


Robin Lous
-
Posts
564 -
Joined
-
Last visited
Content Type
Profiles
Forums
Gallery
Events
Everything posted by Robin Lous
-
 Fantastic! Of course it looks better to the naked eye....close up and blown up photo's are depressing. Robin
 -
It seems like my "take it easy" advise went out of the window. Looks great OC!
- 455 replies
-
- 3
-

-
- slightly modified
- greyhound
- (and 1 more)
-
Looks spectacular EJ! I checked for my build and...yep! also! So, I'll shamelessly steal your idea.
-
Thanks...the deck planking is abachi, the tree nails are walnut. I picked walnut, because the tree nails are tiny (0,5 mm) I'm not sure what I should do with the hull planking. The planking will be walnut, so no idea what I can use for the tree nails there. I'm afraid lighter wood will look odd. Walnut on walnut might be subtle, but perhaps hardly visible ( a lot of work for no result?).
- 91 replies
-
- 6
-
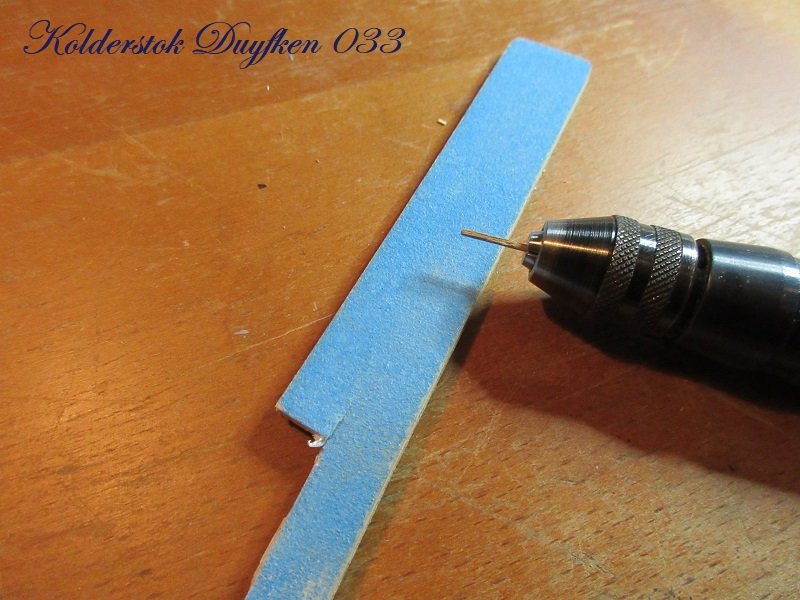
-
- kolderstok
- duyfken
- (and 1 more)
-
Just to show I'm still working on the shipyard...a minor update. Only very limited shipyard time until January, so things slow down, but I do something daily. Most deck planks done, so more nailing trees soon. I switched from painting the sides of the planks with a brush to dab the paint with a cotton bud. This goes much faster and it doesn't destroy my paint brushes. I use undiluted acrylic paint, so the paint won't suck into the wood. More soon(ish), Robin

- 91 replies
-
- 12
-
-
- kolderstok
- duyfken
- (and 1 more)
-
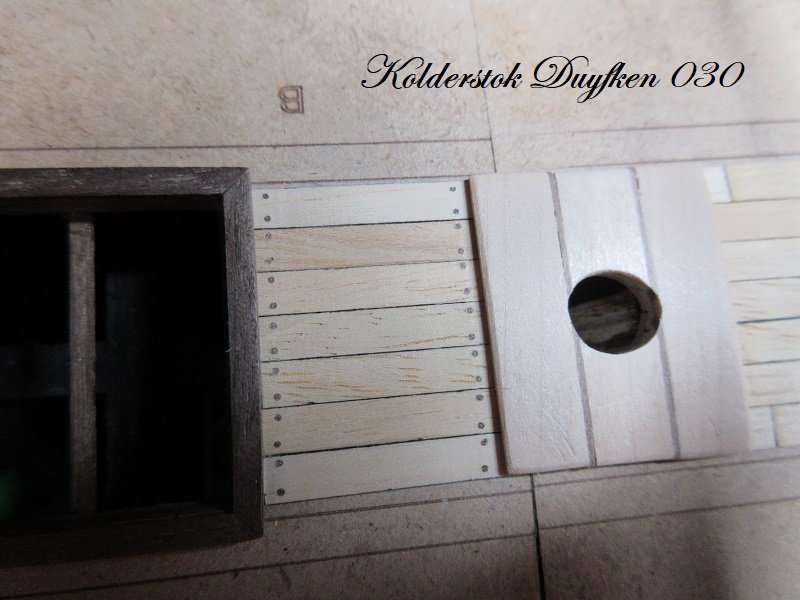
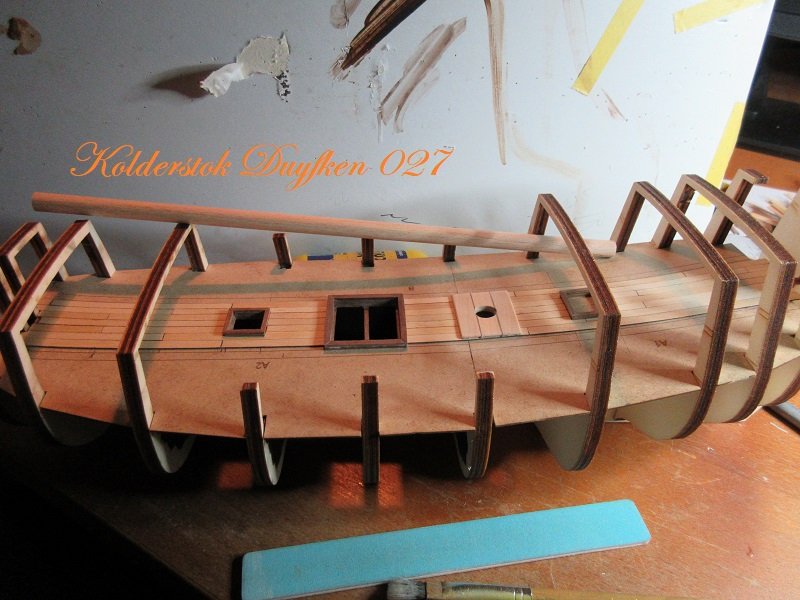
Thanks guys, I now finished the centre part of the deck planking...including the wider planks (schaarstokken) these wider planks don't have nails in them. Different from the manual. After checking photo's these planks are wider, but not noticeable higher. The manual uses 2 regular planks glued on top of eachother. I used wider planks...only a fraction thicker. 232 hecho a mano tree nails used so far. I can now continue the planking, but near the sides (in between the frames) it has to wait until after the hull planking. Frames 4 to 8 will be removed after planking the hull. Slow, but steady...more soon. Robin
- 91 replies
-
- 11
-
-
- kolderstok
- duyfken
- (and 1 more)
-
Welcome aboard Ron.
-
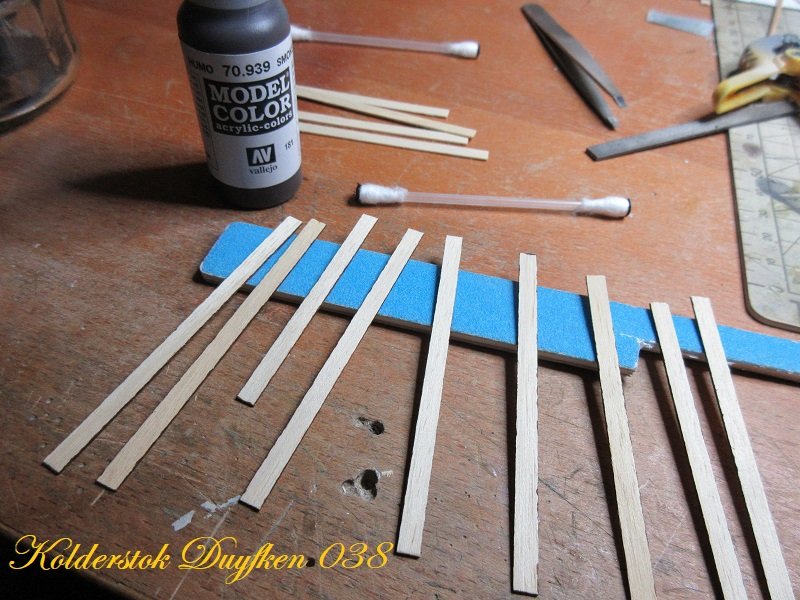
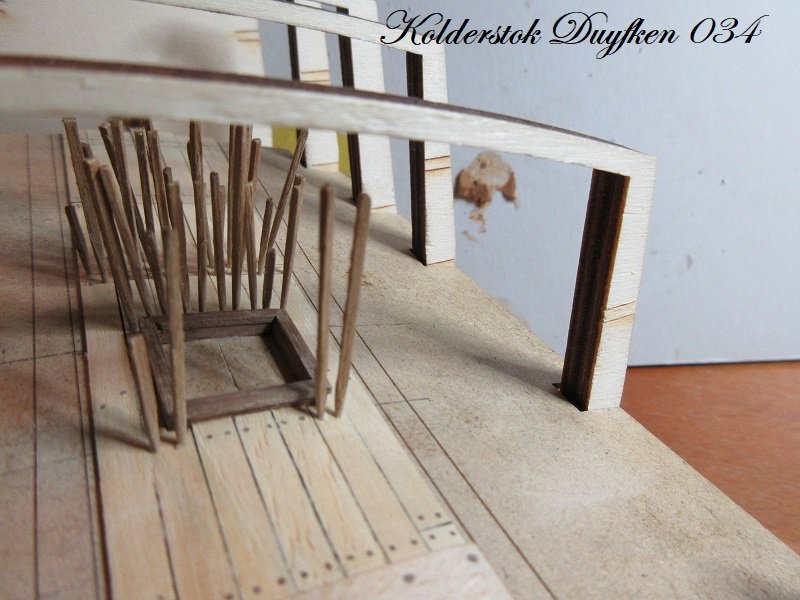
Well Carl, the only way I could think of to make the tree nails.... It is tedious, but only making the tree nails...the rest goes reasonably quick and easy. Marking the place with a pencil, the drilling, placing (with a drop of PVA on the tip), cutting and sanding...all no problem at all. Just sharpening those 1x1 mm walnut strips takes most of the time. I do a batch of about 40 in 30 minutes....just the sticks. Where I am now... By trial and error I learned it's far more easy to use longer punji sticks. The cutting off with a cutter or a pair of decal scissors, filing and sanding is done in minutes. It's all fine, because I think it is worth the effort and because it's 1/50 scale the 0,5 mm tree nails don't look too oversized. A lot of it will be hidden underneath the foreccastle and the quarter deck, but well...I do those also. 138 done! More soon, Robin
- 91 replies
-
- 12
-
-
- kolderstok
- duyfken
- (and 1 more)
-
I do part 5 a bit later...I made the planks longer there, so I can cut them to match the cabin wall. Minor update.. More soon, Robin
- 91 replies
-
- 7
-
-
- kolderstok
- duyfken
- (and 1 more)
-
Indeed...indeed. Looks lovely and so nice you found your mojo again.
- 455 replies
-
- 2
-
-
- slightly modified
- greyhound
- (and 1 more)
-
Thanks gents! It works! It works! But...but...I need about 1000 of them...oh dear.
- 91 replies
-
- 12
-
-
- kolderstok
- duyfken
- (and 1 more)
-
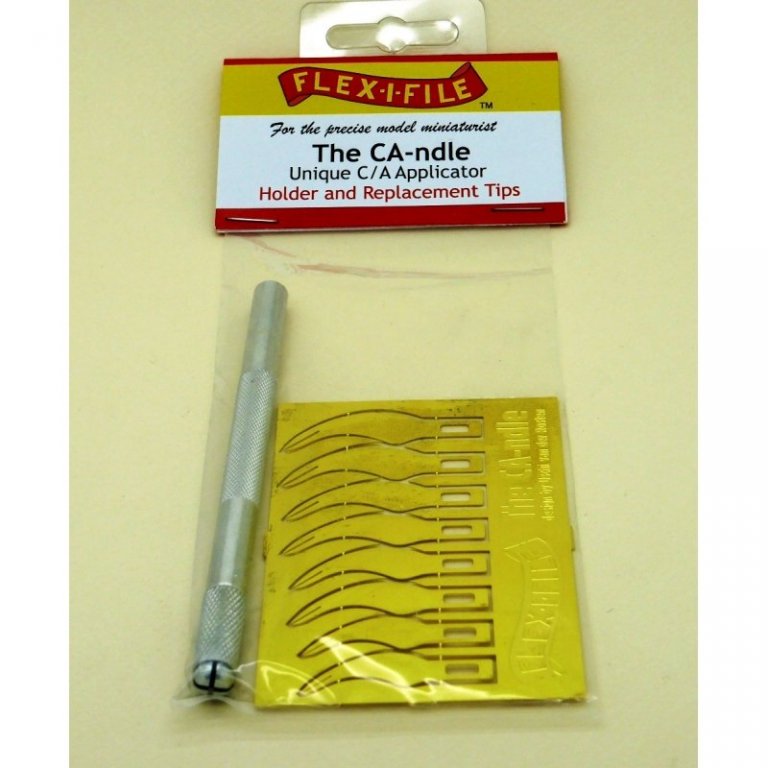
I love this CA applicator... you can pin point tiny drops with it. Clean with a lighter and fine sandpaper...will last.
-
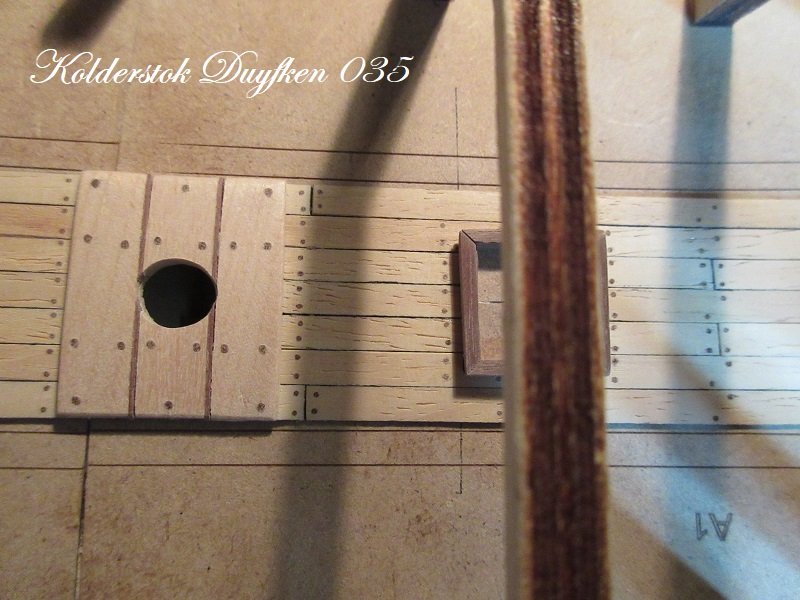
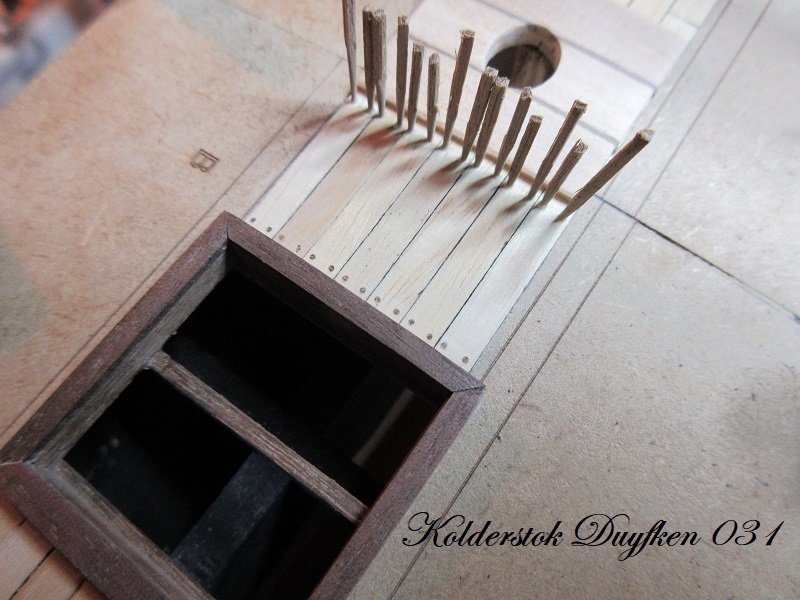
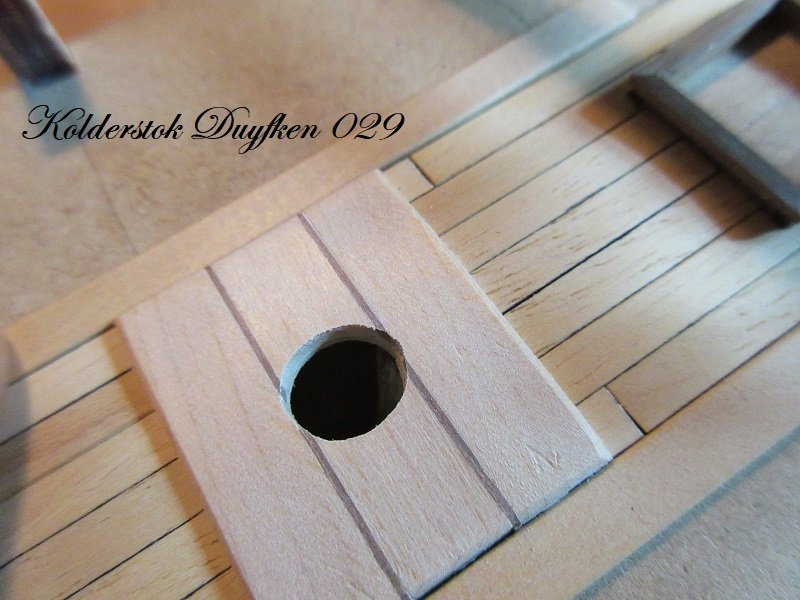
I finished planking the centre part of the deck. And I used this photo to make the mast foot... Because the caulking between these planks is very wide, I used 0,4 mm thin walnut strips for this. After all...the walnut tree nails I'll use on the deck are not tree nails, but is also caulking, so it does match. The wider/heavier planks (Dutch: schaarstokken) next to the centre part shown here also...not in place...just to show them. I painted the sides of the deck planks with dark smoke brown (Vallejo 70.939). Tree nailing this part of the deck is next...I hope I can nail this (lol), it can make or break the look of the deck. Very scary job! More soon, Robin
- 91 replies
-
- 10
-
-
- kolderstok
- duyfken
- (and 1 more)
-
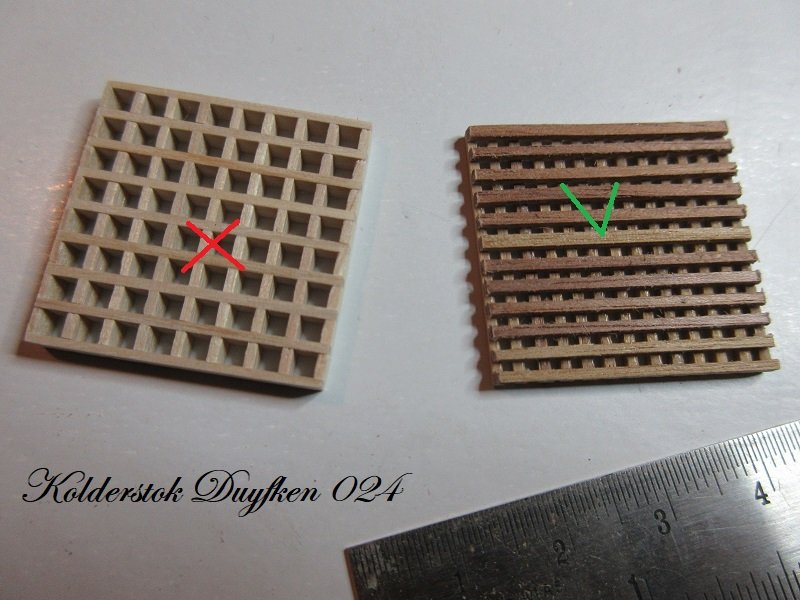
Thanks gentlemen! I already sand the top layer down to approx 0,5 mm...will sand it to half that thickness. The Batavia grating is remarkably close to what the Duyfken builders did. Frugal Dutch not so fancy gratings. Thanks again for your help! Robin
- 91 replies
-
- 4
-
-
- kolderstok
- duyfken
- (and 1 more)
-
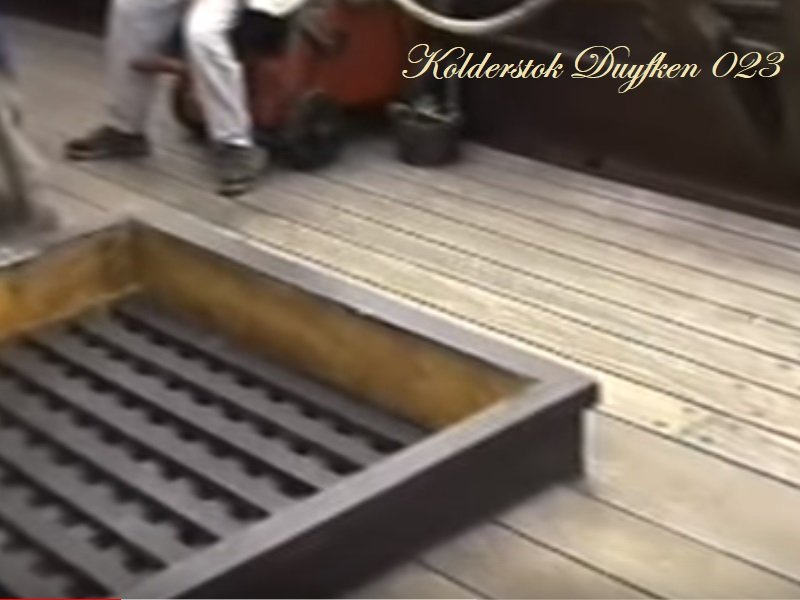
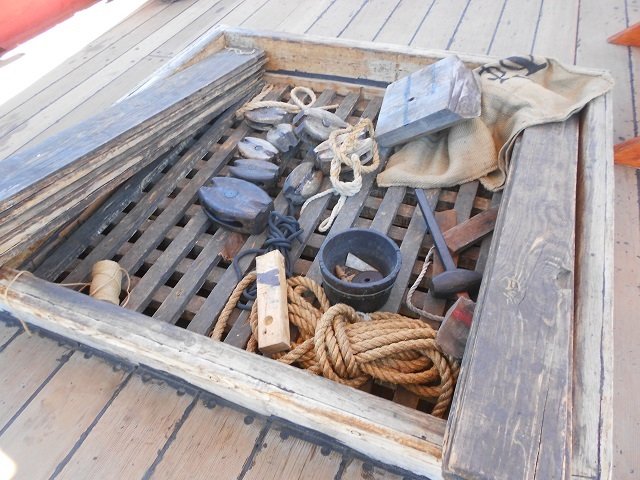
I'm not sure of course, but these photo's (and others, but copyright) show the grating I made... Is there a grating expert in da house?
- 91 replies
-
- 5
-
-
- kolderstok
- duyfken
- (and 1 more)
-
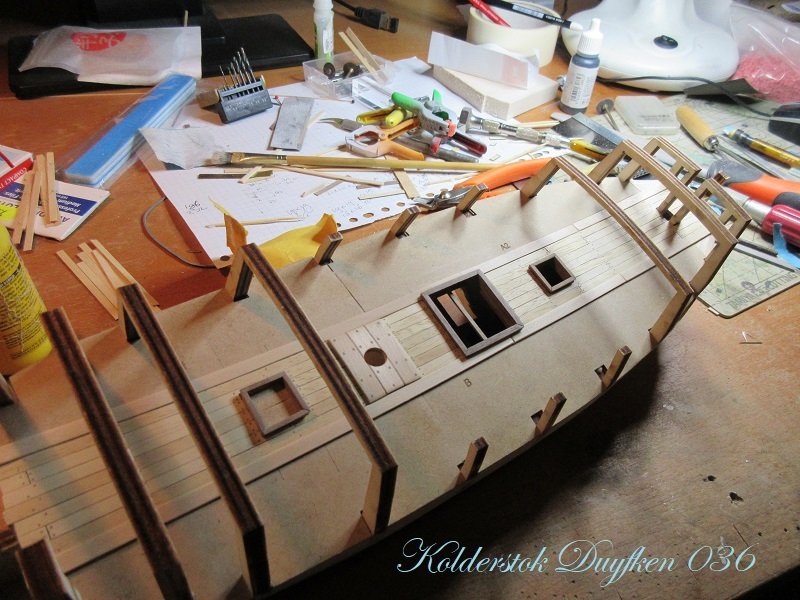
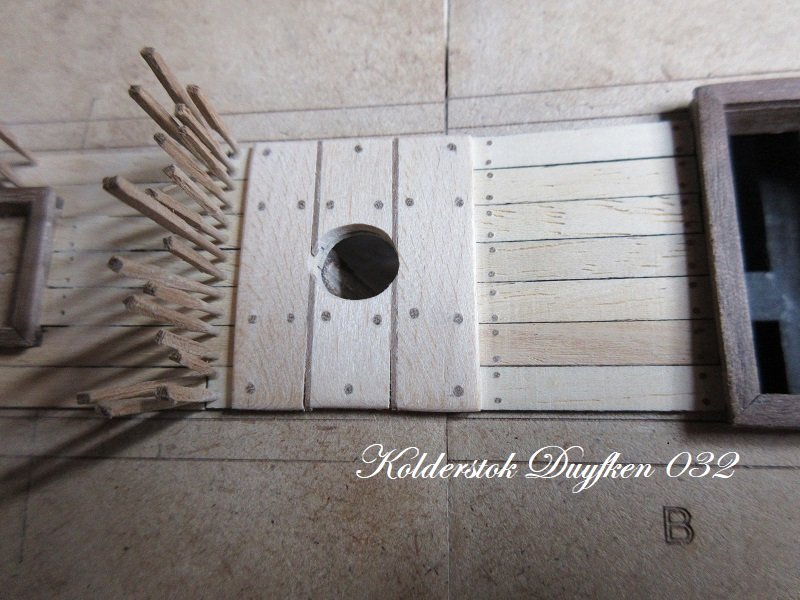
Might usually be true, but this is how it looks on the replica ship. I didn't study 1595 gratings used on a Dutch pinas, so it can be wrong. Now busy with the planking... Before someone says the planks near the mast are not staggered, that's because this part will be covered with mast foot planks. This is the part in between the schaarstokken (translation?). I use wider planks for them. I'll tree nail the deck with 0,5 mm walnut (the planks are 4 mm wide). Since work will become increasingly busy until the end of the year...I'll be happy when I get the deck done this year...and perhaps finish the balsa. More soon, but it will slow down on my shipyard. Robin
- 91 replies
-
- 8
-
-
- kolderstok
- duyfken
- (and 1 more)
-
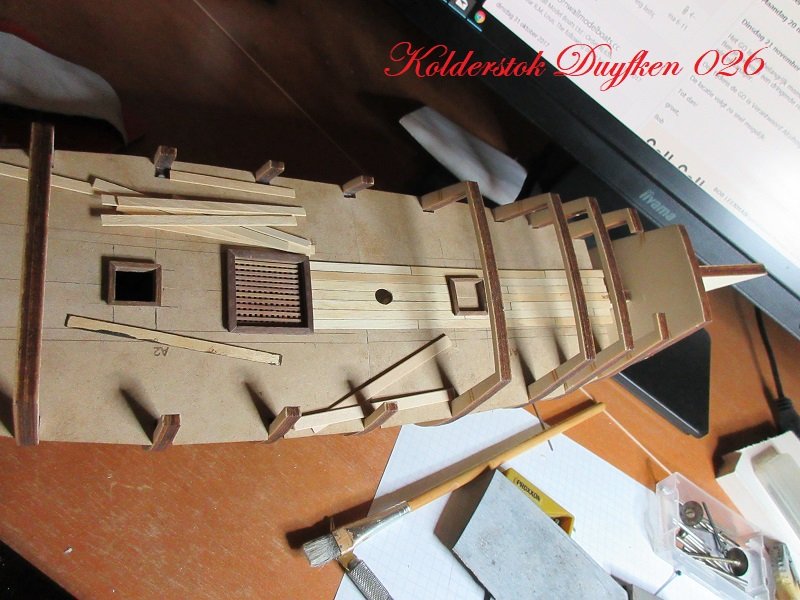
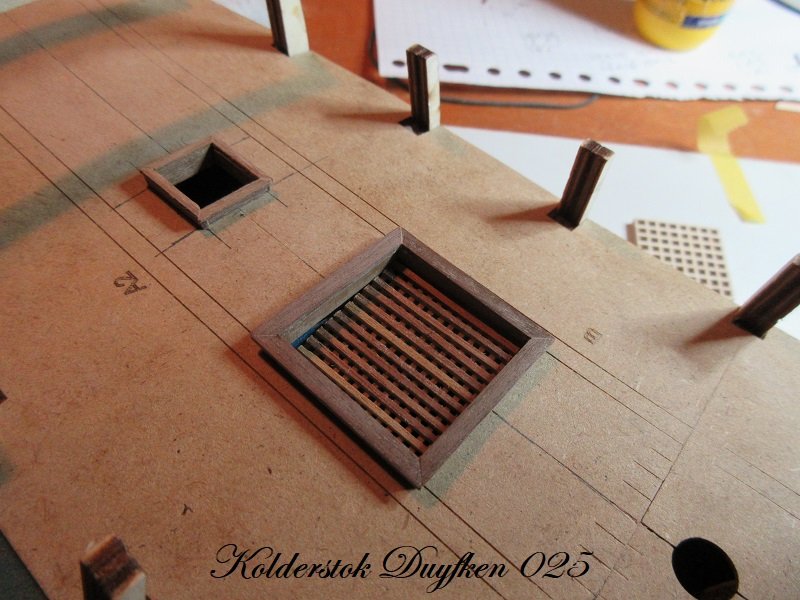
And the grating... Made of 1x1mm walnut strips. This also helps me with the "no staining policy". A dry fit... I think I'll somewhat reduce the width of the cap planks...a tad bit too massive to my liking now. More soon, planking the deck. Robin
- 91 replies
-
- 11
-
-
- kolderstok
- duyfken
- (and 1 more)
-
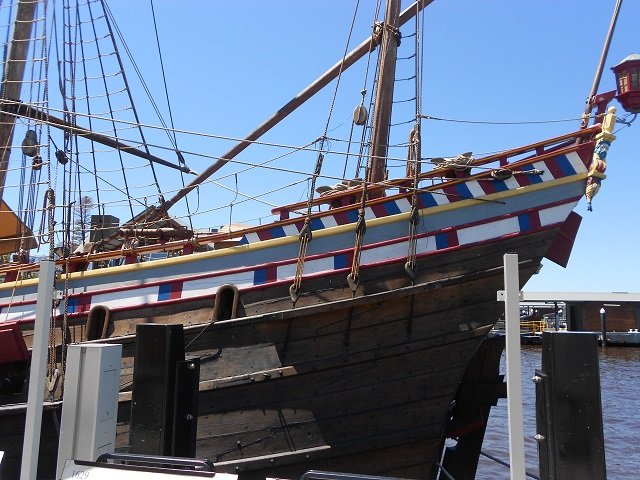
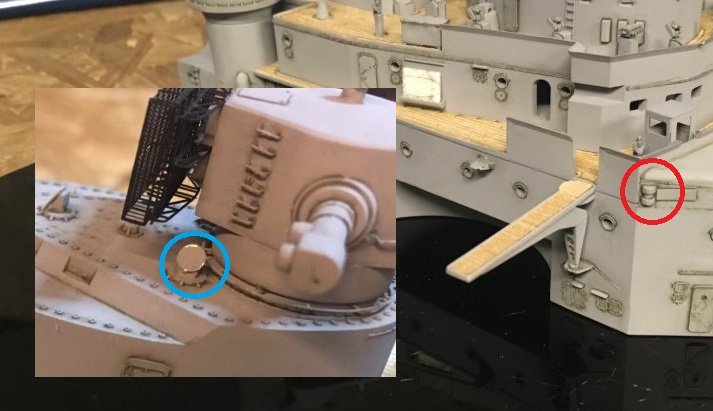
The thingie in the red circle looks a bit like a starboard (green) navigation light....with the rectangular (painted green) reflection panel in front of it. I'm not sure though. And in the blue circle the paint chip I mentioned.
-
Thanks, I'll varnish the deck with semi gloss. I have the intention to leave the walnut as it is. I'll varnish the lighter wood though. Deck and masts, not much more I can think of right now. Robin
- 91 replies
-
- 2
-
-
- kolderstok
- duyfken
- (and 1 more)
