DonnRW
-
Posts
46 -
Joined
-
Last visited
Content Type
Profiles
Forums
Gallery
Events
Everything posted by DonnRW
-
Steve, glad to have you onboard here and really glad that your created NCWW, thank you! Donn
-
It has been a long while since I last posted and for that I apologize. That said, I have been busy. When we moved into our new house, I had a really nice space to use as my woodworking shop, but the space required a lot of work (framing, insulation, sheetrock, painting, drop ceiling, plumbing and HVAC). I have completed all of that and I am happy to report that I now spend more time working "in" the shop than "on" the shop! I am now hoping to allocate my time more evenly between woodworking and shipbuilding. Recent progress on the Aggie has been to complete the roundhouses and quarter galleries. I am just beginning to install the main whale, which will be followed by the second planking. I really appreciate those that contribute to this website; if it hadn't been for you guys, I would have been lost as to how to approach some aspects of the build. Caldercraft produces an excellent kit, but their "instructions" are limited.
-
Indeed, I miss seeing work by Sjors and Mobbsie...both outstanding modelers, helpful contributors and gentlemen!
- 1,616 replies
-
- 4
-

-
- caldercraft
- agamemnon
- (and 1 more)
-
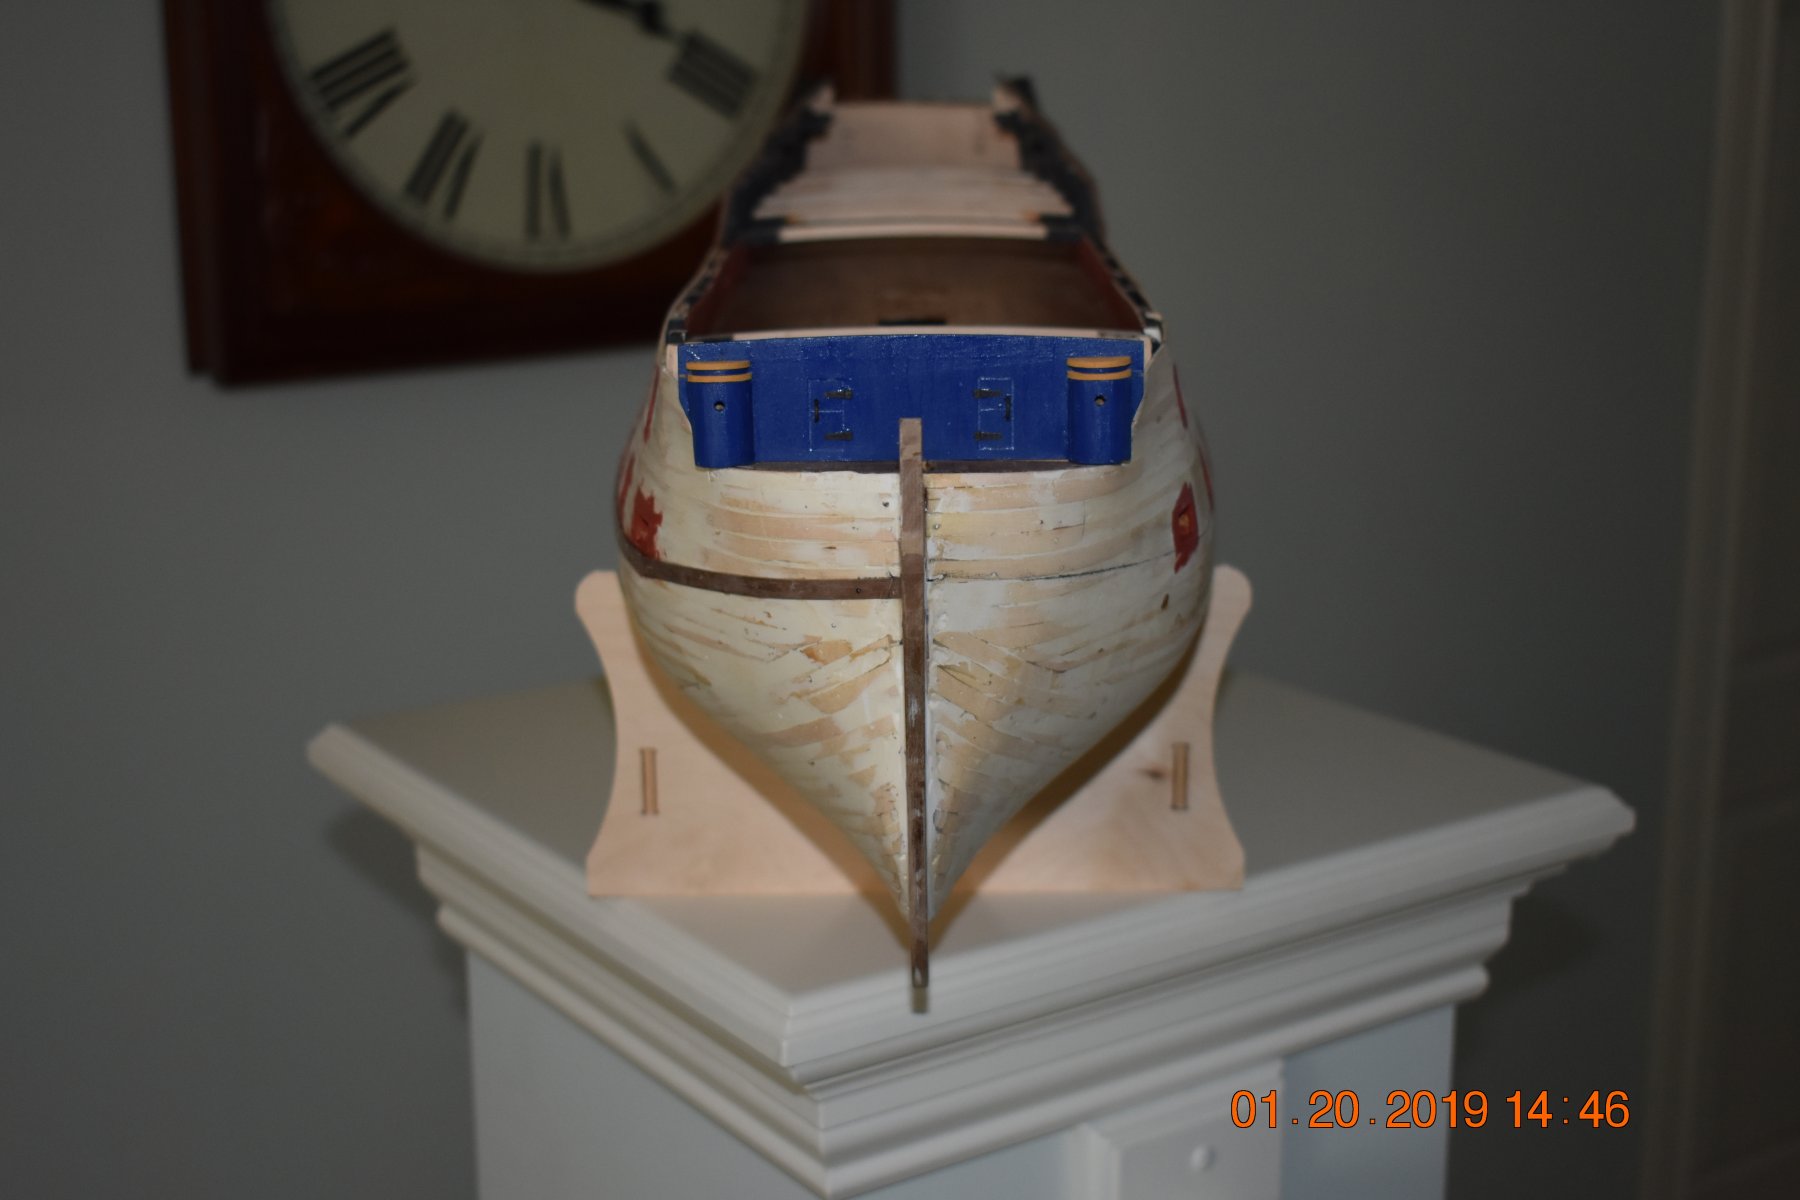
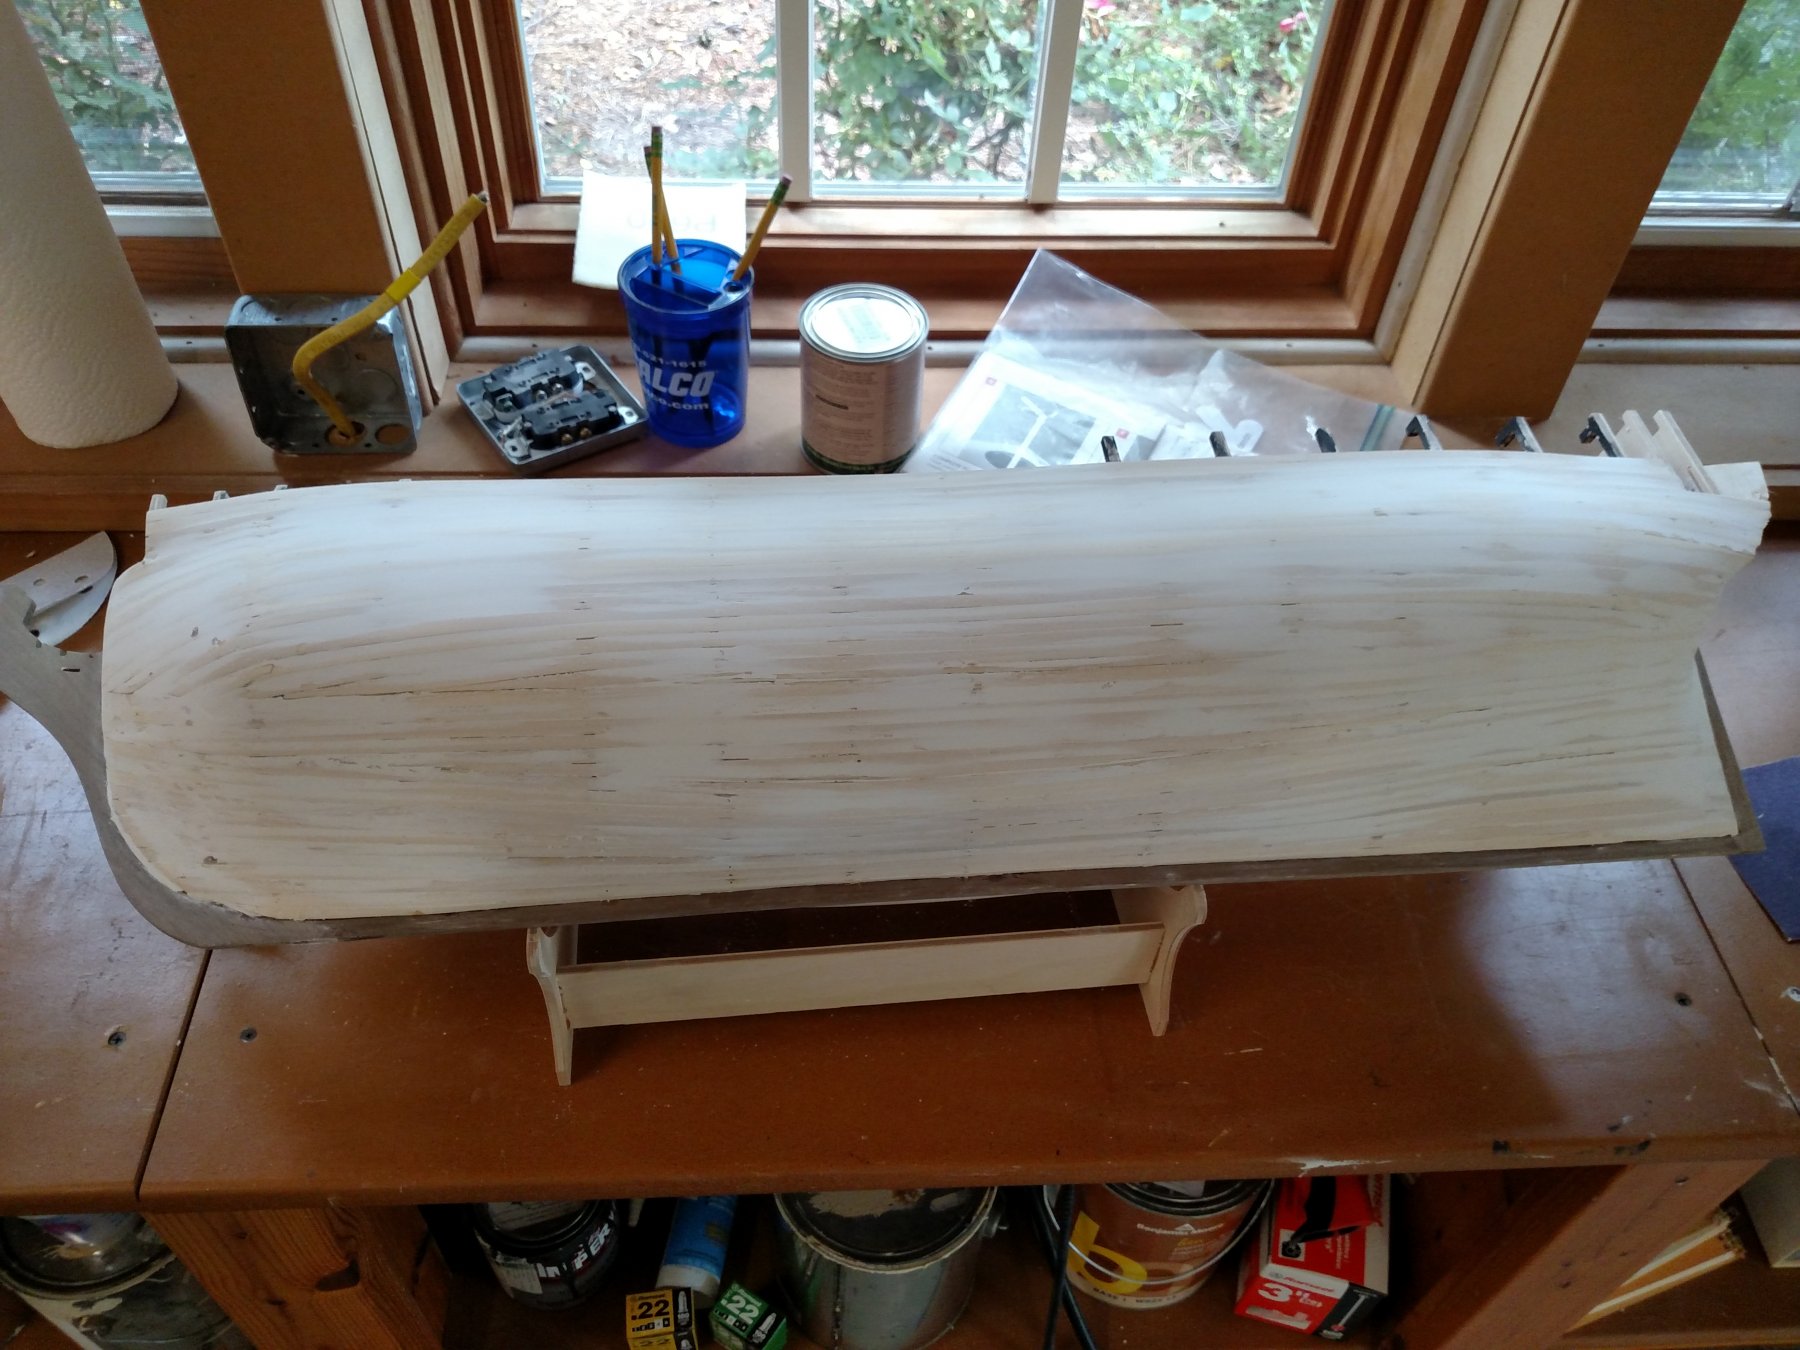
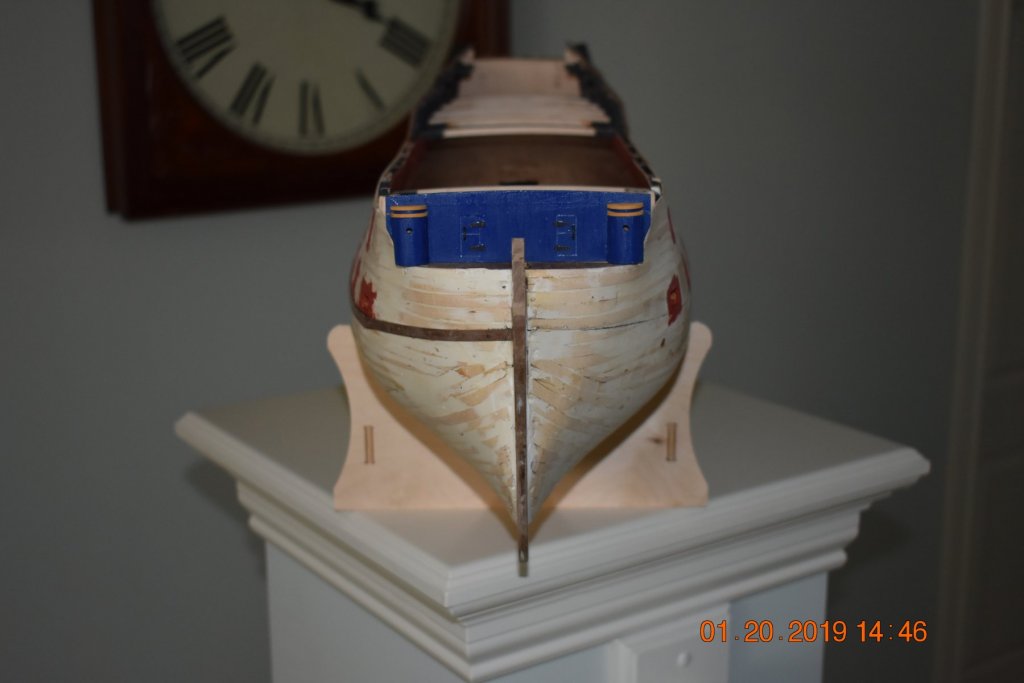
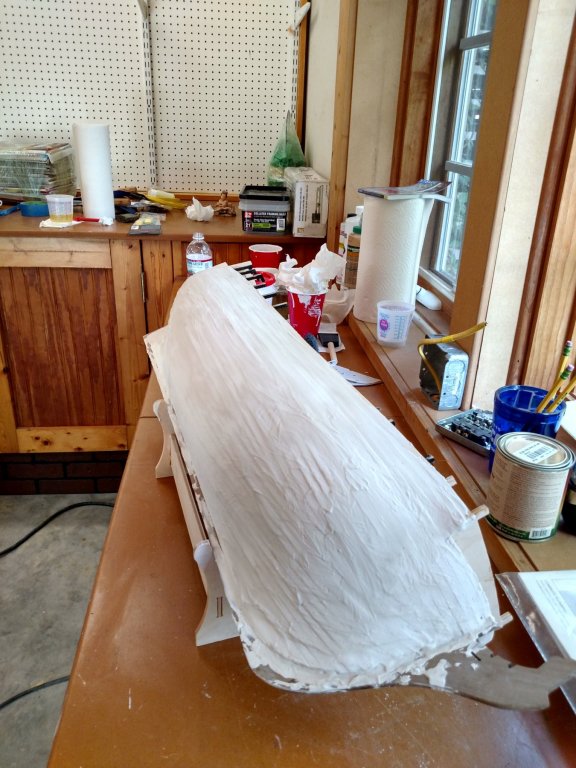
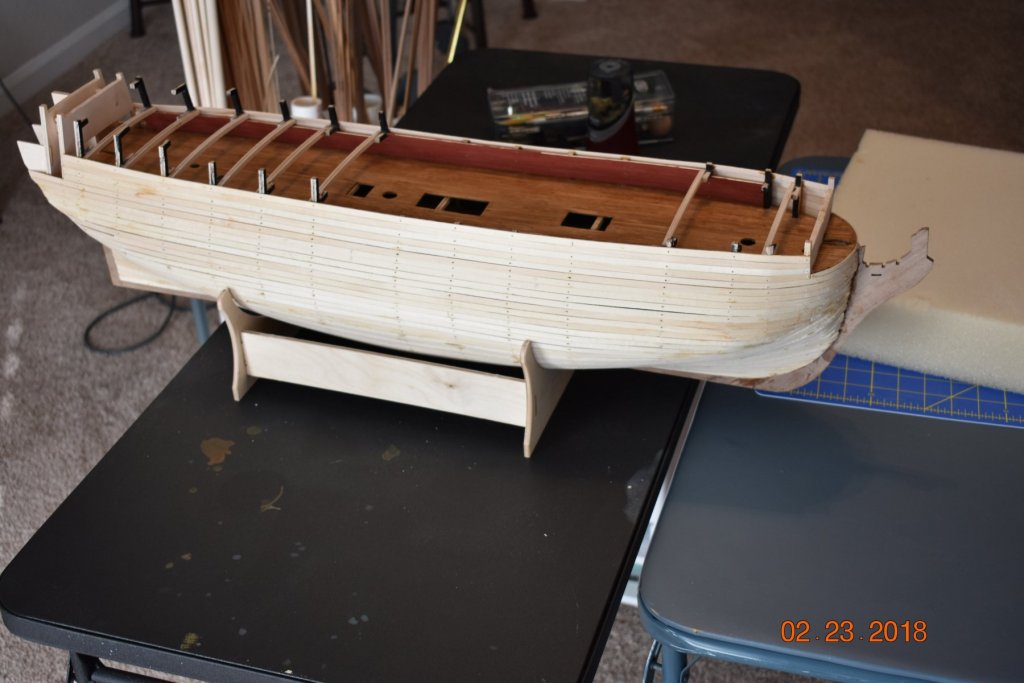
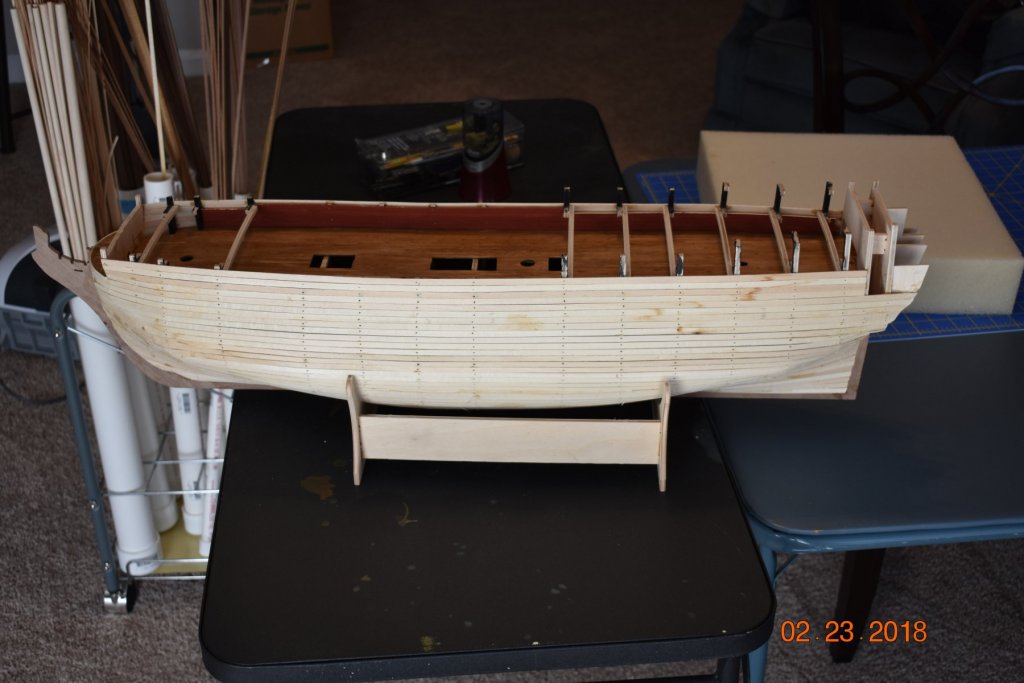
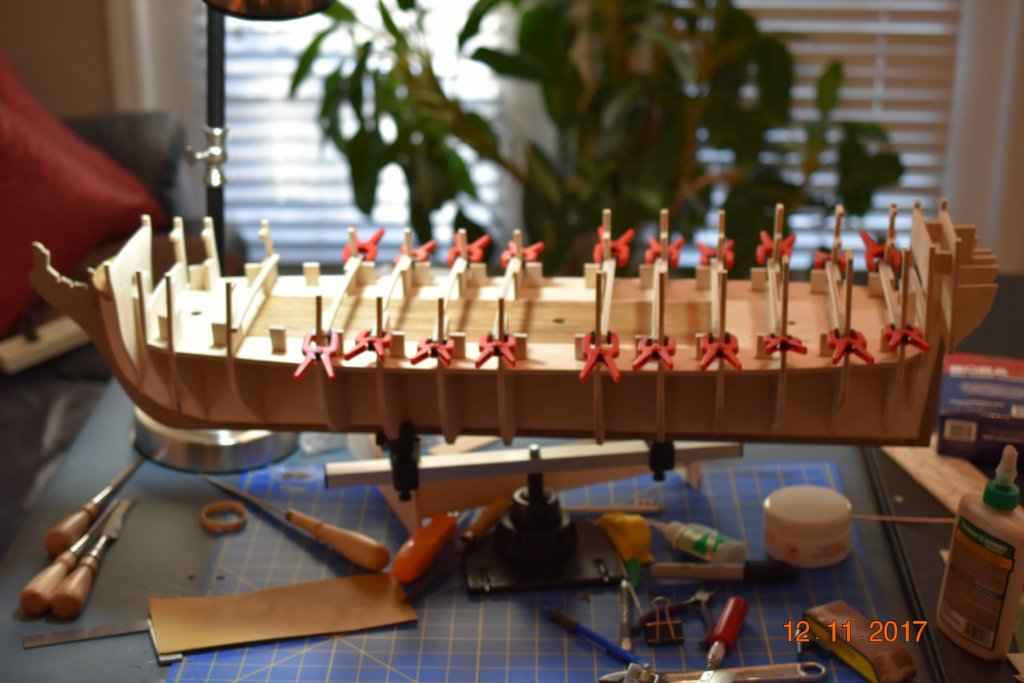
Progress has been slow, but I am finally finding time to work on the Aggie. As you can see in the pictures, I added filler to the first planking and have sanded it smooth. I am pleased with the result. You can see that I really applied a lot of filler (Timbermate), to the extent that the Aggie looked like she was in a full body cast. I waited a couple of days to make sure everything was completely dry before sanding. After sanding I used a foam brush to apply a dilute PVA solution, waited 24 hours and sanded with 400 grit sandpaper. Next on tap is to mark and cutout the gun ports. Given the fact that Caldercraft supplies a template for this task, one may assume that this will be a relatively simple procedure...it doesn't appear that is going to be the case. Nothing lines up exactly as it should....stay tuned.


-
Jobbie, I am So Sorry for taking so long in responding to your question. Since moving into a new house, I haven't had time to do much of anything other that try to get organized in our new space...it seems to be a never ending process. That said, thank you for your kind comments! Regarding the paint it is from Caldercraft and is their Admiralty Paint.
-
I am back! Sorry to take so long between posts, but my wife and I purchased a new house so I have been busy packing, unpacking, etc., etc. Moving is never fun, but the older you get it becomes even less fun. That said, I have a new workshop (I also build furniture) and a new shipyard. Now that I have a workshop to work on, progress on the Aggie will slow...but, I will find time to work on her! Since my last post I did complete the first planking. I will be sanding, filling, sanding and filling.
-
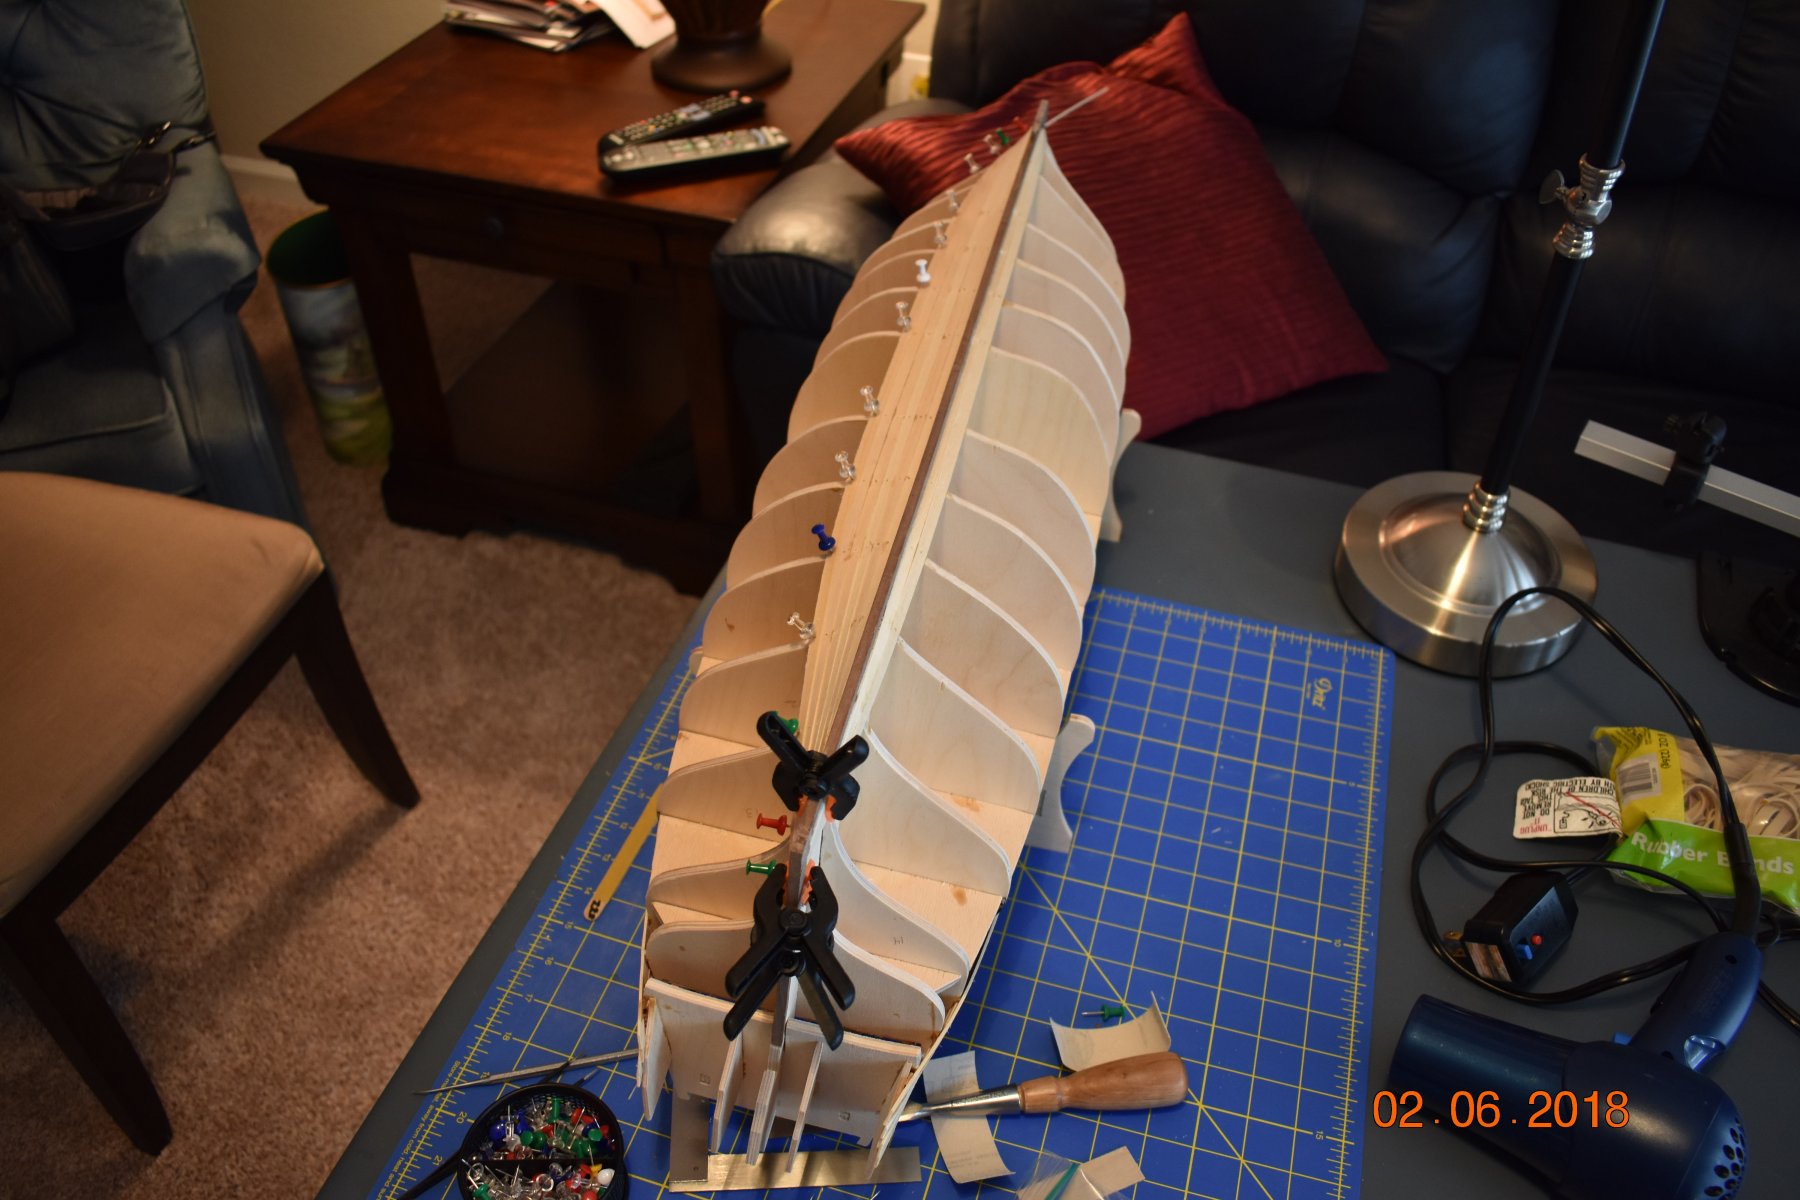
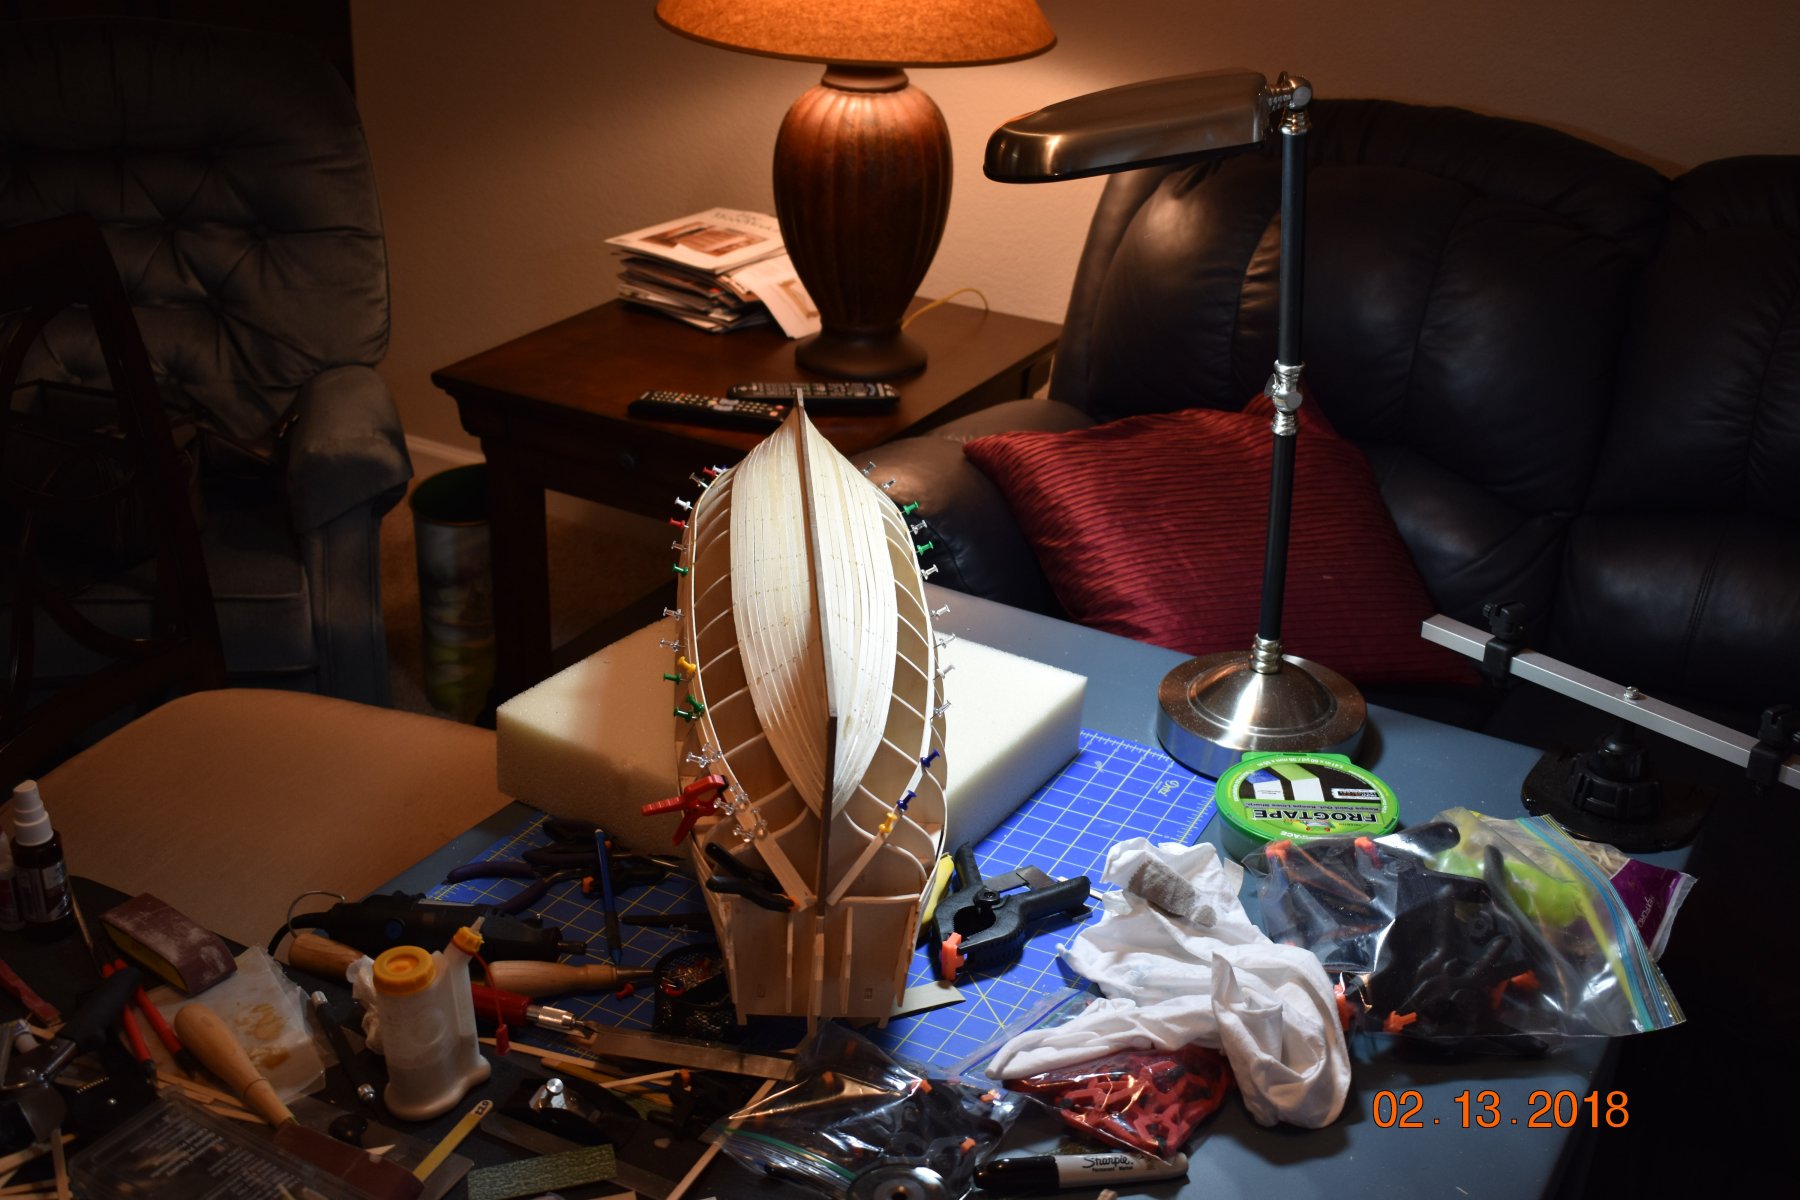
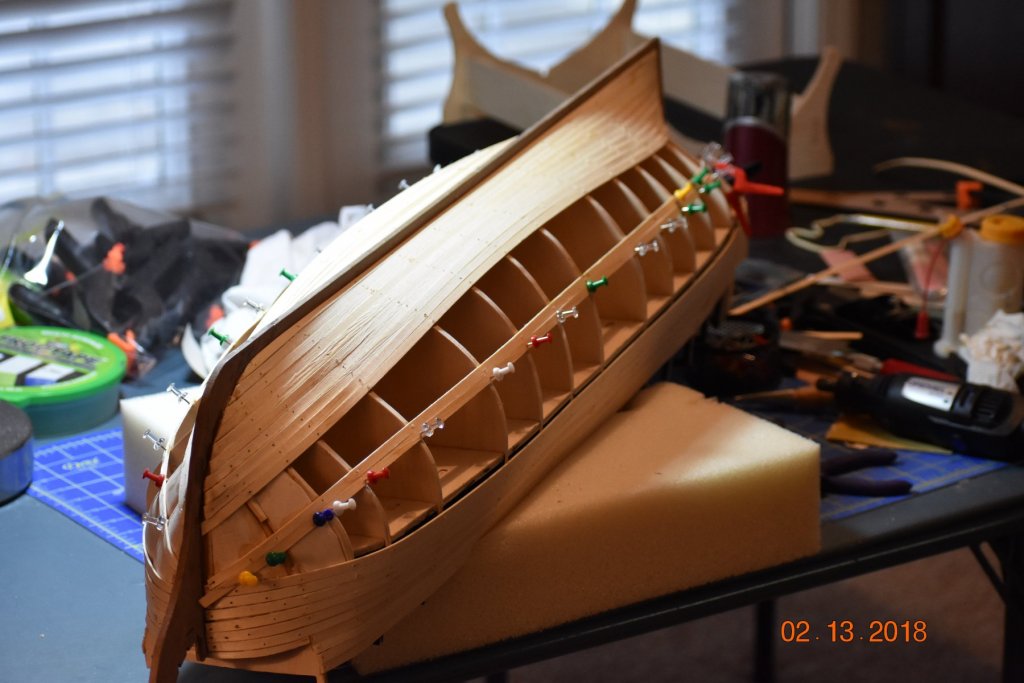
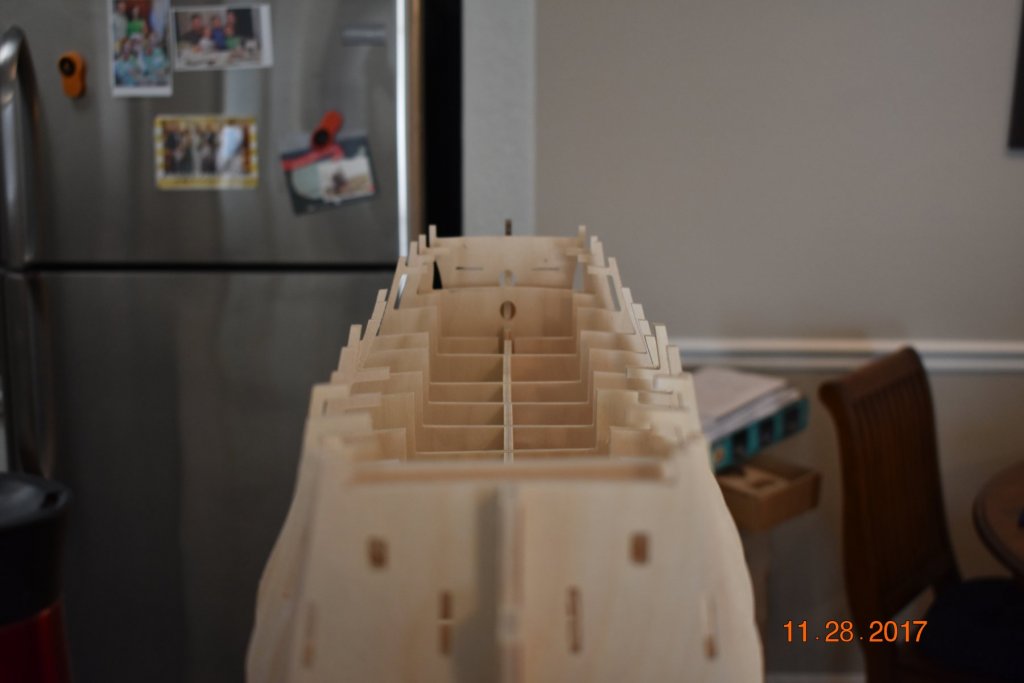
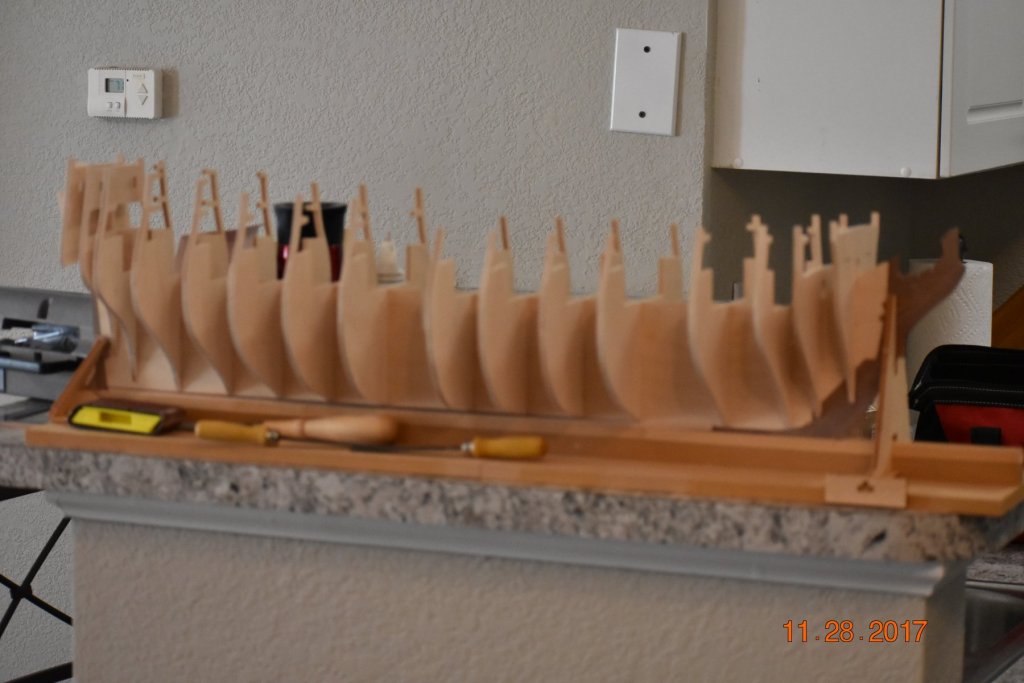
It has been awhile since I last posted, which doesn't imply that I haven't been working on the Aggie (I have), but the work I have been doing is the tedious task of applying the initial planking. The Aggie is a massive model that means a massive amount of planking. In truth, I really don't mind the work; in fact, I enjoy it...but there is SO much of it. Also, there are some very wicked twists and curves to navigate. I have reviewed the build logs of several skilled modelers and it seems that there is no one-way to deal with these twists and curves; while approaches differ, they all resulted in beautifully built ships...that is what I hope will be the outcome of my attempt.


-
Hennie, you are doing a Masterful job! Everything looks precise...a sure sign that a true craftsman is at work. The ship itself is Regal, perhaps a better word is Majestic!
- 192 replies
-
- 4
-
-
- sovereign of the seas
- sergal
- (and 1 more)
-
Not sure, Dave. My friend (another modeler) and I will be getting together for lunch soon, we'll discuss the pros/cons. Personally, unless I am specifically looking for something (which very infrequent), I never look at the classified ads; but, as the saying goes..."nothing ventured nothing gained".
- 742 replies
-
- 4
-
-
- constitution
- frigate
- (and 1 more)
-
Dave, regarding your question of a retailer specializing in scale model kits, unfortunately we do not. We do have a couple of hobby shops, but they are more geared to remote control plane enthusiasts. Cheers, Donn
- 742 replies
-
- 2
-
-
- constitution
- frigate
- (and 1 more)
-
Dave, I have been surprised at the seeming lack of model boat builders in the Triangle area. There appears to be significant interest in model planes (flying clubs), but nothing much with ships. Personally, I am also interested in woodworking (furniture); in fact I hope to be in a new house this spring, which will include a bigger shop area. As for shipbuilding, I would thoroughly enjoy any opportunity to interact with fellow modelers. I hope to be contacting you soon about visiting. Donn
- 742 replies
-
- 4
-
-
- constitution
- frigate
- (and 1 more)
-
Dave, I may take you up on your kind offer to visit and bring a fellow builder. We are relatively inexperienced but enthusiastic. Donn
- 742 replies
-
- 3
-
-
- constitution
- frigate
- (and 1 more)
-
Dave, I am sorry that I am so late to the party, but I just discovered you. While I have never attempted a scratch build, and I may never (kits are a big enough challenge for me), I am so amazed and impressed with your patience, craftsmanship, and ingenuity! Relative to your worldwide group of followers, we are almost next door neighbors (Raleigh area). Thank you for sharing your skills with the rest of us. Donn
- 742 replies
-
- 5
-
-
- constitution
- frigate
- (and 1 more)
-
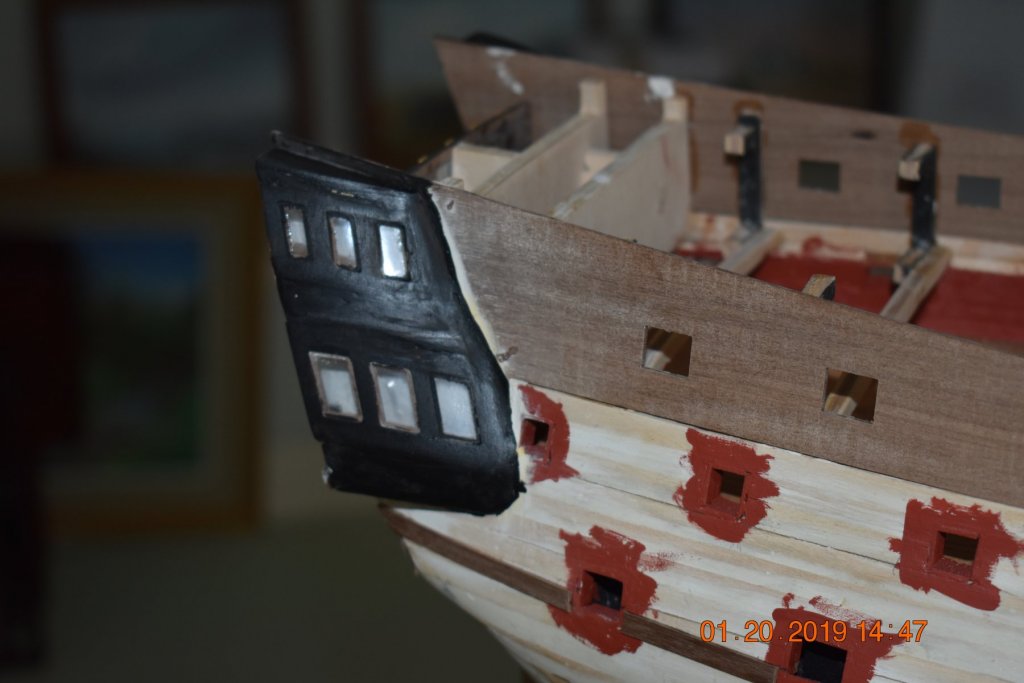
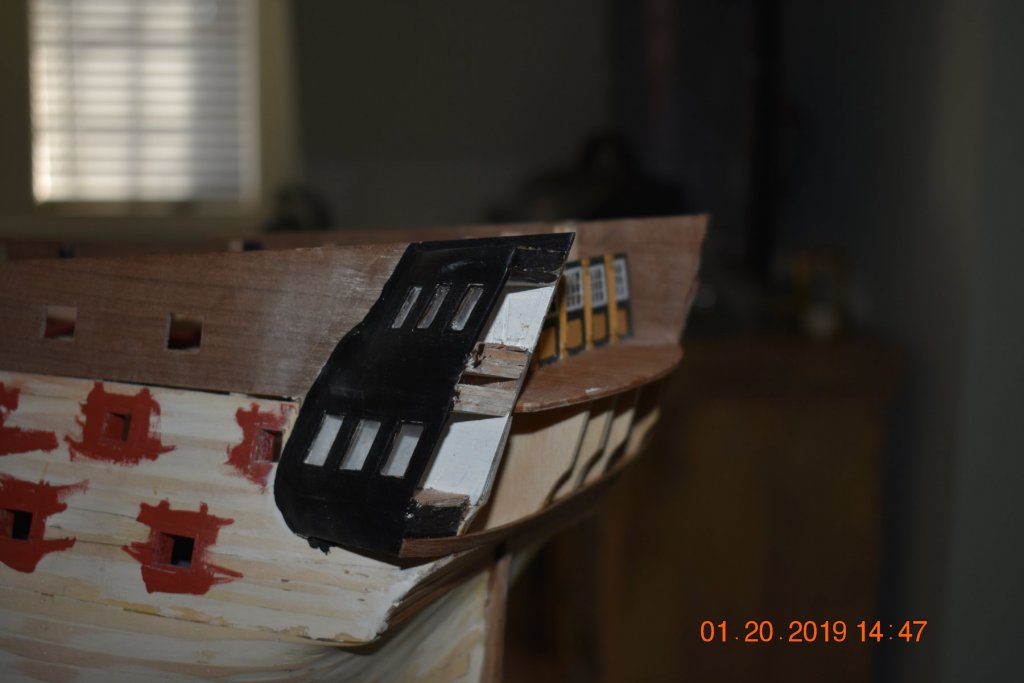
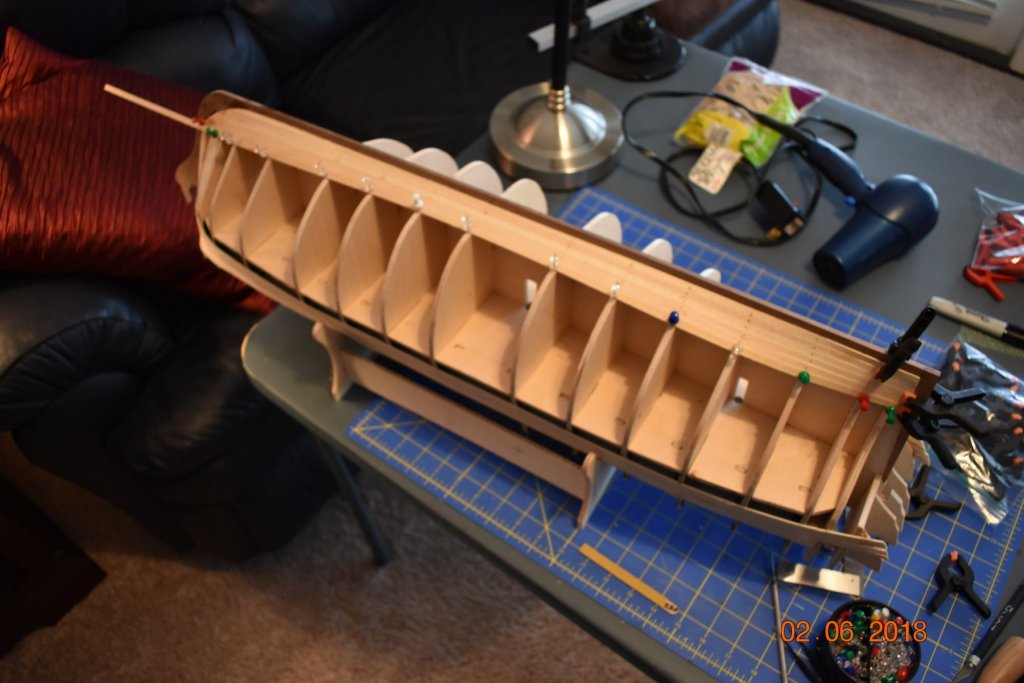
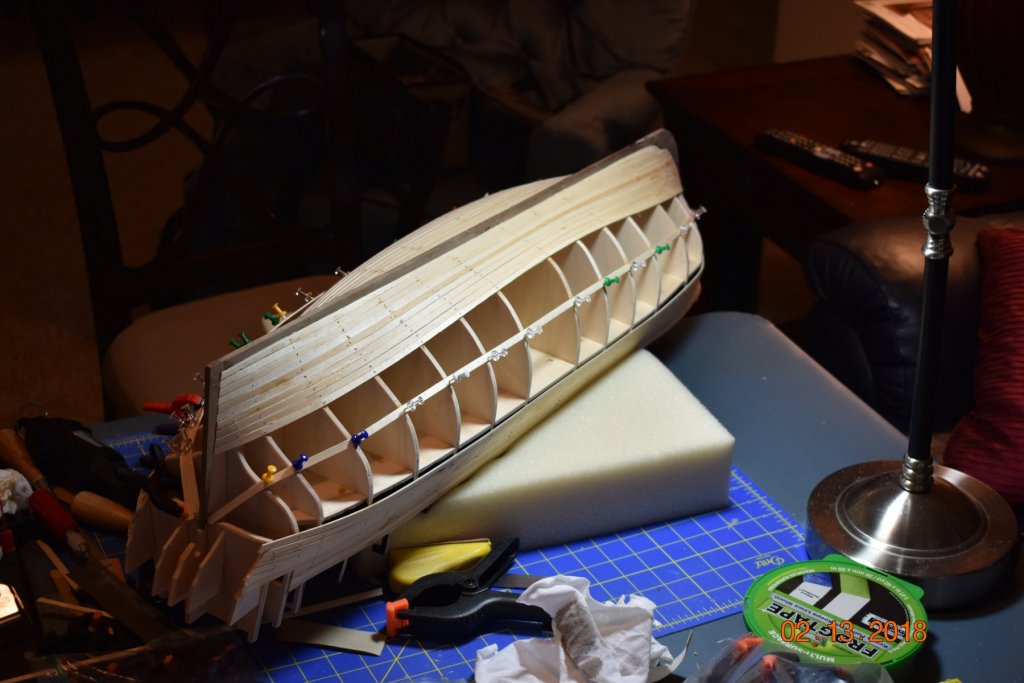
Mobbsie and Hennie, thank you for your comments! Knowing that both of you have beautifully managed the many challenges associated with building the Aggie, your encouragement is all the more meaningful. I have installed the inner bulwarks so I'll soon start with the outer planking...that is where the fun begins!


-
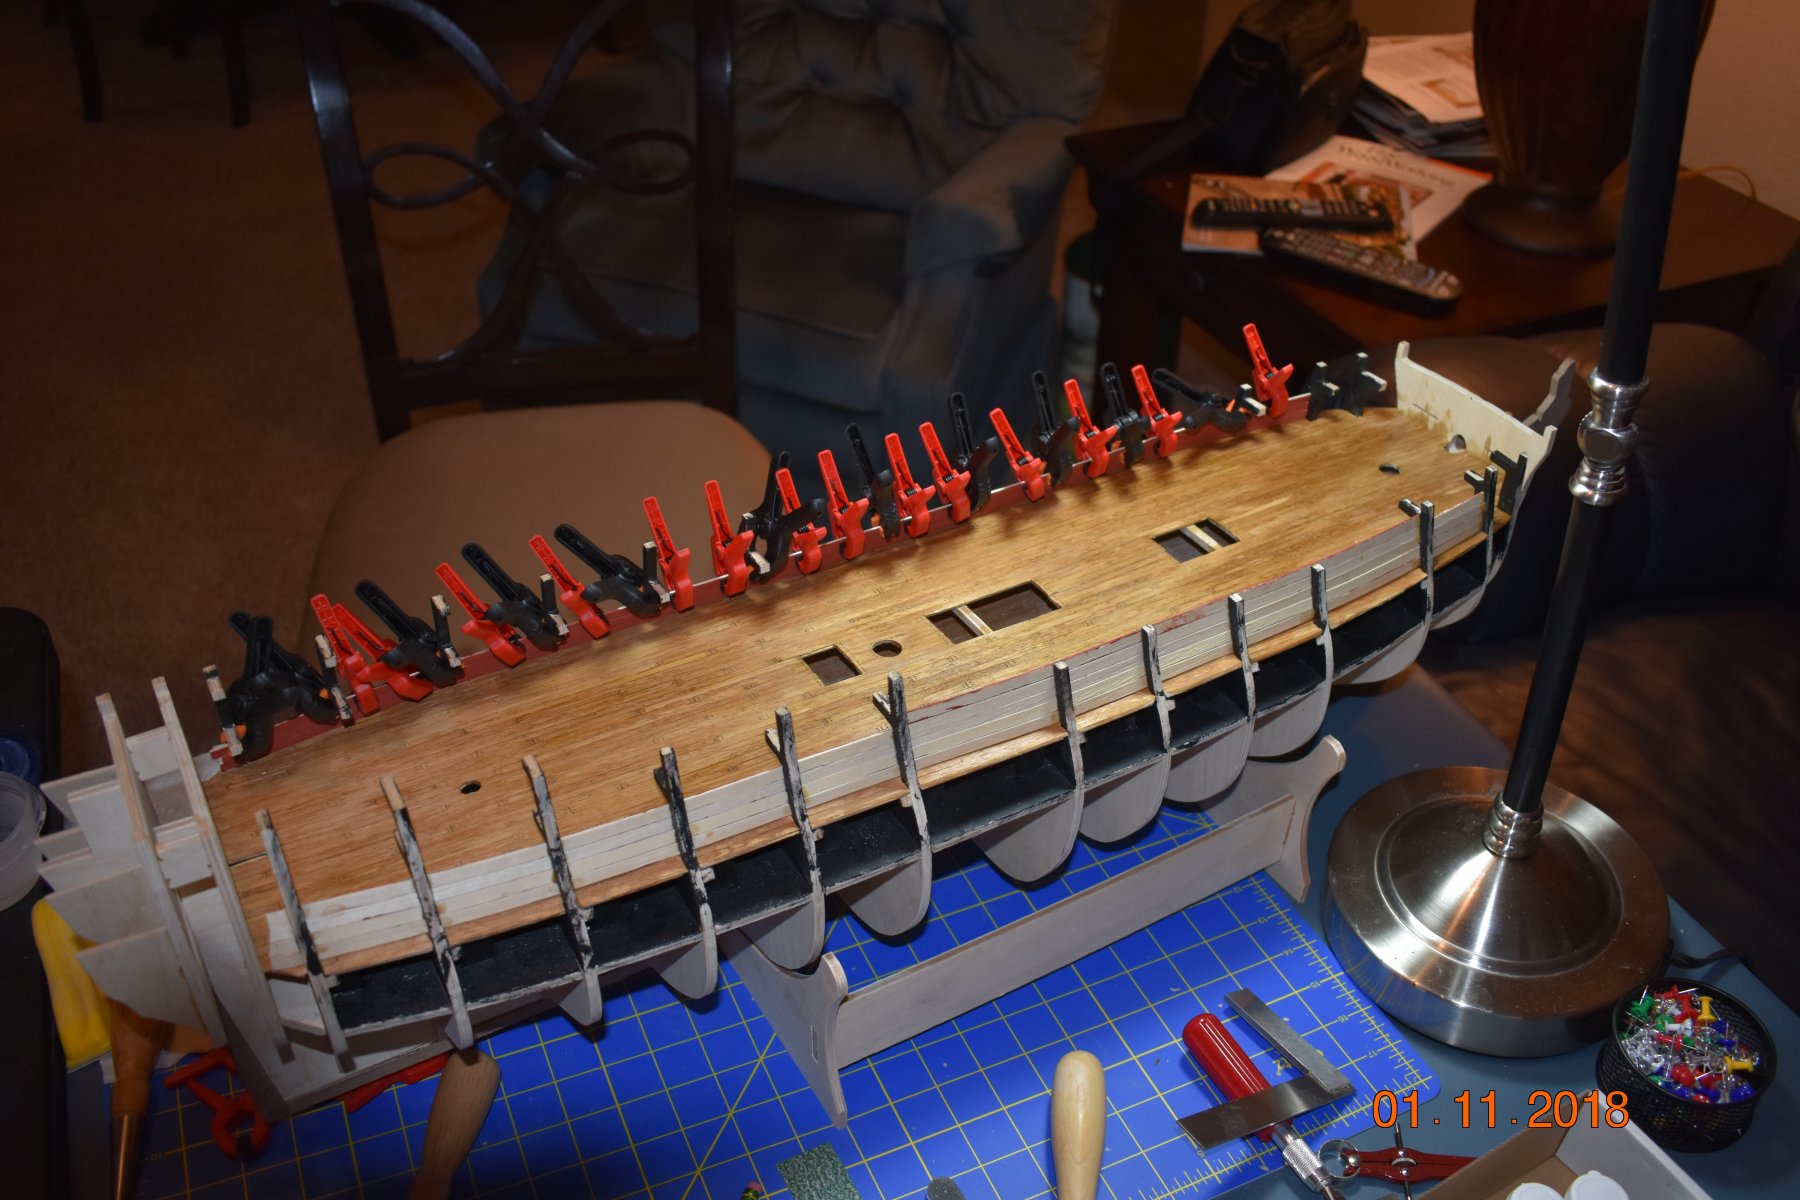
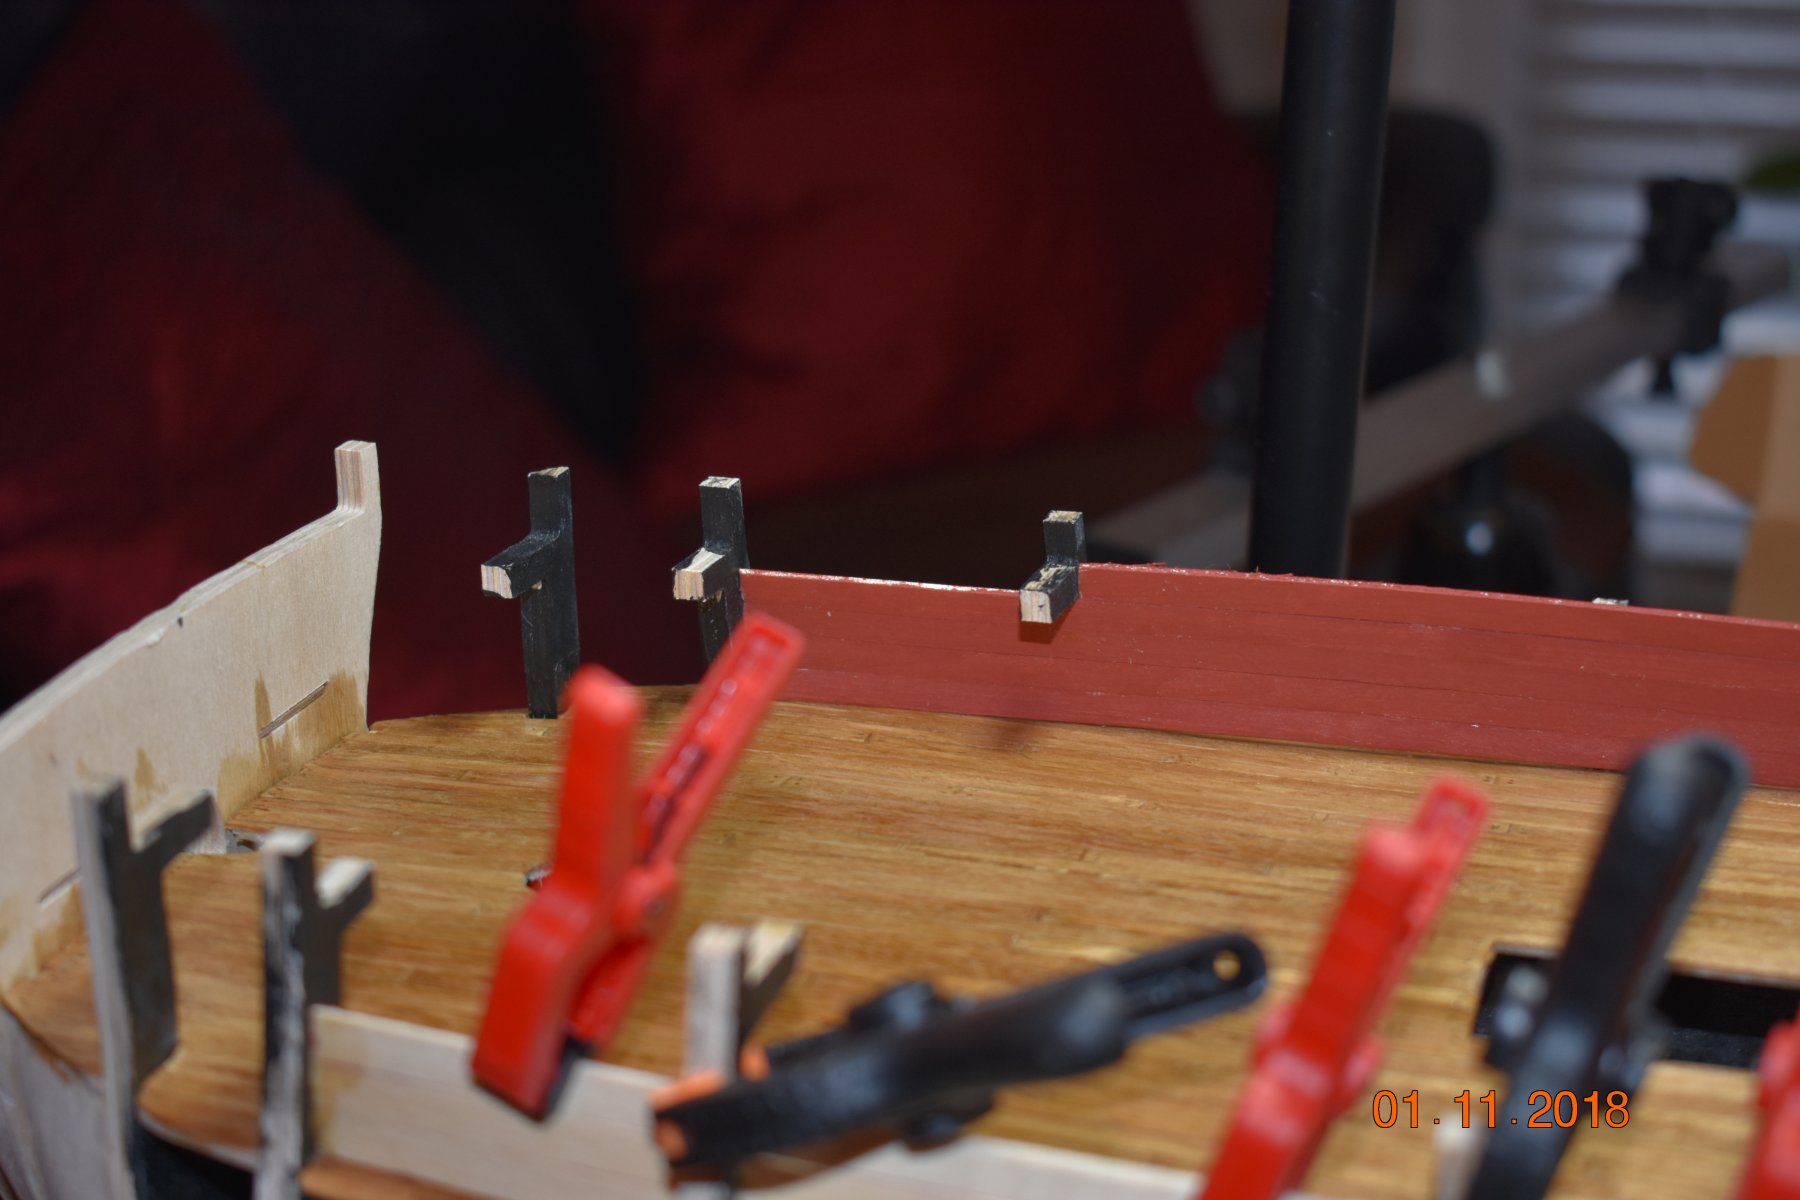
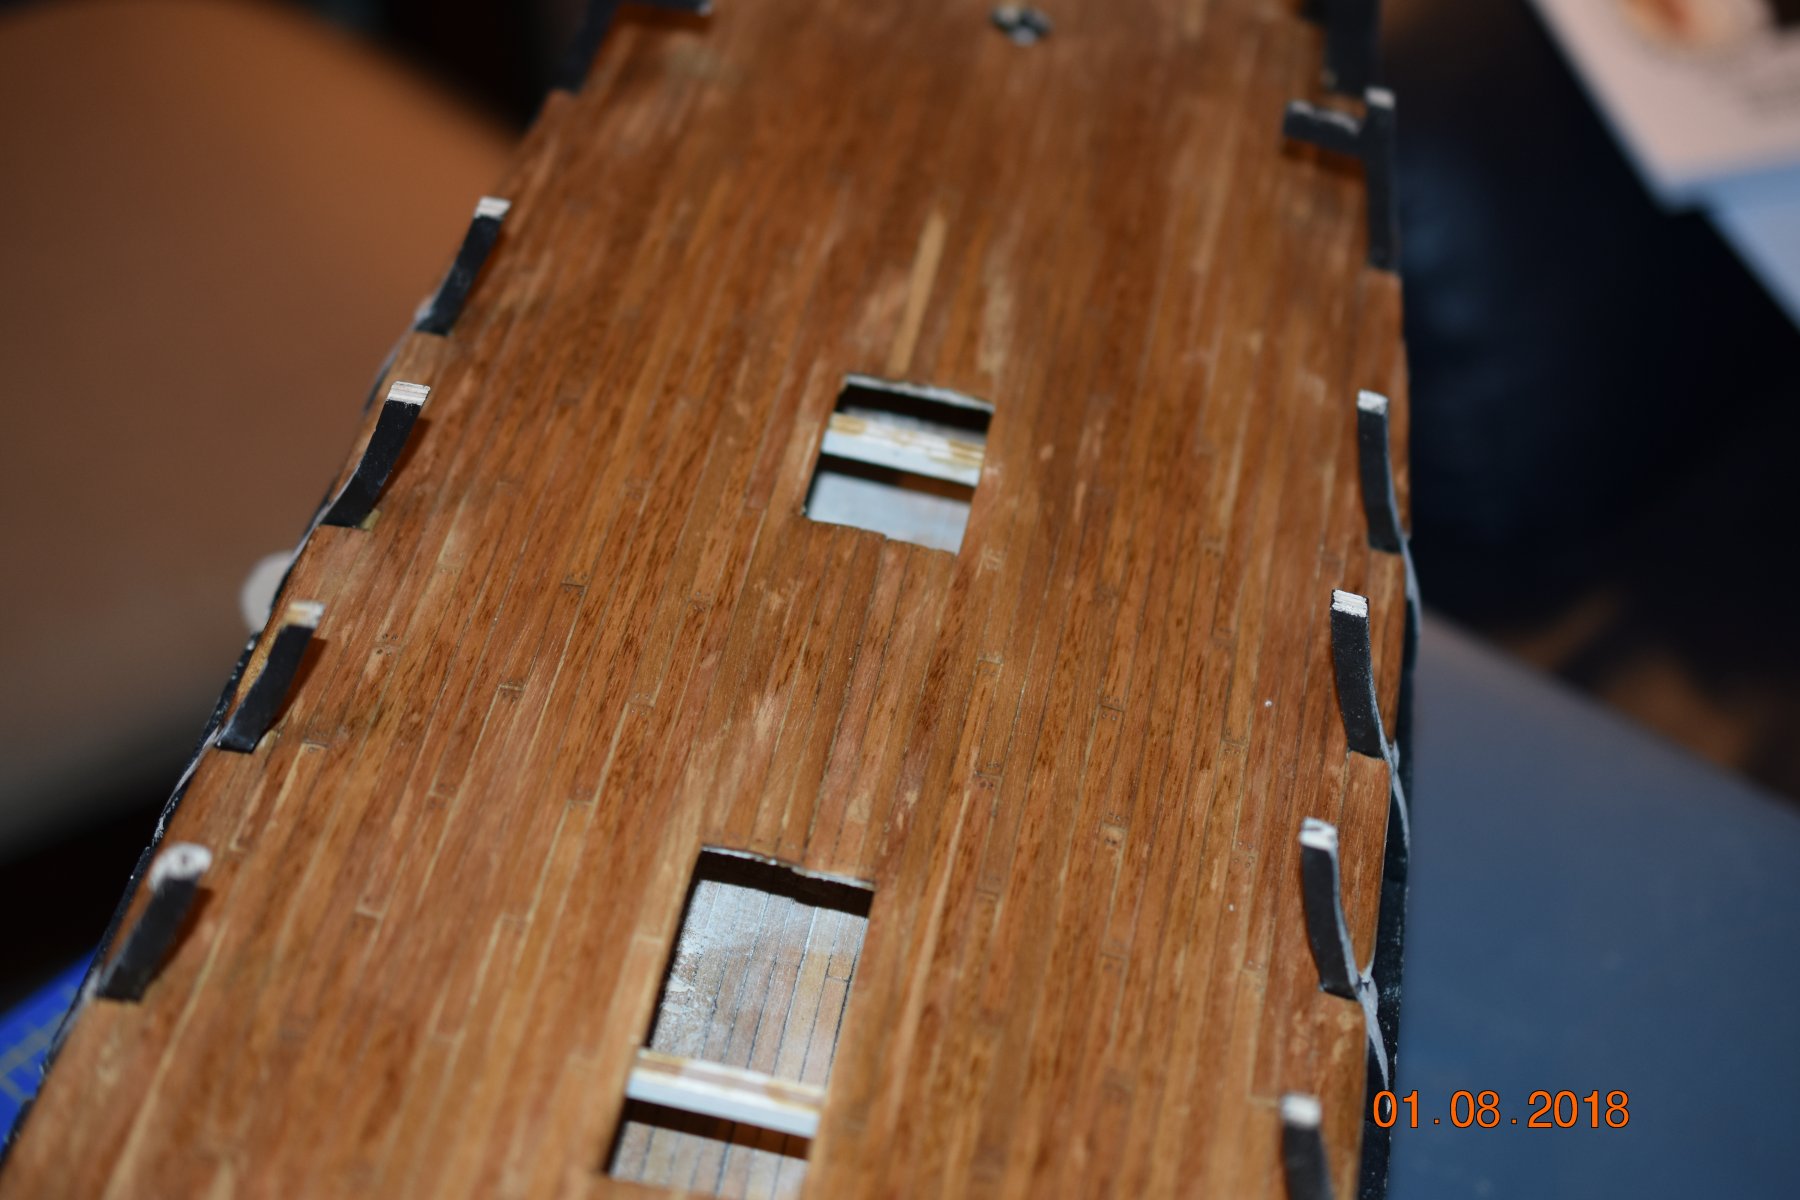
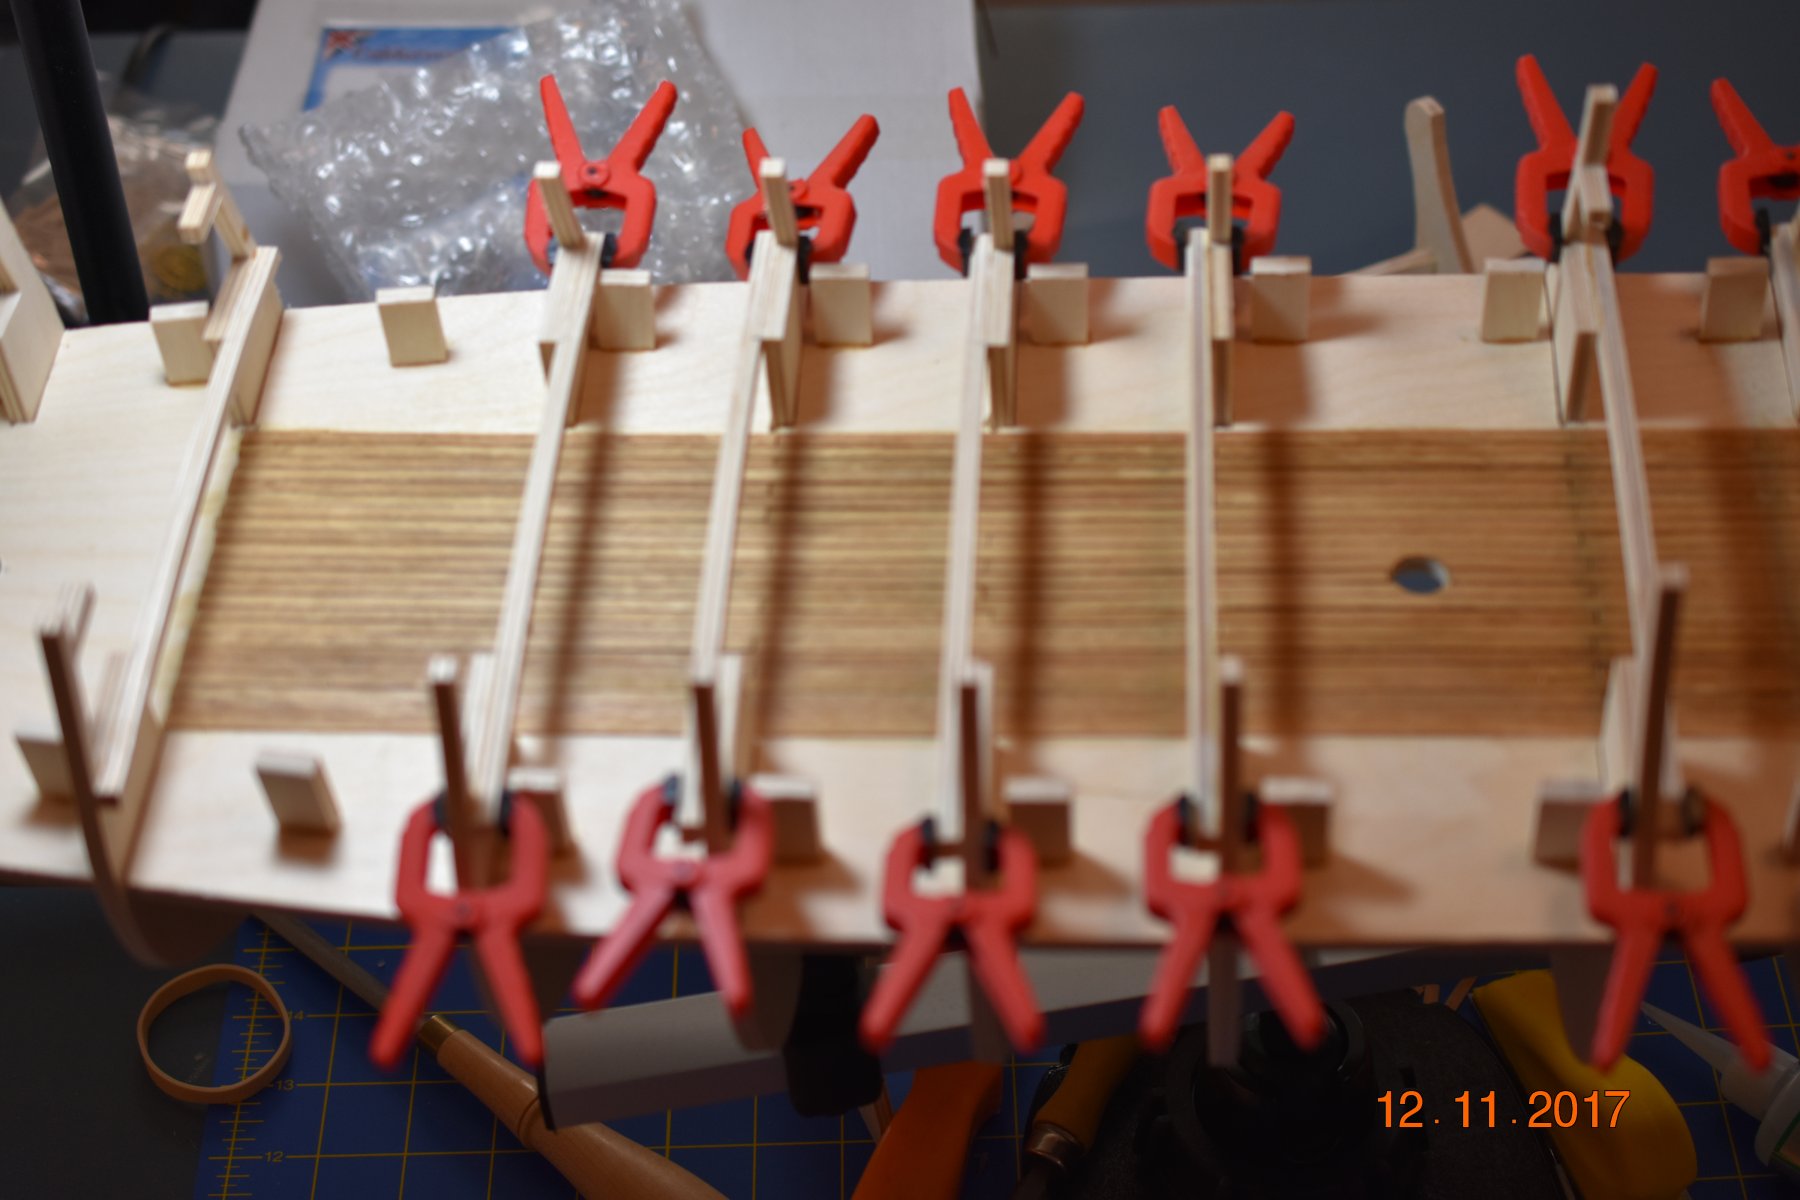
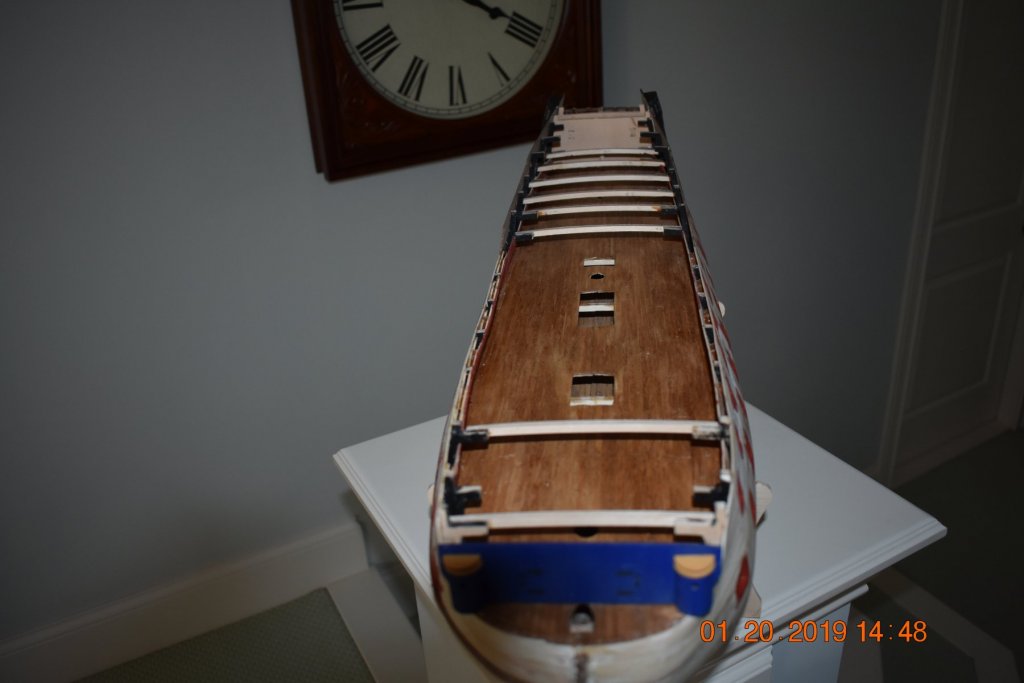
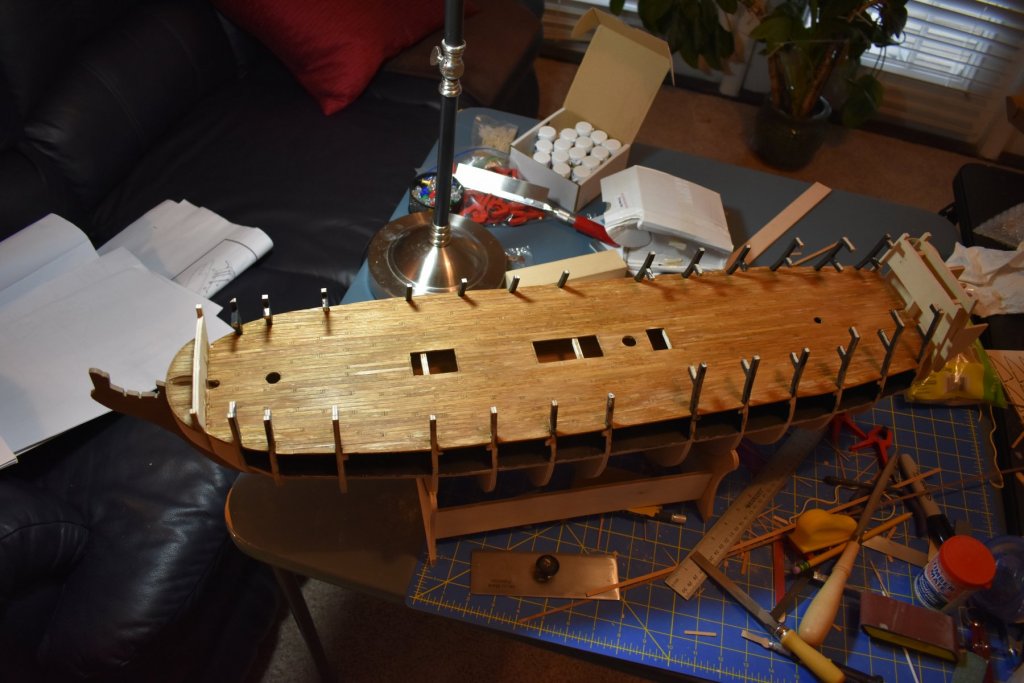
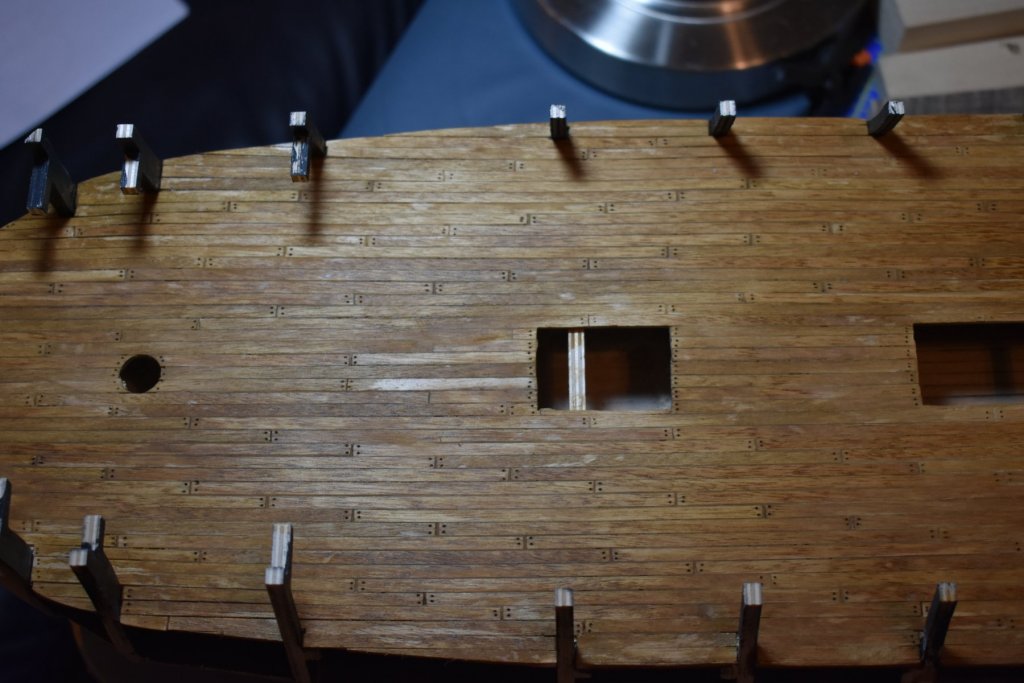
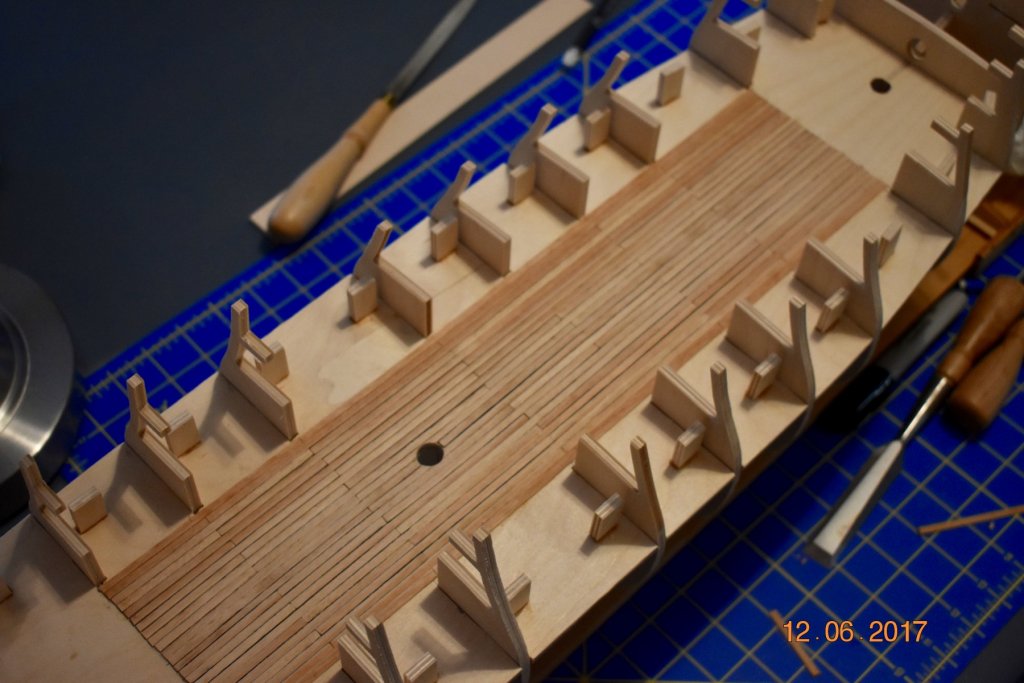
It has been awhile since I last posted, I hope everyone had a wonderful Holiday Season. Regarding the Aggie, I have been making slow but steady progress. At this point, I have completed planking the upper gun deck. Overall, I am happy with the result...that doesn't mean that I didn't experience any problems, I did. Fortunately, the areas that will be the most visible turned out well...the problem areas will be under the upper decks. After completing the planking, I lightly sanded the entire deck, used filler where necessary and sanded again. As you can see, I did install treenails. The method I employed was to use a small drill bit with a 3/4 turn. As you can see they showed up very well especial following an application of Golden Oak stain (Minwax).

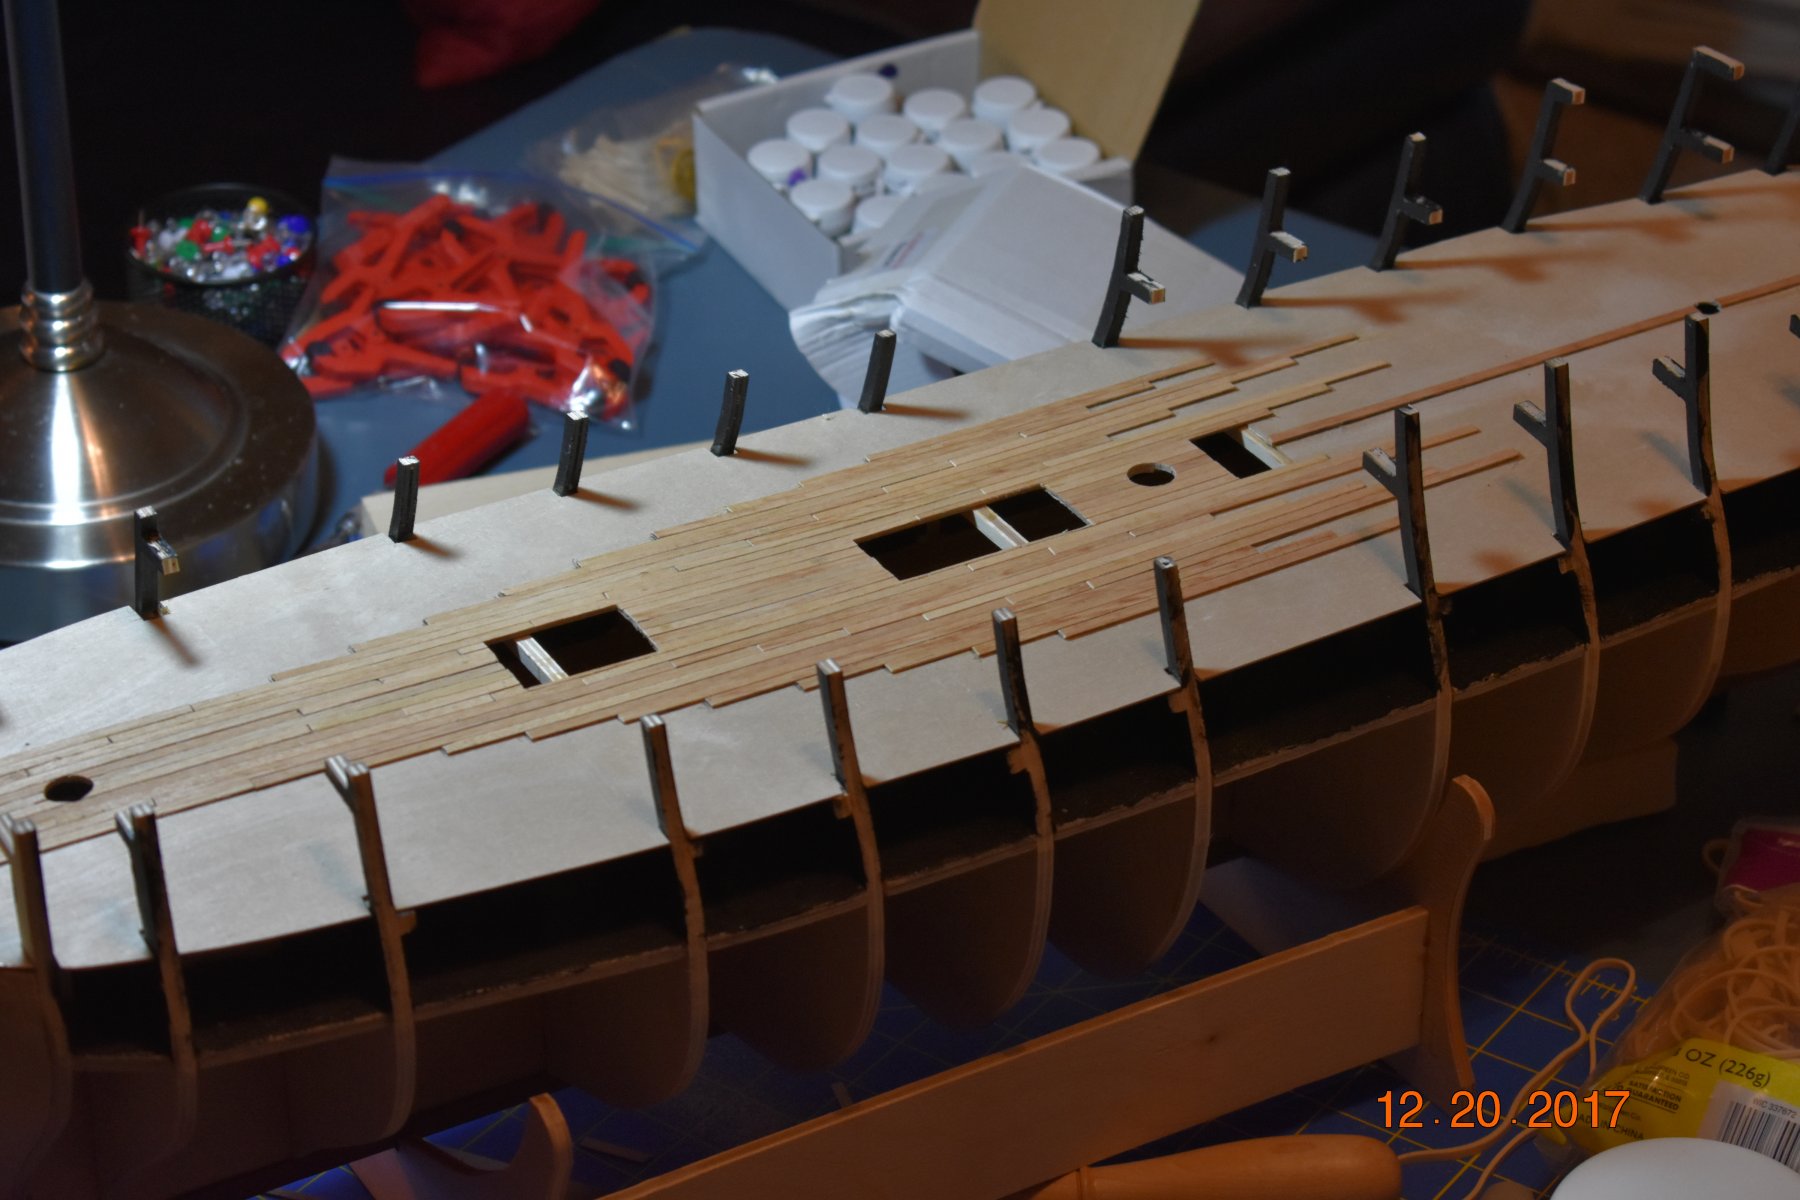
-
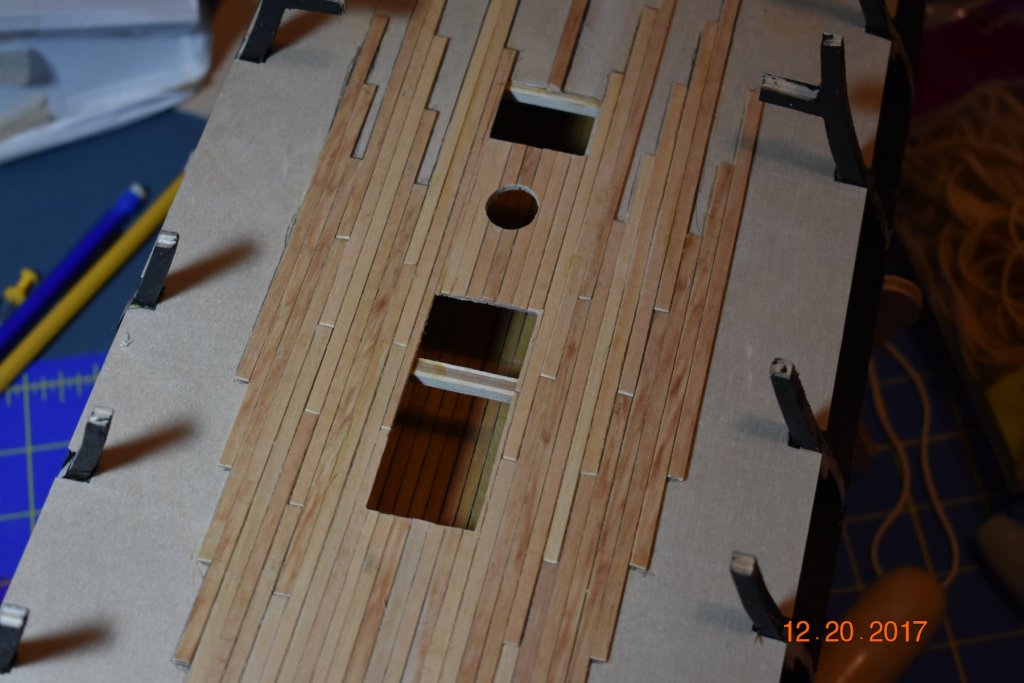
I am making progress with planking the upper gun deck. So far, I haven't encountered any significant challenges with this particular facet of the build. After I complete planking, my plan is to give the deck a light sanding, at which point I am considering some sort of "treenailing" process. While I would really like to add the treenail feature, I am not sure what approach to use. I have read how others have done it (#2 pencil, drill and fill, and drilled dimples), but I haven't decided what I want to do, but I have a few more days to decide. Following the addition of treenails, assuming I do them, I'll stain with Golden Oak (Minwax) and then apply several coats of wipe-on polyurethane (satin finish).

-
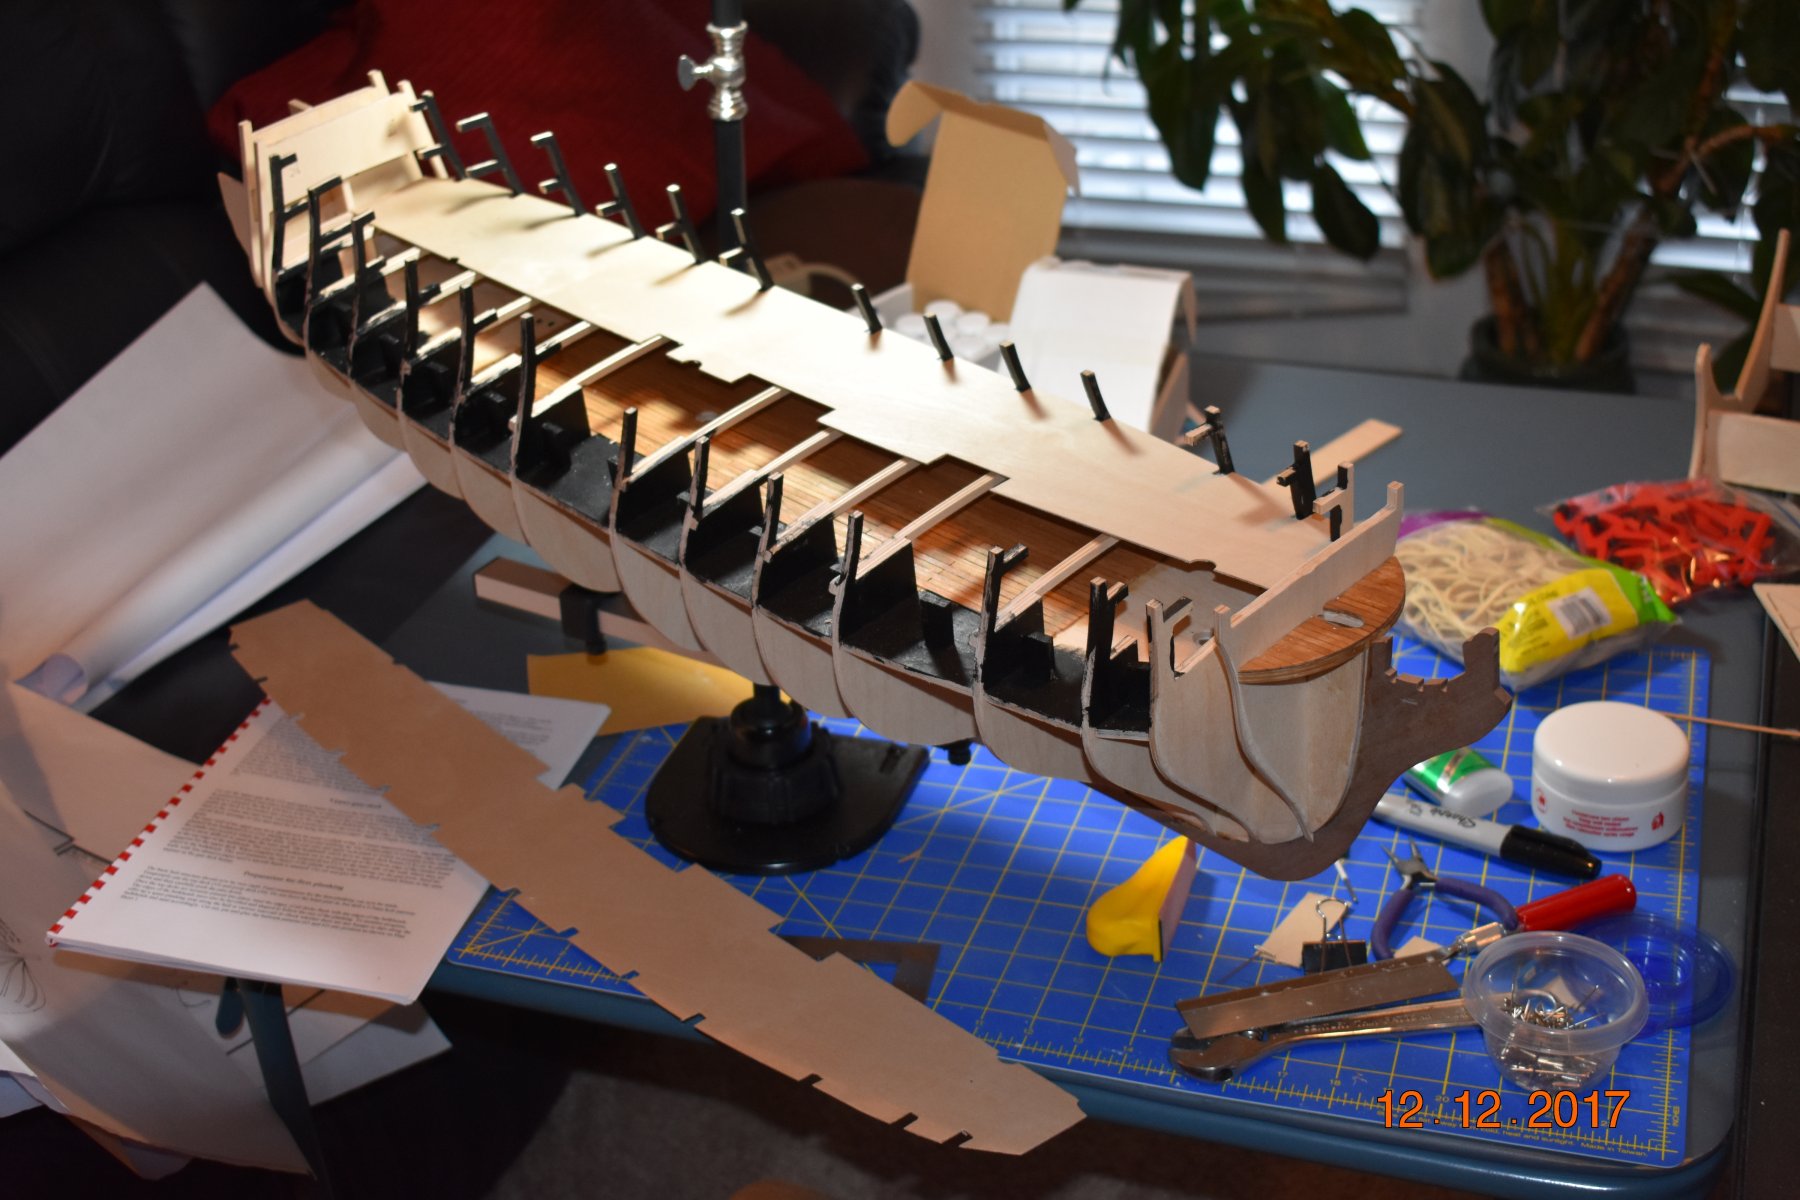
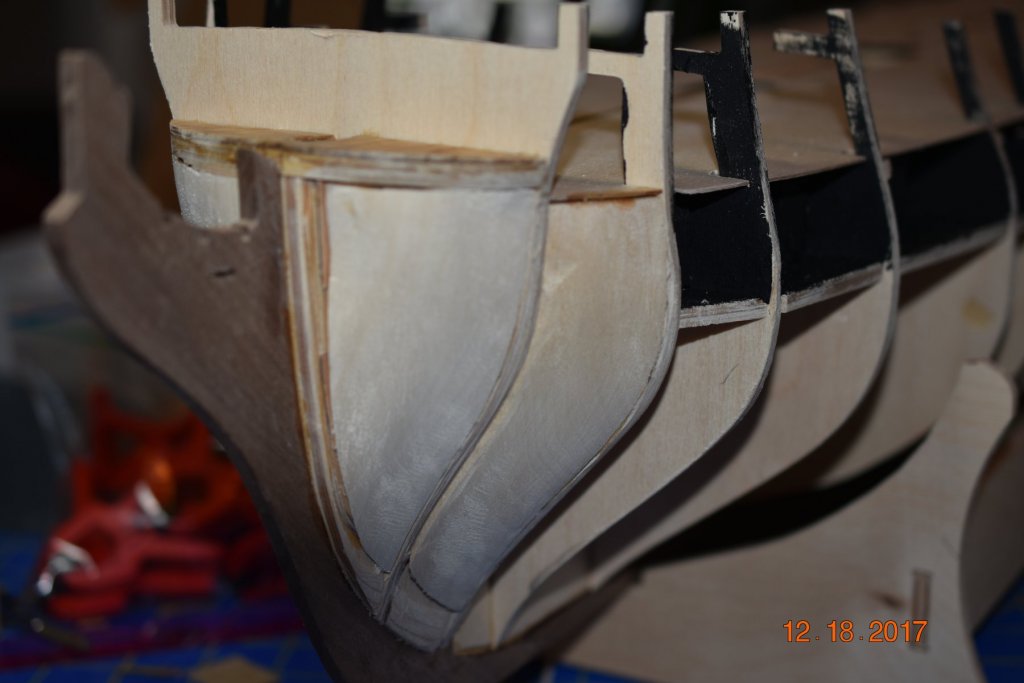
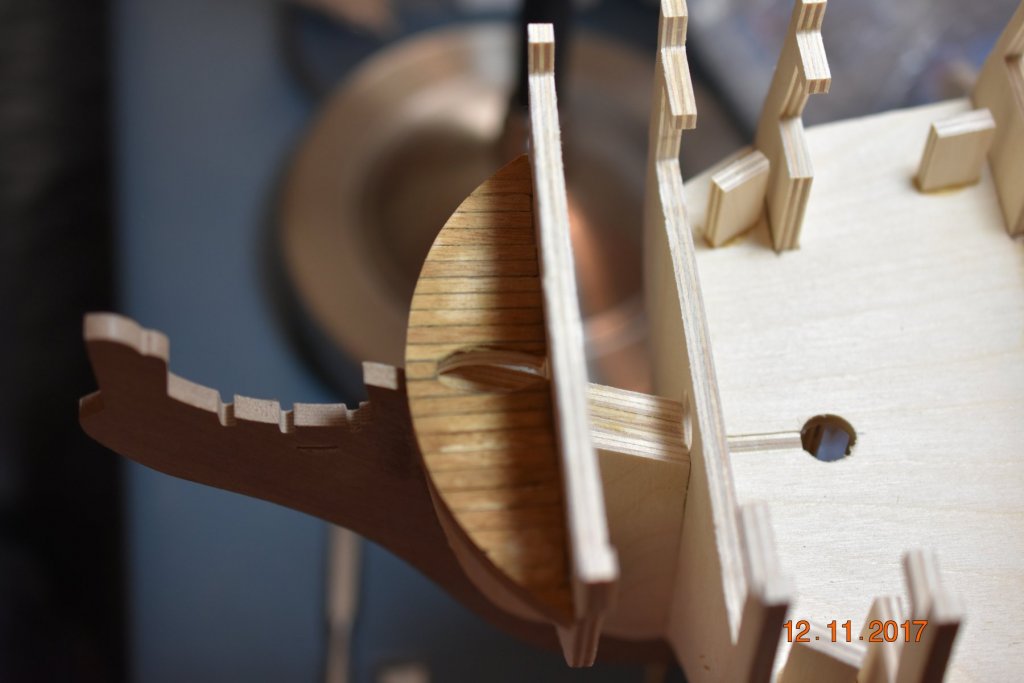
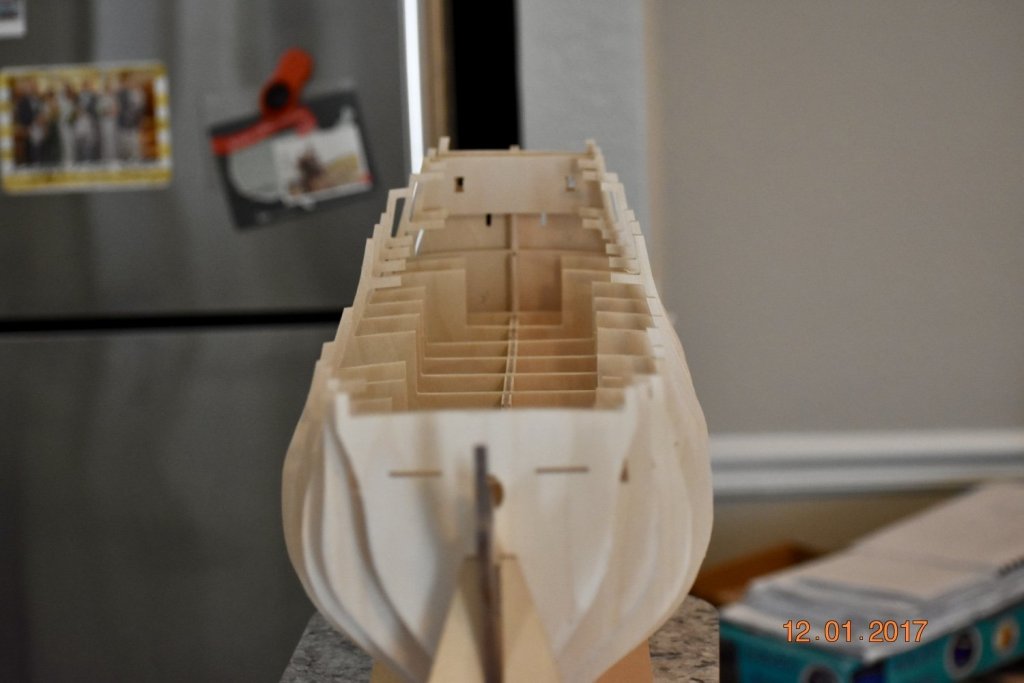
As seen in the following photos, I have been working on the bow cheeks. The manual doesn't actually call for the inclusion of the these features, but it will greatly increase the gluing surface-area for the hull planks as they turn sharply at the bow. As mentioned before, I have followed the building logs of other accomplished modelers and they all add some additional structure at the bow. Not only does it provide additional surface-area for the glue, but they are very helpful in faring the bulkheads in this critical area. That said, I really did not enjoy making these features. Primarily because a lot of the tools that would have been helpful in making the rough cuts (scroll saw) and initial shaping (oscillating spindle sander) are in a storage unit (I'll be moving soon, and all of this equipment will be installed in a new workshop), consequently everything had to be done with small hand tools. I used basswood and rough cut the initial shape with a coping saw. The rough cut blocks were then glued in place and the rest of the shaping was done with a wood rasp and Dremel sanding drum (lots of dust!). Next, I'll be moving on to planking the deck!

-
Mobbsie, thank you for your supportive comments and the reminder...I do have a tendency to get ahead of myself, which can make a the task all that much harder when you discover the problem. Donn
-
Today I painted the areas around the barrel posts were the cannons will be mounted on the lower gun deck. Although very little of these areas will be visible (your will only see it when you look through the gun ports) the custom is to paint the area black. I painted more area than is probably necessary, but I wanted to be sure. With the painting done, it was time to mount the upper deck. As I understood the manual there are two options, 1) mount the deck as one piece and then overlay with 4mm planks or 2) cut the deck into two halves (longitudinal) and plank each half prior to installing. My approach is going to be more of a hybrid. I tried to install the deck as a single piece, but the piece is large and thin, consequently, I was afraid it was going to snap. With this concern in mind, I elected to cut the deck in half. The next step will be to glue the halves in their respective locations and then apply the deck planks. I thought about applying the planks to each half before installing (as one of the options mentioned...the primary advantage being no obstructions to contend with), but I am not as confident that I can get everything aligned as well as the more "traditional" approach to planking.

-
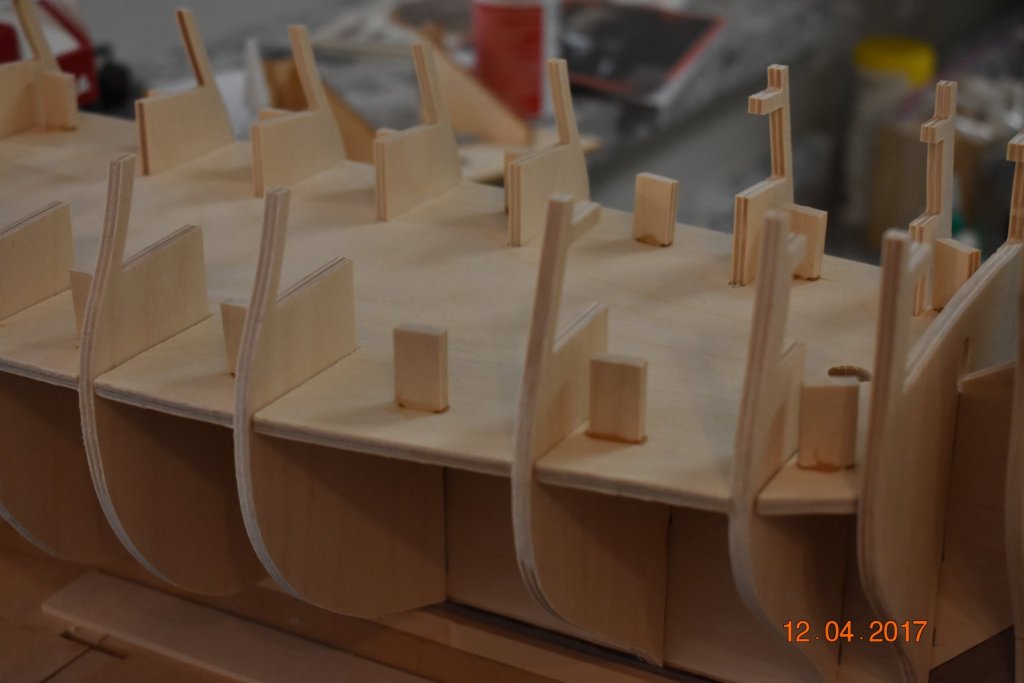
Another good day at the shipyard; I was able to install the bow deck and the upper deck camber beams. At this stage, it is easy to see lots of progress, but as you know in other stages you can spend hours on some very small components, which can make progress hard to see. Bill, Scott, and Hennie, thank you for your comments. Hennie, I read your Aggie building log, it is a thing of beauty, as is your current build (SOS)!

-
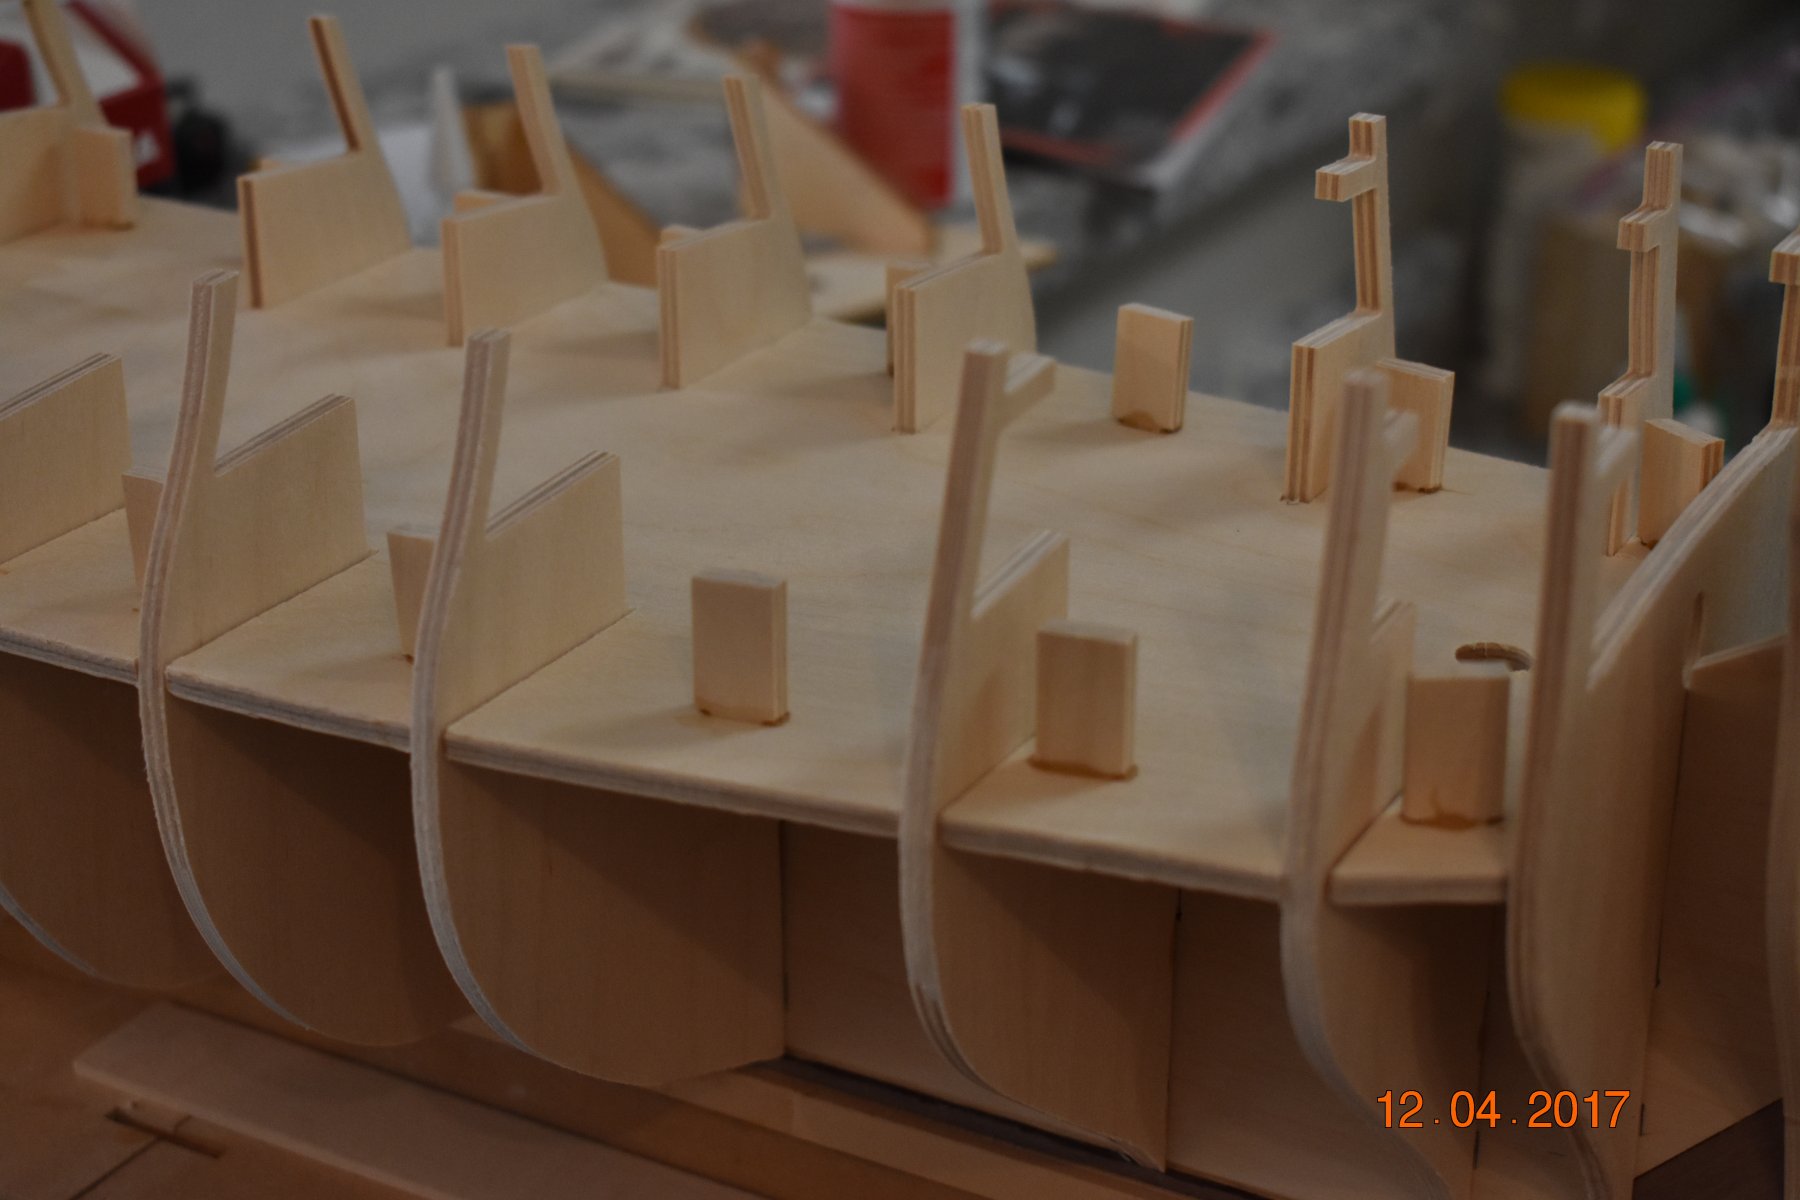
Thank you for your interest in my project! At this point in the build, my go to tools have been the dremel sanding drum and the wood rasp. The bulkheads required a whole lot of "rasping" to get them to fit their respective slots...the best tool for this work turned out to be the rasp! This was also true for the lower gun deck, a lot of wood was removed to get it to slide into place. Placement of the dummy cannon barrels was a straight forward process, but then came planking the lower gun deck. Here is where my lack of experience begins to show. It was my intent to plank this area with a five-butt pattern shift, just to practice for the more critical upper decks. I thought I had the process figured out, but as it turned out, I didn't. Once it became obvious that my process wasn't working, I considered ripping it up, but given the fact that so very little of this area will be seen, I decided to leave well enough alone. An after the fact analysis of "what went wrong" I believe that the root of my problem began with the mistaken notion that the planks had to terminate on a bulkhead. Given the fact that the spacing between bulkheads on the Aggie is not even, that through my plan off. I have since looked more closely at the work of others it is apparent that the planks do not have to terminate on a bulkhead. I am determined to have this figured out by the time I get to the more critical upper decks. Cheers!
-
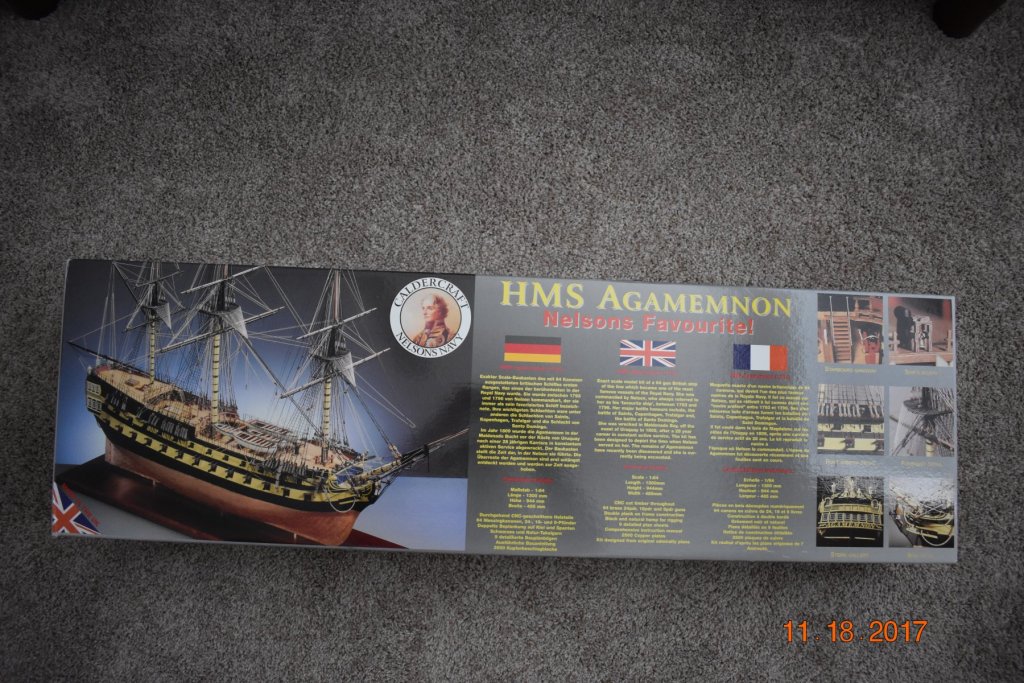
In many respects I am a relative newcomer to the world of model shipbuilding. I recently completed, as my very first build, the HMAV Bounty (Caldercraft) and I am reasonably pleased with the end result. That said, it took me about eight years to complete the project; however in fairness to myself, the actual time spent actively working on the ship was closer to two years. Following retirement, most of my time has been devoted to building furniture, however, I recently sold my house and shop so woodworking had to be temporally suspended. Given the fact that I wanted to keep my hands busy, I dug the Bounty out of mothballs and began building. It took me awhile to get back into the rhythm of working in a smaller scale, but I soon rediscovered how much I enjoyed tinkering with these wonderful old ships. Given my limited experience as a modeler, the wisest course of action would have been to choose a much less ambitious project than the Agamemnon. I totally agree; but having found this website and after reading the building logs of such Master Builders as Sjors, Mobbsie and others, I knew that my next build would have to be the Aggie! ("Aggie" or "Aggy", I am not sure which is correct...but, since one of my degrees is from Texas A&M University, I'll go with Aggie). So, it is with this background in mind that I start this log. No doubt it will take me a very long time to complete this project and I am very confident that I will be calling upon the collective wisdom of this folks associated with this site to help me along the way. As you can see, I have the box with all of the necessary inventory, and I have started the build! Since I have never posted pictures before, I will close for now to be sure I understand the mechanics of the uploading process before I get too far ahead of myself. Thanks, Donn
-
JerseyCity, great pictures...thank you! I have looked very closely at the pictures, it is amazing how much variation there is with respect to the rigging plan. I suppose this means that there is more than one "right" way. I like the approach depicted in this model!
-
JerseyCity, wow, this is a very clear picture and very helpful! I will be using this as a guide for the placement of blocks and rigging. Thank you! Matrim, I recently learned of the belaying plan for the Bounty. Although I learned of it late in the process, I too emailed Caldercraft and requested a copy of the plan. As of this writing, I have not heard from them (it has be at least three weeks). Once again, thank you for your assistance.
-
Gregory and Matrim, thank you for the input. The drawing is a bit busy, but it clearly shows more stays than I have seen on most of the other Bounty pictures that I have reviewed, which is very interesting. Matrim, my version of the Bounty was purchased at least 10 years ago (long story), so perhaps the plans have been cleaned up since my purchase. One example of "discrepancies" I have experienced is that the plans for rigging the "gaff-boom" clearly show a 3mm block attached on top of the gaff at its base (portion nearest the mizzen), however, none of the other plan sheets show this block and therefore no rigging is shown to the block. That said, it has been a lot of fun building this model, I am thoroughly enjoying the process!