Rat-Fink-A-Booboo
-
Posts
53 -
Joined
-
Last visited
Content Type
Profiles
Forums
Gallery
Events
Everything posted by Rat-Fink-A-Booboo
-
 Can anyone enlighten a beginner how to find the waterline on the completed hull when it is not parallel to the keel. I.e on a boat with a large drag. I'm building Lynx by Panart. Many thanks all.
 -
This is the model in the Smithsonian that I mentioned in my earlier post. You are right I suspect about the holes in the gun port covers and the idea about the scuppers is an interesting one. I will consider that when I come to decking Best wishes everyone Don
-
Hi Juhu Thanks for this: v. interesting Could you tell me what publication this is please I note that the current replica has scuppers that are circular holes and look quite out of place Best wishes to one and all Don
-
Hi Juhu Thanks for the heads up about the lids - I've not seen that. Any Ideas how they might have been handled - y'know, ropes 'n' stuff?
-
Hi Folks Not much progress over recent weeks due to stroke, end of year assessments, and holidays. However, thinking ahead - and excuse me if I'm simply being thick - the model plans don't appear to have any scuppers. Would this function have been performed by the gun ports? Also, the plans don't show any gun port covers whereas the Smithsonian model does. Once the exterior planking is finished these issues will start to come up. Does anyone have any pearls of wisdom to impart on these issues? Best wishes to you all Don
-
Hi folks Just looked in on this. For what it's worth, the approach I have taken to this issue is to soften a plank of full length and pin it in place. I let this dry overnight. Then I take it off and cut the pre-bent plank into planks of around 30 scale feet (in the early 19th century on the US east coast they were cutting planks up to 40 ft - this will differ in different locations and different times). To cut the planks I use some little nippers which give the plank butts a very slight shamfer. Clearly when the pieces are butted together they fit perfectly. Hope this is of interest. Best wishes all Don
-
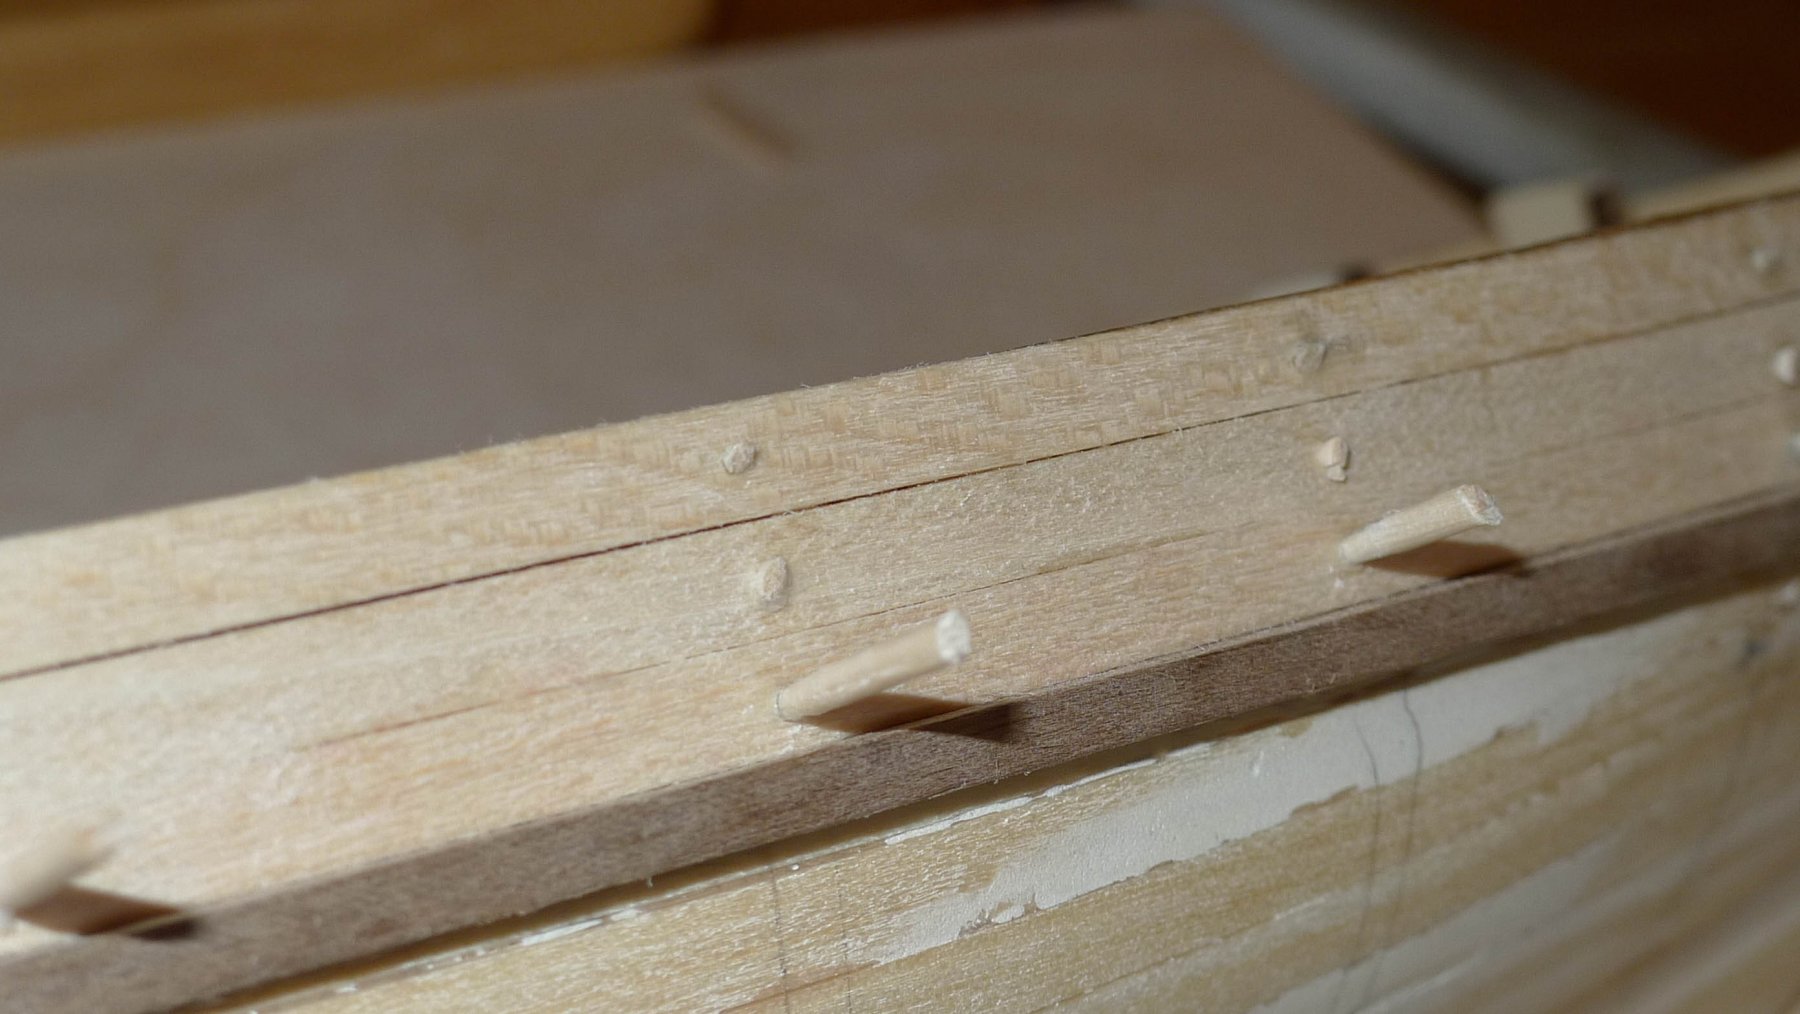
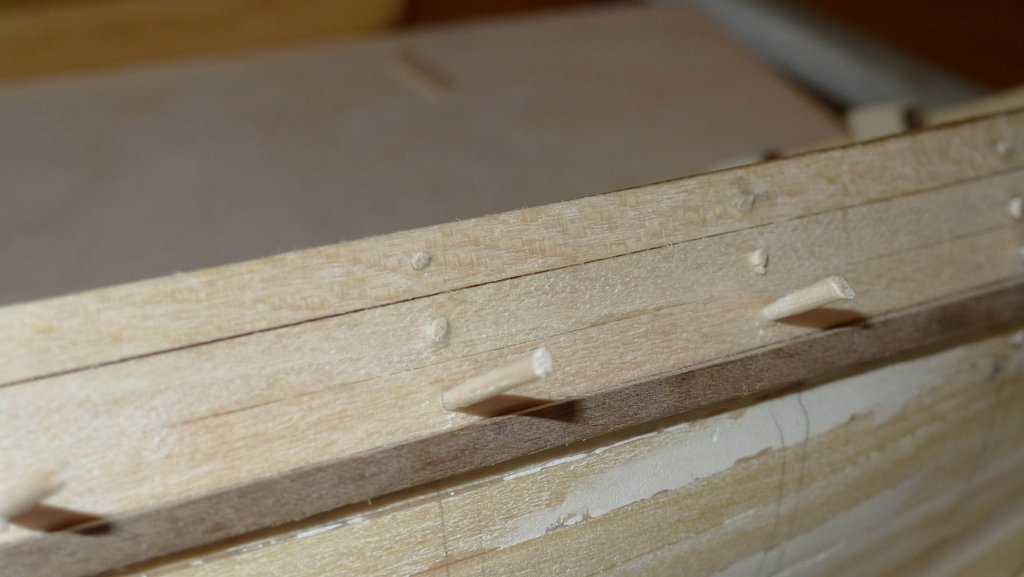
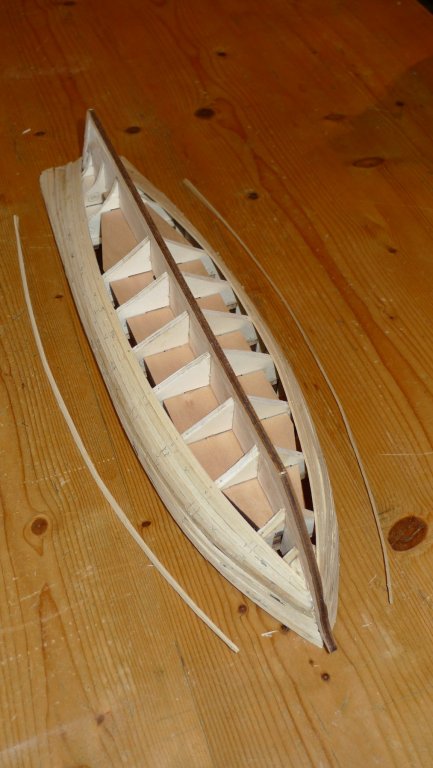
Hi Folks, Just thought I'd pop this picture on the forum. I'm applying the outer planking and can't get the clamps to the new planks as they're bent and glued, so I'm having to pin them as I go. This, of course, leaves holes. I think, ordinarily this shouldn't pose a problem, particularly if, like Ben Lankford in Building First Rate Model Ships From Kits, you're going to fill and sand umpteen times. However, I want to retain the grainy texture so I want to minimize the use of filler. My solution is to fill the holes with a spile cut from a cocktail stick, apply a tiny amount of PVA and tap in using a large half round file. When the glue's set you can nip them off close and when it comes to sanding they can be made flush. I'm painting the hull so the difference in wood won't be visible. Best wishes to you all Don
-
Thanks Juhu Once saw Pride of Baltimore I in Baltimore Harbour - then she went and sank. Not seen POBII, but when I next travel to the 'states I would love to. Gonna press on with this as it's providing lots of little problems, which, by solving I learn. Also, I think that absolute authenticity is obviously impossible - the level of detail at which you 'stop' is always going to be arbitrary - so I have in mind an appearance that evokes the 'romance' of these vessels rather than the rather sterile (to my mind) appearance on the box. Still, long way to go yet. Best wishes Don
-
Hi Andrew Thanks for this - I'd have loved to have seen it. Thanks Juhu I have a picture of this ship as my PC wallpaper currently. I think the biggest issue in terms of it being a replica rather than a mere 'interpretation' is the stern. The 1816 lines show more of a 'lute' stern whereas this ship has more of a counter stern. The model kit seems to hedge it's bets on this issue too, so I removed about 18 scale inches from the transom area so that the rudder now descends almost straight down from the transom board as in the 1816 in Chapelle. According to Chapelle, she should have seven gun ports per side. I think the shallow entry of the bow to the water on the new ship is beautiful, but I don't think its in keeping with the early 19th century. Again, the plans in Chapelle show a steeper, more convex entry into the water. \i think the new ship has been designed to be a bit more friendly, particularly where 'pitch' is concerned - but then, what would I know Did you get a chance to go on board? I'm hugely envious, I love Boston. Wishing all fair winds and a following sea. Don
-
Thanks Popeye, I'll look into that - sounds interesting. I discovered yesterday that Ben Lankford recommends baswood for the outer planking so I think I'll do a few experiments. Best wishes Don
-
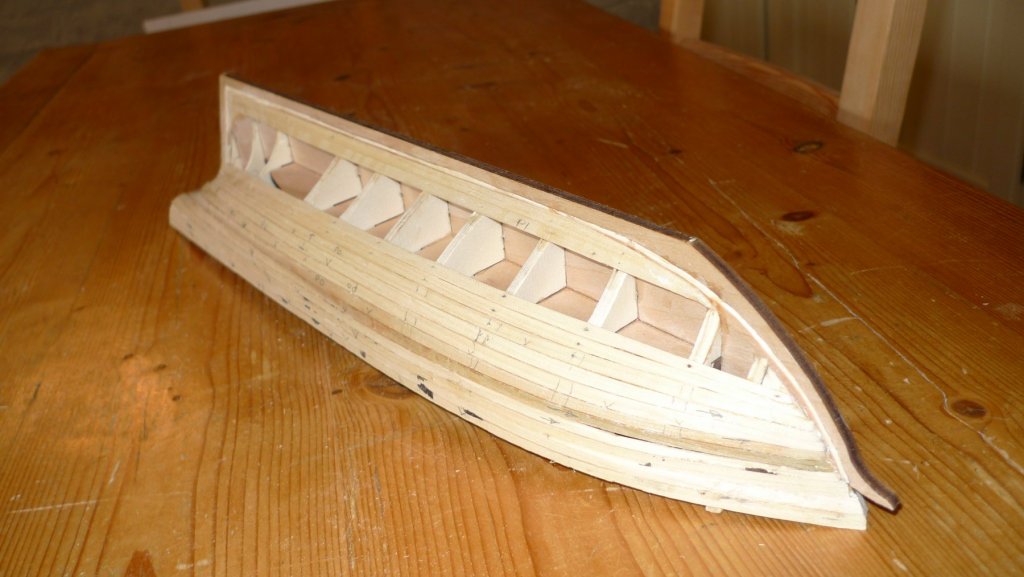
Finished first skin of planks - filled and sanded back. The outer skin will need to be finer! Wishing you all fair winds and a following sea. Don
-
Hi Wefalc Many thanks, as I understand it 'quarters' are the gratings - quartered - of which you speak, so you answer my question precisely. Frankie Many thanks. This is precisely what I wanted to know Best wishes Don
-
Hi Folks, Can any one cast any light on this question please. I am building Mantua's Lynx, Baltimore Privateer of 1812. The kit plans have the hatches on the deck covered with quarters. In my ignorance, I kind of assumed that these hatches would have water-tight covers - perhaps to go over the quartering - does anyone have any knowledge of this please Wishing you all fair winds and a following sea. Don
-
Thanks Michael, Kieth, I was looking for a plank on frame or at least a plank on bulkhead kit. I only have a dining table to work on so I don't have the facility for a scratch build. Perhaps one day I'll have a garden with a man cave in it. There really does seem to be a dearth of 'working boat' kits Wishing you all fair winds and a following sea. Don
-
Hi Michael What a fabulous project - I love these pilot boats. Are you aware of any medium size wooden kits of Bristol pilot cutters on the market? Best wishes Don
-
Hi Popeye There is - I hope it will be a good deal tidier than this one. I'm toying with the idea of doing the outer skin in basswood so that I can raise the grain before painting to give a kind of worn, working boat kind of look. I have in mind what she might have looked like sneaking in and out of the waterways of the Chesapeake when she was captured. (pure fantasy of course ) Wishing you all fair winds and a following sea. Don
-
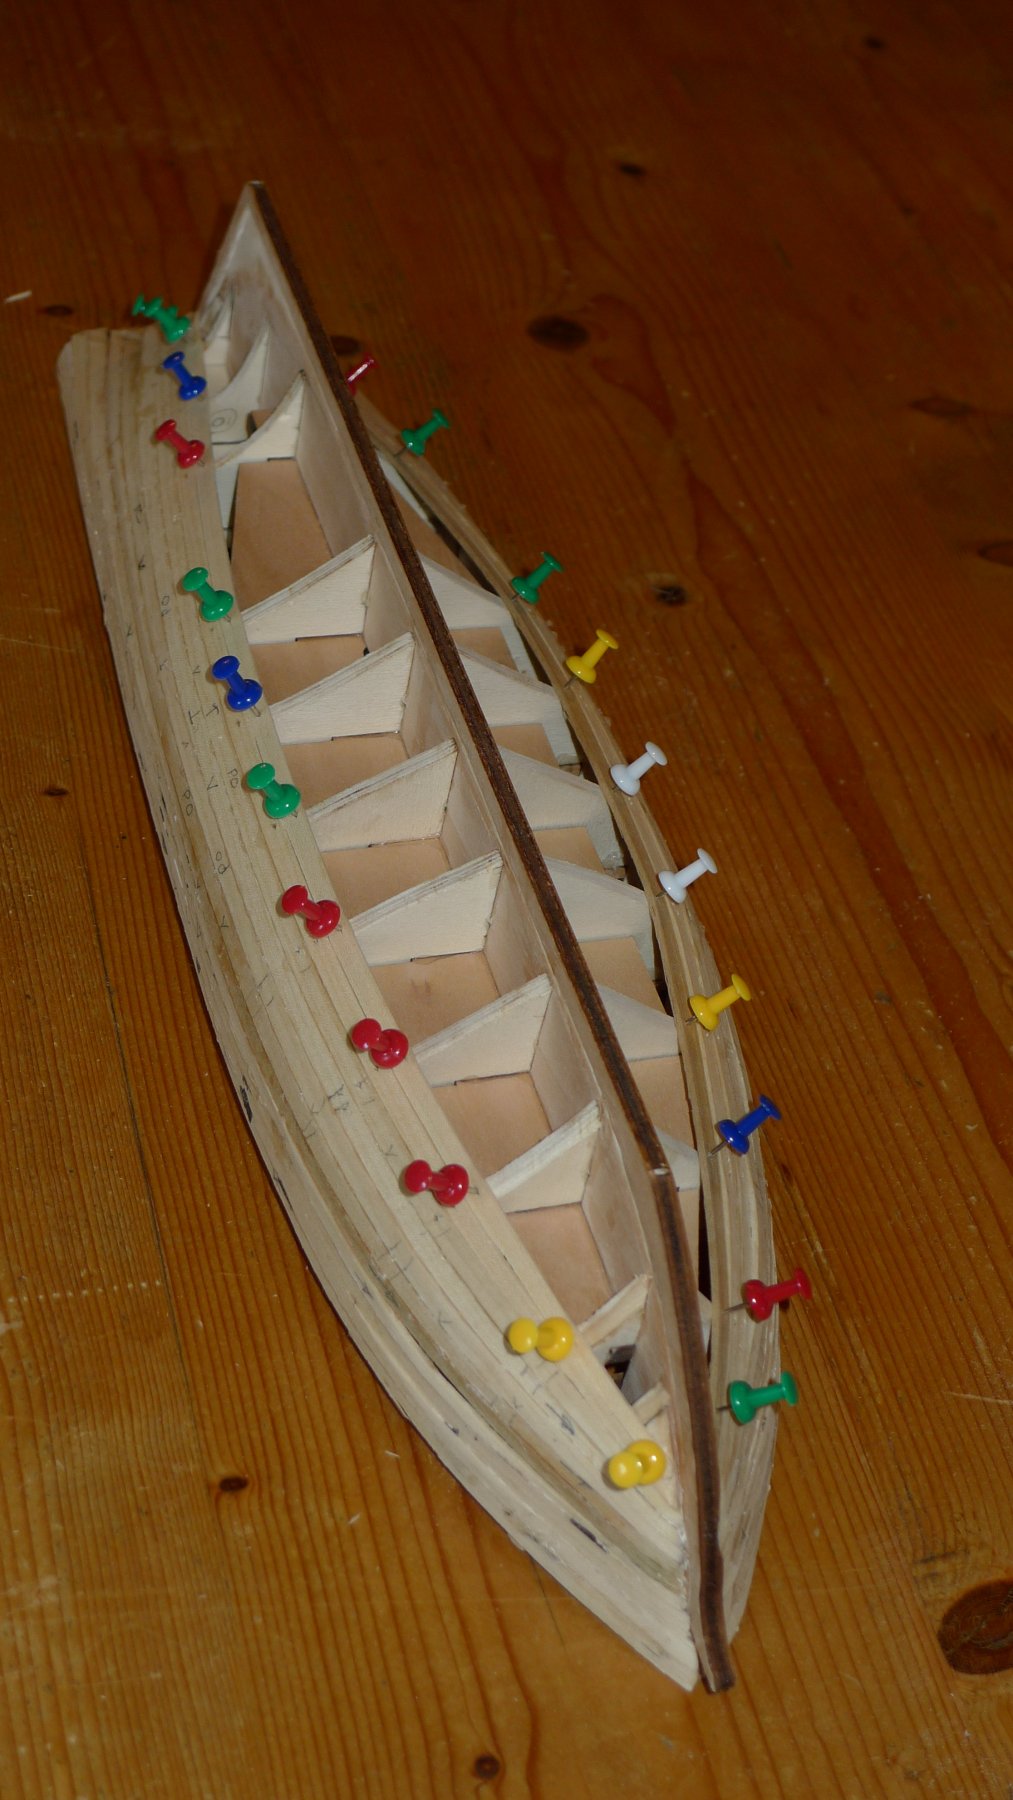
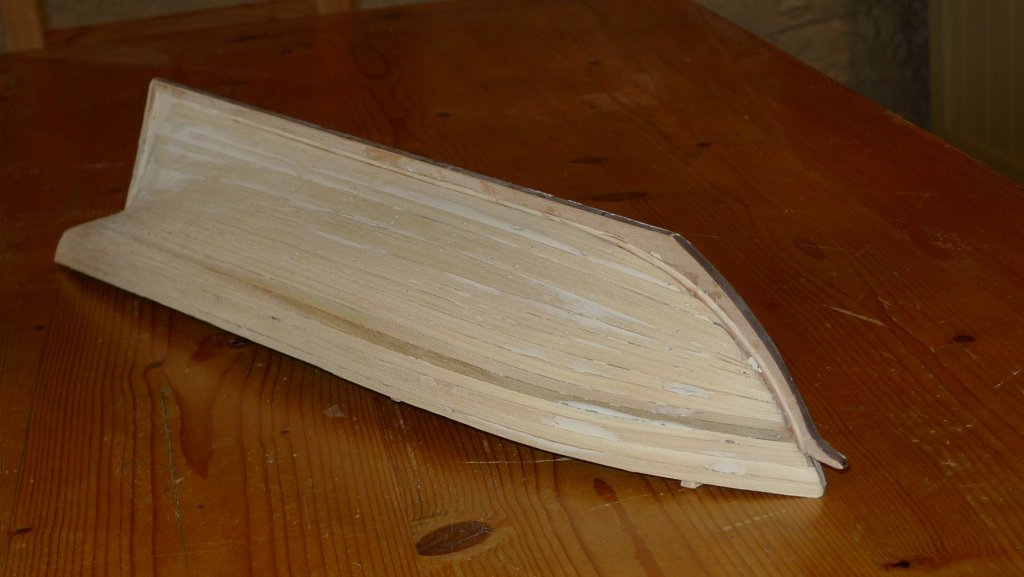
This is my first build folks so please don't take what I say as gospel. but, for what its worth, this is what I did. This is the first skin of two. The kit is Lynx; Mantua/Panart; 1/64. I formed the garboard strake for both port and starboard sides by gluing together two 1.5 X 5mm basswood strips, clamping them together firmly along their length. I made a paper template running the upper edge parallel to the keel and fitting to the bearding line. The template was used to cut the two garboard strakes as a pair and the edge nearest to the keel was then fared closer to fit before gluing. The strake was not fitted tight beyond the bearding line as it will be shamfered to make room in the rabbet for the outer planking. The space left to fill isn't quite as parallel as it looks in the photo and will probably need a drop plank at about bulkhead 5, and, of course, a couple of stealers in the stern. Incidentally, the dots are pin holes not pins. Hope this is helpful. Wishing you all fair winds and a following sea. Don

-
Hi Folks, Garboard strakes added I formed the garboard strake for both port and starboard sides by gluing together two 1.5 X 5mm basswood strips, clamping them together firmly along their length. I made a paper template running the upper edge parallel to the keel and fitting to the bearding line. The template was used to cut the two garboard strakes as a pair and the edge nearest to the keel was then fared closer to fit before gluing. The strake was not fitted tight beyond the bearding line as it will be shamfered to make room in the rabbet for the outer planking. The space left to fill isn't quite as parallel as it looks in the photo and will probably need a drop plank at about bulkhead 5, and, of course, a couple of stealers in the stern. Incidentally, the dots are pin holes not pins. Hope you Florideans are having better weather than we are :-) Wishing you all fair winds and a following sea. Don
-
Hi Bob Thanks for the support of a master Wishing you all fair winds and a following sea. Don
-
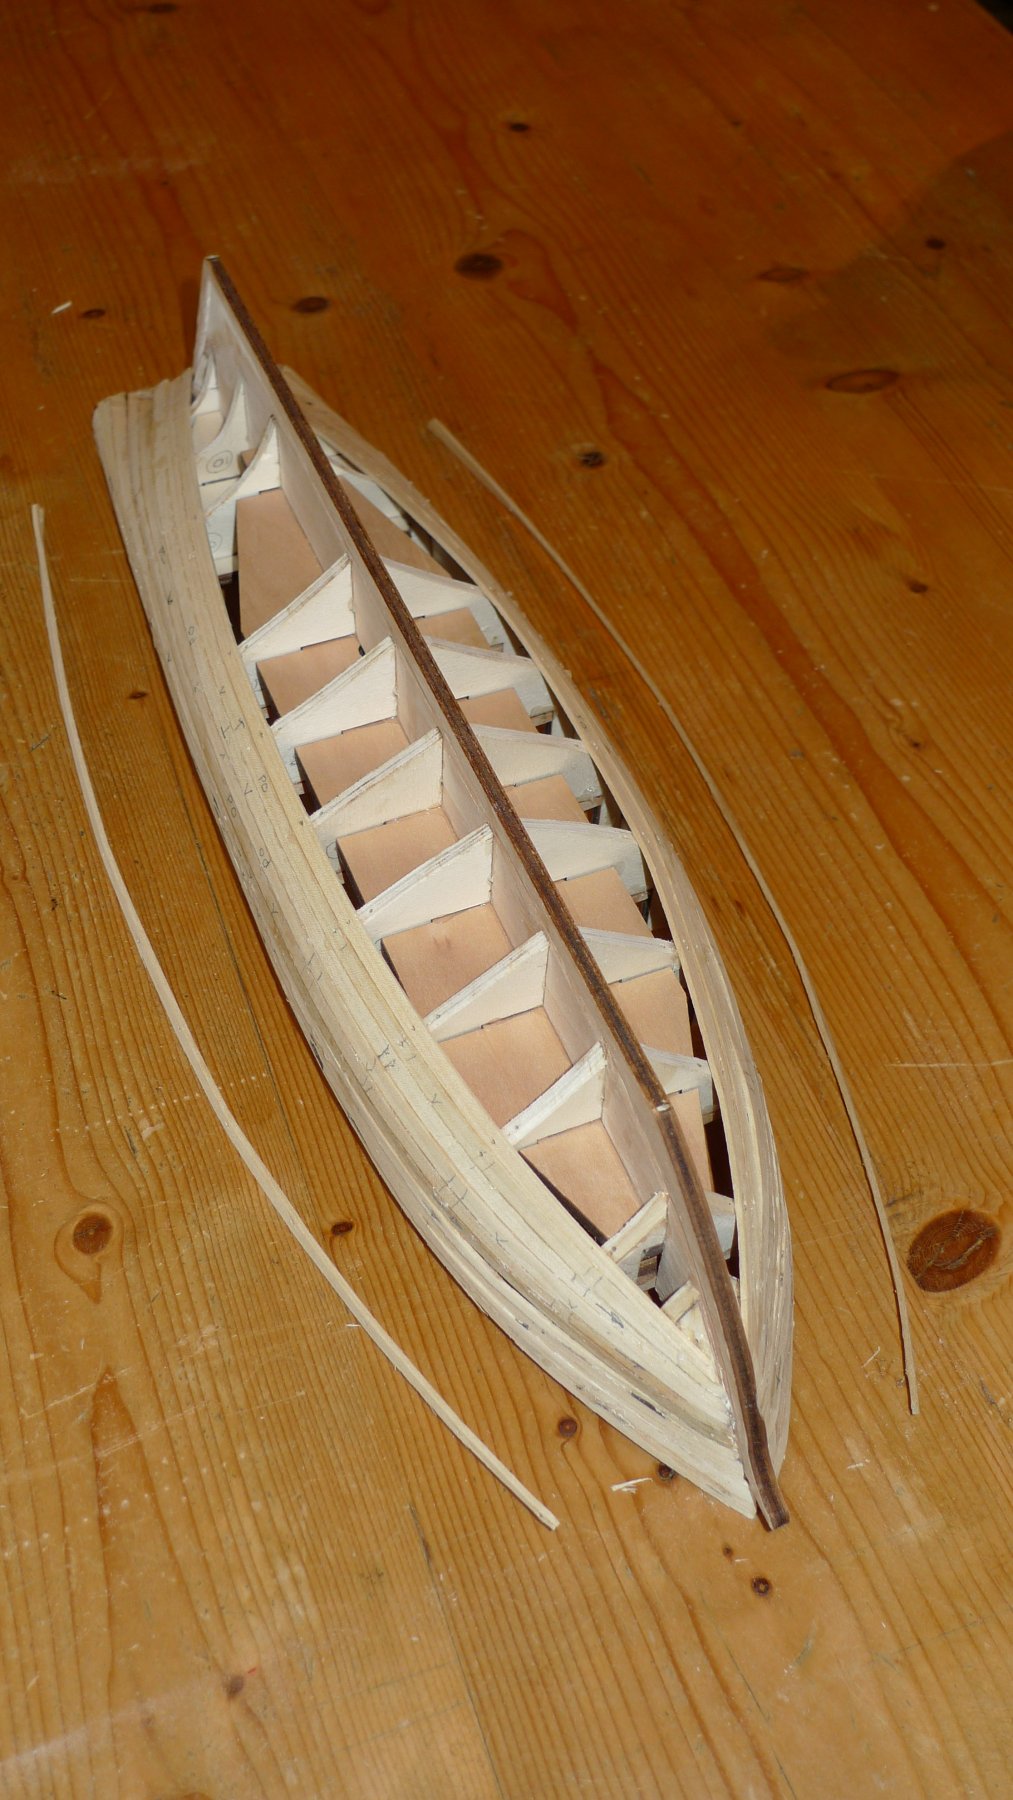
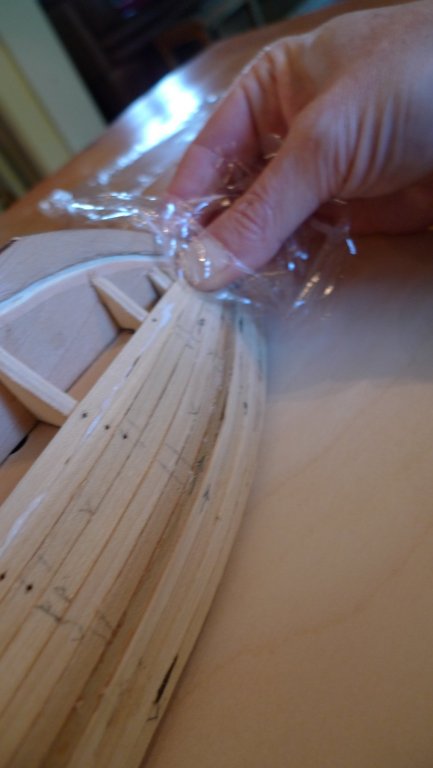
After a couple of weeks feeling very tired after my stroke, its a return to boat building Now there's no longer any room for planking clips I've adopted the soaking method The planks are spilled in pairs and then given 5 minutes in boiling water on the hob in the roasting tray - don't tell the missus. Don't let them get too soft. I think you want a bit of spring in them so they find a good natural line over the bulkheads without bumps where the bulkheads are. I then pin them in place (NO GLUE) and leave to dry overnight. The planks are then taken off . You can see the complexity of the curve (curved in all three planes at once - this would be very tricky, I think, with the hot plank bender). Like this, they just fall back onto the bulkheads without any forcing, ready to be glued. The planks are then glued and pinned. Because the spilled ends of the planks would split if pinned, I use acrylo-cyanate glue (just on the ends), cover the piece with cling film and hold it with my thumb whilst applying the pins to the rest of the plank. I think it's a good idea to remove the excess PVA at this stage as it's a devil to sand. Wishing you all fair winds and a following sea. Don

-
Copper bottomed Baltimore Clipper?
Rat-Fink-A-Booboo replied to Rat-Fink-A-Booboo's topic in Nautical/Naval History
Hi Juhu As to the dates these are the two dates that I have for the launch of the Lynx. These also were my very thoughts Hi USS Frolick I was not aware of this book - I must get it. Wishing you all fair winds and a following sea. Don- 6 replies
-
- 1
-

-
- copper
- hull design
- (and 1 more)
-
Hi Brett For what it's worth I agree largely with vaddoc. It seems to me that it is paramount to establish the sheer first (hopefully there will be an indication of this in your plans). On my build (Lynx - Panart) I have put in three strakes with no spilling to establish the bulwarks. The spilling of my planks was then calculated using a planking fan calculated from the bottom of the bulwark. If you then follow the widths given by your planking fan at the bow rabbet it should naturally show where the garboard strake will go. I imagine, however that this will be a little more difficult with a man'o' war, but there must be somewhere on the hull where the sheer can be established. Wishing you all fair winds and a following sea. Don