
dwalker
-
Posts
10 -
Joined
-
Last visited
-
 GrandpaPhil reacted to a post in a topic:
Akbar by dwalker - Crocker Boat Yard tug boat - SMALL
GrandpaPhil reacted to a post in a topic:
Akbar by dwalker - Crocker Boat Yard tug boat - SMALL
-
GrandpaPhil reacted to a post in a topic:
Akbar by dwalker - Crocker Boat Yard tug boat - SMALL
-
GrandpaPhil reacted to a post in a topic:
Akbar by dwalker - Crocker Boat Yard tug boat - SMALL
-
GrandpaPhil reacted to a post in a topic:
Akbar by dwalker - Crocker Boat Yard tug boat - SMALL
-
GrandpaPhil reacted to a post in a topic:
Akbar by dwalker - Crocker Boat Yard tug boat - SMALL
-
popeye the sailor reacted to a post in a topic:
Fictional sandbagger LANA by mitbok - based on ANNIE plans - SMALL
-
popeye the sailor reacted to a post in a topic:
Fictional sandbagger LANA by mitbok - based on ANNIE plans - SMALL
-
mtaylor reacted to a post in a topic:
Fictional sandbagger LANA by mitbok - based on ANNIE plans - SMALL
-
Awesome build.... but can you tell us more about the Coast Guard Lifeboat in the background ? That looks great too!
-
John Allen reacted to a post in a topic:
Fictional sandbagger LANA by mitbok - based on ANNIE plans - SMALL
-
dwalker reacted to a post in a topic:
Fictional sandbagger LANA by mitbok - based on ANNIE plans - SMALL
-
This is an excellent build. I have most of a Sandbagger completed, but I may b=need to rethink some of the parts and details after looking at your beautiful work. Thank you for sharing.
-
I started building plastic airplane models as a kid. I wish I had all of them back now so I could attend to some very important attention to detail. I get it now. Anyway, I have been building scratch built models for about 25 years. My first was a sunfish. This was particularly easy and a great introduction as the boat is basically flat. I used photos and measurements from a family sunfish. Even though it was generally easy - and I would recommend this as a starting point for a model virgin- there were some challenges in the project. I needed to learn some simple metal bending and shaping to get the pintles gudgeons and cleats. Since then I have learned that I like to build from scratch. I have begun a few kits, but find I like to figure things out for myself. So I think that part of what beginners need to assess is: do they want to do a kit or scratch build. Both choices require a learning new skills. Both can be enjoyable and rewarding. As far as unfinished projects - I don't worry. It seems to me that often the stopping of project is you mind needing to think things through. An example. I discovered the Sonder class boats that competed off of Marblehead Massachusetts in up until the 1930's. I had seen an article in Woodenboat magazine about the building of 2 new boats. I wanted to build one. In the first year, I made the plans. Left them fora year. I needed to think about the right materials. When I began the work, I got the hull and deck completed in about 5 weeks. I left the project for a bit - partly because I was very happy with how it looked at that point. It took me a year or so to come across the right wood for the spars. I completed the boat all the way to being able to step the mast. BUT...... I could not figure out how to make the masthead fitting for the backstay. I worked and was not satisfied for a month on various solutions. At that point I became frustrated. Most of you know the negative impact of frustration. I put the boat down and did not touch it for 2 years. Yes, I periodically looked at it, and thought about it. I figure my brain needed to work it out. Which it did. One day, I just sat down and made the part, and finished the model a week later. My mind just needed the time to mull it over. This has happened to me on multiple occasions. Typically it is due to learning a new skill or approach. I get to a level of frustration that I need to back away and left my brain settle. So, my advice is don't worry about unfinished models ( I currently have 4 ). They will come together when you are ready. Work on a couple, learn new skills and new things and then you will be able to apply them to older unfinished models. Remember, We all basically got into this hobby for the challenge and fun of making something. I can only hope that my future models will look as good as the ones I see and appreciate here. Current build: Akbar a boat yard tug In Process: Sandbagger In process: 14 foot catboat On Hold: Nobska the last steamship to operate Cape Cod and Islands Completed: Catboat Flash Completed: Herreshoff NY 30 Completed: Rhodes 19 ( Oday version) Completed: Sonderclass Fima Completed: Maine Shrimp Boat Completed: Palmer Scott Woodpussy Completed: Fantail launch
-
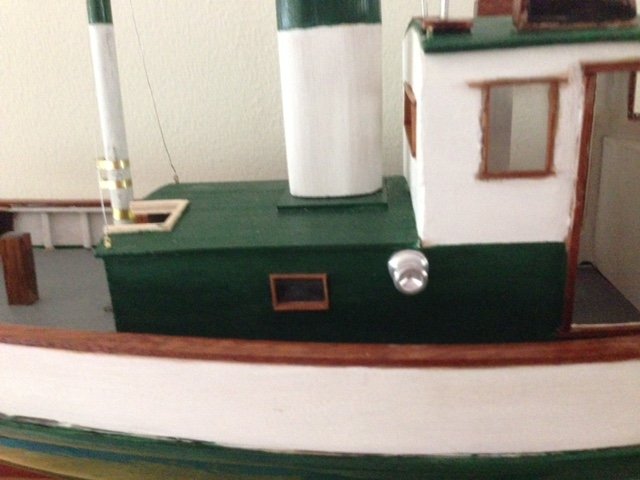
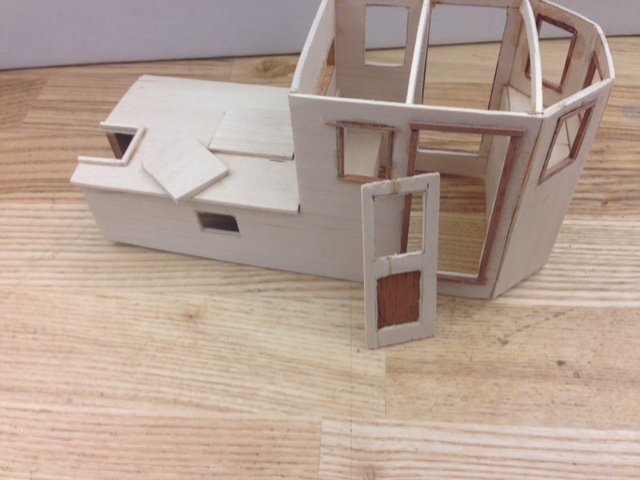
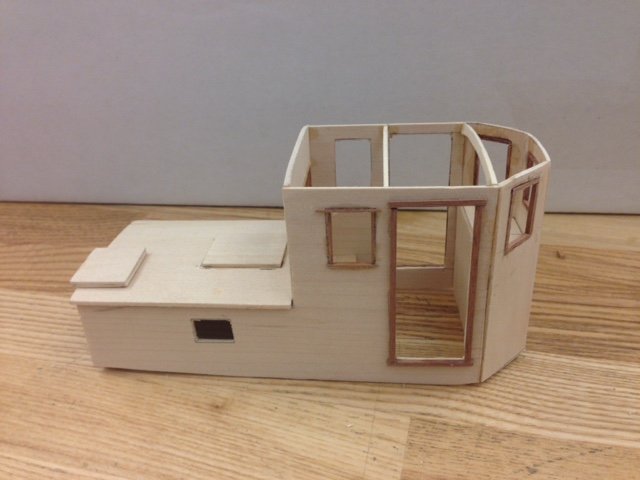
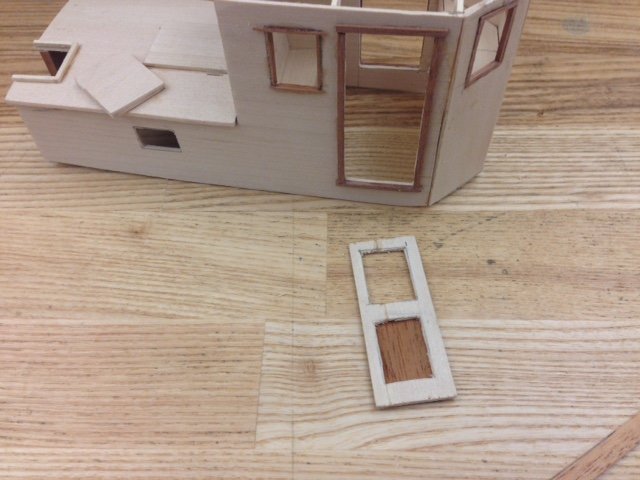
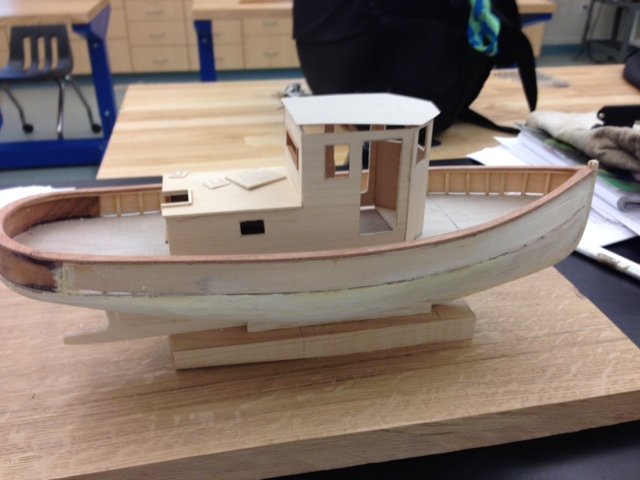
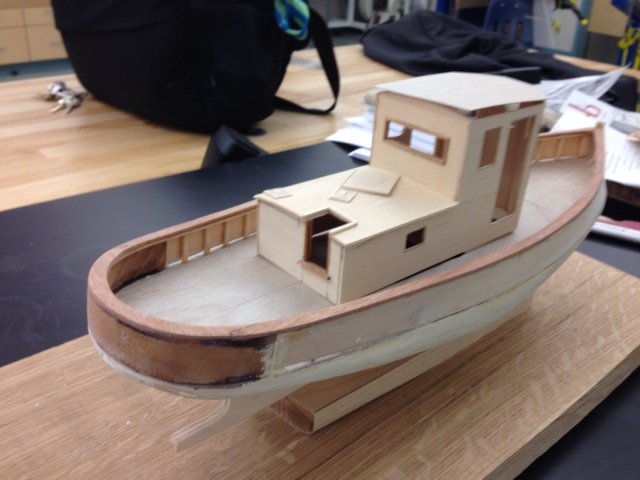
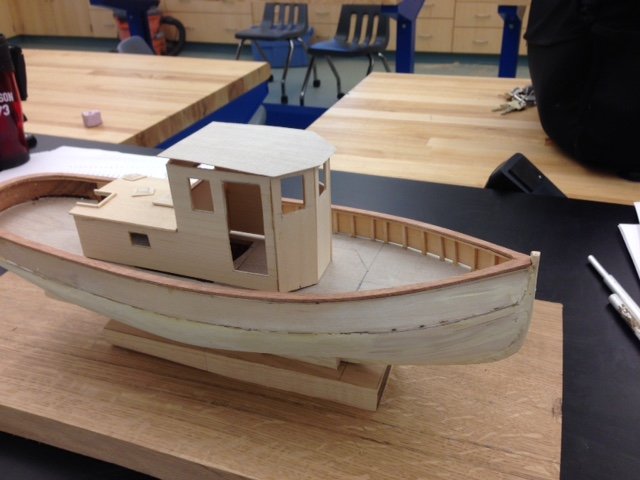
I have been doing some work on the Wheelhouse. Trim is mostly complete. I did the first door, but not sure if I am happy with it yet. It looks a bit rough. I will put a coat of varnish on the mahogany to seal it. Then I will give the rest a prime coat of white. Not sure how others do this, but I always do a coat of varnish on the brightwork before the prime and paint. This way when I make the inevitable slip of hand with paint it does not stain the mahogany. If it hits varnish a gentle sanding with 1000 grit removes the mistake.

-
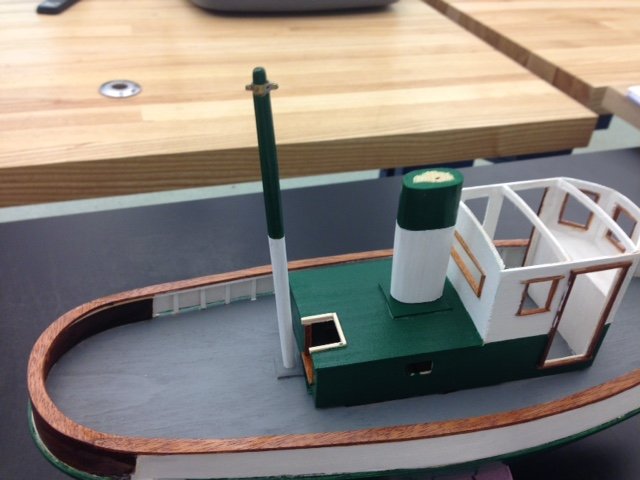
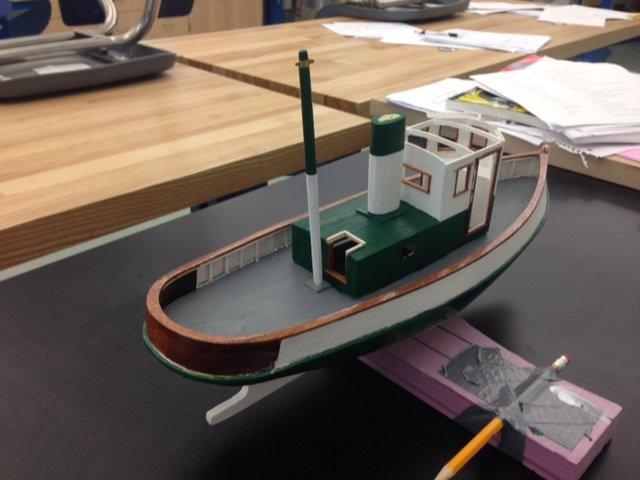
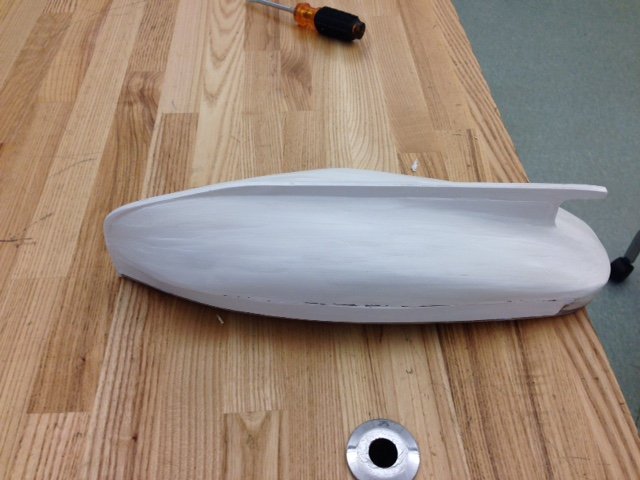
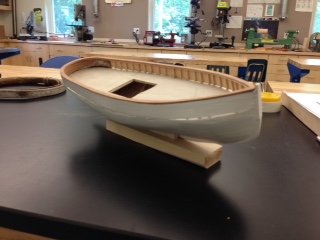
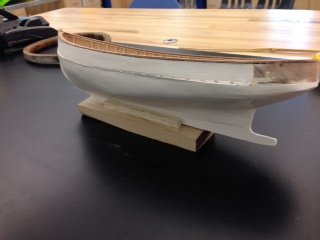
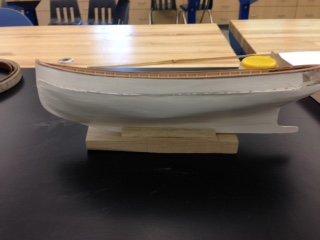
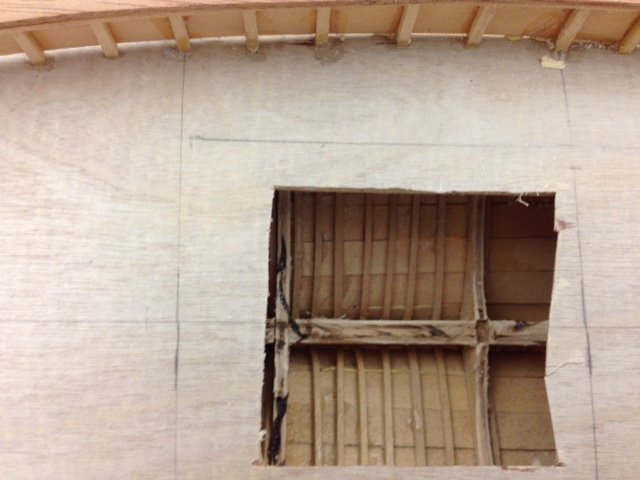
I primed the hull with Interlux primer. ( What can I say, I have regular boat paints ) The primer helps to seal the wood and reveal places on the hull that may need some attention. I like to get a primer coat as well because it also is easier to use pencil lines on it for other markings such as the waterline.
-
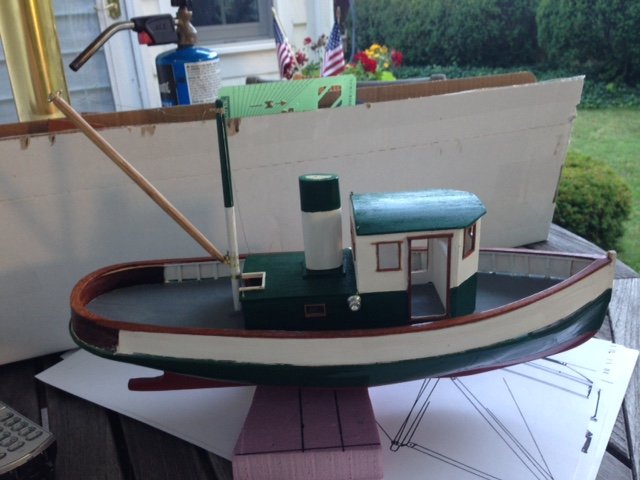
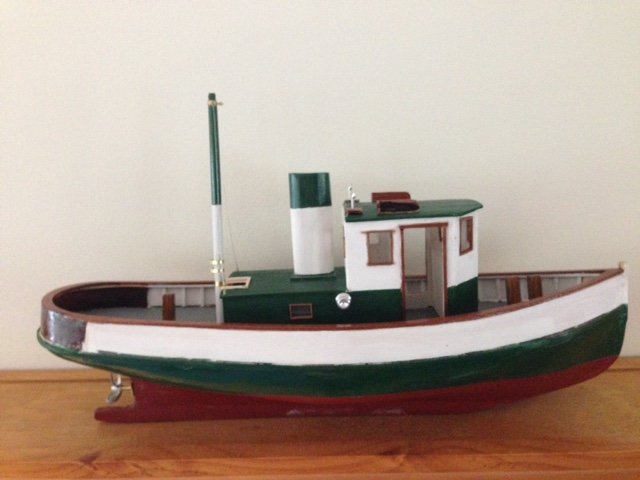
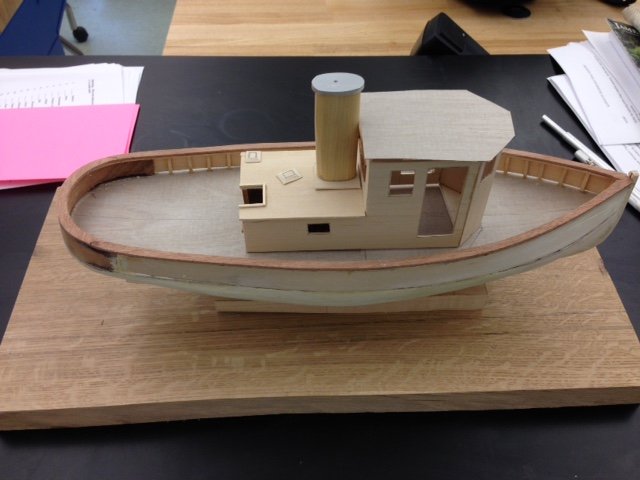
Akbar was designed by Sam Crocker as the harbor work boat for the boatyard in Manchester MA. Designed in 1951, the boat was used until the early 2000's when it was replaced by her sister ship Masconomo II. I chose to build this boat as it was great to see such a small tug moving about the harbor. I also really liked the look of the mast and gaff tackle. I have built a number of plank on bulkhead models and wanted the challenge of building the curved stern transom. ( I had looked at doing a draketail, but figured I would try this first) I am sorry I joined this group after I began the build, and hope that I can catch you all up on what has gone on so far. The keel is birch plywood as were the bulkheads. I steam bent a number of rib frames into the hull because I want them to be visible through the companionway and windows. I am in the process of carving a model of a Gray Marine 6-330 to fit into the engine room so that it too may be seen through the windows and the companionway. Today I turned the winch barrel and the display mounts from aluminum. ( It's what I had around ) My next step will be to make the interior dashboard and seat for the wheelhouse as well as complete the mahogany trim for the windows.
-
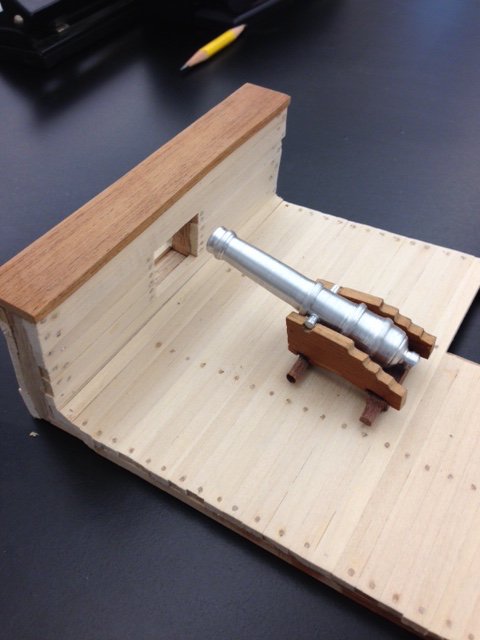
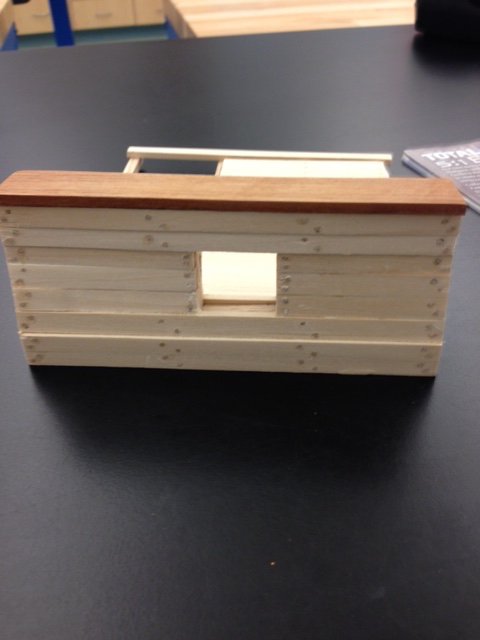
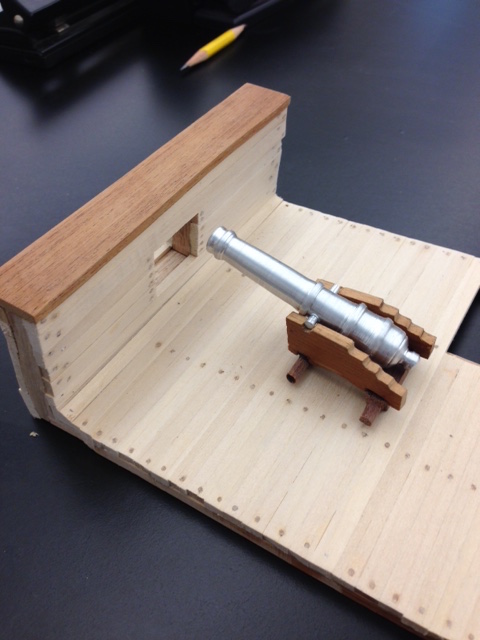
I am currently working on a couple projects, but here is a side project I am doing. The cannon was turned on a mini lathe - my first. I still need to do the trucks and all the hardware. The inboard and outboard pictures are pictures taken after I added the tree nails.