


jthemanjack
-
Posts
112 -
Joined
-
Last visited
Recent Profile Visitors
1,095 profile views


-
 maddog33 reacted to a post in a topic:
Armed Launch by mobbsie - FINISHED - Panart - 1/16 - Small
maddog33 reacted to a post in a topic:
Armed Launch by mobbsie - FINISHED - Panart - 1/16 - Small
-
maddog33 reacted to a post in a topic:
Will Everard by Izzy Madd - Billing Boats
-
EricWilliamMarshall reacted to a post in a topic:
Mamoli Constitution spare parts
-
I saw you post that you have some spare parts for the Constitution. I am looking for schematic drawing that should have accompanied the set. I have step by step direction but not the schematics. Can you help?
Mamoli Constitution spare parts
-

Just checked and there are the step by step instructions 1-15 ... 8 sheets , a 'general instructions for correct assembly of the model ' pamphlet and lastly two 90cm-130cm overviews marked A and B, A shows the ship in profile, five cross sections and a stern view and B is more of a companion to the instructions showing an overview of the ship in profile and an overhead view . Both the latter need some TLC in the form of some sticky tape , but both are still legible . Happy to send .
-
-
jthemanjack reacted to a post in a topic:
Granado by jthemanjack - Victory Models
-
jthemanjack reacted to a post in a topic:
Granado by jthemanjack - Victory Models
-
Canute reacted to a post in a topic:
Granado by jthemanjack - Victory Models
-
Canute reacted to a post in a topic:
Granado by jthemanjack - Victory Models
-
Canute reacted to a post in a topic:
Granado by jthemanjack - Victory Models
-
Edwardkenway reacted to a post in a topic:
Granado by jthemanjack - Victory Models
-
Thanks for the input Joe . I did wander about them as well, I know they weren't part of the normal set-up on-board, but during conflicts I wouldn't be surprised to see them used as Gun-ports, instead of the 'Anatomy of a Ships' description 'Ports (used as cabin lights)' or 'windows' in common speech . Looking at the drawings they were set low and could be used as Gun-ports . I'll wait and see how I feel about them, they're only 'screw ins' and can be removed at any point . The Boy in me thinks you can't have too many Cannons though ... nice to hear from you . Jack
-
KARAVOKIRIS reacted to a post in a topic:
Granado by jthemanjack - Victory Models
-
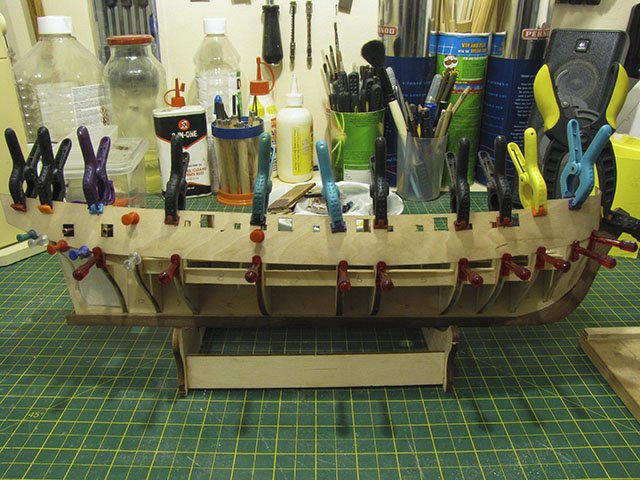
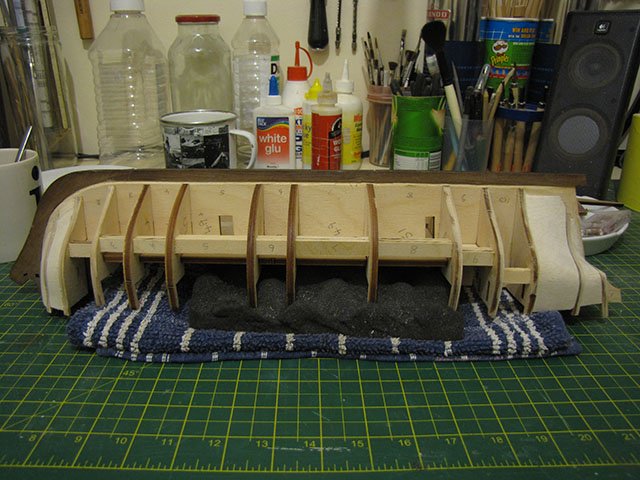
Glued both Gun-port strips into place, what I did was soak and then clamp everything in place overnight to dry, I find these ply patterns easier to glue if they are formed into shape beforehand . The instructions say "The top edge of the strips should be level with the top edge of the Bulkheads" but I wouldn't go by just that, what I did was clamp the strip into position, and then use a gun carriage to check that the Gun-ports are at the right height in respect to the main deck. When I was happy that it was in the right position, I drilled a few guide holes to help with the positioning when gluing. I also drilled 3-4 small holes around the base of the bulkhead tabs that are left above deck level, these need snapping off once the first planking is done, in my experience they don't just 'snap off, it can turn into rather a brutal affair. It's also good idea at this point to drill for the dummy barrels in the two stern Gun-ports, you'll need the strips in place to make sure the barrels are centred .
-
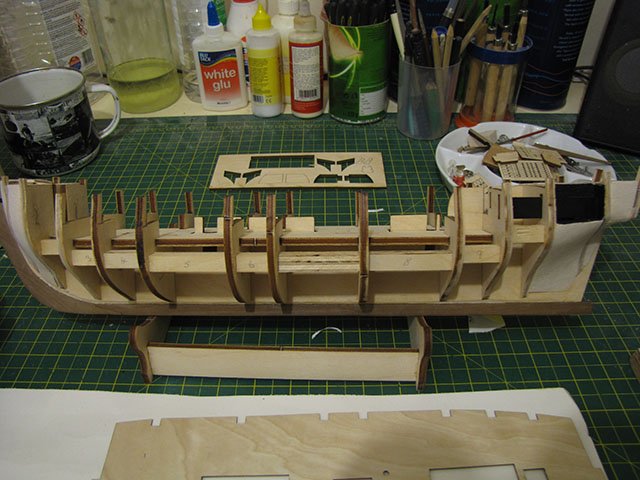
Managed quite a bit in the week , fixed the bulkheads and Balsa'd at the bow and stern , I cannot believe the price of balsa wood now ... I was around 10 or 11 the last time I bought any mind you. Everything shaped and ready for the decks and gunport strips . The gunports need soaking for a while as per the instructions , I use a thermos and hot water, so it's more of a 'steam' than a soak . Spot the 'not so' deliberate mistake at the stern , that comes from not studying the instructions and looking a few steps ahead ... Doh !
-
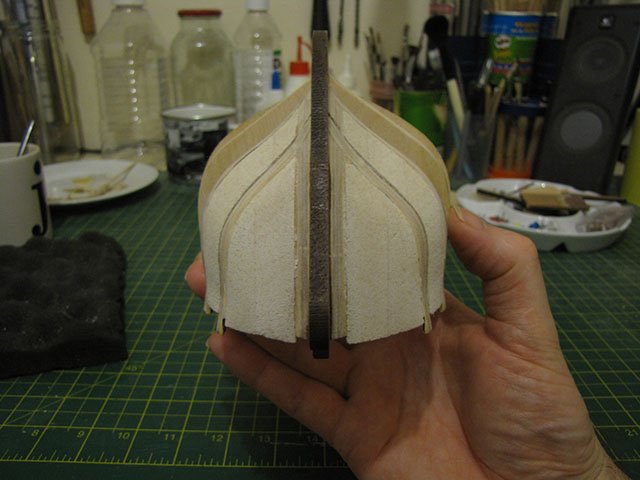
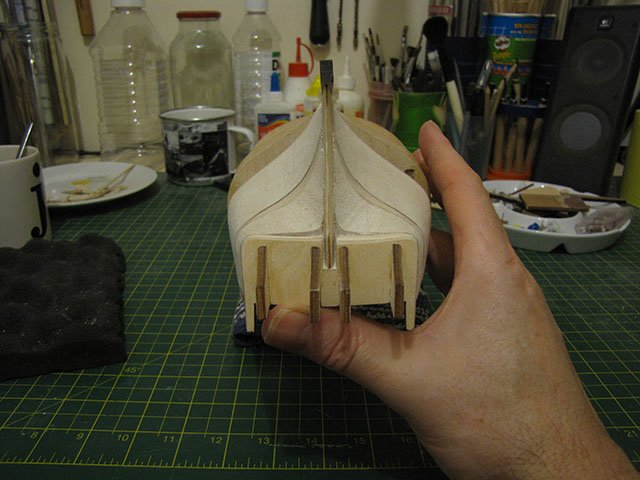
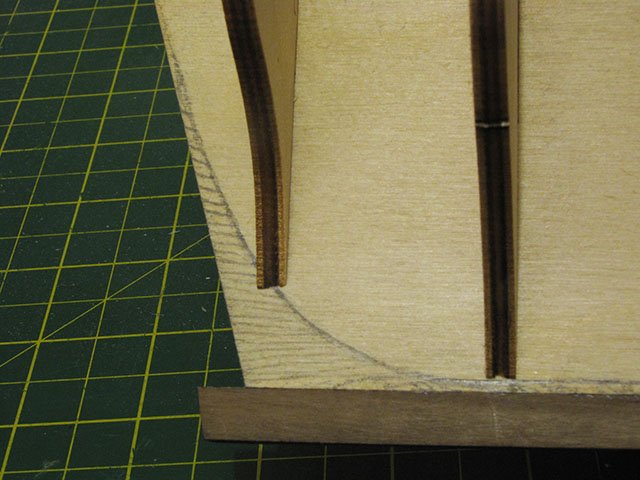
Marked off bearding line and rabbet , going to be conservative in the amount I take off for now, can always take a bit more off when I strake . Measured in between bulkheads for inserts and decided to use balsa inserts at prow and stern ... planking to that transom looks like it's going to be fun . dry fitted all the bulkheads and deck and apart from No4 which needs dropping a tad (about 1mm) all seems good
-
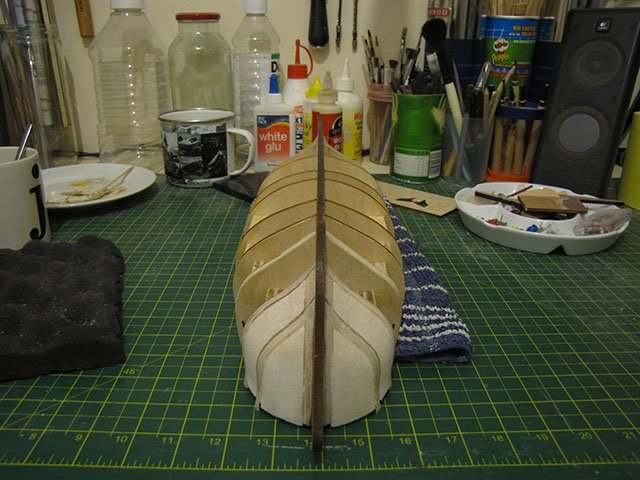
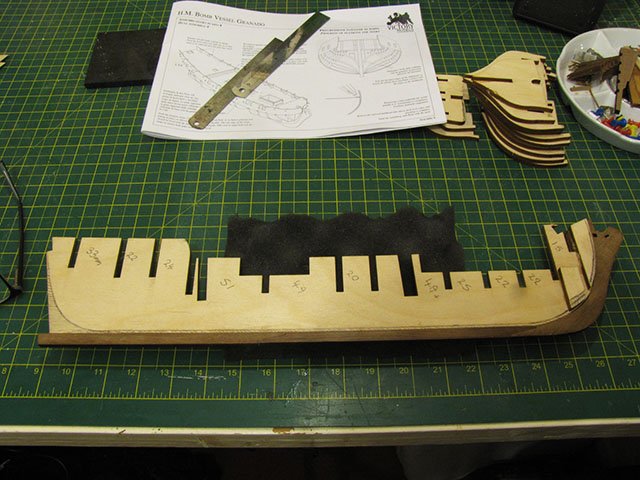
Making a start, Keel, rudder post and Prow being glued .

-
Hi Guys Starting a Granado build and thought a Build Log would be fun ... and helpful ! I've only built Panart models up to now ( Royal Caroline , Armed launch and the Open Whaler ) So a Victory model is my first kit away from Panart . I know there's been an awful lot of Granado builds on this forum, and from Modellers with an awful lot more skill than me, but really it's to get ongoing advice from you Guys and it just 'might' be of help to somebody in the future. Look forward to hearing from you Chaps and please if there is anything on my log that doesn't seem right I would welcome Advice . Panart "Armed Launch" Panart "Open Whaler" Panart "Royal Caroline"
-
Hi everyone , Picked up a great deal on Ebay last month , got the Grando by victory models and a part finished USS Constitution for a snip . The Constitution is incomplete and you can't get parts now so I have some spare parts going gratis, so if anybody has the mamoli kit but is missing parts get in touch and I'll see if I can help ,depending on the cost of postage for free .
- 1 reply
-
- 2
-
-
jthemanjack reacted to a post in a topic:
Cleaning Dusty Rigging
-
Very nice work Sjors, If I ever attempt one of these big builds it will be the Agamemnon, and Build logs like yours are a great help and inspiration to those of us who are a little bit apprehensive about starting such large projects . Jack
- 1,616 replies
-
- 5
-
-
- caldercraft
- agamemnon
- (and 1 more)
-
jthemanjack reacted to a post in a topic:
HMS Agamemnon 1781 by Hennie - FINISHED - Caldercraft - Scale 1:64
-
Lovely clean build Hennie , Will have to do a build with a copper'd hull at some time in the future......makes such a difference to the visual impact of the ship and yours looks perfect. Jack
- 214 replies
-
- 5
-
-
- agamemnon
- caldercraft
- (and 1 more)
-
Hi Mobbsie, Coming along nicely ,Built her myself a few years ago and really enjoyed the build (apart from the triple Planking ) which is needed for stability of the Hull but is a little bit tedious,also did the Open Whaler from Panart which is great fun to build . Will follow with interest . Jack
- 129 replies
-
- 4
-
-
- armed launch
- panart
- (and 1 more)
-
Those 1mm x 1mm fillets sound very fiddly to me Alan but like you I can't see any other way around it ,maybe you could Email Caldercraft and describe the problem....I hear they are very good at sending replacement parts when there is a problem with parts , might be worth a try . Jack
-
Hi there Izzy, Will be keeping tabs on your build as I have a soft spot for the Will Everard as she was my first build,at some time I think I will revisit the build to do a better job of her. Interesting idea to caulk the hull planking...are you going to make her into a working model ? and I may be mistaken but wasn't she steel hulled...... I don't suppose it matters about authenticity as long as you are happy with her and enjoy the build. good luck Jack
-
jthemanjack reacted to a post in a topic:
Royal Caroline by marsalv - FINISHED - Panart
-
jthemanjack reacted to a post in a topic:
Royal Caroline by marsalv - FINISHED - Panart
-
Looking good Alan .....Will start posting again after a long break ,I am a little bit ahead of you but only just so we will both be building together , Jack
-
Looking very nice Timmo ......will do something very similar I think if not an exact copy (nothing patented I hope). Gonna have to get myself a Jewellers saw I think...... looks very handy. Cheers Jack