Osmosis
-
Posts
626 -
Joined
-
Last visited
Recent Profile Visitors
2,940 profile views


-
 Scottish Guy reacted to a post in a topic:
Professional Building Slip - Hobbyzone
Scottish Guy reacted to a post in a topic:
Professional Building Slip - Hobbyzone
-
thibaultron reacted to a post in a topic:
Wood Storage Idea
-
Rik Thistle reacted to a post in a topic:
Wood Storage Idea
-
Akiva reacted to a post in a topic:
Sakonnet Daysailer by Osmosis - FINISHED - Midwest Products - Small - First wooden boat build by Art Smith
-
catopower reacted to a post in a topic:
Hanse Kogge by Catopower - FINISHED - Shipyard - 1/72 scale - CARD
-
etubino reacted to a post in a topic:
Guns of History Naval Smoothbore by Osmosis - FINISHED - Model Shipways - 1:24
-
yvesvidal reacted to a post in a topic:
Peterboro Canoe by Osmosis - FINISHED - Midwest Products - 1:12
-
yvesvidal reacted to a post in a topic:
Peterboro Canoe by Osmosis - FINISHED - Midwest Products - 1:12
-
yvesvidal reacted to a post in a topic:
Peterboro Canoe by Osmosis - FINISHED - Midwest Products - 1:12
-
yvesvidal reacted to a post in a topic:
Peterboro Canoe by Osmosis - FINISHED - Midwest Products - 1:12
-
Osmosis reacted to a post in a topic:
San Francisco Cross Section by Gus - Artesania Latina - 1:50
-
Osmosis reacted to a post in a topic:
HMS Winchelsea by rafine 1/48
-
Osmosis reacted to a post in a topic:
Granado 1742 by DocBlake - FINISHED - 1:32 Scale - Bomb Vessel Cross-Section
-
Osmosis reacted to a post in a topic:
Granado 1742 by DocBlake - FINISHED - 1:32 Scale - Bomb Vessel Cross-Section
-
Osmosis reacted to a post in a topic:
Granado 1742 by DocBlake - FINISHED - 1:32 Scale - Bomb Vessel Cross-Section
-
Osmosis reacted to a post in a topic:
San Francisco Cross Section by Gus - Artesania Latina - 1:50
-
Osmosis reacted to a post in a topic:
Granado 1742 by DocBlake - FINISHED - 1:32 Scale - Bomb Vessel Cross-Section
-
Osmosis reacted to a post in a topic:
San Francisco Cross Section by Gus - Artesania Latina - 1:50
-
 Gixli, I am glad you are finding my build log helpful. I had to take some time away from model building. I am slowly getting back into it and hope to get back to the San Francisco fairly soon. In the mean time I am going to enjoy watching your build and if you have any questions that are not covered in the various logs then just ask and I am sure you will be flooded with answers. Everyone here is very helpful. Enjoy your build and keep up the excellent work. Best Regards
 -
Osmosis reacted to a post in a topic:
HMS Winchelsea by rafine 1/48
-
Osmosis reacted to a post in a topic:
HMS Victory by kostas_gr - FINISHED - Corel - 1:98 Scale - cross-section
-
I have decided to build a steam box.
Osmosis replied to Osmosis's topic in Modeling tools and Workshop Equipment
Very Nice! Glad you found my post helpful. Best Regards -
I have decided to build a steam box.
Osmosis replied to Osmosis's topic in Modeling tools and Workshop Equipment
Not a bad Idea. That is if you don't mind all your models smelling like the inside of a whiskey barrel. Although there are worse smells. -
I have decided to build a steam box.
Osmosis replied to Osmosis's topic in Modeling tools and Workshop Equipment
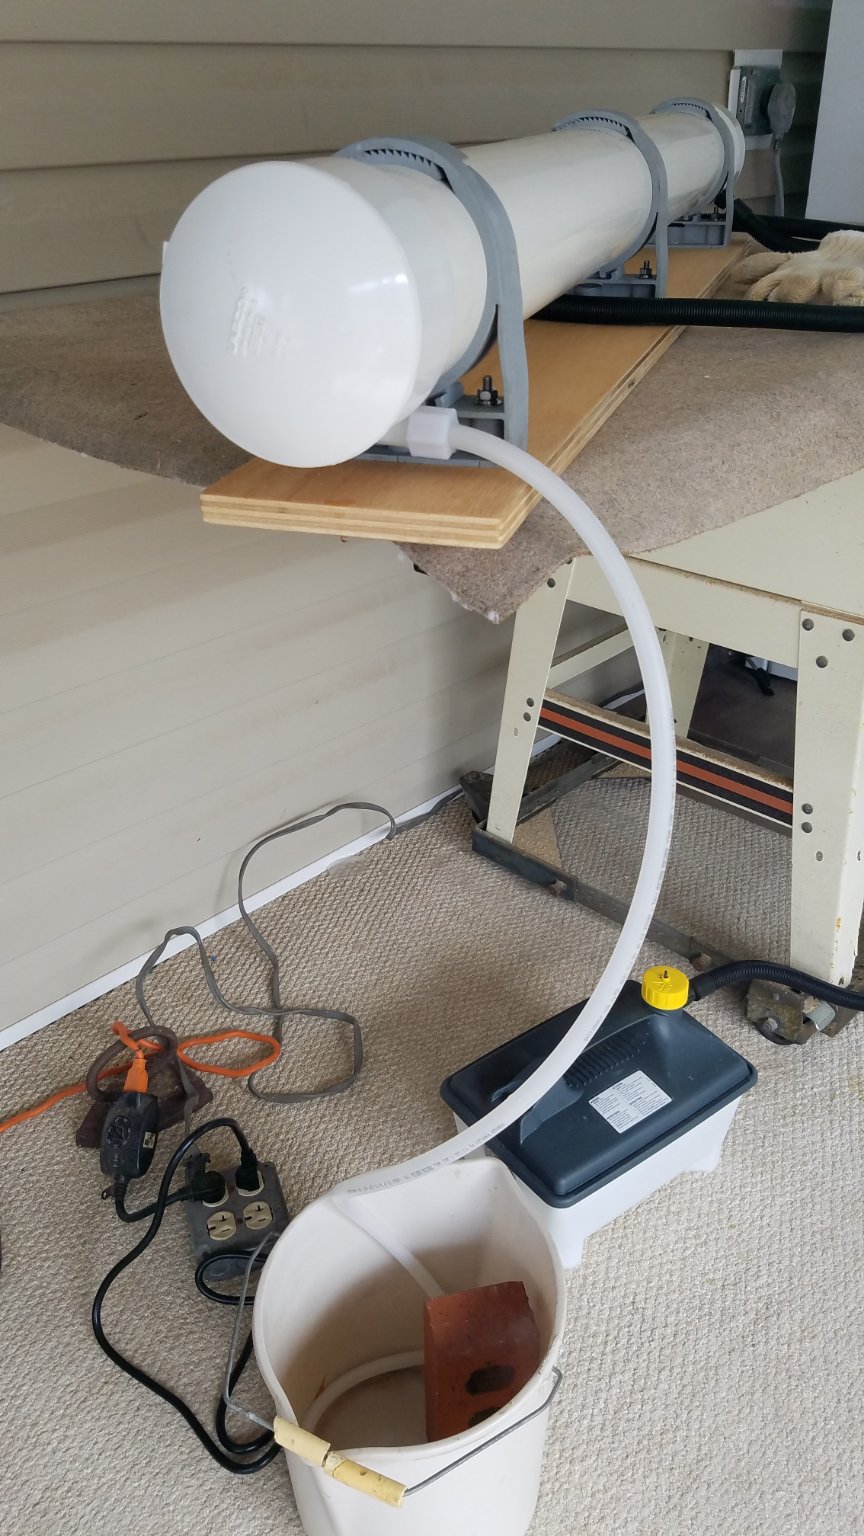
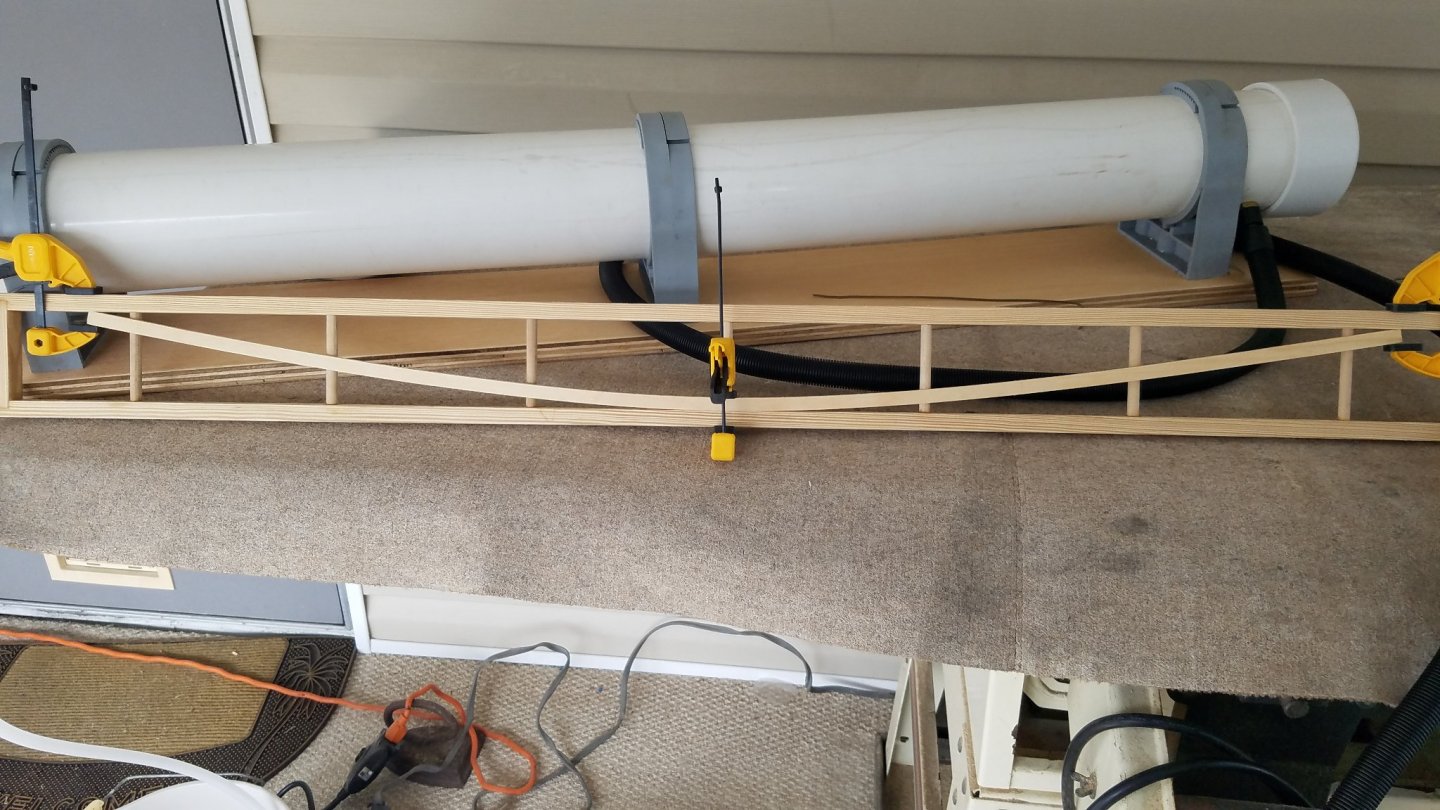
If you use PVC as I did with mine it is simply common sch 40 you can buy at H Depot just support it well and it will be fine. I have used mine several times now with the steam pot running for up to an hour and a half and had no problems at all. Mine is 54" long and supported in three places as you can see. For that matter you could strap it to a plank and it would be fully supported the entire length. Good Luck -
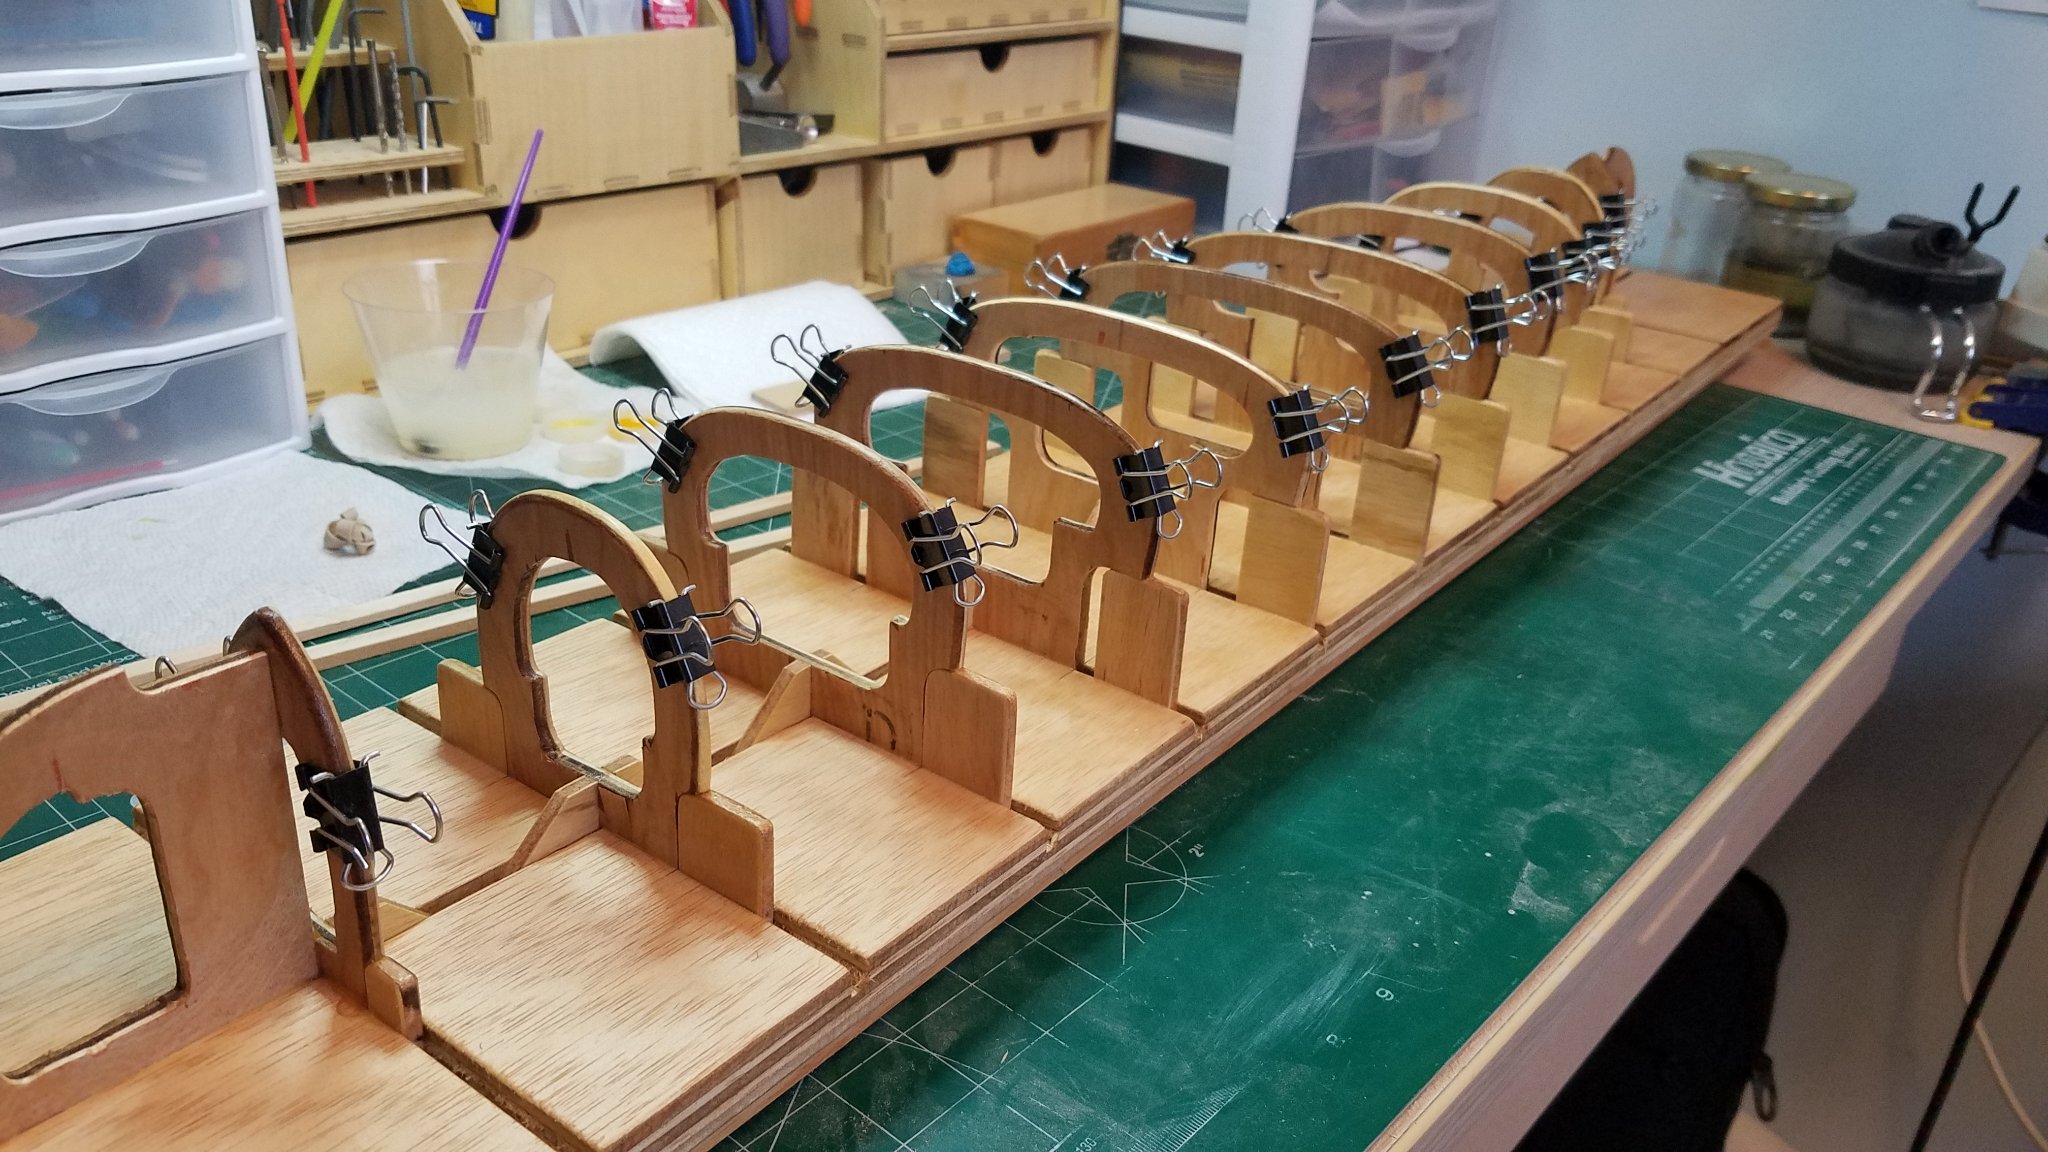
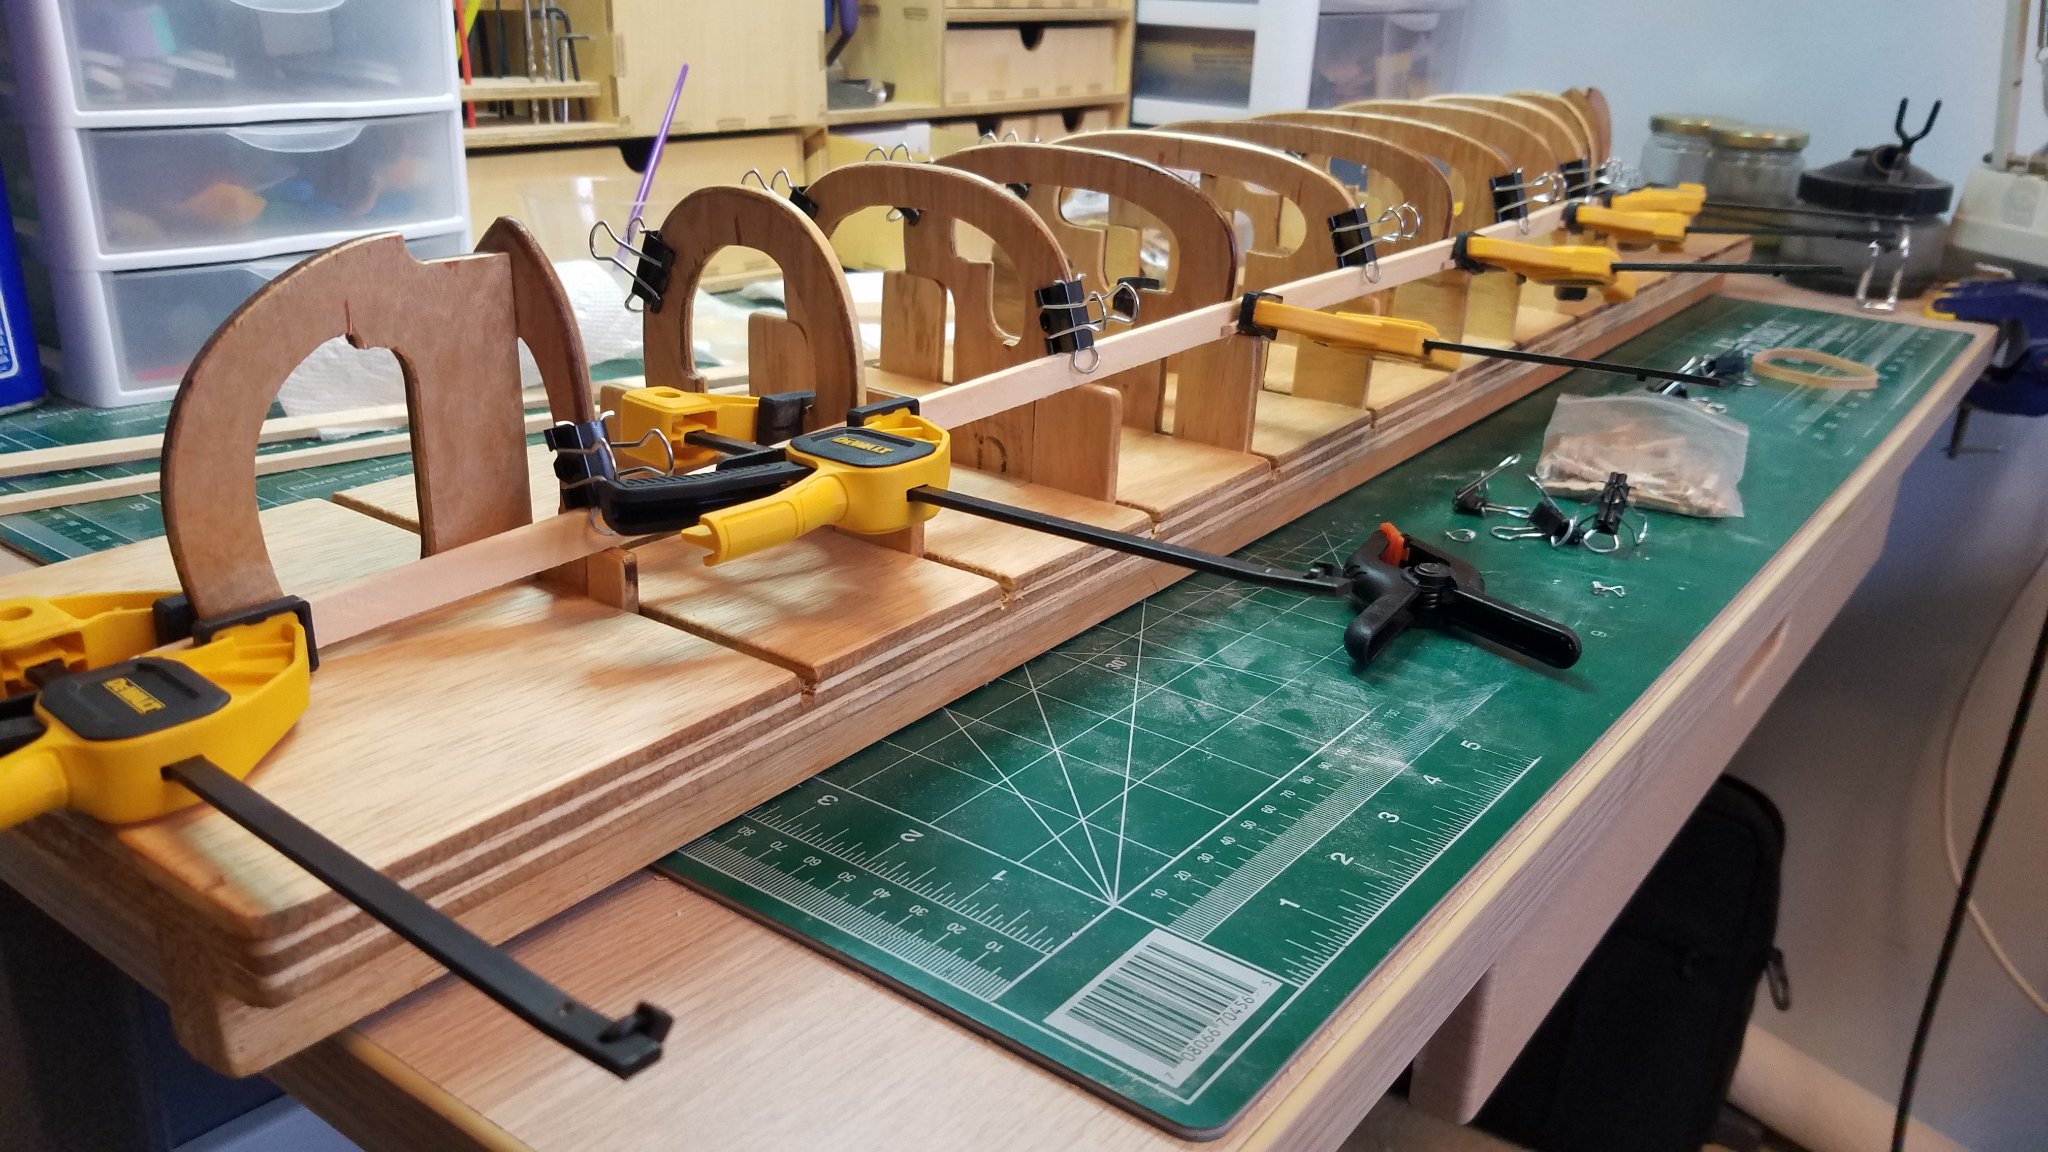
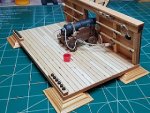
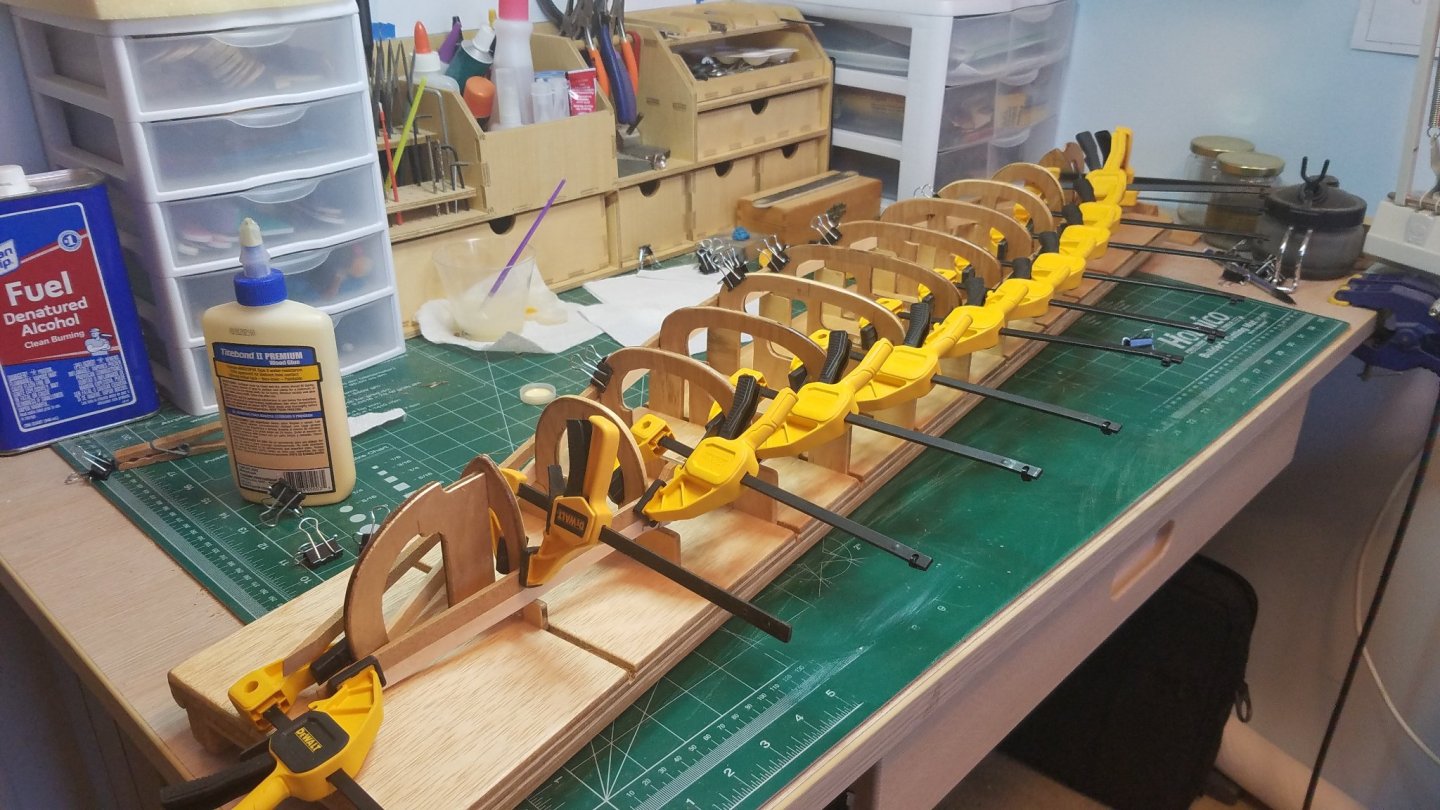
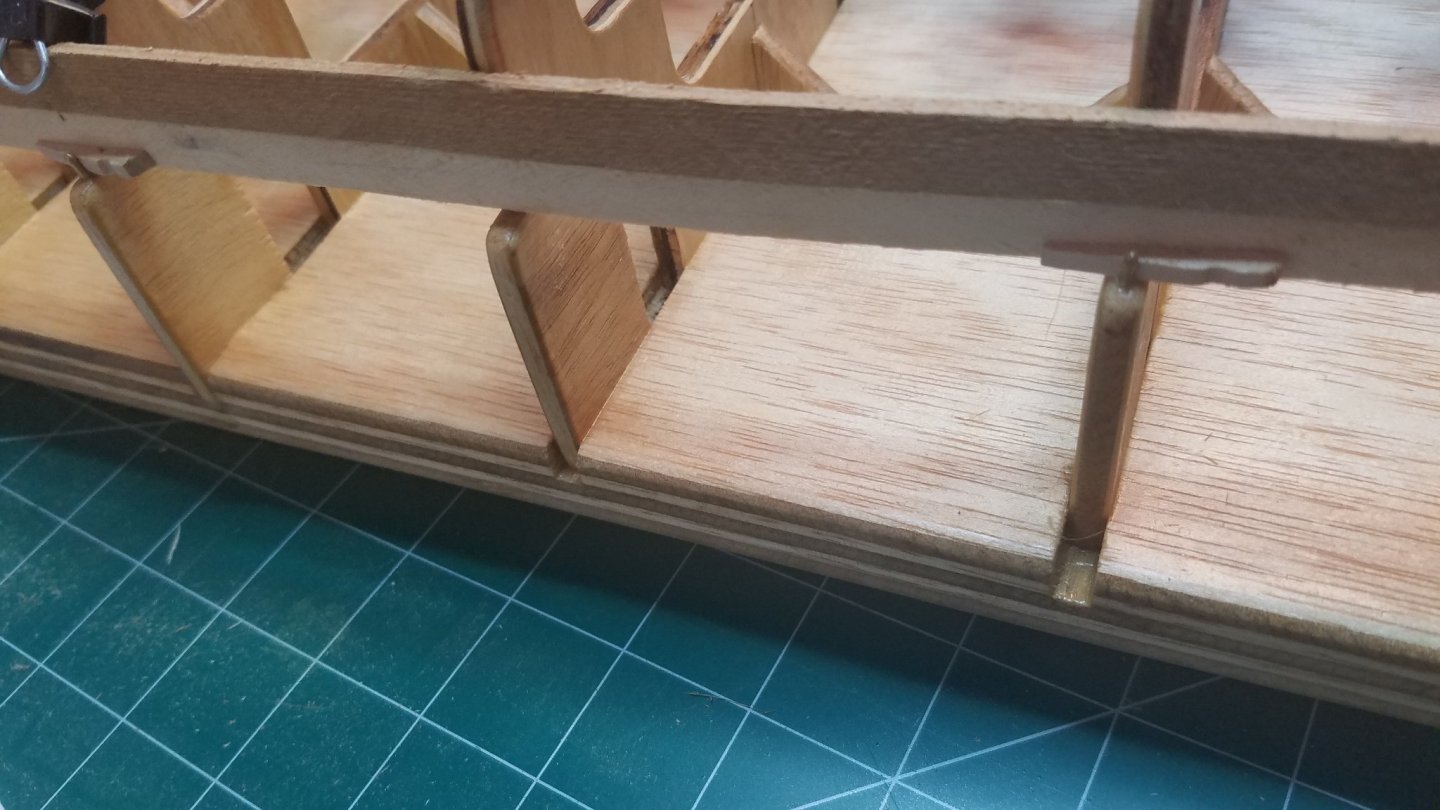
Well believe it or not I have not given up on this build. It is actually getting to the fun part for me. After many different attempts at getting the shear plank right where I wanted it I have finally started making some progress. Unfortunately I was too wrapped up in the process to really document it. The real trick was getting the first planks on then getting them to stay in place with out any clamps in the way of gluing on the next one. I could have just drilled holes through the plank at every frame and inserting some brads and that was probably the next step even though I am not a huge fan of making holes that I know I will have to fill later on. I had some brass belaying pins that came in an old kit I picked up at a garage sale that were just the right size so I drilled down into the shoulders that I added to the building frames. Then glued in a belaying pin at every other frame. Then used some of the tiny clothes pins I got at the dollar store as wedges against the plank to hold it in place. Now it is just steaming, clamping, back beveling, gluing and reclamping and clamping and clamping. As my Hero Norm Abrams used to say you can never have too many clamps. Here is the second plank on one side all glued and clamped up I will let this one dry a little before doing the other side. As you can see I already have the next one ready to go. I think the best I can hope for is two planks each evening after work except poker night and maybe a couple more on weekends so it is going to be a long haul. That is it for now,thanks for looking in, Stay Safe and Best Regards
-
A little bit late to the party but I am all caught up and will be following along from here if there is room for one more. As always Doc great subject and masterful execution, a real pleasure to watch. Best Regards
-
I use an exacto knife and a variety of different blades. If there are any marks left over I buff them out with a super fine sanding stick or just some 1200 grit sand paper.
-
I have decided to build a steam box.
Osmosis replied to Osmosis's topic in Modeling tools and Workshop Equipment
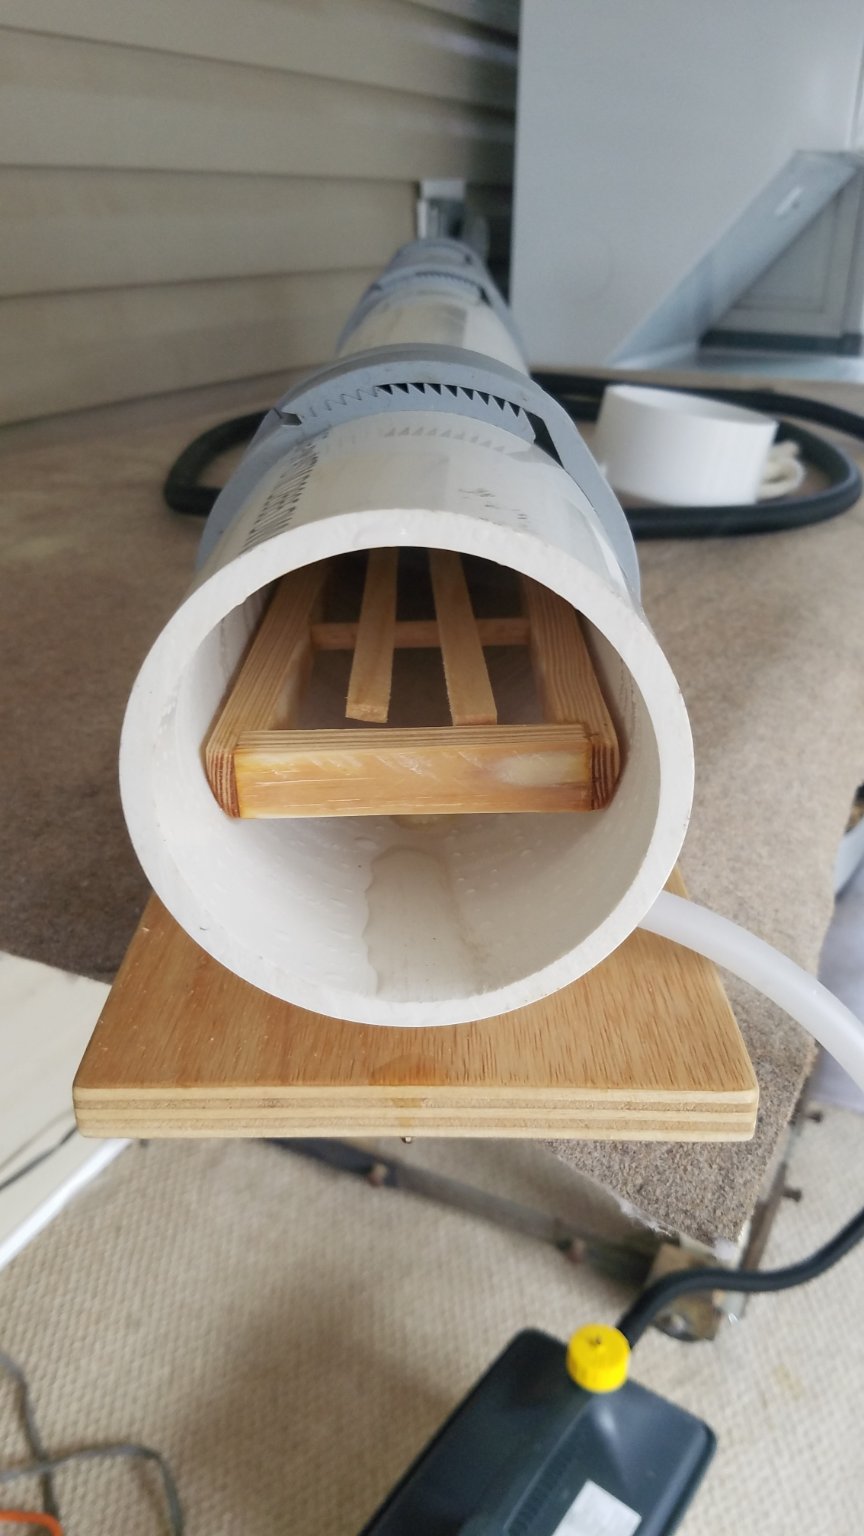
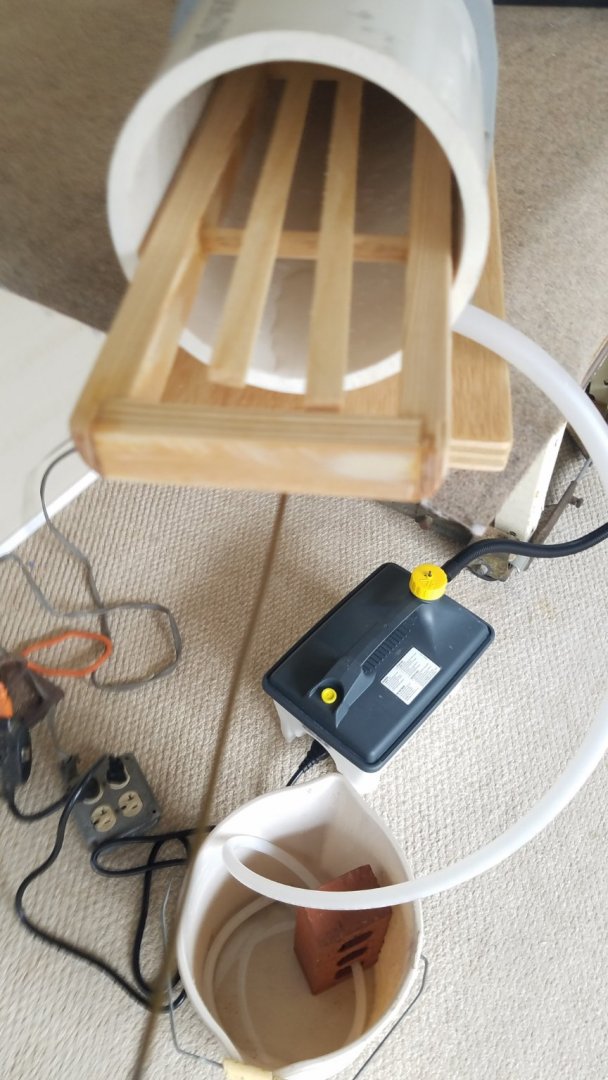
Hello again, Success! It seems to have worked perfectly. First I got the forms and clamps ready for the test strip. Then I fired up the steam generator. Some on line videos stated that they had to wait an hour or so for the water to boil so I went about cleaning up a bit and was pleasantly surprised when I went back after 25 minutes to find a roiling cloud of steam issuing from the open end of my pipe. Steam is not very photogenic. So in went my two test strips and the cap was placed on just barely hand tight. Honest there is a lot of steam coming out of that drain hose. After about 20 minutes, I was able to reach in with my hook and pull the rack out past the danger point and retrieve one of the strips. I am just not a good enough photographer to convey how much bend is in that strip for some reason I can't find the proper angle. Once I got the first one clamped up I went back and got the second one. As you can see the sliding rack allows you to stay well away from the steam. This one I just clamped to the rack as a sort of demo. I could have bent it quit a bit further but did not have anything set up to do it. All in all this certainly exceeded my expectations. Not just in the result but in the process also. This setup could definitely be used indoors without worry. Other than a few drops while removing the cap I had absolutely no leaks whatsoever. The initial heat up time was very impressive and the amount of steam was also more than I was expecting. As for the PVC holding up I did notice that when it was fully heated (after an hour or so) I could squeeze it with a gloved hand and cause it to deflect very very slightly. Certainly it was not soft enough to cause concern but I could see where it might sag if not properly supported. The sliding rack worked out quite well. That was the one Idea I would take credit for. I am sure it is not original but I did not see it in any of the videos I saw. It allows you to pull the stock out past the steam without having to reach in with a pair of tongs or what ever. Also most of the ones I saw simply drilled holes across the diameter of the pipe and drove the dowels through. Allowing steam and condensate to leak out. With only two penetrations in this set up there are far fewer leak points to worry about dripping everywhere. I am happy with the result and will be using this gizmo every evening for the next few weeks I am sure. Thanks for looking in I hope you enjoyed it. Best Regards,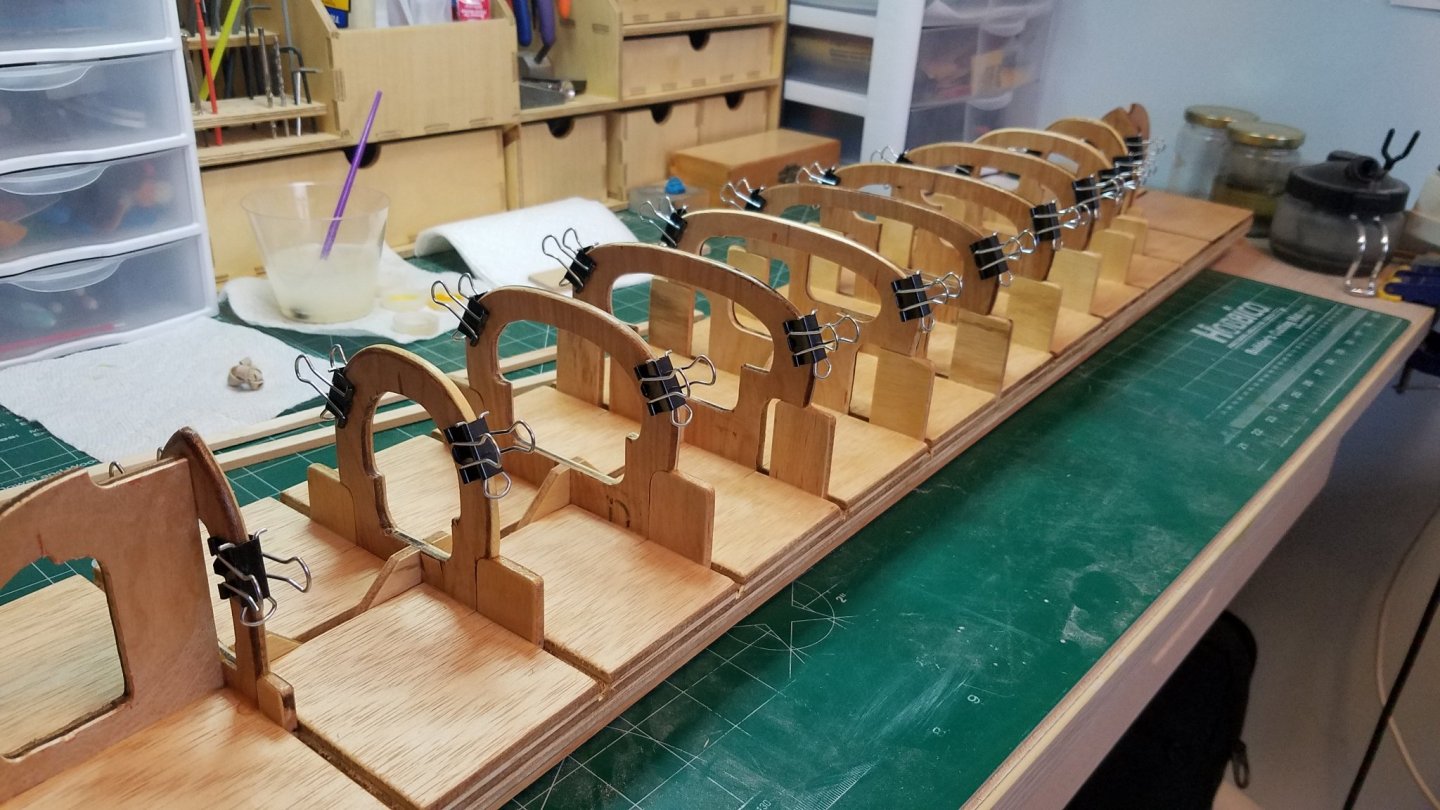


-
I have decided to build a steam box.
Osmosis replied to Osmosis's topic in Modeling tools and Workshop Equipment
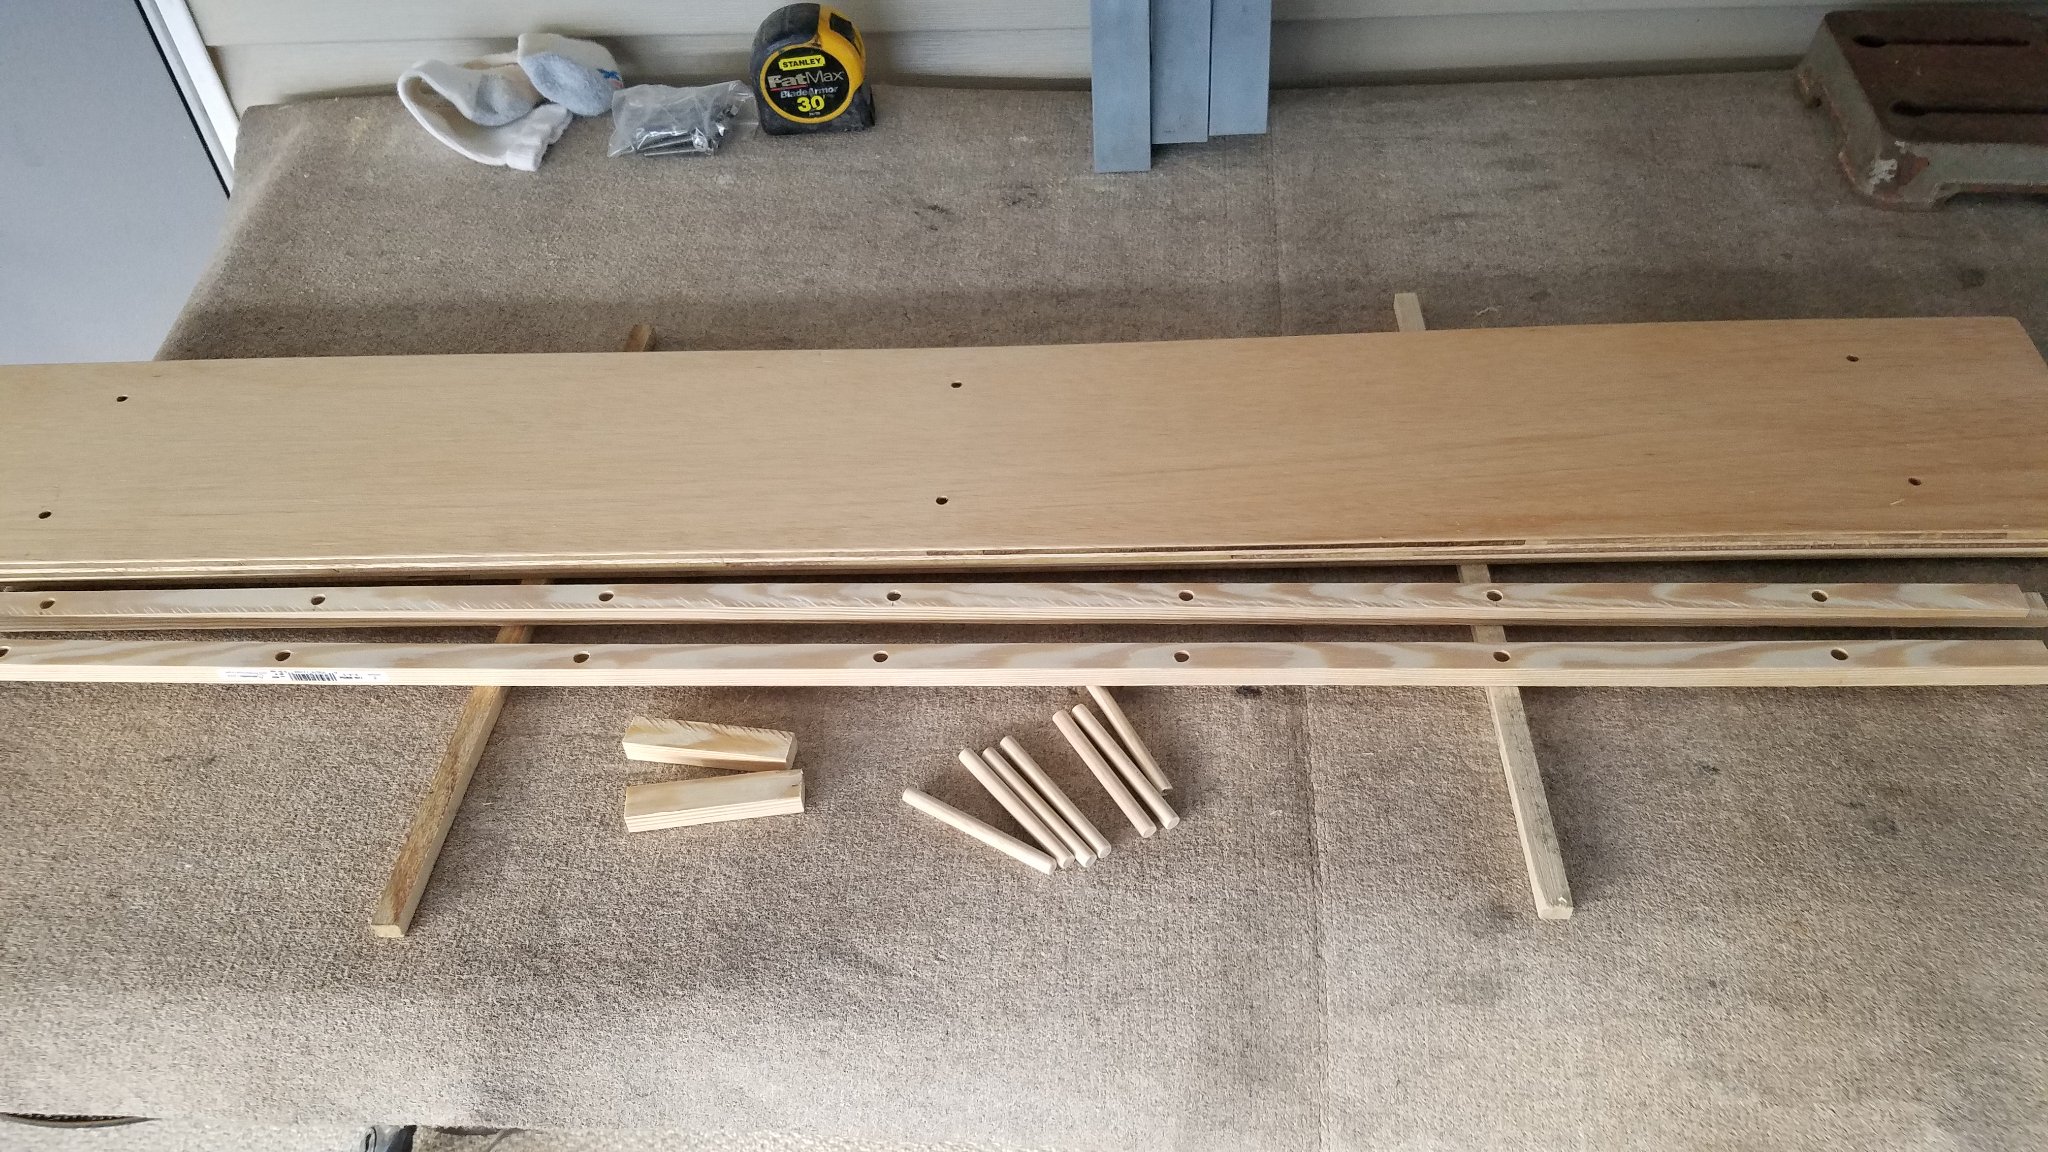
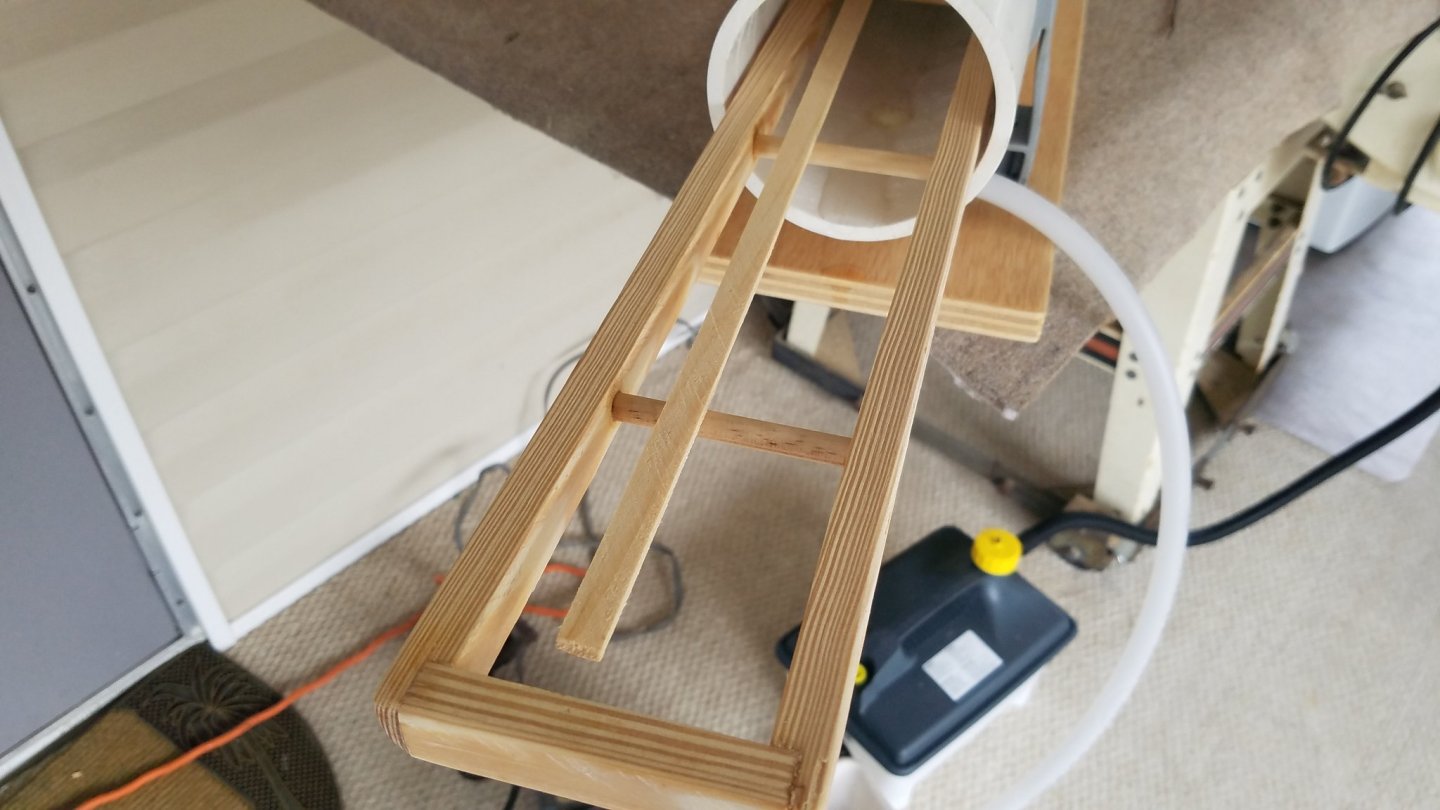
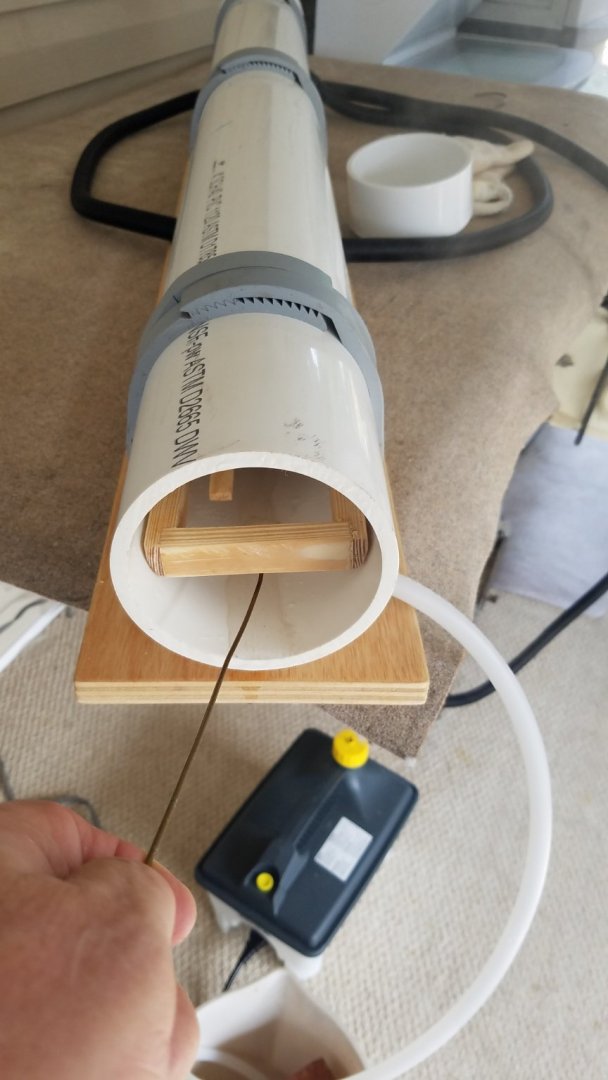
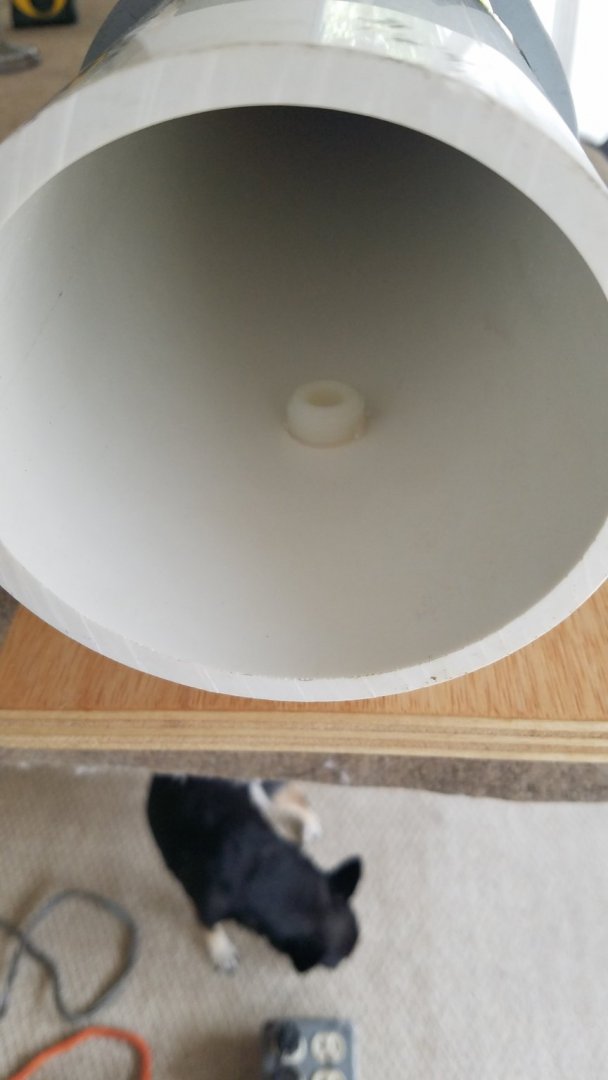
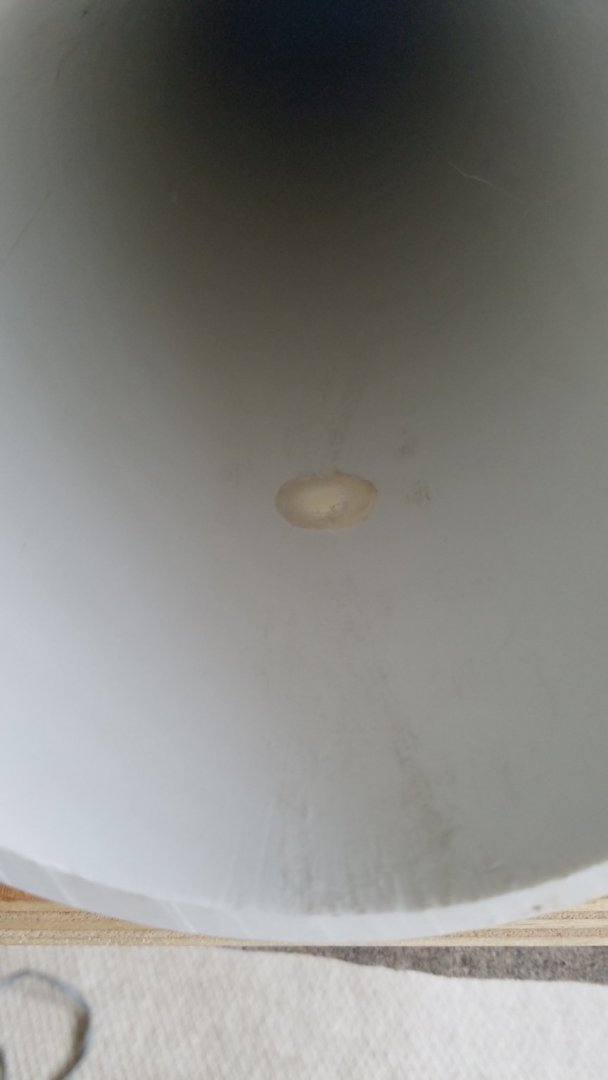
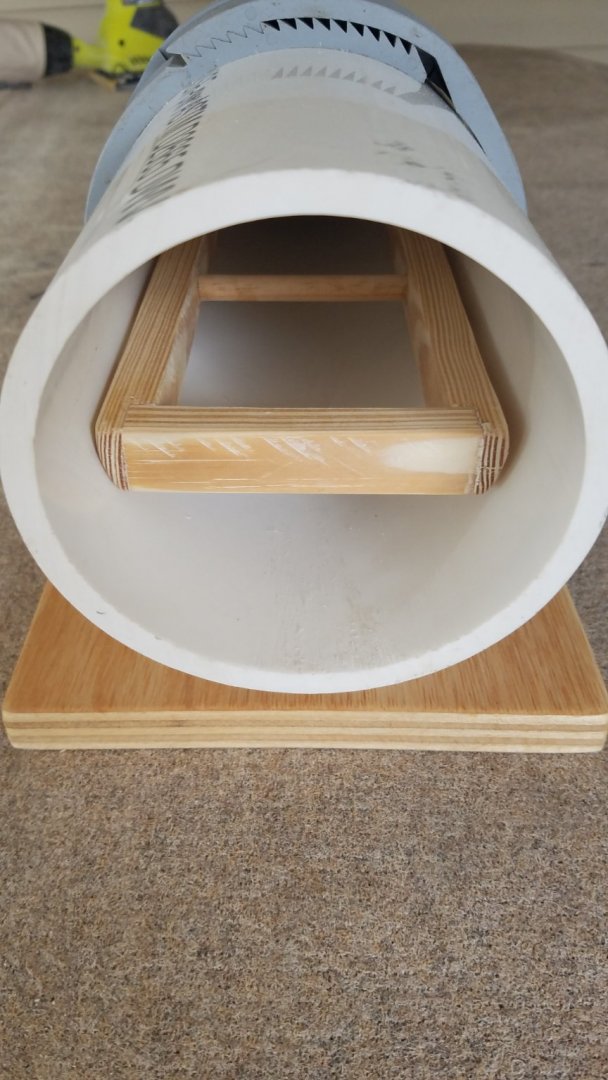
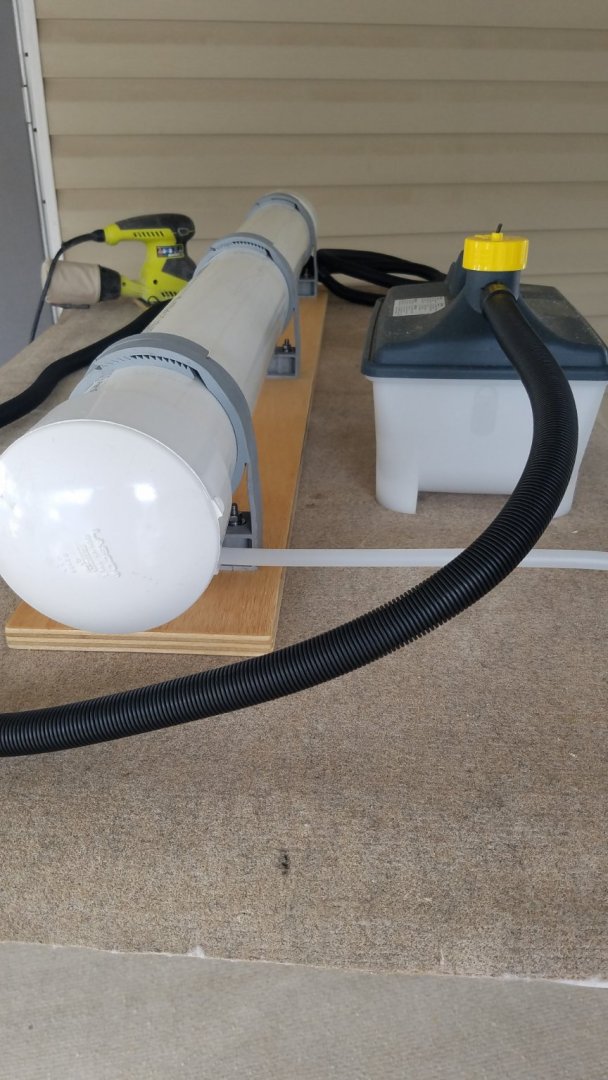
Thanks for all the interest and input. I have decided to go ahead with my original plan pretty much intact. I will try and explain my reasoning as best I can. First of all I want everyone to know that I have the utmost respect for everyone on this forum and value your opinions very highly. As to using PVC It is what I have at hand, and there are several examples of successful use of same on line. Even my hero Norm Abram (New Yankee Workshop) used one made from PVC. Also mine is only a very short span that is supported well so sagging should not be a real issue. I have decided that Roger is right in that the gauge and thermometer are superfluous and will not be using them. My reasoning for including them in the original plan is that they we used on several examples I saw on line and the thermometer seemed handy for knowing your starting time based on the actual temp of the tube. Plus there is the coolness factor, with them you have a real contraption without them it is just a piece of pipe. As for the need for the steam box itself. I will be doing the same bending as Roger just on a smaller scale. Canoes are mostly made from bent wood and some of the bends can be quite acute and on all three axis over the length of a single plank. It is what they use at full scale so why not at 1/6 scale. Anyway here goes. I got started on the wooden parts. The base will be a piece of 3/4 Sande Ply left over from a cabinet project. Cut to size, drilled and countersunk for SS the clamp hardware. The rails and dowels for the rack have also been ct and drilled. After some sanding I applied a coat of wipe on poly to the base just to keep some of the moisture out of it. Then I turned my attention to the rack. I used 30 minute epoxy for the assembly. Firstly for the heat factor and secondly for the extra time to align and clamp all those dowels. I am not all that confident in the rack holding up all that long but again I had the materials at hand. Is there a finish/sealer that will stand up to high temps like this? Next came the drilling and tapping of the PVC. I was pleasantly surprised how close my forstner bits were to the actual sizes I needed. It made really short work of that part. I applied a bead of high temp clear silicon sealant to all the threaded parts prior to assembly. The drain will not work so well like this. After about a minute with a hacksaw blade. That should be much better. I ran the assembled rack through the table saw with the blade tilted to about 18 degrees just to take a sliver off the bottom outside edge so that it sits a little lower in the tube. Then some sanding and we are about done. And here is the complete set up after only a couple of hours. Well nothing left but to test it and see how it works. I will let you know as soon as I finish. Please wish me luck. Best Regards


-
It is not much to see but as promised here is a link to my steam box build. Steam Box Build Regards
-
I have decided to build a steam box.
Osmosis posted a topic in Modeling tools and Workshop Equipment
I Know I know! I have read as many threads on plank bending as I can find. I have tried several of the methods that are outlined in those threads to varying degrees of success. Dry bending and soaking has worked for most applications up till now. On the project I an currently working on the planking is 3/16" x 3/8" x 40" and the bend is predominantly on the thinner edge. Future/Larger projects will require even thicker material so I am going to give steam a try. After spending a couple of evenings on google and youtube I have come up with a plan that will hopefully bring me some success at a fairly reasonable price. I have gathered all of the parts I will need and will most likely get started tomorrow as my current build is on hold until I get this worked out. All of the plumbing parts and hardware I was able to get where I work at cost (less than $20.00) so that was a big savings. The steam generator which was used in quite a few of the videos I saw was only $65.00 on amazon and the wood parts are all left overs and scraps except for a couple of dowels which I just realized got cut off the bottom of the picture. So for less than $100.00 we shall see what we wind up with. Win or lose it will be a learning experience if nothing else. Until tomorrow, Best Regards.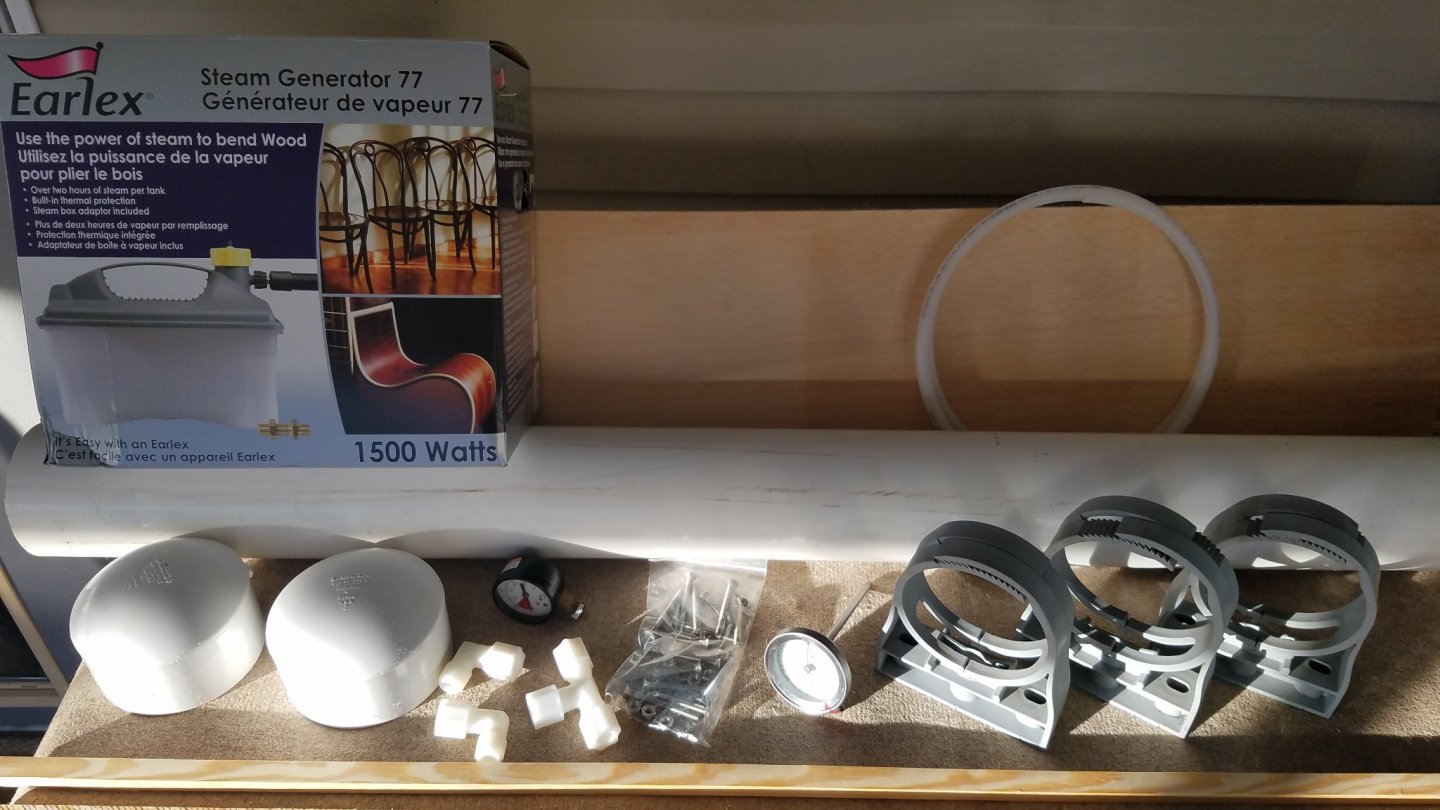
-
Not much to report but here goes. I did manage to get a coat of wipe on poly on the building form and 2 coats on the areas that will come in contact with glue joints on the planking. I used this same method on the Peterboro build and the finished canoe slid off the form like you know what through a goose. Also I tried dry bending the shear plank and you can see the result. Granted I went through the planks provided in the kit and this one was the worst of them but still. So I have decided to build a steam box for this and a few other projects I have in mind. I will start a build thread in the appropriate section once I figure out what that is and I will post a link to the thread once I get it started. I already have everything I need so I don't think it will be much more than a weekend build but you never know with me. Best Regards

-
Welcome aboard Michael from a former Jersey Boy that left the cold behind many years ago. Lots of helpful folks around here so don't be shy about asking for help. Best Regards
-
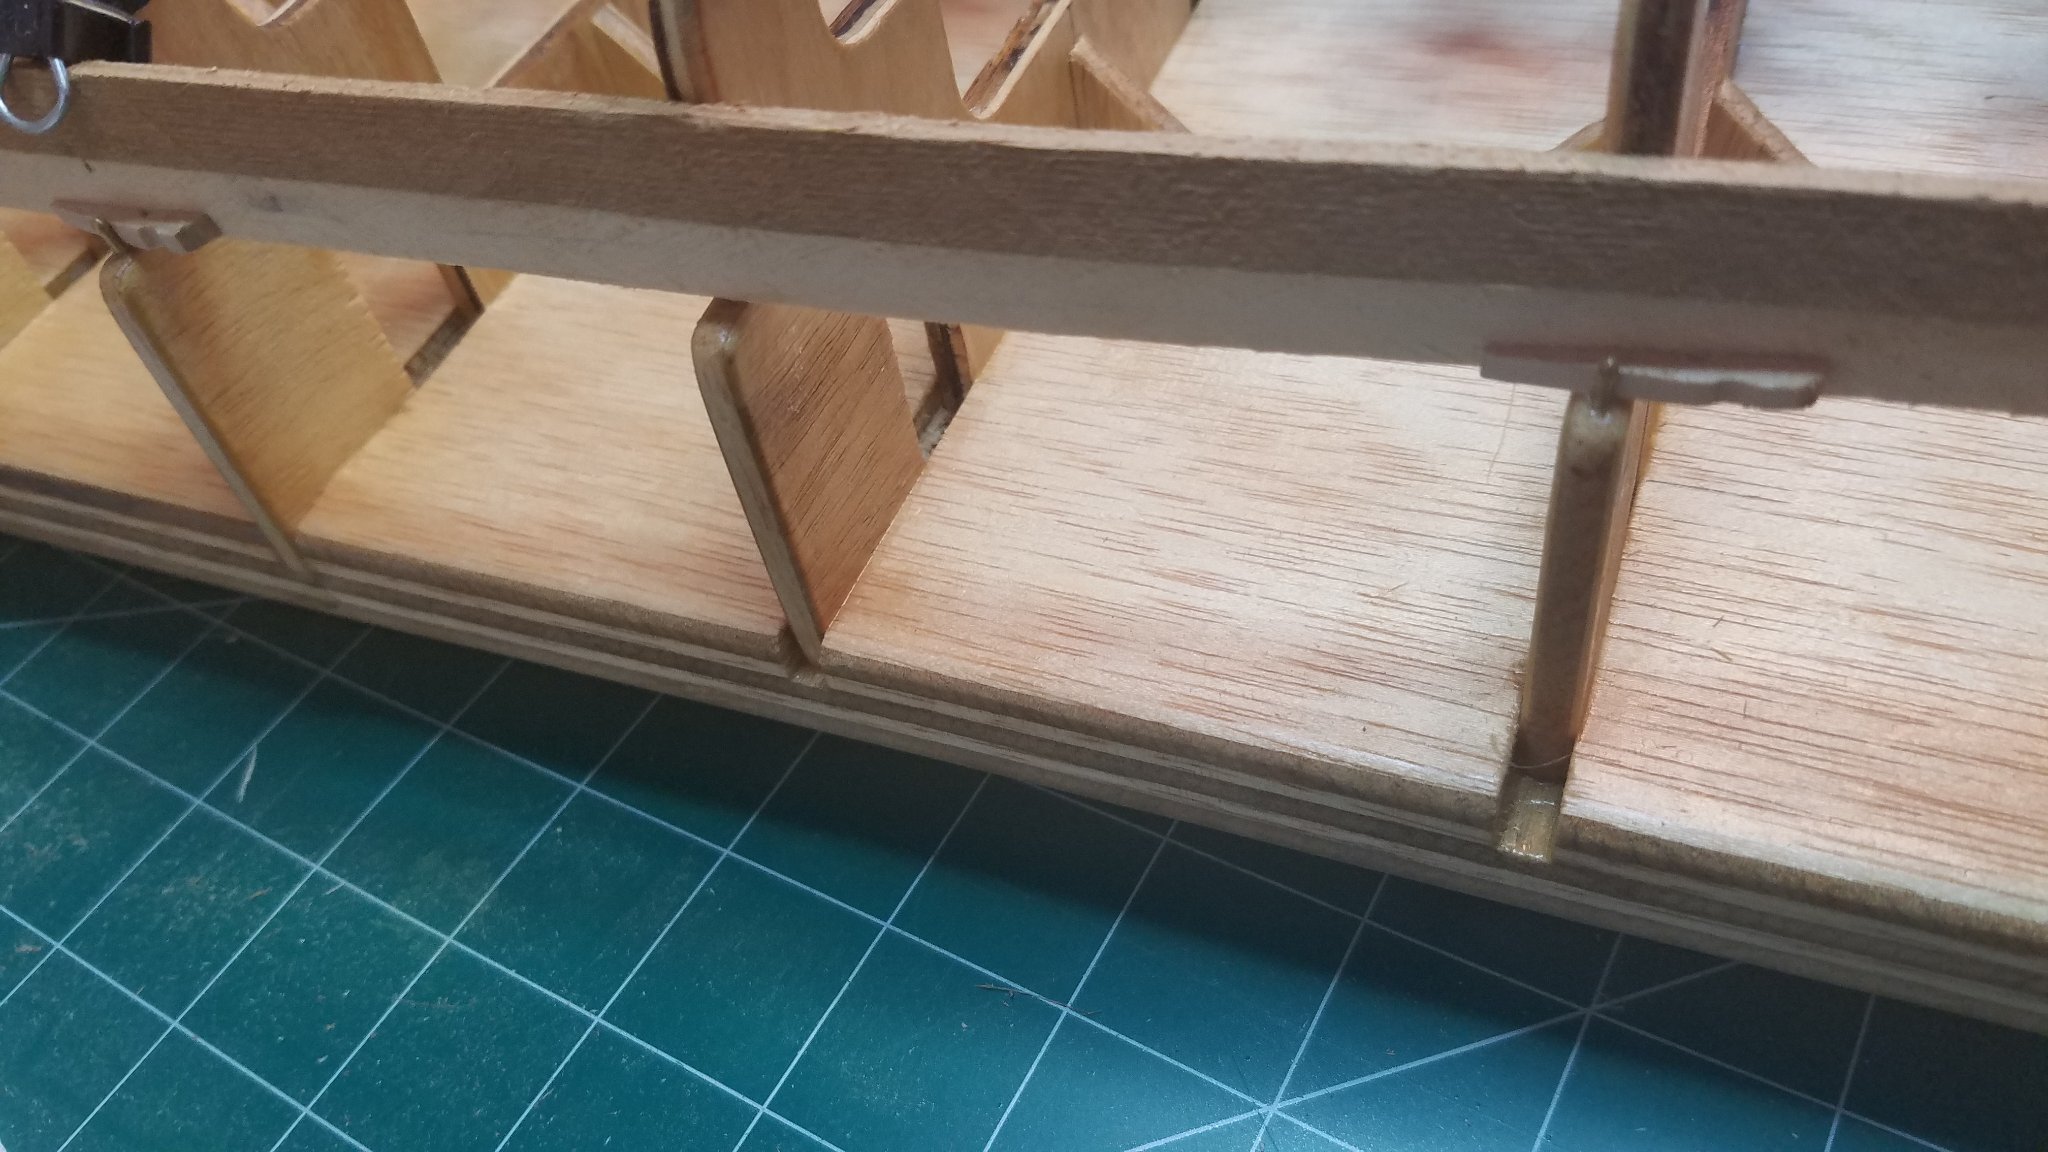
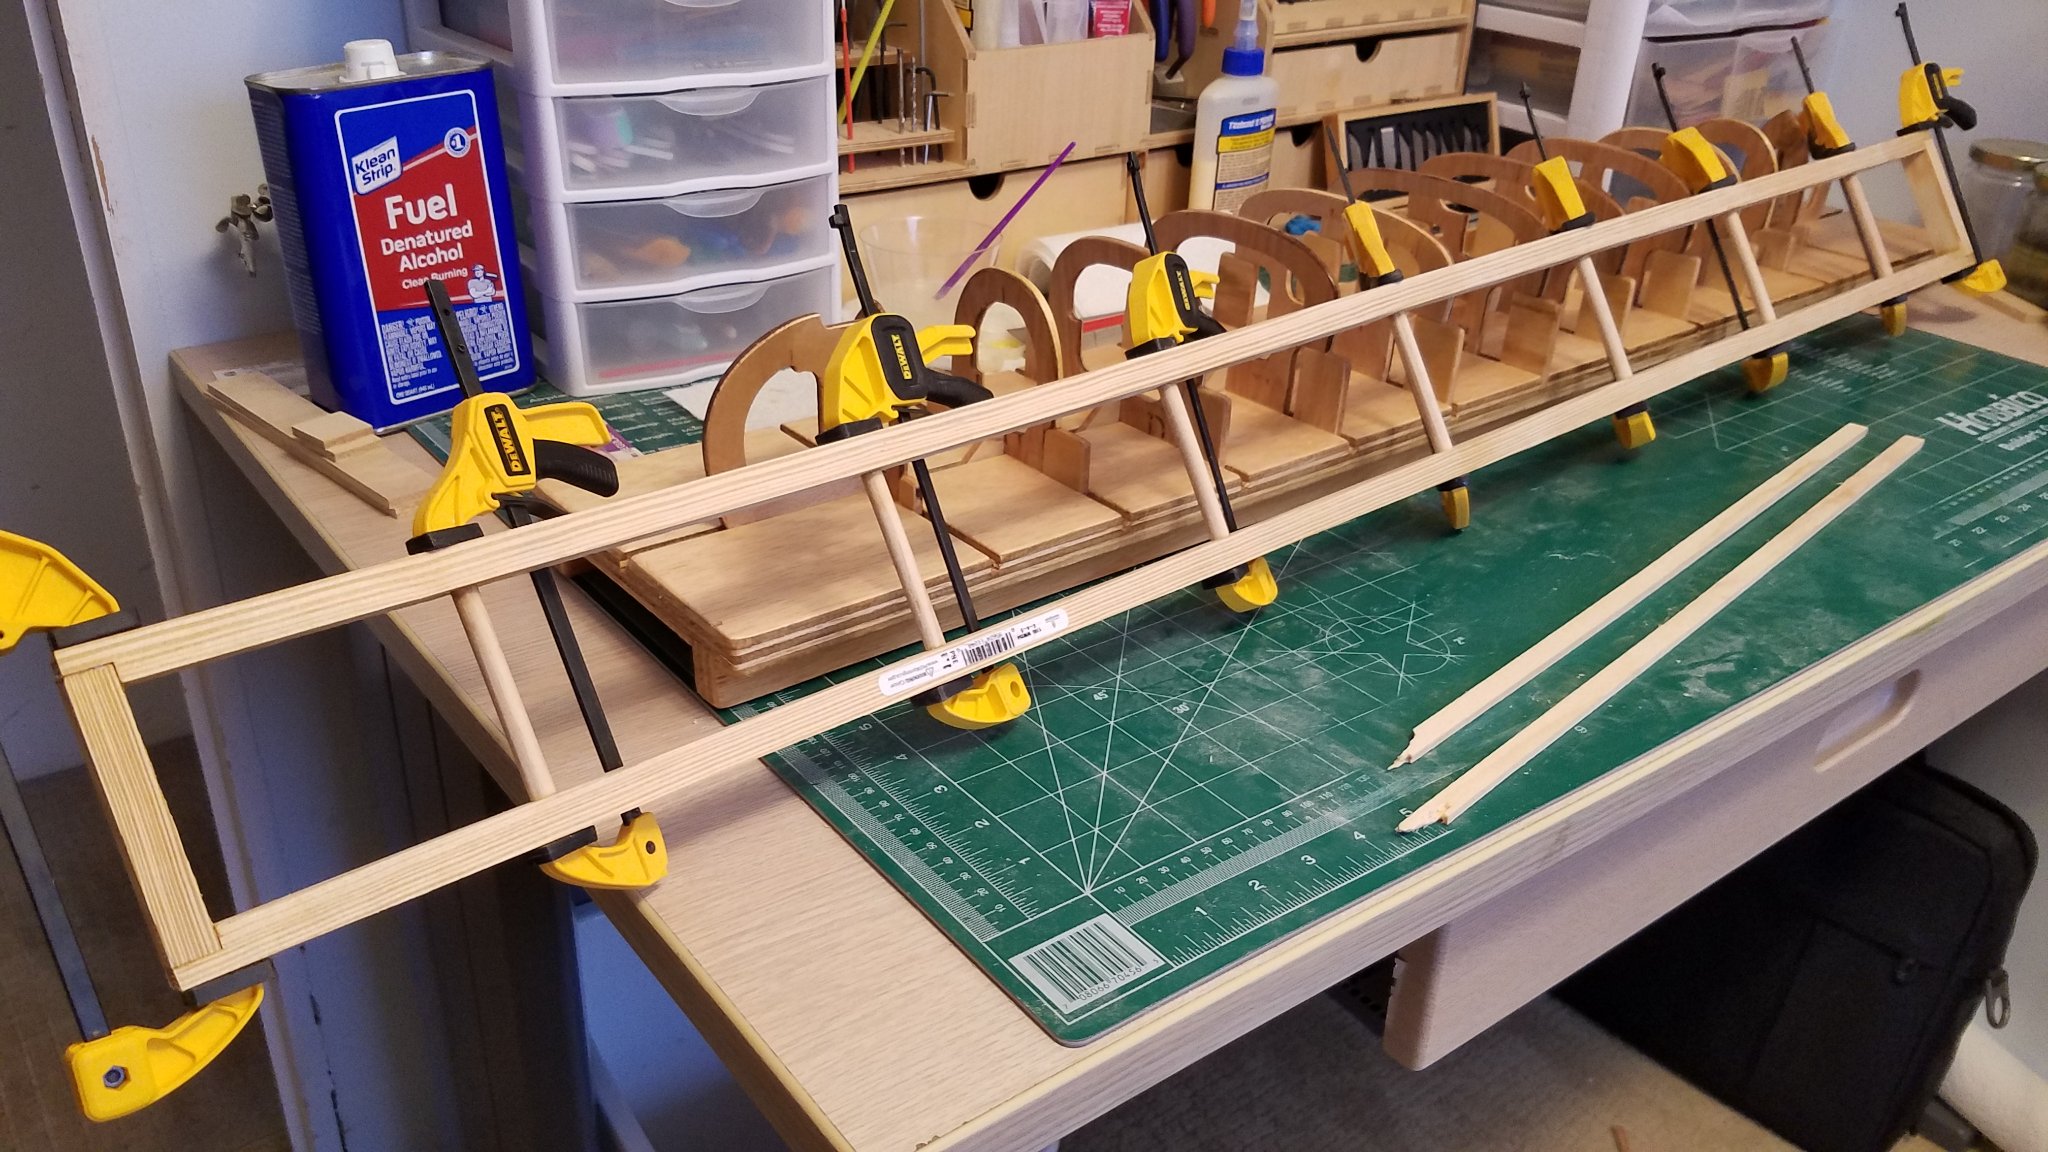
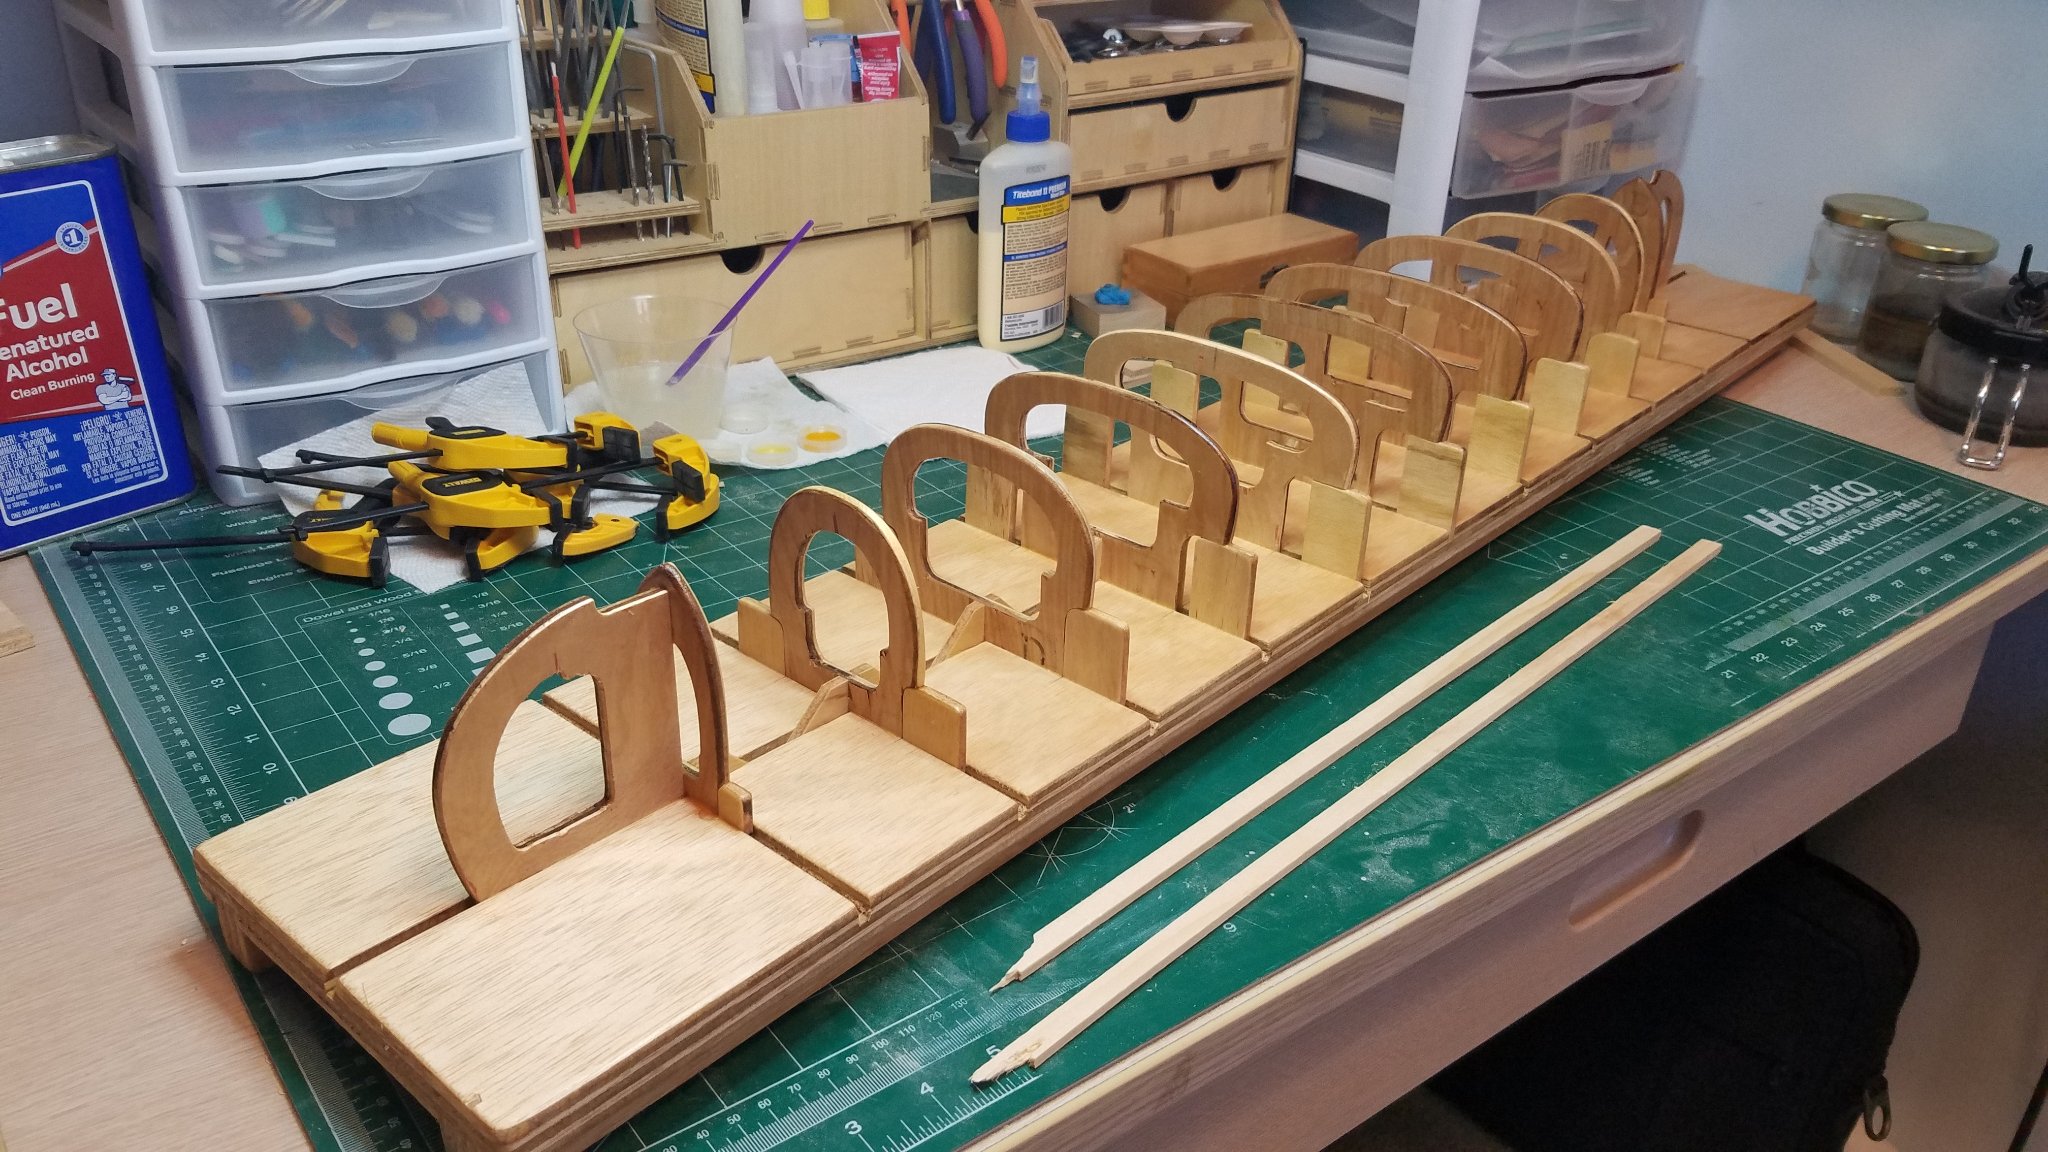
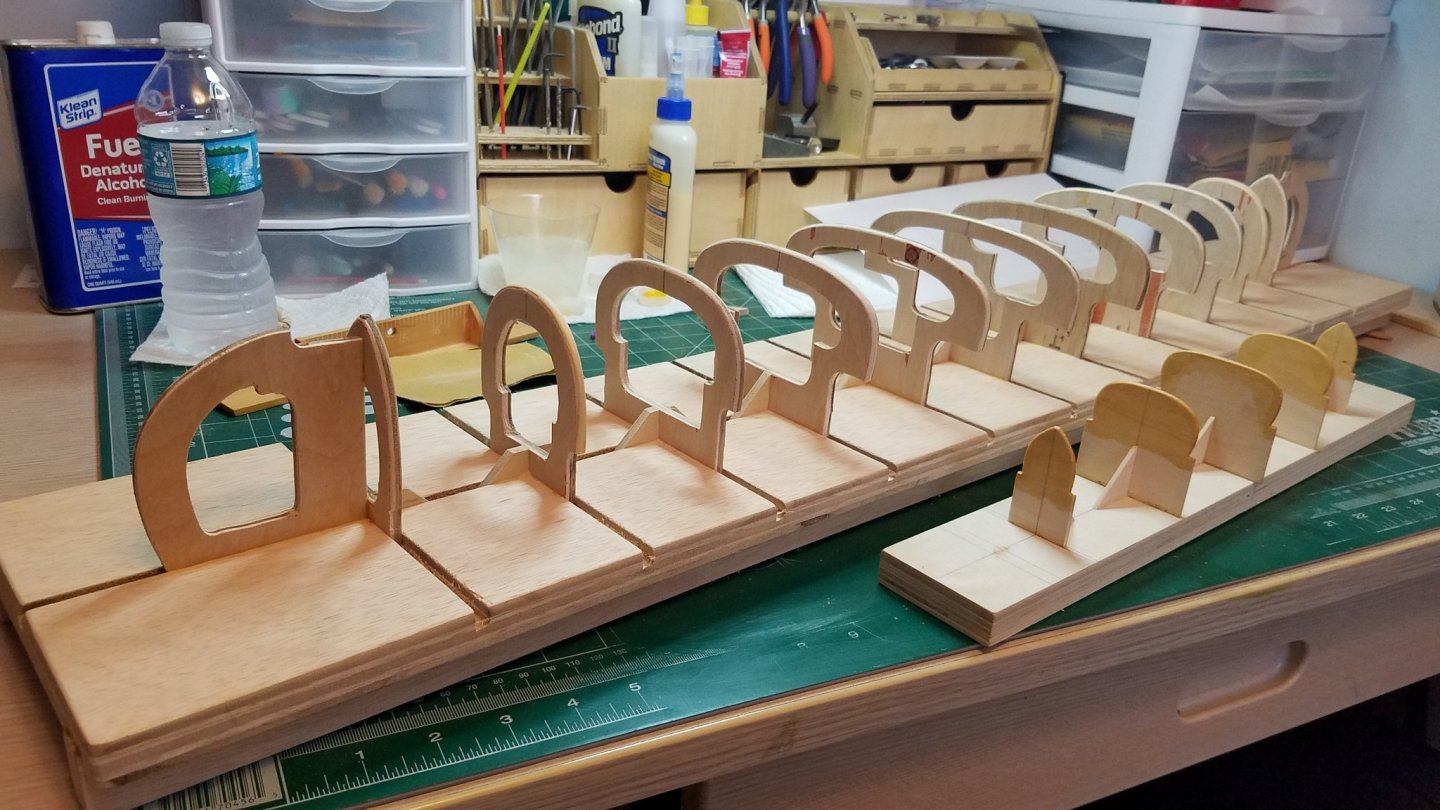
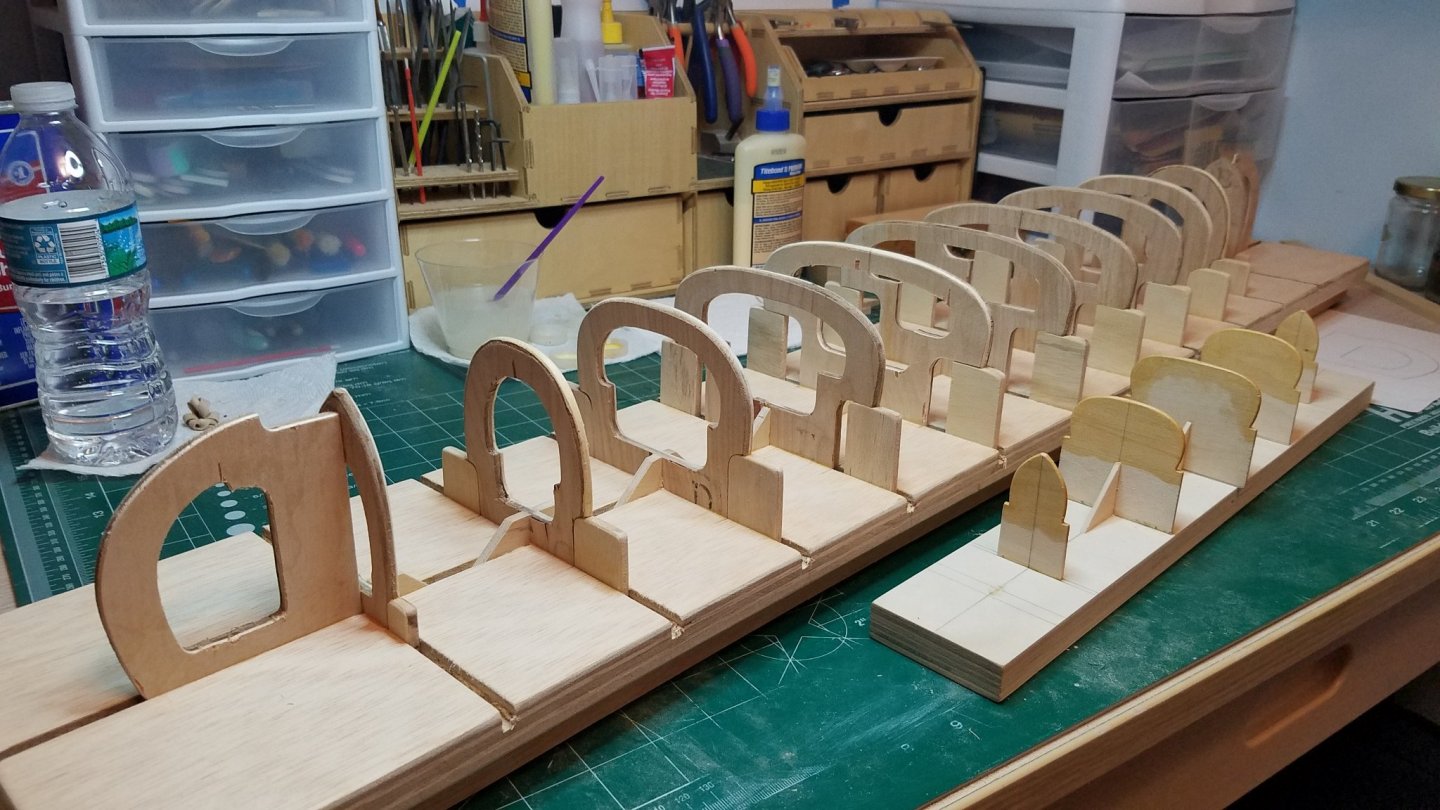
Hello again and thanks for all the likes. Not much to show so far but I have made a little progress. Below is a picture of the building form next to her little sister from Midwest. The instructions are quite clear about how critical the placement of the shear plank is. As we all know this sets up the planking for the entire project. The method they would have me use is to nail the shear plank to each form using the bottom edge as a guide then repeating the process on the other side. Once both sides are done go back and check that the shape/curve of the shears on both sides match and moving and re-nailing as needed. Well the plywood used for the forms is only 5mm thick and of such poor quality that I am not sure it would hold a nail much less moving and re-nailing without splitting. The curve of the bent plank will be putting a lot of stress on those little brads and thin forms. Which brings us to the smaller Midwest designed forms. Each form has a shoulder to clamp the shear plank against to make sure it is in the proper place and is in the right shape without any nails, guess work or adjustments. What a great Idea! So with some plywood scraps and my trusty razor saw and miter box I got to work. It took the best part of the evening but well worth the effort I think. Each shoulder block is measured so that they are the same height on both sides of each form. Where as the forms are not exactly symmetrical so alignment should be much more precise this way. With the blocks glued in place it is easier to see just how much bend is needed on the shear plank. I am not really sure about getting that much bend with dry wood but that is how the instructions recommend doing it. On the other hand I have always wanted to build a steam box! All that is left is a coat or two of wipe on poly and the real work can begin. I know it seems like a lot of time spent on the base and forms but I believe that a strong foundation is needed to build a proper structure. Also since the form is reusable I want it to last through a couple of builds. That's it for tonight. Best regards.
-
Paul, Thanks for the kind words. I am very glad that you found my log helpful. That is what this place is all about. I think build logs are the best and easiest way to give back to the community that has given me so much help. Best Regards
- 81 replies
-
- 1
-
-
- naval smoothbore
- model shipways
- (and 1 more)