austristan
-
Posts
29 -
Joined
-
Last visited
Content Type
Profiles
Forums
Gallery
Events
Everything posted by austristan
-
Love the idea of being able to have an option to plank ourselves. Something very satisfying to me to doing that myself even if it isn’t quite as perfect as the laser engraved pattern.
-
It's a great model (it was my first) and the support from Blue Jacket staff along the way was really helpful. I still need to post photos of my finished model but happy to chime in to address any questions you have along the way.
- 104 replies
-
- 1
-

-
- revenue cutter
- BlueJacket Shipcrafters
- (and 1 more)
-
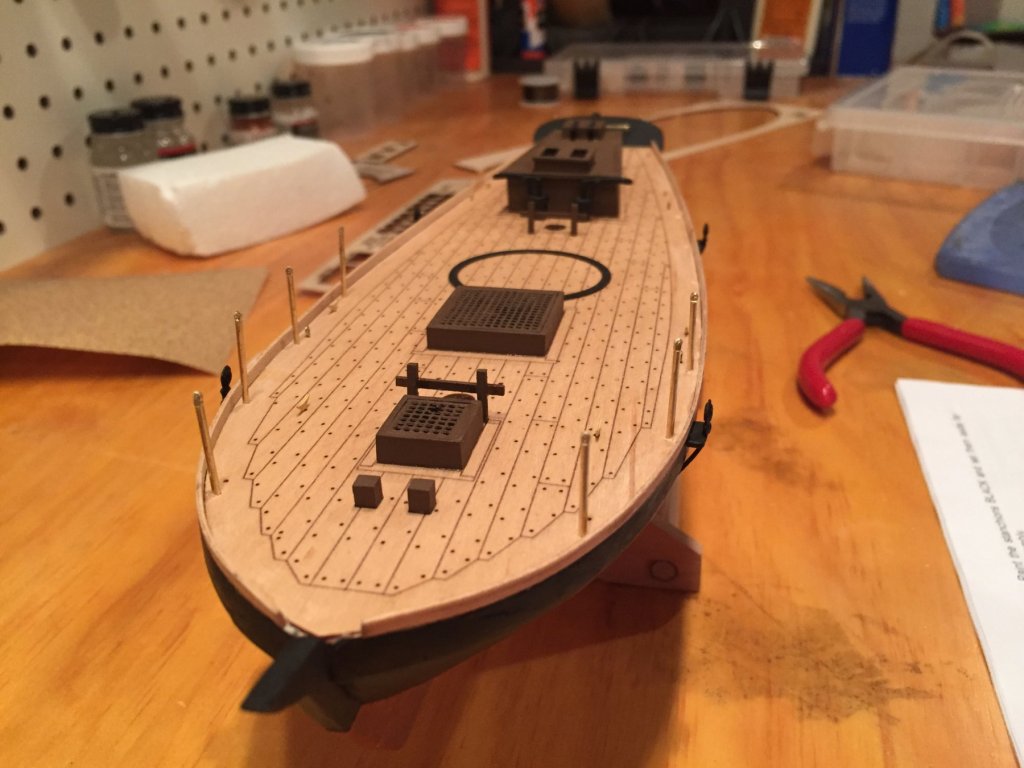
Although I haven't done a good job of updating things on here, I've made a lot of progress on this build over the past few months. Now down to getting the coils of rope together, rigging and installing the carronade and installing the life rail. I'll post a bunch of photos when I'm done so that others can use them as reference.
-
I finished painting the blocks and deadeyes last night. There are a few blocks that get attached to the deck using annealed wire to form pigtails. Is this process as simple as wrapping the wire around the block once and then twisting a number of times at the bottom, cutting it off at the appropriate length and then gluing into the hole? Is there a certain number of twists that is "standard" or do most of the twists get hidden anyway so it doesn't matter? Based on the photos, it looks like the hole for the rope should face fore/aft but please let me know if I'm mistaken on that front. Thanks for the continued likes and for checking in!
-
Hi Matrim, I'm considering this as my next build (or the Armed Virginia Sloop) so would like to follow along as you put together a model of a ship that I heard a lot about growing up in Australia. As I'm working through my first model, I've already become a student of your repeated concept of continued improvement - that's the fun part of this hobby!
- 38 replies
-
- 2
-
-
- bounty
- caldercraft
- (and 1 more)
-
Still have to paint the backsides of all the blocks and deadeyes. Have made some good progress on the stanchions so far. Photo was mid-progress but only have 3 left to make at this stage. They don't get glued in place until almost the end of the process but dry-fitted them to see what it would look like. I've ordered some Brass Black as, based on a number of other build logs, I think the final product will be better than trying to paint these. I wish I had thought about getting some Pewter Black for the blocks and deadeyes before I primed and half-painted them already but will store that away for the next build.
- 43 replies
-
- 5
-
-
- first build
- BluJacket Shipcrafters
- (and 1 more)
-
Looking way into the future, I hoping to tackle this model. I really like your attention to detail and making sure you're well set up for subsequent steps so hope you don't mind me joining along as you continue your progress.
-
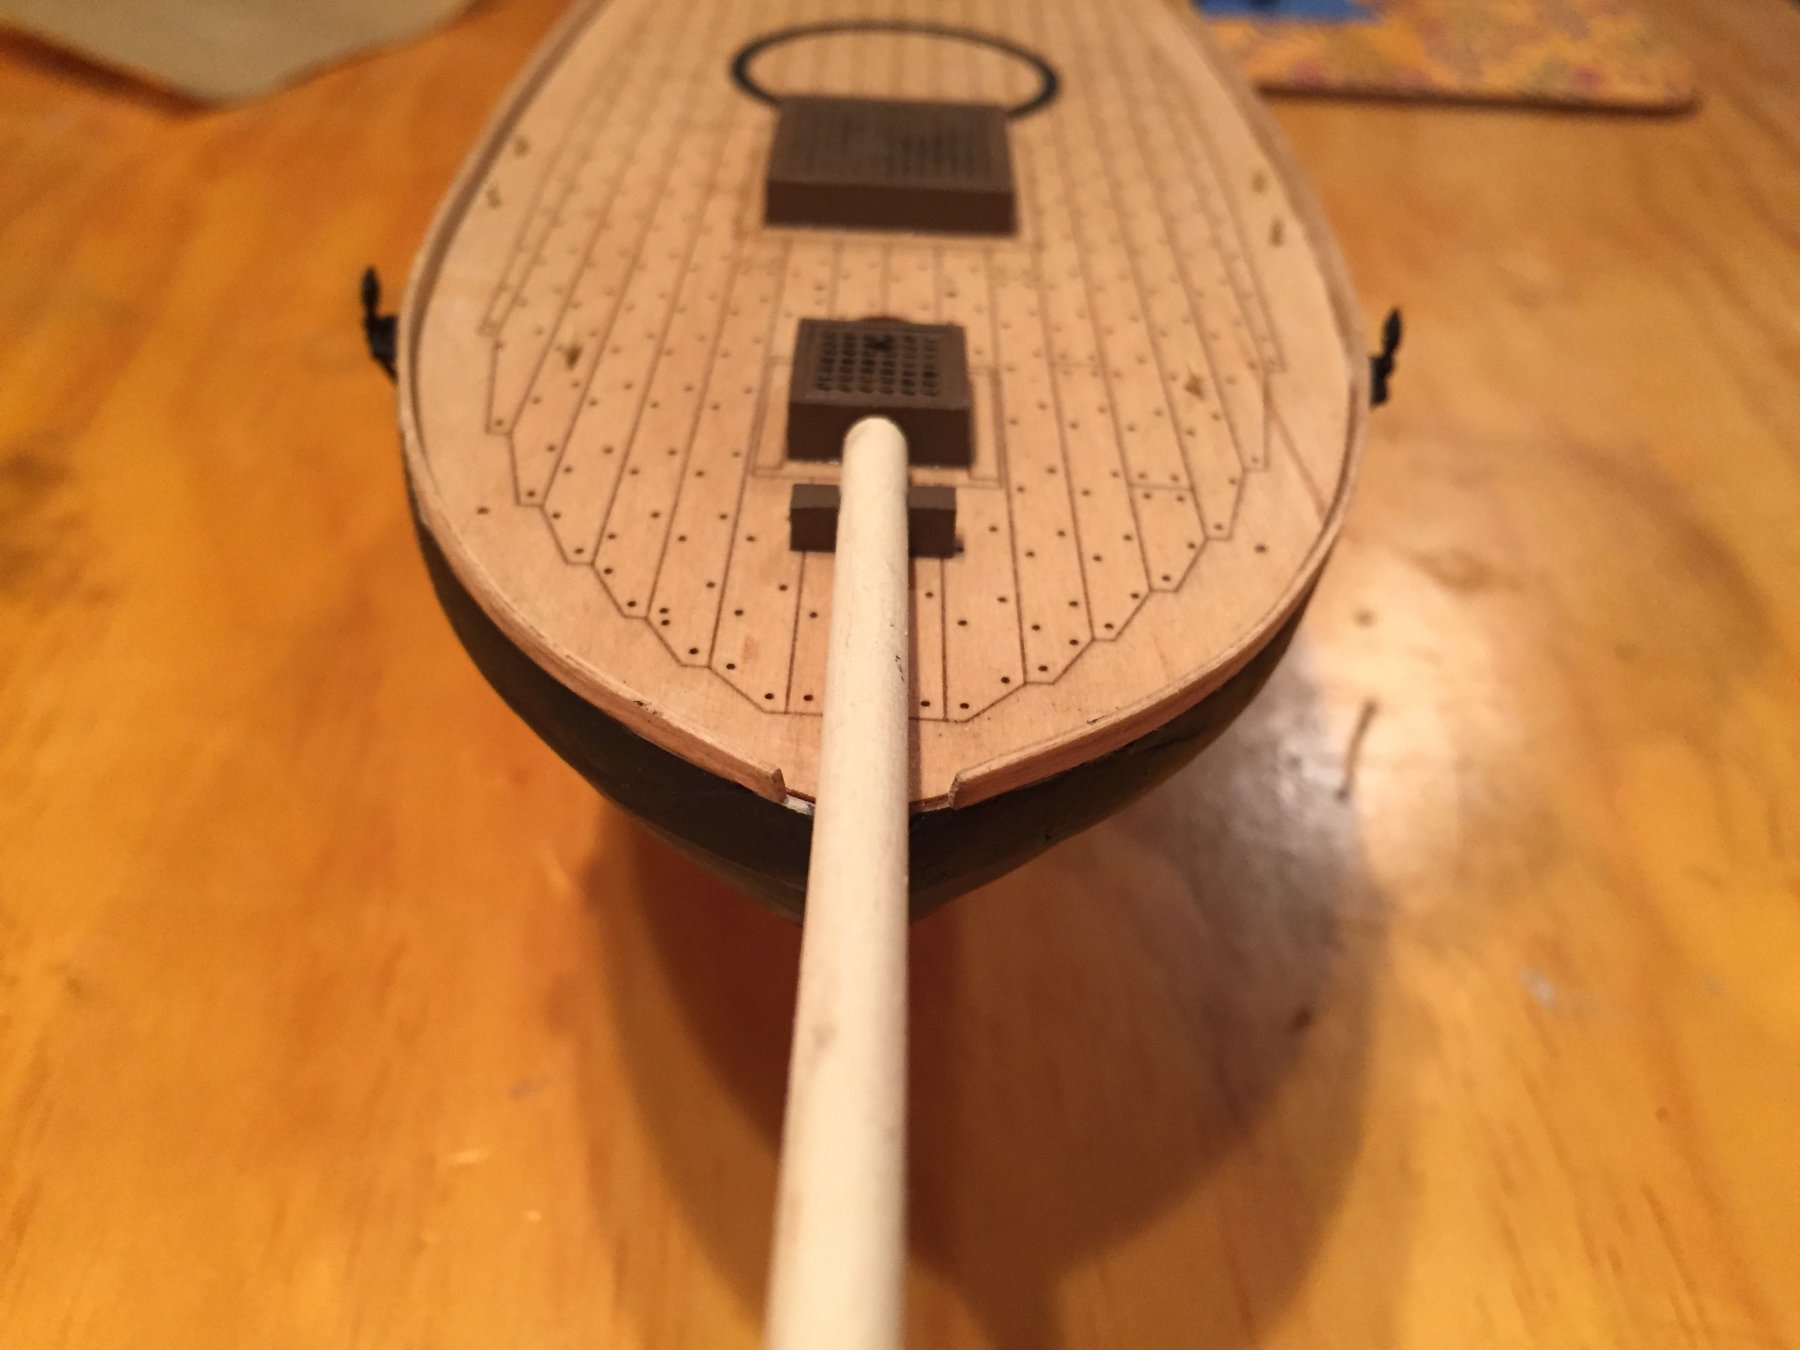
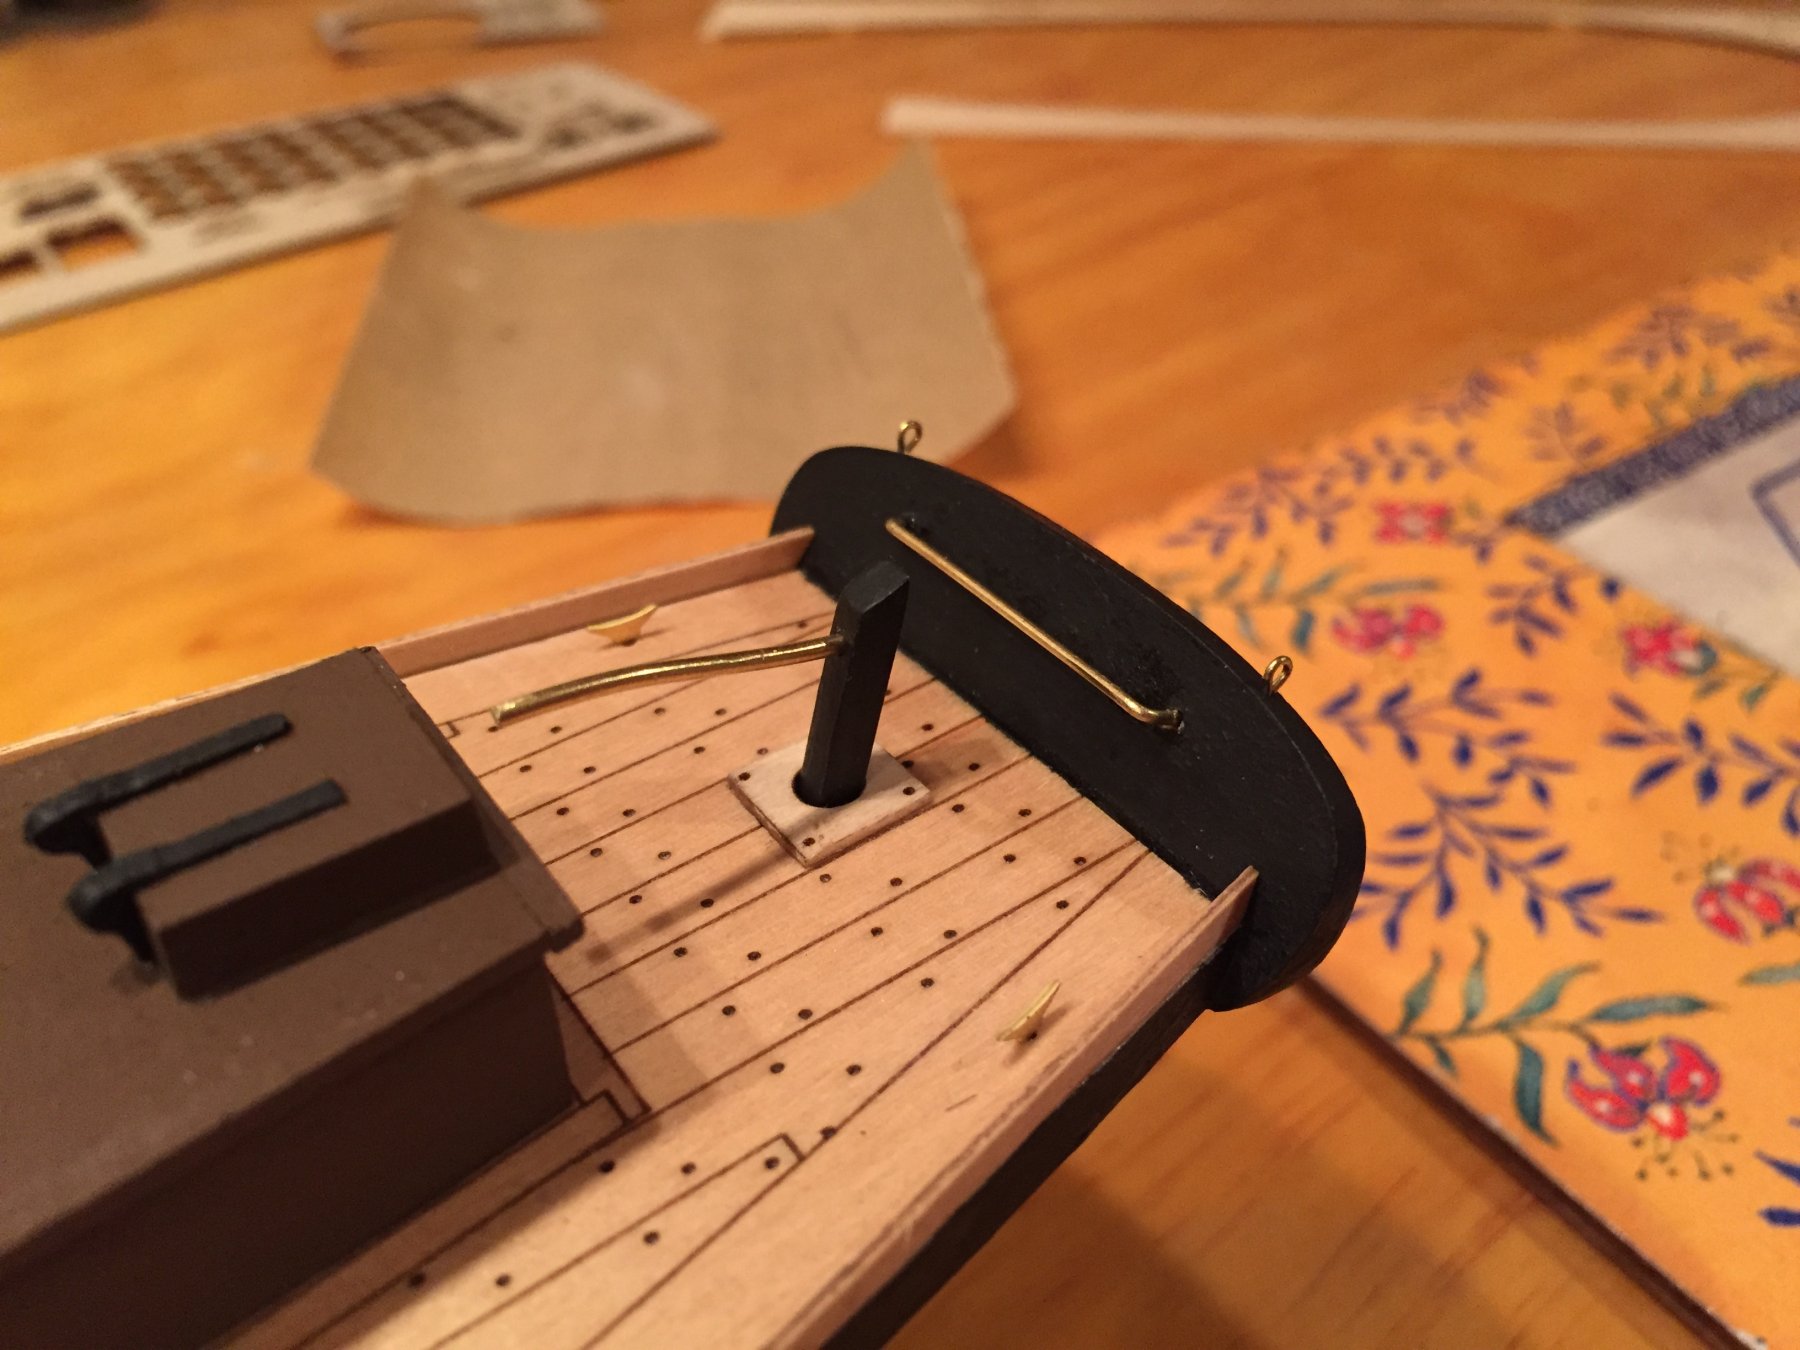
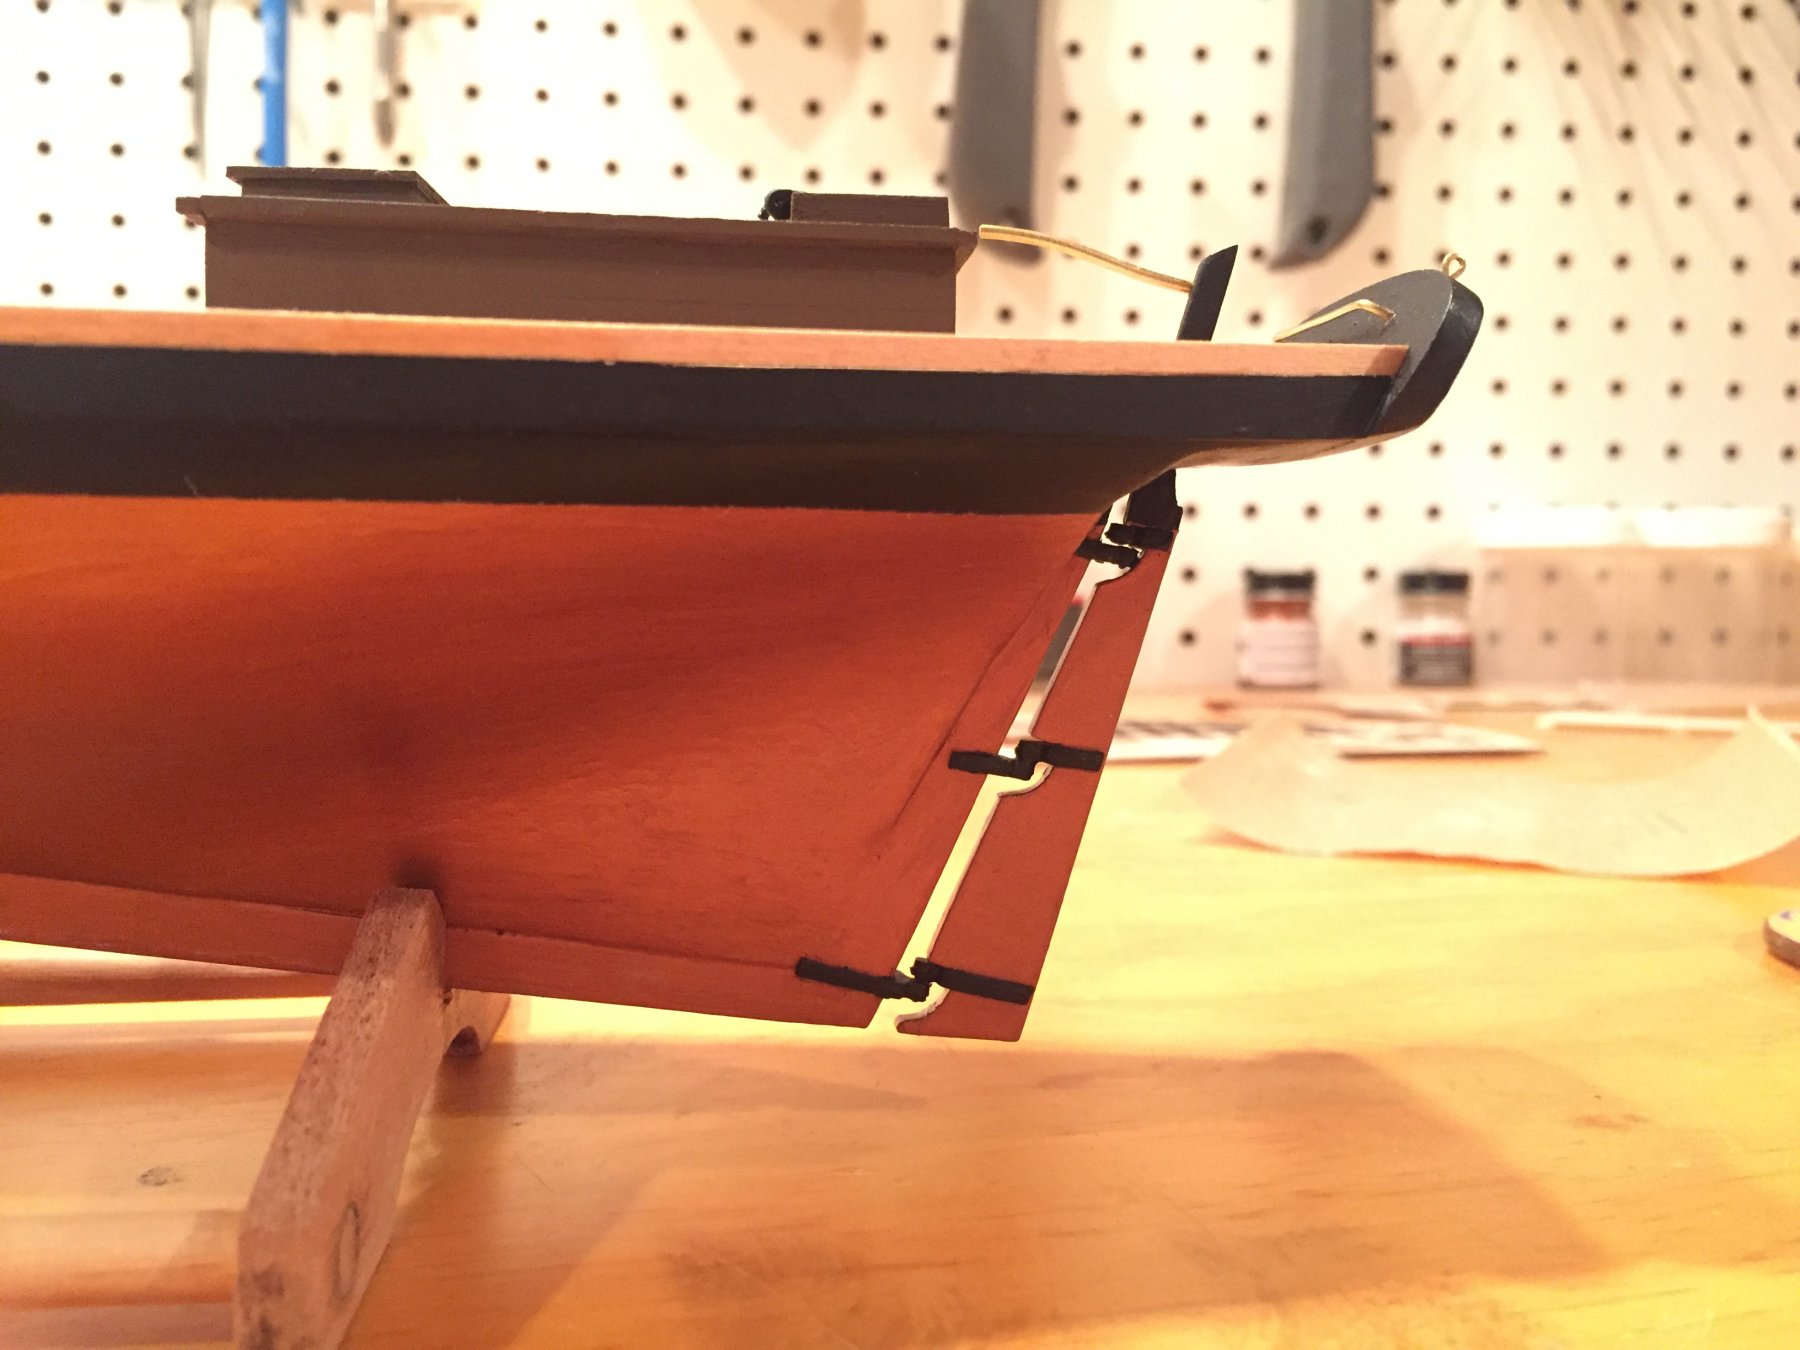
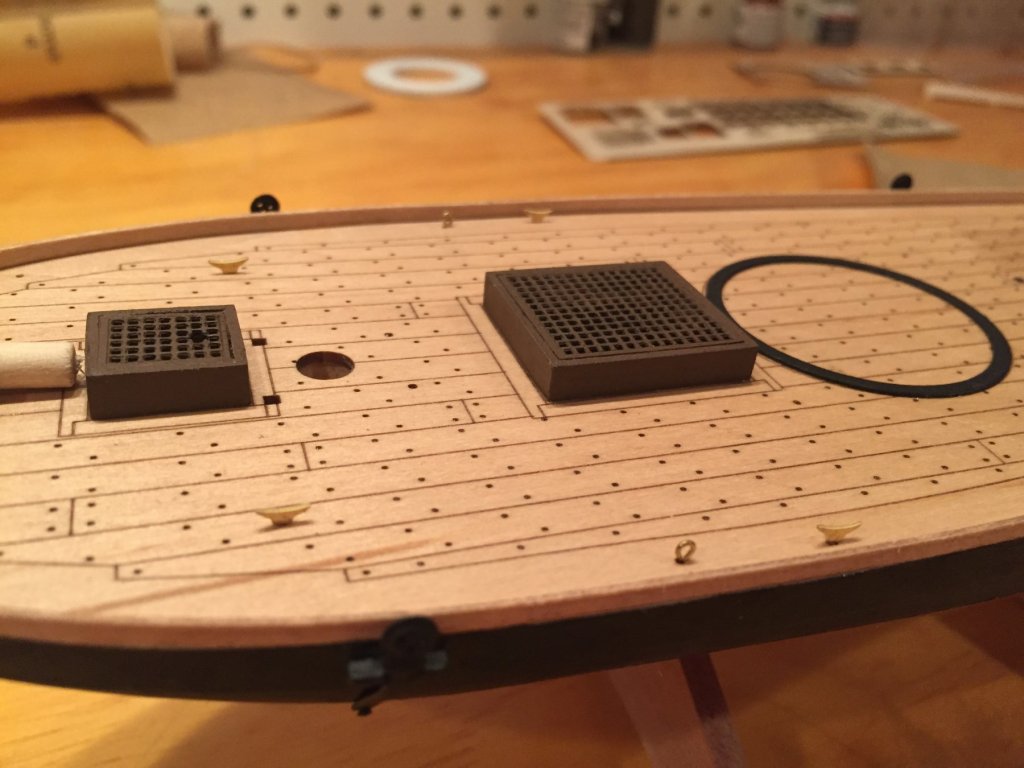
Happy new year, everyone! While I wasn't able to make quite as much progress as I was hoping, the Revenue Cutter is still starting to look more like a ship now. I didn't do a good job of taking photos along the way as I got on a good roll but I'll walk through what happened with the photos I have. The first step was trimming the lower deadeyes to match the plans (and not spill over into the copper section of the hull) and assembling the pintles and gudgeons. These were painted black and attached to the hull. I did have an issue with the alignment on the rudder getting all three pintles/gudgeons flush with the angle of the stern post and the pre-drilled hole in the deck. This is likely driven by the decisions I made earlier on but I decided the best course of action was to break the highest one so that the more visible lower two were good to go. I'll try and force the two pieces a little closer together later on but just leaving it as in the photo for now. I also had to trim the length of the tiller prior to installing to fit within the space leading up to the cabin. This is because the hole for the rudder on the plans is situated much further back than what was pre-drilled into the hull and the deck. I then stained and shaped the toe rails with hot water and rather than taping them to the hull, I used the cutout from the deck so that I didn't have to worry about the tape ruining any of the hull painting. It worked really well. I then attached the toe rails to the deck and that went well. I left a gap at the bow to ensure space for the bowsprit. I may have left this a little wider than necessary but once the bulwark piece is added, it probably won't be noticeable. If it keeps bugging me, I've saved the scrap from the stained wood and I could extended it slightly at that time. I've also painted and installed the forward hatches and the carronade track. While one direction fit perfectly within the printed template on the deck, the other direction wasn't perfect. I decided to have the slight discrepancy be on the fore/aft portion instead of the sides as the carronade base may cover it up for those looking at a quicker glance. I'm working through priming and painting all of the blocks and between coats will be starting to create all of the stanchions for the life rail.


- 43 replies
-
- 3
-
-
- first build
- BluJacket Shipcrafters
- (and 1 more)
-
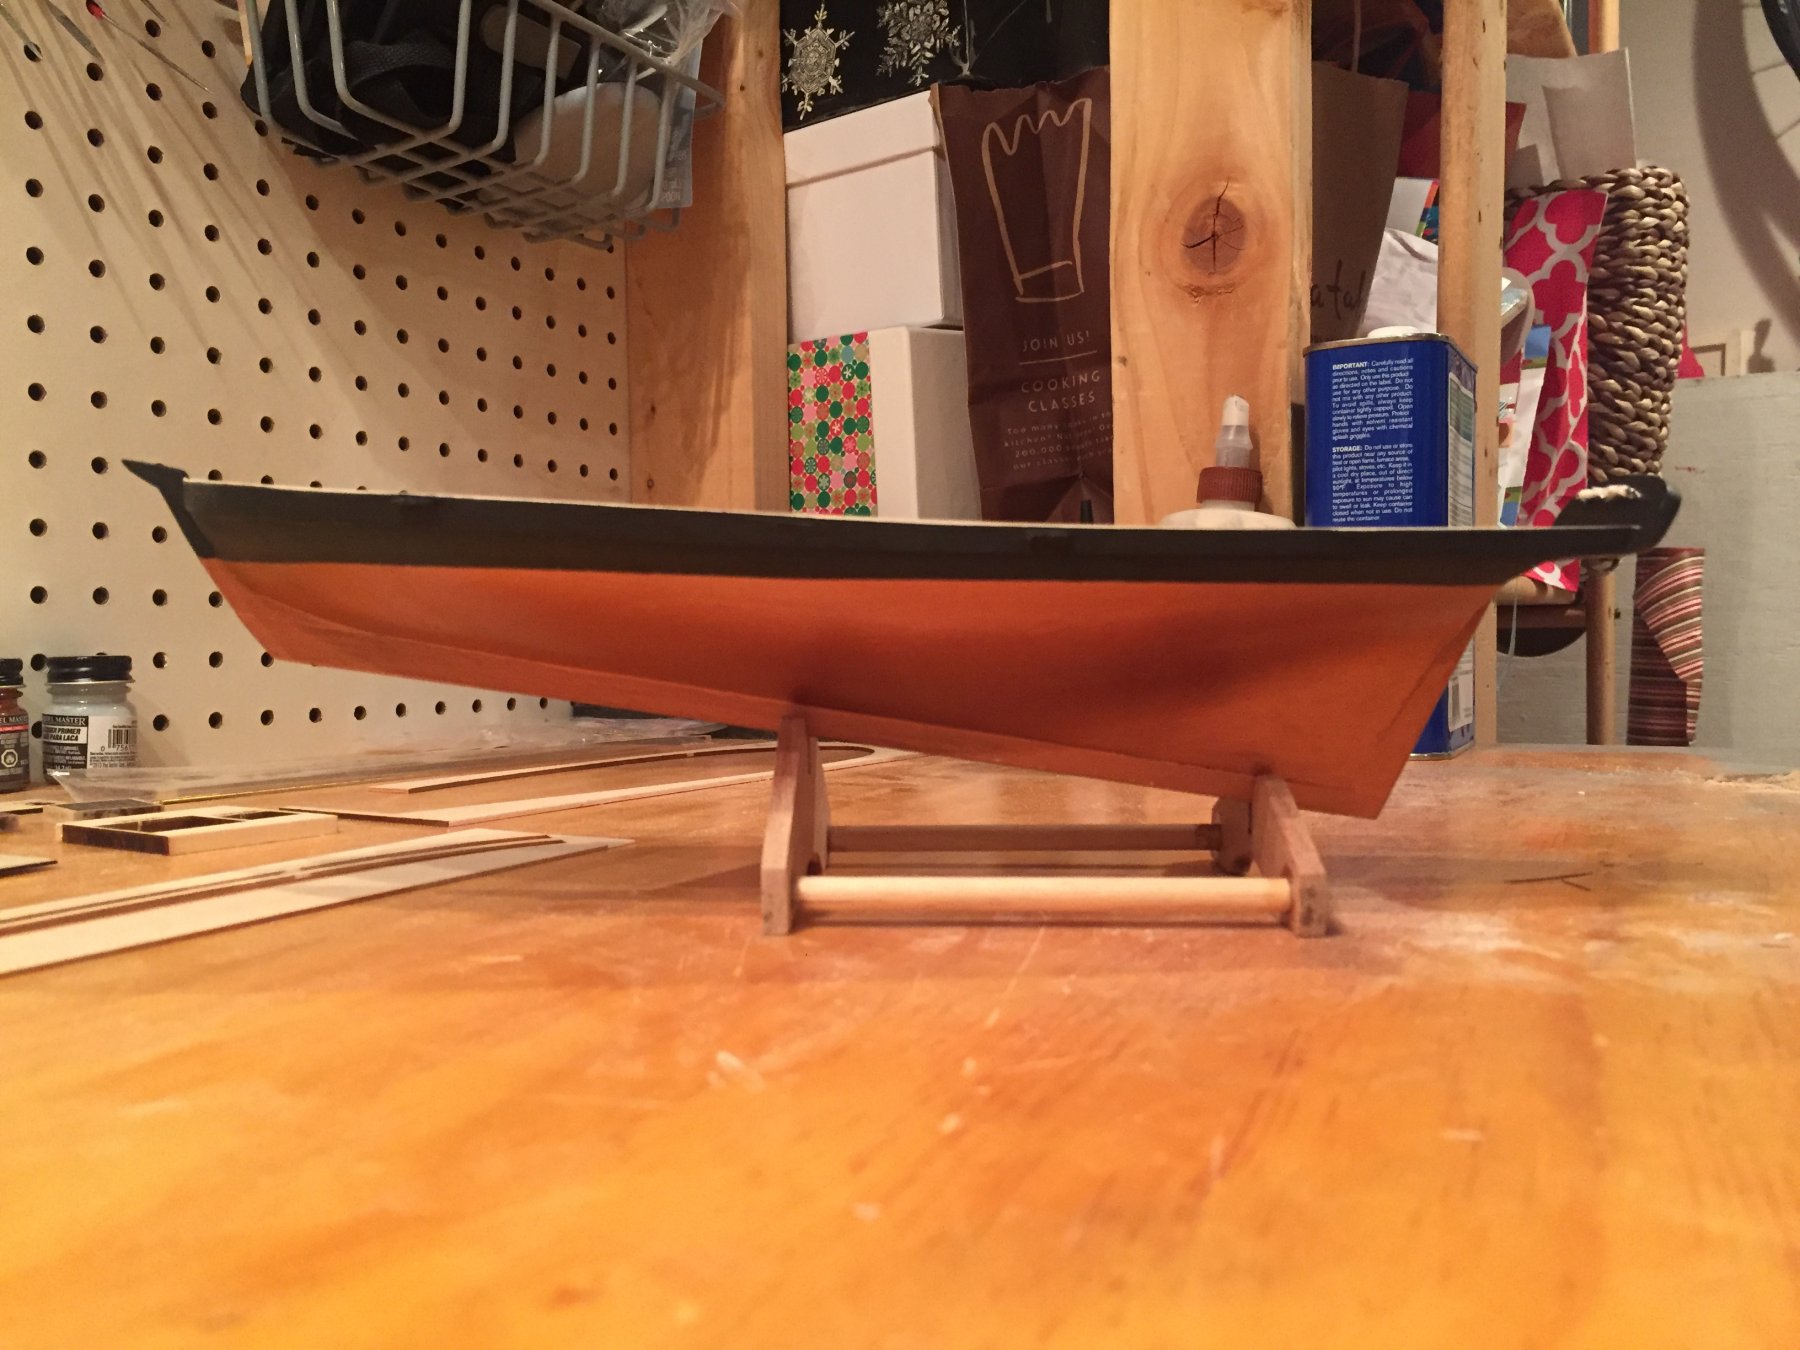
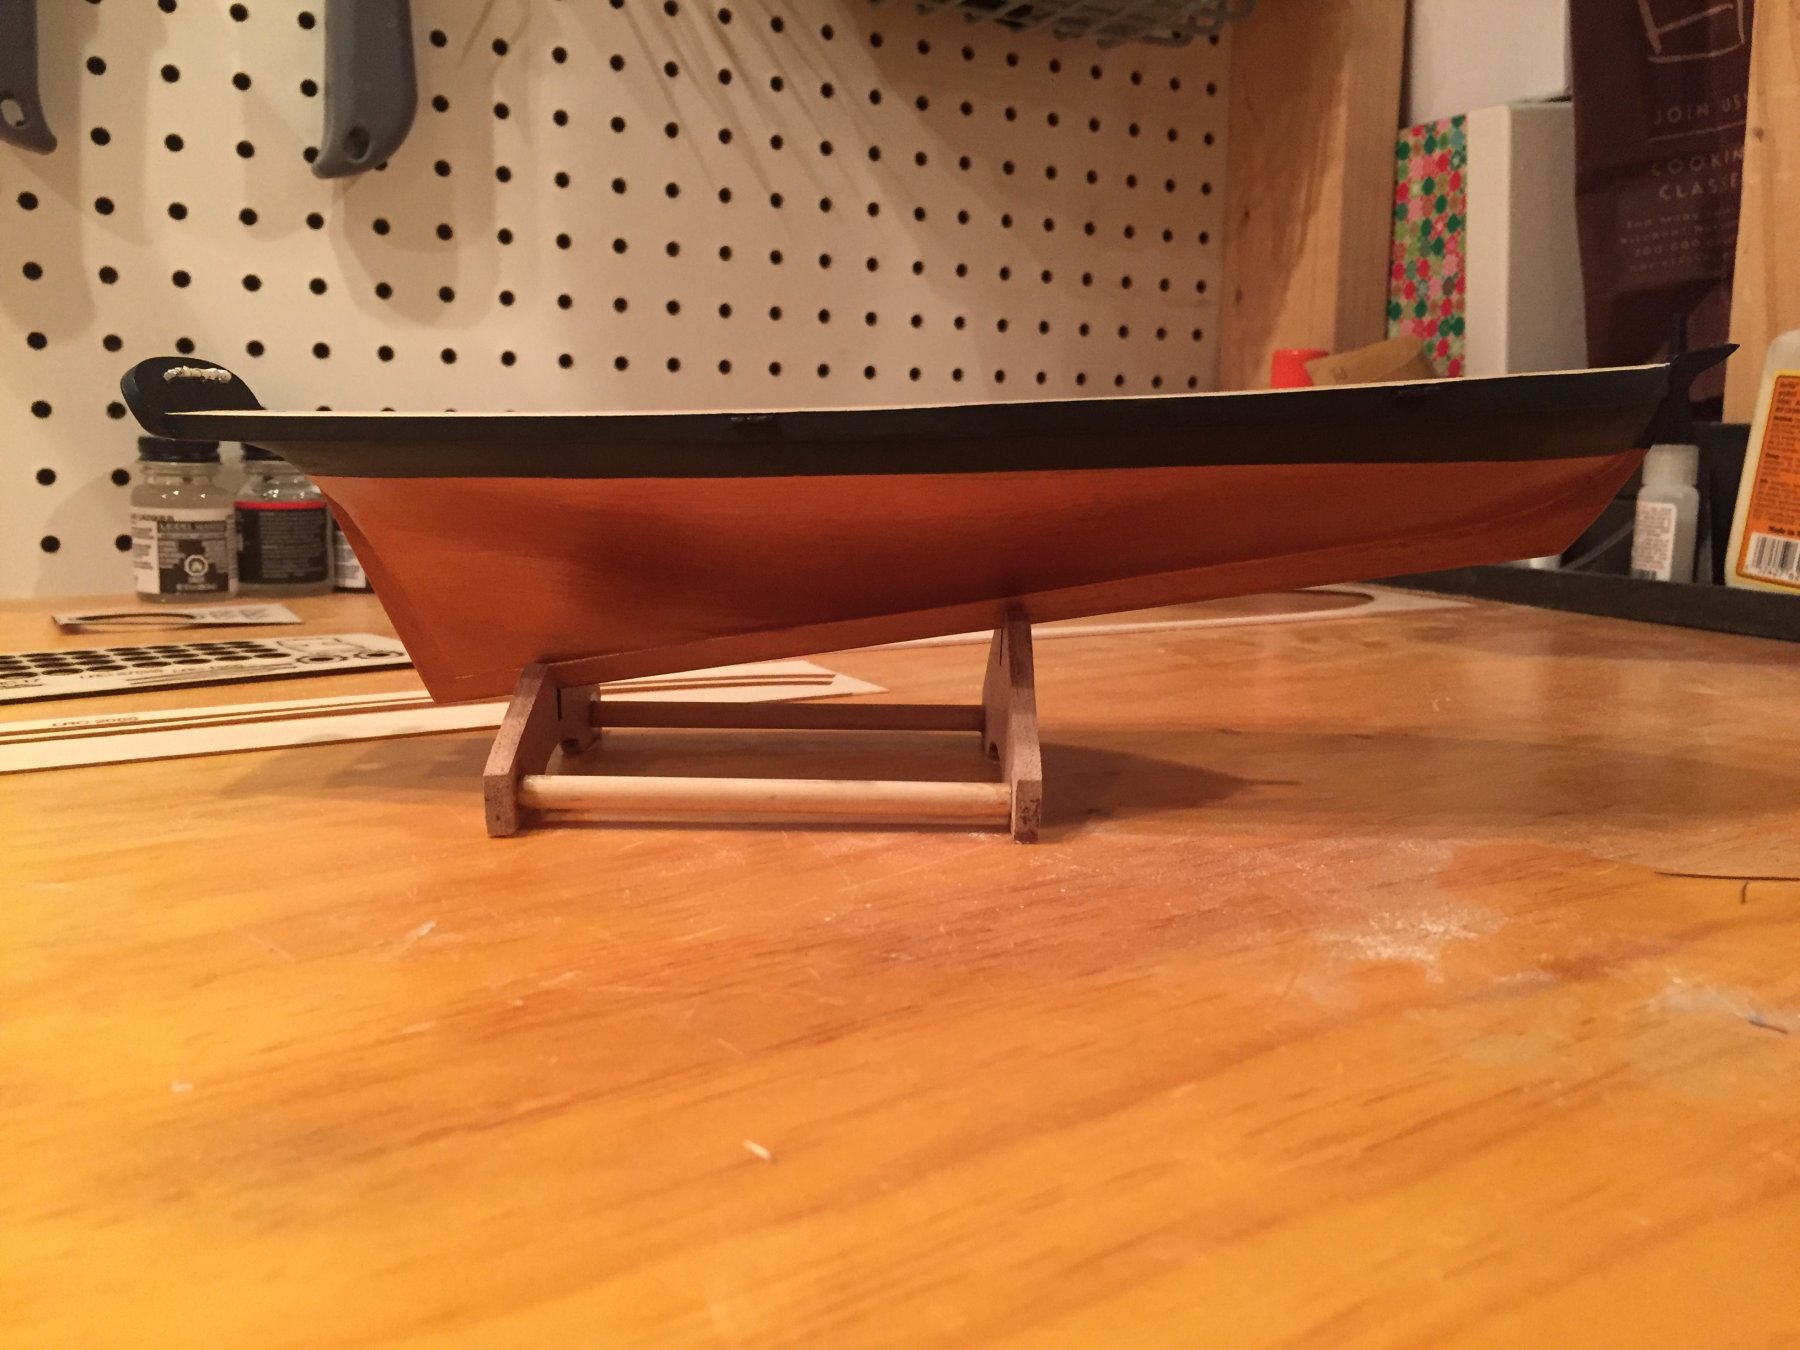
Thanks, as always, Derek for the words of encouragement that all is going well! I was able to complete the painting of the hull and the necessary touch-ups over the weekend. Really happy with the straightness of the water line and the crisp line between the copper and black. Since I already decided to paint the inboard side of the transom black (contrary to the instructions but in keeping with the photos in the instructions), I'm going to have the top of the rudder black too, as I think it'll give a nice contrast with the deck and tie in the transom and hull. The rest of this week may see limited work but I'm off all of next week so should be able to make some good progress heading into the new year.


- 43 replies
-
- 1
-
-
- first build
- BluJacket Shipcrafters
- (and 1 more)
-
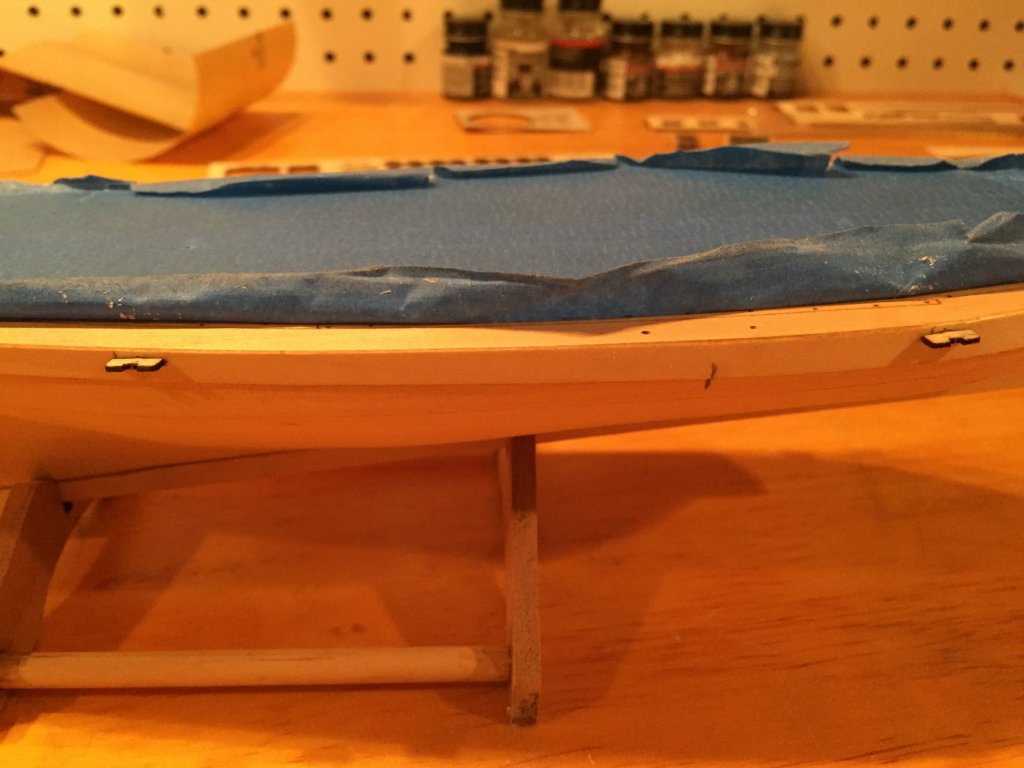
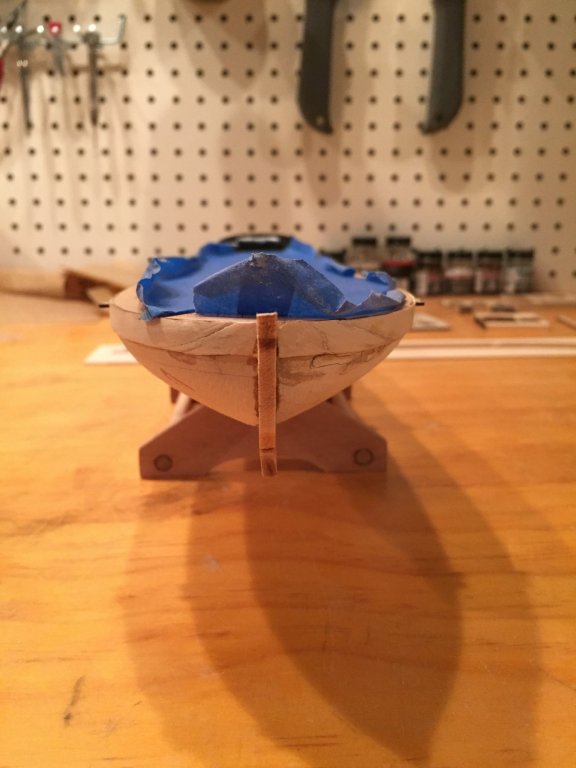
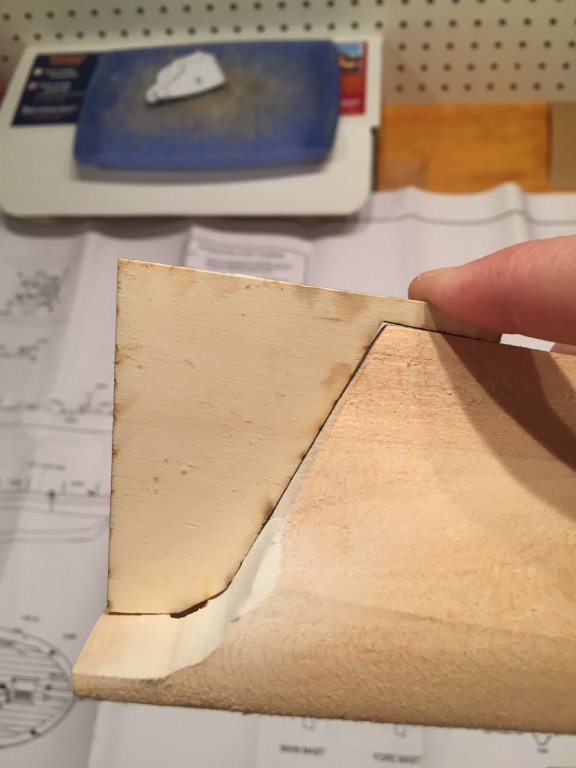
Have now cleaned up the transom to be flush with the hull, added the wales, as well as the channels. Getting the transom wasn't an issue at all (photo is a little off center so the keel looks misaligned but it's all good). Generally speaking, the wales weren't too bad. I did run into some issues right at the bow though. The instructions suggested starting at the bow and working to the stern but it was hard to get a good alignment so I worked the other way. It seems that the shape of my bow wasn't exactly right for the shape of the pre-cut wales so it started putting a lot of stress on the wood to get it to the right shape. The wood ended up snapping in a couple of places but I was happy with how I was able to work it all back together and make it look okay with a bit of sanding (still need to do a little bit more to get the bottom of the plank nice and level but will be an easy fix). When it gets to the toe rails, the instructions specifically mention soaking them in water but there wasn't any suggestion to do that for this step. For any other newbie modelers, I would have two suggestions based on what I've learnt. 1) - get the wales out during the hull shaping process to dry fit them at that stage to make sure the shape, especially around the bow, will work with the pre-cut shape. 2) - if it's going to be a stretch to get everything aligned, then I would suggest soaking the bow end of the wales to make sure you don't end up breaking the plank. The channels went in well although, like Eric W, I used a #55 drill bit instead of the prescribed #67 as a lot of sanding on a very small piece would have been required to get the tab on the channel into the #67 sized hole. Have to do a tiny bit of filling to replace a piece of the existing filling on the bow that stuck to my thumb with the CA but once that's set, I'll be ready to prime the hull for painting! Thanks for stopping in, the likes on the last post and Derek C., for the kind words.
- 43 replies
-
- 2
-
-
- first build
- BluJacket Shipcrafters
- (and 1 more)
-
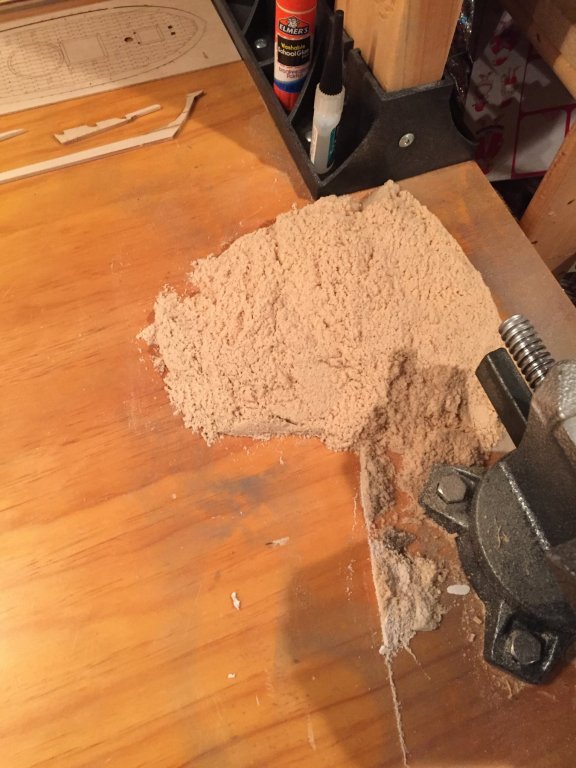
Managed to finish the rest of the hull this weekend. Needed a couple of spots of filler to smooth out a section that was cut too far back on arrival and a couple of missteps on my part. It looks a bit ugly around the filler in a few places because it started separating from the deck as I was dry fitting so used some CA glue to keep it firmly attached and I did some more fine sanding after the photo to get the lines a little smoother than what's shown below. After all the work over the past few weeks, I've managed to accumulate enough sawdust for what looks like enough to build a new hull from scratch (It has since been vacuumed up.) I also had a chance to glue on the deck, stain it, attach the transom and paint it. I think I'll need to do a second coat on the front of the transom but I'm excited to start making this look like more of a ship going from here! Thanks for checking in and the likes!

- 43 replies
-
- 4
-
-
- first build
- BluJacket Shipcrafters
- (and 1 more)
-
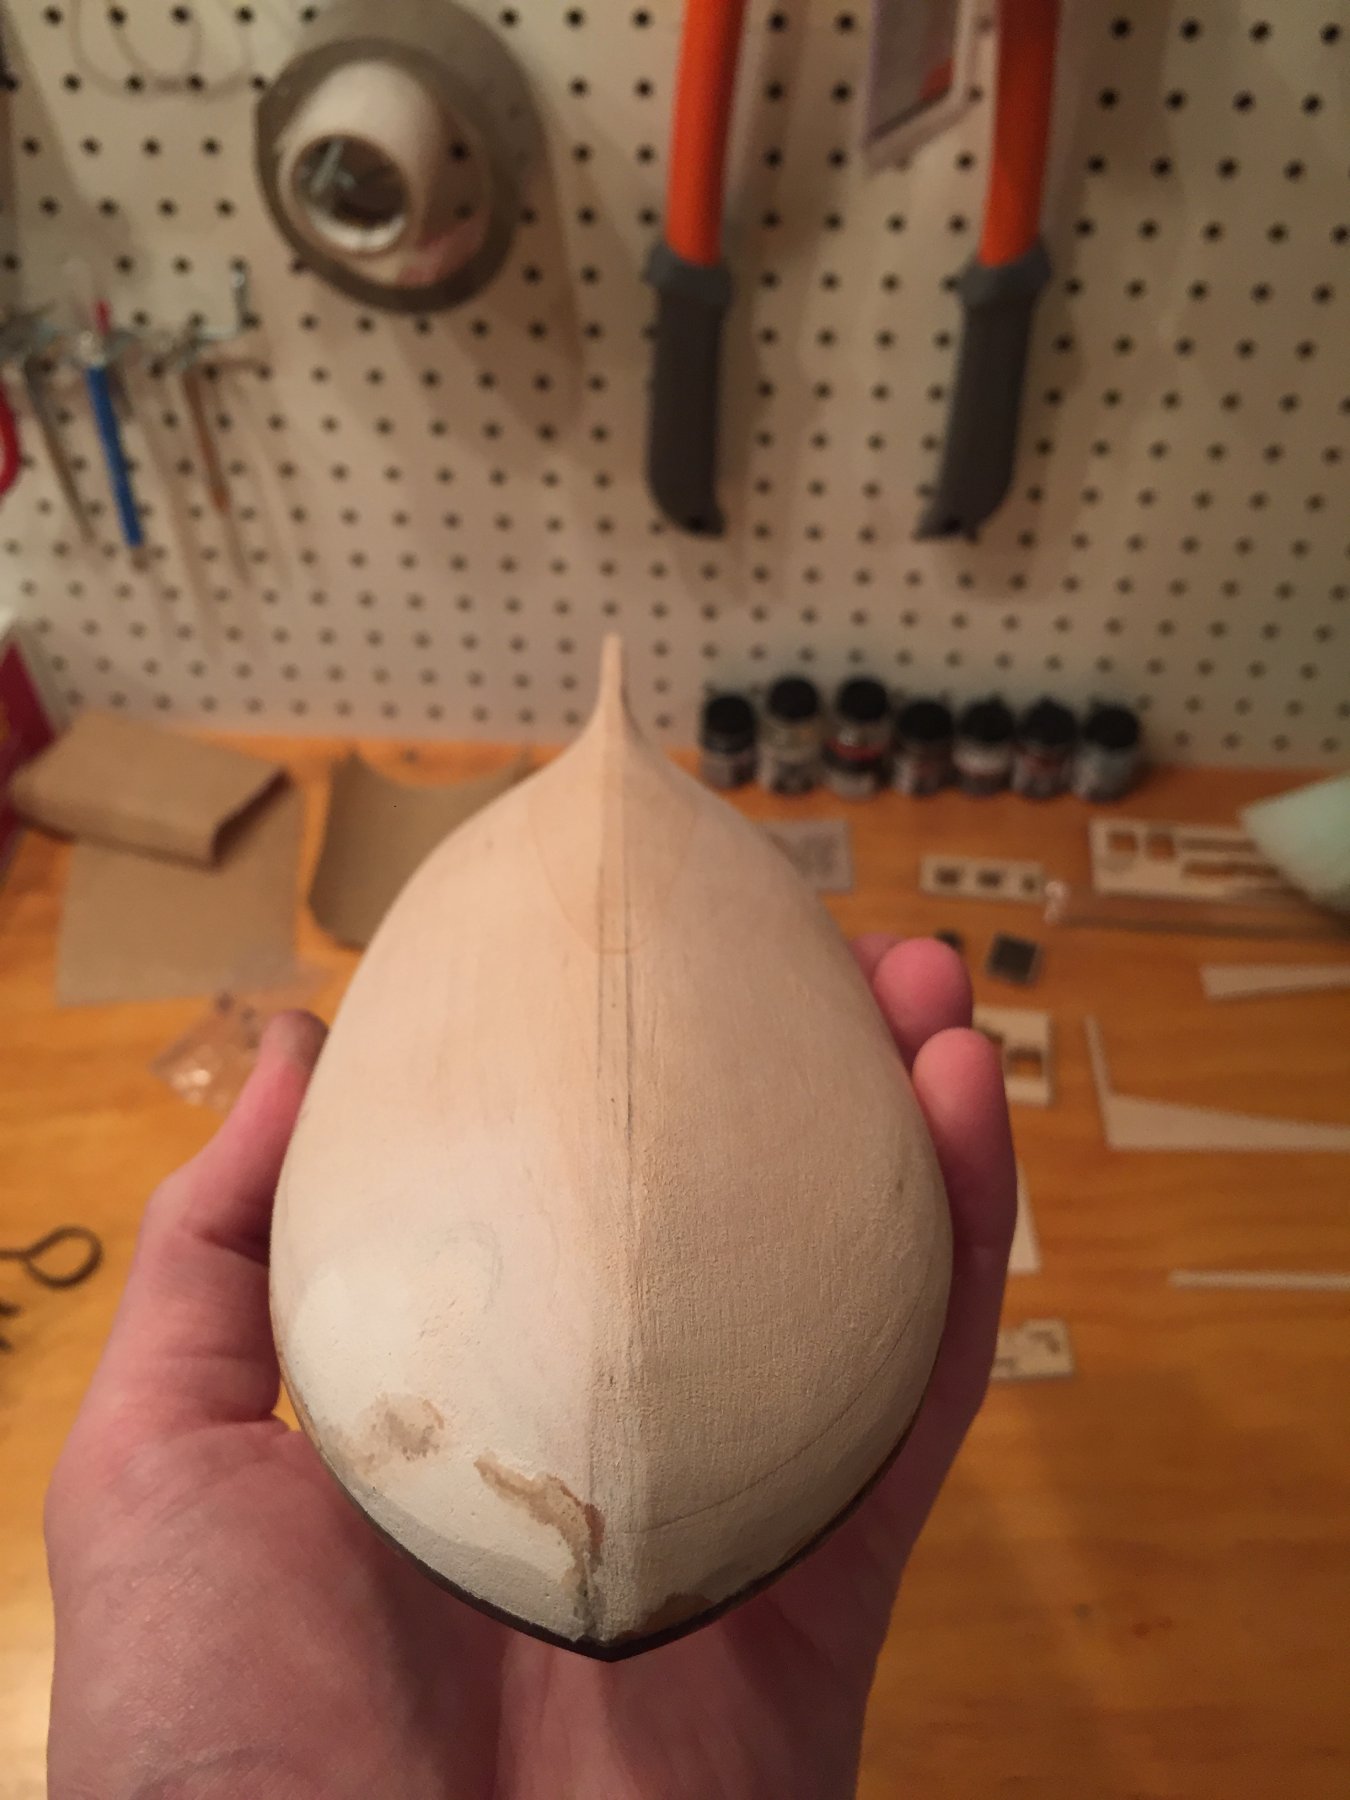
Thanks for the support, Nic. This was exactly the thought I had. I'm really happy with how smooth and fair it's turned out but if you have any feedback given your experience (I know the second photo's a little blurry so may be hard to give an opinion) I'm all ears for tweaks/improvements as I get started on the other side. I'm already making much quicker process on the right side now that I've figured out a good approach to work across multiple areas at once to get the shape smooth. Having the keel at the right height from the outset is also a big help for round 2.
- 43 replies
-
- 1
-
-
- first build
- BluJacket Shipcrafters
- (and 1 more)
-
After being away for all of last week for Thanksgiving, I was able to get back to the cutter last night and finish up the left side of the hull. It's not 100% aligned with all of the templates but I'm happy with the shape I've produced and it was the best I could do to have a perfectly level false keel and follow the template shapes to about 90% accuracy. Any feedback on the results for the left side would be appreciated before I get too far into starting the right side. I also spent a bit of time making the hinges for the cabin above's hatch. Took a bit of work to get them to be be identical given the size and I'll share some photos once they're painted and installed.

- 43 replies
-
- 2
-
-
- first build
- BluJacket Shipcrafters
- (and 1 more)
-
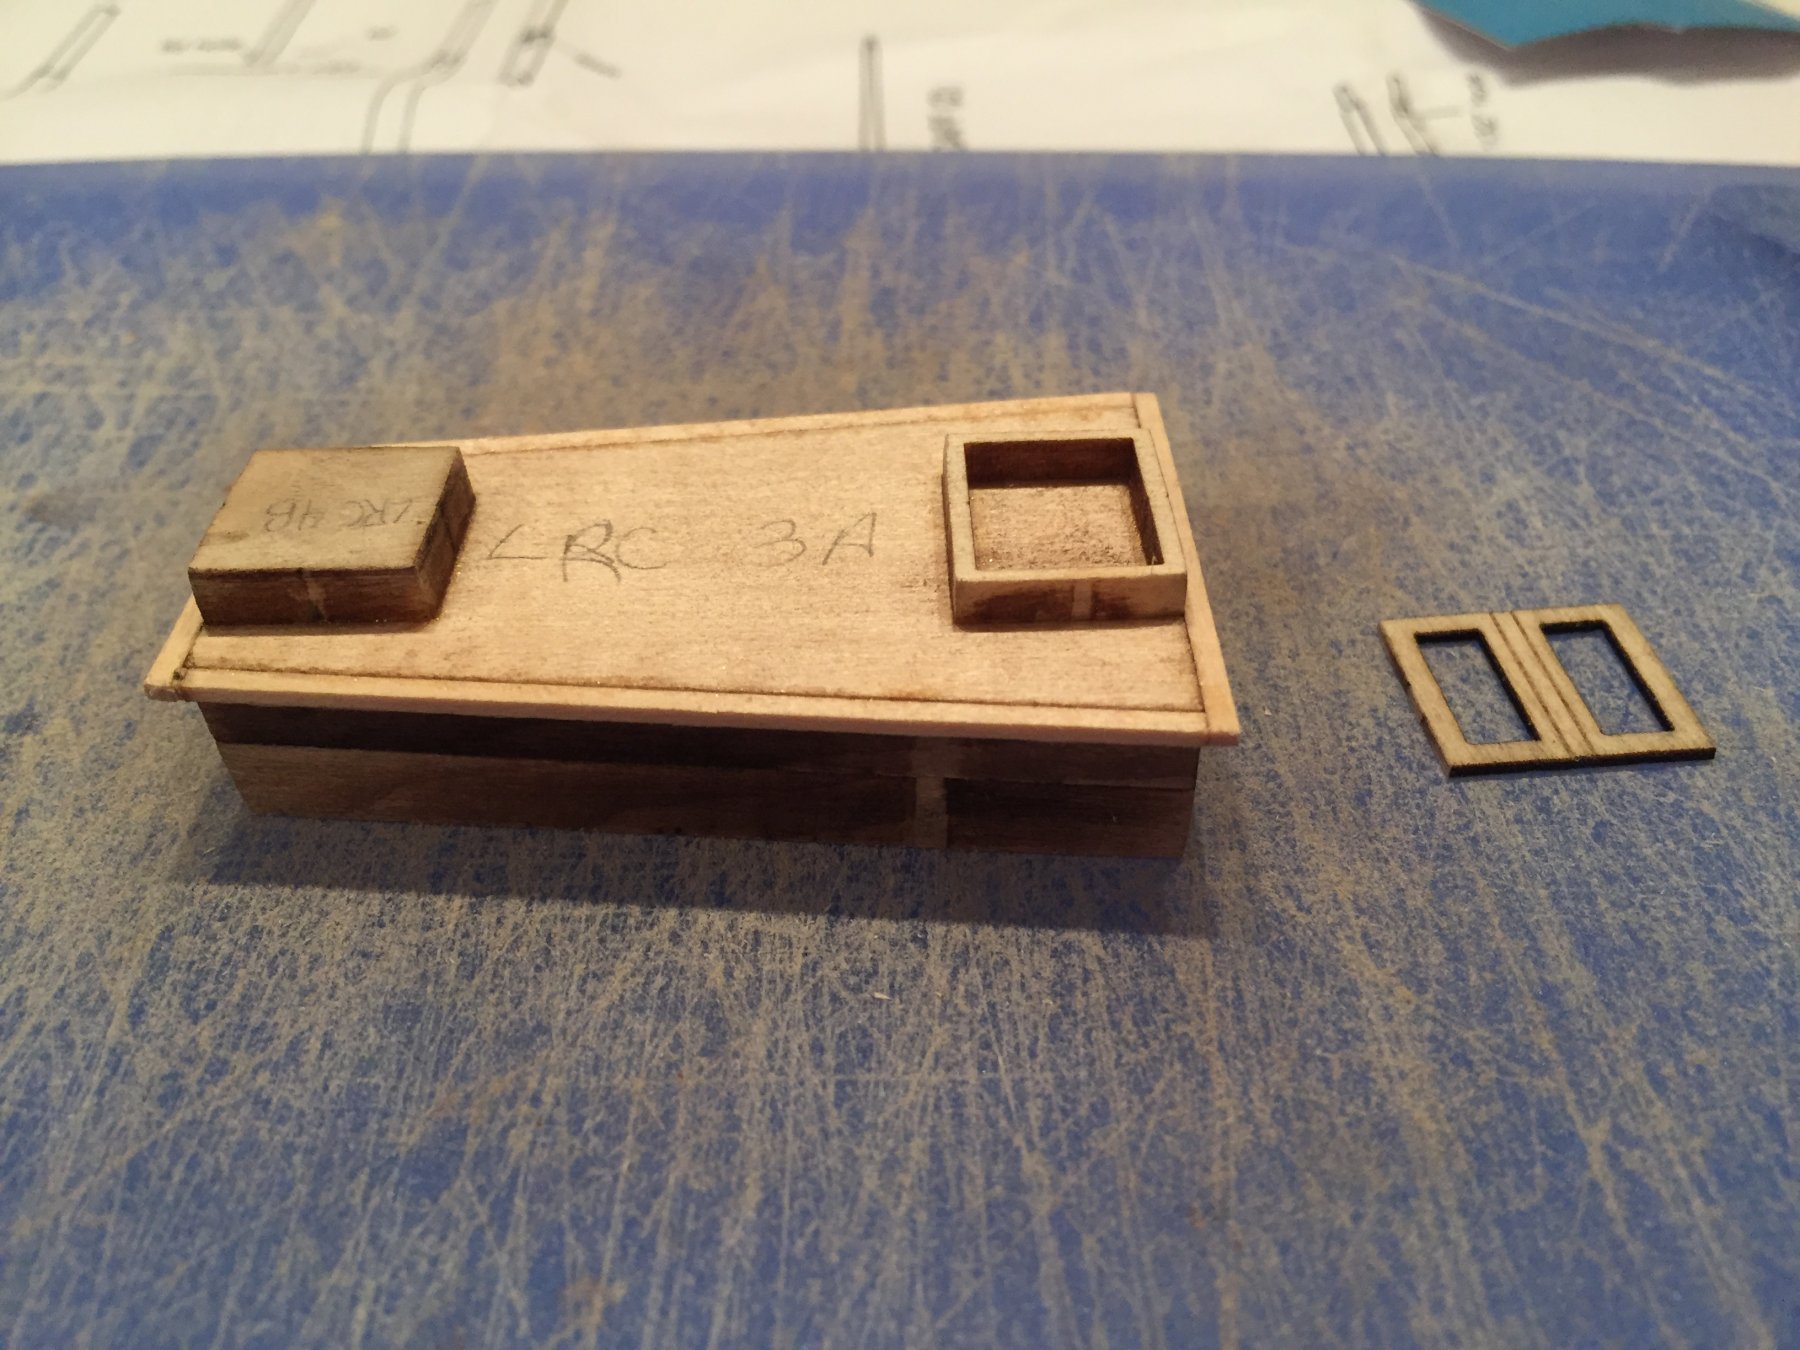
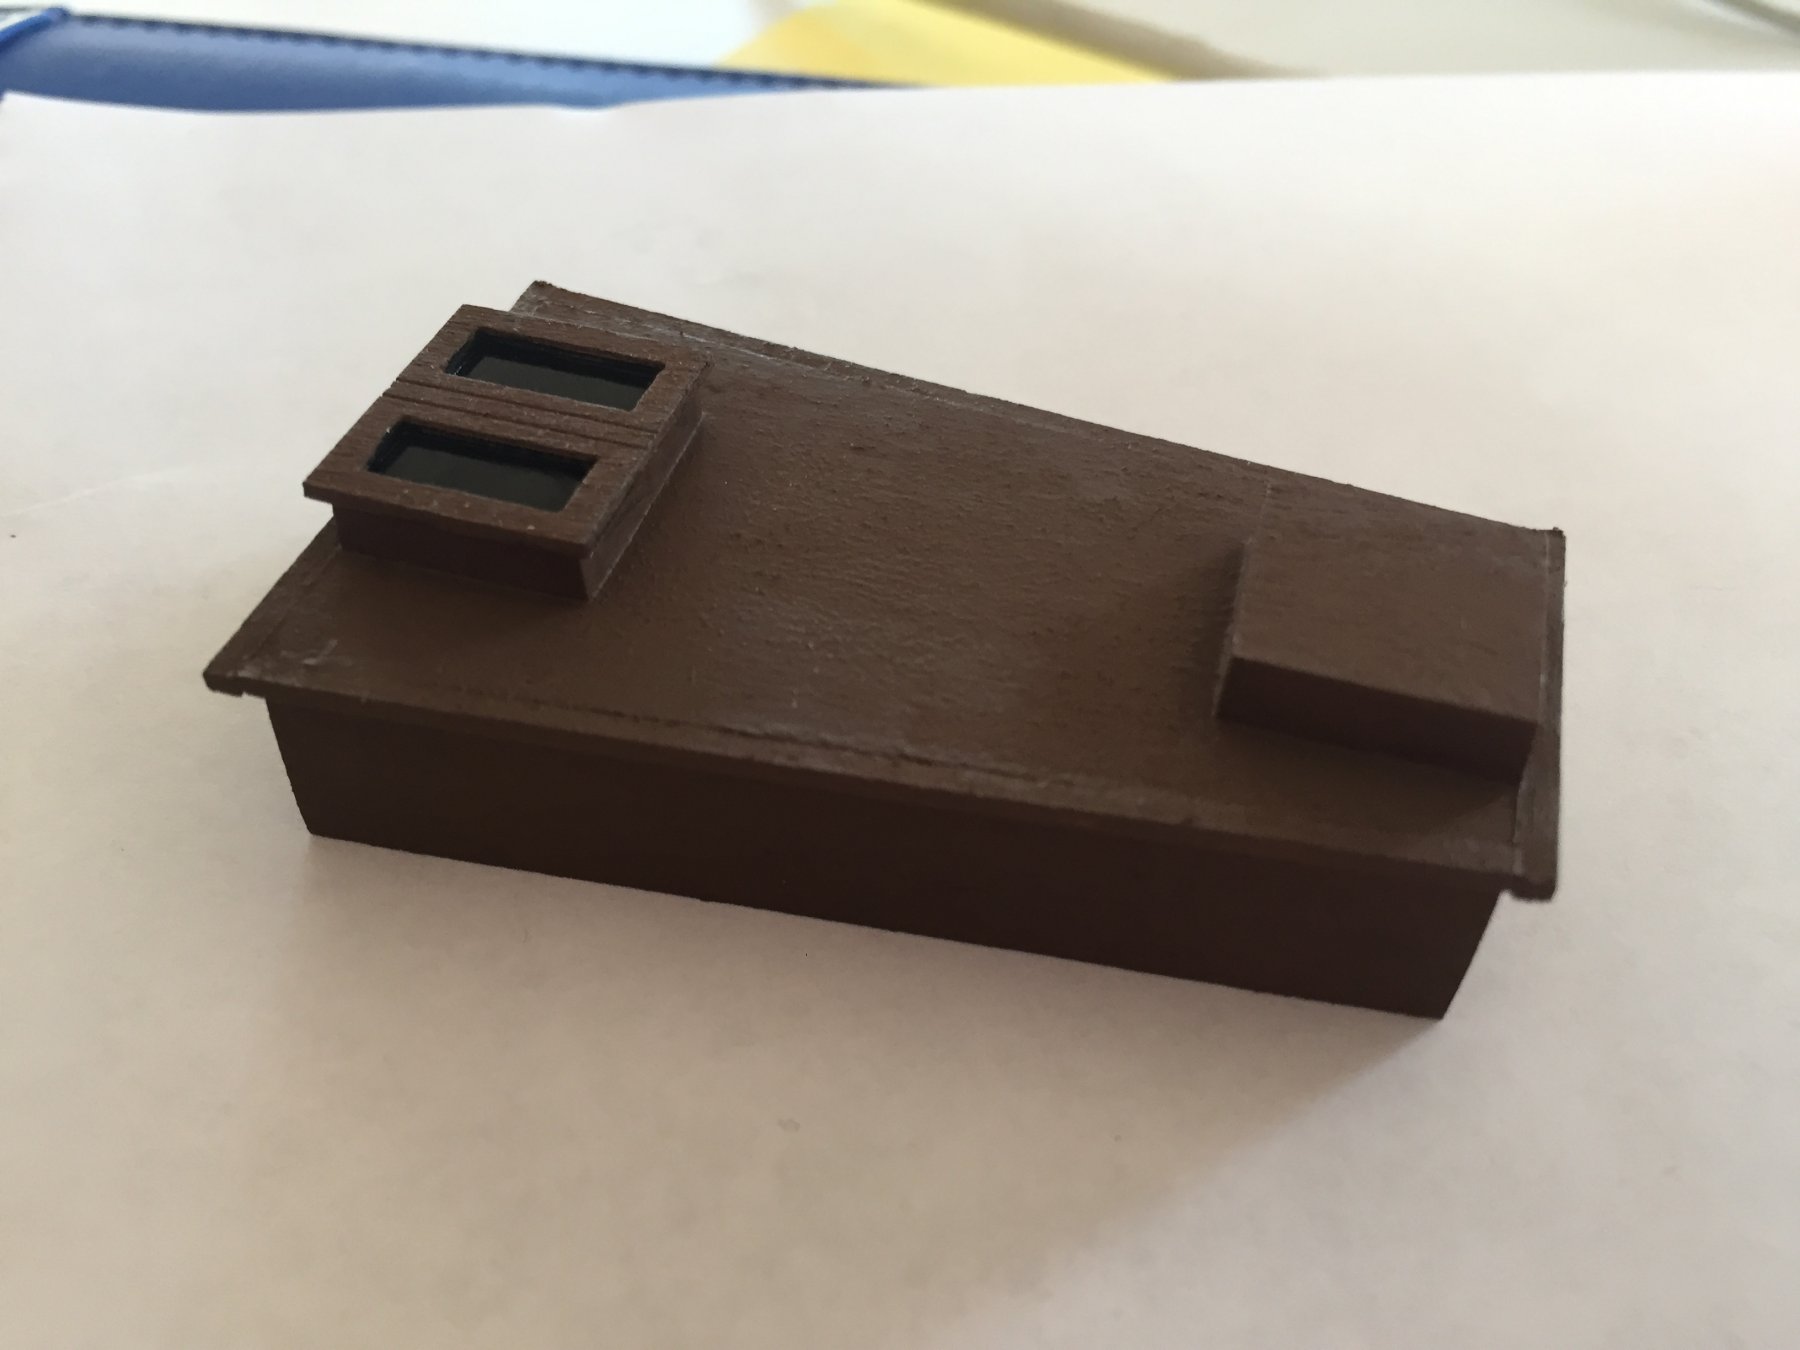
Still making gradual progress on the hull but decided to change it up a little bit and knock out the first piece of deck furniture. Parts were very easy to work with and I'm really happy with how it turned out. Cut one of the side moldings a hair short but was able to add a tiny shim to fill the gap and, once painted, couldn't even tell I'd made a mistake.


- 43 replies
-
- 2
-
-
- first build
- BluJacket Shipcrafters
- (and 1 more)
-
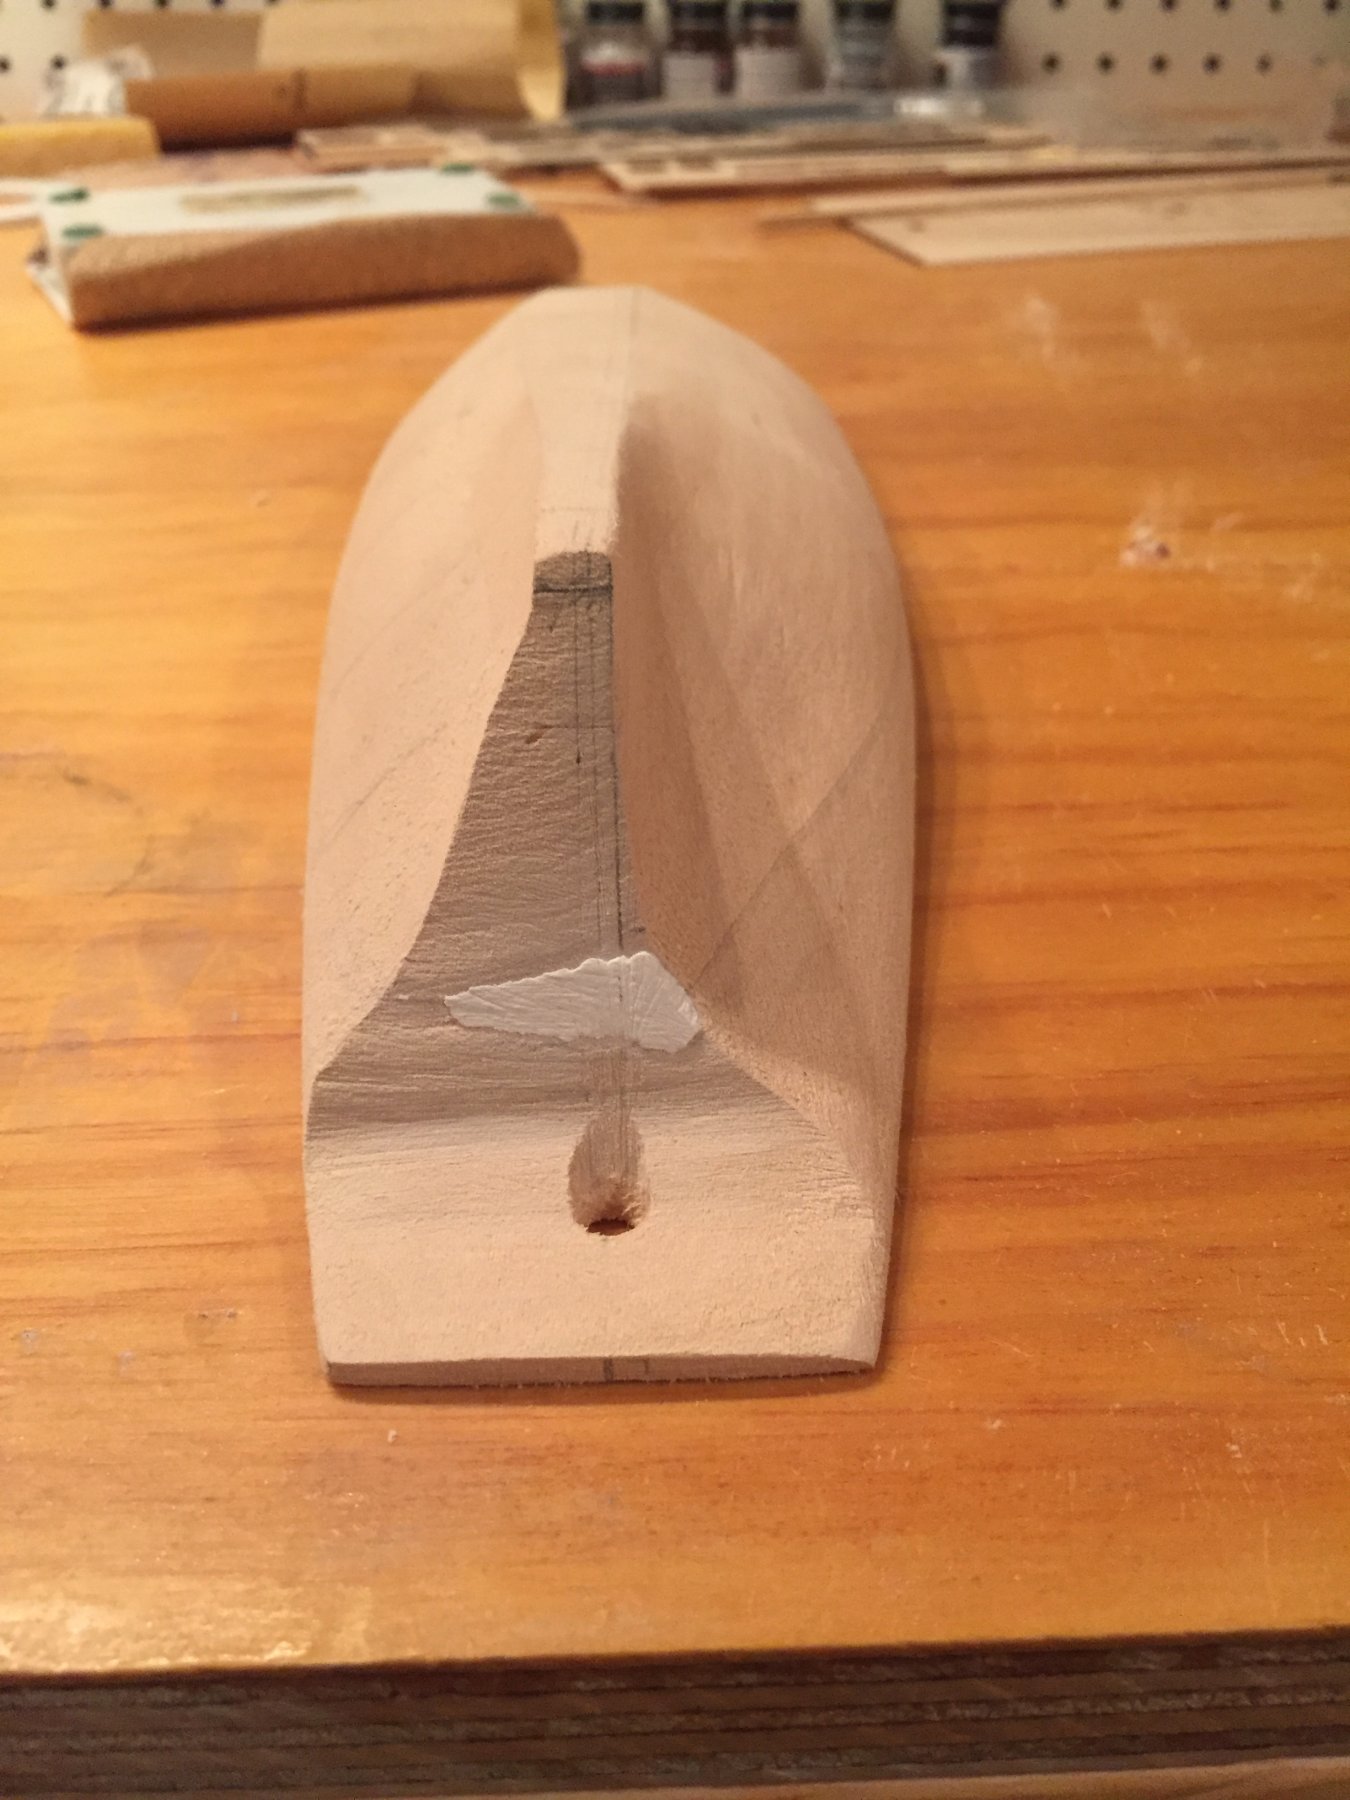
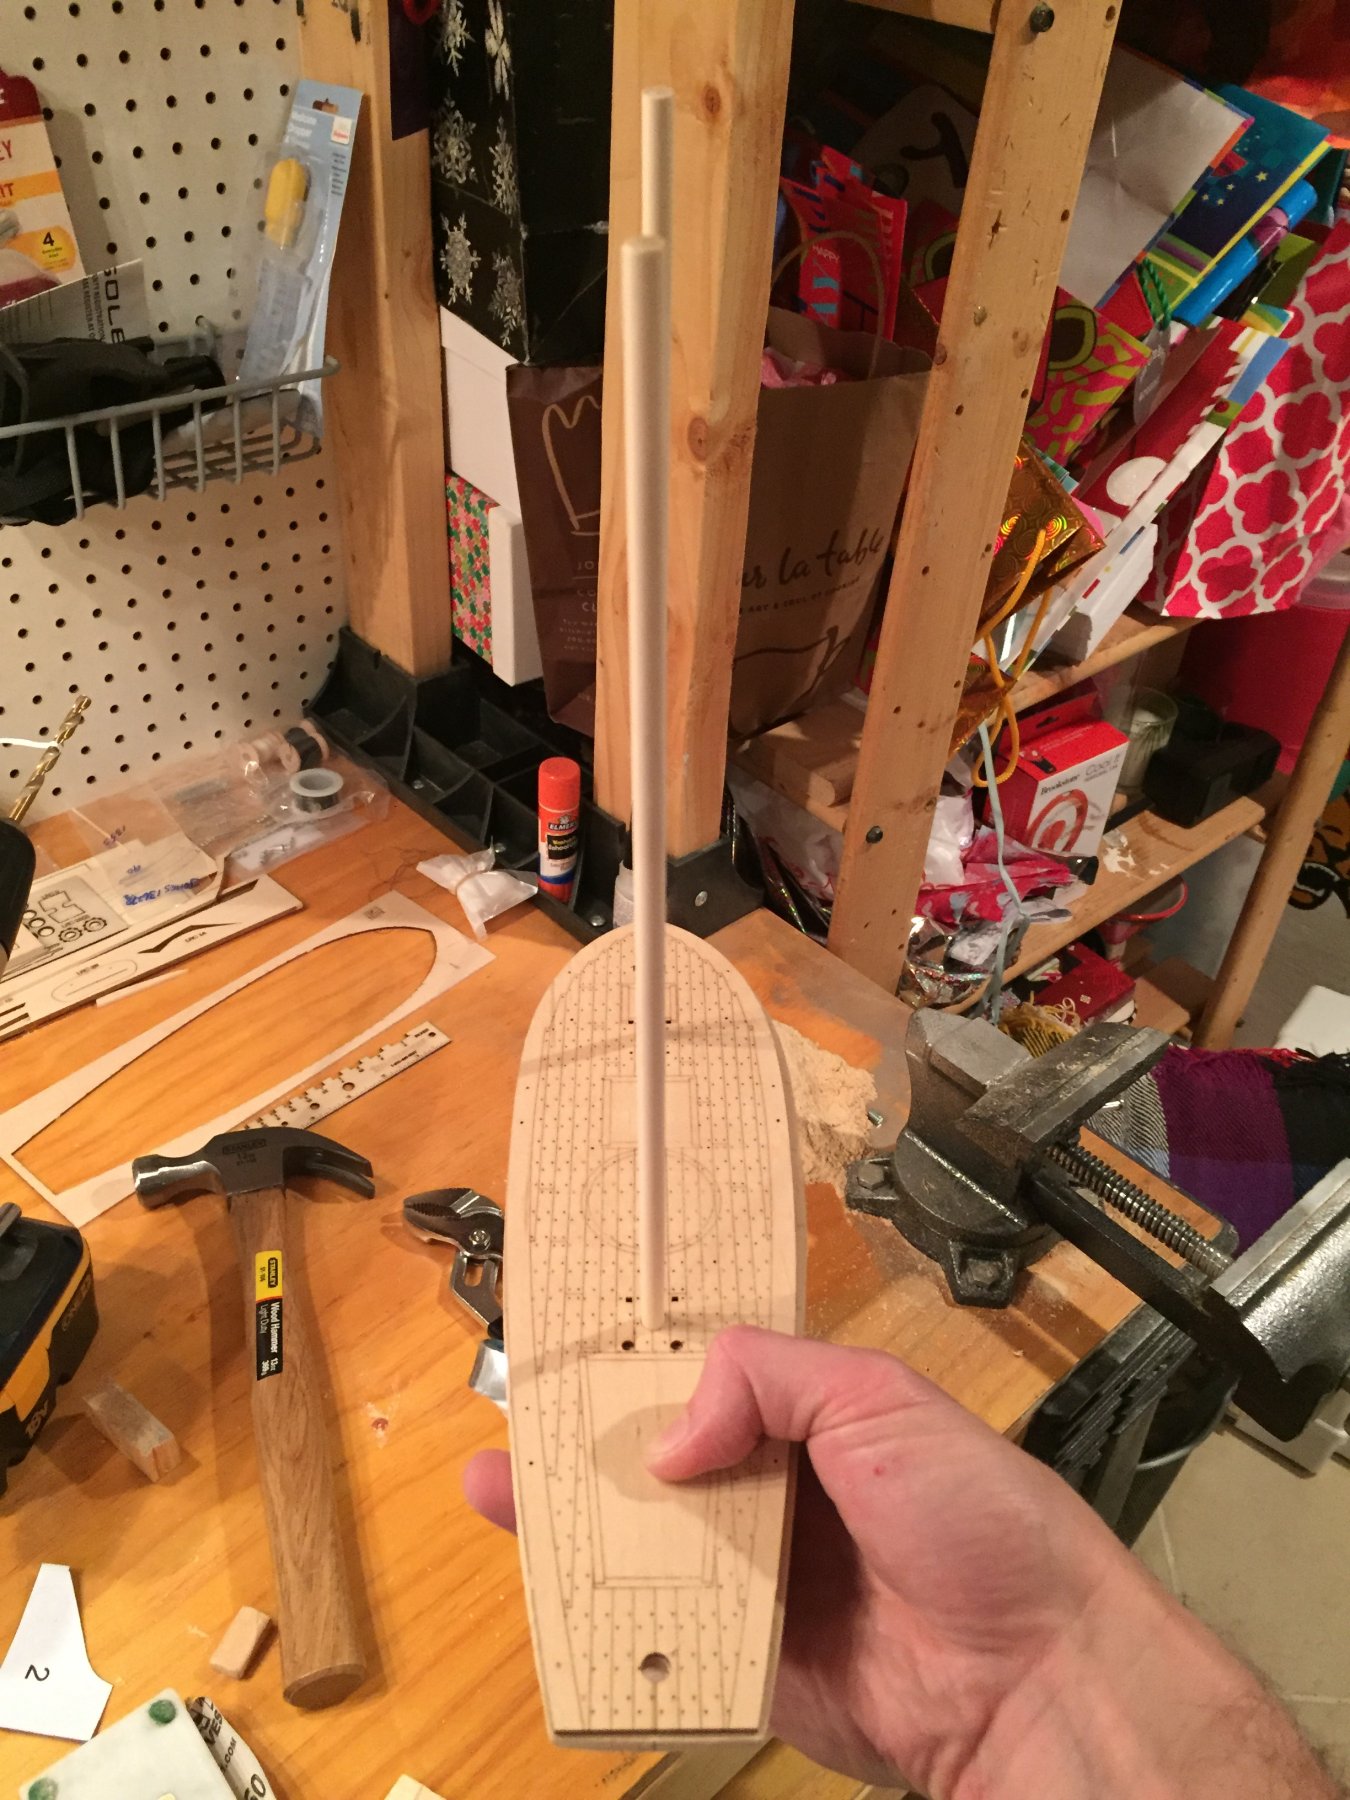
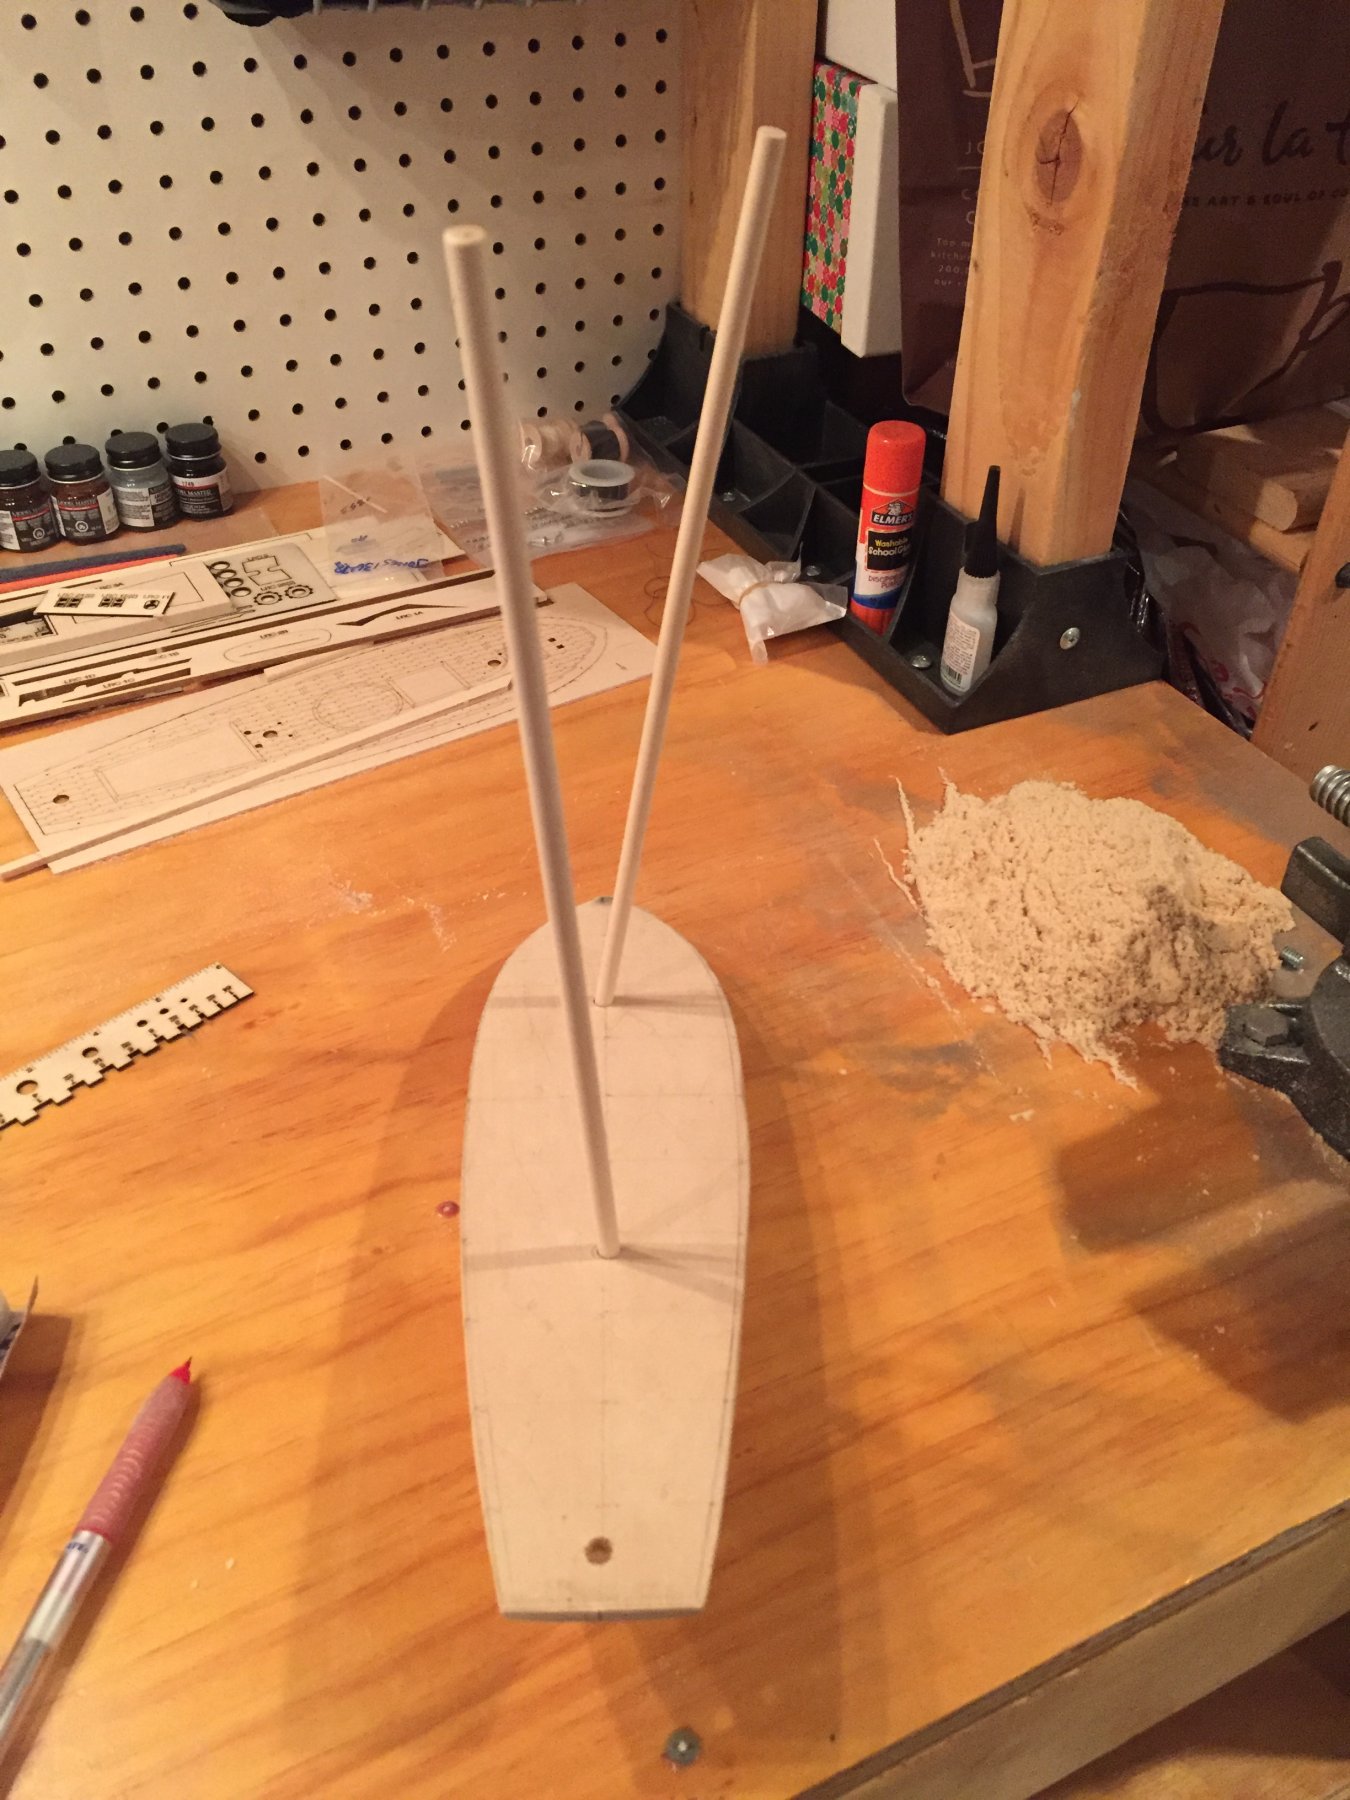
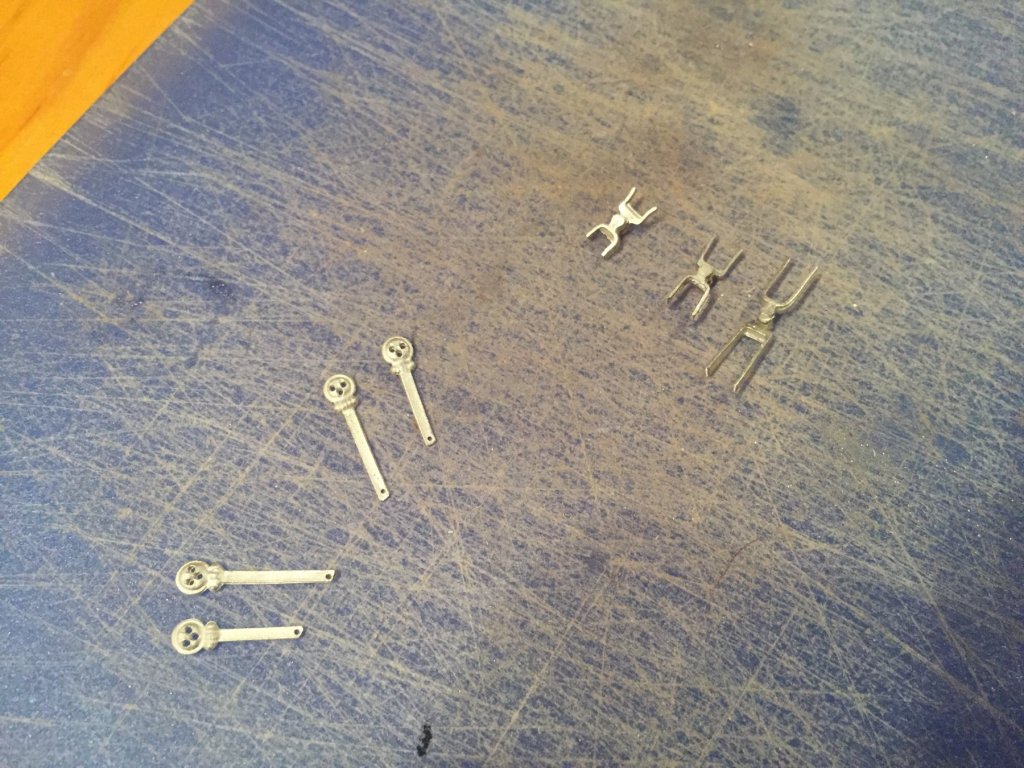
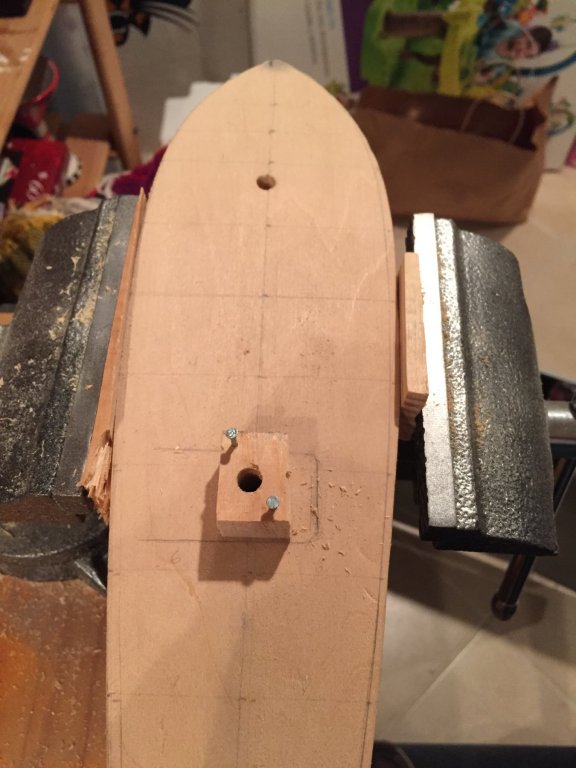
Had some success last night fixing the mast holes. I had to make a little guide to make sure I got the angle right for the drill. For the front hole, I was able to use a clamp to hold everything in place. For the rear one, I had some trouble using the clamp due to the clearance available with the size of the hull and after figuring out to pre-drill holes for the nails (the guide was a lot bigger to start with) I nailed it to the hull and was able to get a successful drill completed in the right place. I haven't filled the excess parts of the holes in at this point as with dry fitting it with the deck, it seems like they'll probably hold their position well enough. I may get some wood glue to add to the bottom of the hole (making sure it's not so much that it squeezes out onto the deck) to give some extra support. While this wasn't something I was expecting to have to deal with at the outset of this build, it was pretty satisfying to see a good result when all was said and done!

- 43 replies
-
- 4
-
-
- first build
- BluJacket Shipcrafters
- (and 1 more)
-
Thanks for the thought, Tim. At this stage, I feel like I've put a good amount of work in to get the hull to where it is and I'm going to try and press forward with making the adjustments to make what I have first. I'm often the first to push back on the customer service side of things but I feel like half the allure of this new hobby is to try and figure out how to work with what you have to get to the end result you're working towards so hopefully I can make this work...
- 43 replies
-
- 3
-
-
- first build
- BluJacket Shipcrafters
- (and 1 more)
-
Thanks, Derek. As this is my first build, I was wondering if there was a "best practice" out there. With limit tools at my disposal currently, my concern is ensuring the right angle and depth for a new hole if I fill them in completely. I was thinking of carving out the obvious adjustments, filling in the "dead space" as best as I can with filler and cleaning up with a drill as the last step. I still have some time before I have to decide as I need to finish the hull before worrying about gluing the deck on.
-
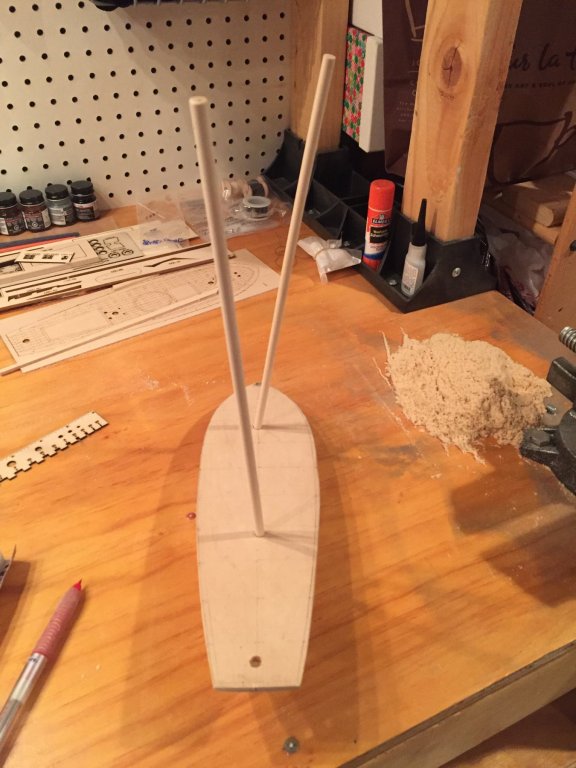
I was able to spend a good amount of time over the weekend continuing to shape the hull. After getting the first quarter/third of the left side in pretty good shape, I decided to start at the back to change it up a little. After a while of sanding back significantly, I found that having the false keel so long was really making git challenging so decided to take some measurements and then get the false keel to the level it needed to be. This will now make it much easier to know that that is the right starting point for the shaping and I just need to get the sides of the hull to where they need to be. There's a minimal amount of work needed to reshape the bow area that I'd already done some work on and then I expect to be able to make good progress on the rest of the left side throughout this week. Thinking ahead to future steps, I wanted to get the group's feedback on the best approach to adjusting the mast holes. I knew I was going to have to redo the rear one anyway since it was a little off center but when putting the masts in both yesterday, it was apparent that they are both not perfectly aligned. What's the best way to fix this? Fill them in and re drill or just make minor tweaks to the holes and then fill as the mast goes in?

-
Have started making some (slow) progress on shaping the hull. Still working on a very small section (need to get it back a little further still to get the template completely aligned with the middle guide line) and moving forward slowly. Has required sanding back a lot more of the hull than I initially expected but I can see how it'll all come together. At this pace, I'll be working on this step for quite a while, but I think it'll start getting easier after this first section is in good shape.
- 43 replies
-
- 1
-
-
- first build
- BluJacket Shipcrafters
- (and 1 more)
-
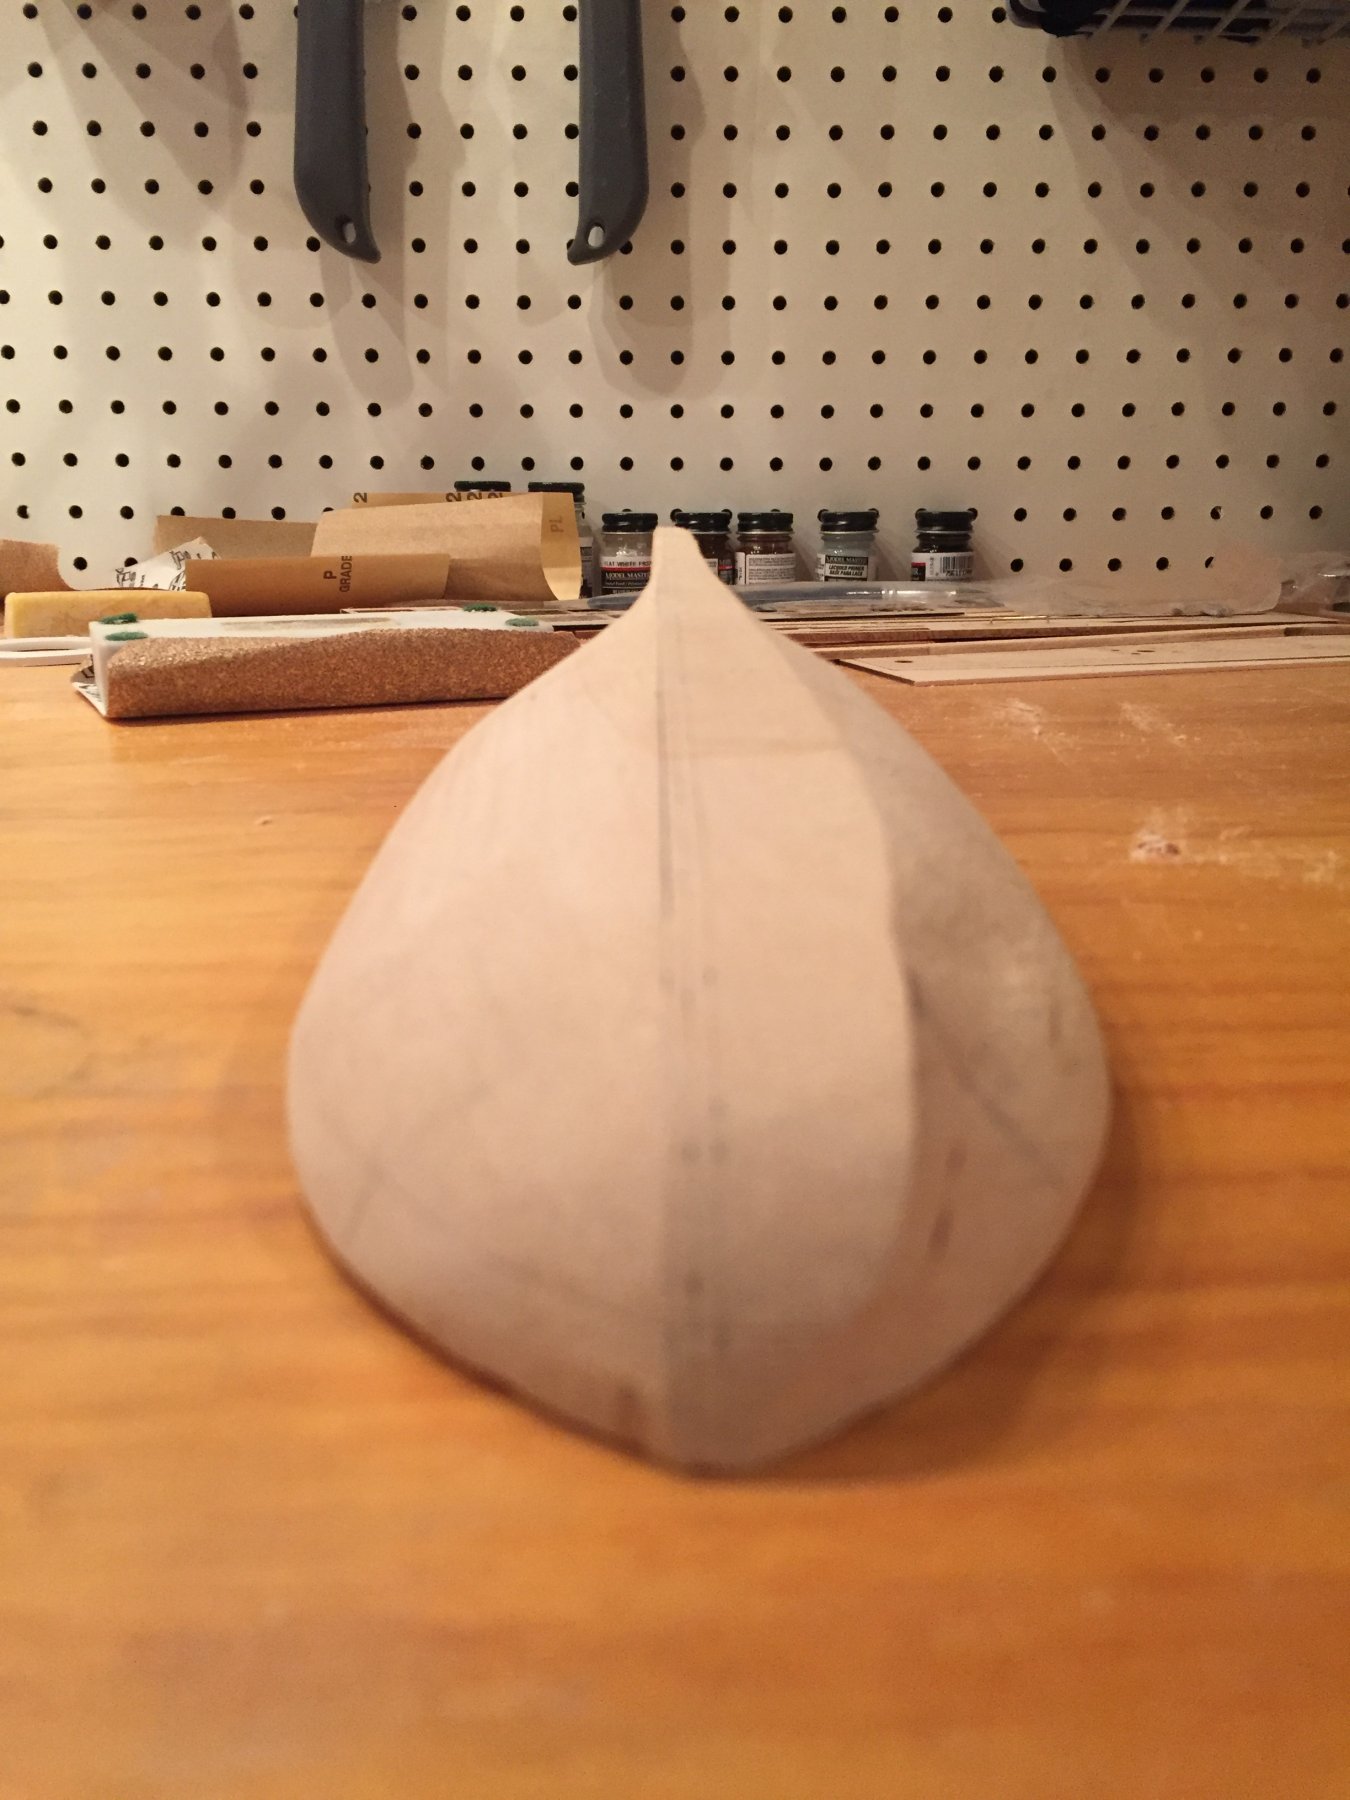
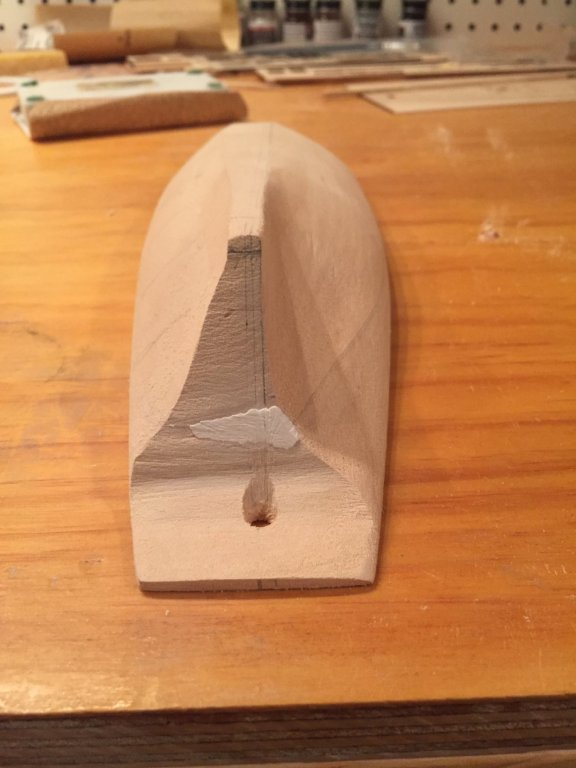
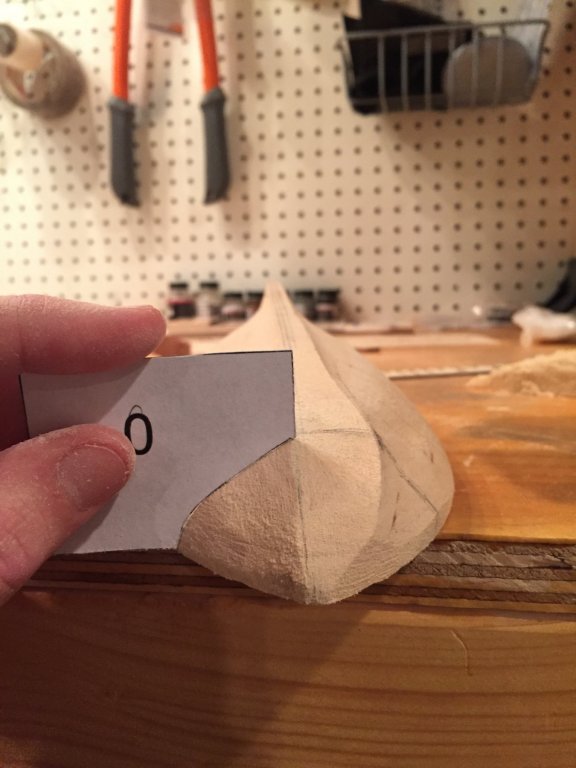
Made some good progress yesterday on the stern thanks to the feedback from Nic. While the template didn't fit perfectly at the keel, when I checked against the sternpost, it was a tighter fit. As you can see, got a little bit of putty in there too to fix a gap that I think I created myself with poor follow through on the initial stern sanding. I got all the keel markings done and am ready to start shaping the rest of the during the week.
- 43 replies
-
- 4
-
-
- first build
- BluJacket Shipcrafters
- (and 1 more)
-
Nic, That’s really helpful - thanks for taking the extra step to explain there. At first that’s what I was thinking but as I was cross-referencing with the plans I must not have been interpreting everything correctly. Will keep everyone posted as I give this a shot and hopefully don’t have to put in an order for a new hull due to user error! 😊
-
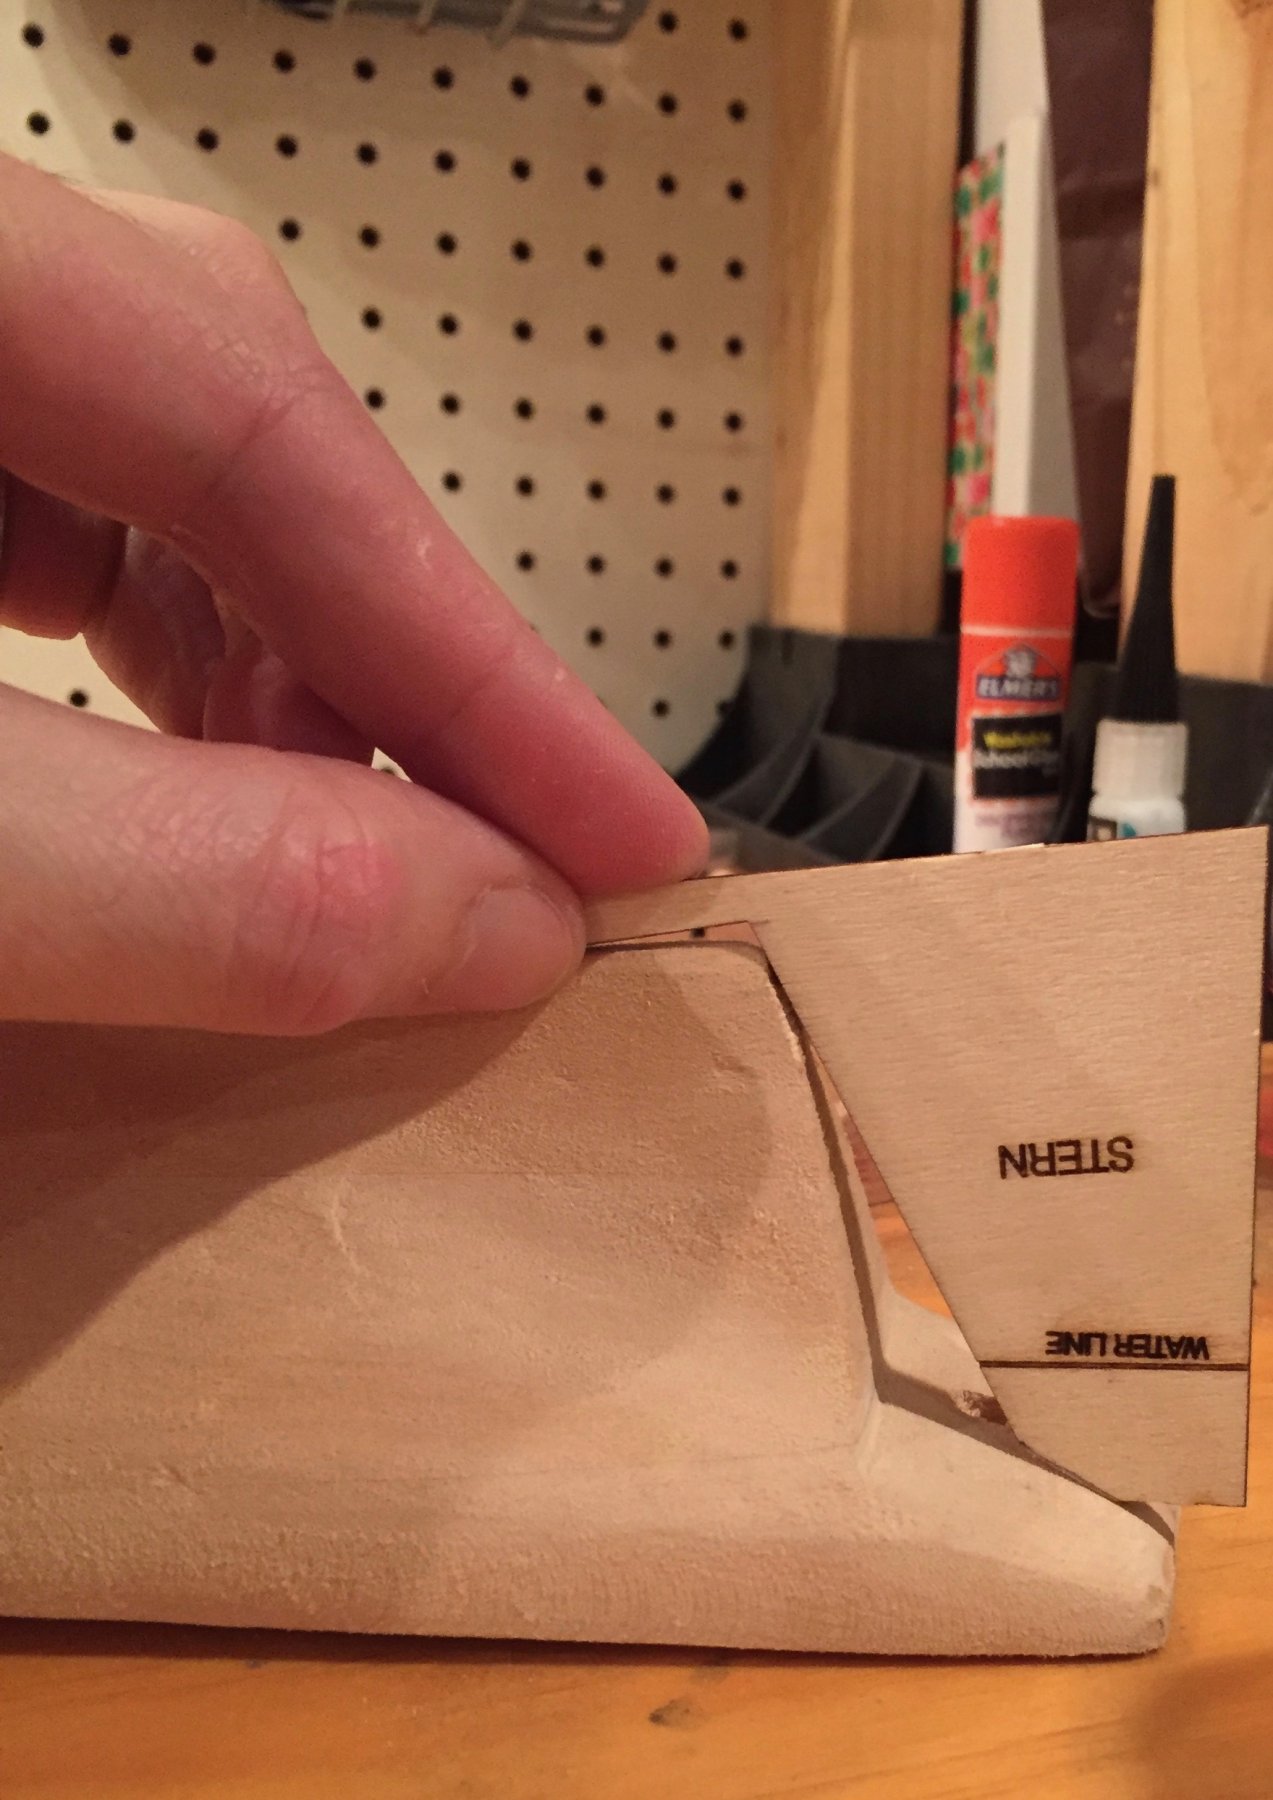
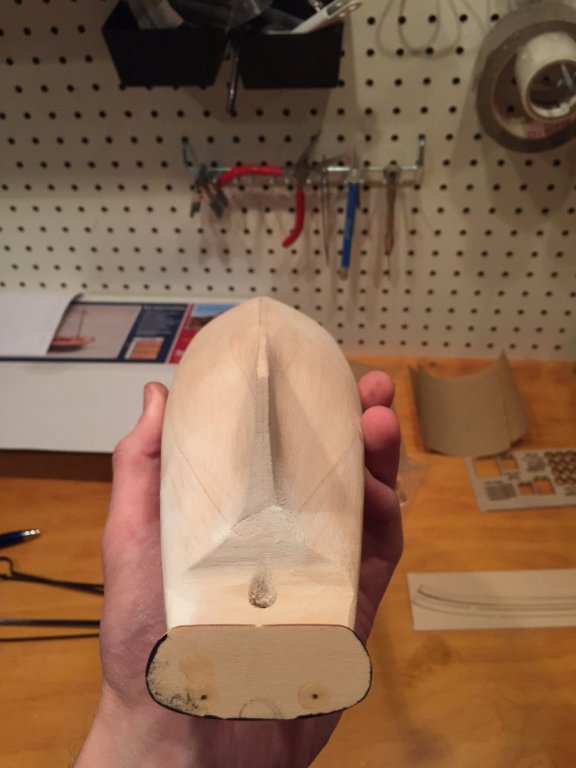
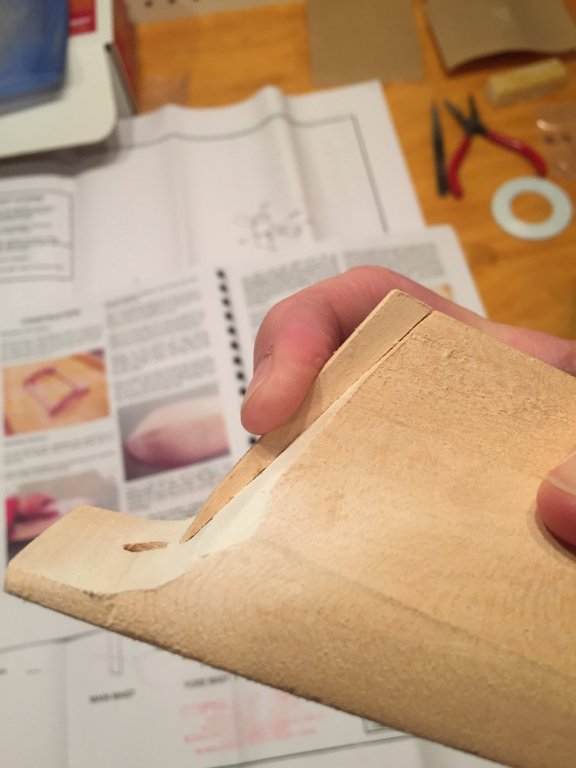
Nic, thanks for the feedback and glad to hear that you're adding the extra step to avoid issues with the hole alignment in the future. Things with the bow worked out nice and smoothly and I'm feeling good about where that stands. The stern, on the other hand, is a different story. After going back and forth with the plans a number of times, I'm pretty sure that the hull was shaved back too far out of the box as shown below. I spoke with George (I believe that was the name) at the Blue Jacket help line and he said I should just look to fill that gap with some other wood without a lot of other guidance. Does anyone have any suggestions for where to buy the right kind of wood match up with the existing hull? With the top of the template being pretty close to the rear of the deck in the photo above, I'm not sure that the drilled hole in the deck would be in the right position either since my understanding is that it would be clear of the vertical piece of the stern to all for a slight separation between the rudder and the piece that the rudder connects to. The hole in the hull and in the deck that's provided do match up perfectly, but both appear to be slightly forward of the position indicated by the plans. I think I'll just look for fill in the gap up to the drilled hole (accounting for the rudder post - if I got my terminology right there) and then adjust the other components accordingly so that it all fits together still. Certainly providing a good challenge for build #1 and any guidance from this group is greatly appreciated!

-
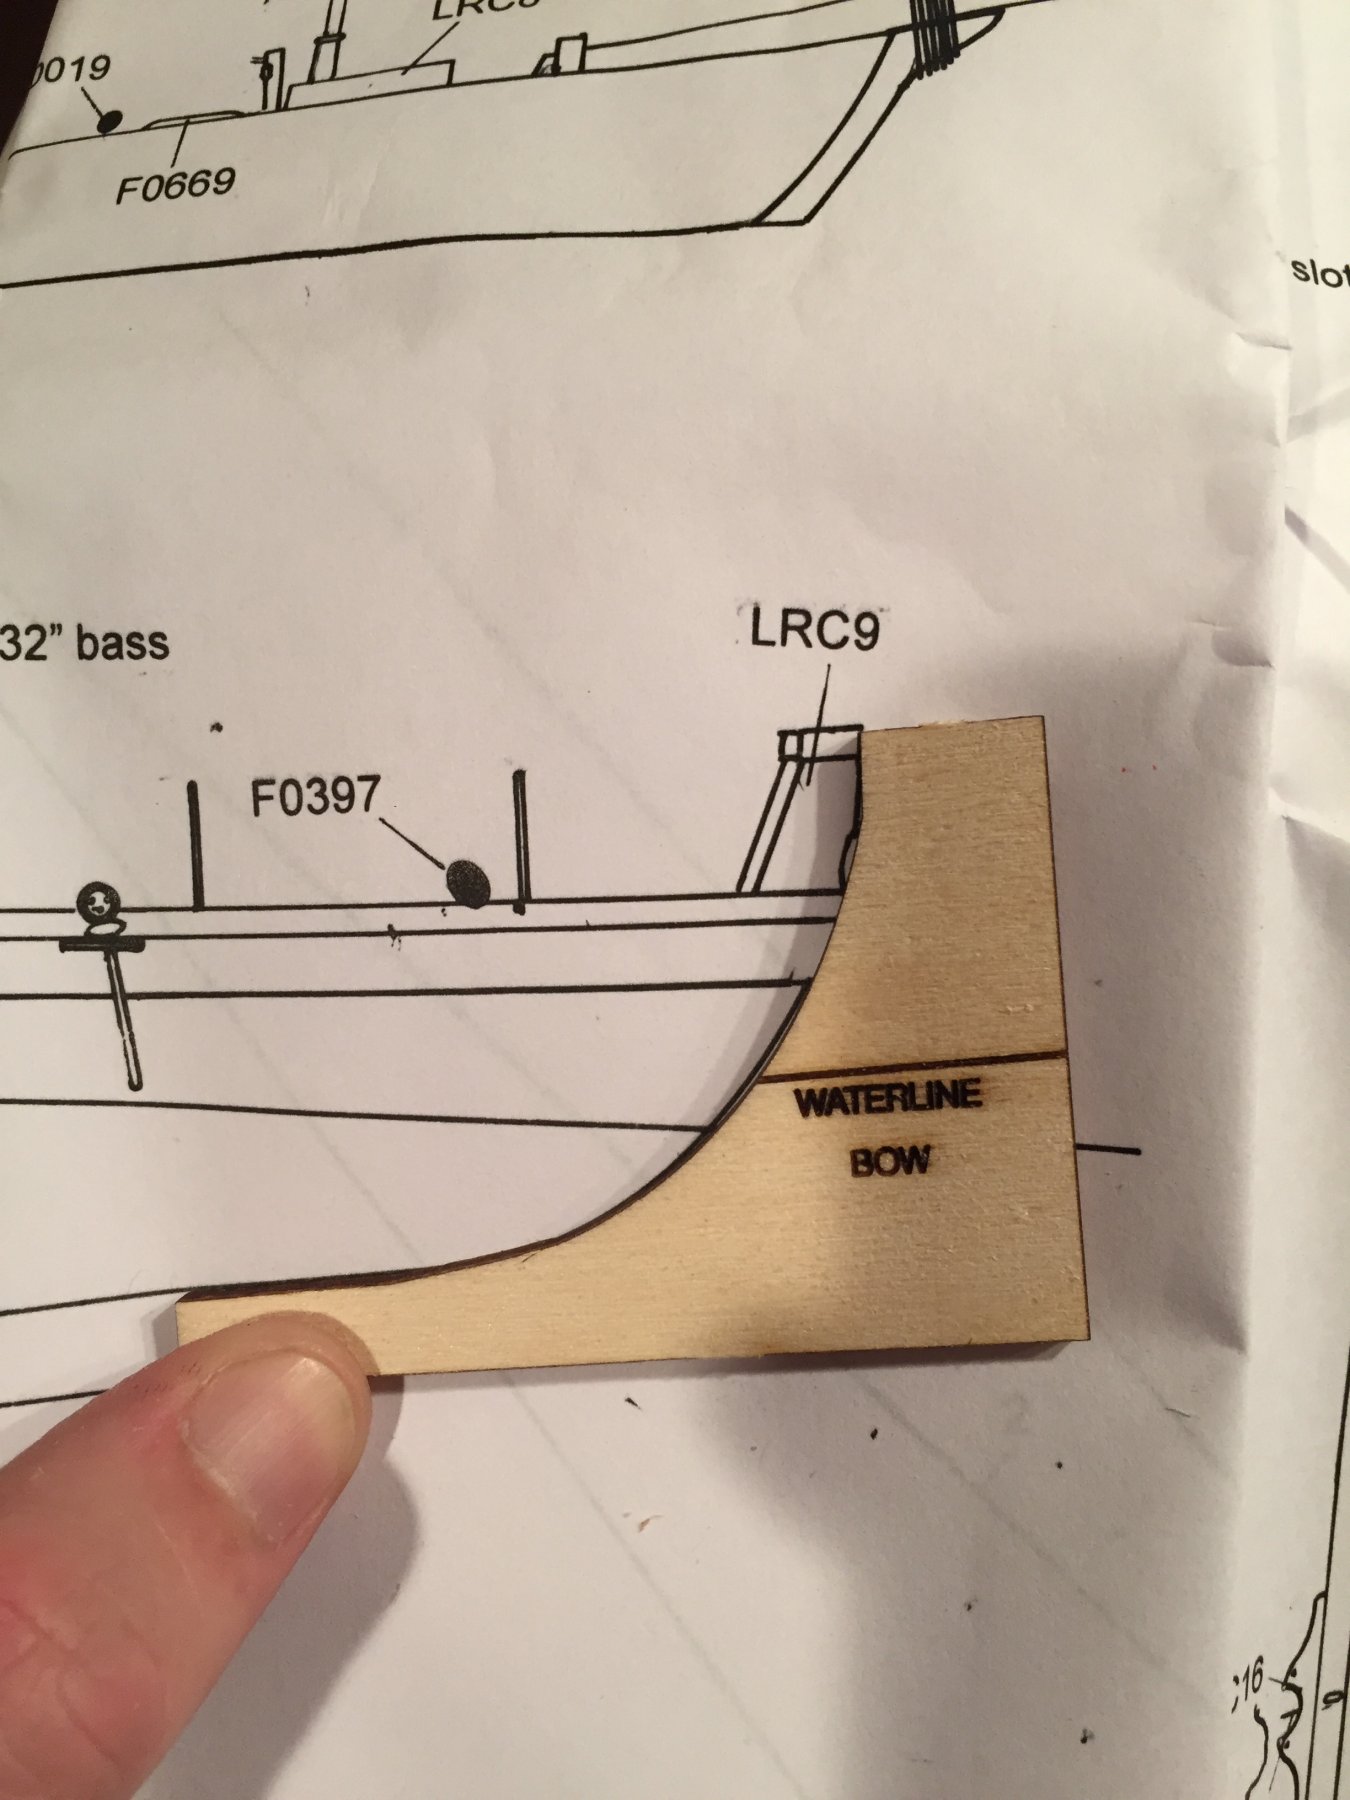
Thanks for the feedback. The concept of the waterline not being a uniform distance from the deck makes sense to me. I'm adding a photo to this post that's more zoomed out to show that the plan I was comparing to was the entire hull. Since the shape looks right, I think it's as simple as changing the waterline on the template but wanted to confirm before I started any sanding.

-
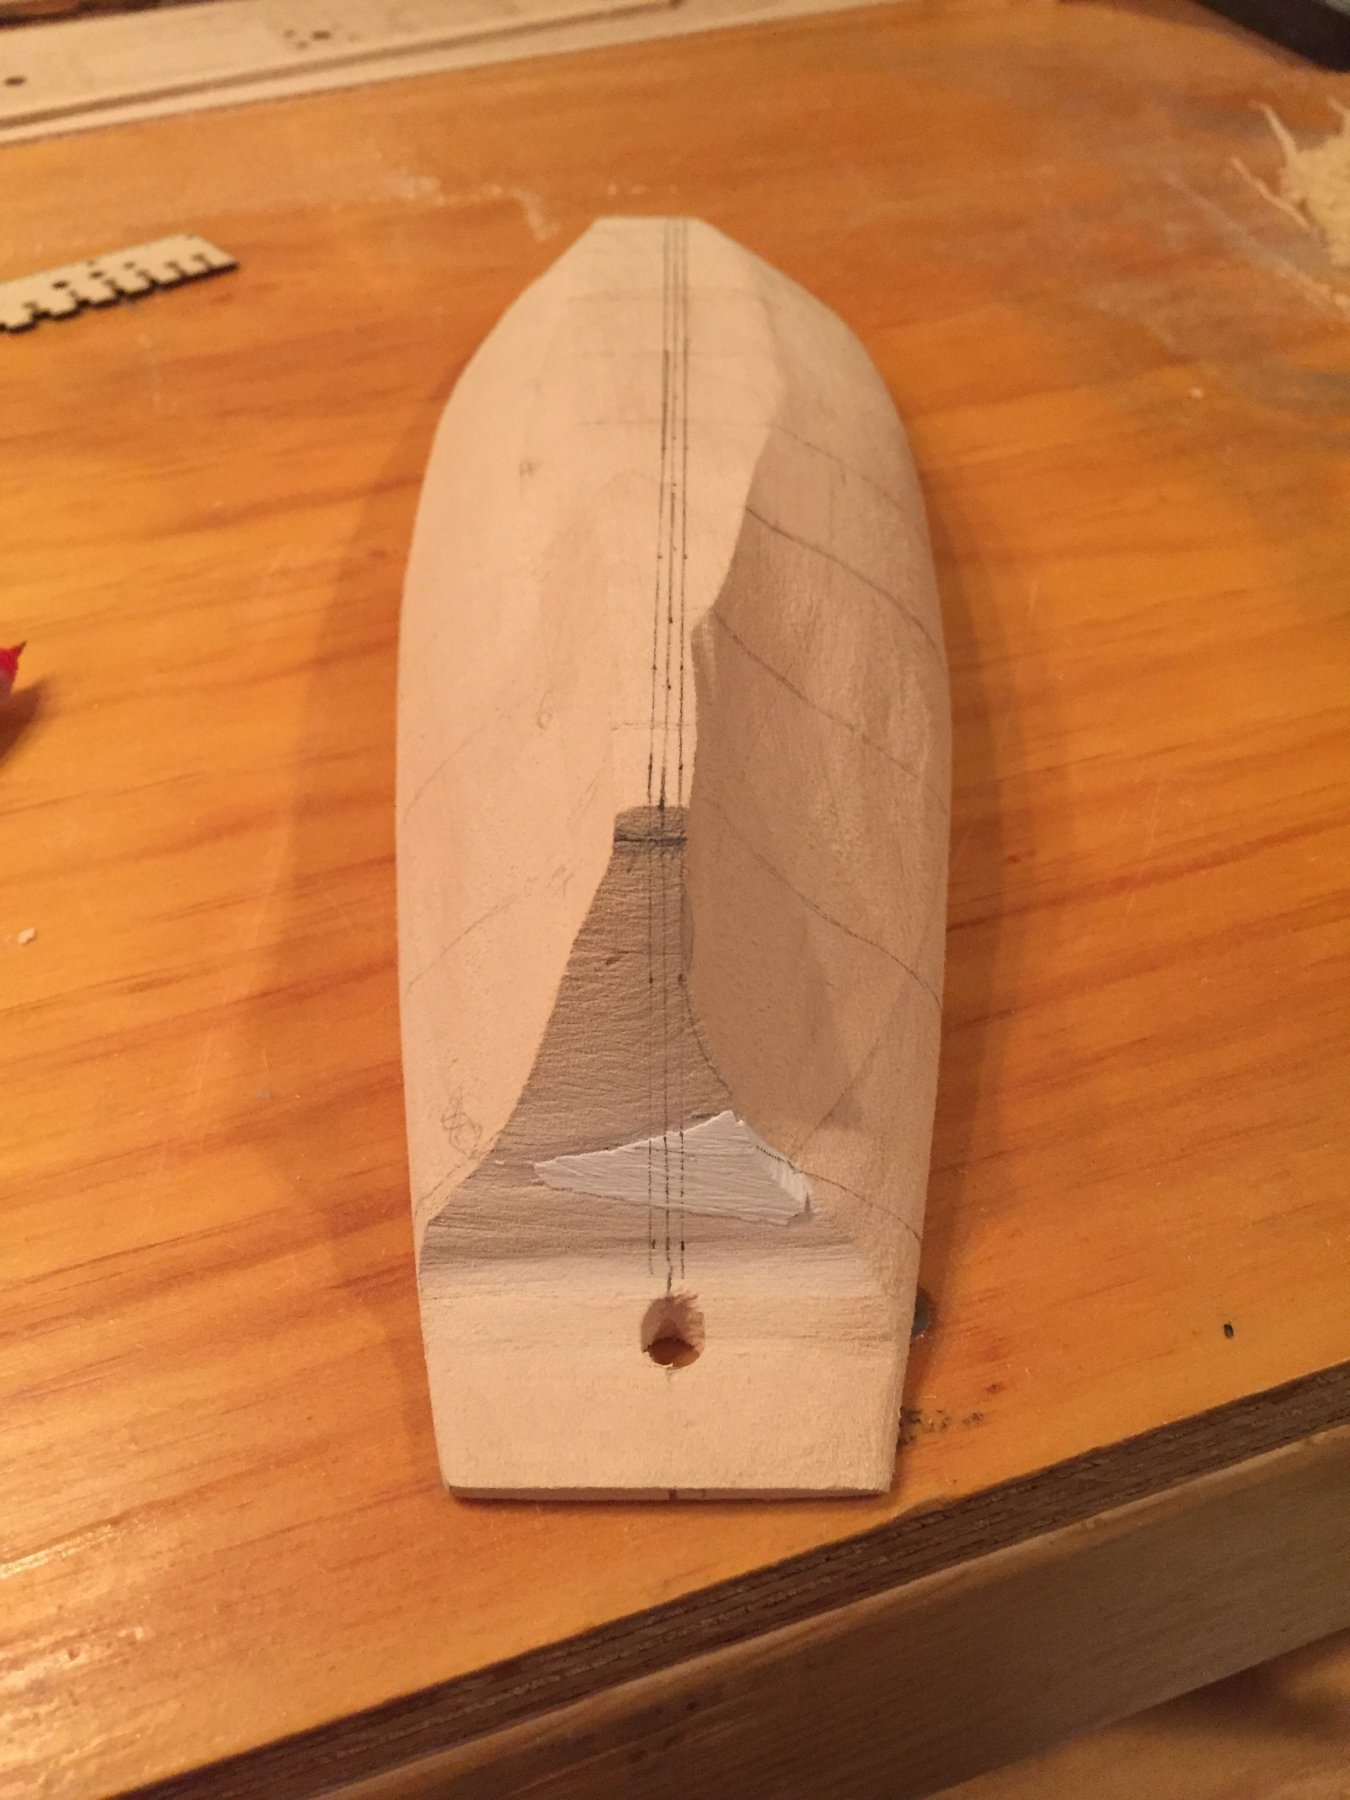
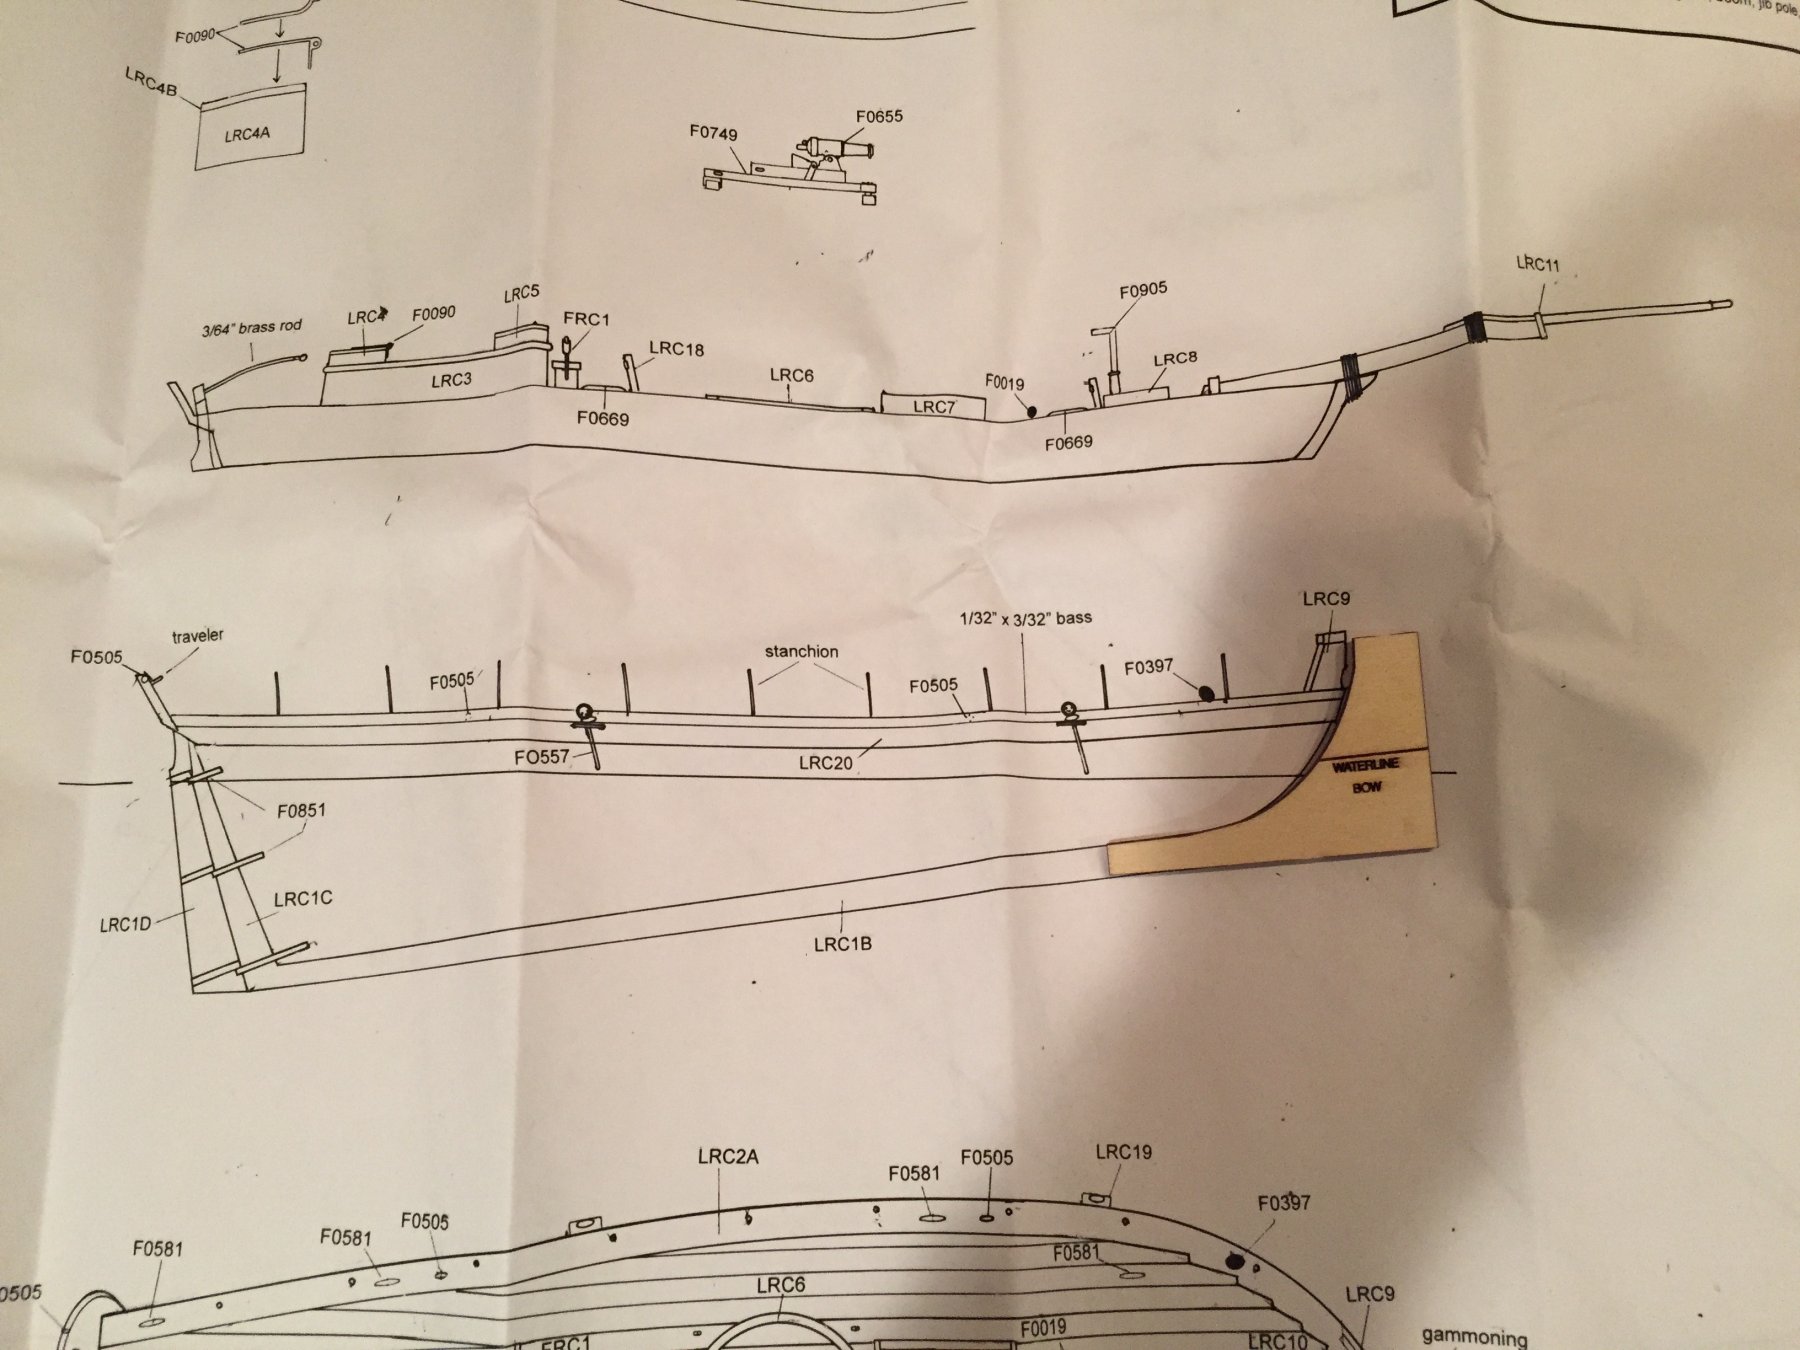
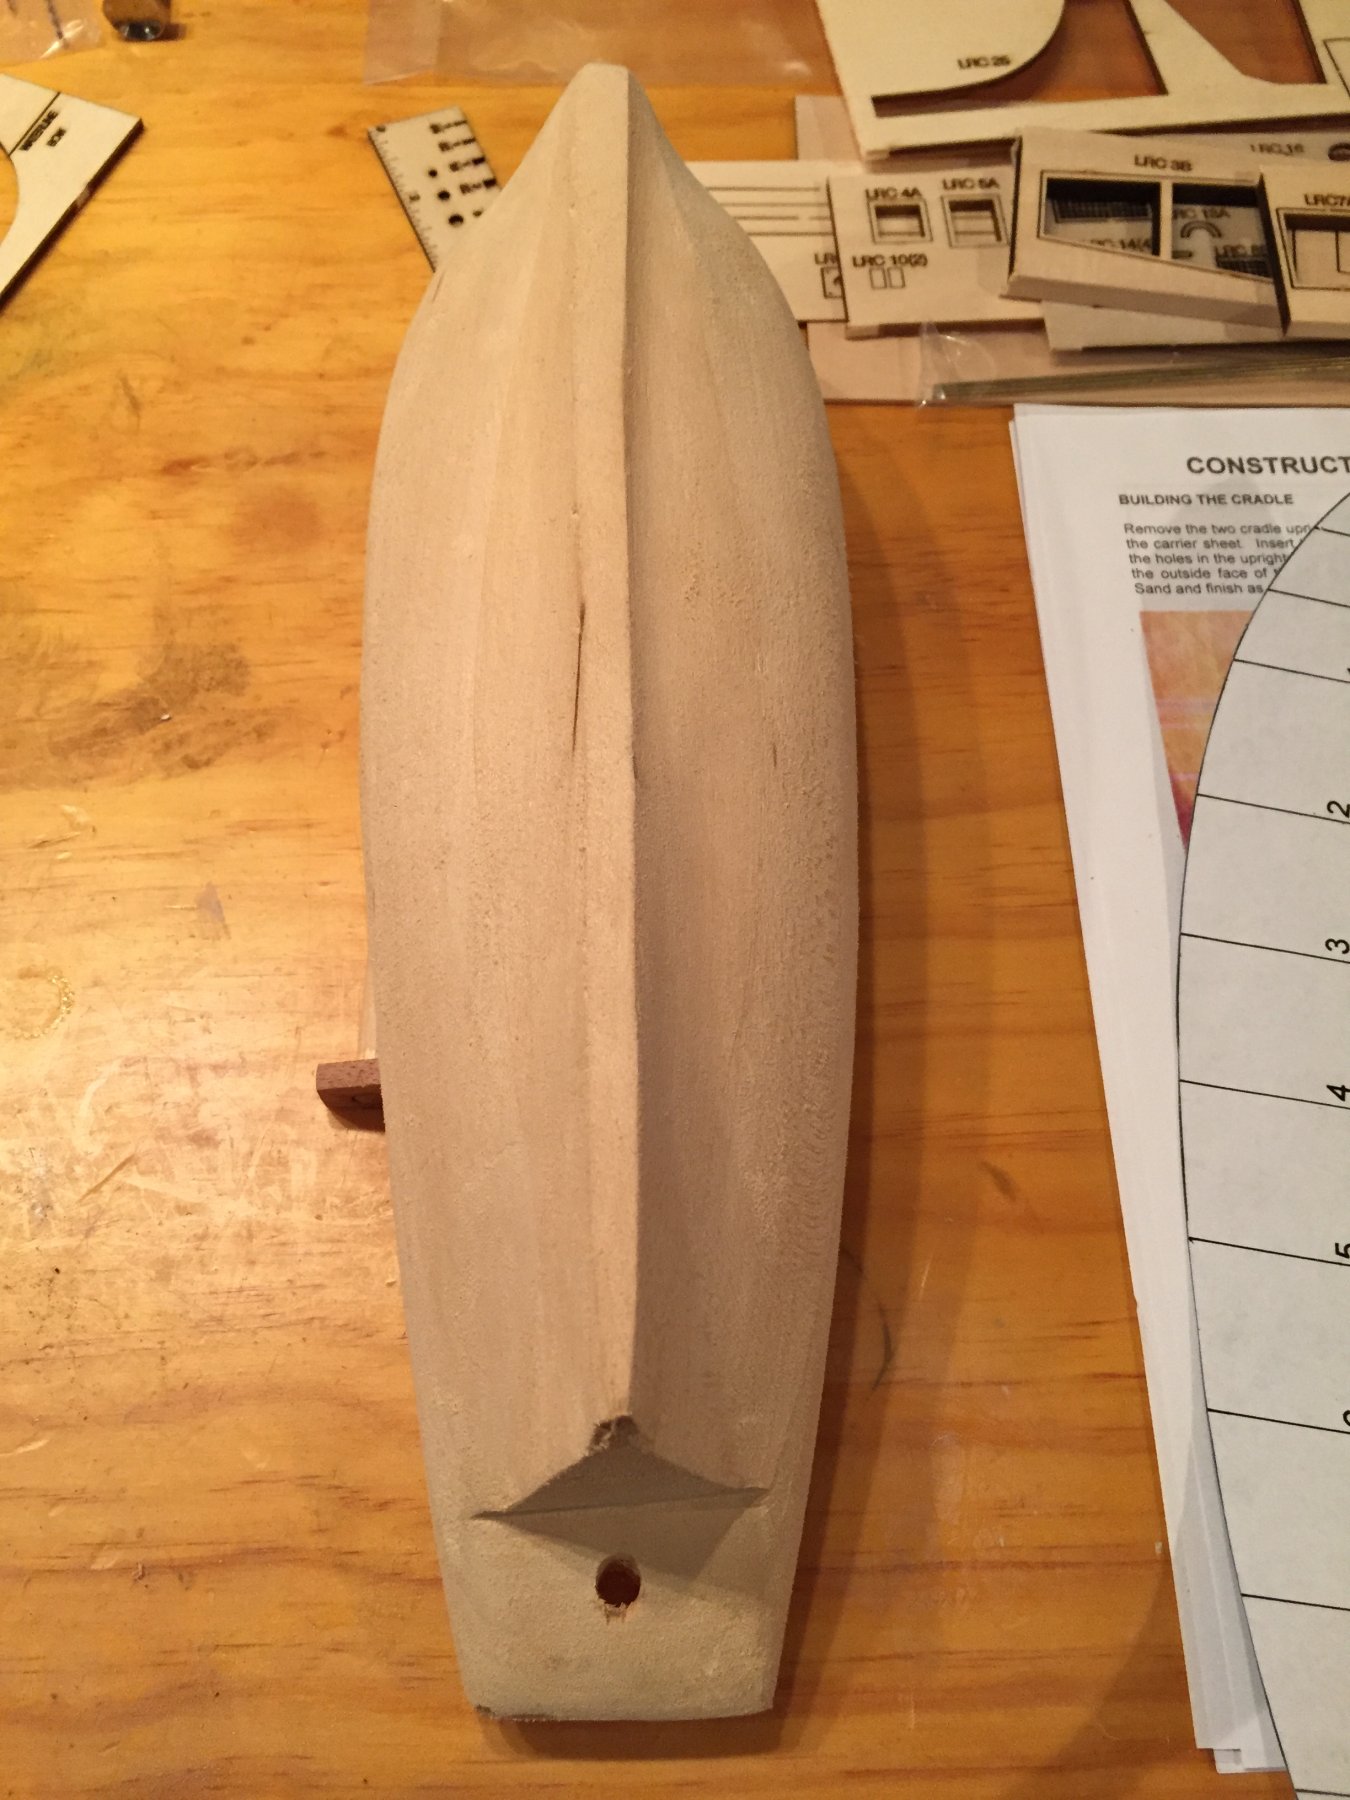
Since I got back, I was able to get the markings ready on the hull to start shaping it. As I mentioned before, the mast holes weren't well lined up and the front left of the hull is already exactly where it needs to be so there won't be a lot of margin of error there. After inspecting the alignment of the mast holes and the keel, I decided to line up the markings using the forward and rear holes rather than the forward and middle ones in an effort to align with the keel. I'm hoping to get started on sanding in the next day or two, but wanted to get the group's feedback on the bow template. It looks like the waterline is off compared to the plans (the keel template was spot on). The height also goes far above the deck level. Is this extra height normal to coincide with the piece marked LRC9? I'm assuming when I get to marking the waterline I should just draw it on the template from the plans. Should I also mark the top of the deck from the plans to then use as my reference point for shaping?


- 43 replies
-
- 2
-
-
- first build
- BluJacket Shipcrafters
- (and 1 more)
-
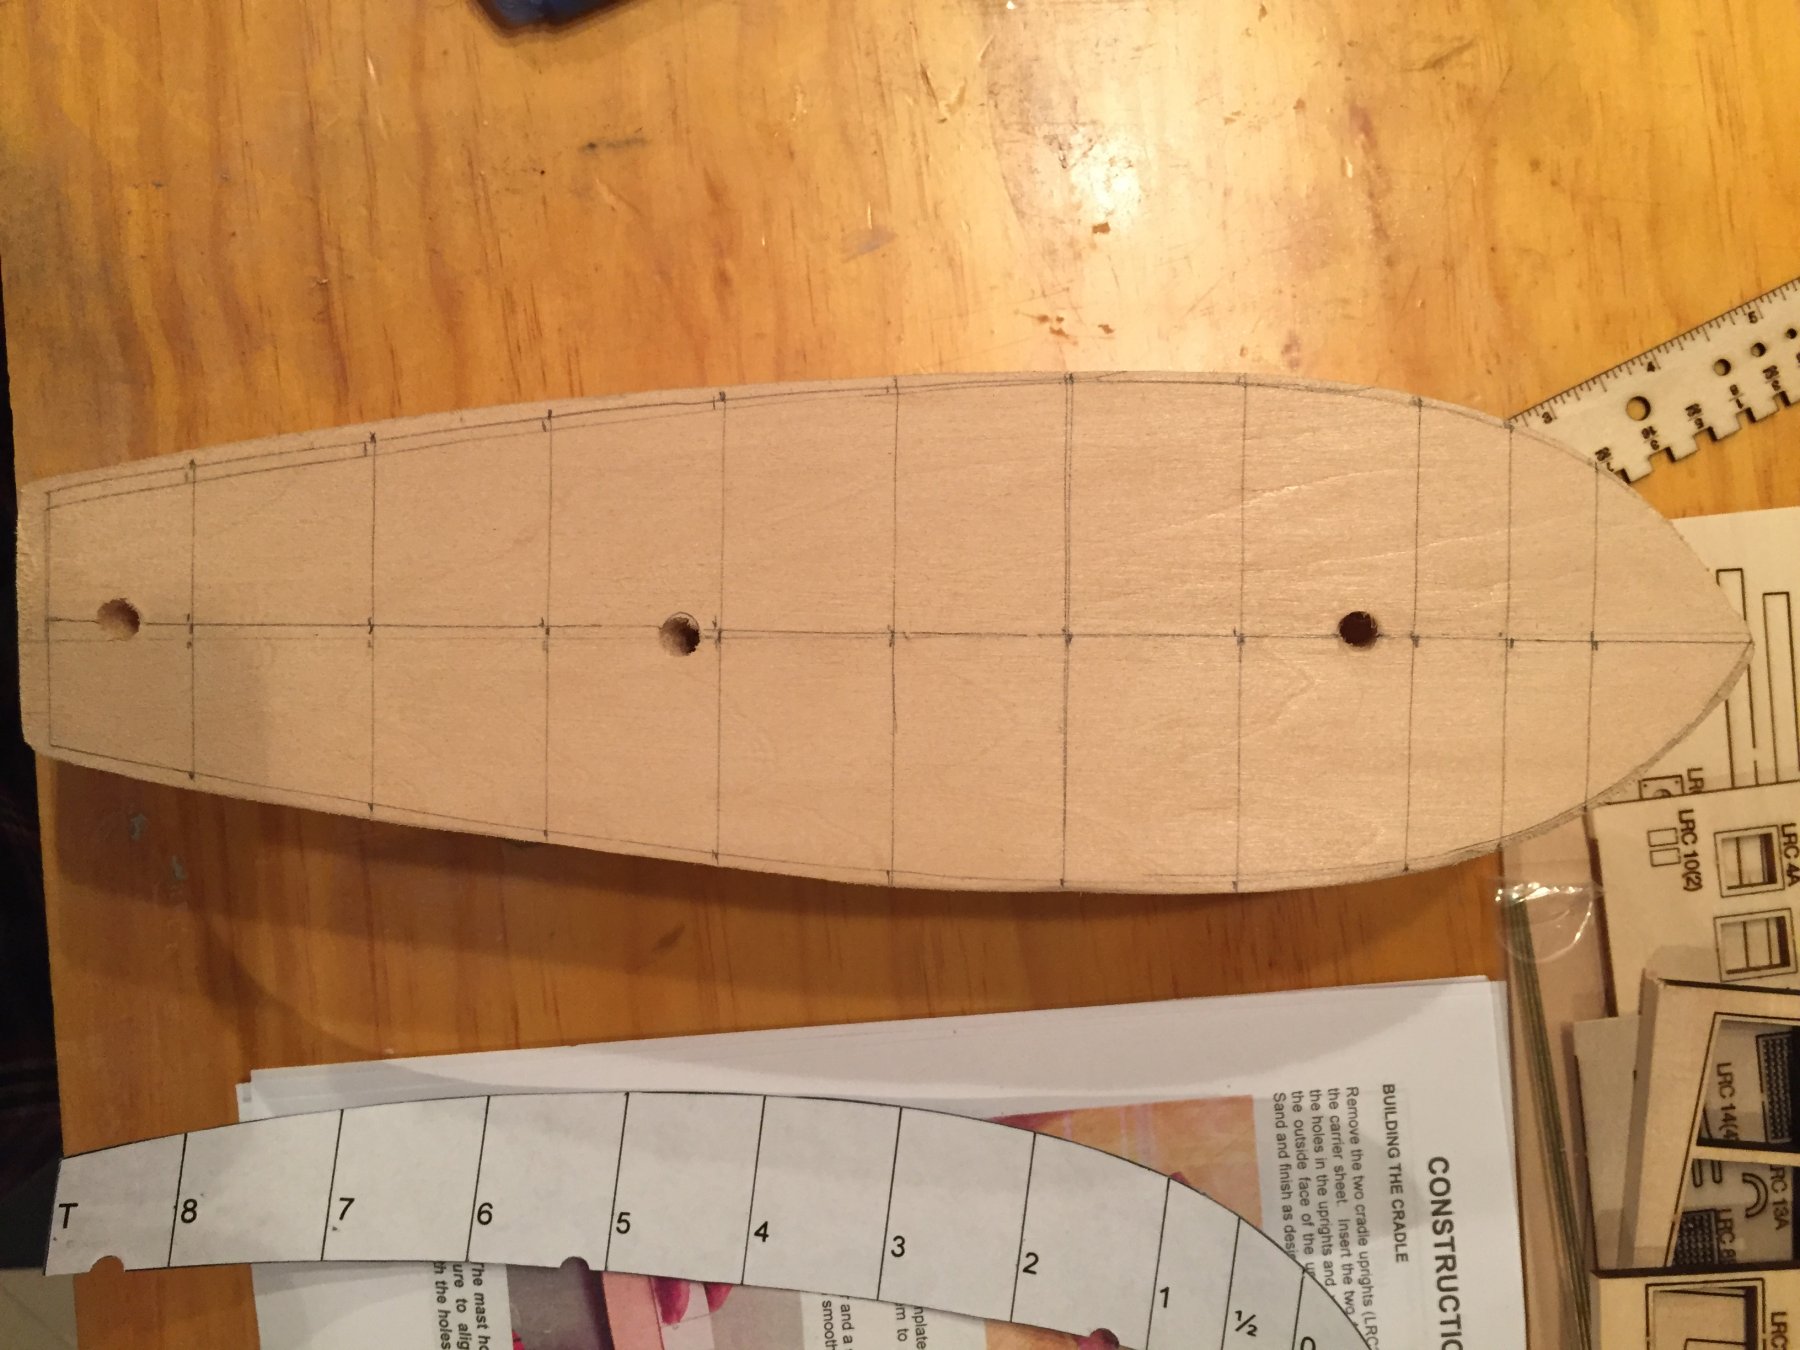
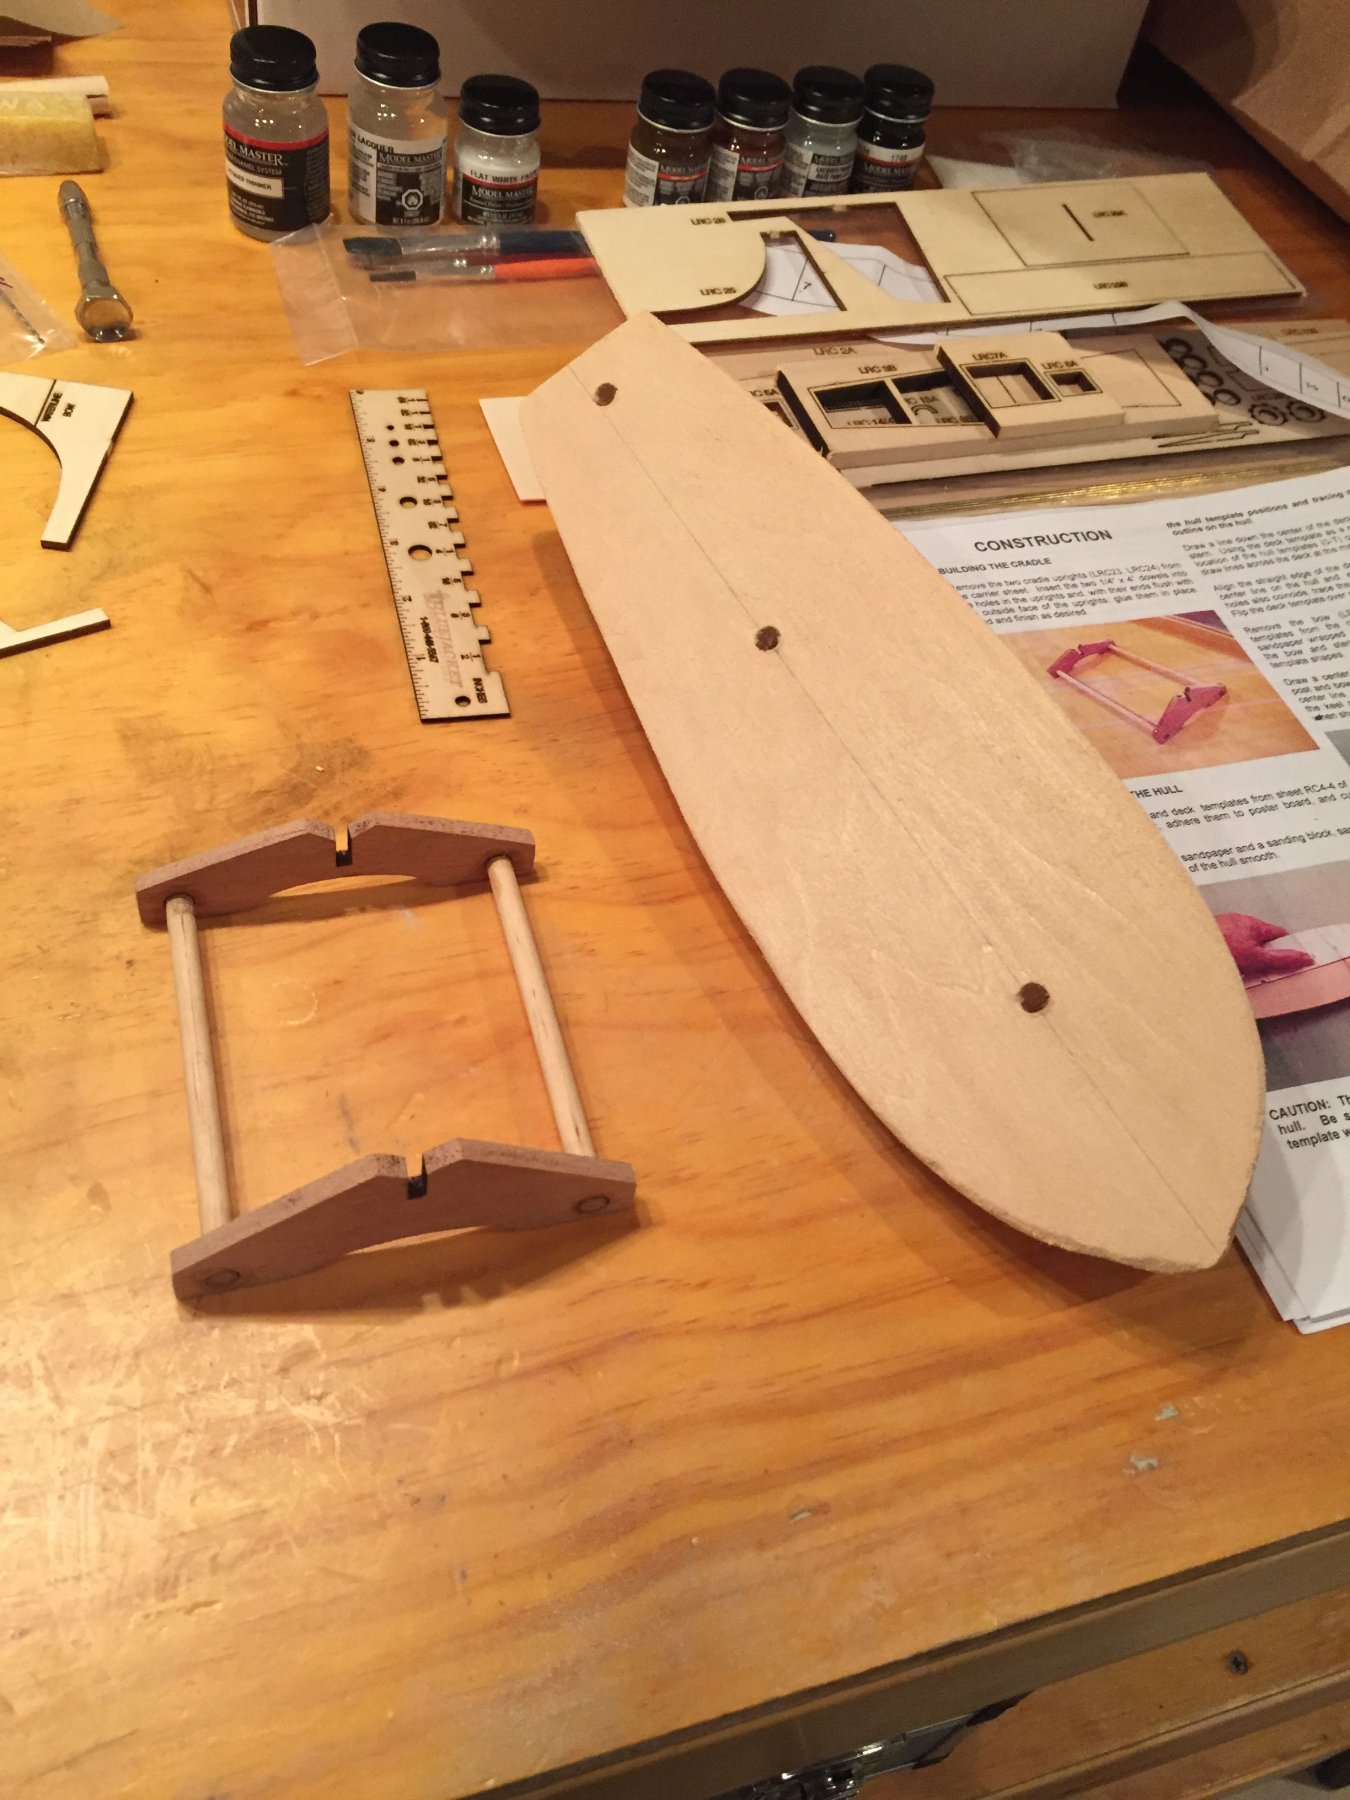
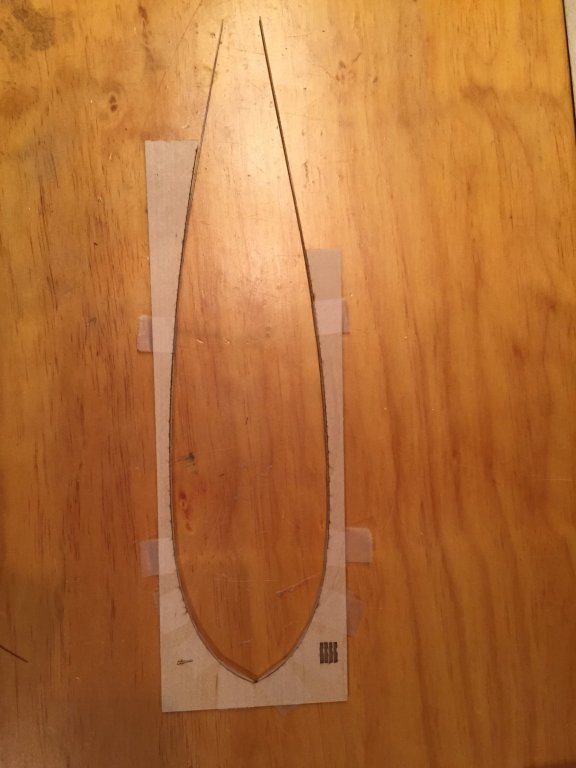
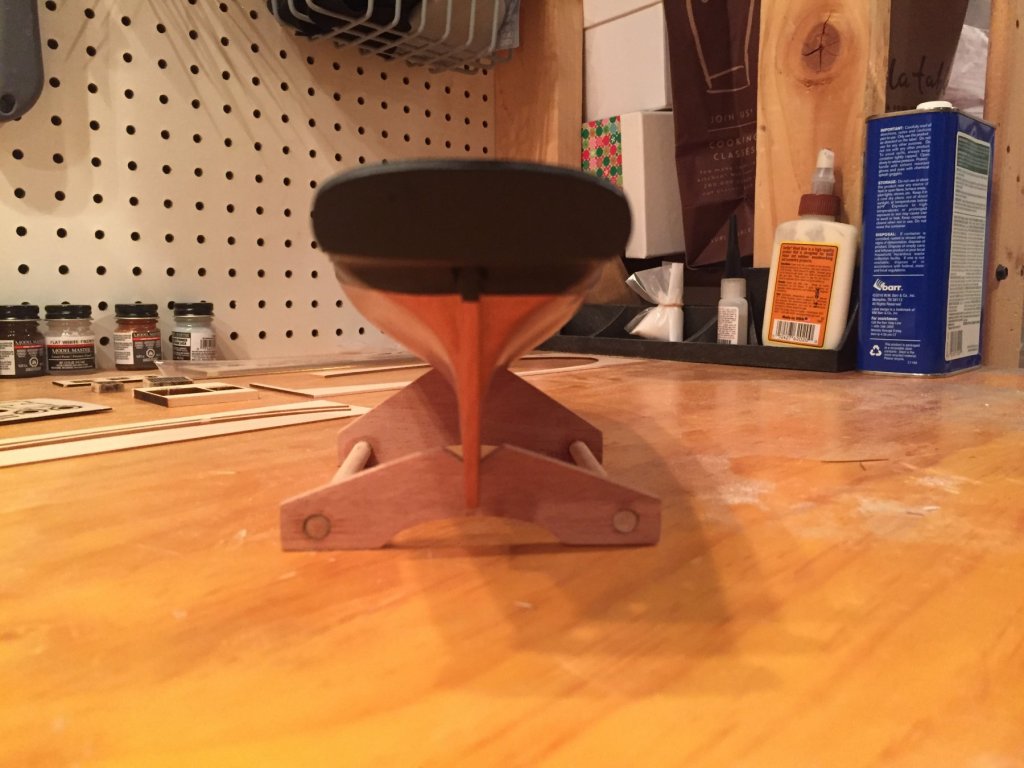
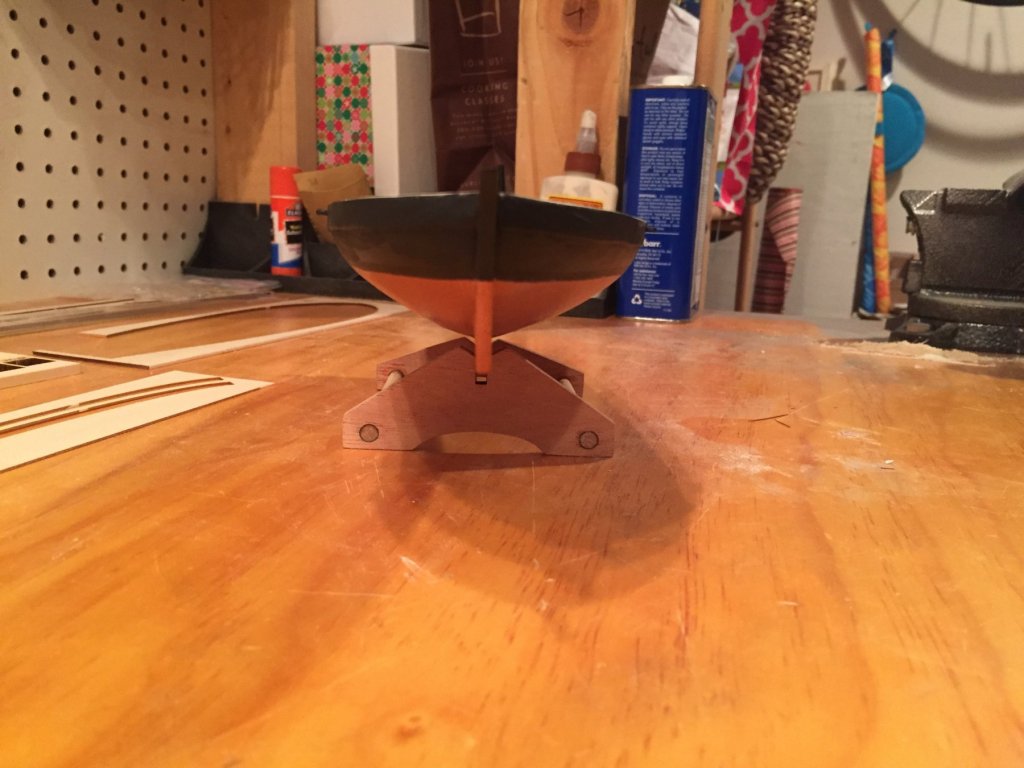
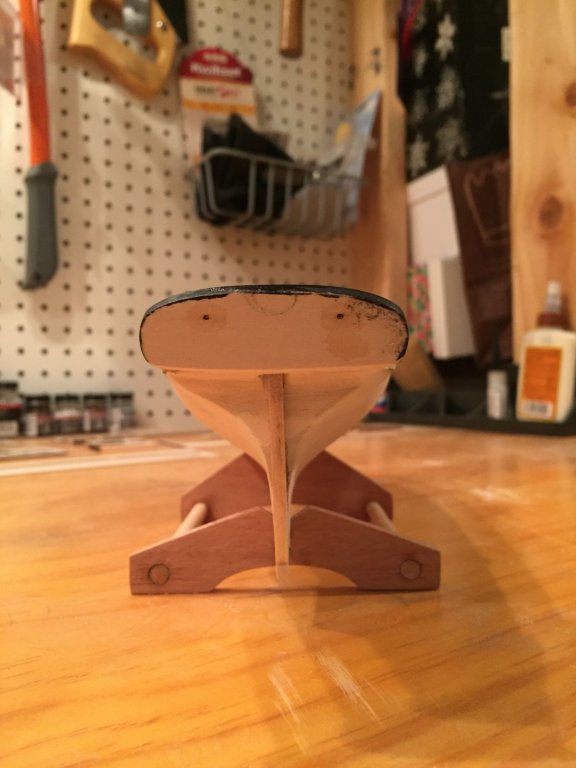
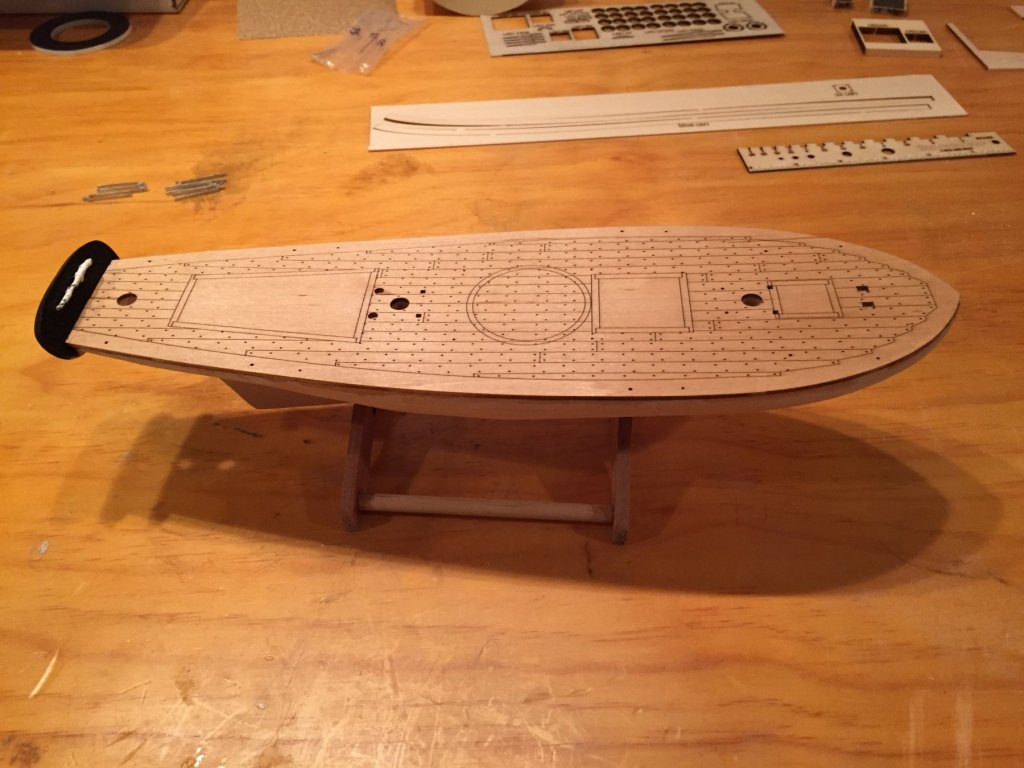
I was able to get a little time this afternoon to get started on the model. Since it's my first build, I figured I'd err on the side of oversharing and if it gets to be too much, everyone can let me know to scale it back a little. I was able to put together the stand without too many issues. Will like need to stain it to help cover up some of the super glue stains but will wait until the build is complete to decide what will look the best on that front. I sanded down the deck and started to map out the guide lines for the hull sanding but found out that the rear hole wasn't aligned with the front two. Looks like I'll get an opportunity right off the bat to get creative on moving that rear hole over and filling in the remaining gap. I still need to get the template for the deck mounted on card to trace out the rest of it but at a first glance it looks like it'll be a little tight in one or two places with not much room to work with. I'm a little worried that the alignment of the centerline on the deck and the keel is off a little bit but it may work out once I start sanding everything back so we'll see how it goes. If anyone has any things to watch out for as I start that process, I'm all ears. I'll be able to put the feedback into practice early next week, most likely, after travel is complete.

- 43 replies
-
- 5
-
-
- first build
- BluJacket Shipcrafters
- (and 1 more)