OldBritAbroad
-
Posts
27 -
Joined
-
Last visited
-
 GrandpaPhil reacted to a post in a topic:
King of the Mississippi by OldBritAbroad - Artesania Latina
GrandpaPhil reacted to a post in a topic:
King of the Mississippi by OldBritAbroad - Artesania Latina
-
GrandpaPhil reacted to a post in a topic:
King of the Mississippi by OldBritAbroad - Artesania Latina
-
popeye the sailor reacted to a post in a topic:
King of the Mississippi by OldBritAbroad - Artesania Latina
-
Hi Brian, thanks for he kind words. Unfortunately I’ve been way too busy with other stuff - and a trip back to the U.K. last summer - to have done any further work. I’m going to try again later this year once my wife has finished remodelling the house around me! Hugh
-
popeye the sailor reacted to a post in a topic:
King of the Mississippi by OldBritAbroad - Artesania Latina
-
BLACK VIKING reacted to a post in a topic:
King of the Mississippi by OldBritAbroad - Artesania Latina
-
vossy reacted to a post in a topic:
King of the Mississippi by OldBritAbroad - Artesania Latina
-
OldBritAbroad reacted to a post in a topic:
King of the Mississippi by OldBritAbroad - Artesania Latina
-
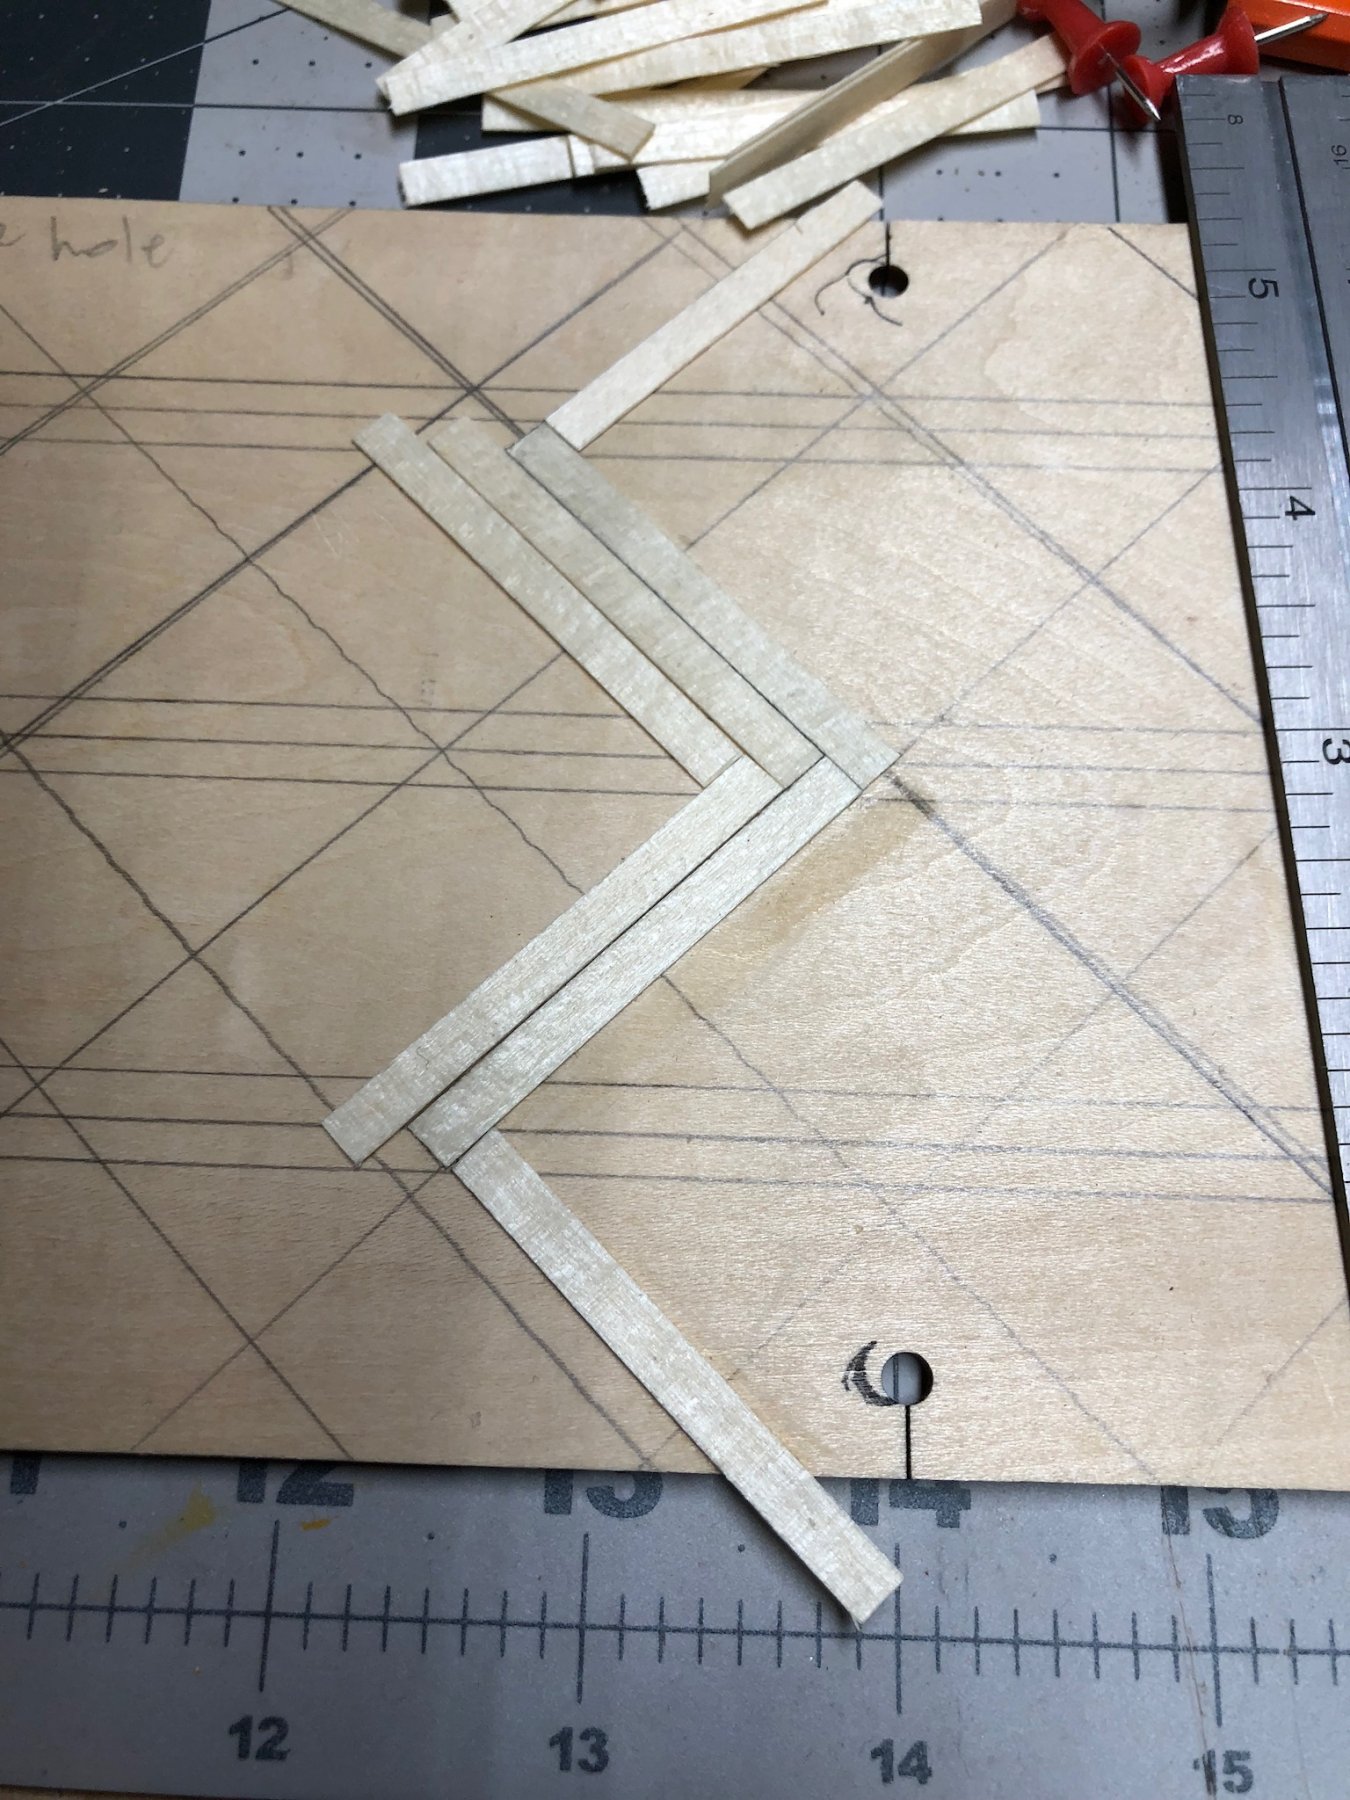
No update for the moment - I’ve gotten rather busy at home! Two pics (only the first for now, the other soonest) showing the start of the 45° planking. Hope to restart work soon! Hugh

-
Jack12477 reacted to a post in a topic:
King of the Mississippi by OldBritAbroad - Artesania Latina
-
popeye the sailor reacted to a post in a topic:
King of the Mississippi by OldBritAbroad - Artesania Latina
-
OldBritAbroad reacted to a post in a topic:
King of the Mississippi by OldBritAbroad - Artesania Latina
-
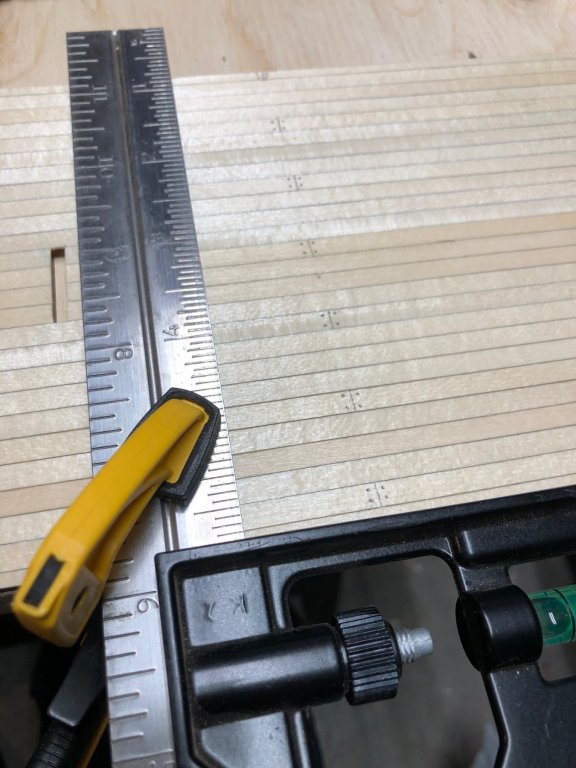
popeye, they’re at 45°. Currently cutting lots of 5cm planks....
-
popeye the sailor reacted to a post in a topic:
King of the Mississippi by OldBritAbroad - Artesania Latina
-
OldBritAbroad reacted to a post in a topic:
King of the Mississippi by OldBritAbroad - Artesania Latina
-
vossy reacted to a post in a topic:
King of the Mississippi by OldBritAbroad - Artesania Latina
-
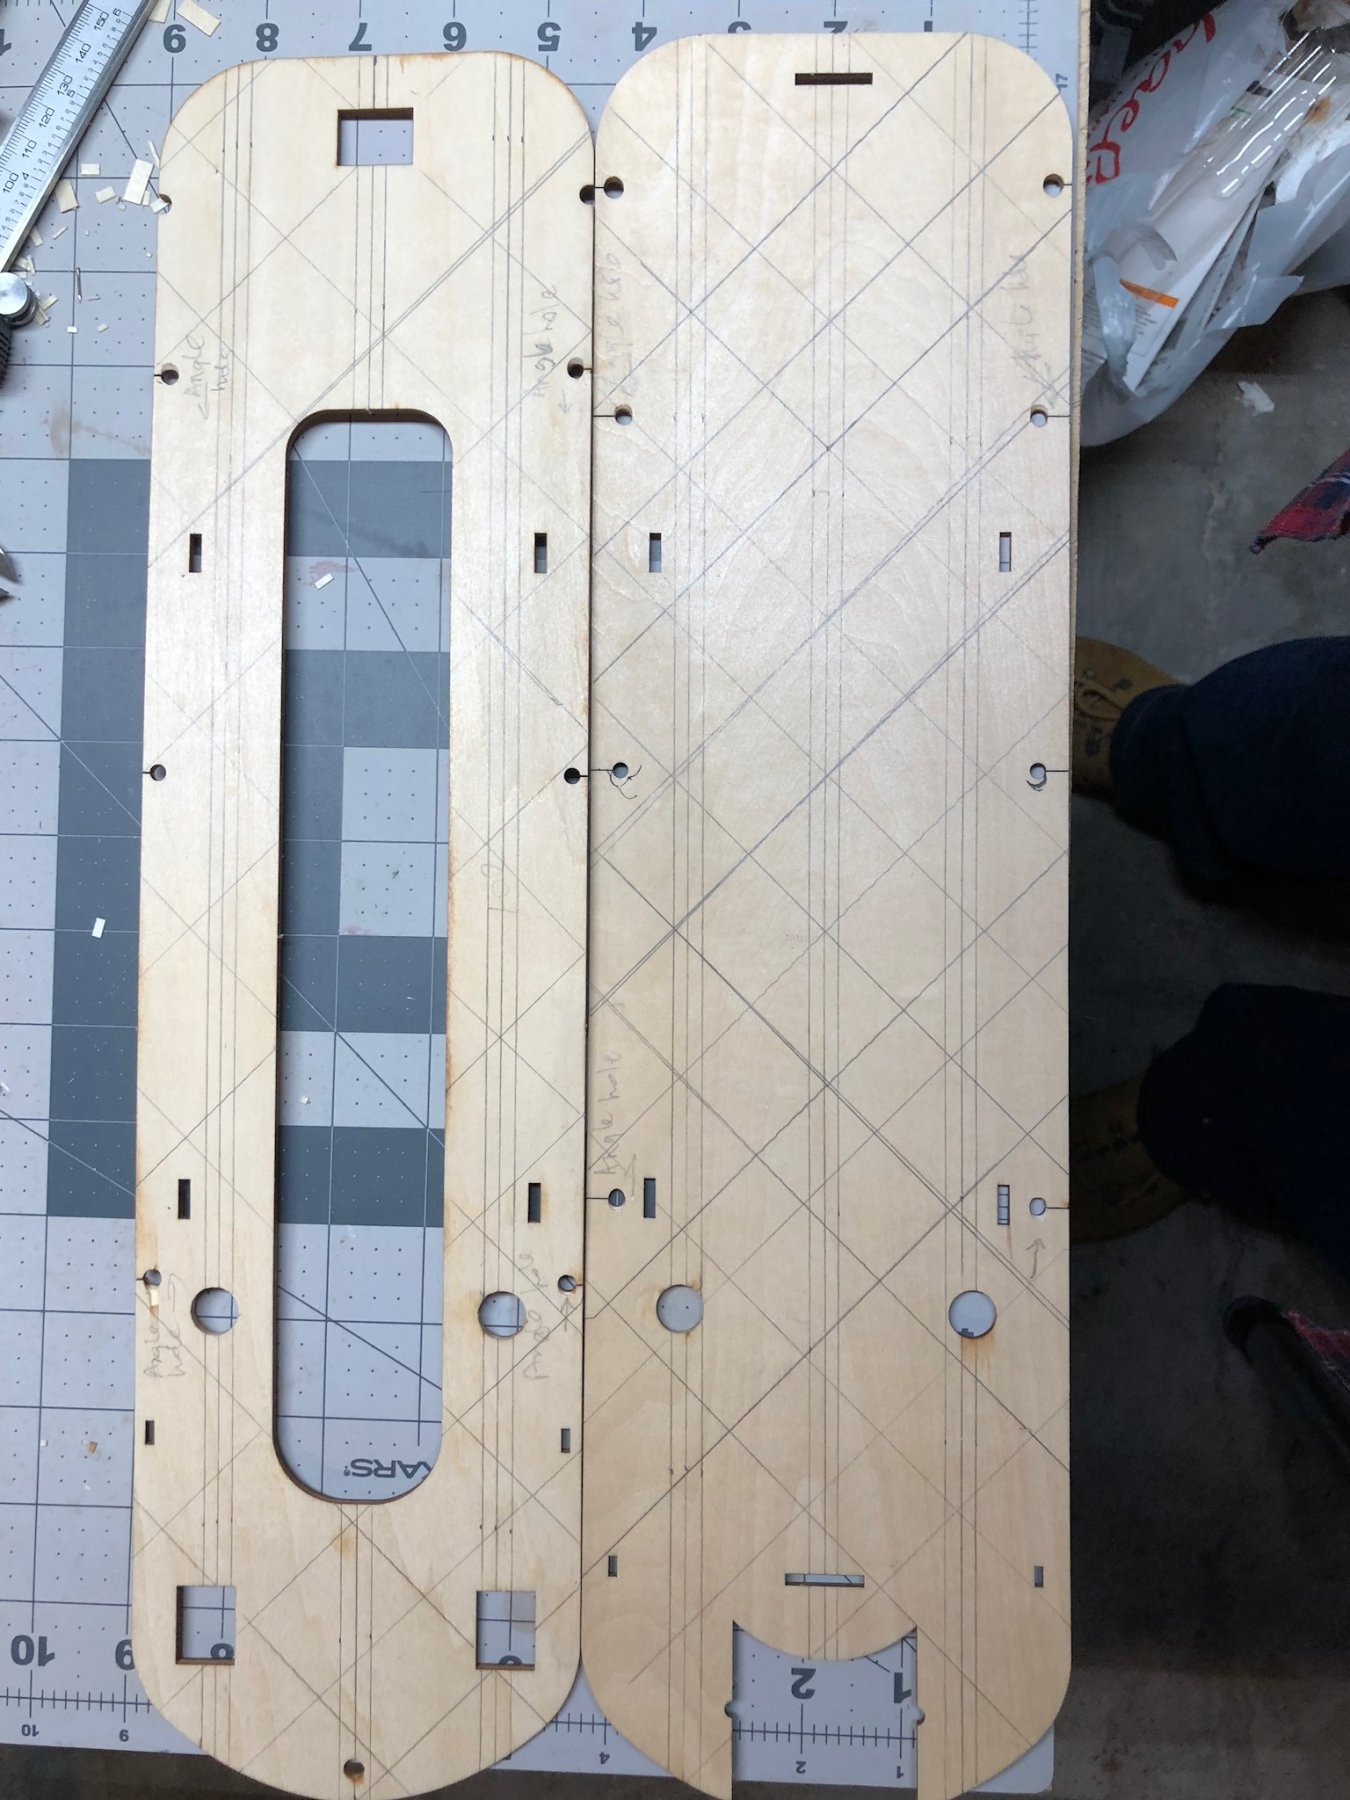
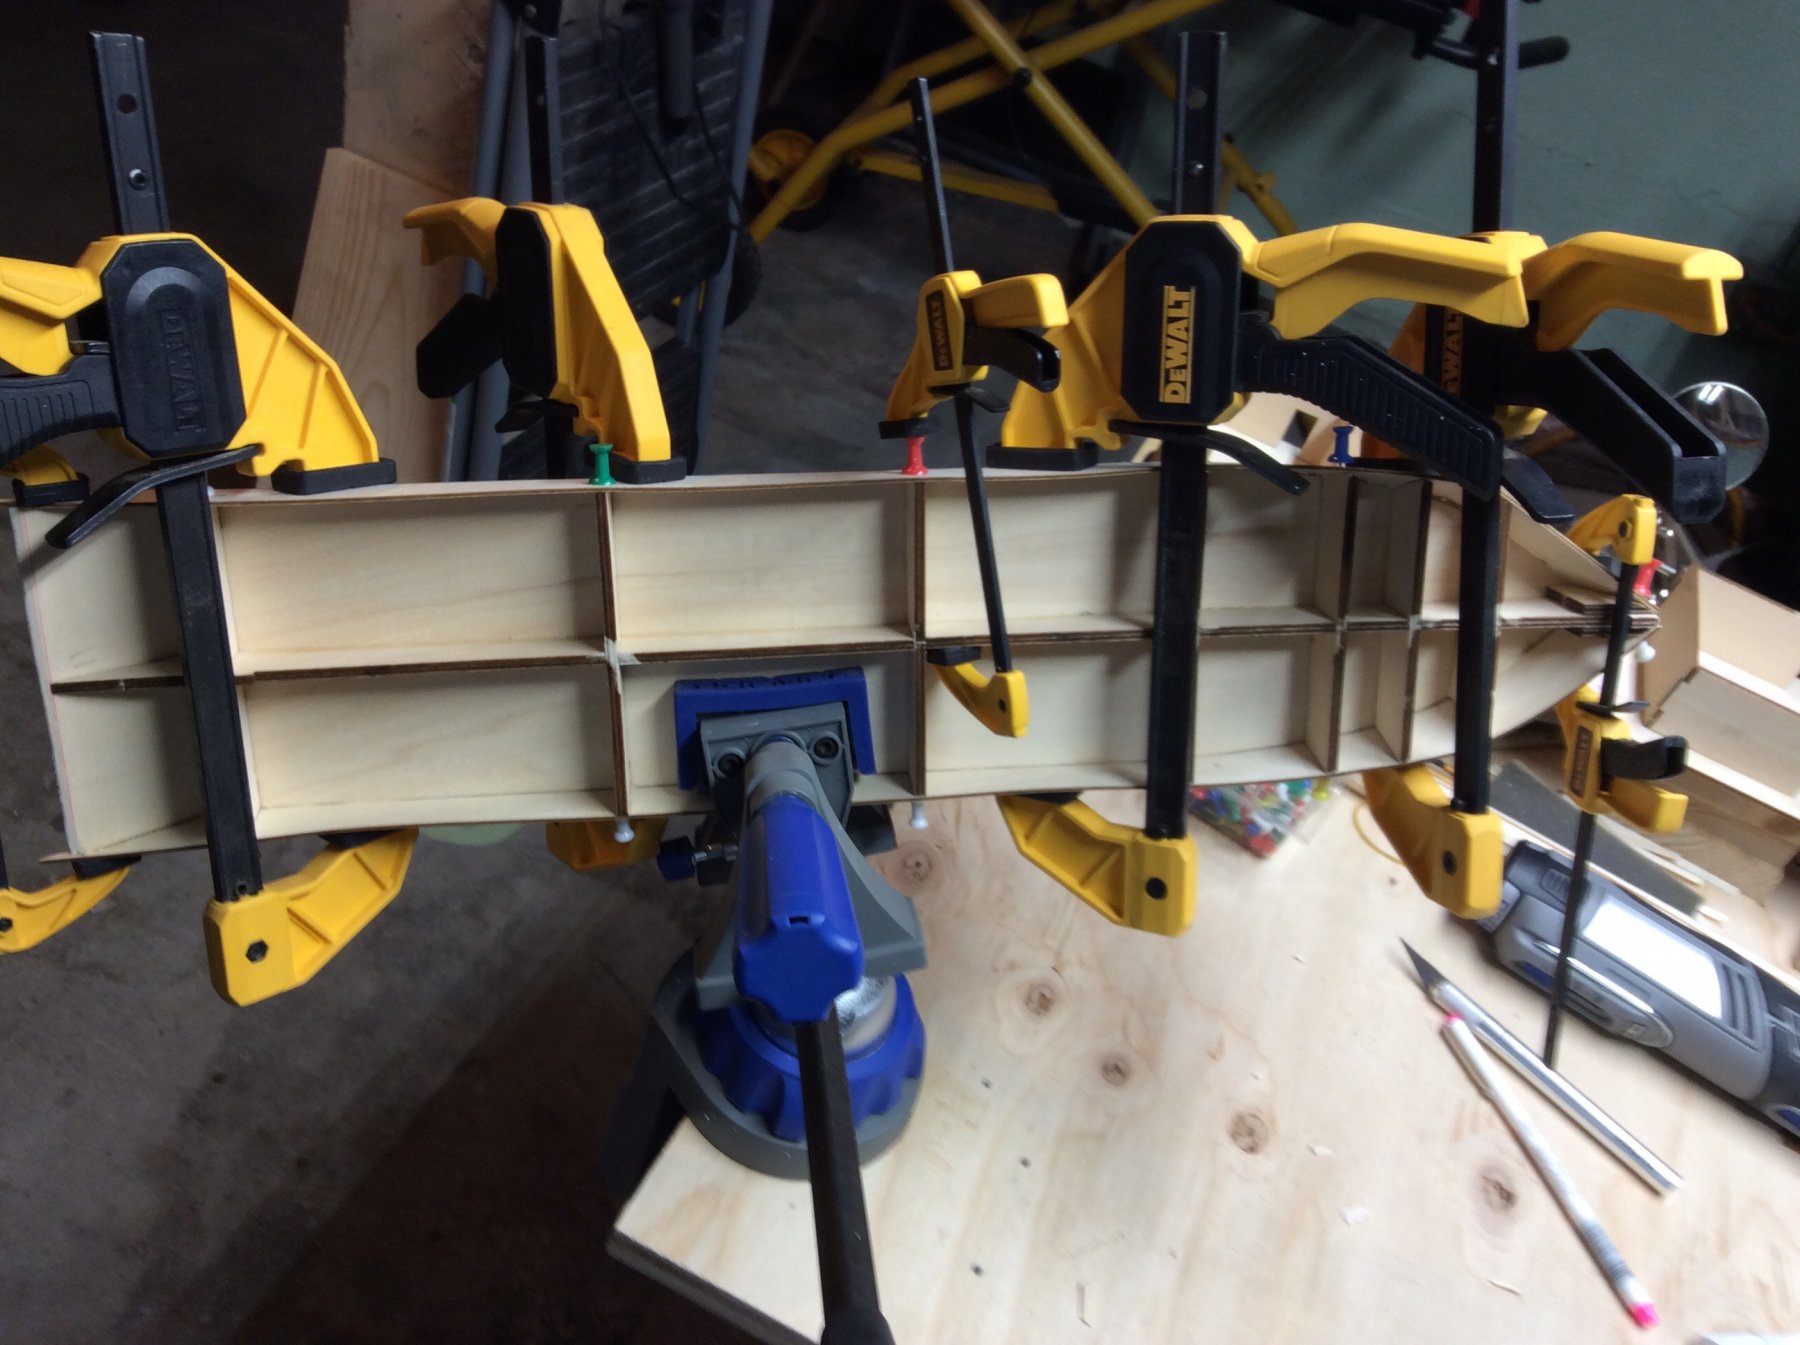
A quick update, managed a couple of hours over the last few days - being retired sure is busy! I’m planking the hull at the moment. As other builders have noted, the kit is short - by about 5 strips - of the walnut used, so I’ve got to order some more. I’ve done the sides (almost) so my plan is to finish that, then do as much of the bottom as I can, working from the sides inward. I’ll be using the cutout sheet of ply to gauge the bow-facing cuts for the strips nearest the sides; I’ll add a pic to show what I mean. I’ve also glued on the livestock bar supports. I’m thinking adding the actual bars might be a challenge given the tightness of it all... Lastly I’ve outlined the 2nd & 3rd decks for the parquet planking. What fun that will be! Hugh

-
popeye, I did indeed dry fit the second deck - no issues there. The deck is stained with Minwax’s Summer Oak. I’m going to go over that with a clear matt varnish.
-
OldBritAbroad reacted to a post in a topic:
King of the Mississippi by OldBritAbroad - Artesania Latina
-
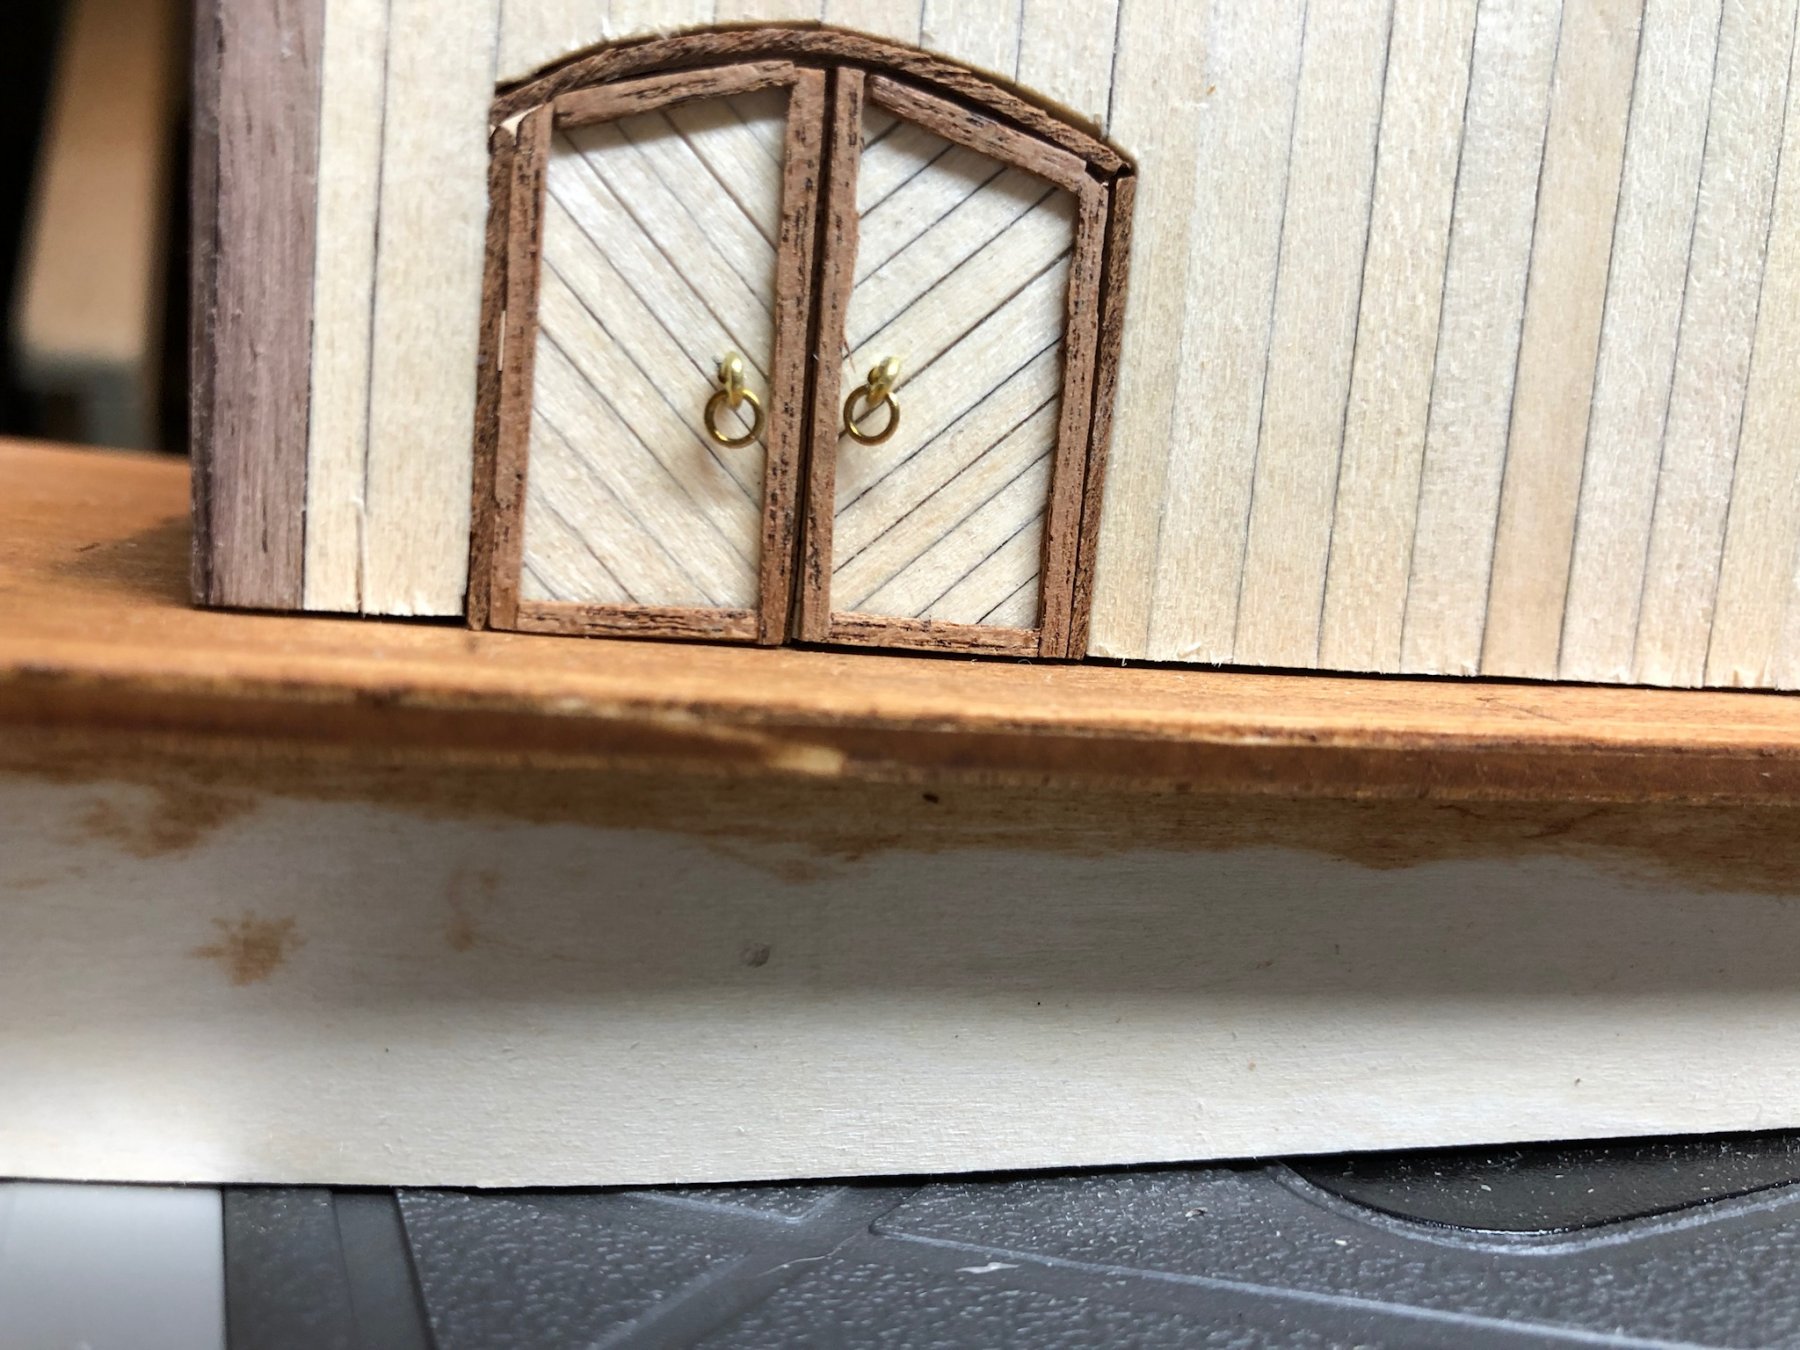
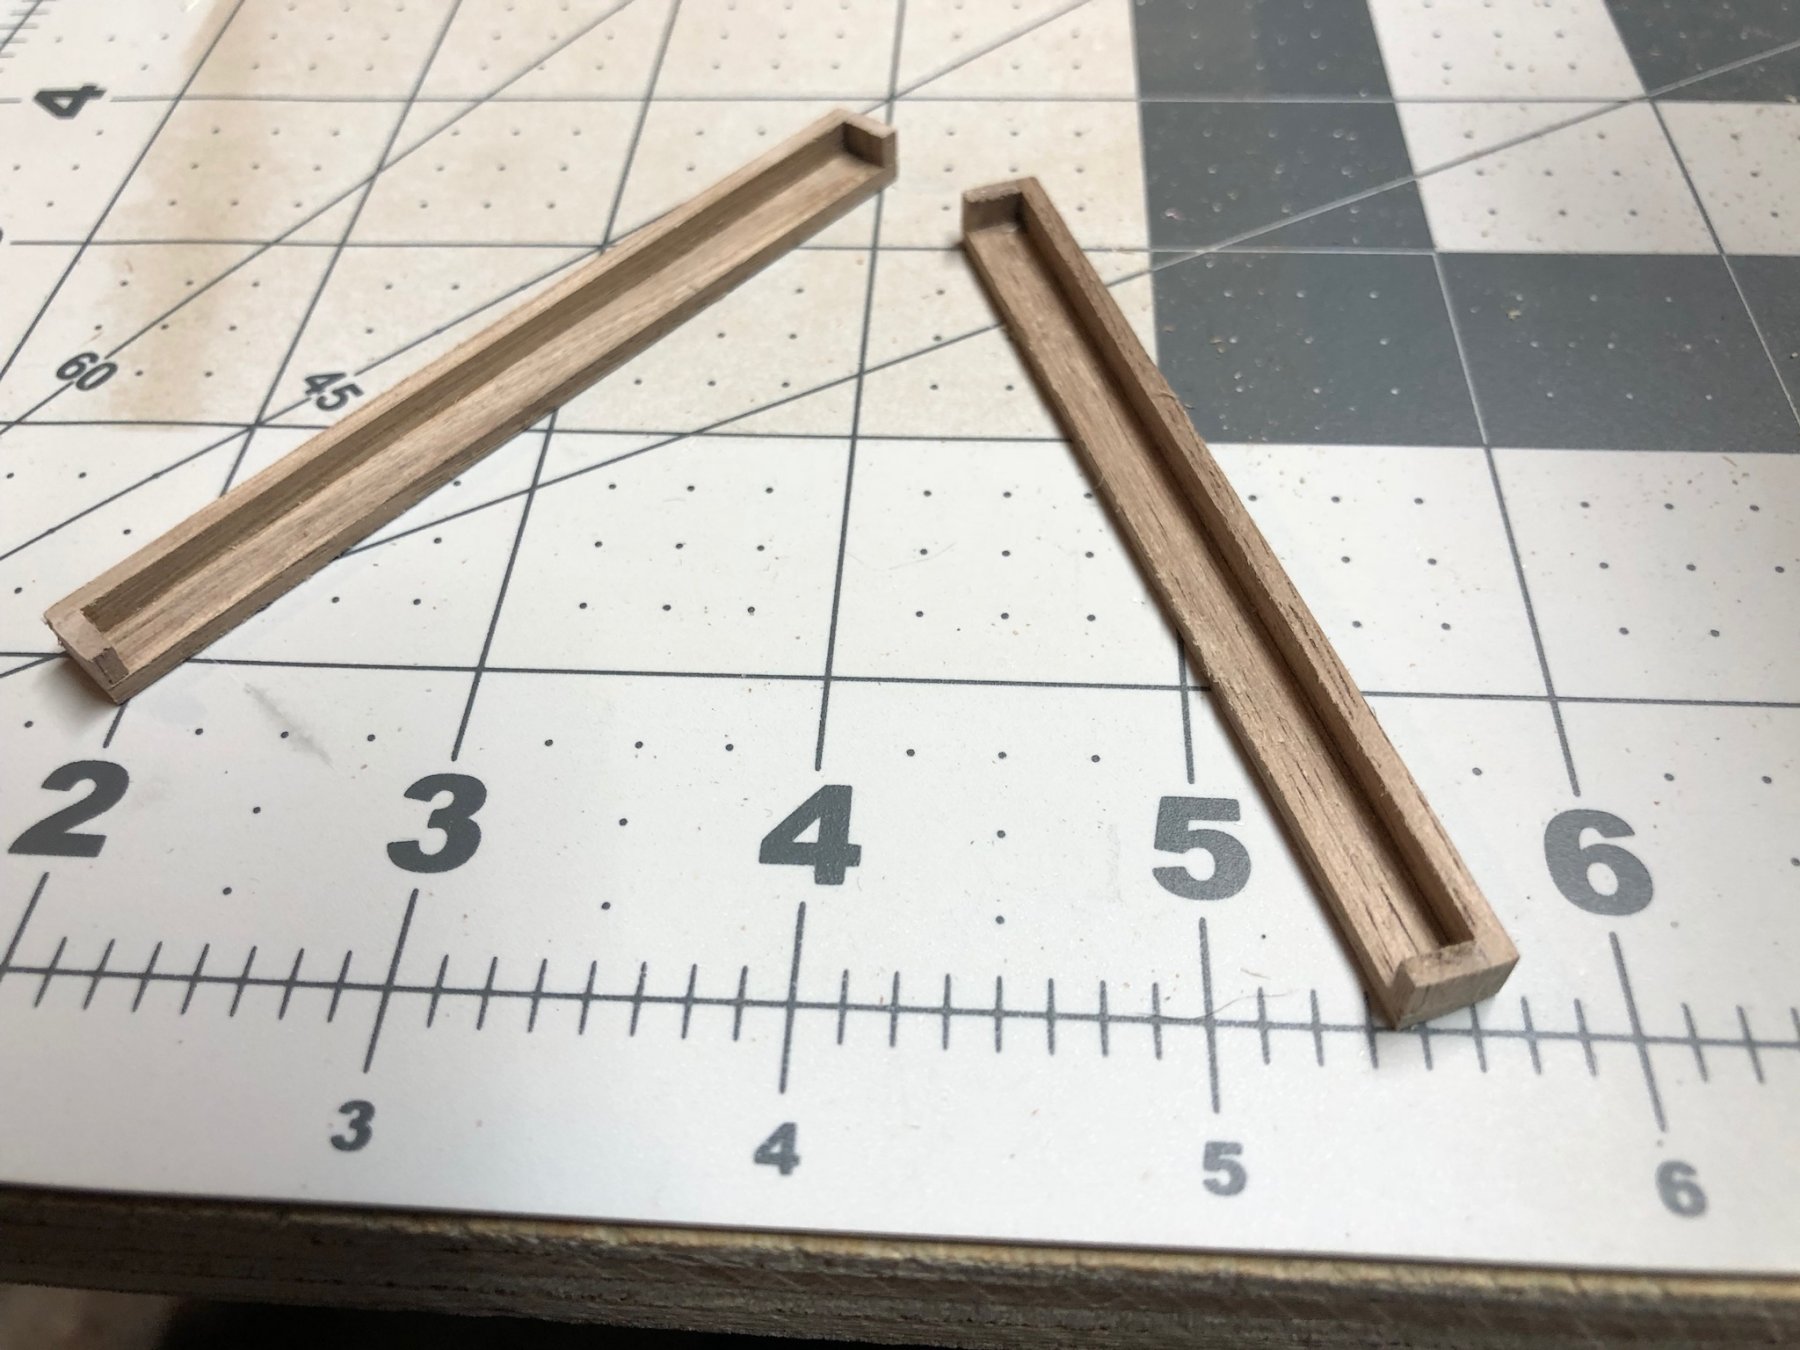
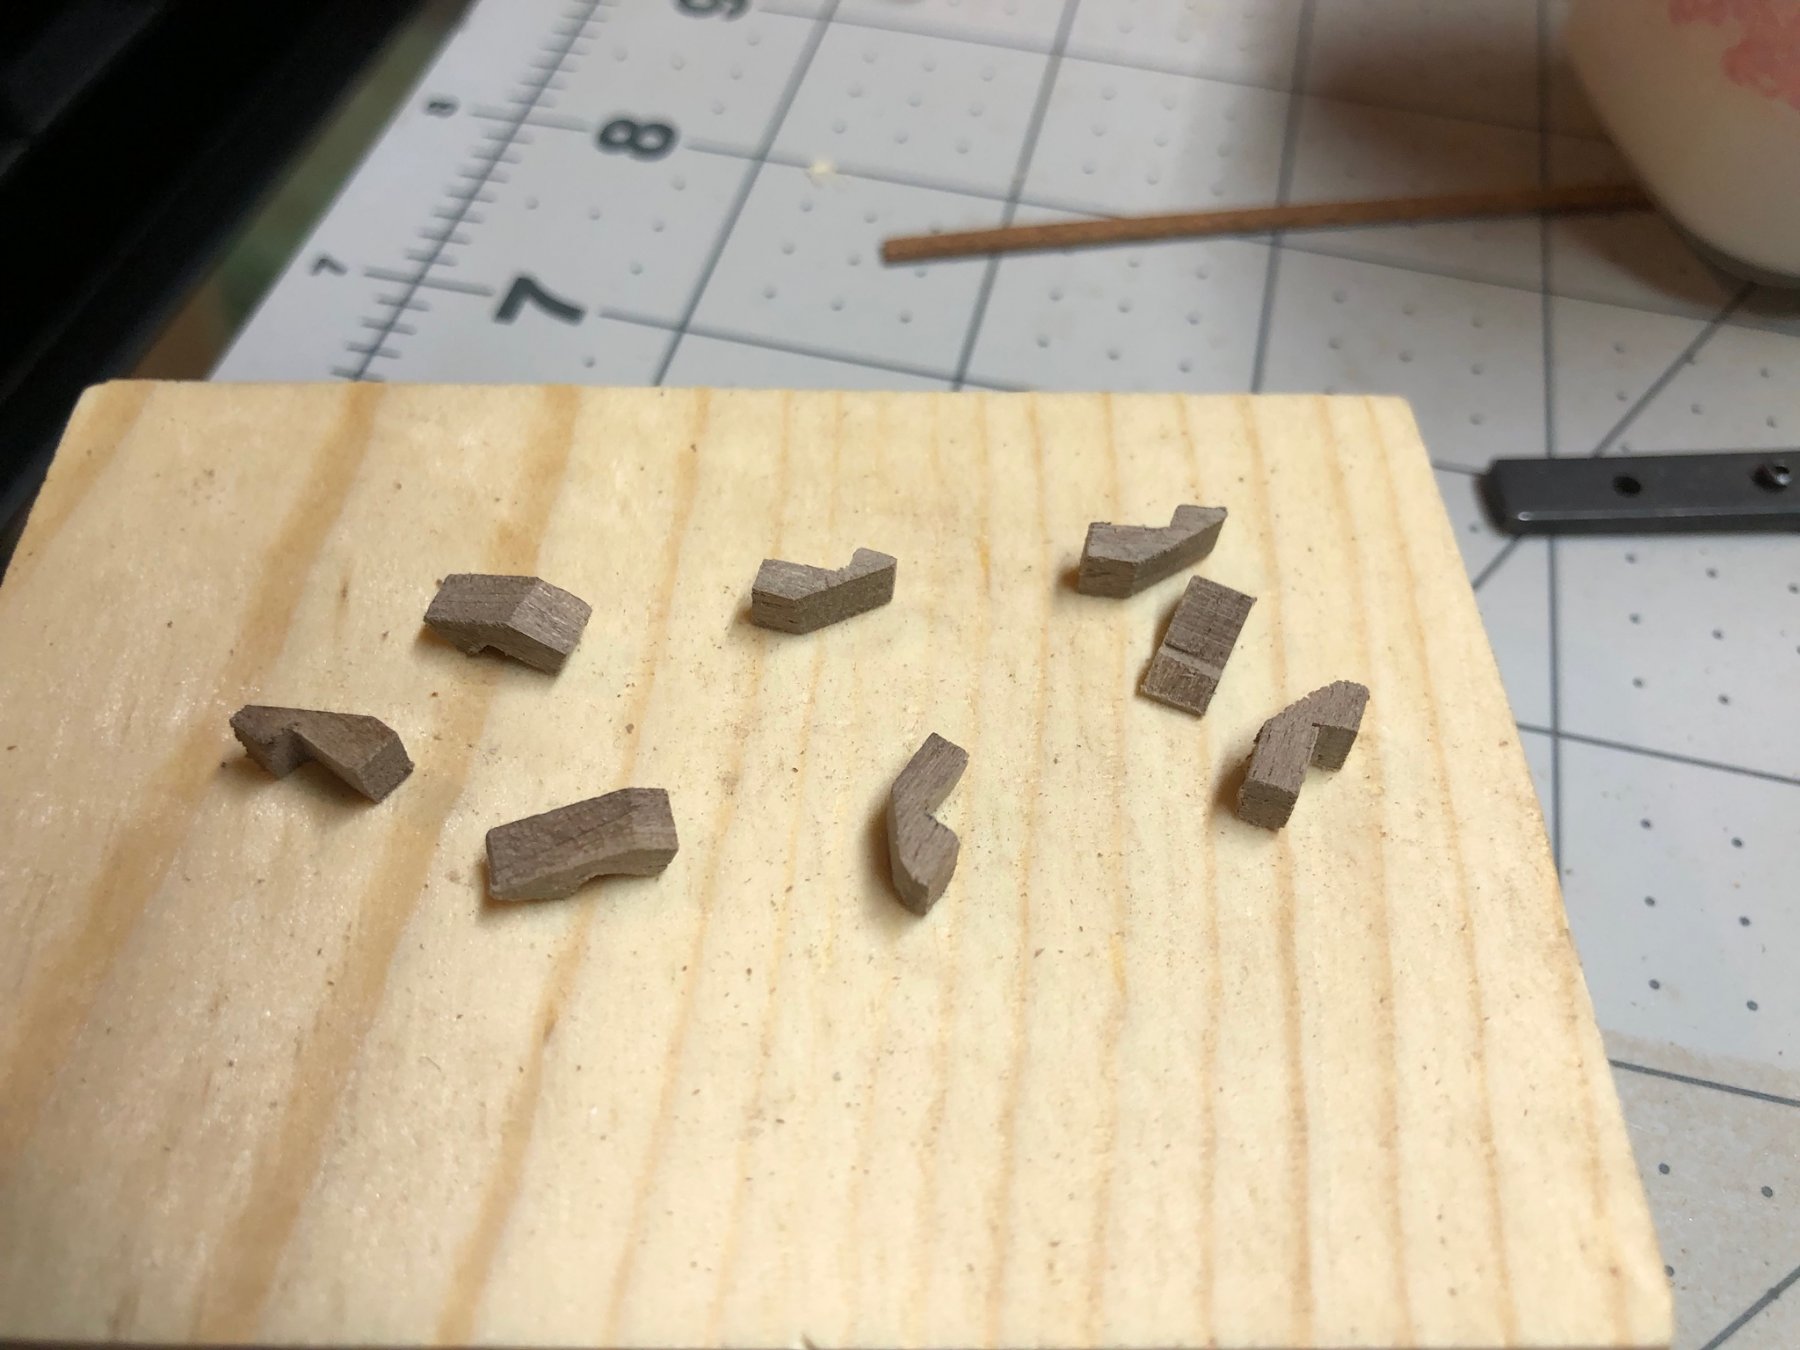
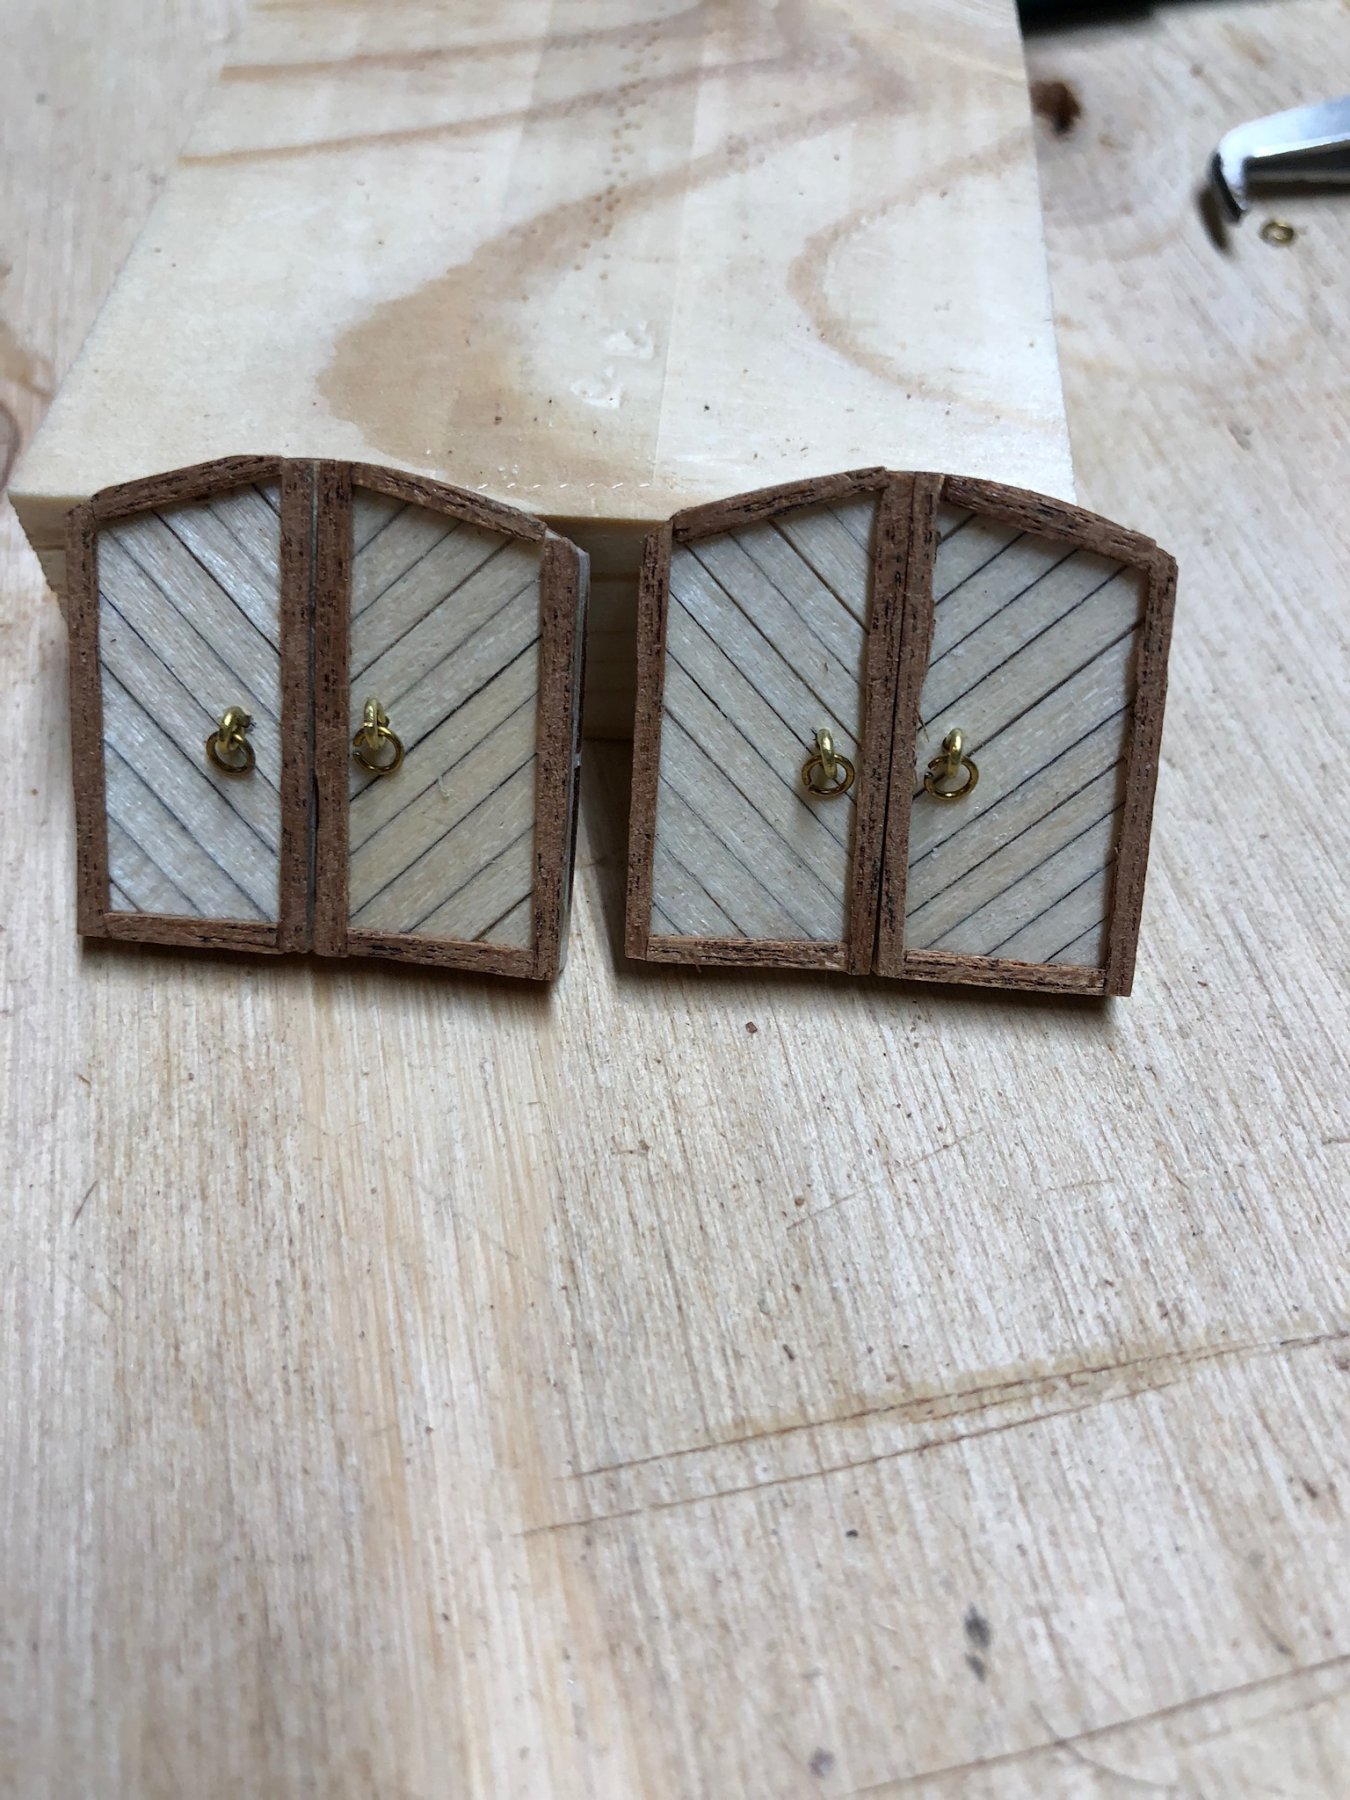
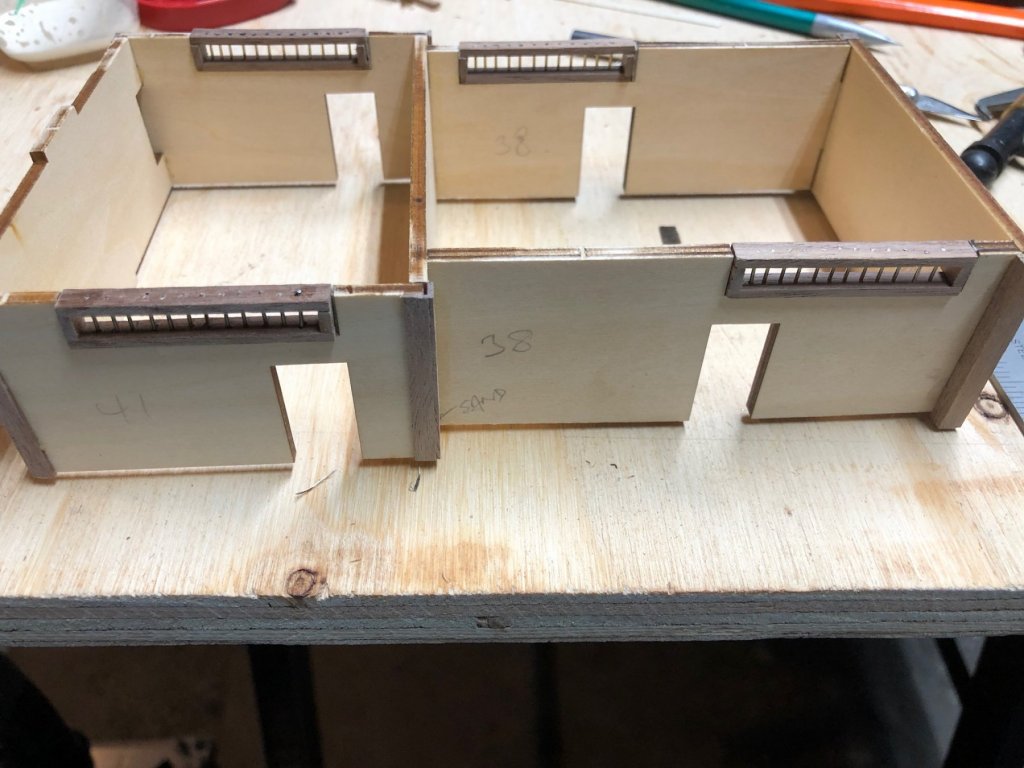
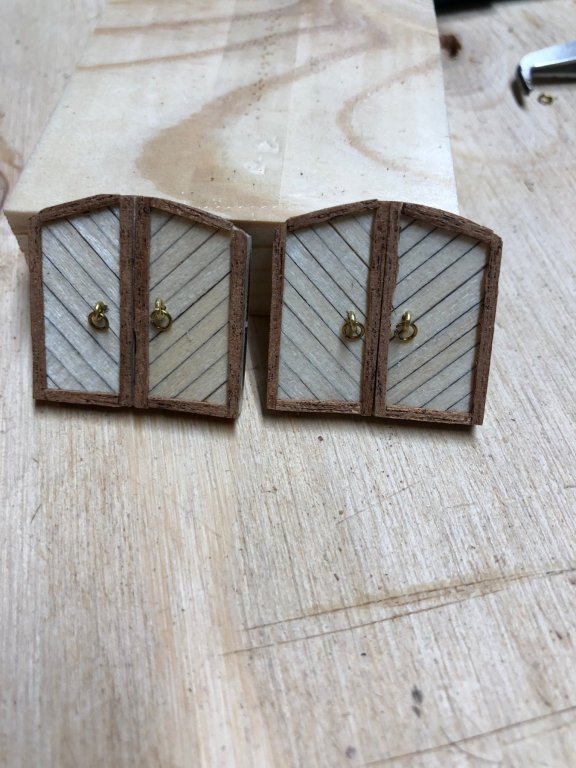
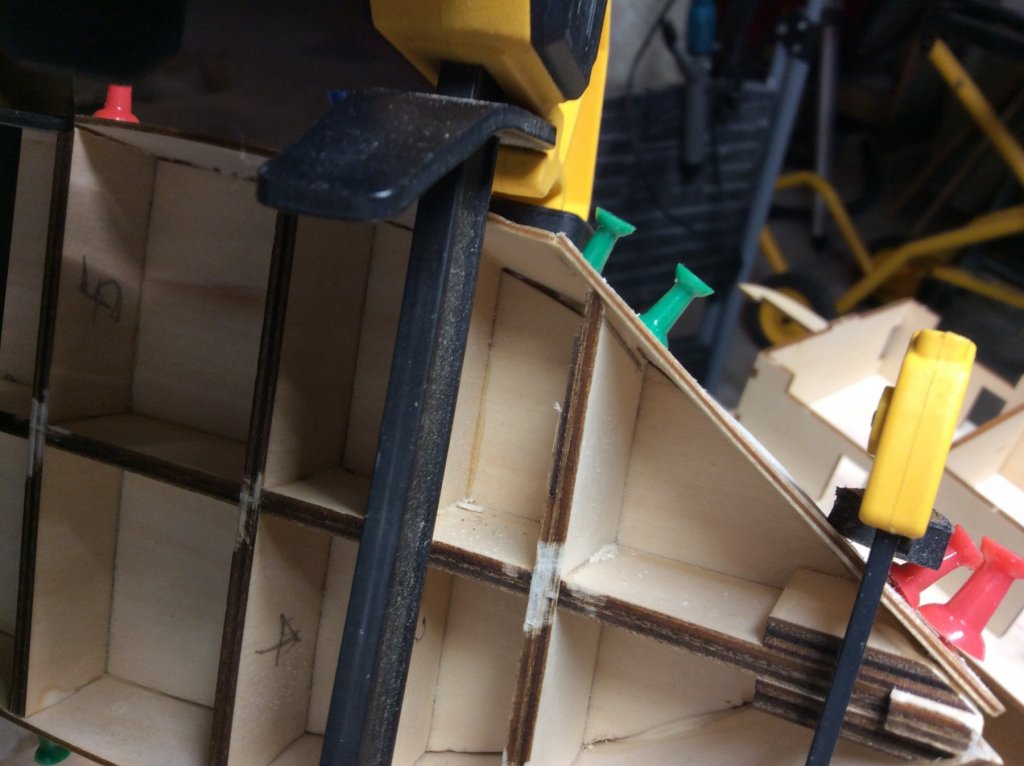
Hi Michael, welcome aboard and I hope you enjoy your voyage! Any comments and/or criticisms will be appreciated; as I’ve mentioned before, this is a voyage of discovery and learning (much of which to date consists of the old adage of measure twice, cut once! I’d also add, if it looks wrong it probably is!) I managed to find a few hours this week tidying things up and building some odd pieces - the pics attached show my progress with the main deck structures, the feeding troughs and the livestock bar supports (bit of a pain to make; for future builders, cut the 1.5mm first, then the 5mm - both of which create the slot to hold the retaining bars, then bevel the lower edge. I did the last first and it made holding the piece very awkward, though I only lost one due to breakage in the end). I’ve now planked all the main deck structures and they’re ready for finishing. The African Walnut will be given a clear satin varnish; the planking will be stained/varnished in a standard light oak. The 0.5mm planking, I’ve noticed, tends to fray across the edges at the top and bottom so, depending on final fit, I may need to add a finishing strip to hide those poor edges. One final thing to add, which you’ll see in the 2nd pic below, is that I managed to get the tabs in the structures to fit in the slots without any repositioning. I have to say this took a little force (and trepidation on my part!) but they did fit, though I’ve noticed the front section of the front structure is now very slightly bowed out. You can also see in the 1st pic where the door handles don’t line up correctly - they’re about 0.5mm off from each other. Would have been perfect if I’d kept the door pairs together lol. Also not too happy with the Sapele trim on the top of the front structure doors (which I’d cut in half lengthwise as the suggested measurement seemed too heavy) - it doesn’t match the curve on the doors, but too late to do anything with it now. Next job is to finish the Sapele straight door surrounds on the rear structure (I’m two-thirds done), glue in the doors, final sanding to shape then put aside whilst I plank the hull. Hugh


-
OldBritAbroad reacted to a post in a topic:
King of the Mississippi by OldBritAbroad - Artesania Latina
-
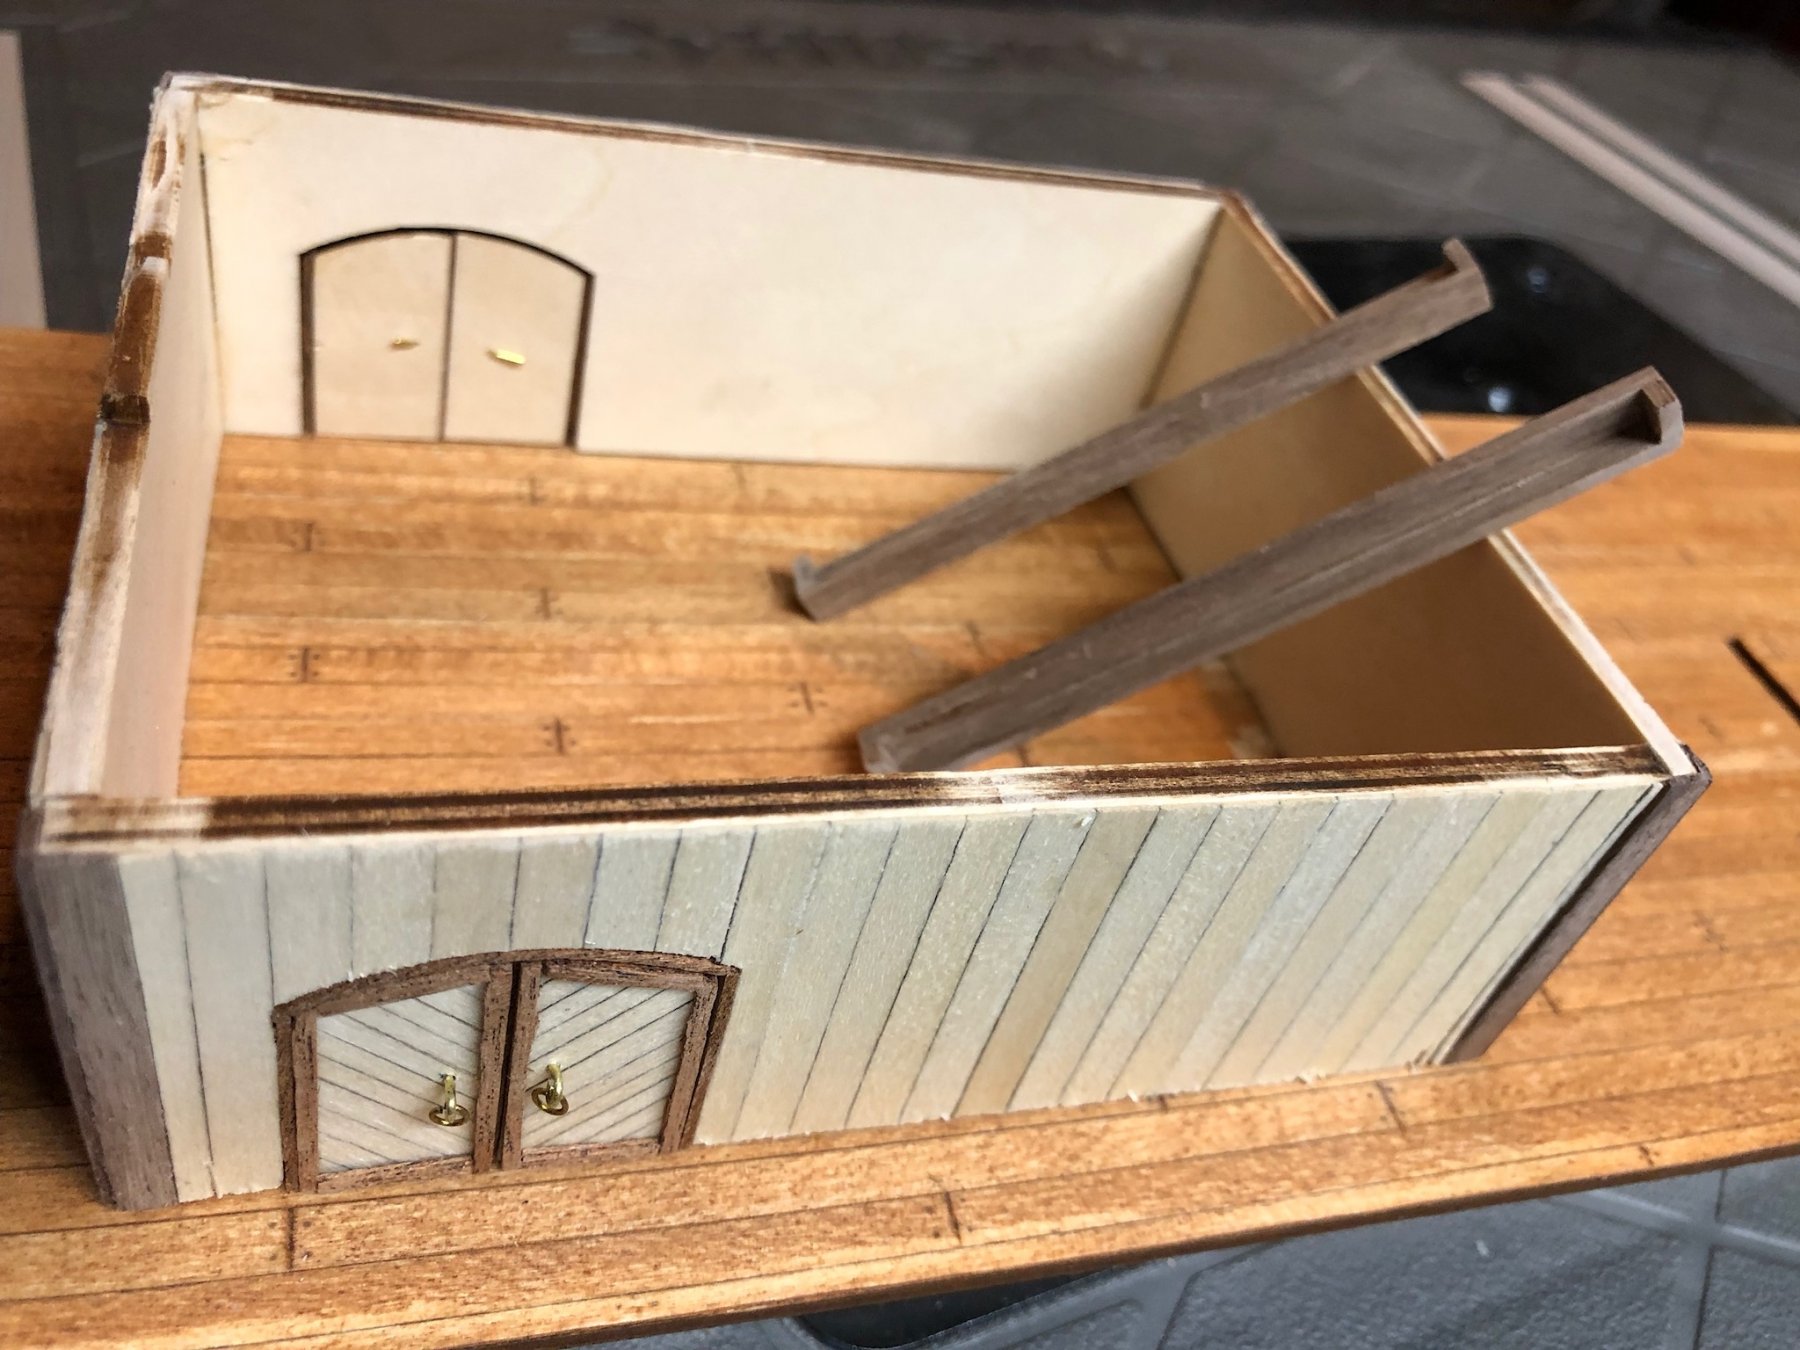
OK so no pics yet - a couple of days wait while I repaint the front room. Some unforced errors on my part I’ve noticed - one was the arched doors on the front main deck structure. I’d carefully aligned the pins etc for each set of doors, then managed to switch each part of the pairs when glueing them in, so the handles are now slightly misaligned. (Pic to follow). Also the sapele framing for the doorways came adrift from the main plywood somehow, leaving a noticeable gap. Cant be fixed now, so will back the doors with some black paper to hide the gaps. Also I’d decided to add the corner pieces before doing the side planking. Mistake. Do the planking then add the corner pieces - saves an awfully of tiny cutting that results! Made the livestock feeding troughs, fairly straightforward though the side/end pieces should be 3*2 mm Hugh
-
Hi popeye, nice to know I’ve motivated you - must be the only time that’s been laid at my door! Re the slots - not a problem as the turned-around piece is one of the side panels - no tabs to worry about. Even if it had been one of the tabbed pieces it wouldn’t matter as they are centrally located on the midship line. Yes the thin ply is easily deformed - or cracked (I discovered I’d also cracked one of the 2nd deck structure sections, will need to fix that soon). Currently putting on the structure planking on the main deck structures, I’ll finish that tomorrow and will post a couple of pics then. Hugh
-
OldBritAbroad reacted to a post in a topic:
King of the Mississippi by OldBritAbroad - Artesania Latina
-
Sorry Mike, no prize for you 😭 If you look at the double room structure, to the right you’ll see that I unfortunately glued the rear wall in the wrong way round! D’oh! So the doors and ventilation grids don’t match across the deck. I decided not to bother trying to fix it - I’d probably only break something irreparably. Bent some Sapele for the arched doorway tops - 5 minutes in hot water did it - so tomorrow’s job is glueing on the side planking for the main deck structures then (if time permits) fitting in the doorway linings etc before glueing in the doors, as I’ve decided my doors will be fixed closed - mainly because I don’t like the door hinges on the front structure; they remind me to much of a Vincent Price (ah, there was a thespian!) movie.
-
OldBritAbroad reacted to a post in a topic:
King of the Mississippi by OldBritAbroad - Artesania Latina
-
OldBritAbroad reacted to a post in a topic:
King of the Mississippi by OldBritAbroad - Artesania Latina
-
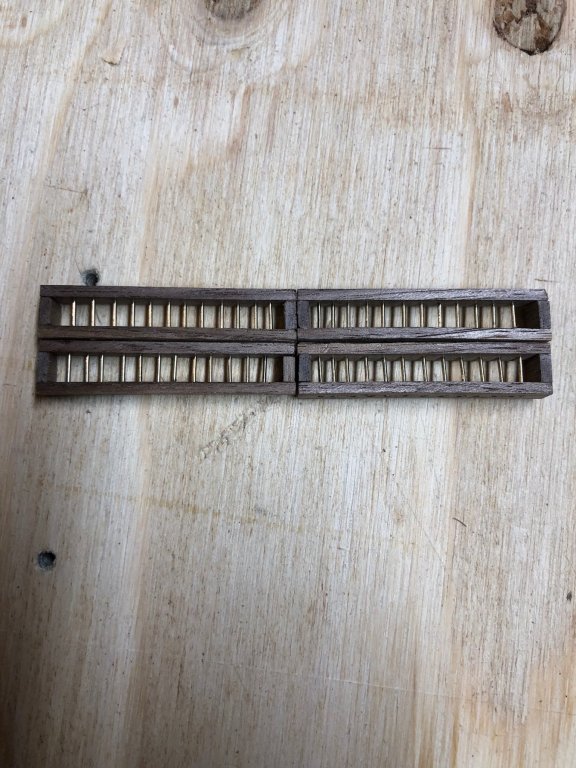
Managed to grab a few hours and did some detail work, making the curved doors on the main deck and the ventilation grids which are now glued in place and intentionally placed to give a little overhang over the siding. The ventilation grids were stuck down in twos on double sided sticky tape and drilled though with my trusty Dremel drill press. I later tapped in the nails with a jeweller’s hammer, cutting off the heads which I’ve kept in case I find them useful later. Also stained the undersides of the decks in case anyone bends their heads! Can you spot the unintentional mistake? (Prize is a personal jet to your tropical island of choice, all expenses paid. *Some restrictions apply*.) Hugh
-
OldBritAbroad reacted to a post in a topic:
King of the Mississippi by OldBritAbroad - Artesania Latina
-
After a few days doing household stuff (ripping up old carpet, but lovely hardwood floors underneath, etc etc), back to the build. For the slightly misshapen portside bow, I went with sanding down the angle quite a lot and have left it at that. I know I’ll notice the slight difference between the two, but by the time it’s planked and varnished I don’t think anyone else will. I went with pencil caulking in the end and have glued on the main deck planking. This is drying at the moment and tomorrow I’ll be adding effect nails etc before giving it a light sand and then varnishing. I’m also going to test a colour stain (American Oak) on a piece of scrap and if I like it I’ll stain the whole deck. I’ll add a pic or two tomorrow or the day after. Edited to add this is how I did the butt joints - a straight edge as I don’t trust myself to manually get them straight - scoring gently with the back of an Xacto 11 blade and then pencilling with a 0.5mm point with treenails simply a rotation of the pencil point. Could have been a bit more precise with that though, and probably didn’t need the scoring first. Colour stain in the end was Summer Oak on the Admiral’s advice, a bit darker/yellower than I was thinking but I think it’s a good choice. Then matt varnish on top. I’ll use the American Oak stain on the deck structures to give a colour contrast. The current plan is to then glue the deck to the hull and then begin hull planking, sides first then bottom. Hugh
-
Had a slight hiatus due to having to do other things, got back to work yesterday bevelling the frames, smoothing out any high points and experimenting with decking - caulking, treenailing etc. Got carried away and decided to steam the hull sides to bend them overnight on the frame. All was going well until I heard ‘crack’ - the port side was insufficiently wet, I hadn’t sufficiently bevelled frame 1 by about 0.5mm and the side cracked just behind it resulting in an angle to the bow rather than a smooth curve. Woe is me. I left the sides overnight on the frame for them to dry - and me to recover - and came back to look over it this morning. I’ve decided to glue the sides on as they are and when dry will add some wood or ply behind the angle, then sand it all back to the curve I need, since it seems the cracked side refuses to do anything other than bend on the line of the crack. Oh well, it’s a learning experience.... Hugh

-
I went so far as to buy some archival ink pens, but it seems too black/heavy for me. I’ll give the pencil a go and see. Probably starting the decking either tomorrow afternoon or the day after (small list of projects from the Admiral!) Hugh
-
OldBritAbroad reacted to a post in a topic:
King of the Mississippi by OldBritAbroad - Artesania Latina
-
Exactly my thoughts, Mike!
-
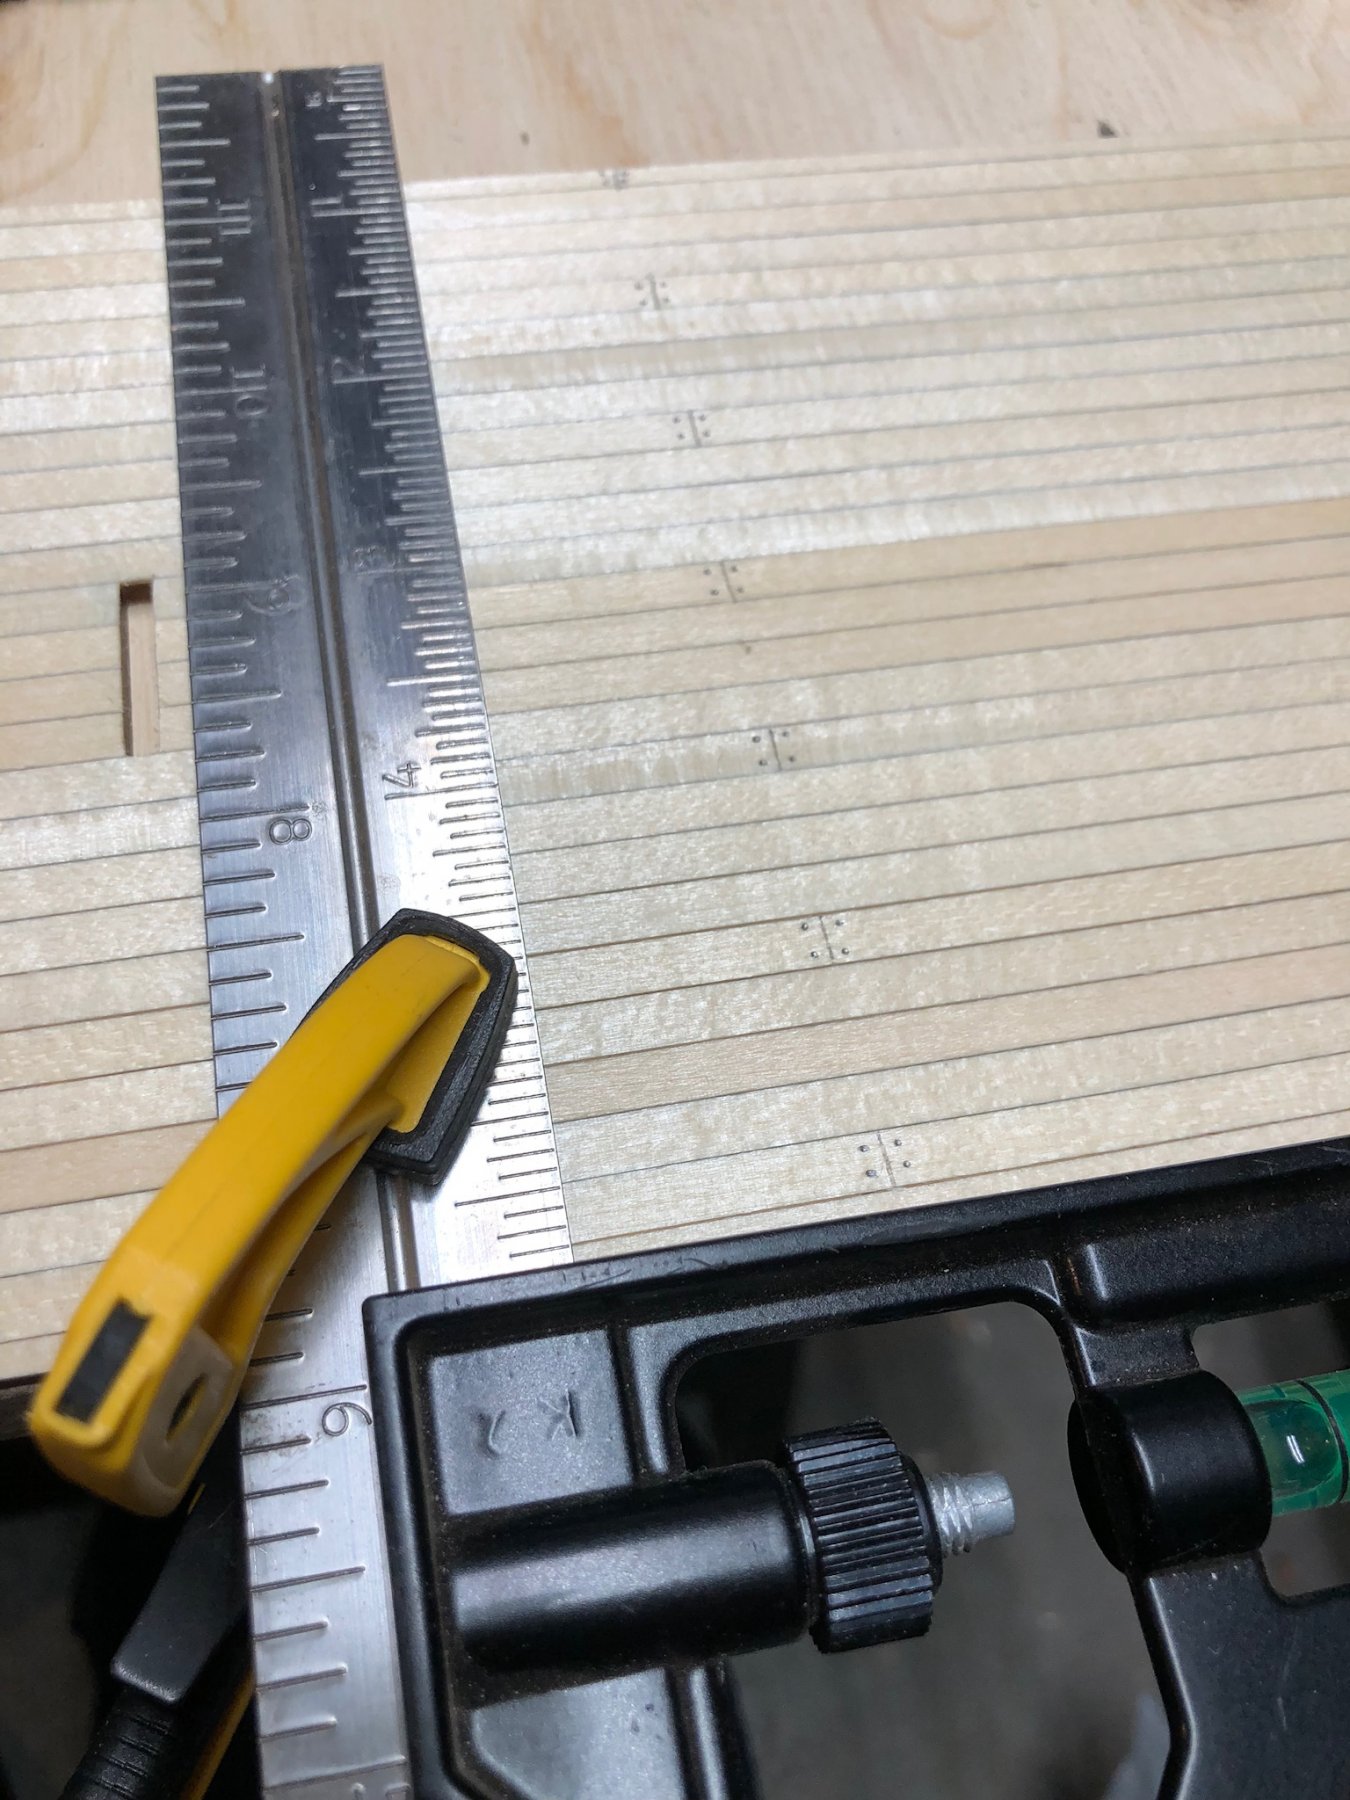
The fiddling about referred to in my last post involved cutting enough deck planks to 10cm for the main deck. Initially tried using an Xacto knife, but found it hard to get a true 90° cut. Then on to my Harbour Freight mini chop saw, but this mangled too many ends. Ended up using an Xacto saw and mitre guide, doing 5 at a time. Not perfect but will do, I think. Experimented with pencil to simulate caulking and treenailing on some scrap. Not doing it, which I’d thought of earlier, simply doesn’t give enough differentiation between the planks; you’d just end up with a bland blond across the deck. So I’ll be edging the planks with pencil lead. Also found my local Walmart stocked 0.5mm pencils, which when briefly pushed into the planks gave a good impersonation of nails, so I’ll be going with that. Now that I have the main deck structures all glued up, I took the opportunity to dry fit again. I can confirm that with the main deck bowed fore and aft the main deck structures DO fit the slots in the deck, though a little pressure is required to get them into place, and that the second and third deck structures also fit nicely. Kudos to AL! Also noticed that the bottom edges of the right angles of the structures aren’t quite aligned - about 0.25mm or so - and thus some sanding will be required to get the whole thing seated properly.