Greetings all,
For my first wooden ship build I chose Caldercraft’s 1:64 Ballahoo due to the good reviews of the company and guidance on MSW to choose something not to complex as a first foray into the hobby.
Although I am no beginner when it comes to plastic models (usually 1:72 and 1:48 aircraft), as I explained here in my introductory post, I would like to learn these skills so i can one day help my Dad finish his HMS Diana which has been languishing for some 4 decades or more.
Secondly and more recently, my wife asked for something nice to put in the windowsill aside from the usual Spitfires!
Since its my first model I’ve tried to manage my own expectations in order not to fall in the trap of letting the perfect be the enemy of the good and becoming disillusioned too early on. If I can get a result which looks halfway decent to the untrained eye then I’ll be happy!
I plan to double plank the hull and then paint her later, probably with a Nelsonian checkerboard but we will see.
I received the kit from my brother as a Christmas gift in December 2017. Tools I also acquired included a razor saw; 2 x forceps; square and measuring gauge. other tools were from my plastic modelling workshop.
---
Although there is a set of instructions and parts list the planking instructions are not really suitable for a beginner (being just a couple of paragraphs). in any respect, as one of the objectives was to learn about planking from the ground up, I researched as much as I could on this here and via other sources such as Mastini and other books.
---
Optimistically, I saw that there were fewer instruction steps than in an Eduard 1:72 scale plastic Spitfire…
---
On a more philosophical note, this was indicative of interesting initial observation between the two hobbies. Constructing plastic scale models is more of an engineering type of activity, with art thrown in (usually at the beginning, painting the cockpit interior and at the end, painting the exterior). there is less ‘craft’ in the actual construction phase apart from cleaning up the parts and sanding to fit. With making model wooden ships, on the other hand implies less instructions but more application of craft during the construction. or something...perhaps I’m just babbling.
In addition to browsing the forum I have got much inspiration from reading the Ballahoo build logs of @ekgb and @jim_smits of this kit. Over the last twelve months I’ve made rather fitful progress, as illustrated by my post here with questions on the bearding line etc from Feb 2017.
After cutting out the main pieces (false keel, rudder post; stem keelson) i discovered very little distortion in the ply & mahogany pieces. I tried to test the symmetry of each bulkhead using paper cut outs (after Mastini’s advice) but in the end it seemed that the differences were largely v marginal (less than 1mm) so decided that rather than get into a situation of losing what the reference should be by filing one side, I left them as they were. I also imagined this would be sorted sooner or later during the hull fairing.
----
The bulkheads were quite easy to fit and seemed to square up without too much trouble.
---
I constructed a quick baseboard off a disused bookcase and used metal right angle shelf brackets clamped to the false keel and b/h to ensure they were at right angles, checking with a square.
---
Bulkhead 11 (below) caused me some trouble to get flat and square since the slot is a bit loose. here you can see the top is faired to lie flat with the false deck.
----
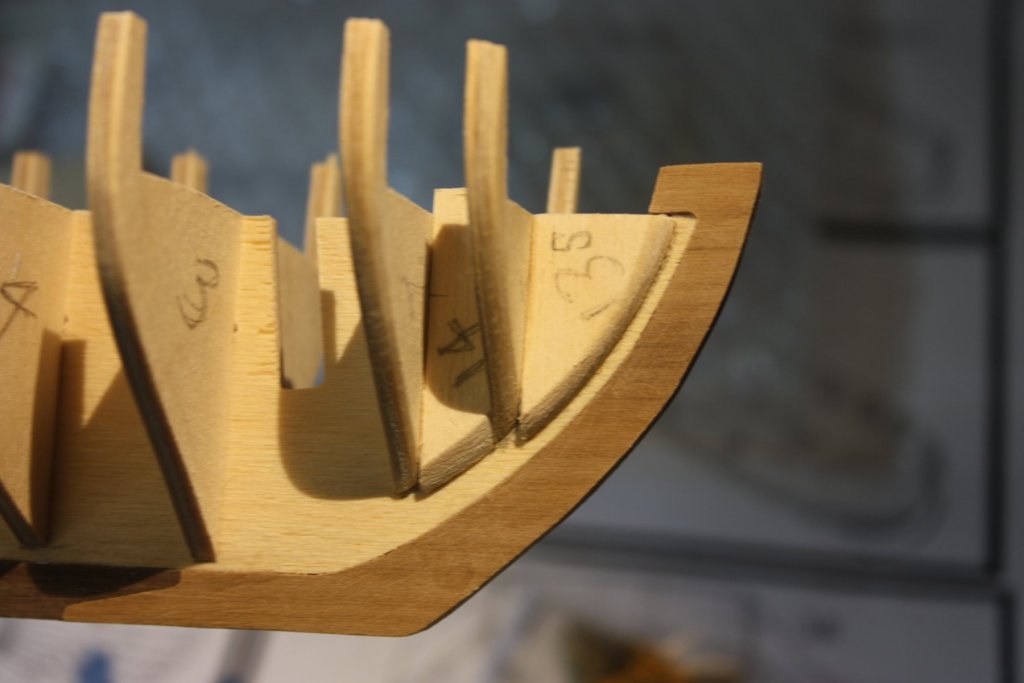
As I reported here in my previous post, I initially was too quick to glue on the keelson, sternpost and stem, so I removed these using IPA, cut the bearding line (thanks Joe) and then re-assembled them. Since the bottom of the false keel, when sanded for the rabbet, was quite thin (1mm wide) I pre-drilled some holes for pins and inserted them in to keep the mahogany parts in place. After I have completed the planking I’ll remove the pins.
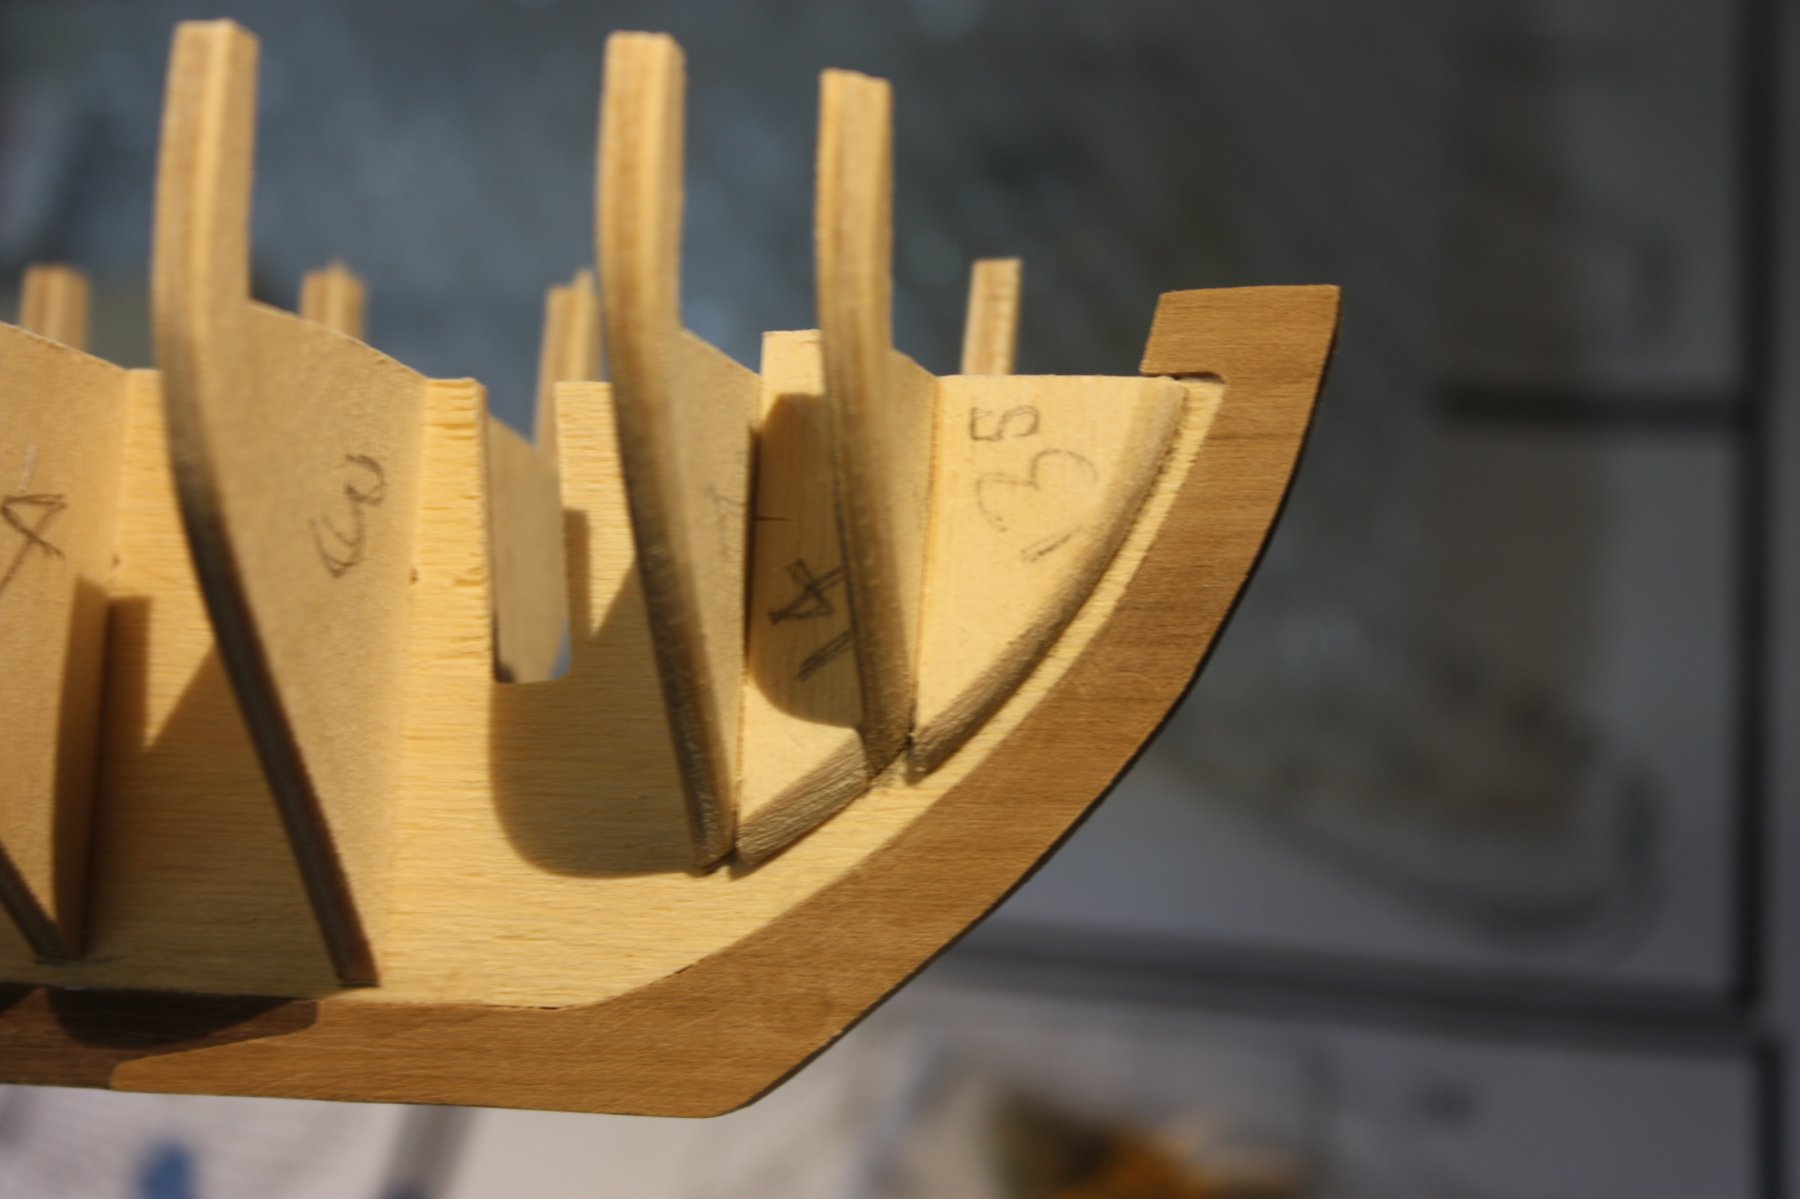
After installing the B/Hs I then created some bow fillers out of balsa. I used these instead of the supplied ply that the kit asks to be installed between BH1 and BH2. This is because there was a discrepancy between the height of these parts and the plans, in that they were too short and gave rise to confusion as to where I should have cut the bearding line. Making these blocks took me a while and was quite frustrating as it was difficult to get the right shape. After I prepared the bow blocks, these were reinforced with spare bits of ply as they were found to be too narrow in beam when faired (and even now, later on, I think the port side is not quite right).
---
I then spent a few happy hours fairing the hull. I think I did an OK job with this, apart from having trouble rounding off the fwd and after edges. At the bow the BH fairing worked out ok but I think I went overboard on the fairing on the last two BHs. We will see how it goes. I then installed the false deck.
Next came the gunport patterns made out of 3mm plywood. These were very difficult to fit and get right, despite being soaked and bent around a mug. I split one above one of the gunports and had to reglue & clamp it. In the end, as shown by @ekgb they did not meet all the tops of the bulkhead horns.
---
The placement of where they should go at the bow was also a bit ambiguous so I ended up, after pinning them, ensuring that they were level with the top of B/H 11 and the 6mm hole for the bowsprit.
---
Upon final inspection i see that they are not quite level. Hopefully it won't be too noticeable and I can adjust with the planking...
---
After a hiatus of some months and after reading a lot on MSW and the various books and guides on the online library here (especially useful was the planking primer and the videos and tutorial by David Antscherl) I recovered some momentum, bought a plank crimper and bit the bullet to begin planking.
After measuring the parametric length of each BH and using a planking fan to identify the width of each plank, I marked the width of each plank on each BH. Later, after having read some more and pontificated for a few days, I redid this and rubbed out (mostly successfully) each pencil mark and instead established four planking bands using black cotton thread, checked they were fair and then marked each band with a felt-tip pen.
I bought several boxes of bulldog clips to cannibalise for planking clamps, after trying drawing pins and various other techniques to hold the planks flat against the BHs.
I tried a few methods to measure and install the planks before settling on an approach that works (at least for me, presently).
As has been pointed out previously by @ekgb, the bow on Ballahoo requires quite a bit of spiling in addition to tapering. I estimated that at the bow, the curve would need a plank three times as wide as that supplied by the kit to accommodate the correct curve. As I didn’t want to buy a whole new set of wood wide enough to allow me to spile each plank, I resorted to lateral bending.
To establish the right curve for the plank to follow the wale, my first approach was using airbrush masking film, taped over the wale (making sure to get it to lay flat) and then, by running the side of a pencil along, marking the run of the bottom edge of the gunport pattern. I found that the curve was generally between the stem and BH 4. As per the planking primer available on the library here, once I had the curve, and the width of each plank at each BH, i was able to create, on the masking film, the outline of the spiled and tapered plank. This could be used as a template to be placed over the kit supplied limewood planks (1mm x 4mm).
---
It was of course necessary to figure out a way to bend the plank laterally (i.e. across its width) and for the first three planks I employed a simple jig I built after some inspiration from others who had constructed jigs using MDF and bits of scrap to act as formers for the end of the plank.
---
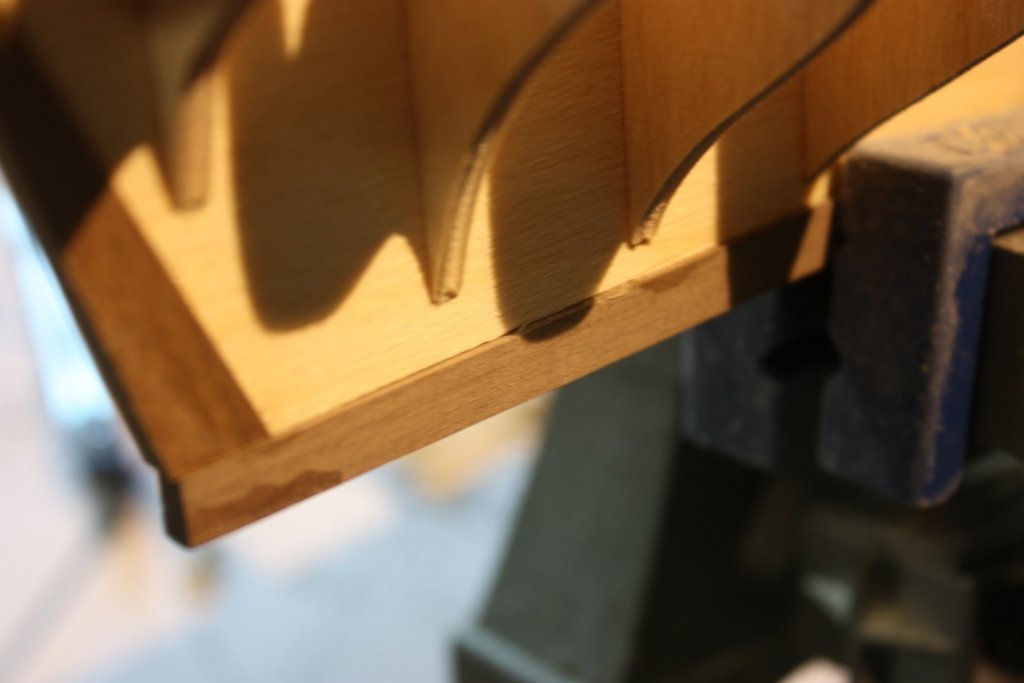
However, I found that this was rather too brutal and I ended up snapping a few planks so in the end I resorted to a quicker and simpler method. Instead of scribing the curve for the lateral bend on a piece of masking film and then cutting the taper out from underneath it (requiring 1 piece of masking film per plank), I found a quicker approach was to use a card template (port and stbd side) and draw the curve on the wood baseboard. The width of each plank at each BH position was calculated by dividing the width of each planking band by the width of each kit plank. I used four small plastic clamps to get the right curve aligned to the template and this was quicker and easier and so far has resulted in less breakages of the planks (or it could be my skill level is improving, who knows?).
---
First plank - this was tapered and spiled using the masking film and jig method thus resulting in a bit of a ragged appearance imho (luckily this is only the first layer). However, I was pleased with how it bit into the rabbet and it didnt need too much coaxing to lay flat against the BH and filler blocks.
---
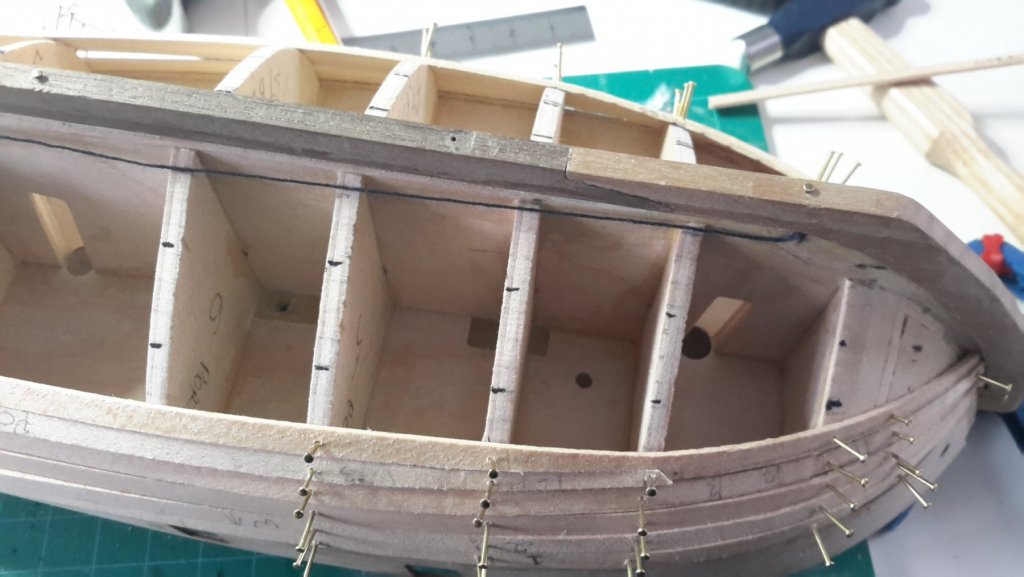
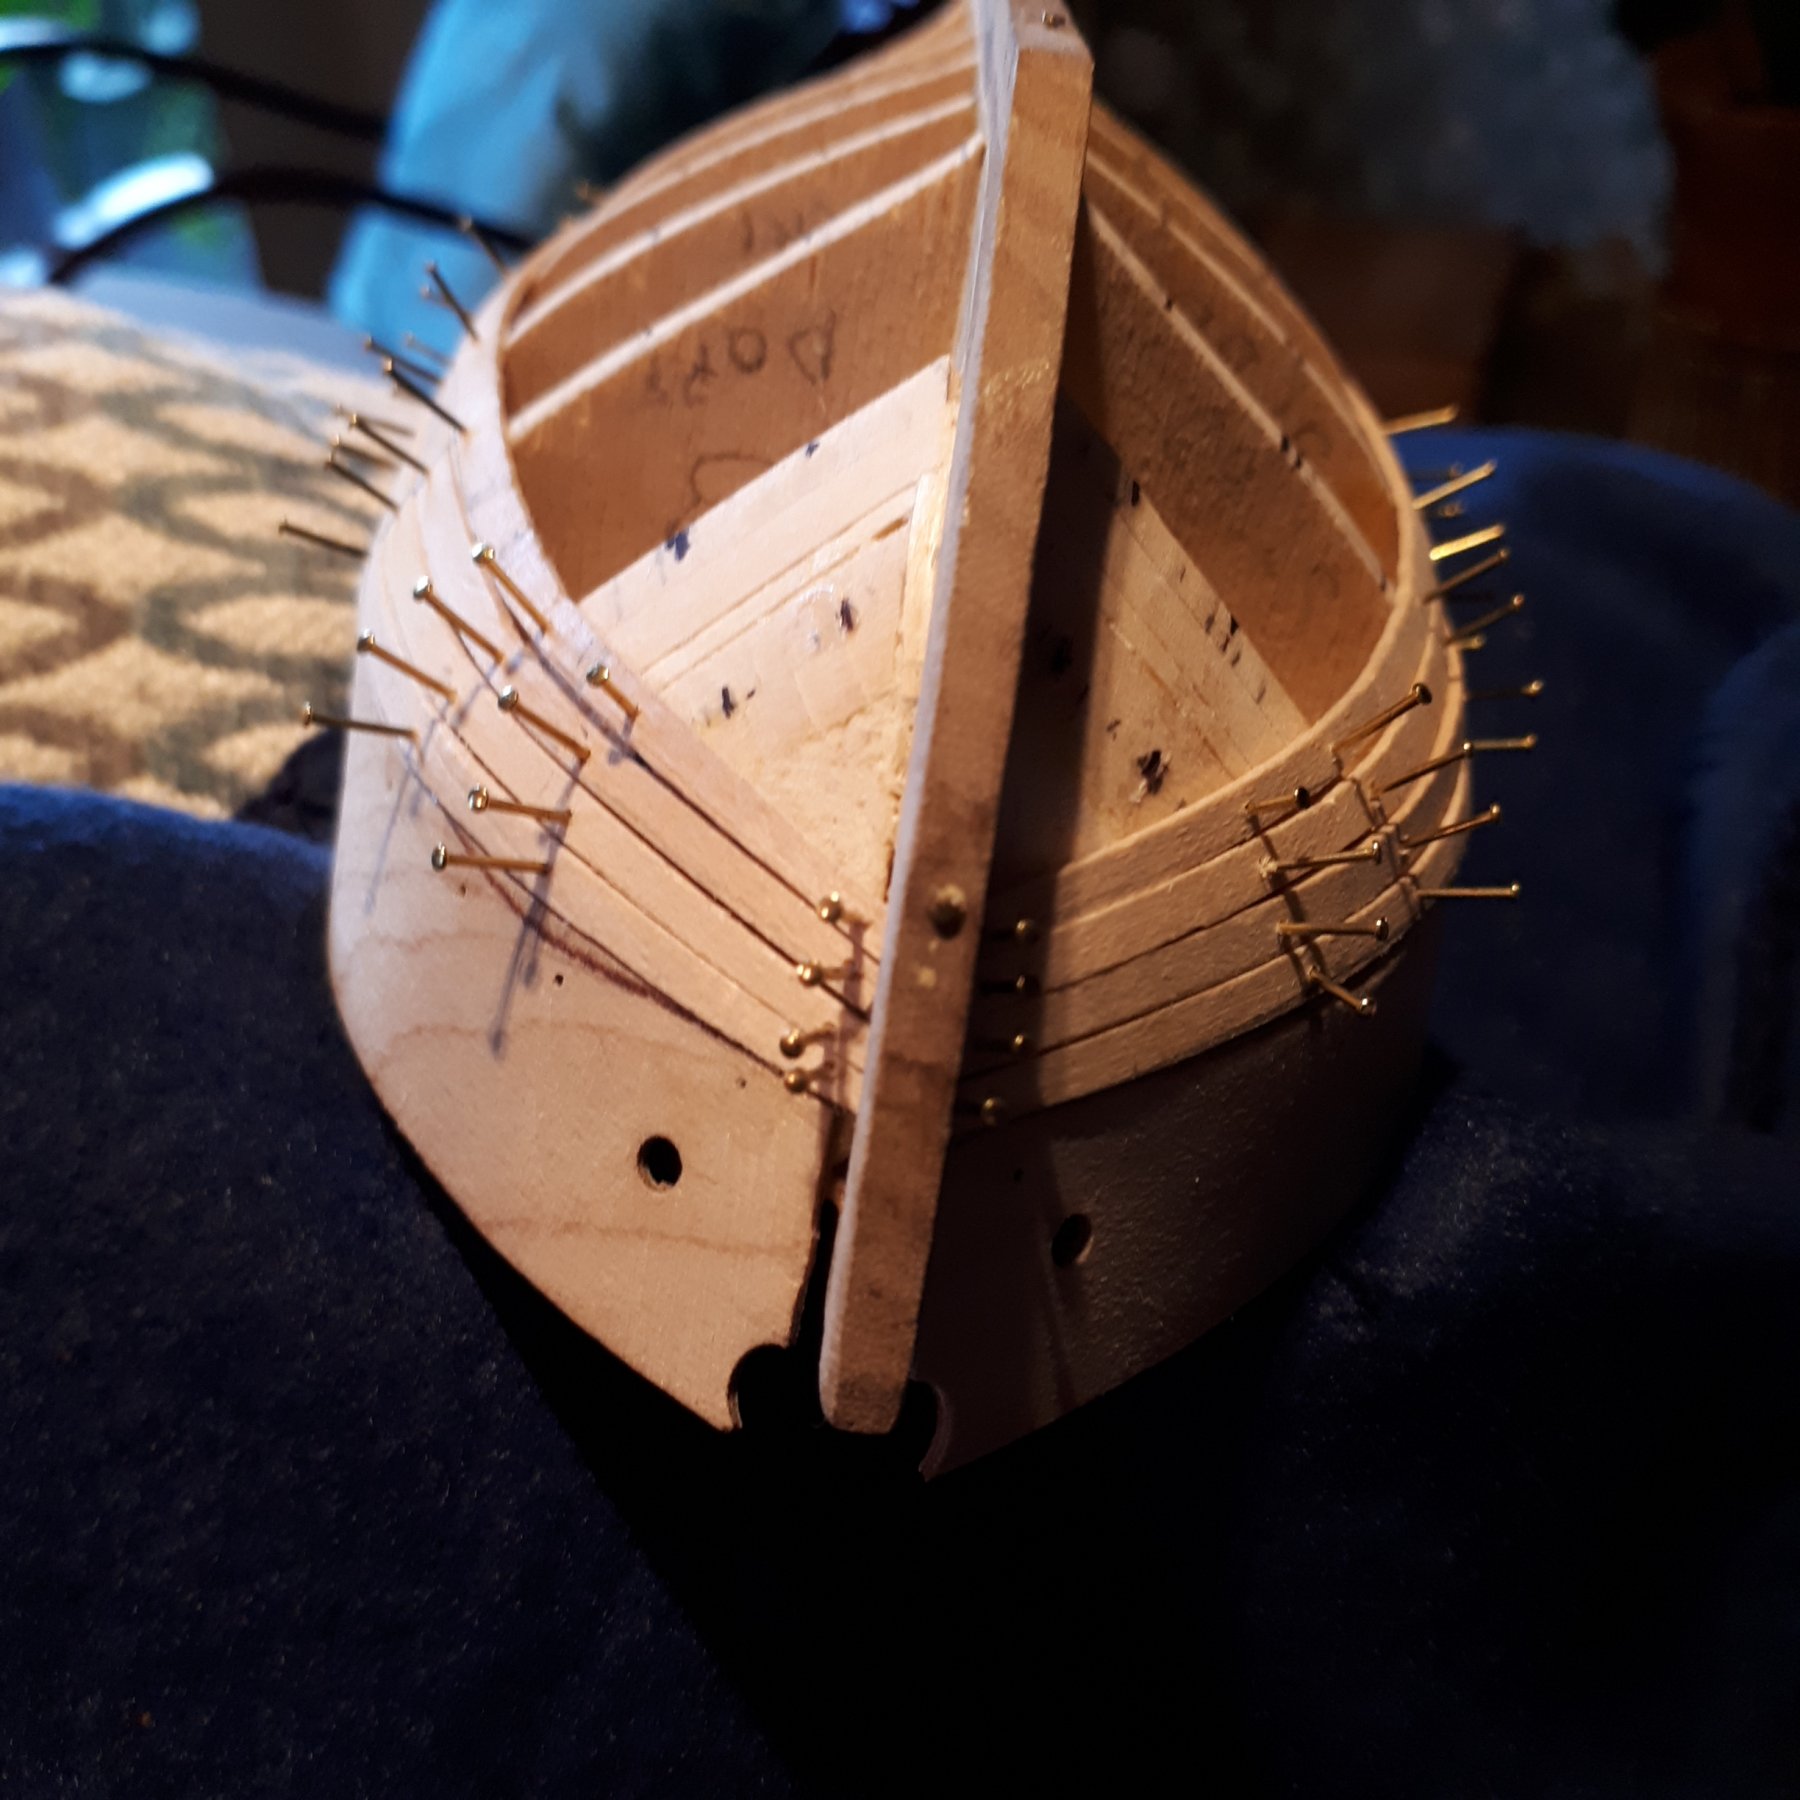
First band of planking done on the port side. To get to this required about four or five attempts of planks with the wrong curve (usually not enough), which, because I’d already tapered them, had to be discarded. Lots of spare bits of planks in the model shipyard. Other issues were me cutting through the plank with the crimping tool, or the plank splitting when I tried to hammer a pin in (I resulted in pre-drilling holes).
It looks quite rough and ready, I’ll admit that. These were tapered and spiled using the masking film / pencil and jig method, which probably accounts for their rather rough appearance.
In the flesh is not so bad and although it seems on the photo to have a discernible clinker effect in reality is that much. There are gaps between some of the planks, especially around BH2 but nothing that filler won’t be able to fix.
You can also see the pen marks of the planking bands.
---
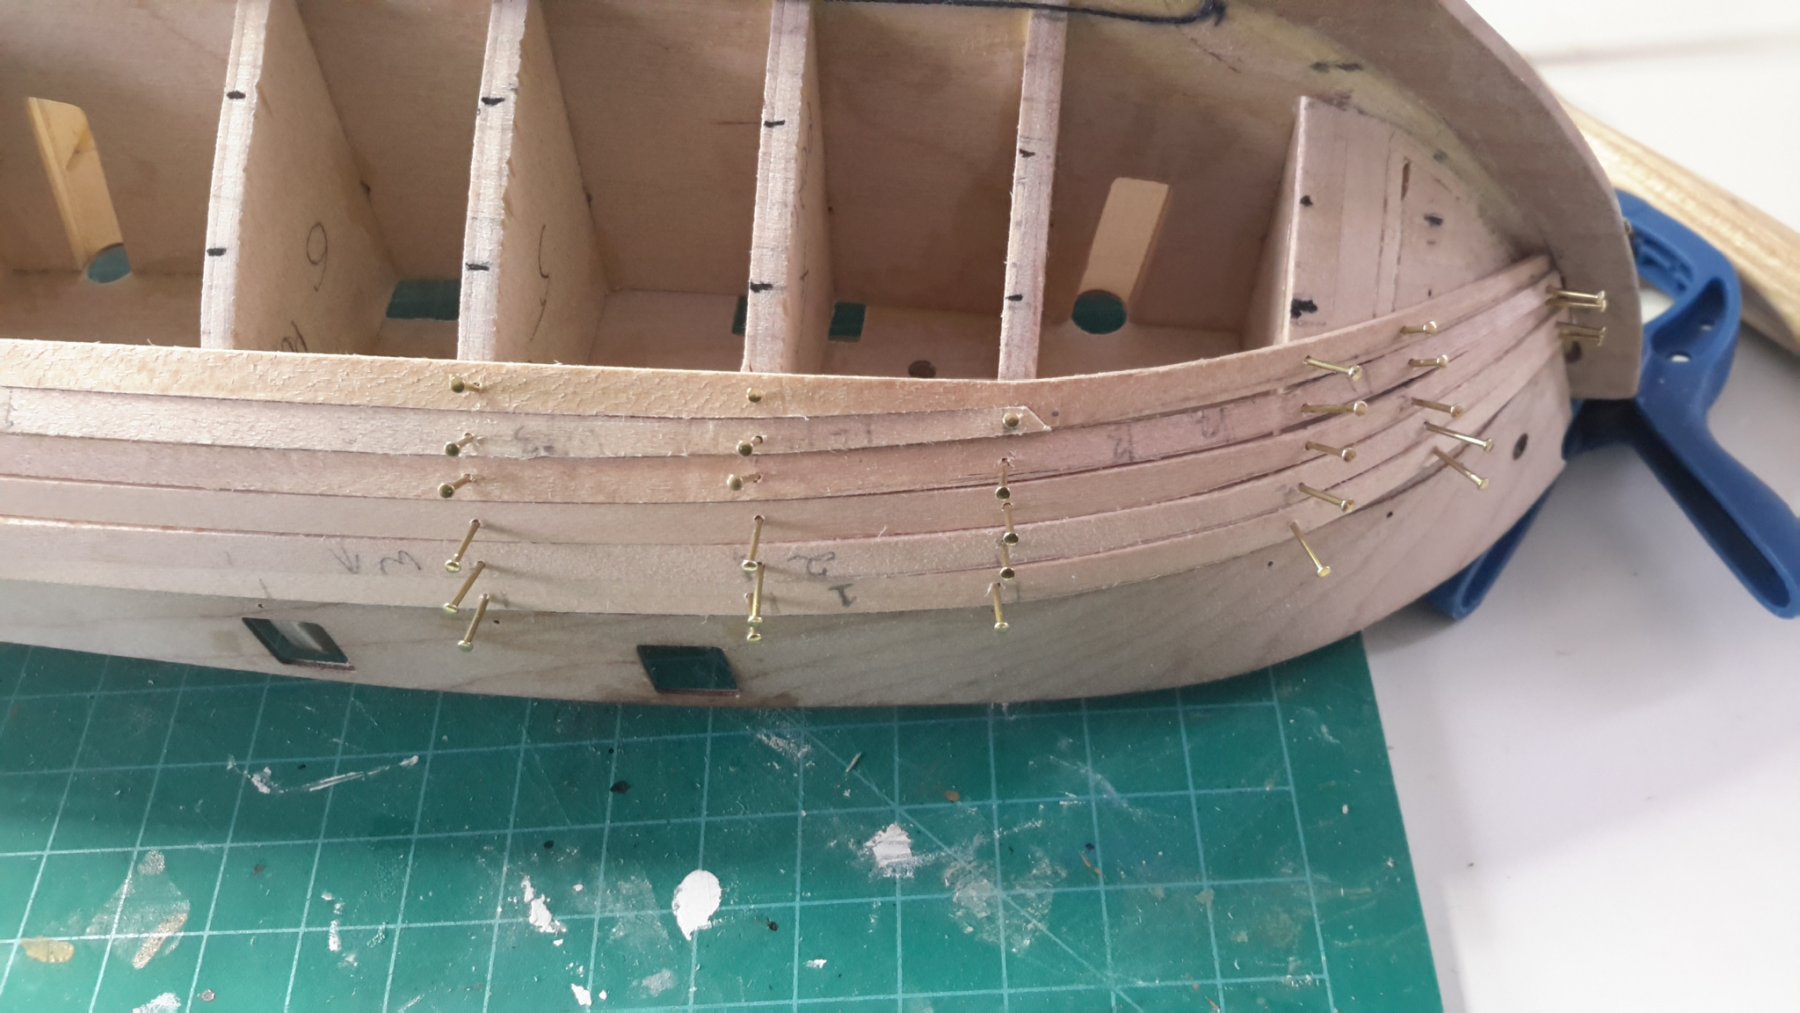
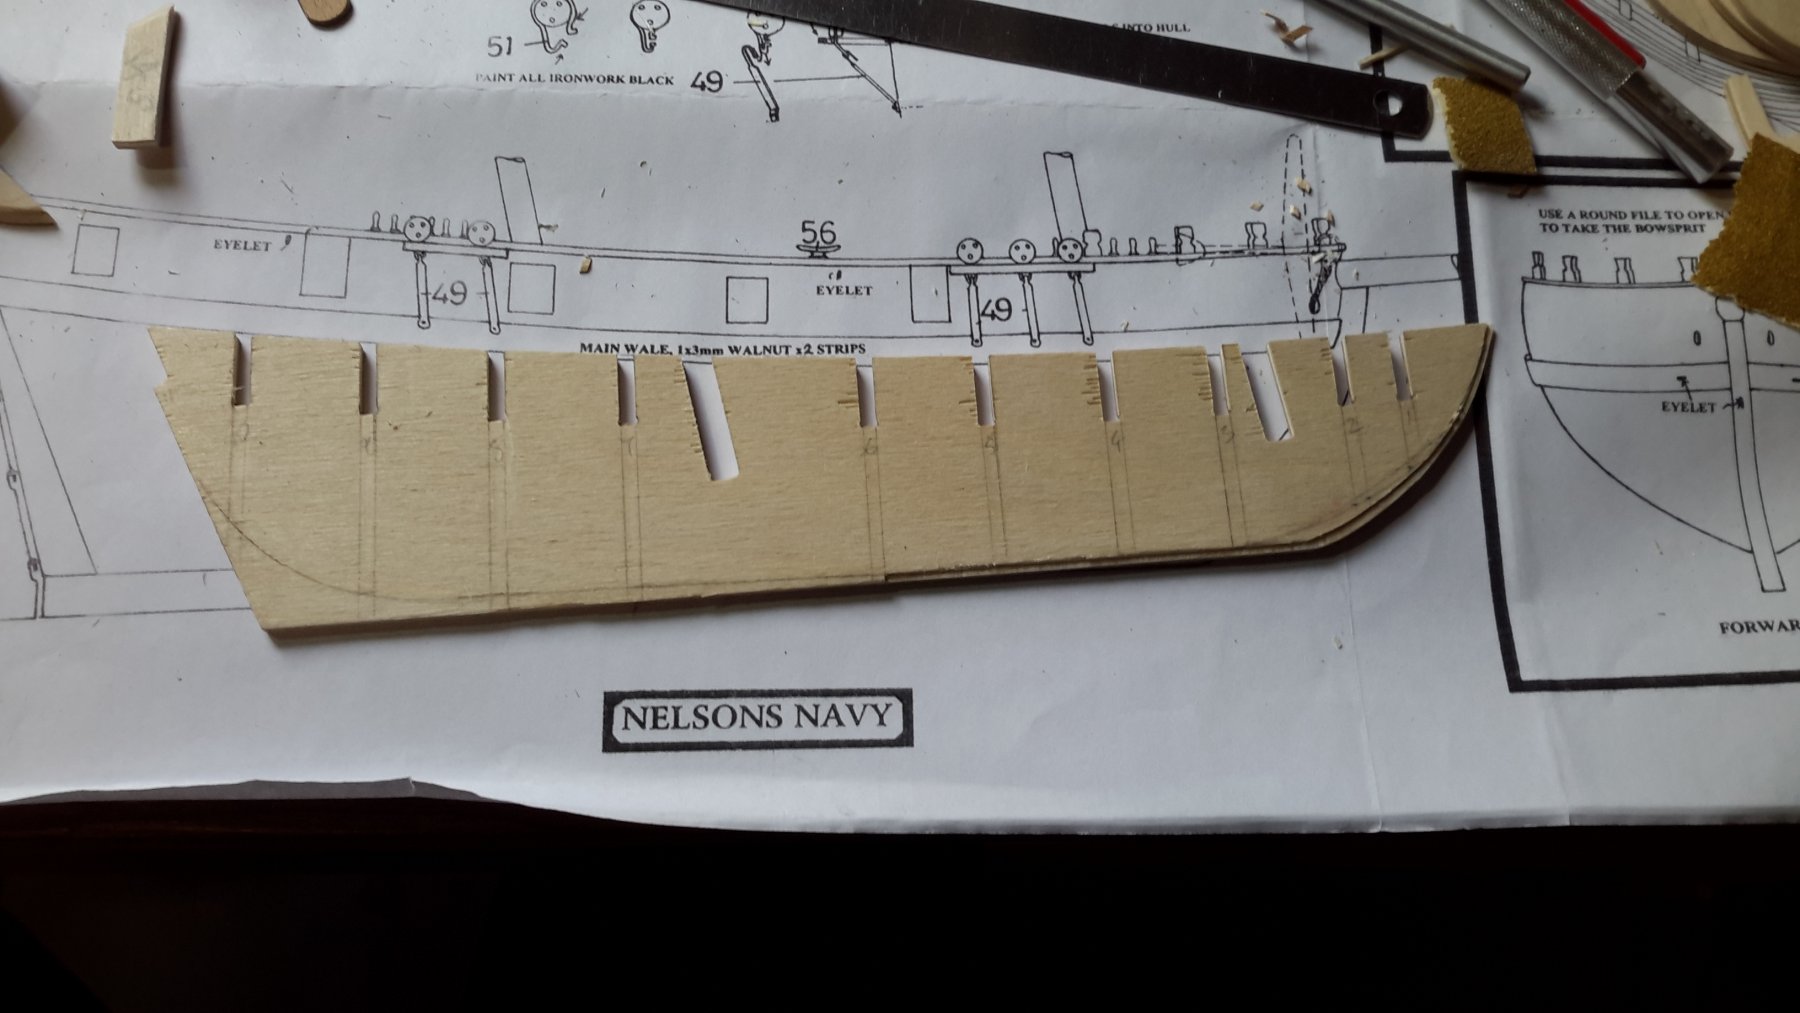
On the starboard side its much cleaner (so far). This was spiled and tapered using the card template and pencil line bending method. The cotton thread to mark the planking bands is still attached.
---
I also tested many different approaches to steaming / heating the planks. After the lightbulb went on that its the heat, not the water that has the effect, I adopted a successful approach of dunking the plank in a just boiled kettle for 30 mins, taking it out, forming it to the pencil line template on the base board and clamping, then heating it with a hairdryer. within an hour or so its cooled and dry and retains the shape. I can do a couple of planks per night this way … accounting for the important use of the kettle to brew tea, of course!
I’ve not done anything to the planks to bend and taper them at the stern yet, I think that for the first strake at least 1 stealer will be required.
That brings things up to date (Jan 2019). My plan is to do both bands below the wale (not forgetting the stern of course), install the garboard plank (I bought a specially wide piece of stock of 8mm for that) and then do the first band above the garbord.