Barry1
-
Posts
47 -
Joined
-
Last visited
Content Type
Profiles
Forums
Gallery
Events
Everything posted by Barry1
-
Thanks!!
-
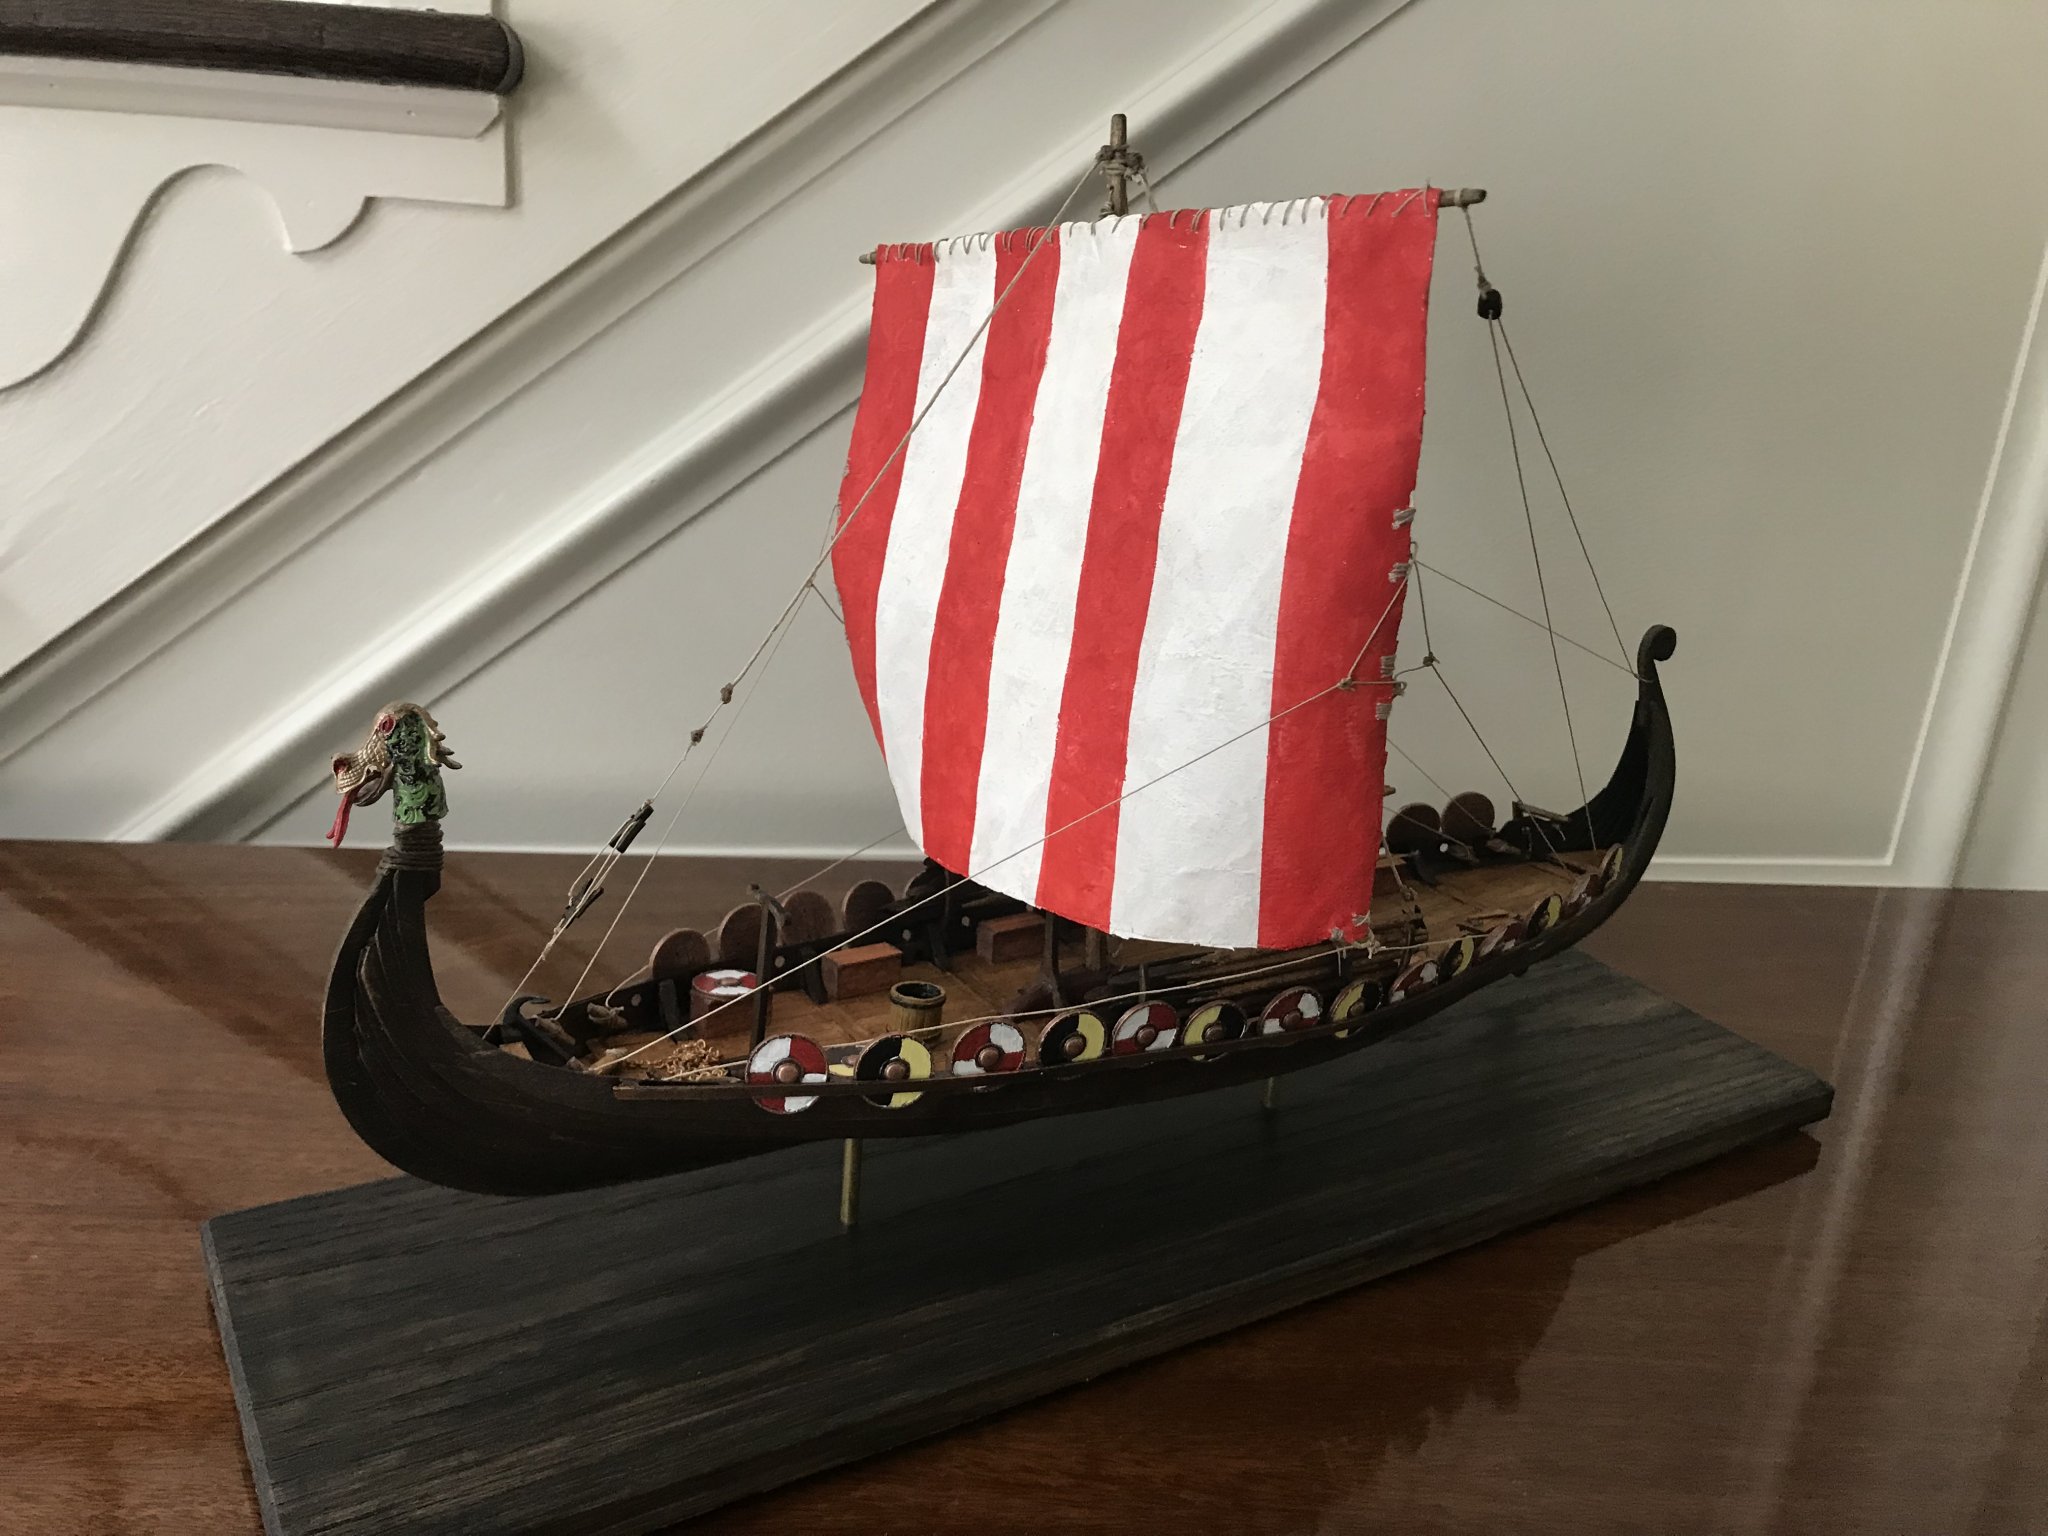
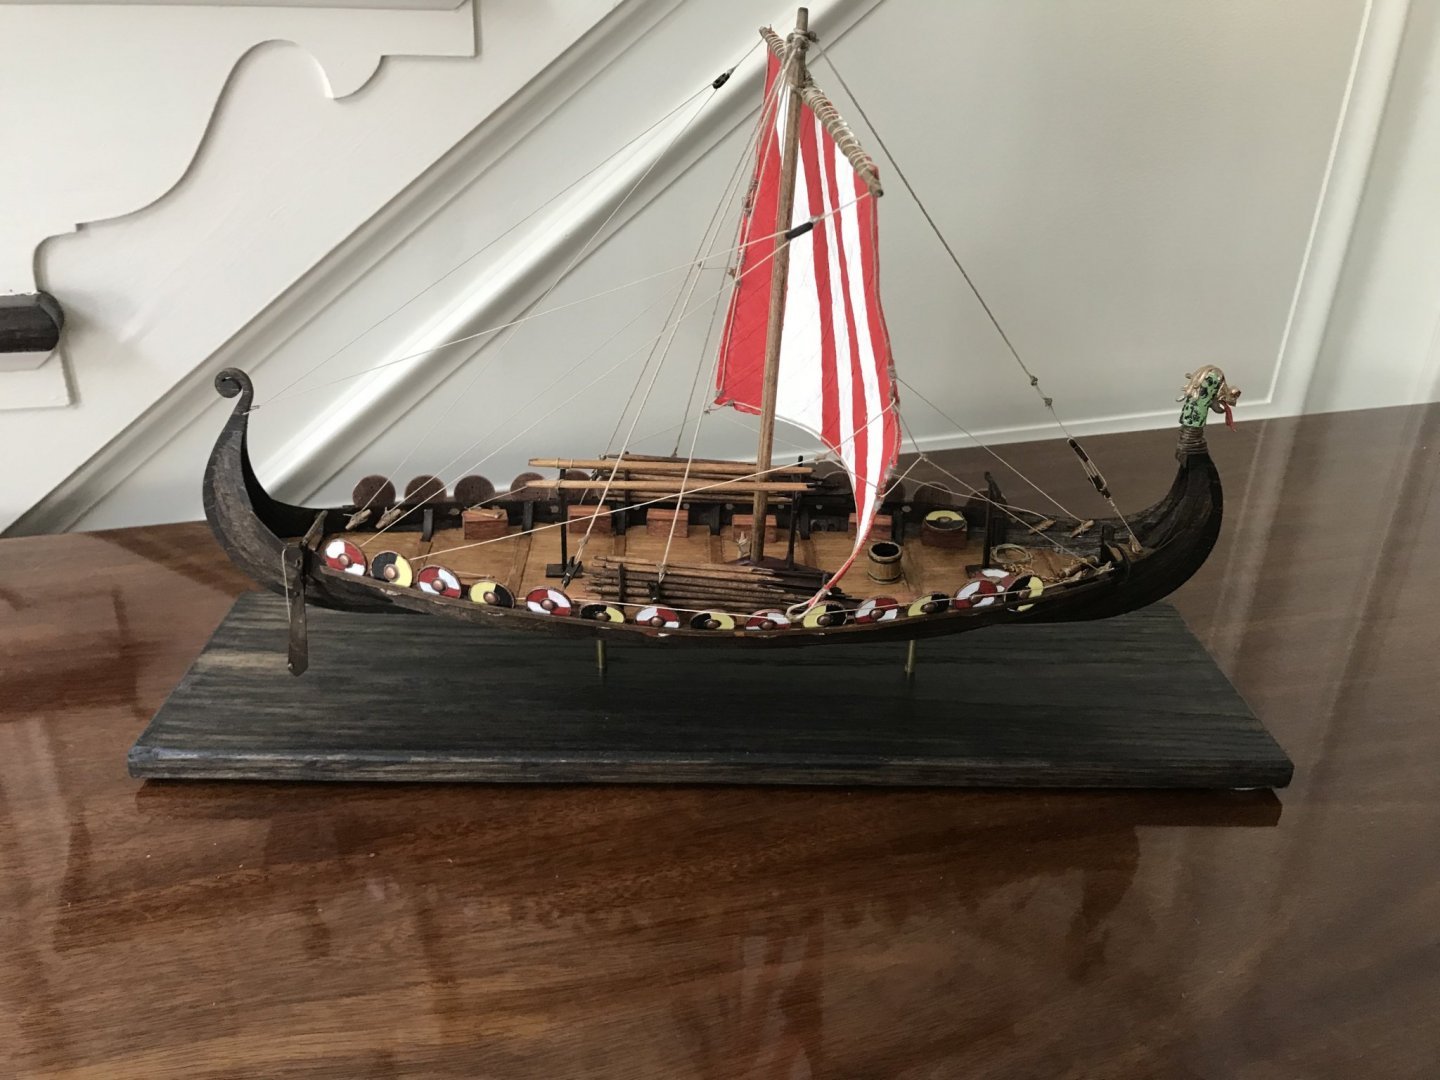
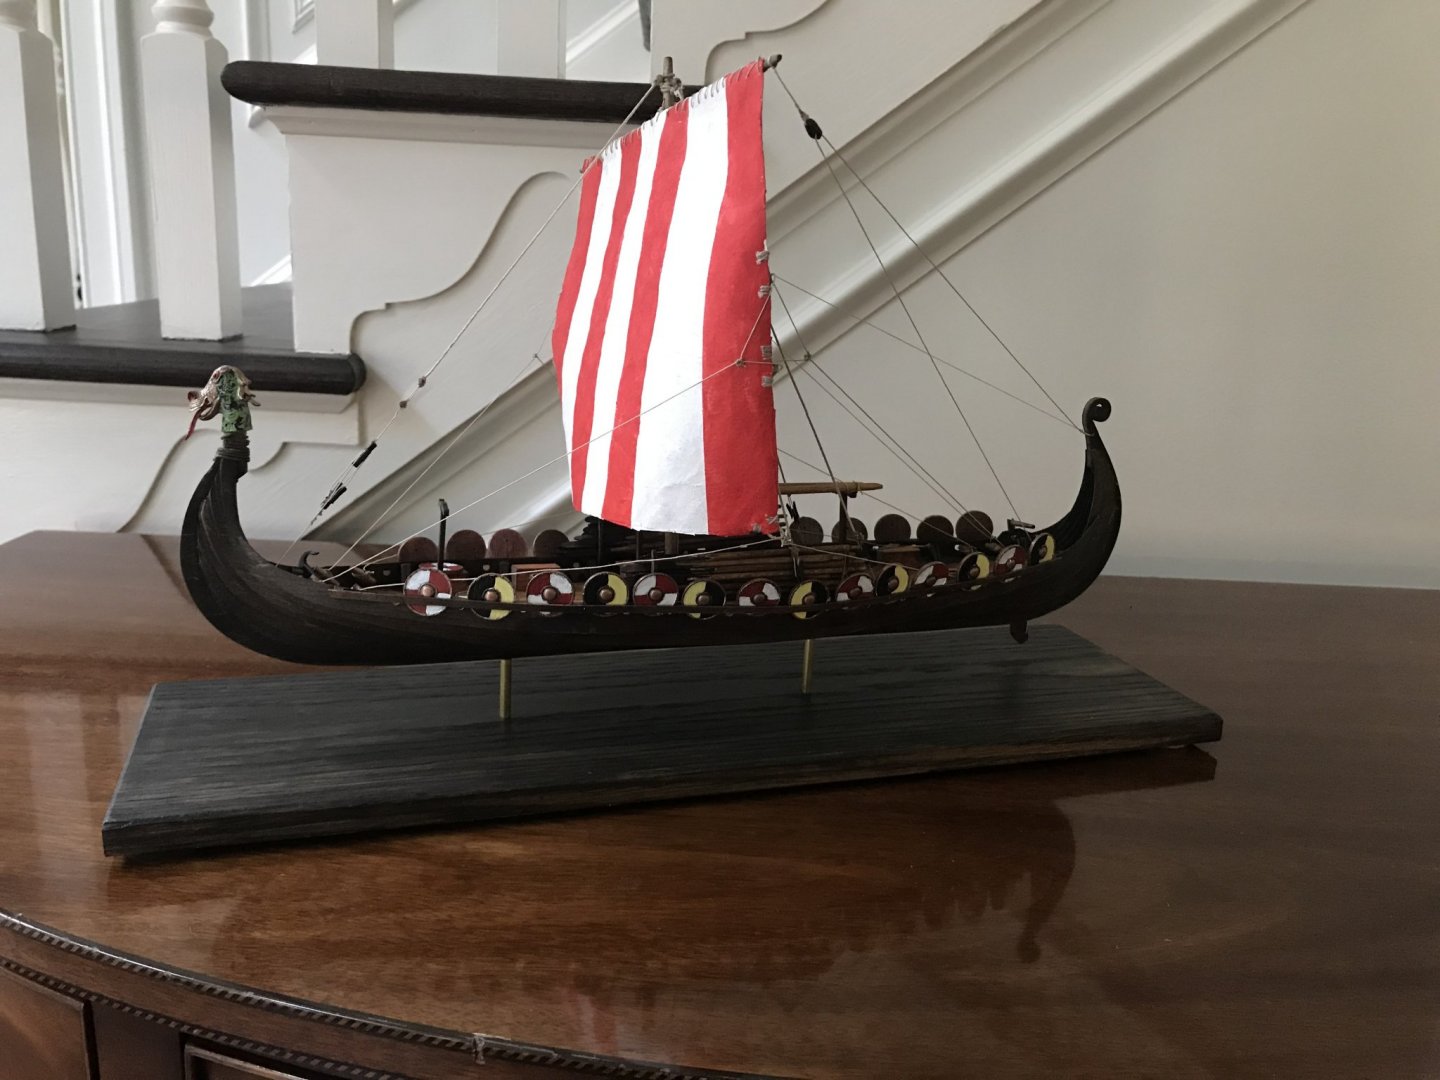
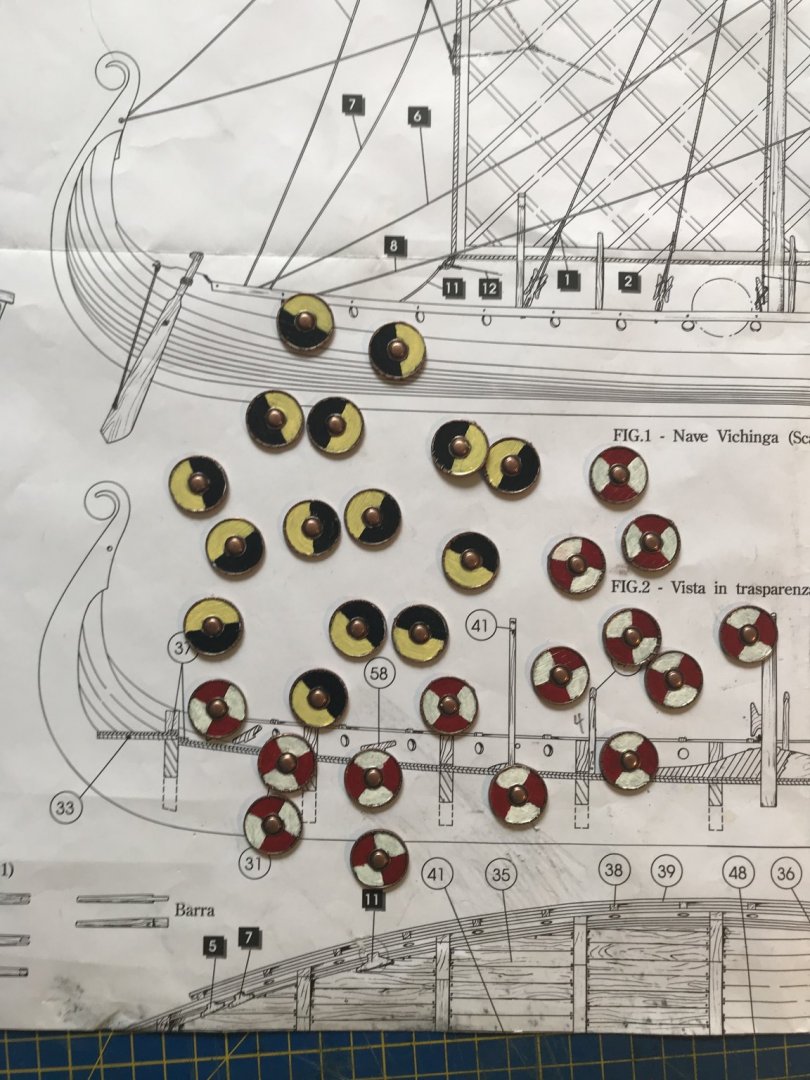
Thanks!! There is quite a bit of debate on the shields are their placement. I hedged by trying to show the ship at sail, besides I liked the look of the shields in the rack so took modelers prerogatives over most accurate historical interpretation😉
-
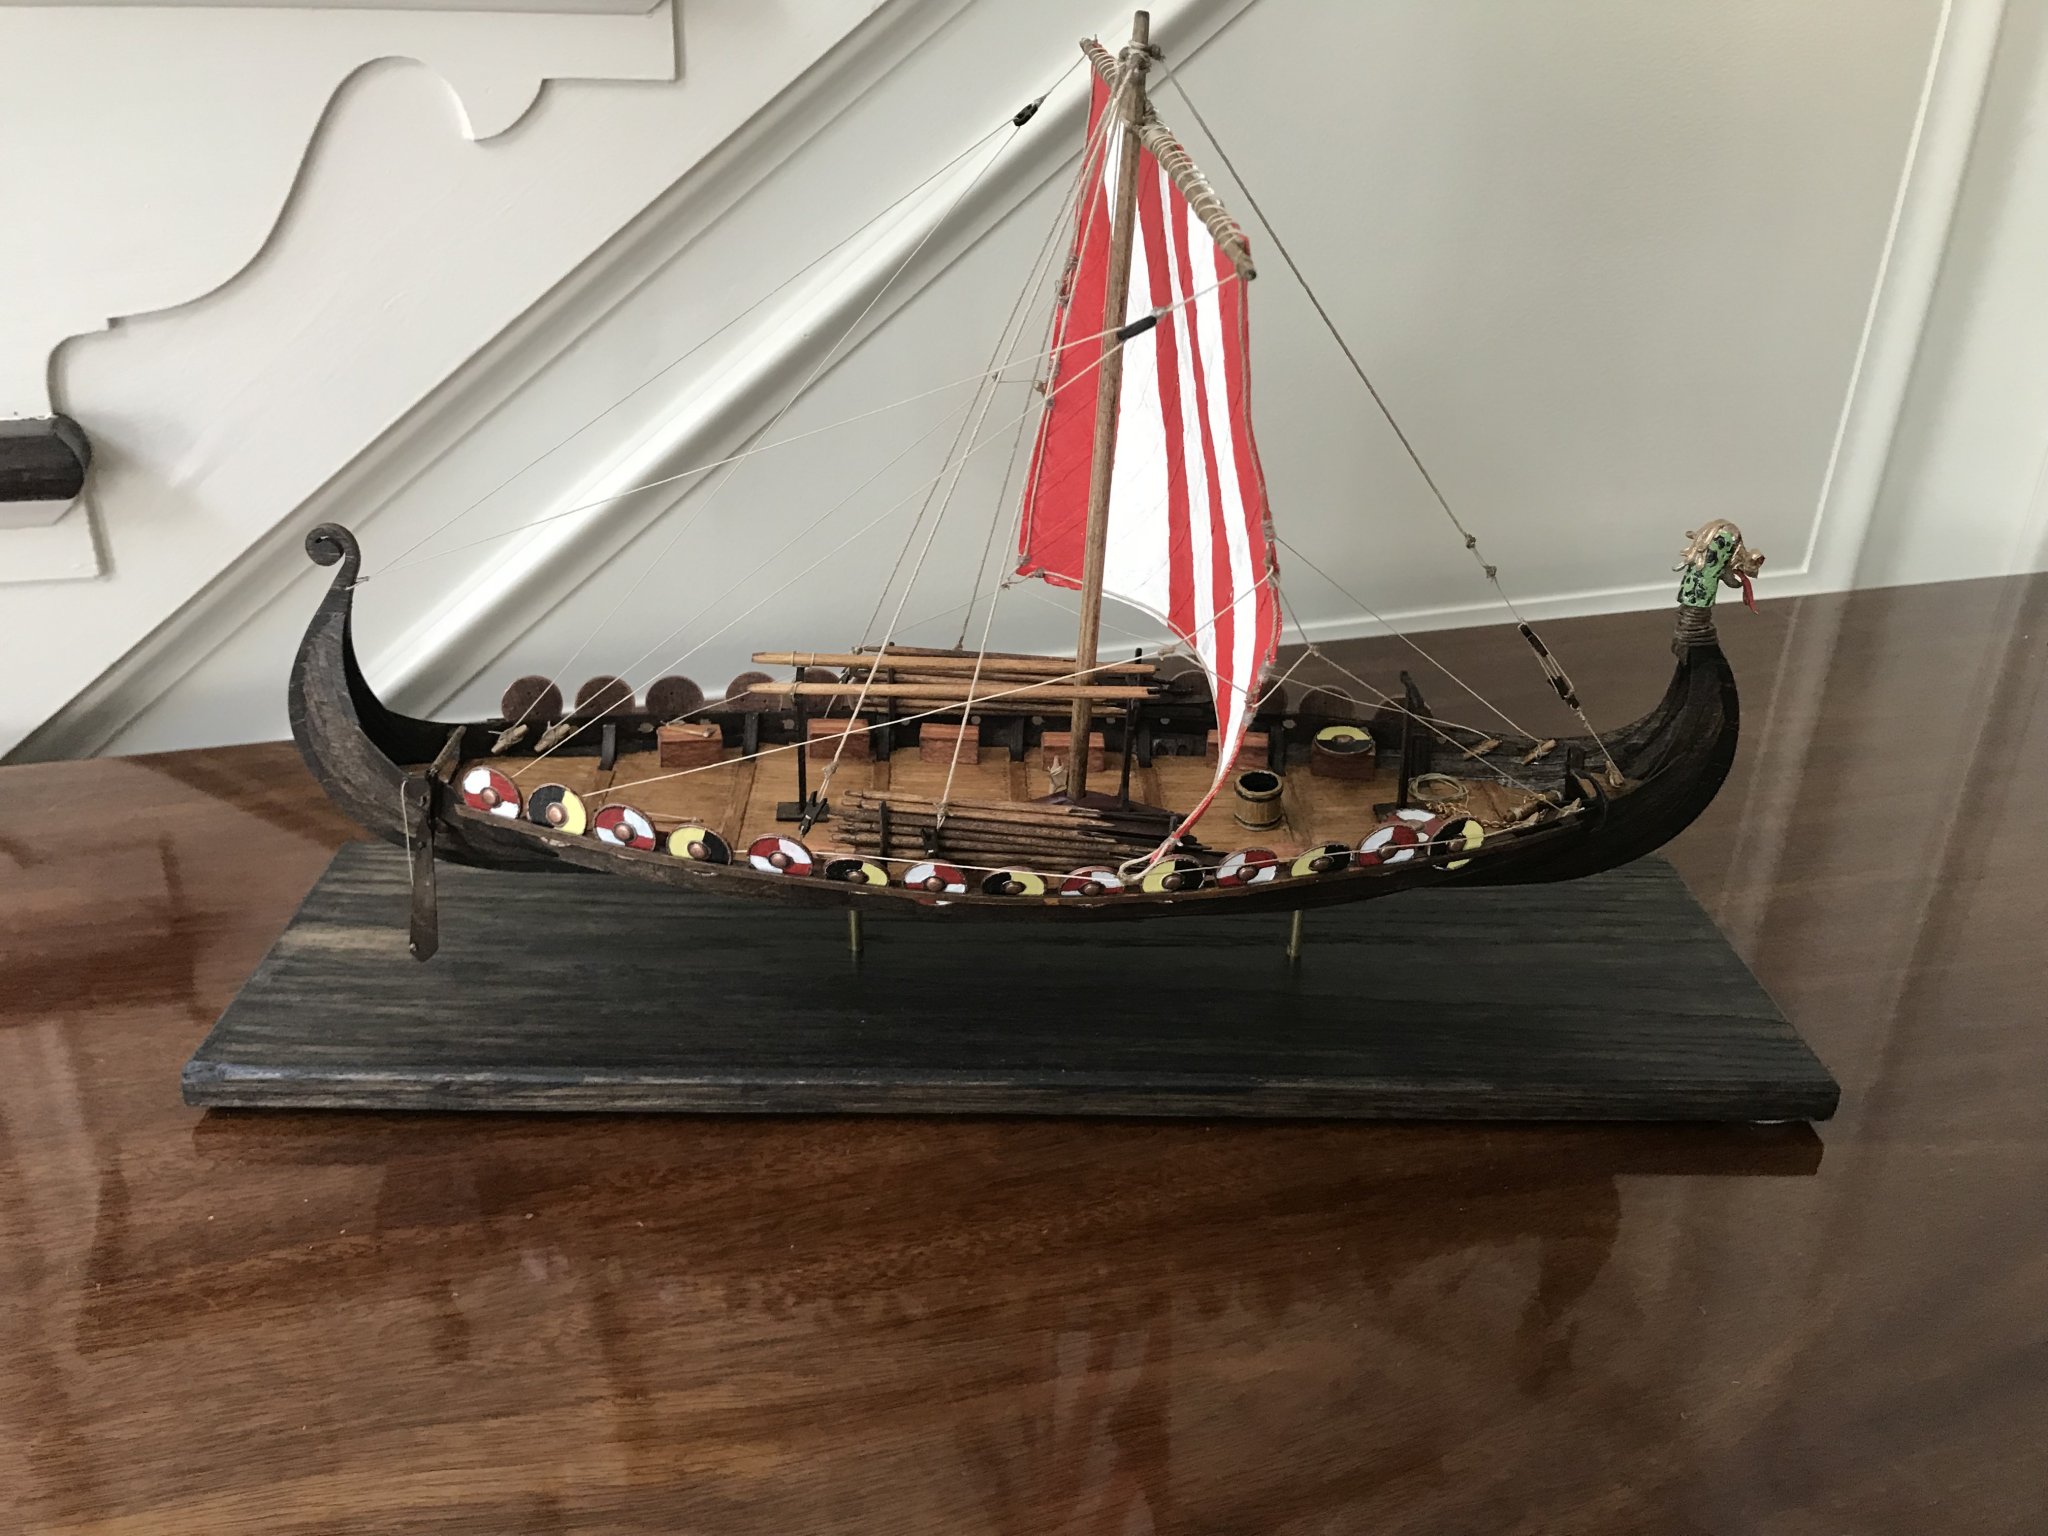
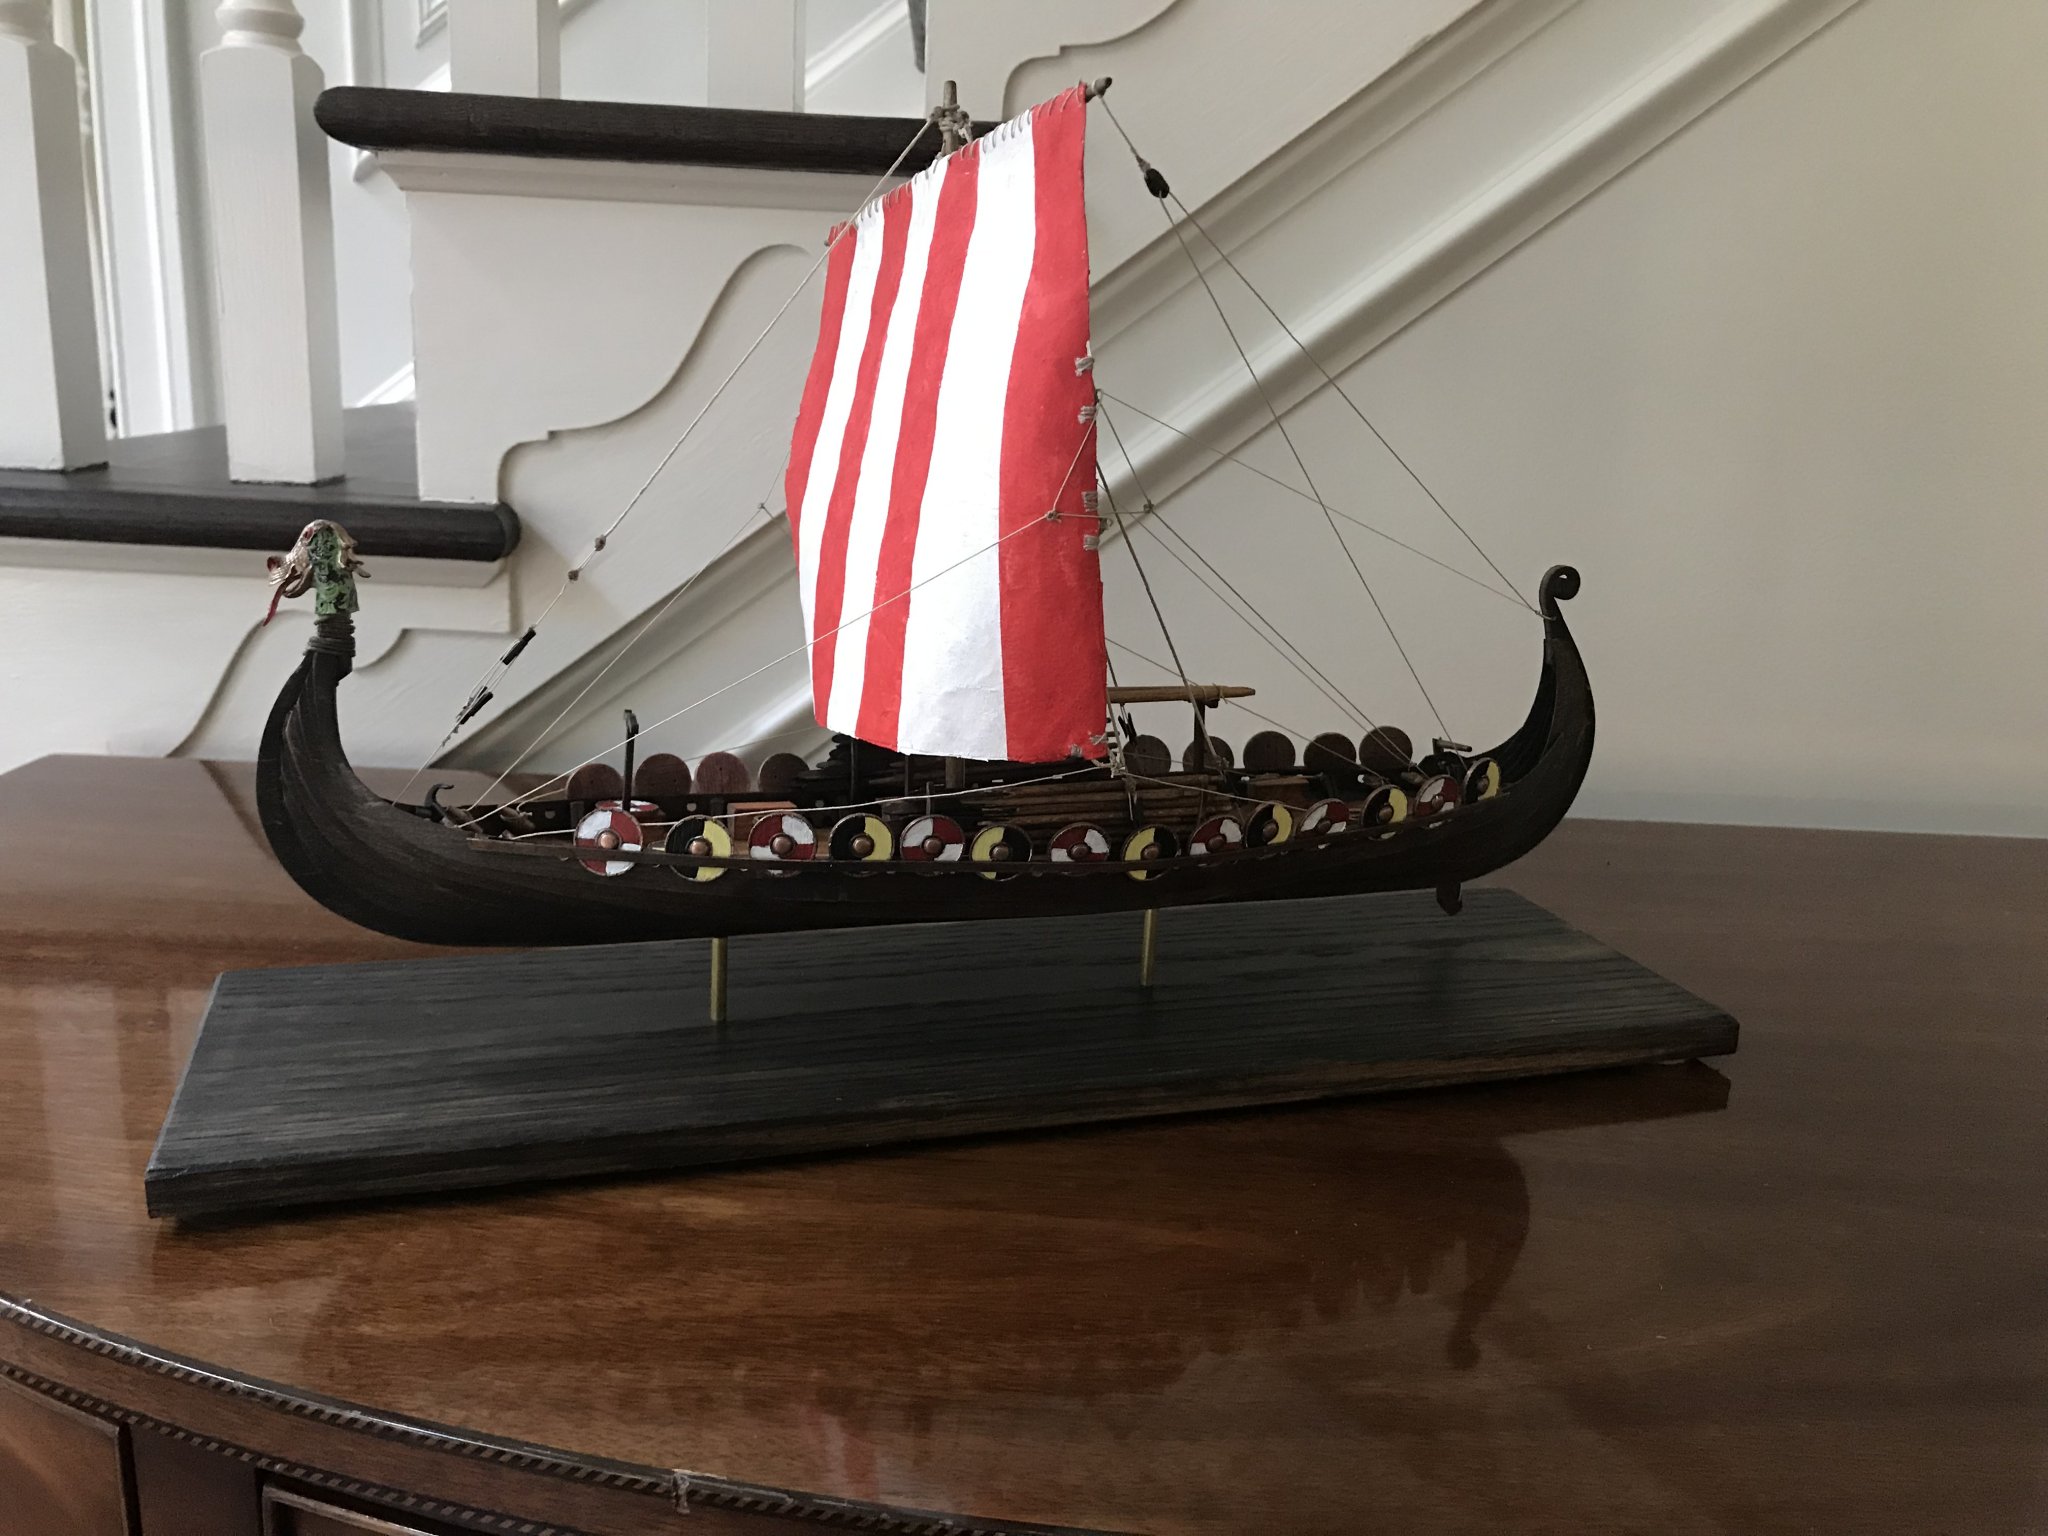
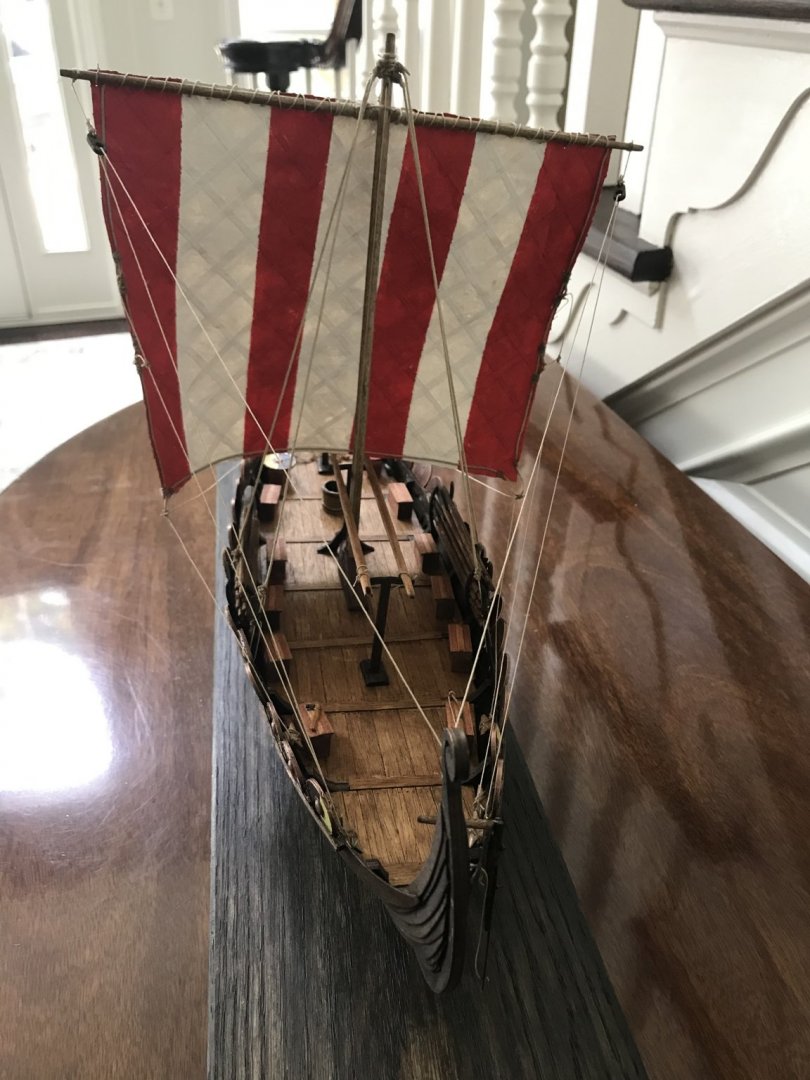
I have now finished the Viking Ship. The rigging was straightforward but a challenge due to the small scale. I added several chests to the deck as well as a couple of the items supplied in the kit, an axe and a bow just for interest. This was an enjoyable kit to build. The English instructions and pictures were adequate, however, a few steps did require some imagination. Wood quality was fine as well. I do suggest good stains and paint to bring the ship to life.

-
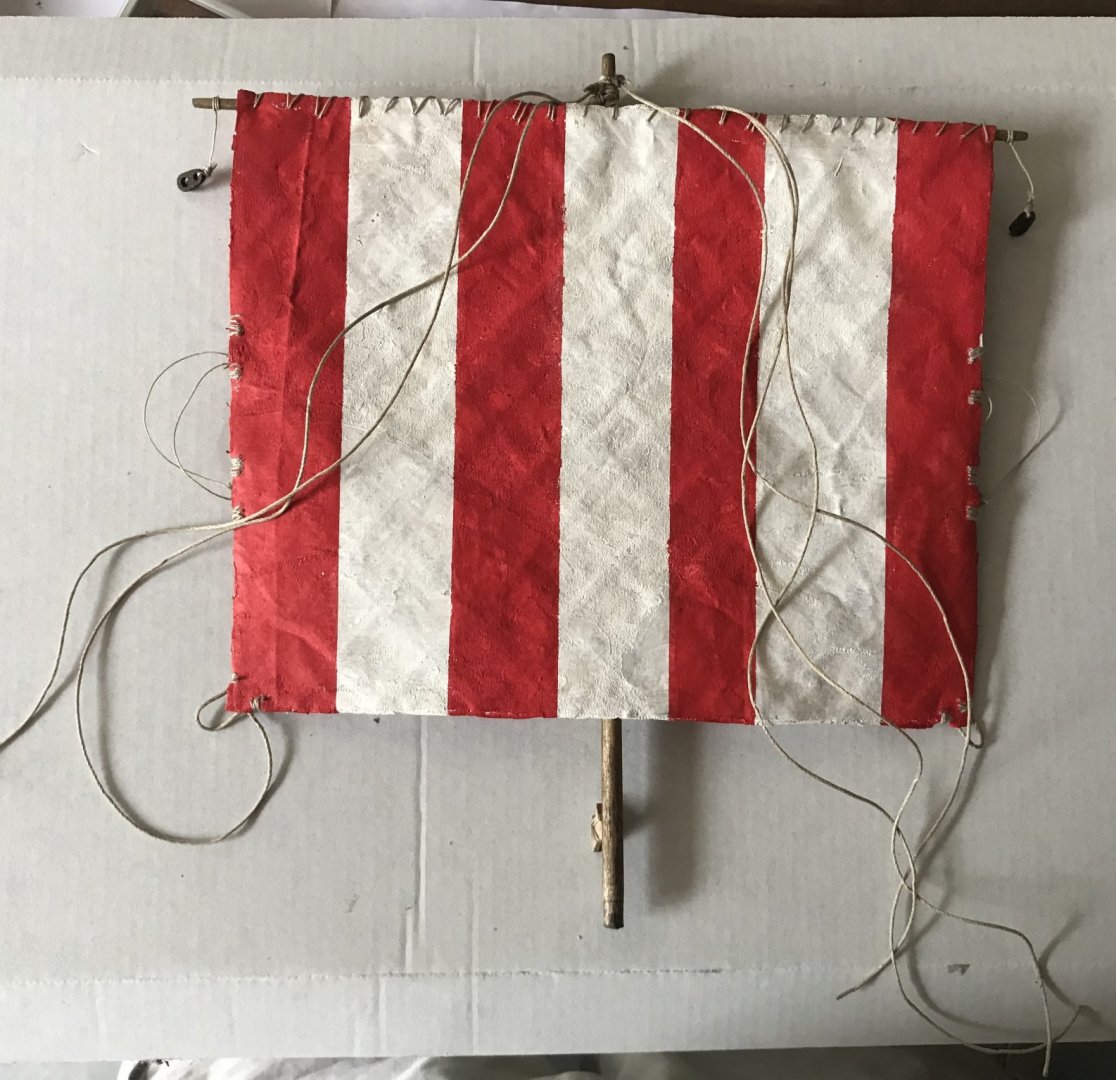
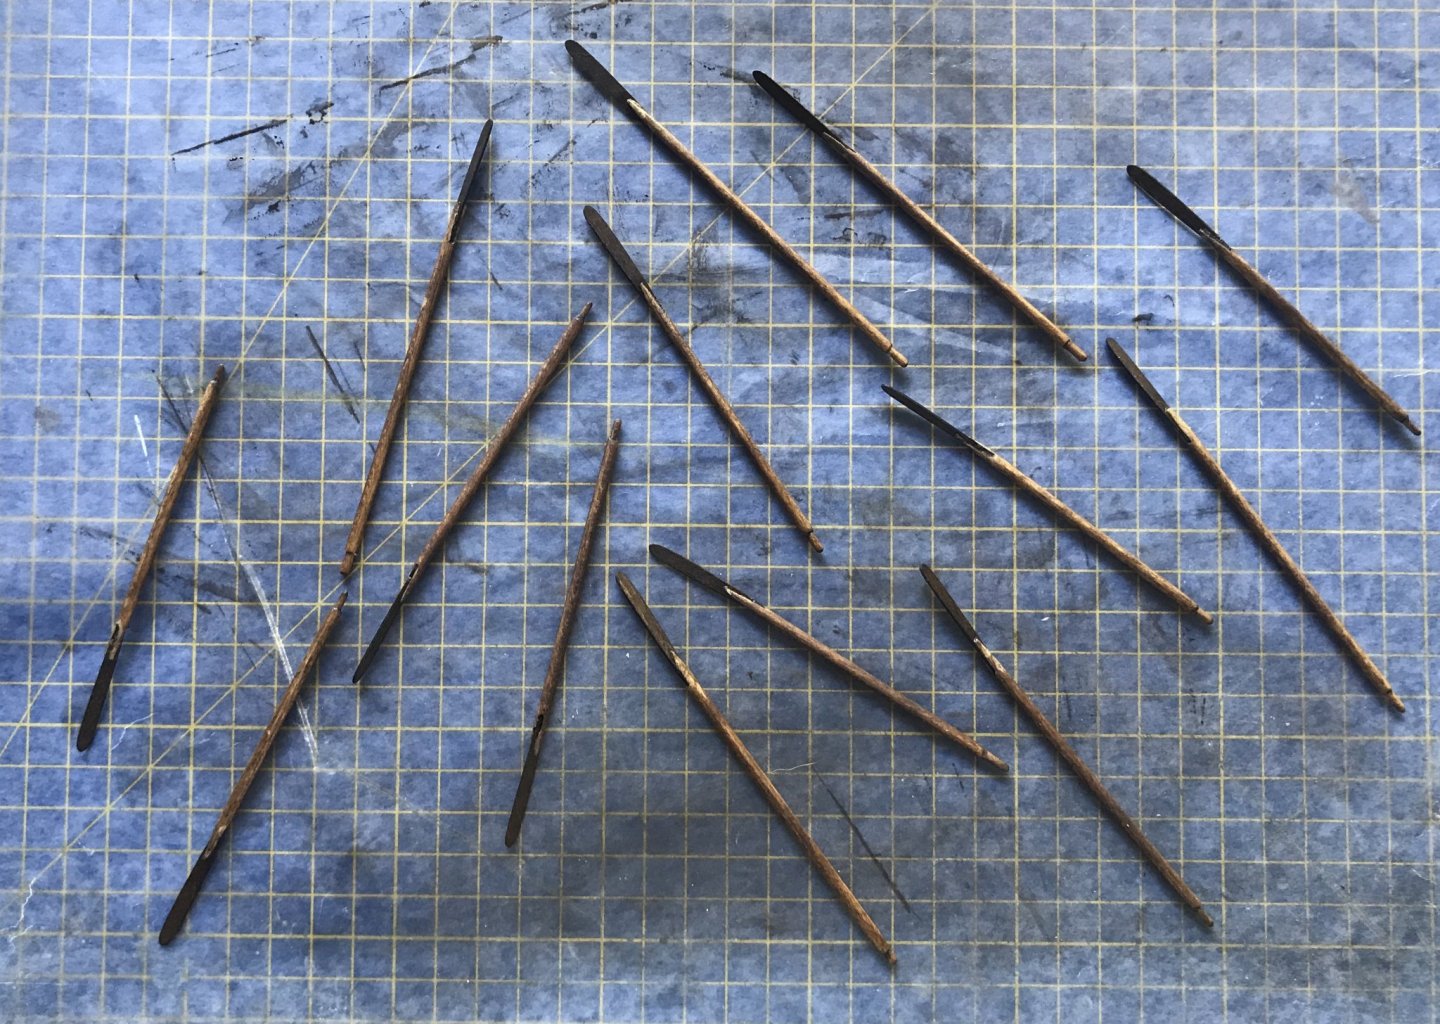
I’ve made quite a bit of progress on the ship since my last post. I fabricated the sail, painted it and added blocks and rigging lines then attached it to the yard. Next was to add the 5 shroud lines. It’s now ready for setting on the ship and completion of the rigging. Next up was to assemble all the oars. There are 14 on each side of the ship, all of various lengths depending on where they would be used on the ship when rowing. While I will display them in the oar racks if I ever want to change the display I can. Pretty unlikely though. Rigging is up next and it looks to be pretty straight forward. Sorry for the quality of the oar pic. I’ve only shown the first batch of 14.
-
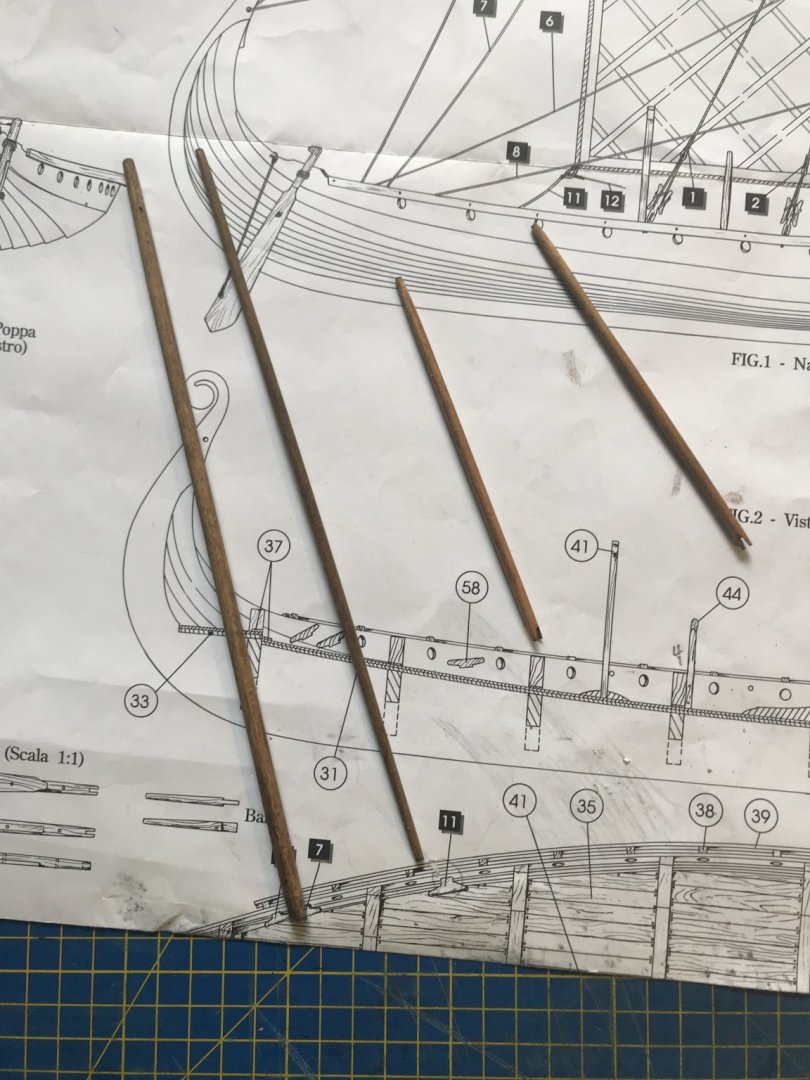
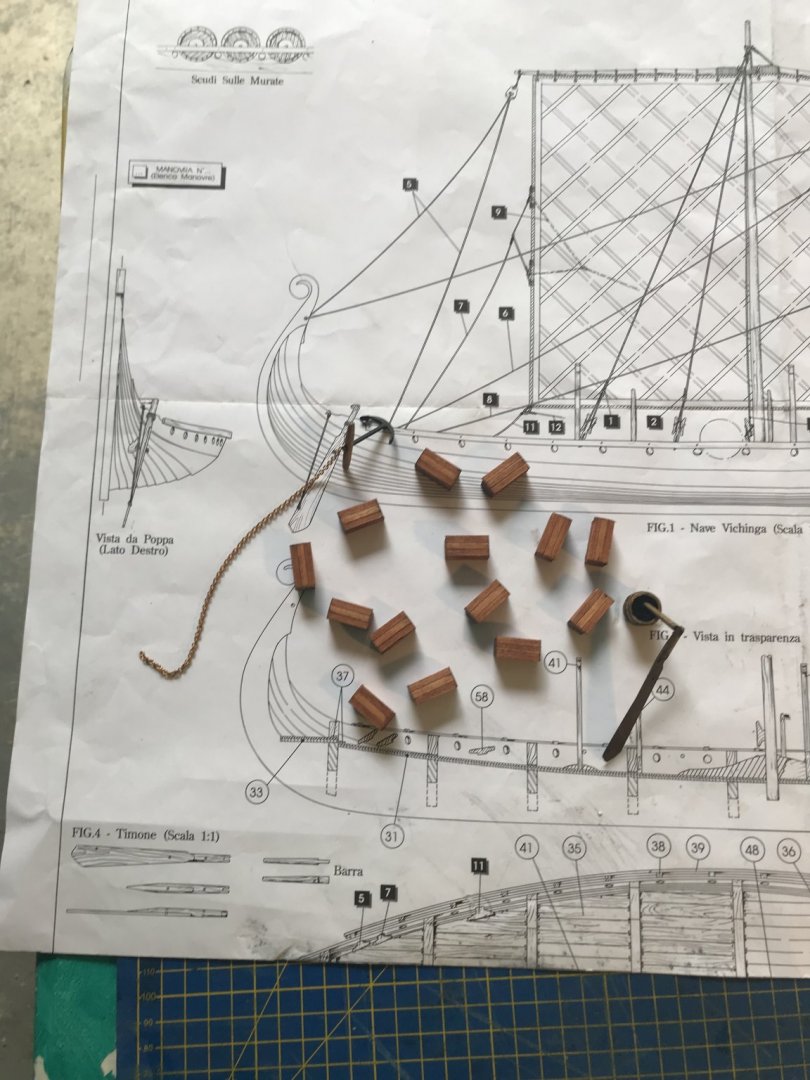
I decided to add another coat of golden oak stain to the deck to deepen it a bit. Looks better to me now. Then went on to mast, rudder, yard and swinging booms. I decided to use the kit supplied bucket and anchor but not the chest. I made up several of my own chests for display on the deck. I don’t know yet how many I will add but I have plenty now. The chests were used not only to store supplies and belongings but also served as seats when the crew were rowing the ship. I decided to display shields on the side of the ship and painted the kit supplied shields both red and white and black and yellow. There is debate on whether the shields were actually displayed on the sides of Viking ships. One theory is that there is no clear proof of this from the ships that have been unearthed and the other is they would have been used on the sides for defensive purposes to protect the crew from in going arrows and such. I am going with the second theory purely based on builder preference. Now starting to work on the sail.
-
This kit builds up fairly quickly. Finished work on trestles, added cleats and oar racks and stained the deck with a golden oak. It’s hard to see the stain in the light. Will try for a better pic on next update.

-
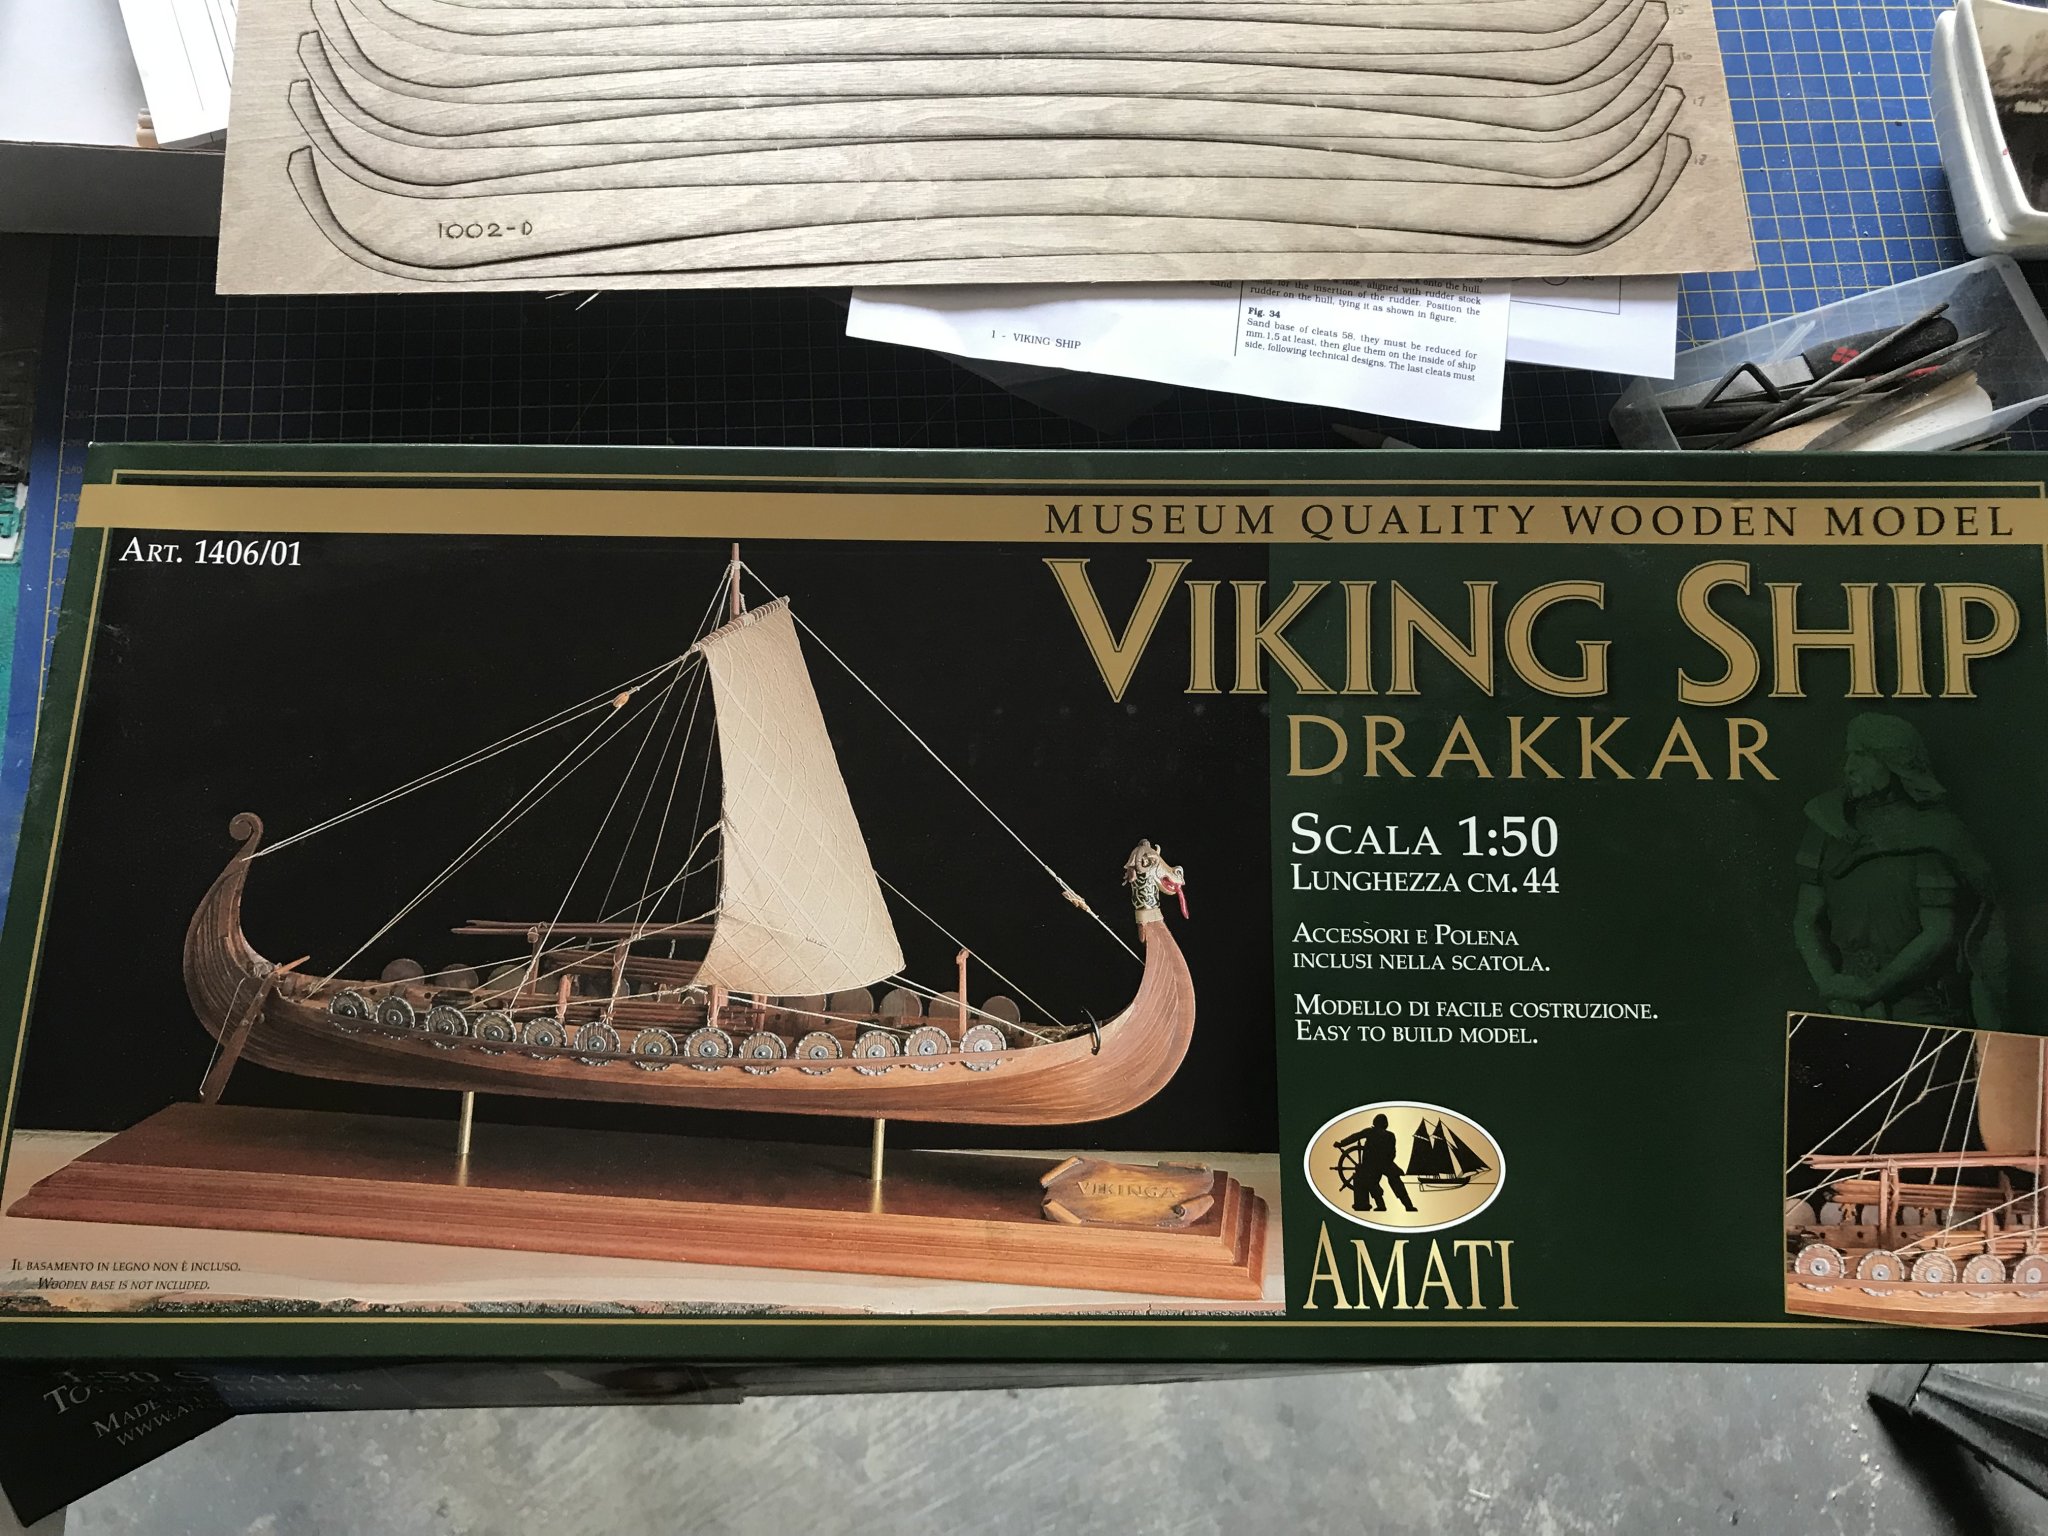
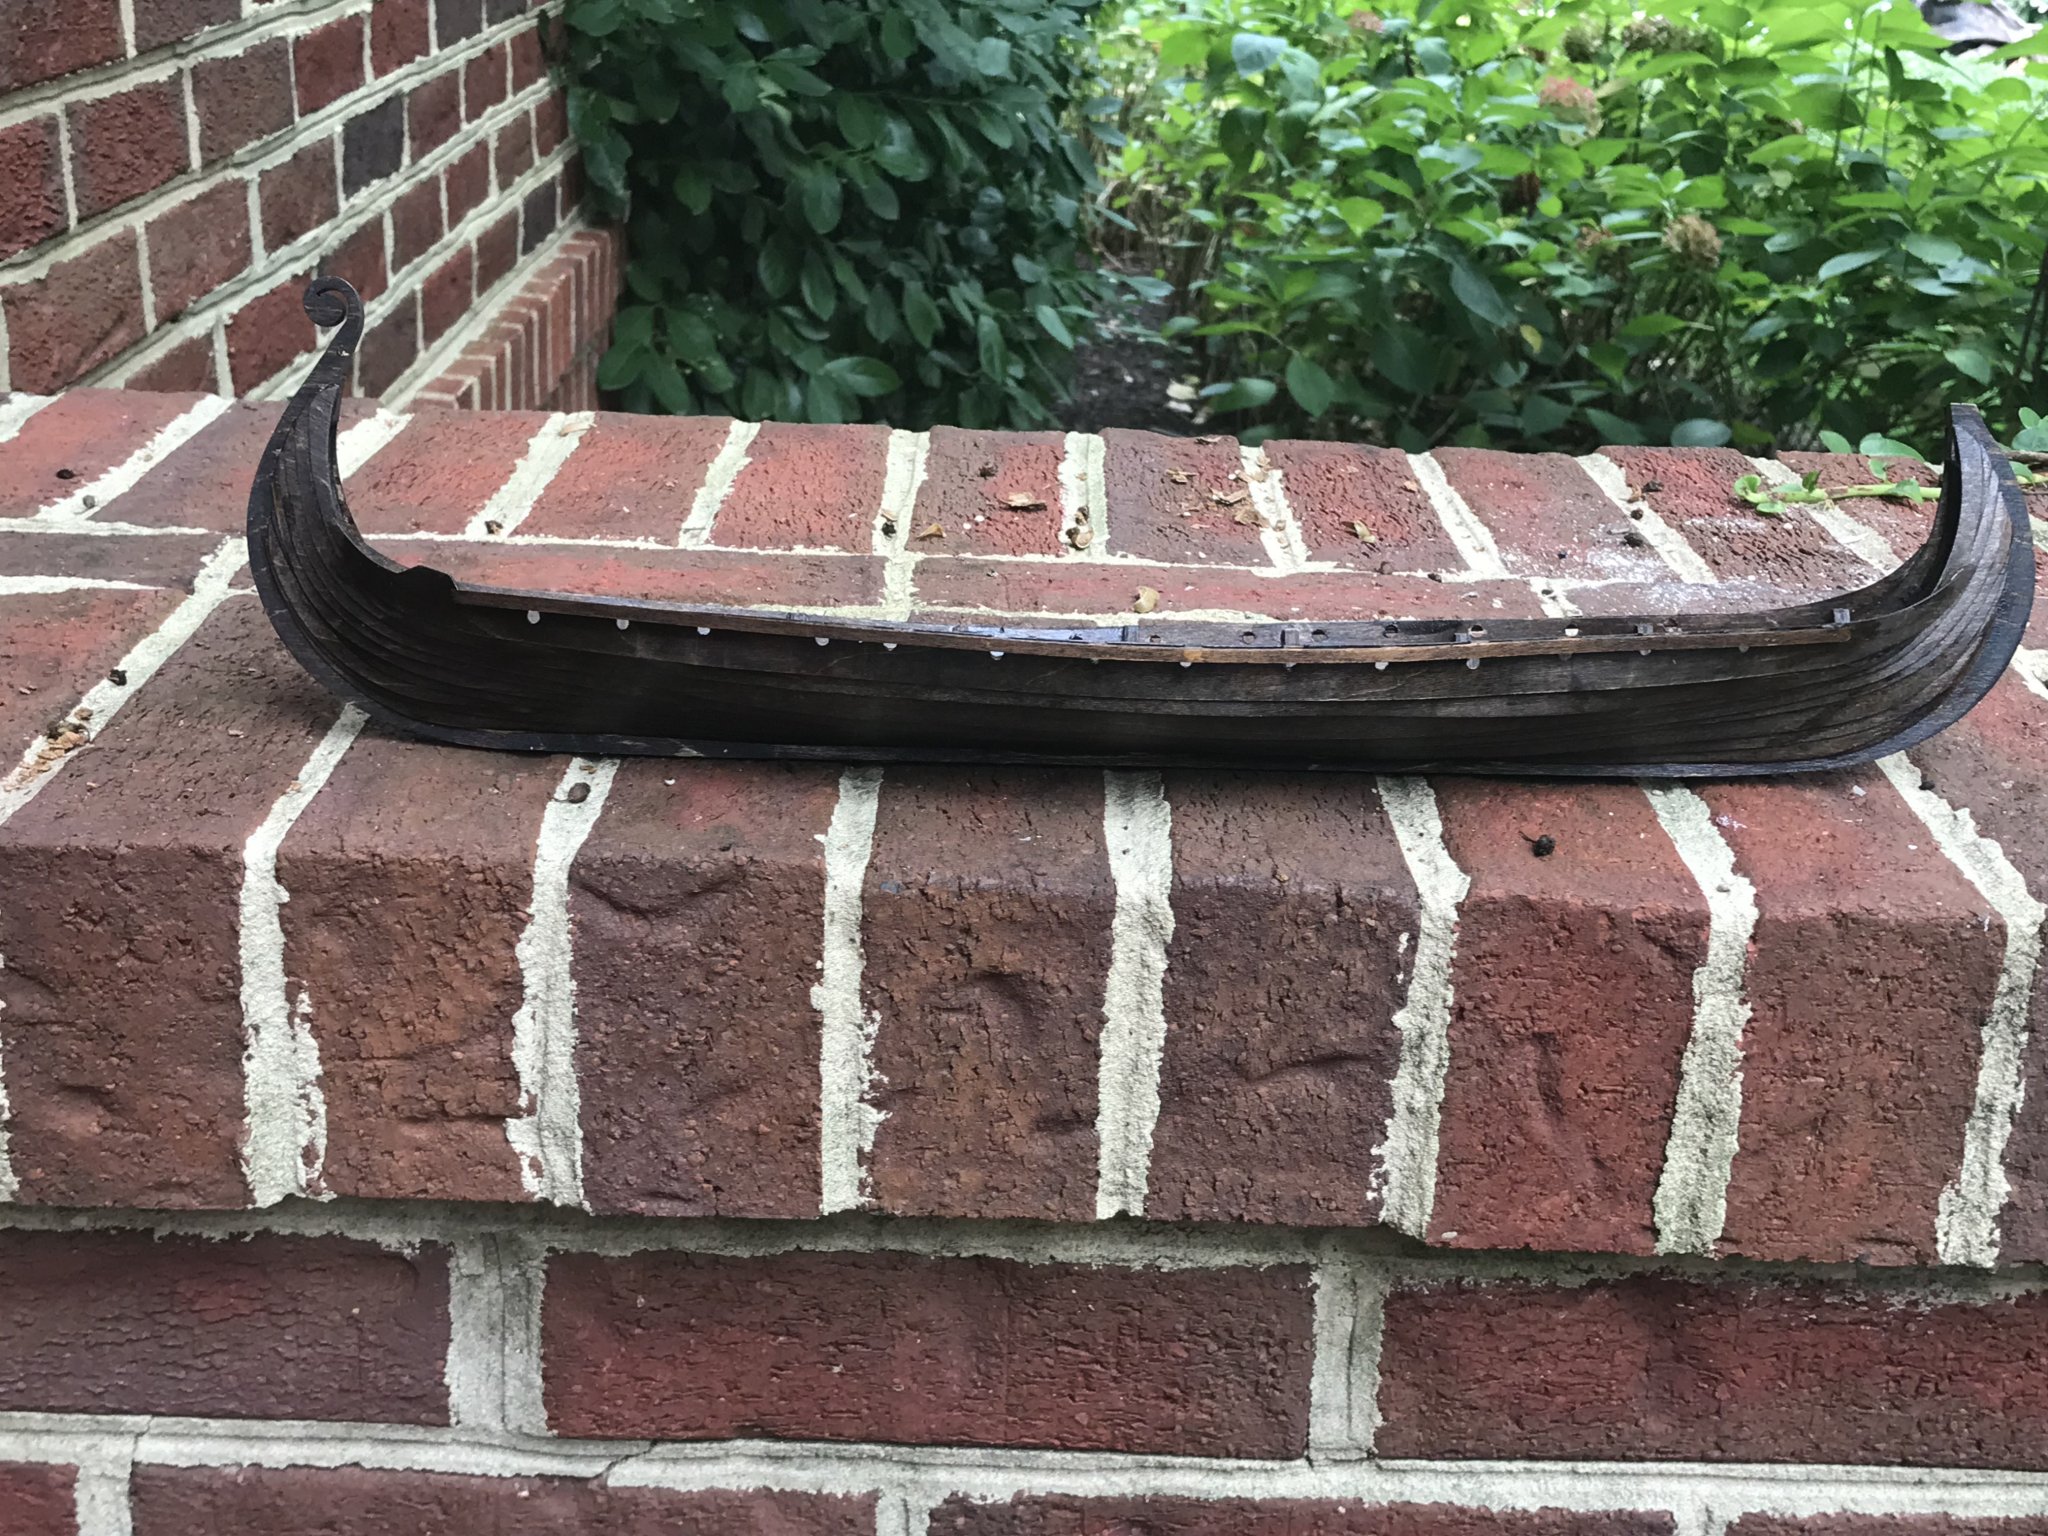
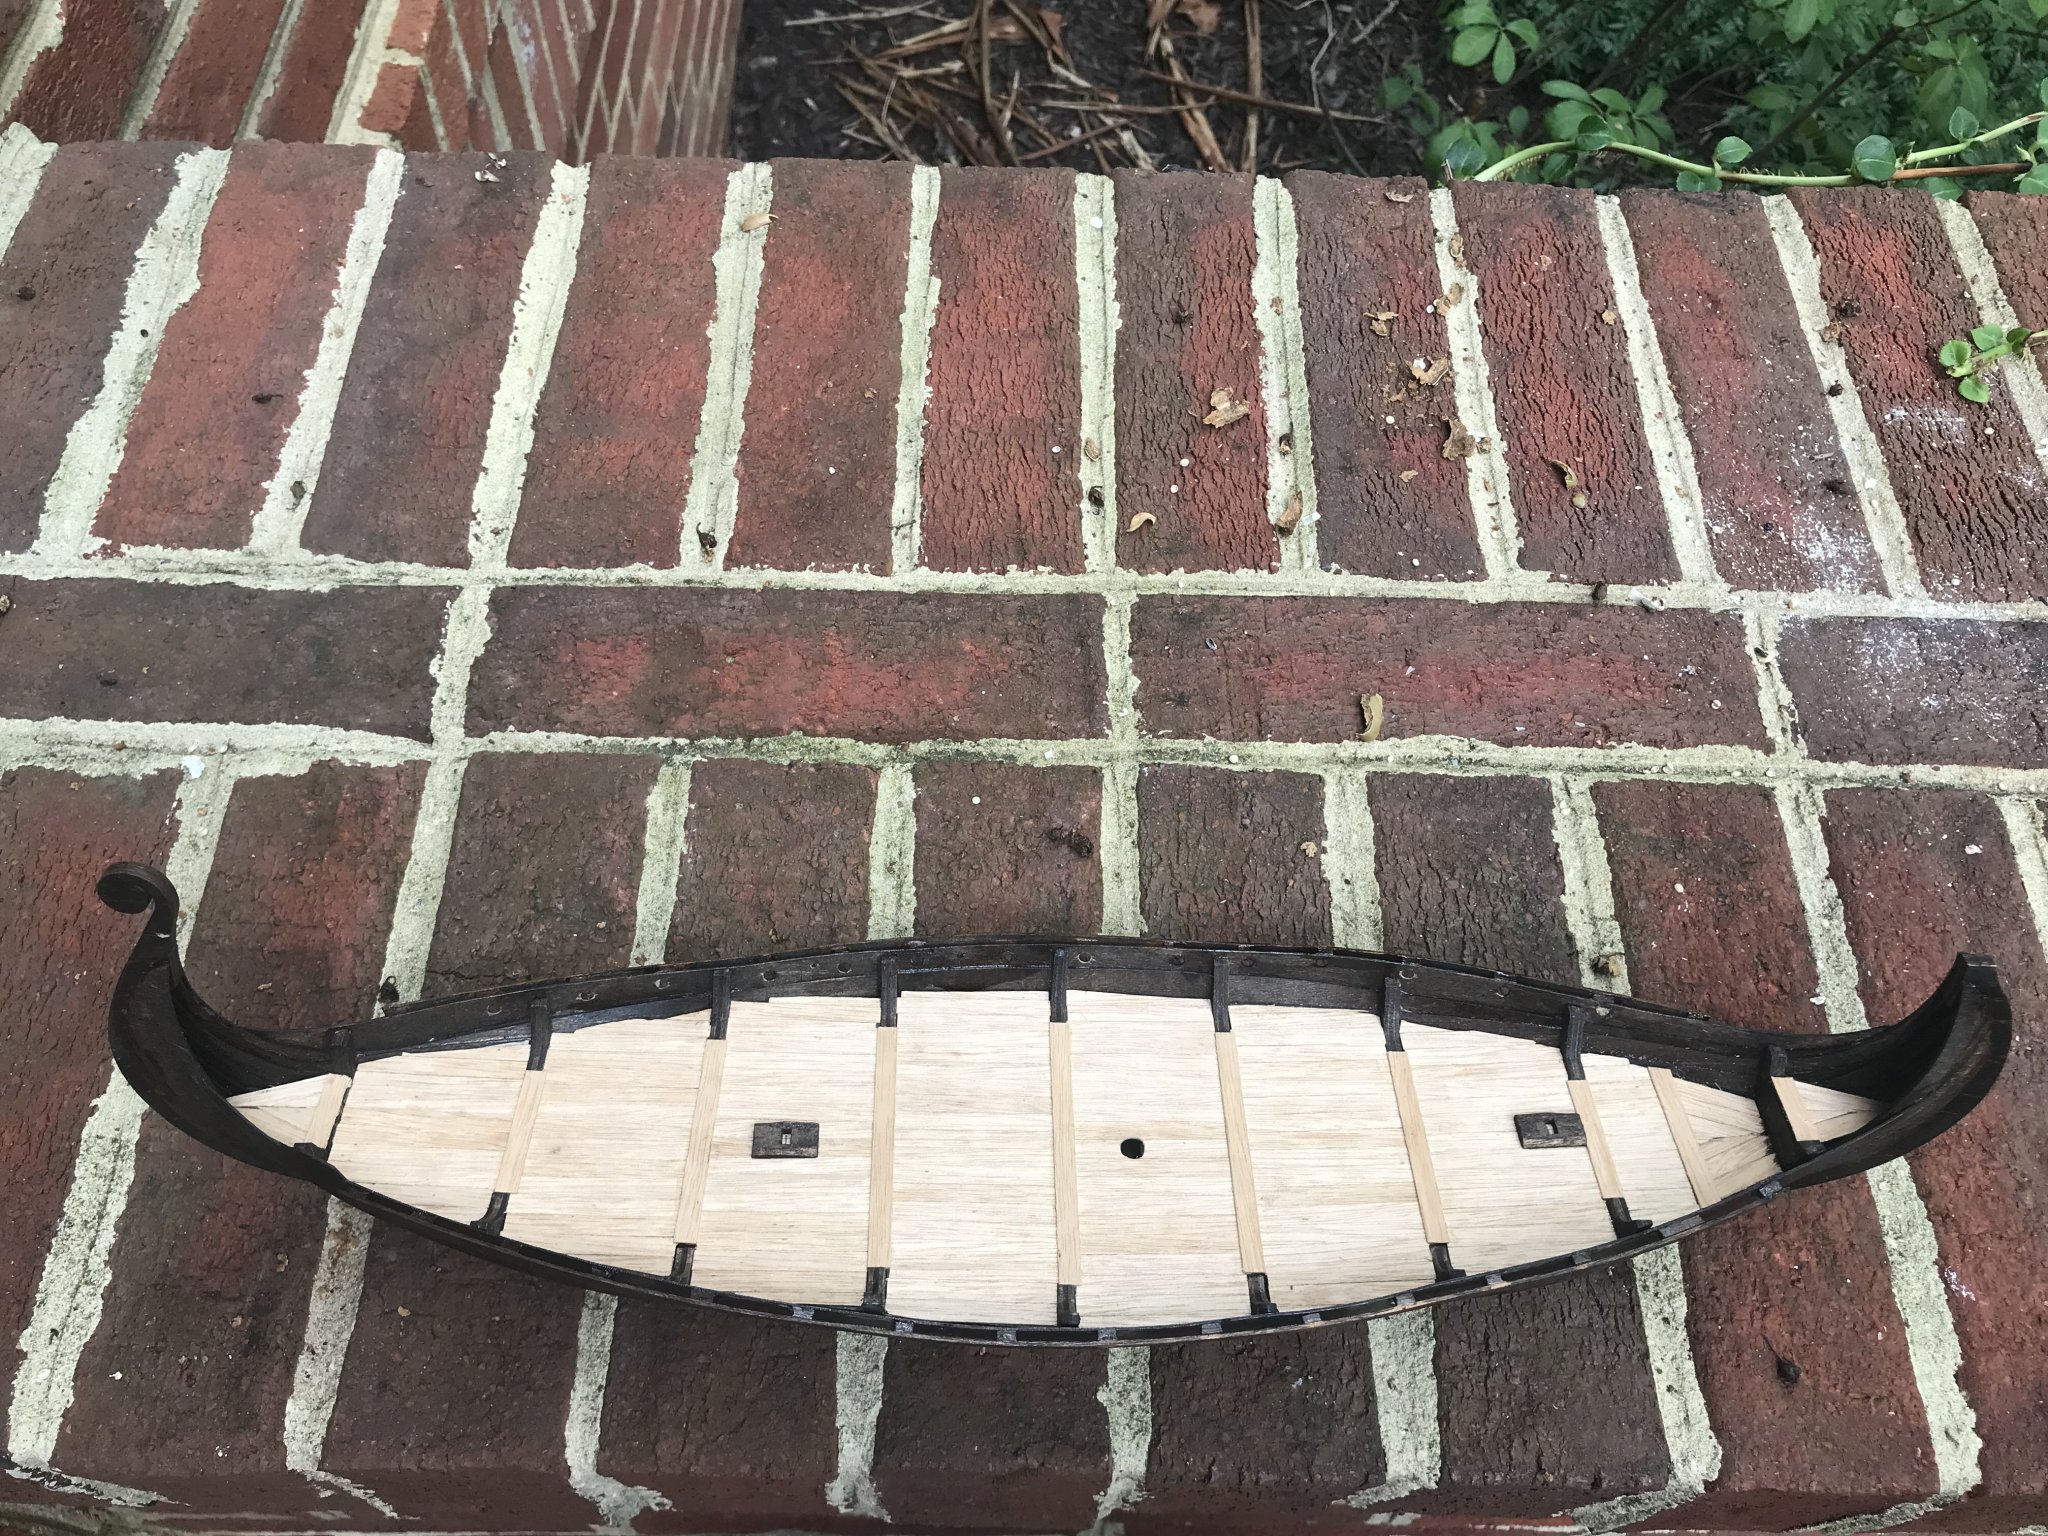
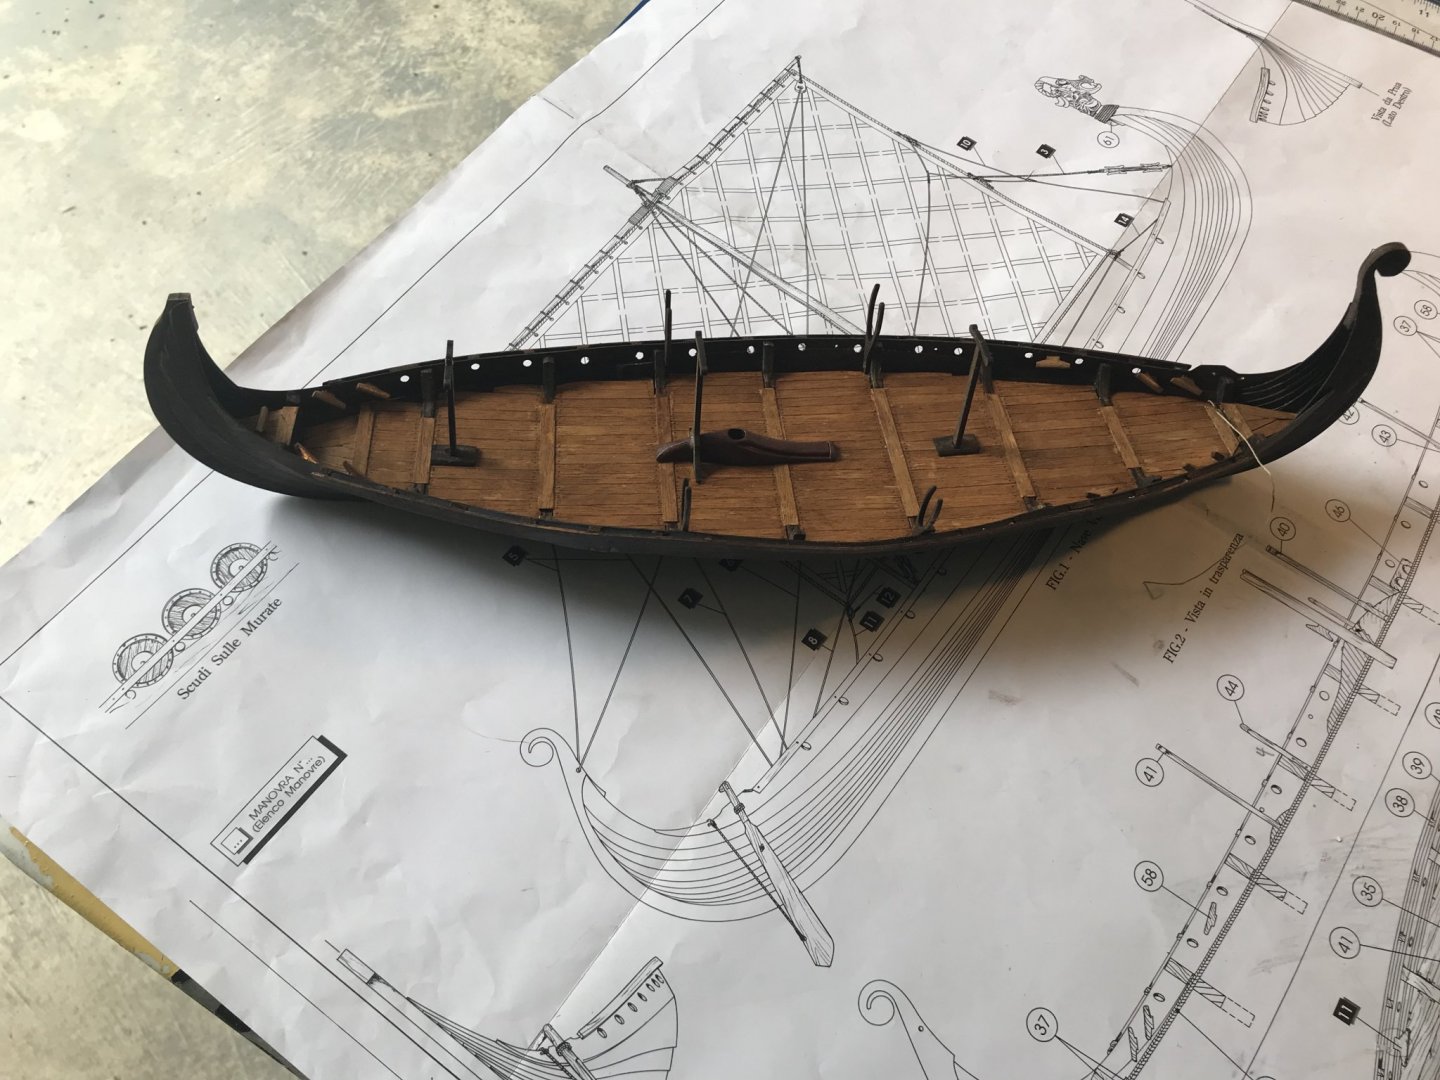
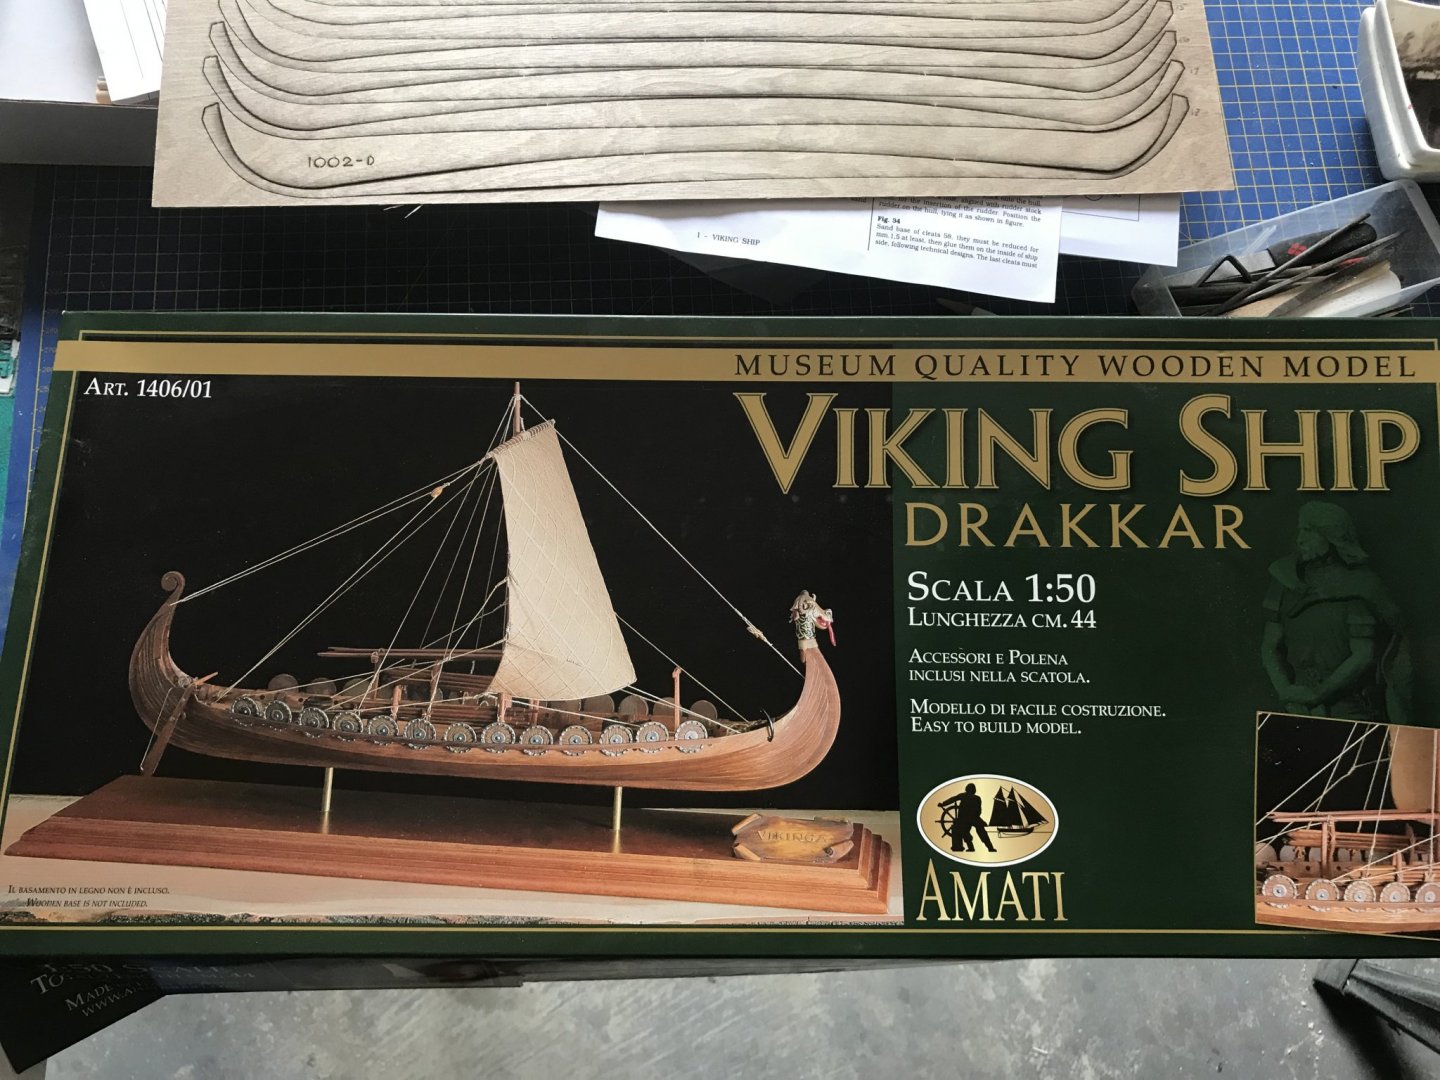
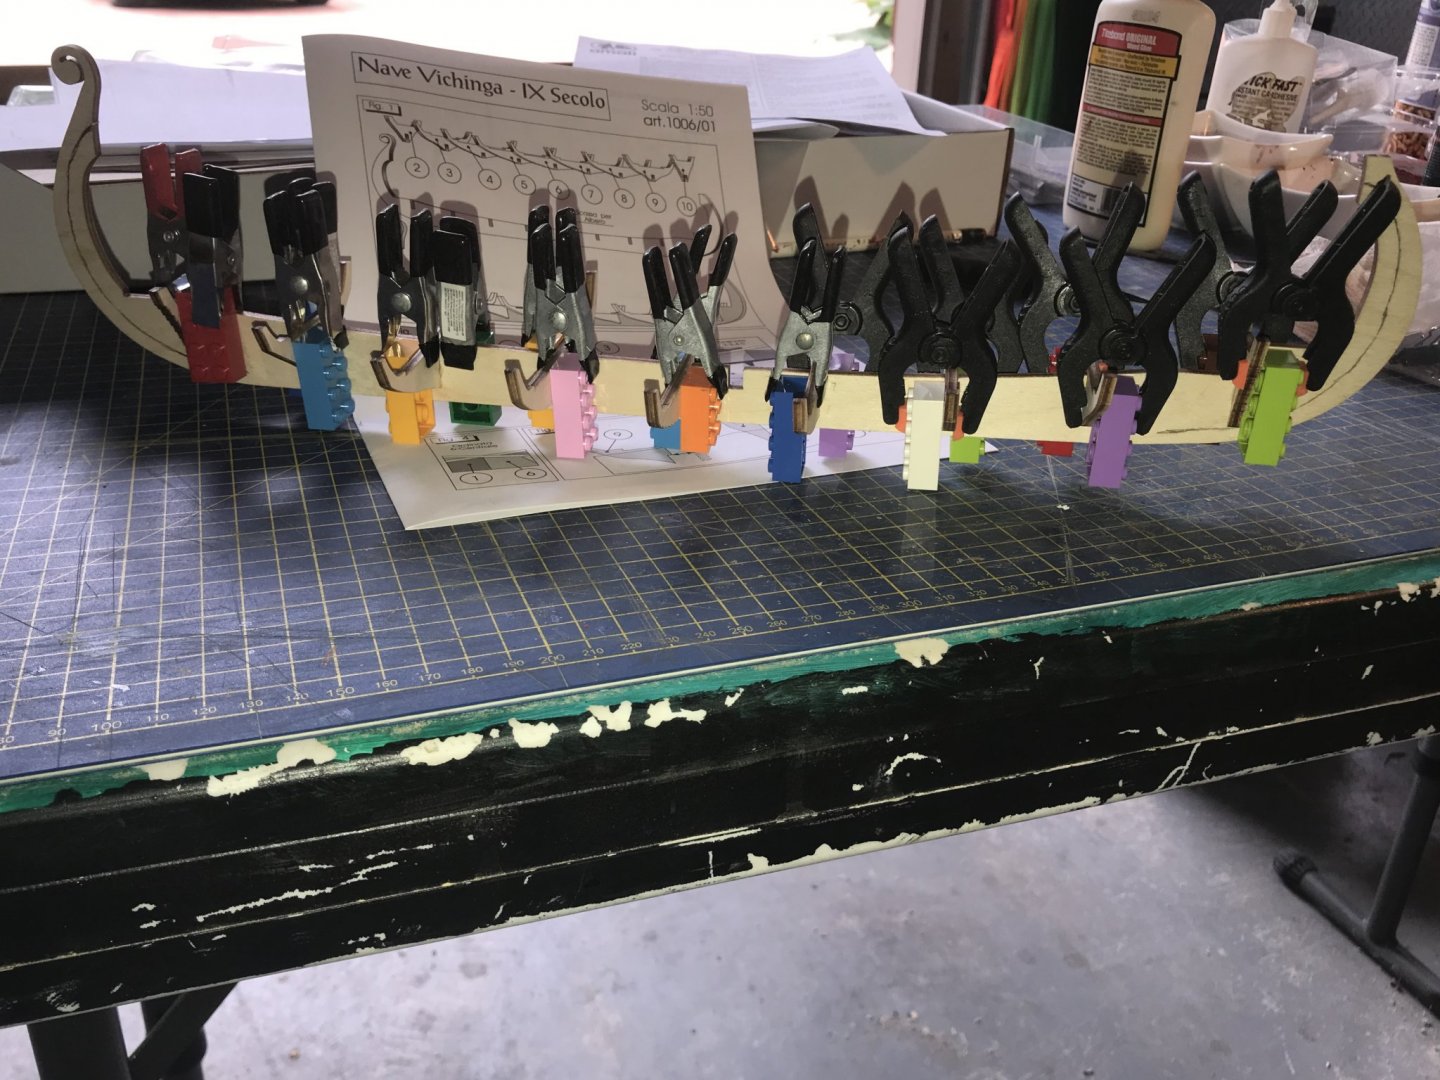
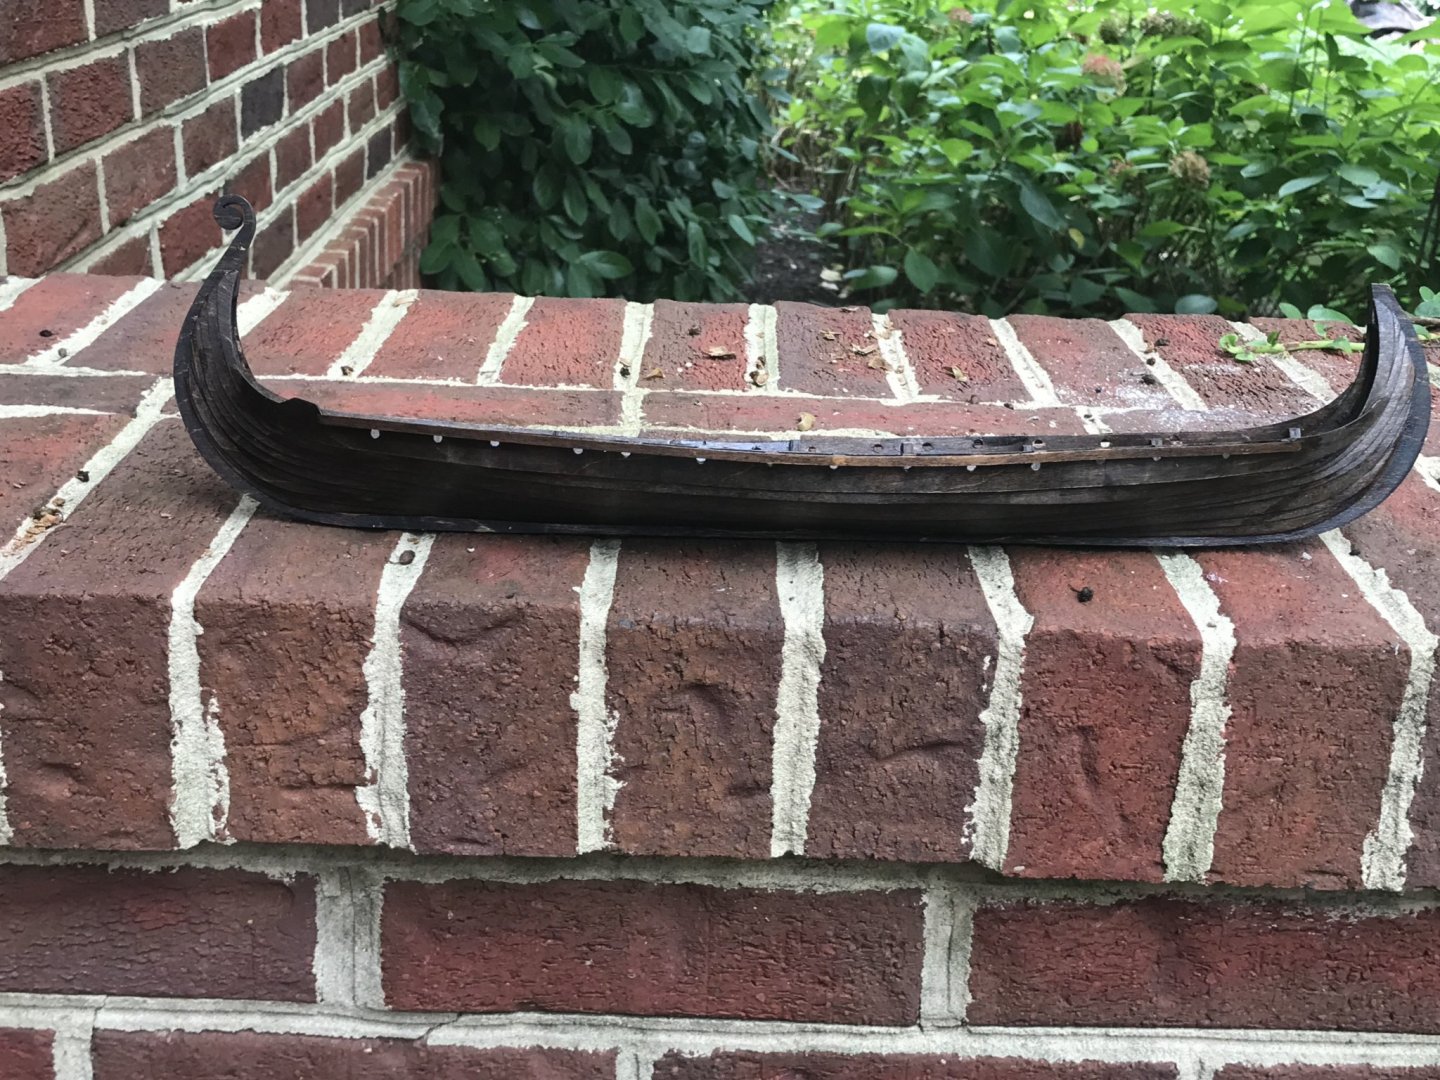
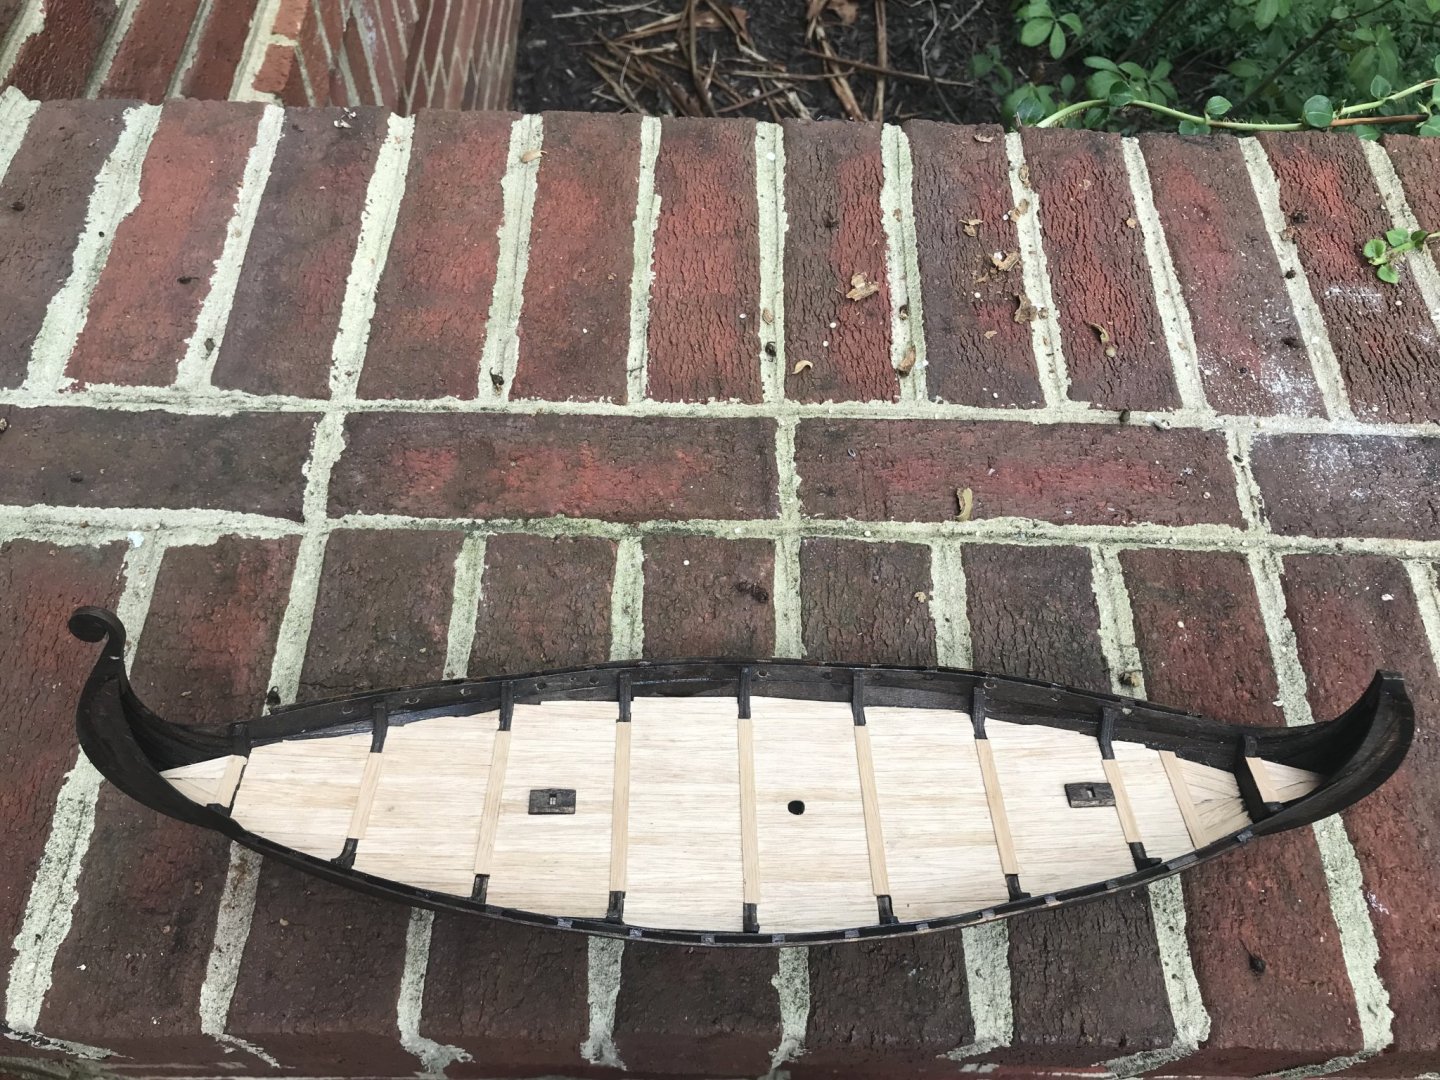
I am waiting for a few items for my Mayflower build and I made the mistake of opening the box of my next build the Viking Drakkar by Amati. The kit is detailed on other logs so I will not go into it other than to say the wood quality appears good not great. I have decided to use the kit supplies wood and other accessories although I might add a few items done the road. I’ve been working on the ship for a few weeks so I will catch up with this log. The keel and frame assembly is pretty straight forward. Three of the frames have notches in them to help align the strakes which are all precut and fit well. I found several pics of Viking ships and decided to stain the strakes and frames in a dark walnut before assembling them to the frame. Next up was adding the false deck and planking. All straight forward. The planks were laid center offset per plans and it came out ok. Not sure yet what stain to use on the deck but it will be stained. I then drilled all holes for oars and shrouds. And added spacers and racks on hull. I will show the sail down so oars will be shown in their racks. I’m now working on trestles. That about catches up to where I am in the build.

-
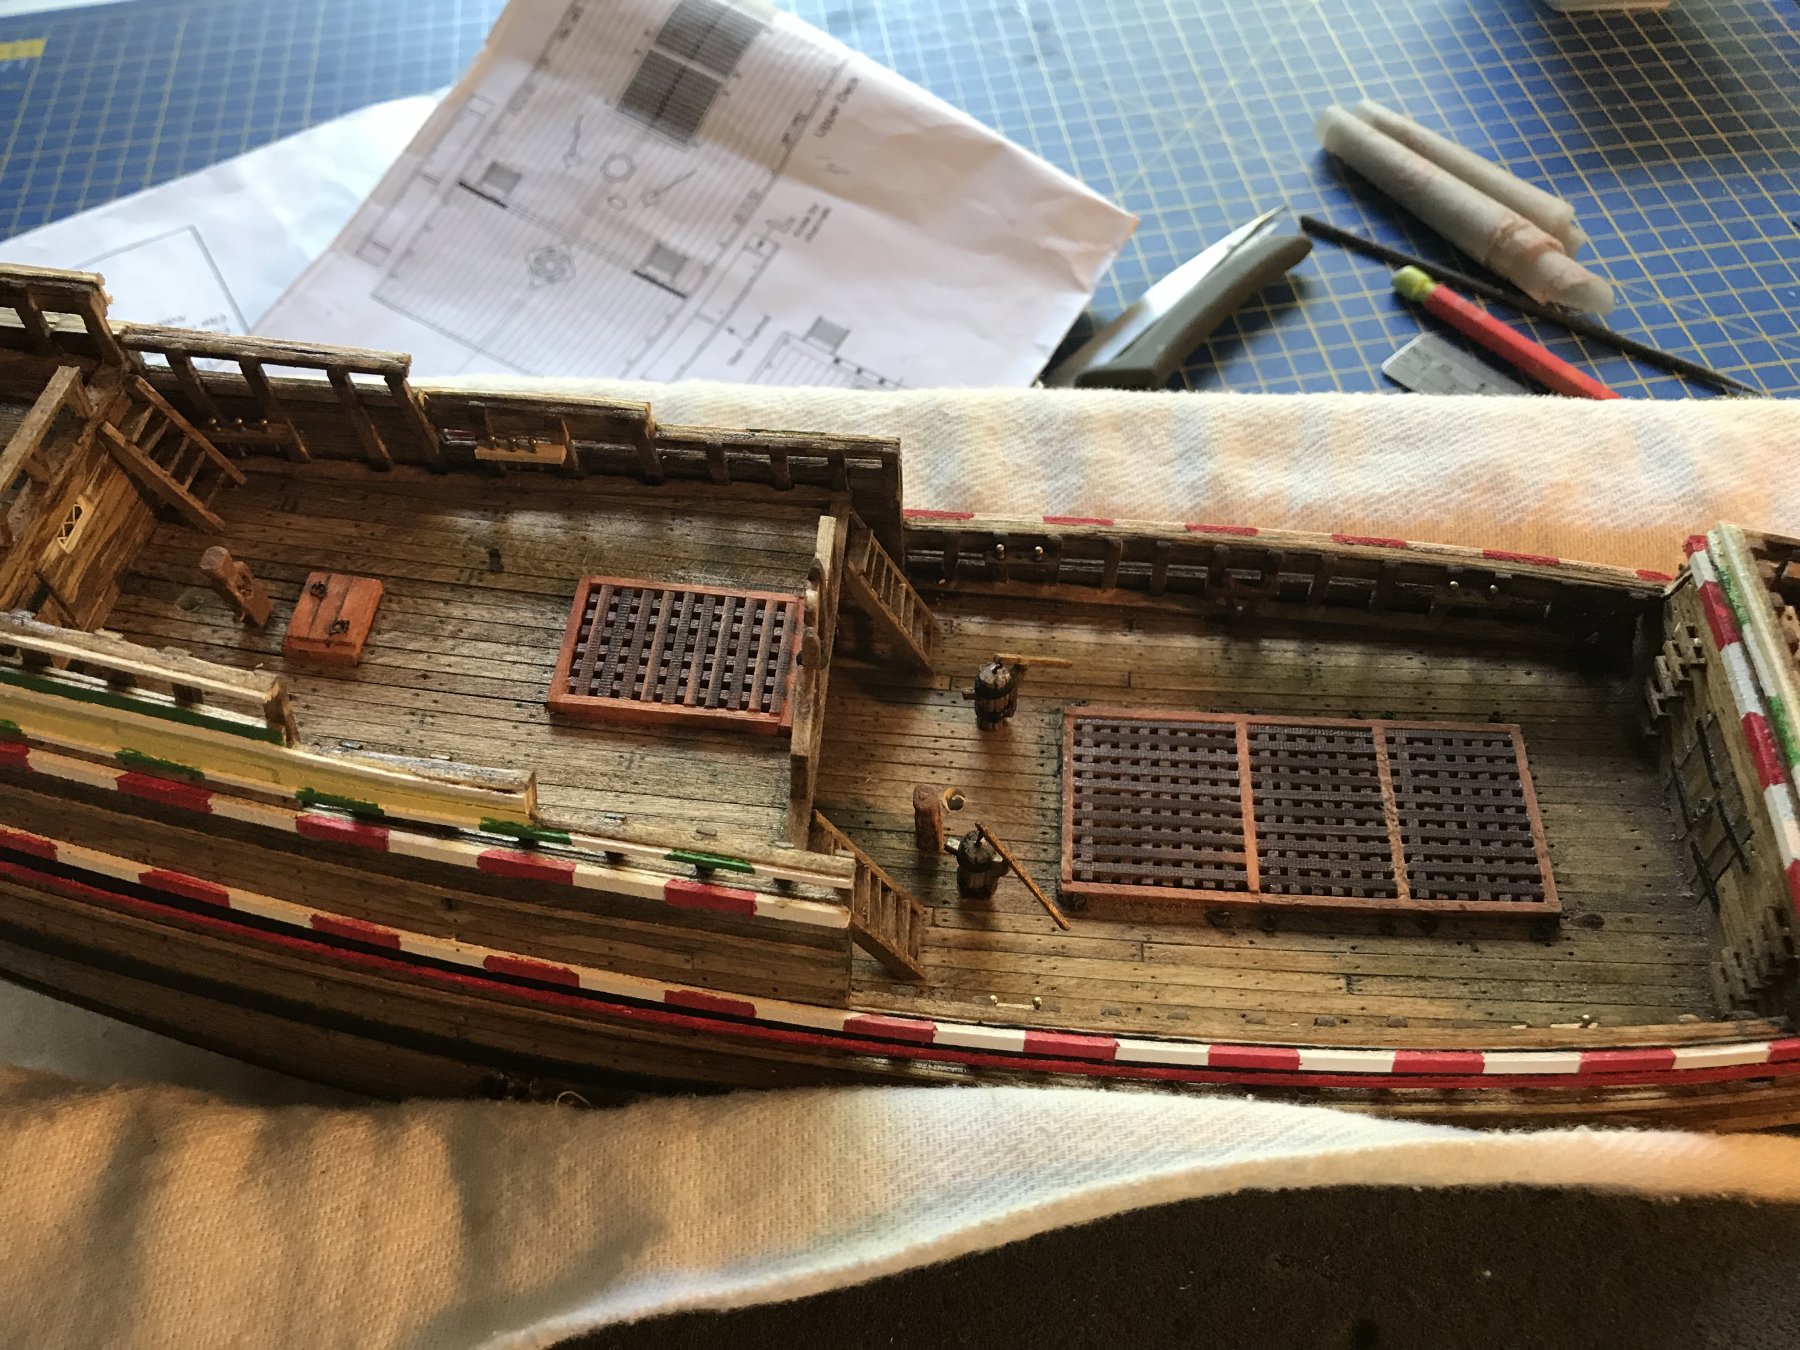
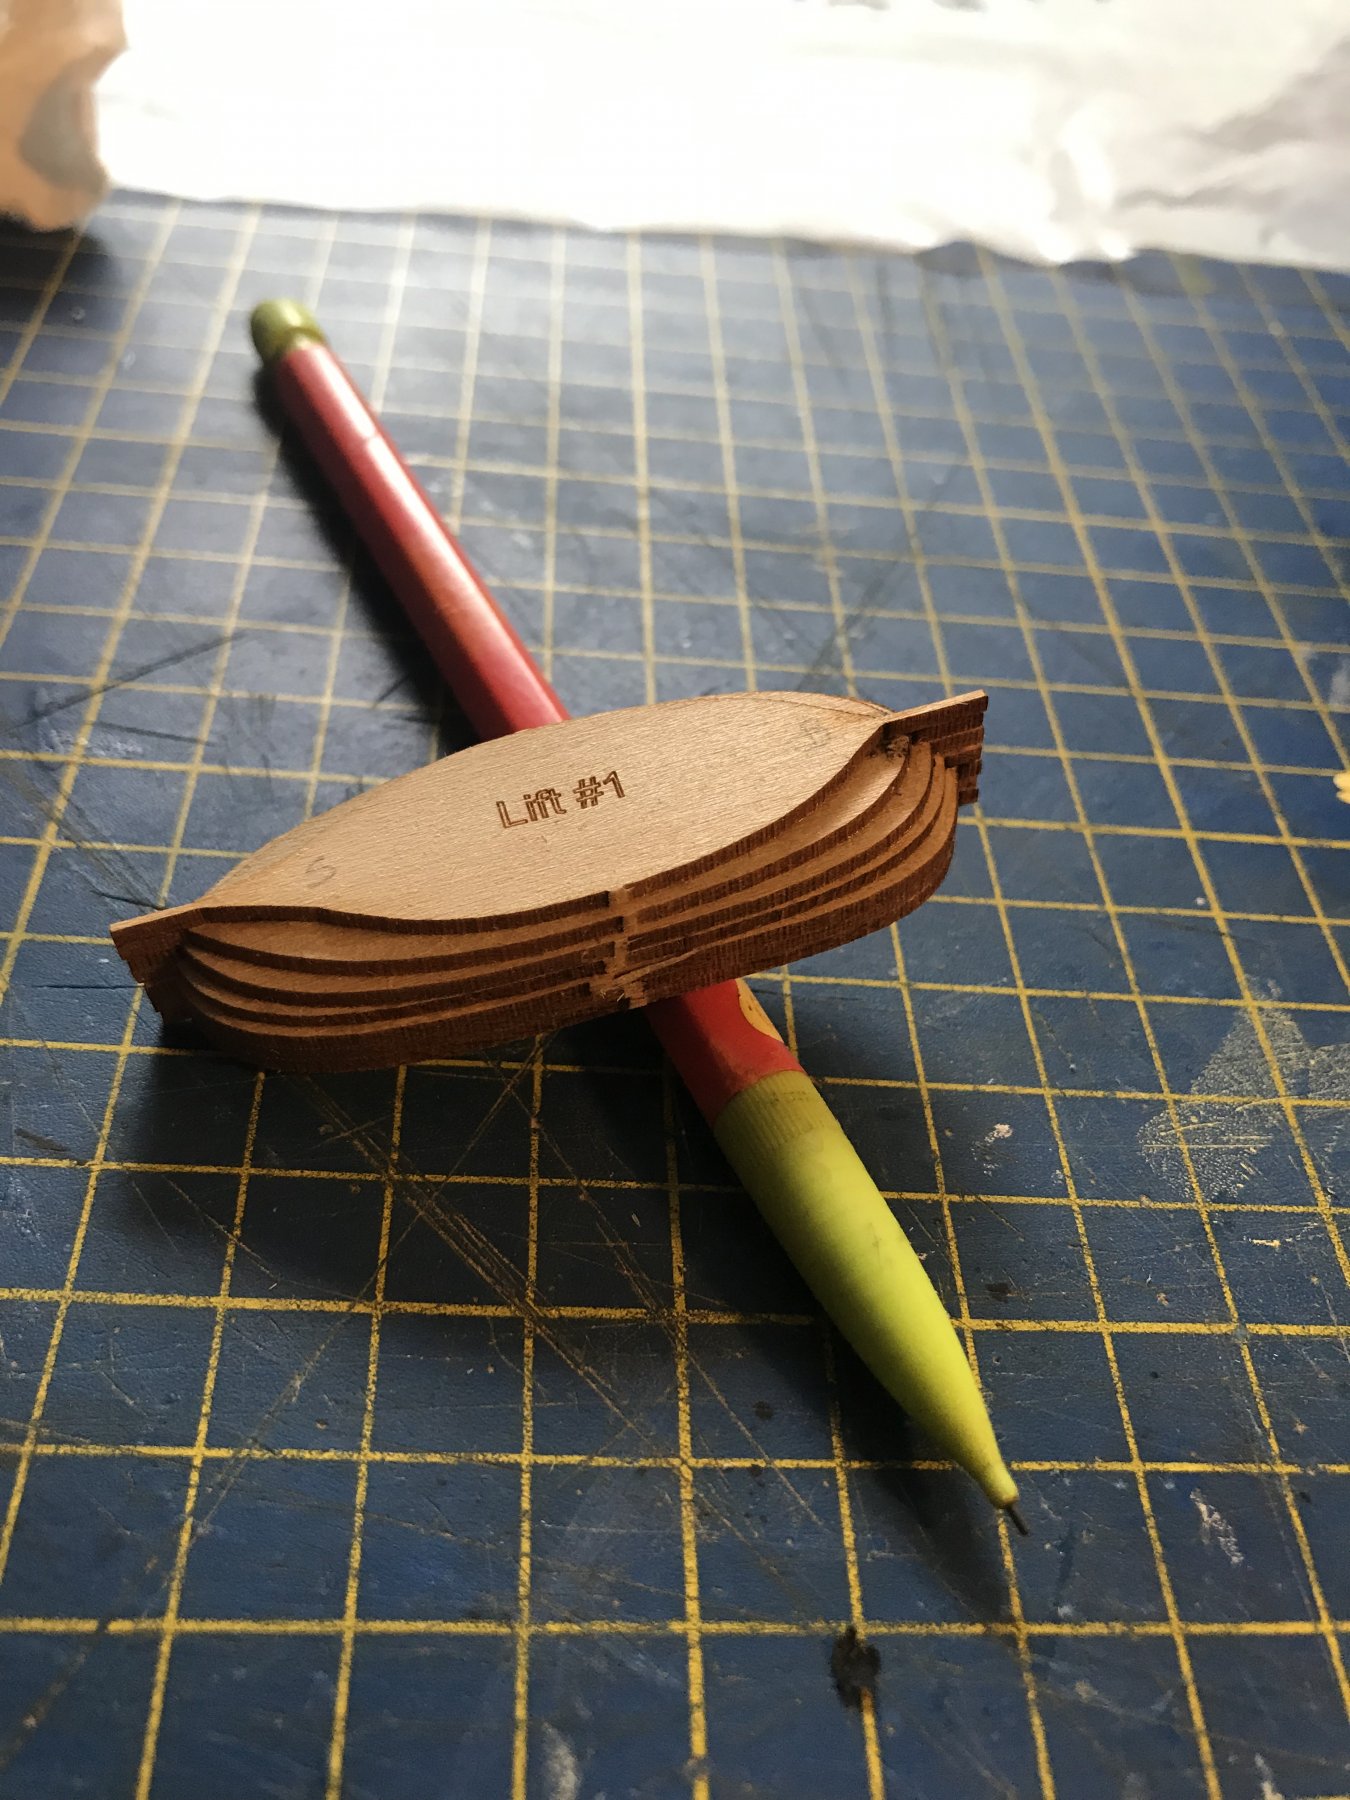
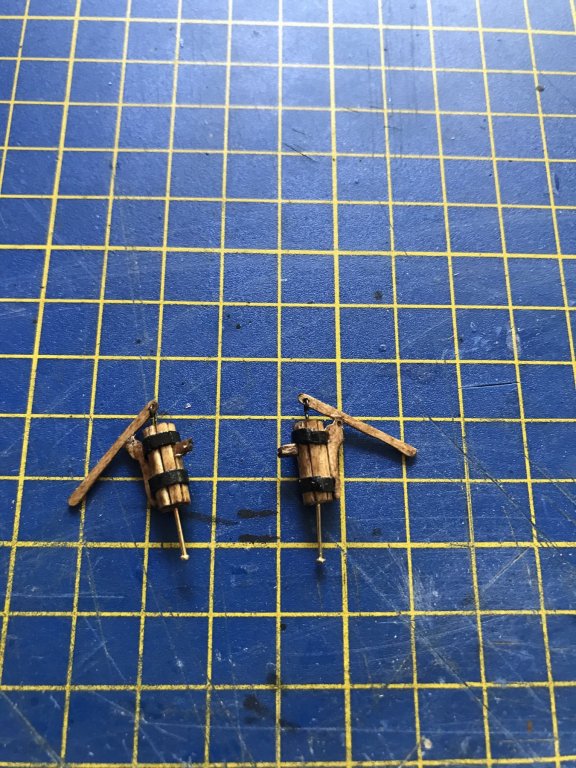
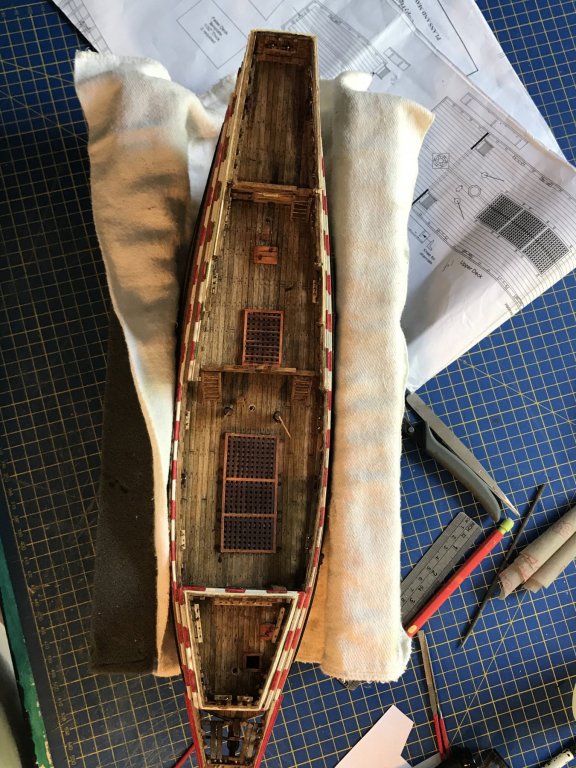
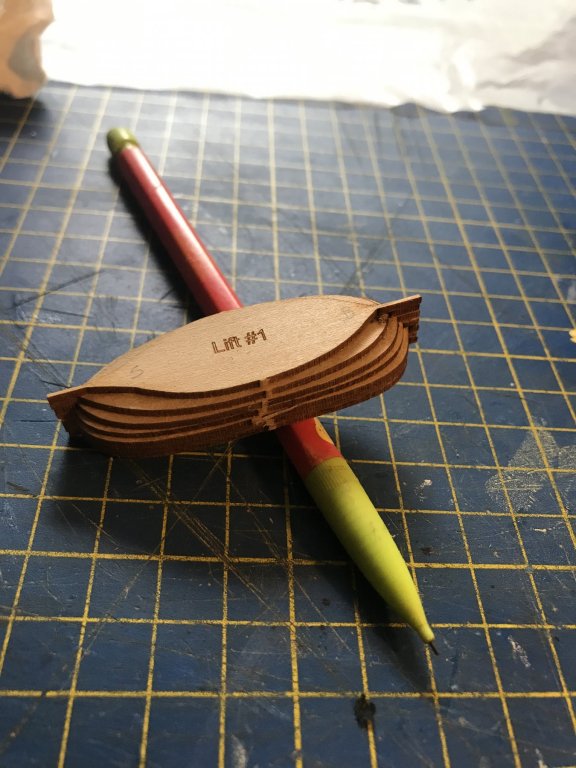
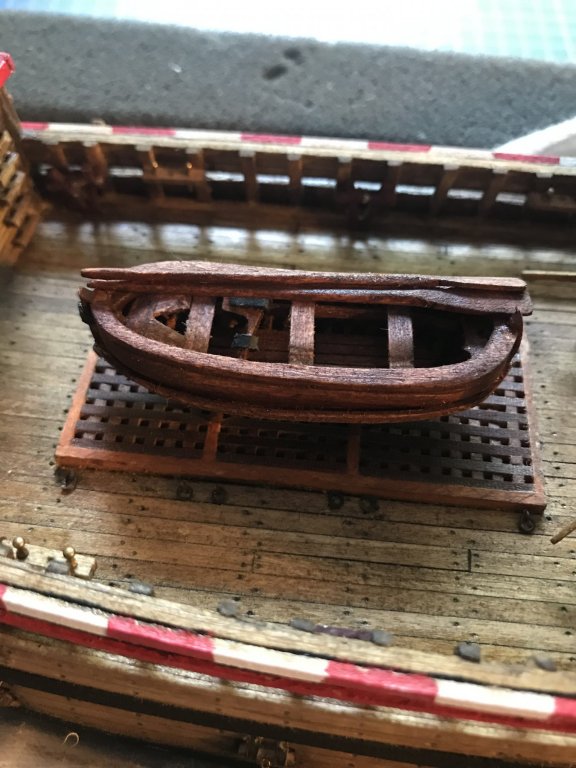
Continued to make progress over the past week plus. I have added all the deck fittings and structures including 8 kevels, 14 pin rails, 3 ladders, 2 railings, one that includes the belfry, 2 knight heads and 2 pumps. I decided to use the kit supplied kevels and Knight heads. While they aren’t great I did not feel the difference in scratching them at this scale would be a significant negative. After painting them up they looked ok. The 2 pumps are scratch built and some fun with very small and thin components for handles. Good experience though. After assembly these parts were all added to the deck. I also drilled the holes for the masts. I plan to use tenons on the mast so waiting until this stage is fine, if you decide to step the masts without tenons I would recommend you drill your holes as you plank your deck. Once the deck fittings are in place drilling the main mast hole in particular will be a challenge you don’t need. Next up was the ship’s small boat. The kit supplies 7 lifts for a bread and butter hull. First time I did one of these. Pretty neat way to do these. I would suggest as the plans indicate to not glue lift #1 on until the inside of the boat is sanded. I failed to do this and it made sanding the inside VERY difficult. I added most of the details indicated with the instructions except for the oar locks. Also tried my hand at adding 3 clinker planks to each side. Best I can say is I learned a bit on building small boats. Lots to improve on in this area but I am glad the boat is wood and not a cast one. I stained all the deck structures Golden Oak, same as deck and the small boat in American Walnut just to give it a little more depth on the deck. It looks better in real life than in the attached pics. Then the outside structures were tackled including making up the catheads and channel knees; the channels and chess trees were all laser cut in the kit and all fit without much trouble. Per instructions I painted the channels, knees and catheads black and stained the chess trees. Last items were to add the Mayflower emblem to the stern (this is a casting supplied in the kit and painted per instructions) and putting on a coat of matte poly to the ship. And with that the log is pretty much up to date. The work in this update took place over about 10 days and again the instructions have been great in guiding me. Next up is starting work on the masts. I’ll post an update when they are completed.


-
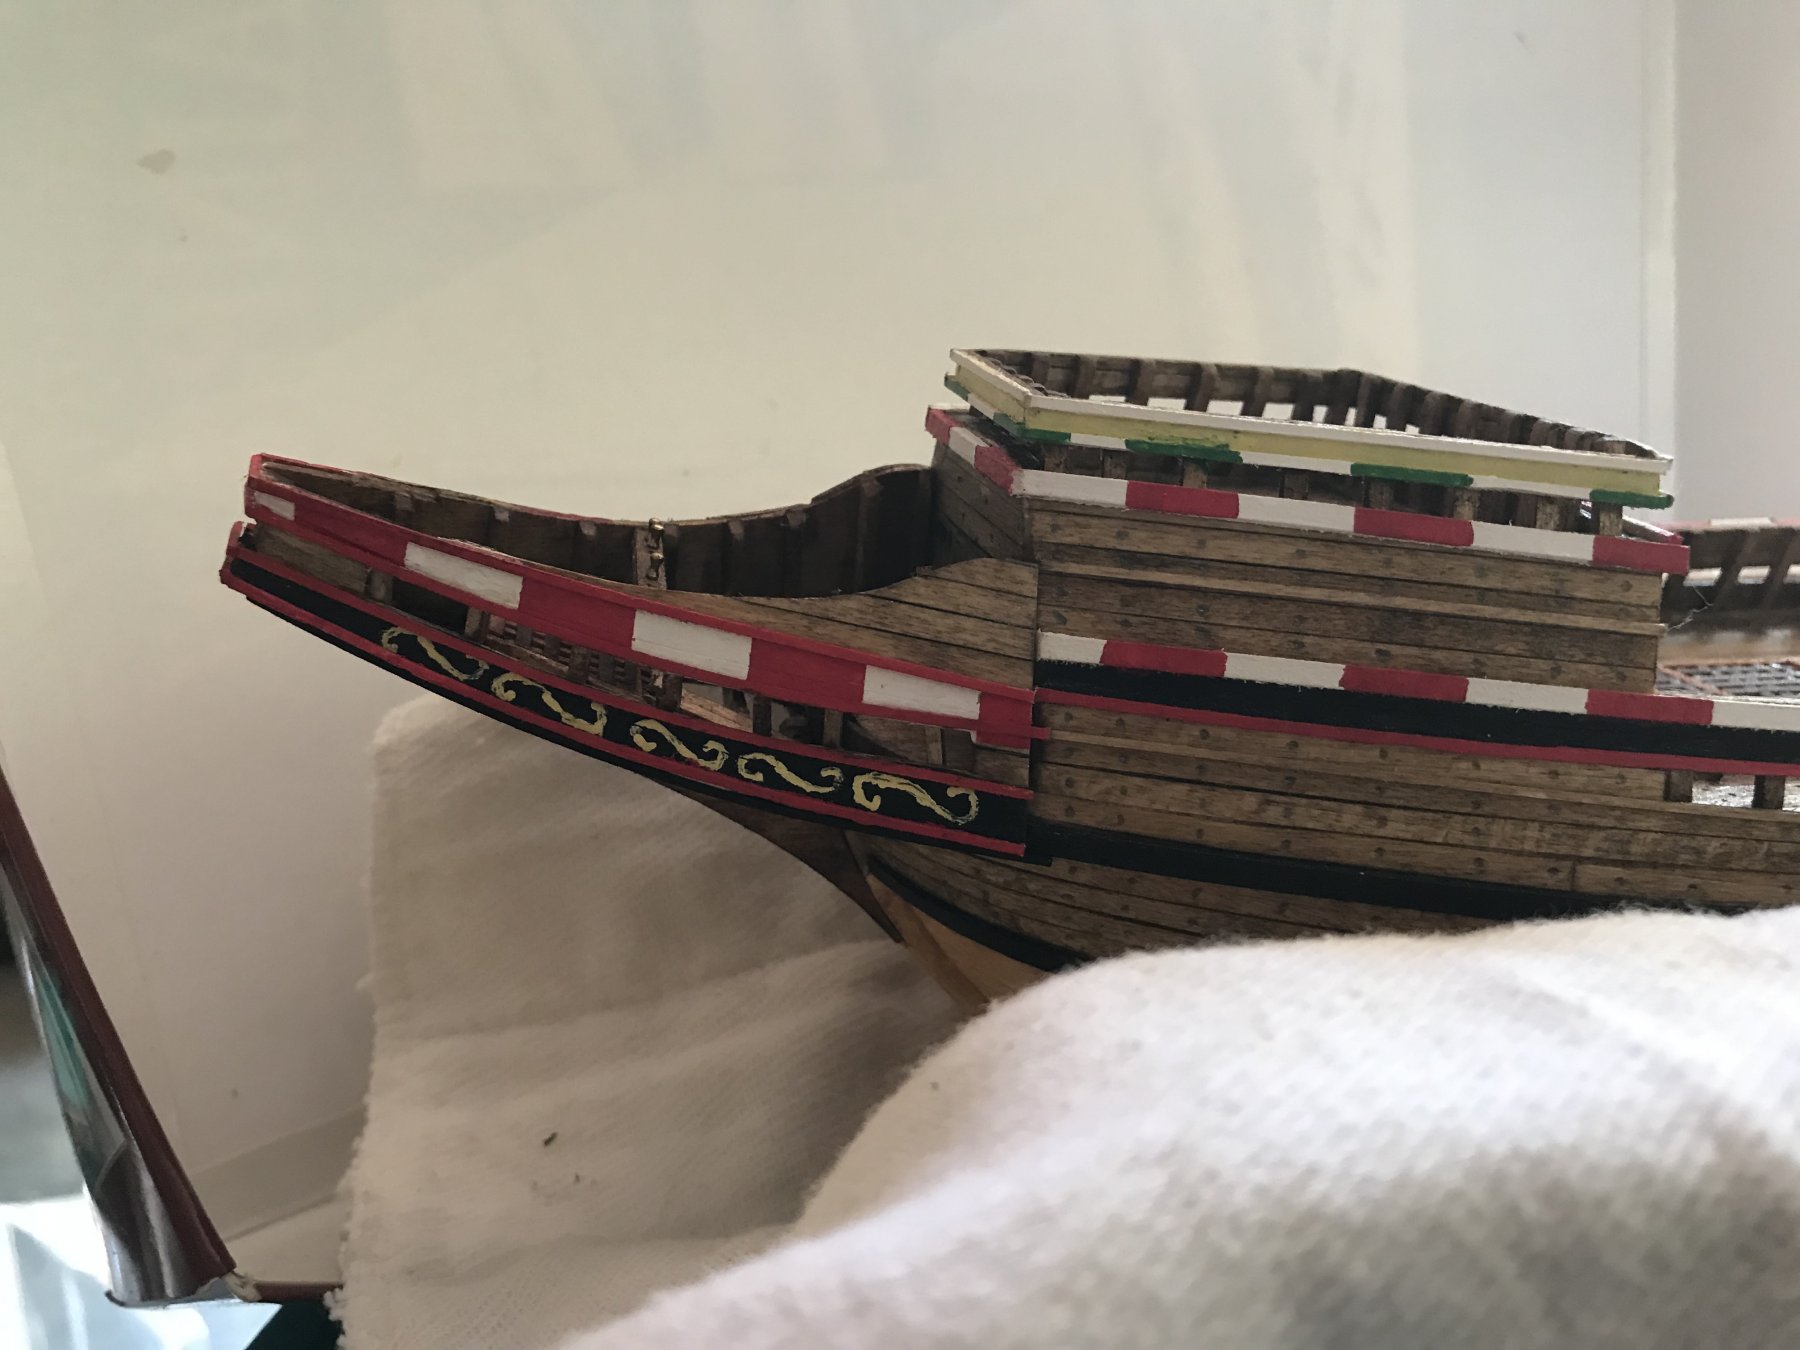
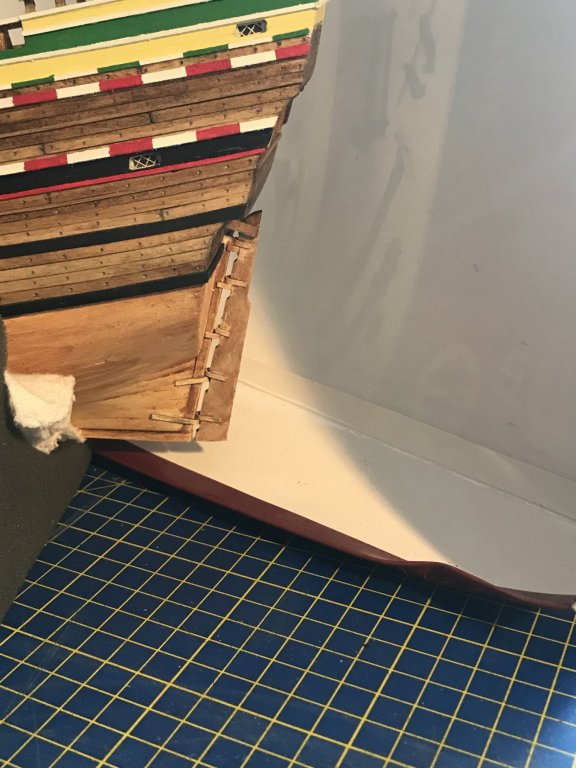
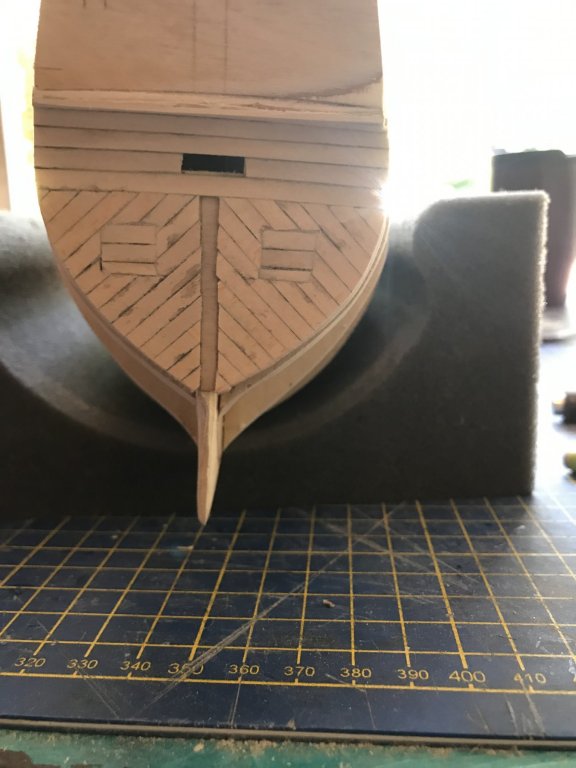
This week I have worked on the beakhead and rudder assemblies. While the beakhead requires many angled cuts and lots of fitting the instructions and pics are excellent and provide all the necessary info. Same goes for the rudder assembly. I really liked the build order suggested in the instructions. This made the rudder assembly the most straightforward I have done. Still learning though!! Most of the painting was done before I attached the beakhead sides to the ship. This made it easy to tape and ensure all the trim moldings would be aligned. I still need to touch up several areas but I will wait on this until later in the build.

-
Thanks!!
-
Thanks!!
-
Nice work on your Victory. I just read through your log and have 2 questions, why did you put the Victory on hold for 8 months to build the Prince? Reason I’m asking is as I retired last year I decided to get back into modeling. I built many plastics as a teen. Wood seemed like a great medium and would allow me to build my skills. My goal is to build the Victory by Caldercraft and the Constitution by Bluejacket. My skills aren’t ready for that so I’m following a bit of the Hunt approach and started with some beginner ships and am now working on intermediates(current build is Mayflower). Hopefully by next year I’ll be ready for one of these. I agree that the more you build the more your skills and confidence to tackle new things grow. Love to see your card stock work. Second question was what tools are you using to do your carvings. This is an area I want to build skills in as well. Thanks
-
It’s one of the mysteries of life😉. I used something from the sewing world. I am not sure what’s it’s called but it is a small very thin wired needle threaded. The eye of the needle is similar to any small block so principle is the same. You can buy these in packs of several at stores like Michael’s or JoAnn Fabrics. Hope this works for you.
-
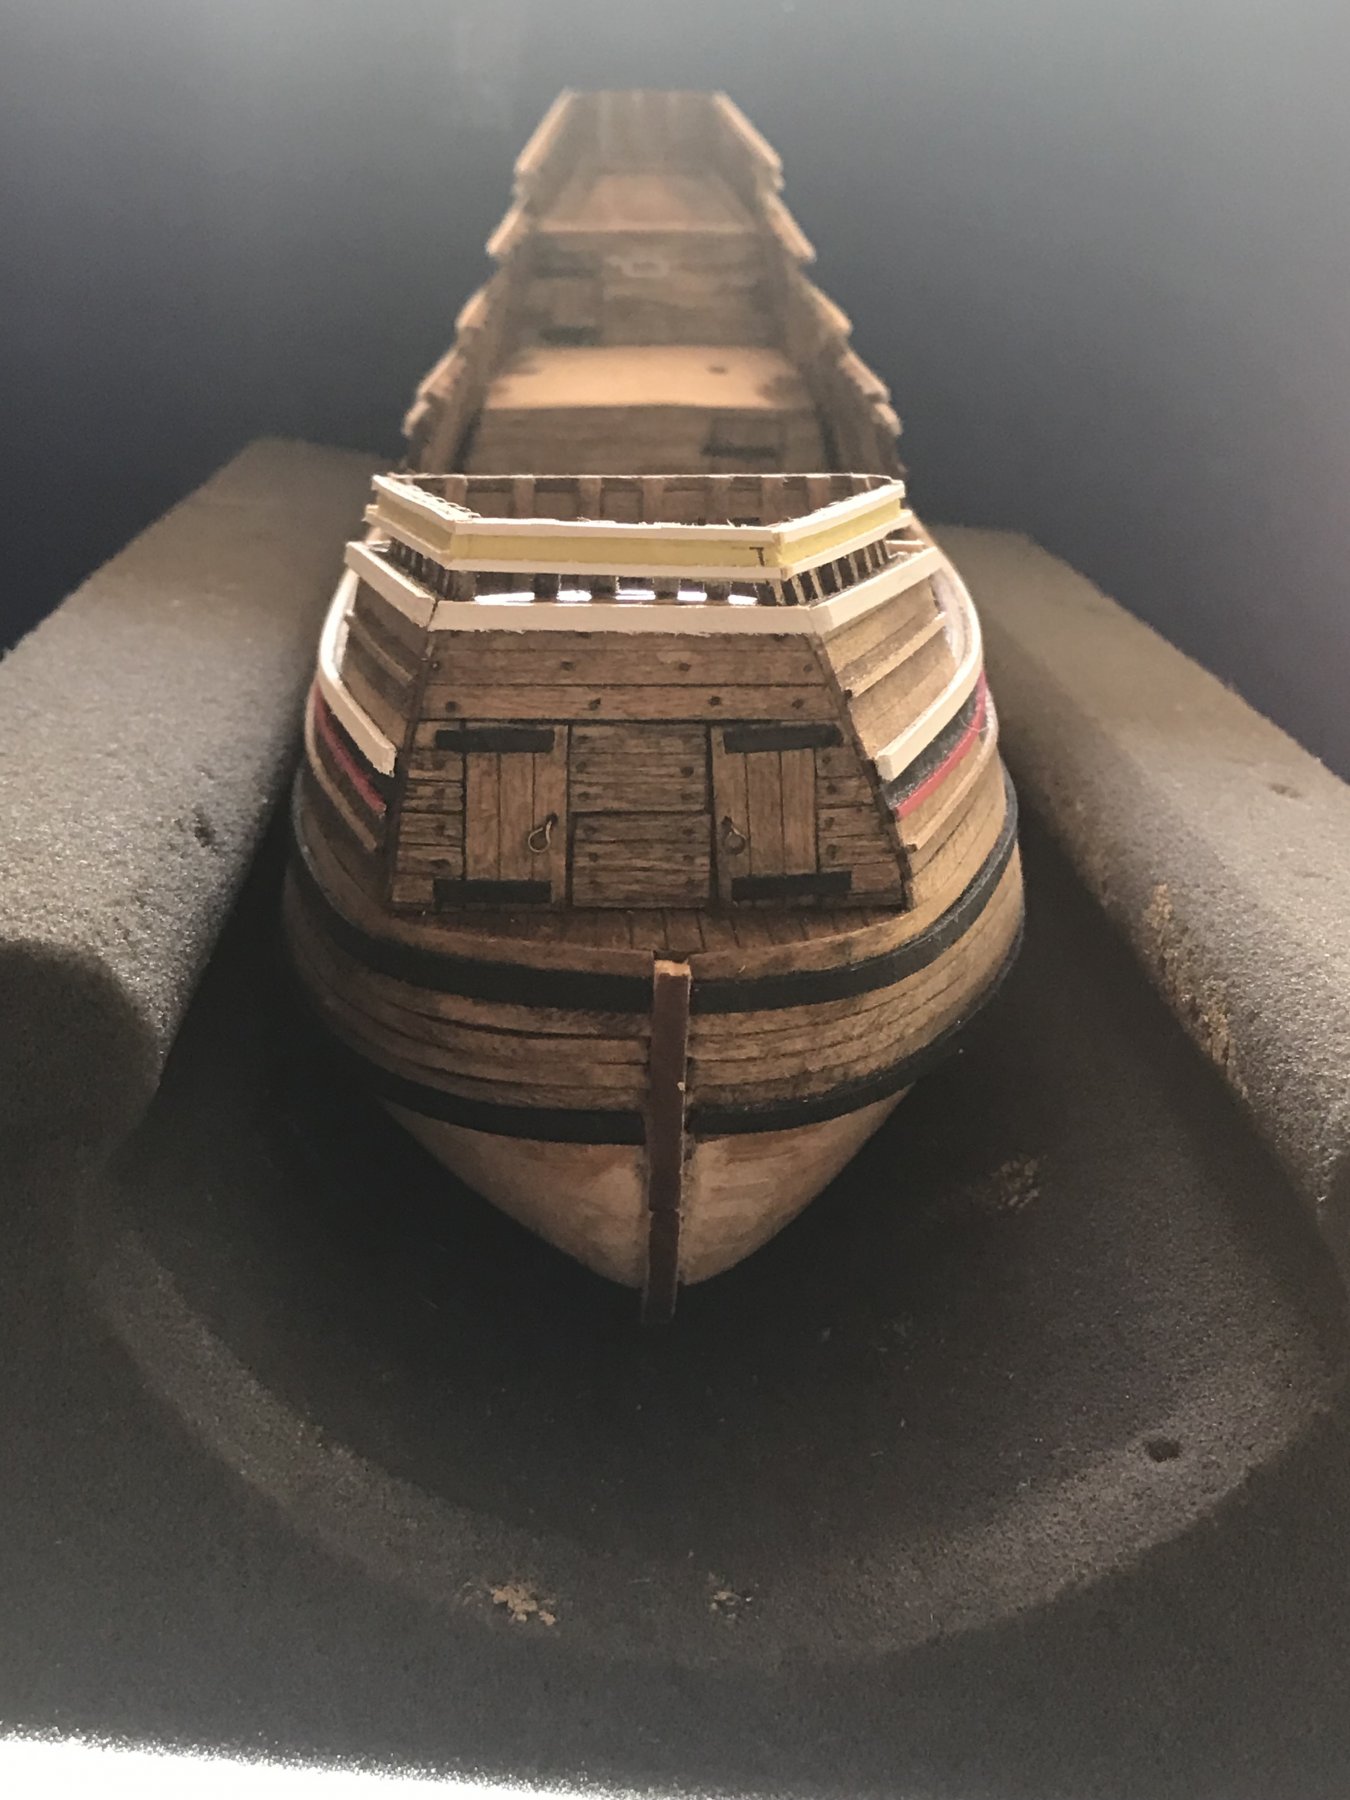
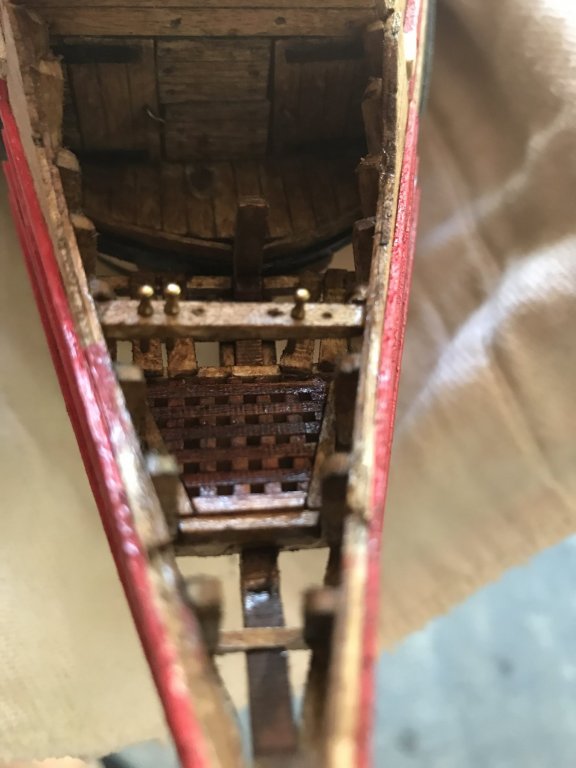
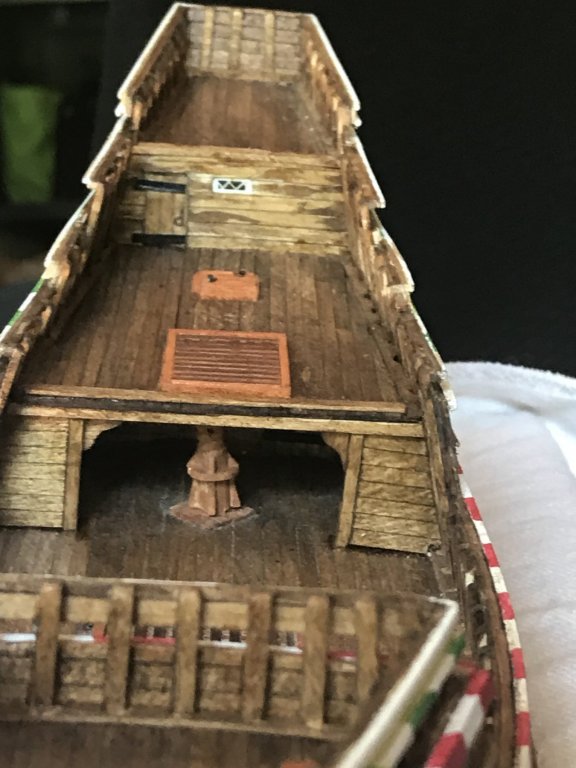
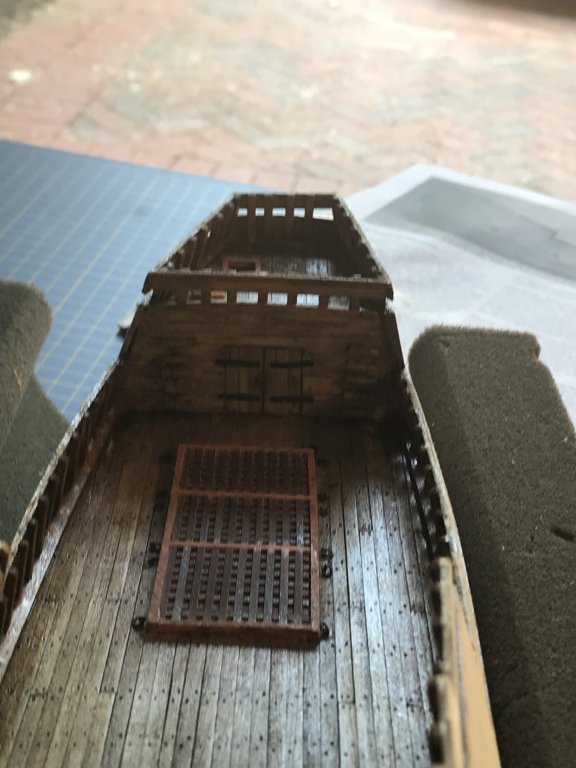
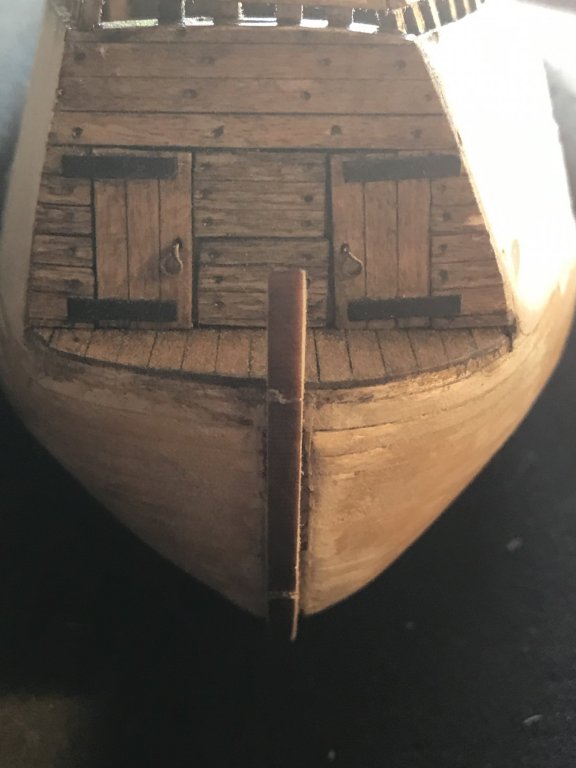
I completed the half deck extension. This included adding the hatch and a grate that would be used to remove the capstan when repairs or replacement were needed. Also worked on painting the hull. Many of the “box” pictures show the hull in a fairly bright white but as the instructions and current pics of the replica indicate this would see to unreal. So I am trying an ivory paint (close to eggshell) and covering it with very diluted brown. My goal is to find something that indicates aging on the lighter color. Next up is the beakhead and rudder assemblies.

-
Thanks! I’m learning some new skills with this build. It’s been enjoyable so far.
-
I totally agree with this comment. I tend to build too quickly but its my style and I do enjoy this hobby so it’s not work but enjoyment for me. That said the instructions are very well done-clear and supported with numerous black and white photos. This gives me the advantage of looking ahead to see how the parts and sections will relate to each other. While it hasn’t made up for some of my skills being sub par it has enabled me to avoid some pitfalls. One thing on the instructions that I do think is off a little is the order of build. For example, if I had elected to have the port lids shown open I would not install them this early in the build. Too easy to get damaged. Also, I believe the following order of build is easier to follow: finish out half deck, rudder, and then beakhead. Instructions show order of beakhead, halfdeck then rudder. It’s clearly a matter of preference but for me I’d rather do the more intricate work(also easily broken) last. Thanks to all for looking in on my build log.
-
Just wondering if you are going to finish your Mayflower for this year’s Thanksgiving. I enjoyed following your build log, your work is very good.
-
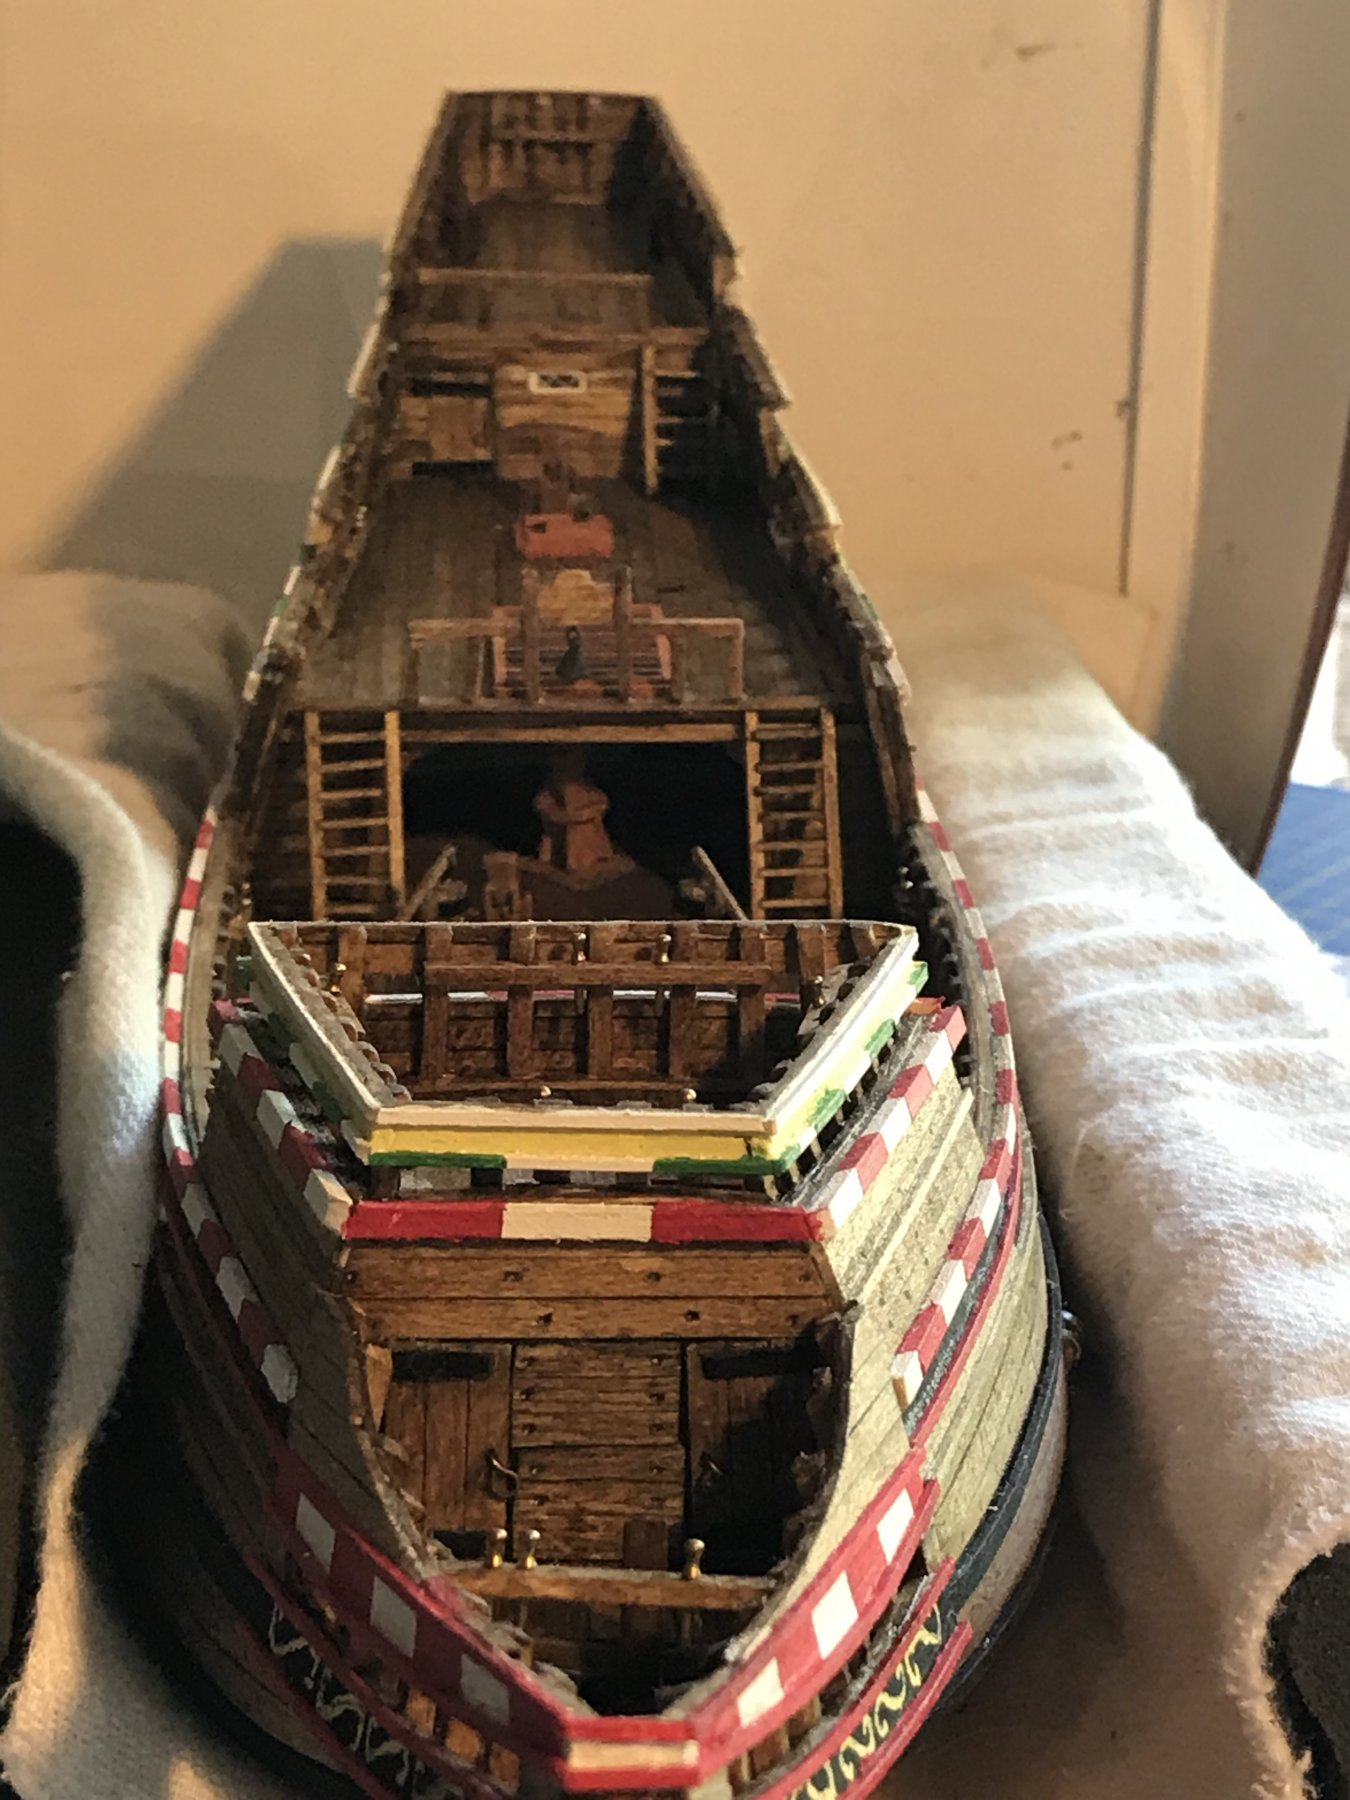
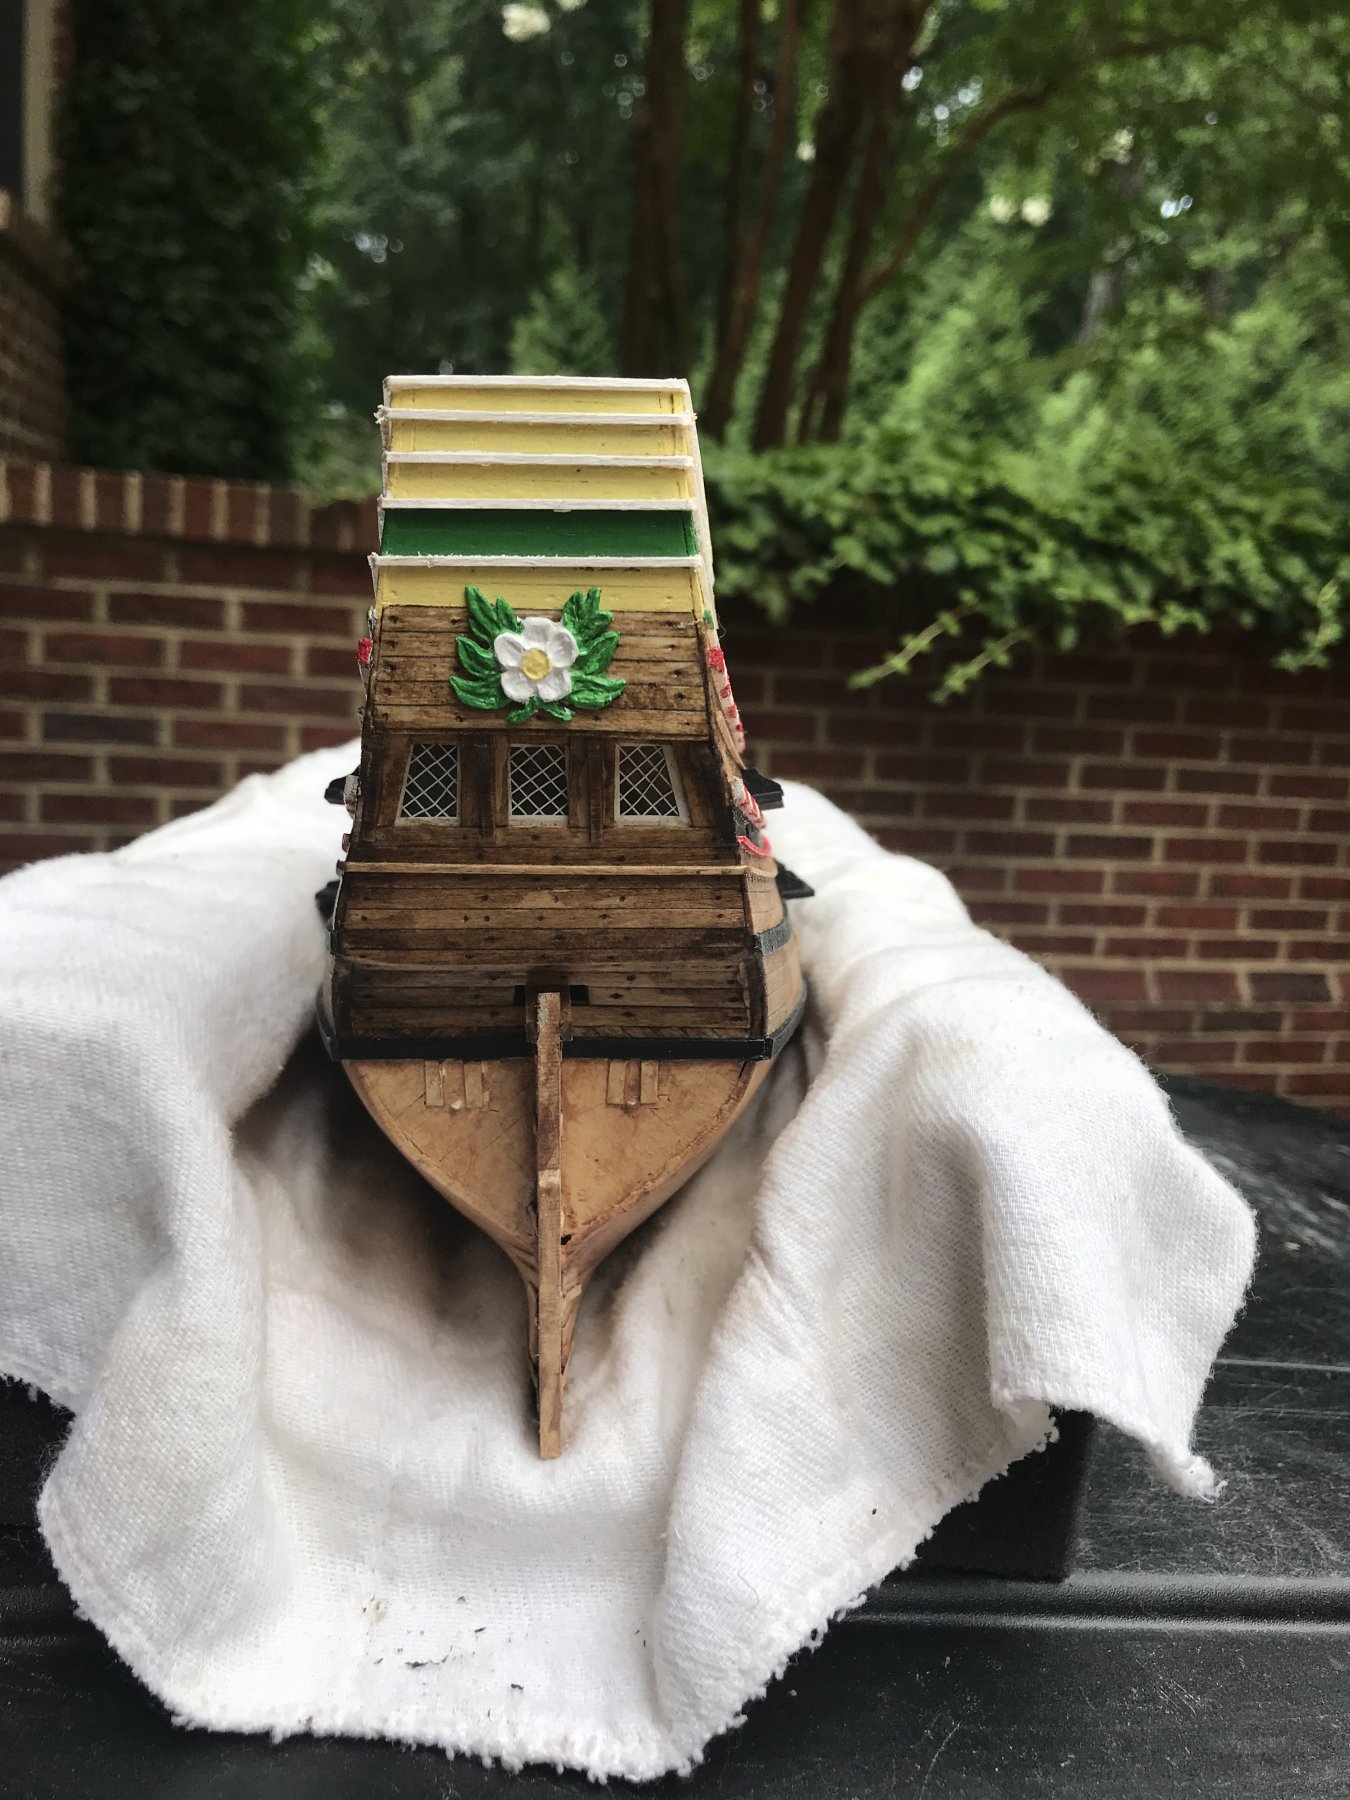
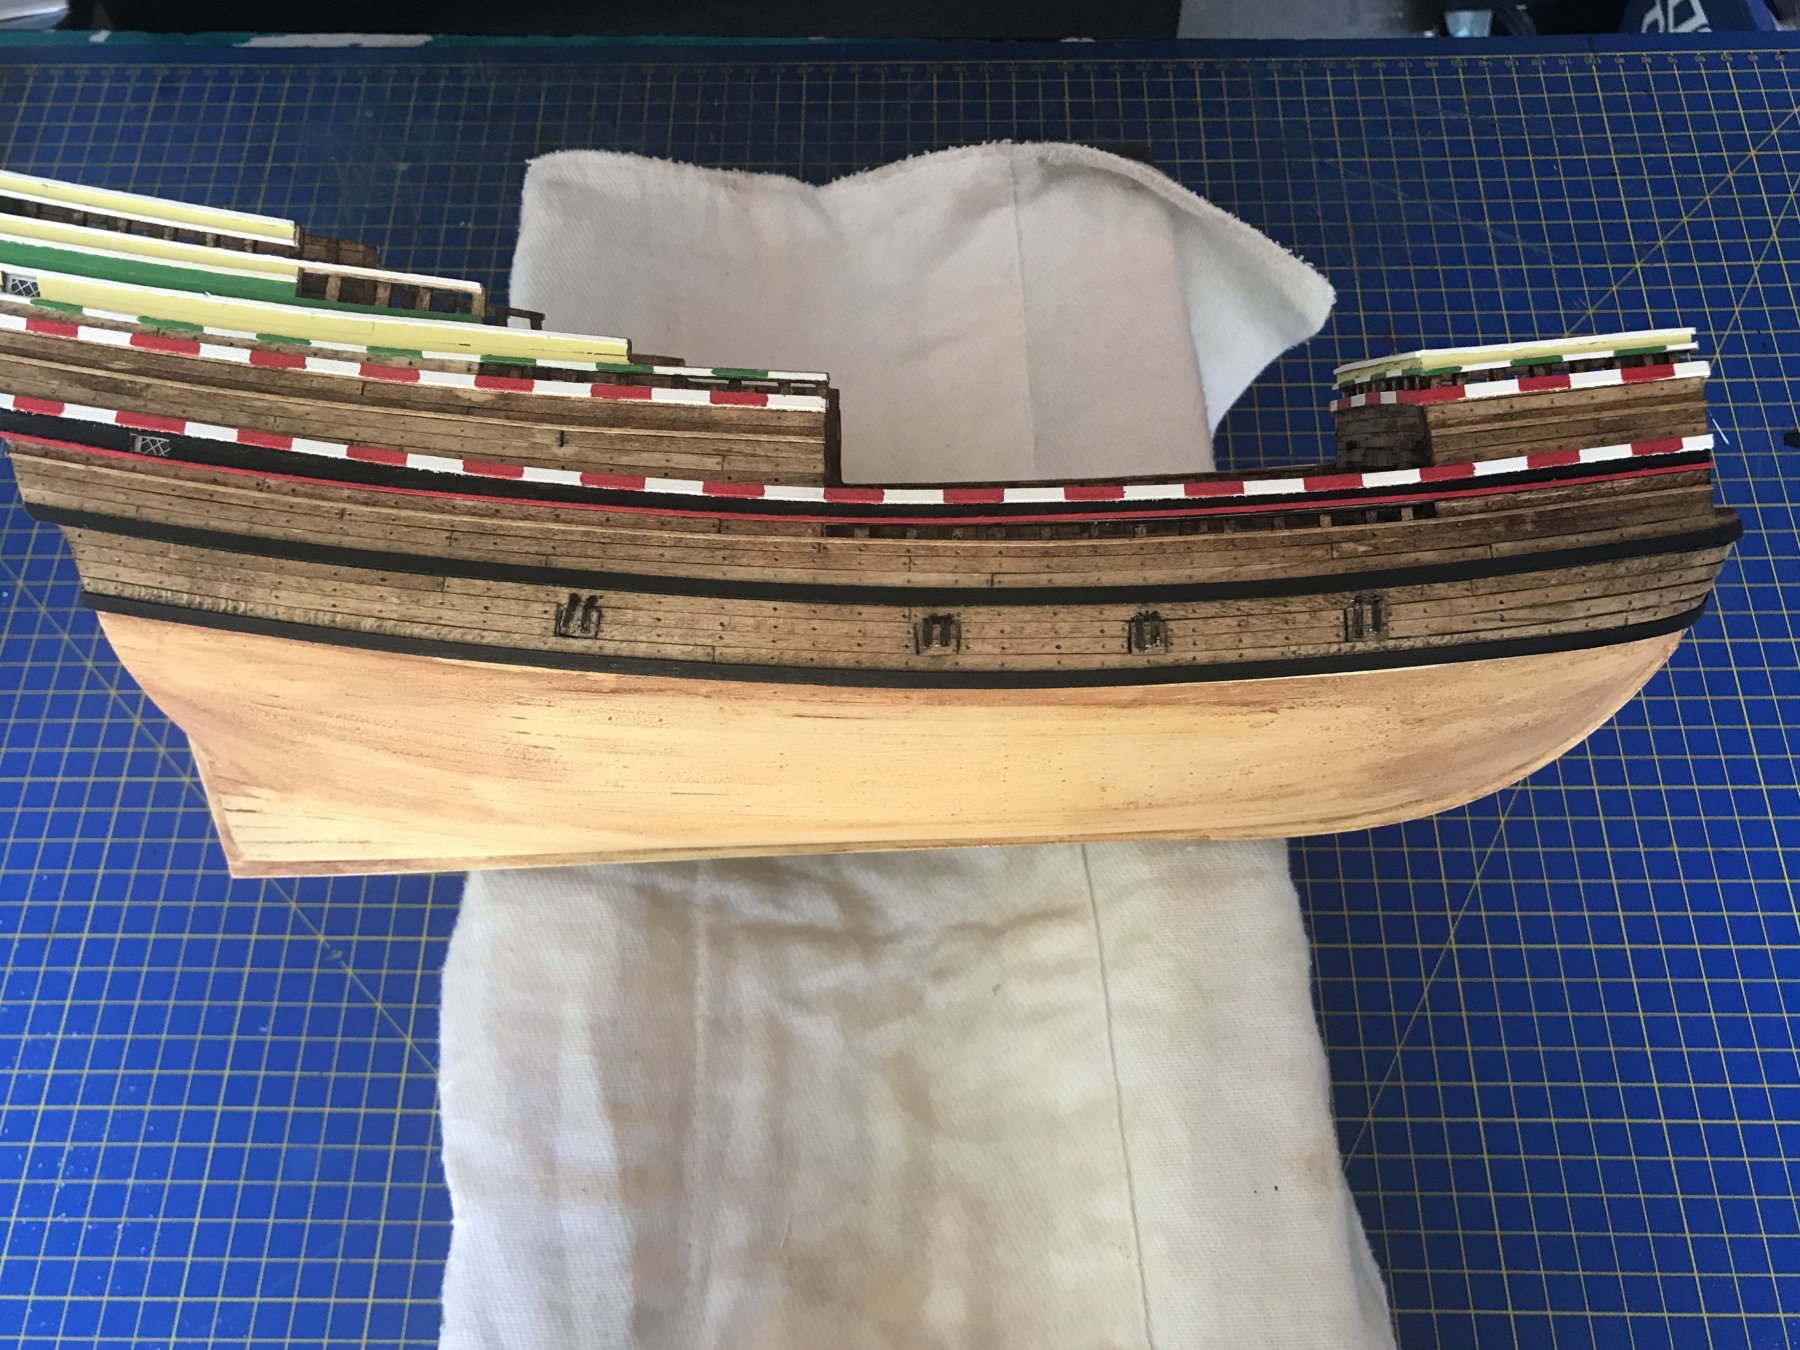
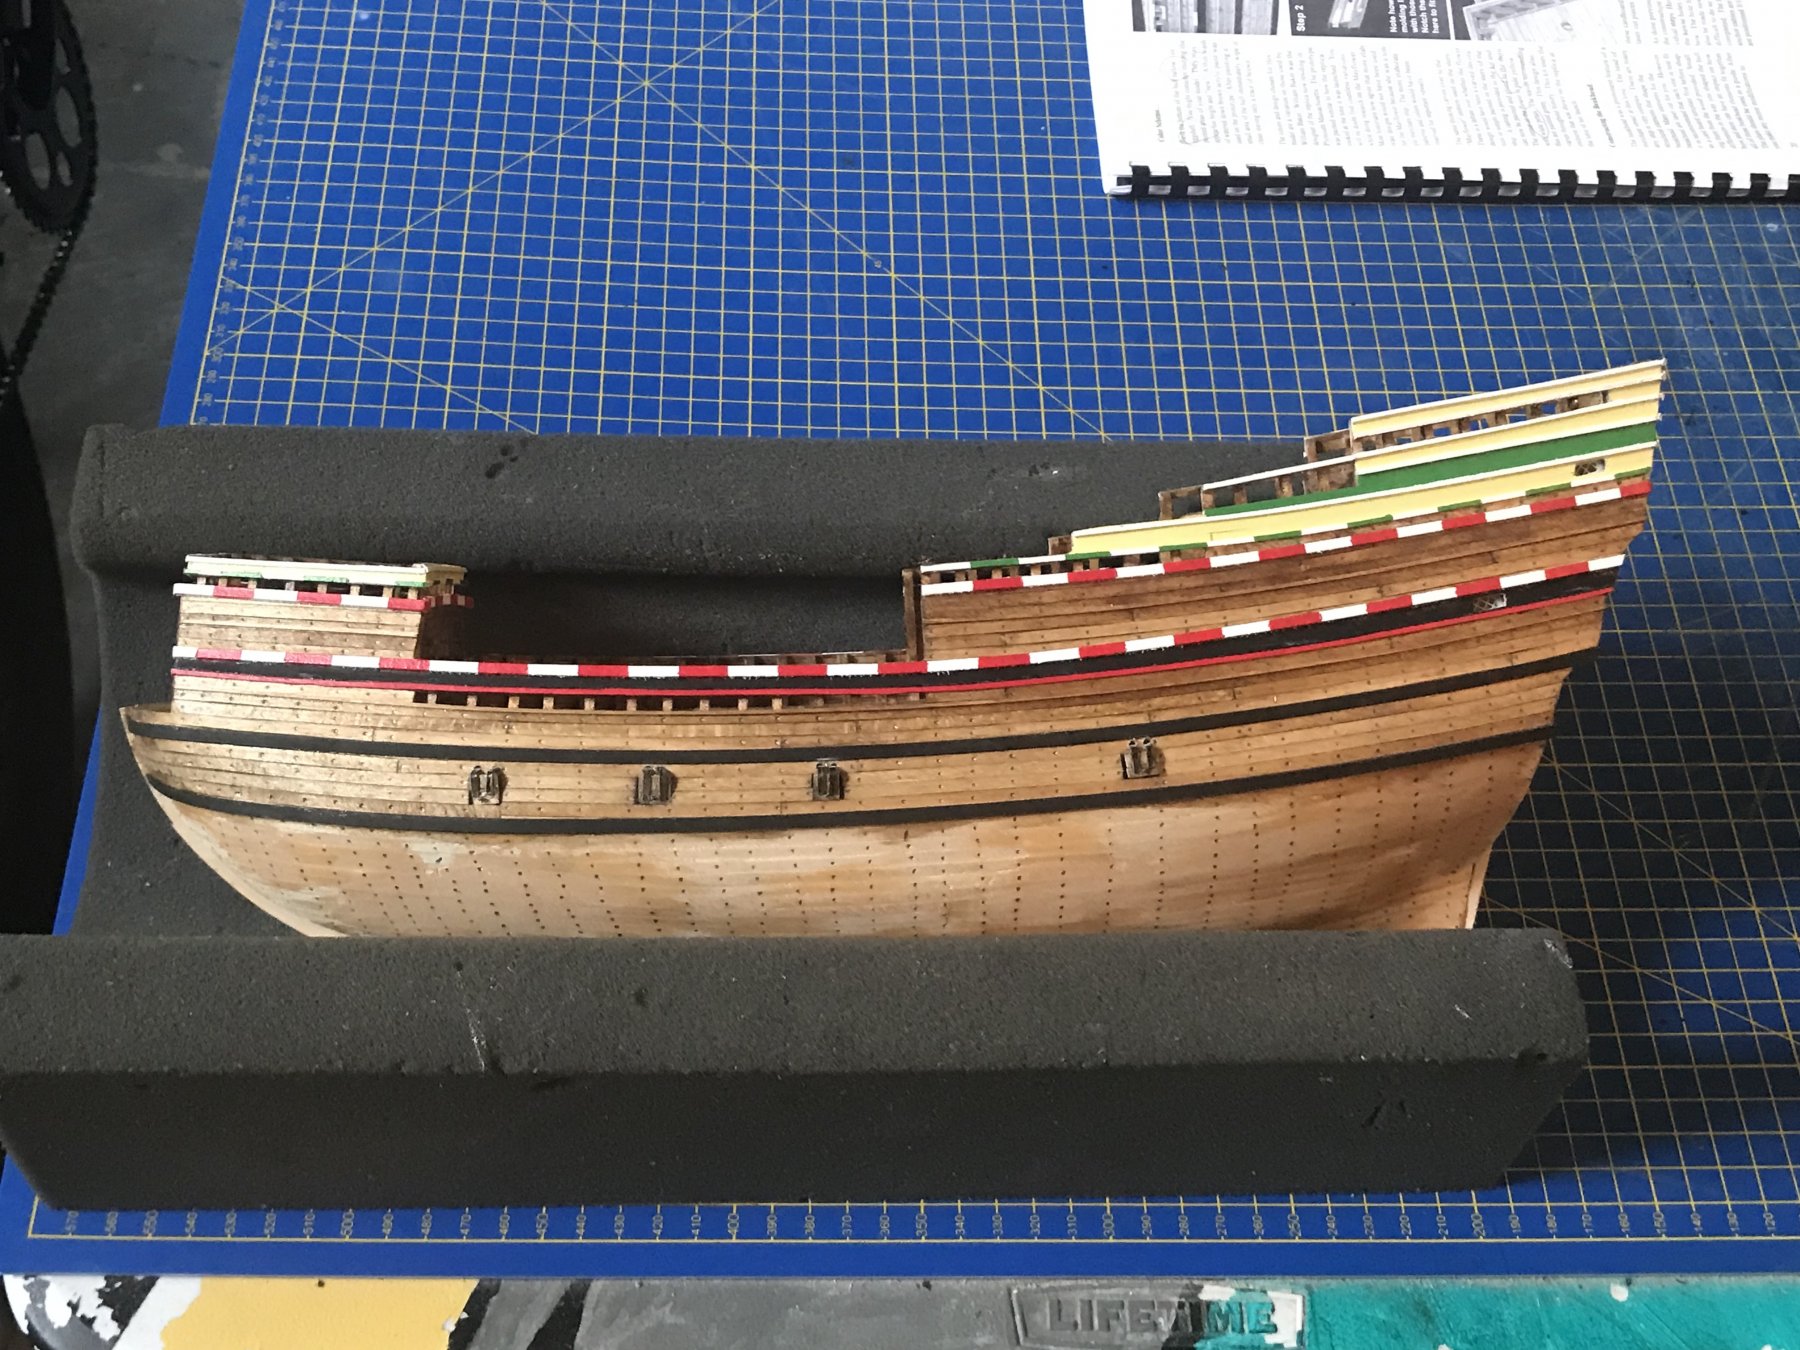
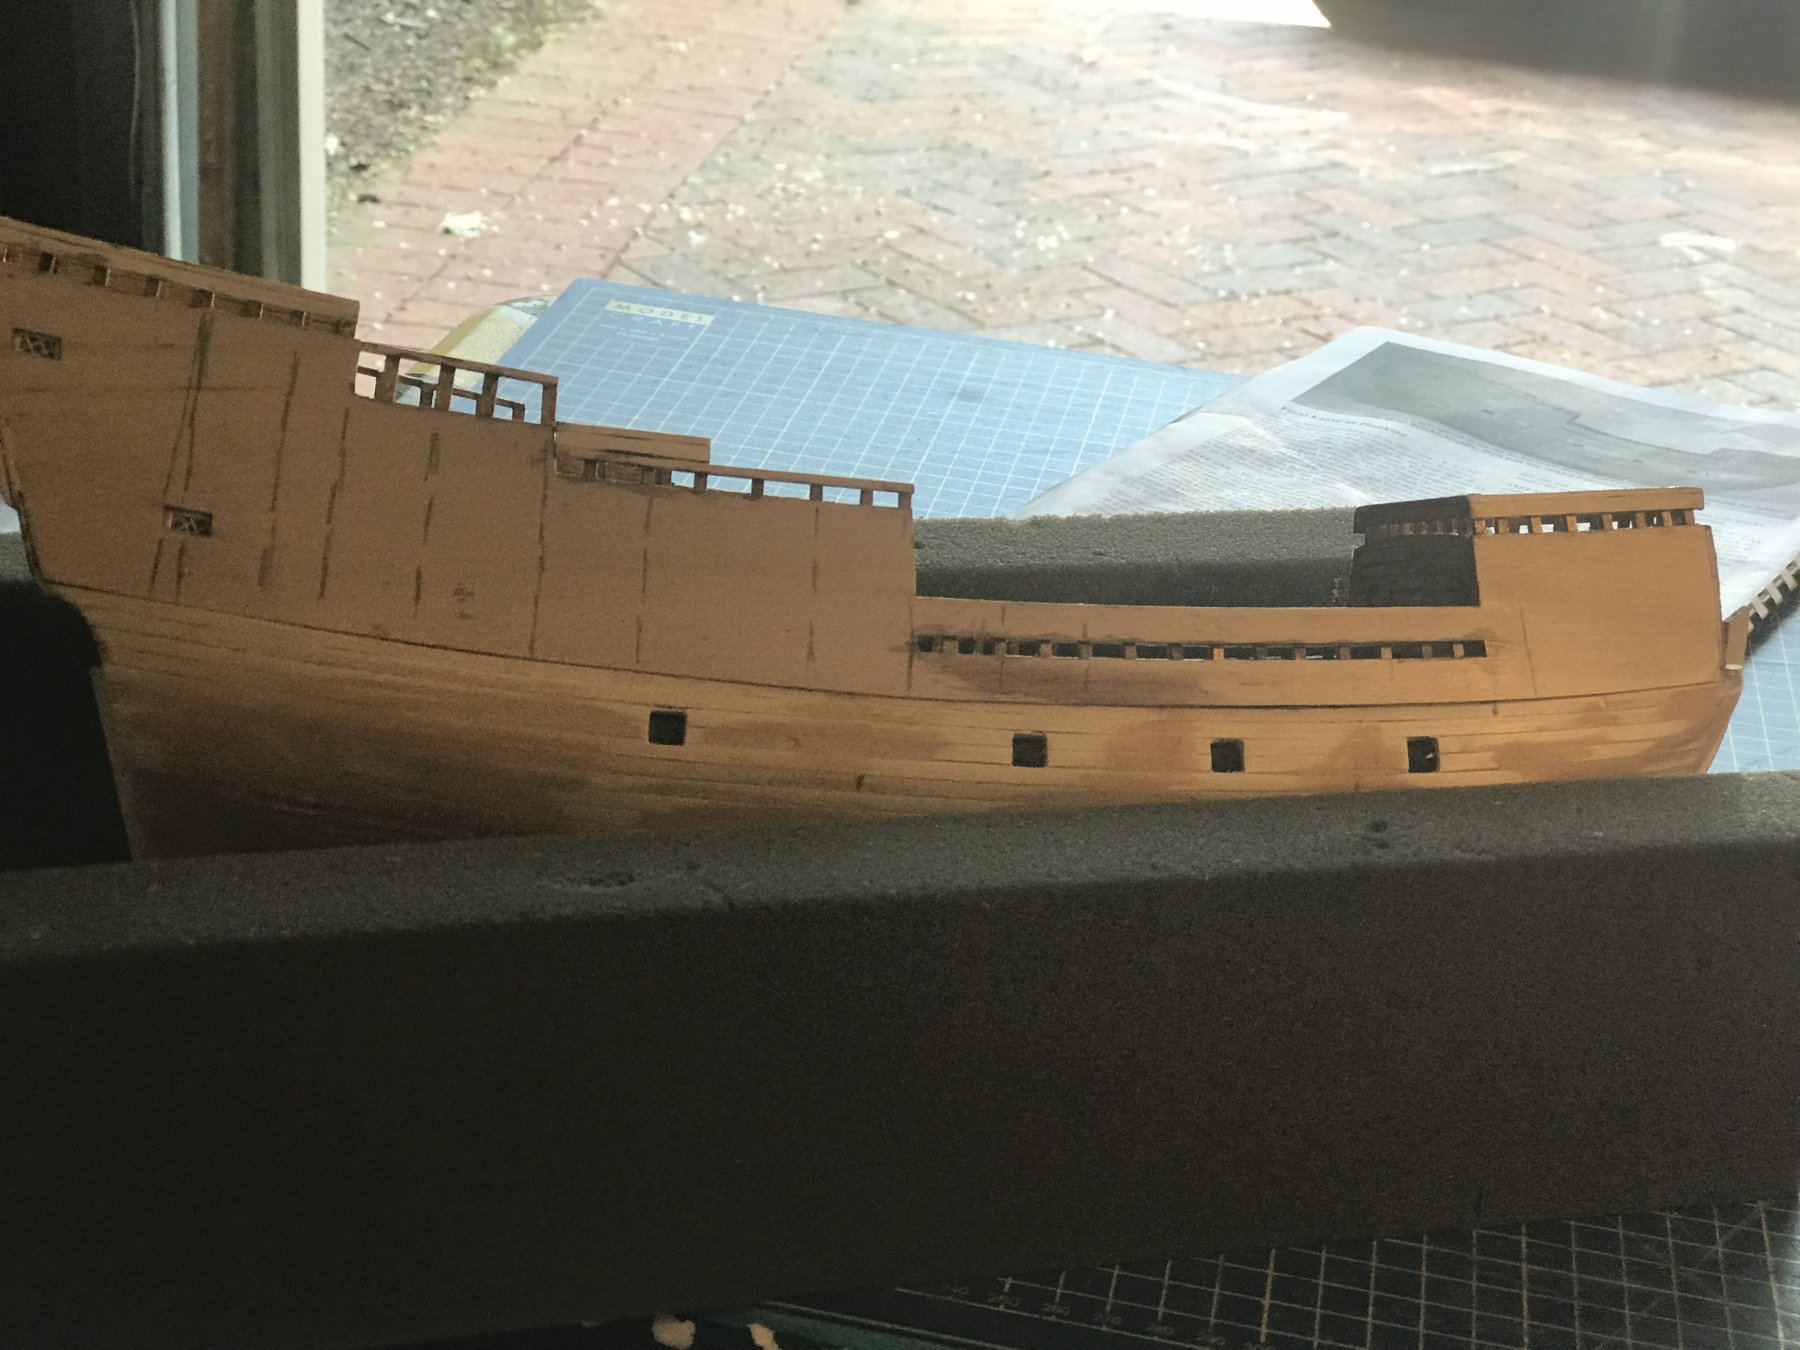
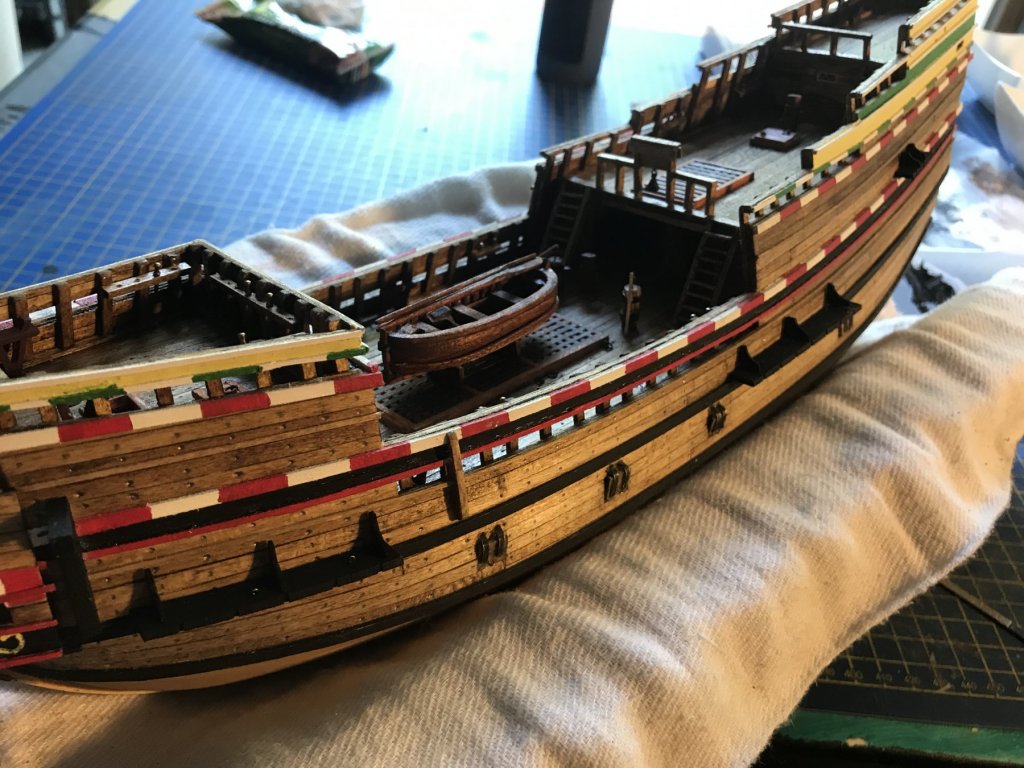
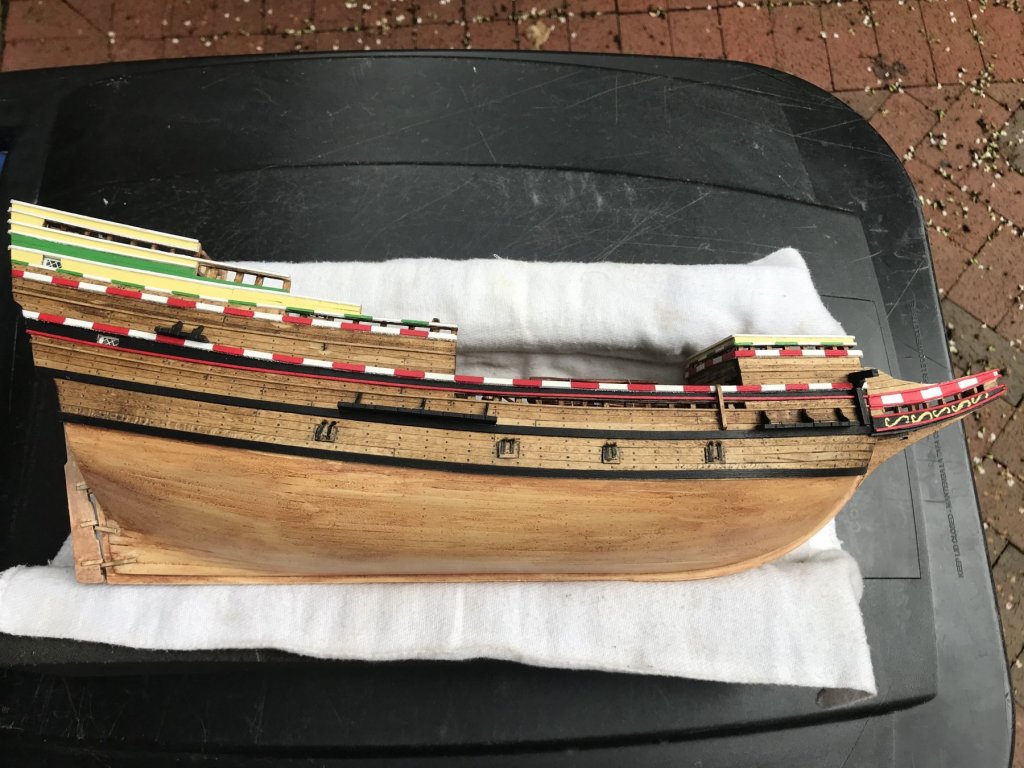
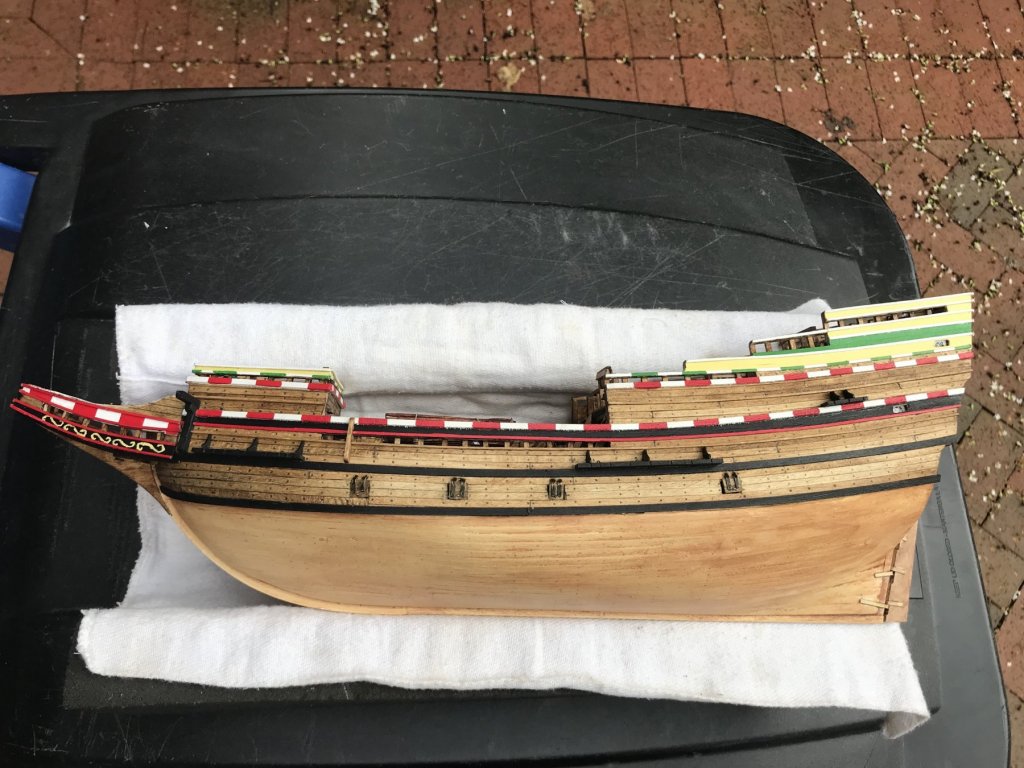
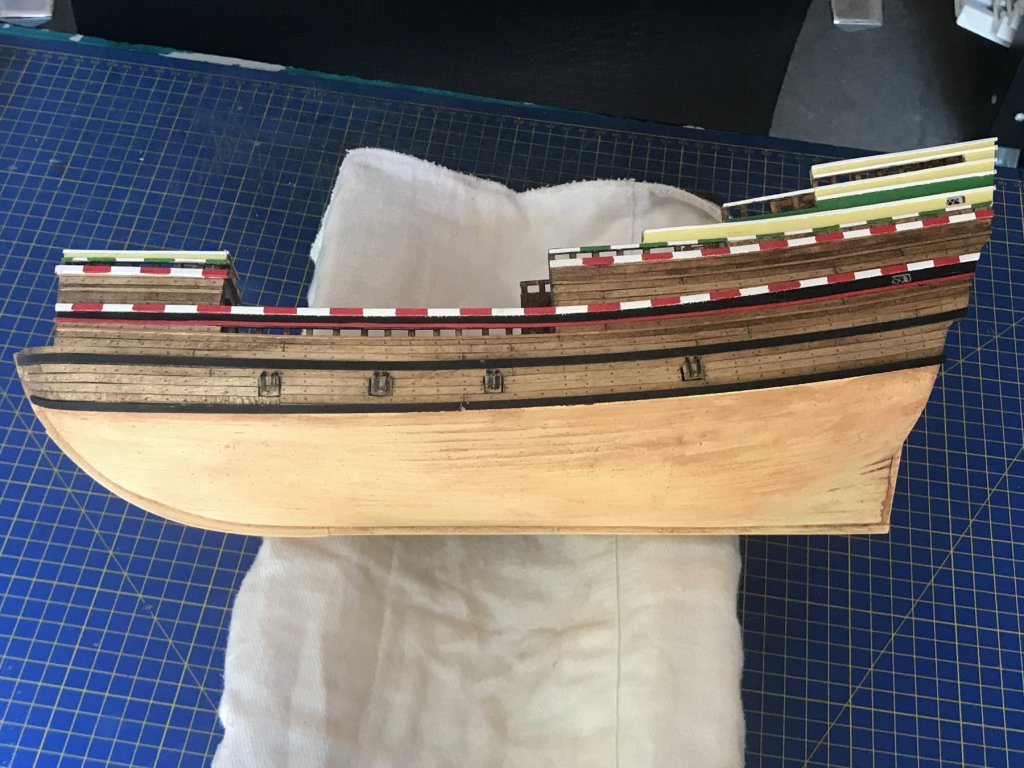
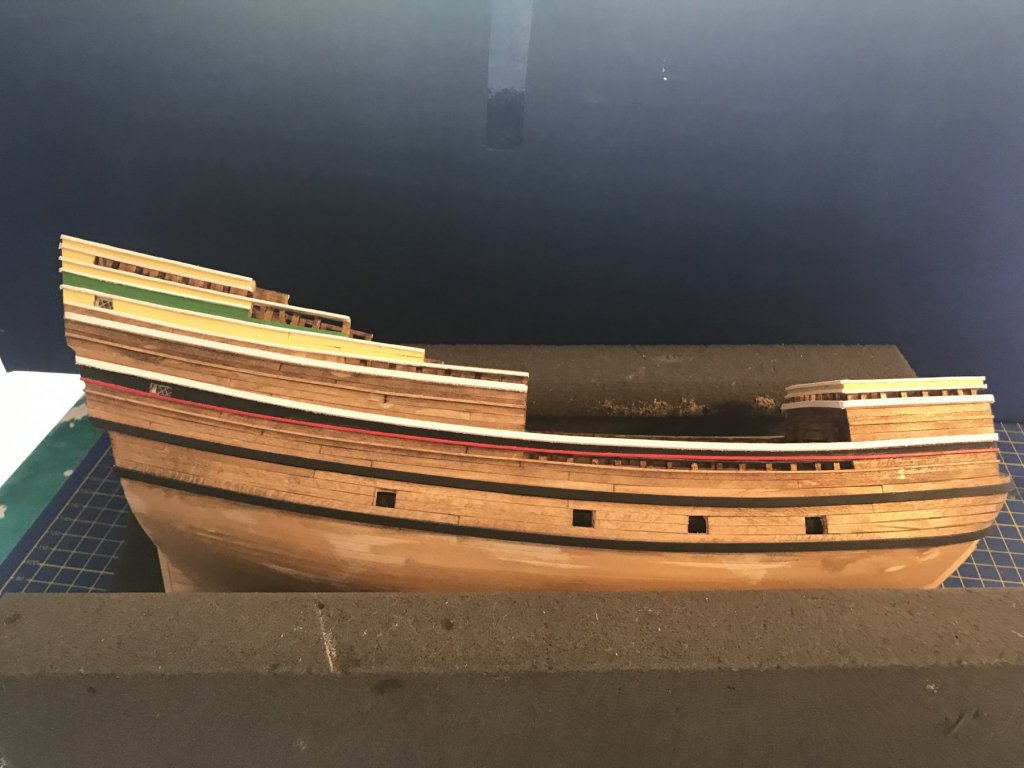
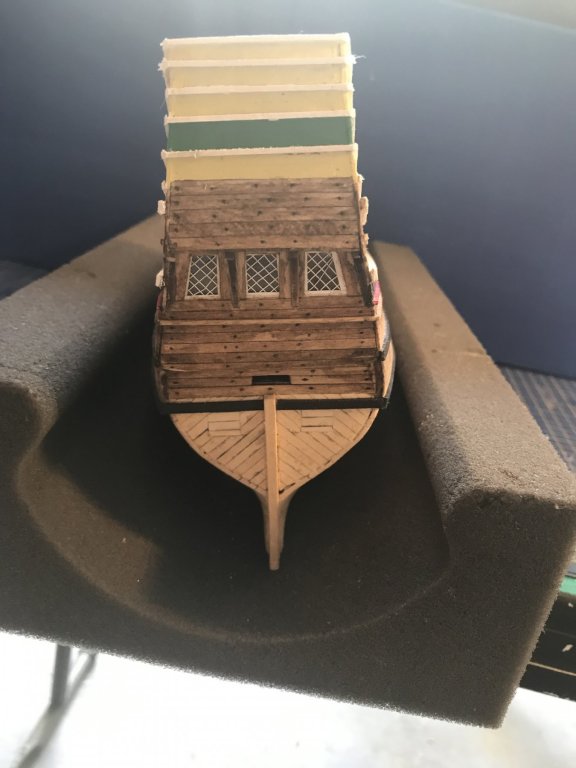
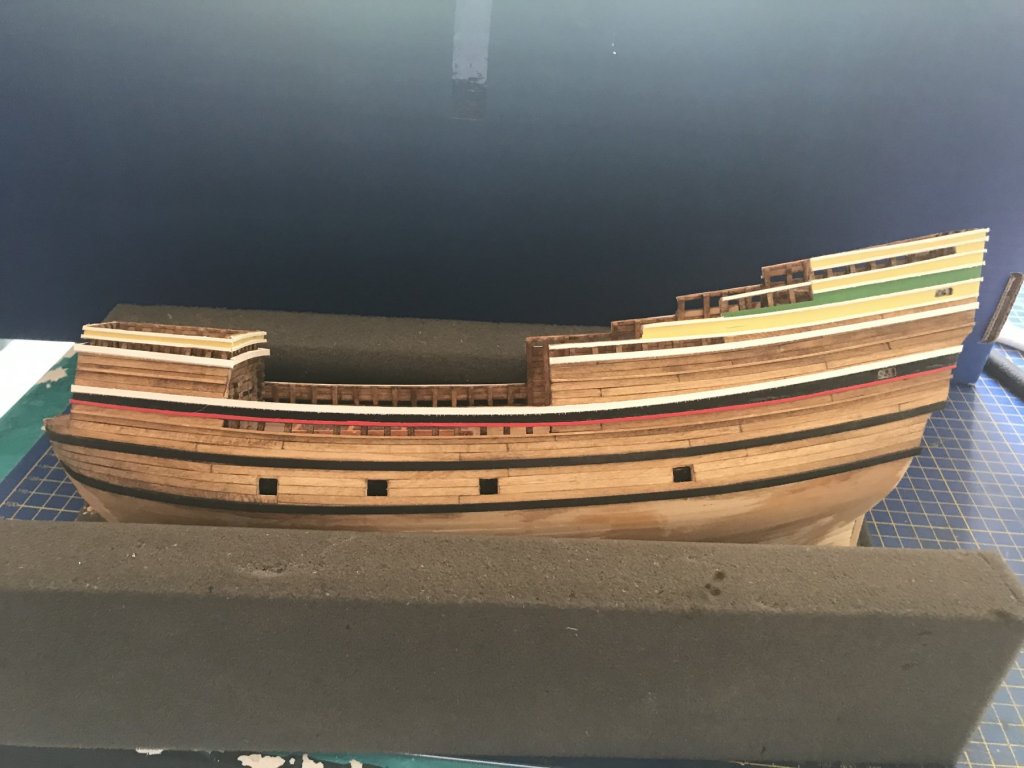
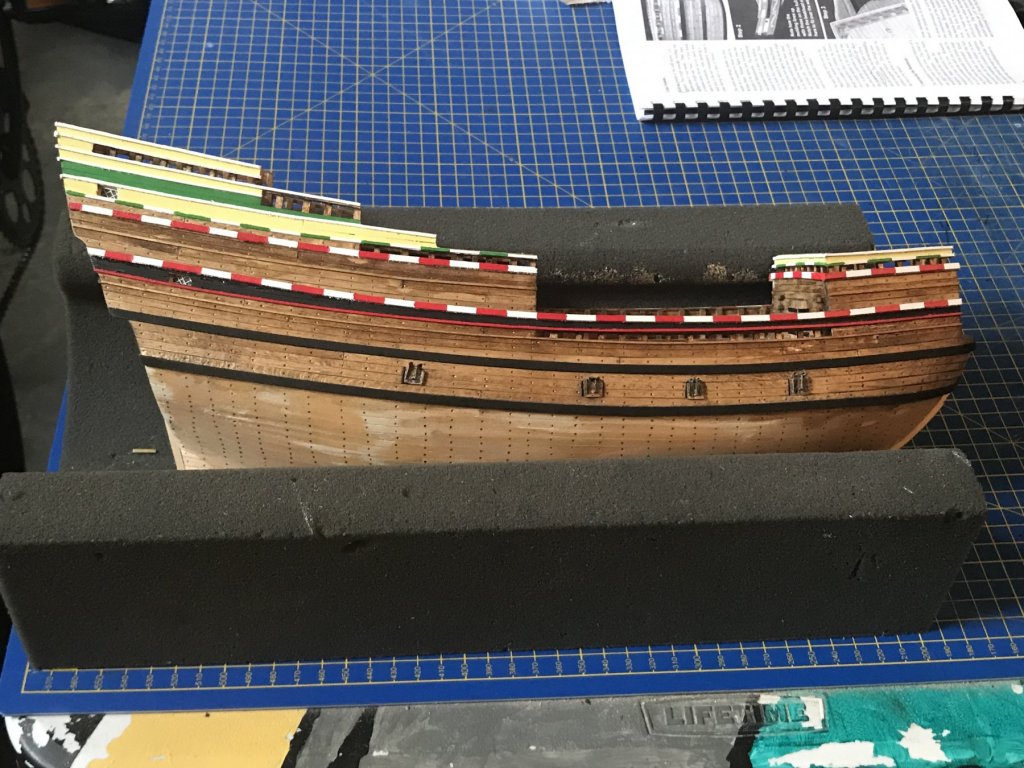
Progress continues on the Mayflower. Over the past weekend I planked the upper sides and stained in same golden oak. Then started painting per instructions; first I painted the yellow, black and green sections of all required structure. I painted all the wales and moldings in their primary colors first before attaching them to the ship; black for the wales, white for most of the moldings except that is red and two that are stained. Once these were attached I taped to create the patterns for the red and green stripes. In researching I have seen numerous schemes for the ships colors. Since this was a merchant ship it was not elaborately decorated. I decided to align the stripes versus offsetting them. Same pattern follows on front and rear of forecastle. After painting I added the 8 port lids. This was a bit more challenging than I thought it would be as the parts are fairly small to fit and manipulate. I’ll also need to do something to address the holes in the sides needed to receive the brass used to simulate the port lid supports. As I thought back on this step it might have been better to use black card stock here instead just like on the doors. Since I am only showing the lids closed the hinge work is not needed. Something for others to think about on future builds.


-
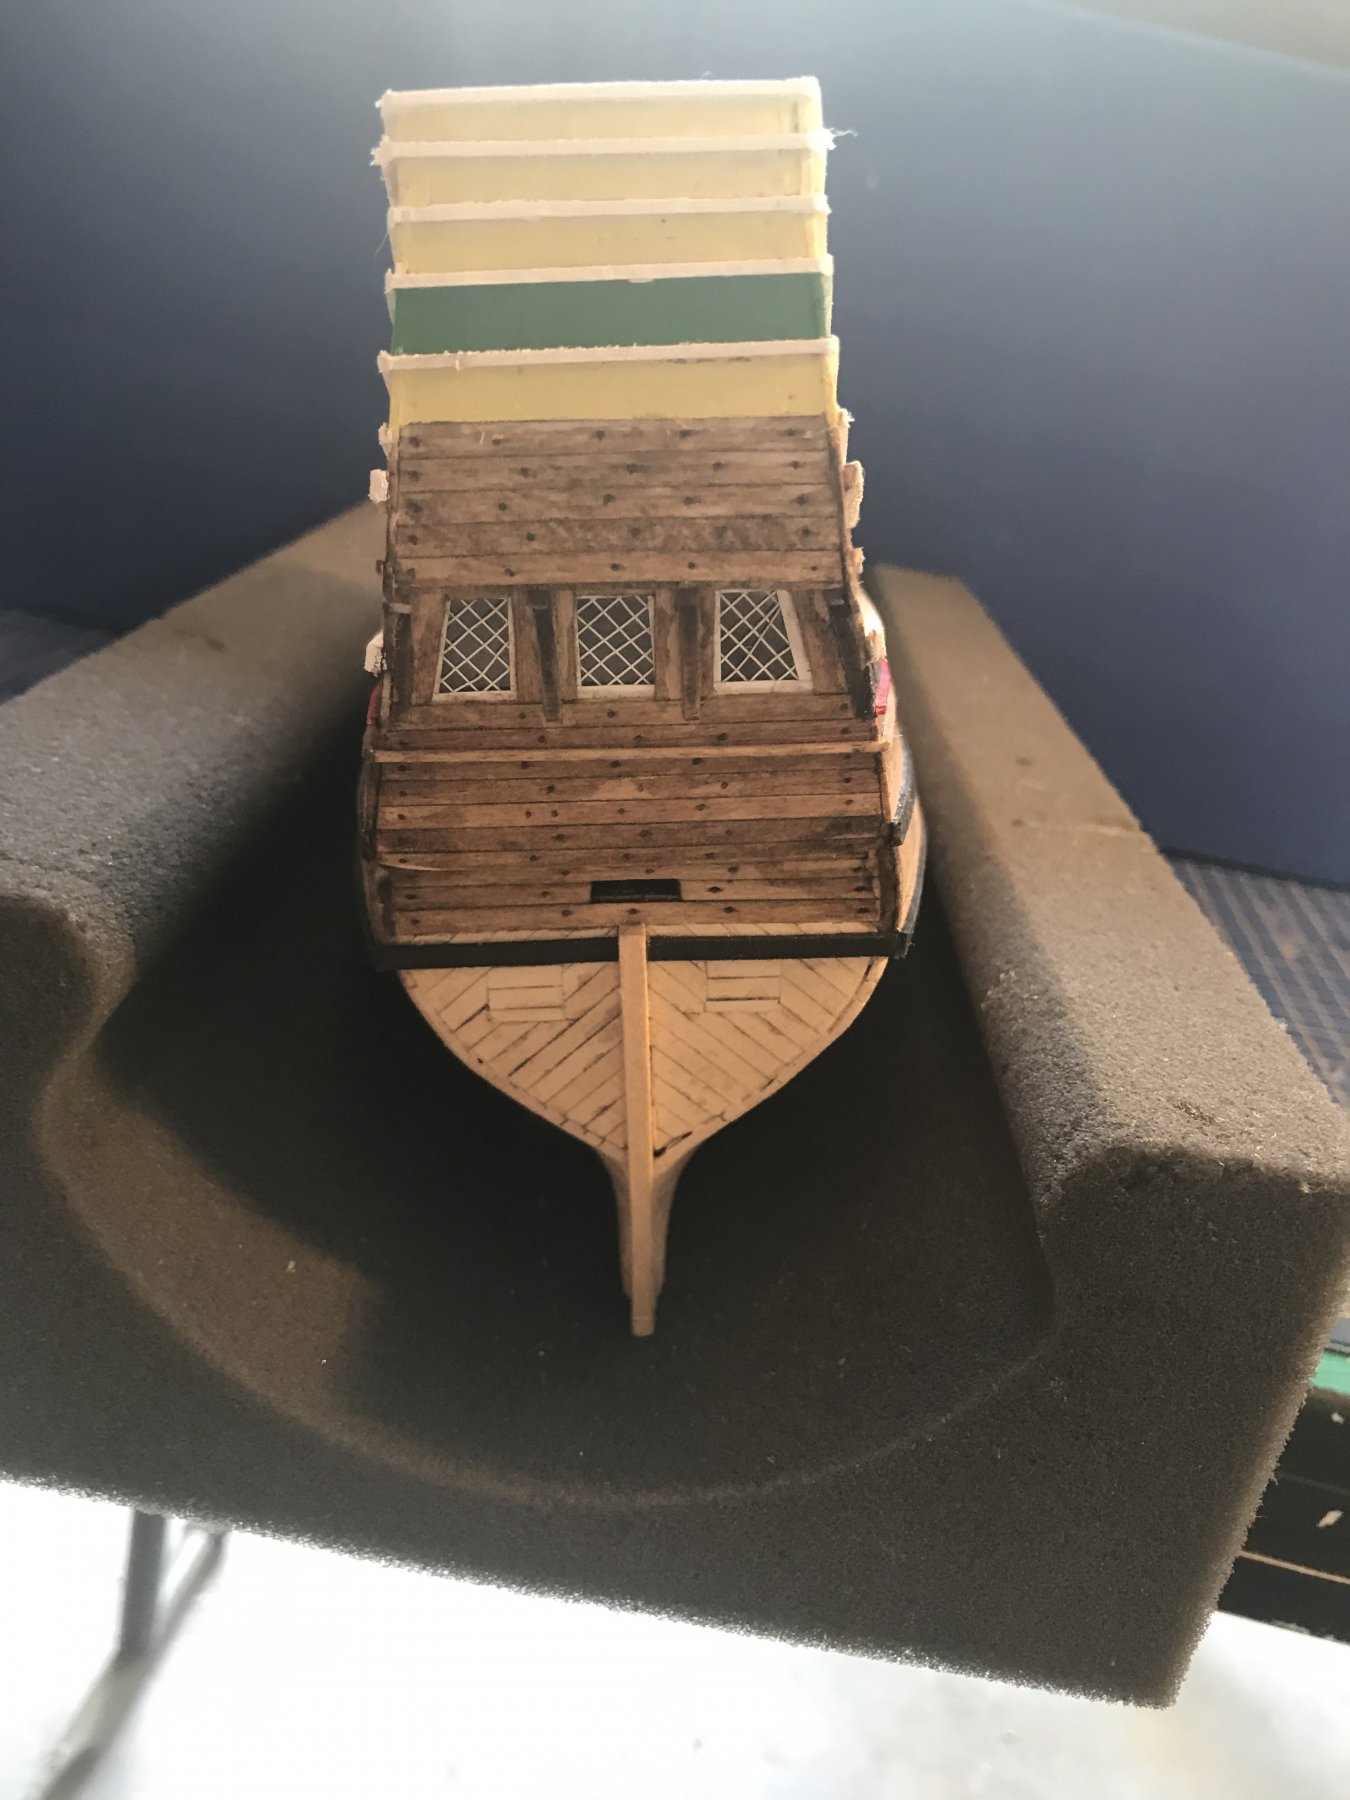
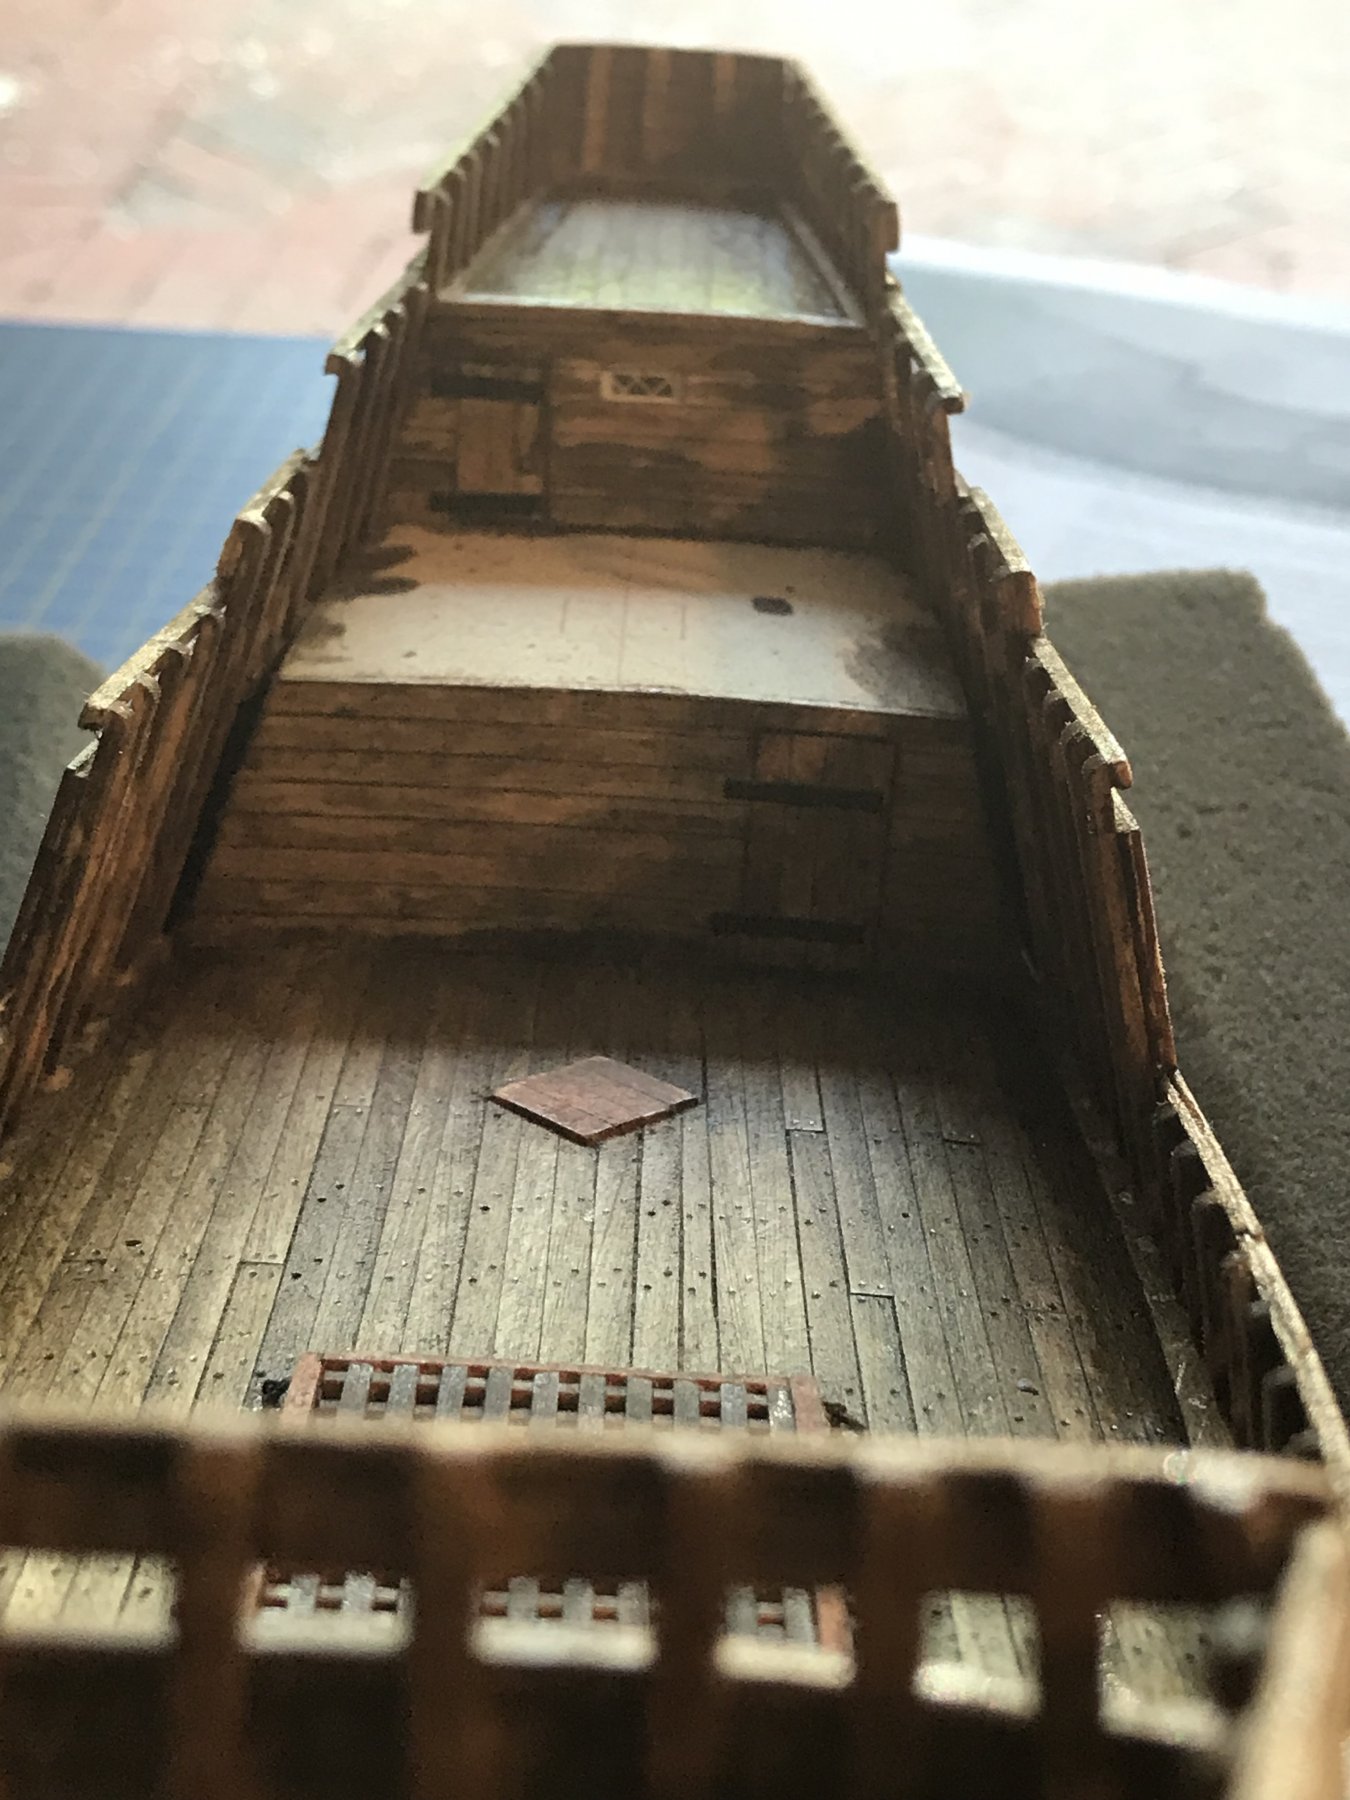
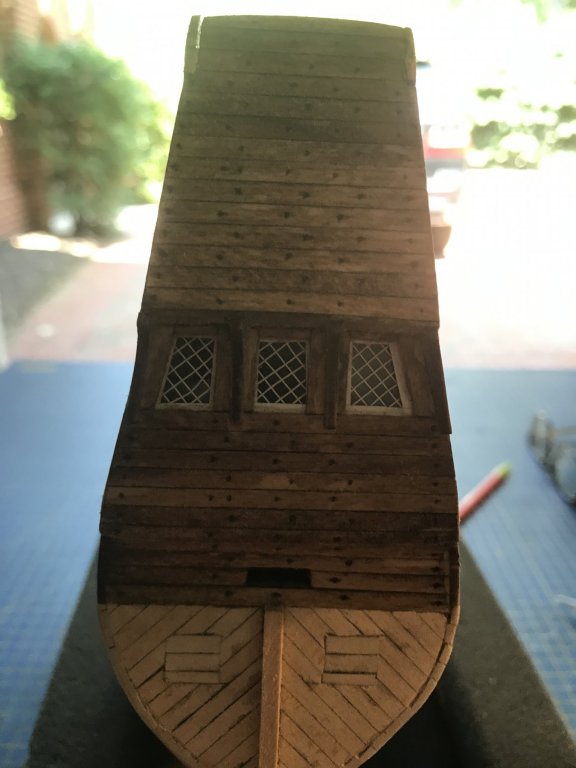
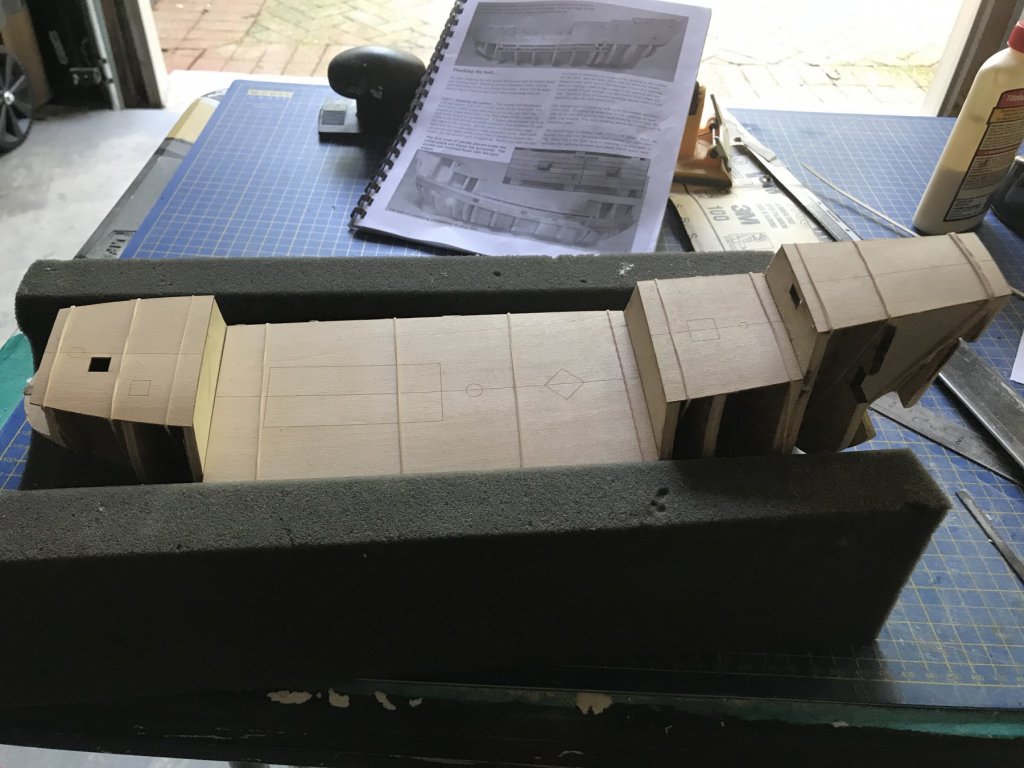
During the past week I completed all the side bulkheads, stanchions with preplanking added and planked the upper stern. One structure I needed to redo was the hatch on the forecastle deck. I mistakenly assumed the plan lines were the inside edge. They are not. The windows are made by applying thin white pinstripe to a piece of acetate in a diamond pattern supplied in the instructions. A wider pinstripe simulates the window frames. It’s a neat way to model the windows. Unfortunately a couple of the thin pinstripes moved slightly during gluing the window to the stern. Trying to adjust them would be an adventure so I chose to leave as is. The lines on the side templates are for planking alignment. That’s the next step.


-
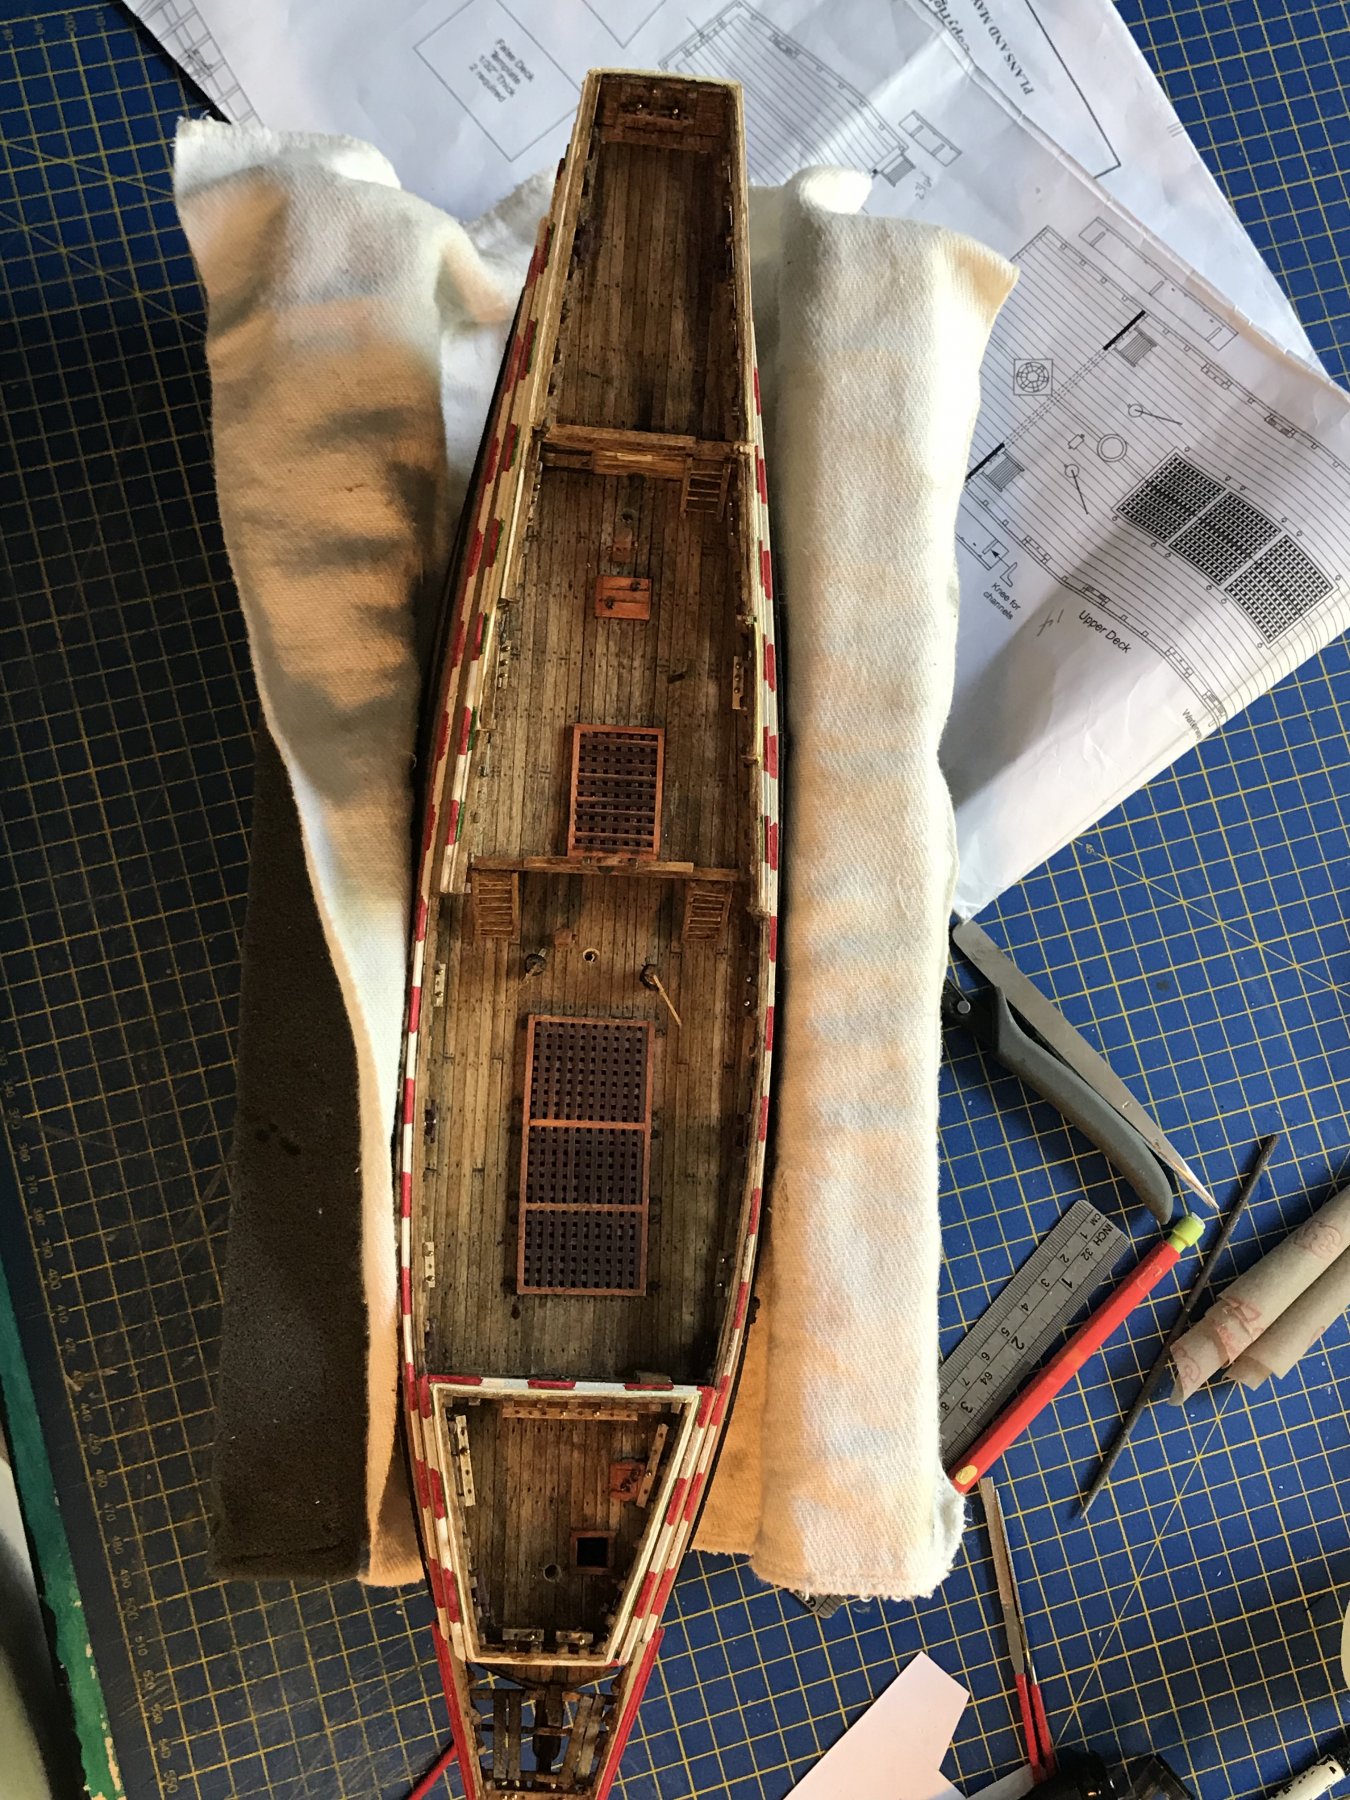
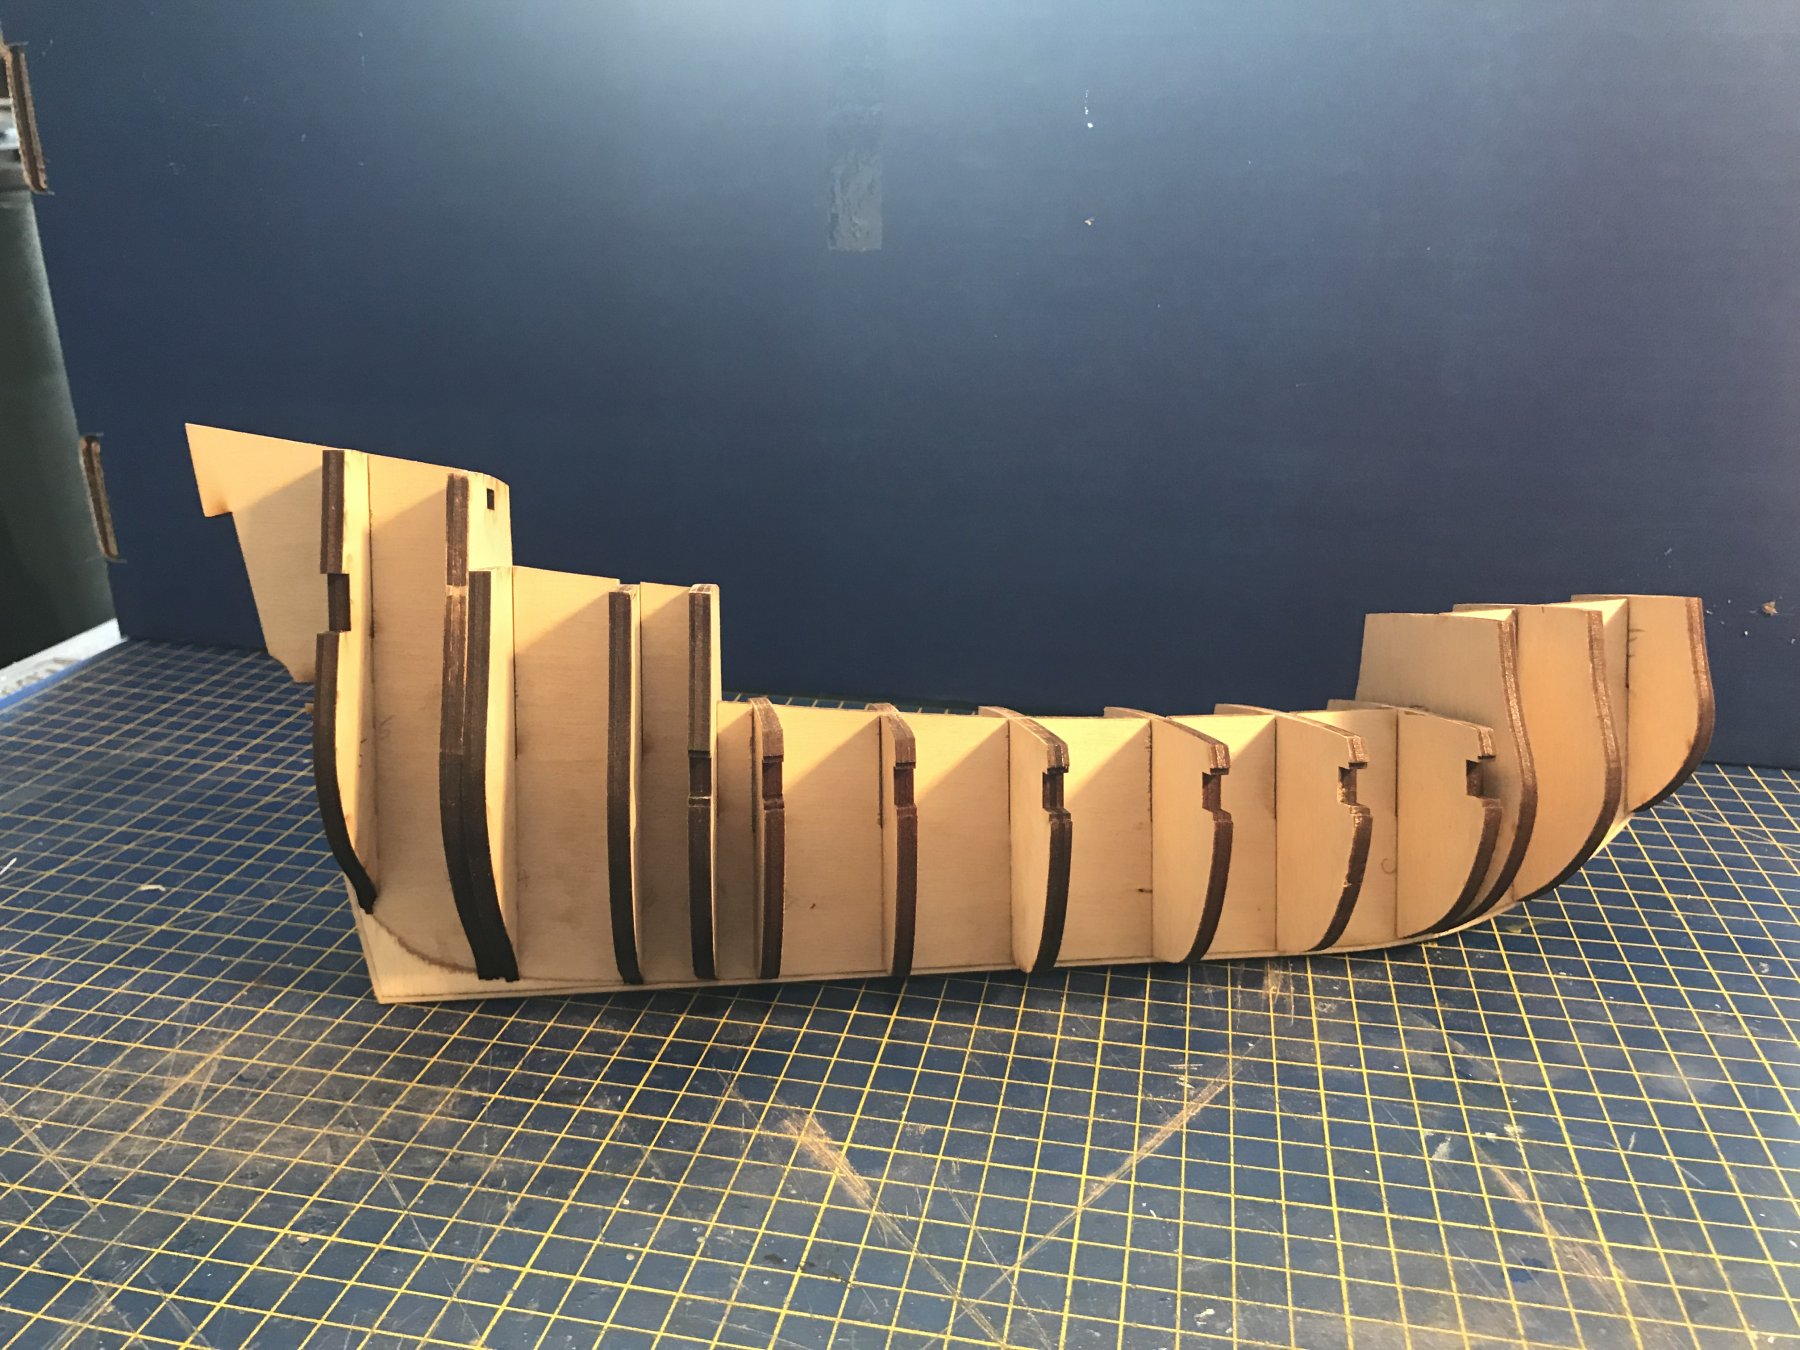
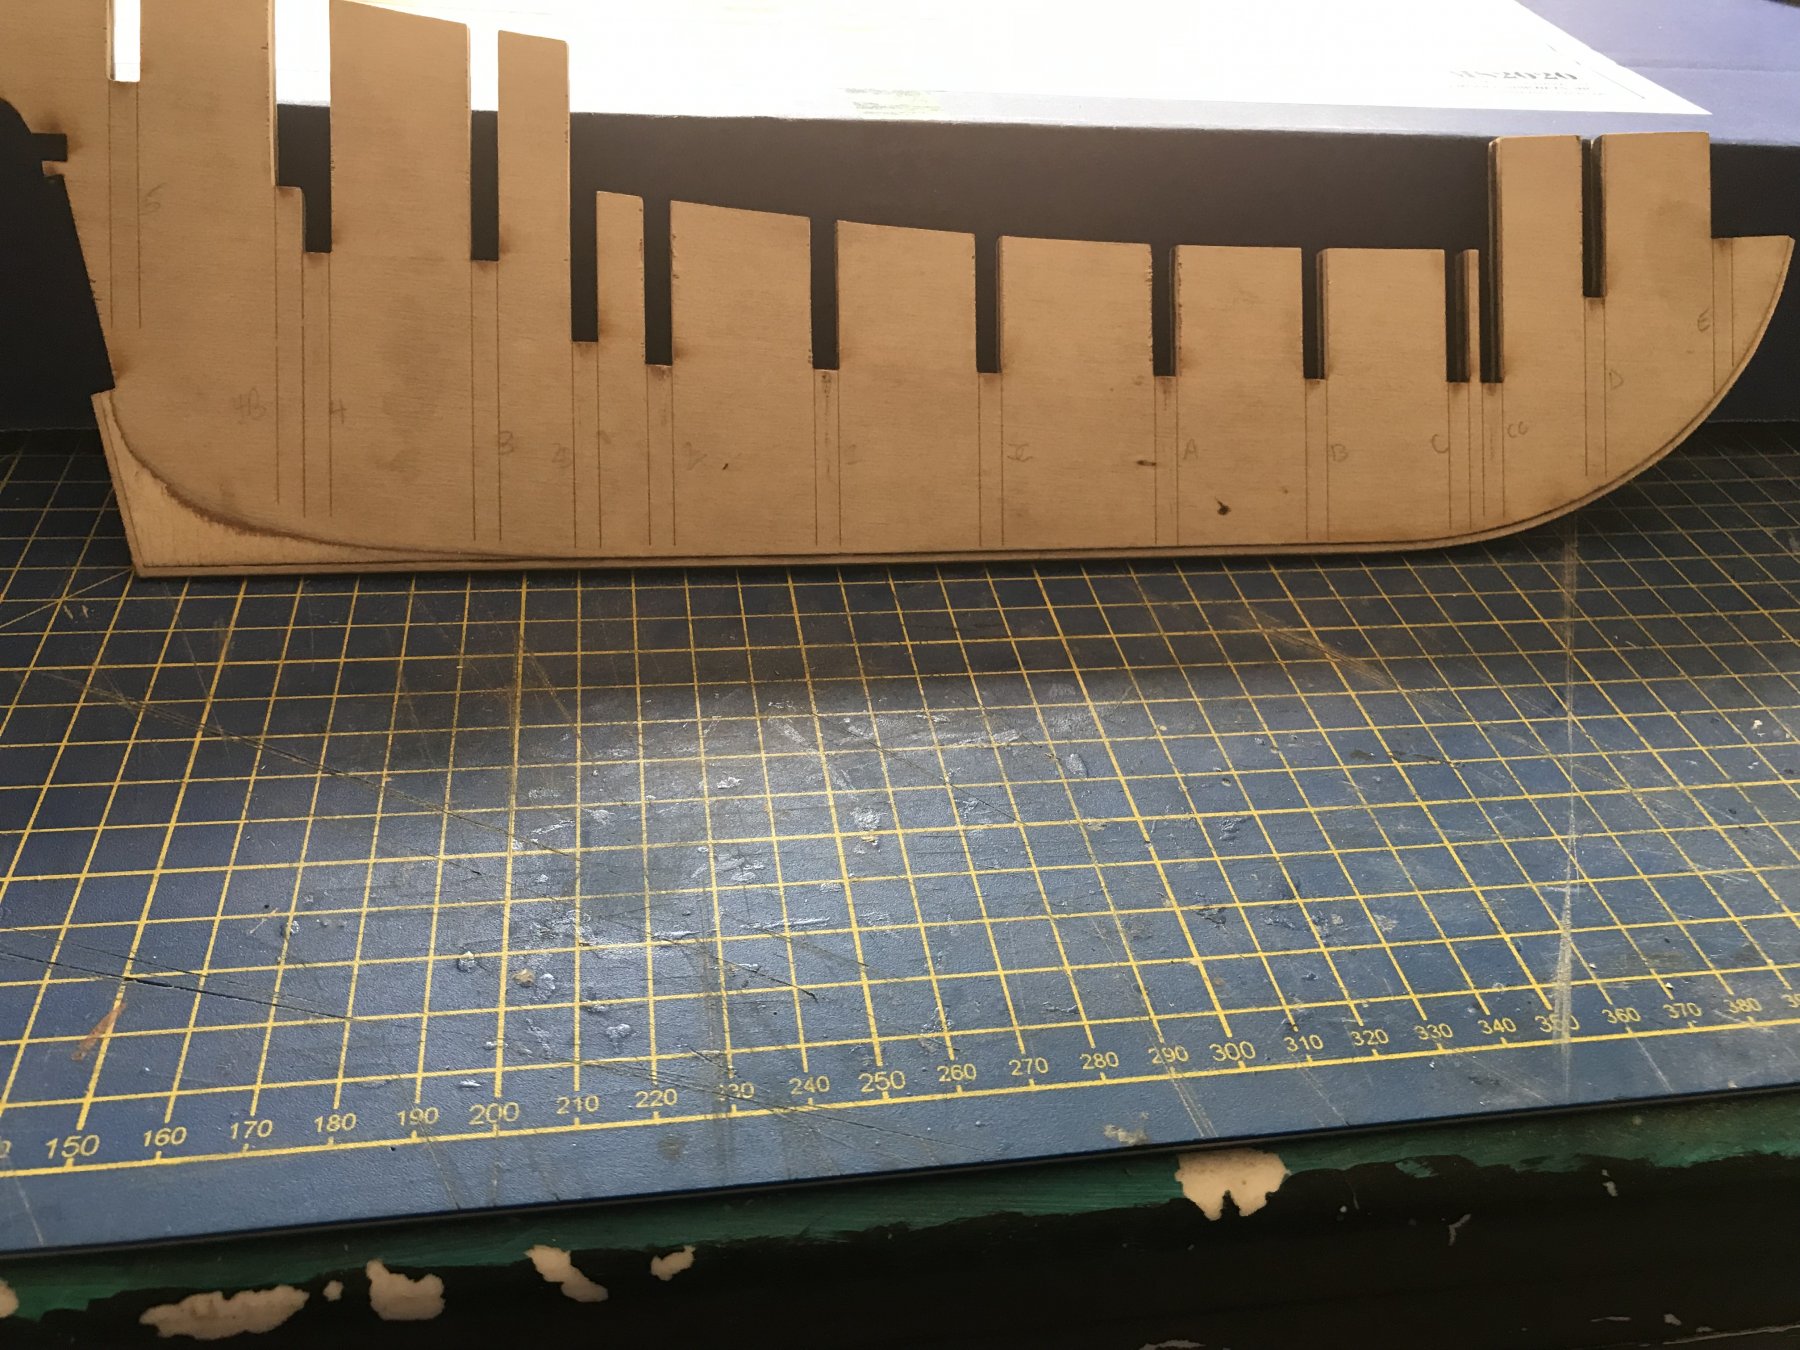
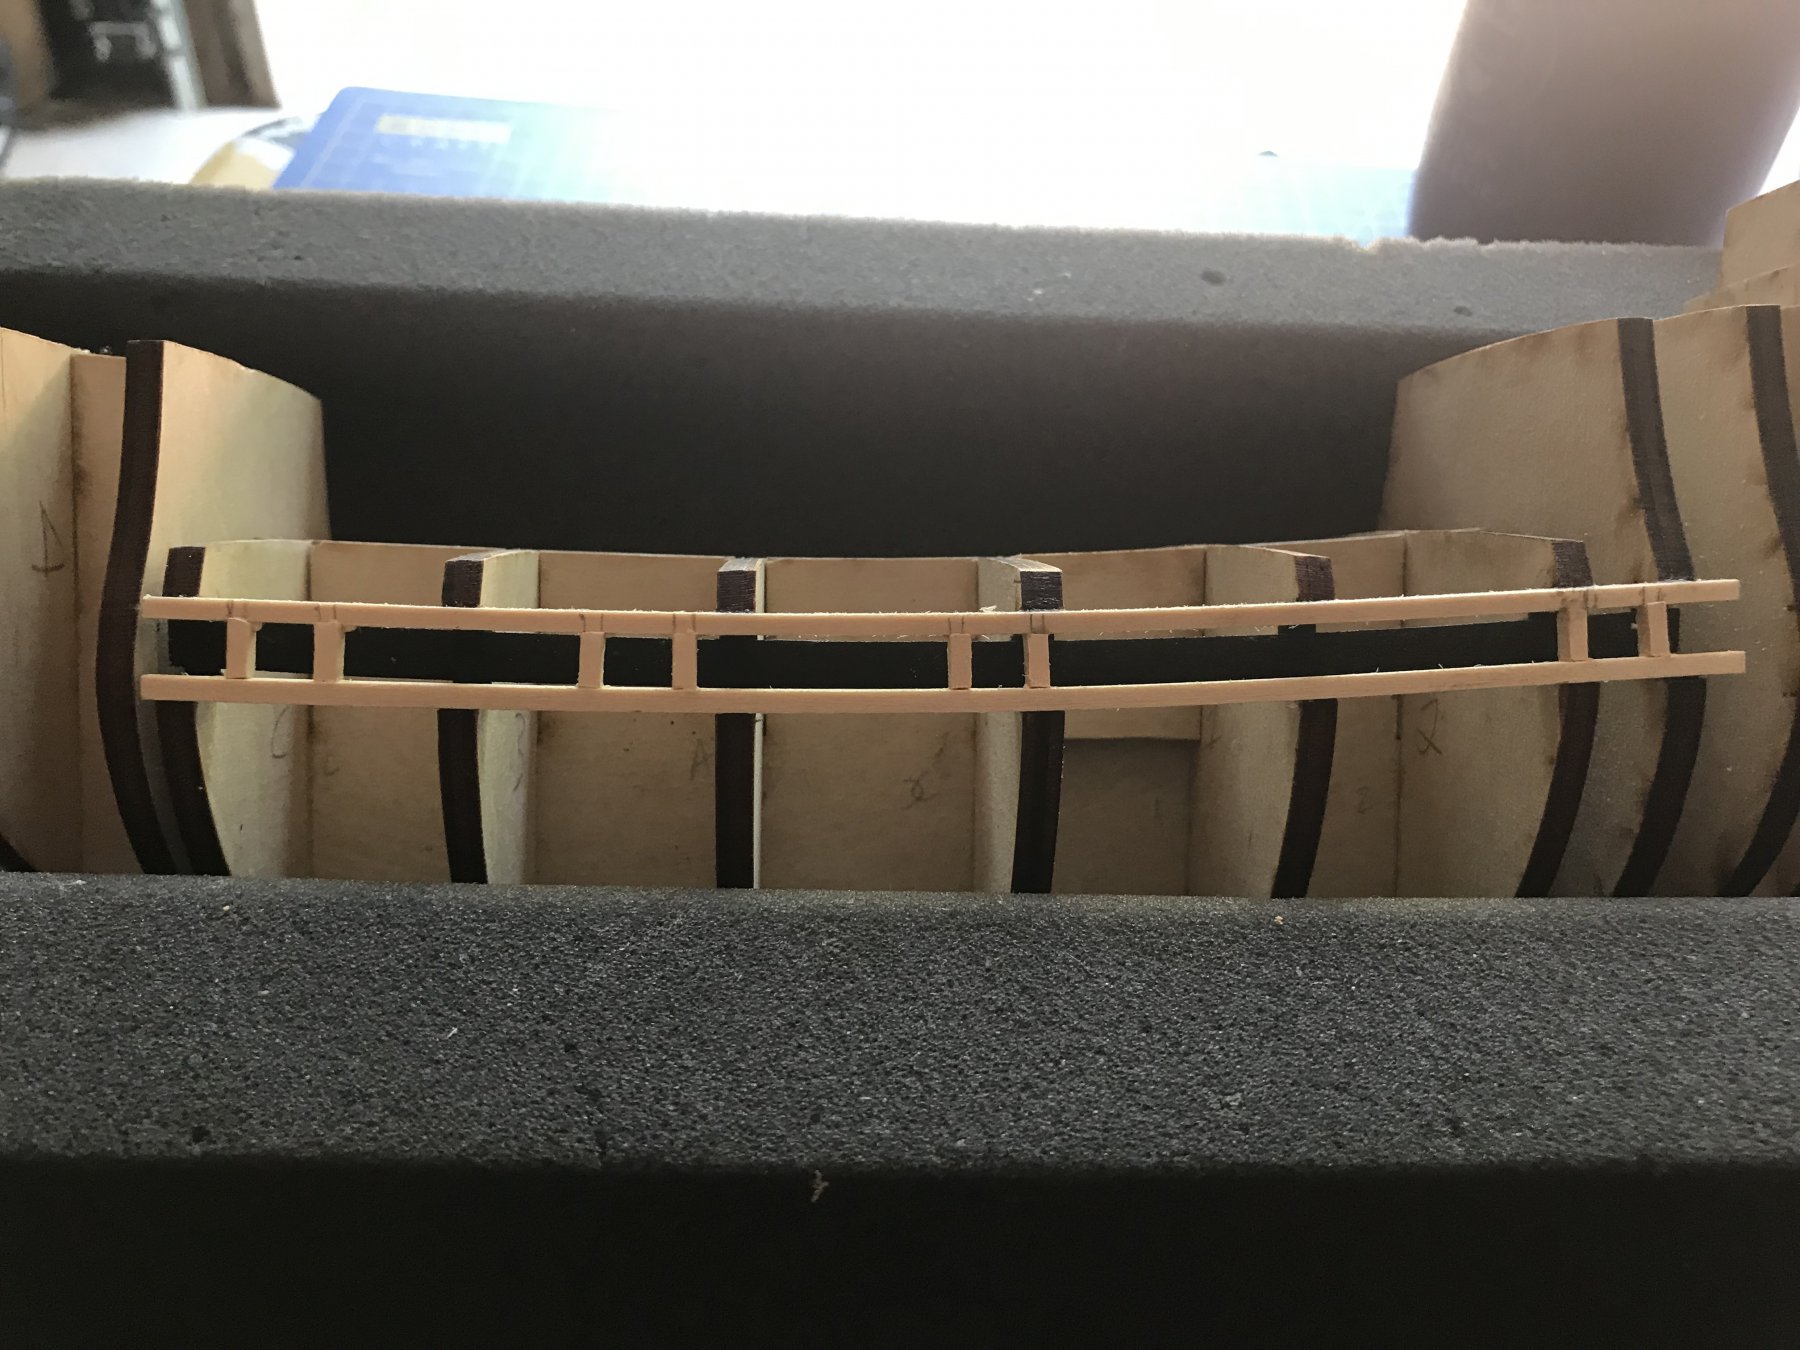
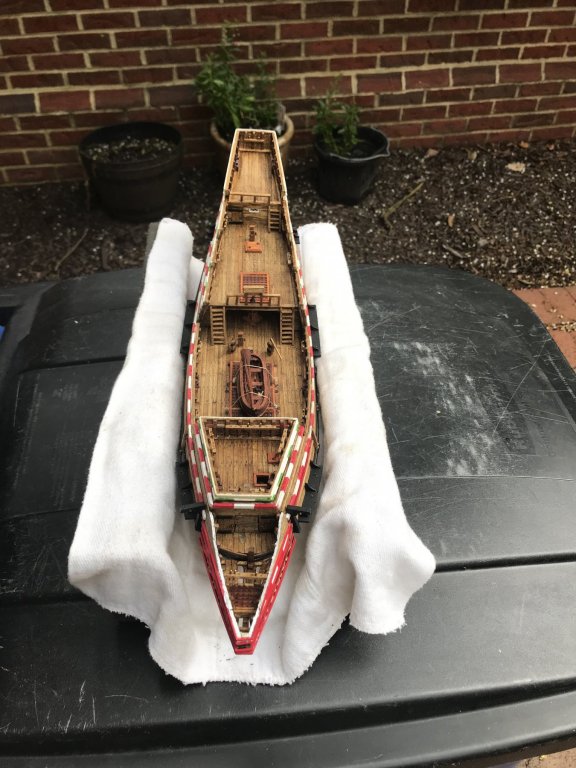
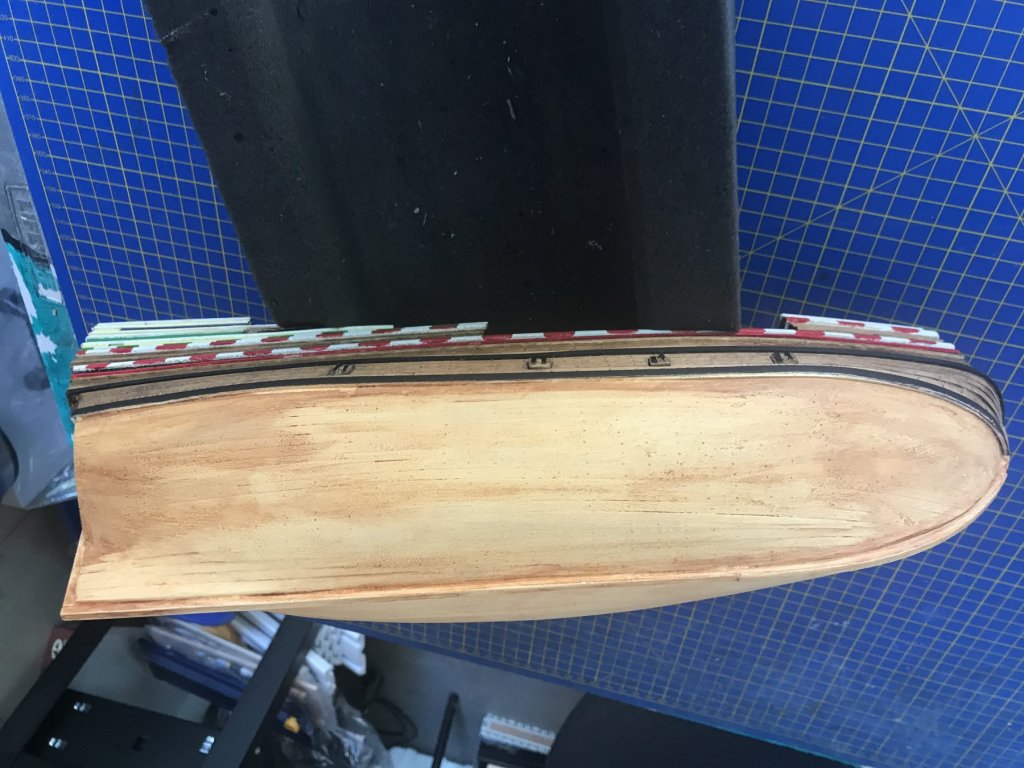
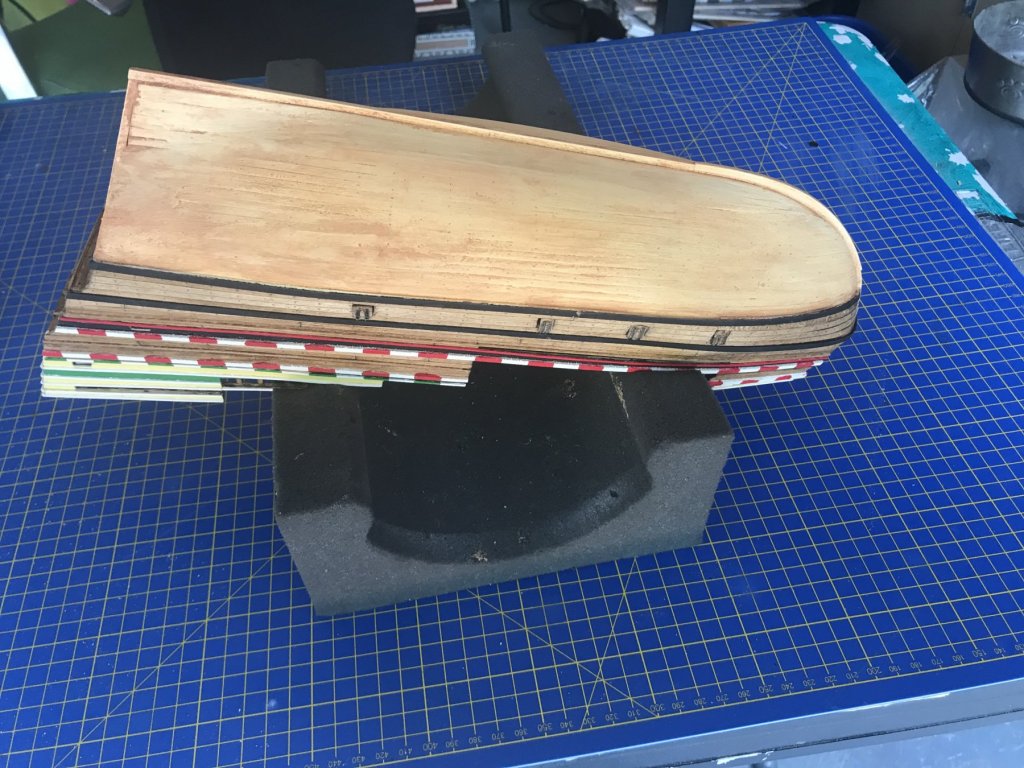
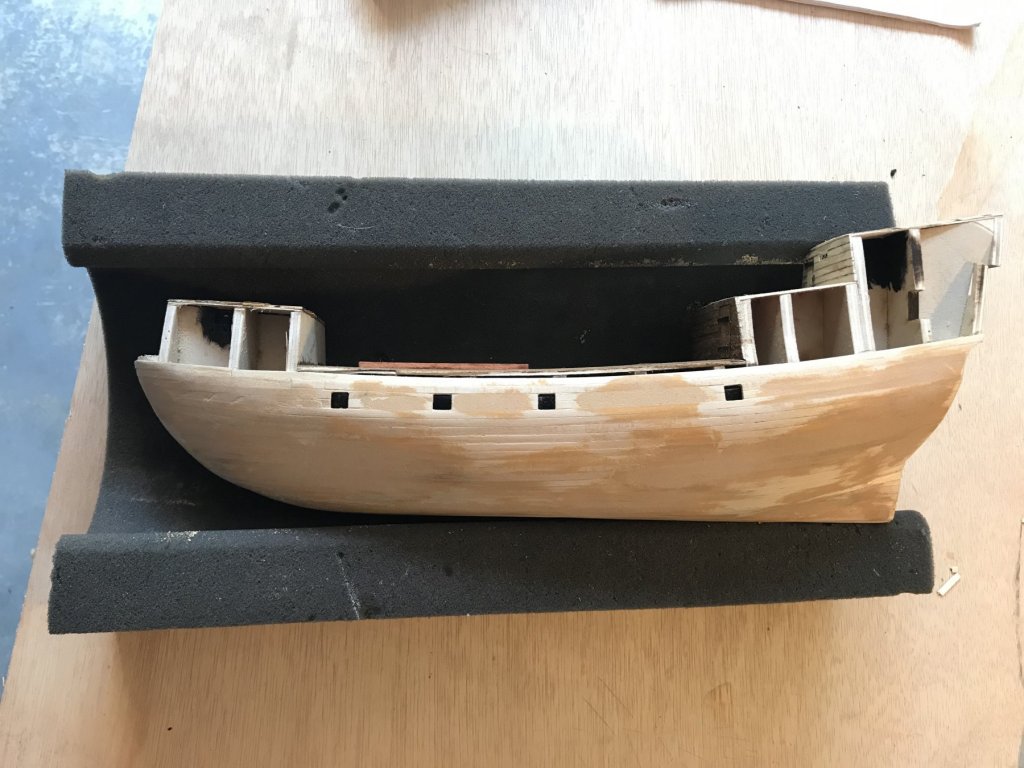
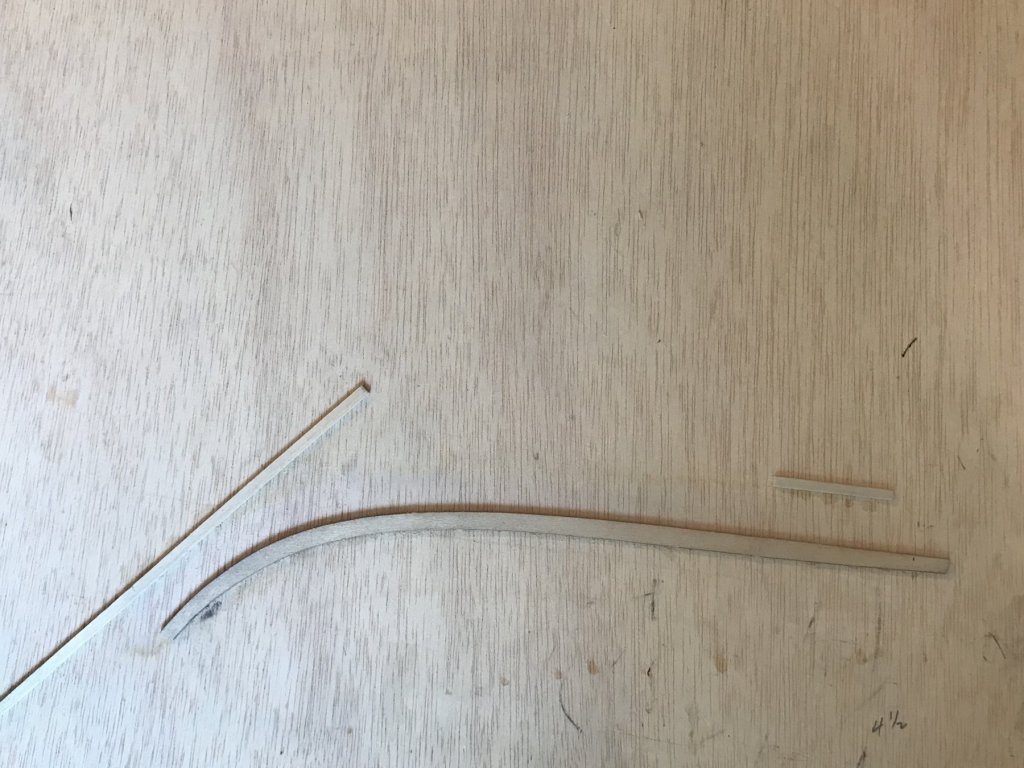
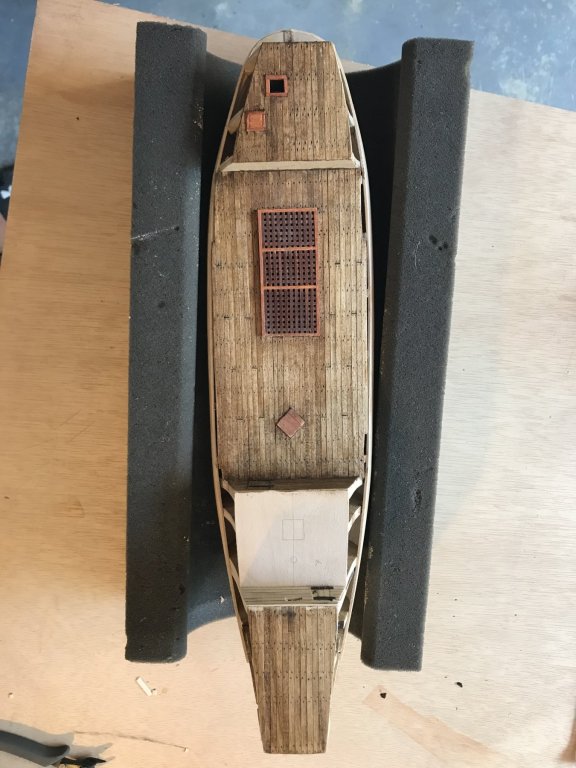
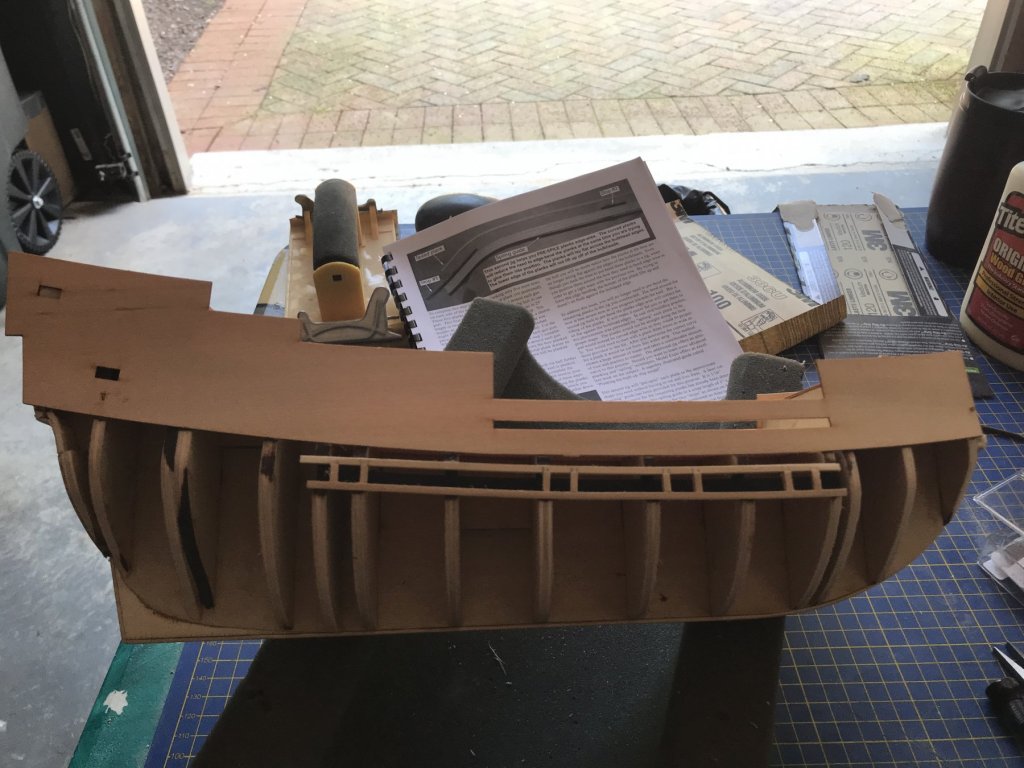
Before planking starts the false decks are added. They fit fine and some light sanding will be needed once the side templates are to be installed. They also have alignment lines pre- etched which made this a snap. Planking the hull was pretty straightforward even though the bow does have a severe bend. The plans suggest a simple jig for this bending which helped. There is also a spiling guide included in the kit to make the bow area planking easily transition along the hull. Once done lots of wood filler was added. I am not sure if I will second plank the hull as it will be painted. If I can get it to look good I will not second plank. Will see. With planking done and some of initial sanding of the hull done it’s onto to the decks. Three of the 5 decks are to be planked but first the hatches on these two decks are added. The deck planking is very straight forward with some cutting needed around the hatches. I will be staining the decks as I complete them. I am using golden oak on this model. Treenailing was simulated by a pencil. Sorry, I just could not gear up for the drill and fill method on this ship. Maybe next one. I am working on the bulkhead structures or sides now. These contain the doorways and windows on the ship. You might see one attached in the pic. More to come on these when done.
-
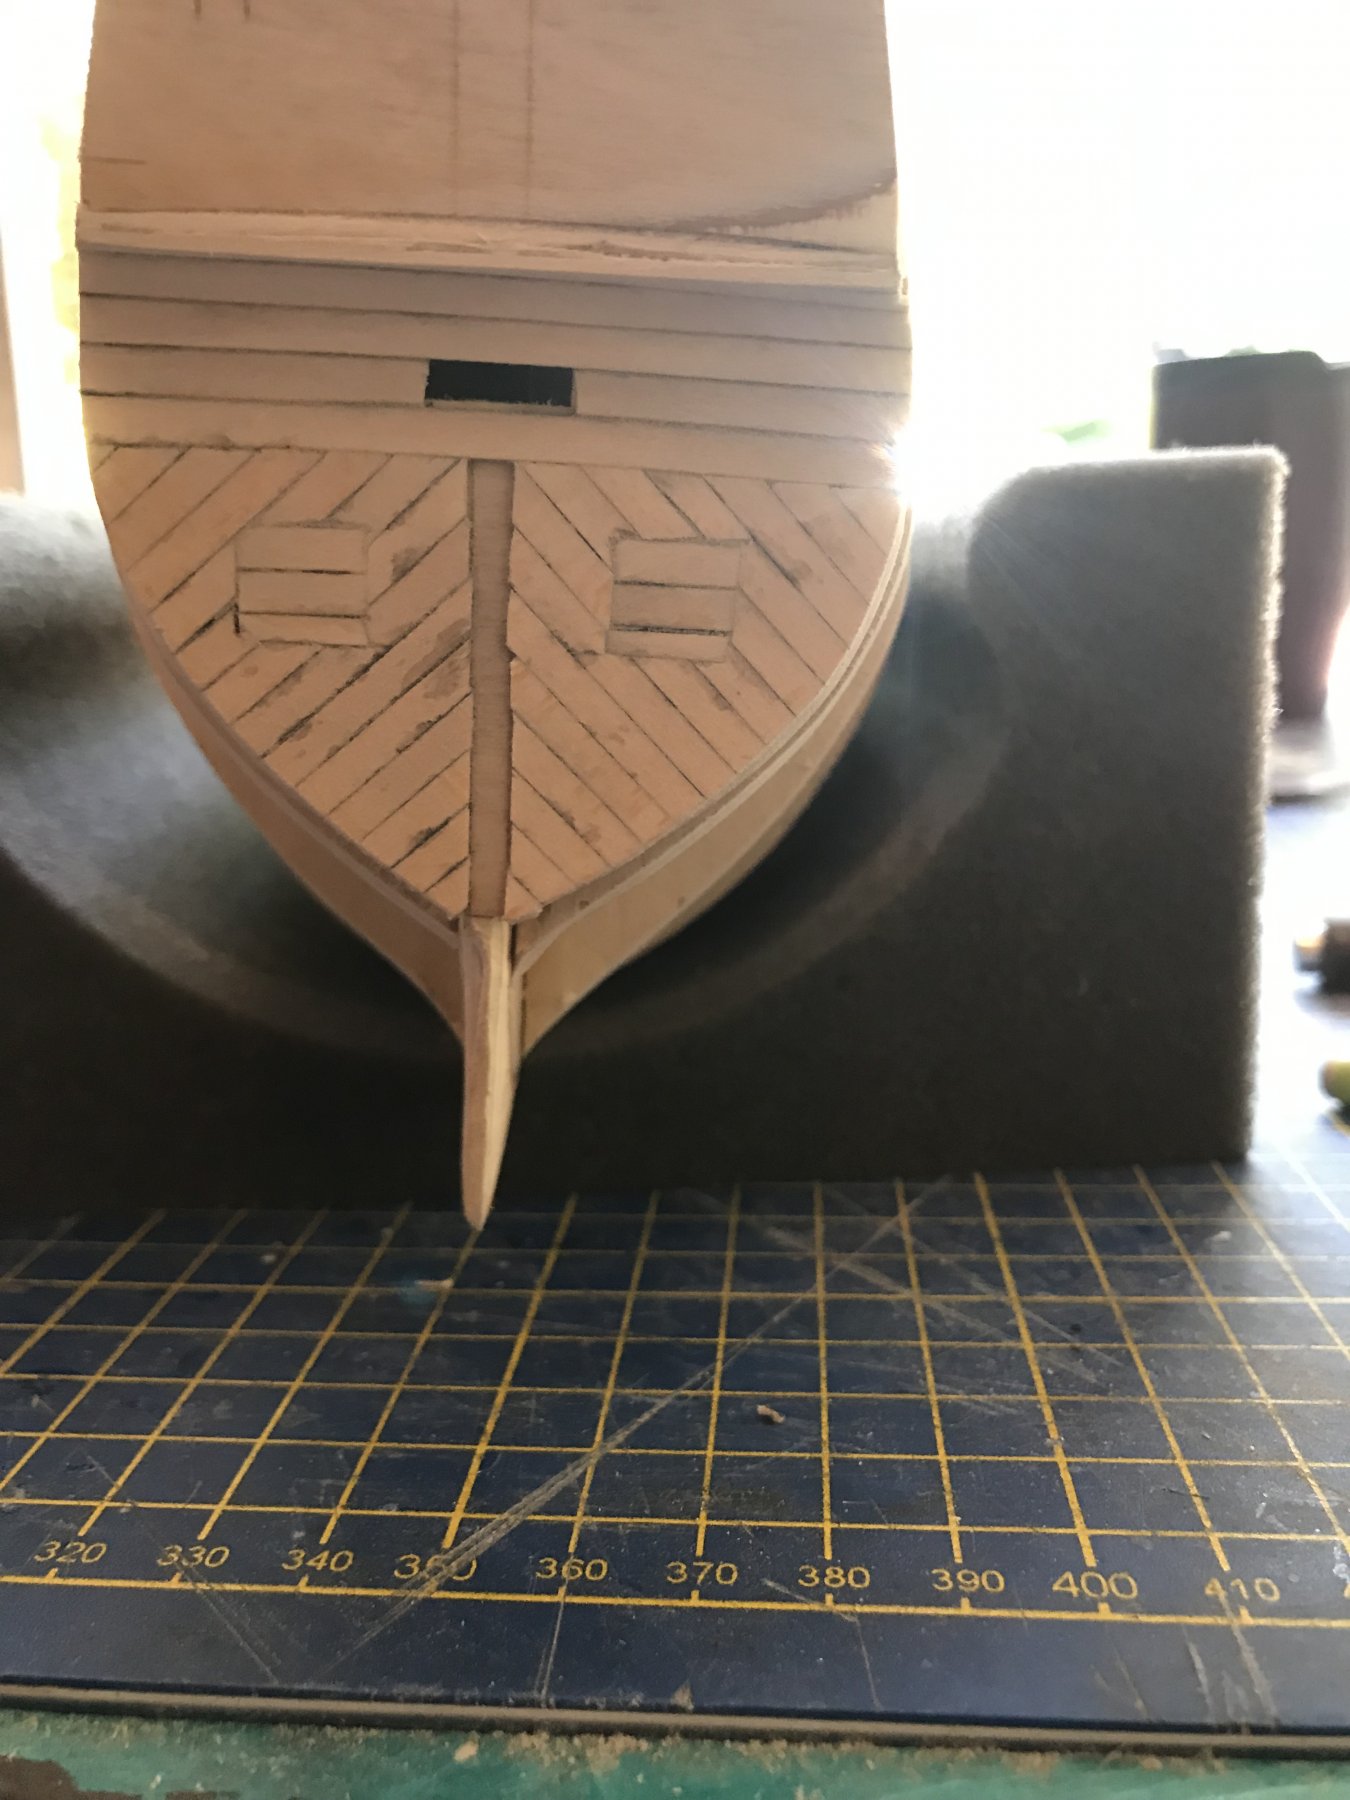
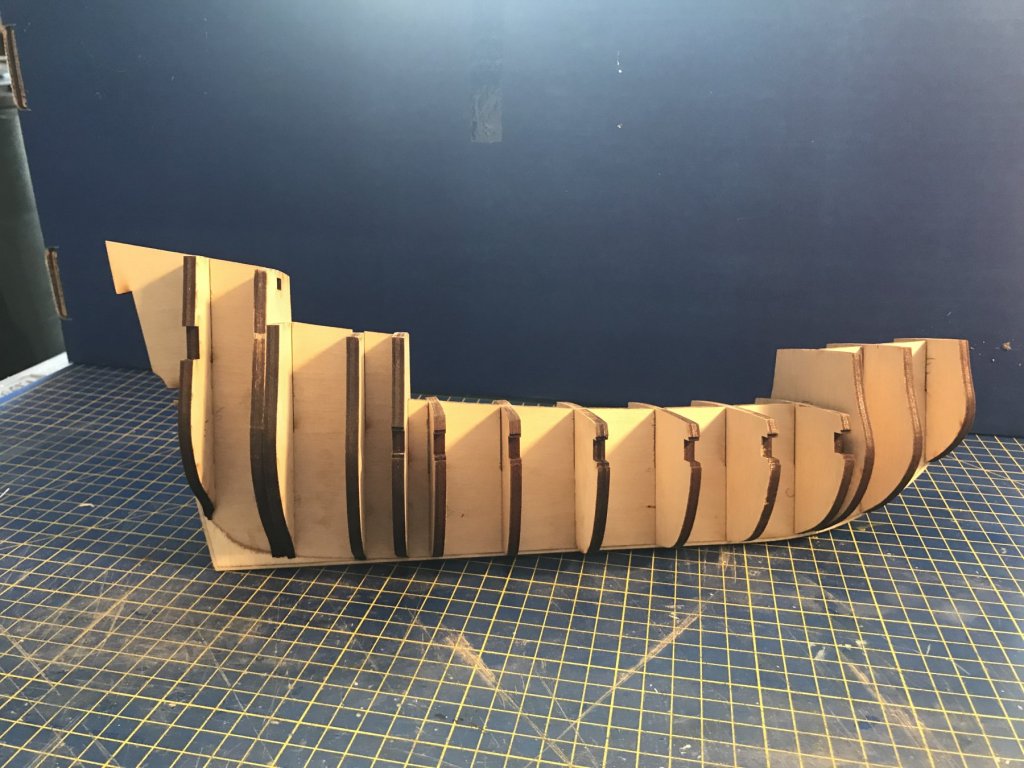
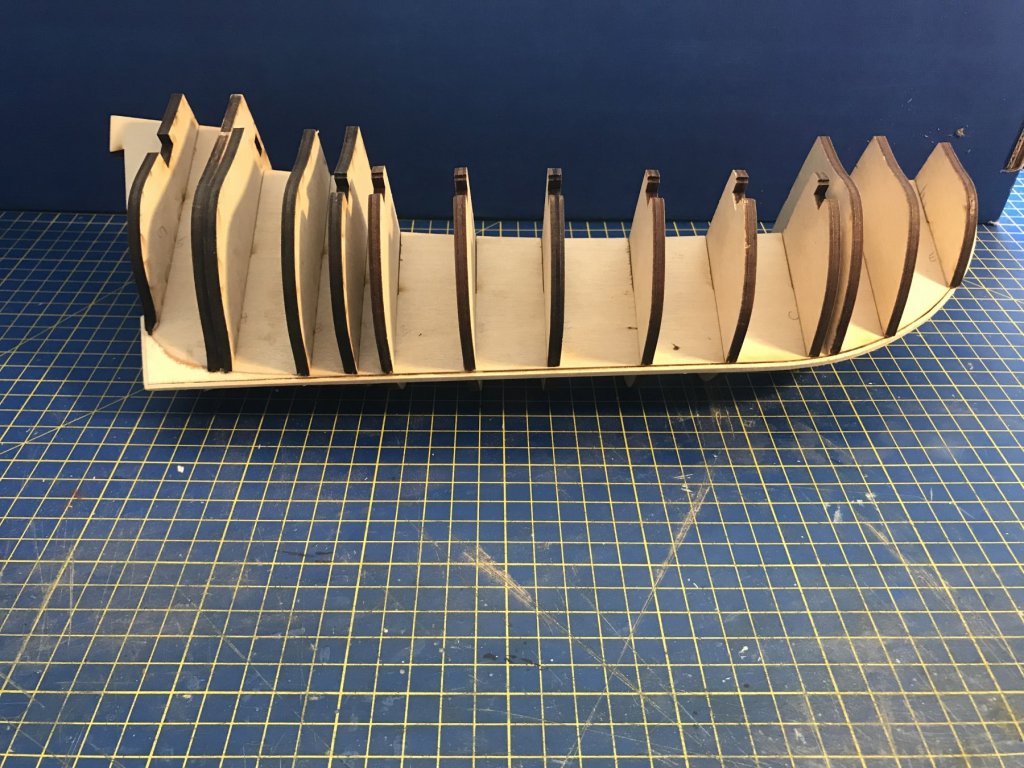
Last month I started the Model Shipways Mayflower. I noticed there are several build logs for the Mayflower but none are finished. I hope this is not a bad omen. I will use the first couple of posts to catch the log up with my current progress so apologies for the long posts. Initial thoughts upon opening the kit were the laser cutting and wood stock were typical of Model Shipways ie generally good quality. The instruction booklet looks well done with many pics to exhibit the build narrative. Looks to be well written as well. I am not great at picture taking so apologies in advance. First step was to create a small rabbet by adding strips along the false keel and a little shaving at the lower stern of the false keel. The bulkheads all needed a little tweaking to fit into the false keel slots but once done the fit was well aligned. I then glued them in place with Titebond. There are a few other supports to add to the stern as well as the three stern plates. These all fit and aligned perfectly. I should mention the bulkheads and stern plates all have reference lines pre-etched into them to facilitate alignment and give you a good idea where things should go. This is a great feature for a kit. Next up was to add the strips to support the openings for canon. All fit well and the plans were very clear on all above steps. Lots of fairing to the hull was next. I am never really certain when I have faired enough. I use the batten test but was the planks are actually glued in place there is always some difference in how they lie. A little more sanding is usually needed. Key for me is to go slow on this step. Once that was done the stern plate on the lower stern is planked. I used artist charcoal to simulate chalking. It does tend to get into the basswood a bit but cleans up with a light sand. Before starting to plank the hull the two side templates are temporarily attached to ensure proper alignment. The reference lines on the bulkheads are also helpful with this alignment.


-
Having gone through the trials and tribulations of tapering these small wood strips, I made the decision to plank the remainder of the Deck straight on. It looks good this way as well and after all the deck structures are added all your hard work on the tapering is hidden.
-
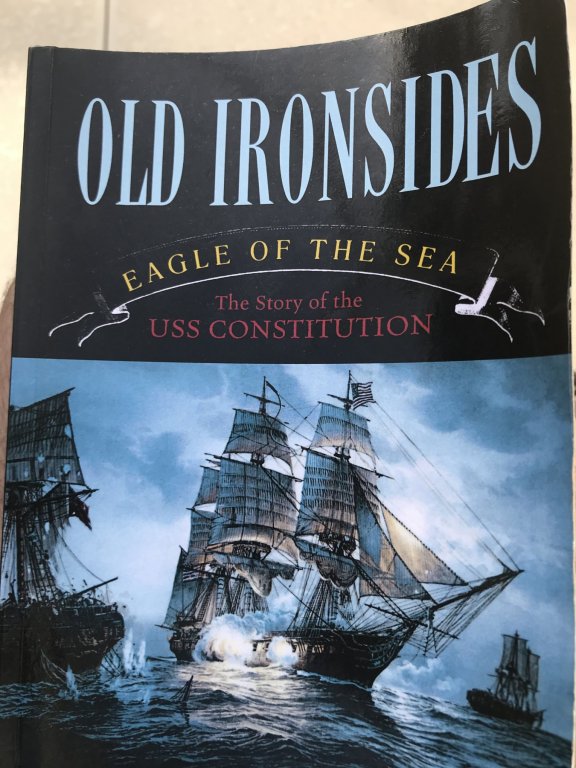
My first foray back to modeling was with the 1/96 scale USS Constitution by Revell. While I have moved to wooden models now I enjoyed this build and learned much from it. It also interested me in learning more about the ship. I grew up just north of Boston and visited the Constitution many times during school field trips but never really got into the history. This book does a nice job of setting the stage of how and why the Constitution and it’s sister ships, the President and United States came to be built by the Congress, it’s role in the War of 1812. The three major engagements the Constitution went fought during this conflict are reviewed as well. The book also details many of the non war missions the Constitution was sent on as well as the several efforts of citizens to fund and save it from destruction. If this topic interests you I recommend it.
-
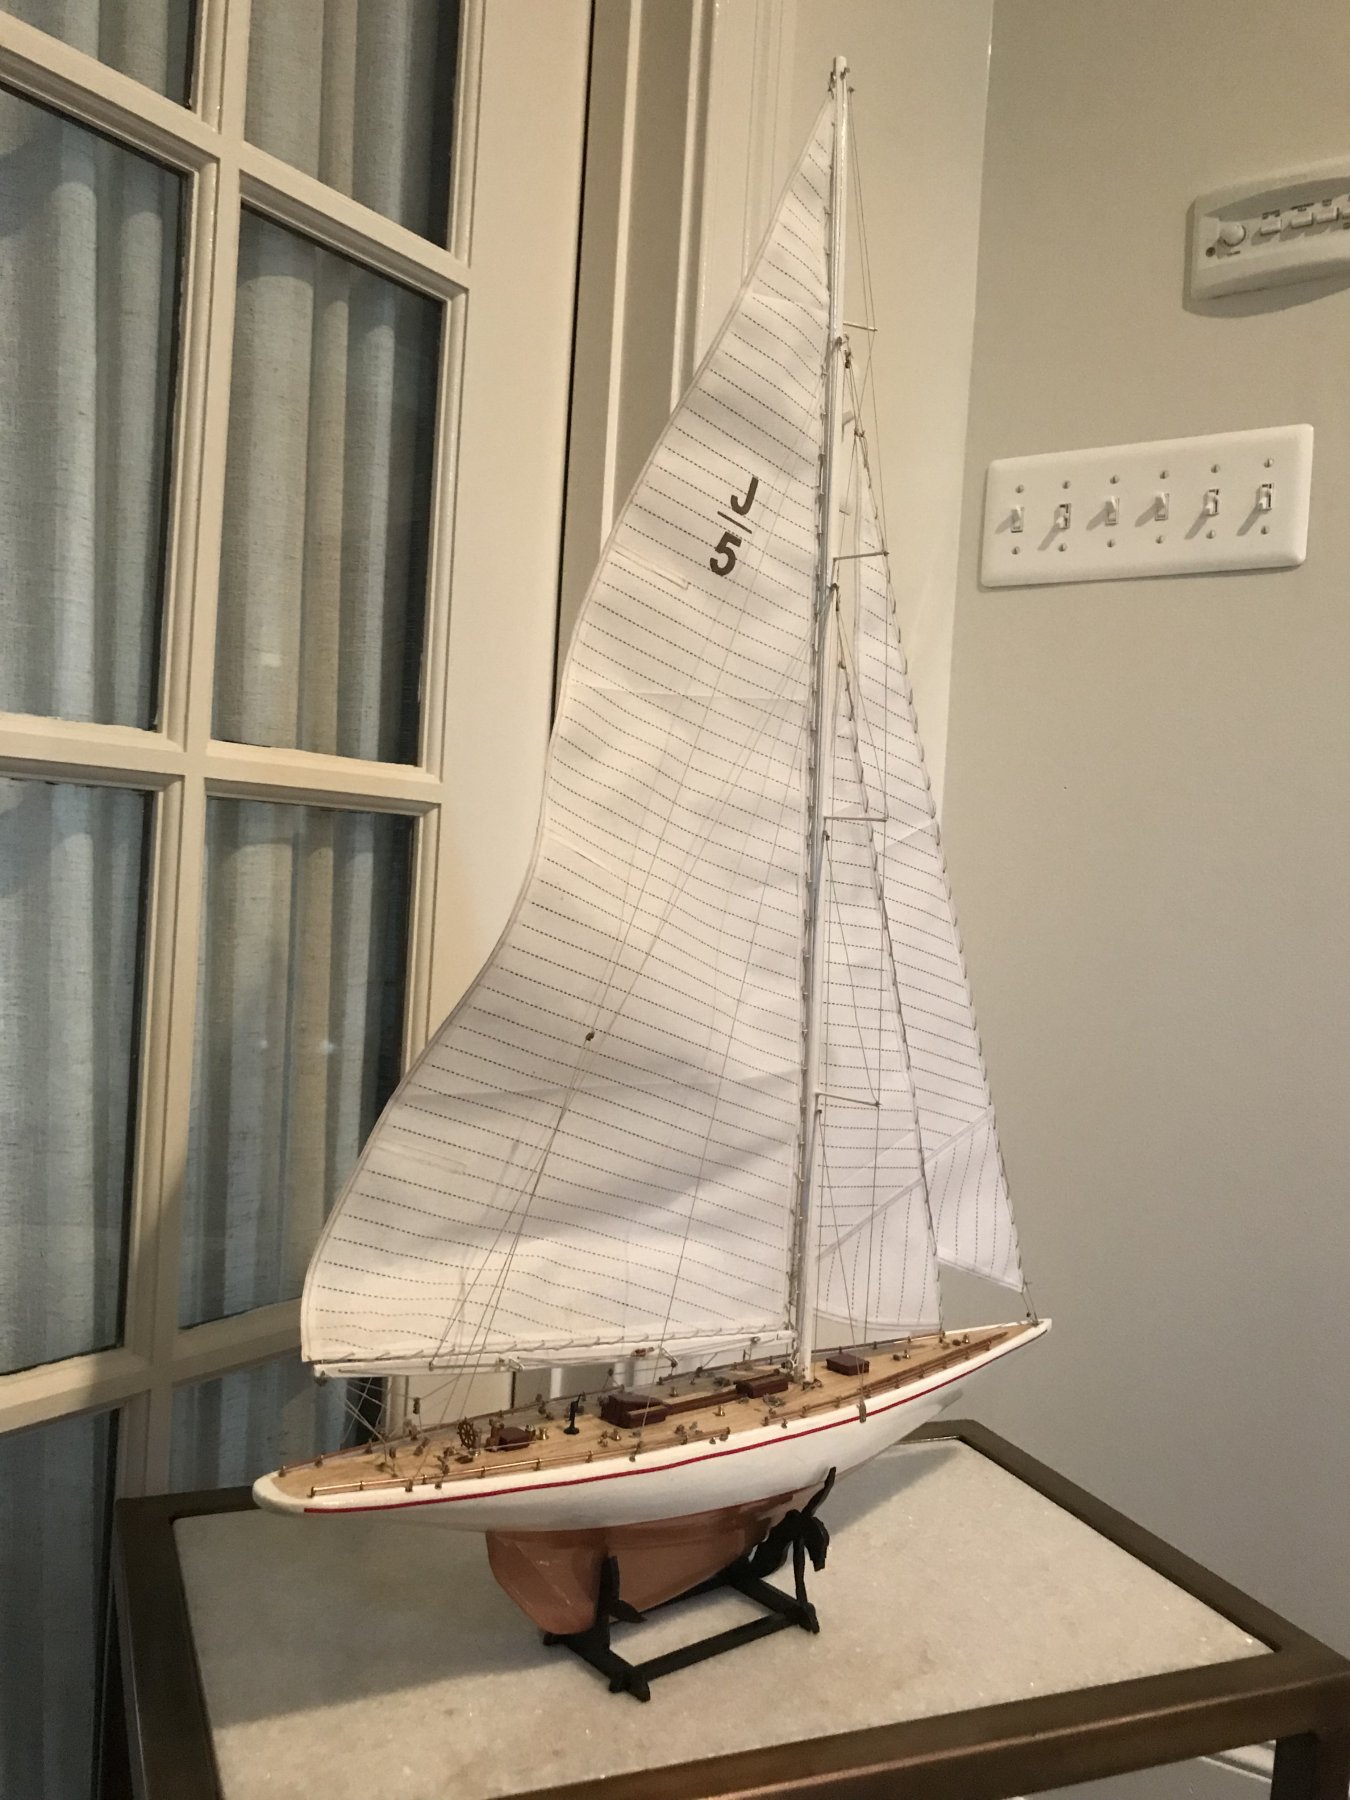
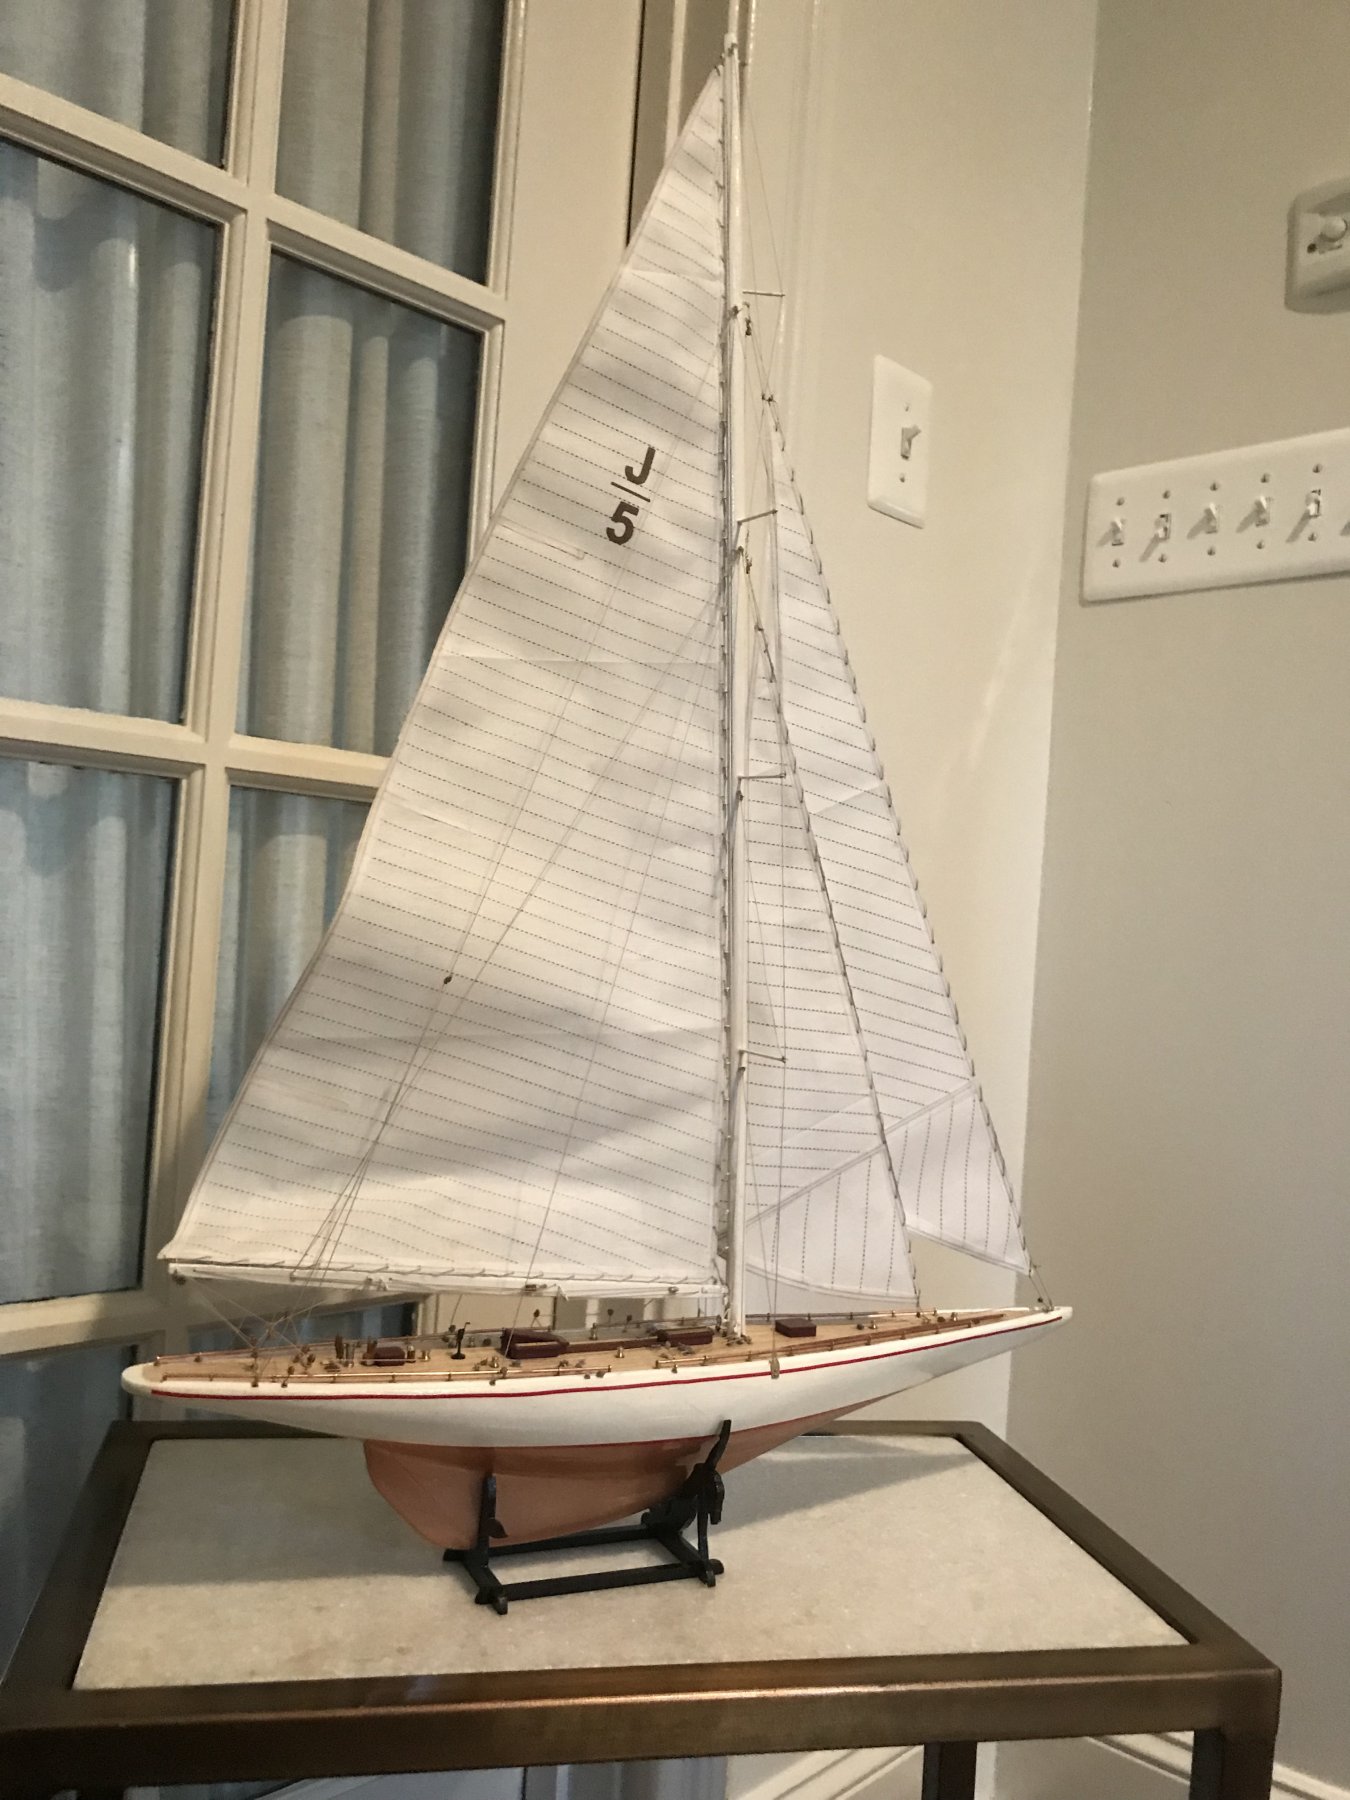
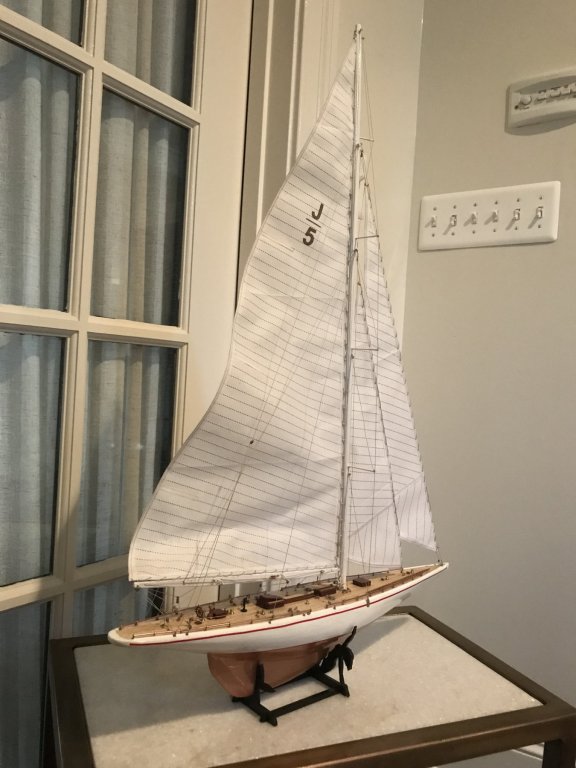
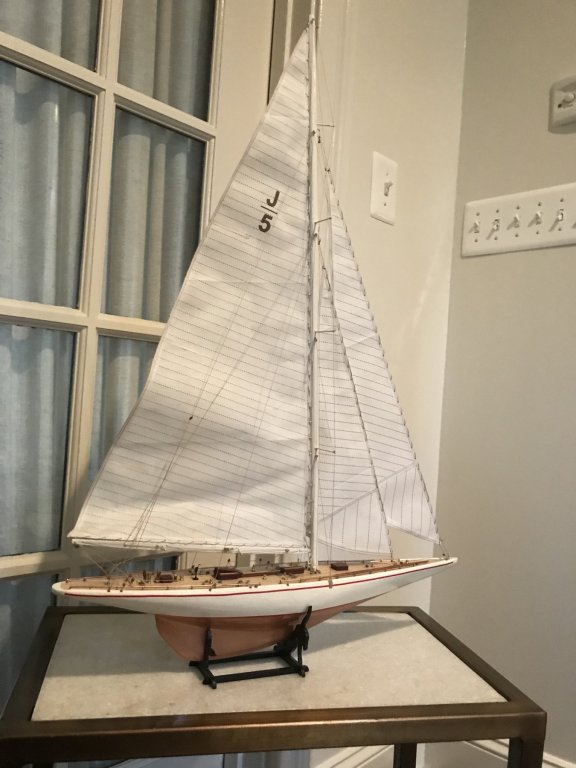
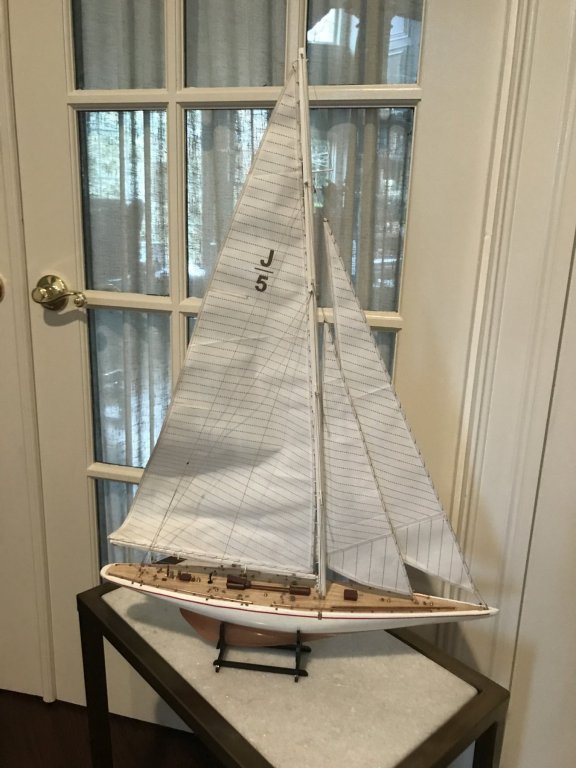
I have added the two jib sails and related rigging. The Rainbow is completed. I may add some rope coils in the future. Not sure yet. It was a fun build and interesting to learn about the ships history.
- 23 replies
-
- 10
-

-
I thought I would also add a brief write up of the Rainbow and it’s rebuilt version the Rainbow JH2. The write up is courtesy of the J Class Association. On May the 15th 1934, the William Starling Burgess Design J Class Rainbow was launched at the Herreshoff Yard in Bristol, Rhode Island, USA. She was built to defend the America’s Cup against “Endeavour” in 1934. The first 2 races were tough for Rainbow but the last 4 races she beat the Challenger Endeavour. Owner Vanderbilt laid Rainbow up in a dry dock and then refitted her. In 1937 she was sold to Chandler Hovey and contended for Defence of the Cup. Sadly for her, Ranger won and became the new defender for the next Cup. In 1940 Rainbow was sold for scrap. YACHT REBUILD Dykstra Naval Architects were chosen to give Rainbow a new life. A repeat client, the former owner of Windrose of Amsterdam, showed his trust in the Dykstra team to be the Naval Architects and designers for this new J Class yacht. The 46 meter schooner Windrose of Amsterdam set the Trans Atlantic schooner record at 10.5 days in 2005, the previous record of 12 days was set by Charley Barr with Atlantic in 1905. The 40 metre J Class Rainbow is built in aluminum and designed according to the JCA (J Class Association) maximum performance rules. She launched in 2012. After 78 years the famous J Class yacht ‘Rainbow’ sails again. This replica of the America’s Cup winner from 1934 was built by Holland Jachtbouw in Zaandam. Rainbow was designed by Starling Burgess in 1933 and re-designed by Dykstra Naval Architects. She sails under the number JH-2. Since her launch, Rainbow has won multiple awards, including Sailing Yacht of the Year (39m+) at the Superyacht Awards and the European Spirit of Tradition class at the inaugural 2013 Classic Boat Awards.