Calhoun Zabel
-
Posts
25 -
Joined
-
Last visited
Recent Profile Visitors
591 profile views


-
 zappto reacted to a post in a topic:
Charles W Morgan by Calhoun Zabel - RESTORATION - Warning: Graphic
zappto reacted to a post in a topic:
Charles W Morgan by Calhoun Zabel - RESTORATION - Warning: Graphic
-
stevenclarklanger reacted to a post in a topic:
Charles W Morgan by Calhoun Zabel - RESTORATION - Warning: Graphic
-
popeye the sailor reacted to a post in a topic:
Restoration of Bassett Lowke "Albertic" by michael mott - FINISHED - Scale 1:100
-
popeye the sailor reacted to a post in a topic:
Restoration of Bassett Lowke "Albertic" by michael mott - FINISHED - Scale 1:100
-
popeye the sailor reacted to a post in a topic:
Restoration of Bassett Lowke "Albertic" by michael mott - FINISHED - Scale 1:100
-
popeye the sailor reacted to a post in a topic:
Skipjack Kathryn by Mahuna - FINISHED - 1:32 - Based on HAER Drawings
-
Calhoun Zabel reacted to a post in a topic:
Skipjack 19 foot open launch By Michael Mott 1/8th scale Small
-
Calhoun Zabel reacted to a post in a topic:
Skipjack 19 foot open launch By Michael Mott 1/8th scale Small
-
Calhoun Zabel reacted to a post in a topic:
Skipjack 19 foot open launch By Michael Mott 1/8th scale Small
-
Calhoun Zabel reacted to a post in a topic:
Skipjack 19 foot open launch By Michael Mott 1/8th scale Small
-
Calhoun Zabel reacted to a post in a topic:
Skipjack 19 foot open launch By Michael Mott 1/8th scale Small
-
Calhoun Zabel reacted to a post in a topic:
Skipjack 19 foot open launch By Michael Mott 1/8th scale Small
-
Calhoun Zabel reacted to a post in a topic:
Skipjack 19 foot open launch By Michael Mott 1/8th scale Small
-
Calhoun Zabel reacted to a post in a topic:
Skipjack 19 foot open launch By Michael Mott 1/8th scale Small
-
BETAQDAVE reacted to a post in a topic:
Young America by EdT - FINISHED - extreme clipper 1853
-
Calhoun Zabel reacted to a post in a topic:
Skipjack 19 foot open launch By Michael Mott 1/8th scale Small
-
Calhoun Zabel reacted to a post in a topic:
Skipjack 19 foot open launch By Michael Mott 1/8th scale Small
-
Piet reacted to a post in a topic:
Young America by EdT - FINISHED - extreme clipper 1853
-
Piet reacted to a post in a topic:
Young America by EdT - FINISHED - extreme clipper 1853
-
mtaylor reacted to a post in a topic:
Chebece 1750 by Forlani Daniel - FINISHED - 1:48
-
 Oh, I didn't realize that was the ship type. I thought that was this specific ship's name. Thanks.
 -
That's a significant amount of framing... Looking very nice so far! This is also a very interesting hull shape. What would this type of ship be called?
-
Pandora by marsalv - FINISHED - 1:52
Calhoun Zabel replied to marsalv's topic in - Build logs for subjects built 1751 - 1800
Outstanding work. 3700 hours, that's mind boggling. Thank you for posting all the pictures you did - I am a particular fan of the photos of the deck with all the lines belayed and coiled. Just perfect. -
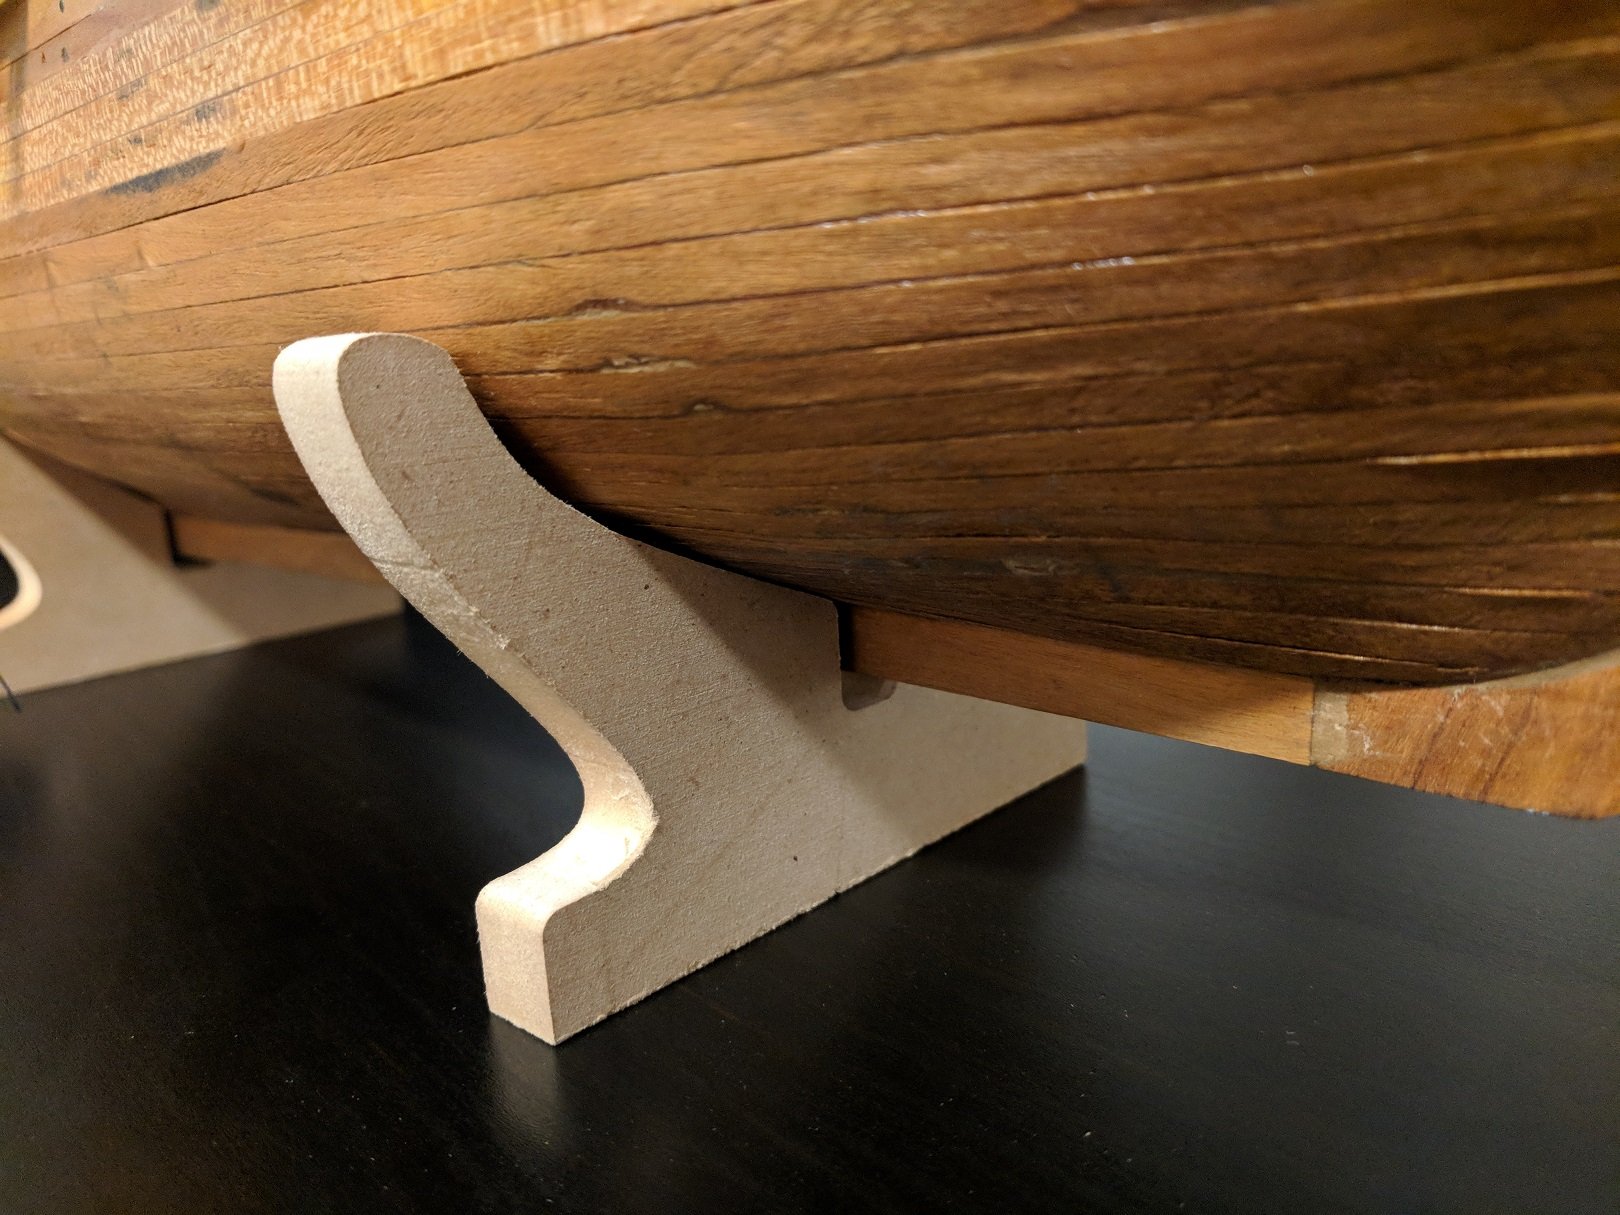
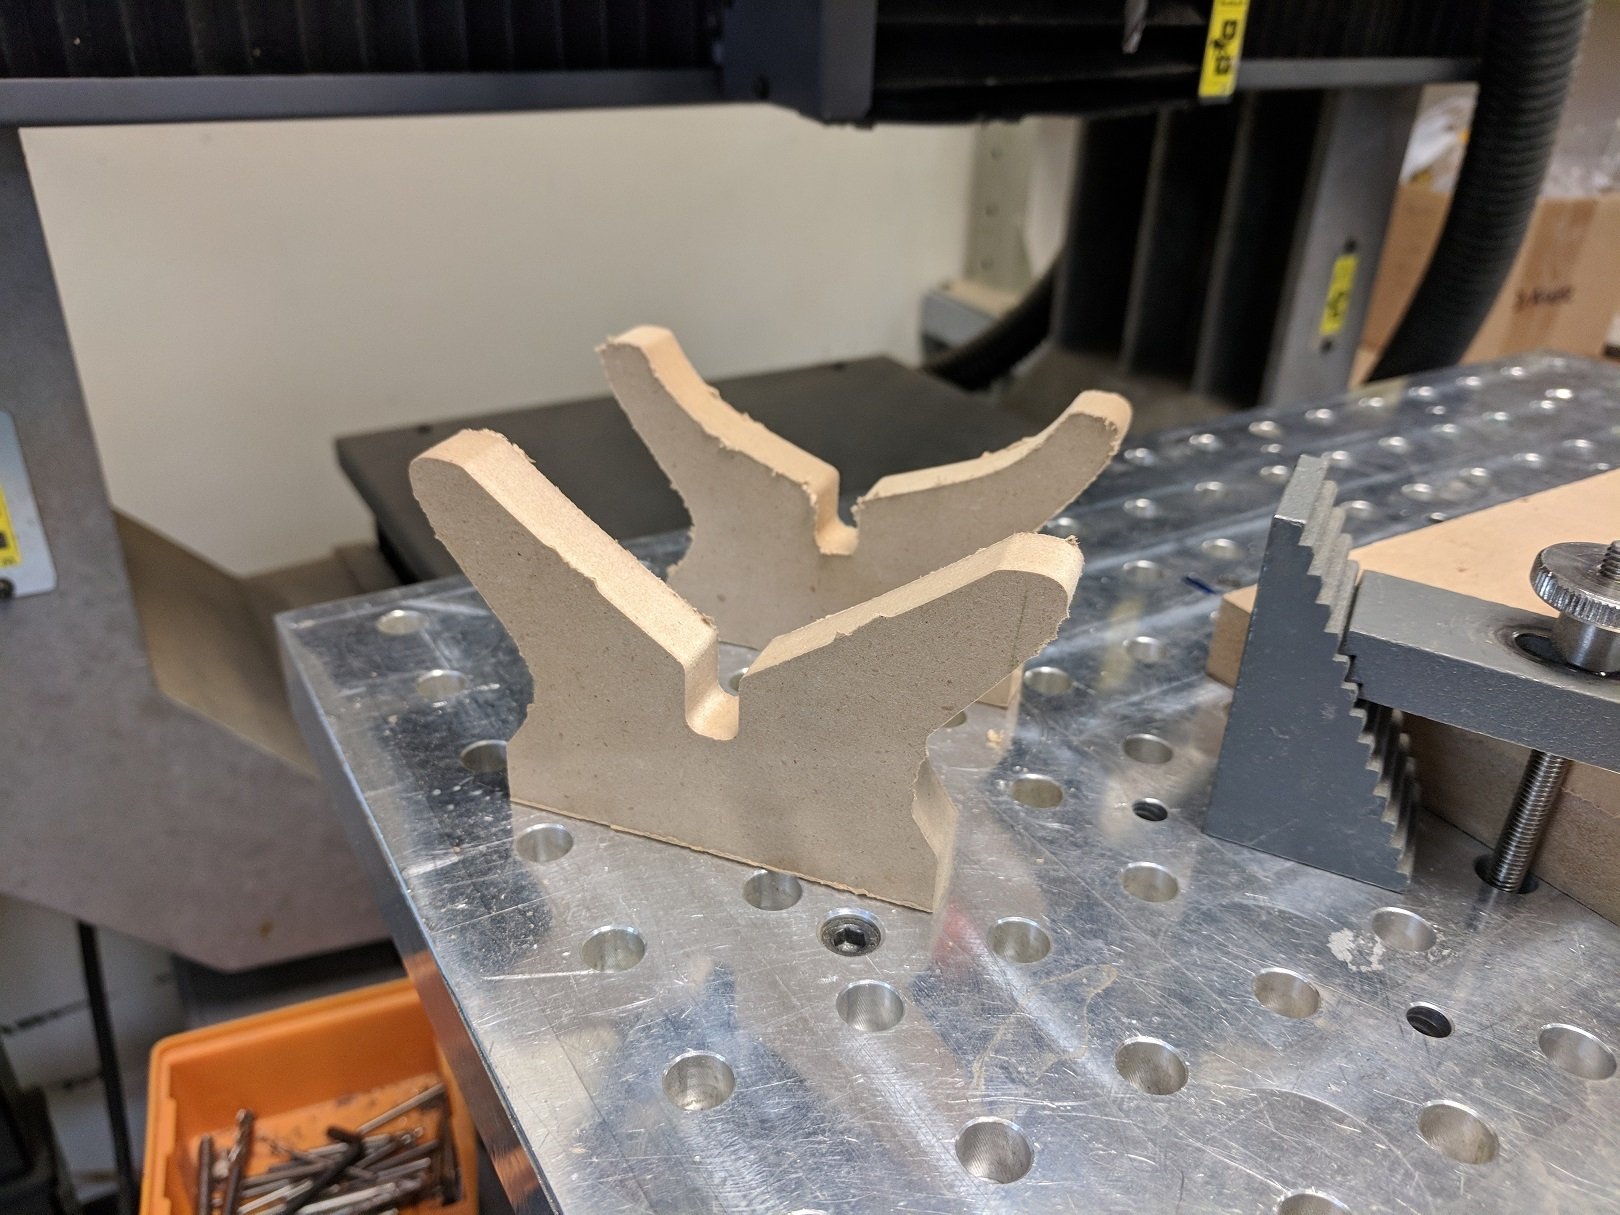
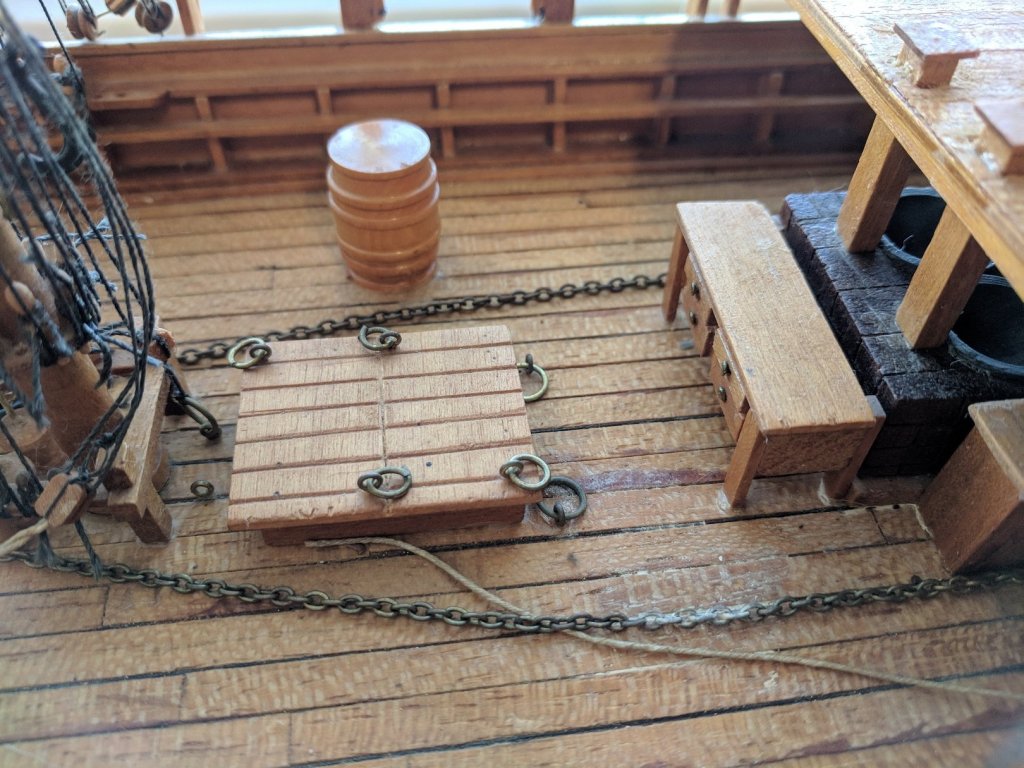
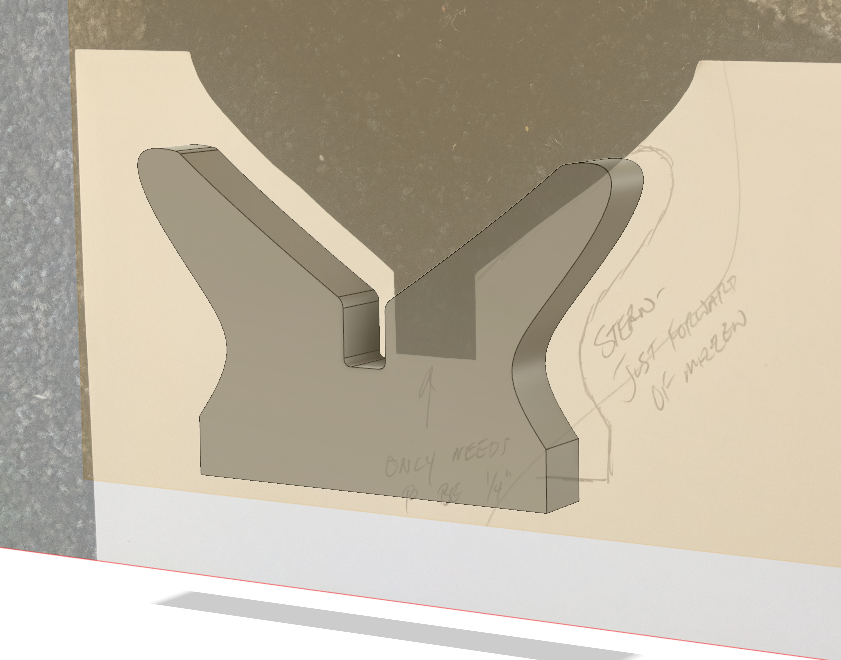
Thanks for your input Steve, I agree. V3 were cut out today, out of 0.25" MDF. Most dimensions were shrunk considerably in addition. I think they're looking much better: Hal, you replied as I was typing this, and I agree - the aftmost support needs to be reduced in height, because it still looks a little goofy. It also needs some hand shaping to match the shape of the hull. It could be done on the CNC, but it's probably quicker to do by hand. I was wondering if I should line them with something. We've got lots of thin foam gasket material at work that I'll probably use. Something black, so it's well hidden. I've got another question... Are the anchor chains supposed to be threaded through these rings on deck? If not, why are they so perfectly placed there and unused?
-
Sweet, I'm up for following this one! I have a newfound love of clippers, thanks to Ed's detailed log. And I tend to model every project I make, so I dig the renders. I'll just grab a seat up front here...
-
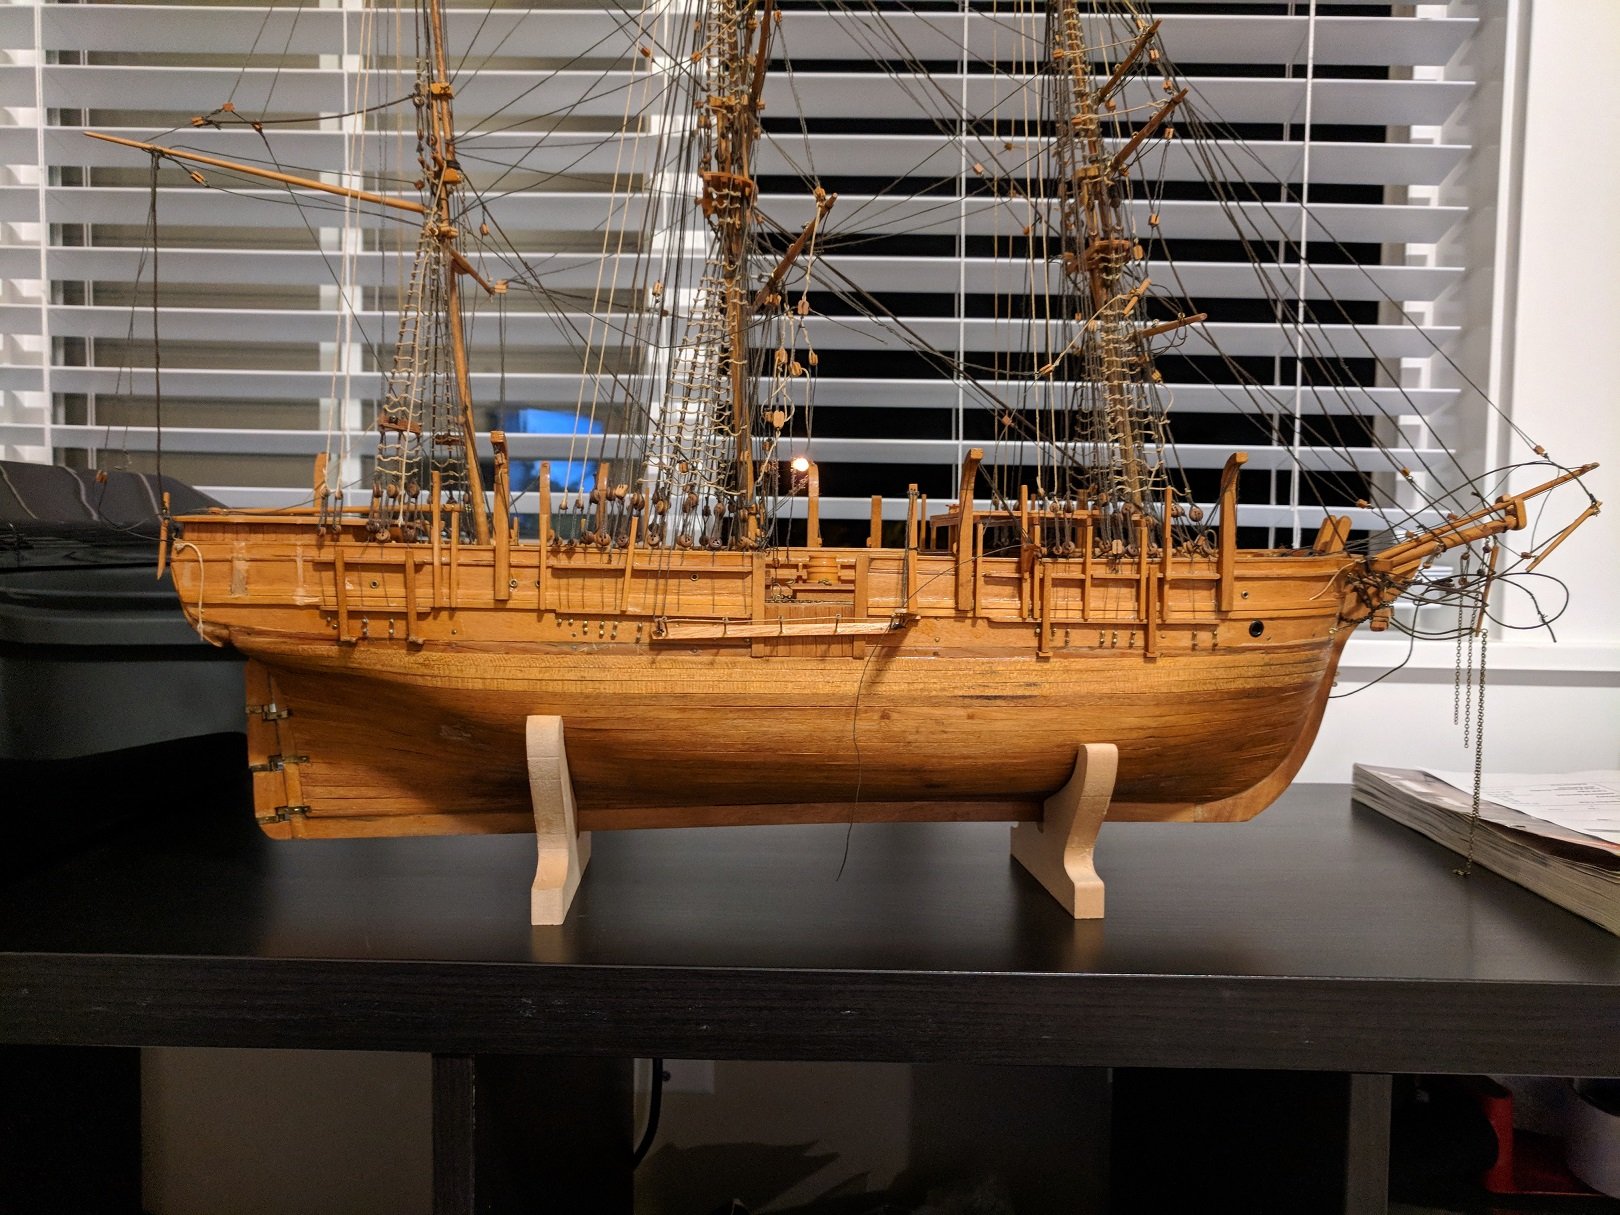
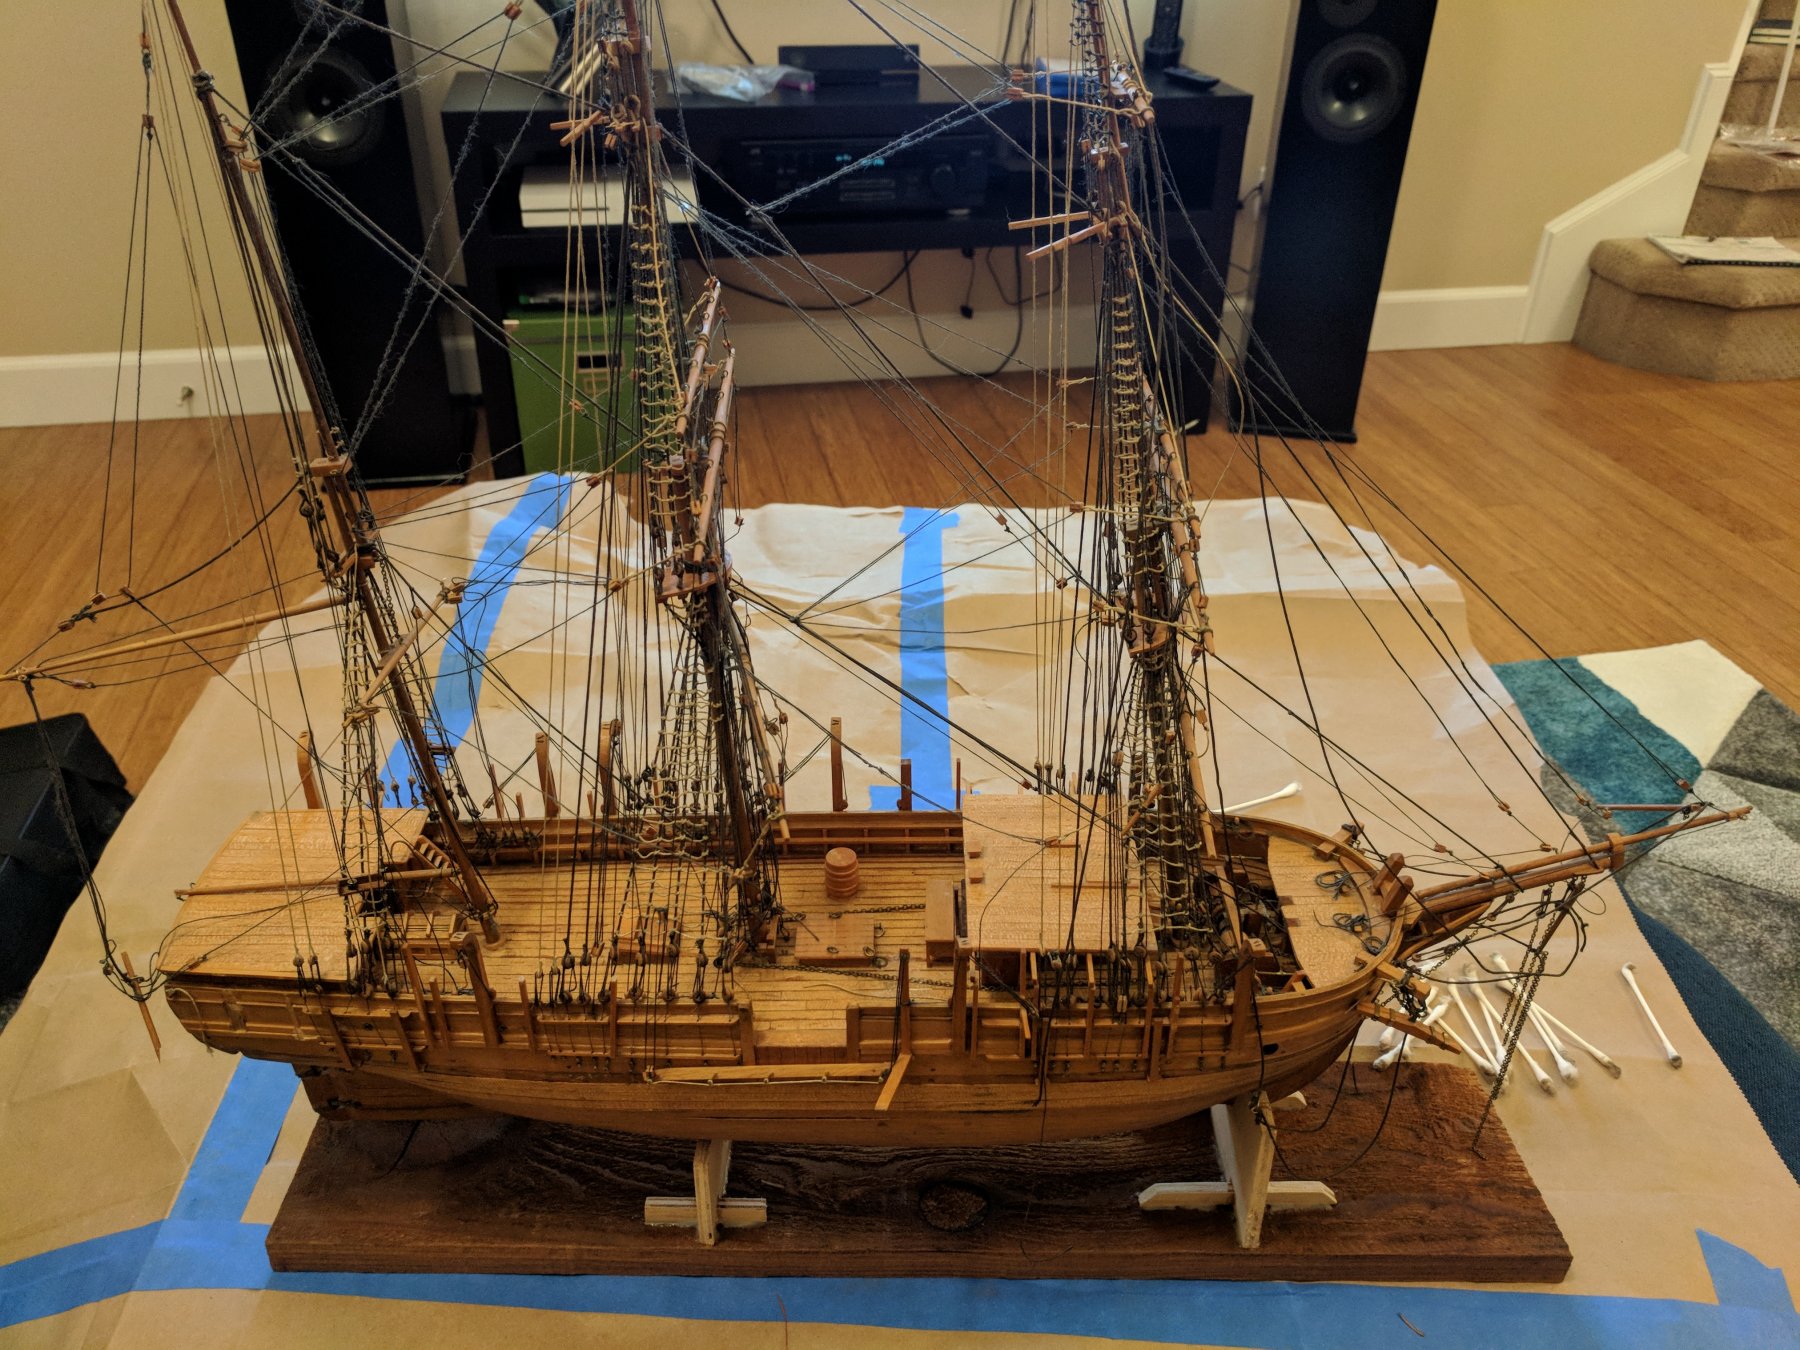
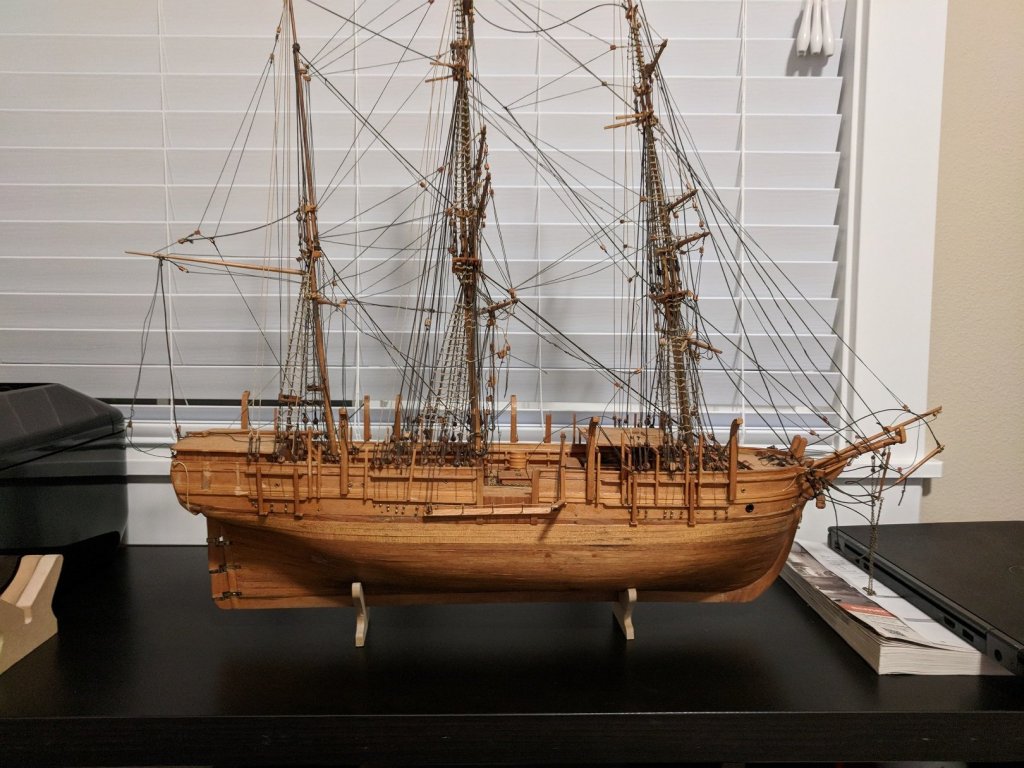
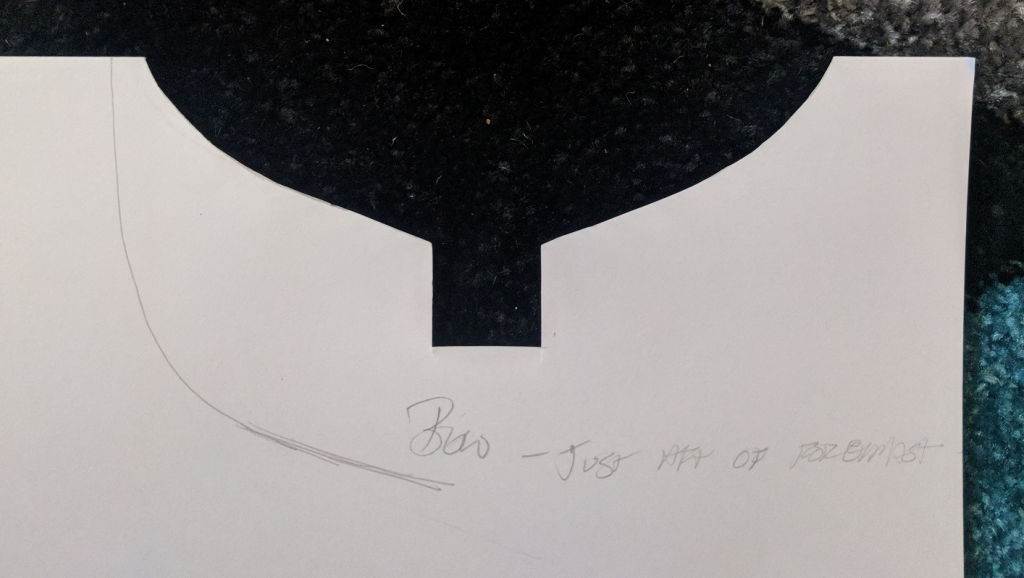
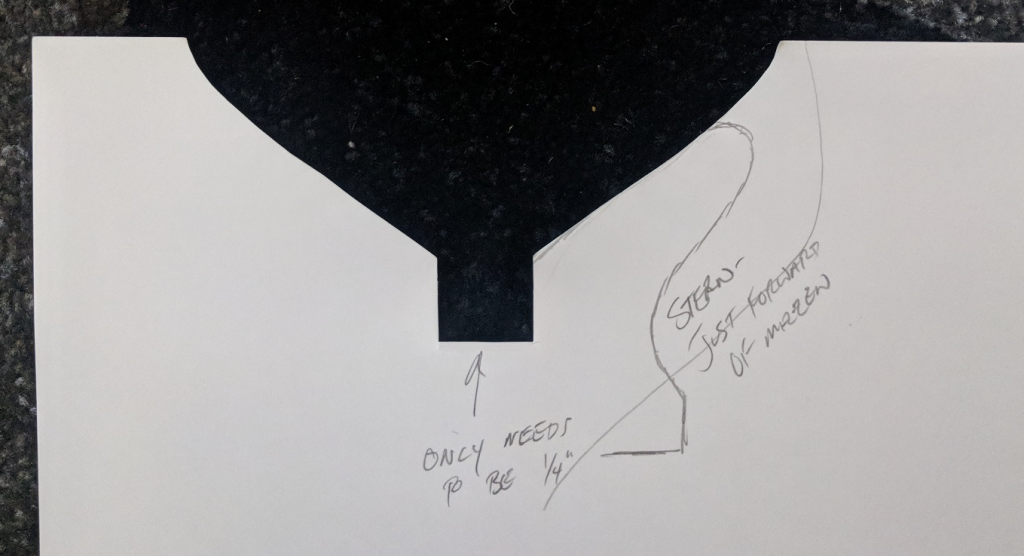
A small update, while I procrastinate cutting the rigging off... I decided that the old, super rough display stand wasn't worth keeping around any more, and that I could do MUCH better. I started by picking rough spots for stand positions, and drew curves that I thought might work. I cut them out of some card stock, and placed them against the hull, re-cutting and adjusting position until I was happy with the fit. Here's what I ended up with: You can also see the stern has the rough shape of the stand that I'm going to make. I was inspired by a dock cleat, which I thought was fitting. Next, I dropped these pictures into Fusion 360 to draw up the final products: Next step is to set up a quick toolpath for the small CNC at work, and cut out test pieces from 0.5" MDF: Quick cleanup with an exacto, a test fit, and now we know these don't quite fit. I scaled one of my reference images improperly, so day 2 sees a new set for testing: Better fit, but there's still need for another revision. I'm not sure I'm a fan of how far they extend up the sides. Am I way overdoing these? Should I just make little stubby pieces to "grab" the keel and call it good? Any input here on preferred mounting solutions would be appreciated. EDIT: Oh, and if anyone's curious about the Fusion stuff, I'm happy to share more detail on that process.


-
EJ, thanks for the pointer toward Syren, looks like their prices are reasonable. Thank you all for the tips - I'm feeling slightly more confident now that I've got a supplier and a rough plan. I'll be using the PDF sheet on Syren's rope page to match up what sizes I need as I pull them off and measure lengths. Time to make another spreadsheet to keep tabs on things, and pictures, pictures, pictures...
-
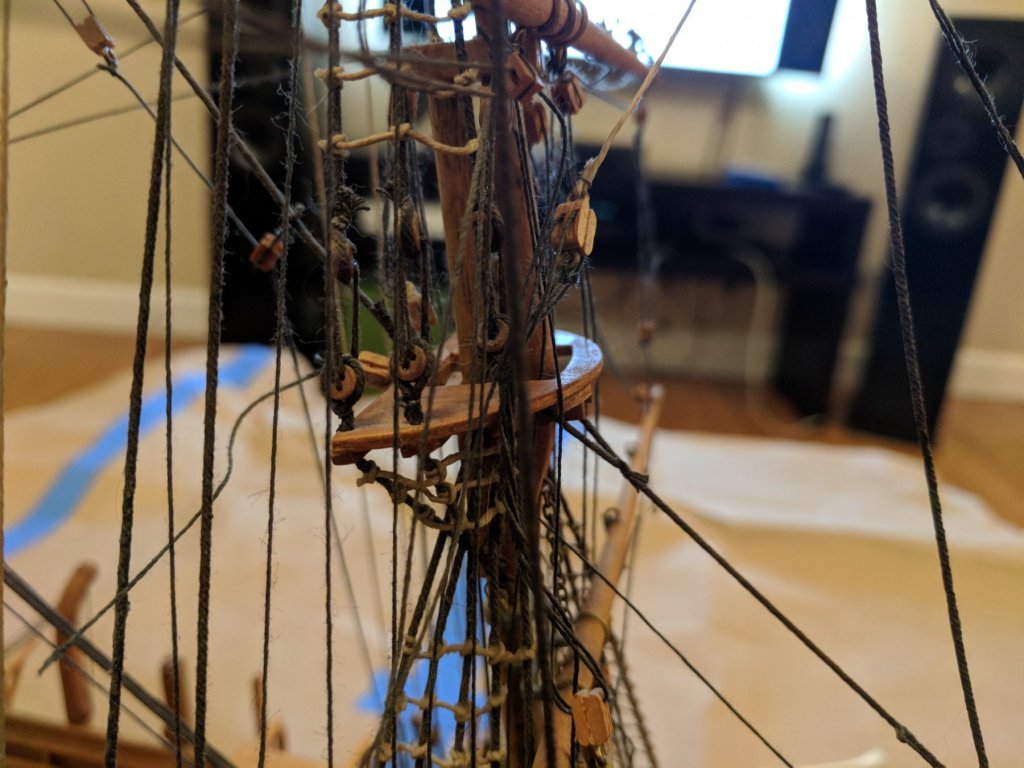
I will definitely be redoing the rigging. I am starting that whole process tonight, actually. Beginning with taking TONS of pictures. As I do this process, I'm going to start trying to figure out the rigging process... Where do I start? What do I look for in terms of materials? I'm probably going to leave the shrouds in place, as the lower masts are intact and I'm sure my grandpa spent a good deal of time on them. (Yes, I know the ratlines are incorrectly colored... My next model will be accurate, I promise 😉). Do I need to find real-world references and scale the dimensions appropriately? What would those references be? Boy, how deep the rabbit hole goes... 😵
-
Man, that is so cool! What a beautiful, large ship. Is it entirely sail powered, or are there props that I missed in the pictures somewhere? How is everything powered? How are you controlling things? Do we get video of the sails in operation? I almost can't believe that the rigging is functional. I love it. Sorry for the deluge of questions, but this is right up my alley, so the lighting and RC aspect of this build really interest me. Do you mind sharing some of the details?
- 213 replies
-
- 2
-
-
- la couronne
- 74 gun
- (and 2 more)
-
Ditto what Mark said. You've even got the drop of the chains correct, to my eyes. Very impressive stuff. I look forward to following along as you complete this build.
-
Ed, I love the correct terminology, so please keep it up. I just had to laugh at that point, I'd been able to follow most things up to that point via context, but that whole paragraph stumped me. Just goes to show how much I need to be reading and learning, so it's definitely not a bad thing.
- 3,596 replies
-
- 2
-
-
- young america
- clipper
- (and 1 more)
-
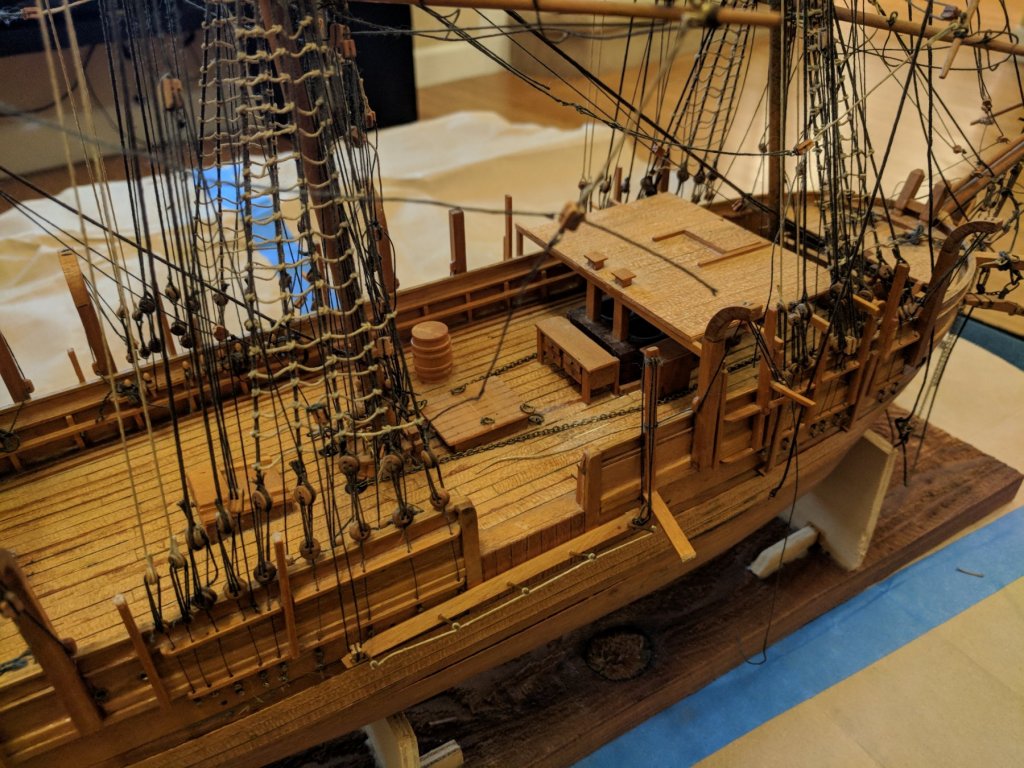
Well, I made some progress last night. I removed all the loose broken pieces, and swabbed the deck. That ugly white spot (I don't know what it is) is mostly gone, as you can see here: And look, some of the wood even has a bit of a shine on it! Looks like there was some finishing done, before the years of dust settled in... I'm encouraged by this, but also a little concerned - after it had been sitting in our hot garage for a few days, there's a distinct smell of cigarette smoke. My grandpa was a smoker, so I'm not sure if this is a feature or not. It's certainly authentic to his style though...

-
Nice work on the starboard light. As druxey said, it looks better than the original. Why not make a second for the port side, so that they do match?
- 749 replies
-
- 3
-
-
- albertic
- ocean liner
- (and 2 more)
-
Whew, made it to present day. What a ride this thread is! There are so many tips and tricks contained here - in both your posts Ed, and others - it's astounding. I'm sure I missed half the information in my first read-through. Especially the rigging information. There was one part in particular: I read that probably three times in a row, and just started laughing - I don't understand what most of this means, and I love it. Then there are some things that make total sense, and are brilliant - the leathering where the lines wrap around the masts for example: incredible! The tiny metalwork: I don't know how you do it, but I'm so glad you take the effort. There are many more examples I could mention, but I'll leave it at that for now. I'll be following along for sure. Thank you for your extremely thorough and patient explanations and tutorials, Ed. You're a credit to this community. On an entirely different note; clippers are very cool! I had no idea these ships were built to be such beasts. I'd heard the term 'clipper' before, but man, seeing what they're actually made of is very interesting. I also find it interesting how similar the mast construction and rigging is to how something like the Charles W. Morgan was done. Not the number of sails, but the general structure at least. Perhaps that was just generally how things were done around that time. I'd be interested to hear the more educated folks' thoughts on this.
- 3,596 replies
-
- 5
-
-
- young america
- clipper
- (and 1 more)
-
For anyone curious, Mystic has kindly digitized Bray's book, Boat Plans at Mystic Seaport for viewing, in the research area of their site. It contains a barebones drawing of the rigging, and a lines drawing. Thanks for the tip on that one Roger. I do think I'll cut all the lines to clean and work on the hull/deck, it's the re-doing of the rigging that scares me a bit.