rtibbs2018
-
Posts
42 -
Joined
-
Last visited
Content Type
Profiles
Forums
Gallery
Events
Everything posted by rtibbs2018
-
Very nice work Melissa. You definitely have the skills and I believe the hook has been set in you for building ship models. Looking forward to the gunboat build.
- 84 replies
-
- 1
-

-
- Statenjacht
- Kolderstok
- (and 1 more)
-
You’ll find a build log for the Speeljacht there also
- 84 replies
-
- 2
-
-
- Statenjacht
- Kolderstok
- (and 1 more)
-
Melissa, If you have not visited the modelbouwforum I encourage you to do so. The following link will take you to Pietsan's superb build log of the Statenjacht. The site is in Dutch however, windows does translate to English. You will find many Dutch ships built by Piet on this site. https://www.modelbouwforum.nl/threads/statenjacht-uit-1678.263783/
- 84 replies
-
- 4
-
-
- Statenjacht
- Kolderstok
- (and 1 more)
-
Melissa, I concur with your endorsement of Kolderstok kits. As you know Hans customer service is second to none. I recently finished the Speeljacht and currently working on the Statenjacht. I had purchased their Willem Barentsz however, when I saw the Statenjacht I fell in love with the lines, the decorations and of course the lower deck furnishings. Not quite as far along as yours but working slowly.
- 84 replies
-
- 5
-
-
- Statenjacht
- Kolderstok
- (and 1 more)
-
Proxxon TSG 250/E disc sander
rtibbs2018 replied to DaveBaxt's topic in Modeling tools and Workshop Equipment
It works both ways. I recently purchased some adhesive from across the pond. The price was less than 8 US dollars and the shipping to the states was 23 dollars. I guess it comes down to what you want. As far as the Byrnes products, his shop is only a thirty minute drive from my home🤪 so I’m fortunate there….. Shipping costs are going thru the roof everywhere. Just ordered an arbor for my drill chuck @ $9.50 with $16.00 shipping. All within the US. -
Proxxon TSG 250/E disc sander
rtibbs2018 replied to DaveBaxt's topic in Modeling tools and Workshop Equipment
IMHO, there is no comparison. The Byrnes is by far the better or the two. Super smooth with no vibration. Nice solid aluminum disk for adhering the sanding disk to. The machine work is excellent. Oh yes, if you should need it the customer service is top notch. No I don’t work for Jim I just have several of his machines. 🤪 -
OMG. Has it been that long since I posted my build. For the last several years I got side tracked with CNC & 3D printing projects. I did finish the Kearsarge however, I never posted the finished model and have since sold it. Not sure if I have pictures of the completed model but will search for some. Going to try to get back into ship modeling although with something not so complex as the Kearsarge was as I'm currently the primary care giver for my wife who has issues with a back surgery gone wrong and not sure how much time I can devote to building. (Ah, the golden years) Ron
- 34 replies
-
- 3
-
-
- kearsarge
- first build
- (and 1 more)
-
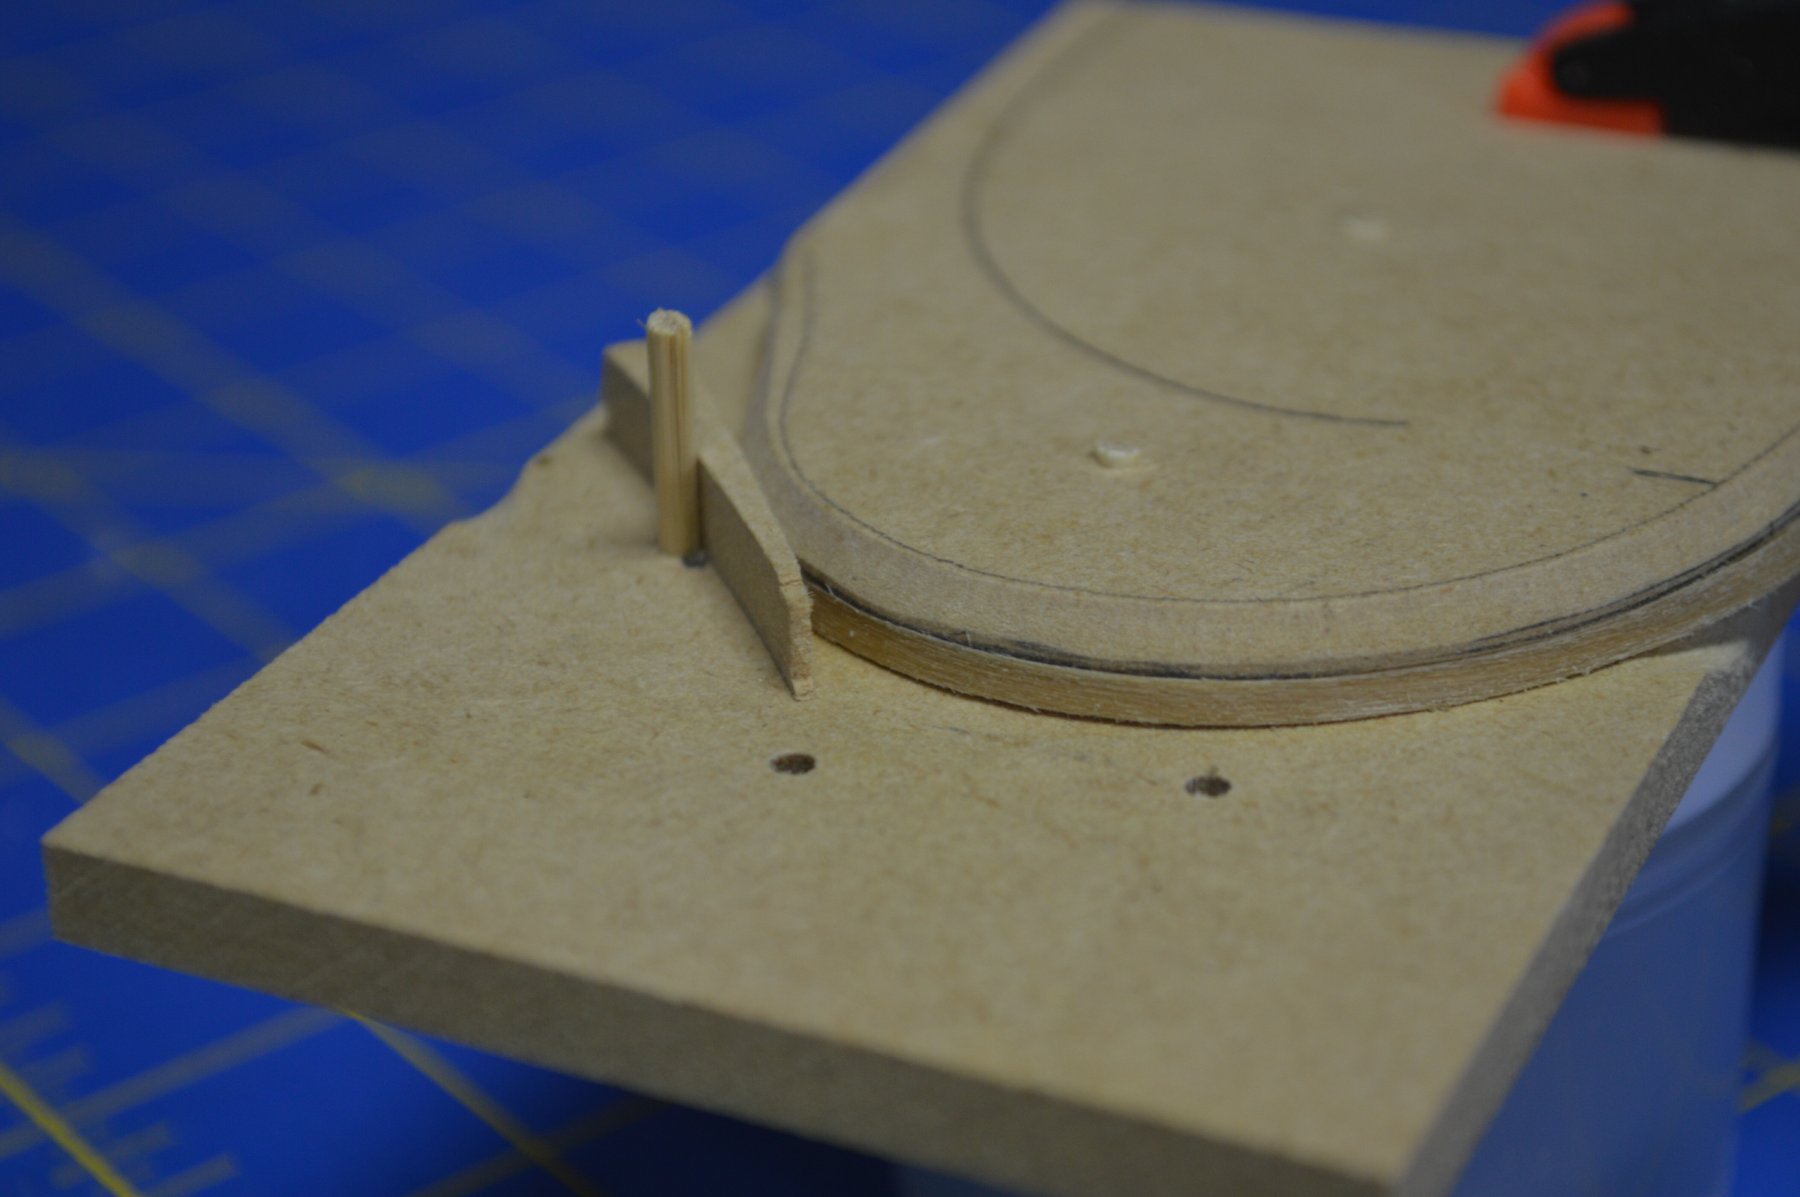
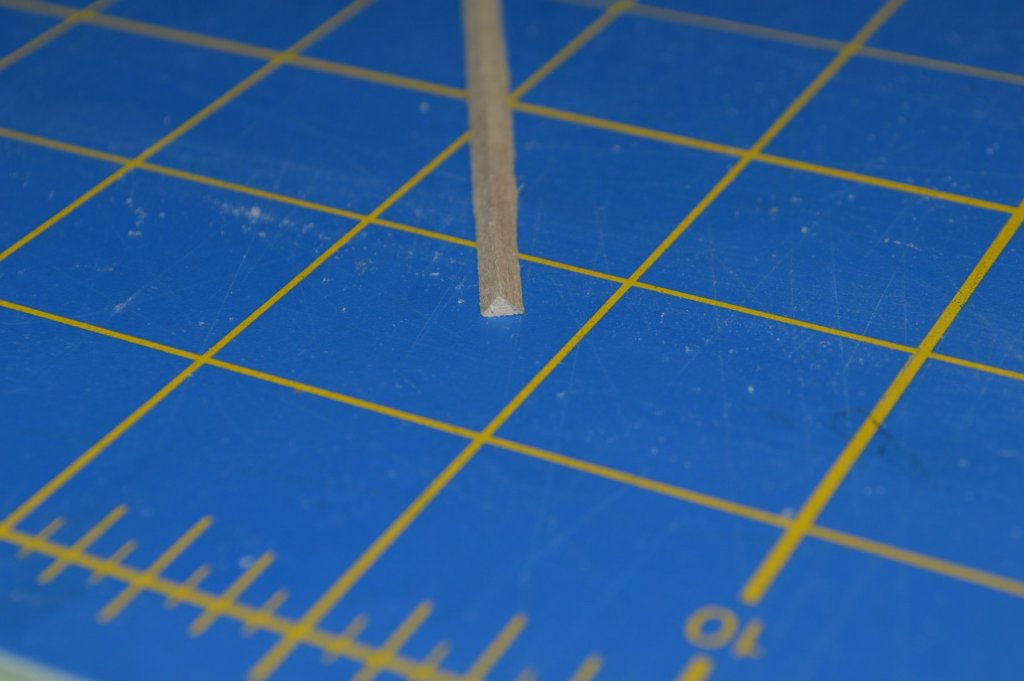
Well, I've kind of been hung up with the waterways. Several attempts have resulted in as less than desirable result fitting the 1/8" wide strip in at a 45 deg. angle around the transom area which requires the strip to be twisted as well as bowed slightly. I came up with a solution which, I'm sure will make you shipbuilder purists shudder. I milled a triangular piece which when formed would lay at the proper angle between the weather deck and the bulwarks. I also made a fixture which formed the radius at the transom.

- 34 replies
-
- 6
-
-
- kearsarge
- first build
- (and 1 more)
-
new to me scalpel handle
rtibbs2018 replied to Kurt Johnson's topic in Modeling tools and Workshop Equipment
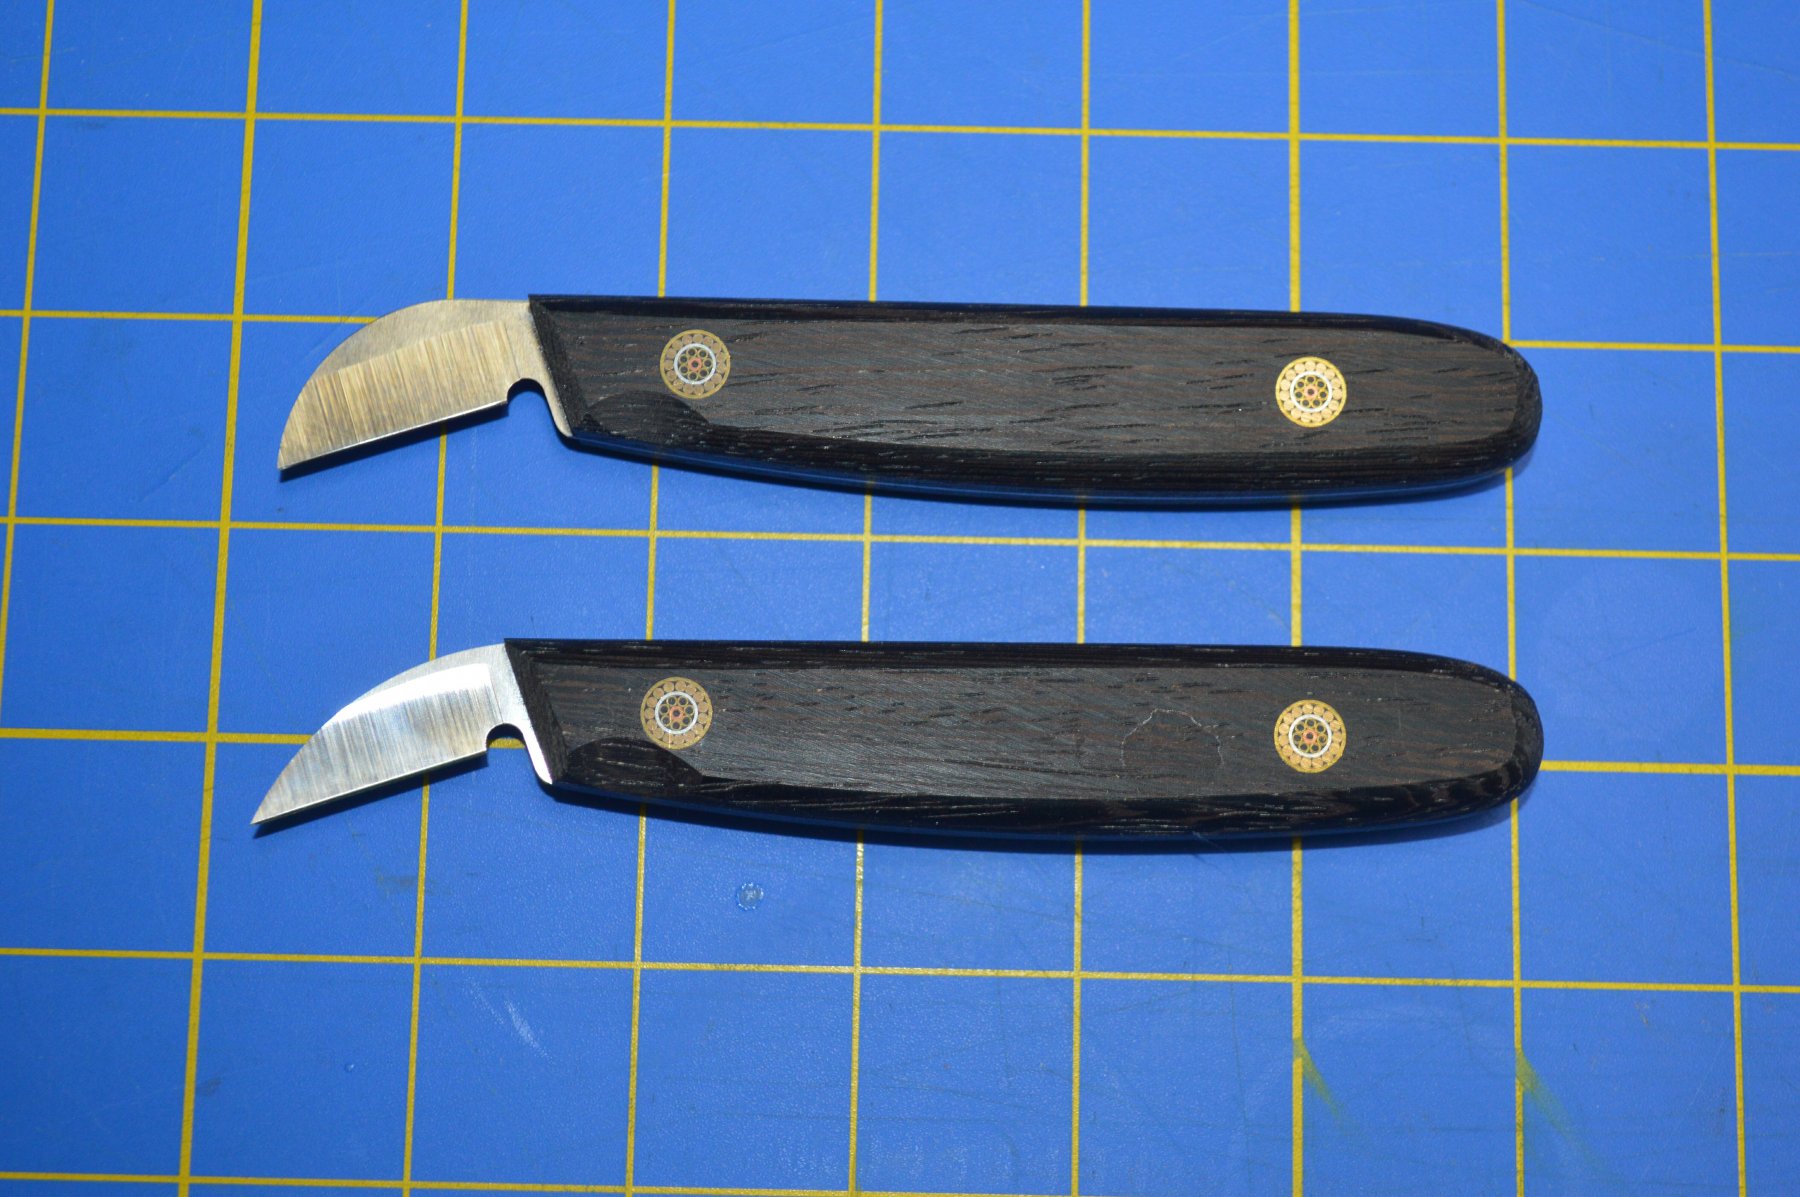
I have a couple of knives that I use for chip carving that I've found to be very handy in shipbuilding. These are full tang M2 steel hardened to Rc 58-59. They have very thin tangs (.040) and hollow ground. A standard knife and a modified knife (Thinner) Extremely sharp and can stoned/honed to keep their edge.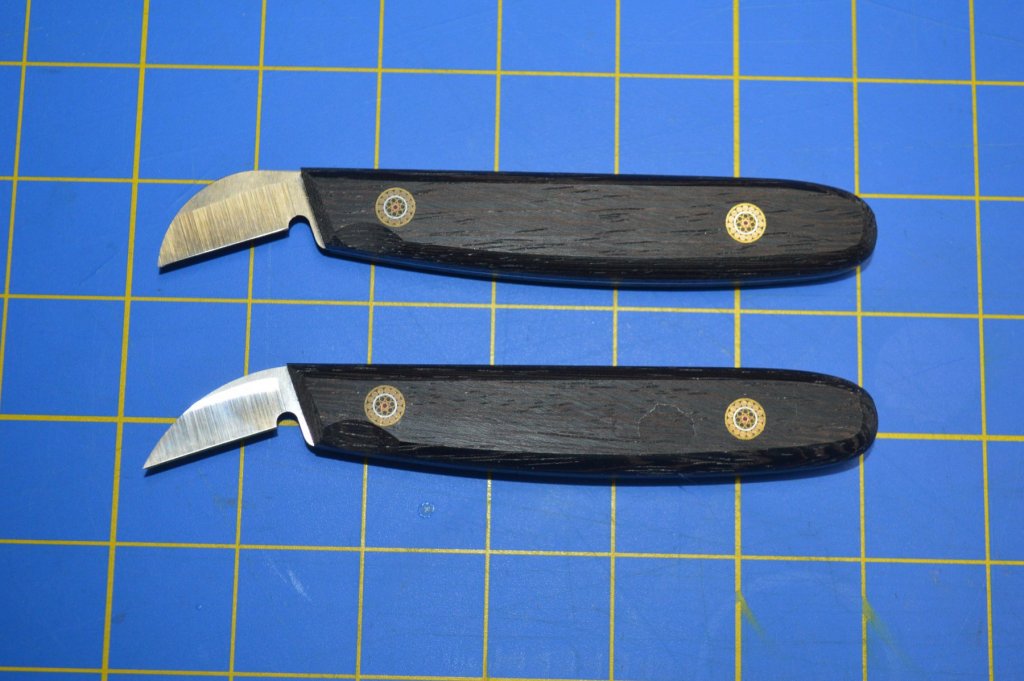
-
Mr. BJ How much overlap are you using on the individual “plates”?
- 77 replies
-
- 1
-
-
- schooner
- solid hull
- (and 4 more)
-
Popeye, Guess I fell back to my model aircraft days. When applying the glass cloth I thin the resin about 25% then brush it on to the cloth. The diluted resin takes a little longer to cure then when applied full strength. Sand off any "strings, etc." with 220 grit then apply the final coat of resin full strength. I then sand with 180 grit and follow up with 220 grit. I sand almost down to the fabric but hopefully, not through it. It does provide an excellent surface for painting. When doing aircraft we always worry about added weight however, the majority of the resin is sanded off and the cloth is only 3/4 oz. to the yard. Of course with ships who cares about adding a little ballast.😀 Some people prefer to use epoxy resin as apposed to the polyester because of the smell of the polyester but, to me. the poly gives a much harder surface and is easier to sand then the epoxy. IMHO
- 34 replies
-
- 4
-
-
- kearsarge
- first build
- (and 1 more)
-
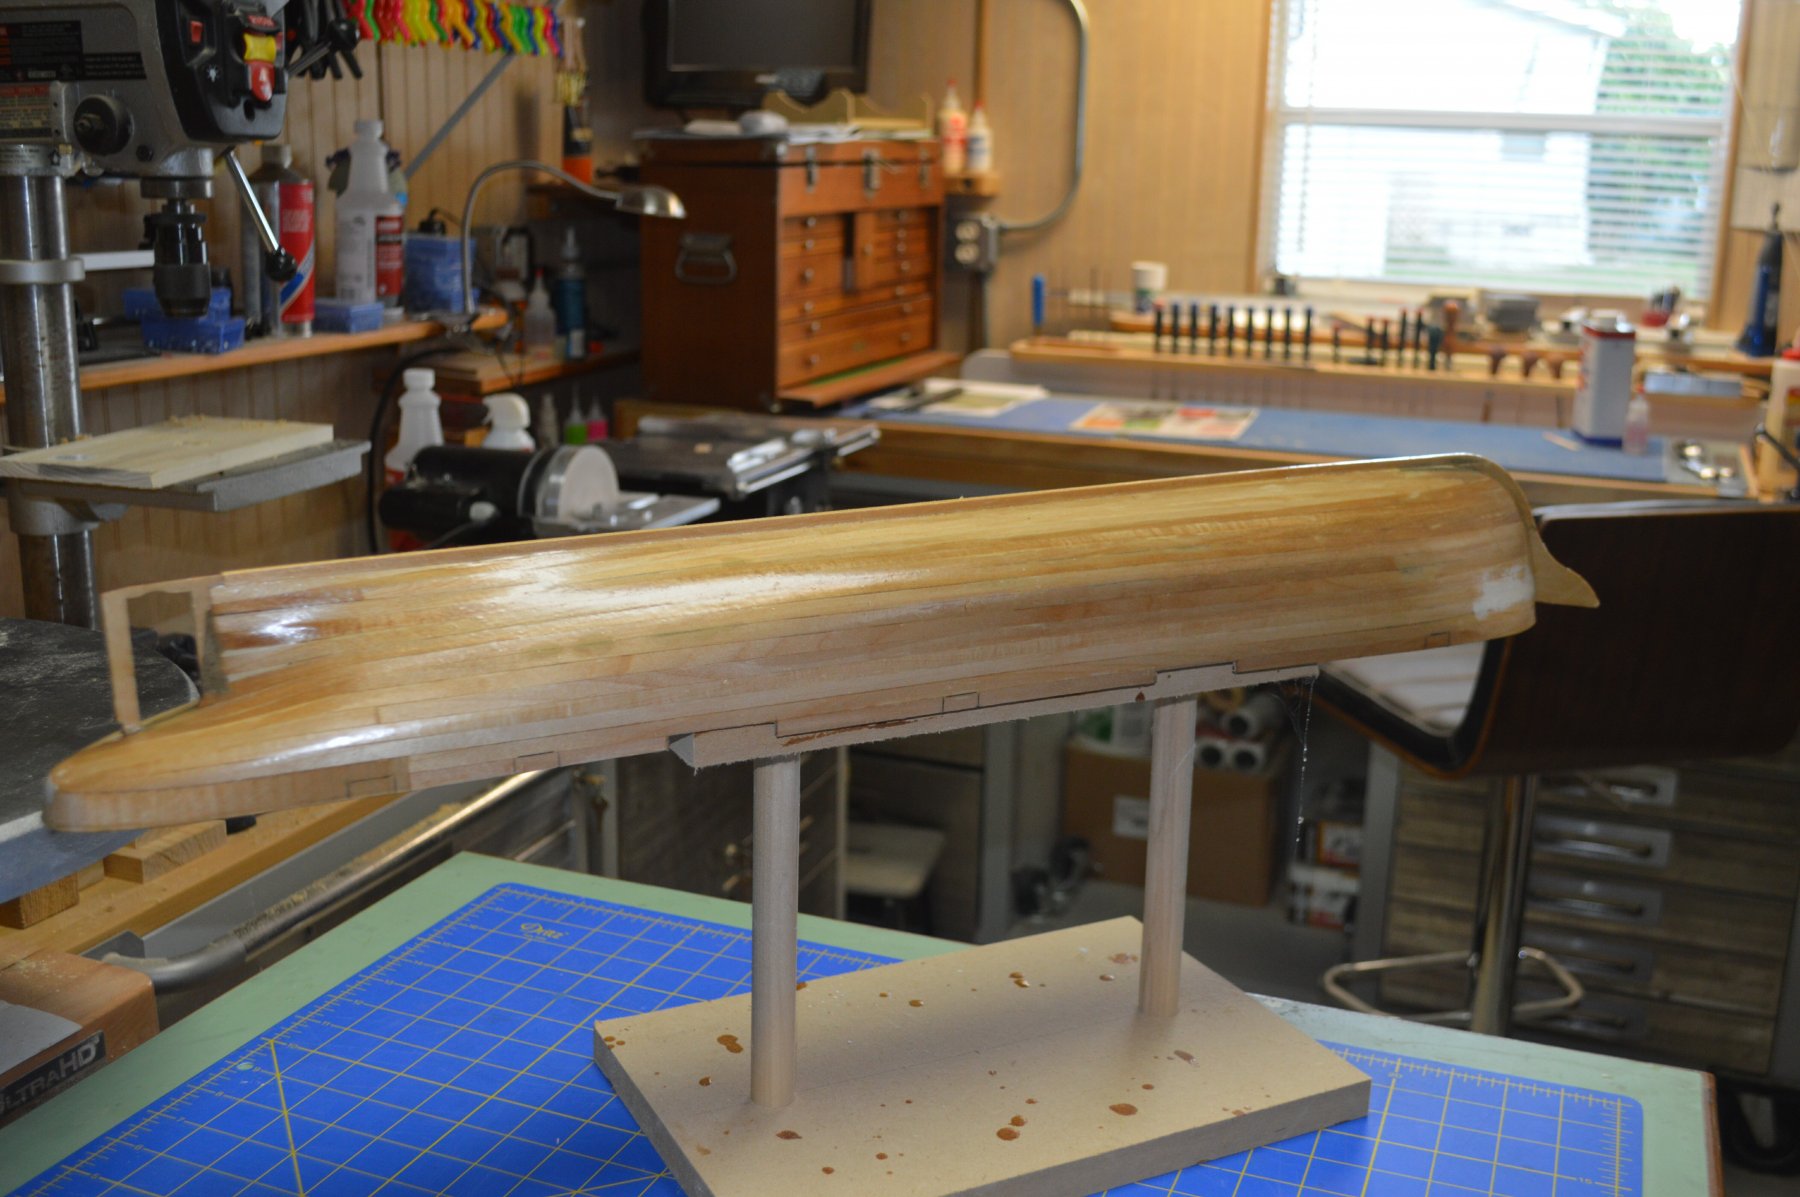
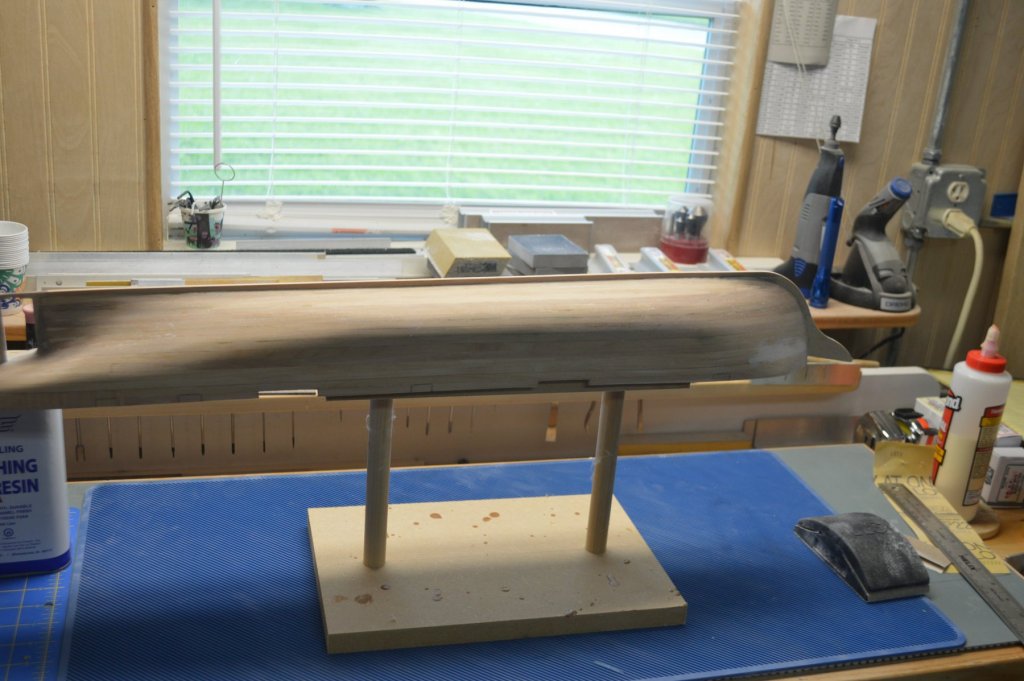
Ok, full scale decking is finished so it's back to the shipyard. Don't you just hate when you start to cook something then you realize you don't have all the ingredients on hand. Since the hull is to be painted and coppered I decided to seal the hull with 3/4 oz. glass cloth then prime and paint. Ya gotta love the smell of polyester resin in the morning. (Paraphrasing Robert Duvall) 😉 Had all my glass cloth cut and ready to apply when I noticed my polyester resin had hardened in the can. I ordered a new can from the local hobby shop and it arrived the next morning. Opened the can and found it had started to gel. Oh crap, it's off to the store to exchange it. They had one container left and it appeared ok. Applied a layer of glass cloth to the hull and Lightly sanded the surface with 220 grit paper. Applied the final coat of resin. Sanded the hull. Now I'm ready to prime the surface with my favorite grey primer. Oops I'm out of primer. So now I wait for Amazon to deliver it as it's not carried locally.


- 34 replies
-
- 9
-
-
- kearsarge
- first build
- (and 1 more)
-
Byrnes thickness sander
rtibbs2018 replied to rtibbs2018's topic in Modeling tools and Workshop Equipment
What’s ironic is that for years I’ve been using, IMHO, junk tools (who shall remain nameless) when these fine products are made less than 30 miles from my home. -
Just received my Byrnes thickness sander and gave it a “road test” this morning. Just like all his tools it’s solidly built, runs very smoothly and with the ability to have two different grits installed should you need to remove lots of material, you can run it through the coarse grit side then fine tune the thickness on the finer grit side. Also, I found that the fine dust produced can be used as a wood filler when mixed with a little adhesive giving you the same filler as the wood you are building with. It now sits next to my Byrnes table saw and disk sander.
-
I think we can all relate to those "30 minute" DIY jobs
-
Well, I have to take a short break from 1:96 scale building to full scale planking. The Admiral has me laying new hardwood flooring. You know, the old fashioned kind, 3/4" oak nailed down
- 34 replies
-
- 4
-
-
- kearsarge
- first build
- (and 1 more)
-
Thanks for all the “Likes” guys. So far this has been a enjoyable project 👍
- 34 replies
-
- 3
-
-
- kearsarge
- first build
- (and 1 more)
-
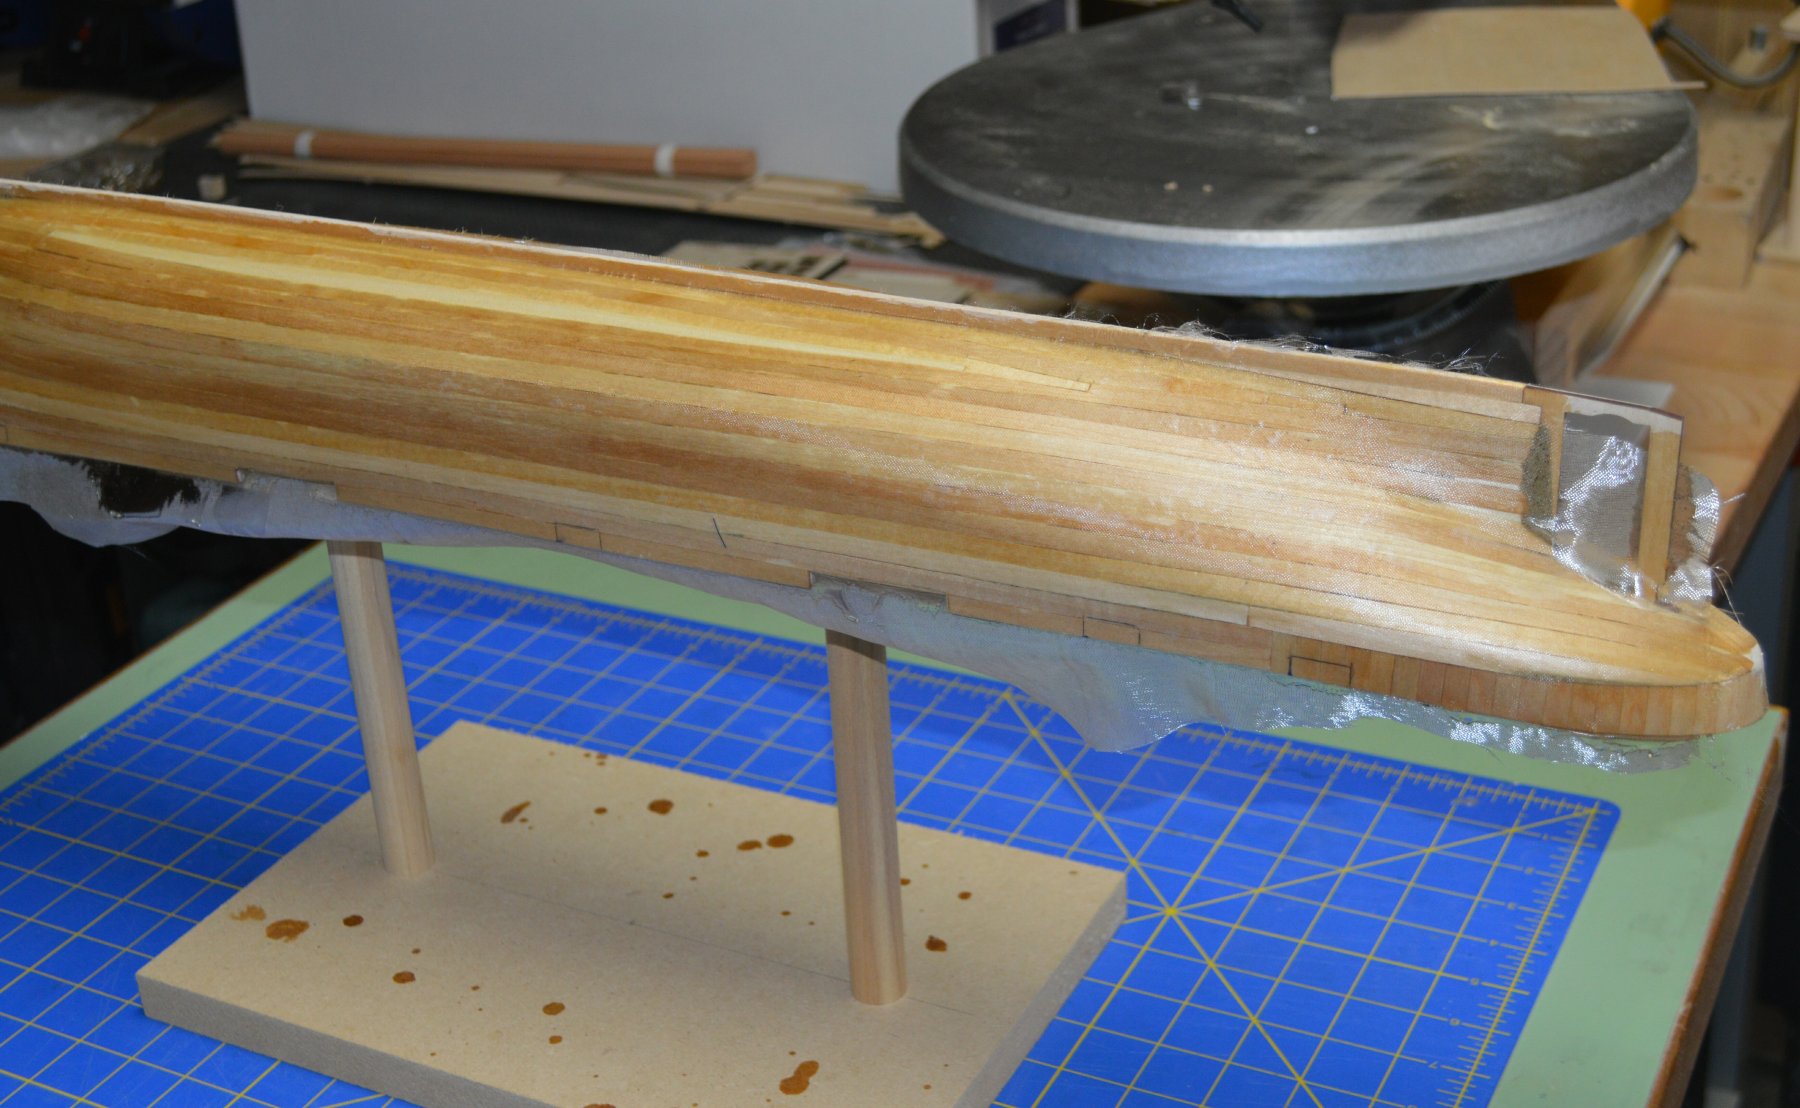
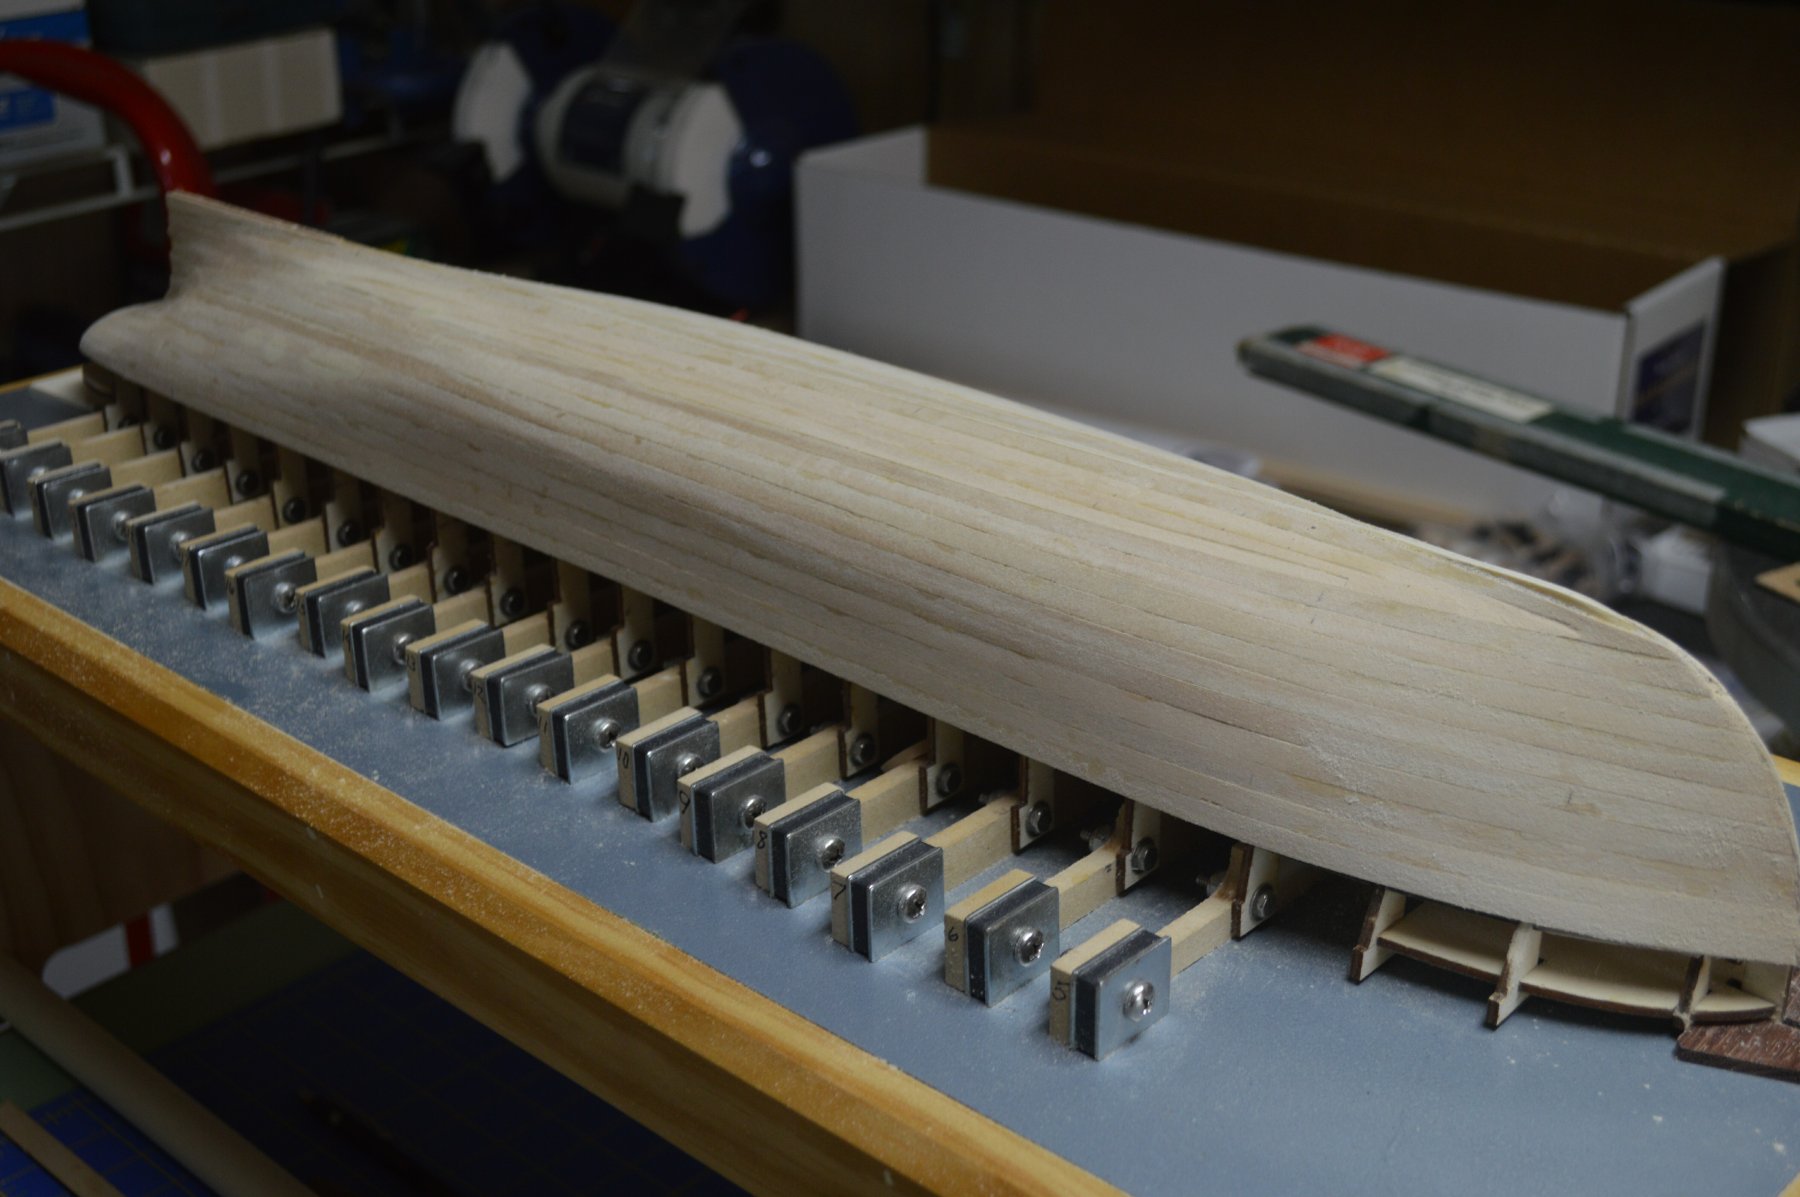
Well, its been a few weeks since my last post and I began planking the hull. I have the lower hull planked and will finish the bulwarks next. I'm sure I've violated most all of the conventions used by you master builders when it comes to planking. Planking is a tedious process which I actually enjoyed. It is a lot easier planking a model aircraft as balsa forms much easier than Limewood. But I digress.... Being my first ship build I certainly learned what not to do on my next project. This is a single plank which will be coppered. When I complete the bulwarks I'll finish filling some boo, boo's, add the keel and sand the hull. I'm looking forward to turning the hull over and looking at the deck.

- 34 replies
-
- 9
-
-
- kearsarge
- first build
- (and 1 more)
-
Byrnes Table Saw
rtibbs2018 replied to WSparrowHood's topic in Modeling tools and Workshop Equipment
Like most others I purchased most all of the “extras”, sliding table, micrometer stop, tilting table etc. the one item I most like is the extended table. Well worth purchasing. I too had the Micro Mark and Dremel saws. Only wish I’d known about the Byrnes sooner. -
Thanks for the heads up. Not there as yet but will make a note of it
- 34 replies
-
- 2
-
-
- kearsarge
- first build
- (and 1 more)
-
MrBlueJacket, In a past life as an engineer I was required to write Operation/Maintenance manuals for machinery we designed. It was a daunting task. As the designer you knew your equipment inside and out however, to convey that in a manual for someone else was a real challenge. I would sometimes take my first draft and have it reviewed by different people. WOW, it was like the old story when you tell one person and then hear it again after it passed through several people.
-
Skybolt, You’re flying through your build. You’re the hare and I’m the tortoise. Still working on my planking and probably will be for a while. Ron
-
Bob, I'm certainly no expert especially since this is my first wooden ship build however, I believe the inner bulwarks have 1/16 plywood pieces fitted first then the forward portion of the hull above the sheer plank will be planked horizontally to a thickness of 1/8" and the curved portion of the transom is to be planked VERTICALLY. When I purchased the kit I also purchased the disk with about 150 pictures of the model. I only wish that more of the pictures showed the hull planking. I guess this is why they list this as an "Admirals" kit. I'm plowing ahead with mine as a "Seaman" Maybe MrBlueJacket will chime in Ron
-
Skybolt, looks like you’re going to pass me up on the build. After laying the first two planks I didn’t like what I saw in the stern area so I’m taking a step back and removing them. I’ll be watching your progress hopefully to get some insight. Ron