CPDDET
-
Posts
948 -
Joined
-
Last visited
4 Followers


About CPDDET

Recent Profile Visitors
2,463 profile views


-
 Keith Black reacted to a post in a topic:
Hello from Sweden
Keith Black reacted to a post in a topic:
Hello from Sweden
-
Nirvana reacted to a post in a topic:
Hello from Sweden
-
Keith Black reacted to a post in a topic:
Hello from Ontario, Canada
-
mtaylor reacted to a post in a topic:
Hello from Ontario, Canada
-
 MBerg reacted to a post in a topic:
Hello from Ontario, Canada
MBerg reacted to a post in a topic:
Hello from Ontario, Canada
-
Scottish Guy reacted to a post in a topic:
Hello from Ontario, Canada
-
Sounds like you have a solid plan in place. Take your time, learn, and above all enjoy.
-
CPDDET reacted to a post in a topic:
Bluenose by Retired guy - Model Shipways - scale 1:64
-
Scottish Guy reacted to a post in a topic:
John
-
Keith Black reacted to a post in a topic:
John
-
Nice job on your first build. Press on!
-
Dristigheten reacted to a post in a topic:
Hello from Sweden
-
Welcome aboard! All the help necessary is at your fingertips.
-
CPDDET reacted to a post in a topic:
Drill bit suggestions
-
Welcome aboard!
-
 Always look forward to seeing your progress.
 -
Welcome! Enjoy the journey.
-
CPDDET reacted to a post in a topic:
Adding a cheap DRO to a Proxxon XY-table
-
I know I saw a link for a protractor app somewhere on this site but I'll be darned if I can find it again. There are several apps available but I want to check out the one that was recommended. Anyone know what I'm refering to? Dave
-
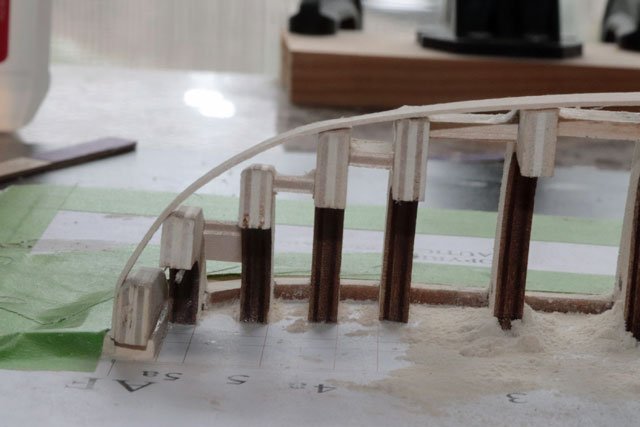
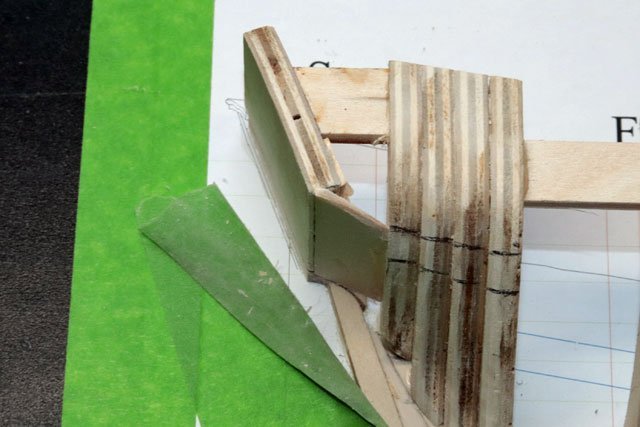
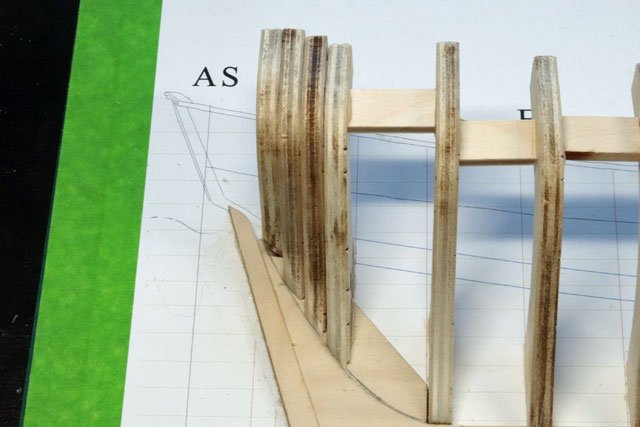
I marked the tops of the bulkheads to align them with the topline using a machinist square as outlined in the practicum. I used a small Japanese pull saw to trim them. After much shimming and sanding and test fitting planks I finally finished fairing the hull (or half hull). This picture shows an example of how laborious this task can be; note the piles of sawdust and gaps that needed shimming. The process took about a week to complete, working an hour or 2 each day. But I’m quite satisfied with the final product. I also installed the transom and transom support piece, as well as the counter. I found using a piece of 1/16 inch thick basswood for the counter to be easier than using thicker wood. Here is one mistake I made. When installing the support pieces between the bulkheads I ended up placing them in line with the plan markings for the wale. This sometimes blocked the use of my square when trying to mark the wale on the bulkheads. I was able to mark either the top or the bottom of the wale on most of the bulkheads, but not all. Not an insurmountable problem, but a bit frustrating. I really need to get better at looking beyond my current processes to see how they will affect future processes. This picture kind of shows the issue. Moving on to the garboard and broad strakes.
-
CPDDET reacted to a post in a topic:
Bluenose by Retired guy - Model Shipways - scale 1:64
-
CPDDET reacted to a post in a topic:
Bluenose by Retired guy - Model Shipways - scale 1:64
-
When all is said and done I keep different types of glue available for different tasks. For me, one size dosent fit all. Glue is just another tool. And like tools there is always the correct one needed. How many cutting instruments do we use? How many types of clamps? Sometimes we use files, sometimes chisels and sometimes sandpaper, and so on.
-
CPDDET reacted to a post in a topic:
Keel holder/clamp recomendations
-
CPDDET reacted to a post in a topic:
Type of glue to use planking a hull
-
Welcome back!
-
Keel holder/clamp recomendations
CPDDET replied to Mike Shea's topic in Modeling tools and Workshop Equipment
I'll second the Keel Klamper -
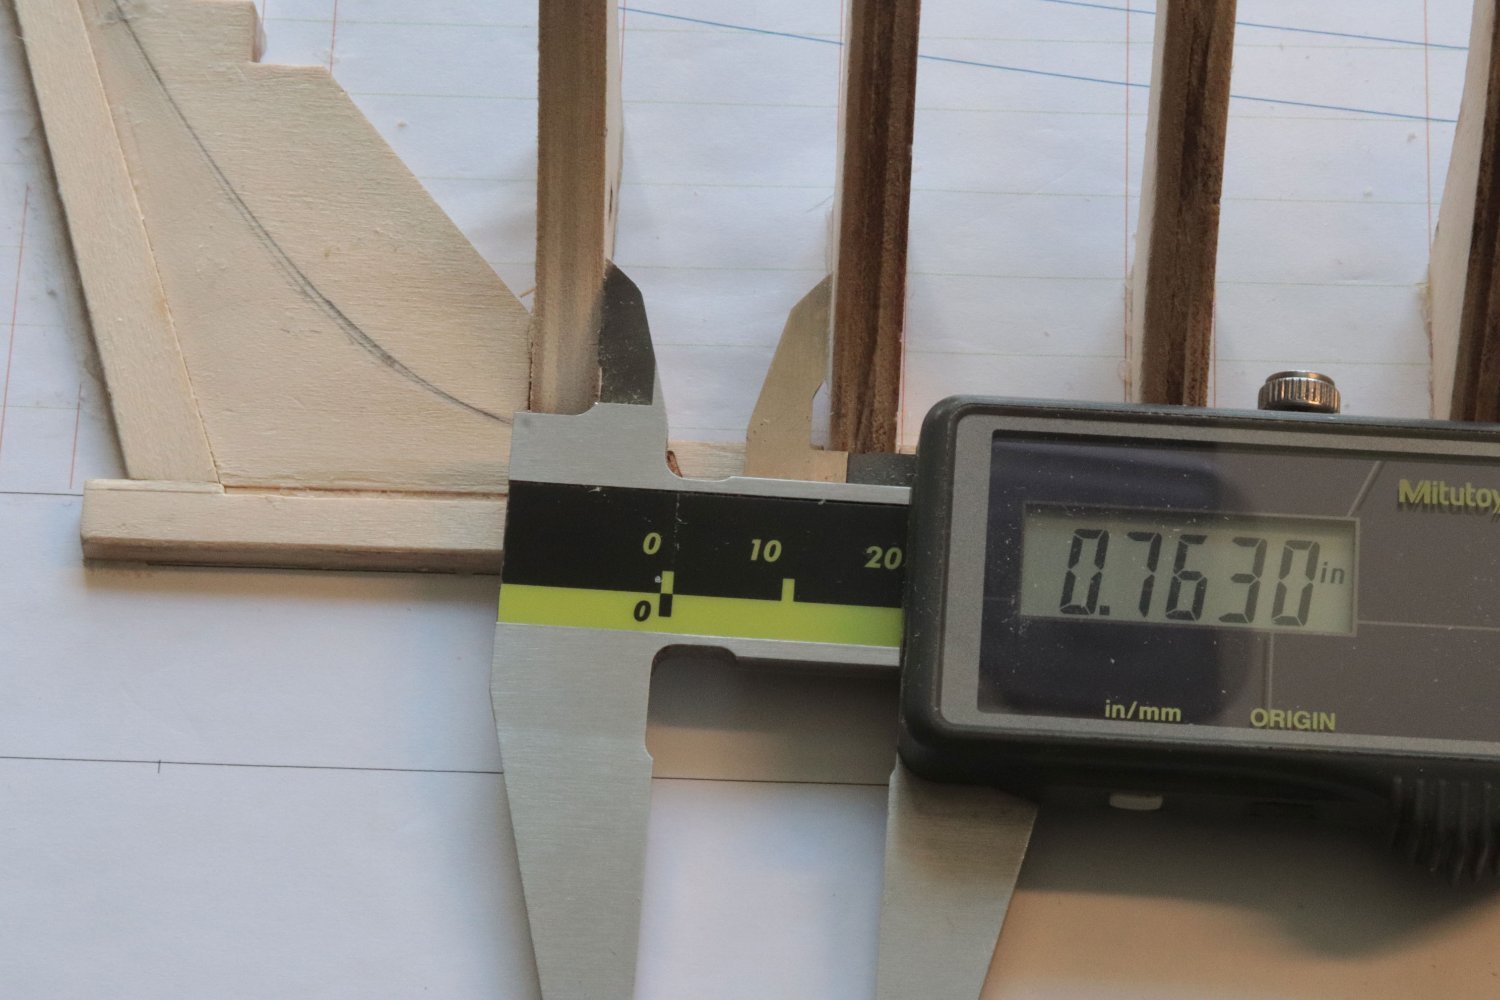
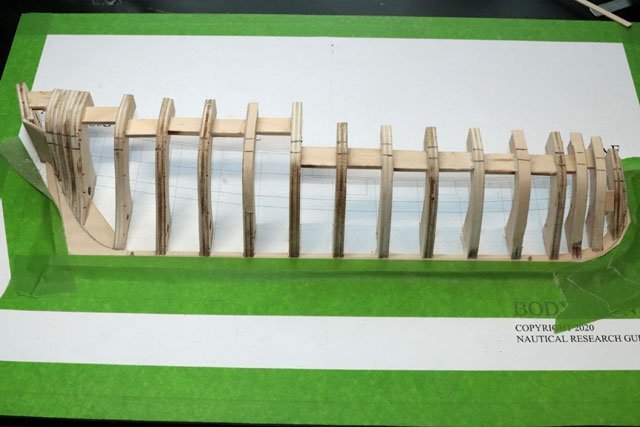
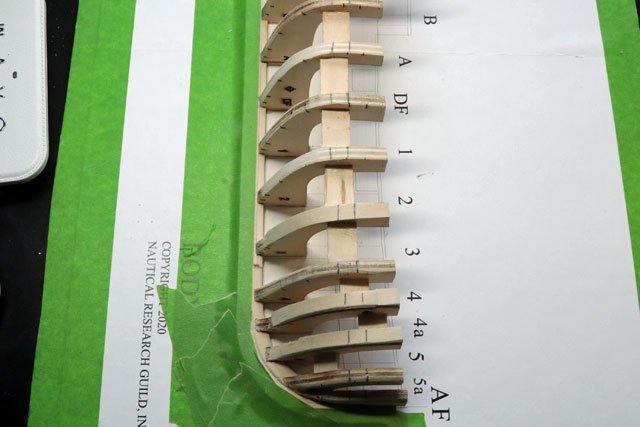
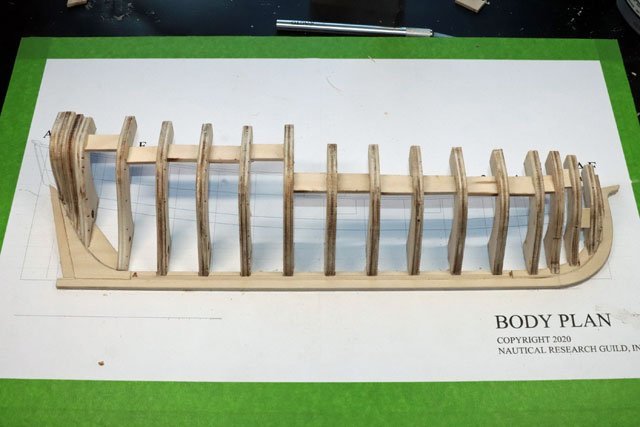
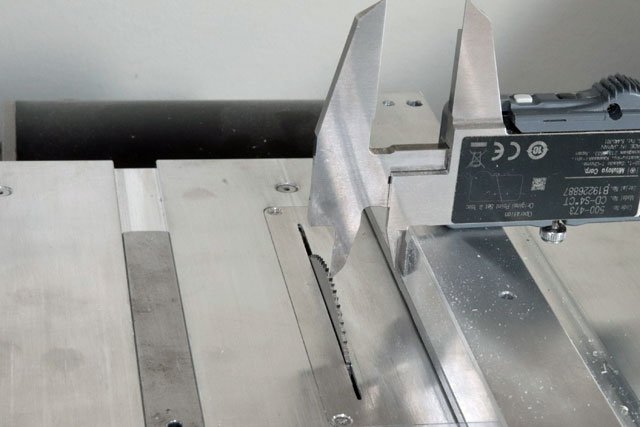
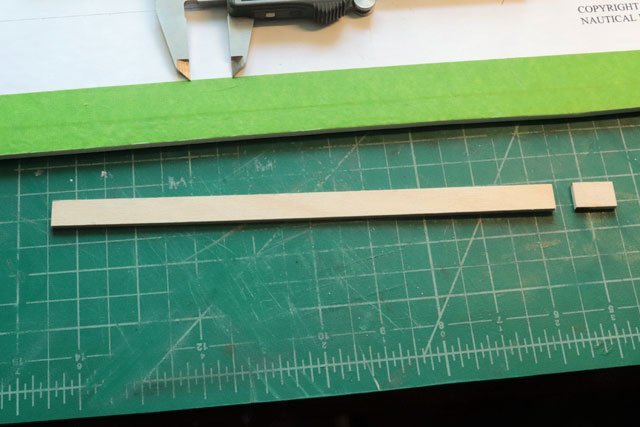
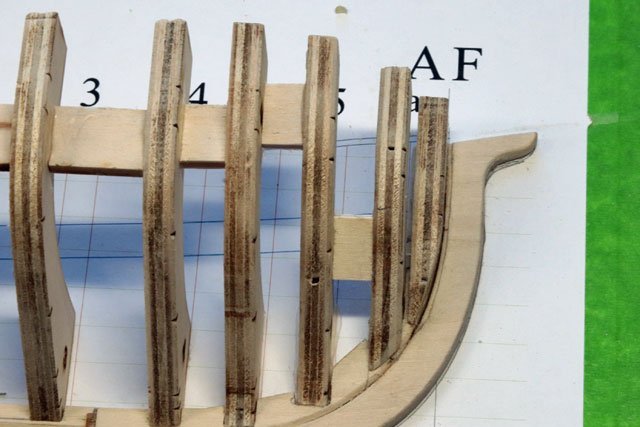
All the frames have now been installed. I didn’t feel like sanding or shimming the stiffening spacers between the frames that came with the kit and decided it was easier to make my own. I first cut a strip of scrap wood the same thickness and height as the kit pieces. Using my caliper I measured the distance between the frames at their base and locked it in place. After raising the blade on my saw, I rested the caliper on the fence and adjusted the distance to the saw blade. Then lowered the blade and cut the strip to the proper width. This gave me very accurate pieces and assured that the distance between the base and top of the frames was equal. Before gluing in the furthest forward and aft frames I held them in position and marked them at the rabbet / bearding line. Then sanded them, test fitting as I did so. Then glued them in. Now Ill trim the top of the frames using my Dremel with a cut off disk and start the faring of the frames. I’m going to take my time with this and not screw it up like I did on my first attempt. I figure this might take several days.

-
CPDDET reacted to a post in a topic:
Soldering Success.... Finally!
-
CPDDET reacted to a post in a topic:
Hello from Chile
-
Welcome aboard, from a fellow sailor.
-
Nice work!
-
Welcome aboard!