SteveColes
-
Posts
16 -
Joined
-
Last visited
Recent Profile Visitors
401 profile views


-
 maddog33 reacted to a post in a topic:
Cutty Sark by SteveColes - Artesania Latina - Scale 1/84
maddog33 reacted to a post in a topic:
Cutty Sark by SteveColes - Artesania Latina - Scale 1/84
-
 Well, from everything I’ve seen, I think I prefer just barely visible. From the scale, I think a bung hole would be about 1/32 in or 0.75 mm. I bought a draw plate and some 1/16 dowels and now I have draw them down to 1/32.😱 Also, there should only be 1 hole across instead of two and it should be 4 step deck instead of two.
 -
1 for 1 against. Any other thoughts? Please🙏
-
What about caulking lines.
-
SteveColes reacted to a post in a topic:
Cutty Sark by SteveColes - Artesania Latina - Scale 1/84
-
SteveColes reacted to a post in a topic:
Cutty Sark by SteveColes - Artesania Latina - Scale 1/84
-
I know how to create the appearance of trenails and/or bungs and caulking. But my question is should I? The scale of this model is so small. I wonder if one could even see these details if done to scale? The few pictures I have of the Cutty Sark decking, I really don’t see these details.? Comments please
-
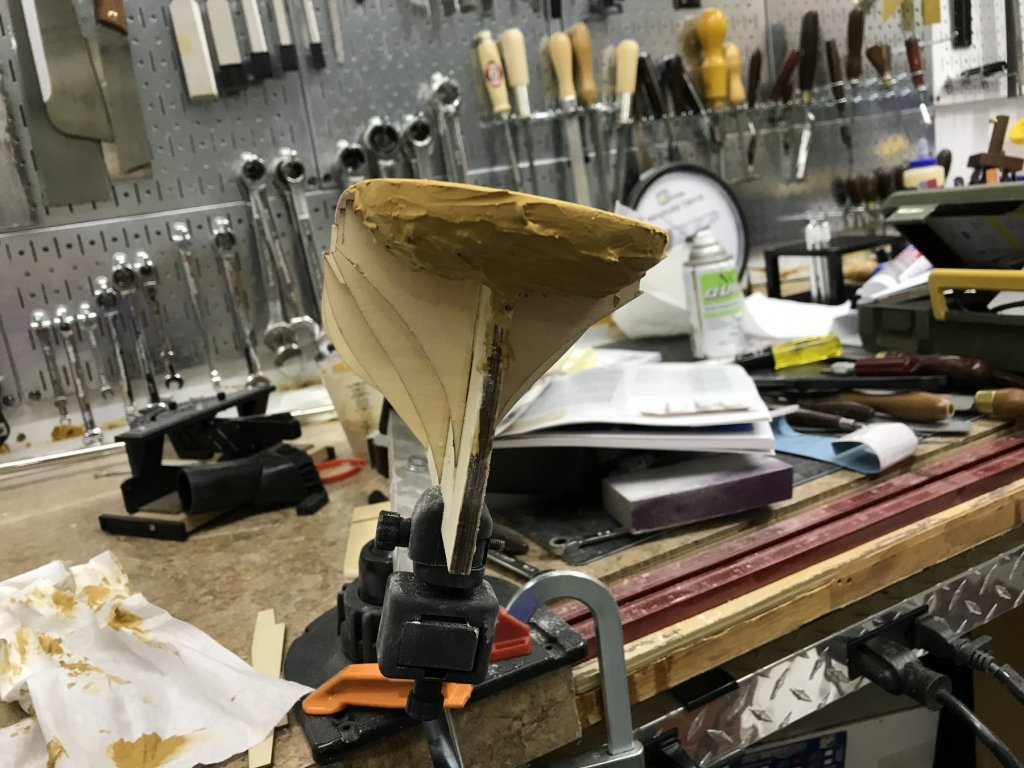
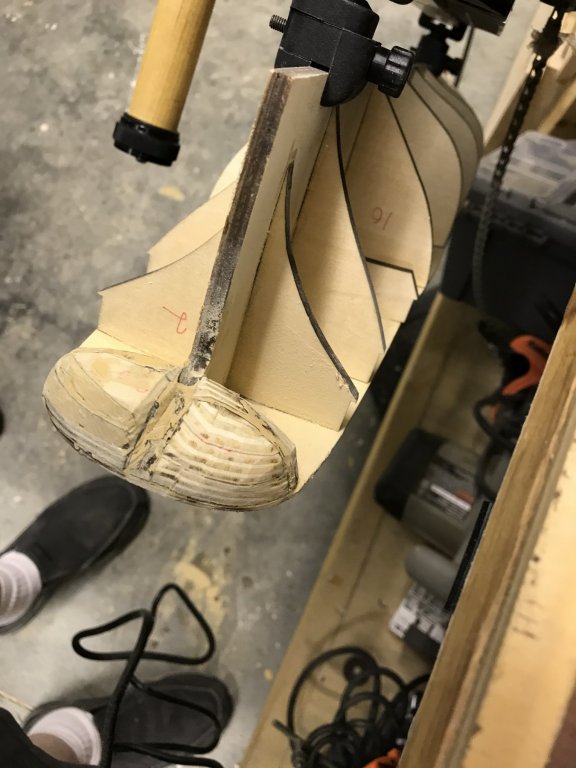
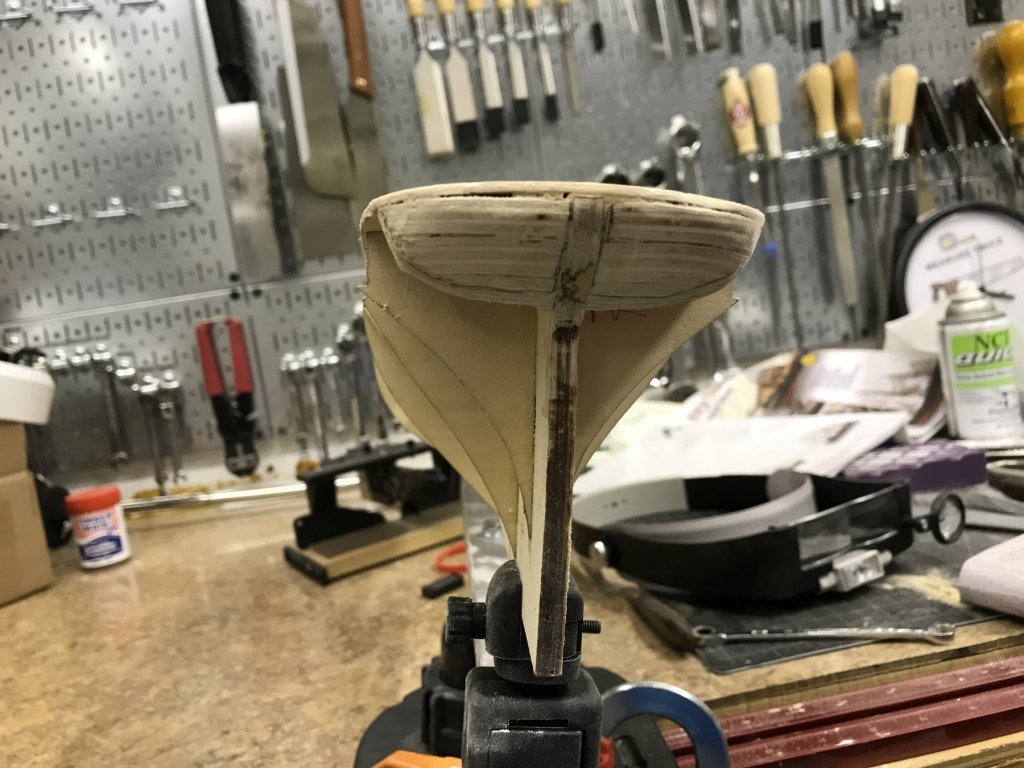
Well the thing that has been holding me up has been the shape of stern. The kit supplies parts that make up filler blocks for the stern. But there are no instructions or photos that show the shape in 3 dimensions. So I figured I could intuit the proper shape from my past experience. Well I was wrong🤬. Anyway I think I have it pretty close now.🙏. But in researching something else, I found this Article . Very helpful?
-
For those who are following this, my apoiogies. i have not quit on the model; i just haven' gotten much done. It gotten very slow. the biggest problem has been getting past the mistakes, i mentioned in my last post. But i think i knowhow to fix them. Now i must actually perform them. Messis, thank you, but I'm not very good at shaping, so that would only make things worse for me. So i went back to the framework of the stern. And then i rebuilt it. the result was much better, but not quite right. I realized that i must do the shaping of the bulkheads, the bow, etc. That way i can shape the hull as a whole rather than piece meal. that way will work for me the best.
-
To those who are following this, my apoiogies. i have not quit on the model; i just haven' gotten much done. It gotten very slow. the biggest problem has been getting past the mistakes, i mentioned in my last post. But i think i knowhow to fix them. Now i must actually perform them. Messis, thank you, but I'm not very good at shaping, so that would only make things worse for me. So i went back to the framework of the stern. And then i rebuilt it. the result was much better, but not quite right. I realized that i must do the shaping of the bulkheads, the bow, etc. That way i can shape the hull as a whole rather than piece meal. that way will work for me the best.
-
McByrd66 reacted to a post in a topic:
Cutty Sark by SteveColes - Artesania Latina - Scale 1/84
-
keelhauled reacted to a post in a topic:
Cutty Sark by SteveColes - Artesania Latina - Scale 1/84
-
How not to shape the stern. A little better But, not much. still not symetric. It sure don't look like the picture. Also, the upper deck is not properly centered gonna have think about this.
- 27 replies
-
- 1
-
-
- cutty sark
- artesania latina
- (and 1 more)
-
Cuda1949 reacted to a post in a topic:
Cutty Sark by SteveColes - Artesania Latina - Scale 1/84
-
Cuda1949 reacted to a post in a topic:
Cutty Sark by SteveColes - Artesania Latina - Scale 1/84
-
tasmanian reacted to a post in a topic:
Cutty Sark by SteveColes - Artesania Latina - Scale 1/84
-
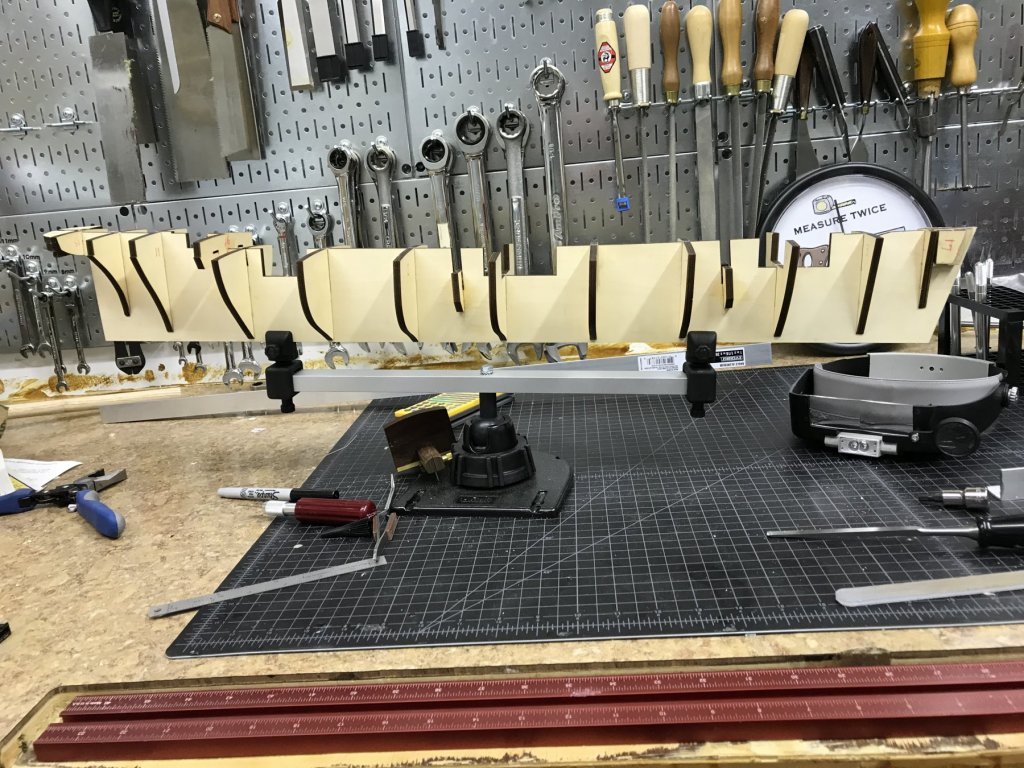
Ok, back to work. life interfered. So I just went back and did a more permanent glue up on bulkheads and false decks. Also did more filling on stern and false aft deck. the pink stuff is a spackling compound will turn white when dry. the brown is Timbermate filler. Using spackling as a filler is something I read qbout here and I wanted to try it. So far, so good. Timbermate is something I used many times. I used it on the stern because i was not sure that spackling would work when being shaped. So now I have to wait for drying.
-
jablackwell reacted to a post in a topic:
Cutty Sark by SteveColes - Artesania Latina - Scale 1/84
-
jablackwell reacted to a post in a topic:
Cutty Sark by SteveColes - Artesania Latina - Scale 1/84
-
Please do, the more the merrier
-
Thank you very much, i would most appreciate any help. Reading the directions and some of the posts about decking and hulI planking, I got very confused. So the last few days, I stopped building and did a lot of reading in the forums here. Now I think I've gotten the terminology straightened out in my head, I will be building again.
-
Oliver24 reacted to a post in a topic:
Cutty Sark by SteveColes - Artesania Latina - Scale 1/84
-
ccoyle reacted to a post in a topic:
Cutty Sark by SteveColes - Artesania Latina - Scale 1/84
-
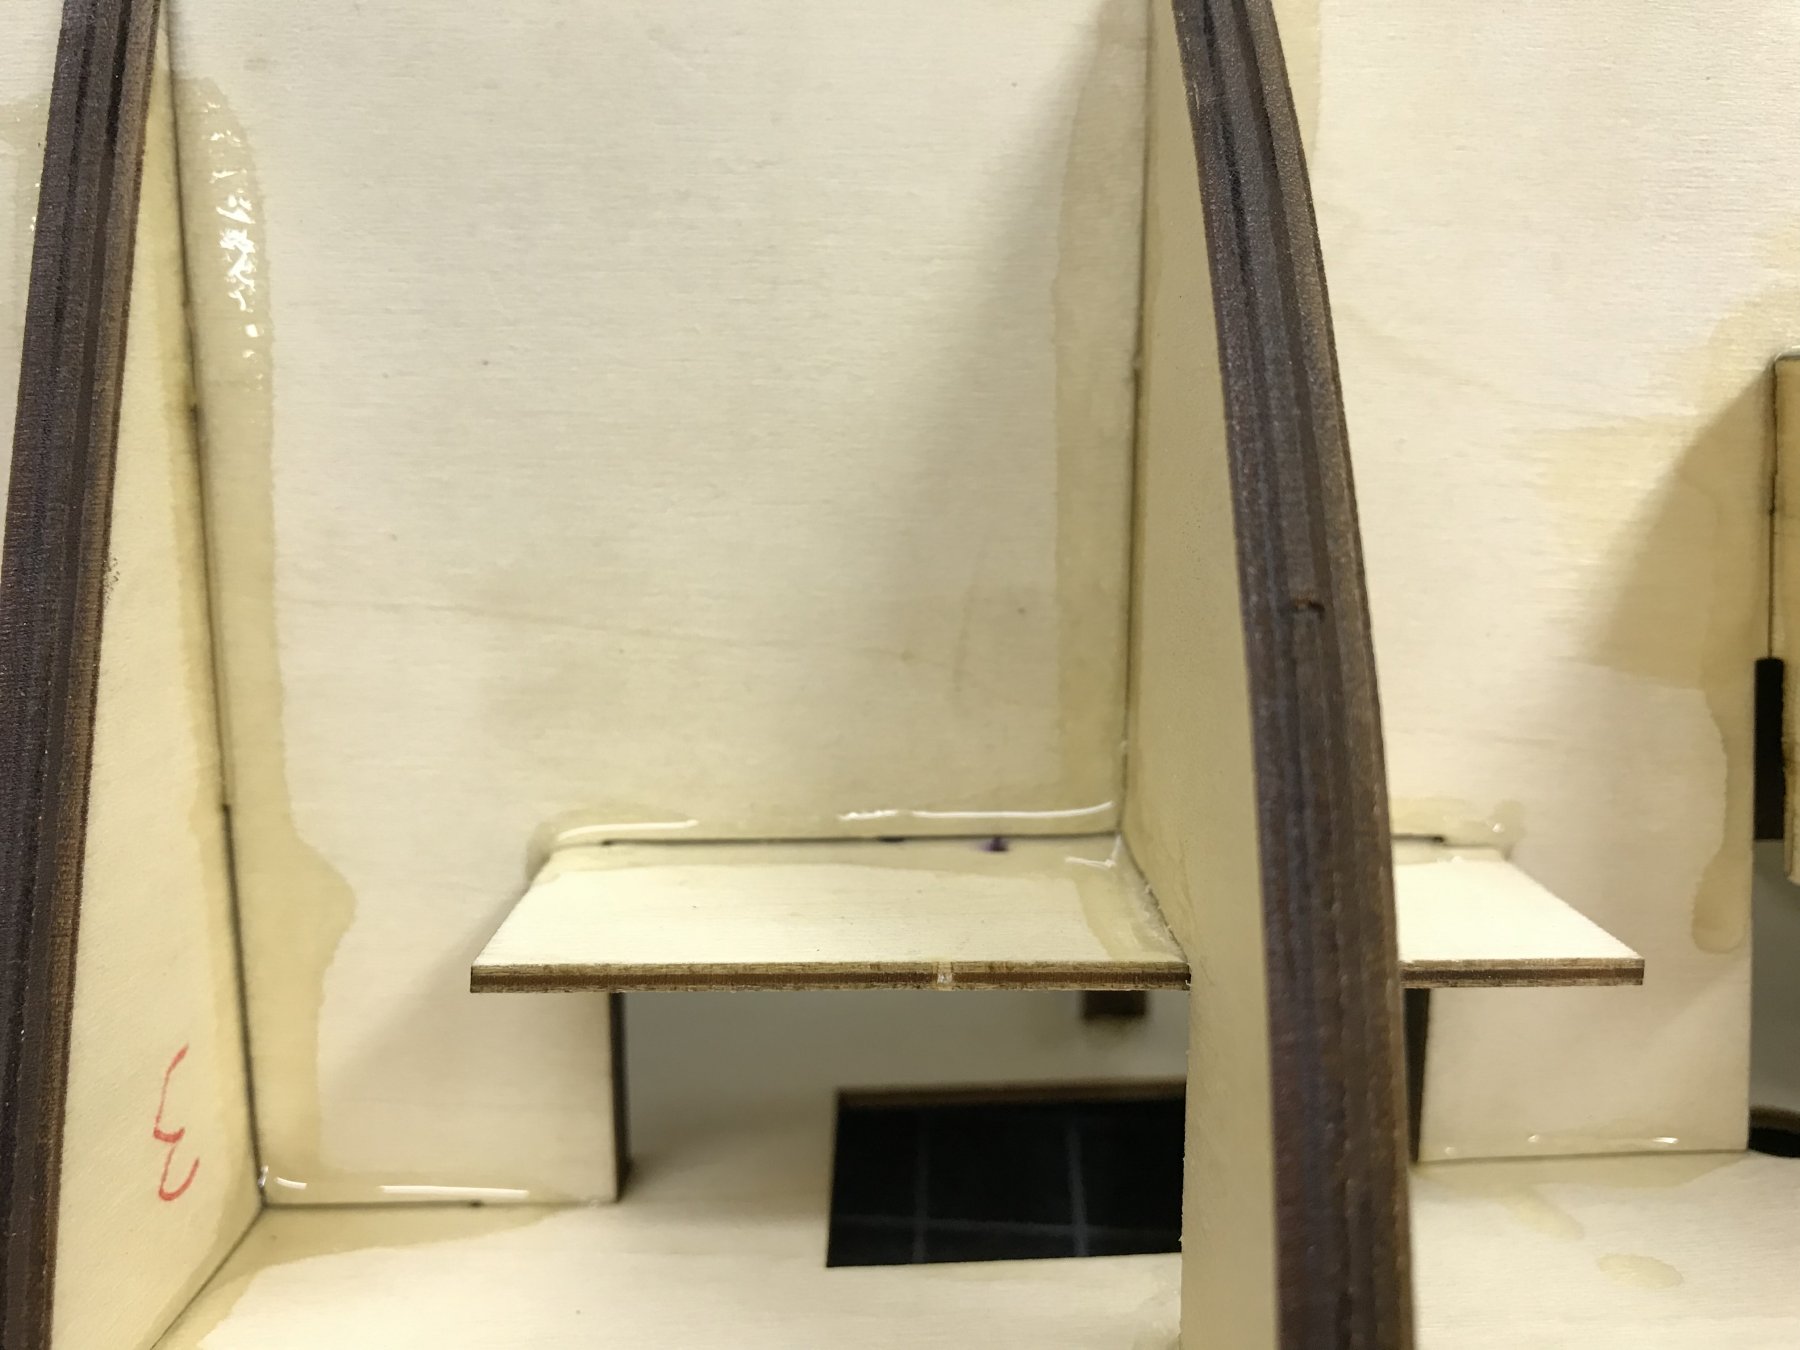
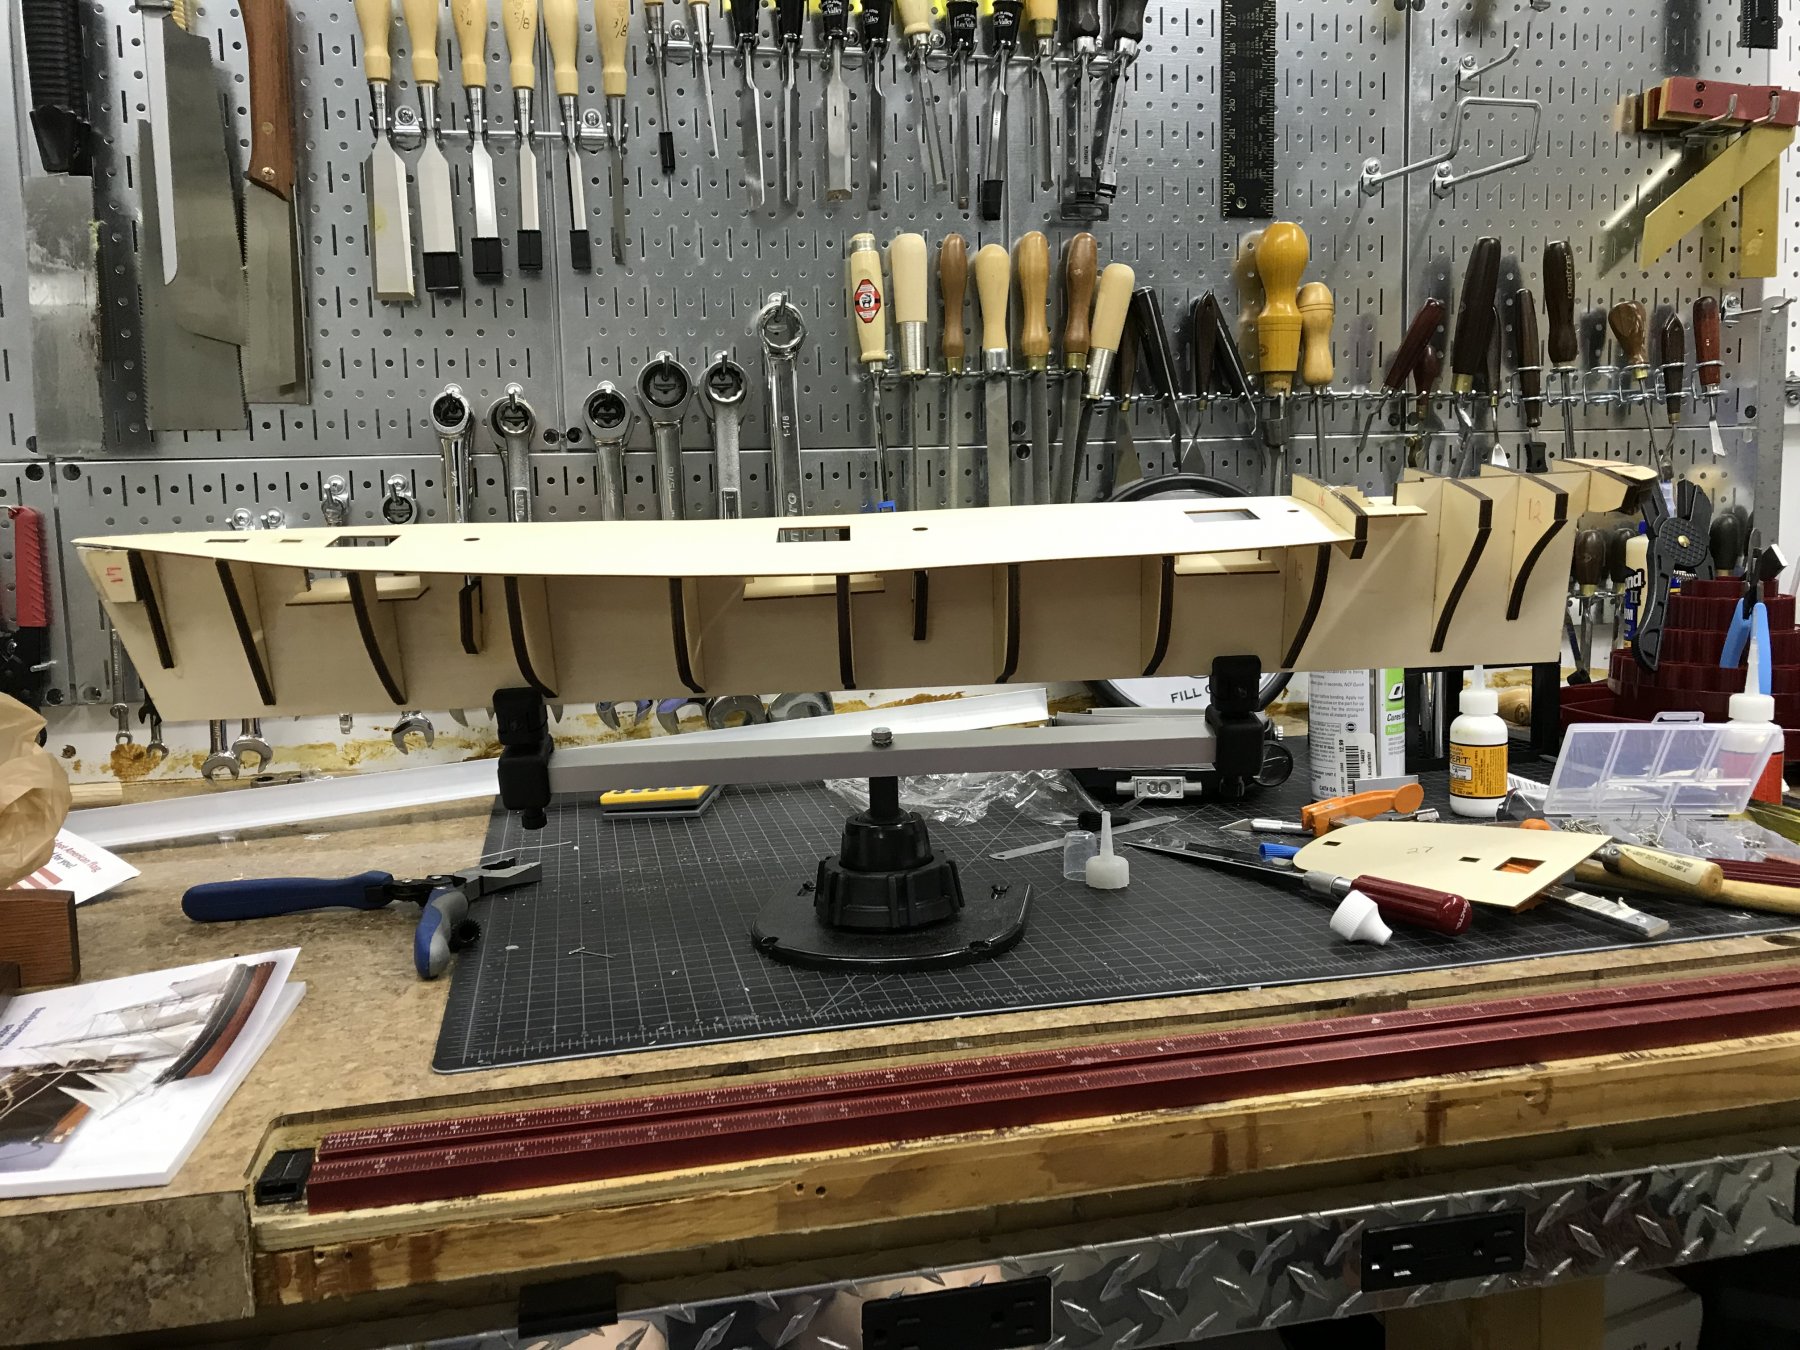
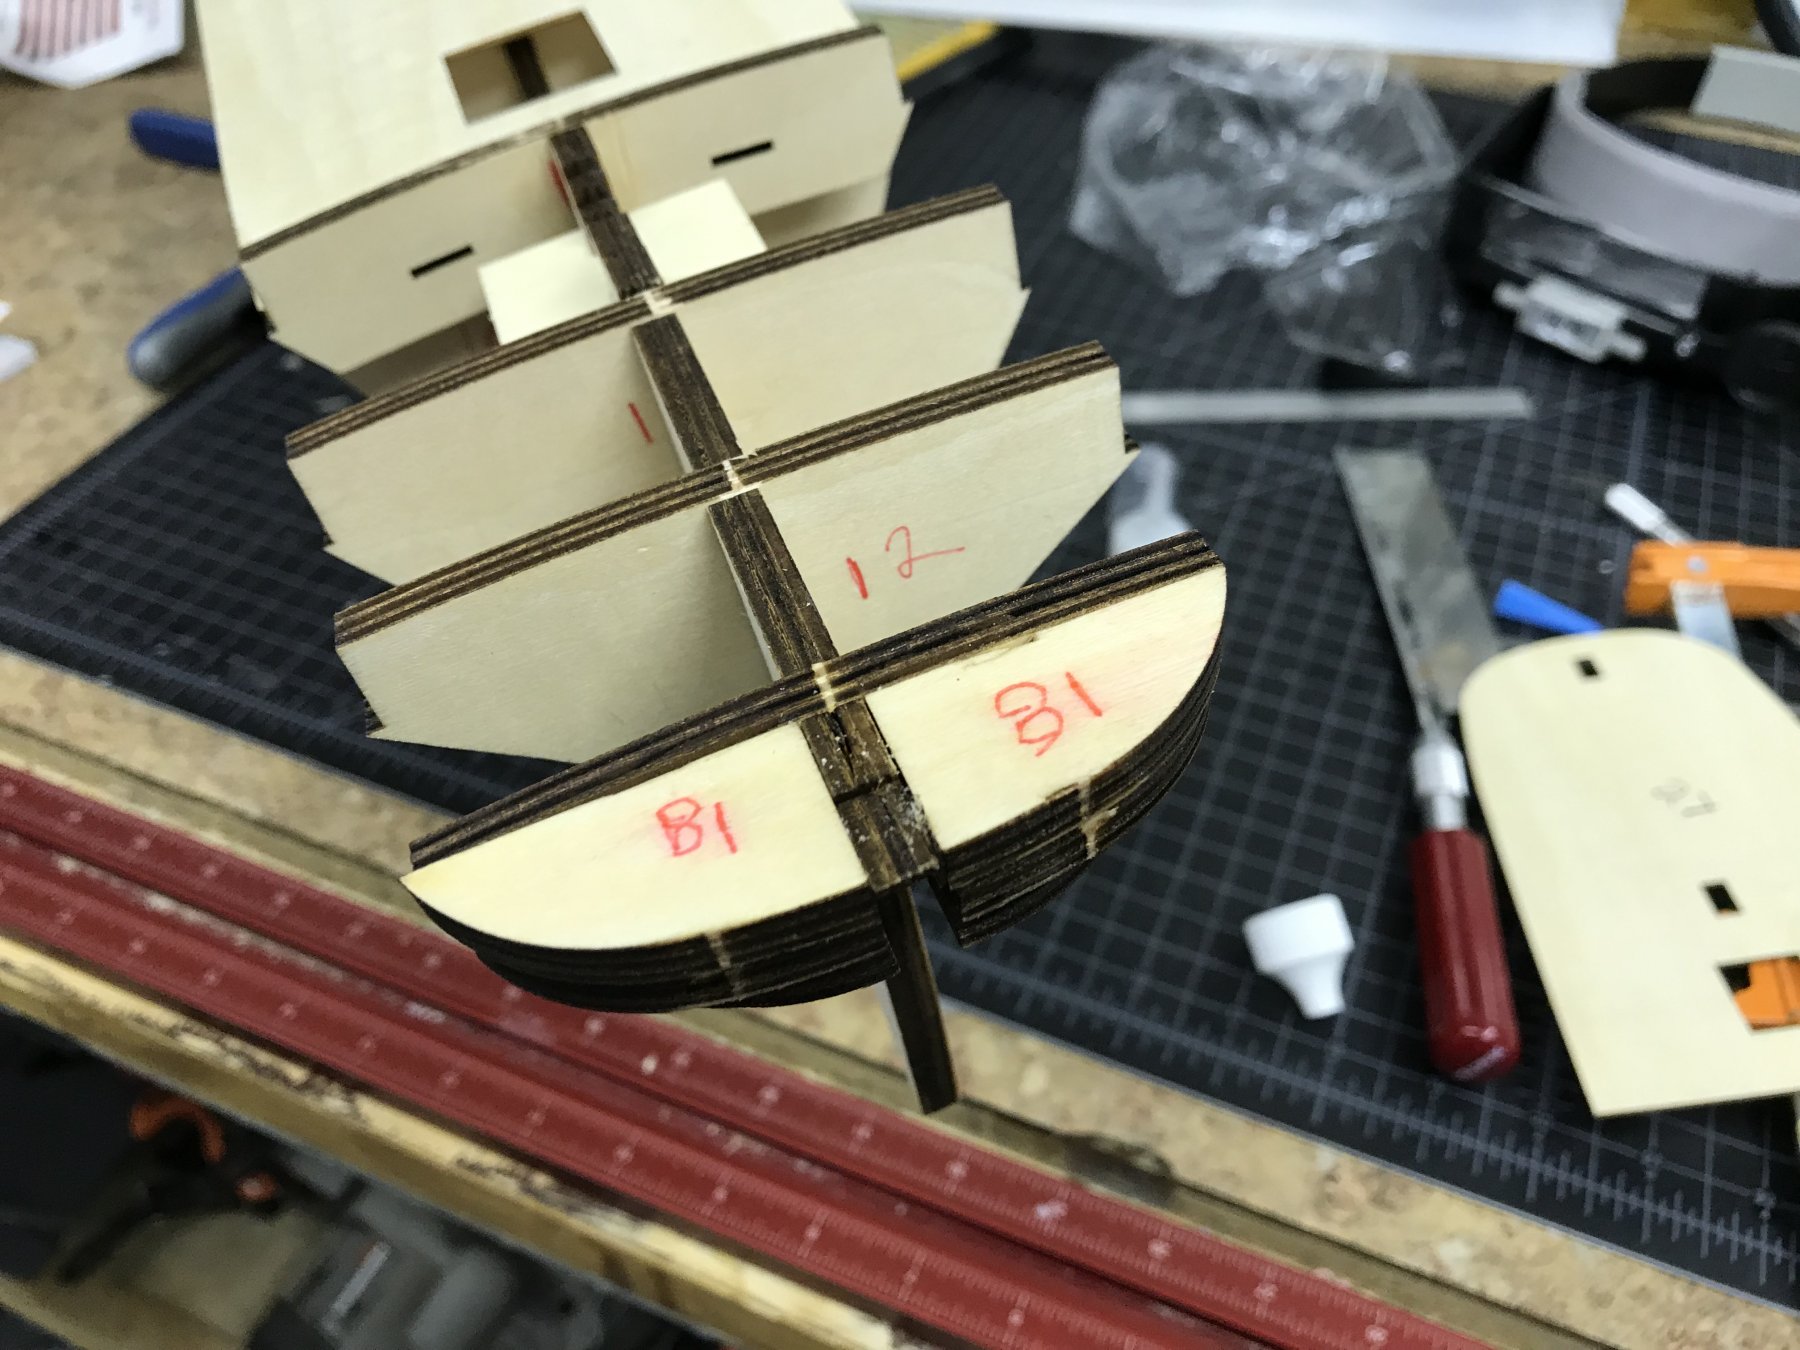
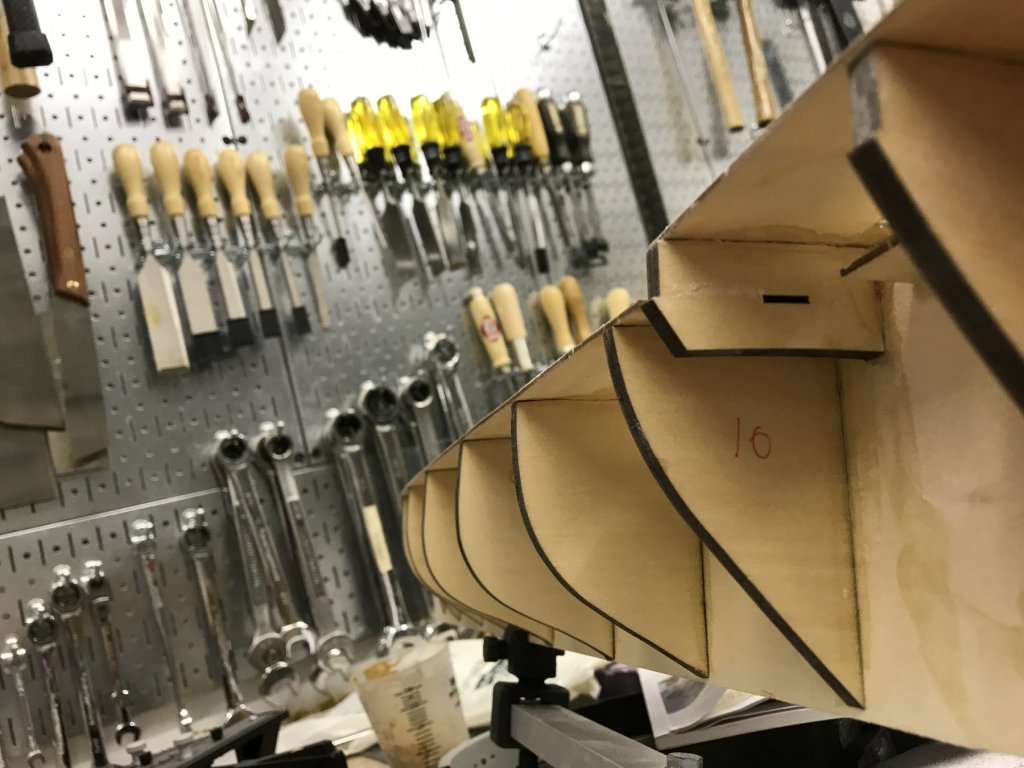
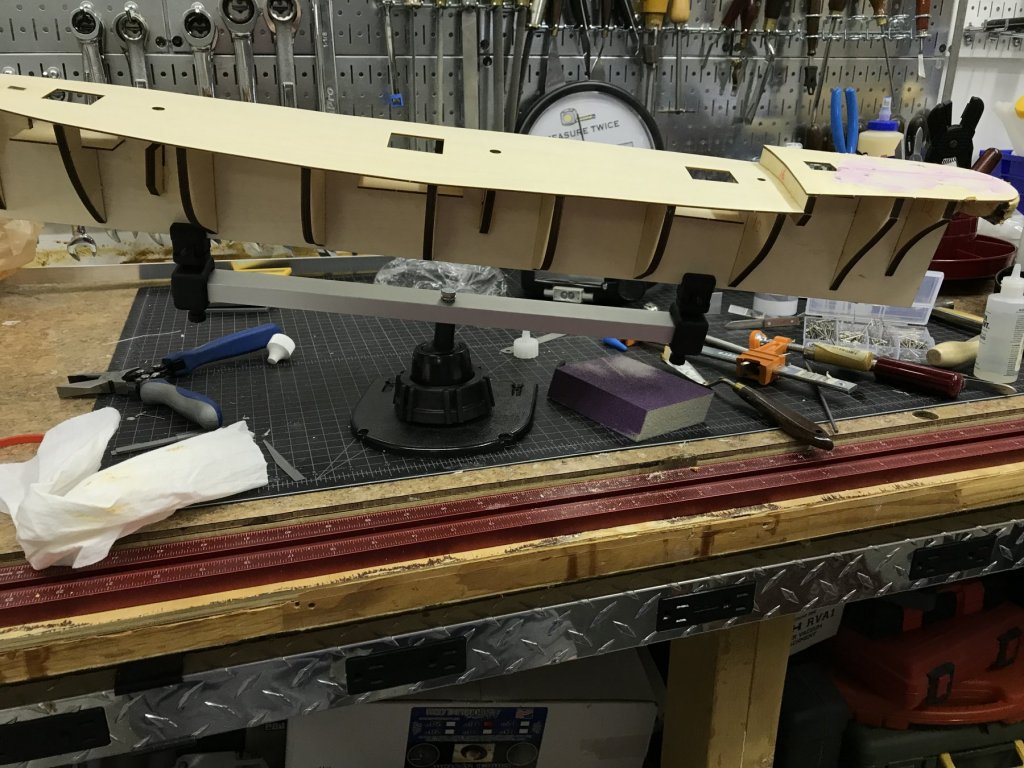
FYI Context Who Am I Goals For Me. Since this is my first Model in 20 years, I want to finish it. I want it to be more of a display piece rather than anything else. Accuracy may take a back seat to display. An example would be that this ship was coppered. But I would rather it show the wooden hull if i can do it so that is good looking. However, please tell me if i do things are wrong. No matter what, I want my failures in accuracy or anything else to be choices that I consciously make rather that stupidity or ignorance. So please give me as much criticism as you have time for. Jan 8, 2019 - First picture. False keel mounted onto holder with frames dry fitted. Jan 20,2019 Using CA thin and/or med. The frames and forward false deck are tacked in place I had tried to fit and tack the stern false deck but discovered that I had misaligned the stern filler blocks (parts marked 18 in picture)🤮 Had to remove the partially tacked stern false deck and the filler blocks. Out came the CA dissolver, several different razor saws, and a good small sharp Paring chisel😂 Put the filler blocks back about 1/8" lower. Tacked the stern deck into place and filled the gaps caused by the fixes. Sometimes moving a CA tacked piece causes some destruction.🤪


- 27 replies
-
- 9
-
-
- cutty sark
- artesania latina
- (and 1 more)