mfrazier
-
Posts
253 -
Joined
-
Last visited
Content Type
Profiles
Forums
Gallery
Events
Everything posted by mfrazier
-
 Thank you all for the well wishes. After an 8 hour surgery in November, they seem to have fixed the problems. I am feeling much better. Things hopefully will get back to normal soon. Mark
 -
Yes, you are right ...... but I sure miss the challenges of building the ship. Mark
-
I keep hoping to feel up to finishing my HMS Victory model. But afraid it will be a bit longer. Mark Frazier
-
Well ...... I thought things were going OK, but lately, I have been very tired and fatigued. I have been too tired to do anything. It was time to have my pacemaker checked ( I have a machine to do it remotely from home) so I sent a report in to the hospital. Shortly, the nurse called and asked me to send another. I did and then the doctor called and told me to come in because my heart has been in atrial and ventricle fribulation for the last 4 weeks 100 percent of the time. That explains why I get exhausted just getting out of bed. To make a long story short, now I will require heart surgery. On August 10, I will go to have a procedure called a cardioversion done to try and get my heart back in sinus rhythm ( they will put me to sleep and SHOCK my heart to try to correct the rhythm). That same day I will have some tests to determine what needs done to make me stay in rhythm. There are a couple of procedures that may help. I go to Cleveland Clinic in Cleveland, Ohio for my care and they are the number one hospital, in the United States and number two in the world for heart care. Wealthy people from all over the world go there for heart care, so I am confident that if anyone can help, they can.
-
It has been a long haul for me getting better, but I have finally. I have been very busy taking care of my wife. We lost her care giver last year, so I had to take over and that requires about 10 hours a day of my time. It doesn't leave me any time for anything else, but I hope to start back on the victory soon. Mark
-
Richard, Thank you for the kind words. I have had to put the victory aside for a while as there have been too many of life's little problems getting in the way. I hope to get back to it this winter. At the beginning of the year, my wife and I both had the Covid 19. We were so sick for months, but eventually got better. Yes, the directions are very poor, but I find if I study them long enough, things start to make sense. I too have been and am following several of the other builds on here. This has been a wealth of information and ideas. I am still second planking the hull and ready to cut the cannon port openings. This has been quite a project as I had to move several ports to avoid the bulkheads and still keep everything looking correct. I also found I had to change the height of the upper ports to get the deck height correct for the cannons. I love building this ship, but this kit has been a nightmare. The quality was poor and that was the biggest issue. I am only using the instructions ( term used very loosely) for mostly reference and using John McKay's book for my main references. I also had intended to put LEDs in the gallery mainly. I have the LEDs and the power supply but not sure I will use them yet. I too had a list of parts I wanted to order from Shape ways, but tried my hand a scratch building first and was pleased with my results and have cut my Shape ways wish list more than in half so far. I look forward to getting back to the victory. Good luck to you on your journey with Victory. Mark Frazier
-
Thank you OC. , I think these parts will be a big improvement. Mark Frazier
-
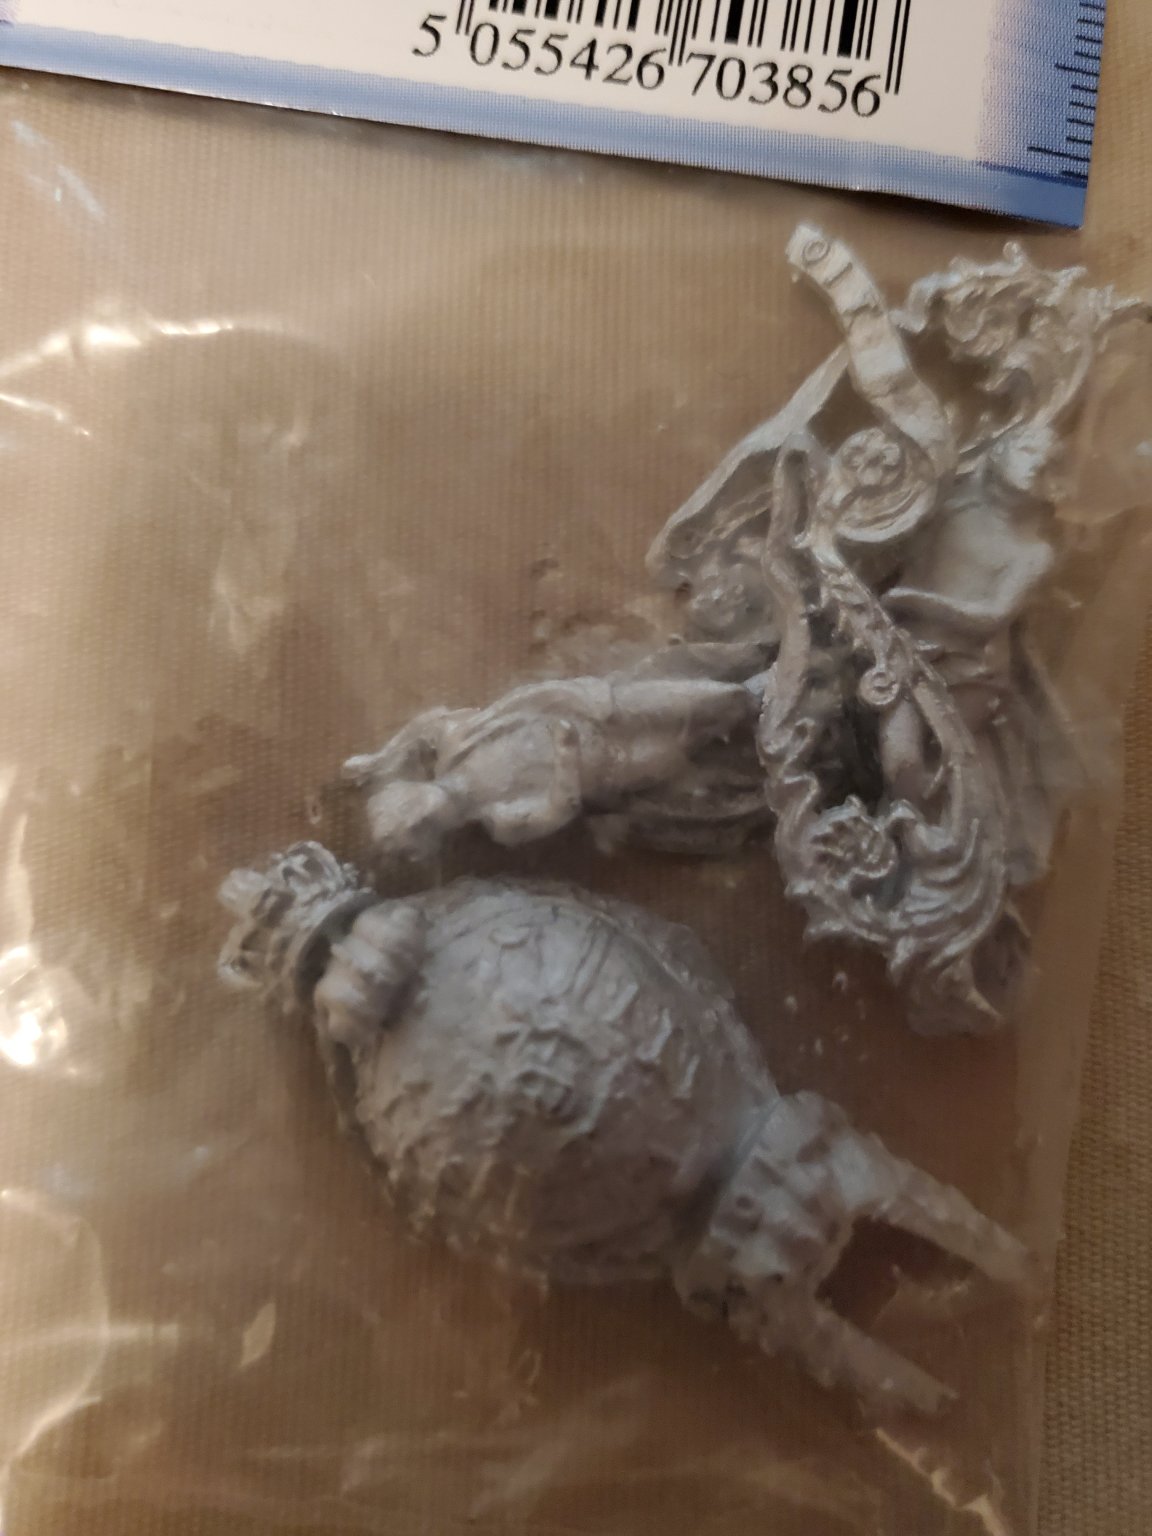
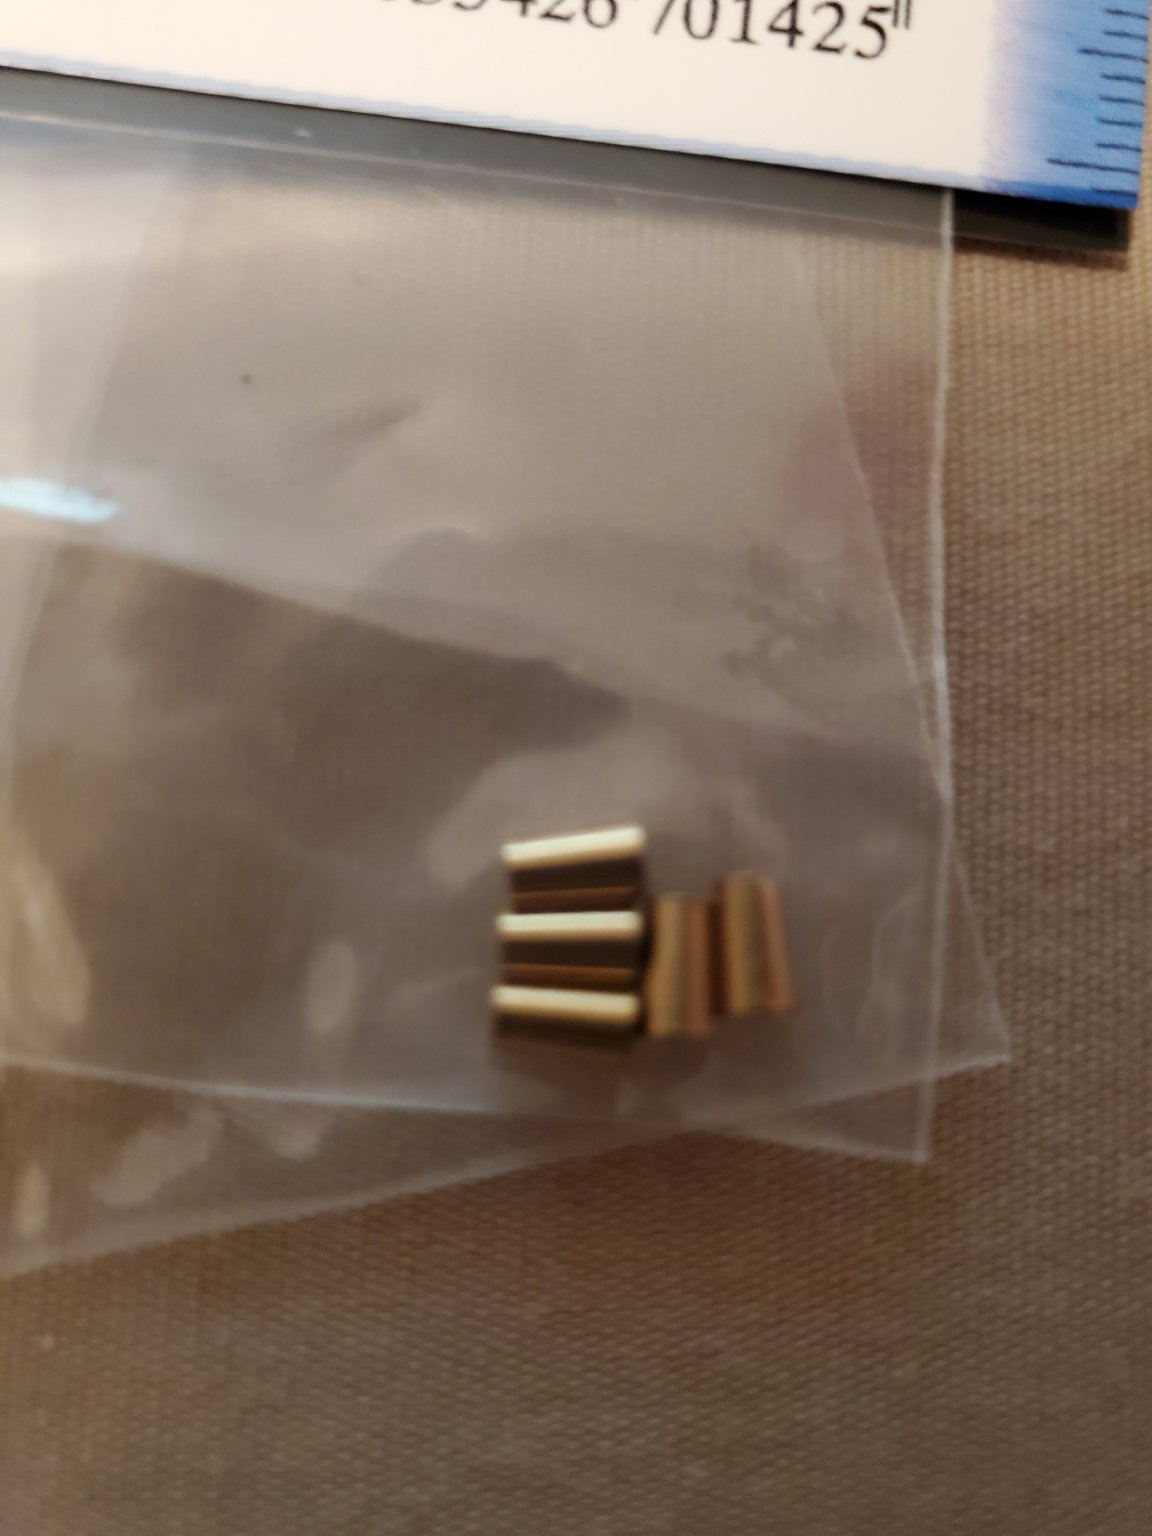
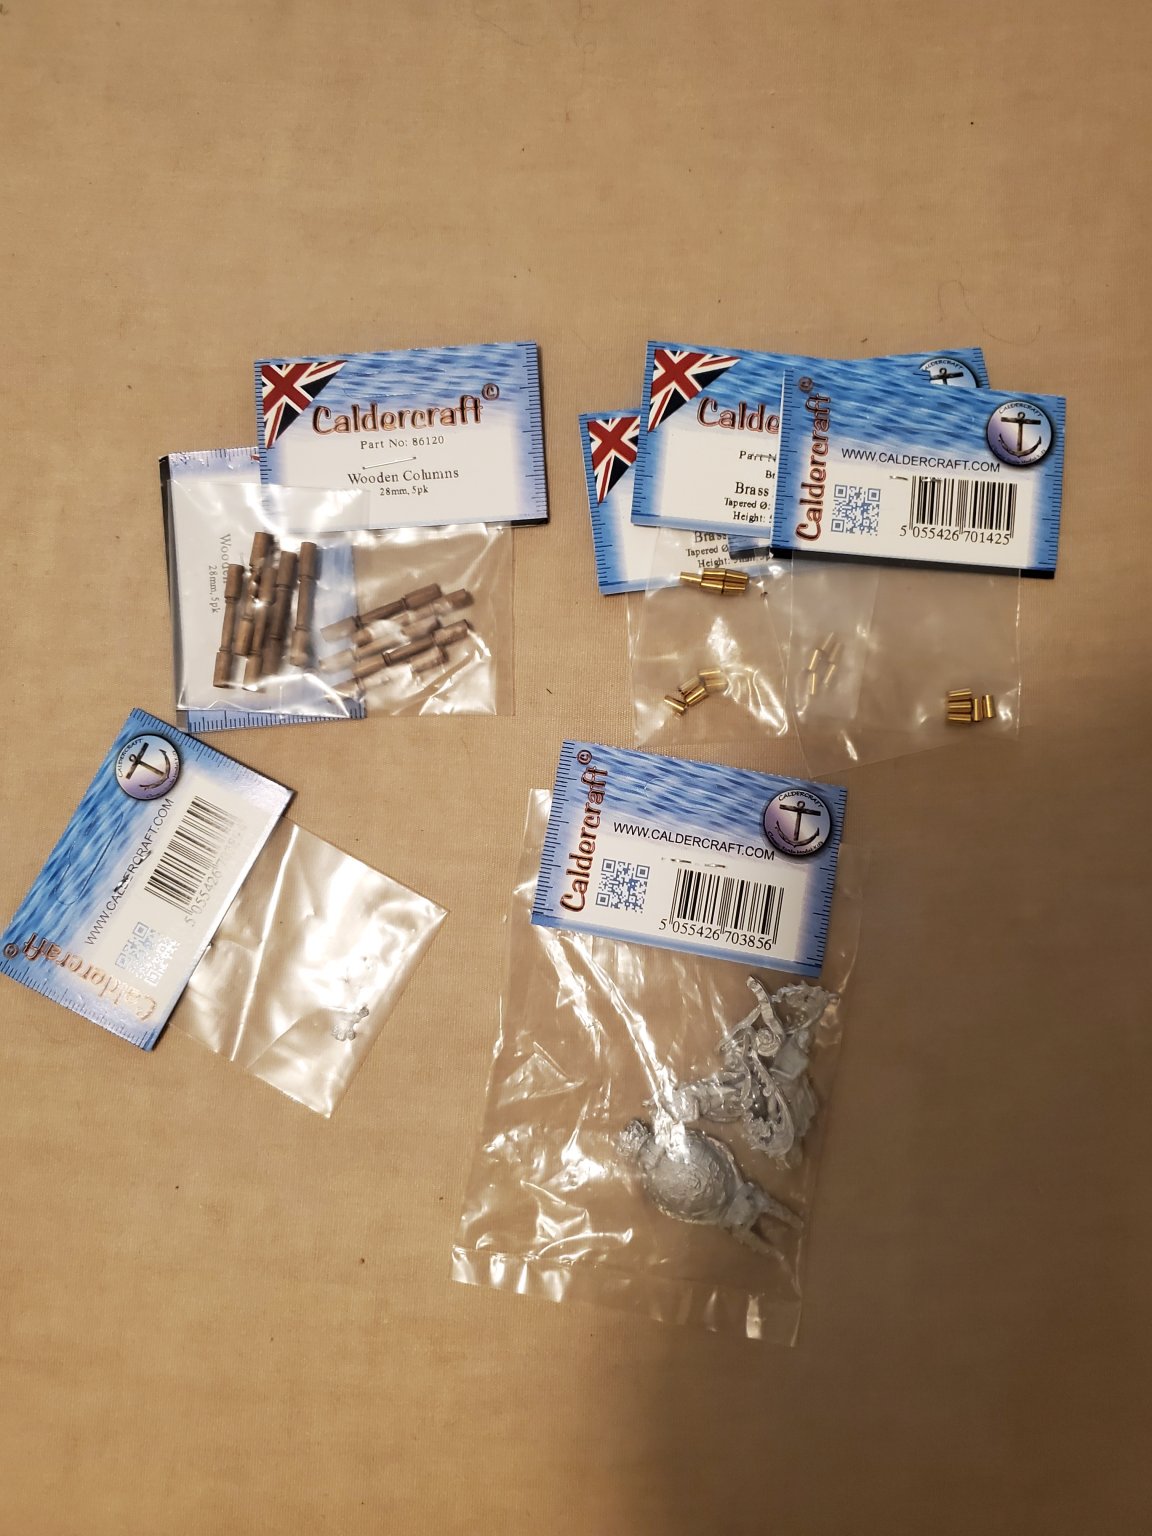
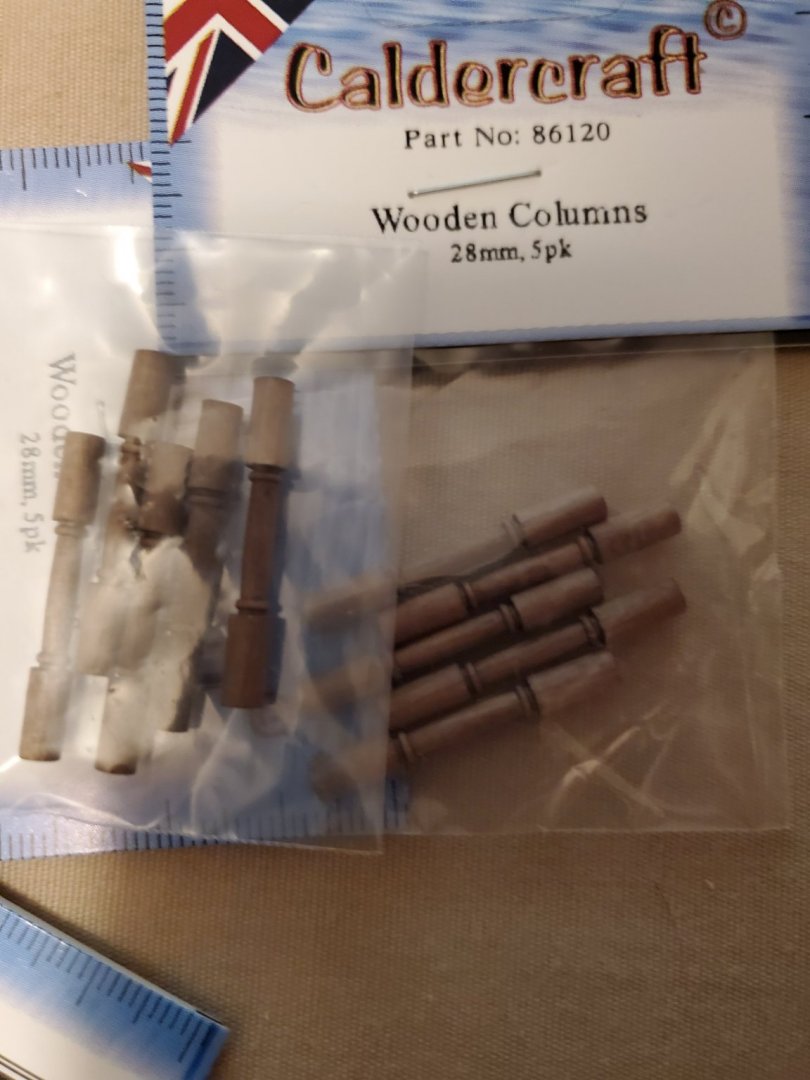
Well ...... I have been unable to work on my Victory for a while as several of life's task had been getting in my way, but I shall be starting back at it again. I am still doing the second planking on the hull. This takes a lot of time. On another note, over two months ago I ordered some parts for the Victory and they finally came yesterday. I ordered a few Caldercraft parts to make this build a little better. I ordered the Caldercraft figure head. The quality is so much better than the "thing" that came in the kit. I ordered the crowns that go on the end of the arms for the anchors (they are really small). And most importantly, the brass fire buckets. These are super nice and proper scale. I will blacken these and apply a handle to hang on the front of the rail on the poop deck edge.The kit came with wooden buckets, which were nice but twice this size. This meant there were fewer and they were too large for this purpose. The kit buckets will be good to place on the deck here and there. I also ordered some nicer columns that support the deck. I was not impressed with the ones in the kit. It will be a while before I get to these as I still have a good bit of planking to do. Mark Frazier


-
Thanks, I was a machinist all my life and was used to working where everything had to be within .0005 inches. This tends to make life almost impossible as I see a tiny gap that most people don't notice as a huge imperfection and problem. This is hard to overcome after 50 years of seeing the world one way. Being a perfectionist makes me super critical of my own work. In my lifetime, I have scrapped many things and started over that most people could not find any problem with. It is hard to change, but I am trying. Sometimes it takes a "normal" person to kind of convince me something is not as bad as I think. Mark Frazier
-
Thanks for the compliments. You are correct OC., things will work out. Everything always works out, one way or another. It is a fact of life. You just have to have some faith and keep trying until it works hopefully in a way you are comfortable with. You are correct, ErnieL. I hadn't and still don't plan to copper the hull. I really don't know why, but I just don't like the look of the copper. The only way I would copper is if I really mess up the planking beyond repair. But then I would know what was under the copper and I could not accept that. Edwardkenway, that is good advice. Thanks. Sanding made a great improvement on how everything looks and I know there will be more sanding when the planking is done. I did a preliminary sanding to see if this crappy wood was even going to look close to good and I think it may. So ....... with that, I shall push on and see how this all works out. The most important thing is that I am enjoying my attempt at building this ship. Mark Frazier
-
My goal was to stain the hull. I have seen a build that stained the bottom of the hull and painted the top half. It looked okay but I was wanting to stain the complete hull. I need to think on this I guess. I really regret not buying new would now. ( the last would I ordered took 2 months to get here.) Mark Frazier
-
I thought about that, but I don't think it would match when finish is applied. I don't think the glue/sawdust will stain like the wood. Mark Frazier
-
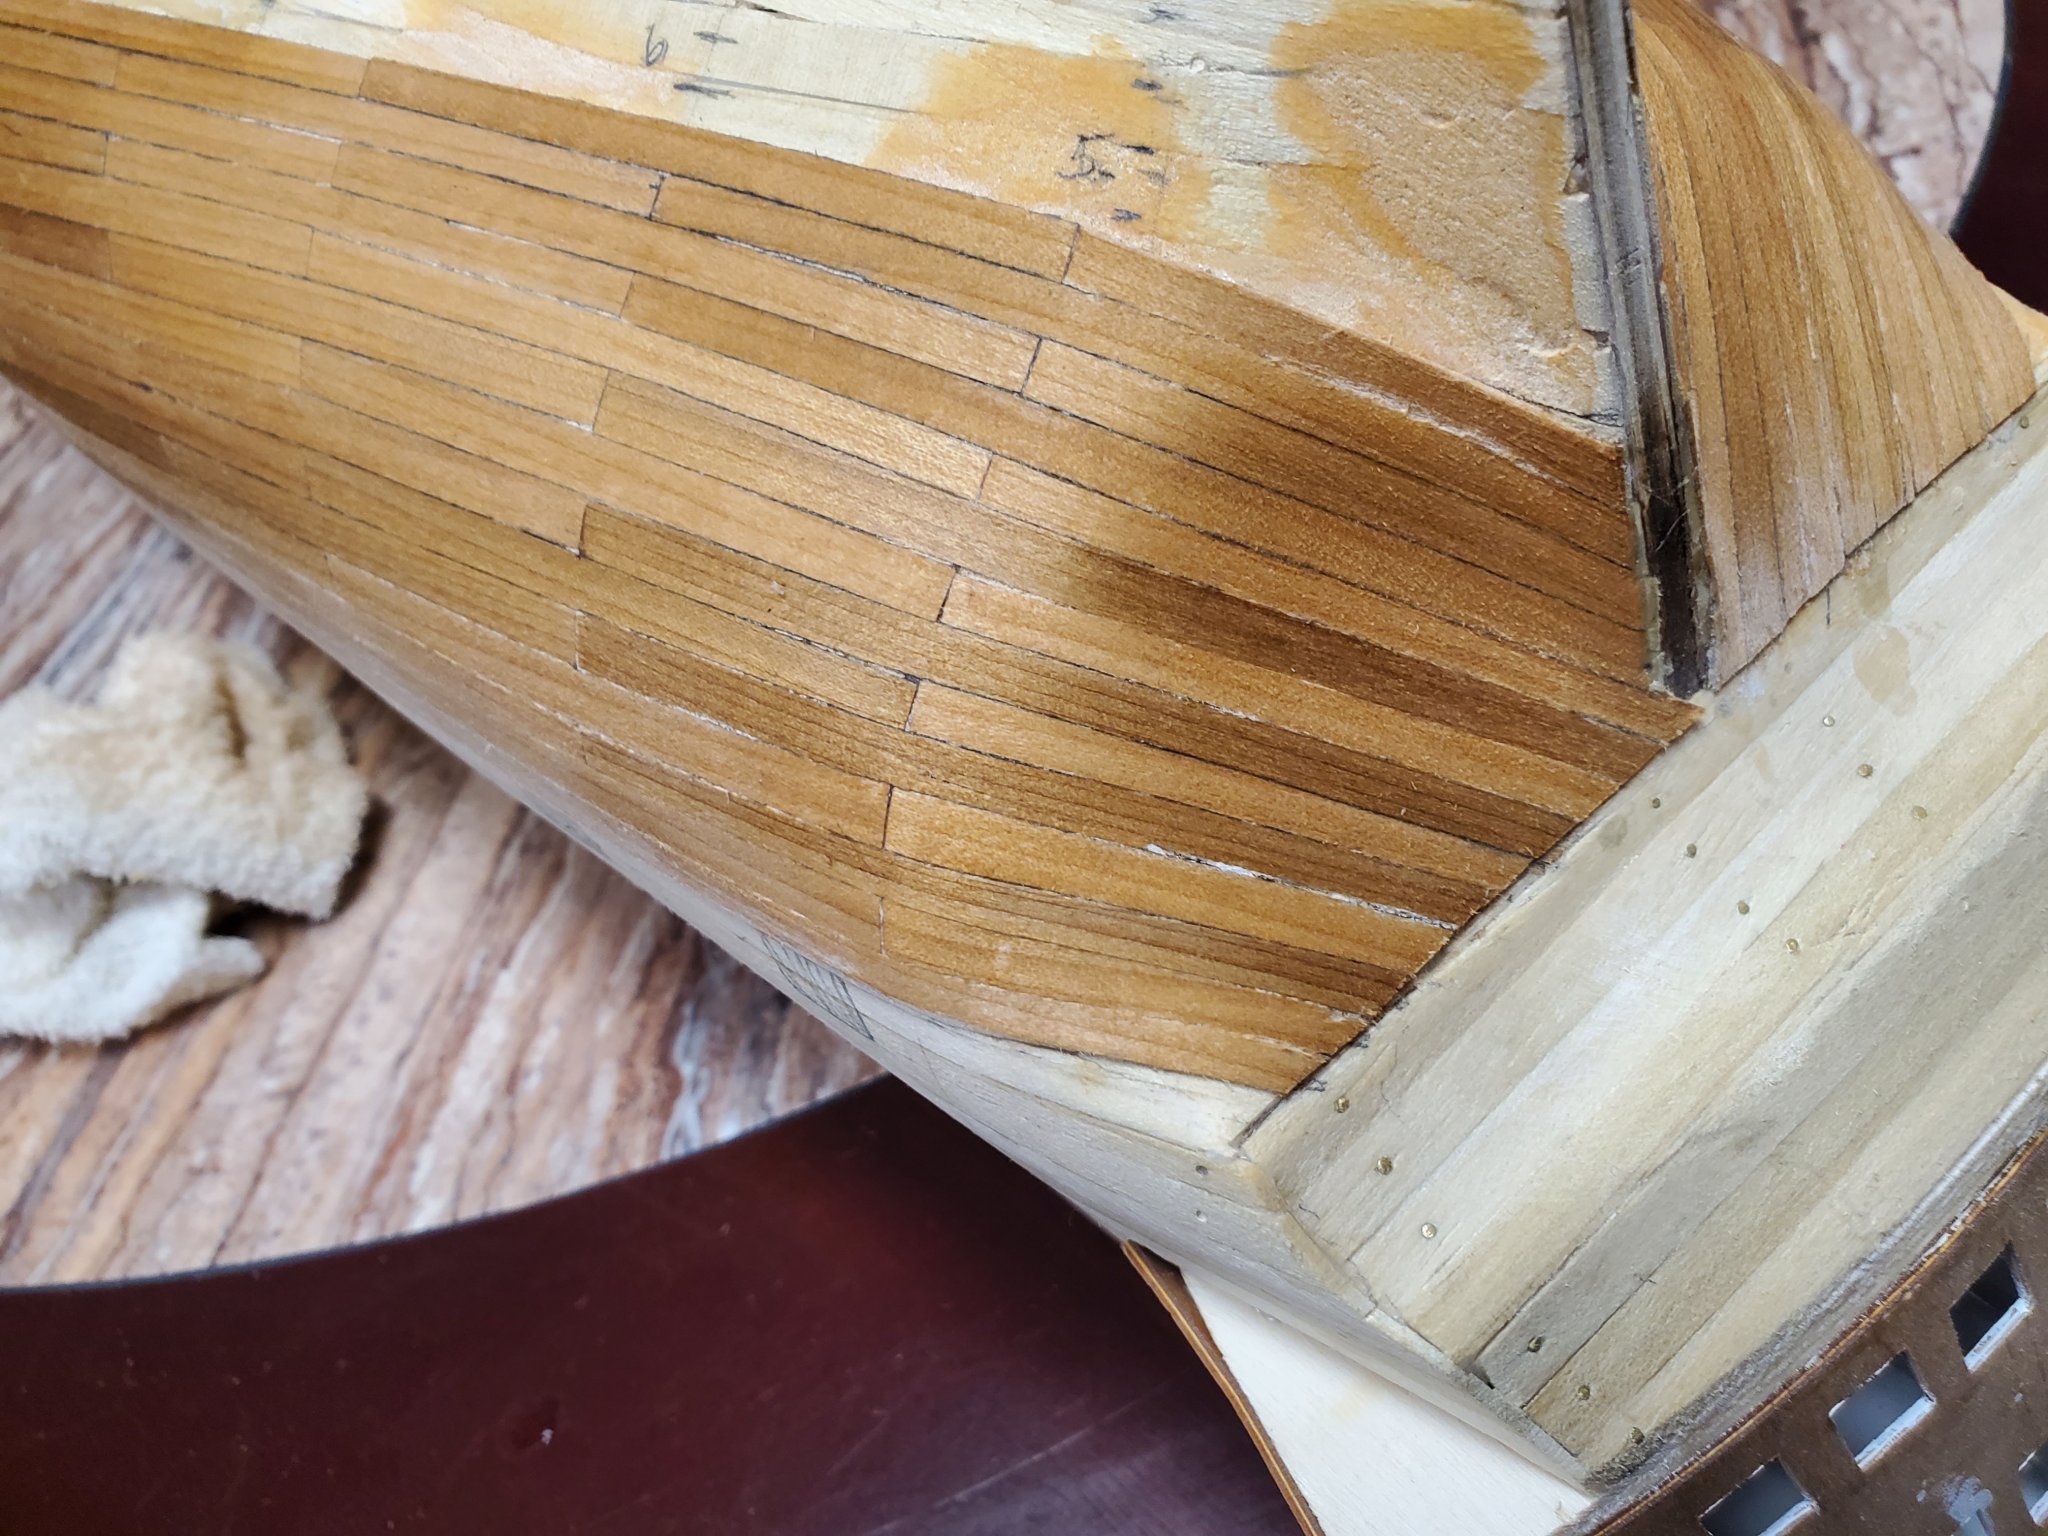
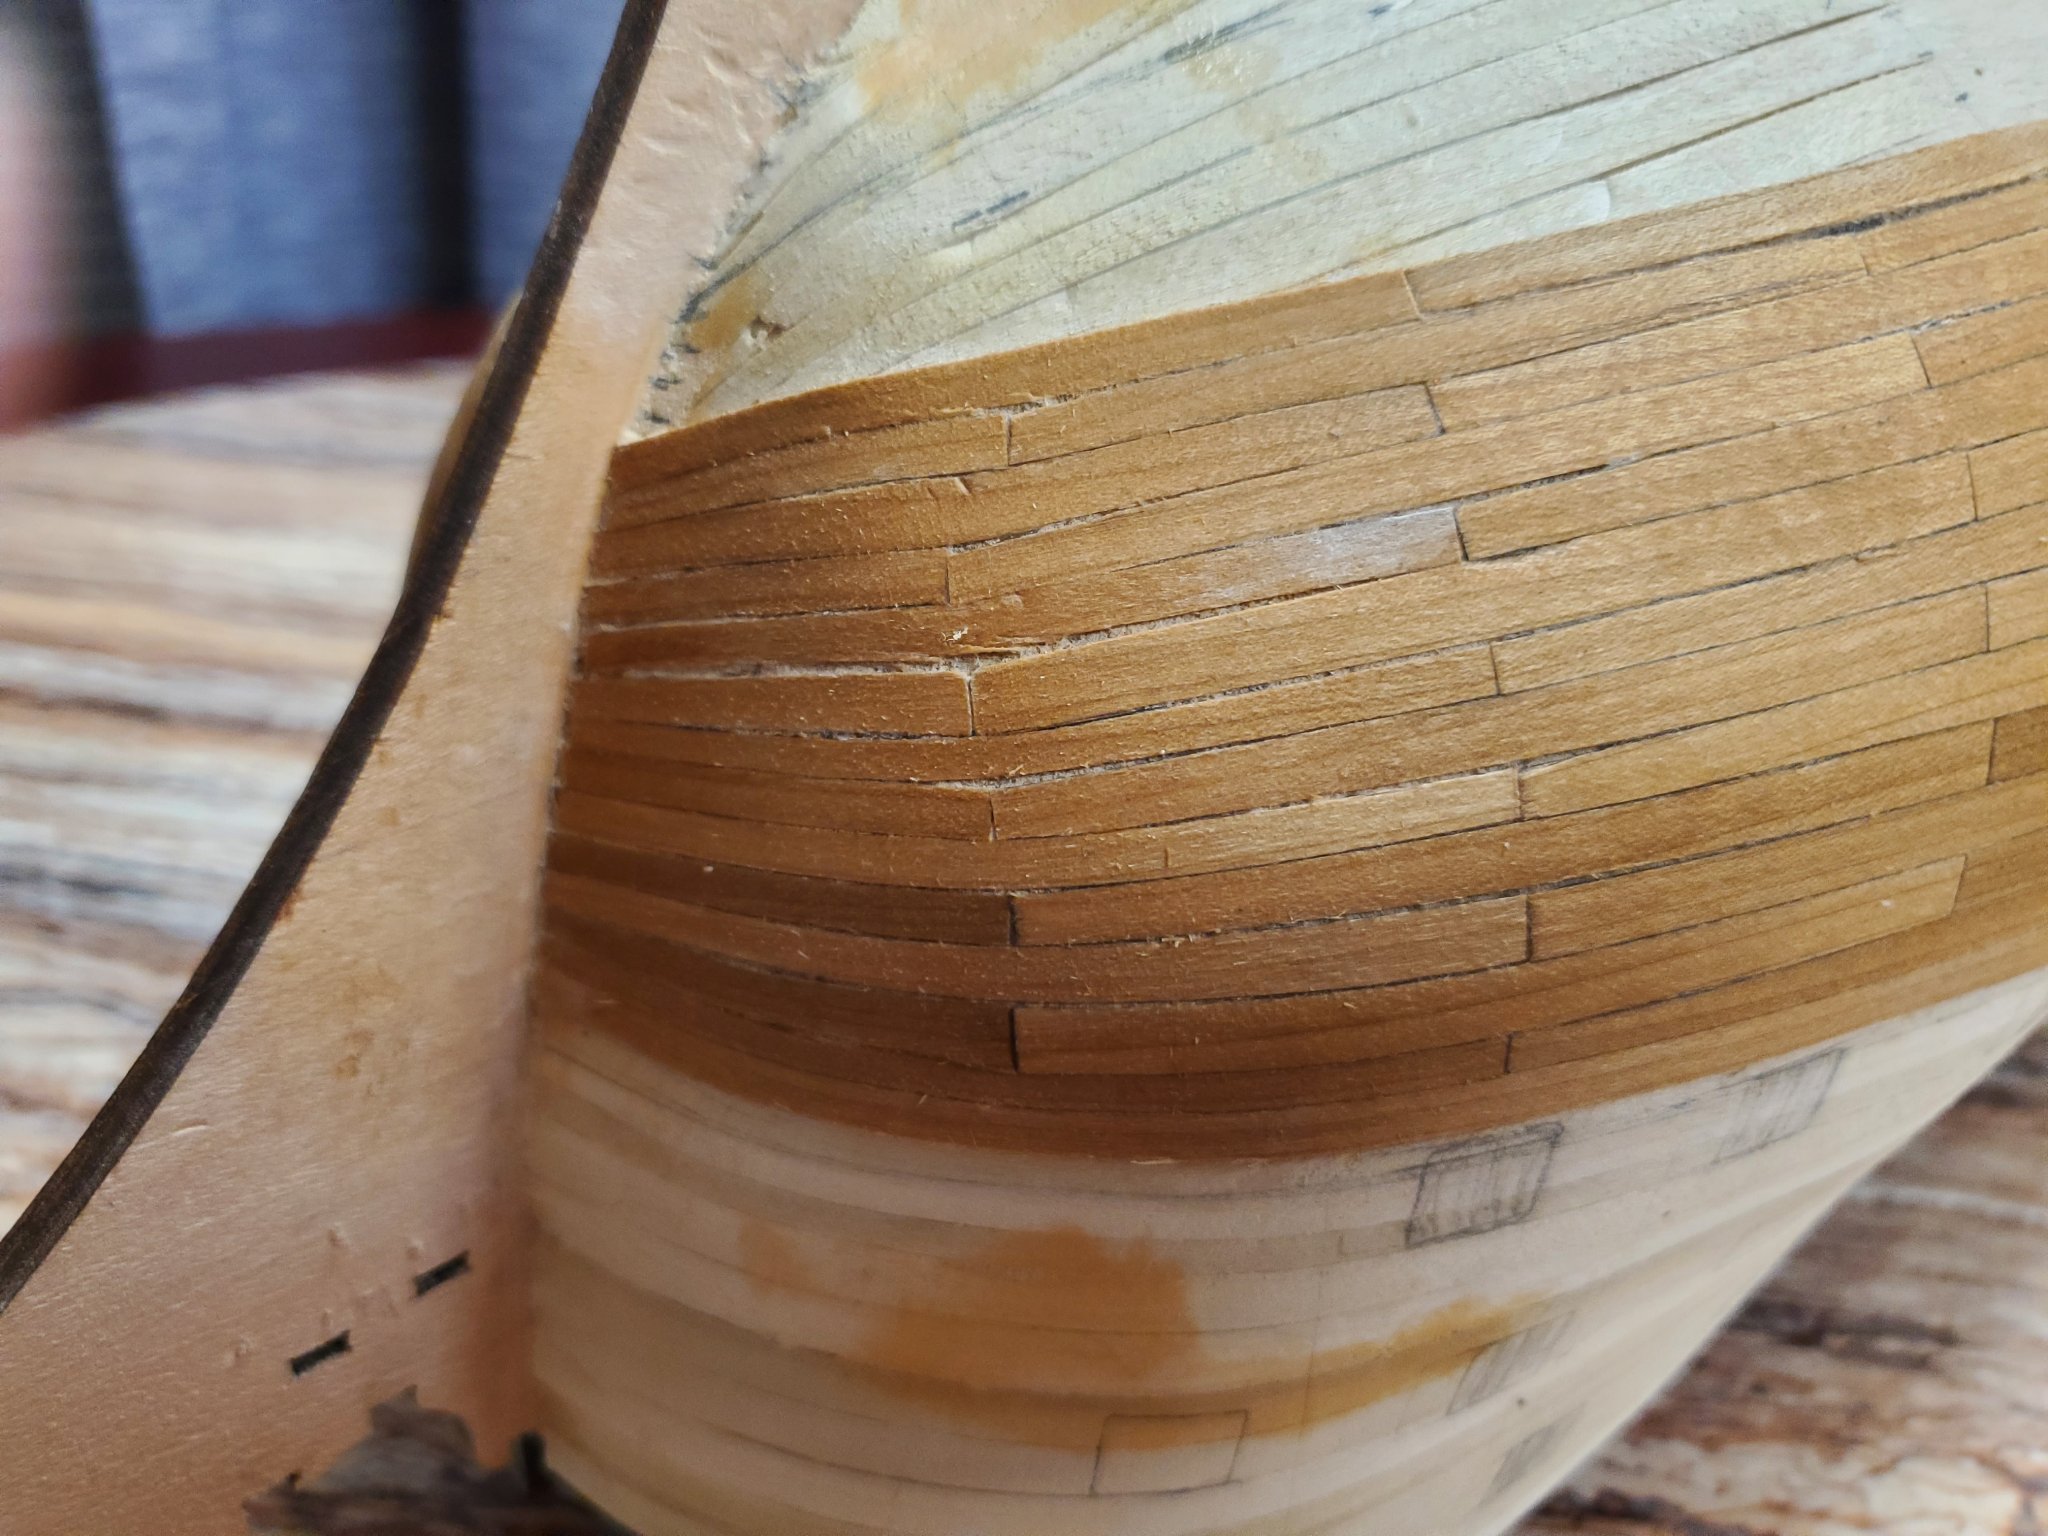
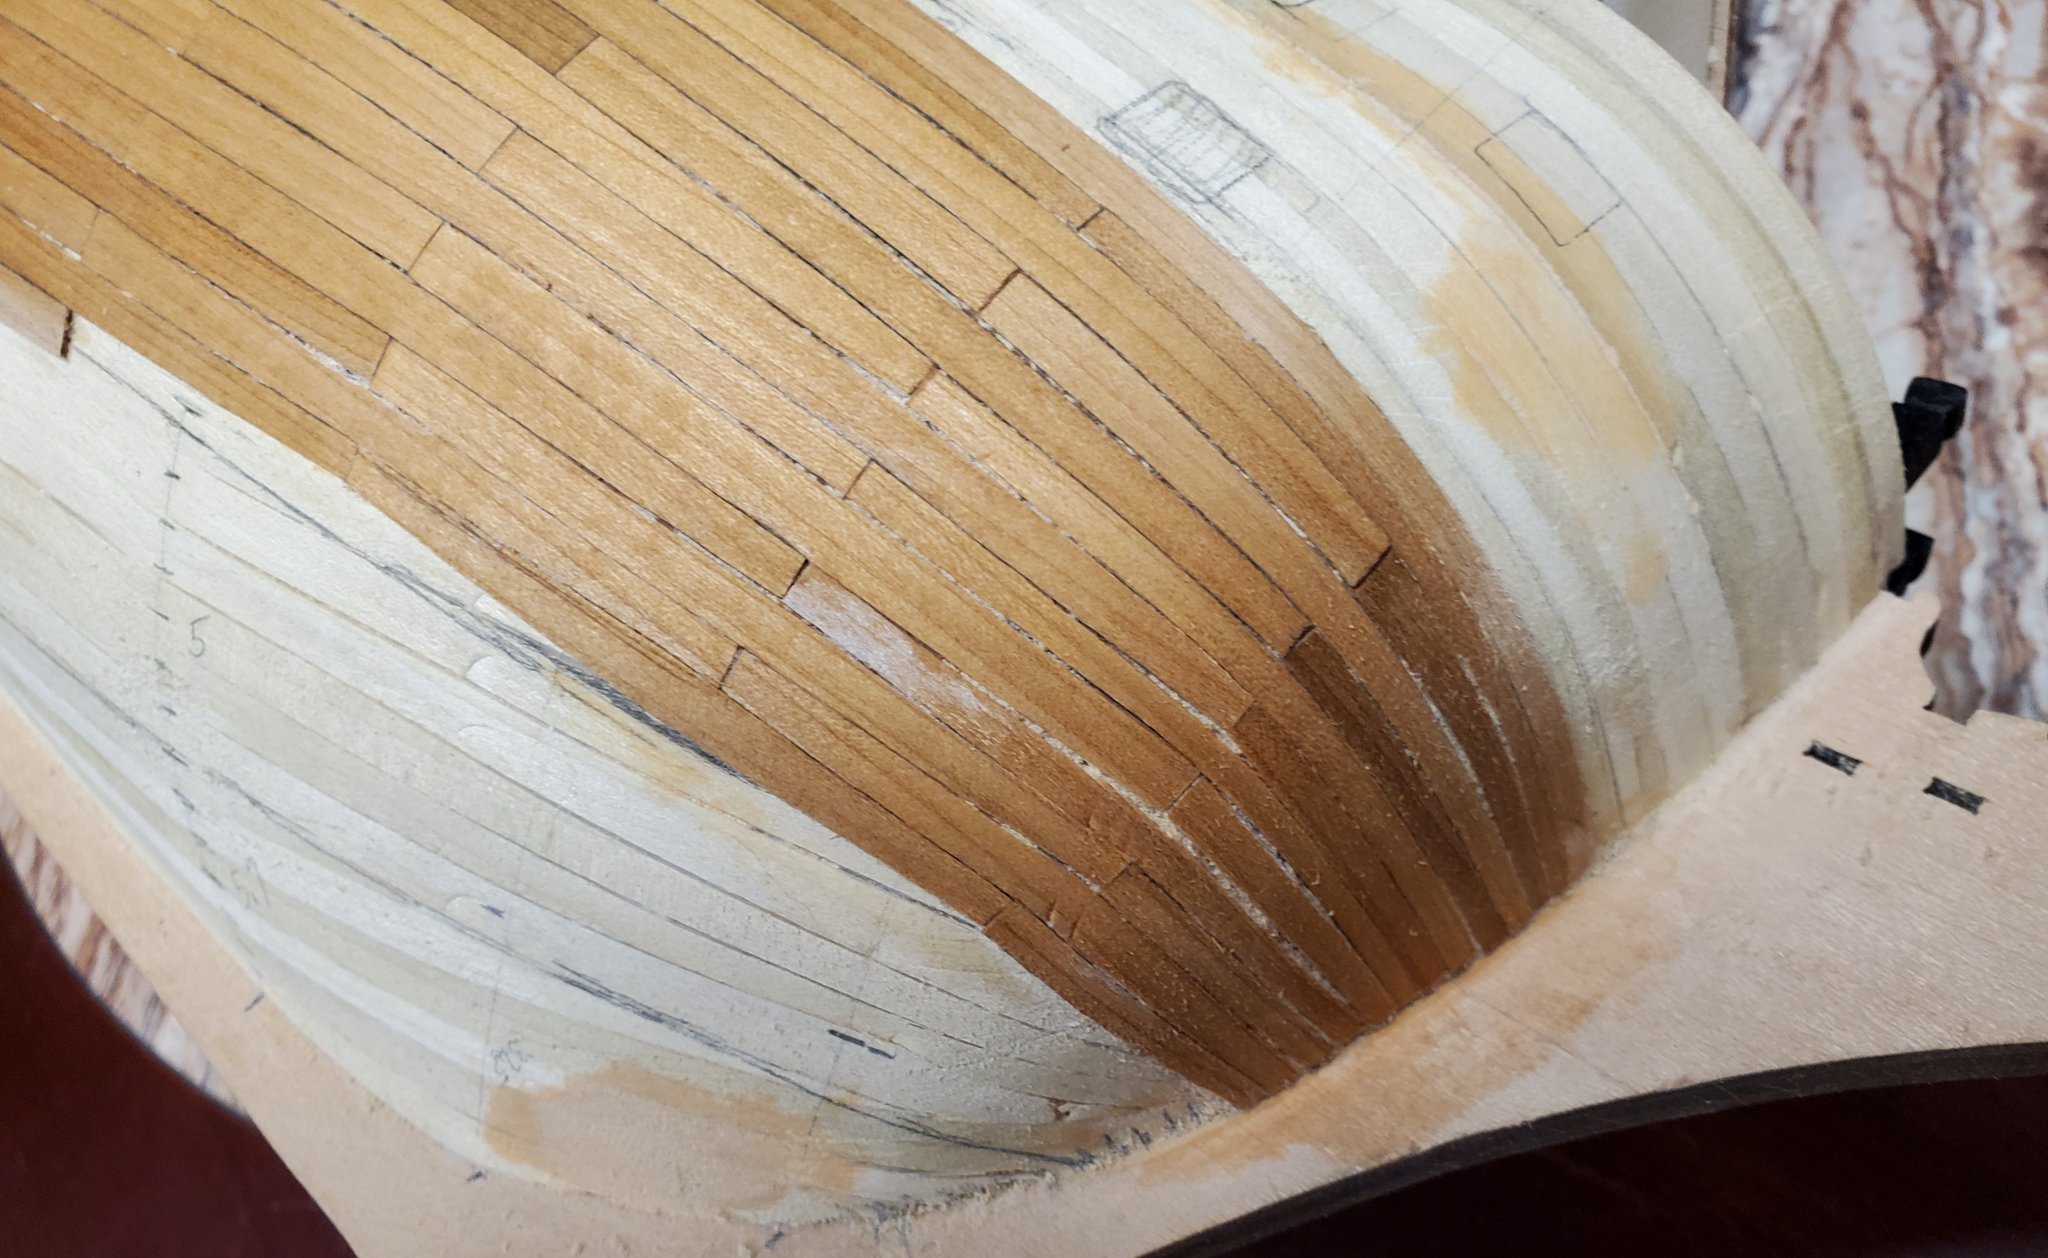
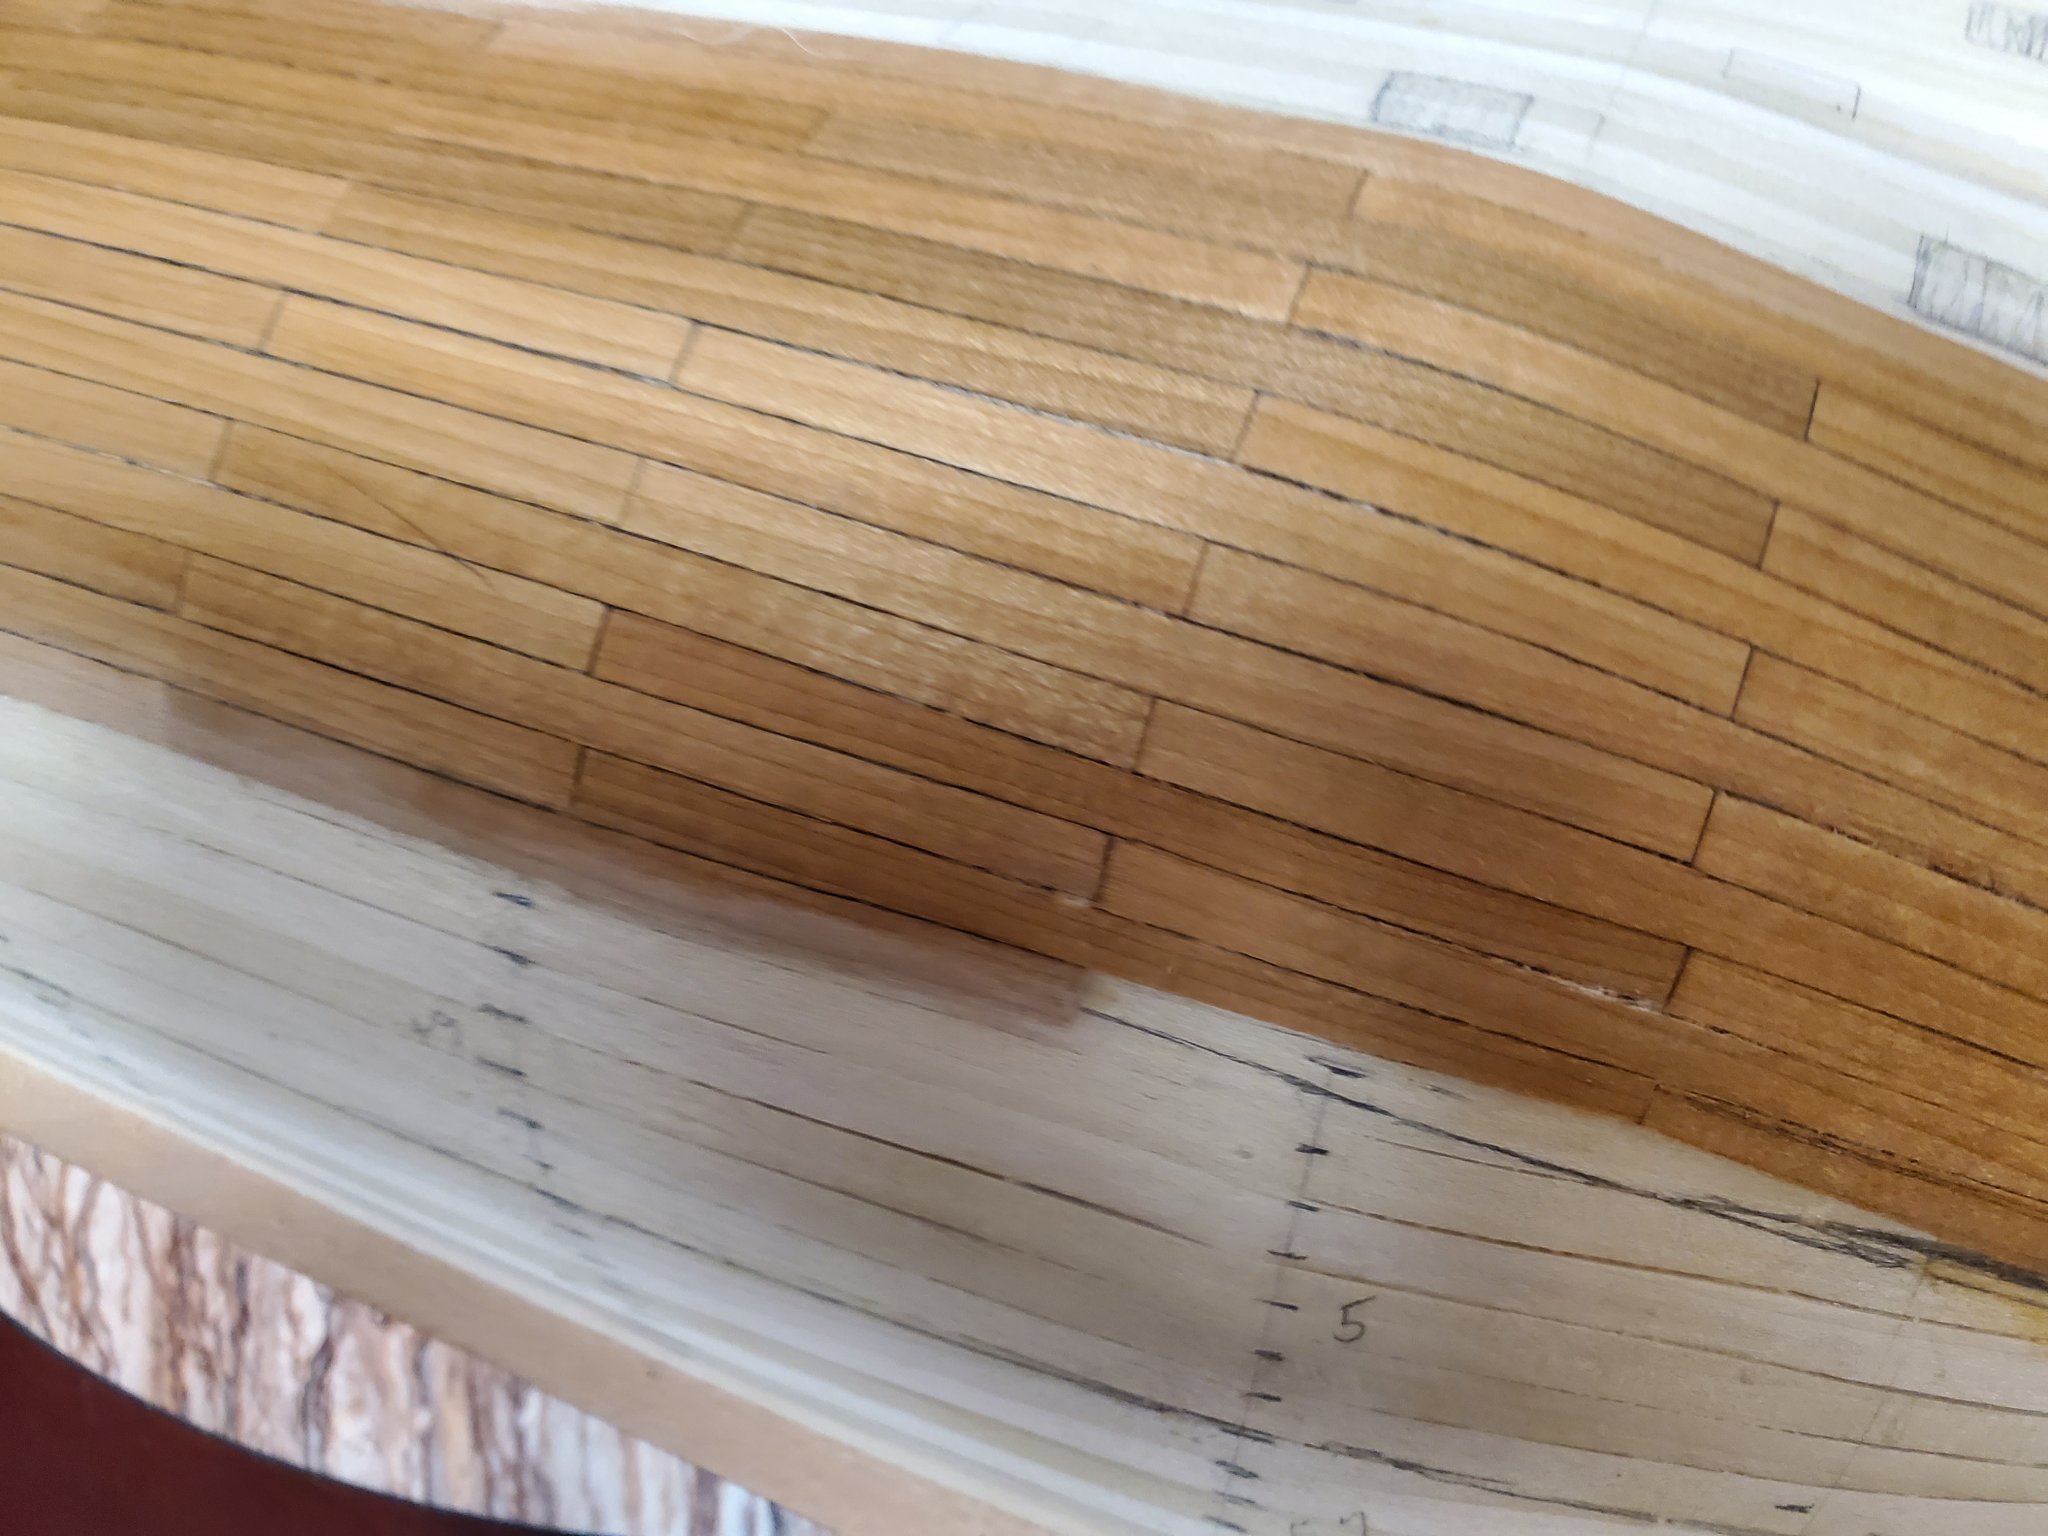
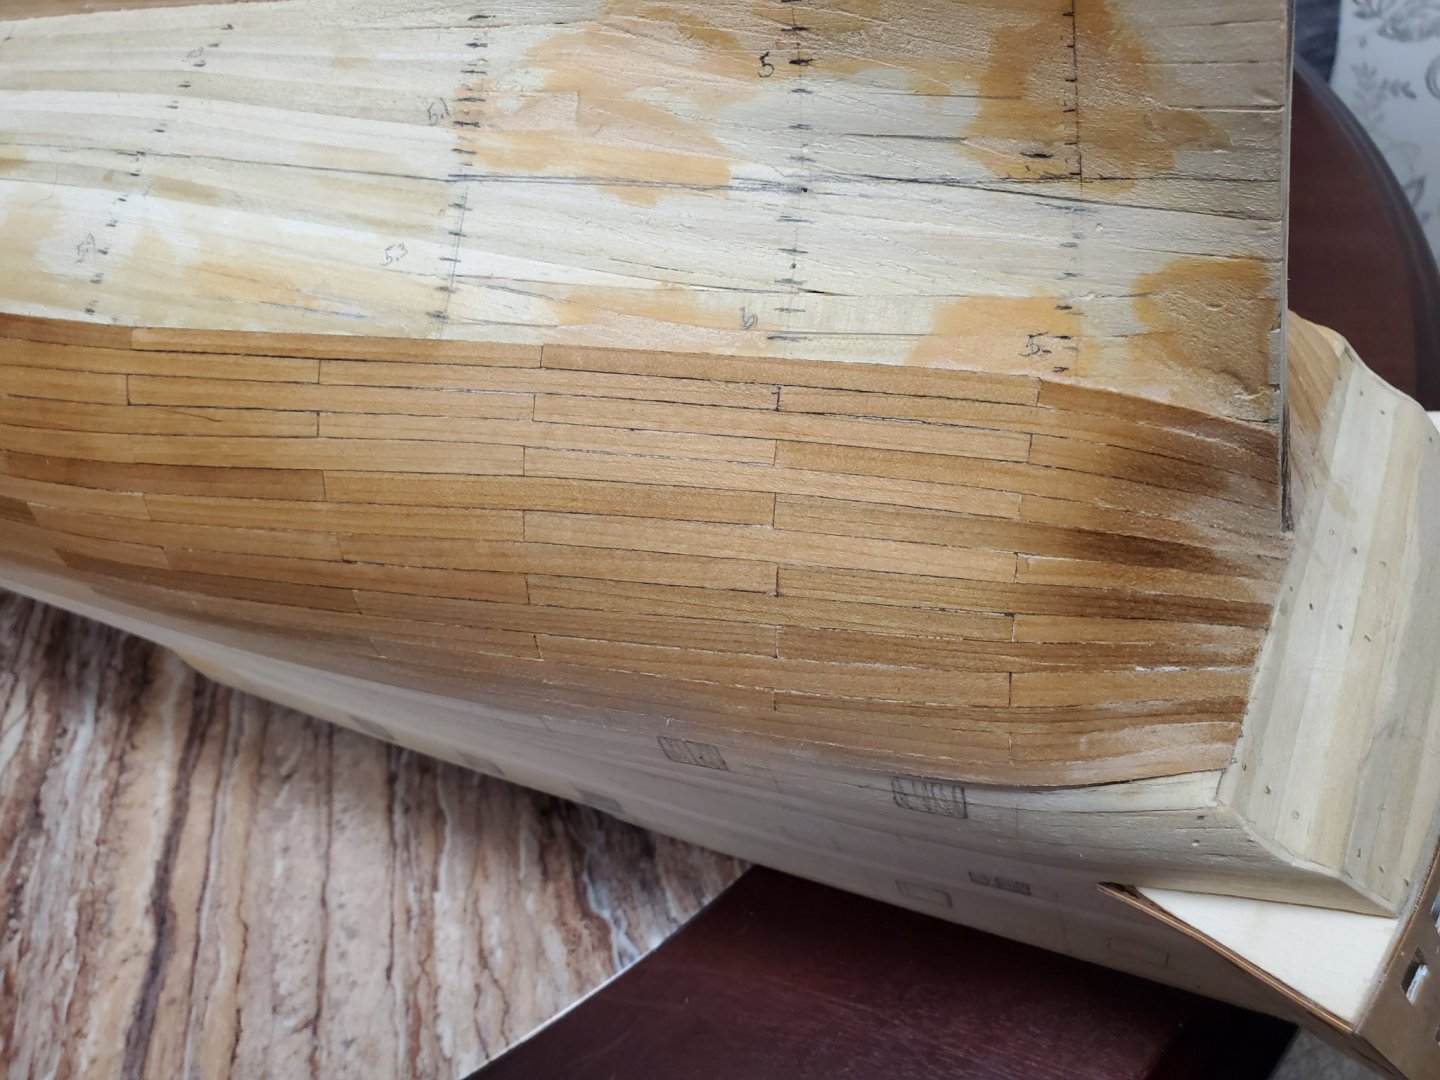
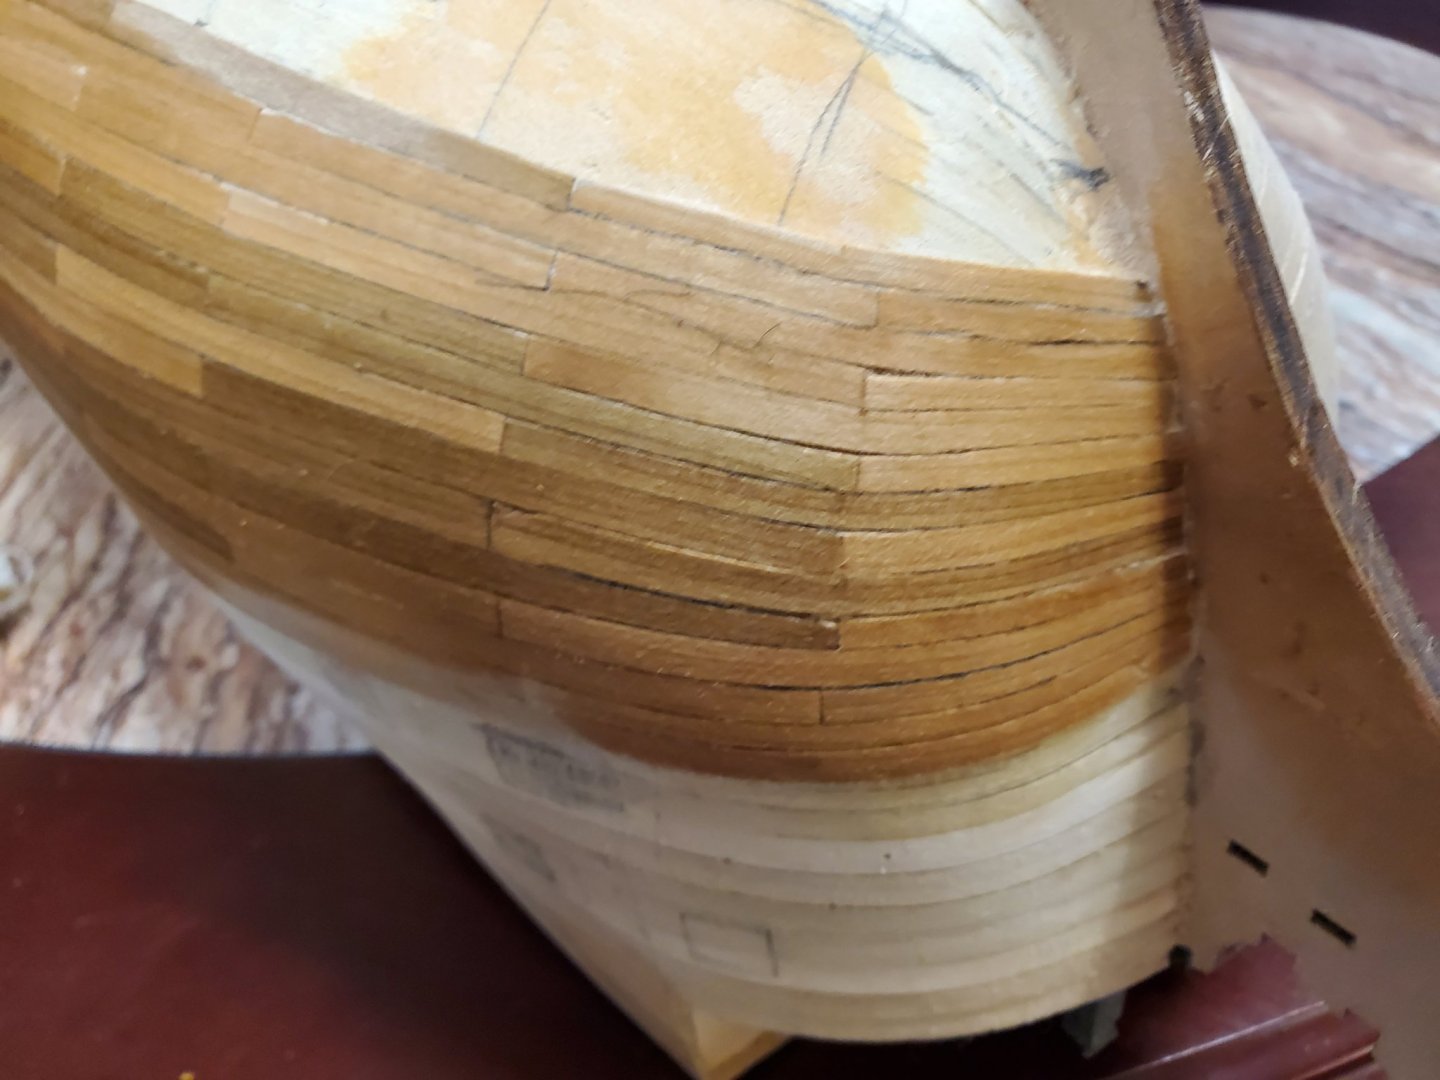
I got half of each side planked and did a partial sanding to see how it will look. I am happy with the sides and the stern, but not so happy with the bow. I wiped it with a damp cloth to see how it will finish. There are some small gaps at the bow. I had to do some edge bending and this wood doesn't want to edge bend very well. It may look better if a gel stain is used. The only other option is to strip the bow back and redo it. ( I hate the thought of that). Mark Frazier


-
I am using gel CA glue for the second planking. I used wood glue for the first layer and most other things, but I kind of like the gel CA glue for planking. You just have to be quick because you only have a few seconds to lay it correctly and then it is pretty permanent. If you try to remove it, many times it will pull part of the base up also. It is a little tricky but works well. Mark Frazier
-
Thanks OC., I guess this is the same kind of problems you could have scratch building. There is so much of this kit I am NOT using, it will be more than half scratch built by the time I am done. I know I am going to have a couple "springy" planks as they will be to thin when sanded. I will inject glue into the springy spots with a hypodermic needle to make them solid. I will just do the best I can with what I got. Mark Frazier
-
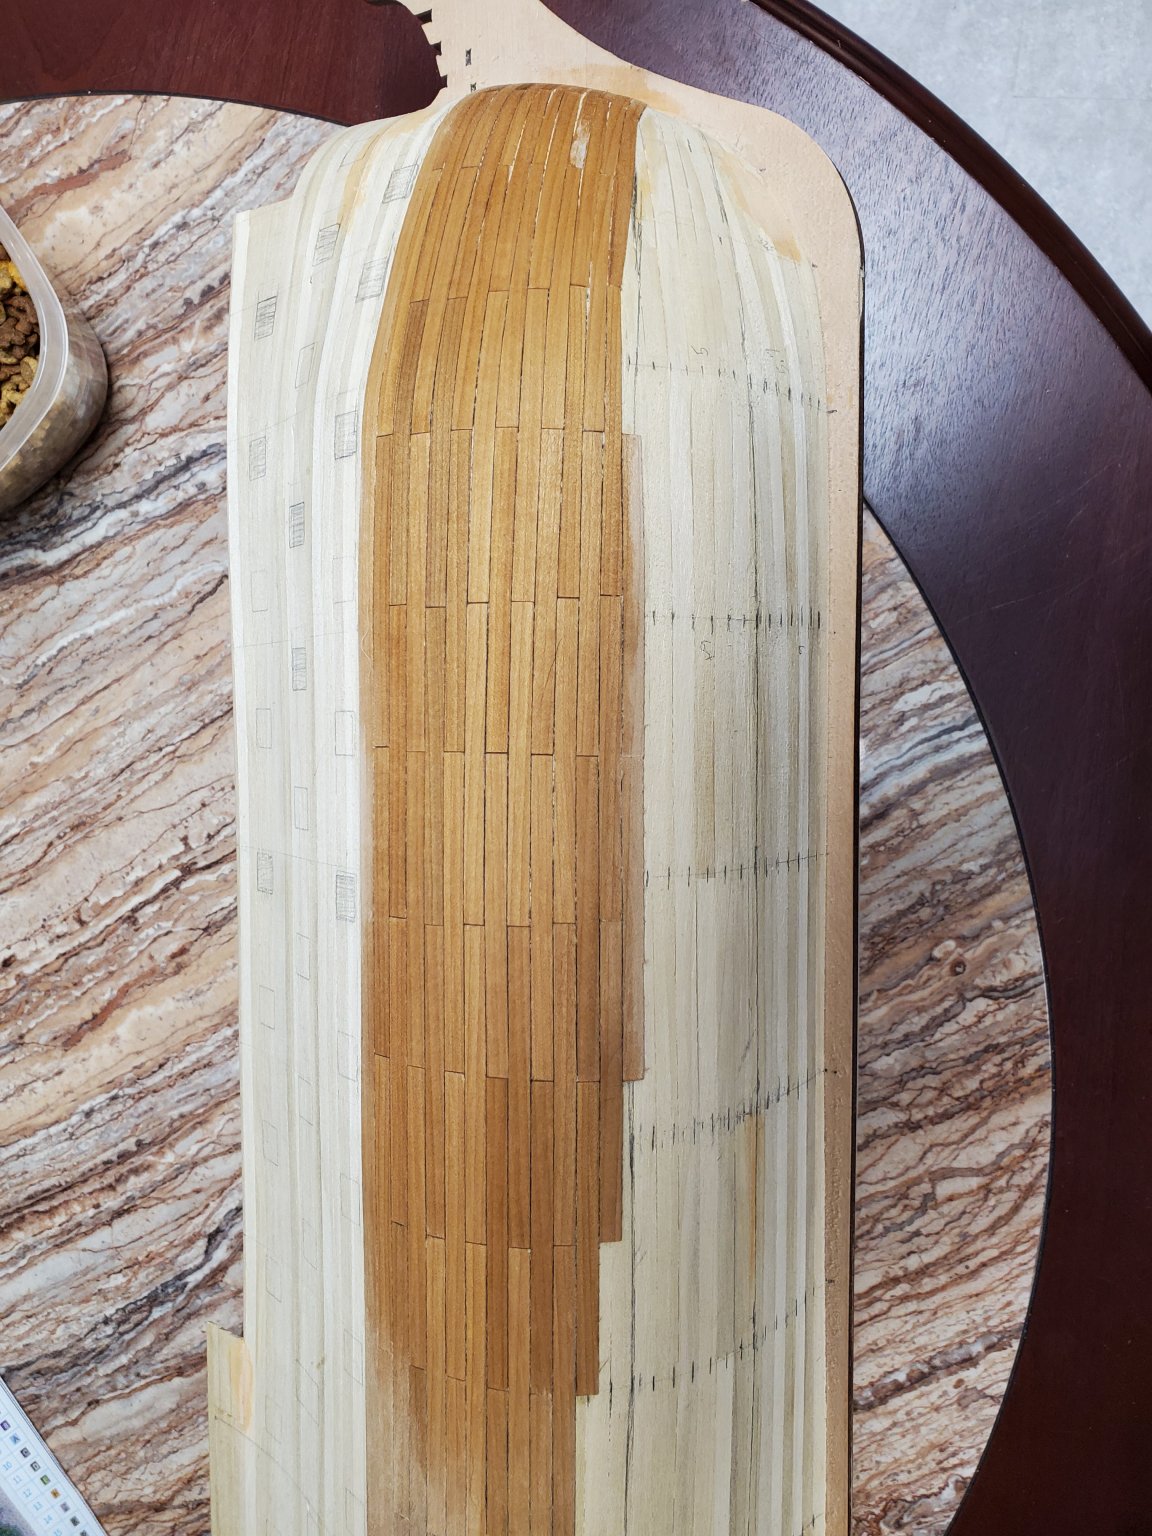
I hate this cheap lousy wood for the second planking in this kit. The first planking wood ( lime wood) was much better. It was very well finished and consistent. The walnut for second planking is all slightly different widths and very rough on the edges. .....With that out of the way ..... I got about half of each side done and it is rough going. I have to constantly try to adjust the width by sanding a little on the edges and try to make the bands finish close to width. I have noticed the thickness is varying slightly on the boards. ( I regret now not replacing all the wood, but it is stupid to pay five hundred dollars for a kit and have to replace almost every thing). I did a preliminary sanding on one side and rubbed a dampened cloth on it to see how it will finish out before continuing. I am not sure there is enough thickness to sand down to where it will need to be to satisfy me. This wood is only 1 mm thick. The curve on the bow is the worst area and the hardest to do. I don't think I can go back with new wood, as when I had to replace a couple of boards, I almost ruined the first layer planks trying to remove a plank. I would never get this stuff off..... so I shall continue and see what happens. Mark Frazier


-
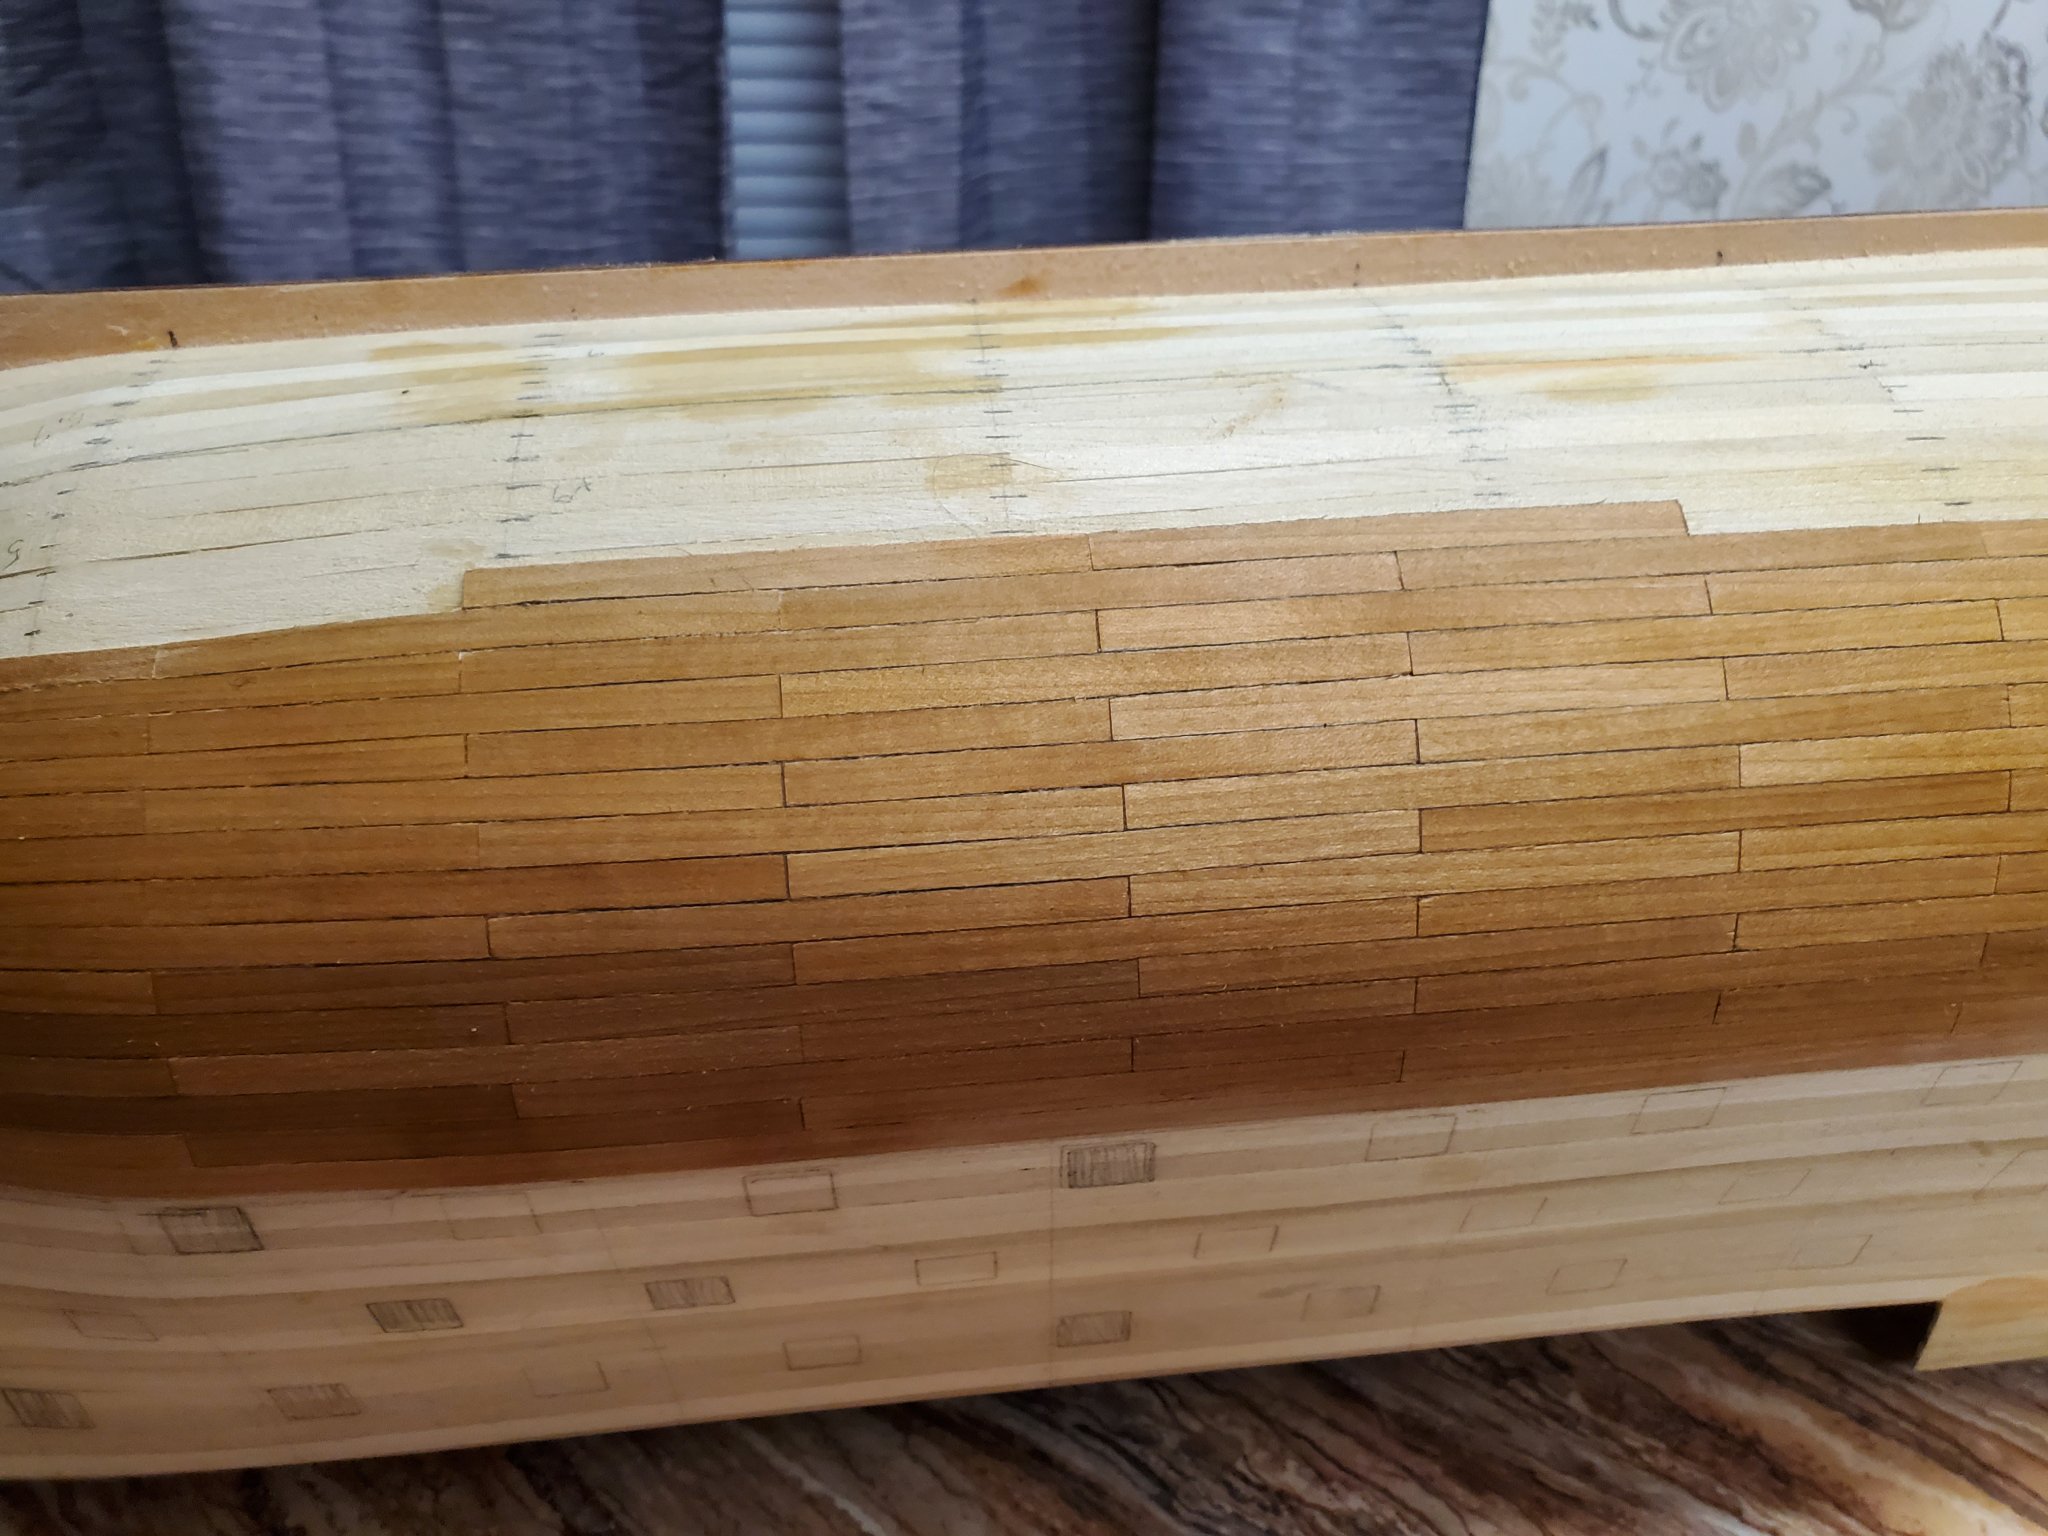
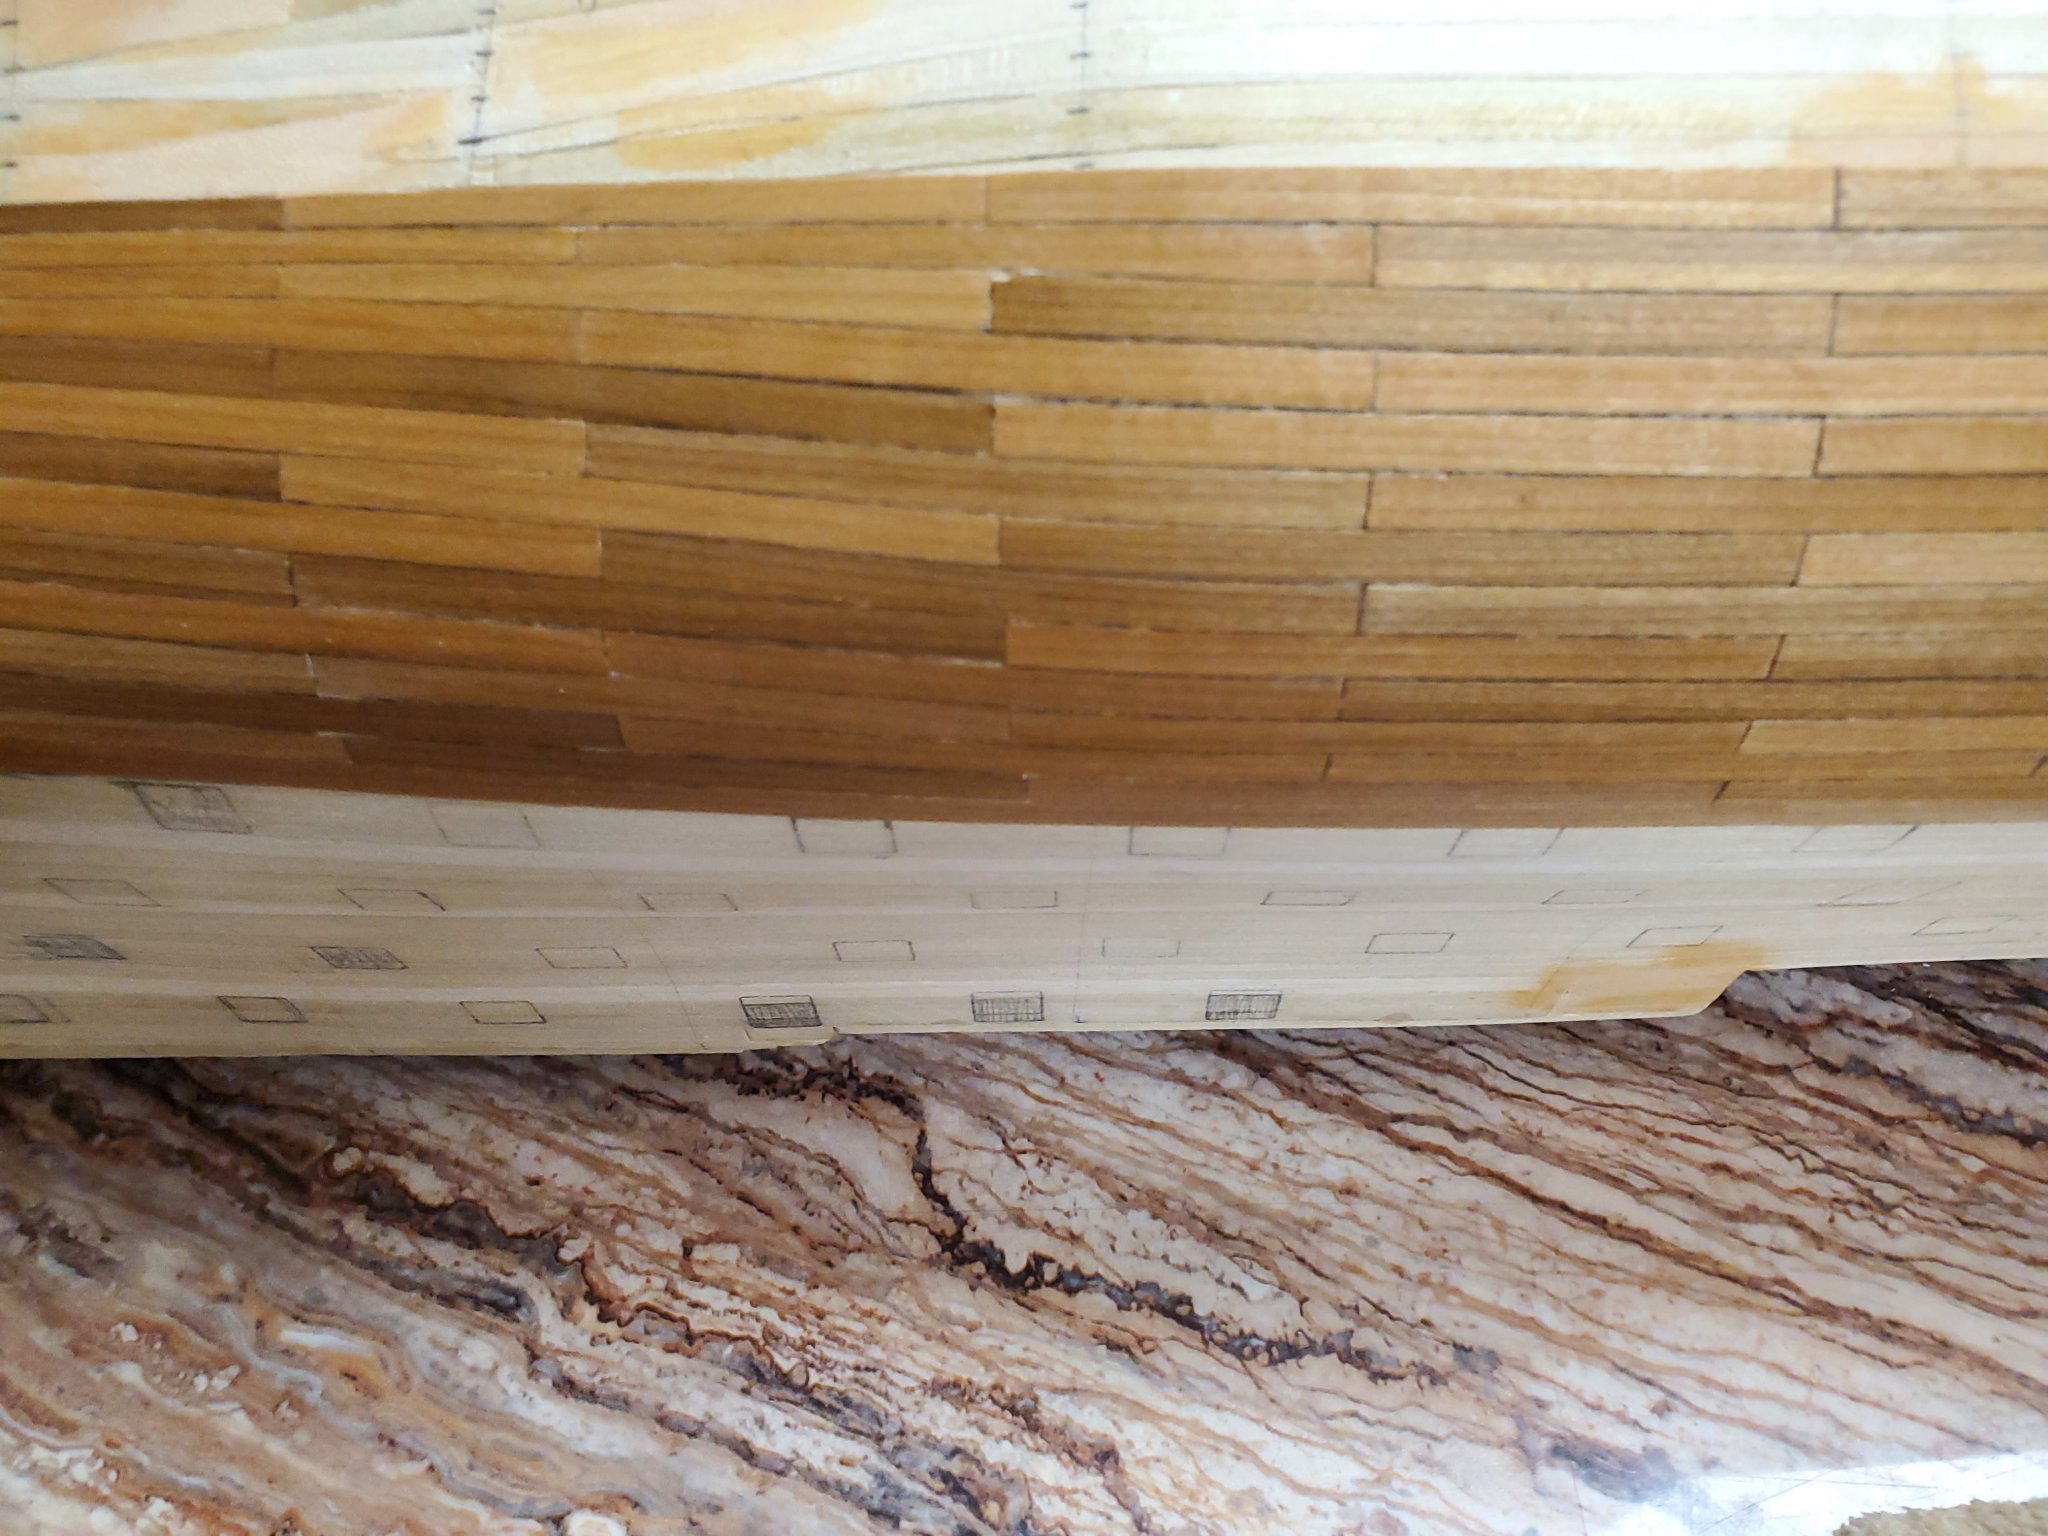
I cut the planks into 85 mm lengths as this works out best for the hull length. I put the first two rows on one side. I am coloring the edges with a pencil to try and simulate caulking. I don't know how it will work out until I sand. I will now put two rows on the other side. I try to keep everything identical between sides. This wood is in my opinion, very poor quality. I thought about replacing it all, but that is not just expensive, but a waste. I will try to make use of this lumber as best possible. The edges are very rough on all this lumber. Other lumber I have ordered is very nicely milled on all sides. Maybe this poor lumber will accentuate the seams more, which may be a good thing if it is not too bad. Mark Frazier

-
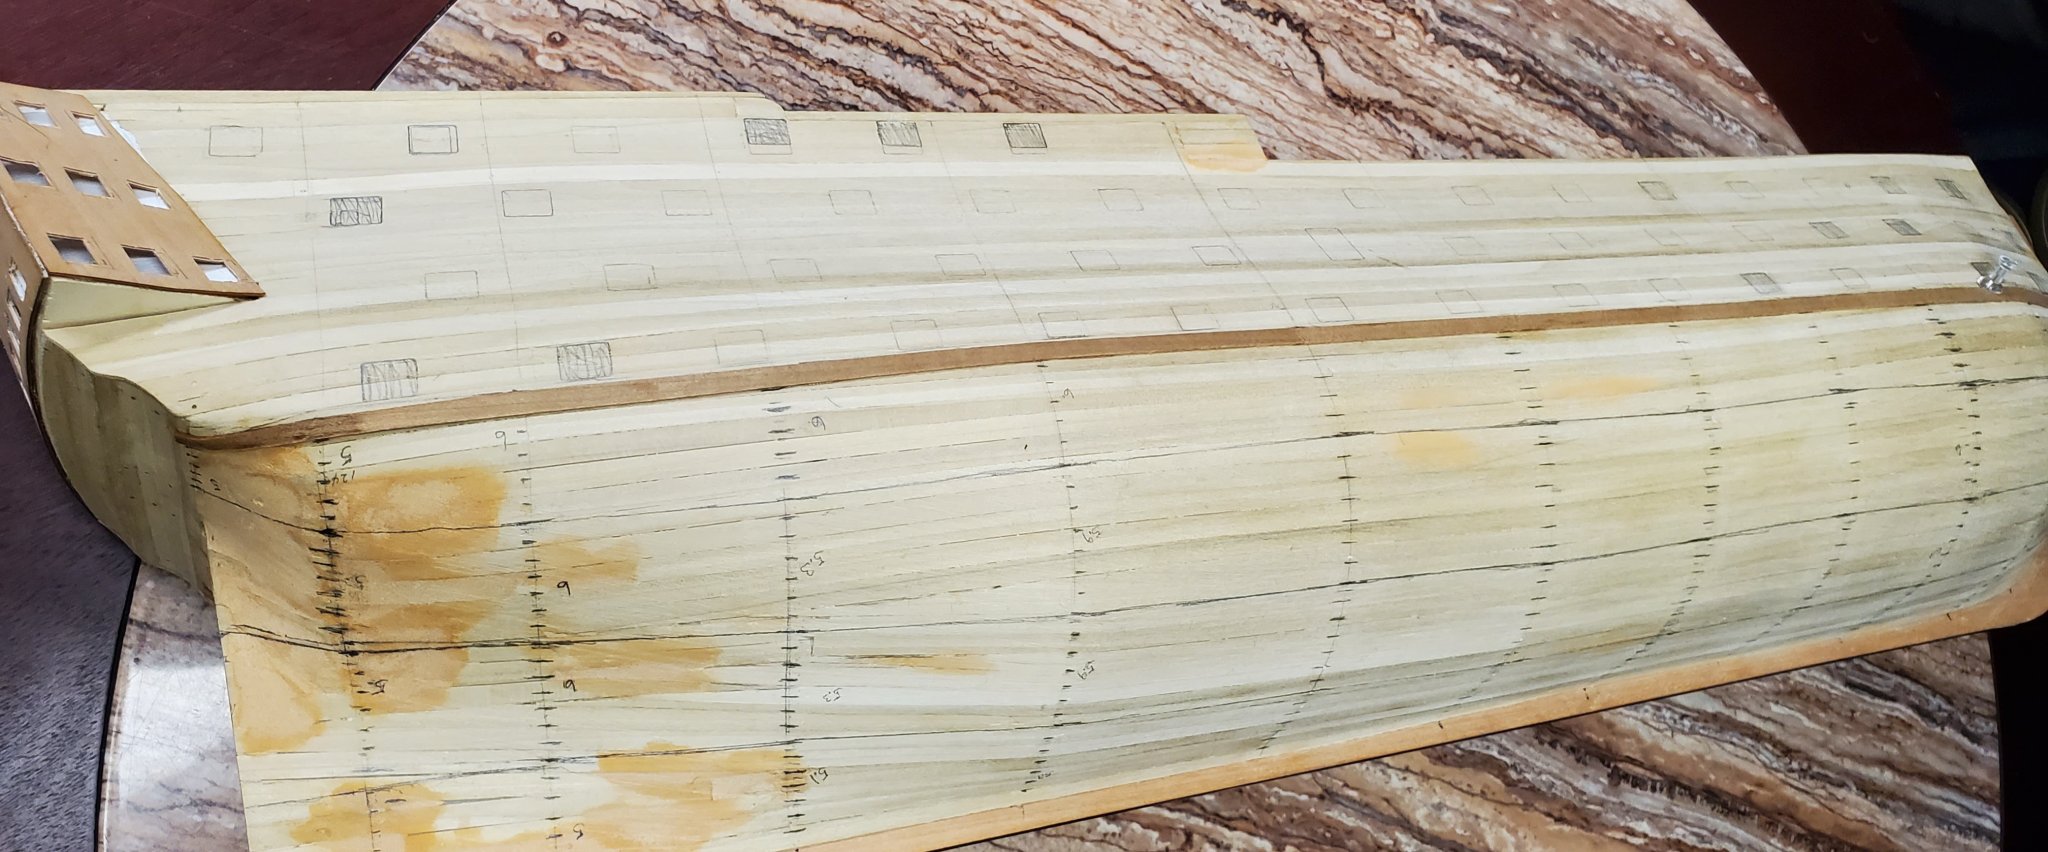
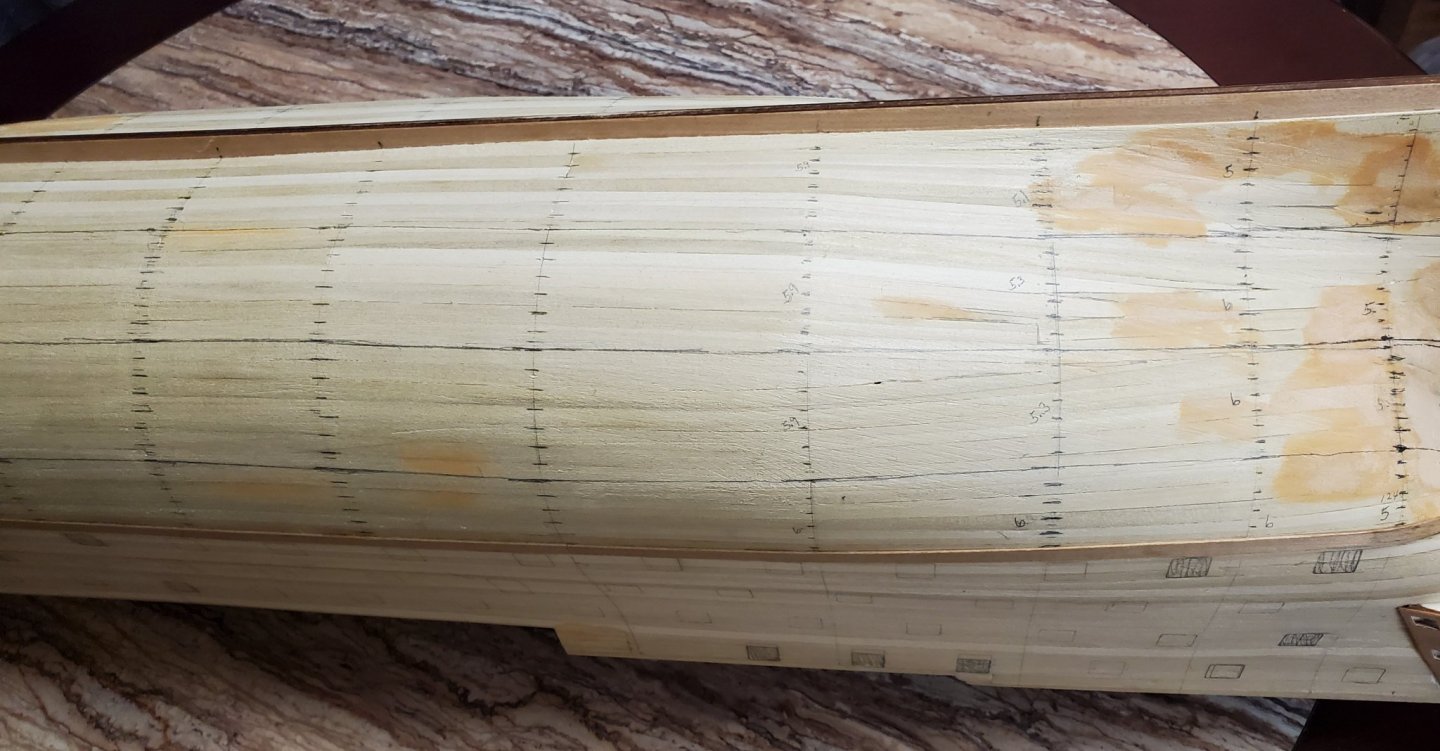
I have laid out every plank as close as I could. The planks are supposed to be 6 mm wide ... BUT ..... I measured them and they are just slightly wider .... like 6.05 to 6.1 mm. So when I laid out for 28 6 mm planks on each side, they wouldn't come out right. I could only get 27 planks on, so I had to lay them all out again.(more poor quality). I will make any adjustments on the garboard plank. The walnut strip that is glued on each side is the top of the lower wale. No the wale line will not be correct because I am attempting to make the bands with stained wood instead of painting. I'm going to plank the bottom portion of the hull before I cut the gun ports because I noticed the line of ports was not all exactly the same height above the lower wale and I will readjust them before cutting. So.... here I go..... starting the second planking. I get really nervous at this point. Mark Frazier


-
I may be able to squeeze them in at half the plank width if I use one drop plank in each band, but I think that is too many drop planks. Would it look bad? Mark Frazier
-
This is slightly better, but it will take several drop planks to do it and I doubt that will look good. Mark Frazier
-
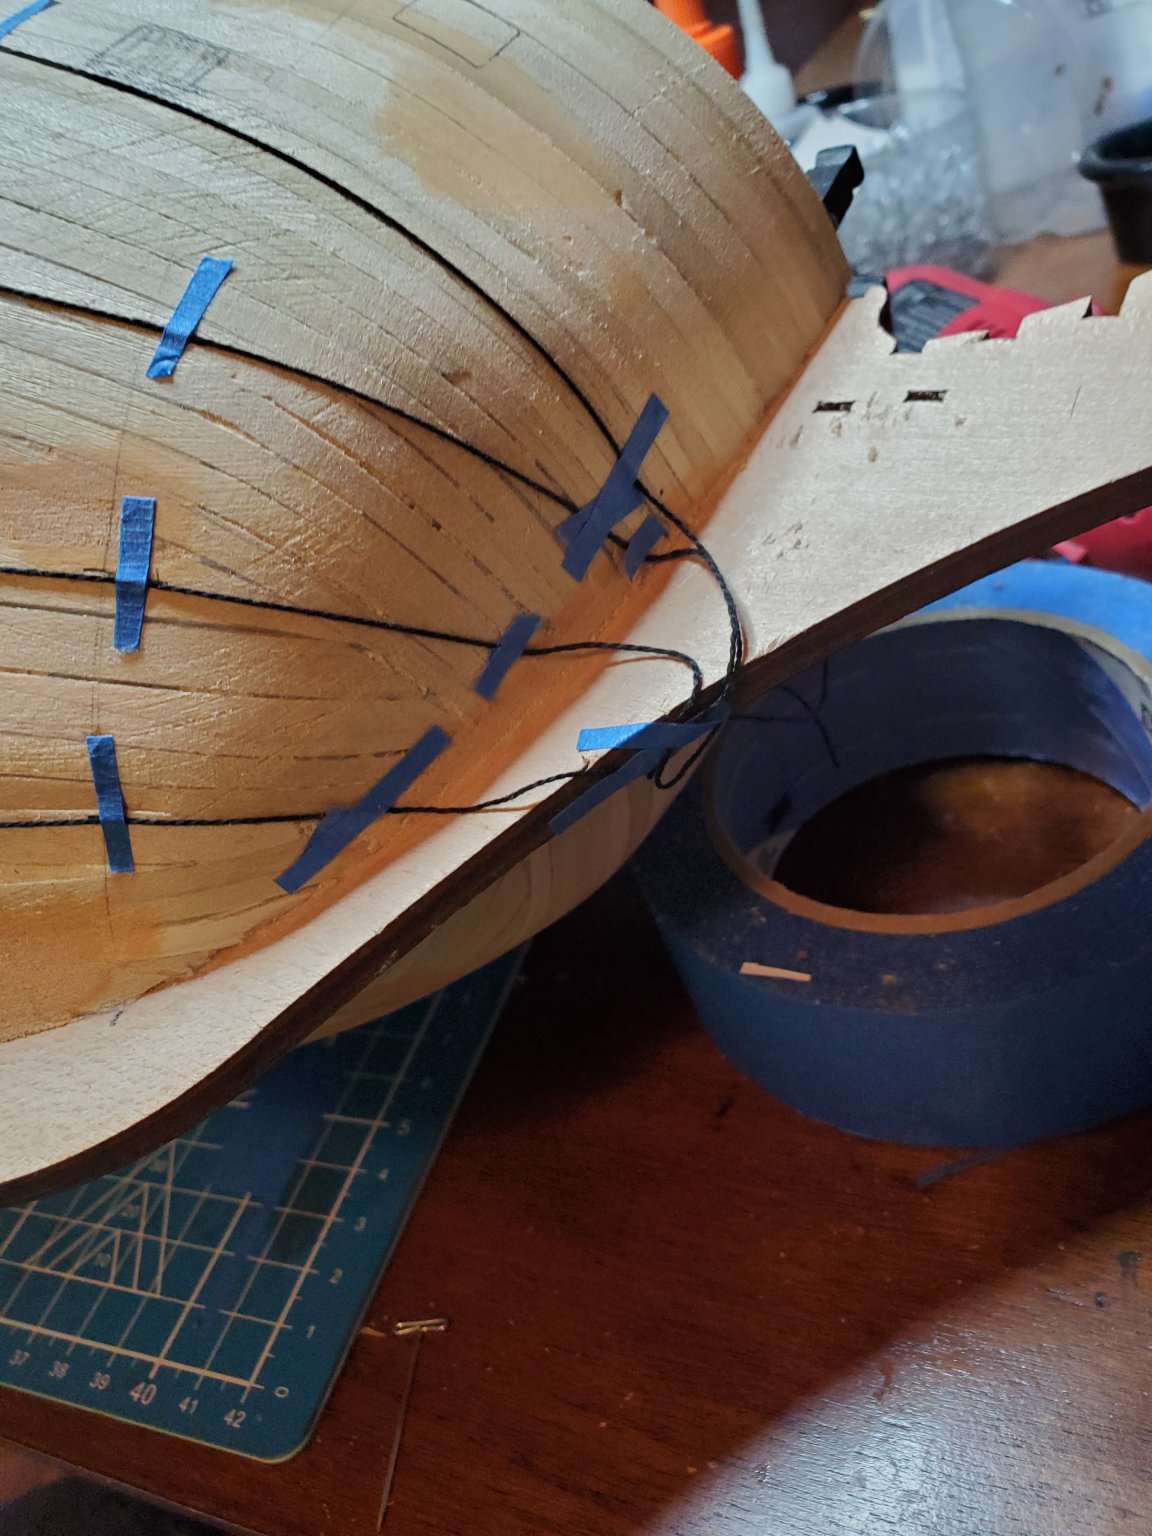
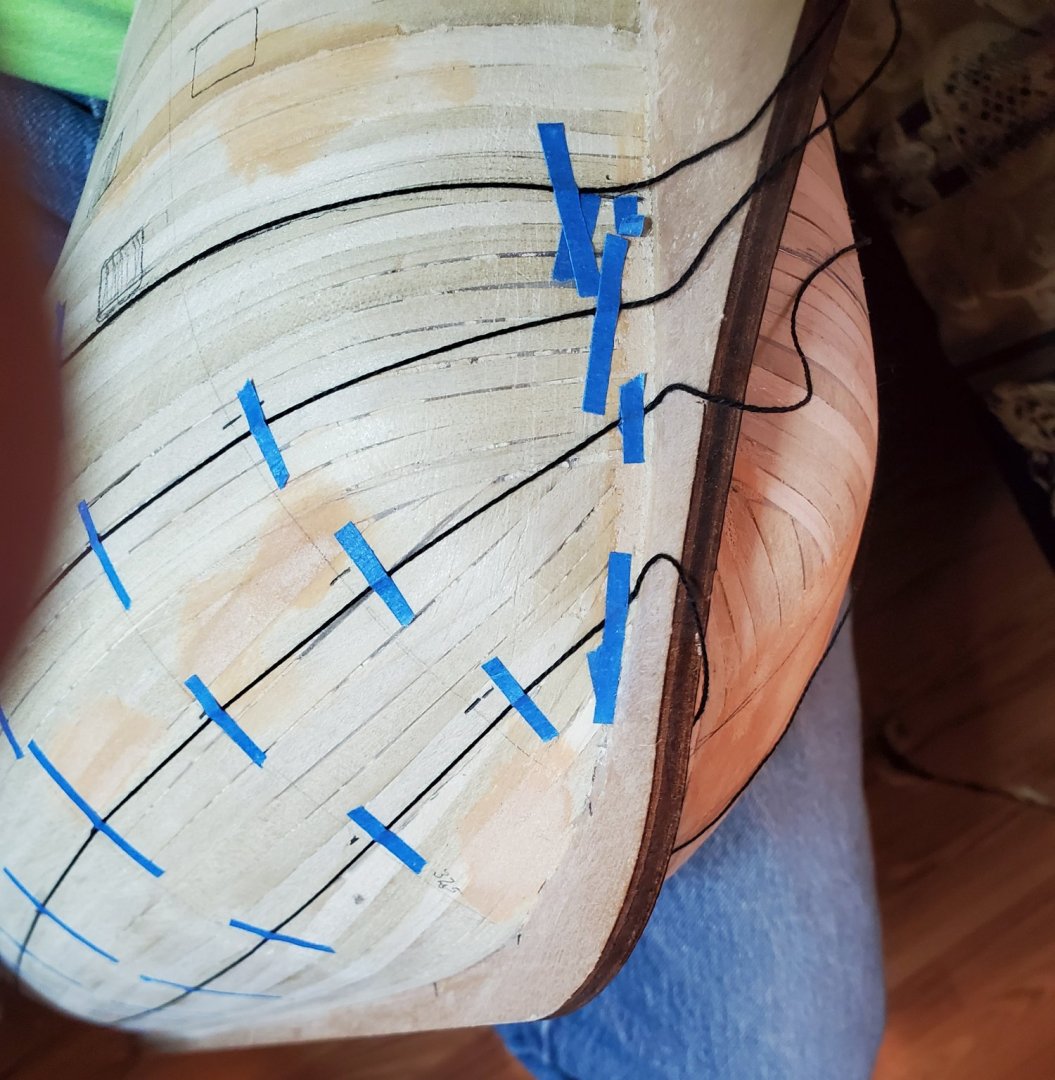
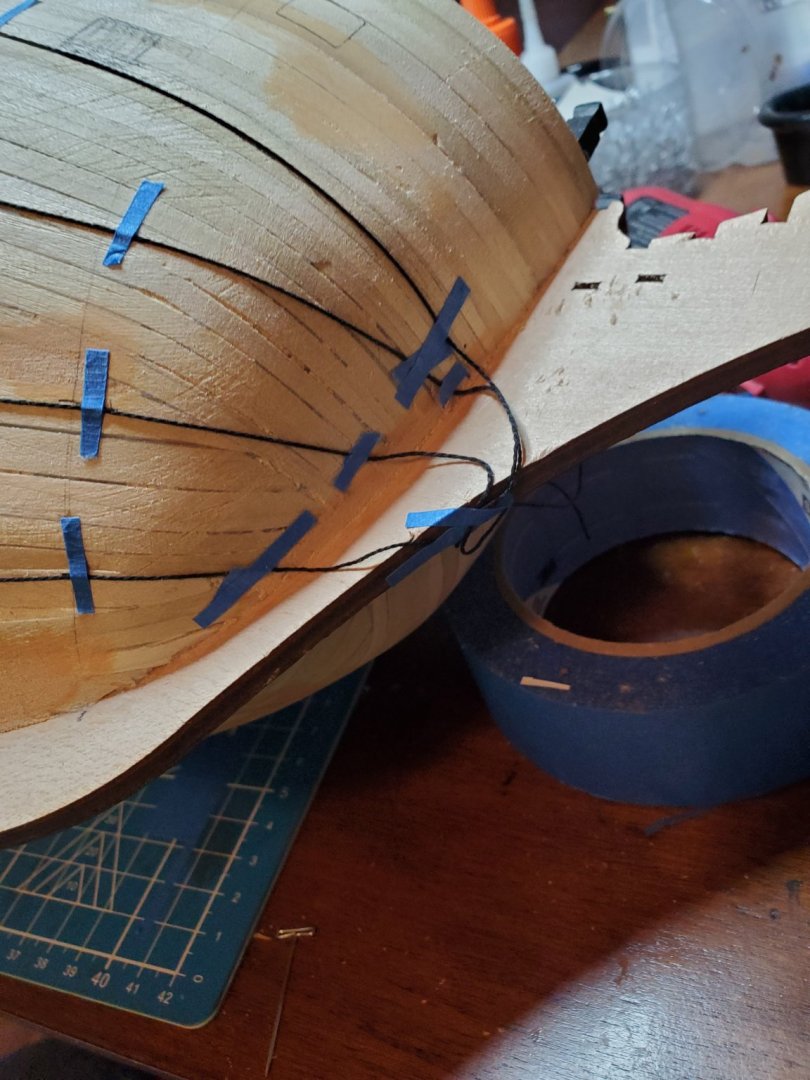
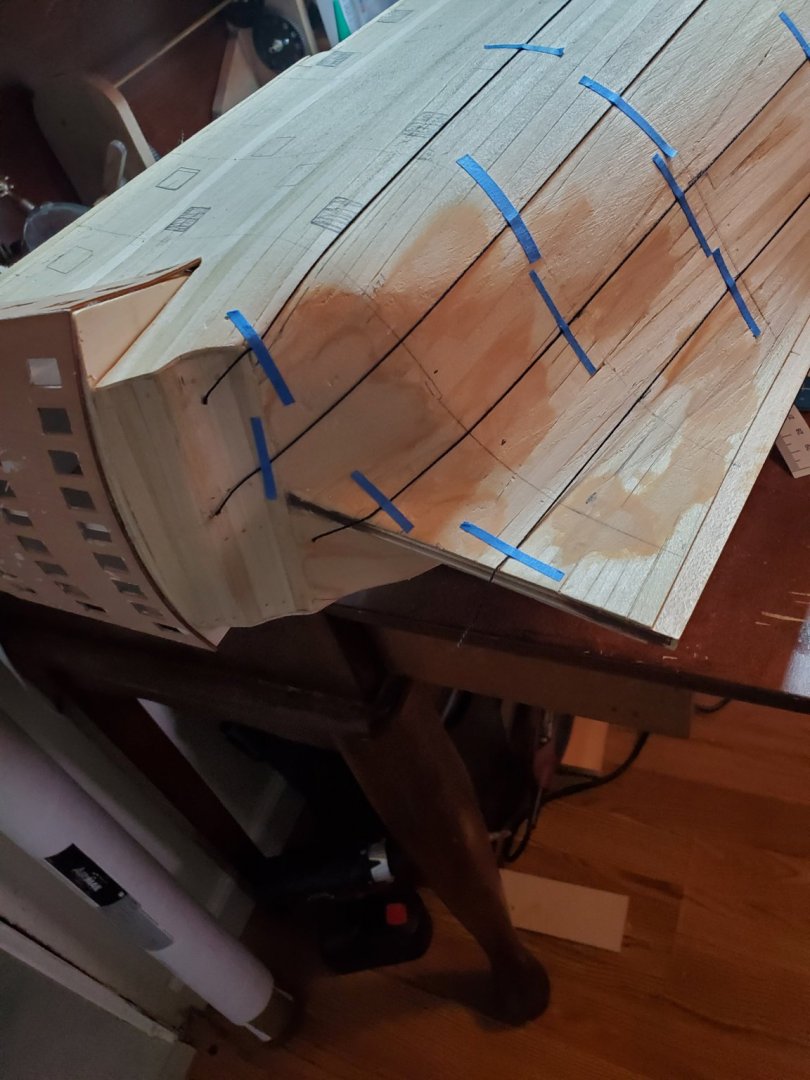
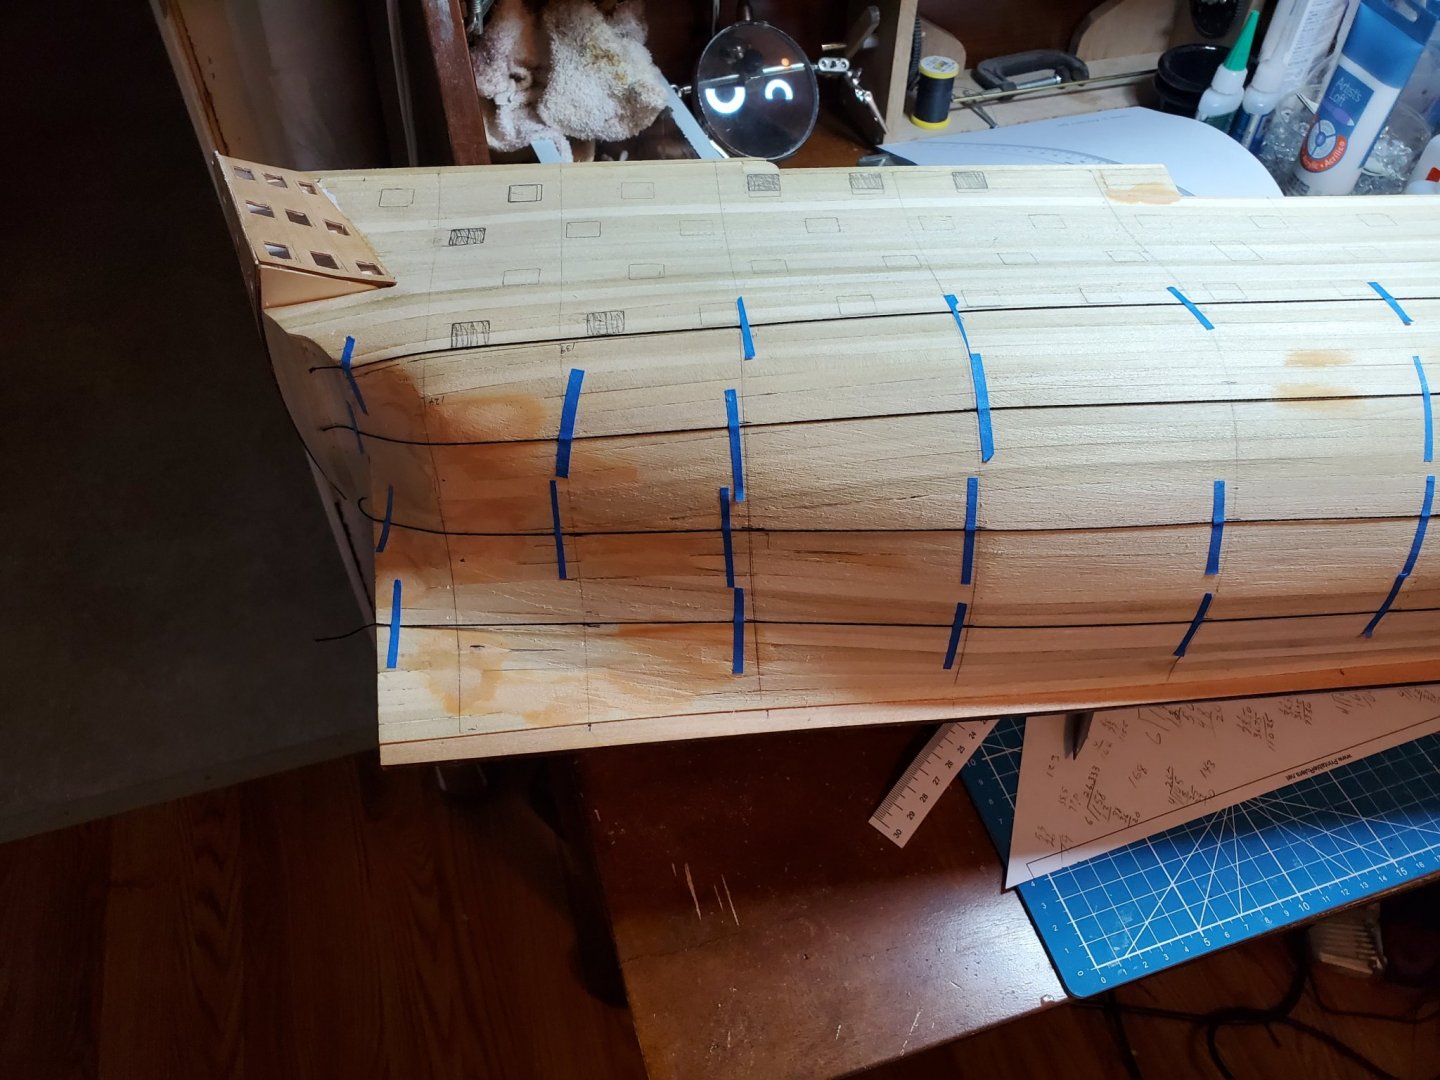
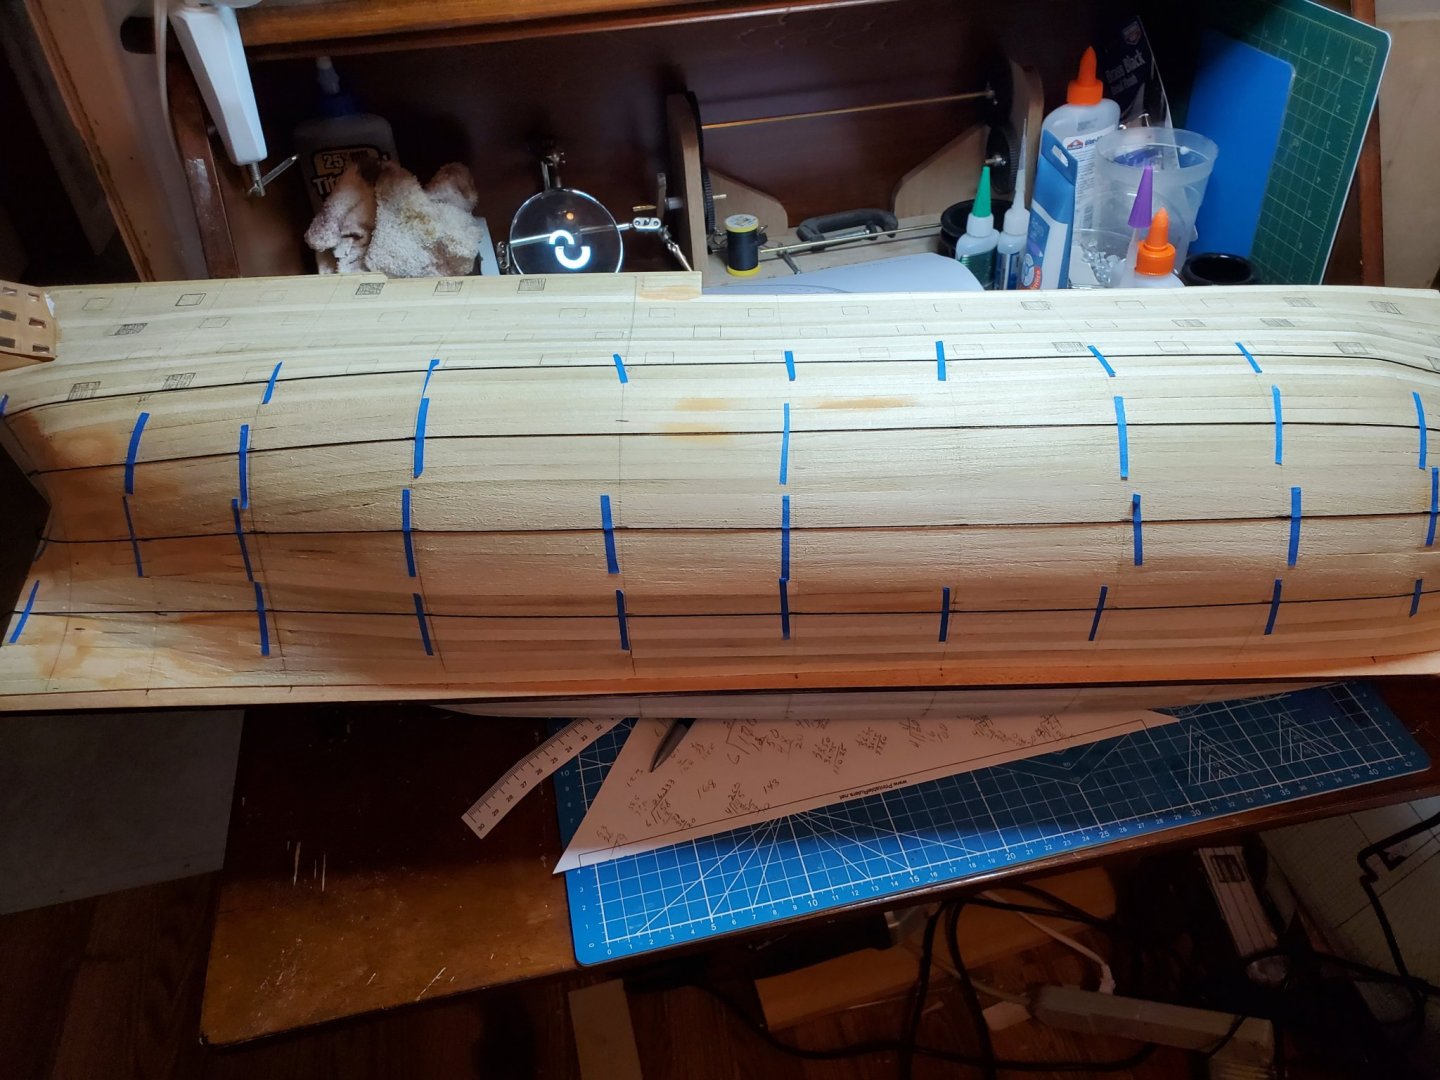
Since I screwed up the first planking, I thought I would lay out the second planking to see how things should look. I used some string and tape ( with everything closed, you gotta use what you can find) to lay out the planking bands. I divided the hull into four bands, each will have seven, 6 mm planks. I think I can work with the stern, but the bow .... that's a problem. I let the string kind of follow a natural path. The last photo is the bow and 7 planks are NOT going to work well. Any suggestions to how to do the bow would be appreciated.
-
Thanks, his was one of the ones I downloaded for reference. I will check it again. Mark
-
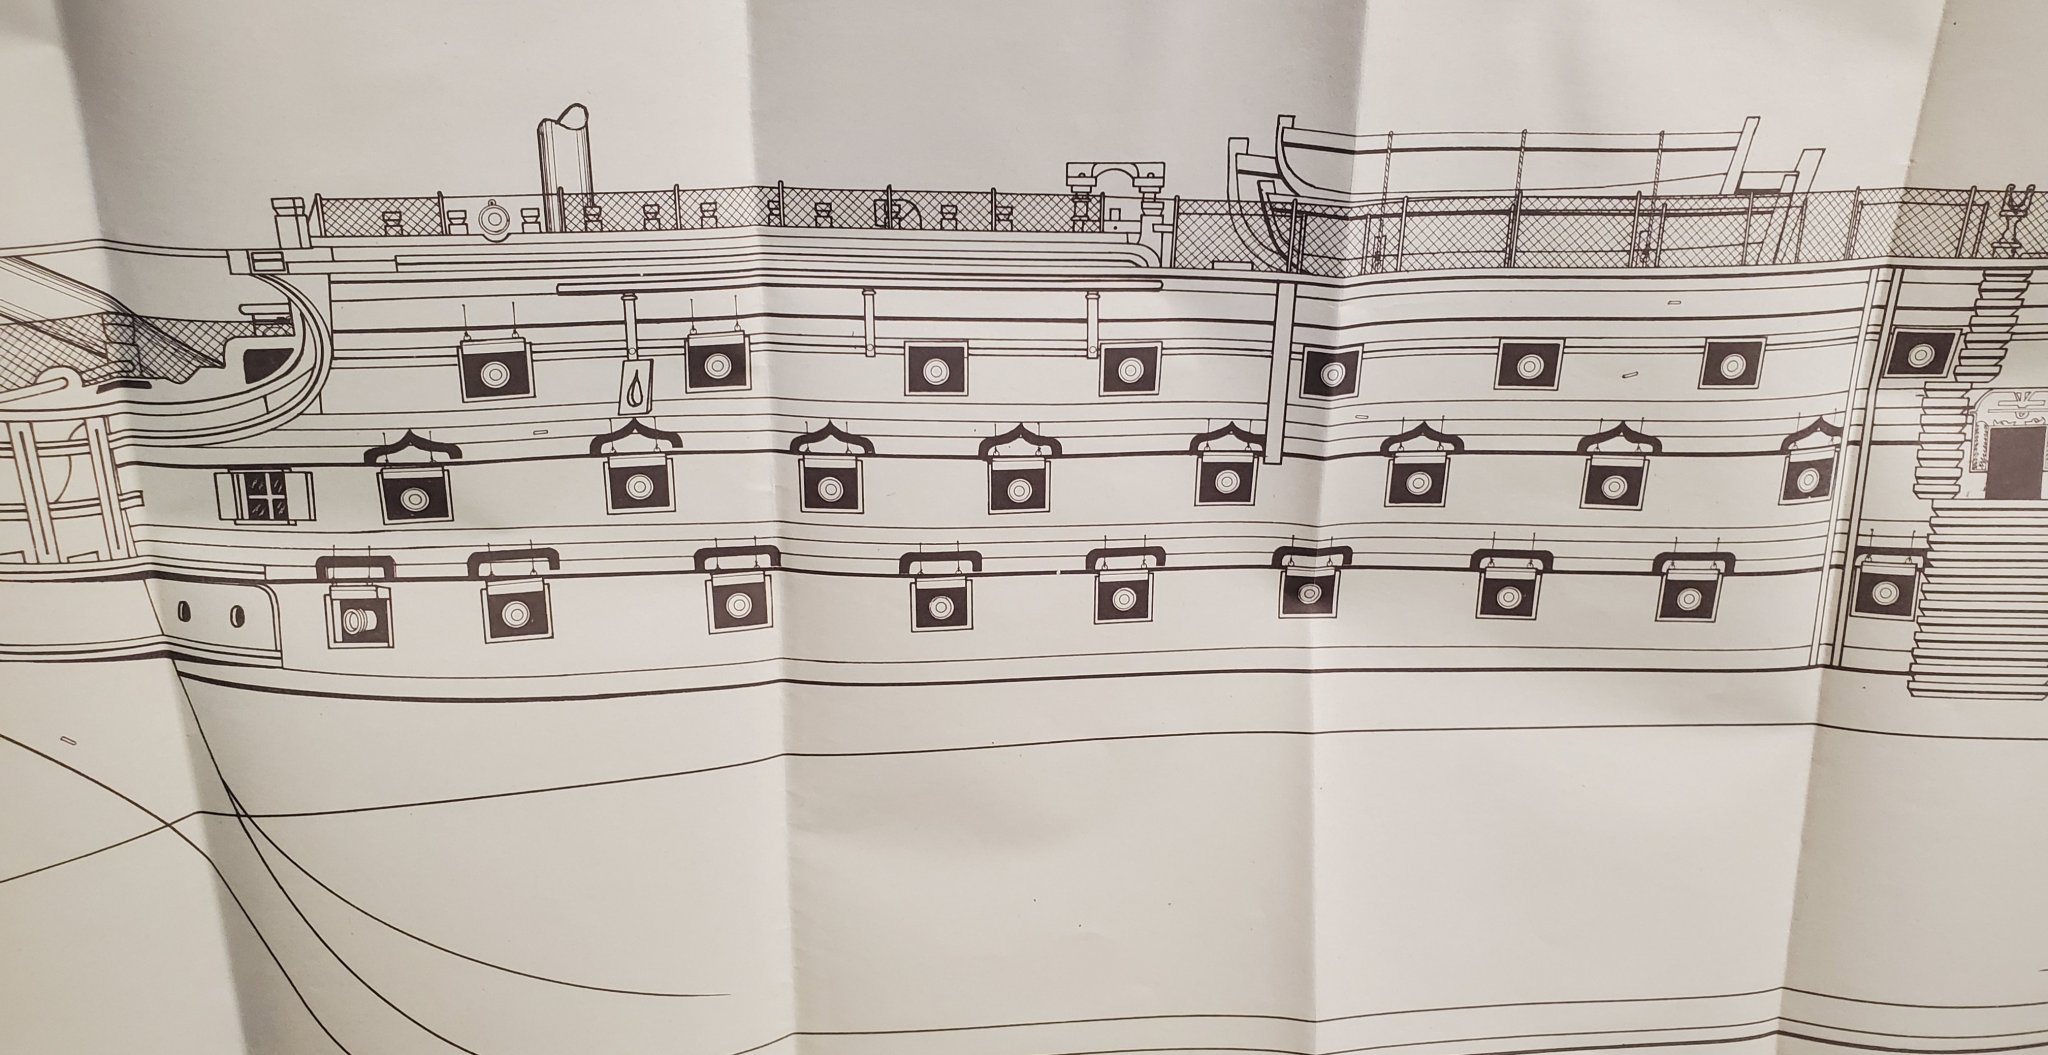
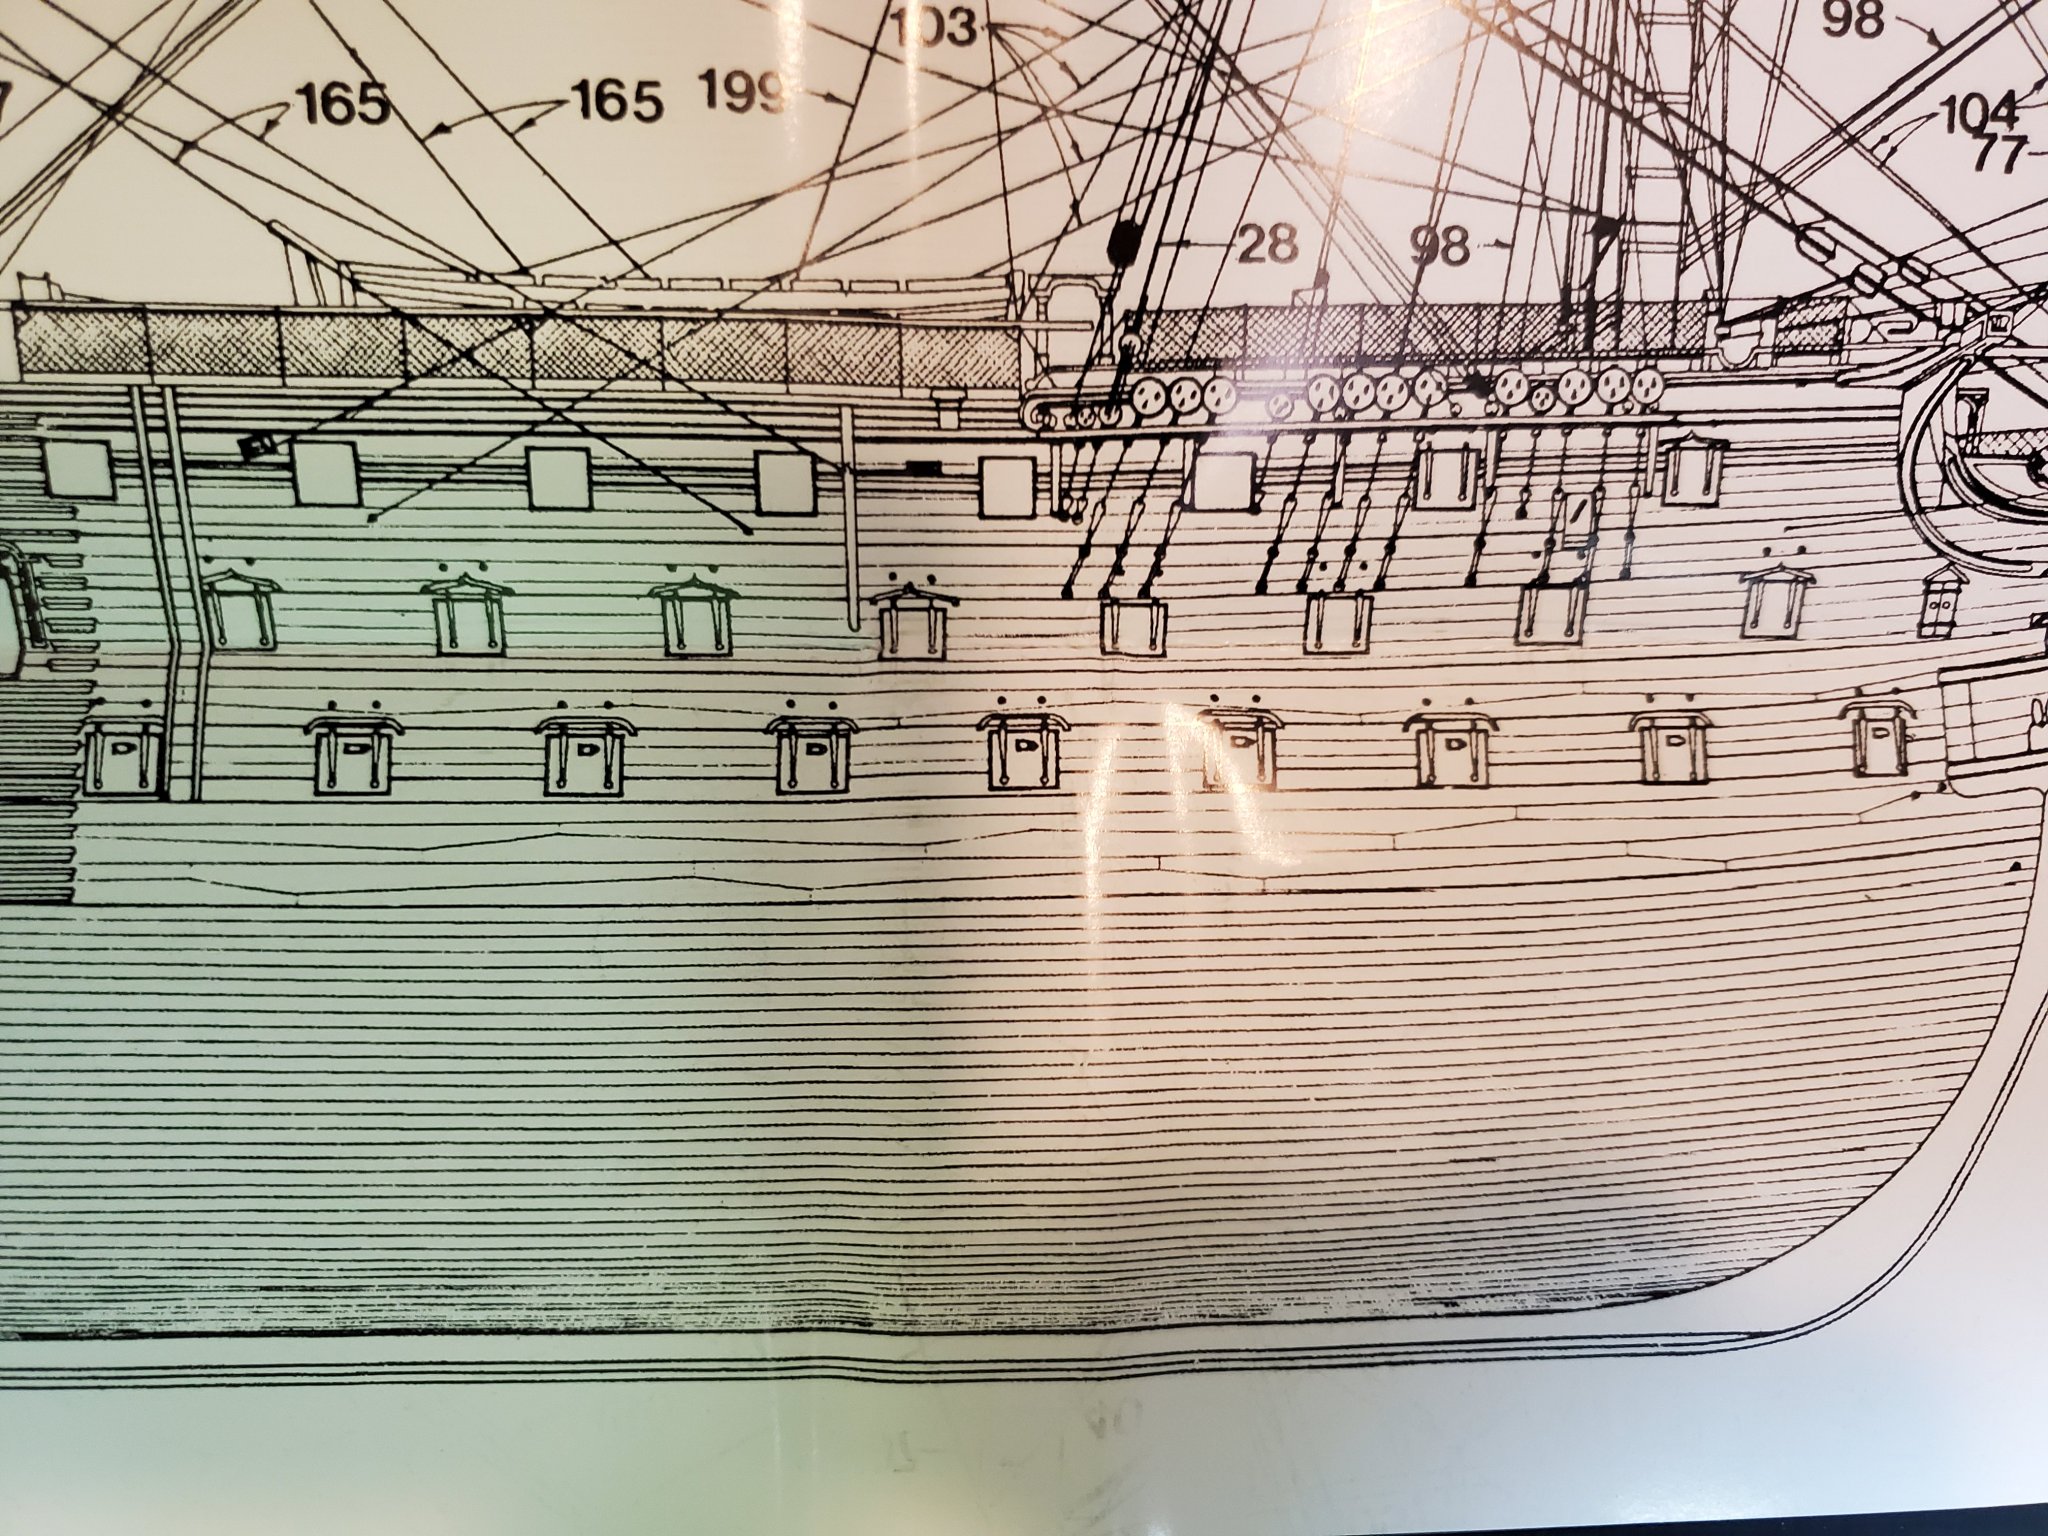
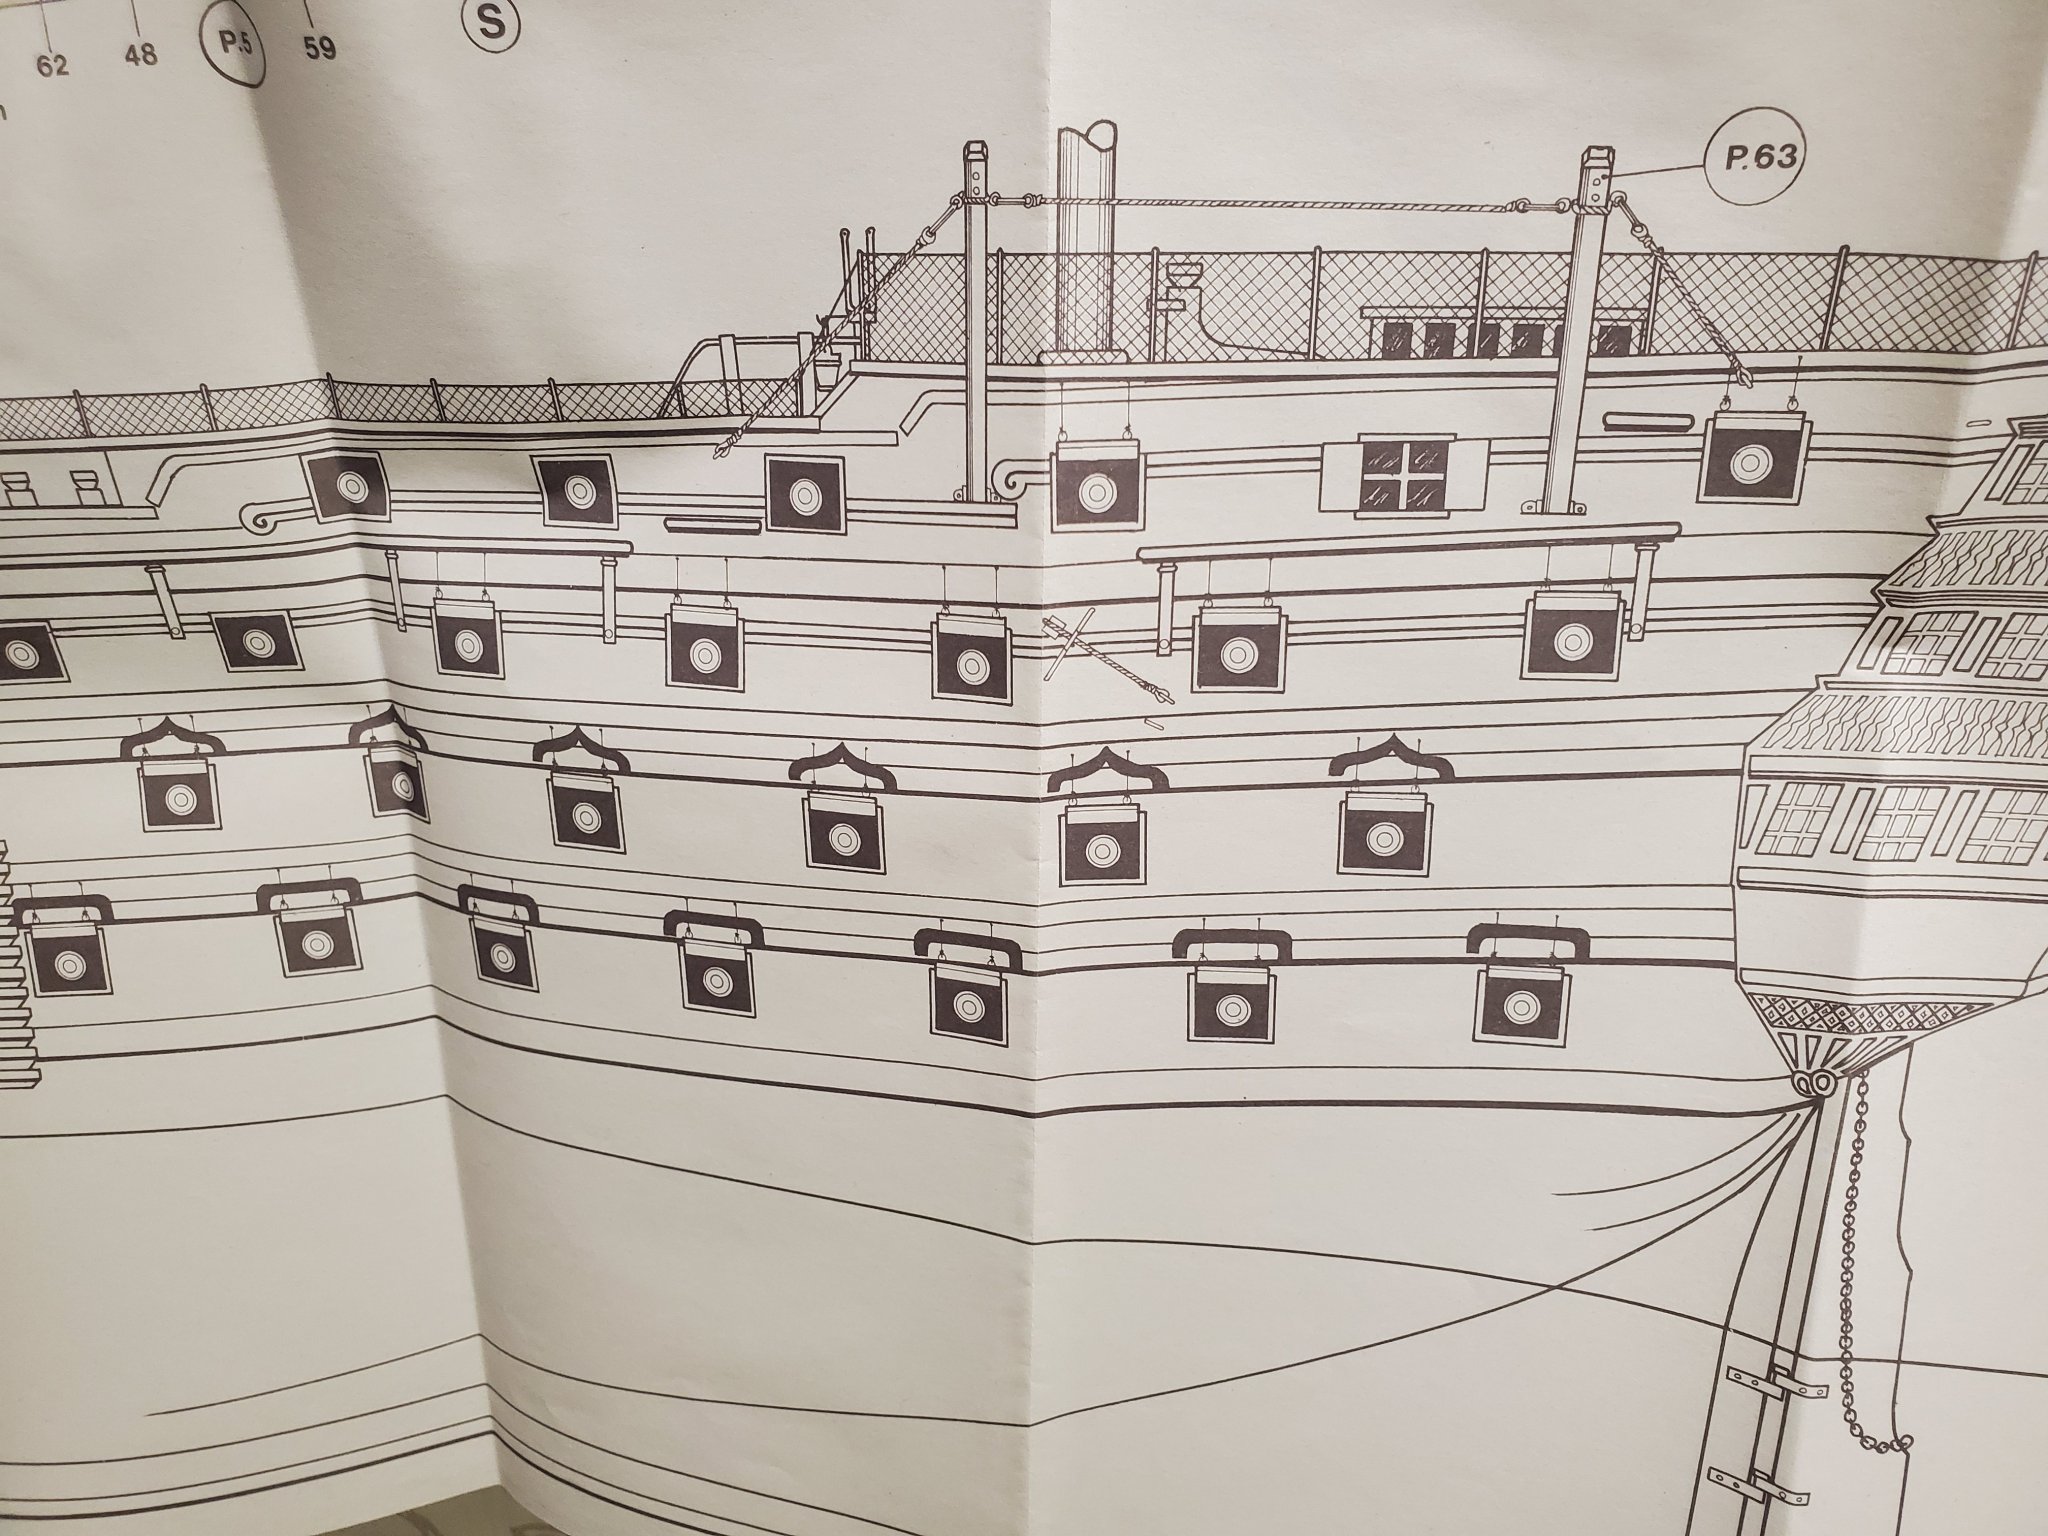
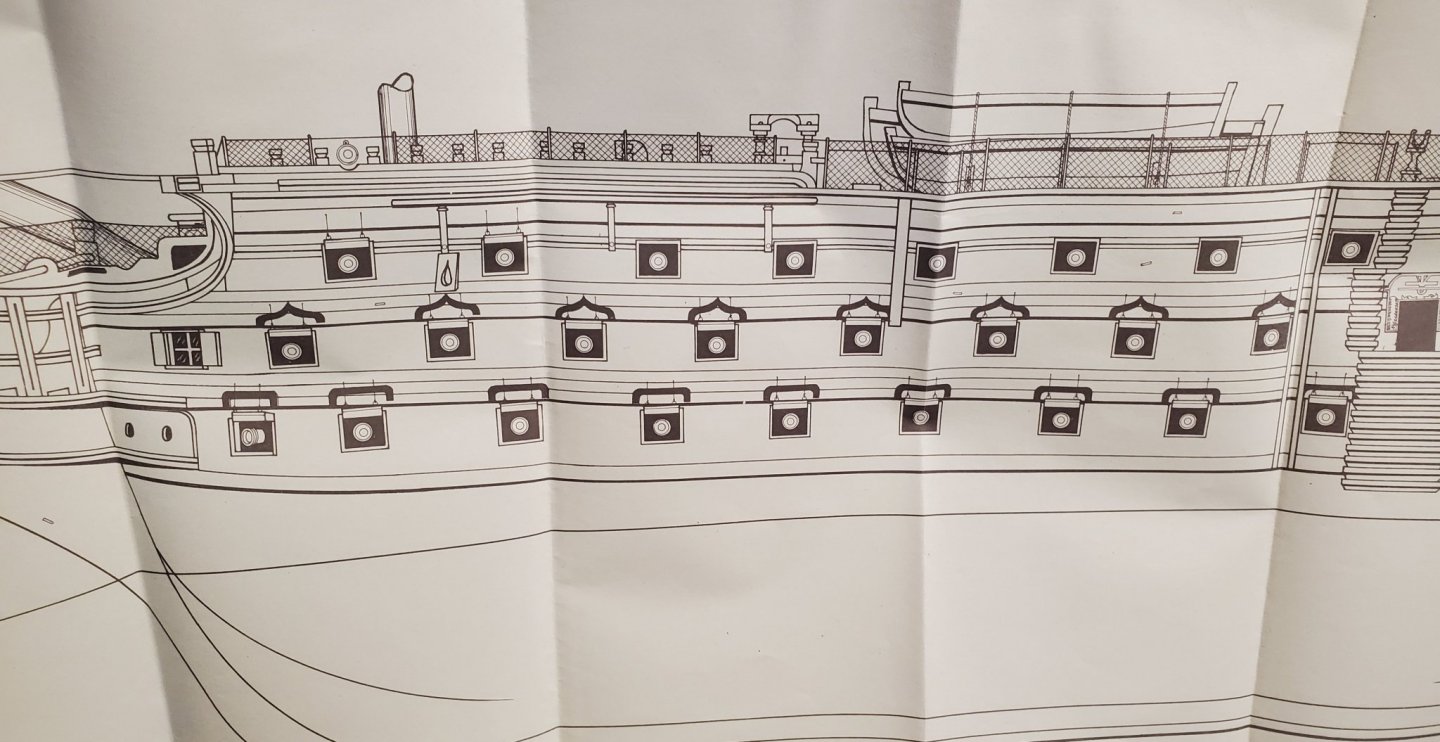
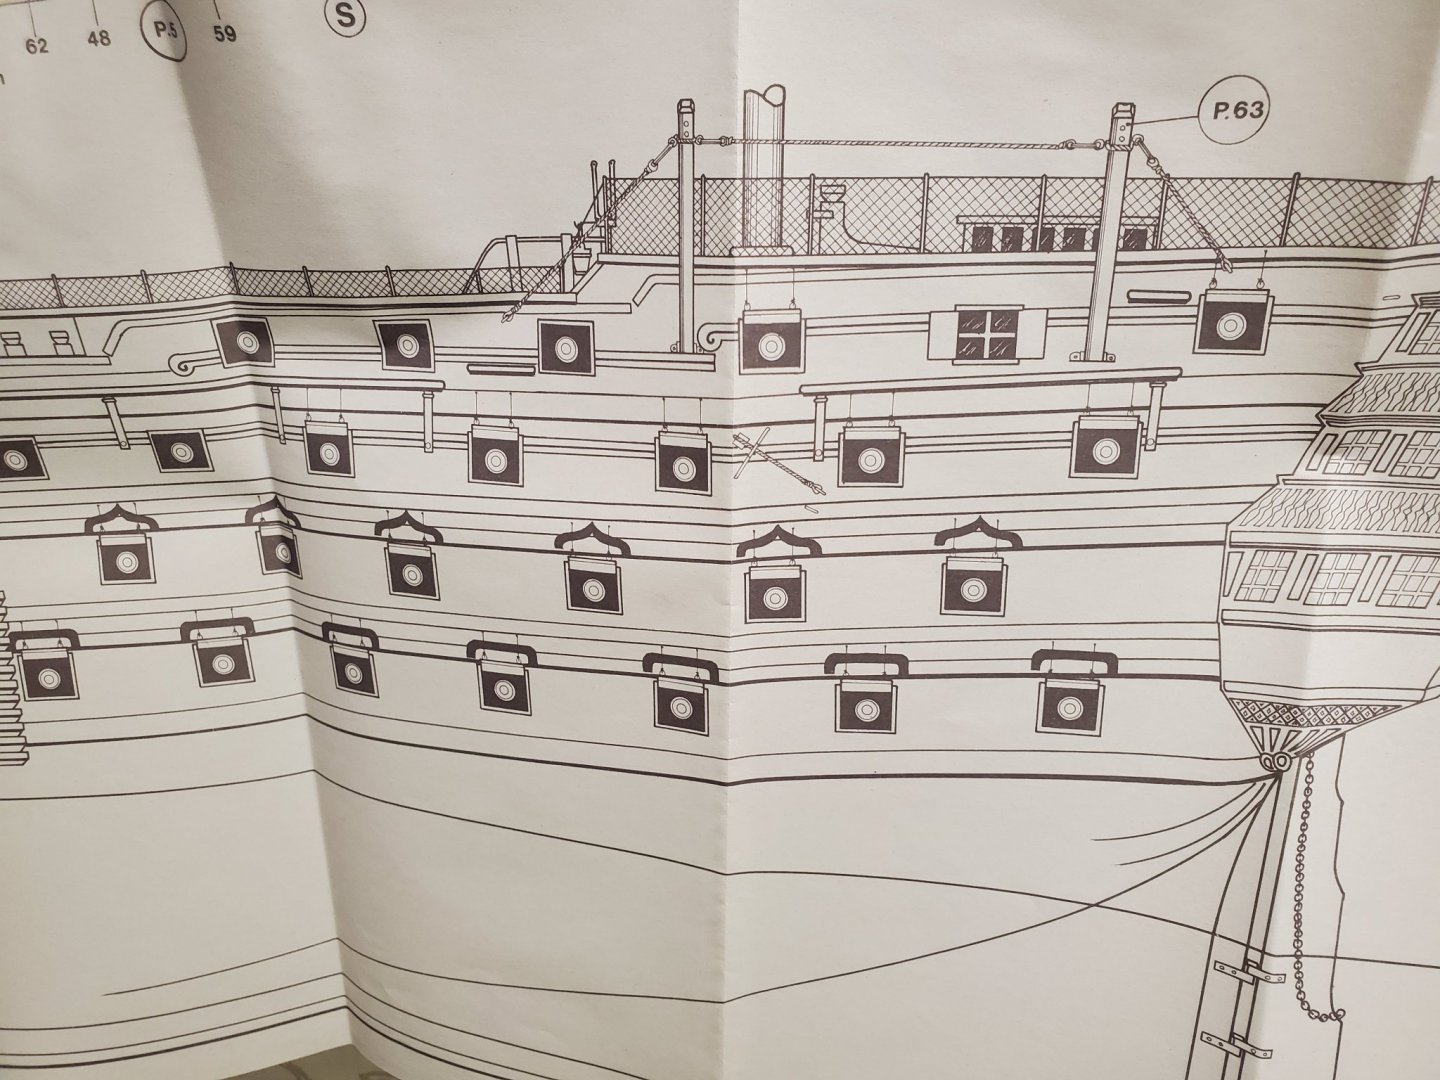
This kit drives me crazy some days. There are so many wrong things, I have to constantly be checking and comparing. If I blindly follow the somewhat instructions and one print of construction details, I would end up with a ship, but it wouldn't be the Victory. ( now I get off my soap box). I decided that it would be best to lay everything on the hull out before going any farther to see how things will fit and look to see what is right, what is wrong, and what needs attention. So I got all the gun ports laid out and I hope, so they will work. Now I thought .... better check the wales. Now this is interesting. The next two photos are the kit version of the wales. There doesn't seem to even be a lower wale. Just a board. Now the next two photos are from McKay's book. BIG difference. Now..... I had been planning to TRY ... to cut the anchor stock and top and butt planking for the lower two wales..... But ... if I can do as planned and stain instead of paint the ship, I will have to come up with a combination of the two different layouts to accommodate the light and dark stained bands that representthepainted bands on the real ship. I am thinking of staining the wales with ebony black stain and using some yellow Alaskan cedar for the light bands. I probably won't have as much curve in the lower wales at the rear of the hull. I found some images of stained model Victory ships on the internet and they were done like this and I thought they looked good. So...... I will lay this out and post a photo of the layout shortly, and make a decision on proceeding. Mark


-
Thanks guys. That makes sense. The photo Gregory posted above would have saved me asking if the prints would have showed it like that.. It would have been nice if Mantua at least mentioned it. When I get that far, I will try making it. Mark Frazier
-
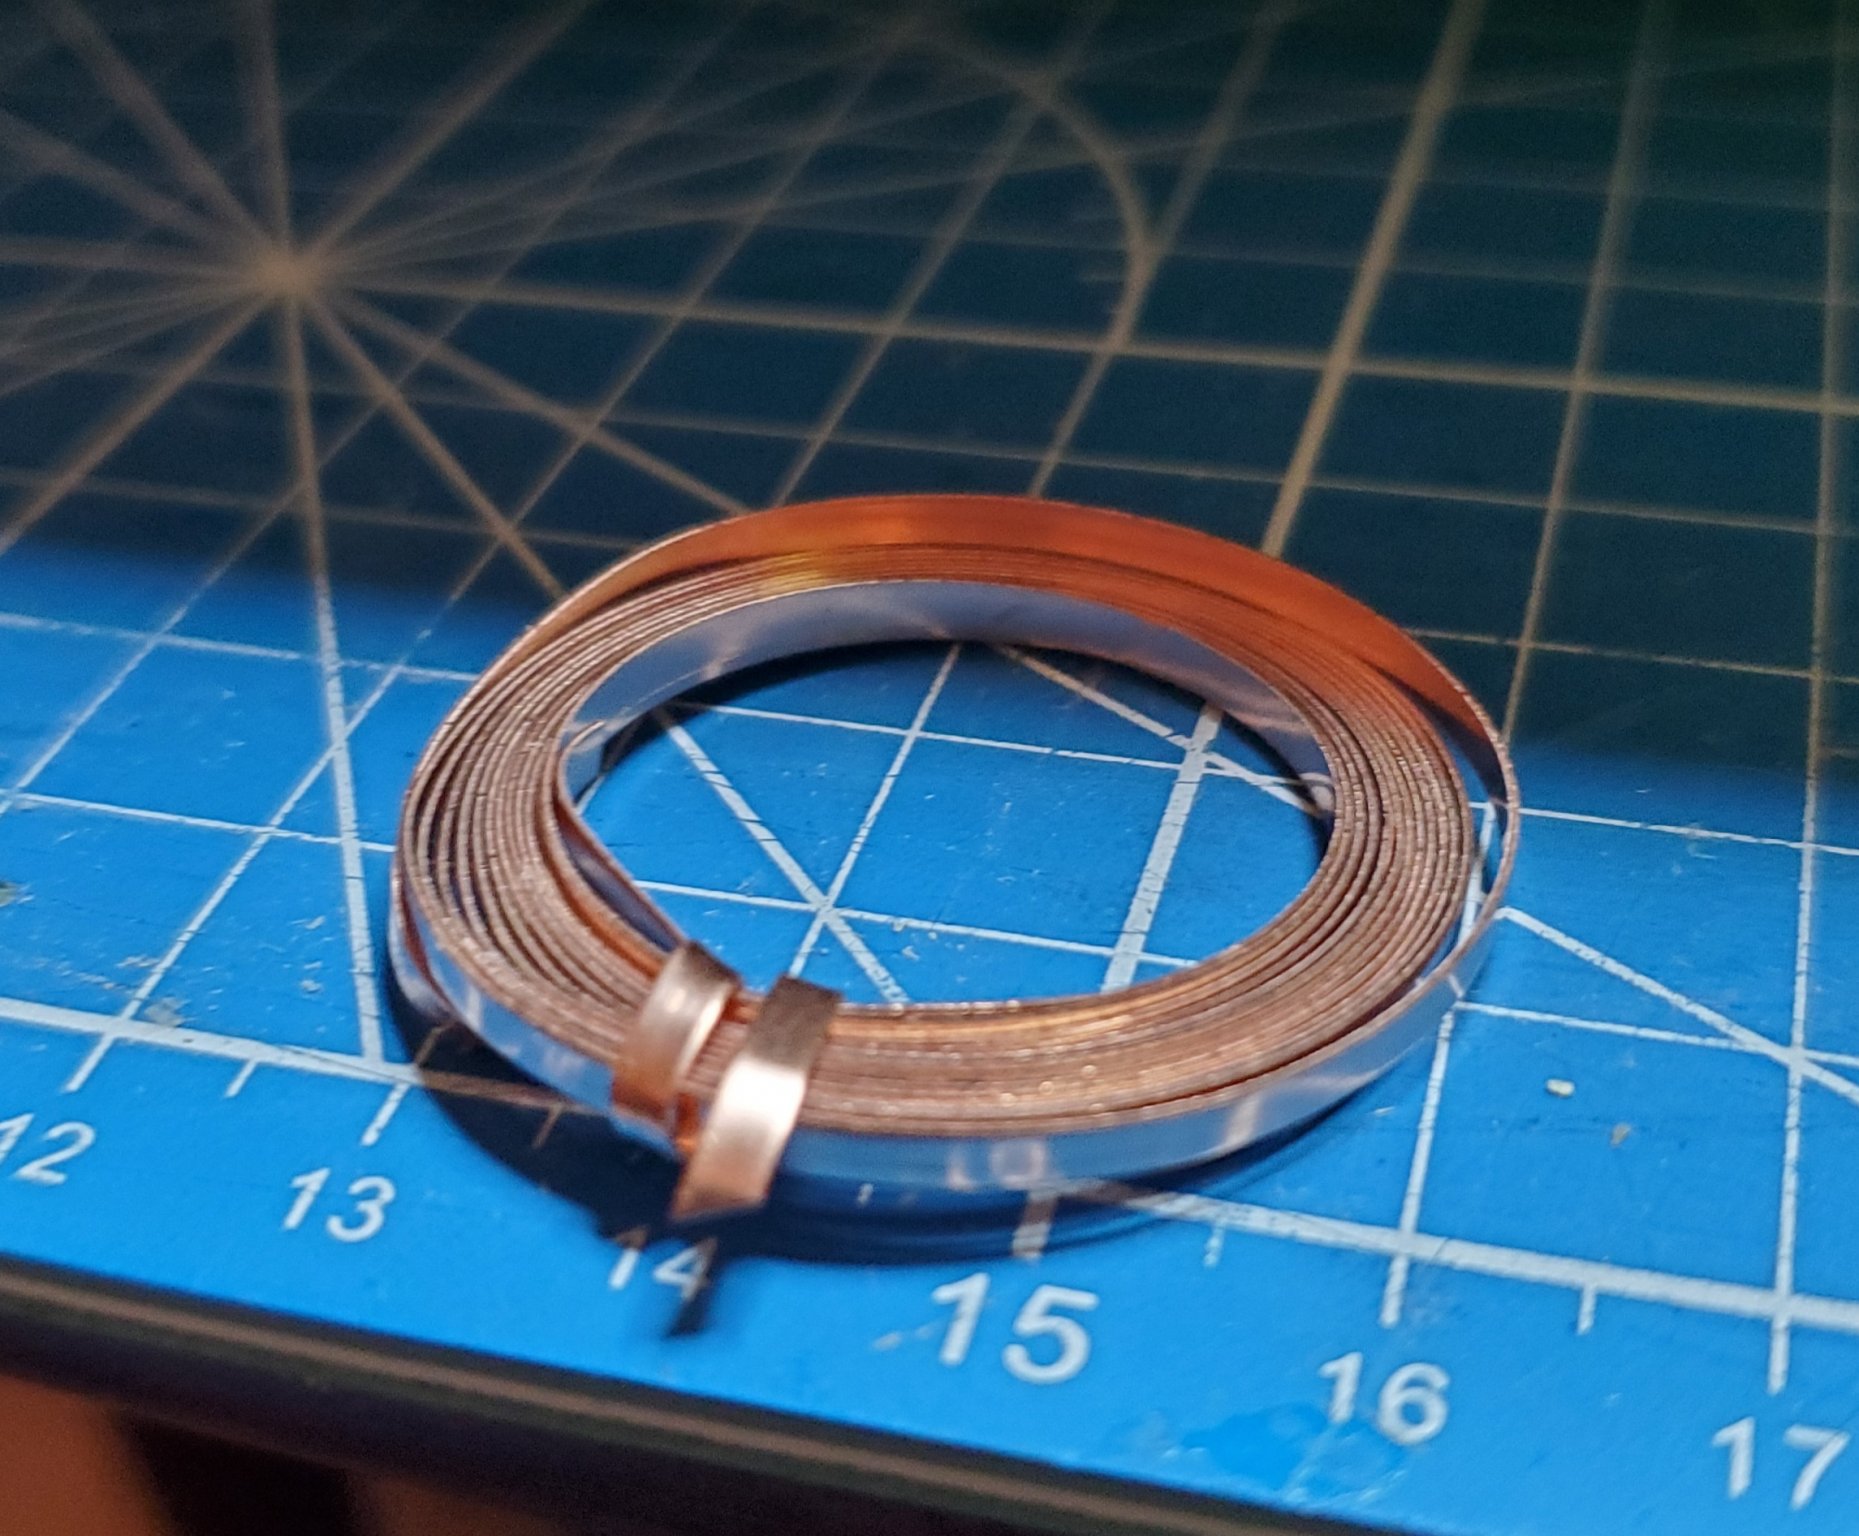
I meant to add this also. It is a small roll of copper band. It's about 1/8 inch wide and fairly thick. I have no idea what it is for as I can find no mention of it either. Anyone know what it is for? Mark Frazier