DocBlake
-
Posts
1,811 -
Joined
-
Last visited
Content Type
Profiles
Forums
Gallery
Events
Everything posted by DocBlake
-
 Thanks guys and to all for the “likes”.
 -
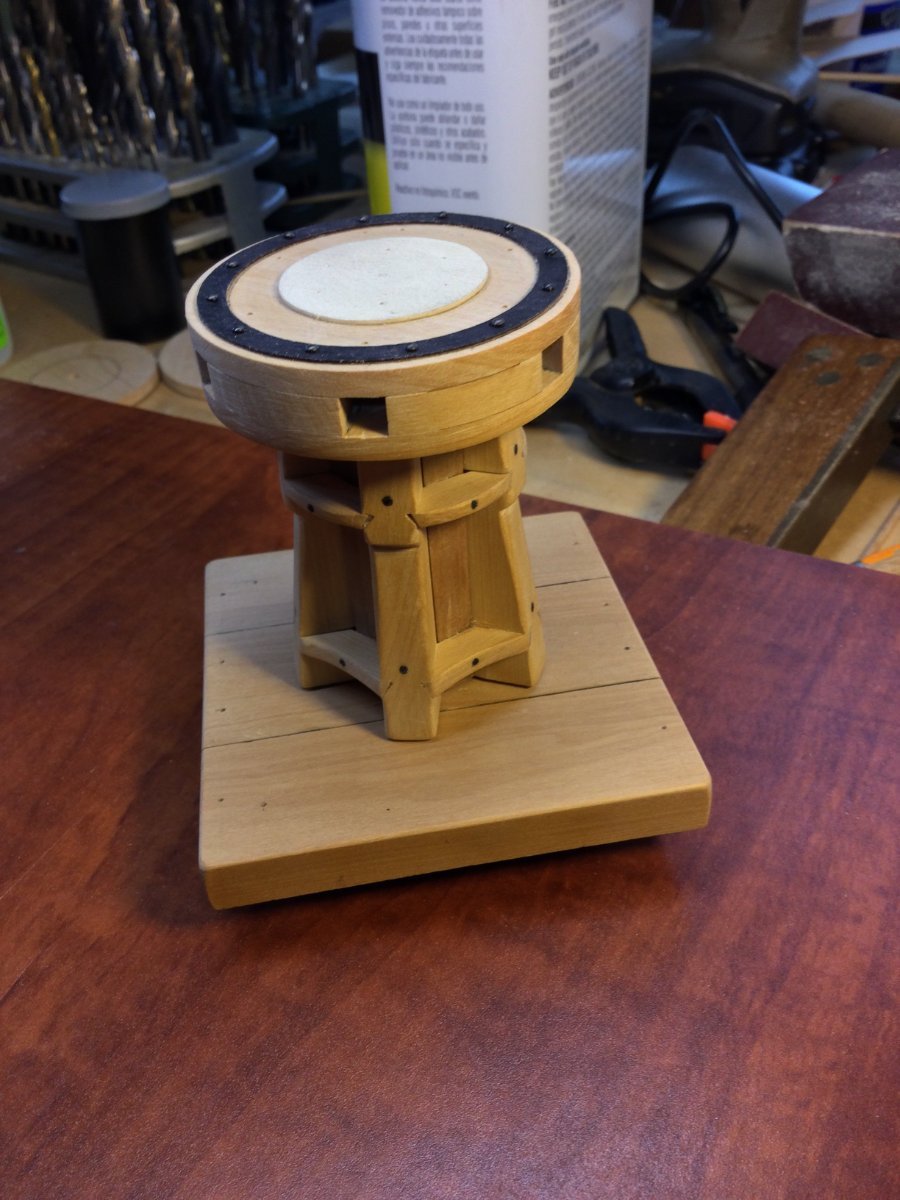
Thanks, Toni! FINISHED!!


-
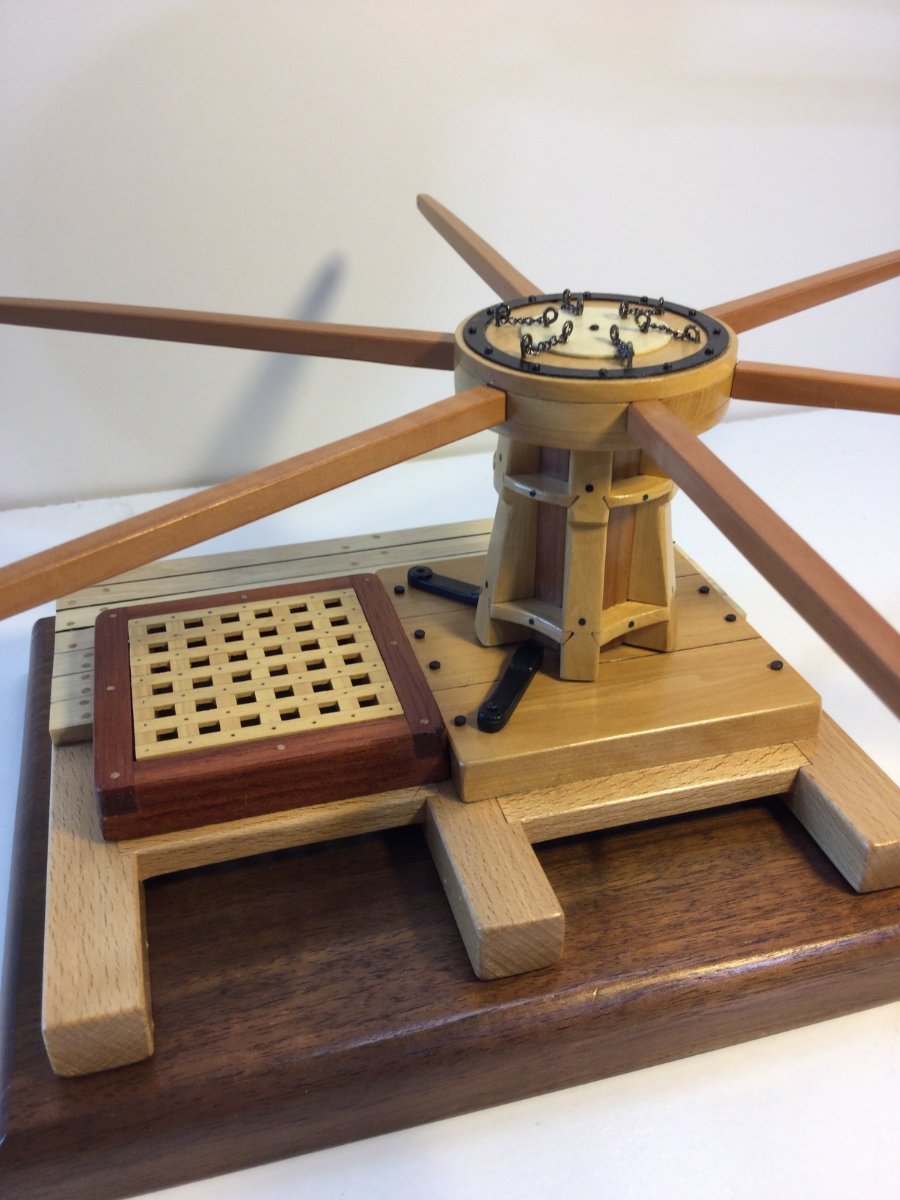
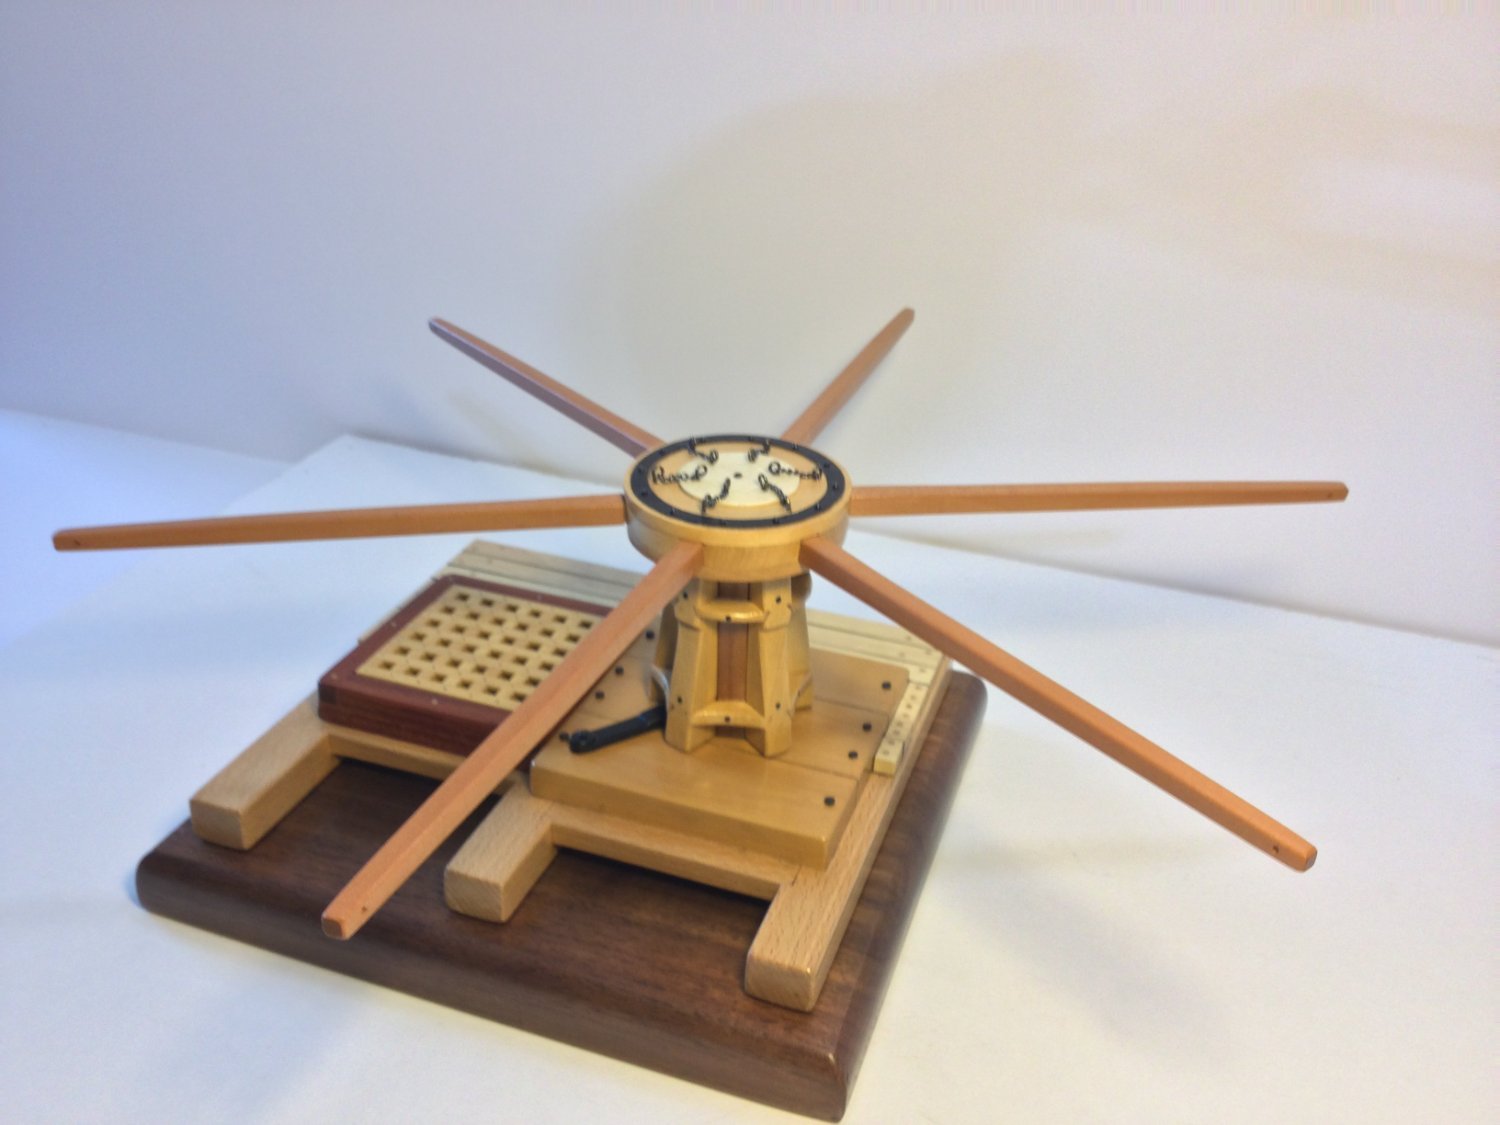
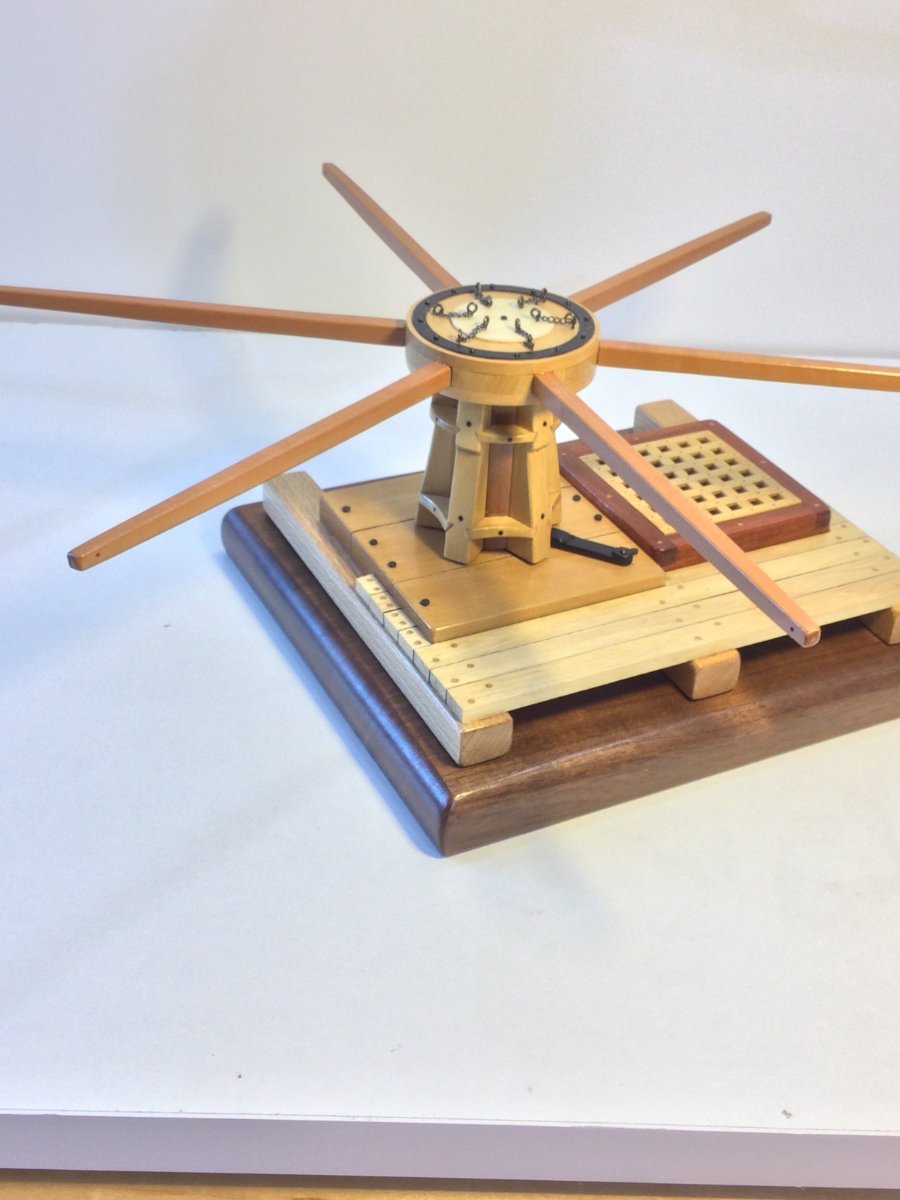
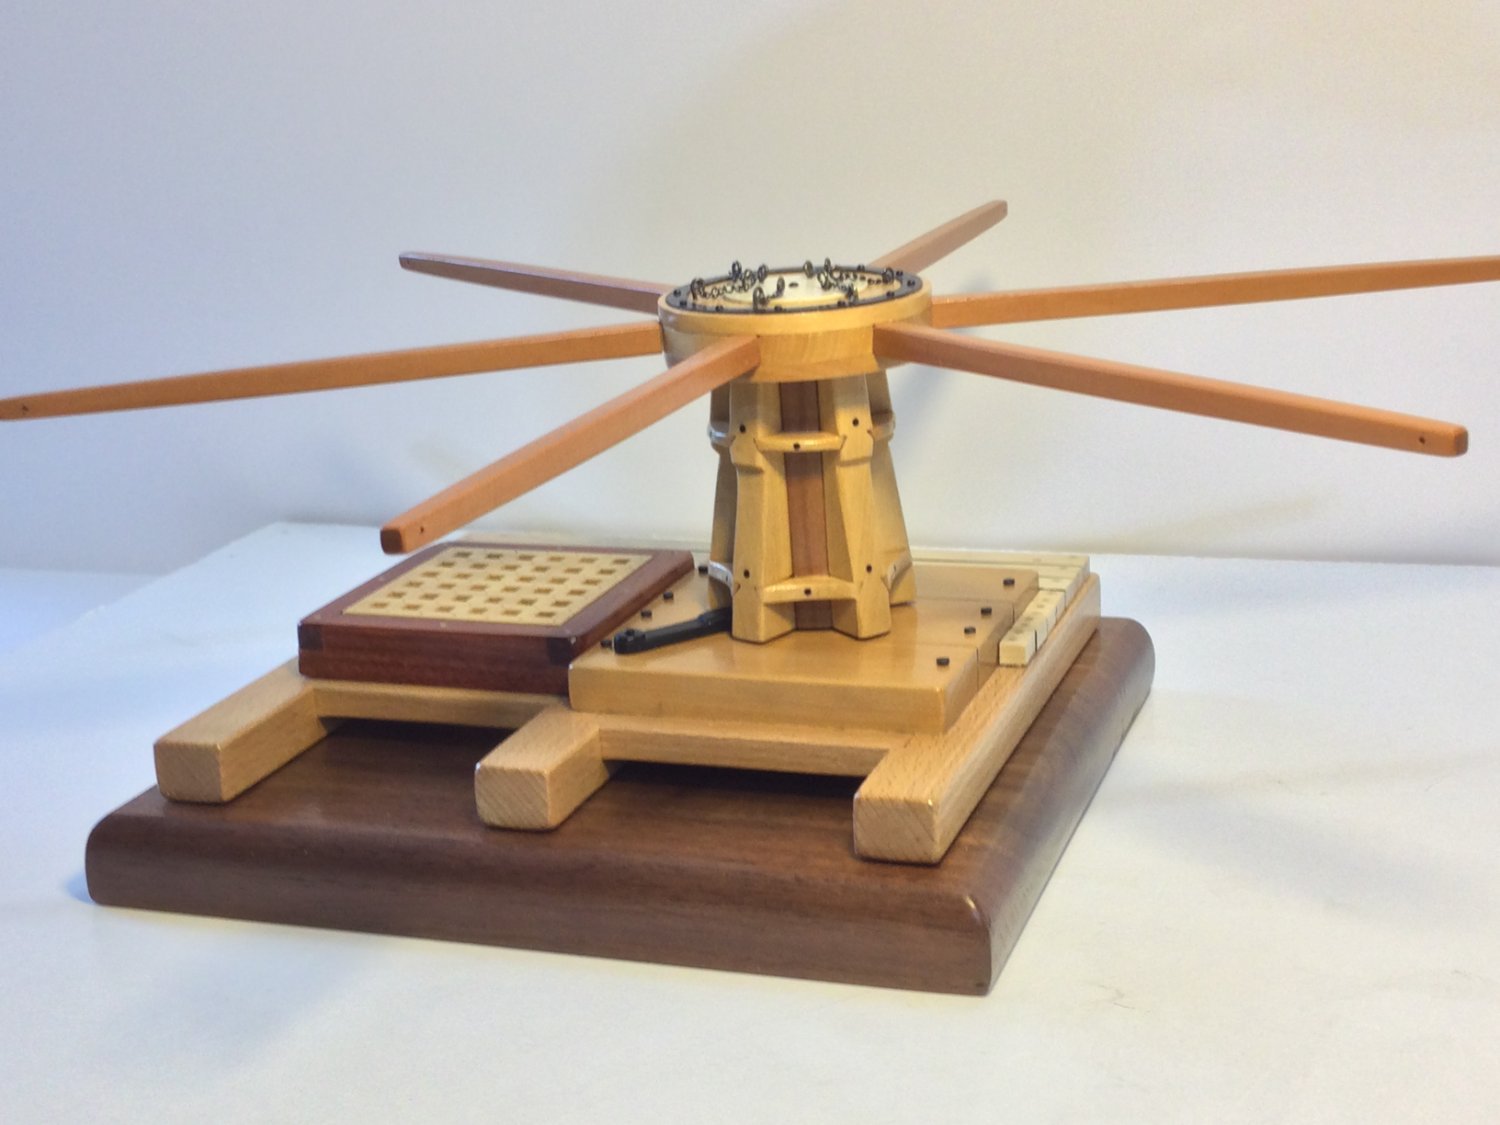
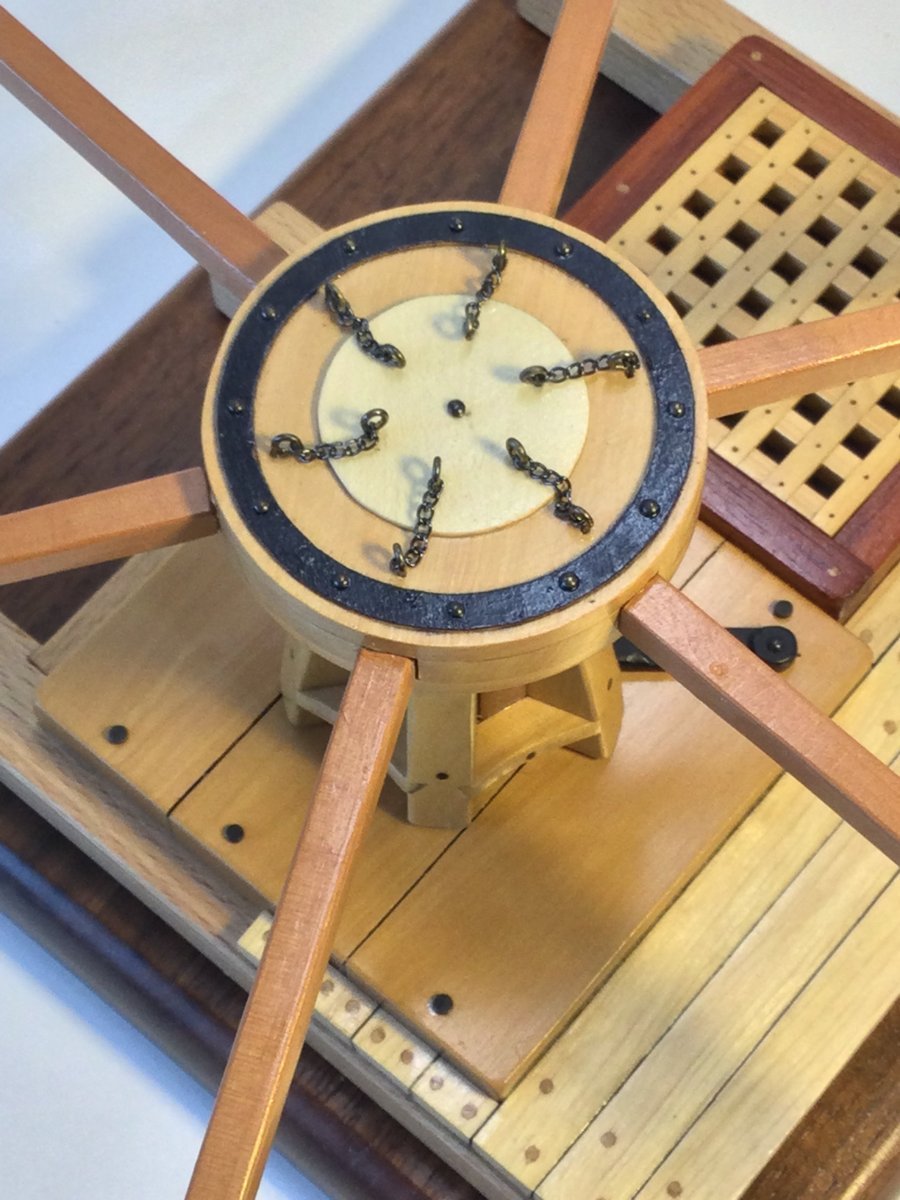
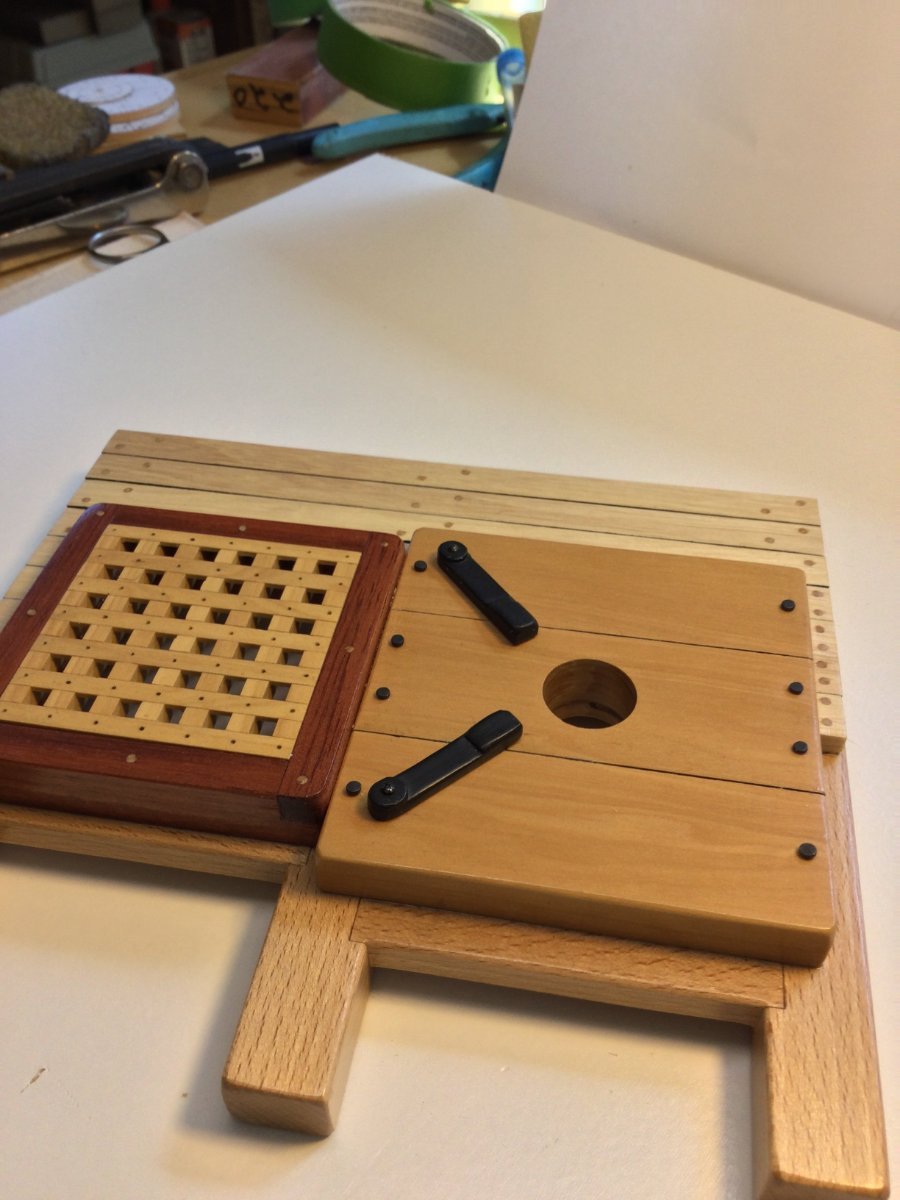
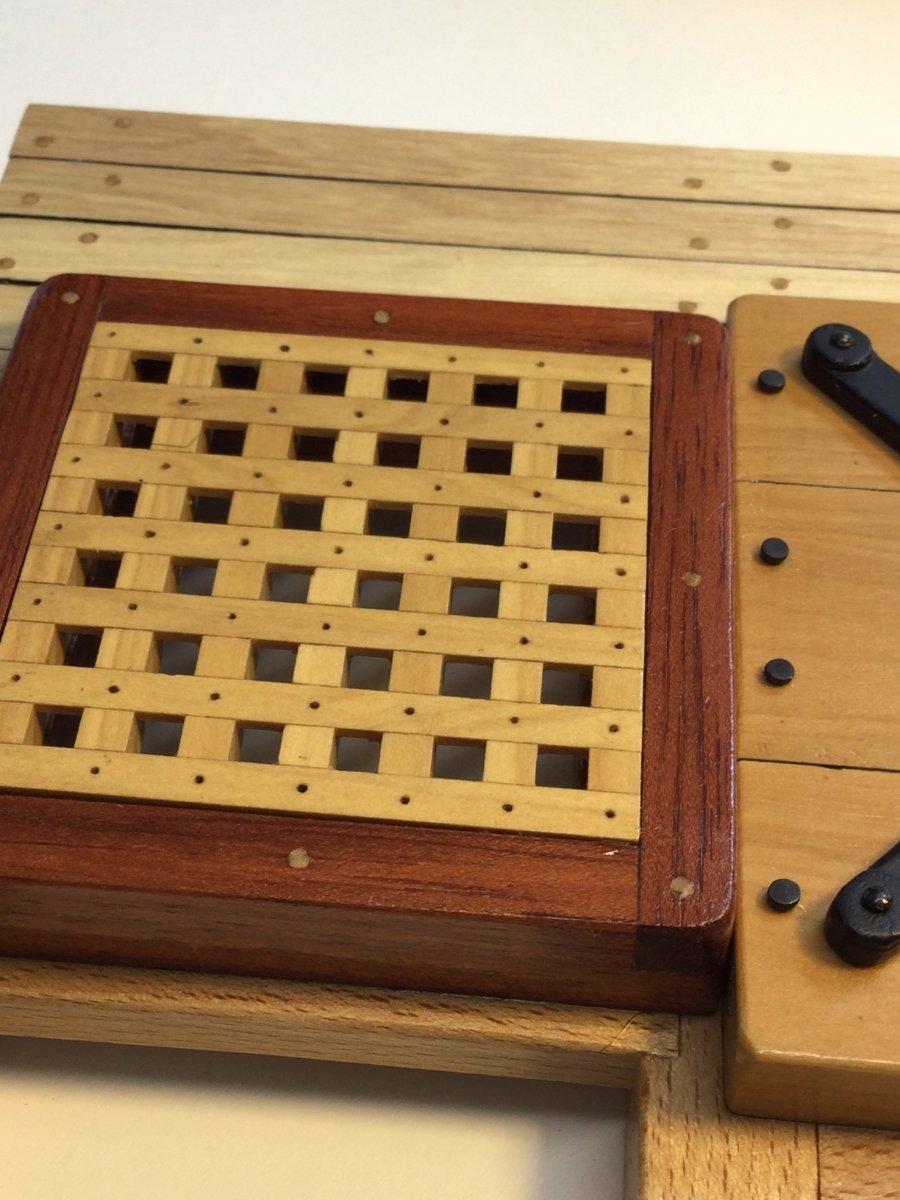
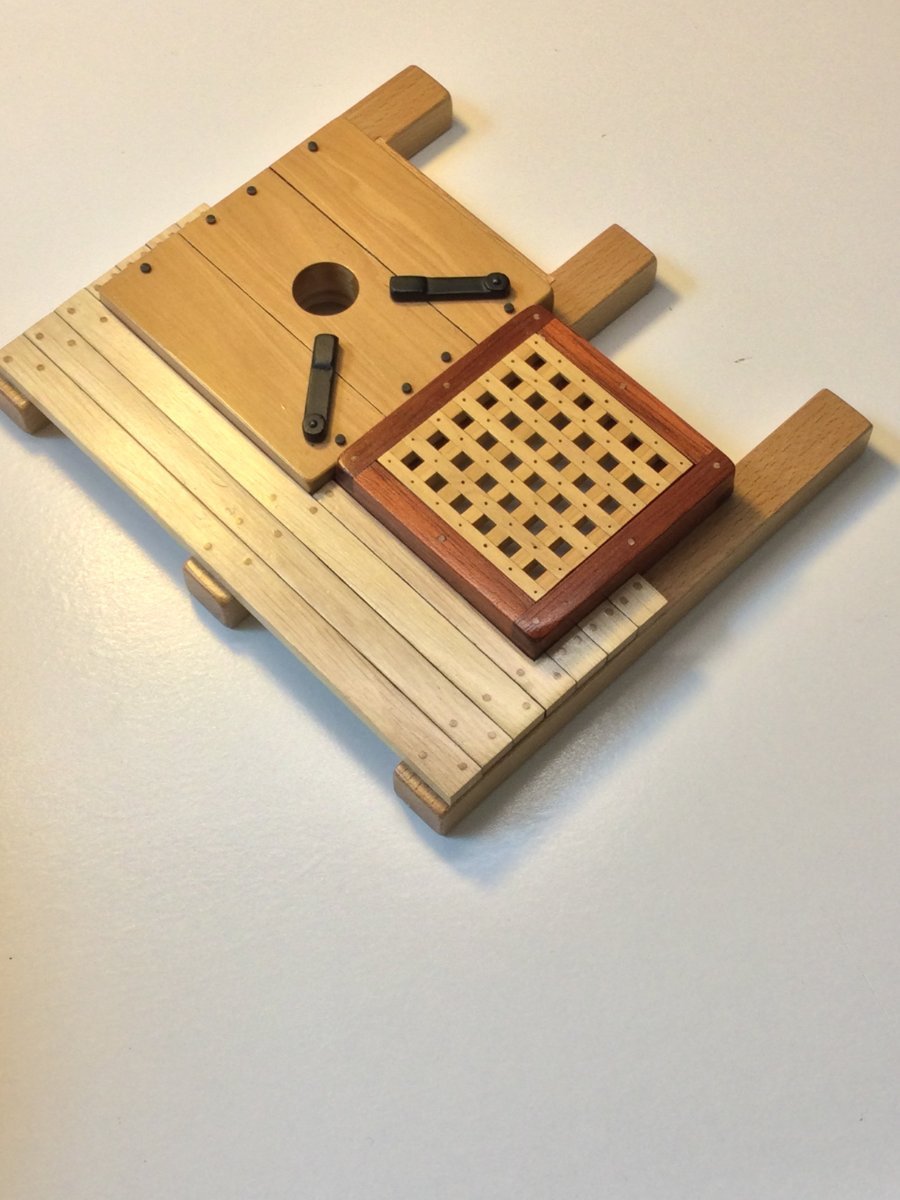
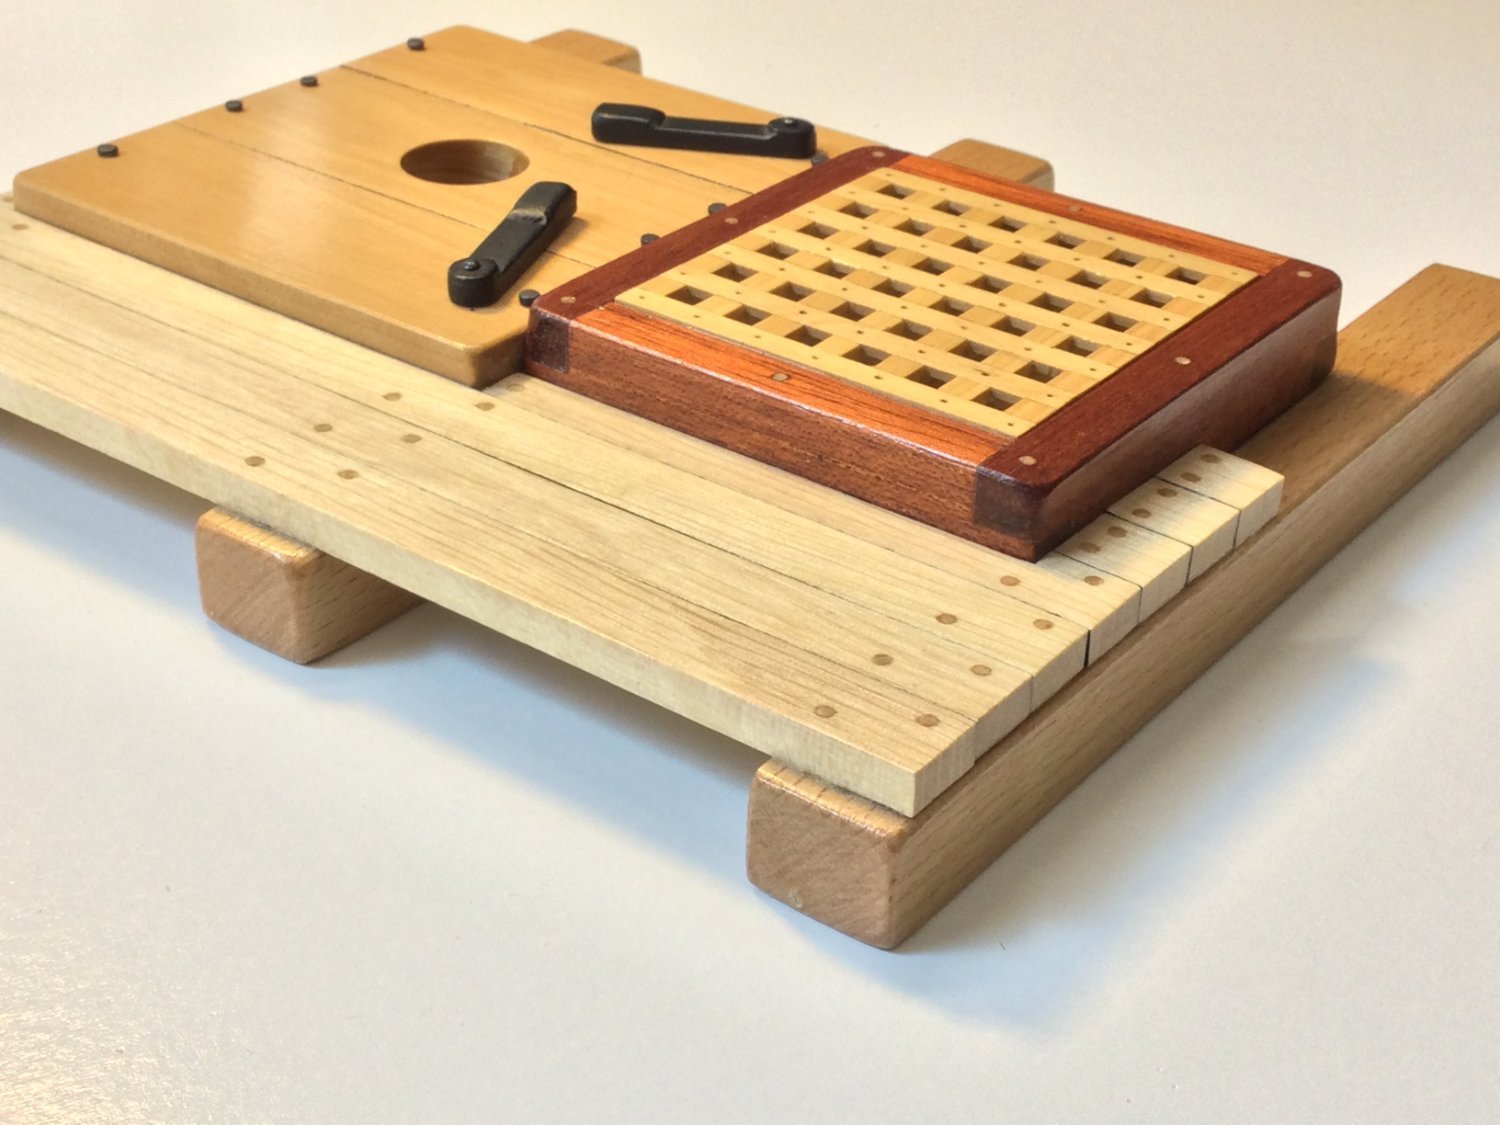
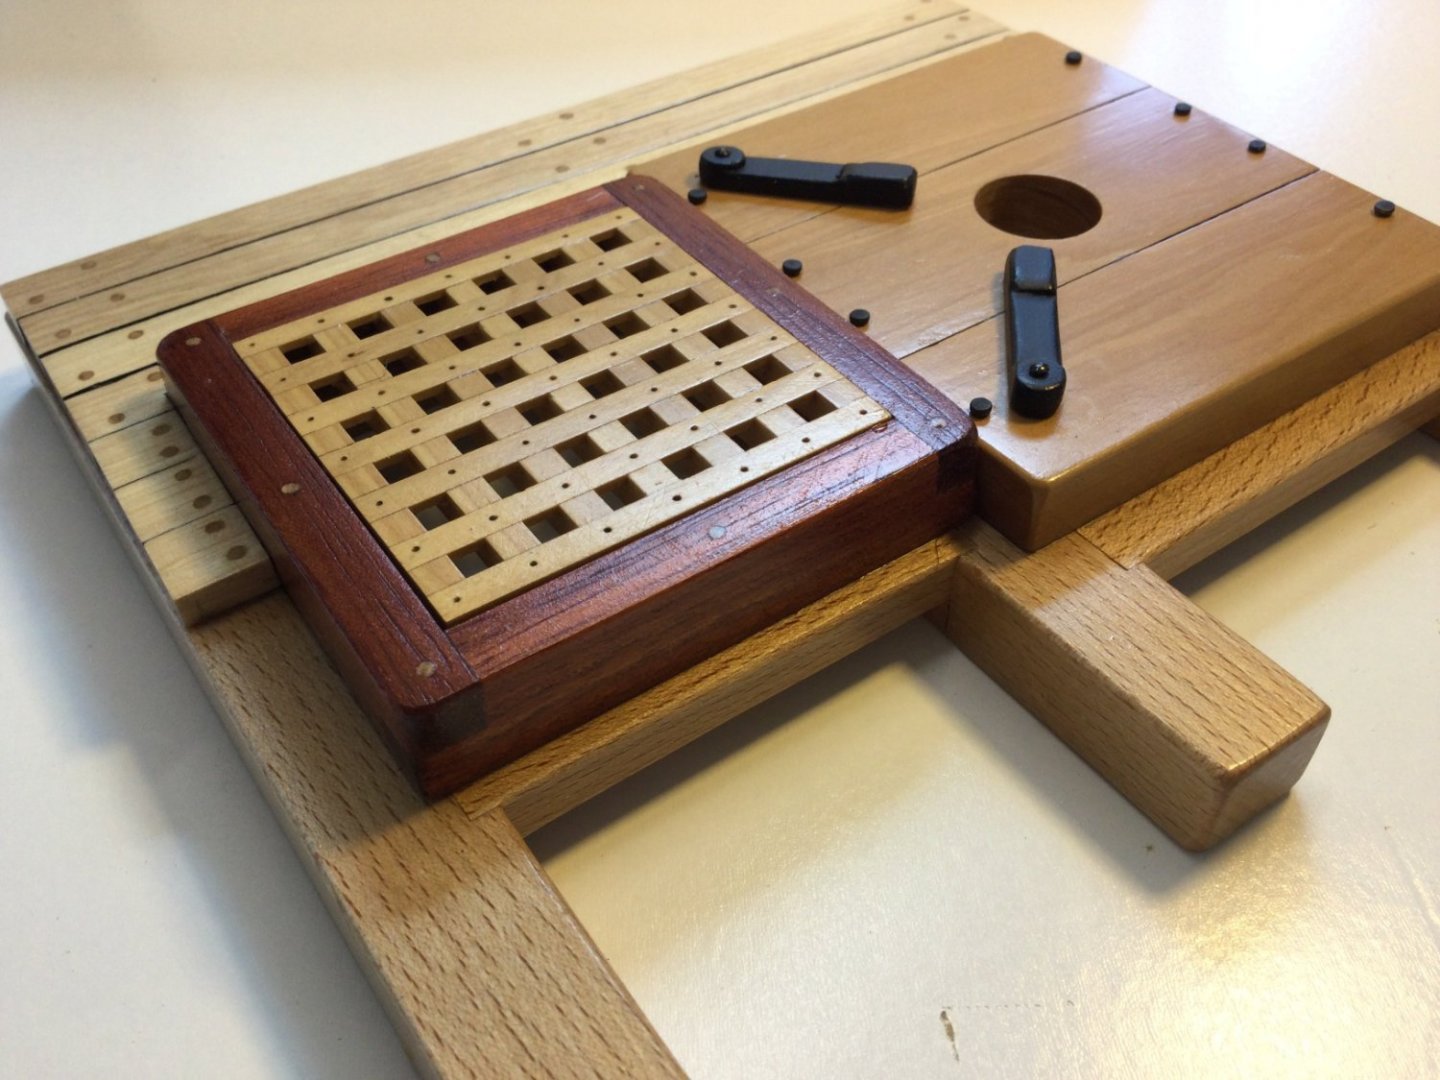
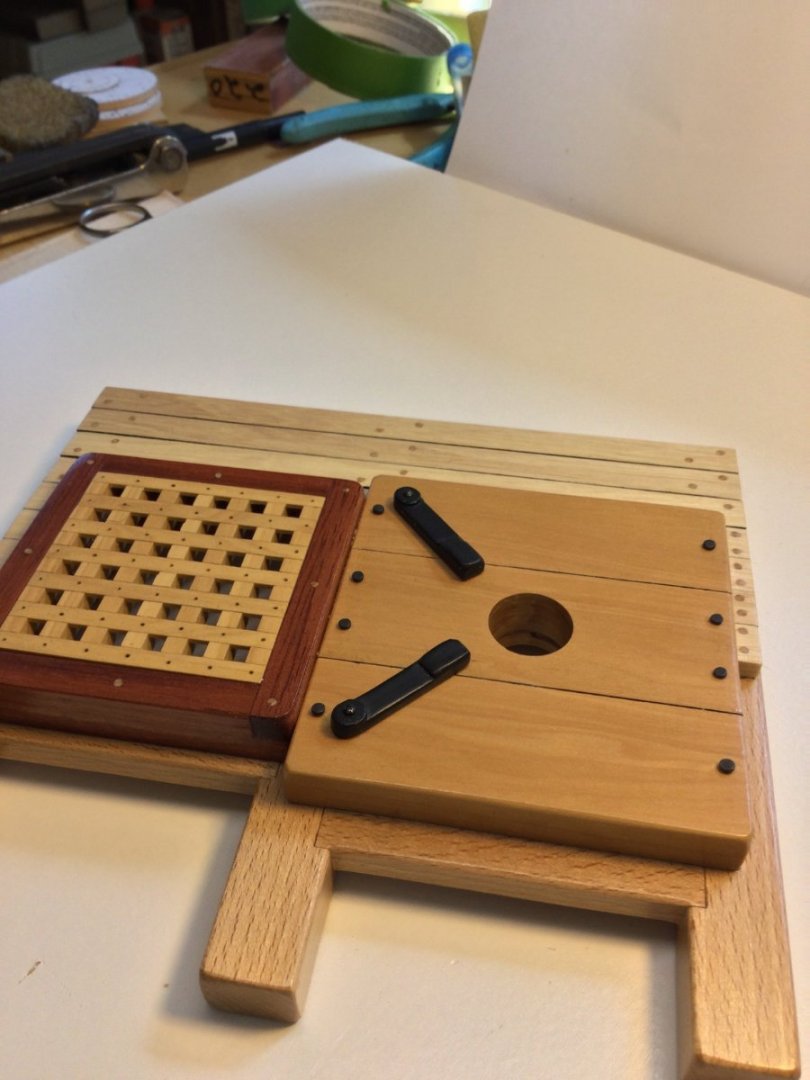
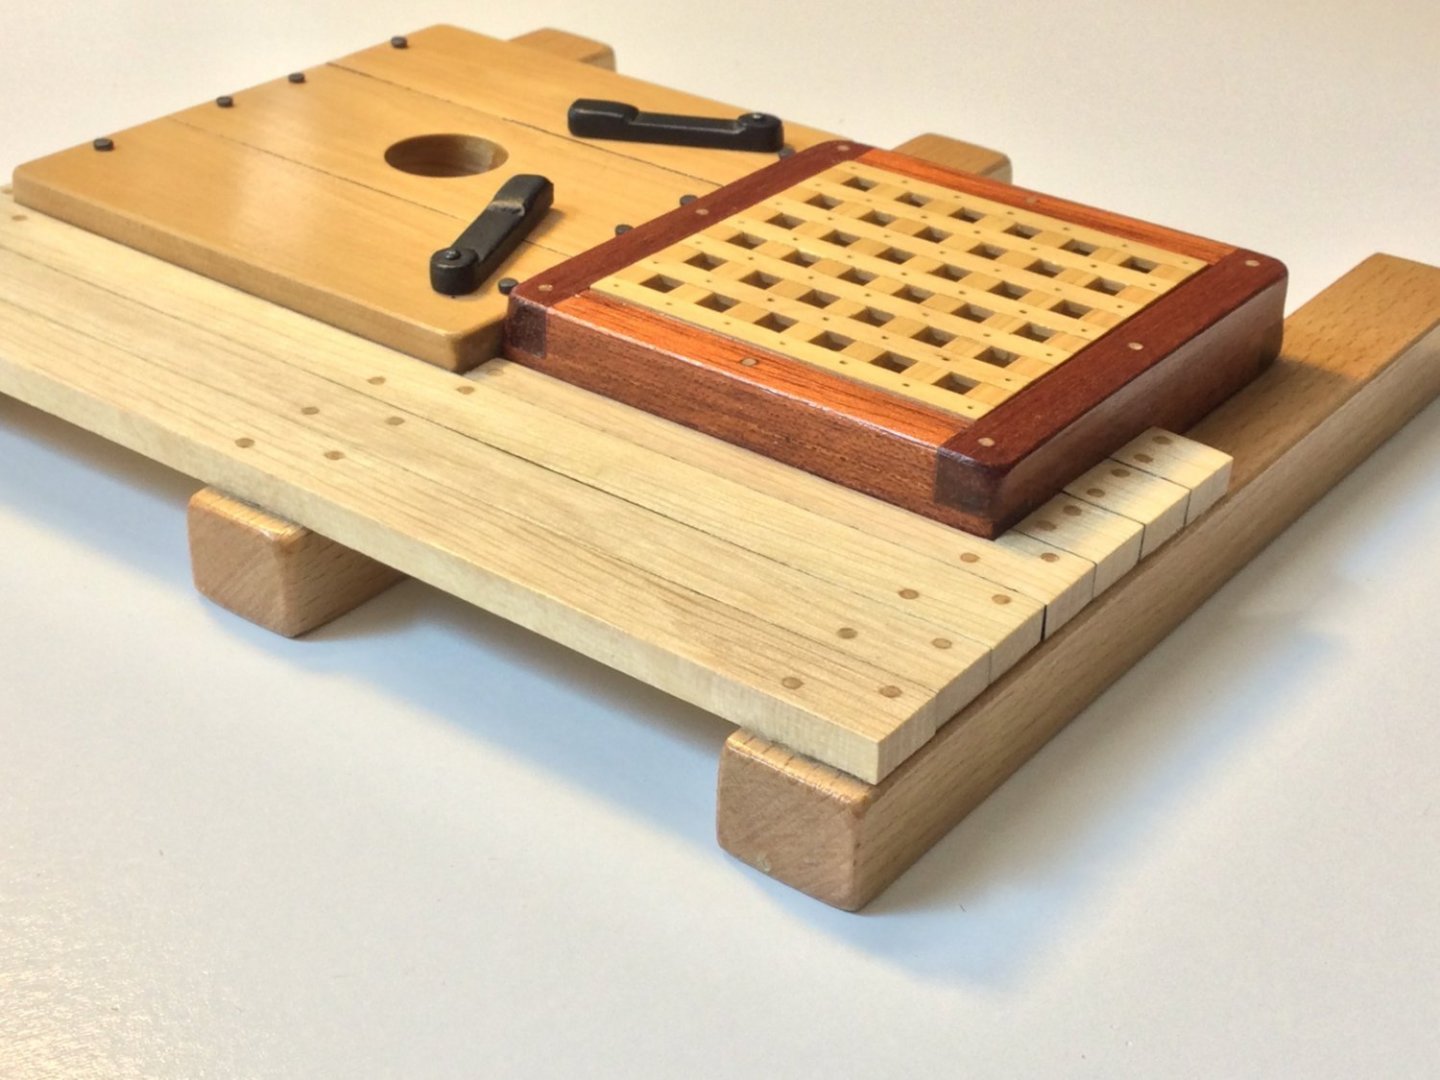
I decided to use a single treenail at each joint on the grating because I thought the two diagonally placed ones might be too busy looking. These are not actual treenail…just marks in the wood made with an awl. The effect is subtle, which is what I was going for. The hatch coaming is bloodwood. I added the capstan step bolts and made up the step brakes and installed them. I decided to add some deck planking. The wood is hornbeam. Pale like holly but with a slight gray cast. I kind of like it. The only thing left is to finish up the drumhead on the capstan and add the bars.


-
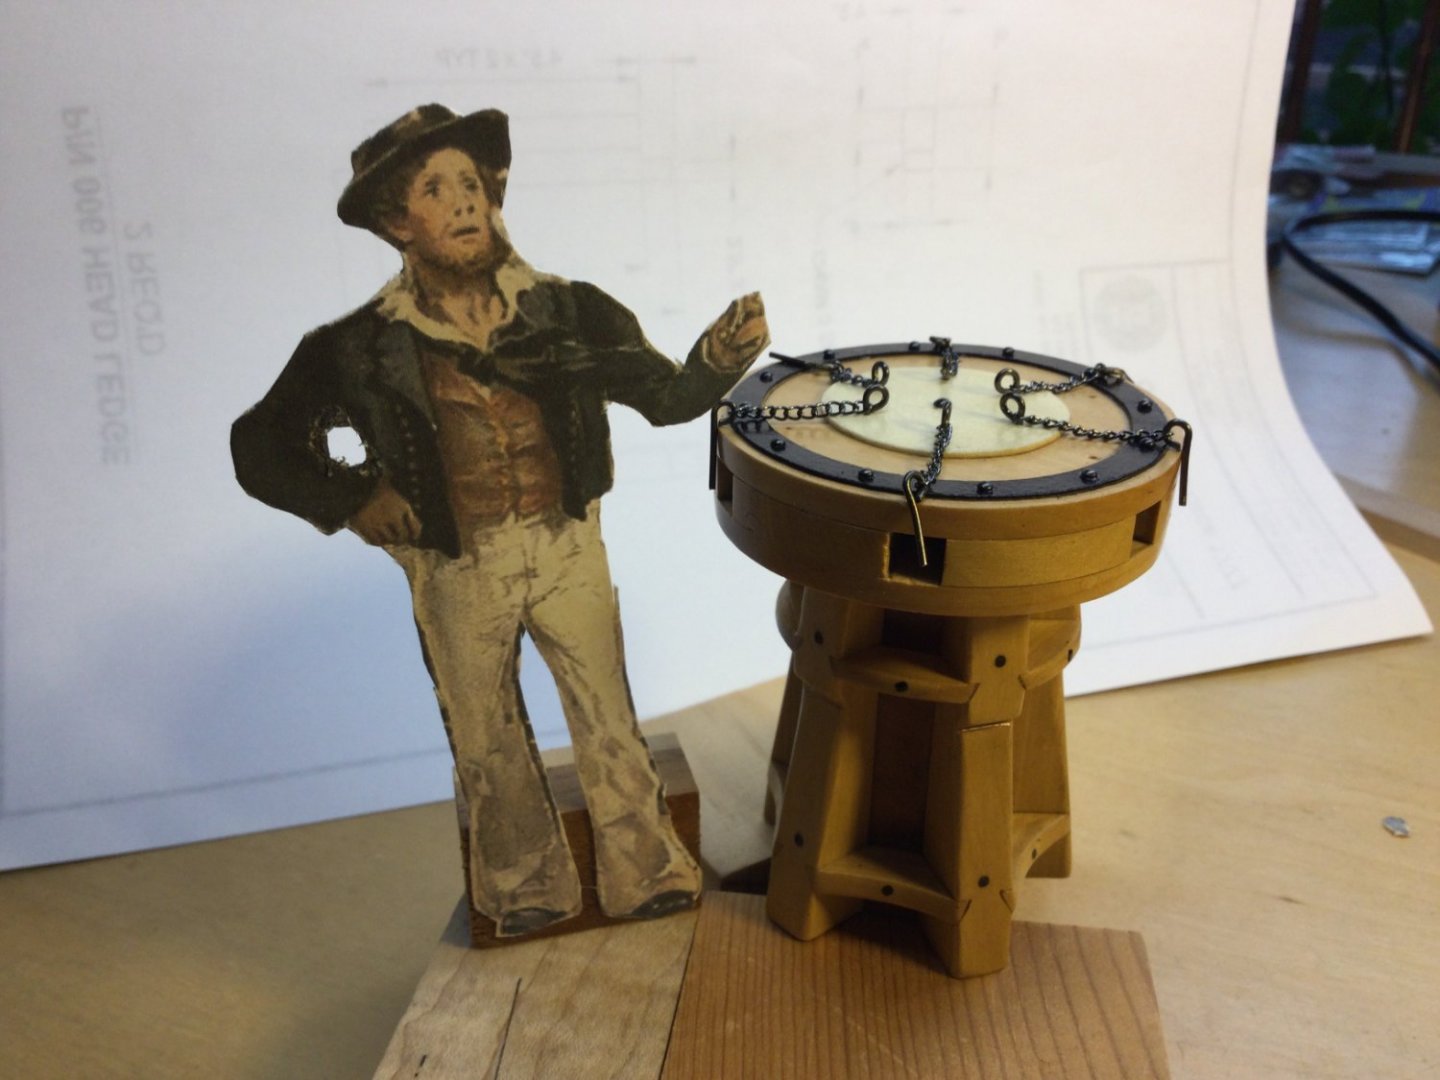
To give a sense of scale, I made a mockup of an average Royal Navy sailor in 1777 for comparison. He stands 5'6" tall, about average for the time.
-
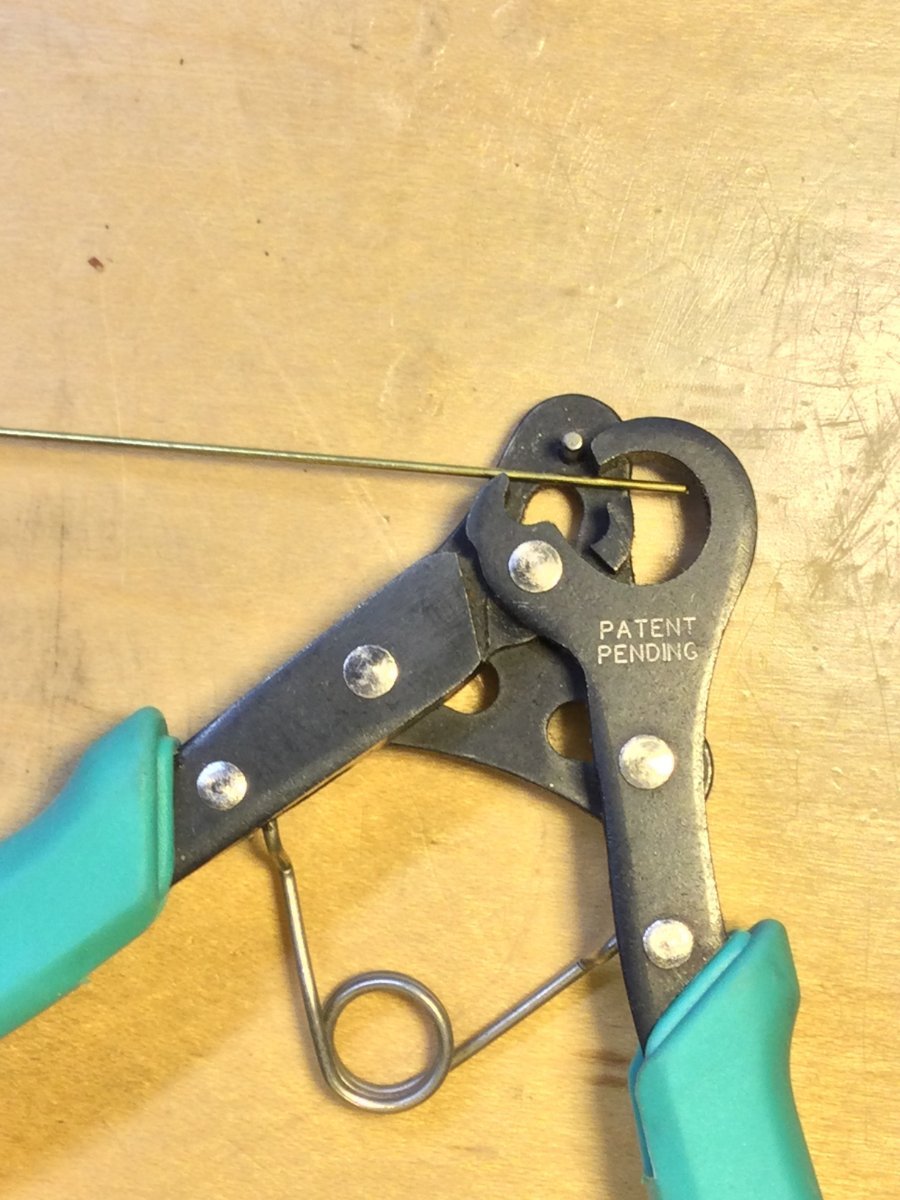
The only problem is that the ring size is fixed. The 1.5 mm looper makes ringbolts with a 1/16" ID. That's 3 scale inches at 1:48 scale. Almost perfect for rigging cannons etc. https://www.amazon.com/Beadsmith-Millimeter-Consistent-Bracelets-Necklaces/dp/B00BOZ79UO?th=1
-
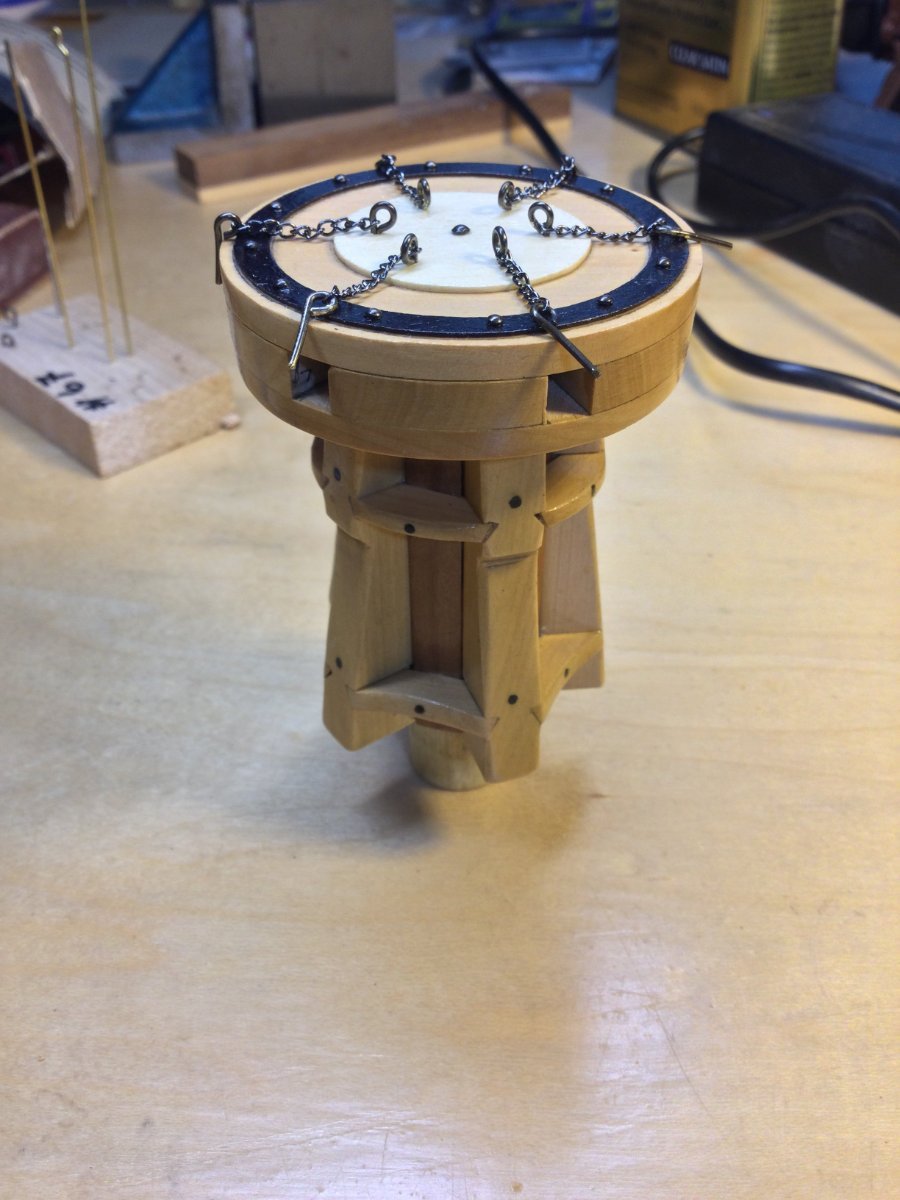
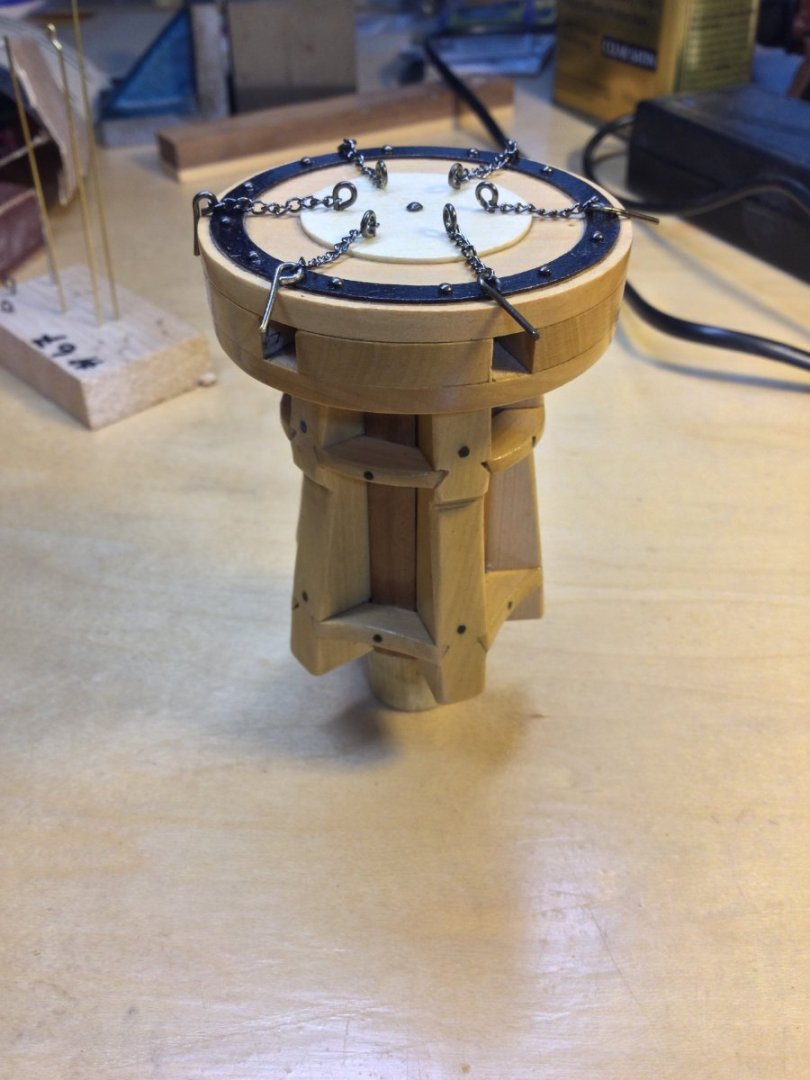
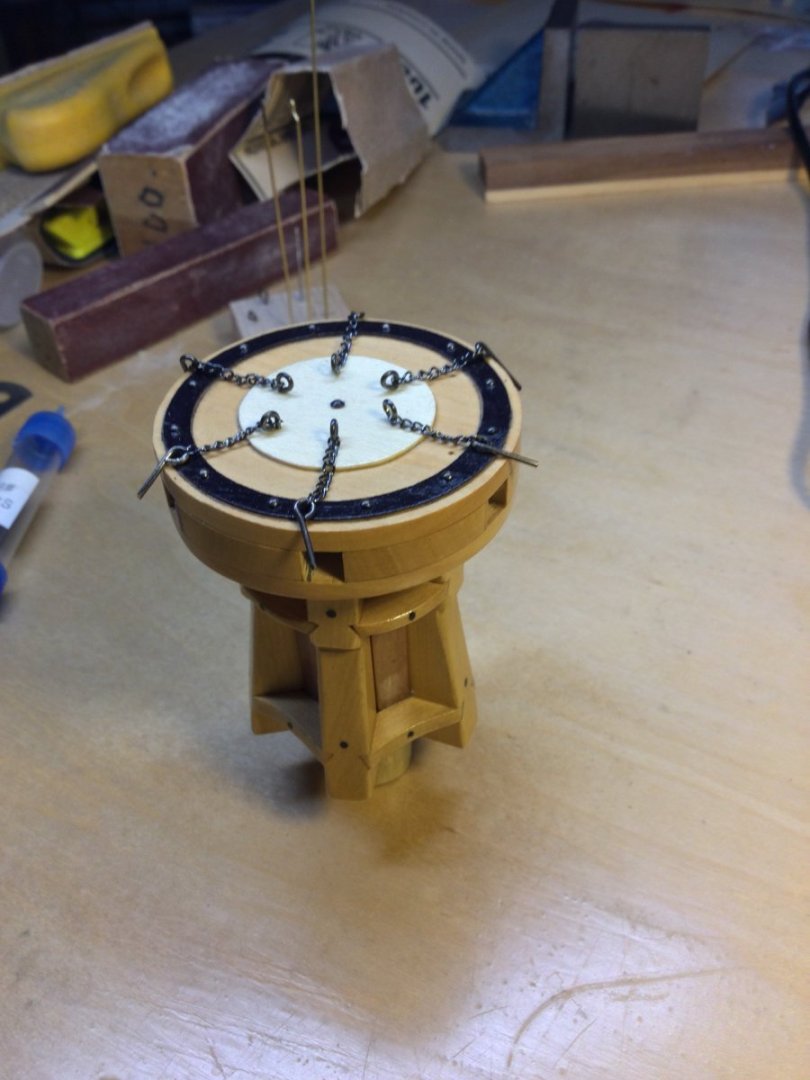
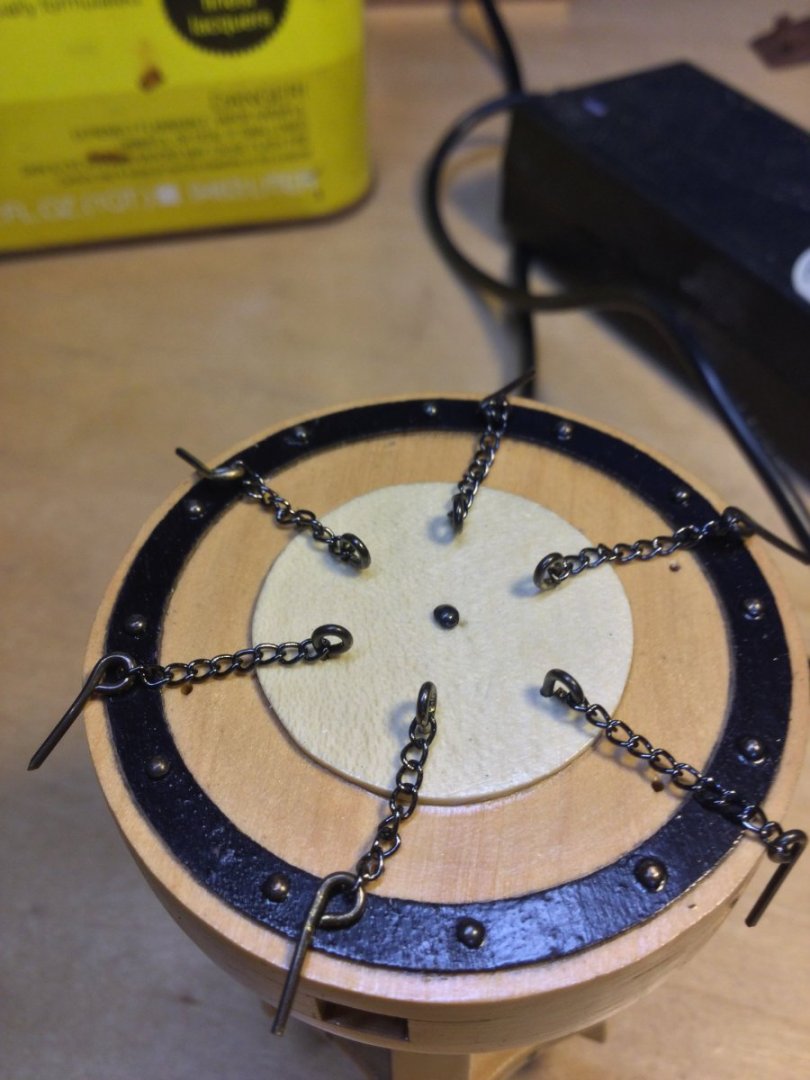
The capstan bars are held in place in the drumhead bu long ring bolts that pass through the upper drumhead, the capstan bar in it’s mortise and then the lower drumhead, locking the bar in place. The ringbolts are removable to remove the bars and are attach by a chain to some permanently mounted ringbolts around the center of the drumhead. Because the bars will not be removable on this model, the ringbolts are much shorter than they would be. I used .032” brass and a special jewelry-making tool that fashions ring bolts or eyebolts. They are blackened with dilute Birchwood Casey Brass Black. The chain is from Michael’s craft store. The ringbolts attached to the loose end of the chain will be glued in place once the bars are in position.


-
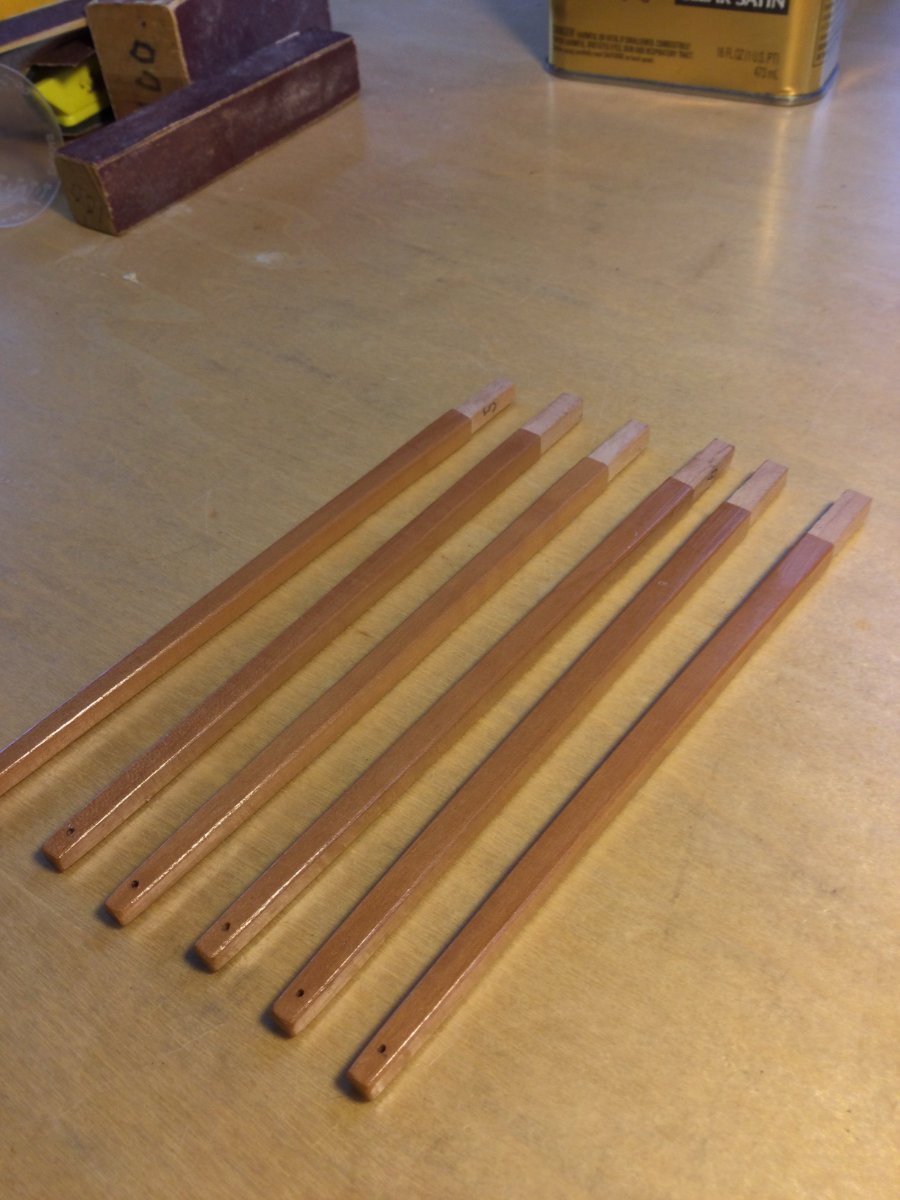
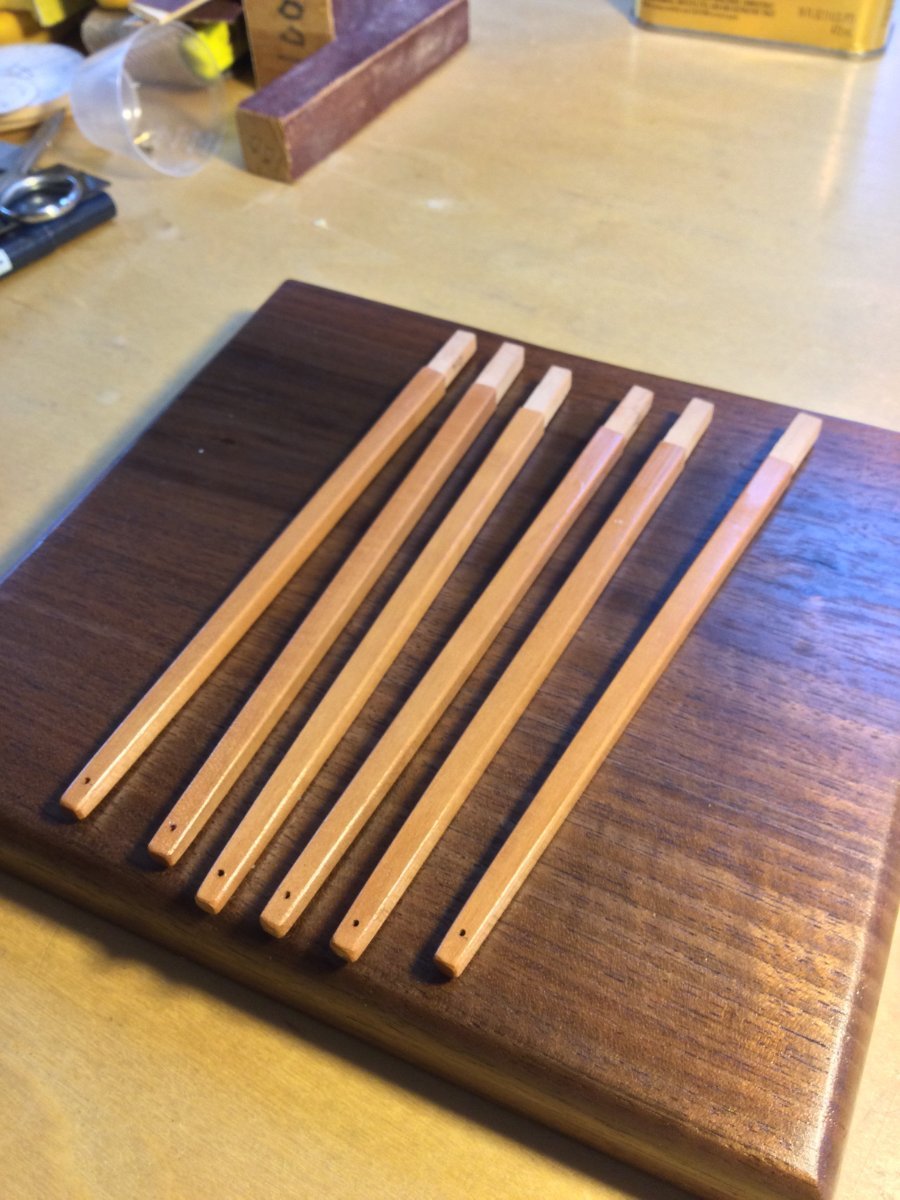
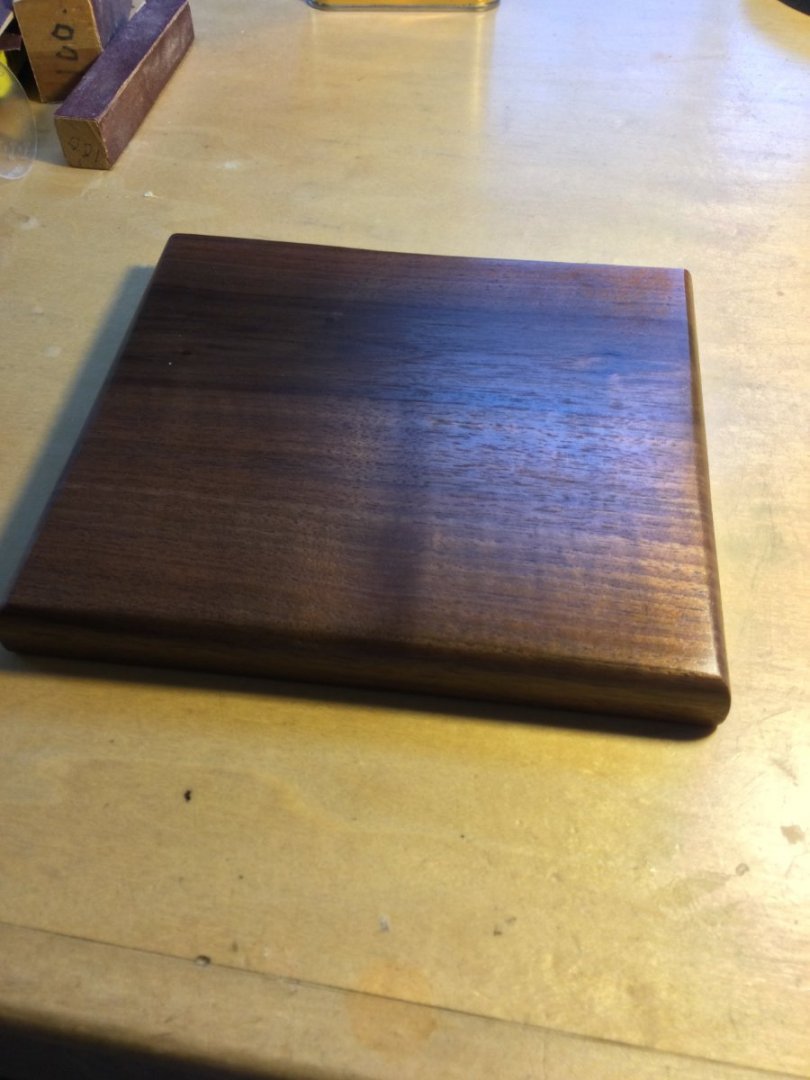
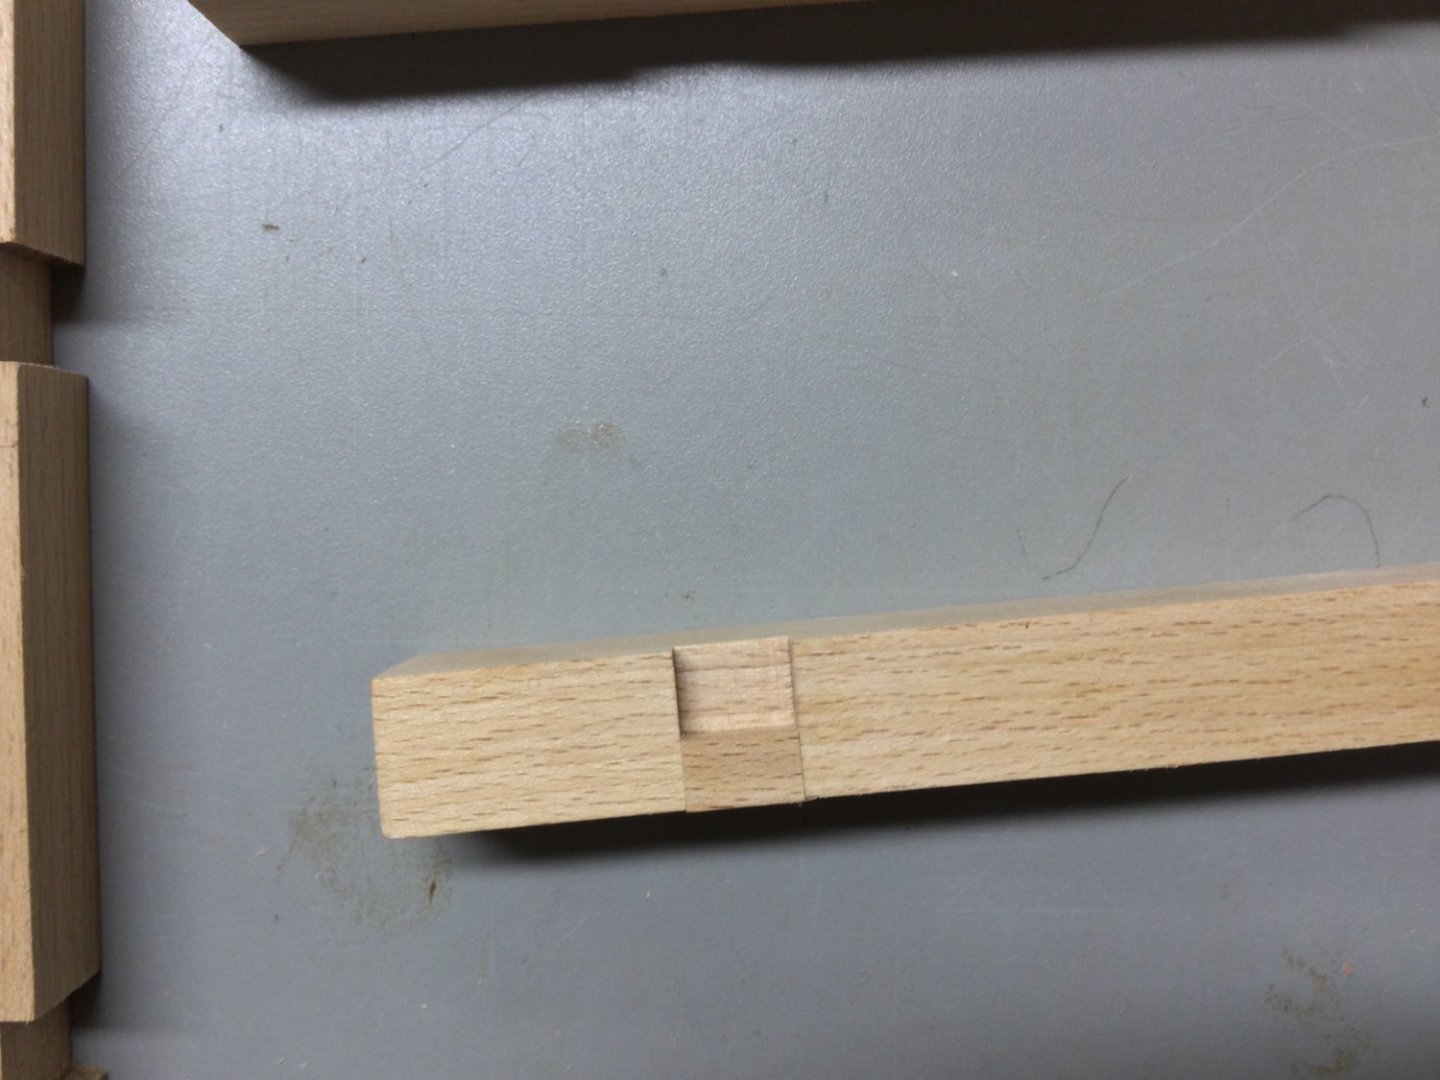
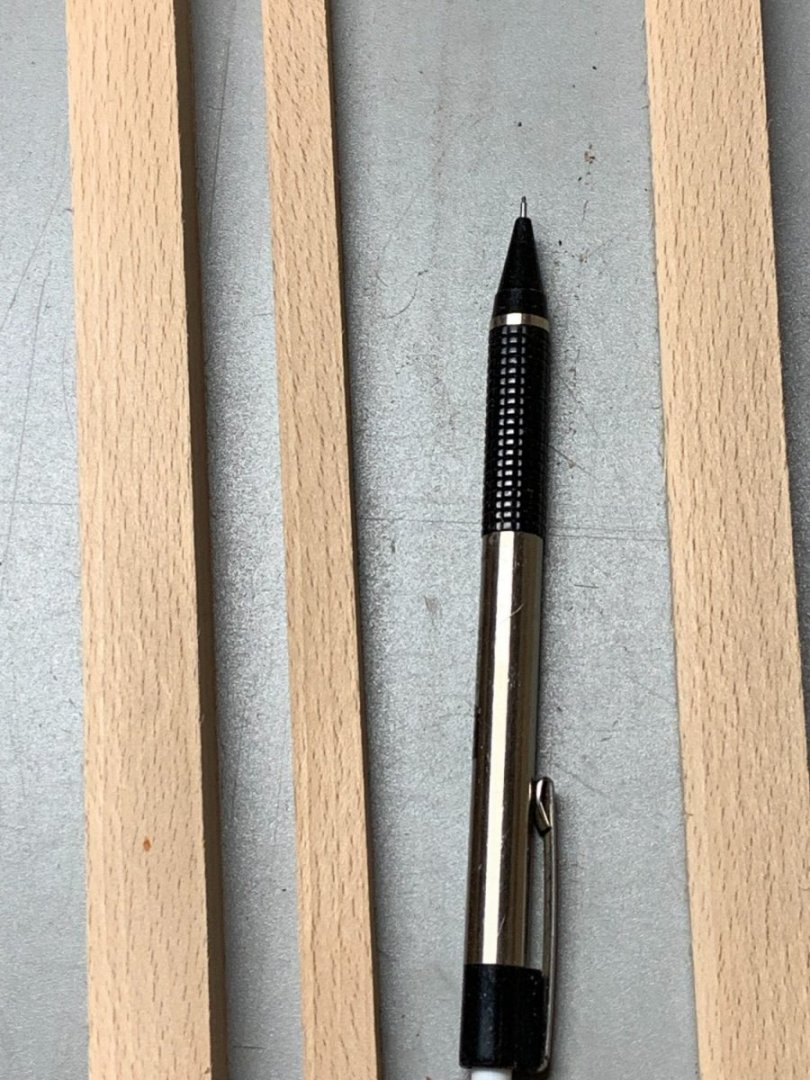
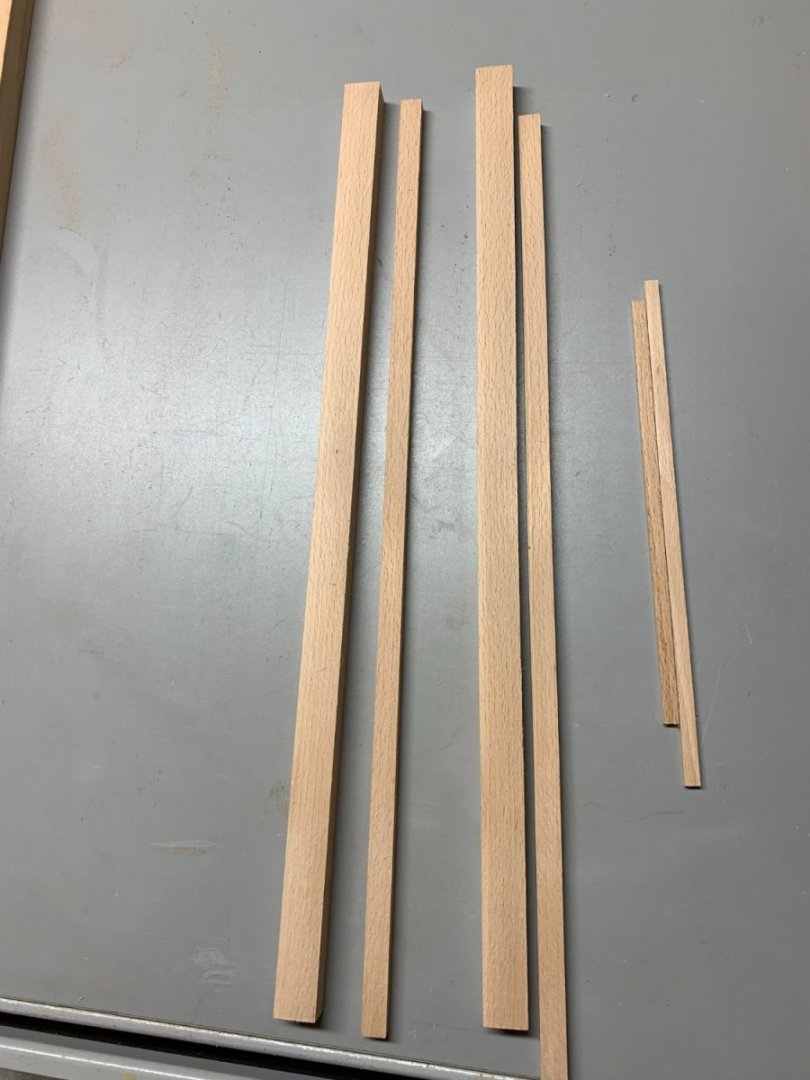
Getting closer to the end. I found a nice piece of walnut cutoff that was about the right size for the model base. A few minutes at the miter saw and the router table and the base was done. Next came the wipe on poly. The capstan bars are made of swiss pear. They are tapered, and have a tenon cut into the proximal ends which fit into the square mortises in the drumhead. A little poly applied to all the parts. The bars fit pretty well!!


-
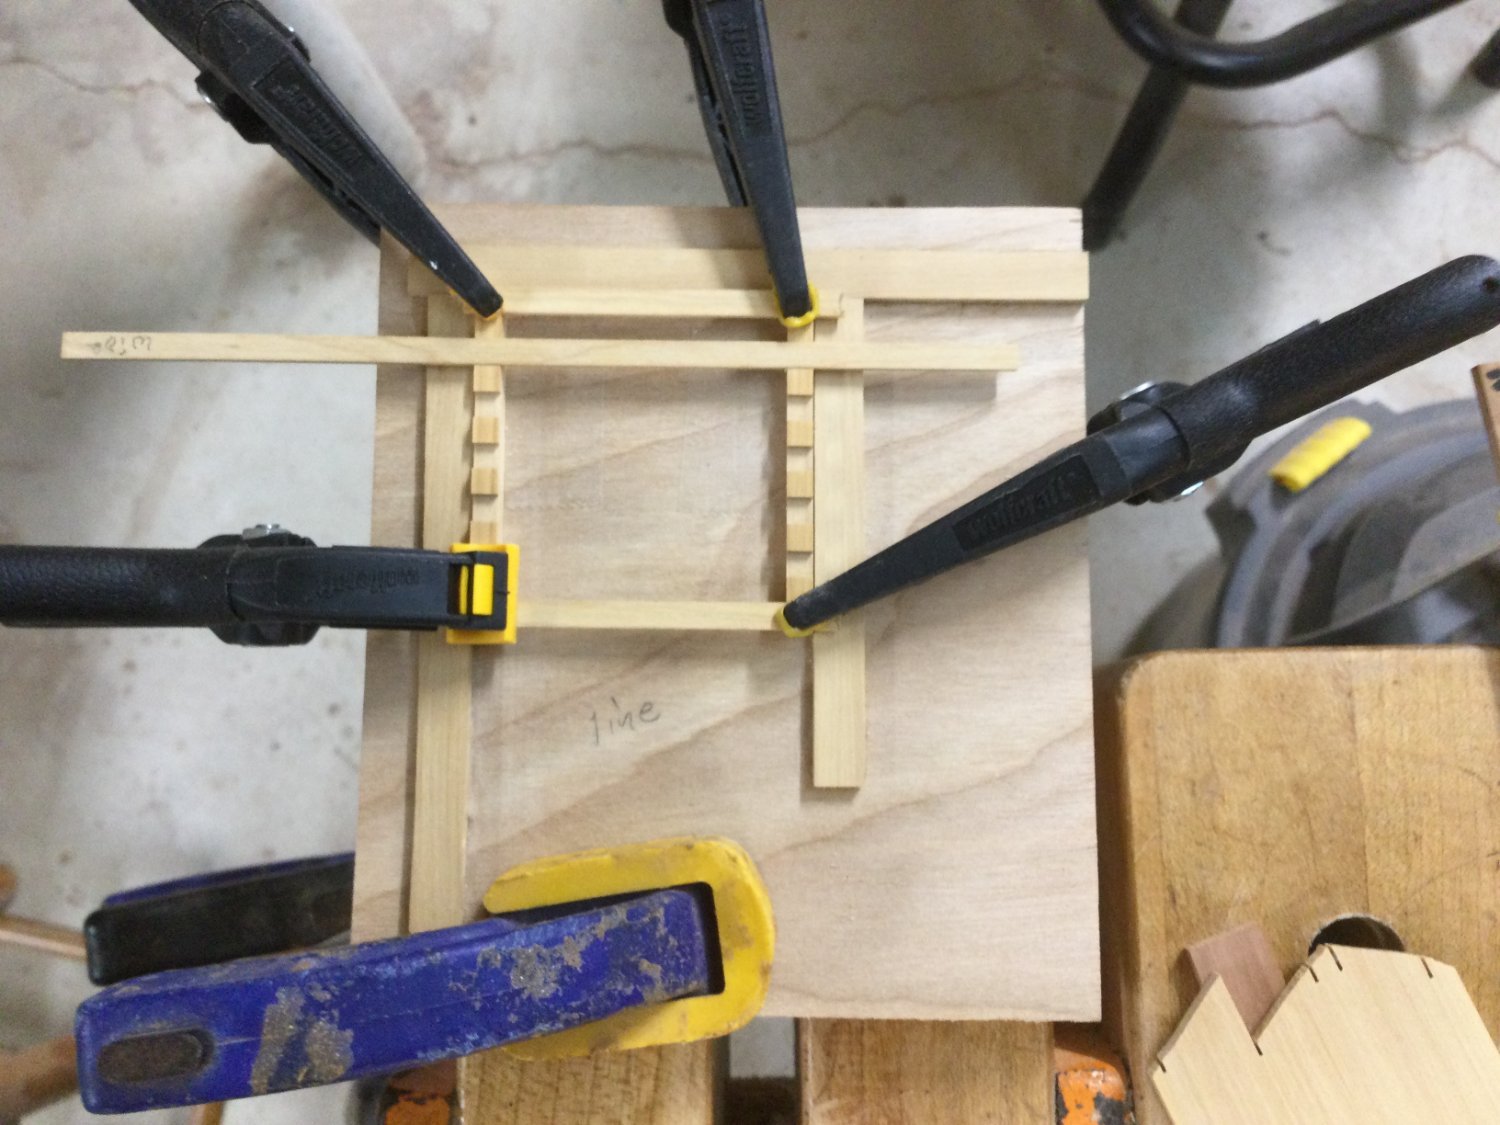
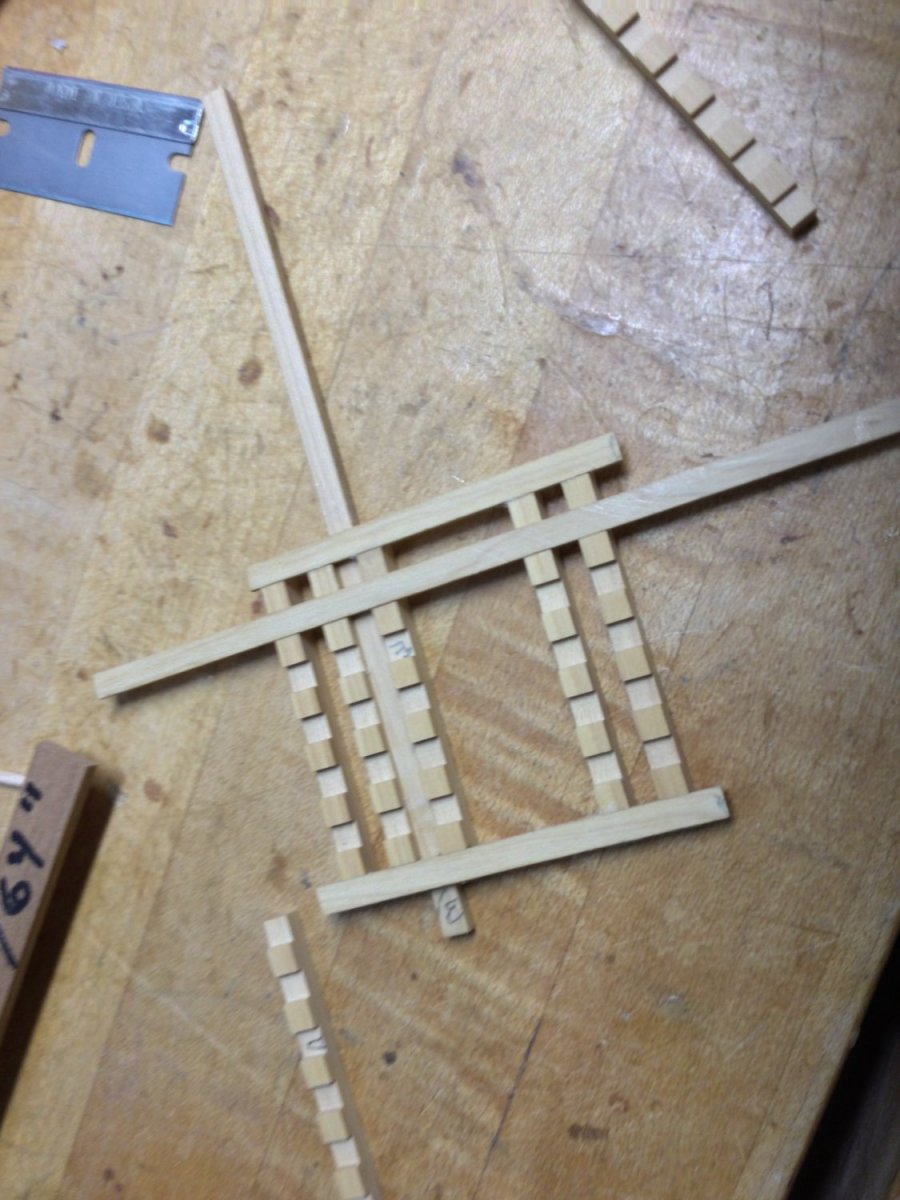
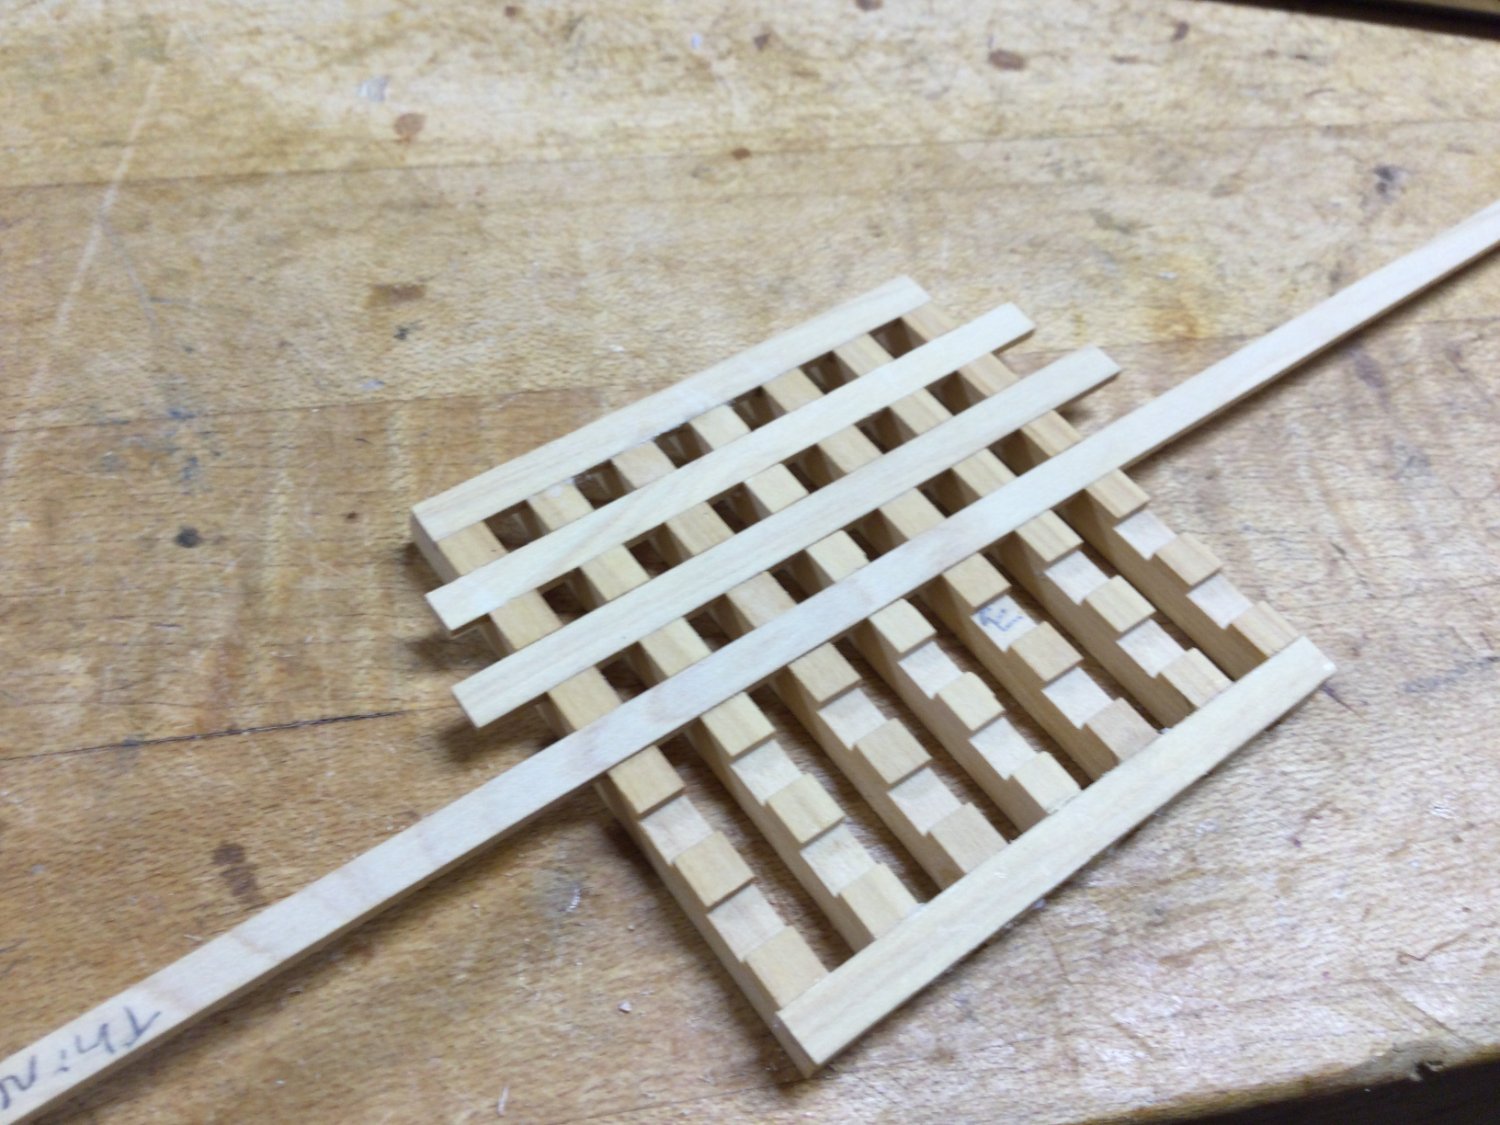
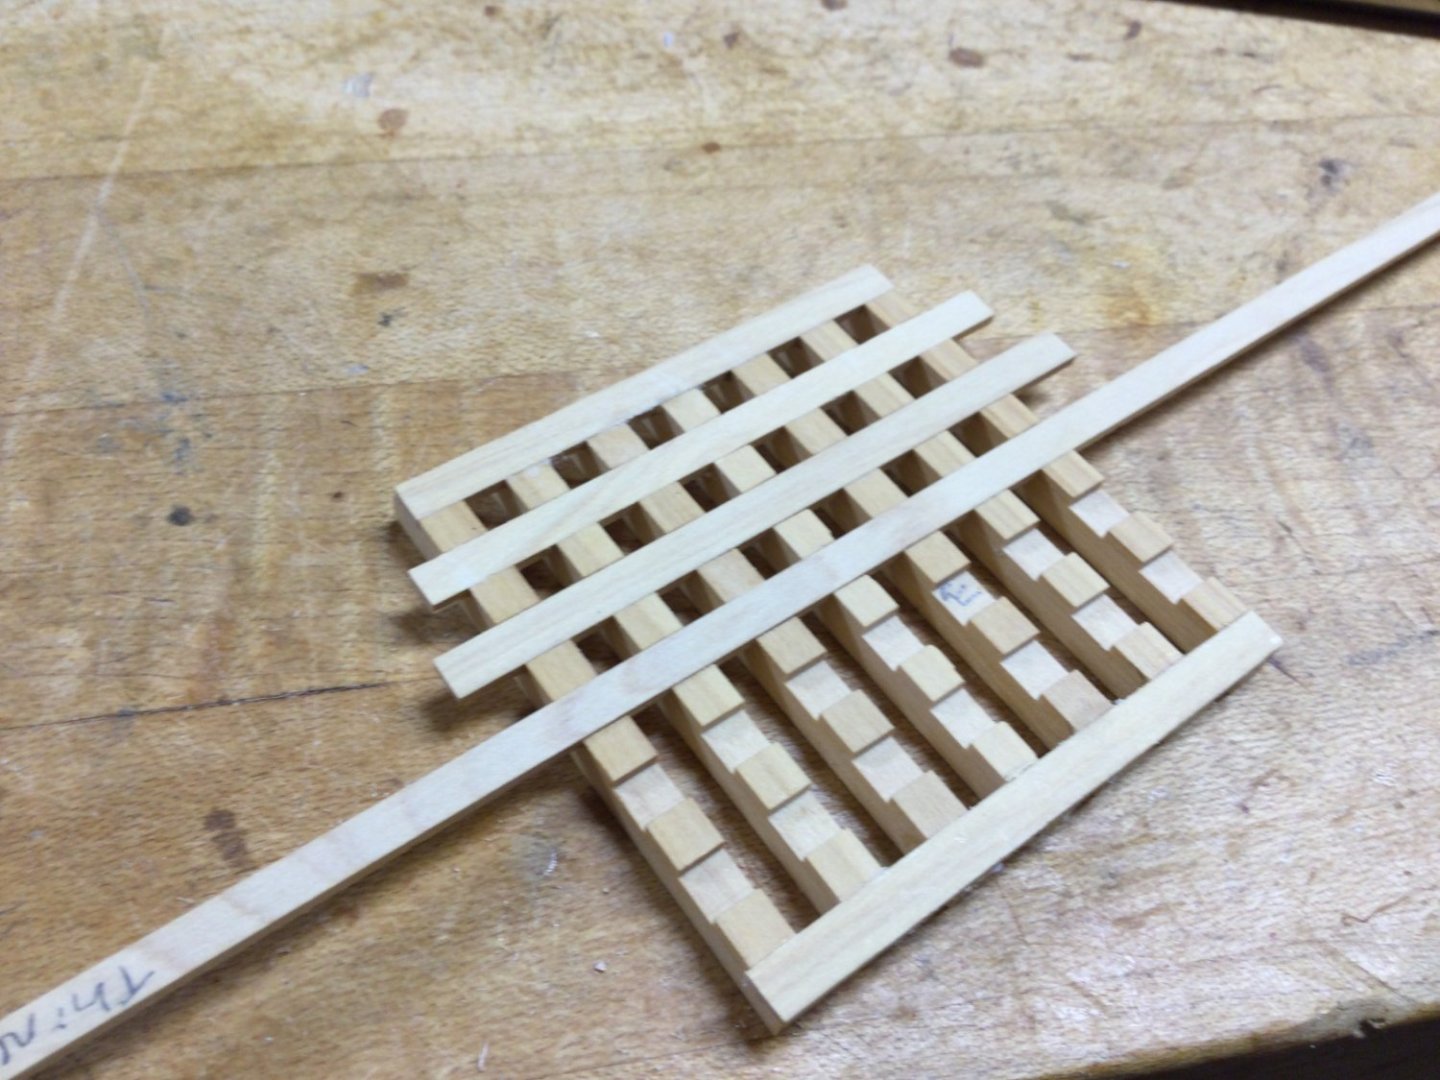
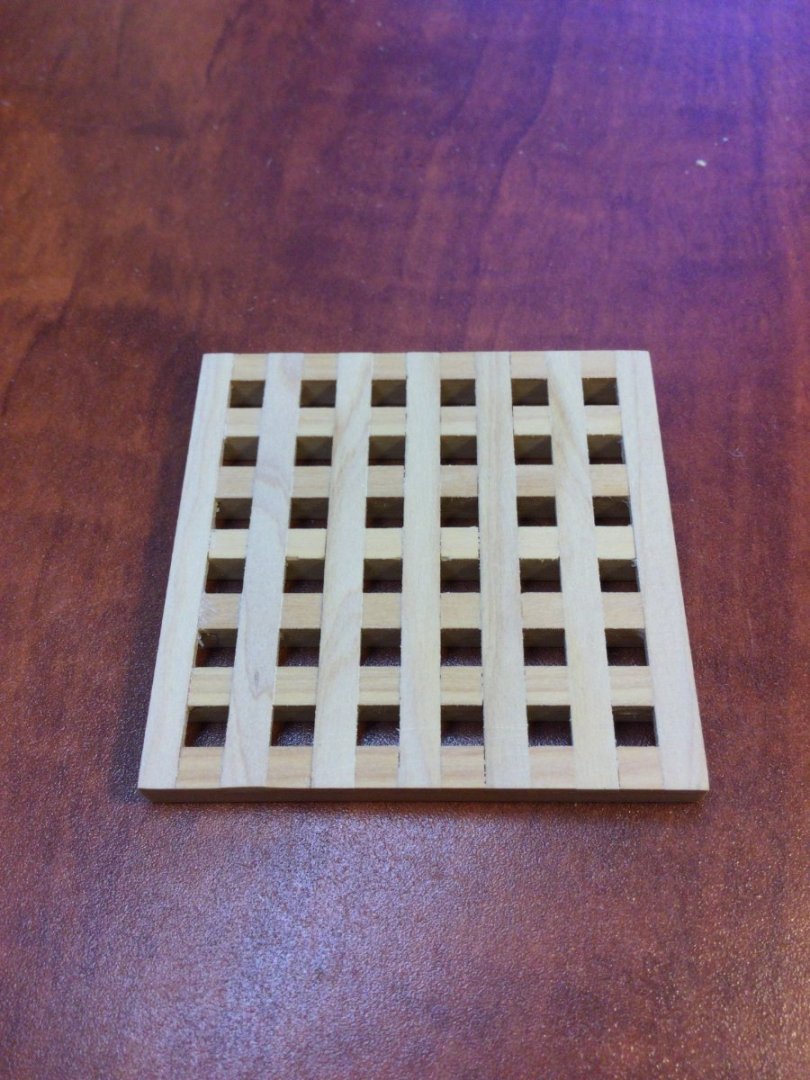
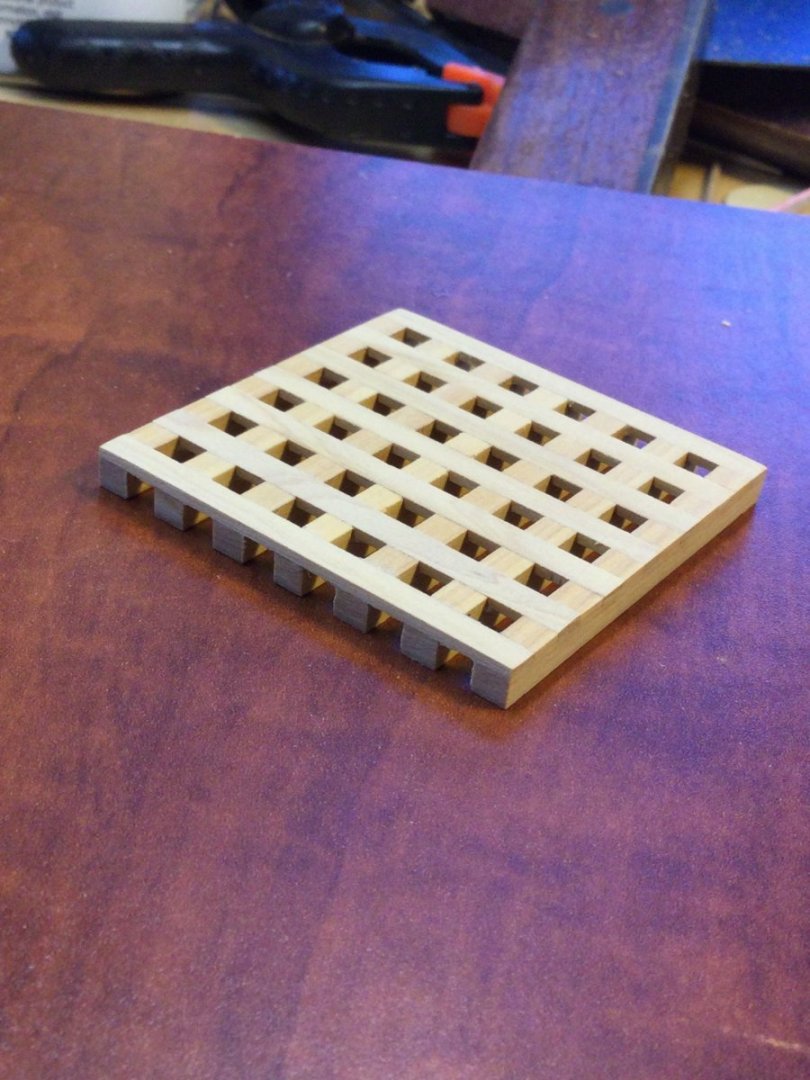
To assemble the grating, I started by making a quick, simple jig to keep the assembly square. Make sure the sides of the jig are no taller than the the level of the notches for the battens. They should be about 1/16" below the batten level. This helps prevent gluing the grating to the jig! Set the first and last grating ledges in the jig and then glue the first and last battens in place, making sure everything is square until the glue dries. This is the critical step! If the first two ledges and battens are square, so will the grating be. Continue adding ledges, using a spare ledge as a spacer and fitting battens into the notches until the grating is complete. Use a razor saw to remove the ends of the battens. Sand the grating and it’s done!


-
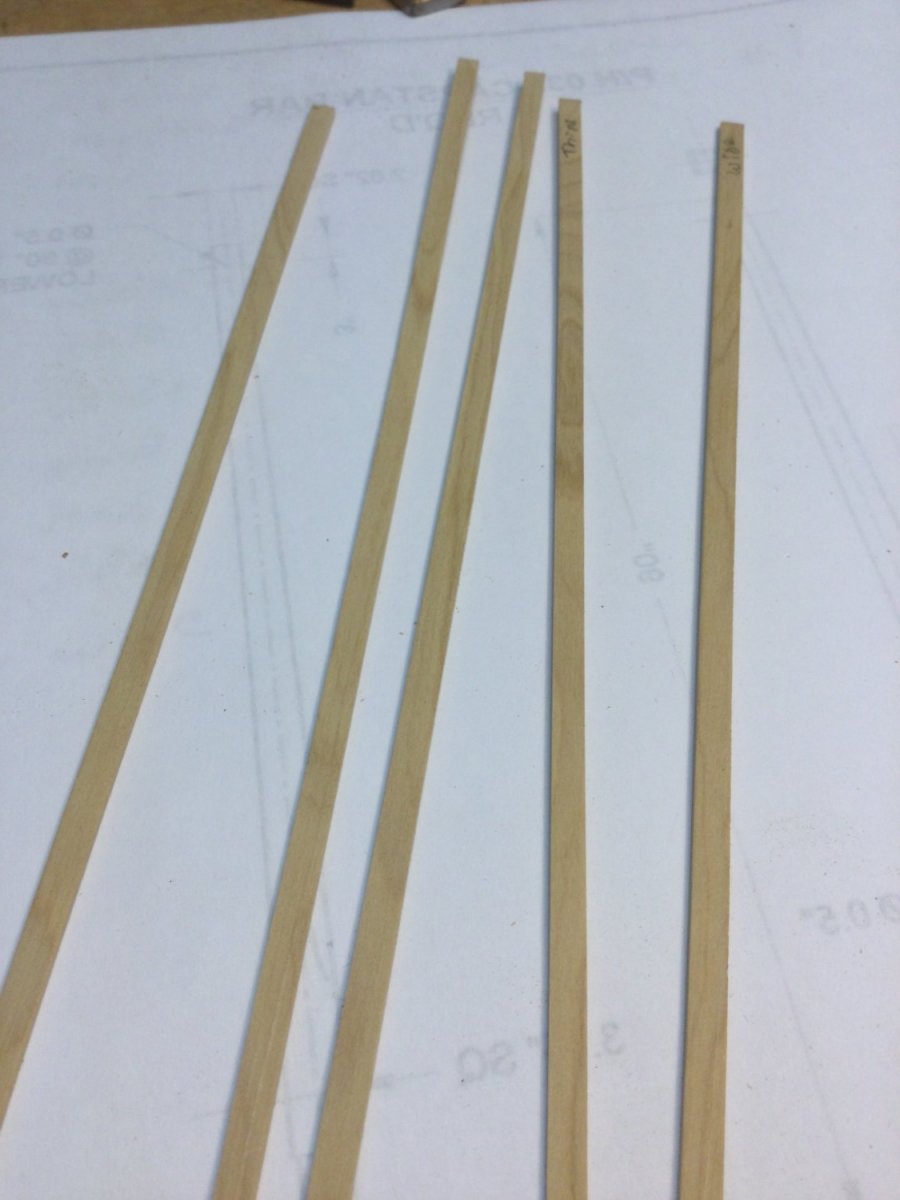
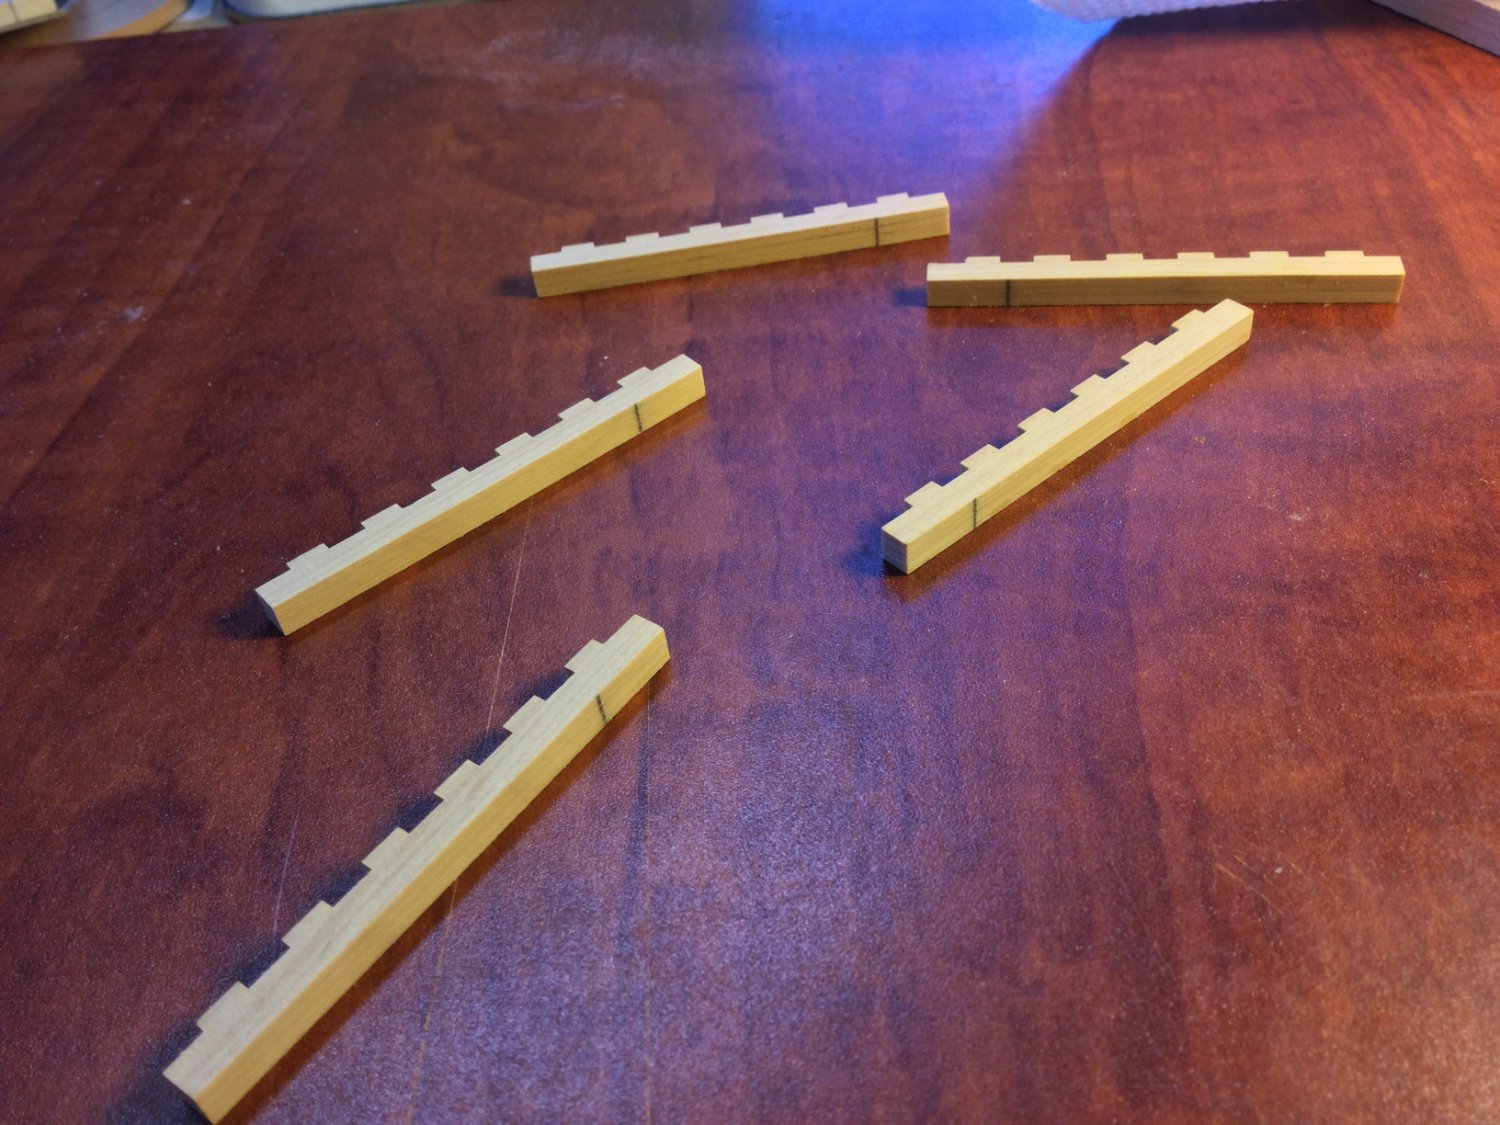
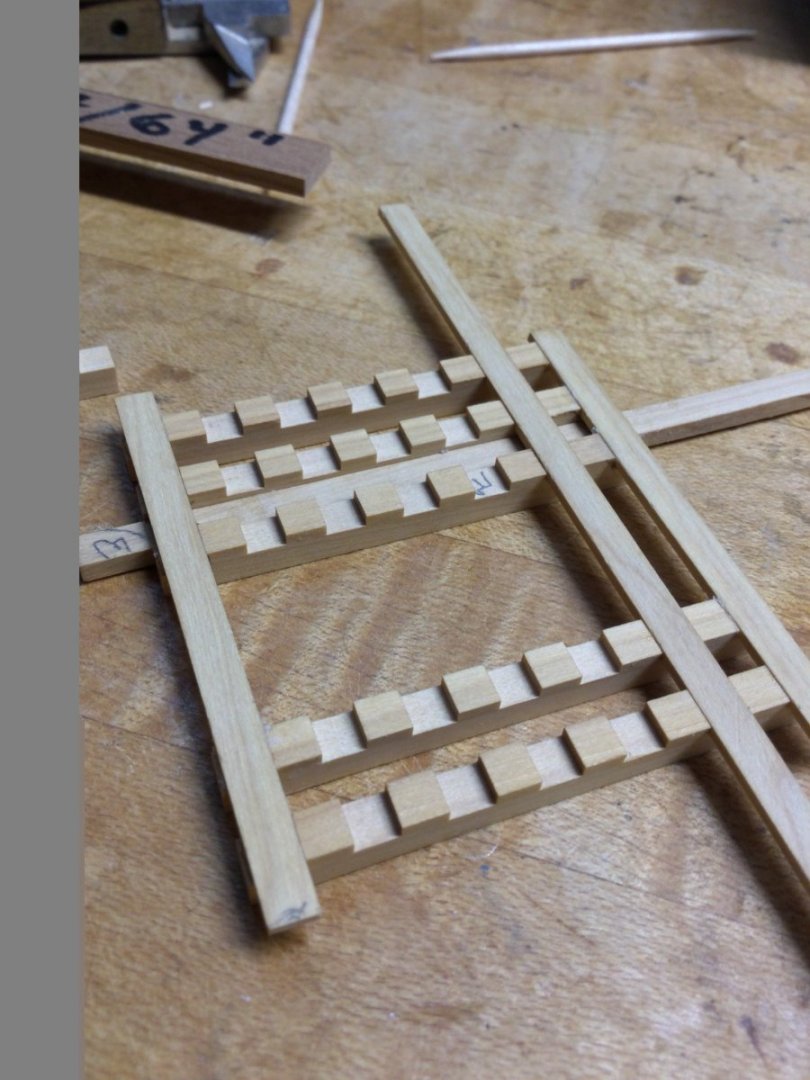
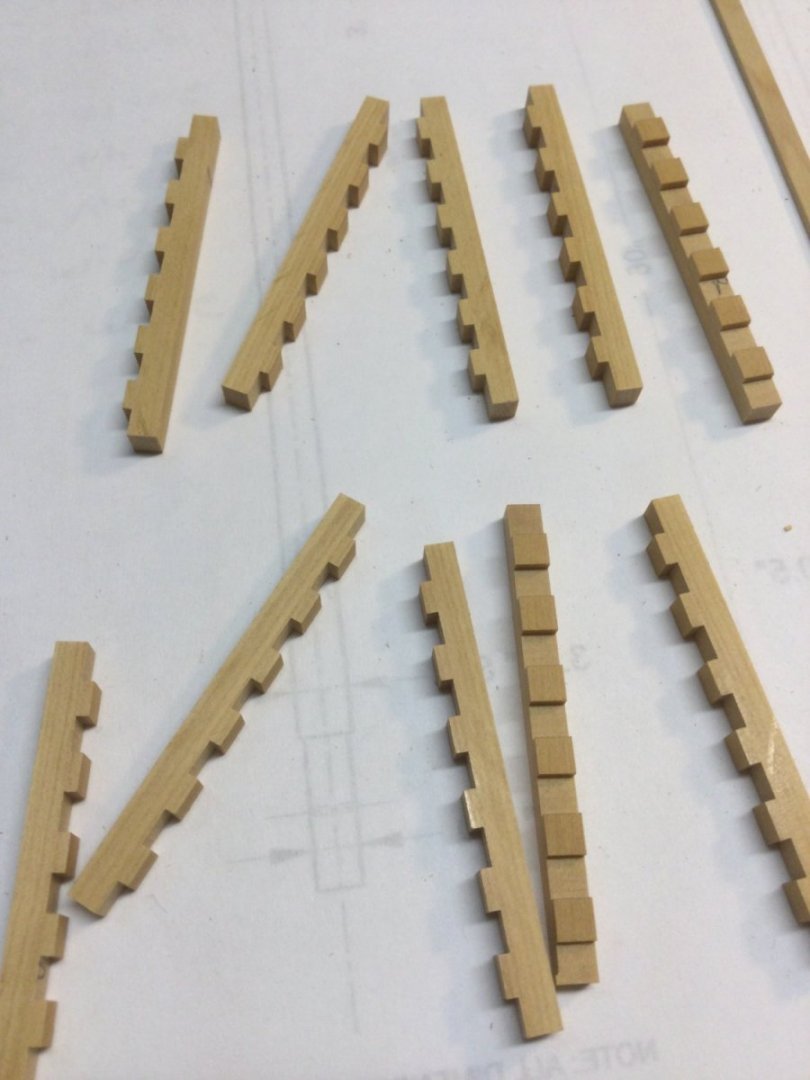
After prepping the blank for the ledges (cutting the batten notches), I started with the battens. The notches for the battens were cut freehand in the Byrnes saw. I didn’t use an indexing pin like you would with a box joint jig. I’m pretty good at this, and my notches on the ledges vary in width from one another by only a few thousandths of an inch. The eye can’t discern any differences. Make sure the depth of cut is equal to the thickness of the battens or slightly less. Lock the blade height! Then cut out the battens, more than needed, and making them slightly wider than needed to fit in the notches. Use the fence and the fine micrometer adjustment on the Byrnes to “sneak up” on each individual batten. A custom fit for each batten! Next, use a slitting blade on the Byrnes and slice off the grating ledges. I cut about twice what I needed (14). Using boxwood, and at this large scale, I didn’t have one broken tooth! Each of those ledges has a pencil mark near one end on the back side so all the slightly varied notches for the battens line up.


-
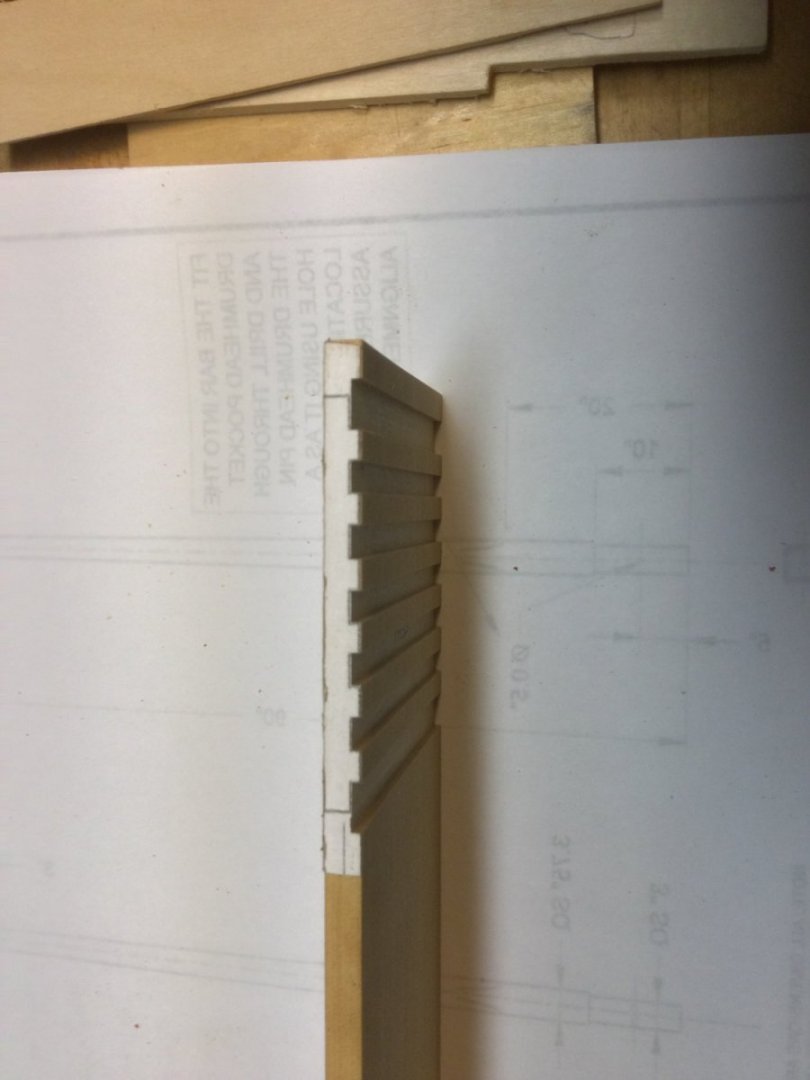
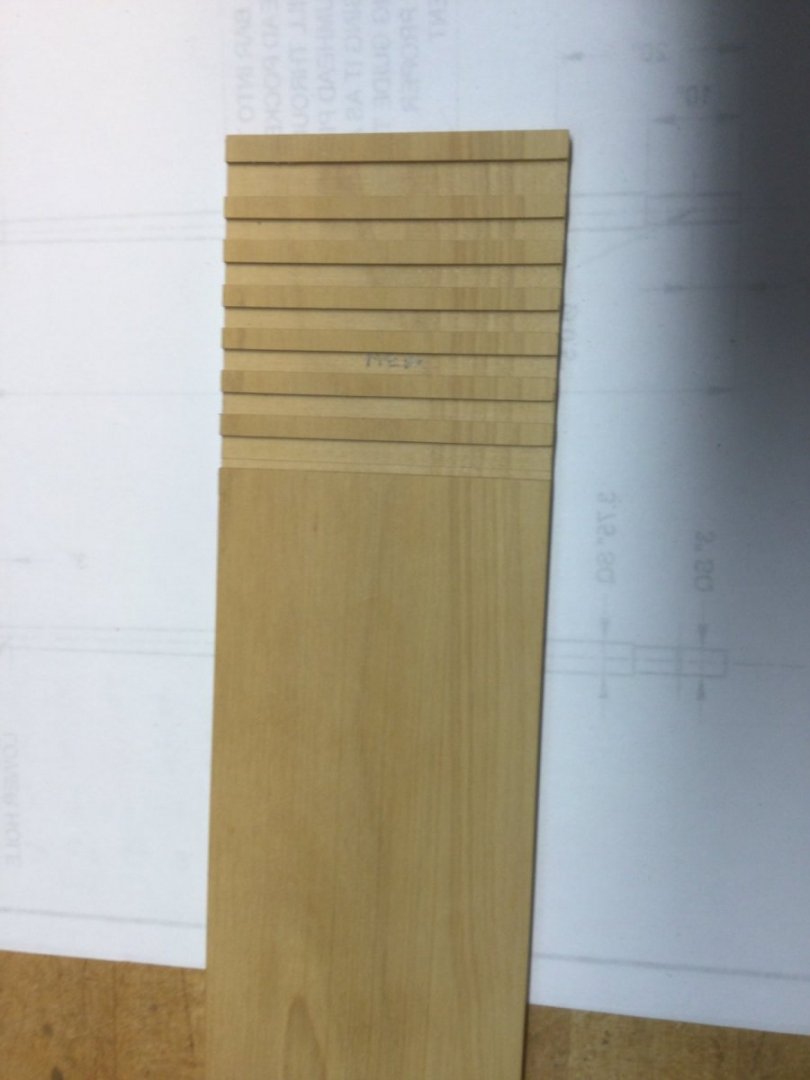
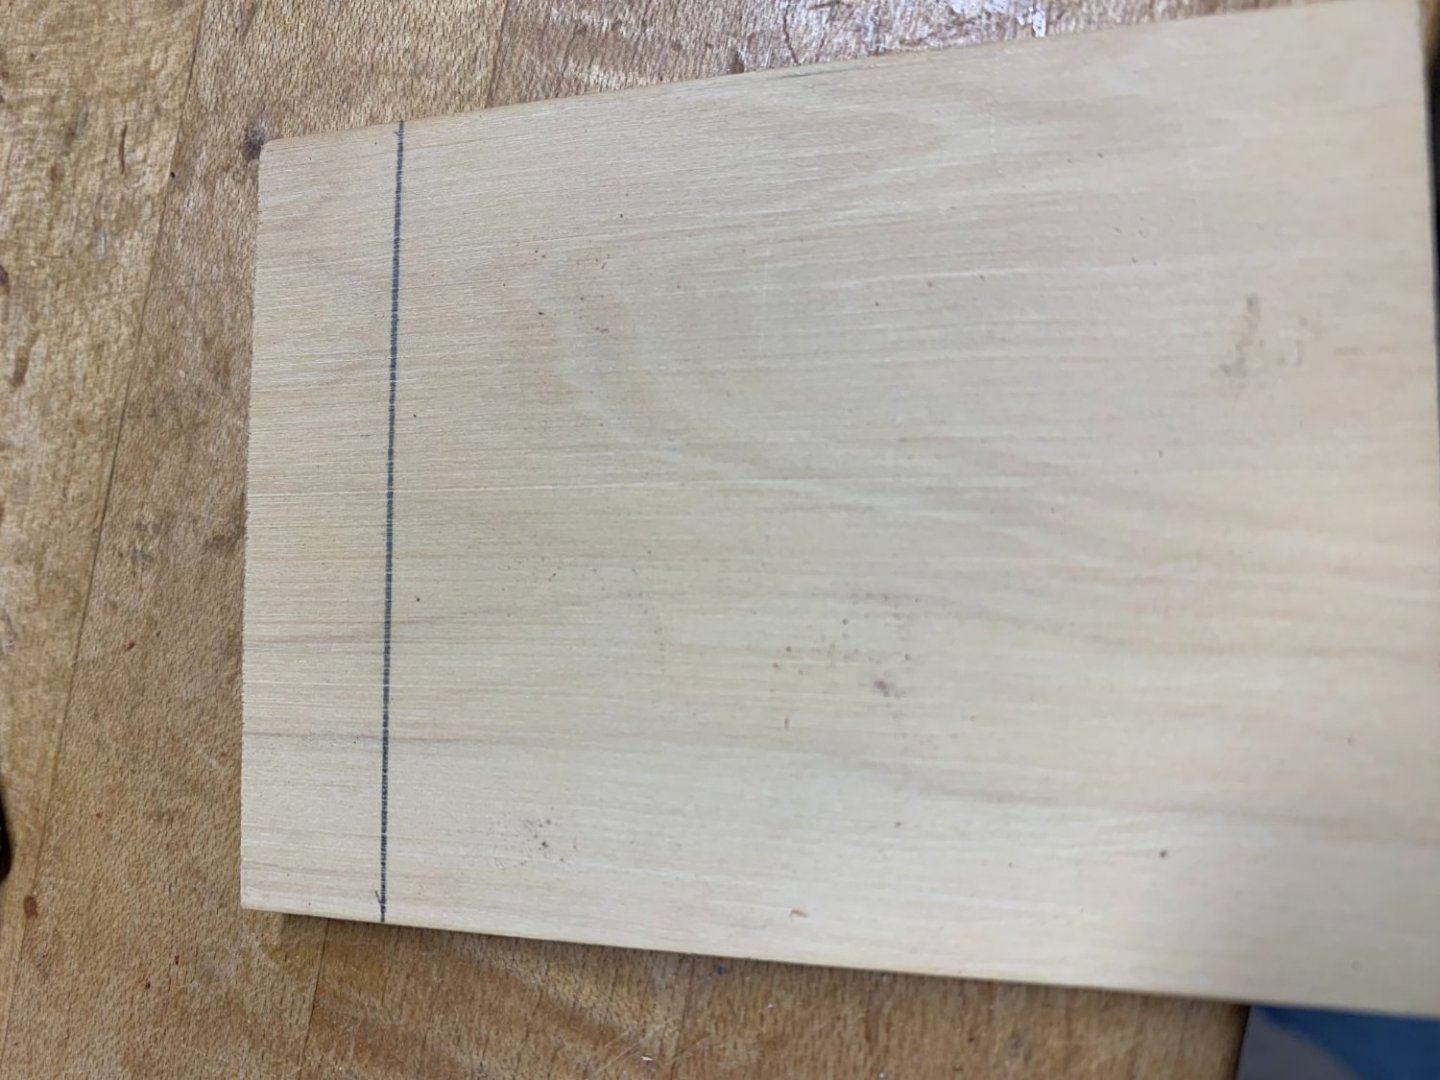
I anticipated the hatch grating would be the toughest job in the build, so I put it off until near the end. The practicum outlines a couple of methods of making the grating, but both require gluing up individual grating ledges into a “sandwich” with PVA glue and then dissolving the glue in isopropyl alcohol once the notches for the battens are cut. I took a little different approach. I did this all with a Byrnes saw and a disk sander, so most scratch builders can use the same technique First, I decided to build the hatch coamings to fit the grating and not vice versa. The gratings are made of 2 different parts : The grating ledges – the parts with the “teeth” that define the holes in the grating, and the battens, which fit into the spaces between the teeth. The ledges are 3/16” thick and the battens are 3/64” thick. The teeth and the space between them are all 5/32” square. I milled some 3/16” boxwood for the ledges and glued a grating ledge side template to the edge of the strip. Preset the depth of cut to 3/64”. I then carefully cut the teeth and recesses for the battens. A sliding table for the Byrnes saw makes this easy work, but you can do a fine job with just the miter gauge. Once the grooves for the battens are cut, turn the blank over and draw a line across the bottom of the blank, parallel to the grooves and close to one end. This will orient the pieces when it comes time to assemble the grating. Mill a piece of boxwood 3/64” thick. We’re ready to cut ledges and battens. The last photo shows the pencil line on the back of the blank, parallel to the grooves.
-
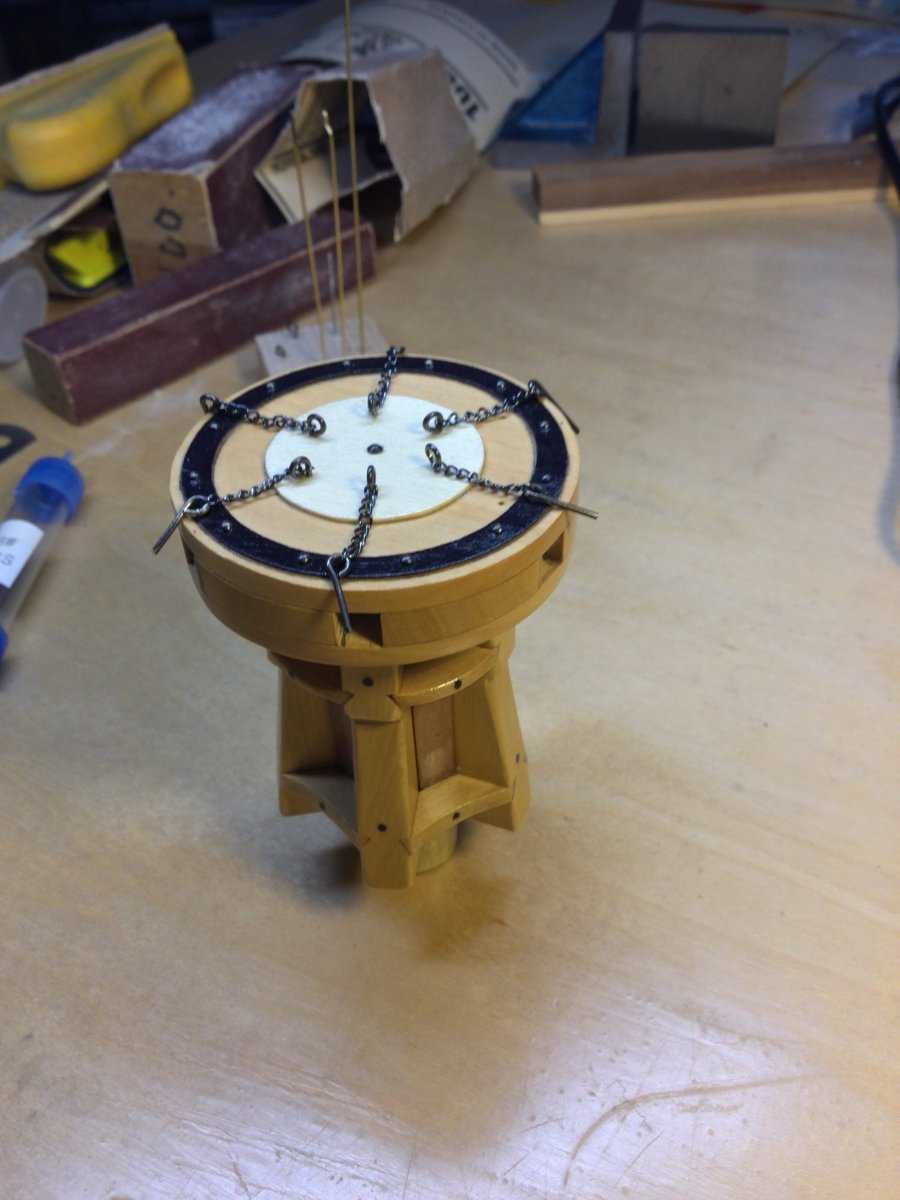
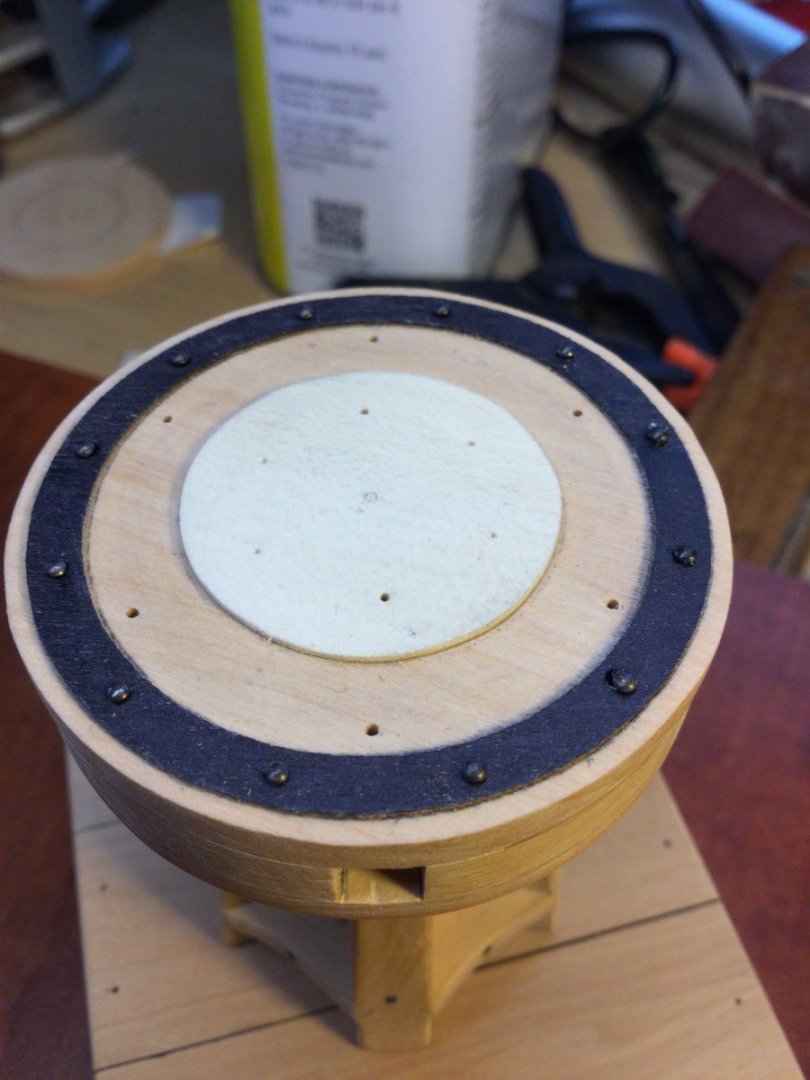
The parts of the drumhead were glued together and 12 bolts were added to hold the iron ring to the structure.

-
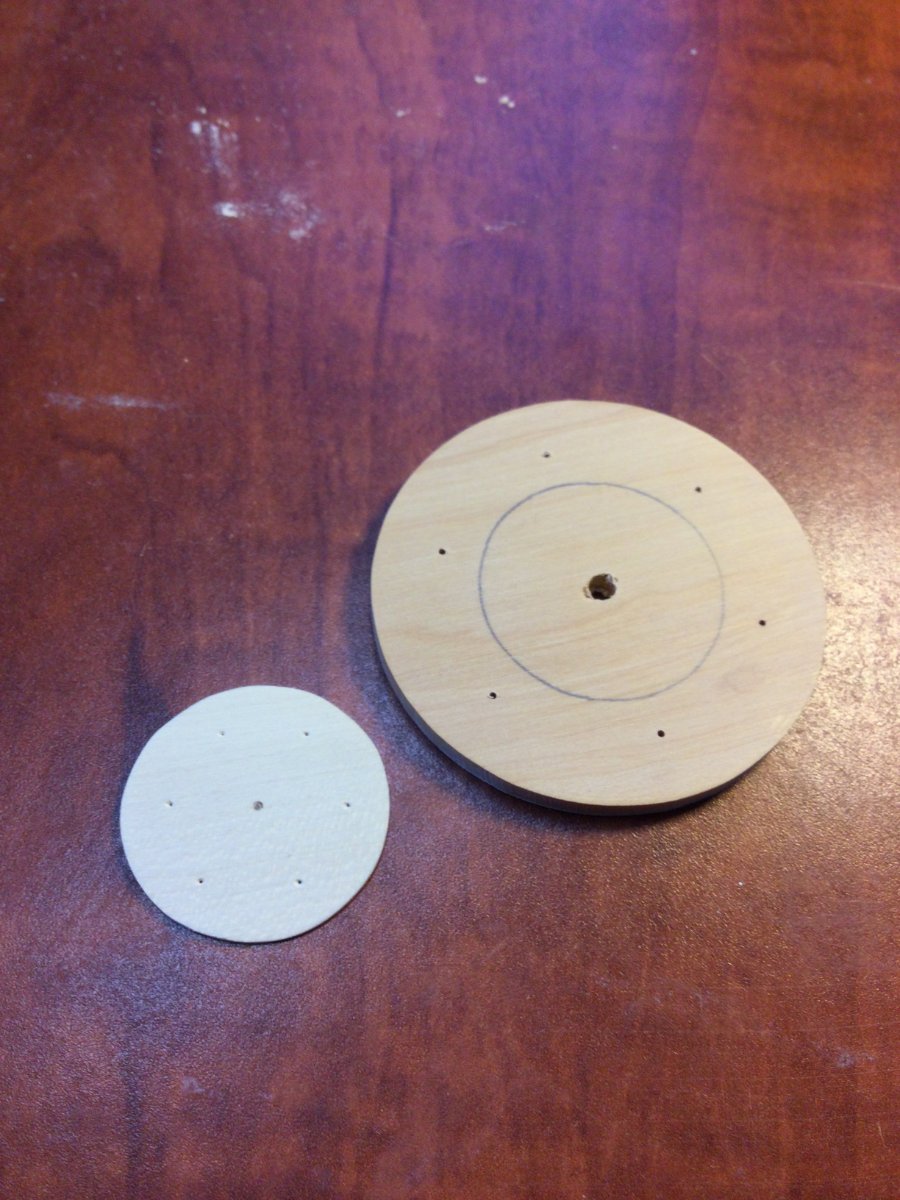
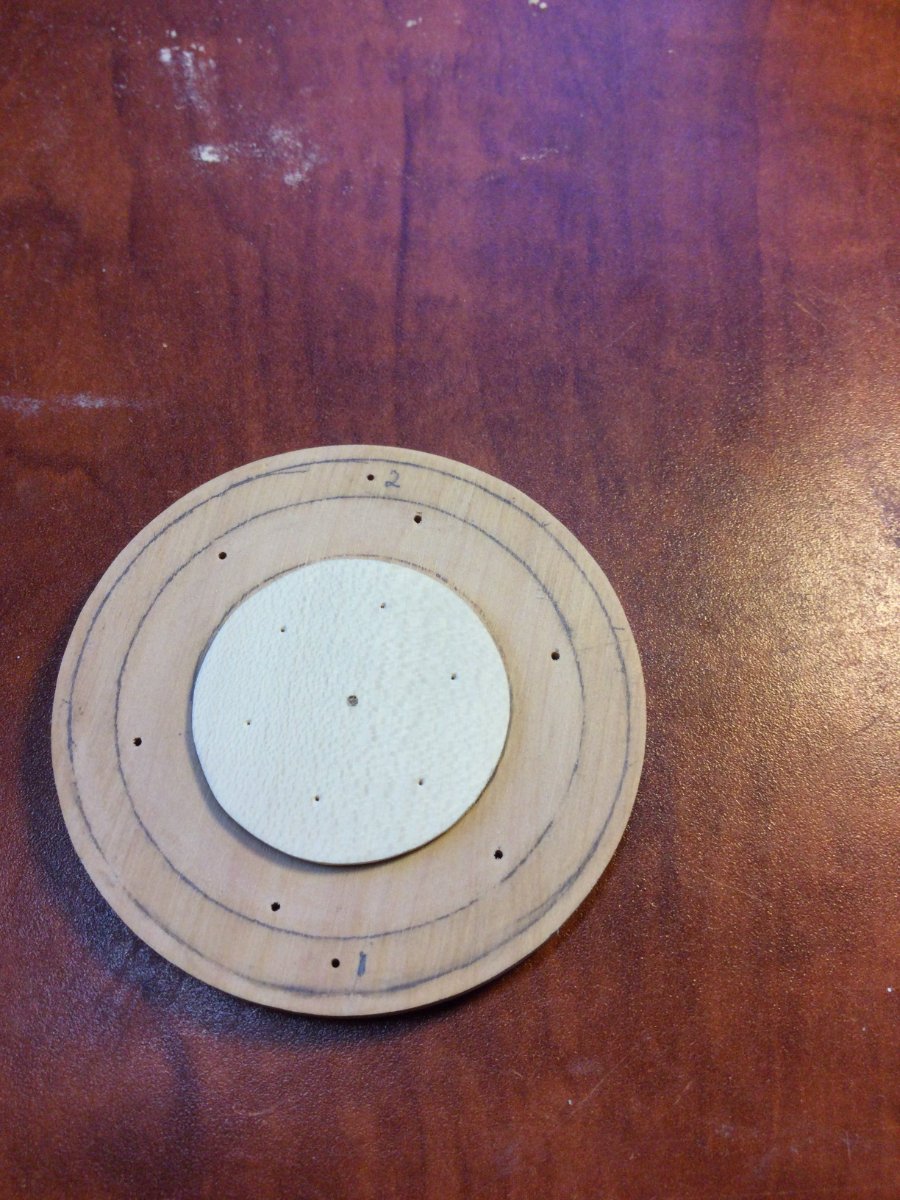
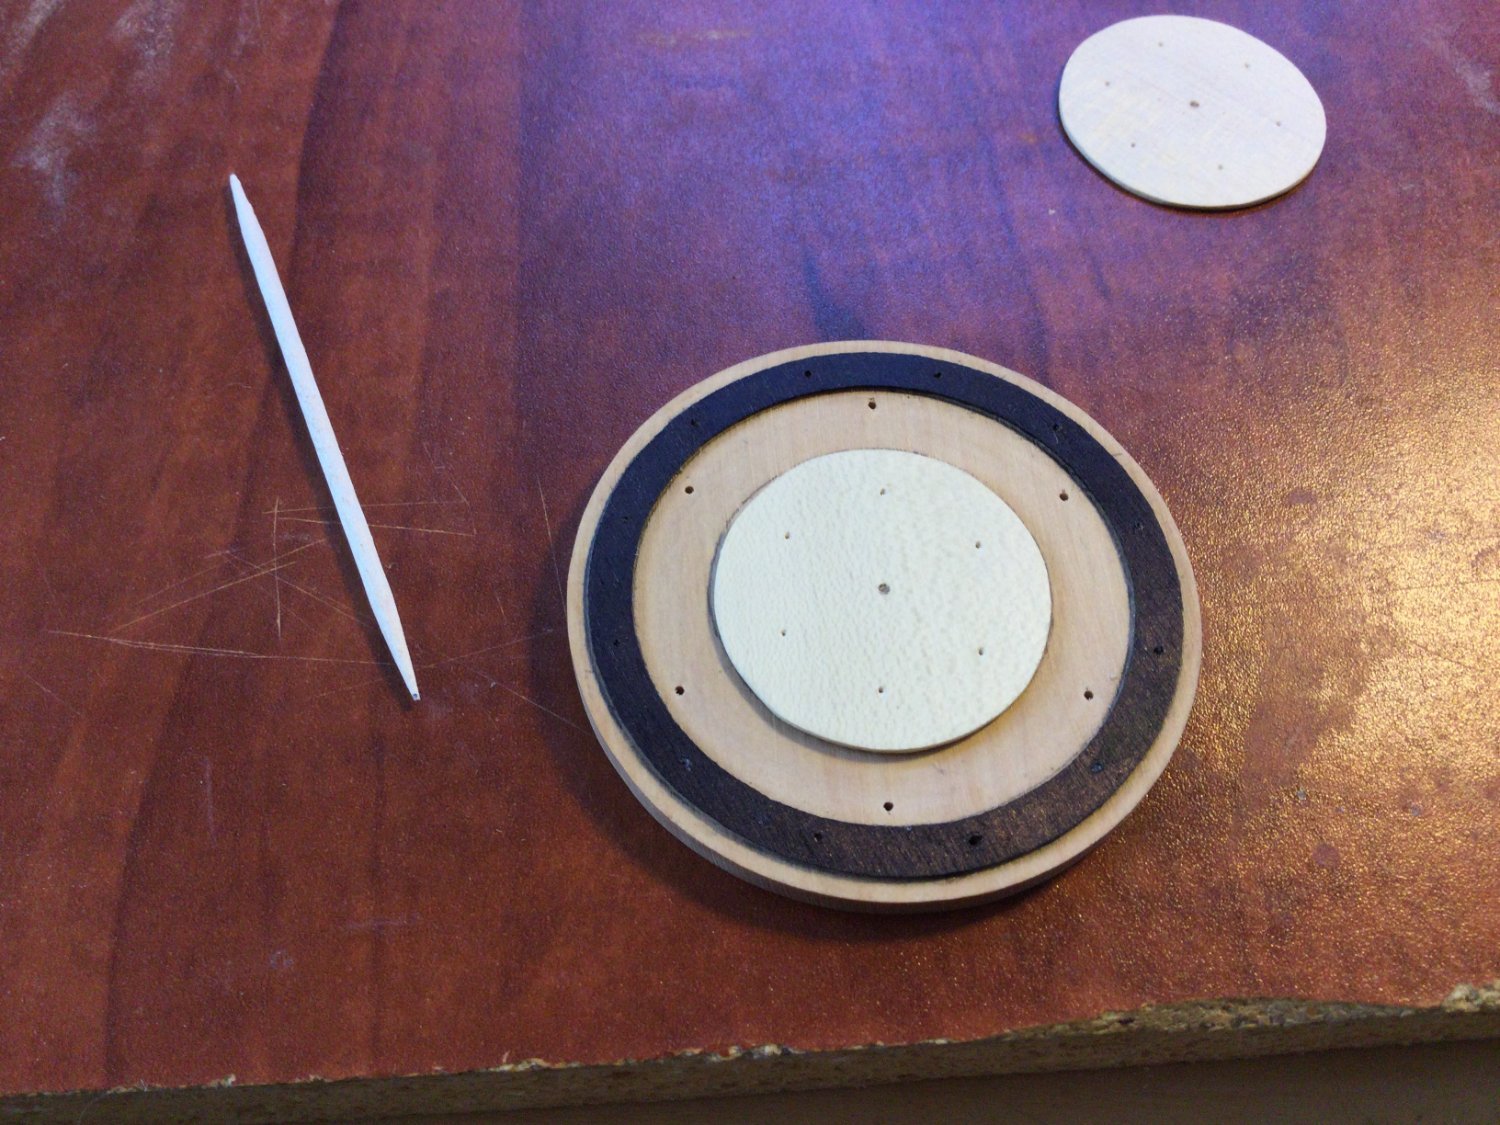
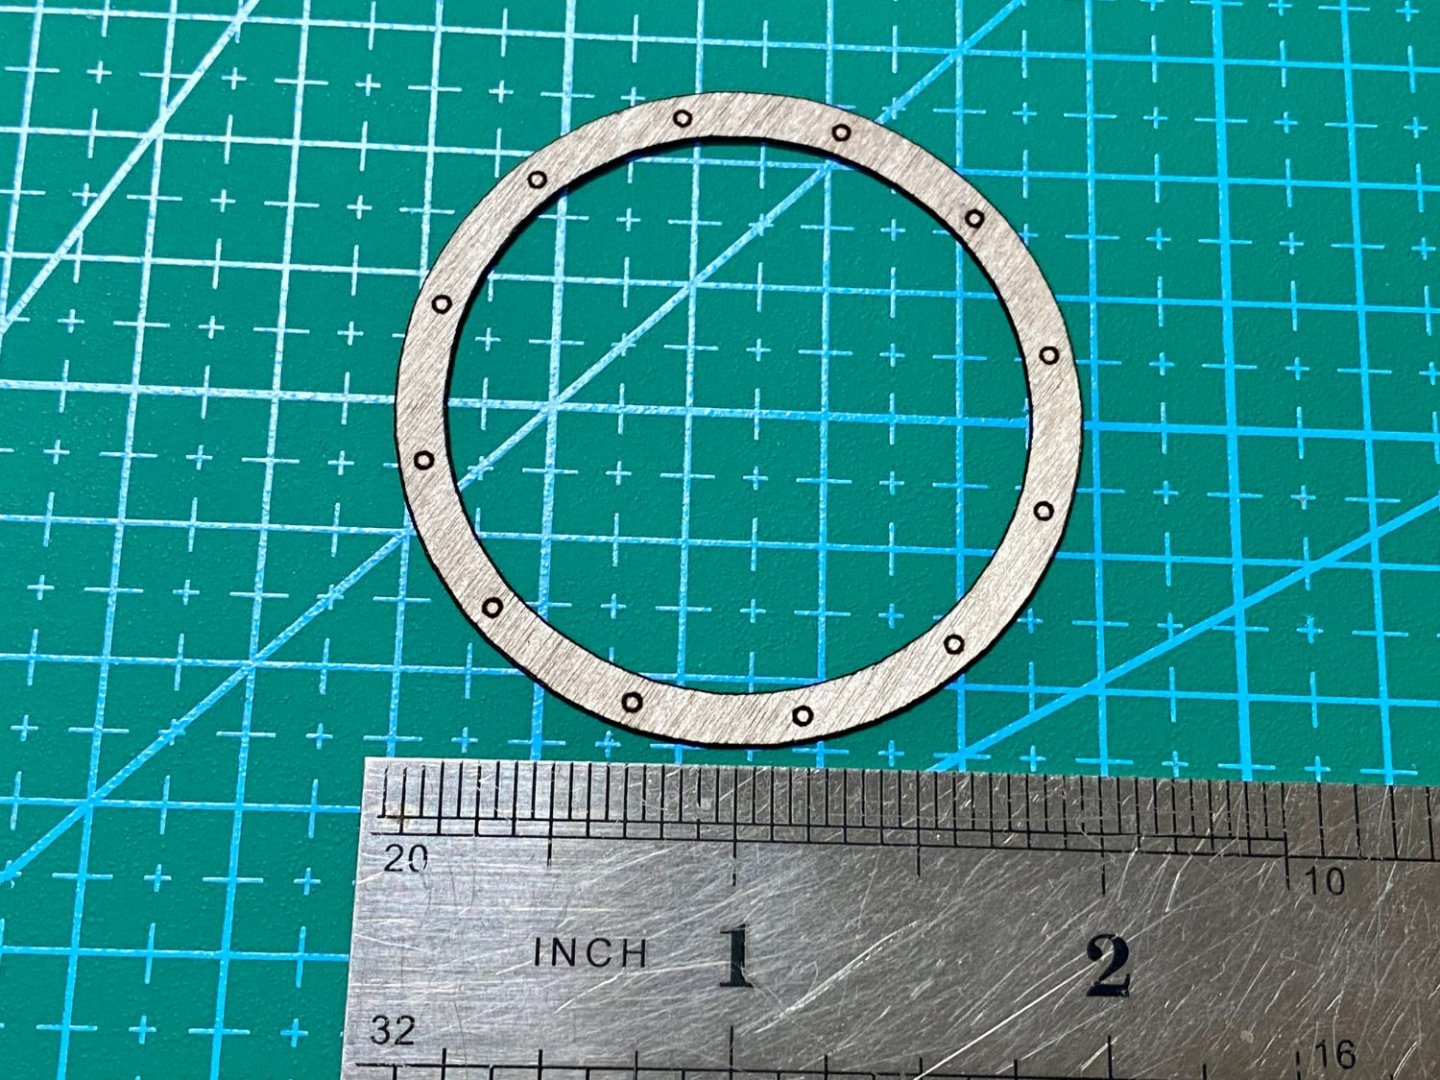
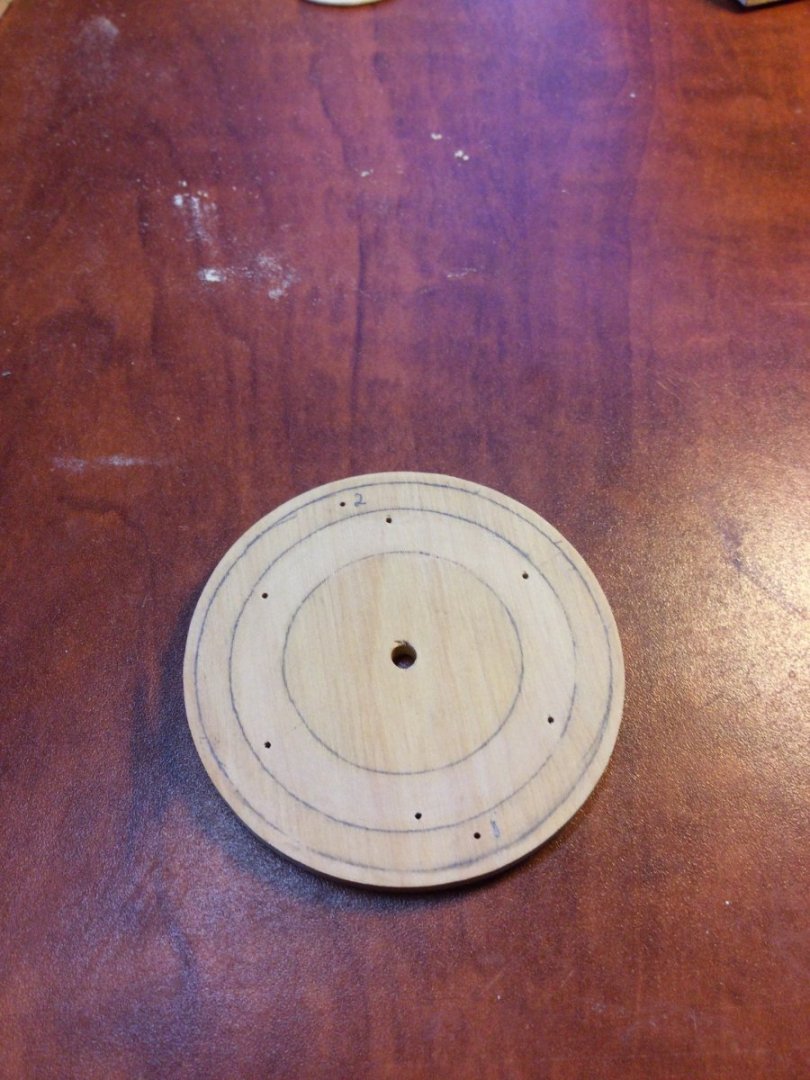
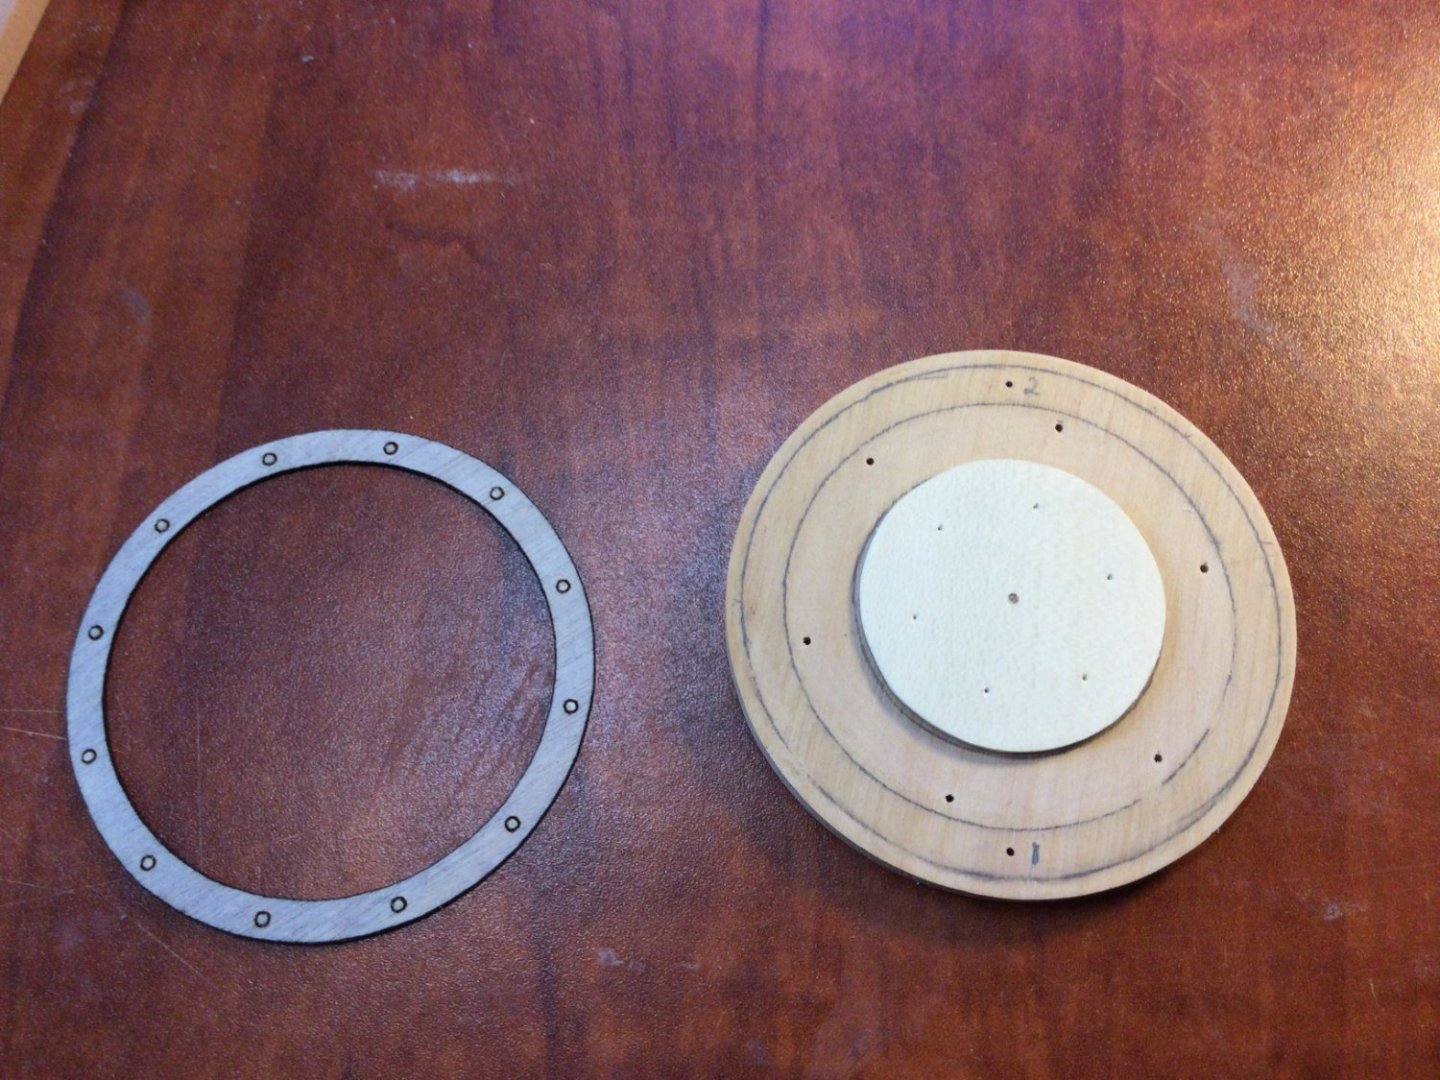
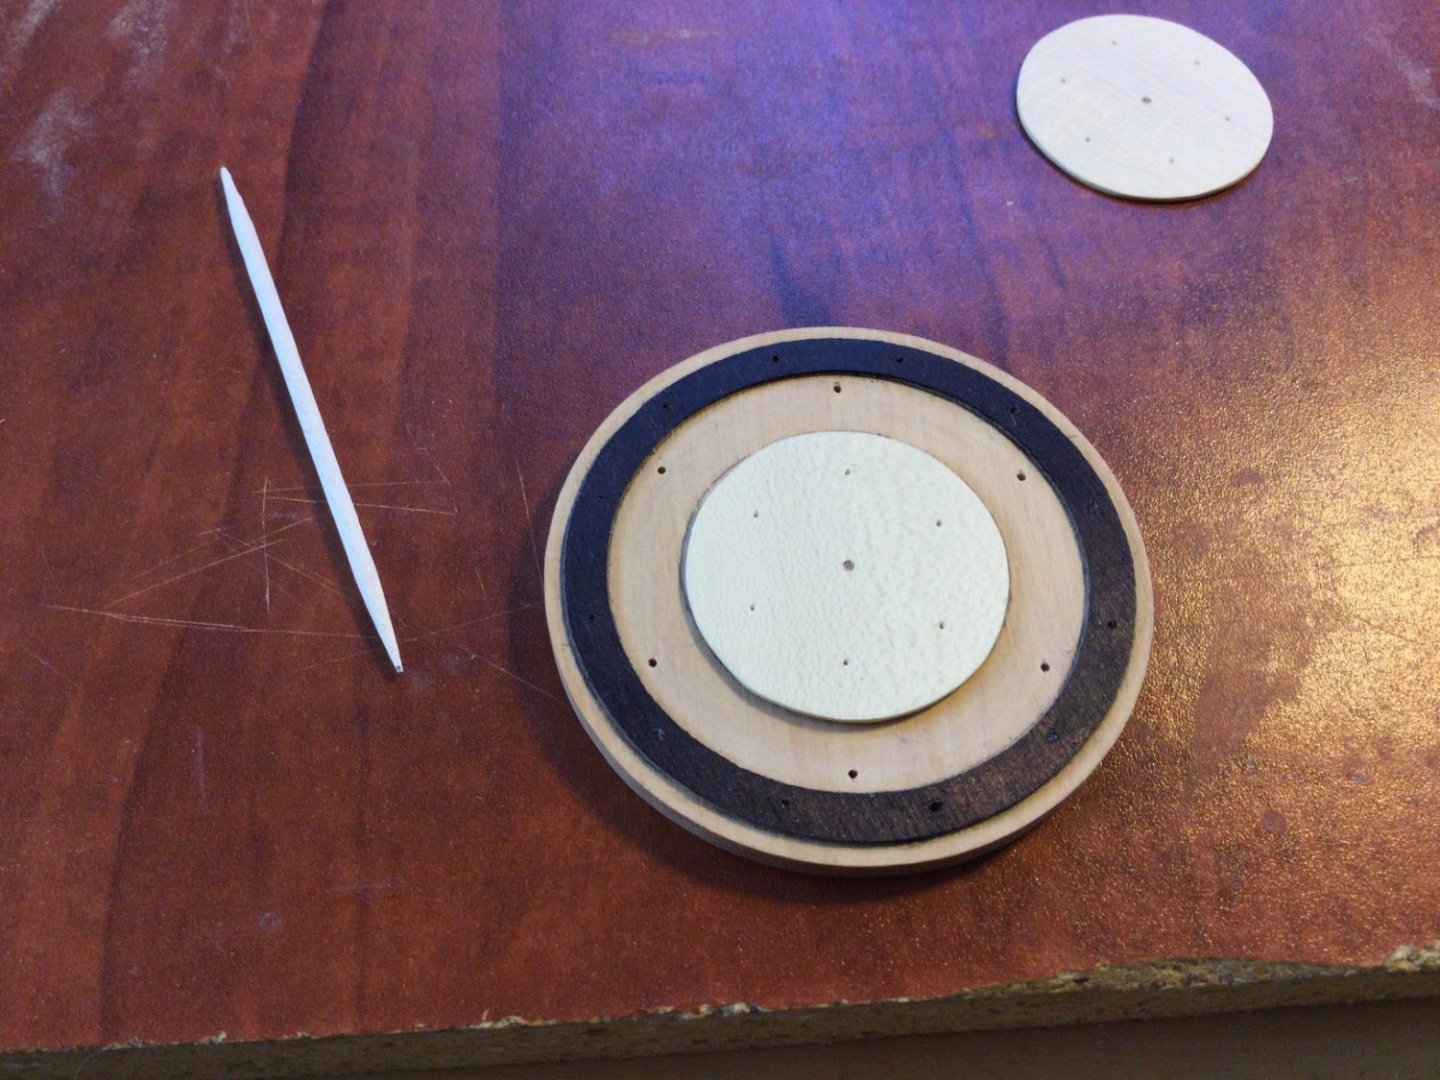
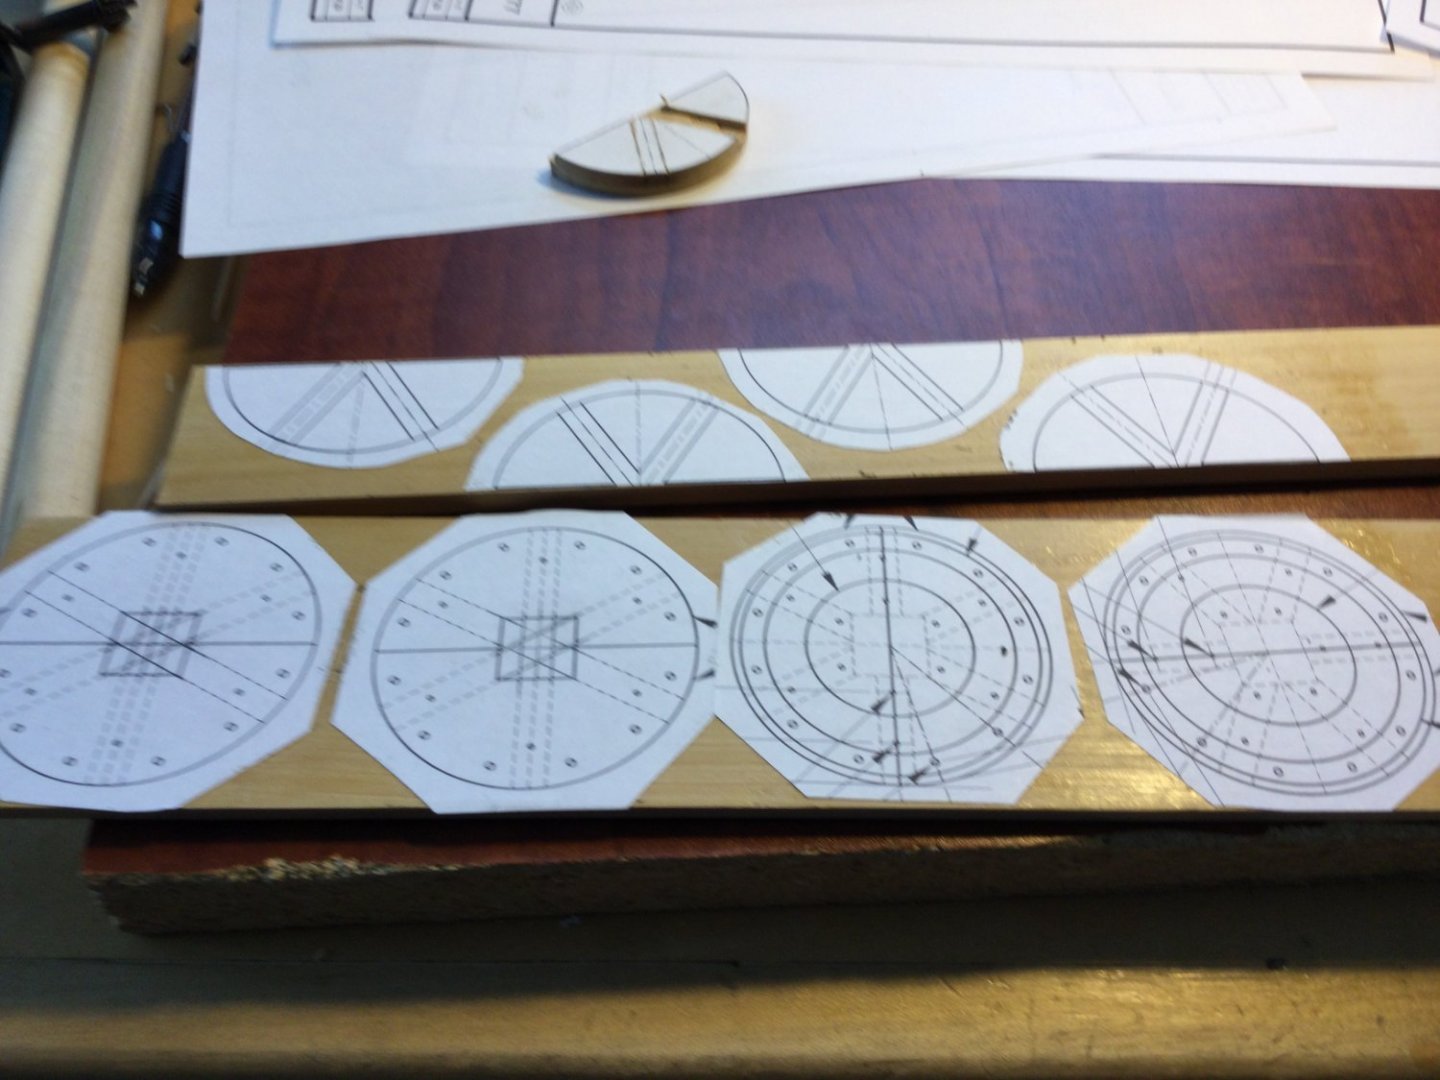
The upper part of the drumhead is made of three parts: An upper drumhead disk made of boxwood, a cap piece made of holly and an iron ring. The plans call for thin sheet brass for the ring if you have a mill and metalworking skills, otherwise paper is suggested. I thought 1/64” thick aircraft grade plywood was a good option. I had a good friend laser cut a few rings for me (Thanks Mike!) and the ring was dyed black with a marker. Holes for bolts and bar pins etc. were positioned using the plan templates rubber cemented to the drumhead parts. The photos show some of the steps.


-
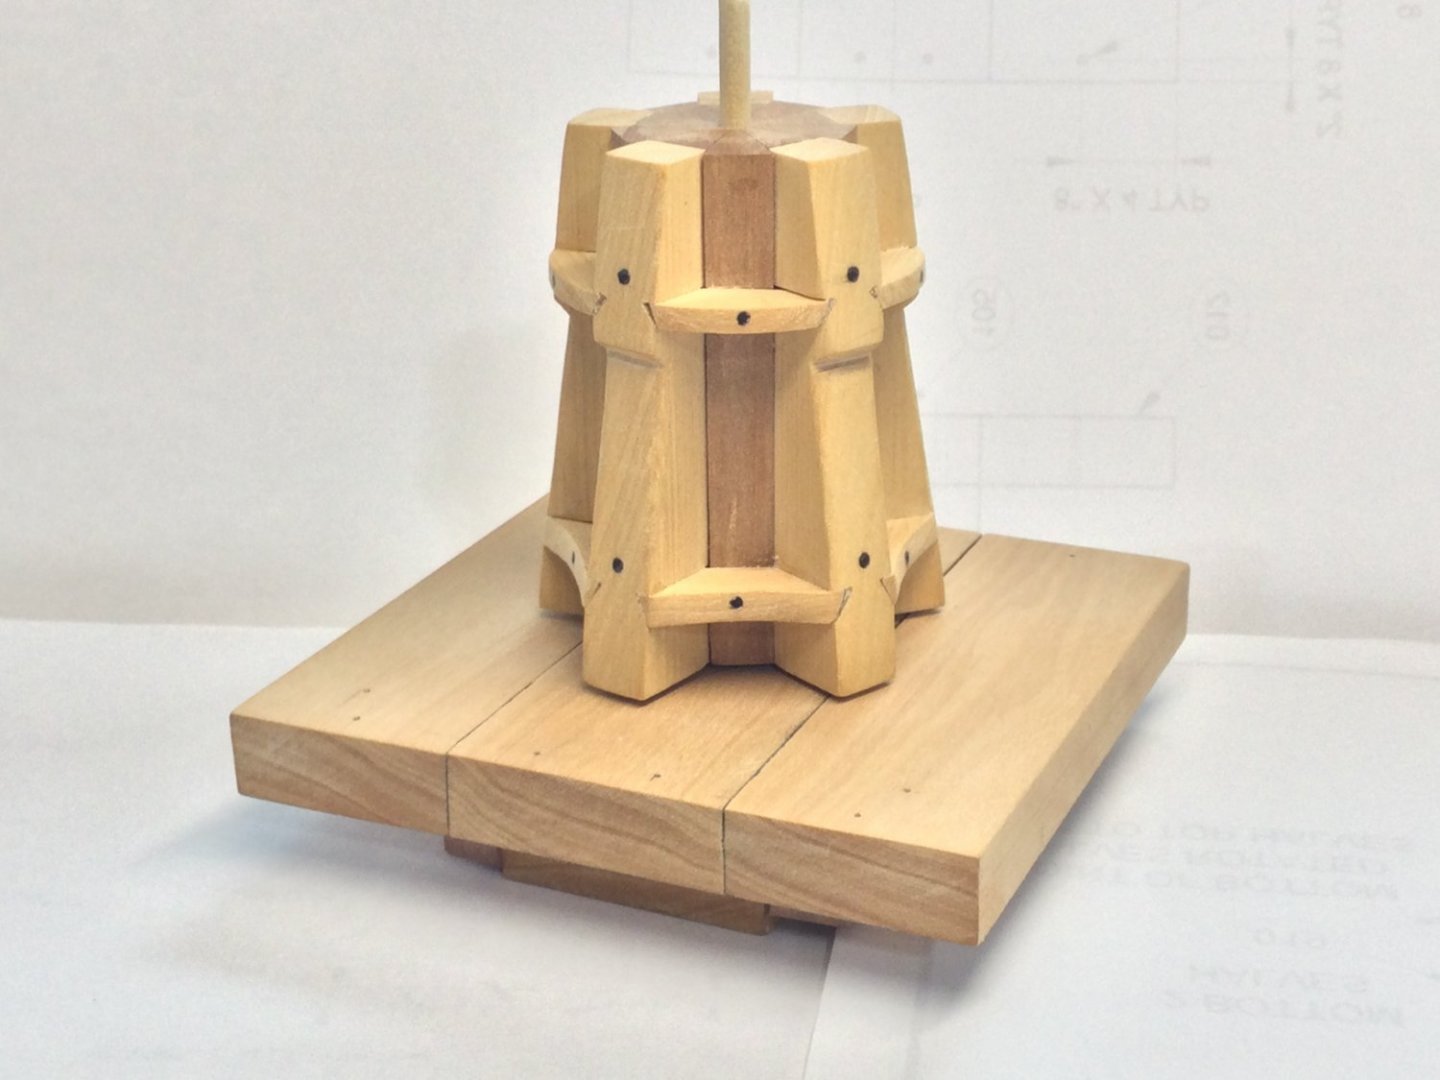
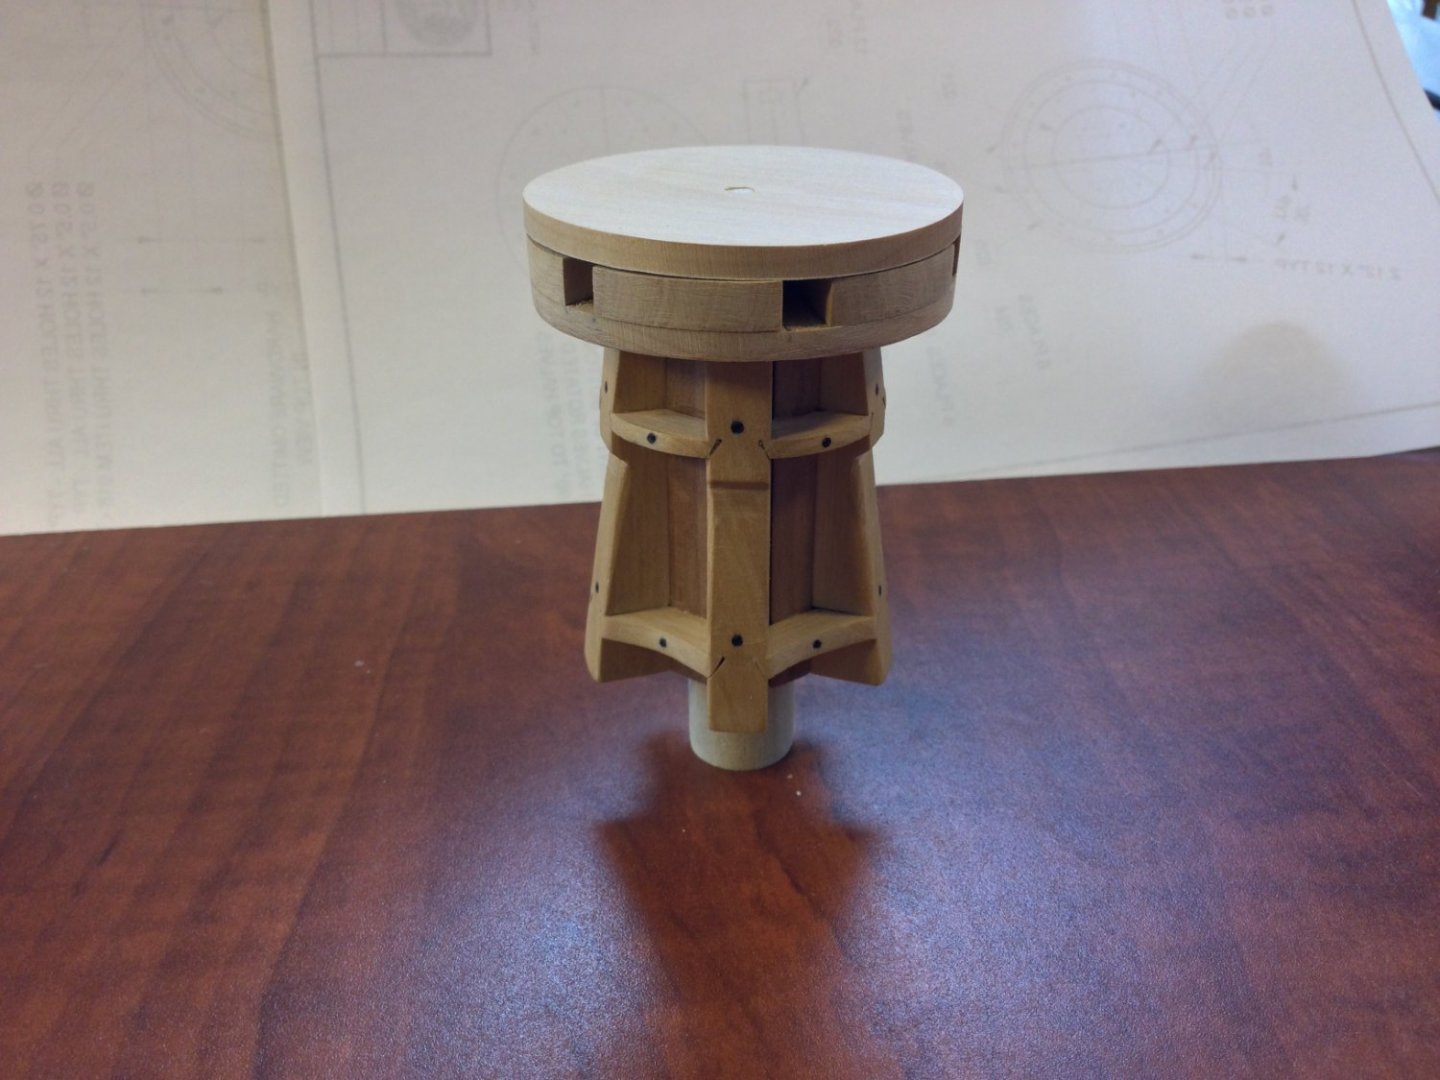
I haven't posted in a while. We've had a major house remodel project underway for the last six months and are just finishing up. Ready to start back in with the capstan! A photo of the barrel/whelp assembly sitting on the capstan step.
-
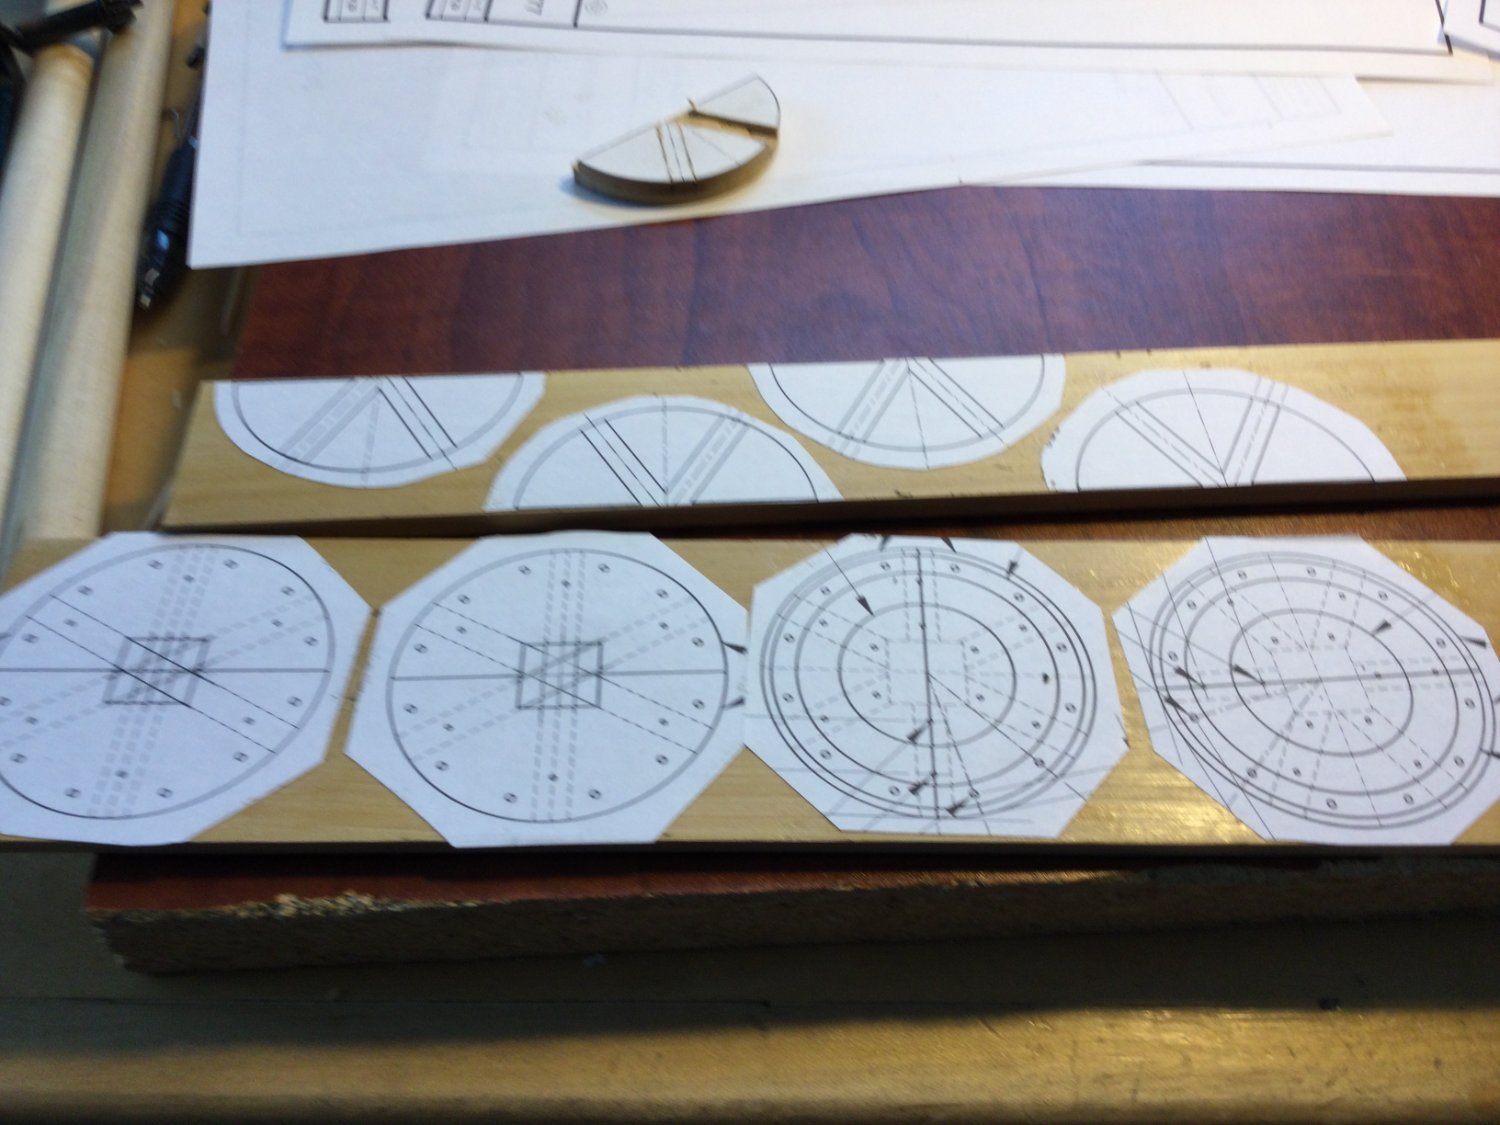
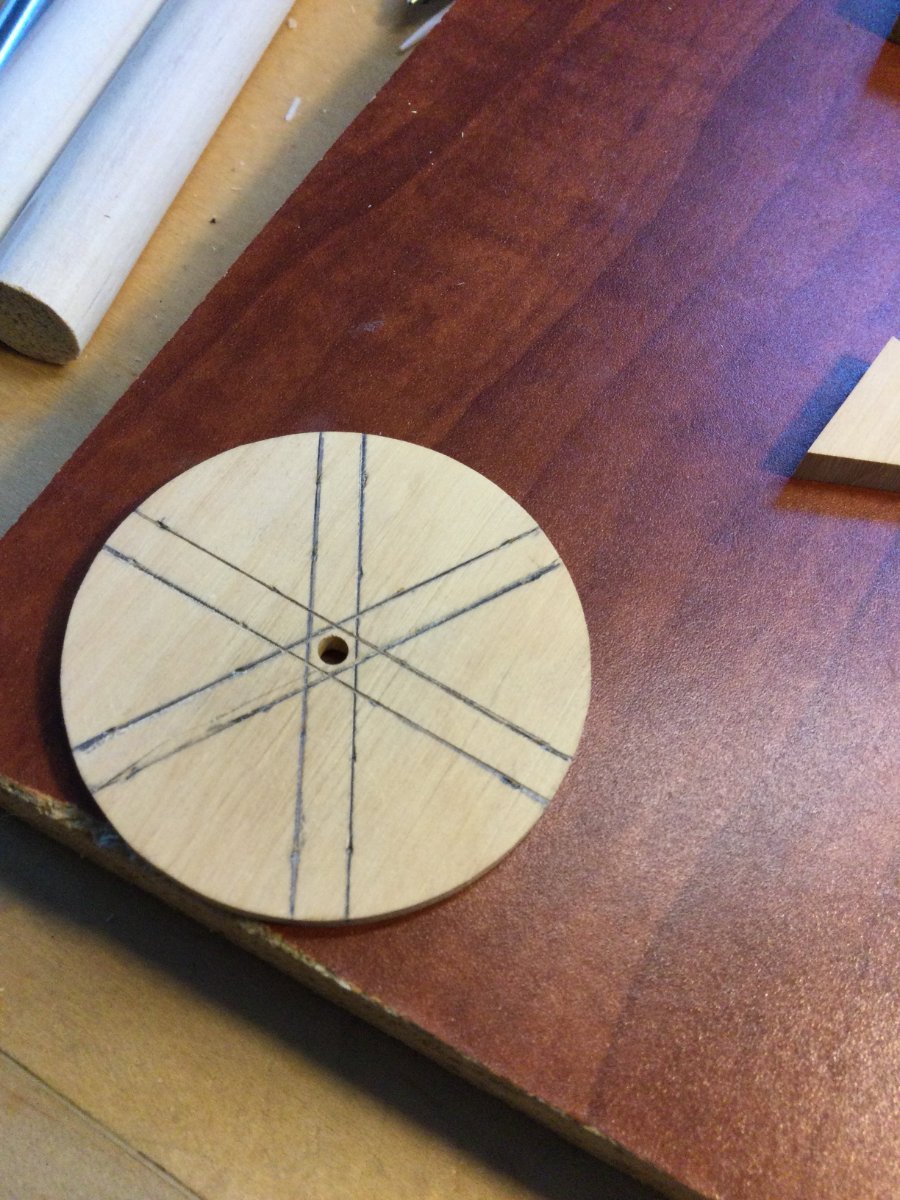
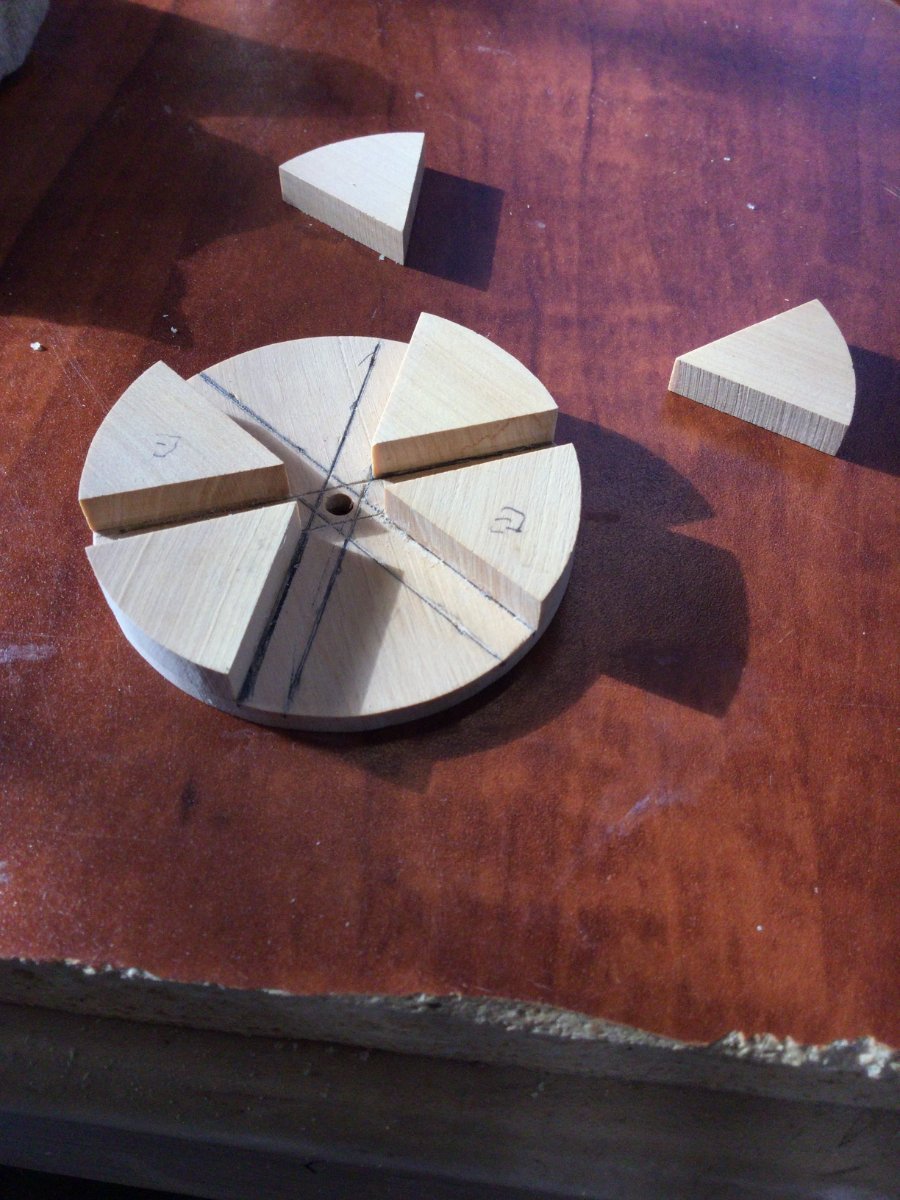
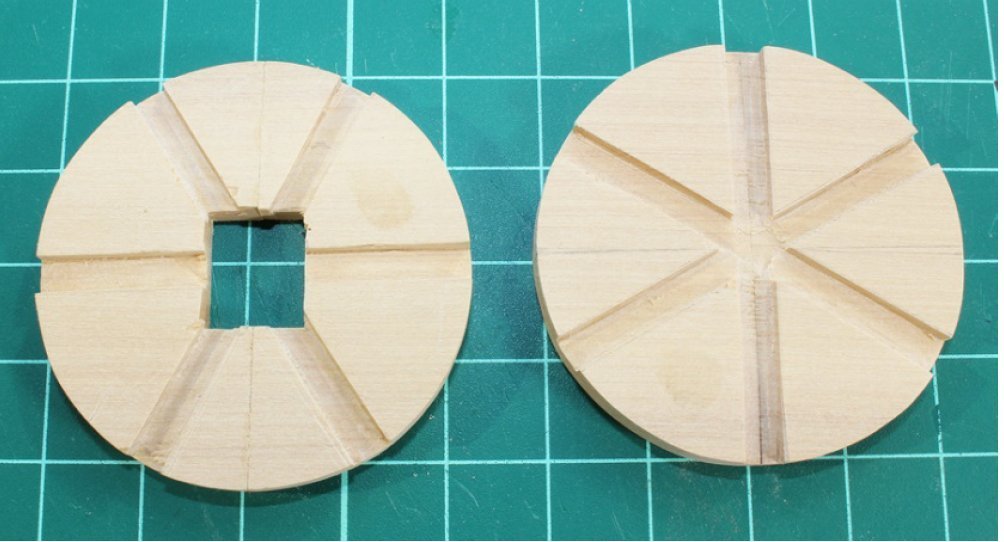
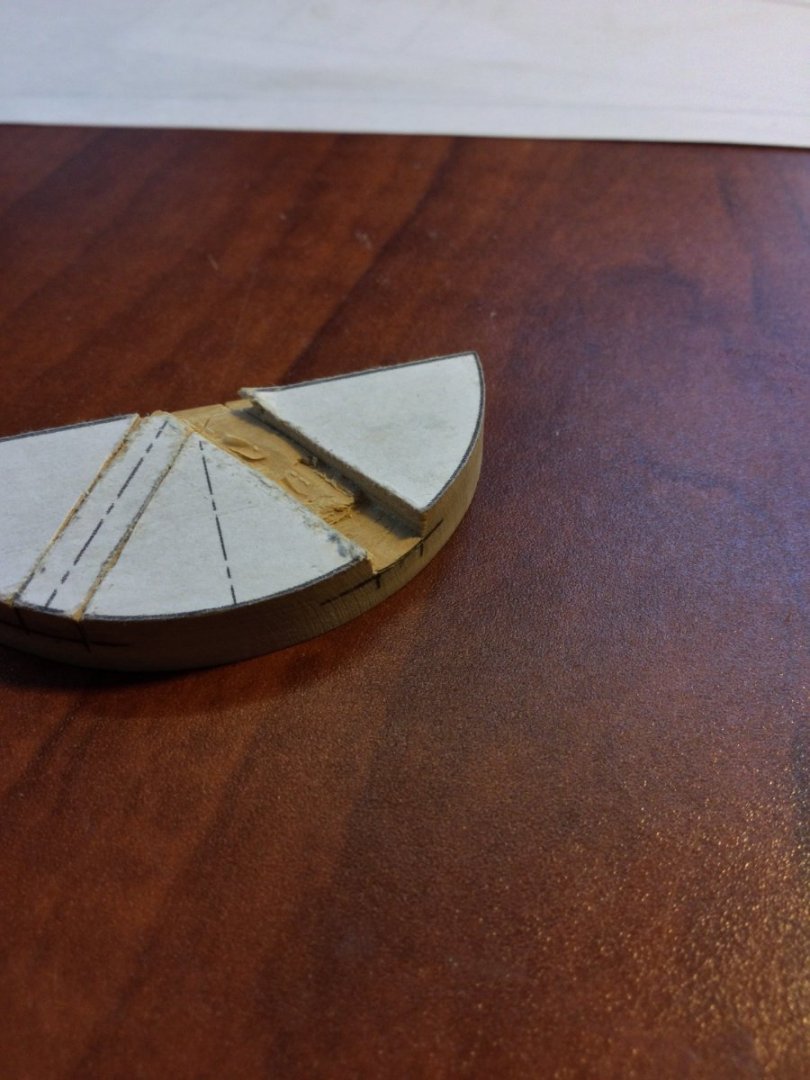
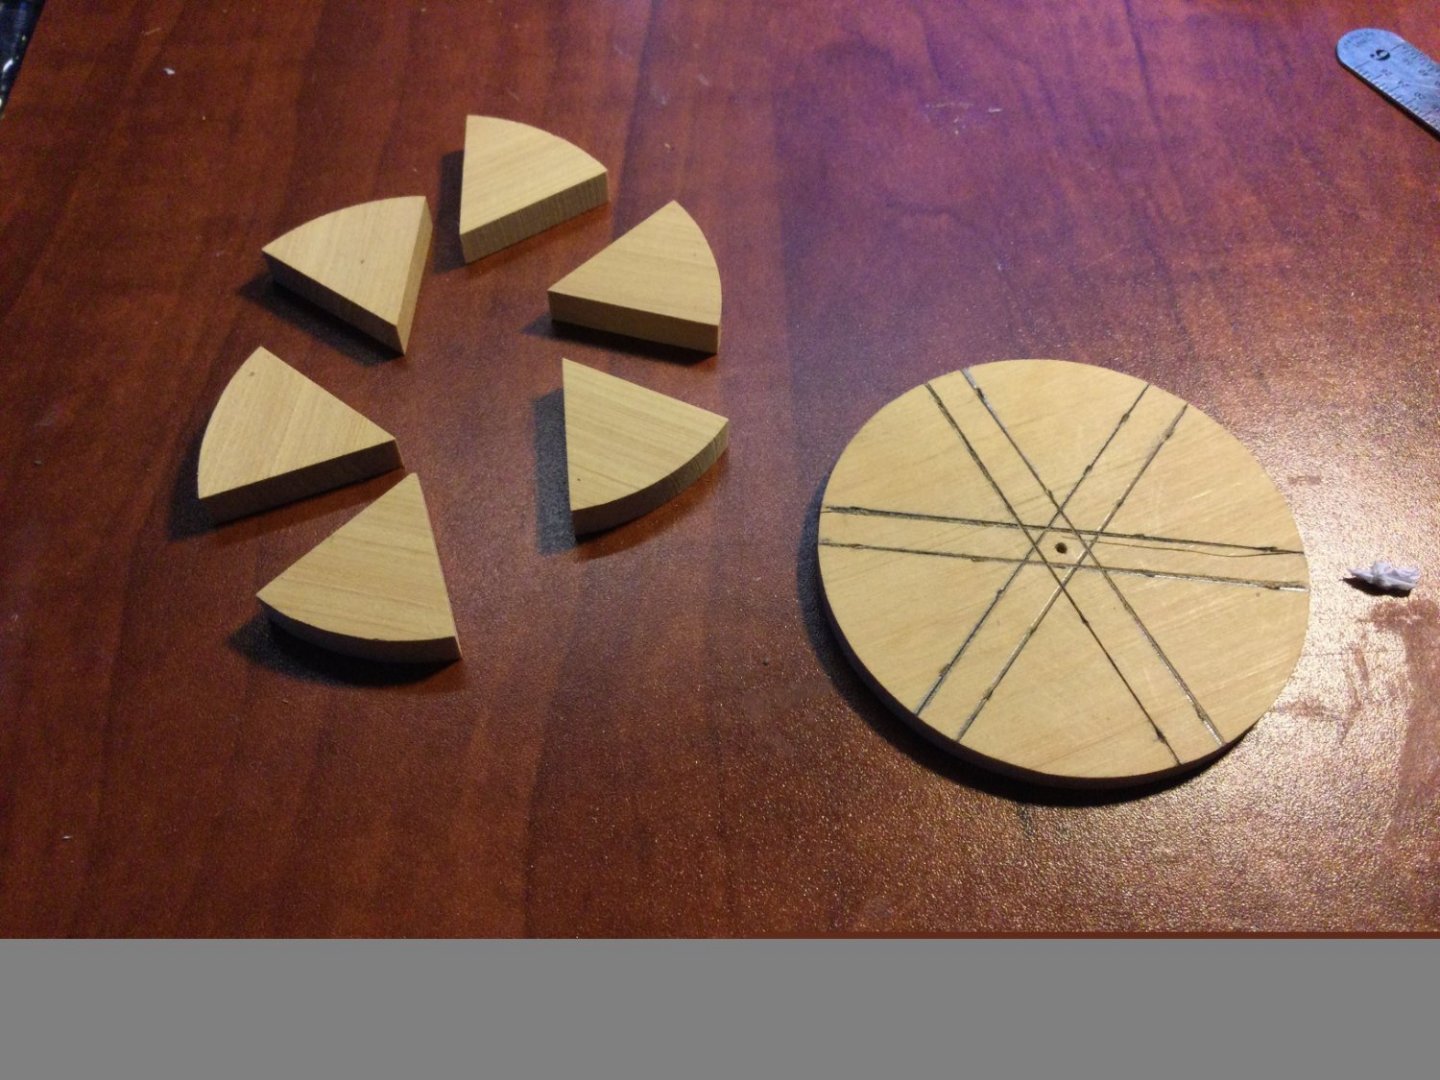
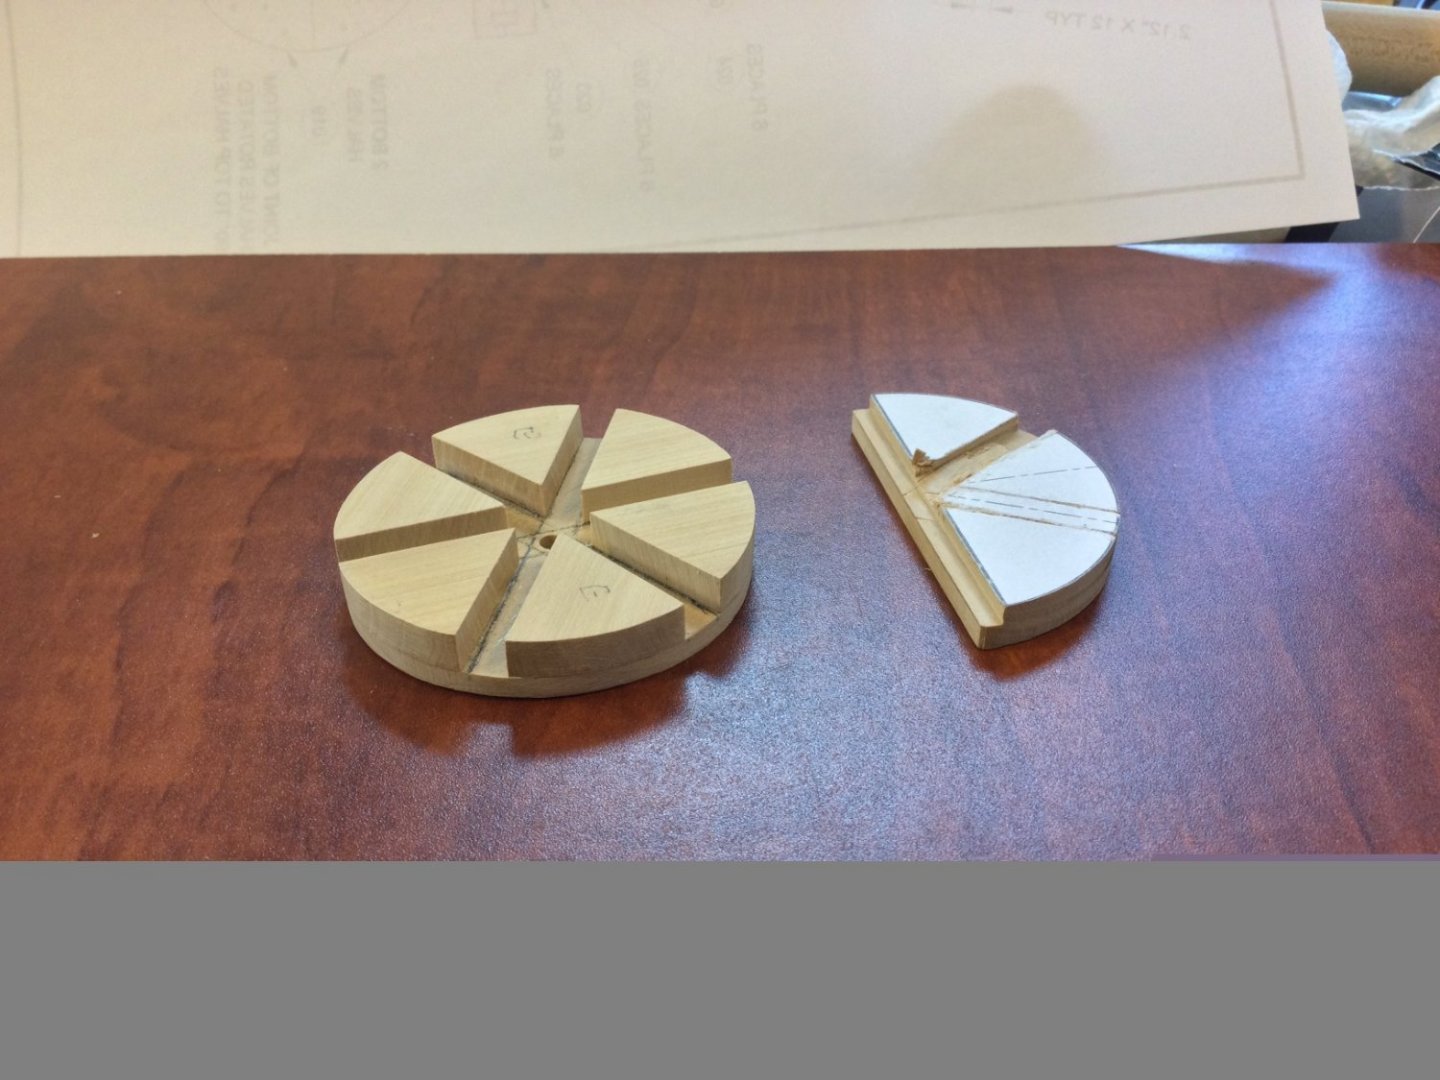
1) With the barrel completed, the next step is to build the drumhead assembly. The drumhead is a short cylindrically shaped part that has 6 holes around the circumference for the capstan bars to insert. The bars are used to turn the capstan barrel. The drumhead is shaped like a snare drum (duh!). The plans and practicum call for the drumhead to be made from 4 semicircular slices of wood, with the recesses for the capstan bars cut out using a razor saw and various chisels and X-Acto blades. There is a square hole in the lower drumhead which fits onto a square extension from the top of the capstan barrel. I gave it a try and soon realized there had to be a better way. Or at least an EASIER way! I cut out two pieces of boxwood for the upper and lower part of the drumhead. I then cut some stock that was as thick as the 6 holes for the capstan bars were tall. I cut out pie-slice shaped pieces and glued them to the lower drumhead part. When the upper part is added, the result is a finished drumhead with 6 perfectly shaped and spaced holes. The first photo shows Toni’s parts for the drumhead. The second two are my initial attempt. The rest are the sequence I used to make the part.


-
As noted above, I cut the chocks oversized and custom fit them to the notches on the whelps. The lower chocks are larger than the upper. Once installed, the lower chocks were sanded convex and the upper sanded concave. Chock bolts were then installed. A gasket was made of 1/32” plywood to raise the capstan barrel up a tiny bit above the step so the barrel doesn’t “drag” on the step when turned. Finally a 5/8” diameter barrel bottom was added to mount the capstan barrel in the 5/8” hole in the capstan step.


-
The 5 whelps are next glued unto the recesses of the capstan barrel. The edges of the flat surfaces where the whelps contact the barrel are beveled slightly before gluing to ensure a tight, clean fit. The upper and lower chocks are of different sizes and shapes. I cut the oversized in two dimensions for a custom fit. You can see the start of the process in the final photo.


-
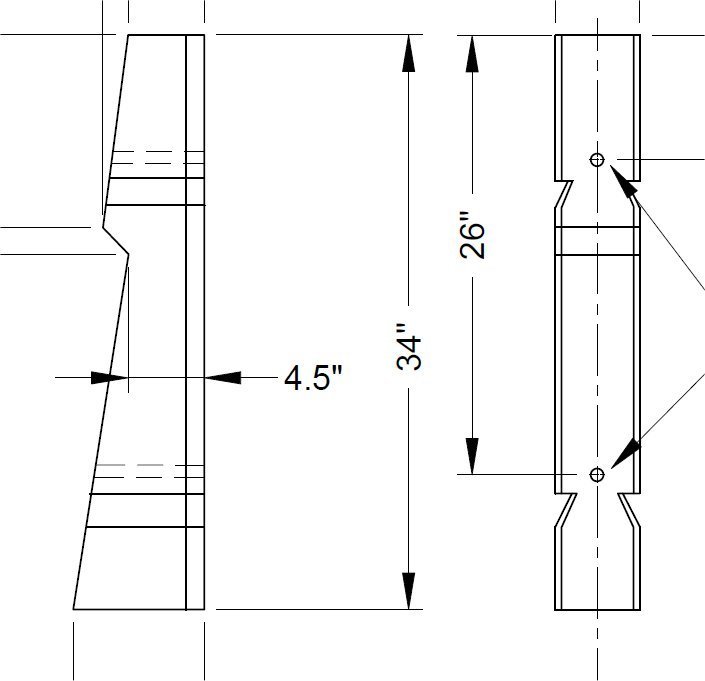
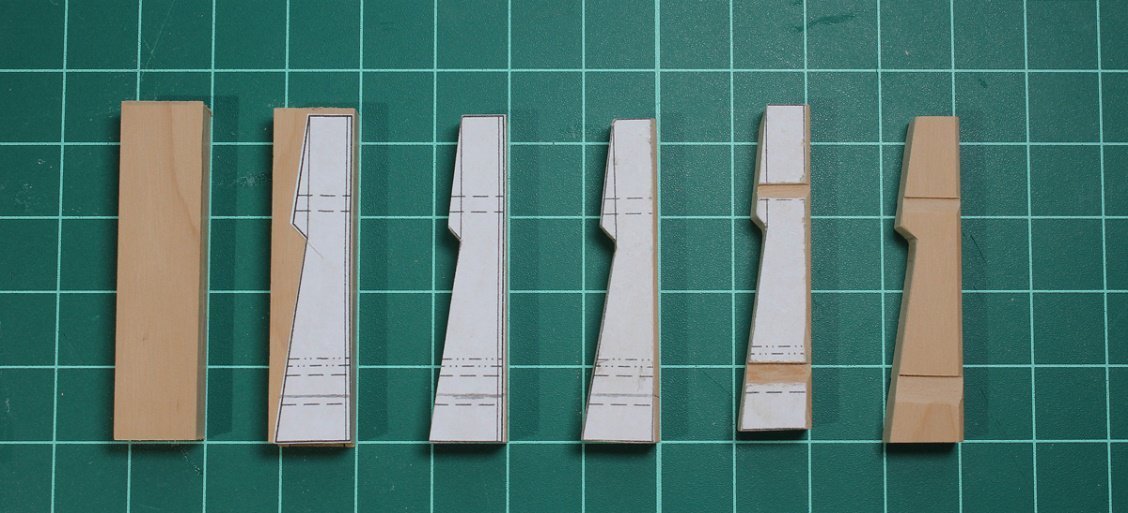
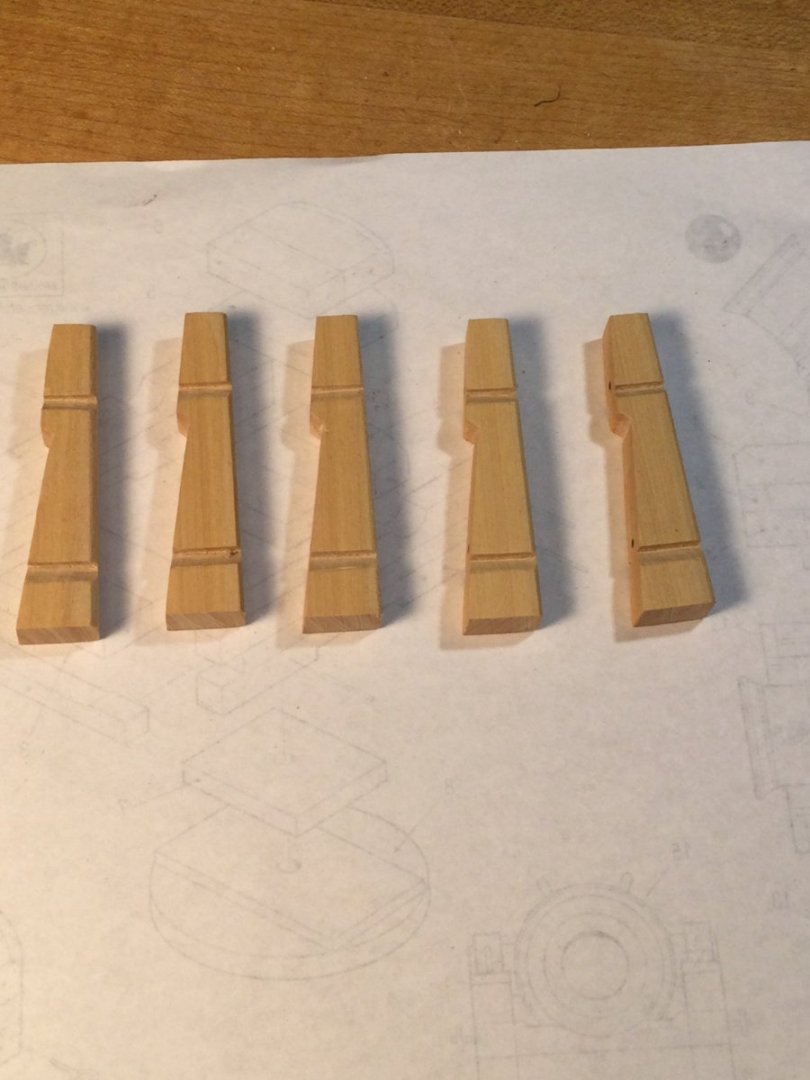
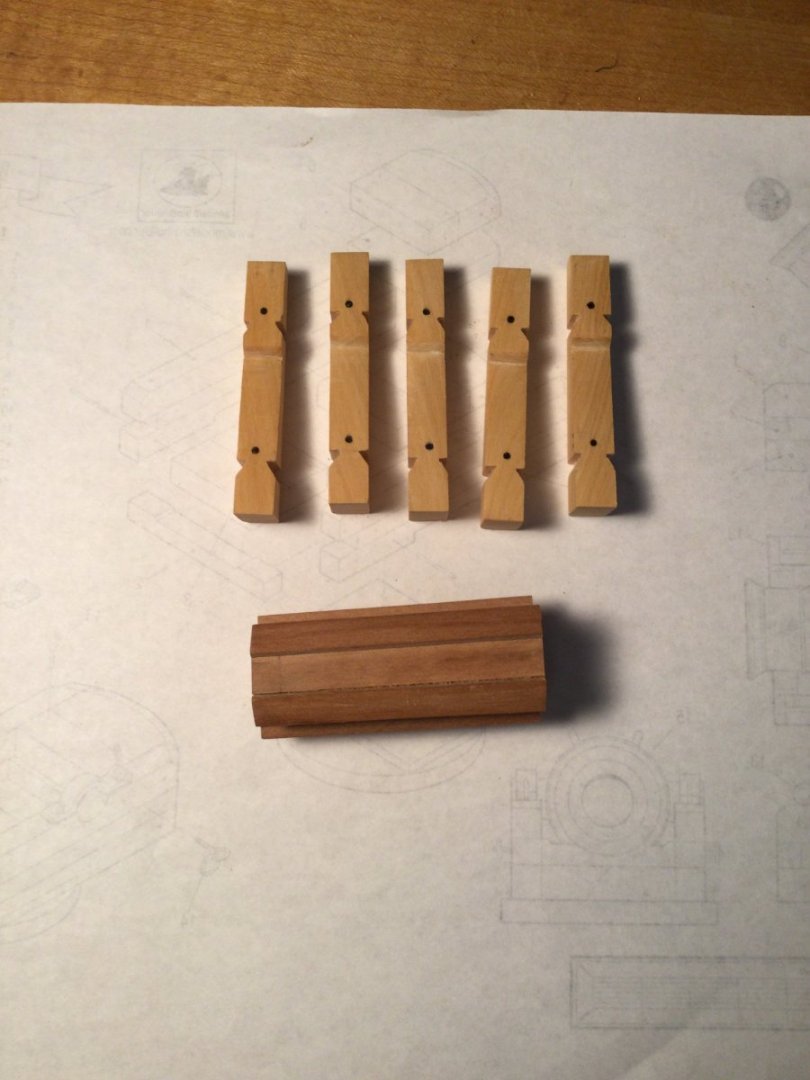
All five whelps are identical and they sit on the “recessed” faces of the barrel polyhedron. The first step is to cut out five blanks for the whelps (and a couple extra) and shape their profile. I used rubber cement to glue the template pattern for each whelp to the boxwood blank. I cut them out with the scroll saw and used files, sanding sticks and a disk sander to define the final shape. There are two pair of notches on each whelp, one at the top and another pair near the bottom. These are for fitting the upper and lower chocks. It’s a custom fit, and comes a little later. The notches can be cut with a chisel, but I found a sharp X-Acto works better! The first photo is a detail of the whelps from the plans. The second shows the steps Toni used to shape the whelps. It comes from the practicum. The last photos are my whelps, with the chock bolts in place.
-
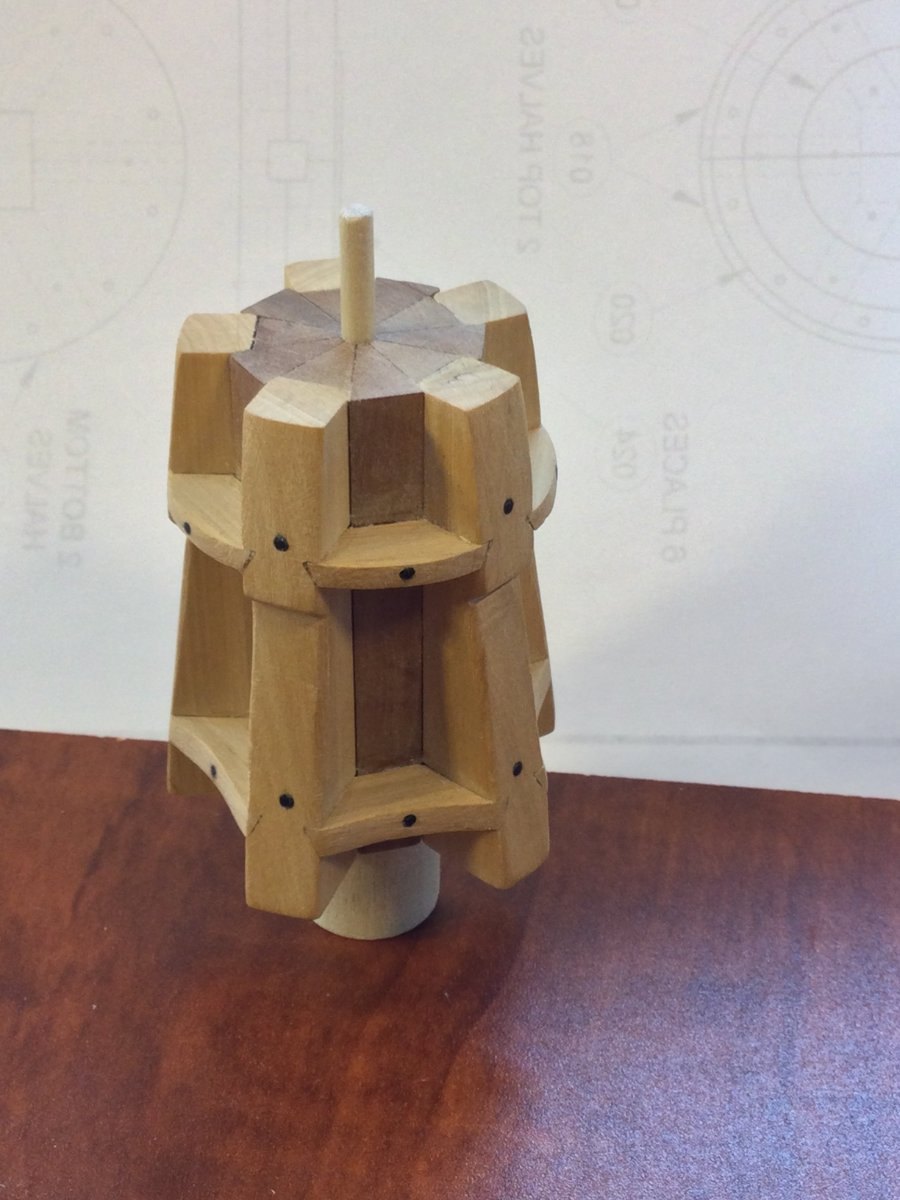
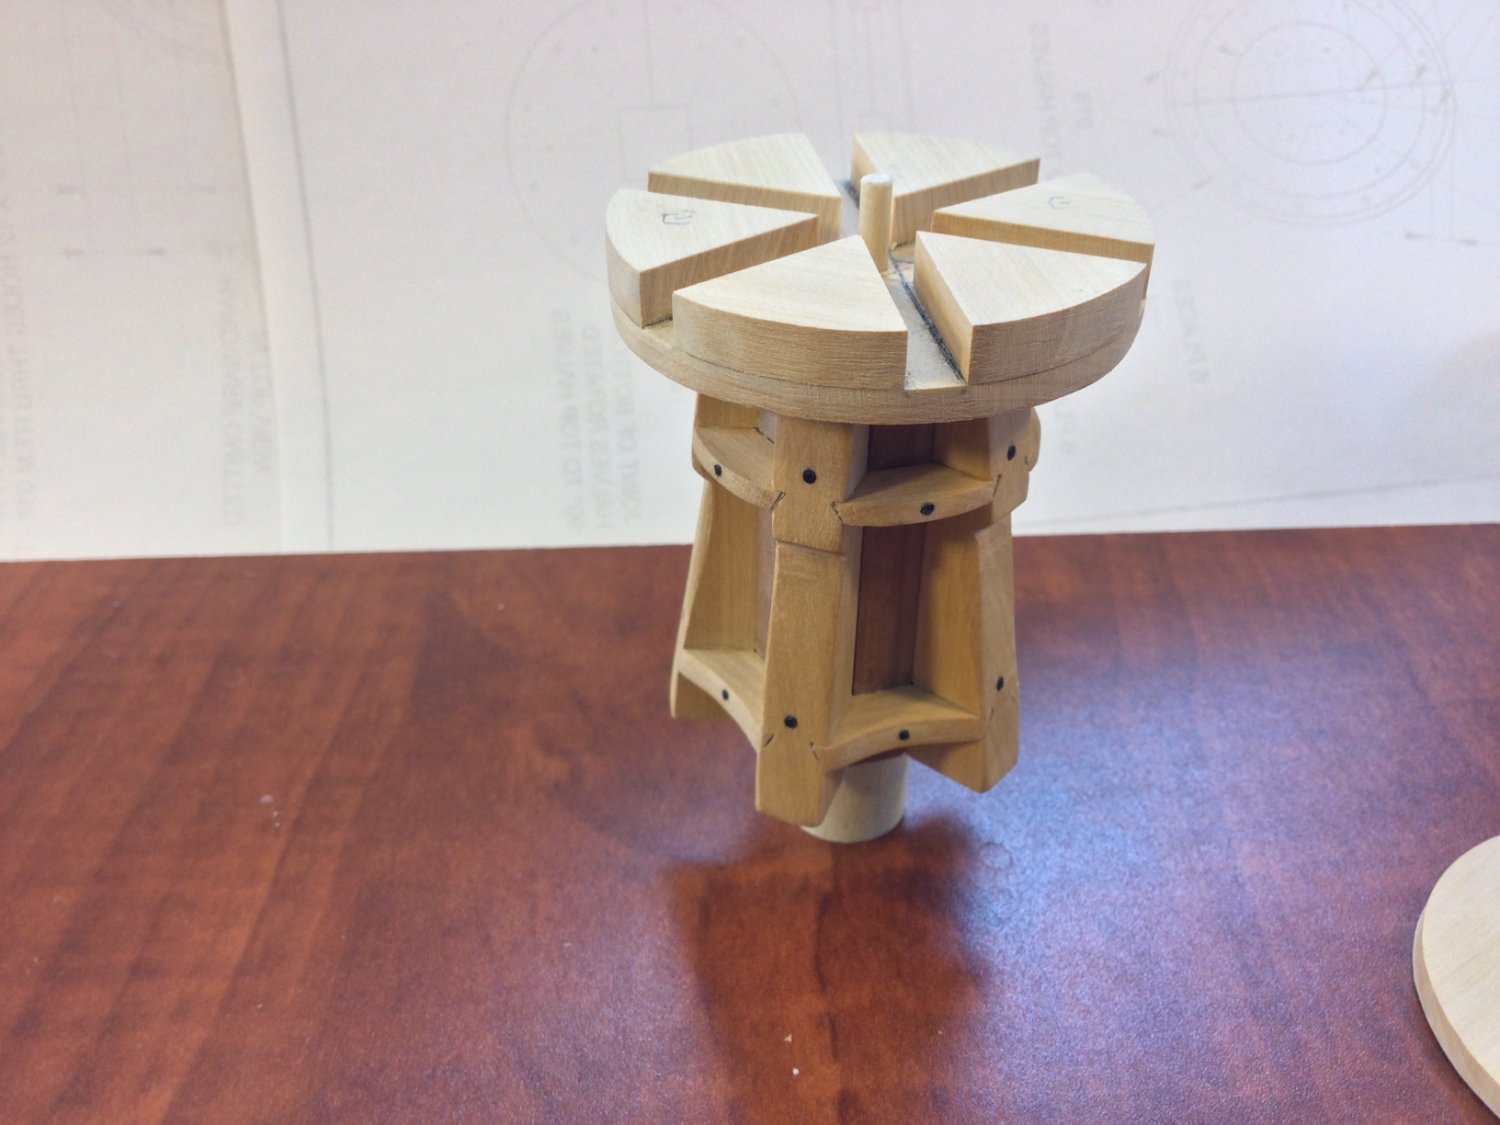
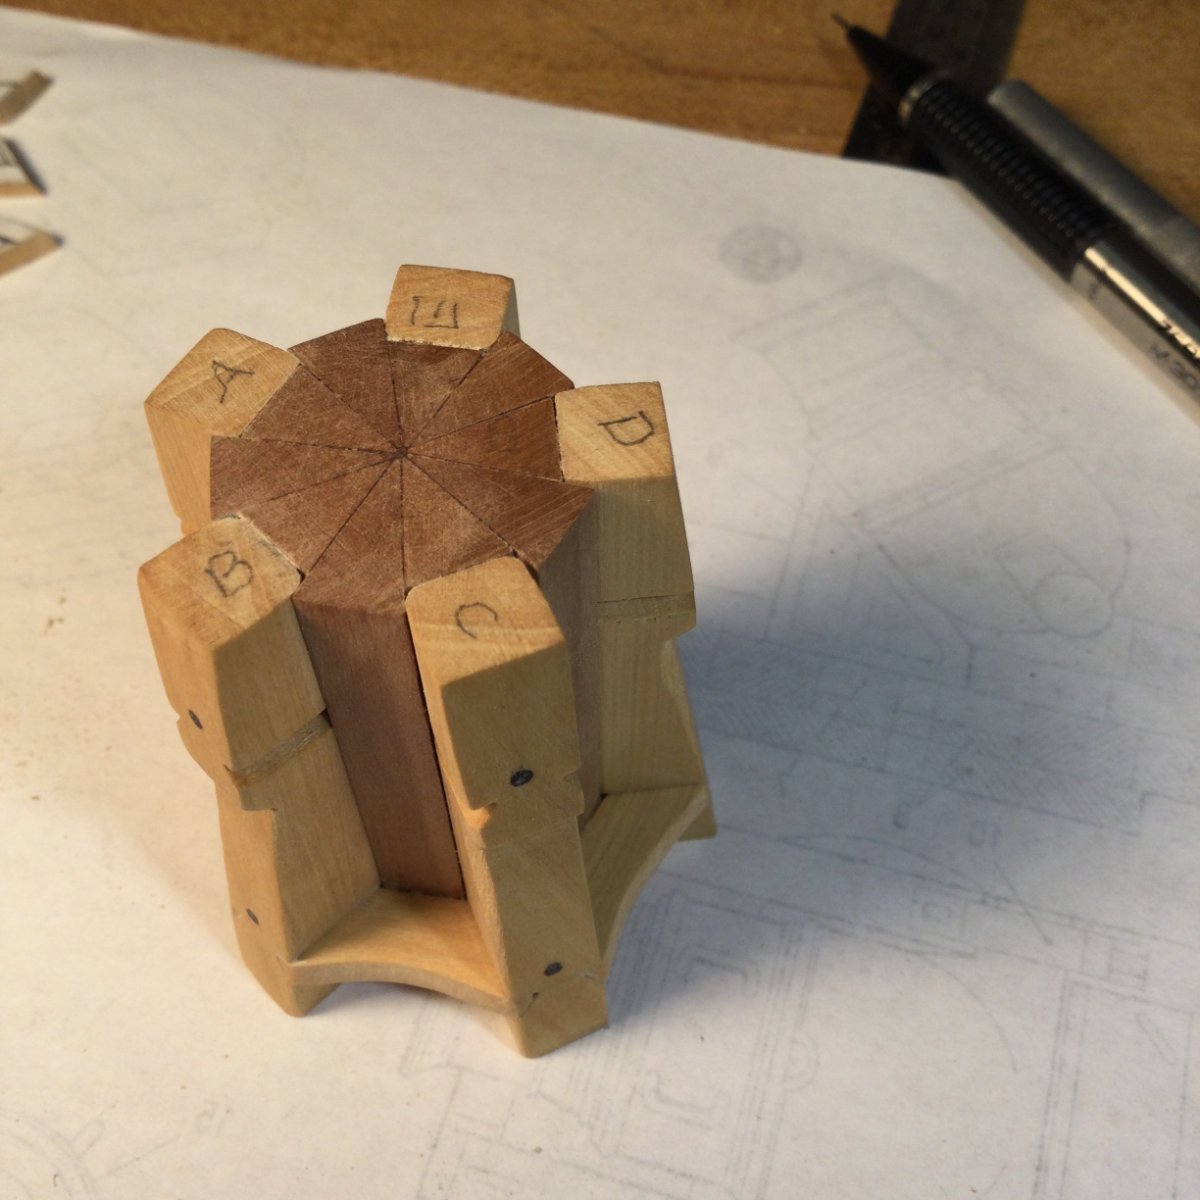
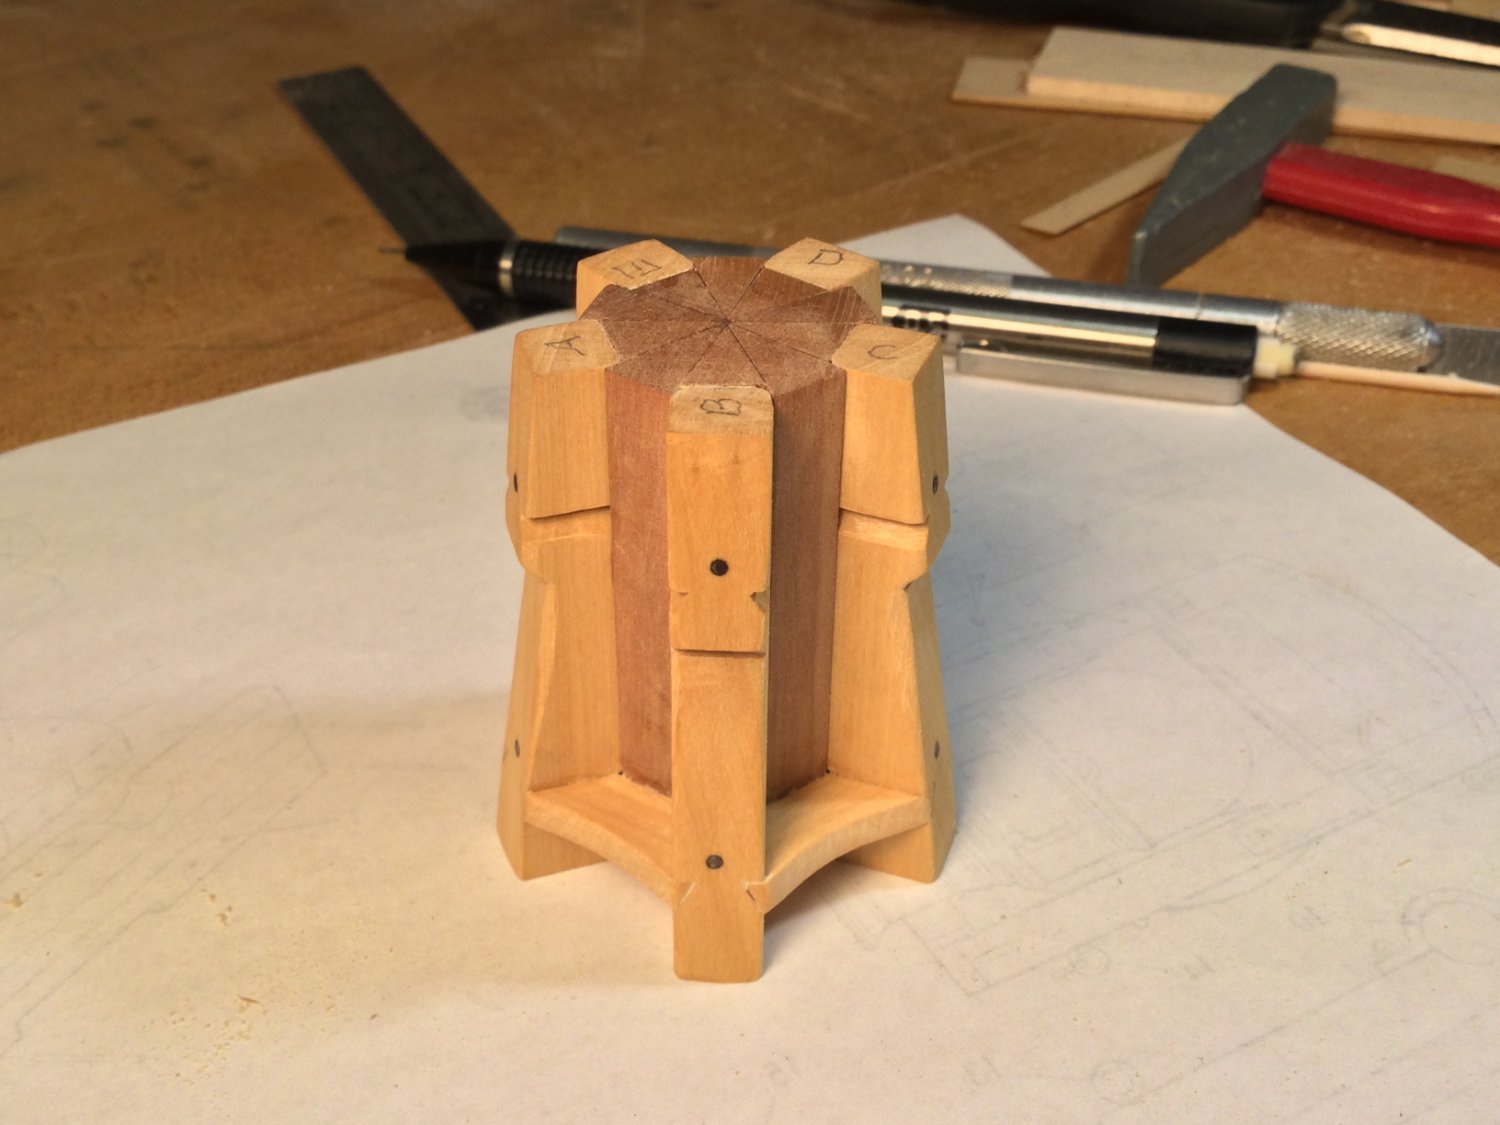
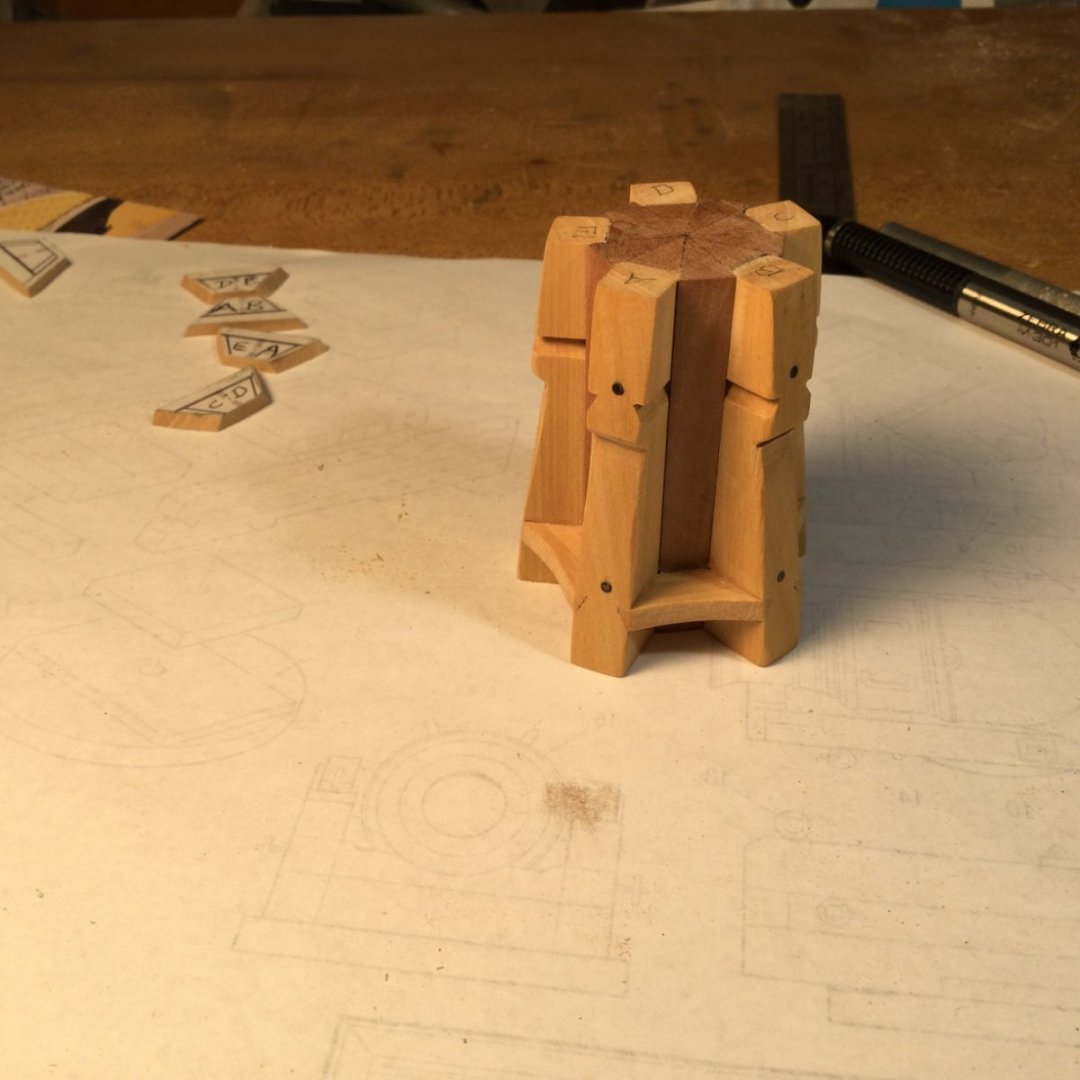
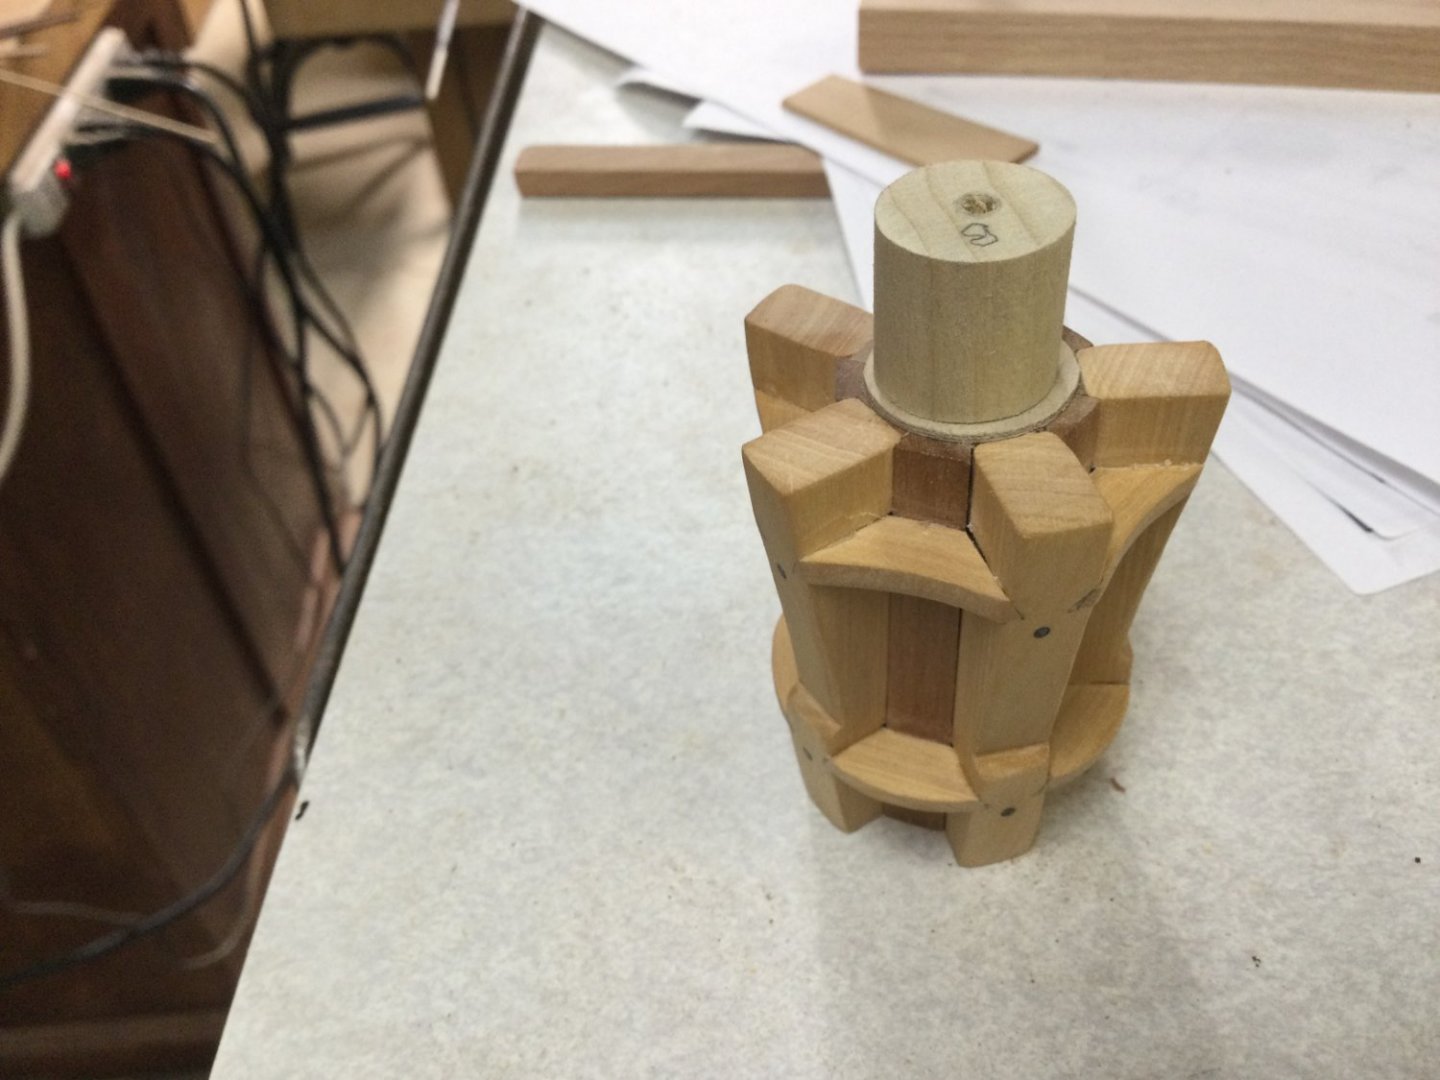
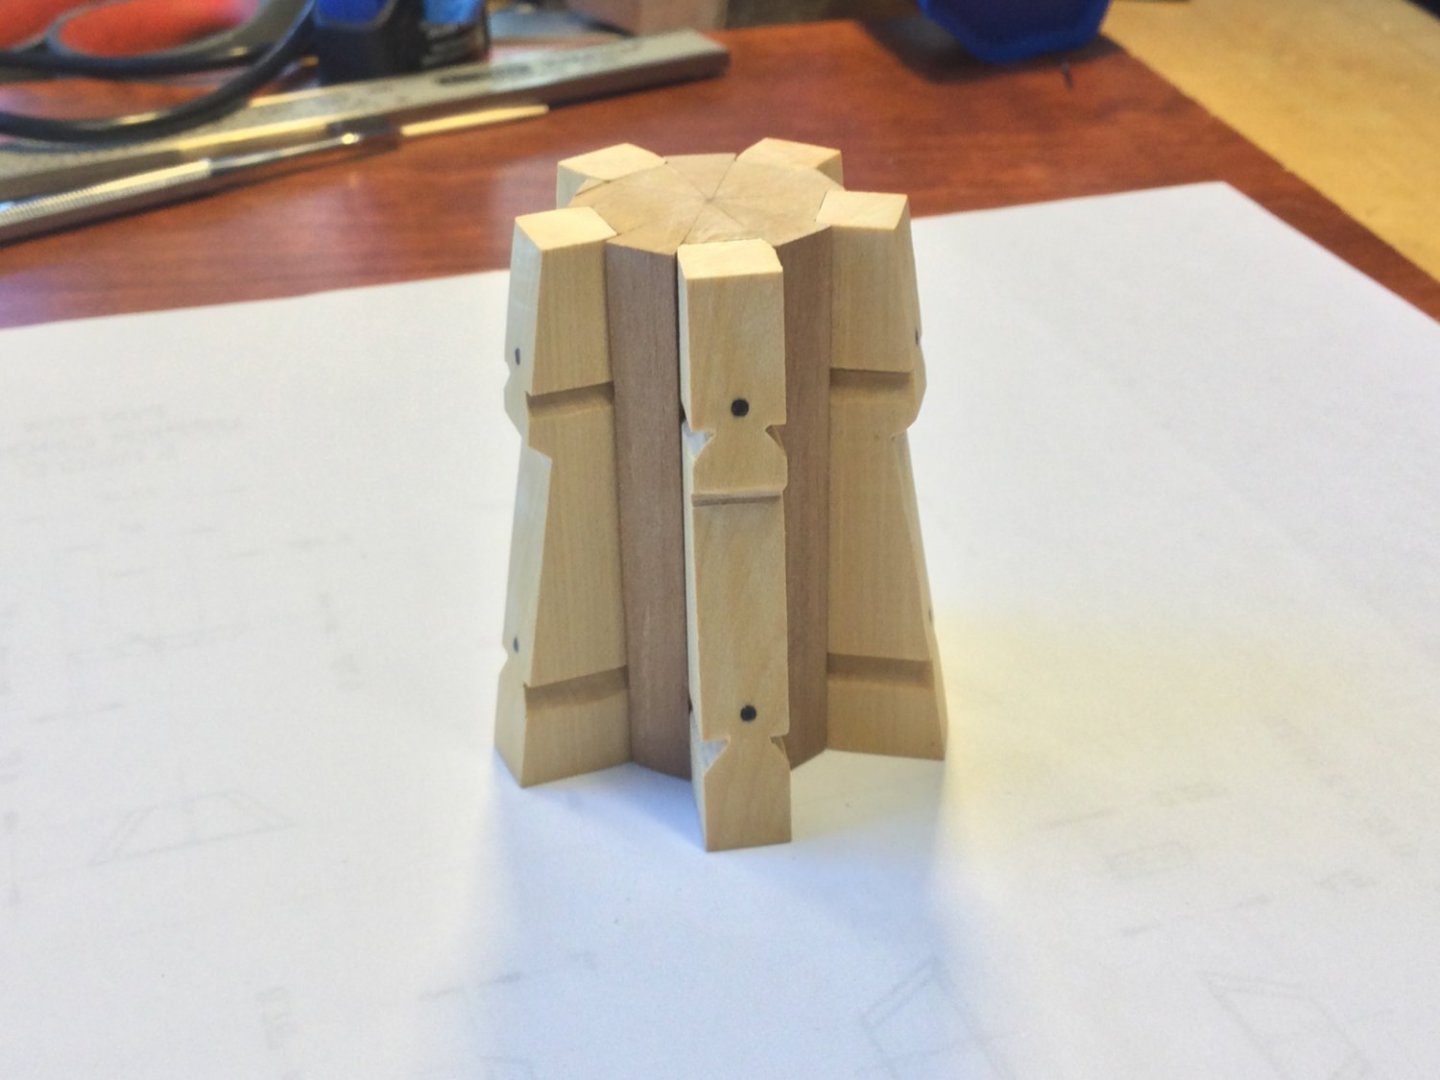
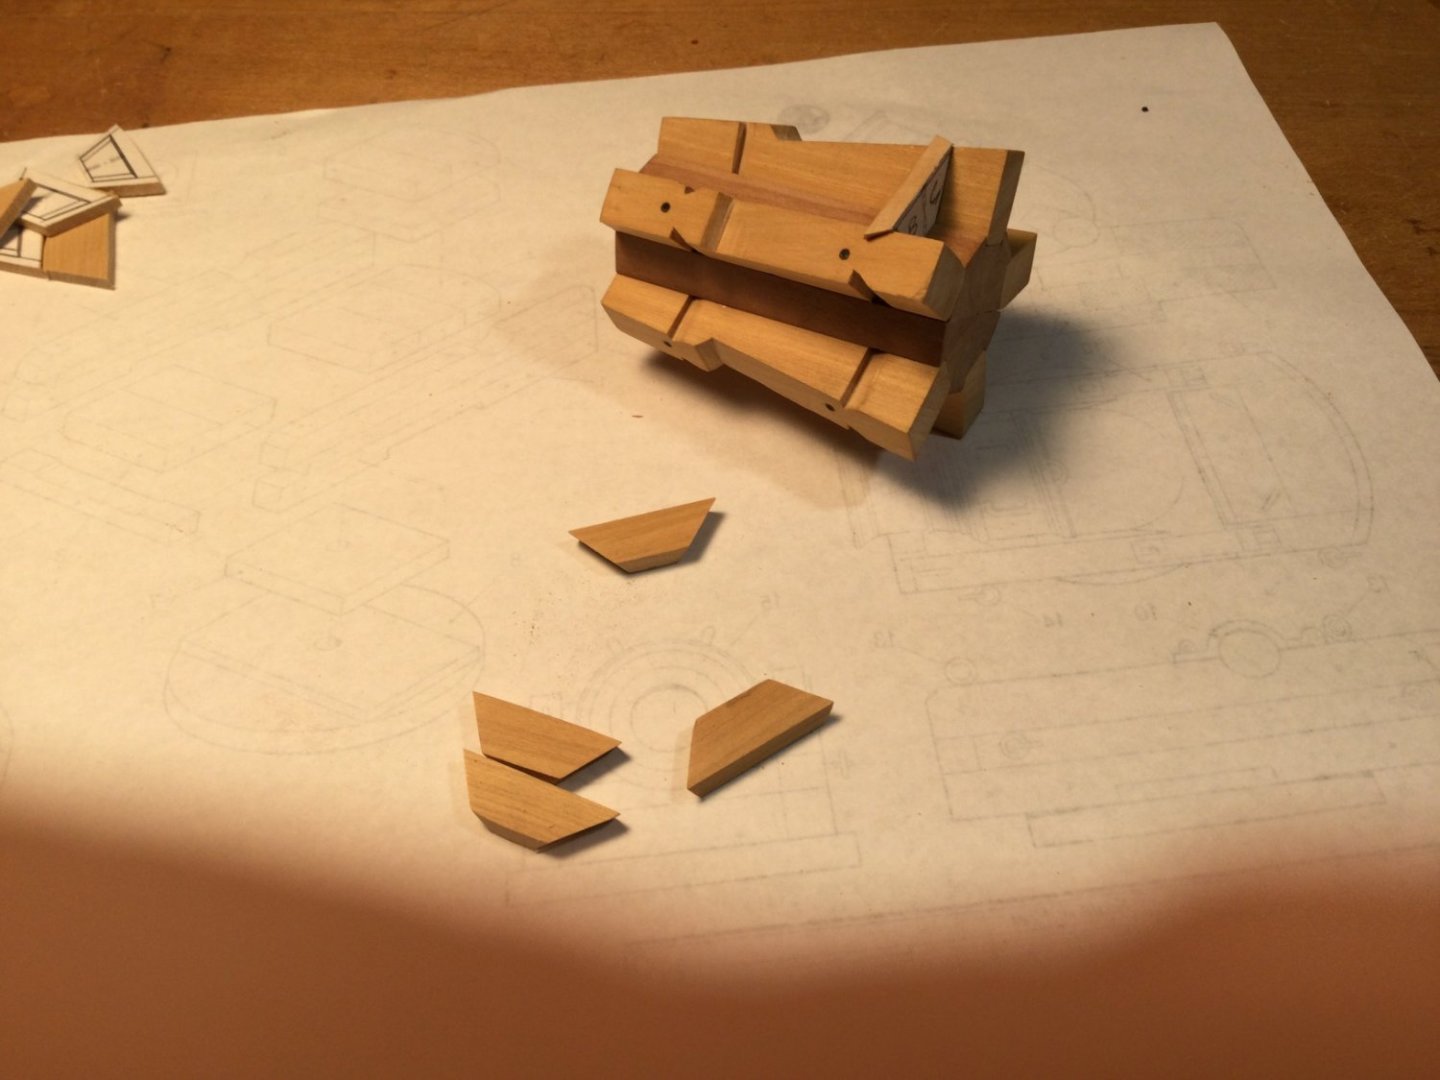
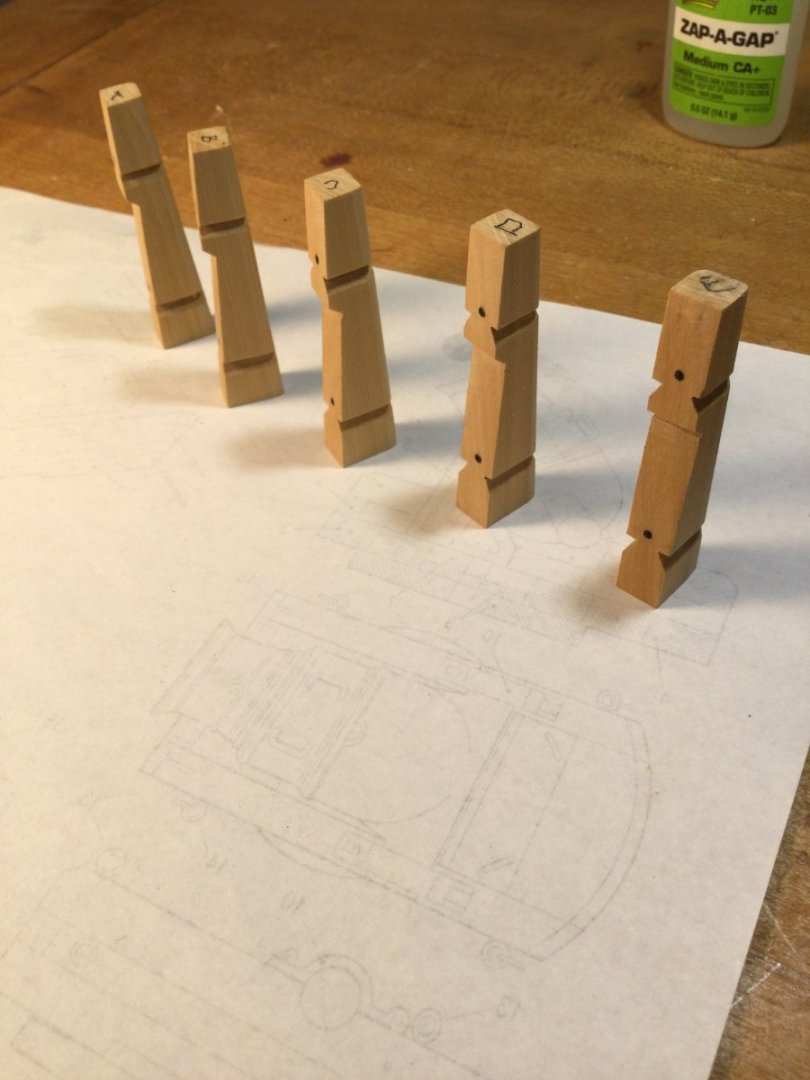
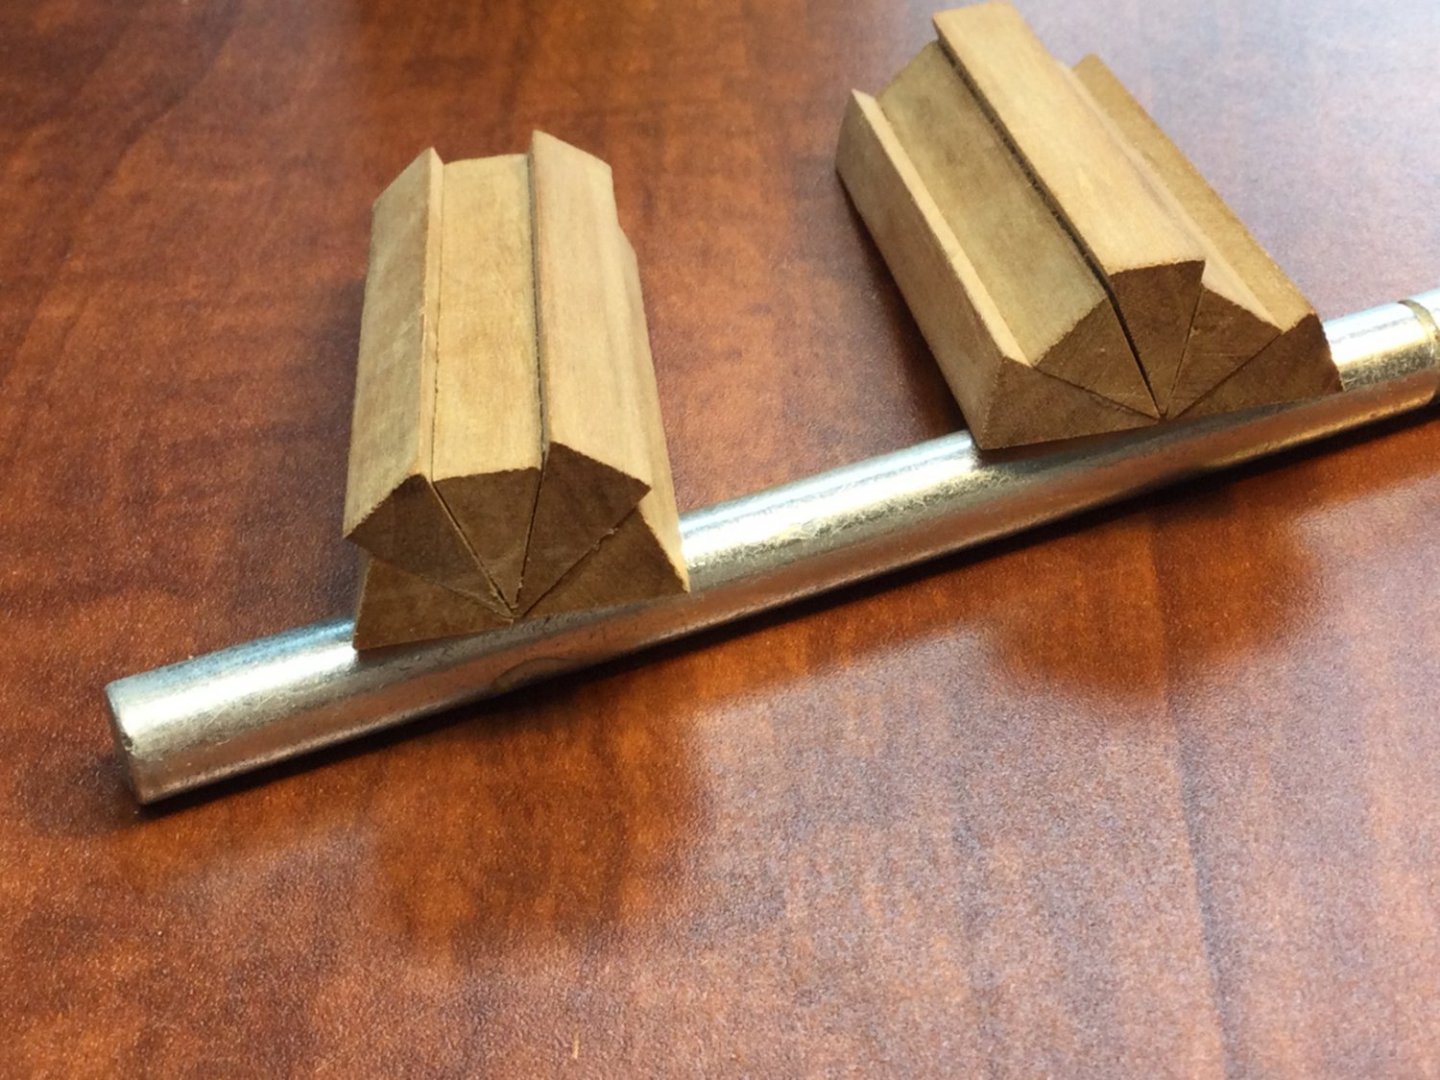
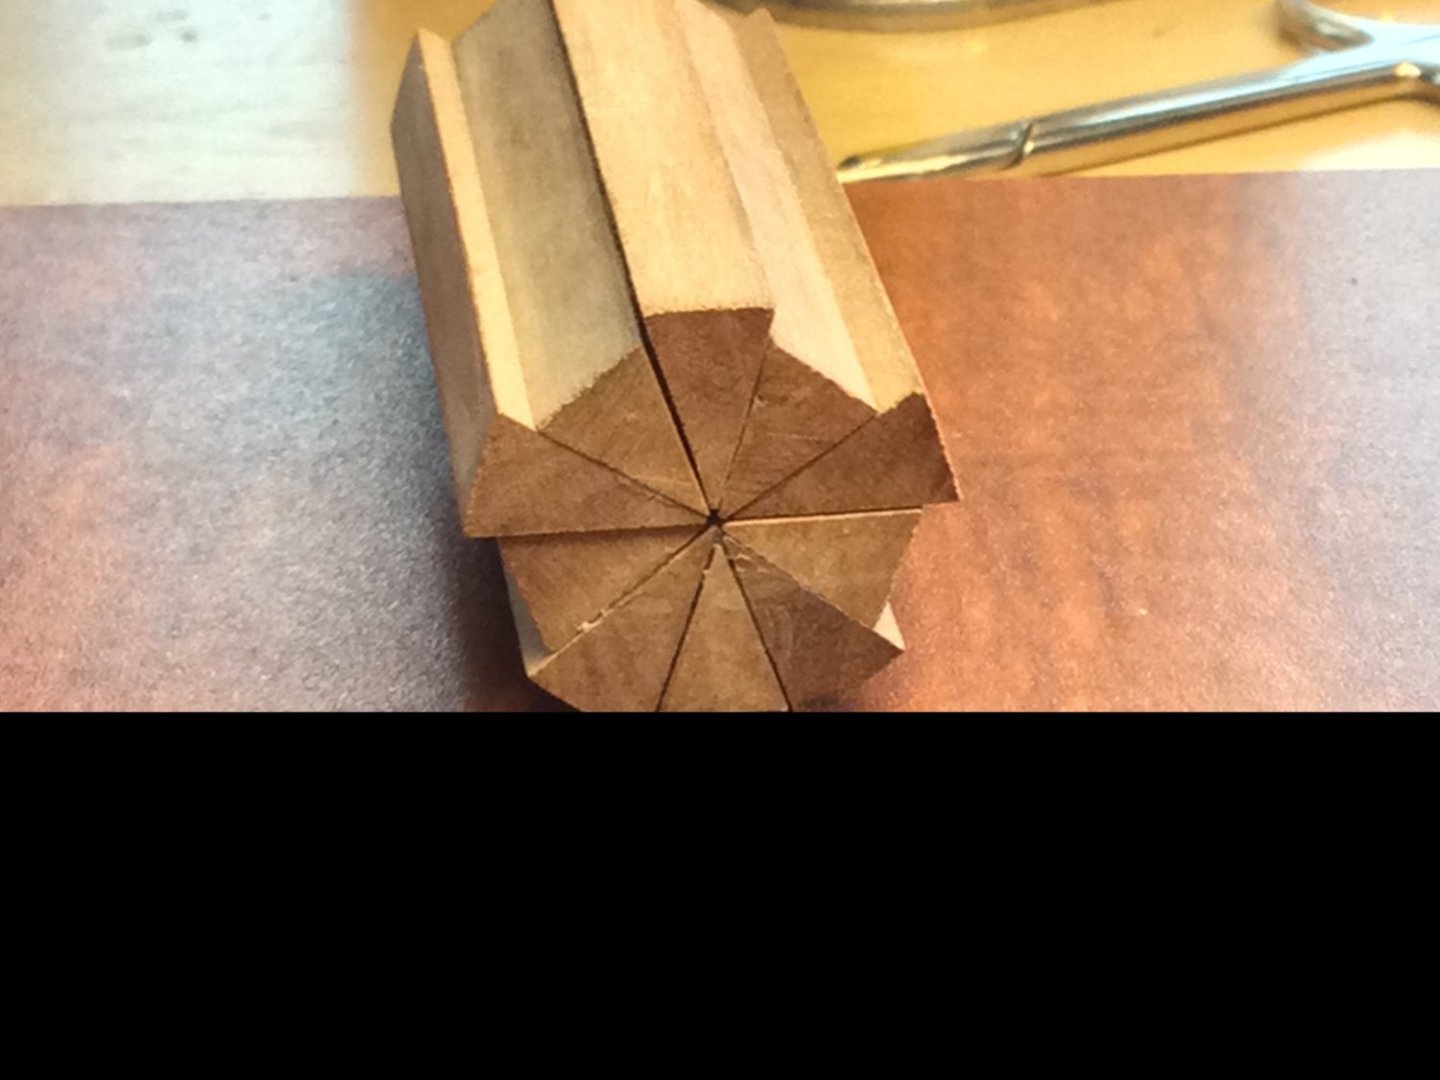
After the capstan location was defined by the hole, construction of the barrel began. The barrel is the most important part of the model because it established the shape of the capstan, sets the angles and spacing of the whelps and determines the location of the chock. In the advanced version of the model, the capstan barrel is, for the most part, a 10 sided polyhedron with each face being 36 degrees. This is easy to produce with a mill. For those without a mill, we make 10 “orange slices" of two different sizes for the ten faced polyhedron. These are then glued together radially. This is easier to understand from looking at the photos than it is from my explanation! The result is a ten-faced barrel with every other faced recessed to fit the whelps.


-
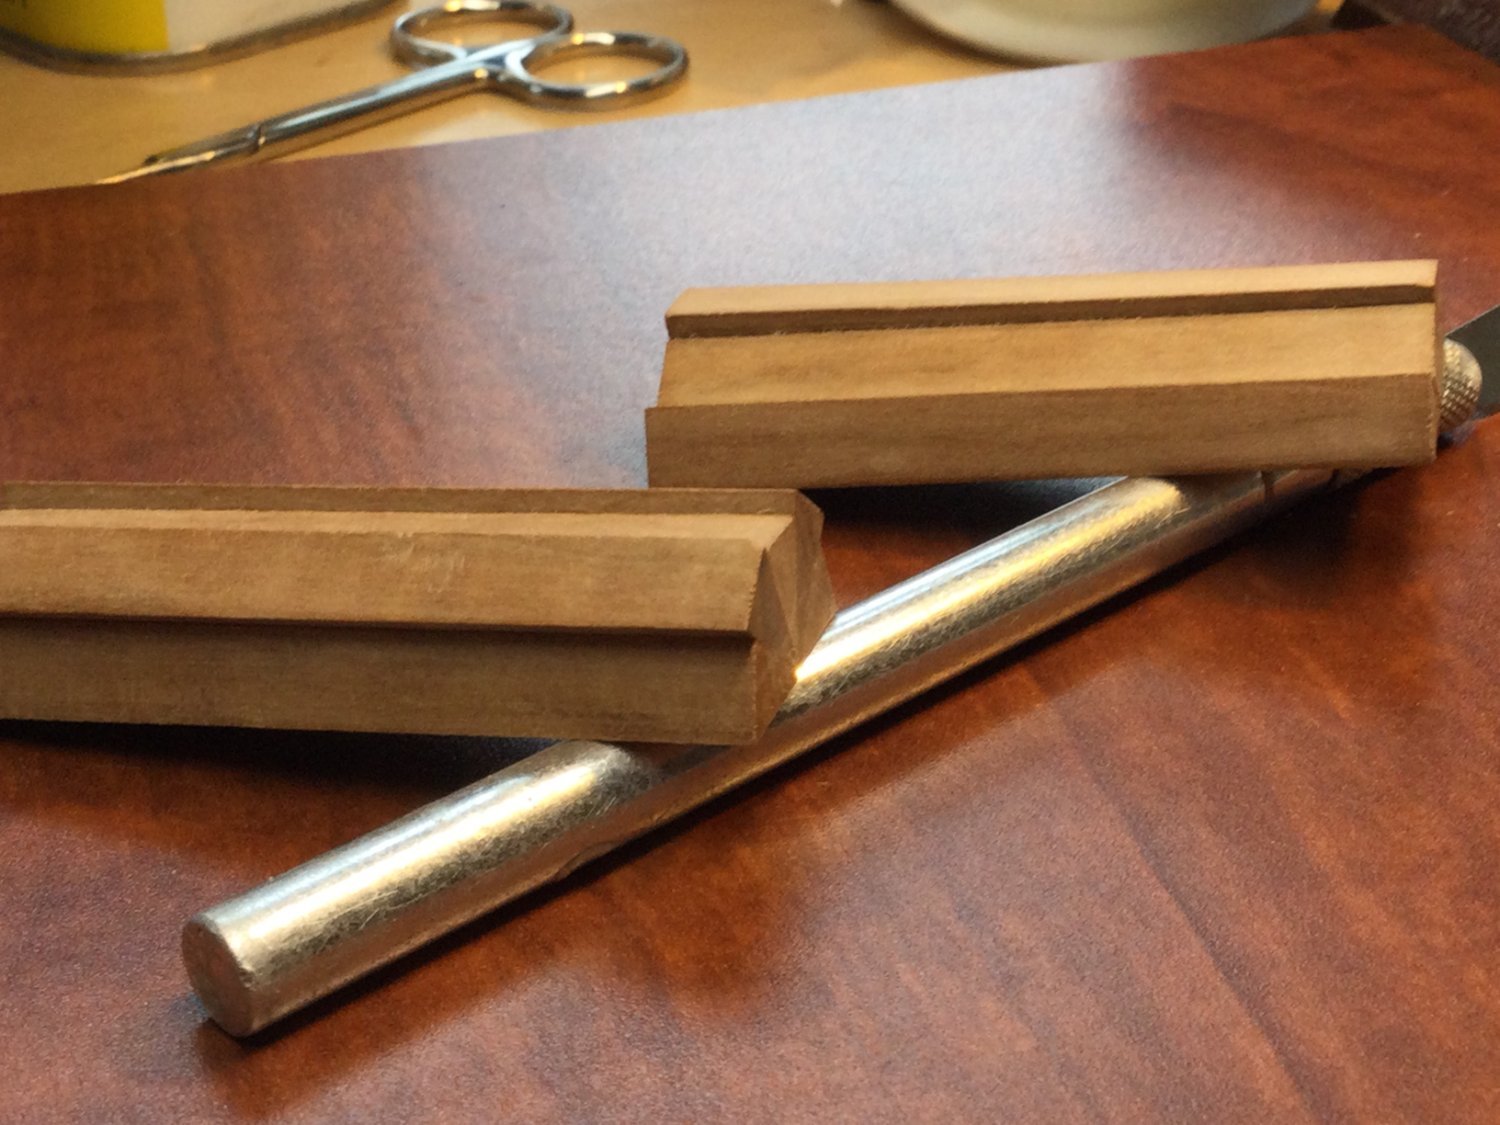
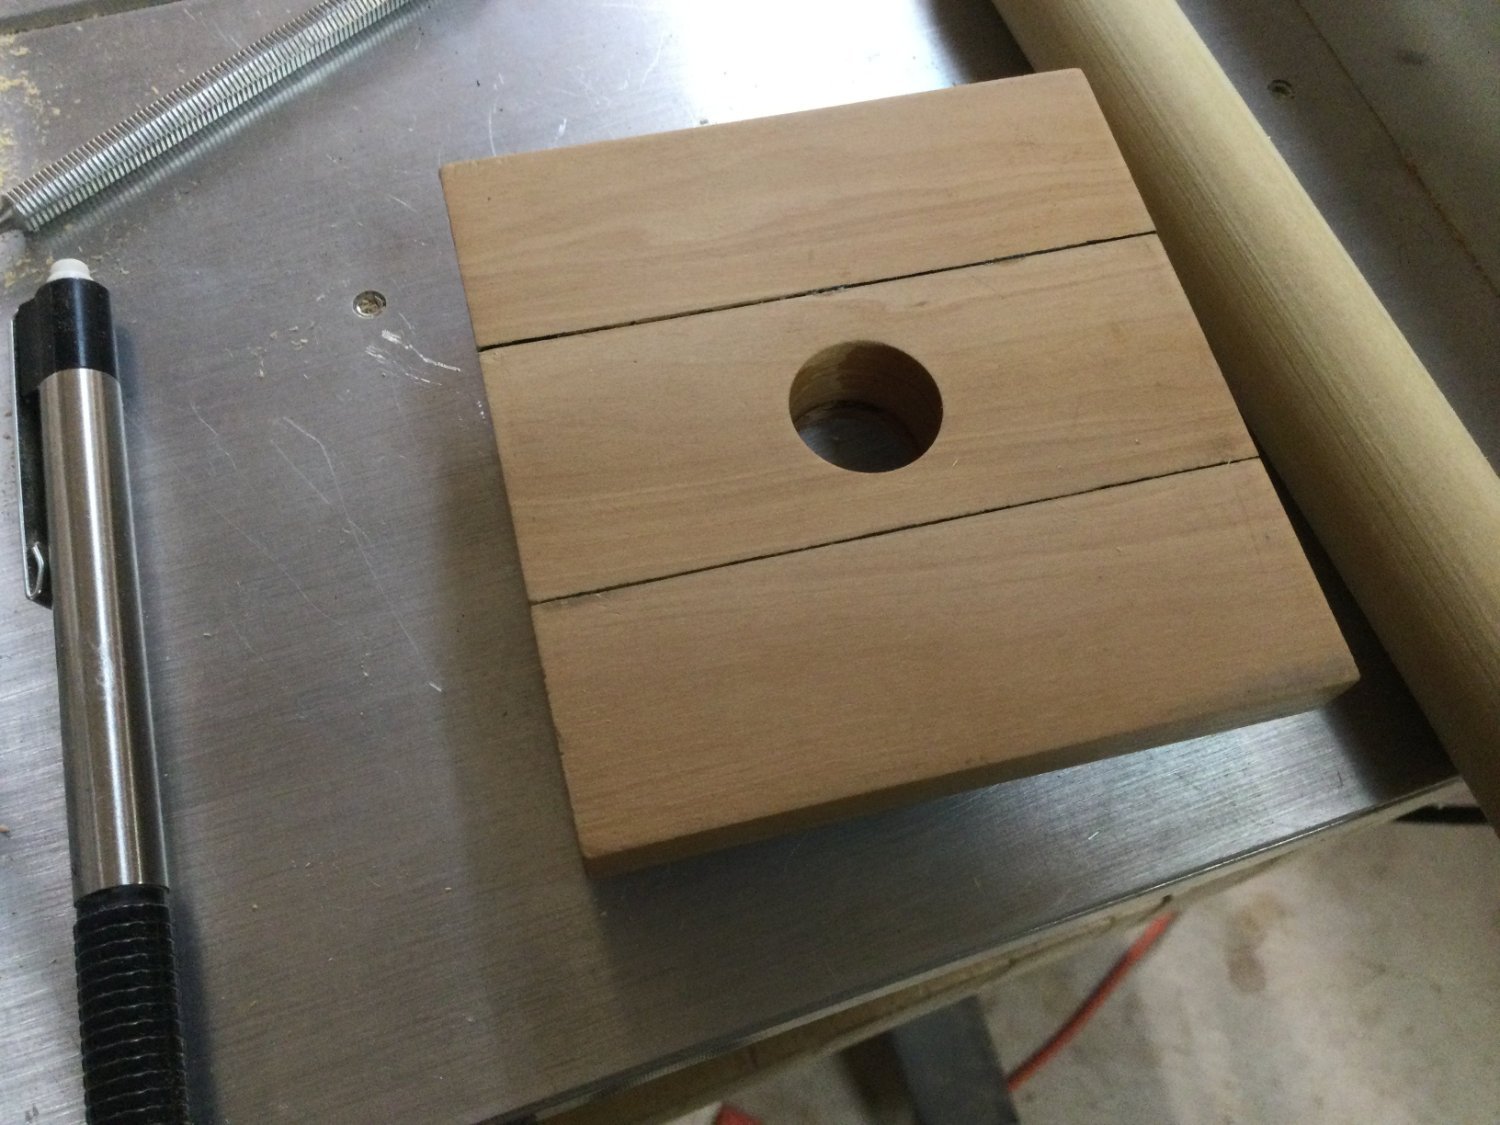
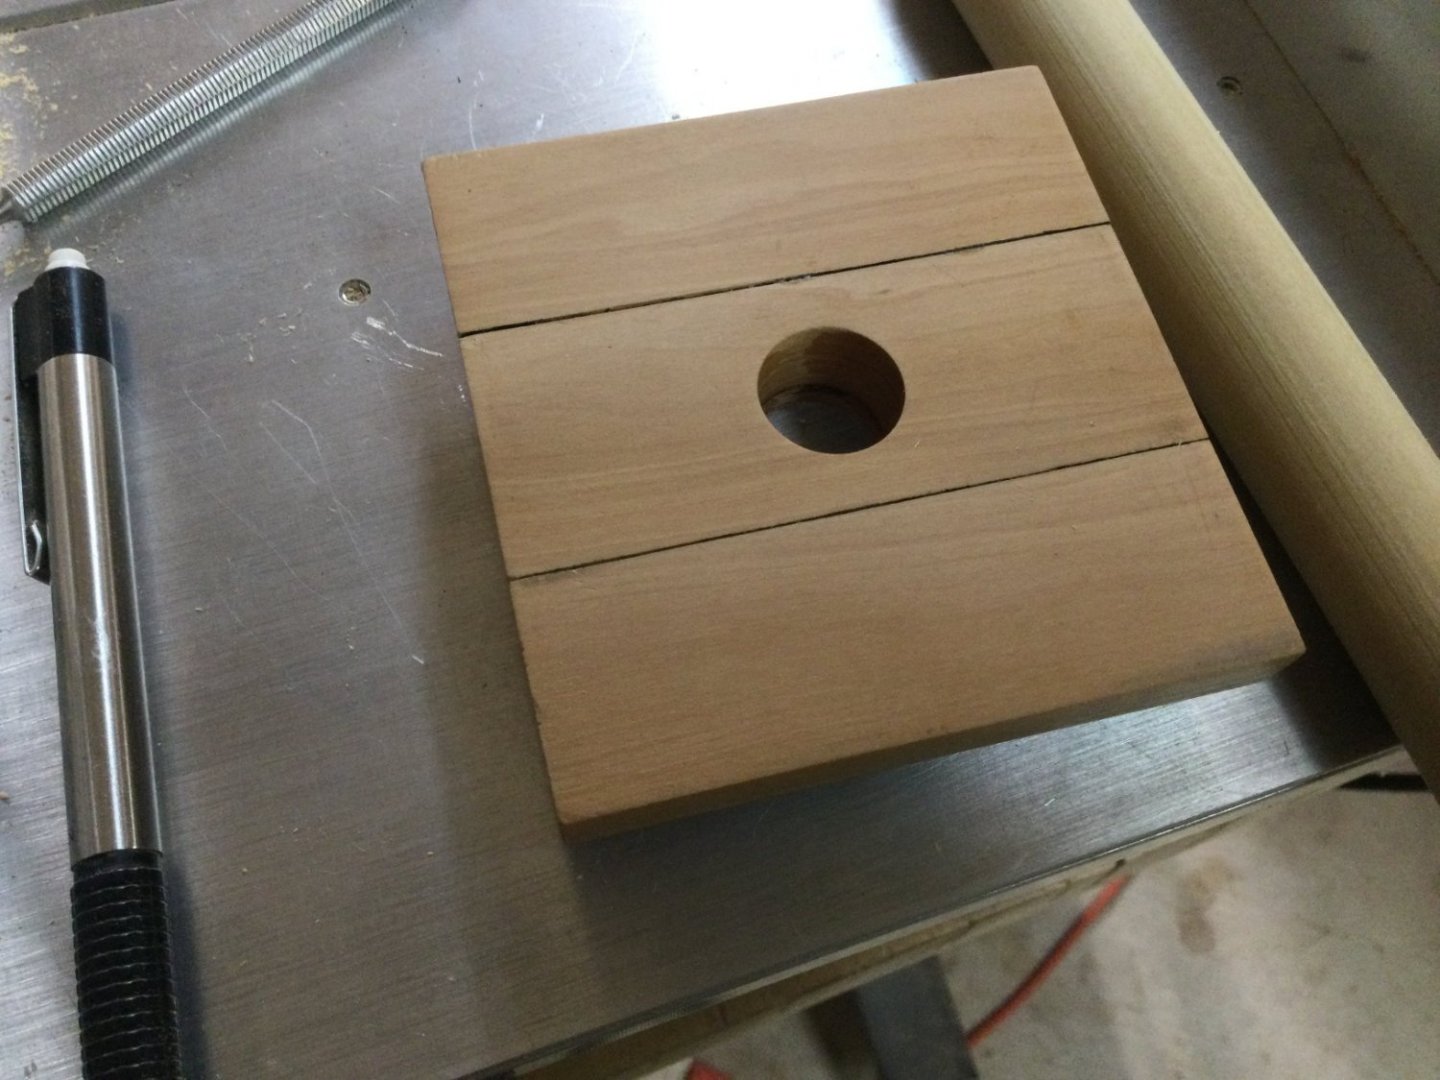
In the exact center of the step is a hole for the capstan barrel. This is invisible on the final model but it allows the capstan to rotate. The best way to bore the hole is with a Forstner bit. The plans call for a 11/16” hole. I don’t have an 11/16" Forstner bit so I used a 5/8" bit instead. Worked fine!
-
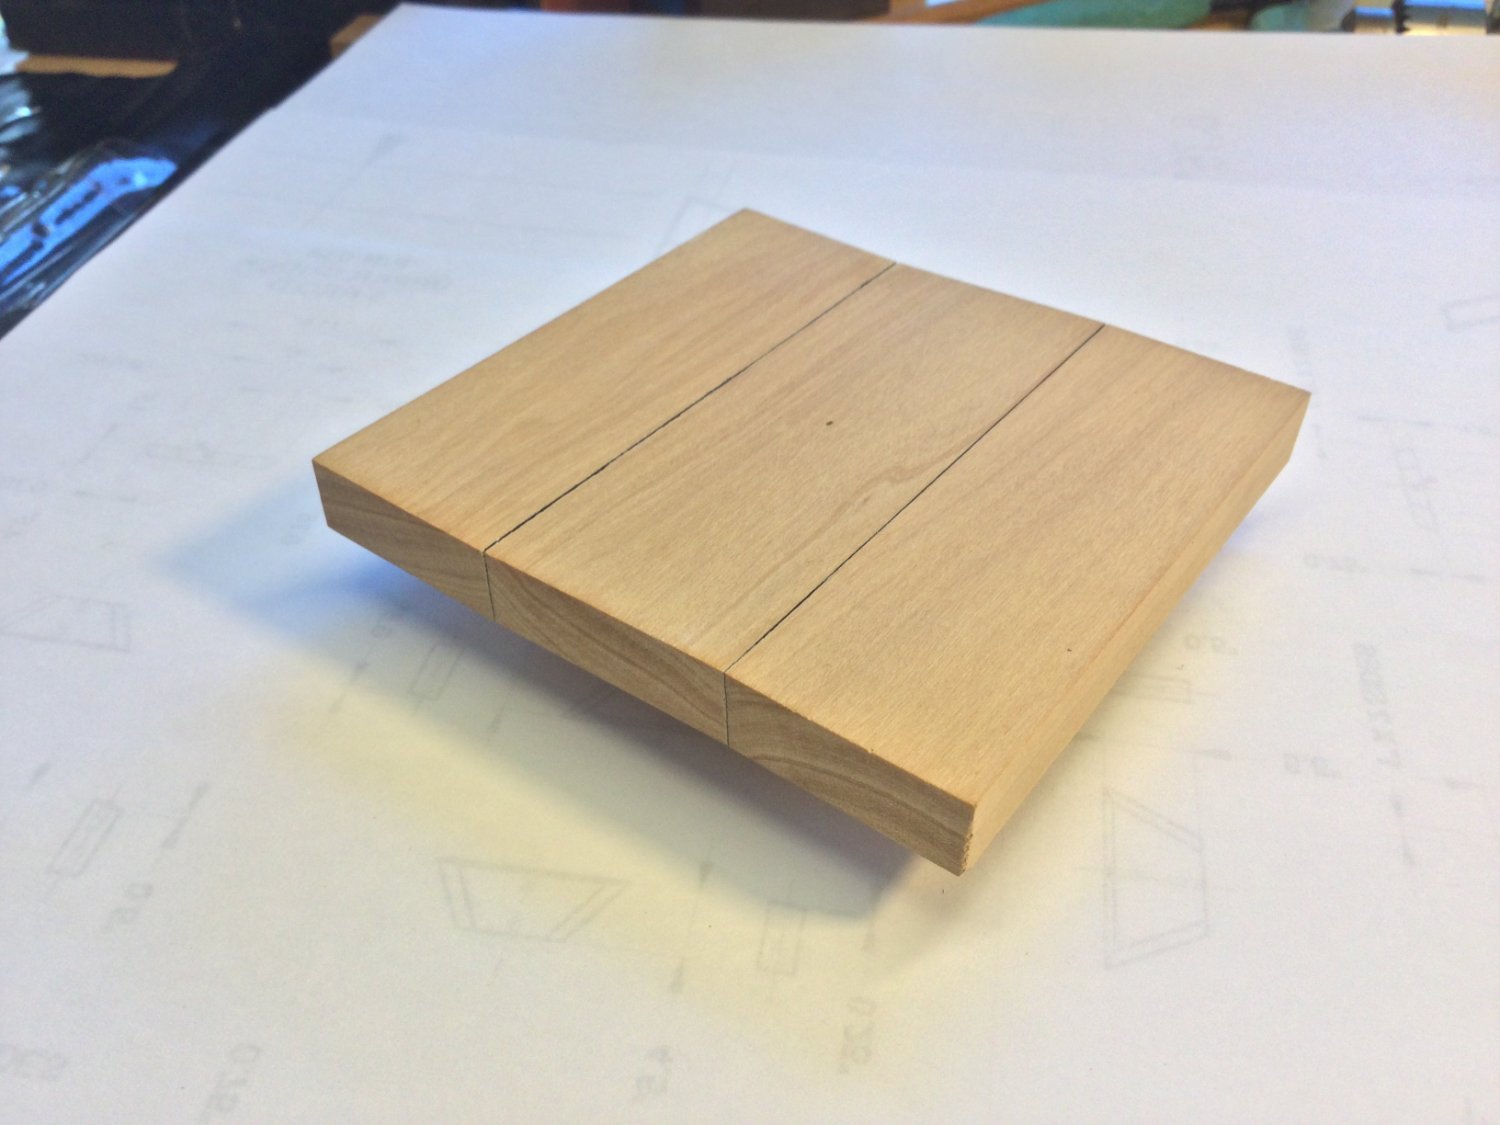
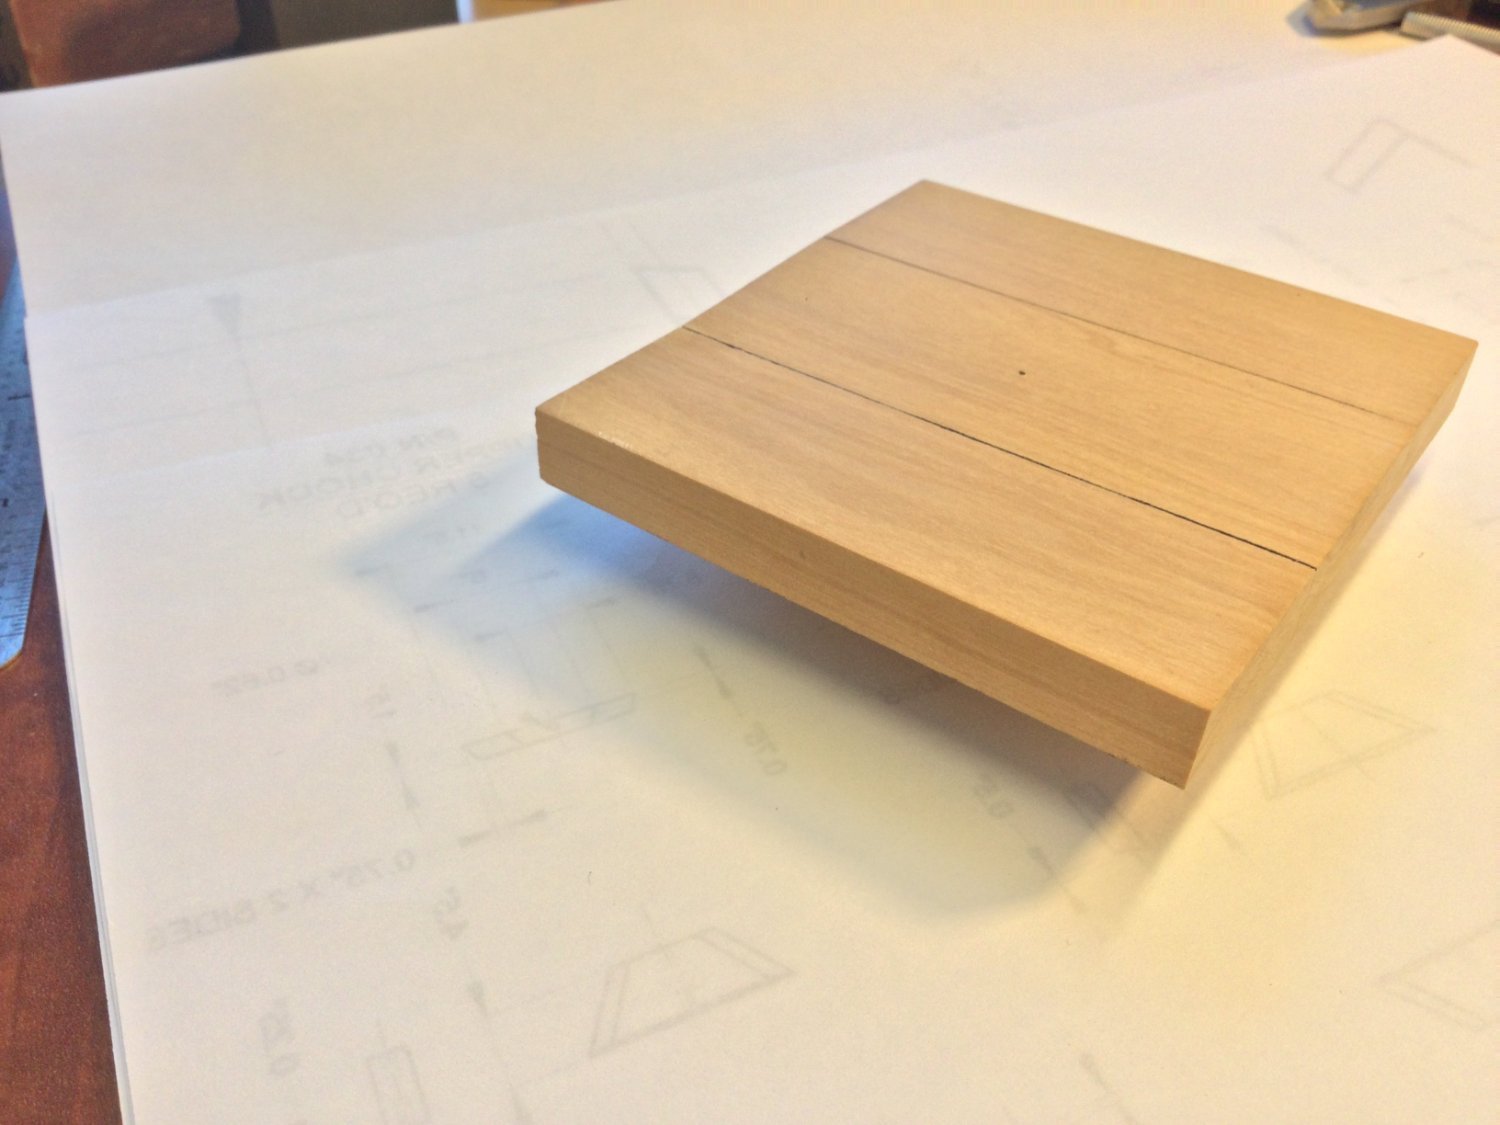
The capstan step is made of 4 parts: 3 visible, and one not visible -which holds the step between the deck beams. I chose boxwood for the step. The advanced practicum calls for the step to be constructed with 2 ship-lapped joints. I took the easy way out and used butt joints. The joints between the step parts were “caulked” with black acrylic paint. Bolt heads and a hole for the capstan barrel will come a little later.

-
Thanks, Grant! Toni PM'd me about the changes. I'm saving the hatch and grating for last. Last step in deck prep: Using right angle tools to square up the assembly and the final result!

-
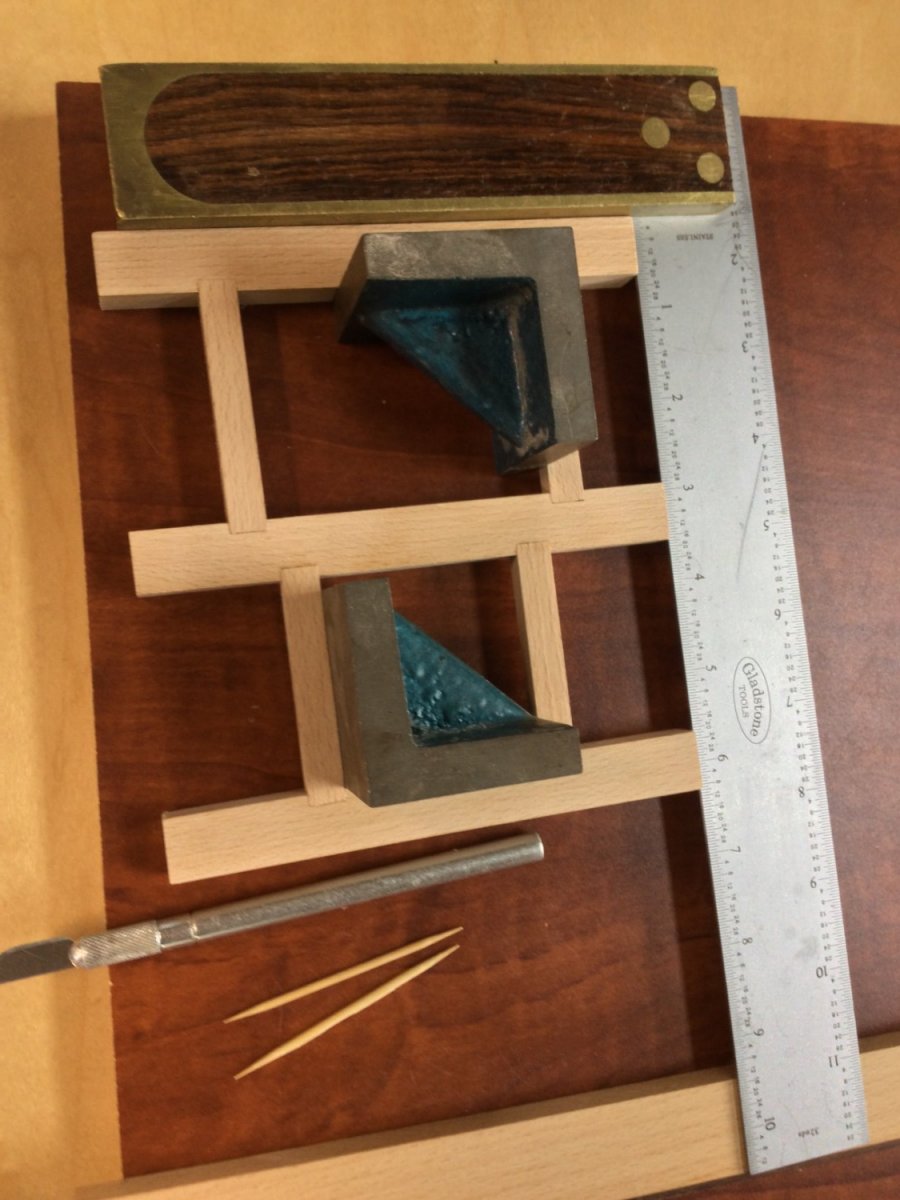
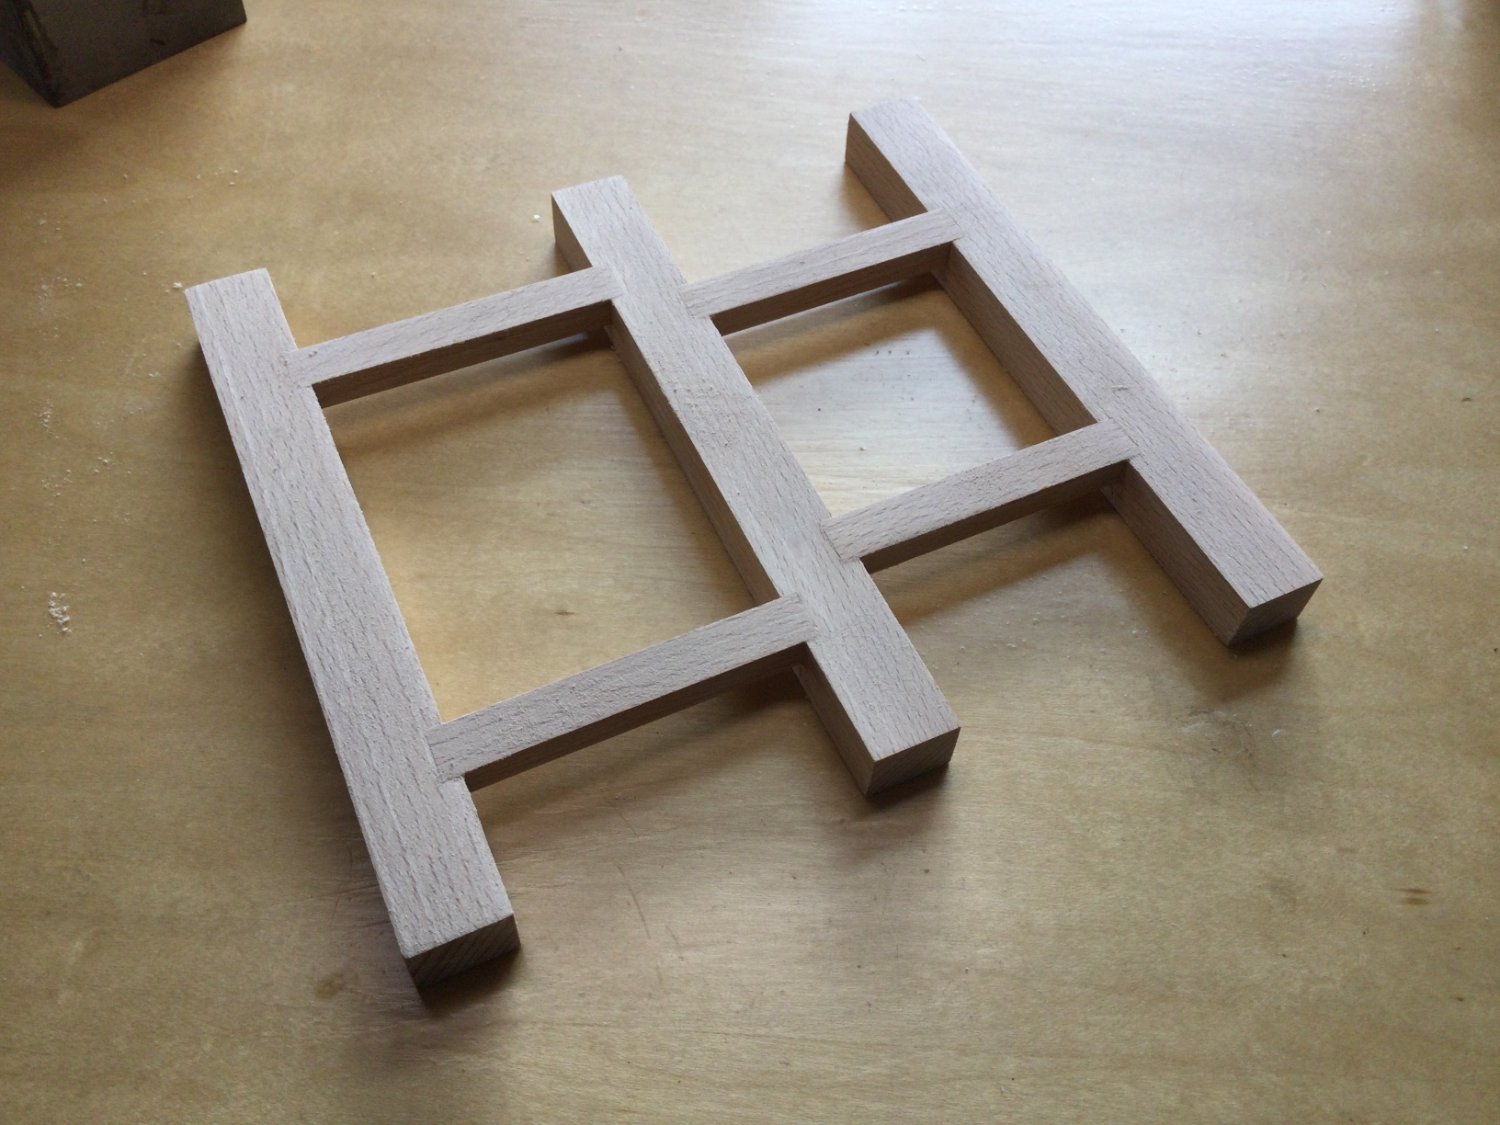
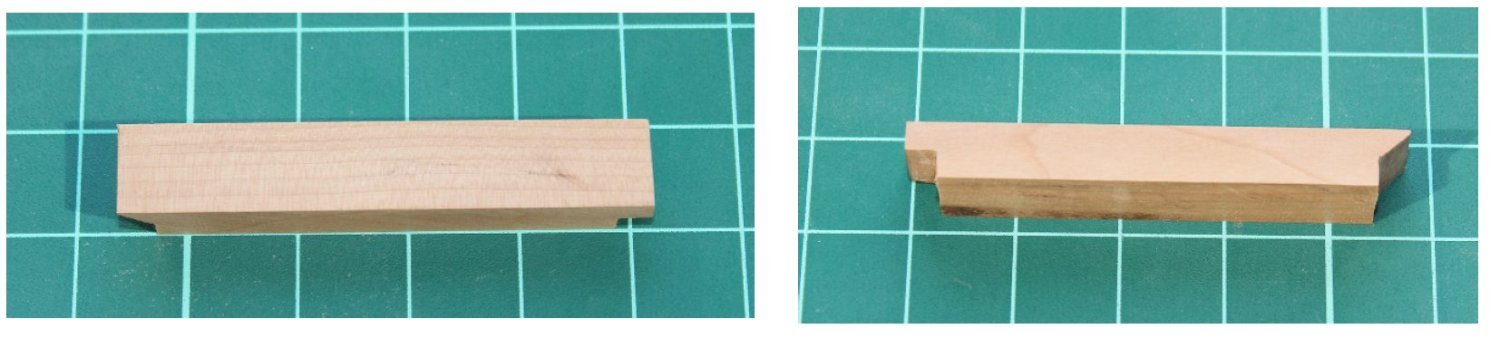
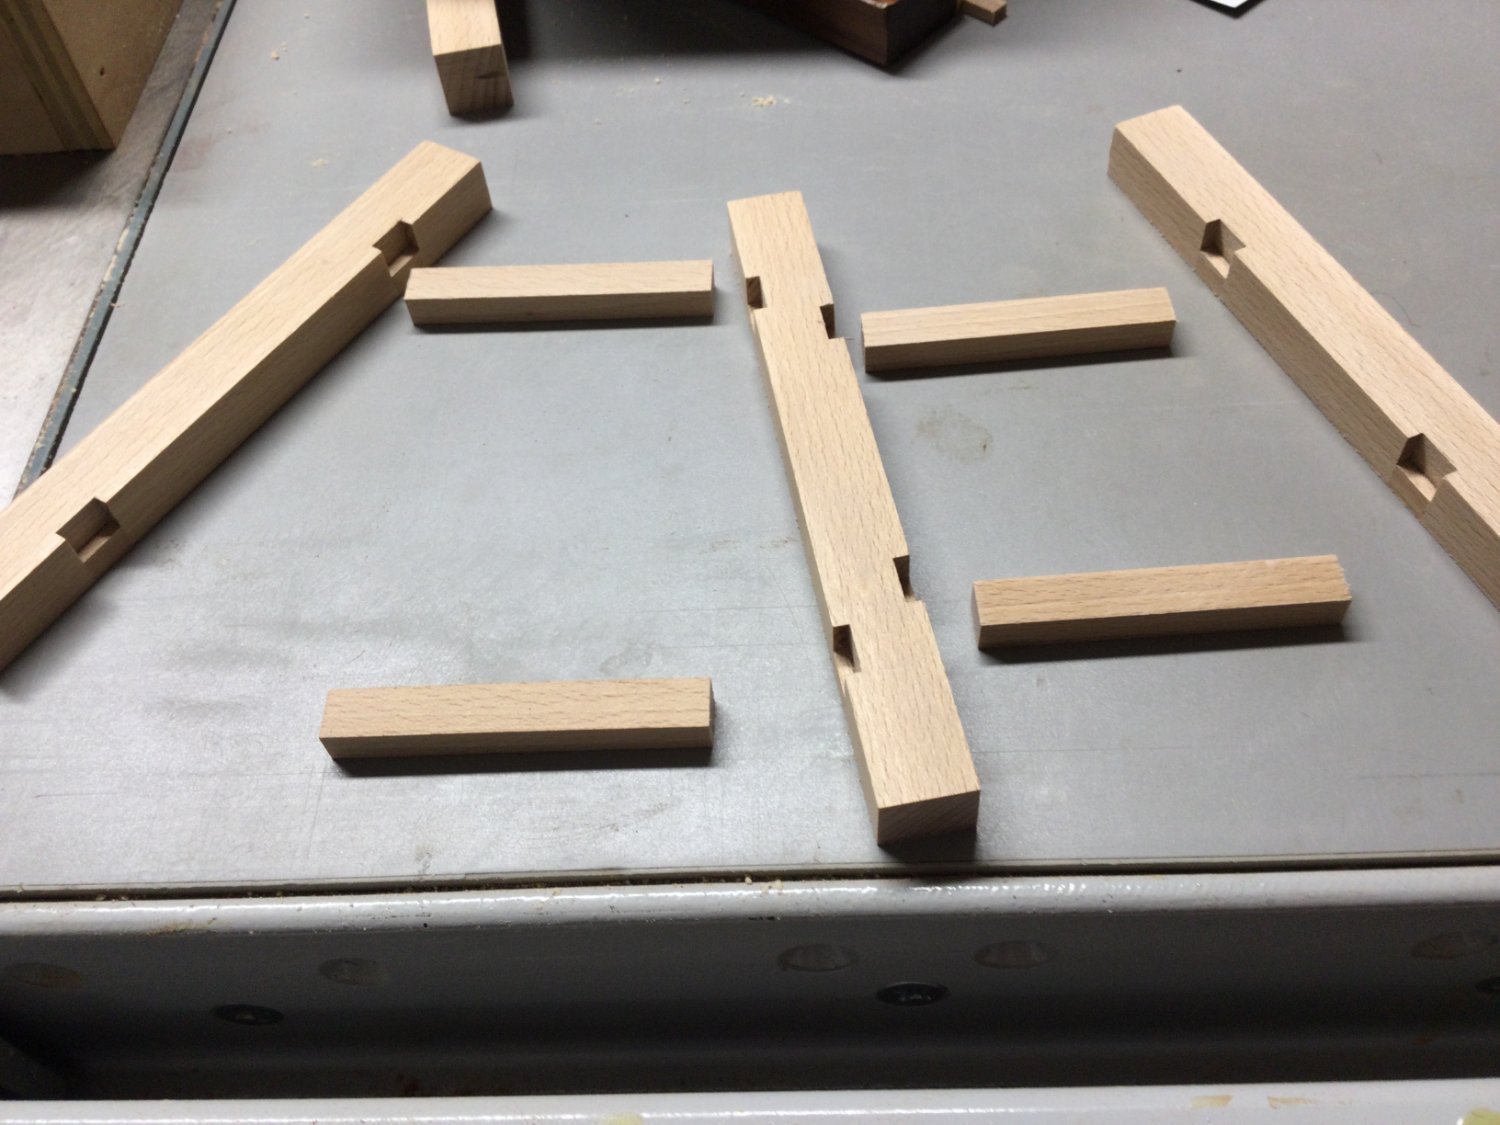
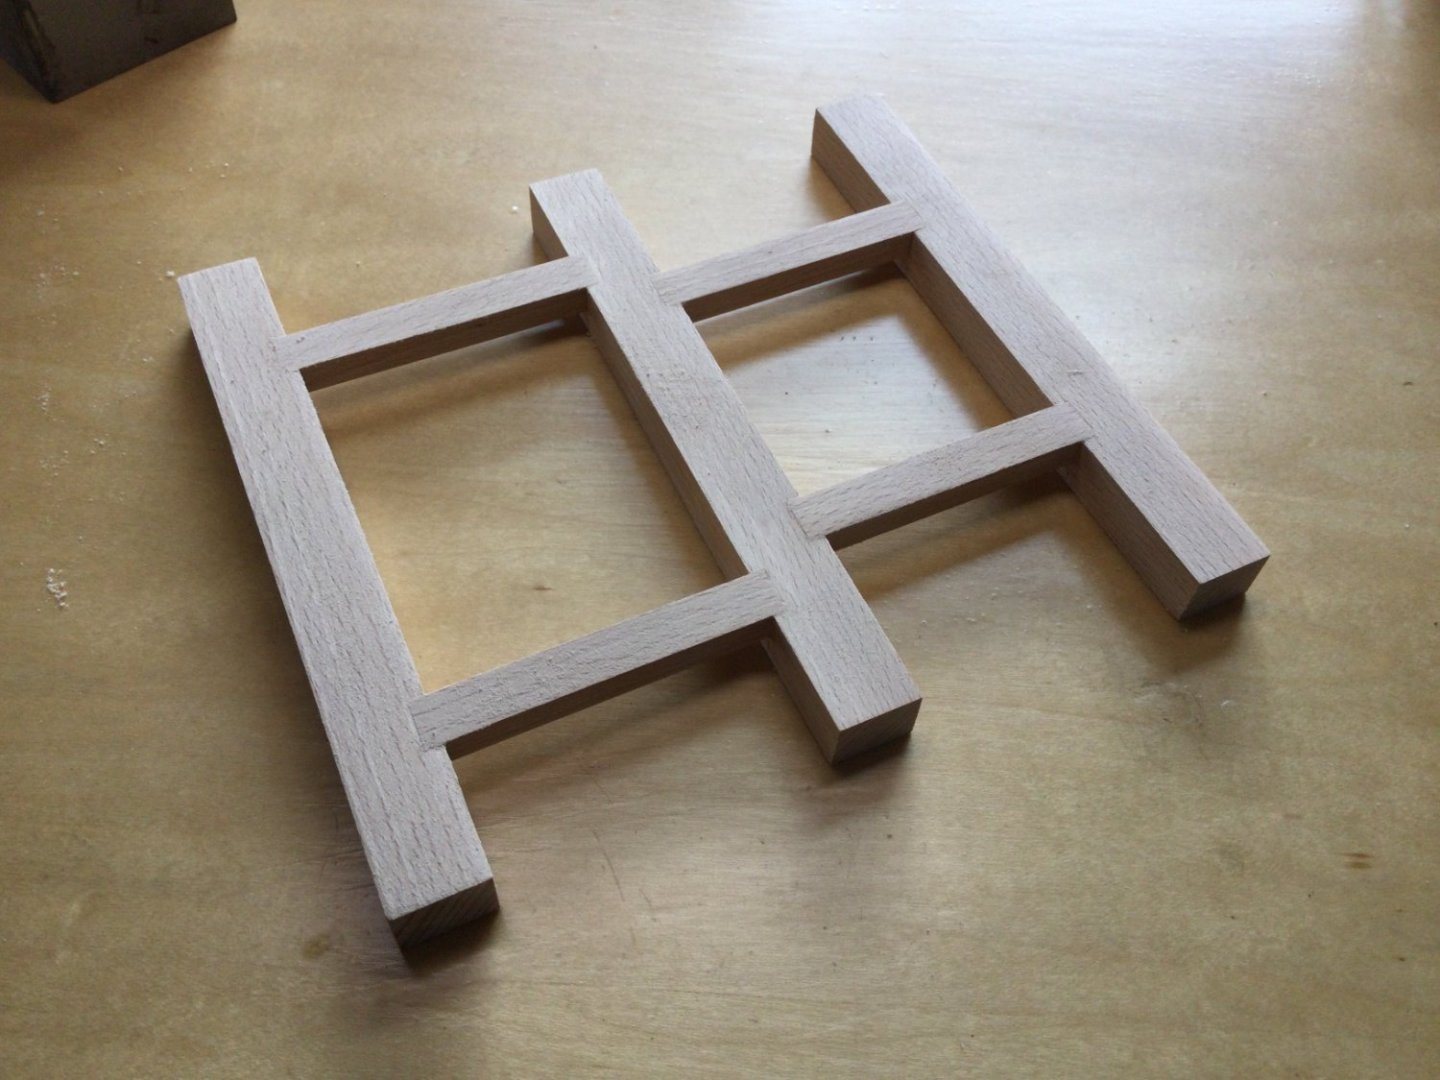
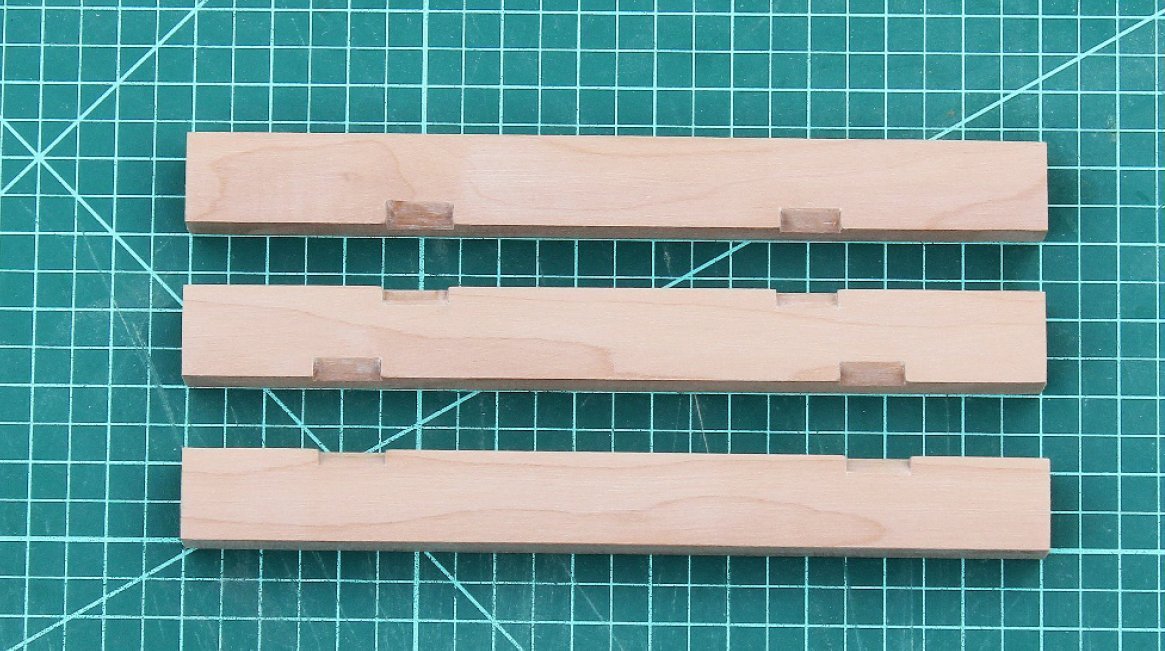
Thanks, Grant! The three deck beams and four carlings are joined to form the deck, and support the hatch and grating, as well as the capstan step. The practicum suggests two ways of doing this. The first is like the actual historical joinery used. The carlings fit into stopped dadoes or “blind mortises" in each beam, the upper surface of the carling being visible and flush with the deck beams. The second method is easier, if historically inaccurate. It involves making “diagonal” mortise and tenon joints as noted in the first two photos below from the practicum. Once glued together, both decks look the same. I chose a different method. After marking the mortise locations on the beams, I cut them through the full thickness of the beam, rather than leaving them stopped or “half blind". I then "filled in " the bottom of each mortise up to the bottom border of the carlings with wood to simulate a half blind joint. It the filler pieces come from the same billet of wood as the beams and carling, the “cheat" is barely visible! I've used this technique on several decks in the past.


-
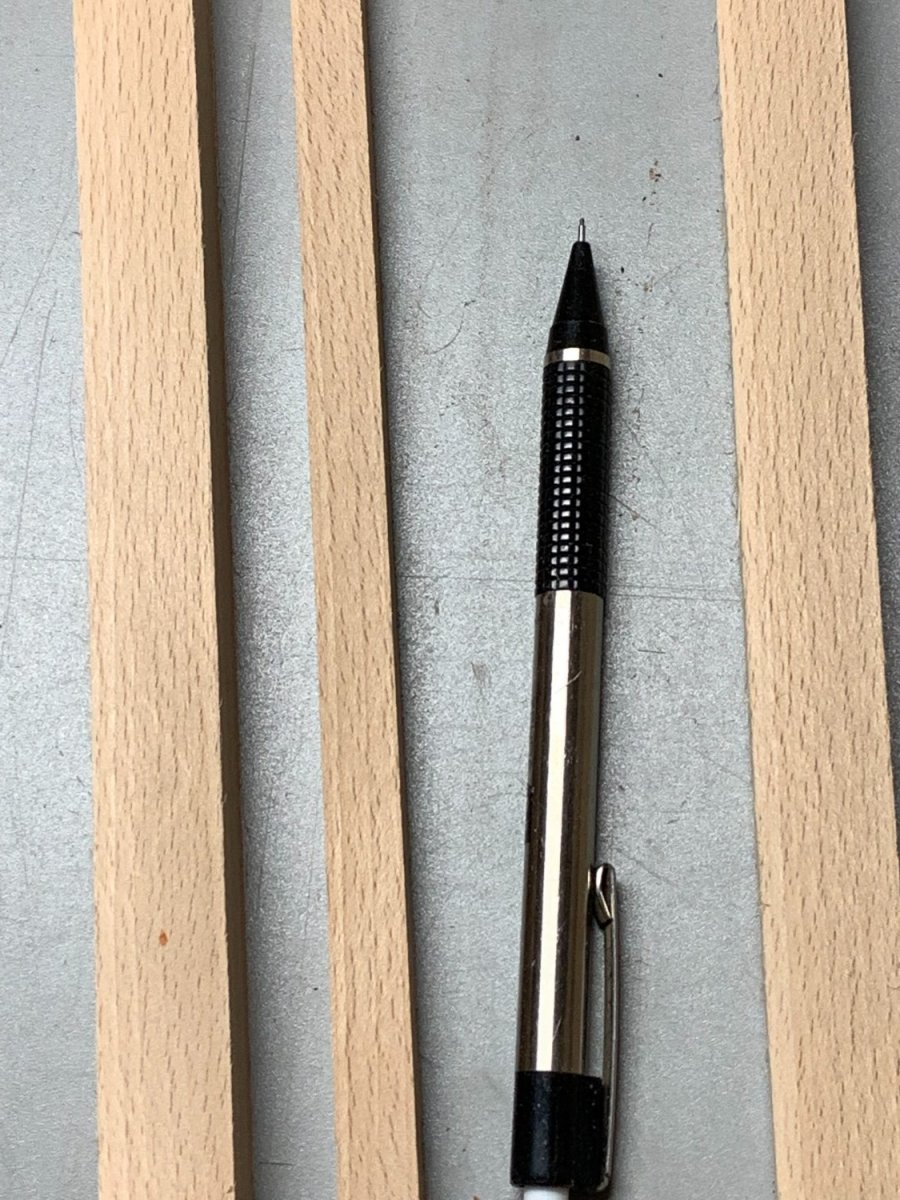
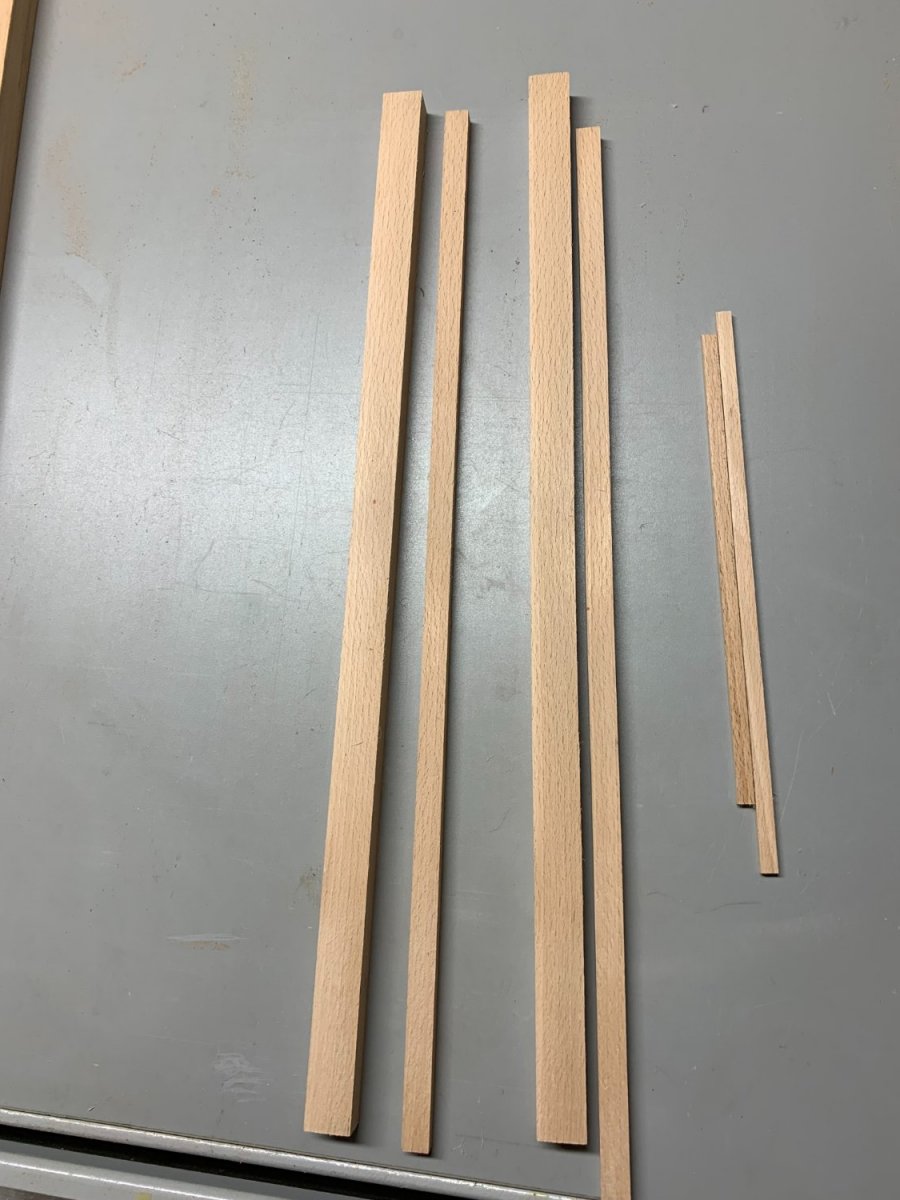
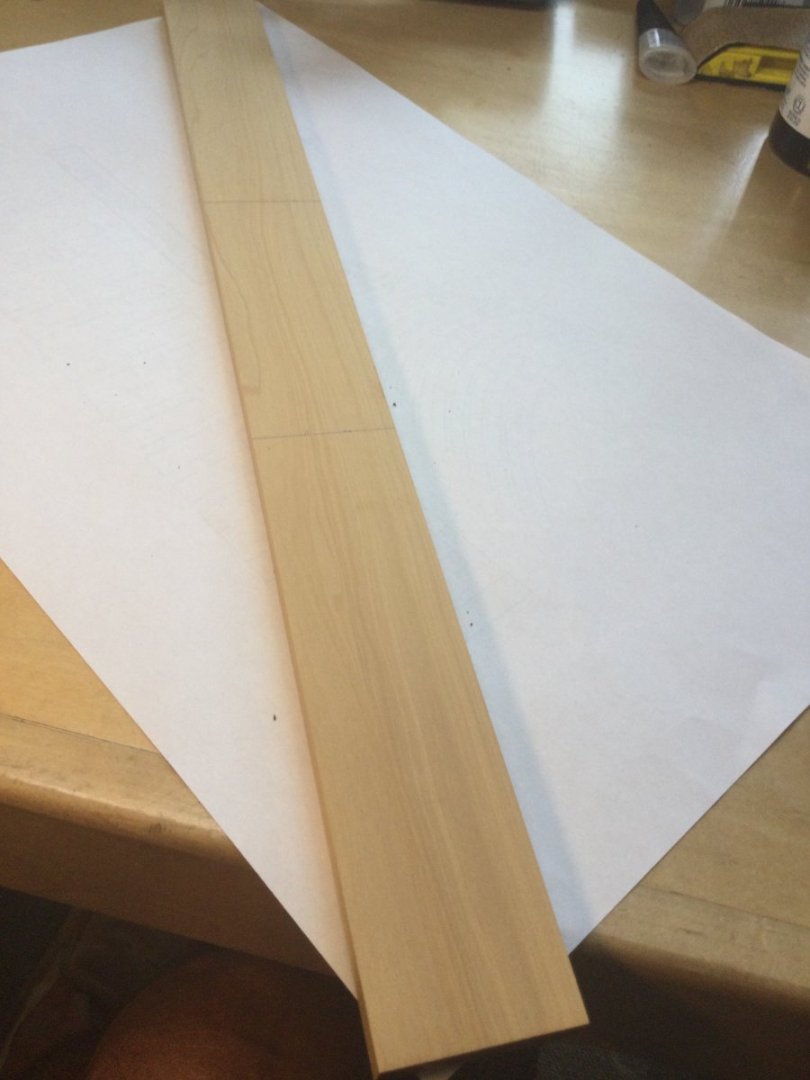
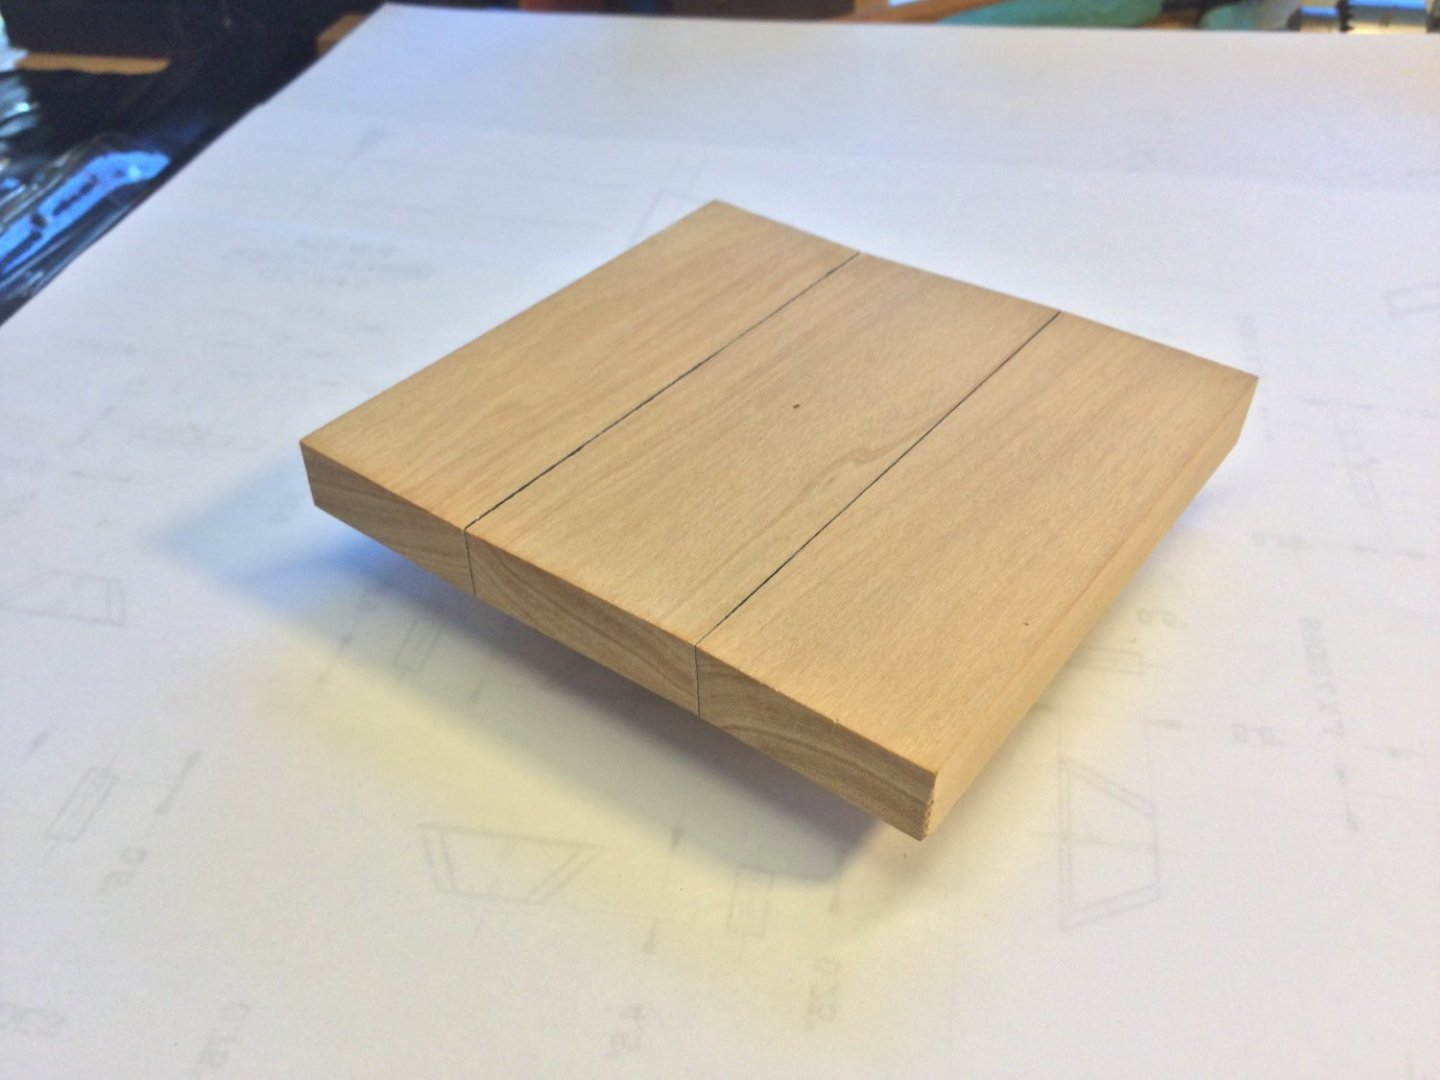
Welcome, Bruce! Let’s get started. The project is composed of several substructures. These include the deck framing (beams and carlings), the capstan step, the hatch and grating and the capstan itself. These can be built in any order, but it makes sense to start with the deck framing. I chose beech for the deck beams and carlings. It looks very much like the oak that would have been used, but the grain/pore structure is much finer than oak. At 1:16 scale it looks about perfect. I milled up the blanks for the beams (1/2" thick X 5/8" wide) and the carlings (3/8" square). Since the model involves only a narrow portion on the centerline of the deck, no camber was designed into the beams. This makes construction much easier. The photos show the grain and the cut out blanks.
-
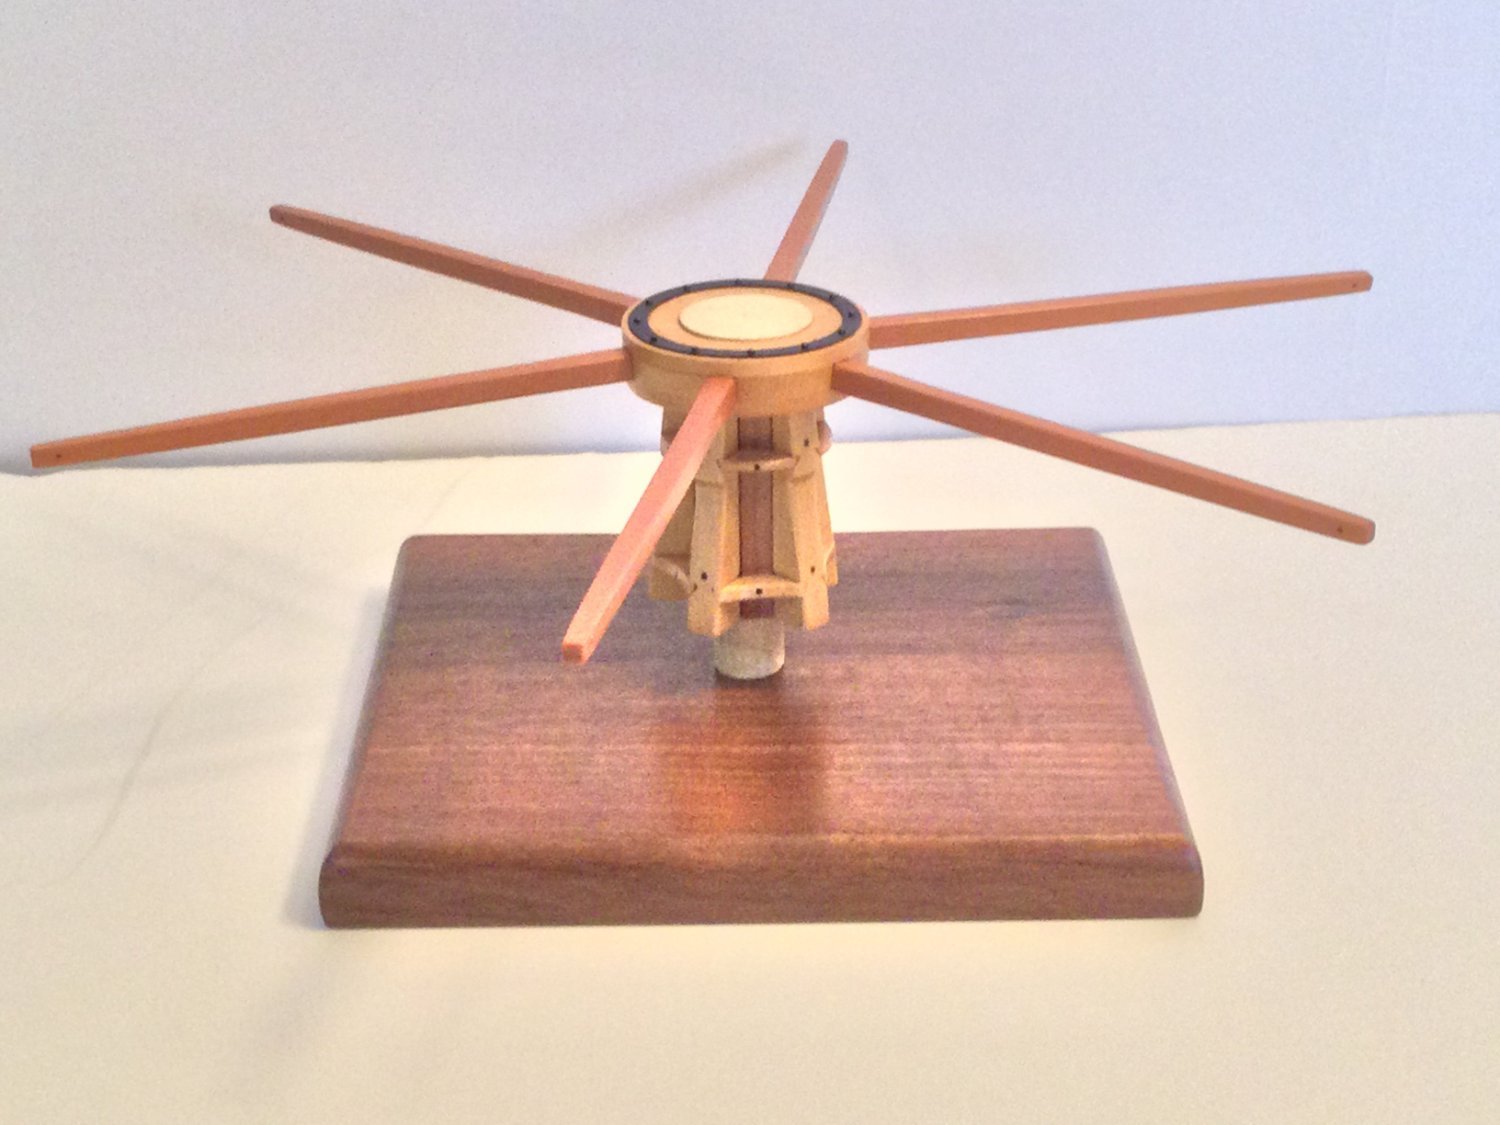
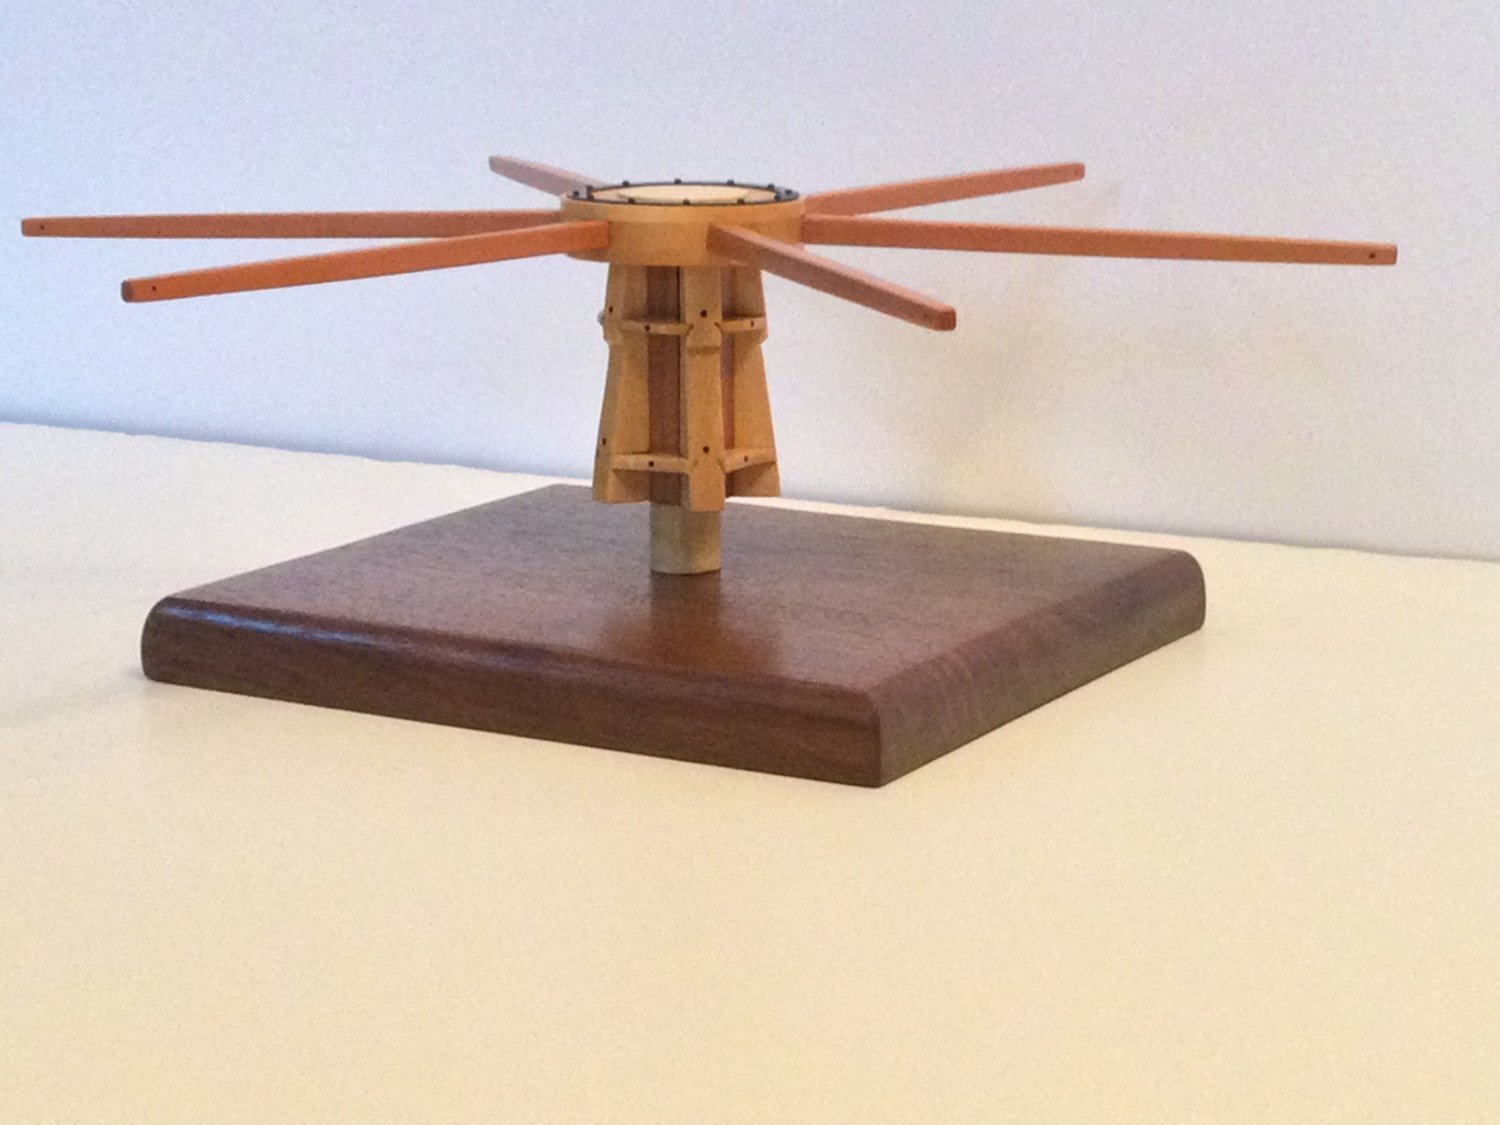
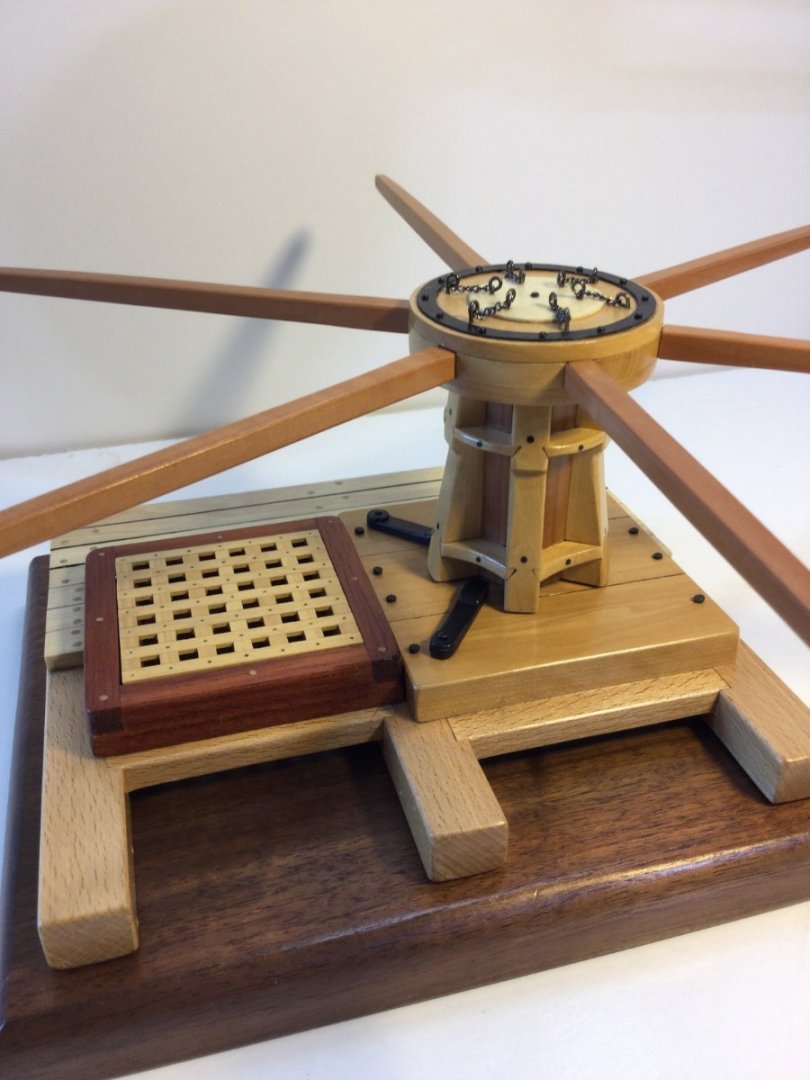
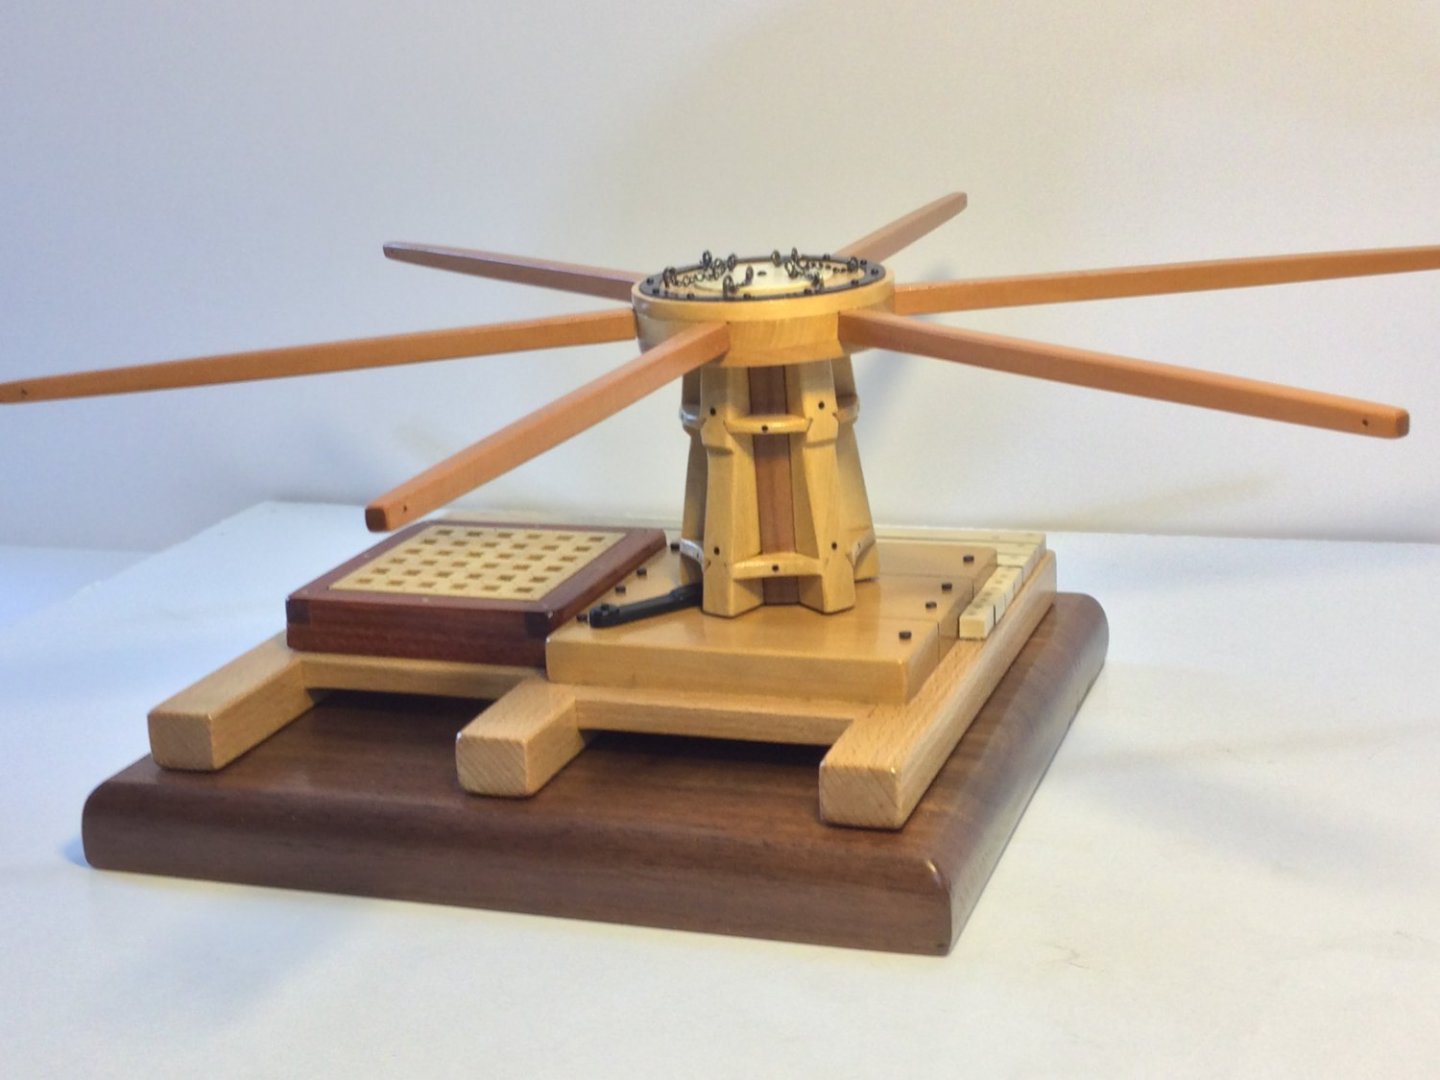
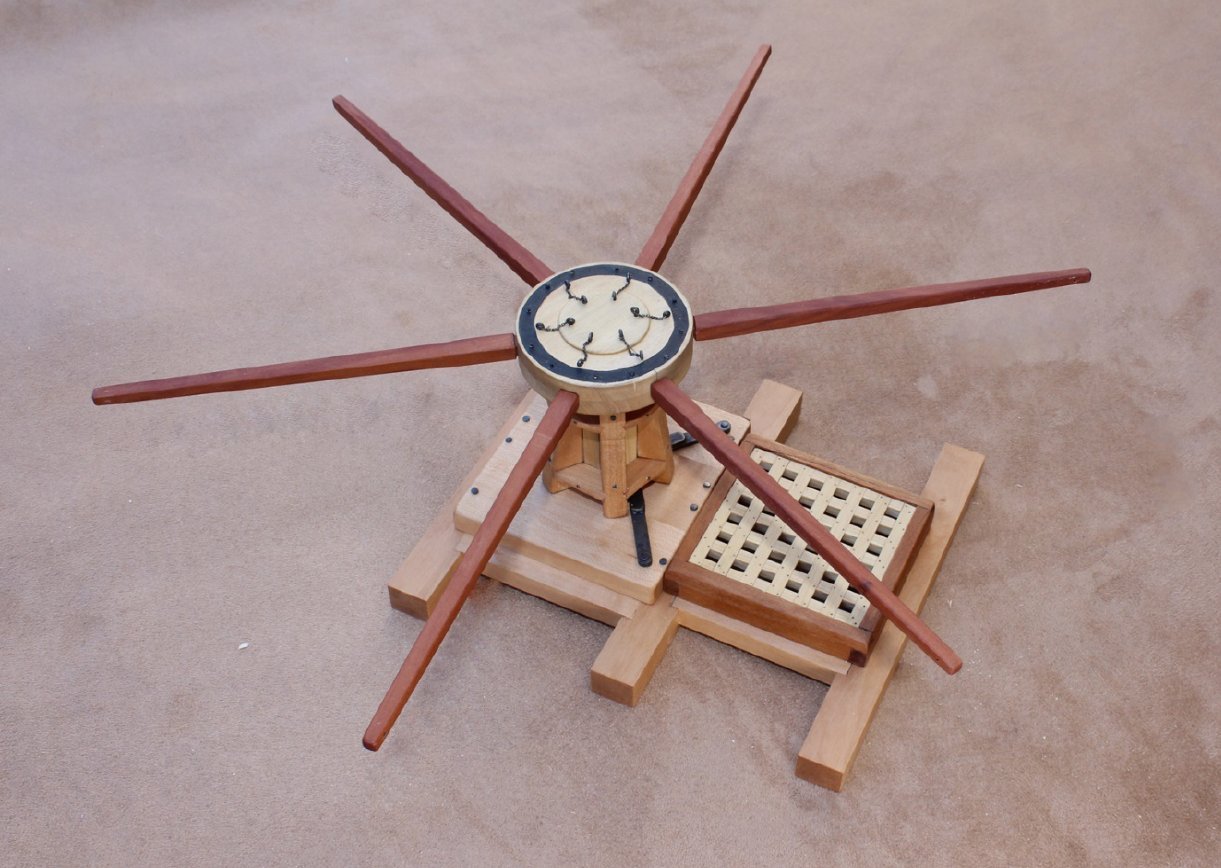
This will be my build log for a scratch built English Naval Capstan circa 1777, The scale is 1:16 (3/4” = 1’). Toni Levine, a name familiar to many of you, produced the plans and accompanying practicum. Toni was assisted by Mike Lonnecker, Bob Andreotti and Alan O'Neill. The result was 29 individual sheets in the planset. The model is only 6” X 6” in size without the capstan bars, so you get the idea as to the level of detail in those plans. In addition, although drawn in 1:16 scale for the most part, all measurements are given in real-life size, so scaling up or down is relatively easy to do. There are actually two versions of the practicum in the package. The first is for intermediate modelers who may own a Dremel tool and a miniature table saw. The second requires owning and knowing how to use a lathe and a mill. I don’t have a mill so I opted for the intermediate version . As is my preference, I’ll try to avoid paint or stain in the build. The bulk of the timbers will be beech, boxwood, pear , bloodwood and holly. Below is the frontspiece from Toni’s practicum showing the finished capstan.
-
Beautiful job, Grant. Fine workmanship and a really nice model. Kudos!