Greg Davis
-
Posts
334 -
Joined
-
Last visited
About Greg Davis

- Birthday 05/29/1959
Recent Profile Visitors
801 profile views


-
 GrandpaPhil reacted to a post in a topic:
Sciabecco 1753 by Greg Davis - Amati - 1:60 scale
GrandpaPhil reacted to a post in a topic:
Sciabecco 1753 by Greg Davis - Amati - 1:60 scale
-
GrandpaPhil reacted to a post in a topic:
Sciabecco 1753 by Greg Davis - Amati - 1:60 scale
-
GrandpaPhil reacted to a post in a topic:
Sciabecco 1753 by Greg Davis - Amati - 1:60 scale
-
GrandpaPhil reacted to a post in a topic:
Sciabecco 1753 by Greg Davis - Amati - 1:60 scale
-
GrandpaPhil reacted to a post in a topic:
Sciabecco 1753 by Greg Davis - Amati - 1:60 scale
-
mtaylor reacted to a post in a topic:
Santos Dumont No. 18 Hydroplane 1907 by Greg Davis - Scale 1:16
-
JacquesCousteau reacted to a post in a topic:
Sciabecco 1753 by Greg Davis - Amati - 1:60 scale
-
gsdpic reacted to a post in a topic:
Sciabecco 1753 by Greg Davis - Amati - 1:60 scale
-
gsdpic reacted to a post in a topic:
Sciabecco 1753 by Greg Davis - Amati - 1:60 scale
-
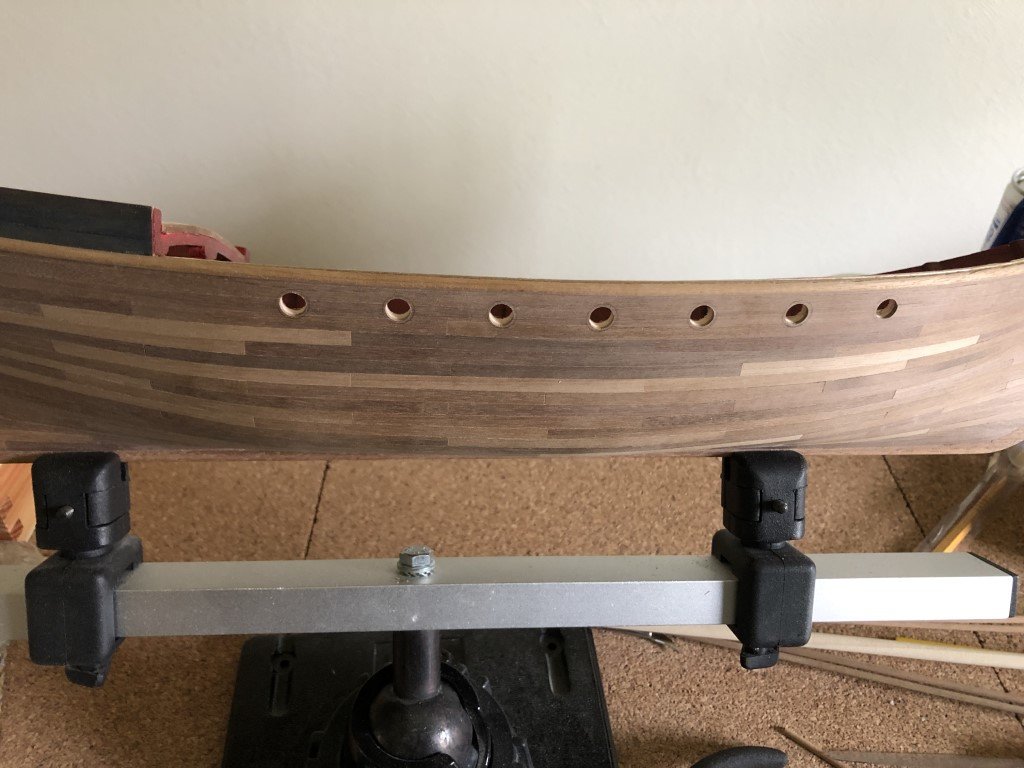
I've attached the top half-round molding to each side of the hull. Gun port wreaths fit between this molding and a second molding. The instruction booklet shows the second molding being attached next. I've decided to open the gun ports and attach the wreaths before attaching the second molding. I feel that I will have a better chance of having these pieces line up if I work in this order. I could see how I could easily not leave enough space between moldings and not be able to get a wreath in place and/or leaving too much space and then having gaps between the wreaths and moldings. So here's a look with the 7 starboard gun ports being opened up. I drilled a 1/8th hole and then have been increasing the hole's diameter with round files. There is just a small amount of filing left to do on this side.
-
yvesvidal reacted to a post in a topic:
Santos Dumont No. 18 Hydroplane 1907 by Greg Davis - Scale 1:16
-
John - Thanks for your interest! It will certainly get done, sometimes I just have a problem with jumping around on multiple projects at the same time. Some people call it multitasking, but it more likely lack of focus at times. I had built the Santos-Dumont 14bis (because it looked really interesting) as a winter break from milling wood and sanding frames for my L' Invention model. That was not to take a long time, but then I came upon pictures of the No. 18 Hydroplane and making a model of this machine has moved up high on the to do list. I believe that now I am going to be making fairly regular progress on the hydroplane model. It seems that I've figured out how to construct the pontoon and nacelles. I'm now thinking about how to do the metal work that connects these three parts. The metal work for the engine mount looks to be straightforward. Making a nice steering wheel will take some doing and I have a pretty good conjecture on how the steering would have been rigged. That then leaves the last big piece of work - the V16 Antoinette engine. I have two of the Model Airways Antoinette V8 engine kits that I plan to bash into a V16. From what I have been able to uncover, this is pretty much how the Antoinette V16 actually came about. So this is the basic plan of attack on the hydroplane and then back to L' Invention big time. Greg P.S. I may also be trying to finish a few other models that were started in the distant past concurrent with this project ... I hope I don't start anything else ... Is there a part of the MSW forum that helps people keep the number of projects manageable?
-
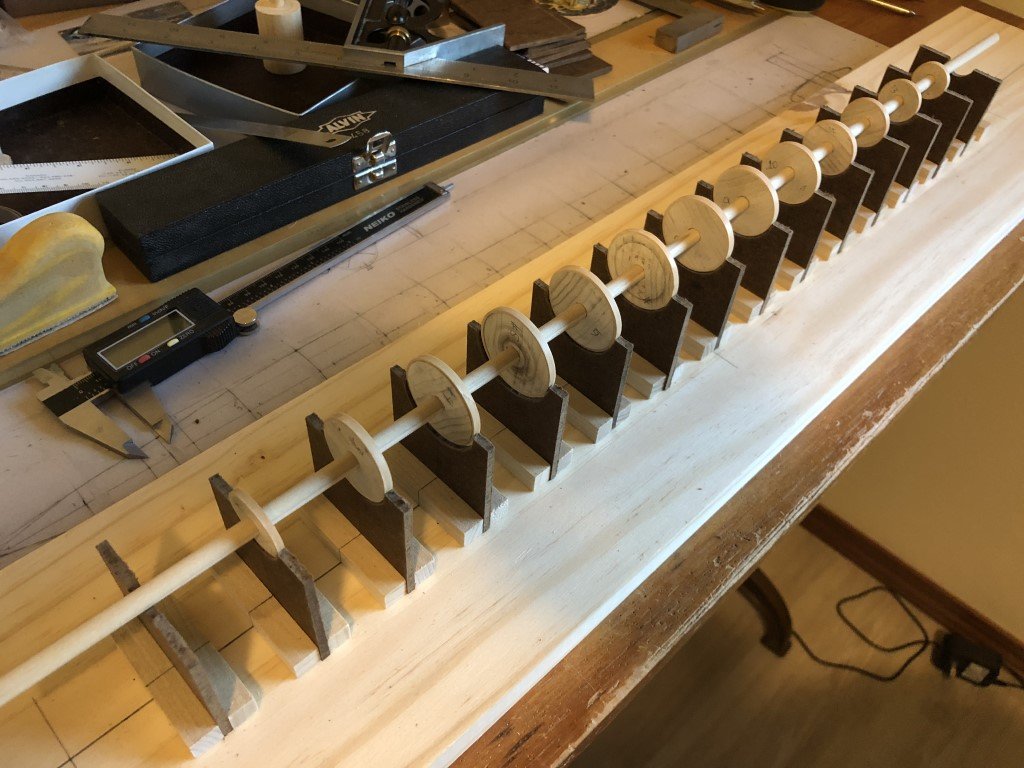
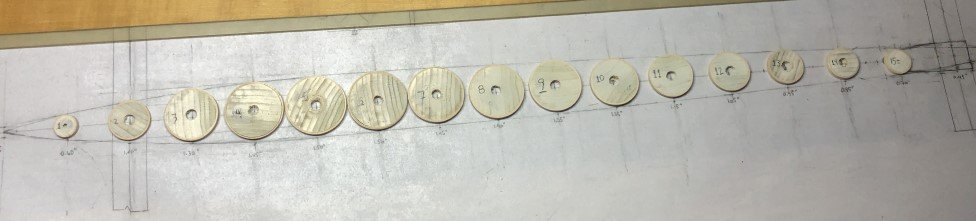
One more pic for today - a test fit of hoops in the jig. Here 13 of the 16 hoops have been slipped onto a 1/4" dowel. I'll be holding the dowel down using rubber bands at each hoop location when work is being done. As expected, tabs and/or another stabilization method will be necessary to keep the hoops squared to the jig.
-
Here is a picture showing some progress on the building board / jig.
-
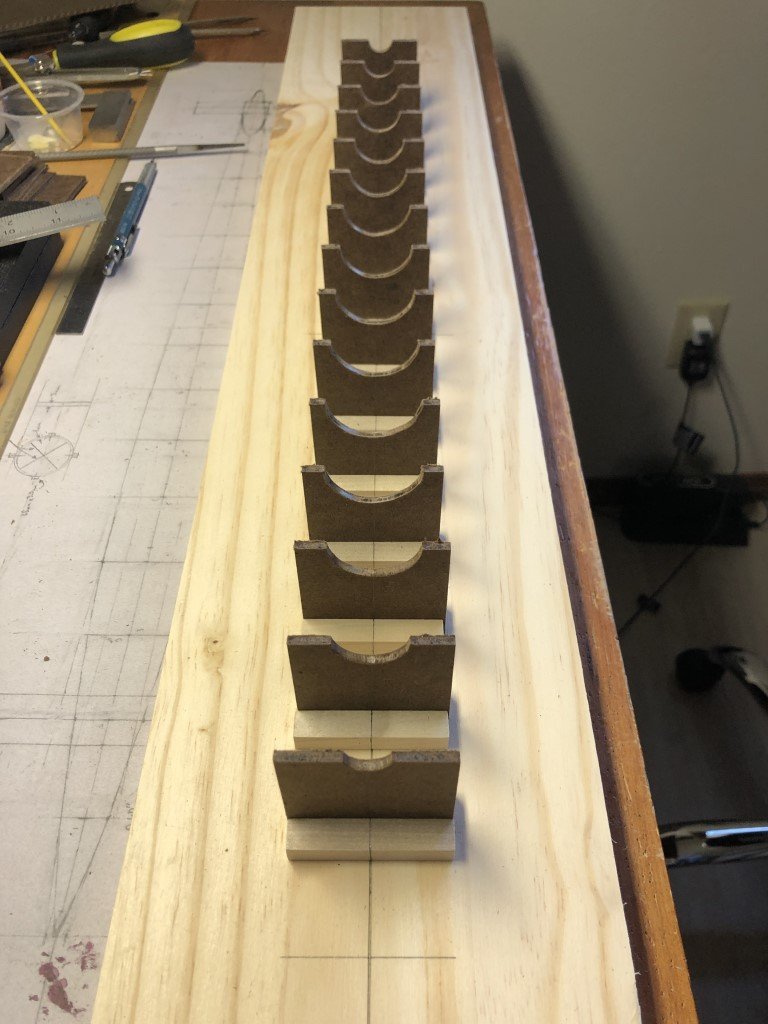
Today I've made a good start on the building jig. I made up supports for hoops 1 - 15; I'll deal with one for hoop 16 after it is remade. The supports are made from 1/8" hardboard and are approximately 2" square. First I had made a number of 2" x 4" pieces with a center line along the 4" dimension. I used the midpoint of this line to mark the center of the pontoons axis. I drew semi-circles to match the outside diameters of the hoops using this mark - Two per blank. They were cut in half and then the semicircles were cut on a scroll saw. A little filing and the hoops fit in nicely. Finally the height of the supports were cut to 1 15/16" (measured from the bottom) so that the side stringers can rest on the supports when they are being attached. I need to mill a notch in the bottom of each semi-circle so that the top / bottom stringer will be accommodated for as the pontoon sits in the jig. I will also add a few tabs to insure the hoops stand perpendicular to the building board.
-
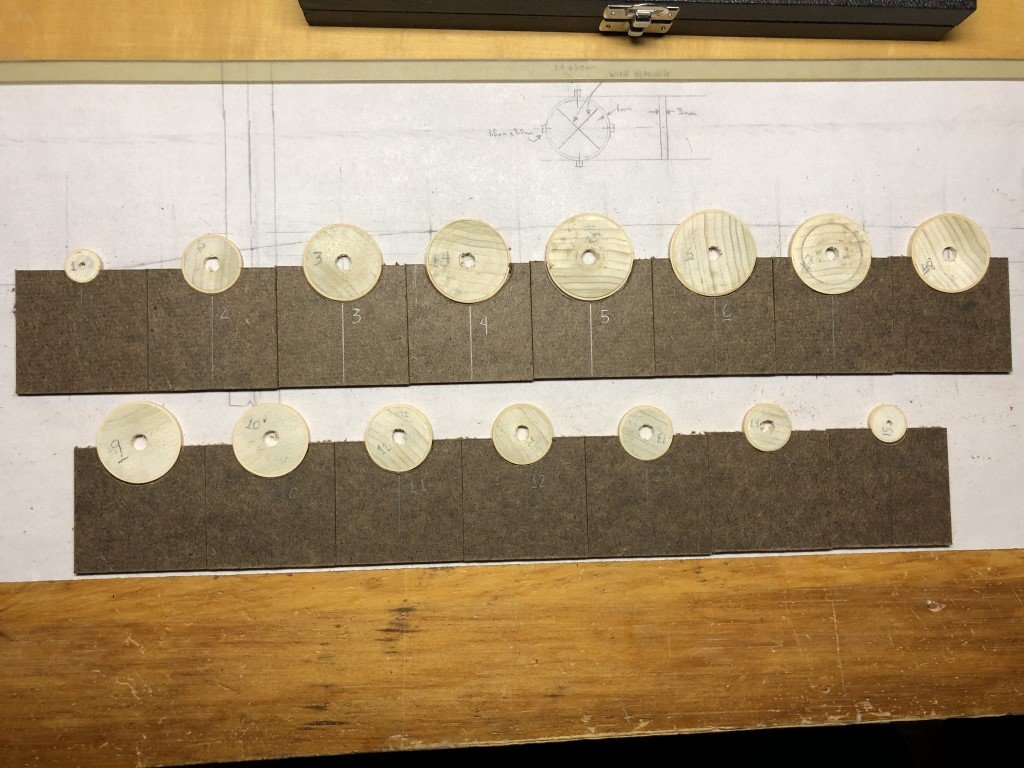
Finally got up the courage to part off all of the pontoon hoops. 15 out of 16 were successful. Hoop 16, the one with the smallest diameter, was a fail. It turned out that I had not been able to lay up the hoop material tight enough to form the solid hoop. I will need to remake that one using a different technique. I may try thin shavings as Craig suggested earlier. I drilled 1/4" holes in the center blanks for hoops 2 - 14. Numbers 1 and 15 have 1/8" holes, but I think I may be able to open them to 1/4" as well. Now that I have these hoops made, I can use their outside diameters to begin construction of the pontoon building jig.
-
Did some exterior painting today. This was a bit of an experiment for me as the deep blue was done with a watercolor paint.
-
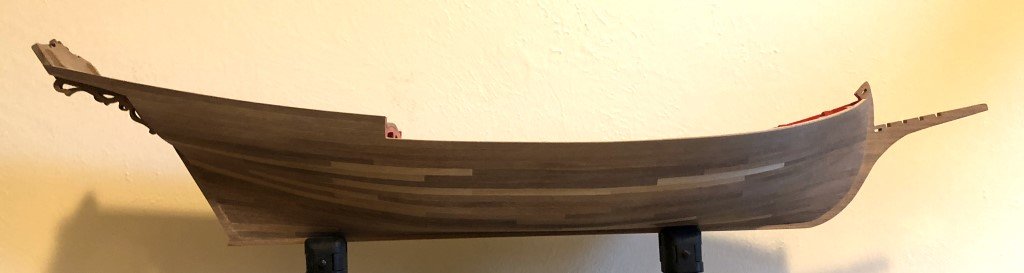
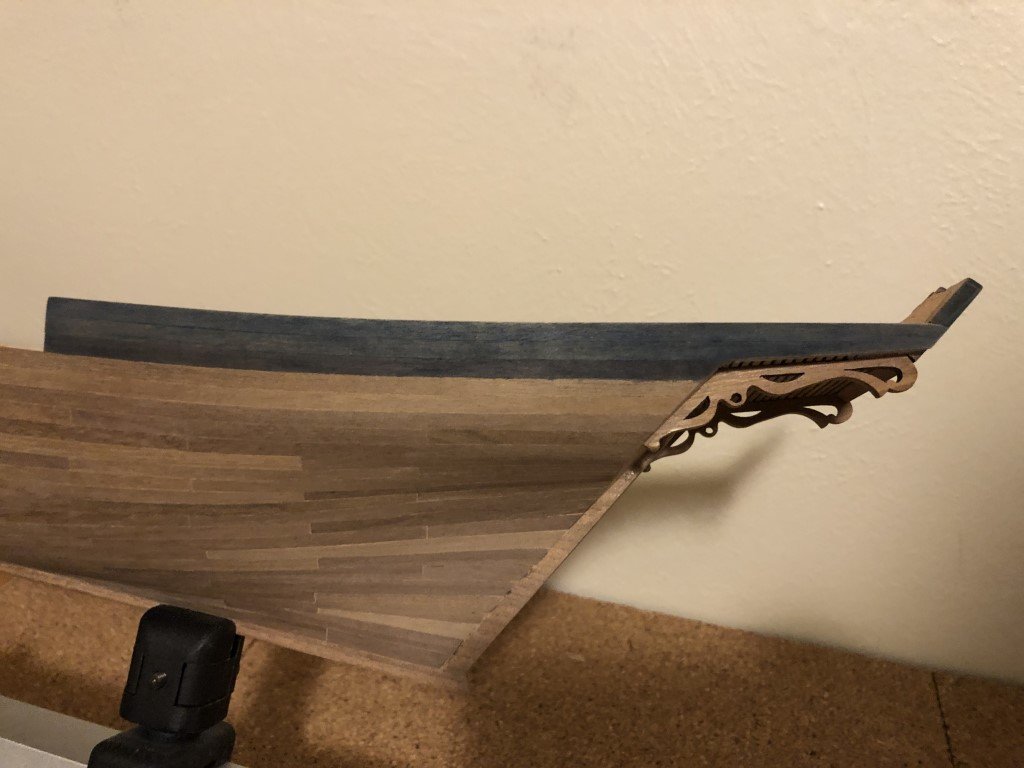
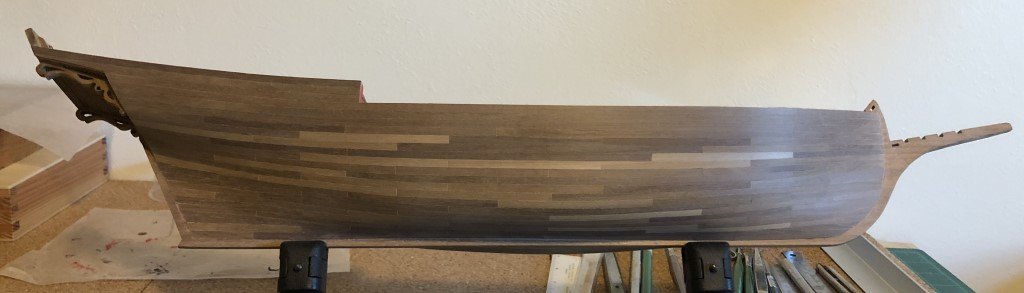
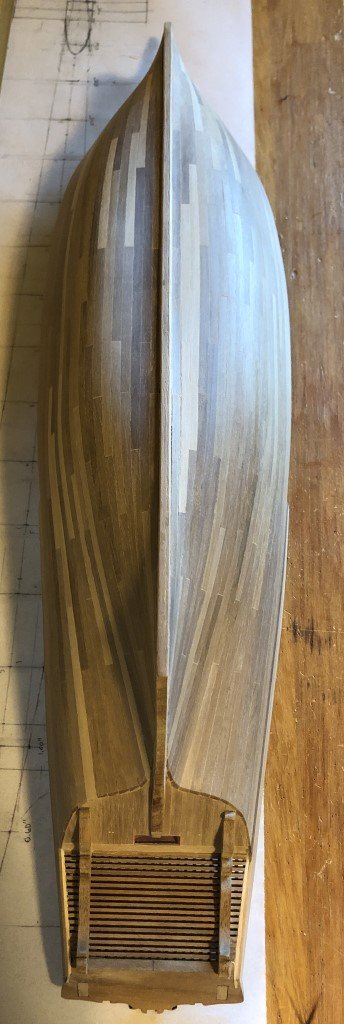
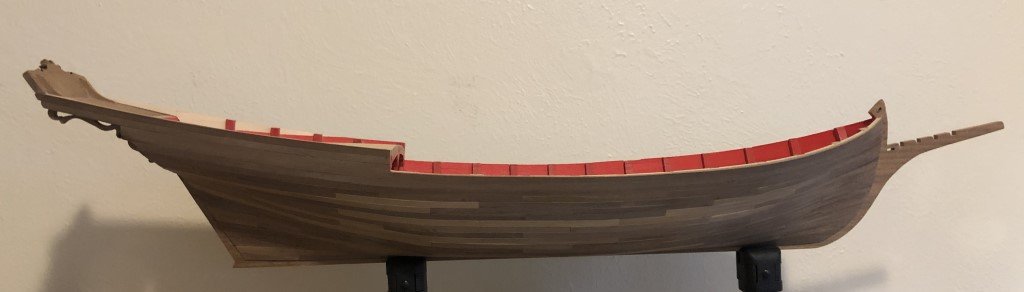
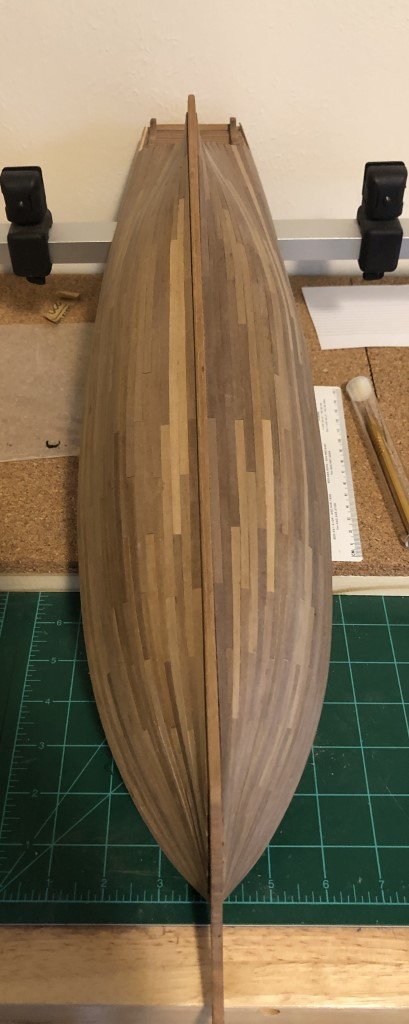
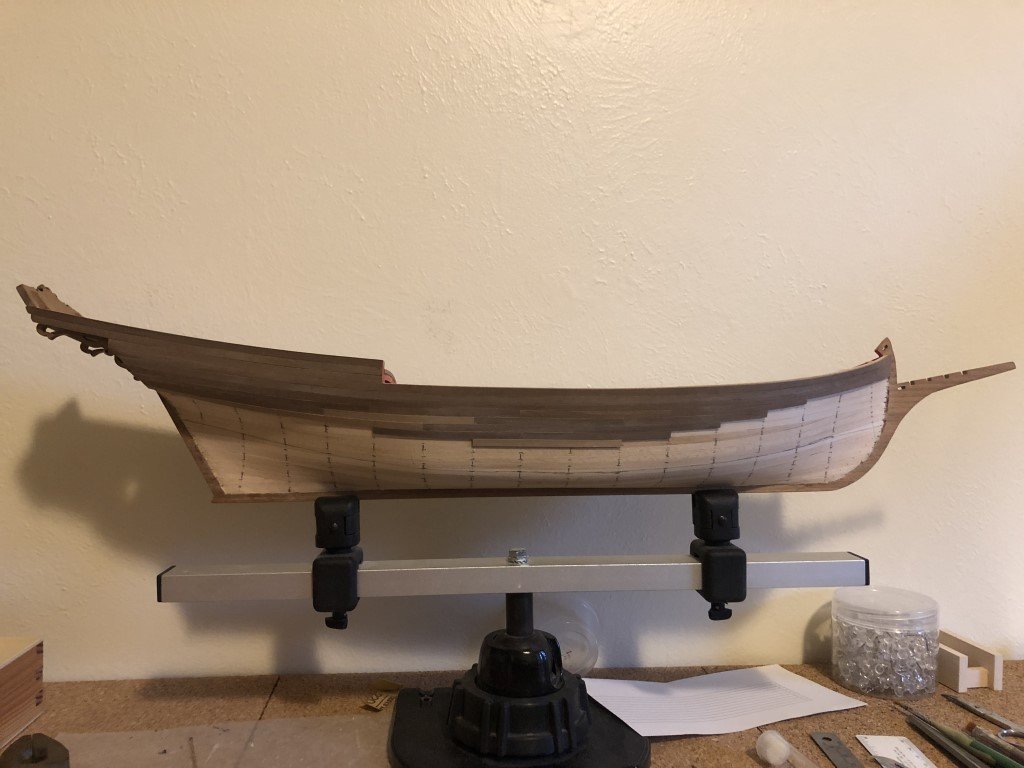
I am now done smoothing the hull. In the previous post, I had smoothed the hull as best possible with paper as fine as 180 grit. I've now gone over the planking with 220 grit sandpaper - this is the finest that I will be using. Here's the starboard side again; not sure if there is any visual difference, but it is now glassy smooth to the touch. One final picture at this stage of the planking from the bottom / aft looking forward. I believe the next step will be some painting. I no longer like the current interior red I had chosen. Now I'd like it to be a deeper darker shade. I also need to make some decisions on the amount of coloring that will be used on the exterior. I think that there will be some exterior paint, but not anywhere near the amount shown on the model as presented in the kit. In my mind the planking looks too nice to cover up with paint.
-
Completed the starboard planking this evening. Everything worked out well - same number of planks on each side! Hopefully there will be some nice weather coming this week so that I can sit outside and sand the planking smooth. I prefer to do the major sanding out of the house and with the wind at my back! I don't think it will take very long as I was able to lay the 1mm x 4mm x 80mm planks quite tight to the hull. I would have preferred for the material to be a little more uniform in color; however, the variation is much less noticeable to my eye than it is in the photographs.
-
 Greg Davis reacted to a post in a topic:
Sciabecco 1753 by Greg Davis - Amati - 1:60 scale
Greg Davis reacted to a post in a topic:
Sciabecco 1753 by Greg Davis - Amati - 1:60 scale
-
I appreciate your evaluation and I hope that my final result does not pale too much in comparison to your 'Eagle of Algier'. I've looked through your log quite a few times for inspiration!
-
Greg Davis reacted to a post in a topic:
Sciabecco 1753 by Greg Davis - Amati - 1:60 scale
-
Greg Davis reacted to a post in a topic:
Santos Dumont 14 bis (1906) by Greg Davis - Model Airways - 1:16 scale - Finished
-
Greg Davis reacted to a post in a topic:
Santos Dumont 14 bis (1906) by Greg Davis - Model Airways - 1:16 scale - Finished
-
Made some good progress - there has been a spring snow storm here, so more modeling time than usual!

-
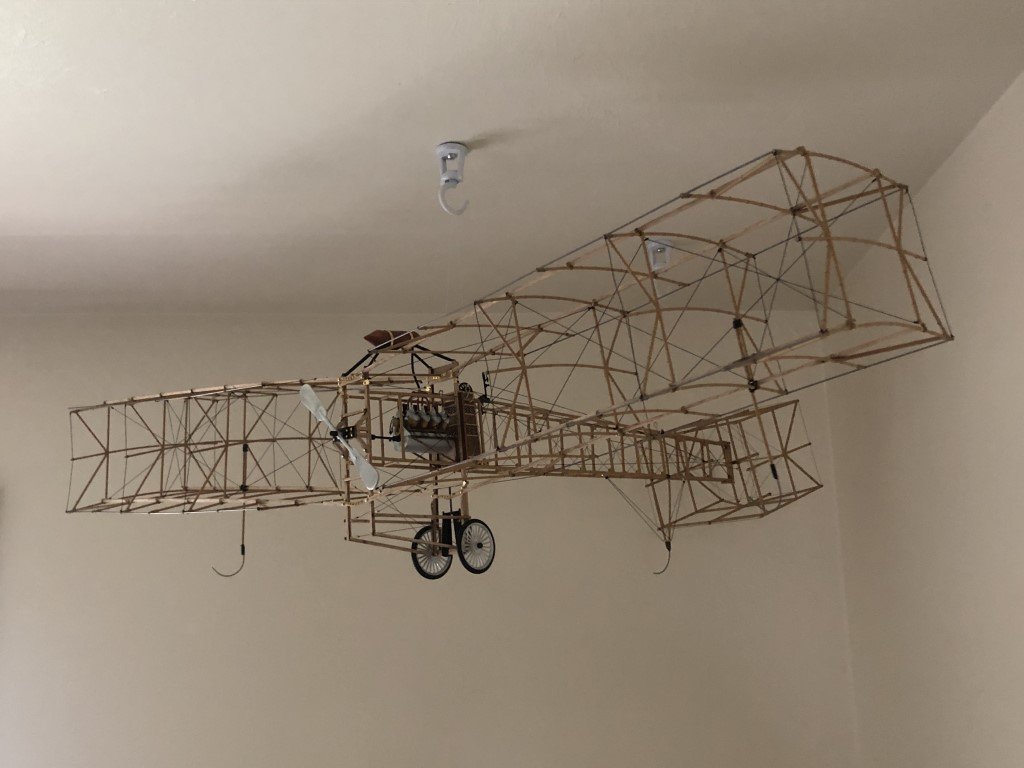
Earlier today I was able to hang my latest finished model - the Santos-Dumont 14 Bis airplane in my office / workroom. So I got some space back to do other tasks, and started the second planking of the starboard for the Sciabecco model.
-
One last picture - I've hung the Santos-Dumont 14Bis in the corner of my office / workroom. As it attempts to fly out the corner of the room, the model should be safe here and easy to view.
- 133 replies
-
- 11
-
-