cdogg
-
Posts
380 -
Joined
-
Last visited
Recent Profile Visitors
1,327 profile views


-
 Scottish Guy reacted to a post in a topic:
For Beginners -- A Cautionary Tale
Scottish Guy reacted to a post in a topic:
For Beginners -- A Cautionary Tale
-
AlleyCat reacted to a post in a topic:
For Beginners -- A Cautionary Tale
-
Dave_E reacted to a post in a topic:
For Beginners -- A Cautionary Tale
-
DmitriyMarkov reacted to a post in a topic:
Scotland 1775 by cdogg - Corel - 1:64 - Baltic Ketch
-
EricWilliamMarshall reacted to a post in a topic:
Model Shipways Ropewalk
-
EricWilliamMarshall reacted to a post in a topic:
Chesapeake Bay Flattie by cdogg - FINISHED - Midwest Products
-
GrandpaPhil reacted to a post in a topic:
Pirate Ship by Cdogg - FINISHED - Woodkrafter Kits
-
GrandpaPhil reacted to a post in a topic:
Chesapeake Bay Flattie by cdogg - FINISHED - Midwest Products
-
GrandpaPhil reacted to a post in a topic:
Scotland 1775 by cdogg - Corel - 1:64 - Baltic Ketch
-
Bobby reacted to a post in a topic:
Best glue for rigging: CA & GS-Hypo
-
Did you start a build log? That is the best way to get help , take pictures of each step, people will help along the way, some members are more helpful with hull building, some with rigging, some with planking, etc
-
cdogg reacted to a post in a topic:
La Couronne by EJ_L - FINISHED - Corel - 1:100 - 1637 Version
-
 Nice job man, I am about 25% done with this kit, got side tracked with a dollhouse kit, and lost my picture instructions! Thanks for posting the pictures about the kit pieces not fitting, it seems everything piece I got with the kit is off. pain in the a$$
 -
cdogg reacted to a post in a topic:
Mare Nostrum by Worldway - FINISHED - Artesania Latina - Scale 1:35 - Fishing Trawler - First Wooden Ship Build
-
cdogg reacted to a post in a topic:
La Couronne by EJ_L - FINISHED - Corel - 1:100 - 1637 Version
-
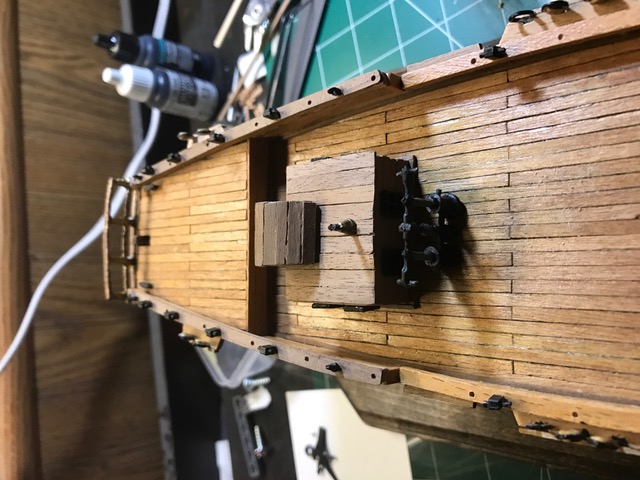
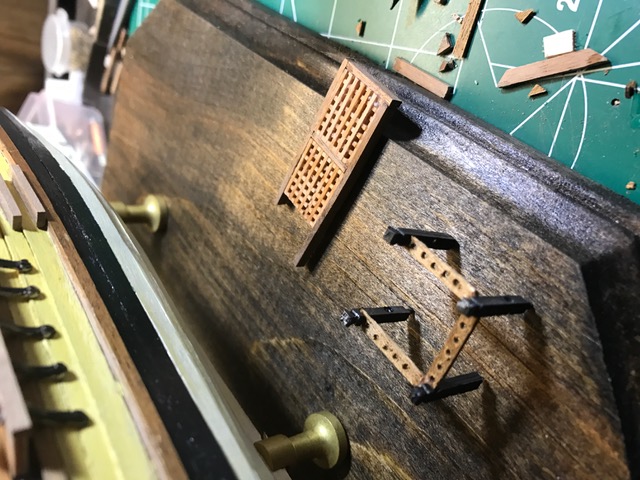
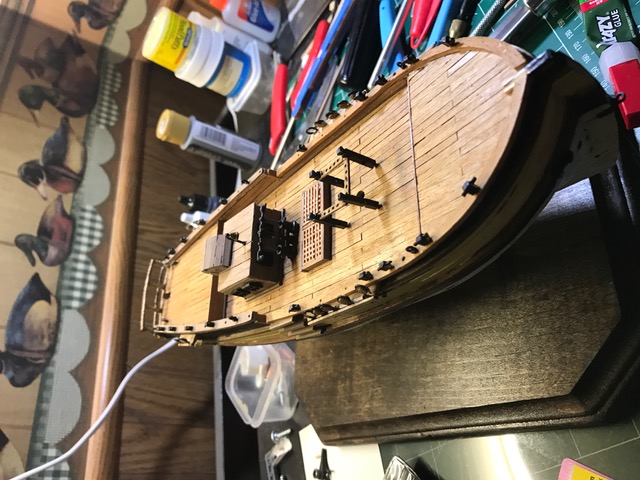
I haven't had a chance to touch up the grates yet, just wanted to get them placed. Also I need to do some fins touched on the cabin door yet, a little raw
-
It's been a busy time of year, finally spent a few hours on the boat Here I measured and placed the pin rack and the grating on the deck The wonderful kit provided posts were too small for the 1.5x3mm walnut pin rack so I went to a 1mmx3mm walnut piece, worked fine The grating was a pain in the a*s, first time making one, at least now I know how to do it correctly. lol
- 98 replies
-
- 3
-
-
- baltic ketch
- corel
- (and 1 more)
-
cdogg reacted to a post in a topic:
Scotland 1775 by cdogg - Corel - 1:64 - Baltic Ketch
-
cdogg reacted to a post in a topic:
Chesapeake Bay Flattie by popeye the sailor - Midwest Products
-
http://www.corel-srl.it/modell.html
-
The ship is looking awesome, that balcony is pretty cool.
- 608 replies
-
- 4
-
-
- la couronne
- corel
- (and 1 more)
-
cdogg reacted to a post in a topic:
La Couronne by EJ_L - FINISHED - Corel - 1:100 - 1637 Version
-
cdogg reacted to a post in a topic:
La Couronne by EJ_L - FINISHED - Corel - 1:100 - 1637 Version
-
cdogg reacted to a post in a topic:
Orca Boat by ndeconte - 35" movie replica - Finished
-
Hi Rob Here is my advice Every model I build I learn something that I could have applied to a previous one. Now I look at the first two ships I built and think, "Man, I should have used the technique I used on the other". So if you want the Constitution to be your pride and joy, then you should probably build your skills up with smaller kits. Experience will make the build more enjoyable and more efficient. Building wooden display ships is my favorite hobby but very difficult.
-
Thanks Hof. A few of those pics will help.
-
I will figure it out, just in shock that AL thinks two pictures and a paragraph are sufficient for planking instructions. I do not really need them but that stern is a pain in the a**. Also there is no guidance on how to build the boards behind the pile of boxes. They go into detail about how to build the box but not that piece, lol. I am just venting more than anything, never built an AL kit before.
-
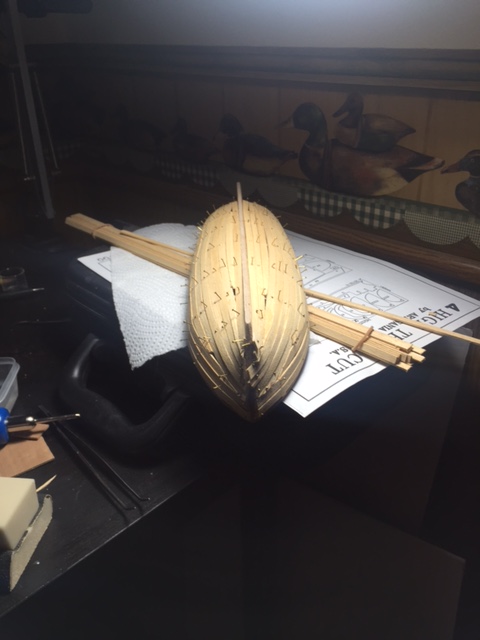
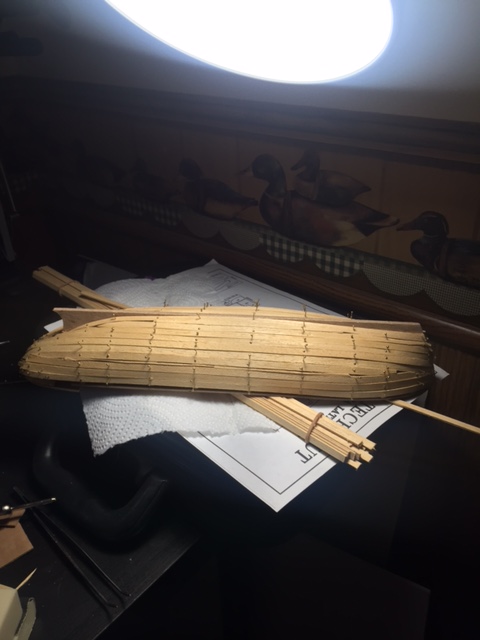
Well, this has been on my shelf forever so I thought I would dust it off. I know this forum is no stranger to this kit so I am going to try to focus on the work after the first hull planking This is my first AL kit, and I can honestly say these instructions are horrible. There is no direction for some of the prominent items on the deck. Also, the stern / bulwark planking is the most frustrating planking I have yet to encounter in my few years of this hobby. Here are some early pictures of the hull now that I have the first layer on, very raw yet.
-
Thanks for checking out my painfully slow build log, now I have motivation to get this going this weekend! lol
- 98 replies
-
- 1
-
-
- baltic ketch
- corel
- (and 1 more)
-
tasanhalas - use the same wood as you used for railing, 2x5mm or 2x4mm beech wood. just cut out the notches with a blade, fairly easy
-
I will look tonight and get back to you
-
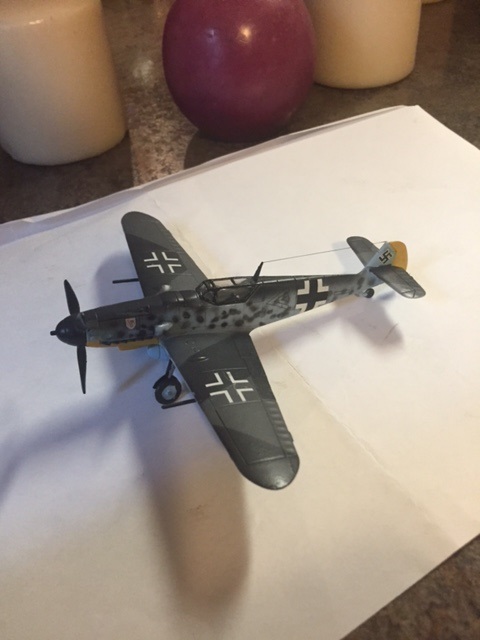
Airbrush
cdogg replied to Mike Dowling's topic in Painting, finishing and weathering products and techniques
I bought a Master airbrush kit off Amazon a few years ago around $75, played around with the cheap airbrush until I knew what I was doing. Buying an airbrush is like buying a guitar. You don't know if you will enjoy it, so don't go an buy a $400 toy to sit in a closet. Once I got the hang of airbrushing I moved to a more advanced "cheap" airbrush, a Master G233. As long as I keep it clean I can do decent work, here is a picture of a 1/72 Bf109 that I finished last October with the Master starter kit. Not exactly museum quality, but proof that a starter kit can get you a decent paint job. This winter I will buying a badger brush or two for more detailed work. Don't worry about all the complexities, just buy a starter kit and go from there.