FlounderFillet5
-
Posts
139 -
Joined
-
Last visited
Content Type
Profiles
Forums
Gallery
Events
Everything posted by FlounderFillet5
-
Hey Ginger! I use a program called irfanview for saving the photos to the proper dimensions and file size, then you can just upload directly to MSW. Hope this helps and keep up the good work on your Phantom. I miss working on mine, I can't wait till I have a place to do modelling again.
- 9 replies
-
- 2
-

-
- Model Shipways
- Phantom
- (and 1 more)
-
Phantom Rigging Question
FlounderFillet5 replied to FlounderFillet5's topic in Masting, rigging and sails
Thanks for the response Don, I think that the rigging plan includes both standing rigging and running rigging since the kit came with both black (standing) and tan (running) line. I just wasn't sure if the running roofing that is included in the rigging plan includes the rigging for the sails or just for moving the yards and whatnot around. I'm not sure if there is separate running rigging for yards and sails, but if the sails are attached to the yards, it would stand to reason that they are one in the same. Like I said, just new top this and don't yet know the basics of rigging. I also need to sit down and closely examine the rigging plan some more and try to figure out the purpose of each line, I think that will clear some things up. Good luck on rigging your Bounty, she is looking great so far! -
Hey everyone, I just got to the rigging on my first ship model, the MS Phantom, and had a question about the rigging. Is the rigging shown on the plans the complete rigging, or is it missing some of the rigging for the sails. I would like to, if possible display her with sails but am unsure on whether or not it makes sense with the rigging plan supplied with the kit. Also, I would appreciate any input on what state the rigging would look good in, i.e. full sail, half sail, furled sails etc. Thanks in advance for any and all input you guys are willing to share with a young deck hand. On a side note, if it is recommended to display with unfurled sails, I plan to use a method I found a while back that uses dyed thread pulled through to the undyed cloth to simulate the stitching in a closer to scale way. Preliminary tests have shown promise but canbea quite frustrating process because if a thread breaks, that could be all she wrote for that sail. Thanks again,
-
Hey guys and gals, Just wanted to stop in and give a quick update, the build has been on hold while waiting for, and setting up my new tools. Everything is set up and tuned in for the most part, with the exception of my mill as I had an issue with the headstock overhearing with the high speed pulley set installed. That will be sent off to sherline tomorrow for diagnosis and repair. I will say this, assembling and squaring up the sherline 2000 mill could have been a build log in itself! That took some time but it should be a very useful tool when I get the headstock back from Sherline. I also gained a better appreciation for the Byrnes tools, since they come assembled and ready to make saw dust right out of the box. Now that the tools are all sorted out, I should be able to get back to the Phantom soon, I have just been busy with school, tools, and bowling and have had trouble finding the time. This weekend, I think I week head down to Denver for the Rocky Mountain Ship Wrights meeting, I think they have a couple members on here and their work looks to be top notch from their website. I also think they are having an exhibit this weekend, so I should get to see a variety of very nice models. I am excited to see what they are all about. Anyway, I hope to have an update on the Phantom by next week. Until next time,
-
Nick, I just caught up on your build and it is coming along nicely. I too am working on the Phantom as my "first" build (the quotes are because I built a few much less involved kits before starting the Phantom). We are at similar points as well, but your progress is much faster than mine, life just keeps getting in the way! I will watch your progress with interest, glad to see another phantom build on here, there were far more on the old MSW but they were lost a few years back. Anyway, keep up the good work! Regards,
-
Stubby, Your build appears to be coming along nicely! To square the frames, I would likely either cut a stack of scrap wood, clapp them together, and sand them to the proper spacing between bulkheads and just glue them in as spacers for the time being. Or if the spacing is not the same between each bulkhead, just take the measurements from the plans and make them in pairs so that the spacers on the port and starboard sides are equal in width. Just the two cents of a fellow novice builder. I look forward to seeing this build progress, I really like this kit a lot. Best Regards,
-
Al, Kurt linked one earlier in this topic for one that looks to have a 1/8" shank since it is in a rotary tool. http://umm-usa.com/onlinestore/product_info.php?cPath=21_161&products_id=3338 The other one linked was to a micro mark drill chuck which has a 5/16" chuck.
- 31 replies
-
- 1
-
-
- Drill Press
- Microlux
- (and 1 more)
-
Tweezers Deal
FlounderFillet5 replied to Ulises Victoria's topic in Modeling tools and Workshop Equipment
I ordered a set of these, can't pass up such a great deal. Like you said, even if they are terrible, at least you are only out $2.50. No biggie! Thanks, -
Al, I think the drill bit chucks that are being referred to probably have shank sizes between 1/8" and 1/4", but that is just my assumption.
- 31 replies
-
- 1
-
-
- Drill Press
- Microlux
- (and 1 more)
-
Thank you guys for the informative responses, it is now official, a band saw is back on the Christmas list unless I can find a suitable one at a steal before then. Jason, thank you for giving me a price comparison on the wood, it sounds like I was offered a more than fair deal on these boards. I may have to purchase a board foot or two to have on hand when the time comes that I can process it down to Byrnes scale lumber. Also, it is helpful to hear an experienced person's point of view on board dimensions for the Byrnes saw. Frank, I have been looking for a band saw of the rough size you mention, I have found a couple 14" Delta's and I think I have seen a Rockwell for sale recently, though both of them were much newer which does not seem to be a positive with these companies as they used to be built rock solid and the newer ones don't seem to be built to the same standards. Jaager, The Grizzly looks really nice, I will have to keep an eye out for a second hand one. If not, I will continue to look for band saws that have 1+ HP motors to accomplish resawing. I have some of the other species of wood you mention on hand that I use for scrolling work but so I should be able to get a bit of practice using my tools and maybe I will do a small scratch build with some of these materials to get my toes wet. You did mention a couple varieties of wood that I have never seen or heard of, I will have to look into those so that I am aware of them when the time comes to purchase wood for a build down the line that they may be suitable for. Thanks again for all of the great responses, I will be able to move forward more informed and hopefully get to the point where I can process my own wood down by the end of the year, or by my birthday in March if Christmas doesn't pan out . See you guys around,
-
Frank, Thanks for the quick response! That is pretty much what I figured, So the 15/16" boards would need to be resawn on a band saw down to slightly thicker than wanted thickness, process in the thickness sander and then ripped into planks on the byrnes saw. So, this tells me that I would either need to buy boards that are resawn to slightly thicker than needed boards for me to re-dimension and rip or I would need to get my hands on a band saw or find someone with one who would do this work at a reasonable price or a case of beer. hmm, I almost bought a band saw recently but opted for some other small scale tools instead. Maybe a band saw will be back on the Christmas list. Are there band saws out there that run on 110V and have enough power to resaw wood in this manner? Also, what would you recommend for board widths for most modelling work? I figure about 3" wide boards are probably suitable to do most framing work and pretty much any width will work for ripping planks. Regards,
-
Hello, I recently purchased a Byrnes saw and thickness sander and would like to start finding wood to use for my next build. I contacted a local wood supplier and asked if they could track down some holly, pear, or boxwood and they just called me back saying they could get some holly. The wood comes in rough cut 15/16" thick boards up to about 6" in width. My question is what kind of dimensions should I be looking for with rough cut wood? I do know that it is best to resaw down to the thickness you need with the widest side being the face, in this case, I would have to saw the wood such that I would be cutting down the 15/16" dimension to the rough size I would need, correct? Also, the asking price is $34.25/boardfoot, it this a reasonable price for rough cut holly? Any help getting into milling my own stock would be a great help. I have seen topics coving milling wood from rough stock but I am unsure what the maximum dimensions of the wood I will be able to process will be with these small tools and no band saw. Thanks,
-
Adam, great to hear from you again! Thank you for the kind words. From what I understand, the MS Phantom POB kit is on hold indefinitely which is too bad because I feel that many builders would like to build this ship as a POB kit, especially ones who build the solid hull version as their first build years ago. At least, I imagine there would be a market for it. I just checked out your build logs, you are a busy guy! I can't imagine working on that many ships at once, how do you keep them straight? and how do you have space for them all? Impressed, all I can say is, I'm impressed lol. Have a good one Adam and I hope you continue to pop in from time to time. Later,
-
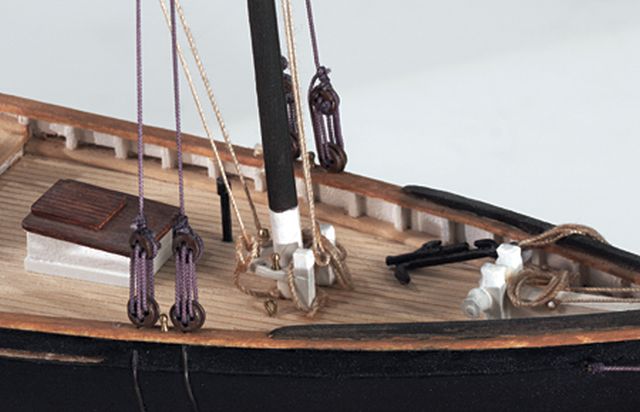
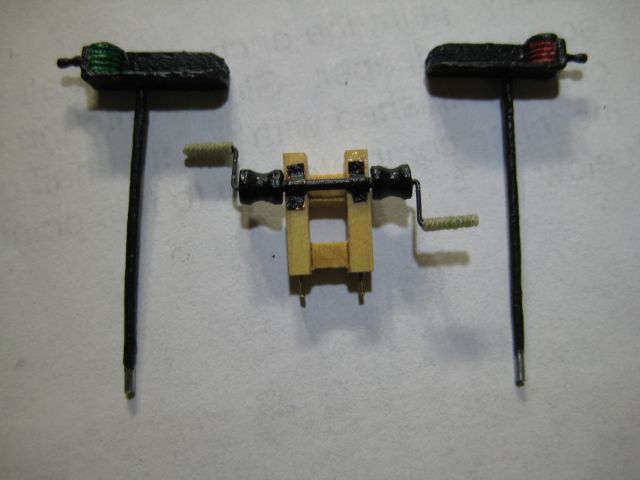
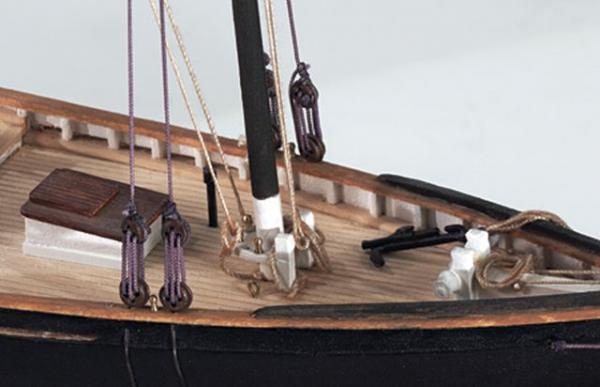
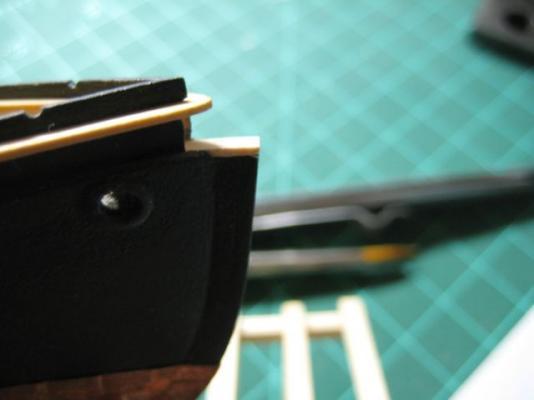
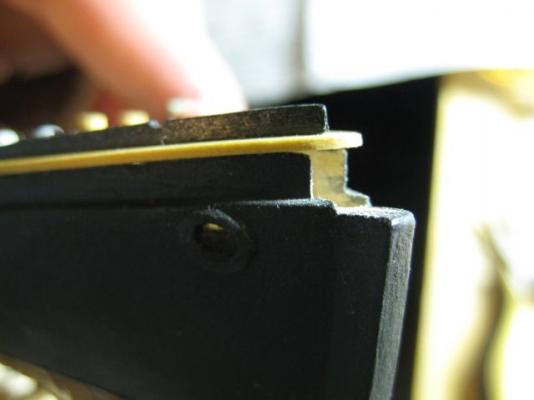
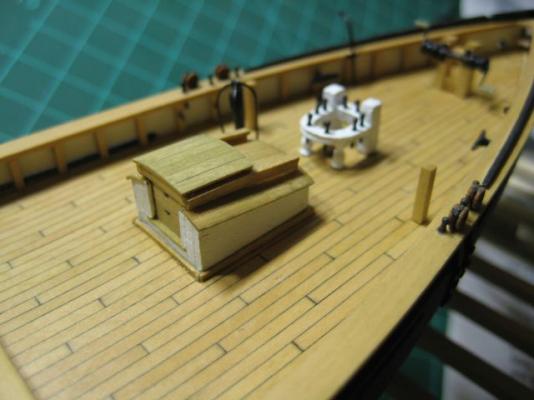
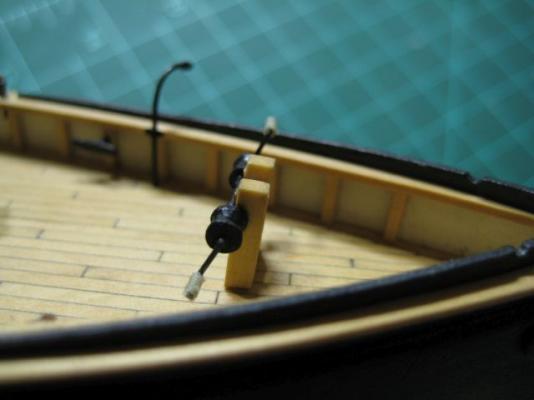
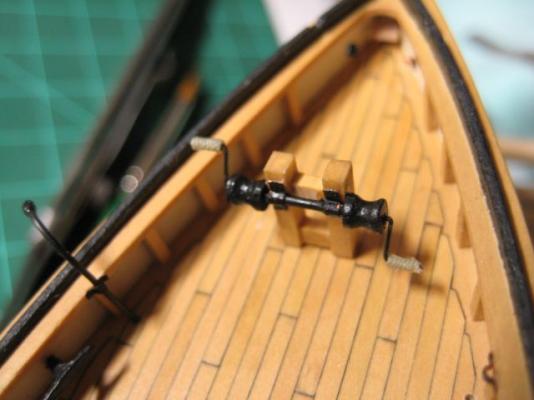
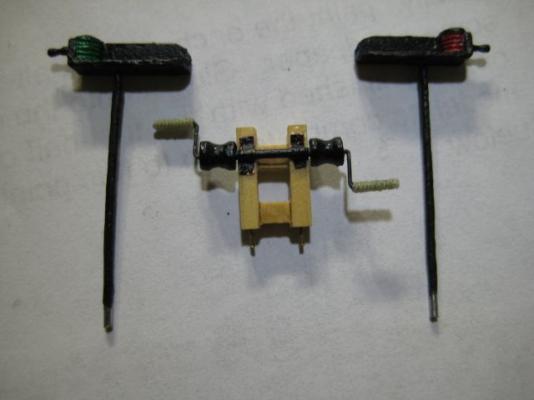
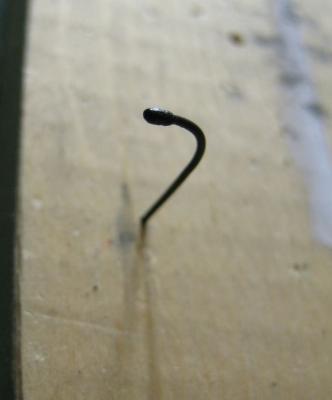
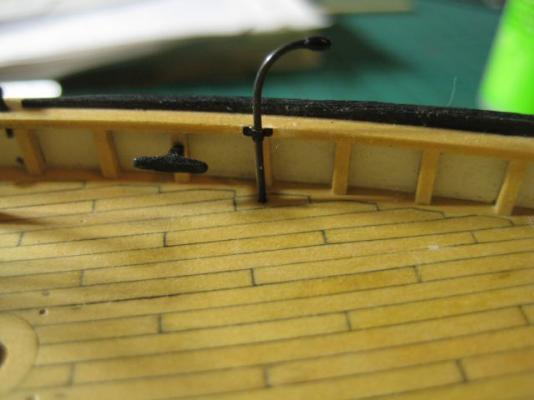
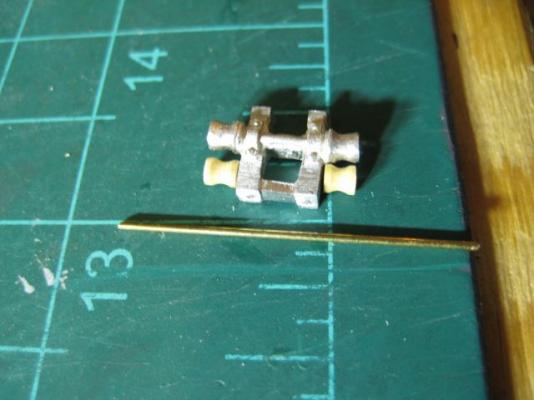
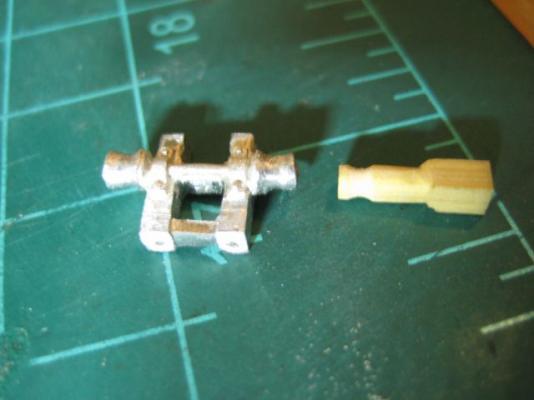
Sal and Wayne, I am very satisfied with the way the windlass came out as well. Pictures of the finished product are below. As for the anchor cable questions, I did check the model expo site and the model they took pictures of have a "cable" installed. It looks like they placed the anchor cable out through the hawse pipe and over the cap rail onto the deck. It also appears that they used three ropes instead of a cable but I imagine that this is due to the lack of a model expo supplied cable laid rope. This has raised one more question for me, if the hawse pipe leads onto the deck, then would they have to have stored the entire anchor cable on deck? Update: First, here are couple pictures of the windlass in its final steps of fabrication. I decided to wrap the windlass handles with rope. This picture also shows the navigation lights painted, I still think the painting on these is quite rough but I am just going with it. A couple pictures of the windlass installed. Next, I made the davit as described in Chuck's practicum. Just used a few drops of glue to make the ball at the end, it did take a few coats of the CA to get the desired size of this feature. A picture of the davit installed. I then installed the ventilator, ventilator cage, fore fife rail, and the fore companionway. Pictures of the completed fore deck with fixtures installed. I drilled the holes in the deck for the navigation lights and installed them. The brackets for the navigation lights were made from extra copper tape. The bulwark step at the bow of the ship was carved out a little too much when I made the cut out for the bowsprit earlier in the build, I wanted to repair this. Here is a picture of what I am referring to. I sanded down a small piece of kit supplied basswood and fitted it into place, it just needs to be trimmed to size and painted black to match the stem. Last picture of this update is a top view of where my build stands, with everything installed except the anchor since I am still trying to figure out exactly how I want to display it. The rigging portion of this build is going to be put on hold for a little while since I just ordered some new toys(read: tools) and want to fabricate the bowsprit and masts on my shiny new lathe and mill when they gets here. Can't wait to get some time using these tools, I am very excited! I look forward to your comments/input,


-
Yes, that is the same type as I had and paid a little less at a jewelry supply site as he mentioned. It was not very accurate but it did as good a job as you can expect from a tool in this price point. This cheap still press is a big step up from no drill press at all though, so if it is all you can spend, it is worth the cash in my opinion. On a side note, the sherline mill and large combo I found turned out to be in much worse condition than it was described to me so I am back to square one. Well, not quite square one, because now I am looking at spending entirely too much on a new much better equipped pair of sherline tools with lots of extra tooling. I am trying to justify it as I can use the tools for prototyping machines and devices of my own design, I just need to convince myself to drain some savings funds lol.. We will see what I end up with in the next few weeks.
- 31 replies
-
- 3
-
-
- Drill Press
- Microlux
- (and 1 more)
-
One more note: If you have anything else to add to this topic, feel free to do so as there are not many threads on here that compare drill presses that are sized appropriately for this hobby.
- 31 replies
-
- 2
-
-
- Drill Press
- Microlux
- (and 1 more)
-
Thanks again for all the information presented here, this topic has become a moot point for me as I just found a Sherline 5400 with digital read out and Sherline 4000 lathe package that was priced at a point that I could not turn down. I am super excited about getting these tools as I have wanted a lathe and mill for a long time but could not justify the $2000+ price tag for the pair. I can't wait to get aquainted with these great machines, I pick them up on Thursday! Best Regards,
- 31 replies
-
- 4
-
-
- Drill Press
- Microlux
- (and 1 more)
-
Kurt, That is a great price for a seemingly great product, might have to pick one of these up. Thanks,
- 31 replies
-
- 3
-
-
- Drill Press
- Microlux
- (and 1 more)
-
Wow, a ton of responses while I was away! Thanks for all of your guys' input. Now for responses as there was a ton of great info/suggestions given here. Augie, I am still on the fence about the Microlux drill press, it looks like a decent quality tool(much better than my current one) but I don't want to regret the purchase with a hefty price tag if it does not preform as I would expect a mini drill press at that price point to perform. Still thinking... Jack, I too have the dremel workstation but my particular one is very inaccurate so I pretty much never use the thing. Was quite disappointed with that dremel accessory, along with the router table accessory. Kurt, I will have to look around online for one of these small drill chucks, that may be the solution. Mario, that Vanda-Lay mill is a great find, I really like that it is up-gradable and there are so many attachments for it! Seems a bit pricey at $250 but I would love to have the x and y axis control which is offered at a higher price. I have also been looking into lathes and, while I would love to have a metal turning lathe, this thing would be great for turning masts... hmm, this might be an expensive setup once I figure in the accessories I would want. Also, their router table is another item I would consider as the dremel one that I have is pretty terrible. Thanks for pointing me in the direction of this company. On a side note, the name made me chuckle because of the Seinfeld reference in there. Jagger, that is the one I currently have. While I feel like I got $60 worth out of it, I don't think I would be willing to buy another one, the fact that the arm can come out just really bothers me and it has scared the bajeezes out of me a couple times in the past. George, do you have a link to an example of such machinist pin vices? On a little bit of a side note, while looking up reviews on the Vanda-Lay mill attachment, I came across a great site for dremel accessories at very reasonable prices. A great find, I think! https://www.widgetsupply.com/ Thanks again for all of the replies and great info, I will have to do some serious pondering as to the best fit for my needs. Cheers,
- 31 replies
-
- 4
-
-
- Drill Press
- Microlux
- (and 1 more)
-
Mark, Thanks for the quick reply. I have considered some of this size of drill press but have been worried that they will not accept the tiny drill bits that are commonly used in model ship building. Most of the time that I am using the numbered drill bits, I am using a pin vise and drilling by hand but sometimes the drill press it preferred, such as drilling holes in the masts for eyebolts and whatnot, I find the drill press can achieve more centered holes than I can by hand. If the chuck on these presses cannot hold the tiny drill bits, is there an appropriately sized drill chuck connect to a shank or something that you know of? Thanks,
- 31 replies
-
- 3
-
-
- Drill Press
- Microlux
- (and 1 more)
-
Hello there, I am in the market for a bench top drill press and would like some suggestions from you all. I currently have a cheap chinese made bench top drill press that I picked up for about $60 a couple years ago. My current drill press has done some good work for me but I really don't think it is that safe as the pull down handle can be pulled out and this causes the spring loaded drill press head to shoot toward the ceiling which has broken the top plastic cover. This time around I am able to spend a bit more money but I am having trouble finding reviews that I trust for these small drill presses. I have looked at the Microlux drill presses from Micromark and they both seem decent but I have heard mixed reviews of them. I would definitely prefer a drill press that will, like the Byrnes sander I own, last many years and hopefully be a pleasure to use. Most of what I am finding are very similar drill presses to the one I currently have and I am skeptical to get anything that resembles my current press. Any and all help is appreciated. Thanks in advance! Best Regards,
- 31 replies
-
- 3
-
-
- Drill Press
- Microlux
- (and 1 more)
-
Interesting, it's no Byrne's saw, but it beats out my DIY Dremel table saw that I made last year!
-
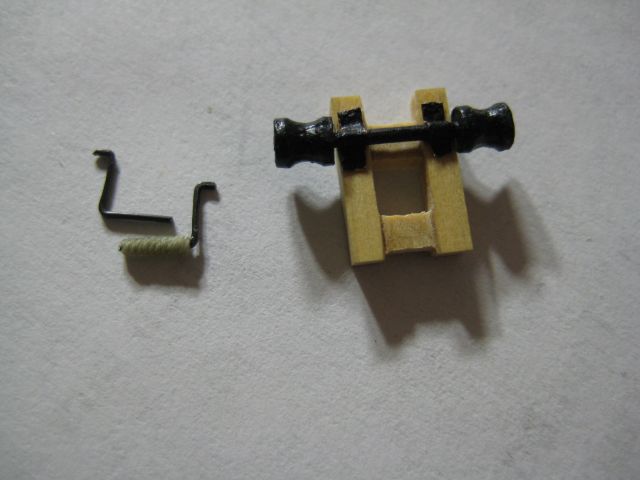
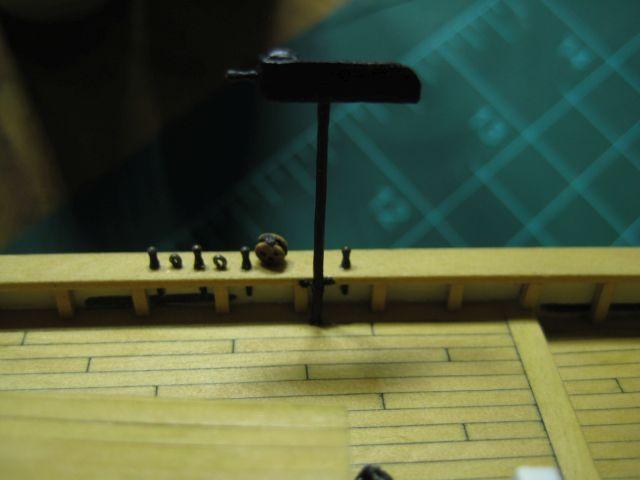
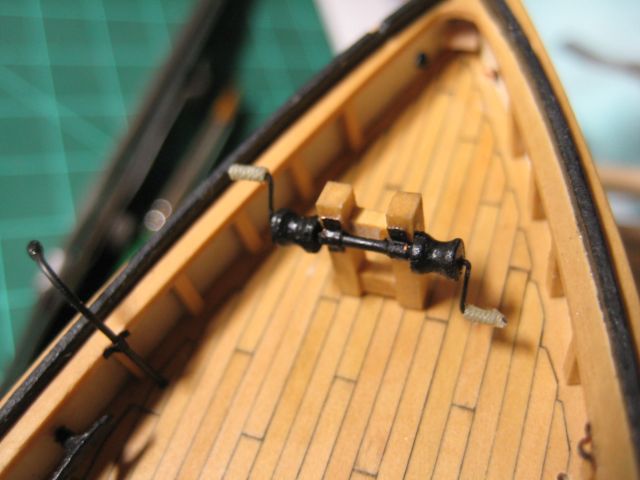
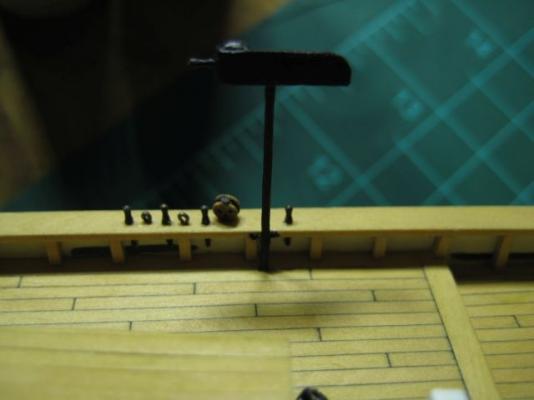
Sal and Tom, welcome back to my log! I hope I can continue to contribute to the ever growing knowledge base here on MSW. Your builds of the Syren and Constitution are both coming along very nicely, very ambitious builds and impressive work so far. I look forward to moving into plank on bulkhead and advanced kits in the future, hopefully I can do them justice! Mini update: I have been working on a bunch of the final deck fixtures that need to be completed before moving on to the rigging portion of this build. First came the ventilator, I cleaned it up with a needle file and then added some vertical grooves in the top cap, though it was difficult to keep it in place while making the cuts so they are not perfect. No biggie. I also forgot that I have an airbrush for painting so this one was hand painted but I will be switching back to airbrushing, whenever possible, for other items moving forward. Next, I began working on the anchor. I decided to drill small holes between the main anchor and the bar that runs it's length (not sure what this part is called). Similar to cutting the scuppers in the bulwarks, I just drilled some holes and then cut out the remaining material with my exacto knife. I like the effect of this, it separates the different pieces. Just needs to be painted now. Last thing for this update, the windlass. I decided to scratch build this item out of some spare boxwood so that it would match the deck and other deck fixtures. I had to glue some strips together to get the desired thickness for the square stock. I cut the two uprights to length and then gave them 7 degrees of angle on the bottoms so that they would stand vertical despite the angle in the deck. I took this from the plans as it looked like they were vertical in them. Next, I glued the horizontal timbers into place, making sure to match the 7 degree angle on the bottom so that they would be parallel with the deck and hopefully better accept the bowsprit. Then I just sanded them flat and filed the horizontal timbers so that they were smaller squares and matched the plans/cast windlass that came with the kit. Finally, I fabricated the winch bits out of some more scrap boxwood and cut a piece of brass wire to length. Here is one last picture of where the windlass stands right now, just needs a coat of black paint on the winch bits and then I will use some copper tape to fasten the winch to the windlass. Before logging off, I have a question regarding the anchor and how to display it. I have some cable laid rope in 1.2mm (black) and 1.5mm (tan) and was wondering: 1) Should the anchor cable be tan like running rigging or black like the standing rigging? It seems like the tar would have made it more durable but harder to work with so I am not sure. 2) If I want to display it with the cable attached, how should this be routed? I figure it would come out of the hawse pipe hole but then should it come over the cap rail onto the deck where the anchor is stored? Also, should the extra cable just be coiled and placed inboard near the hawse pipe hole, this would certainly help cover some of the imperfections in the forward decking up near the bow. 3) I know some ships had a few feet of chain connecting the anchor to the anchor cable, would this be accurate on the Phantom, I have so much trouble finding information on these ships that I can't find anything related to this detail of this type of ship. As always, I hope you enjoyed the progress update and I definitely appreciate any input you guys may have about the anchor questions raised above. Until next time,
-
Hmm... I will have to think over when I want to build this beautiful ship. I would love to build it next but I don't think I have the confidence in planking the hull yet and I would like to get one or two POB kits under my belt so that I could do this ship some justice. I know this was your first planking job but you id a much better job than I think I could do on my first try, it is actually very impressive the quality of planking you were able to accomplish. Additionally, I don't think I will be able to convince the admiral on the purchase of another kit while I have a few under the bench already. Regardless, first things first... finish the Phantom before planning my next challenge, on my way to update my log now. See you around,
- 659 replies
-
- 3
-
-
- syren
- model shipways
- (and 1 more)
-
Sal, Thought I would come check out your build log to see another great ship being built. All I can say is wow, fantastic work so far! I look forward to seeing your progress as you move forward. Question, since your first build was the Phantom and this is your second, how do you feel about the instructions that are included with this kit? As I understand it, they are quite detailed but I am wondering how much prior knowledge is assumed since this is an advanced kit. Keep up the great work Sal! Best regards,
- 659 replies
-
- 3
-
-
- syren
- model shipways
- (and 1 more)