


popeye the sailor
-
Posts
15,981 -
Joined
-
Last visited
Content Type
Profiles
Forums
Gallery
Events
Everything posted by popeye the sailor
-
 such a beautiful looking plane the stenciling is a really good process. it works well around covers and hatches.........hard to do with decals. super nice job with all the extras you put into this bird.
 -
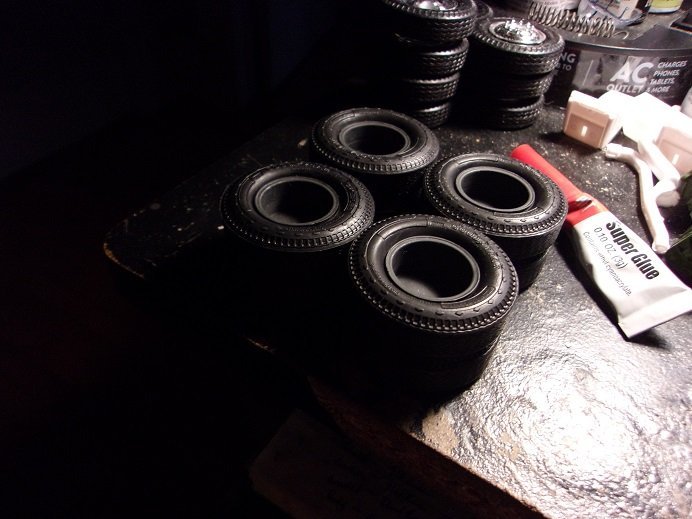
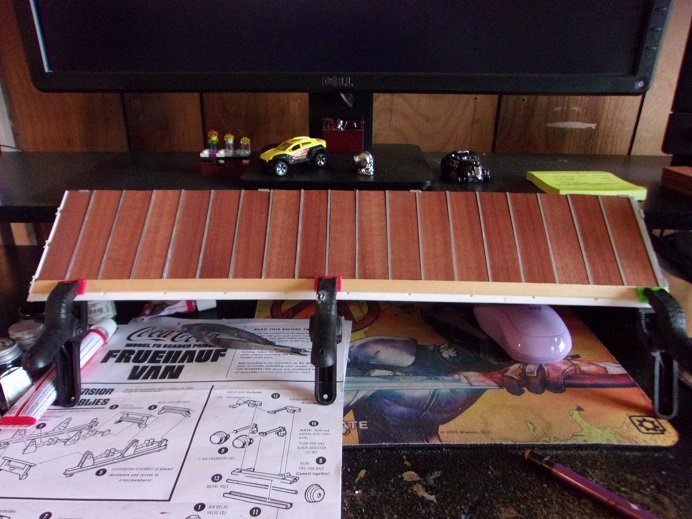
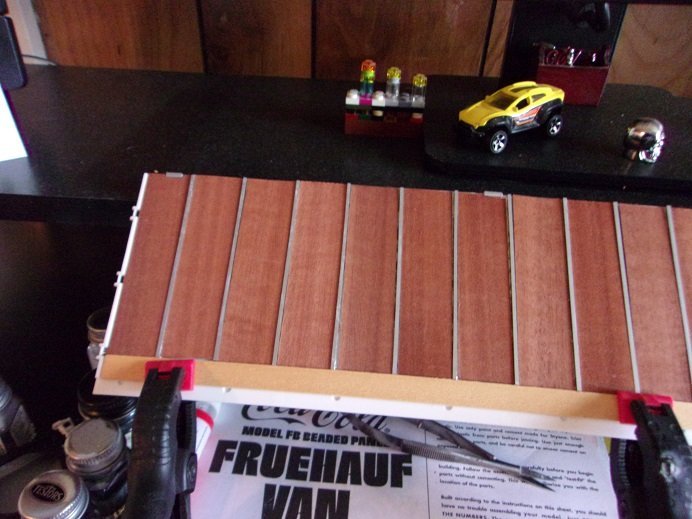
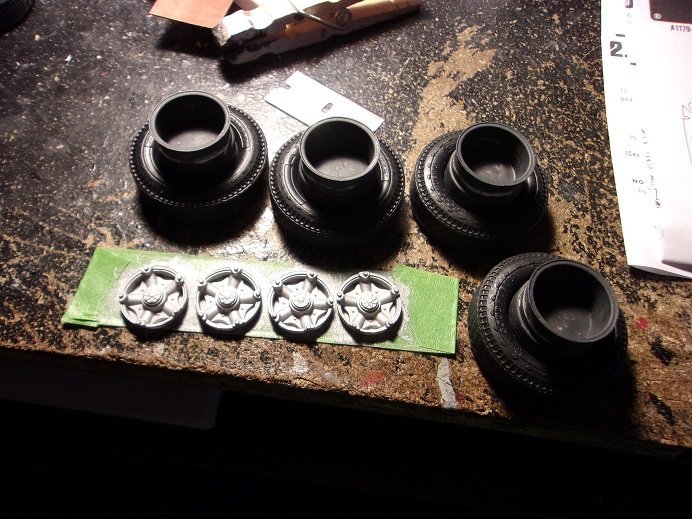
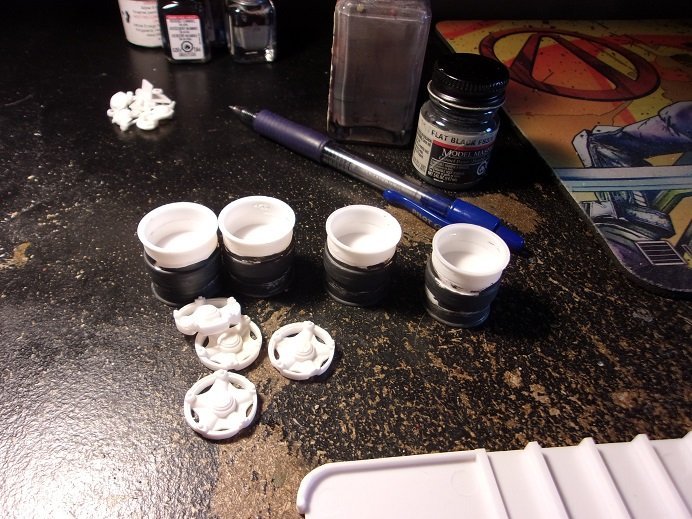
see........I wasn't gone too long although I have a couple more steps to do with sizing down the pictures. I'll get used to it I added the outer tires to the wheel assemblies. the hub part needs a bit more paint. the hubs on this trailer are oil hubs. they require 5W90 oil. we used to have quite a few, but most, if not all the trailer that have them, have been taken off the road. we switched over to bearing grease {I forget what type it is}, which is really runny stuff. the caps are threaded and screw on, rather than the bolt on hub caps for grease. the caps are mostly clear........our Stemco hub caps were metal with a see-through face. a red rubber plug in the center is the fill port. I wondered how I was going to emulate that, since they are kinda shiny, if not dirty. I got an idea to use the Testor's window maker........I painted it on them, and it looks the part. add the red plug and they are ready to add to the wheel assemblies. the tandem dolly and the landing legs got a coat of paint. I added the cross bar to the landing legs. another area that I want to expand on is the service plate. the service plate is the plate on the front of the trailer that has the glad hands and light receptacle. on this type of trailer, it is built into the front outer wall. I need to remove the detail and find something that will bring out the parts better. I'm sure I have something. each side of the trailer interior, is made up of 19 spaces between the wall posts. I still have that Mahogany stripping that I have been trying to find a use for. I think I found it here. I cut up a bunch of pieces, 3 1/2 inches long. one bad thing is that the spaces are different widths........tooling isn't that exact. not that I thought it would each space was measured, and the strip was cut to fit. one side down...........and one to go the scuff liner is the guide. hopefully, I have it figured out so that the floor will fit. so far, everything is just set in place. I may have to trim where the door hinges are, but that can be done later. more soon!
- 39 replies
-
- 10
-

-
that an old trick........not without it's dangers either. the same danger lies in the use of 'fix a flat' on passenger tires. we had a guy working with us at one time, that would dismount the outer tires {if they had a problem} without taking the wheel assembly off the trailer. the GM didn't like it though and told him not to do it anymore. we plug and patch our tire repairs. thanks OC..........I have been trying to catch up on your Battle of Waterloo diorama. now that my ordeal is pretty much over, I can get back to it yes friends........leaving your internet provider and changing how we watch TV and go online, can be a real pain. we dropped Comcast and went to Fidium, and now we stream TV. Comcast halted my home page, but allowed me to use my e-mail.......or, at least they did I can't log in now and their reason for it, is that it is expired. today, I went back to MSN and started a Hotmail account. there really is no reason why I need to go back to the Comcast account, since all my bookmarks came with me. I was using windows 8.1, until someone hacked me from Russia {or so they said}, and I found that I was able to download Windows 10.........so that's what I did as well. so, other than having to change all my profiles with places I normally visit, things are getting back to normal . I do have a small update, and I should have it for you very soon. thanks for look'in in.
-
good you were able to sort out the tanks. you a great job with stenciling........it looks so much better than with decals
-
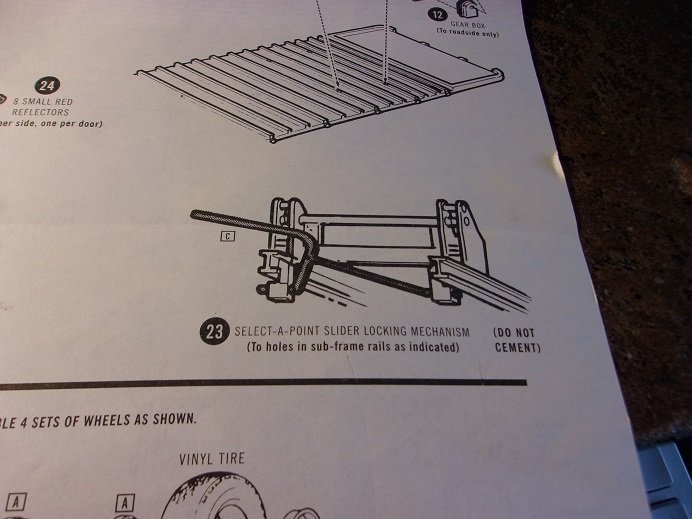
it's a wonder why I didn't recall this.........we had trailers with single slider pins. modern trailers have four, two in front and two in back. Wally phased out these trailers...not sure if there was a requirement for the newer system. I looked at the back page of the instructions, 'cuz I knew that the slider actuator handle was included in the kit. the G rails still need stop bars though....so I will add them. ....a funny story...... a trailer was brought to the shop {drive up, as we call it} because the driver couldn't move the slider. the common way to do this, is to chock a wheel position with a 4 x 4 block of Oak. wood is the best form of chock, guaranteed not to allow a trailer to 'drag'......ever this was unsuccessful. so Jim and Little John {these two were inseparable } decided to get one of the trucks and free it by using the Jake brake. our supervisor Paul was a little hesitant, but Jim convinced him it would work....and so the 'go ahead' was given. so, here they are..........out in the yard, hooked up to the trailer, and driving it around the shop, applying the Jake a few times. I was talking to Paul, being funny..............I started to mention a worst case scenario, where the tandem gets ripped out.........when all of a sudden, they applied the jake right in front of us! what a noise it made!.....Paul was quite addled at this point....they were going probably around 30 MPH when they did it. they stopped..........of course the dolly moved....it had slid back. when they backed the trailer up, the rear stop bar fell out on the ground! I saw Paul's face drop, and the two backed the trailer up to the shop door. by this time.......Paul didn't say anything.........he just turned and went back over to the truck side. these two get out of the truck laughing. it wasn't too long before the bar was welded back in place and the driver was hooked back up to the trailer. you may be curious why they just didn't use the driver's truck to do this...........his truck was logged in assigned to the trailer. if they would have used it, Logistics would have been ALL over them....and the driver as well {for thinking that HE did it}. another funny story would be the day I showed these two how to make an Air Cannon...........but that's another day
-
some were like that, and some went all the way to the top. Pine, Trailmobile {AMT has the 'double header' kit out there}, they built them like that as well. Great Dane and Hyundai got away from that and started lining them straight up to the roof in 14 1/2 strips, either in wood or fiberglass / plastic. the posts are so thin, that they only give a wall depth of around 1/4 of an inches! I've never seen one with a sky light, but we have some that have round clear discs along the tops of the side walls. they don't fair very well though...........many times I see one with one or two missing. Wally is adamant about the inside wood lining........holes no bigger than your fist must be patched or the panel replaced, they view it as a form of asset protection.....and rightly so. I replaced a inner wall panel one day and found several CD cases of a popular game at the time.......the cases and instructions were there, but the CD's were gone. I turned them in to the boss and he took it from there. I did find out about the slider mechanism........I'll tell yaz in a bit....Gibbs needs to go out
-
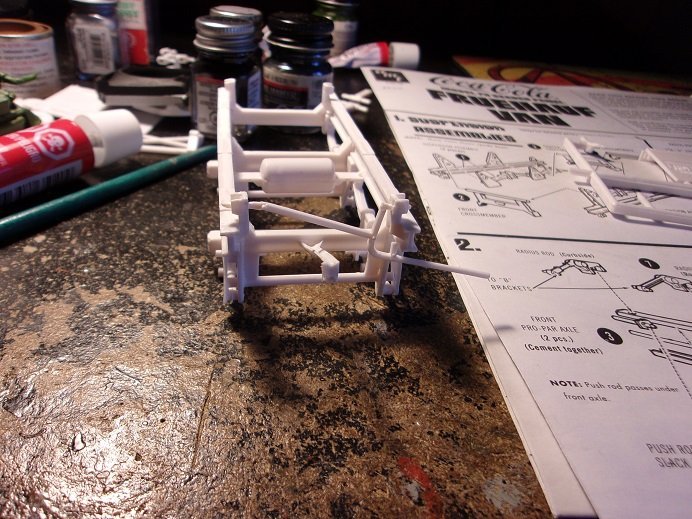
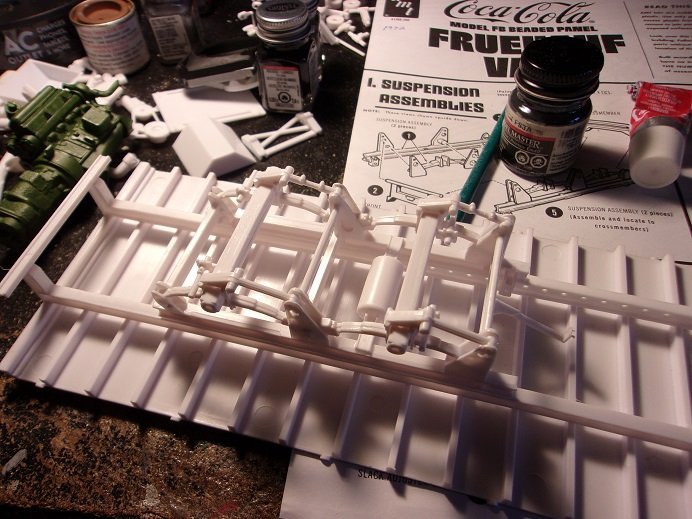
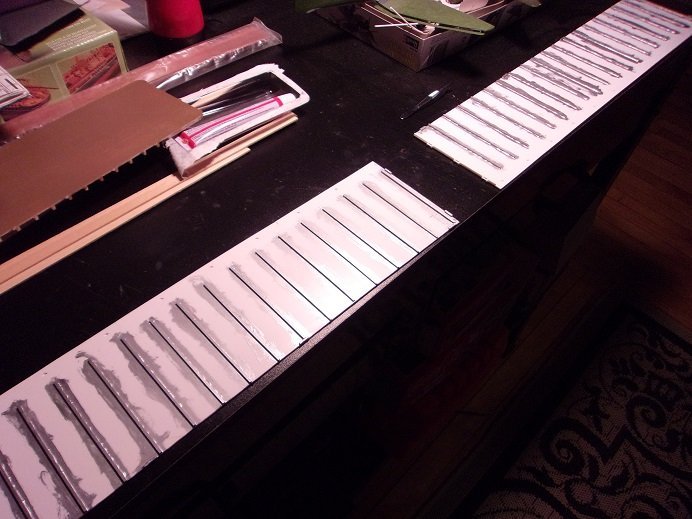
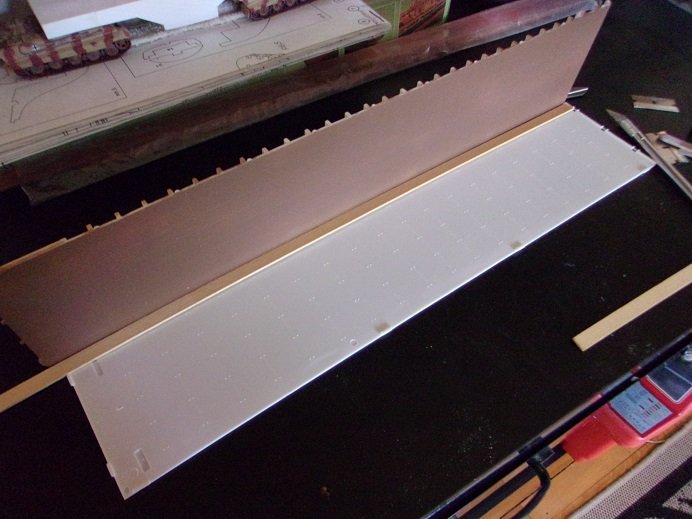
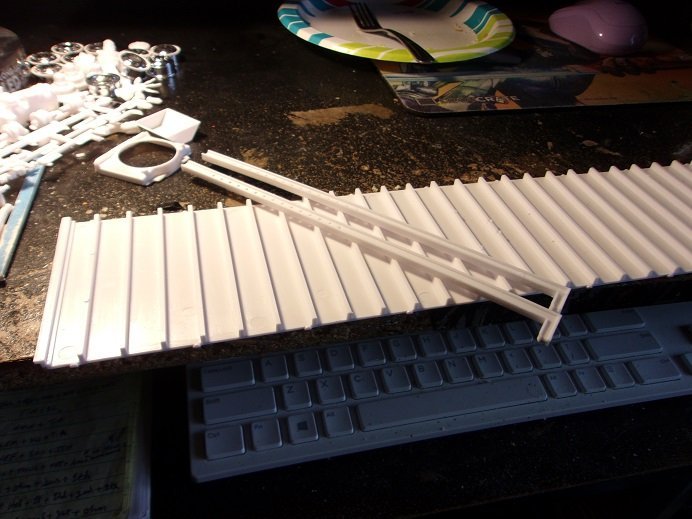
sage advice Jack........I'll definitely keep that in mind {in the event that I lose mine } some trailers do have them........most are older trailers though. I've been seeing more companies leaning towards the container trailer. the box is separate from the rail frame underneath.......mainly use in shipping to and from other countries by ship. dry vans are good, but they damage quite easily....means a lot of repairs.........a container is thick steel and hard to damage. they are also stackable on the ship and at the yard. since this trailer doesn't have one, it's a safe bet they weren't equipped with one. as for the cargo........it probably wouldn't be hard to do.......haven't given it much thought. I have the Budweiser wagon.......it has the cases of Bud, but the decals are pretty bad.......after all, it is an old kit. not only that, they are stick ons .....YECH!!!!!!! so I got a bit further with what I've done so far......the assembly should start picking up now. the tandem dolly fits snug on the G rails, as I mentioned earlier. the G rails have holes for locking pins on the dolly to fit in, so it won't move. the dolly is moveable, so the weight of the load can be adjusted, to even out the weight across the axles {truck and trailer}. on most trailers, there are holes along the entire G rail.......on the model, there is not. seeing that I already have G rails in place, it might be hard to drill them........but I do want to add the missing parts of the slider assembly. usually there are four....two in the front and two in the back........but in this case, since it's a short trailer, I probably can get away with the two in the front. I'll also need to add stop bars at the front and rear of the G rails. more research needed....I'll see if I can find anything on this. I made a goof already.........good thing it was an easy fix. to keep the trailer in alignment, you have the torque arms and radius rods. they are attacked to the leaf saddles and the brackets on the axle tubes. torque arms are always roadside, and the radius rods curbside. the old method for aligning a trailer {we have a portable alignment outfit} is to align the rear axle and 'tram' the front axle to the rear. adjustments are made at the torque arms. to tram the front, measure the distance from hub cap centers of the right side wheels and match them to the left side....adjusting the same way....at the torque arm. my goof was that I didn't pay attention.....I just glues them in place. thankfully, they came off with little effort. I cleaned up the mess and glued them on correctly. I then turned to the interior. the inner walls on these older trailer were mostly covered in plywood, with scuff liners along the floor. some have plastic dividers....some.....metal.........usually in 4' x 8' sheets. now, on 53 foot trailers, there are thirteen a side {the last being a half sheet top and bottom}. I' going to do this one another way, seen on newer trailers. I bought some 1/16 x 1/16 evergreen strip for the dividers, also simulated wall posts. the riveted detail on the inner walls will be the guide to place them. I cut a bunch of 3 1/2" strips, and began gluing them on the inner wall. I left room for the scuff liner at the bottom.......first one done. once the other side was done, I painted them with silver paint. I'll let this dry over night cutting the wood fillers is the next big task. the front wall will also have a scuff liner and plywood. the roof already has the roof bow detail molded onto it, so I won't need to do anything with it. hope to have more to show tomorrow

-
some really cool pieces there.........must have been fun being there super planes Greg......a very nice dio!
-
great looking plane Greg! nicely done
-
Vincent Black Shadow by CDW - Revell - 1:12 Scale
popeye the sailor replied to CDW's topic in Non-ship/categorised builds
the bike rims look really good......gonna add to the detail for sure -
sweet little boat Greg! the early amphibians look really cool
-
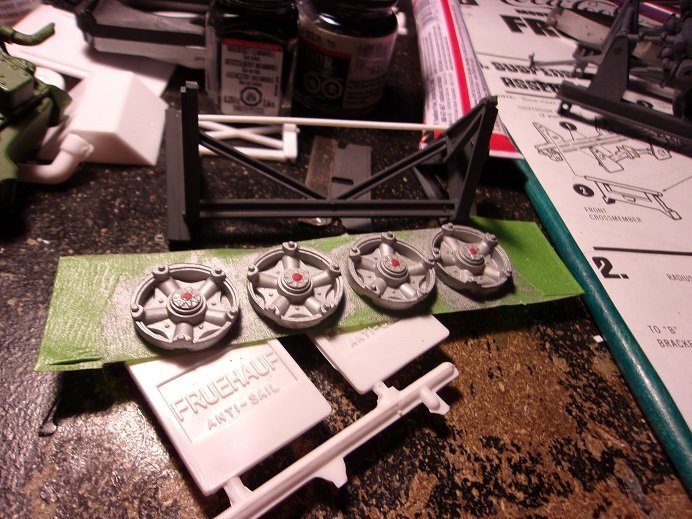
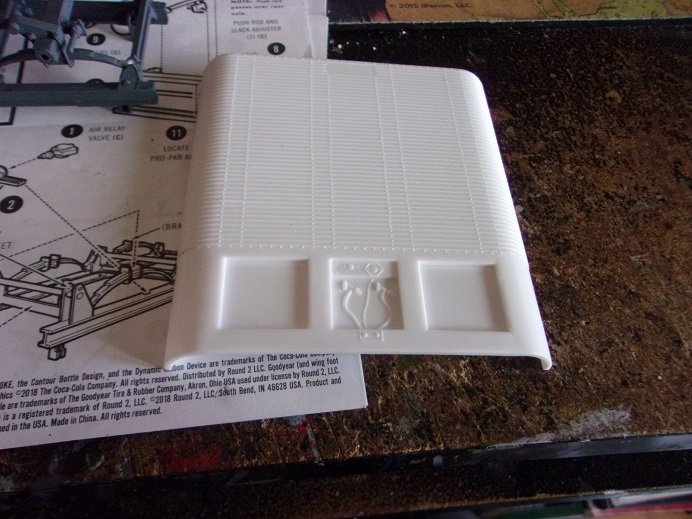
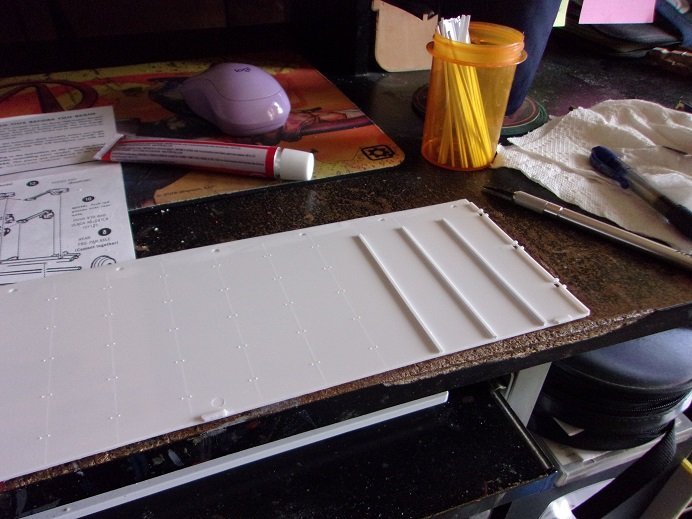
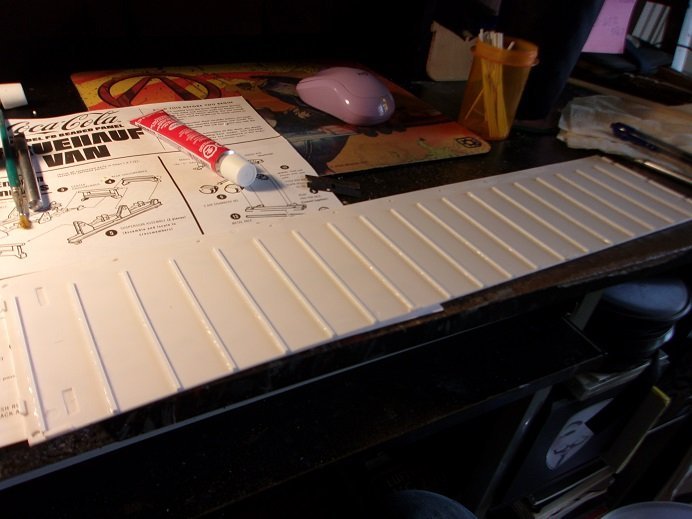
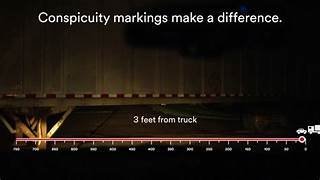
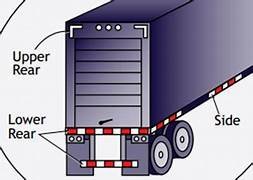
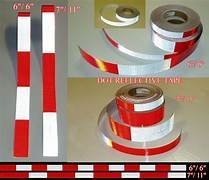
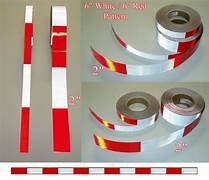
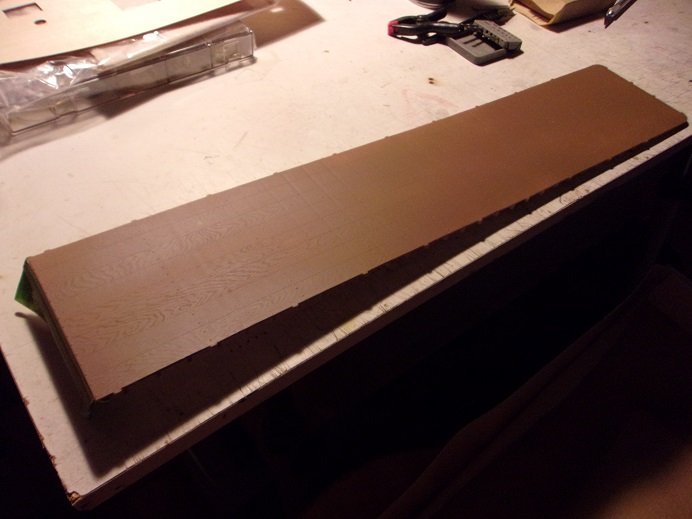
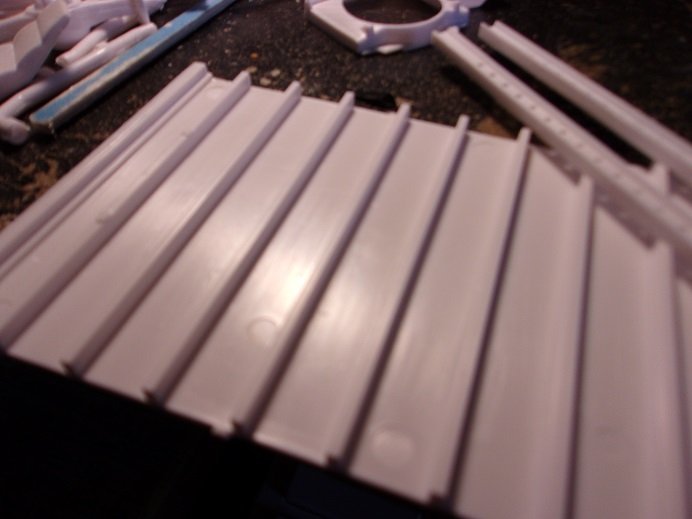
thank you gentlemen.......gee Jack, perhaps you can give me a head's up on what to expect for the next 20 years ! I have never seen such an extensive line of 'Coca Cola' models...from what I've seen, AMT had the exclusive As mentioned, I did see a 53 foot kit at Hobby Lobby, but I was hesitant in pulling the trigger. it wasn't a long box, which indicates that the top, bottom, and sides were in multiple pieces {filler, here we come!}. for this trailer, I may go with the Coca Cola motif, seeing the the truck has the same logo. I do want to do something different for the second one........and hopefully another truck to go with it. a mural sound like fun too the decal sheet is large and the kit even supplies a sort of gauge to help in aligning the logo the one aspect that is missing here, is the conspicuity markings along the sides of the trailer. according to the FMCSA {Federal Motor Carrier safety administration}, any trailer manufactured after 1993, has to have conspicuity tape markings this enables motorists to see trailers better at night. the reflective tape can span the entire length of the trailer, but regulations state that the amount of reflective tape must be half of the total length. so, for a 53 foot trailer, there must be 26 1/2 feet of tape on the sides, as well as along the bumper and bottom of the door {s}. in 1989, the NHTSA {National Highway Traffic safety Administration} published a rule that all light and reflective devices {reflectors}, be made of a reflective material, which means that tail lights and the use of reflectors was mandatory. I started working at Wal Mart in 2004.........we were still dealing with reflectors back then....if some of our trailer had them, they had to be on there. we use the 6 x 6...6 inches of red and 6 inches of white reflective. there are other types of reflective tape, like the 7/11 tape........7 inches of white and 11 inches of red reflective {we use this one too, but it depends what DC the trailer comes from}. as far as colors go, red and white is the main combo.........as for the round or oval reflectors {mainly made of plastic, but can be found as a placard decal} yellow is used which follows the lighting rules along the sides of the trailer body.....yellow at the front, red at the rear. the white tape seen at the top of the buck plate door opening is a requirement mandated a few years later. the truck doesn't have a lot of reflective tape requirements, but there must be some on the mud flap brackets, and some form {whether it be the lights or round reflective material} of reflectives on the back of the cab. I was having a devil of a time trying to locate some, but Egilman was kind enough to direct me in the right direction.....thank you although it is not reflective, it fits the bill perfectly! whenever I replace any at the shop........I try to miss the rivets.....I hate that. I came up with a way around this, but recently, the higher ups changed the policy that all side wall patches be buck riveted, so that put a stop to my idea. inside the box there is printed detail.......there is rivet detail on both sides. to put my interior mod in the first steps to reality, the floor must be painted. it has wood grain detail....more modern high end trailers have metal floors........either of light steel or aluminum. the little tabs you see along the sides pose some of the problems in fitting the sides.........some are a tad off, while others are too big. at this point, I had finished with one side. this wood strip will serve as the scuff liner, wall bumper. scuff liner are always a constant repair item...........some folks just don't know how to drive a fork lift. you ought to see what it look like when the forks go completely through the side wall! I've operated fork lifts and single power jacks. I've also started to assemble the wheels..........really wish there was more detail here, but it is what it is


-
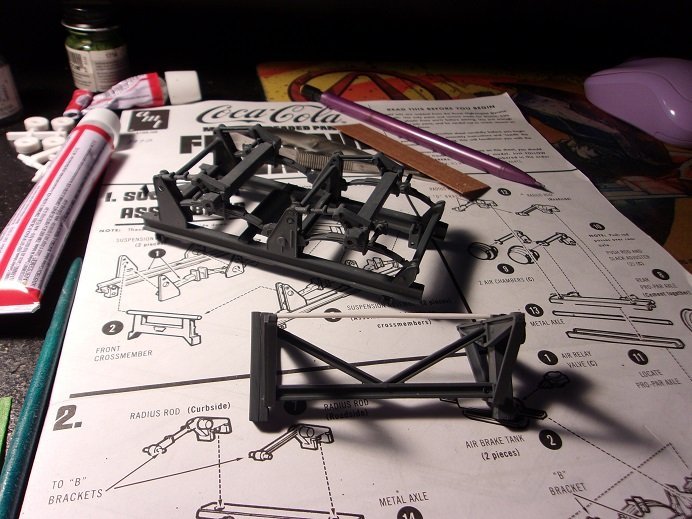
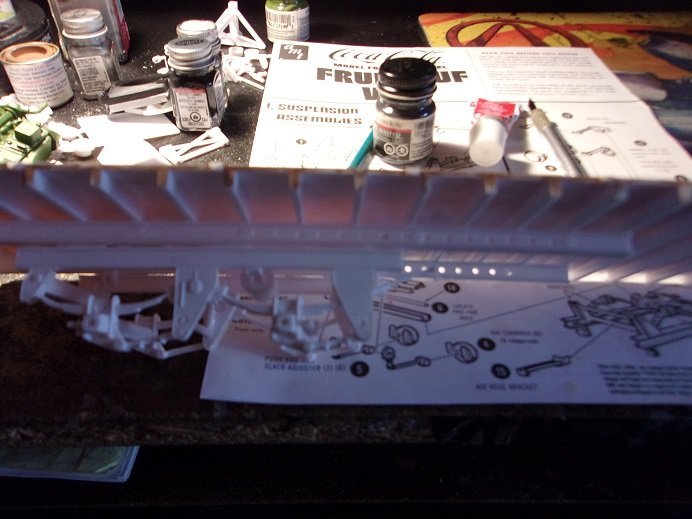
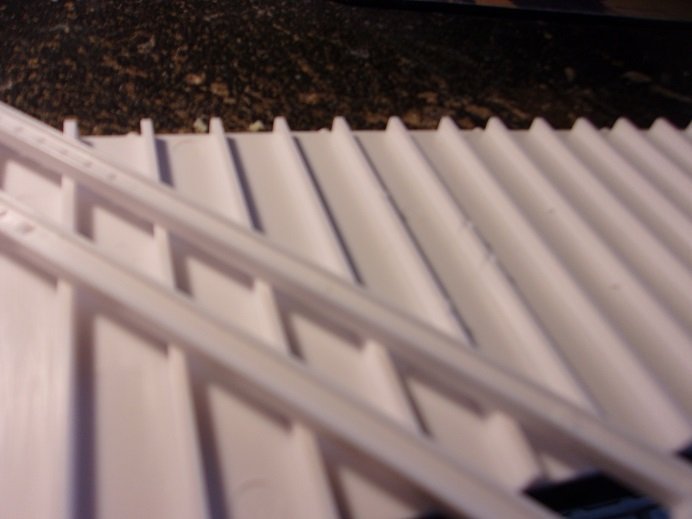
I've seen some trailers in HO scale.........pre assembled, but I'm sure there are kits out there. with a little weathering, one could add a touch of realism . today is out 35th wedding anniversary.........I had to work, and we had the younger son and his girlfriend over to do their laundry. they normally eat with us, so I grilled up some burgers. not much of a celebration, but we'll make up for it later. these past two days at work, I have been on the trailer side by myself. my co worker called out, right along with our only tech 3.......since covid, we have dwindled down to a skeleton crew. so it was just Brian and I...and our manager John. it's distraction night....I'd better get moving the kit does have some problems......what kit doesn't?! there is a lack of location pins and tabs throughout the kit, so care must be taken to get the important parts straight. some parts are misshaped, which requires extra fitting before it sees any glue. the joints for the sides and the bottom need to be trimmed to fit. these pictures probably aren't that good, but as it is, the holes and guides for the tandem rails can hardly be seen. two guides are on the last cross member the front two guides can be see on the cross member before the one with the two holes. I used a ruler to insure that they were straight. another thing that I totally got rid of, was the chrome. no shiny bobbles here I de-chromed the whole thing and will rely on metallic paints. I started to assemble the wheels after the rim parts were out of the 'soak'. the landing legs had a lot of mold lines and mis-shapened parts...still in the process of being refined. the tandem was assembled and fed onto the rails to see how it would track. it is supposed to be movable, but there is no real reason why it must be {as a model}. it is tight enough to stay where you put it, but there is no adjustment mechanism to show it locked into position. I may add it.........I'll get into this more when we speak again


-
really interesting project.........looks well done
-
hello Ken model train........this would be a bit too big. HO is what.......1:87, or something like that. but even at that scale, you can acheive a lot of detail. I was looking for Wal Mart decals for the other trailer........I guess I'll stick with the Coca Cola decals for this one. I found them in HO and O scales, but haven't seen them in 1:25 scale. I could pass it off as a Wally 'Circus' trailer. I did see a 53 foot trailer kit, but the admiral was not happy with my choice. I hope the log helps or gives you ideas. how about some good 'ole graffitti!!!!!!!!
-
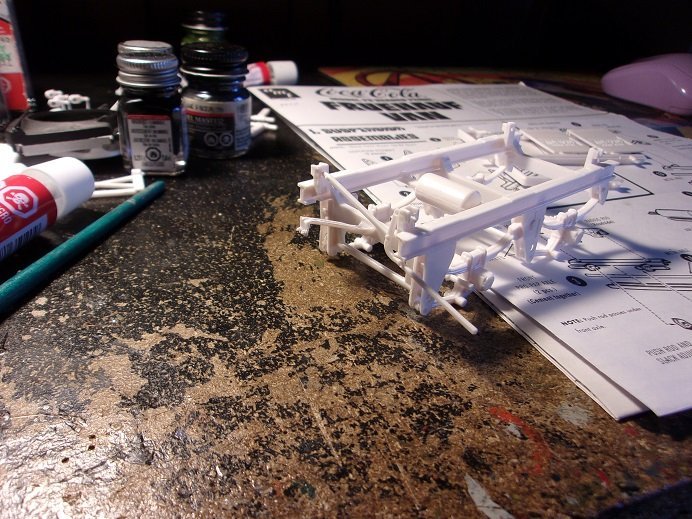
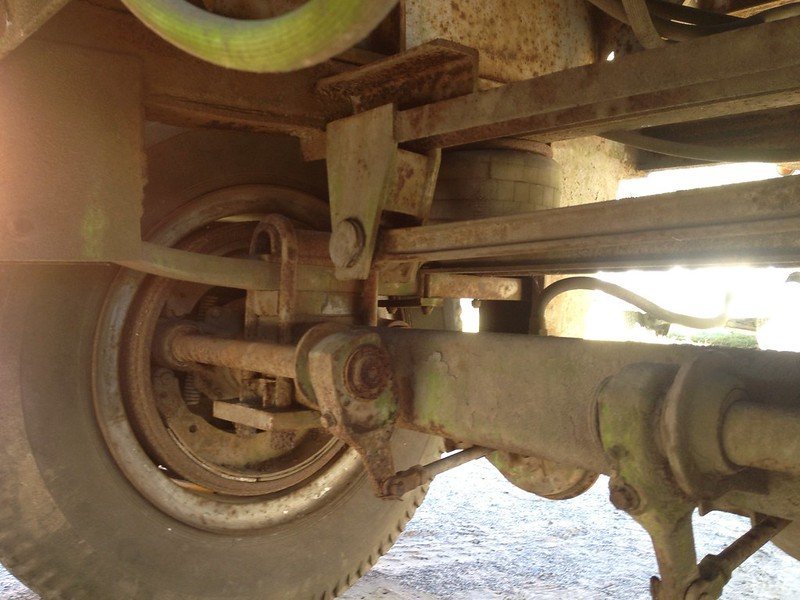
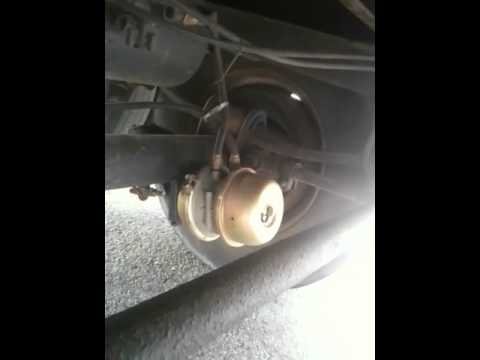
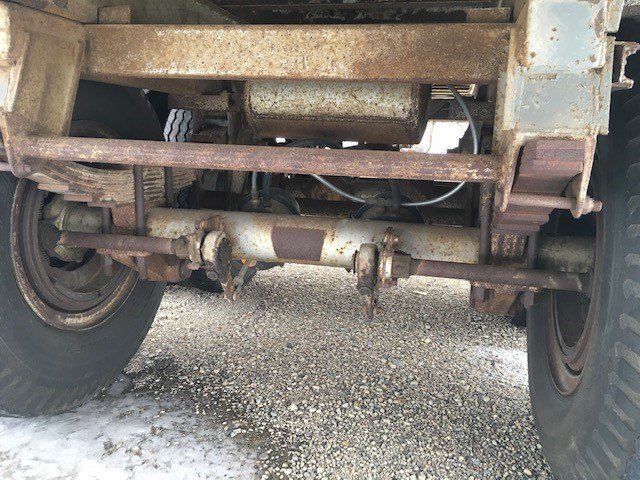
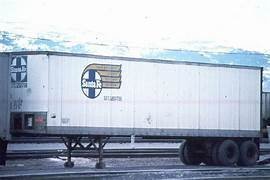
thanks for the welcome Egilman I will try and make something of the contents......what I see in trailers that the kit leaves out. I should have done an overview of the contents......I could point out some of the shortcomings. I'll just have to point everything out as I go along. I noticed that the title has been changed....did I do something wrong.........I tried to follow what others have done in their titles?! Wal Mart never had any 40 foot trailers...what Fruehauf trailer we have {had} were mostly 53 footers. Trailermobile, Wabash, Pines, Hyundai, and Great Dane are names that we use, although the first three are being pushed out due to age. we are begining to receive newer Wabash trailers.........I pointed out a lighting issue, but the GM doesn't see it as a big deal. since all the lights on the trailer must be lit while on the road, the issue is moot. the timeline that I've found for Freuhauf puts the 40 footer somewhere around the early 50's {they might have produced a shorter version before this}. I didn't see anything about a 48 footer, but by the late 60's / early 70's, the 53 footer rolled out, and has been the staple since then. the picture I showed of the Sante Fe trailer is a 1972....so I dated the model around this time. of course, the trailer is showing some age....it might even be dated 1962. the Freuhauf trailer used the Pro par suspension system, which might account for the airbag at the front of the leaf spring. most other types of suspension has them in the rear. none of the trailers I've seen has backing plates. although trailers with 'wedge' type brakes might have had them. I've never seen this type of brake system...I've been meaning to look them up. the brake system shown here is the s-cam system. the front ends of the shoes rest on anchor pins, fastened by springs. the rear spring can be seen in the rear ends of the shoes......at this end, there are rollers that sit on the s-cam pawl, which gives the system it's name, since the pawl is shaped like the letter S. what I see here are the shoe pad thickness and the condition of it. DOT is 8/32nds..........these are clearly at or below 10/32nds. there is also separation between the pad and the shoe backings, which suggests rust jacking. rust is forming in between and left unchecked, will crack the pad and cause it to be edjected, leaving the condition to be metal to metal.........not good! it has manual slack adjusters that are so old, that the protective sleeve that surrounds the adjustment nut is stuck in the slack {the pop out ring can be seen around the adjustment nut}. we're talking a brake job and new slack adjusters. there is an early type........another type seen on Pro Par systems are called Crusen Bruner {I may have spelt the name wrong here}, which are self adjusting (but only to a point}. they were suseptible to becoming as rusted and jammed up like this type seen here, and a real bugger to remove due to the double clevis pins that connect them to the brake chamber yoke. the brake chamber is another interesting aspect....note that only one hose is connected to it. this is a single stage chamber, capable of releasing the brakes only. braking for the trailer is controled by a valve on the reserve air tank. another type of valve that might be seen on this trailer is called a full function valve. I hated these valves....they were more trouble than they were worth! on a few of the trailers I worked on, I did away with it and changed it over to the two valve system I forget the name of this type of brake chamber, I've always just seen them on trucks. modern trailers use a two chambered chamber......... the front part of the chamber {bolted to the axle} is the service {brake} side.........the back section is called the emergency {release} side. each side is governed by it's own valve....emergency {relay} and the brake valve. the brake valve has evolved to contain ABS abilities and the electronics to send pulses to the truck as it functions. there is a warning light, in the event that there is a malfunction. we even have trailers with disc brakes.....one can really see in there now!!! the wheel seal is fully in view, as well as the brake pads to check for wear. I like the system only because there is nothing to grease........but I hate it because it's a bugger to get the tires off. in this picture, you can see that there is plenty of meat on the brake shoes. the protective rings around the slack adjuster nuts is popped out, doing what it's supposed to be doing while it is still a rust bucket, note that there are multi leafed springs under here. the type used depends on the amout of weight the trailer can carry....whatever it's rated for. there are trailer on the road today with single leaf....and some of them are not made of metal. Buick passenger cars in the 80's had such a spring set up in the rear, made of a plastic that is extremely stiff and can support a lot of weight. the Pro Par system used two types of brake drums........inboard and outboard. inboard drums are bolted to the hub from the back.......outboard drums are slipped on from the outside of the hub. careful not to mix them up........one guy in the shop did it, and after zapp'in up the wheels, found that he couldn't turn the wheels! he found, after removing the tires again, that he had cracked all four drums, due to the clamping pressure of tightening the lug nuts! walk of shame anyone? they didn't fire him, but they definitely weren't happy. yes......you are right on the split rims........if they were found bad in an inspection, they were replaced. but as a rule, you can get a longer life out of them.......close monitoring is key. when I worked at Granite State tire, I did a couple for a company called Knoxland farms. they always did business with us, but it was agreed that we wouldn't do split rims. well........a pair slipped through the cracks, and none of the borthers would touch them. my older brother worked with me, and he took it upon himself to put me in the middle of it...........oh......Den's done them before......he can do them! yea......so I was chosen for the task. it's not bad really......tire casing goes on the bottom part of the rim.........slip in the tube, making sure nothing is pinching it and the stem is sticking out correctly, and then put the outer ring on. I took an air guage and put on an extended air supply hose to the tire and inflated it to 20 - 30 PSI. lightly tap around the ring to insure that it is seated properly {don't stand over it}. I then pushed the assembly under the alignment rack, and finished inflating the tire. the story of what happened to my dad was his own foolishness. he couldn't wait for me to come home {I was at work} he didn't follow what I just outlined and likely inflated the tire to full pressure. putting it on the dump truck, it got jammed, so he hit it with a sledge hammer. the force knocked him a few feet {distance varies} from the truck....the tire was laying on him when mother found him. the account was that she took the tire and sent it rolling down the private driveway {I had to go get the darn thing}. I got the call at work {I forget who called}.......but I told them I would see him after work. "at least I know where he is". when I saw him........I chewed him out, mainly because he deserved it. he got mad, but I reinterated that he would have done the same to me. what's good for the goose....as the say'in goes he had fractured ribs, a broken collar bone, a fractured jaw, and a compound fracture of the lower leg {tibia?} the bone was sticking out of his boot for cry'in out loud! it got fun after that........we'd be working on something in the carport, and dad would come down stairs with his crutches and all..............soon after, mom would show up with the cast iron skillet and shag him back upstairs. she didn't take any guff from him it's kinda condensed, but it gives some insight on the suspension and braking. there is more, but a lot of it pertains to modern trailers. we have some trailer that not only keep the tires inflated, but will adjust the air pressures to maintain 100 PSI. like I told the GM........we have been adjusting air pressures since the dawn of time. what are ya gonna do whe someone comes in and says all eight tires are flat! well folks, we are about to find out.....such nonsense has BEEN going on! last week, we had to disable over 80 trailers outfitted with this faulty air inflation system! Holland, the company that developed this abomination, is trying to diagnose a fix for them. I say send 'em all back..... but I am just a thrawl and carry no weight in making sensible suggestions. we get this system.......given no instruction on how to maintain it.........can't even touch it due to warrenty reasons, and NOW they want us to deal with it!?!?!? oh.....we did get an audio file to listen to, which basically said that we don't need to do anything with it....we don't even need to check the air pressures anymore! oh happy days! I can't wait to hear what we need to do next..........too late to put everything we took off back on..........Holland told us to toss everything out once they find the fix, they are going to send us kits to get them up and running again. my word........look at the time........time to hit the hammock. see.........go off the radar for a spell, an' when I git back, I'm like a blink'in chatty Kathy! haven't even gotten into what I've done with the model yet....... well, that means that I'll have to make it a point to get my duff on here tomorrow and get some progress going! a lot of it has been experimental.......but it is in getting the parts to fit good. I'll explain more when I post the next session. perhaps I'll have something juicy to tell yas about work
-
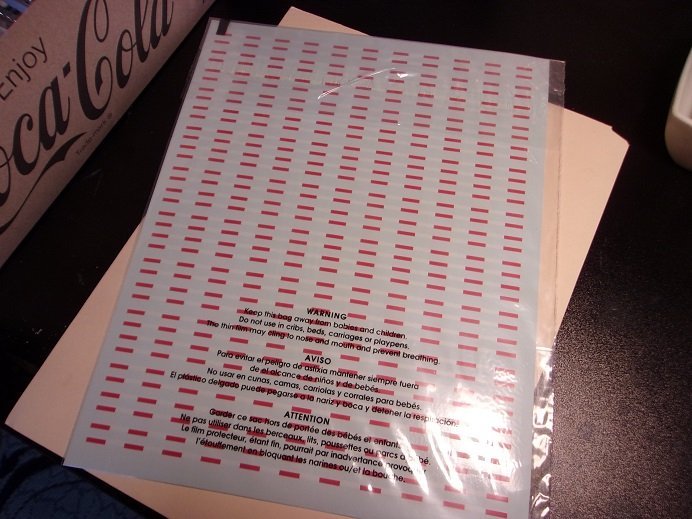
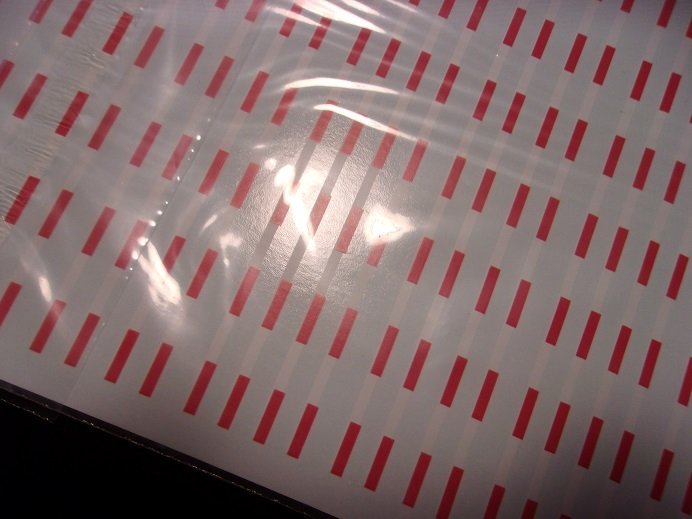
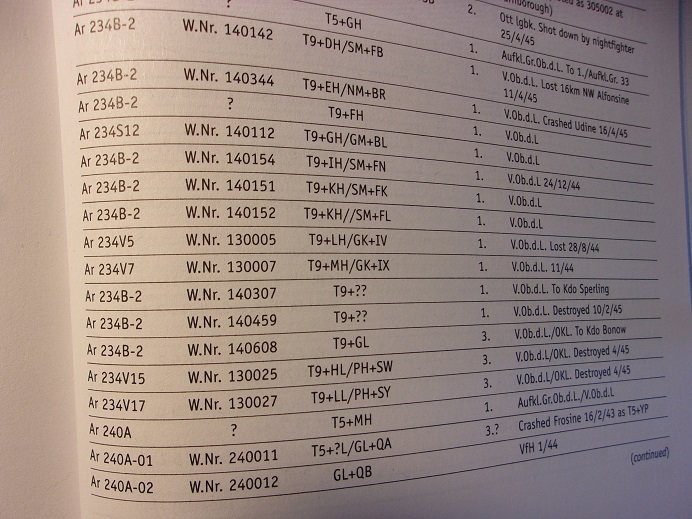
I took a picture of the page for you, but in reviewing it, I though it came out bad. once transferred to my computer, I saw that it didn't look as bad as I thought........so here it is. it might give you ideas for code lettering. not sure what the V5 / V7 and the V15 / V17 is about.......perhaps possible variants. there is also an S12 listed. hope you can glean anything frm it
-
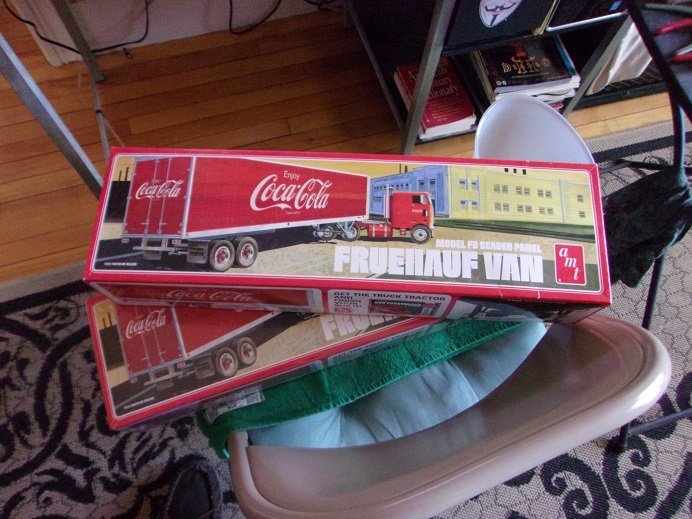
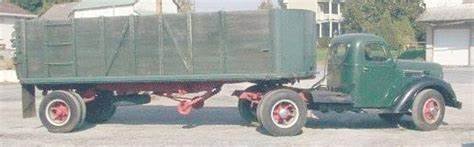
it's been a while friends.........models started, and models put back in their boxes.........the draw just faded {but not forgotten}. I'll get back to them. I'm getting ready to get nutz with this one, ans I thought I'd share it with you. I bought two of these trailers at Wal Mart...the last place I thought I'd ever see models......... the box shows a Peterbuilt 352 Pacemaker cabover, but Wally had a GMC "General" {I'm sure there is a model name}, and this one is showcased on a Holiday trailer. this kit is versitile......there are other kits with different subject matter. anyway.........the General will have to do. looking over both truck and trailer, I do see some points to correct or expand on, but I'll keep it to what I know. I'll try to give some insight to what I do at the shop........I'll try to keep it somewhere between a pity party and a rant this is pretty close to the kit. this thing that sticks out here is the landing legs. most modern trailers have a platform style foot {feet 'cuz there's two}, but this particular trailer has the wheels. now, whether they turn or not leads to be see....I've never dealt with them. the reason for this, is in how they are retracted up to the body and away from the ground. it's not readily seen here, but the early design of landing leg folded up under the body.......there was no telescopics to them at all. modern legs have a hand crank that retract the legs into themselves. the next thing to note are the wheels and the spoked hubs. these are what they call split rim, a rim with a ring that serves as the outer bead. I dealt with them when I was young.......and my father was nearly killed with one. there is a procedure to mount these tires, and if not followed, it can take your head off! I could tell yuns a couple of stories, but the admiral mentioned that it's time to run errands.............so, I'll continue when I get back. what can you glean from this picture? I thought it interesting

-
mop stripes.........now we know why the pictures were only in black n white they look great.........scares the hell out of me just look'in at 'em! super job thus far
-
hello Rob......thought I'd pop in and browse......your log caught my attention. I recall building an He 219 in the past....this is one plane I've never seen before. even in war time pieces, there are subjects that are rarely touched on or modeled {yea, I'm drawn to them too }. I've rarely done short run kits.......I have one on the table still. Special Hobby is another company from the Czech republic, and they are not known for locator pins or tabs either. I really like what your putting into this model.......going to be awesome when finished! an offer of a book reference was put out there........and I happen to have a Luftwaffe book as well. it fits the rool this plane performed...Luftwaffe KG 200. in the back of the book, it lists every plane that the KG 200 flew on thier missions. most of them were B 2 variants...there are about 15 listed. they wer already pre coded.......the 200 never changed them. they were in service for a relatively sort amount of time, given less than a year before they were reported crashed or shot down. I'll browse the text to see if there is any info on them. meanwhile, your doing a superb job thus far, and I'll be follow'in along
-
1951 Chevy by Papa - FINISHED - AMT
popeye the sailor replied to Papa's topic in Non-ship/categorised builds
very nice job on the chevy.......you did a super job in getting that older rod look then again, no one can hold a candle to that rounded body look I've lst count of the chevies in my stash. -
looks very good.........the gaps filled in quite well
-
awesome job Jav!.........very well done on the camo too! I wouldn't worry too much about the yellow......I get the same nonsense with it scream'in out at me too
-
don't feel bad Craig.........I feel even worse for not commenting before now, and I followed the build! the paint is so good, one would never know this was a plastic kit! .....and I agree with everyone else.........your rendition is better great job on the model........hope to see another one!
