


popeye the sailor
-
Posts
15,981 -
Joined
-
Last visited
Content Type
Profiles
Forums
Gallery
Events
Everything posted by popeye the sailor
-
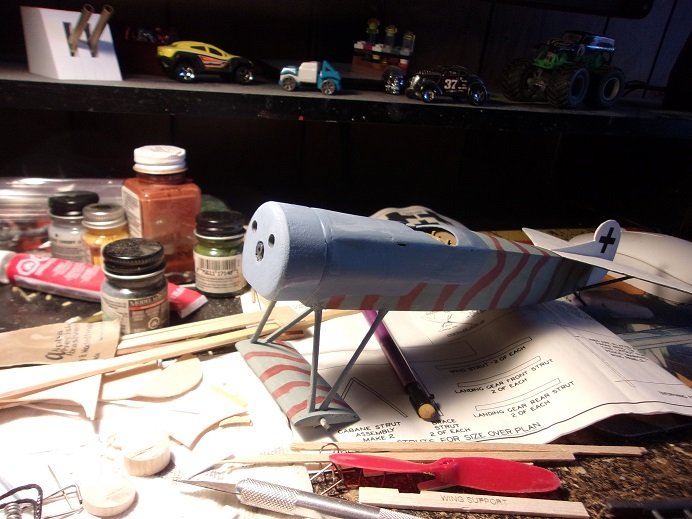
 hello all! I do apologize for the extensive hiatus, but I thought I'd make an appearance to let you all know that I'm well and not knock'in on Heaven's door. so many things to think about..........so many thing I want to do.......I seem to be in the clutches of some sort of builder's block. I've started a few projects, but so far, I haven't found anything to peak my interest....I tend to drift back into the hole at the moment, I'm in the middle of revamping the shelving in the living room, so I can add more finished projects. I've also been selected to attend Jury duty the end of this month....I really don't want to do it.....but we'll see how it all pans out. for those who know me, I have always tried to put as much into my models as I can........some even exceeded my envisions. but the last few builds haven't shown my visions, and that is disheartening......great expectations, but they seem to fall short. imagination has always been the mother of creativity for me. I thank you all for liking the model I'm glad that I was able to find the model in the box...........opening a box, you never know what your gonna get. to open a model this old, especially a wood kit, is a crap shoot. you find one that you can utilize most or all of the parts, or you get one that needs a lot of love and replacement wood. I have been lucky in this respect, although I did add some basswood into the model to make it look more complete.....the upper plane of the wing and fuselage. added missing aspects added to the model, but I feel that the absense of rigging knocks it down quite a bit I know I sound like my own worst critic, but it stands as an example of what I'm talking about.........my vision of adding it wasn't realized in the finished model. I either goofed in adding the provisions for adding it, or I overlooked what it would take for adding it.....could even be a mix of both. don't get me wrong......I like the way it came out, but this one aspect subtracts from the overall apearance of the model. the wing was a bit warped.....but looking at the finished model, I was correct that it wouldn't be that noticeable in the finished model. it was fun adding the cockpit, even though it's just the basic....anything is bettter than staring into an open cavity the machine guns were another fun thing, even though the plane went into service near the end of the war, and most were not fitted with them {mine is going to go down fighting}. an open cowl without an engine was blasphomy!.........even though it doesn't stick out as far out of the opening as I would have liked, it fills the openness perfectly flying models......if you intend to fly them, does tend to leave out some detail.........could be that it might make the model harder to balance. but as a static model, one can go totally mental in adding the most trivial of detail, to arrive at a more complete representative of it's subject. I feel I did that.........not 100%, but enough that it will sit on display with my other models I like it........and I'm glas you all agree! I hope to be back soon, just as crazy as ever
- 79 replies
-
- 12
-

-
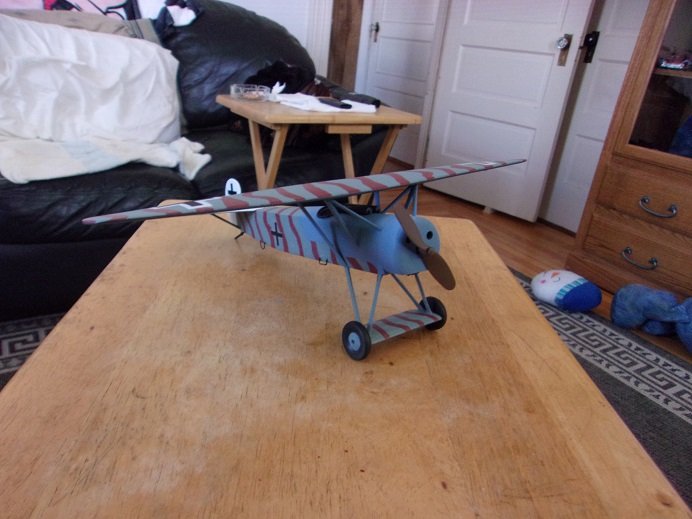
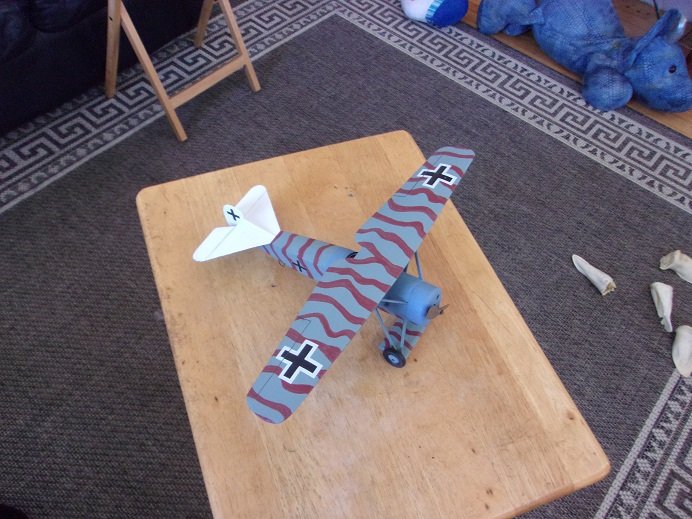
so........this ends the log my friends. while it would have been nice to find the rpoduction date of this model, it is safe to say that it is an old kit.......likely from the 60's or 70's. for only $2.50, a boy could have just as much fun, as I did it was fun adding the extras, and with any model kit, there is no limit on what can be added. each model is it's own rabbit hole a huge thanks to all who looked in
- 79 replies
-
- 16
-
-

-
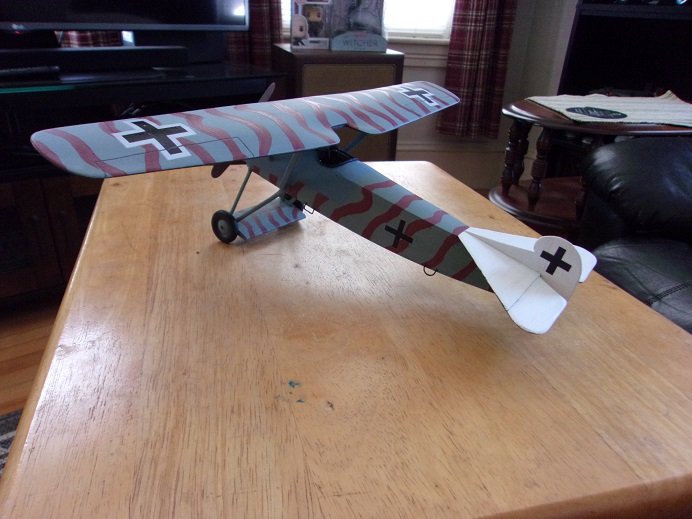
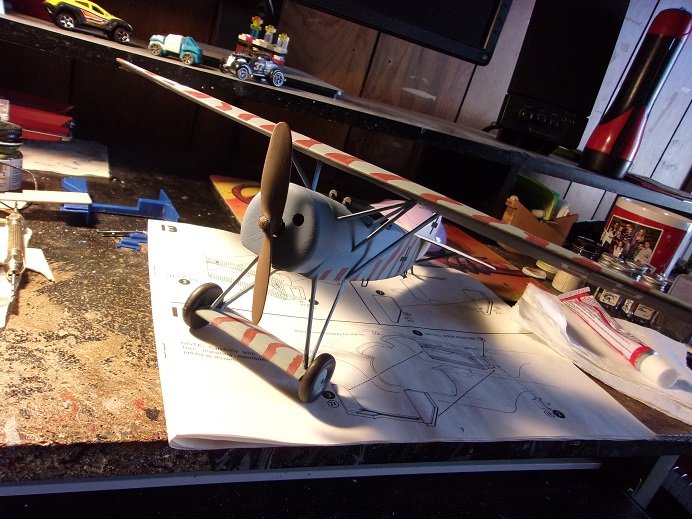
a few day later, the last two bits were added.........the fuselage decals and the prop. I had sprayed the sides of the fuselage with sealer {flat lacquer}, but it was still a problem for the decals....the issues were still there. the decals broke and I had to piece them together.....I sprayed the fuselage again to lock them in place. I had some that weree encased in a white square {boxed in}.......but since I didn't used the white banners for the wing, I stayed with the plain look. I used the kit supplied prop to finish it off. the edges were sanded to tone down the fat look, so it wouldn't have the appearance of a wind up airplane. I didn't totally succede....but it looks better. I was going to do a wood grain like look, but at the last miniute, I said the heck with it. the hub in the center isn't as 'fat' as it should look, but an odd part from another model kit gave it some sort hub appearance. while the prop was still setting, I did reposition it a little and took the second picture....... the epilog is nigh!
- 79 replies
-
- 11
-
-
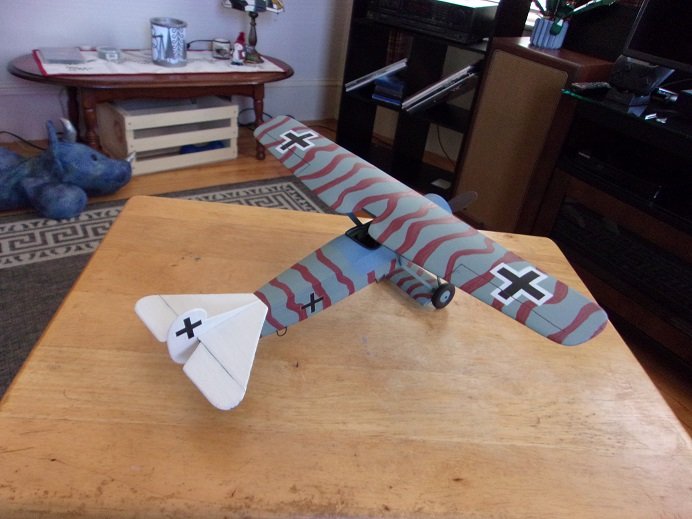
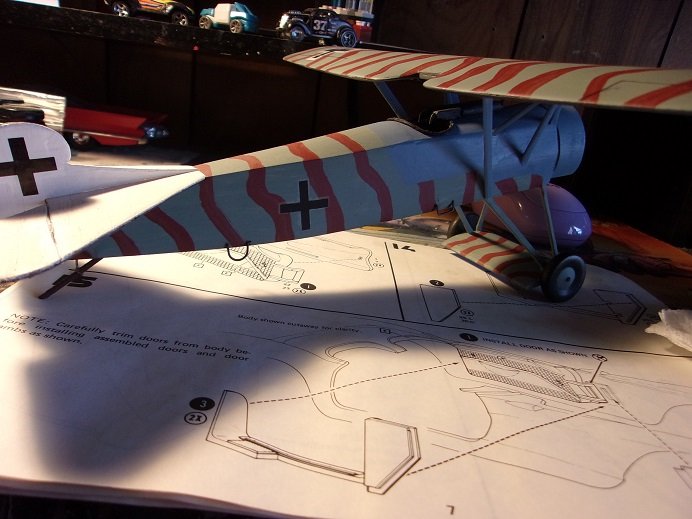
I got back to the model a few days later and added a few other parts. the pilot's step and the grab bars for the tail were added. both sides are done.........I was holding off on the tires 'cuz I wanted to add the landing gear rigging. this was one of the features I decided not to do, since I didn't do the aileron and rudder rigging. ....getting near the end
- 79 replies
-
- 10
-
-
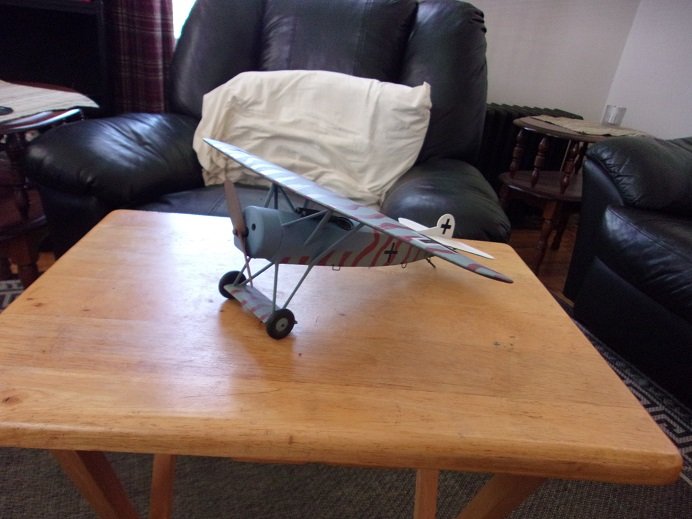
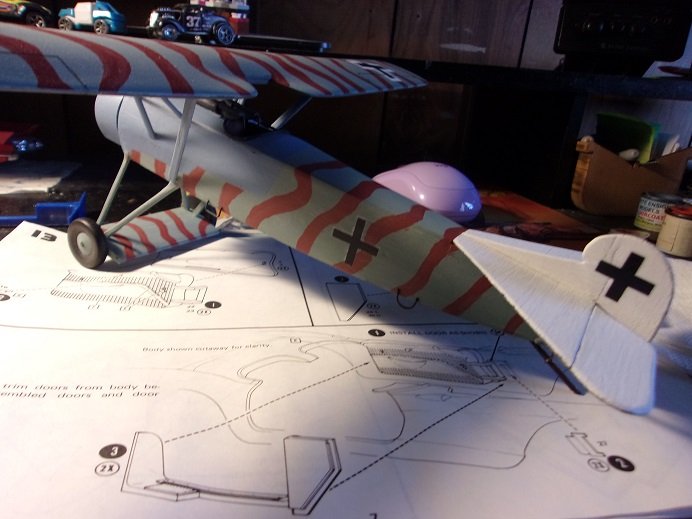
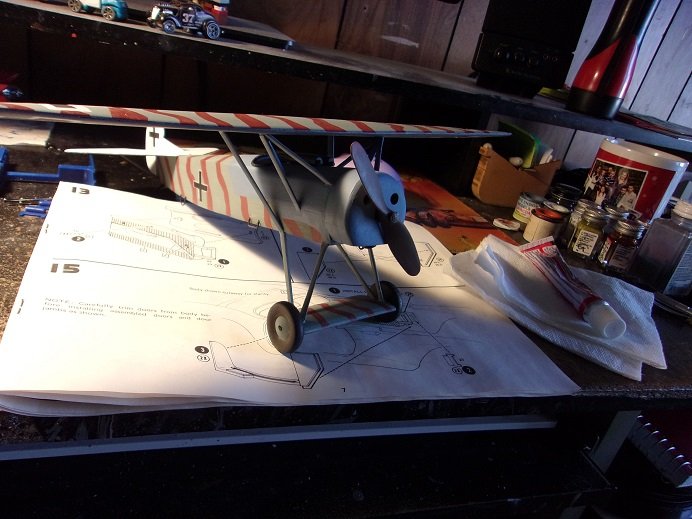
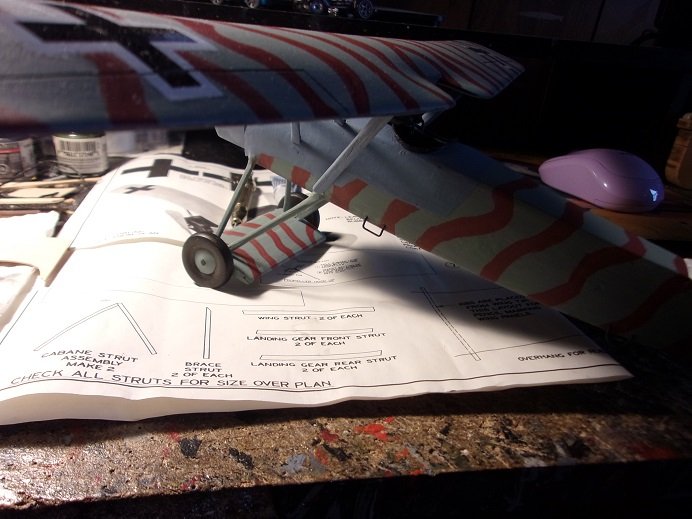
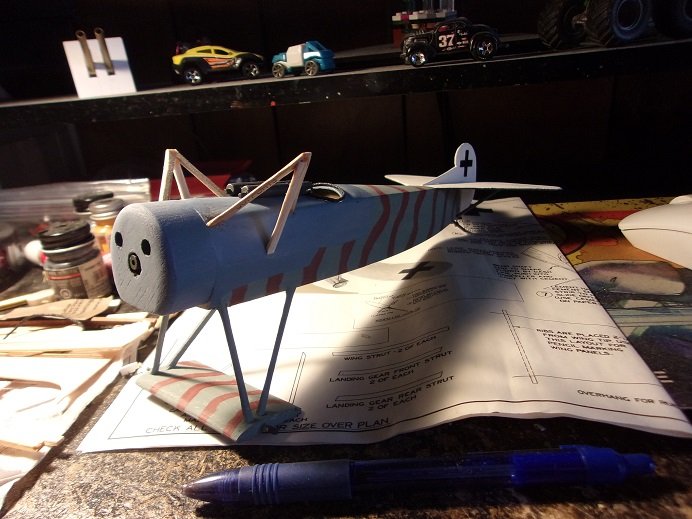
hello all........been a busy couple of weeks. I picked at the D VIII every chance I got........decided to for-go a few bits of detail to bring it to a close. parts were made and painted........now the push to assemble them all together. I had problems with the decals for the most part........being a wooden model, unless the surface was sealed, they wouldn't stick good. there was also a huge problem with breakage.......not sure how old the decals were either, but I managed to use them anyway. the added wing struts were sanded to round off the squared edges....and then they got some paint. the trailing struts will be made after the wing is on the plane, so I can get a better idea of the length. the monent of truth finally came........ the underside tabs will need to be filled. the measurement of the trailing struts originates just above the trailing landing gear strut, to the aft tab slot in the wing. I made them from cast off balsa, finding that the die cut parts were too short. shaped and painted, they were added to the model.
-
getting settled in Patrick.........surprised how early I'm chiming in for this one
-
WOW! great diorame Alan! you've done a superb job with it! while I do agree that the figures don't have much detail, they give it detail in it's own. a diorama isn't really viewed upo close.......it is viewed as a whole and imagined as a snippet in time. you captured it perfectly! congratz on a model so very well done!
-
she's really coming along nicely Andy! did the kit supplied tires have the weight squat? kind of Ironic if they did...........to be moveablewith a flat spot would be a bit weird
-
I would have mentioned that there are many places where you can get aftermarket decals........Mega Hobby is one of them
-
I do have to apologize Andy for not looking in sooner.........I though this was the other log and since I had already looked in.......failed to look into this one of course.........I must have cursed you......I look in to find your on the mend here's one of my follies to cheer you up. I lived out in the country too........my younger days were farm life and fishing {go whenever I could get away}. during the winter, sledding and tobogganing was the norm, we on the other hand, used car hoods. I also liked to snow shoe.......there were a couple pairs left by the previous owners of the home, as well as some skis. I got this insane ides one time to go down our sled run with a single ski, since the run was formed very well by the car hood. I did well in the beginning, but it quickly went south on me, once I lost my balance, sending me right into a tree! .....didn't break anything, but I wasn't up to a second run either I hope you get better quickly. your doing a great job on the Hurricane........here's hoping you can get back to it
-
hello folks ....thanks for looking in this is the oldest model of this type that I've built.......the early stick n tissue are as far back as I go. kind of a let down in what I though I was getting, but I think it's come together rather well......I don't feel so let down anymore. not much has been done since the last update.........been rearranging the spare room to reduce the clutter that has been festering, concerning the admiral's puzzles. I just put together a cabinet for her to store them and that has been a great improvement. hope to get more done soon.......big thanks and to you as well Gary........enjoyed your last shadowbox and so glad to see you've started a new one!
-
hey ther Mike! sweet looking buffalo your progressing with...........love the paint work I used to be a member of James's original site...too bad it got taken down by hackers I believe he mentioned that he started another site a while back, but I failed to follow up on it {my loss}. thanks for the link
-
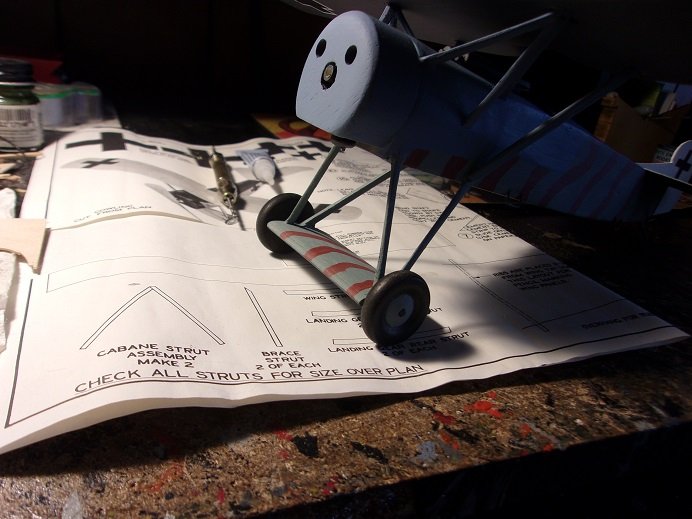
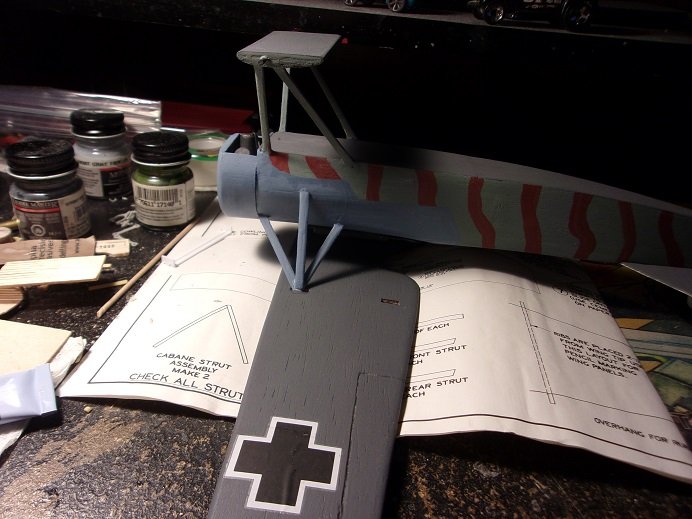
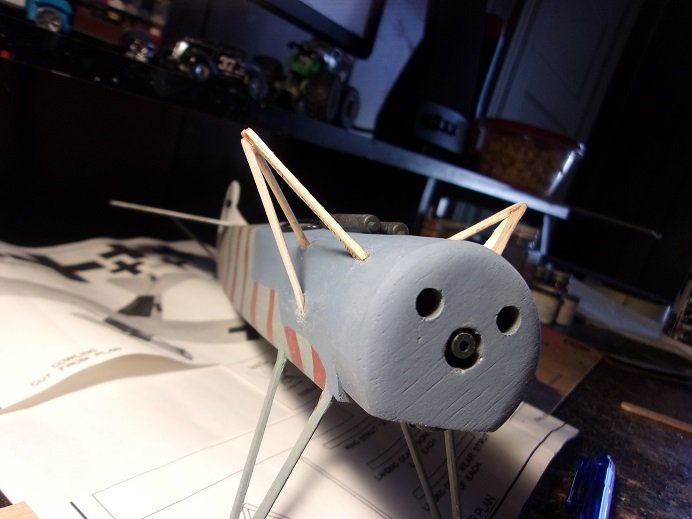
I got back to her on the 29th..........sanded the corners off the struts and added more CA to fill in the gaps. a supprt strut for the main cabane struts needs to be added. I cut them from the harder balsa and added them to the model. the next step is to finish sanding the struts to blend the joints in better and get them painted. from there I can cut the rear struts and put on the wing. more to come
- 79 replies
-
- 19
-
-
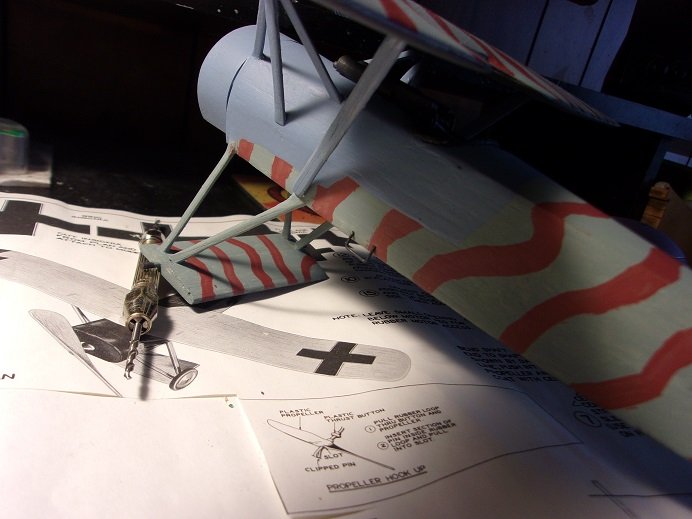
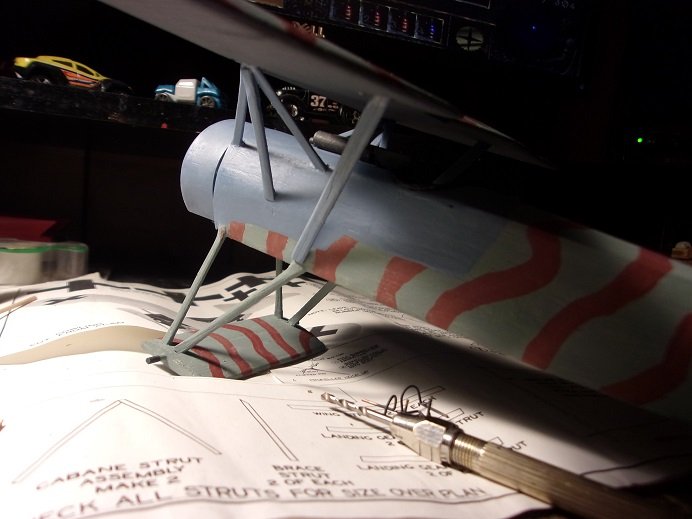
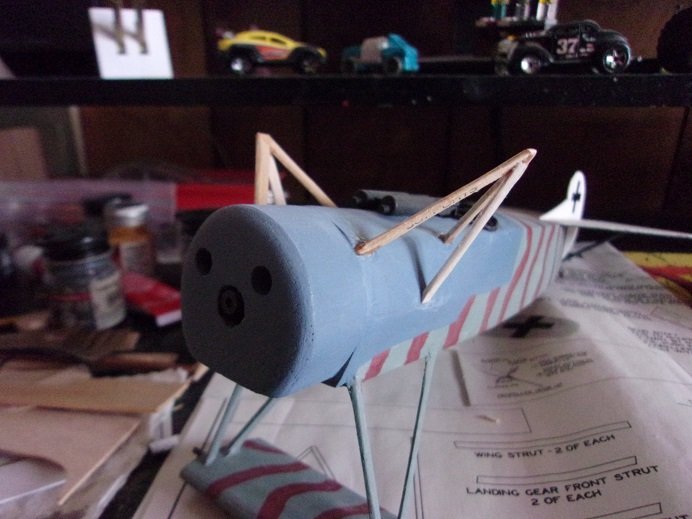
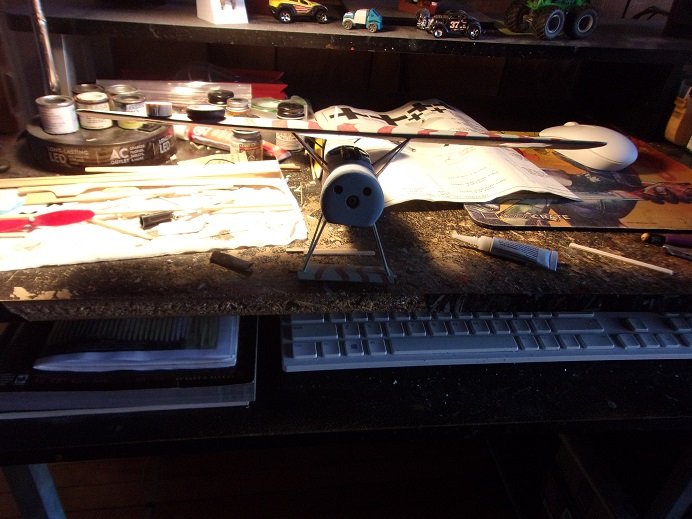
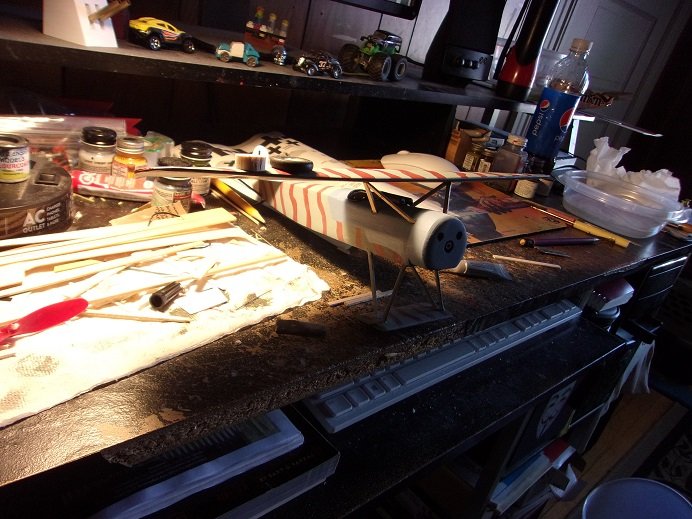
the year has come and gone........here's hoping that 2023 is a fun filled year! I intend to make it so I finally got the Billing Slo mo shun....the model I wanted to get when I built the M&M Fun Ship. originally, I wanted to do an M&M racing boat, but couldn't get it to fly with the budget director........so I had to work with what I had. I still managed to pull it off I also got my first Eduards model of a Focke Wulfe BF 109D-9.........looks to be quite a project when I get to it! I had made a little more progress before the end of the year........silly I guess to hang on to them, waiting for more to accumulate. I had some time on Christmas Eve, waiting for my son to arrive, so I thought I'd open the holes for the cabane struts. I still need to open the holes for the trailing strut {the rear one}. how to set them up was confusing.........the holes under the wing looked too large, dreading how much patchwork would need to take place. how the struts locate and spacing was another question. I used a slower setting Ca for this, so I could position the wing properly........or as good as I could get........ it seemed a a bit off to the port side, so I added weight to the starboard side to counter it.....the wing is actually balancing on the struts amazingly well, making it a lot easier to adjust the struts and equalize their angles. with the wing looking good where it is, it will sit here to fully dry. now to enjoy the festivities
- 79 replies
-
- 12
-
-
SWEET!
-
awesome diorama your putting together Alan! it really looks super!
-
superb finish on the E.V Chris.........hard to believe that it's made from paper! very well done!
-
superb jog on the Corsair Rob........the paint work is really spectacular! I've done a little on masking detail markings, but not to the level you did on this one.....they came out great! really nice looking bird!
-
really nice work on the Harrier.....impressive to see it in different scales hope you and yours had a super holiday season and a very prosperous New Year!
-
thanks OC...and thanks for the likes. made a little more progress had a very nice Christmas with the family........hope you all had a great holiday as well!
-
there is different densities with balsa wood..........I've got two in this kit alone. I'm using the denser stuff for the struts. if I was going to competitions, I'd likely do the same. how many flights can an average person get out of one of these planes? rubber doesn't last too long.......the rest is all glide. weight has always been an issue.......even in the real world. it was thought that paint would add too much weight to the plane, so they opted for printed canvas to cover them. all I was saying is that with the electric motors they have out there now, they can provide the constant push needed to get them off the ground and keep them in the air. from what I've read, basswood is a second choice for wood........they even have lightweight plywood out there for larger plane kits.
-
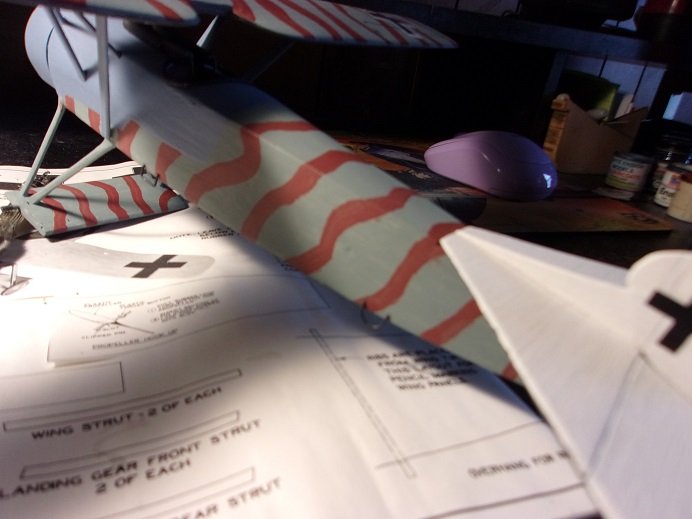
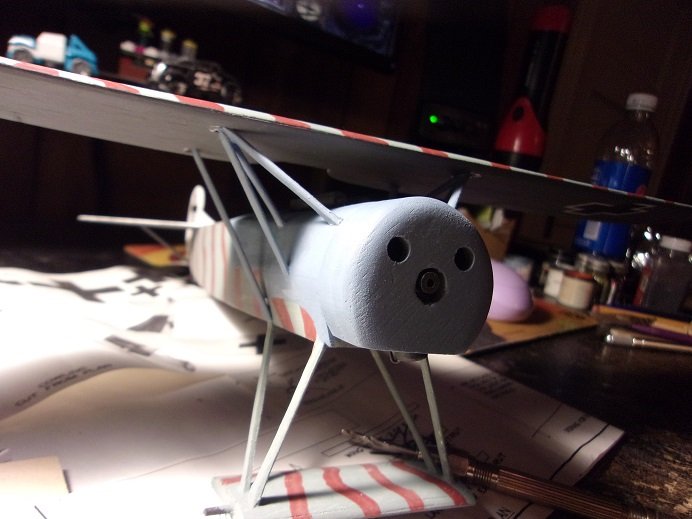
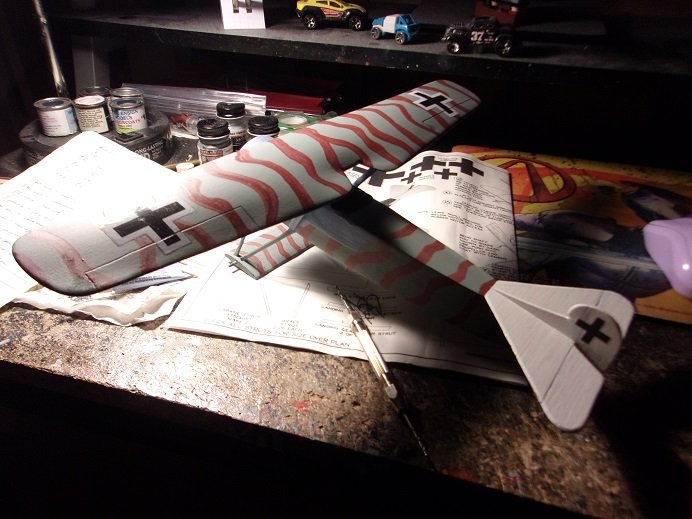
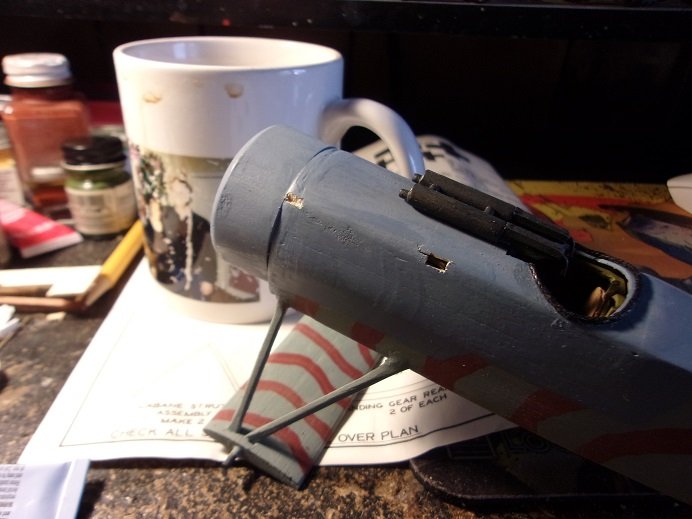
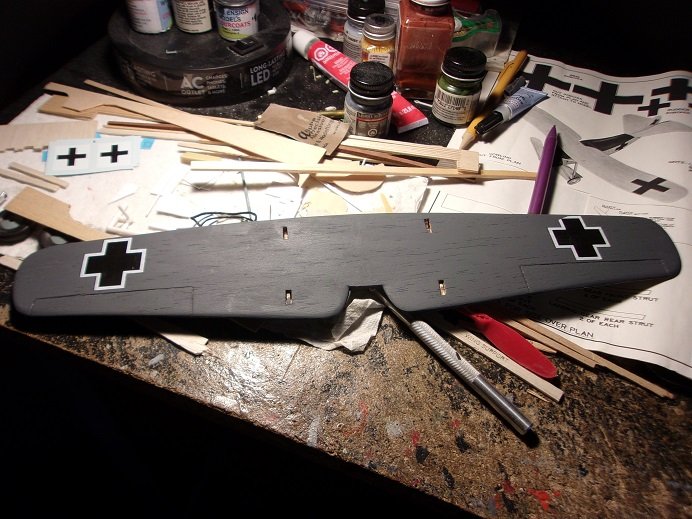
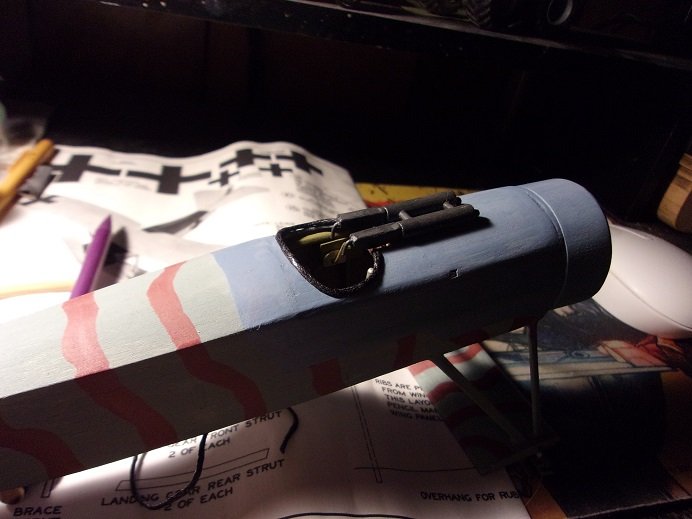
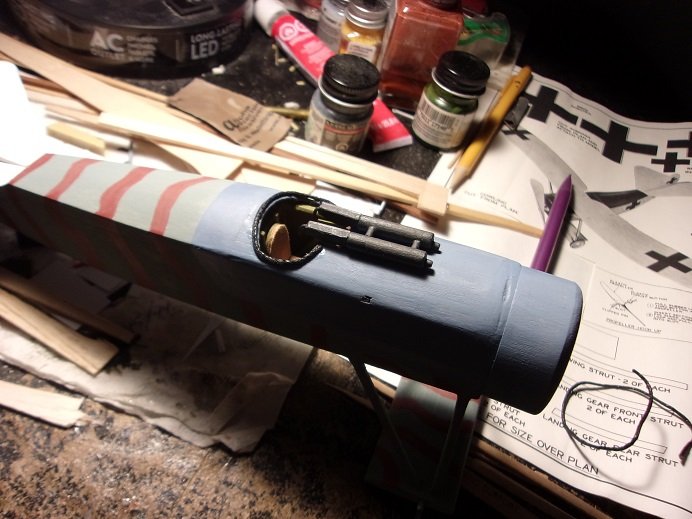
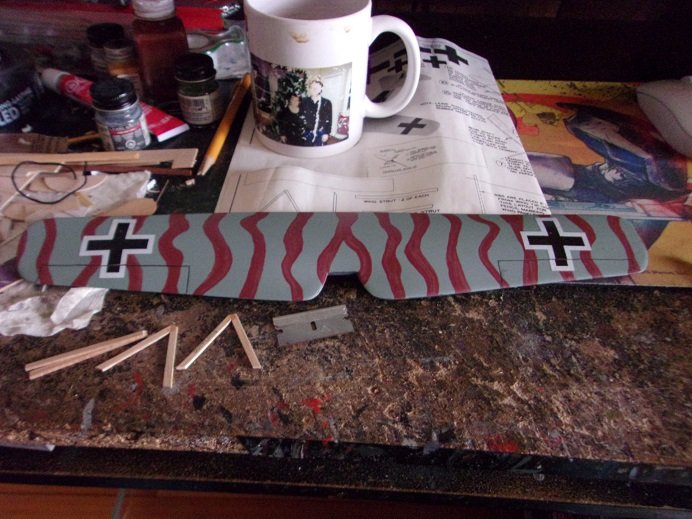
Christmas is tomorrow..........can't lie.........I'm on the edge on my seat! I keep bugg'in the admiral..............and she keeps telling me to knock it off! my younger son and his fiancé {thanks spell check!] are coming over, and we spend the evening playing games....one year mixing it up and watched a Christmas movie. however it works..........it should be a fun evening. my oldest........though it would be nice to have them all over, he has his own brood and they have a separate party with her in-laws { I can respect that } I think back to my younger days..........there was a time when the ENTIRE Wenzel family used to enjoy gatherings throughout the year. I'm talking as far back as second..........and even third cousins! through the following years.........everyone got older..........older relations died........and a disagreement {I'll call it that} between two families, literally destroyed the tradition I reminisce.............. "time it 'twas, and what a time it 'twas" it 'twas......... a time of innocence, a time of consequences." "Long ago, it must be....... I have a photograph." "preserve your memories........ their all that's left you......." {Bookends by Simon & Garfunkel} so............as we arrive at the big day, I think it's a good time to update you all on where I am with this model. the bottom of the wing has been painted and allowed to dry. I didn't use the Iron Crosses like I wanted to, opting to use the simplified crosses instead. this way, I can use up the thicker ones I have on the wing bottom........for some reason, I only have three of them........thought there was four. the decals are very brittle.........it's been hard to apply them without breakage. then a major development occurred........they wouldn't stick! there must be something with the White Ensign paint.........either that, or the wood sucked in most of the paint 'quality', leaving the pigments on the surface! most disheartening! a quick remedy for this is to spray a clear lacquer over the wing to seal the wood. I removed the decals {what a job}........and sprayed the wing, giving it a couple coats on both sides. I couldn't find the flat lacquer, so I used dull cote instead. I had no problem with the rudder decals, because I used Testor's flat white on the rudder and stabilizer top surface. this is what makes me thing that it's the type of paint, and not a wood issue. not to say that it isn't though......the bottom is balsa and the top is basswood {could be the type of wood}. the decals stuck to the revised wood surface, but I do notice some lifting.......I'm running a test at the moment. get this solved before the wing goes on......... there is a white chip missing on the port underside........found it on the floor, but it was so brittle, that it was impossible to pick up {I'll try and fix it with some paint}. the cowl has bee added to the fuselage and painted. the coaming has also been added around the cockpit opening....I'm surprised it worked, since it is thick thread and wax coated. I bought the spool thinking it might work well for rigging, but it didn't. the machine guns are added as well. I will need to cut the slots for the cabane struts.........with the poor quality die cutting, they kinda got lost in the process. I let the bottom wing decals dry before applying the top decals. I had to cut them so they would lap over the aileron gap. being treated with the dull cote, these stuck better than the underside decals. I went over the aileron detail with a mechanical pencil and that's it.........this is where I am at this point in time .........from out in the kitchen, there rose such a clatter..........guess I should go and see what's the matter!
- 79 replies
-
- 13
-
-

-
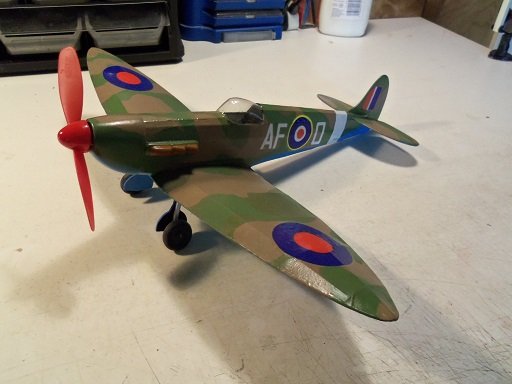
I'll have to check out that site CW.........I've only done a few rubber powered planes. in my experience with these types of models, the use of basswood really doesn't add much weight at all. I've subbed in basswood on this model, and it still feels very lightweight. this is not to say that it doesn't, but powered with an electric or gas engine, I really don't think it would be a huge issue. when I built the Spitfire, I subbed in basswood stringers. it is set up to fly, having installed the rubber band...........I did other aspects differently as well. throughout the assembly of these planes, they use a paint called Dope......IE, doping the plane.......tissue.......ect. I used diluted white glue to coat the tissue.........it shrunk the tissue as it dried, just as spraying it with water would. I gave it a couple more coats, and then airbrushed it with enamel paint. this did loosen the tissue, which I was hoping wouldn't happen, but it tightened back up as it dried, which made me breathe a sigh of relief. it also got a coat or two of clear lacquer. I've got it sitting in the hallway at the moment........a year or two after I built it. it proved not to be the safest place though..........I noticed that one of the stabilizers was broken off and had to repair it. I hadn't built another flying model since the 70's. I'm not sure if temperature would play a huge part for flight, but now I'm tempted to send this one up to see how I did. my past experience with the more modern fixed wing aircraft didn't do so well. the Piper cub I did back when I was in school flew fairly well.........but the real success story was the Fokker D VIII. my reason for not using the Dope was with the smell and the toxic nature........this stuff can send you into another world if not used in a well ventilated area. kinda reminded me of Lenny Bruce and the aero plane glue skit he did at the time, I really wasn't set up to handle this stuff safely. back with all the others, I used no paint at all, but white glue in the assembly process. thanks to you folks for the kind comments and the likes as a static model, I'm trying to add as much as possible....most from memory, since I've built quite a few of these planes. I may not get everything I want on it, but I think it will turn out to be an interesting model. it has a wingspan of 14 inches....the stabilizer is 4 1/2 inches wide........can't measure the goodbar............I ate it
-
nice work on your figure Jack.........very life like
-
Fokker Dr1 by Javlin - FINISHED - Revell - 1/28
popeye the sailor replied to Javlin's topic in Non-ship/categorised builds
superb job.......a tribute to the amazing art work that is found on these planes