


glbarlow
-
Posts
3,803 -
Joined
-
Last visited
8 Followers


About glbarlow

- Birthday October 30
Recent Profile Visitors
7,976 profile views


-
 glbarlow reacted to a post in a topic:
HMS Portland 1770 by scrubbyj427 - 1:48 - 4th rate 50 gun ship
glbarlow reacted to a post in a topic:
HMS Portland 1770 by scrubbyj427 - 1:48 - 4th rate 50 gun ship
-
 Thanks, lining them up is a sticky challenge but worked out ok.
 -
KennyH78 reacted to a post in a topic:
HMS Winchelsea 1764 by glbarlow - 1:48
-
CiscoH reacted to a post in a topic:
HMS Winchelsea 1764 by glbarlow - 1:48
-
glbarlow reacted to a post in a topic:
HMS Winchelsea 1764 by glbarlow - 1:48
-
glbarlow reacted to a post in a topic:
HMS Winchelsea 1764 by glbarlow - 1:48
-
Ryland Craze reacted to a post in a topic:
HMS Winchelsea 1764 by glbarlow - 1:48
-
Gregory reacted to a post in a topic:
HMS Winchelsea 1764 by glbarlow - 1:48
-
westwood reacted to a post in a topic:
HMS Winchelsea 1764 by glbarlow - 1:48
-
westwood reacted to a post in a topic:
HMS Winchelsea 1764 by glbarlow - 1:48
-
westwood reacted to a post in a topic:
HMS Winchelsea 1764 by glbarlow - 1:48
-
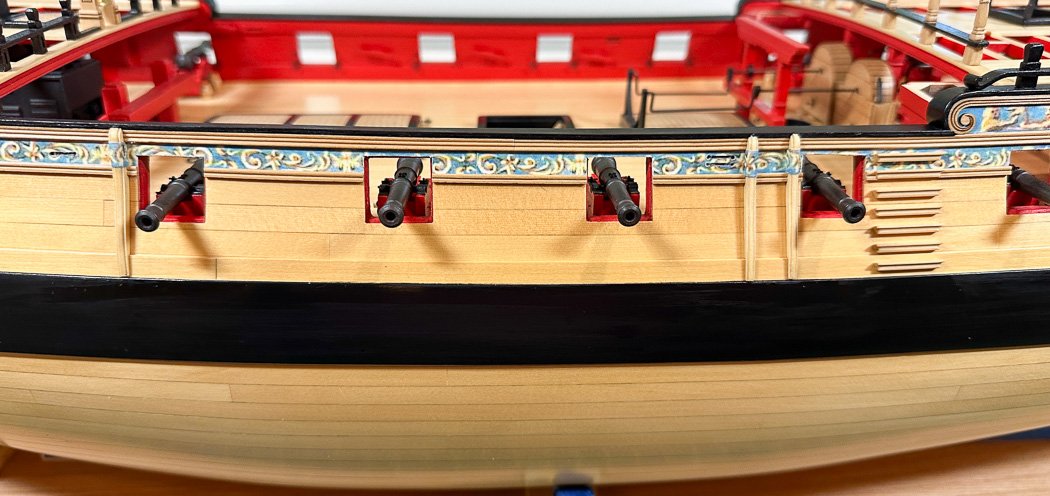
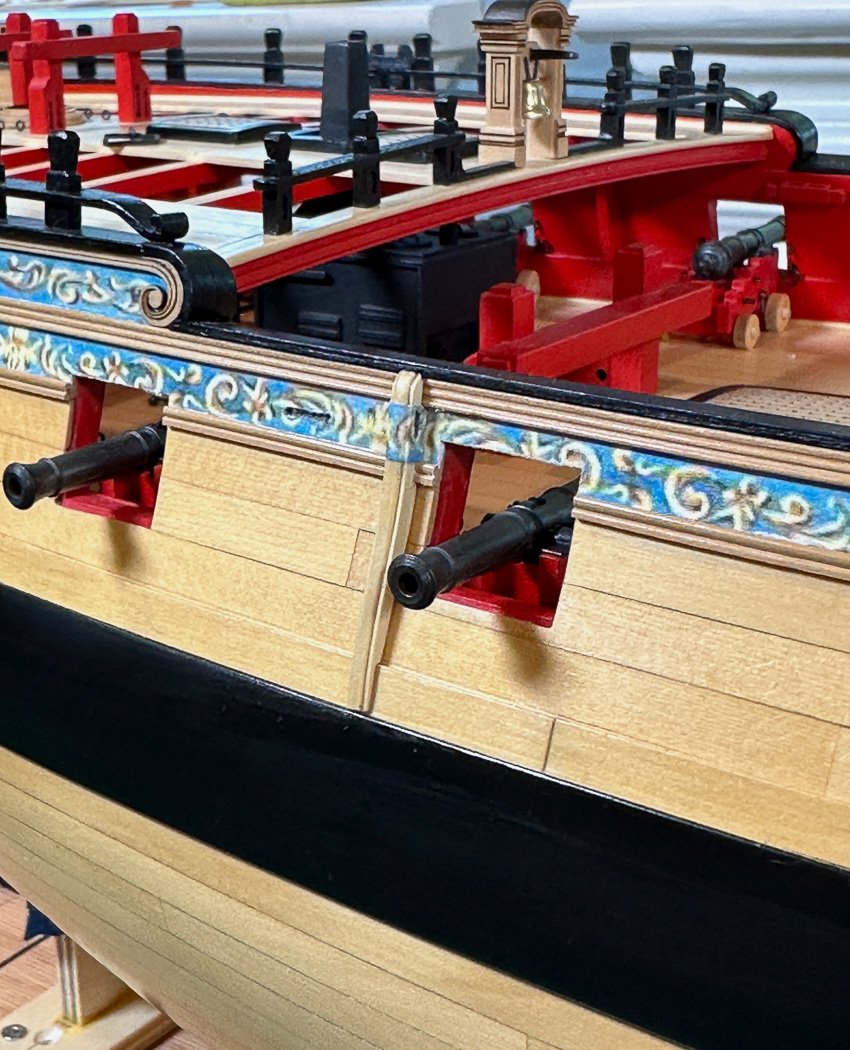
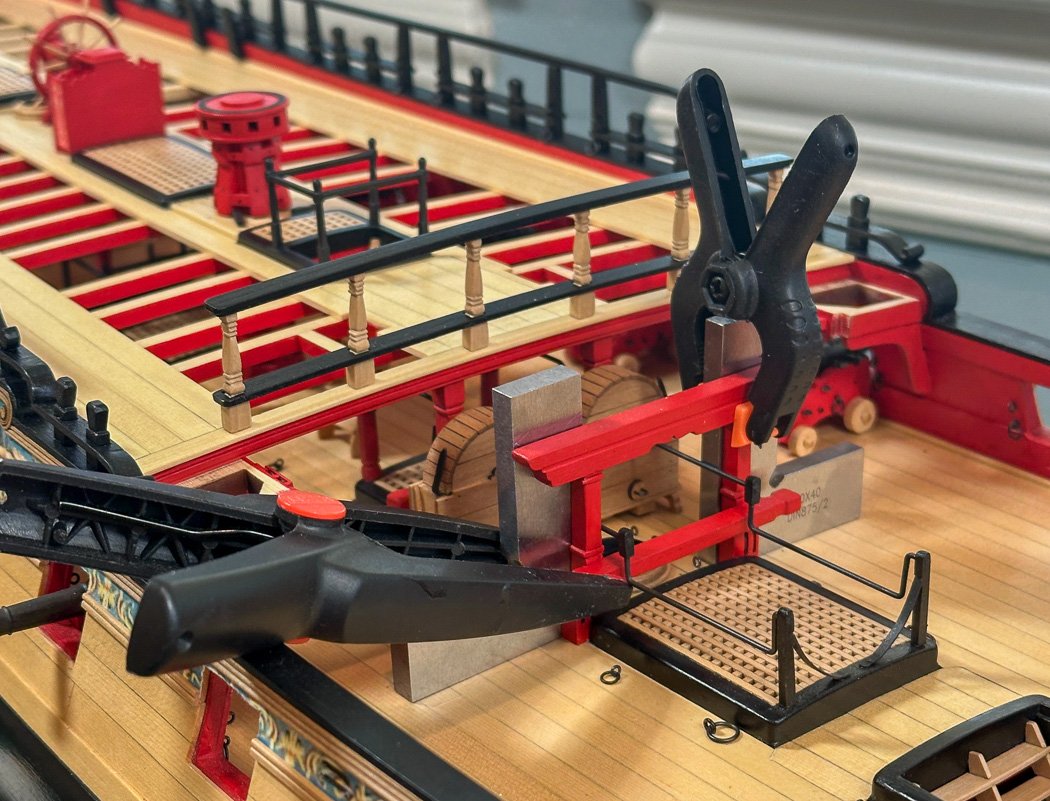
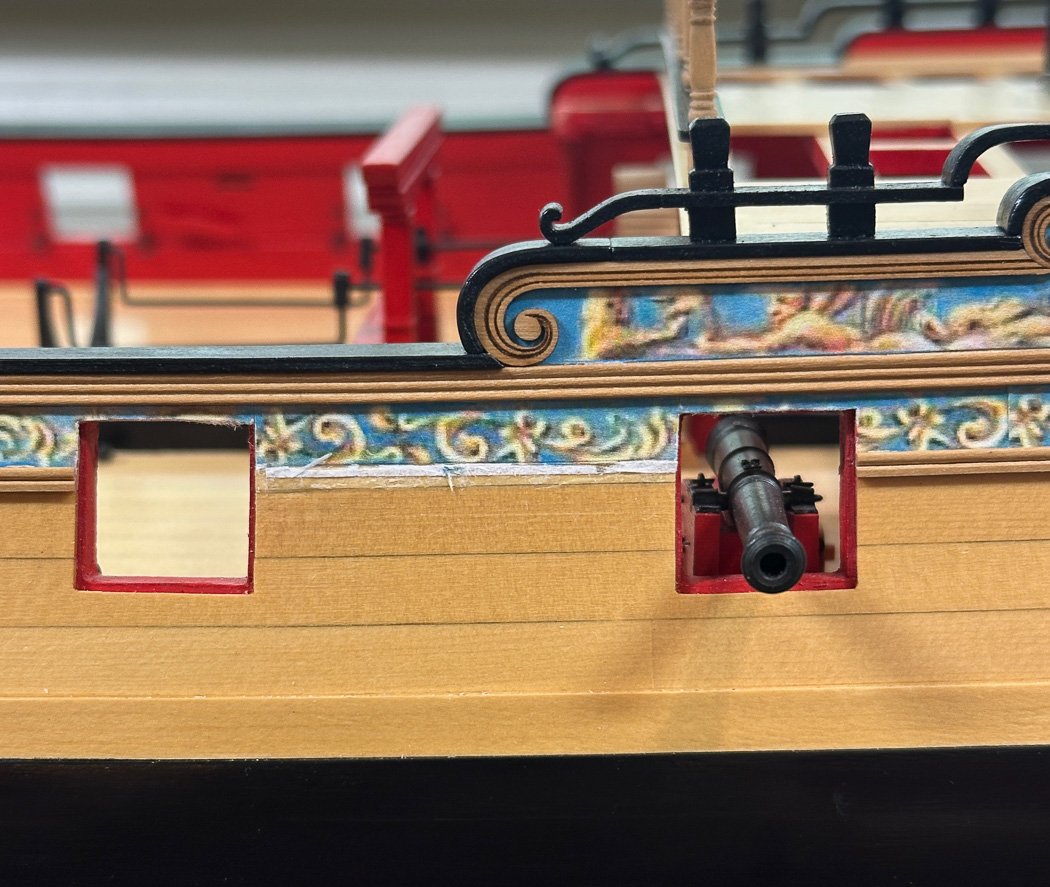
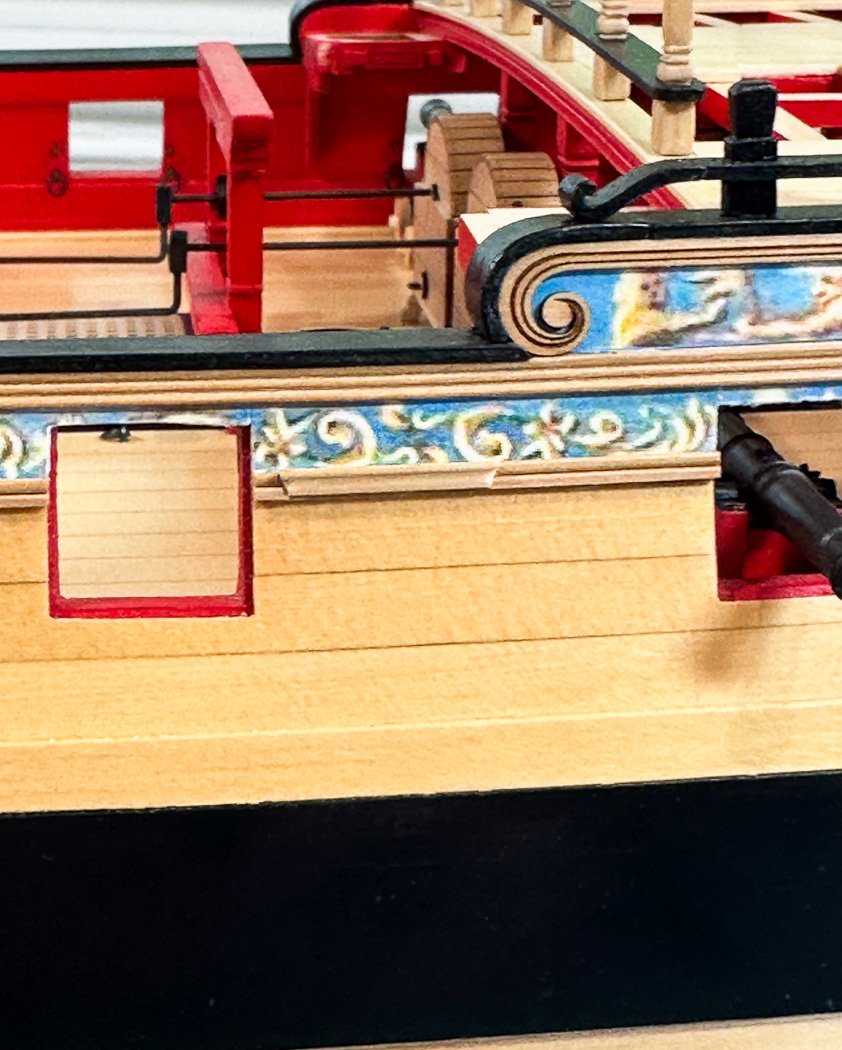
Fenders and Chesstrees Keeping with shorter posts: Added the fenders and chesstrees to the hull. Each consist of a center and two outer layers glued together providing a nice dimensional look. After removing char the center piece is tapered from top to bottom and the outer edge slightly rounded before the two very thin are added (amazing to have layered wood on this thin a sheet of wood). With great trepidation I removed the center moulding. Then came a lot of careful shaping to conform these to my particular hull - both patience and time are required following the firm rule of while you can remove wood, you can’t put it back. I tried printing the frieze on tissue paper, really I tried. While successful the color and texture just weren’t a good match for me, probably the wrong tissue paper or I need more practice doing it. I was however successful using the original paper printed frieze. Ample use of the same glue stick used for the hull softens the paper and allowed me to get a match. With Chuck’s suggested tooth pick approach I was able to guide the paper into the groove created by the three pieces. I also rounded out the sheave on the chess tree before applying the outer pieces along with a little 7mm lead pencil. I’ve still not mounted the waist cannon, but set them for the photo. The addition of the fenders, chess tree, and ladder really bring the hull alive. My one regret is while the boxwood for the ladder match, the AYC for the fenders are way whiter than the hull despited several coats of WOP. I kinda wish they had been boxwood as well to match the moulding. I note however, at this point the hull planking is near three years old. I am confident in time the fenders and chess tree, like the hull, will mellow and blend in. I’m moving onto the waists platforms and will finish chapter 11 with the channels. Thanks for stopping by.

-
glbarlow reacted to a post in a topic:
Sloop Speedwell 1752 by Rustyj - Syren Ship Model Company - 1:32 Scale - POF Sloop
-
Just found this. Once again I’ll live vicariously through your work. Off to another great start Rusty!
-
Surely there’s a way to model the deck without hiding all this amazing below deck detail.
- 776 replies
-
- 2
-
-
- speedwell
- syren speedwell
- (and 1 more)
-
Nice coils and rope work. Your effort and skills on the details really makes your model stand out.
- 476 replies
-
- 4
-
-

-
- vanguard models
- alert
- (and 1 more)
-
glbarlow reacted to a post in a topic:
Are you an NRG Member???
-
glbarlow reacted to a post in a topic:
HM Cutter Alert by Thukydides - Vanguard Models - 1:64 - first build
-
I pin the backside of the yard to the mast with a little CA - completely invisible and holds it in place. The gentle torque of the appropriate lines keeps it squared up beyond that. Your servings look great, well done.
- 476 replies
-
- 1
-
-
- vanguard models
- alert
- (and 1 more)
-
Are you an NRG Member???
glbarlow replied to Chuck's topic in How to use the MSW forum - **NO MODELING CONTENT**
Just click on your profile, its right there. -
Are you an NRG Member???
glbarlow replied to Chuck's topic in How to use the MSW forum - **NO MODELING CONTENT**
Plus it looks cool 😄 -
Are you an NRG Member???
glbarlow replied to Chuck's topic in How to use the MSW forum - **NO MODELING CONTENT**
Because you're supporting this site. True you can free load and never contribute through NRG or the Donations tag at the top, but if enough did that they MSW wouldn't have the funds to operate. Shell out the very nominal membership fee, you can display or not the avatar once you do. -
Those are some nice looking gratings Frank. I considered not painting as well but in the end decided to do so. I’d suggest you consider your entire deck plan for paint colors and/or natural. My thought was if the gratings were natural so would have to be other furniture/fittings and that I liked the contrast the black provided to the red and yellow cedar. It is you ship, whatever you decide it will turn out great.
-
I start with an acetone bath, then blackening for 90 seconds, then a water rinse, dry and a slight buff with a soft cloth. The acetone bath is an important step. I have learned not all blackening solutions, like CA, are equal in quality or results. Foe me paint designed to look like metal rather than just black paint works ok, but only if weathering powder is applied, and not as good as blackening for some things.
-
glbarlow reacted to a post in a topic:
HMS Winchelsea 1764 by glbarlow - 1:48
-
glbarlow reacted to a post in a topic:
HMS Winchelsea 1764 by glbarlow - 1:48
-
Thank you JJ, as long as we’re having fun right. Thanks Rusty. Accurate description, and I have so many upcoming opportunities to get freaked out.
-
Thank you. At least that piece got a fresh coat of paint.
-
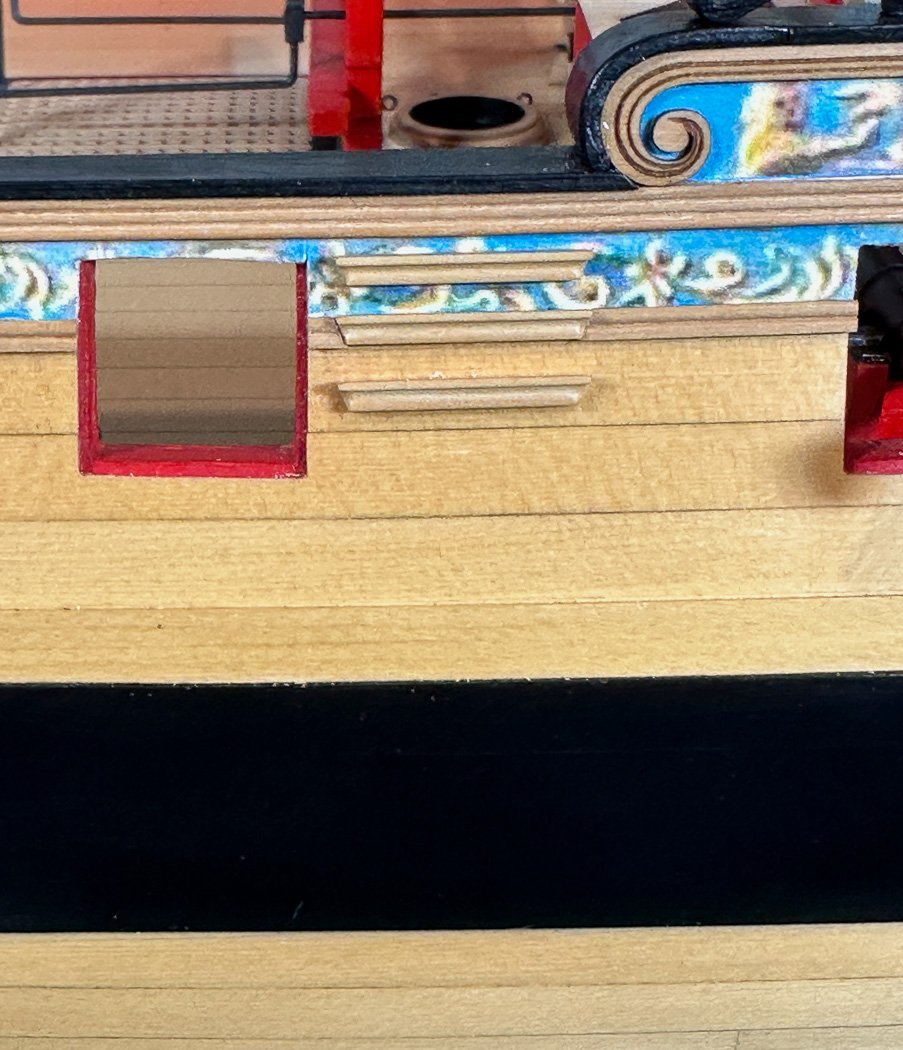
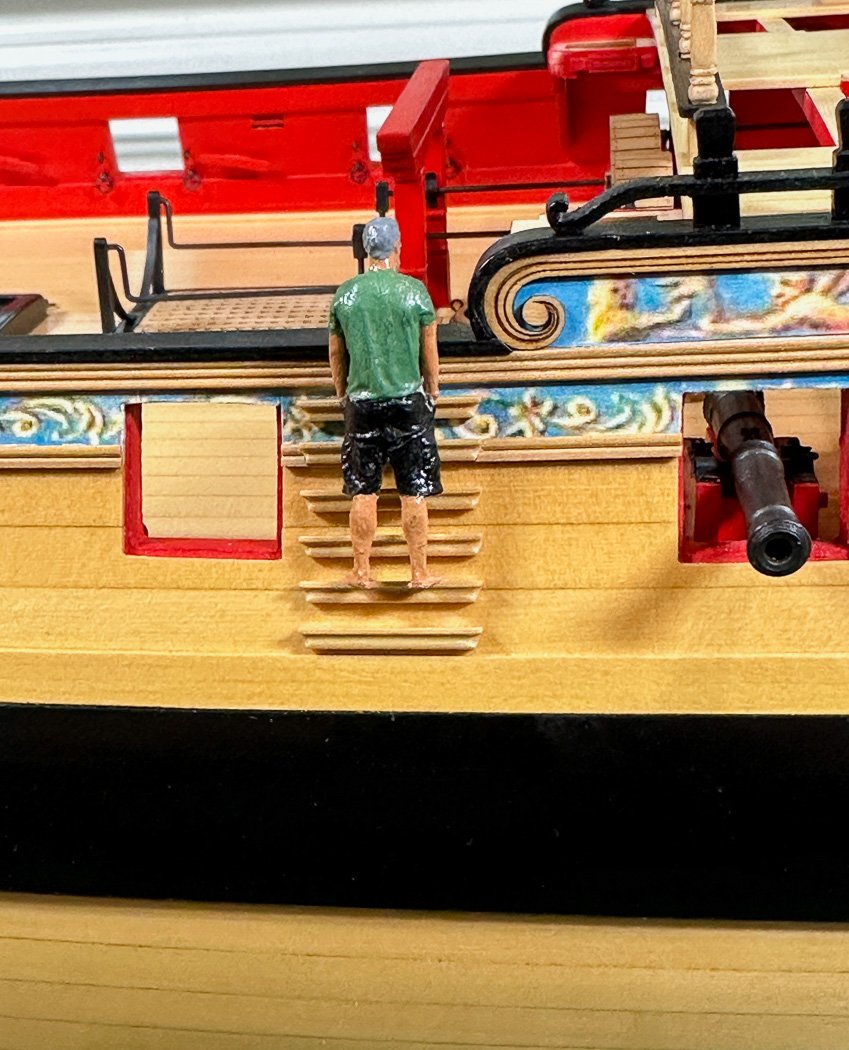
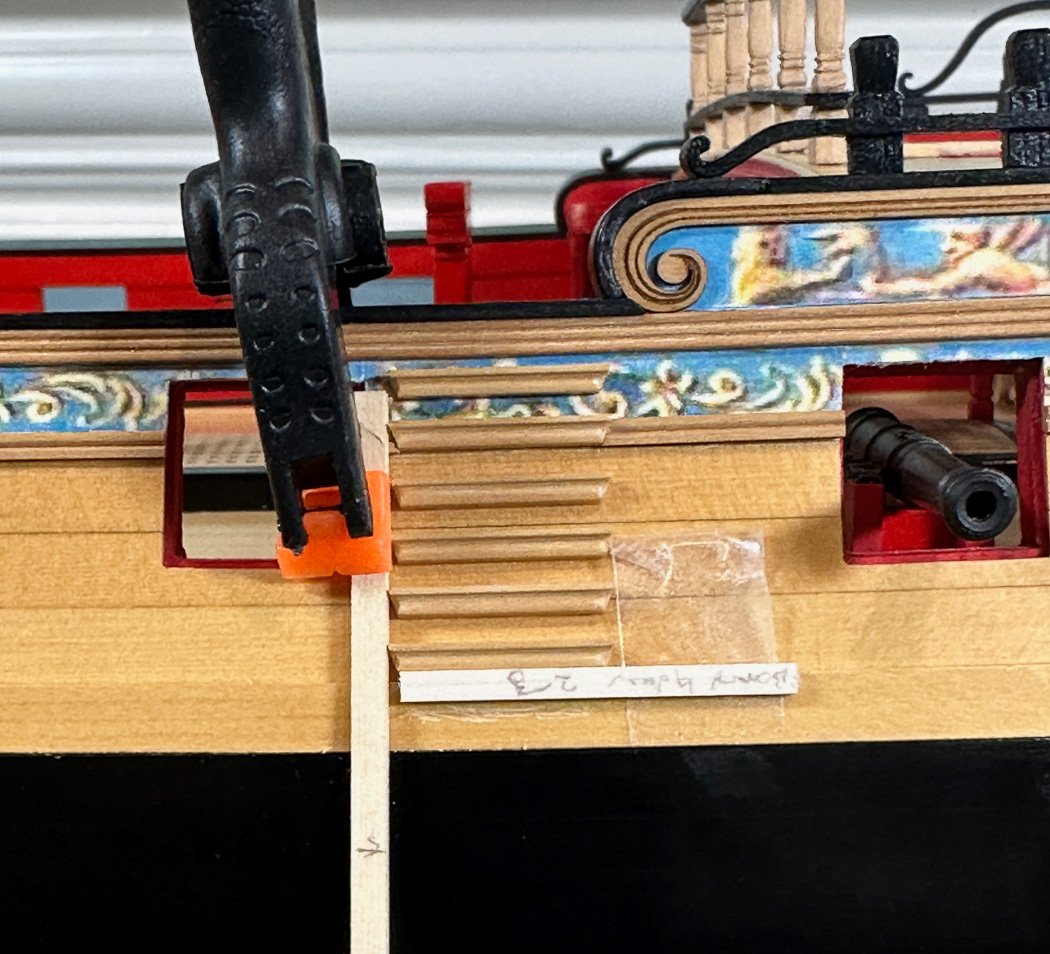
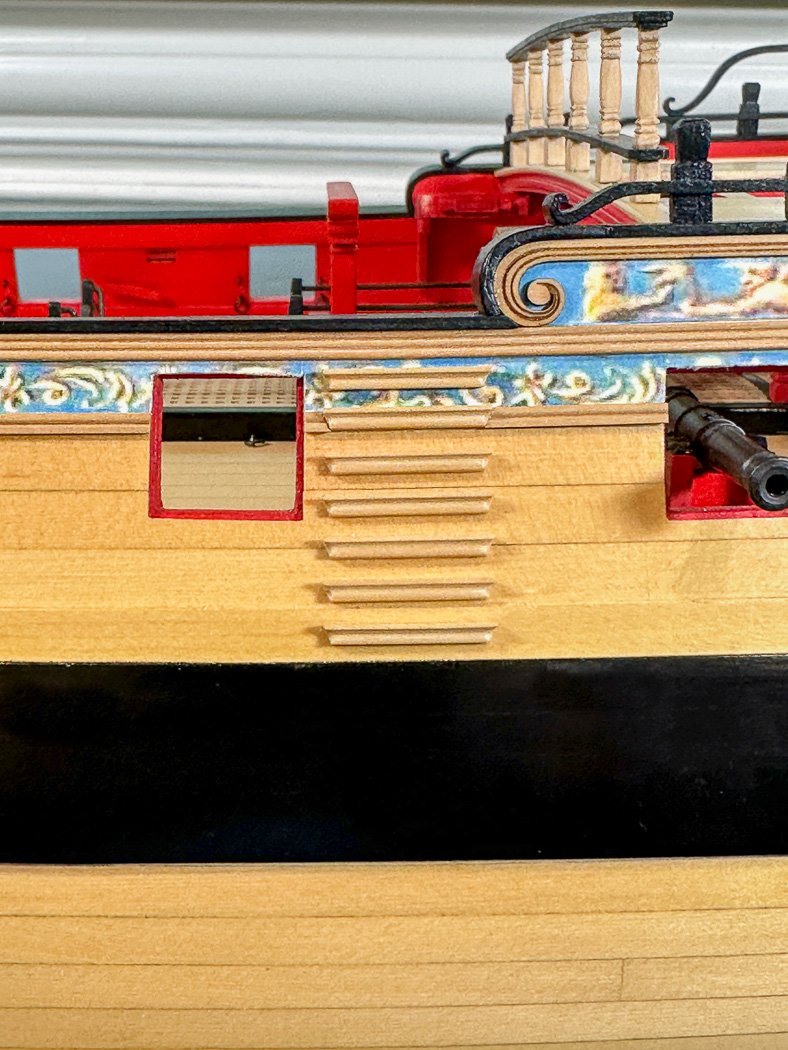
Boarding Ladder I have a friend making me a display stand, he’s an artist with “big wood.” I can’t wait to set Winchelsea on her final home. I had to turn her over to get the final fitting on the three cradles she’ll sit on - something I should have done much sooner. So of course something broke. Fun it was clearing, cleaning, repainting, 18/0 and 10/0 spotter and shader brushes, and reinstalling this piece, or pieces as they became, (especially the tiny metal braces on the inner edges) with everything around it complete and completely in the way. A lot of patience and slow going, In the end all is ok again. I made some decisions installing the boarding ladder. First was to remove the complete molding rather than try and cut into it. I also elected to scrape a pattern similar to the moulding. Then by sanding a 67.5 angle on each side and a reverse 67.5 on the re-cut to fit separated molding I could create an integrated look for the anchor step. Anchor step because I would space the rest based on the fit of this step within the moulding. I used a round file and 400 grit to round the pattern into the side of each step after scraping them from a length of boxwood strip. I kinda like the result. I printed the frieze pattern on tissue paper, a first for me. I just didn’t like the outcome of wrapping the top step, partially because I couldn’t get a clean look on the sides, admittedly I didn’t try very hard. While the wrapped step looks great I preferred a natural look atop the frieze. I split the distance between the top and second step for spacing. I lined all the steps up with the right edge of the port, it being perpendicular to the actual water line (the photo isn’t straight on so the perspective is off). Mini-me had a new view of the ship standing here on the ladder. He's to scale so I like the perspective he provides to size and space. The plans show 6 steps with the last one on the black strake. I measured out how that would work on my particular hull, the spacing would have looked awkward with the top two steps fitted as they needed to be. So I reduced the spacing for the remaining four steps for a consistent look. But I worked it out. After measuring, cutting and re-cutting multiple test spacers (2.23mm wound up to be the right gap) to allow a seventh step sitting in the middle of the black strake. Ahh symmetry … and some drama. Determining the jigs by measuring and remeasuring and making the steps was fun. Removing the moulding without taking the frieze with it, and with a #11 blade scratching into the multiple coats of WOP to create a bondable surface for the glue provided a few deep breath moments. I used CA, applied with a straight pin onto the step with just enough to adhere without spillover onto the hull. It all turned out ok. Thanks for stopping by.
-
Who would send hate mail. You made the right and best decision. We love our dogs, taking our previous 17 year old beagle for that last trip is heartbreaking, no matter how right it is to do.

