Charter33
-
Posts
409 -
Joined
-
Last visited
6 Followers


Recent Profile Visitors
6,012 profile views


-
 Mr Whippy reacted to a post in a topic:
HMS Victory 1805 by kiwiron - Caldercraft - 1:72
Mr Whippy reacted to a post in a topic:
HMS Victory 1805 by kiwiron - Caldercraft - 1:72
-
Charter33 reacted to a post in a topic:
HMS Victory 1805 by kiwiron - Caldercraft - 1:72
-
Charter33 reacted to a post in a topic:
HMS Victory by CraigVT - Panart - 1:78
-
 Charter33 reacted to a post in a topic:
HMS Victory by CraigVT - Panart - 1:78
Charter33 reacted to a post in a topic:
HMS Victory by CraigVT - Panart - 1:78
-
CraigVT reacted to a post in a topic:
HMS Triton by Charter33 - Complete model - POF - 1:48 Scale
-
CraigVT reacted to a post in a topic:
HMS Triton by Charter33 - Complete model - POF - 1:48 Scale
-
 CraigVT reacted to a post in a topic:
HMS Triton by Charter33 - Complete model - POF - 1:48 Scale
CraigVT reacted to a post in a topic:
HMS Triton by Charter33 - Complete model - POF - 1:48 Scale
-
Charter33 reacted to a post in a topic:
Hr Ms O-13 by FreekS - 1:50 - RADIO - 1931-1940 - Last Dutch Sub “on eternal patrol”
-
Charter33 reacted to a post in a topic:
Mary Rose by Baker - scale 1/50 - "Your Noblest Shippe"
-
CraigVT reacted to a post in a topic:
HMS Victory by CraigVT - Panart - 1:78
-
Impressive work Craig, especially the challenging task of marking, cutting and lining those gun ports! As you said in your first post, filler and sanding is definitely often your friend and has certainly helped me out on numerous occasions. Coming up with jigs and other aids to assist in achieving accuracy is an aspect of model making that I enjoy. I'm currently thinking through a way of drilling the two holes above each gun port for the supporting ropes. Unfortunately I no longer have any access to those well equipped workshops, and in particular the software and laser cutter that I used to make many of those simple tools.... but I have a plan..... I'm getting closer to finishing my home workshop at the bottom of the garden. The insulation arrived last week, the electrical supply has been planned and the fittings etc. are being sourced as funds become available. I have also successfully experimented with a way to clad the internal walls using recycled (and free!) wood. I'll be updating the build log for this in 'Shore leave' when a bit more progress has been made. In the meantime there's plenty of prep work to keep me busy on Victory. Looking forward to watching your build, you've clearly made excellent progress so far 👏😁
-
Mr Whippy reacted to a post in a topic:
HMS Victory by CraigVT - Panart - 1:78
-
Charter33 reacted to a post in a topic:
HMS Victory by CraigVT - Panart - 1:78
-
CraigVT reacted to a post in a topic:
HMS Victory by CraigVT - Panart - 1:78
-
Hi Craig, Covid certainly changed things and its impact on you clearly brings its impact into perspective. Sorry to hear you lost your business! From a personal point of view it caused me to make the difficult decision to retire earlier than planned from the rewarding 44 year plus career I loved. With no proven medical solutions at the time, some students idea of meeting safety protocols being to rub their hands together to give the impression that they had sanitized on their way onto the school site as they bypassed the measures provided for their protection, and the stress of trying to deliver a genuinely high standard of education in my chosen field of Design Technology and Product Design remotely when classes were 'closed' and isolated due to infection, I relented and accepted the Admiral's advice to put my own health first for once and to hang up my workshop apron a year earlier than expected. Teaching a practical subject when the workshop facilities were unavailable, lessons were delivered in classrooms normally used from anything Science to Geography or Music definitely had an adverse impact on mental health. As for retirement, it's definitely not as expected and I still look forward to the time when I can fully enjoy it.... I can honestly say that I have never been so busy! Grandchildren, and the Admiral's house and garden projects make me long for those happy halcyon days when returning to work on Monday morning brought an illusionary opportunity to relax a bit! But we move on, the world has definitely changed. The photo in your post is impressive and intriguing and I look forward to hearing and seeing more with eager anticipation....... no pressure 😄 Cheers, Graham
-
Charter33 reacted to a post in a topic:
Bragozzo by maurino
-
Nice, very nice Ron. I found the bow and stern the two most satisfying stages so far.... Well done!
-
Well spotted Ron! The four timberheads, parts no.179, have now been cut out of 3 mm walnut sheet 1, cleaned up and painted ready for installation tomorrow together with the recently blackened channel brackets.... Cheers, Graham

-
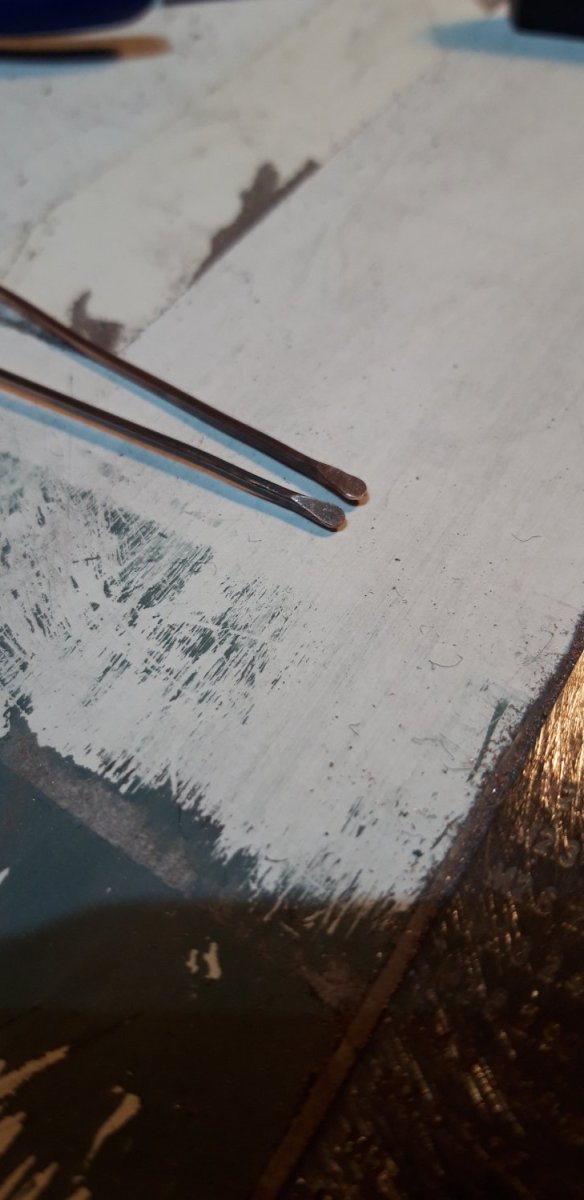
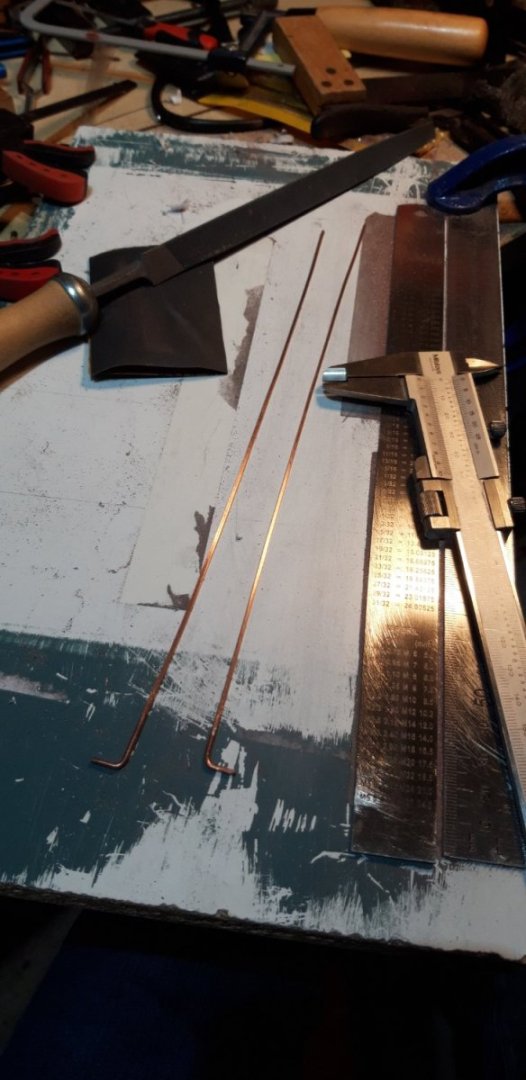
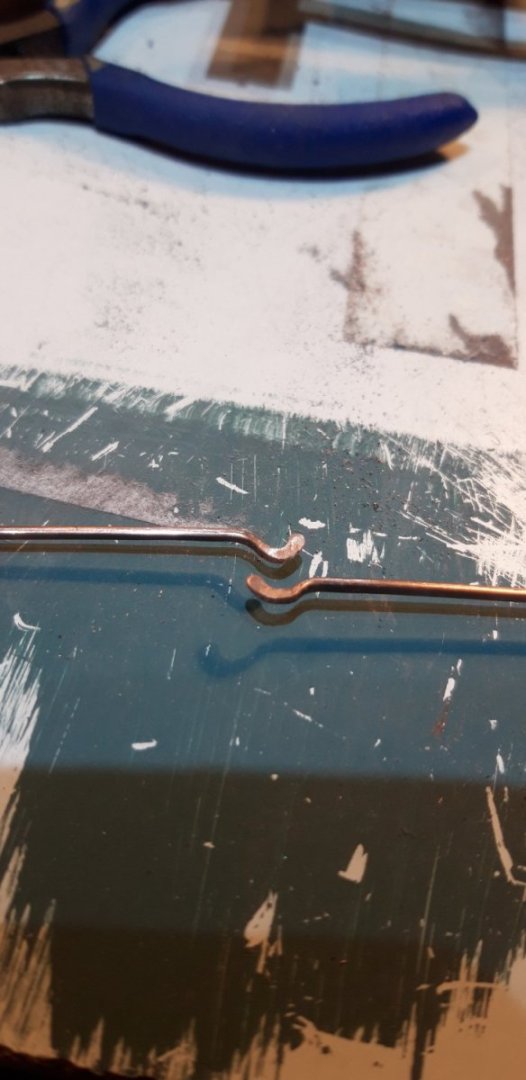
Thanks for following my contributions and giving them a 'thumbs up'..... Robert, it is a great motivation seeing the inspirational work of the master craftsmen on this site whose build logs have helped me through many of the challenges that have arisen. It certainly pushes me to try and improve my own skills. It is really important to study the plans Ron, those brackets aren't the only instance where the written instructions don't give the whole story. It just happens that it was the case with the next task I tackled. On the same plan sheet (5) there are details of the decorations on the outside of the bulwarks. I cannot see any reference to how these are constructed in the manual. The parts manual shows parts 412 and 413 listing them as Moulding 90 degree and Moulding termination foot respectively. They are on the second sheet of 1.5 mm walnut. There is no information on what to use to use with them. I assume it should be 1.5 x 1.5 walnut strip. When I added the inner bulwark decorations I used copper wire scavenged from a bit of twin and earth electrical cable (post #84), and I decided to go the same way here, discarding the wood for metal. This took me back to those lockdown days when I made the inner decorations. Travelling to a modelshop for materials at that time was impossible so a bit of improvisation was called for. First stage was to file the 1.7 mm dia. copper wire to profile, three flat sides and one, the outward facing surface, left curved. The final thickness is 1 mm. Next step, after annealing, was flaring and tapering the ends in preparation for making the termination feet followed by shaping Pieces were then cut, bent and soft soldered as required. After cleaning up these were glued in place. All this work needs to be painted next. Currently awaiting a delivery of Dull Black and Yellow Ochre from Cornwall Model Boats as my stock, purchased along with the kit many years ago, is showing its age.... In the meantime I'll get those support brackets cut from the PE frames and prepared for fitting. Cheers, Graham.

-
Hi David, Did you use an on-line photo hosting site for your pictures? I used to, it was free and allowed me to crop, rotate and manipulate the data size of images before uploading them into my build log. When they changed their conditions of use and required a subscription payment I stopped using them, and could no longer access the pictures I had saved with them. There were then problems with photos I'd previously added to my build log through that provider. Just a thought...... Cheers, Graham
- 439 replies
-
- 1
-
-
- victory
- caldercraft
- (and 1 more)
-
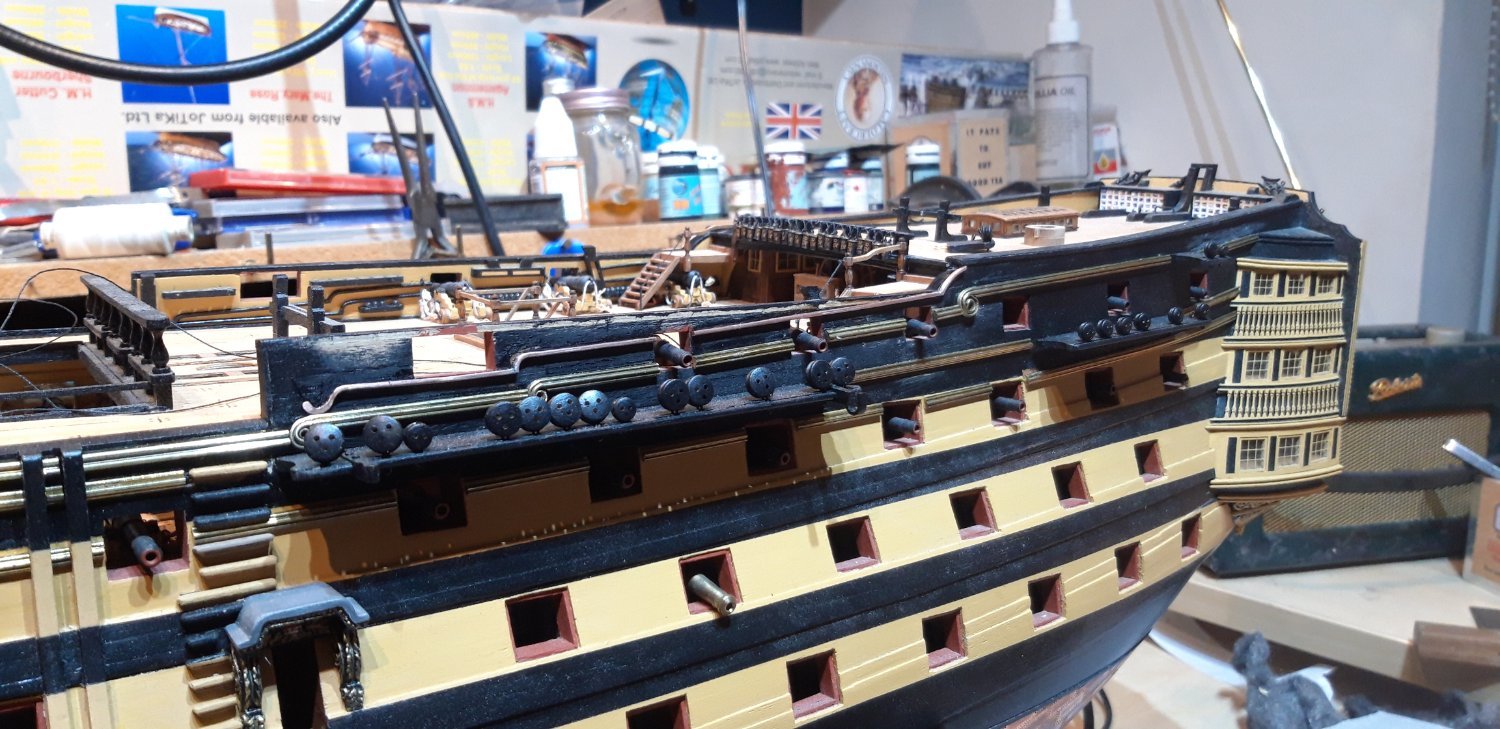
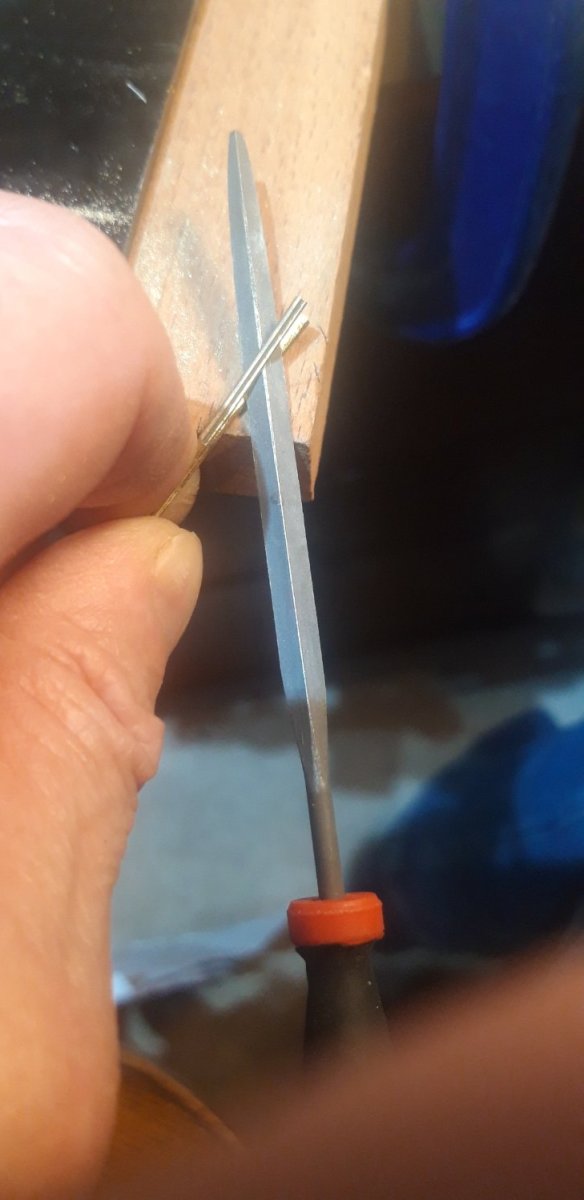
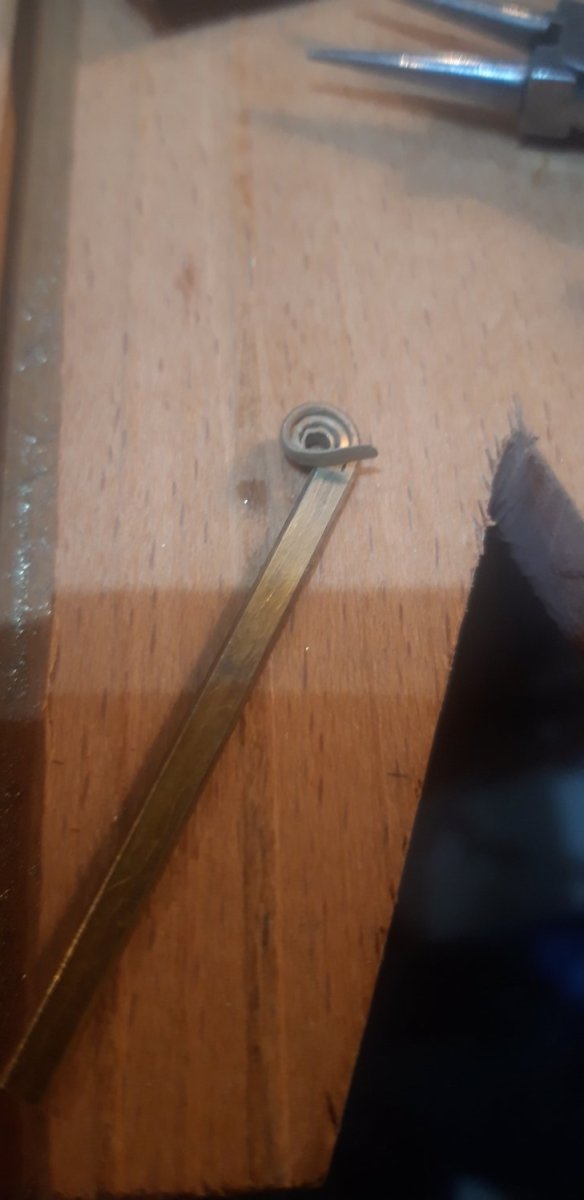
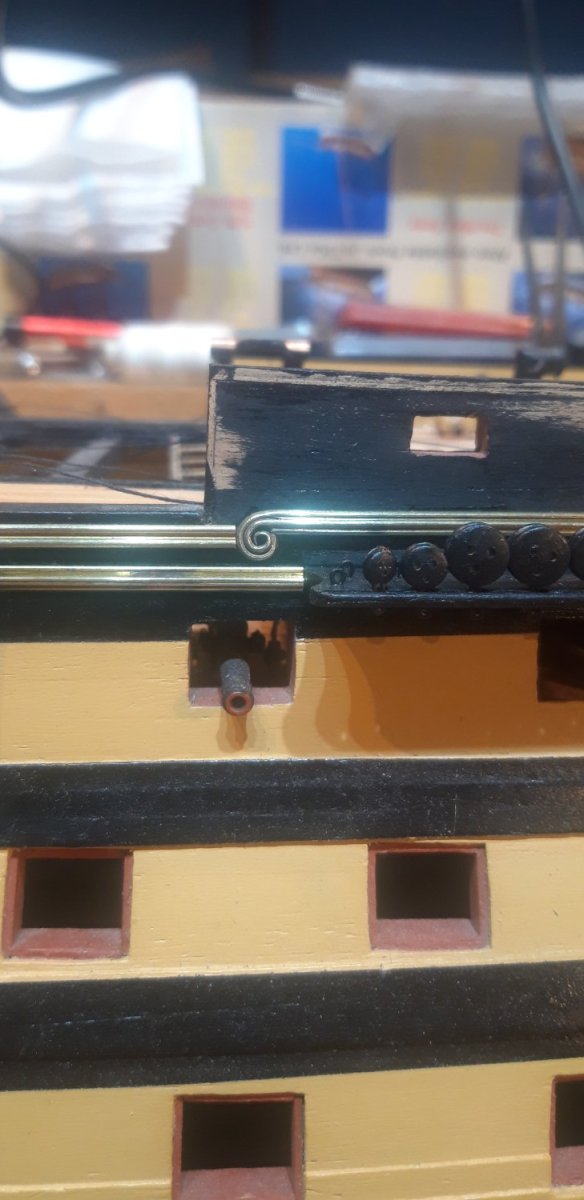
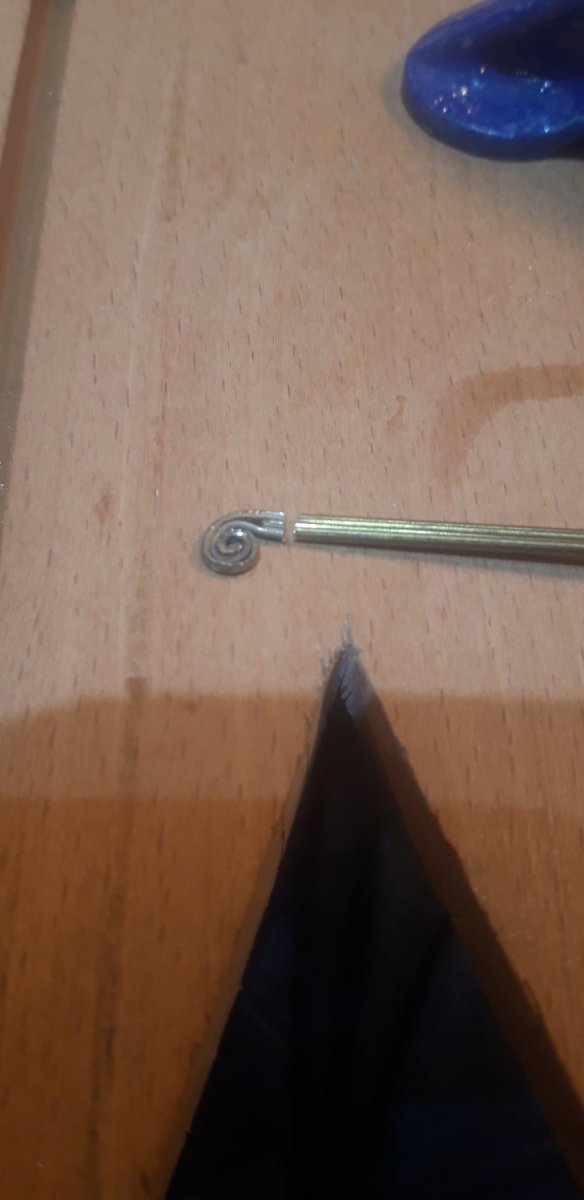
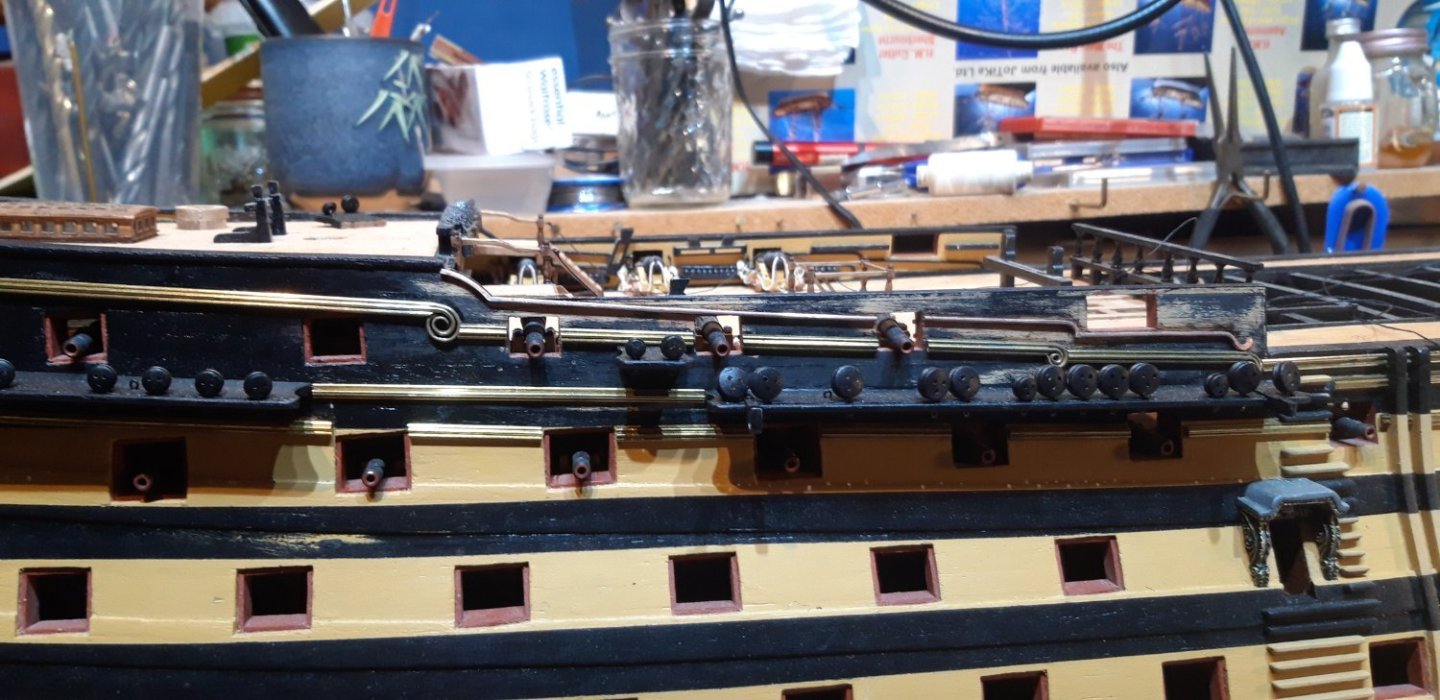
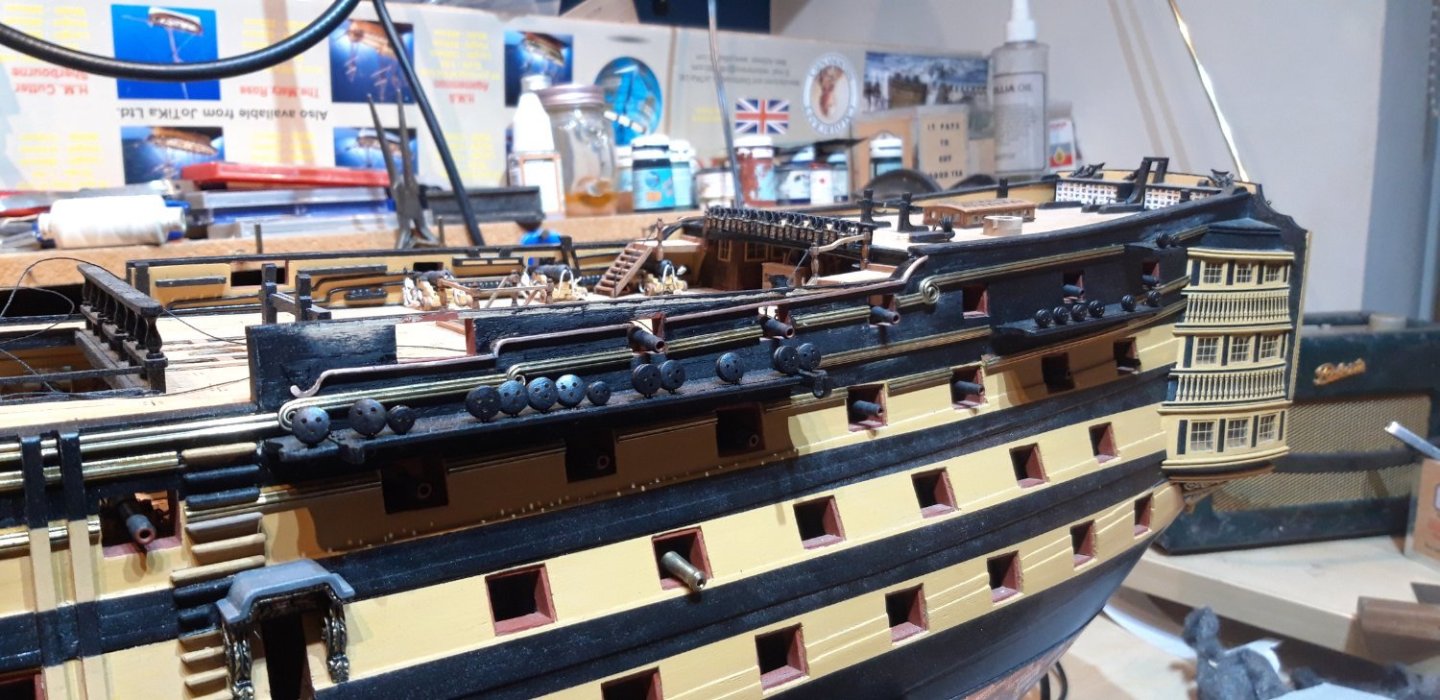
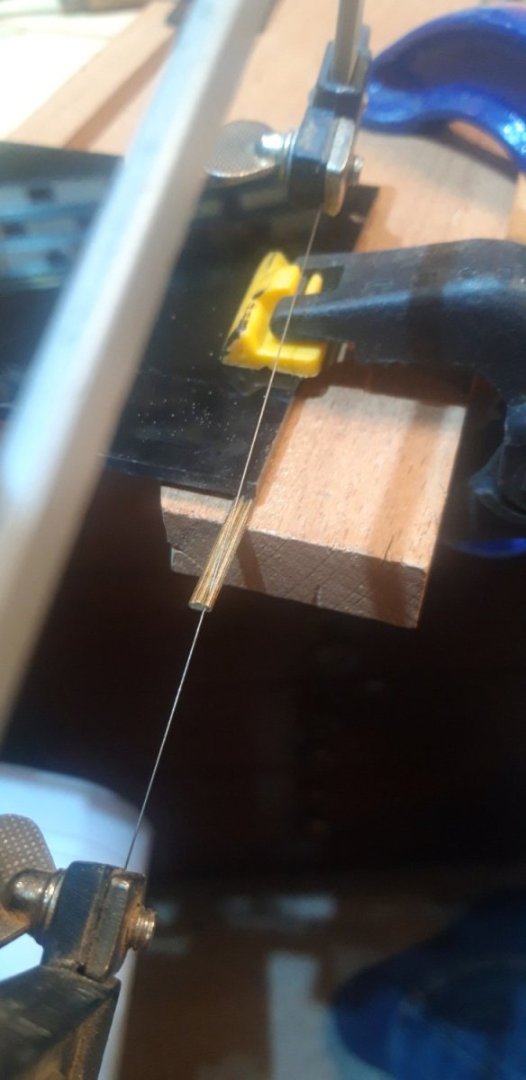
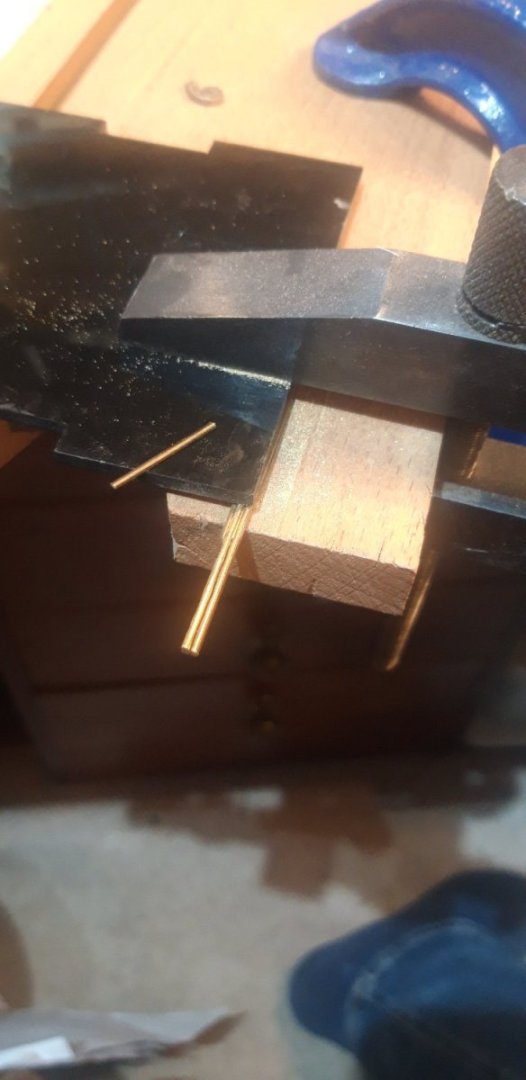
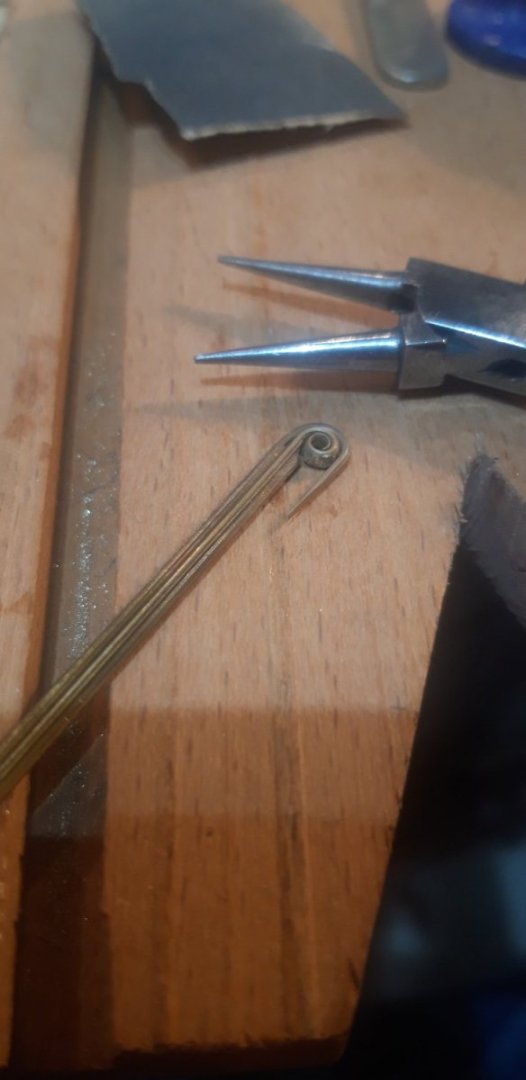
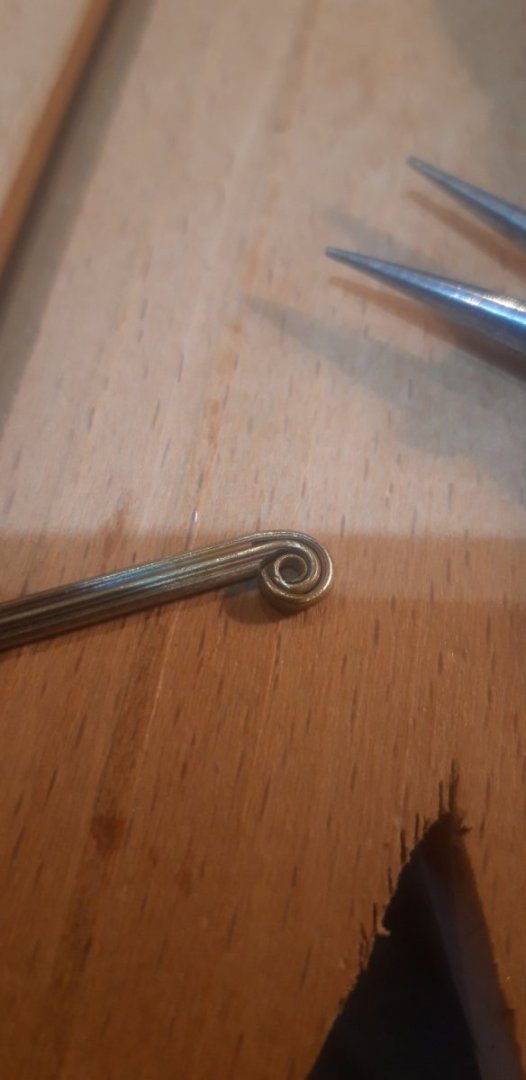
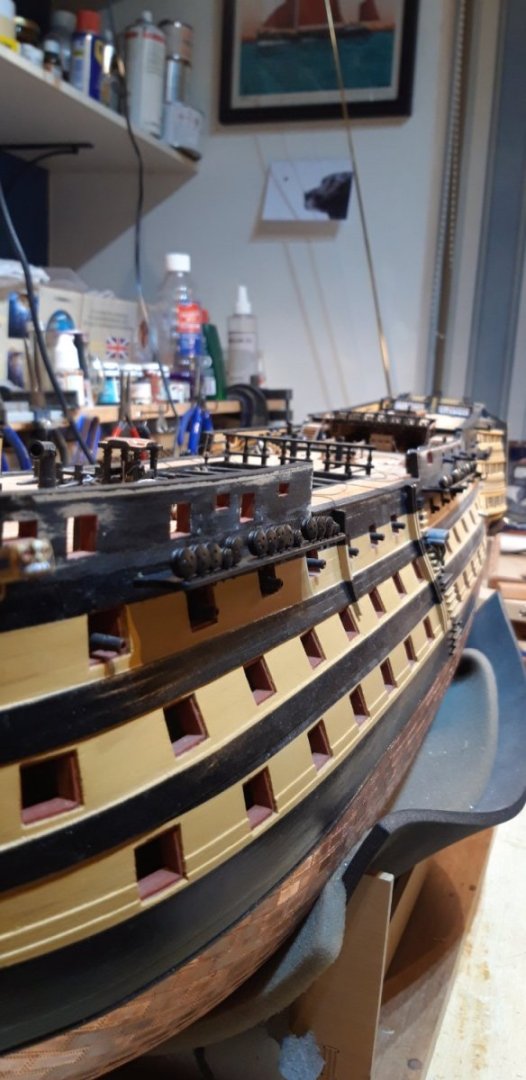
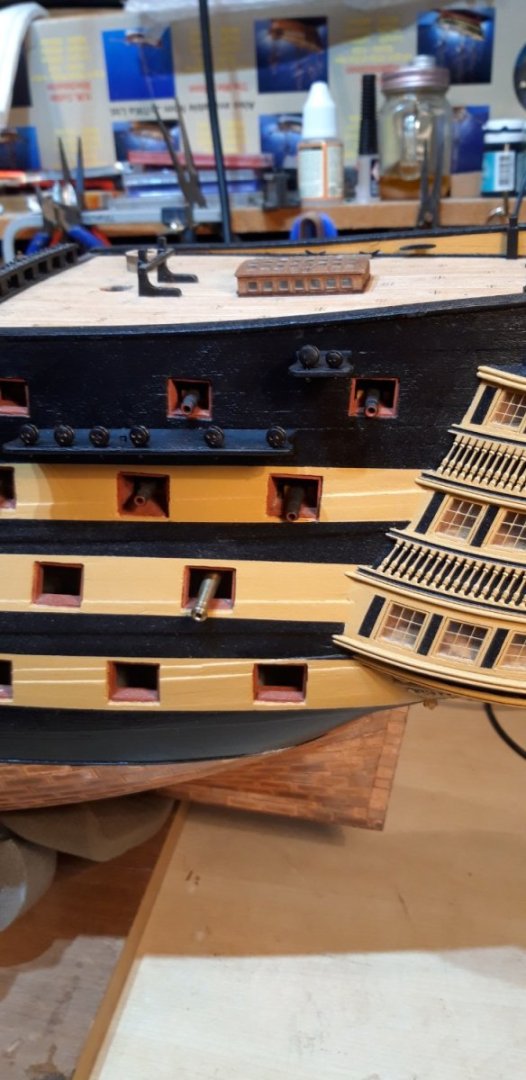
This picture shows my first attempt at the decorative scrolls, refered to as moulding swirls in the manual, that enhance the hull decorations. The method that the kit provides is a bit lacking and many builders have come up with alternative improvements. My plan was to try and replicate the way these scrolls flow from the straight sections of brass profile. This first attempt is very rough but in terms of developing the technique and proving the concept it taught me alot. The first step was to use a piercing saw fitted with a 0/4 blade to cut 20 mm up the brass strip following the two thinest sections The second cut then turned out to remove the bottom piece The two remaining pieces were carefully spread apart wide enough to allow a needle file to access the inner sufaces to smooth them off. 8 mm was then cut off the centre section and the outer sides filed to tapered points One lesson learned from the test piece was not to anneal the strip until all the cutting and filing was completed. Once these two 'fingers' were annealled round nosed pliers were used to roll the centre of the scroll The top section was then bent around the centre The excess length was cut off and this piece pushed into place These pictures shows the scrolls in place and includes the larger scroll at the stern. This one was made the same way, the only difference being those two saw cuts which were made 25 mm long, and the tightness of the scrolls. Having the channels still removable at this stage made adding these brass strips more manageable, I certainly wouldn't want to have had to work around them! A word of warning relating to the channels. Looking at plan sheet 5 there are vertical lines shown under the three main sections which turned out to be PE support brackets (Part 626). I've looked through the manual but cannot see any written reference to them. Glad I spotted this now before adding the chainplate assemblies. Just a few more sections of brass profile to add to this side, then I can tackle the port side of the hull. Cheers, Graham


-
Coming along nicely Chris. Background research and hunting down that extra detail to enhance a model kit is a very satisfying and rewarding aspect of any field of modelling, especially when you are committing so much time and effort to a project like this one. I regularly refer to my copies of Longbridge and McKay, but wasn't aware of Alan McGowan's book. I am now. Just found a copy - I'll have it by the weekend......thanks for bringing it to my attention! 👍😉 Cheers, Graham
-
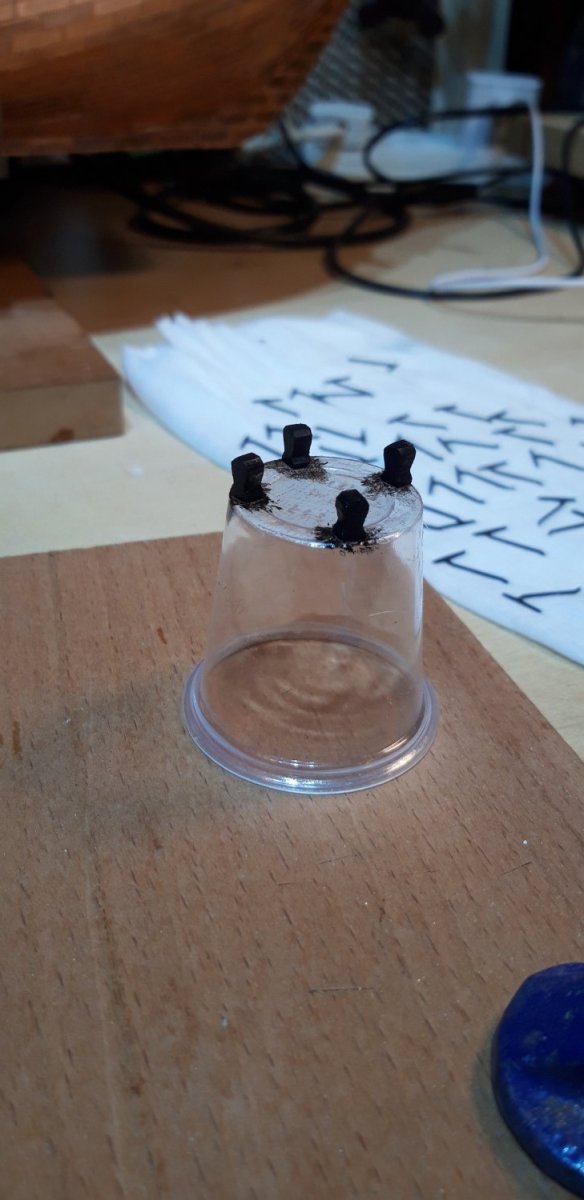
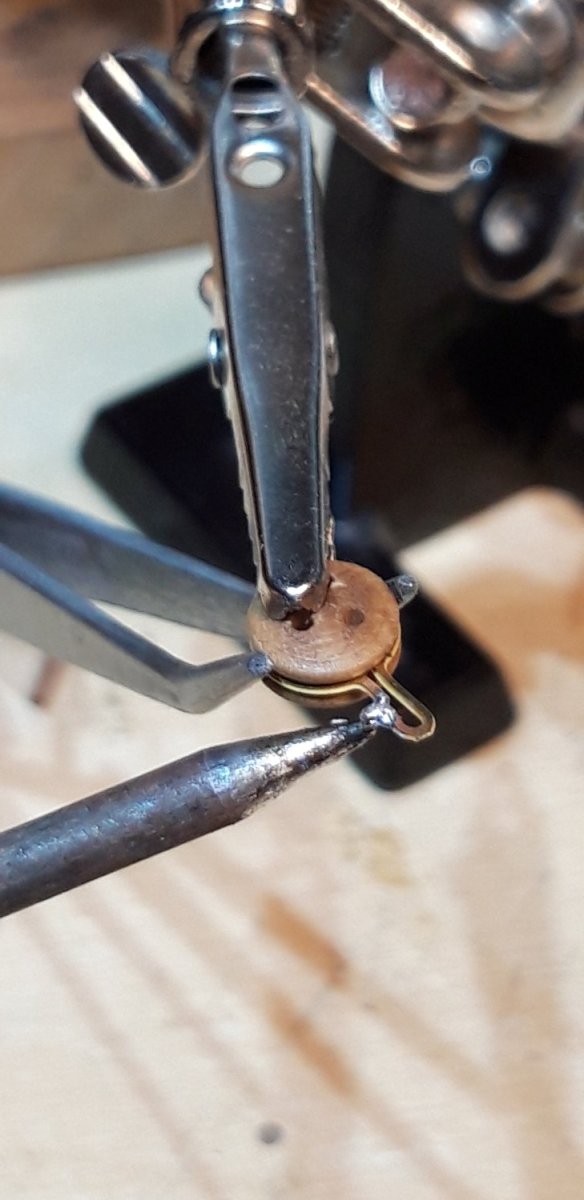
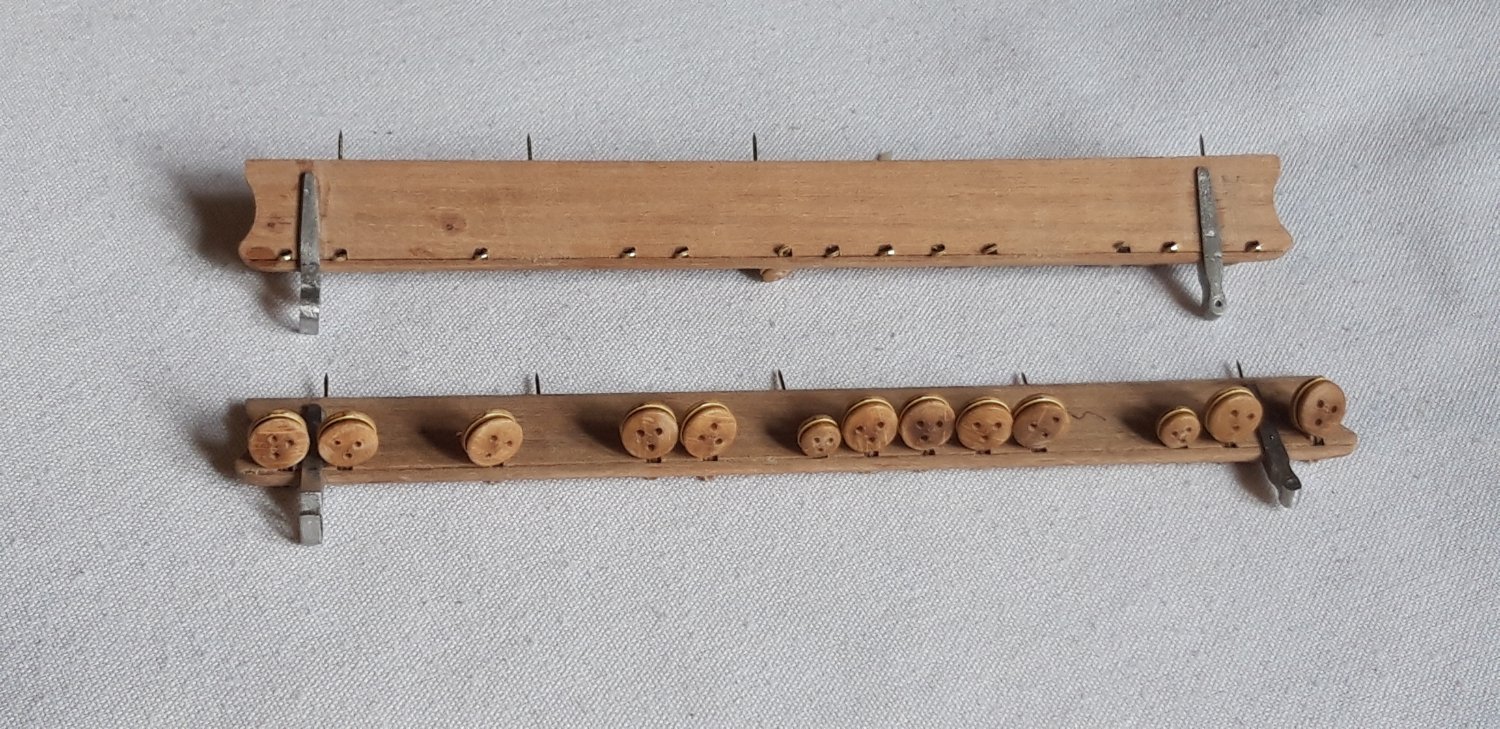
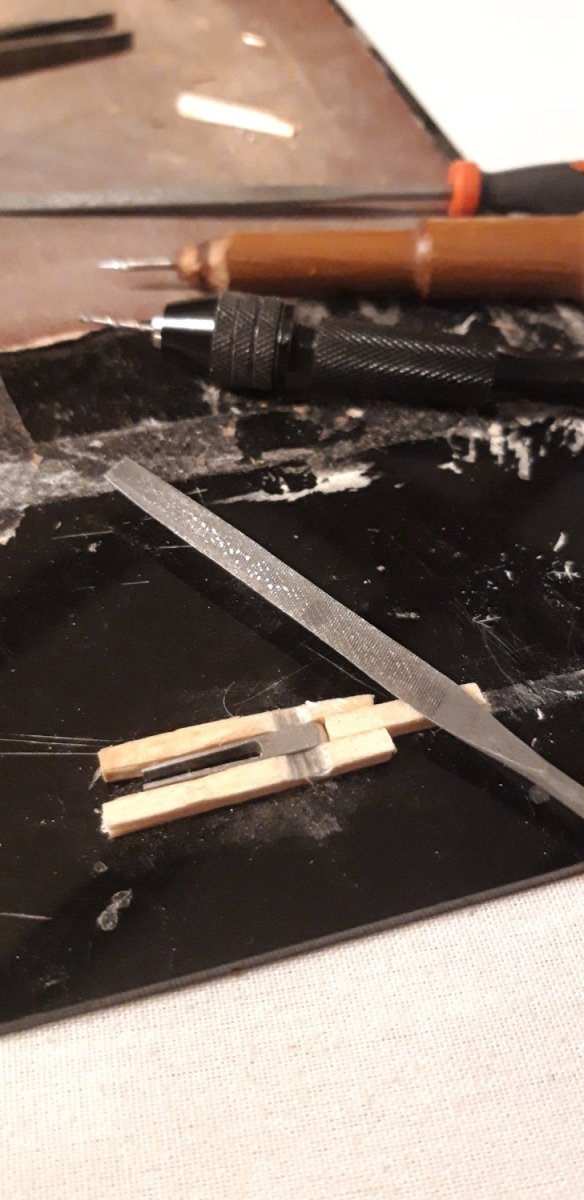
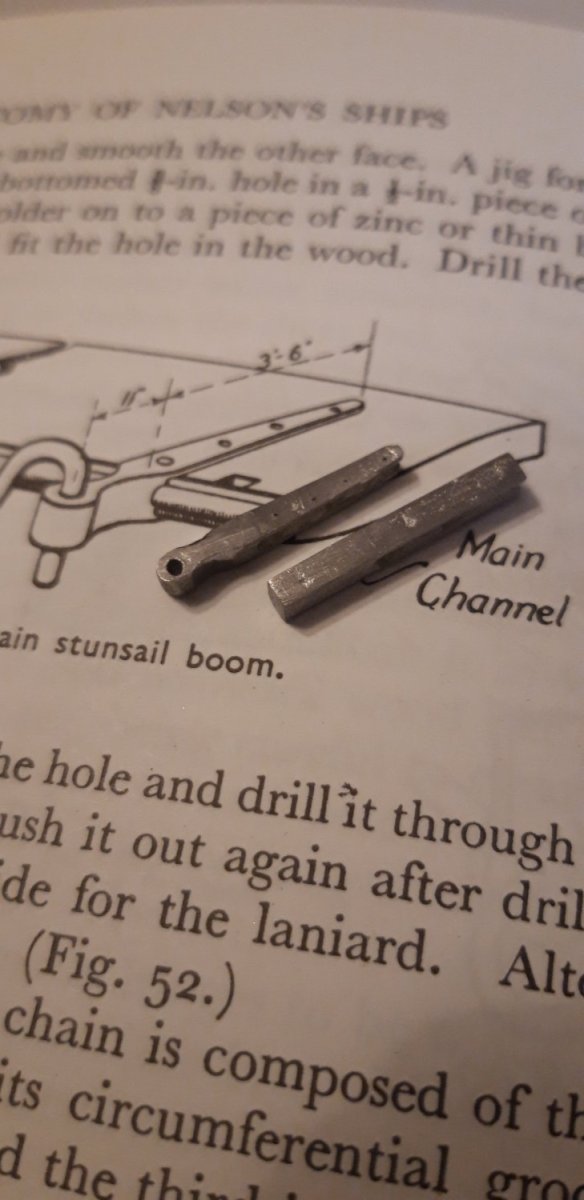
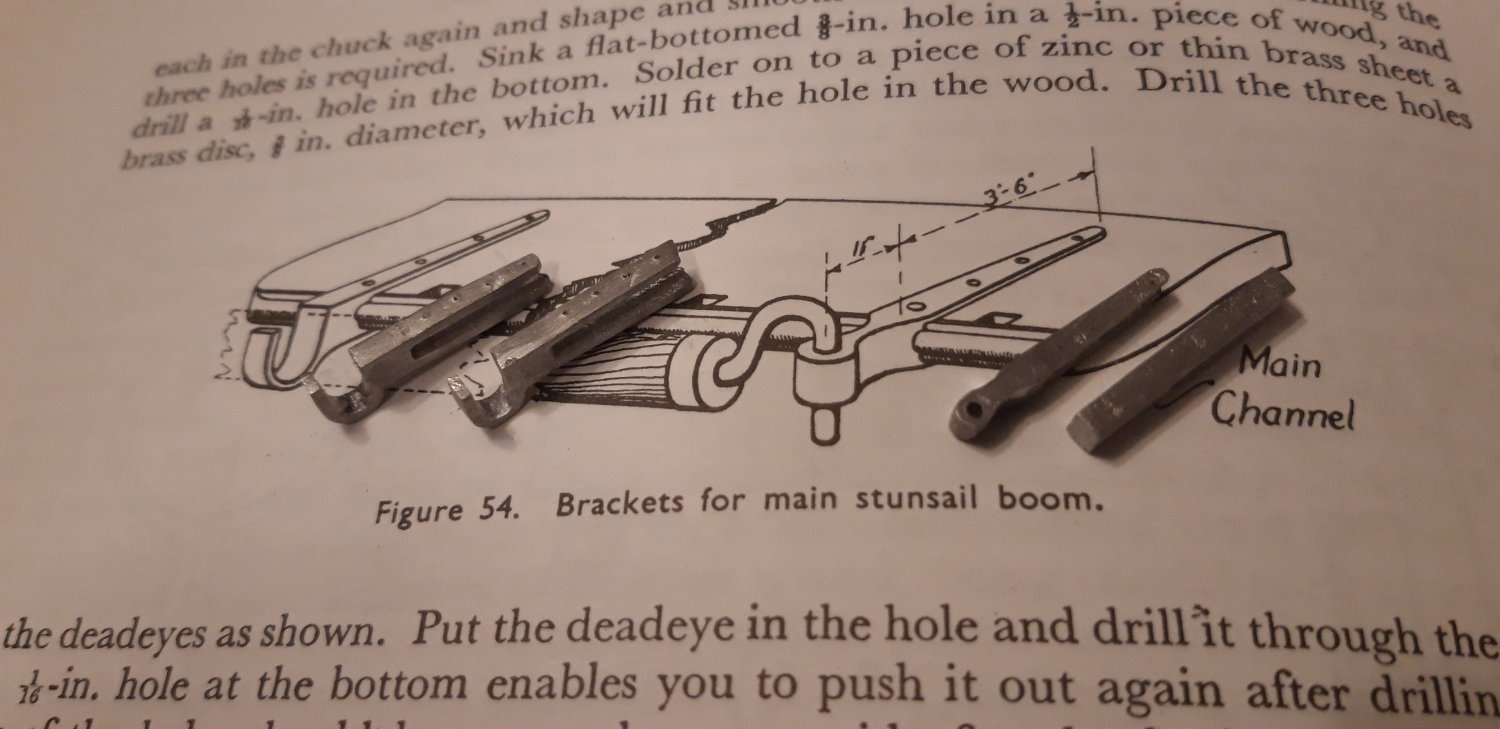
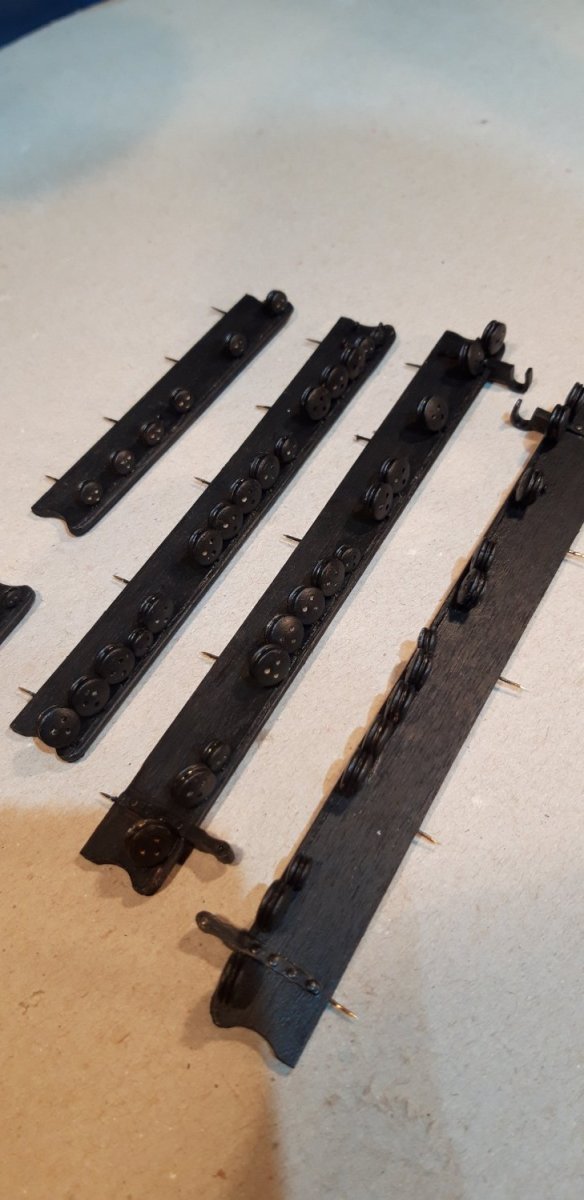
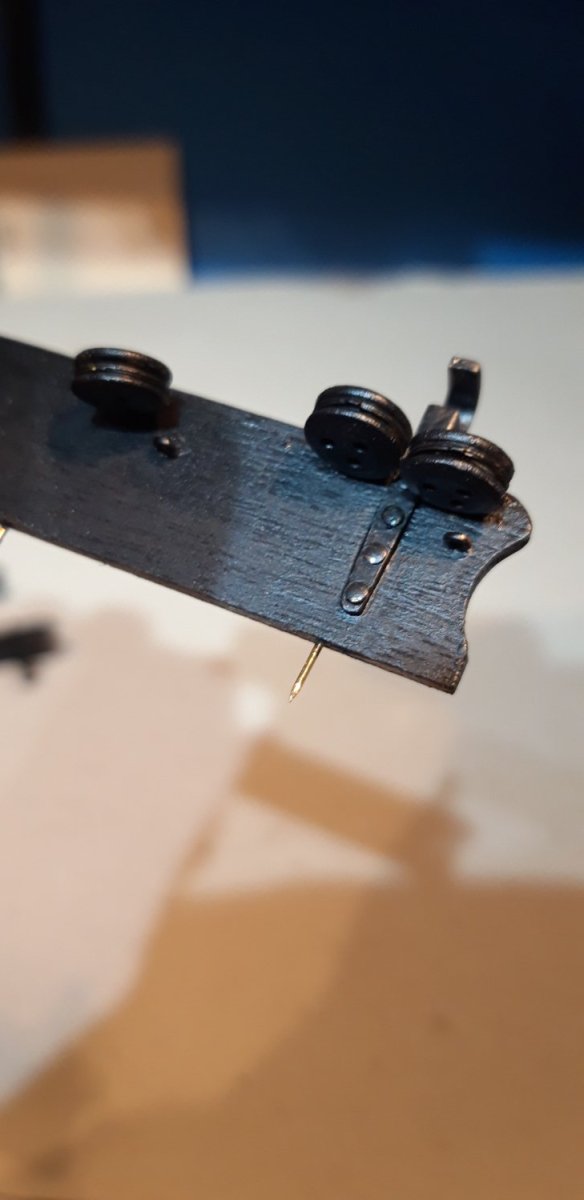
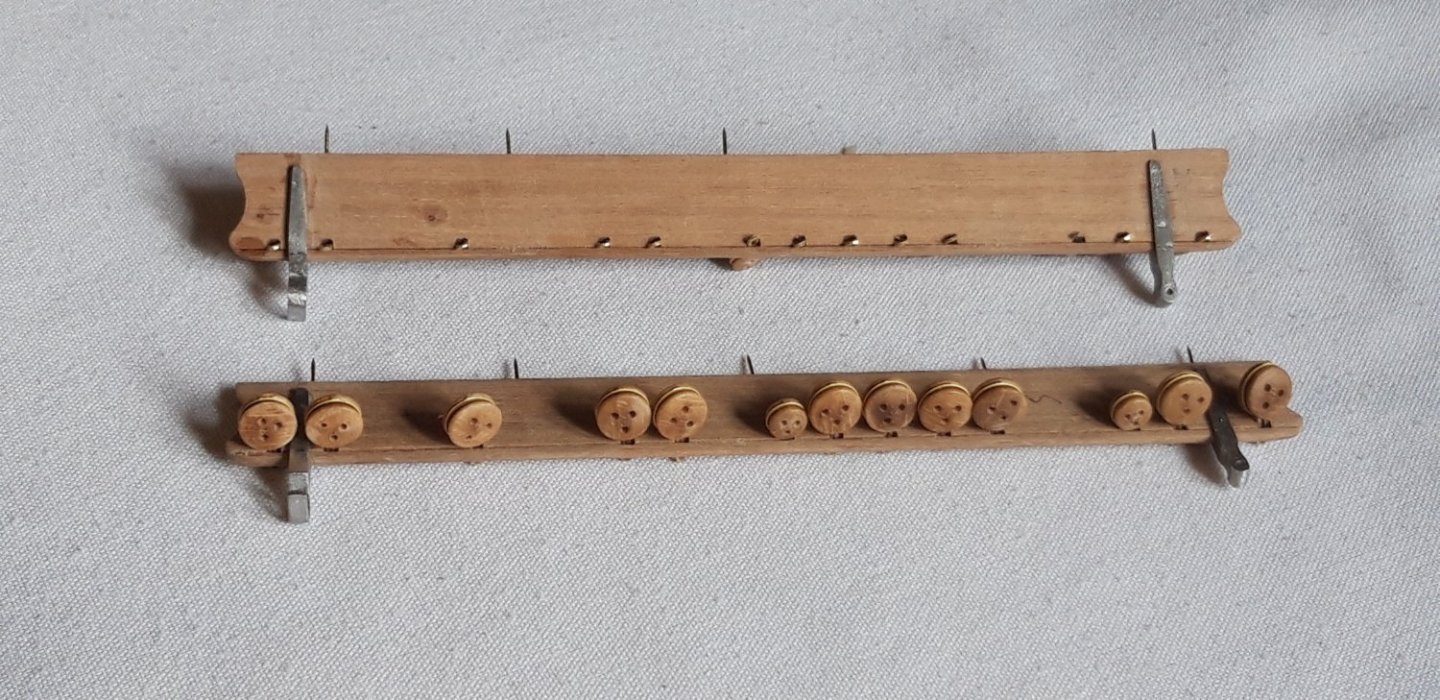
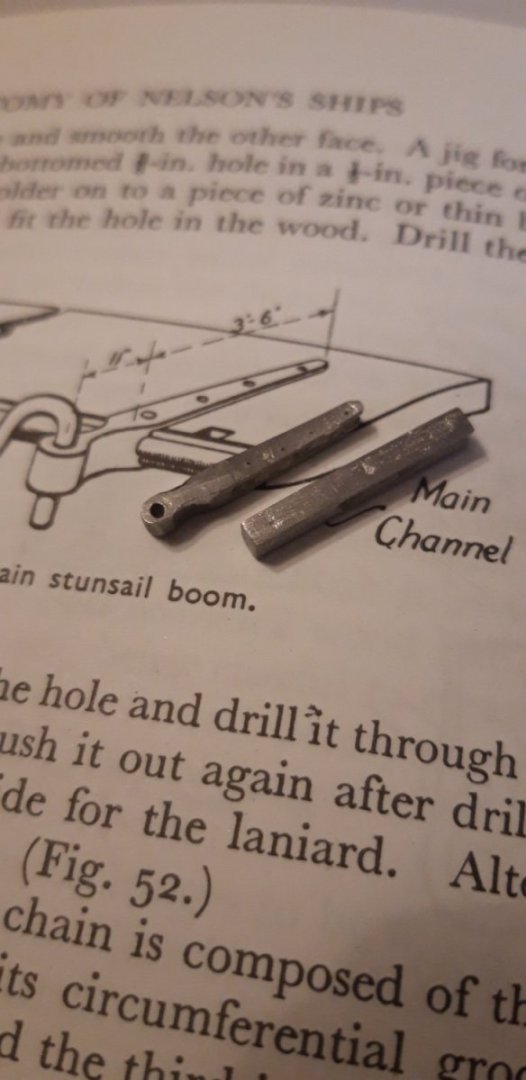
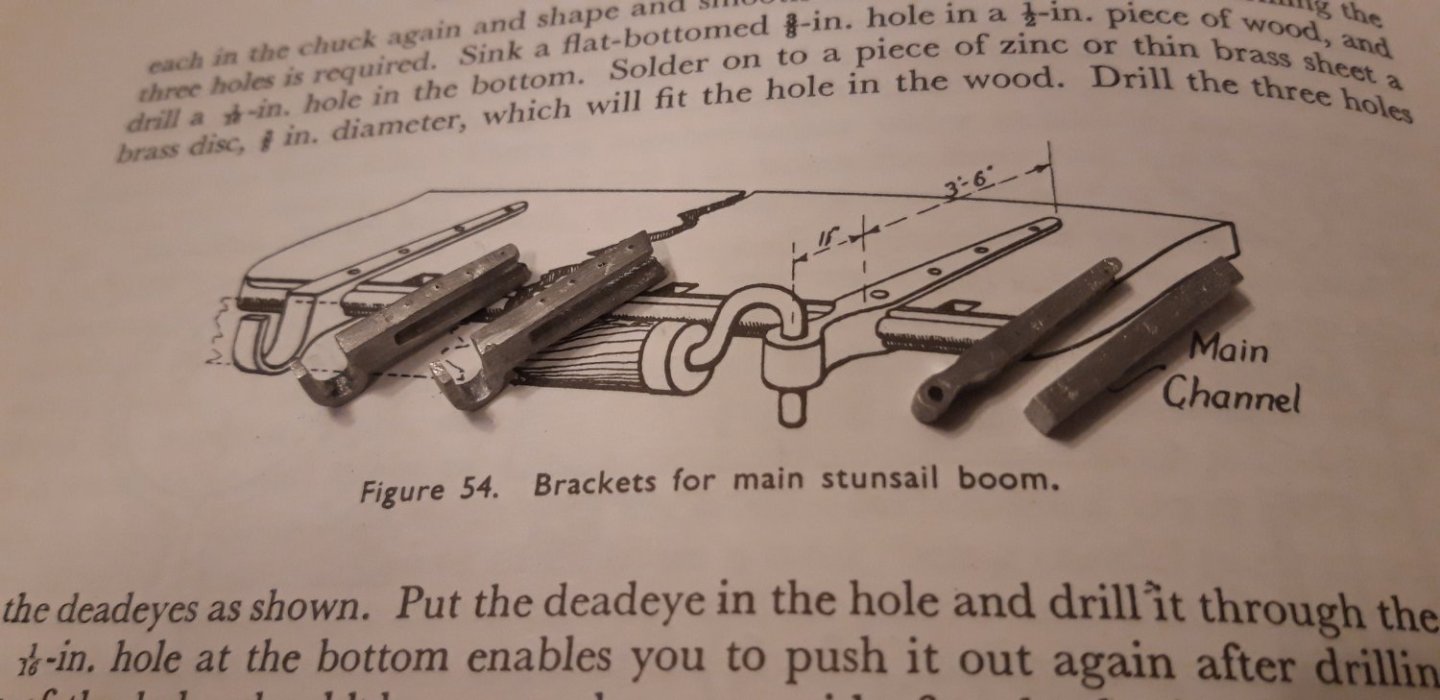
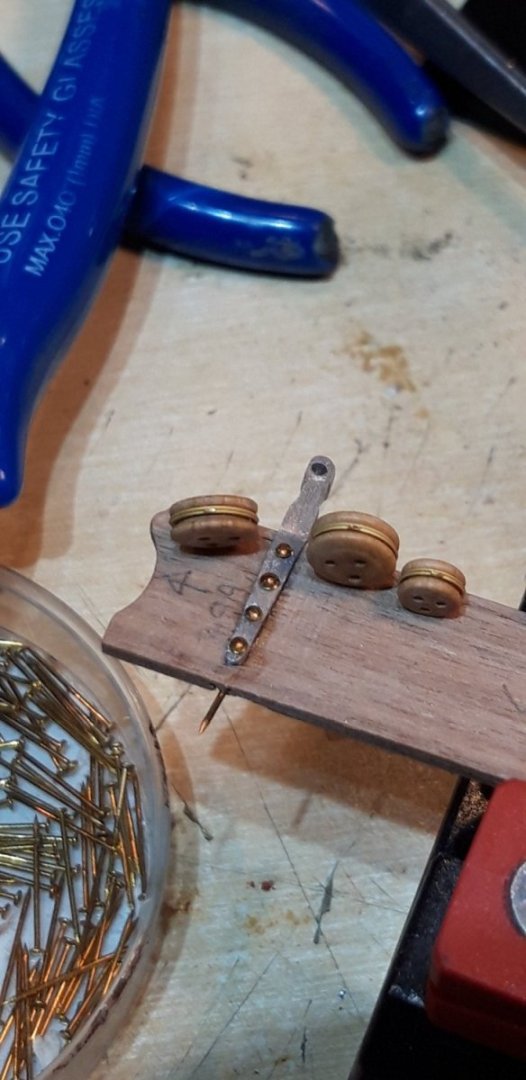
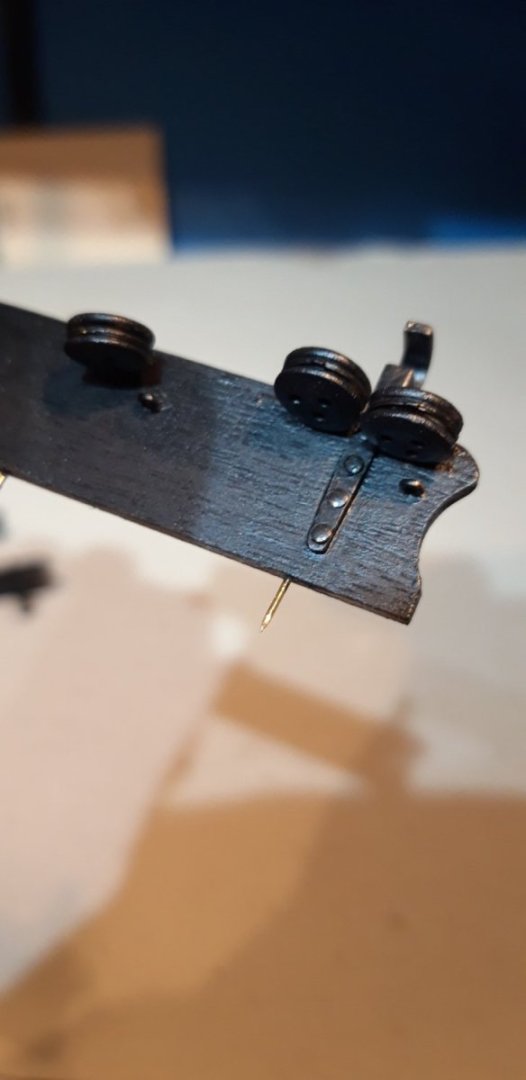
Thank you for the likes and kind and encouraging comments. Robert, I still visit your build log for inspiration. Have you managed to get your Victory mounted on that intriguing base that you were working on? I look forward to seeing it done...... First step with the channels, once they had been cut from the sheet and cleaned up, was to fit some mounting/location pins. These were made from fine brass lace makers pins with the heads cut off. Next the pin positions on the hull were marked and drilled with a 0.5 mm drill bit. Deadeyes were slotted into strops and the nib joint soldered, self locking tweezers keeping things together. A small hole at the bottom of each cut out in the channels acted as locating aids before the covering strip was glued in place. The white metal castings for the studding sail boom bracket and the support were filed to appear closer to the shape shown in Longbridge's illustration (page 94)...... ... the 'waist' just inboard of the ends achieved with a half round needle file and a simple jig constructed from matches.. Once glued in place, to simulate the method these components are fixed to the channel, the pin heads previously cut off were literally pressed into service. All the assemblies were painted... These are just dry fitted at the moment. I've decided to add the brass decorations to the hull first, and the advice is that it could also aid the fitting of the top row of gun ports - thanks Robert!😄 Cheers, Graham.


-
If you're thinking of using a PVA adhesive for the second planking layer you might get away with giving the hull's filler a brushed coat of watered down PVA. A little tip about viewing pictures on this site - when using a touch screen cell phone to look at build logs if you tap a picture it comes up in a format the lets you zoom in. On a PC try clicking on a picture, it can than be enlarged in the usual way. Good luck! Graham
-
Good progress Chris. There's a steep learning curve with this kit, but patience and perseverance pays off in the end. I found those quarter galleries a challenge too, and commented in my own build log on there were times when having as many arms as an octopus would help 🤣. Planking the middle deck is a great opportunity to practice the skills you need for later in the build, and your work here looks impressive - well done! The filler has done the trick on the first planking. Are you planning to seal the filler surface in any way to aid the bonding of the second layer of planks? Graham.
-
Welcome Chris, from another Caldercraft Victory builder. You've certainly got off to a flying start! It's a challenging model, but lots of enjoyable and rewarding tasks lay ahead. It may seem way ahead in the future, but it might be worth considering how you are going to display the model once complete. I mention this as some methods need a bit of preparation such as pre-drilling holes in the bottom of the keel etc. before progress with the hull construction interferes or makes the task more difficult. One technique I wish I had used, because at that time I was unaware of it, is the infilling of the spaces between some of the bulkheads, notably at the bow and stern, with a soft and carvable wood to help with the construction of the first planking. As you say, there are some truly inspirational build logs here on this site and time spent reading through them is genuinely time well spent. I always refer to the work of these very skilled builders together with the comprehensive instructions provided by Caldercraft. My build is only my second model ship. The first was nearly 40 years ago followed by long period of absence while a growing family took precedence. Good luck, I'll be following your progress with much interest. Cheers, Graham.
-
Woodwork/Model making workshop. Scale 1:1
Charter33 replied to Charter33's topic in Non-ship/categorised builds
That's right - model making area at the far end, wood turning lathe on the right, and woodworking bench to the left at the near end. -
Woodwork/Model making workshop. Scale 1:1
Charter33 replied to Charter33's topic in Non-ship/categorised builds
There are quite enough gun ports and gun muzzles on a model of Victory to last a lifetime, without adding more to the workshop itself, Ron 🤣 ....but the Admiral's input to the build was a request for a weather vane above the door, and you've now planted the seed of an idea..... and I love a challenge!