Dfell
-
Posts
219 -
Joined
-
Last visited
1 Follower

Recent Profile Visitors
3,002 profile views


-
 Ryland Craze reacted to a post in a topic:
Saucy Jack by Dfell - Vanguard Models - 1:64
Ryland Craze reacted to a post in a topic:
Saucy Jack by Dfell - Vanguard Models - 1:64
-
DB789 reacted to a post in a topic:
Saucy Jack by Dfell - Vanguard Models - 1:64
-
VTHokiEE reacted to a post in a topic:
Saucy Jack by Dfell - Vanguard Models - 1:64
-
Mr Whippy reacted to a post in a topic:
Saucy Jack by Dfell - Vanguard Models - 1:64
-
Mr Whippy reacted to a post in a topic:
Saucy Jack by Dfell - Vanguard Models - 1:64
-
chris watton reacted to a post in a topic:
Saucy Jack by Dfell - Vanguard Models - 1:64
-
ccoyle reacted to a post in a topic:
Saucy Jack by Dfell - Vanguard Models - 1:64
-
Thukydides reacted to a post in a topic:
Saucy Jack by Dfell - Vanguard Models - 1:64
-
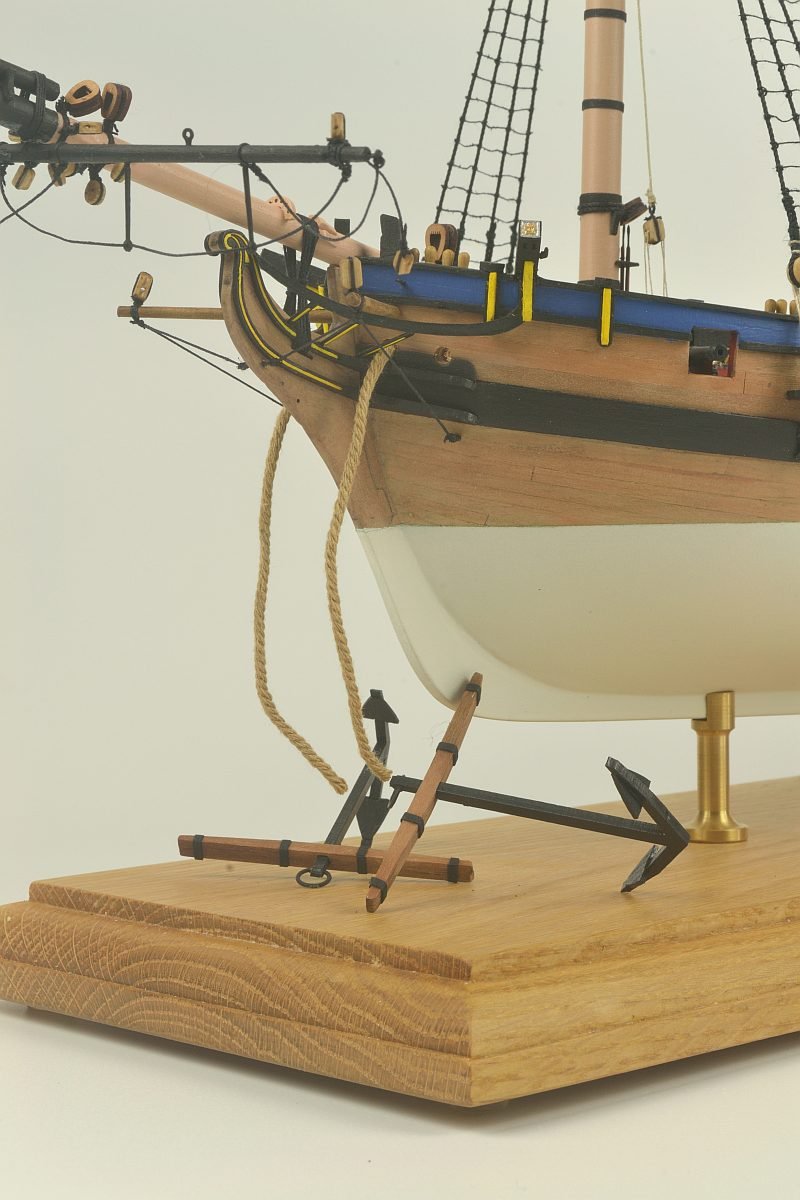
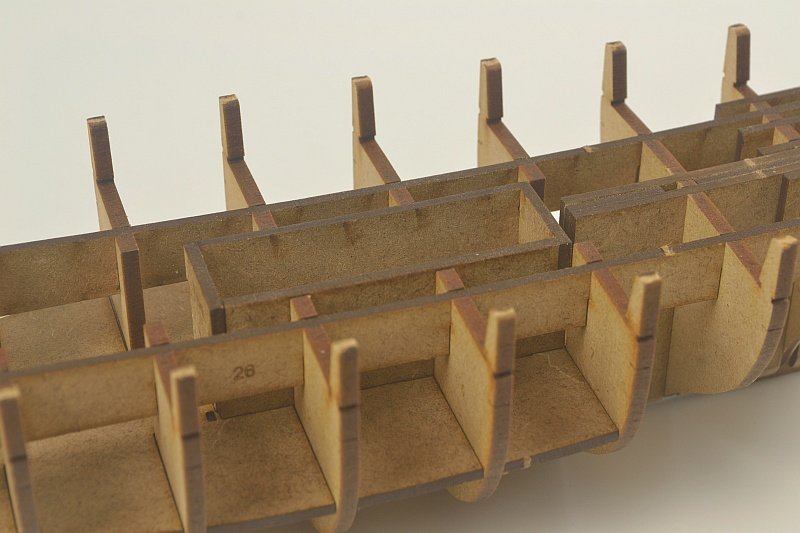
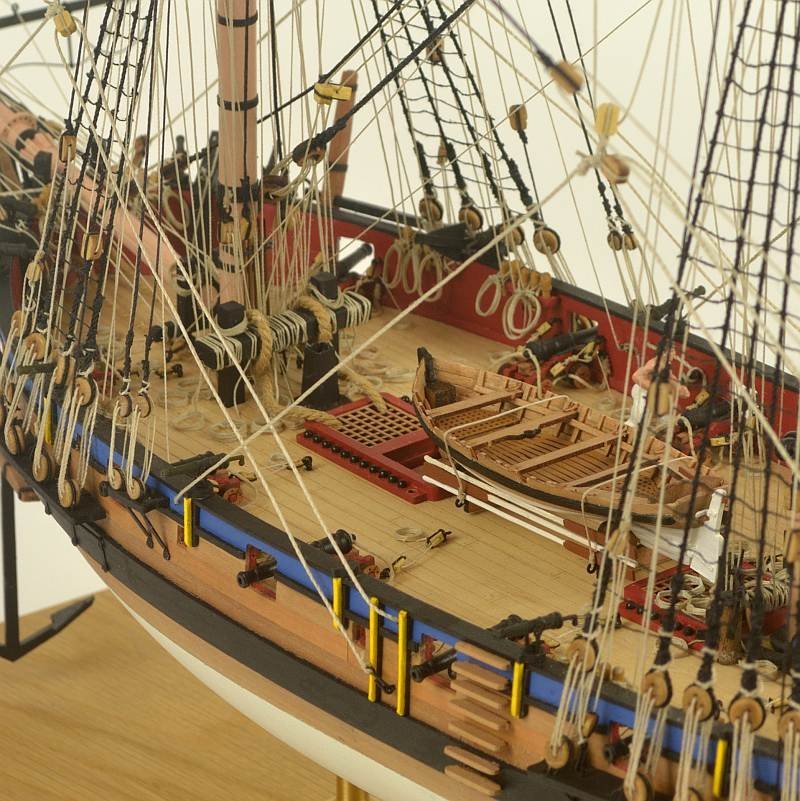
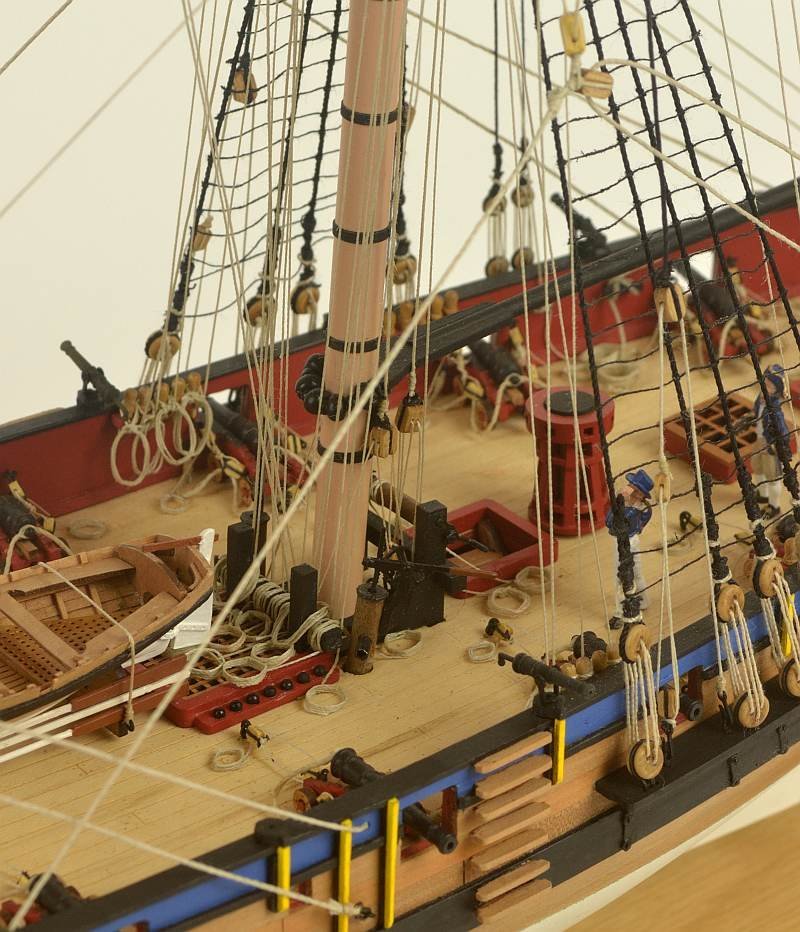
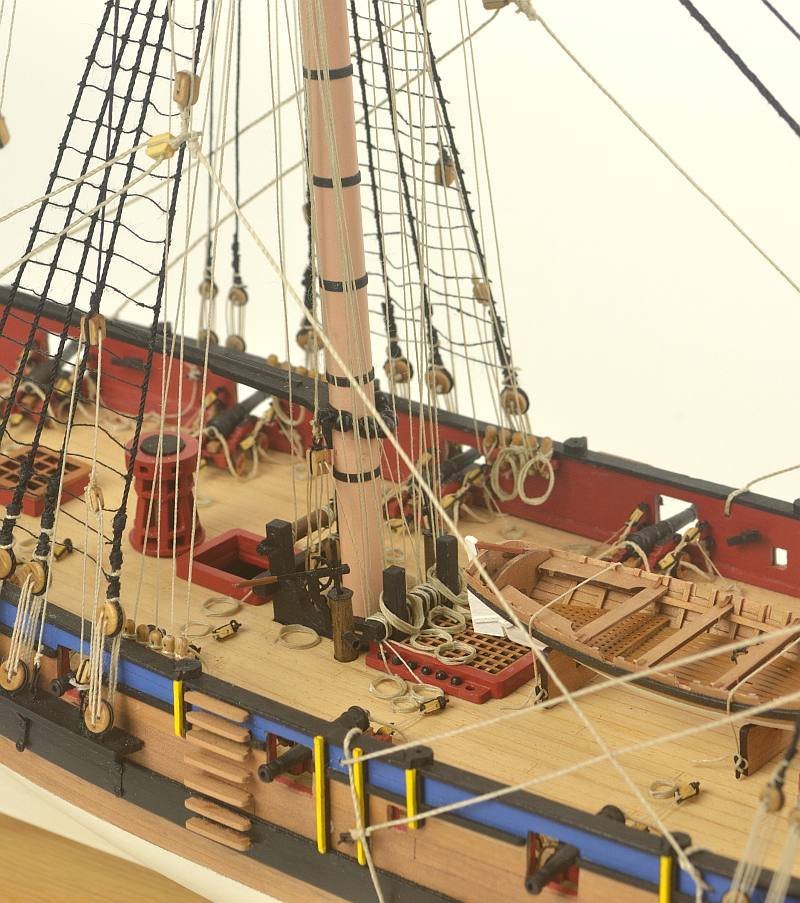
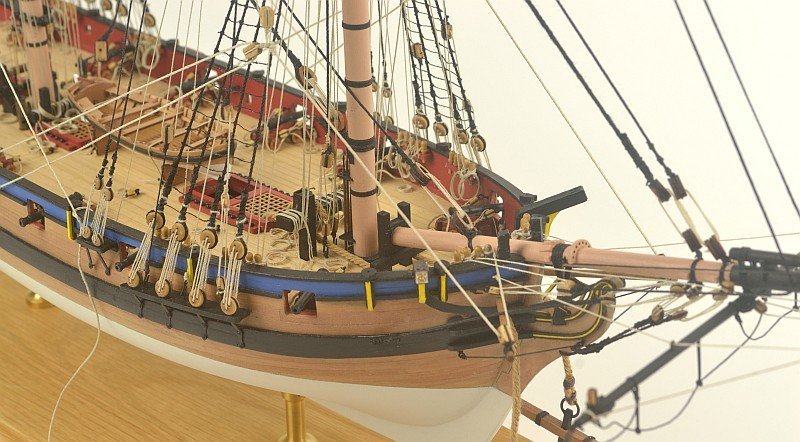
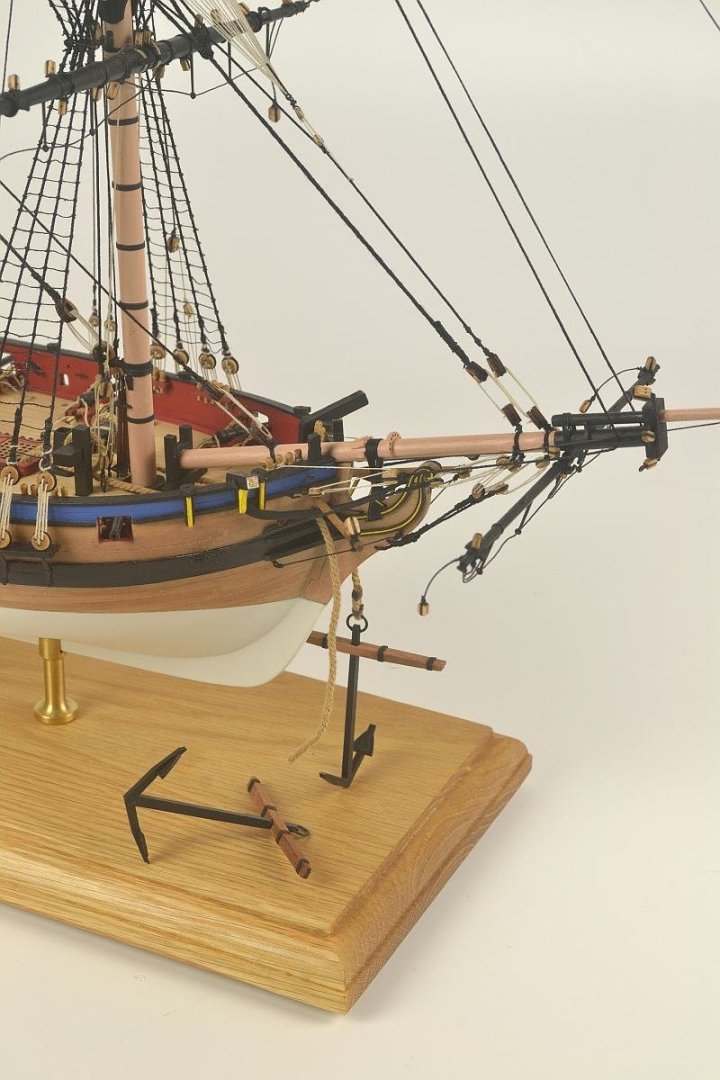
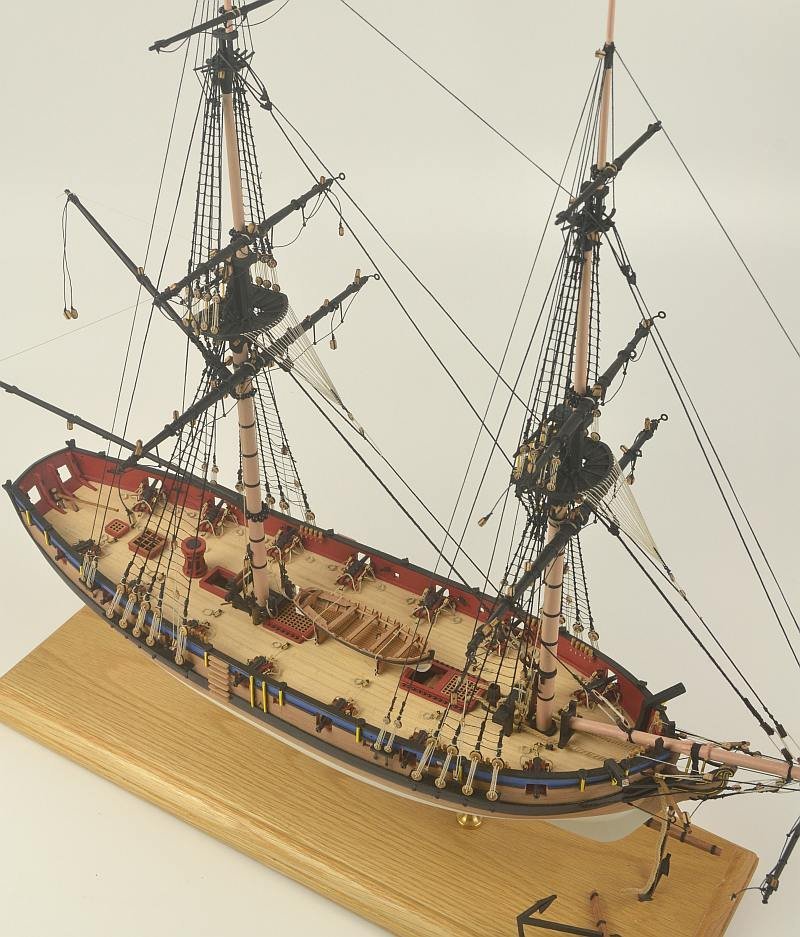
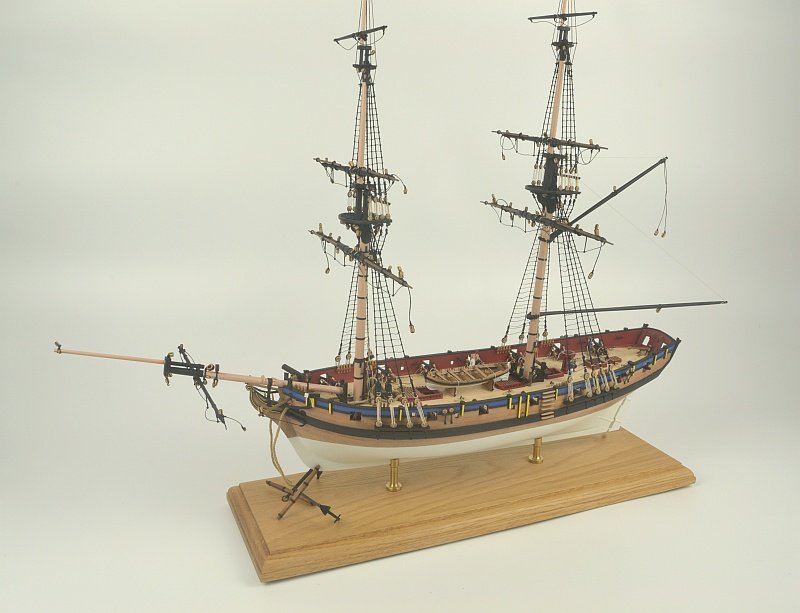
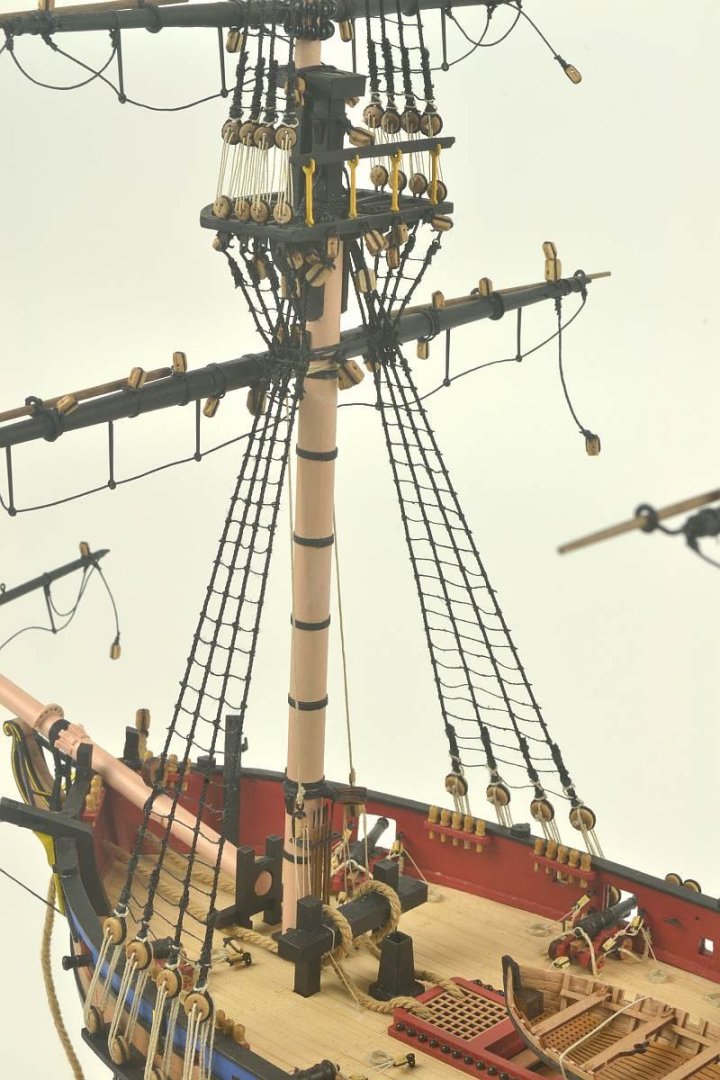
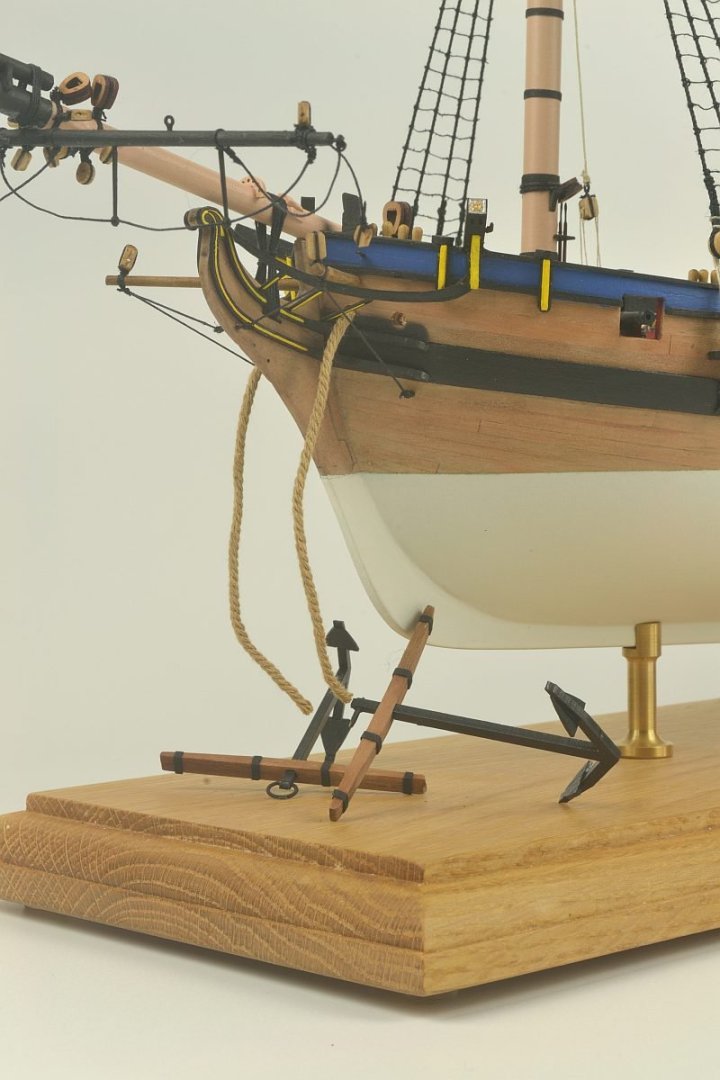
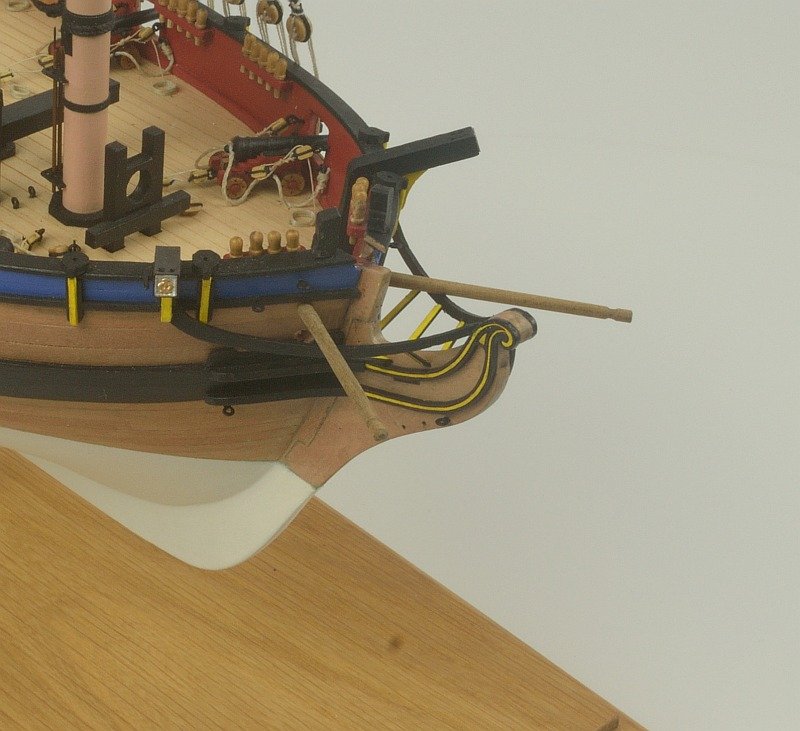
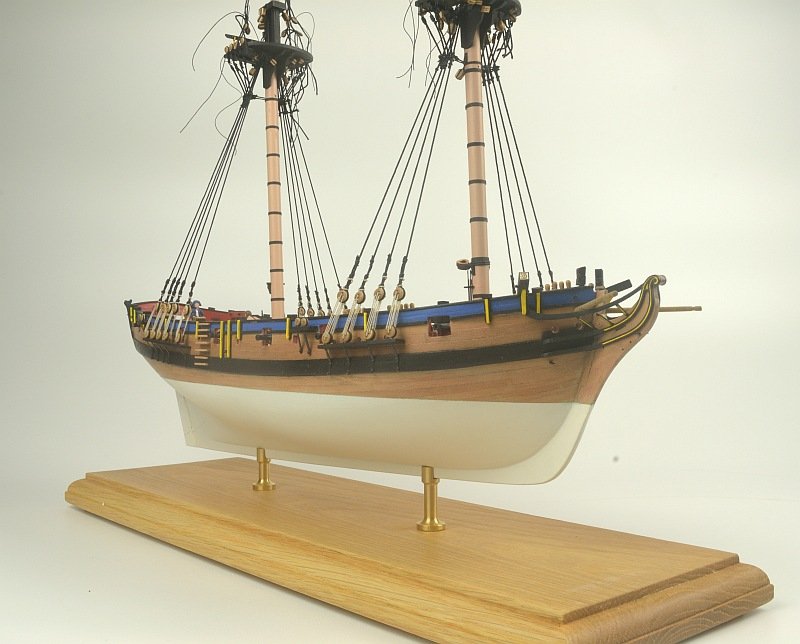
Hello - a bit more progress. Additional Keel parts added along with the Bulwarks. Made the mistake of wetting the wood so as to bend it which resulted in some dark stains. Heat to bend probably been better. The maple veneer part was added with as much wrapping around as possible but had to do it as separate pieces. Onto the first planking - we will see how much of a mess I make of this...... Regards Doug
-
rcweir reacted to a post in a topic:
Saucy Jack by Dfell - Vanguard Models - 1:64
-
CTDavies reacted to a post in a topic:
Saucy Jack by Dfell - Vanguard Models - 1:64
-
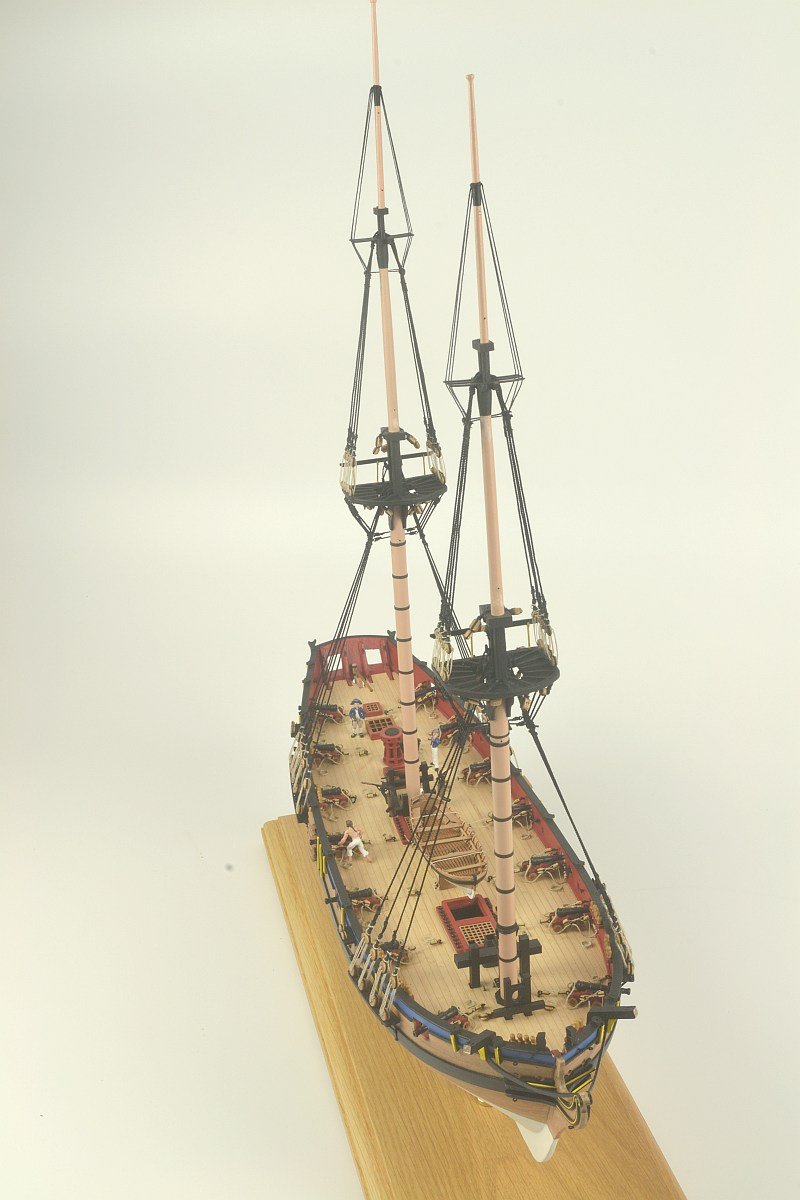
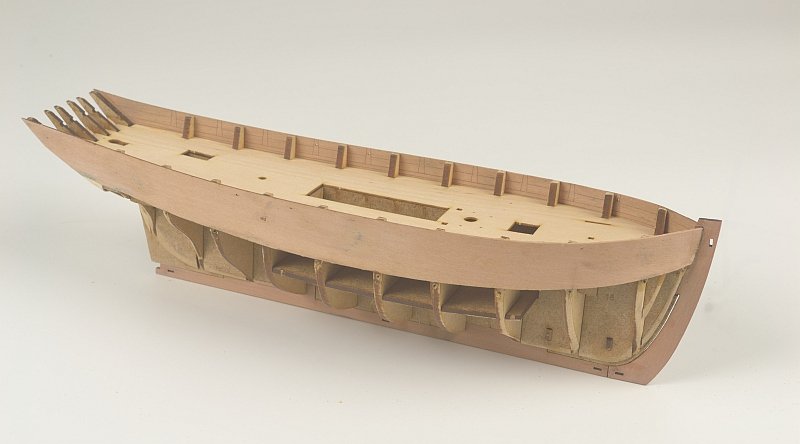
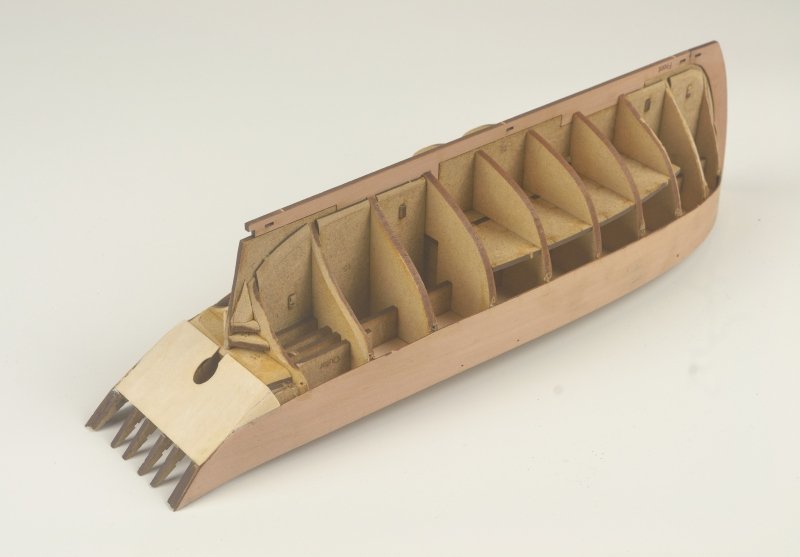
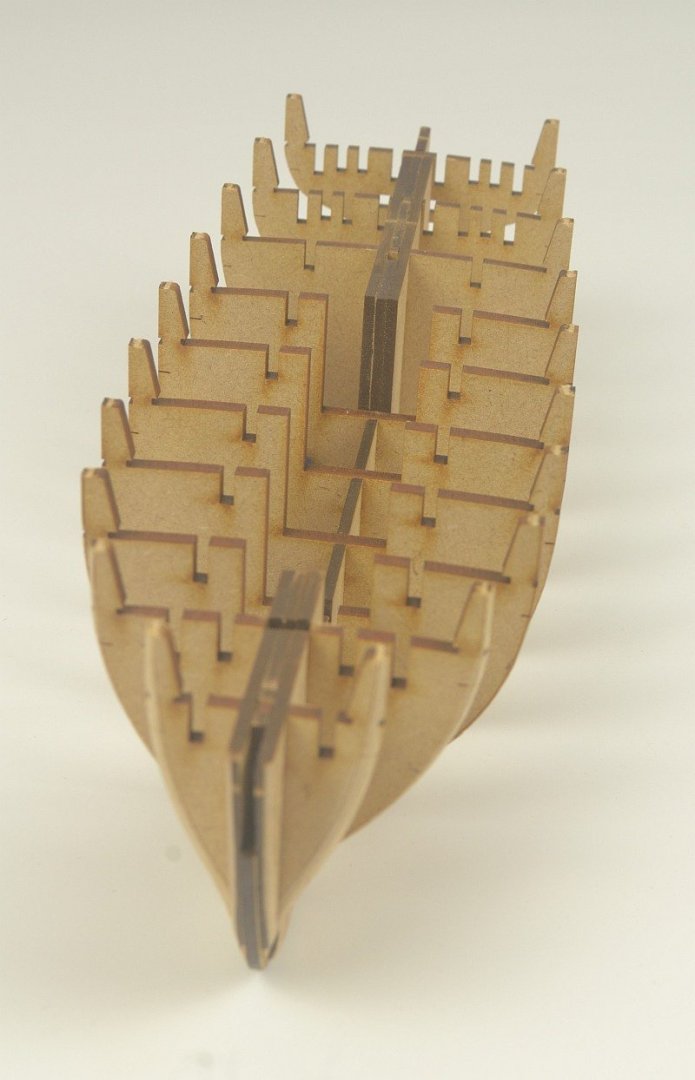
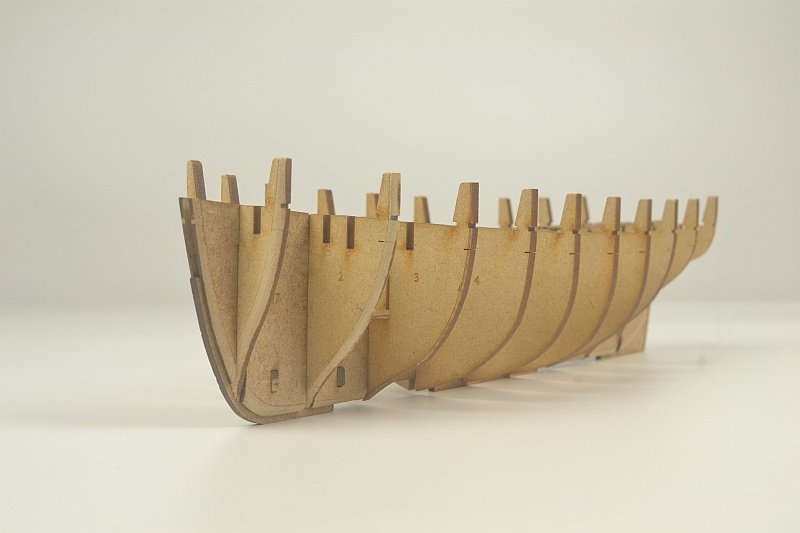
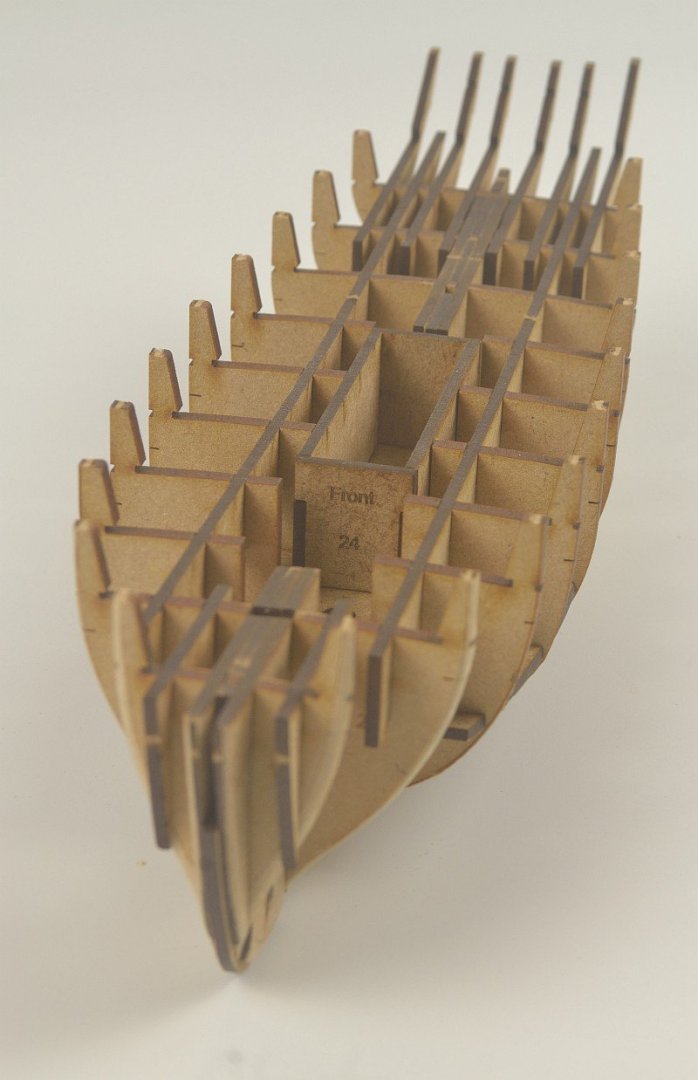
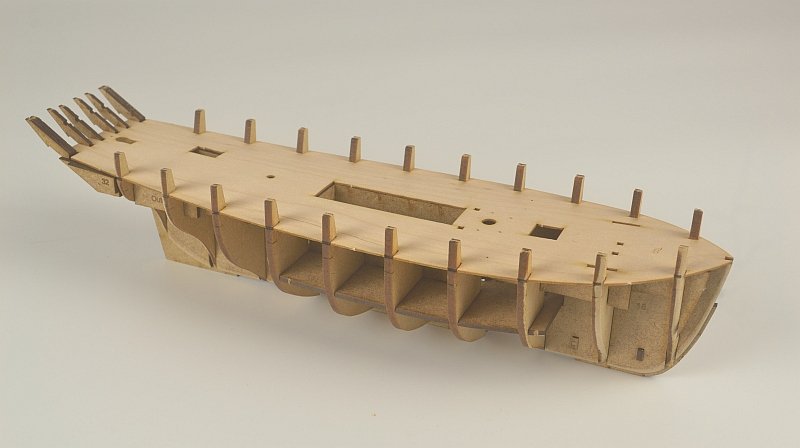
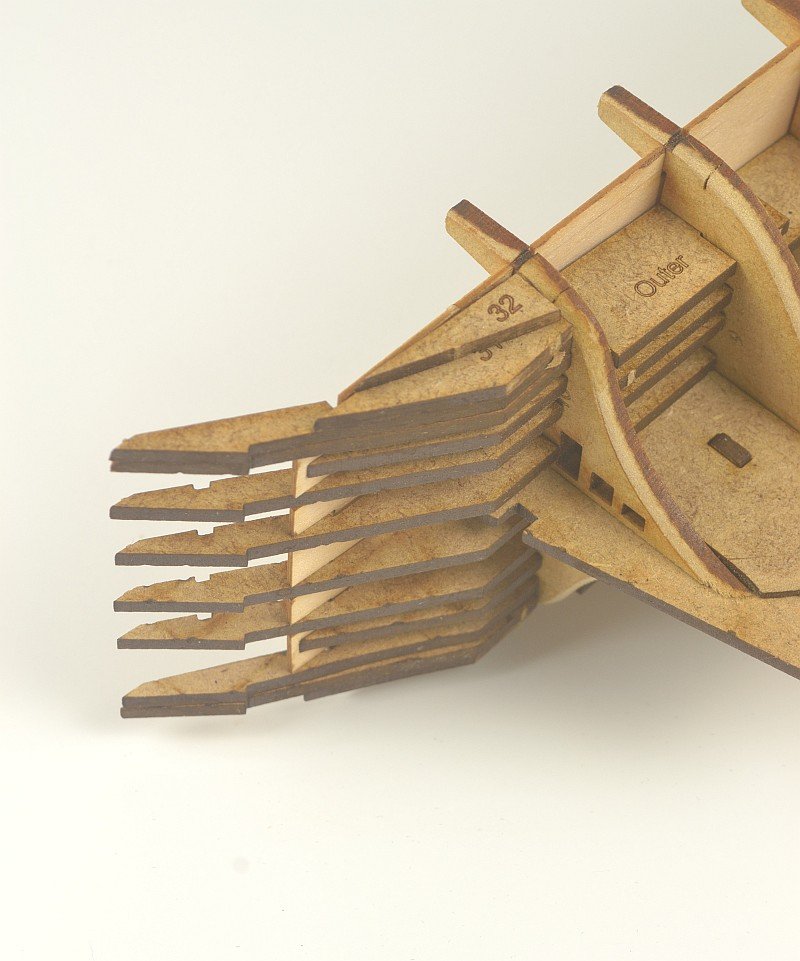
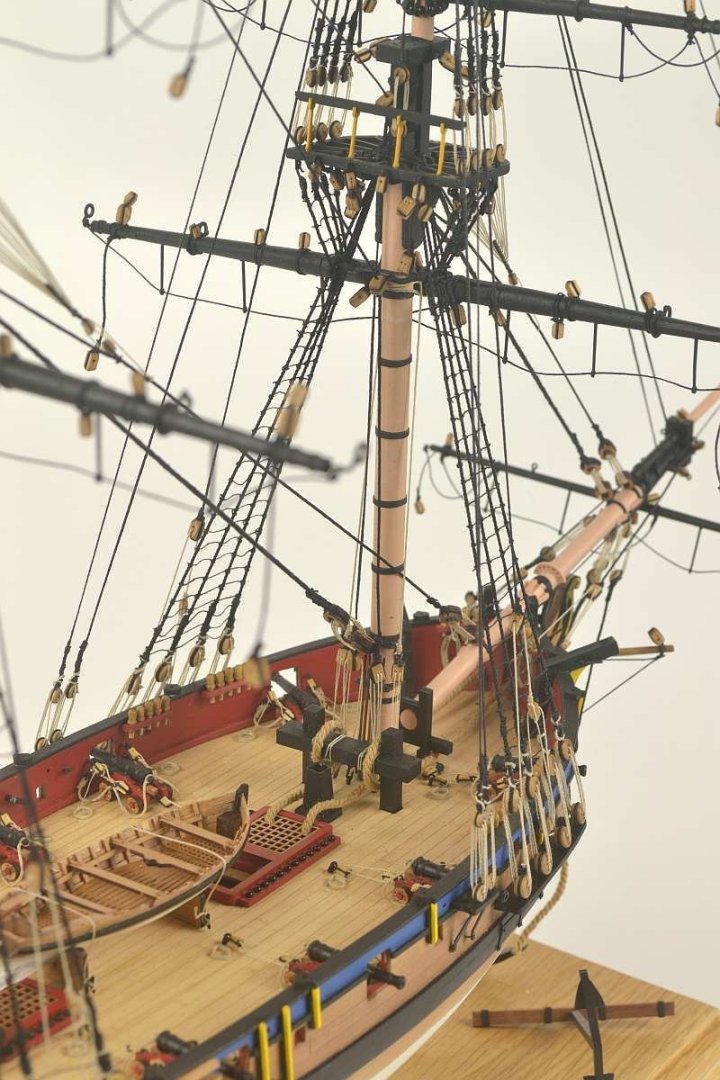
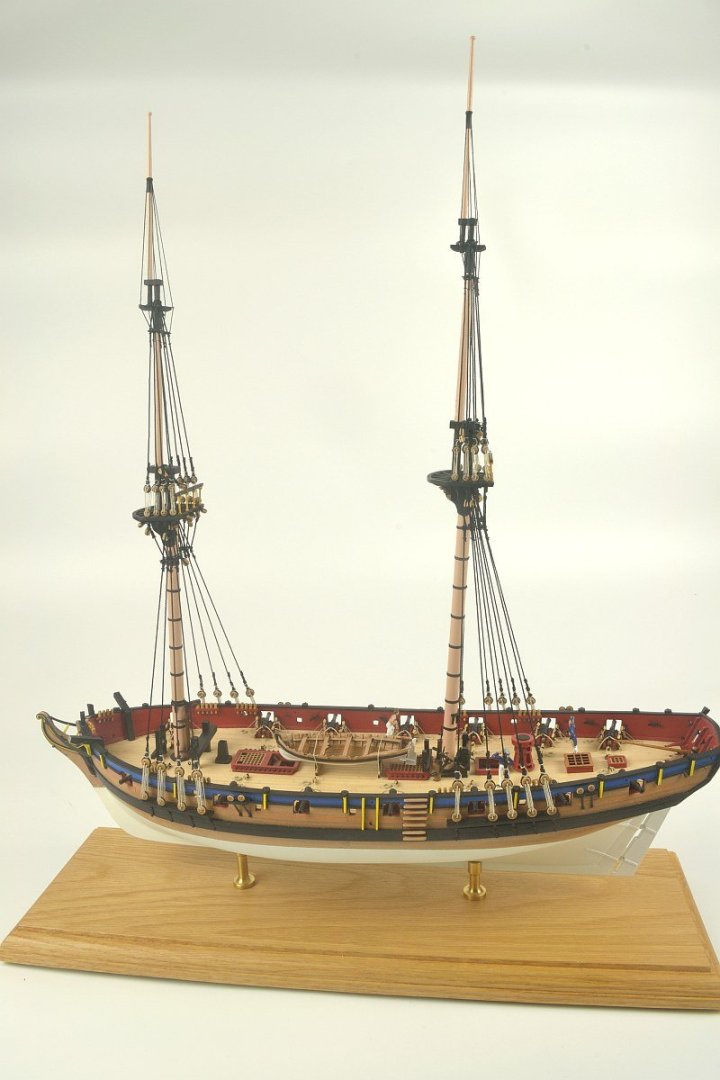
Hello - initial stages started. All Bulkheads that require some bevelling have been done prior to assembly to Keel as per instructions. Only minor sanding of slots to ease assembly was needed to prevent any breakages. No glue used at this stage. Lower Deck added along with the Well / Hold. The Well / Hold was glued in place. Then the various pieces that make up the Stern fitted along with the two parts that run parallel almost the length of the frame. The Sub Deck was slotted in along with some additional pieces at the Stern which were glued in place. Then the all Bulkheads etc were glued. Next will be some more piece to add to the underneath of Stern section. Thank you for looking and the previous 'Likes' Regards Doug
-
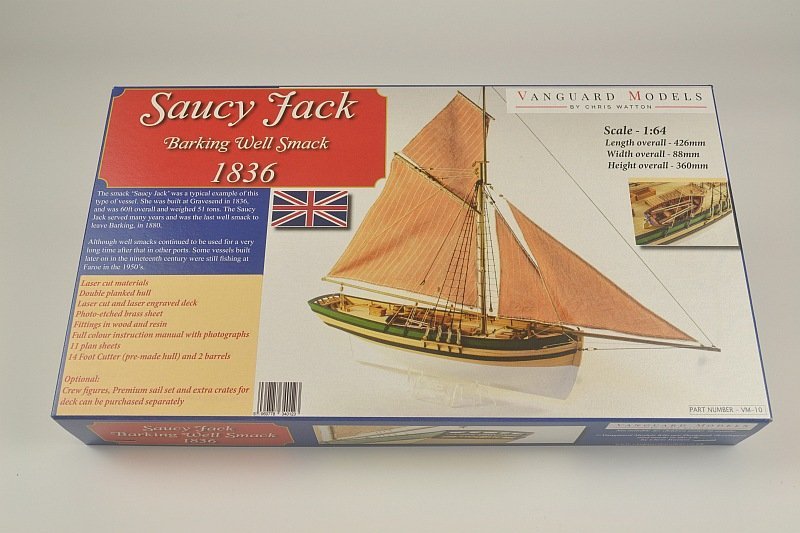
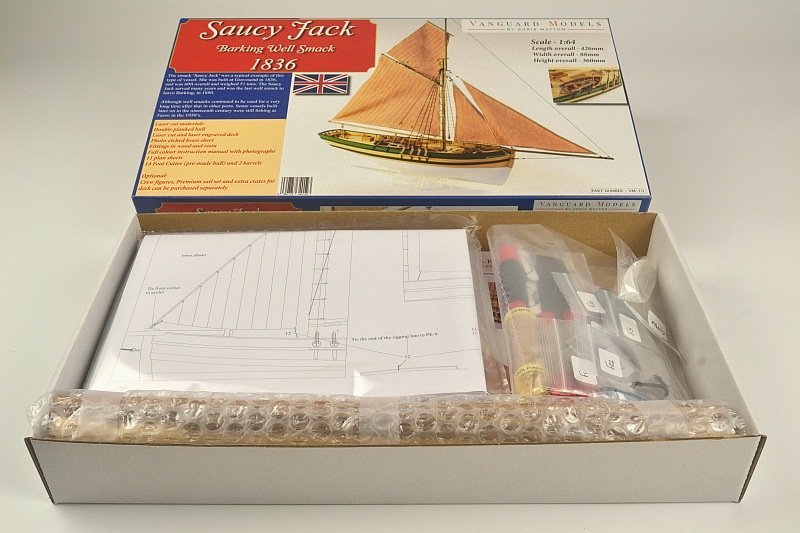
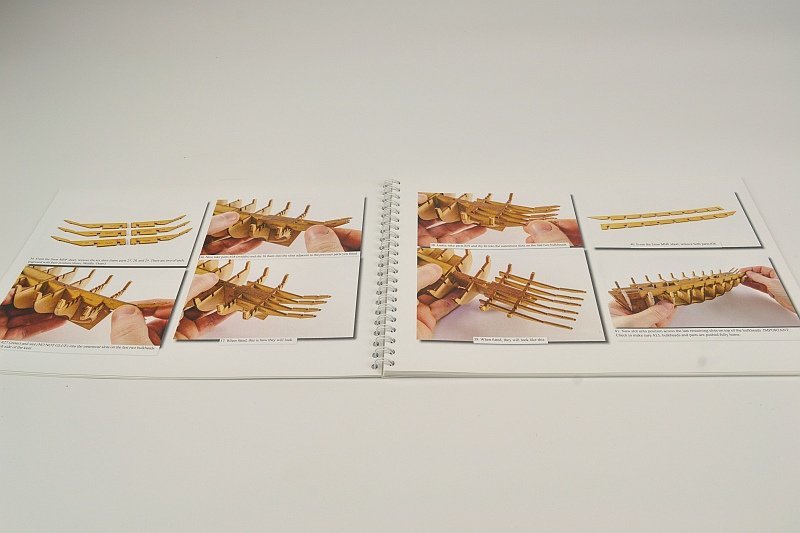
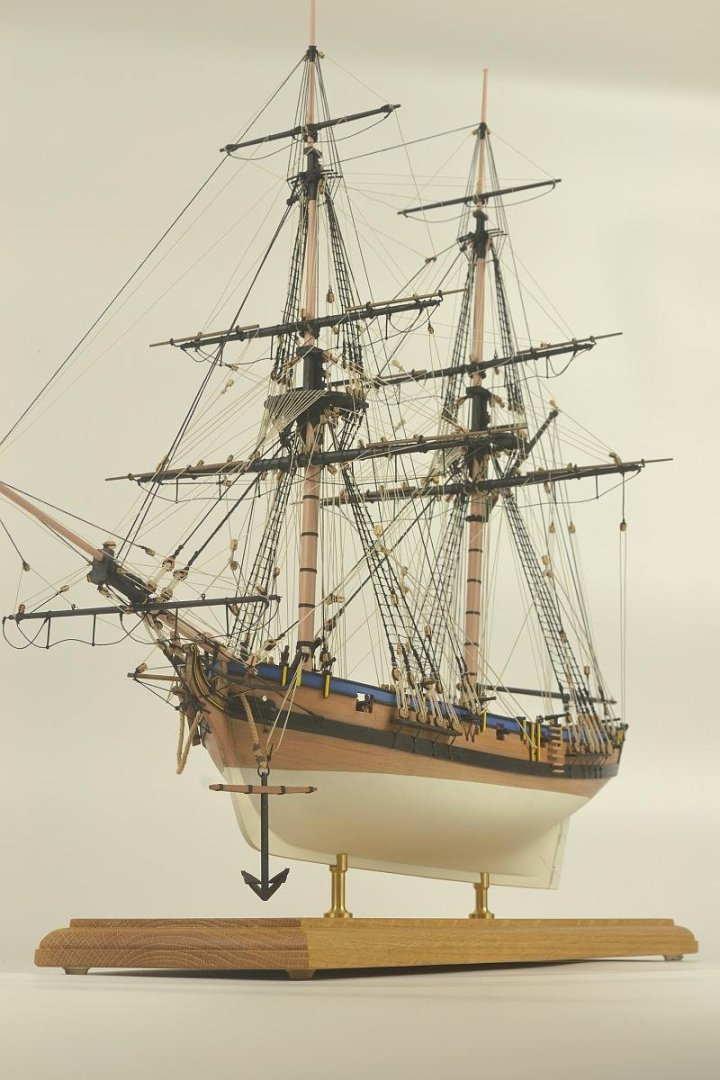
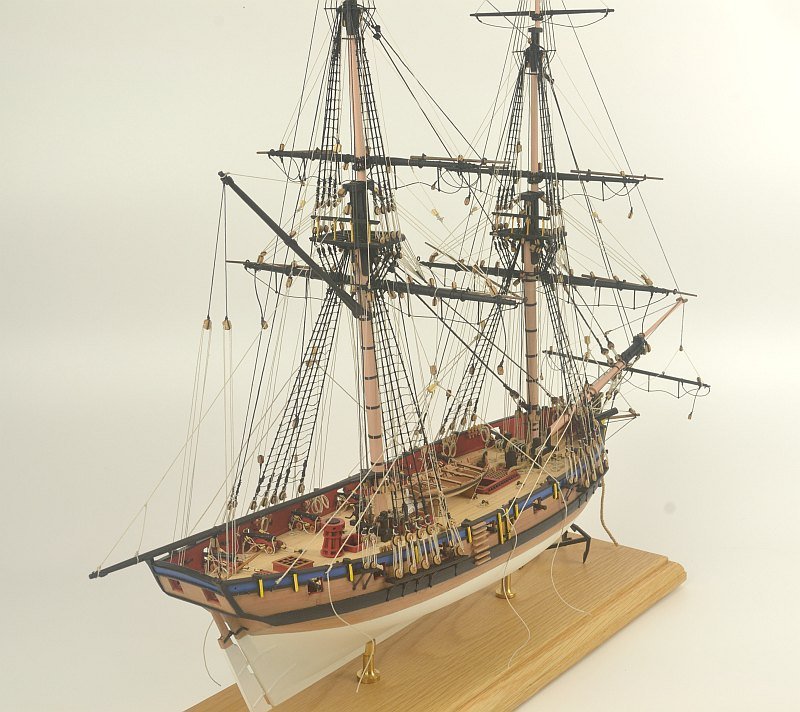
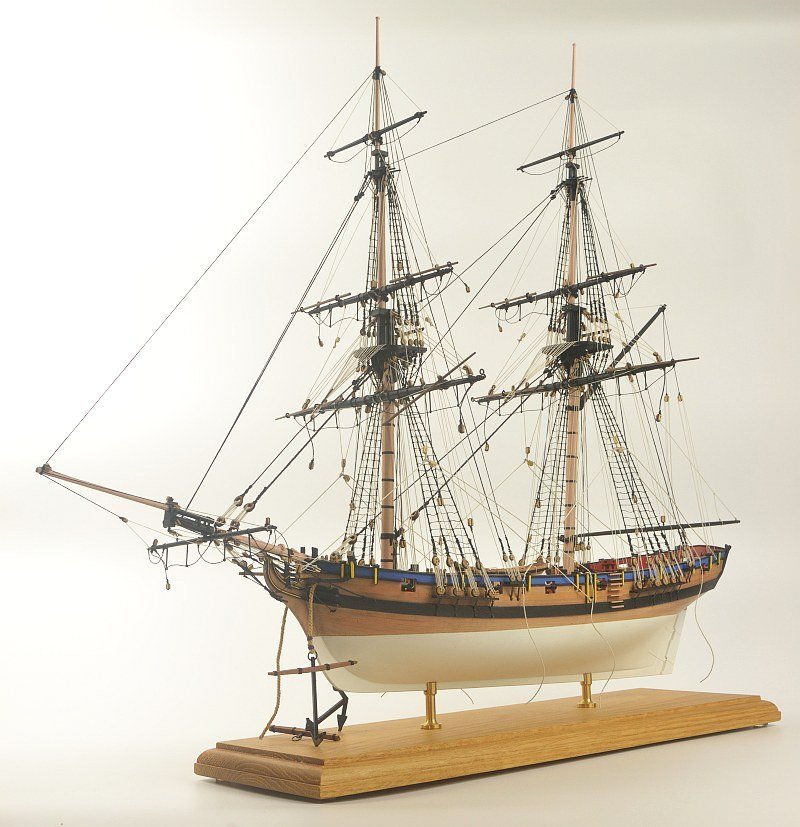
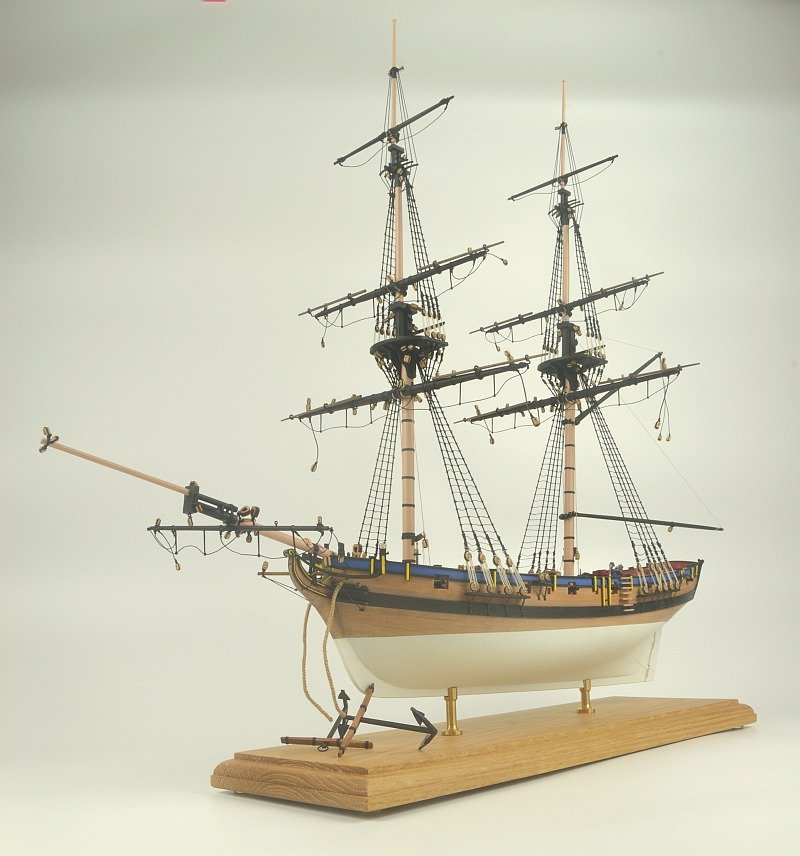
Hello - Just wanted to start this log by uploading the box cover and contents. The contents are nicely packed and in good order. As with Vanguard model kits there is a lovely illustrated instruction book along with 11 sheets of plans. Also ordered the upgraded sail set. Regards Doug
-
Dfell reacted to a post in a topic:
HMS Fly by aliluke - Amati/Victory Models - 1/64
-
Dfell reacted to a post in a topic:
HMS Speedy by Theodosius - Vanguard Models - 1:64
-
 Dfell reacted to a post in a topic:
HM Brig-Sloop Speedy by DennisL - FINISHED - Vanguard Models
Dfell reacted to a post in a topic:
HM Brig-Sloop Speedy by DennisL - FINISHED - Vanguard Models
-
Dfell reacted to a post in a topic:
HMS Fly by ccoyle - FINISHED - Amati/Victory Models - 1/64
-
Dfell reacted to a post in a topic:
HM Cutter Alert by Thukydides - Vanguard Models - 1:64 - first build
-
Dfell reacted to a post in a topic:
HMS Sphinx by Delf - Vanguard Models - 1:64 scale
-
Dfell reacted to a post in a topic:
HMS Jason by Beef Wellington - Caldercraft - 1:64 - Artois-class frigate modified from HMS Diana 1794
-
Dfell reacted to a post in a topic:
HM Cutter Alert by Thukydides - Vanguard Models - 1:64 - first build
-
Dfell reacted to a post in a topic:
HMS Indefatigable 1794 by Blue Ensign - FINISHED - Vanguard Models - 1:64 scale
-
Dfell reacted to a post in a topic:
HMS Indefatigable 1794 by Blue Ensign - FINISHED - Vanguard Models - 1:64 scale
-
Excellent - looks good. Well done.
-
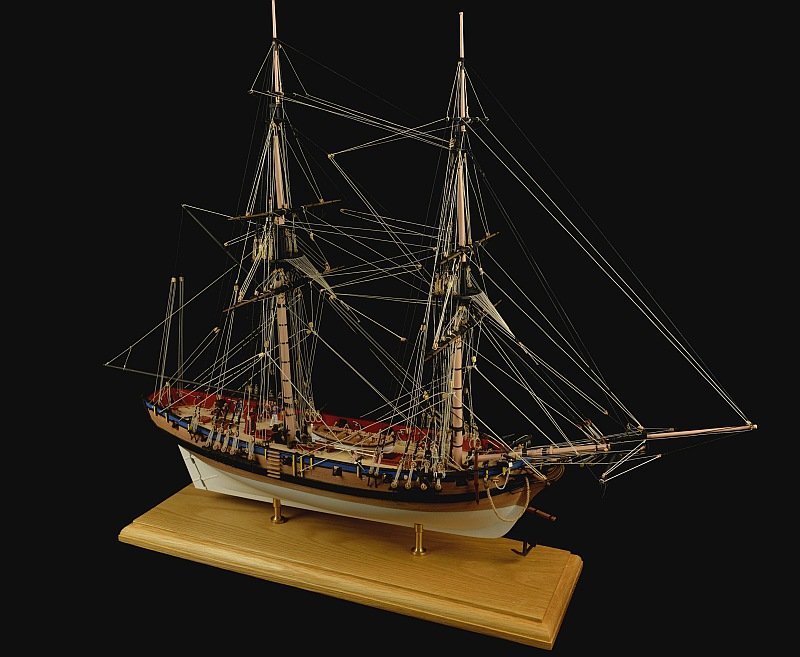
Hello - final pictures of my HMS Flirt. Trying to show the rigging hopefully a bit better. Thank you all for the encouragement and nice comments during the build. Nearly had a disaster with the waterline thinking I ought to keep the keel level as it would be a problem to source brass mounting columns. In the end sorting that out was fairly easy. Think my next build will be something with less rigging - probably Vanguard 'Saucy Jack'. This has not been a log showing how to build Flirt as it comes with a very good manual and I did not encounter any real problems other than my dodgy building skills / lack of knowledge. Anyway again thank you for looking - the comments and 'likes' Regards Doug
- 102 replies
-
- 13
-
-
-
- Flirt
- Vanguard Models
- (and 1 more)
-
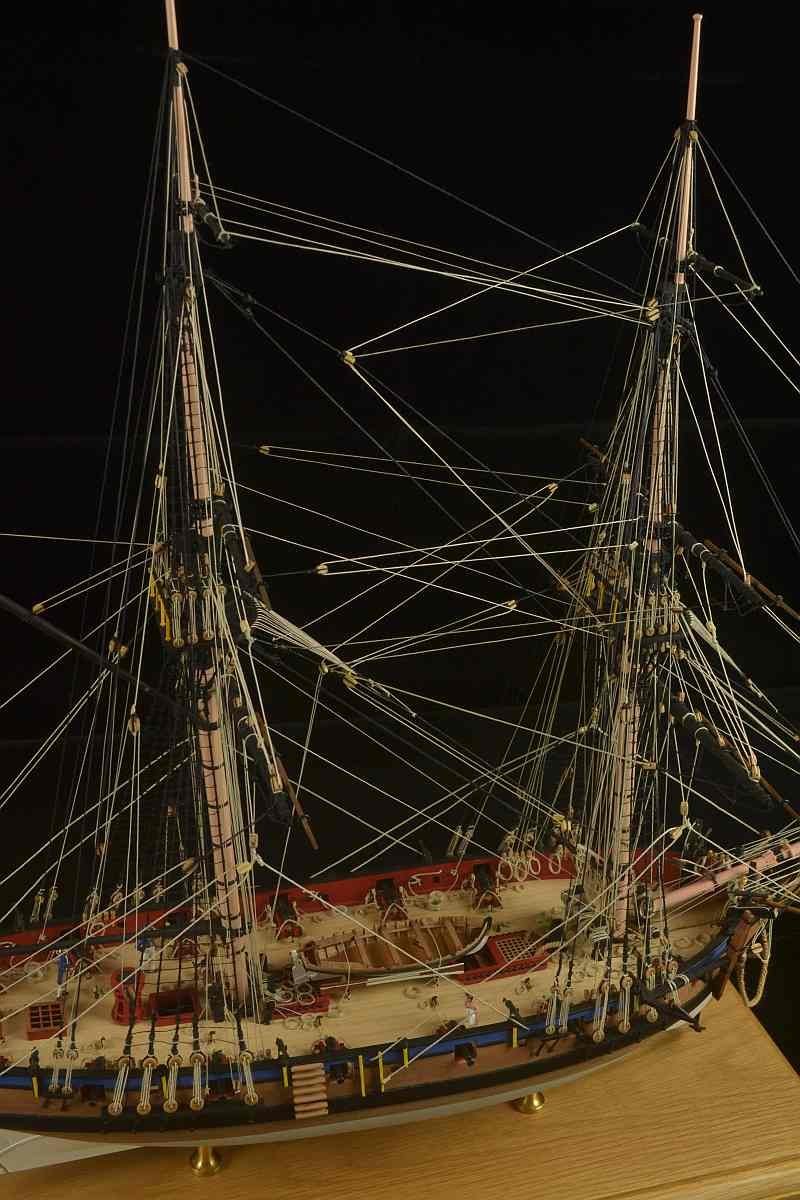
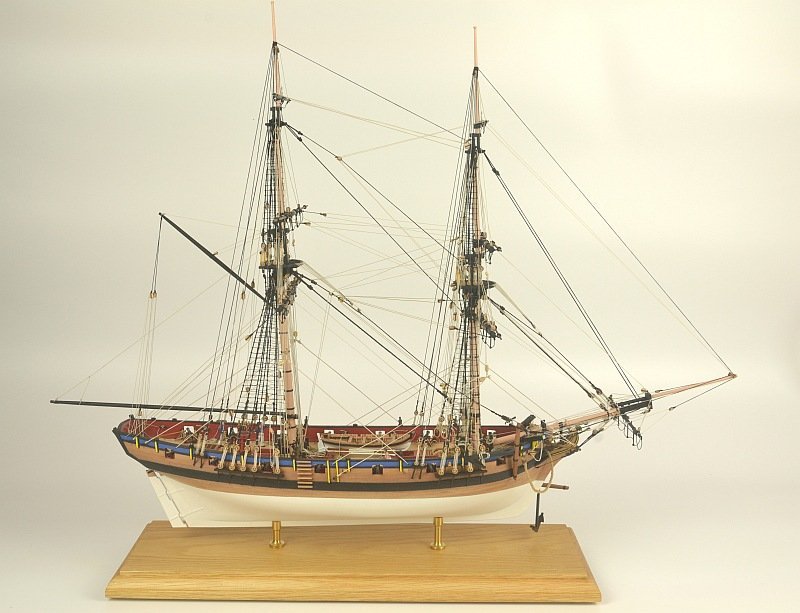
Hello - Have now finished HMS Flirt. A lot of rigging...... Going to have to take a few more photos with a black background as the white thread is not showing up as much as I hoped against the white background. Some threads not tied off as instructed - have found more suitable belaying places. Found these tools helpful with doing the rigging. Not sure if all these rope coils spoil things - maybe the way I do coils etc does.... Hope you don't mind but will upload later few more photos with a black background. Thanks for looking. Regards Doug

- 102 replies
-
- 18
-
-
-
- Flirt
- Vanguard Models
- (and 1 more)
-
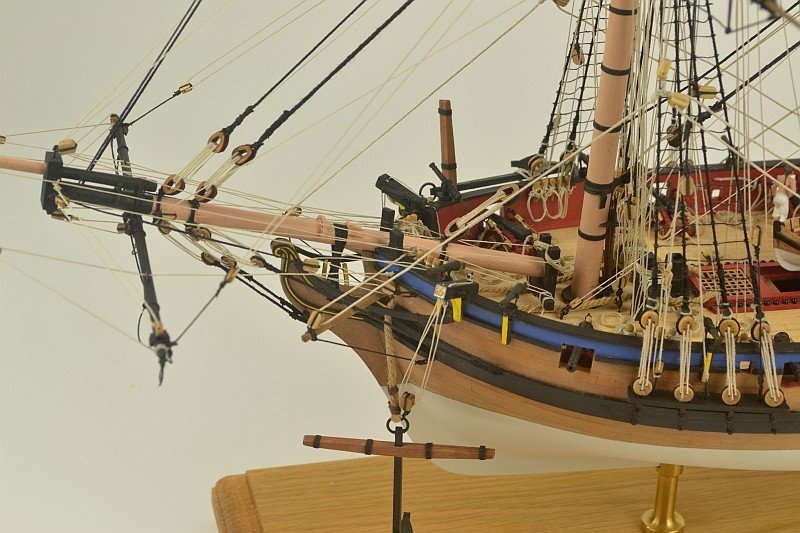
Right - That's sheet plan 9 finished. Just one more to go for the rigging - it's getting mighty difficult to belay any lines and there is plenty more to be tied off on the same piece of furniture. Made a mistake - realised when half way along stropping the blocks for the Top Sheet Clew lines I had done them in natural thread when I should have done them in black. Having tied them off I did not fancy doing them again so carried on doing the same for the lower section. Have not tied them off so as to gain access as instructed to finish plan 10. Final picture. Just noticed one of the stunsails has dropped down 😕 Thanks for looking and the comments / 'Likes' Doug

- 102 replies
-
- 15
-
-
-
- Flirt
- Vanguard Models
- (and 1 more)
-
The building board a clever piece of work. Always a joy to see your work. Doug
- 614 replies
-
- 3
-
-
- Indefatigable
- Vanguard Models
- (and 1 more)
-
Hello navarcus - wouldn’t think they do. Other rope lines are attached. You need to ask someone with more knowledge than me - I can see why you’re asking but not sure how the anchors would be handled easily. The anchor rope wrapped around bitts - just followed instructions. All the best Doug
-
Hello Alistair It’s good to see you back and you’re going to finish your superb Fly. Thank you for your lovely comments - you are being too generous but much appreciated especially coming from someone whose work is up there with the best. Like you I also make model plane kits - Guillows - balsa wood and tissue paper. Regards Doug
- 102 replies
-
- 6
-
-
-
- Flirt
- Vanguard Models
- (and 1 more)
-
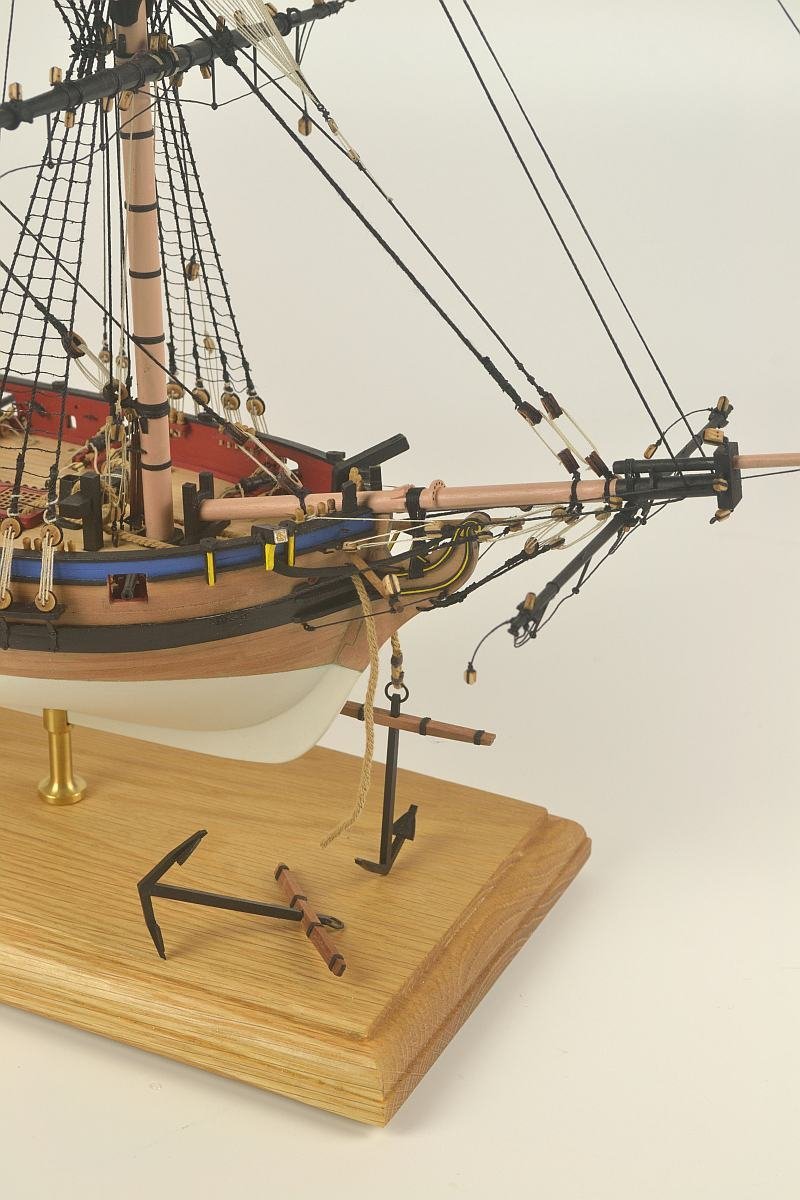
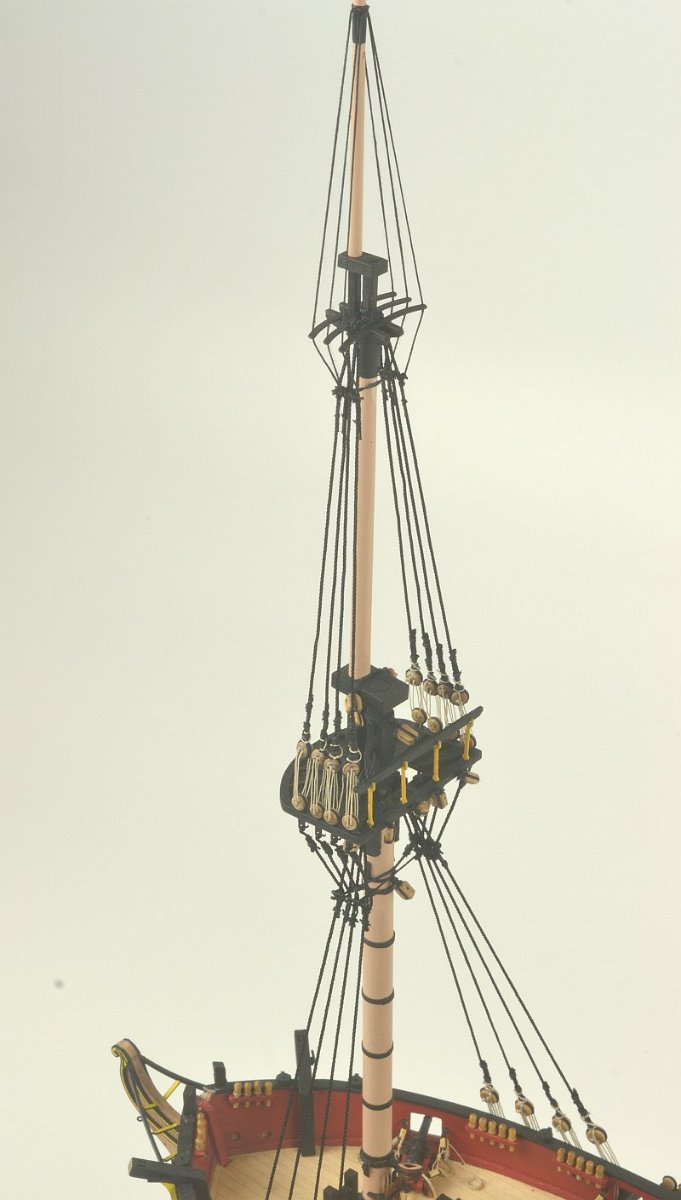
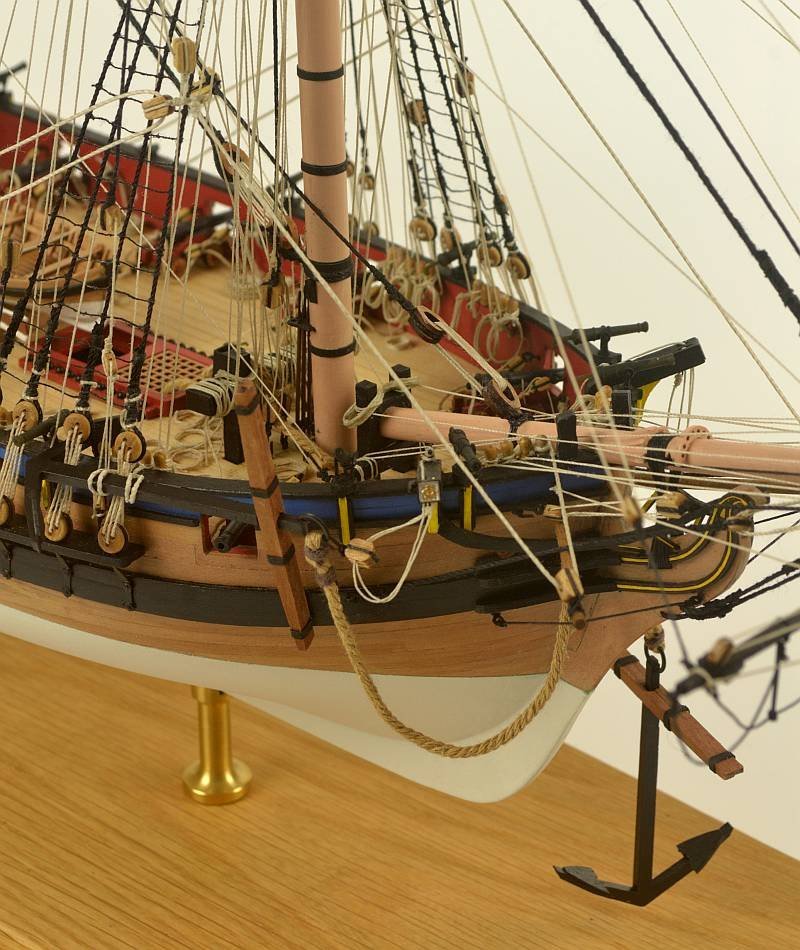
Hello - more progress. All Stays and Preventer Stays etc installed, plus Crowsfeet. The instructions suggest to use F-14 and 15 which are larger Parral Beads for the Mouse but I had used them for the Main Boom and Driver Boom as the plans did not say which beads to use on them although the plans showed larger beads on the Booms. So had to make the Mouse with turning some dowel. Also found out what the wooden beads were used for - they are Thimble blocks for the Topgallant Mast Stay. At fault for not studying the plans further ahead. Bowsprit Stays. Thank you for looking. Regards Doug
- 102 replies
-
- 14
-
-
-
- Flirt
- Vanguard Models
- (and 1 more)
-
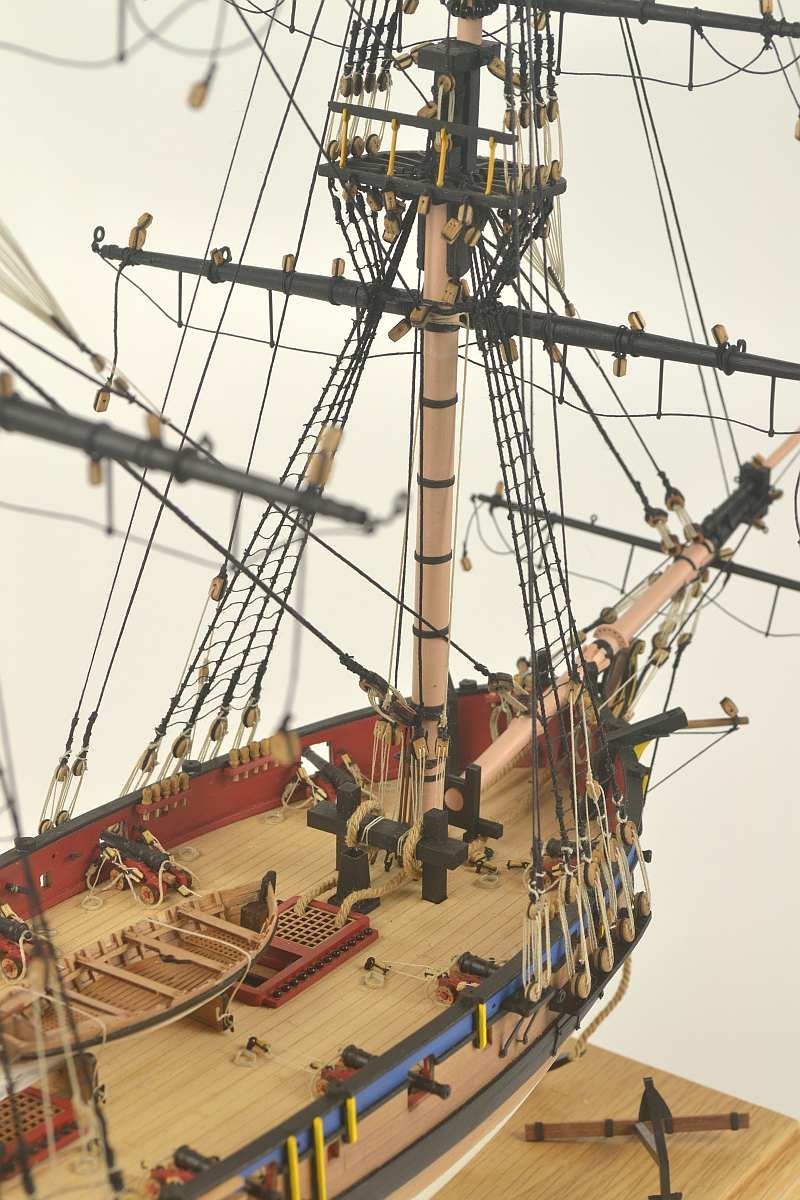
Hello - few steps forward. Ratlines etc done although have made another bad decision on use of thread. Used black sewing cotton instead of what was instructed. It started off okay but then realised the black cotton thread was varying in thickness and was getting fuzzy but as I was over half way decided to continue. Yards attached with Parral Ribs and Beads although there is no reference to which Beads are needed for the Main Boom and Driver. Used the largest Beads for the Main Boom - there was also a packet of wooden Beads which I assumed were for builds which were not being painted. Thanks for looking and the 'Likes' - much appreciated. Thank you Regards Doug

- 102 replies
-
- 13
-
-
- Flirt
- Vanguard Models
- (and 1 more)
-
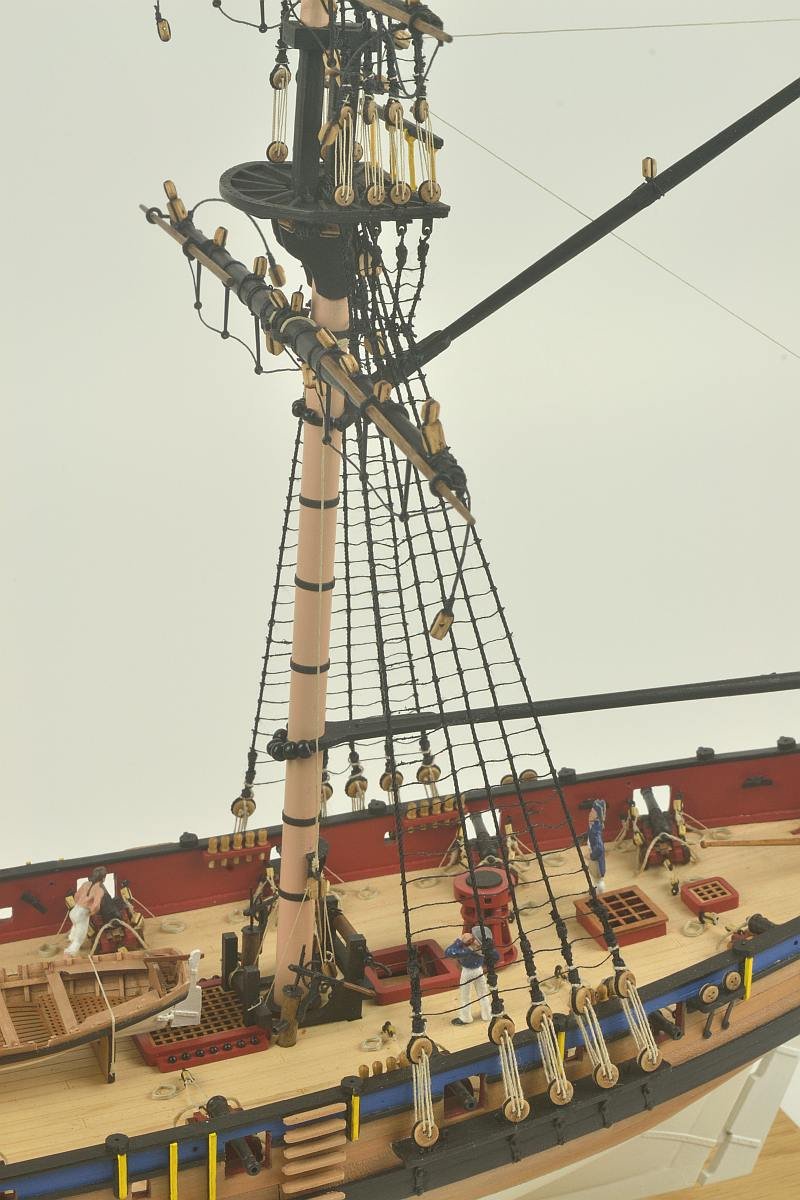
Hello - Upper Shrouds completed. Kind of wished now I discarded the supplied 1.0 and 0.75 thread and used previous thread left over from other builds as there is no difference between the two sizes of the supplied thread possibly the Upper Shrouds may look wrong. Next the Ratlines - so maybe some time....... Thank youOldsalt1950 for looking and your nice comment. 1950 was a good year........ Regards Doug


- 102 replies
-
- 11
-
-
-
- Flirt
- Vanguard Models
- (and 1 more)
-
Hello - further progress. All Yards / Bowsprit Yard / Gaff and Boon Yards shaped, rigged etc. Boomkins shaped and dry fitted with pins. Lower Shrouds completed. Used hooks at the ends of the Catharpins to fix onto the Futtock Staves. Had a problem with identifying the correct size thread as it was very difficult to distinguish between 1.0 and the 0.75. and I only had what looked like half the amount of the 1.0, labelled H thread. It looked possible slightly thicker than the 0.75 but when both pulled tight the labelled 0.75 looked thicker so this is what I used for the Lower Shrouds and also there was more of it. I did ask Chris for some more 0.75 but did not hear back - it was over the Christmas hols. So I have used what was marked as 1.0 thread on the Upper Shrouds and just had enough. The labelled 0.75 was much thicker than the other thread I had left from previous builds but the texture was different so I kept to the supplied thread for the Shrouds as it looked better. Everywhere else I used the other left over 0.75 black thread. Looks like there's a mark on my camera lens which needs to be sorted..... Thank you for looking, Regards Doug

- 102 replies
-
- 9
-
-
- Flirt
- Vanguard Models
- (and 1 more)
-
Just come across your build - that’s some amazing work!!