GTM
-
Posts
249 -
Joined


-
 AJClark reacted to a post in a topic:
Santisima Trinidad by GTM - OcCre - 1:90 - Kit Bashed
AJClark reacted to a post in a topic:
Santisima Trinidad by GTM - OcCre - 1:90 - Kit Bashed
-
AJClark reacted to a post in a topic:
Santisima Trinidad by GTM - OcCre - 1:90 - Kit Bashed
-
Vinnie reacted to a post in a topic:
Santisima Trinidad by GTM - OcCre - 1:90 - Kit Bashed
-
cristikc reacted to a post in a topic:
Santisima Trinidad by GTM - OcCre - 1:90 - Kit Bashed
-
maddog33 reacted to a post in a topic:
Santisima Trinidad by GTM - OcCre - 1:90 - Kit Bashed
-
maddog33 reacted to a post in a topic:
Santisima Trinidad by GTM - OcCre - 1:90 - Kit Bashed
-
maddog33 reacted to a post in a topic:
Santisima Trinidad by GTM - OcCre - 1:90 - Kit Bashed
-
maddog33 reacted to a post in a topic:
Santisima Trinidad by GTM - OcCre - 1:90 - Kit Bashed
-
maddog33 reacted to a post in a topic:
Santisima Trinidad by GTM - OcCre - 1:90 - Kit Bashed
-
maddog33 reacted to a post in a topic:
Santisima Trinidad by GTM - OcCre - 1:90 - Kit Bashed
-
GTM reacted to a post in a topic:
Santisima Trinidad by GTM - OcCre - 1:90 - Kit Bashed
-
 Hej sjors, Please don’t worry, I’m still alive and kicking Overwhelming activity in my Business/work is preventing me mainly to come with frequent new updates .. Nevertheless I’m still working (every now and then) on the ST and hopefully will be able to post an update soon. be alert...
 -
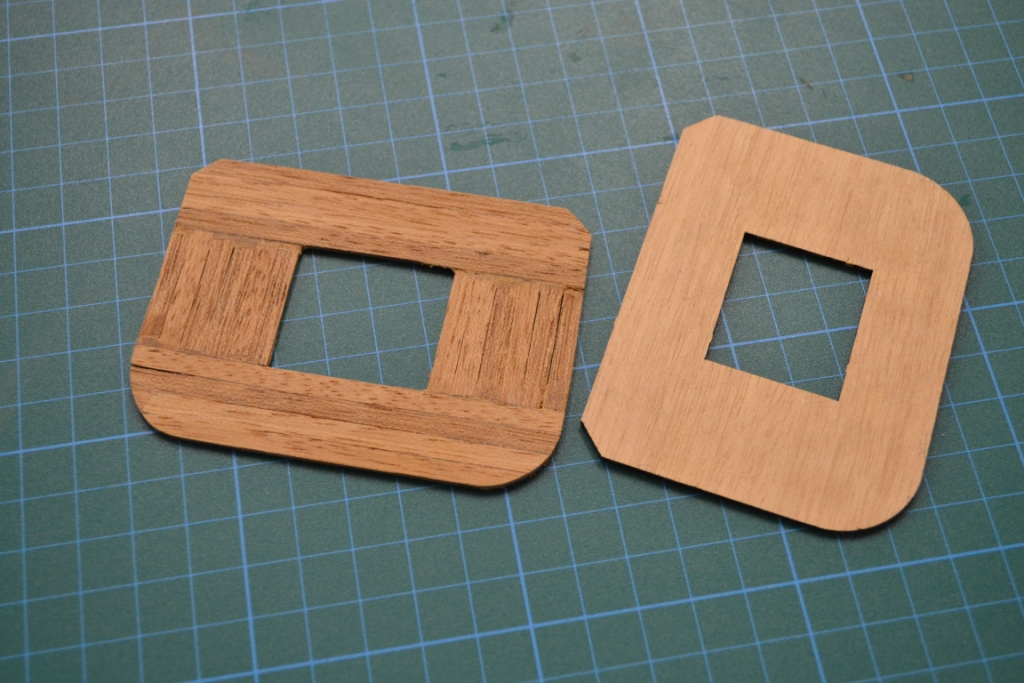
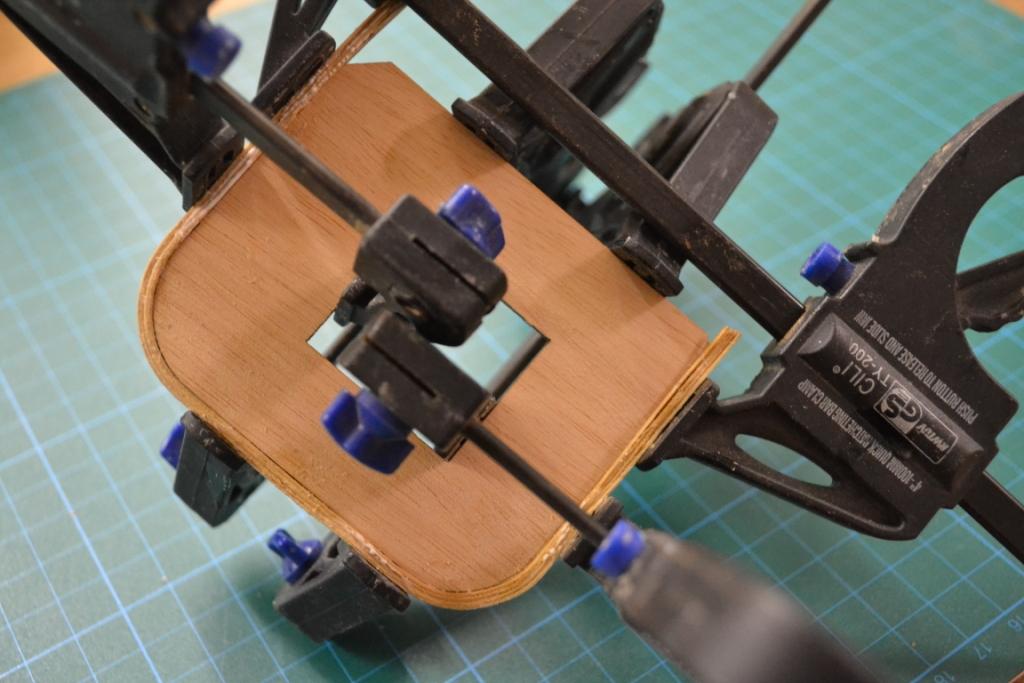
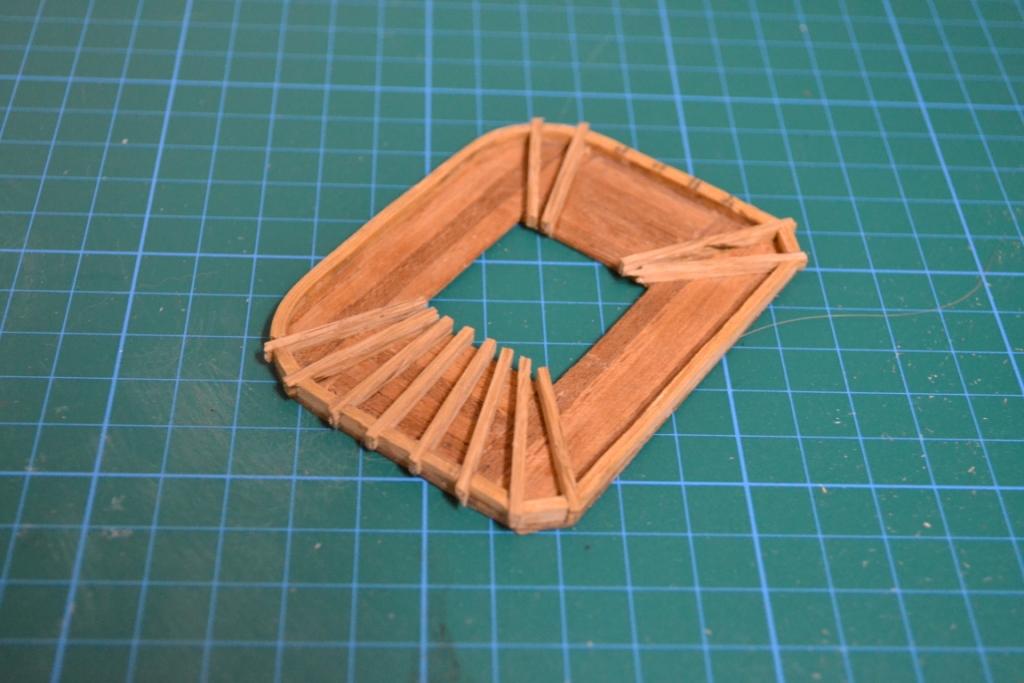
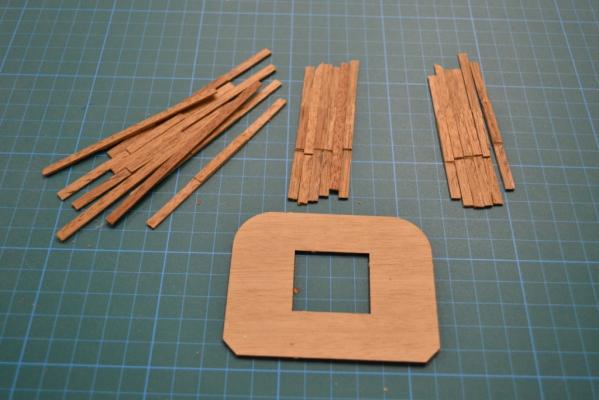
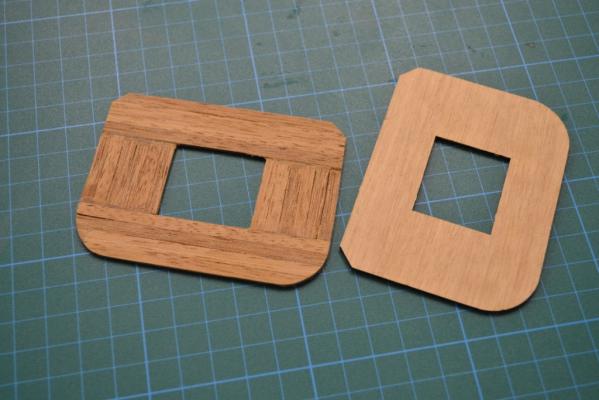
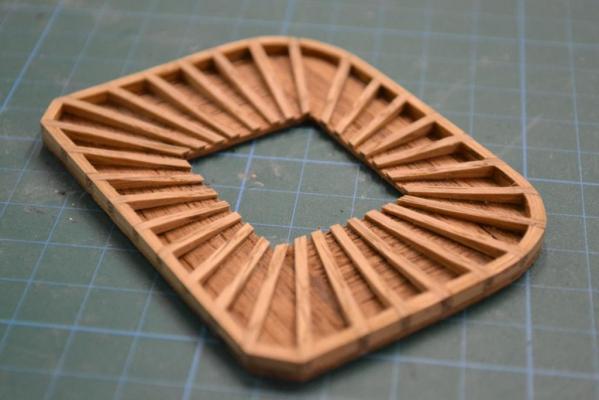
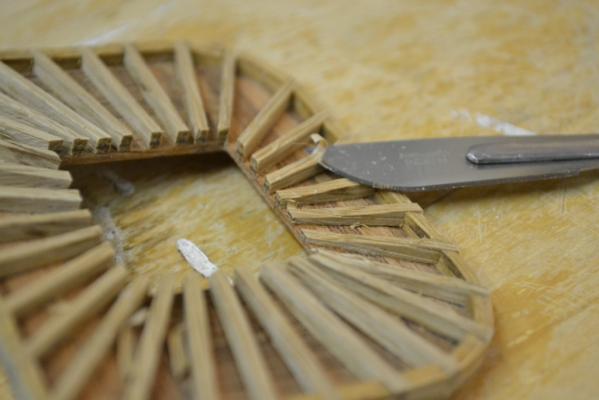
Thank you all, for the motivating responses .. And guess what ! (almost after a year), an real update !! I have cleared an corner in the basement and started concentrating on the tops of the ST. Again the kit version of the tops are made of plywood and are pretty basic, so naturally I will build them from scratch. So I started with preparing the planks for the platform itself. And to glue/shape the platform. The kits version doesn’t have a “ring” around it, so I decided to add one. For this I used the “size modified” plywood version as a template, and glued 4 pcs. Of 0.6mm oak strips together. Positioned the ribs.. .. and after some rough shaping, I started to shape all the ribs with a scalpel blade I can see now on the pictures that 'm still a bit rusty, so a few "minor" details/adjustments are needed..


-
GTM reacted to a post in a topic:
Santisima Trinidad by GTM - OcCre - 1:90 - Kit Bashed
-
GTM reacted to a post in a topic:
Santisima Trinidad by GTM - OcCre - 1:90 - Kit Bashed
-
GTM reacted to a post in a topic:
Santisima Trinidad by GTM - OcCre - 1:90 - Kit Bashed
-
Thanks Mike for pulling up my build from the MSW archives, you must have digged very deep .. Hej Guys, I know it has been a long time without any updates the main reason is space.., i had to pack most of the stuff away as the shipyard had to be cleared when i (after a dramatic change in my employment) started my own business. The shipyard now looks more like a stockroom and is completely filled up with boxes and equipment. I hope to be able to clear a corner soon, so i can start working on her again So don't be surprised to see some "real" updates of the ST soon
-
GTM reacted to a post in a topic:
Santisima Trinidad by GTM - OcCre - 1:90 - Kit Bashed
-
GTM reacted to a post in a topic:
Santisima Trinidad by GTM - OcCre - 1:90 - Kit Bashed
-
GTM reacted to a post in a topic:
Harriet McGregor by Boccherini
-
GTM reacted to a post in a topic:
Wasa by md1400cs - FINISHED - Corel - 1:75
-
GTM reacted to a post in a topic:
Sovereign of the Seas by cristikc - Mantua - 1:78 scale
-
GTM reacted to a post in a topic:
Sovereign of the Seas by cristikc - Mantua - 1:78 scale
-
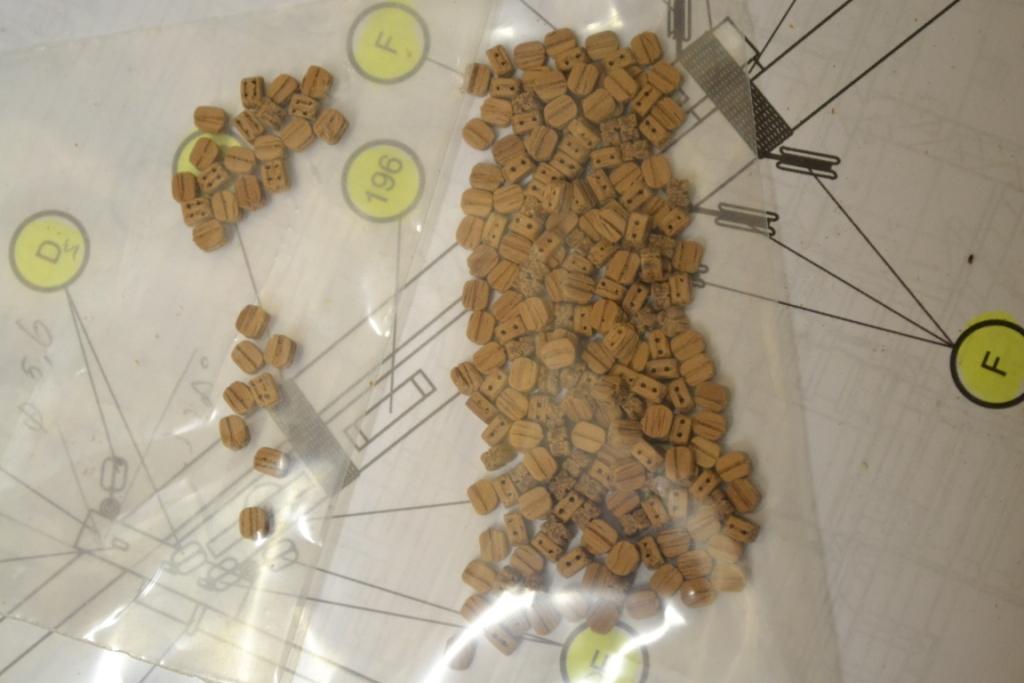
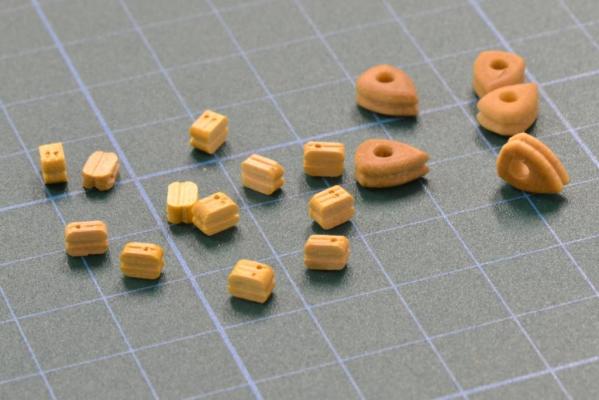
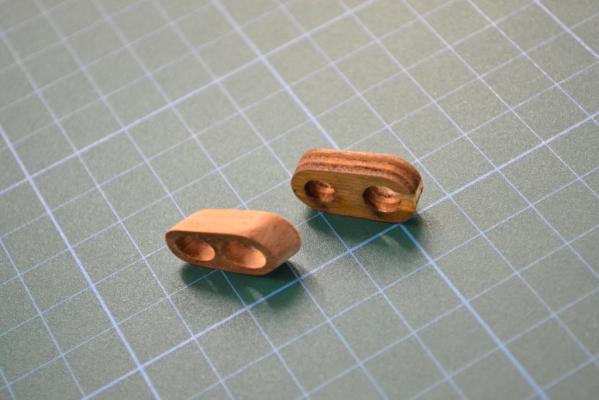
Not a lot of time I have spend on the ST, but I’m still alive and kicking So here’s an update about the progress I did so far. Instead of using the bright colored blocks provided by the kit, I made my own 4mm blocks out of teak wood. .. Not the best wood to use for manufacturing blocks.., too grainy as you will see and a lot of them ended in the trash .. But I like the color.. After having prepared the bowsprit, I placed it in position.., but I might regret it placing it in this early rigging stage of the build.


-
Thank you Jack & Michael Very appreciated and needed
-
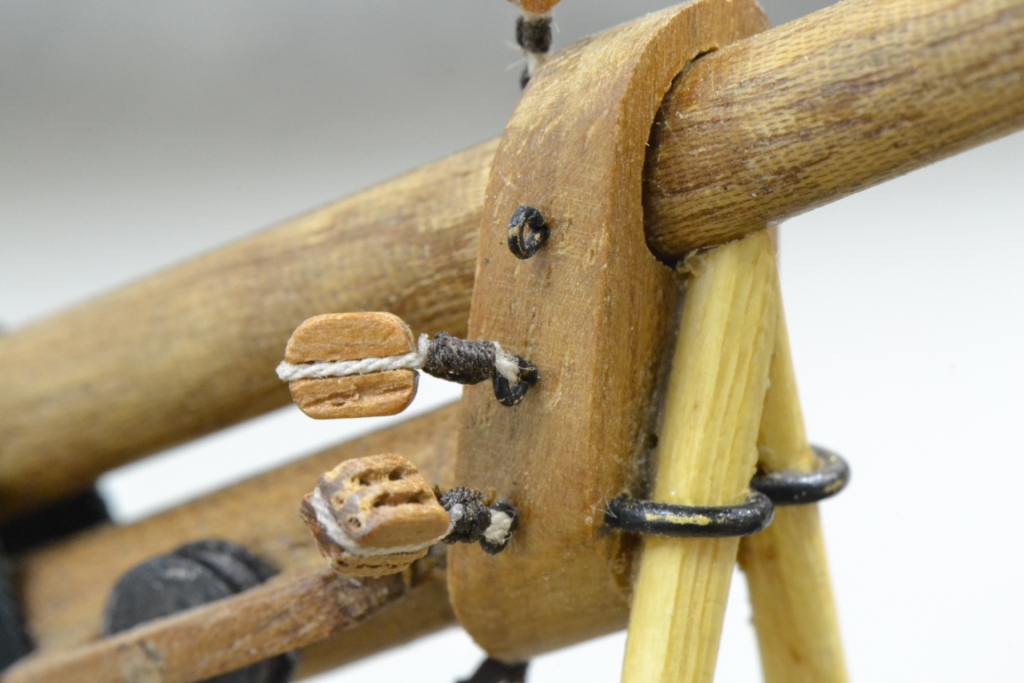
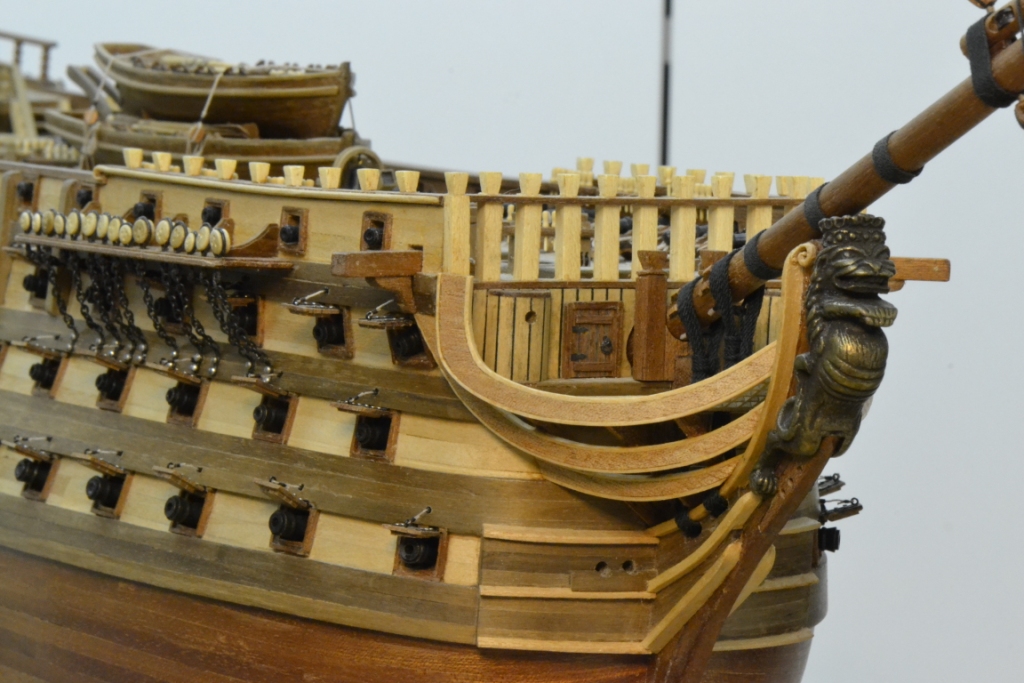
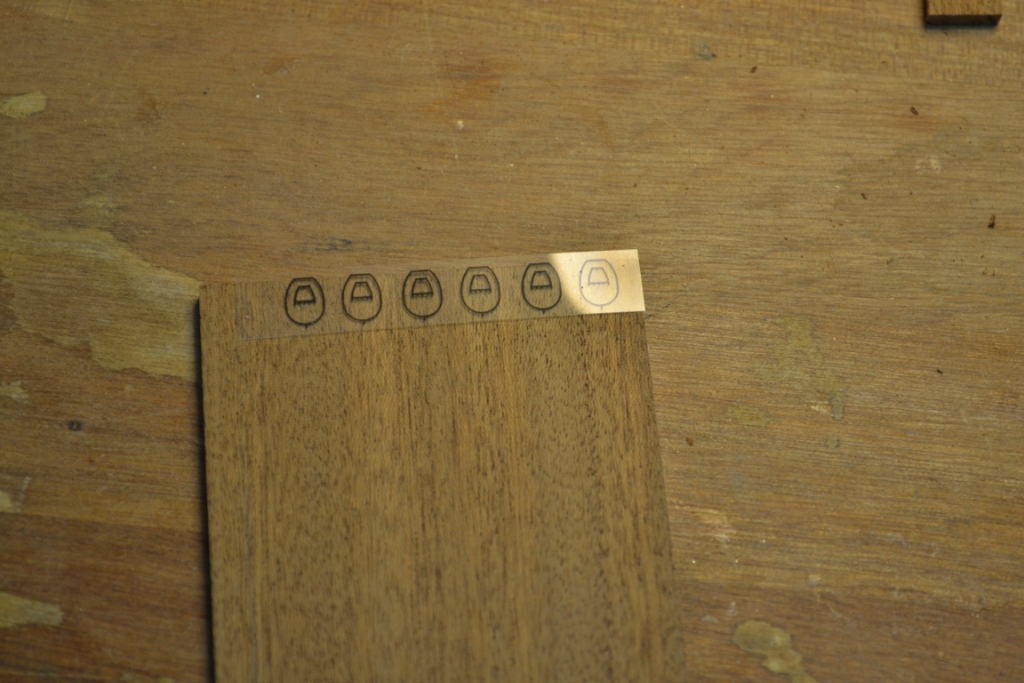
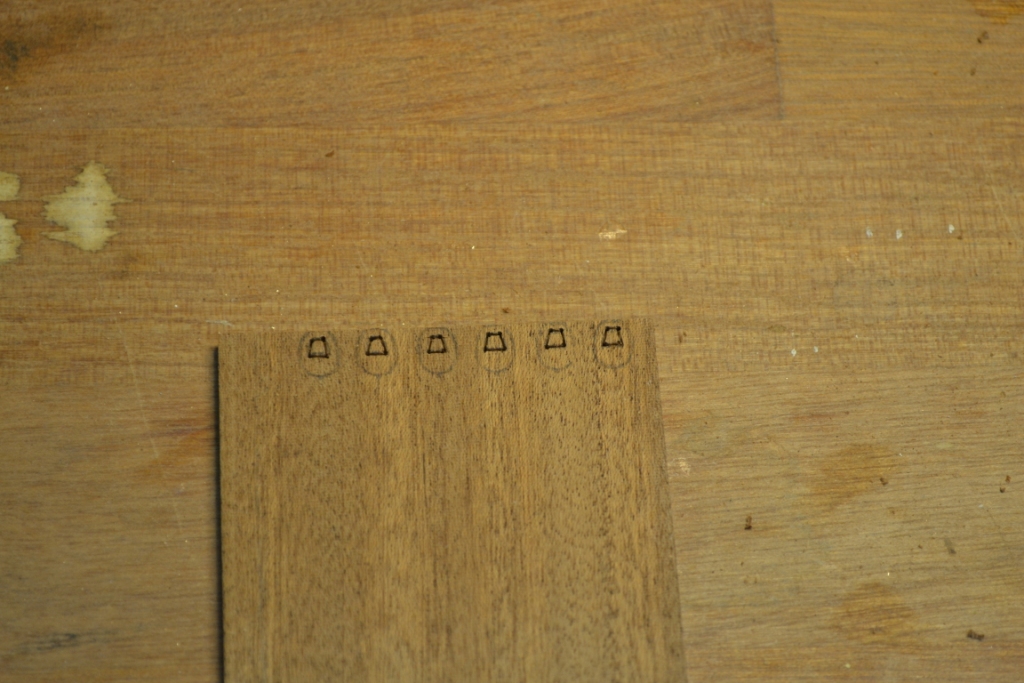
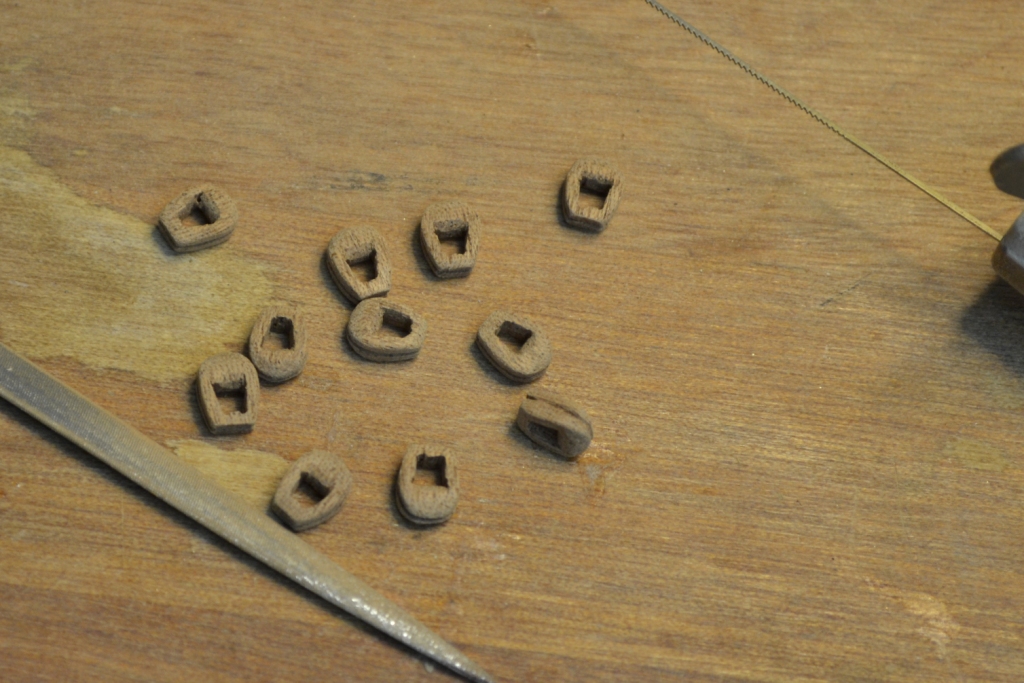
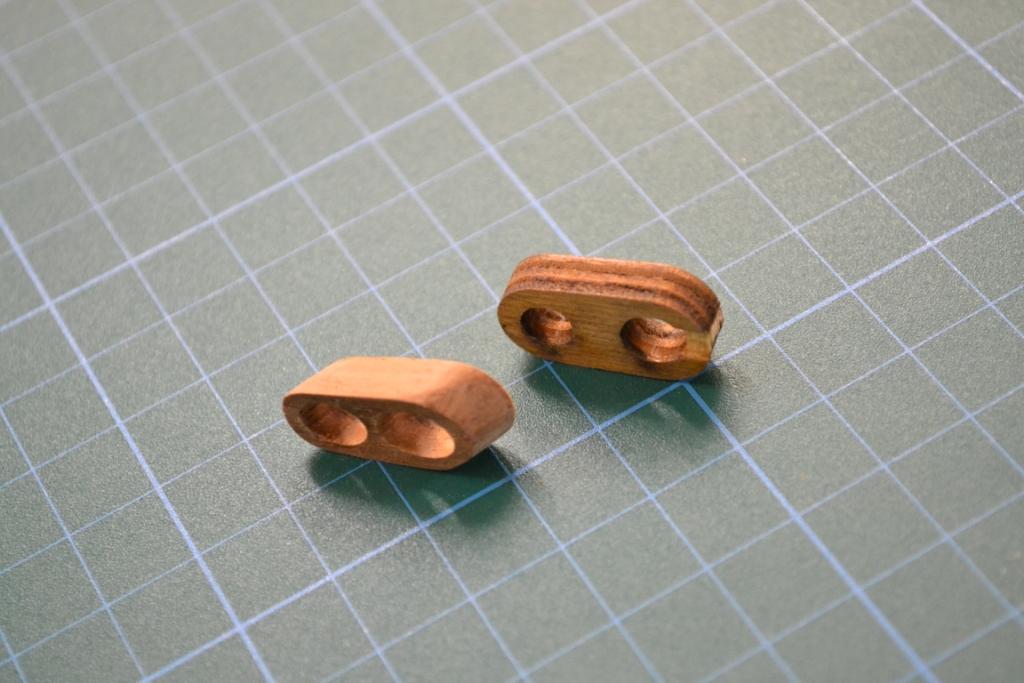
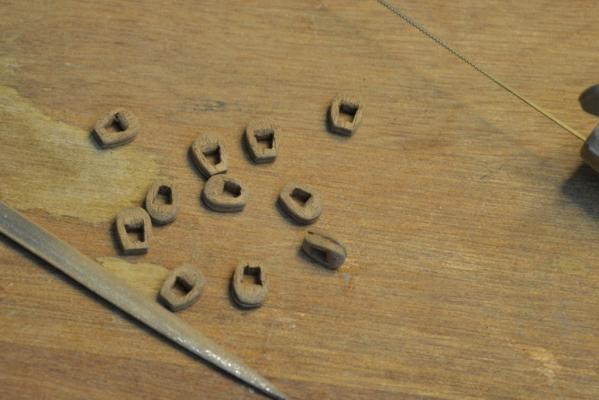
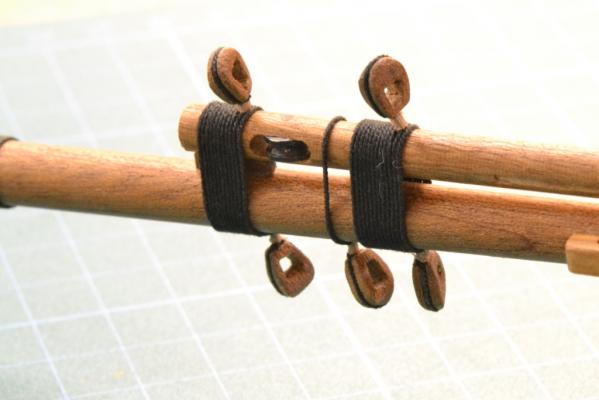
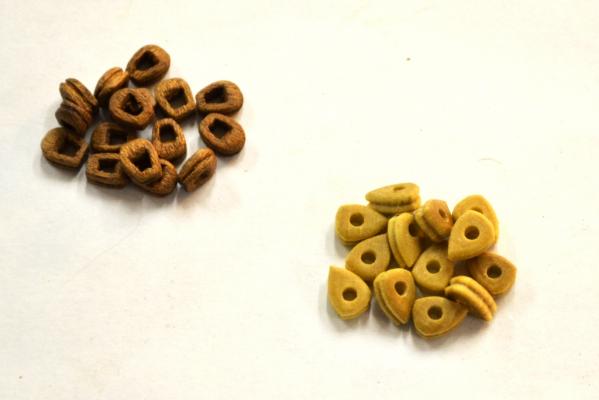
Thanks David, An dramatic change of employment has taken all my attention at the moment I’m afraid future updates on the ST will be quite irregular for an unknown period of time. An minor update. I (finally) managed to make my own hearts from teak wood and mounted/rigged the first ones on the bowsprit.. Underneath an visual sequense ..

-
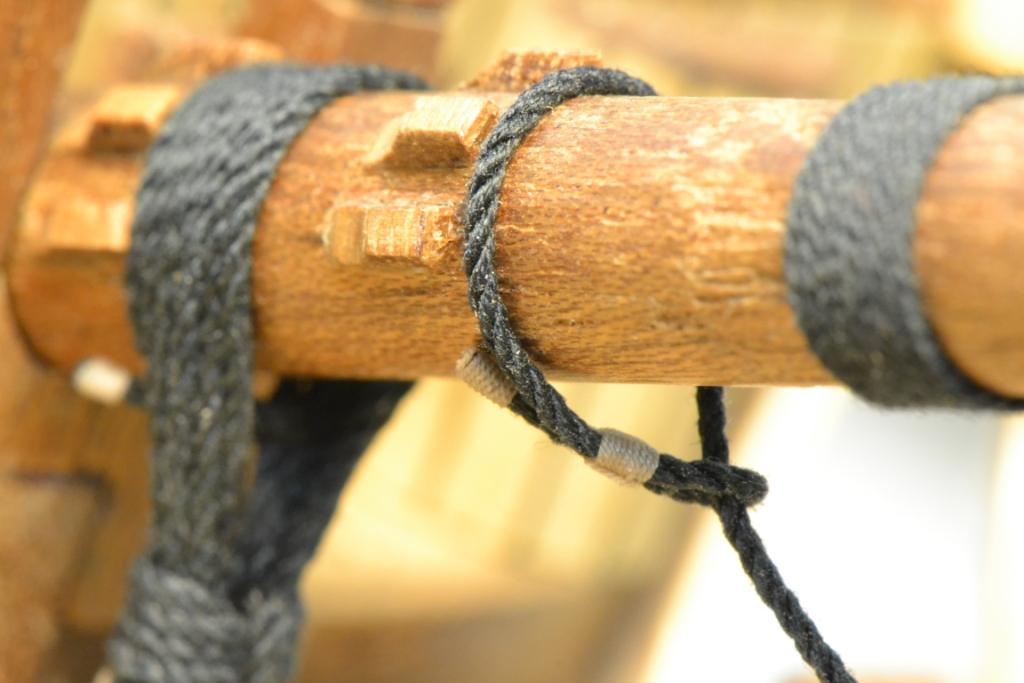
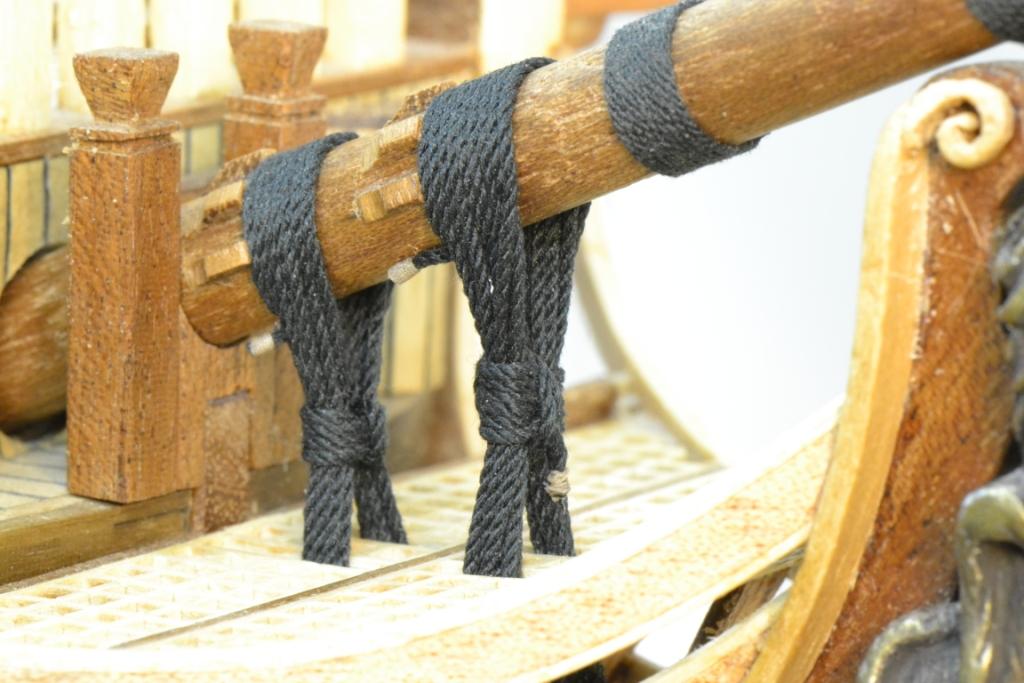
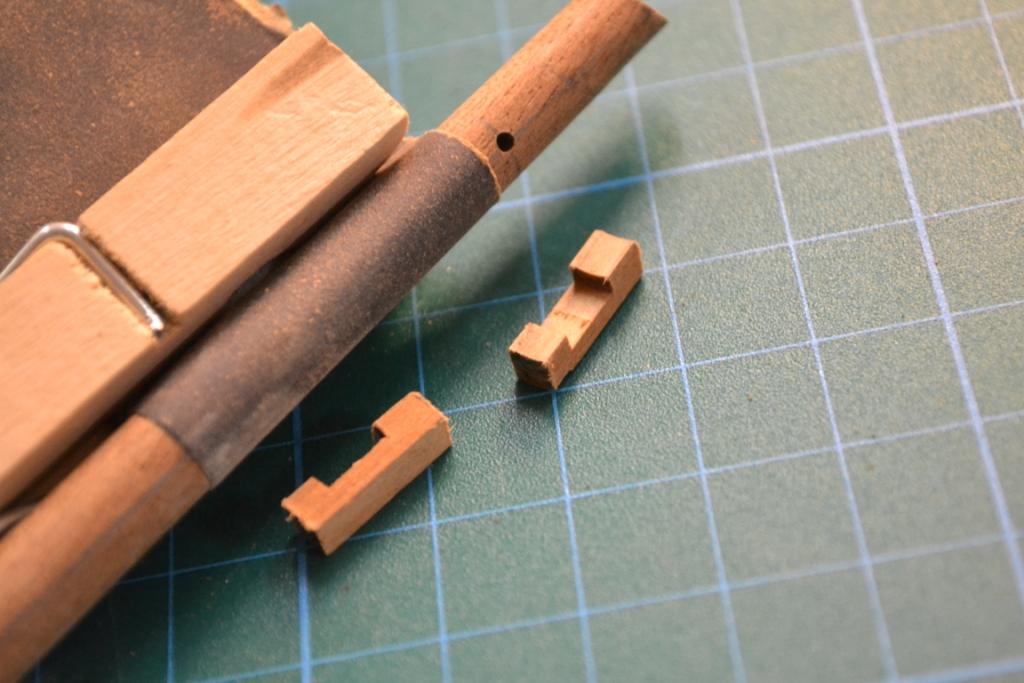
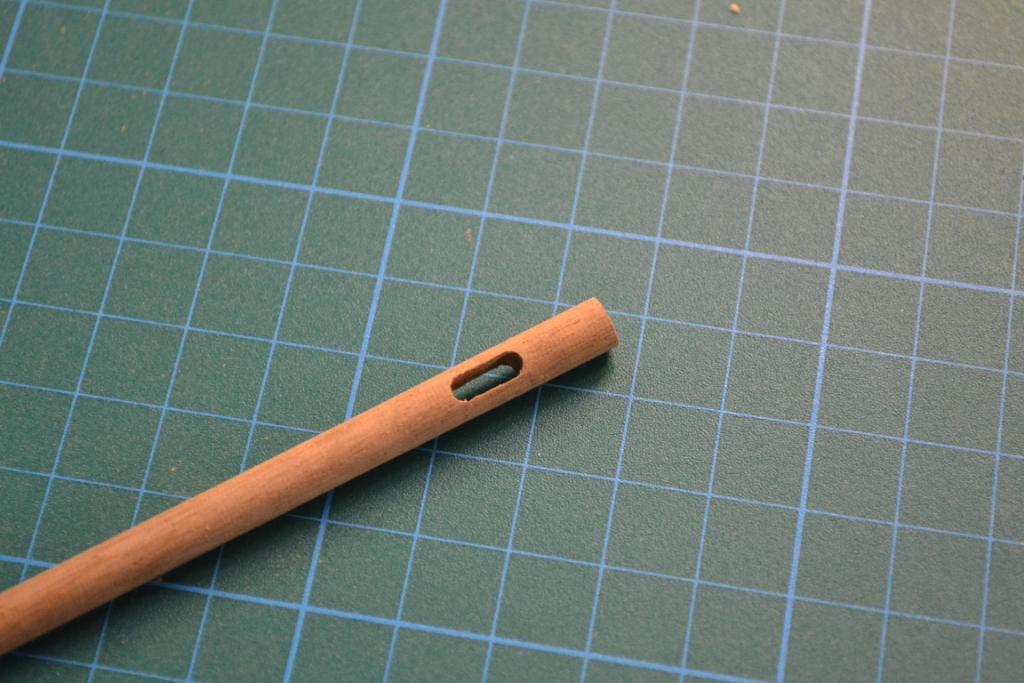
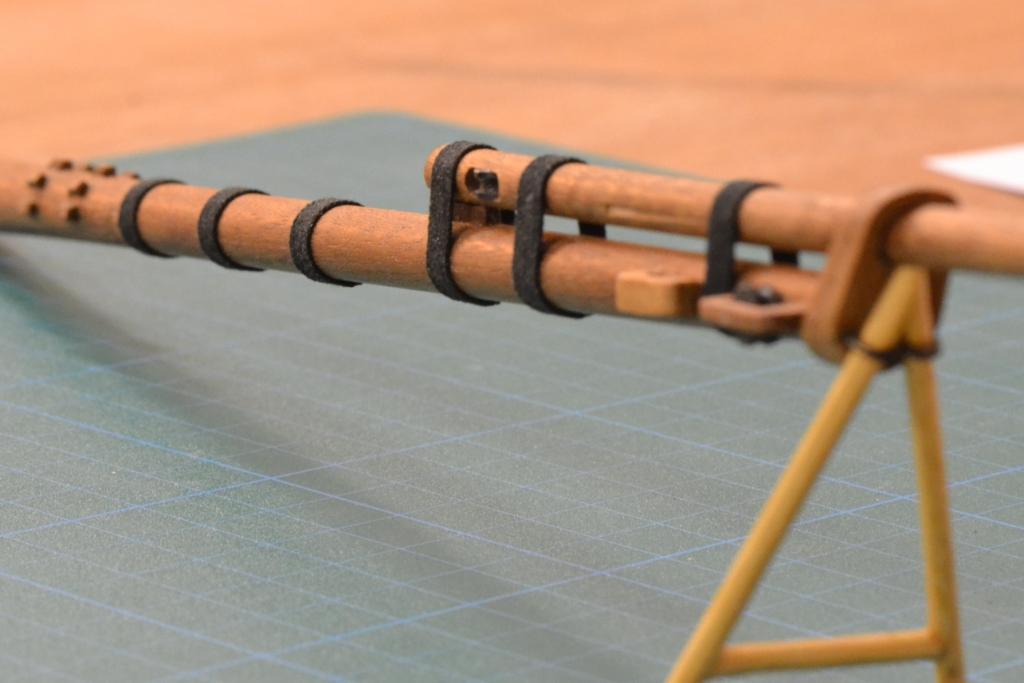
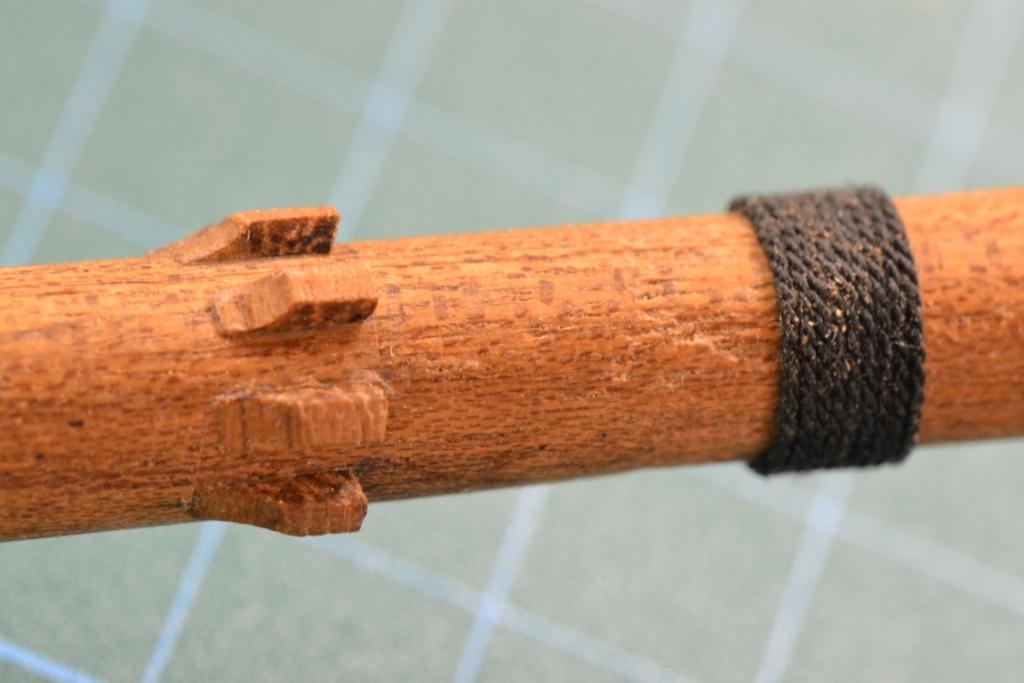
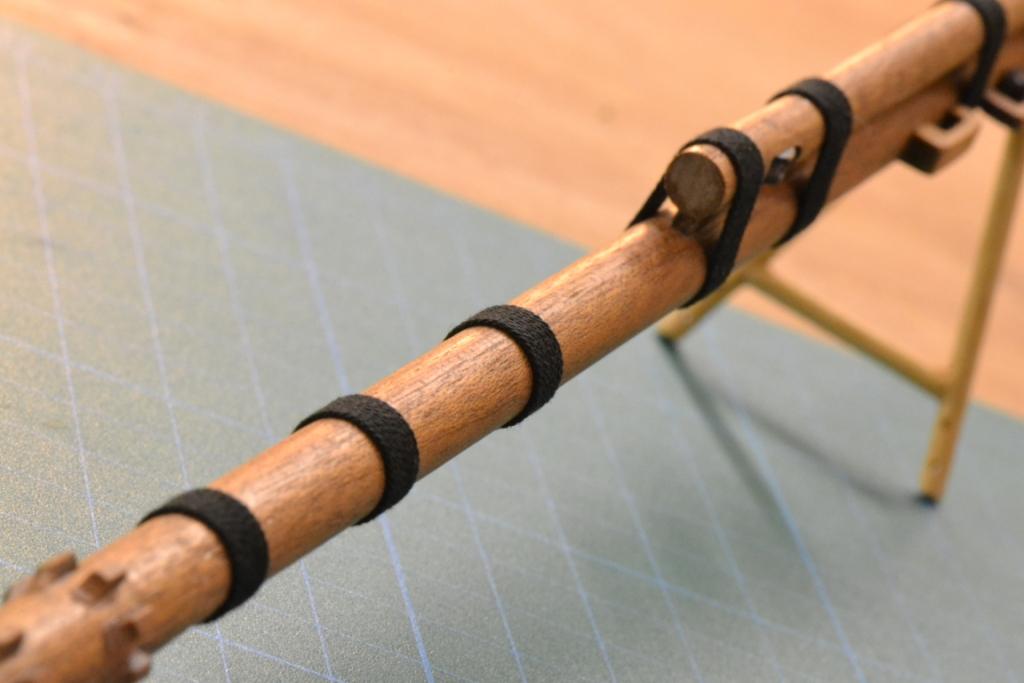
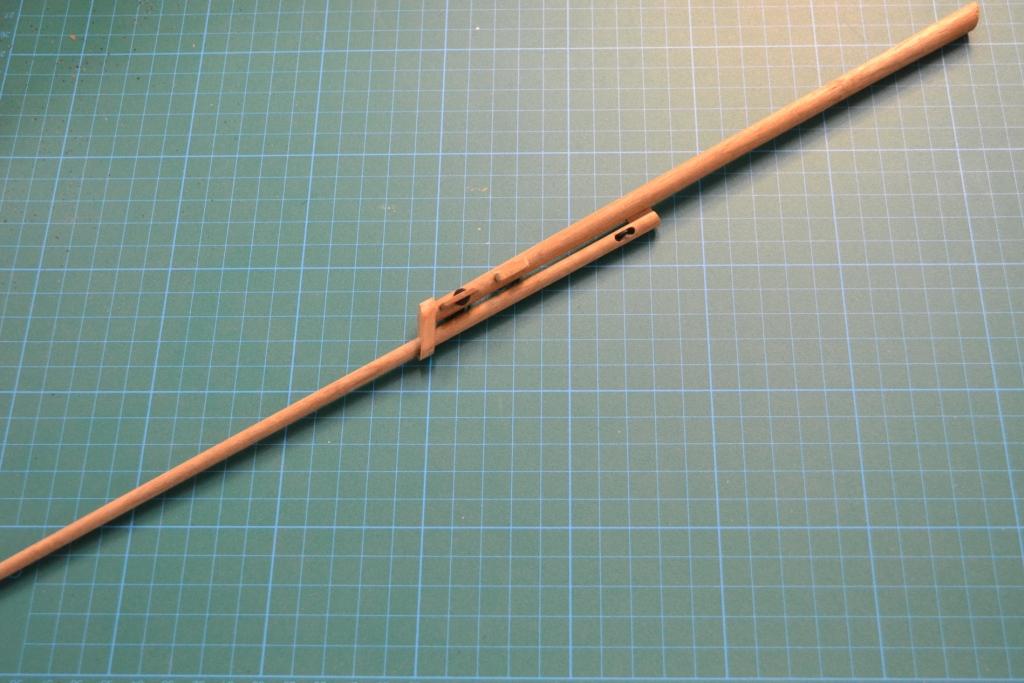
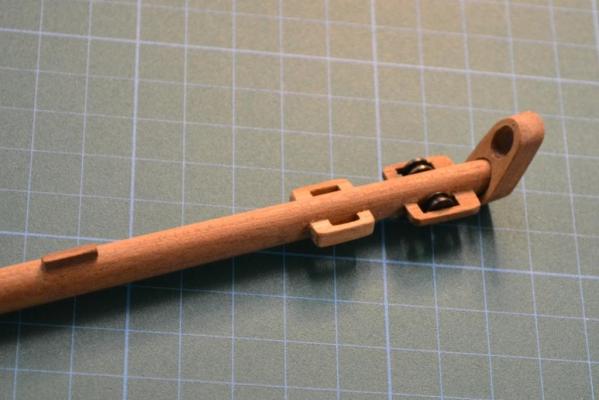
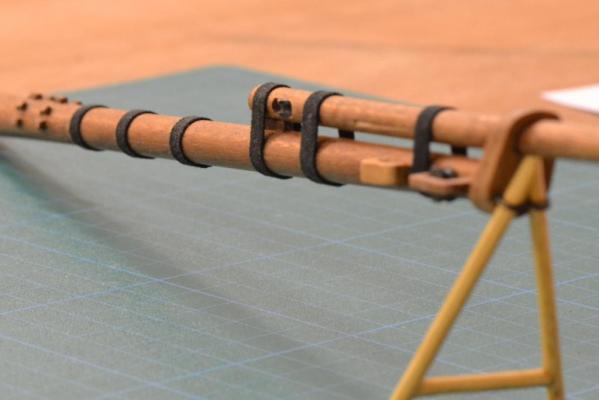
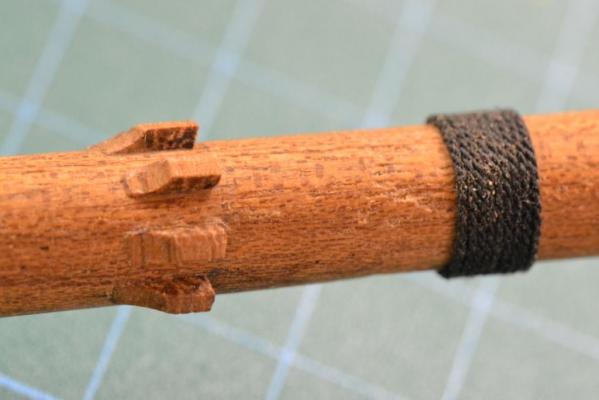
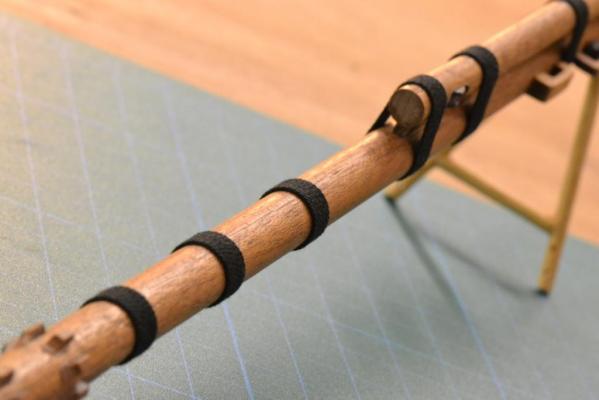
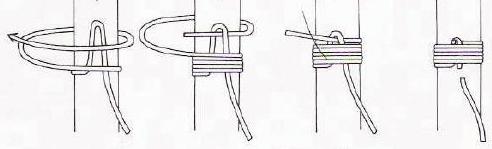
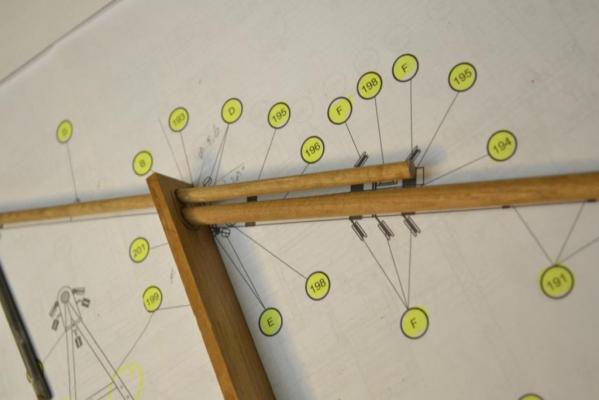
Thanks Sjors !! I know, I know.., I didn’t planned all this from the beginning at all.. Mainly thanks to my decision not to use any paint on this model ship makes the “plywood” parts and some of the supplied fittings not so attractive looking.. Today I had some quality time and continued working on the bowsprit.. I started with making and shaping the “Bee Blocks” (the back of them with help of sandpaper and the mast) so they should be a perfect fit. ..Milled a groove in the Jib boom for a sheave, and assembled the dolphin striker .. a close-up of the assembled Bowsprit Head and the bowsprit with jib boom. The drawing shows cut-outs in the bowsprit for the gammoning rigging, but instead I glued 2x5 small pieces of wood on the bowsprit and shaped them into so-called “gammoning cleats” by using a scalpel, a few different files and sandpaper for the final finish and not to forget I also added (black) wooldings. I used the following technique for securing the wooldings. What remains are the blocks and hearts (but after having looked at them) I will most likely "somehow" make my own.


-
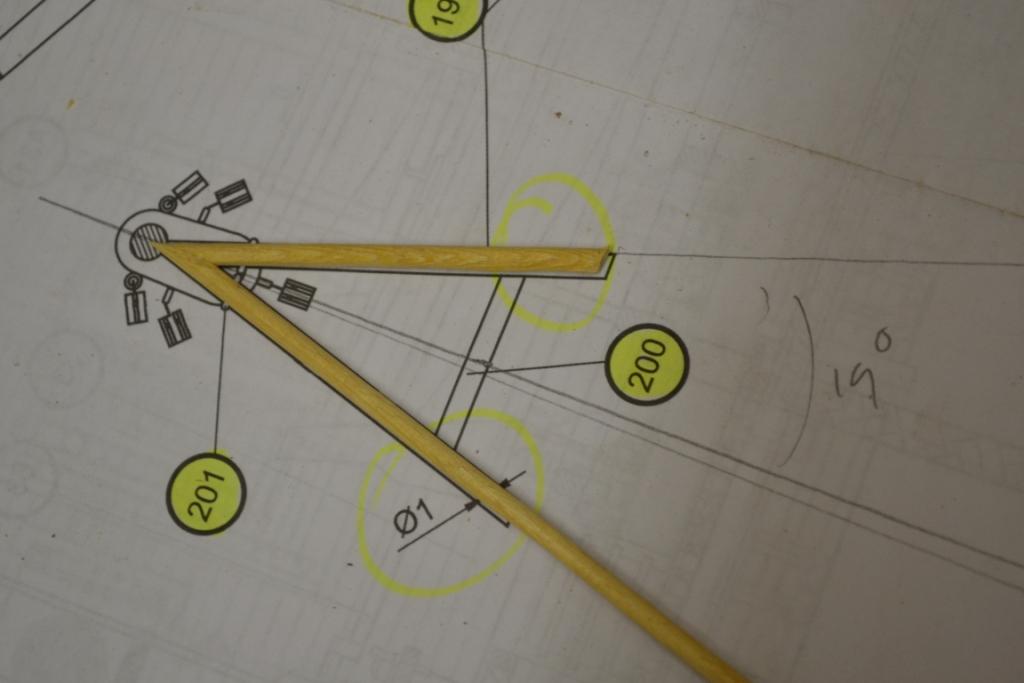
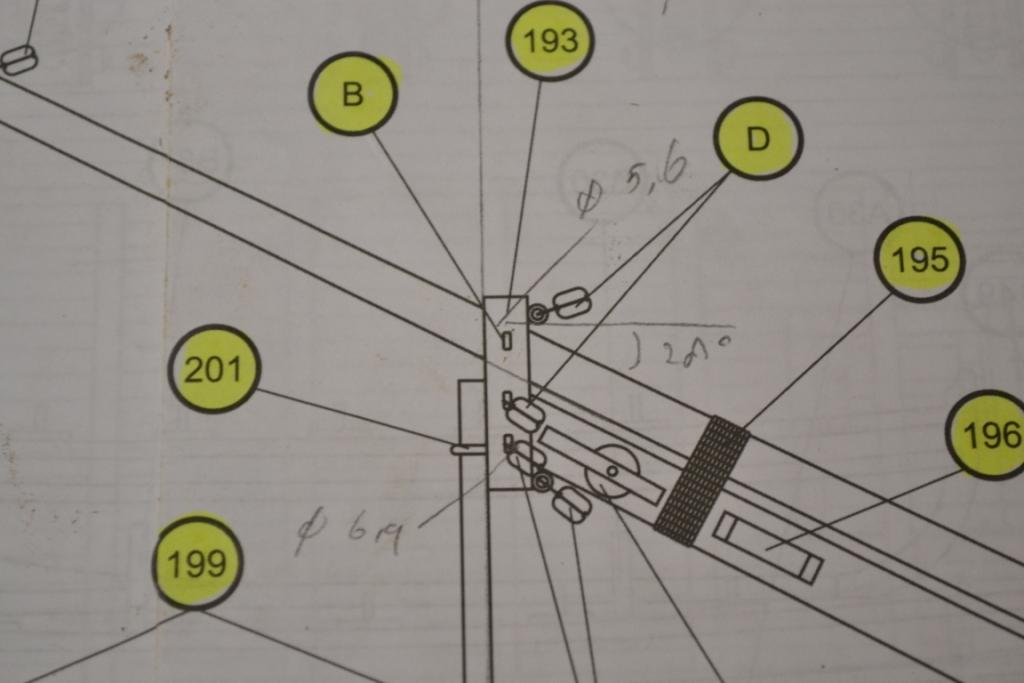
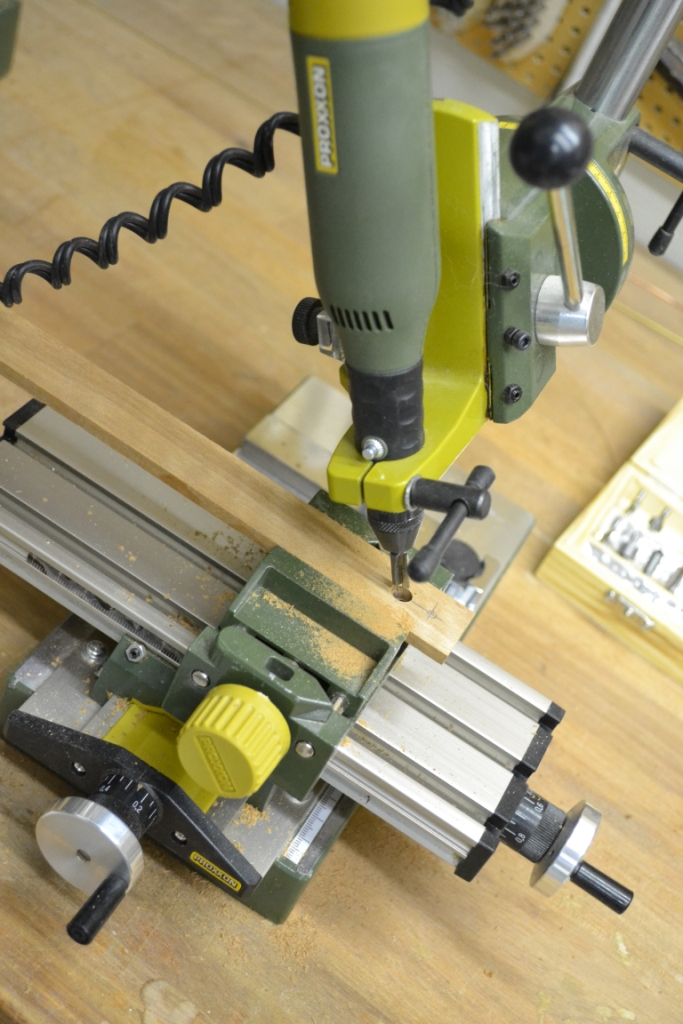
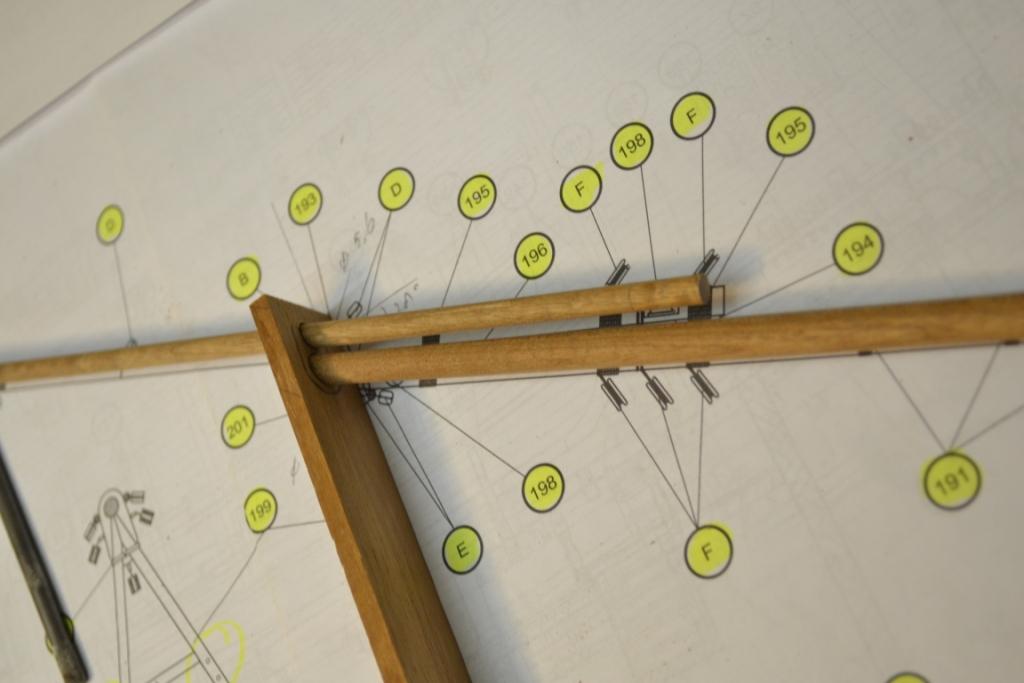
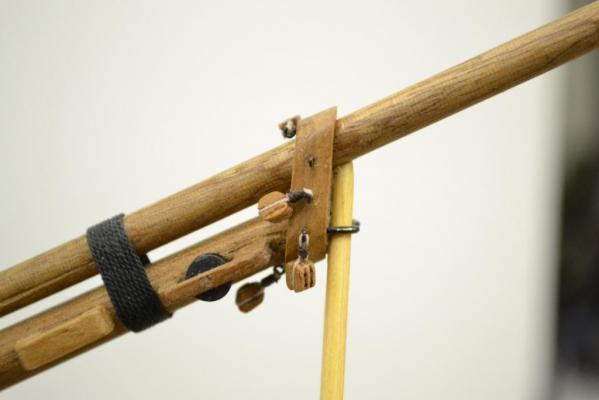
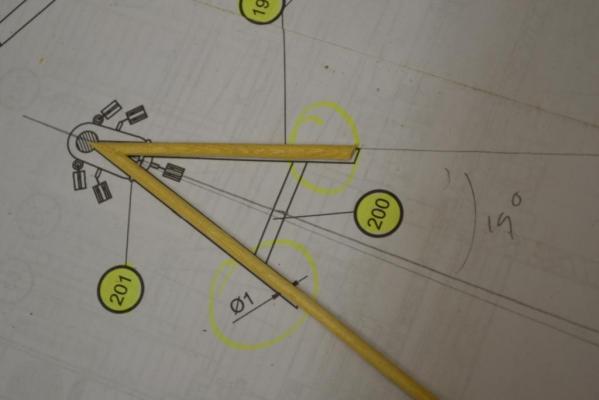
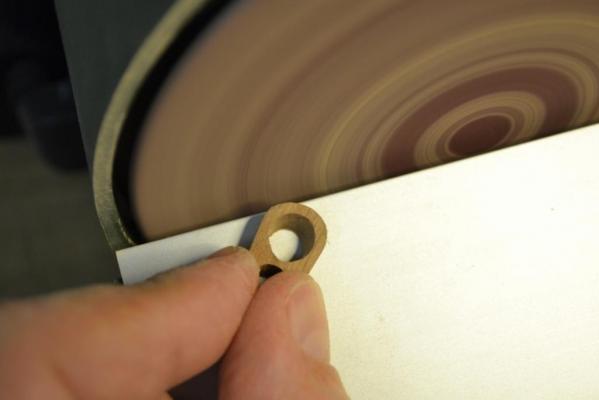
A slow start… , I worked a bit on the bowsprit. The first thing I noticed was the “bowsprit cap” (no. 193) The kit includes a version which was laser pre-cut, but “made of plywood”. So (with a little help of Santisima Trinidad drawings found on a Spanish website) I started working on another version which was based on the angles and diameters of the Occre Kit. So for the first time I could “try-out” the proxxon drill stand in an angled position and drilled 2 holes in a 28 degree angle with a Ø5mm router-bit. And (after some small file-adjustments) with the right angles. Additionally I also could try-out my newest tool in the workshop (a proxxon disk sander) with strange angles So here’s my version of the bowsprit cap..


-
Thank you very much Tom and Michael, for your kind remarks, (as always) very appreciated and motivating .. I have to say that I'm looking forward to proceed with the next level of this build..
-
I agree Sjors, this “dark side” is getting pretty close... I’ll see if “the force is with me” when I’m finished with this build. I completed the assembling of all 4 anchors and have “pre-“rigged them. Nothing spectacular to mention about how I did it, but installing them now would not be so clever I think. I’ll wait with that until I have installed the masts & rigging. From now on the instruction-book stops telling in detail what to do next. However, there are several (close-up) pictures of a complete rigged ship and 1:1 drawings of the masts & detailed rigging drawings. So after 2 years and 3 months of building, I’m finally ready for the next step: masts & rigging..

-
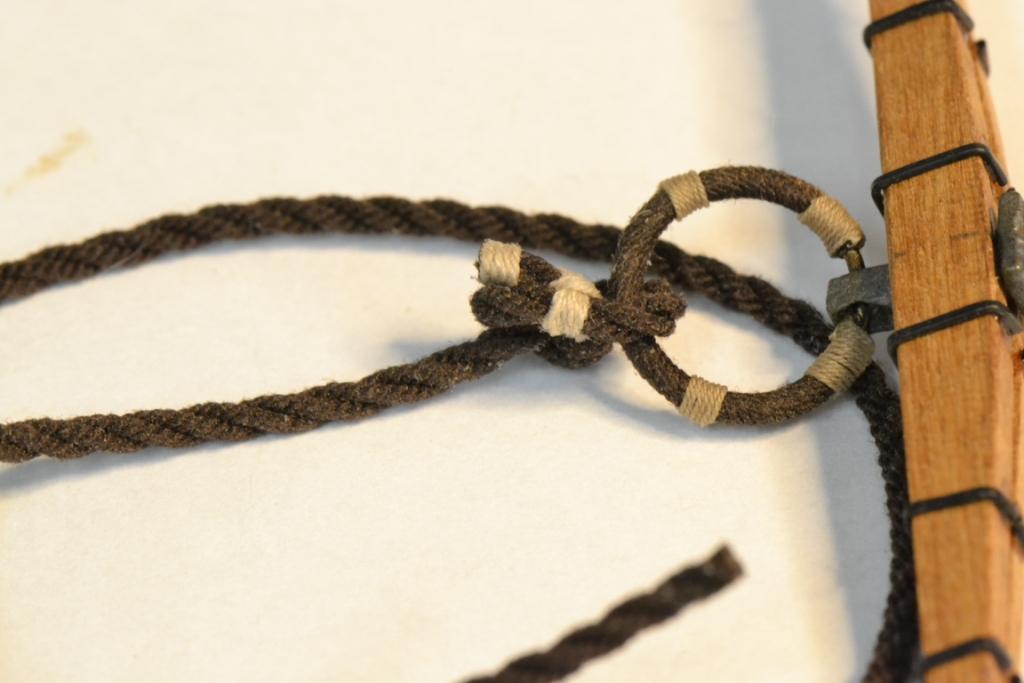
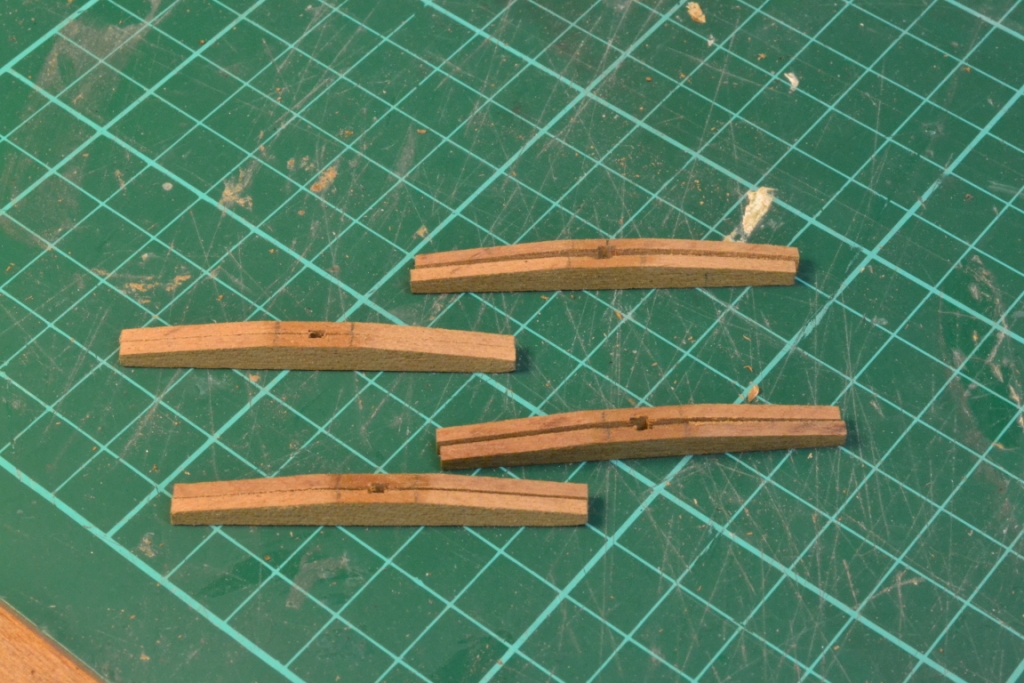
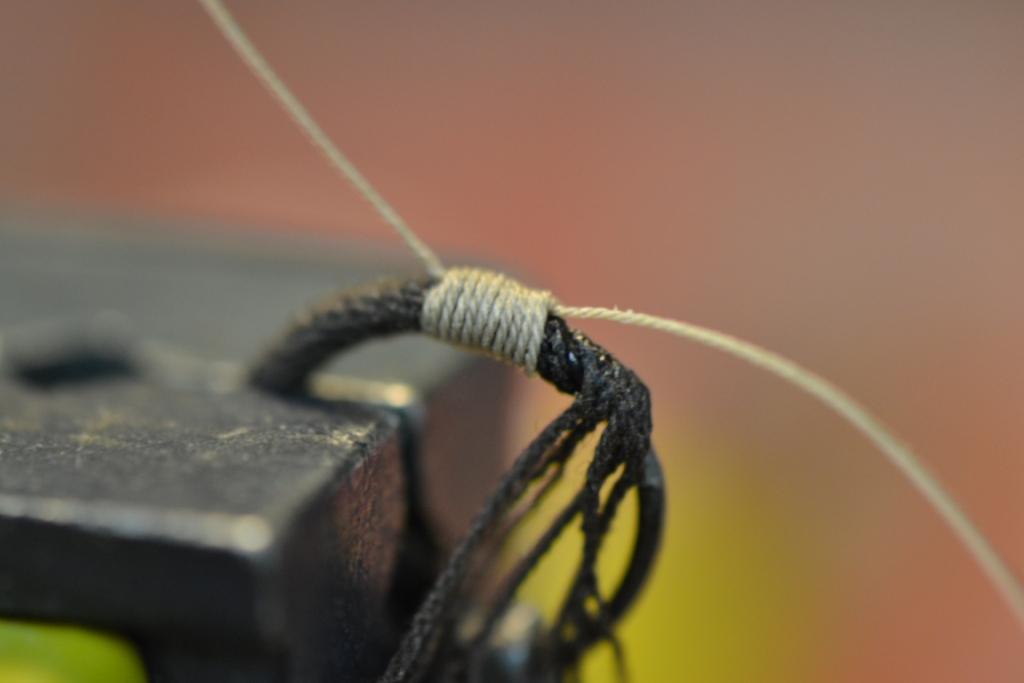
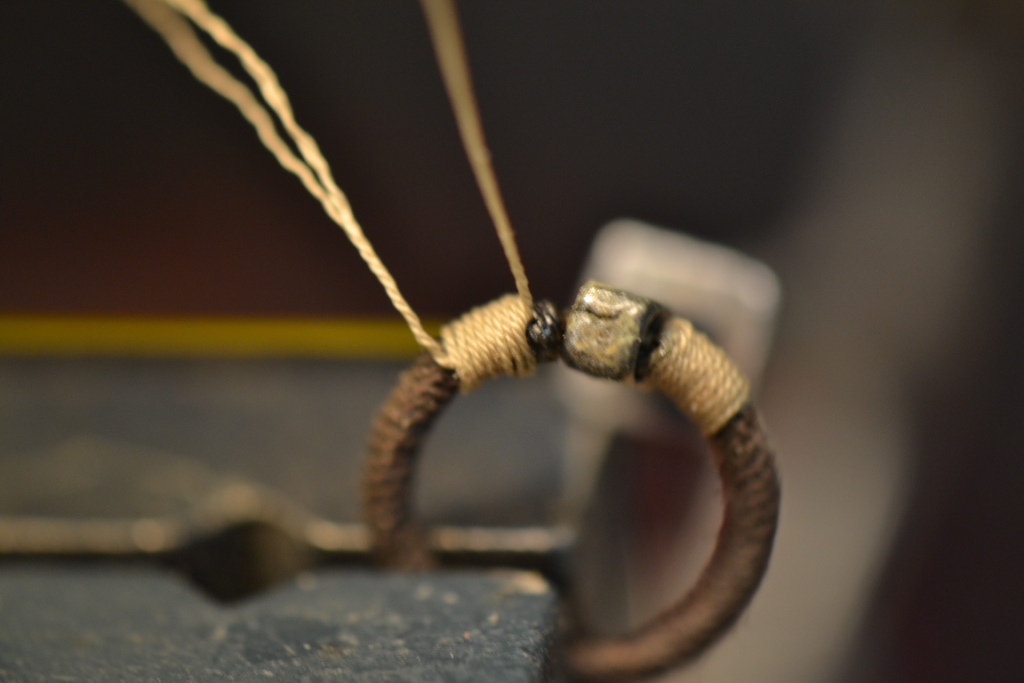
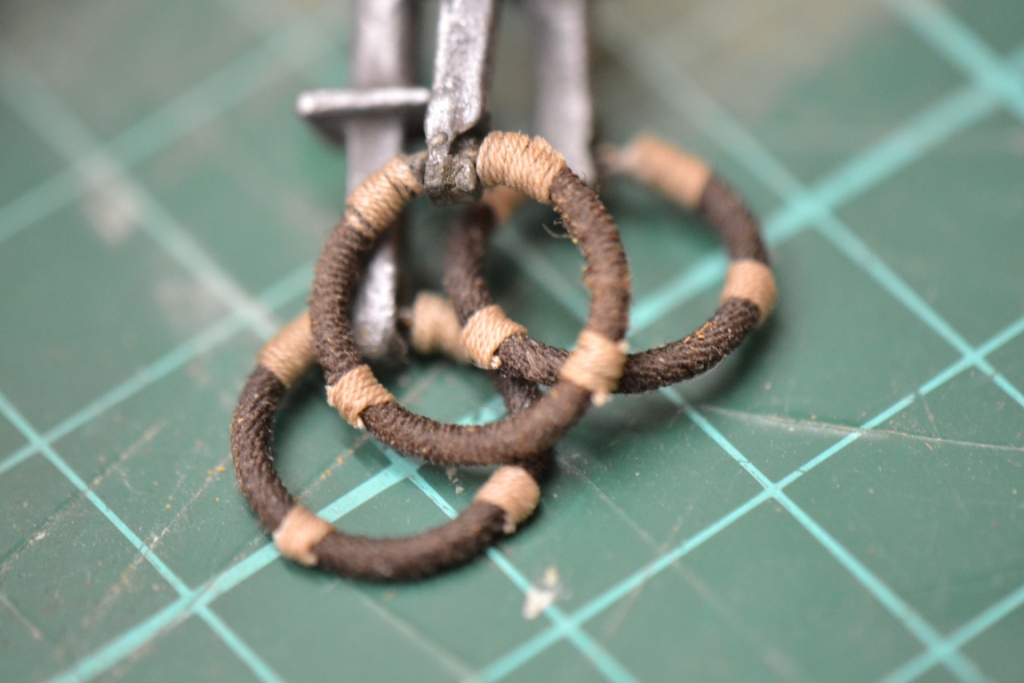
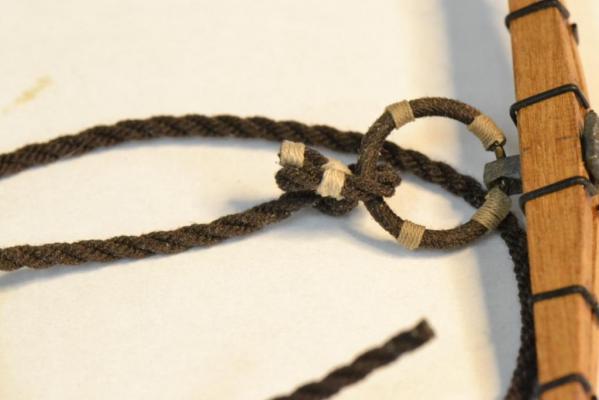
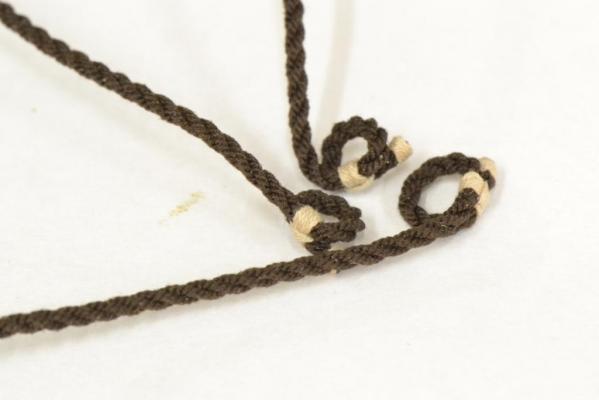
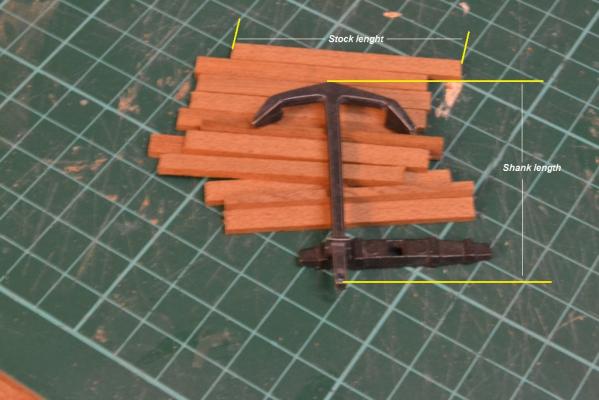
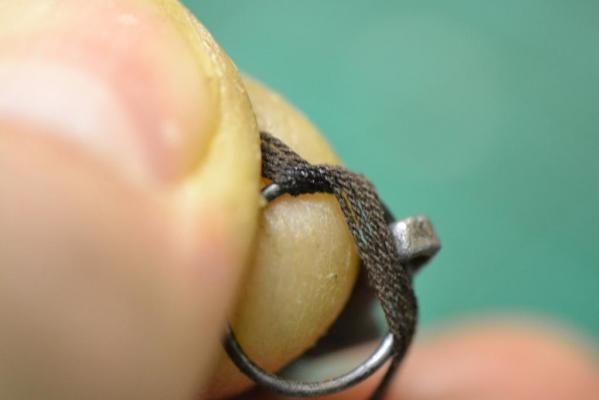
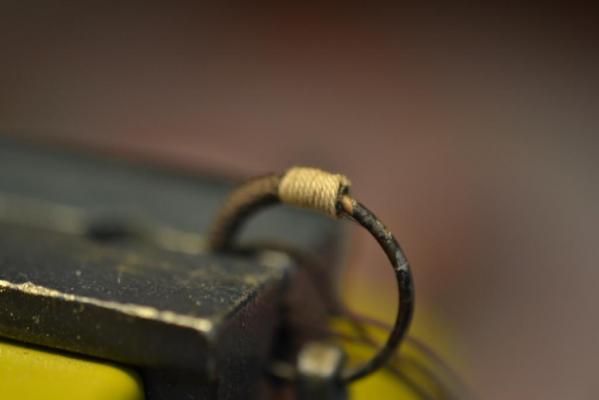
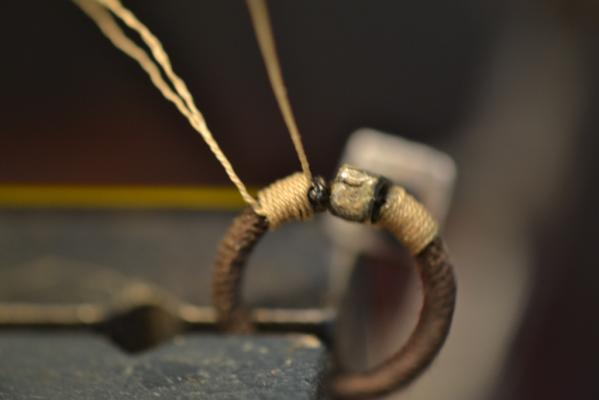
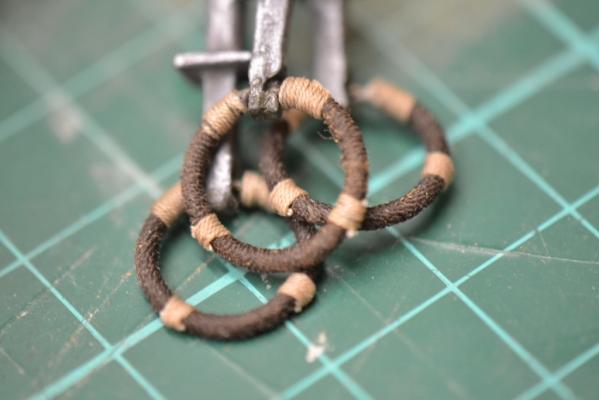
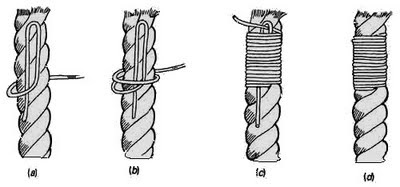
Thank you Sjors & CaptainSteve & all the likes !!! After spending "months” on building the ships boats, it is nice to start on something else Today I started looking at the anchors and after some research I found out that the included (cast metal) "stock" is not in the correct scale. At least in the 18 century the stock has the same length as the shank, so I made a new stock for all 4 anchors. Thanks to this research I also found out that the anchor-ring has to be covered with “tarred cloth, rope and yarn” .. So I gave it a try but failed miserably the first few times .. and I’m not going to show my first results.. “learning by doing” (and thank god for the invention of thin CA glue) I “developed” the following technique.. After positioning “5 pcs.” of Ø0,35mm ropes with my hands, I used thin CA glue to “fix” these ropes temporary in position, I wrapped the ropes several times around the ring and placed the ring in a vice so I could “permanently” fix the ropes with "common whipping". Common whipping: I cut the ropes just before the whipping by using a sharp scalpel blade and use thin CA glue to prevent any unraveling. After having wrapped the ropes all the way, I use the same technique again: fixing the ropes with CA glue, whipping, cut the ropes and “securing” with thin CA glue. I’m satisfied with the end-result, but naturally “Macro pictures” shows every mistake ..


-
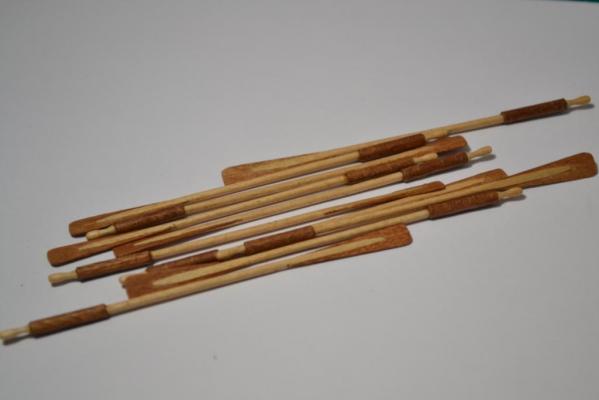
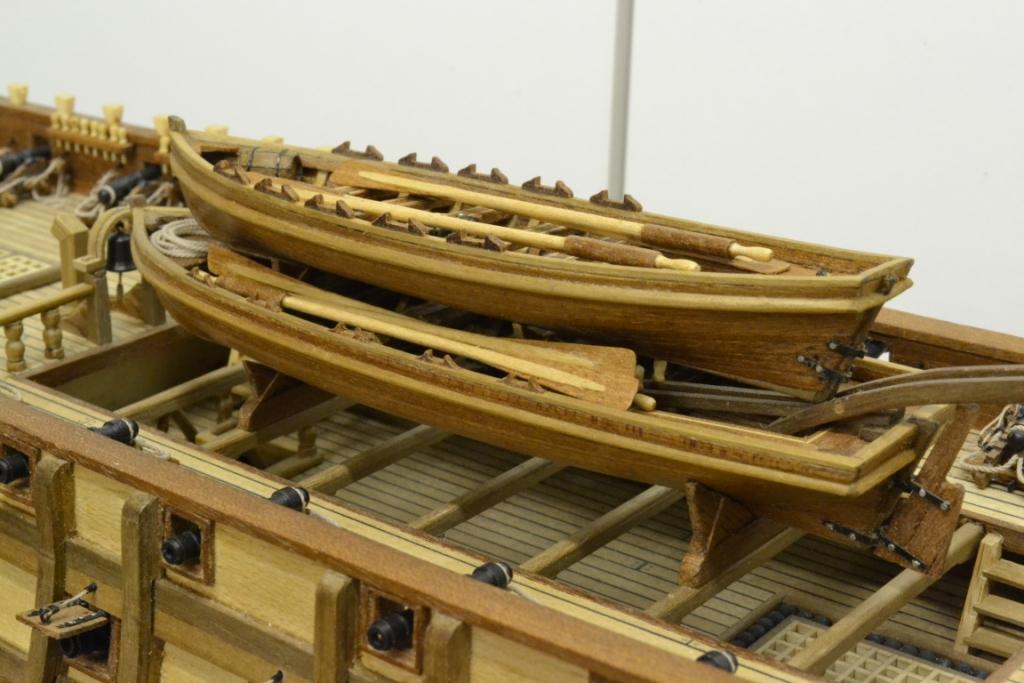
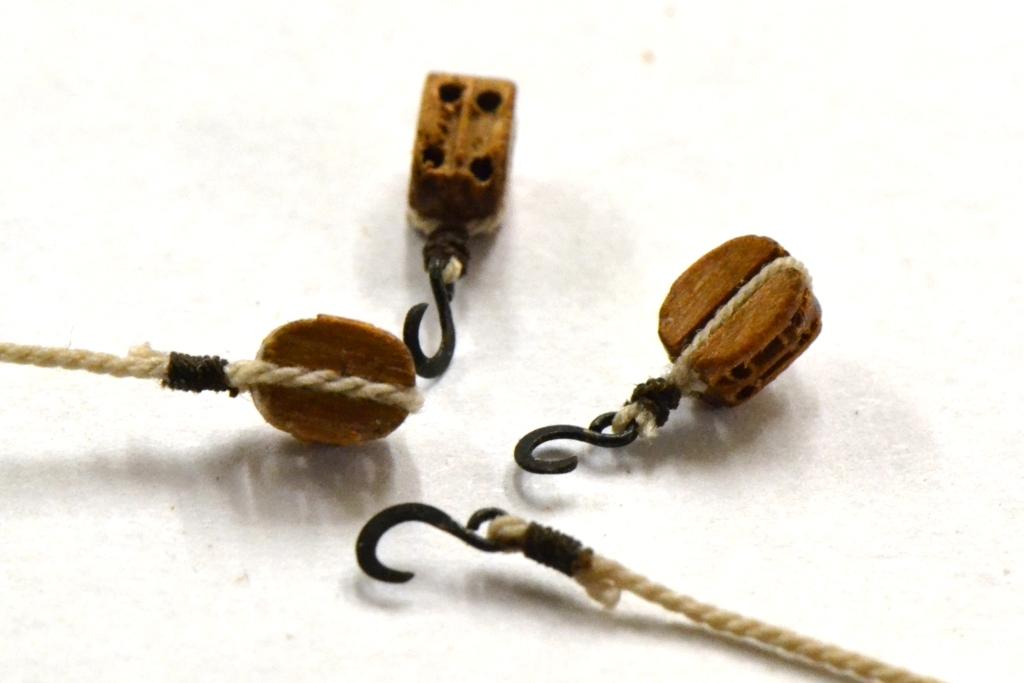
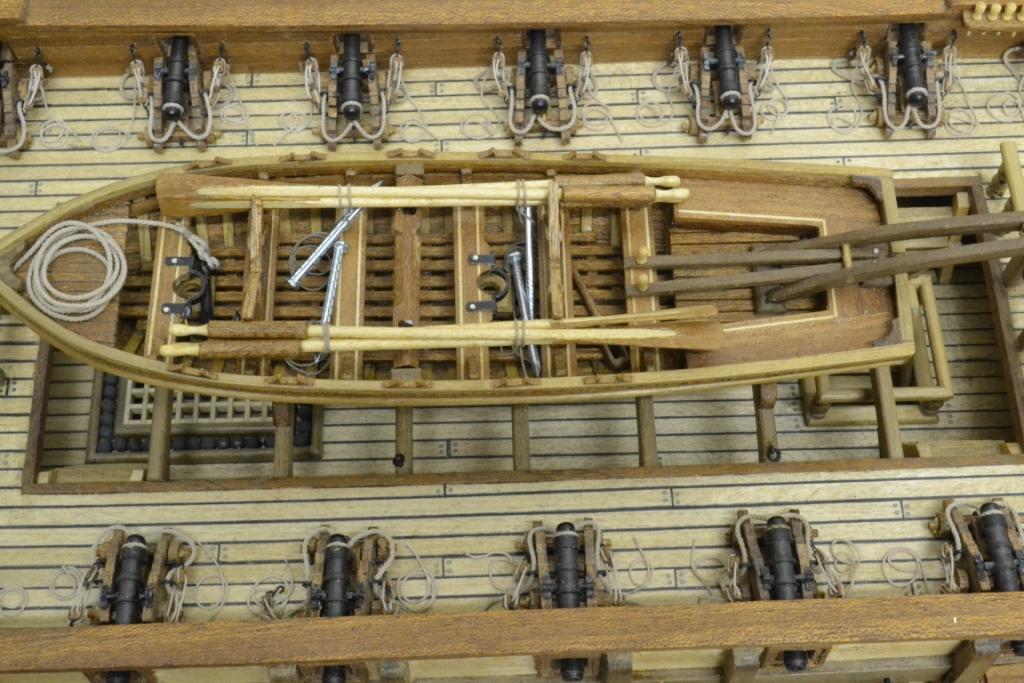
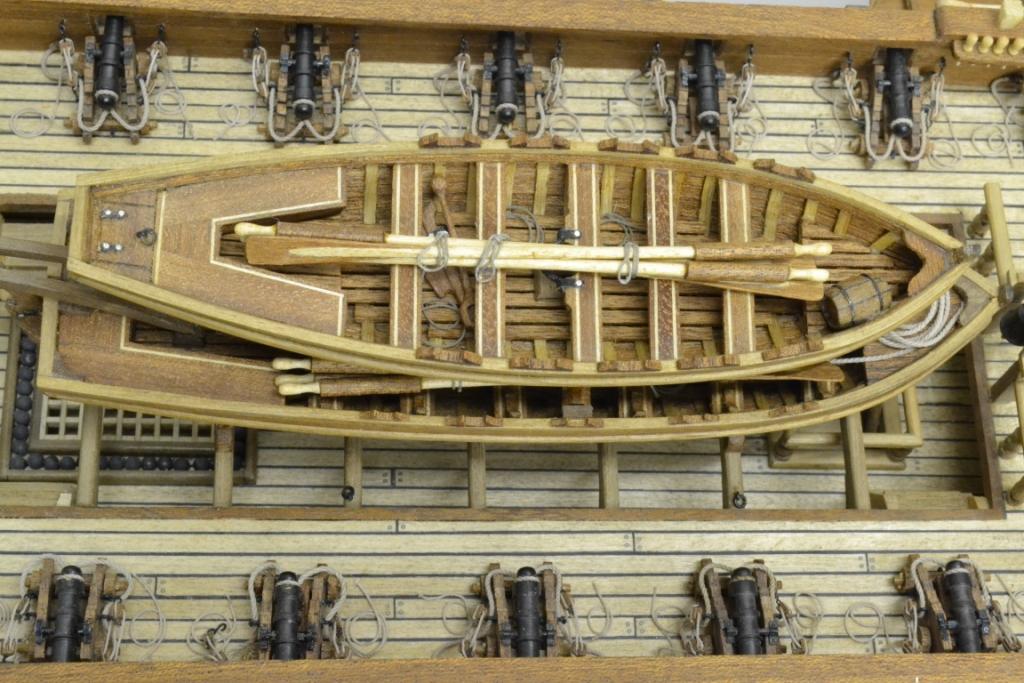
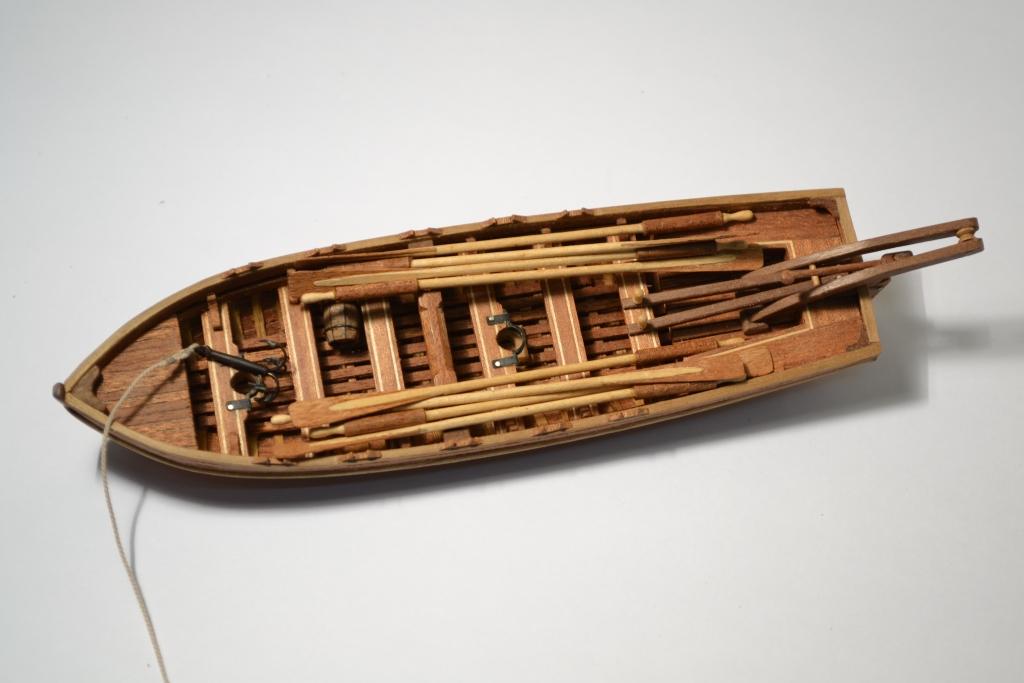
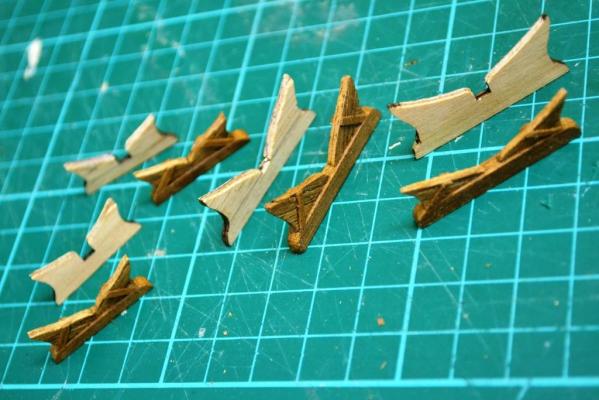
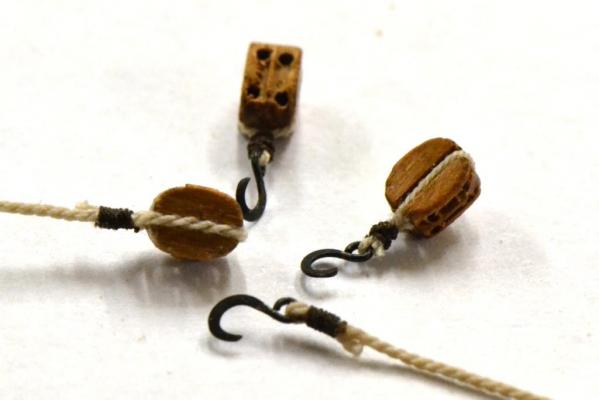
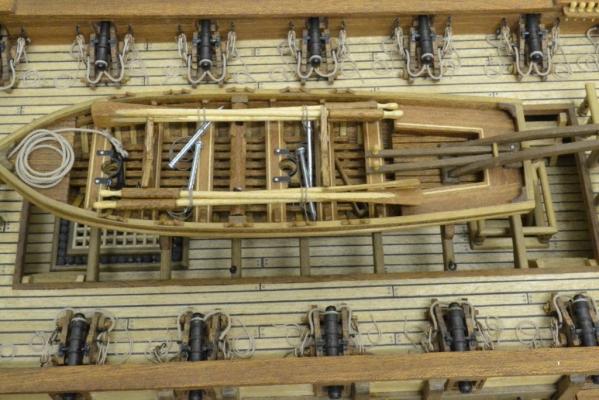
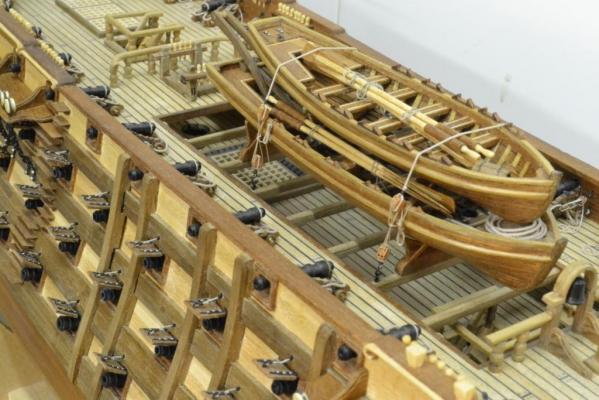
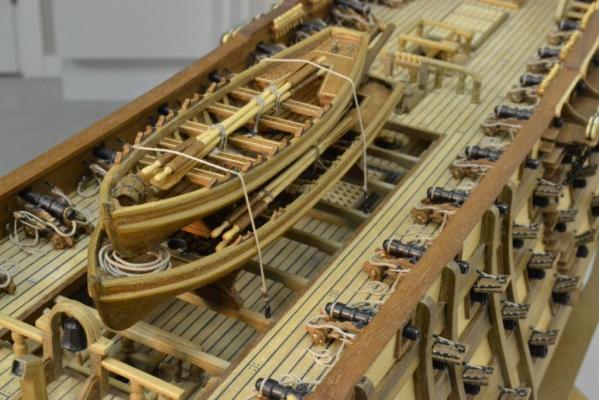
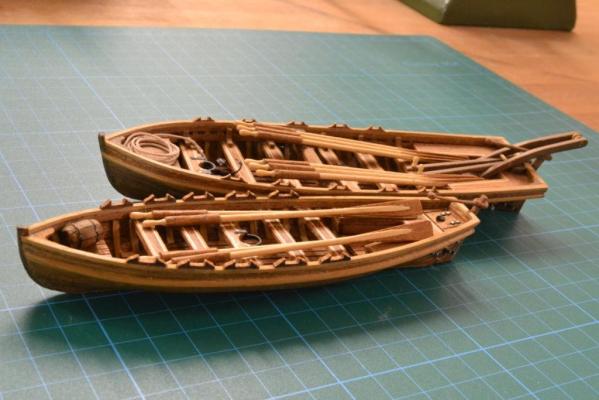
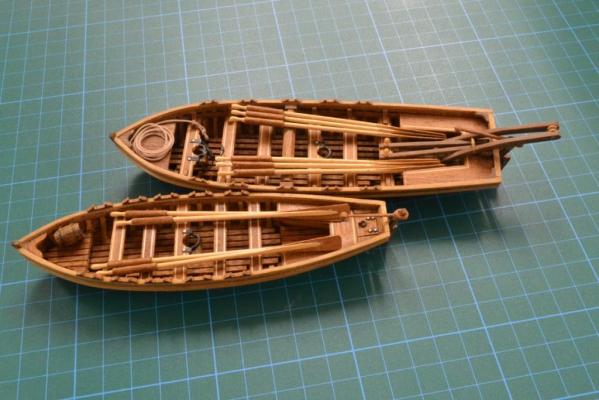
An ”minor” update.. I placed the ships boats into their final position, however also this took much longer time as I had in mind. First I wasn’t satisfied with the supplied “plywood” crutches, so I decided to make my own. But I couldn’t find much inspiration for them (so mine are based on the supplied ones) however i think i added a bit more “vintage" to them. Here’s a “dry fit” picture. The next thing I decided to make was some mini-hooks for the rigging (This post “LINK” explains in more detail how I made them). Because I wasn’t happy with the color of the supplied rigging blocks I tried to make a few myself with some darker wood types. I ended up in using teak (probably not the best choice) as teak is quite grainy, but this was what was available to me. With this macro shot I can see that the rigging (and the blocks) looks much better from a distance … Also all the oars needed to be lashed in their final position, and I spend quite some time in “coiling” randomly all the ropes with my previously mentioned (rigging of the cannons) technique. Too bad that most of all this will be invisible after positioning the second ships boat … And, “at last”.. I could rigg the boats in position, and (off course) I had to make some extra rope-coils.. Taa-Daaa !!!


-
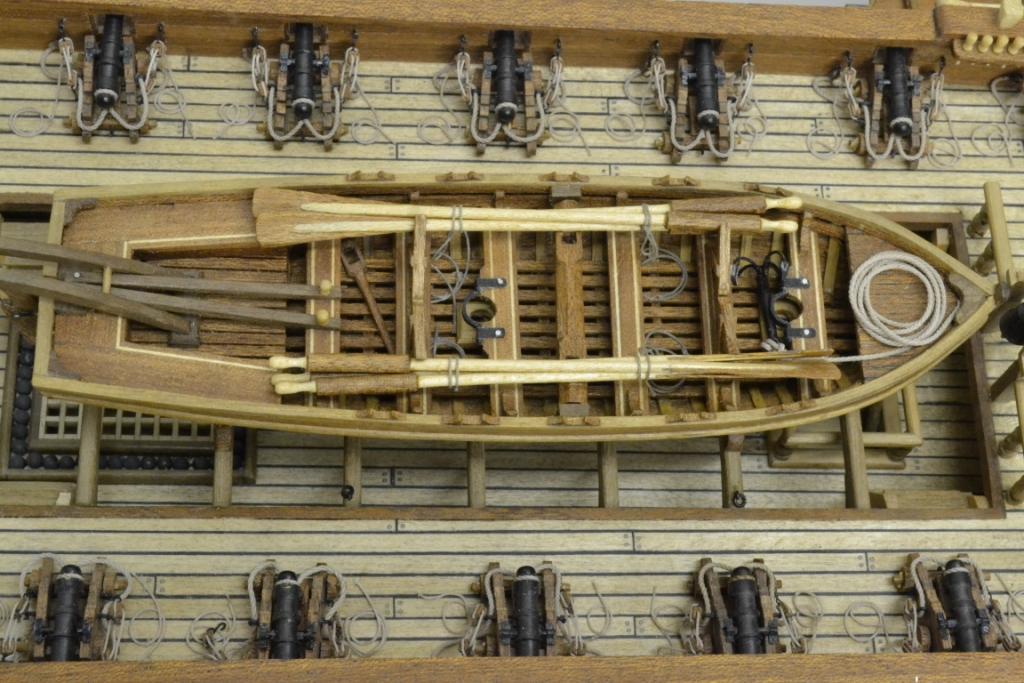
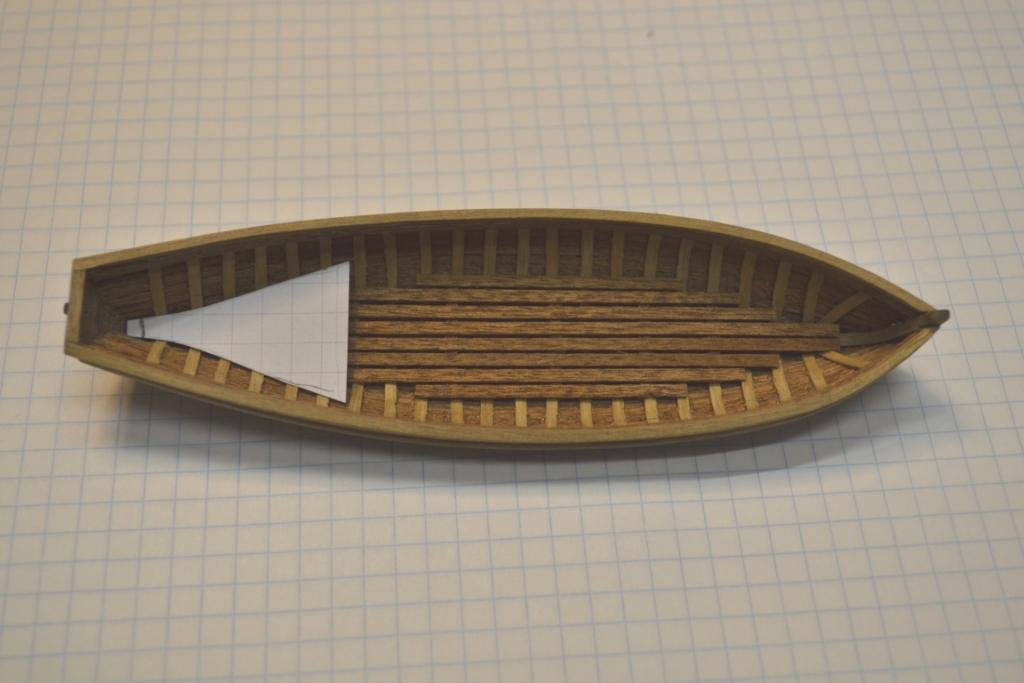
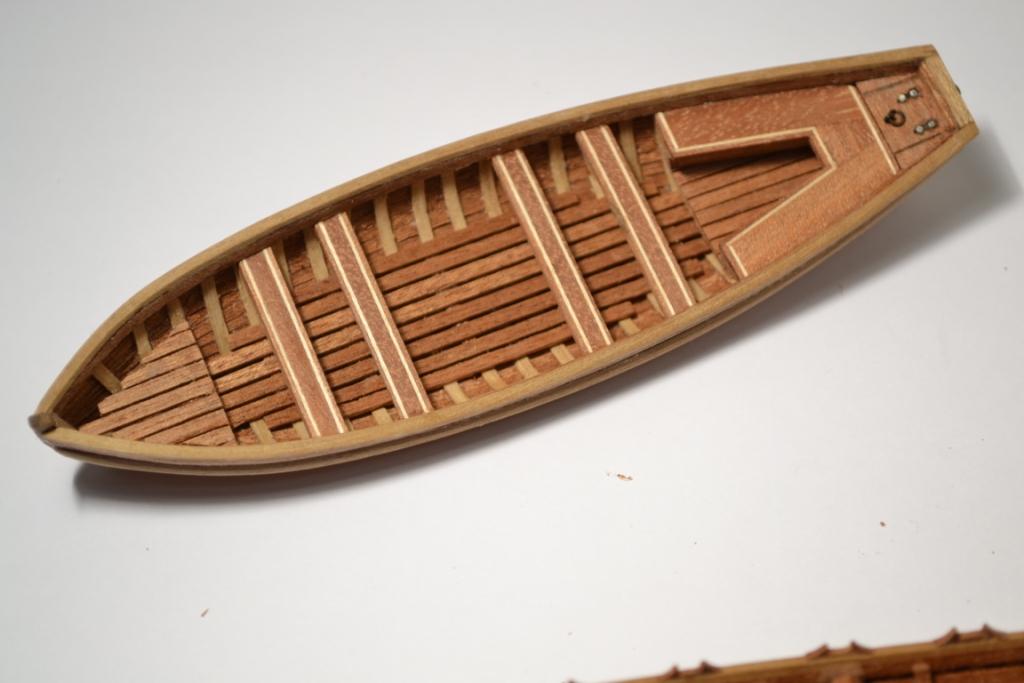
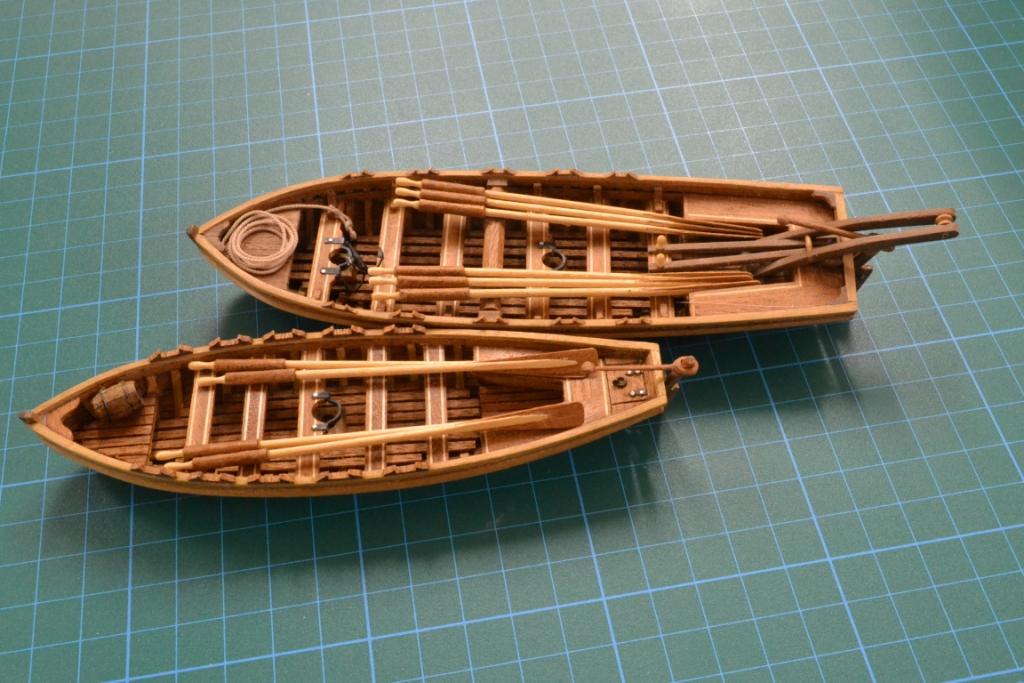
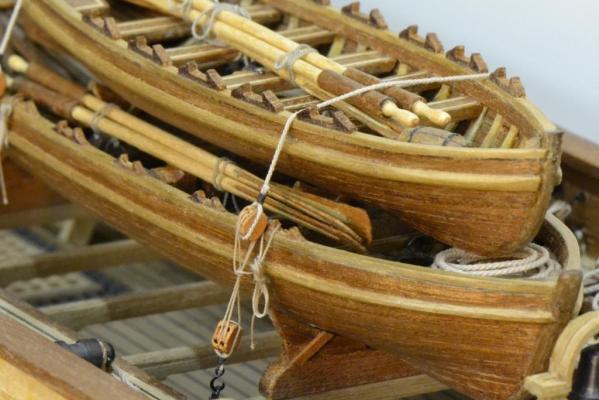
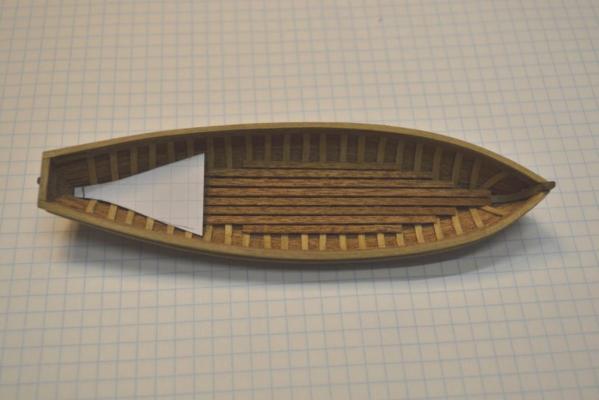
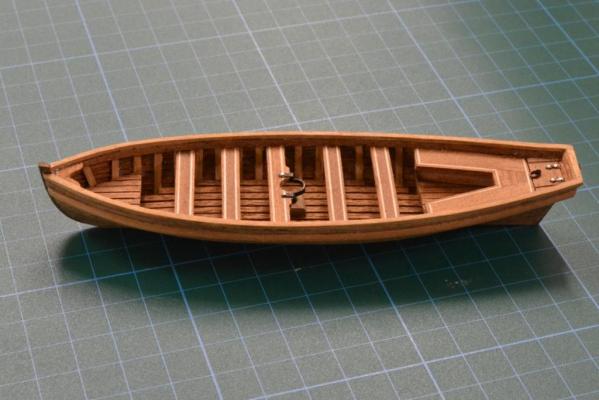
Thank you very much Michael, and thanks to all who hit the “like button”. Yes !!, I'm finished with the second ships boat.. The techniques and look i used is similar to the first boat. Underneath a very brief photo sequence. Here a few shots of both, with the fittings in place.. .. I wish everyone in MSW a happy 2015 !! ..
-
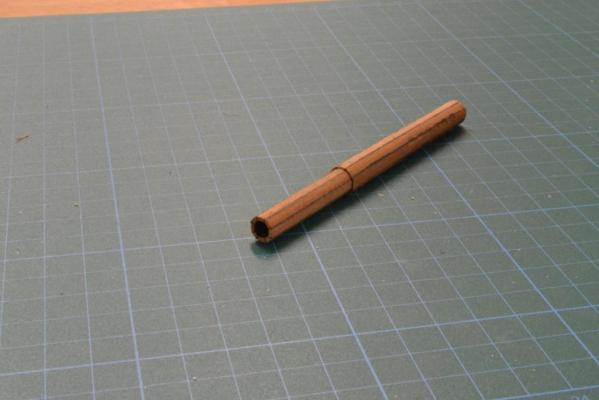
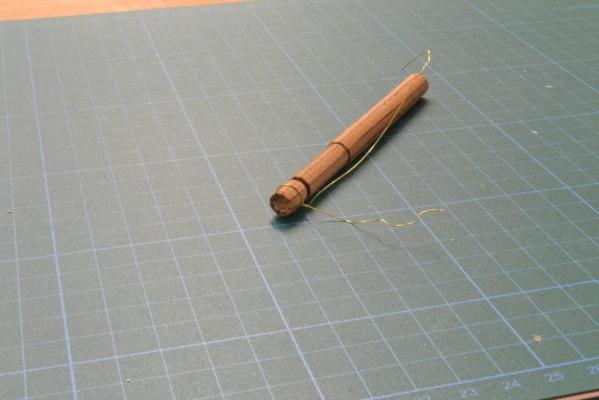
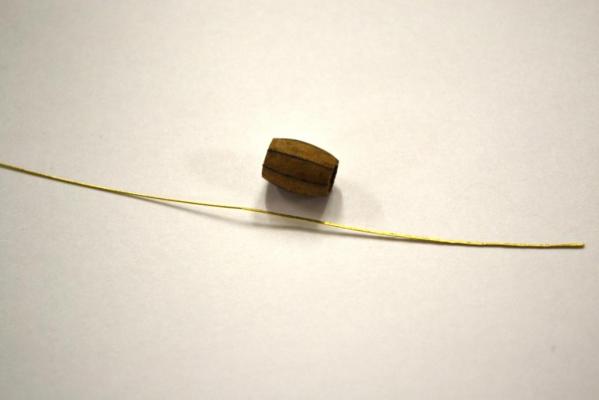
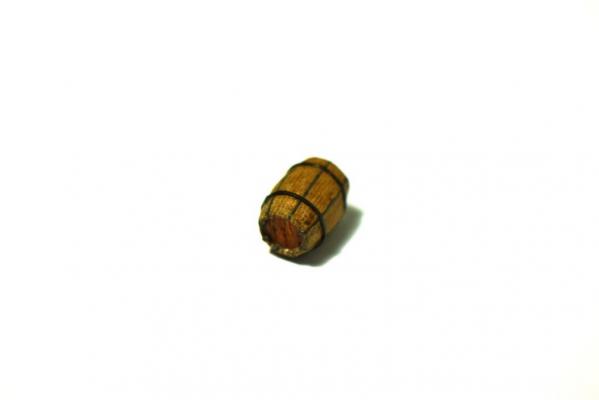
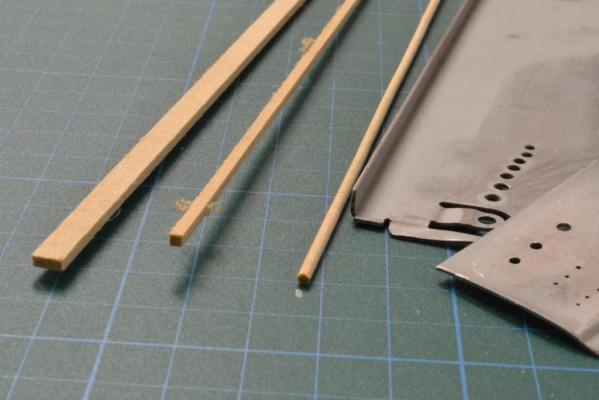
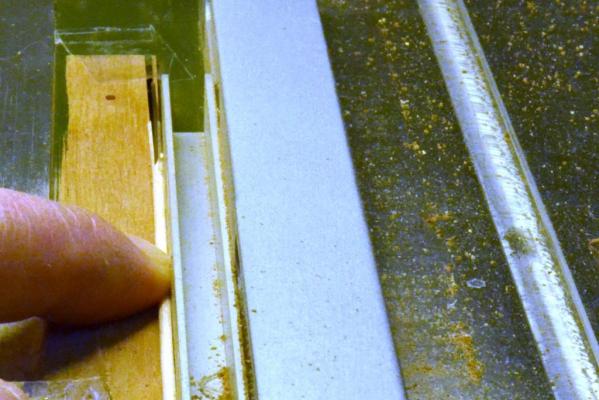
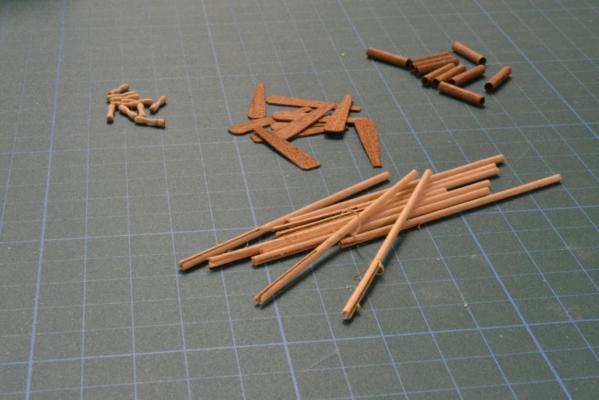
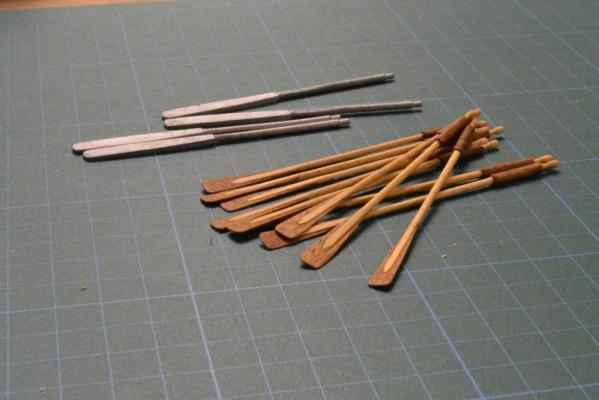
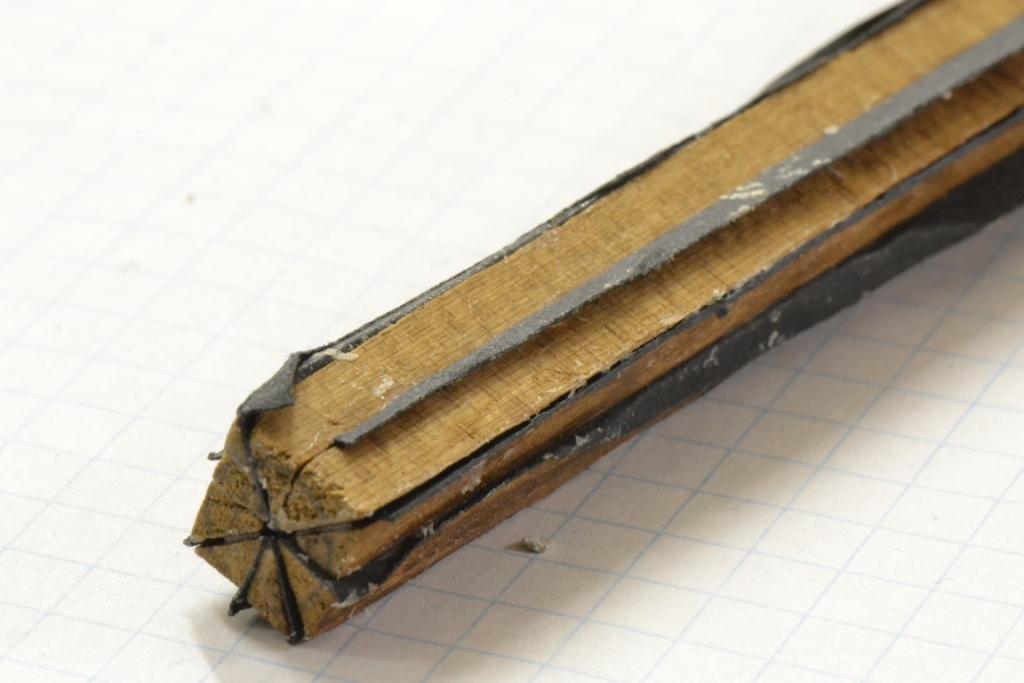
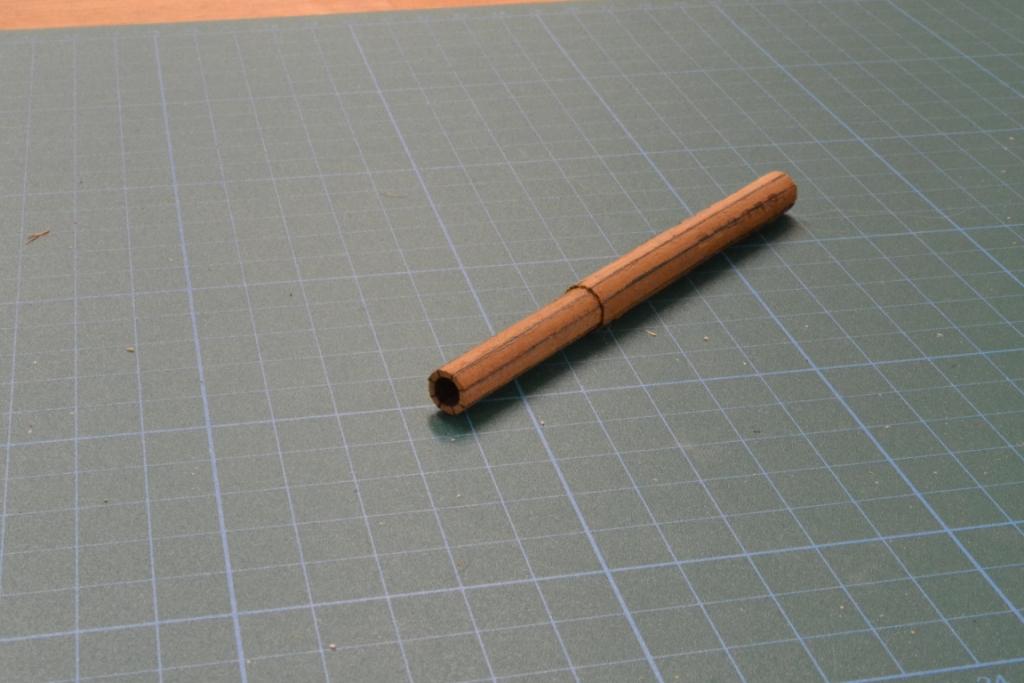
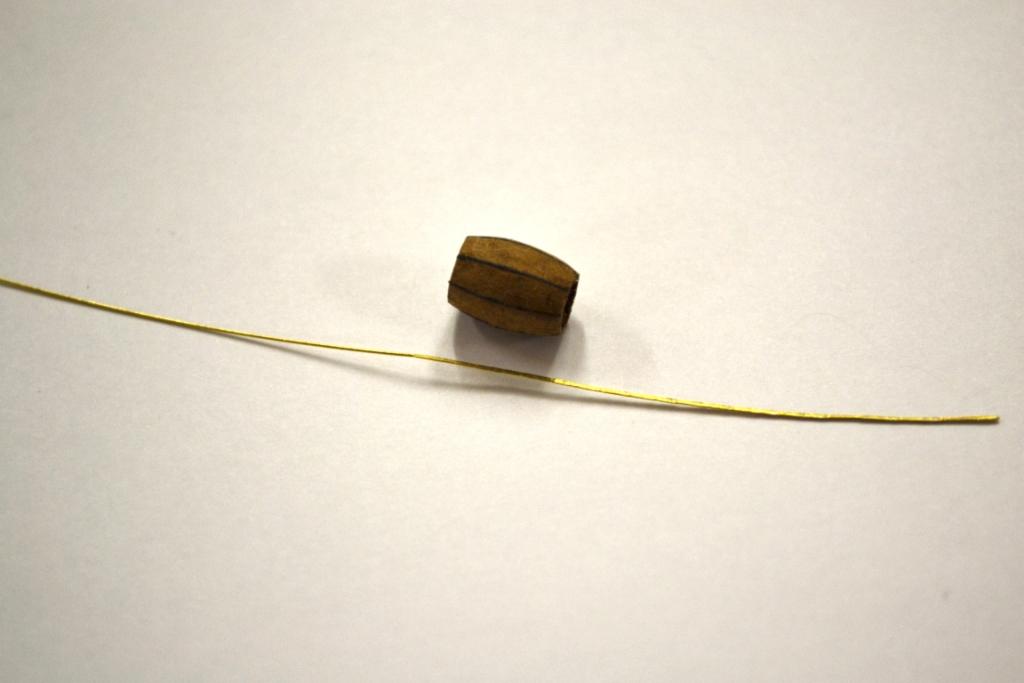
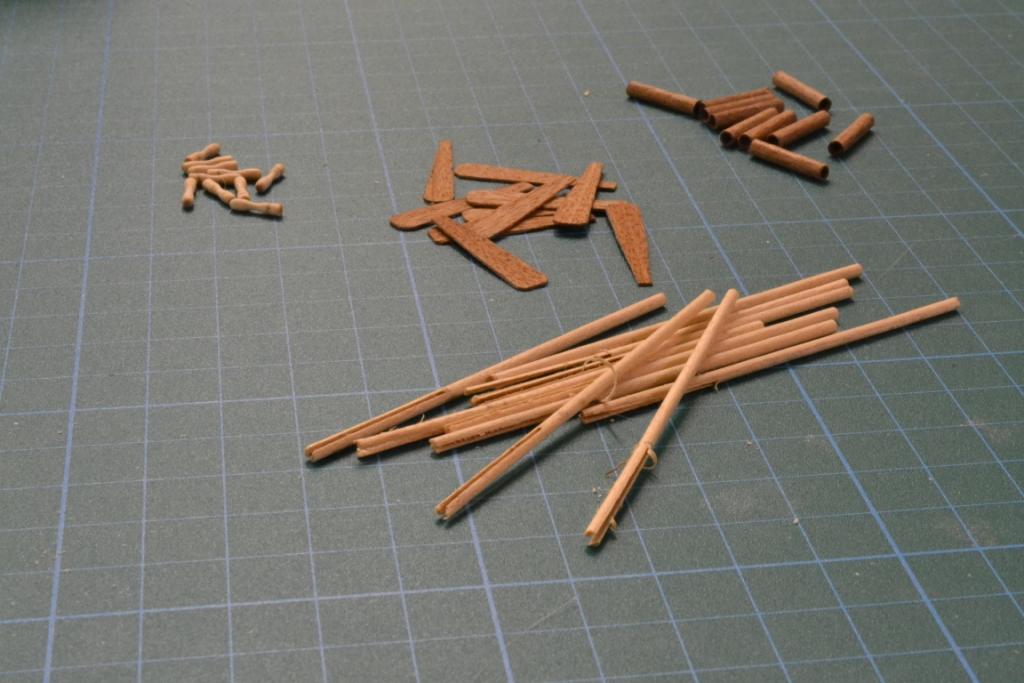
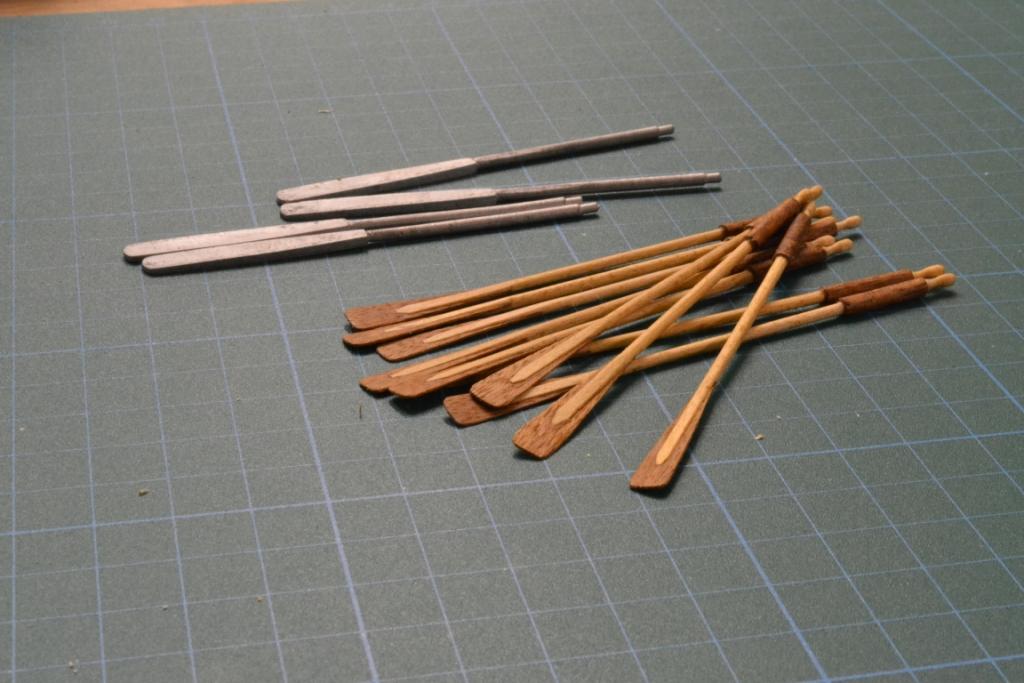
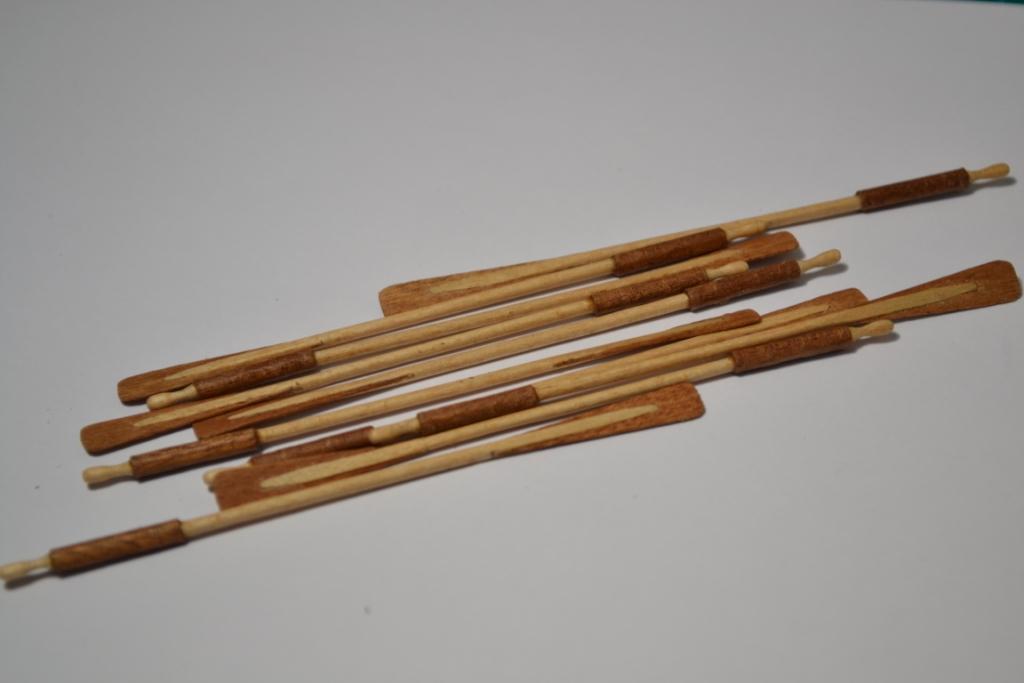
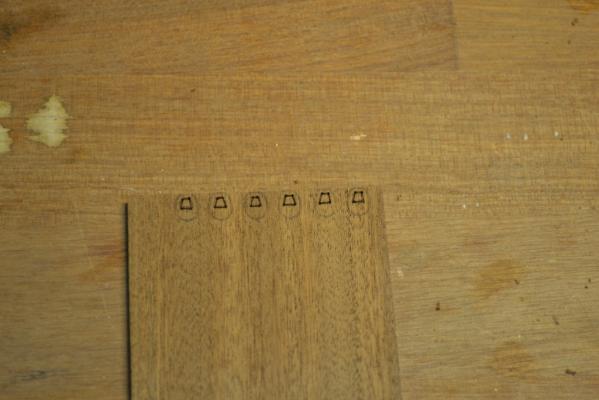
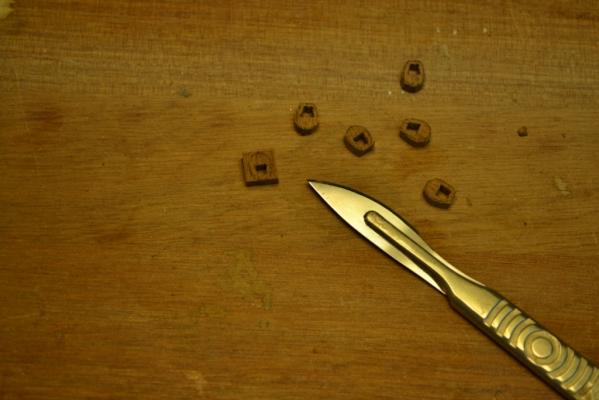
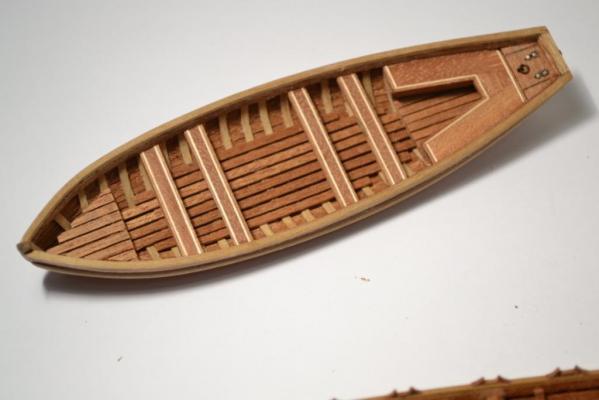
I’m still working on the second ships boat.. pictures of the (slow) progress will follow soon. In the mean time I spend some time on other details for the ships boats.. I had an idea in my head about how to make “barrels”, and started working on a prototype. I cut a “square lath" into “8” triangles with my FET saw and glued these in a "square lath" again with pieces of (black) paper in between. The picture underneath shows much better what I’m trying to write .. Using a lathe I turned it into a round stick and drilled a hole in one end. I shaped it with a file, sandpaper and a scalpel into a barrel shape and glued a top & bottom in position. "Flattening" 0,3mm brass wire, soldered it into a circles and blackened them. Maybe not the best, but here it is: my first prototype of an barrel.. I also spend some time on the oars (the kit’s supplied oars where made out of cast metal.) No more “new” ship boats details, I will leave it with this and continue with the second ships boat ..