WBlakeny
-
Posts
252 -
Joined
-
Last visited
Content Type
Profiles
Forums
Gallery
Events
Everything posted by WBlakeny
-
 Hi Robin. Ever since i ordered that dvd from modelship building secrets i was intriged by that method. You're off for a good start. I'll gladly follow your build.
 -
GL thats a work of art! Your buildlogs are always such a joy to go through. They're so informative and instructive. Thank you.
-
Nice Christian!
-
Thank you all. I'm very proud of her. As for my next project, i'm not decided yet. I'd really love to make a frigate. Three choices, Chucks beautiful winchelsea, the Triton or the gorgeous Belle Poule. However i'm not sure i can take that on. Perhaps the cutter Cheerful or La jacynthe would be a wiser choice. So much choices...
- 144 replies
-
- 1
-

-
- boat
- bermuda boat
- (and 2 more)
-
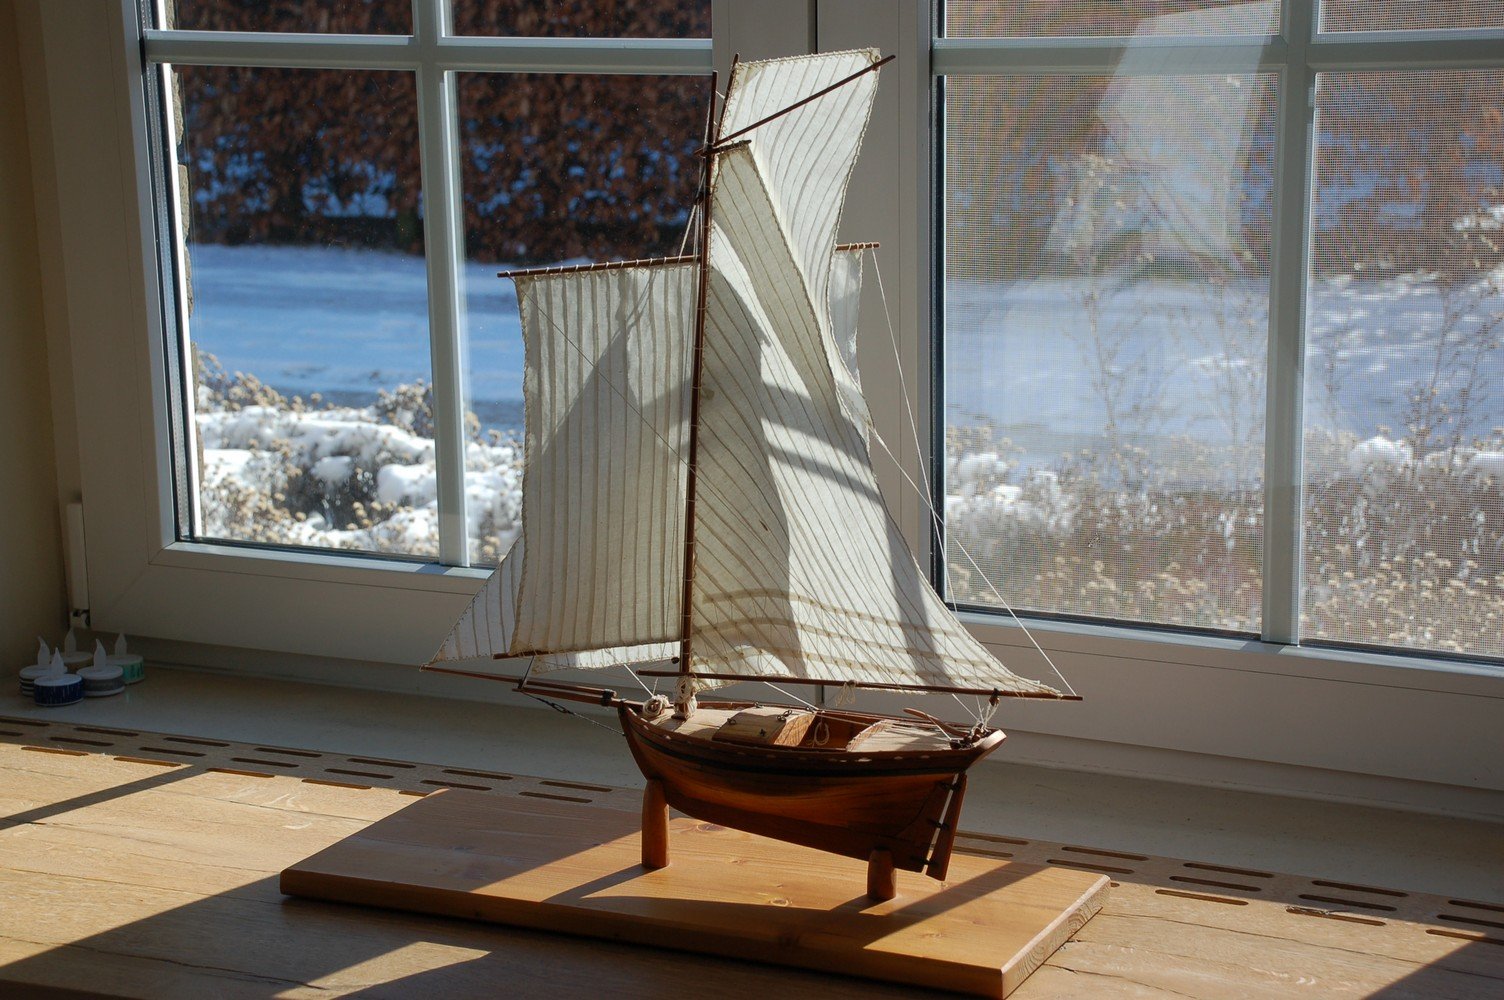
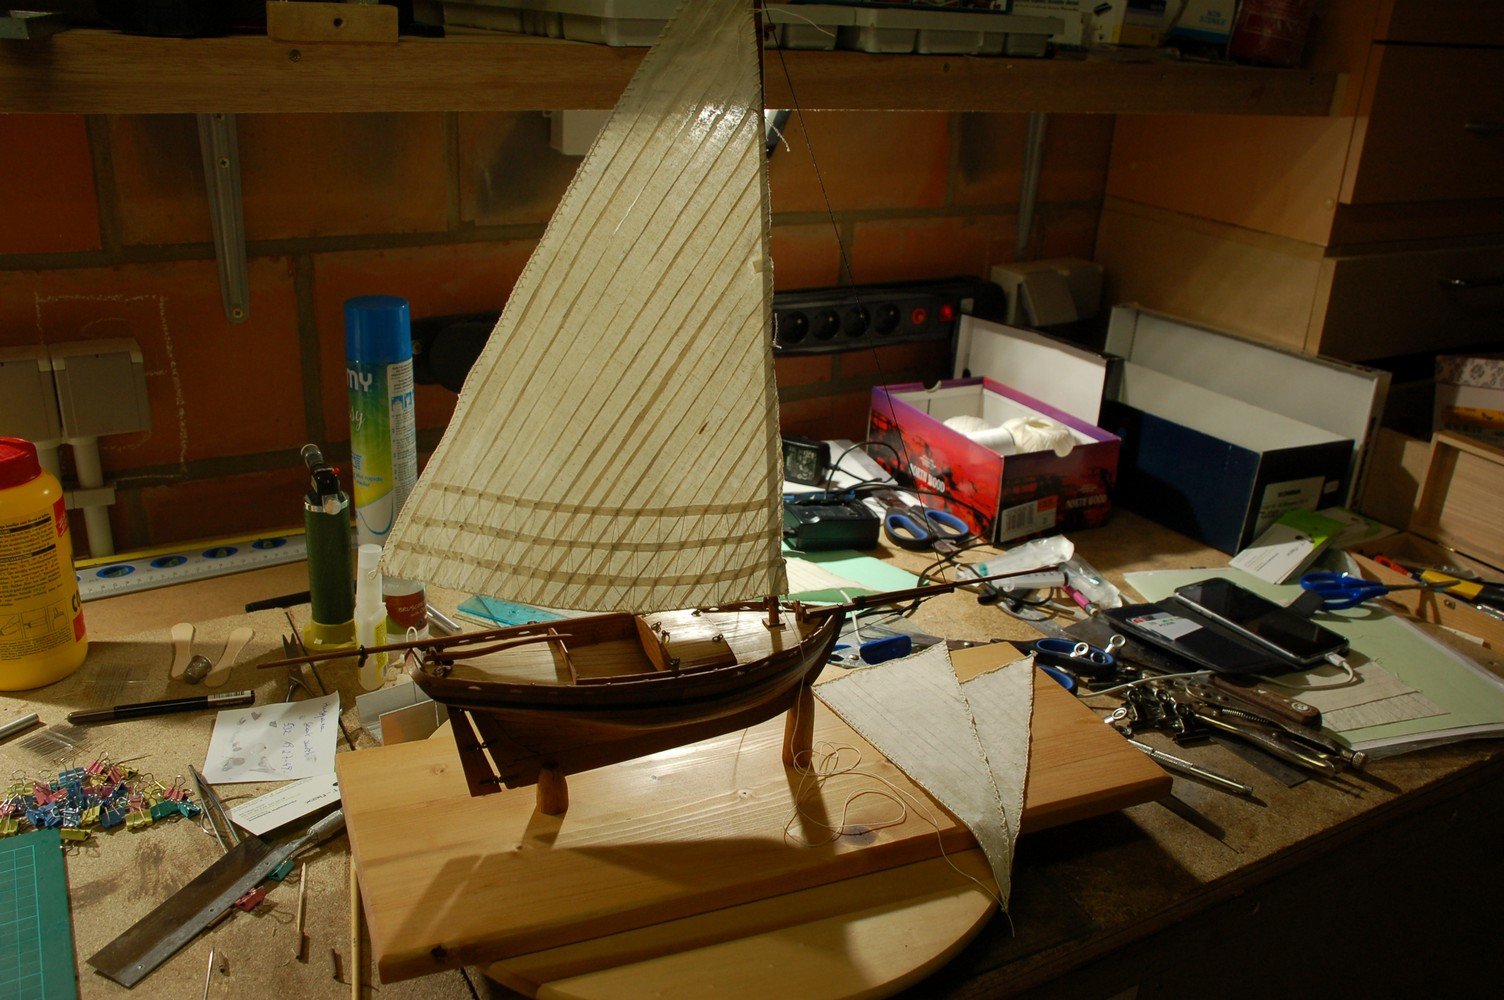
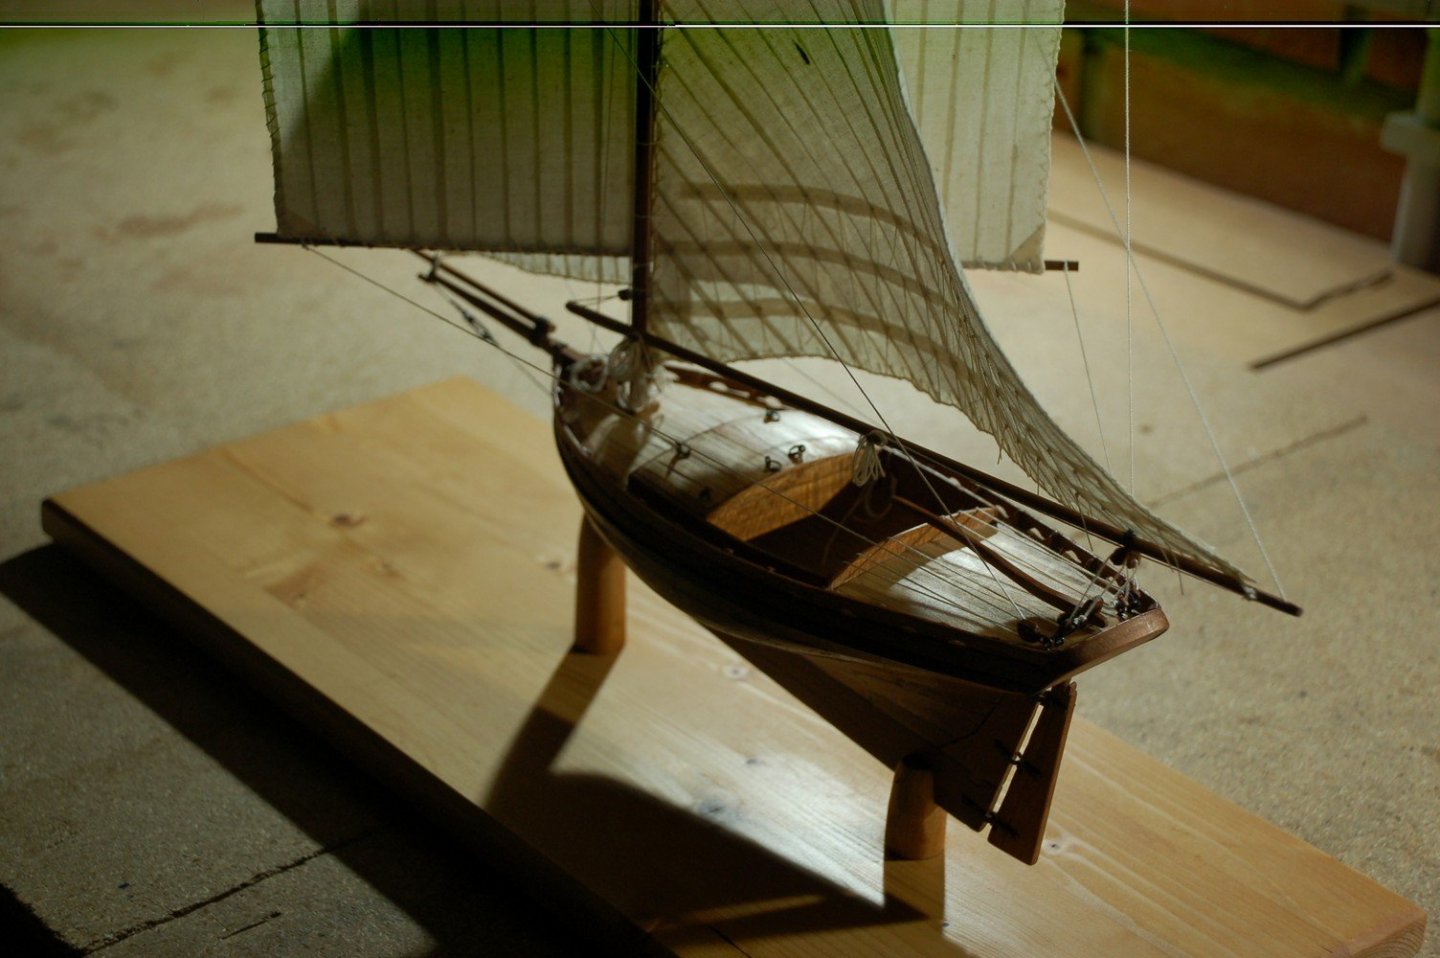
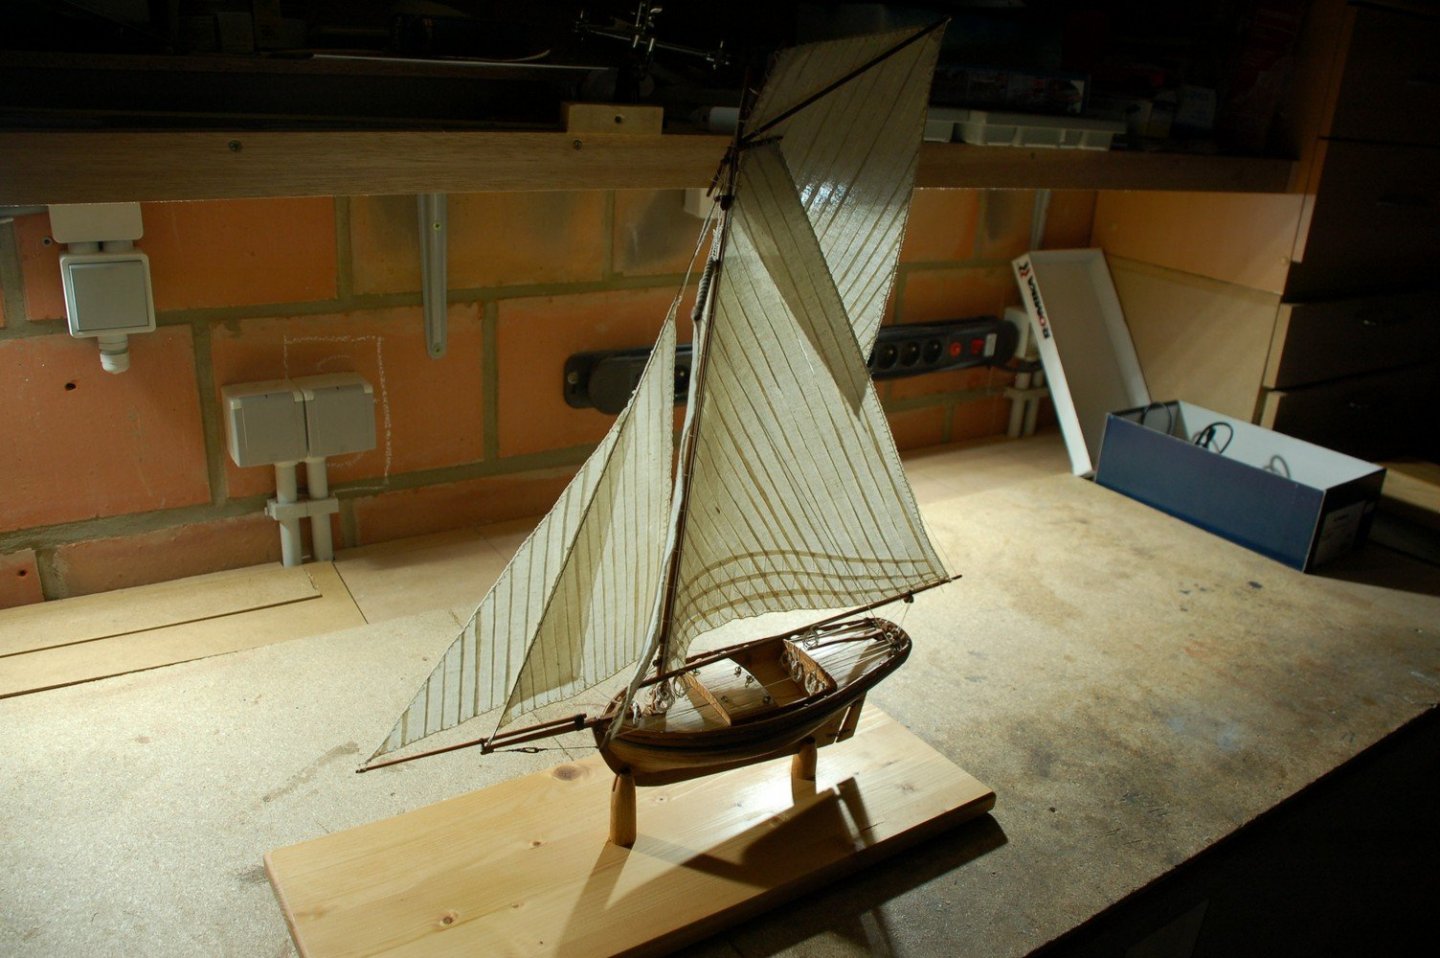
Finally i finished her! My first scratch build little ship! Some pictures of her.


- 144 replies
-
- 7
-
-
- boat
- bermuda boat
- (and 2 more)
-
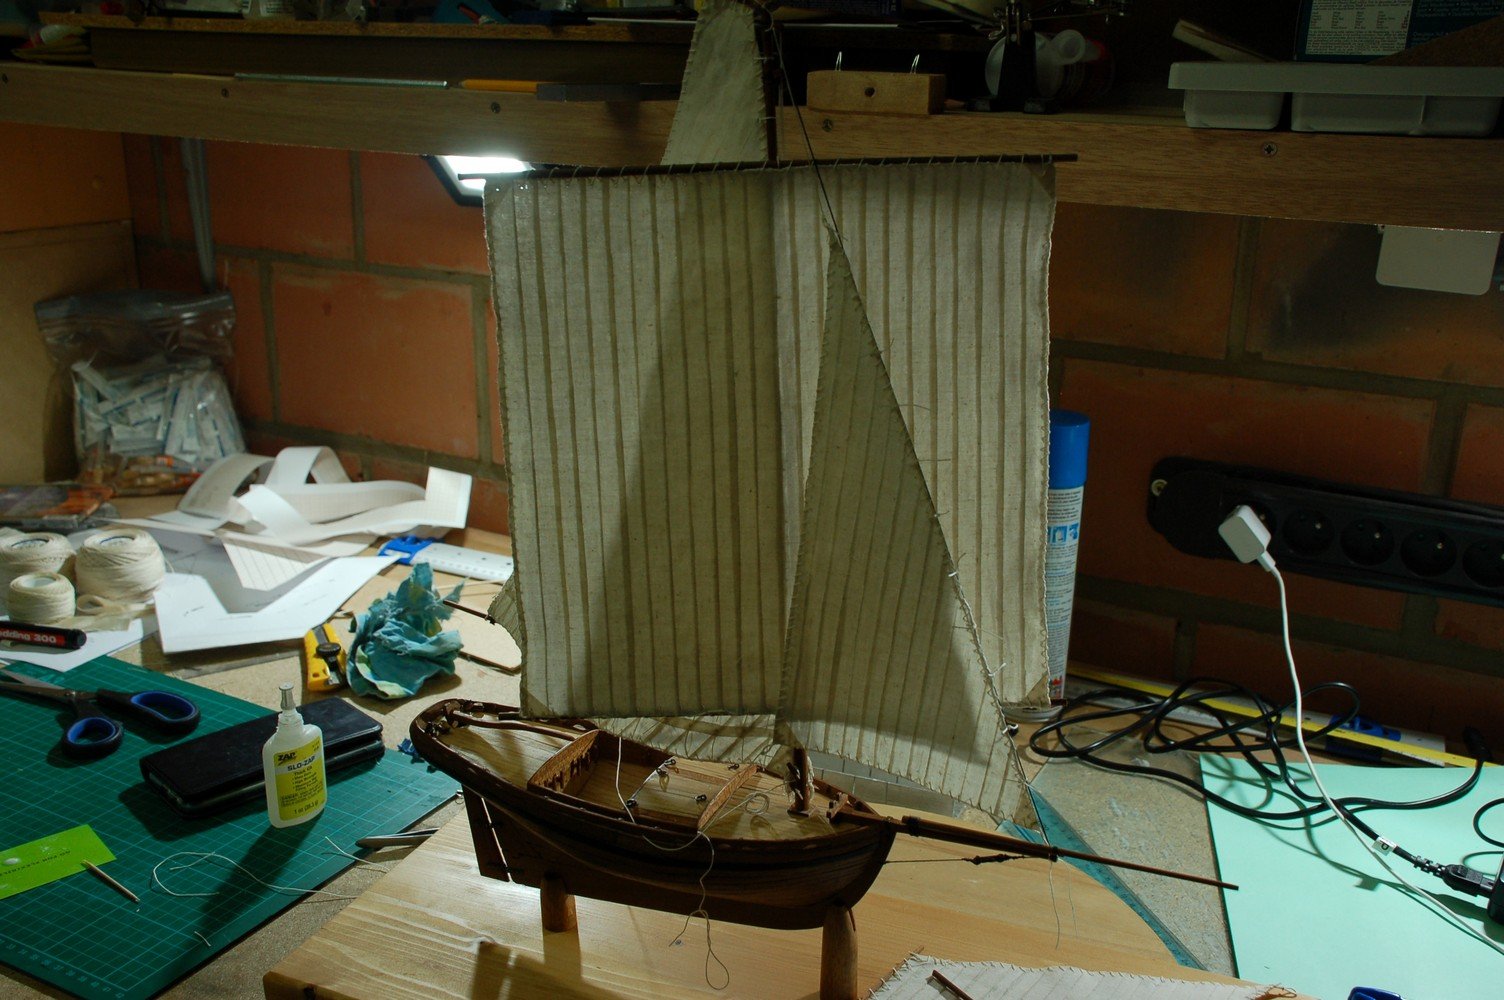
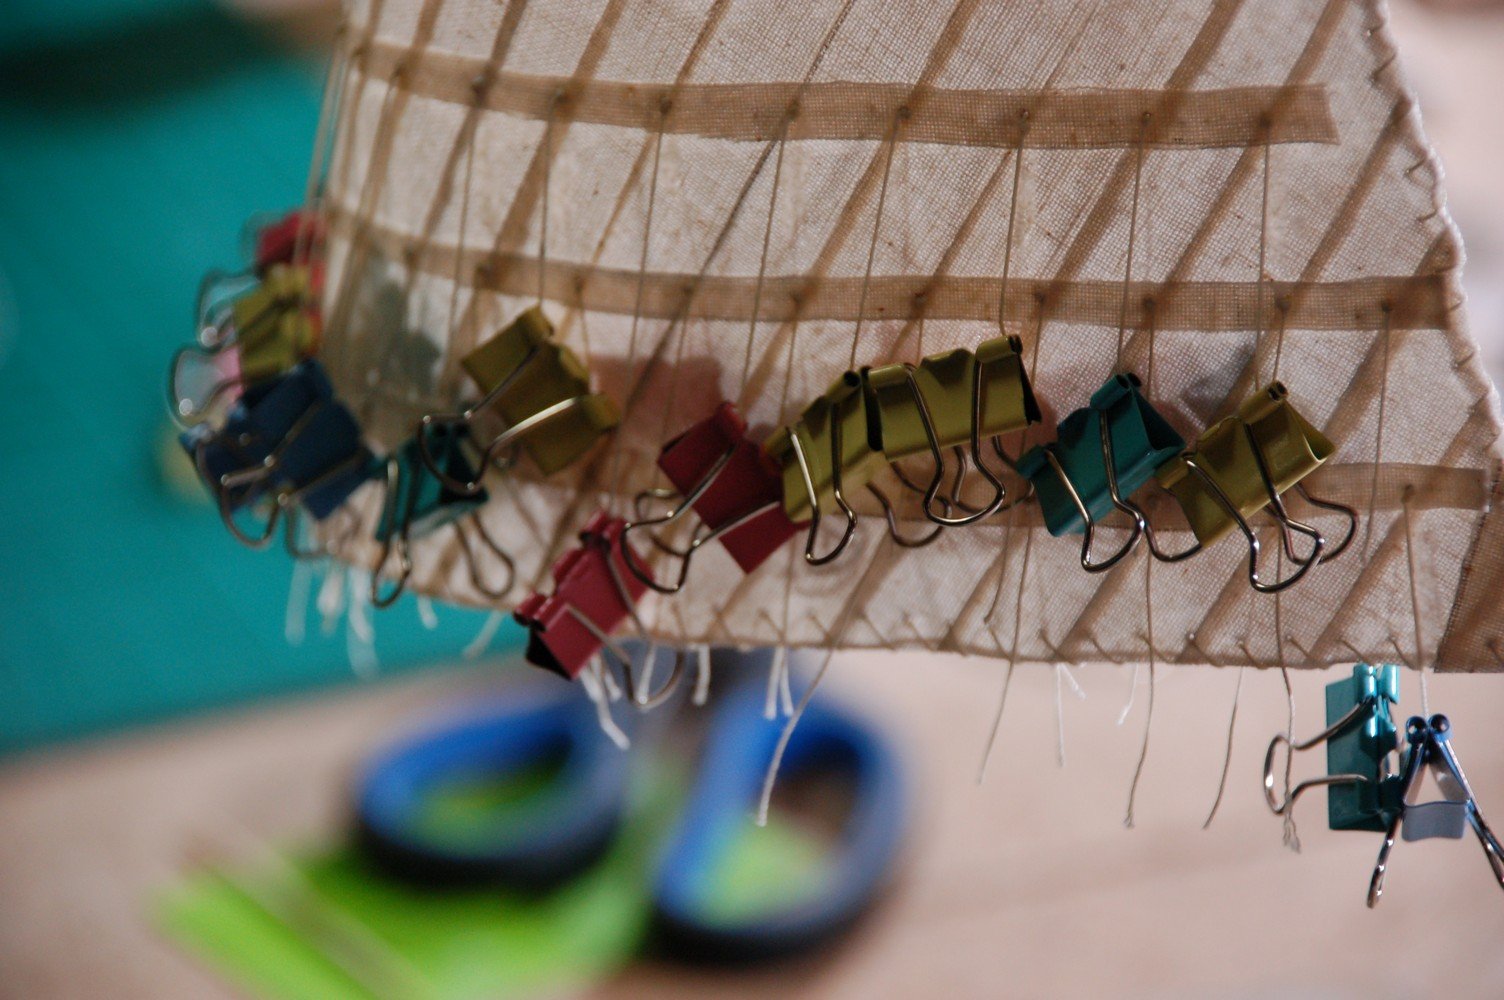
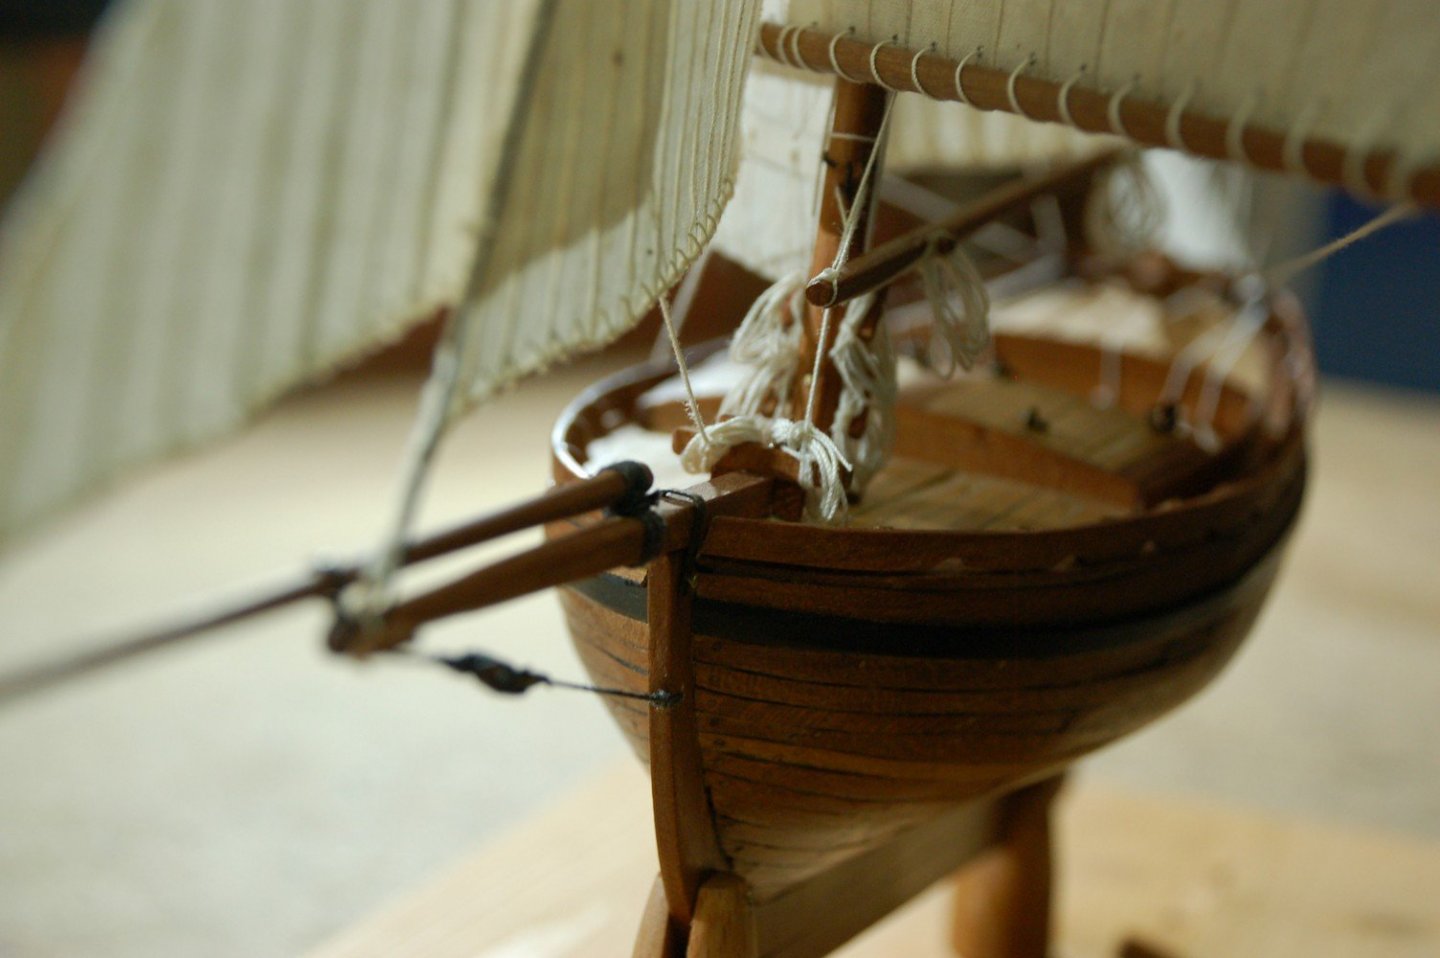
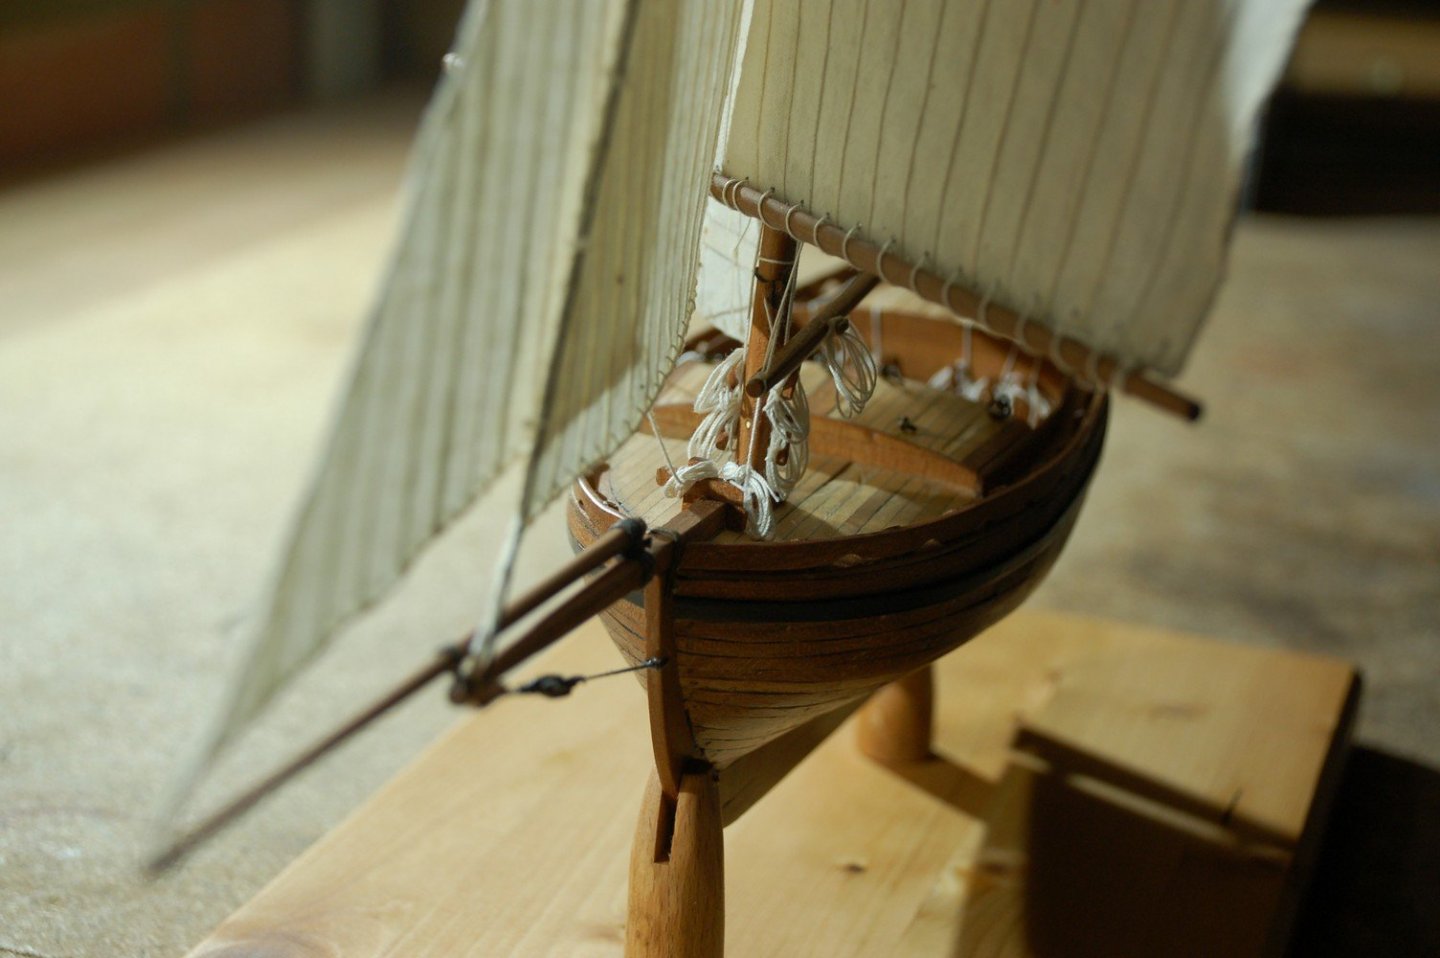
I still need to add the reefing points to the mainsail. Afterwards i applied some diluted pva glue to the reefing lines and hanged a clamp on them to straighten them. When dried i cut of the excesses. Then it was finally time to rig the first sail on her. Slowly progressing and rigging all the sails.


- 144 replies
-
- 4
-
-
- boat
- bermuda boat
- (and 2 more)
-
Hi Jorge, you're Triton looks amazing. It's inspiring me to start one as well.
-
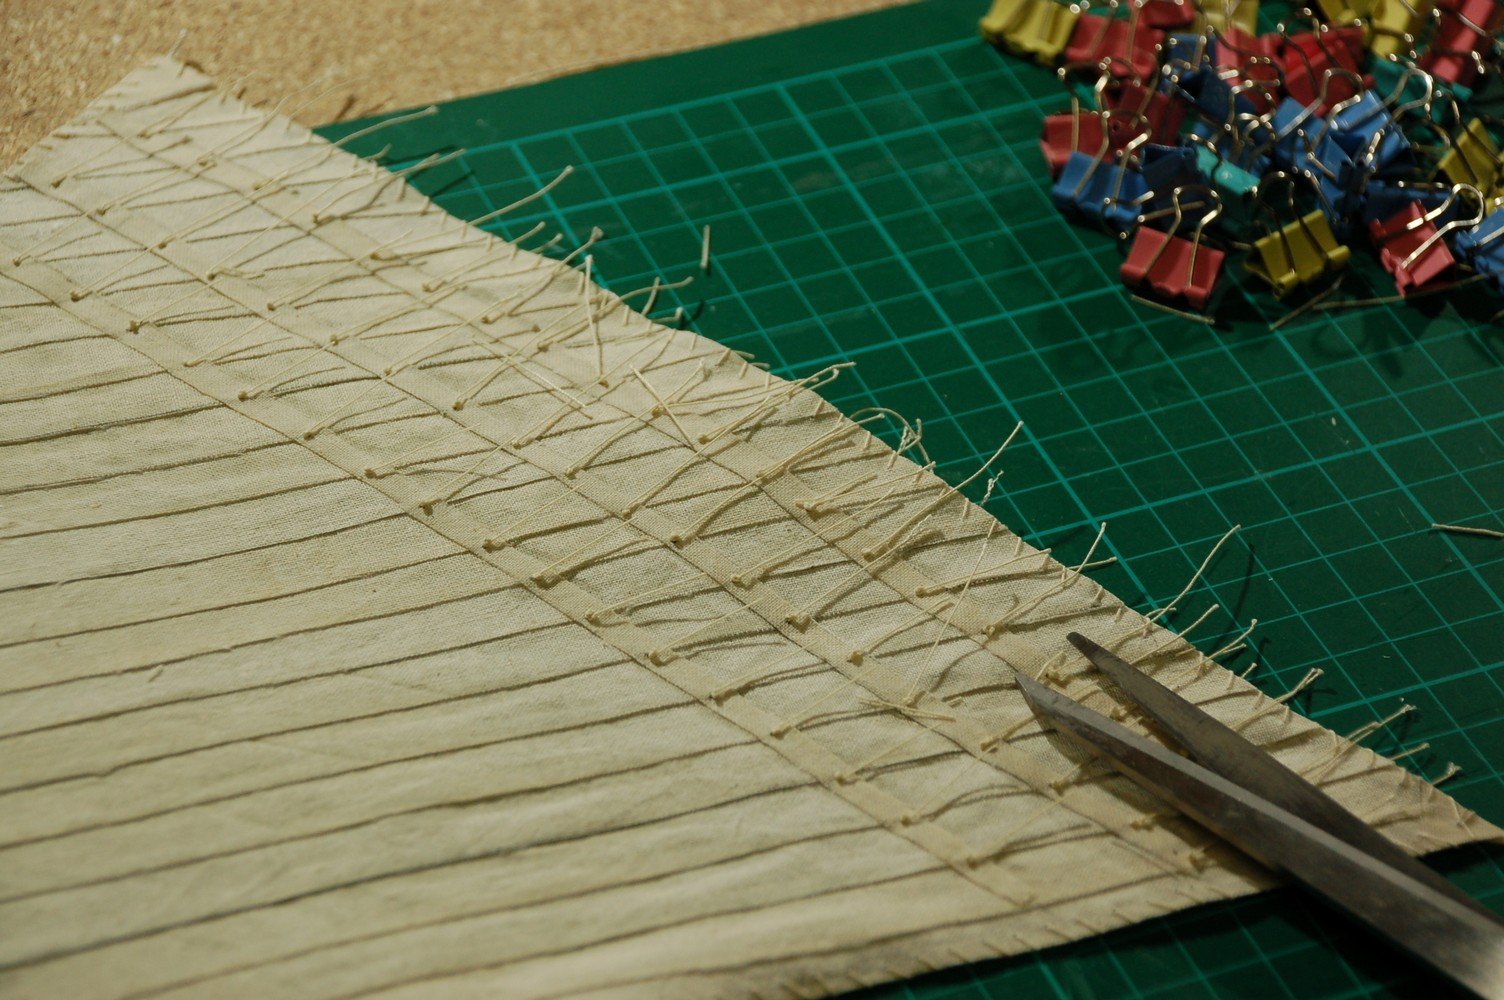
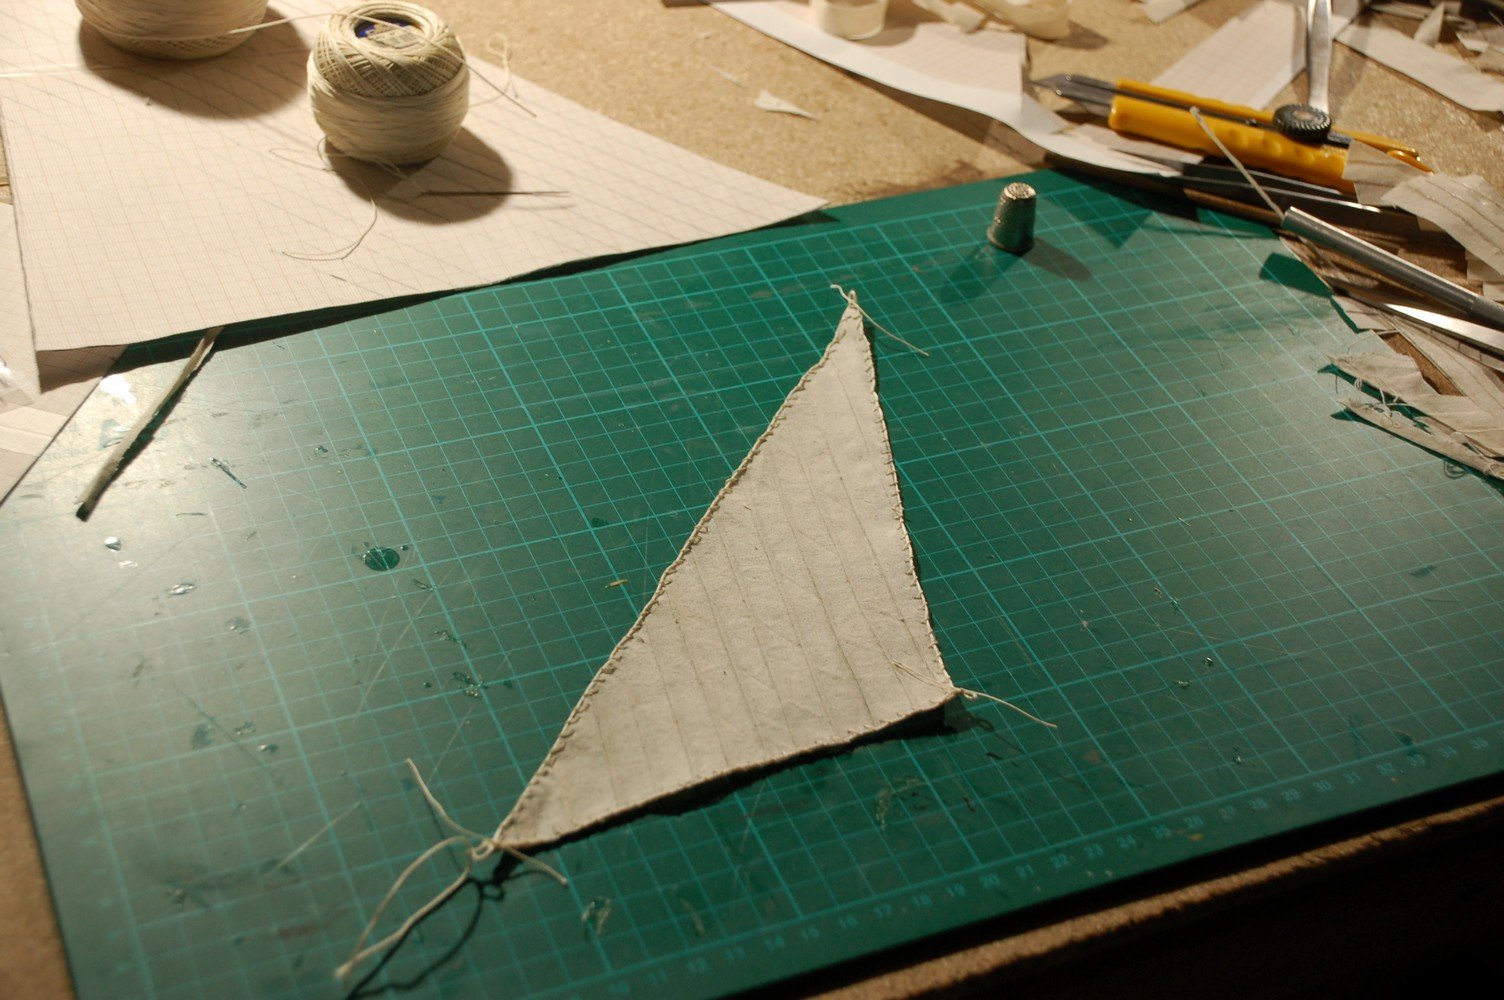
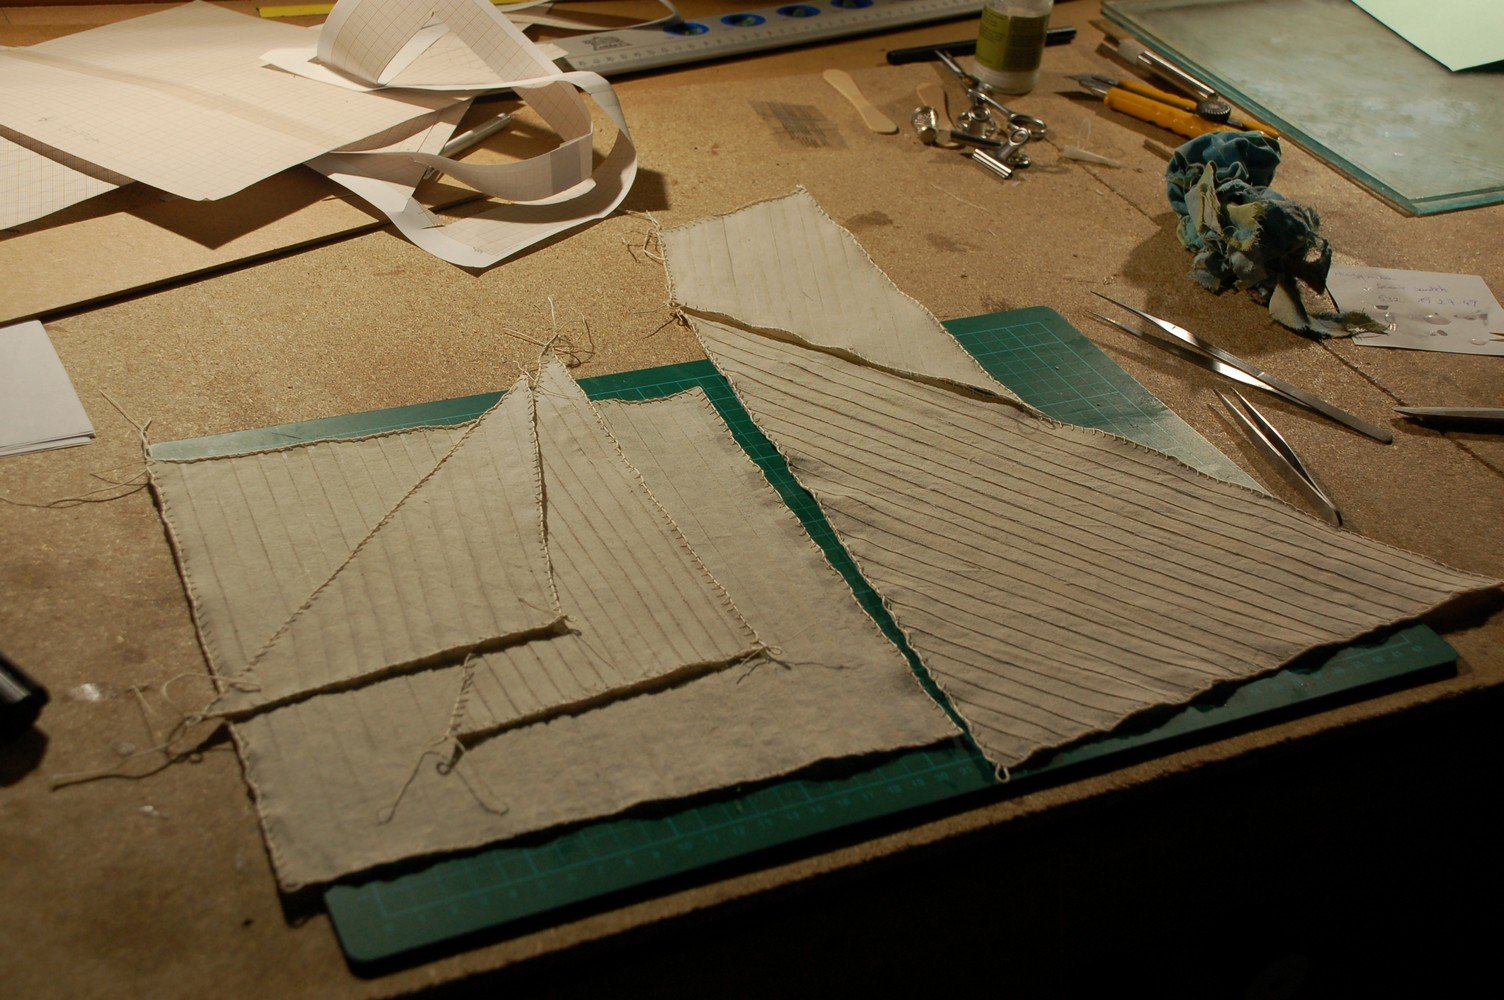
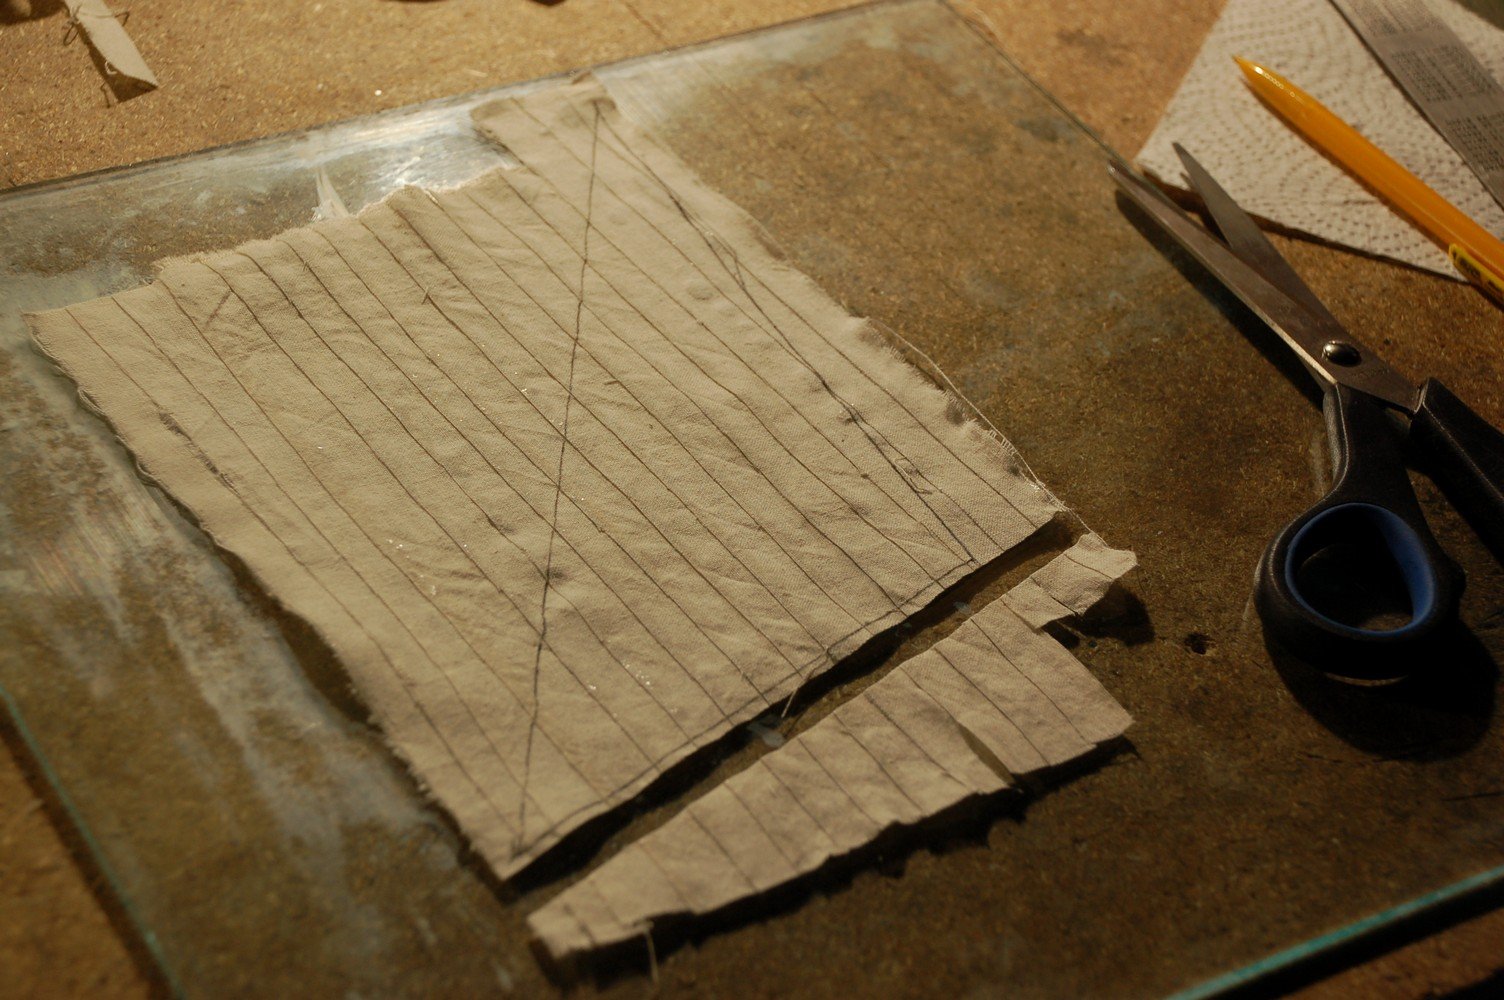
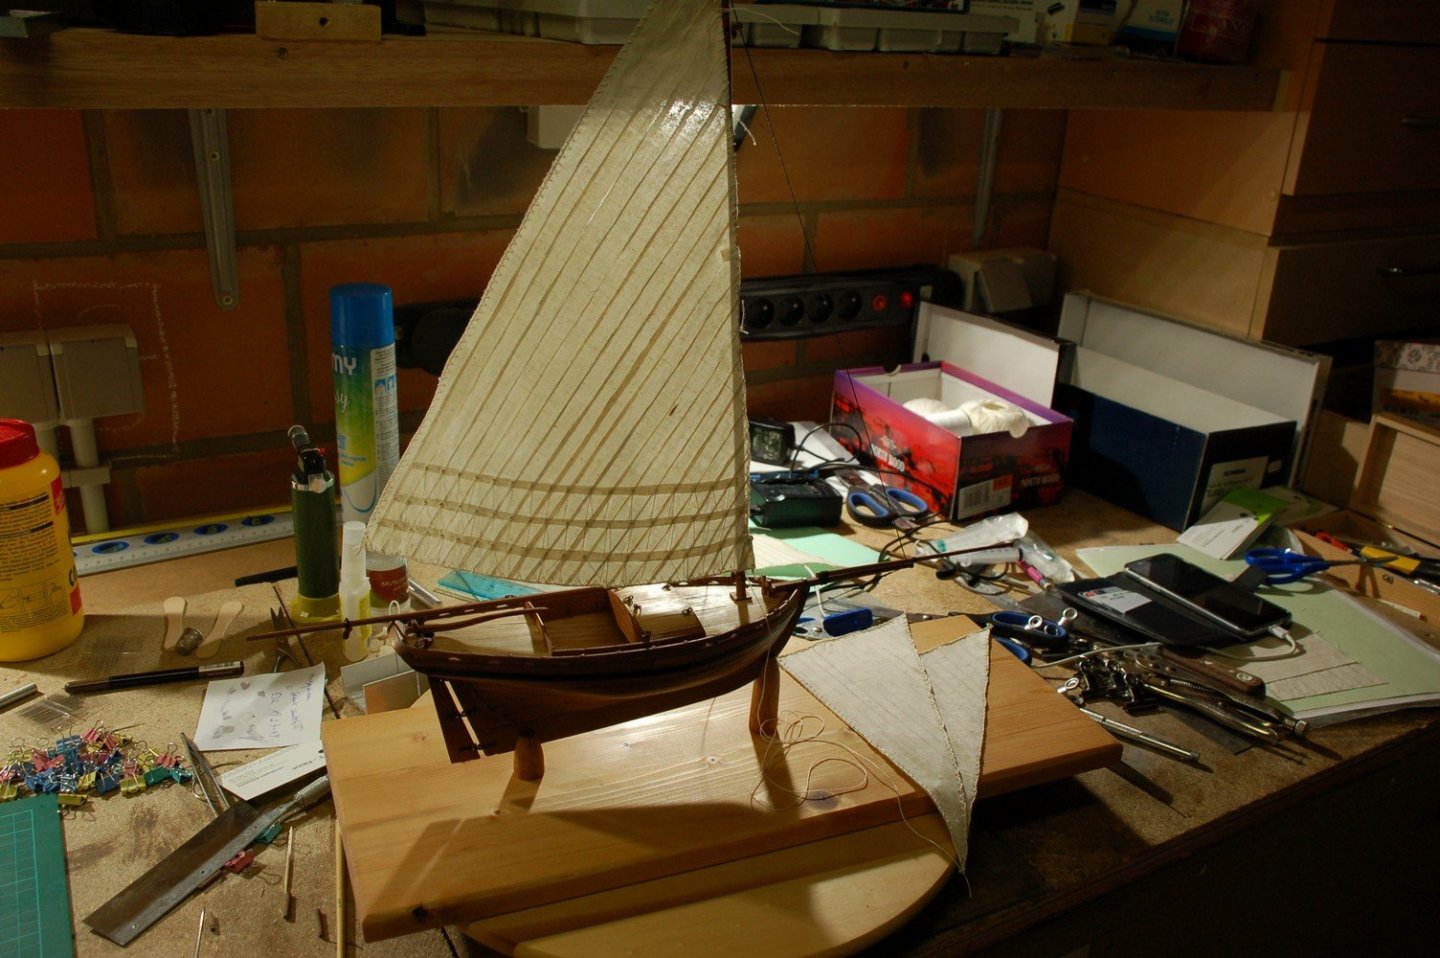
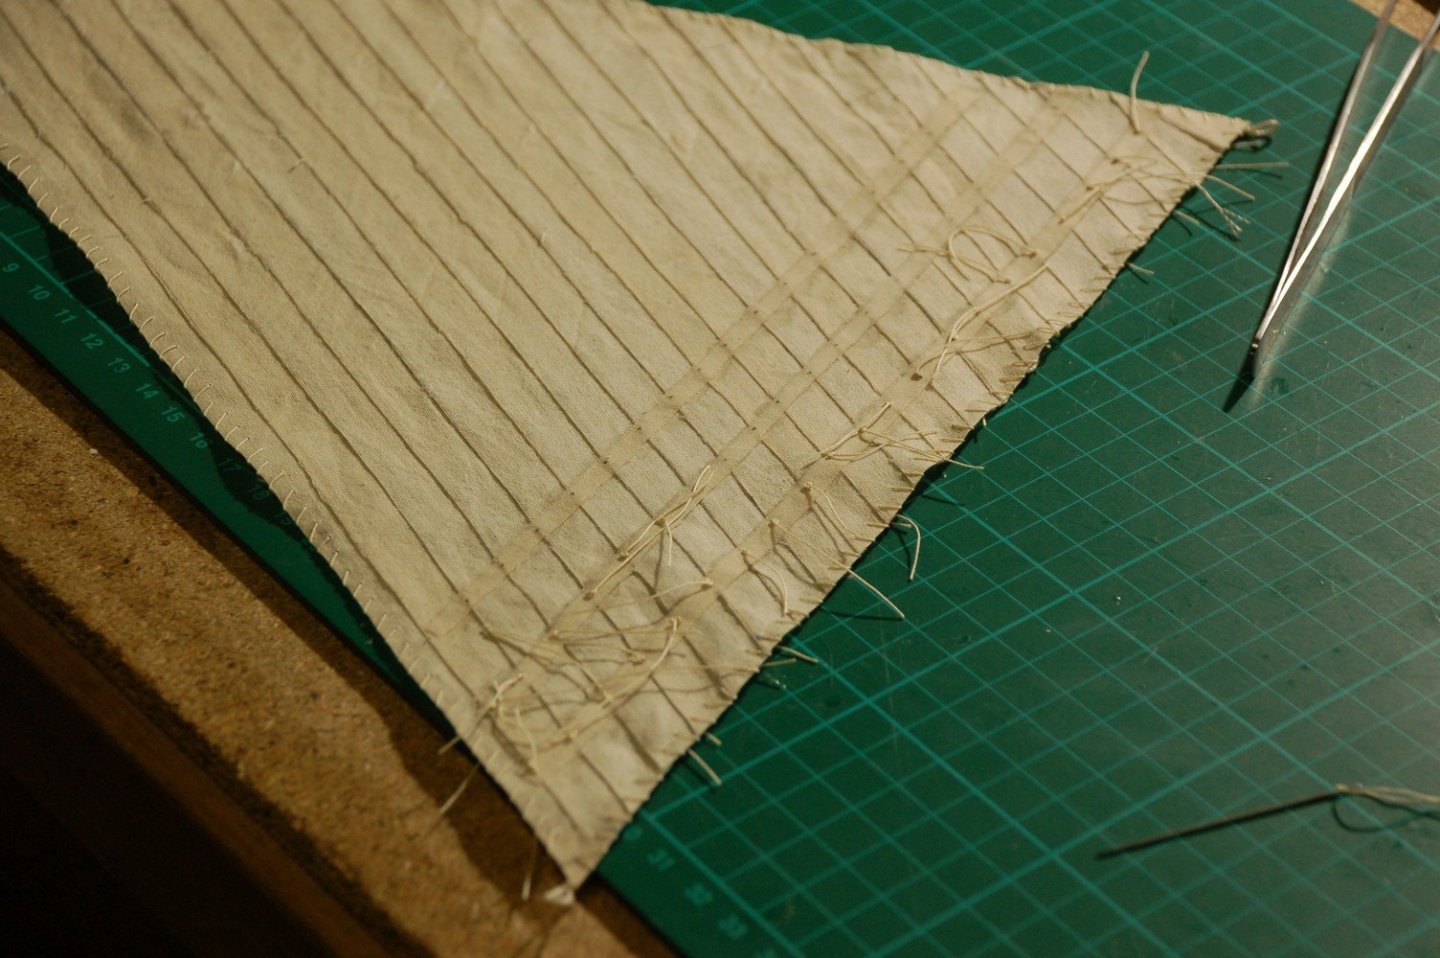
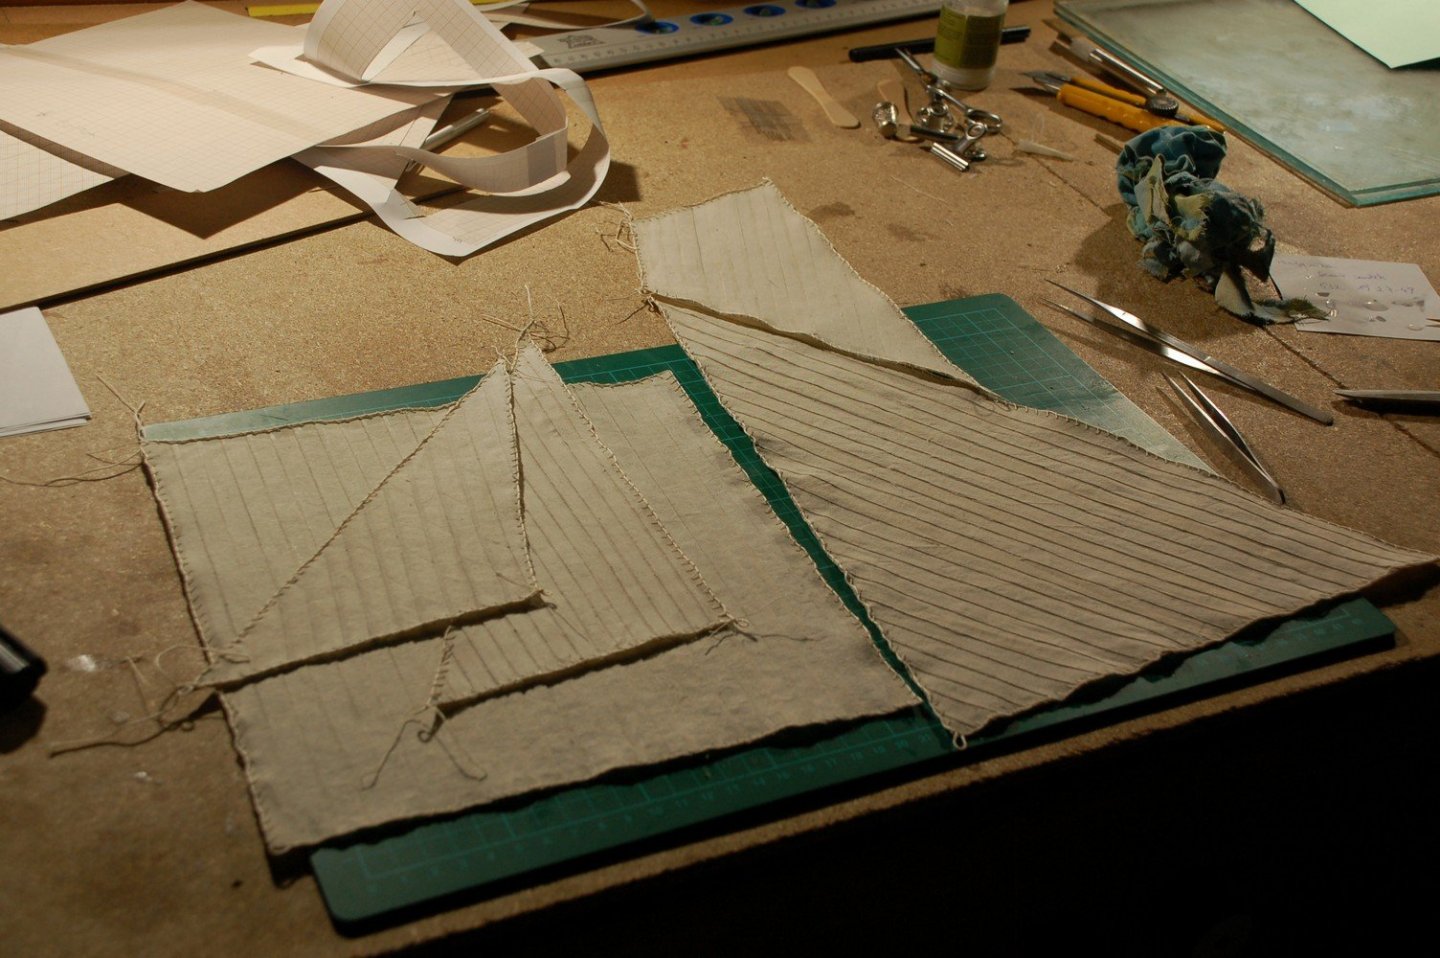
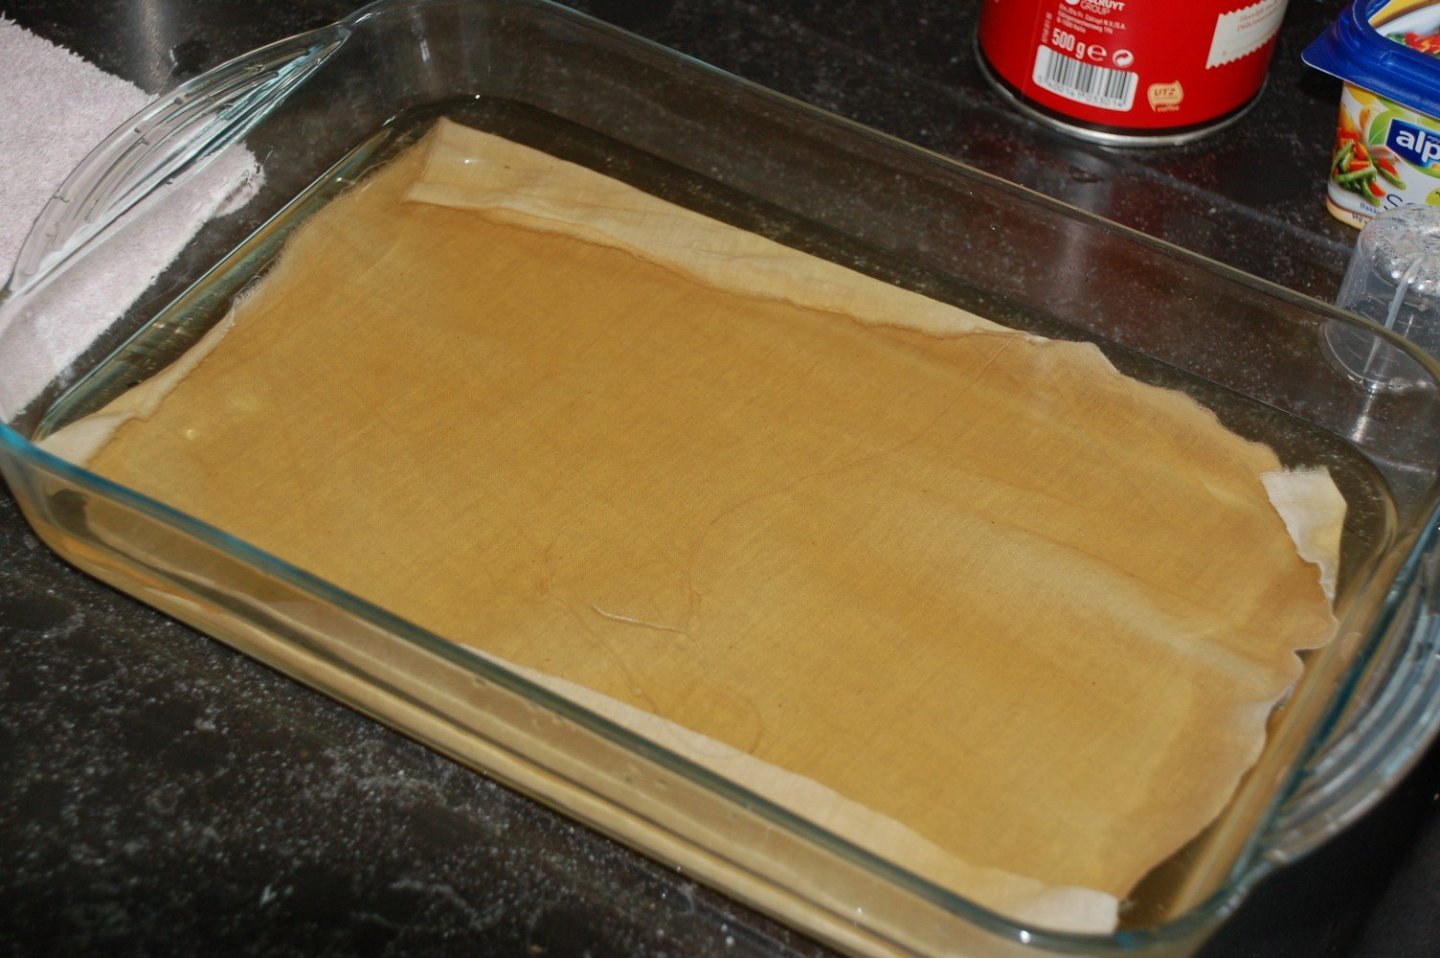
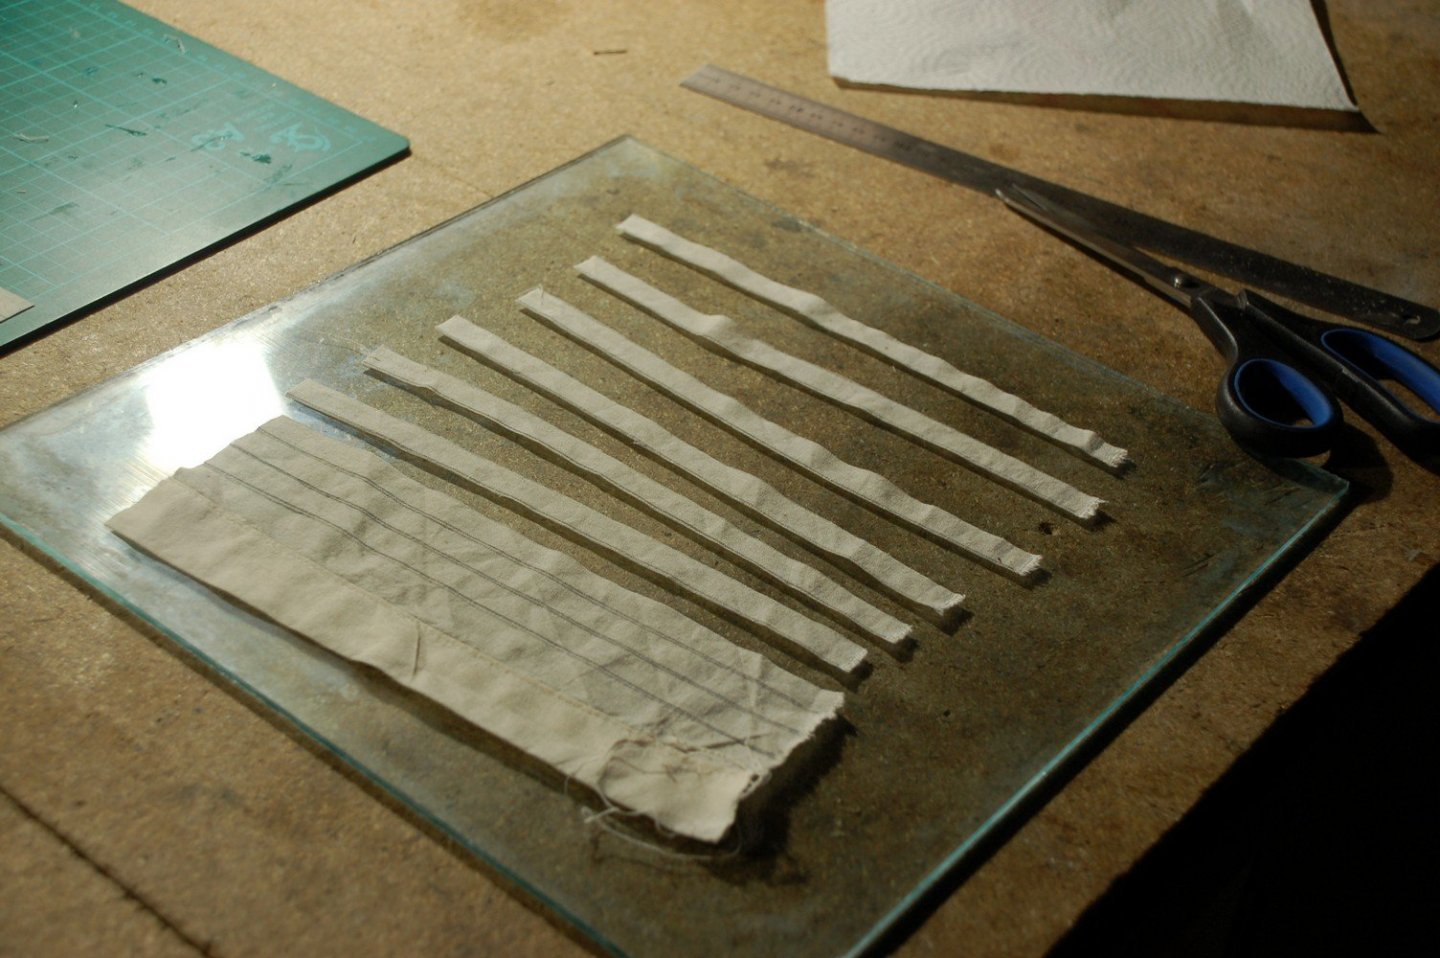
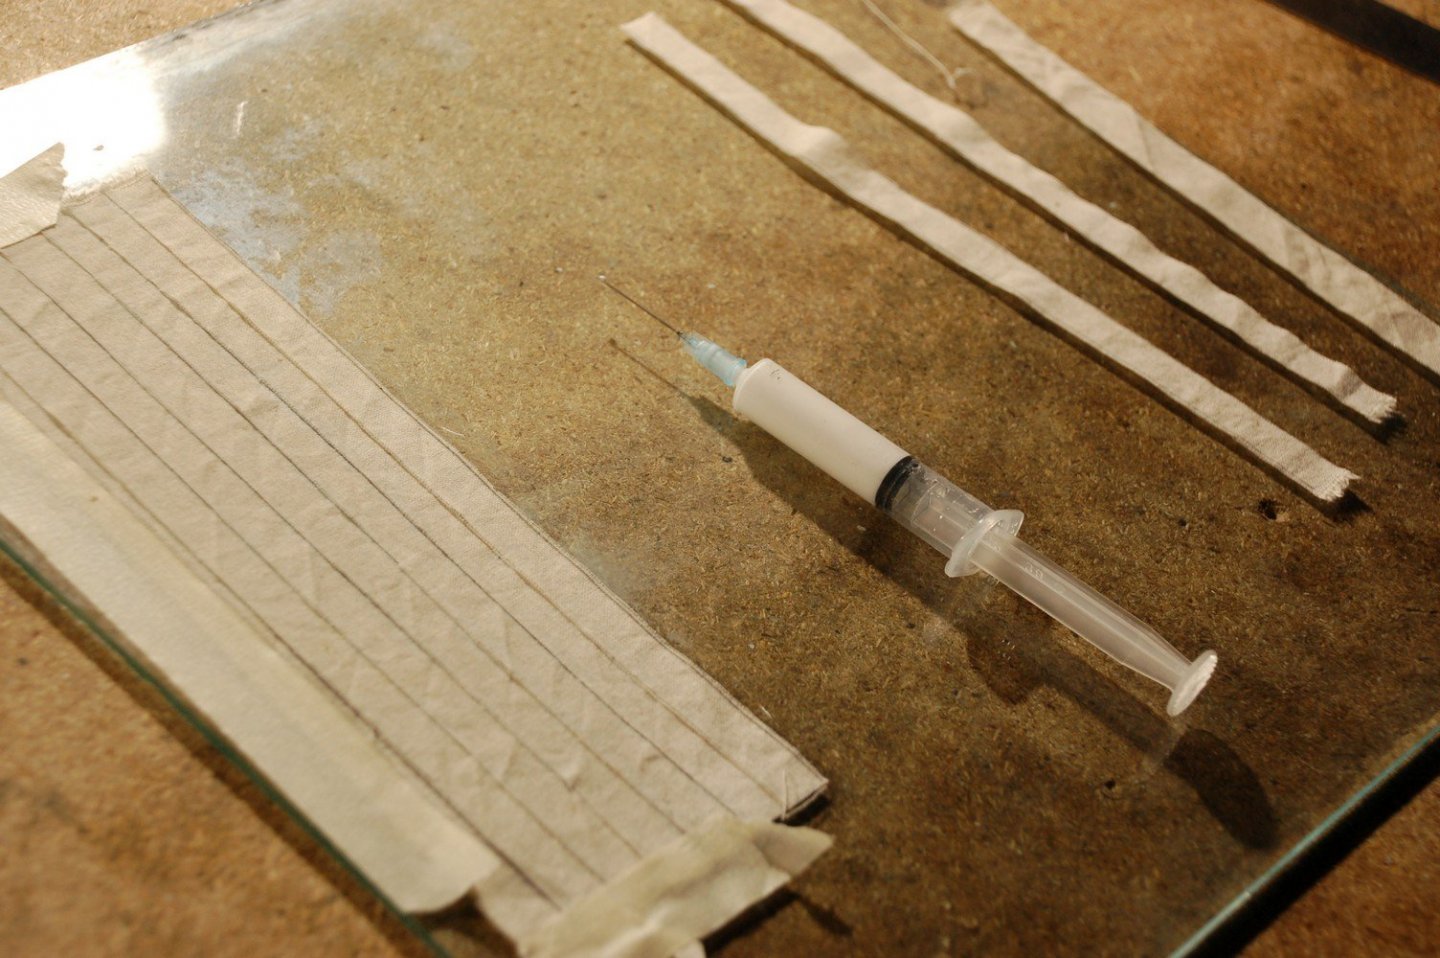
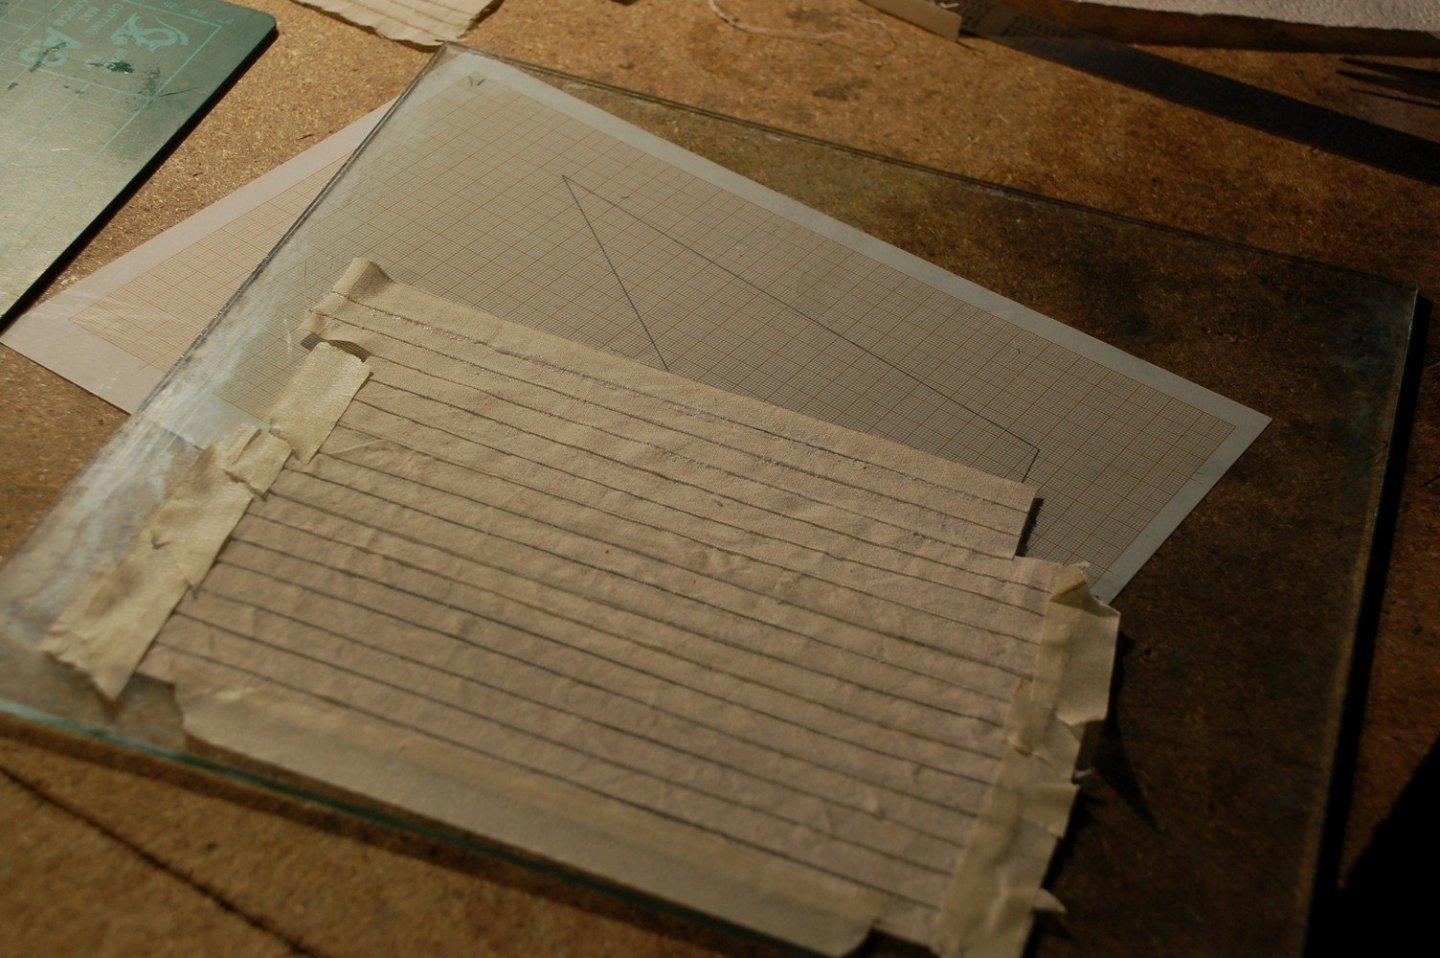
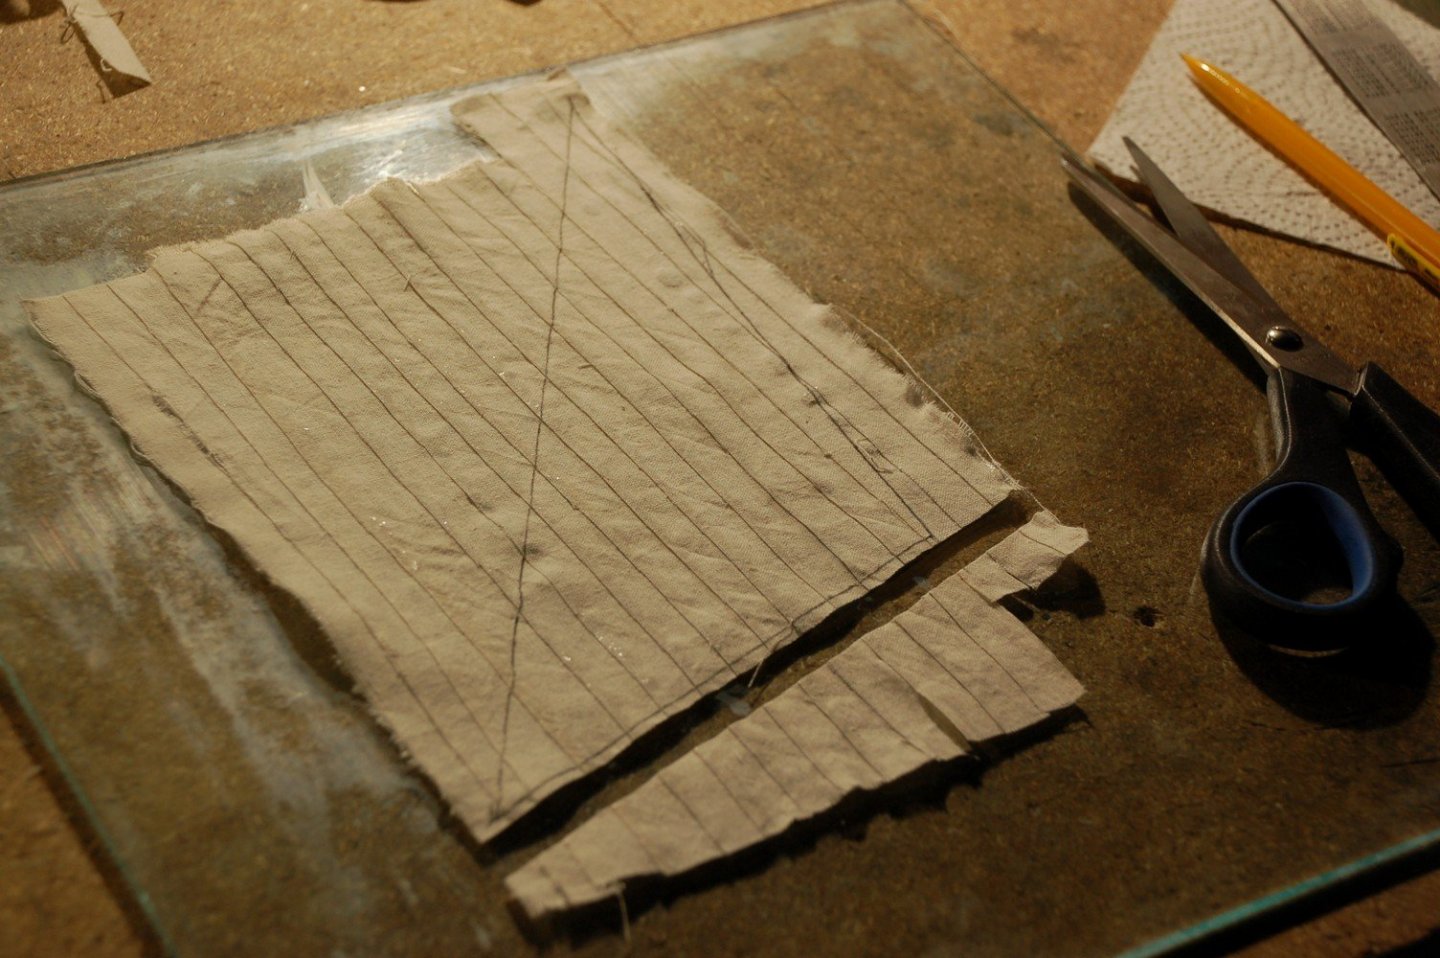
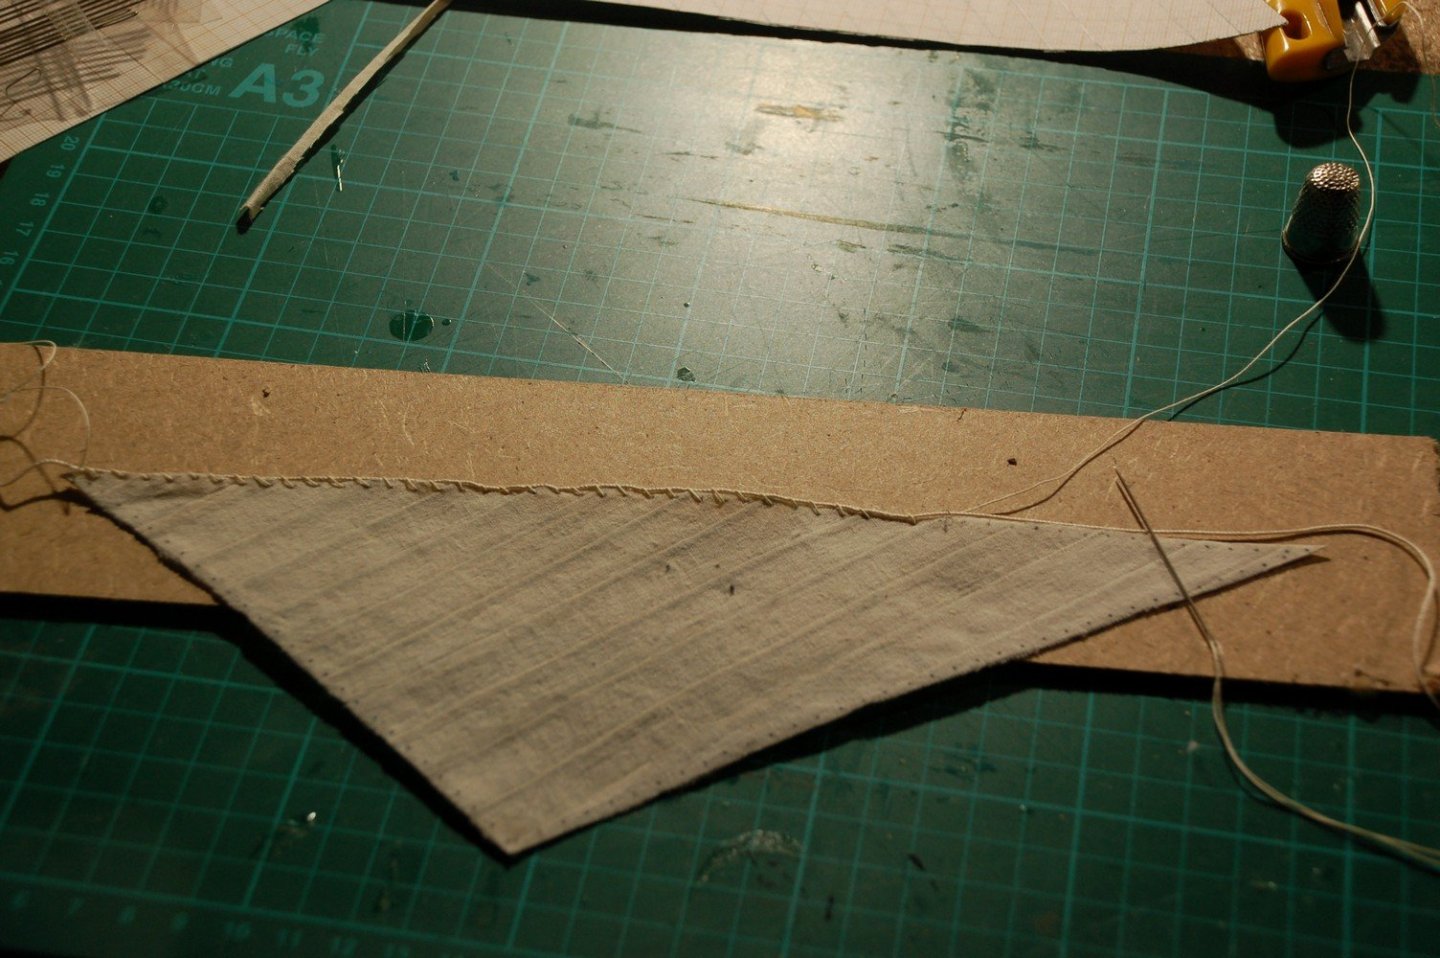
To make the sails, i first soaked the tissue in some tea for some time. After drying, i ironed them and use some starch. Then i drew with a pencil the bands and cut them off. Then i glued them to each other with dilluted glue. Overlapping each other just slightly, taping them to a piece of glass. When enough bands were glued to each other, i used a paper pattern of the sail to drew it on the tissue. Cutting it out. And finish each sail with sewing the boltropes around them. And behold, one finished sail So, i did for all the sails.

- 144 replies
-
- 5
-
-
- boat
- bermuda boat
- (and 2 more)
-
Thank you Chris and Christian It's nice to be back and to have the shipyard open again.
- 144 replies
-
- 1
-
-
- boat
- bermuda boat
- (and 2 more)
-
Hey Glenn Glad to see another DeAgostini Yamato here. Nice job on her hull.
- 64 replies
-
- 2
-
-
- yamato
- deagostini
- (and 2 more)
-
Hey Glenn, no i didn't watch those youtube videos. Thank you for pointing me to them.
-
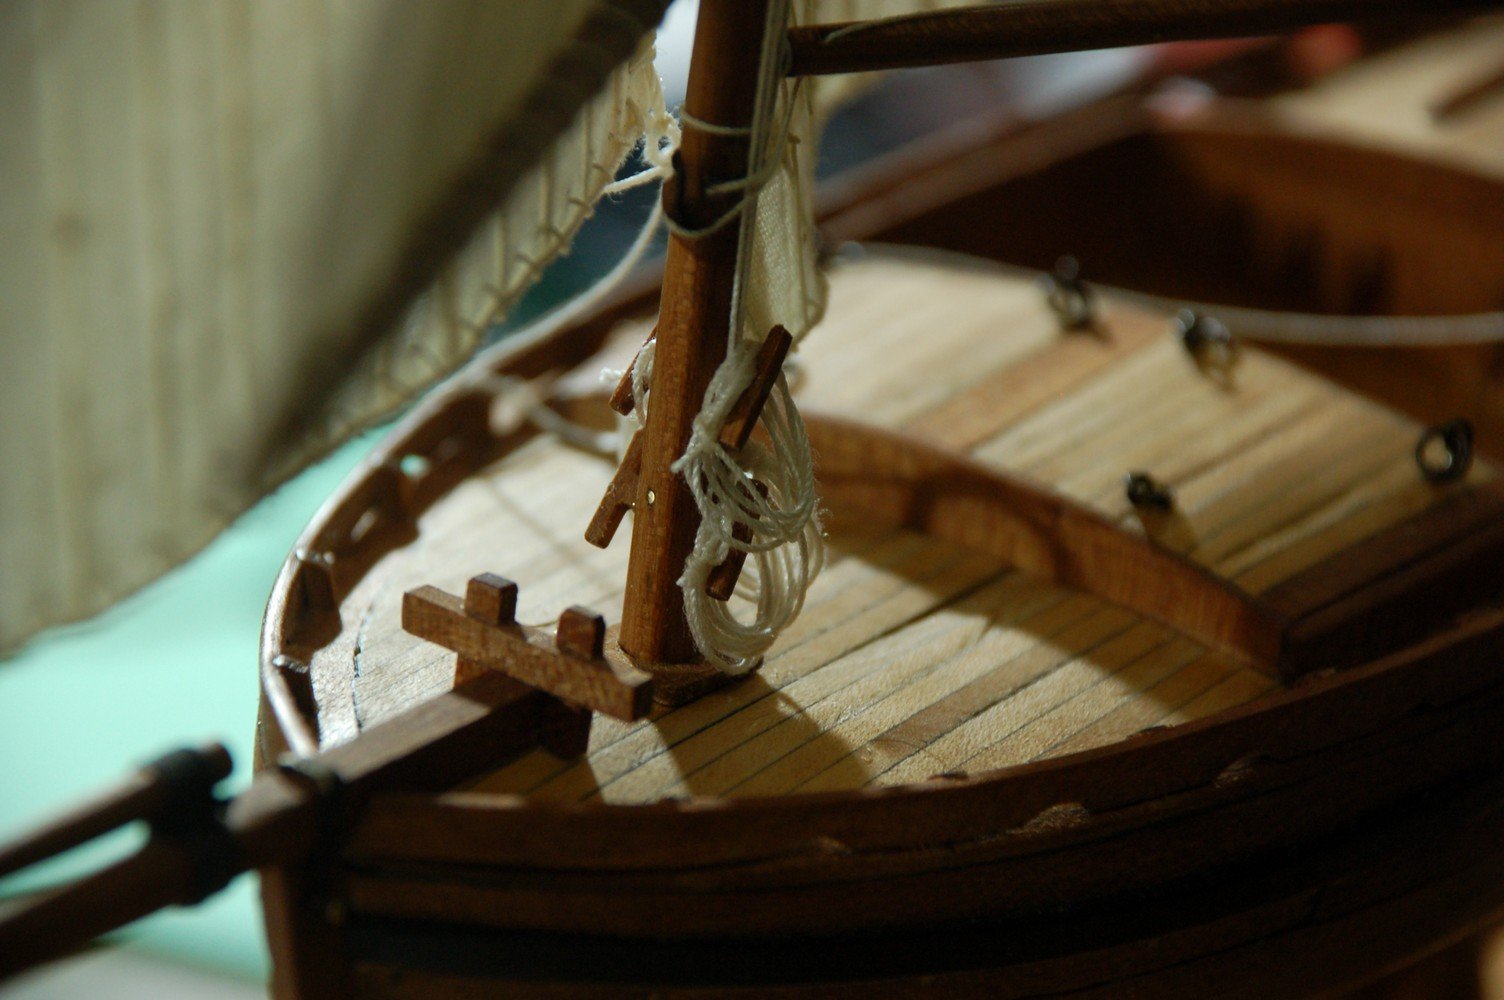
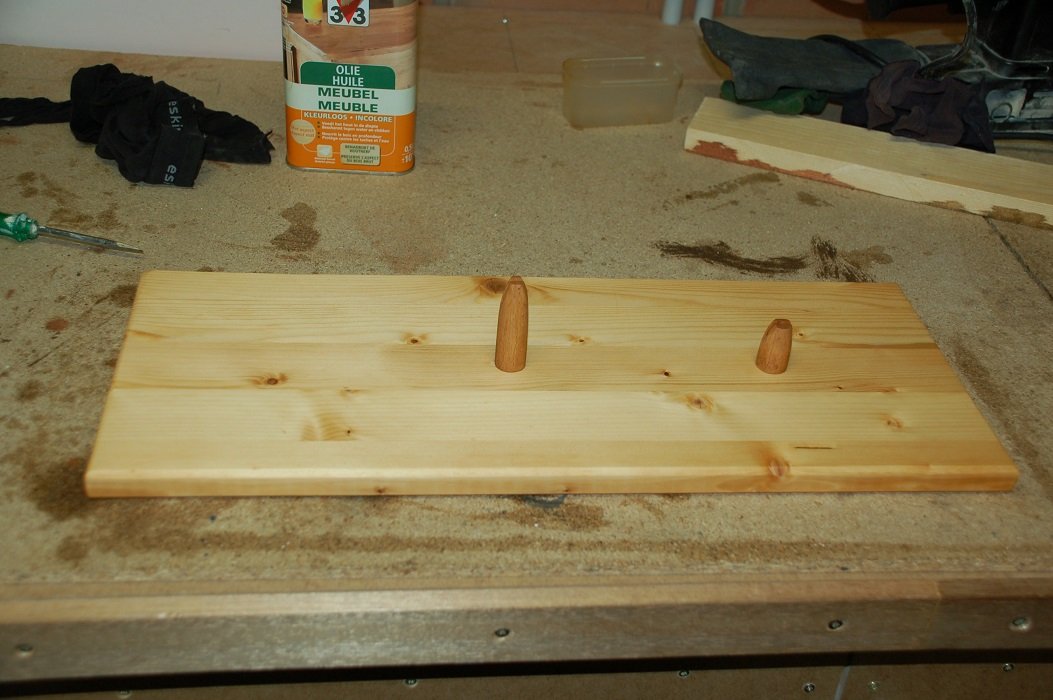
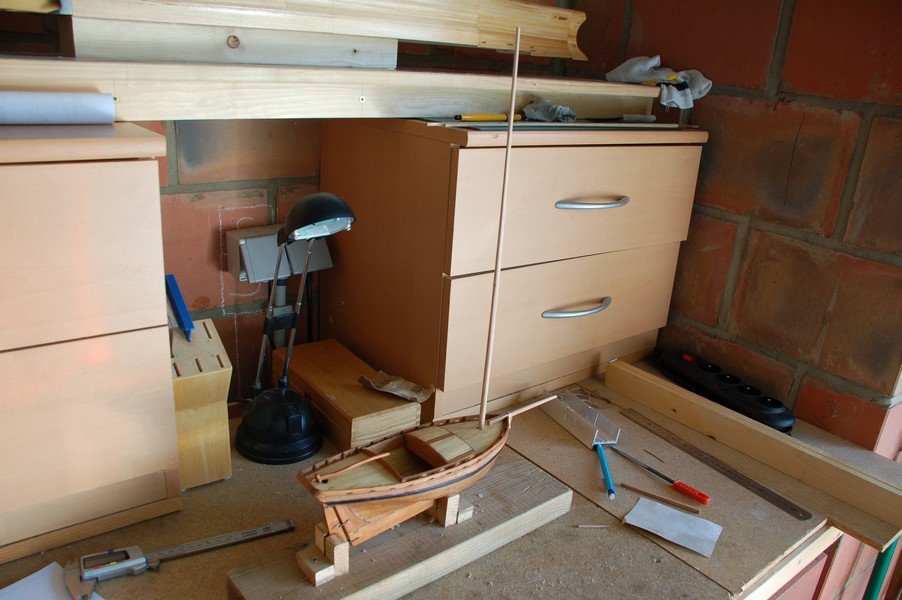
I also created a base plate to install her. I've made two pedestals from some scrap birch i had lying around. I gave it several coats of oil.
- 144 replies
-
- 5
-
-
- boat
- bermuda boat
- (and 2 more)
-
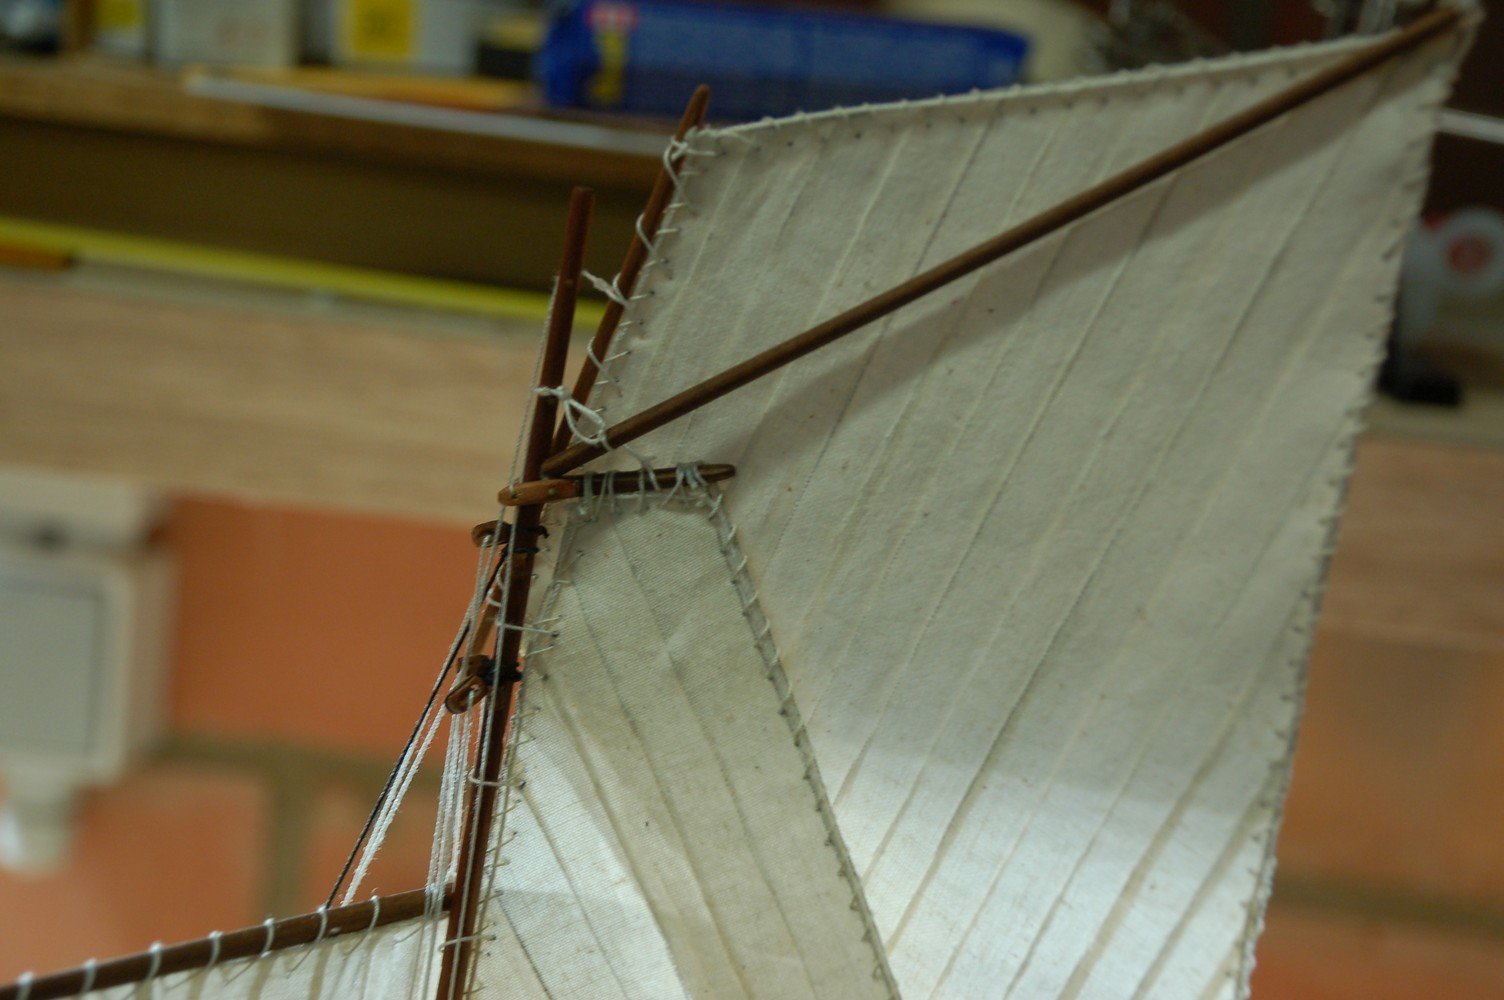
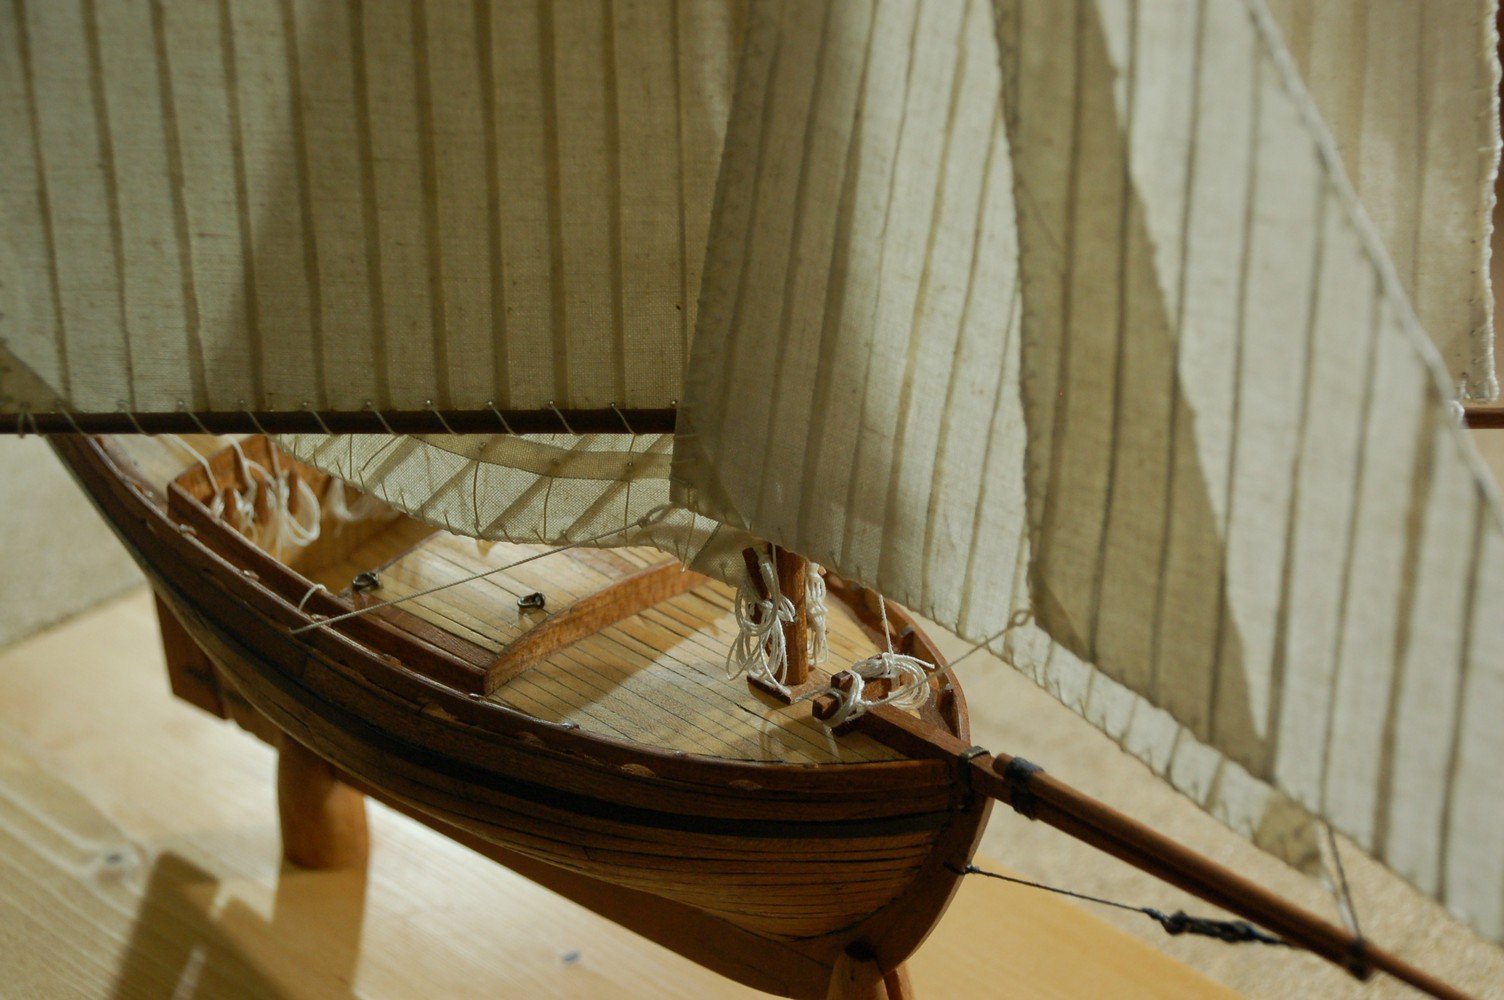
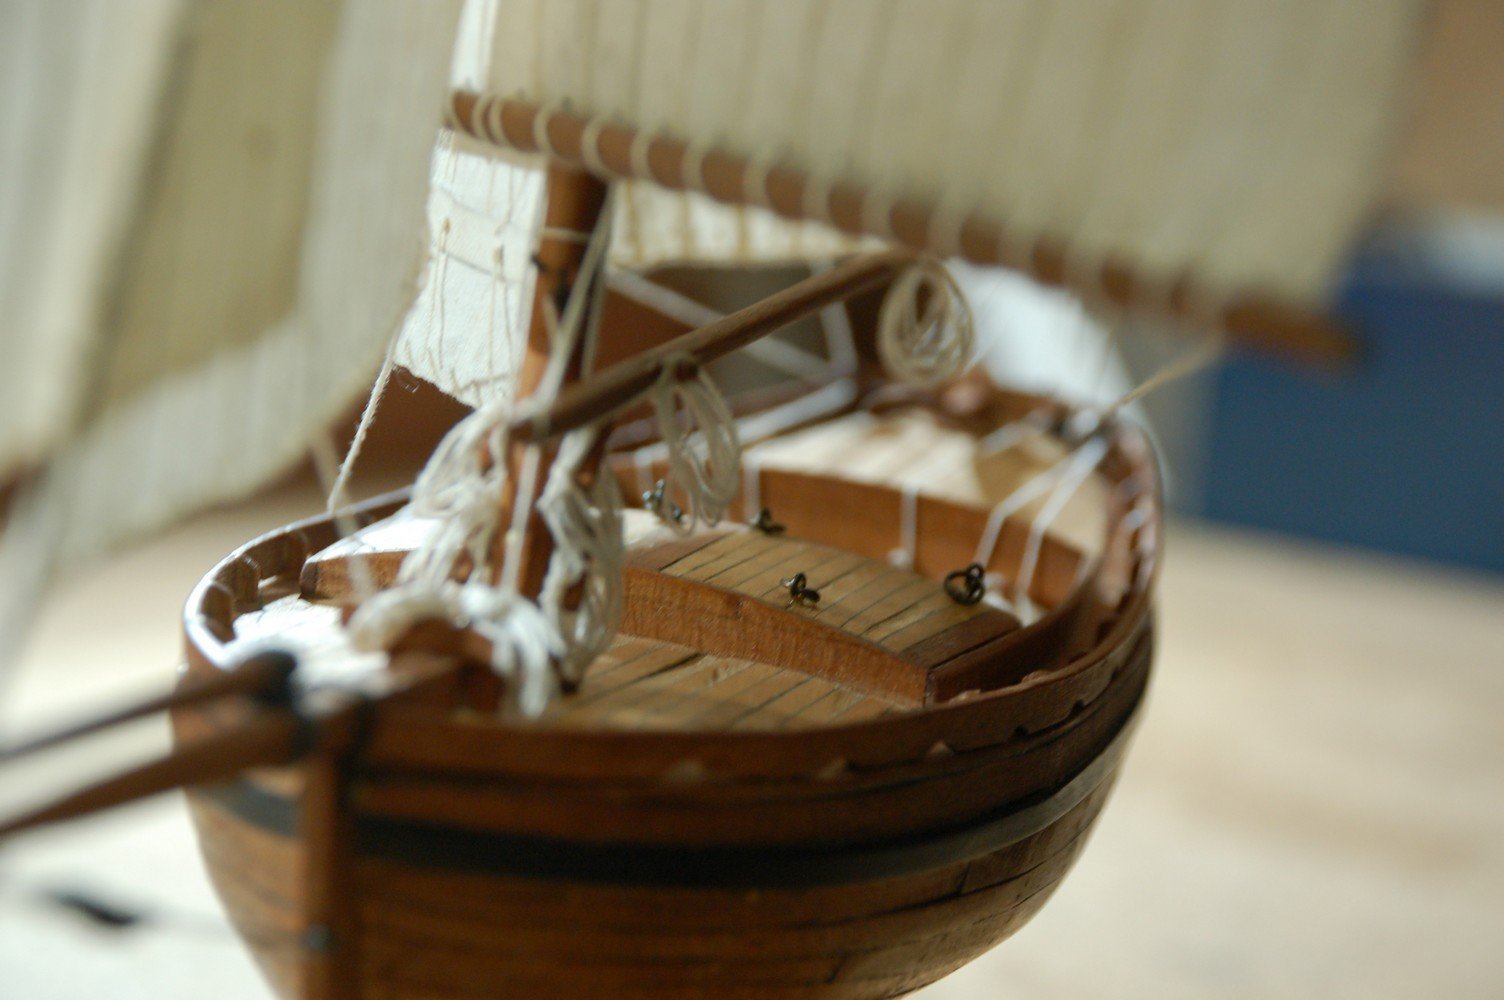
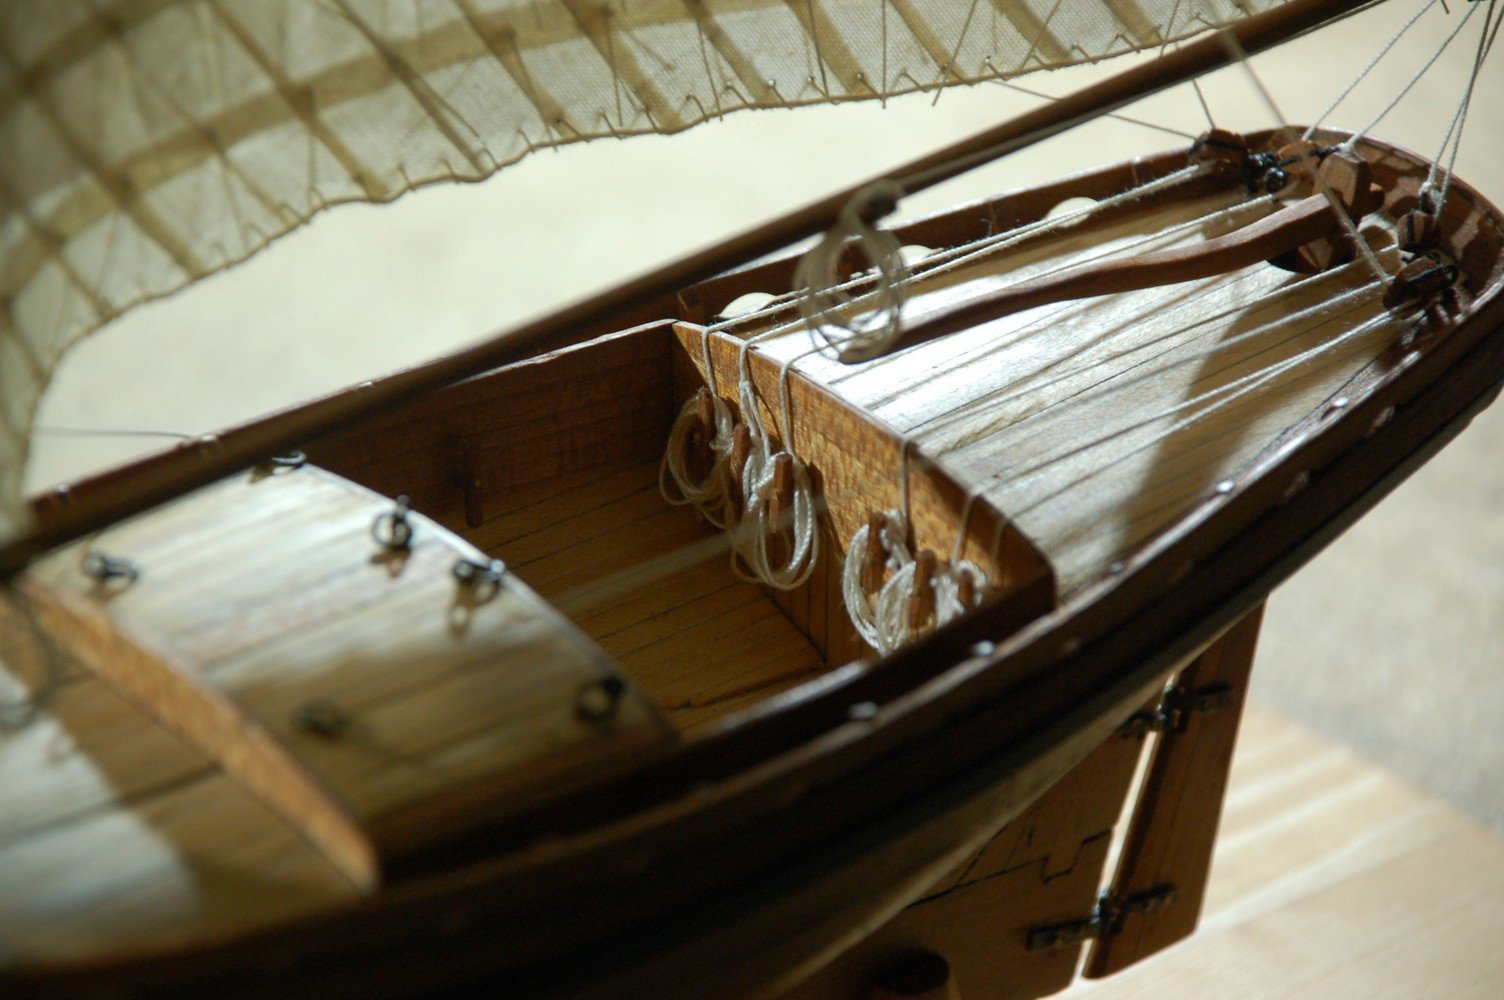
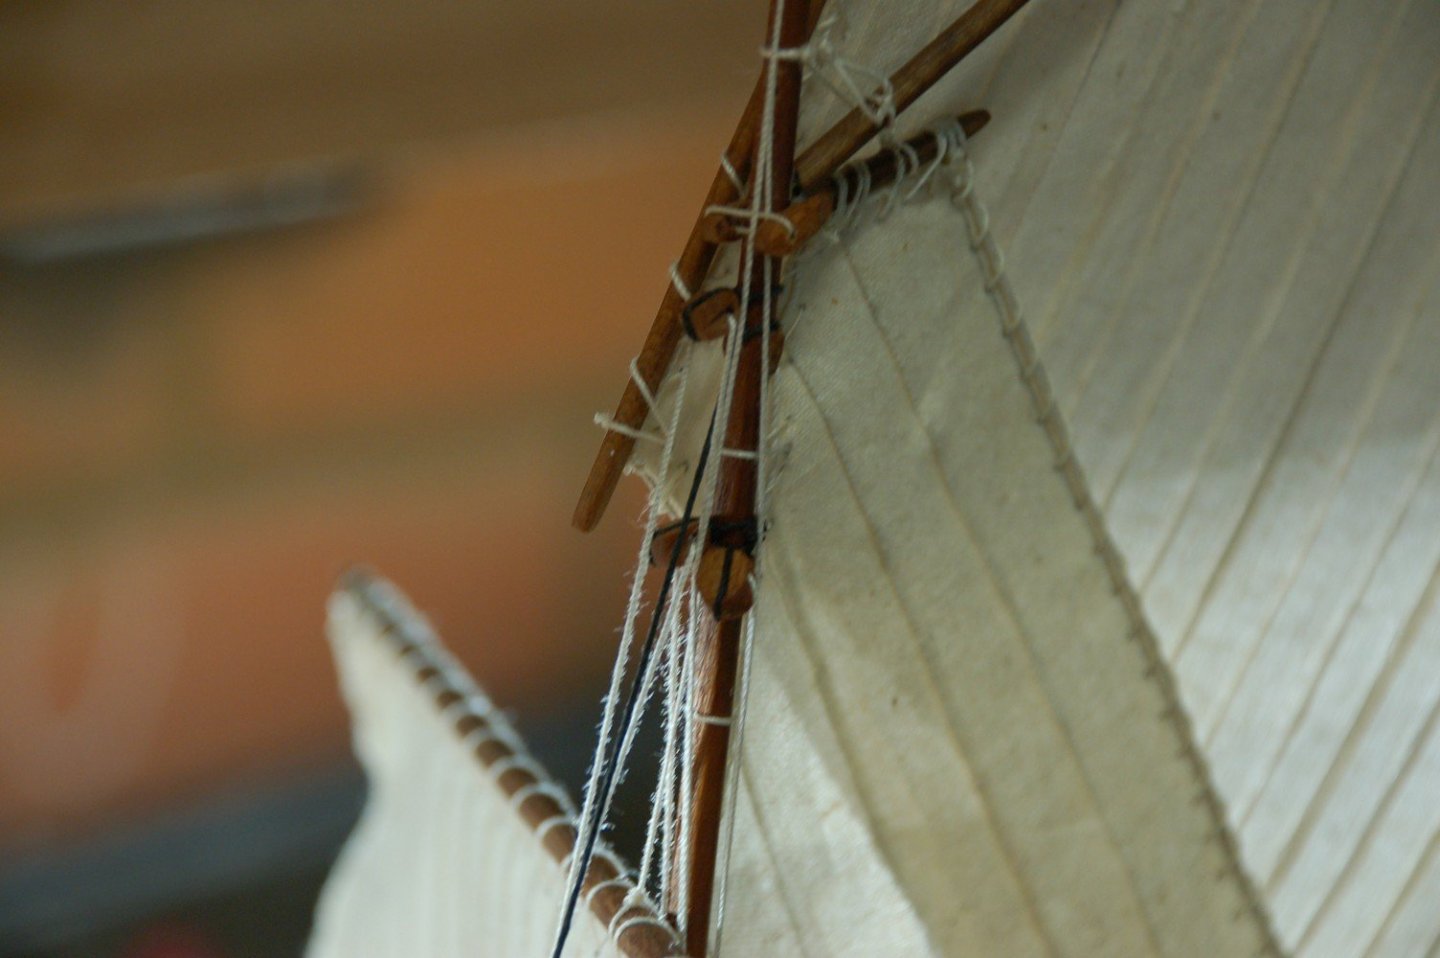
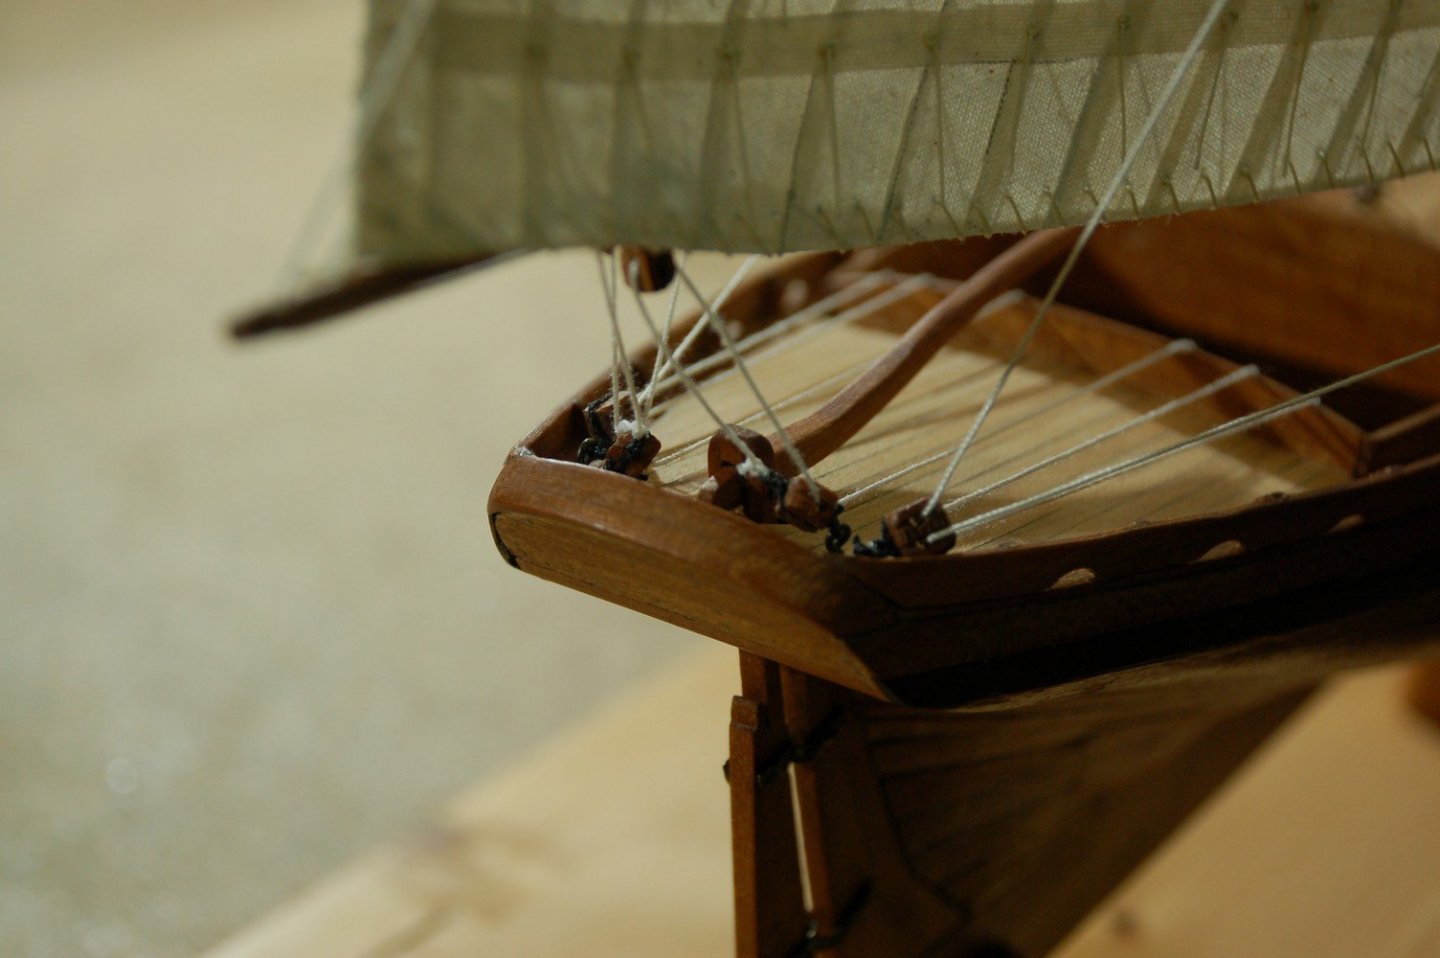
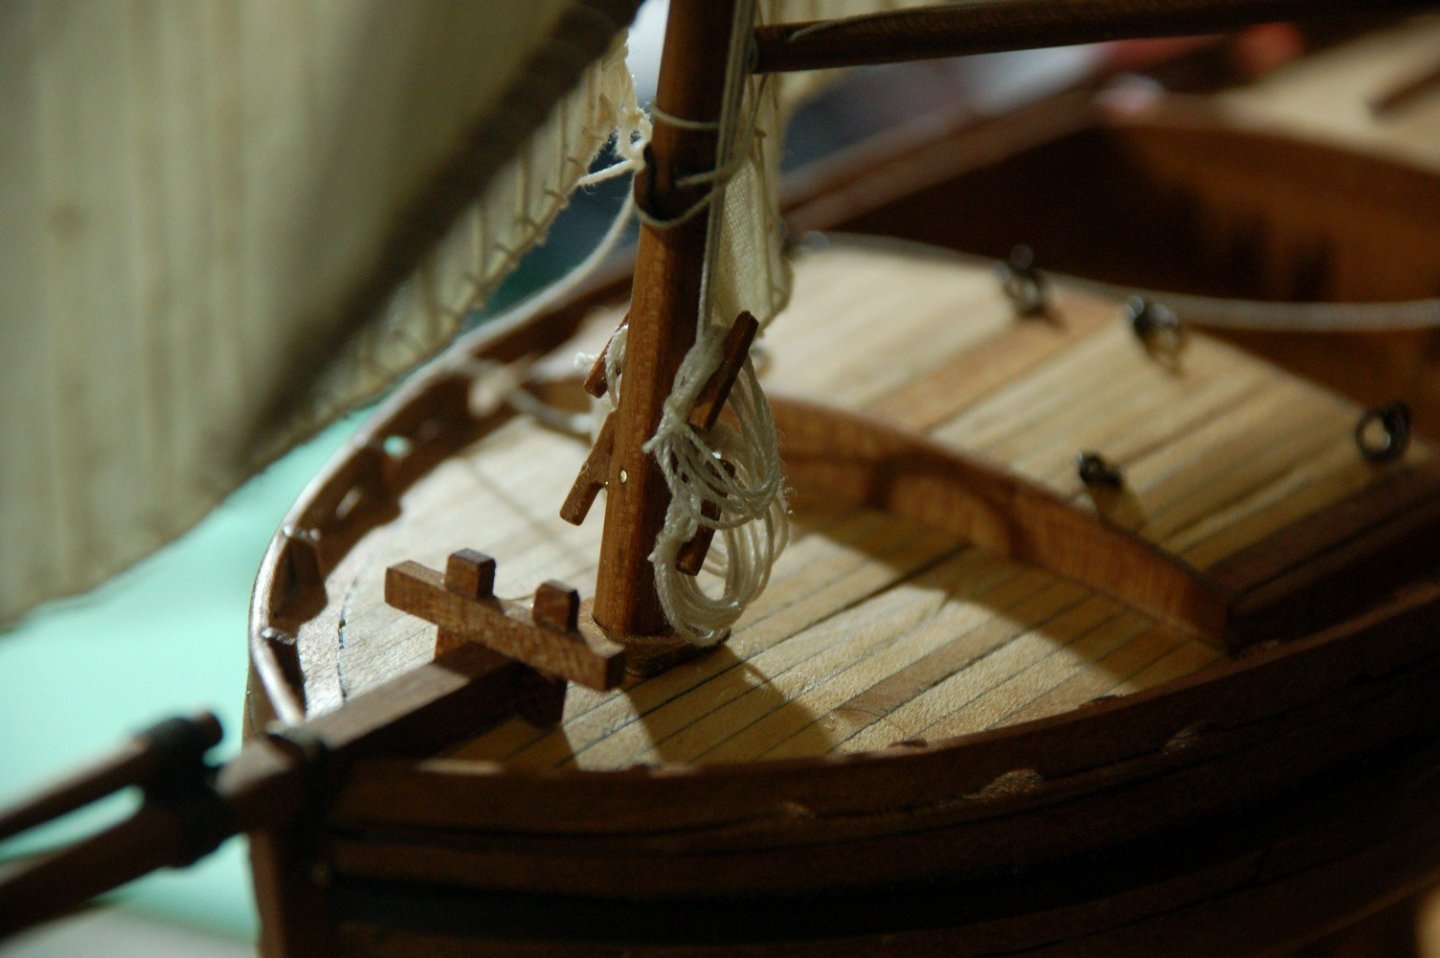
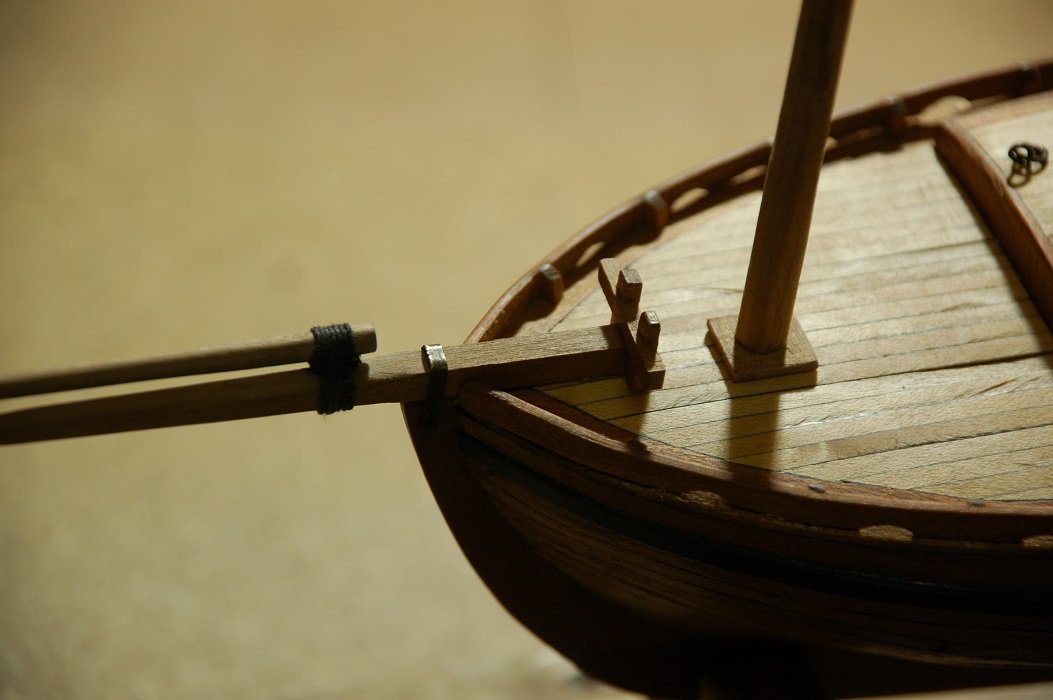
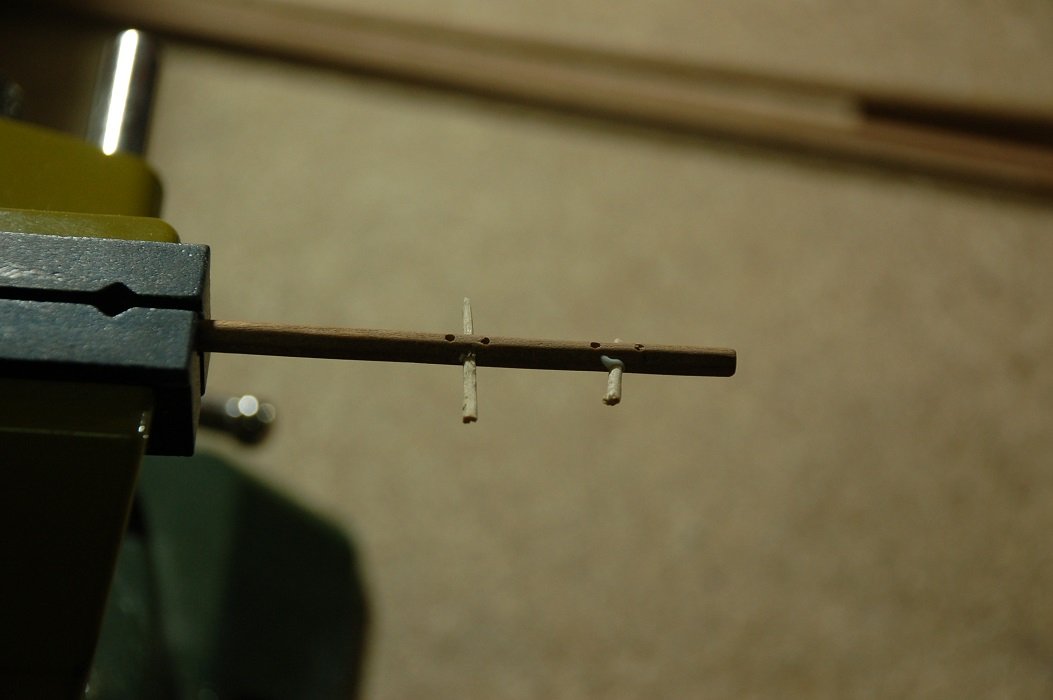
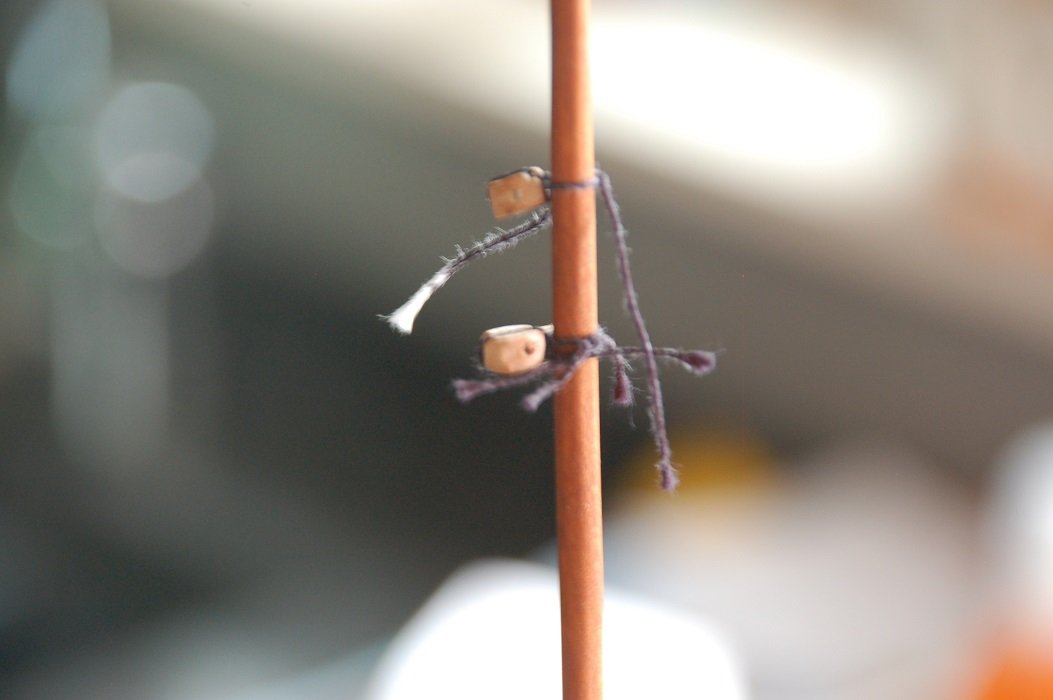
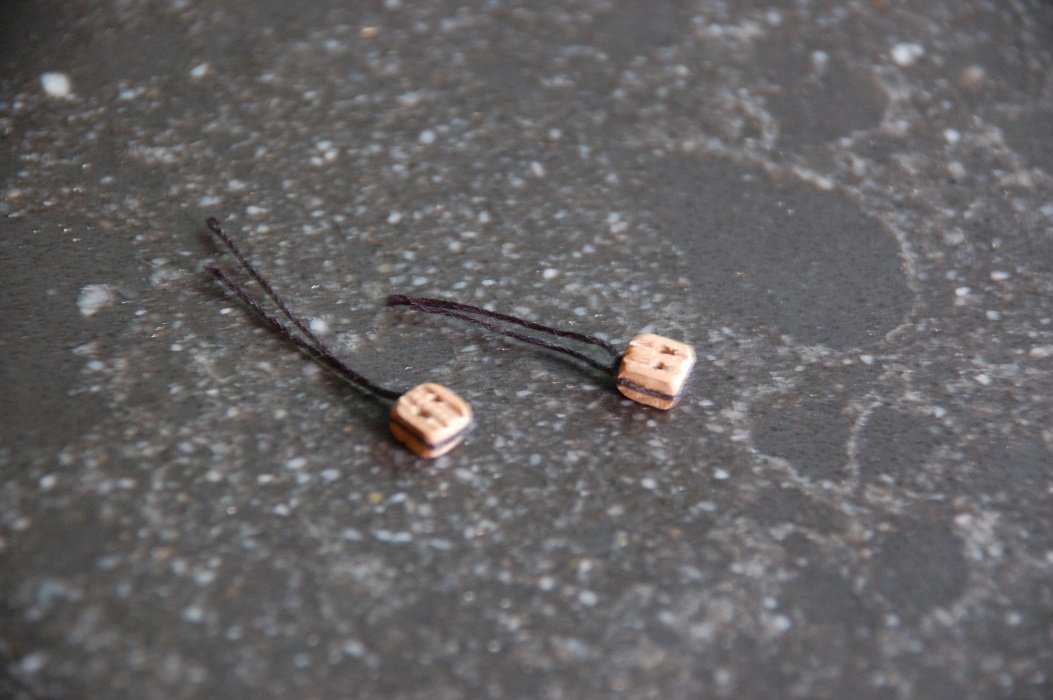
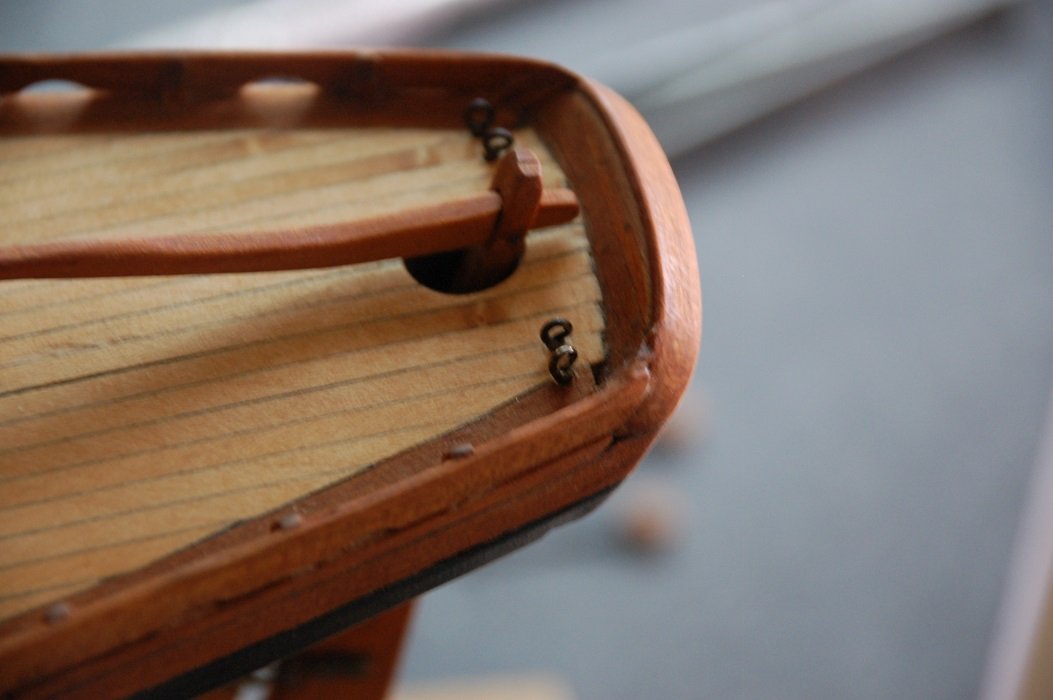
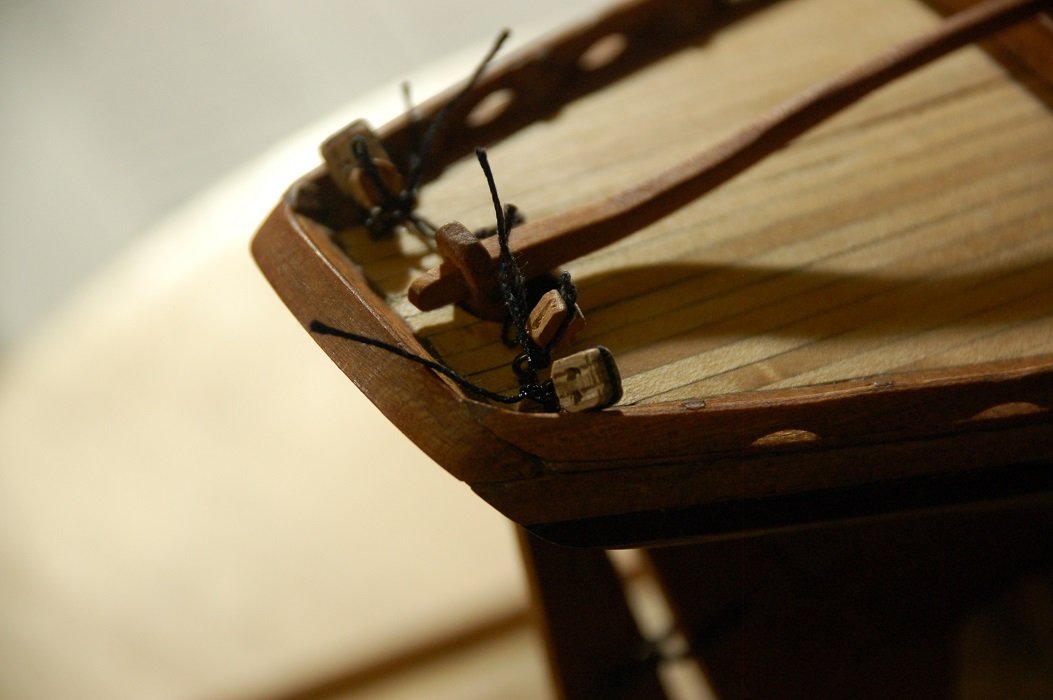
What a long time i've posted here. I switched jobs and life was hectic. Meanwhile i've finished her. I'll be posting some pictures of the last stages of her build. The bowsprit is held in place by a wooden brace, the bowsprit bitts . Outboard by a iron retainer bolted to the stem. The cleats are installed on the mast and spritsail boom. On the mast, near the top are two sheaves. Here they are simulated by drilling holes and forming them with a file. The wheels of the sheave are simulated by a bamboo dowel. I've created the blocks myself. There were only 10 to make. I made the eyebolts for to attach the blocks on deck. And installed the double blocks.
- 144 replies
-
- 5
-
-
- boat
- bermuda boat
- (and 2 more)
-
Yes. There's still some hull left 😀 I'm sorry, i've changed from job and have not much time left for my ships. The shipyard is temporarely closed, unfortunatly, but i'm hoping it'll get better soon. I'm missing the building alot though.
-
This is shipmodelling at it's best! What a wonderful and a heartwarming team project. I've started building a victory in 1/84 scale, what a difference
-
Nice work GL. (Heel knap gedaan.)
-
Nicely corrected! And what a superb cross section you are building.
-
She's a beauty. You really did a nice job on her Christian. She deserves a center piece in your living space. Hats off.
-
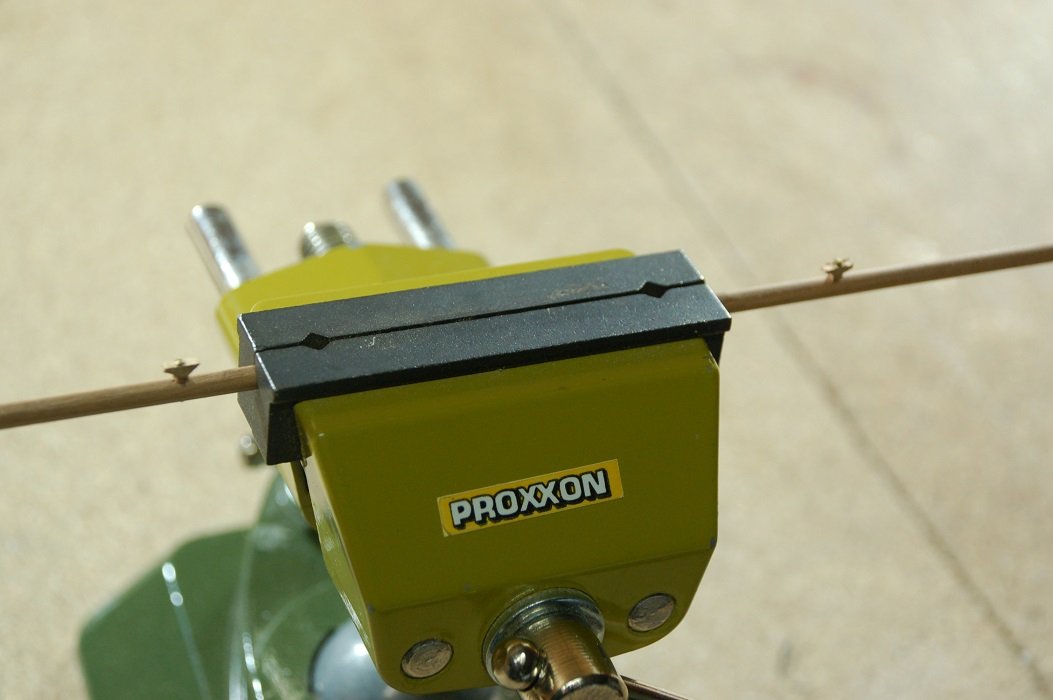
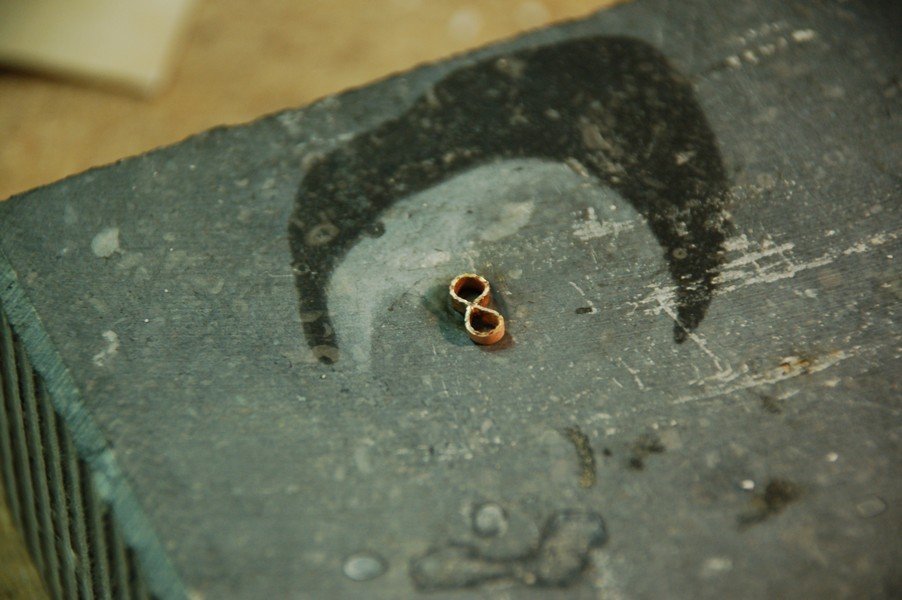
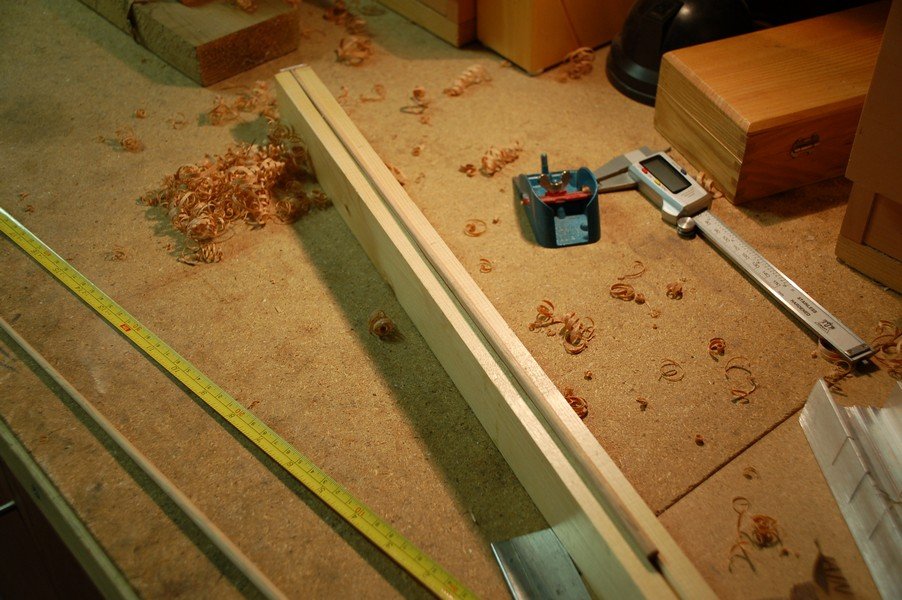
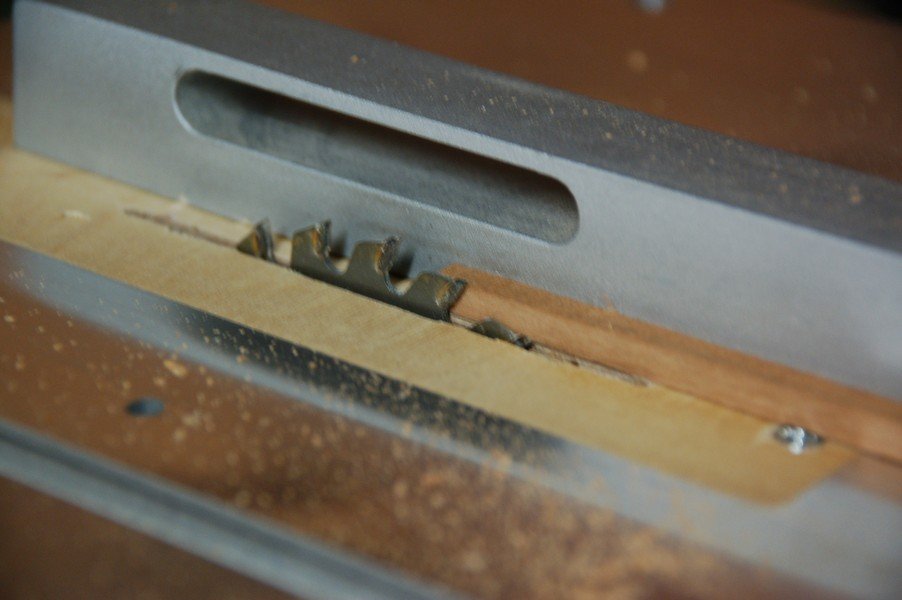
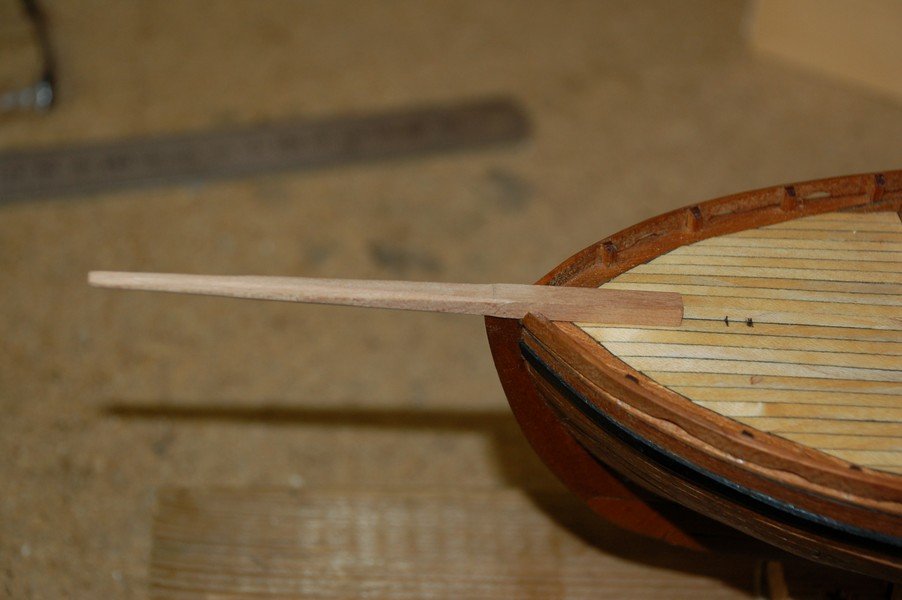
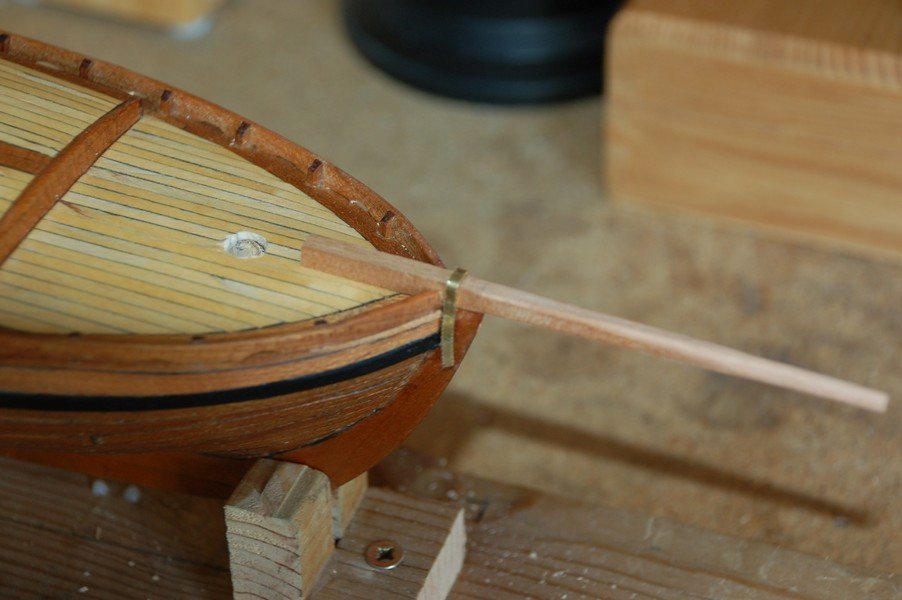
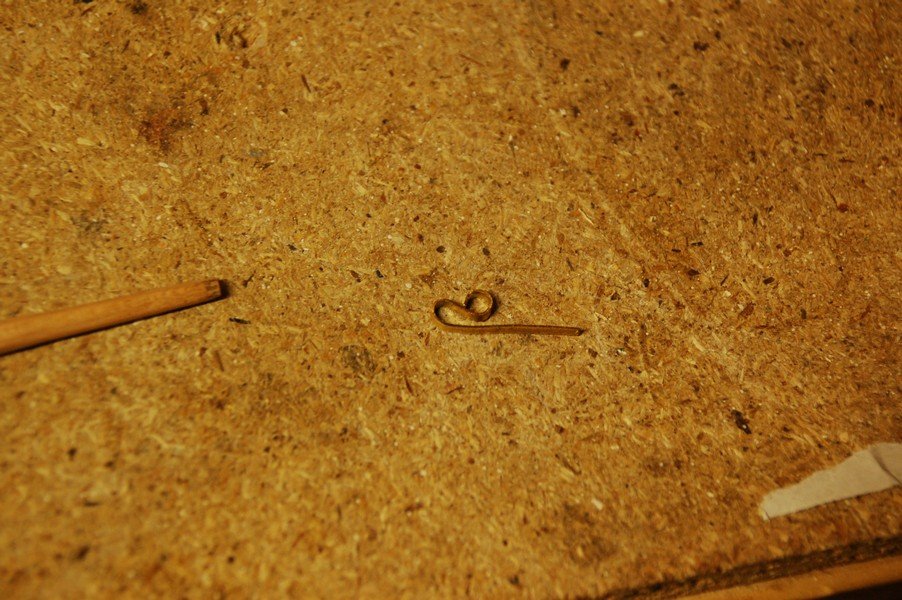
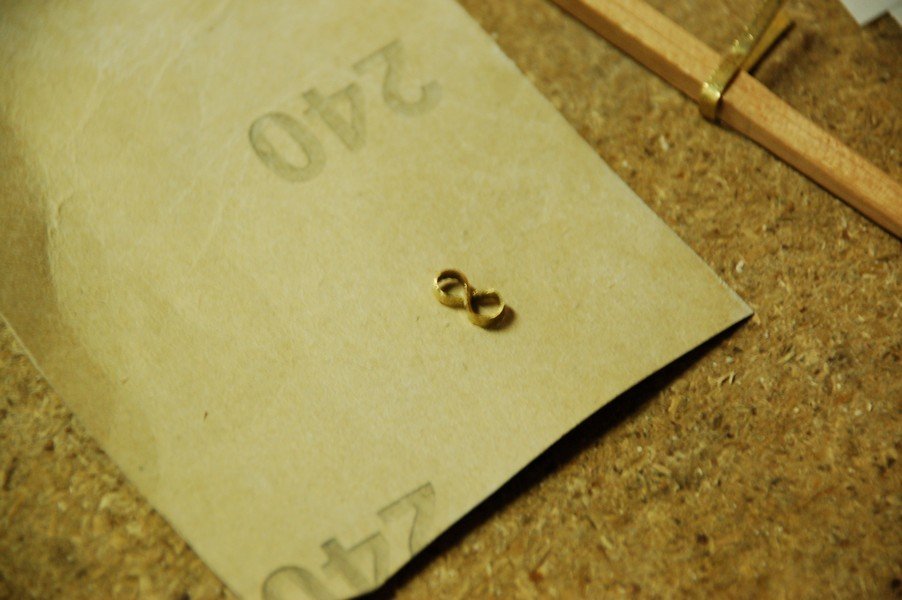
Pfeww, quite a while since i've been posting here. I've made a little jig in order to be able to create my masts and spars. The mast has been made with it and it went very smooth. I always start from square stock, reduced to the size of the minimum diameter with the table saw. The result of the bowsprit. Mast and bowsprit fitted to the boat. I've done a bit of metalwork as well. I've started on the bowsprit clamp. Below you'll see how i made the iron cap, for holding the bowsprit jibboom on the bowsprit. First i've bended a strip of brass around my bowsprit. Then i formed an '8' from that. Which i fixed with some silver soldering.
- 144 replies
-
- 6
-
-
- boat
- bermuda boat
- (and 2 more)
-
Le Soleil Royal by Nek0 - 1/72 - Marc Yeu
WBlakeny replied to Nek0's topic in - Build logs for subjects built 1501 - 1750
Nice carving! Would it be possible to make a close up of your own made chisels? I'm in awe of your skills.- 205 replies
-
- 3
-
-
- ship of the line
- soleil royal
- (and 2 more)
-
Wow, i haven't been around for some time now, and what a piece of art you've created again. Your airbrushing skills are superbe!