(2).jpg.a27525da3c49bada3d200718e0a34e4b.jpg)
herbgold
-
Posts
61 -
Joined
-
Last visited


-
 GrandpaPhil reacted to a post in a topic:
HM Brig Supply by Telp - Caldercraft - 1:64
GrandpaPhil reacted to a post in a topic:
HM Brig Supply by Telp - Caldercraft - 1:64
-
Telp reacted to a post in a topic:
HM Brig Supply by Telp - Caldercraft - 1:64
-
(2).thumb.jpg.912c5f2f71767b6eecf3db45057e51a5.jpg) herbgold changed their profile photo
herbgold changed their profile photo -
Looks great, Terry, miles better than my Supply - here's her current state (I never did the ratlines), together with my rather sad-looking Pegasus, which I must start second-planking one of these days...
.thumb.jpg.d31f62f695e5919dd22485d3644fefe7.jpg)
-
Shipyard sid reacted to a post in a topic:
HMS Pegasus by herbgold - Victory Models - Scale 1:64
-
Ryland Craze reacted to a post in a topic:
HMS Pegasus by herbgold - Victory Models - Scale 1:64
-
Just to say that I haven't given up in spite of my long absence from these hallowed pages... I started two new history courses and my time has been taken with reading and attending lectures. I'll be back - probably not before next March!
-
cristikc reacted to a post in a topic:
HMS Pegasus by herbgold - Victory Models - Scale 1:64
-
herbgold reacted to a post in a topic:
HMS Pegasus by herbgold - Victory Models - Scale 1:64
-
Landlubber Mike reacted to a post in a topic:
HMS Pegasus by herbgold - Victory Models - Scale 1:64
-
Martin W reacted to a post in a topic:
HMS Pegasus by herbgold - Victory Models - Scale 1:64
-
Martin W reacted to a post in a topic:
HMS Pegasus by herbgold - Victory Models - Scale 1:64
-
Martin W reacted to a post in a topic:
HMS Pegasus by herbgold - Victory Models - Scale 1:64
-
Martin W reacted to a post in a topic:
HMS Pegasus by herbgold - Victory Models - Scale 1:64
-
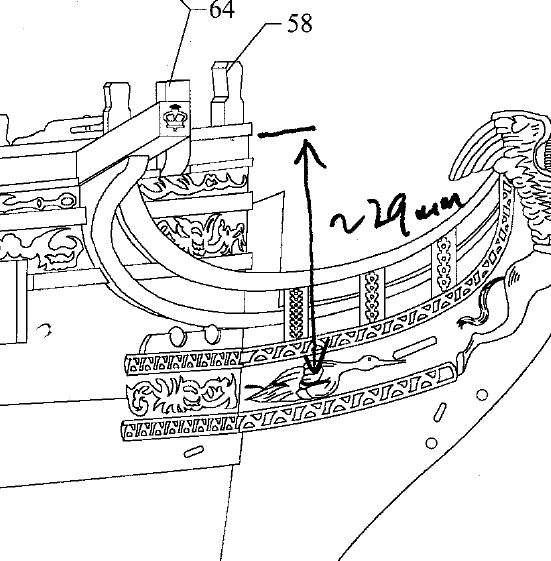
Thanks, SpyGlass. I measured down from the very top of the gunport strip to the bottom of my temporary batten, and get 29mm, which I think equates pretty closely to your 23.35mm measured from your extrapolated line.
-
Thanks again - I had thought of laminating two 1mm strips, and the trial soak and bend seems to work just fine.
-
I think so, Mike, although it's very difficult to tell. (I did read your log, and found it very useful. Especially the batten idea, as you see here.)

-
Thanks, Spyglass. I did take them from the plan, the problem I had was measuring the extreme forward and aft ends where there aren't any easy reference points. I have just remeasured and my marker batten is actually spot on, to less than 1mm.
-
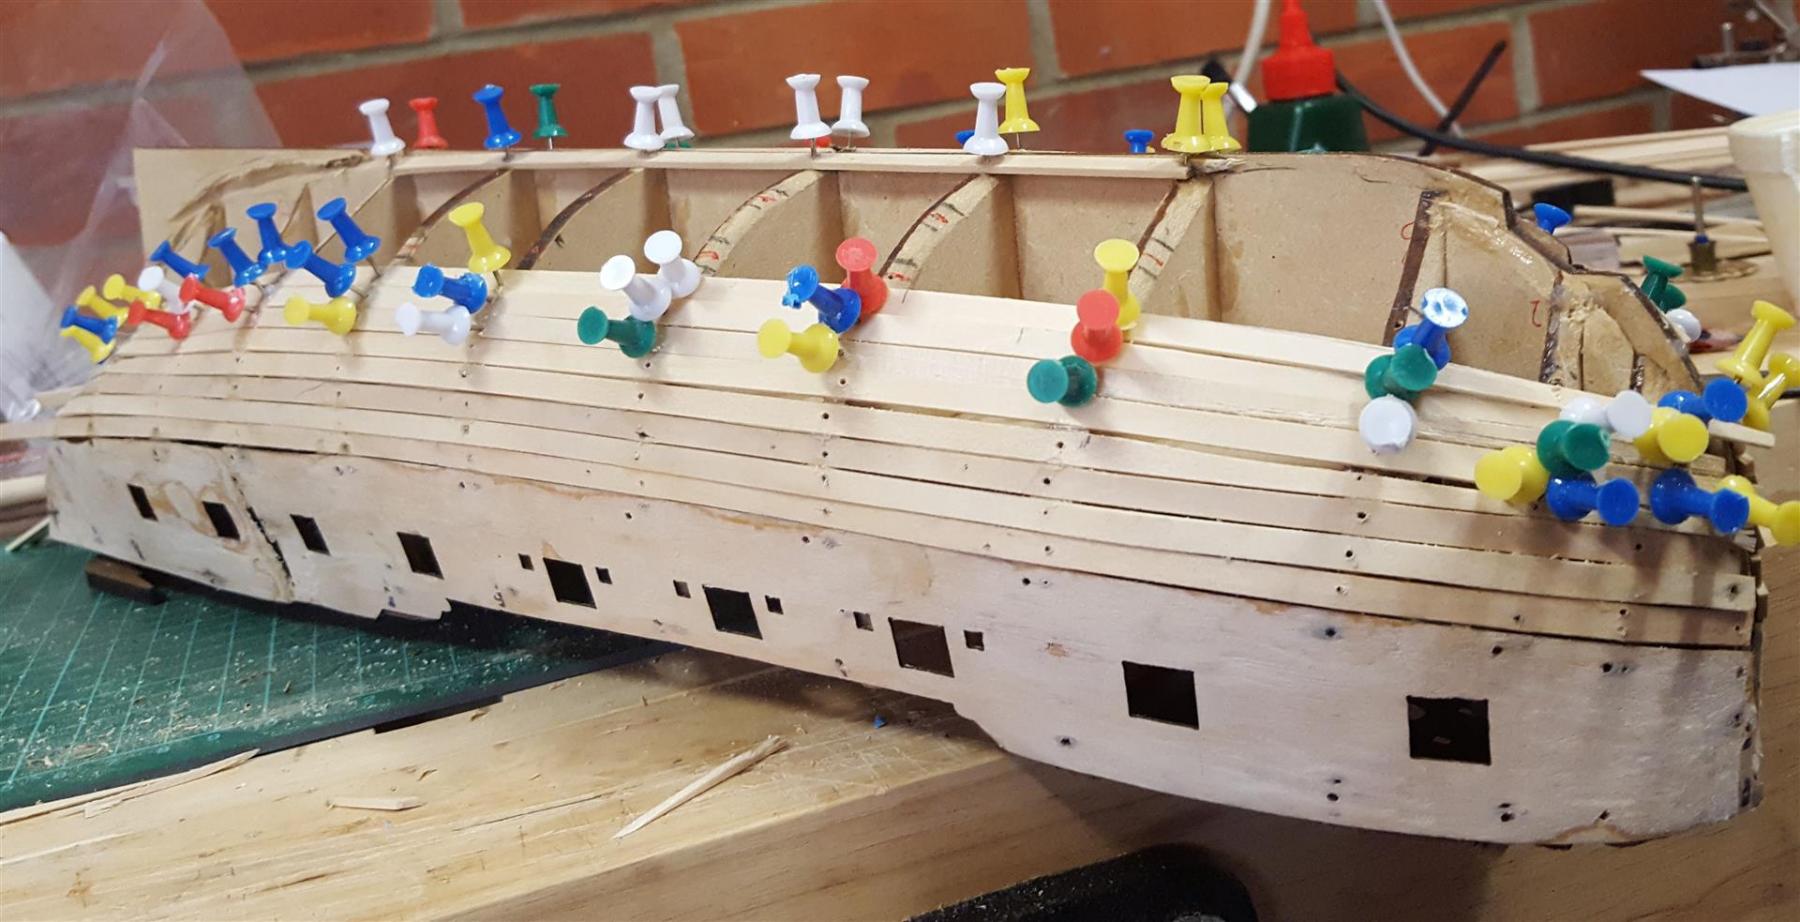
I've pinned a temporary batten to guide the top of the wale. Like others, I was a bit puzzled by how the wale should curve at the bow and stern, and I've just let the batten relax in what seems like a natural curve fore and aft. On another topic, this thing (I find it hard to describe it as anything else) has just moored next to HMS Belfast here on London River. Cheek! https://www.theguardian.com/world/2016/sep/06/russian-billionaires-superyacht-makes-waves-in-london
-
Thanks Mike. It's amazing how much more clearly the imperfections show up in a photo than on the real thing!
-
herbgold reacted to a post in a topic:
HMS Pegasus by herbgold - Victory Models - Scale 1:64
-
Well, I've finished the first planking. It's not pretty - there's far too much filler for my liking - but I think it'll do as a foundation for the second planking. I hope.

-
herbgold reacted to a post in a topic:
HMS Pegasus by herbgold - Victory Models - Scale 1:64
-
herbgold reacted to a post in a topic:
HMS Pegasus by herbgold - Victory Models - Scale 1:64
-
Sorry if I over-reacted, chaps - it's been a long day and I've spent two hours of it in the dentist's chair... thanks as always for your interest.
-
herbgold reacted to a post in a topic:
HMS Pegasus by herbgold - Victory Models - Scale 1:64
-
I'm sorry, Mike, but you said (a little above, on 26 July): Just make sure that you lay your planks naturally against the hull, and don't try to bend them laterally against their width. and that's exactly what I've been trying to do!
-
Yes, that's exactly what it does - edge bends the plank. I don't see a problem with it as far as first planking is concerned.
-
Can't remember if I read about this somewhere, but if I did I've forgotten. Seems to work well, but will have to think of some other method on the second planking - or perhaps stick the cut out bits back in afterwards???
-
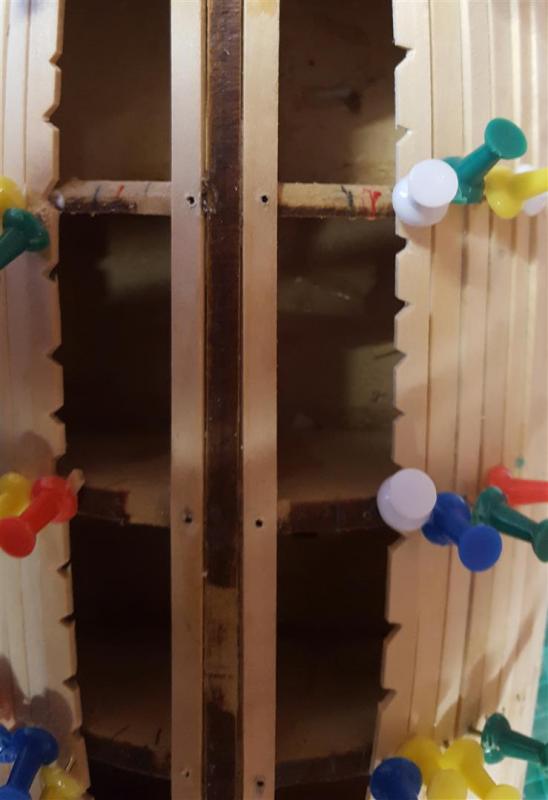
Eight planks laid on each side, plus a short garboard strake. There's a bit of a problem on the right of this picture, where the green pins are, and I'll remove that bit and fix it tomorrow. I feel reasonably happy with progress.

-
herbgold reacted to a post in a topic:
Chuck's planking videos...
-
herbgold reacted to a post in a topic:
HMS Pegasus by herbgold - Victory Models - Scale 1:64
-
Well, I started to mark up the bulkheads according to the method in Simple Hull Planking Techniques for Beginners (Dirk De Bakker et al,) but the more I thought about it the less sense it seemed to make to divide the bulkheads up the way it is done there without actually marking the planks on them. The Jack Nastyface Planking Tutorial looks superb but is too advanced for me (and uses different widths of planks, whereas I am pretty much bound by the kit contents). So the best option seems to be to follow Nico's Planking the hull, running the planks, which looks straightforward and seems to leave much less to chance. I will report back once I have done it...
.jpg.b6d2b8c735e6875f5b7e49b928029a4f.jpg)