Capt.Fisher
-
Posts
52 -
Joined
-
Last visited


-
 popeye the sailor reacted to a post in a topic:
HMS Bounty by vossy - Amati - scale 1:60
popeye the sailor reacted to a post in a topic:
HMS Bounty by vossy - Amati - scale 1:60
-
Eddie reacted to a post in a topic:
Bounty by Mike Dowling - FINISHED - OcCre - 1/45
-
Eddie reacted to a post in a topic:
Bounty by Mike Dowling - FINISHED - OcCre - 1/45
-
Eddie reacted to a post in a topic:
Bounty by Mike Dowling - FINISHED - OcCre - 1/45
-
Eddie reacted to a post in a topic:
Bounty by Mike Dowling - FINISHED - OcCre - 1/45
-
Eddie reacted to a post in a topic:
Bounty by Mike Dowling - FINISHED - OcCre - 1/45
-
Eddie reacted to a post in a topic:
Bounty by Mike Dowling - FINISHED - OcCre - 1/45
-
Eddie reacted to a post in a topic:
Bounty by Mike Dowling - FINISHED - OcCre - 1/45
-
Eddie reacted to a post in a topic:
Bounty by Mike Dowling - FINISHED - OcCre - 1/45
-
Eddie reacted to a post in a topic:
Bounty by Mike Dowling - FINISHED - OcCre - 1/45
-
Capt.Fisher reacted to a post in a topic:
HMS Bounty by thomaslambo - Artesania Latina – Scale 1:48
-
Capt.Fisher reacted to a post in a topic:
HMAV Bounty By cobra1951 - Artesania Latina - 1:48
-
Capt.Fisher reacted to a post in a topic:
HMAV Bounty By cobra1951 - Artesania Latina - 1:48
-
Capt.Fisher reacted to a post in a topic:
HMAV Bounty By cobra1951 - Artesania Latina - 1:48
-
 And, Bob, to put the story closer to its end, you might present to publics attention a nice pic of the main action hero - THE DOG I think the world deserves to see him/her.
 -
Wow mate.. I'm sorry for your efforts. Though it is just a piece of wood it hurts somehow. But amasingly good ideas keep on comming from all over the world, don't you agree? Shipwreck diorama, part build (bow/stern), even ceremonial setting her on fire (this one should be filmed) . Yet, you chose the best option i think - go straight ahead and never look back! Good luck with your next models!
-
You will do a fine job, Cobr@, as always ! A small present for you (and all other Bounty-ers) - just in case you missed it: https://www.youtube.com/watch?v=l_Id-BQt08Y&index=8&list=FLLNEItXfiZaWVvI4DzdHcEQ Enjoy!
-
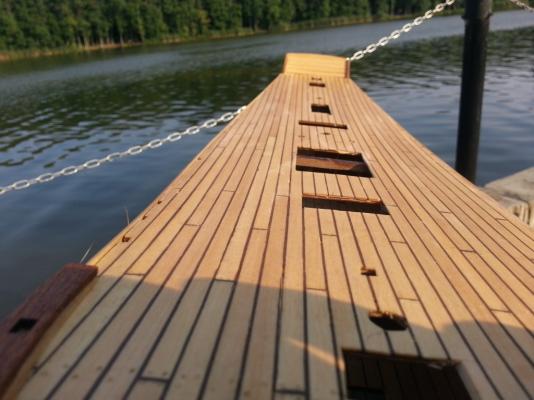
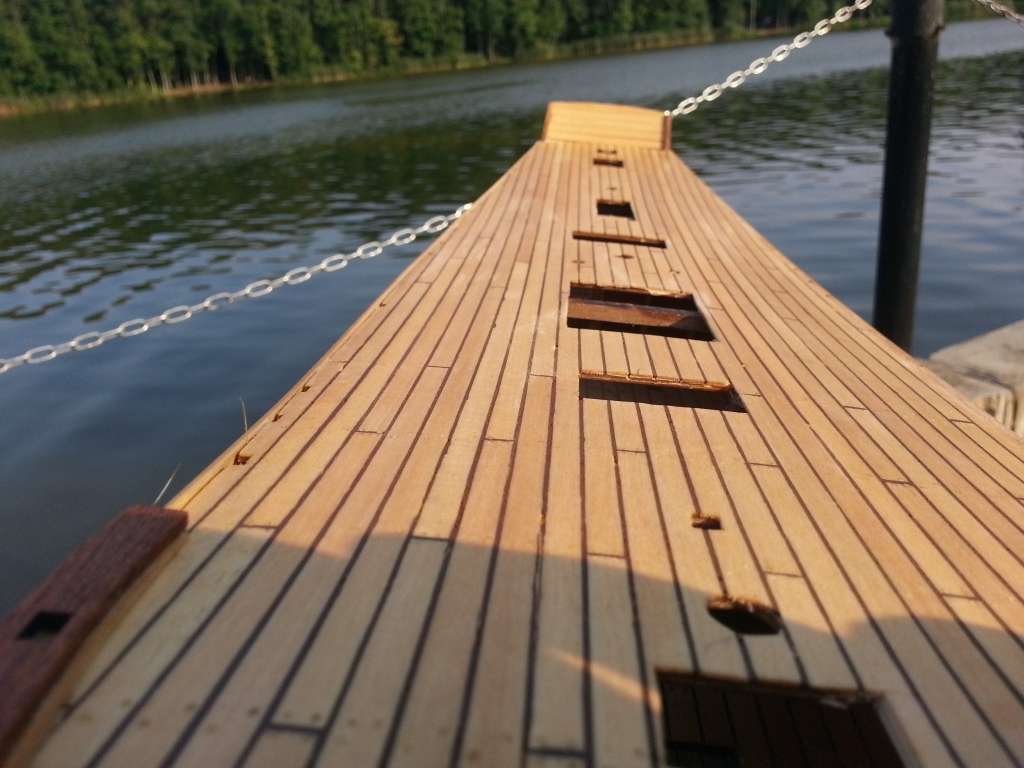
Hi guys What I did was planking the whole deck from bow to stern, over all the openings, thus achieving a whole tight surface. It was much easier to make a quick and even sanding. Only after that I made all the necessary cuts for hatchways, stairways, masts, etc. And the poor quality of the plywood did not matter at all..
-
Great job, Cobr@! Wish I would reach that stage too, some day.. One suggestion, if you permit, with all my respect to your craftsmanship: The only detail that pokes my eye is the unnatural way the rope around the companionway (staircase) bends. I guess you could easily reshape them bend down, according to gravitation law and thus seem more natural. kind regards and respect! Capt.Fisher
-
Capt.Fisher reacted to a post in a topic:
HMAV Bounty By cobra1951 - Artesania Latina - 1:48
-
Great Mate! Your enthusiasm might take me back on board, after almost 2 years of "creative silence"! My hands start itching and I am now seriously thinking of taking Her body out of the dust and restoring work on her. Pity I did not pay as much attention on decking as you did... Great job, keep on!
-
Capt.Fisher reacted to a post in a topic:
HMAV Bounty By cobra1951 - Artesania Latina - 1:48
-
Nice! just a hint, if you allow... I would leave mast support rings, as well as mast support heels loose at that moment. Later, when it is time to push the masts into a sequence of 3 fixed holes it might appear they are not exactly in a straight line. Then a slight allowance to the left or to the right might be very very useful.
-
Hi, Giant Do I see some lighting installed in your cabins?? Could you please tell us more about this please?
-
Hi guys, A very nice job Giant! Maybe you were a carpenter in your previous life. One thing that worries me, though.. You should well guess about what great amount of sanding is expecting you, after the planking is done. So, how do you expect to keep all that furniture in good shape and condition? What I know from my "sanding period" is that one - the whole ships body is being shaken, rotated, turned upside down, rocked, etc.etc, under the hard sand dusting. And two - dust comes EVERYWHERE! So I can imagine that those pieces of furniture, plus trees in the pots (the ones that will eventually not be shaken out of their places) will be stuffed with dust and very very very hard to be cleaned. Correct me if I am wrong, but I still have trouble with cleaning the inside of my hull, even with no single peace of equipment inside. Good luck GG, I'm watching with interest. Some day maybe even manage to catch up with you
-
Hi Chris Are you still in building that boat?? Hope so! I've been doing the same recently, and slow, too. It is not Amati but AL kit, yet the boat is the same, so I think we could be useful to each other. Say Hi if you anre interested Good luck Capt.Fisher
-
Capt.Fisher reacted to a post in a topic:
HMS Bounty by Captain Al - FINISHED - Artesania Latina - Scale 1:48
-
Capt.Fisher reacted to a post in a topic:
Bounty by Mike Dowling - FINISHED - OcCre - 1/45
-
Weeel, Mike, you are a speed-runner! Great job! Wish I could also have that much time! About the plans - I cannot see anything better than 'The Anatomy...". Do you have it? I can mail it to you if you want. As a reward, please send me the record of swear words that Bindy mentioned I'll need it very soon, I hope
-
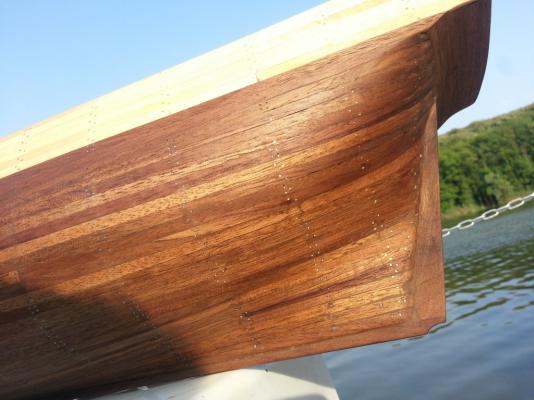
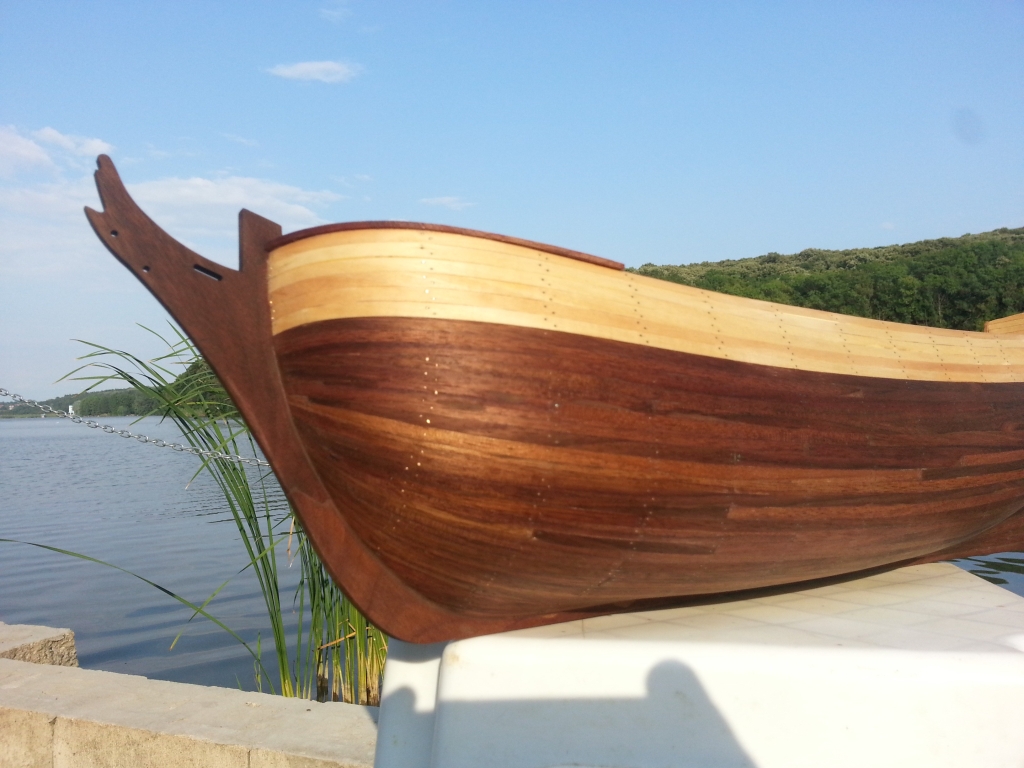
Yes Al, you are right - my starboard side is planked more than suggested on the AL pictures. Many reasons for that: 1. I saw a pic in a russian forum and I liked how it looked 2. I read a theory, saying that the more difference in planking both sides, the more danger of 'propeller effect', So i thought more planks on starboard side would diminish the risk 3. By additional planking I tryed to hide those compartments, which would be not equipped with furniture, i.e. doors, barrels, sacks etc. They look empty and ugly to me, besides seeing the inside part of the portside is also not a good view 4. I thought (and even I think I read somewhere) that there should be enough planks in the kit to fully cover BOTH sides, for those who are not willing to fiddle with interior design... I WAS WRONG! Yes, you are right - thats was why I ran out of planks. I guess A.L. has cheap owners - they save every tiny piece of material they can! So, my advice - try to plan your needed material in advance in order not to get in my situation. And also please remember that tlans are always wrong :-) so give a good 20-25 % of allowance... :-) Good luck, and eager to see some recent pics
-
Capt.Fisher reacted to a post in a topic:
HMS BOUNTY by Capt.Fisher - Artesania Latina - 1:48
-
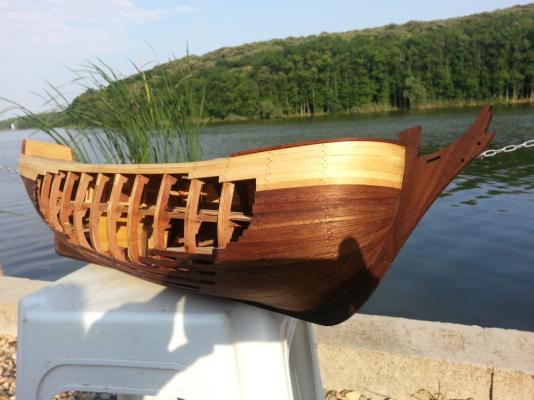
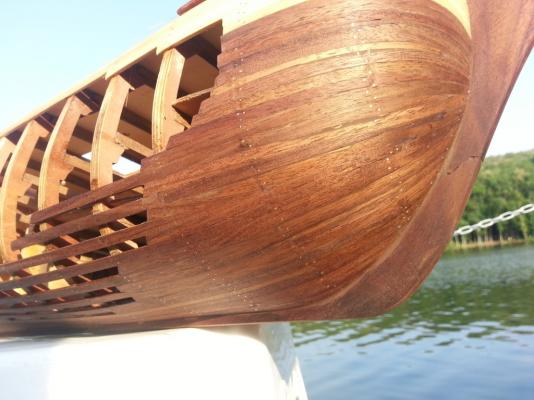
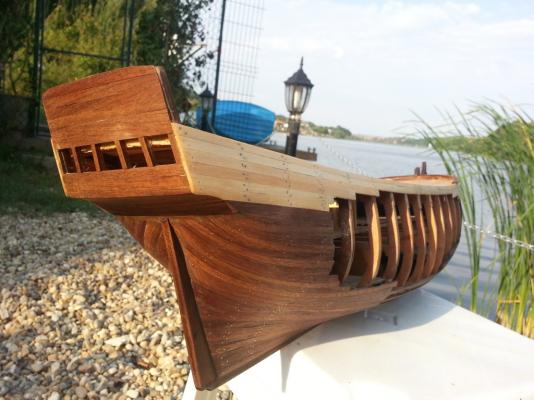
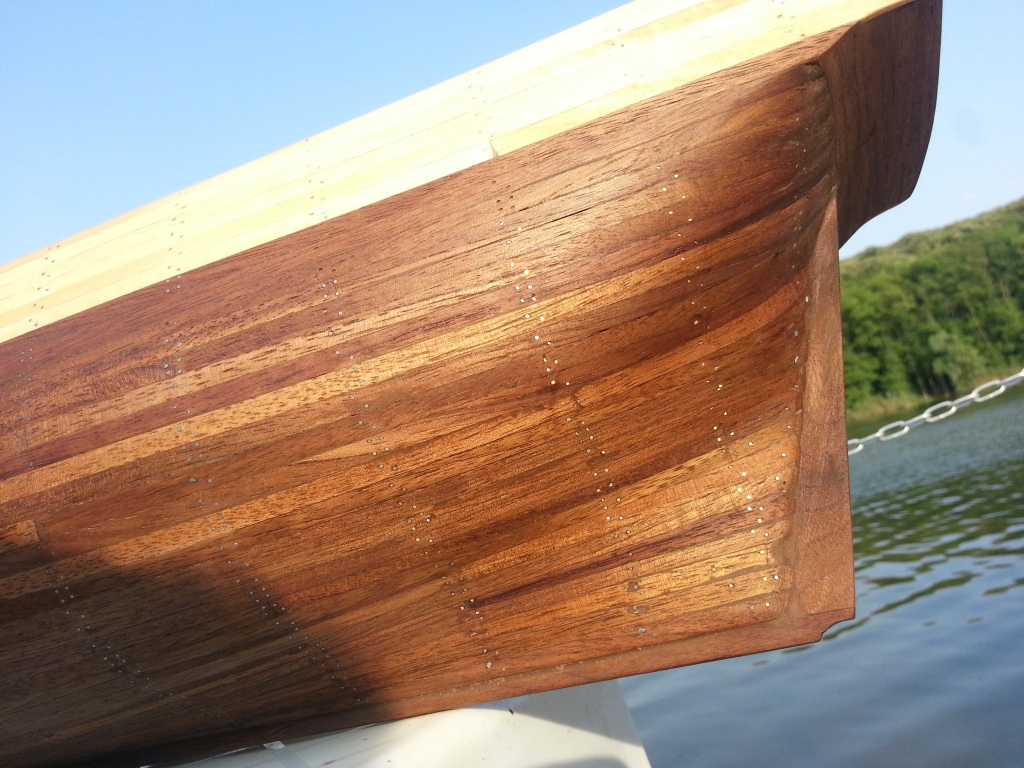
Hi Al, Thanks for yr kind words I find the open side strong enough, as I used nails for real nailing, not fake one. You should make sure to end the planks on a frame or very near to it, so that you avoid vibrations of the lose part of it. I do not have a single wedge shaped plank, I paid too much efforts to that (still wonder if this was reasonable enough). If you zoom some of the pics you can see drop planks and stealers. If you fail to see them I can post you better pics.
-
Capt.Fisher reacted to a post in a topic:
HMS BOUNTY by Capt.Fisher - Artesania Latina - 1:48
-
Well, its been quite a long time... Summer can be distracting... so many other things to do. Here are some pics on my slight progress. Nailing is quite anoying and timetaking, especially when you run out of nails from time to time.