.jpg.f26acc9a74319261612561bfa7da1303.jpg)
vaddoc
-
Posts
1,518 -
Joined
-
Last visited
3 Followers


Recent Profile Visitors
4,655 profile views


-
 FriedClams reacted to a post in a topic:
Lightship ELBE 1 by Mirabell61 - scale 1:87 - launched 1948
FriedClams reacted to a post in a topic:
Lightship ELBE 1 by Mirabell61 - scale 1:87 - launched 1948
-
Scottish Guy reacted to a post in a topic:
For Beginners -- A Cautionary Tale
-
FriedClams reacted to a post in a topic:
21' Fisherman's Launch by Vaddoc - Scale 1:10 - Plans from Howard Chapelle's "Boatbuilding"
-
FriedClams reacted to a post in a topic:
21' Fisherman's Launch by Vaddoc - Scale 1:10 - Plans from Howard Chapelle's "Boatbuilding"
-
FriedClams reacted to a post in a topic:
21' Fisherman's Launch by Vaddoc - Scale 1:10 - Plans from Howard Chapelle's "Boatbuilding"
-
FriedClams reacted to a post in a topic:
21' Fisherman's Launch by Vaddoc - Scale 1:10 - Plans from Howard Chapelle's "Boatbuilding"
-
FriedClams reacted to a post in a topic:
21' Fisherman's Launch by Vaddoc - Scale 1:10 - Plans from Howard Chapelle's "Boatbuilding"
-
Scottish Guy reacted to a post in a topic:
For Beginners -- A Cautionary Tale
-
vaddoc reacted to a post in a topic:
Lightship ELBE 1 by Mirabell61 - scale 1:87 - launched 1948
-
Retired guy reacted to a post in a topic:
Lightship ELBE 1 by Mirabell61 - scale 1:87 - launched 1948
-
FlyingFish reacted to a post in a topic:
21' Fisherman's Launch by Vaddoc - Scale 1:10 - Plans from Howard Chapelle's "Boatbuilding"
-
vaddoc reacted to a post in a topic:
21' Fisherman's Launch by Vaddoc - Scale 1:10 - Plans from Howard Chapelle's "Boatbuilding"
-
.thumb.jpg.6fd4c1b78768bb3efd745ab810936005.jpg) What a nice subject Nils and truly enjoyable to follow, although your pace is lightning fast! Never heard of a mushroom anchor.
What a nice subject Nils and truly enjoyable to follow, although your pace is lightning fast! Never heard of a mushroom anchor.- 119 replies
-
- 7
-

-
-
- lightship
- Feuerschiff Elbe 1
- (and 1 more)
-
vaddoc reacted to a post in a topic:
Lightship ELBE 1 by Mirabell61 - scale 1:87 - launched 1948
-
vaddoc reacted to a post in a topic:
Lightship ELBE 1 by Mirabell61 - scale 1:87 - launched 1948
-
vaddoc reacted to a post in a topic:
Lightship ELBE 1 by Mirabell61 - scale 1:87 - launched 1948
-
vaddoc reacted to a post in a topic:
Lightship ELBE 1 by Mirabell61 - scale 1:87 - launched 1948
-
vaddoc reacted to a post in a topic:
Lightship ELBE 1 by Mirabell61 - scale 1:87 - launched 1948
-
vaddoc reacted to a post in a topic:
Lightship ELBE 1 by Mirabell61 - scale 1:87 - launched 1948
-
vaddoc reacted to a post in a topic:
Lightship ELBE 1 by Mirabell61 - scale 1:87 - launched 1948
-
vaddoc reacted to a post in a topic:
Lightship ELBE 1 by Mirabell61 - scale 1:87 - launched 1948
-
As long as it is under the Admiral's radar, it is ok. And as per you logo: “Τα πάντα ρει, μηδέποτε κατά τ’αυτό μένειν“ Everything is in motion, alas also money.
-
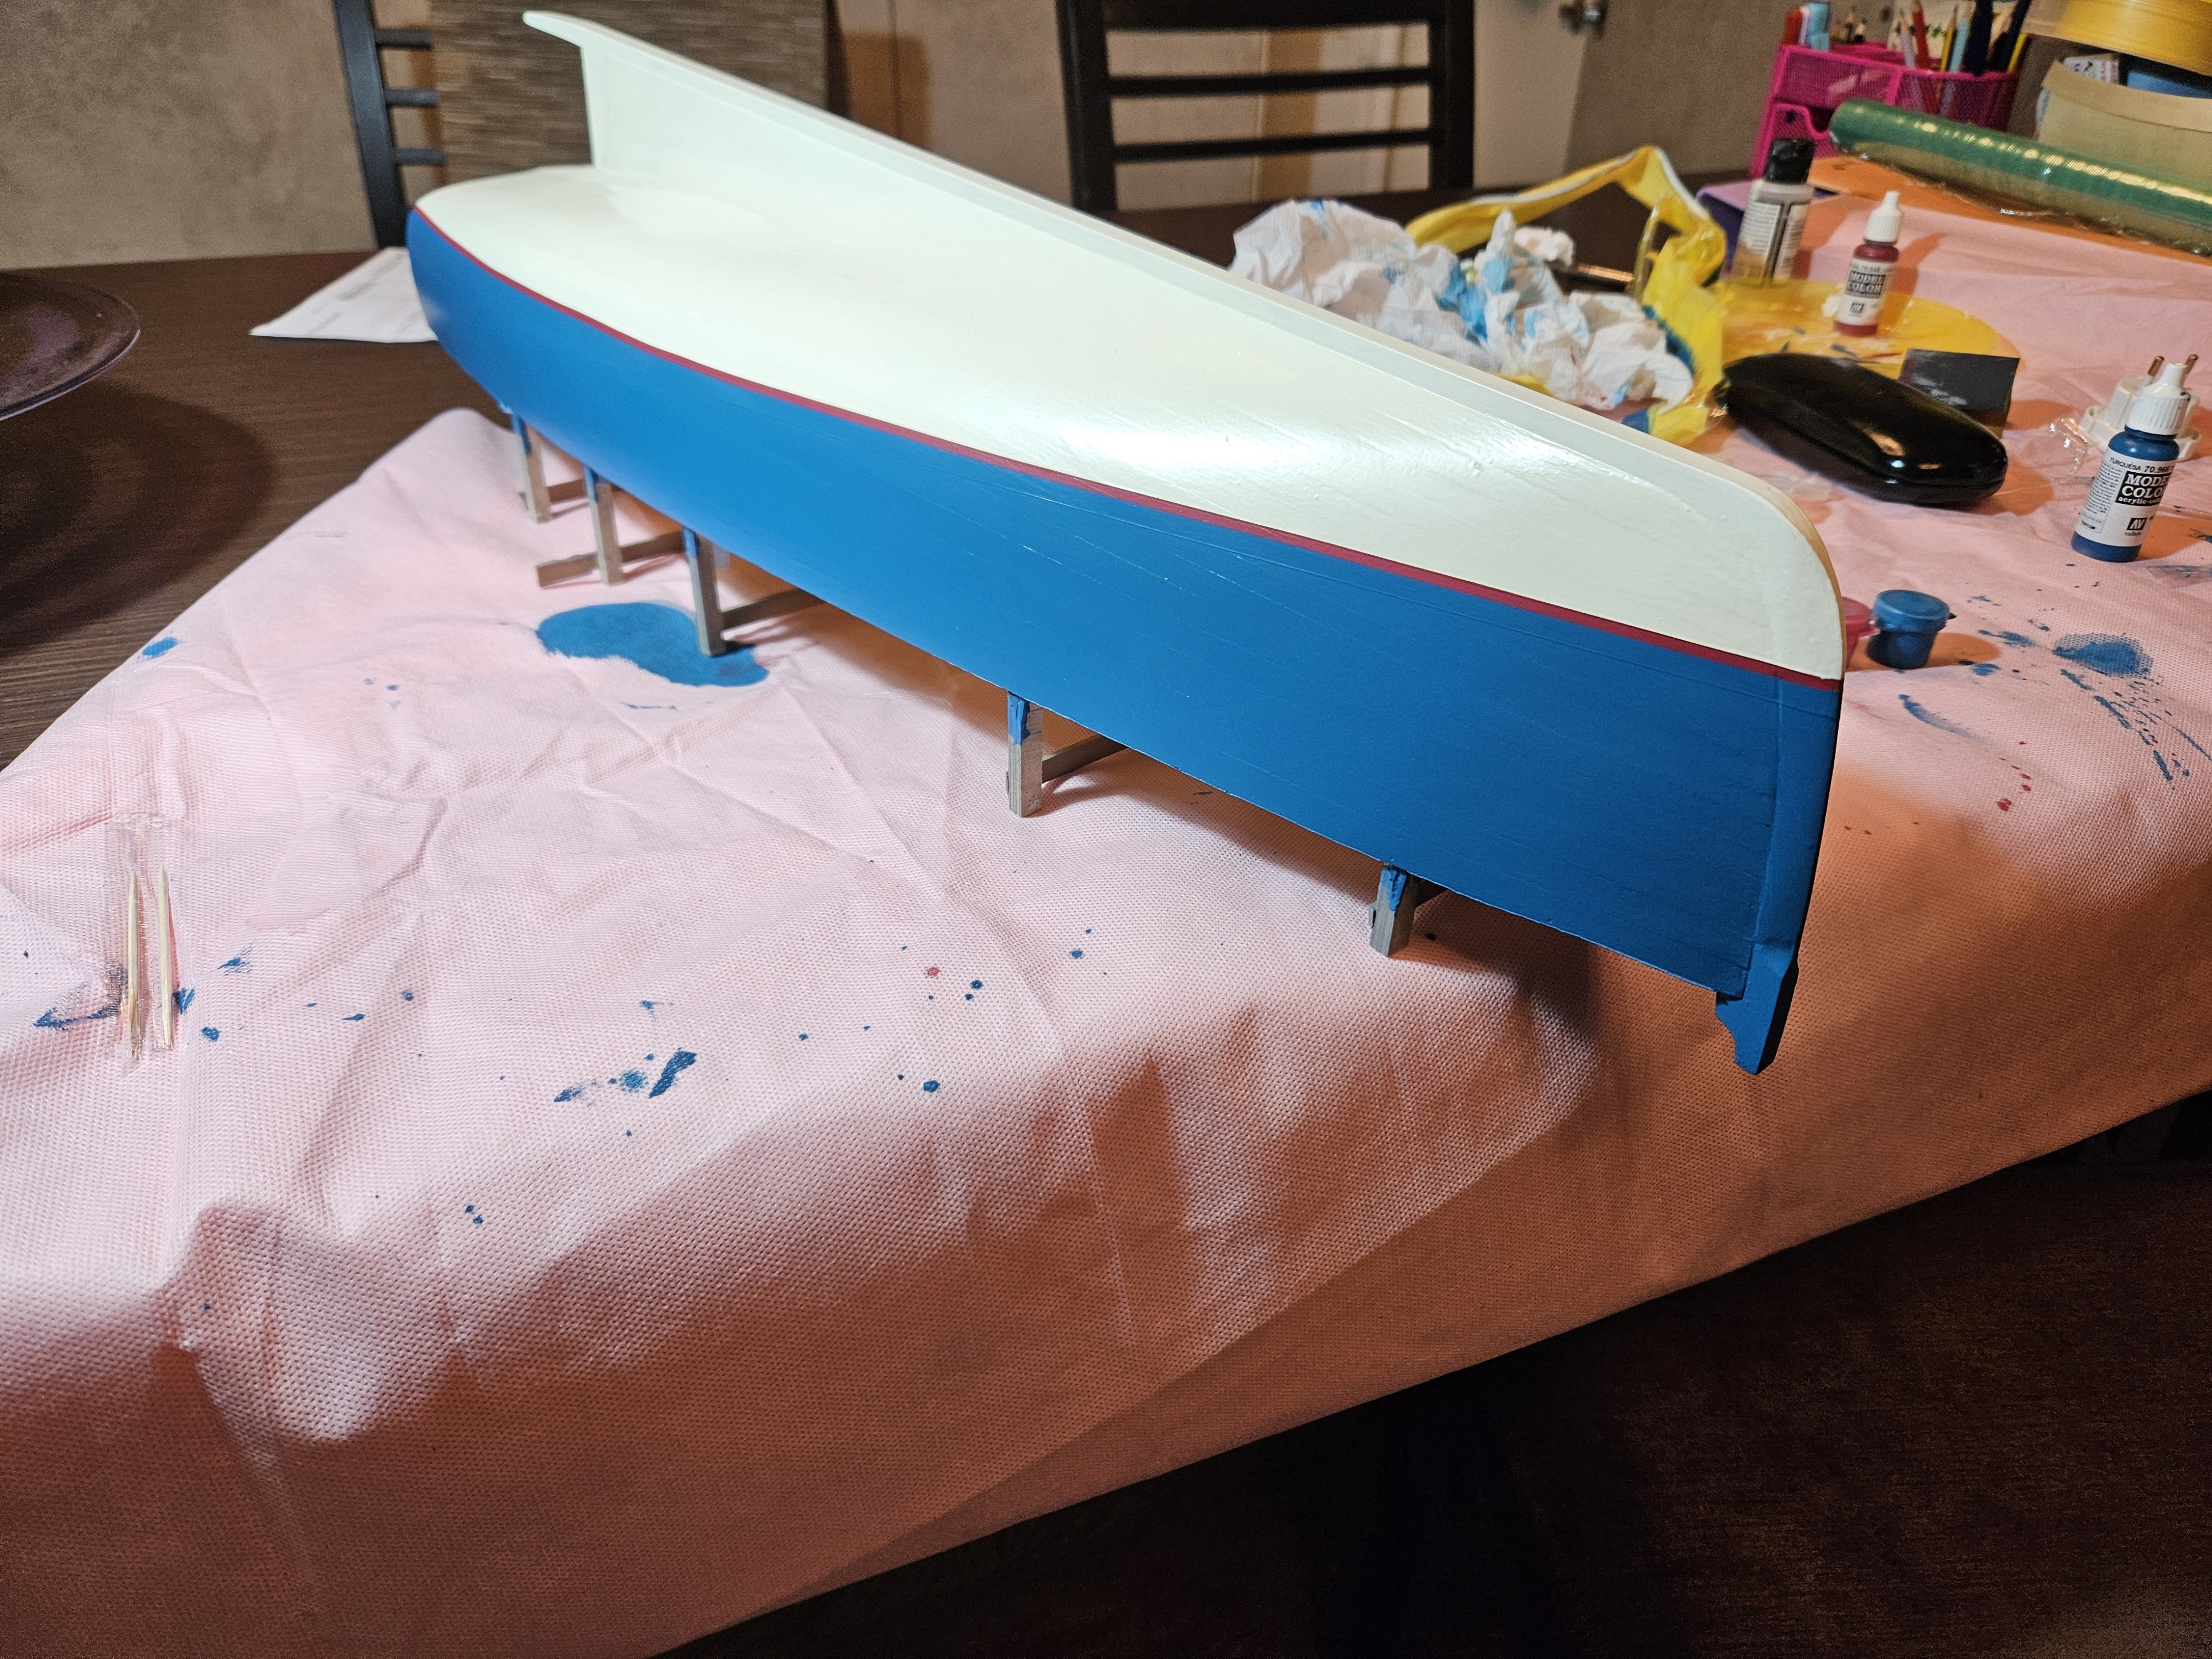
So the paint has settled further and it actually looks pretty good! Especially the red and Turquoise are really nice. Some photos bellow in natural light. The hull of course is rough despite so many cycles of filling and sanding. Never use Beech! But look what the postman dropped, all the way from the colonies across the pond! Till next time Vaddoc


-
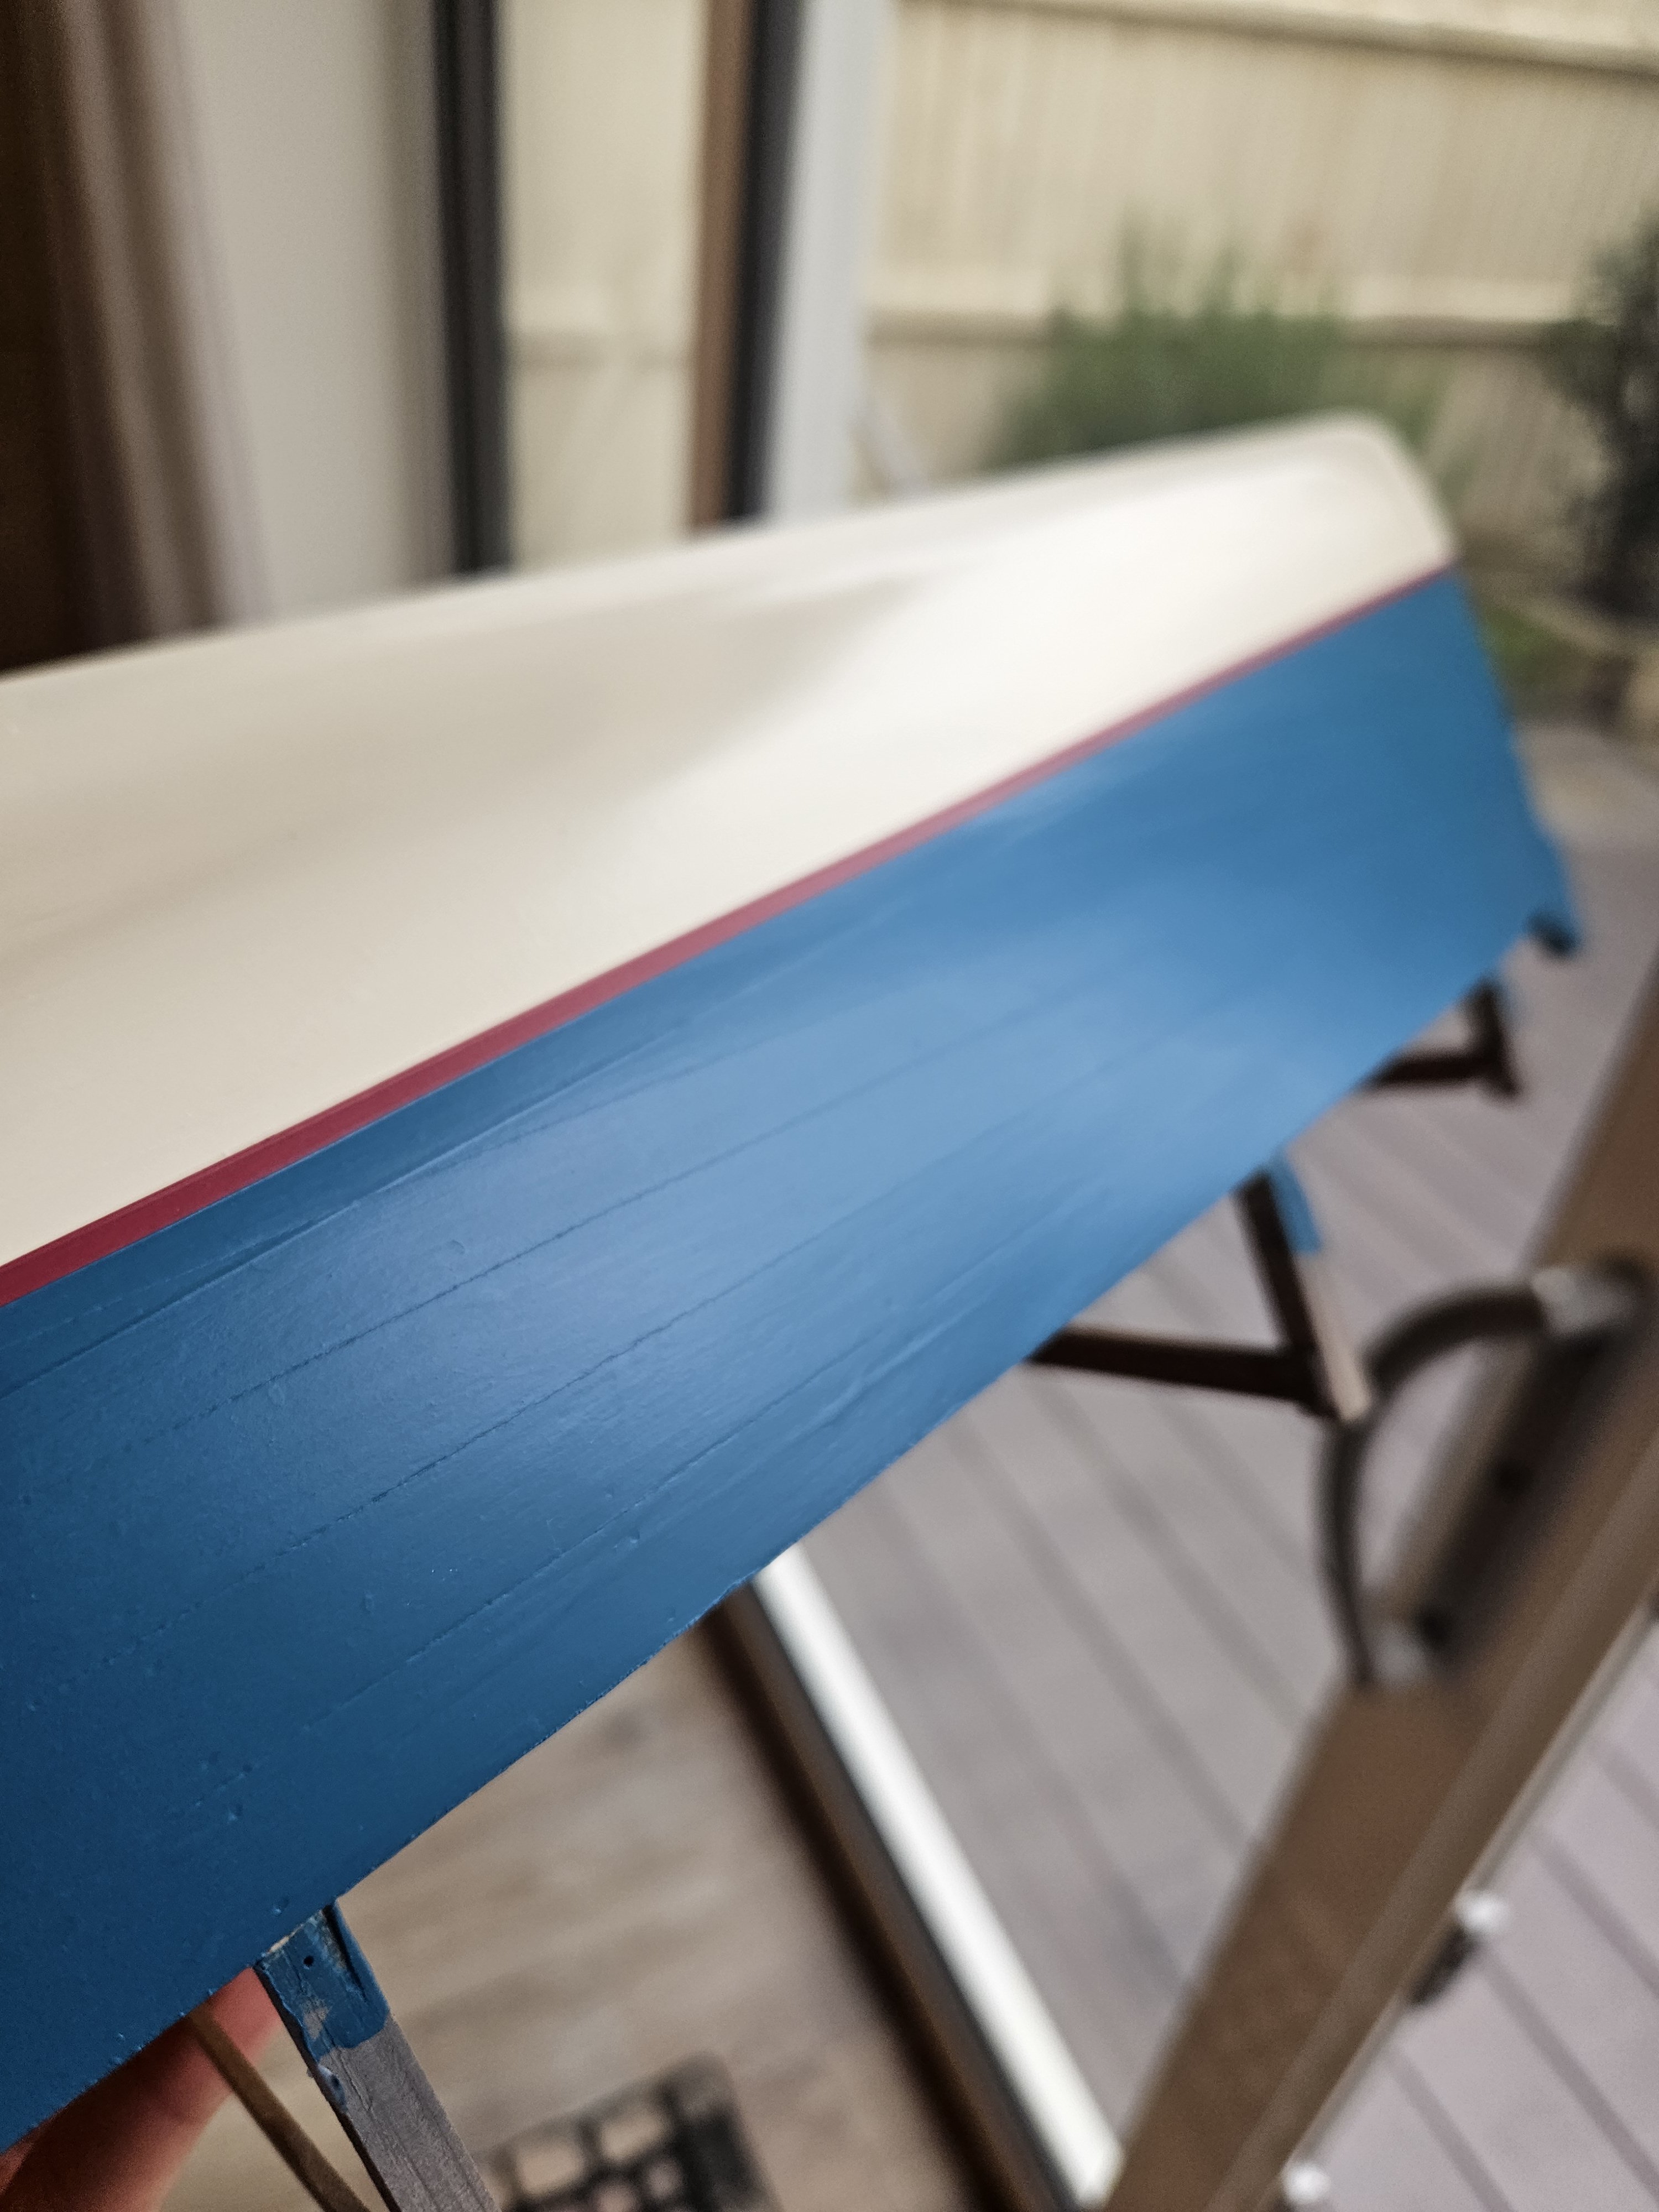
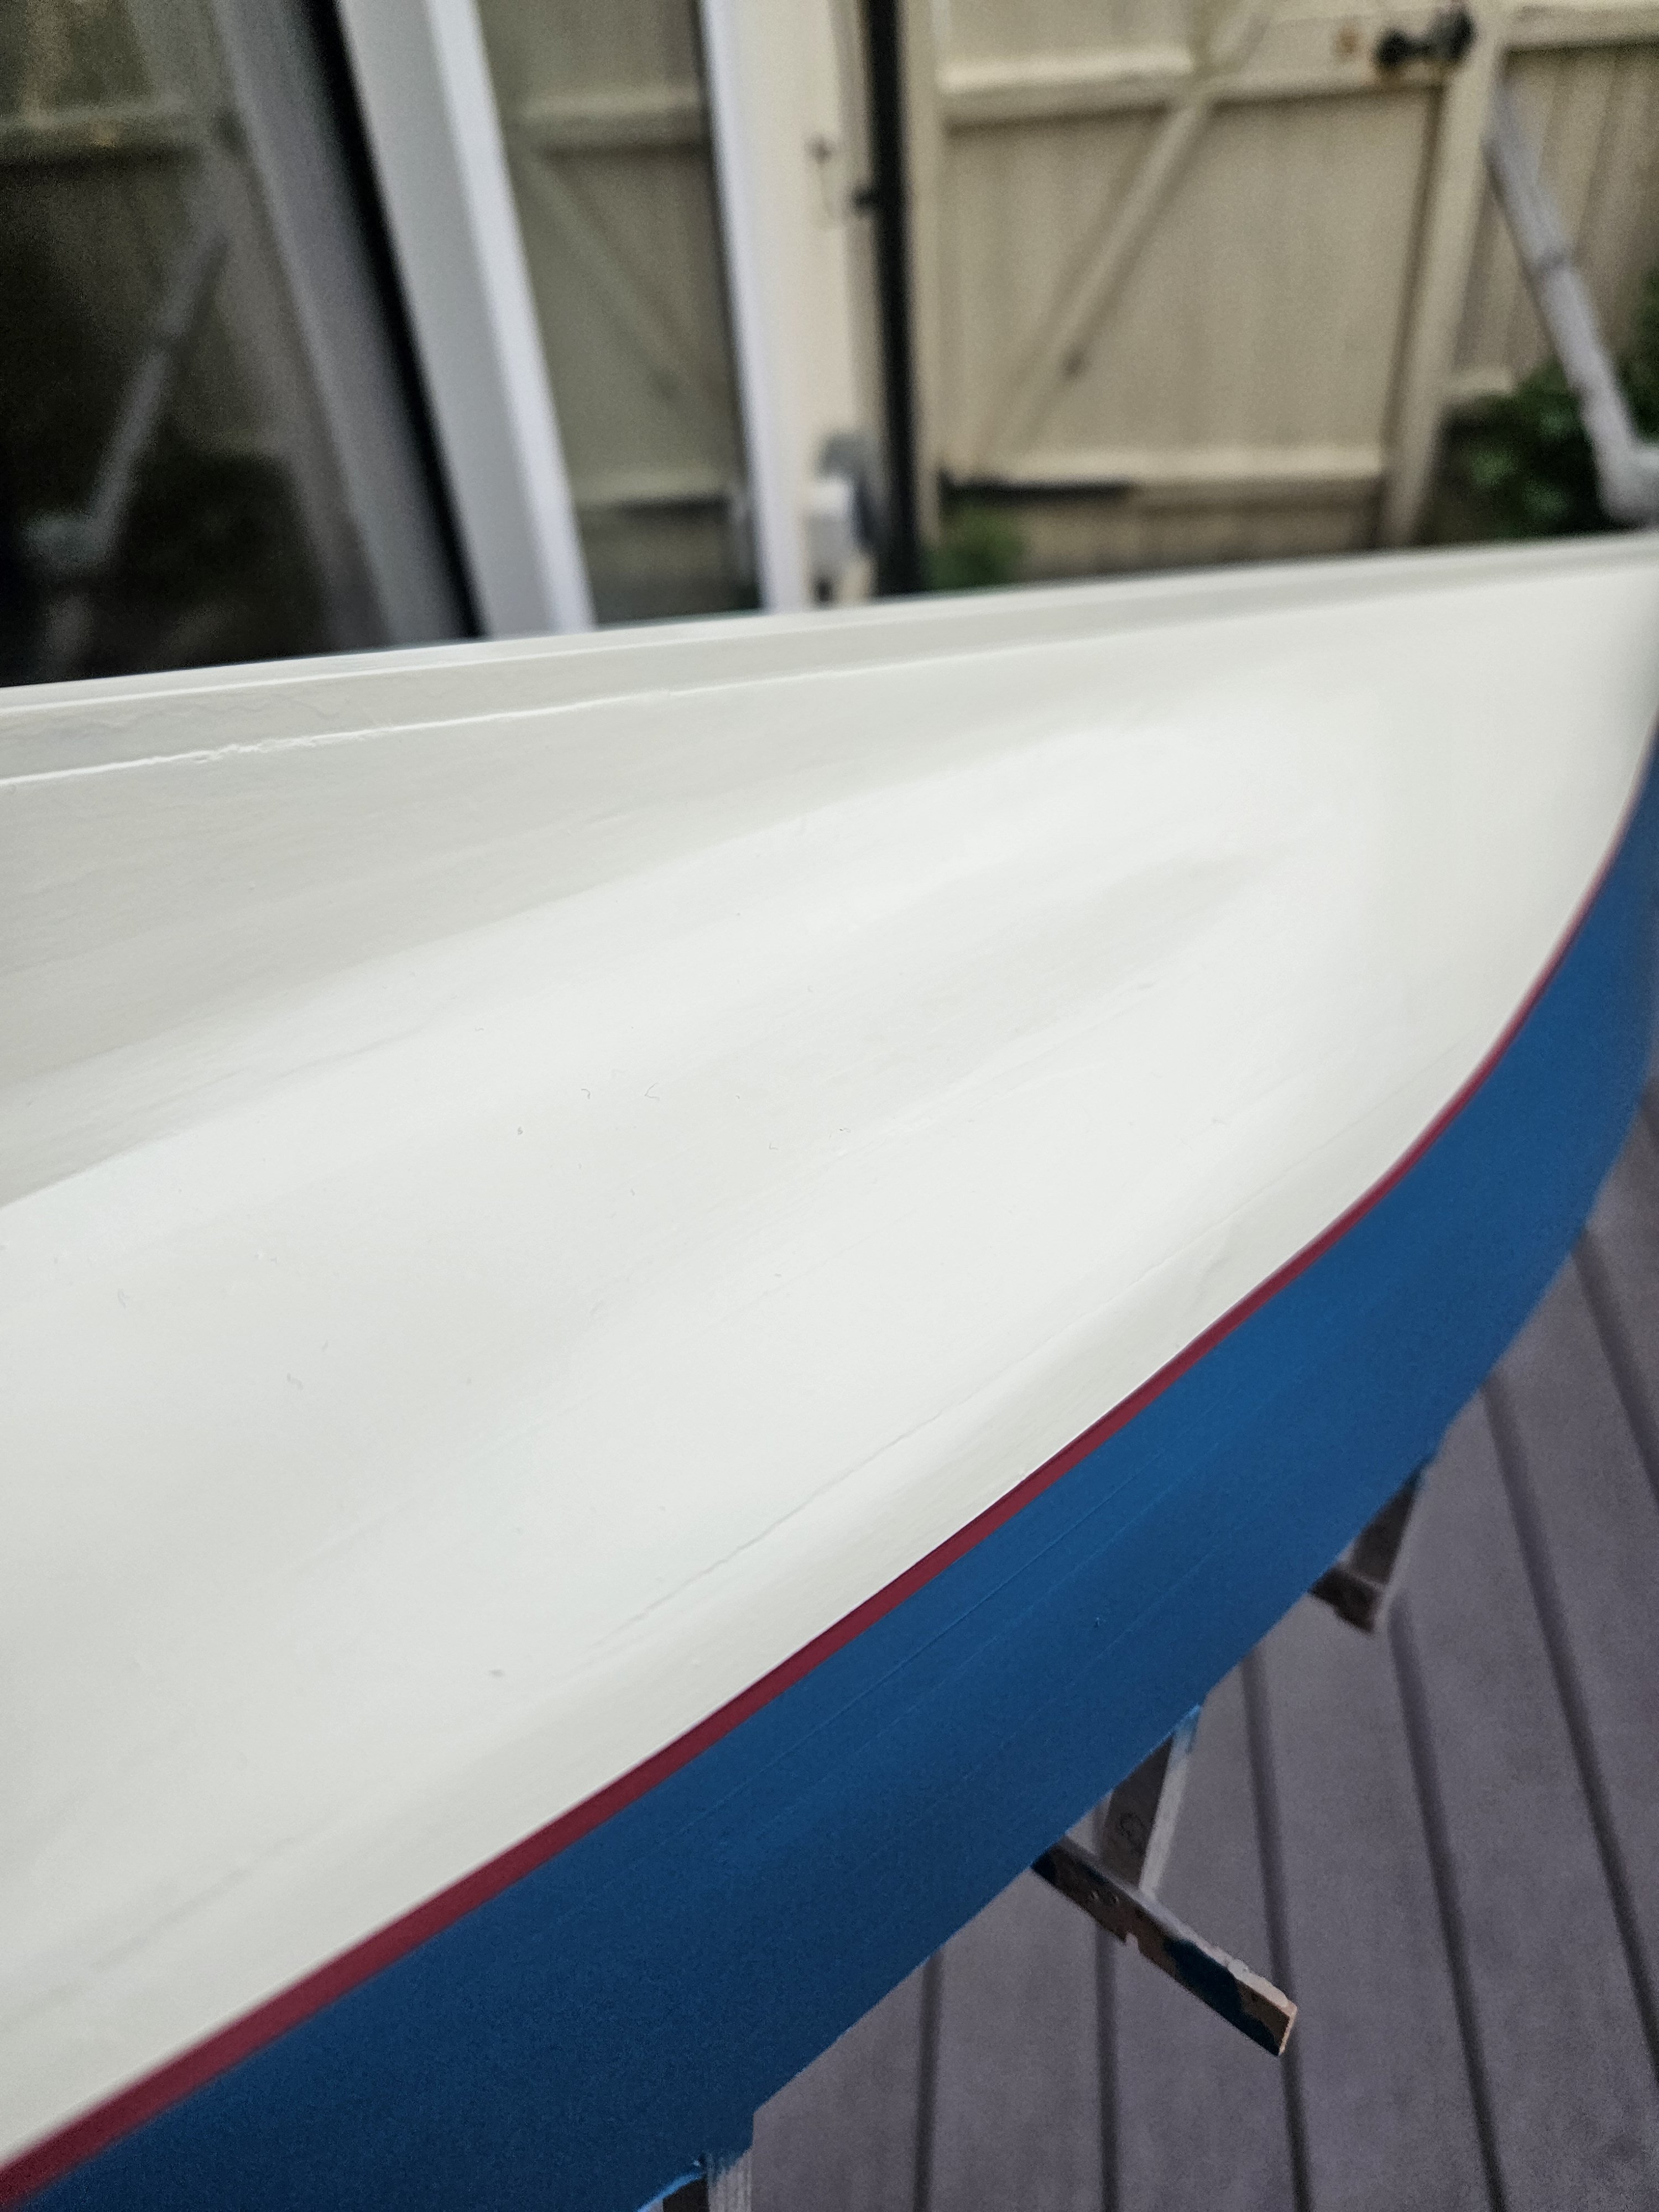
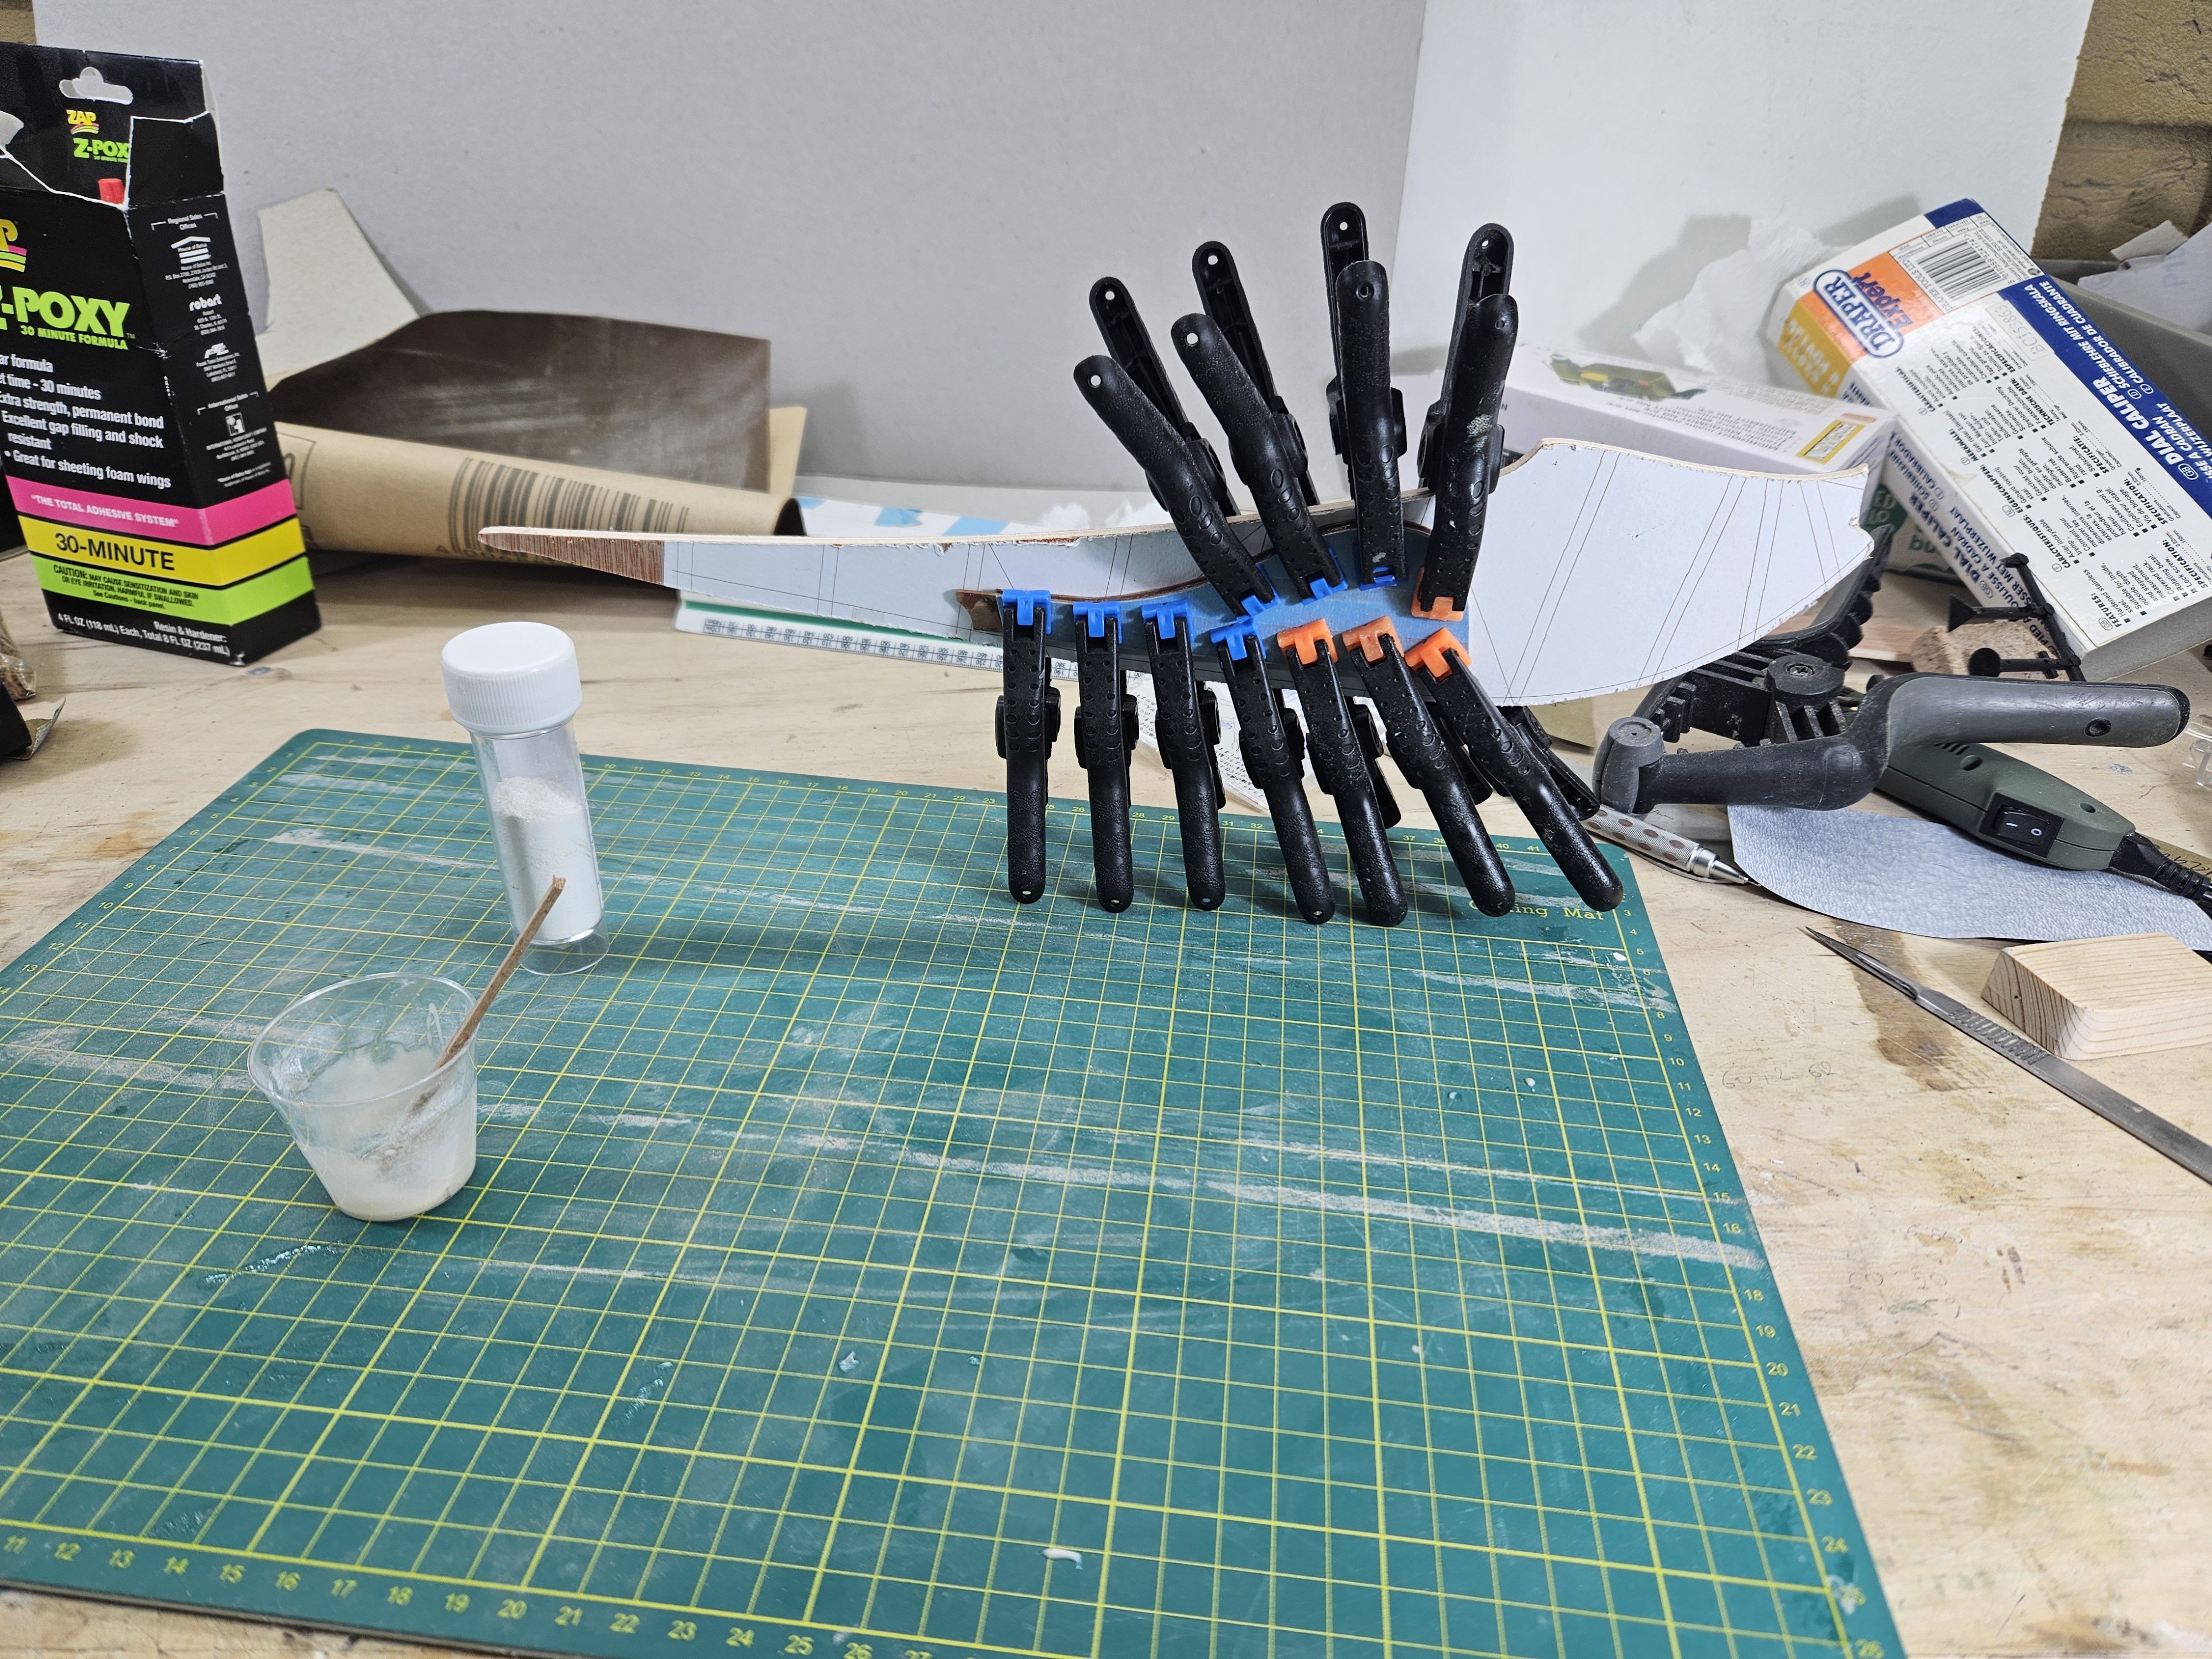
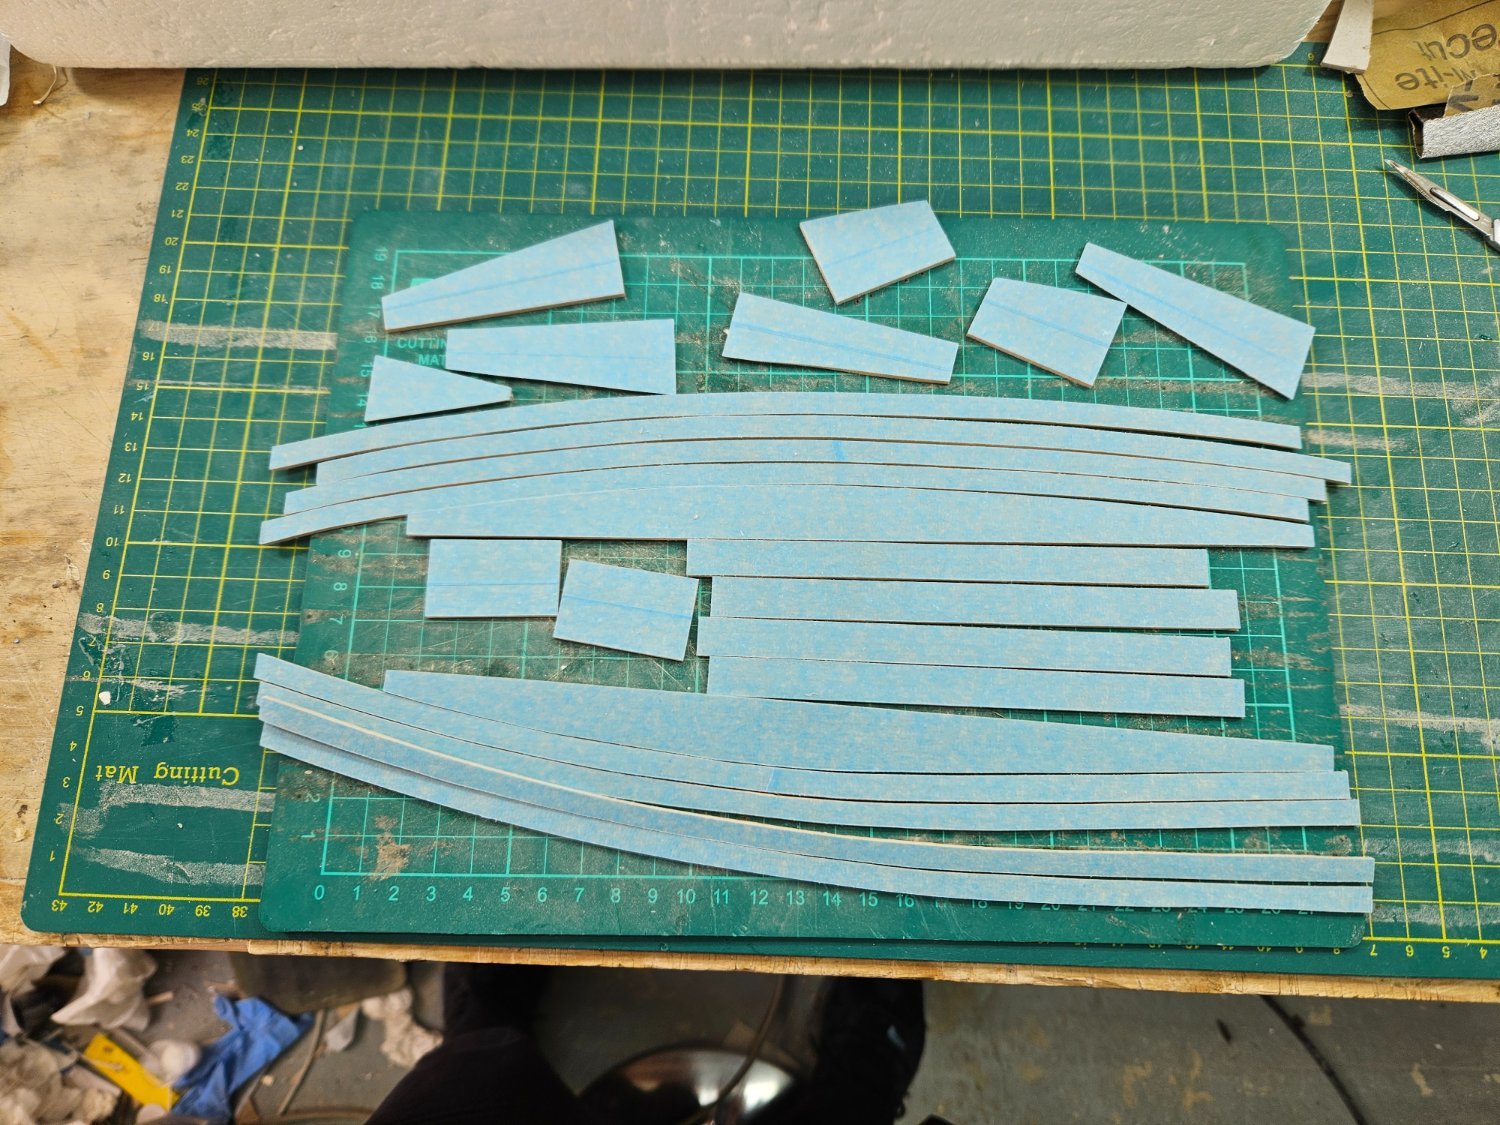
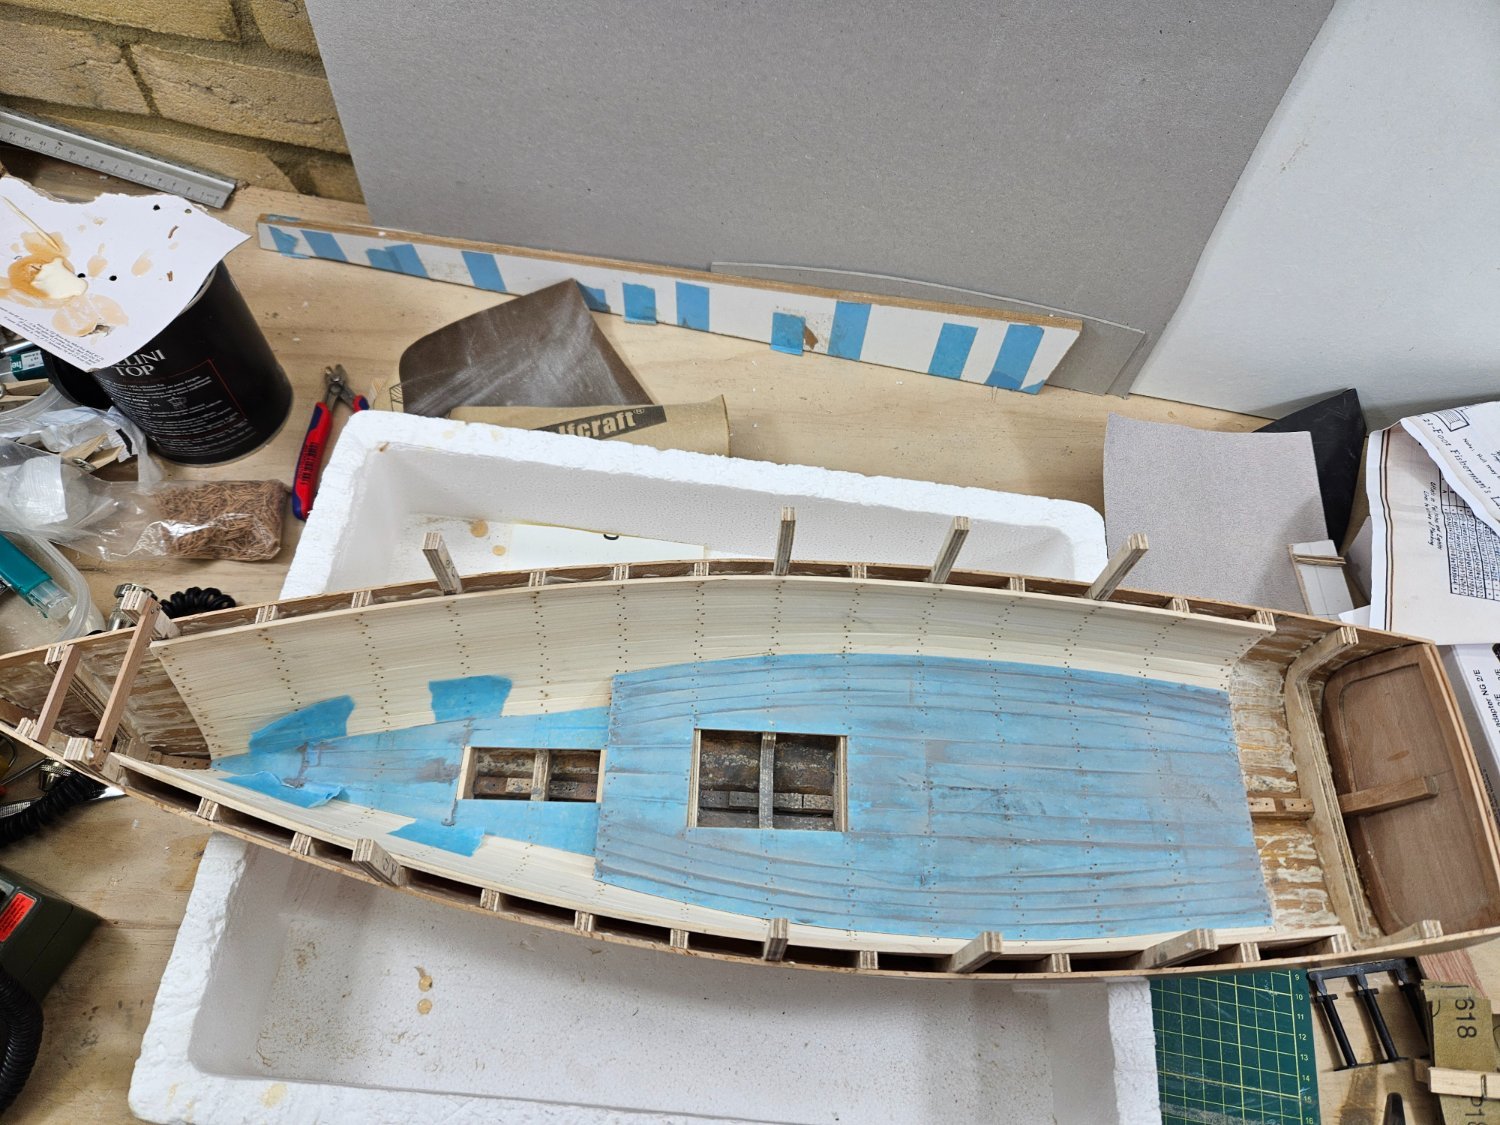
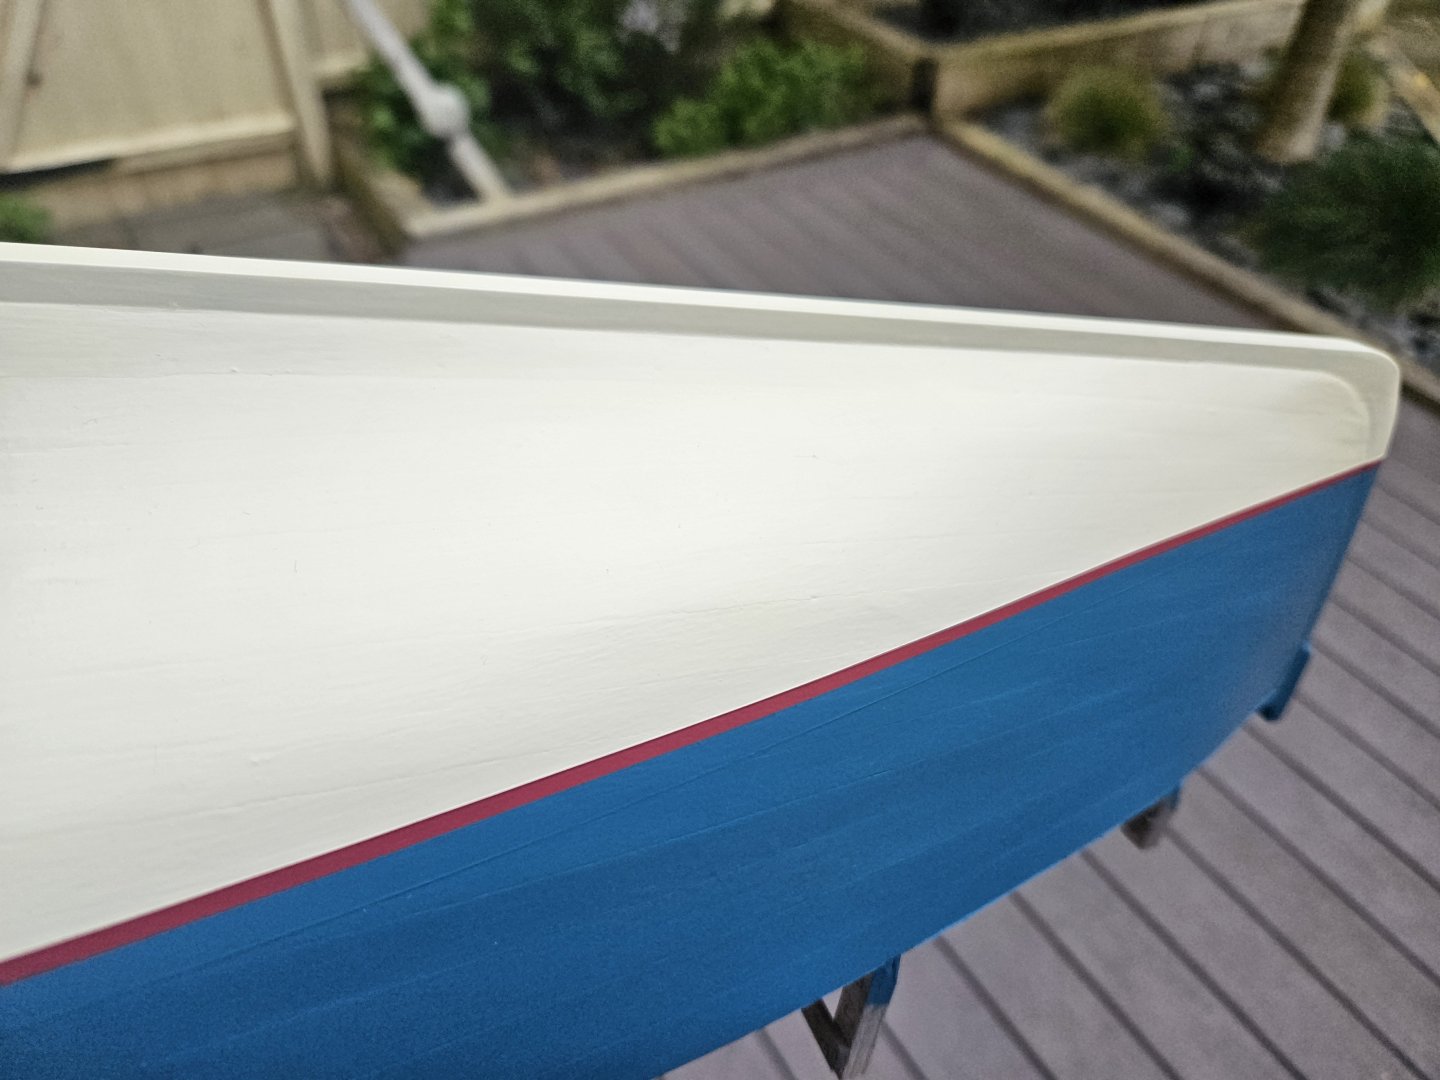
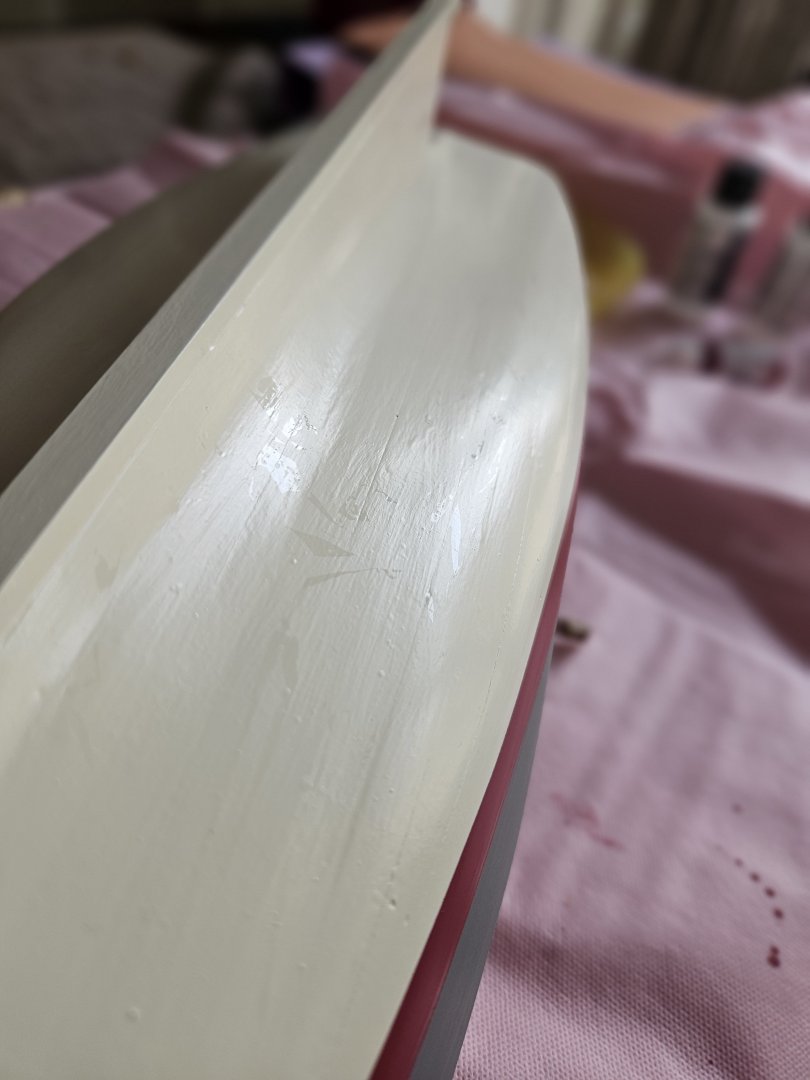
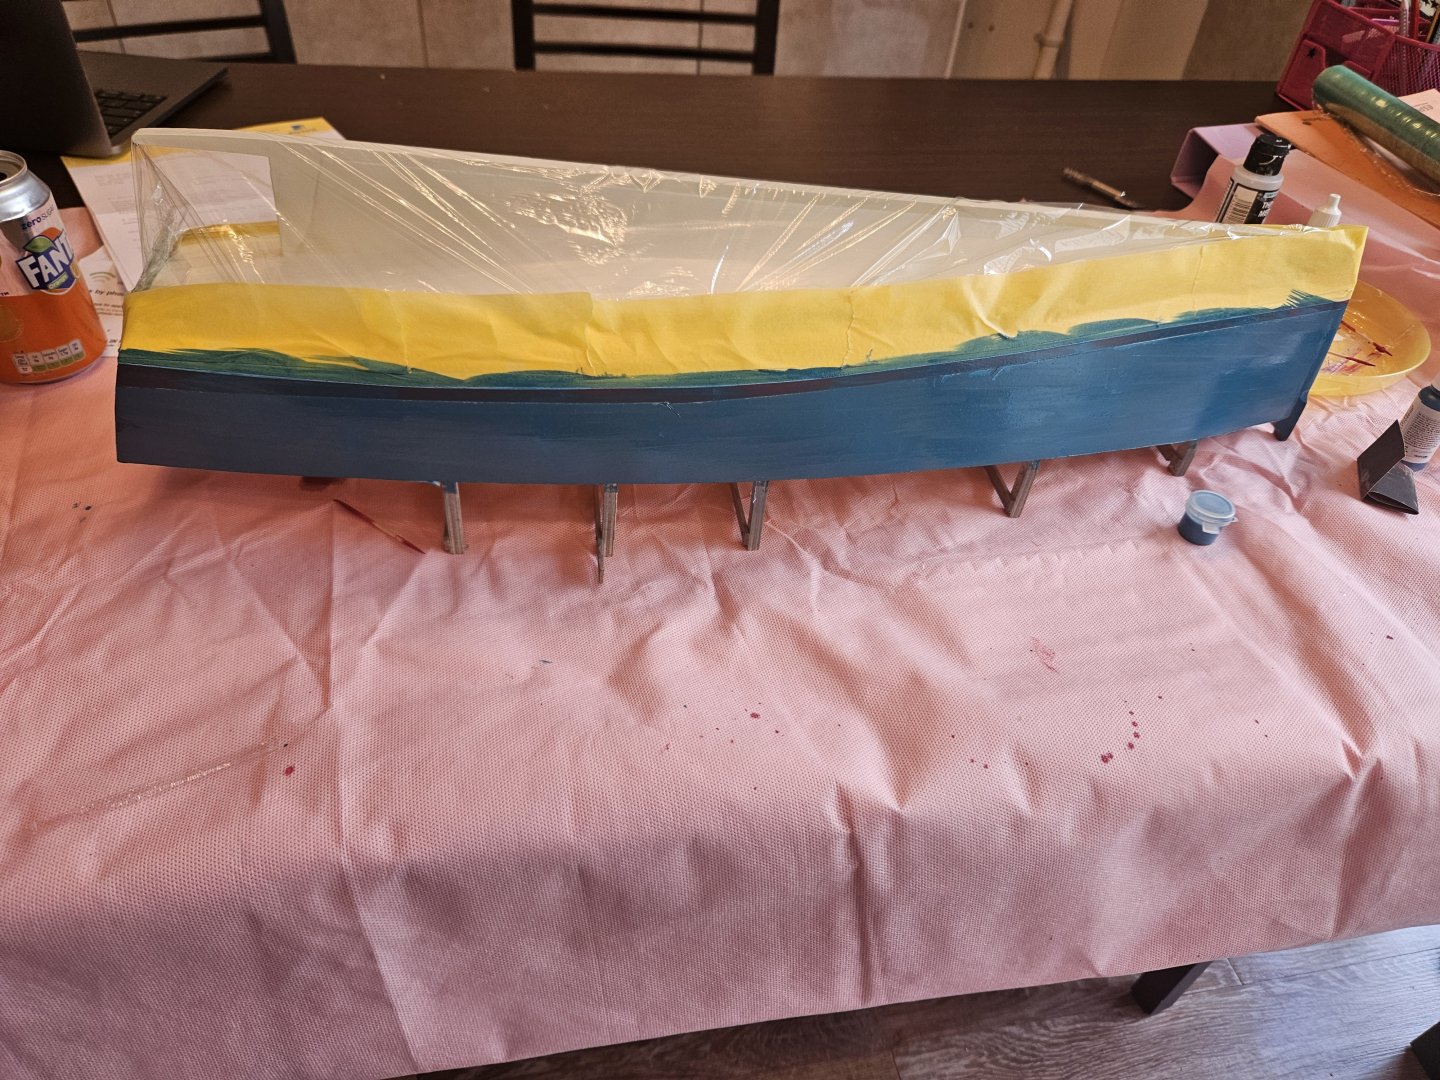
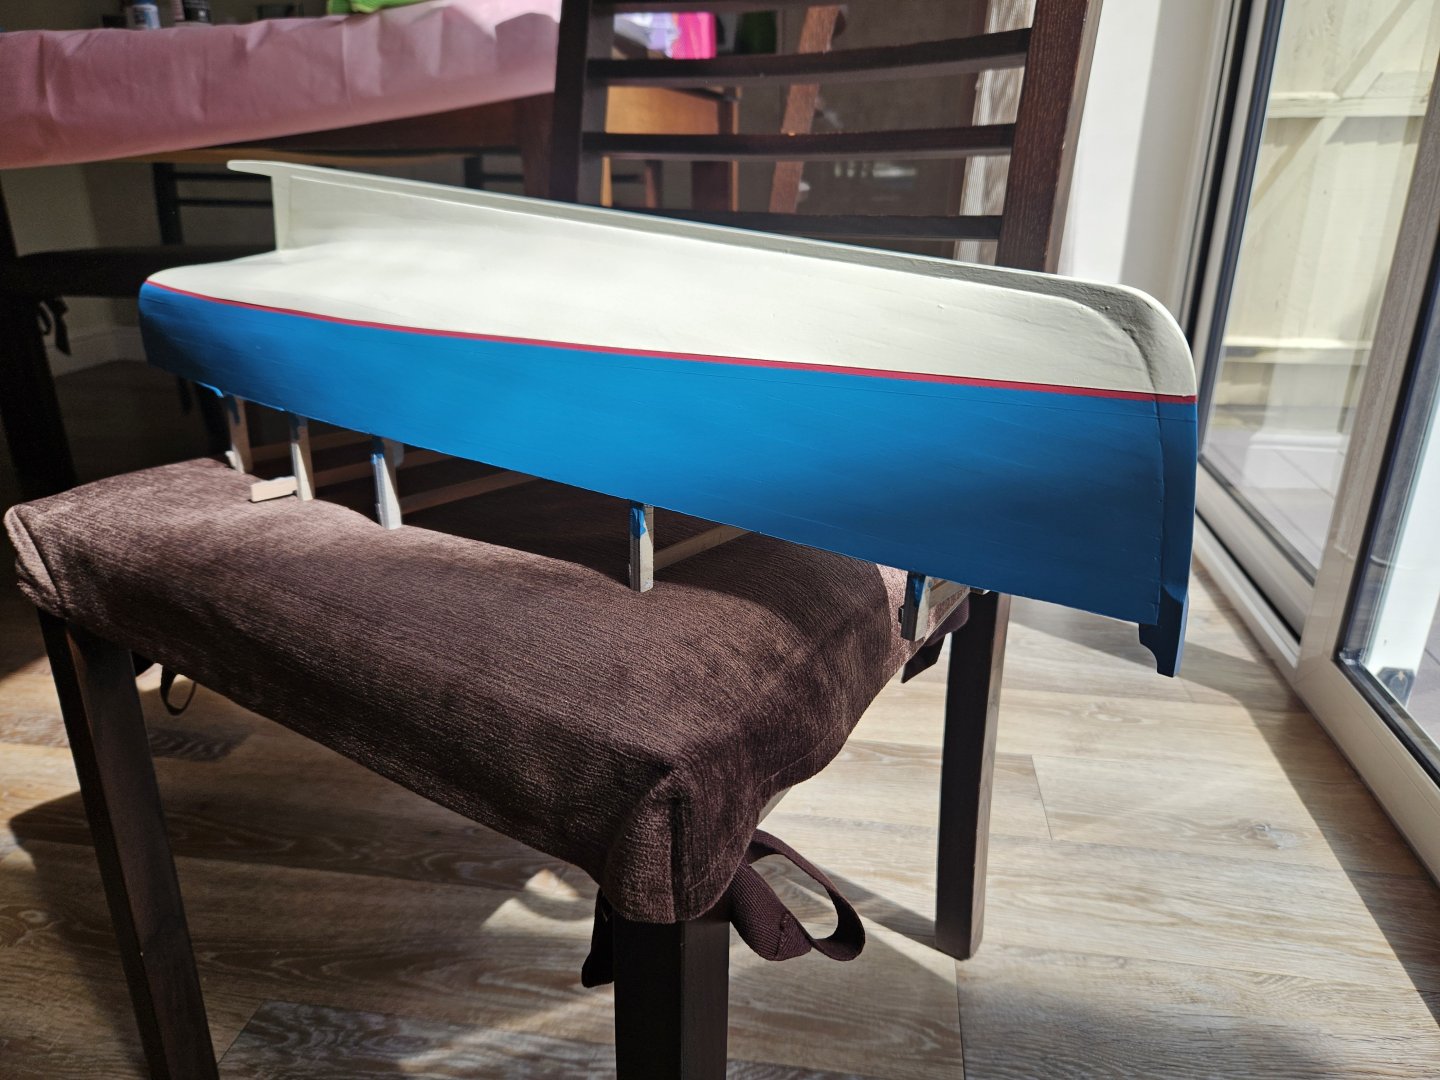
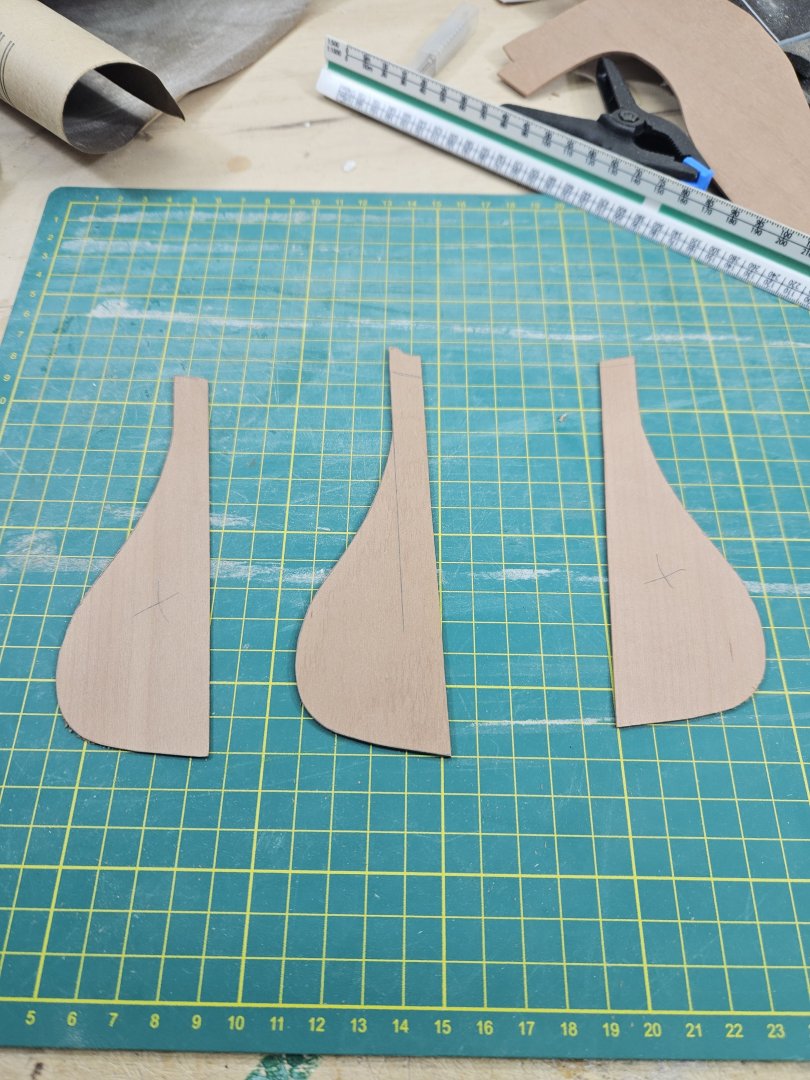
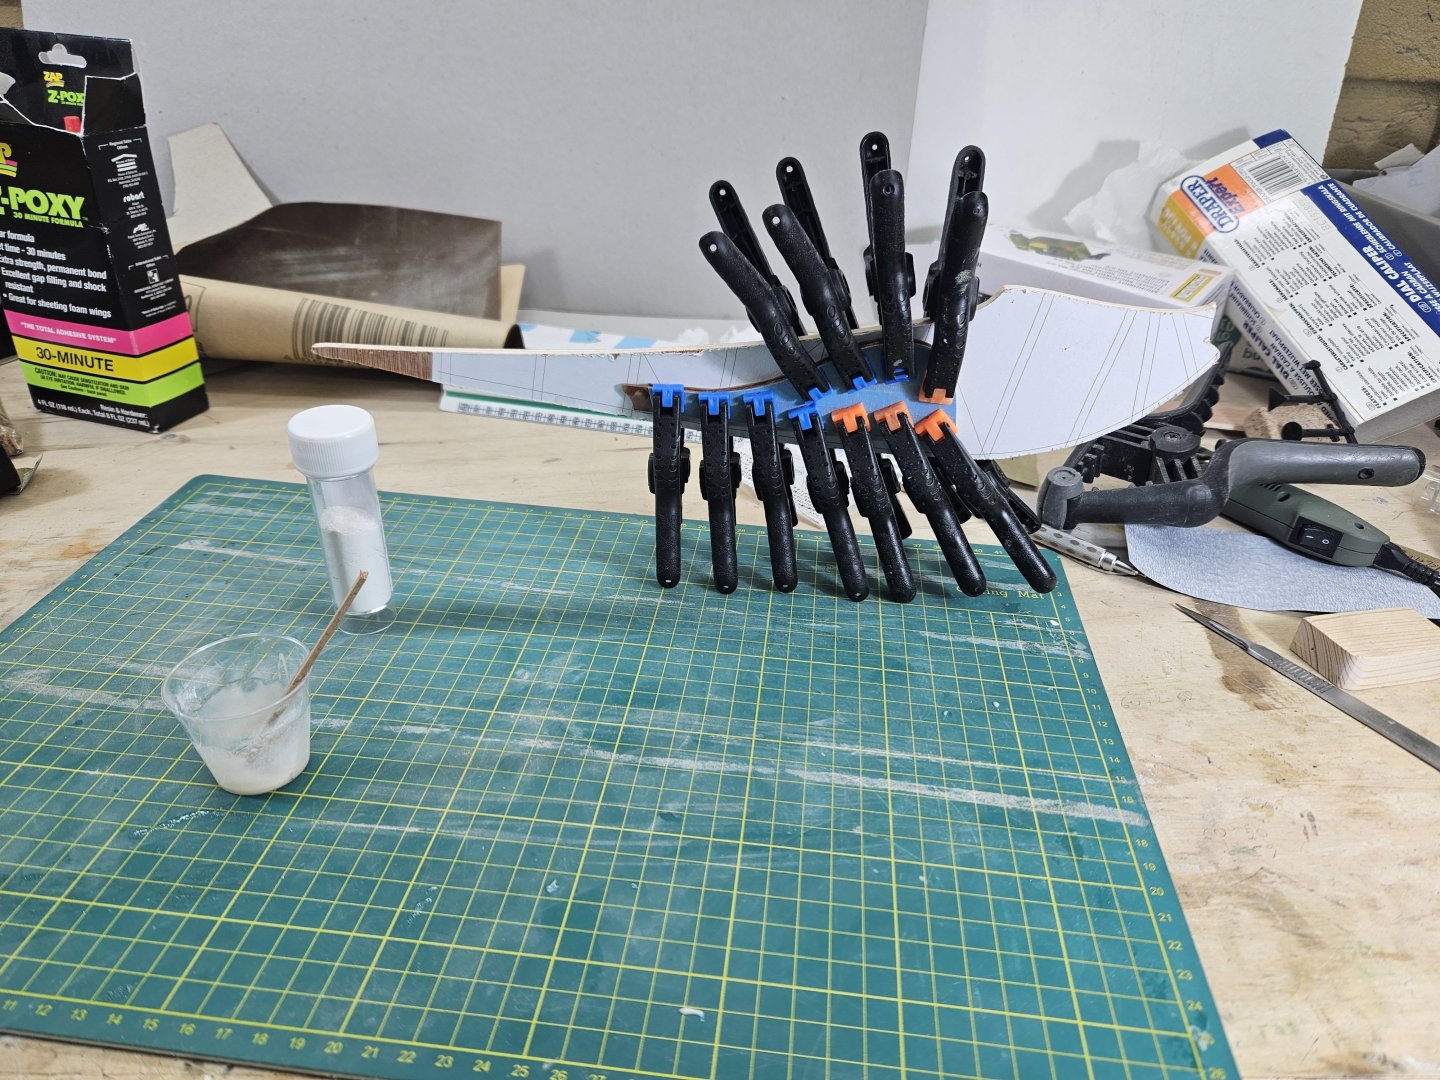
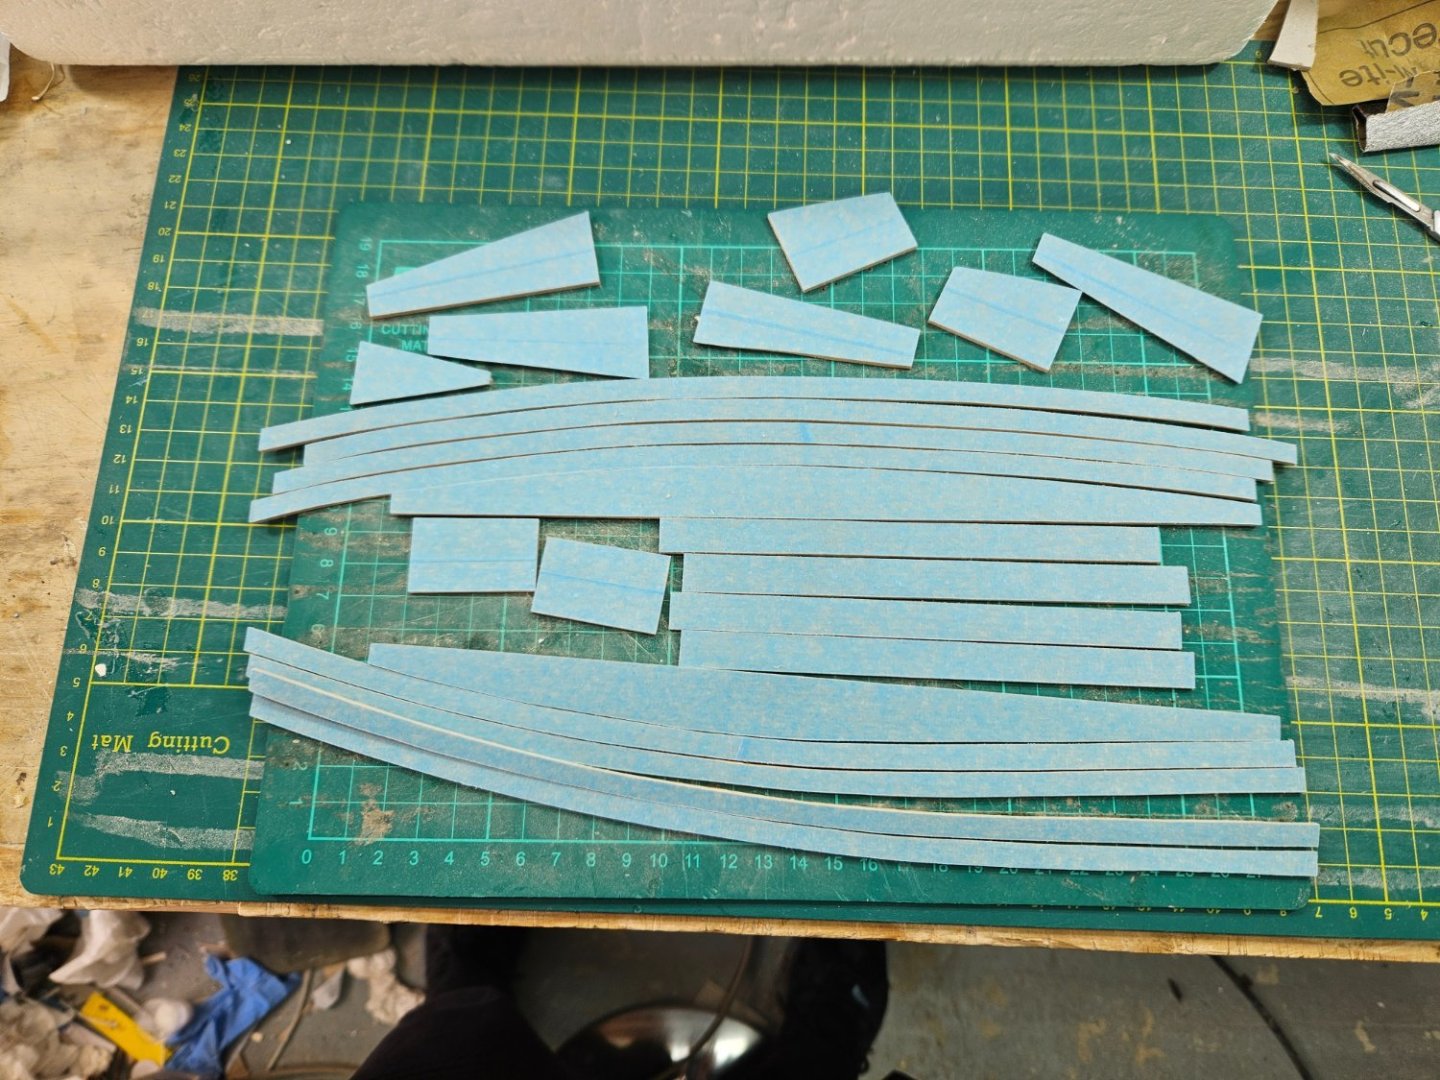
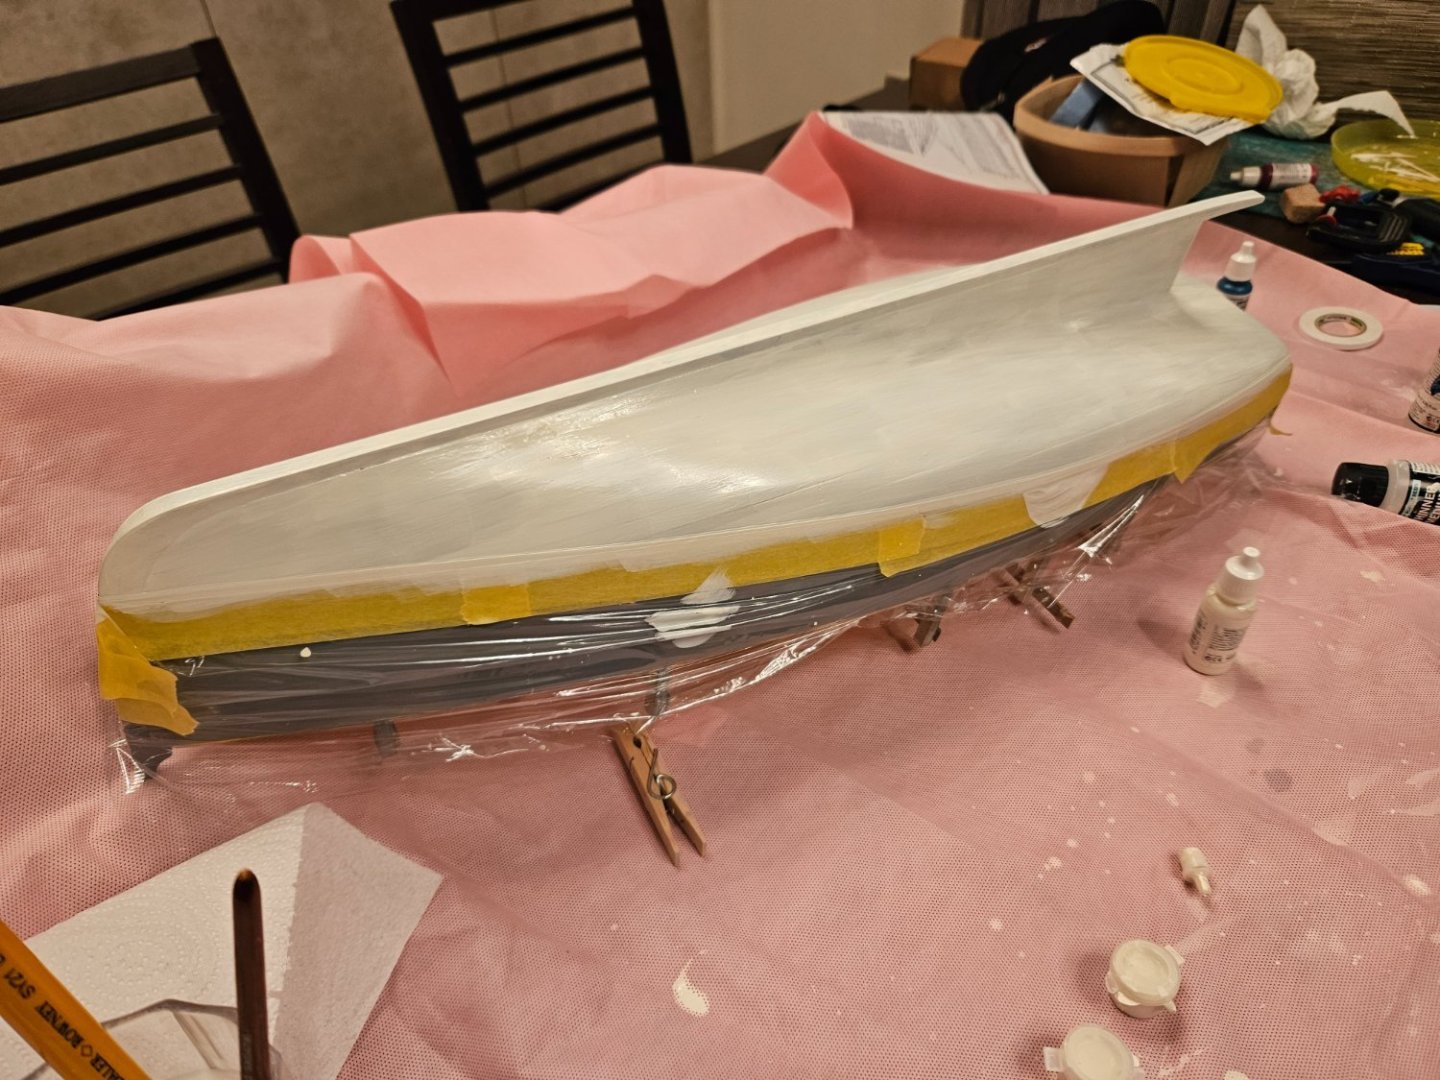
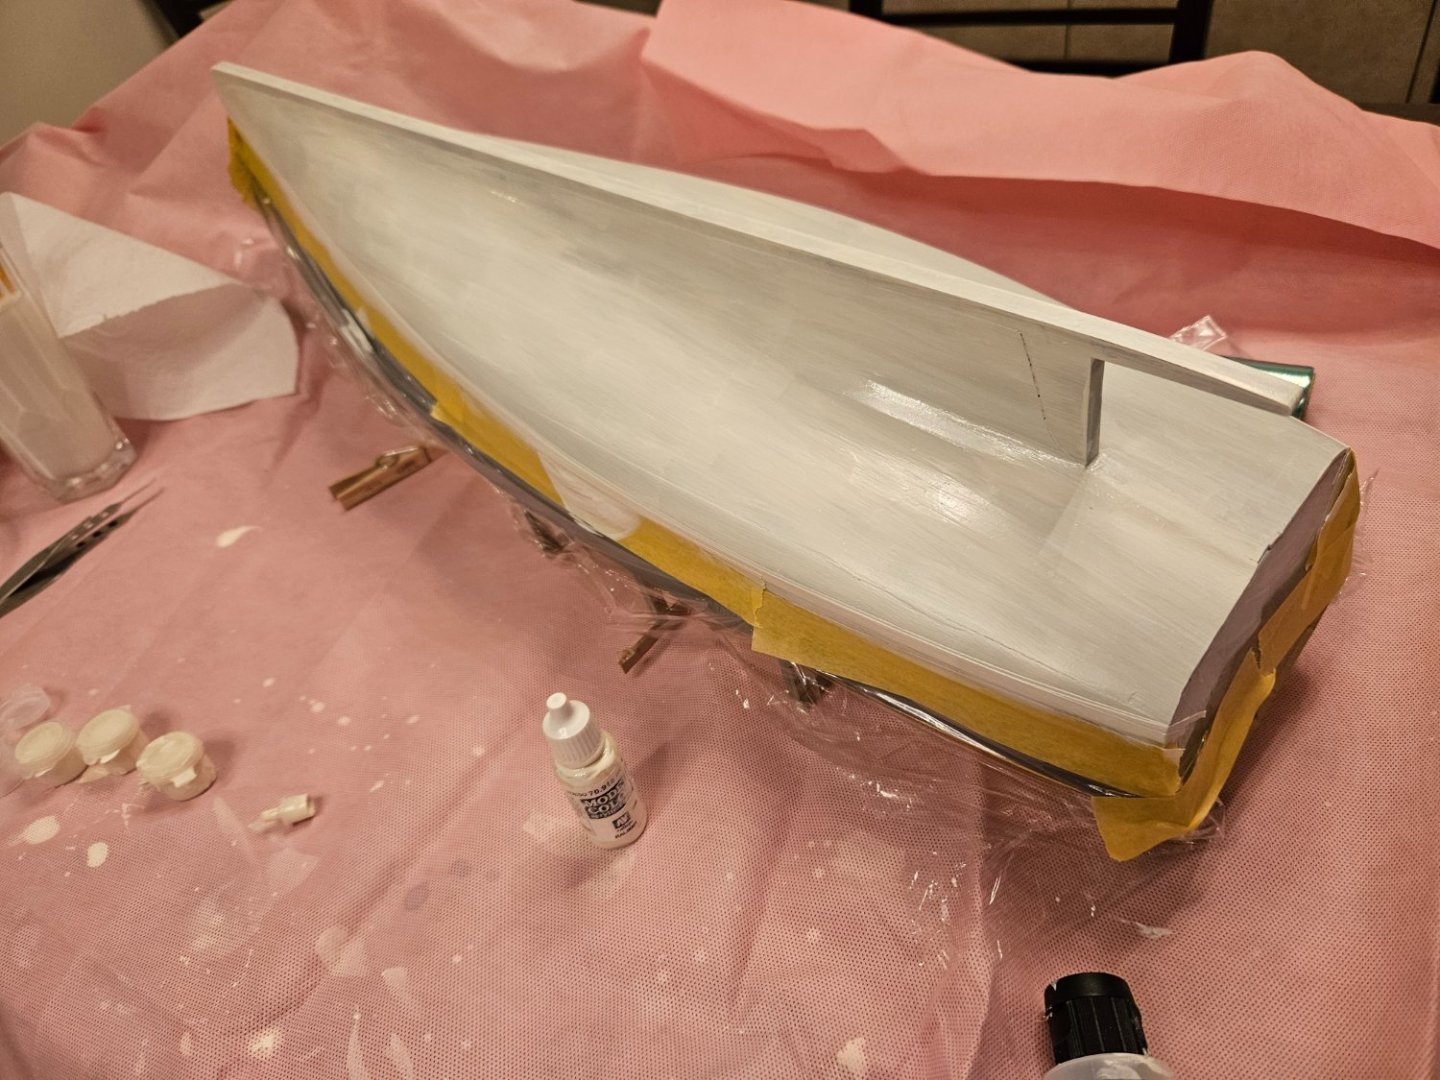
Dear Friends Another quick update to share some photos! Mark, it is Valejo matt acrylic paint, it is just that the photo was taken immediately after the coat went on so still wet. @64Pacific Thanks Scott, welcome! @KeithAug Keith, I do not think Humbrol enamels will be arround for long so if you use enamels, stock up. I bought some of the enamel varnish. So I carried on with painting. The white paint has exceptionally poor coverage. I must have put on 15 coats, not with the greatest of care I must admit. But it came out alright - modern paints are so forgiving. I am not sure what the shiny areas are but it does not matter, these should disappear after varnishing. I then masked again and added the red waterline. The red color has much better coverage I could have sanded the paint but I decided not to bother. Also, I should have first painted the red zone, mask and then paint over. I did not really pay much attention but in the end it came out fine, I just had to mask and remask again and again. Then, I added the turquoise - very nice color, excellent coverage. I was more careful this time and came out much better. There is a masking line that shows, I masked without thinking. I could have sanded it off but did not bother, it actually looks ok. I will now give it a couple more days for the paint to cure and then I will protect the paint with enamel Humbrol varnish. I am dissapointed with the water based ones - Poor adhesion and not as hard. So next I started work on the rudder. In the plans it is only 1.5 inch thick - that is 4 mm in the model. So I made a card template and cut three pieces to laminate Waiting for epoxy to cure - then the rudder will be painted in same colors. Take care all Vaddoc


-
Keeping my head in the game.....
vaddoc replied to Egilman's topic in 3D-Printing and Laser-Cutting.
Now, this is impressive. Its one thing to design a hull on CAD, but these complex shapes like brake handle and gear selector or the gearbox, this is on another level! Hope all go well with your health. Vaddoc -
You are very right Wefalck, enamels have a much better self leveling potential as they take a long time to dry. But this is counterbalanced by the hair and dust particles they attract. Still, modern acrylics with a bit of retarder can have fantastic self leveling when applied by brush but they need speed, extra care and the margin for error is small. Their coverage is appalling - I am already at coat number 9 and still needs more. Because of the above, I was determined to use enamels on this boat. I rushed to buy some of the Humbrol enamels before they are pulled out of the market - apparently one of the ingredients is now banned in Europe. I decided on the colors. And then I used acrylics! I must admit I am not giving this boat my full attention due to work and life commitments so I expect a bit sloppier results - We ll see how it turns out!
-
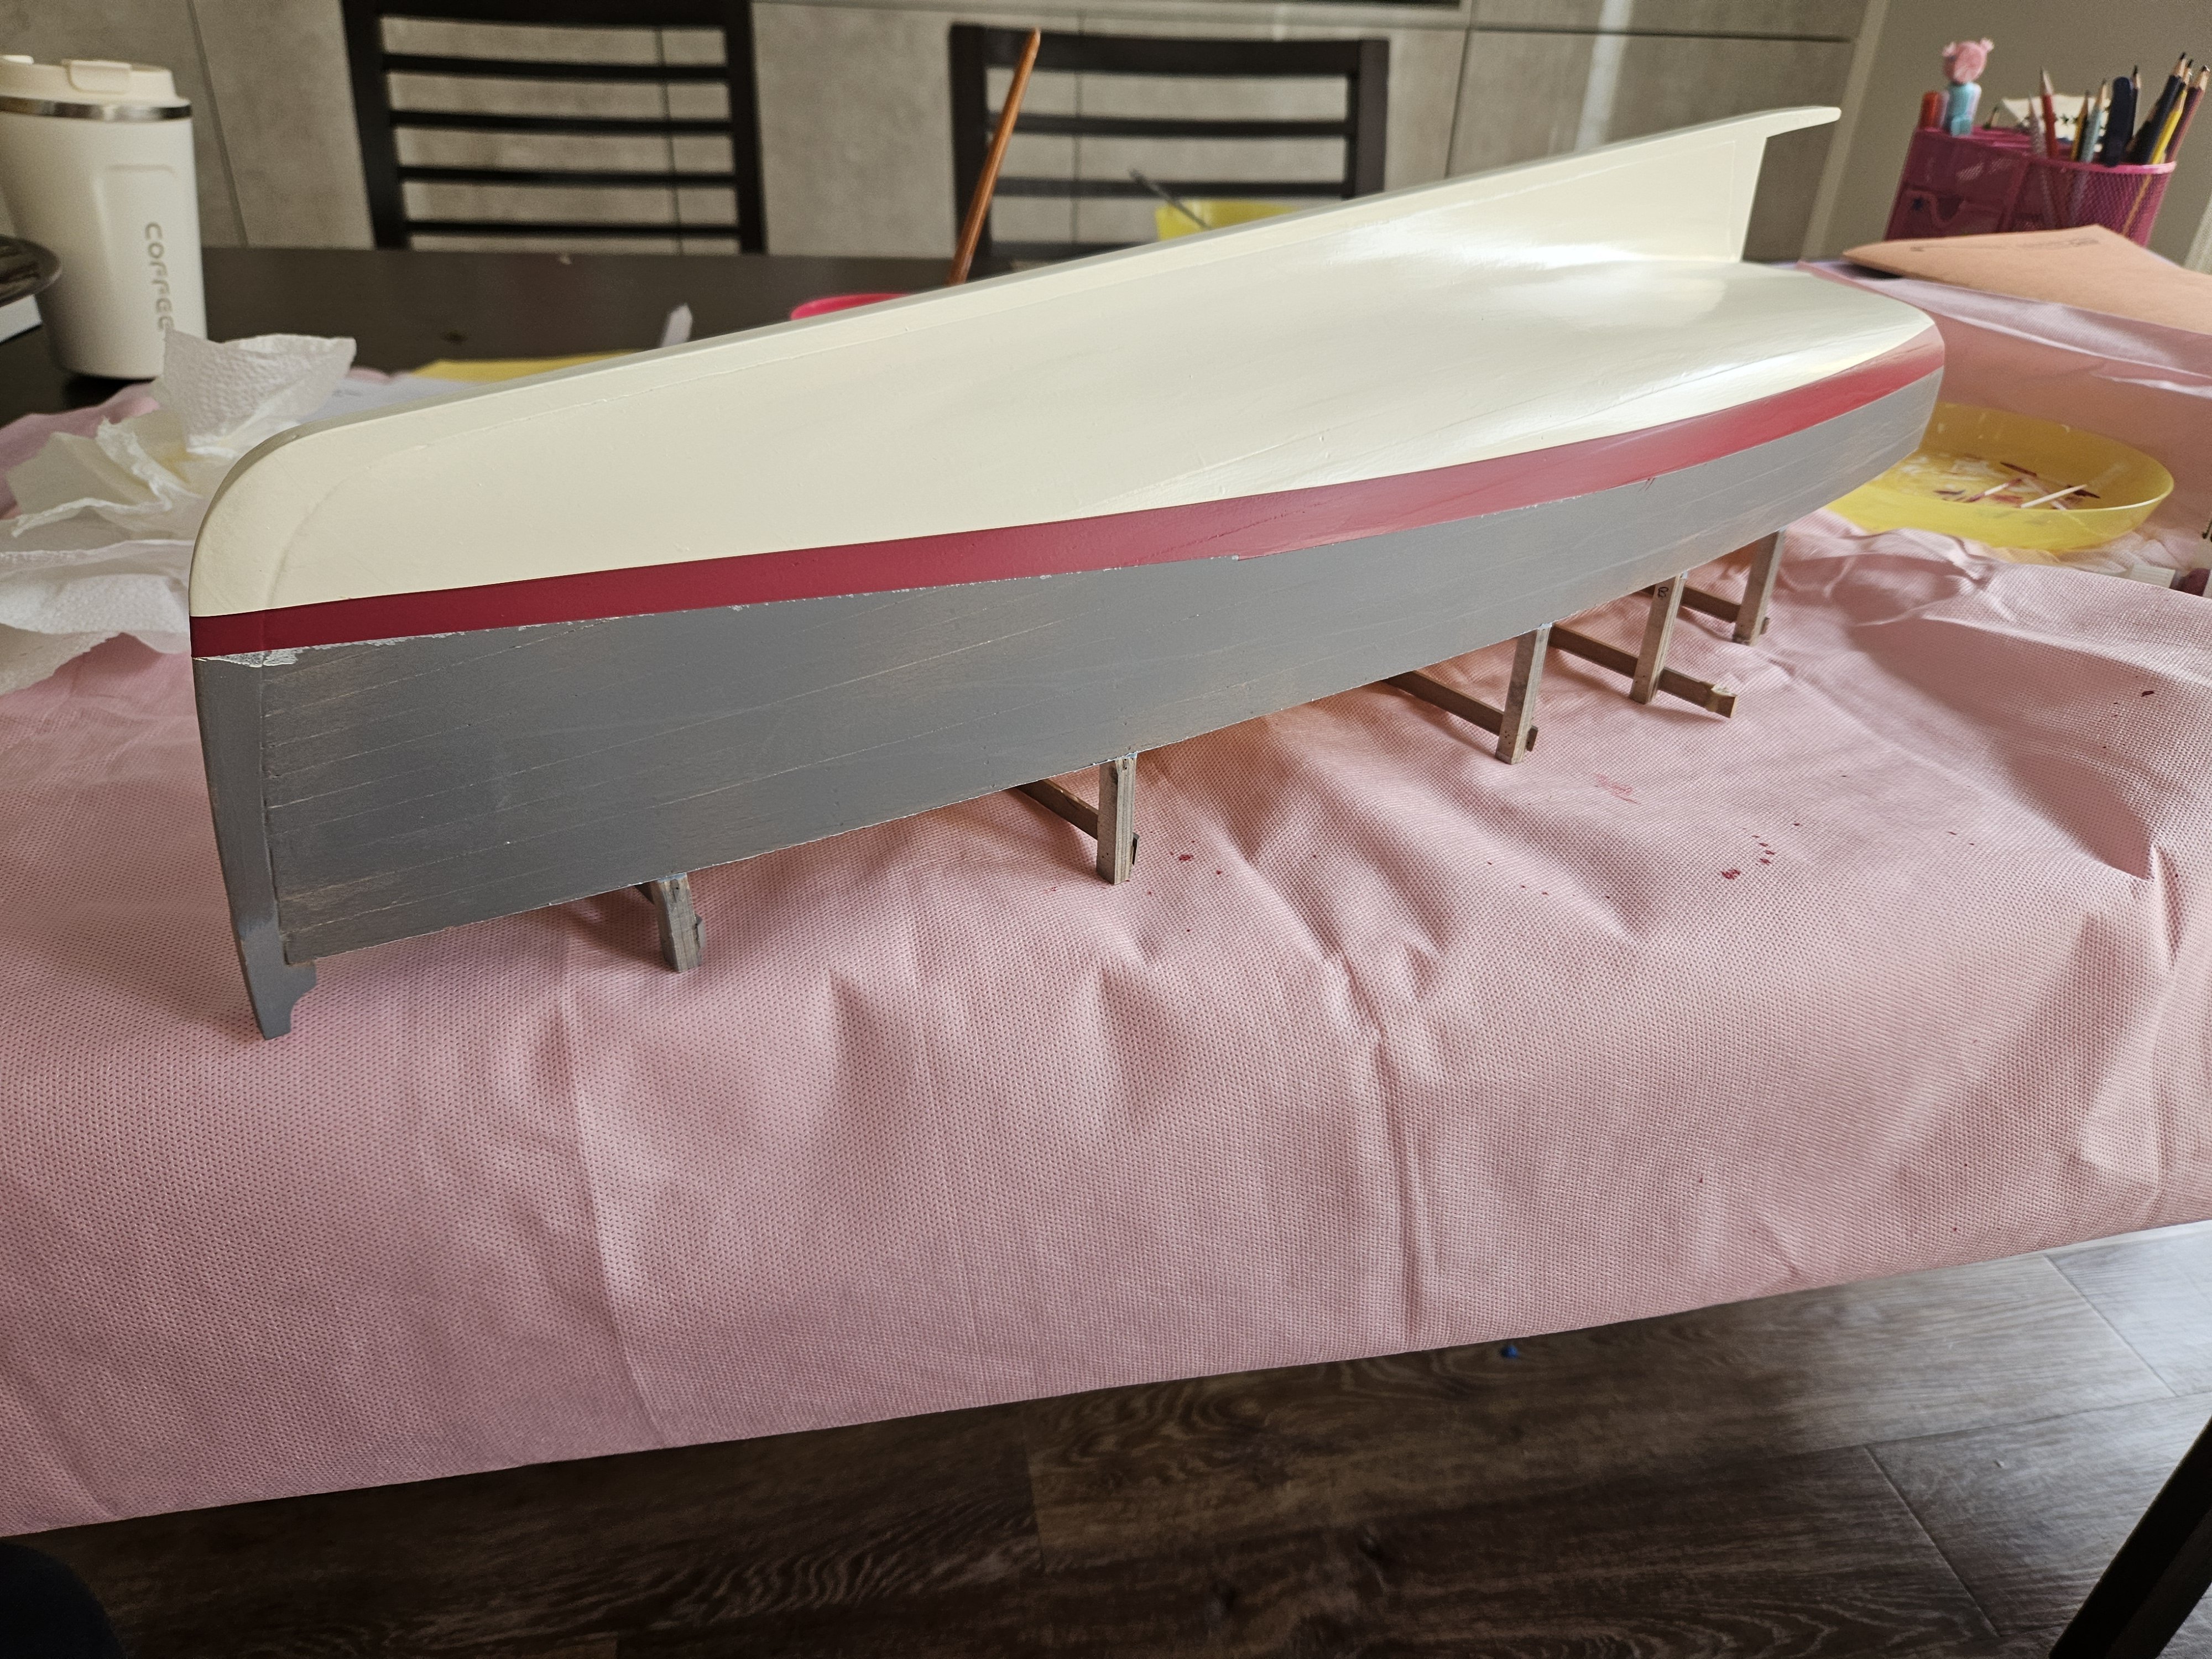
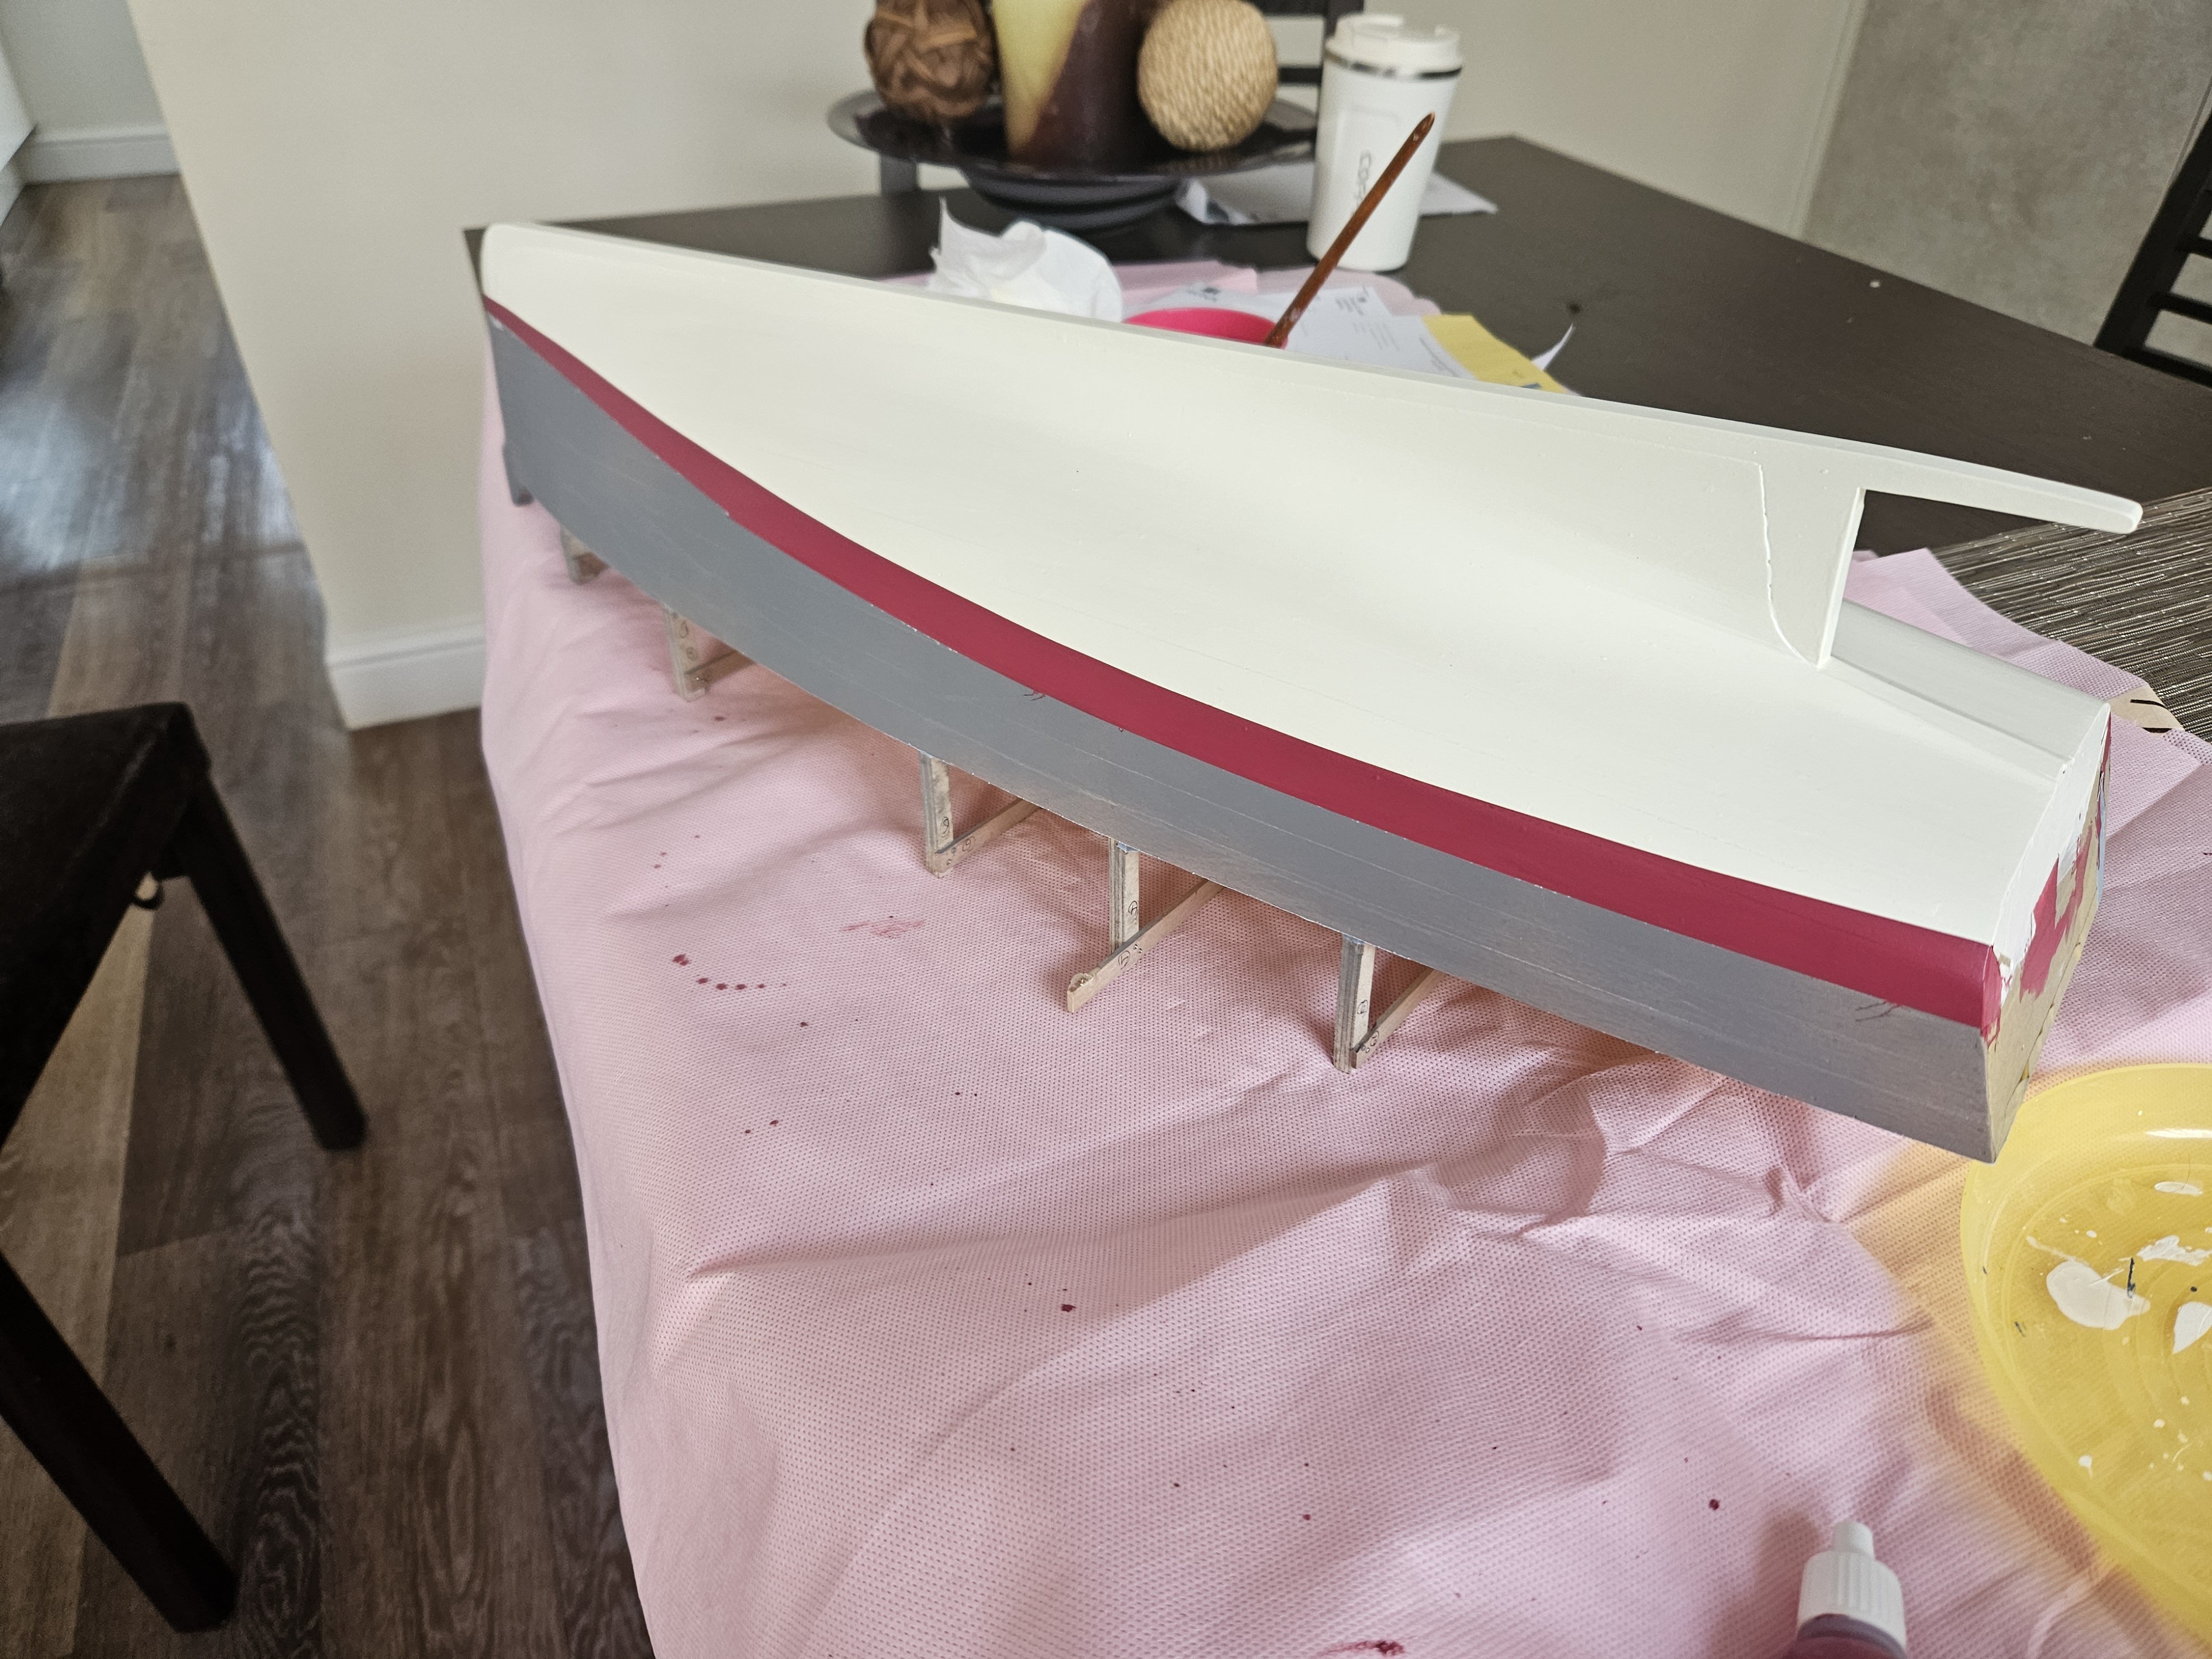
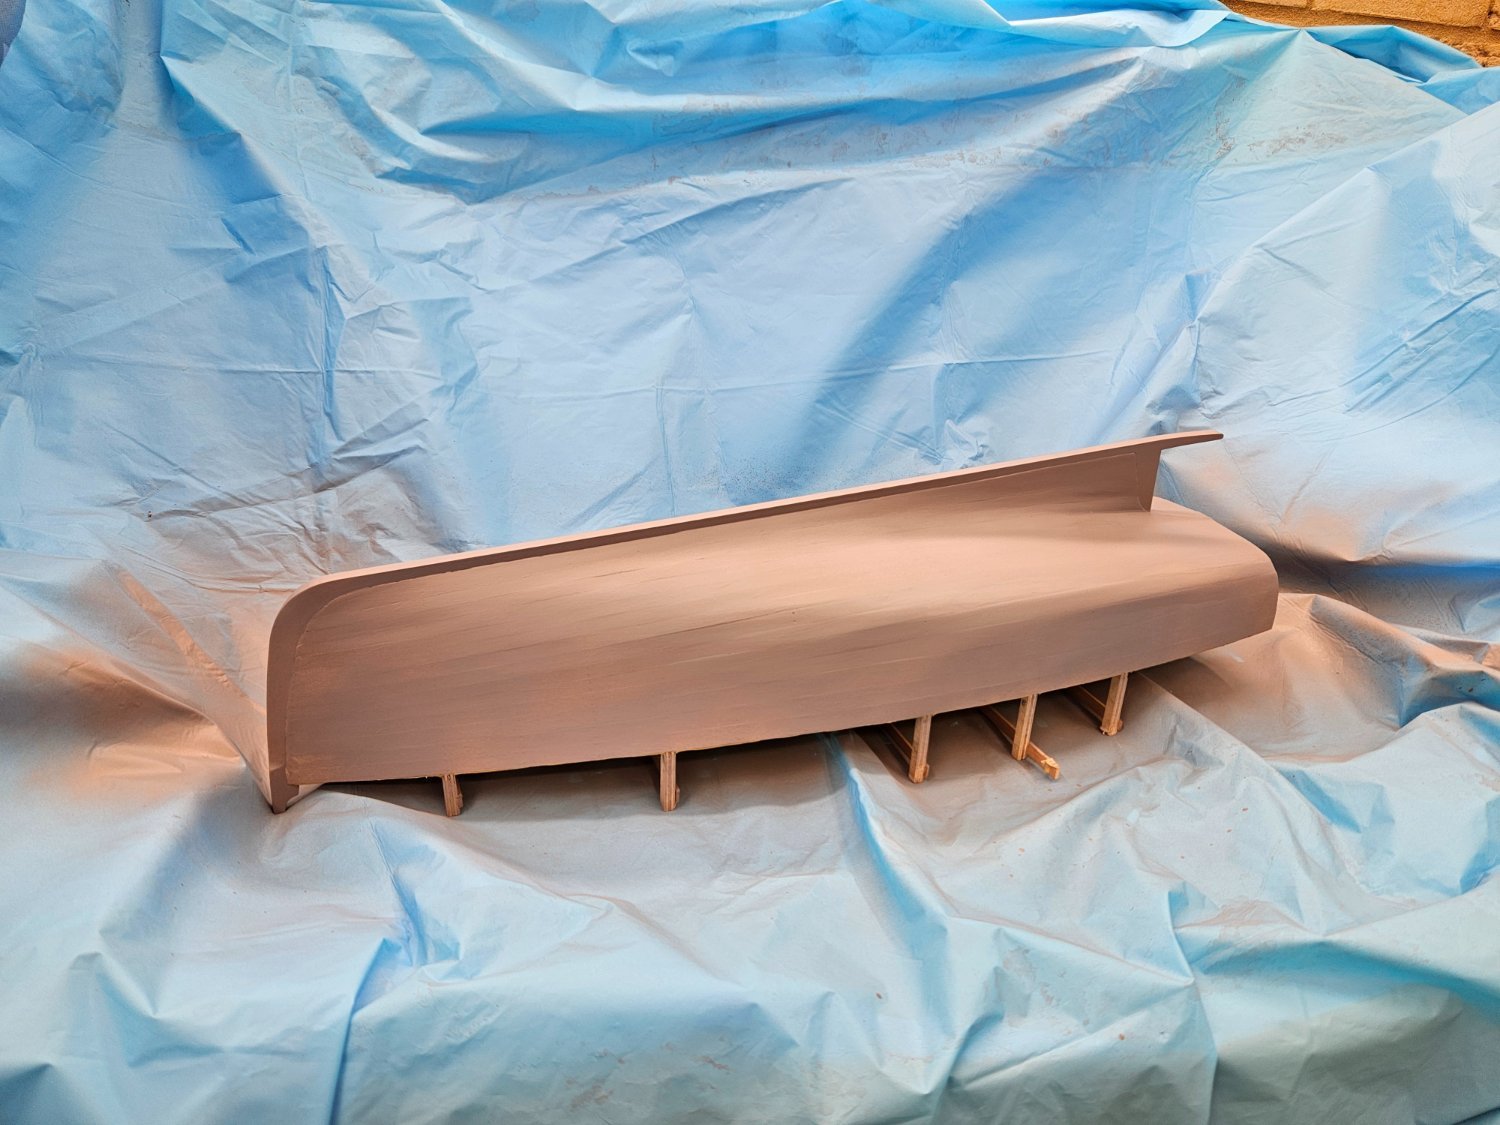
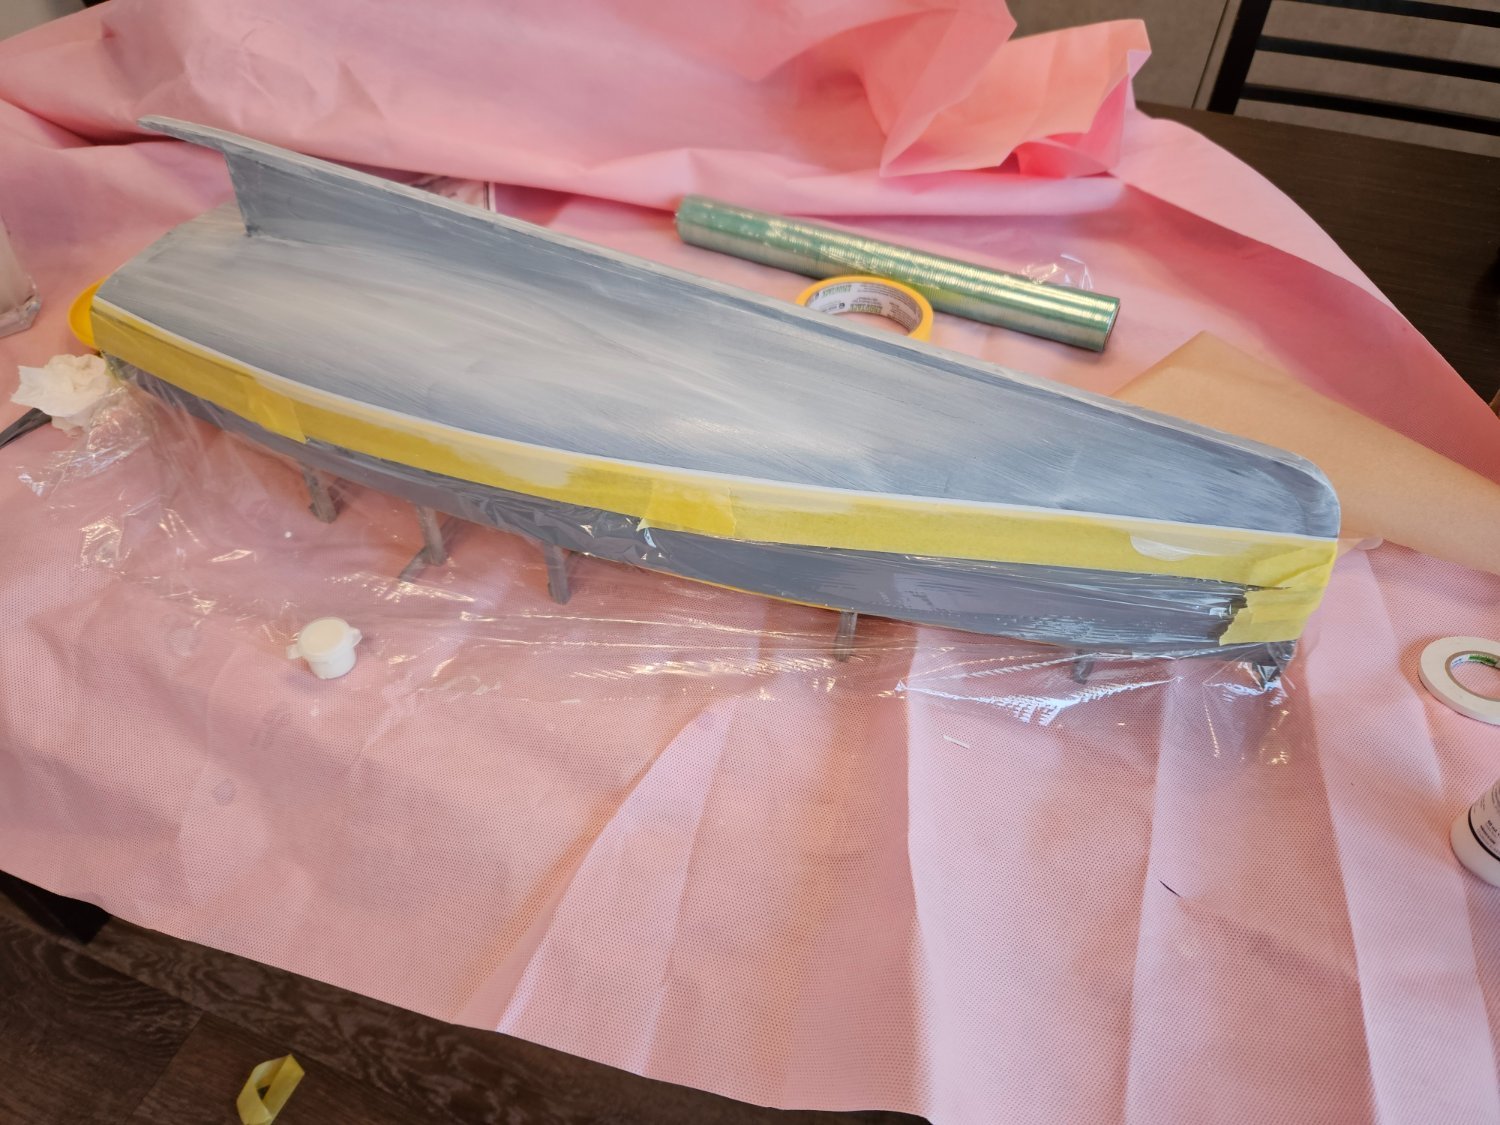
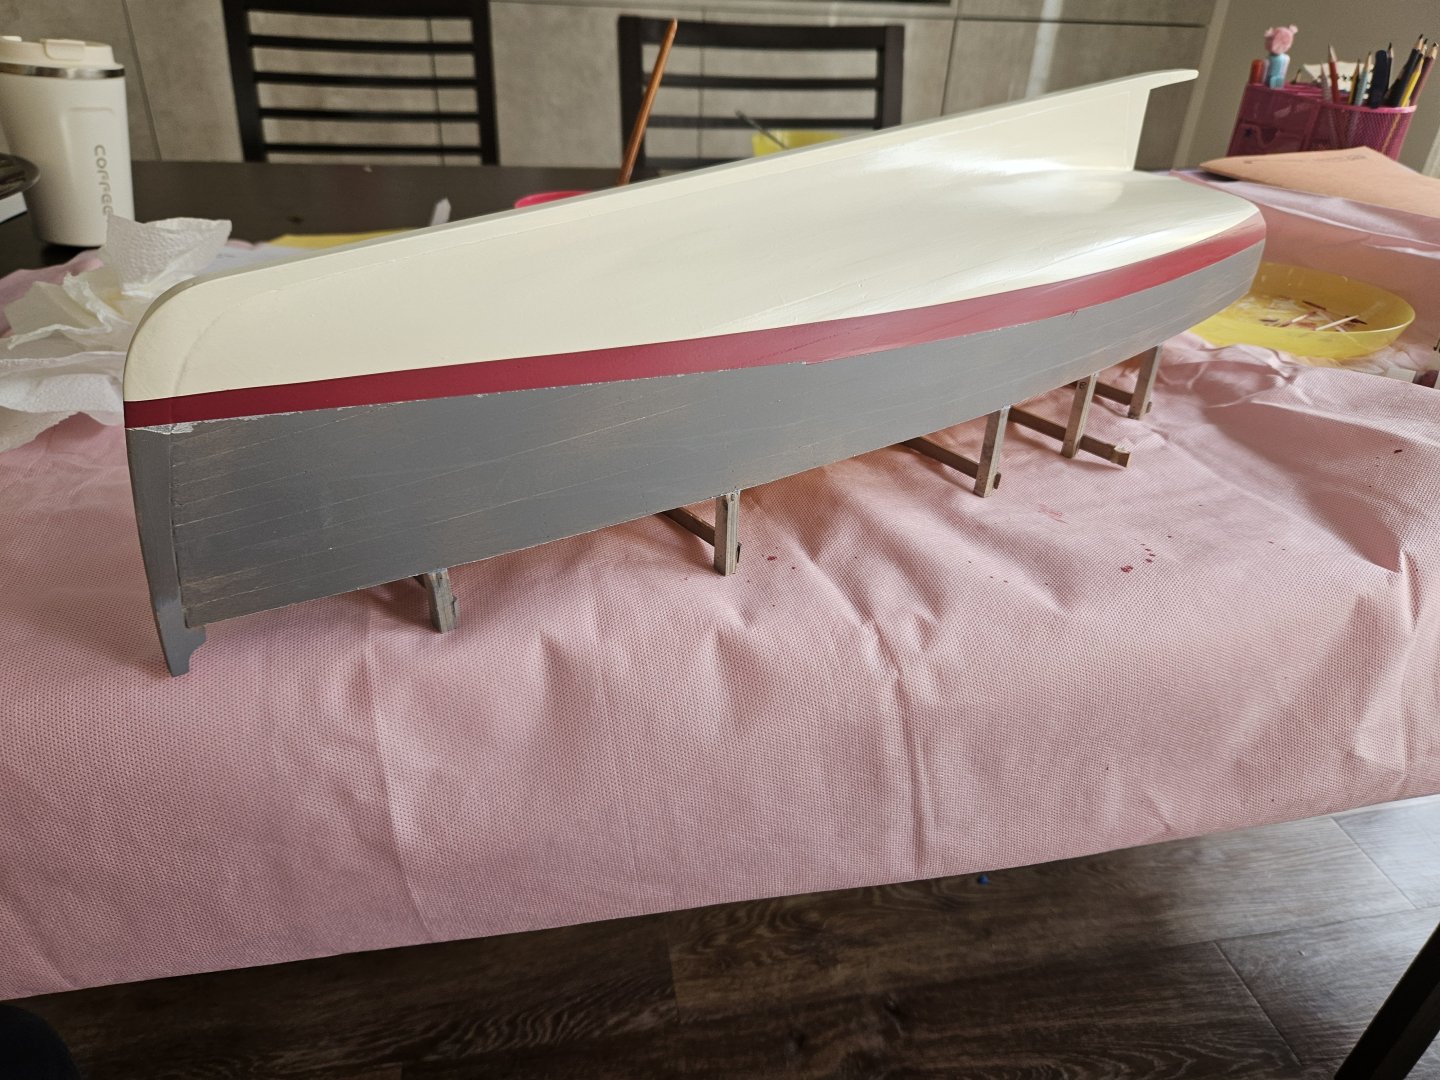
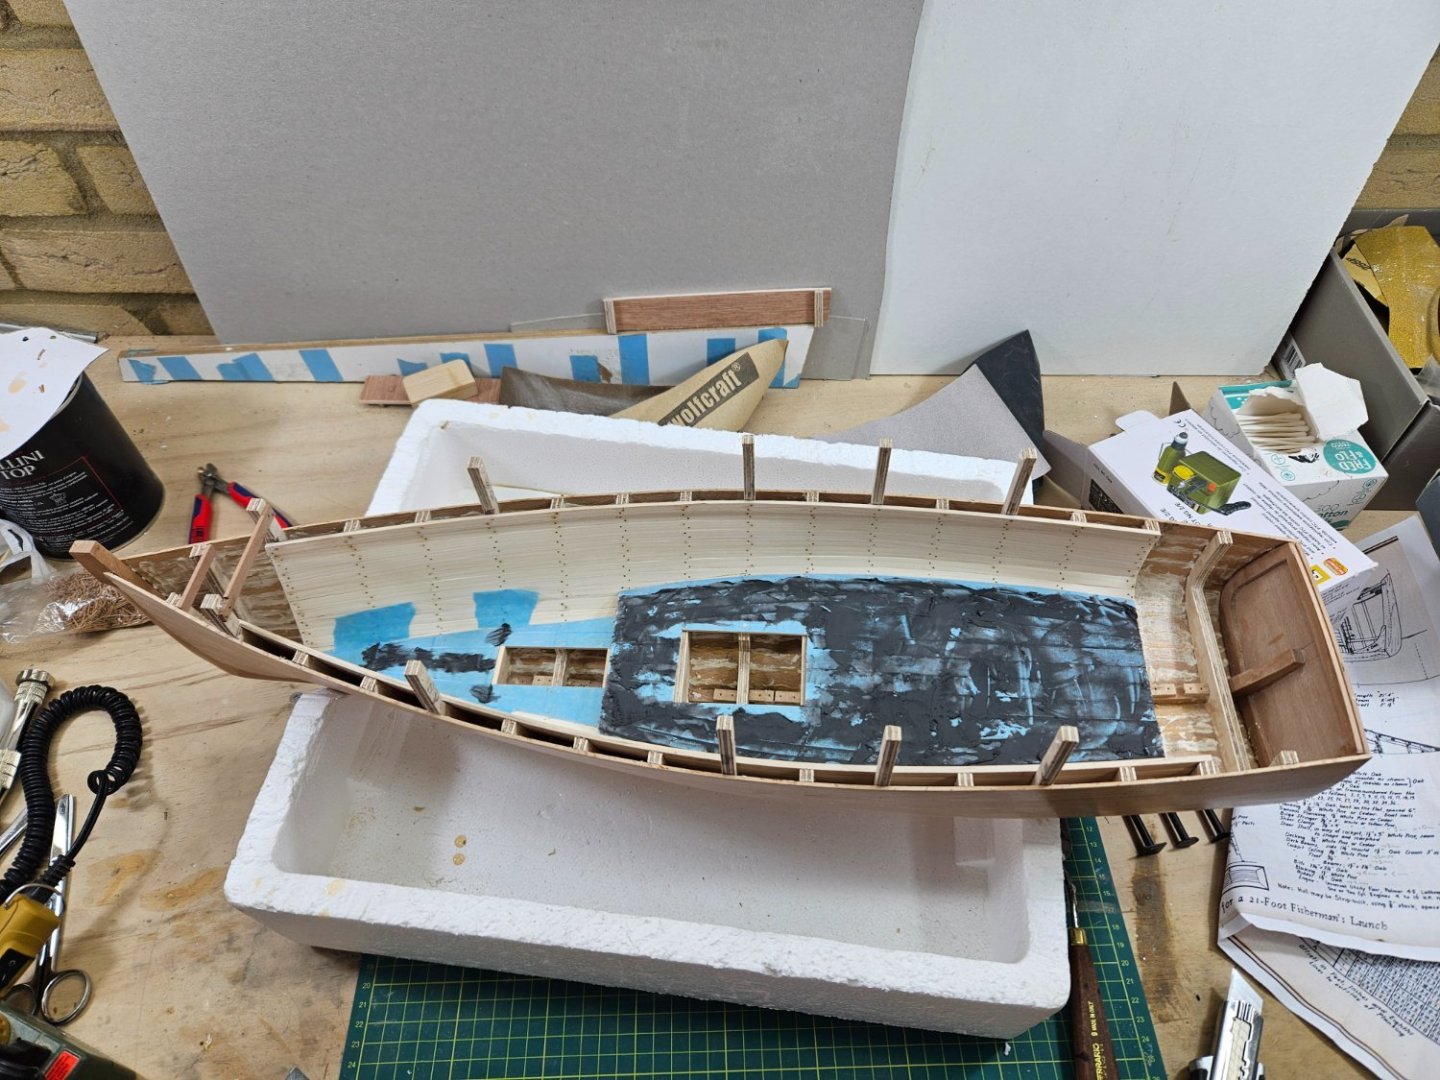
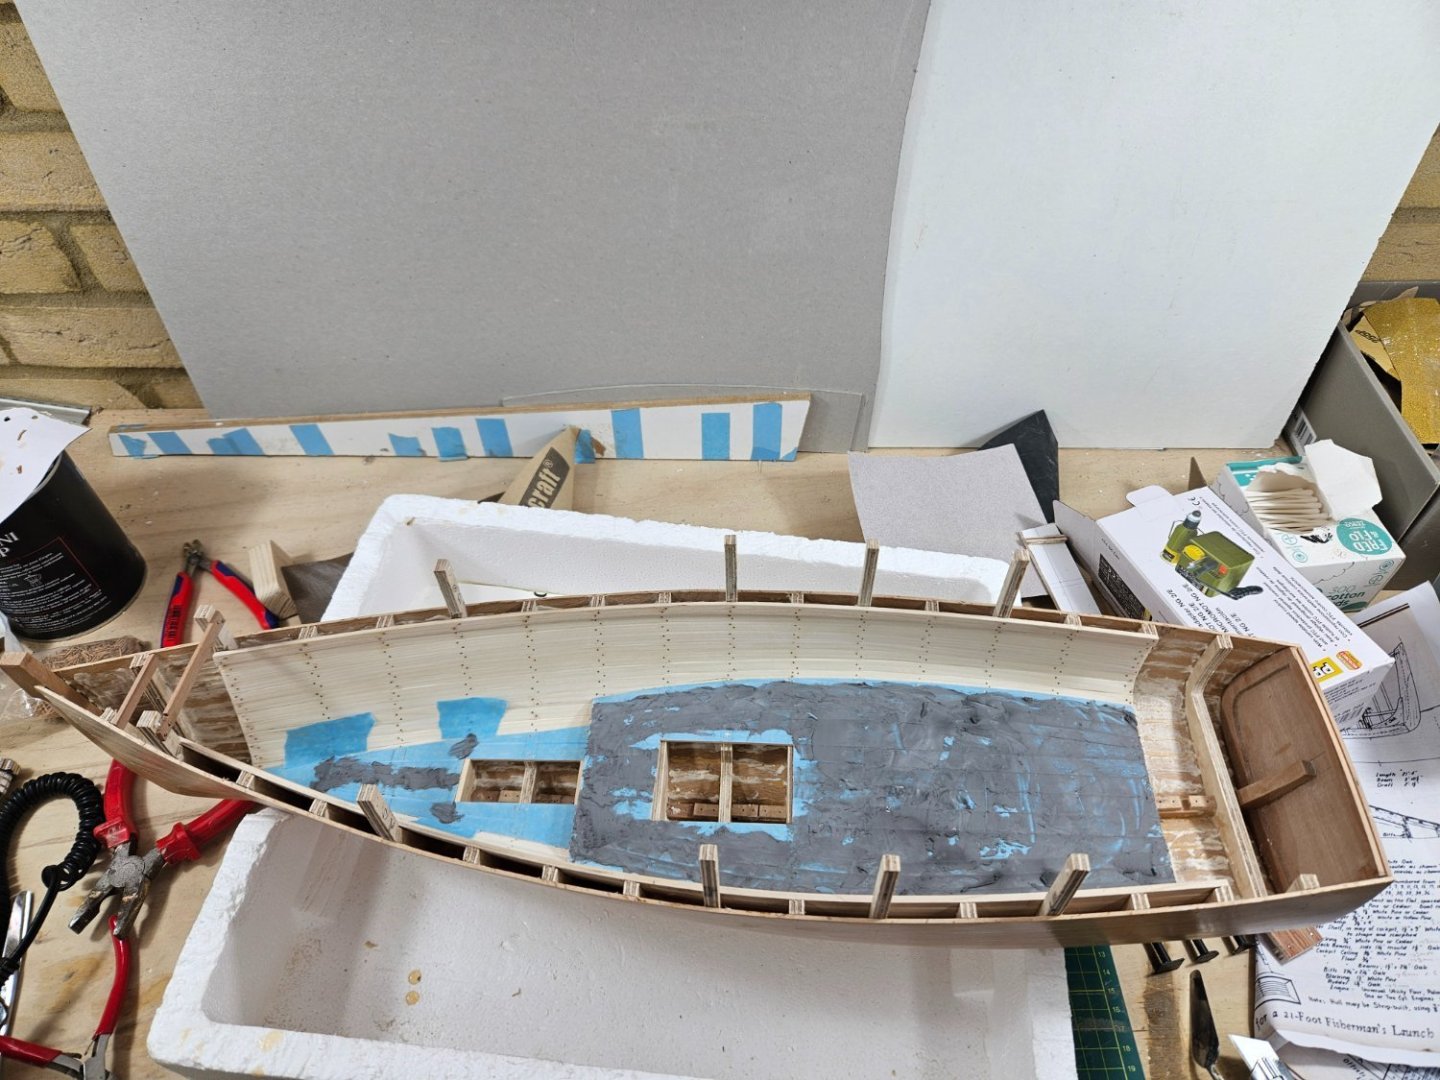
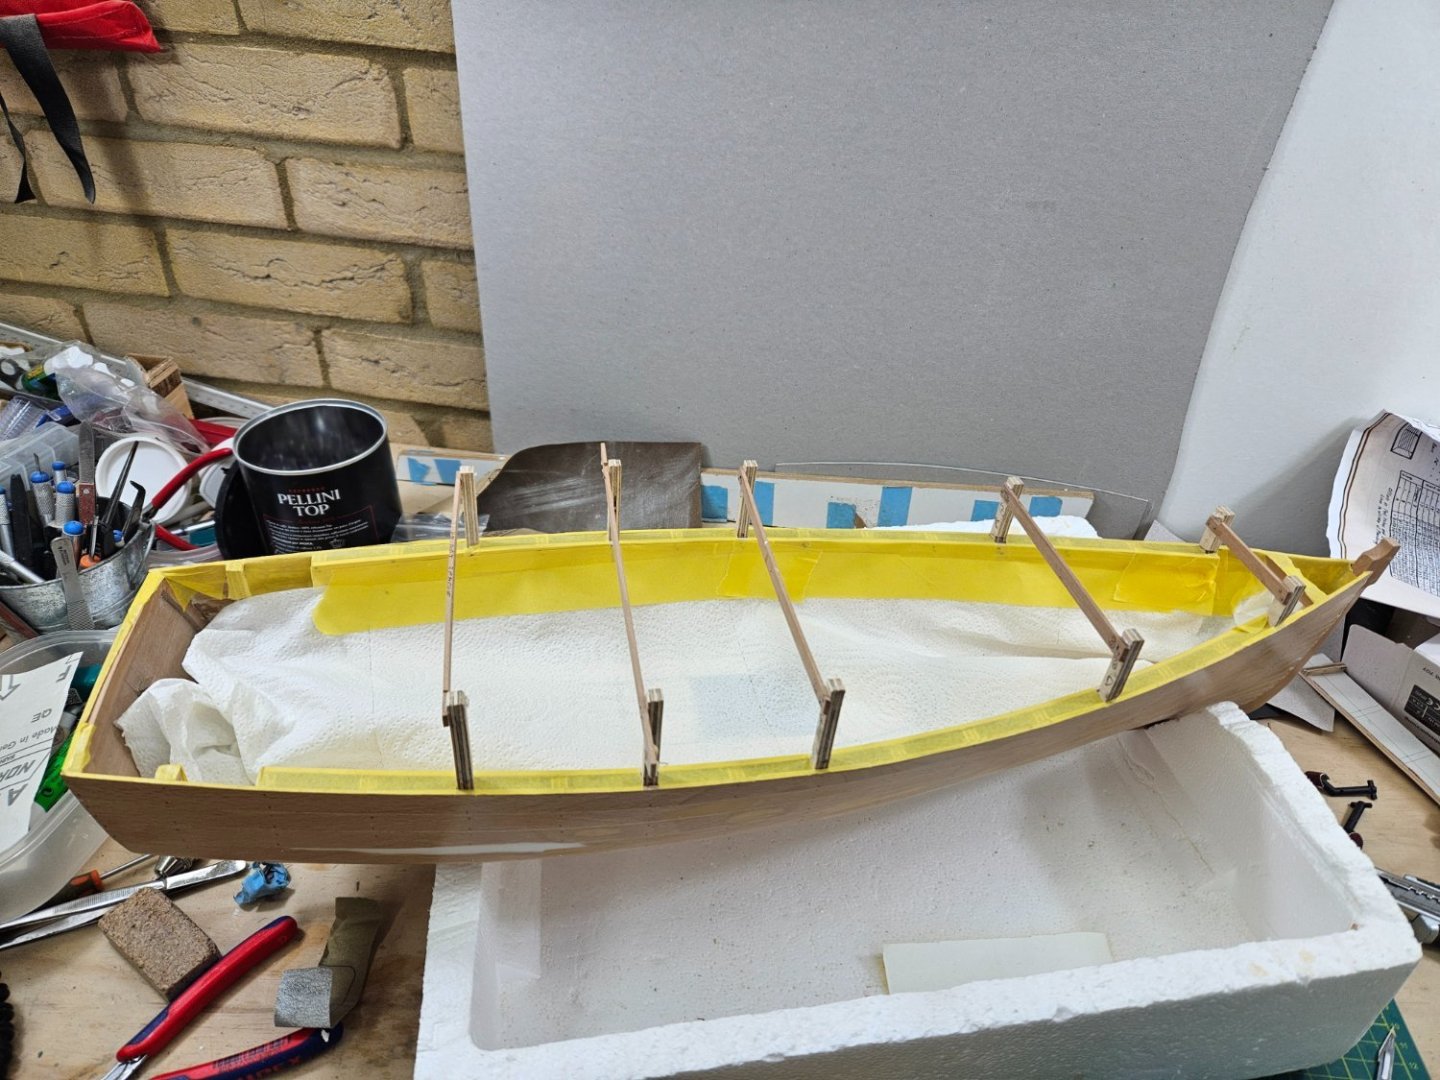
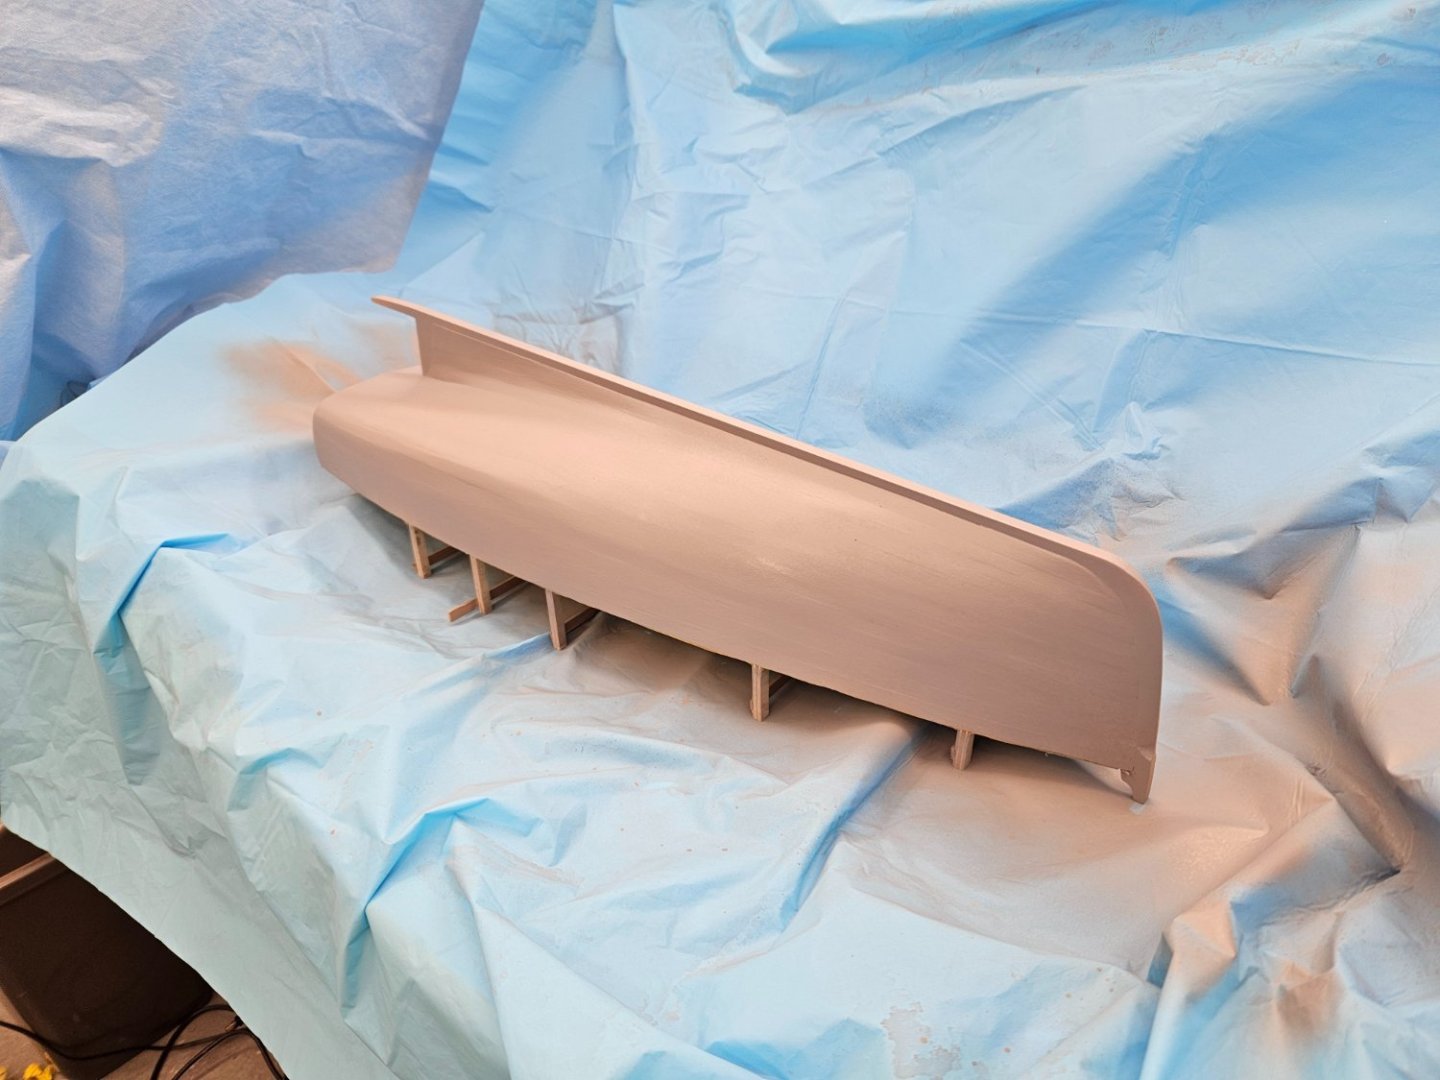
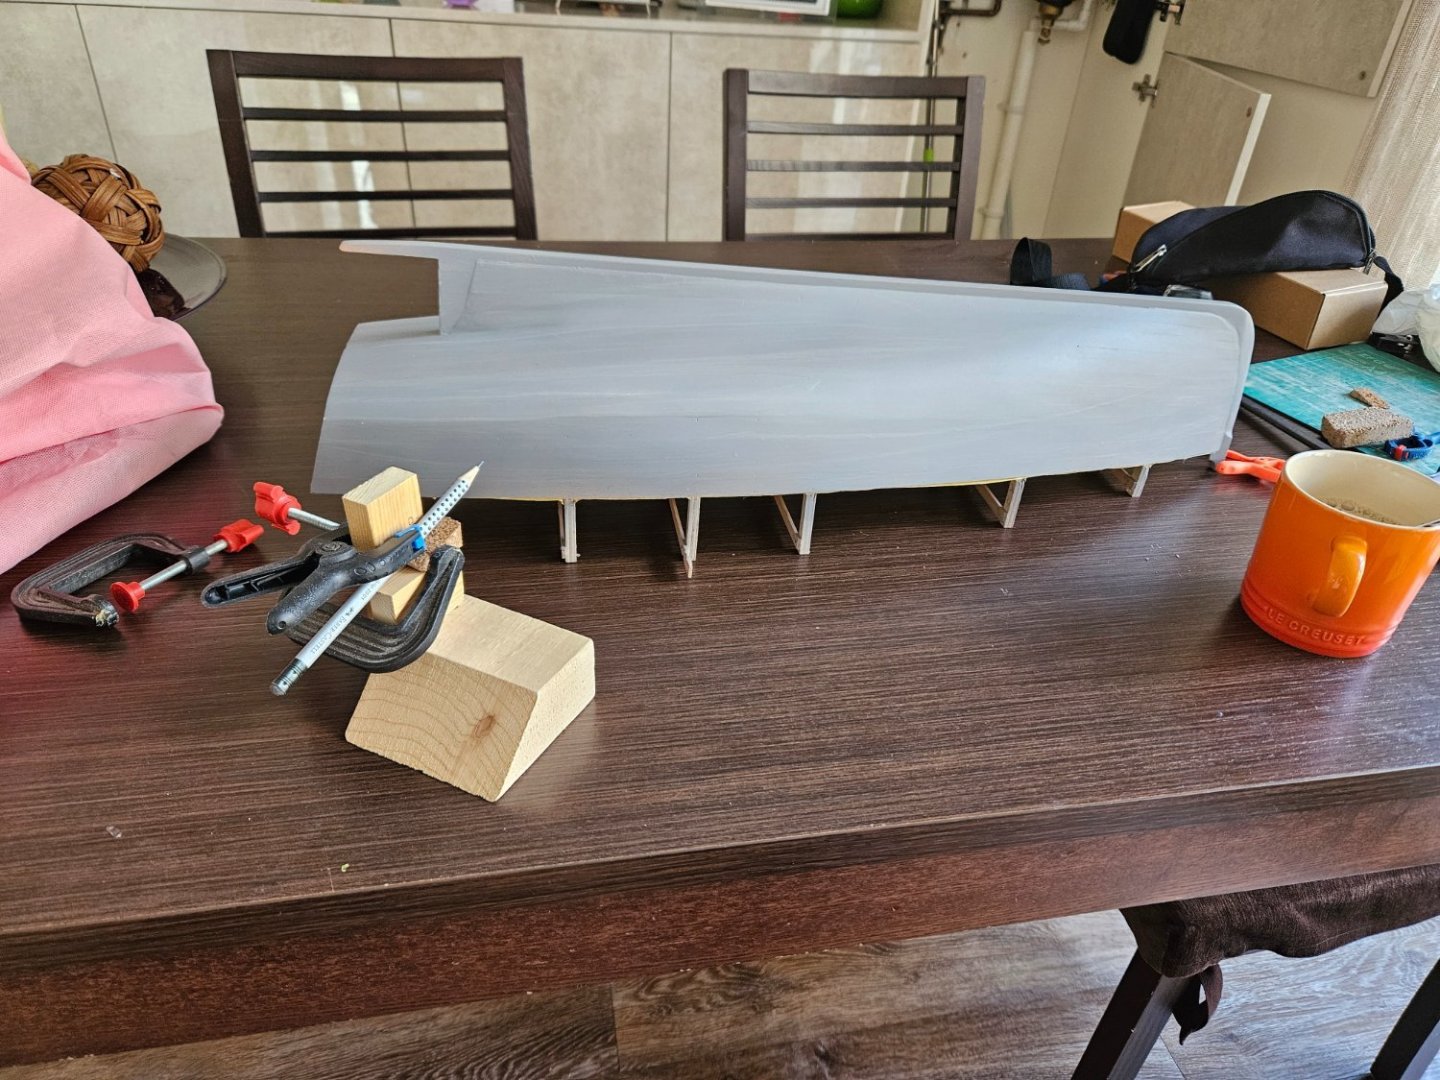
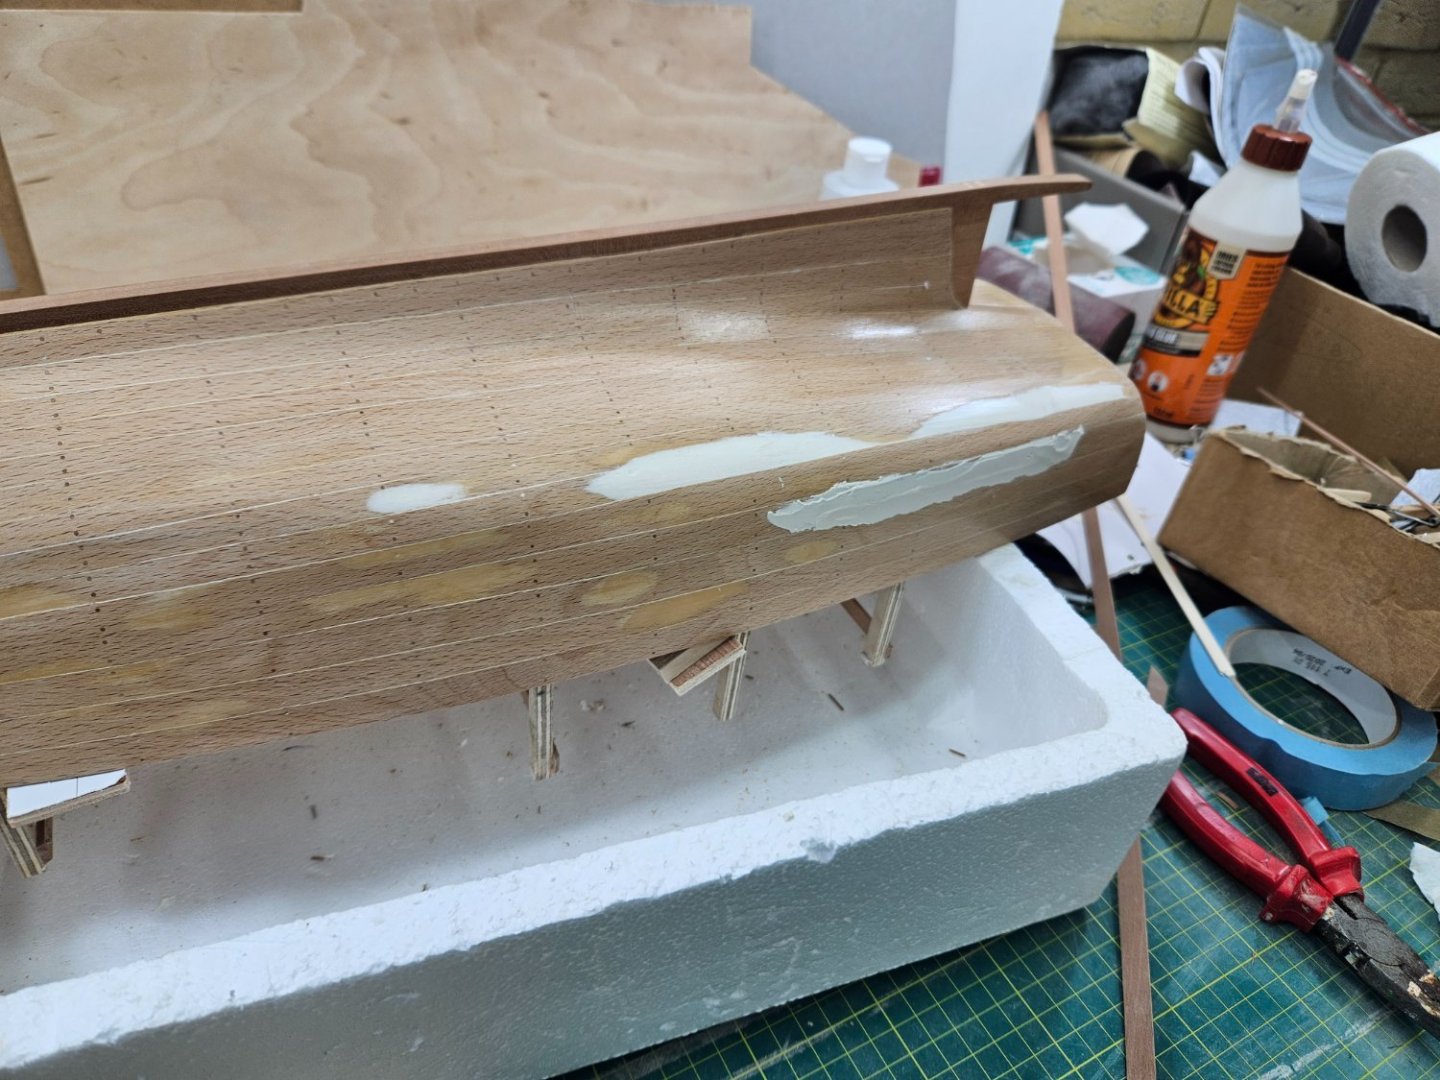
Dear all Paint has been splashed onto wood, so time for another update. Also, as this boat is approaching completion (in my time, this means less than a year), I ve been thinking about the next one. I have some thoughts involving multiple masts, we ll see... In any case, I decided to do some caulking on the deck. I do not think it needs it and almost certainly it is historically inaccurate but this boat from the beginning was about having fun and cutting (some) corners for speed. I ll use Osmo filler mixed with black acrylic paint. This needs Tung oil to shine black but maple does not take well to Tung oil, needs to be sealed first or will come out very blotchy. So floors came out again and were sealed with my favorite Americana Decoart water based sealer (I dislike Shellac) Of course the hull needed some more attention again. The floors were covered with masking tape. Then put back in place, all screws replaced with wood nails, sanded smooth Then the mixture was slapped on! Wait until dry Then sanded off Tape off, Tung oil on - done! It is not perfect by any stretch but it is done! And now it is time to paint the hull! Lots of masking done (which immediately failed) Then I sprayed some Humbrol grey primer. The photo really did not get the color well! Then the waterline was marked and the hull masked further I used grey primer because I intended to use Humbrol enamels. At the last moment I decided to use acrylics, completely different colors. This is why enamels are dead. So first coat of Valejo Ivory is brushed on. It looks dreadful: And yes as expected, the hull is moving again! And after 5 more coats, still looks terrible! It will get better. Maybe I should have used enamels! I am almost certain the waterline will mess up the whole paint job. I will try and tuck the masking tape down well but I am sure the red paint will find a way underneath. We ll see Till next time, take care all Vaddoc


-
Lots and lots of info on MSW, some dedicated threads as well, a wealth of info. Test on scrap wood, not the model! I would however suggest to buy good brushes straight away - System 3 if still around are great Modern paints are so good that with a bit of practice and attention you ll have excellent results Vaddoc
-
@allanyed This is it pretty much Allan. Actually the hole left when the screw is removed is smaller and can even be filled with a smaller 0.7 mm wood nail dipped in PVA (or copper or brass wire dipped in CA which is a much faster process).
-
In my experience, there is a world of difference between cheap and higher end CA glue. An issue to consider with any glue is the degree of contact between the mating surfaces. PVA needs excellent contact and pressure, not always possible with planks. CA just a bit of contact as it is incredibly strong. Thickened epoxy will bridge any gap but is very messy. Expanding glues like the amber Gorilla one are even messier. I would not trust contact cement for this task. Hide glue I have no experience with. If I was gluing planks to frames I d probably go for CA. Have debonder at hand though to detach your finger from your eyelid!
-
I use 1 mm screws which I then replace with wooden nails. In the past I ve used brass wire dipped in CA glue. All planks in all of my models are fastened this way - no plank is glued. Once I thought of threading brass wire and using it without glue but the amount of work needed would be far too huge.
-
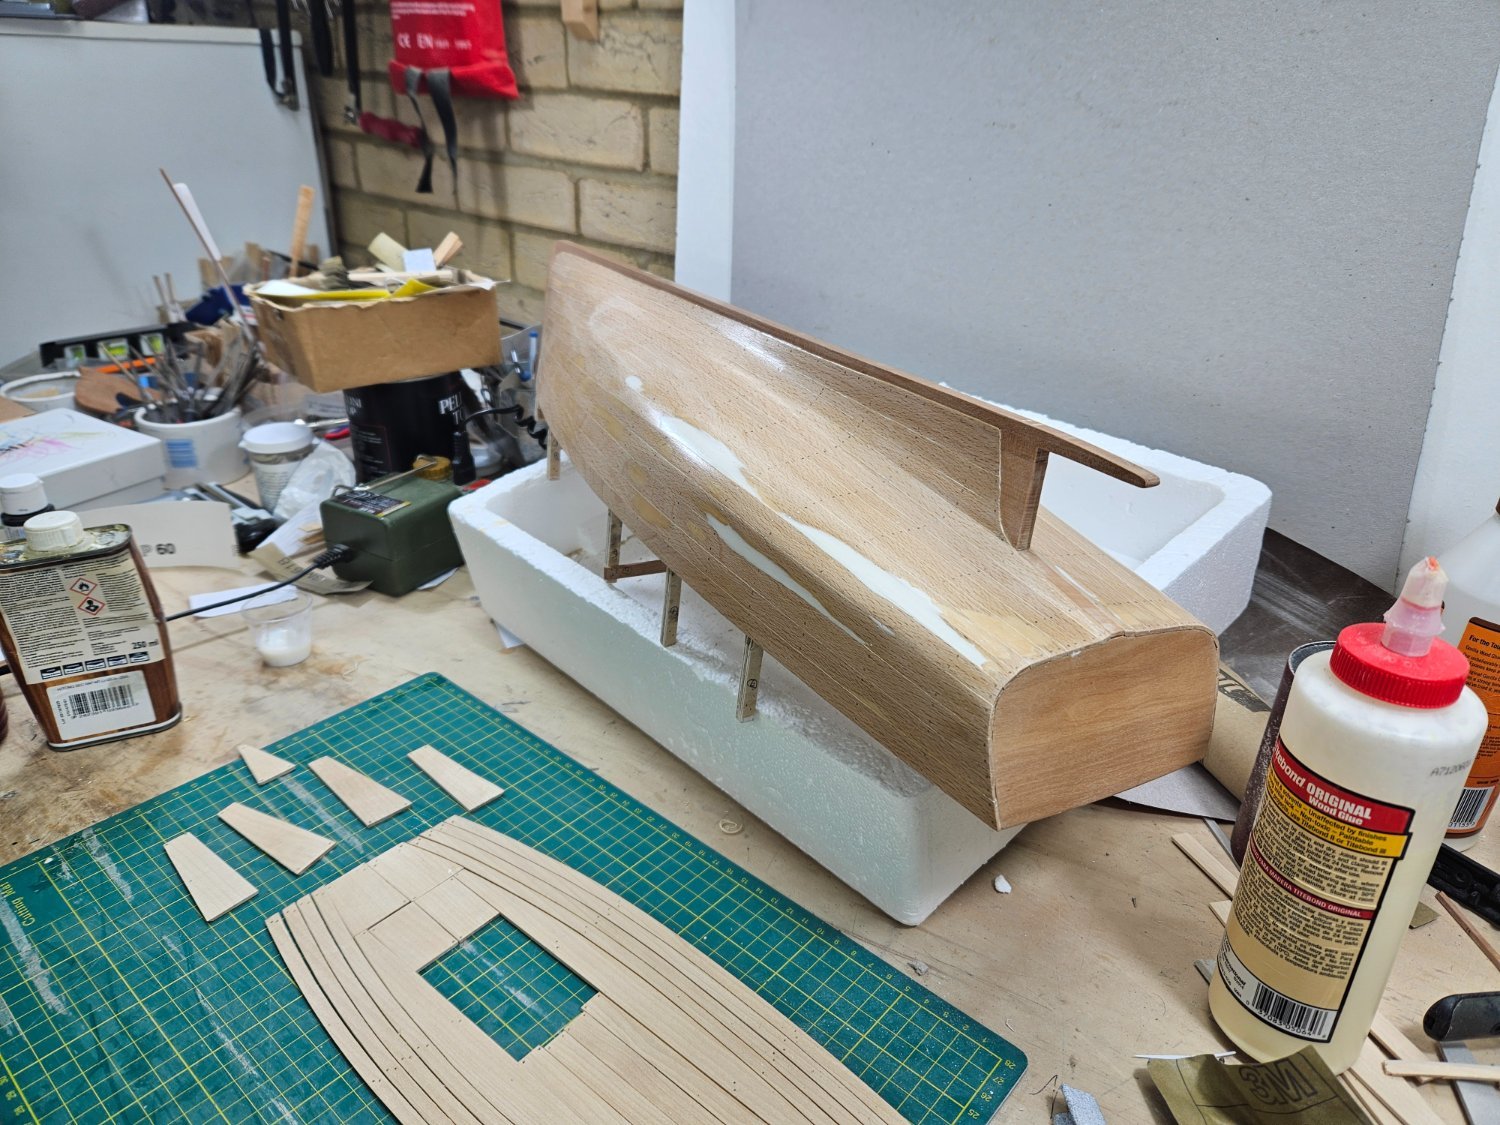
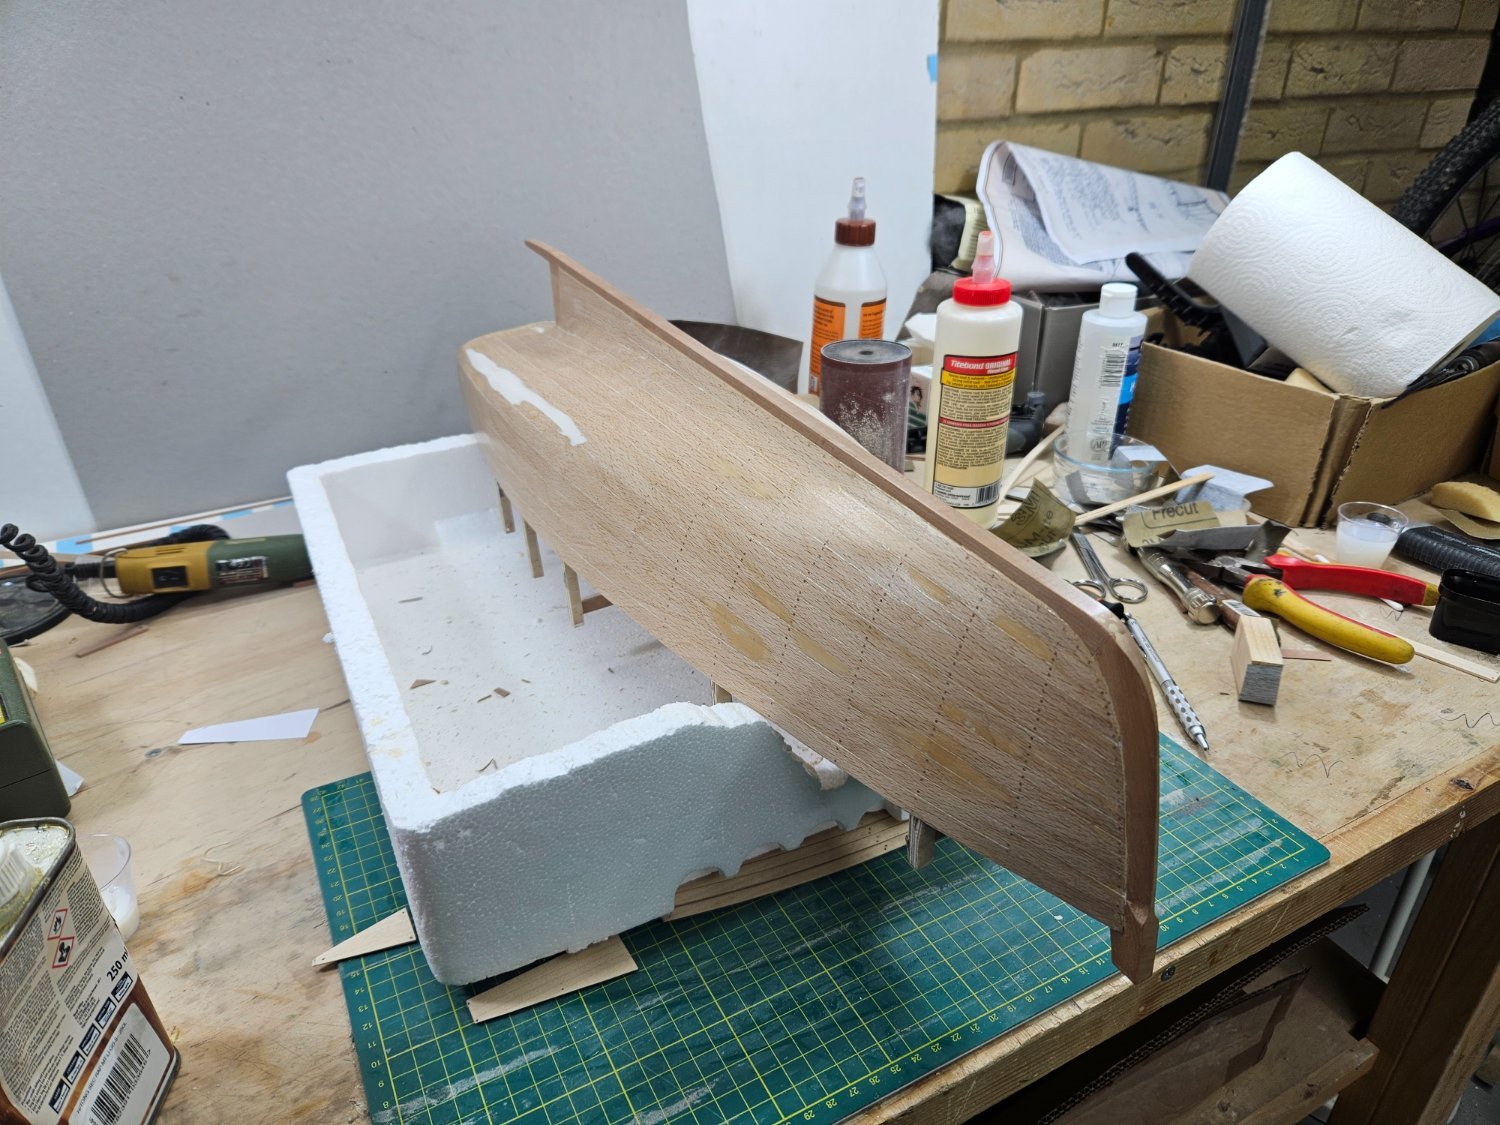
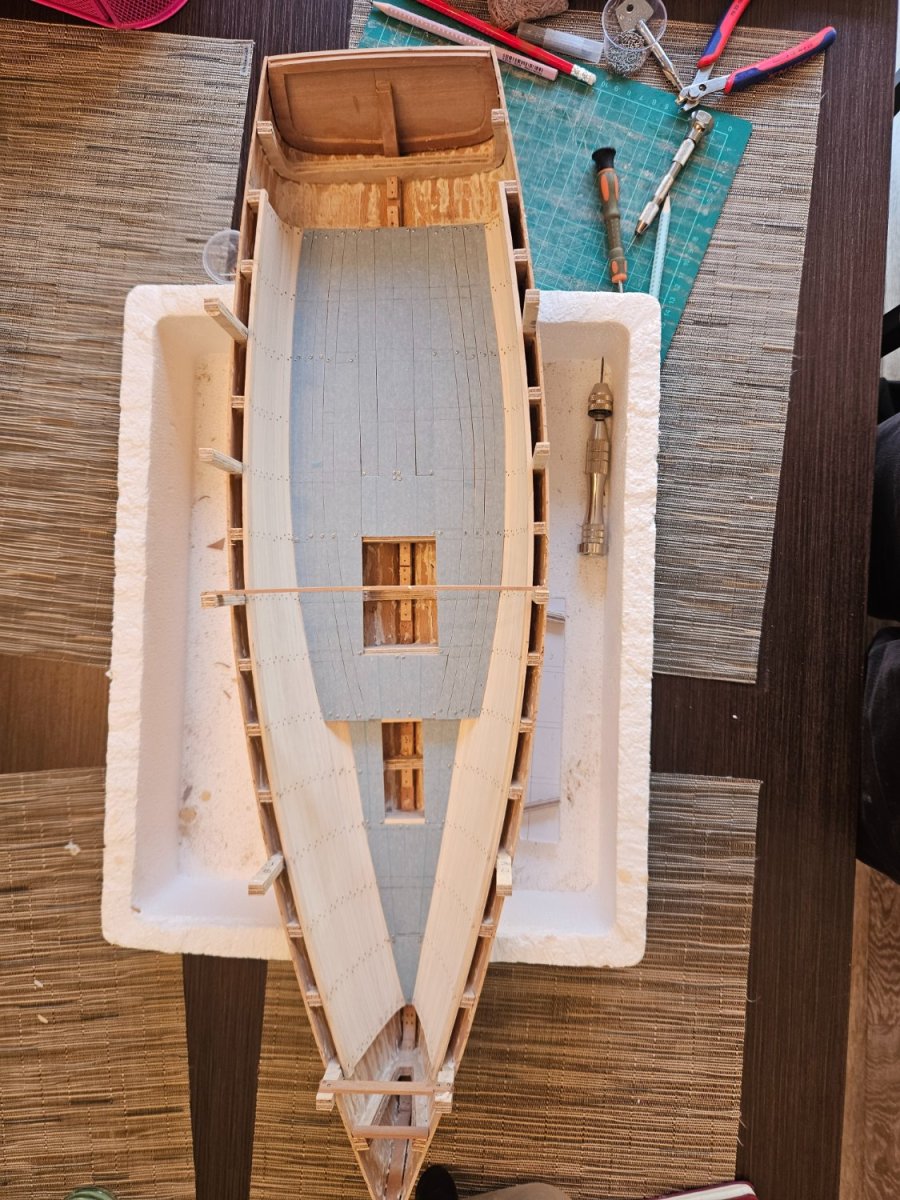
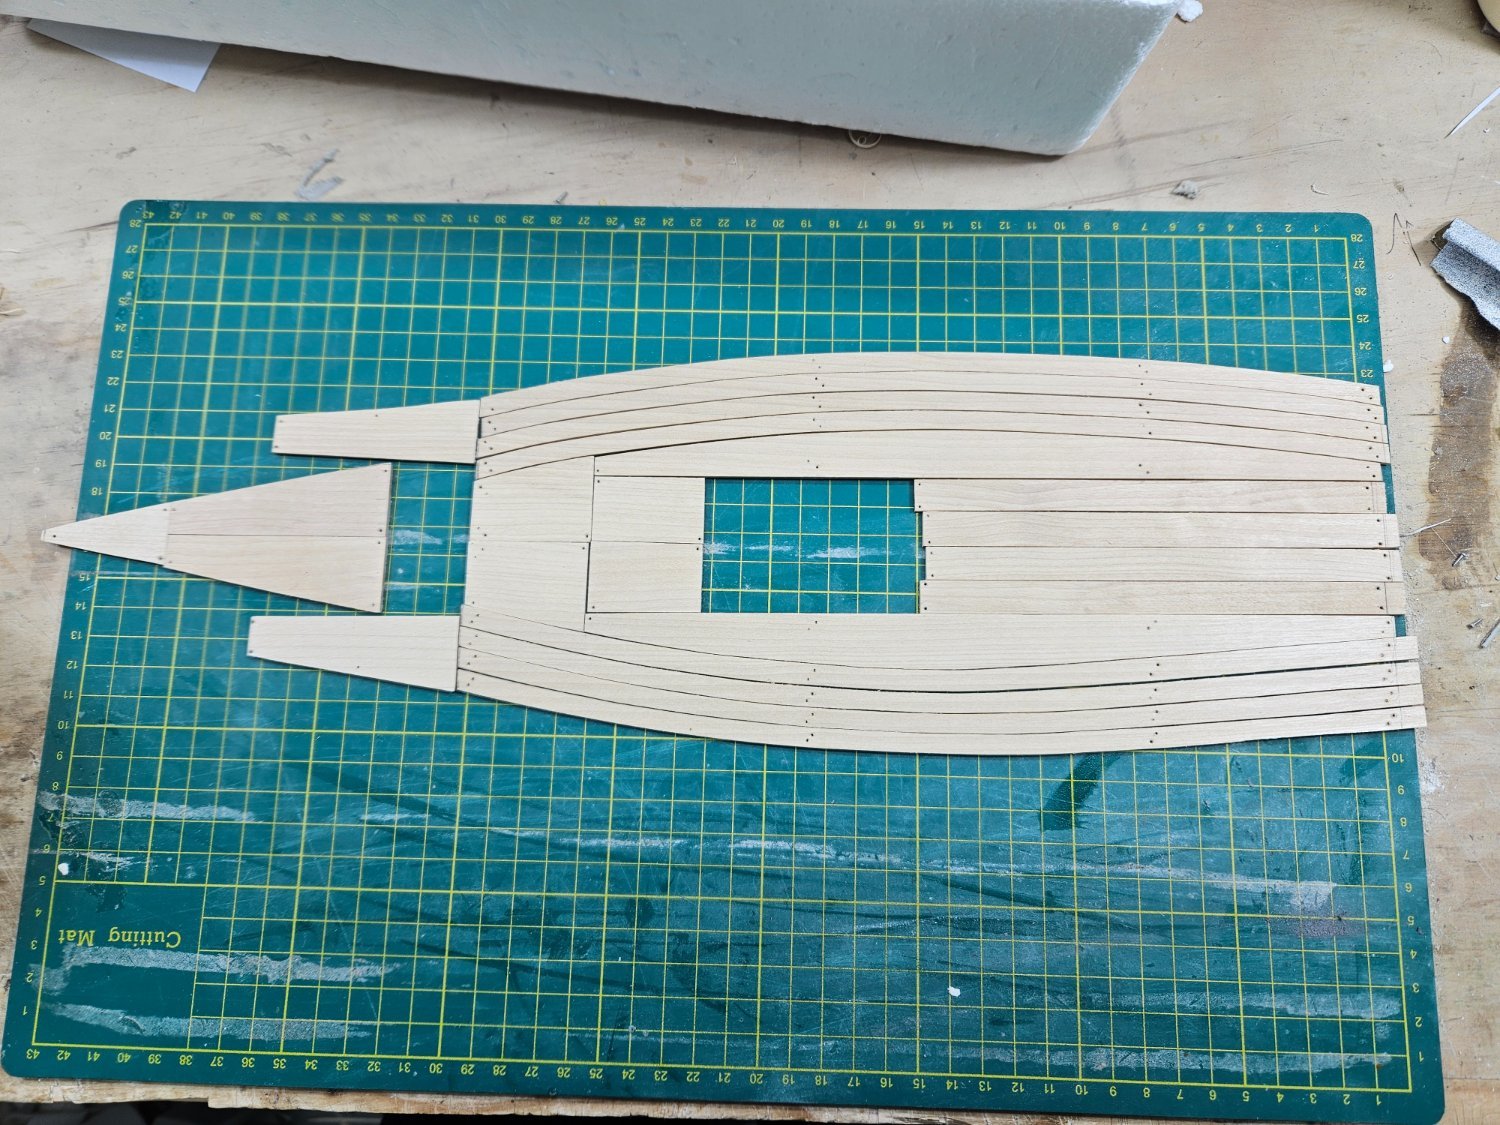
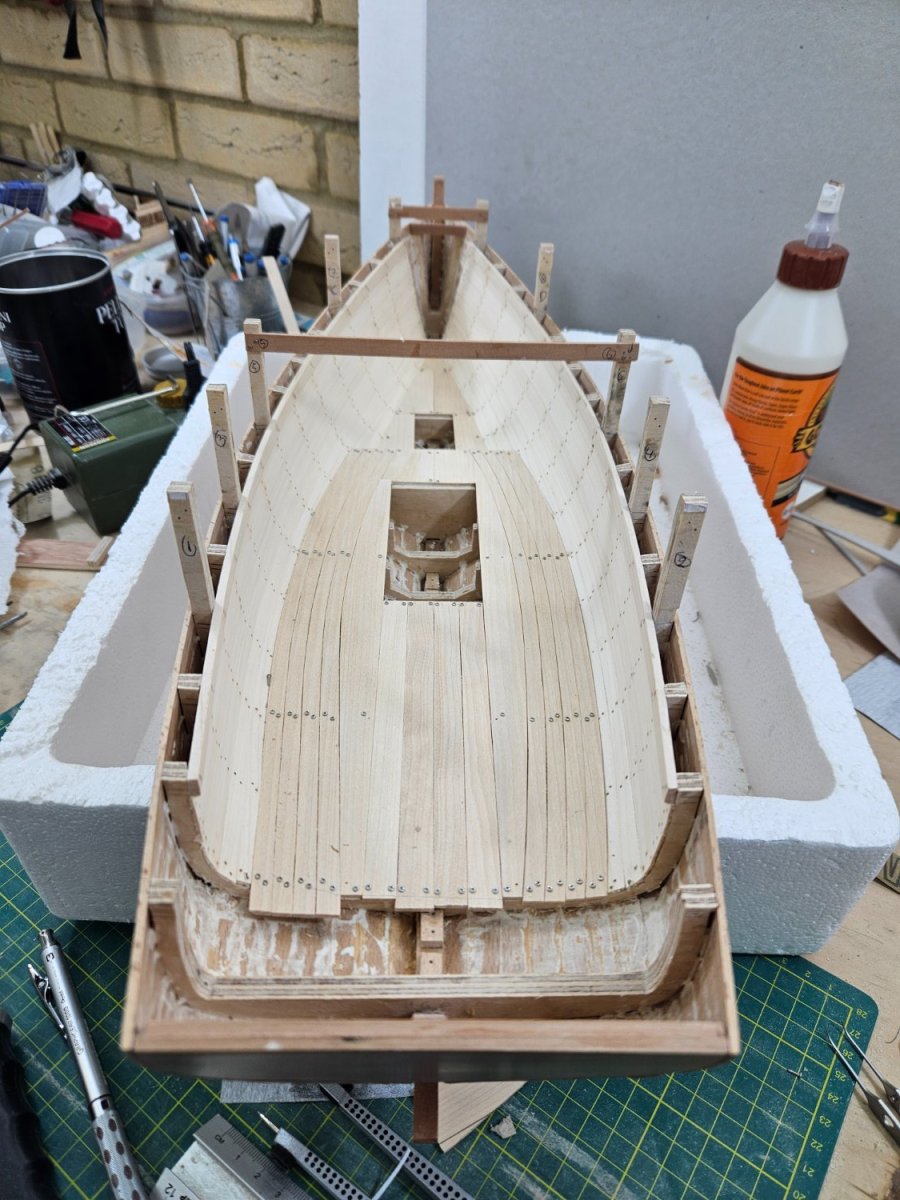
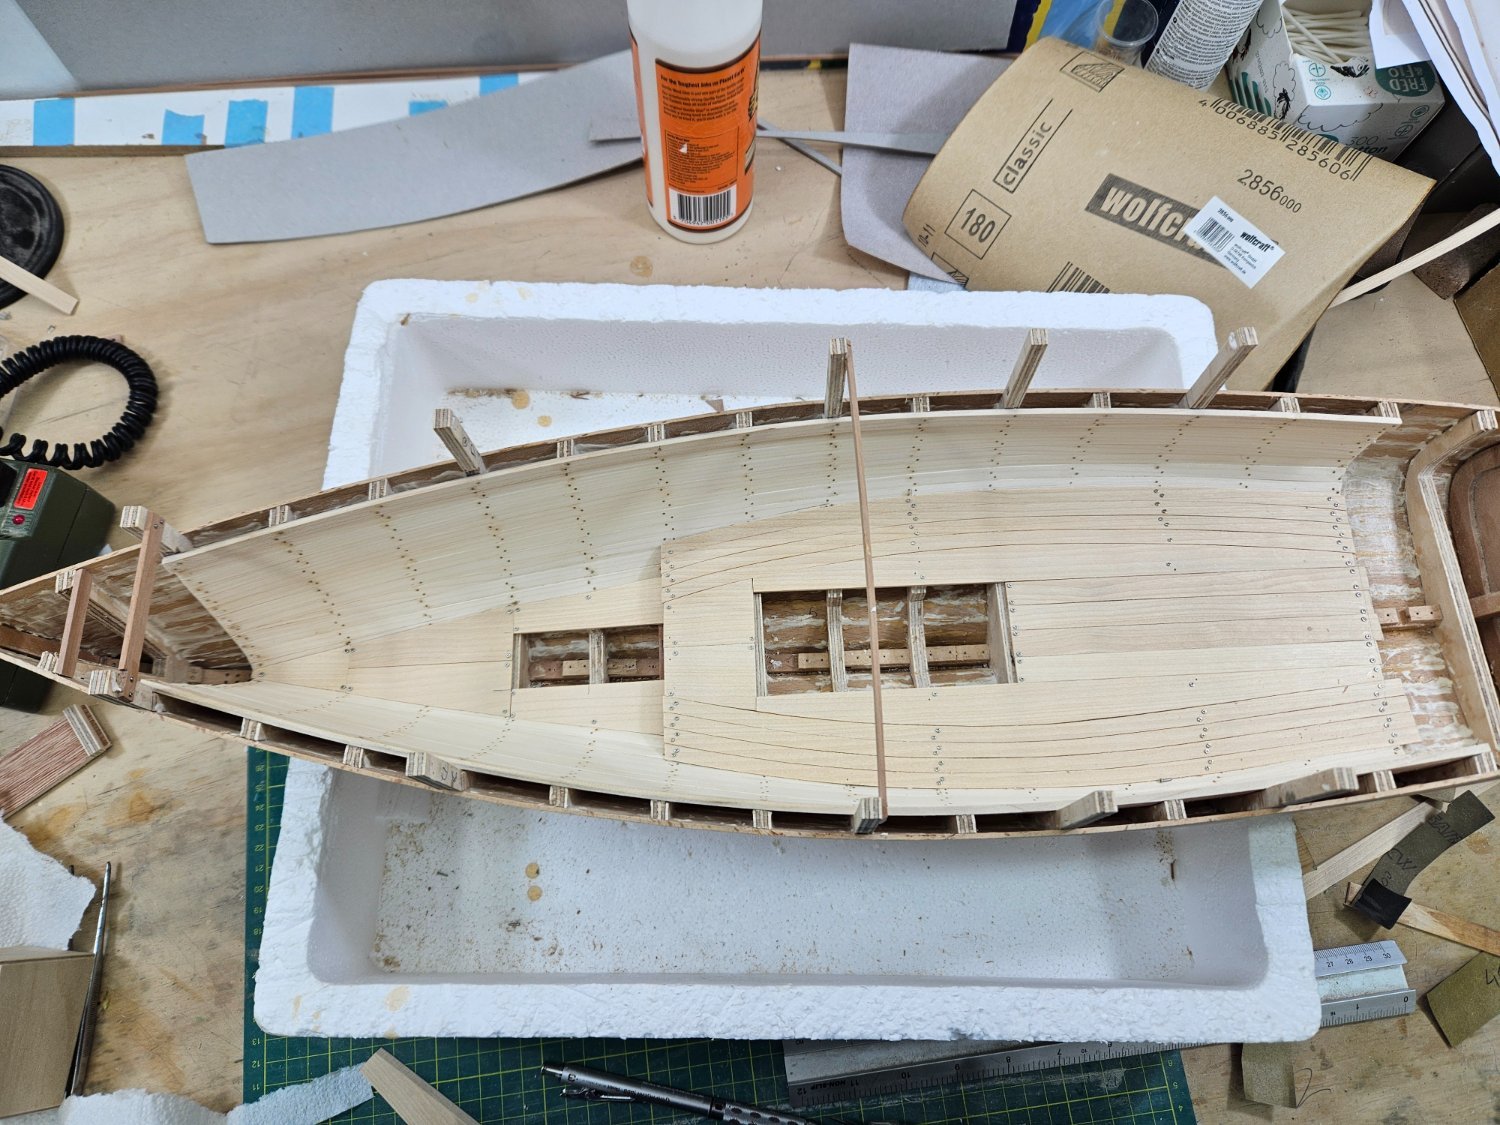
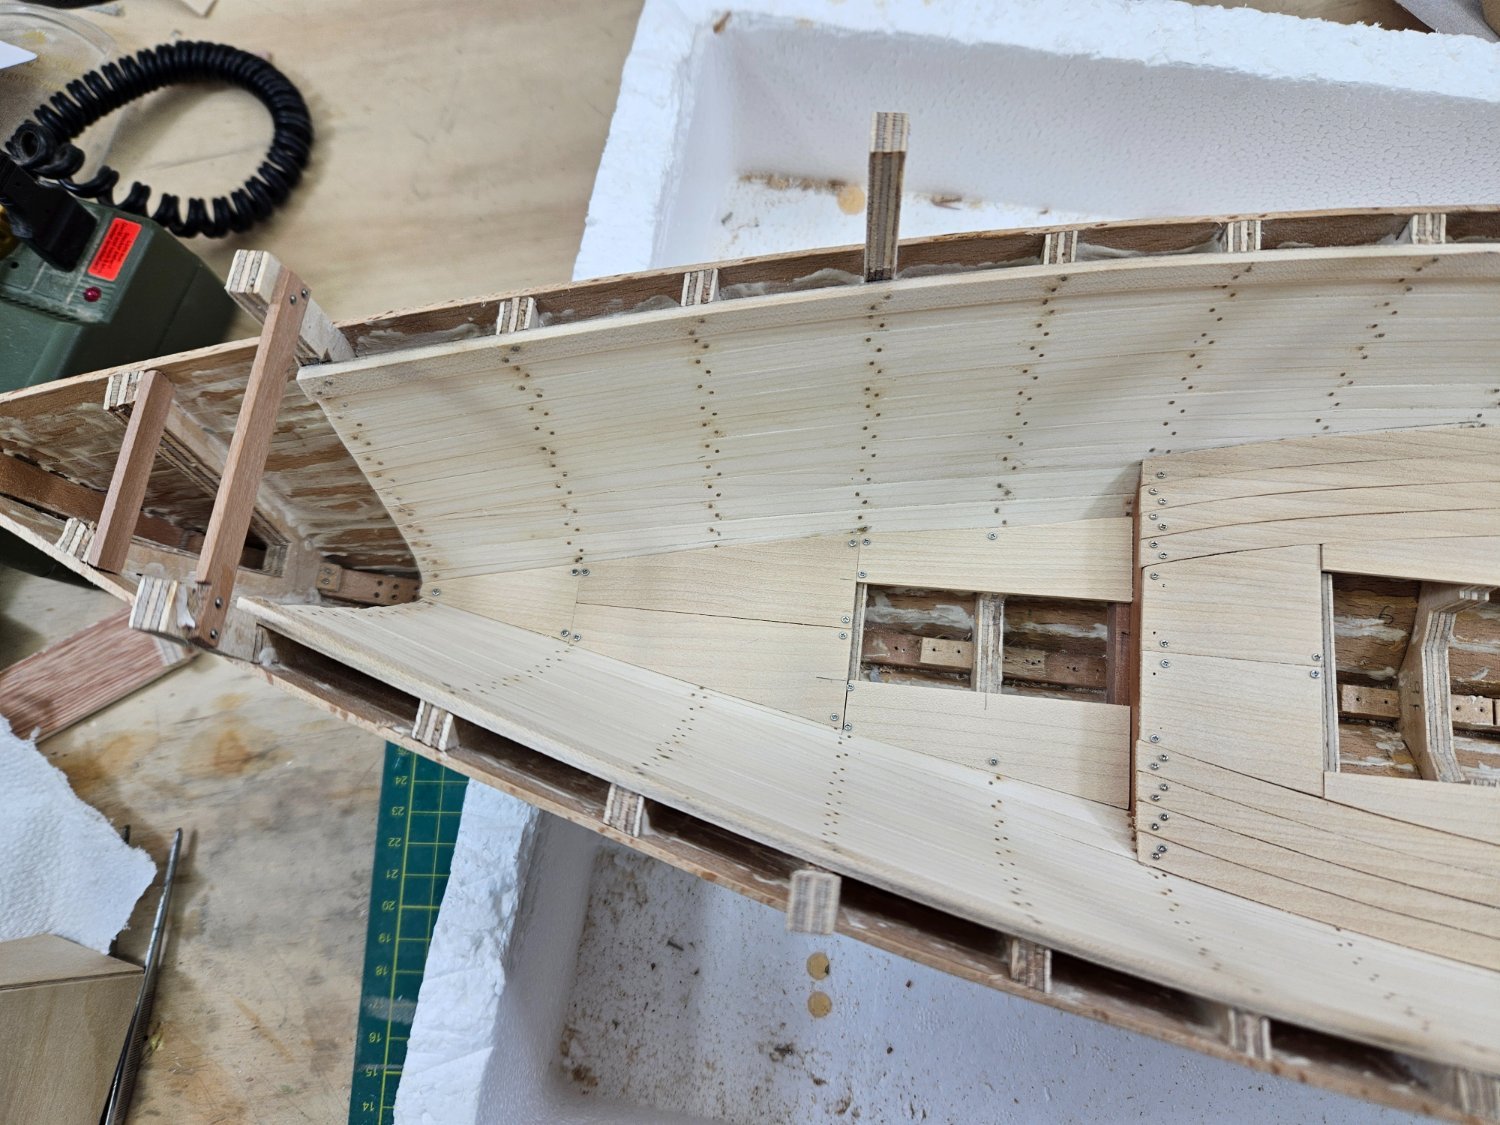
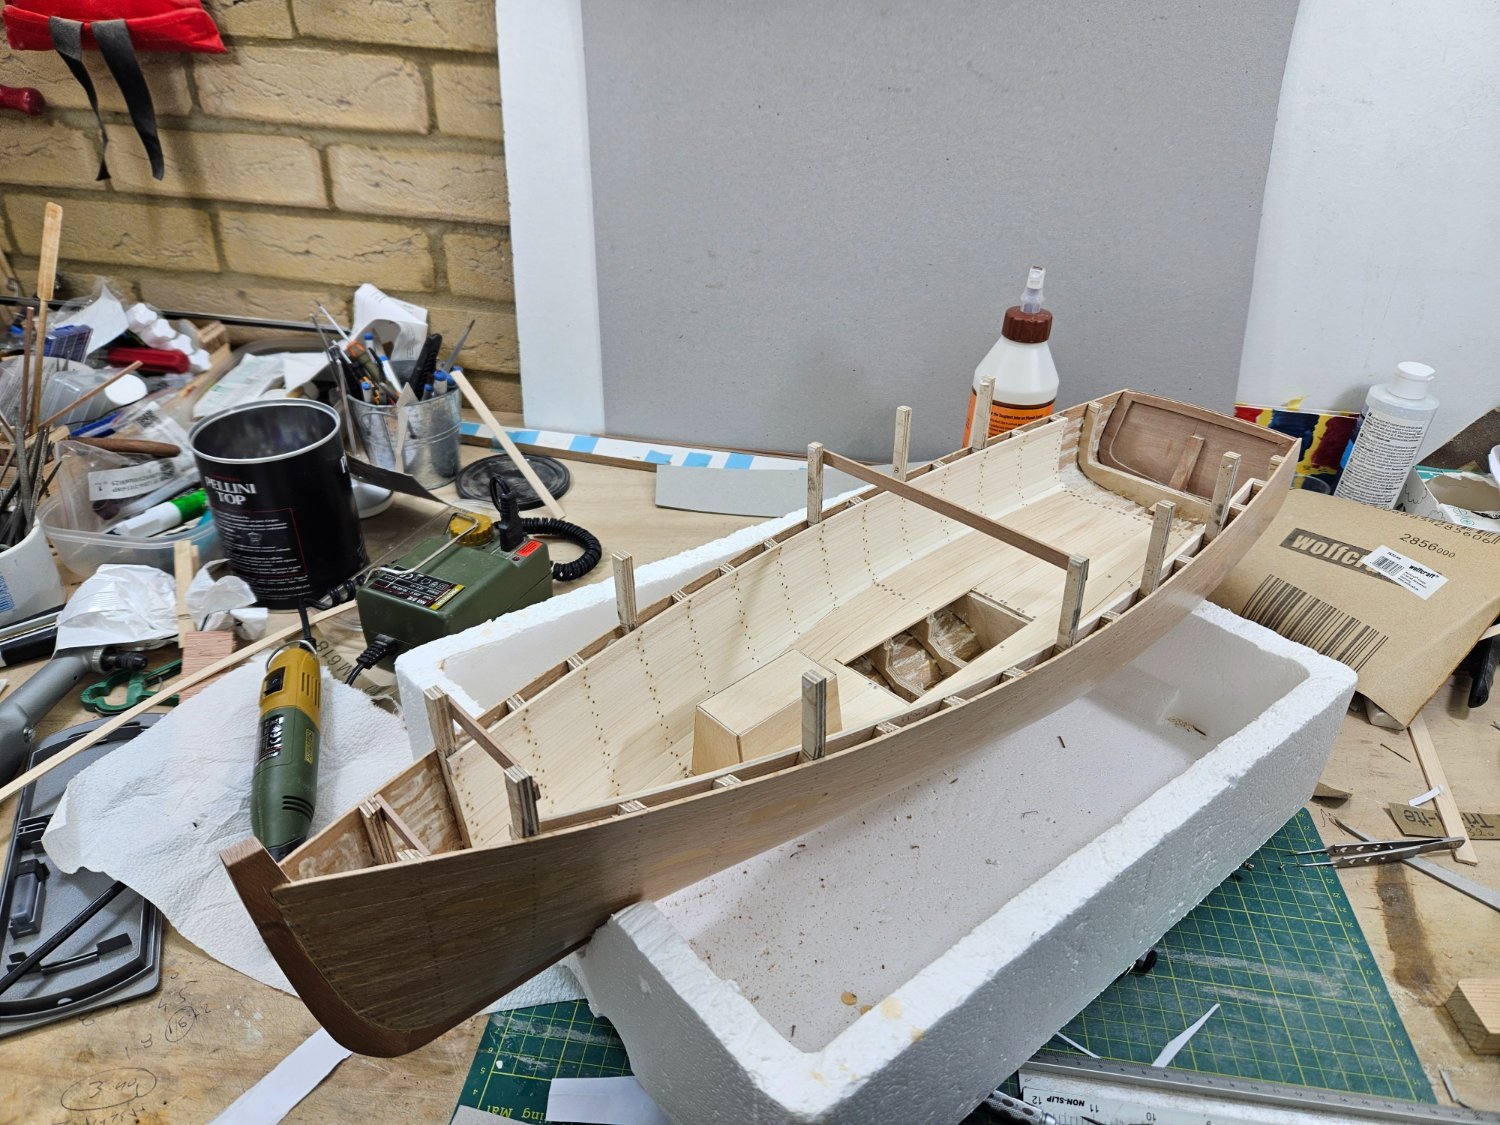
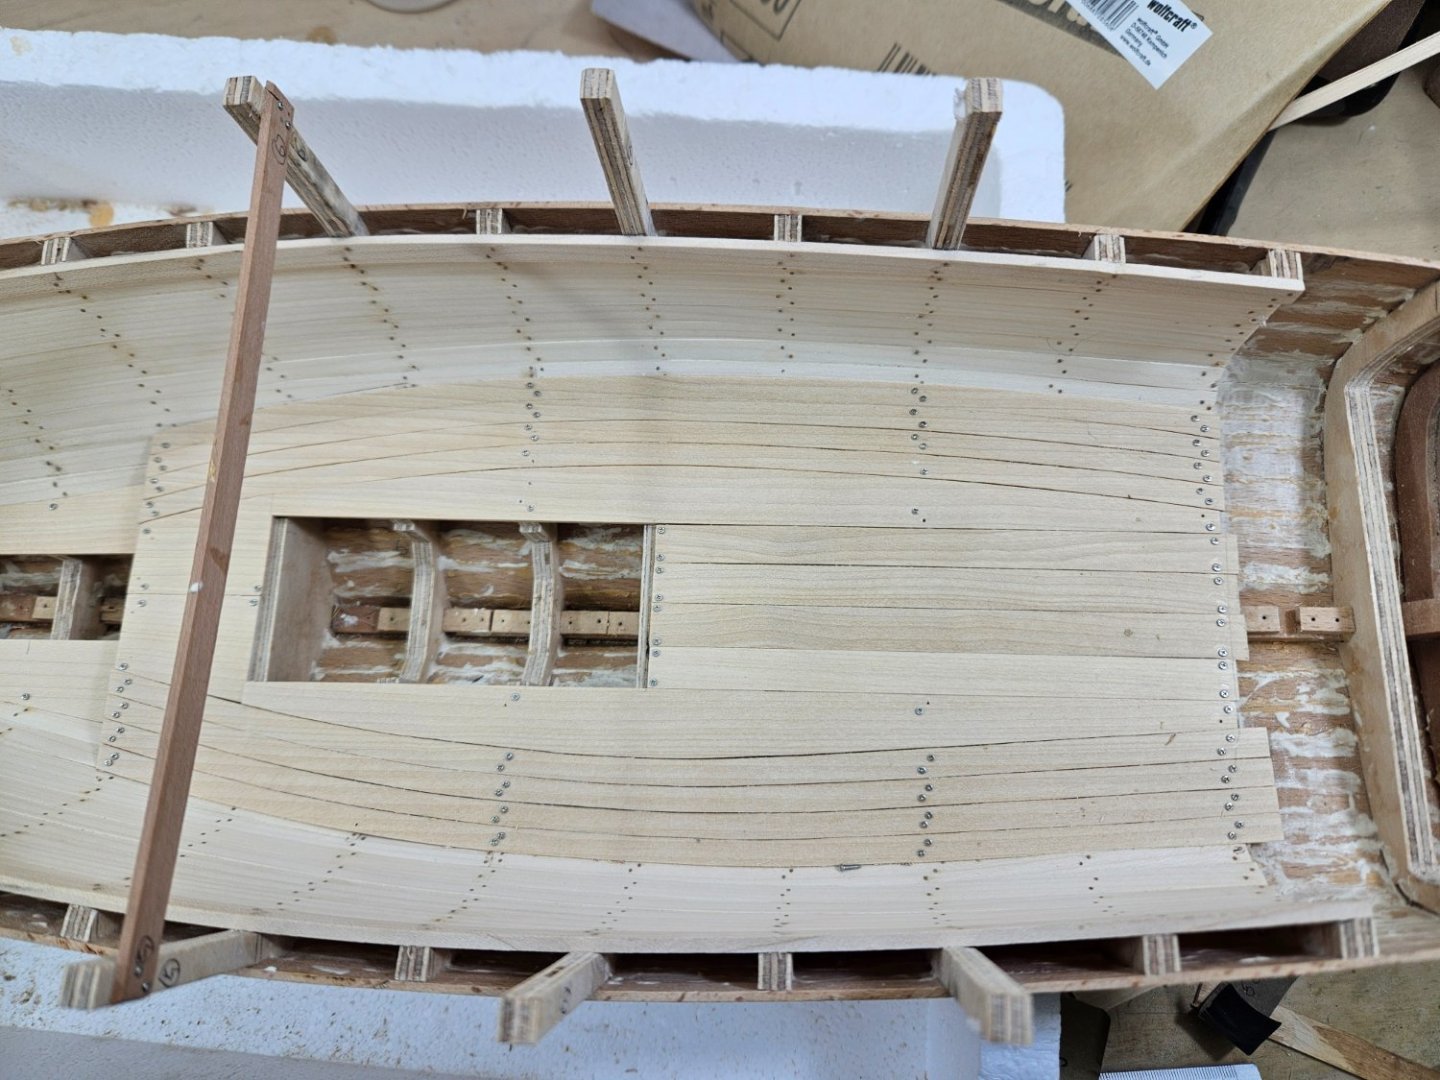
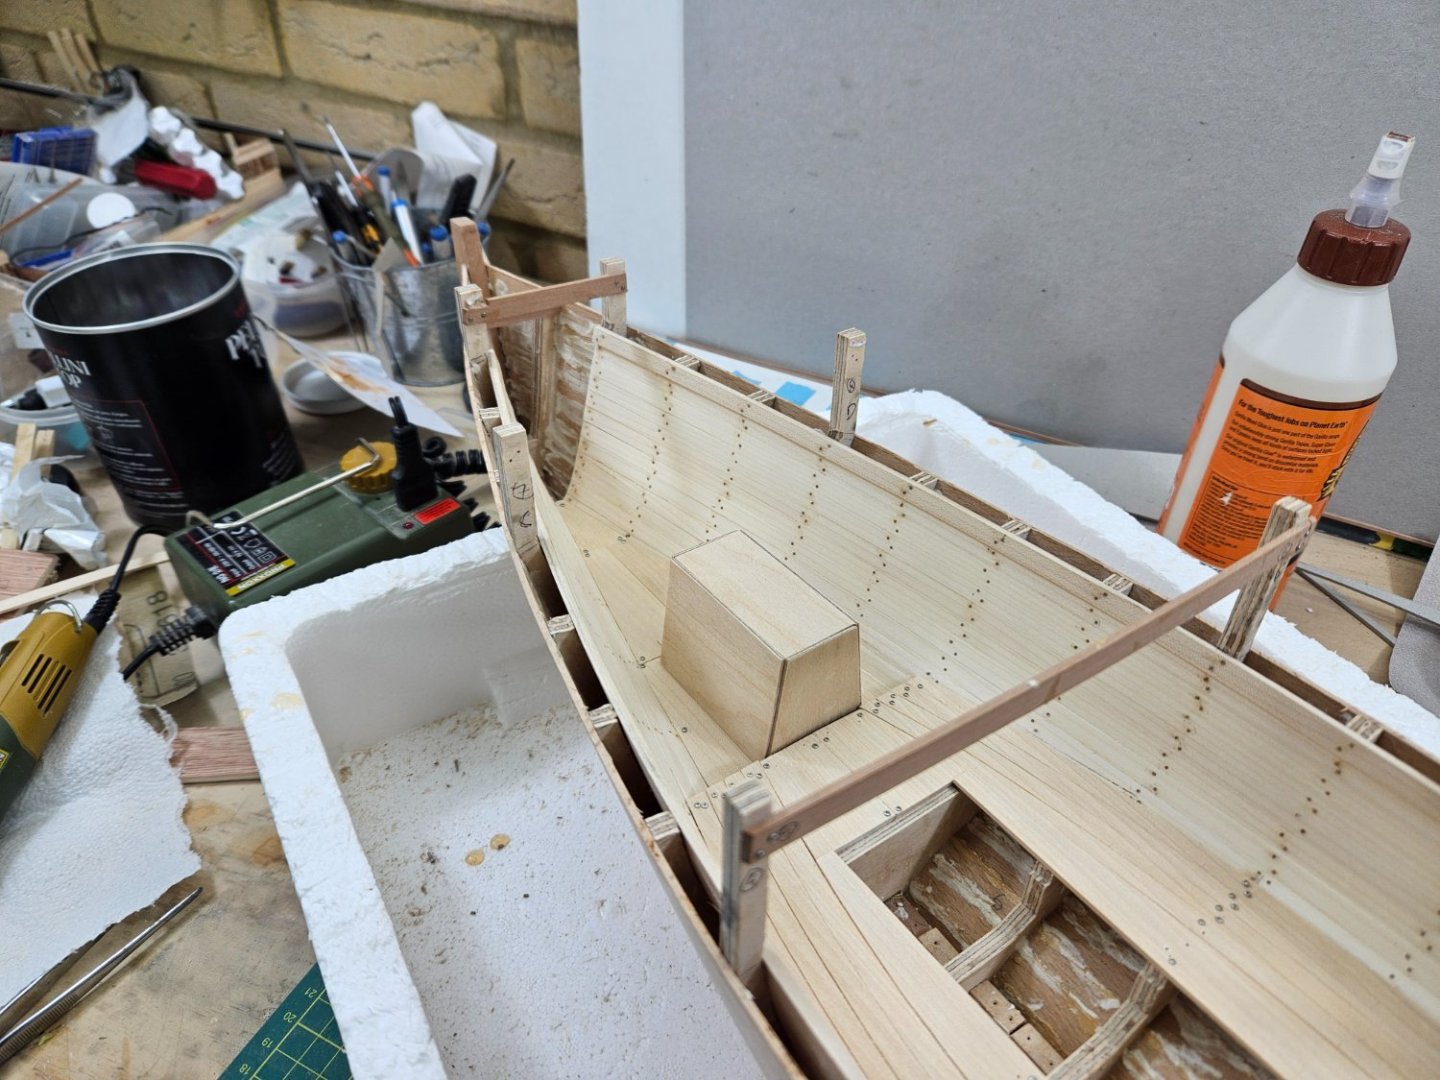
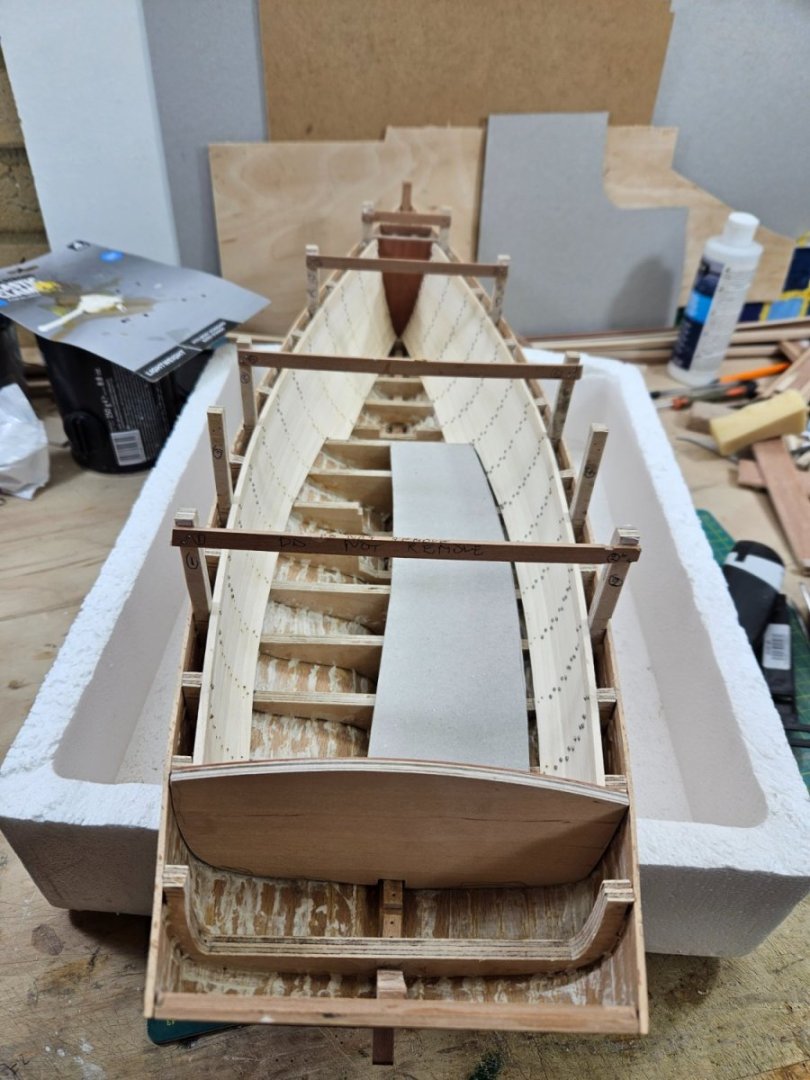
Dear all A bit of progress but a also a bit of a milestone: The deck is done! Still needs lots of work, treenails, sanding, caulking etc but the arrangement seems ok - I hope in the end it will look more tidy. The wood is maple but has a different color than the maple used for the inner planking. One of the planks aft stands out as, not sure where I cut it from but it needs to be replaced. Take care all Vaddoc


-
Thank you John and Nils @Mark Pearse Mark, the wood is already sealed inside and out! It has reduced the movement but not completely. Maple that I ve used in the past, does not move at all. Isn't boat building fun! Vaddoc
-
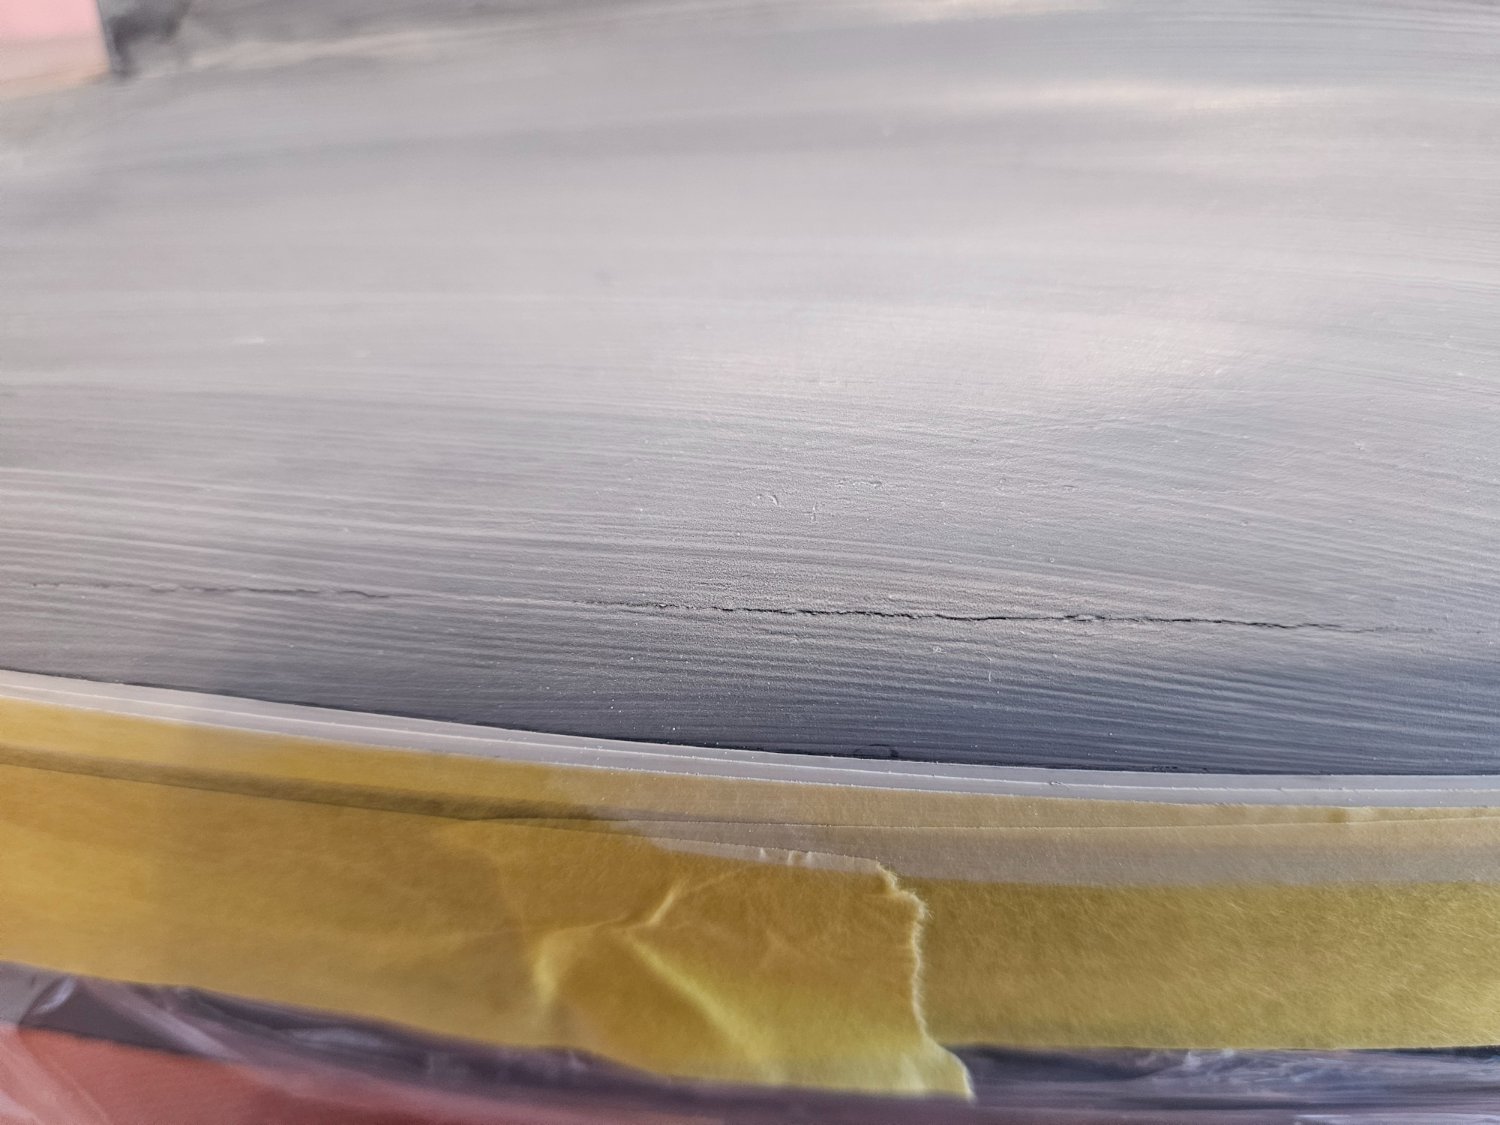
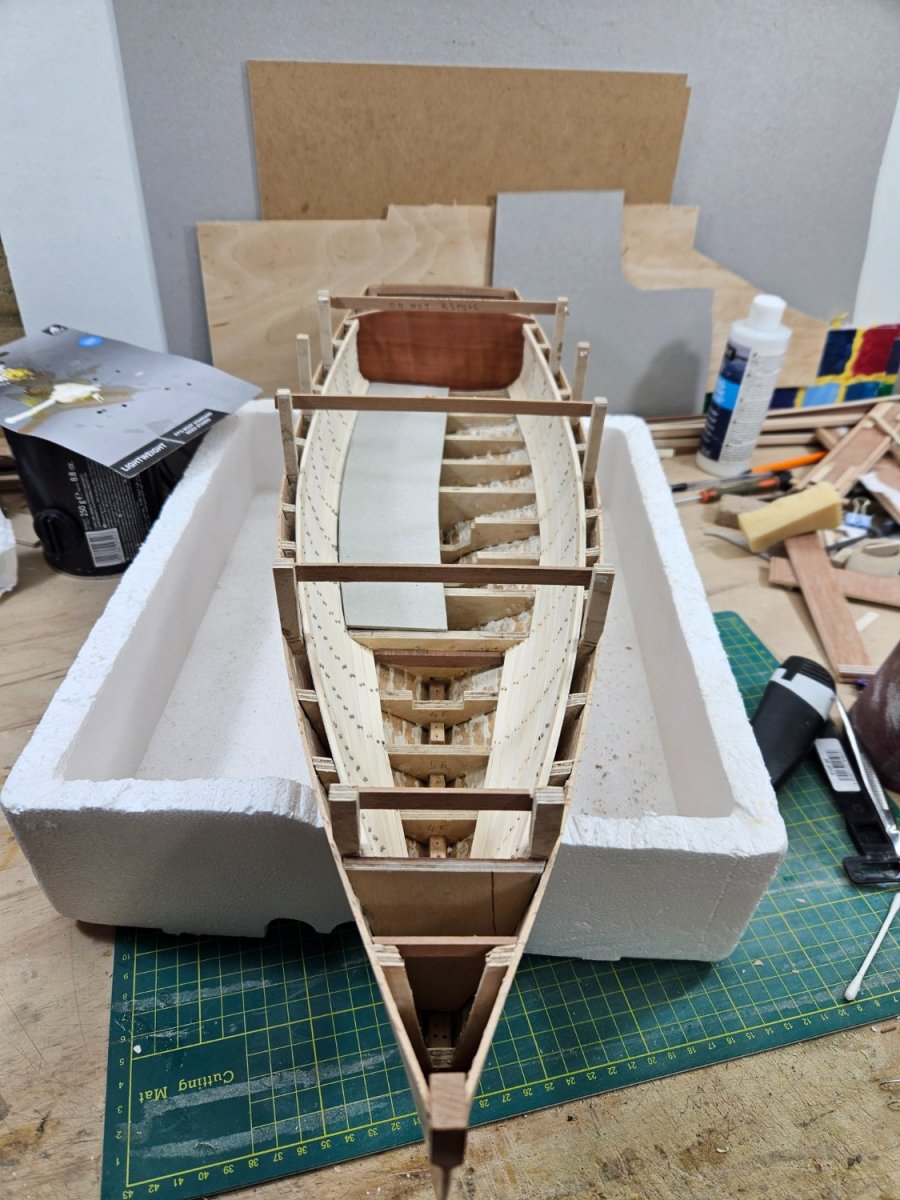
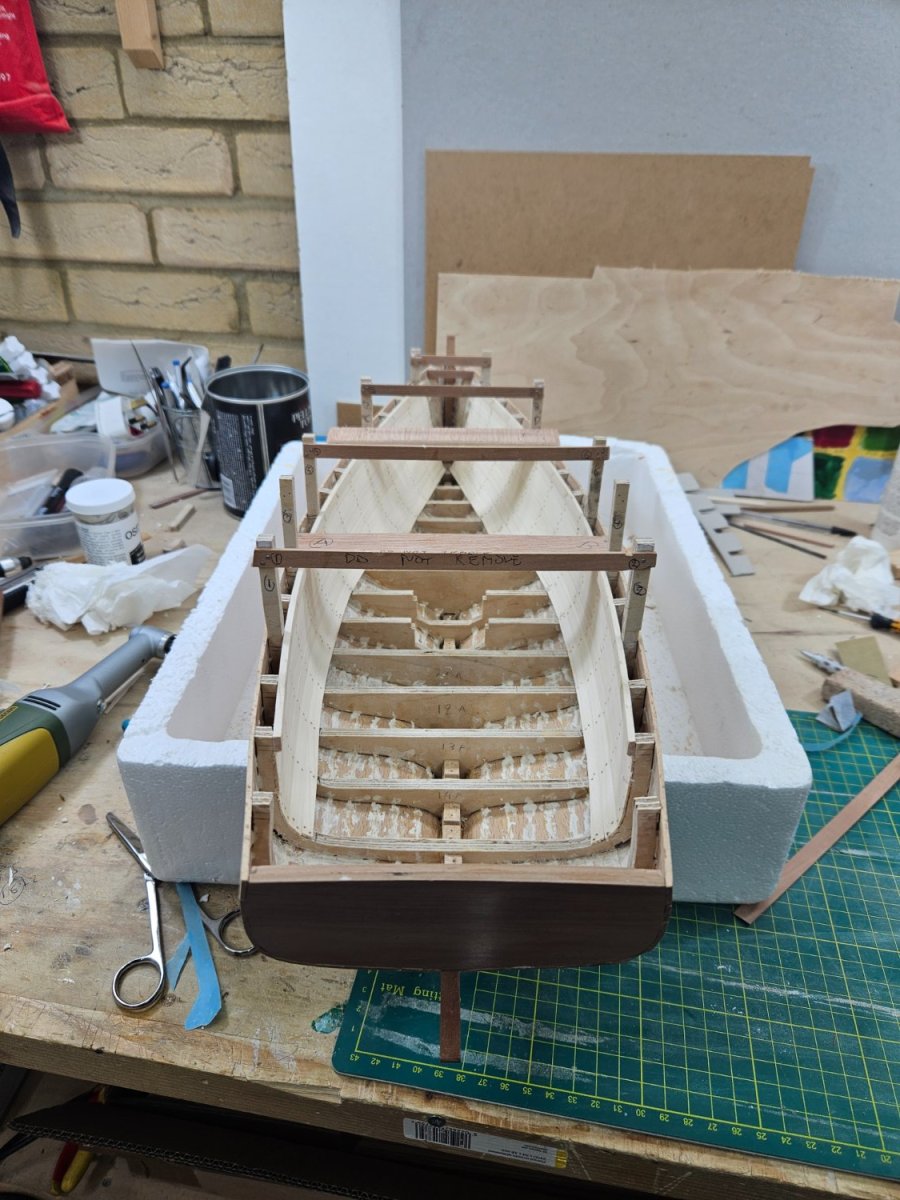
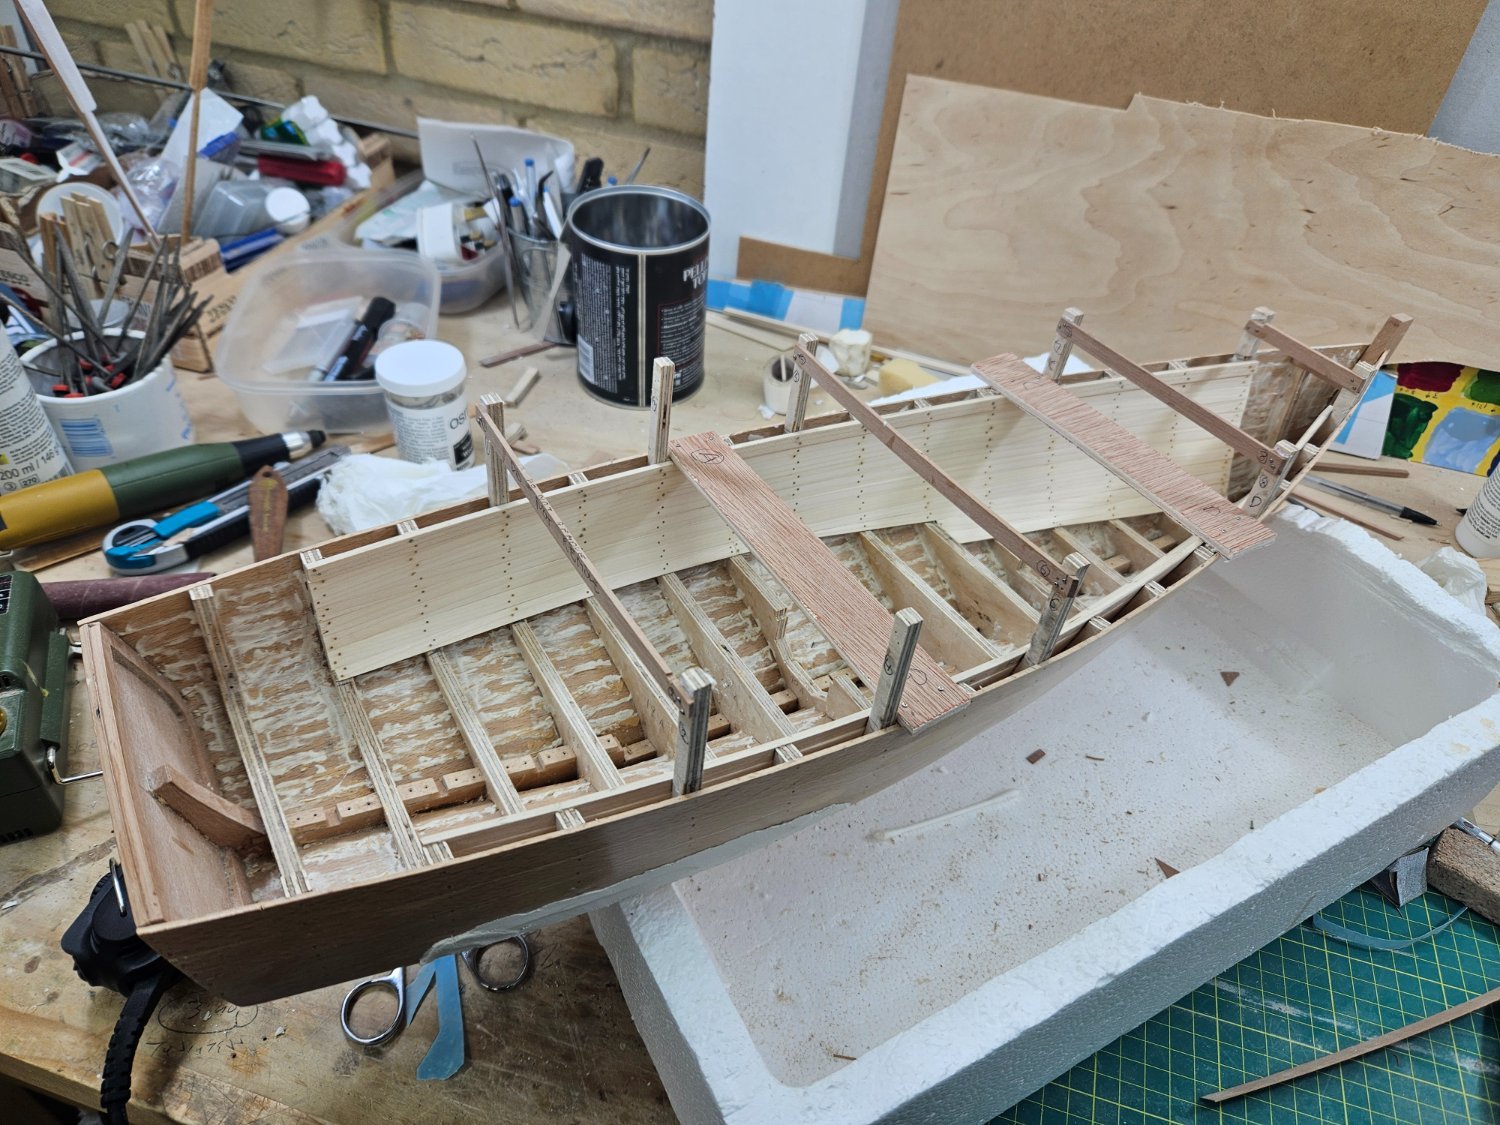
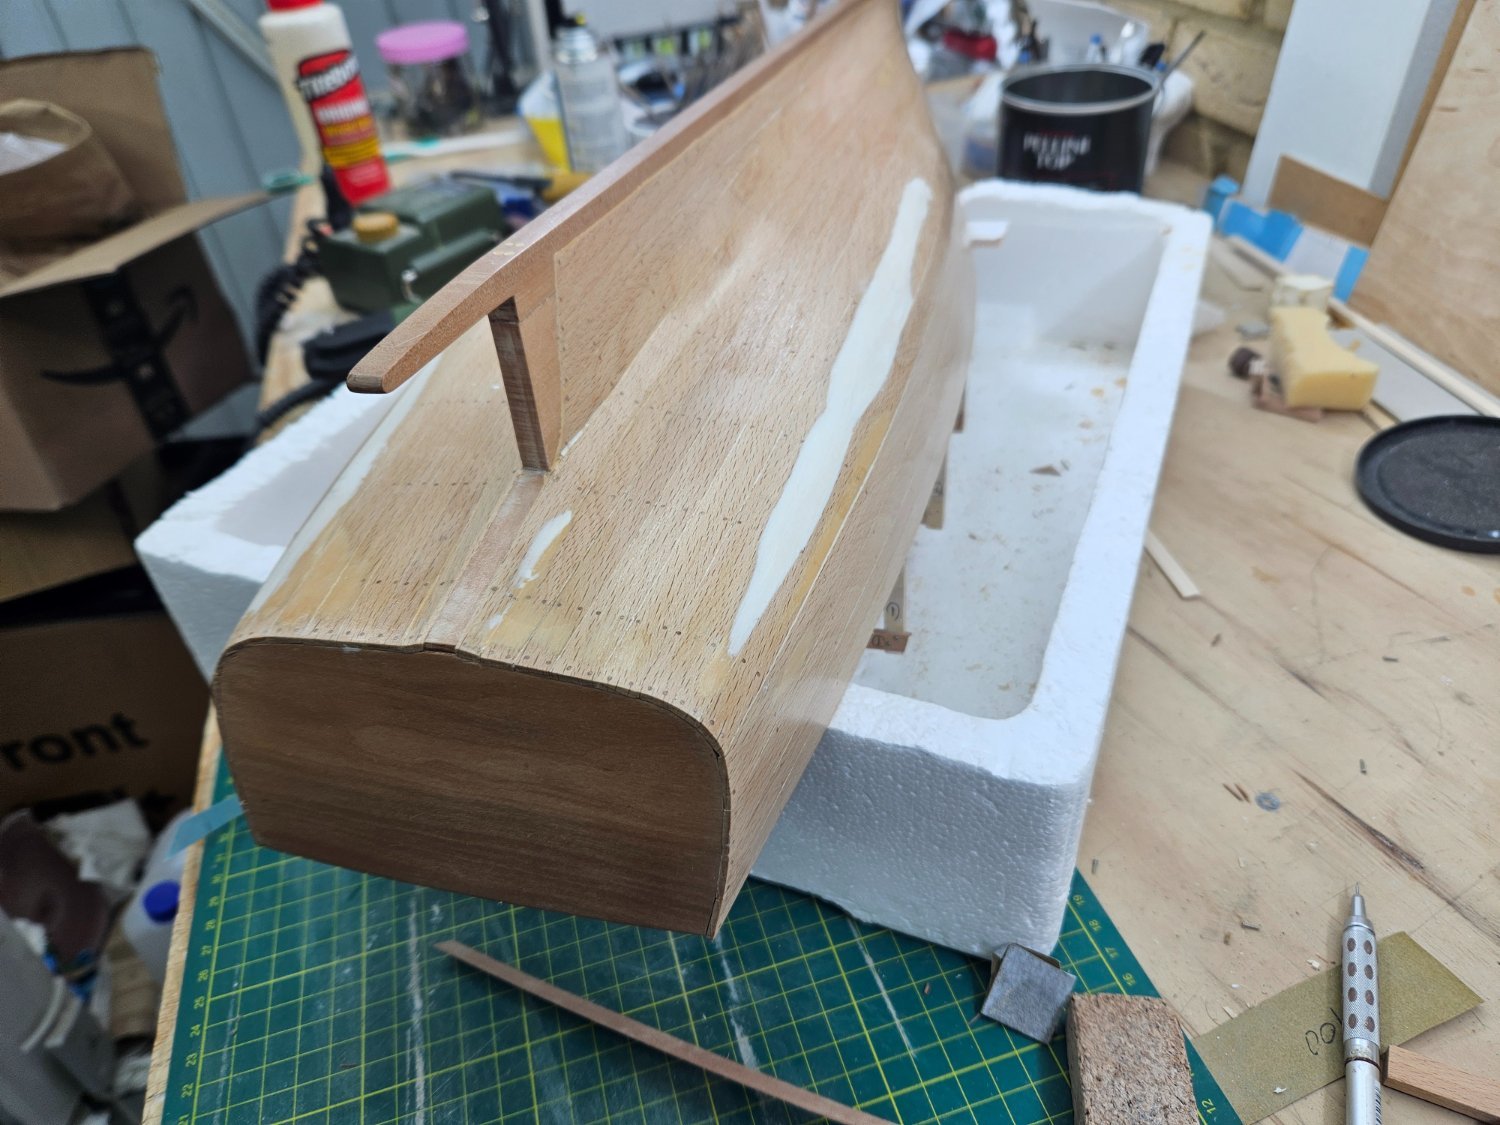
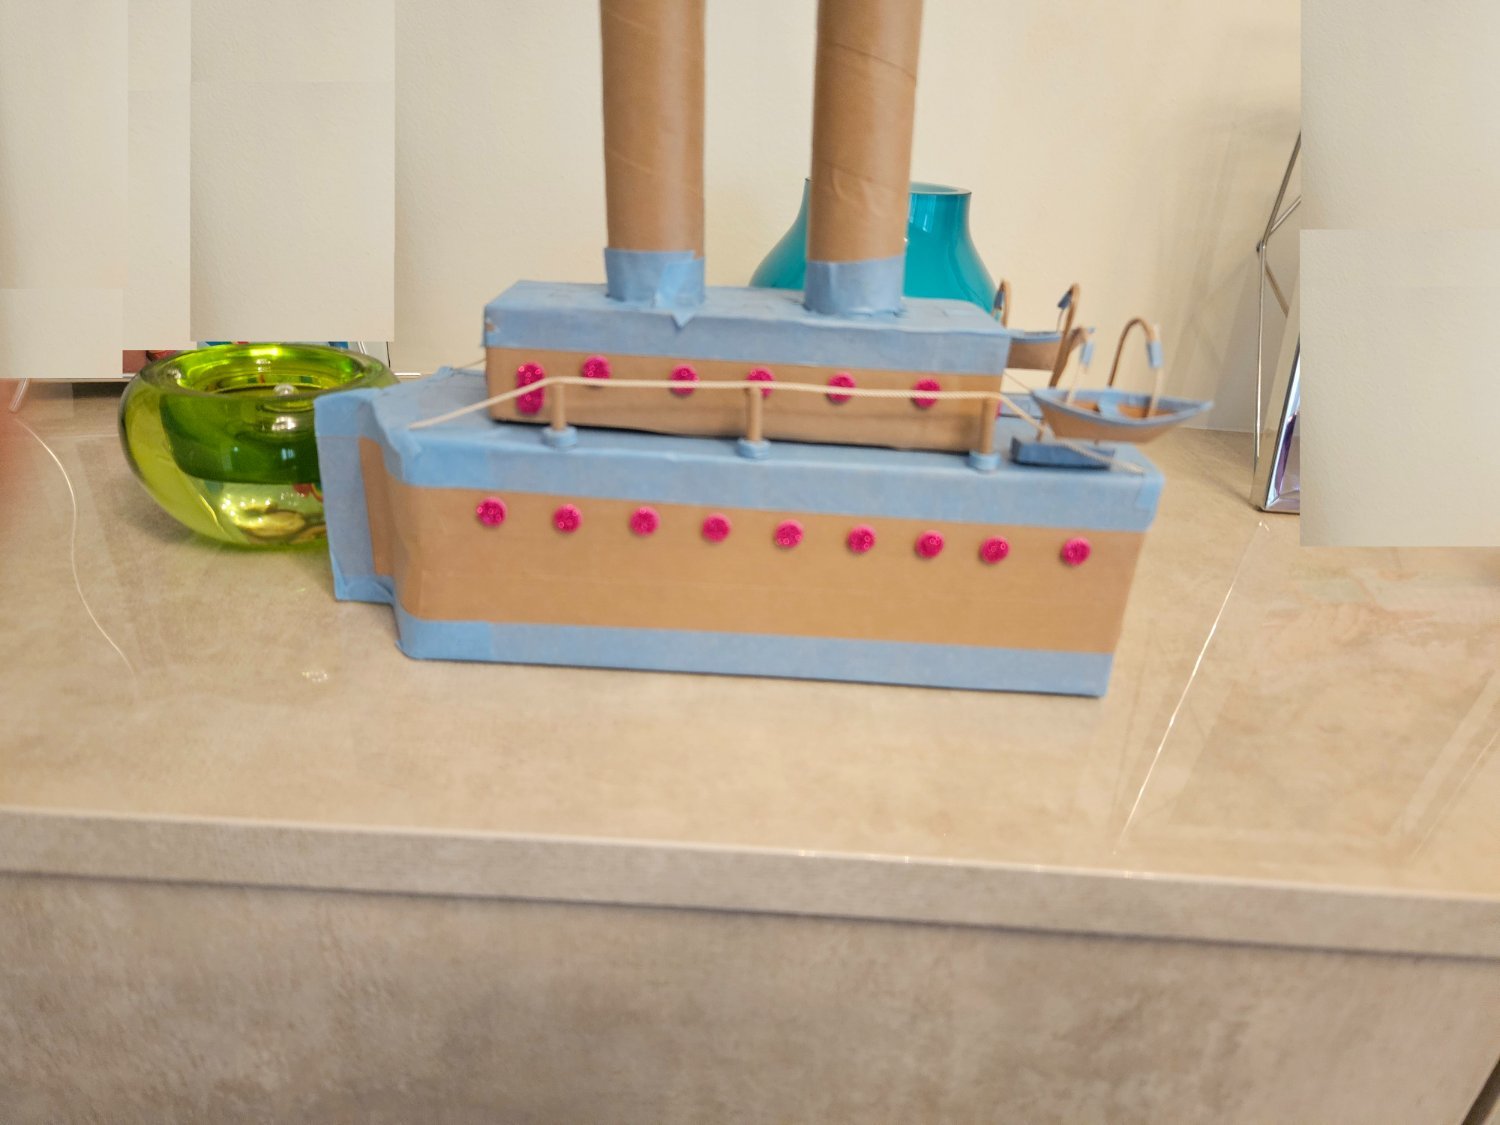
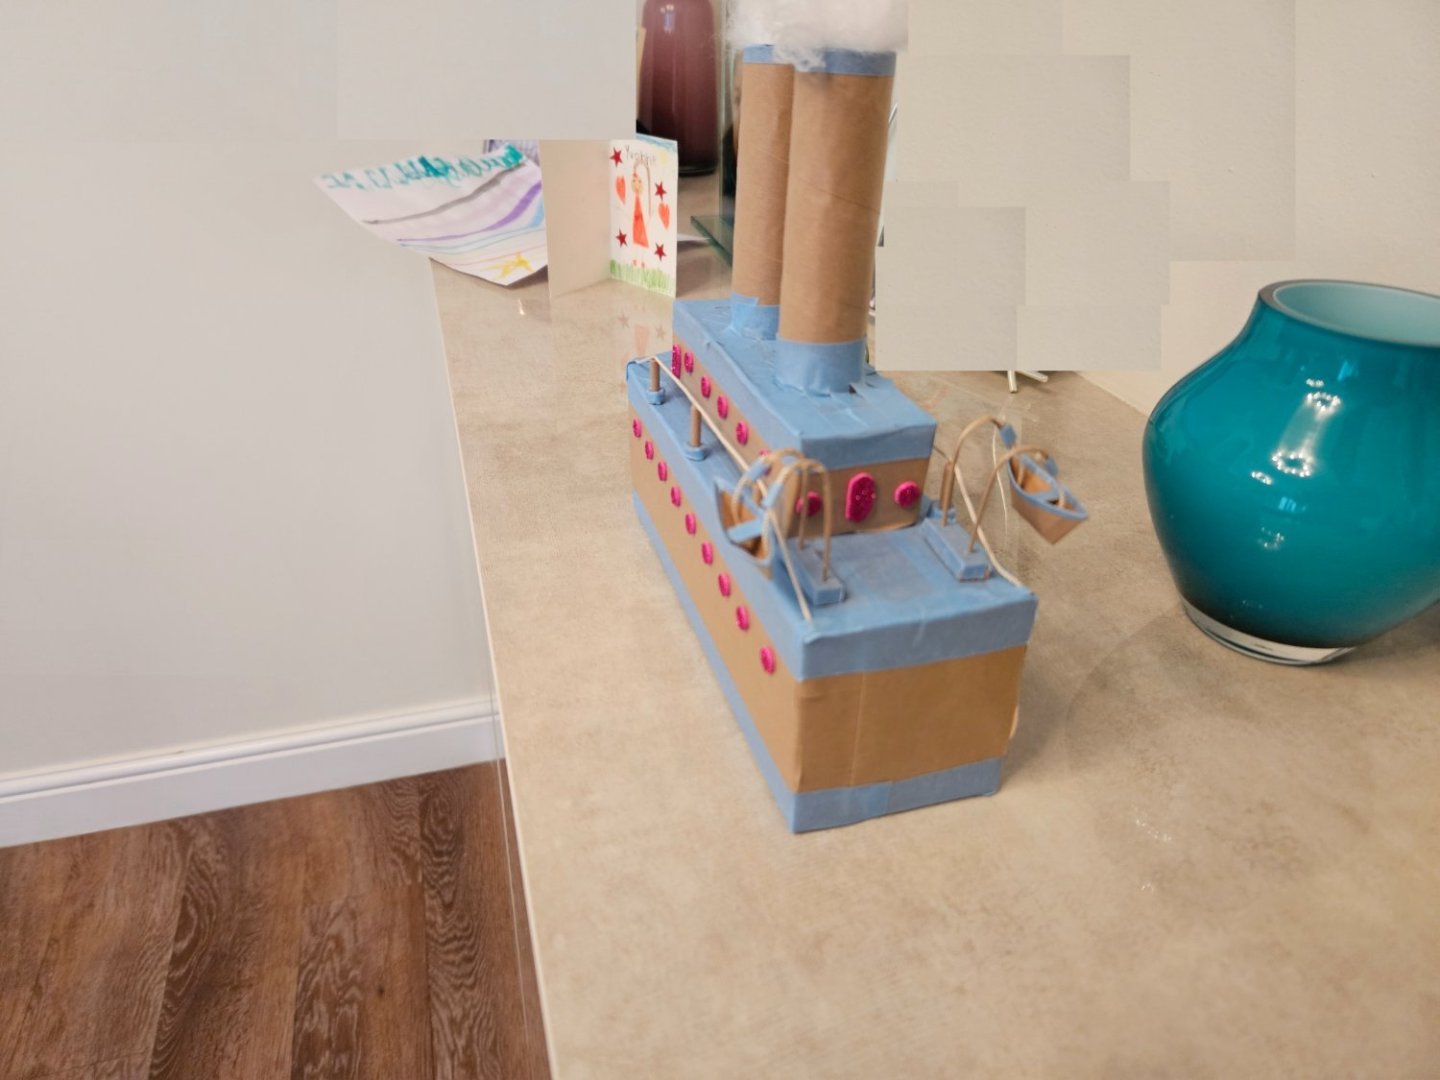
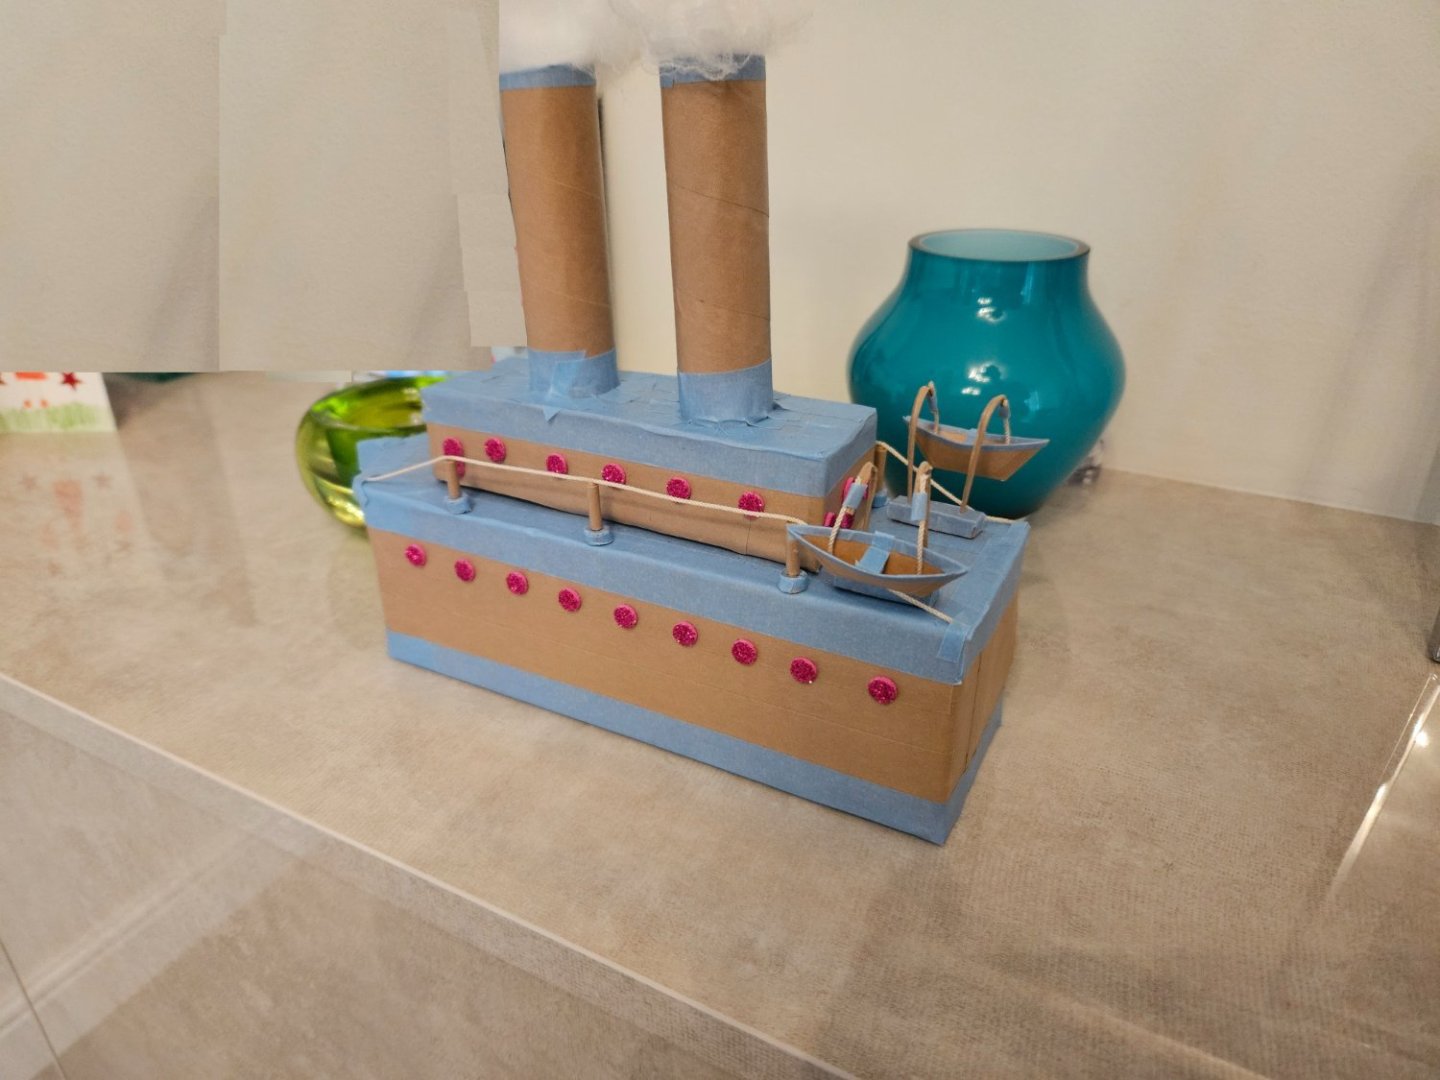
Dear all Many thanks for your comments and likes. @Dr PR You are right re: epoxy Phil, but I ve used beech wood - couldn't have made a worse choice! I ve lost count how many times I have had to go back to the hull. It keeps on changing shape, new cracks appearing, planks shifting, it follows the change of seasons and when it reaches equilibrium with the ambient moisture the planks go walkabout. I am waiting for the weather to get warmer so I can paint and varnish it and then leave it to cycle through its moods. For now, I ve just used some more filler - Ill sand it smooth tomorrow. I am using Osmo filler which is wonderfull stuff, run out of beech colour so using colourless but I ll prime the hull so it does not matter. I finished the inner planking and sand it smooth - ish. I ve been scratching my head for some time now, not sure how the floorboards should be arranged. There is a substantial curve at the sides where the floor meets the side planking. Not sure how this would have been made In the meantime, I made another model with my 7 year old daughter - a school project. The photos are terrible but you may just make out the cotton at the top of the chimneys. We really enjoyed the juice previously contained in the hull. Till next time Vaddoc


-
Axminster 300 mm disc sander unboxing
vaddoc replied to vaddoc's topic in Modeling tools and Workshop Equipment
Ok, so I ve used this sander a bit and these are my thoughts. Really quiet, this is a massive advantage. Also the 150 mm usable disc is very useful. The guide is solid and totally usable. Now, the negatives. There is a run out of about 1 mm at the very edge, this however is not a huge issue as the disc rotates fast and also nearer the centre this run out reduces a lot - overall, it would be nice to be dead flat but it is not an issue for me. However, it comes with 80 grit paper which I changed to 120. Oh dear! This took me 3 days and was a Herculean task. The disc it comes with is some kind of very high industrial quality disc, with a thick plastic backing. Unfortunately all of the glue was left stuck to the disc which is not smooth but rough. I destroyed my finger tips rolling off the glue. Heat did nothing. Isopropyl alcohol and methylated spirits also were ineffective. Acetone however did the job well. I used cheap toothbrushes and finally all the glue came off. I assume and hope the glue of the replacement paper discs will be less vicious. I put the new paper on which did not stick well and comes off if left unused. I may not have allowed enough time for the chemicals to evaporate or not degreased the disc well. As I am still traumatised I just press it it back and ignore it for now. Overall, a good buy and a good tool, I do not regret getting it and I ve been using it a lot. Regards Vaddoc