Old Collingwood
-
Posts
11,476 -
Joined
-
Last visited
11 Followers


Recent Profile Visitors
9,733 profile views


-
 yvesvidal reacted to a post in a topic:
Westland Sea King HU.5 by chadwijm6 - Airfix - 1/48
yvesvidal reacted to a post in a topic:
Westland Sea King HU.5 by chadwijm6 - Airfix - 1/48
-
Canute reacted to a post in a topic:
B-25J Mitchell by Chadwijm6 - HK Models - 1/32
-
Canute reacted to a post in a topic:
Westland Sea King HU.5 by chadwijm6 - Airfix - 1/48
-
Canute reacted to a post in a topic:
Westland Sea King HU.5 by chadwijm6 - Airfix - 1/48
-
Canute reacted to a post in a topic:
Battle of Waterloo Attack on La Haye Sainte Farm 1/56 28mm
-
Canute reacted to a post in a topic:
Battle of Waterloo Attack on La Haye Sainte Farm 1/56 28mm
-
Canute reacted to a post in a topic:
Battle of Waterloo Attack on La Haye Sainte Farm 1/56 28mm
-
Canute reacted to a post in a topic:
Battle of Waterloo Attack on La Haye Sainte Farm 1/56 28mm
-
Canute reacted to a post in a topic:
Battle of Waterloo Attack on La Haye Sainte Farm 1/56 28mm
-
Canute reacted to a post in a topic:
Nabopolassar King of Babylon and Daffadar, Skinners Horse by king derelict - Art Girona - 54 mm
-
Old Collingwood reacted to a post in a topic:
Nabopolassar King of Babylon and Daffadar, Skinners Horse by king derelict - Art Girona - 54 mm
-
Old Collingwood reacted to a post in a topic:
B-25J Mitchell by Chadwijm6 - HK Models - 1/32
-
Old Collingwood reacted to a post in a topic:
Nabopolassar King of Babylon and Daffadar, Skinners Horse by king derelict - Art Girona - 54 mm
-
 If I can help in anyway pleased to do so. OC.
 -
Old Collingwood reacted to a post in a topic:
Nabopolassar King of Babylon and Daffadar, Skinners Horse by king derelict - Art Girona - 54 mm
-
Thank you kindly Alan, going to try a wee bit of lichen on this one with PVA and my grass sprinkles. OC.
-
Old Collingwood reacted to a post in a topic:
Westland Sea King HU.5 by chadwijm6 - Airfix - 1/48
-
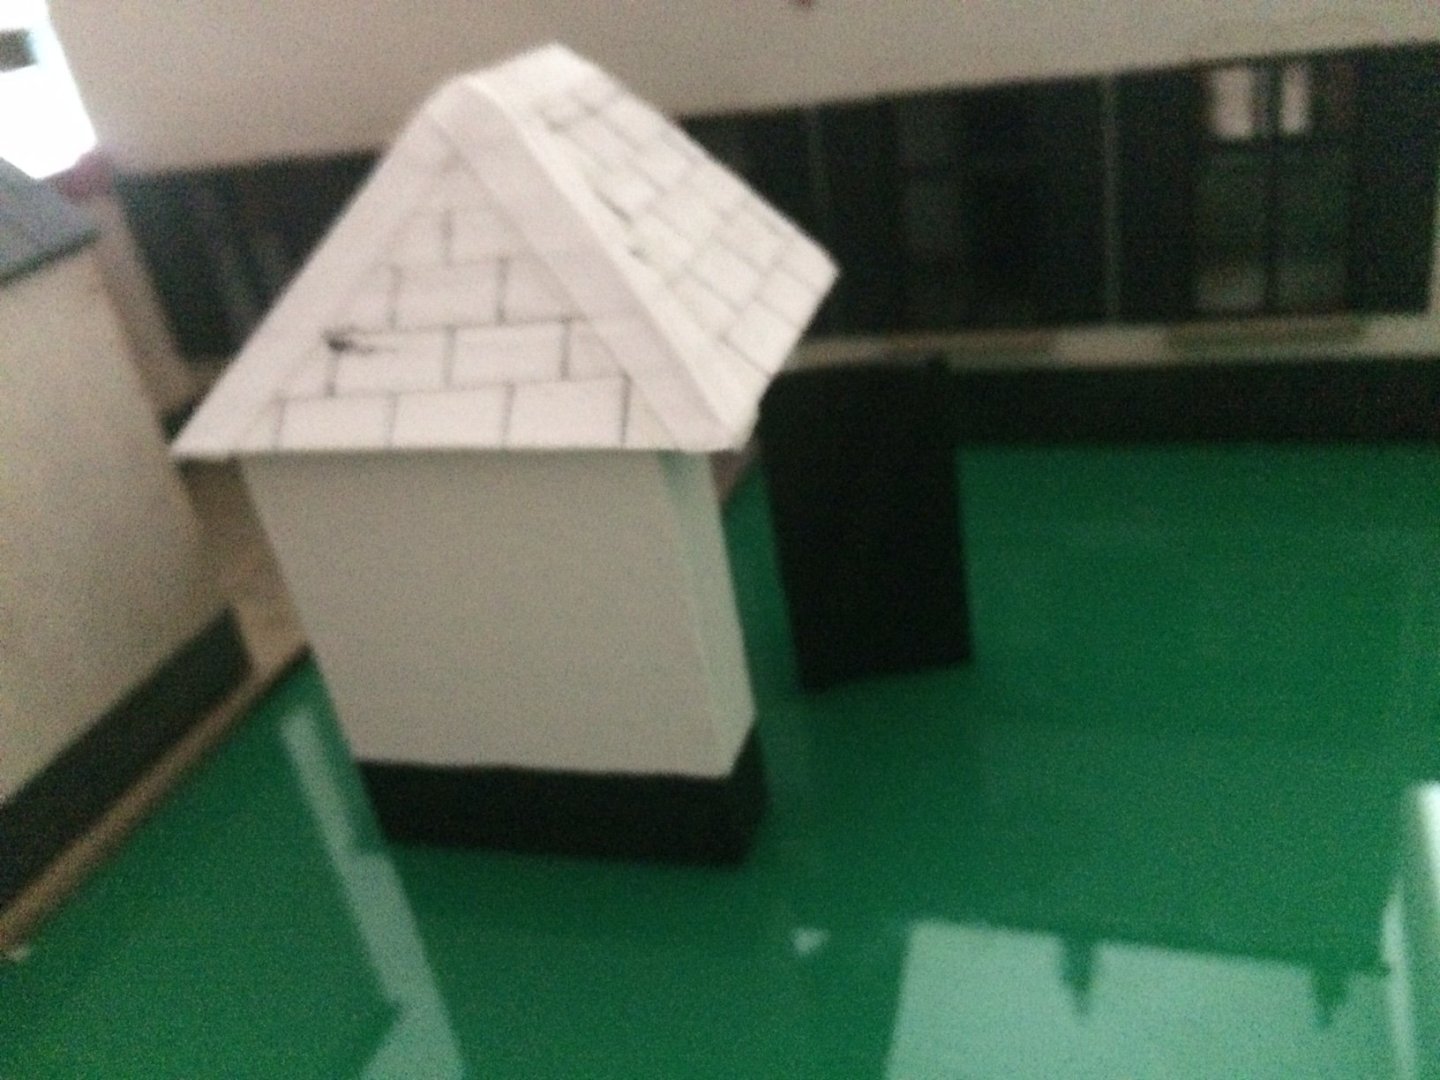
Evening all, Black roof done and the first bit of washes with the dusting of dry brushing still to do. OC.


-
 Old Collingwood reacted to a post in a topic:
Ferrari 288 GTO Yellow by CDW - Fujimi Enthusiast Series - 1:24 Scale
Old Collingwood reacted to a post in a topic:
Ferrari 288 GTO Yellow by CDW - Fujimi Enthusiast Series - 1:24 Scale
-
Old Collingwood reacted to a post in a topic:
Ferrari 288 GTO Yellow by CDW - Fujimi Enthusiast Series - 1:24 Scale
-
Old Collingwood reacted to a post in a topic:
Ferrari 288 GTO Yellow by CDW - Fujimi Enthusiast Series - 1:24 Scale
-
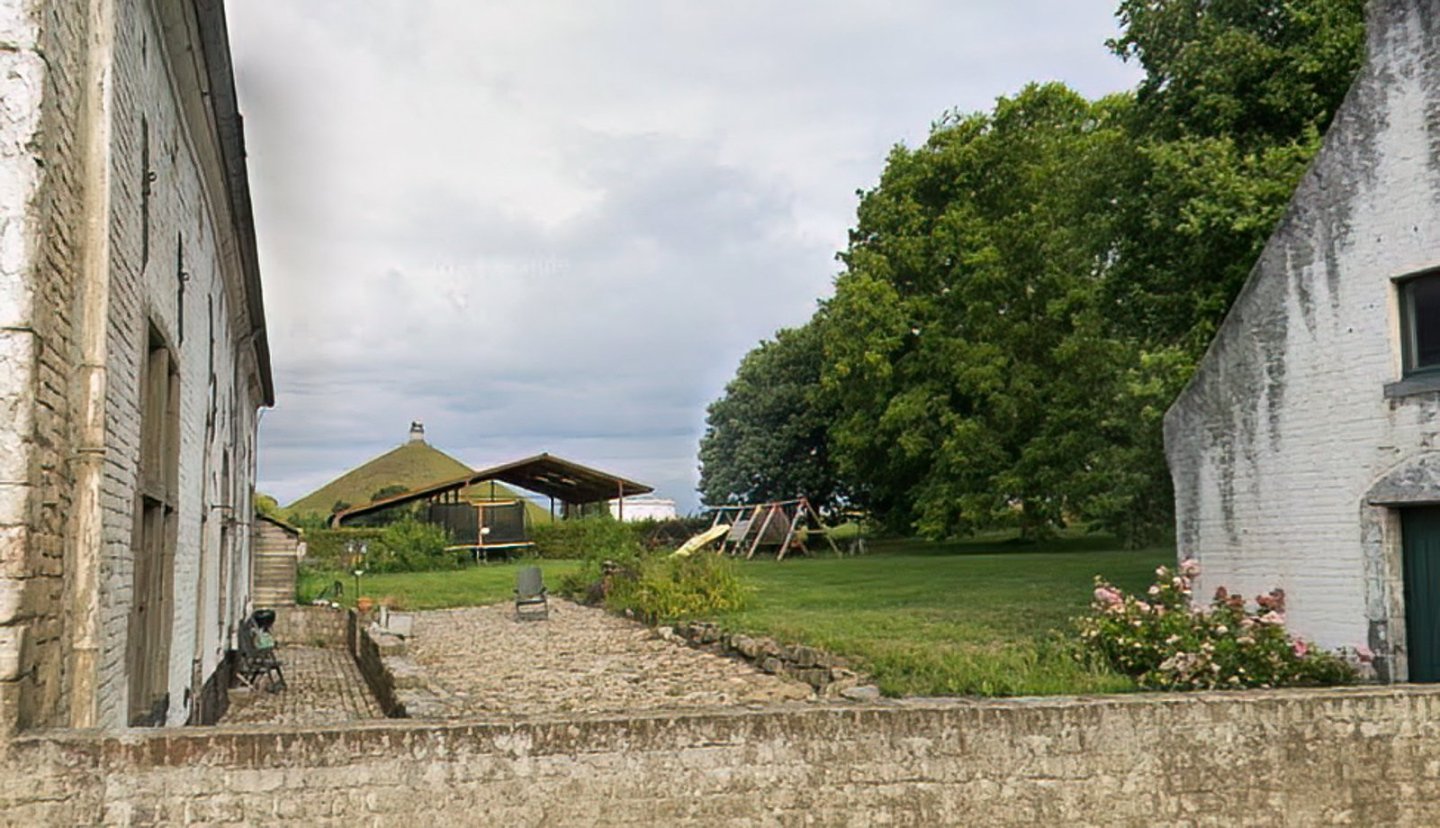
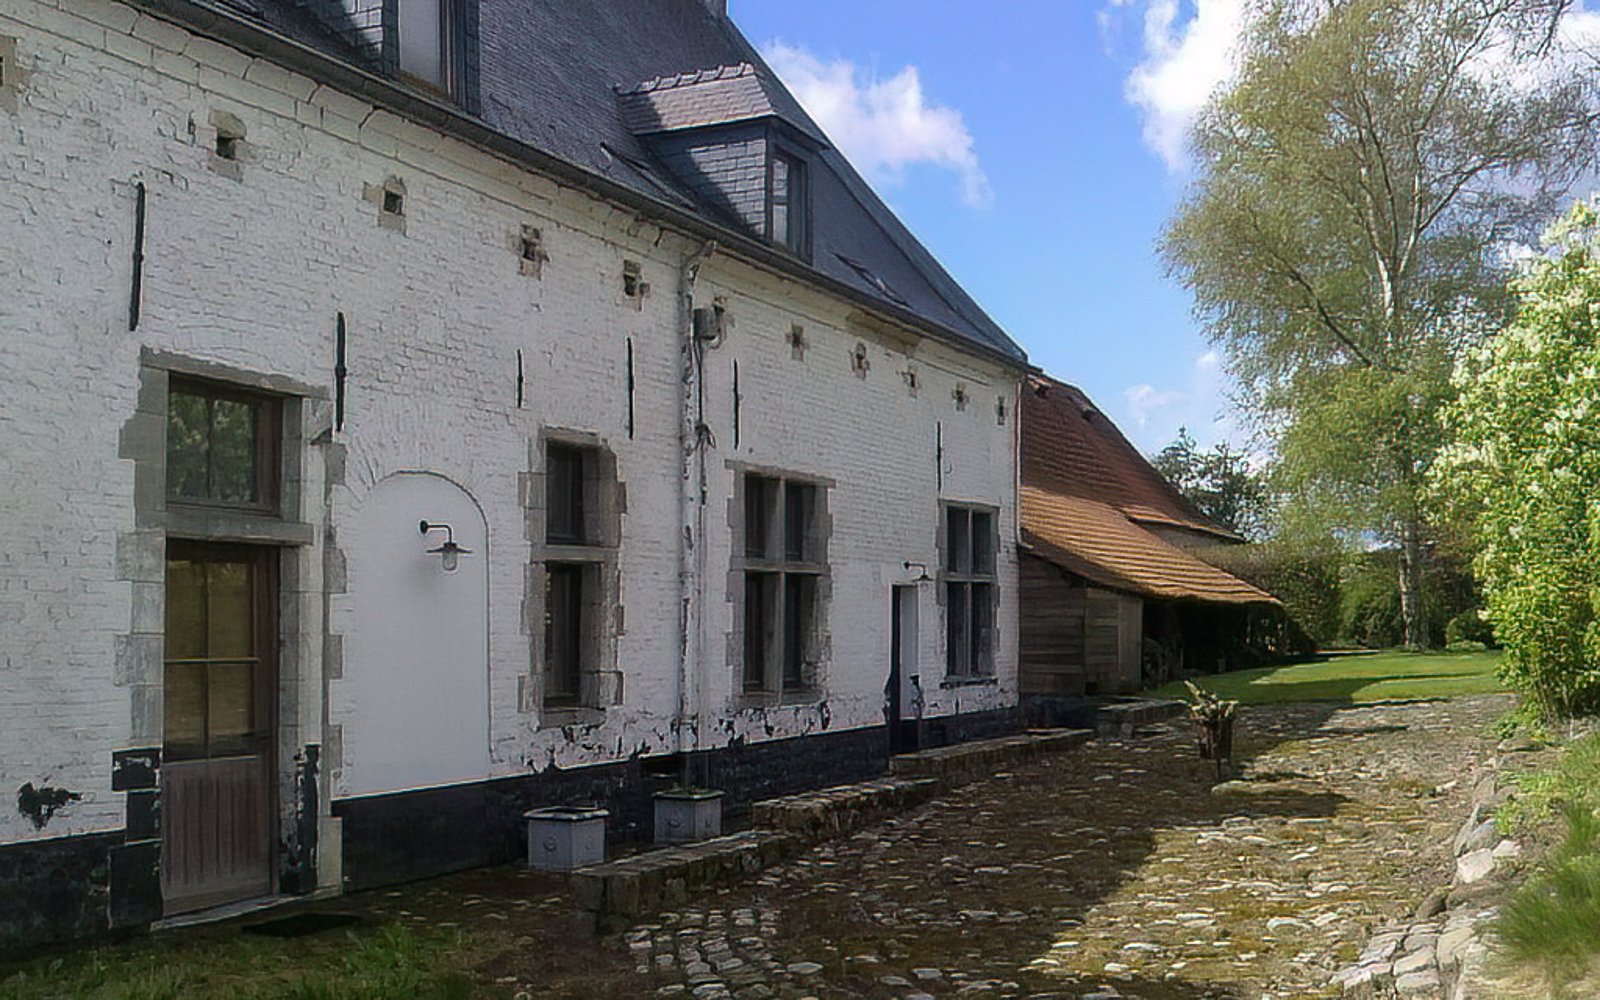
This is XV-666 in here prev role shot by myself some years ago. OC.
-
Im in Alan, these do look interesting. OC.
-
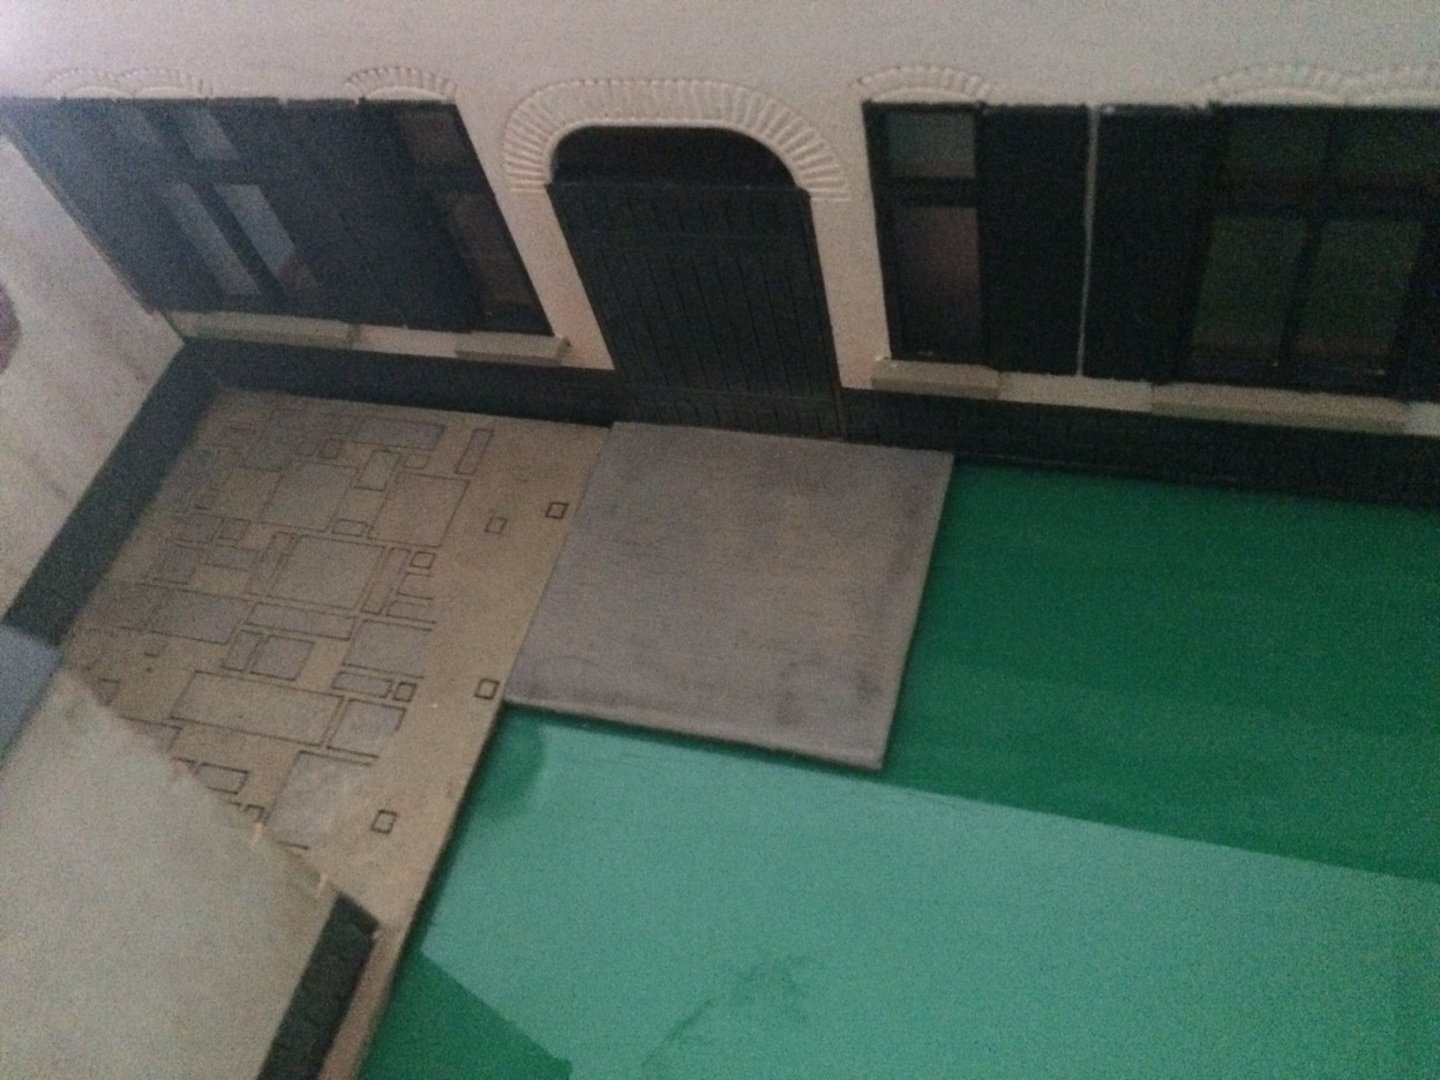
I have also been measuring and cutting out a piece of ground works - in the shape of a small section of cobbled stone path, its only small no more than Four feet wide (In scale size) Im making it from my MDF type wood, the idea is that I will mark the cobbles then scribe them using my knife, then paint and weather them as required. OC.
-
Are the Carlings sloted or just but fitted Tim? as I was wondering if you could just cut them back and re place them. OC.
-
B-25J Mitchell by Chadwijm6 - HK Models - 1/32
Old Collingwood replied to chadwijm6's topic in Non-ship/categorised builds
This looks so good - a very interesting kit. OC. -
Thank you kindly. OC.
-
Superb job alll round, I have seen this frame in the flesh when she was in RN use. OC.
-
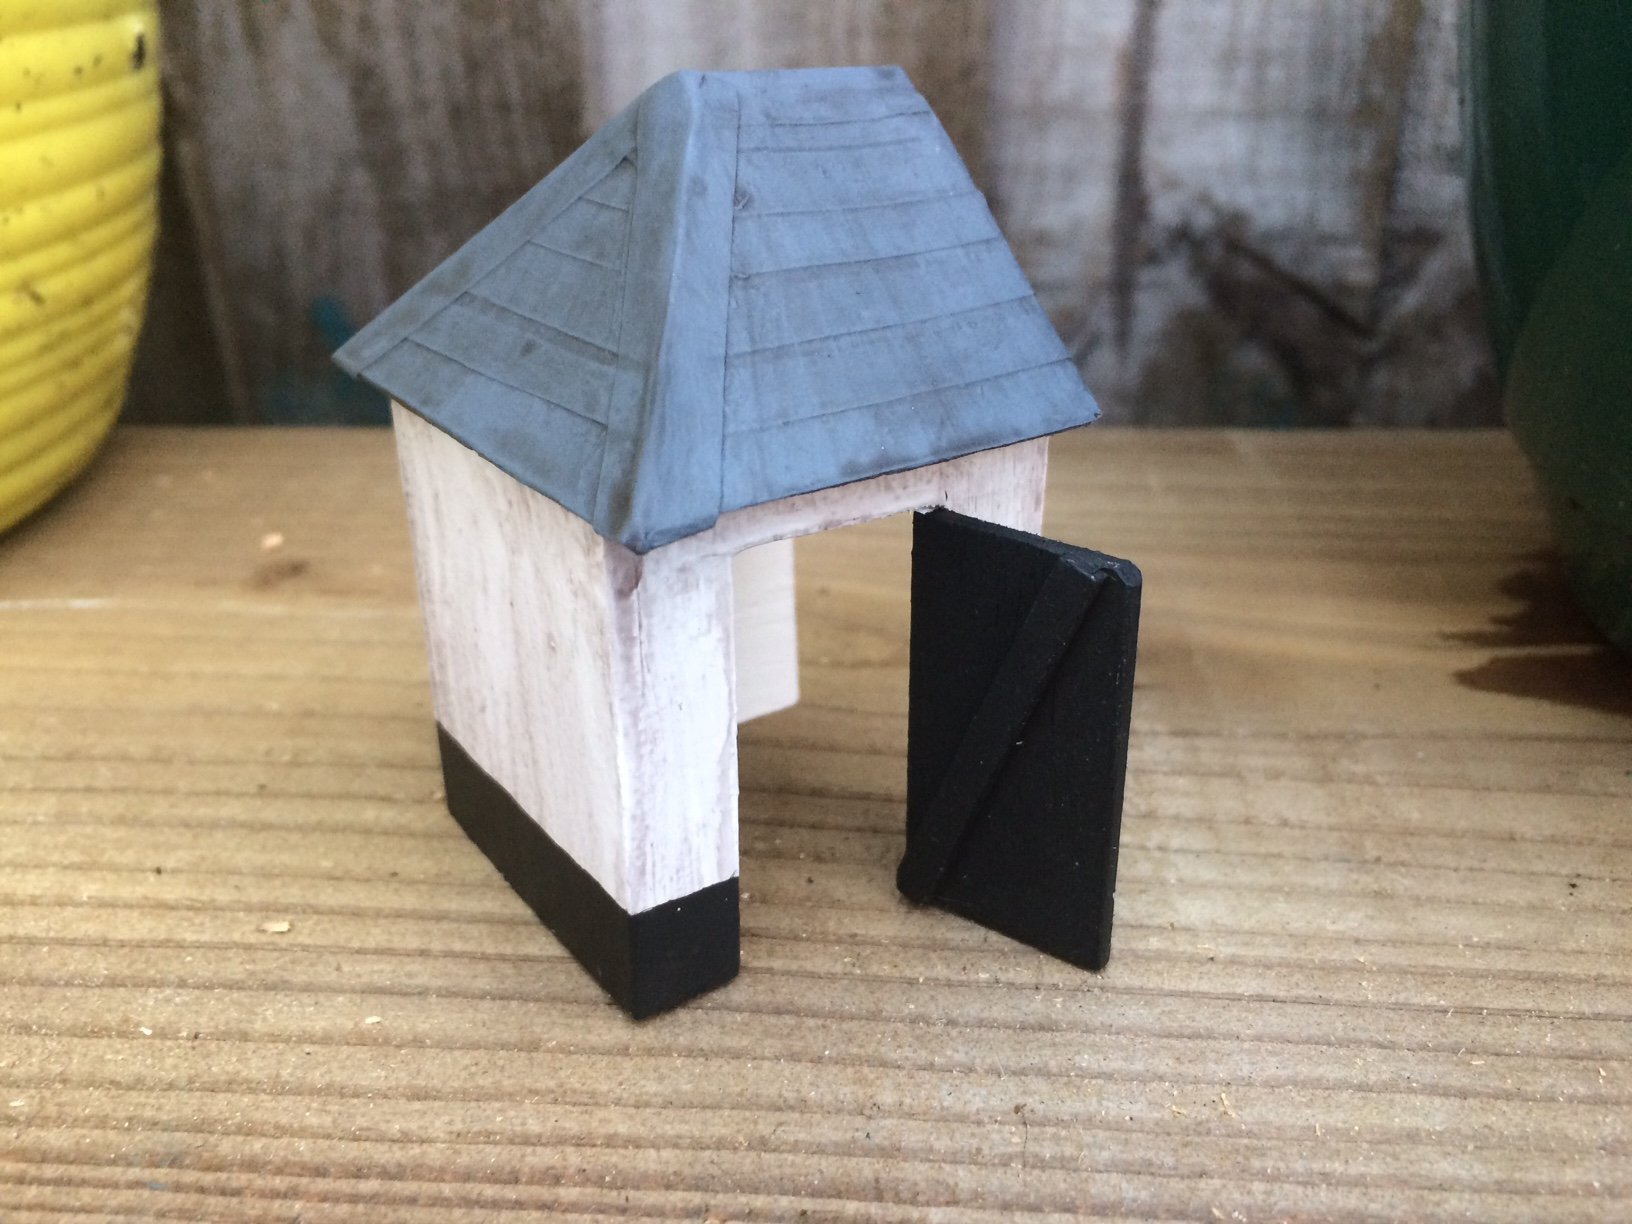
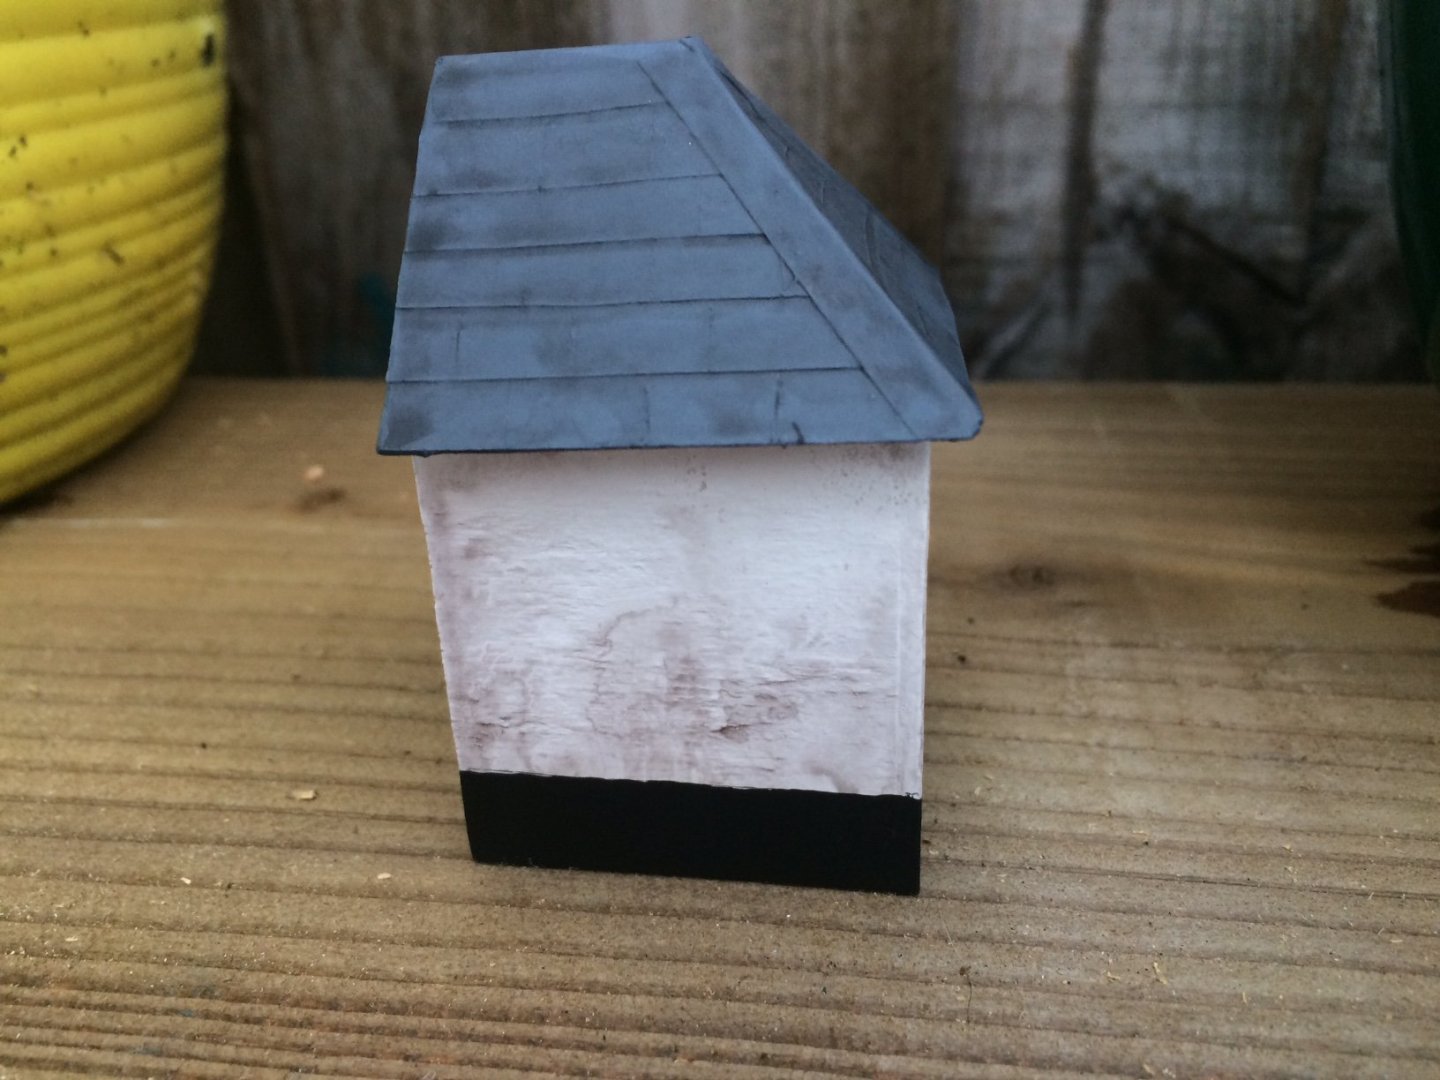
Evening all, - Pictures - base down - White applied and Black band and gate. Sorry about the pic quality - light and hand shake)))) OC.
-
Tim are you saying that the Two rectangular cut outs (indicated by the Two Large Arrows) should be moved inwards to line up with larger cut out further forward in yoy picture? OC.
-
Amazing work - so hard to find out the 100% facts as proof is burried - but damn good attempt is all we can do (like my own build) OC.
-
Evening all, a bit more progress on the porch, I put a few coats of White on it - inside and out, and I have also made the stone base for it thats also been painted and weathered, the base was then glued in place on my dio. Next stage will be to paint the Black bottom same width as on the farmhouse, then the Grey on the slate tiles followed by some weathering. No pics as my batt was dead but will take some later. OC.
-
Some of the scenery I need to tackle - stone paths - a wall and a sloping grass that I estimate will go from zero to about Four Feet at the edge of my dio. Some head scratching me thinks. Oh also the porch has been taken down in these modern pics of the net - even the original door has been bricked up and moved to the side. OC.