RMC
-
Posts
933 -
Joined
-
Last visited
.thumb.jpg.4b7bd8d1724d970eaddb3802a1706a45.jpg)


-
 Kingspoke reacted to a post in a topic:
HMS Vanguard by RMC - FINISHED - Amati/Victory Models - scale 1:72
Kingspoke reacted to a post in a topic:
HMS Vanguard by RMC - FINISHED - Amati/Victory Models - scale 1:72
-
Kingspoke reacted to a post in a topic:
HMS Vanguard by RMC - FINISHED - Amati/Victory Models - scale 1:72
-
Kingspoke reacted to a post in a topic:
HMS Vanguard by RMC - FINISHED - Amati/Victory Models - scale 1:72
-
Kingspoke reacted to a post in a topic:
HMS Vanguard by RMC - FINISHED - Amati/Victory Models - scale 1:72
-
Kingspoke reacted to a post in a topic:
HMS Vanguard by RMC - FINISHED - Amati/Victory Models - scale 1:72
-
Kingspoke reacted to a post in a topic:
HMS Vanguard by RMC - FINISHED - Amati/Victory Models - scale 1:72
-
Kingspoke reacted to a post in a topic:
HMS Vanguard by RMC - FINISHED - Amati/Victory Models - scale 1:72
-
Kingspoke reacted to a post in a topic:
HMS Vanguard by RMC - FINISHED - Amati/Victory Models - scale 1:72
-
Kingspoke reacted to a post in a topic:
HMS Vanguard by RMC - FINISHED - Amati/Victory Models - scale 1:72
-
Kingspoke reacted to a post in a topic:
HMS Vanguard by RMC - FINISHED - Amati/Victory Models - scale 1:72
-
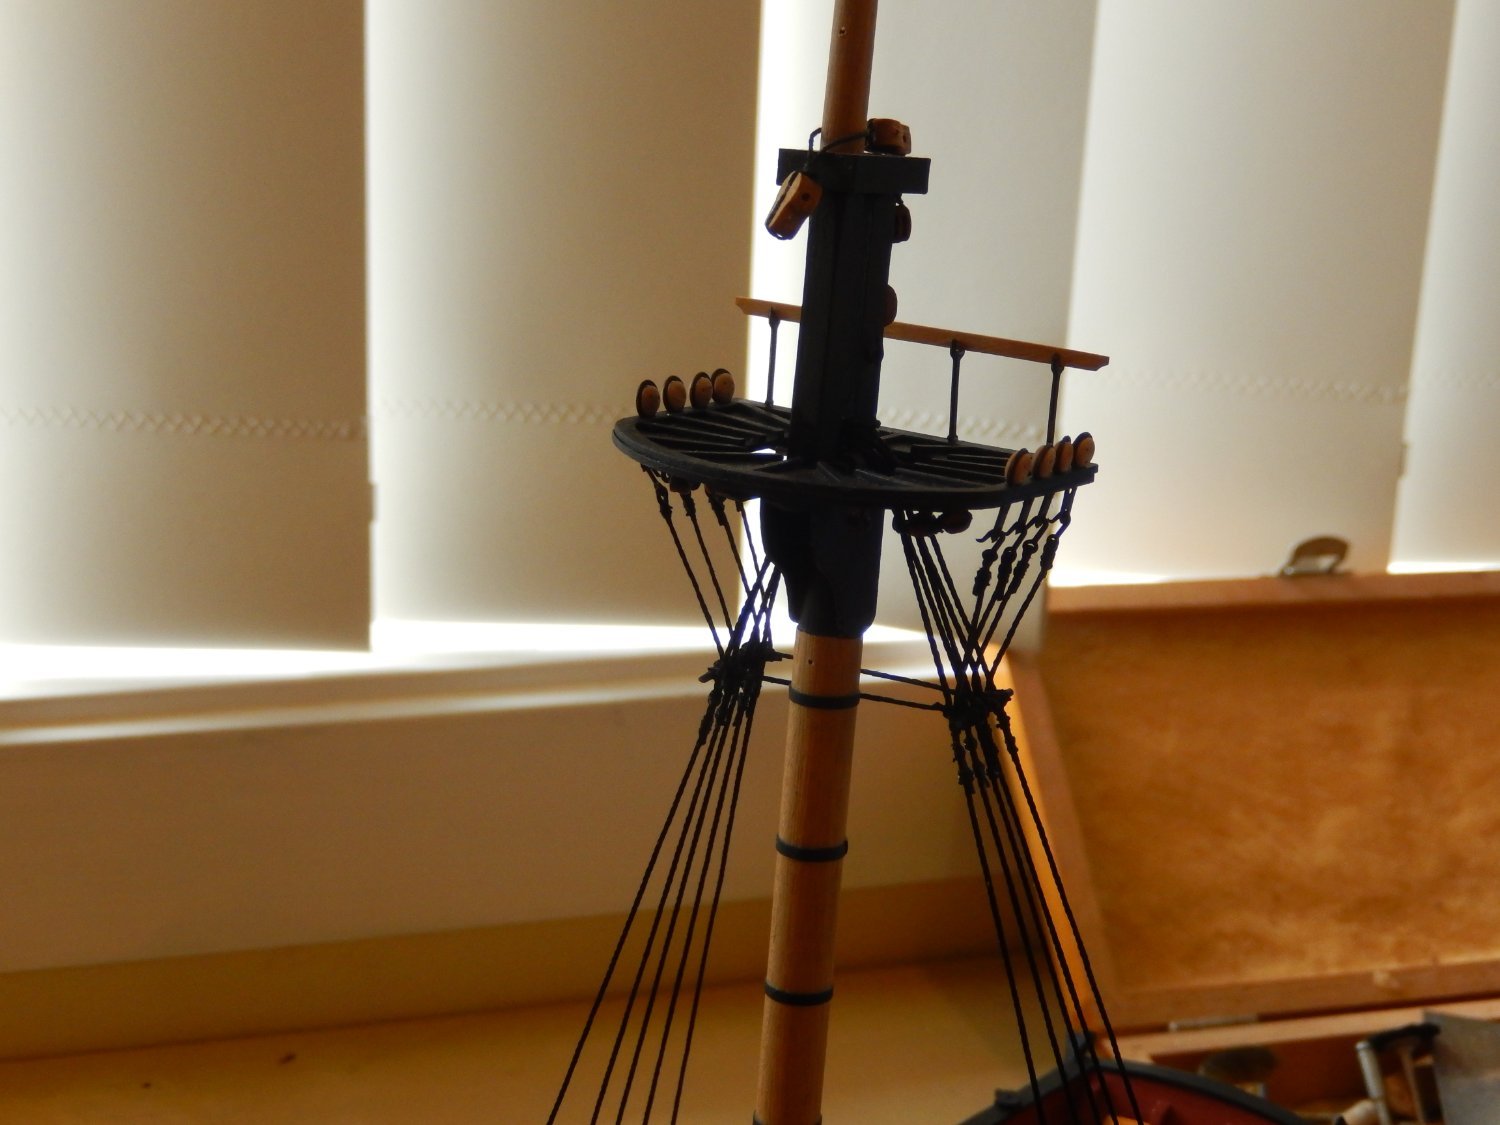
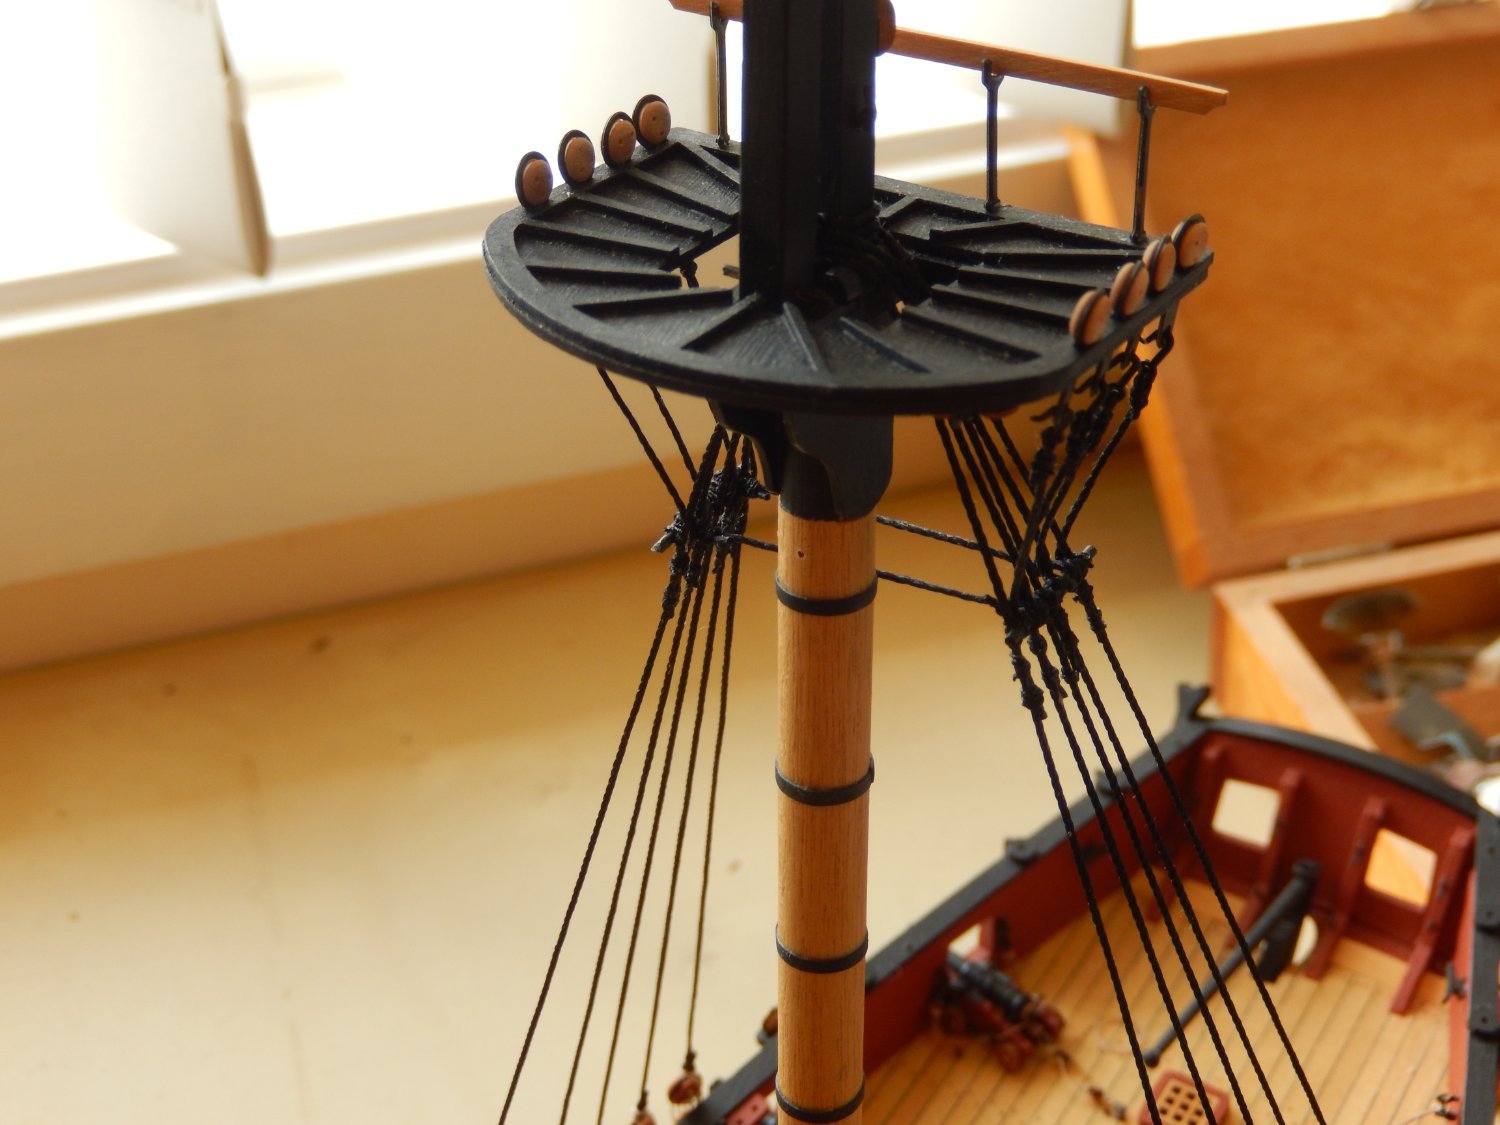
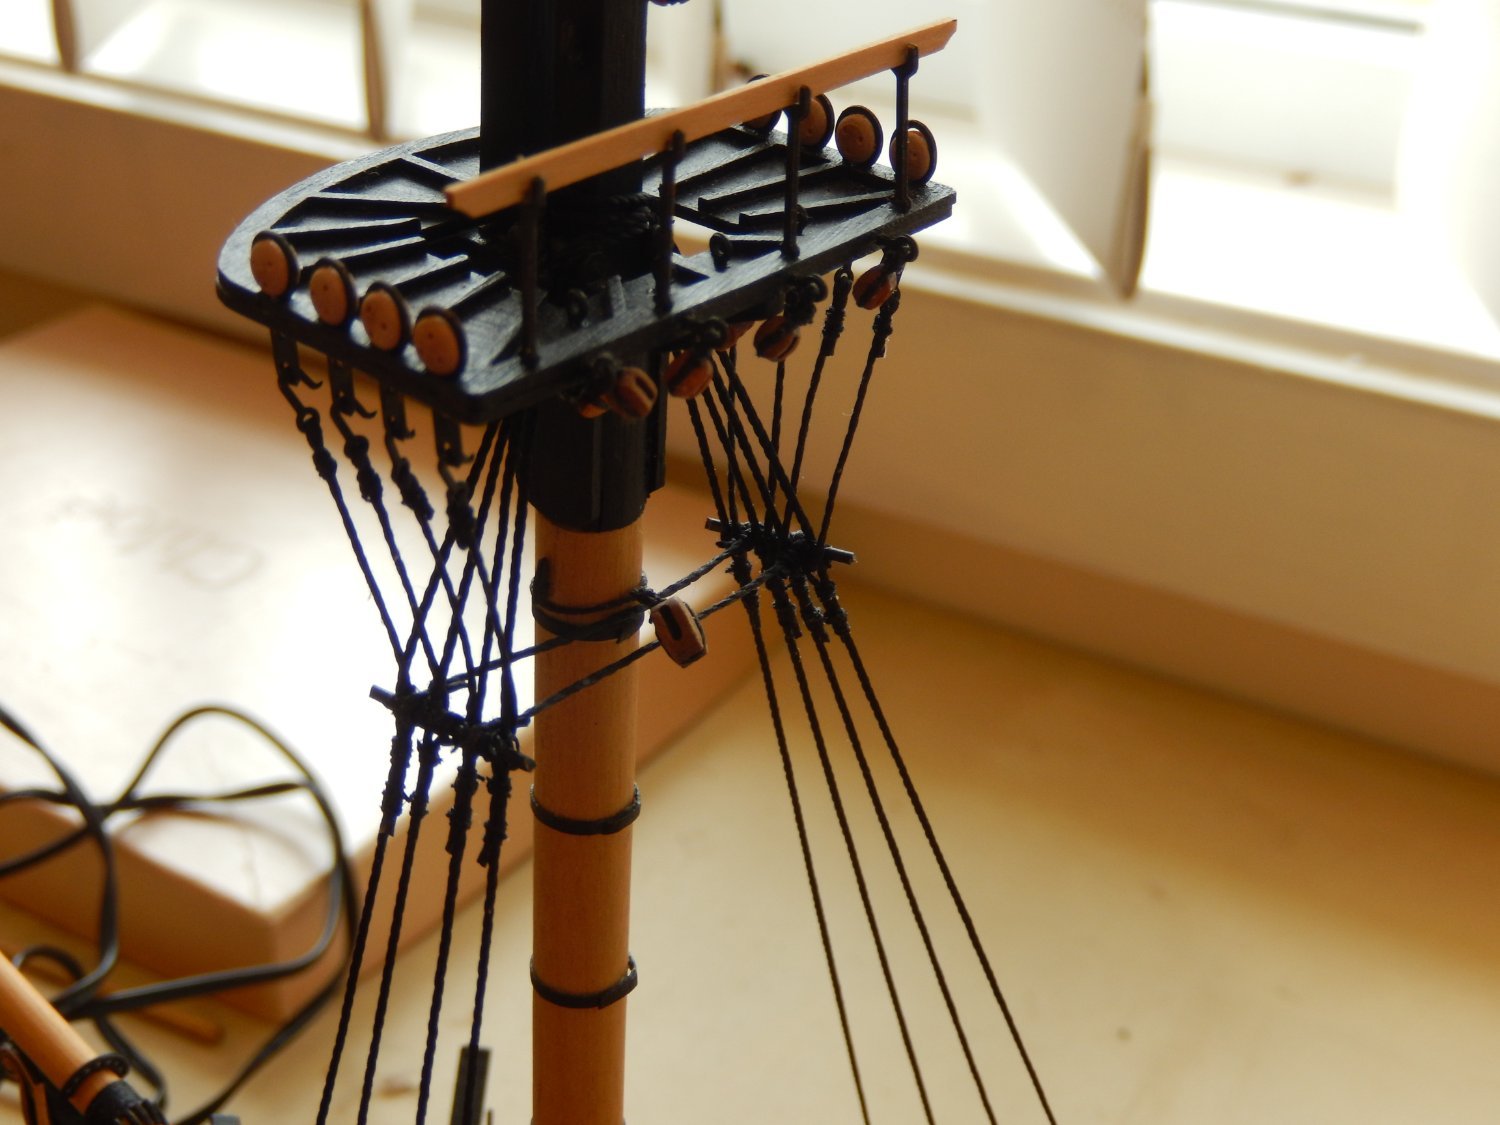
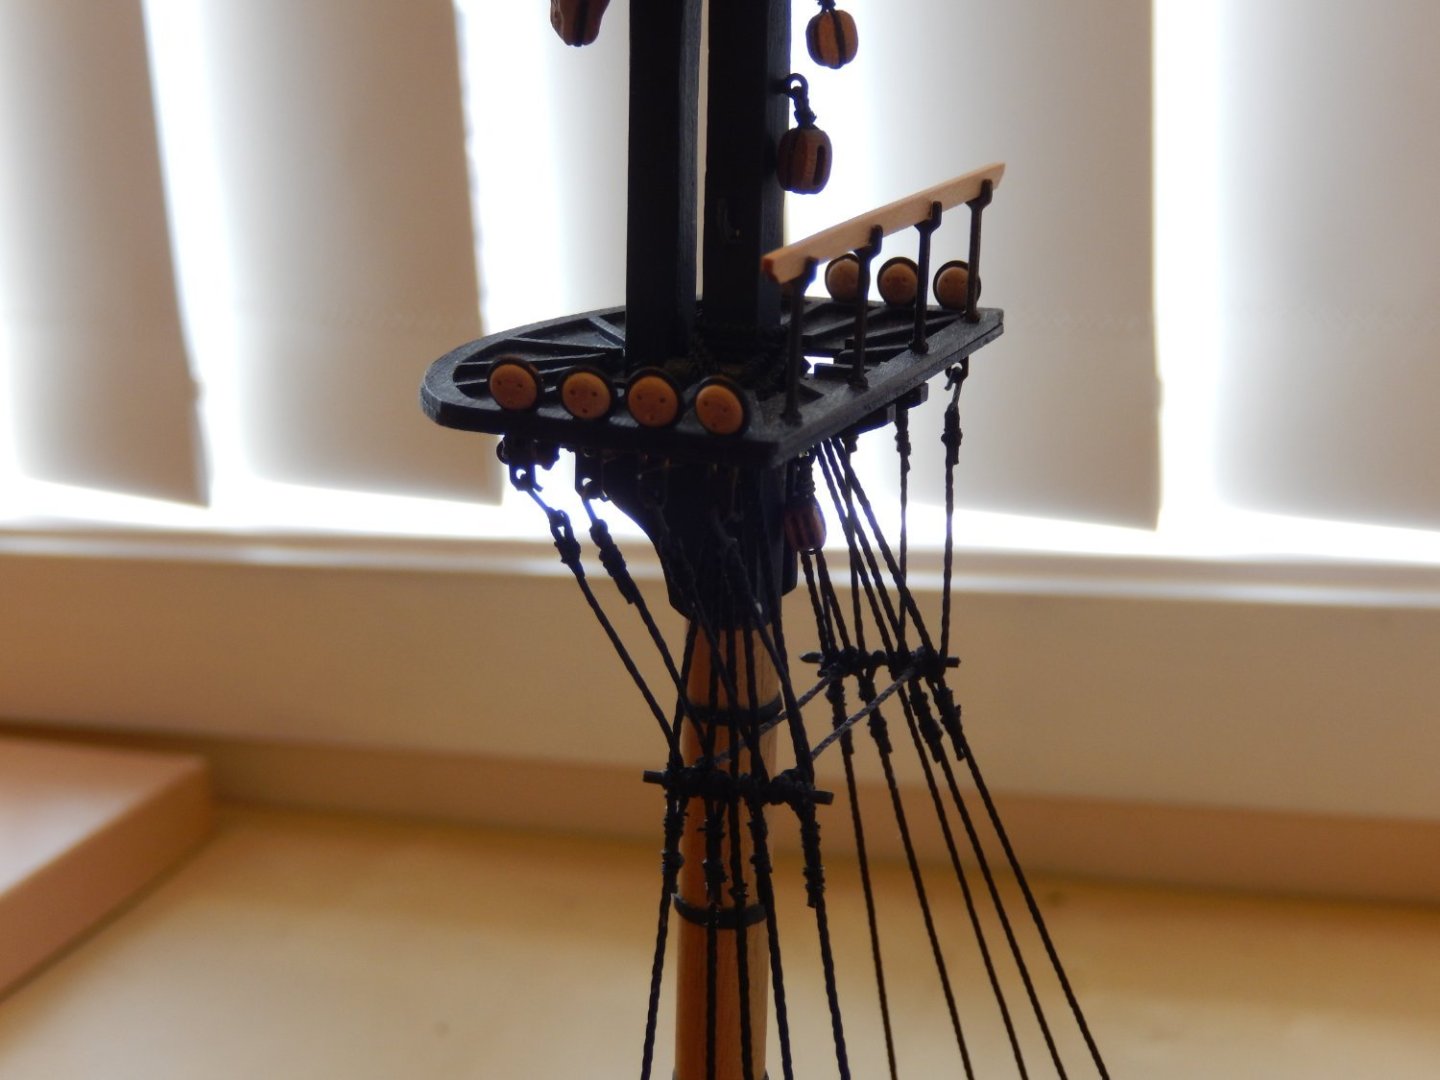
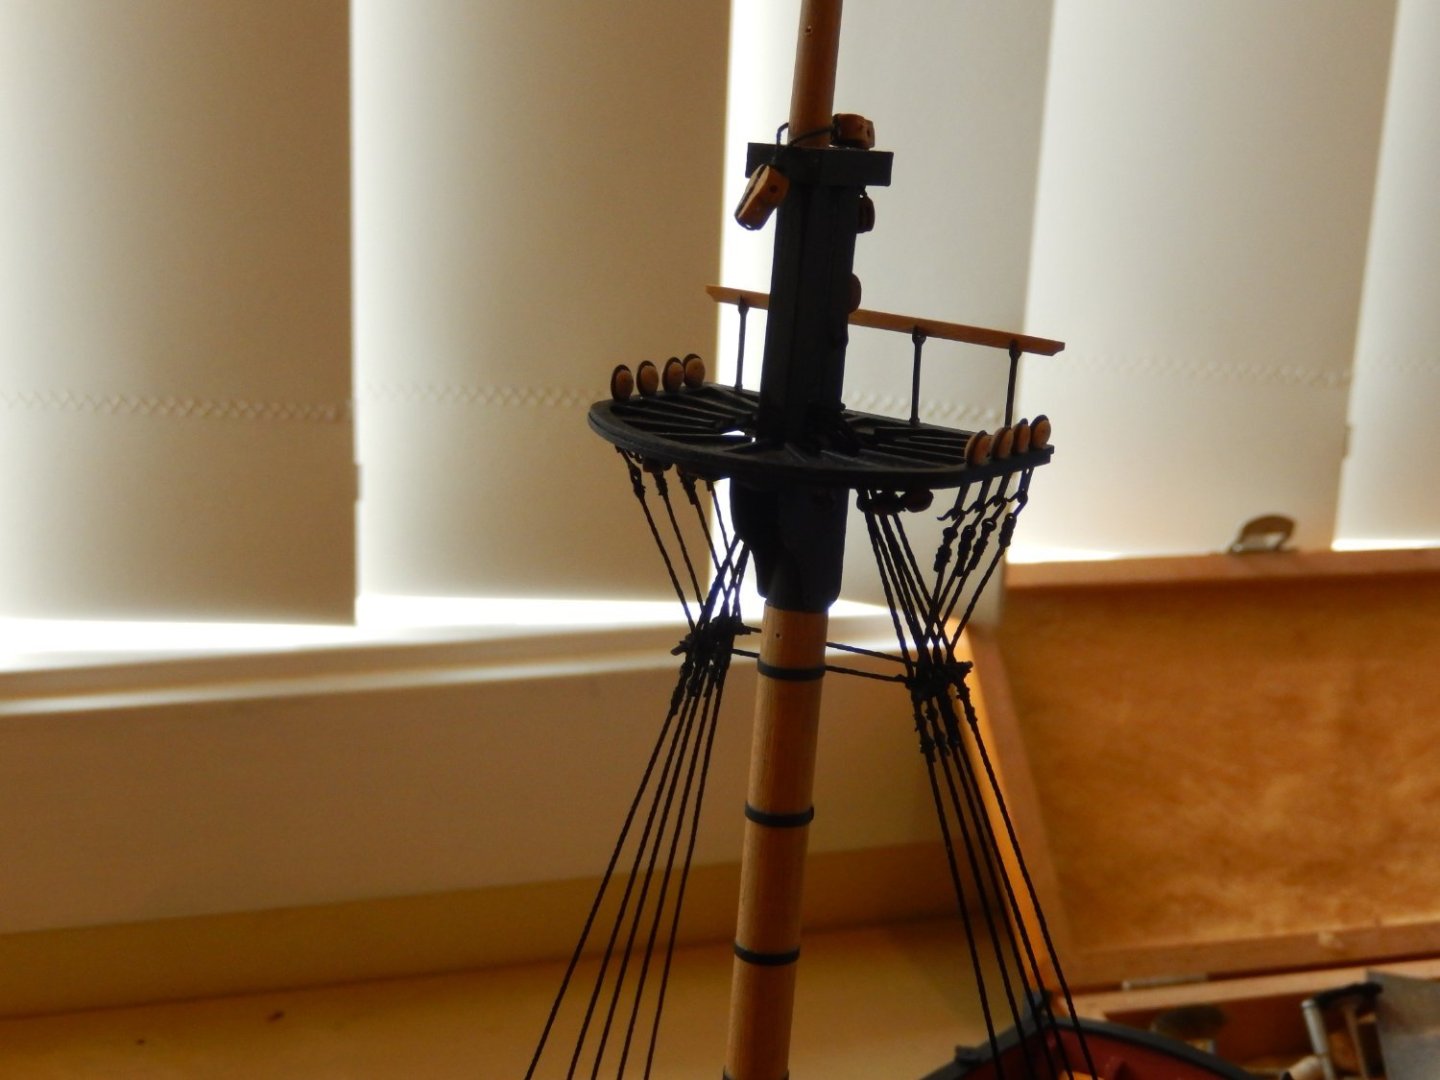
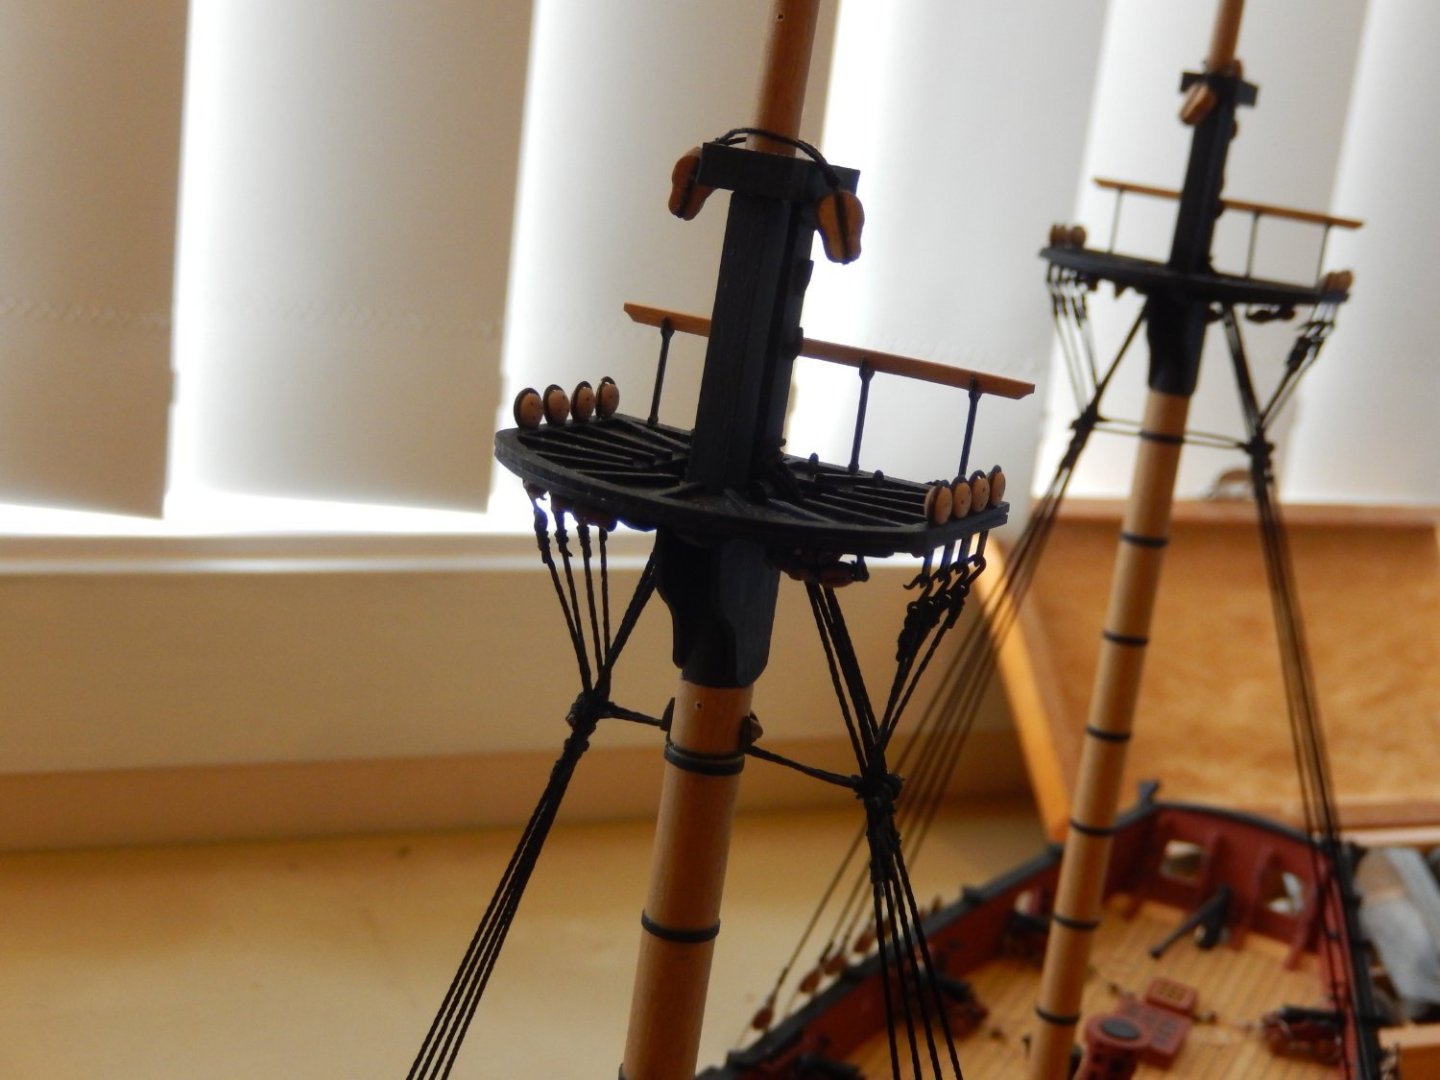
Finally. Some progress. The futtock shrouds are finished and the catharpins are done. It's taken ages, though other things have interrupted over the last few weeks. I found the whole process quite difficult and time consuming. The thread is quite stiff and difficult to manage - wetting it helped. I am not looking forward to the equivalent process for the topgallant shrouds.


-
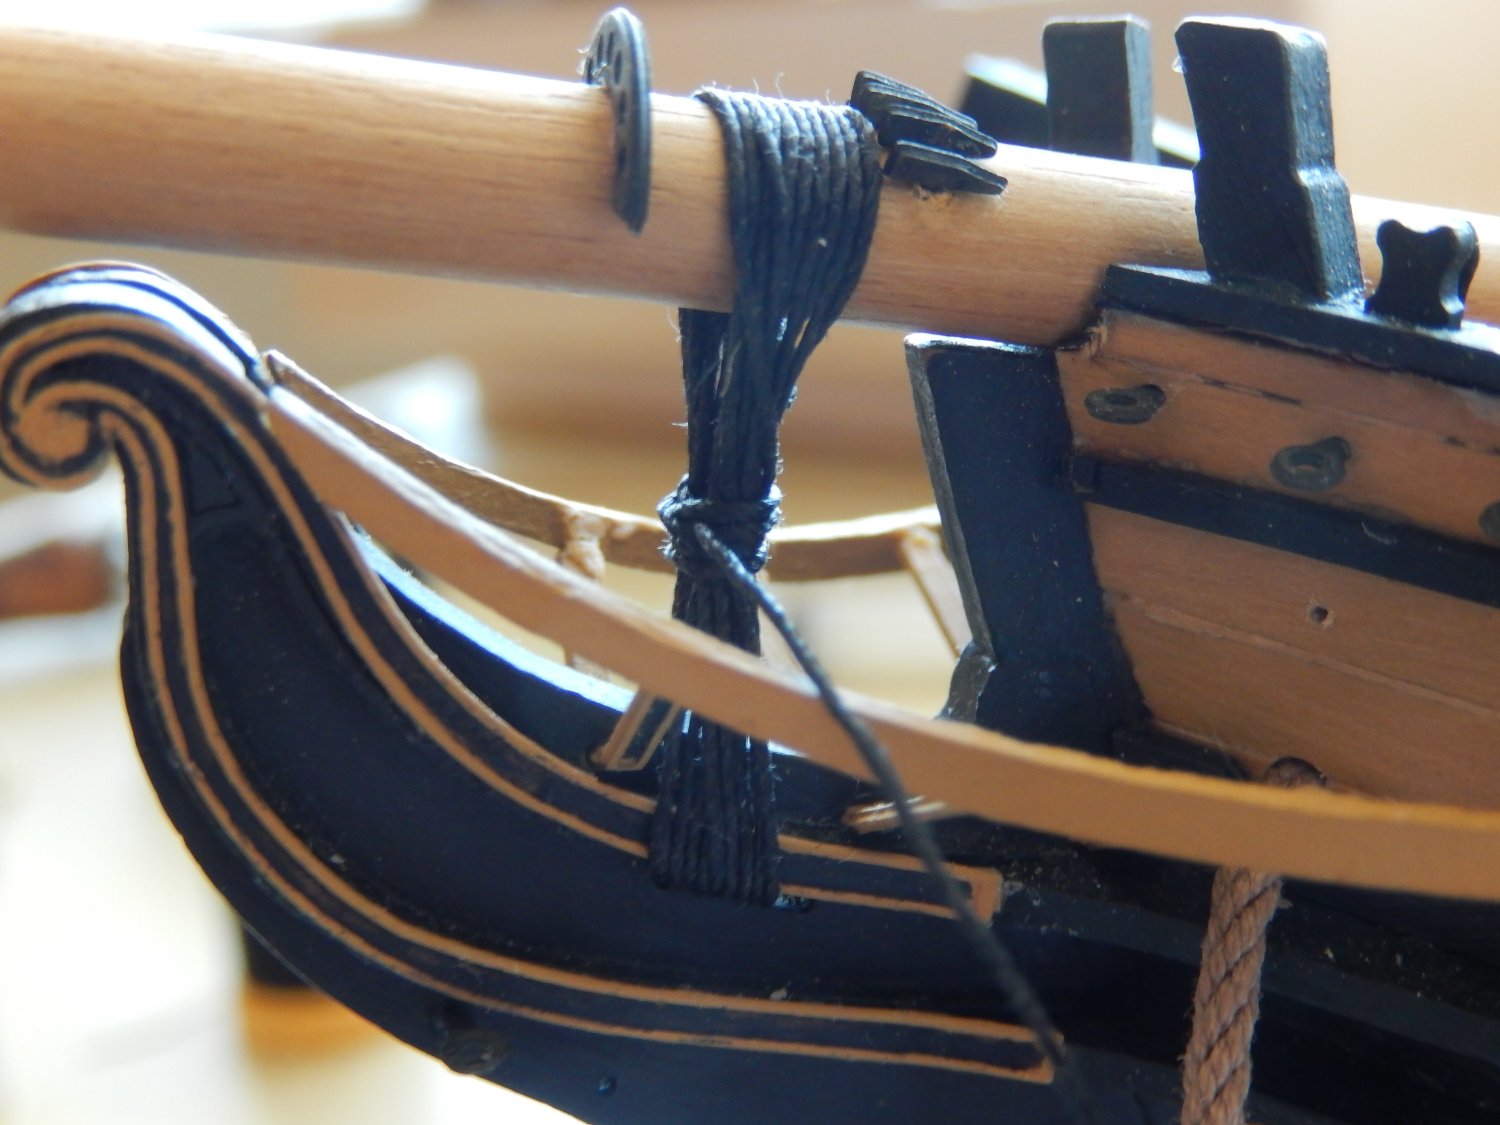
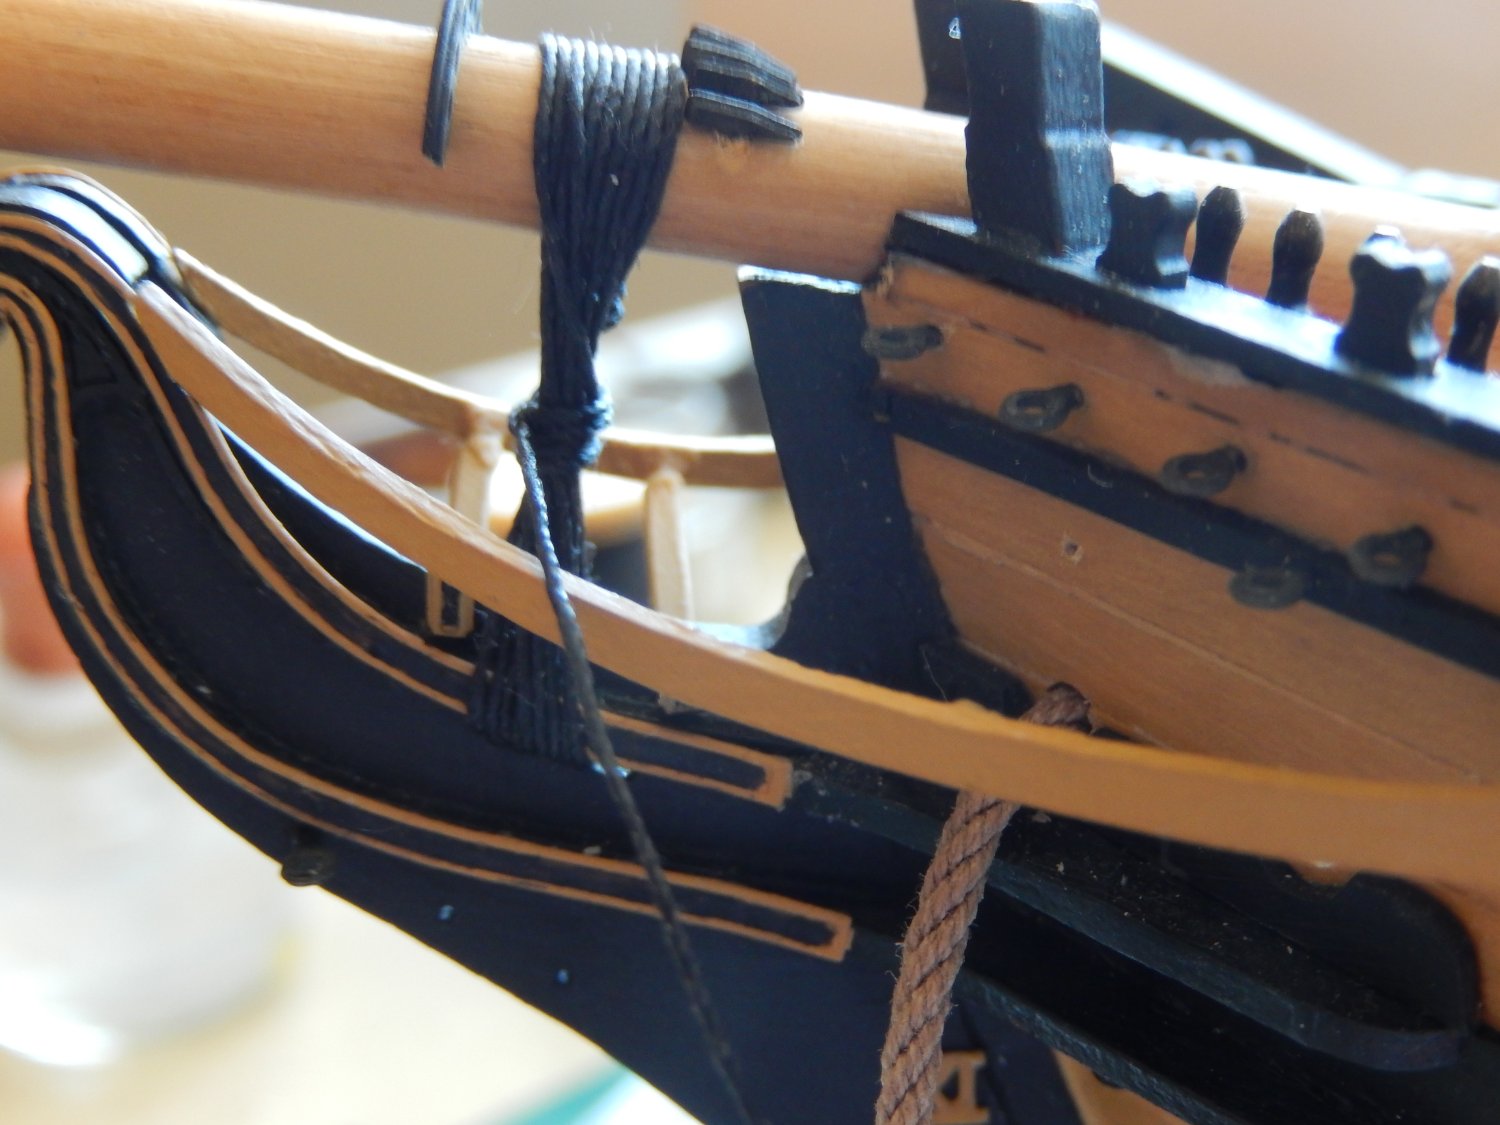
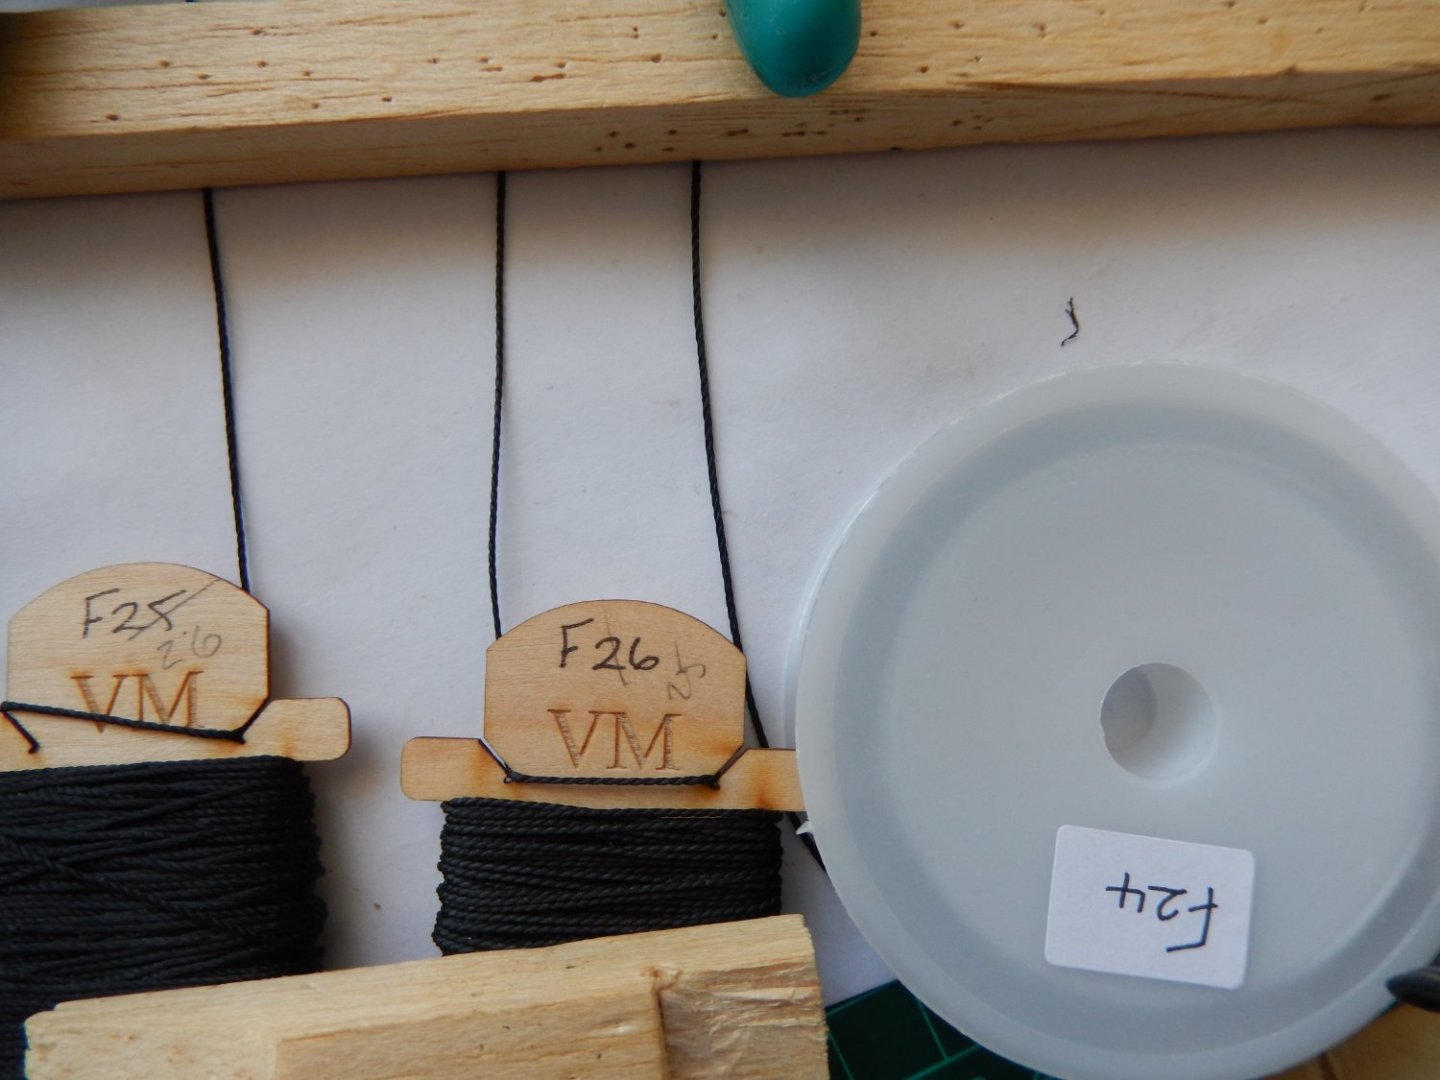
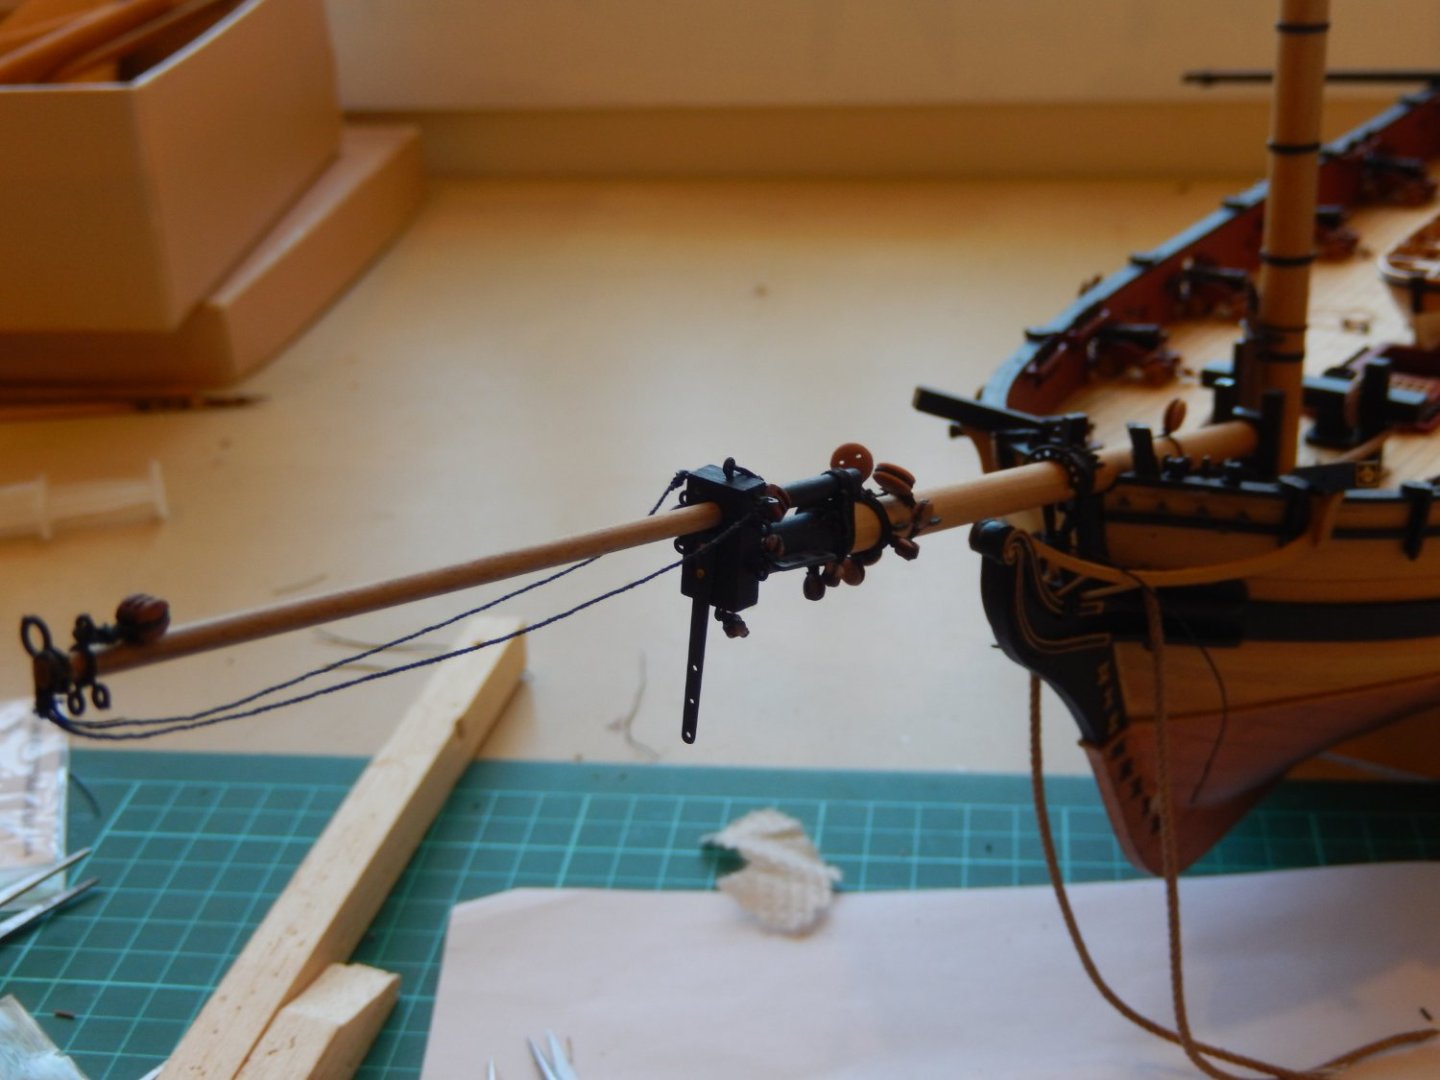
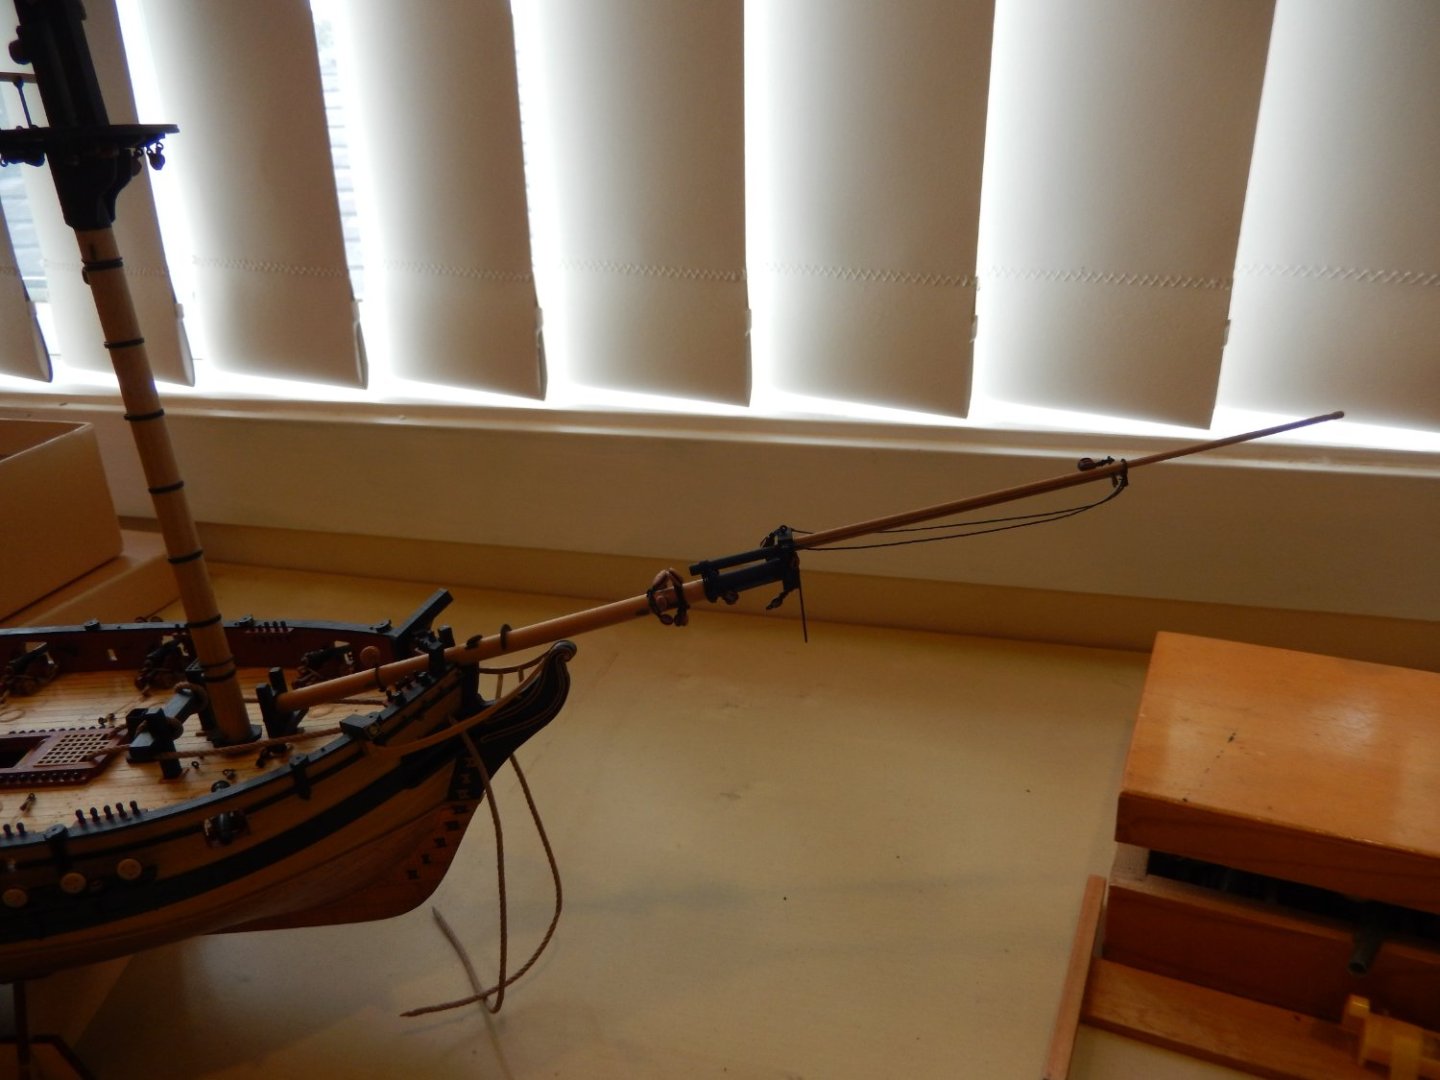
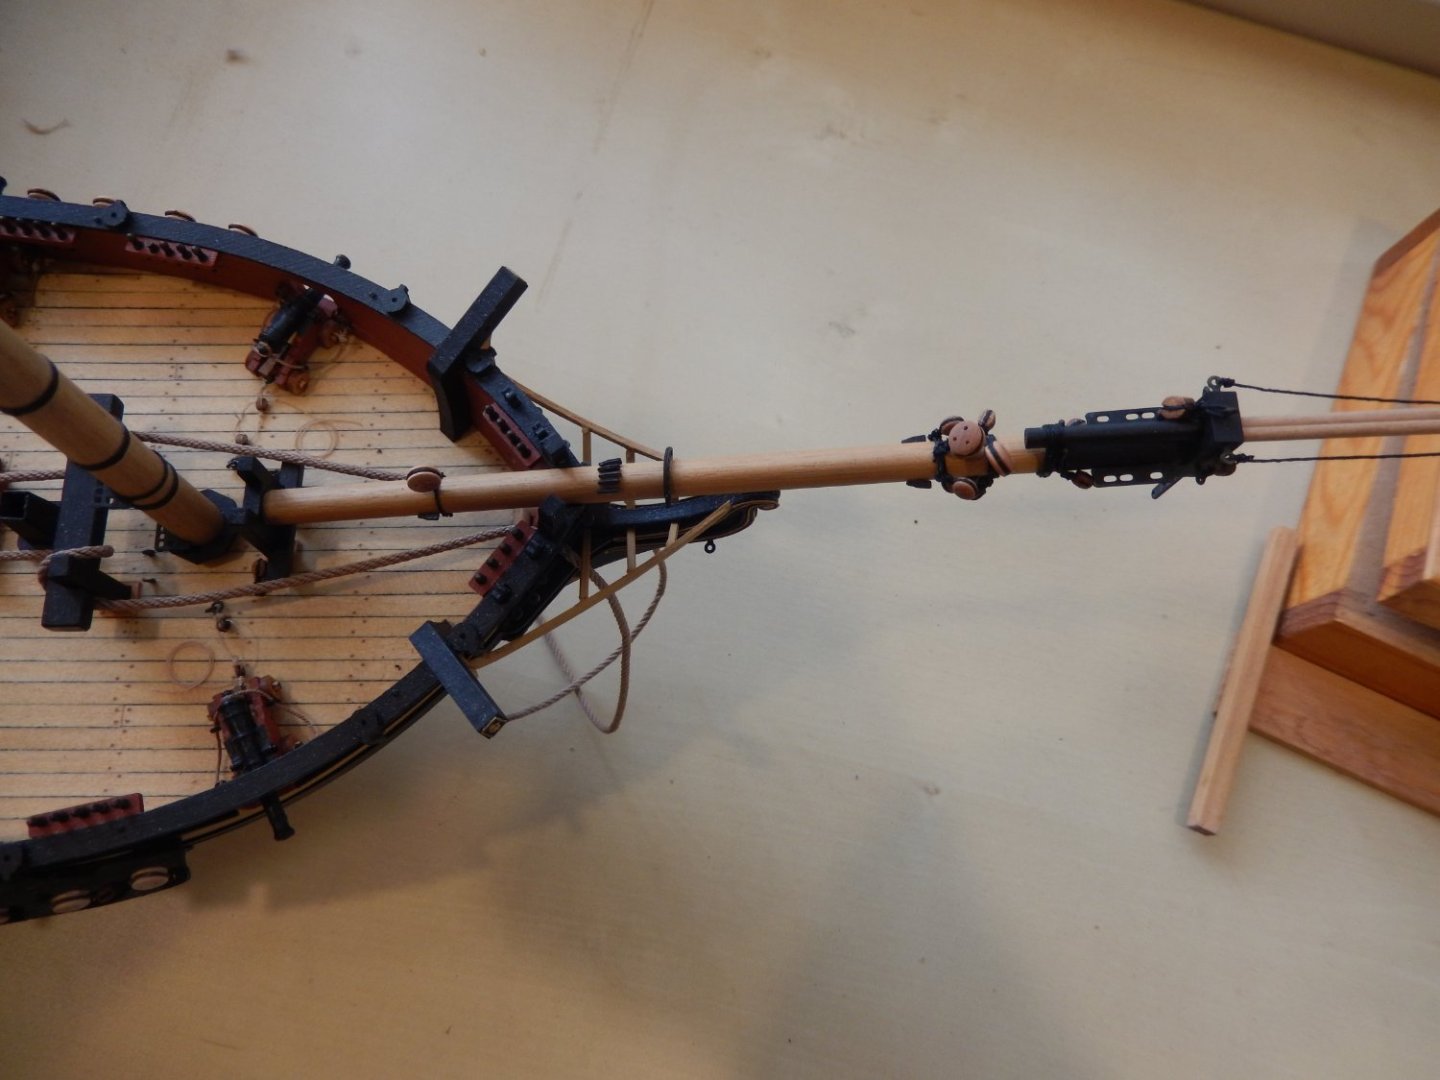
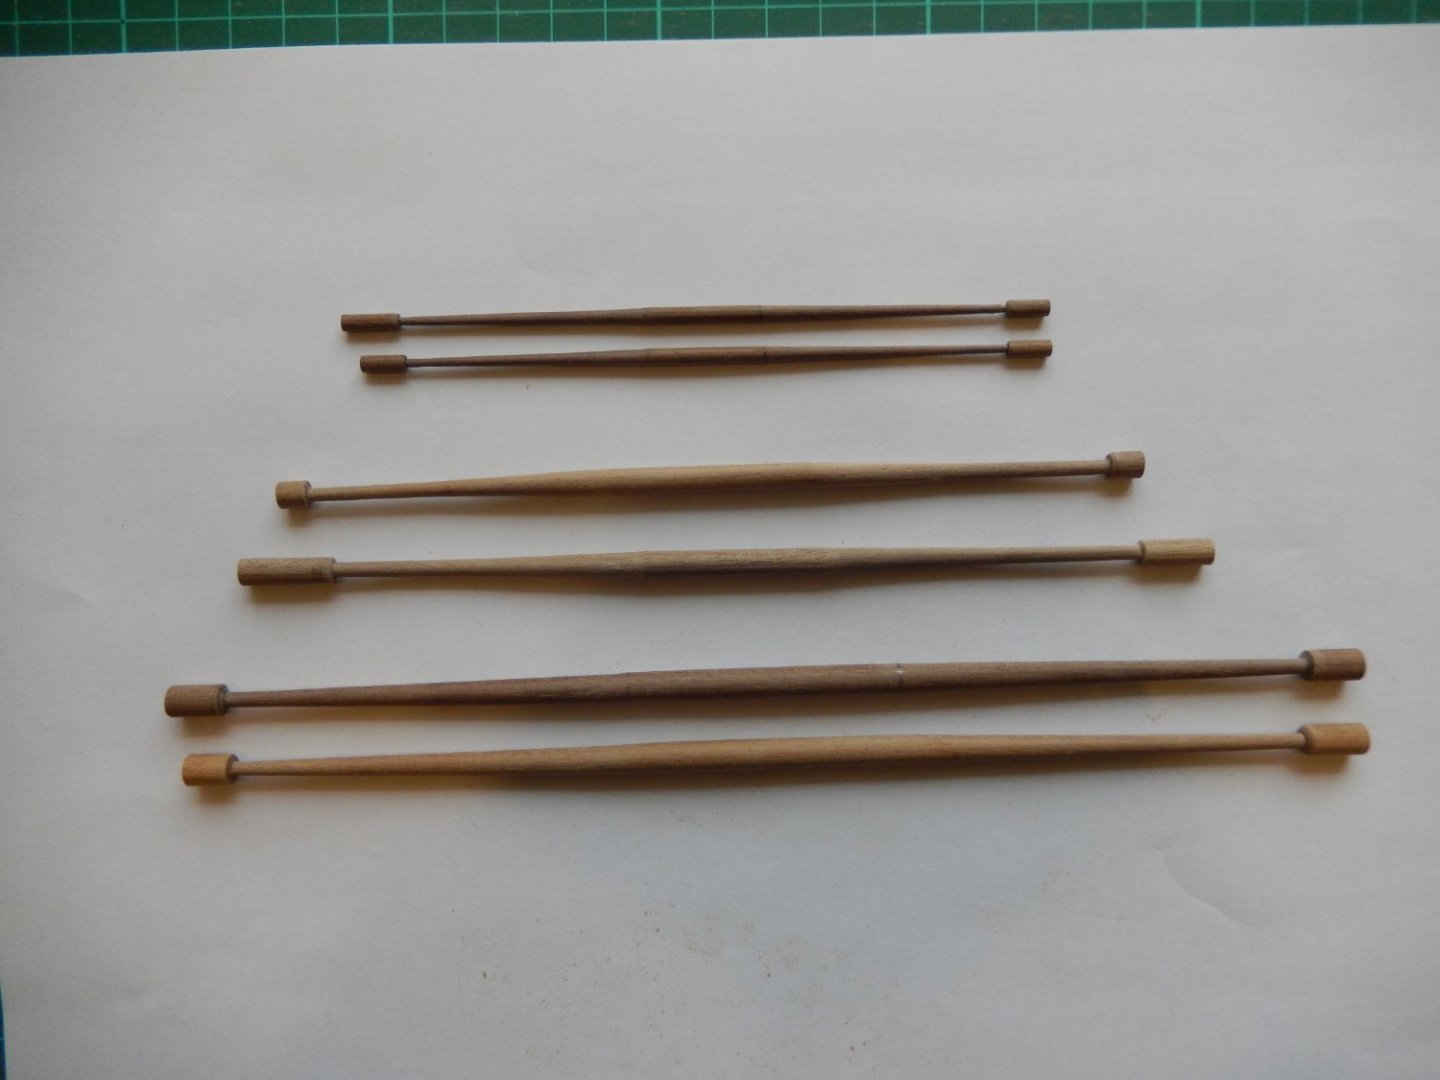
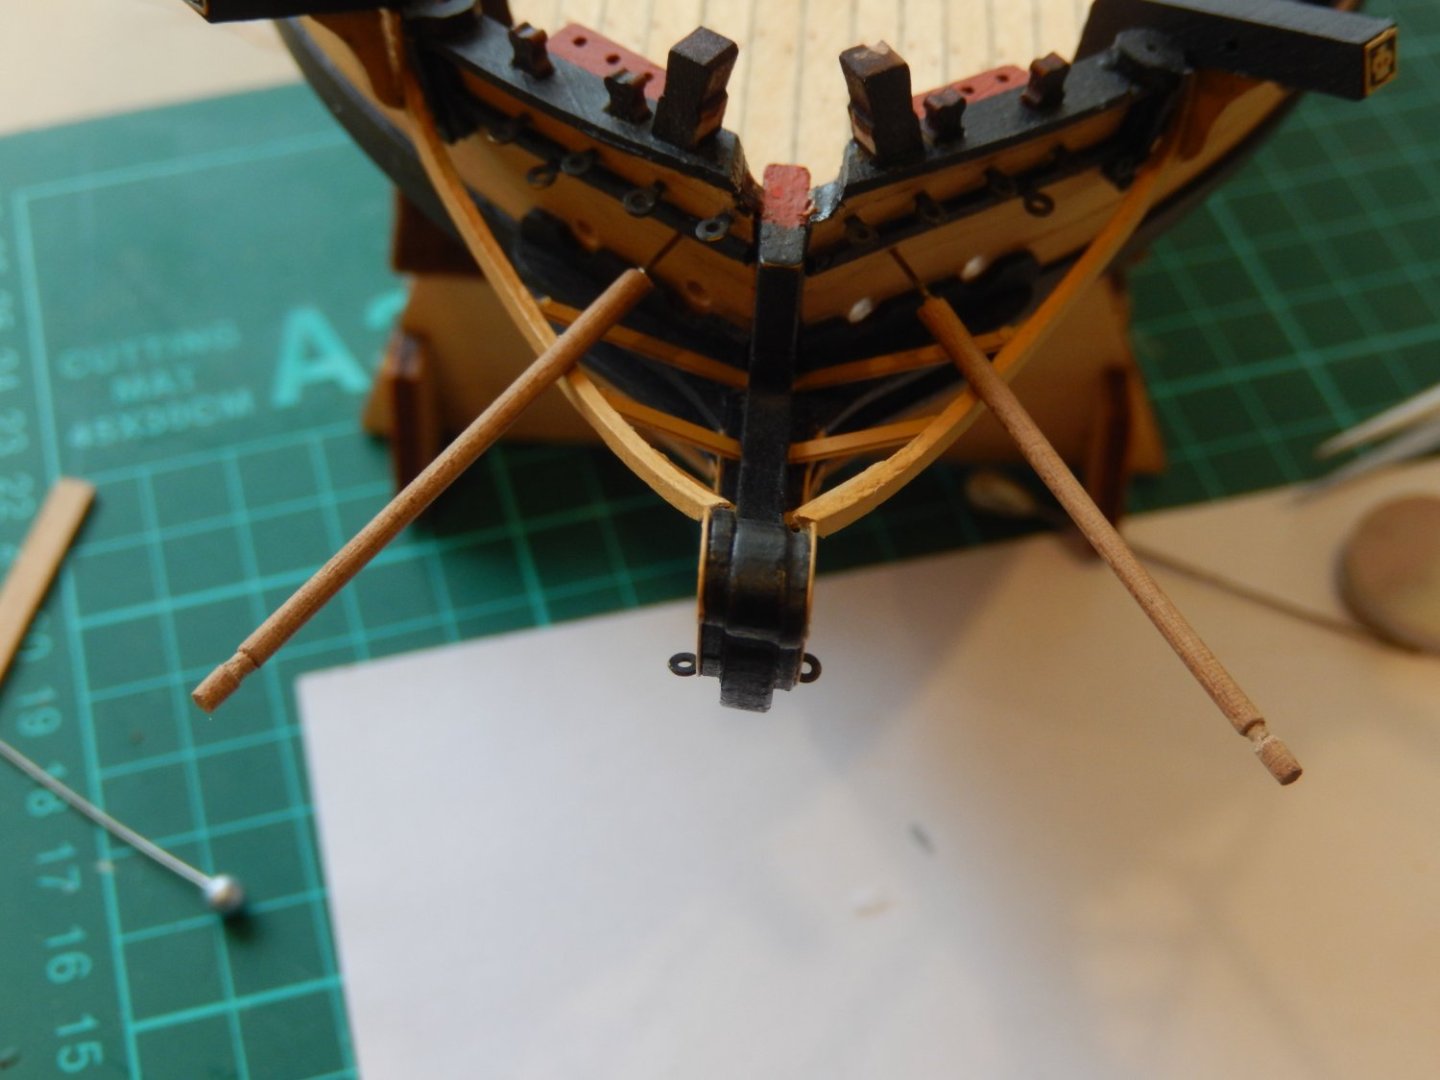
Long time ... The knot tying is almost over and the yards are (almost) fully rigged. To do something a little different, I finally fitted the bowsprit and its gammoning. (sp?). This required the use of 0.5mm black thread - F24 in the instructions. In the photo F24 is on the right and is the thickest of the three - about 1+mm. The thinnest is F26 which is supposed to be 1mm, but is less than that. It's something to look out for. Fortunately I had some suitable leftover thread and the gammoning turned out acceptablly. I see I haven't yet trimmed the excess thread.


-
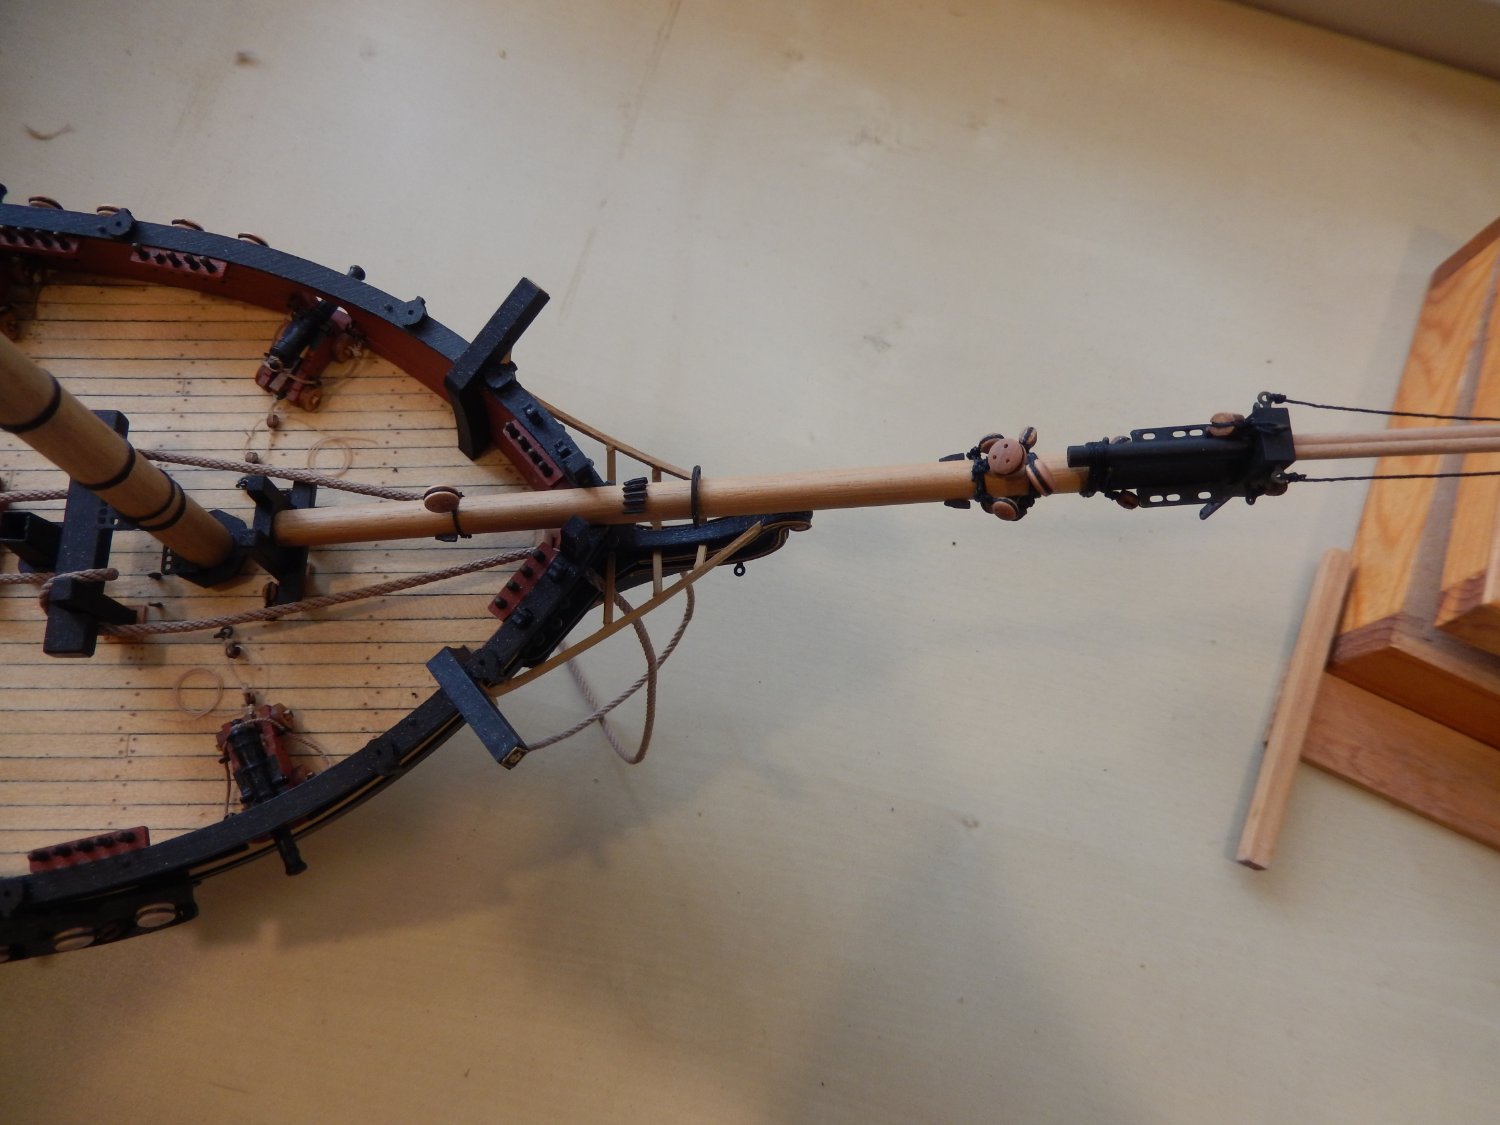
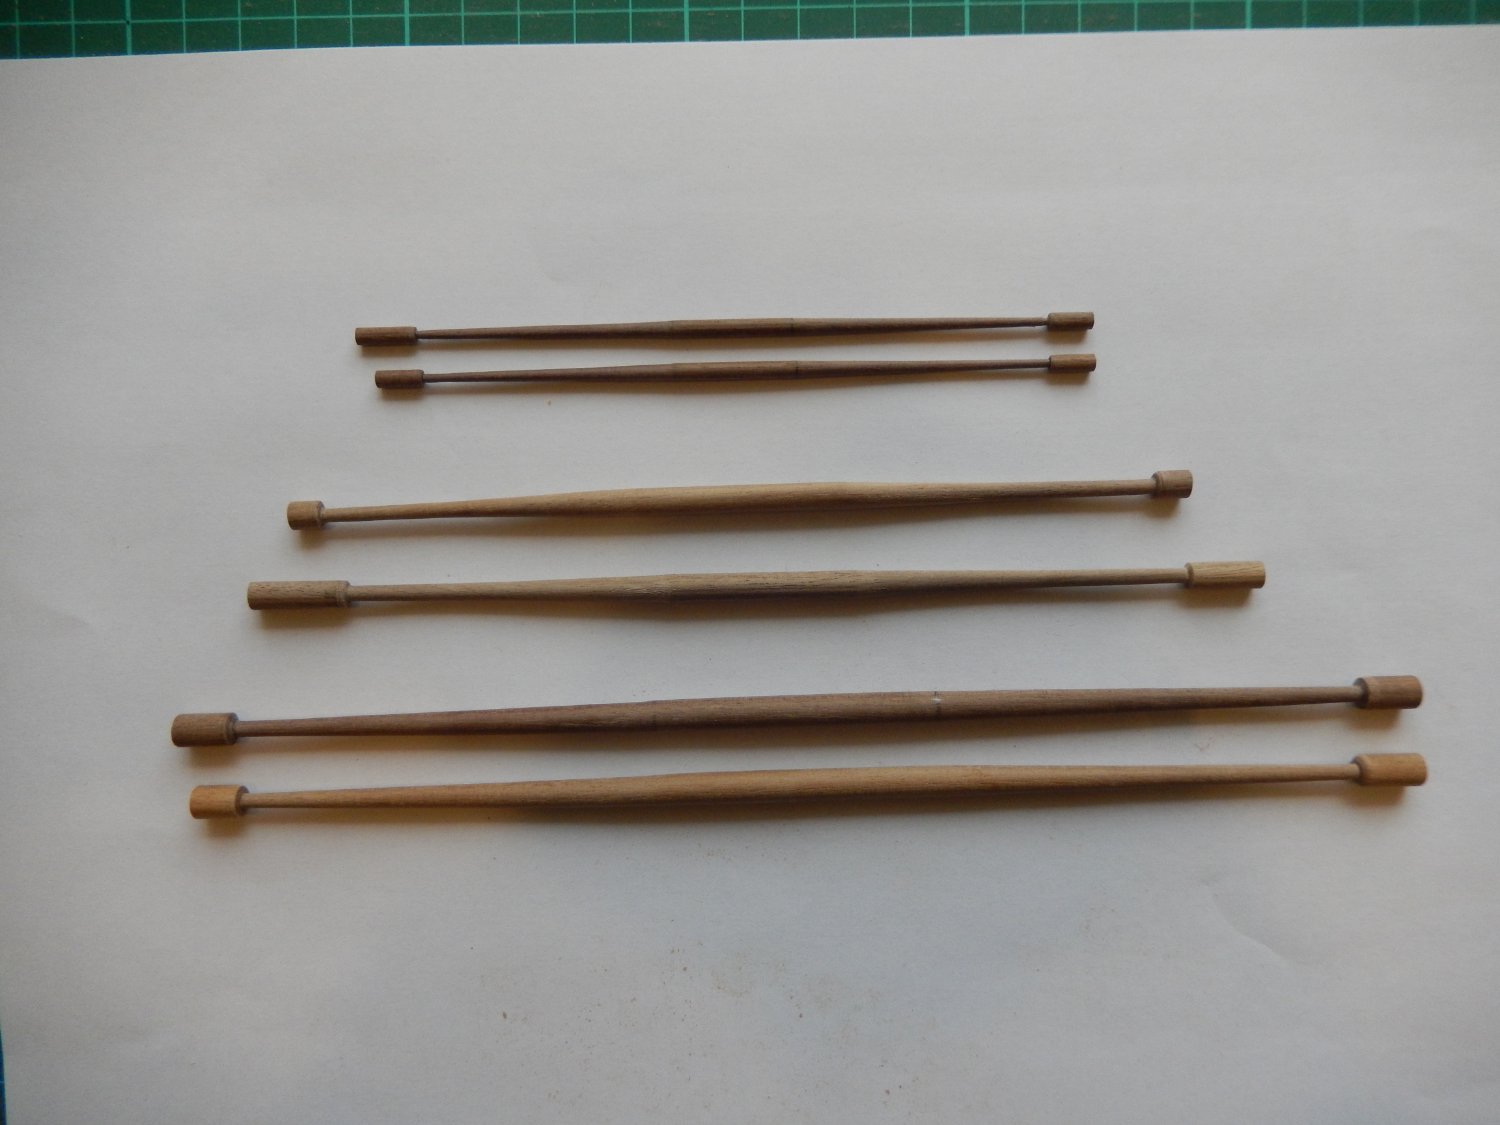
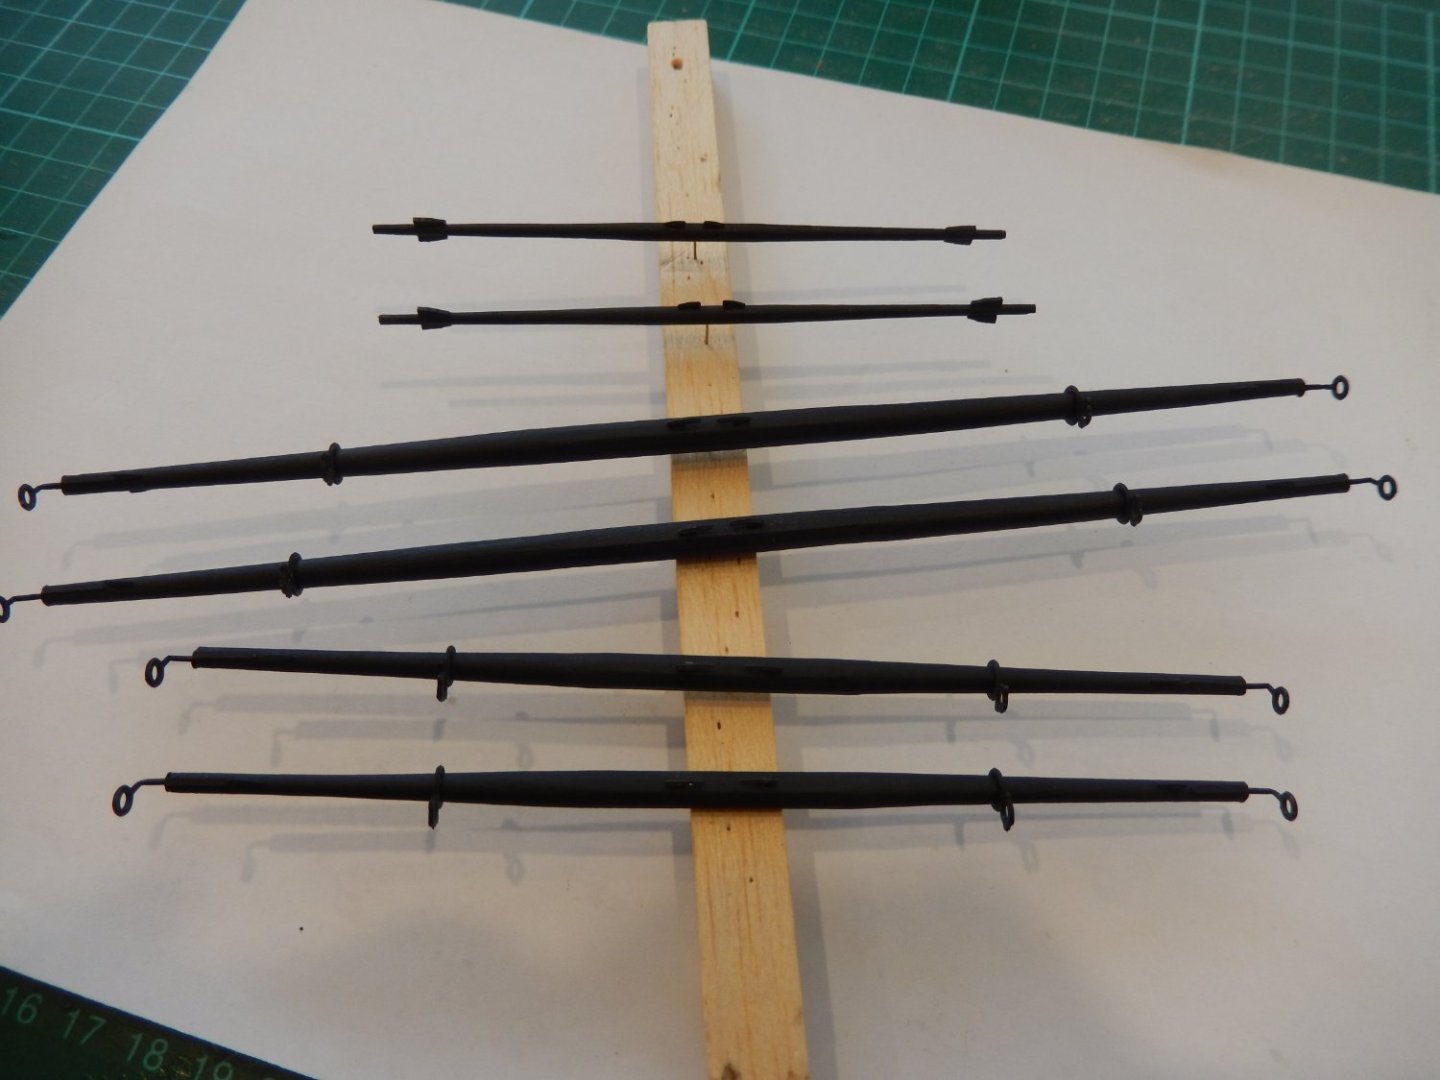
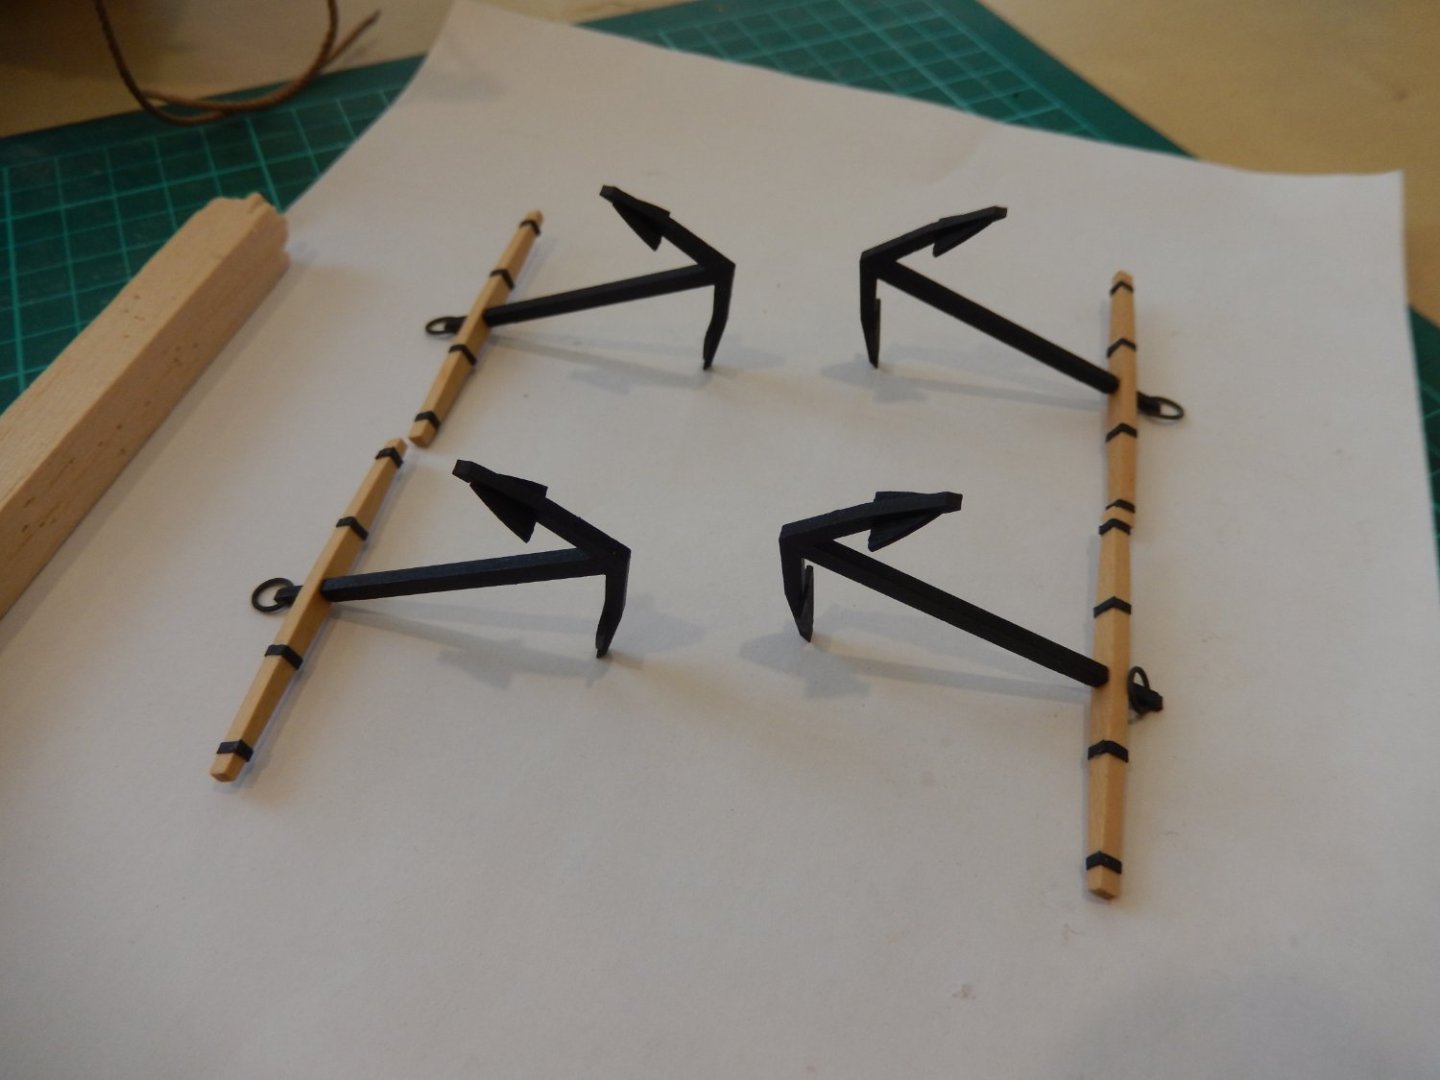
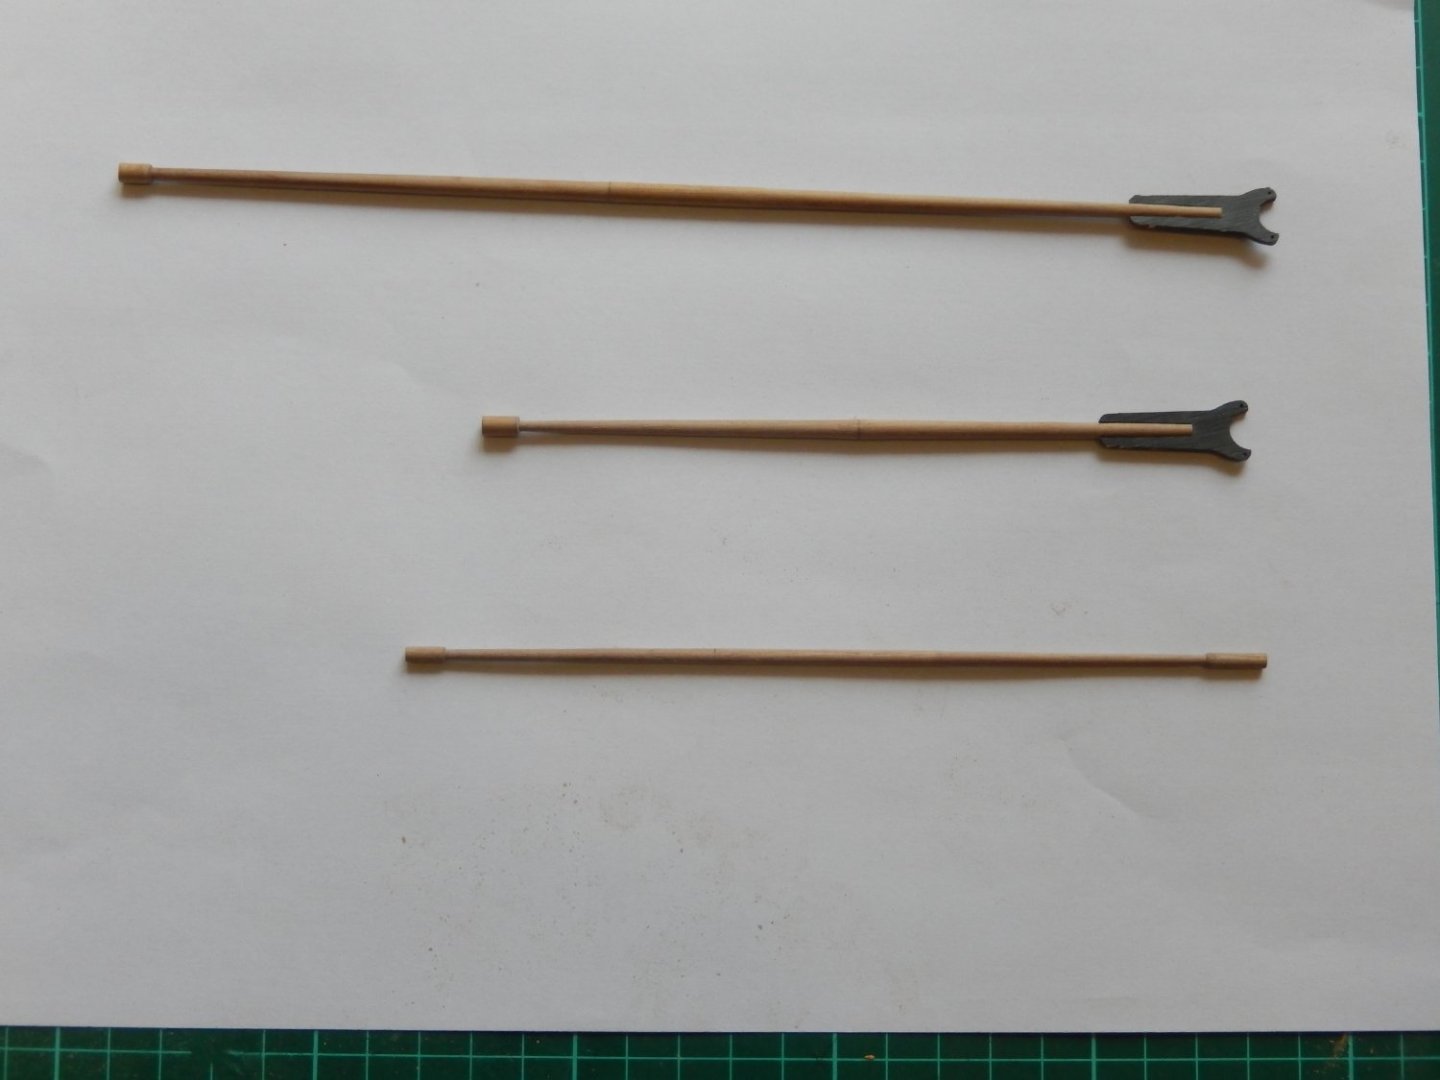
A belated thanks for the kind comments. There is some progress to report. The yards are finished and their rigging is about to begin. Here are the yards. The bowsprit is complete and in the photos is dry-fitted. The flying jib boom is dry fitted and will be fixed as late as possible. Sticking out as it does while doing other bits and pieces is asking for trouble. Finally, the anchors are done. Now comes my least-favorite part of the whole exercise: tying knots.

-
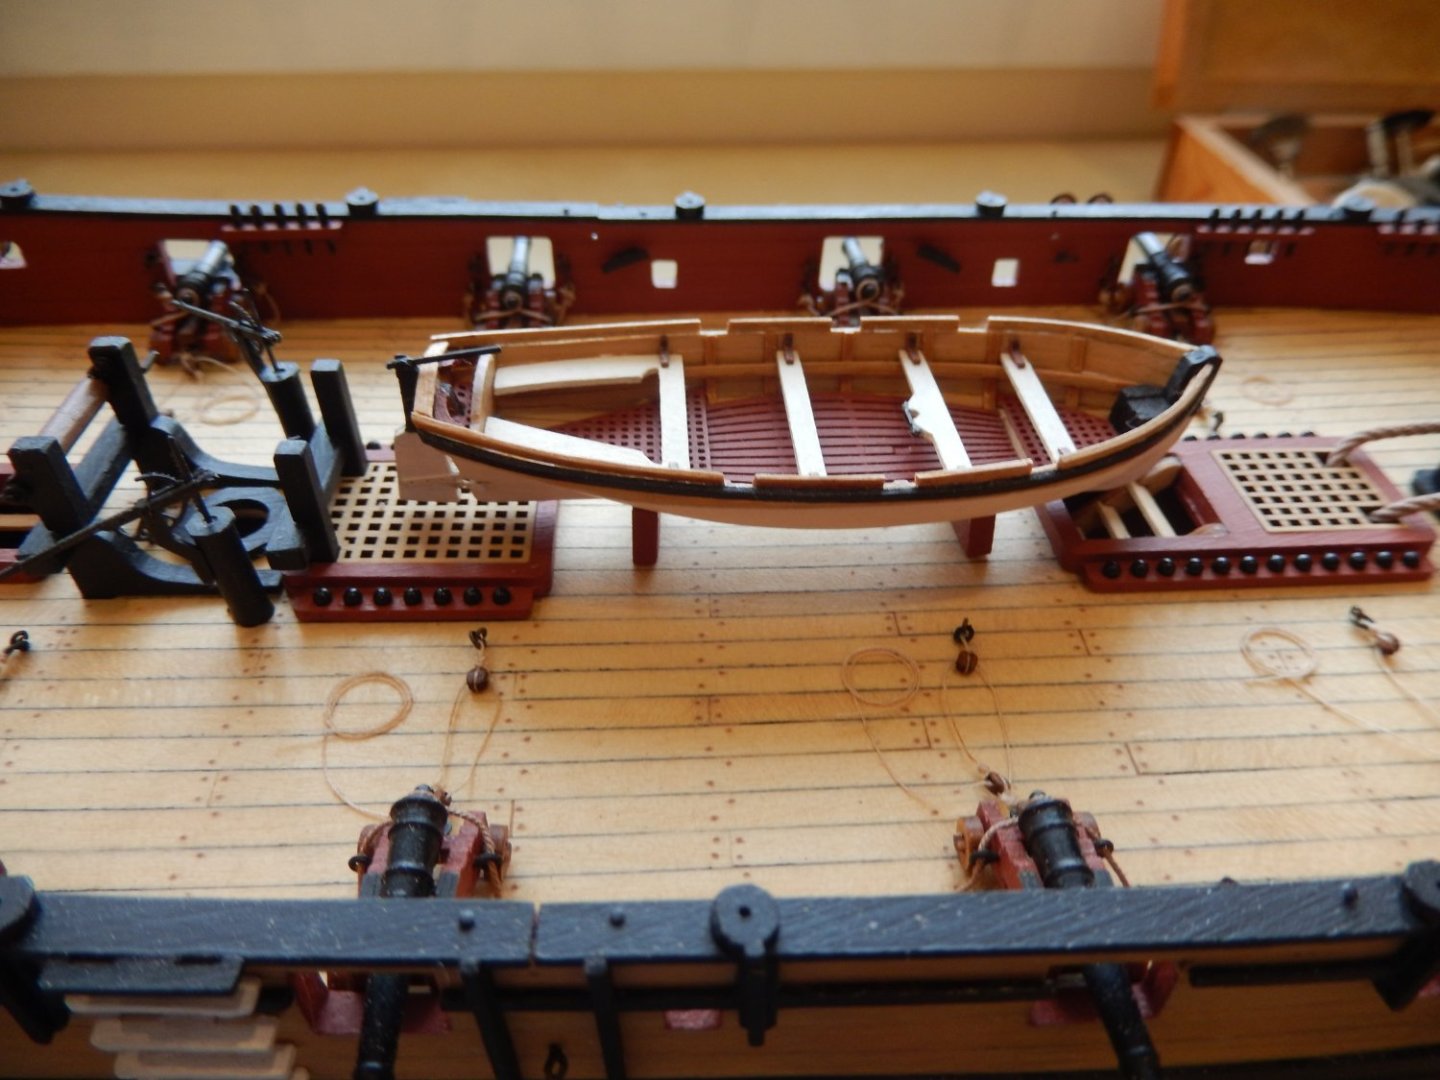
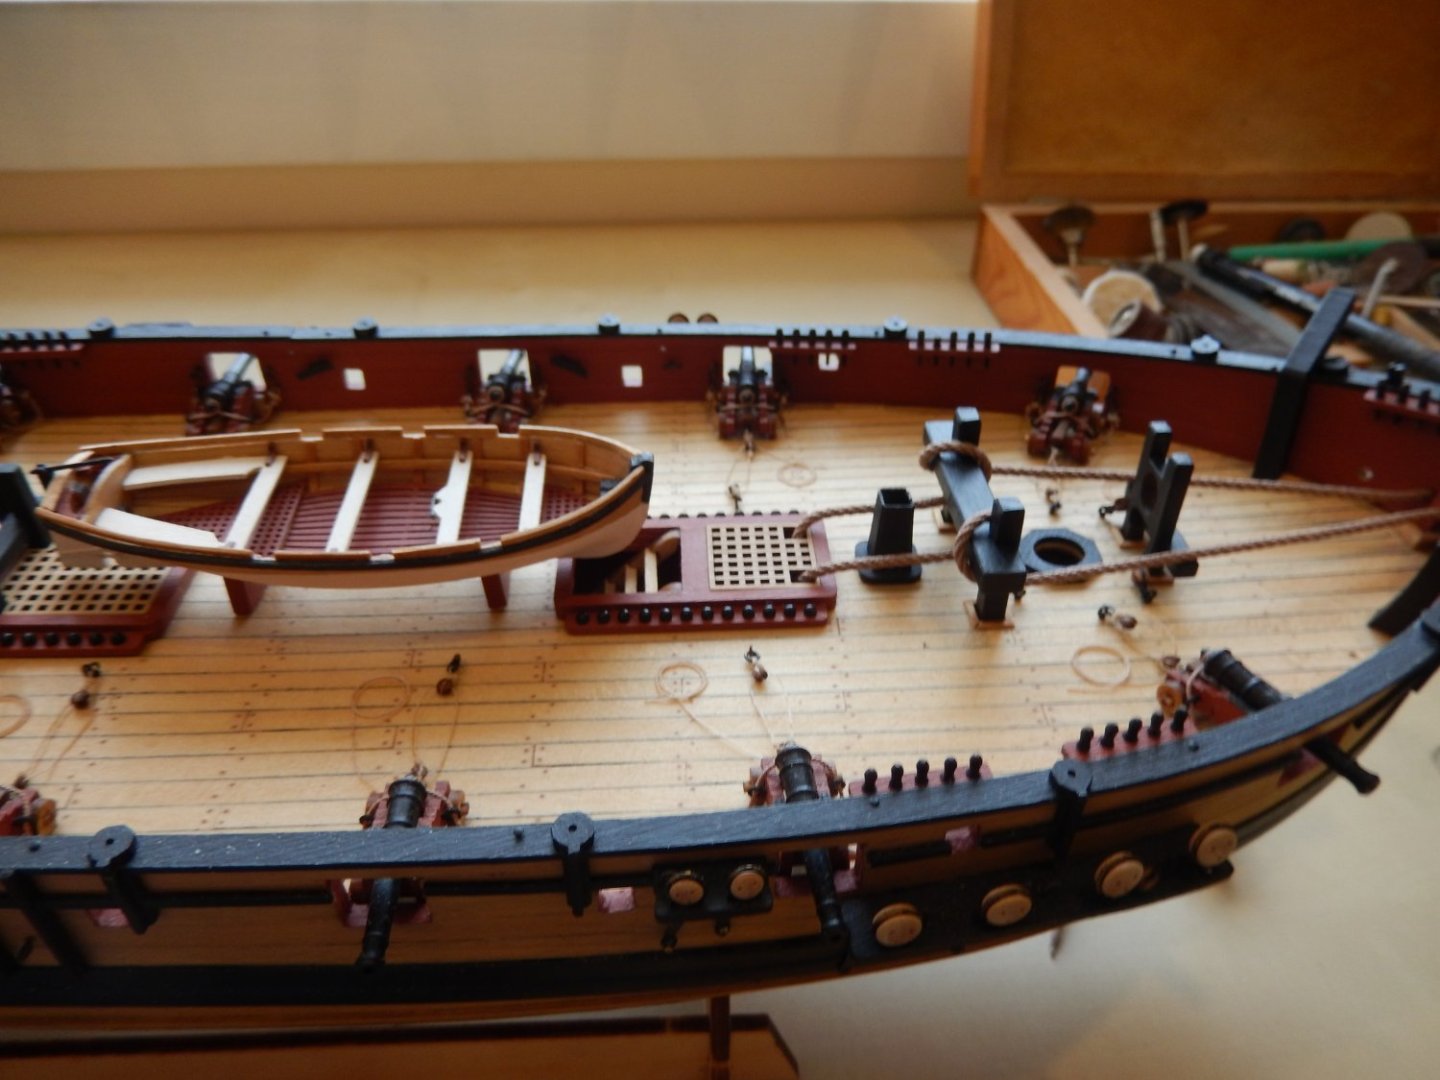
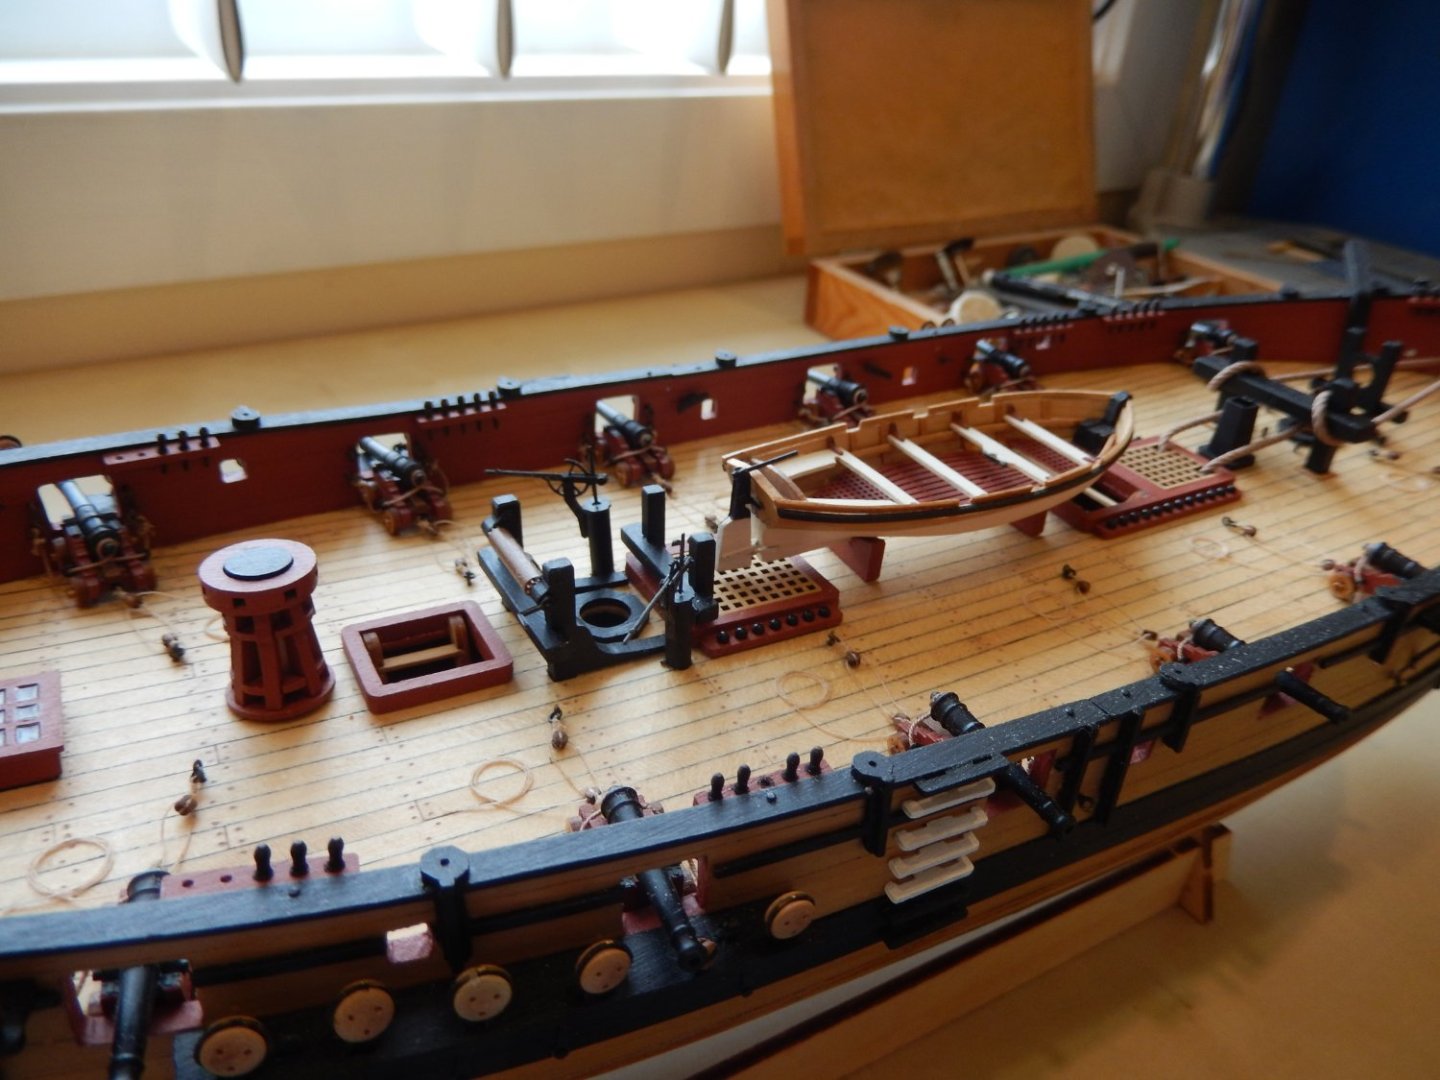
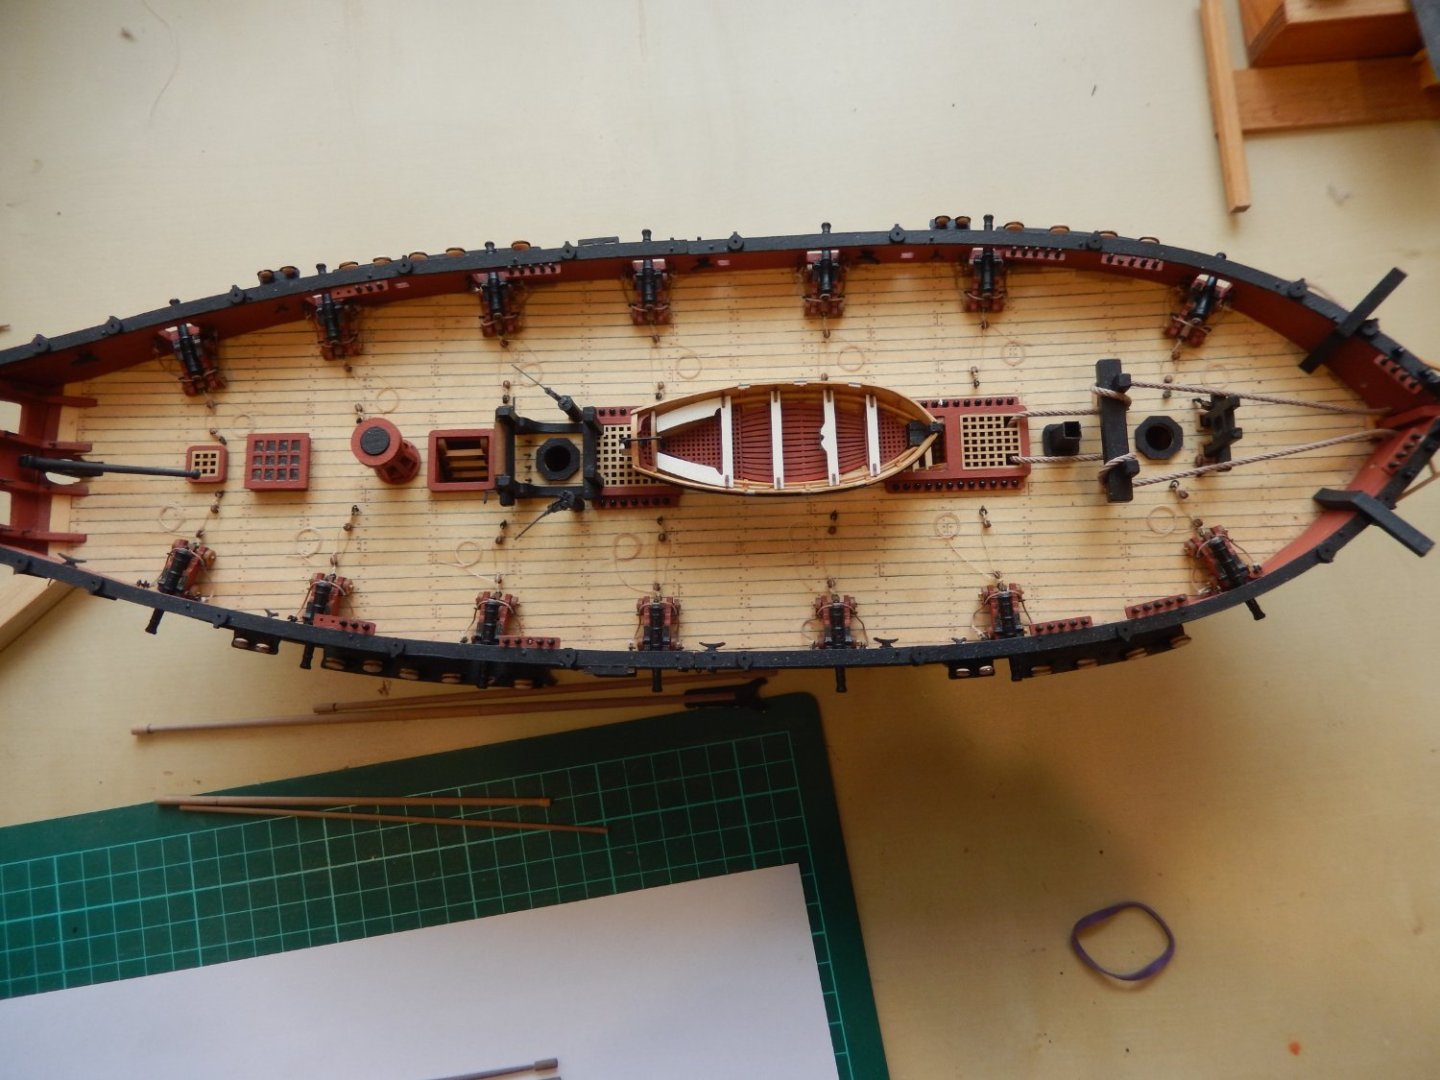
Finally here is some progress. The various yards are on the way to being finished. Here they are before adding the octagonal sections, painting and putting on the various bits of hardware. The deck furniture is now complete. The ship's boat is dry-fitted in the photos.
-
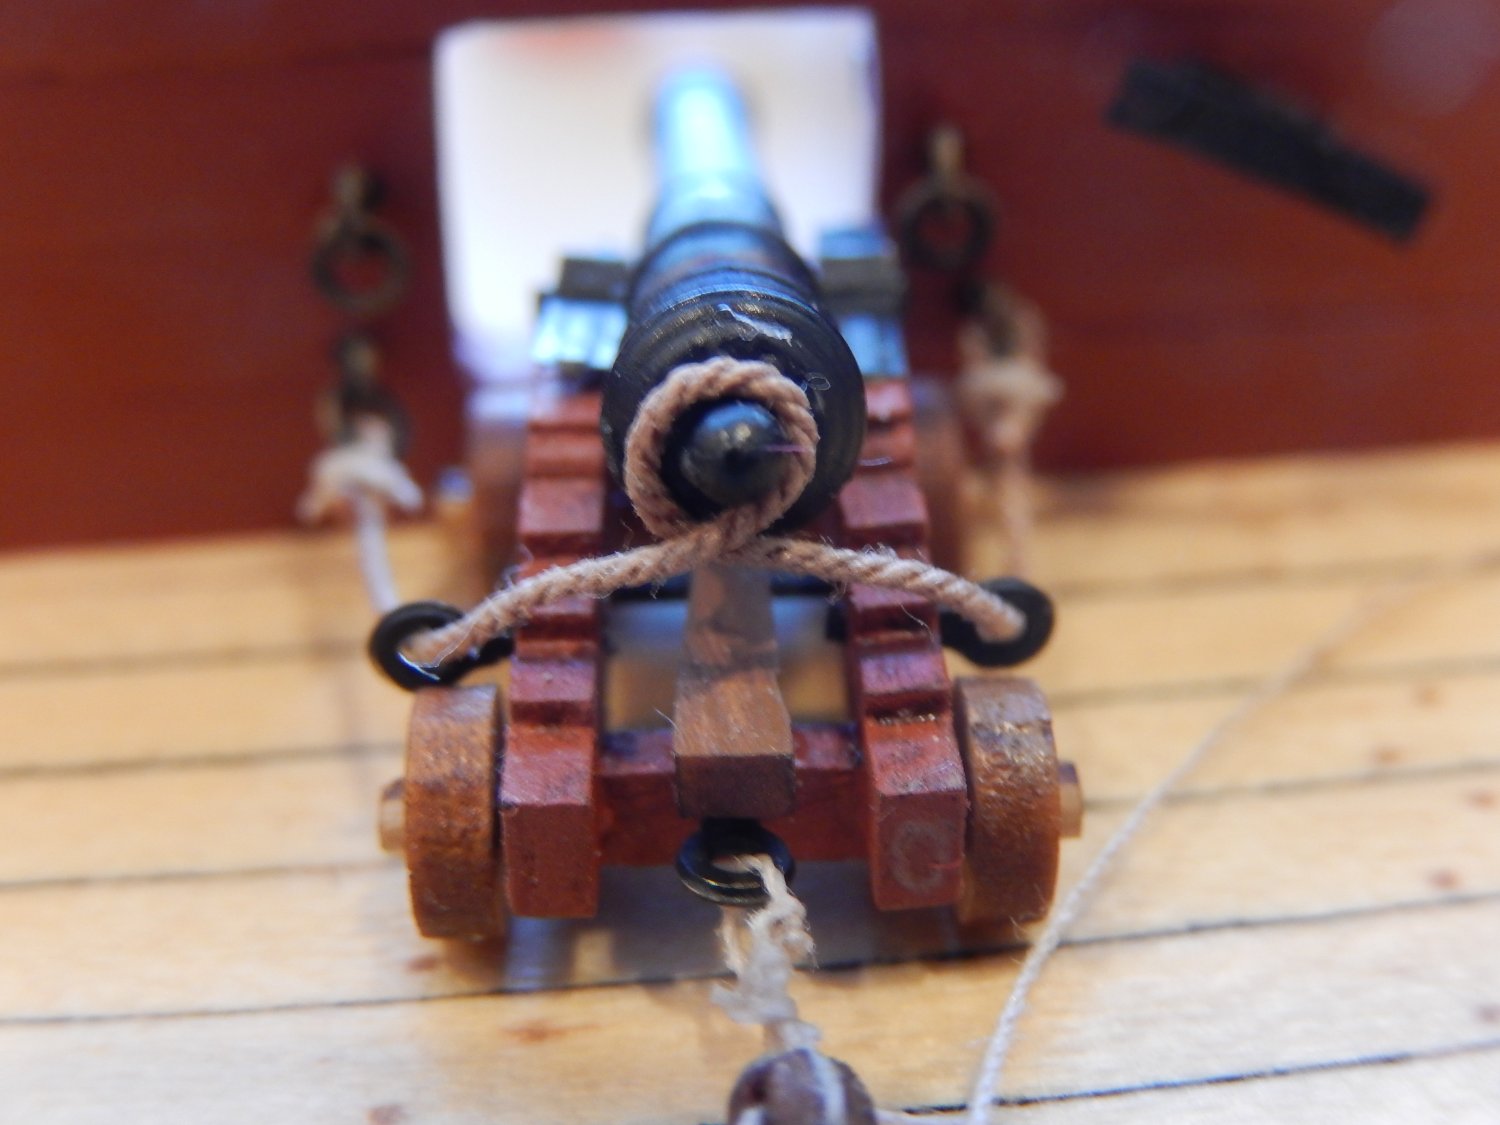
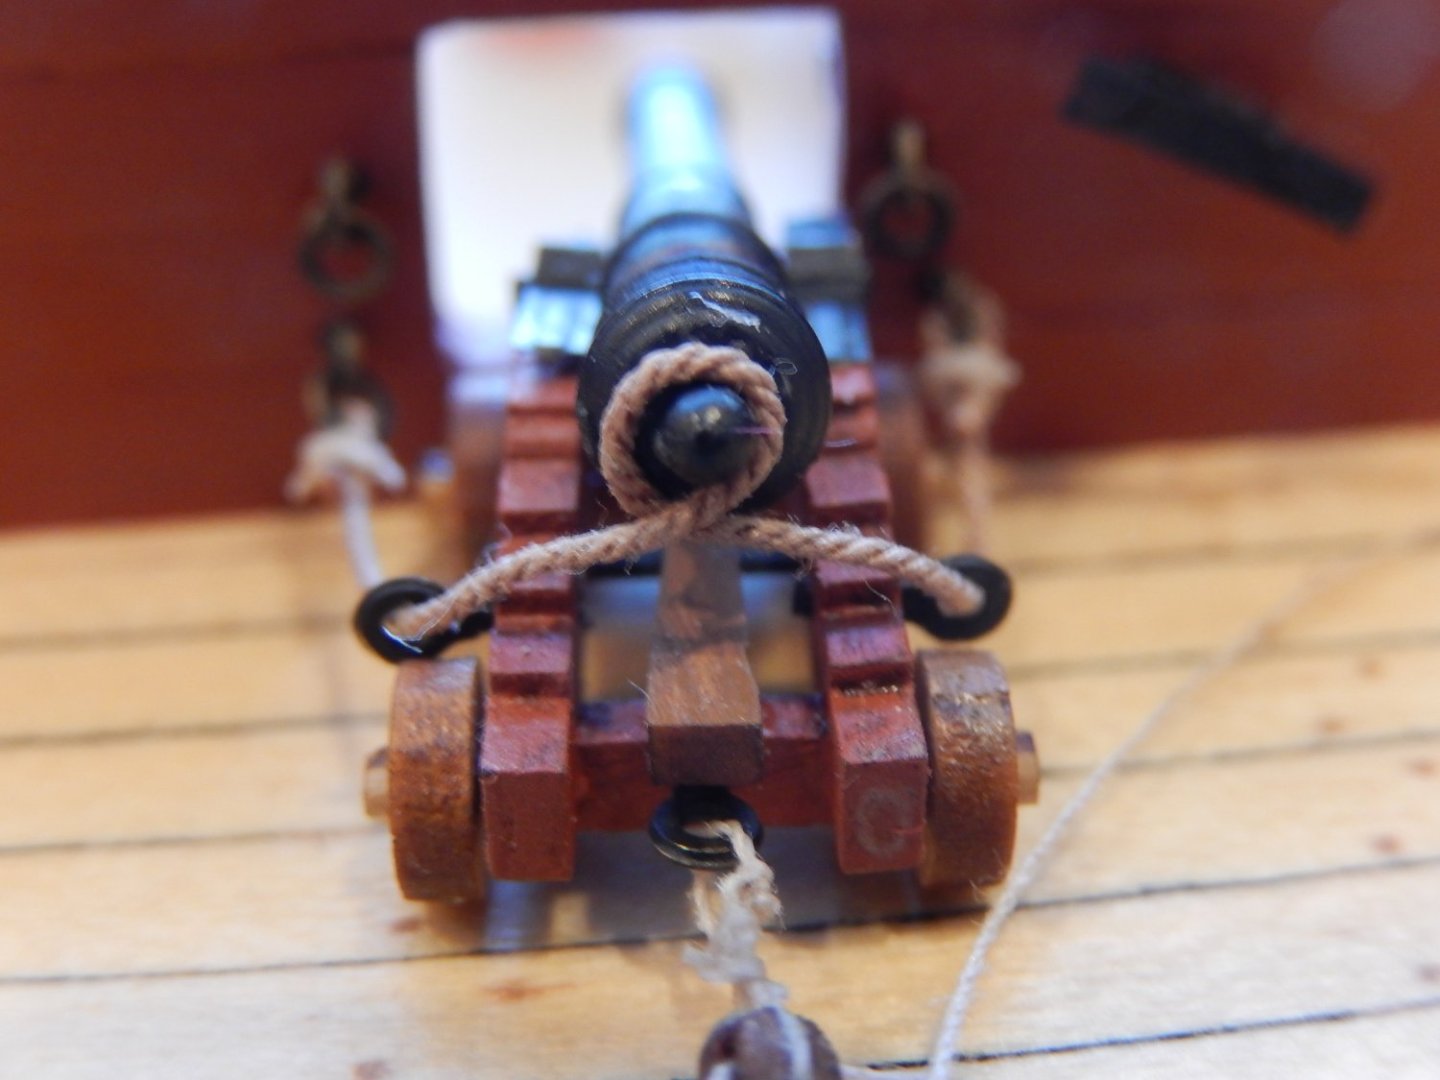
The guns are finally finished. They came out acceptably, but I would not care to do it again. The eye bolts - PE-7 and 7a are, I think, more trouble than they're worth. The round 7a s do not sit well and are difficult to thread. The recommended breeching rope (0.75mm) quite simply will not fit. As an experiment I temporarily fitted the anchor ropes. The next two photos show the thread provided in the kit. The third is Syren thread left over from Vanguard. I am not that happy with the kit tread - it's rather furry and appears to me to be too thick. The Syren thread is thinner (too thin?) and far tighter. I am leaning towards the Syren thread. Comments?

-
Thanks for the kind comment. I have already wet the tackle with dilute PVA. It looks quite respectable now. The 2mm blocks are beautifully made but really tiny and very difficult to handle. Evidently they came from Russia and are no longer available.
-
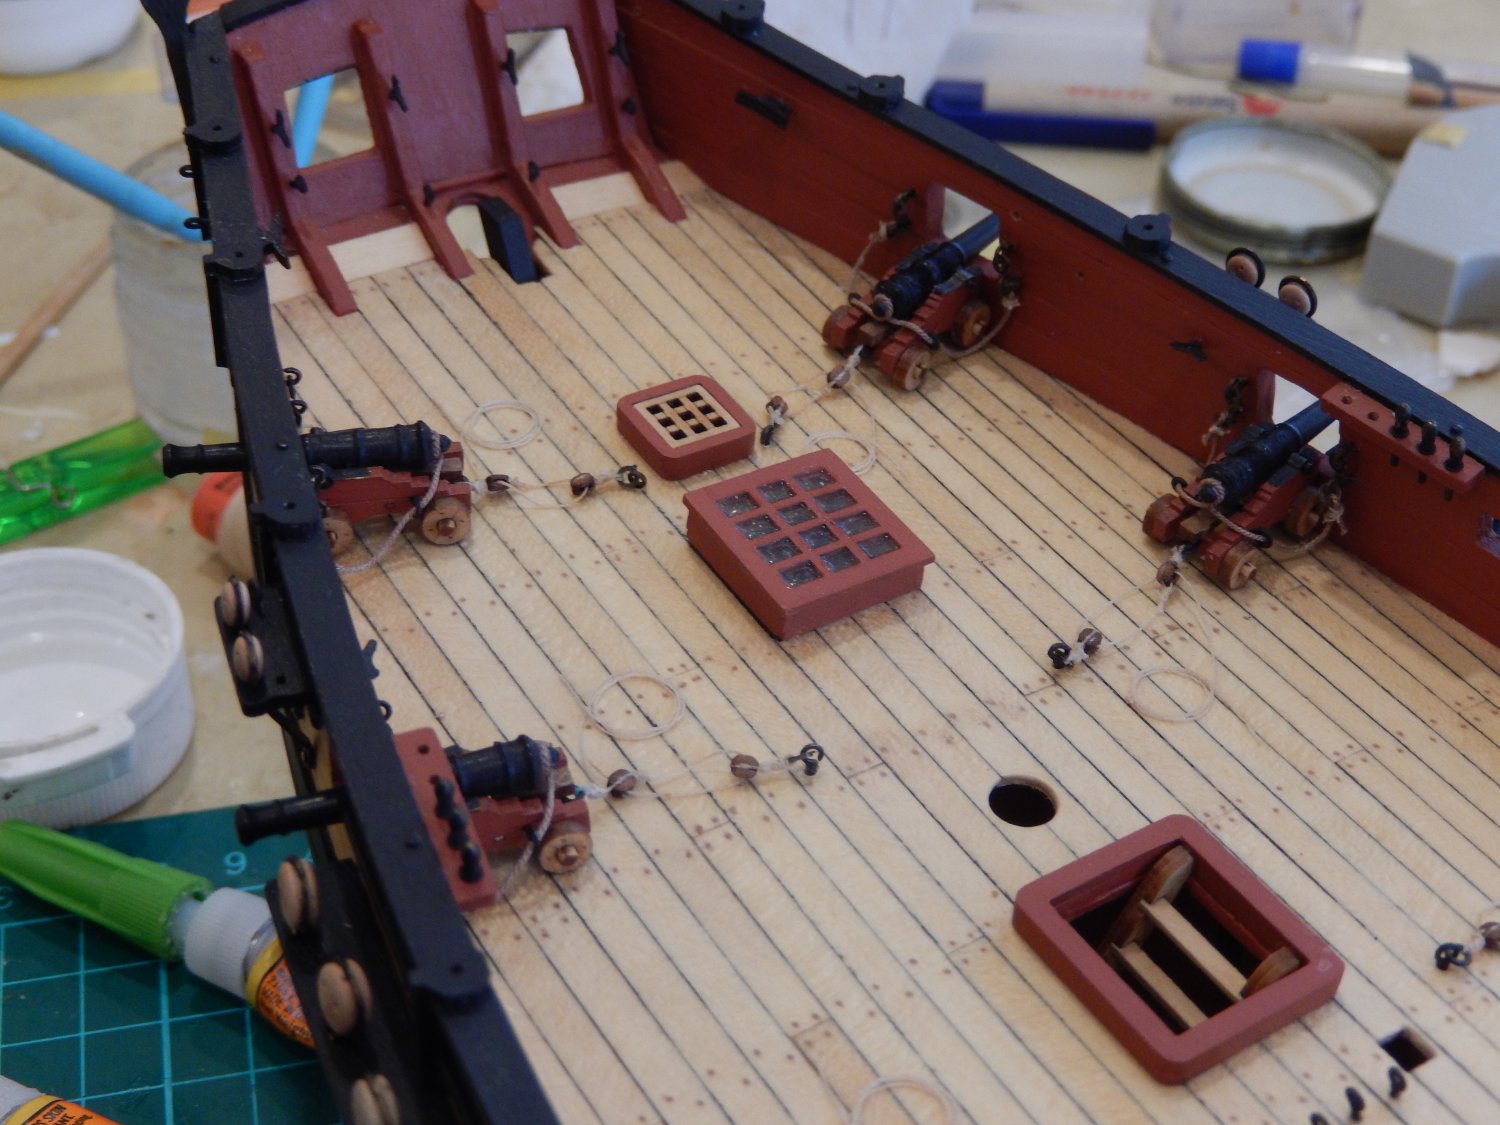
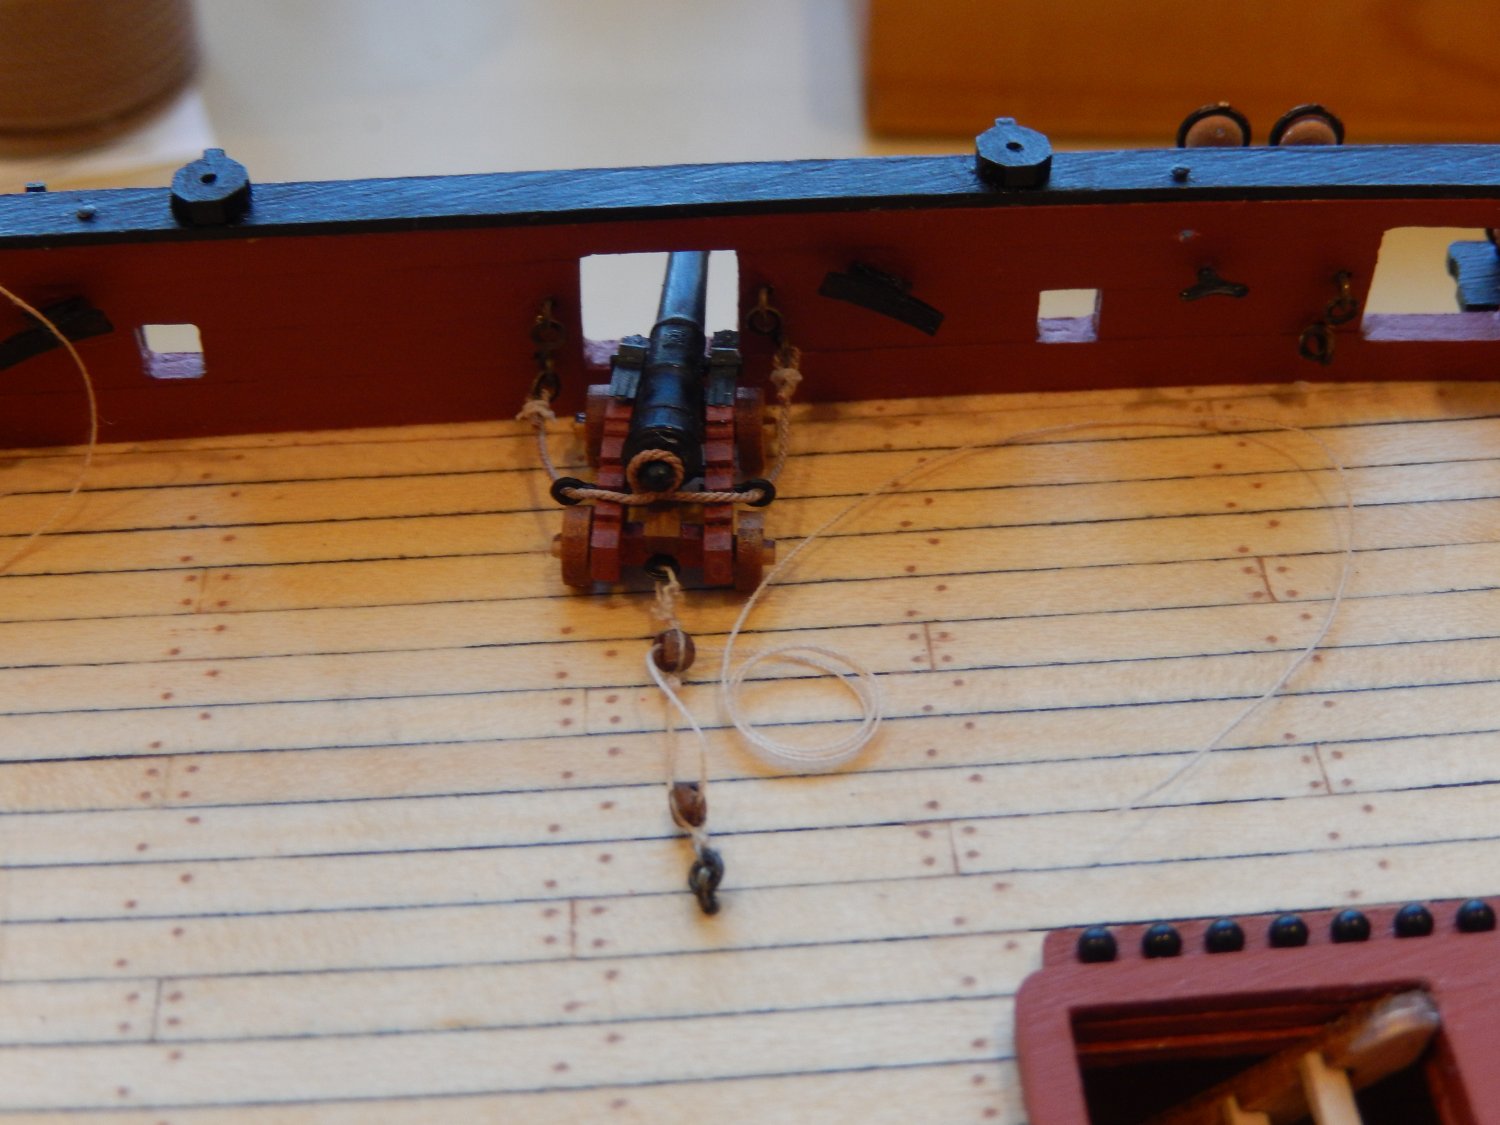
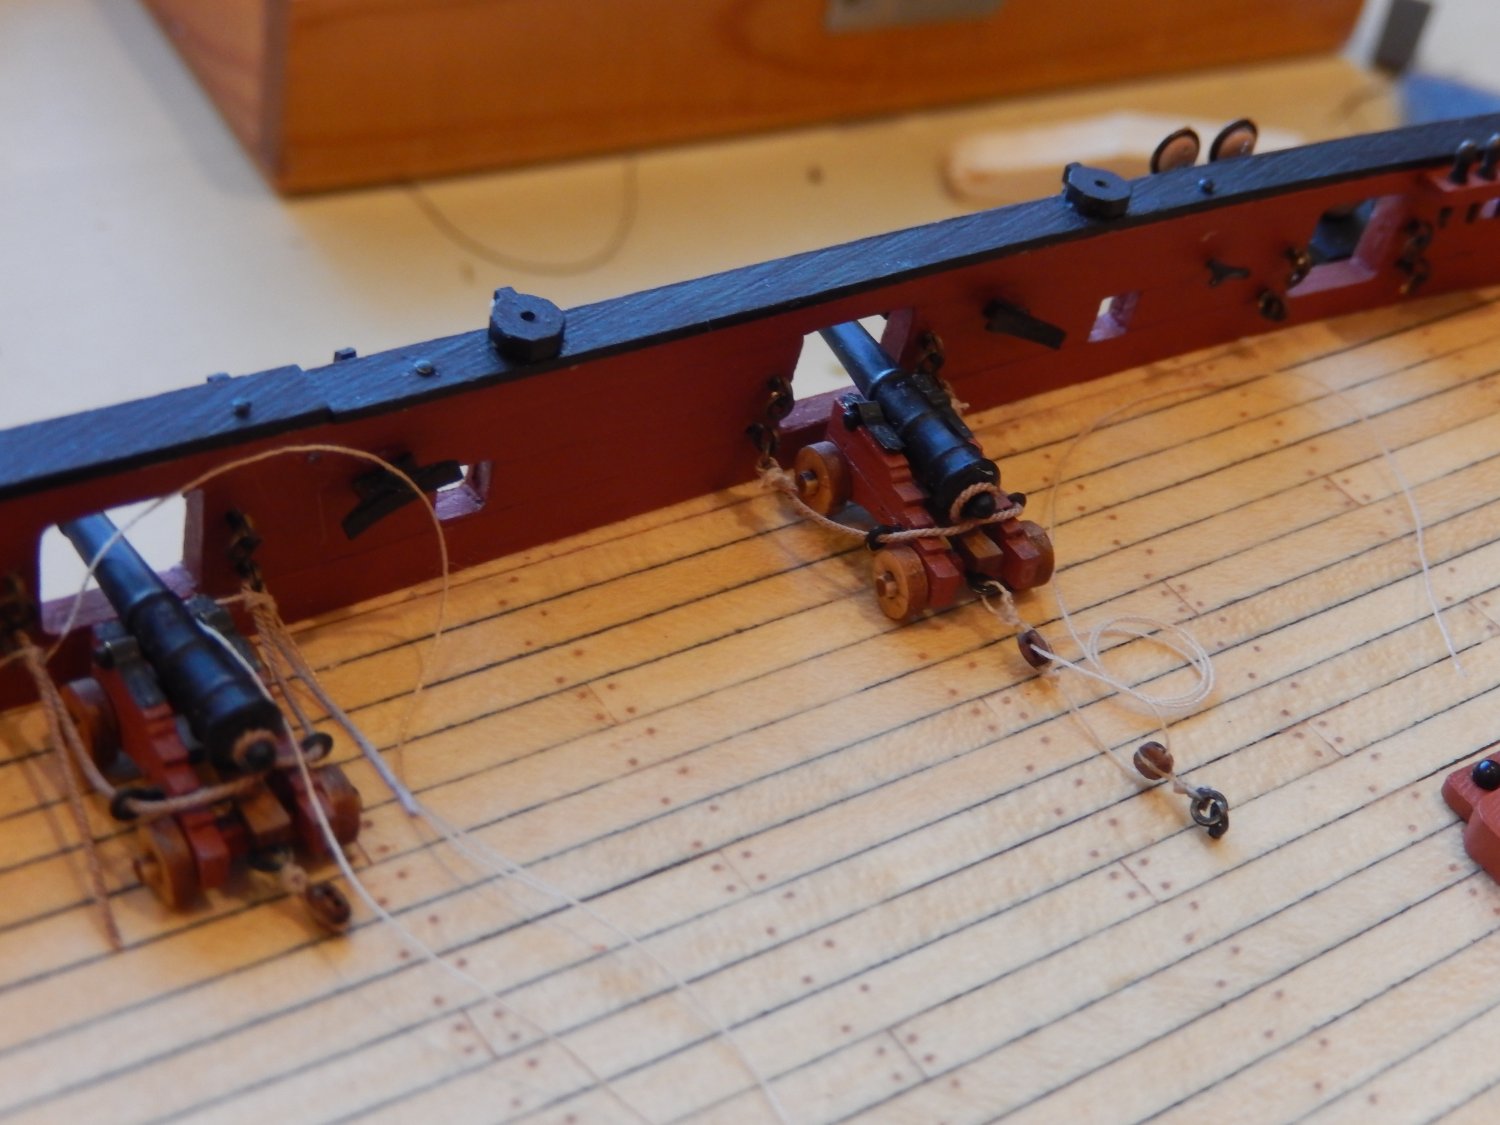
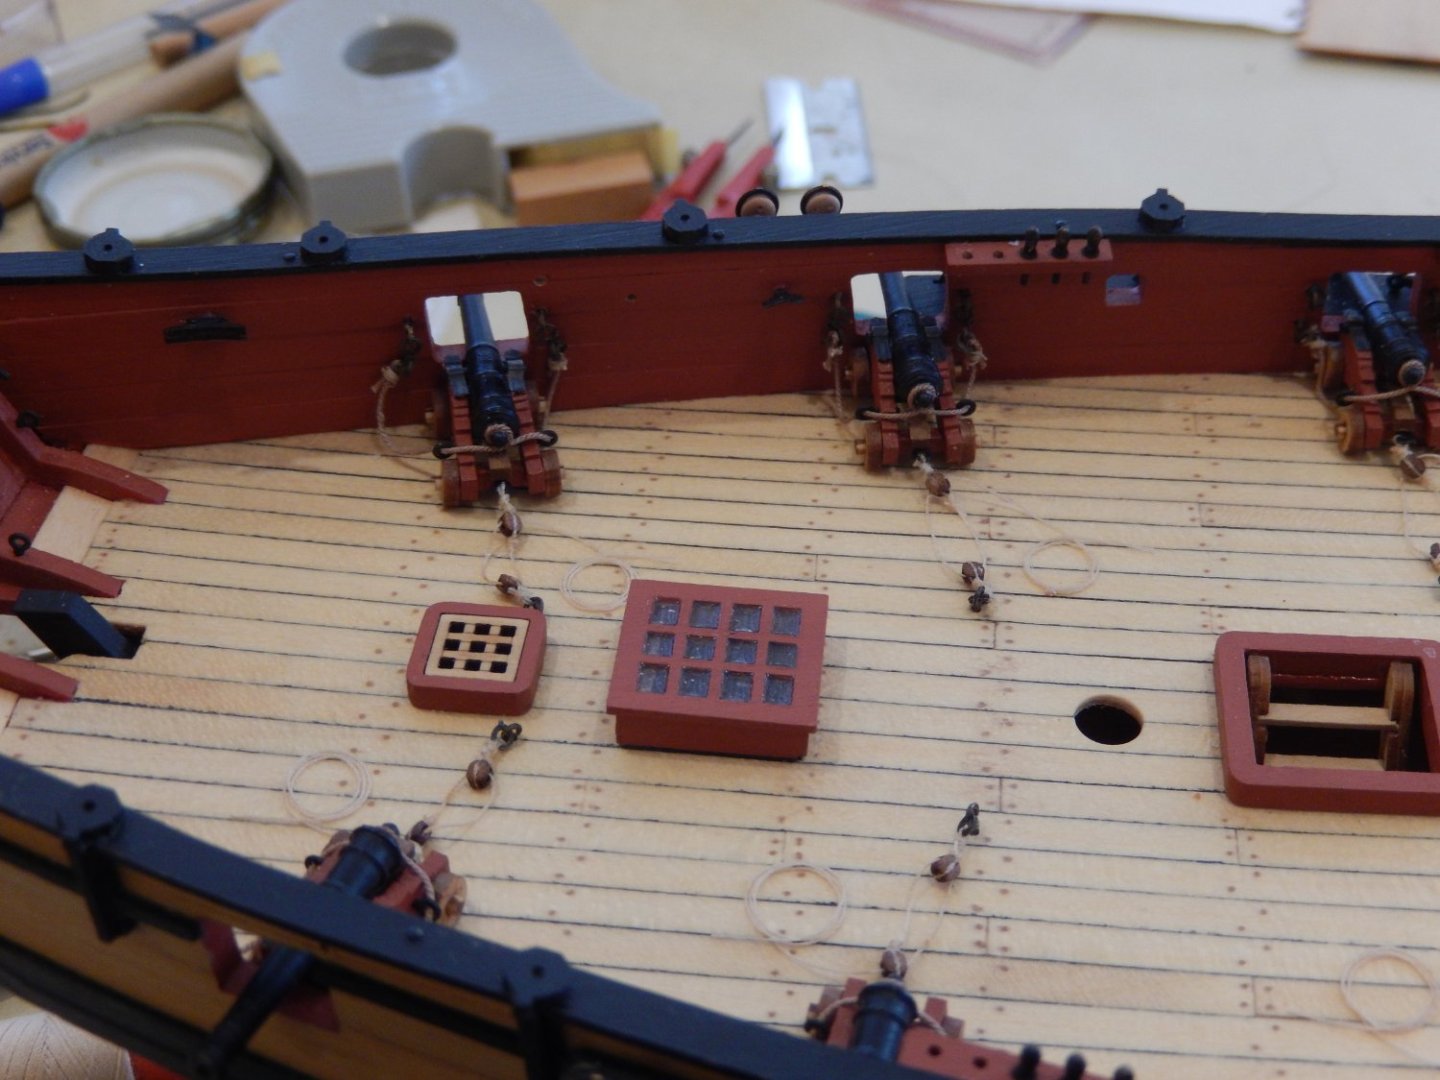
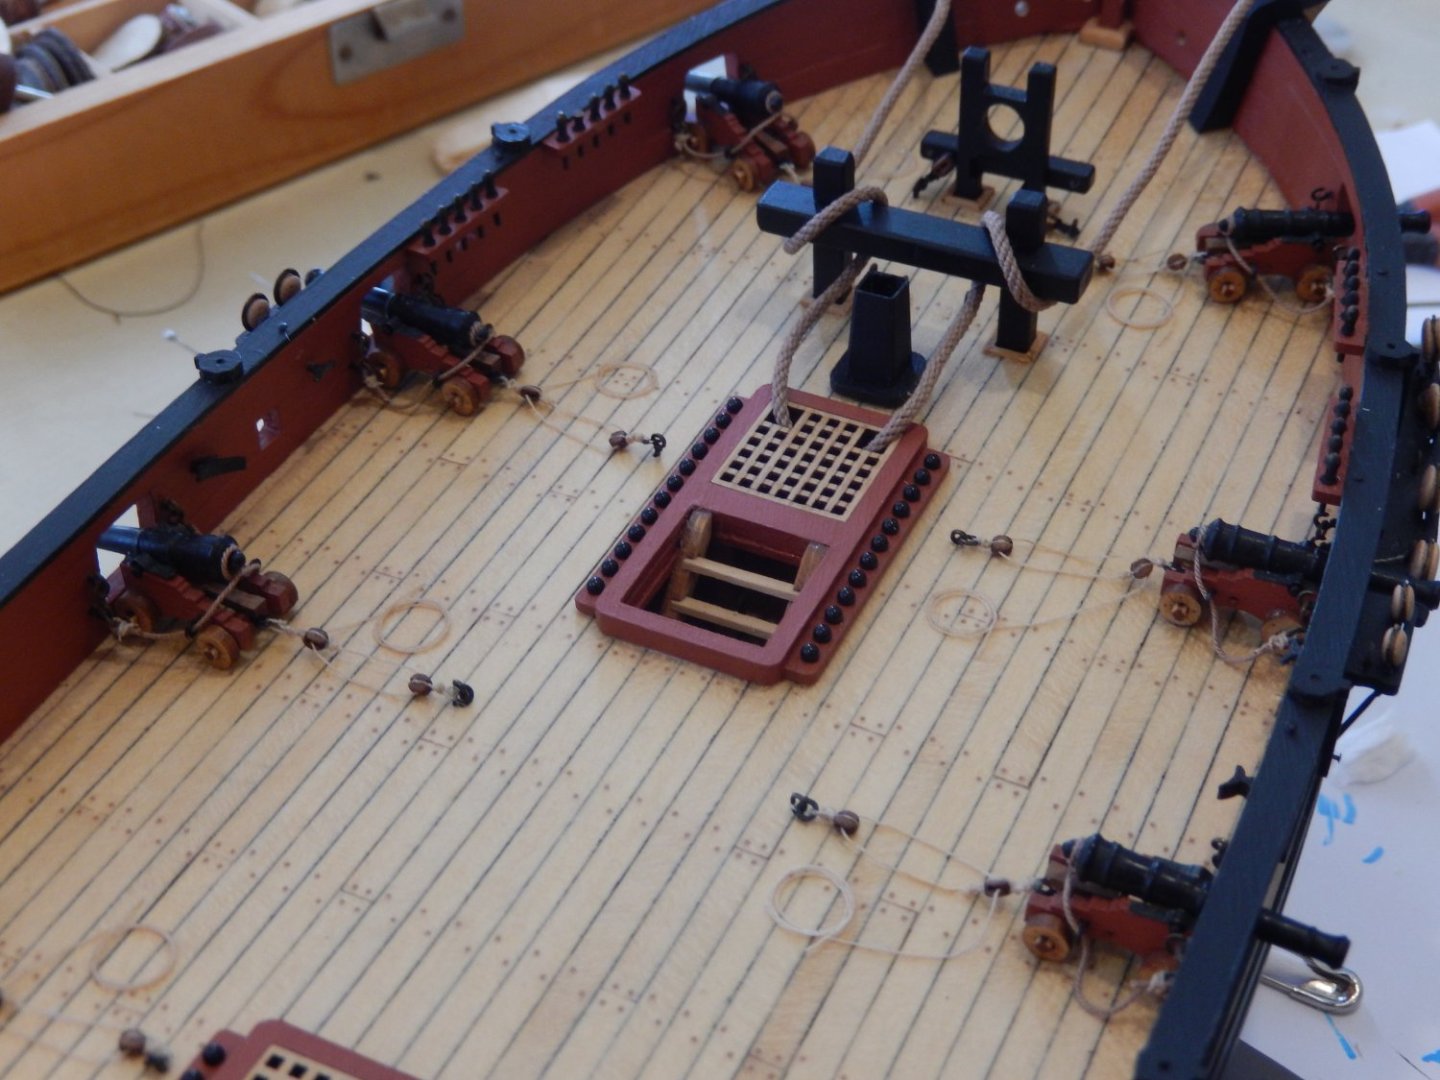
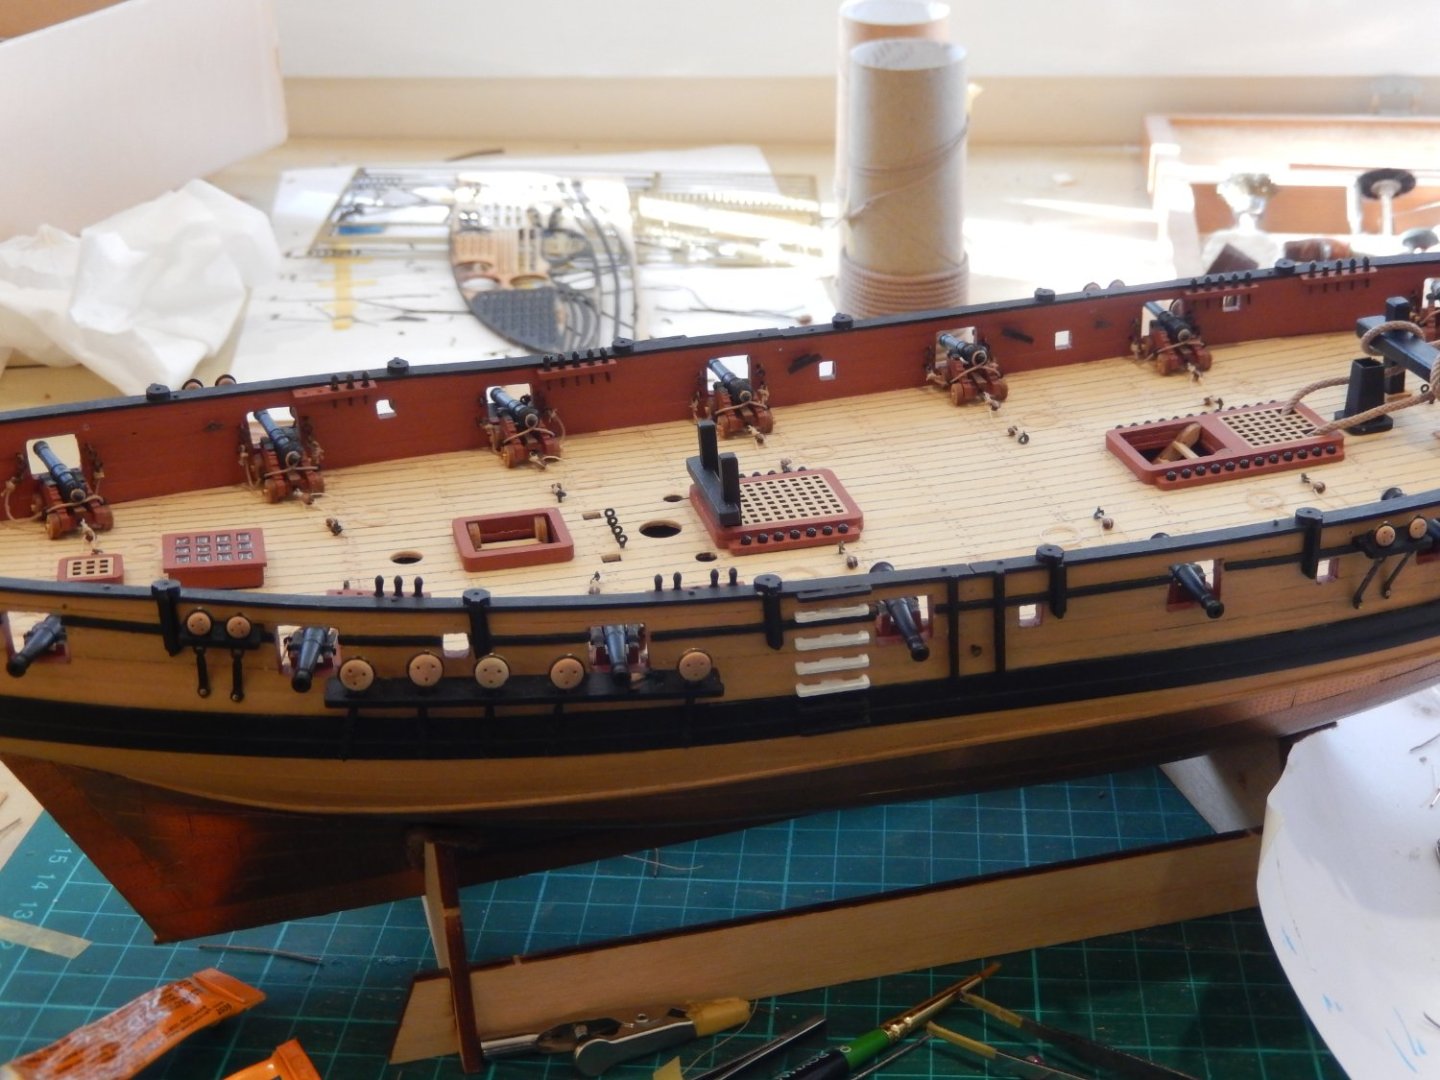
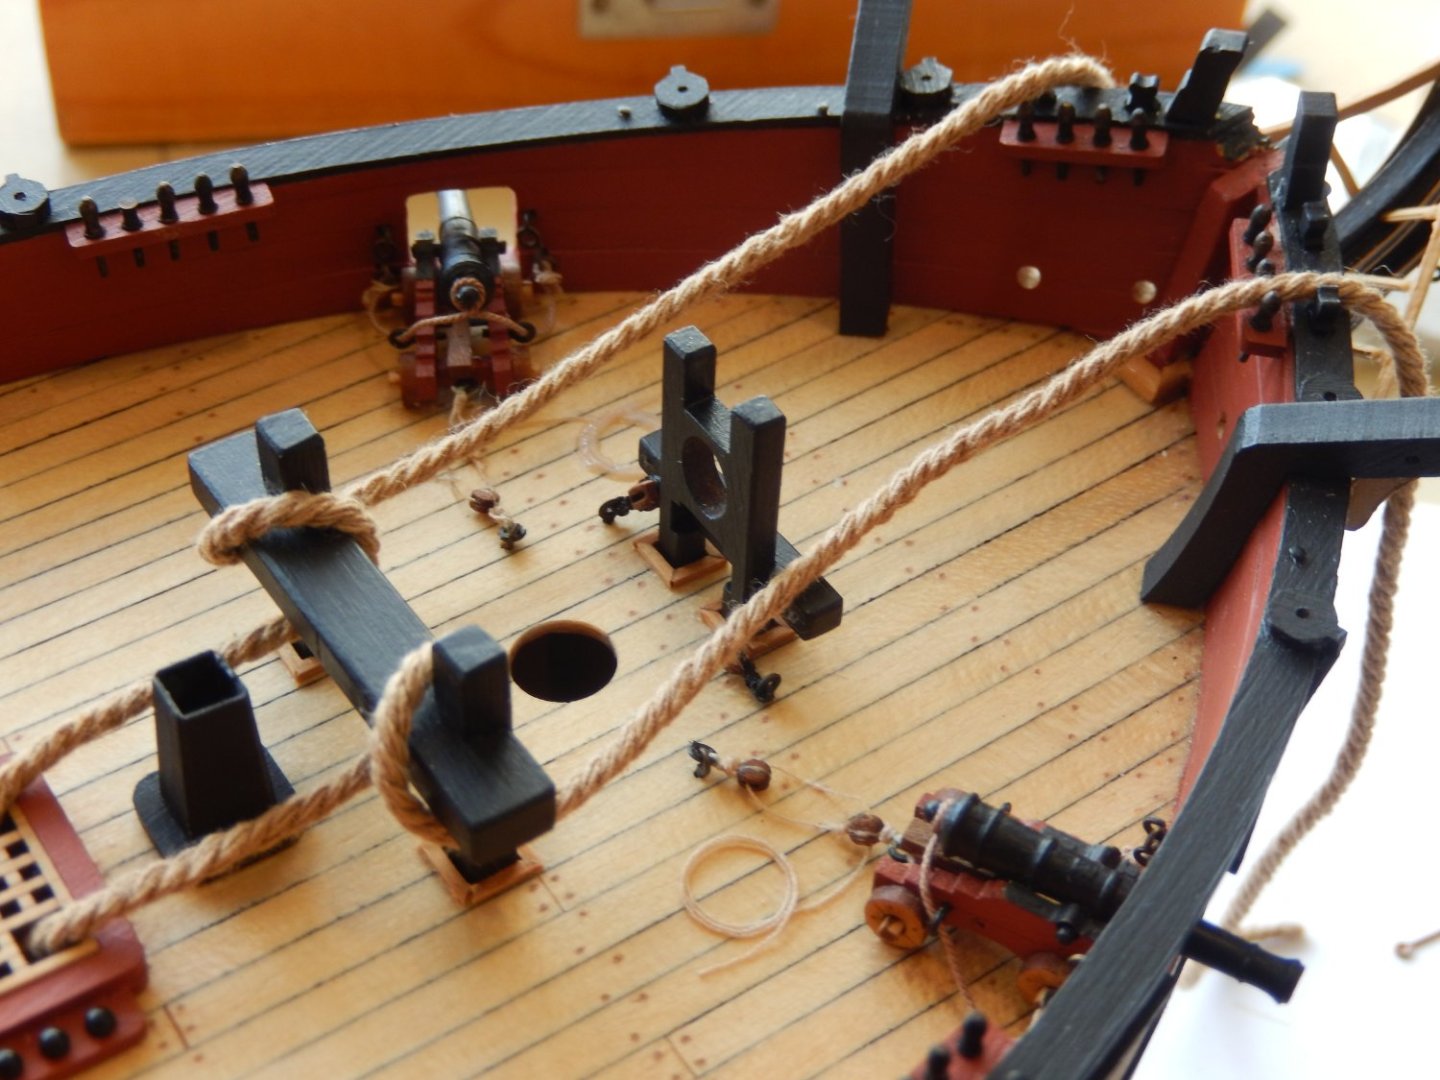
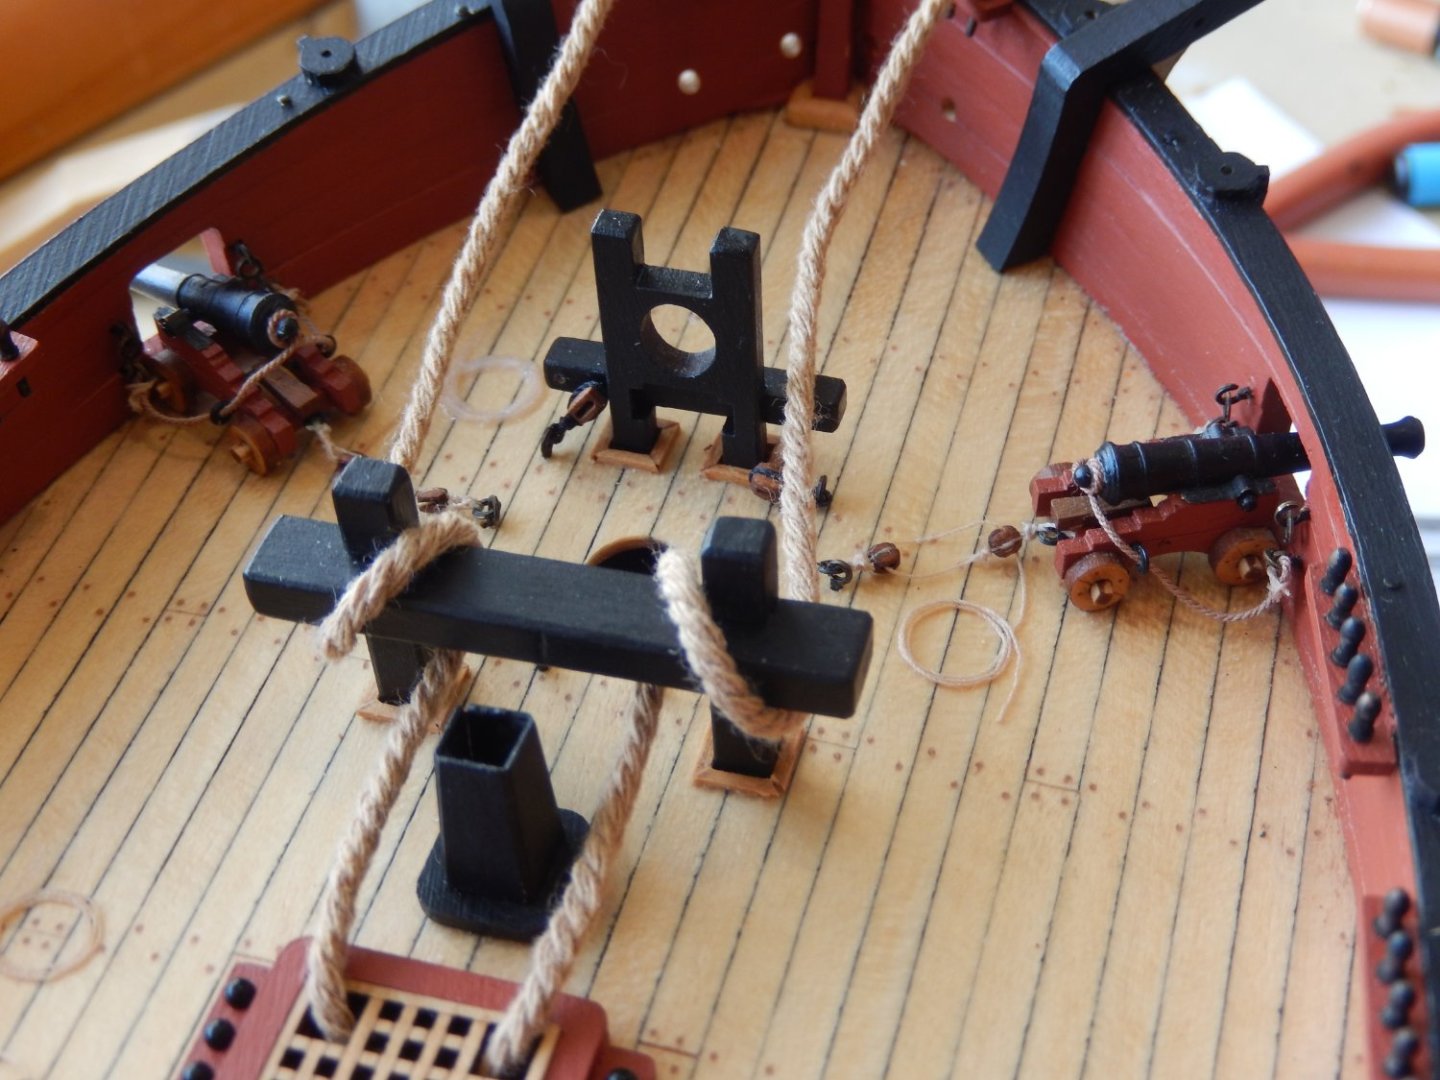
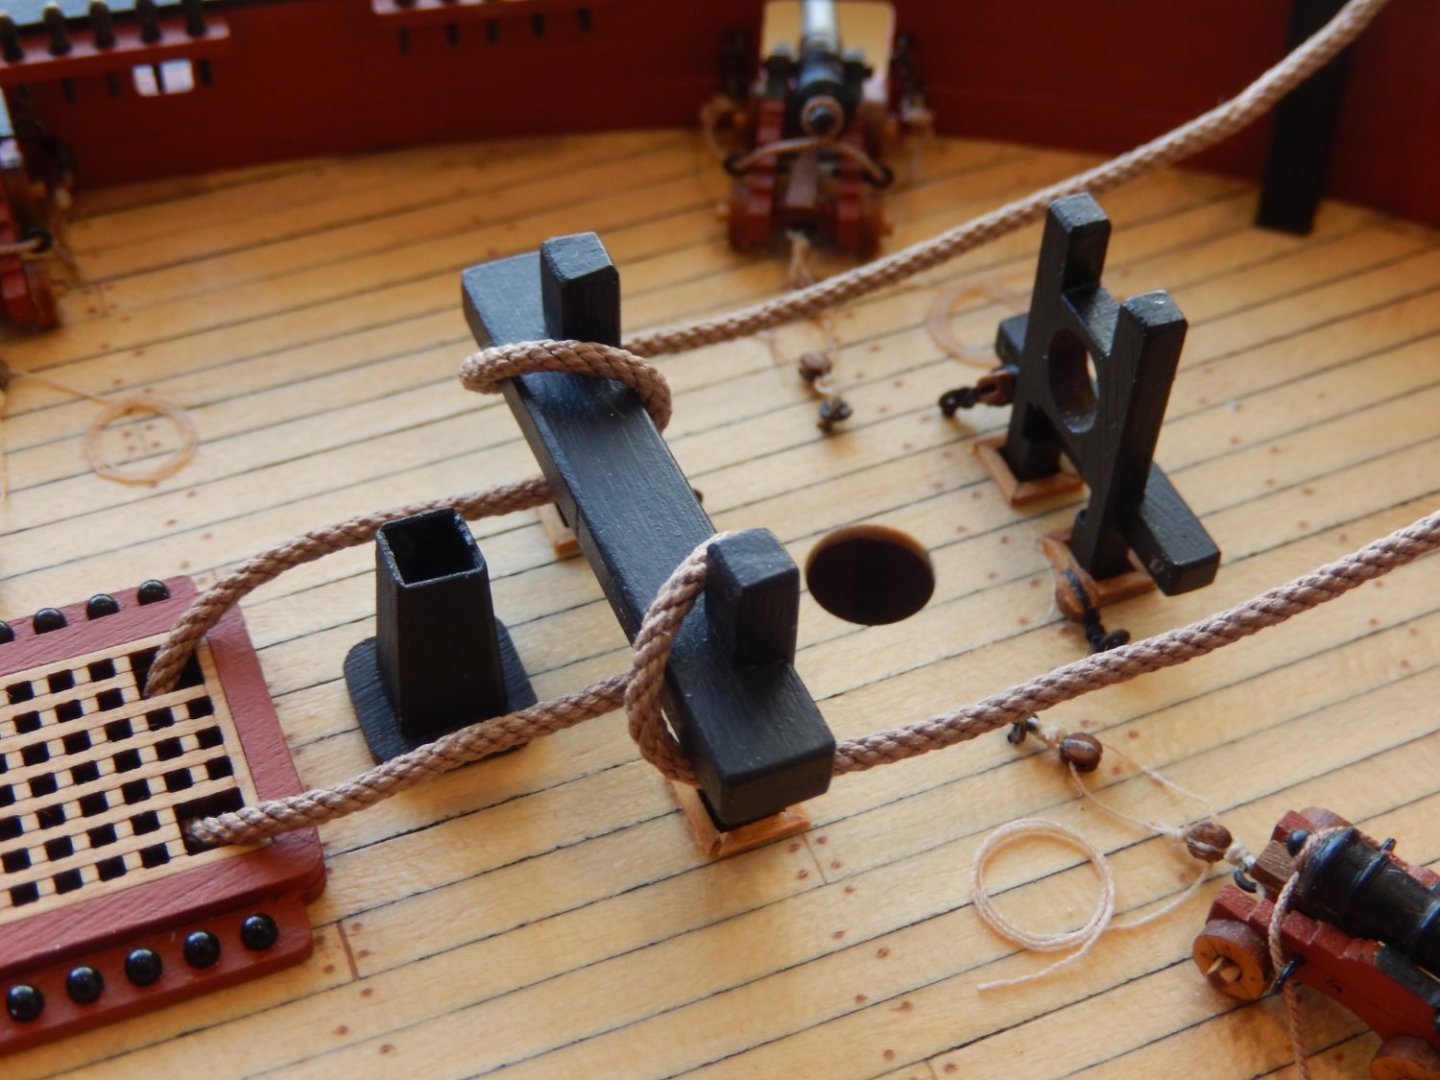
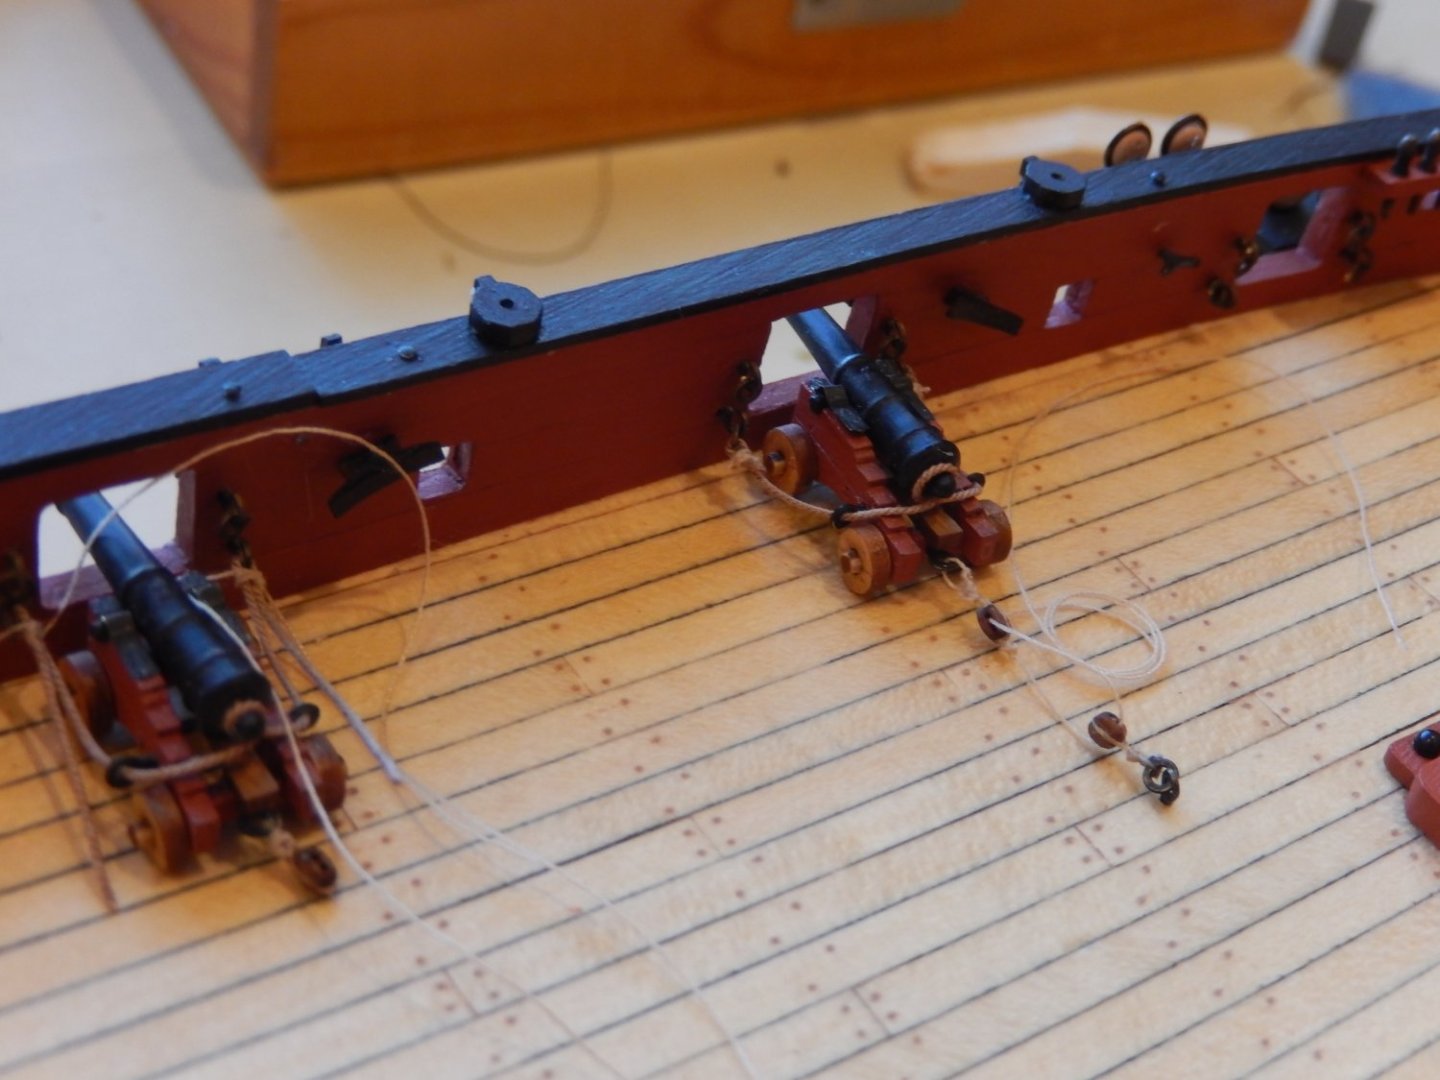
I decided to rig the guns which is probably a big mistake, I am using the 2mm rigging blocks recommended (not supplied in the kit). Handling them is quite awkward and the task is far more difficult and time-consuming than I anticipated. The instructions recommend .75 rigging thread to wrap around the end of the gun barrel. That is far too large to go through the rings for the eye bolts and even the eye bolts themselves. Aside from that, the whole thing looked out of scale. I ended up using some leftover Syren .45 thread which has come out fairly well. Quite aside from that, the rings for the eye bolts were difficult to get on but had a propensity to come off quite easily. Belatedly I figured the I should close the eye bolts after the rings were mounted. Genius. Here is the first gun mounted. (It has not yet been properly stuck down.) Only 13 to go.

-
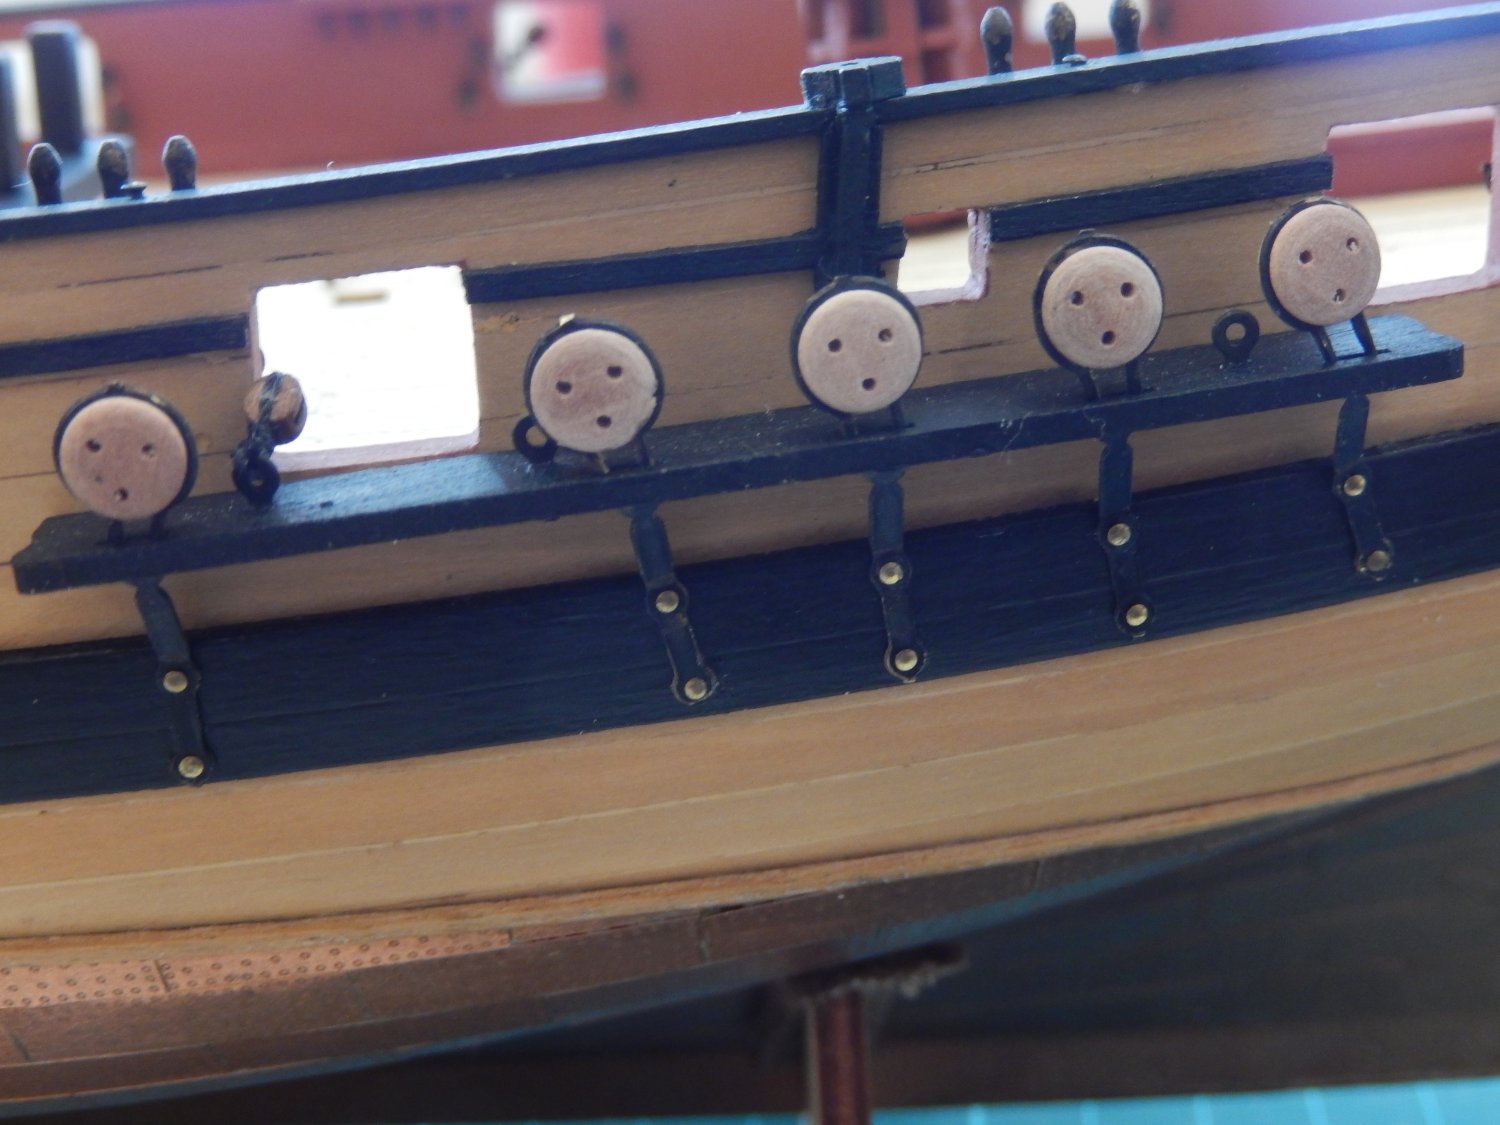
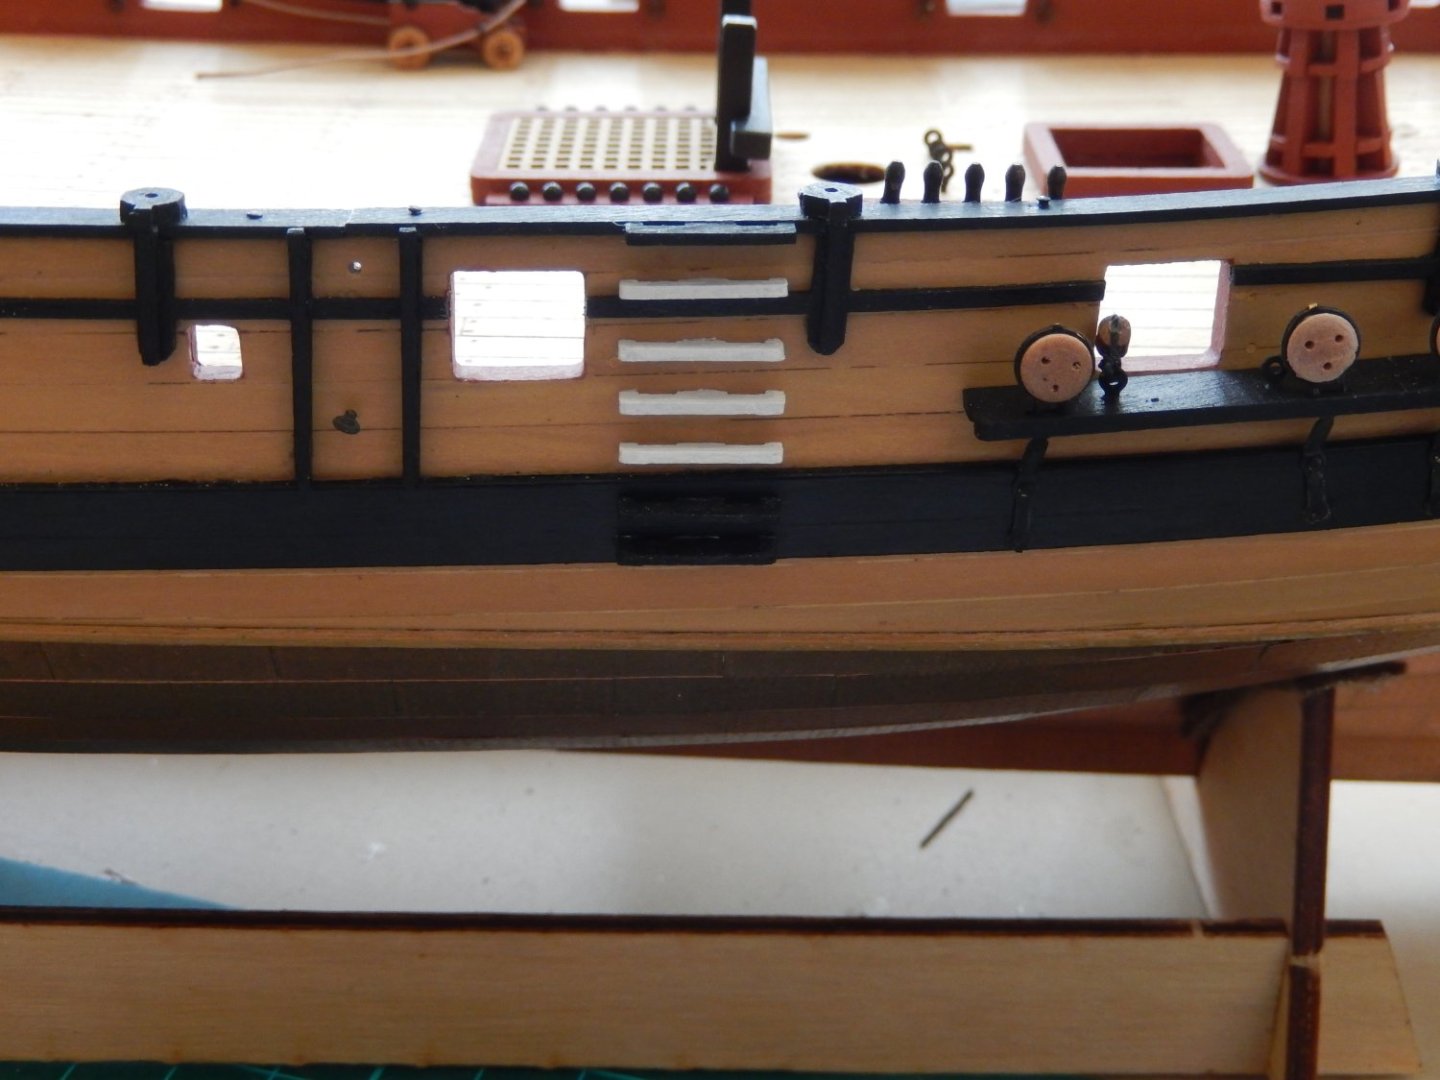
The rigging work on the exterior of the hull is complete. The first two photos show the deadeyes mounted - the brass pins have since been painted. Mounting the side steps was rather hair-raising. I again used the Tamiya tape as spacers. Fortunately I had 3mm tape which was the correct spacing for the steps. Here they are complete. I would not care to do it again.

-
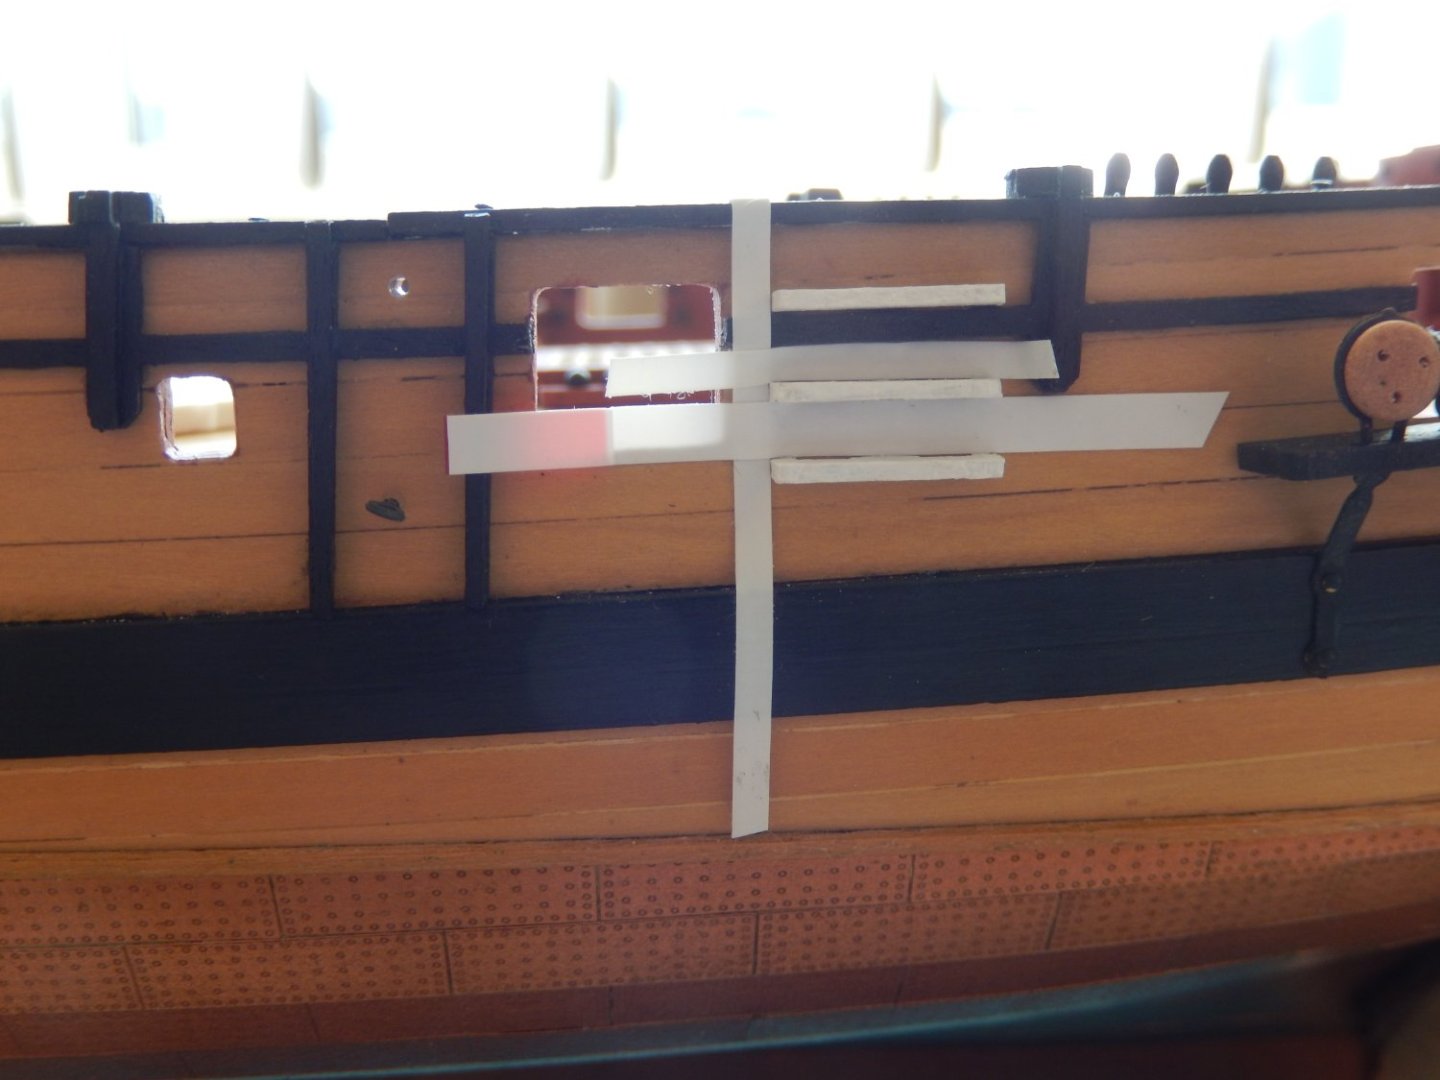
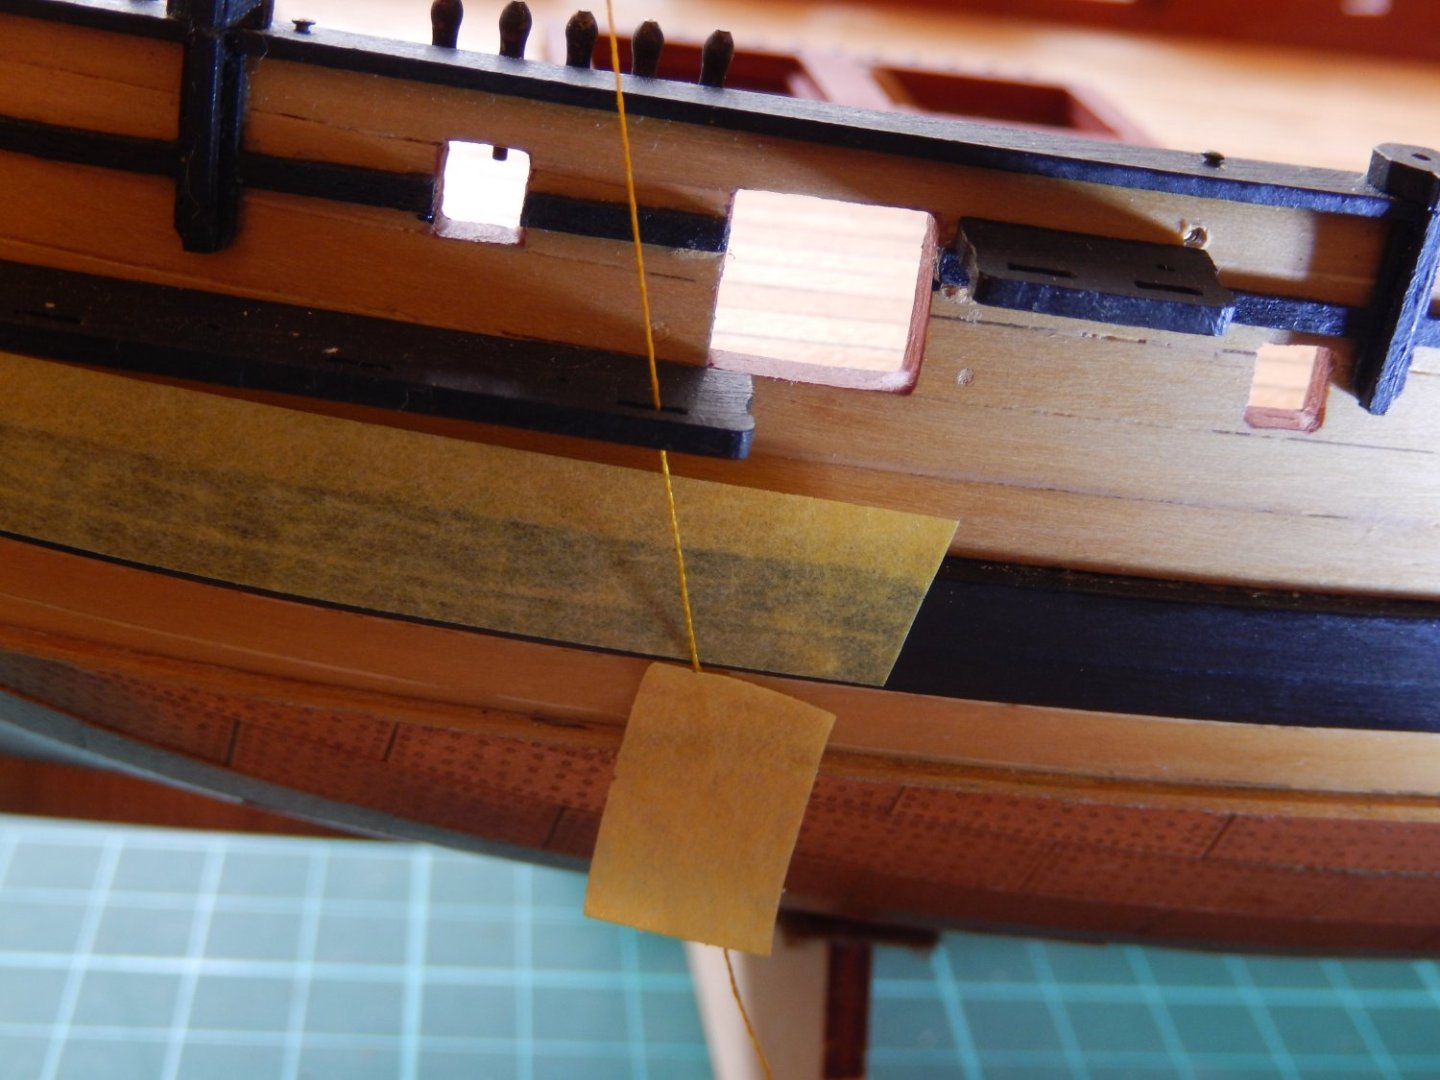
I have done all the preliminary work in installing the shrouds. Here is my method getting the rigging for the deadeyes at the right angle. Fortunately I had a piece of dowel the same diameter as the main and foremasts. The following two pictures shows the dowel inserted in the main mast position and a length of thread attached at the same height of the main top. The thread is led down taught, through the hole for the deadeye assembly. The angle is then marked on masking tape. The white tape, above is to provide spacing for the holes to be drilled near the bottom of the wale. Pin holes may be seen which are guides for the drill bit. Above is a lonely deadeye dry-fitted.

-
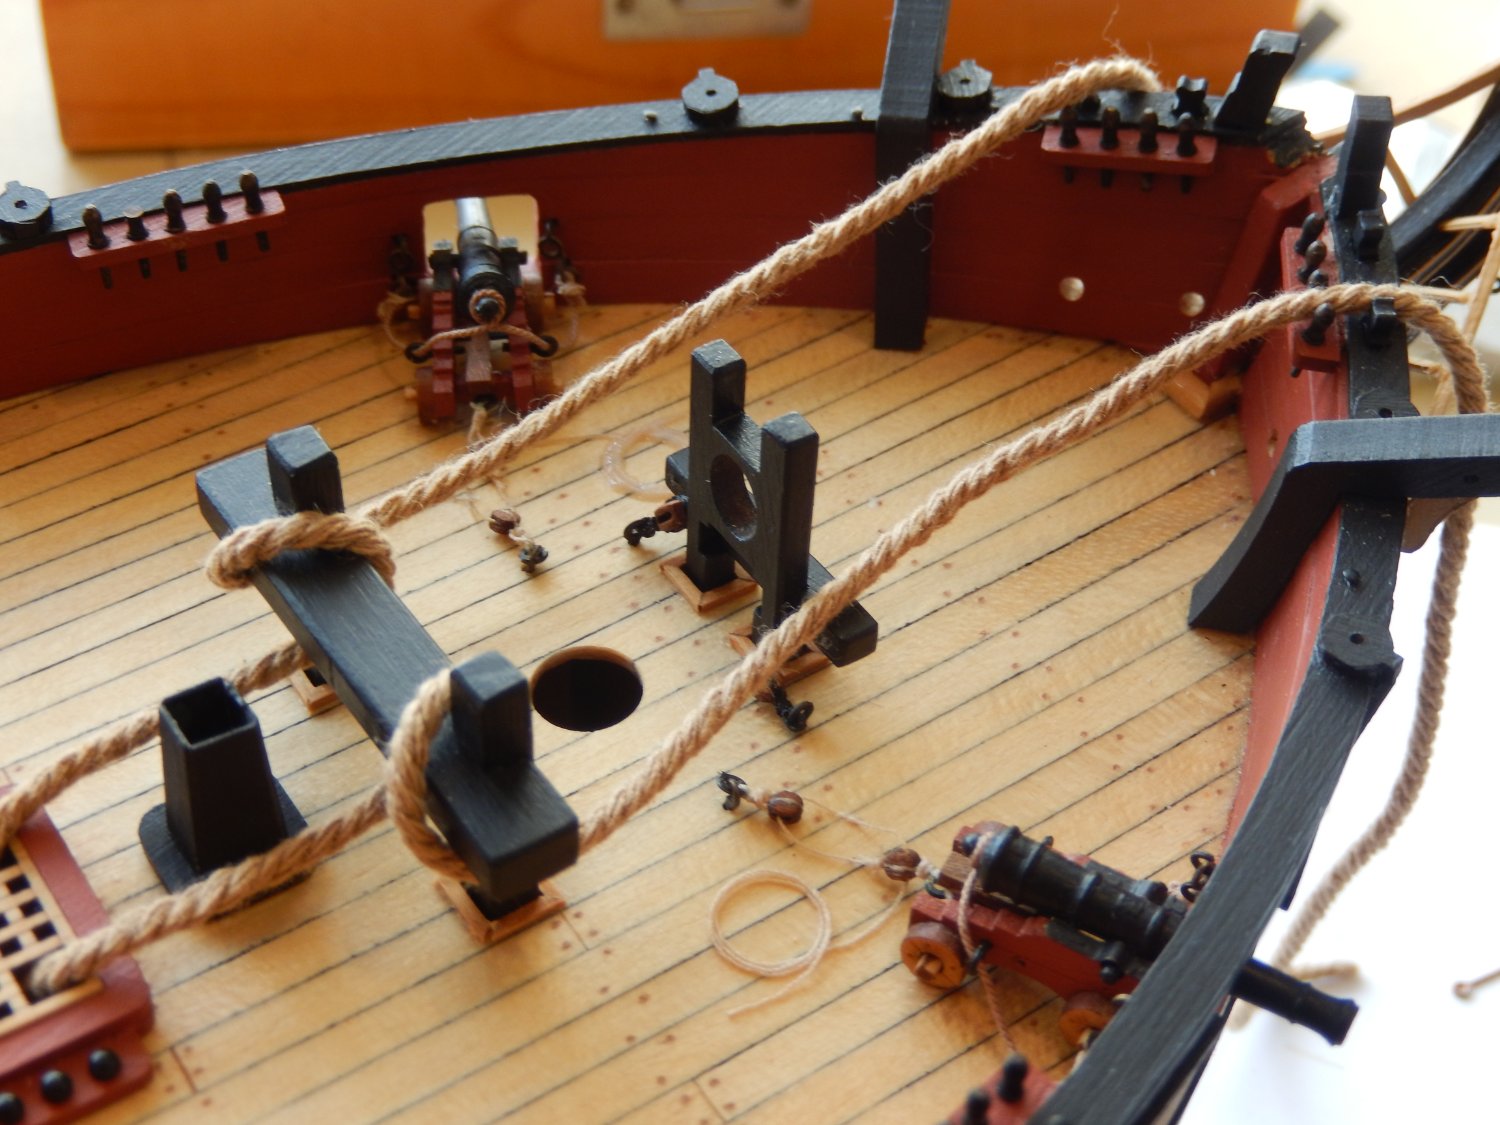
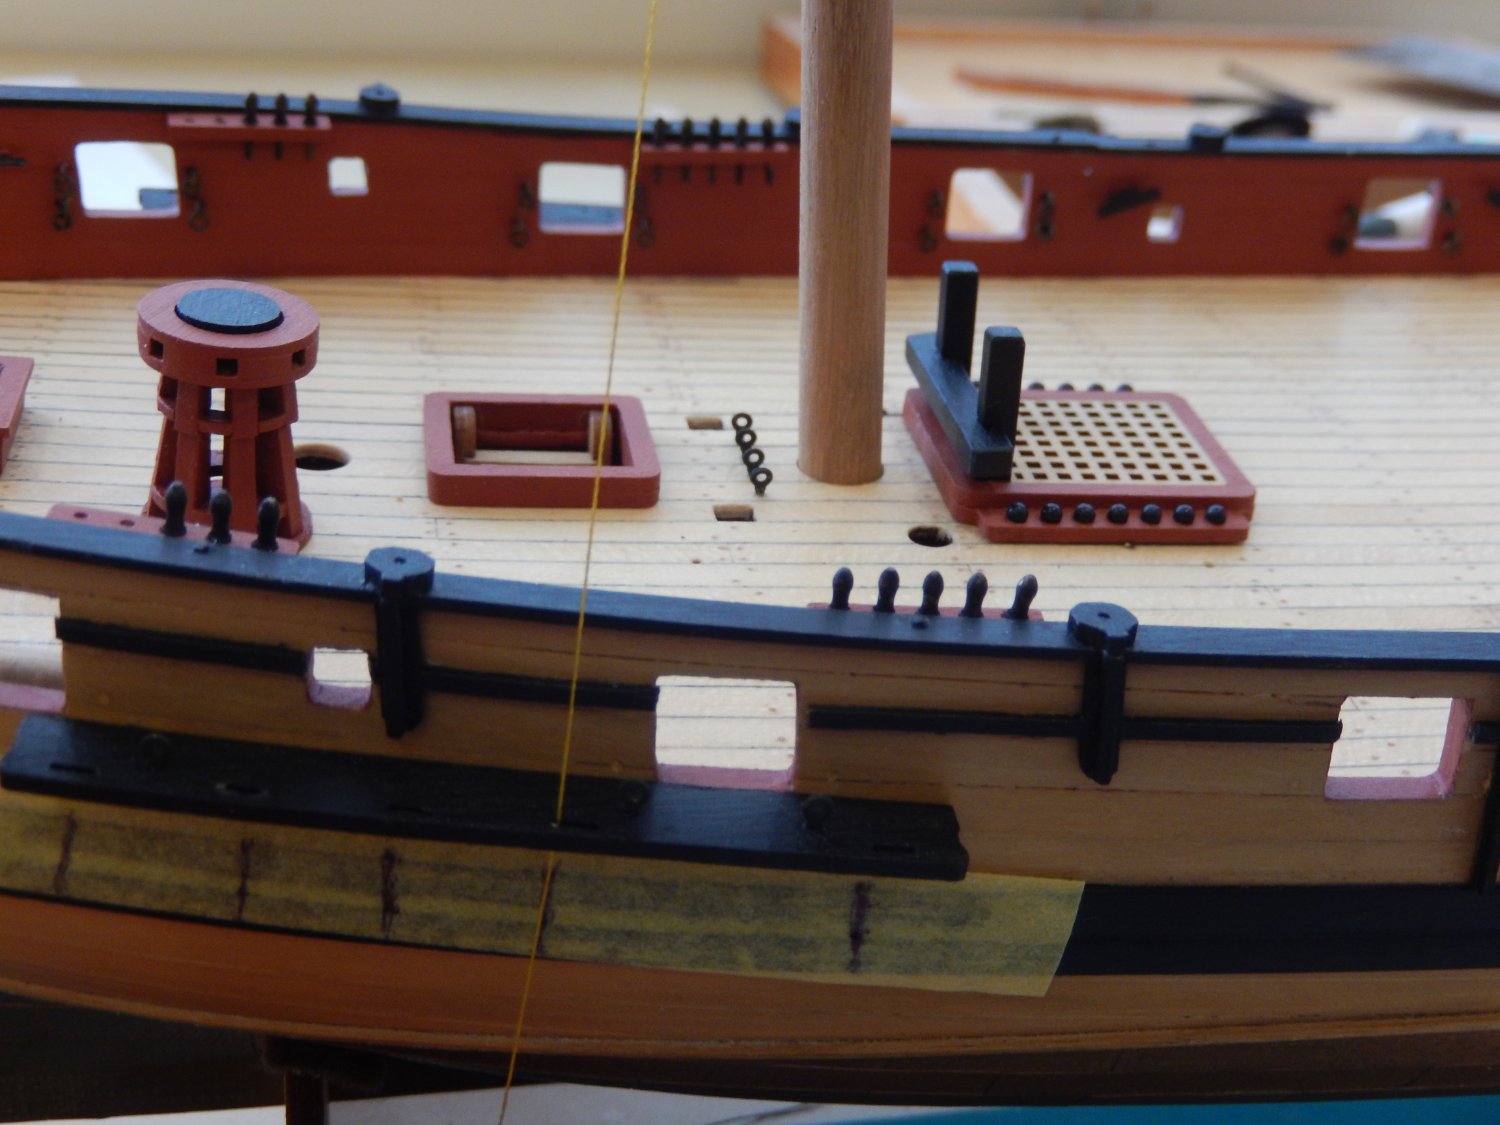
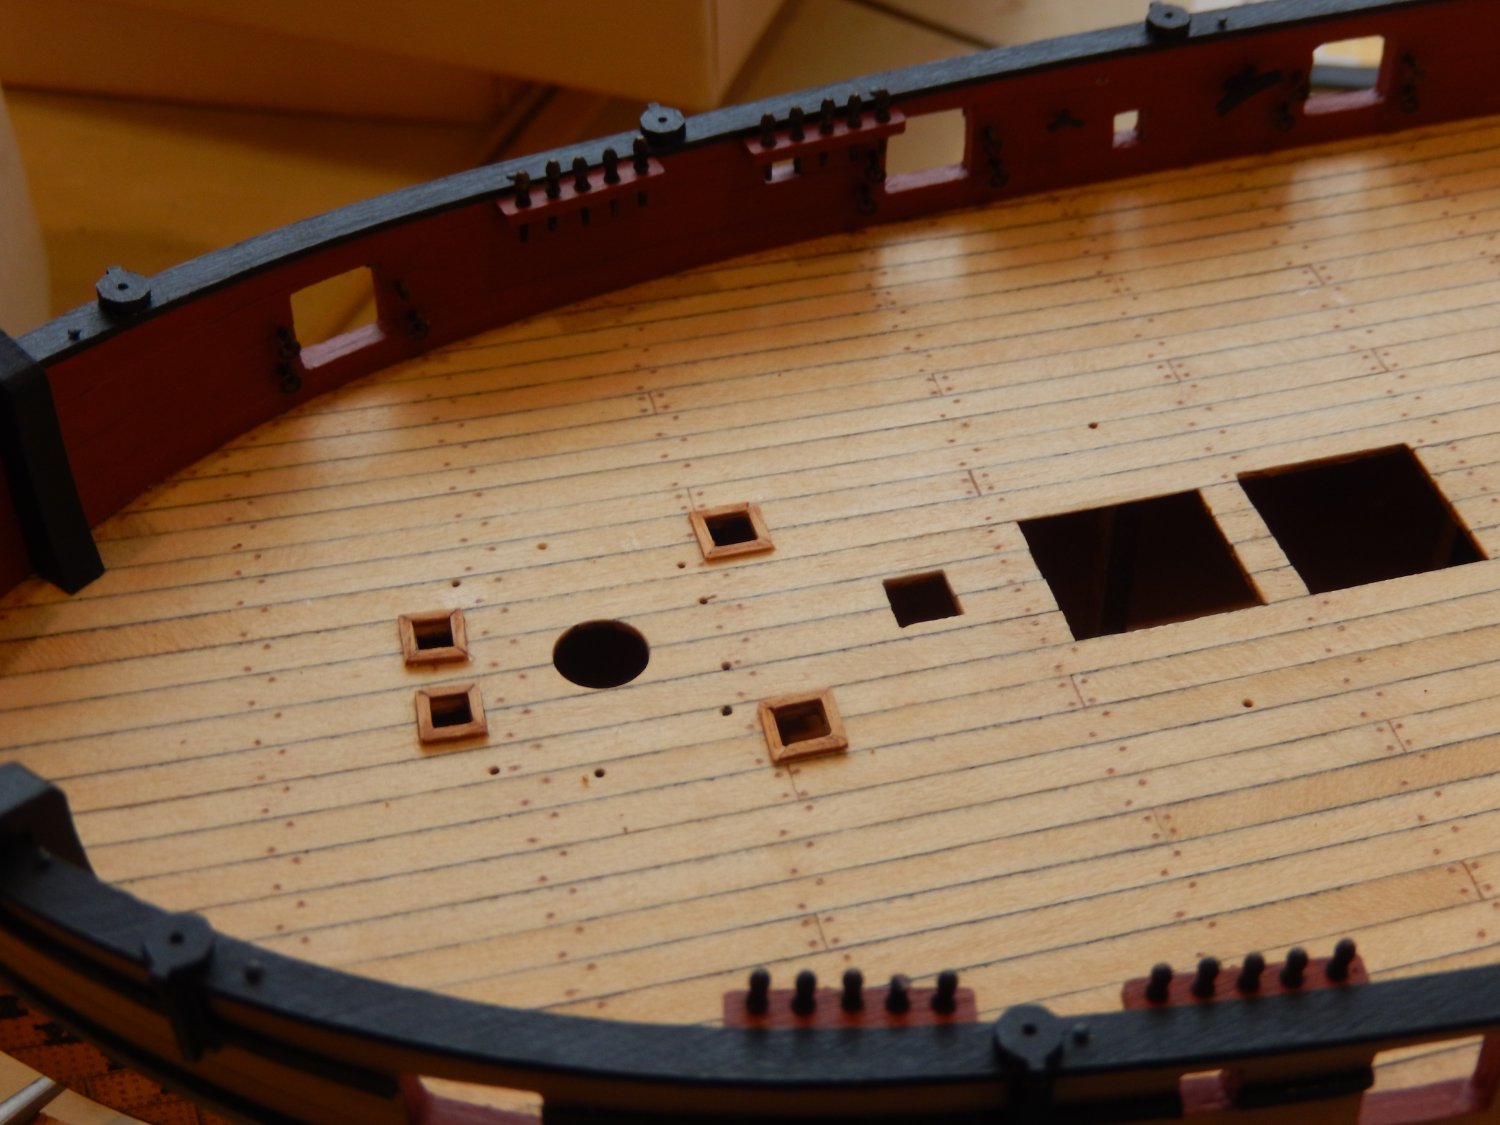
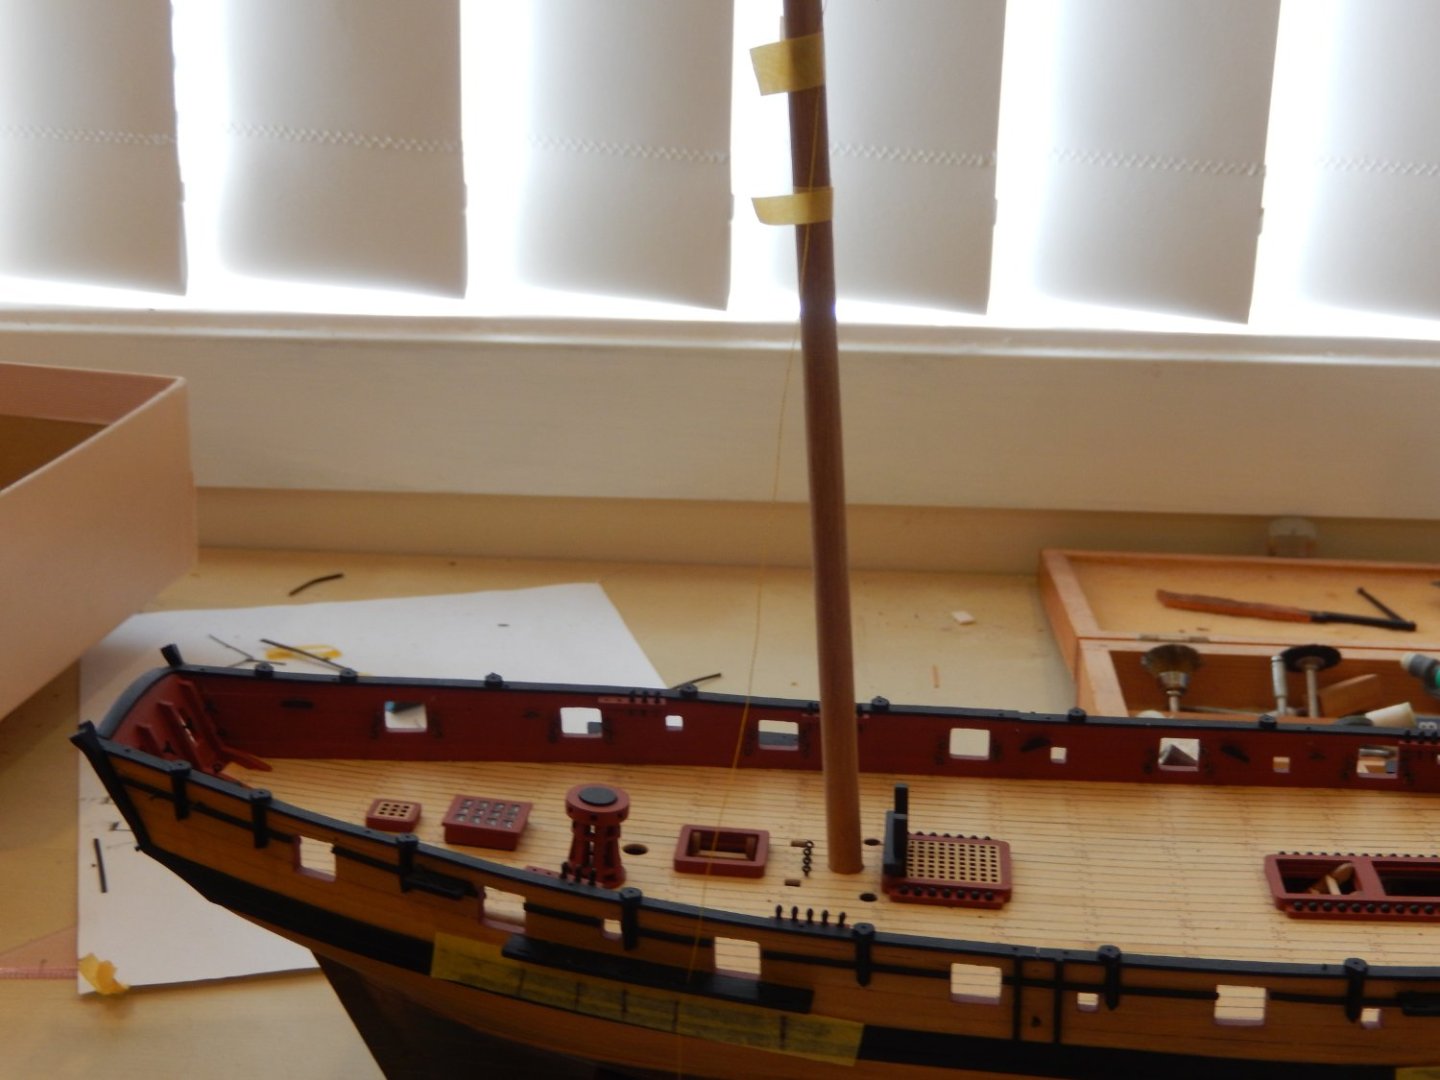
Here are a few bits and pieces just before all the deck furniture is installed. The jibbooms have been tapered, and are dry fitted in the next photos. They have since been painted. I will not fit them for the time being - having a couple of fixtures sticking out like these while other work is being done is asking for trouble. I don't know what to call these. The laser etched deck supplied with the kit seemed to have an equivalent around the feet of the bitts and this is my attempt. I'm not sure it's worth the trouble, but the whole thing looks quite good with the bitts installed


-
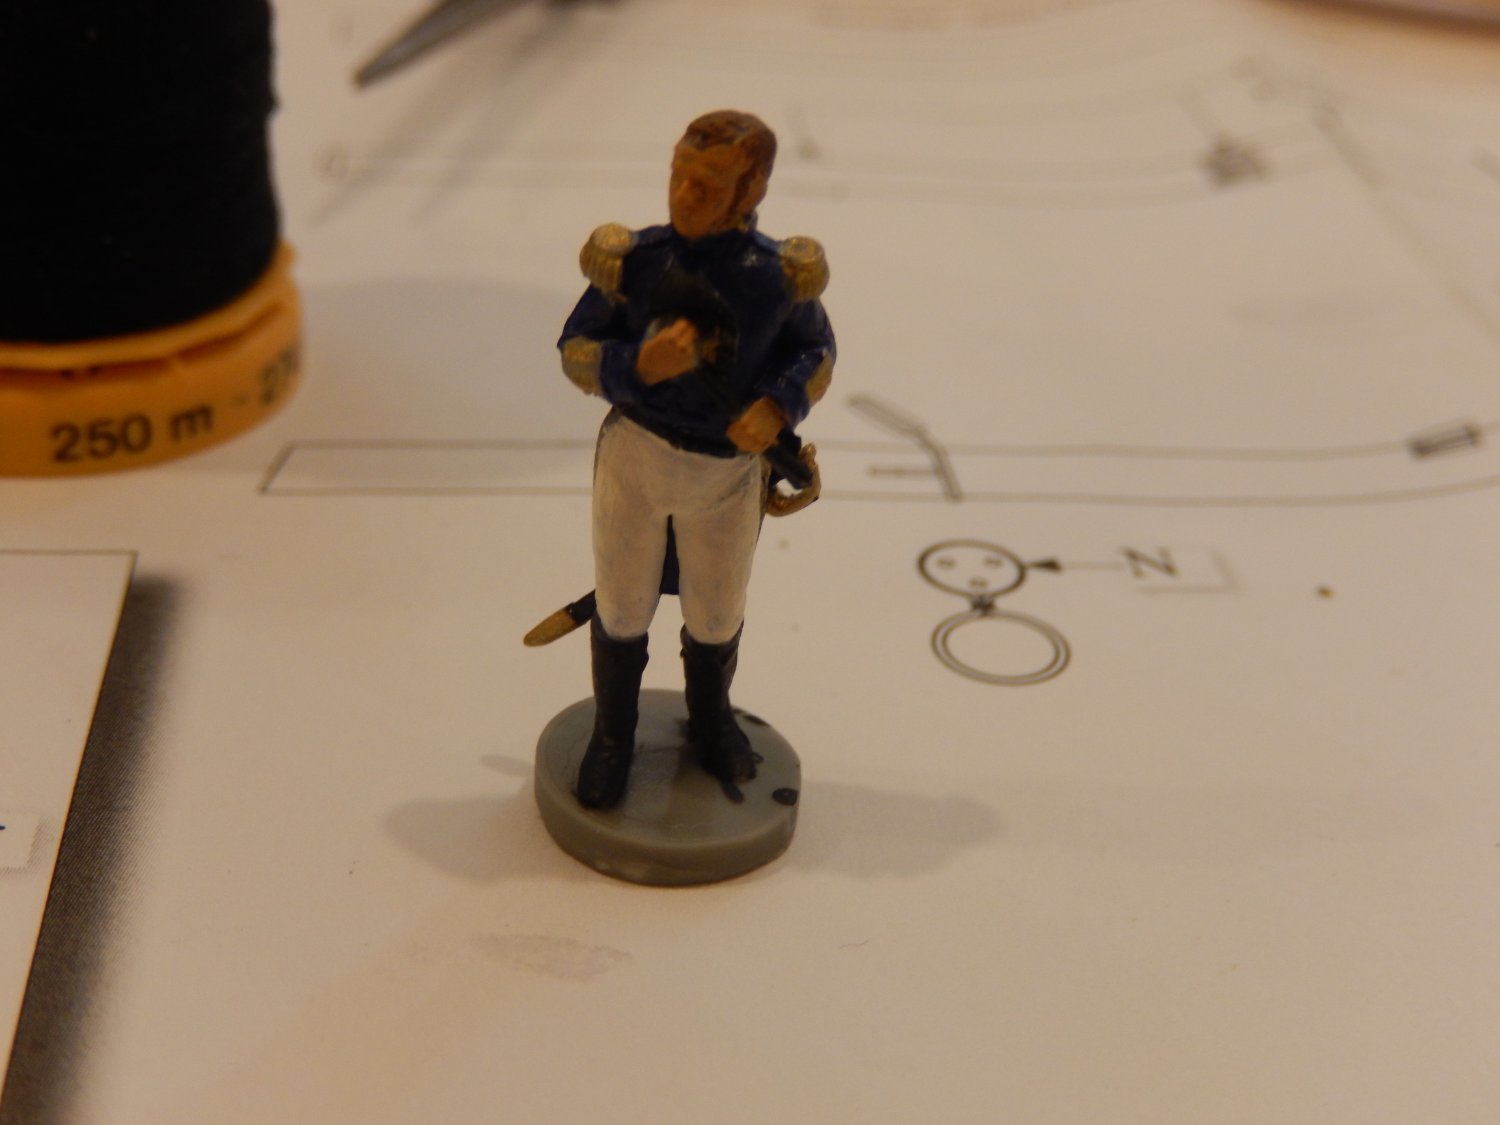
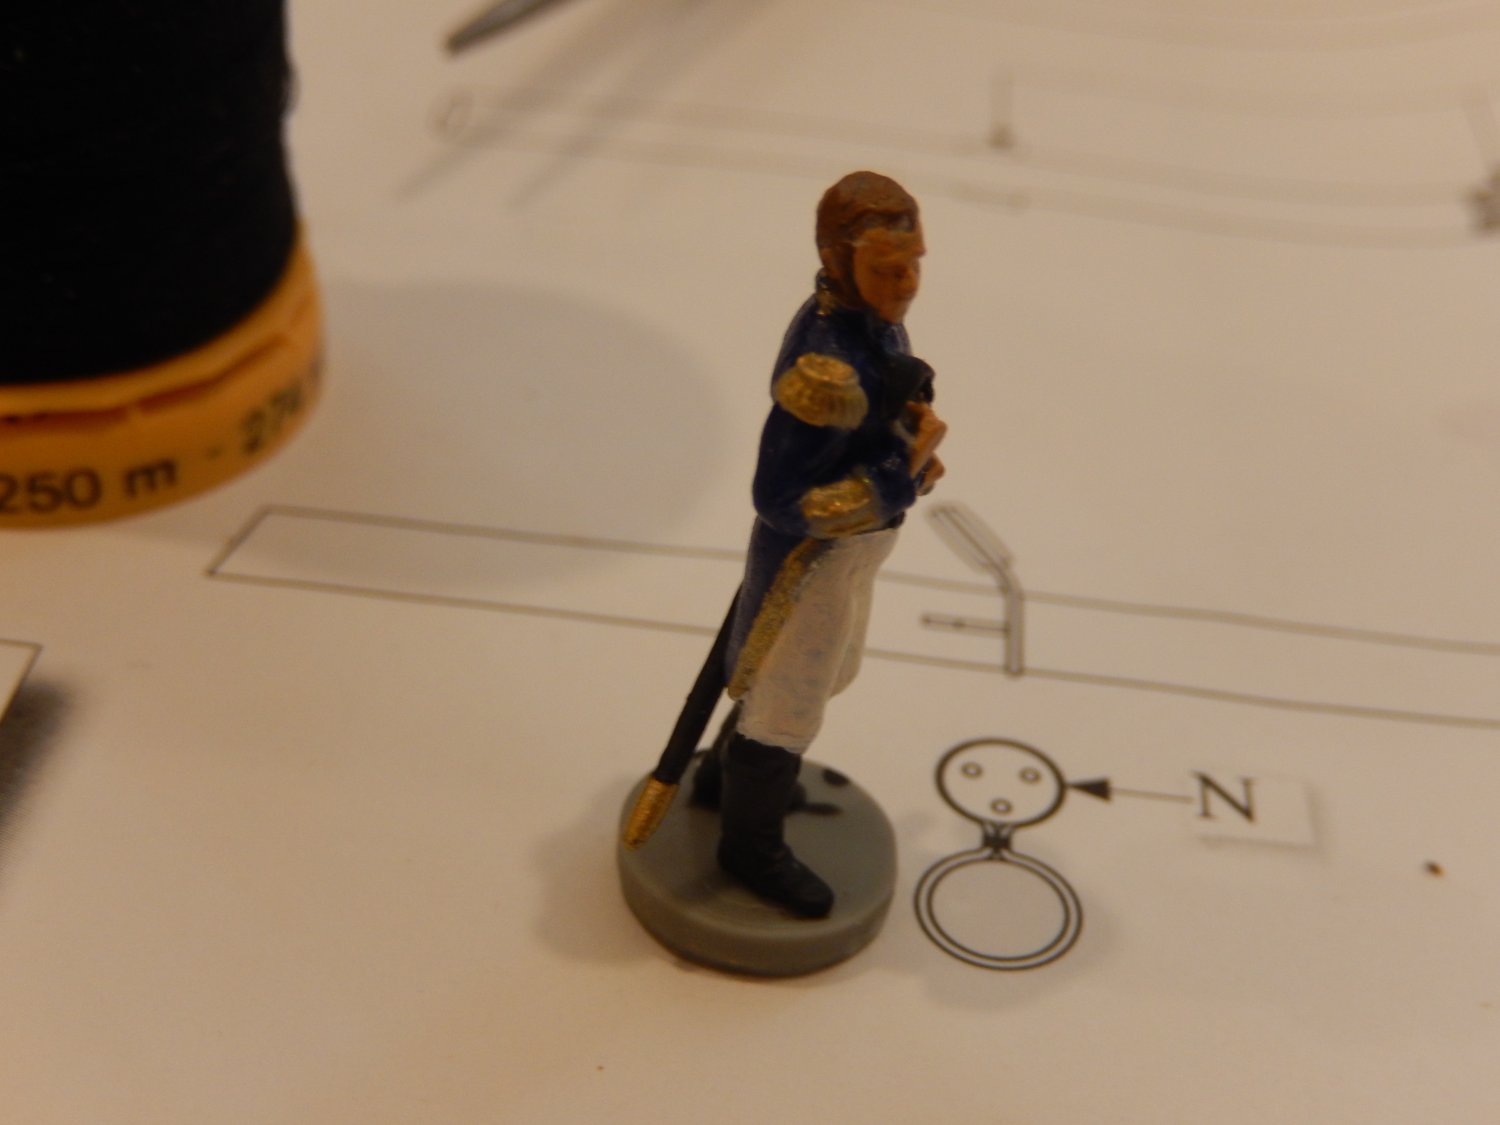
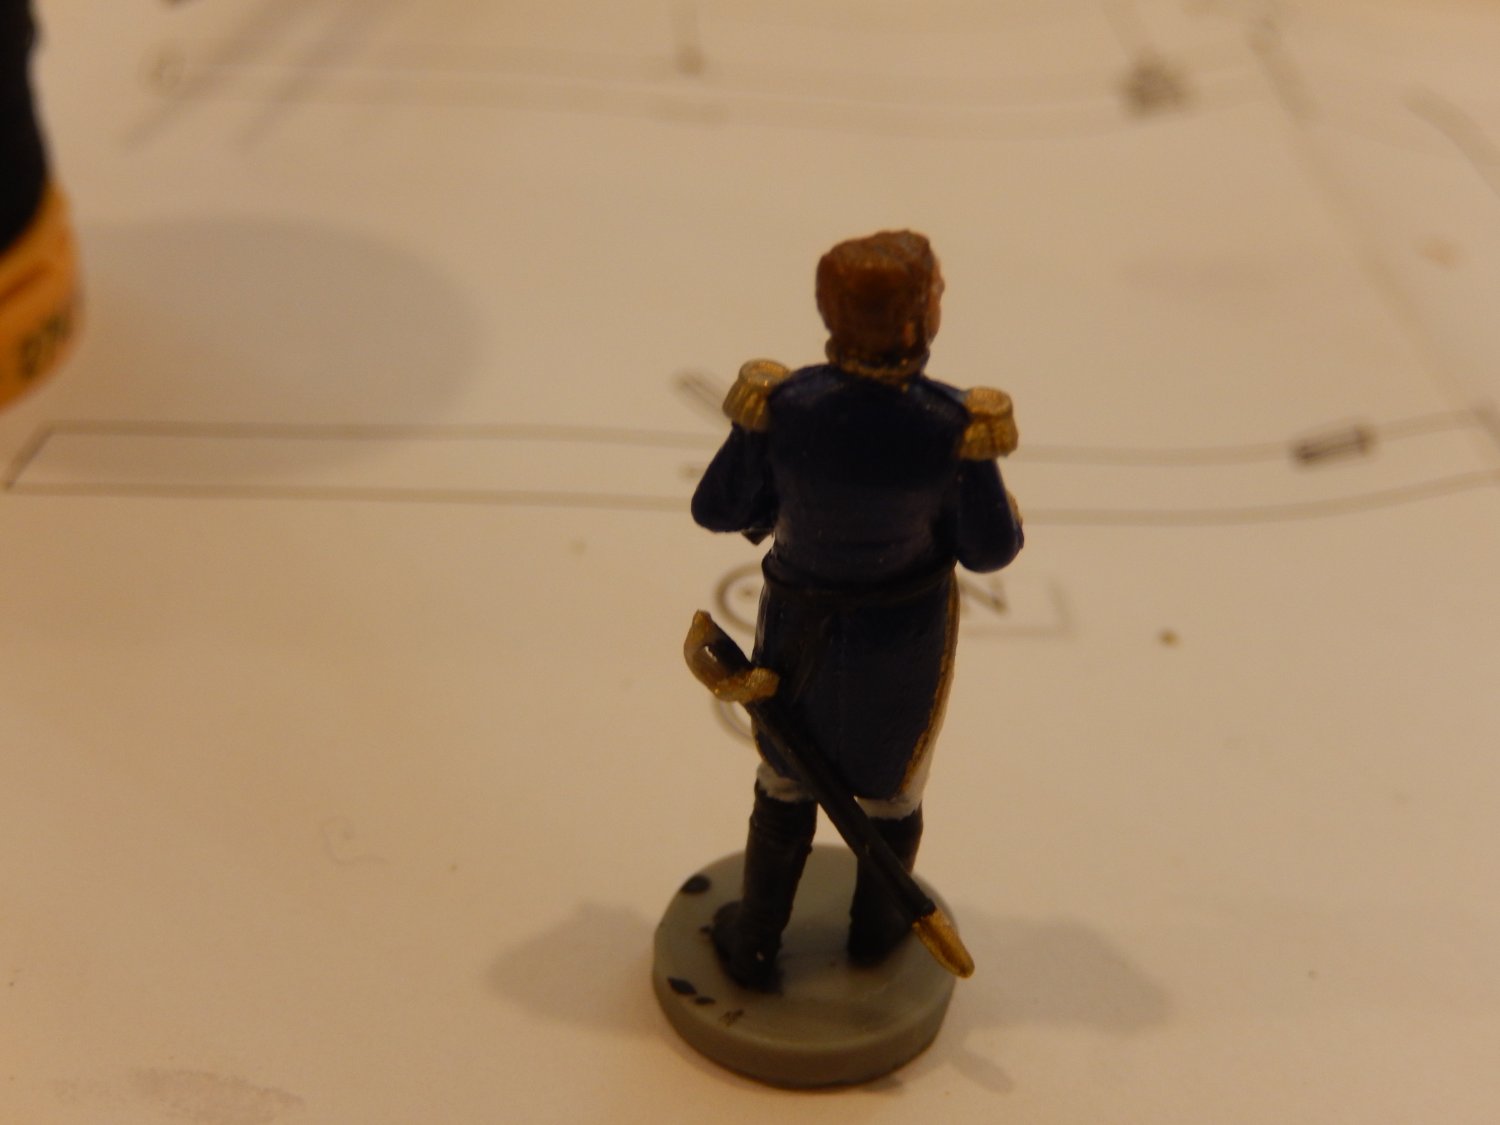
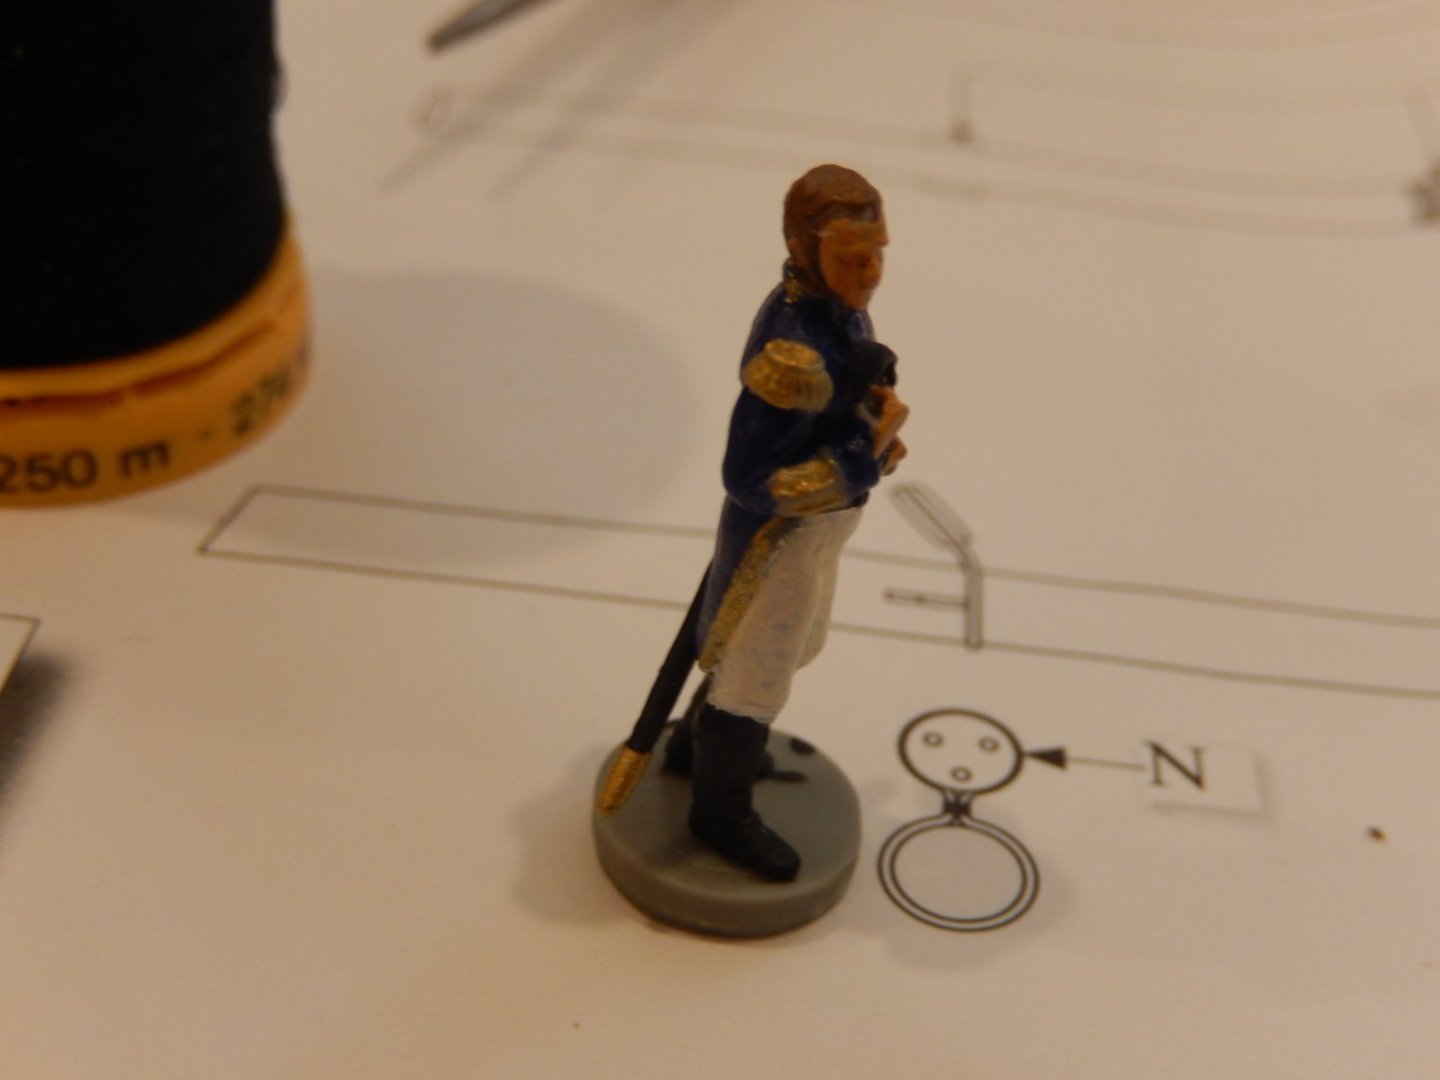
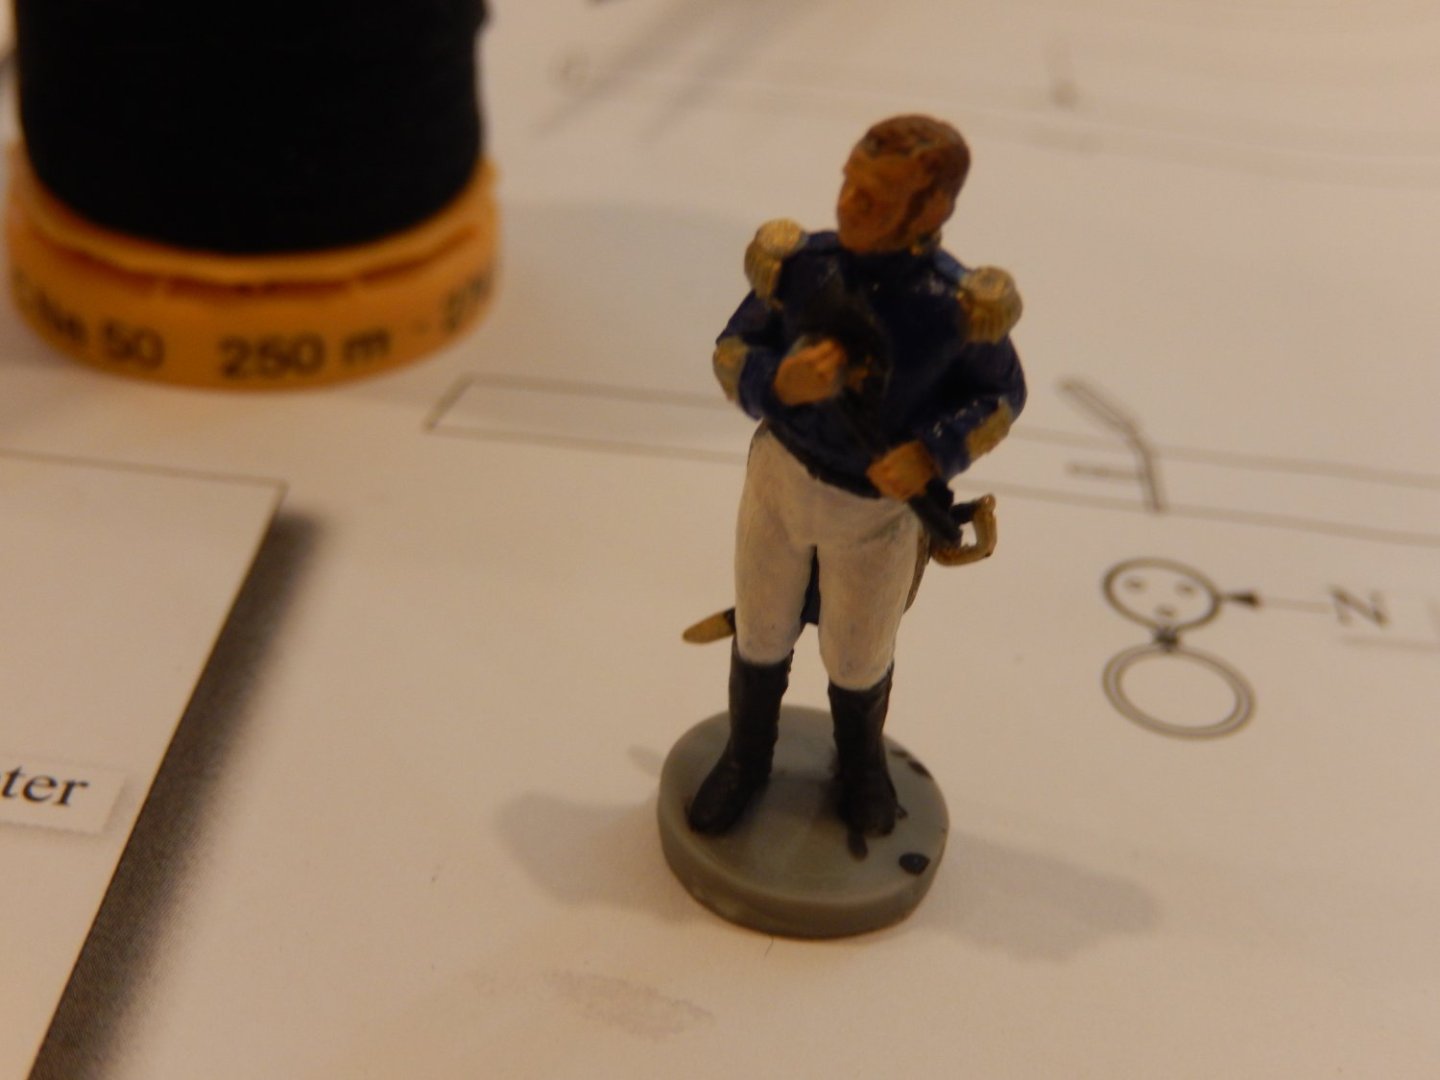
Just for something different I have dressed Lord Cochrane. Here he is on his pedestal. He'll be losing it later.


-
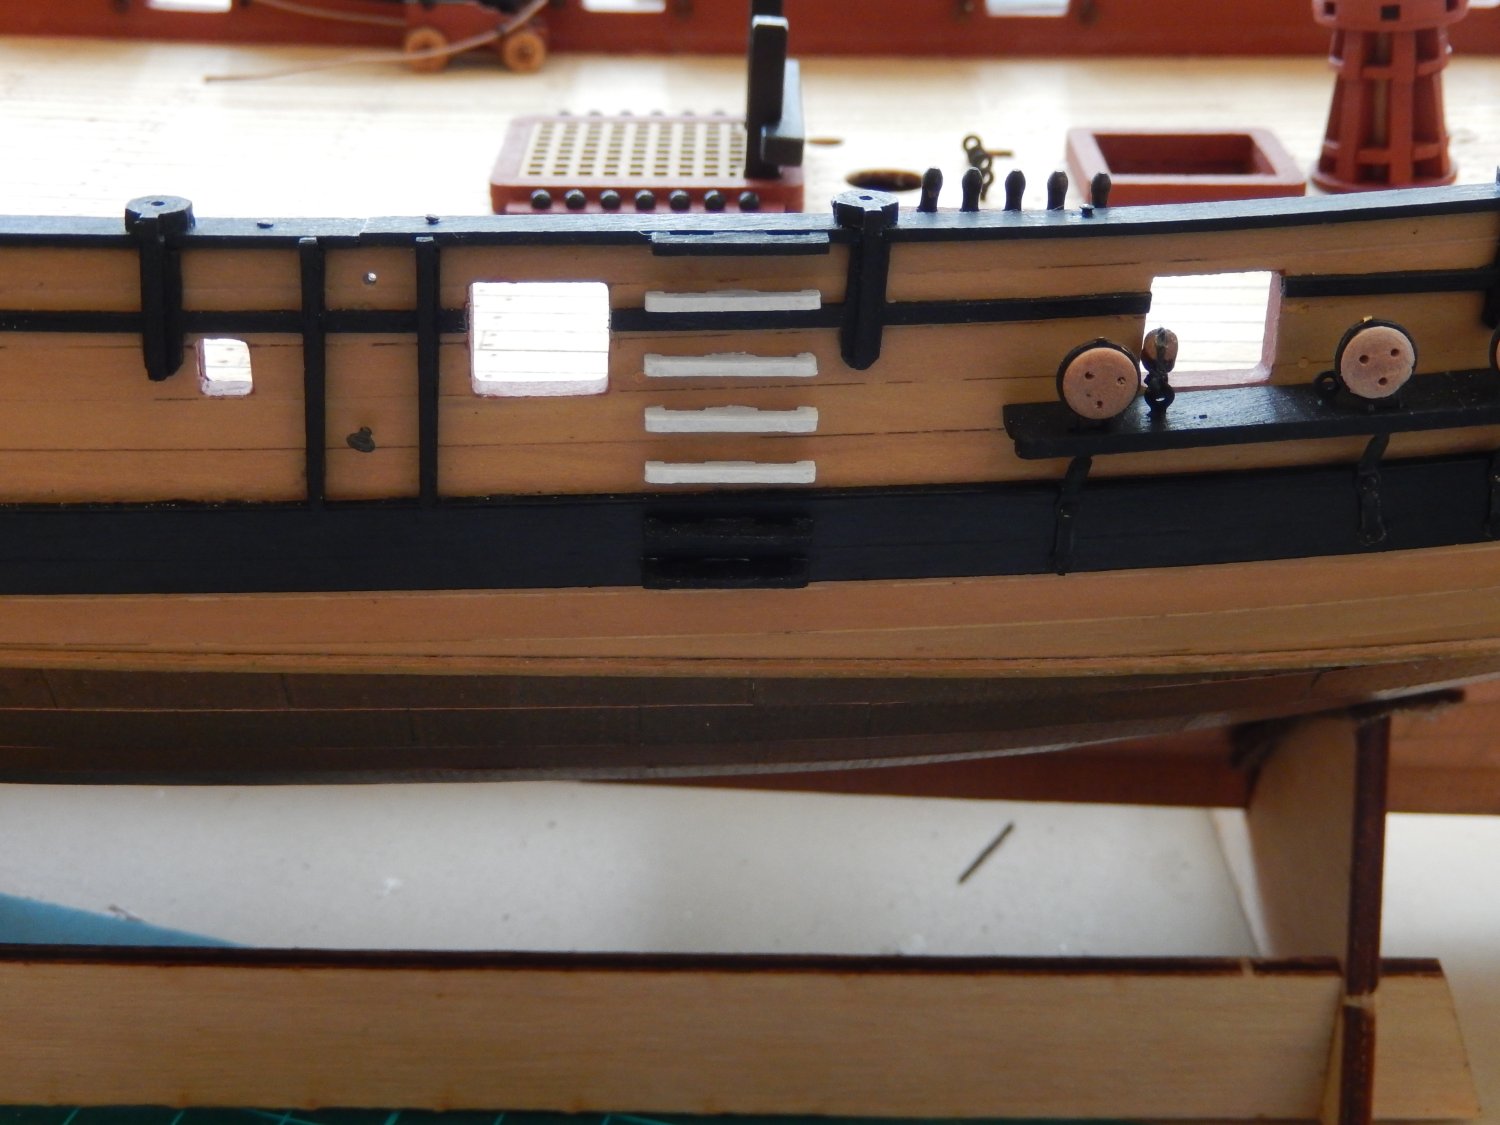
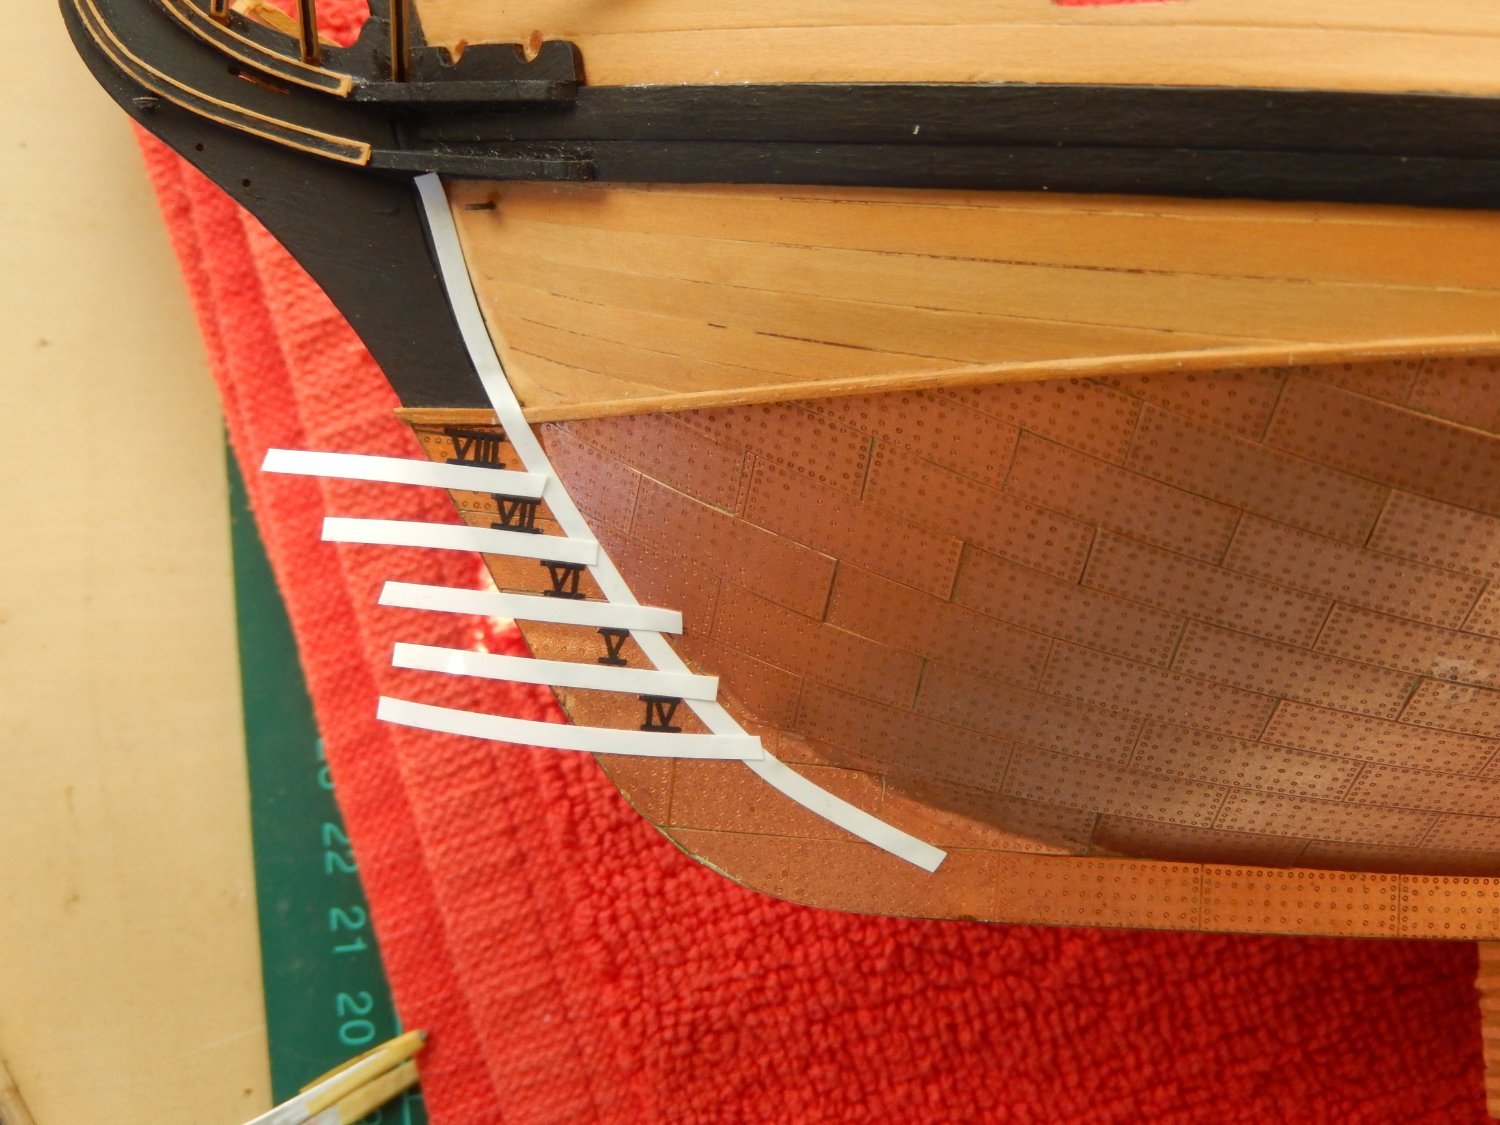
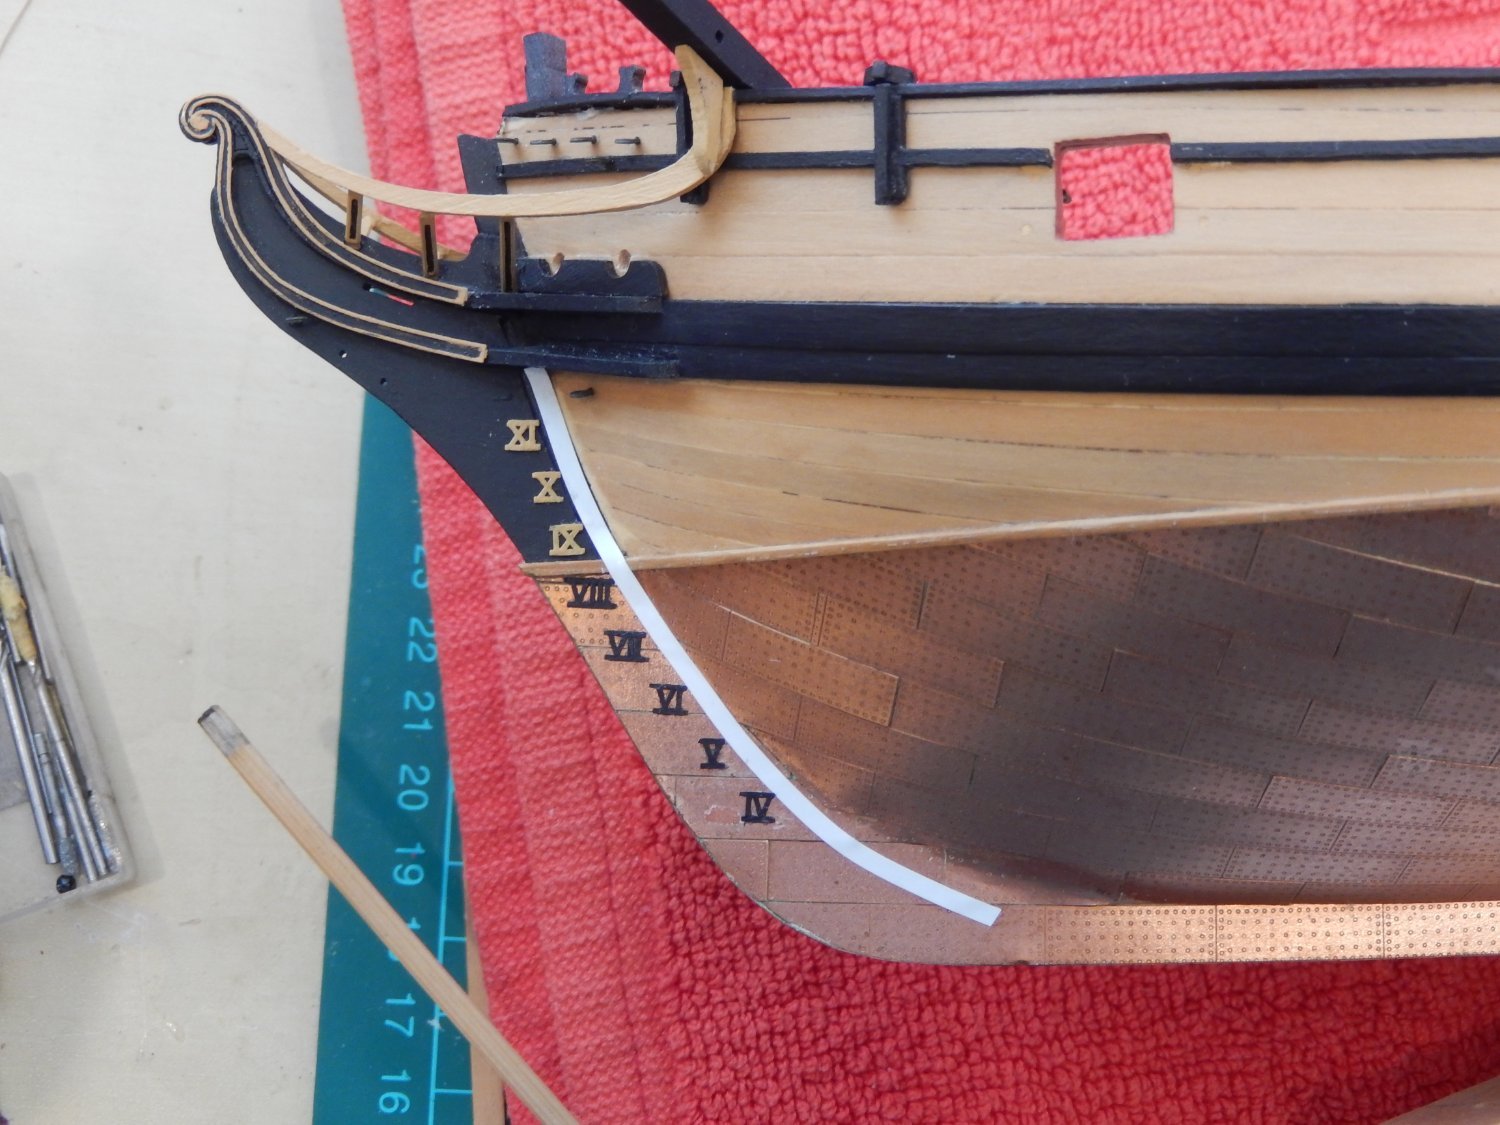
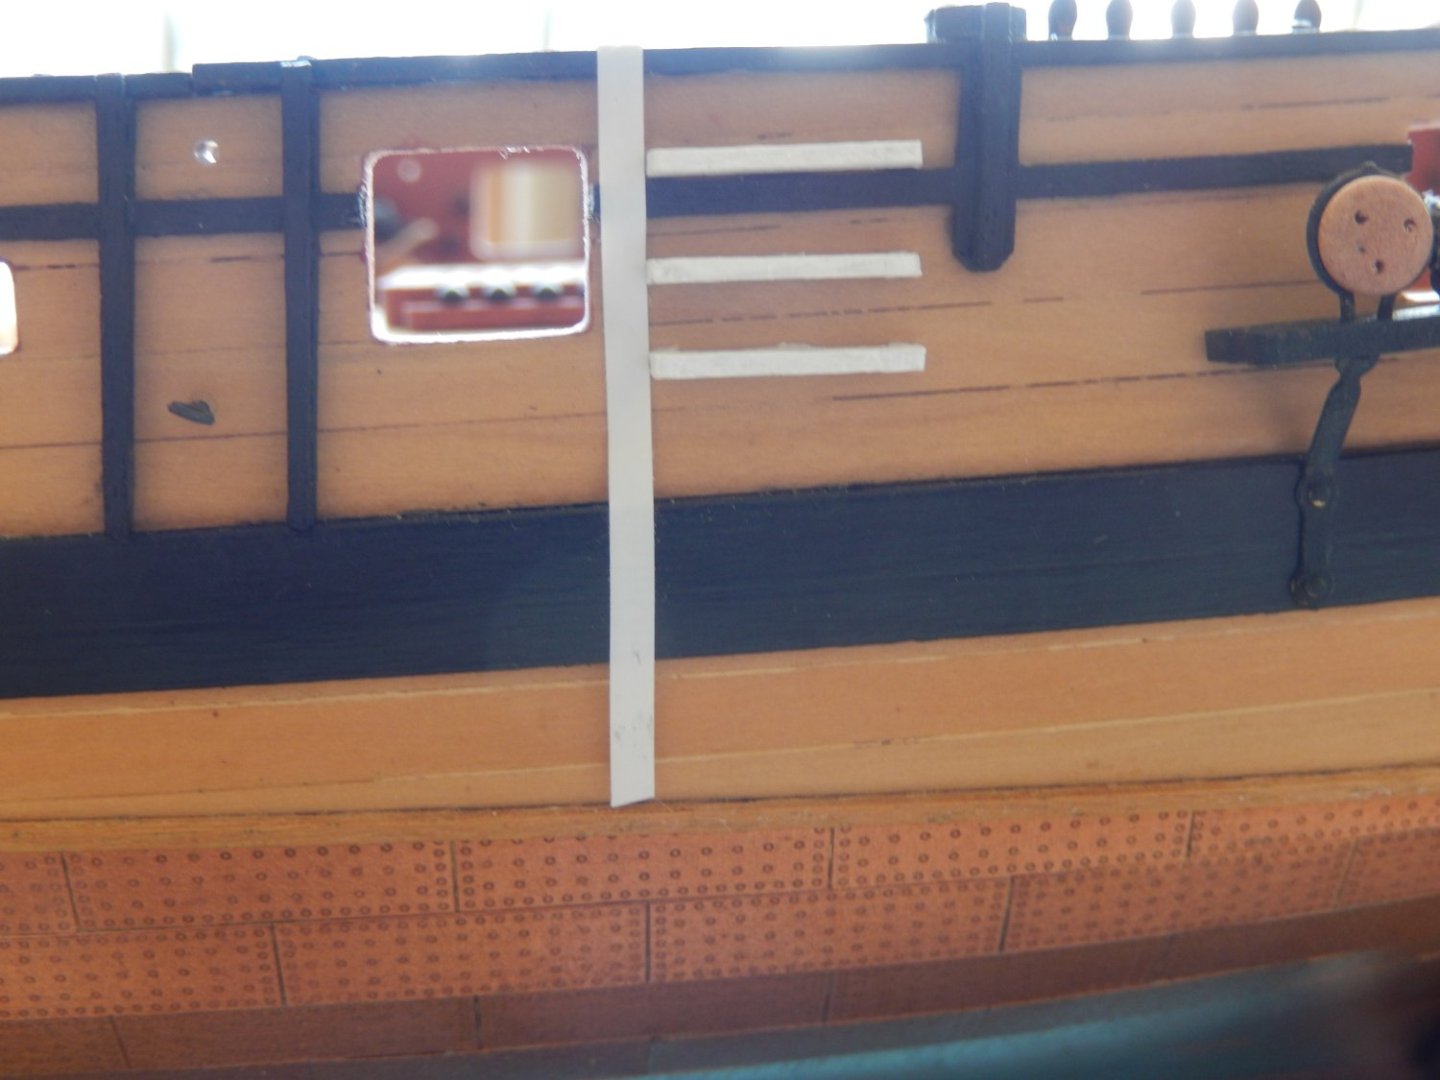
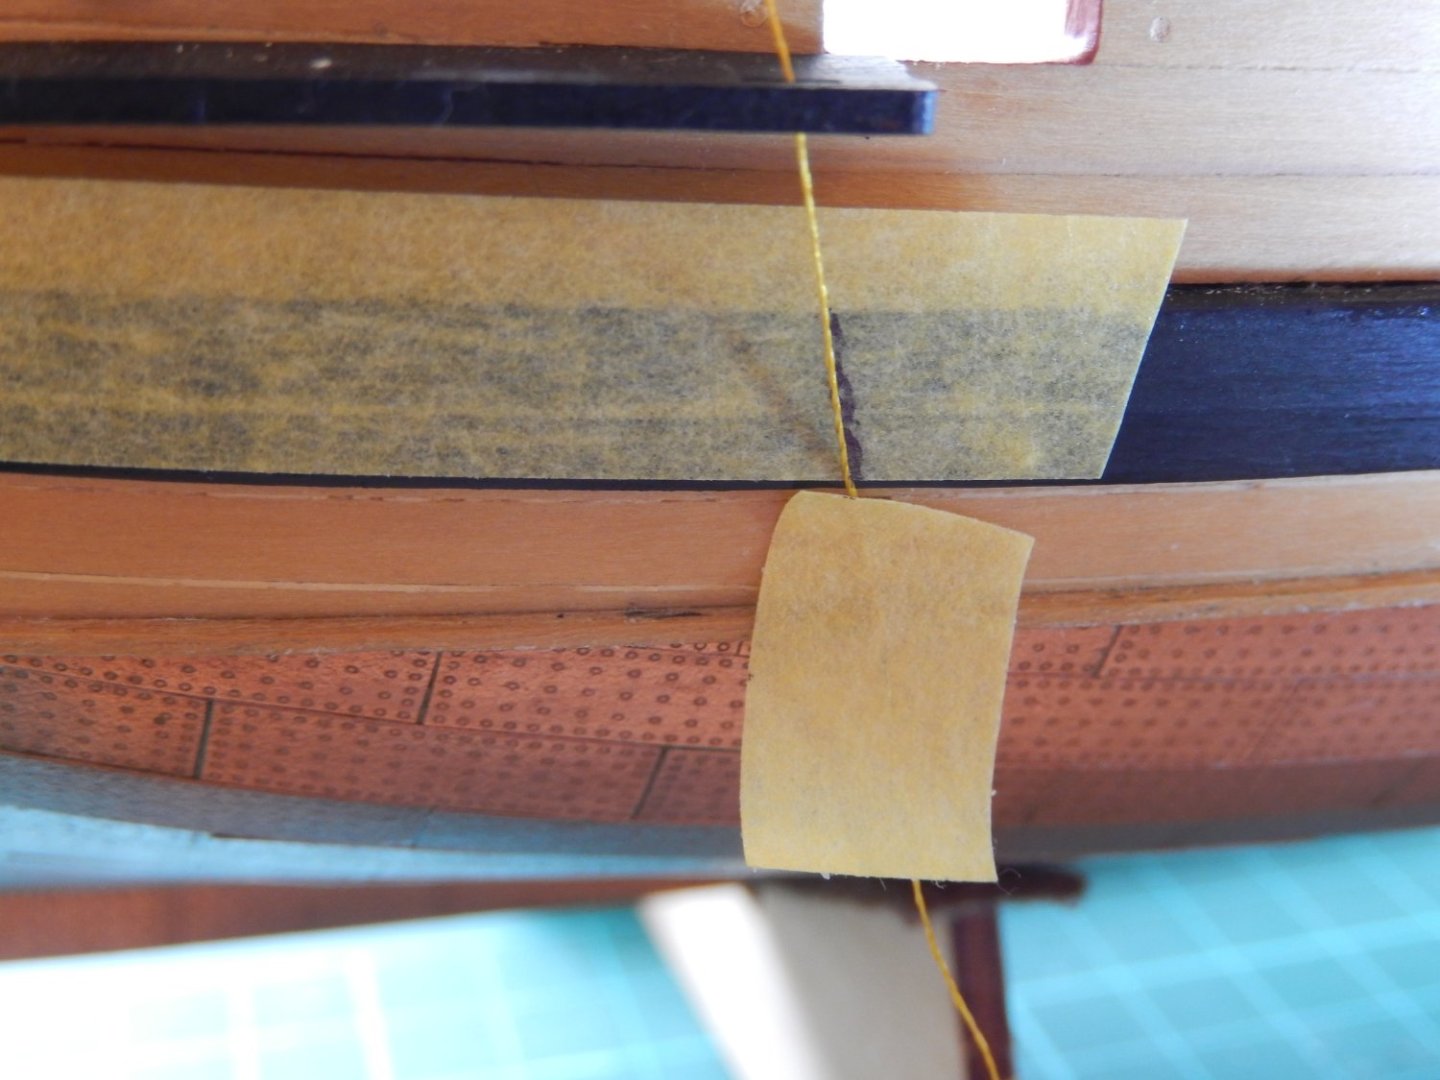
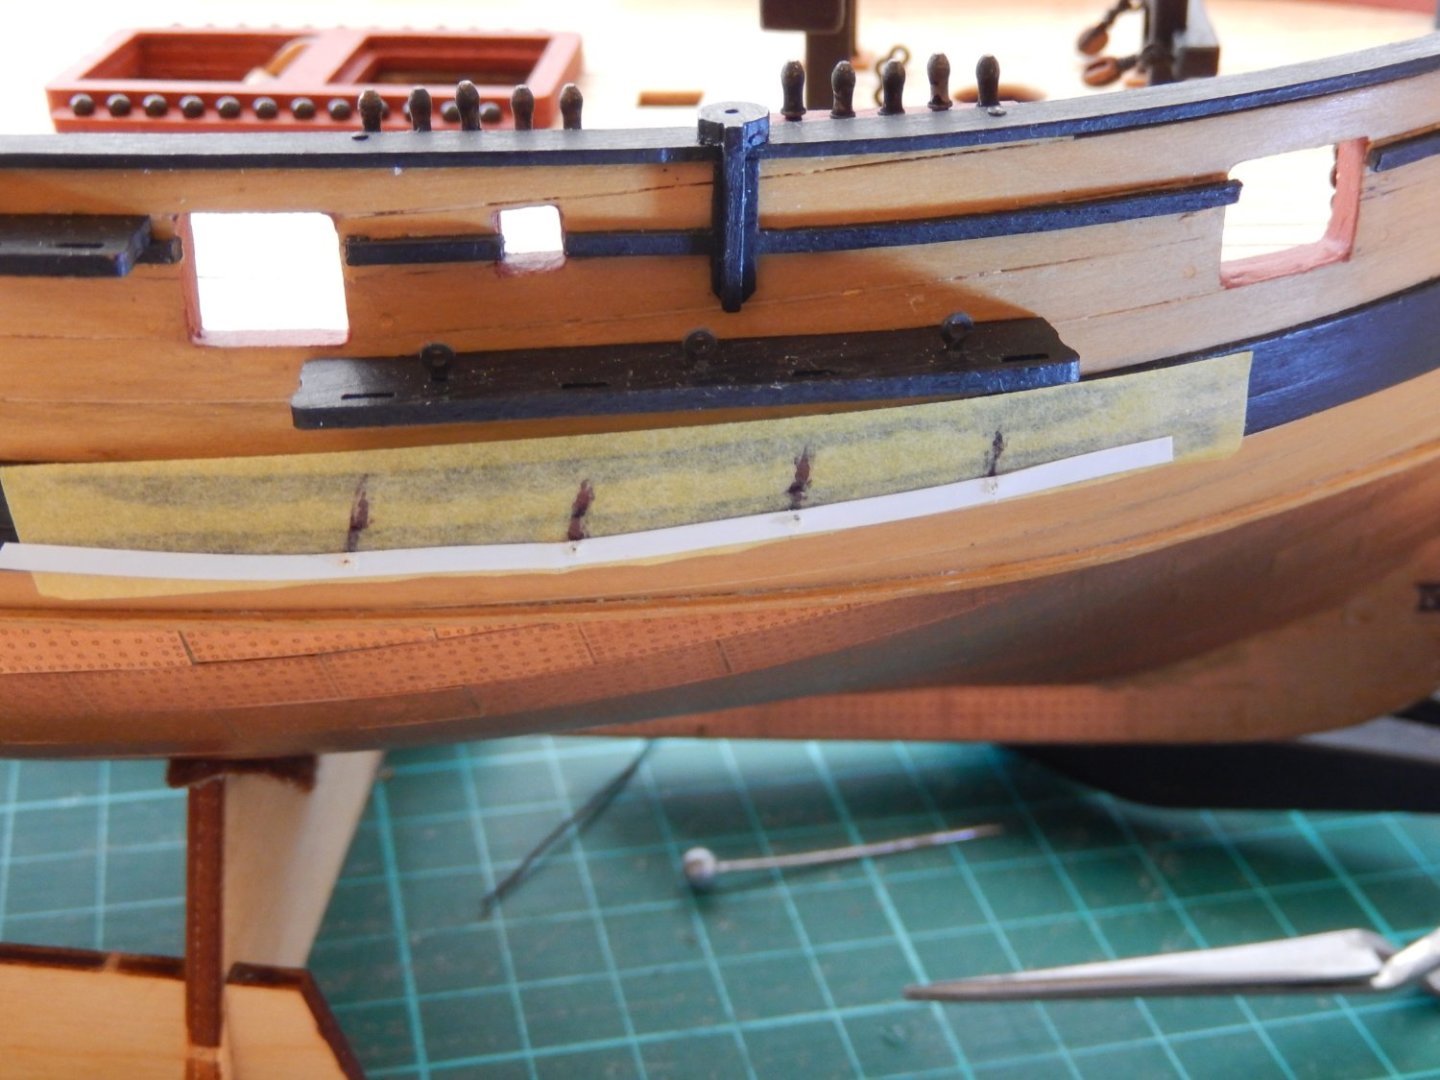
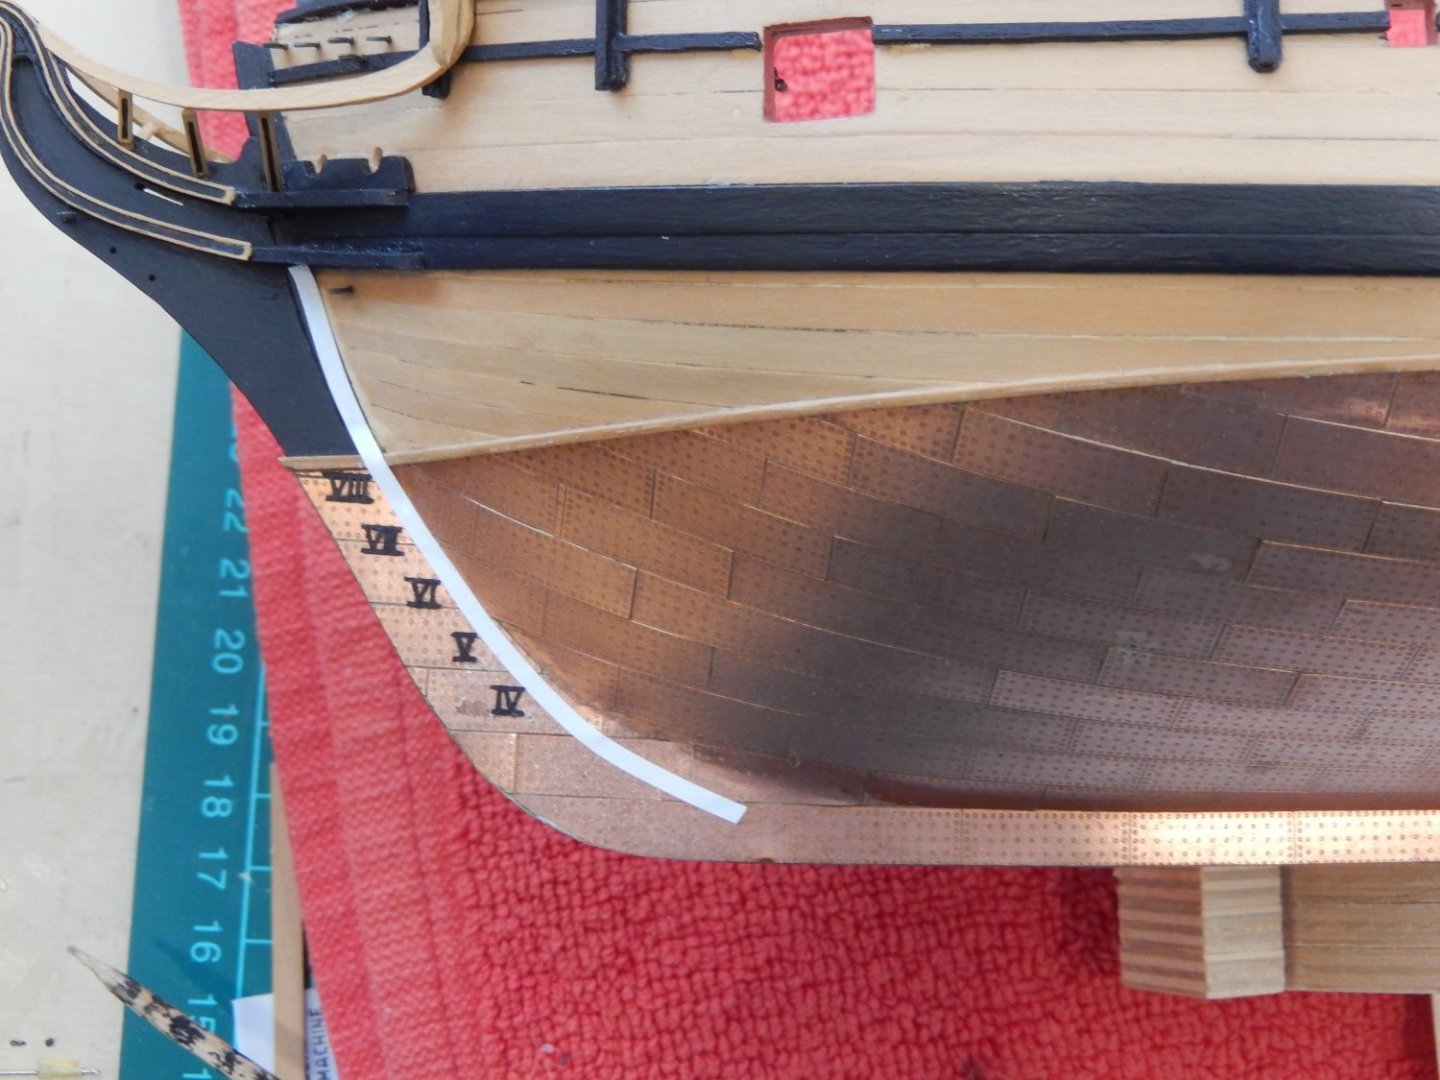
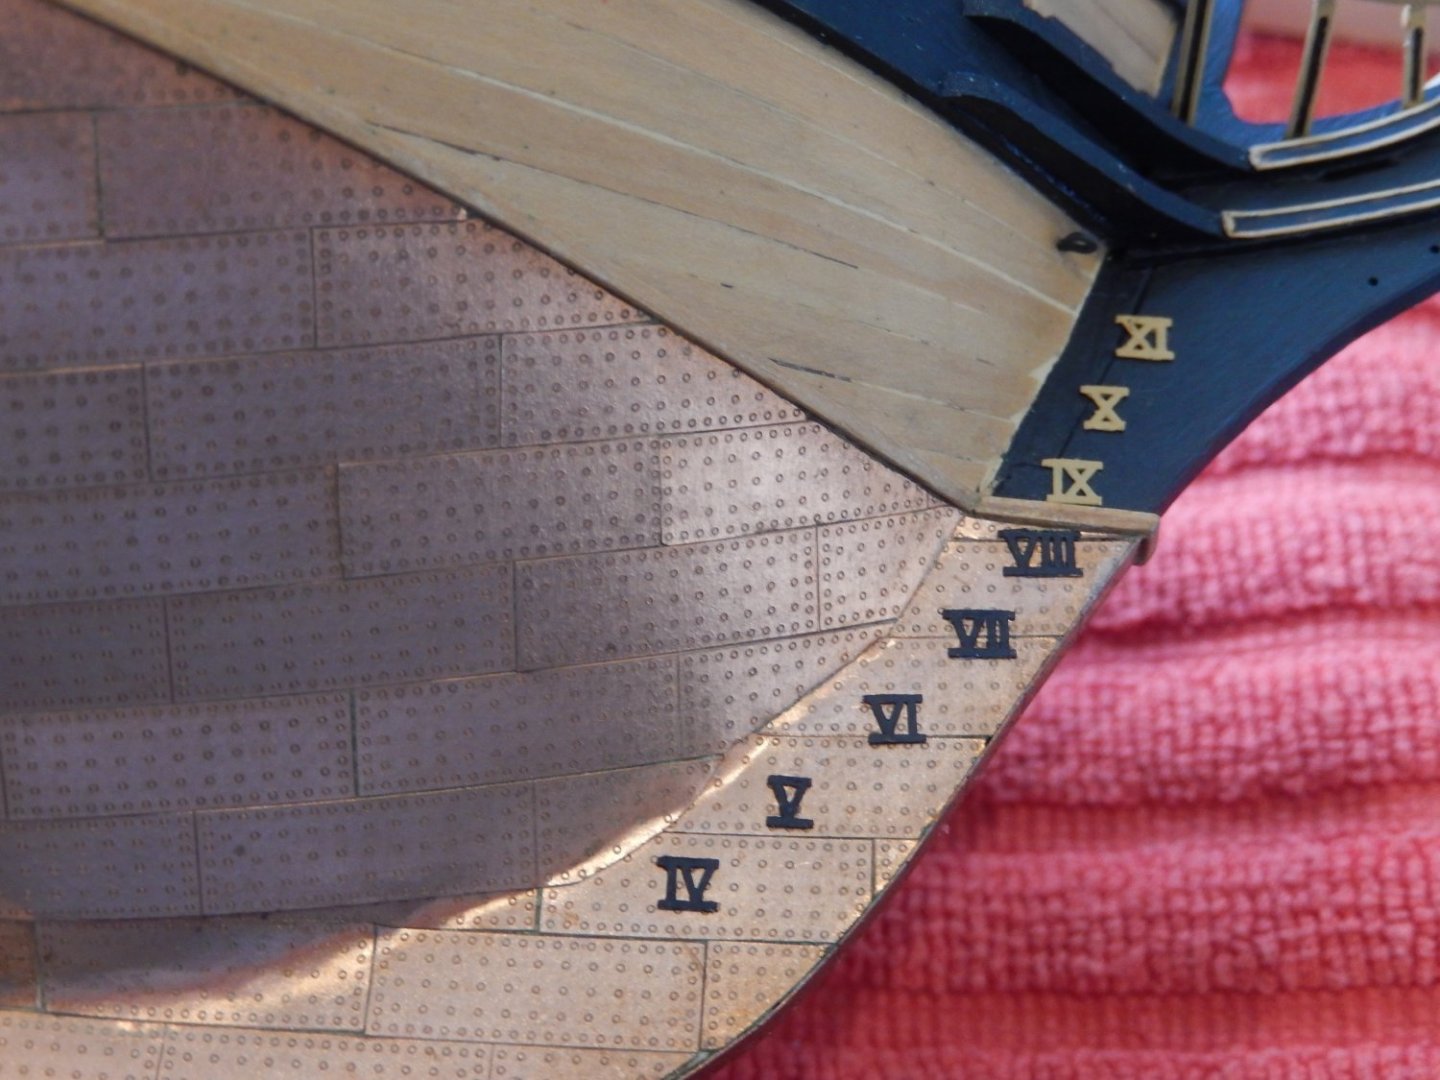
It has been with some trepidation I put on the depth markers. It proved to be a very fiddly job indeed. Without the Tamiya masking tape for curves I wouldn't have attempted it. I hope the following pictures will show how it may be done. The tape is quite thick so that it holds the numerals in place fairly well. I used non-drip CA on the point of a pin to apply the glue, and a pair of fine tweezers to drop the numeral between the lengths of tape. Now above the waterline - the ochre paint I think works well - but of course that's a matter of taste.


-
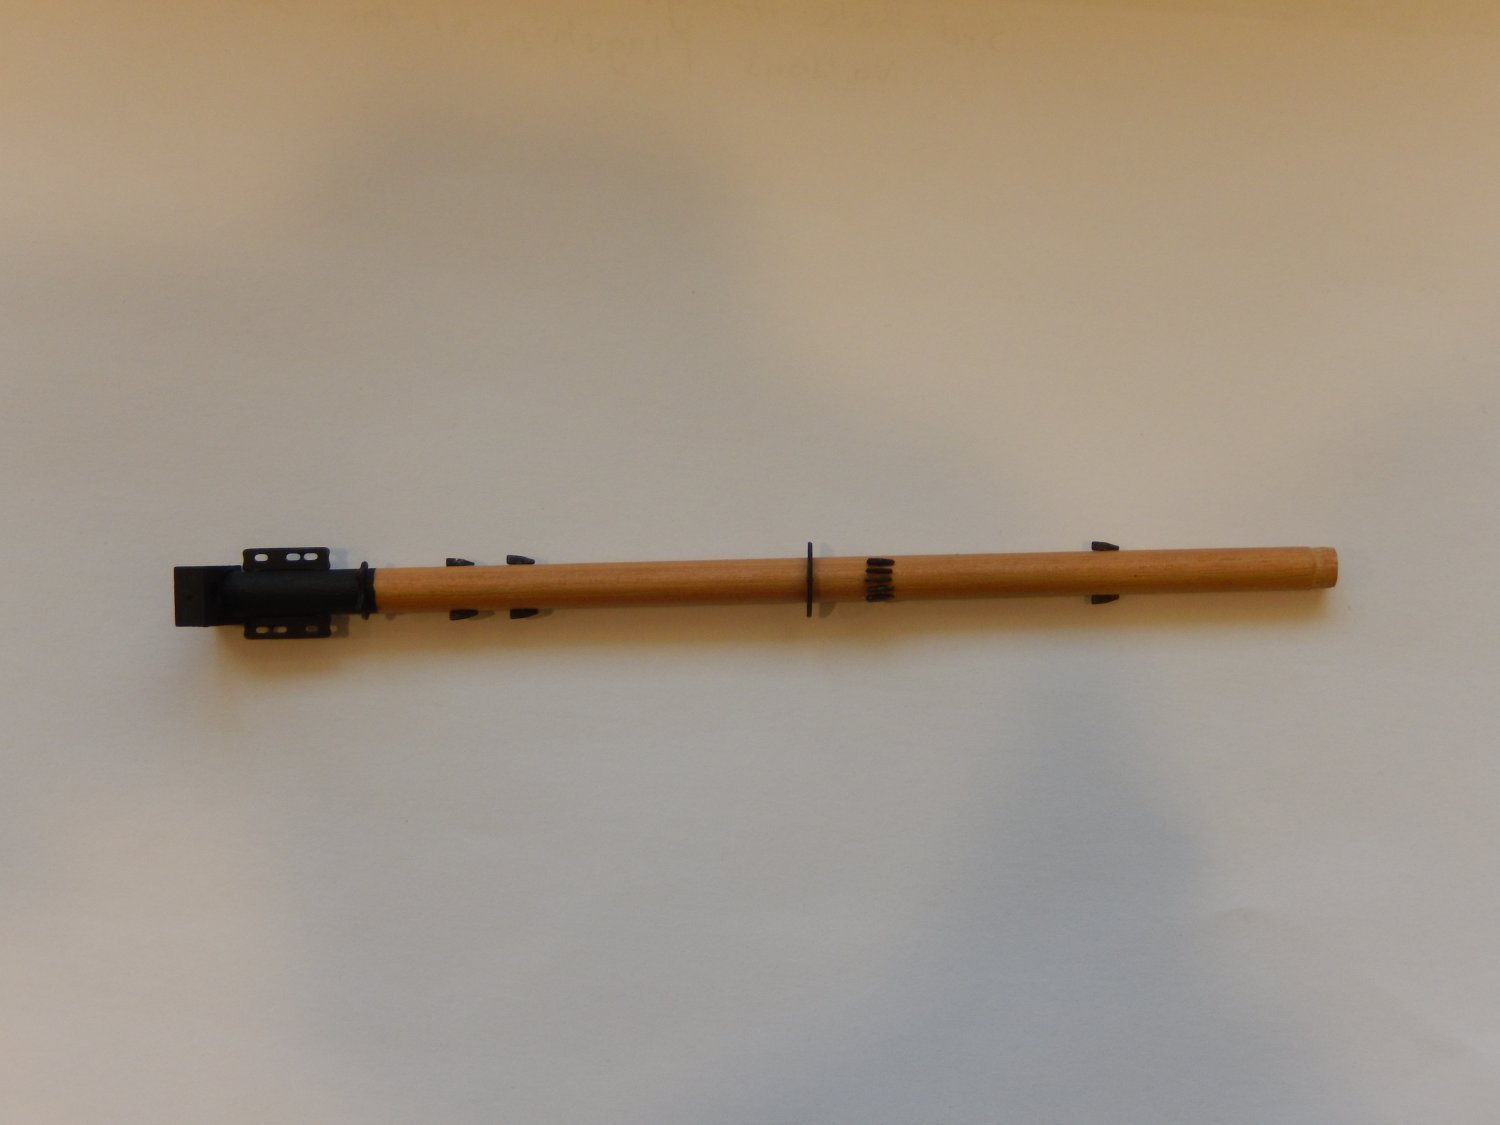
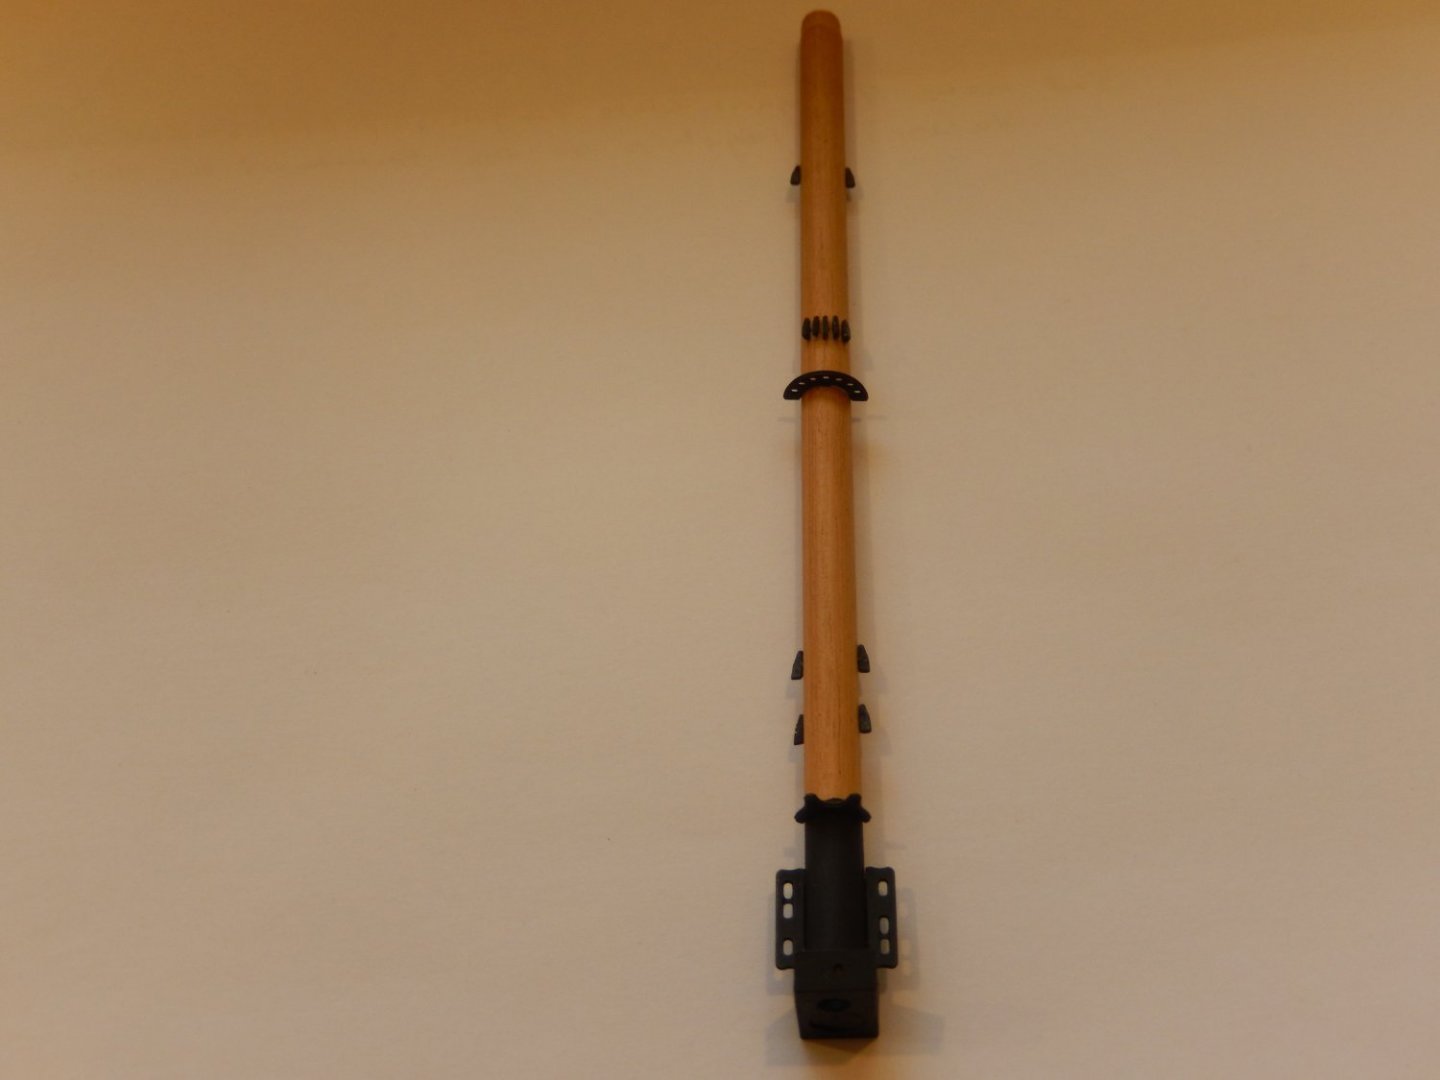
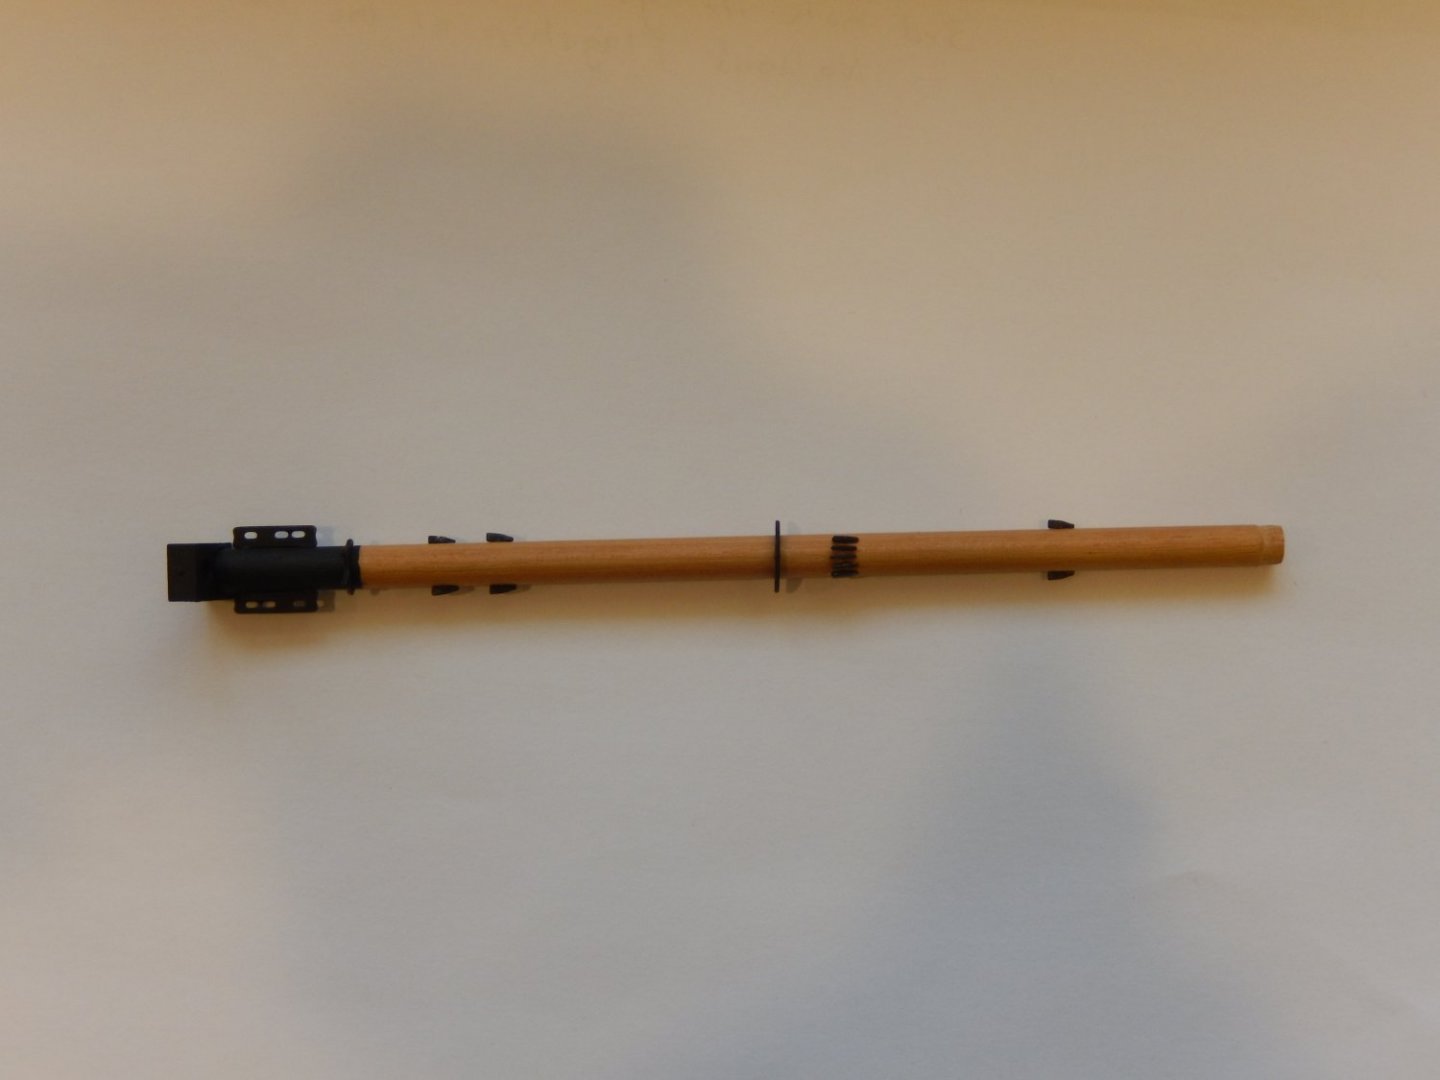
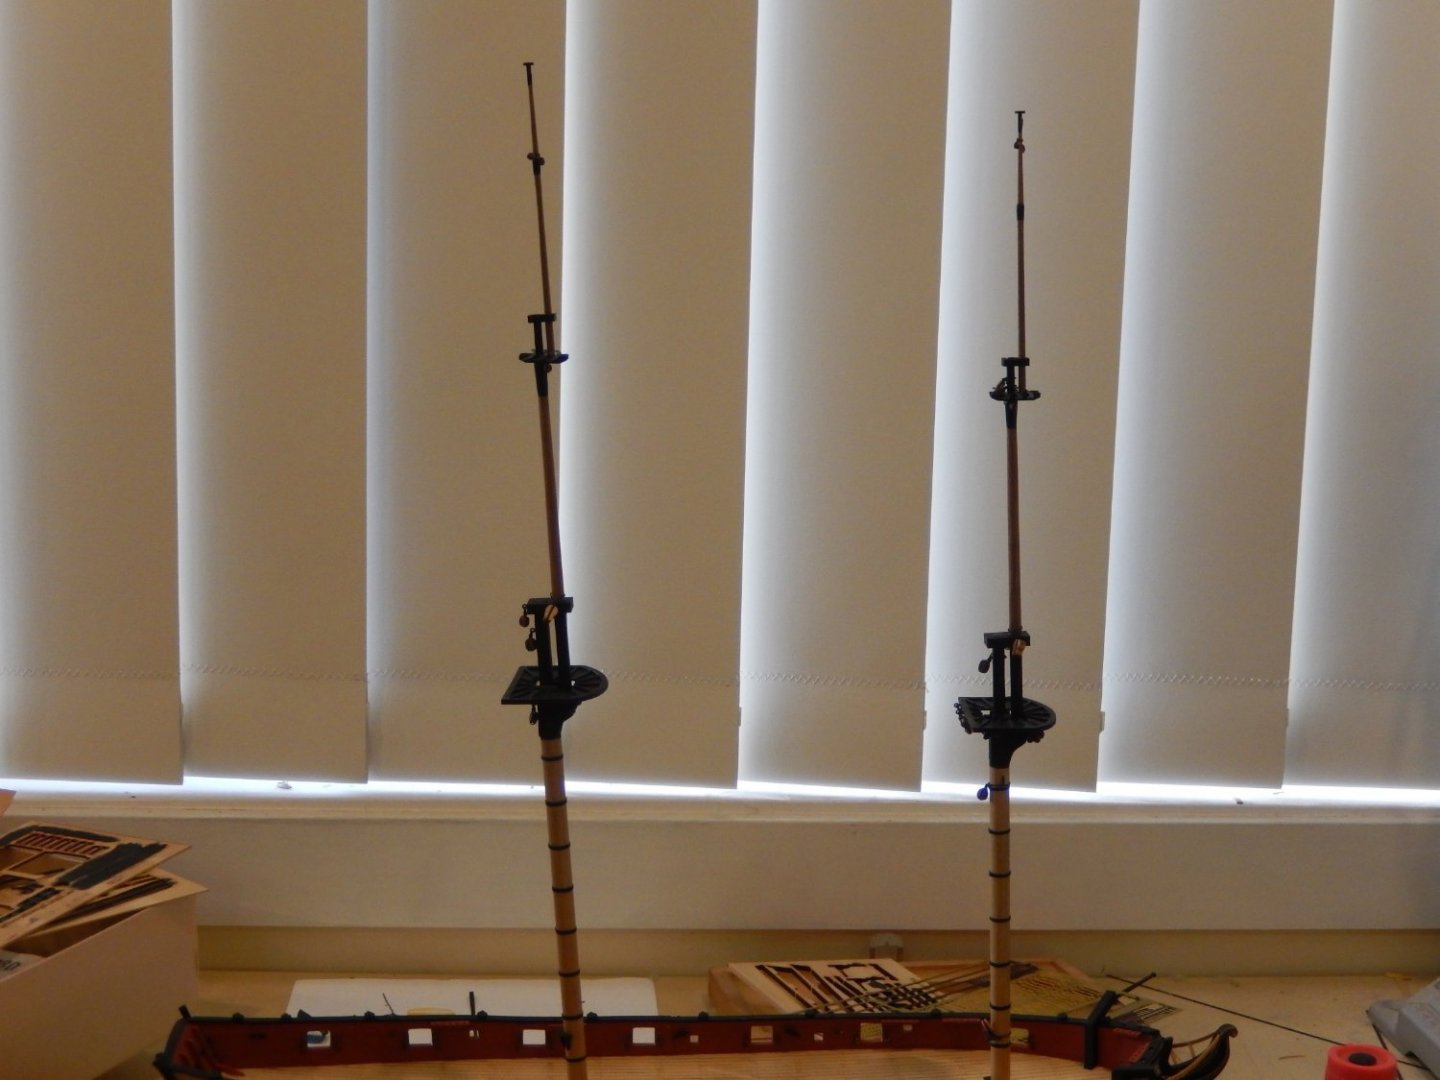
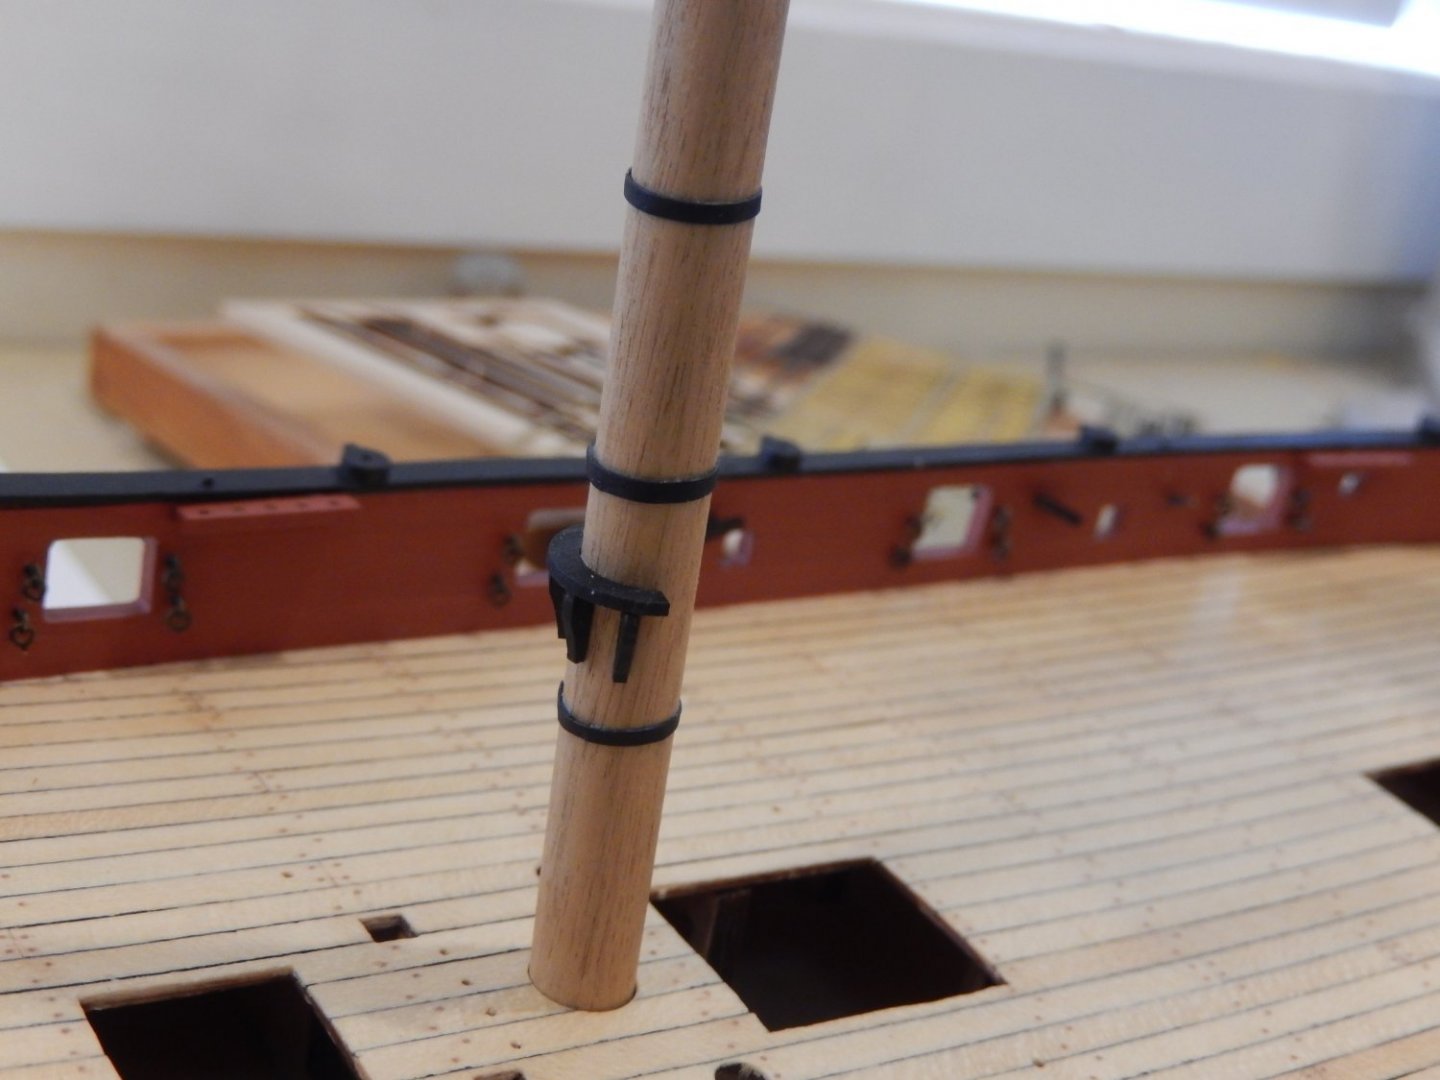
Thanks for the kind comment Burt. Have doing bits and pieces, not necessarily in the 'right' order while waiting such boring things as paint drying. I have finished the bowsprit and the various masts. The masts shown below are dry-fitted. The next step will be permanently fitting the deck furniture, all of which have been prepared.


-
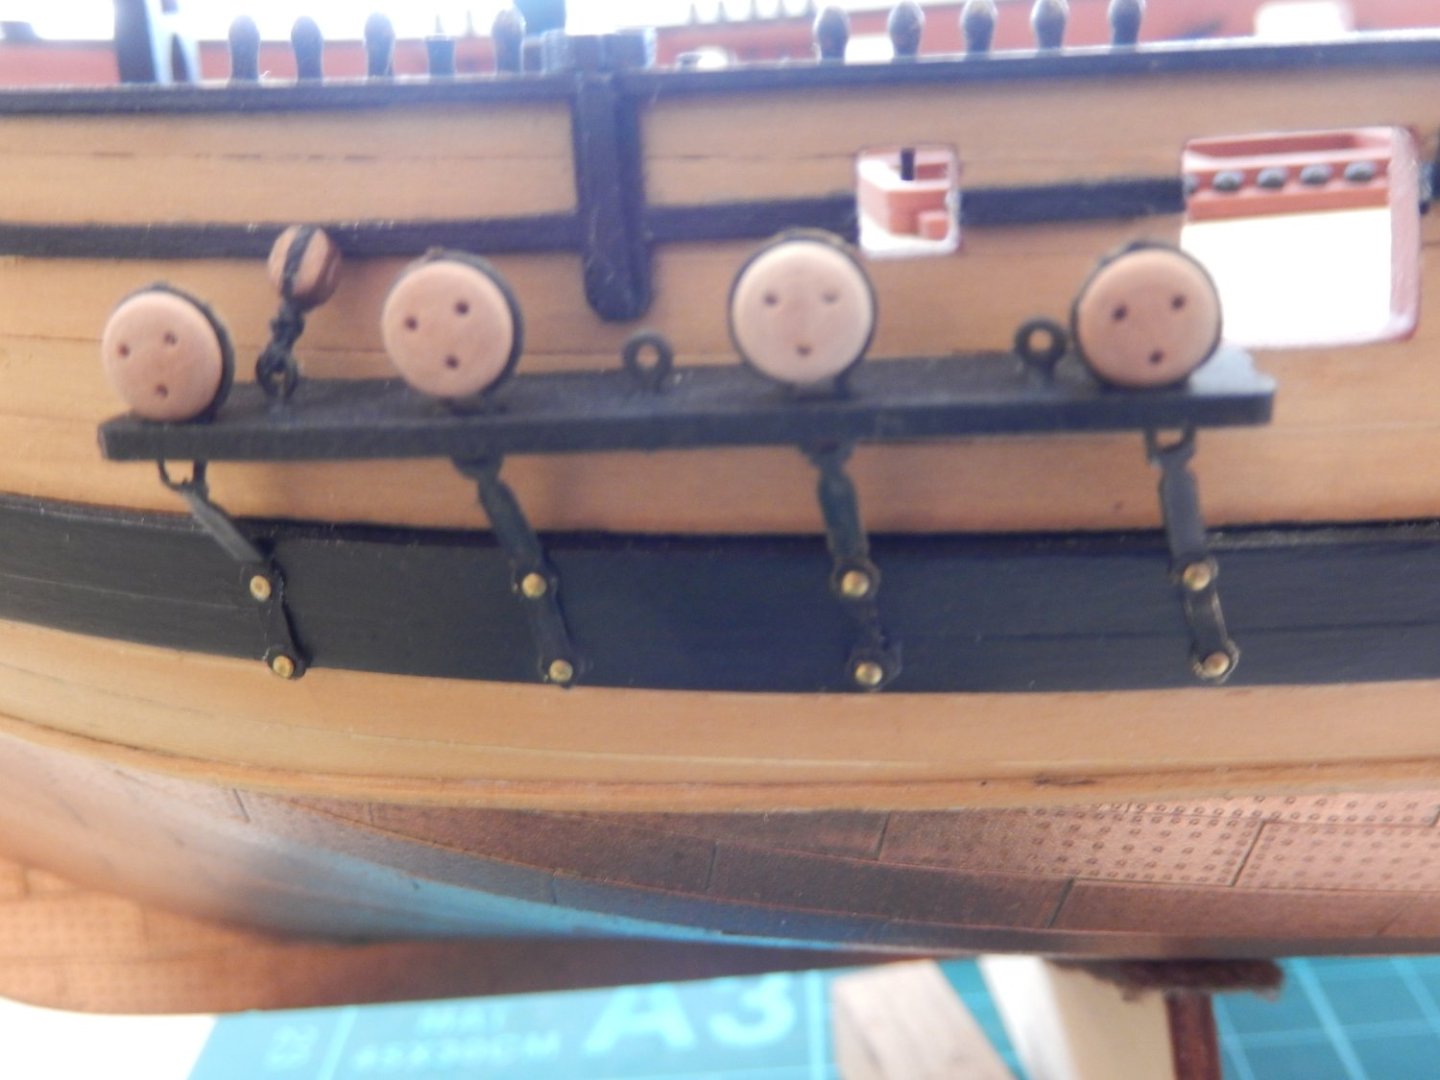
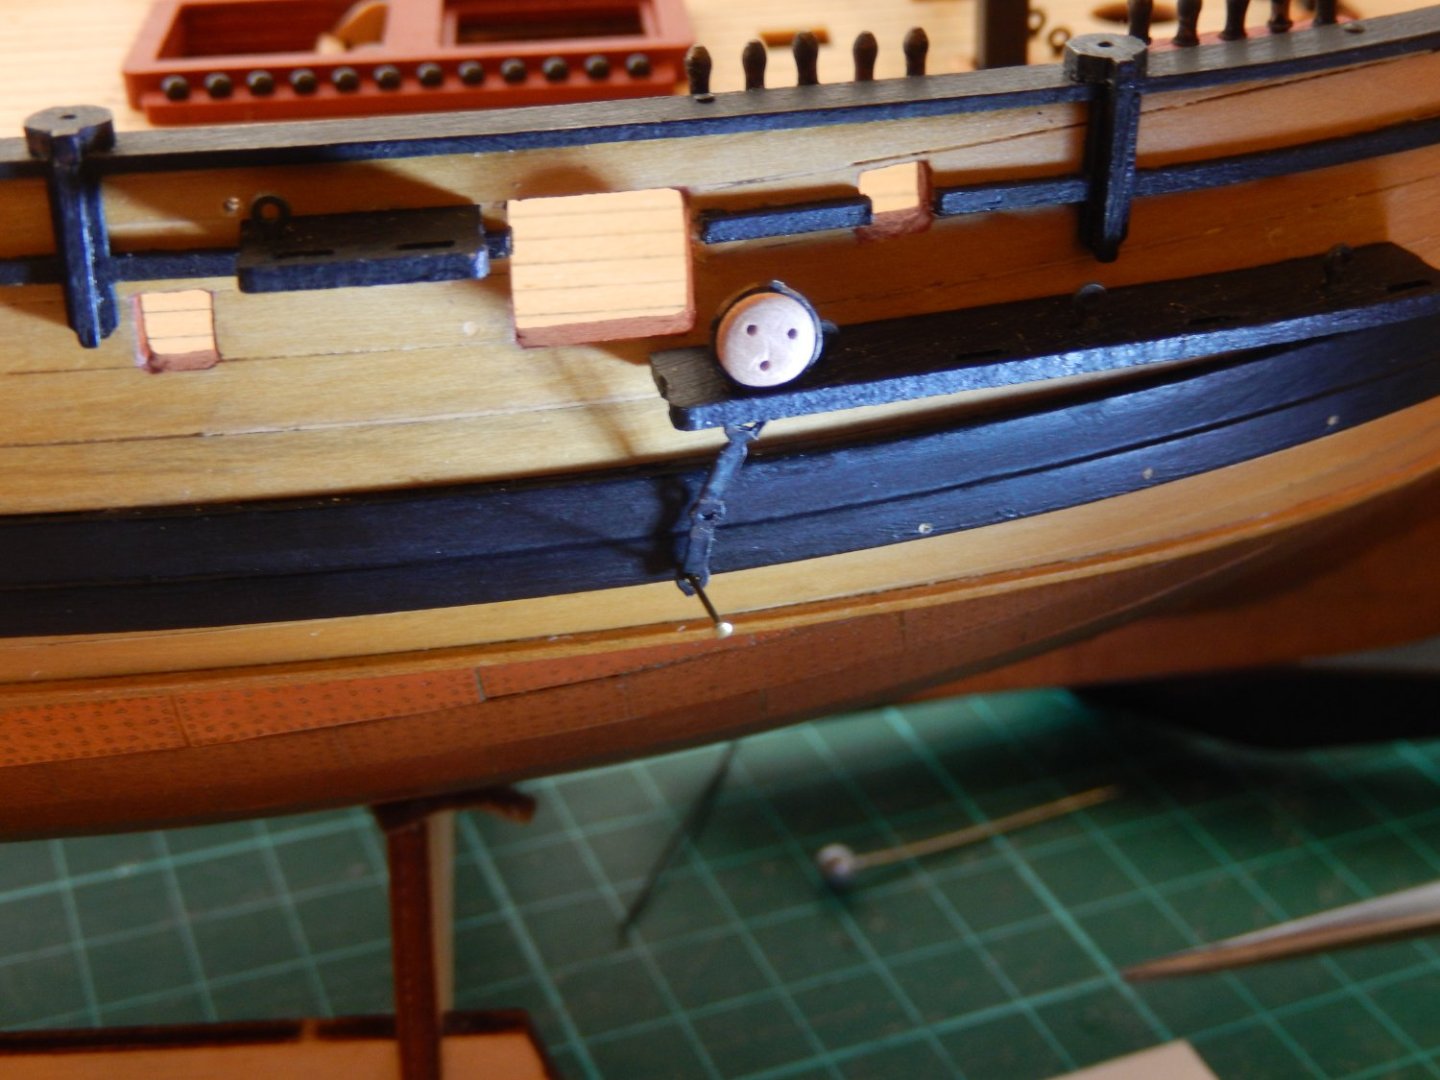
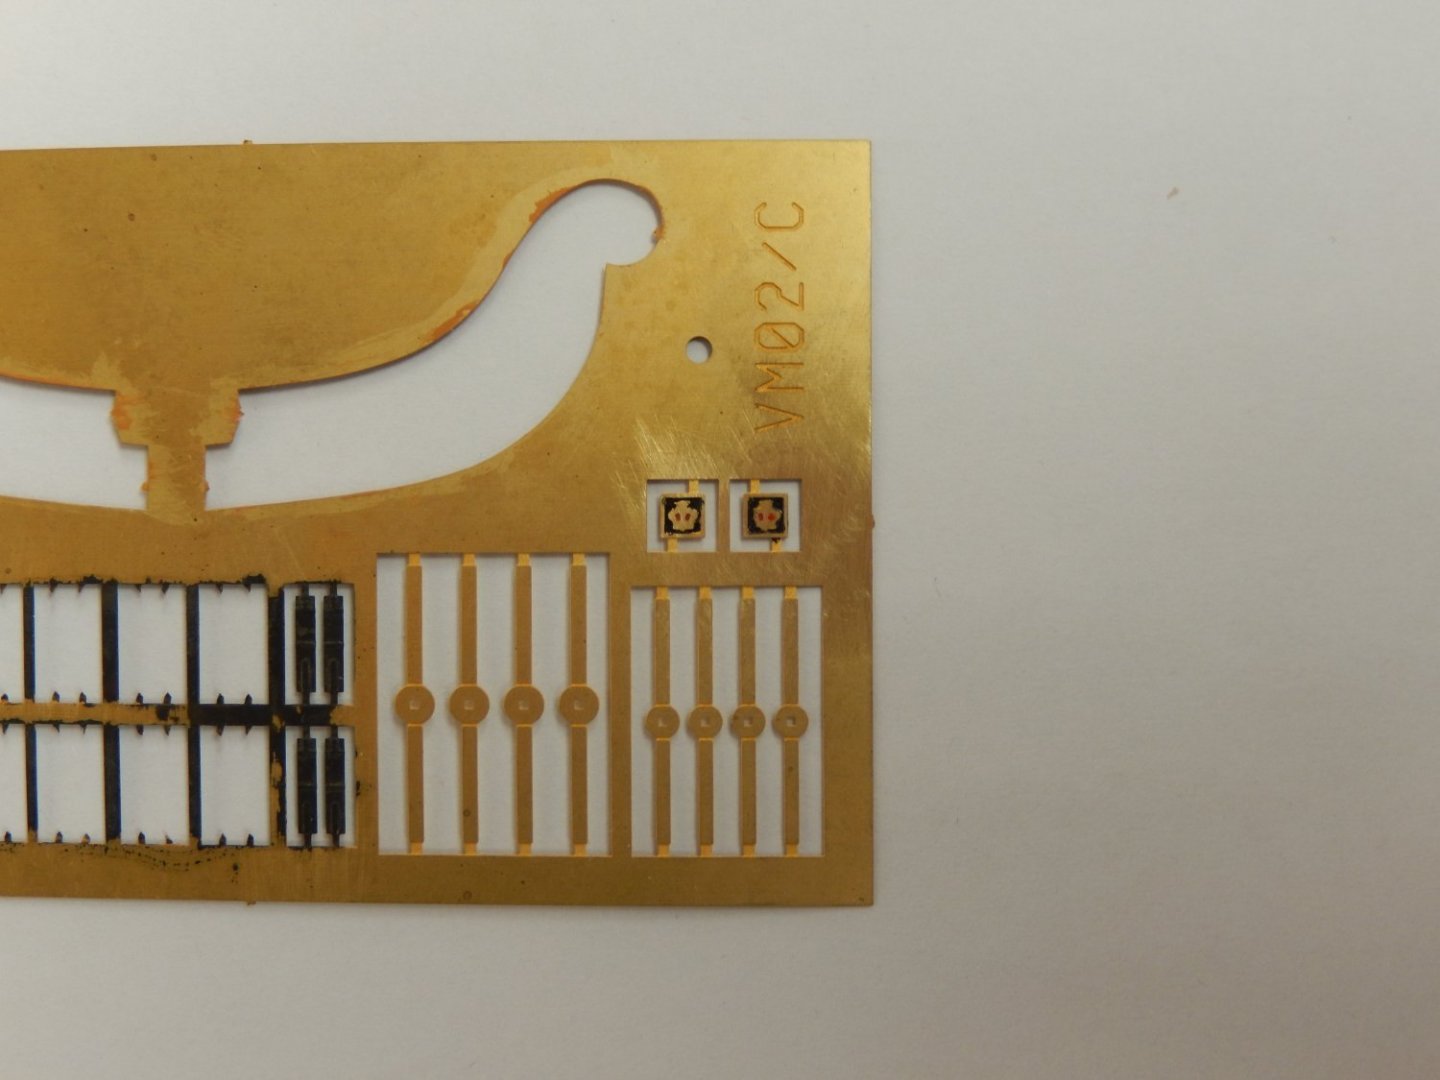
As a very minor alteration to instructions I have painted the little crown decorations on the catheads. They were done with a very, very fine brush while the decorations were still attached to the large copper assembly. The decorations were then abraded with 1000 grit glass paper. Below is the result. Here they are glued to the catheads. I'm quite pleased with the result.

-
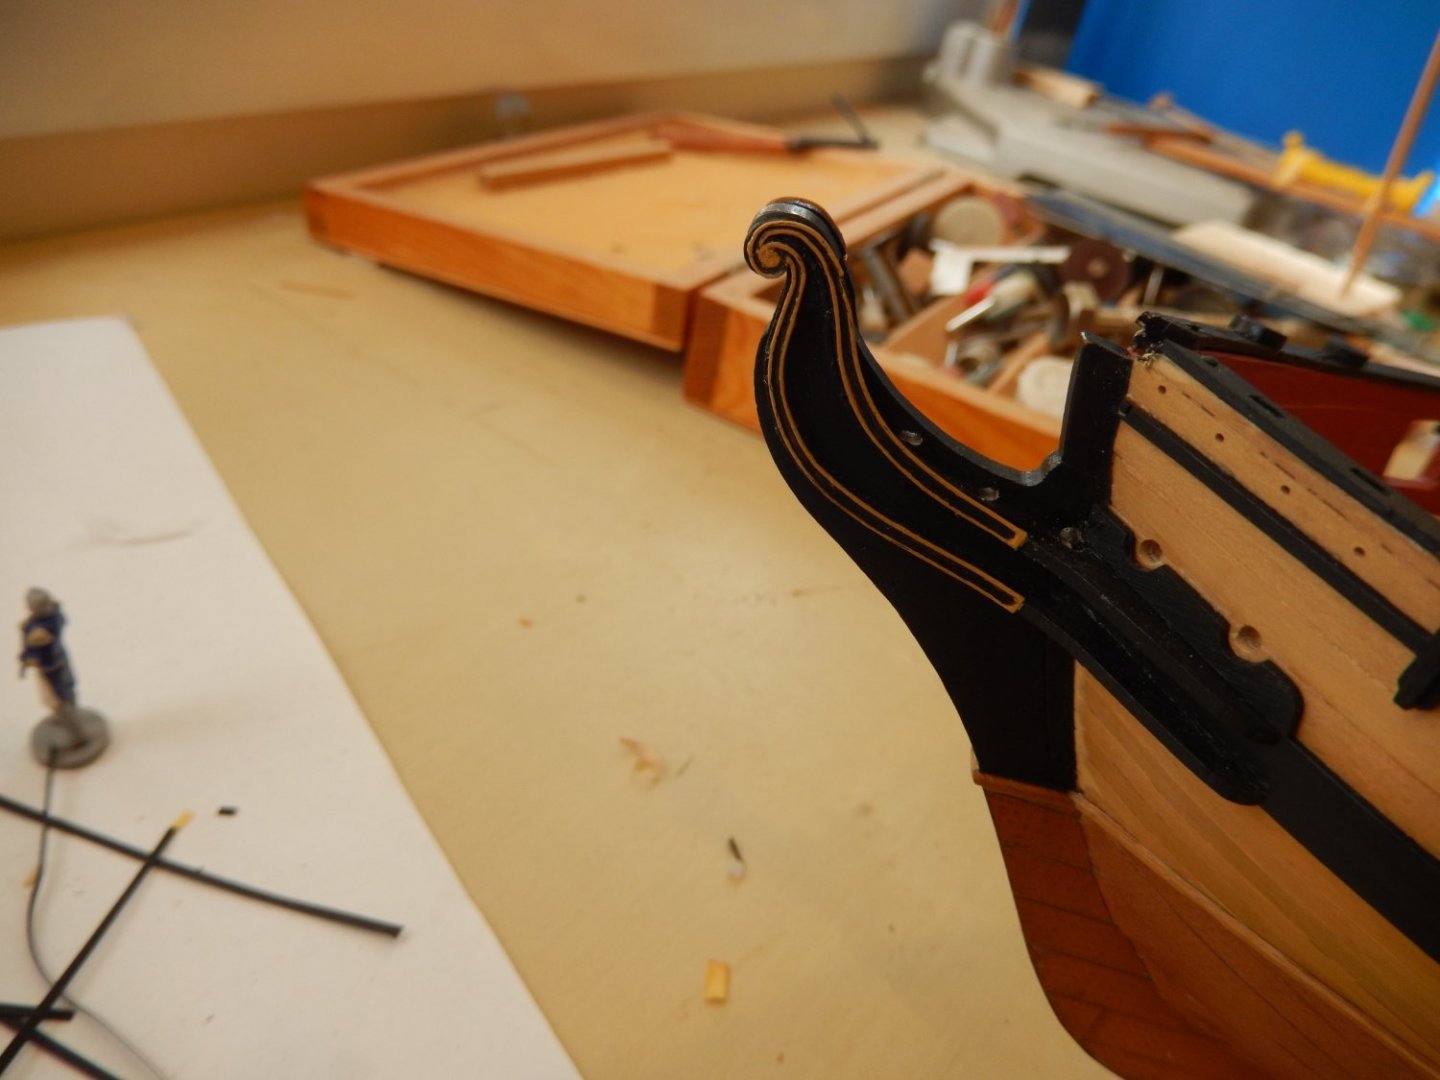
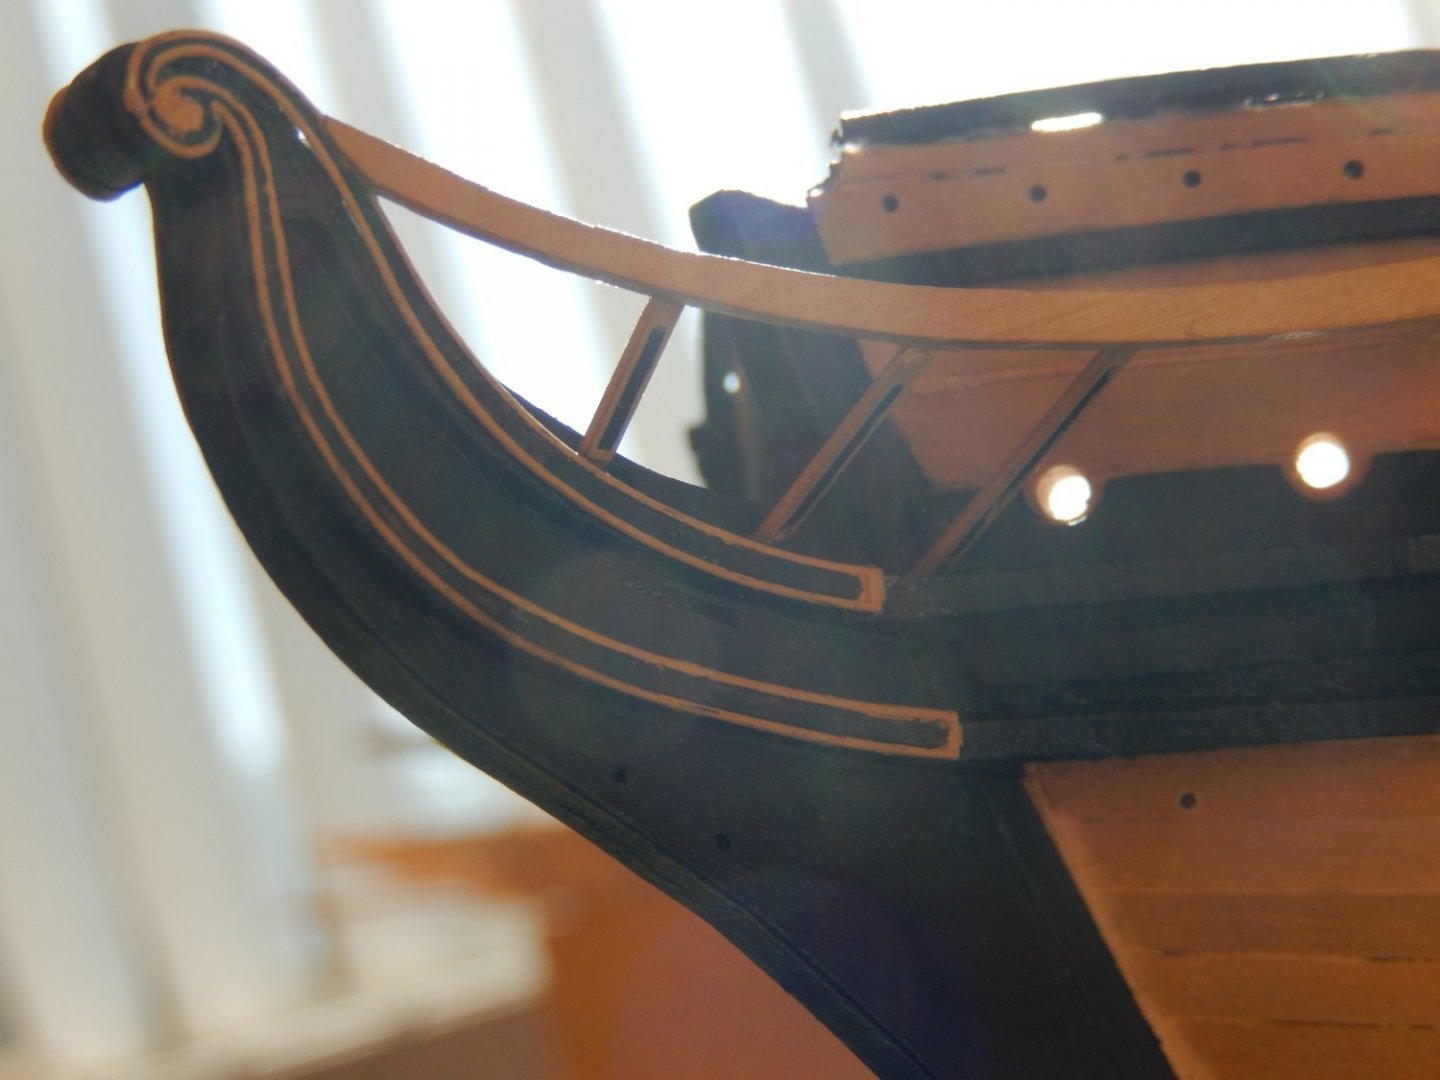
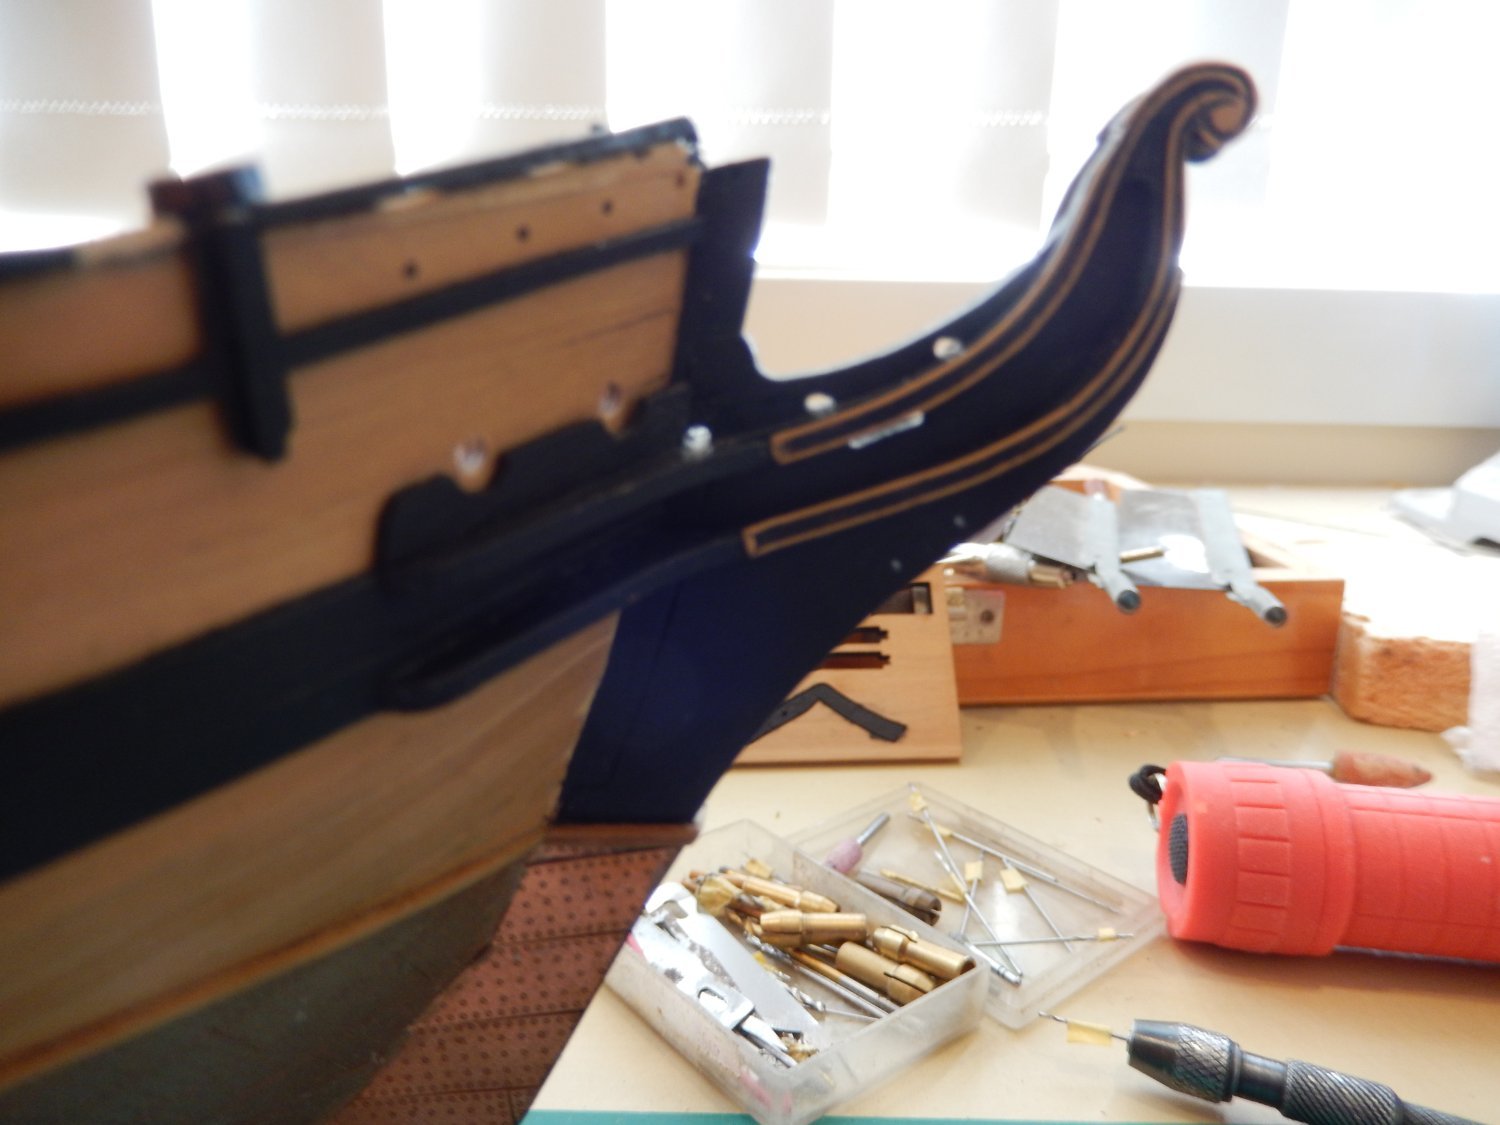
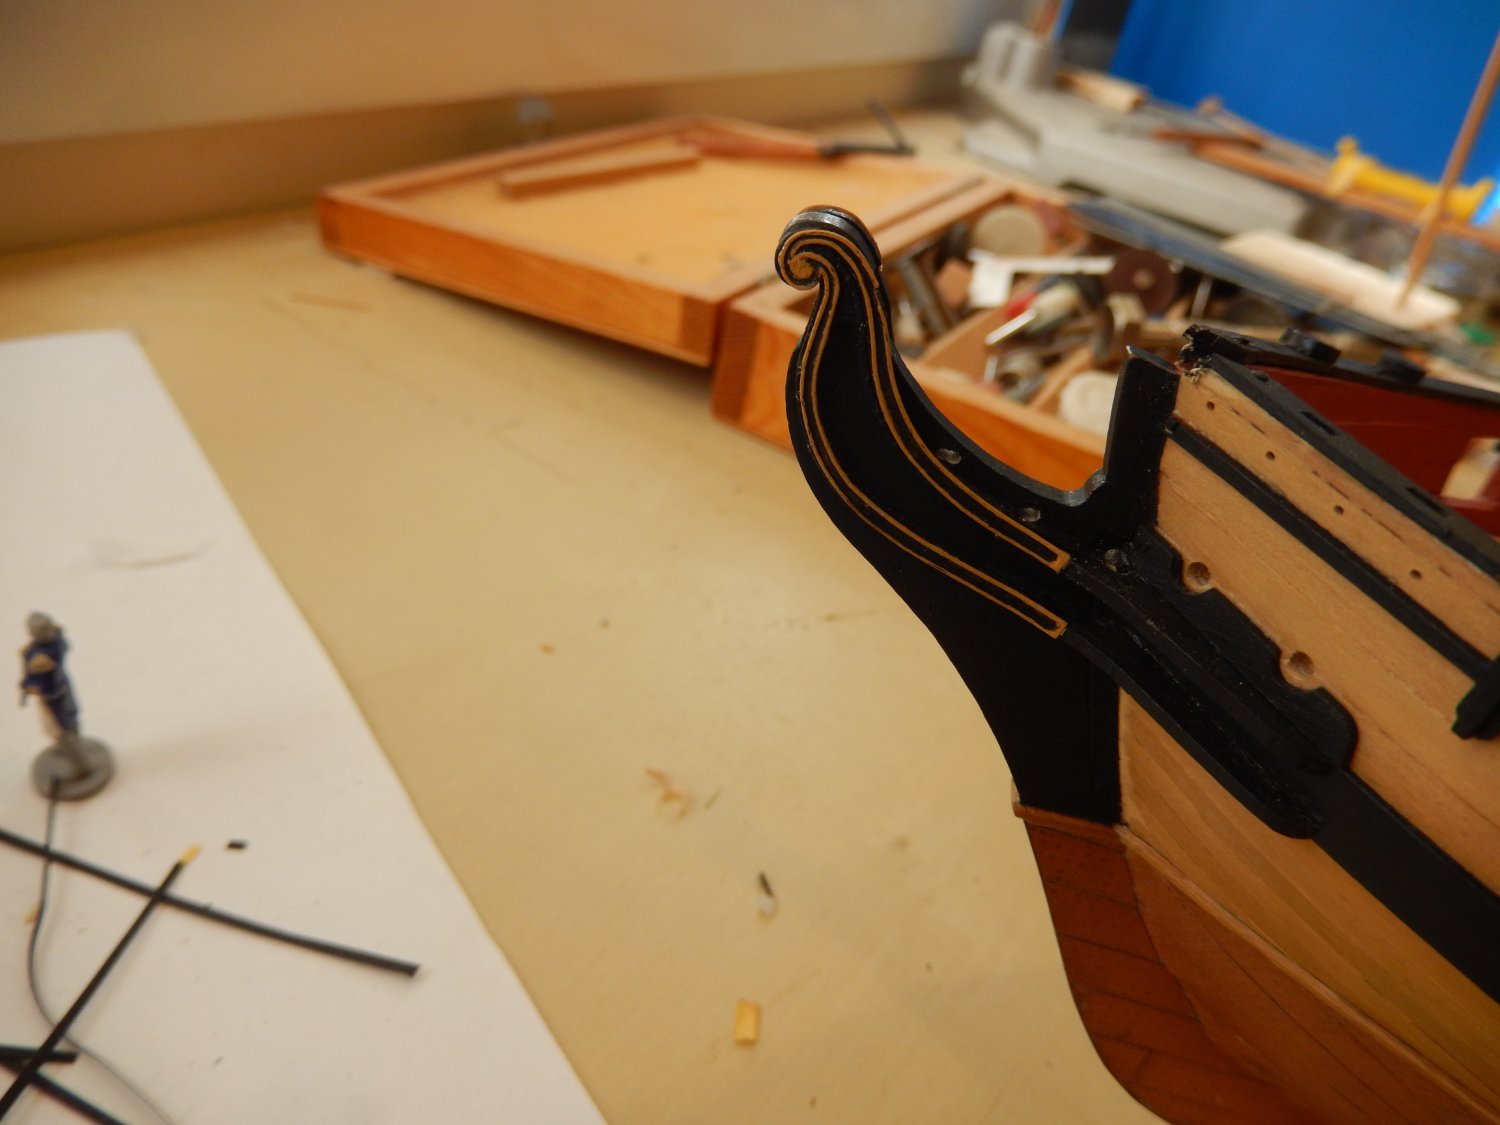
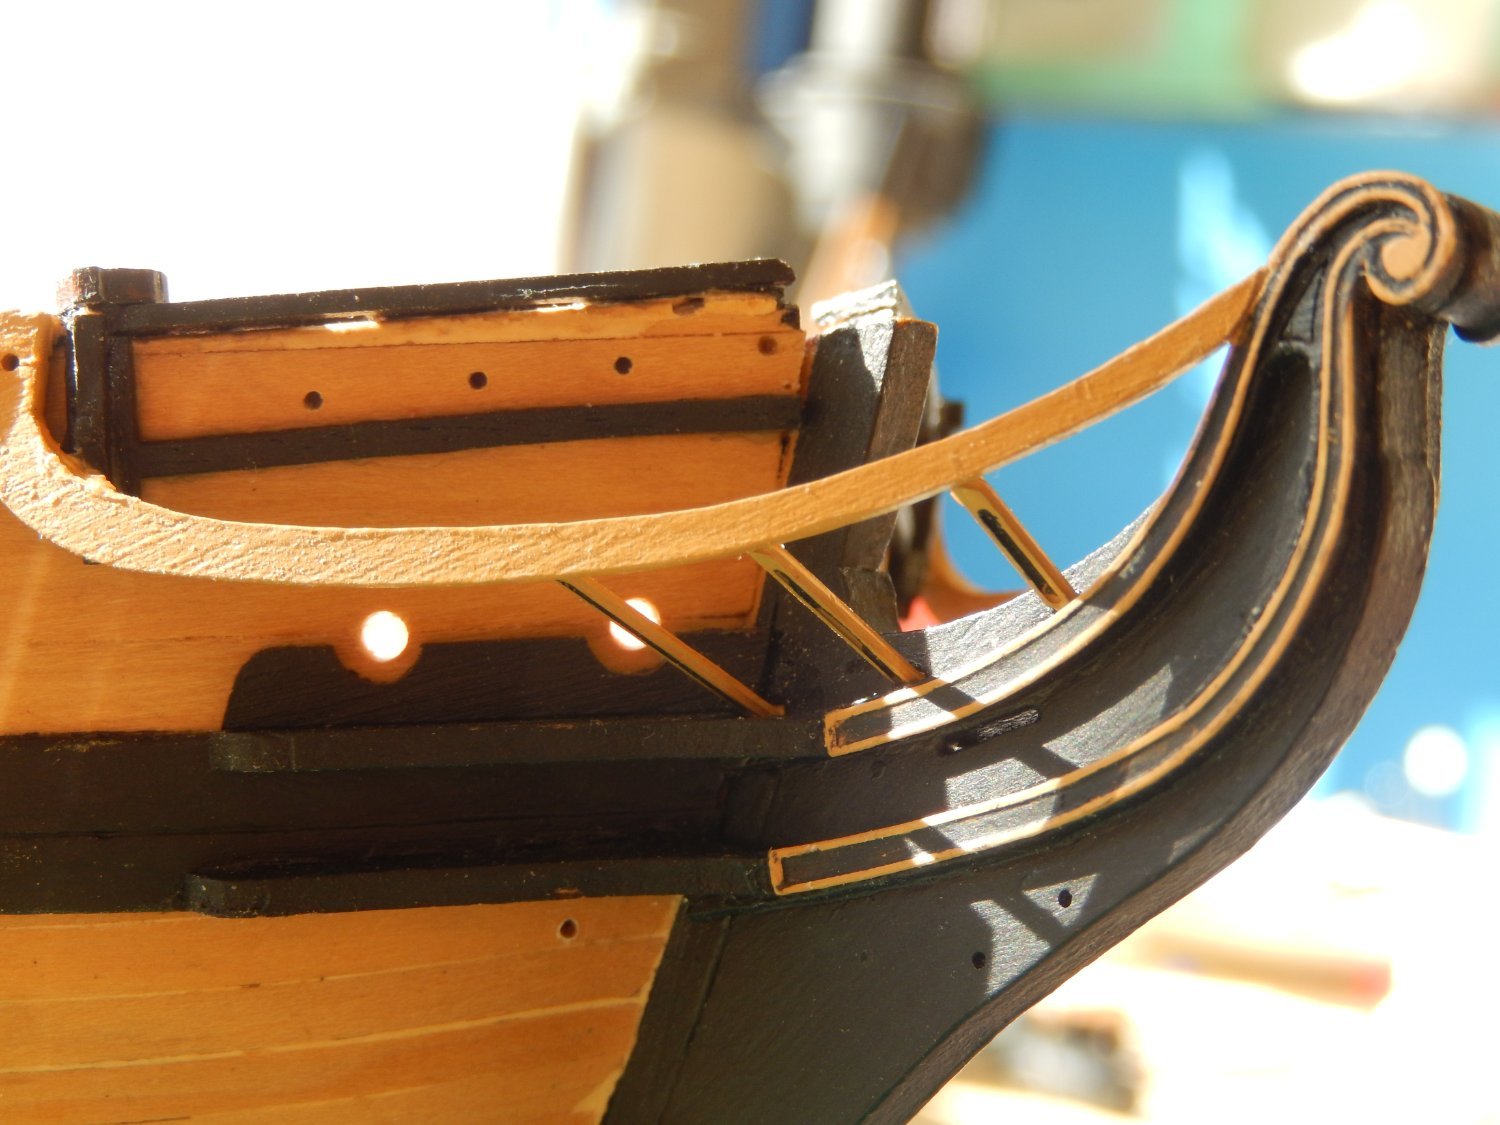
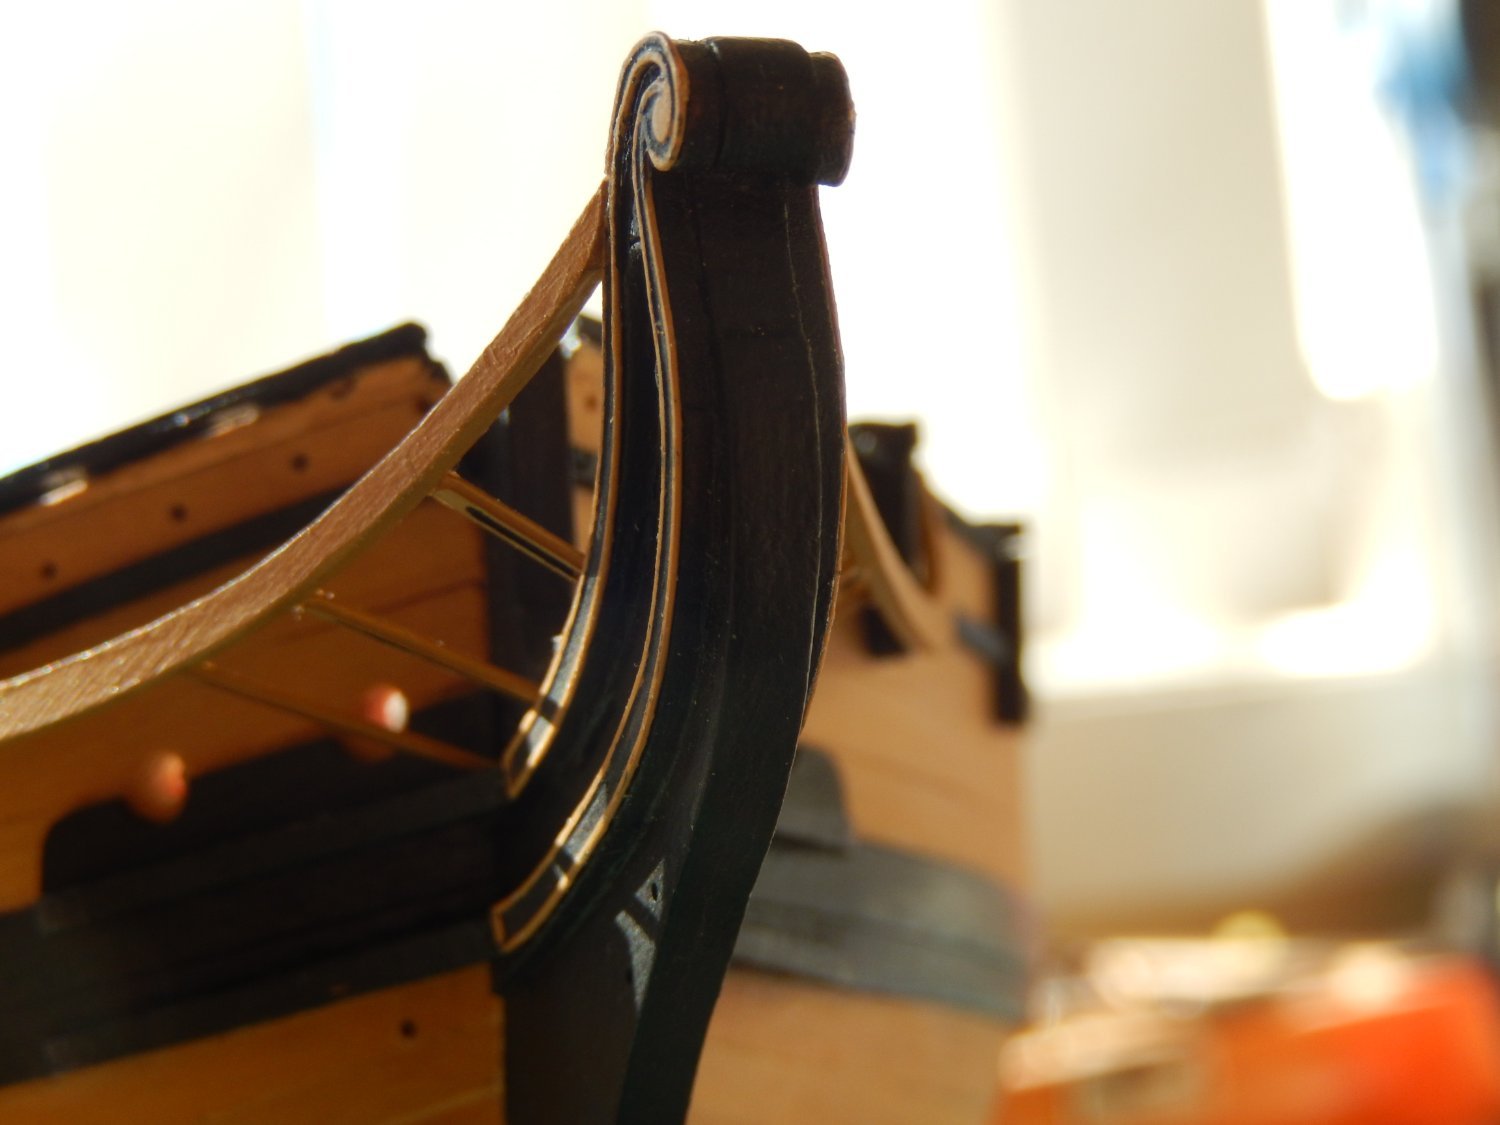
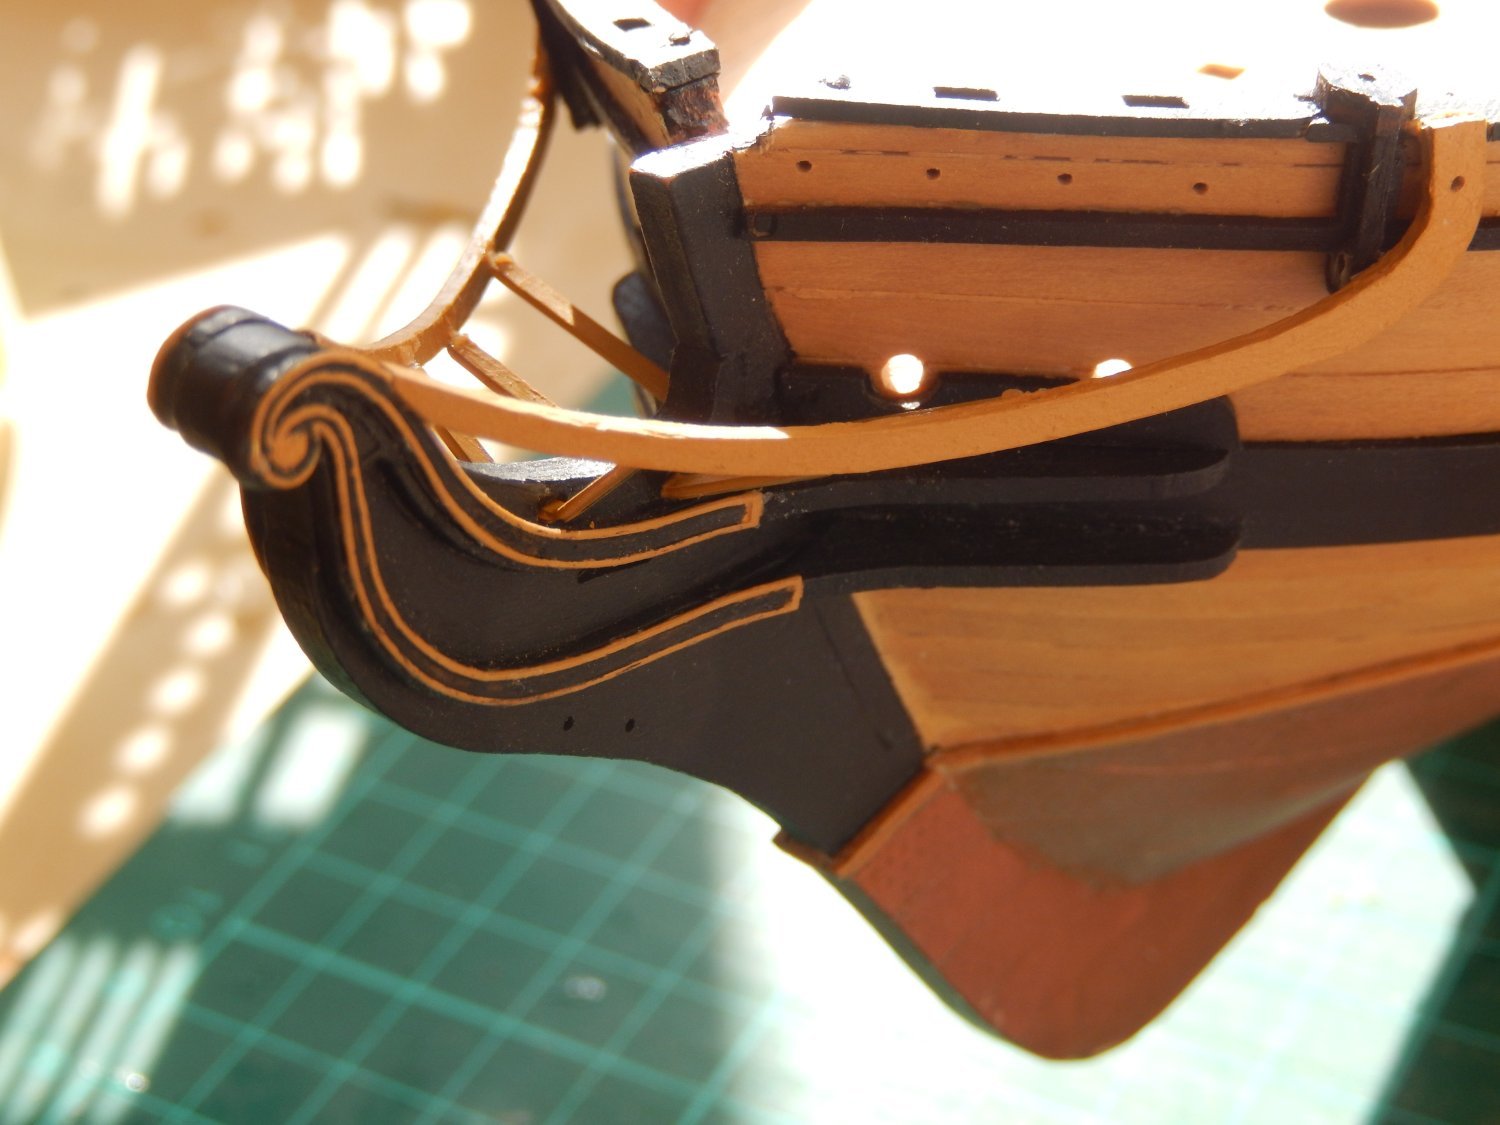
The bow decoration is now finished. I would not care to do it again. It's very fiddly and easily damaged. The hair bracket decoration and the bow main rails - one of each - broke where the grain of the wood is at roughly right angles to a vertical part of the decoration. Perhaps making these parts with metal would be better than the boxwood. The results are below.