RMC
-
Posts
933 -
Joined
-
Last visited
Content Type
Profiles
Forums
Gallery
Events
Everything posted by RMC
-
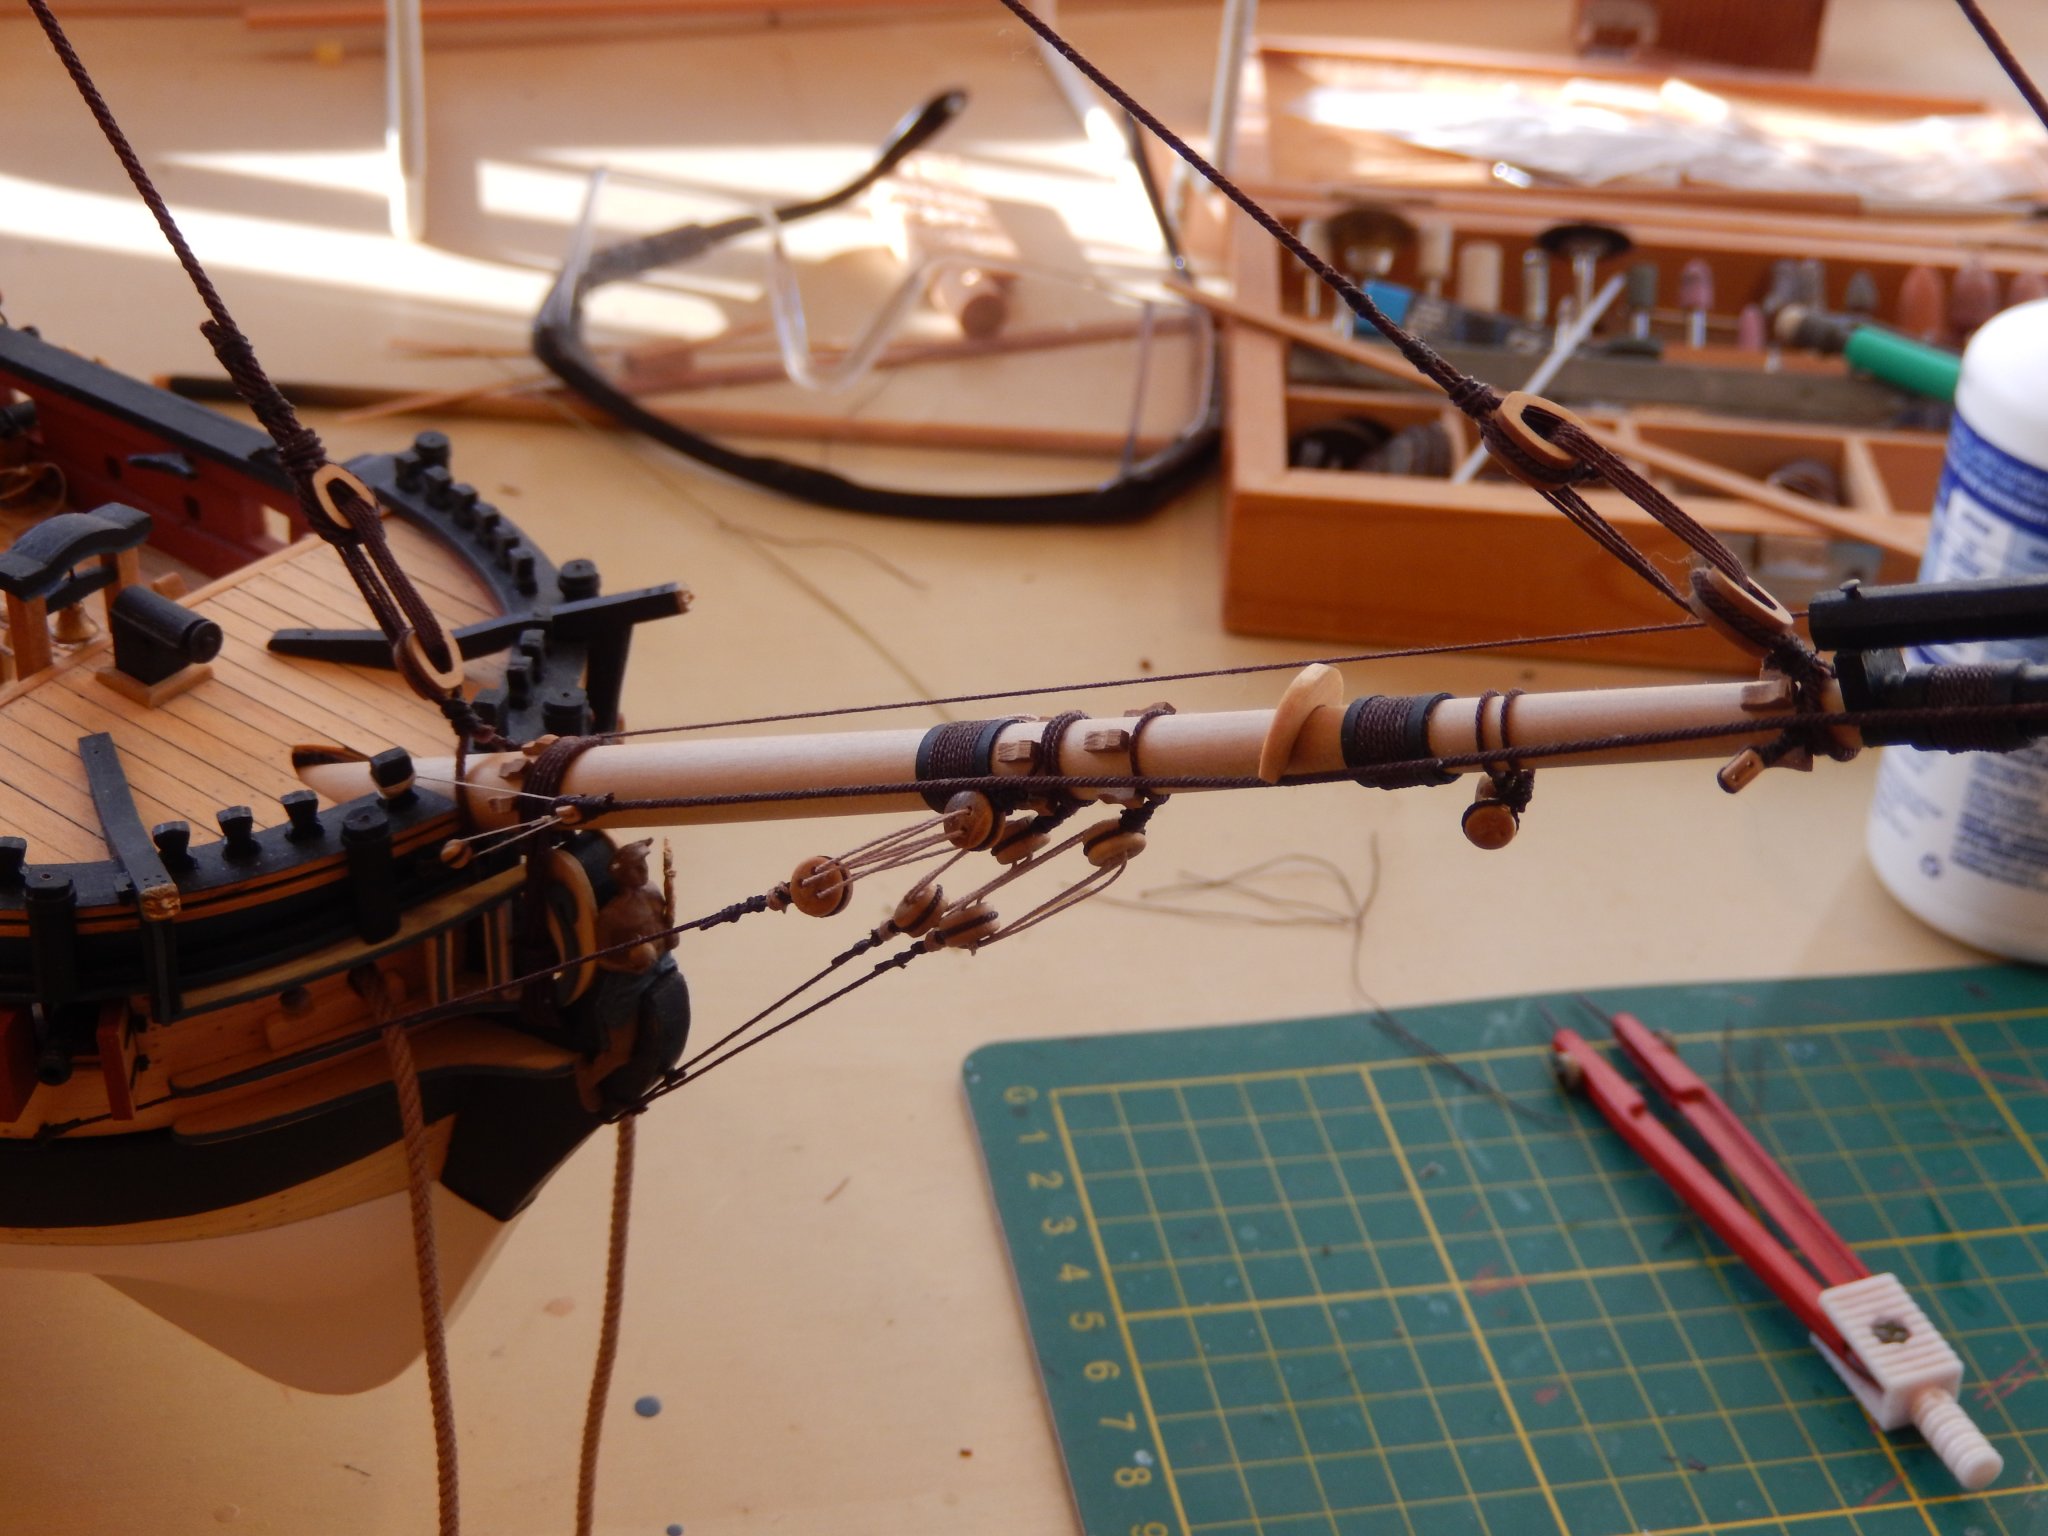
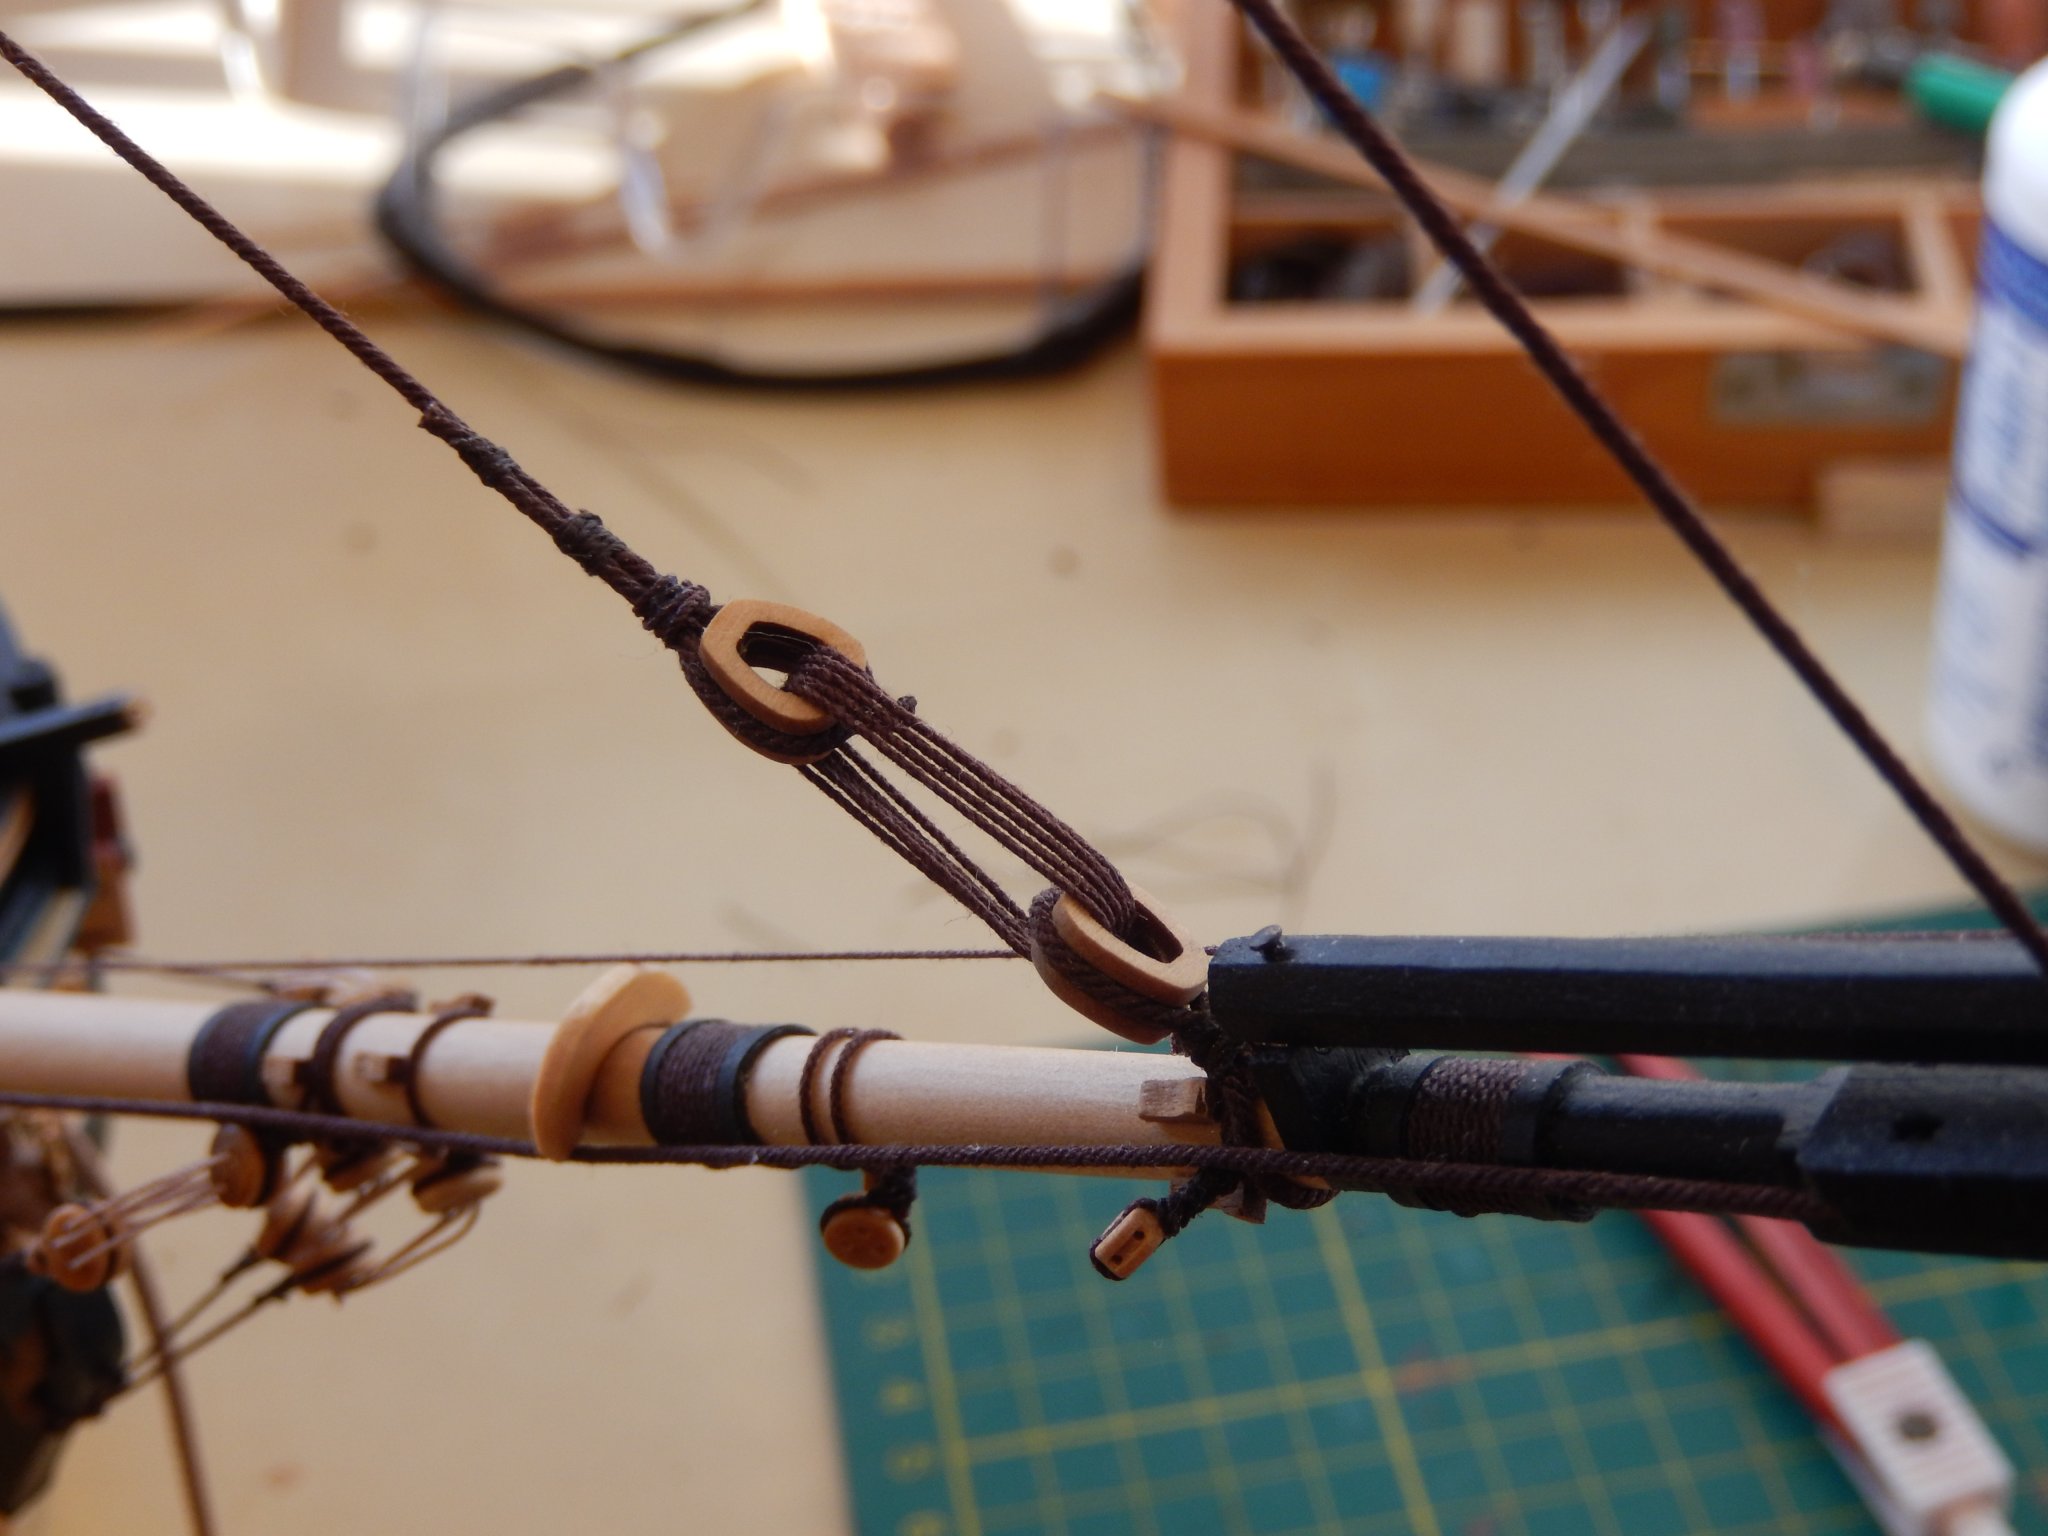
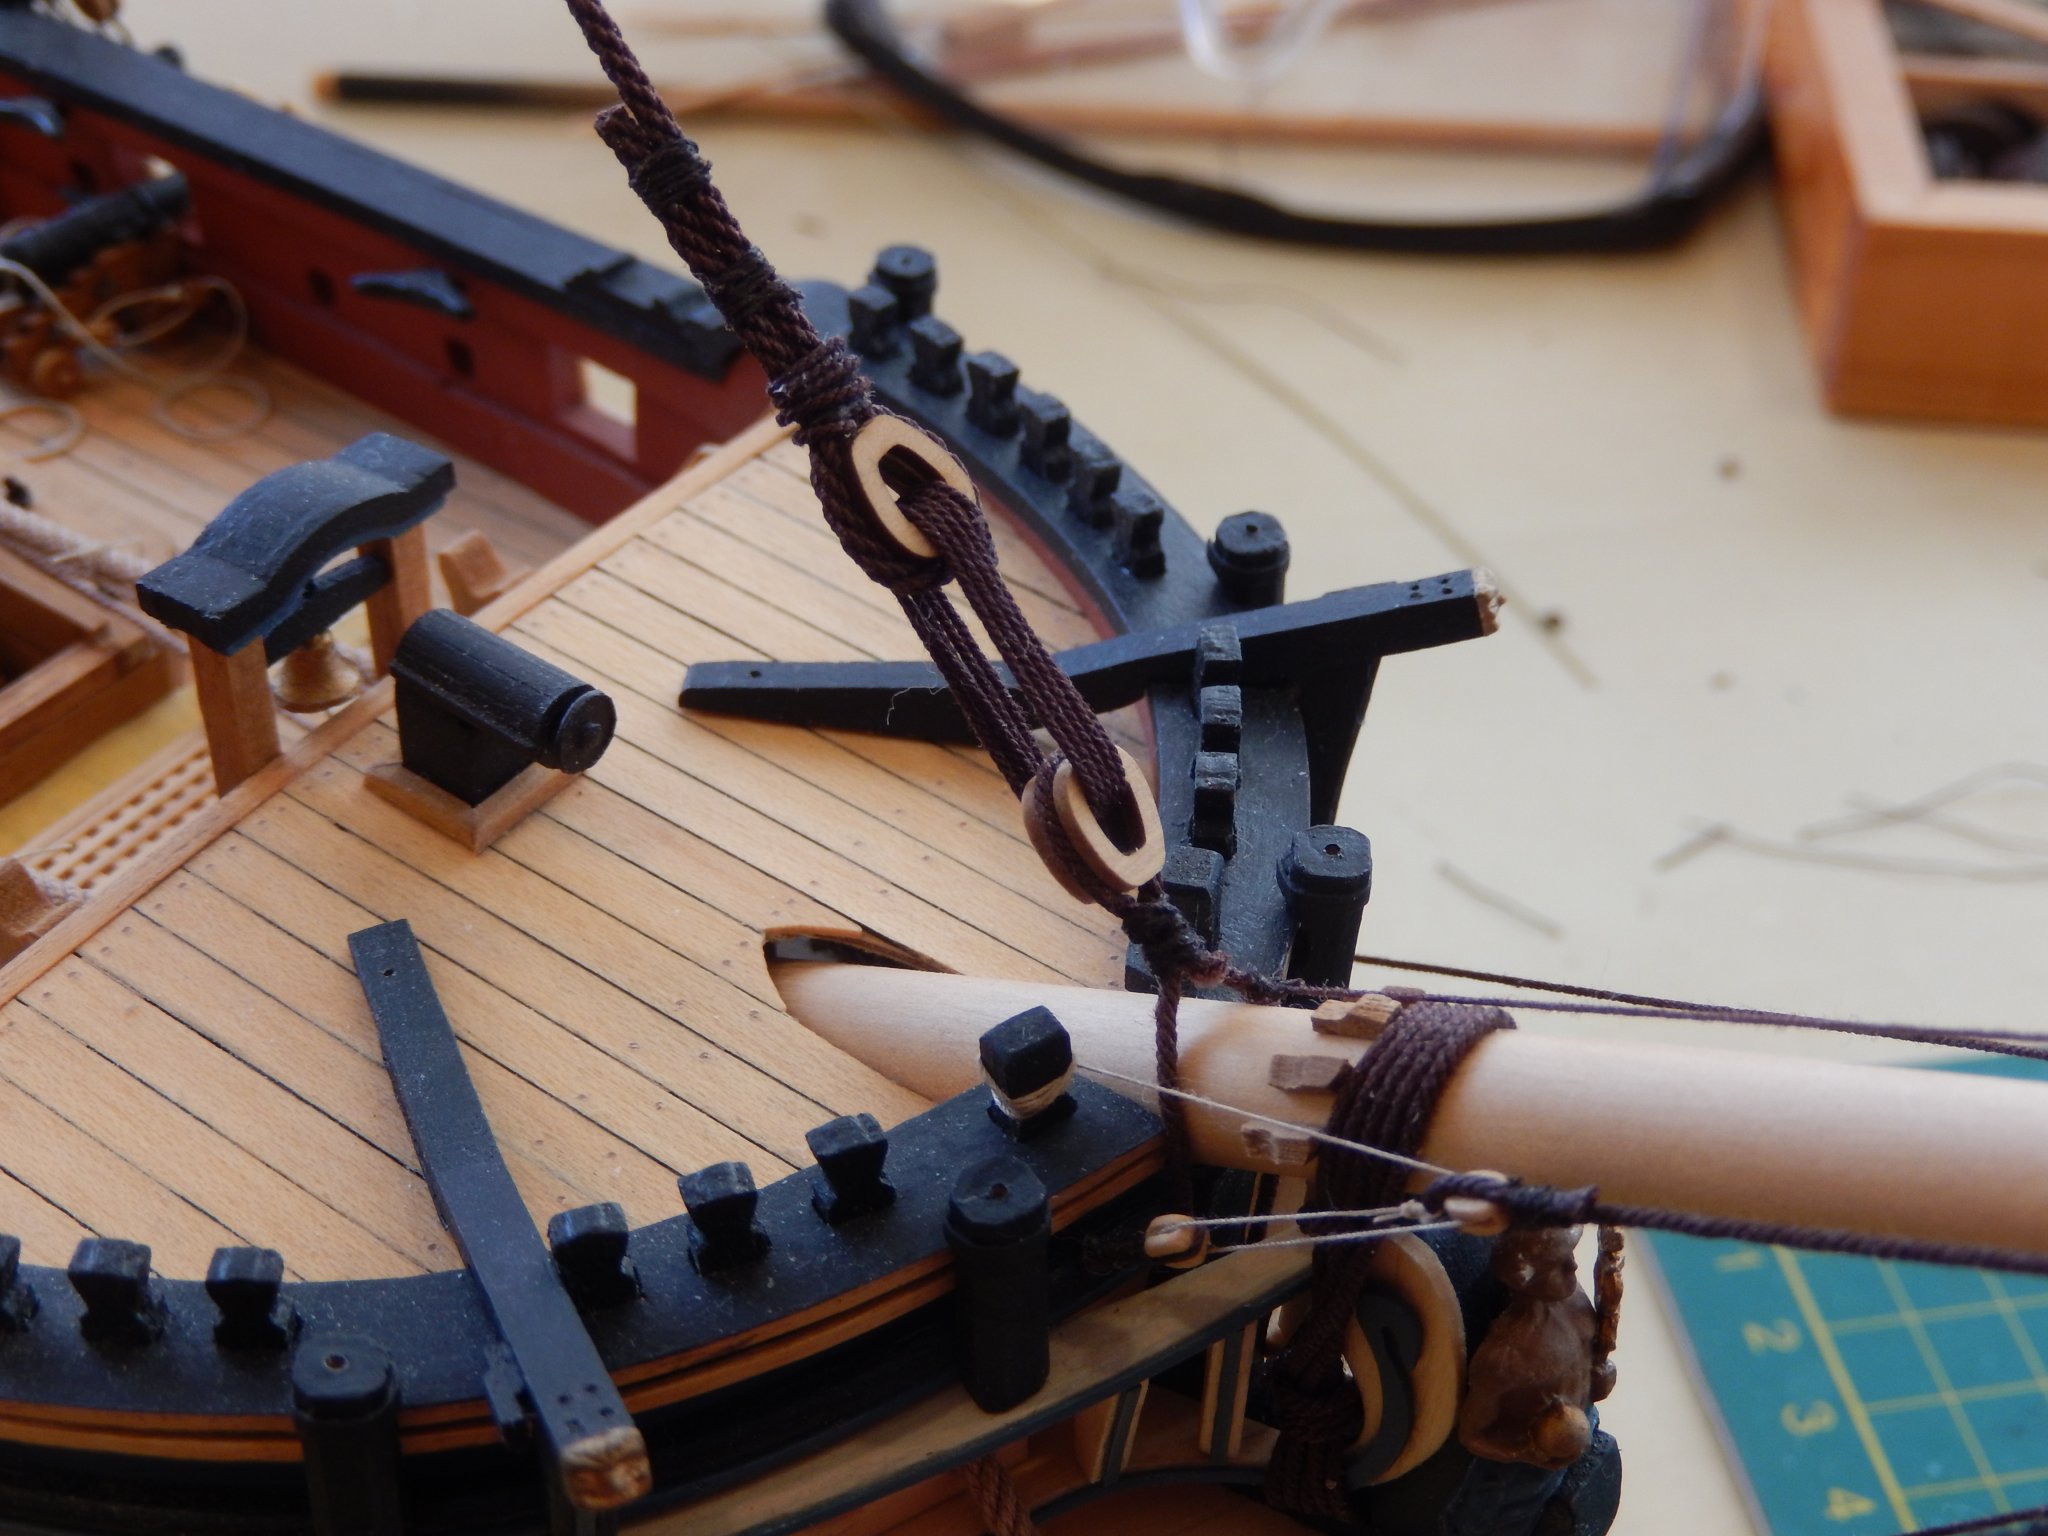
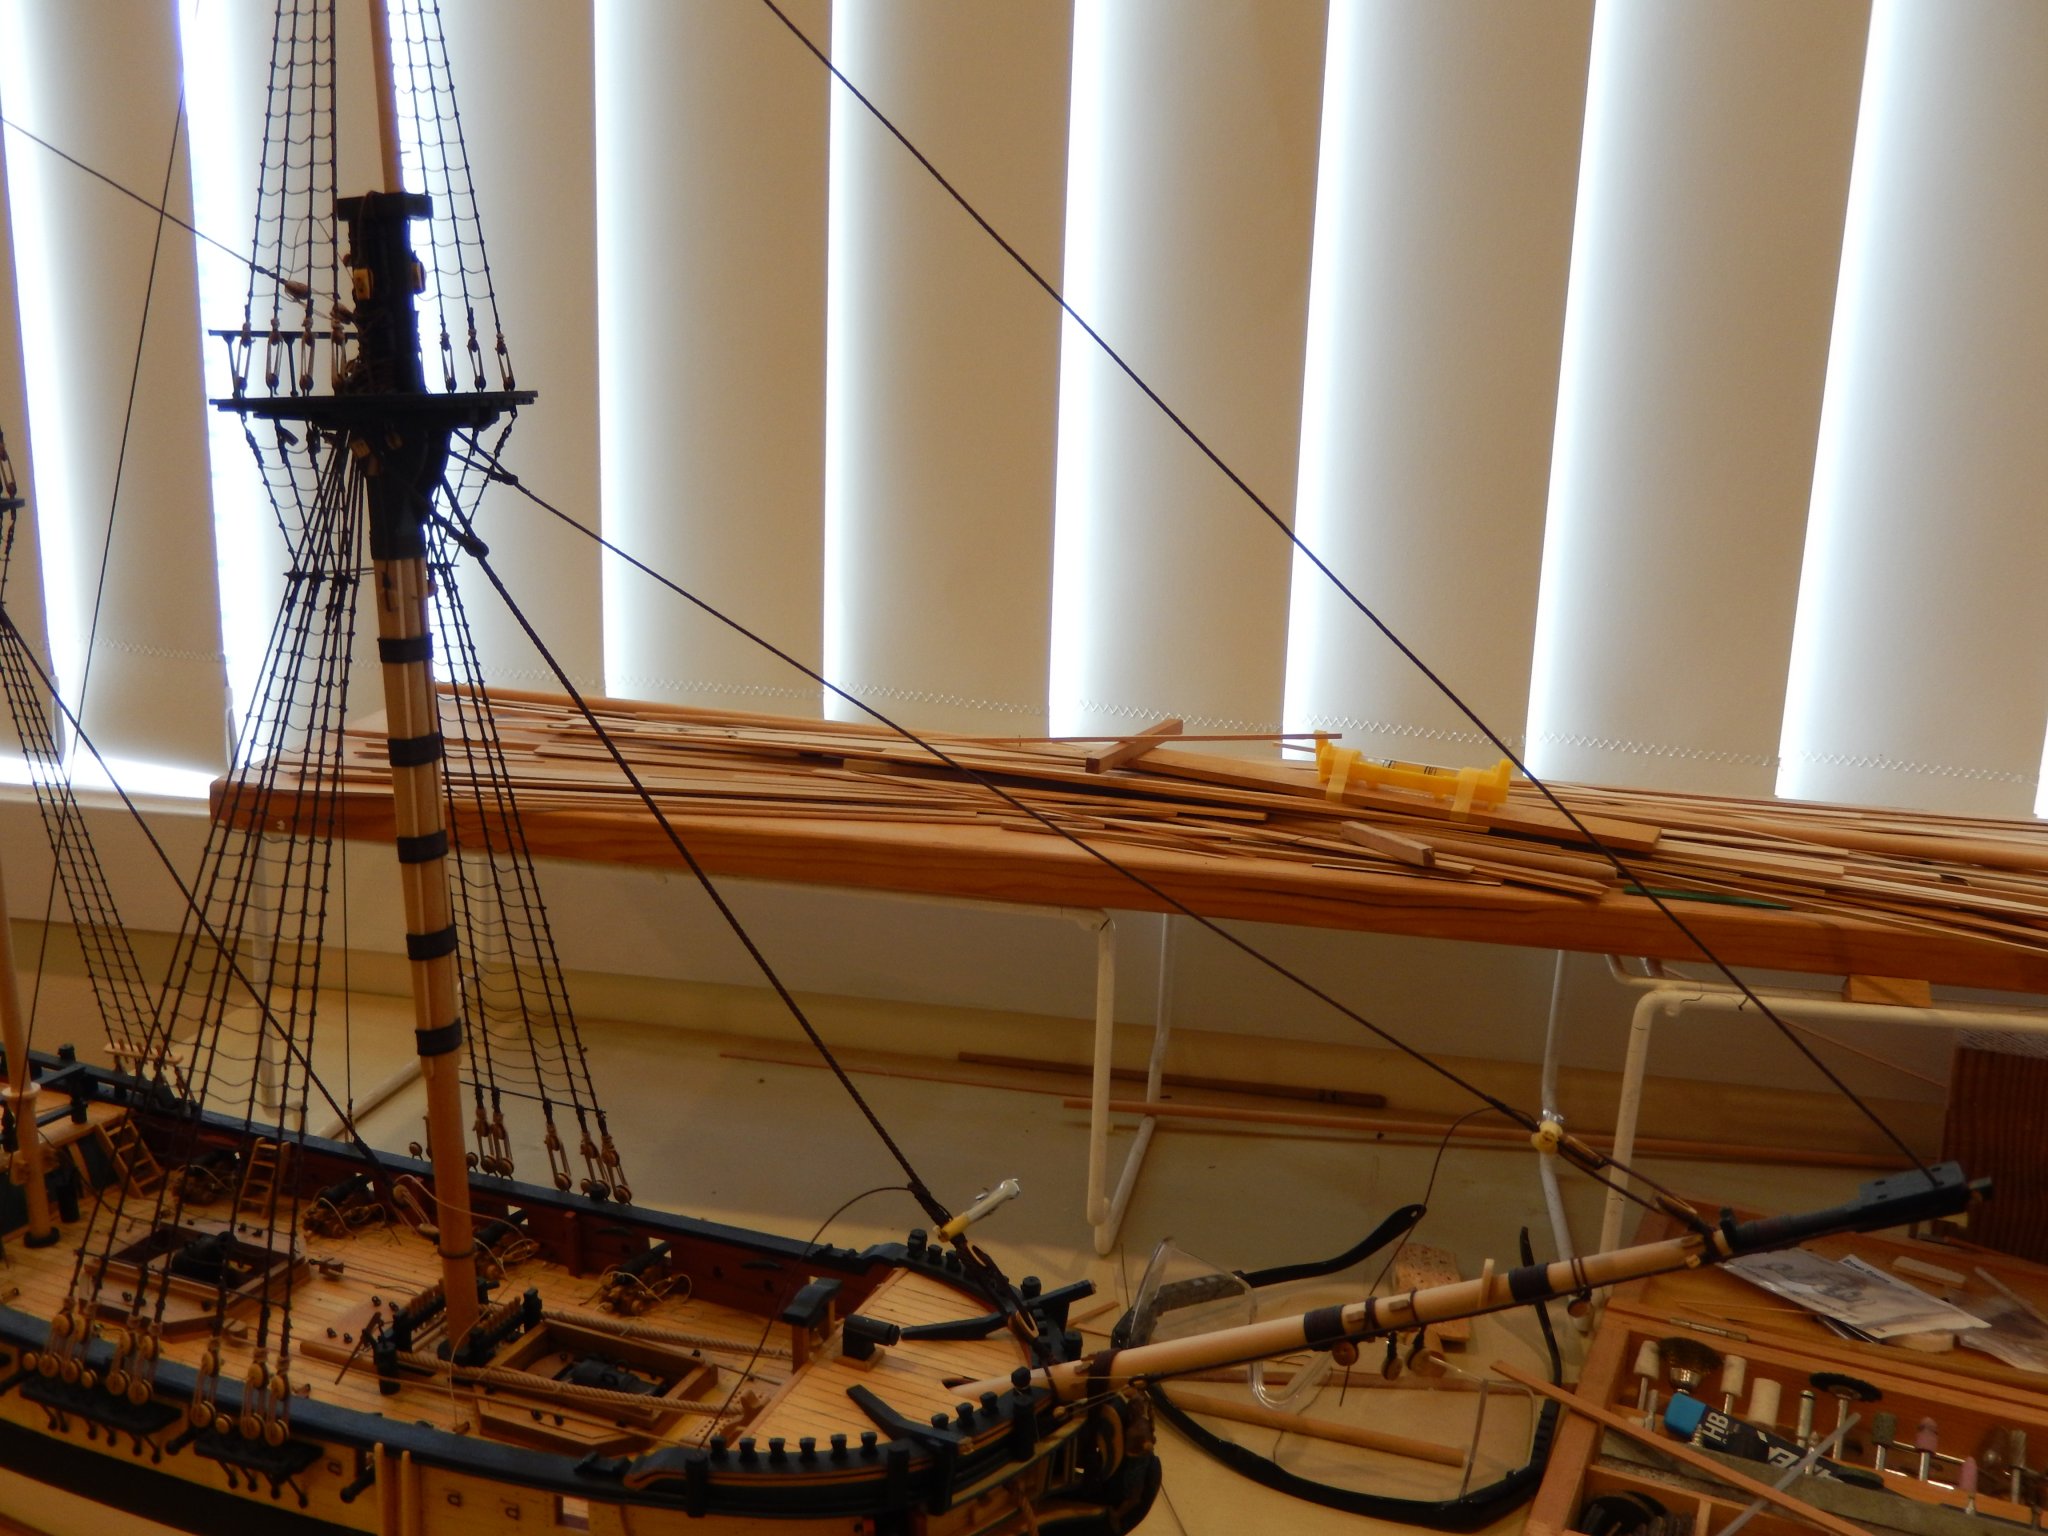
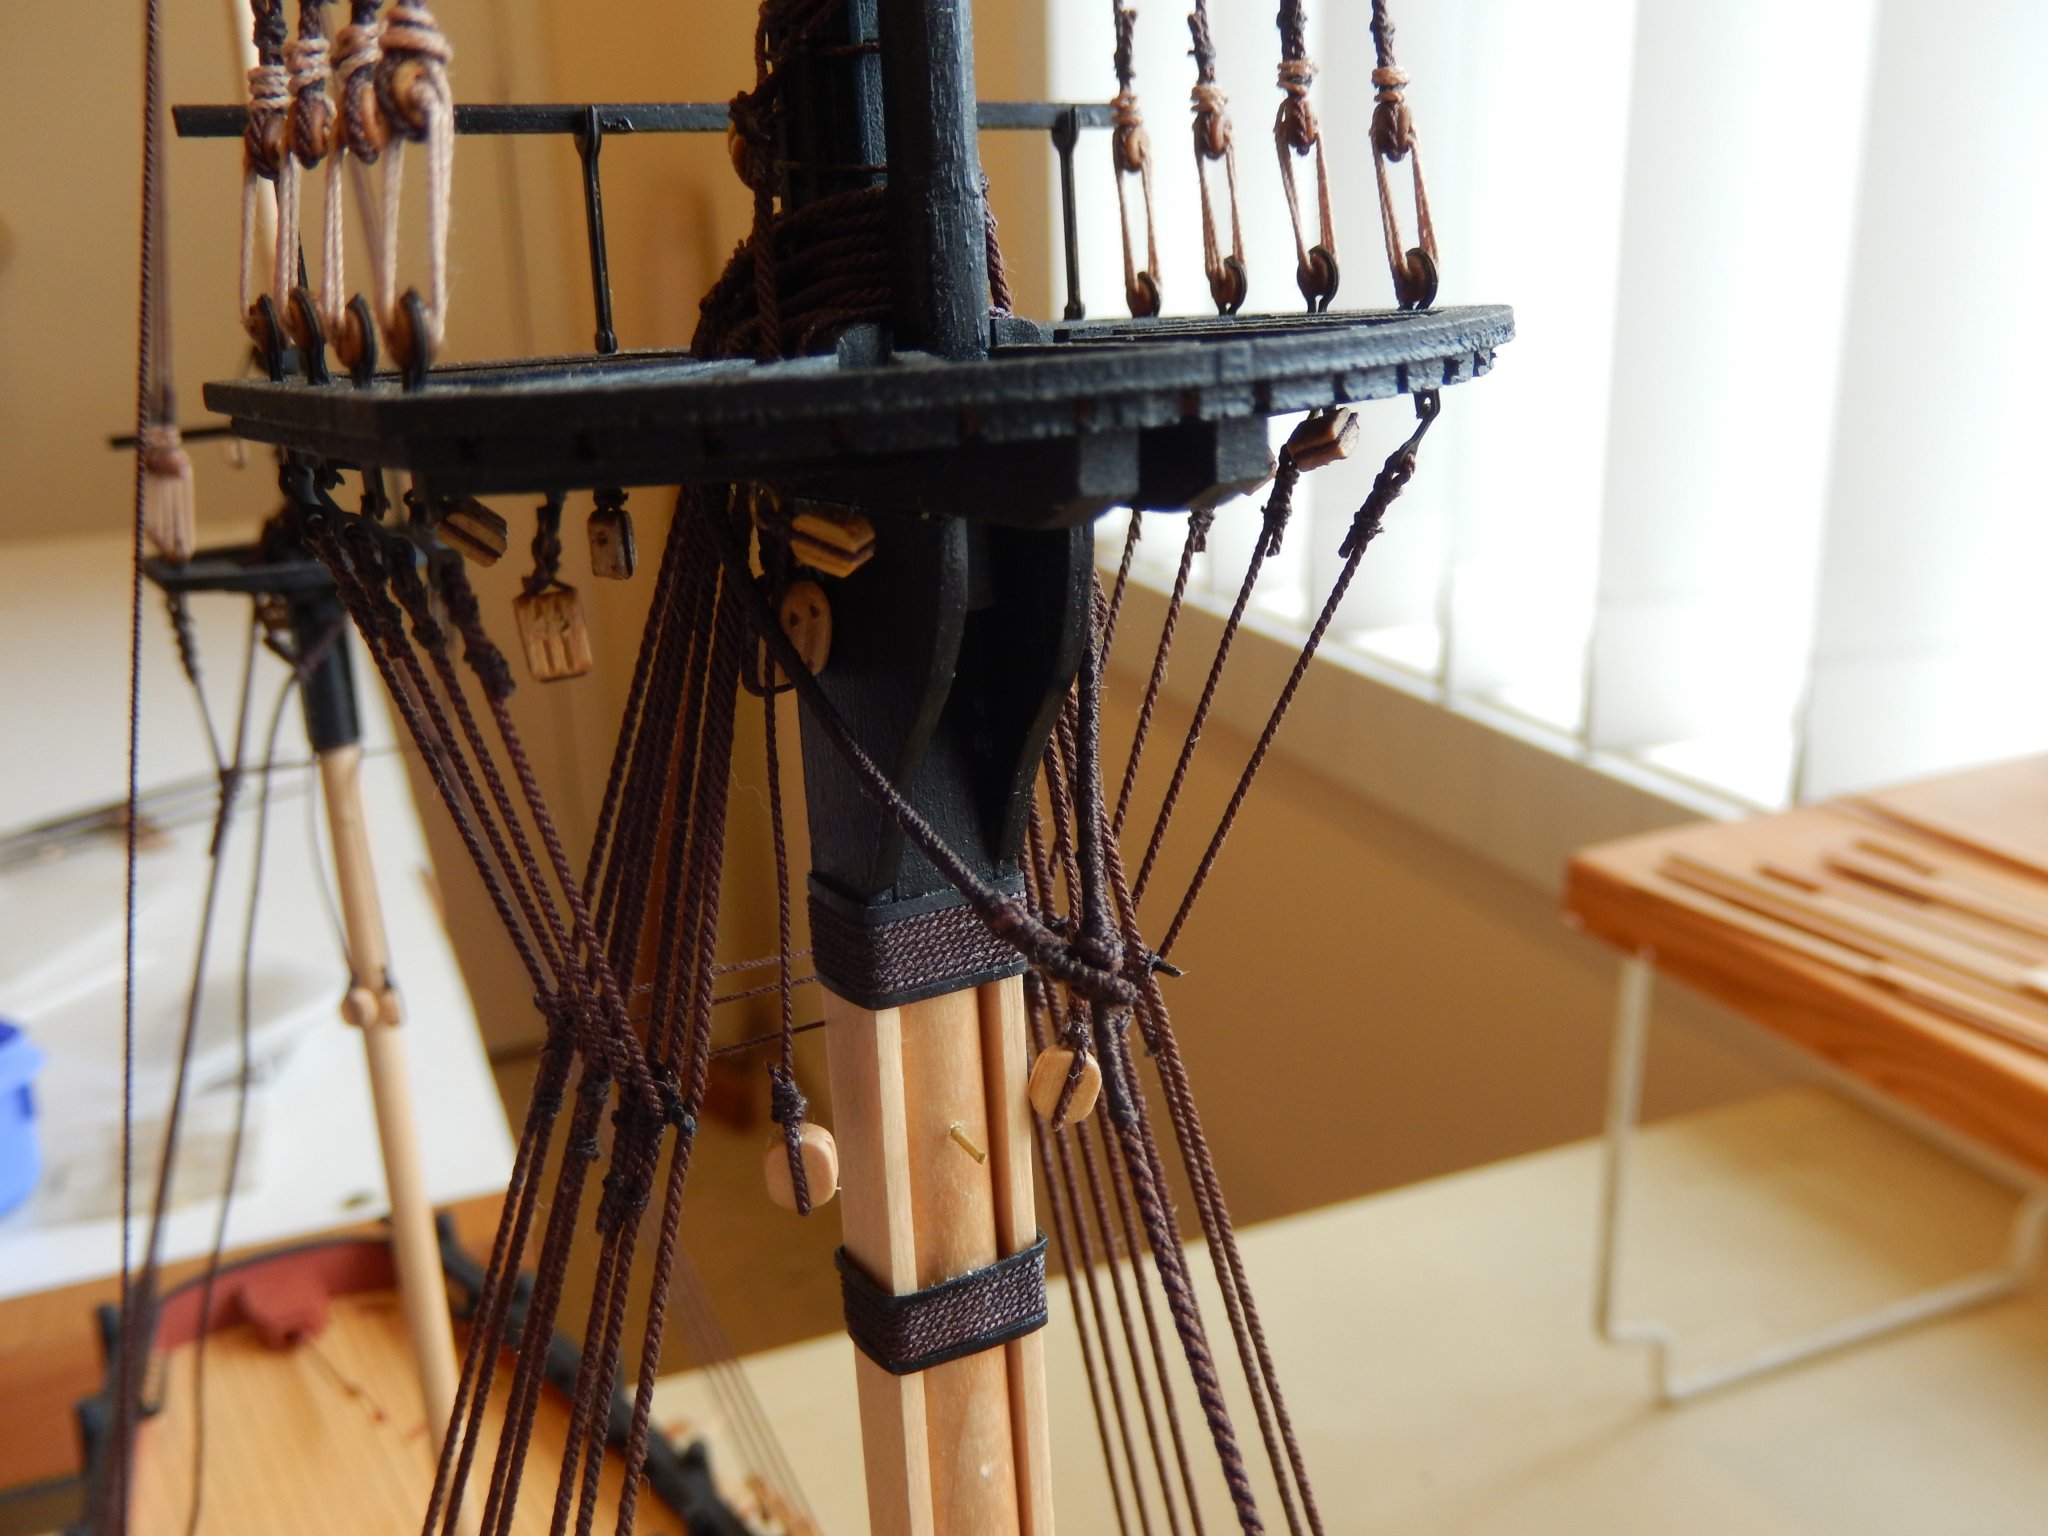
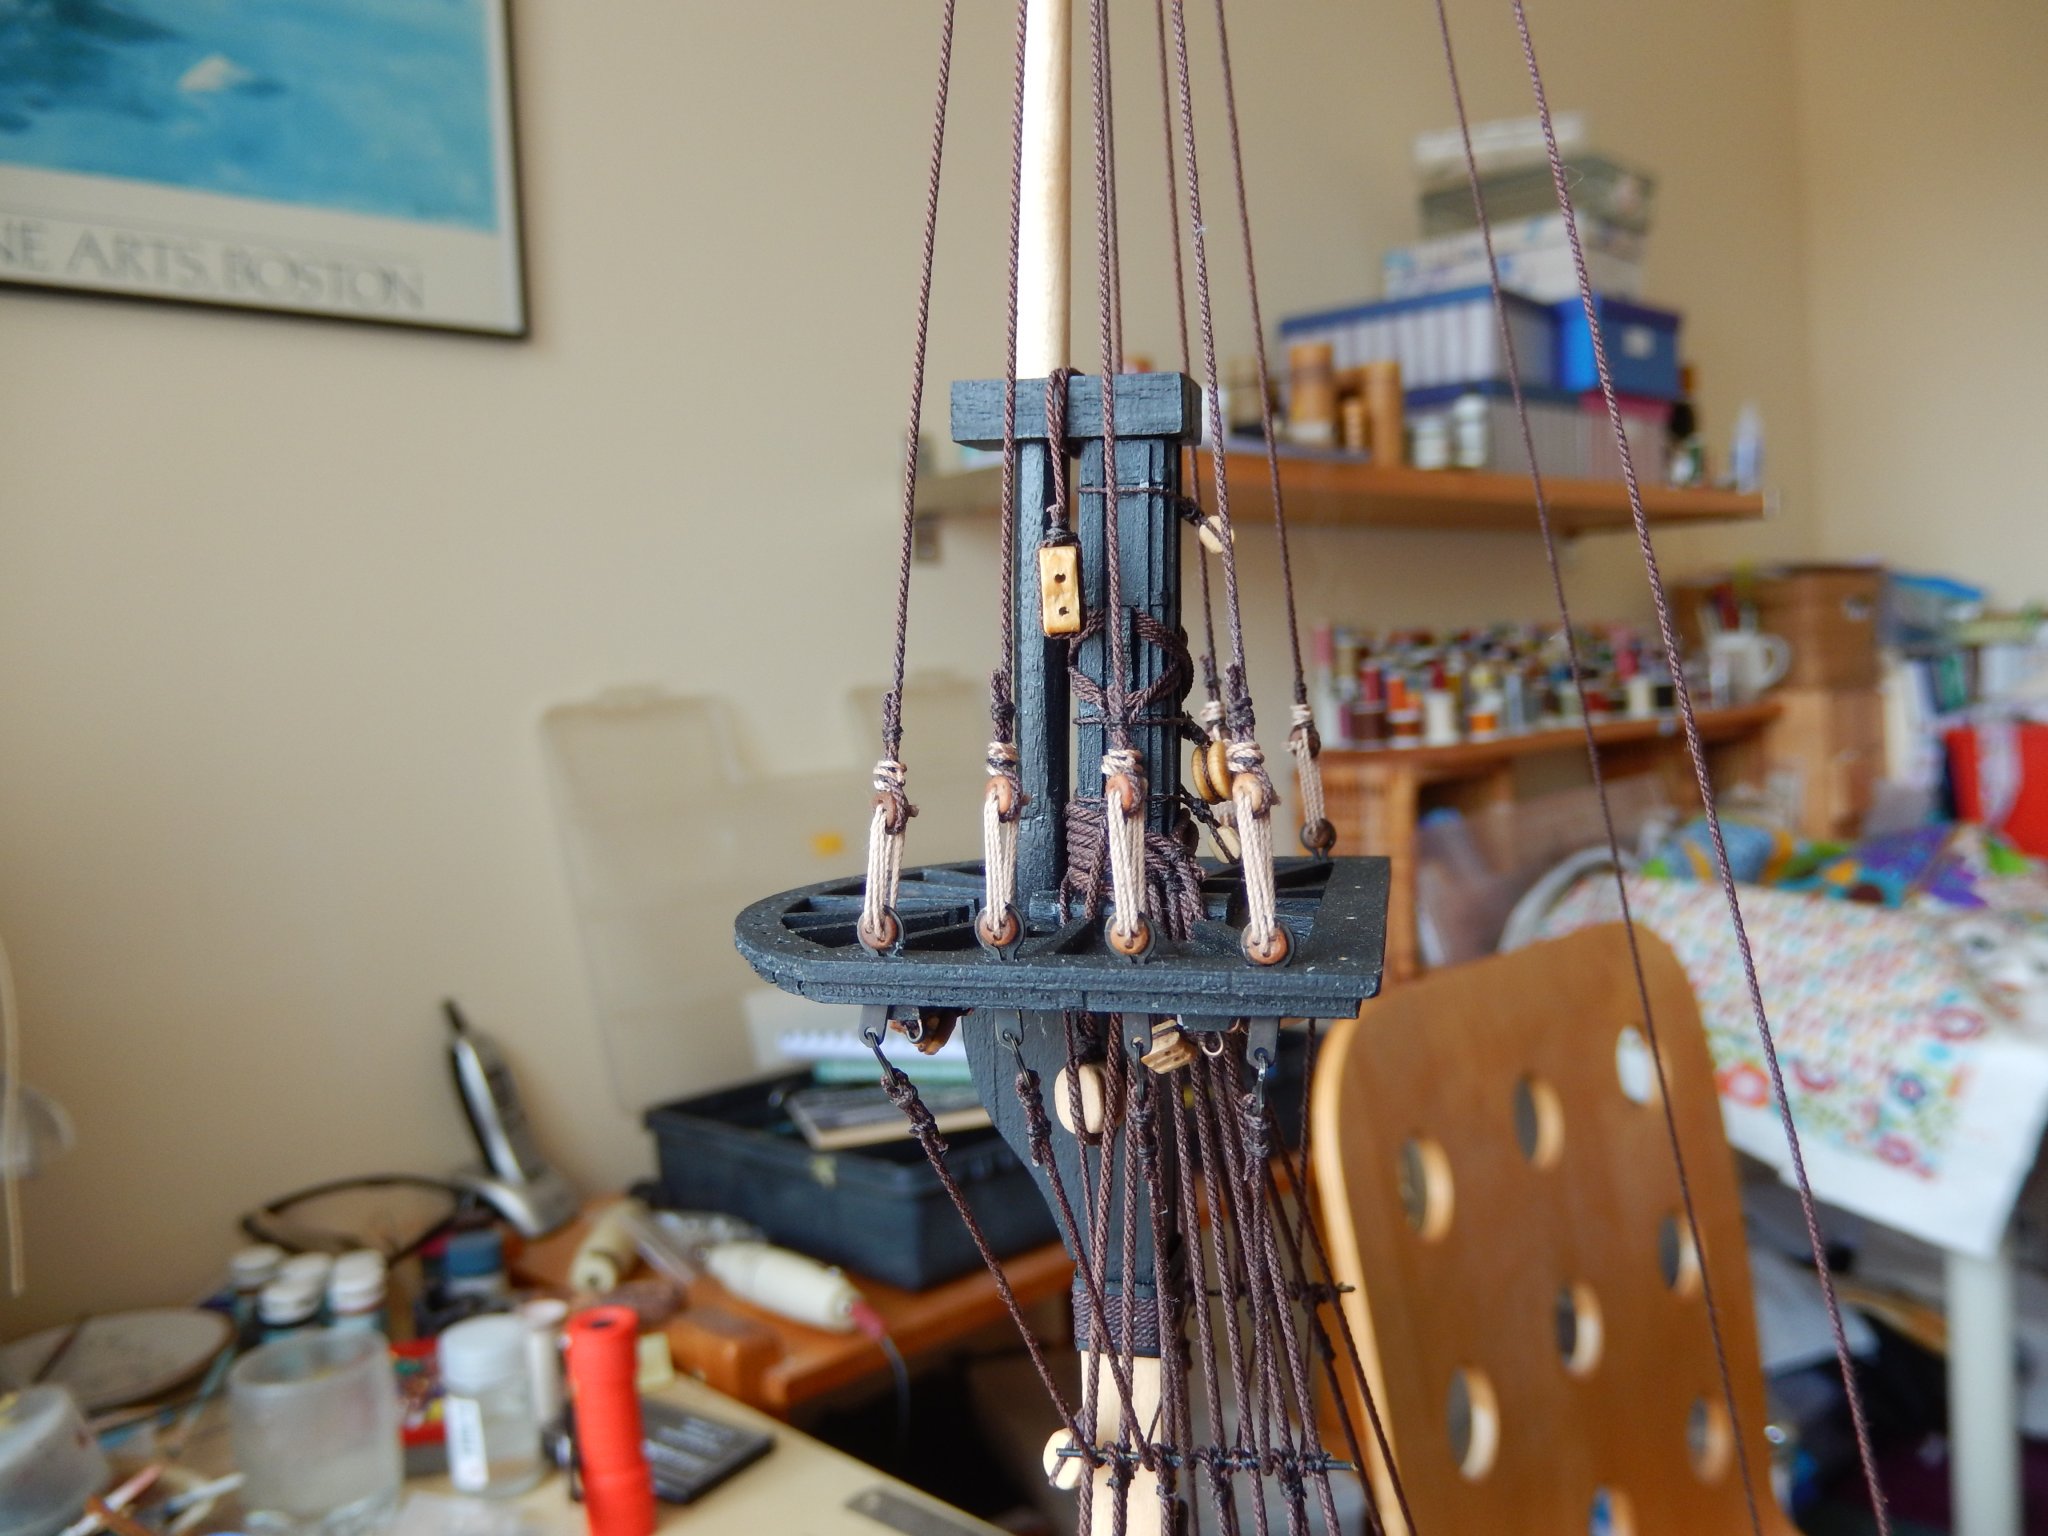
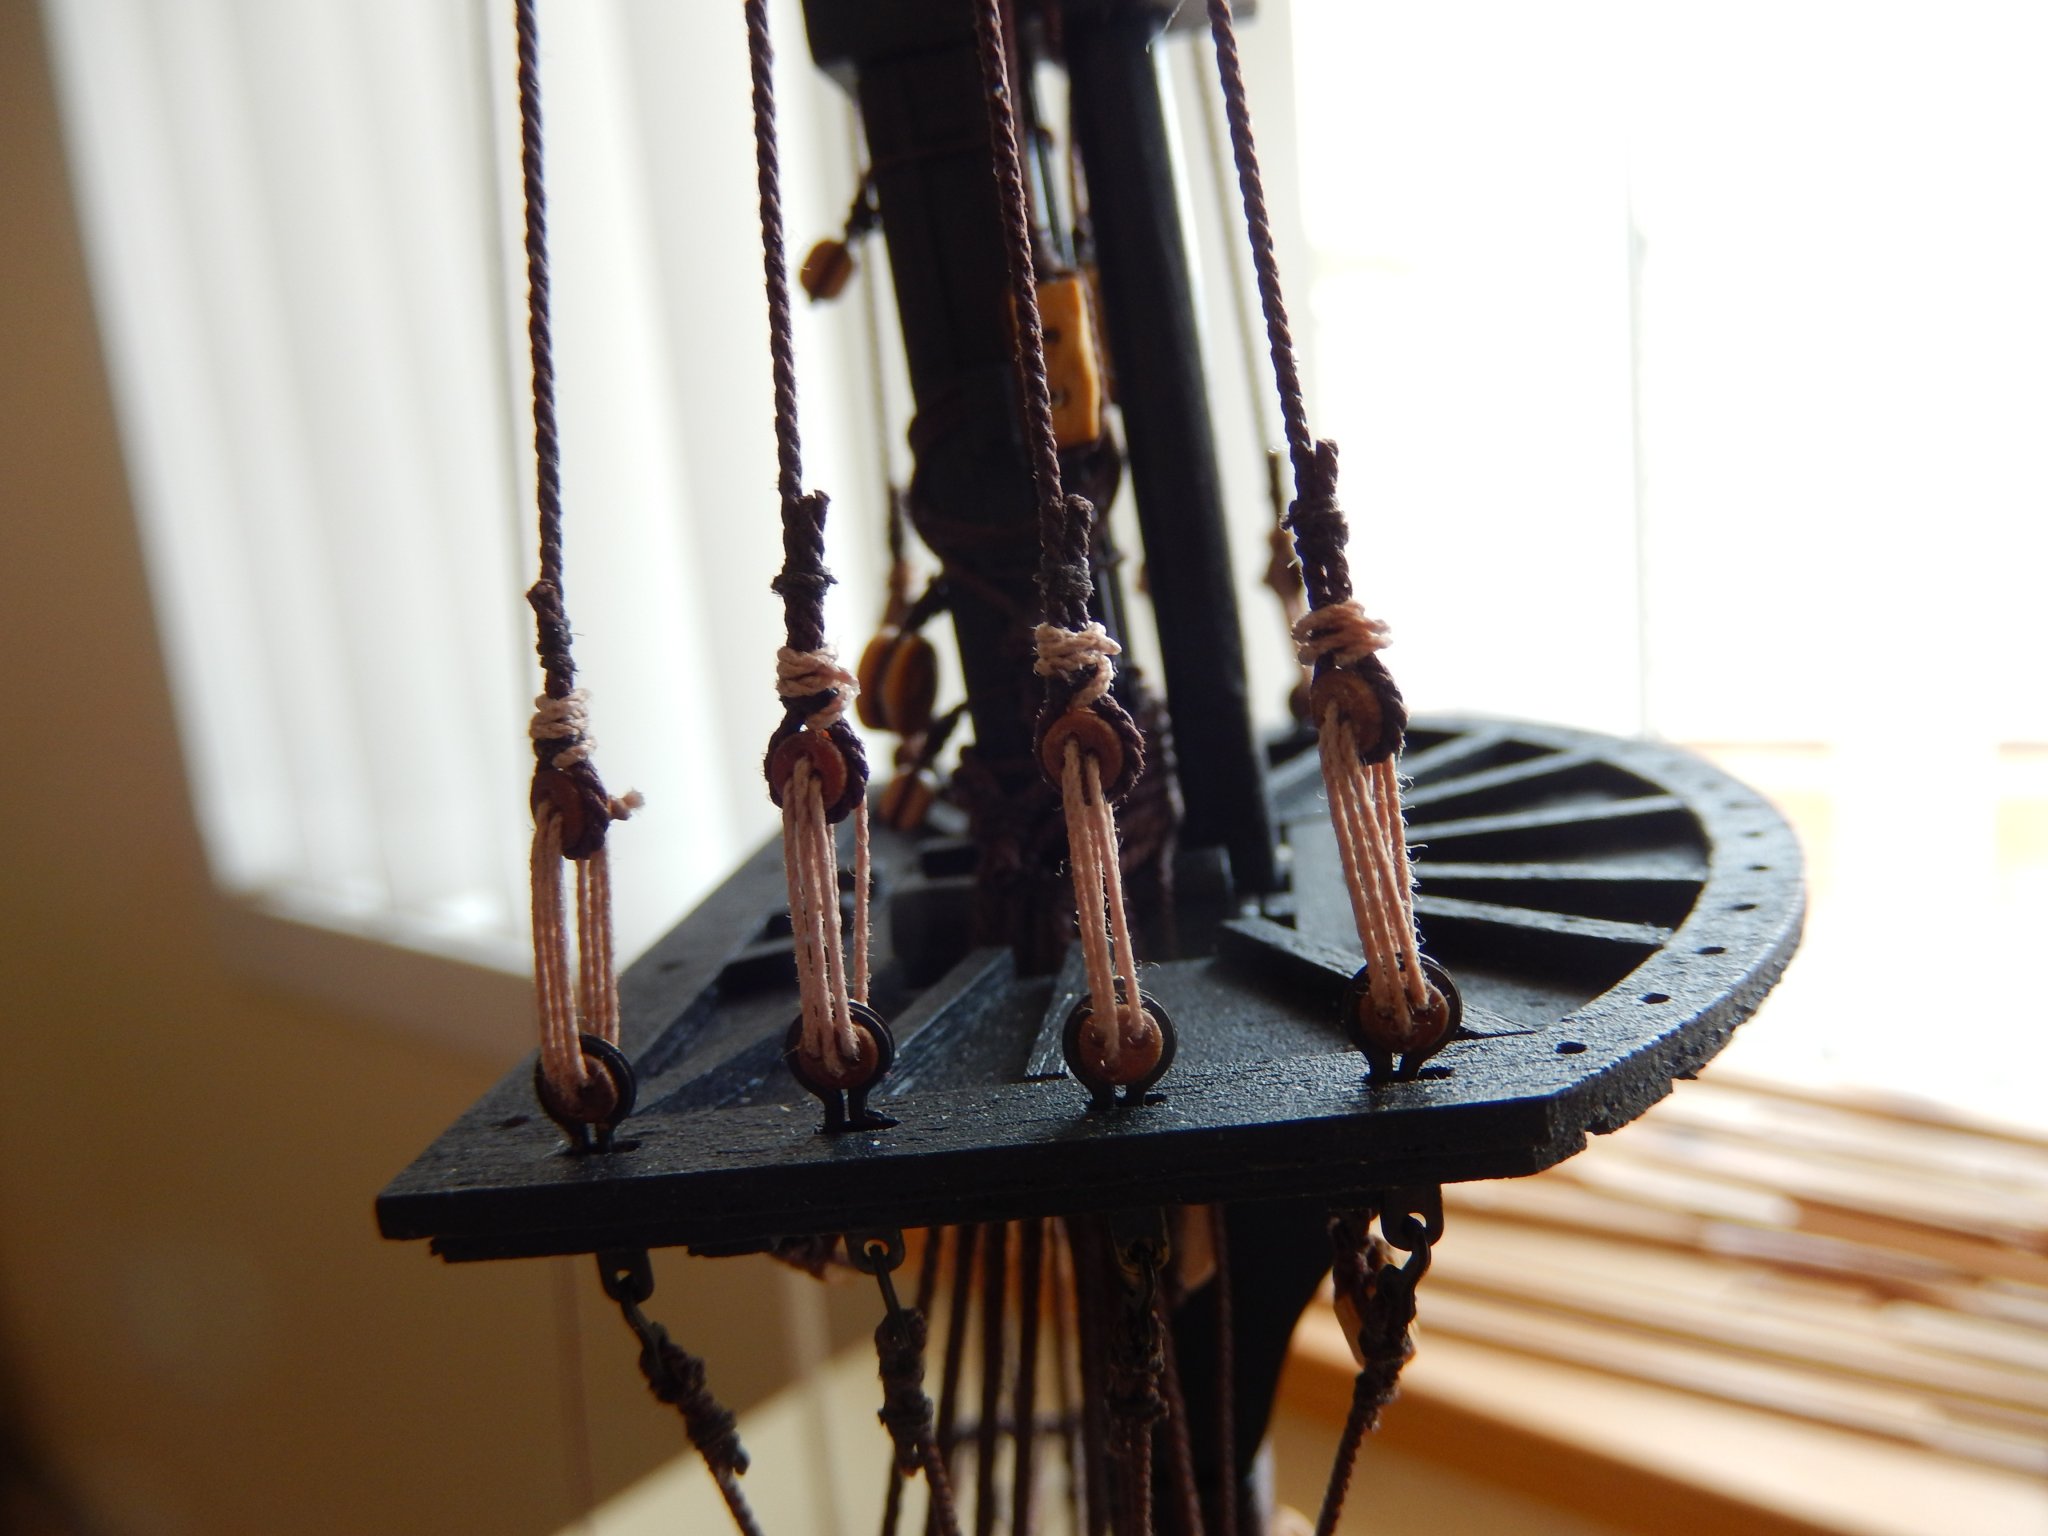
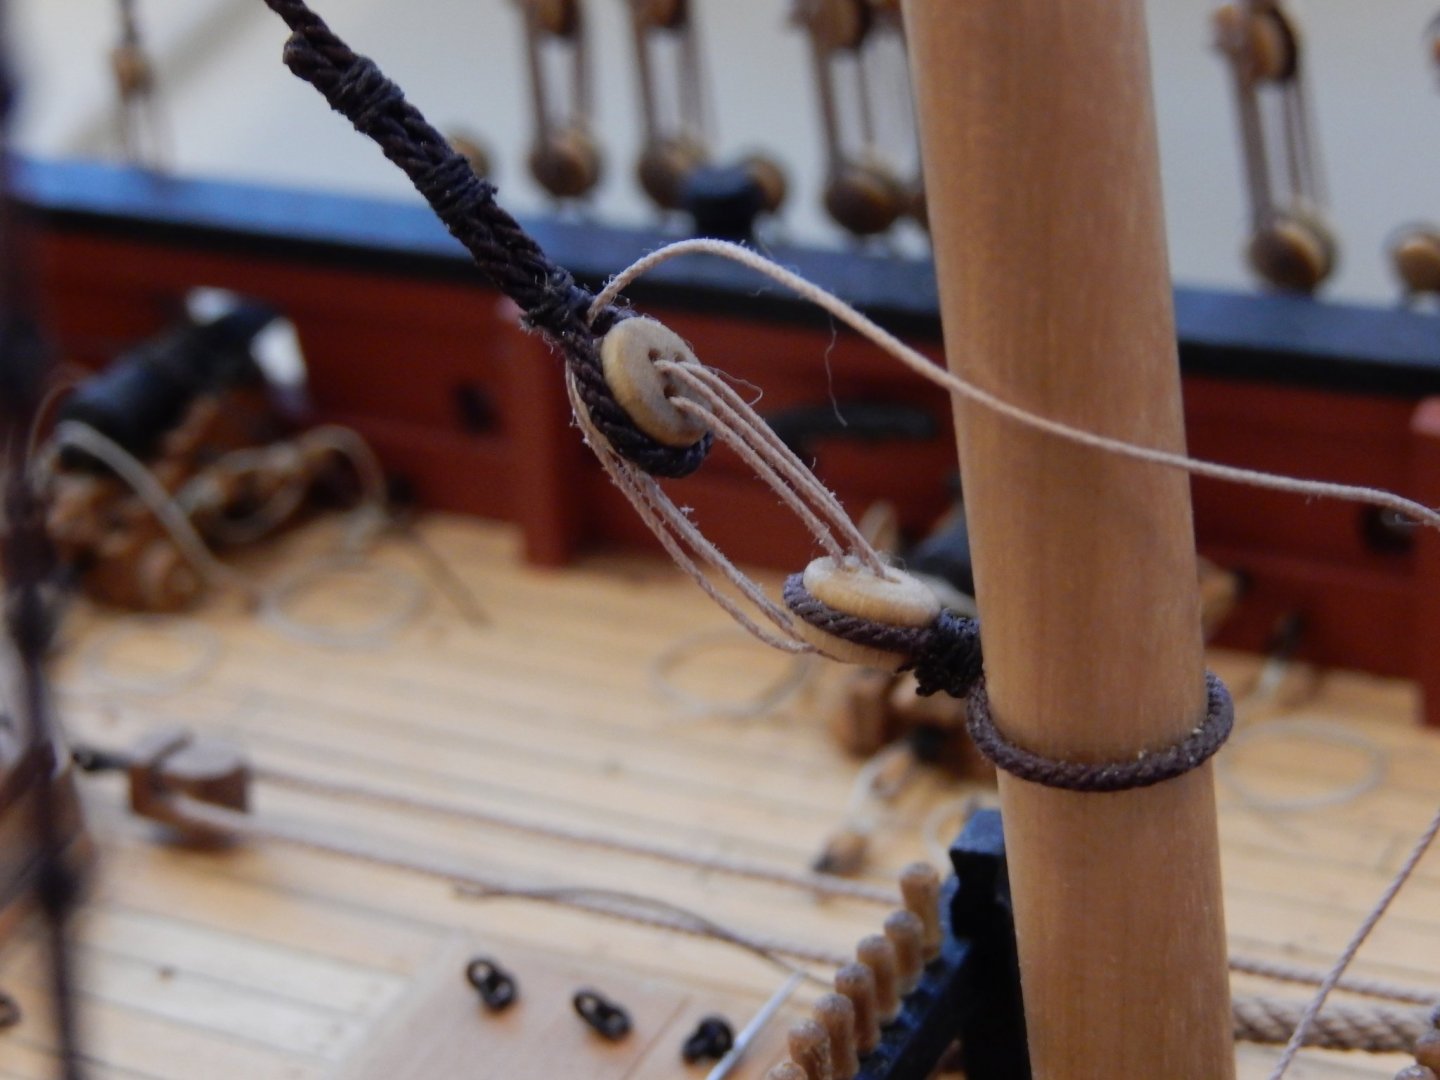
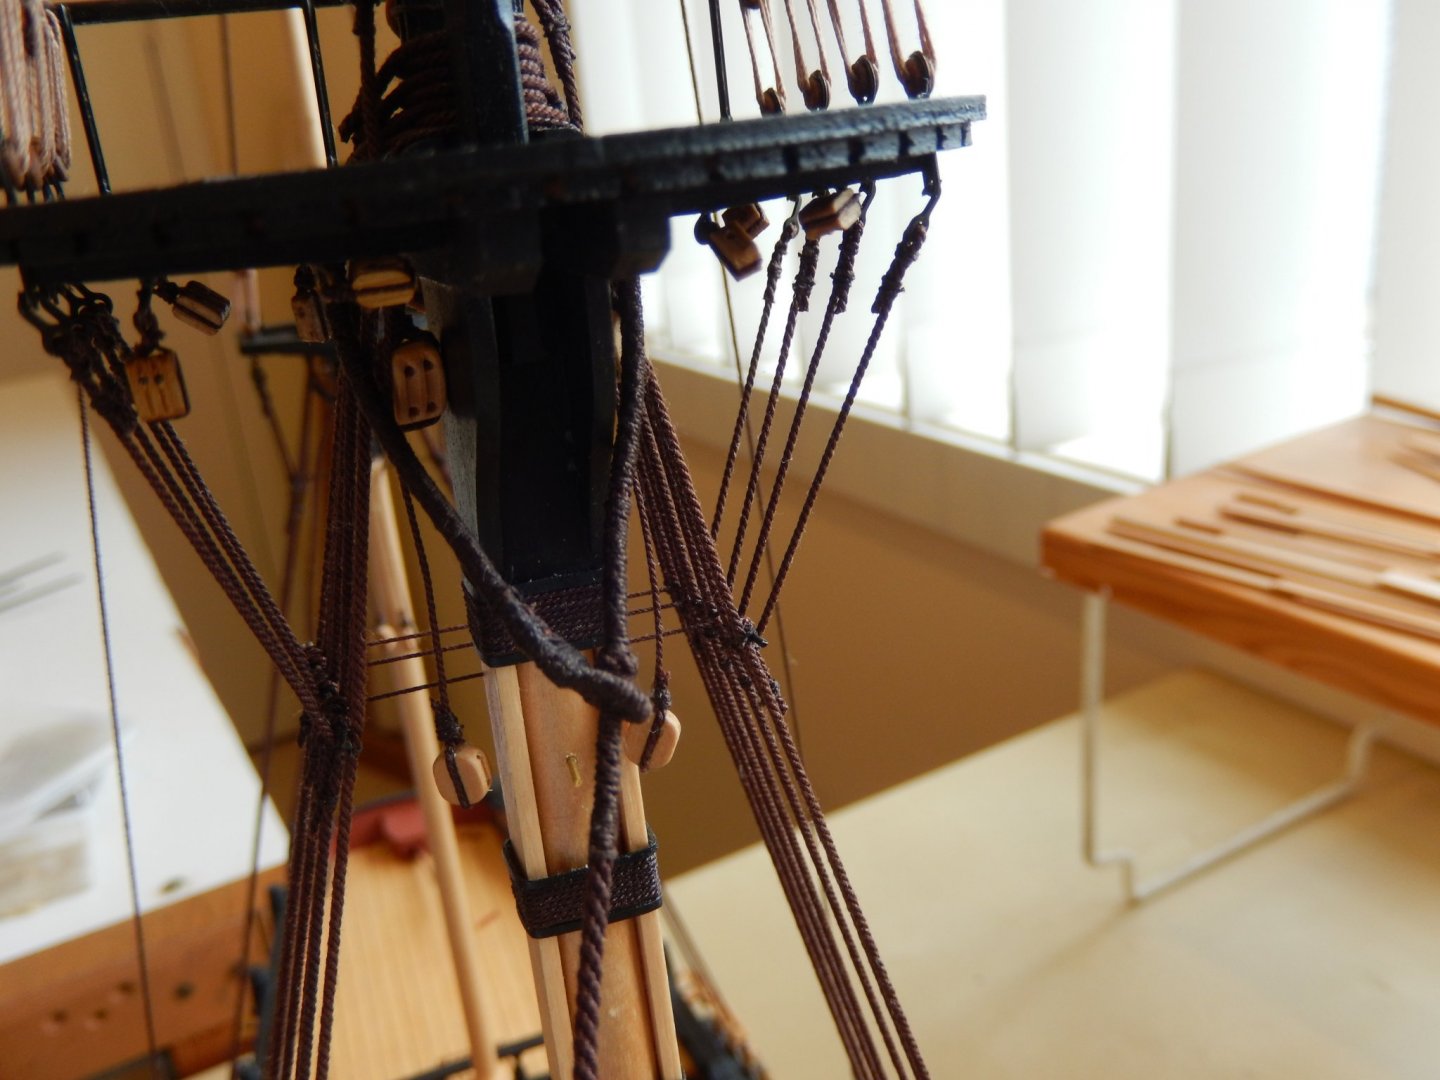
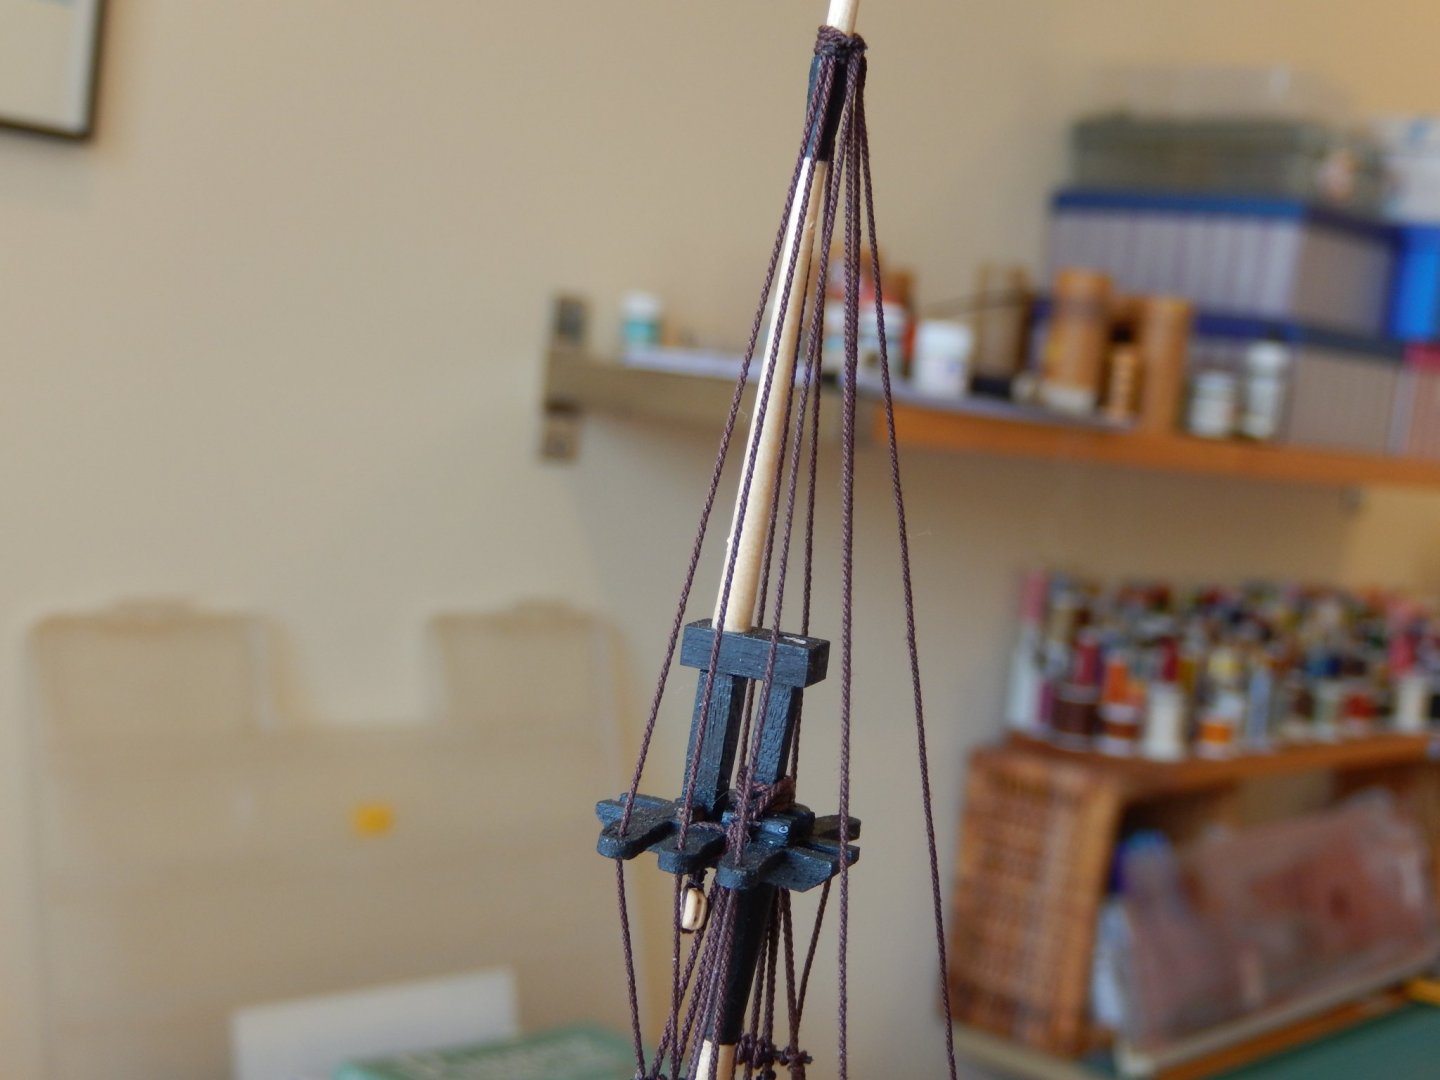
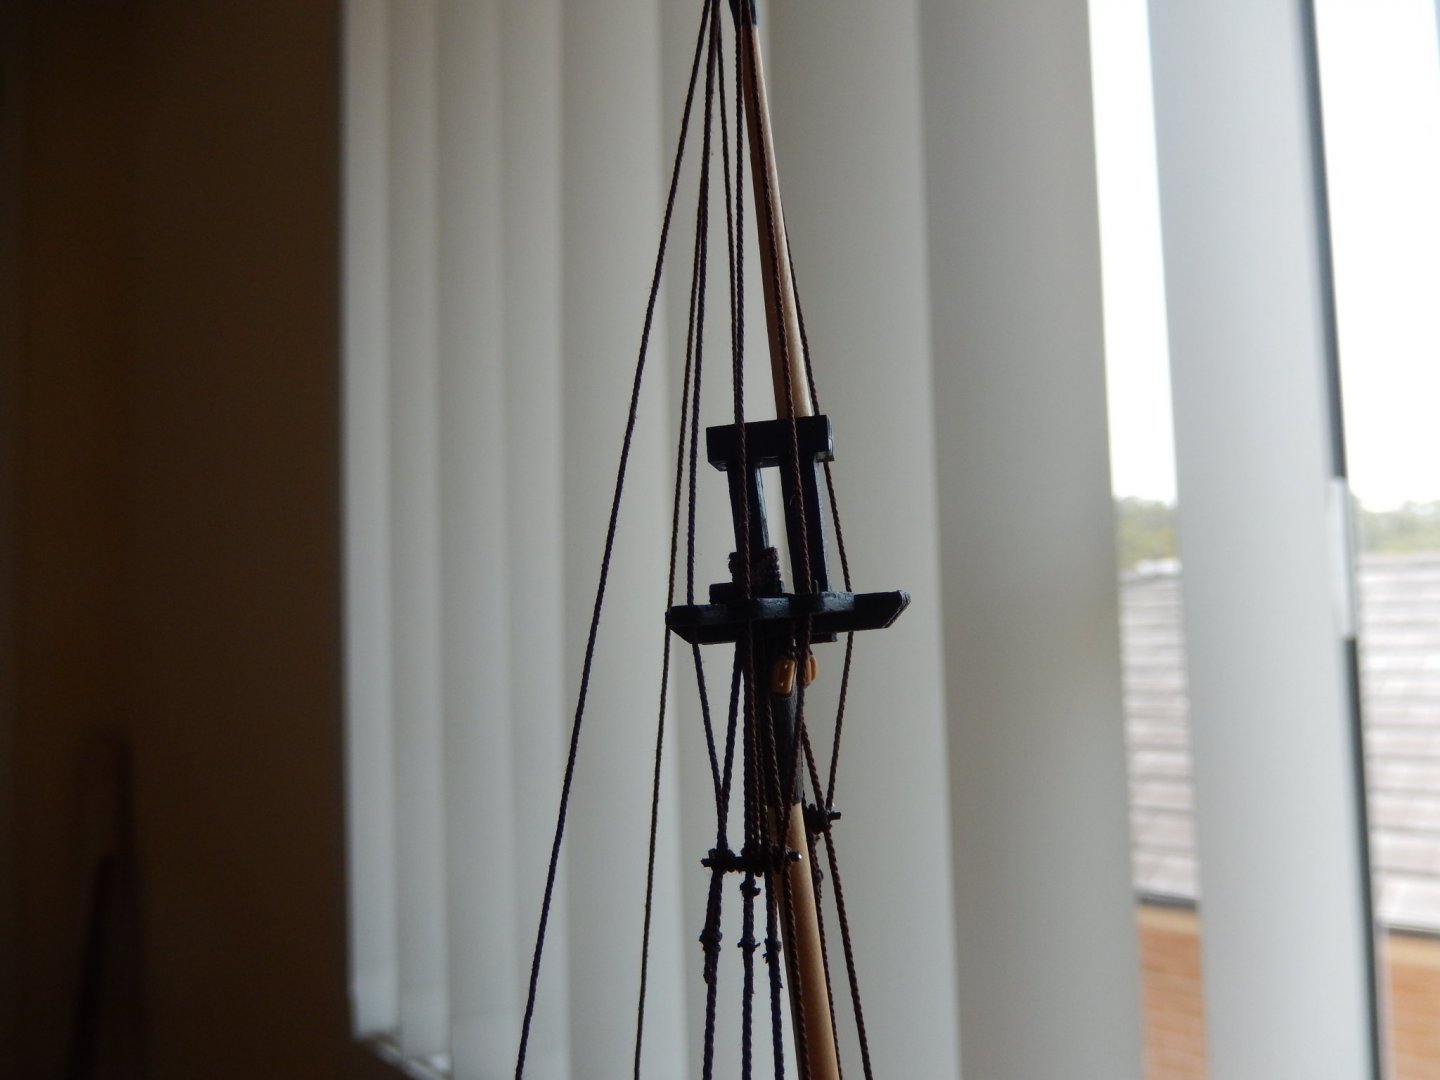
Other things have intruded on boat building recently. However here is some progress. All of the various main stays are complete and tied off, as are the mizzen, and mizzen topmast stays. They have come out reasonably well. The bowsprit shrouds and bobstays are complete and tied off. I have had some problems with some of the backstays. For a few, the Syren thread has twisted which results in the top deadeyes being at a noticeable angle to the bottom deadeyes. I can find no reason for it. All of the stays have been treated in exactly the same way. I have experimented by giving one or two the opposite twist, clamping it, then running very dilute PVA down their length. I then left them to dry overnight and the problem seems to be solved. Now for the rest. Best of luck and good health to all. In the following photo the main topmast stay has been caught underneath the collar. This has been fixed. The rigging for bowsprit shrouds and bobstays is all rather crowded.


- 421 replies
-
- 16
-

-
- caldercraft
- granado
- (and 1 more)
-
Thanks Sam for the encouragement.
-
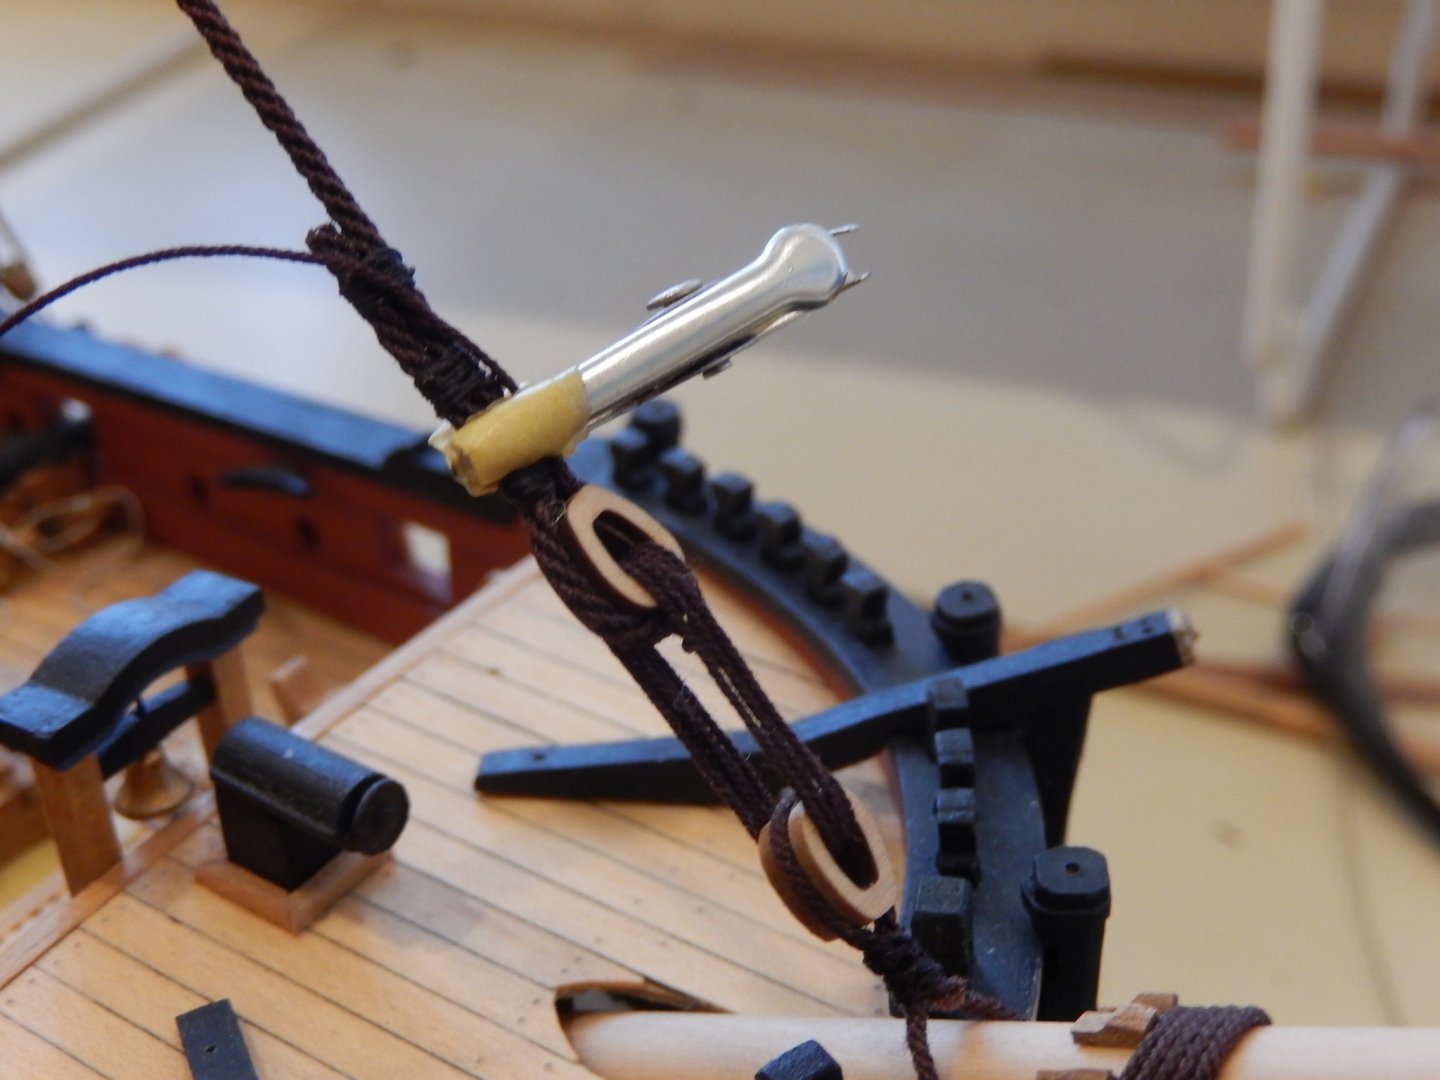
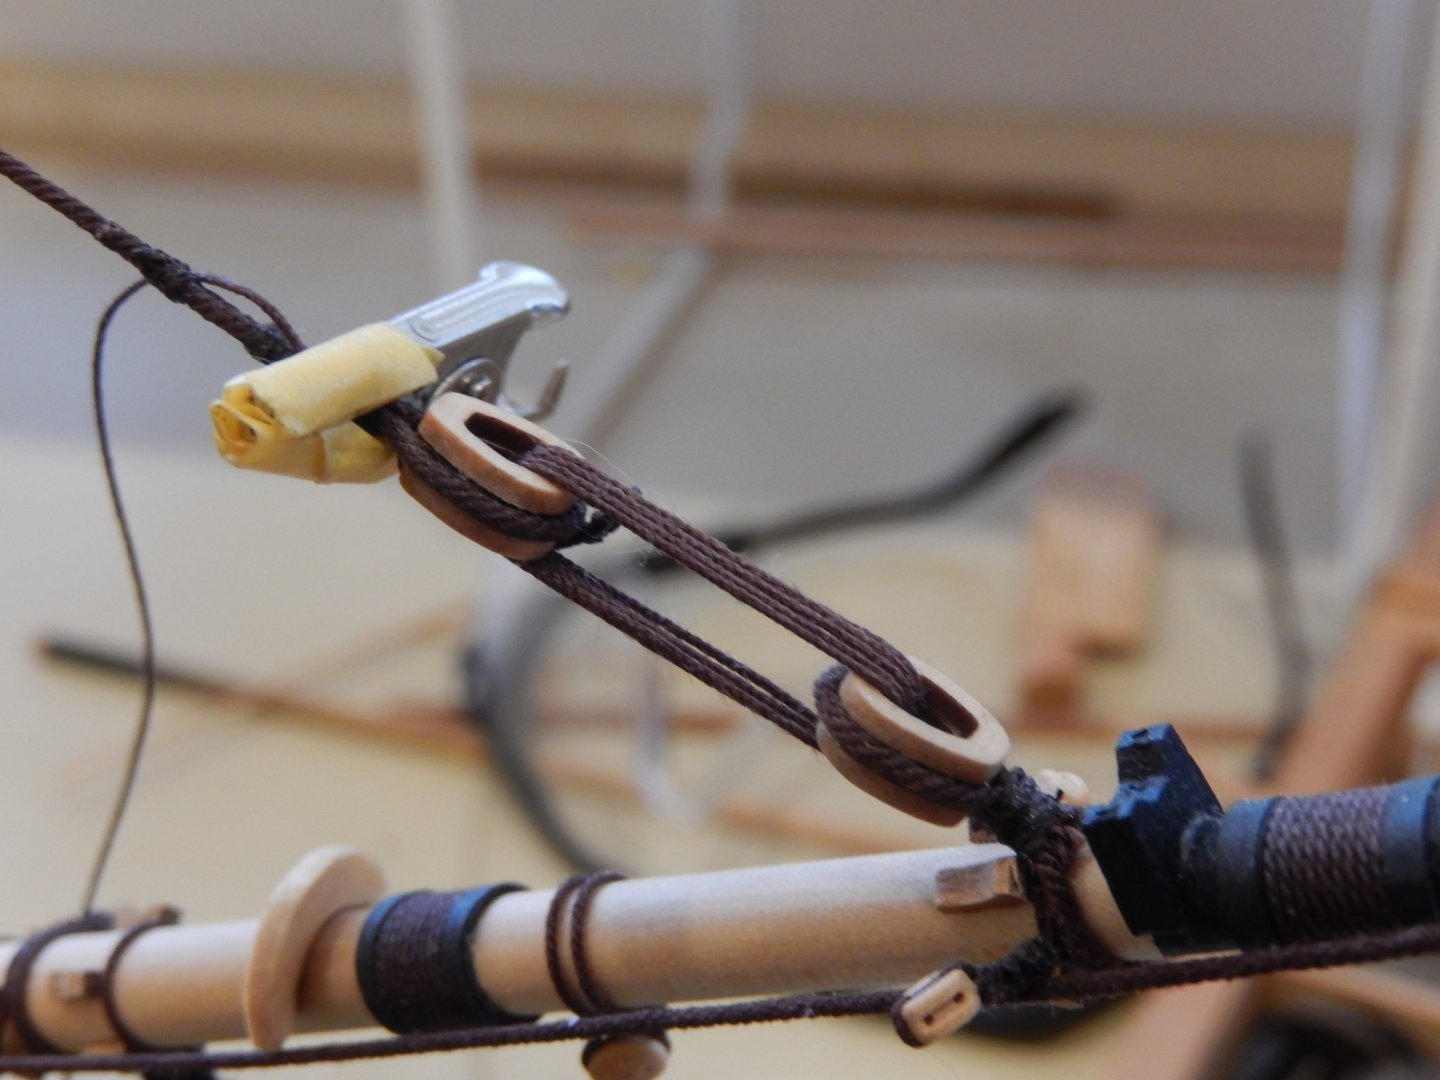
The stays, but for the main to gallant stay, are complete, but not finally tied off. If the stays are tied off as you go, it's likely that one or more will adversely affect the tautness of the stays that have already been finished. I suggest leaving them until all are complete but for the tying, then each one may be adjusted so that they do not have any effect on the others. Then all are finally tied off at the same time. I hope all of this makes sense.😊 Good luck and good health to all. The hearts turned out to be difficult. I have done it in a way that is not strictly accurate. The lashing here will be tied off to the stay. Evidently the last strand of the lashing should be seized to the penultimate one. The way I have done it prevents an outbreak of bad temper, and I hope it will not be noticed.

- 421 replies
-
- 13
-
-
- caldercraft
- granado
- (and 1 more)
-
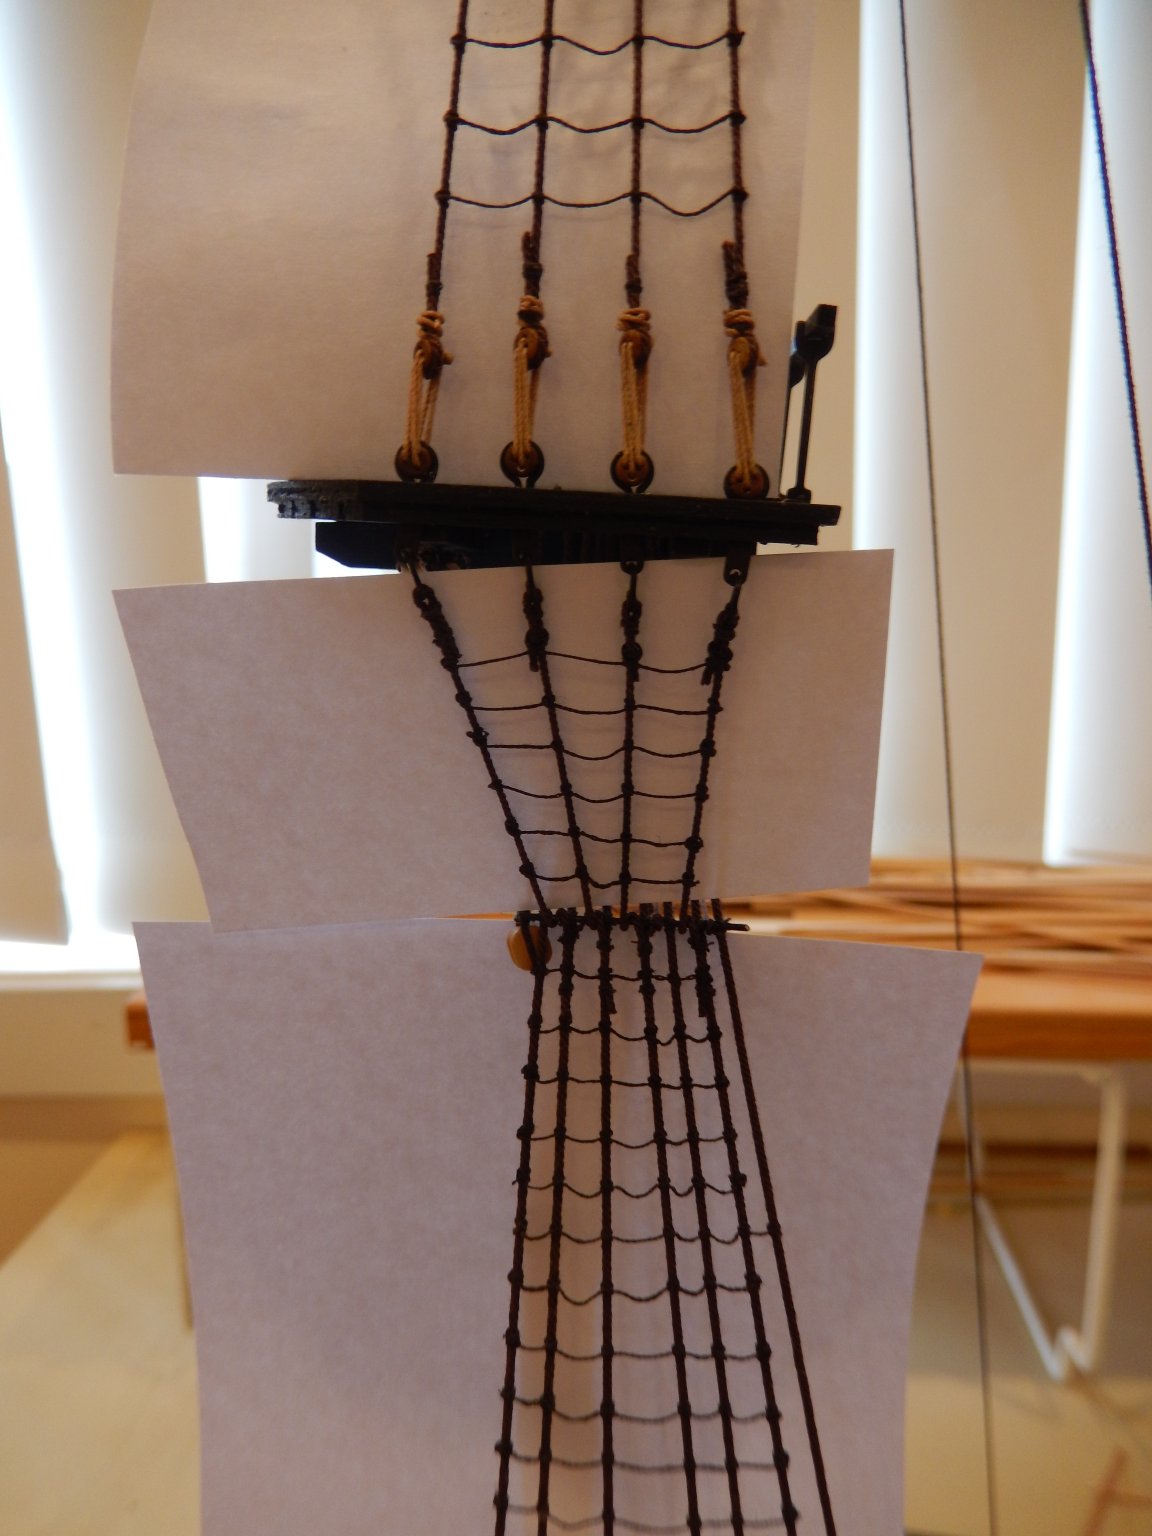
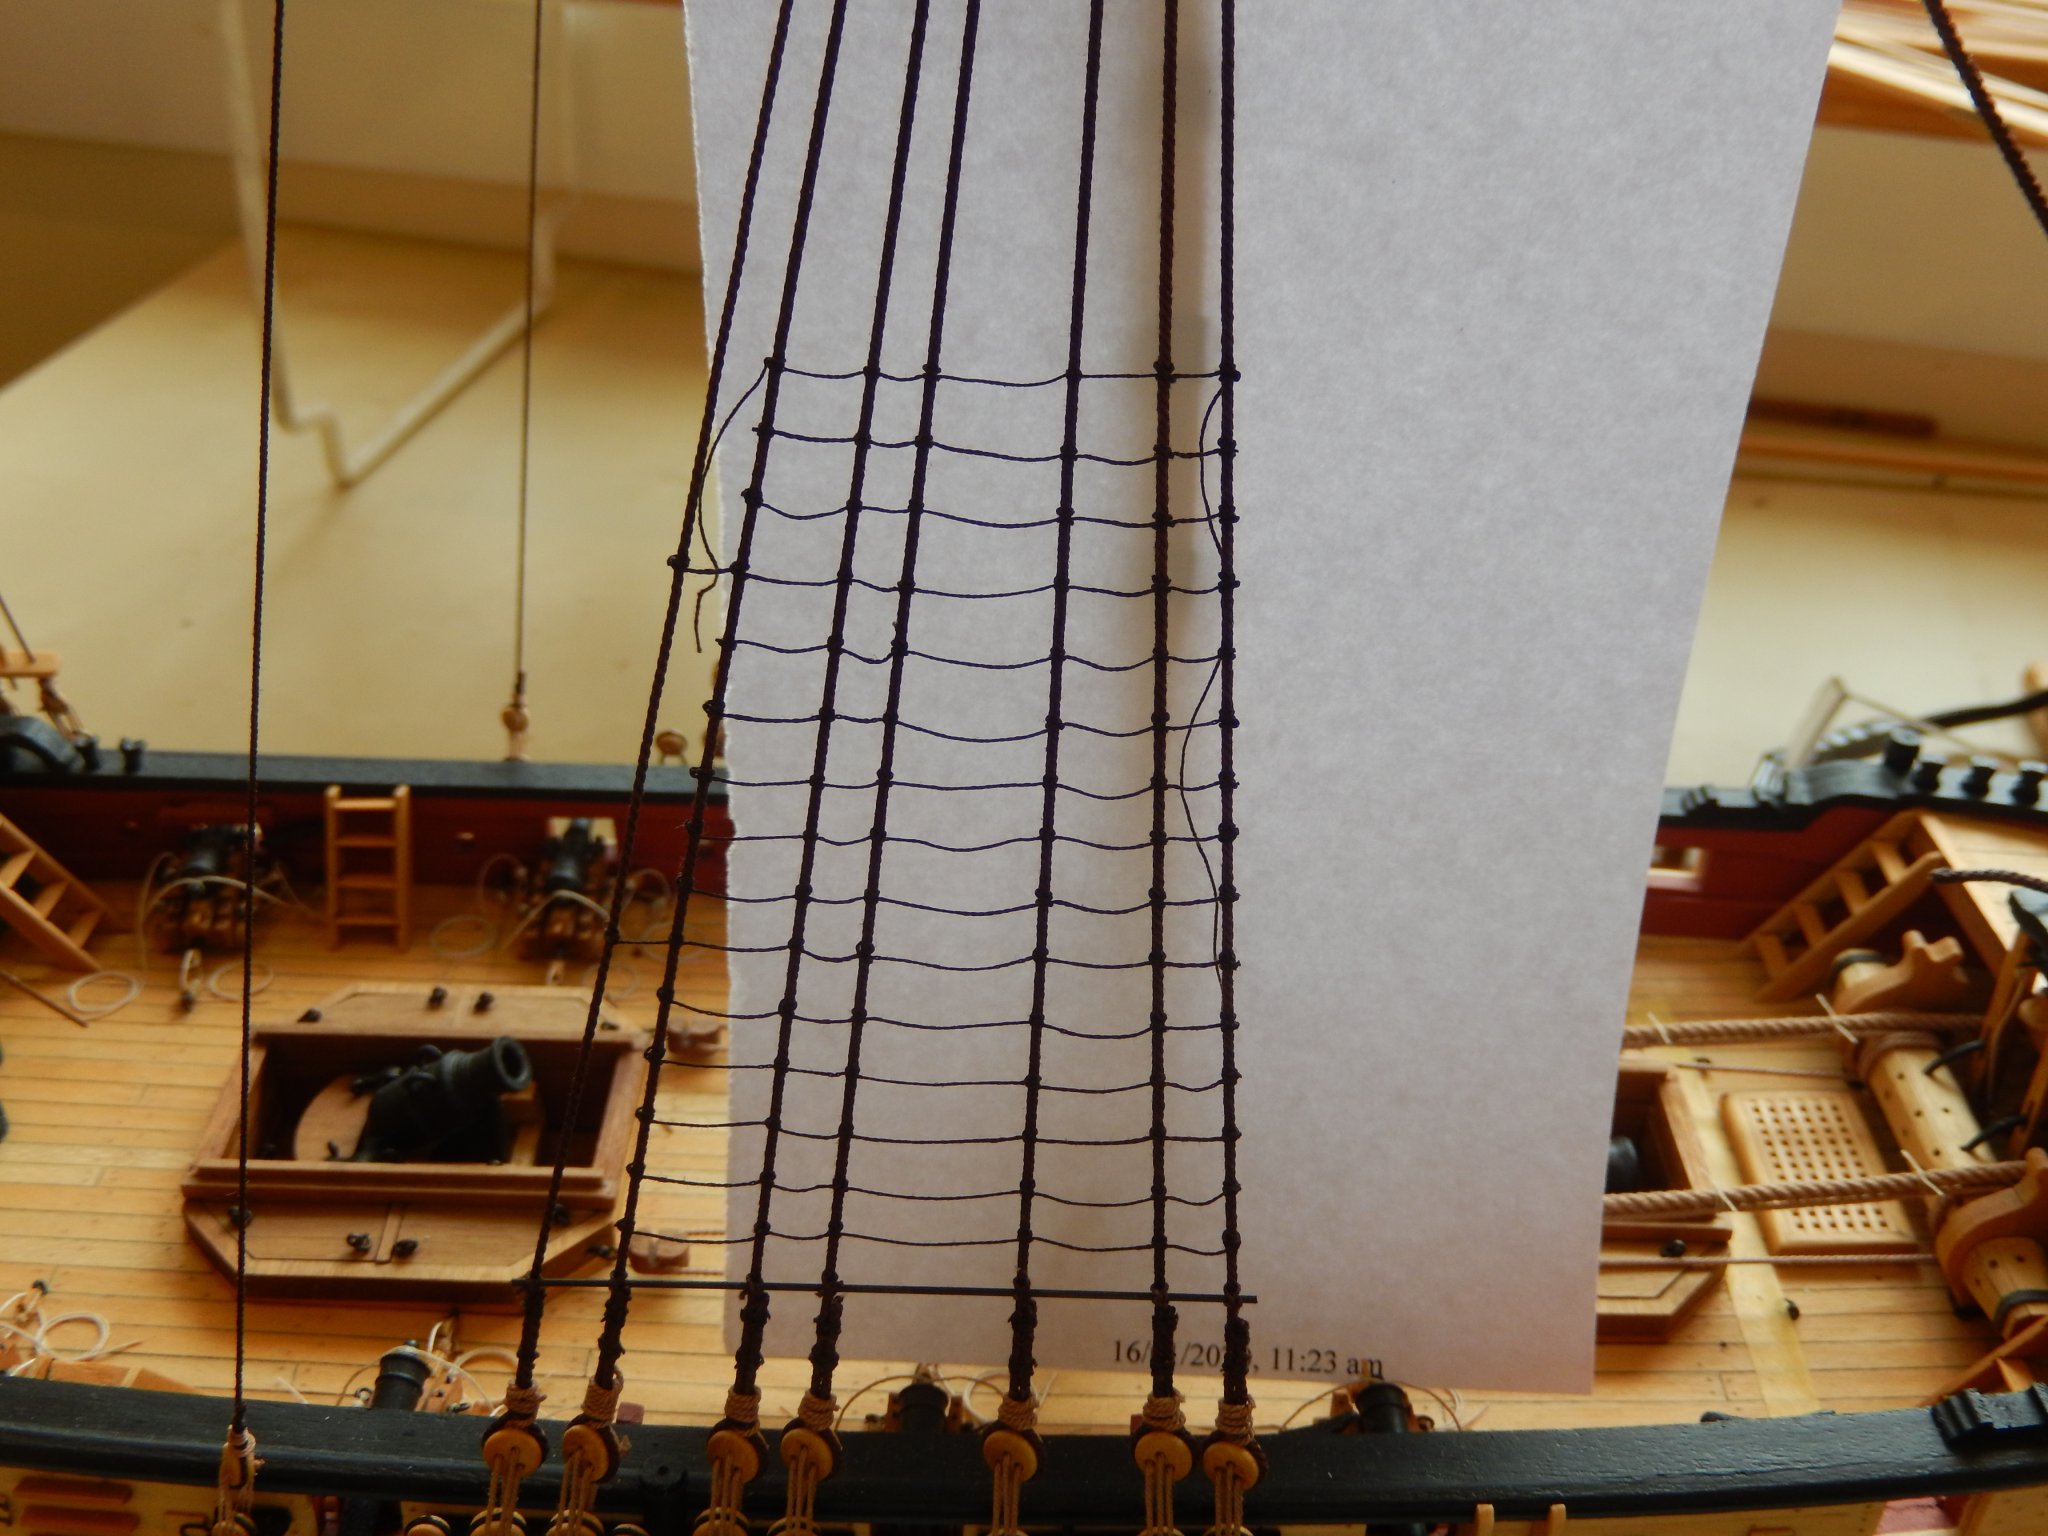
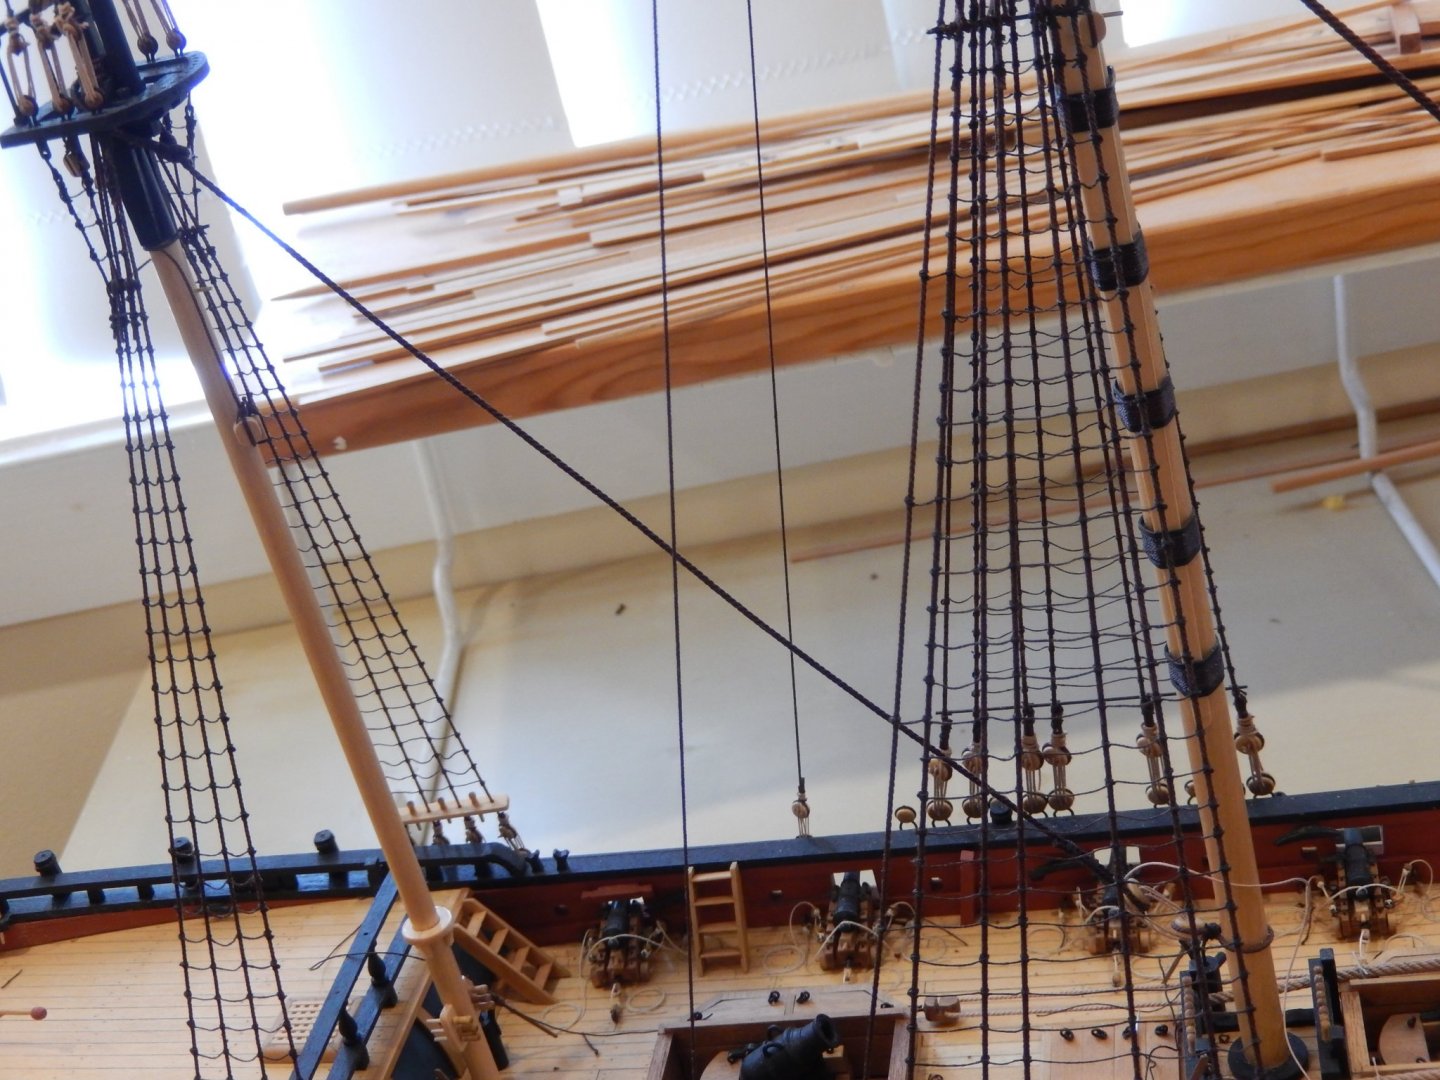
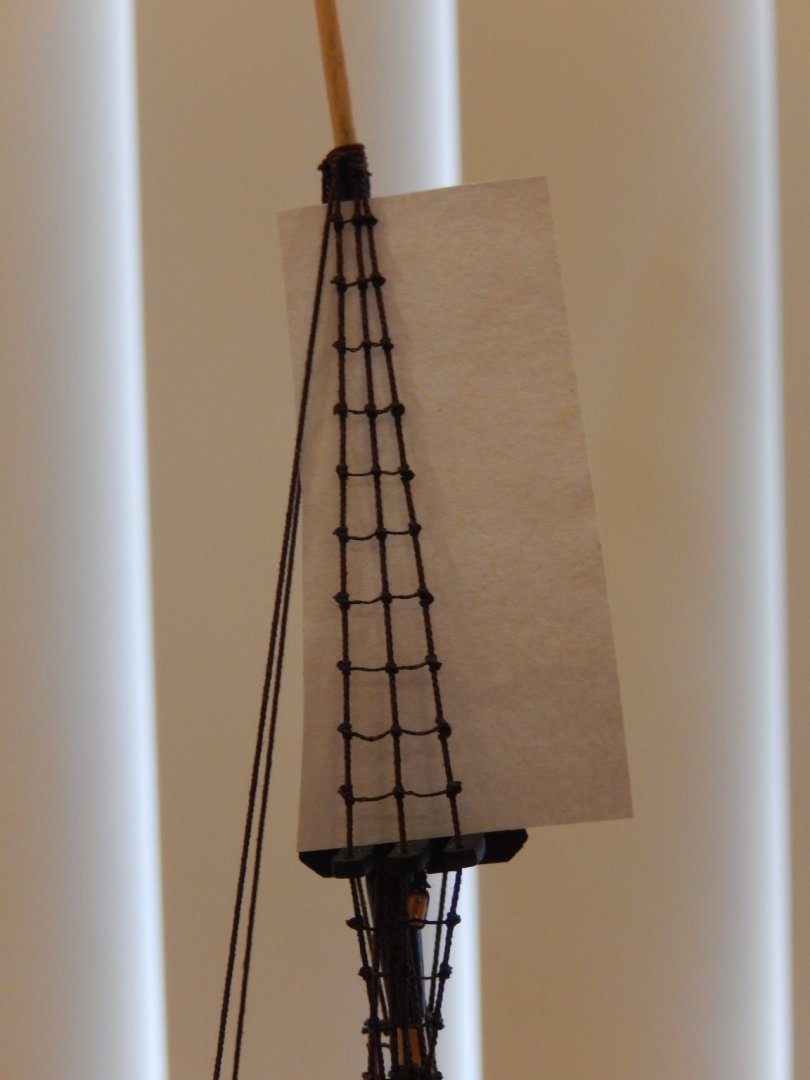
The ratlines are finally finished. They came out quite well, but it's certainly not the most interesting thing I've ever done. The following photos shown the port main mast shrouds. Fortunately the other side looks much the same. I hope everyone remains safe and healthy at this difficult time. Best wishes, Bob
- 421 replies
-
- 8
-
-
- caldercraft
- granado
- (and 1 more)
-
Thanks mugje. The starboard side ratlines are now finally complete.


- 421 replies
-
- 7
-
-
- caldercraft
- granado
- (and 1 more)
-
Thanks Jason. It makes my enthusiasm for the job sag a bit less. At least now it's almost finished.😊
-
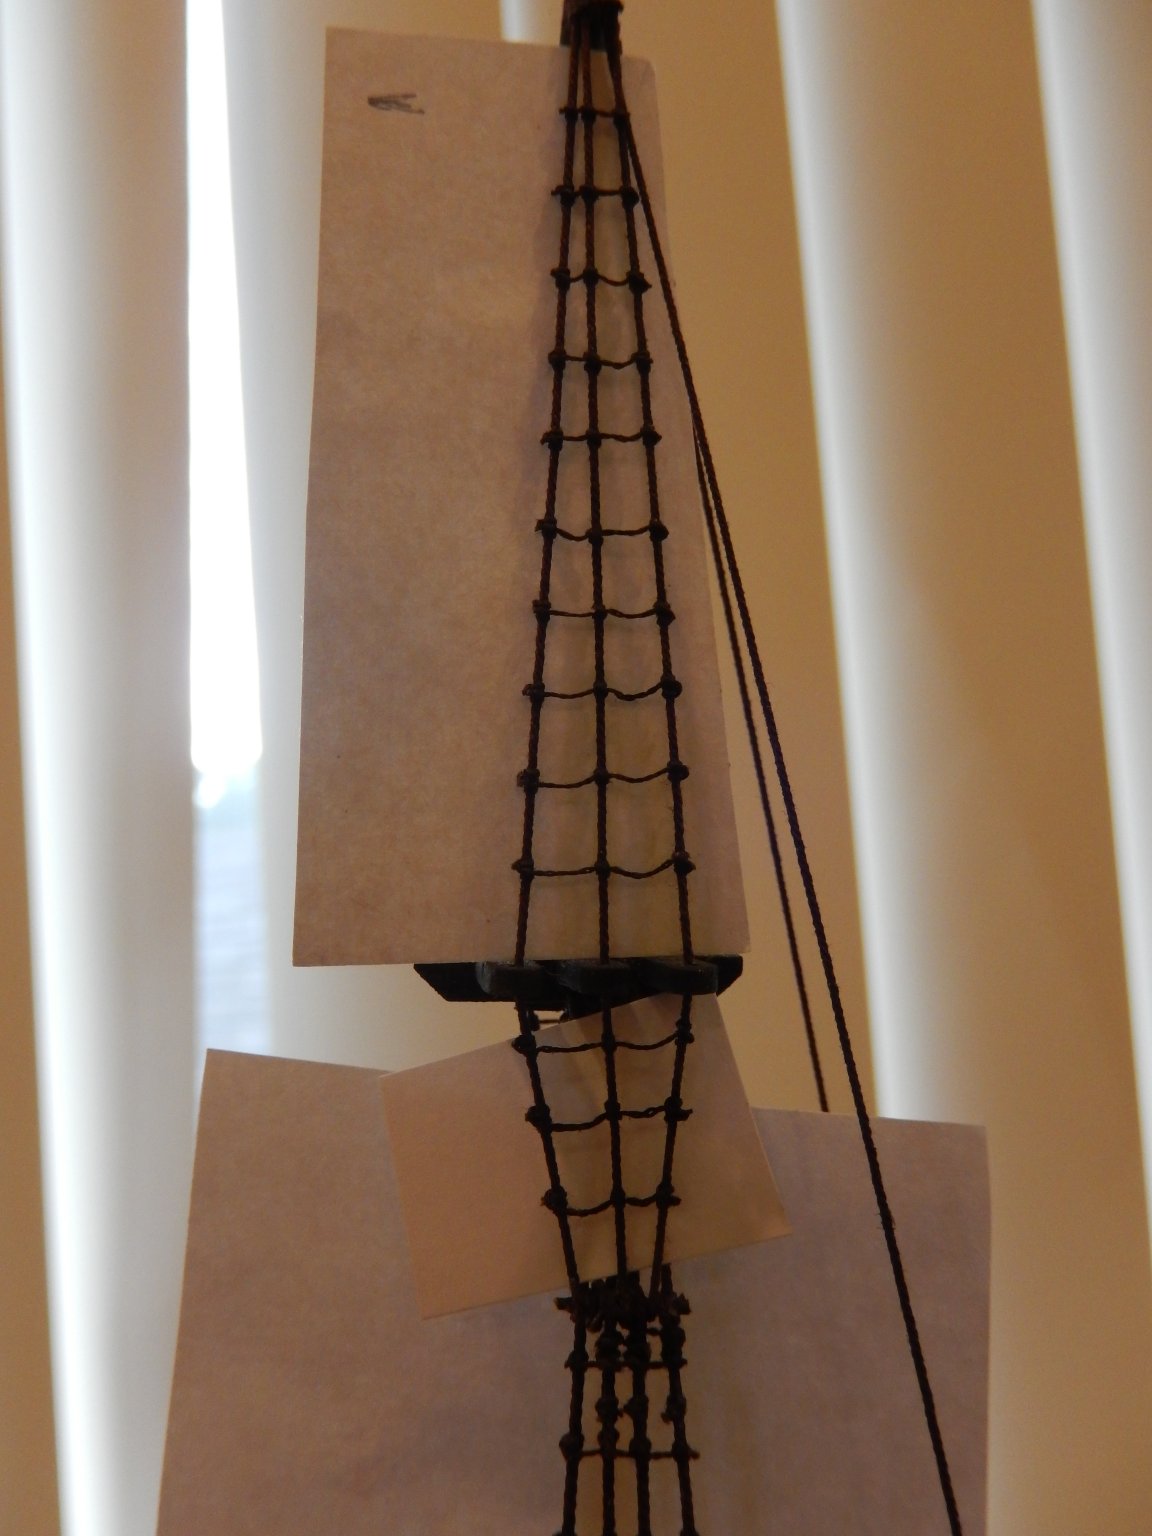
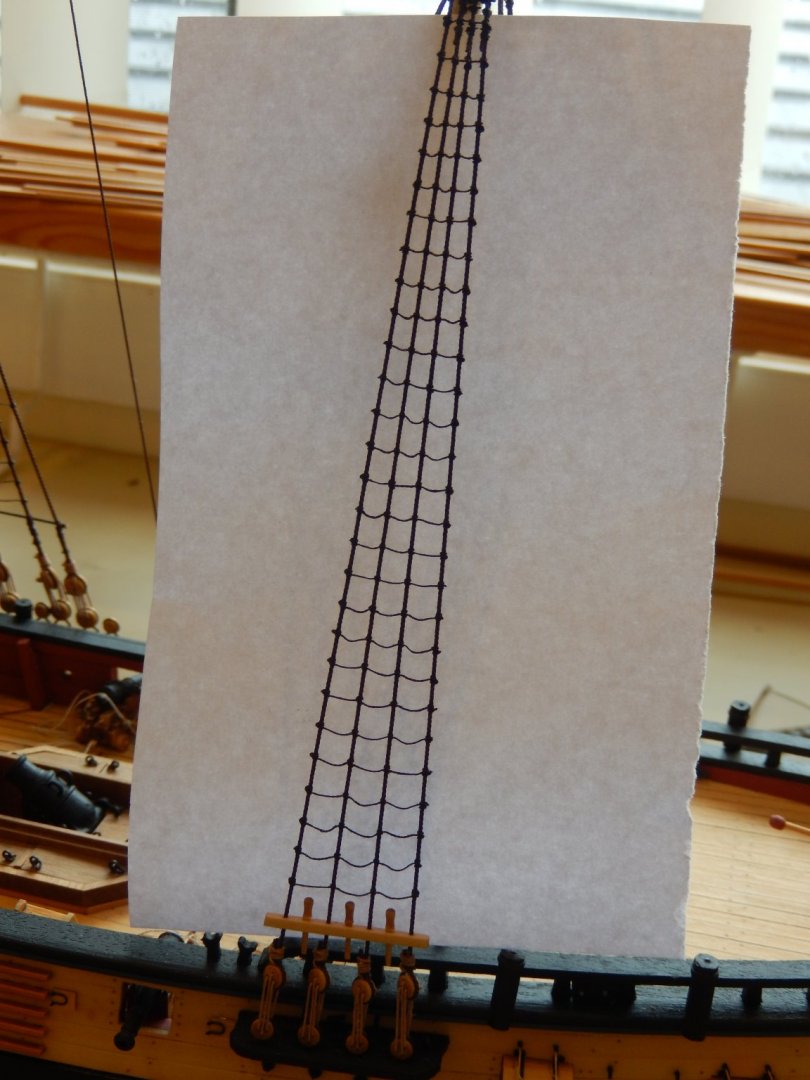
The ratlines for the lower mast shrouds are finally complete. Those for the upper masts are underway. It's very tedious. I'm looking at any excuse not to do them - even to attacking the bougainvillias which unfortunately fight back. I have the scars. Here are the ratlines for the port lower mizzen. Both sides came out quite well.
- 421 replies
-
- 14
-
-
- caldercraft
- granado
- (and 1 more)
-
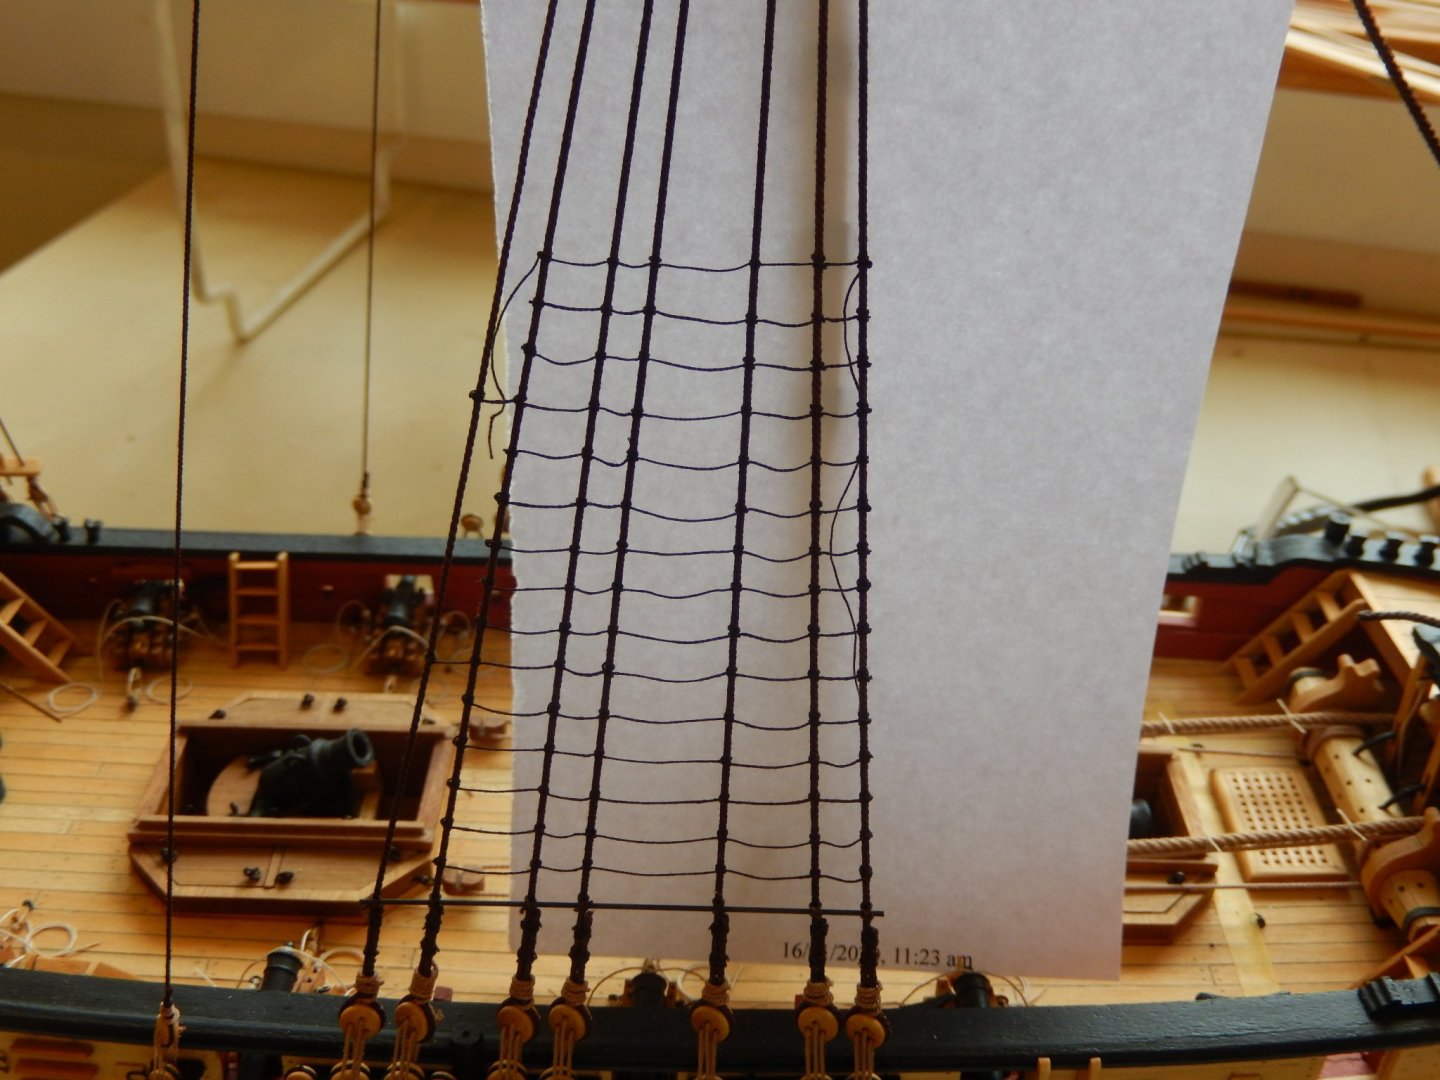
Progress is glacial. The ratlines for the mainmast shrouds are now done and some progress has been made on the mizzen ratlines. My computer went berserk with an update of Windows 10 which didn't help. Here are the port ratlines for the mainmast. Fortunately the ones on the other side are exactly the same.

- 421 replies
-
- 12
-
-
- caldercraft
- granado
- (and 1 more)
-
Jason: I think you're right. More contrast is needed between the lower stays and those above. Thanks for taking the time to comment. All the best, Bob.
-
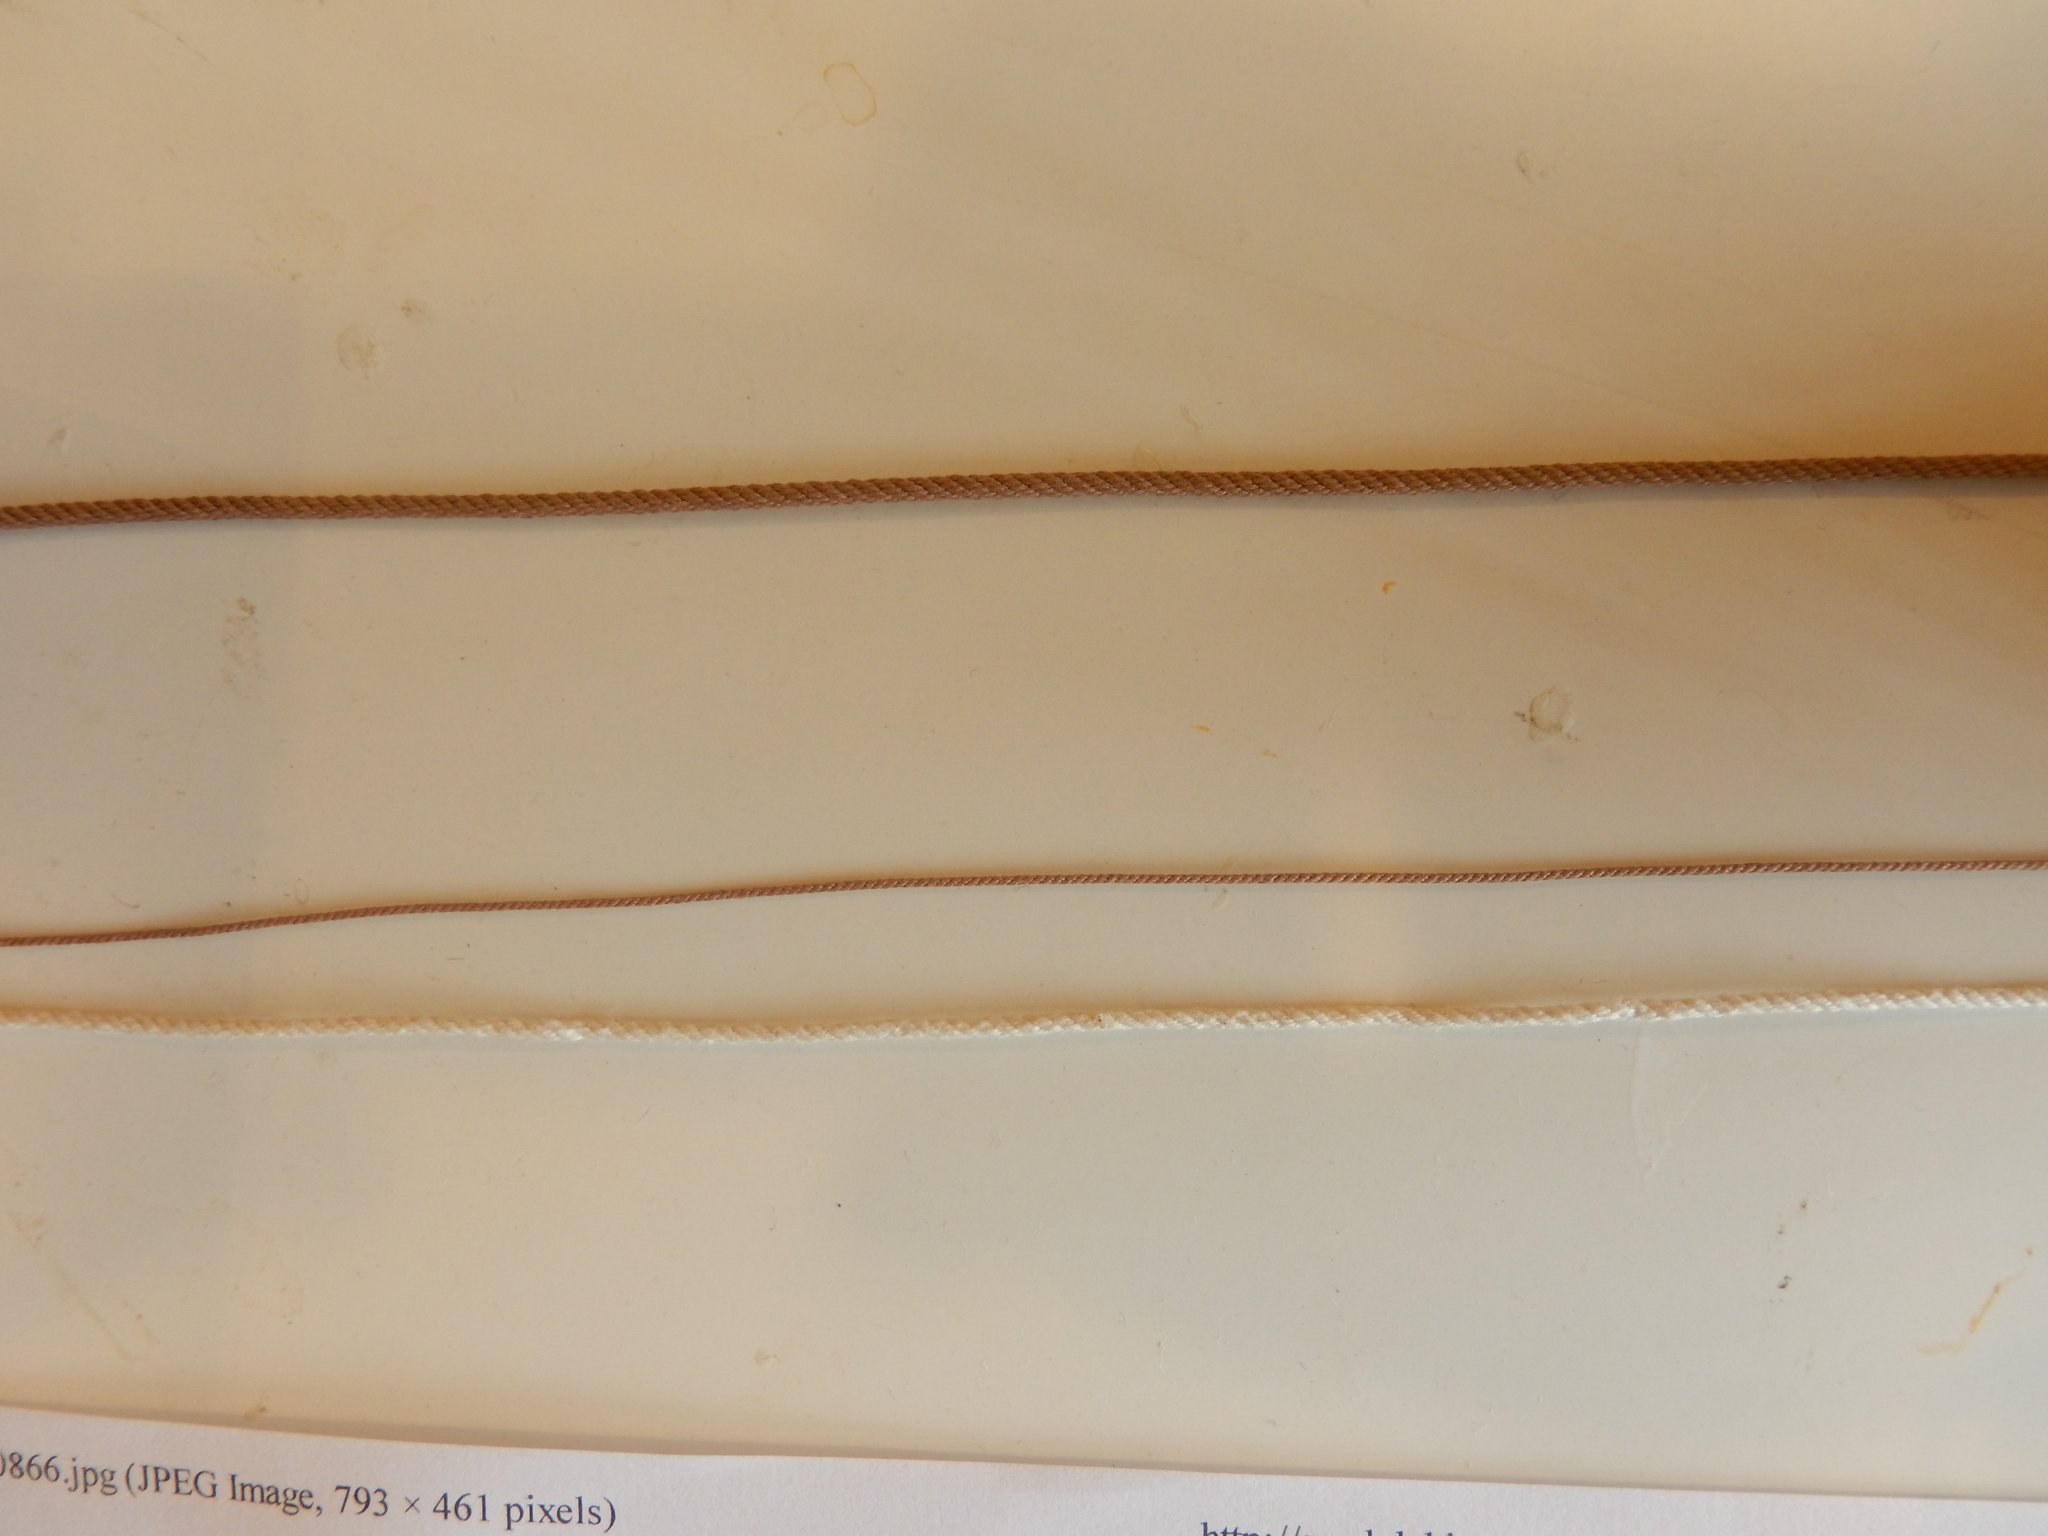
Very slow progress. After the January fires we now have floods. Locusts must be next. At home we had 350mm of rain over the weekend before my rain gauge overflowed. The cleanups have been time consuming, but we are far better off than many. Here is progress. The ratlines continue unfortunately. The other side is done to the same level. As a break from the ratlines I have made up the main stay. The plans specify 1.3mm thread. The Syren thread comes in either 1.37mm or 1.14mm sizes. In fact, the 1.37mm is closer to 1.5mm and the 1.14mm appears to be just over 1.0mm. I have made up both. I'm afraid the serving on both is only adequate. This shows the difference in the thread sizes. Here is the1.37mm in place ... and the 1.14mm. At the moment I lean towards the narrower thread. The thicker thread looks just a bit too thick. Comments welcome.

- 421 replies
-
- 7
-
-
- caldercraft
- granado
- (and 1 more)
-
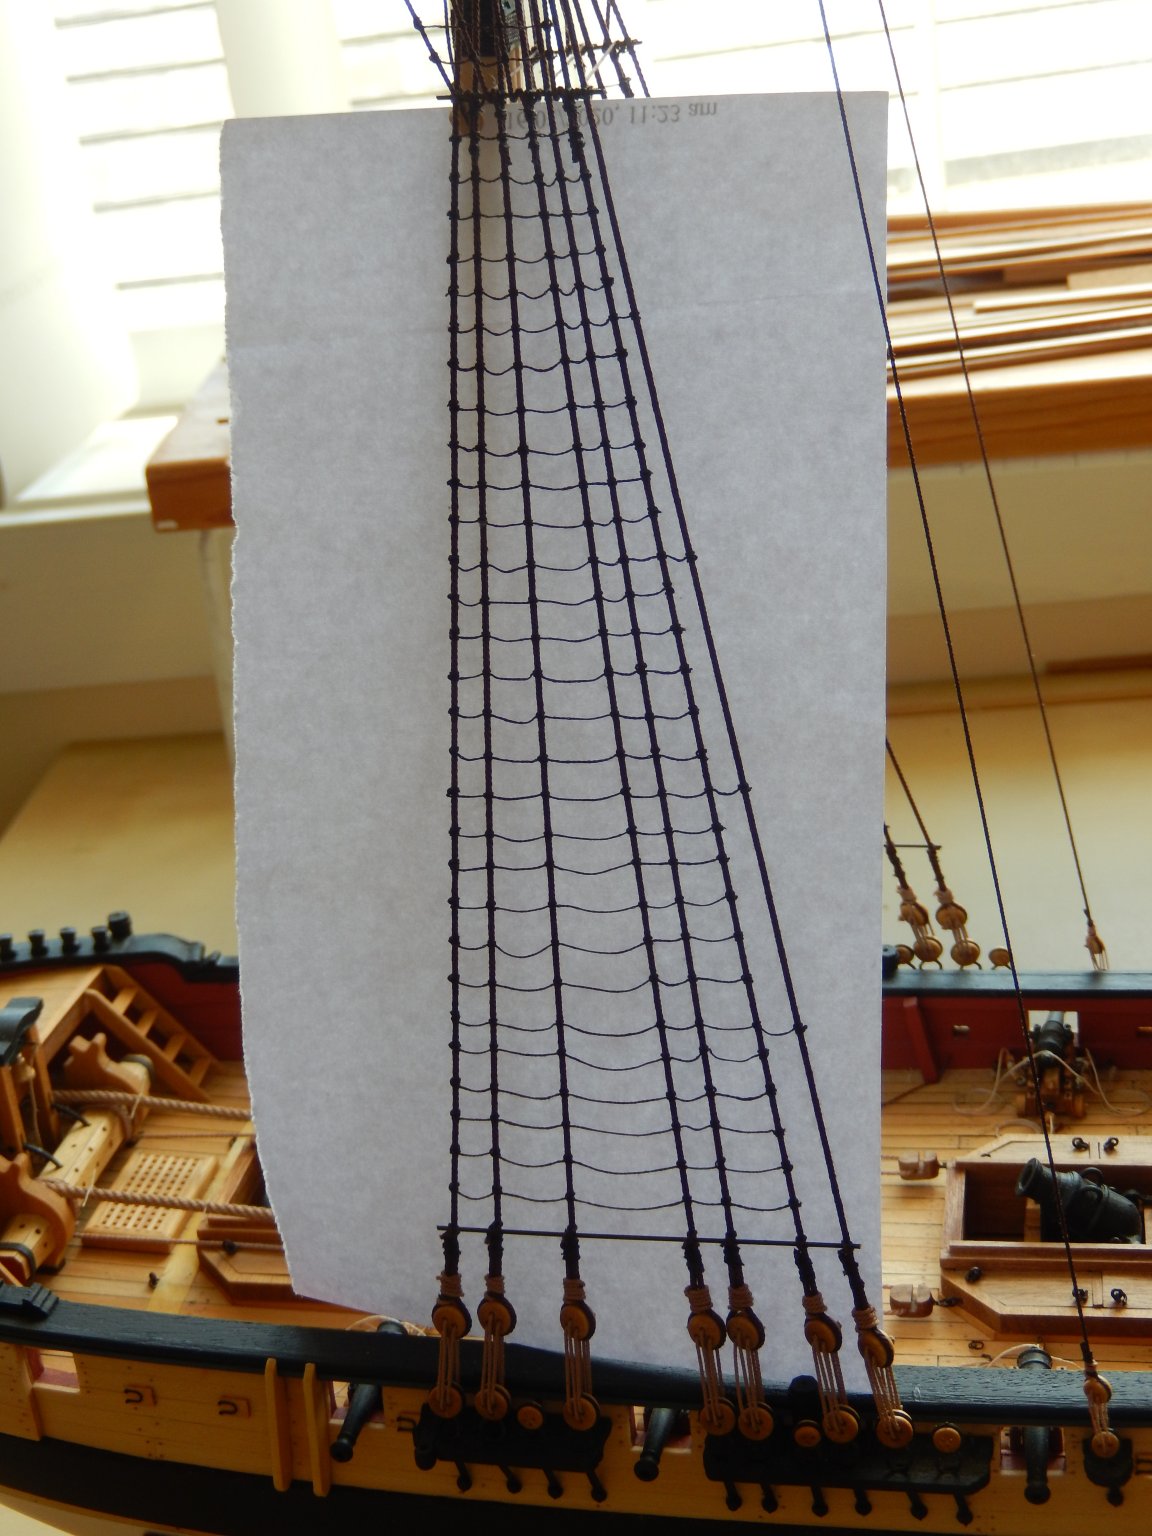
I haven't had much opportunity to work on the boat. Here is progress such as it is. I have begun on the ratlines for the main mast shrouds - probably my least favourite part of the job.. I will do six rows alternately starboard and port to make sure the number of lines on each side line up properly. Here is the first six on the starboard.

- 421 replies
-
- 13
-
-
- caldercraft
- granado
- (and 1 more)
-
Thanks Joe. I'm just glad it's finished. Progress may may get a little slower here. We had brown rain last night (rain and dust) and everything is covered in a thin layer of dried mud. With the water restrictions we have, making things moderately civilized will take some time. Never seen anything like it before - but then I've said this so often this summer.
-
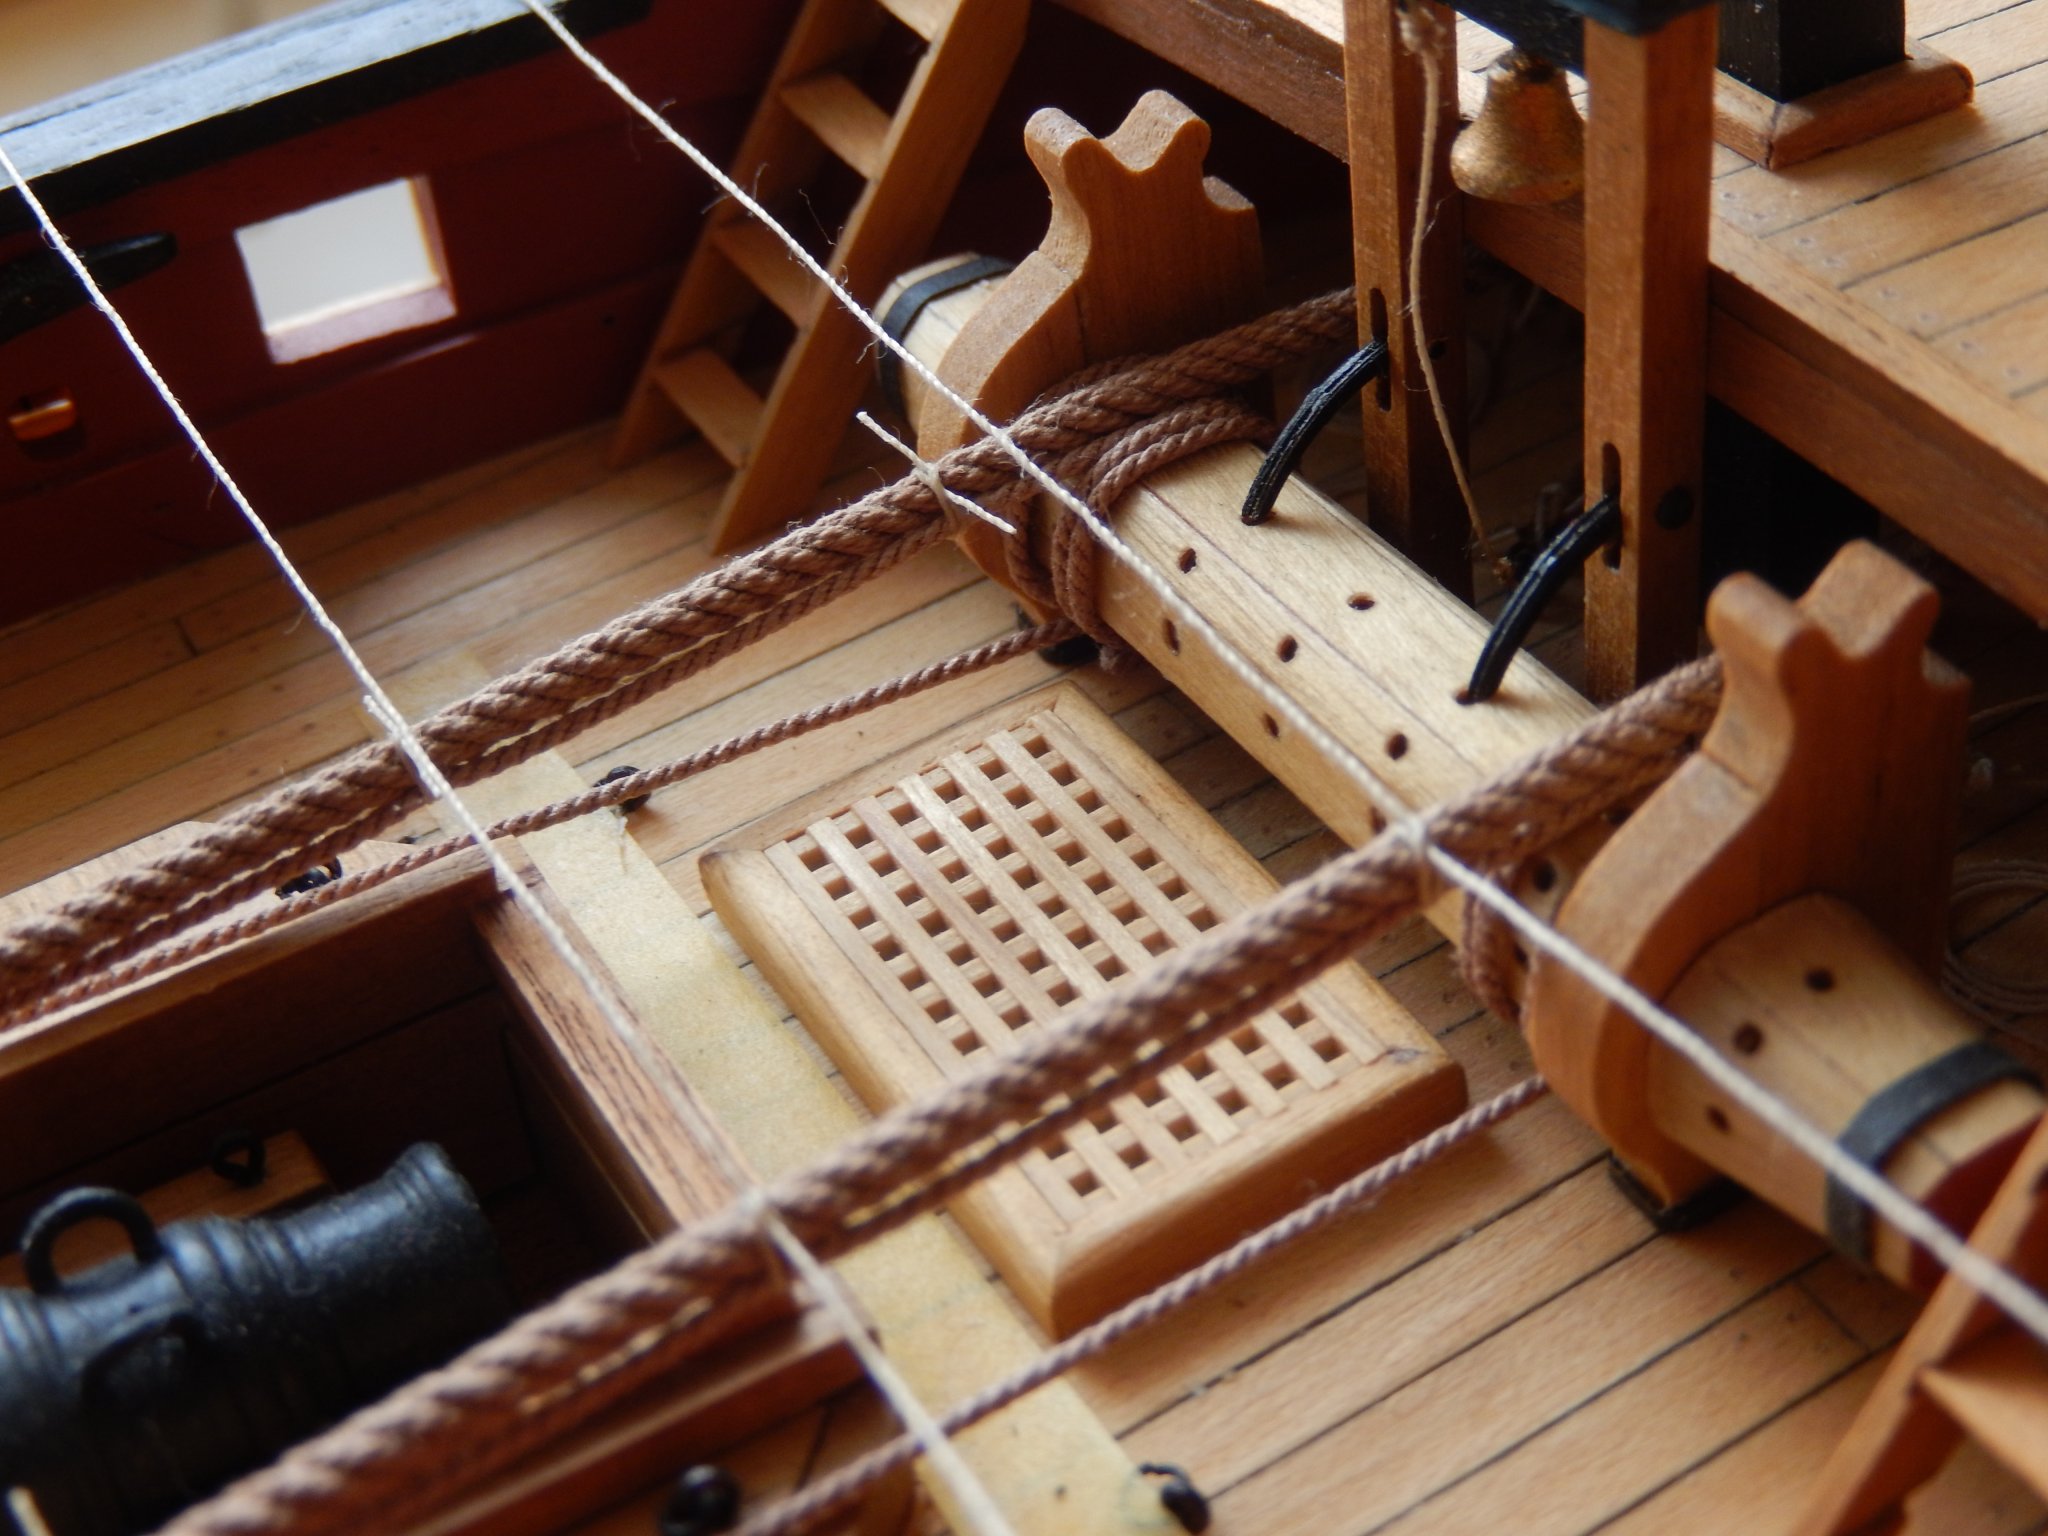
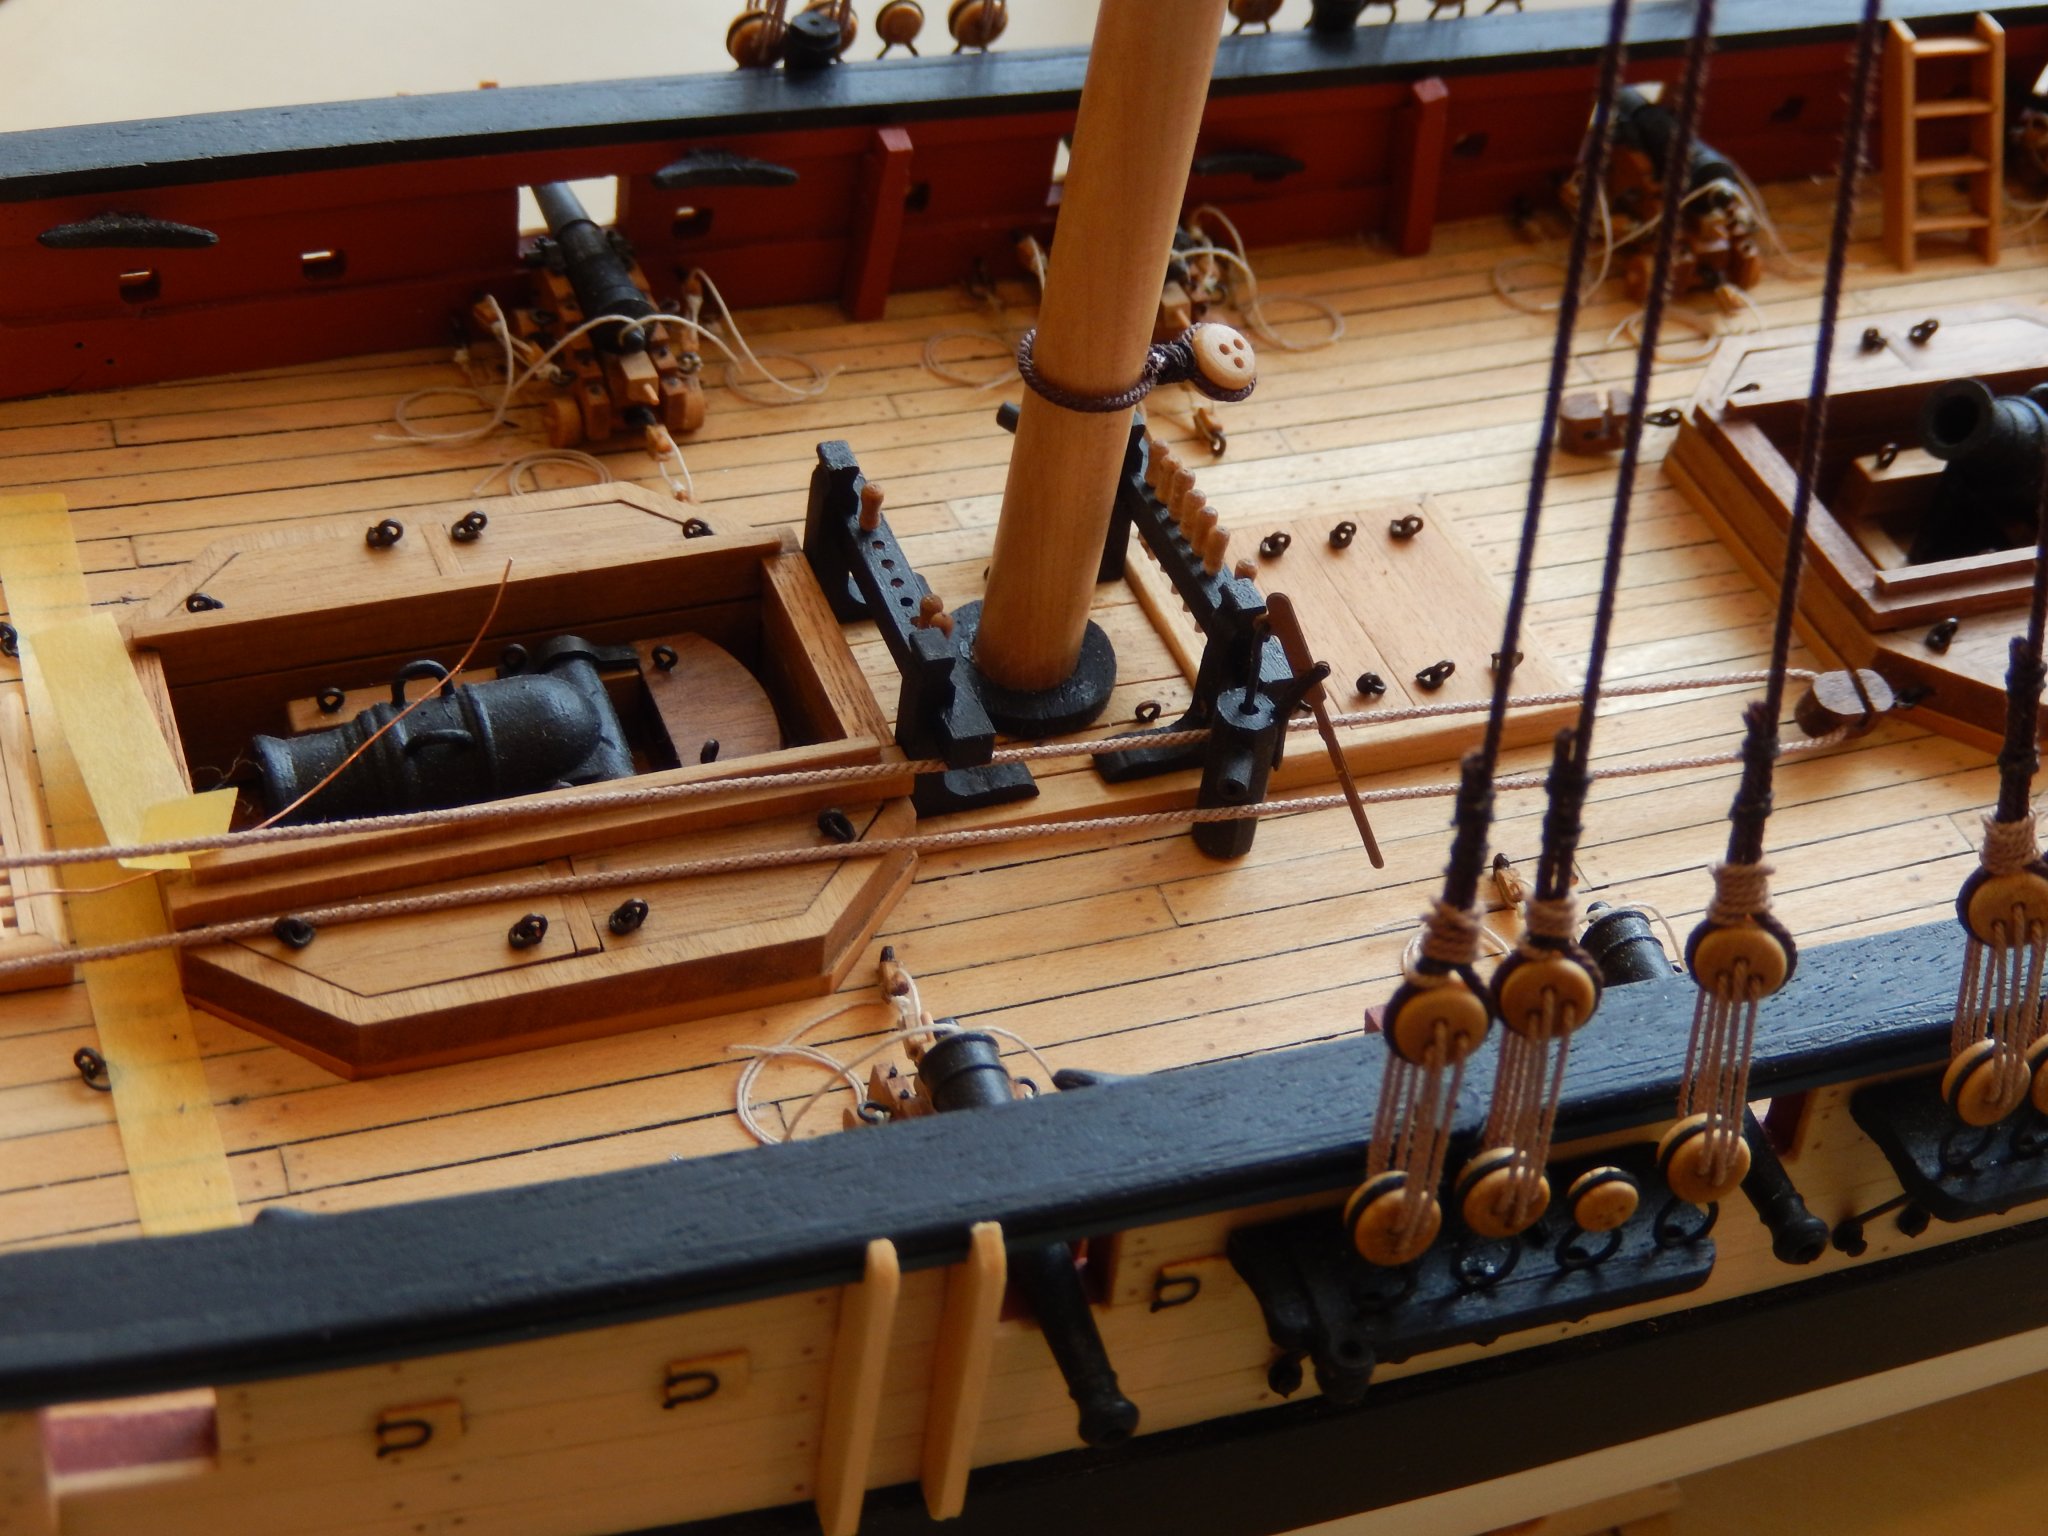
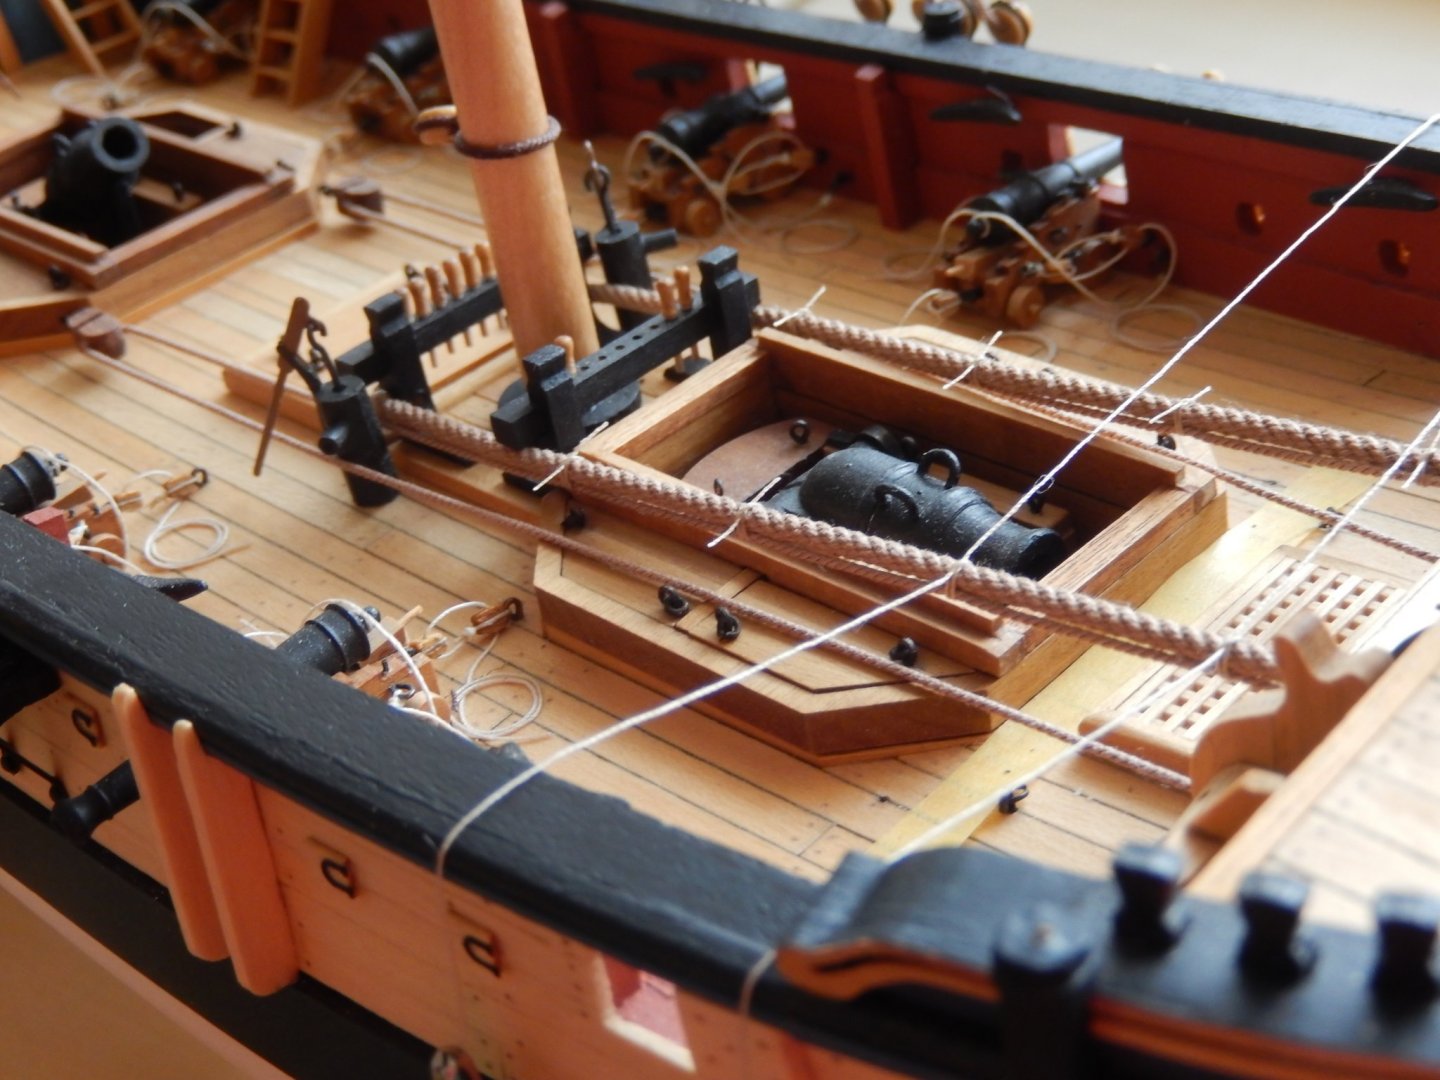
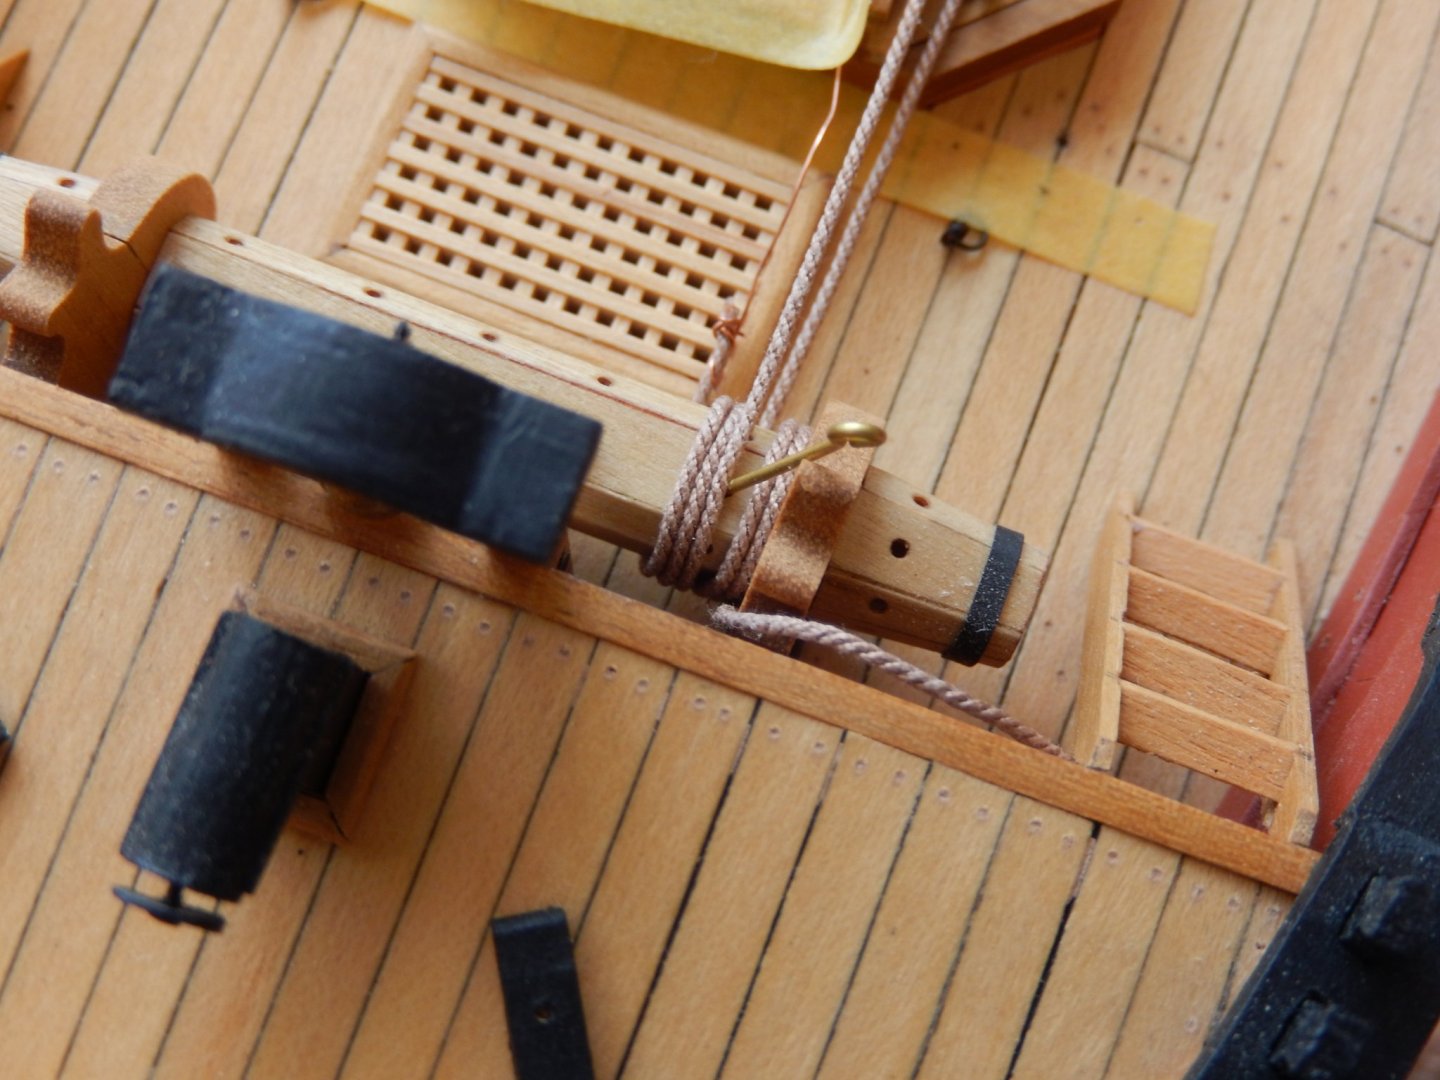
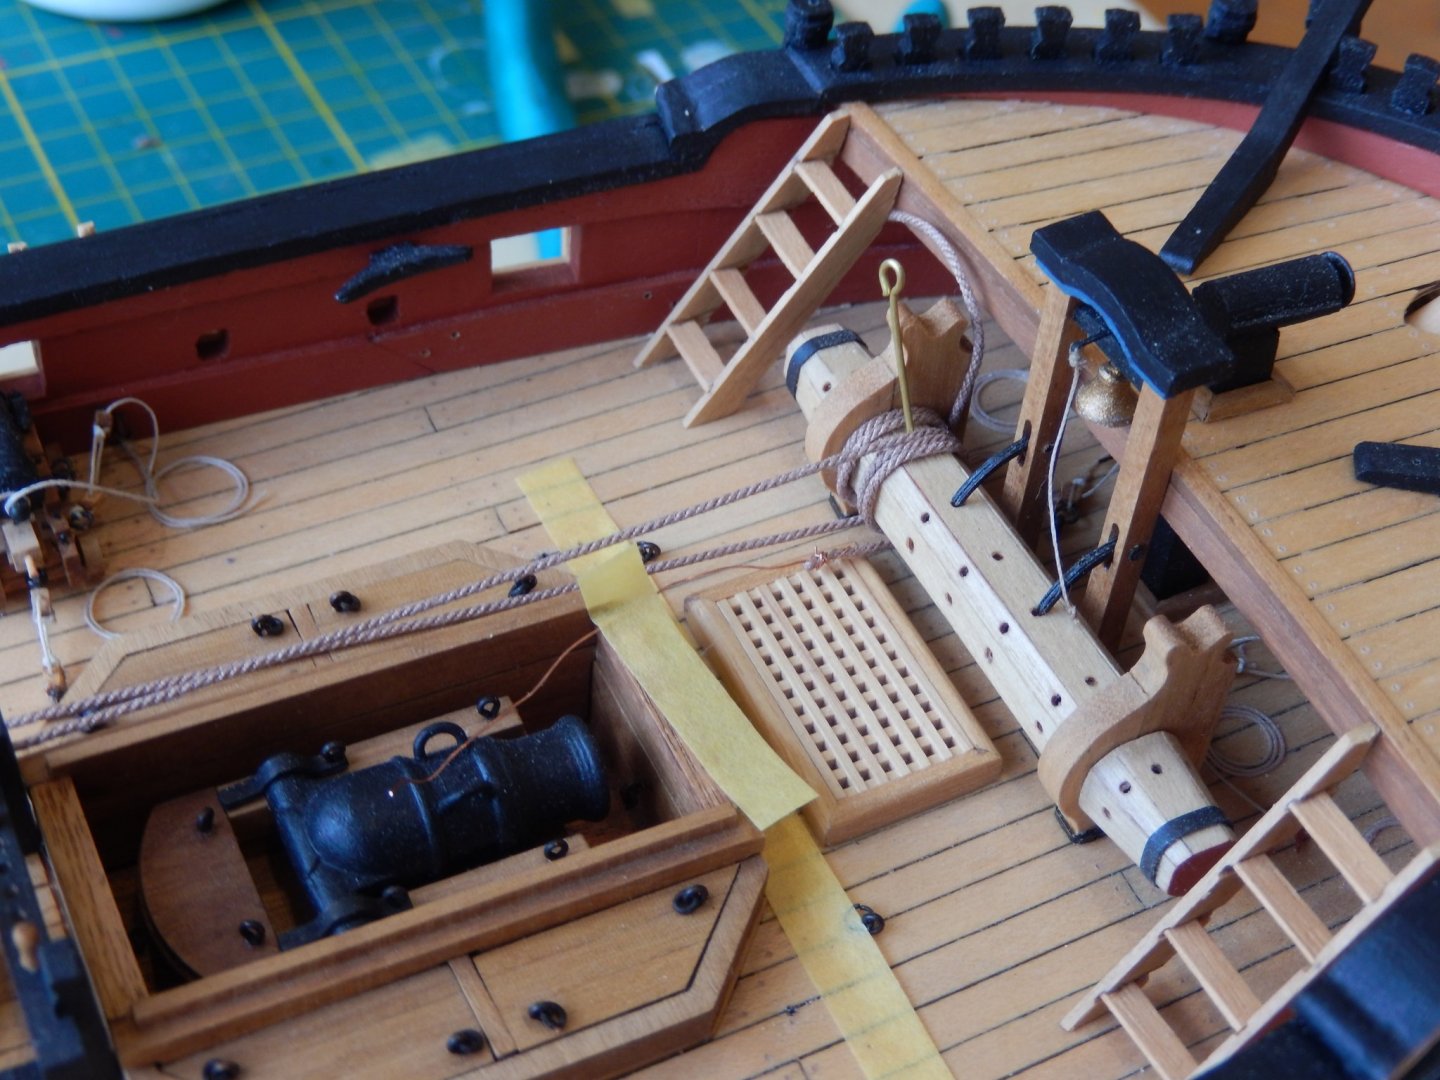
The messenger and anchor cables are now done. I made it needlessly hard for myself by doing this far later than the instructions suggest. There is a lot of rigging that made things quite awkward. The lesson in all of this is to do it as early as possible. Next time I may even read the instructions. This shows two of the nippers tying the cable and the messenger together. They are kept taut by hanging light weights to each end, applying dilute PVA, then cutting them off when dry. The anchor cable is kept taught as the messenger and cable are tied together. Incidentally, the anchor cable first needs to be fed through the hawse hole then towards the stern. I taped a length of copper wire to the cable which made it far easier to correctly position the cable as it went under the fore deck and out the other side. The finished article....

- 421 replies
-
- 18
-
-
- caldercraft
- granado
- (and 1 more)
-
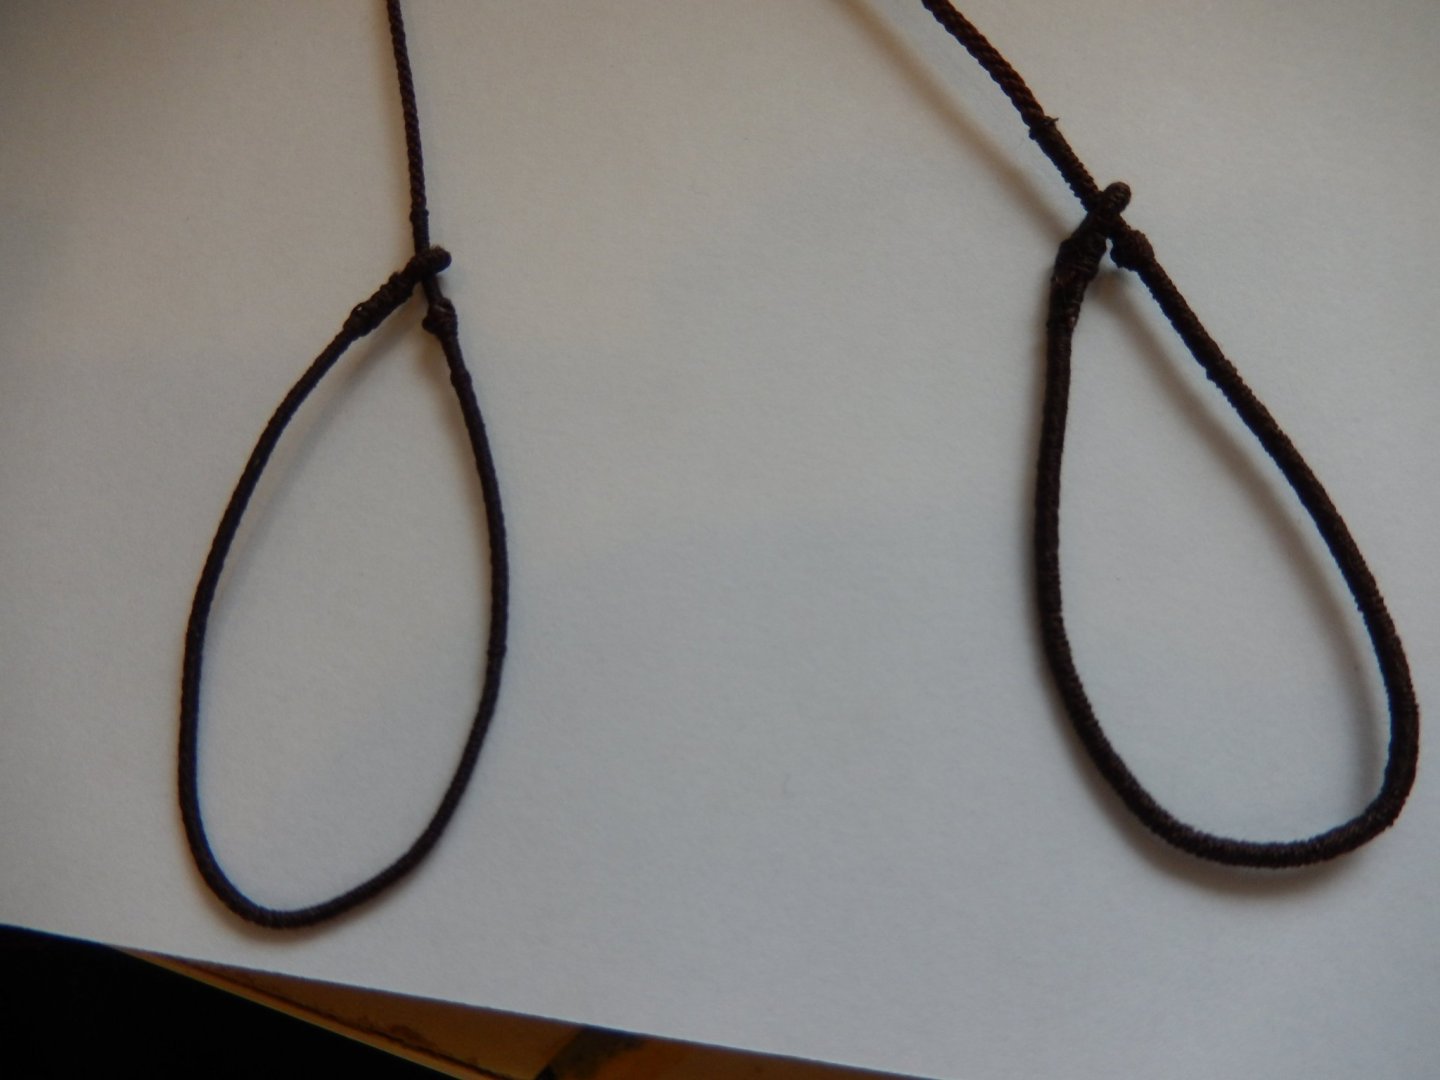
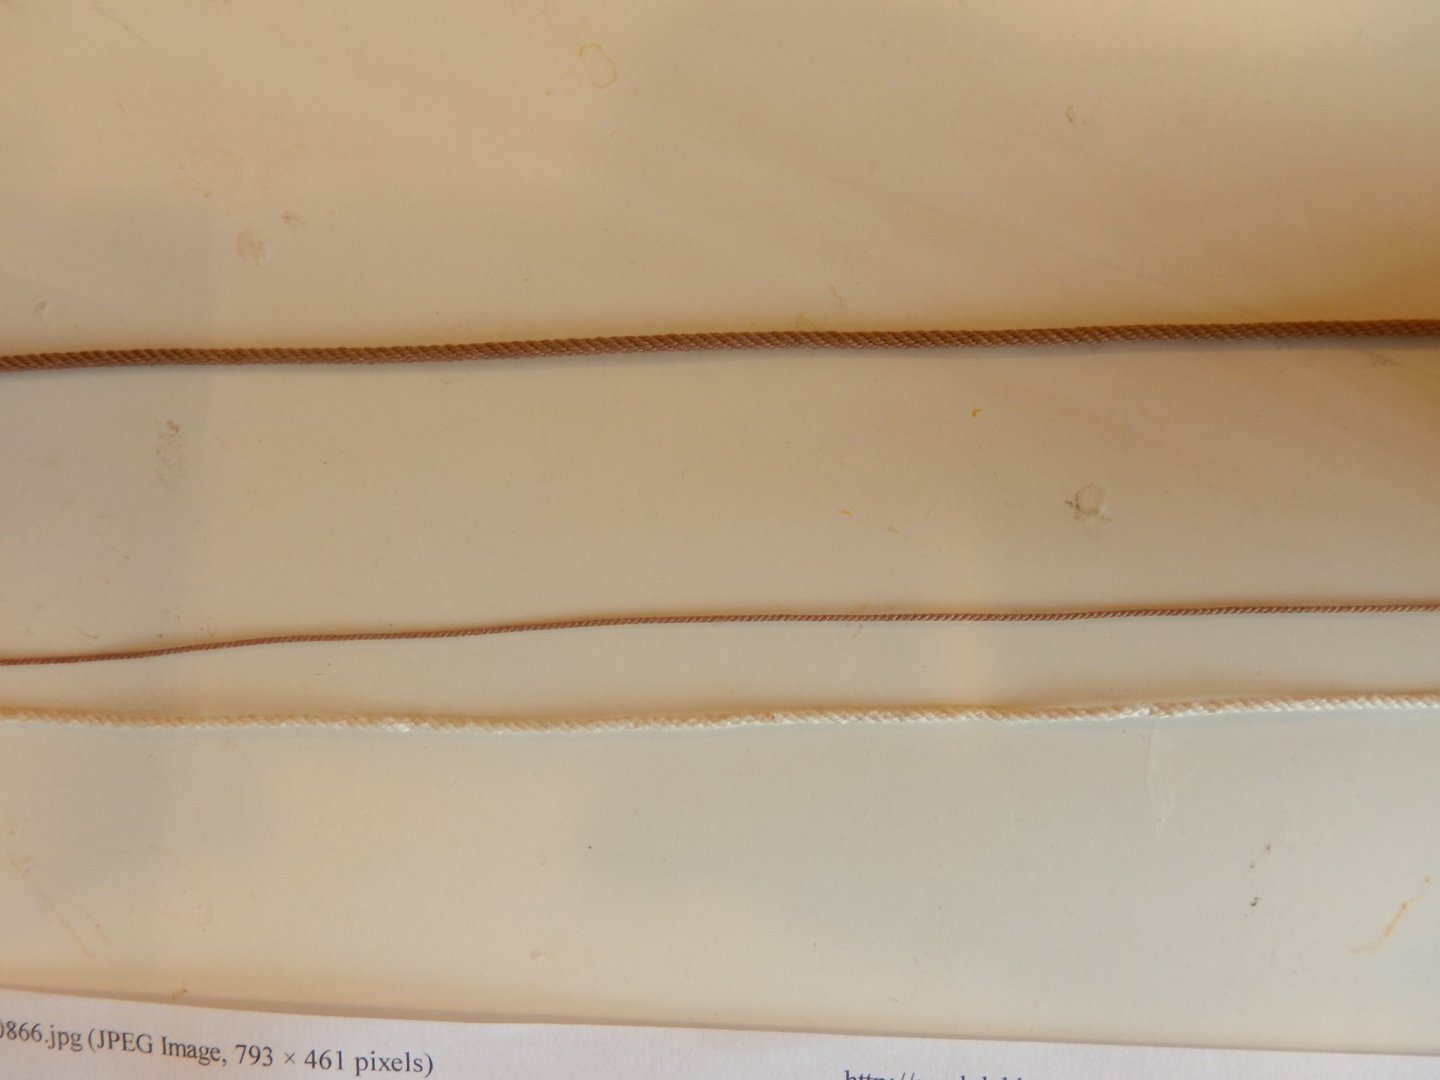
Thanks Joe and Peter for taking the trouble. I appreciate it. Both sets of photos are really helpful. Joe: The specifications in the kit for the 'rope' are 1mm for the messenger and 1.8mm for the anchor cable. I have decided not to use the kit-supplied thread as it is out of character with the rest of the Syren thread I have used. The following photo shows Syren 2mm thread (top), 0.88mm thread (middle), and the kit's 1.8mm thread. In fact the kit's thread is about 1.5 or 1.6mm. I intend to stretch the Syren 2mm thread a little to make it a bit closer to 1.8mm. I hope this will result in effective differentiation of messenger and cable Peter: I think you are right about the 'endless slings' of the messengers. I hadn't really given it much thought before. Again, thanks for your help. Bob
- 421 replies
-
- 5
-
-
- caldercraft
- granado
- (and 1 more)
-
Thanks a lot Joe Am away at the moment. I'll reply in detail when I return home. Bob
-
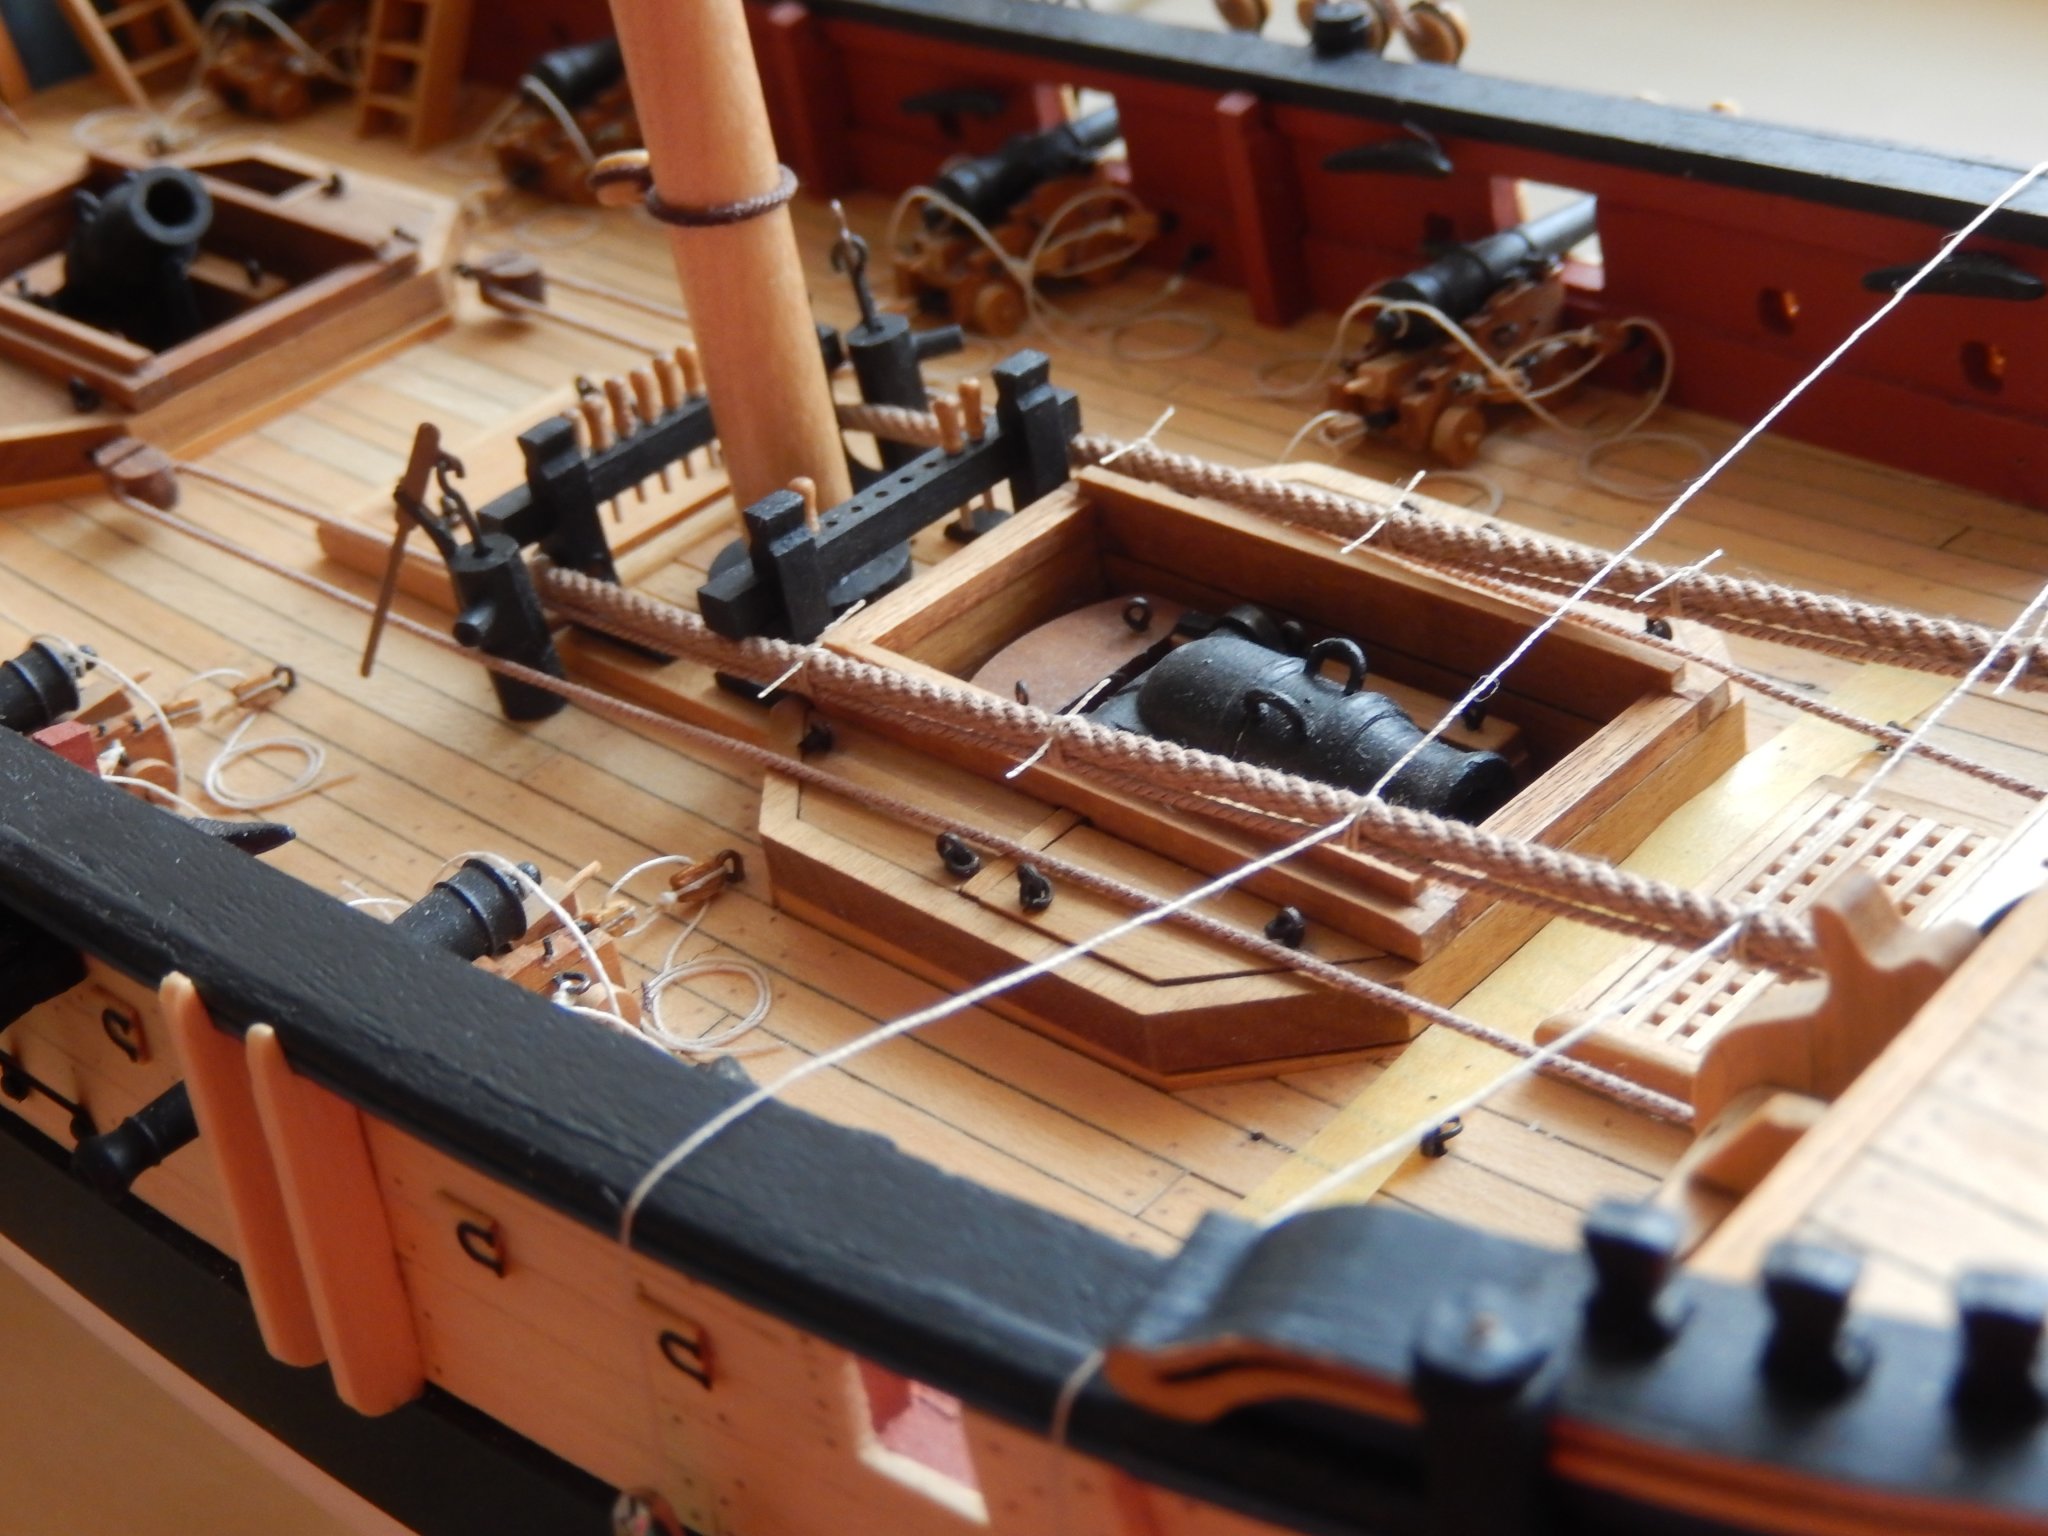
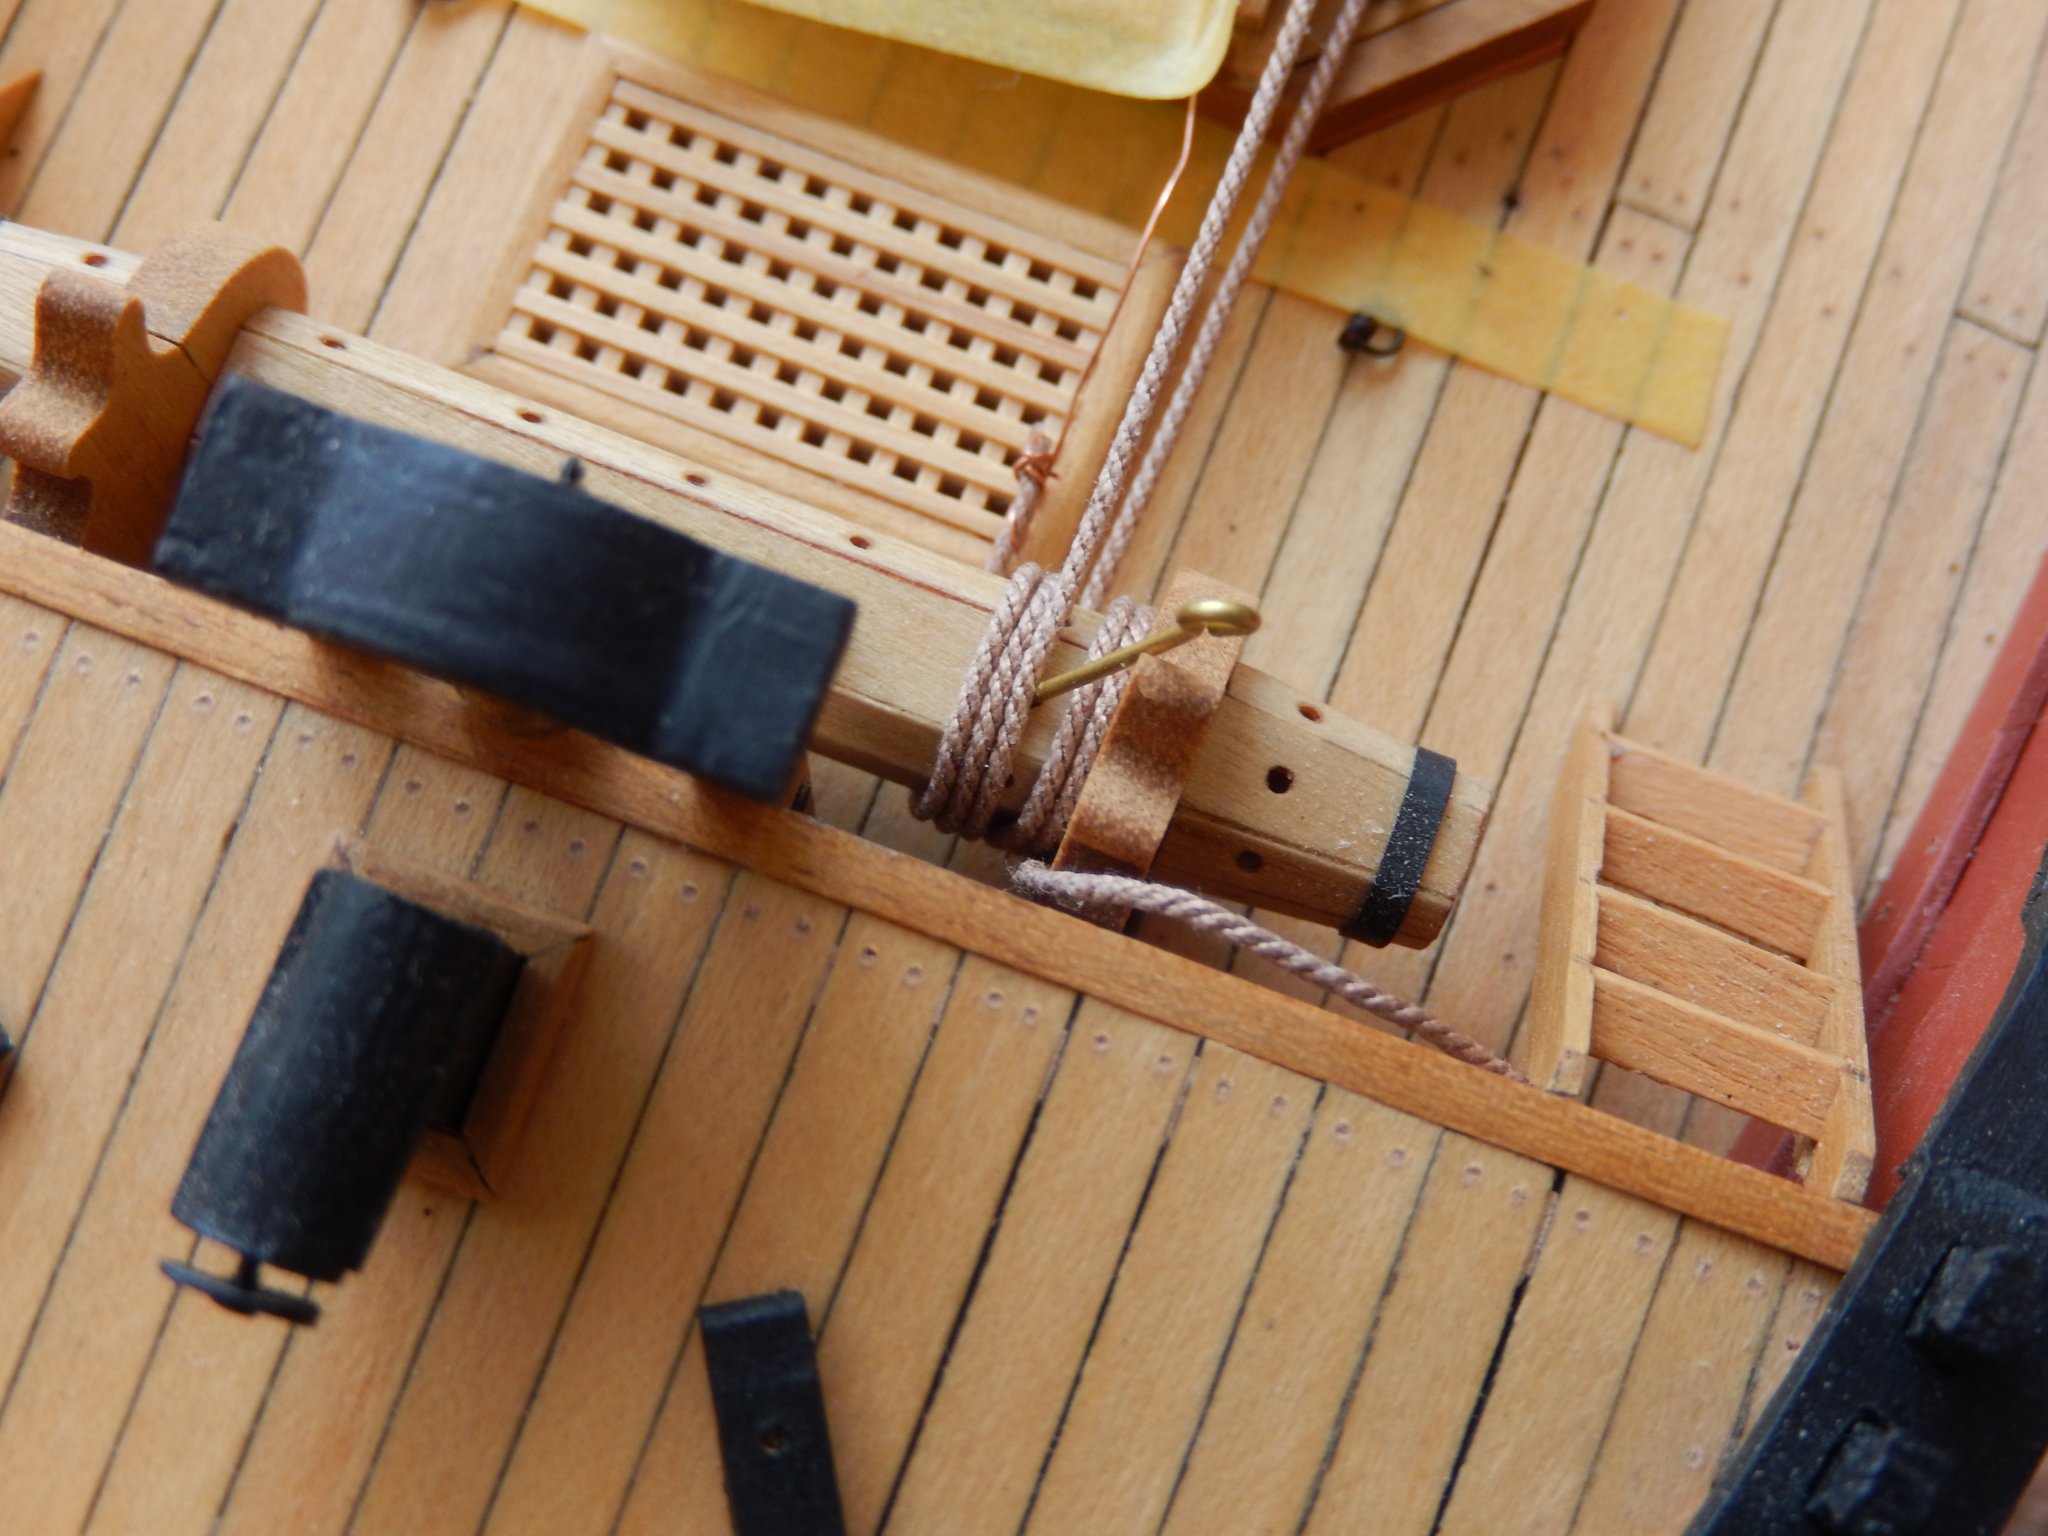
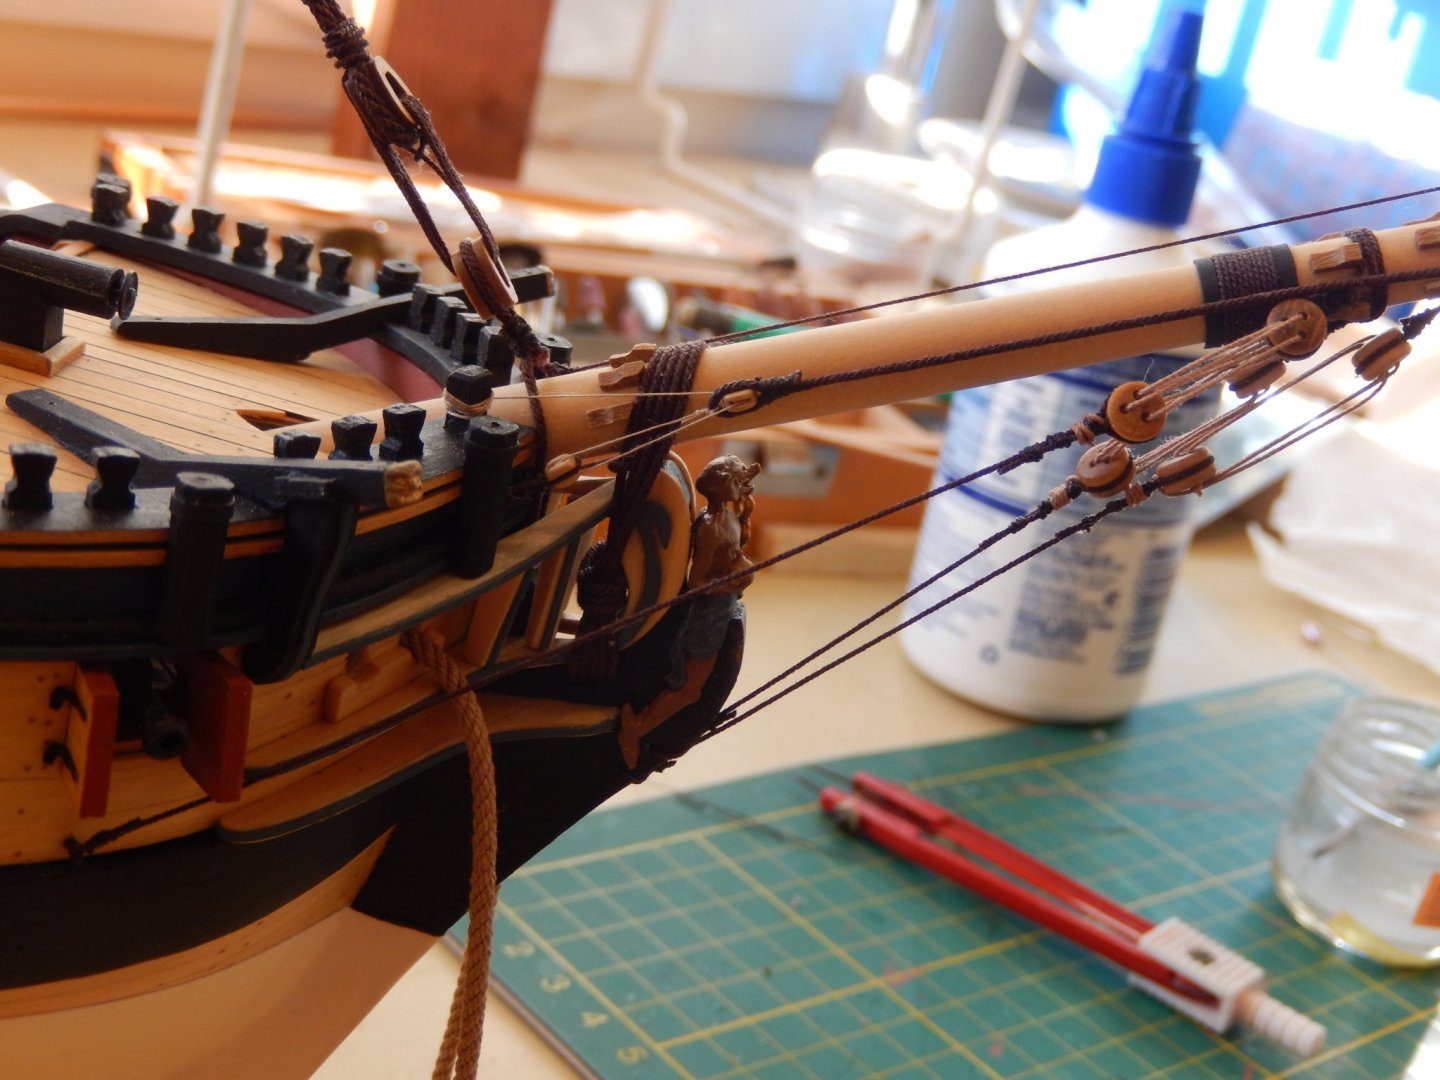
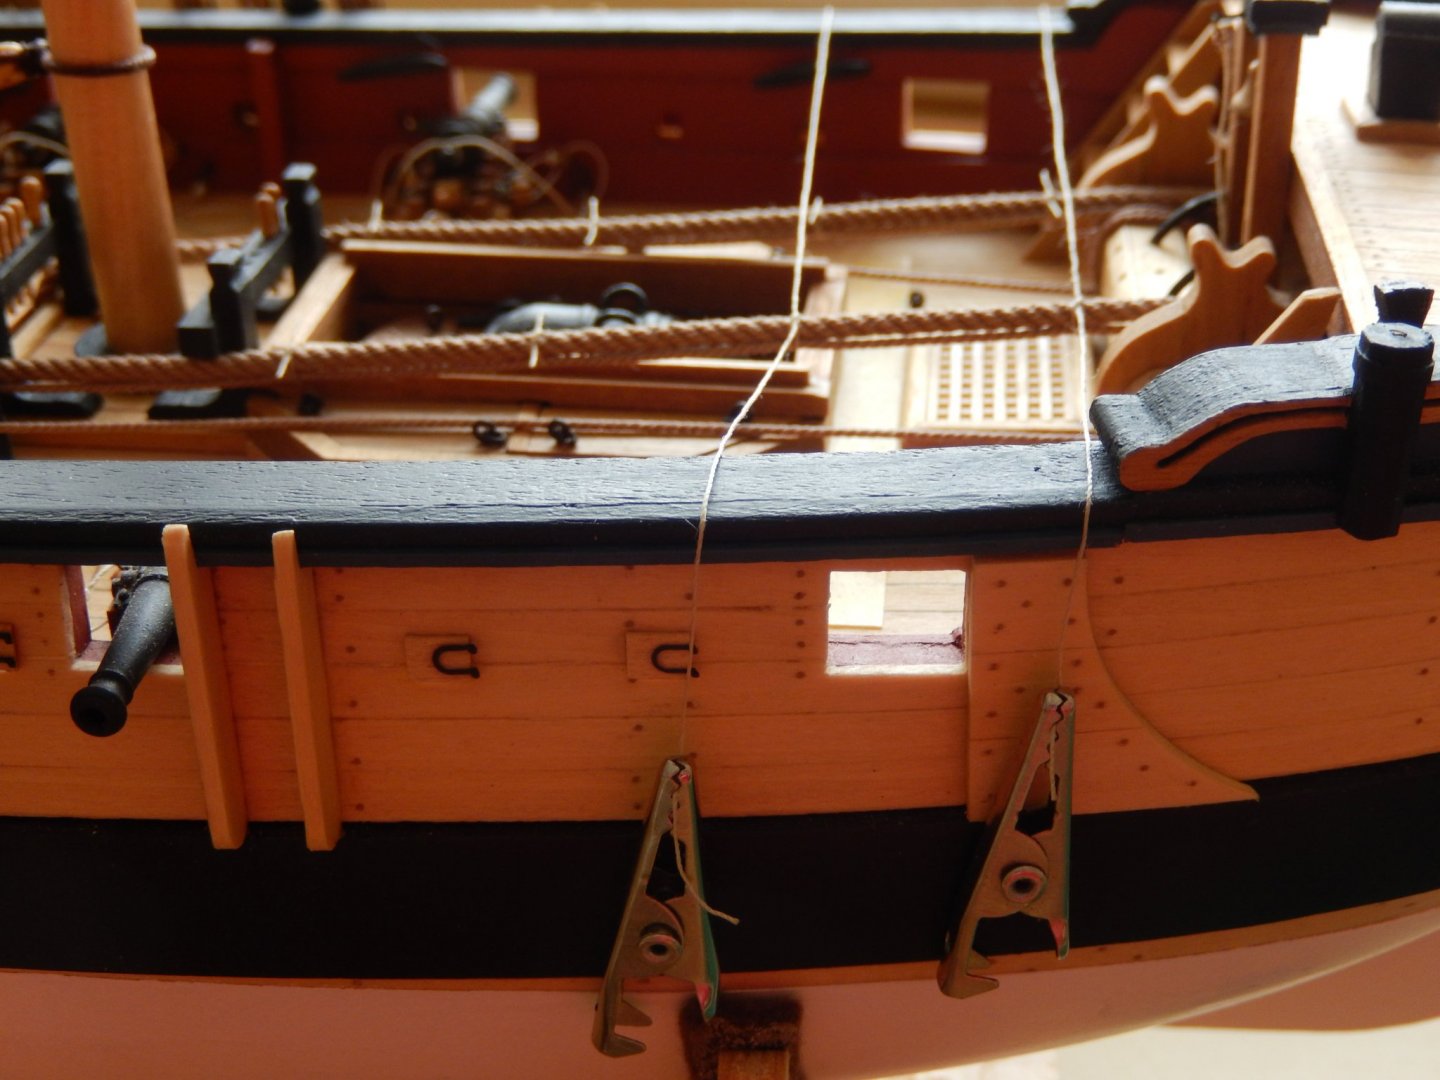
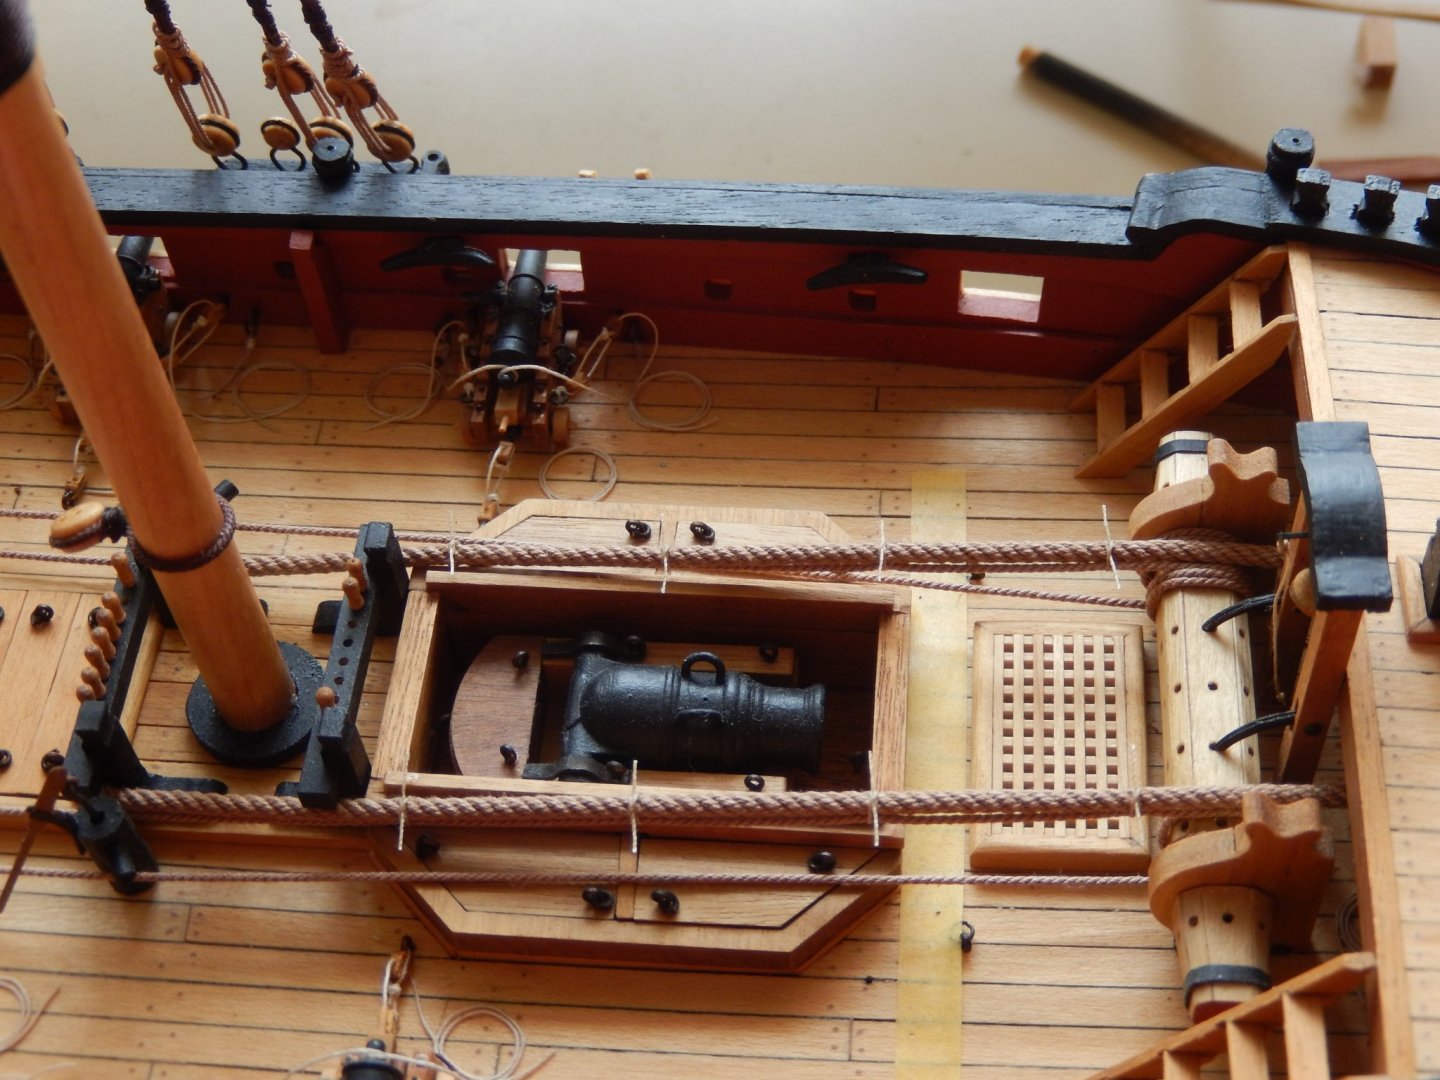
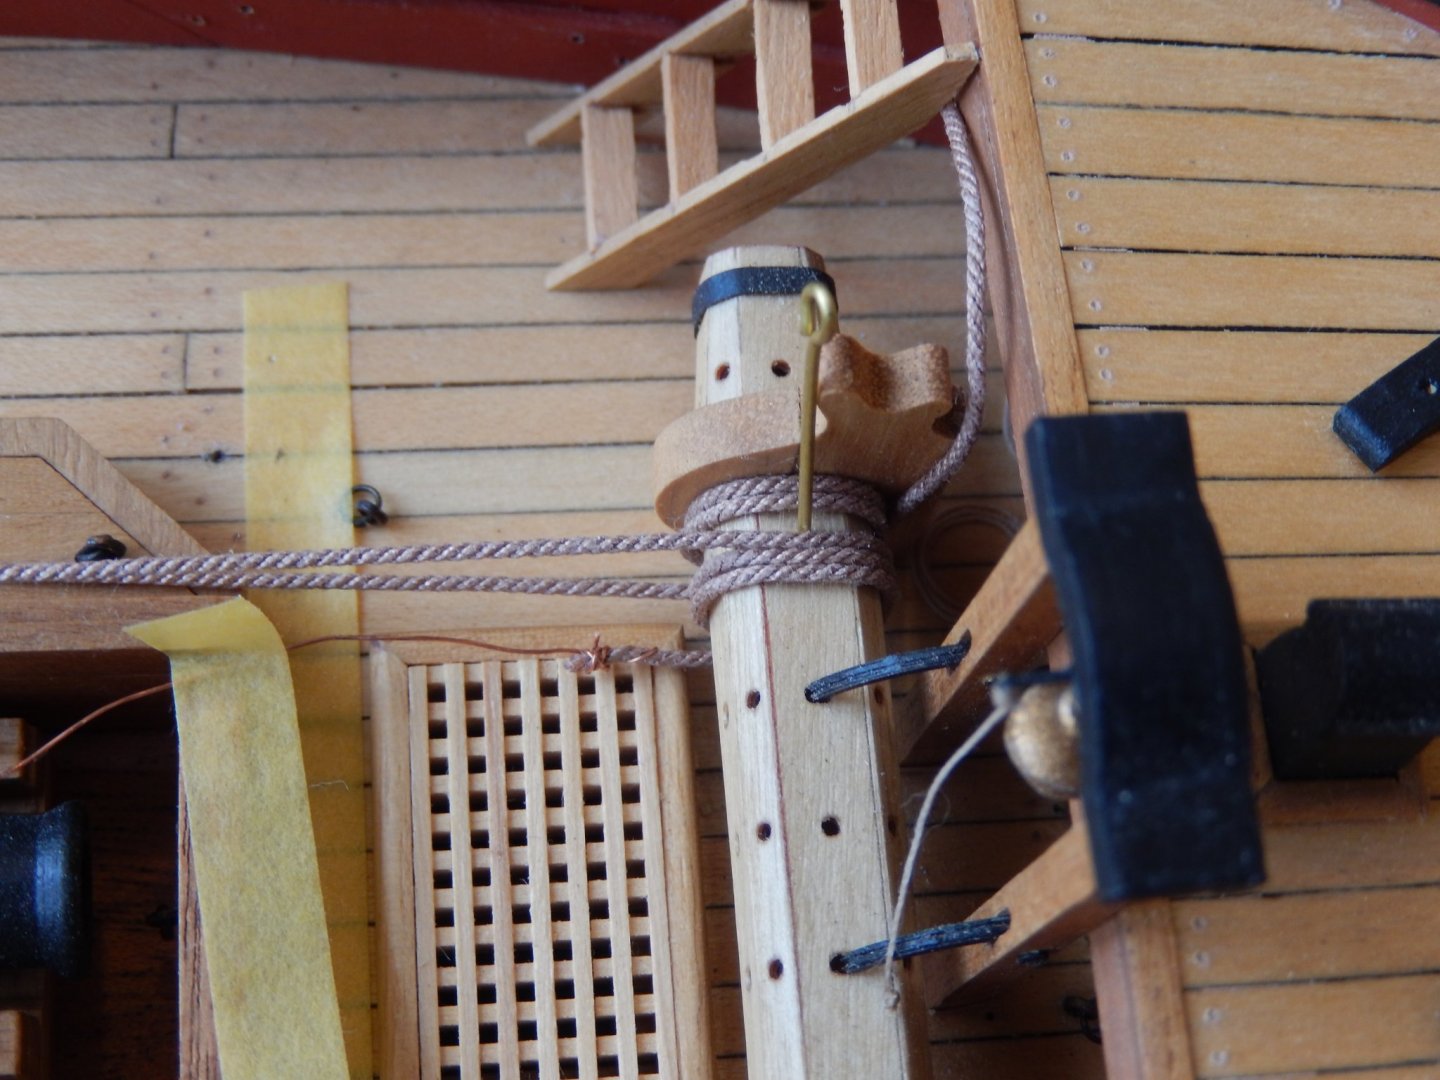
Thanks Thomas. A bit of encouragement is always welcome. I am now working on the messenger for the anchor cable. It's proving very awkward indeed. This is the port side. It doesn't look right to me. In the instructions there is reference to the 'inboard face of the standard' - which seems to be the support of the barrel. I can find no other reference to the term. Shown in the photos is my method, but it may well be wrong. Comment/help is very welcome. If it is wrong it may be undone easily - it is all essentially dry-fitted.

- 421 replies
-
- 10
-
-
- caldercraft
- granado
- (and 1 more)
-
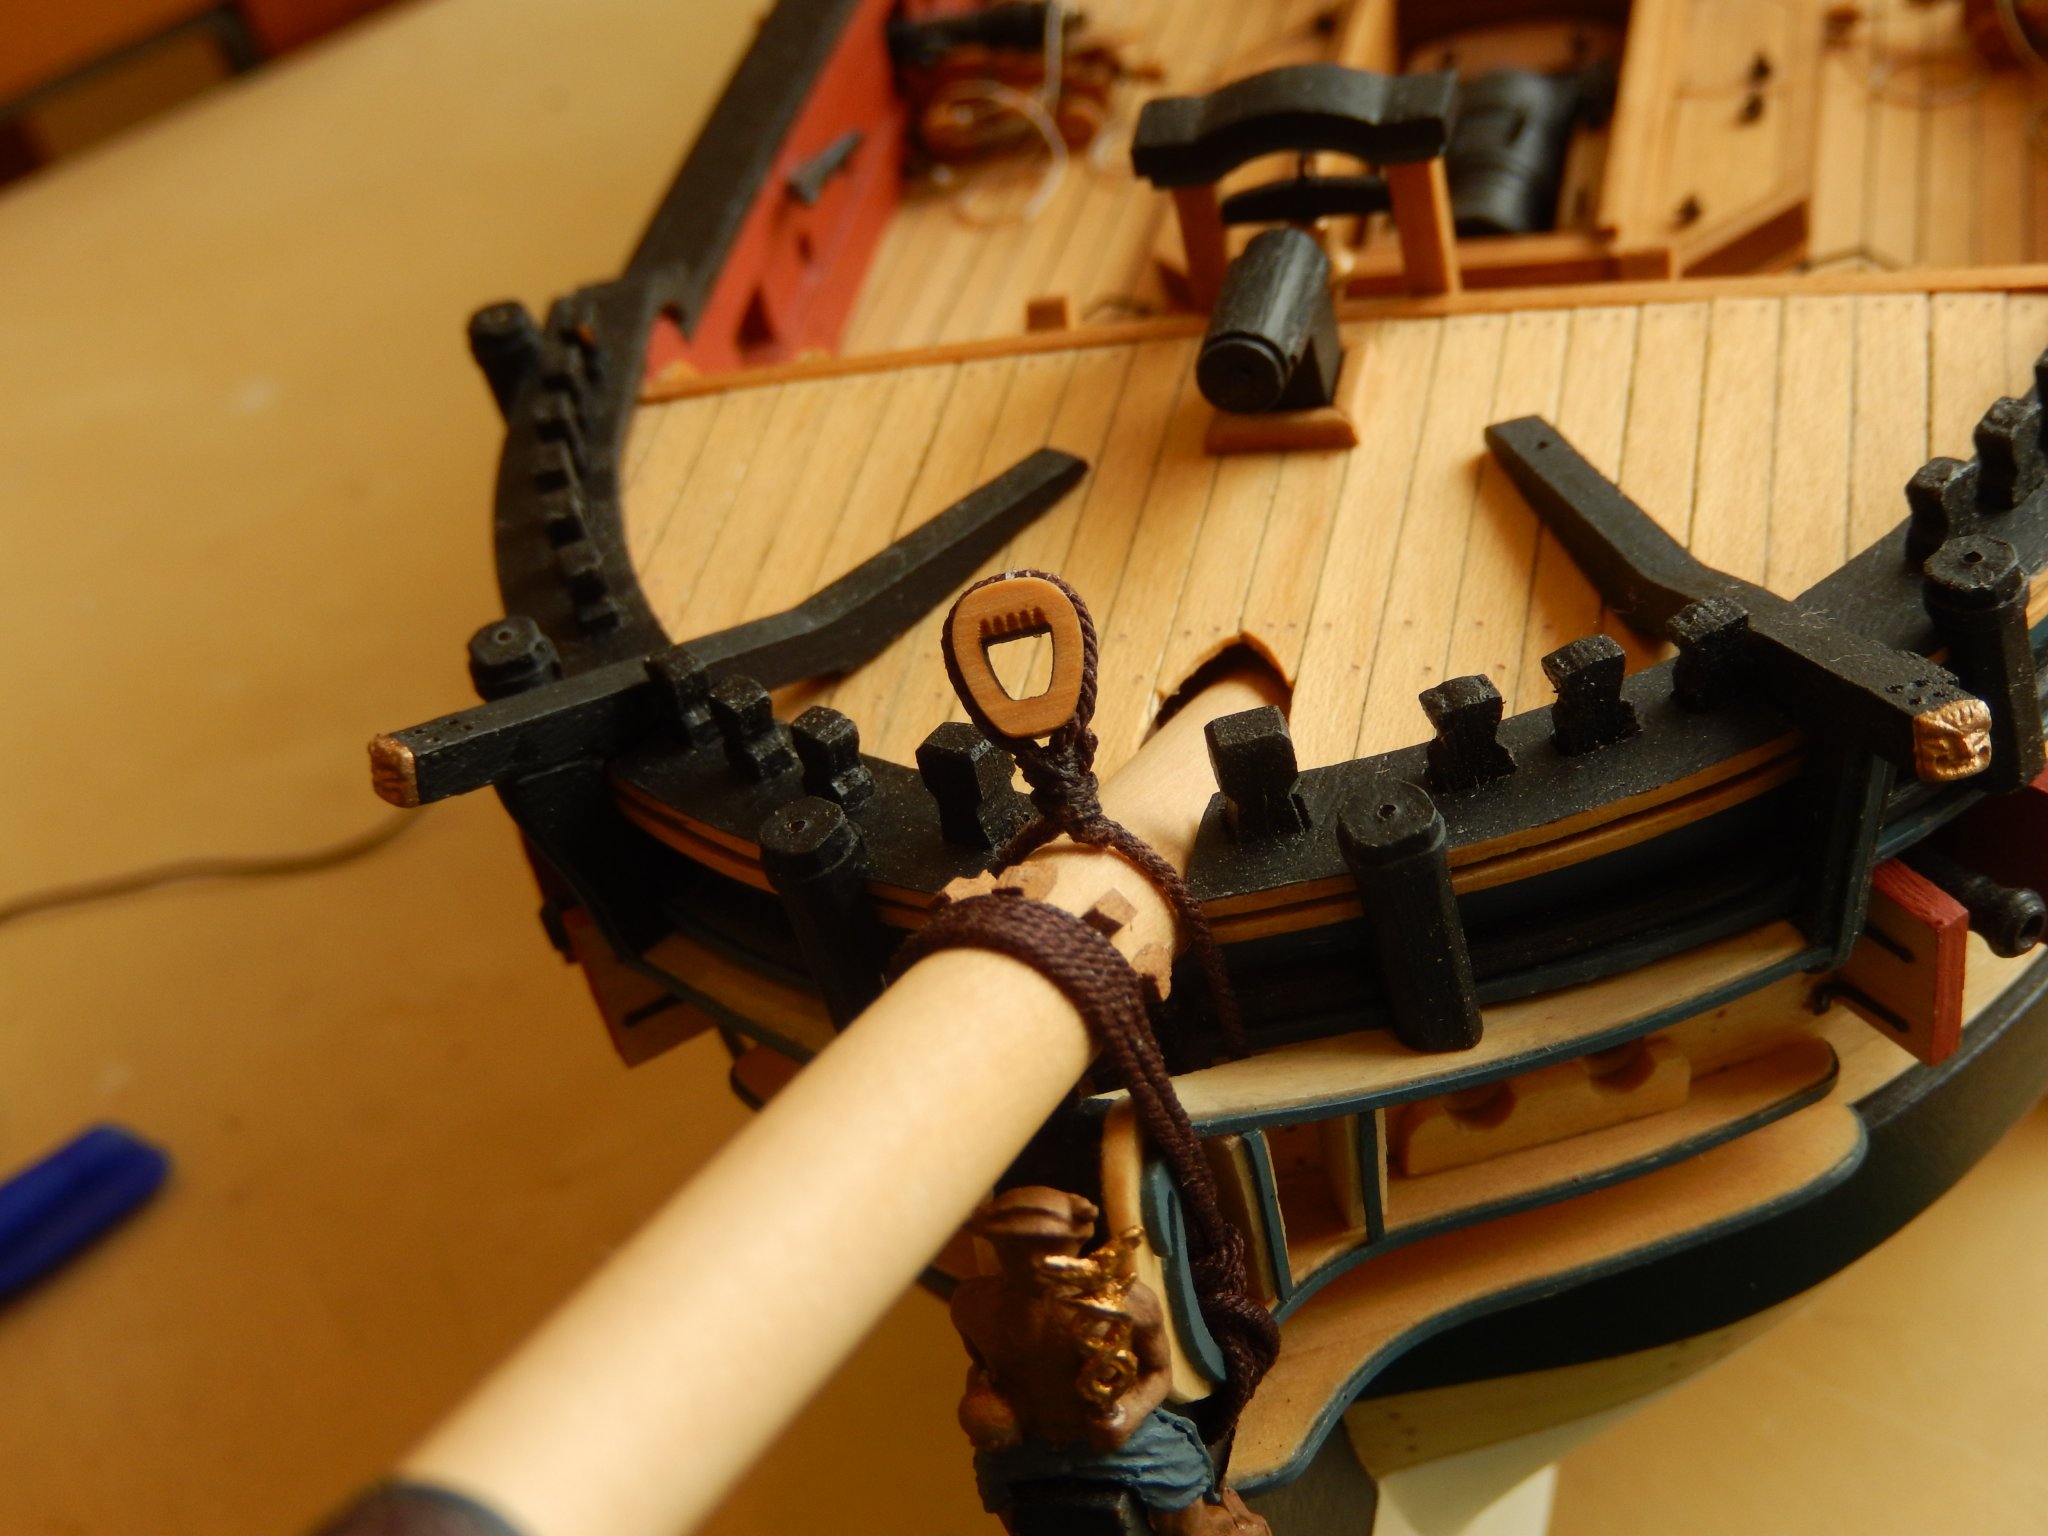
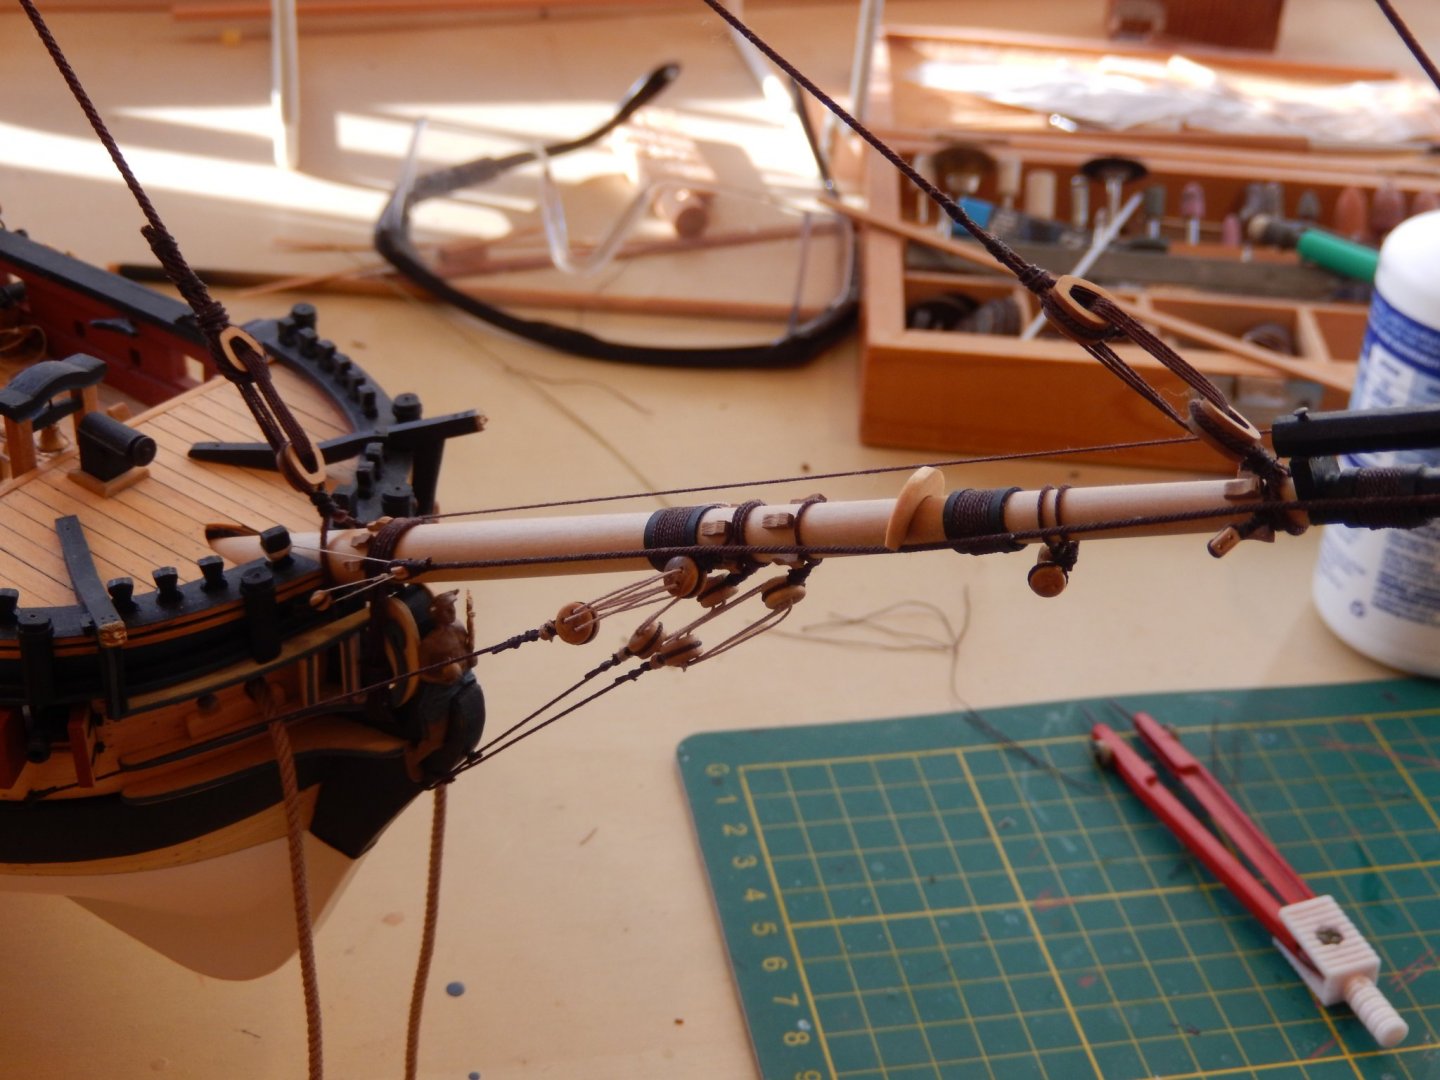
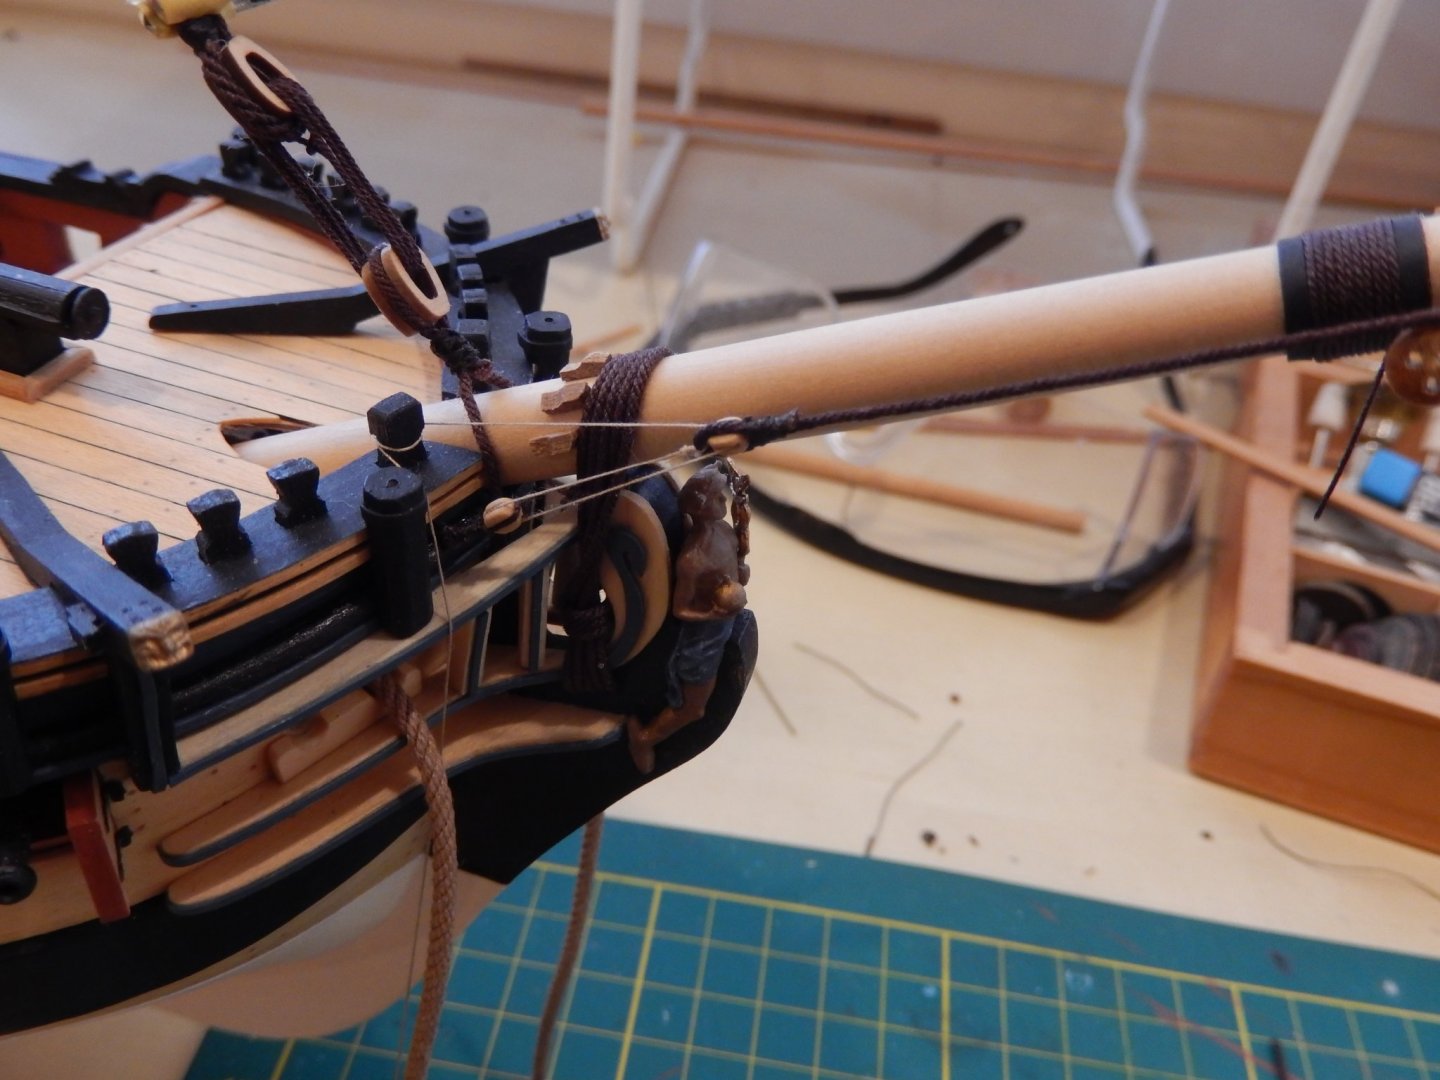
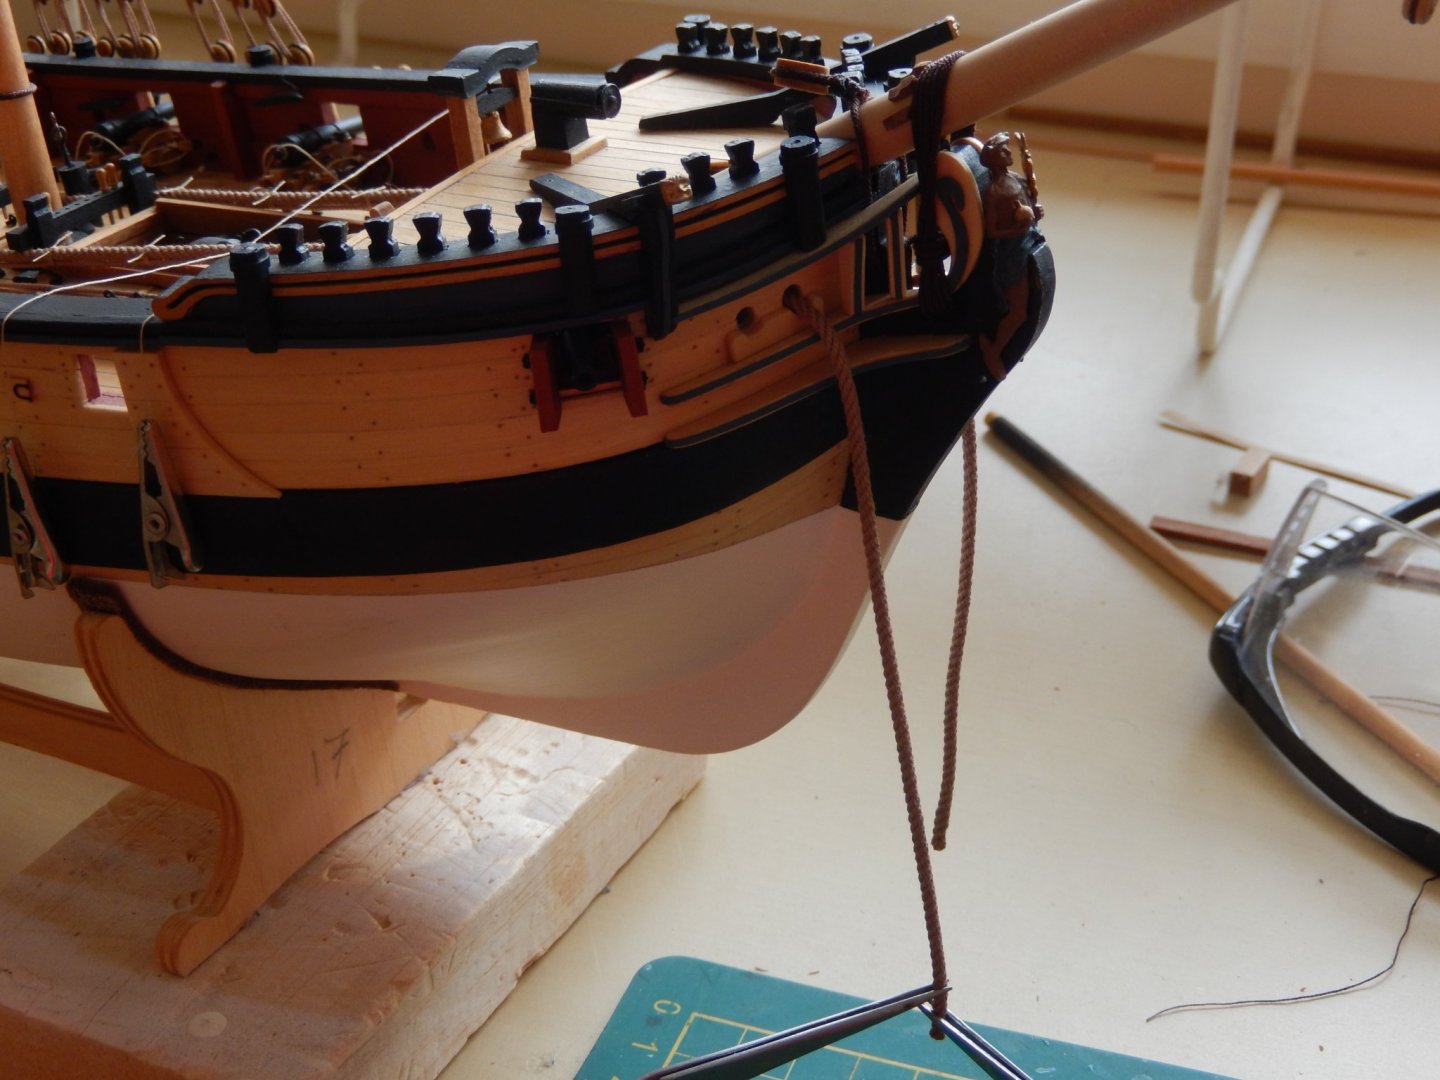
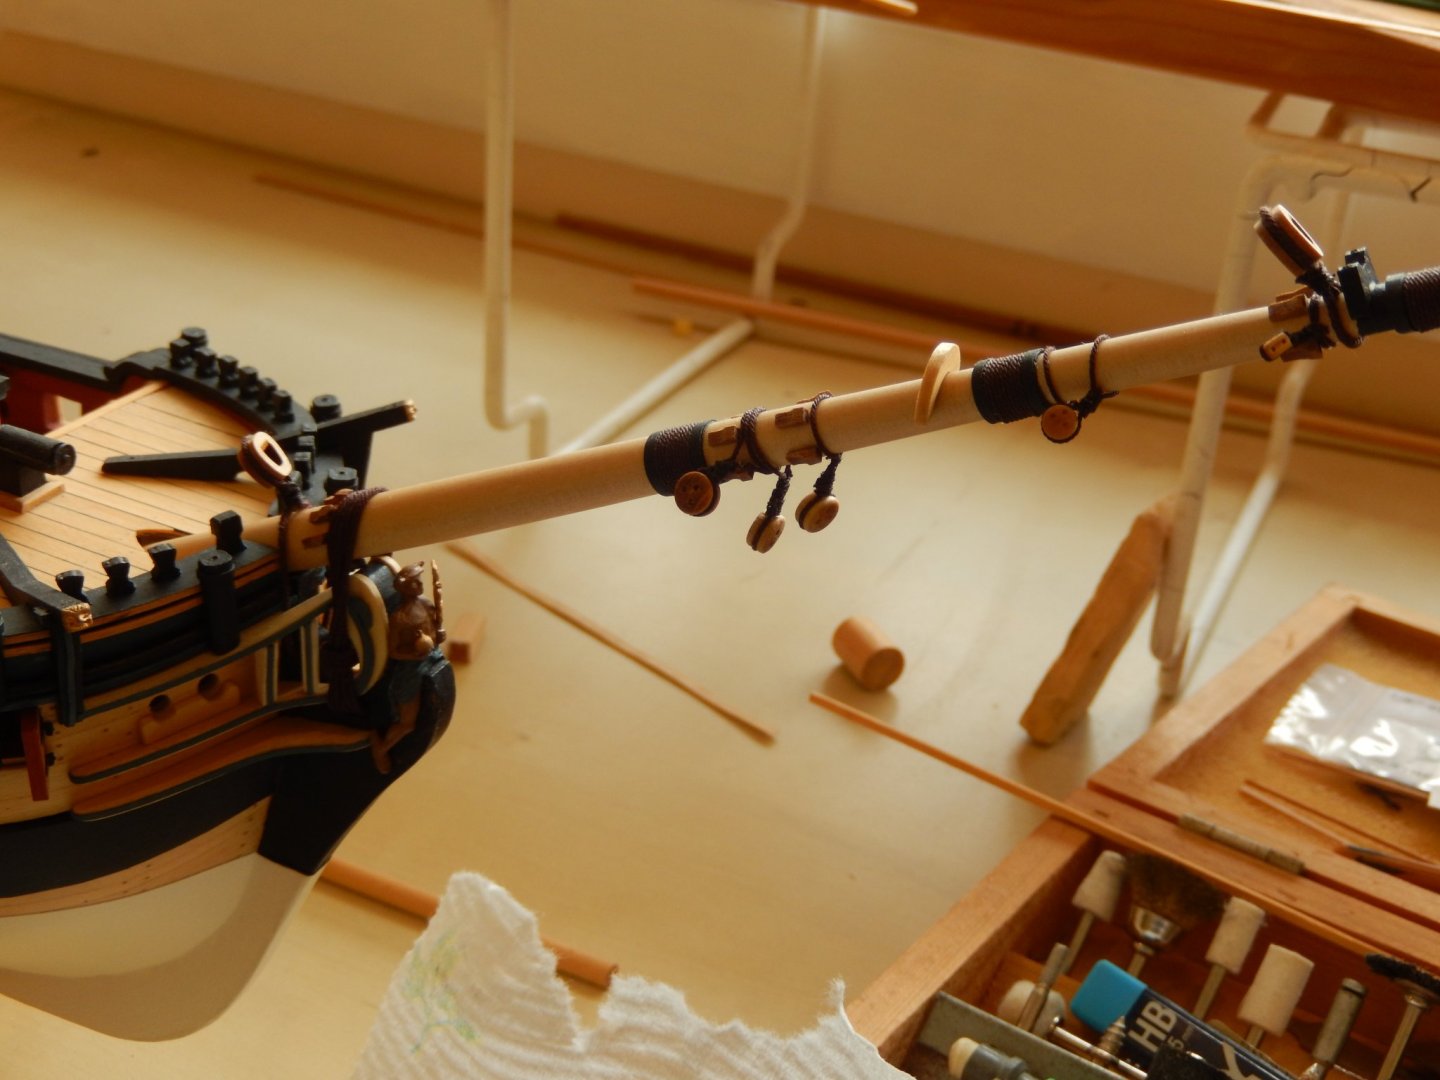
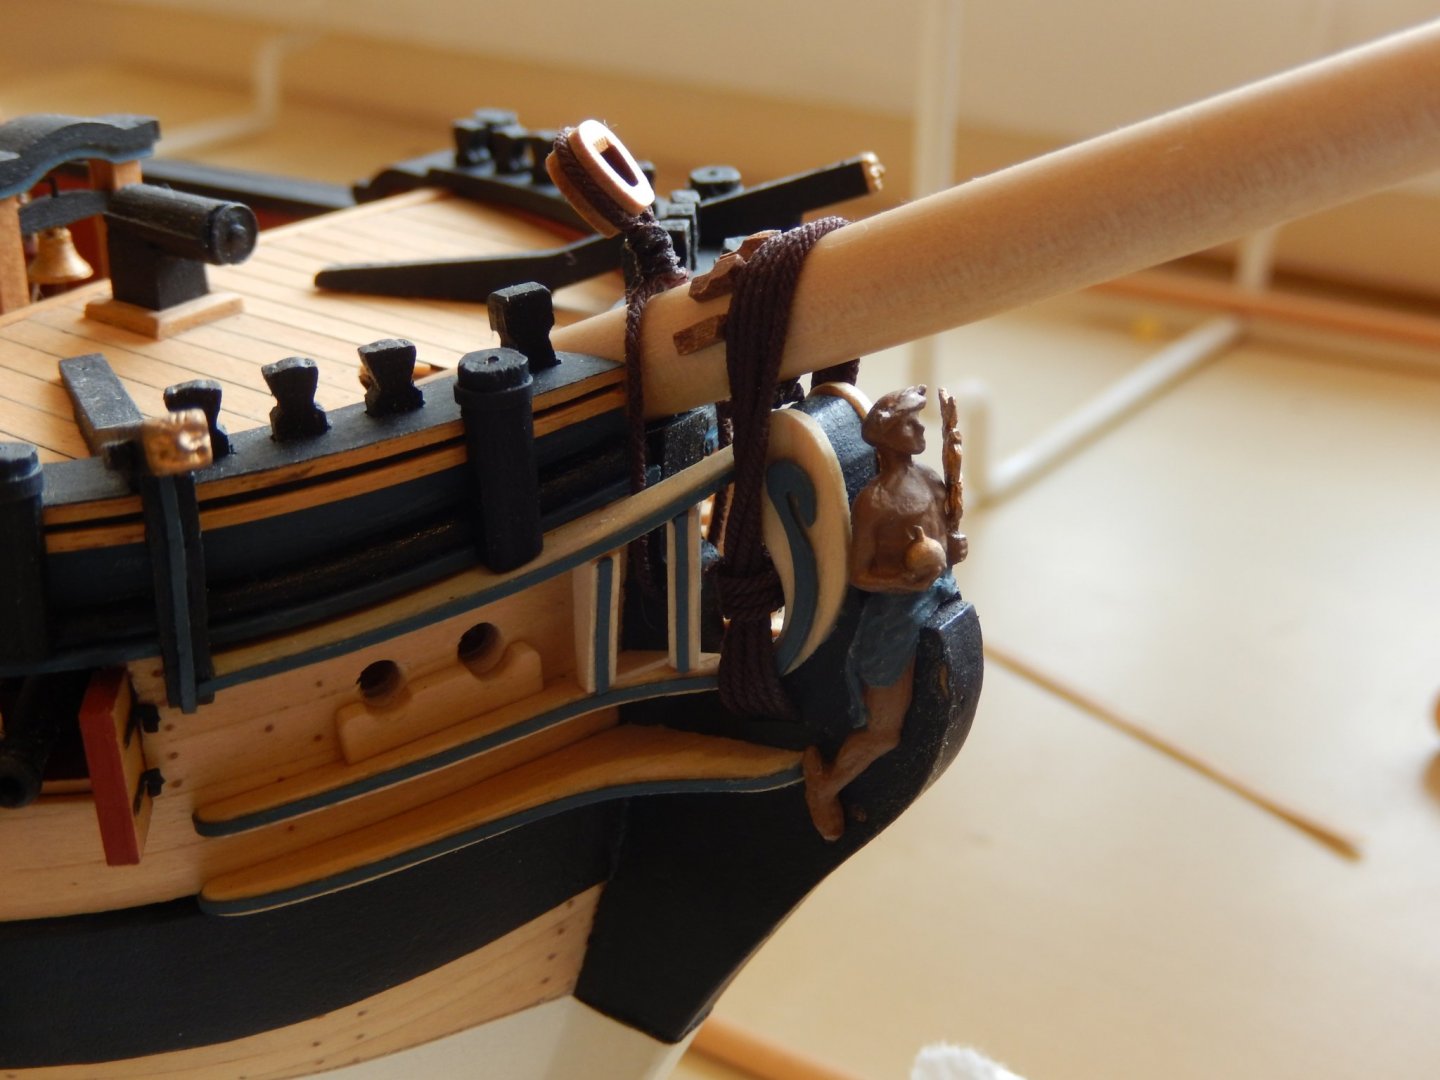
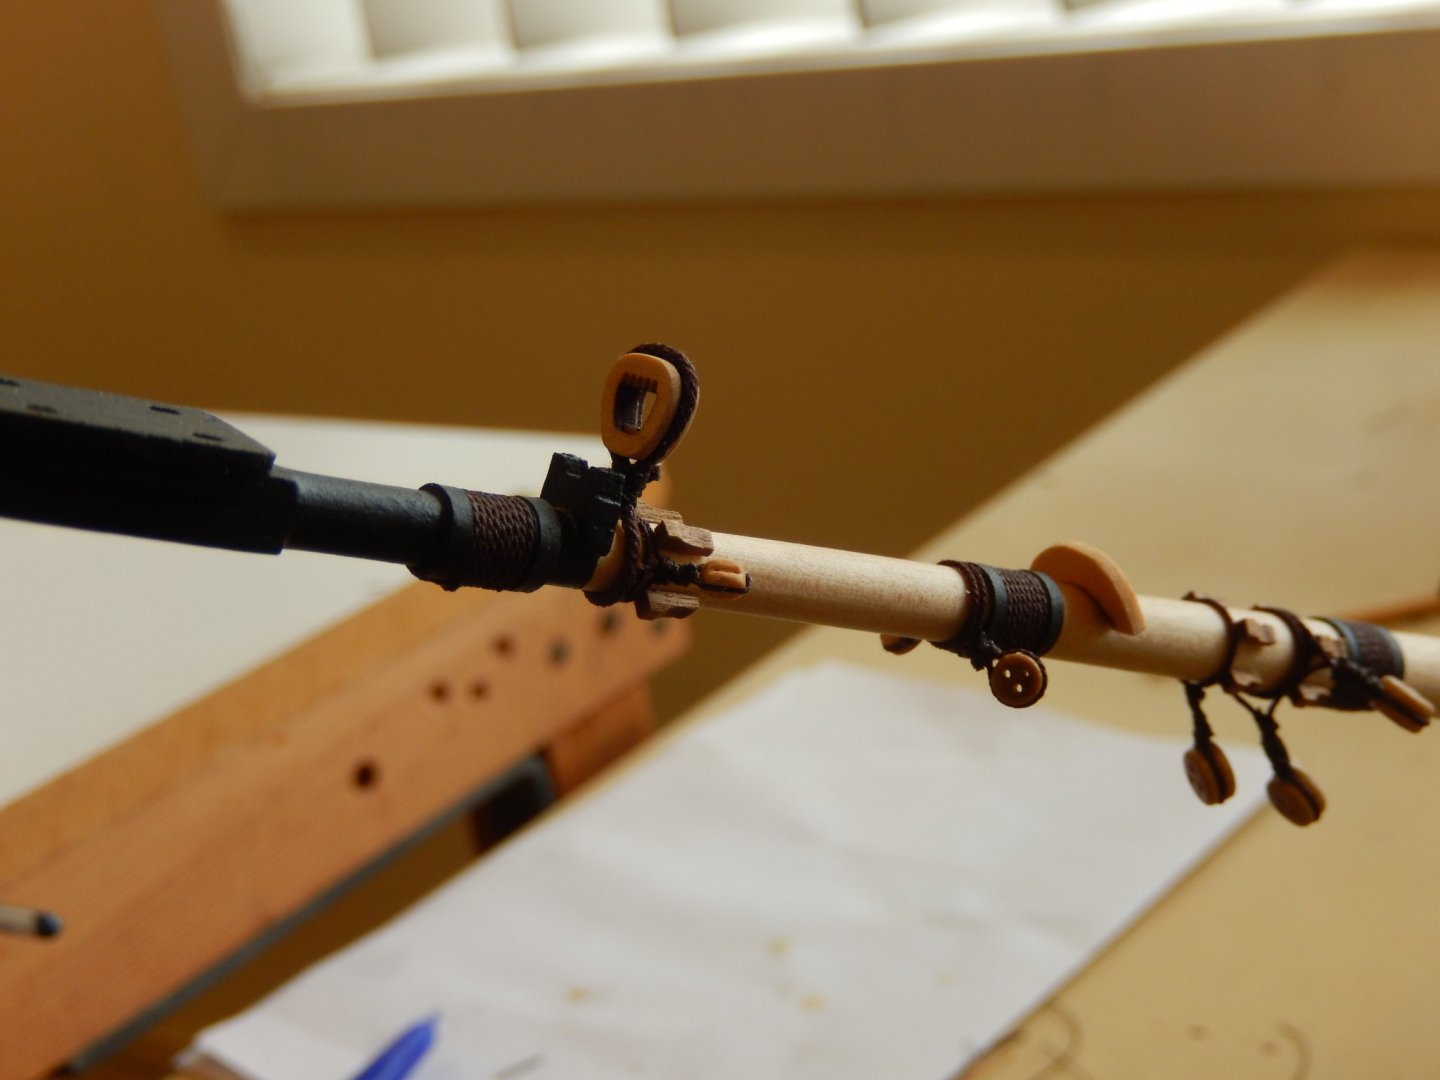
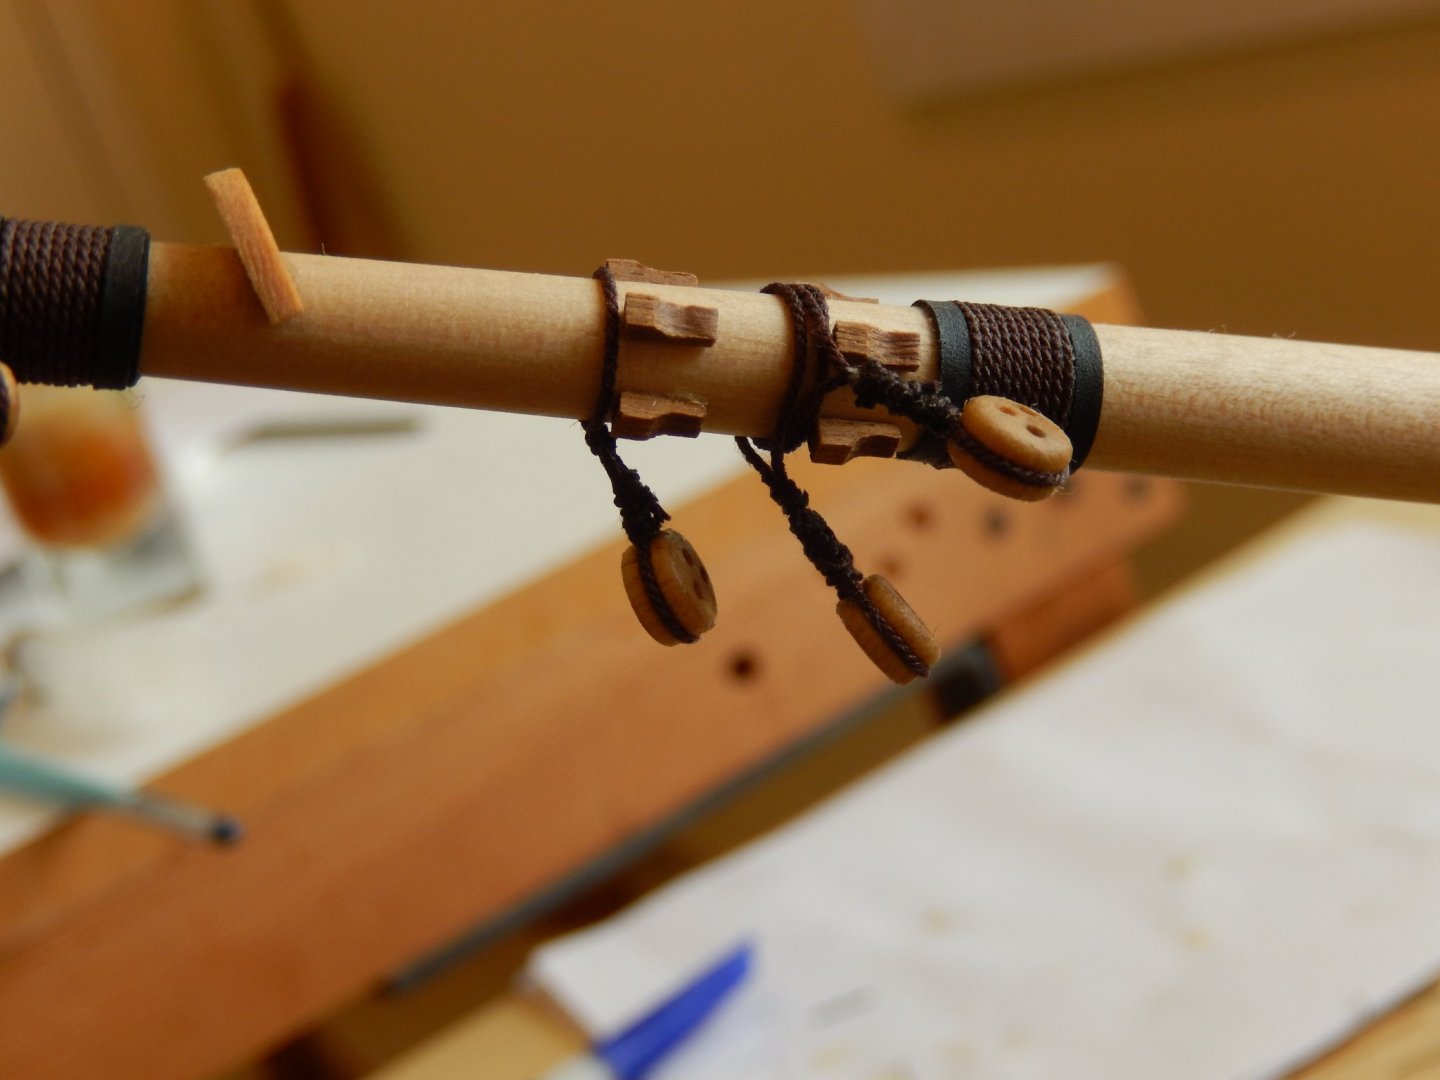
The bowsprit is now permanently mounted. The gammoning proved a bit tricky as a result of the changes I made to the fittings around the bow. I will delay mounting the jiboom as long as possible. Sticking out as it does, it's like a magnet for destruction.

- 421 replies
-
- 12
-
-
- caldercraft
- granado
- (and 1 more)
-
Hi Peter I belatedly found yesterday afternoon that the crossjack yard and the mizzen yard are the same thing. I am now, of course, a far more knowledgeable person.
- 421 replies
-
- 1
-
-
- caldercraft
- granado
- (and 1 more)
-
Thanks a lot Joe. It didn't occur to me to look at the AOTS book.
-
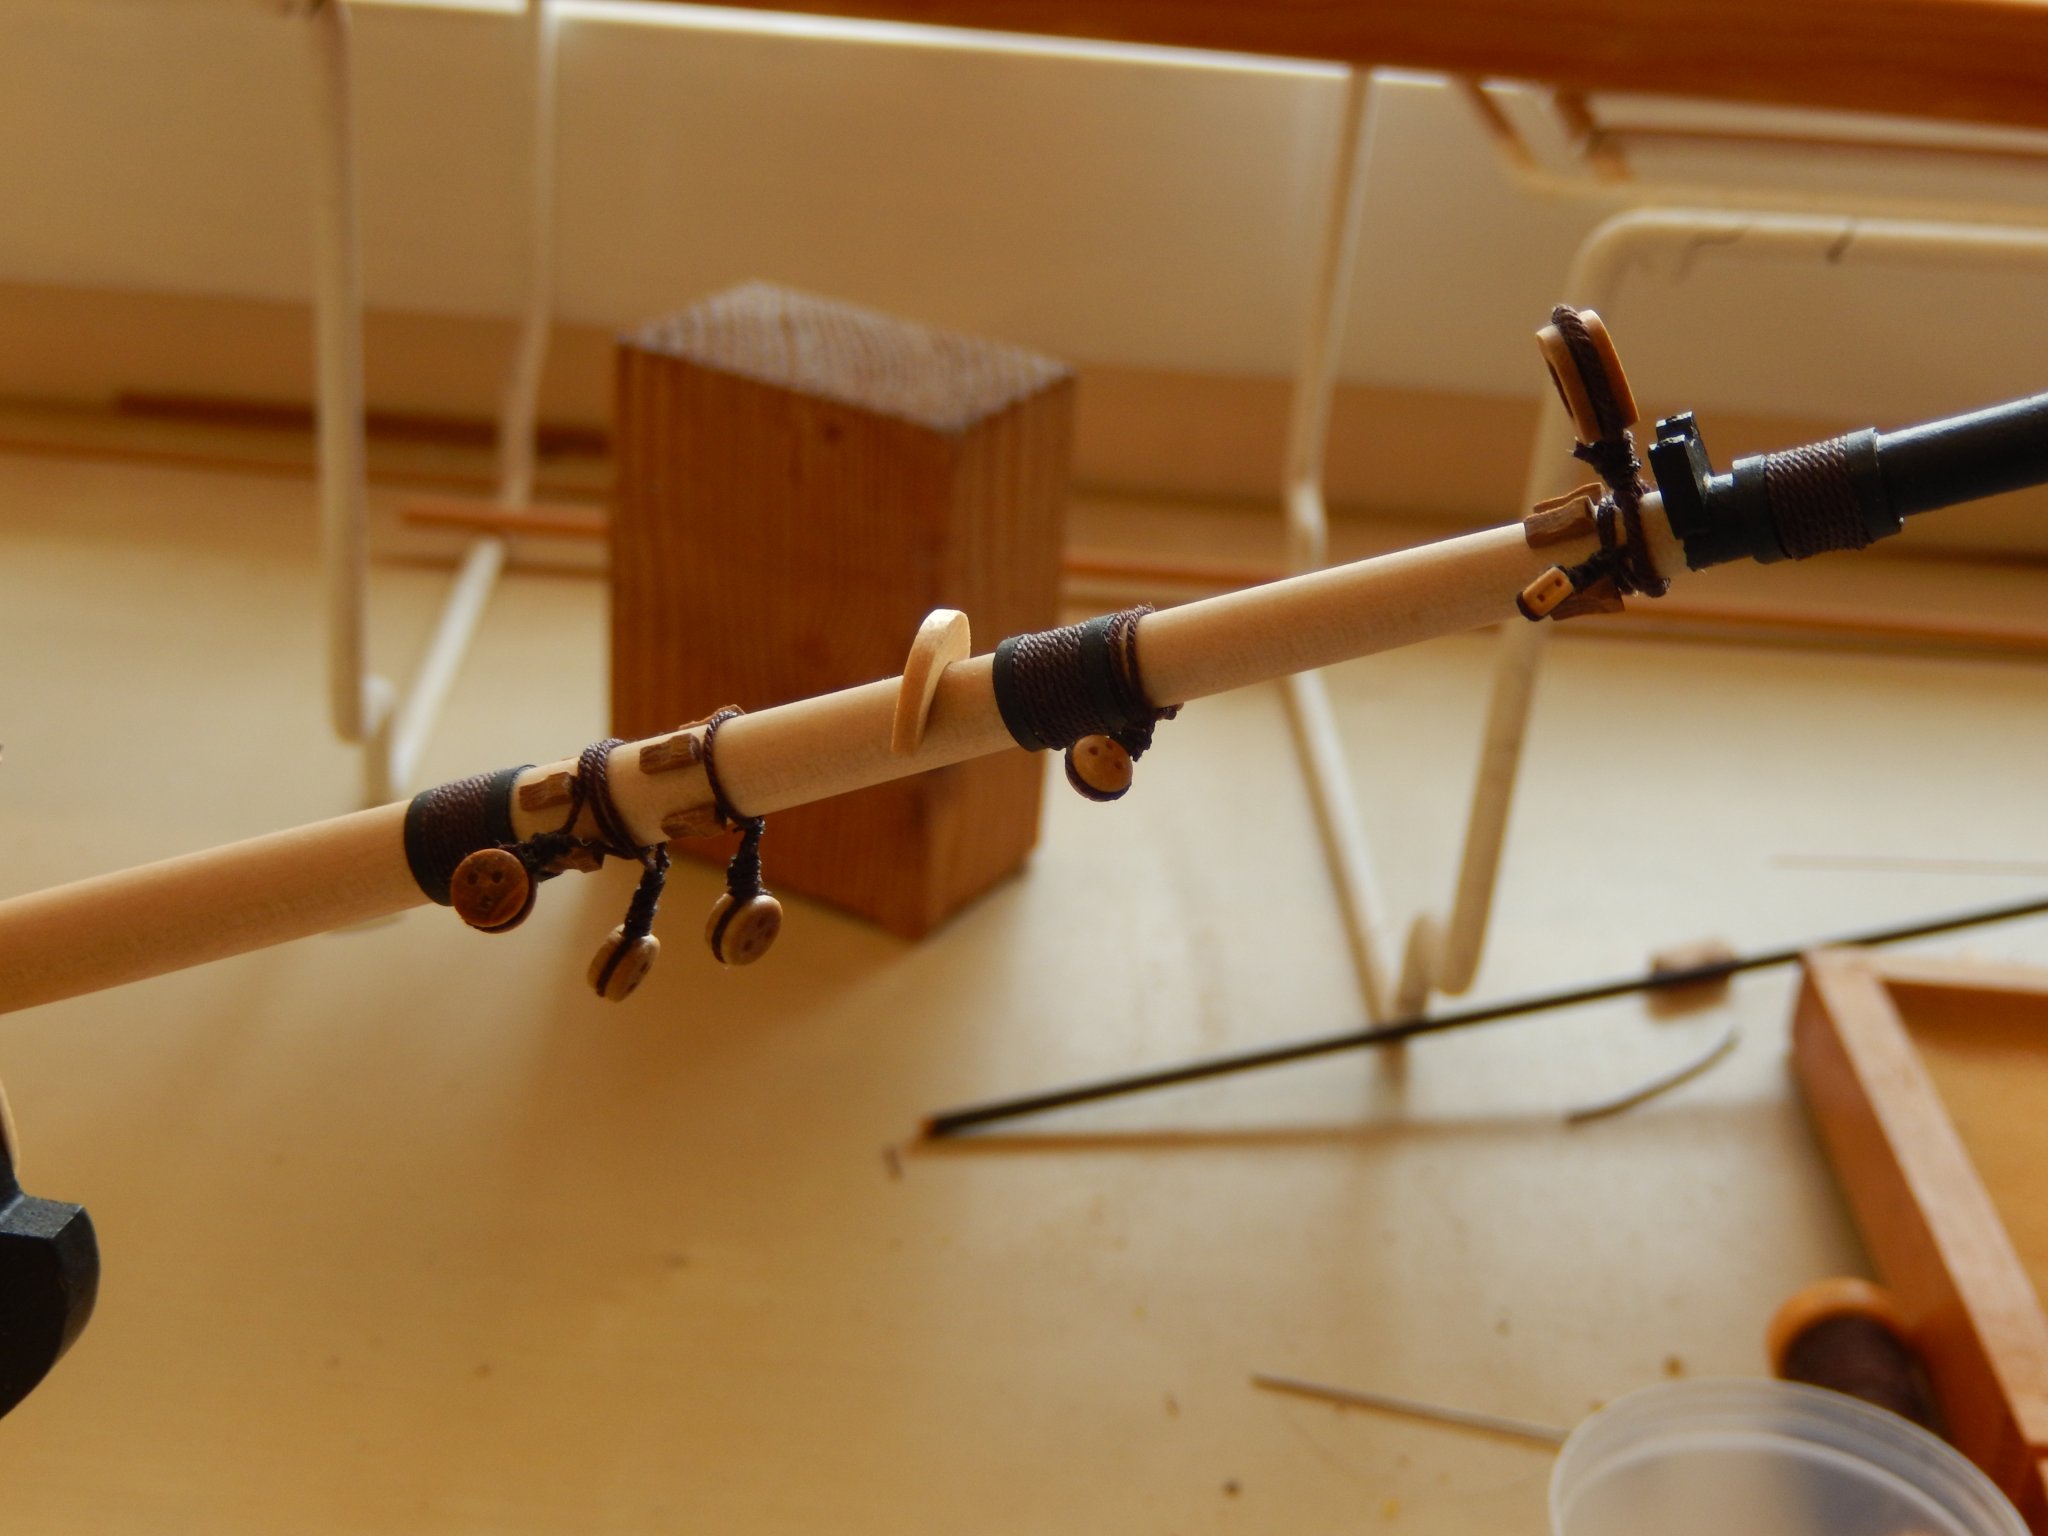
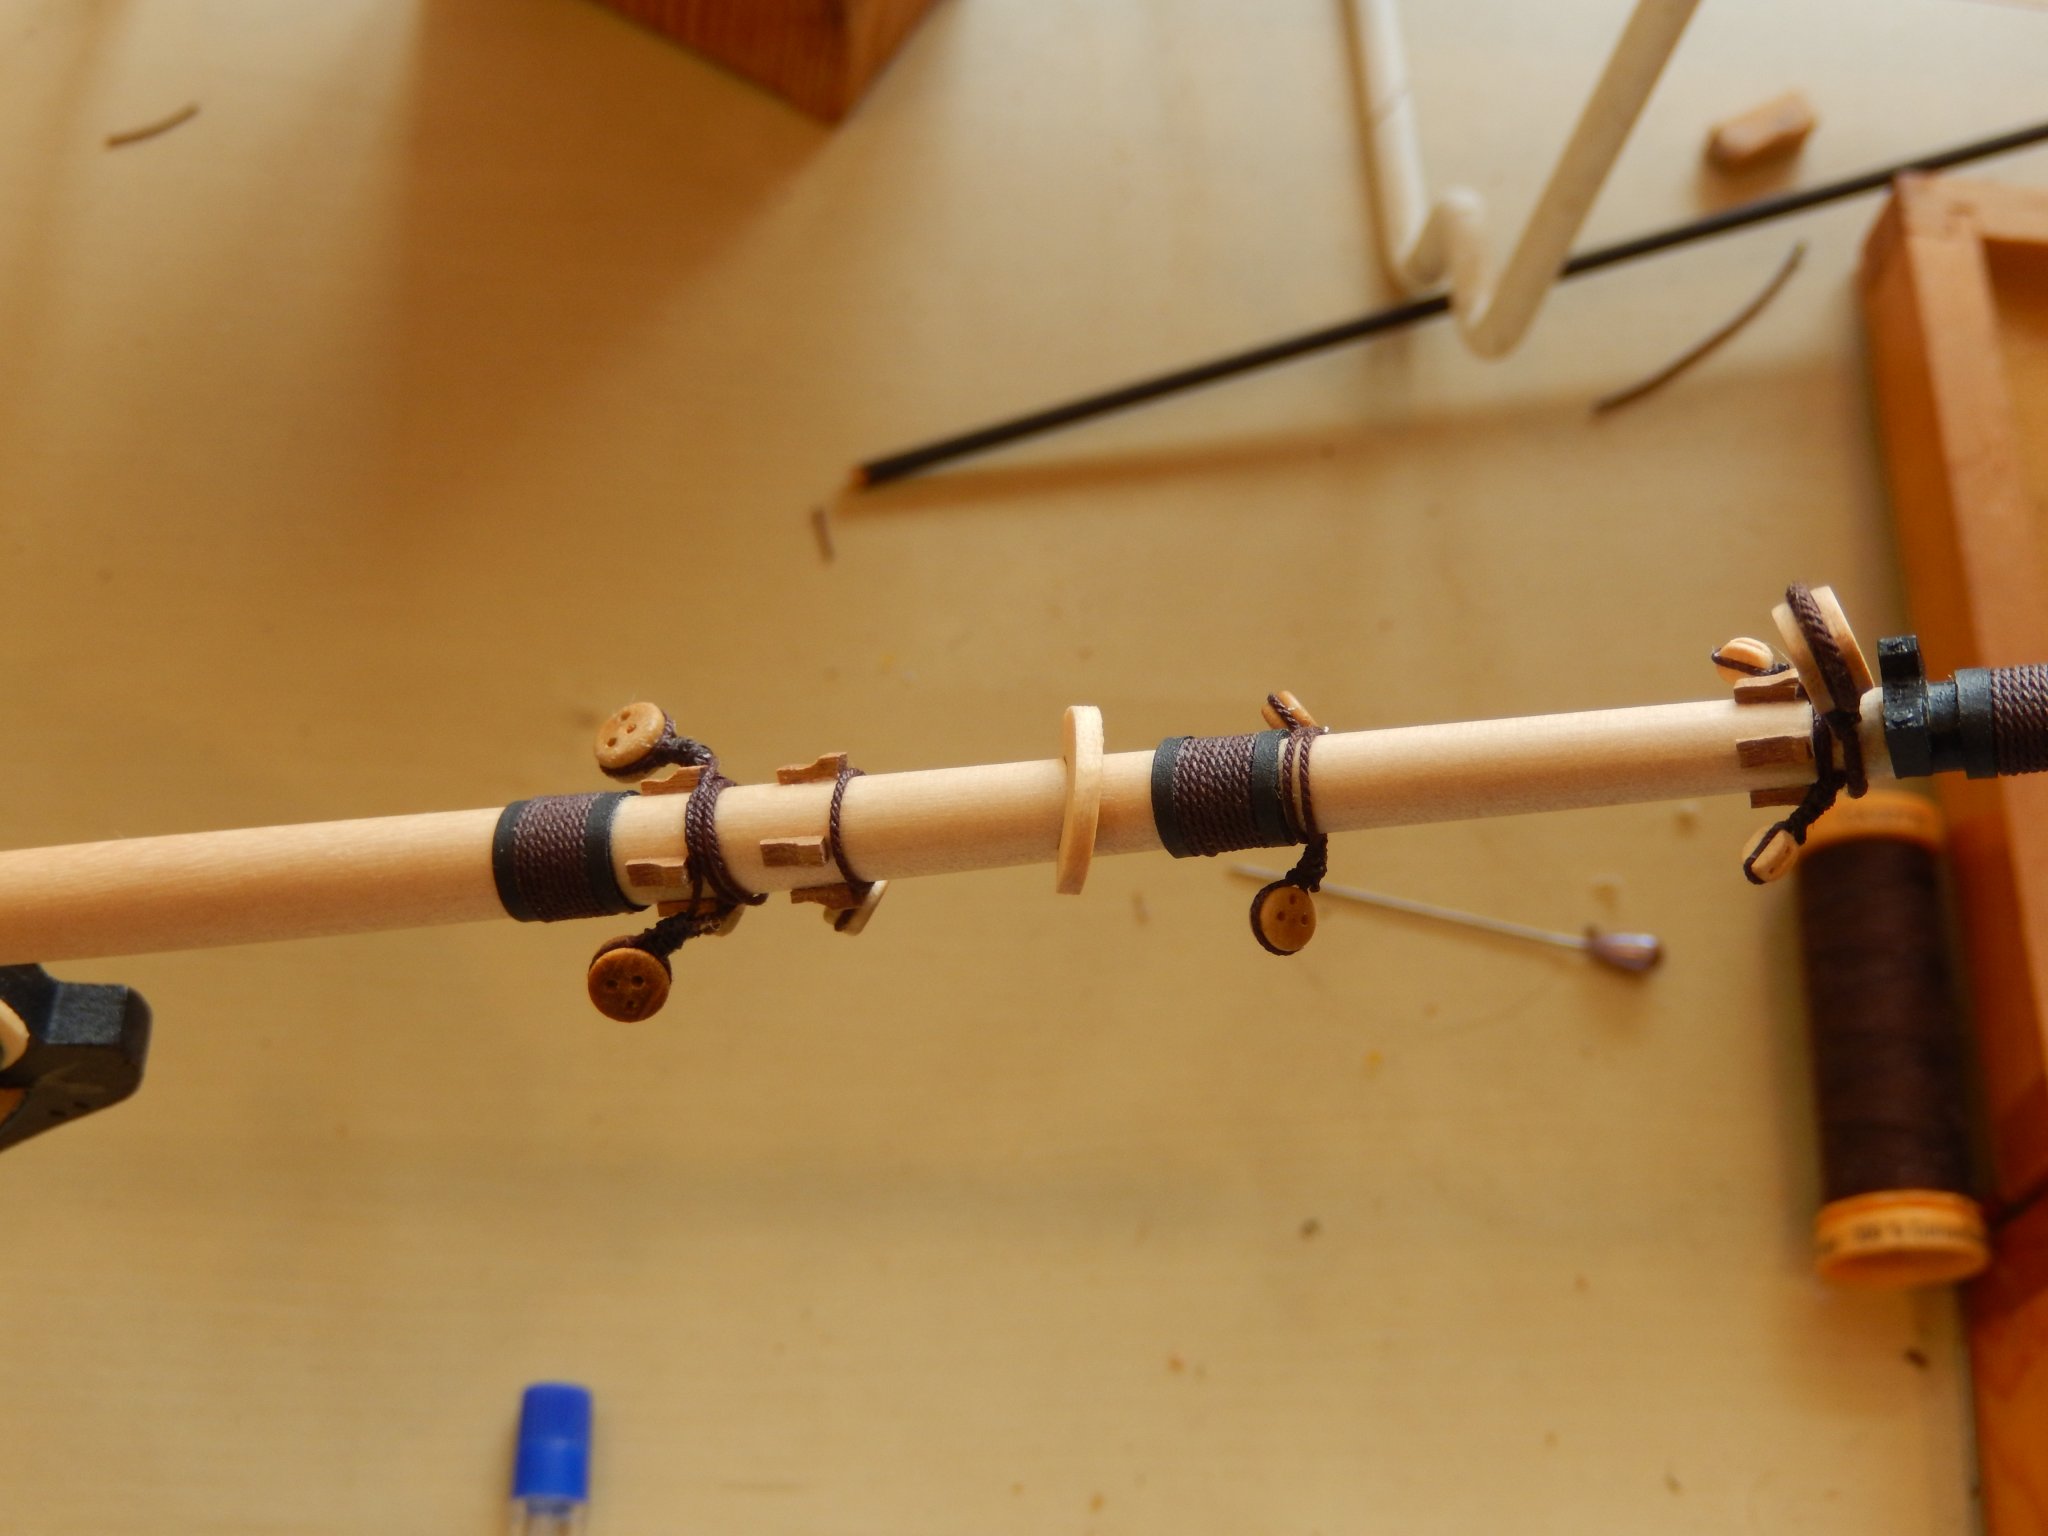
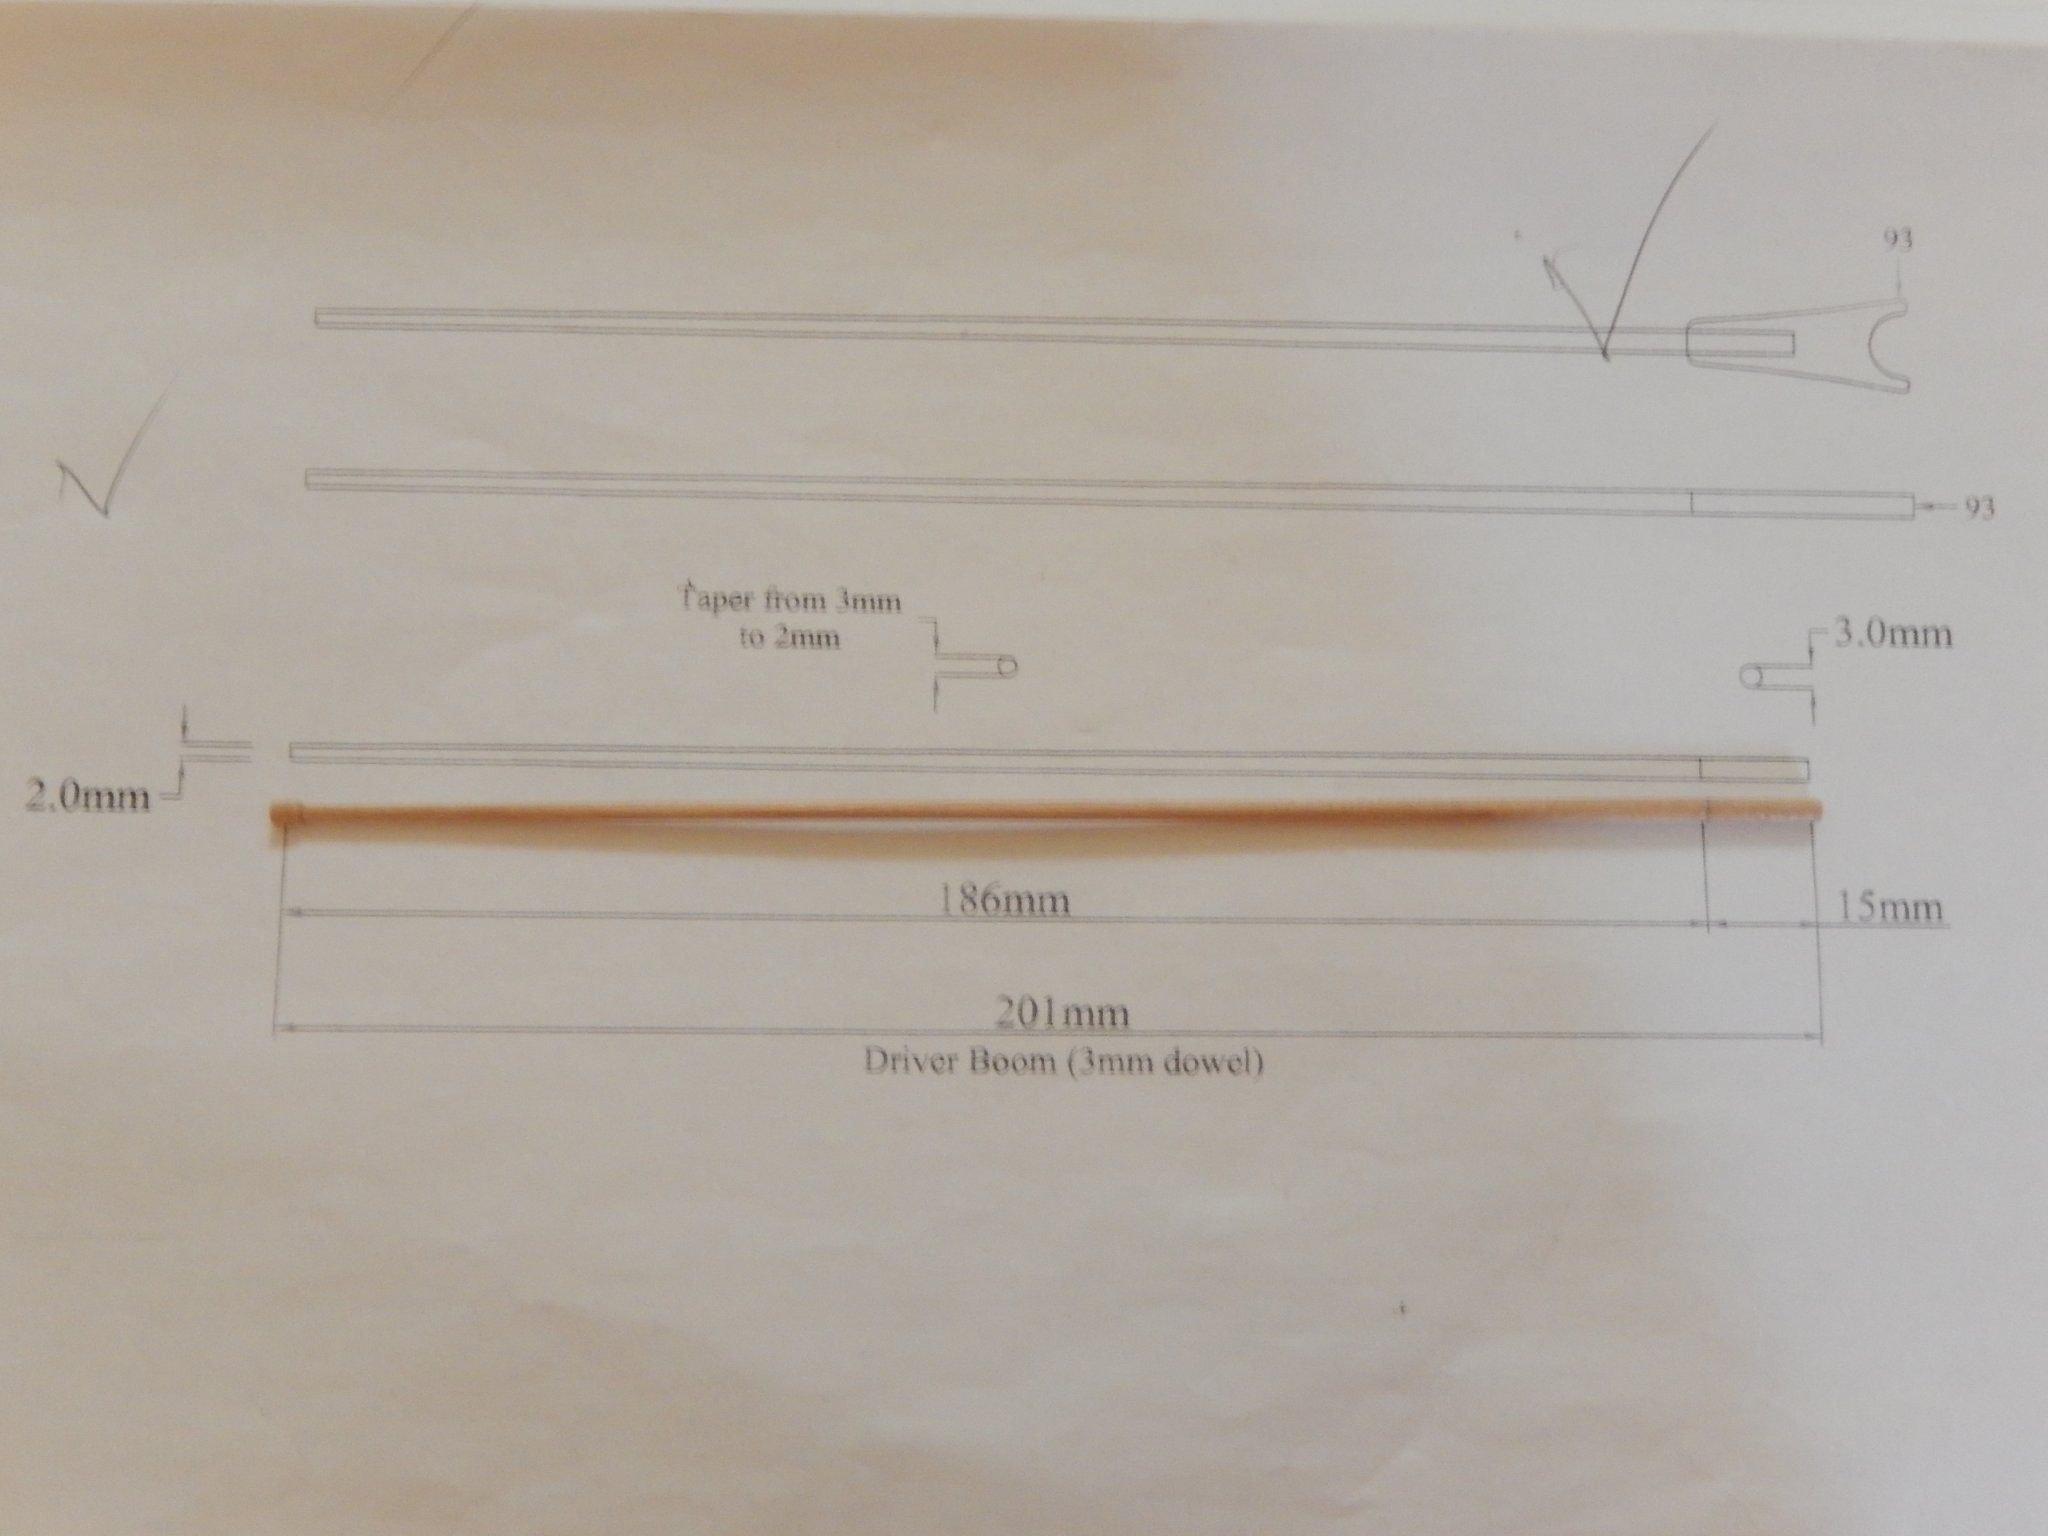
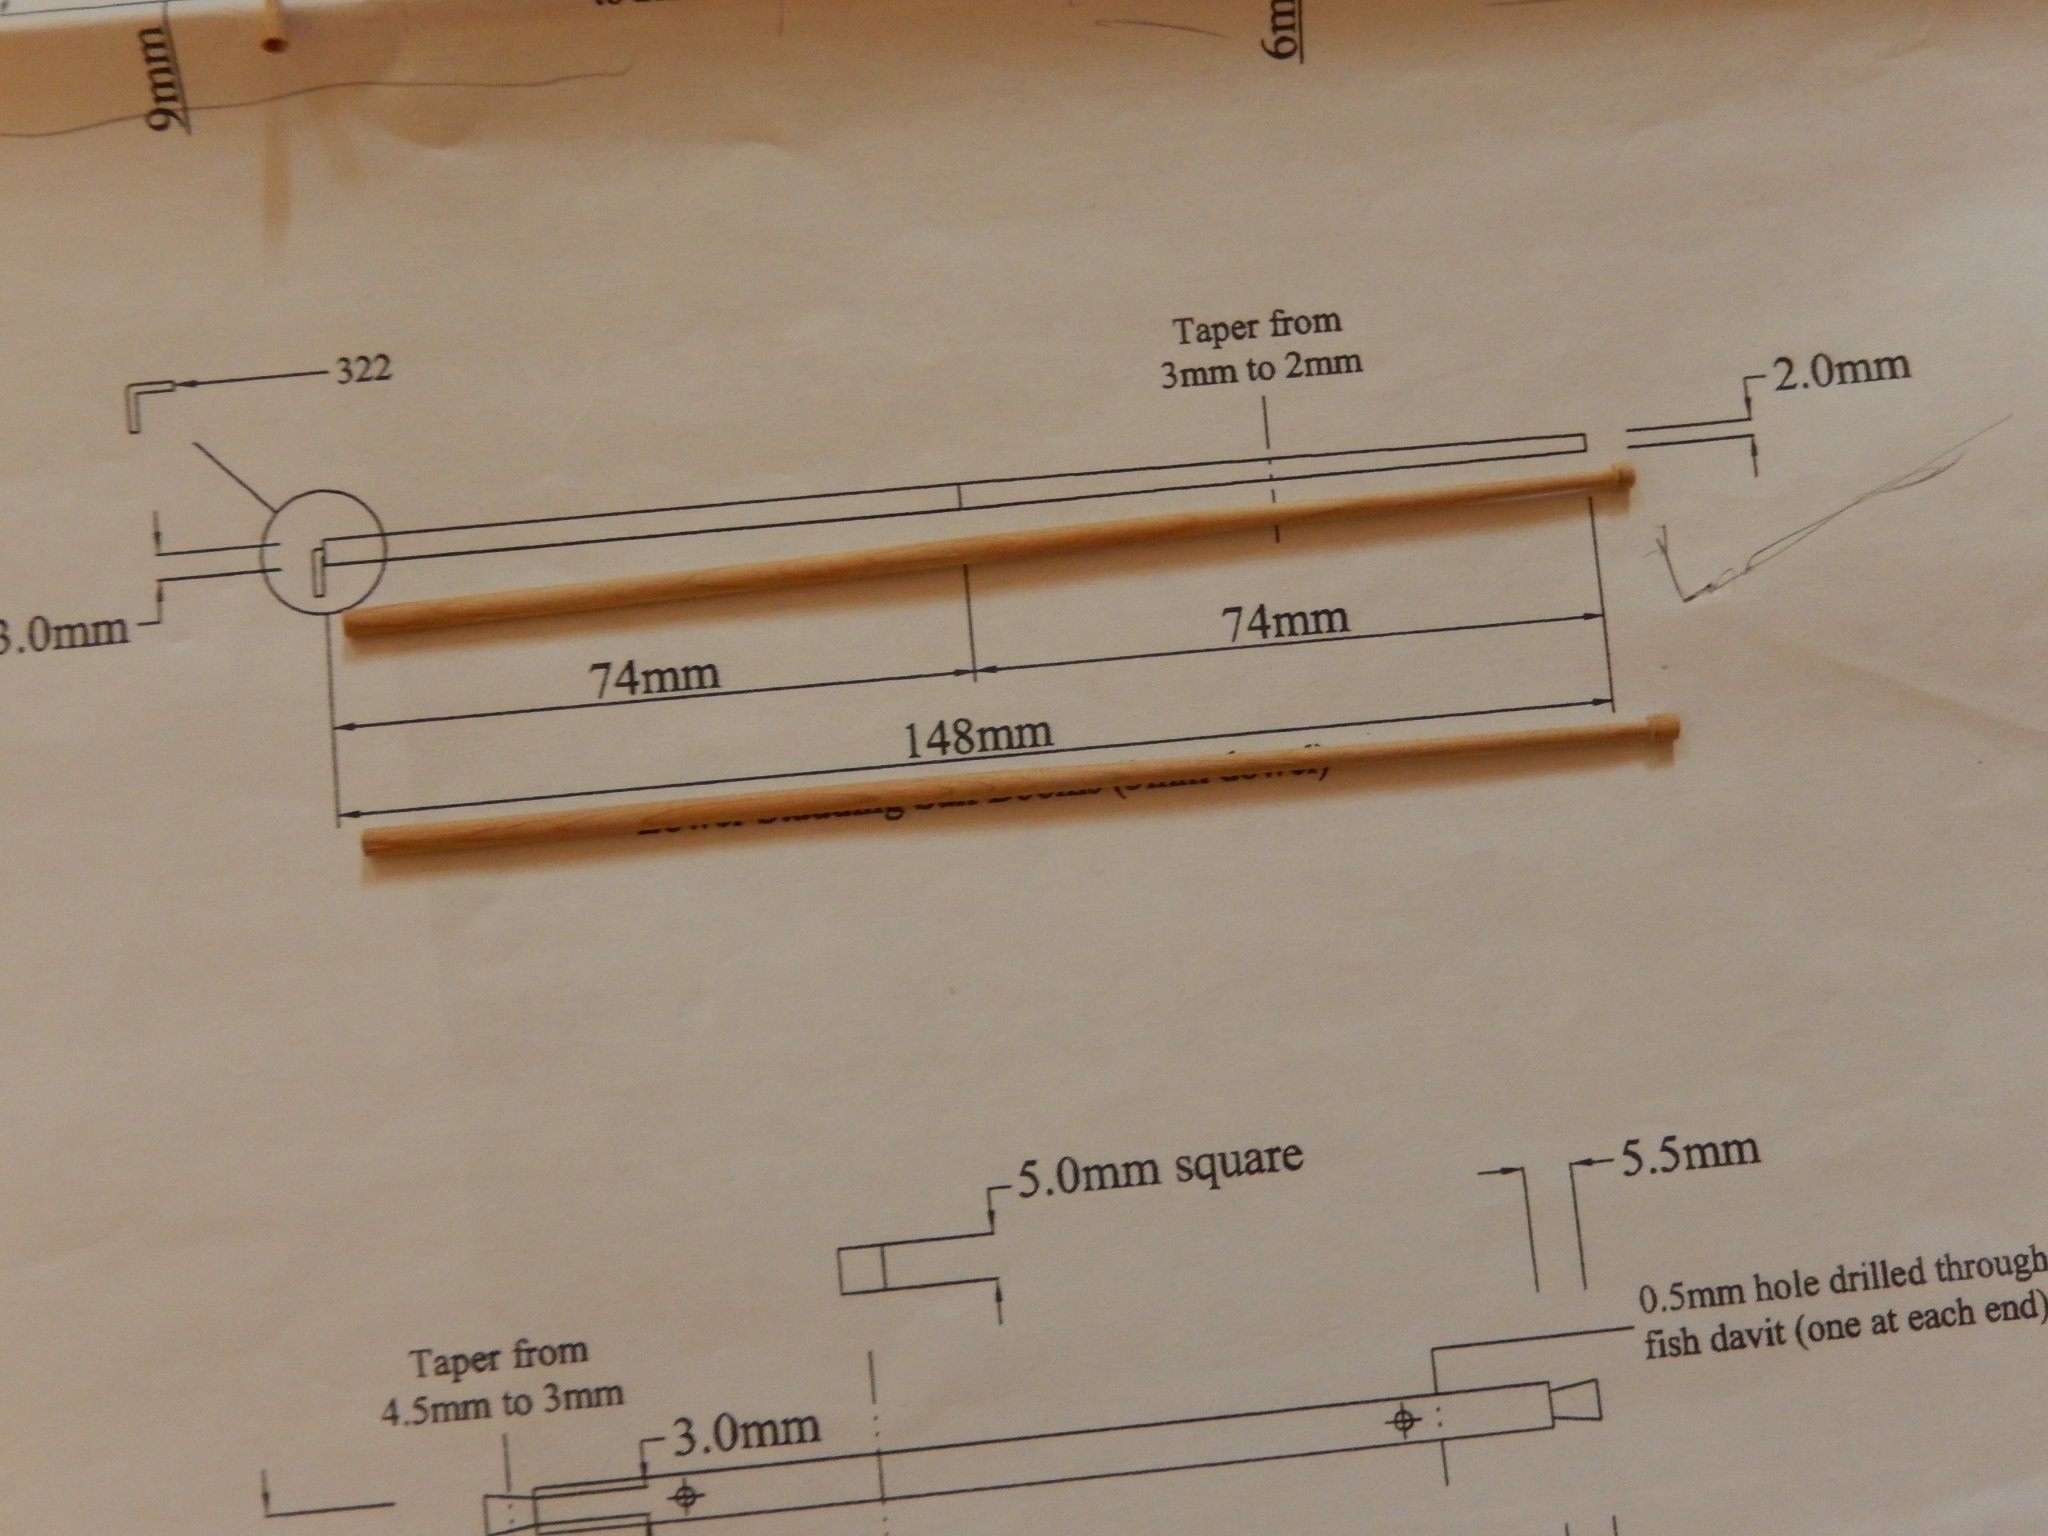
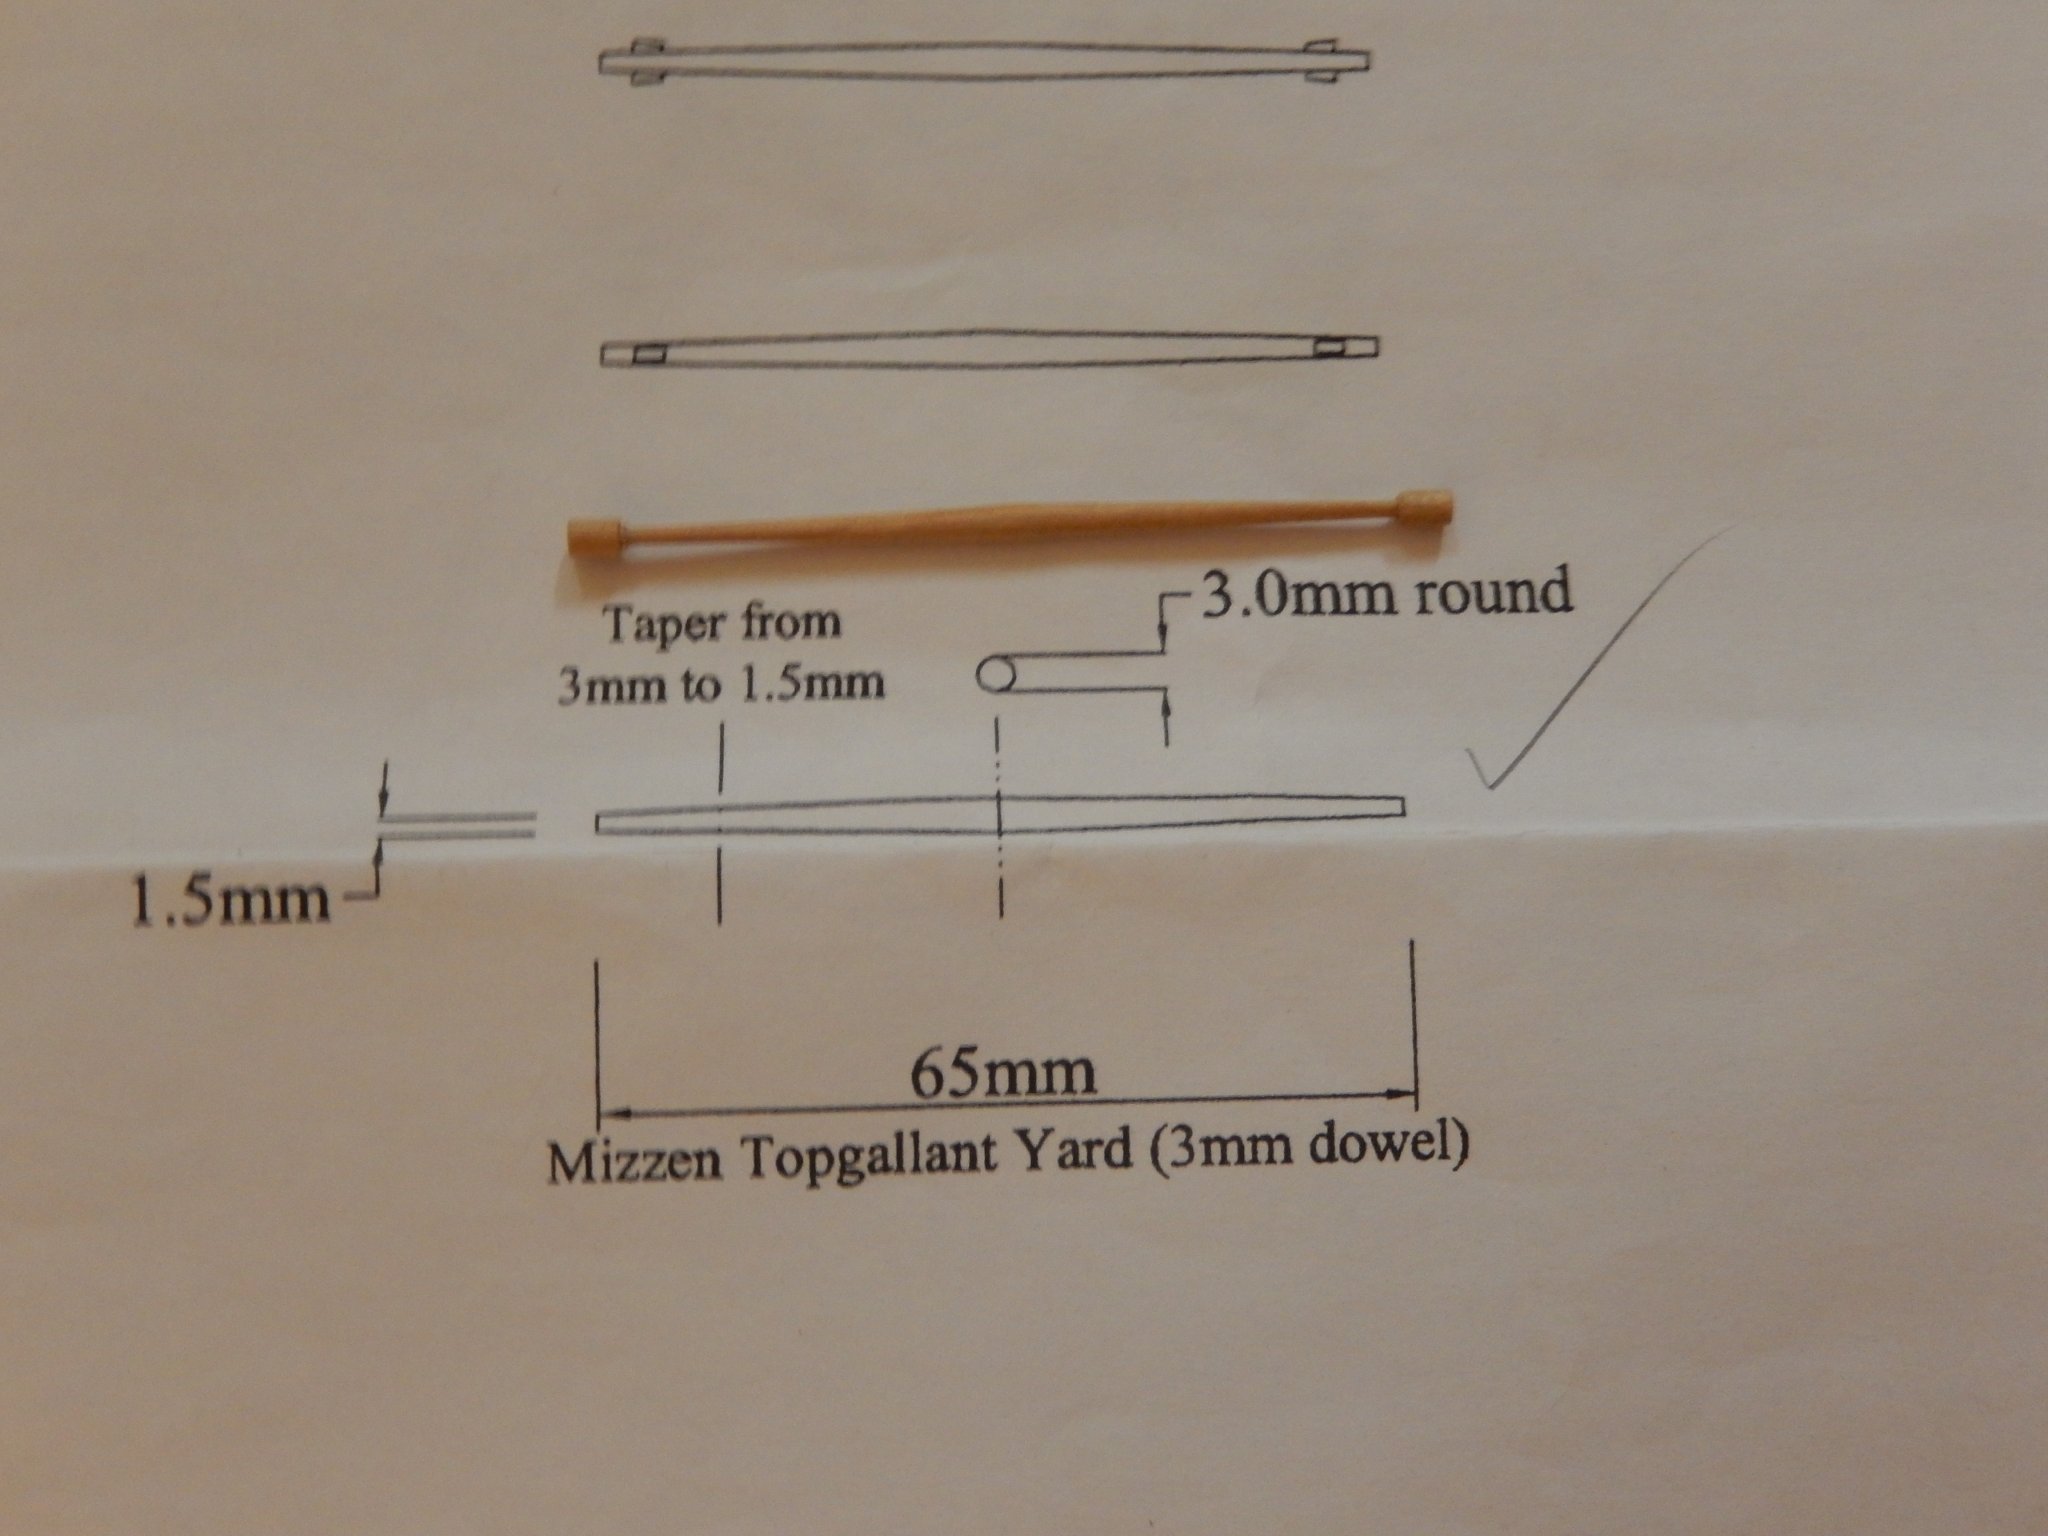
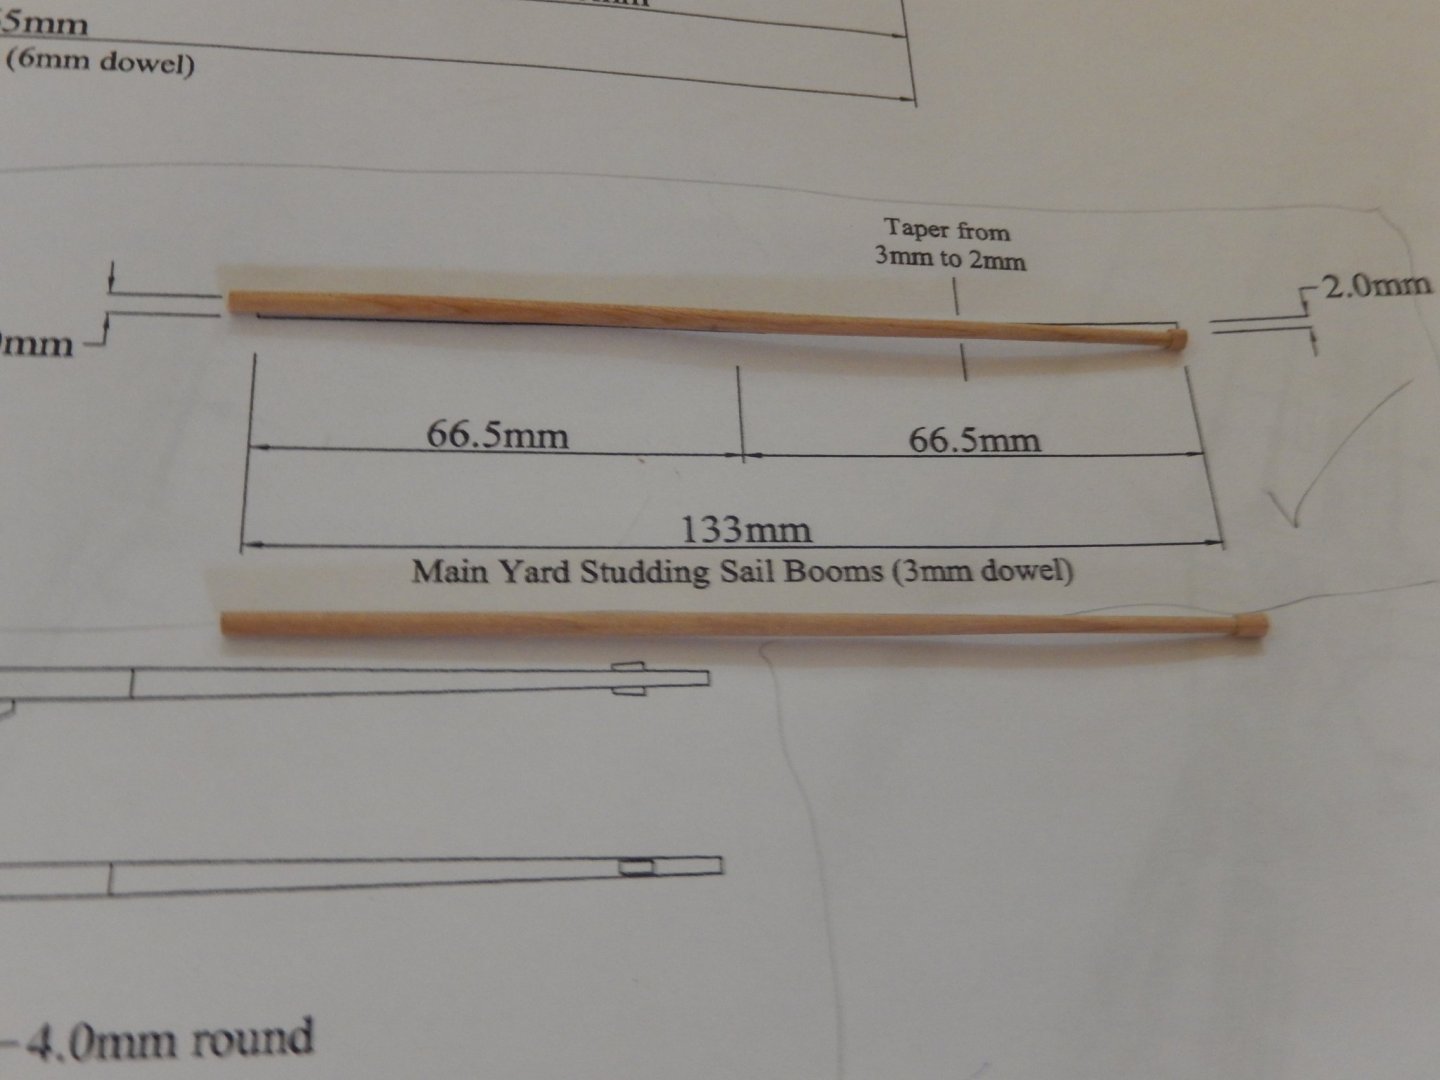
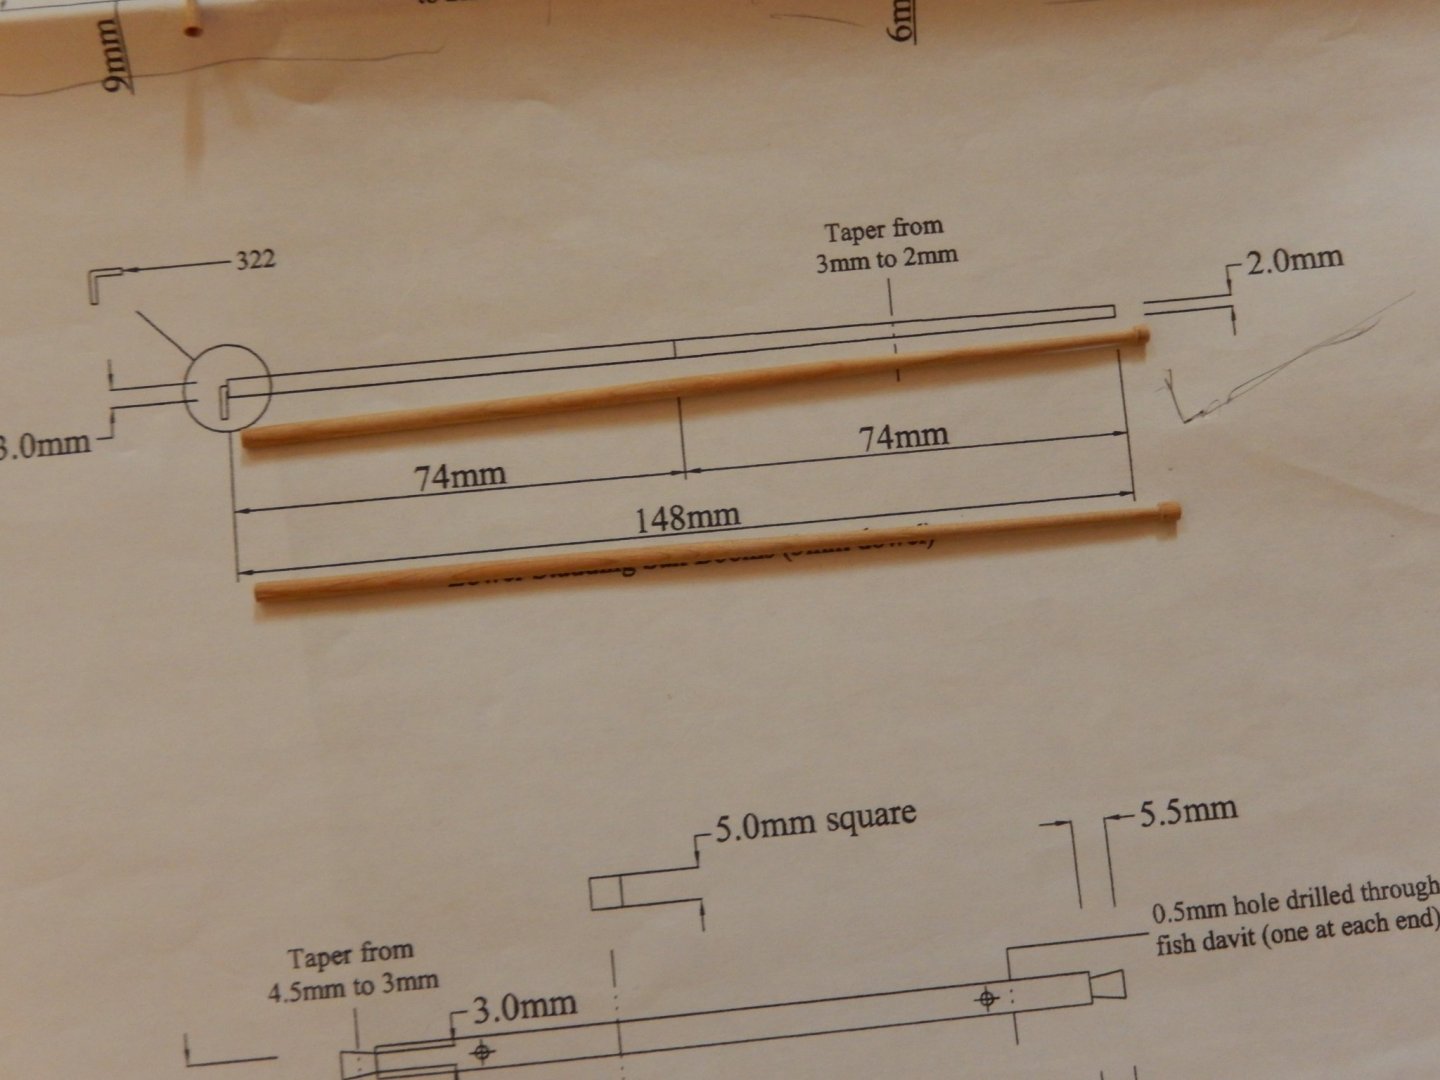
Thanks Joe. I have a problem the the plans - again. I cannot find the dimensions and detail of the mizzen yard on page 4 - where it should be. It is shown on plan 5 to be about 190mm long and the centre section looks to be 46mm (octagonal?) then 4mm tapering to 2mm. Does this appear to be correct? Does anyone have more information?
-
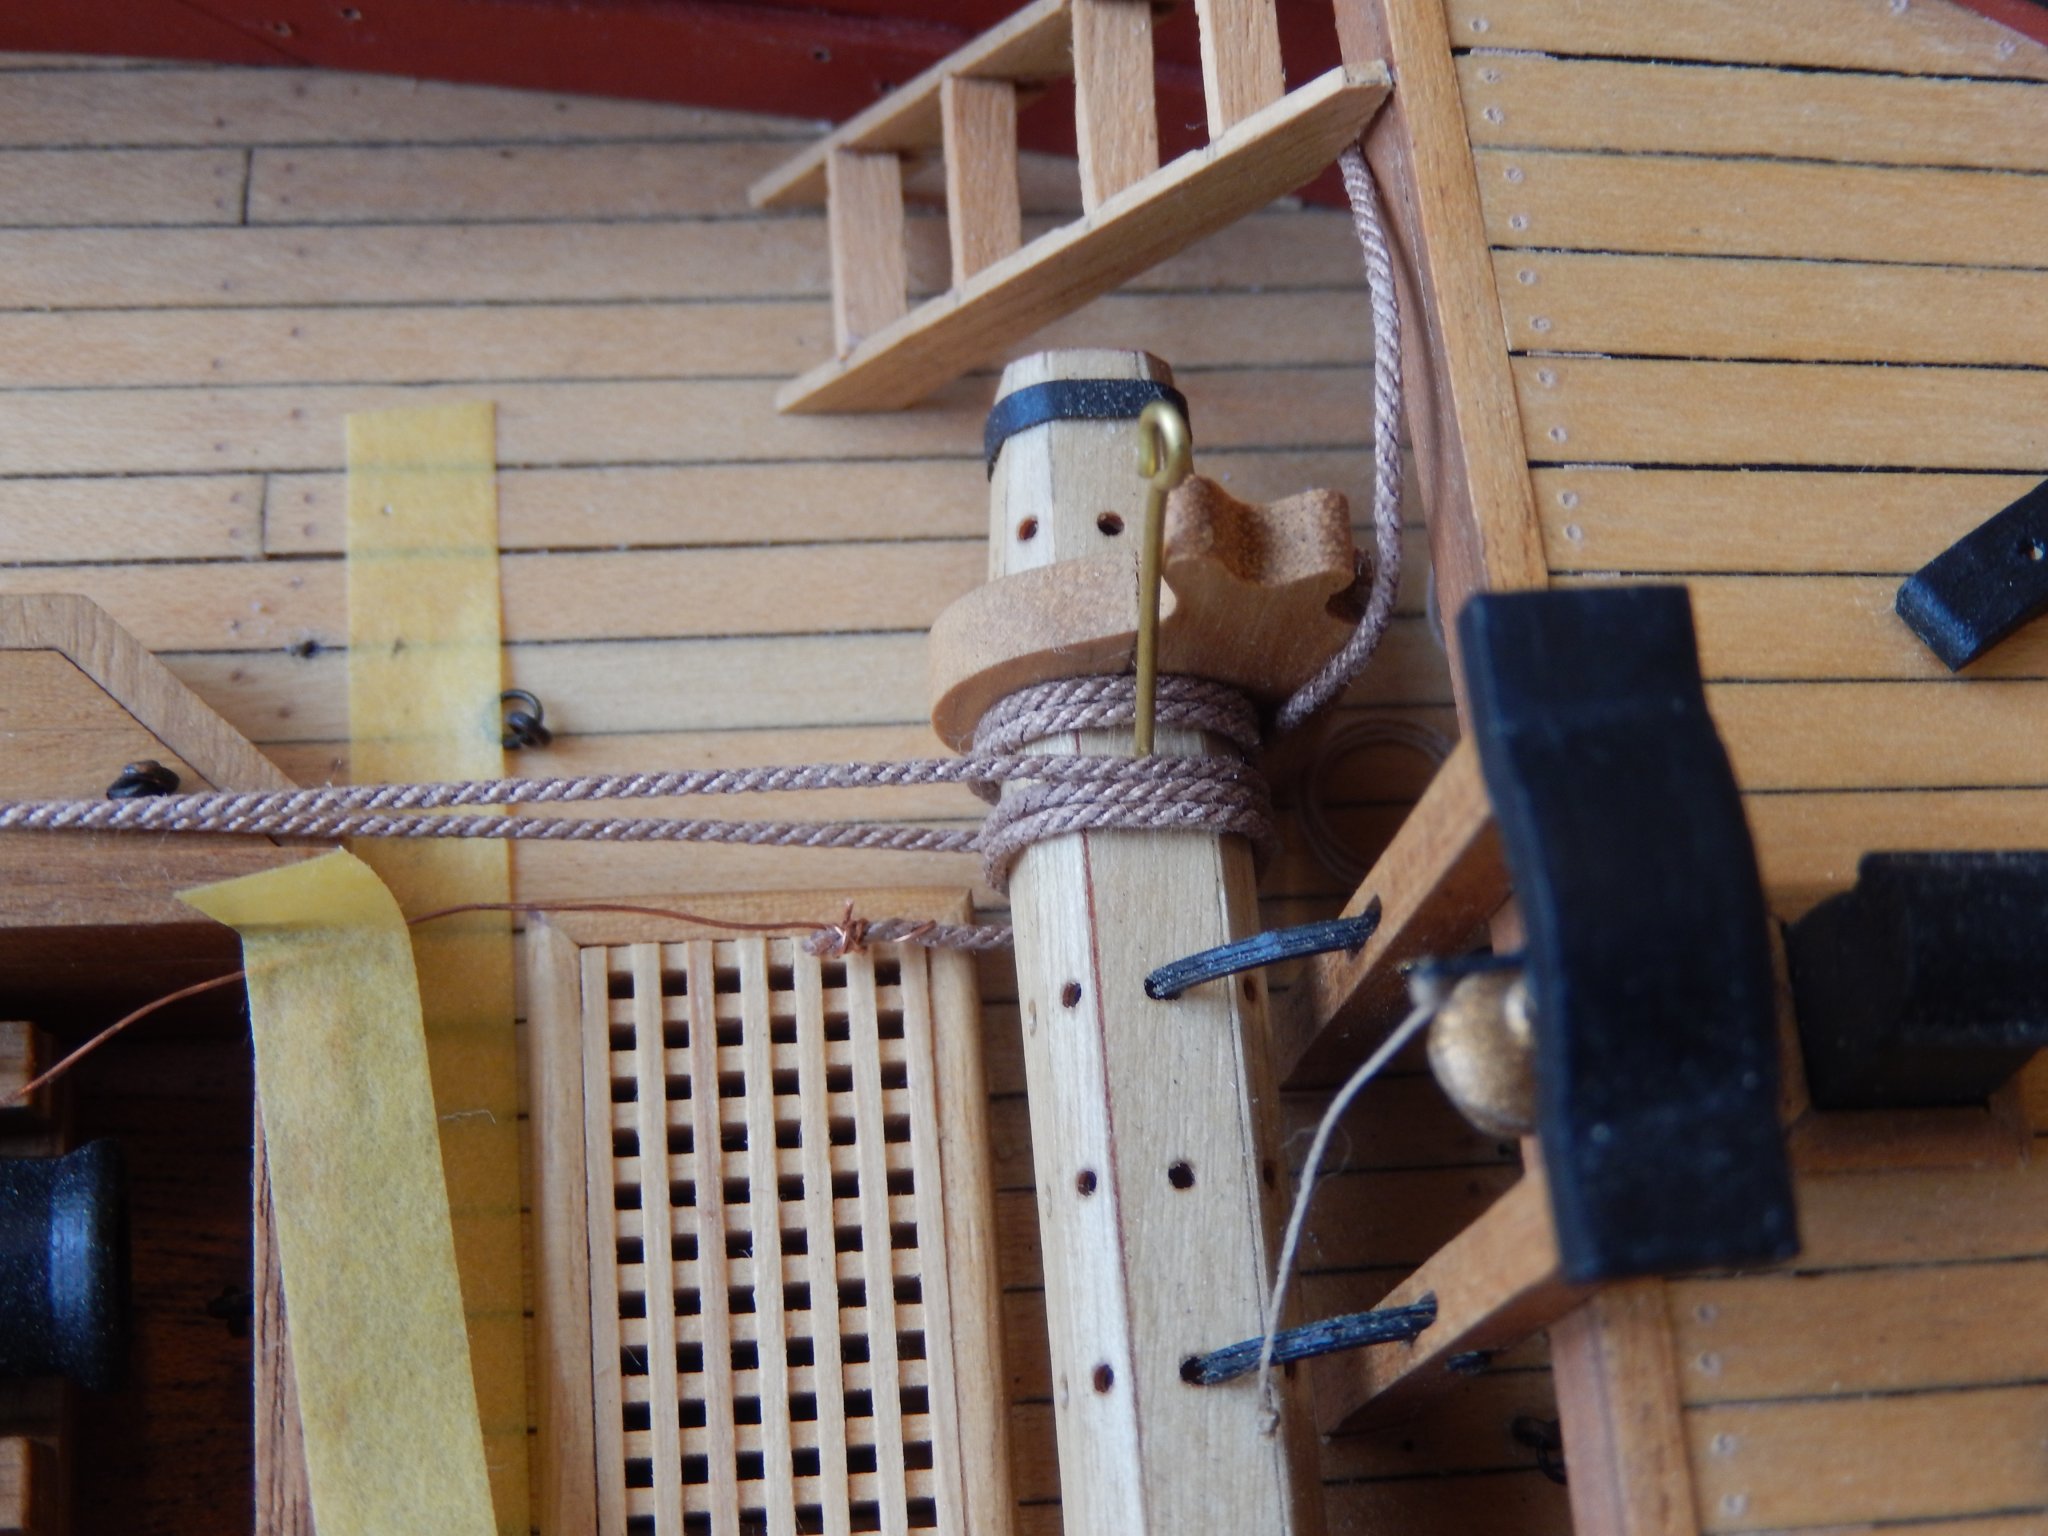
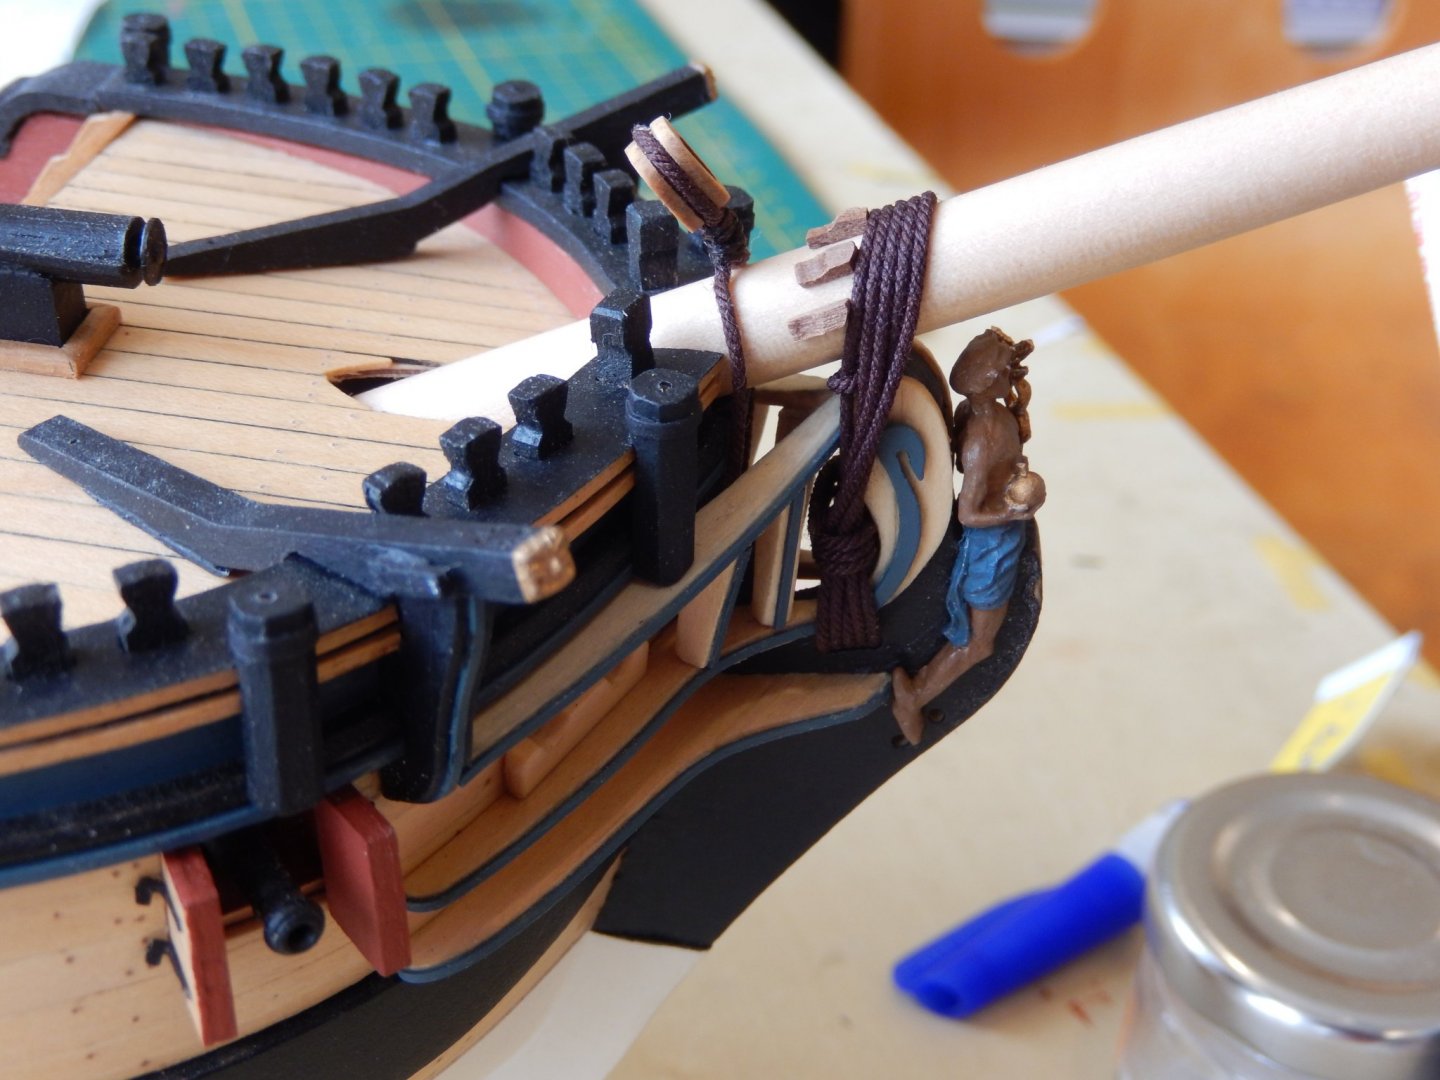
Vane: the 'rope' wound around the bowsprit shown here, and those similar on the masts, is 'woolding' and the 'metal' (cartridge paper) hoops on either side are woolding hoops. Hope this helps. Kevin: thanks for the comment.
-
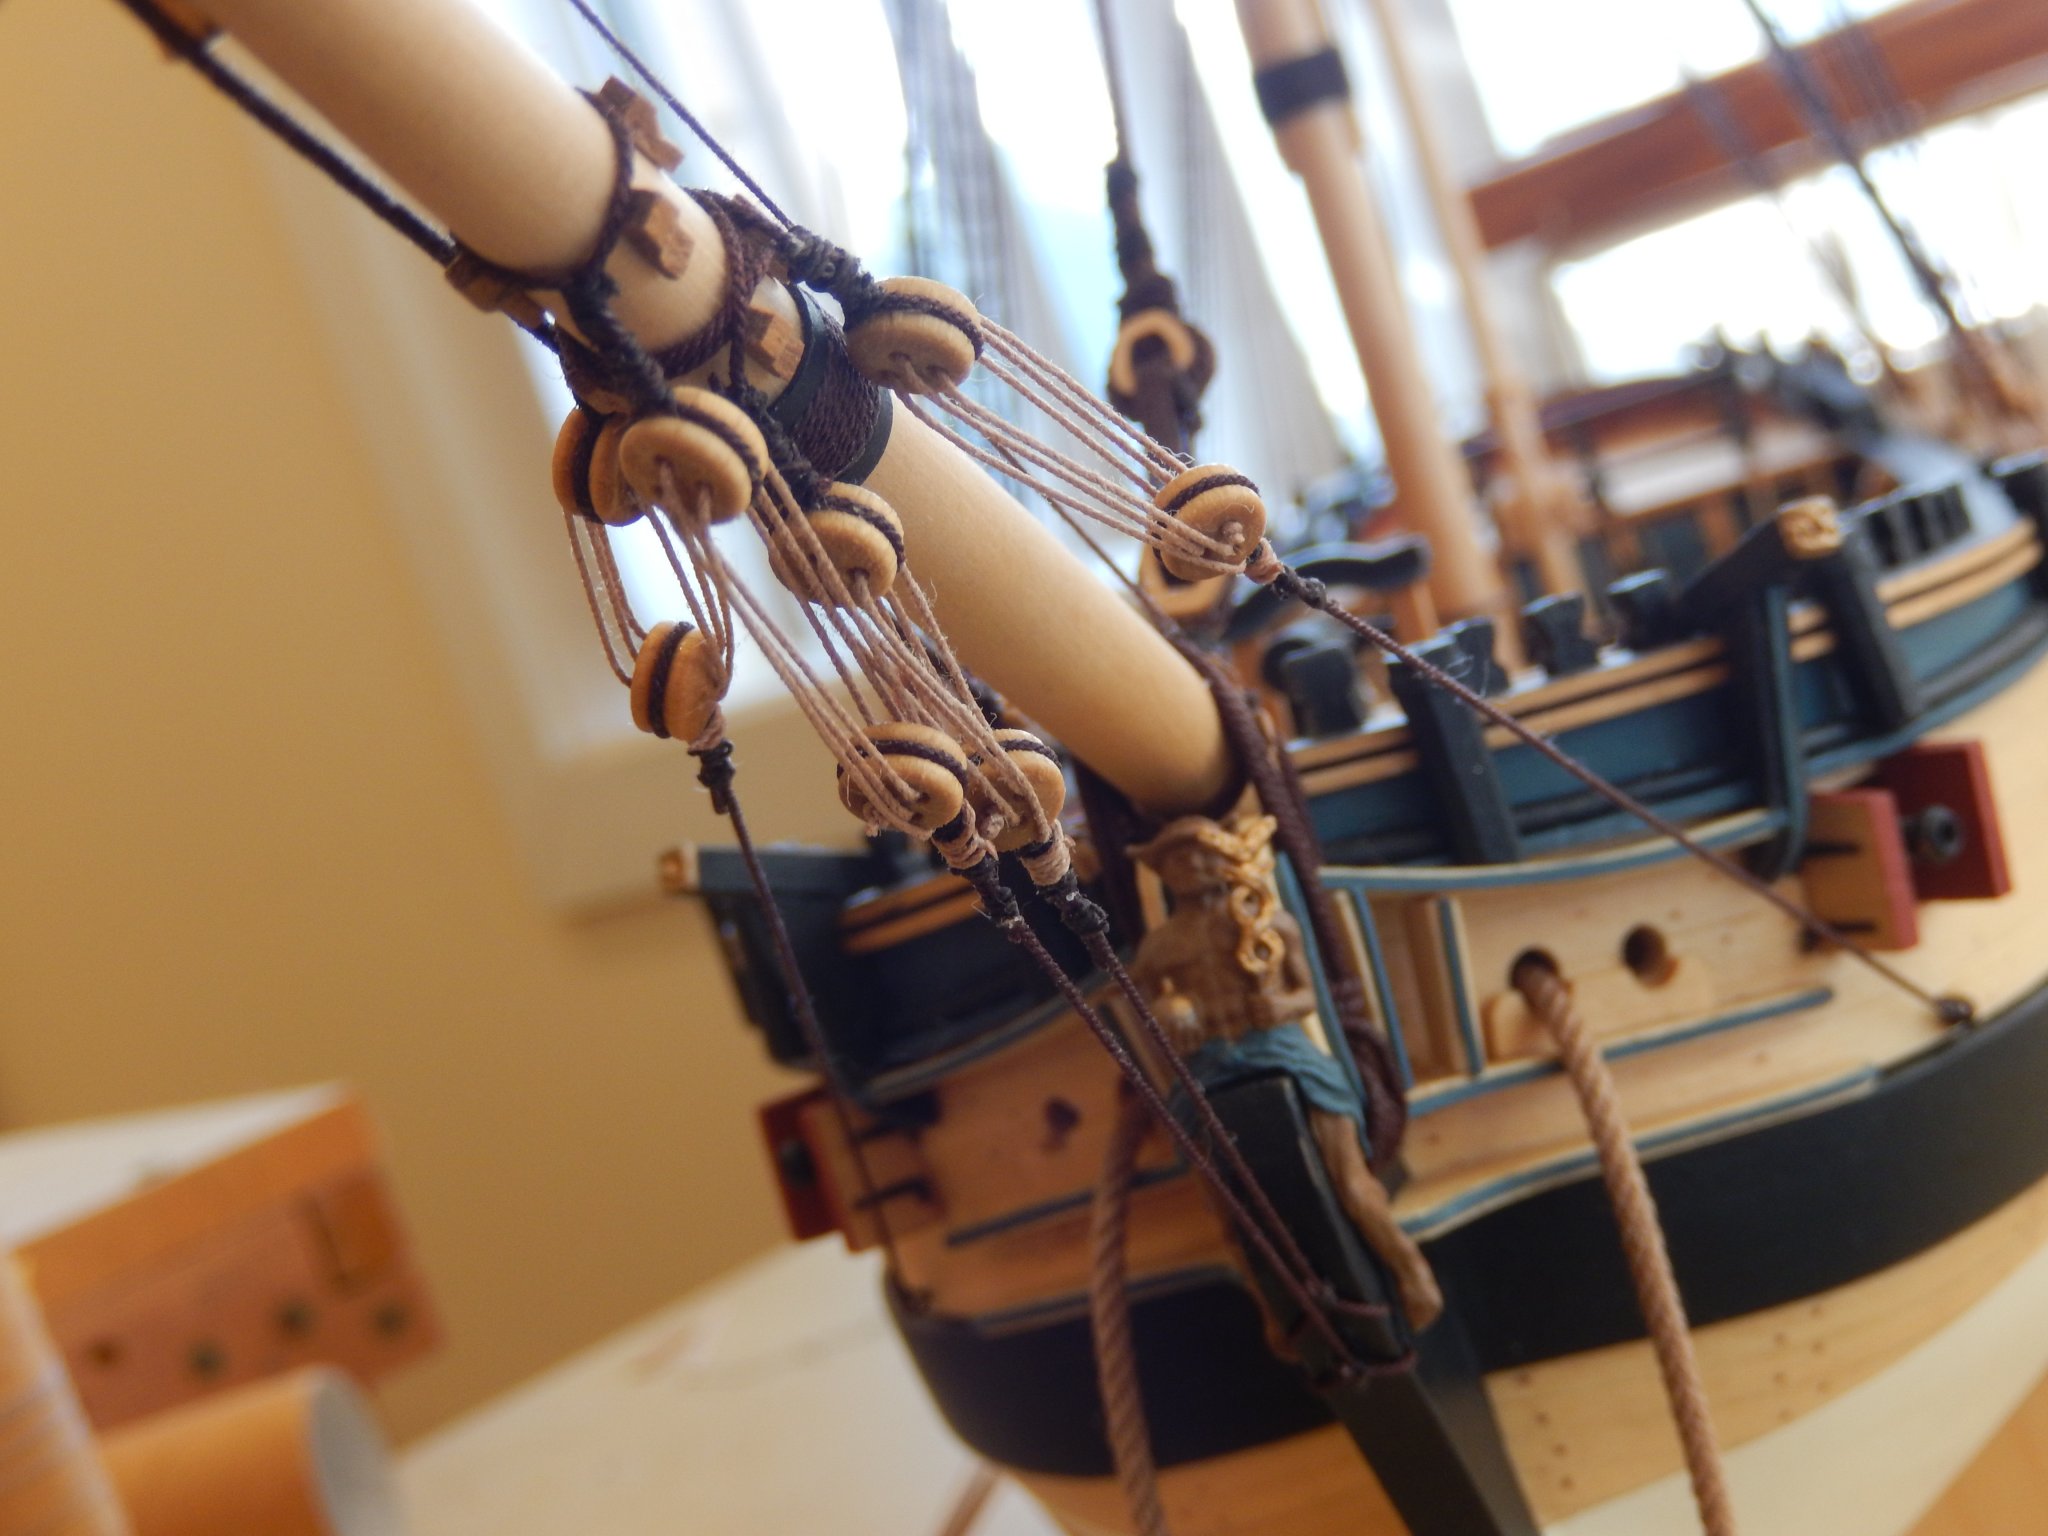
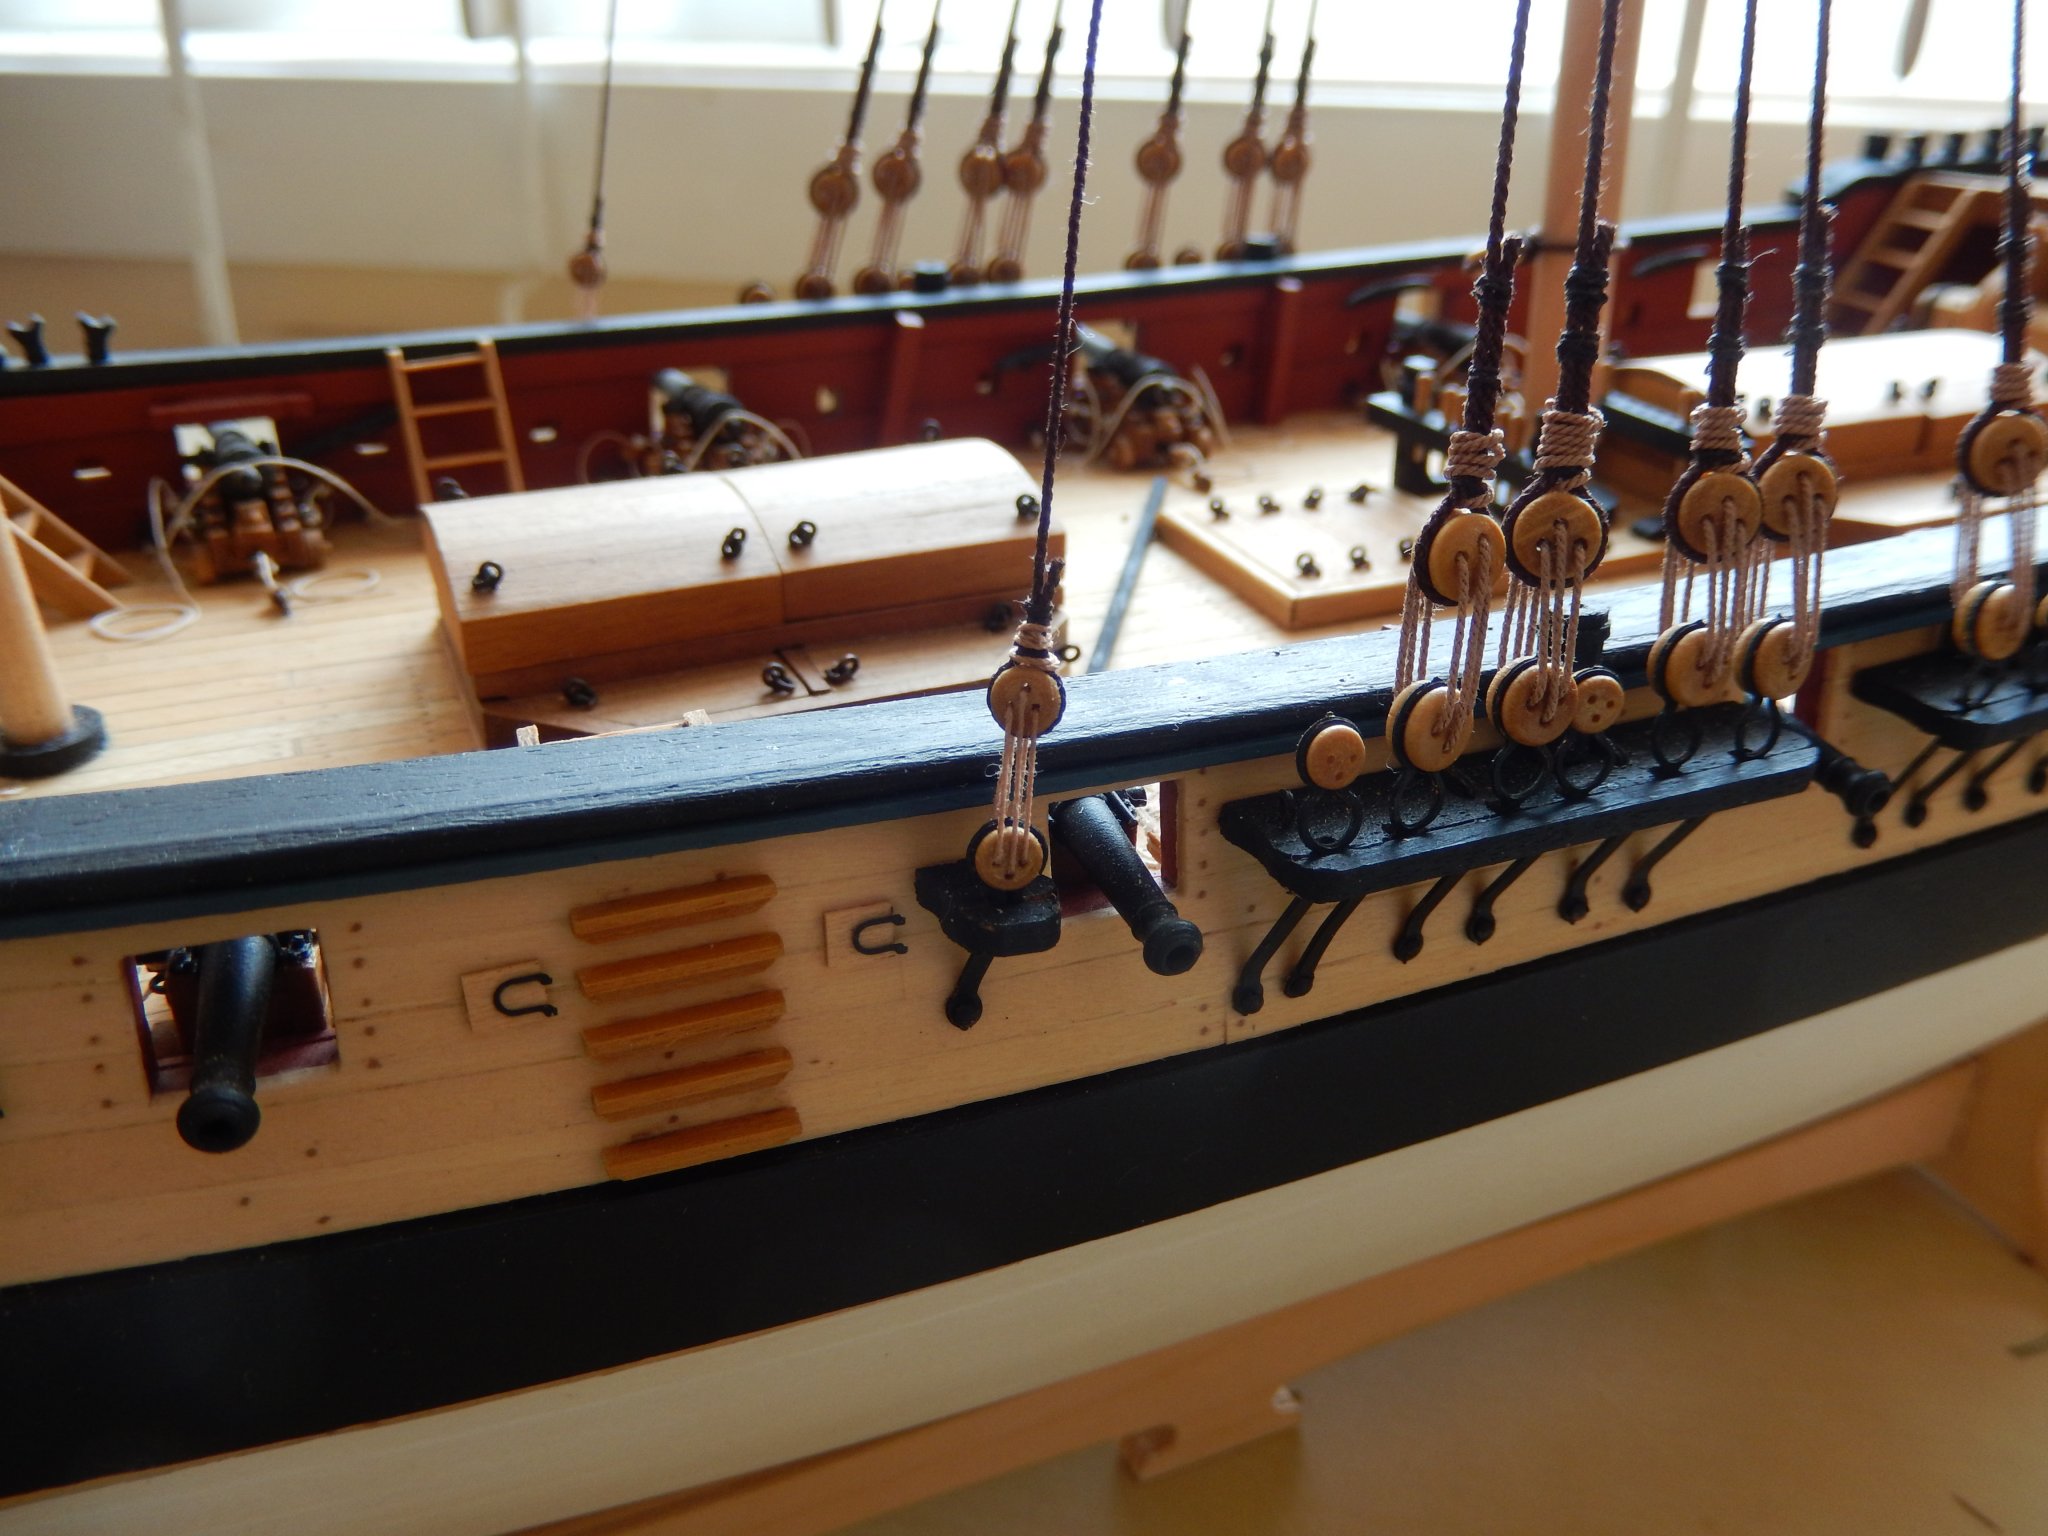
Some progress has been made, but other things have intruded. I have concentrated on attaching the various blocks and deadeyes to the bowsprit. It has turned out acceptably, though I did a better job on Vanguard. Here is the result. At the moment the bowsprit has been dry-fitted. The photos show up the faults and there are a few small adjustments to be made as a consequence. I found the plans to be of variable quality.


- 421 replies
-
- 12
-
-
- caldercraft
- granado
- (and 1 more)
-
Well things didn't exactly go to plan. Christmas ended up being a non-event, but we eventually made it down the the coast last Saturday- unfortunately. We did however have two, pleasant, uneventful, though smokey days, and among other things, I made progress on a few spars. Then new years eve came - 40 deg. C - strong winds, power down (and will be for at least a week) and instructions to stay put as the access road and the main highway were both blocked. We were then told to evacuate on Thursday. We spent 4 hours in our car (along with about 300 other cars) waiting for the road to be cleared. We were supposed to go out in 30 car convoys escorted by police and fire vehicles. The fires had other ideas. Same arrangement Friday and after another 4 hours in the car waiting for access to the highway, we made it to the highway and home Friday night. It's normally a 2 1/2 hour trip door to door. People were wonderful - kind and considerate through all of this. The damage done we saw on the way home is beyond comprehension. Our house there should be OK, given its position, though embers are a problem as today is supposed to bee ven worse than new year. Anyway here is progress. Happy New Year.

- 421 replies
-
- 8
-
-
- caldercraft
- granado
- (and 1 more)
-
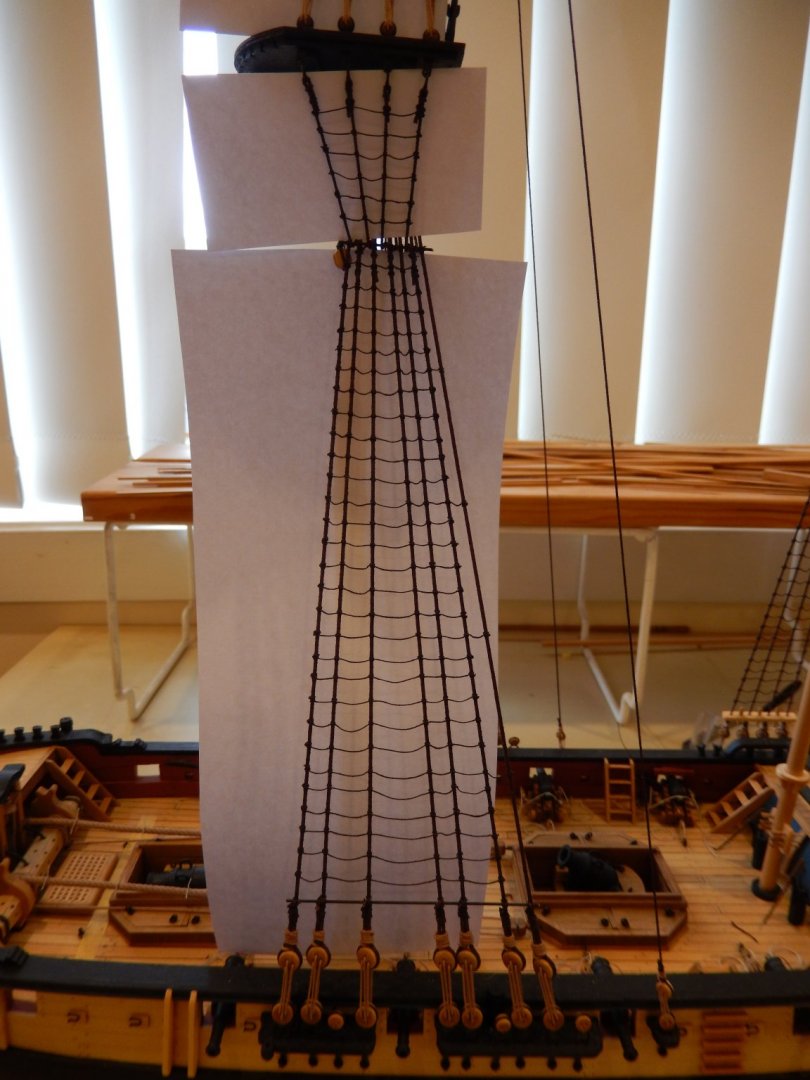
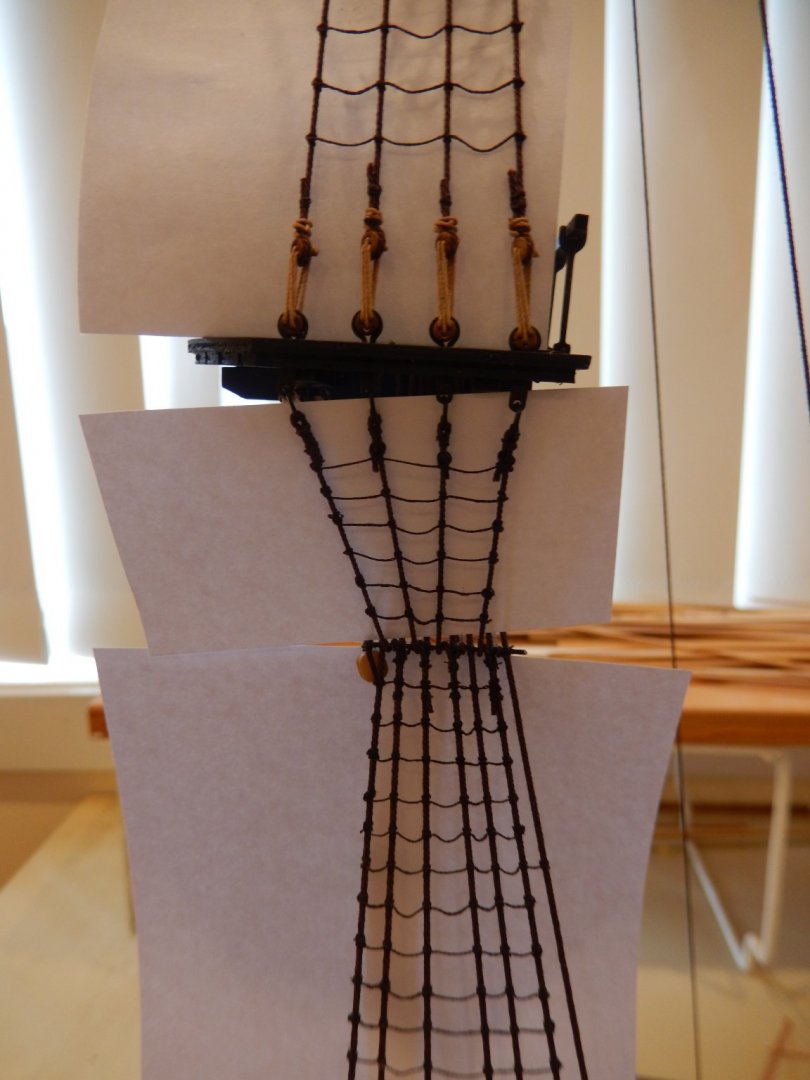
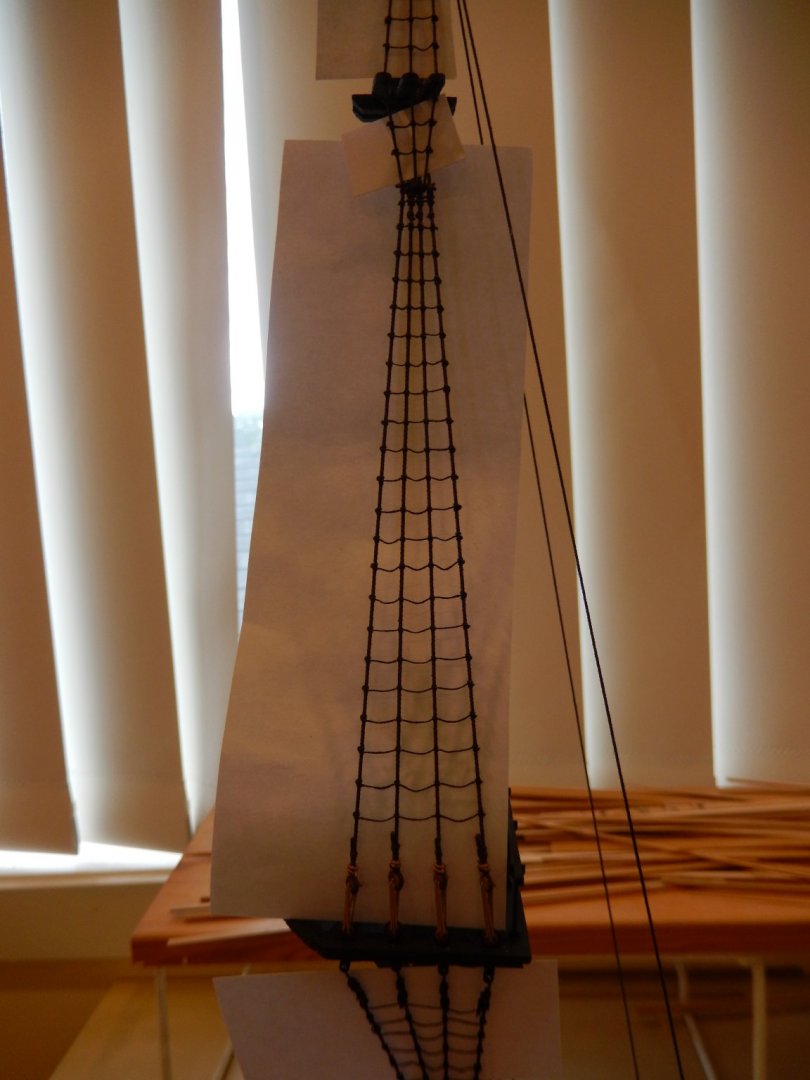
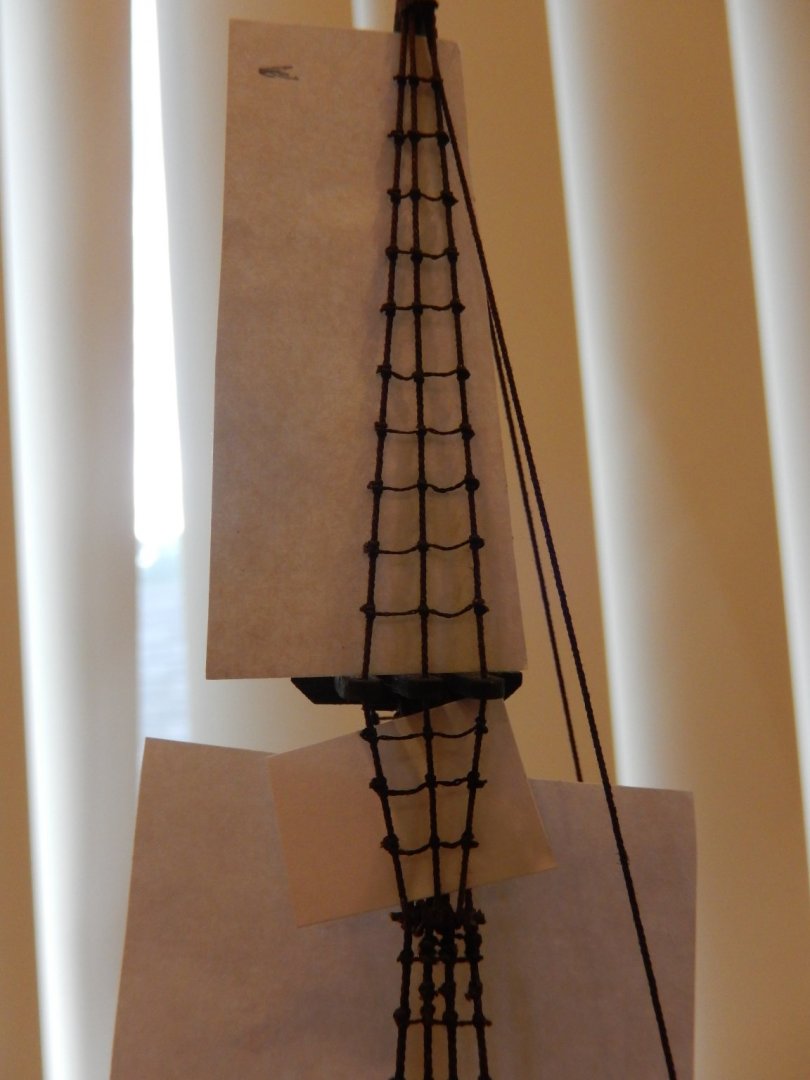
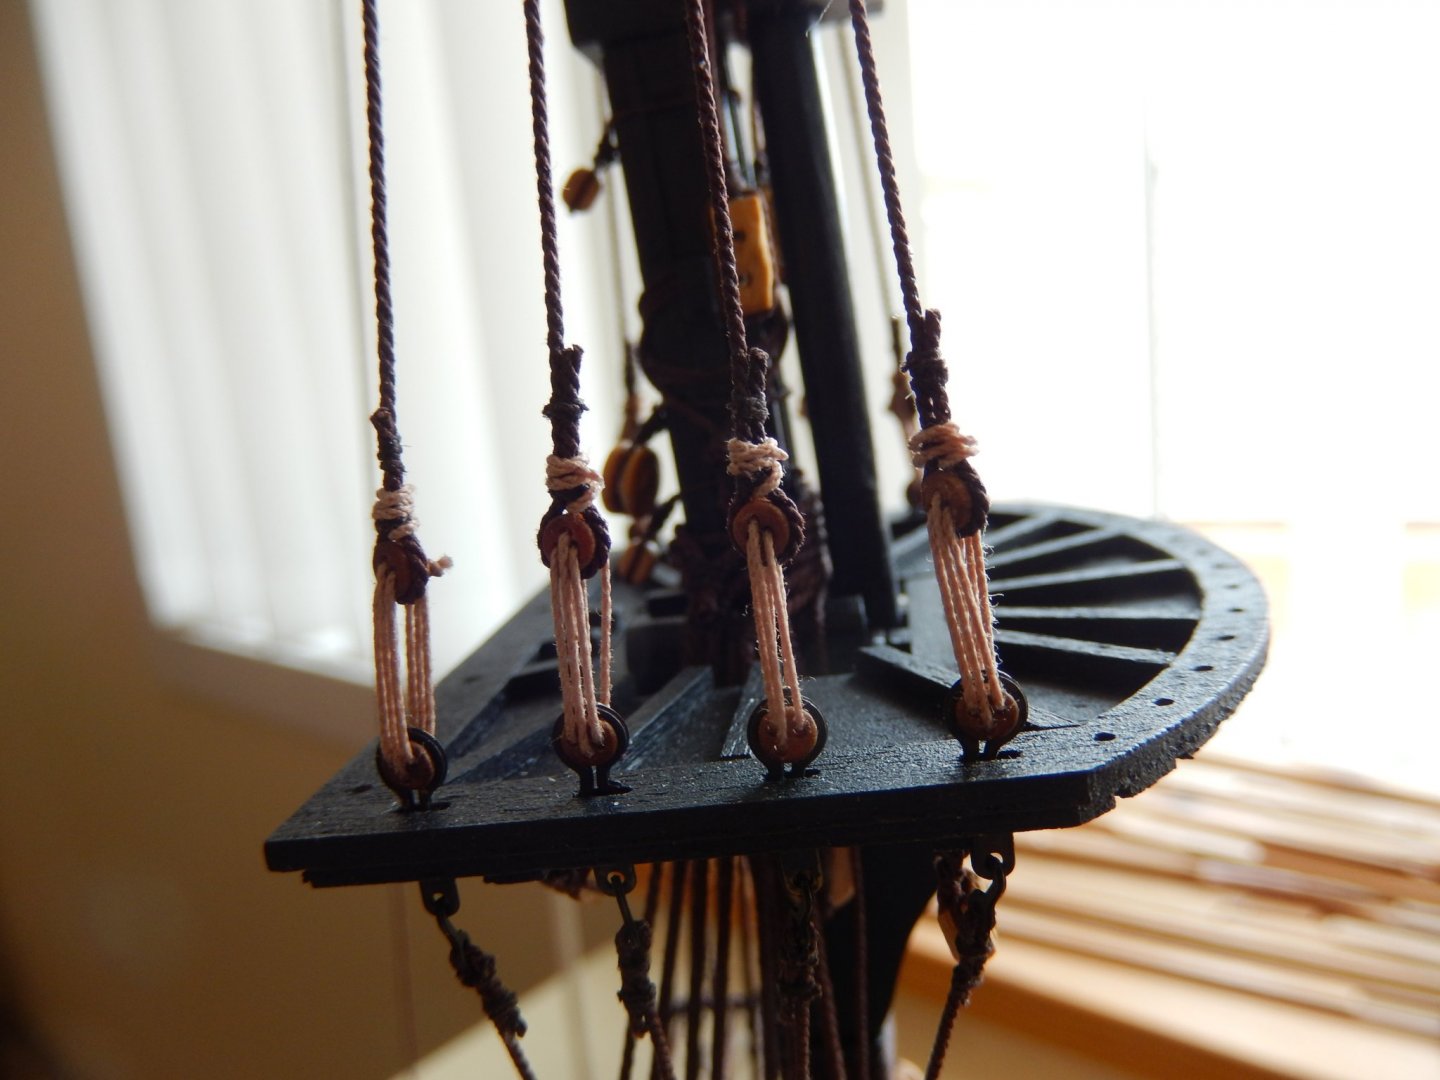
The shrouds are finally complete. I'm rather sick of the sight of them. The first two photos show one of the the main topgallant backstays. Any deck furniture to be seen in the background is dry-fitted. I'm hoping we can make our belated 'Christmas' trip tomorrow, and if so, will try to finish the various yards over the next week or so. Now here are the various shrouds.


- 421 replies
-
- 13
-
-
- caldercraft
- granado
- (and 1 more)