RMC
-
Posts
933 -
Joined
-
Last visited
Content Type
Profiles
Forums
Gallery
Events
Everything posted by RMC
-
The mizzen topmast shrouds are now done. Working with 2.5mm deadeyes is fairly difficult. I discovered the holes for the lanyards are 0.5mm, but the wire used for the spacing jig is 0.6mm - so one of the holes had to be drilled to that size. Here's how they turned out. Again, they have not been finally tied off. I have a couple other photos, but as it took five attempts at downloading the one below, I think I'll call it a day.
- 421 replies
-
- 9
-

-
- caldercraft
- granado
- (and 1 more)
-
Well the fires didn't permit, so it's Christmas at home. For us it's a minor inconvenience - others are having a very, very tough time indeed.
-
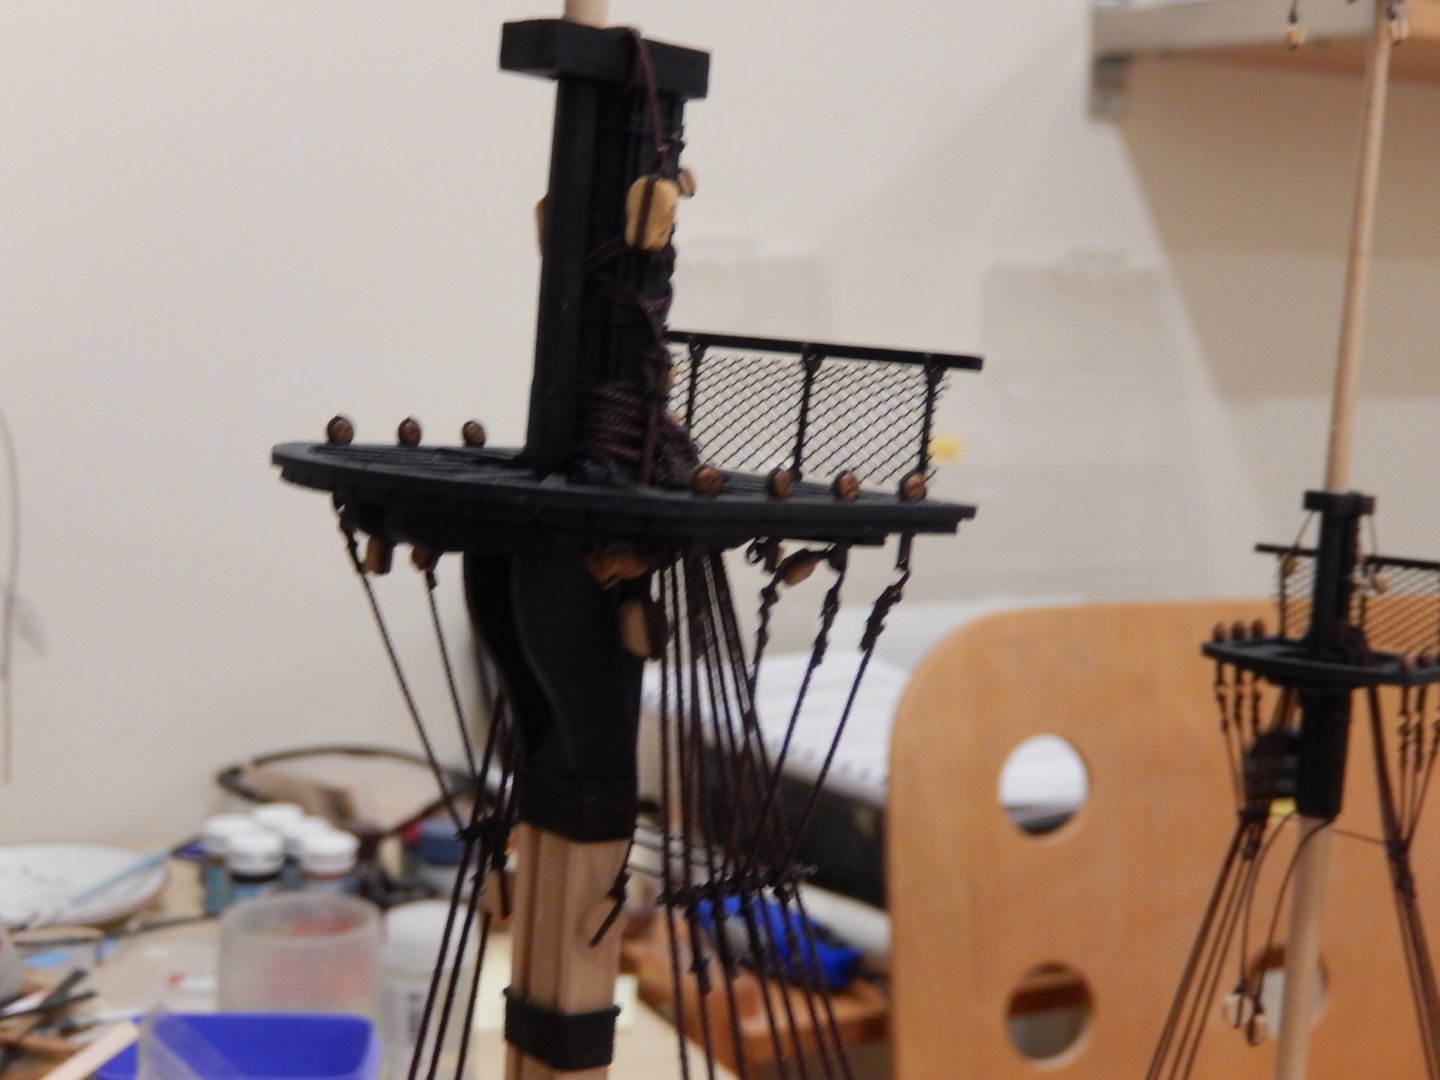
The topmast shrouds are now complete. They are not finally tied off. We are going away tomorrow for a couple of weeks (fires permitting) and I will leave them until we return. Sometimes the thread may stretch a little and I can then make any adjustments to the lanyards. I have redone the protective mesh on the tops and this time made a better job of it. Best wishes to all for Christmas and the new year.

- 421 replies
-
- 13
-
-
- caldercraft
- granado
- (and 1 more)
-
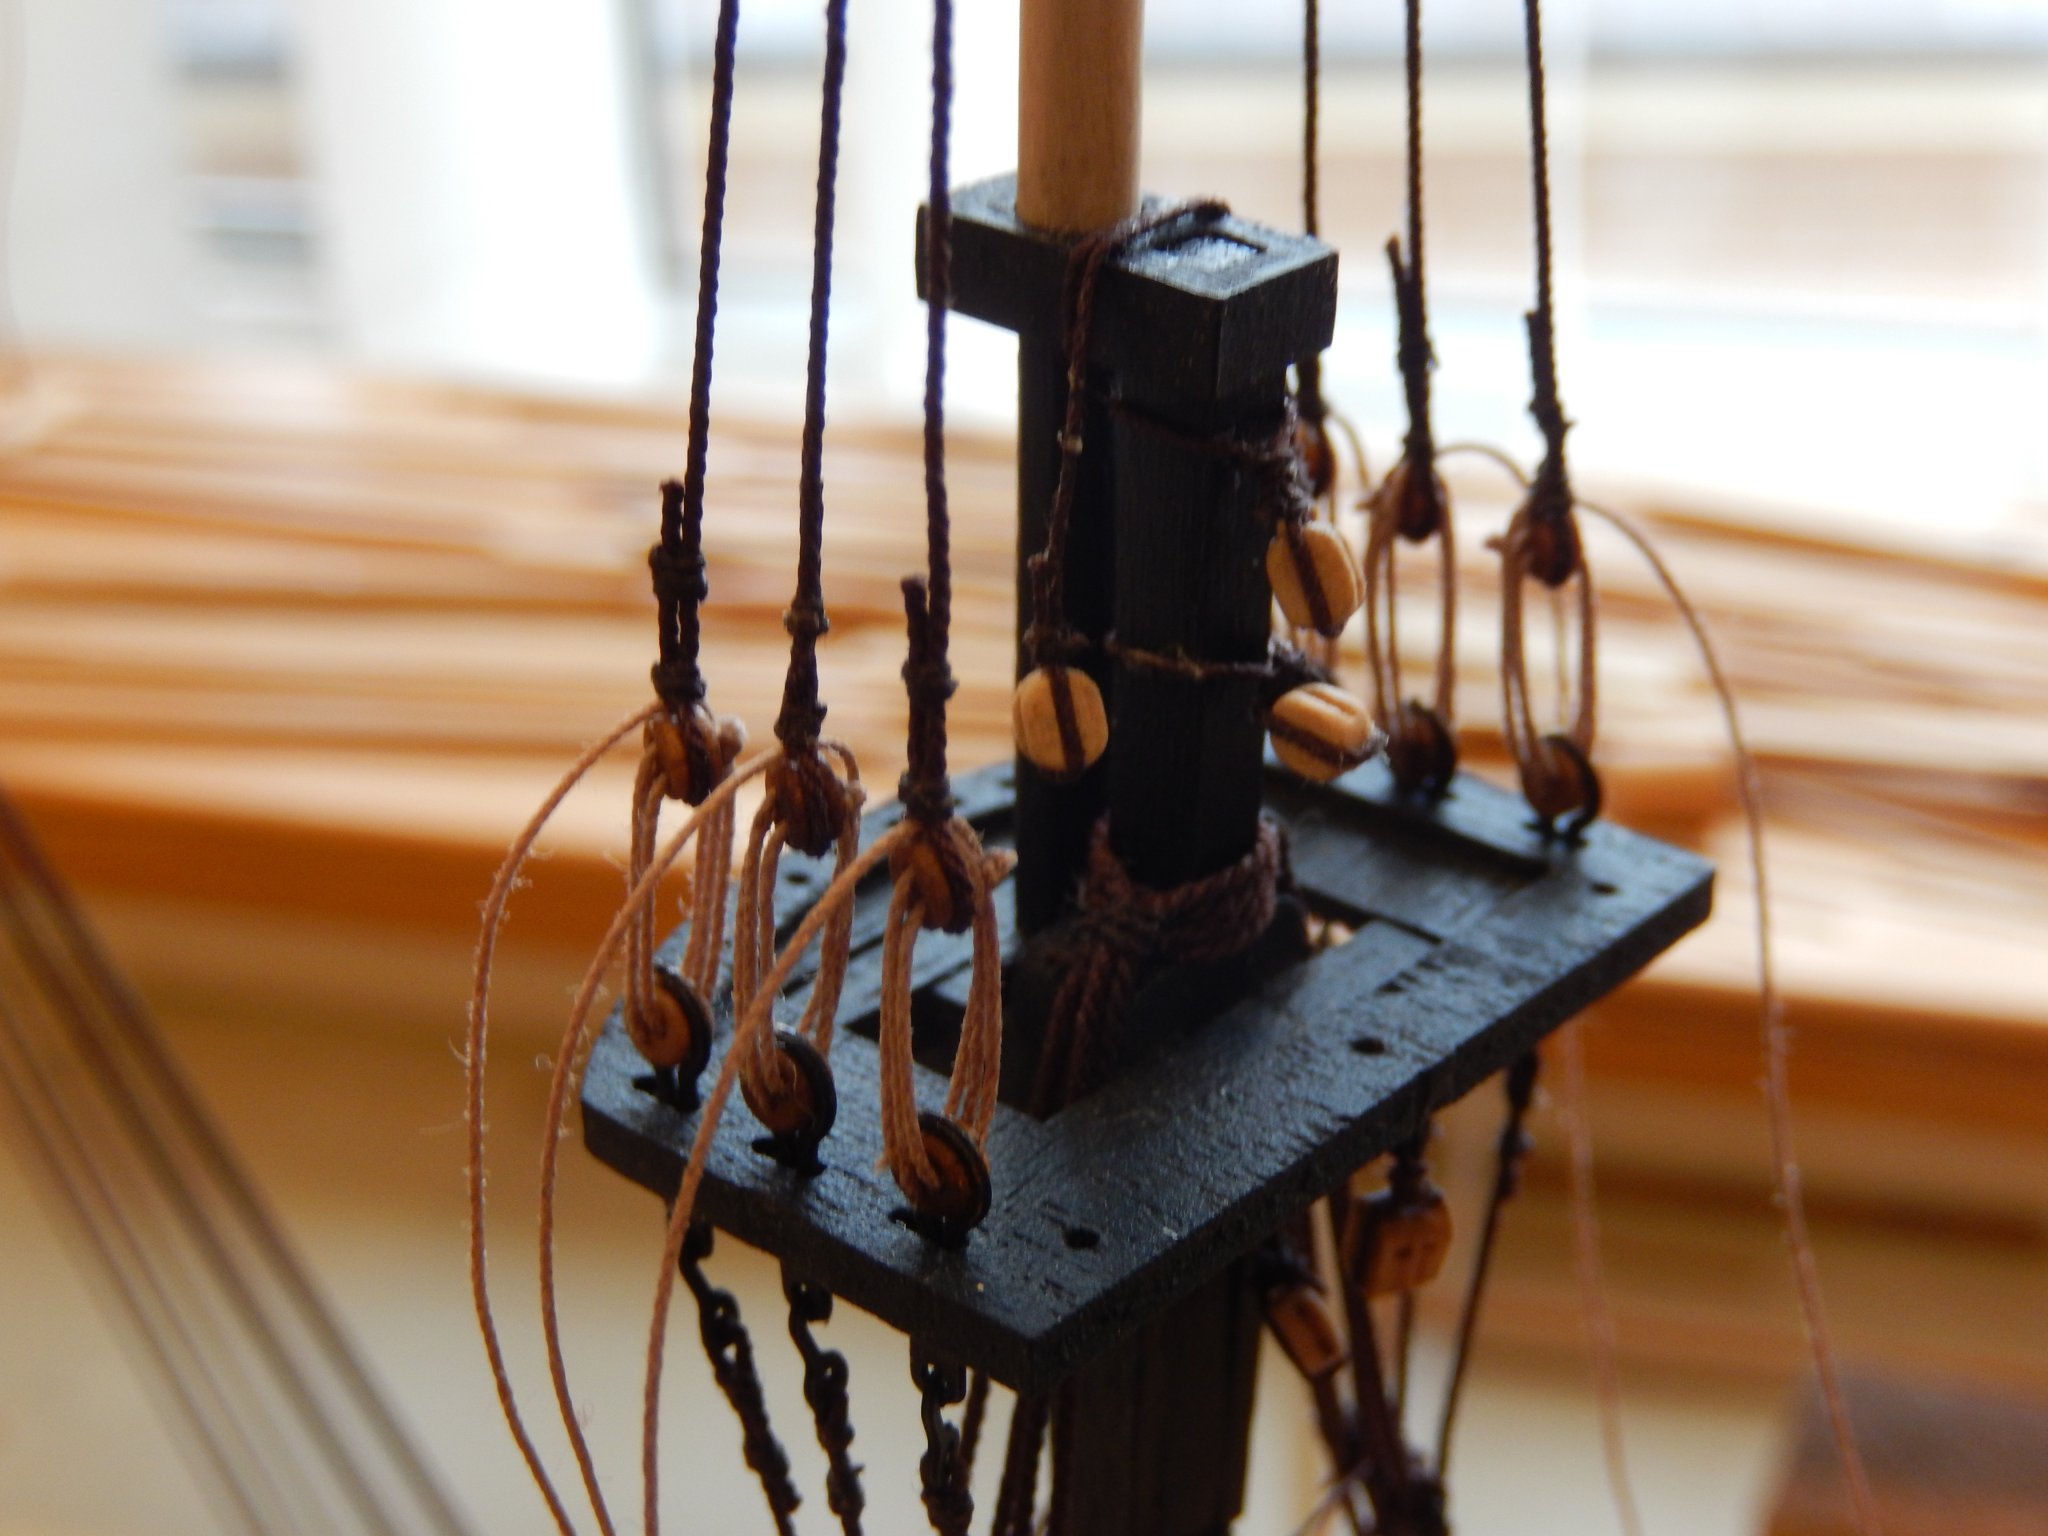
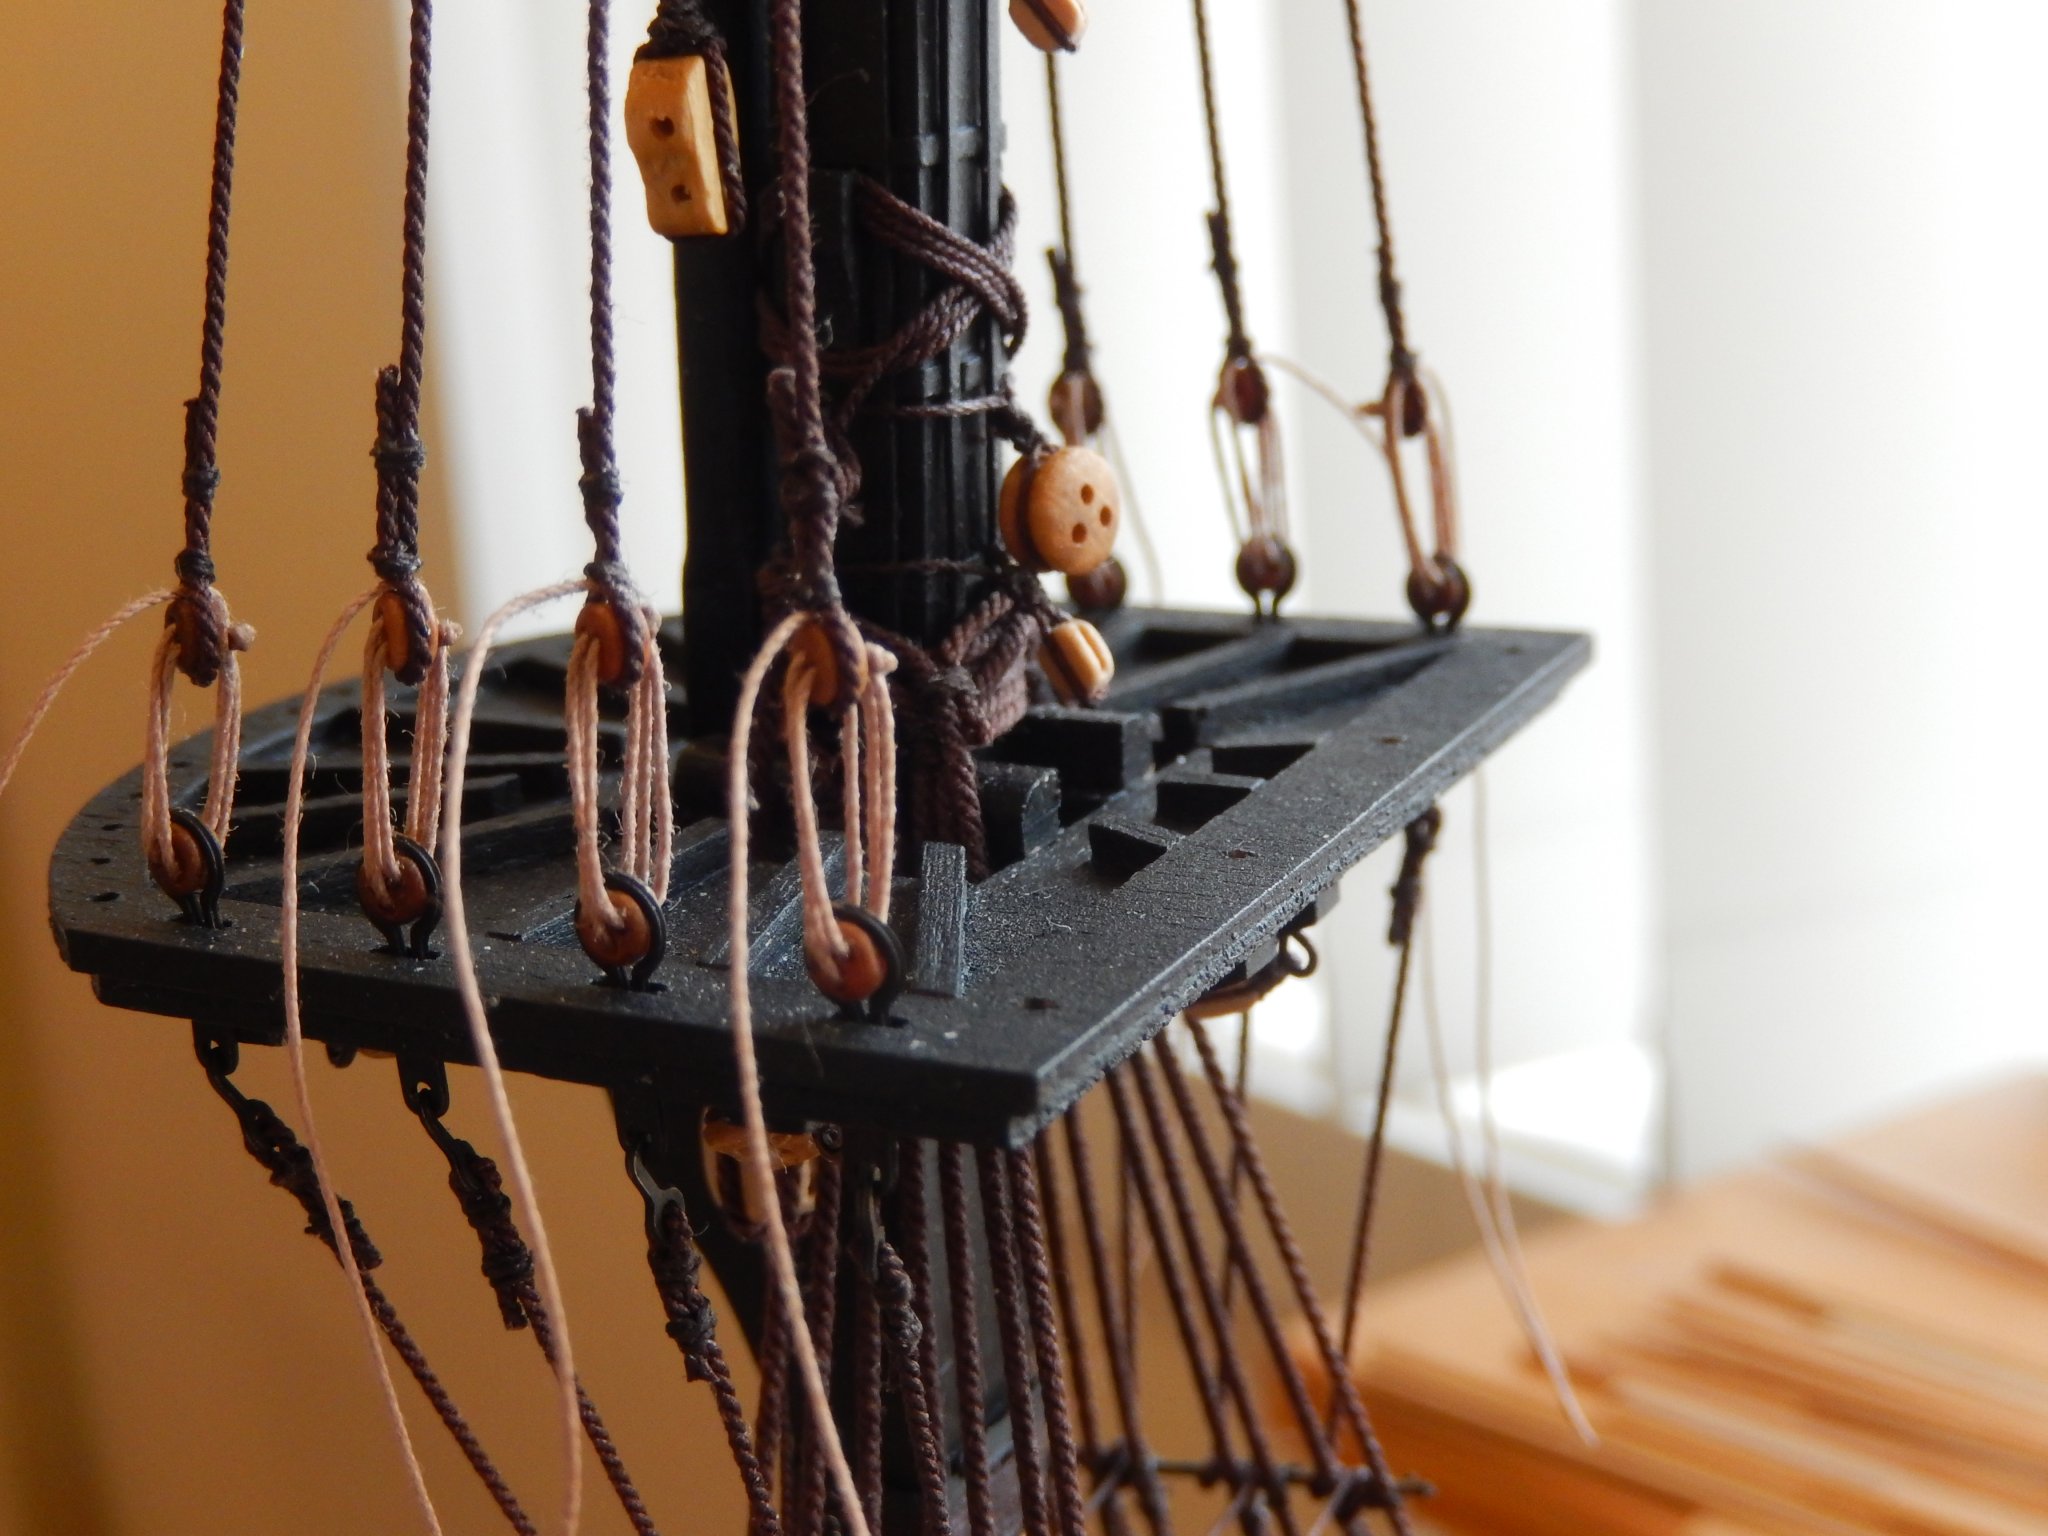
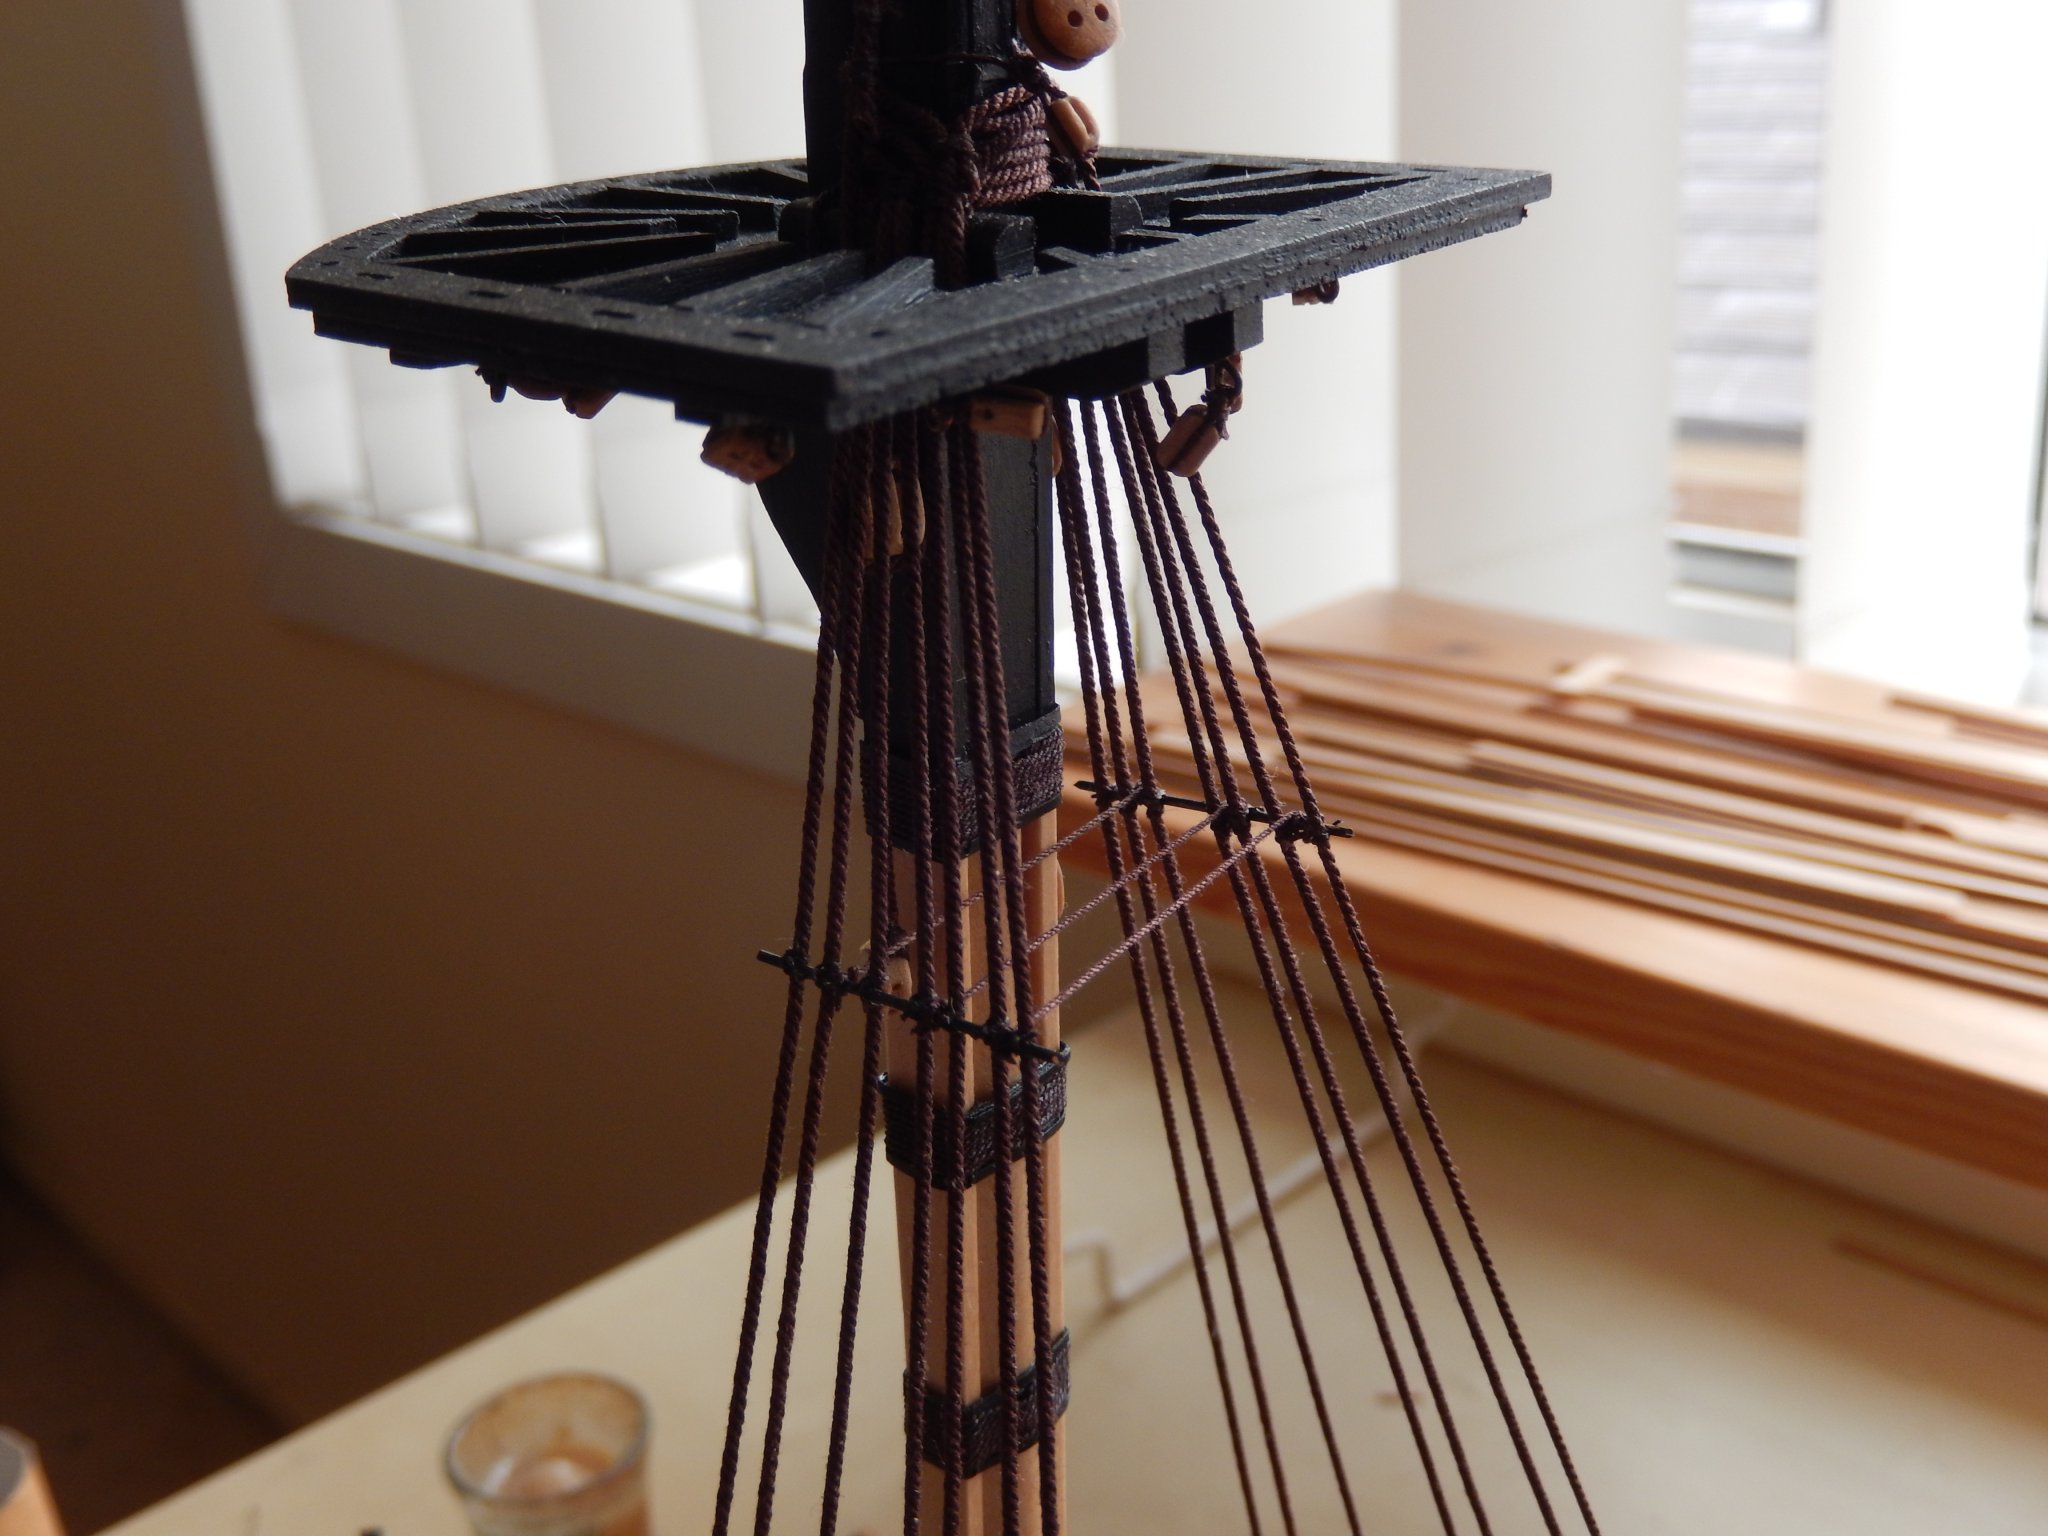
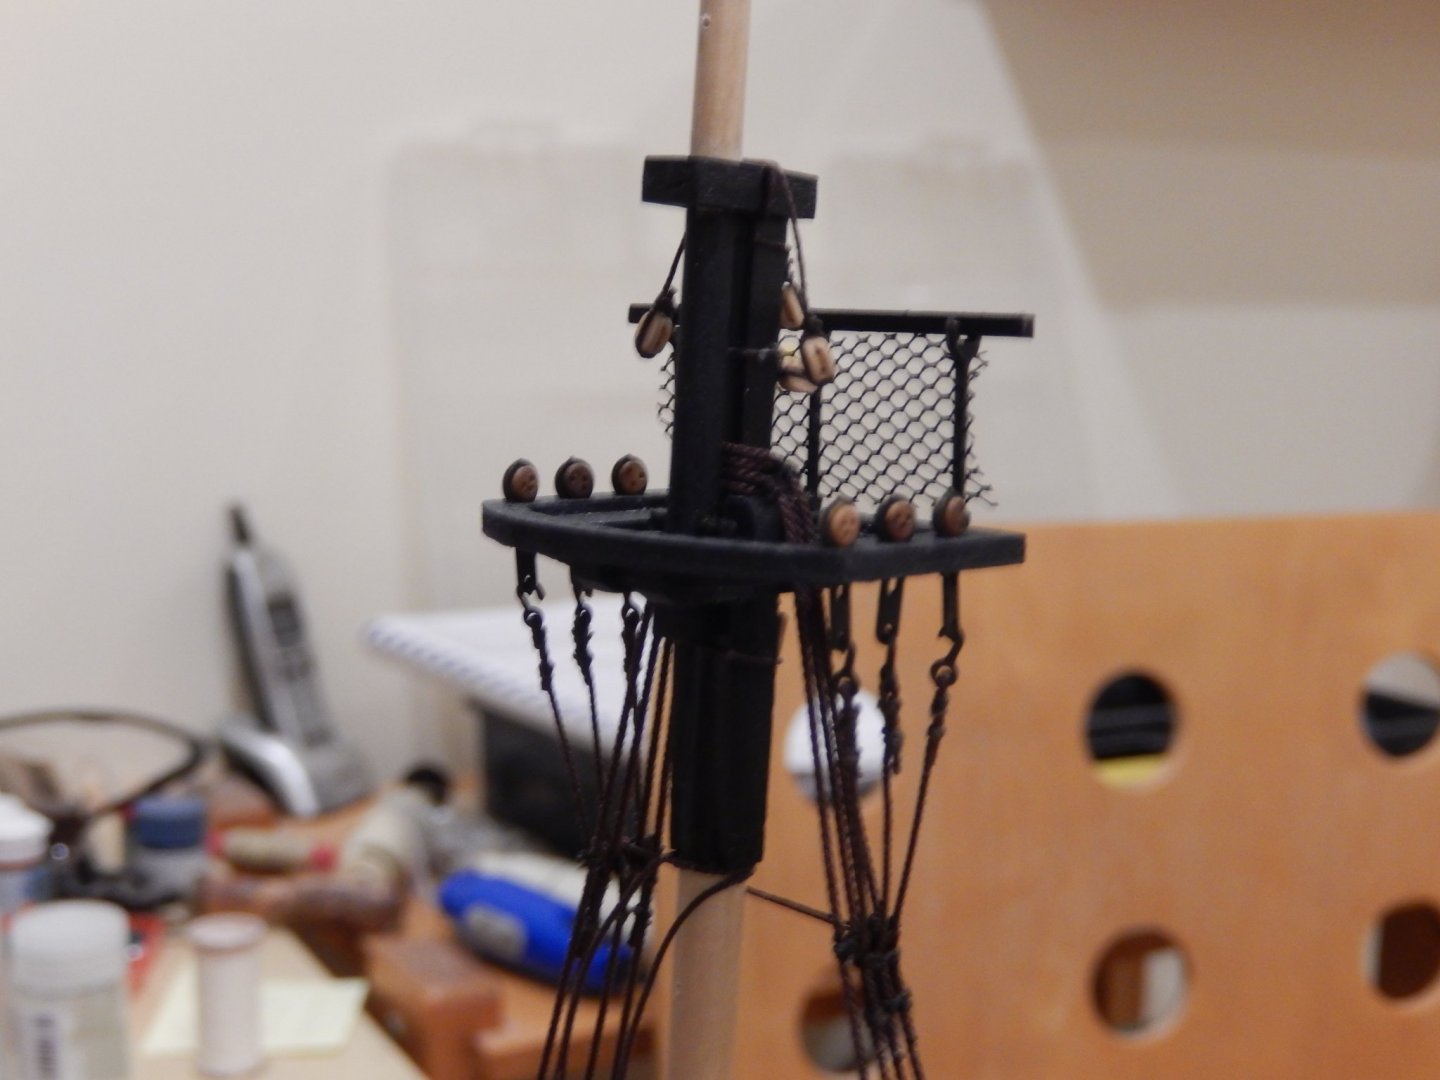
Here is a bit more progress. The tops are now complete. I thought the sailors needed a little more protection, but I can see that some adjustment and a little more trimming of the mesh is required. If it doesn't work out, it's easy to get rid of it. The railings are both dry fitted at the moment.
- 421 replies
-
- 8
-
-
- caldercraft
- granado
- (and 1 more)
-
Thanks mugje. The lower mizzen is now finished. Boat building is on hold for the weekend - it's off the the beach and away (?) from the smoke.
- 421 replies
-
- 10
-
-
- caldercraft
- granado
- (and 1 more)
-
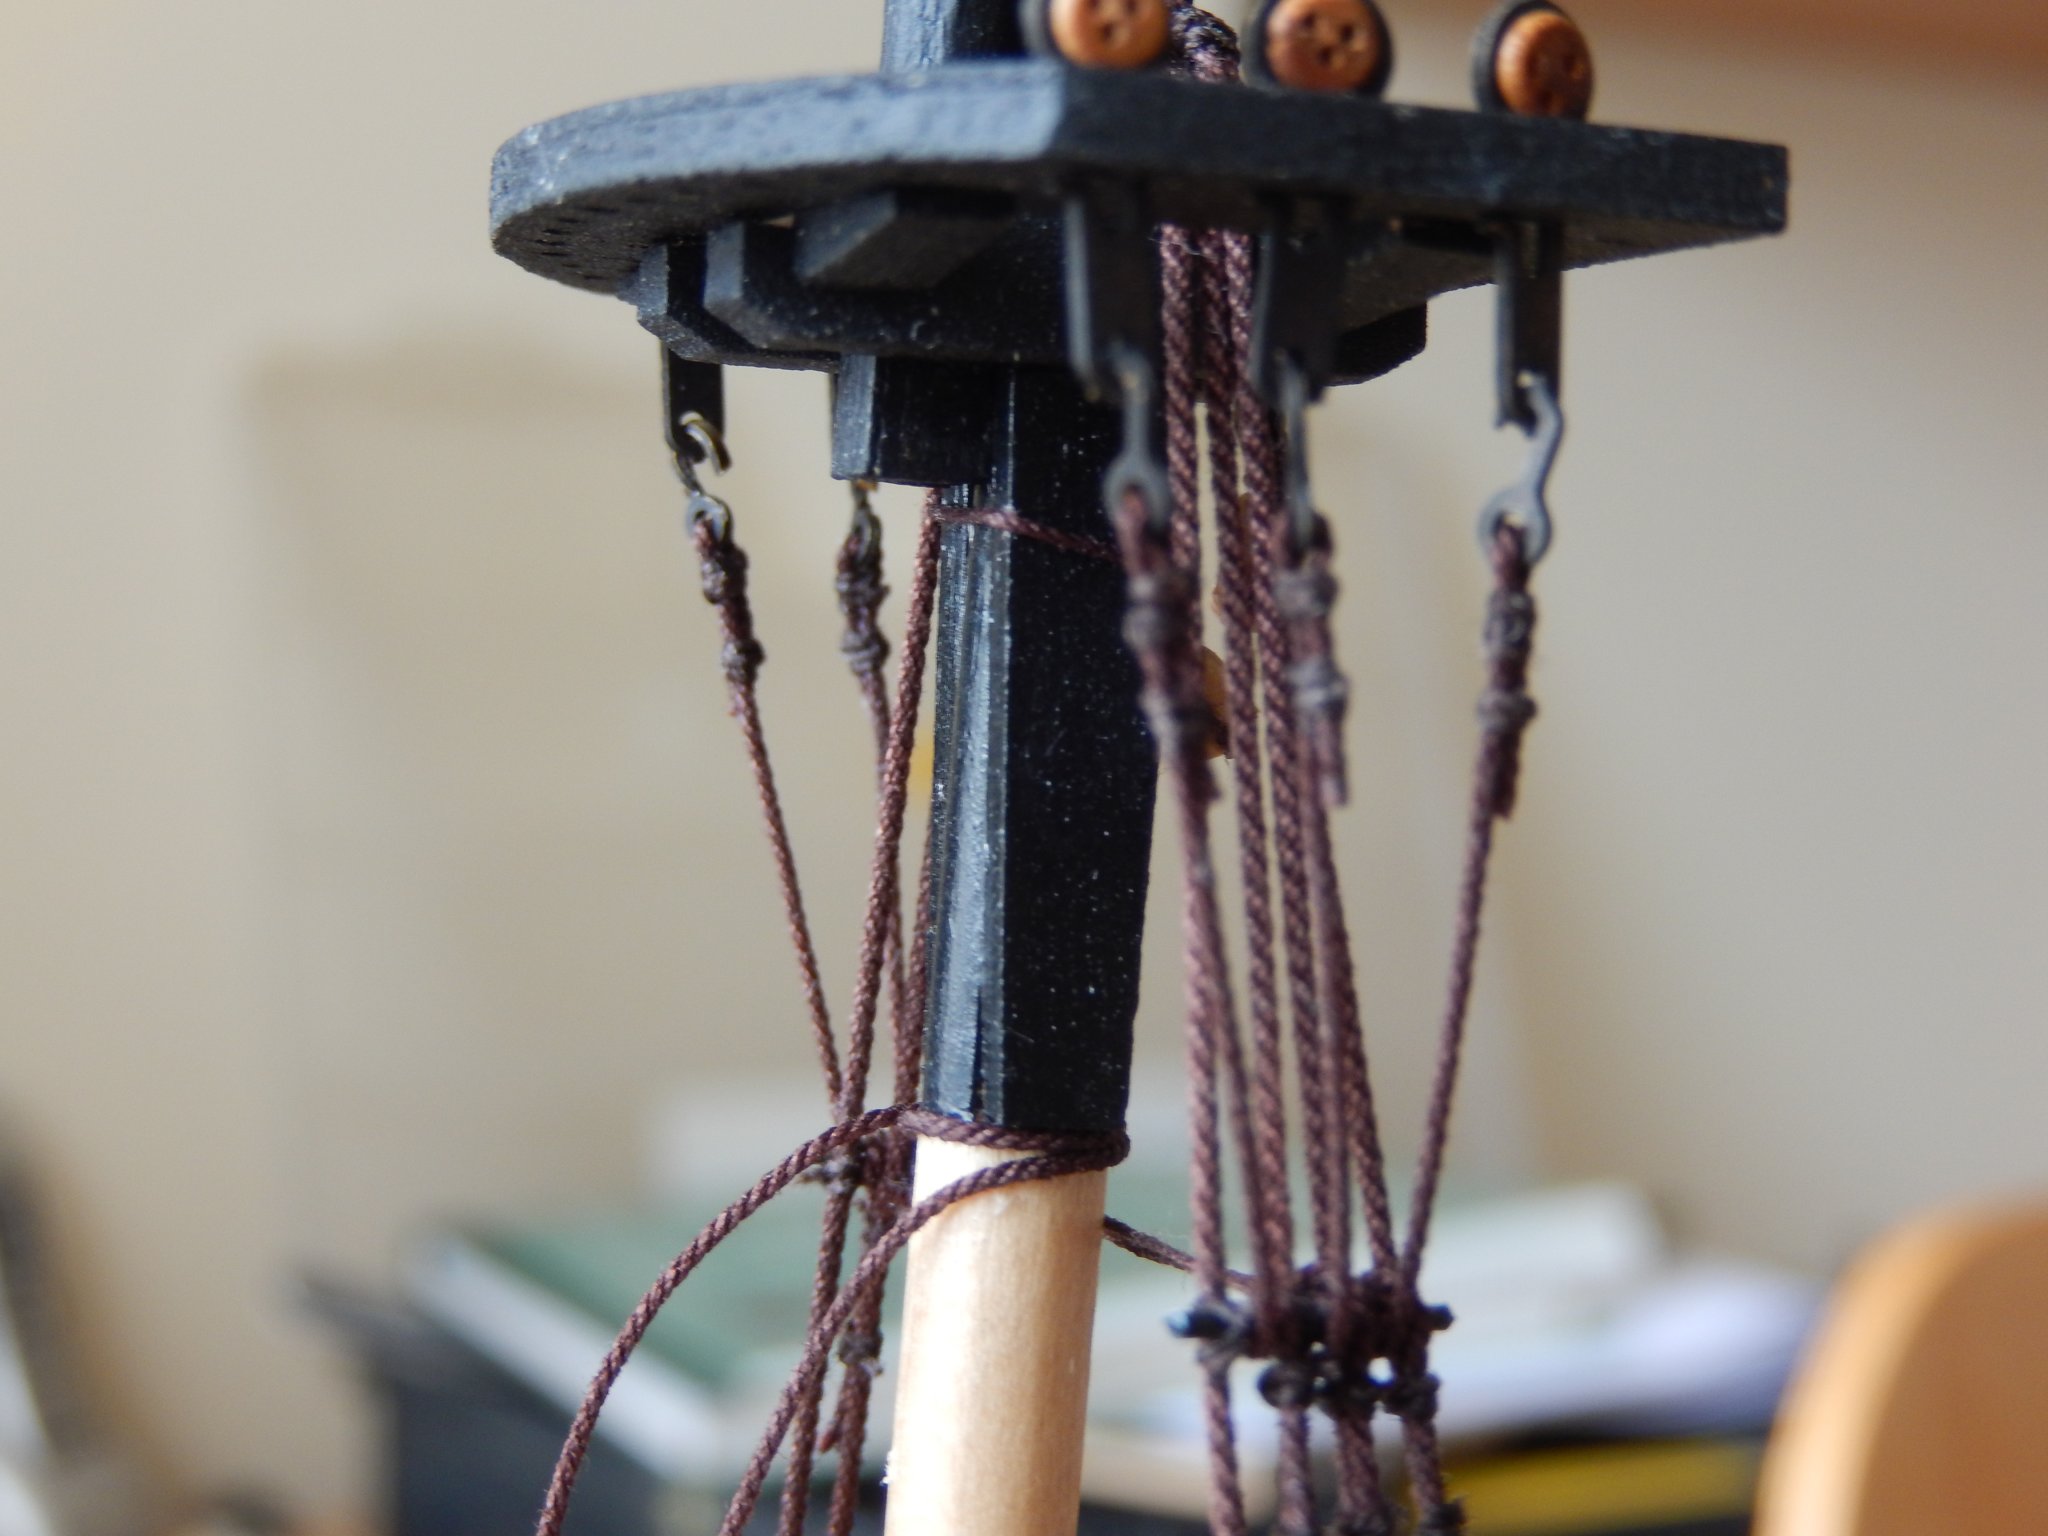
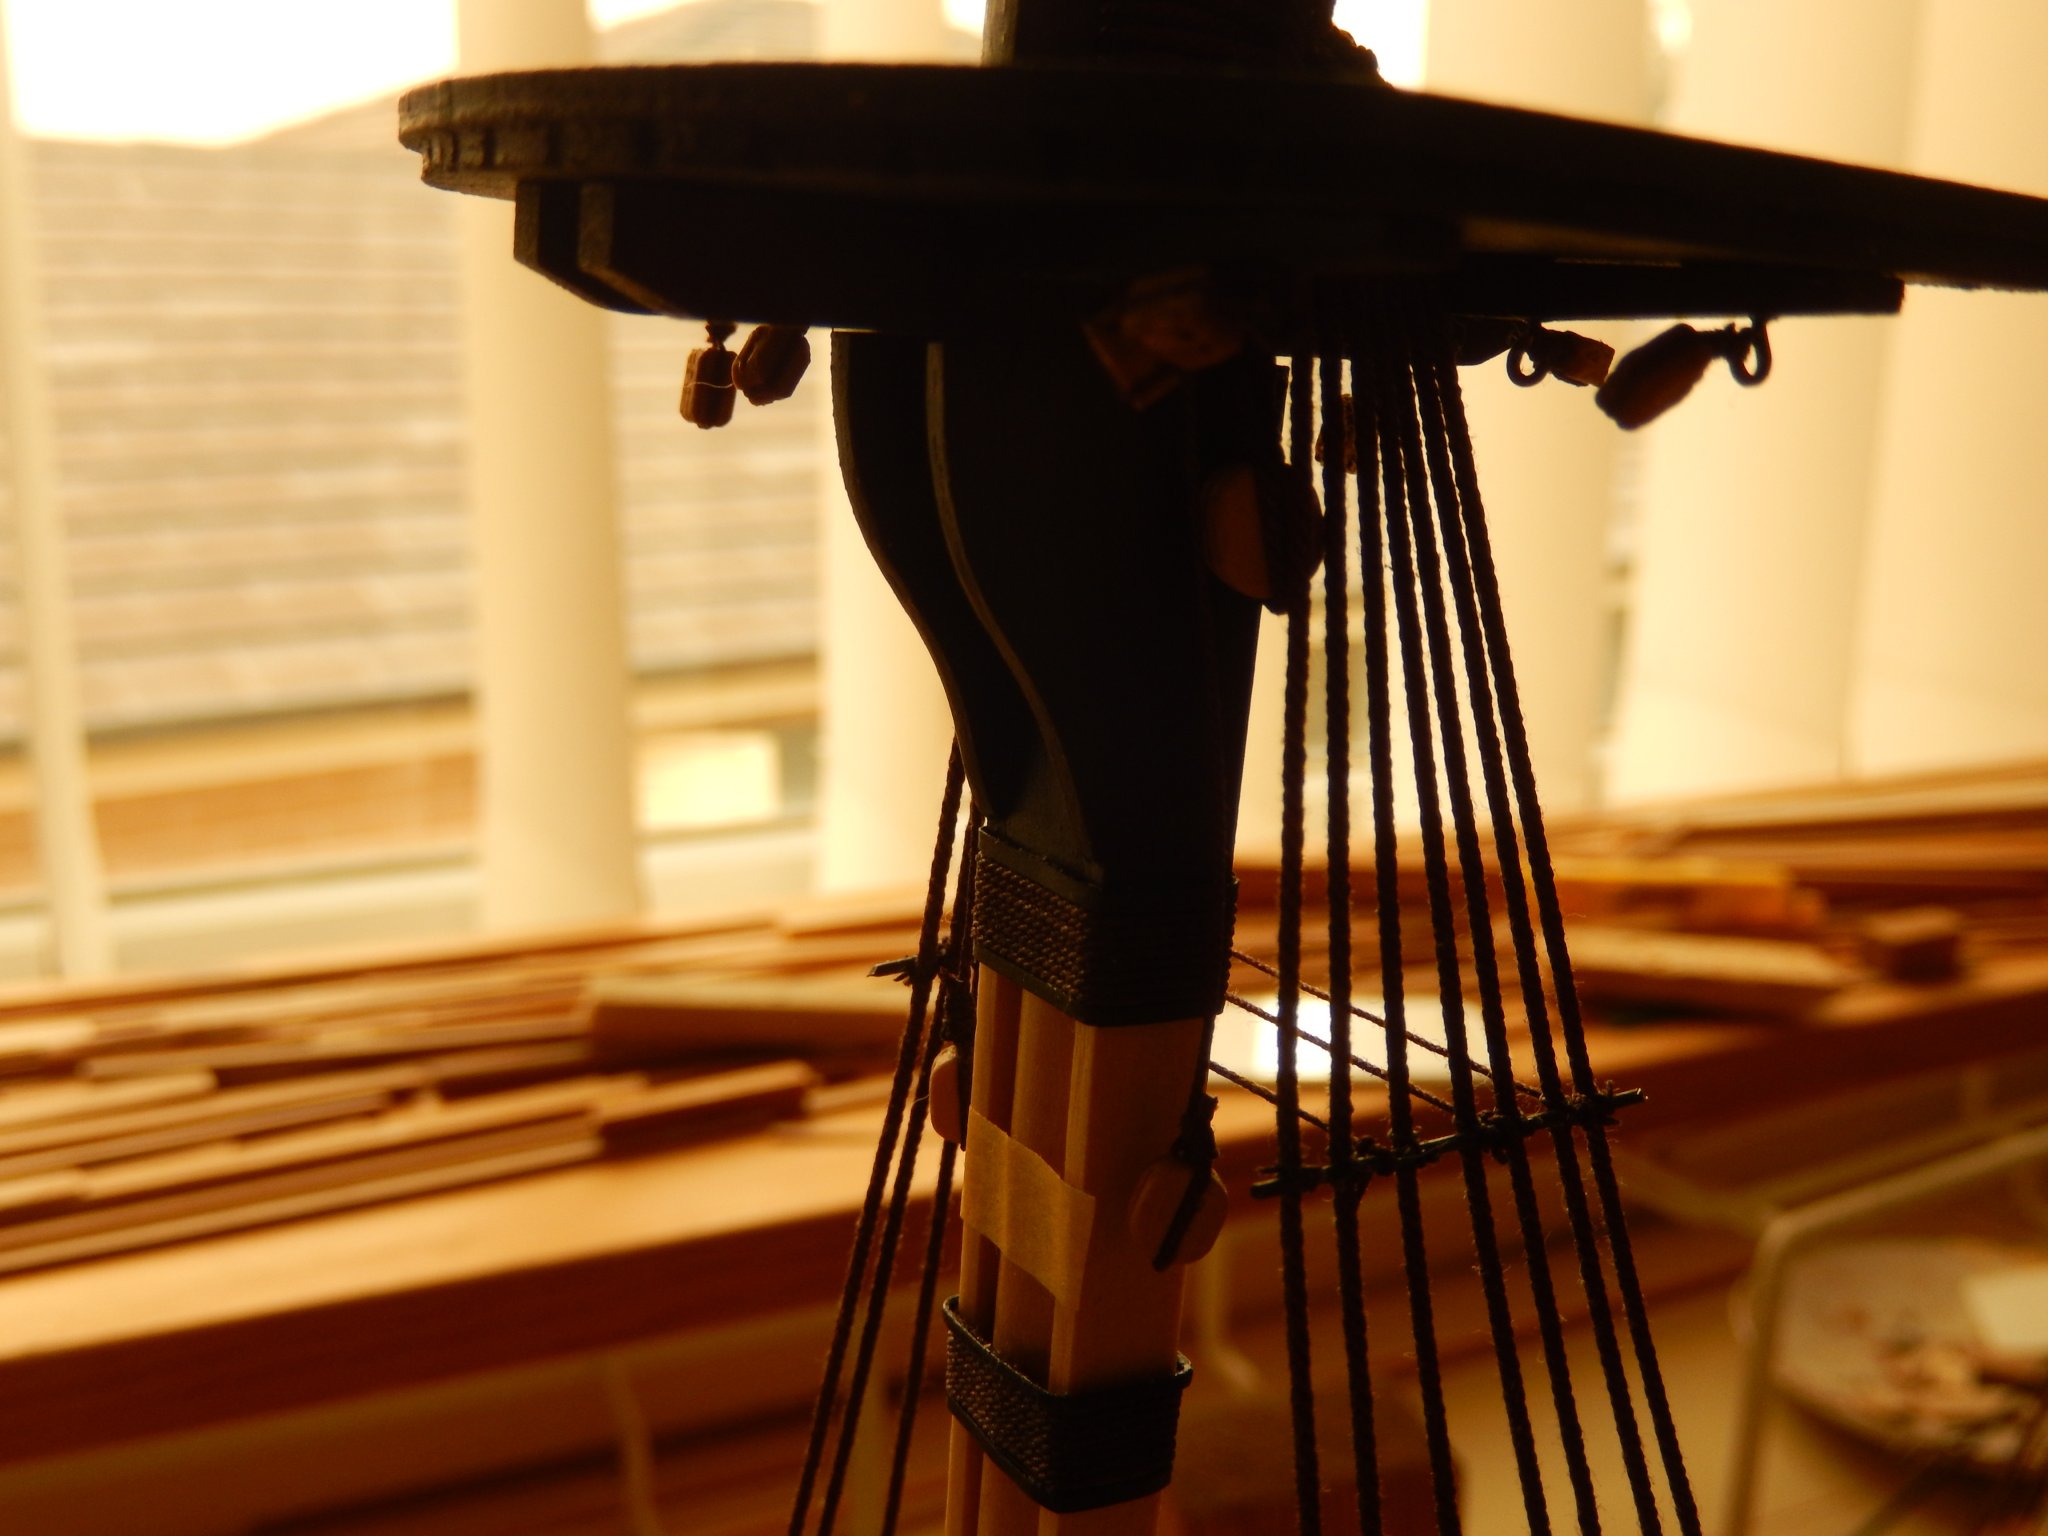
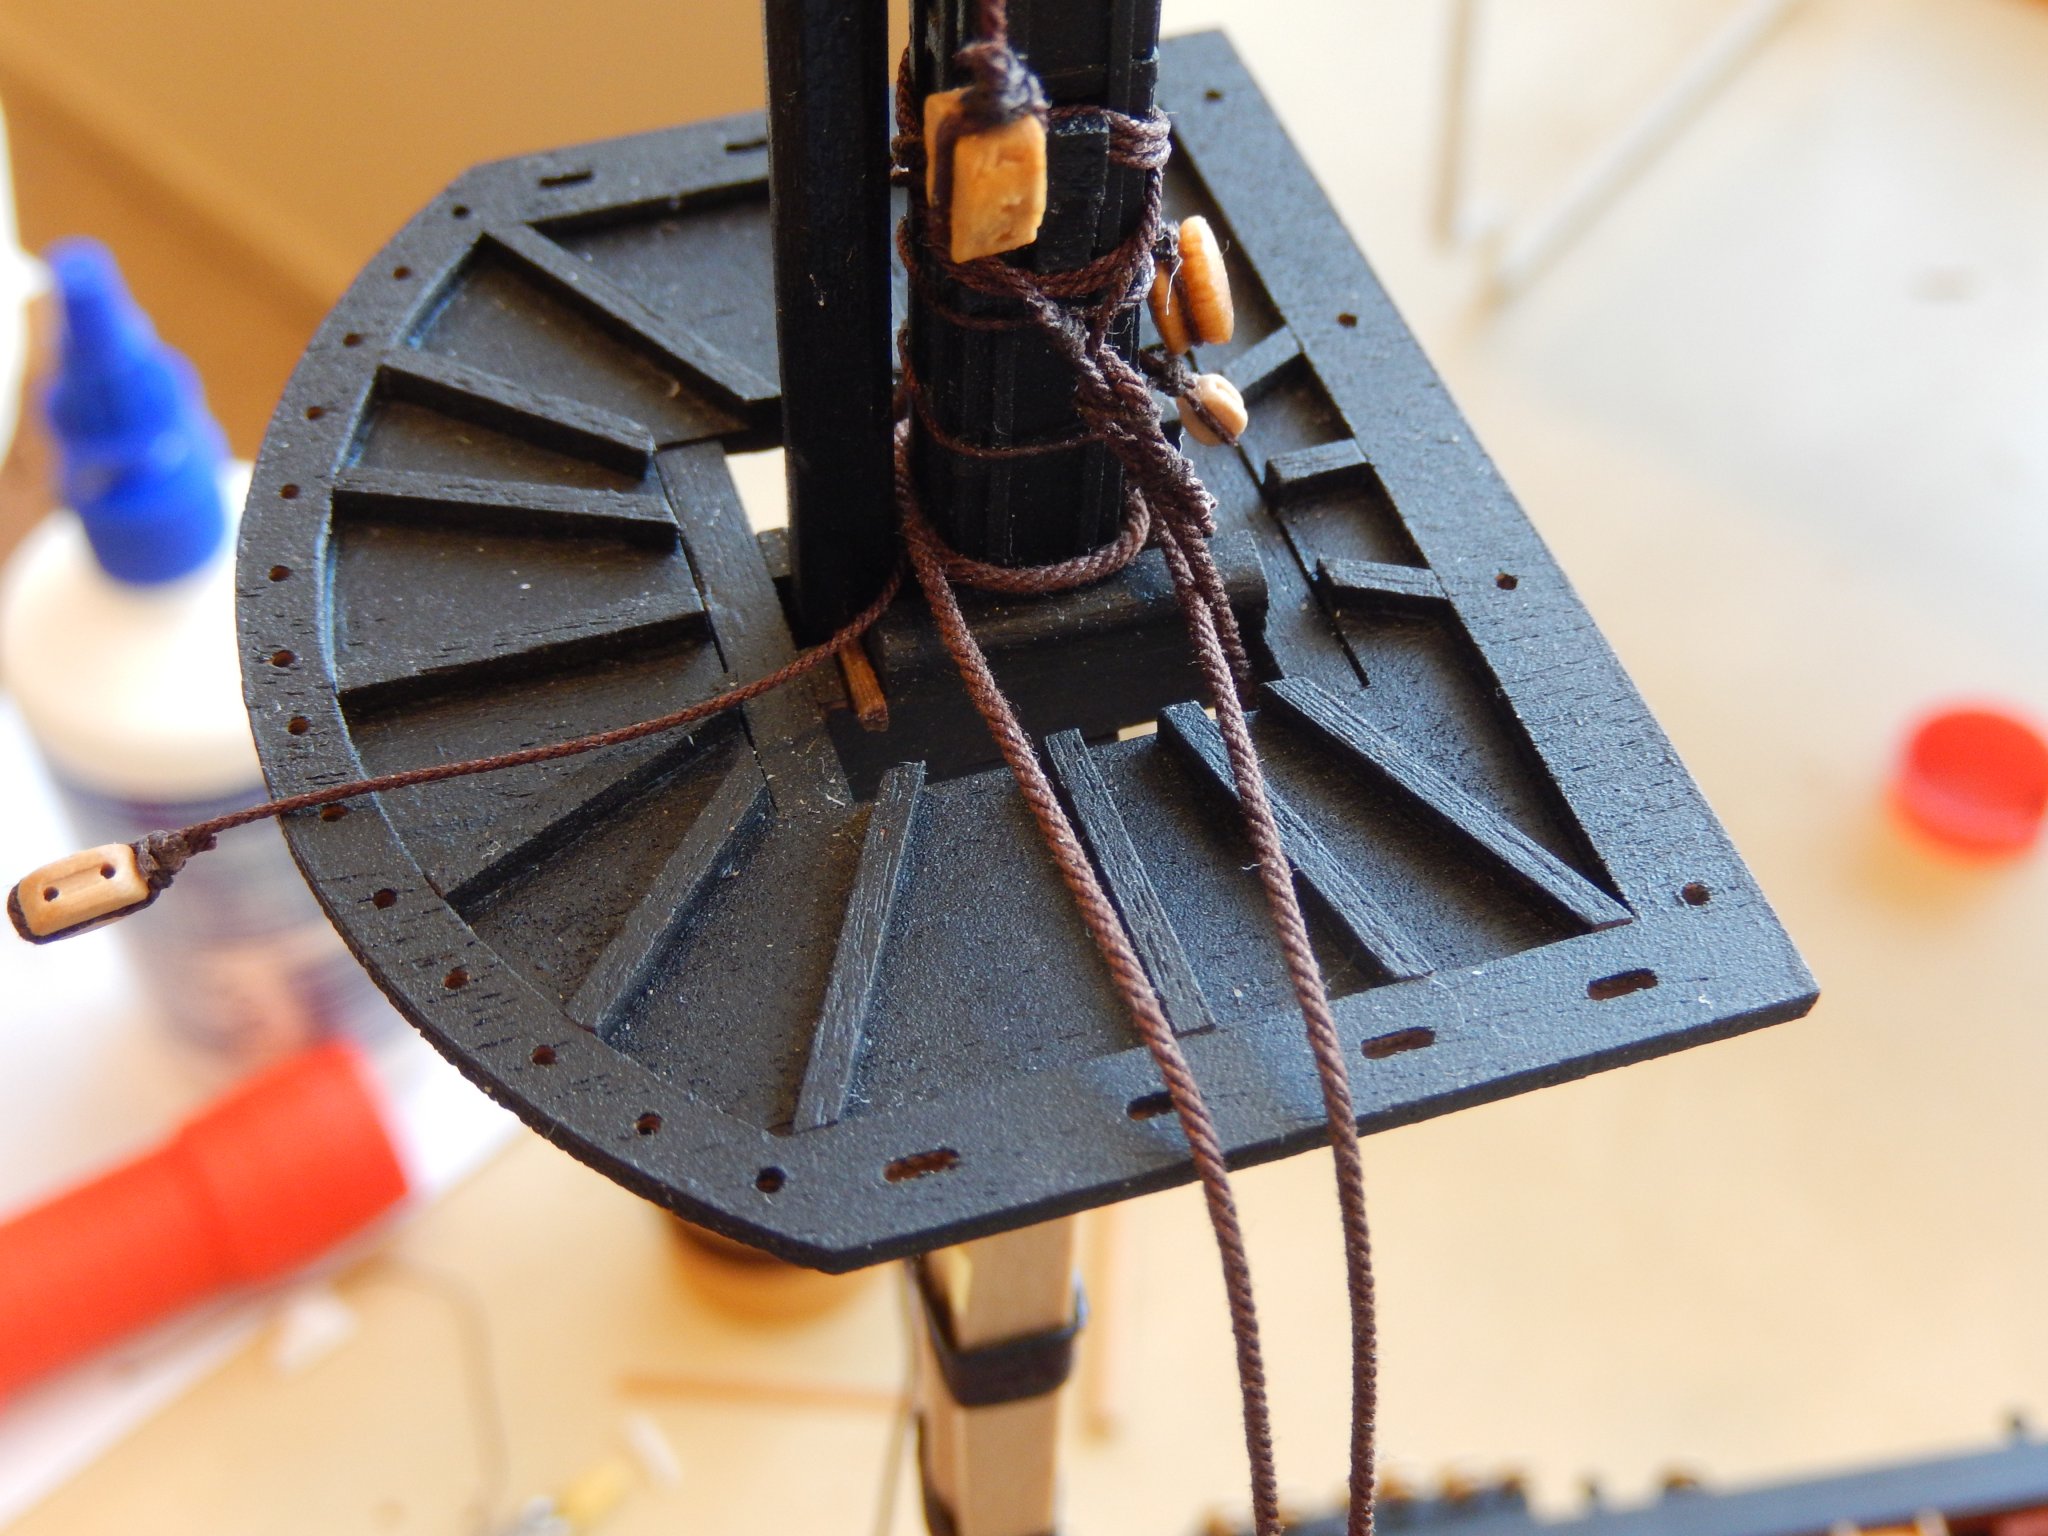
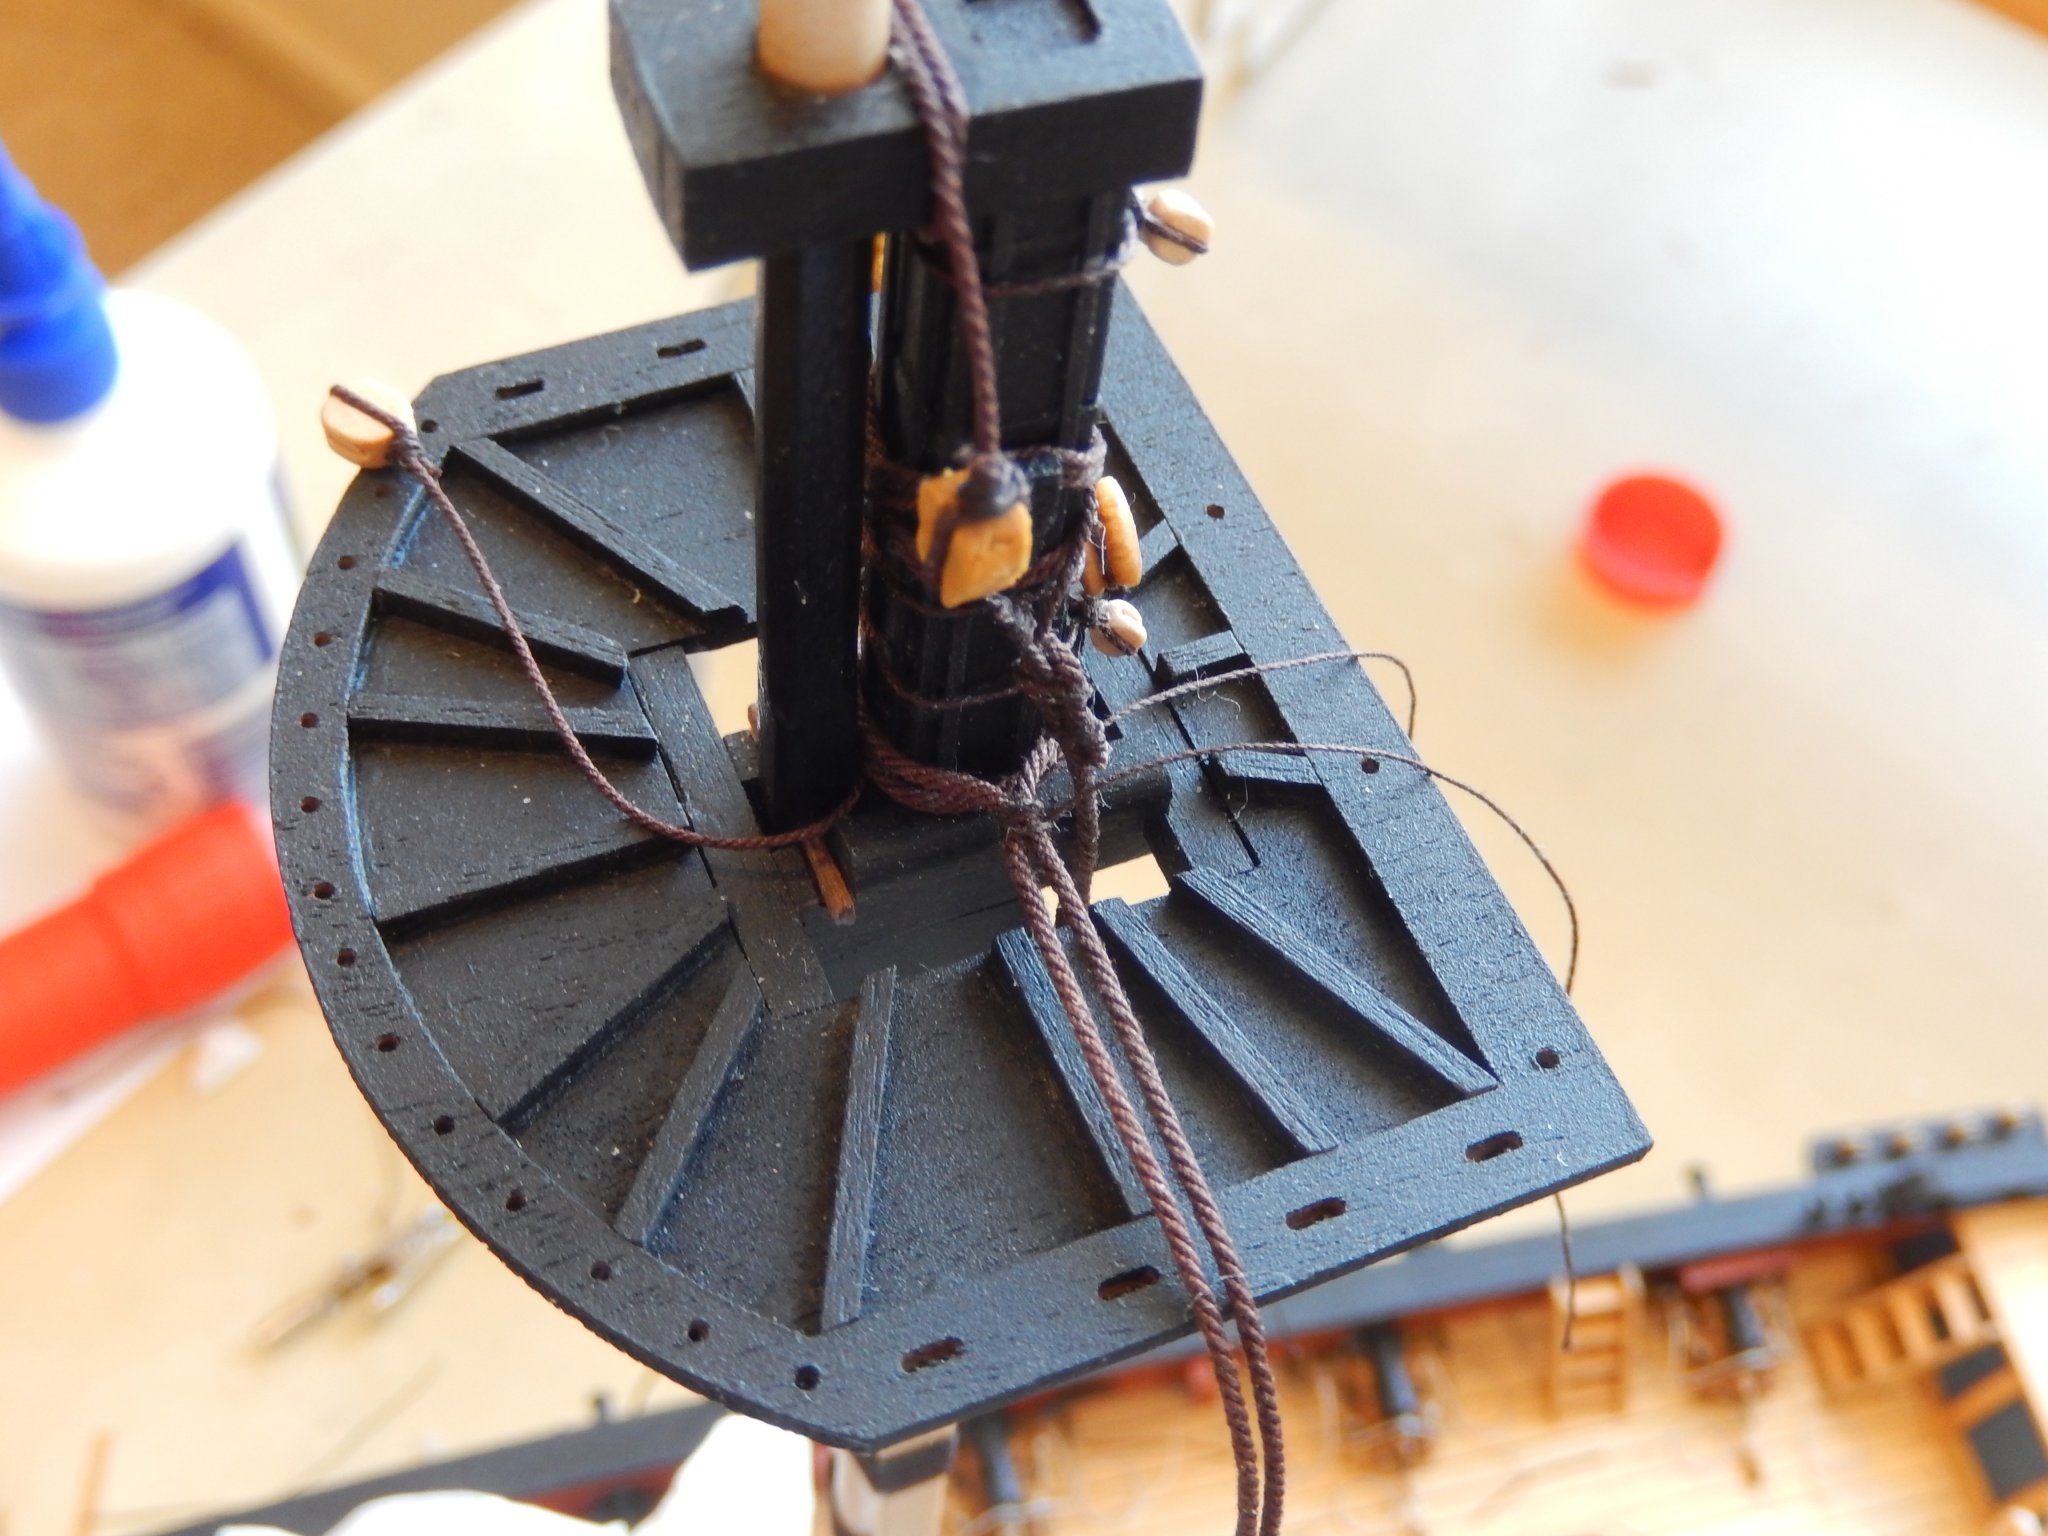
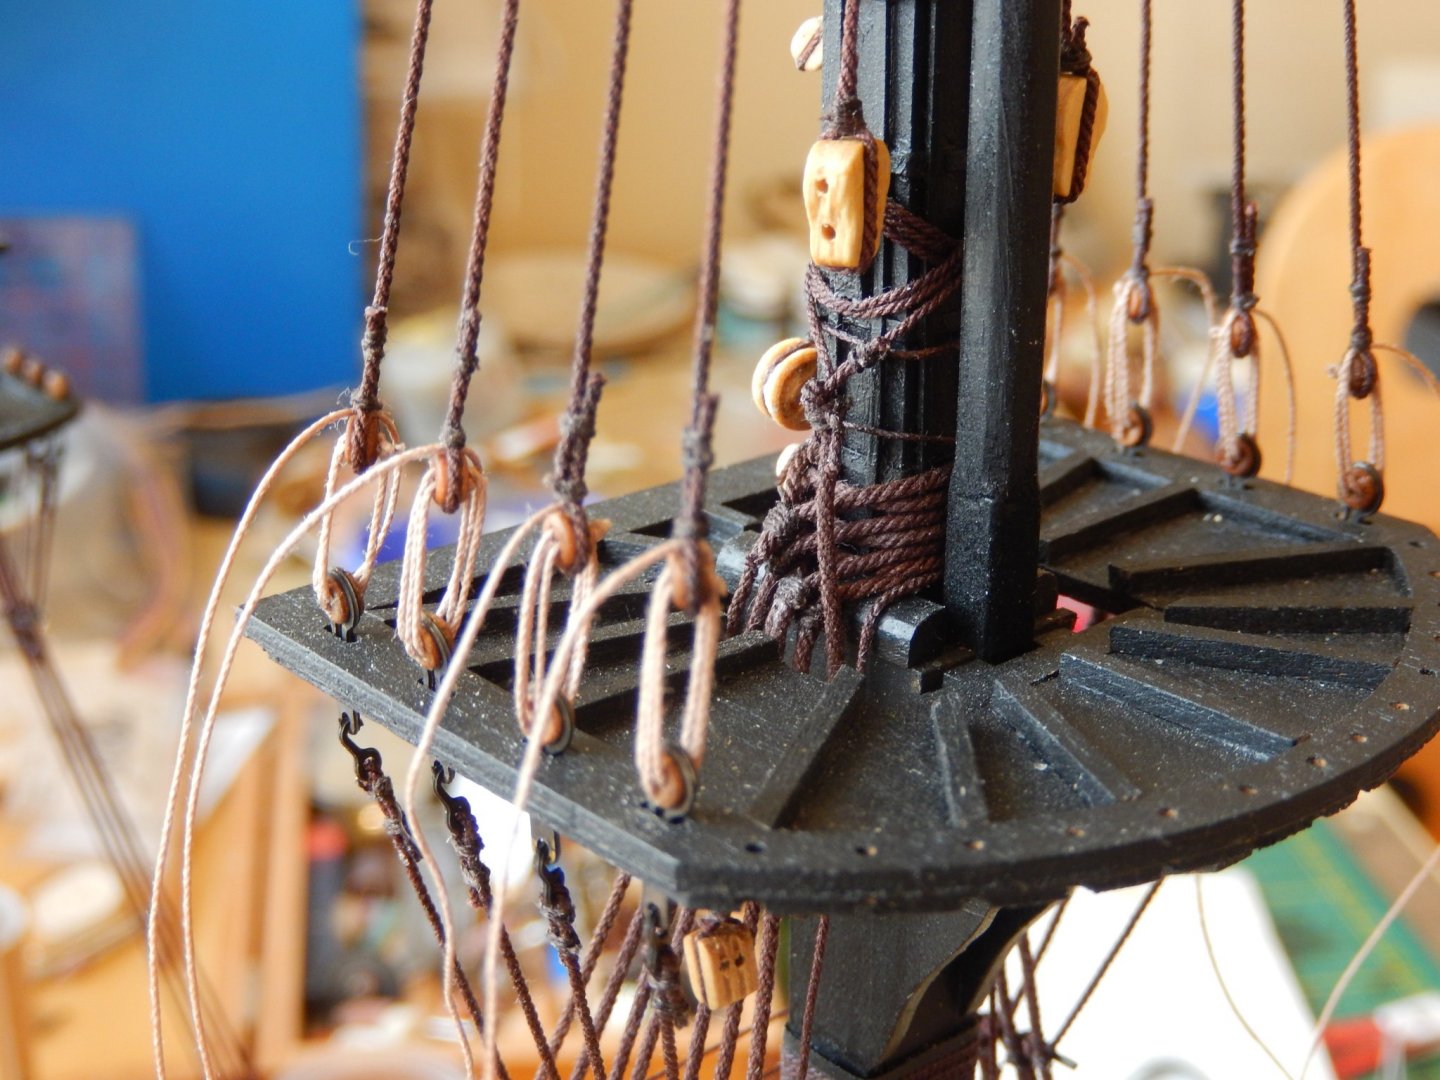
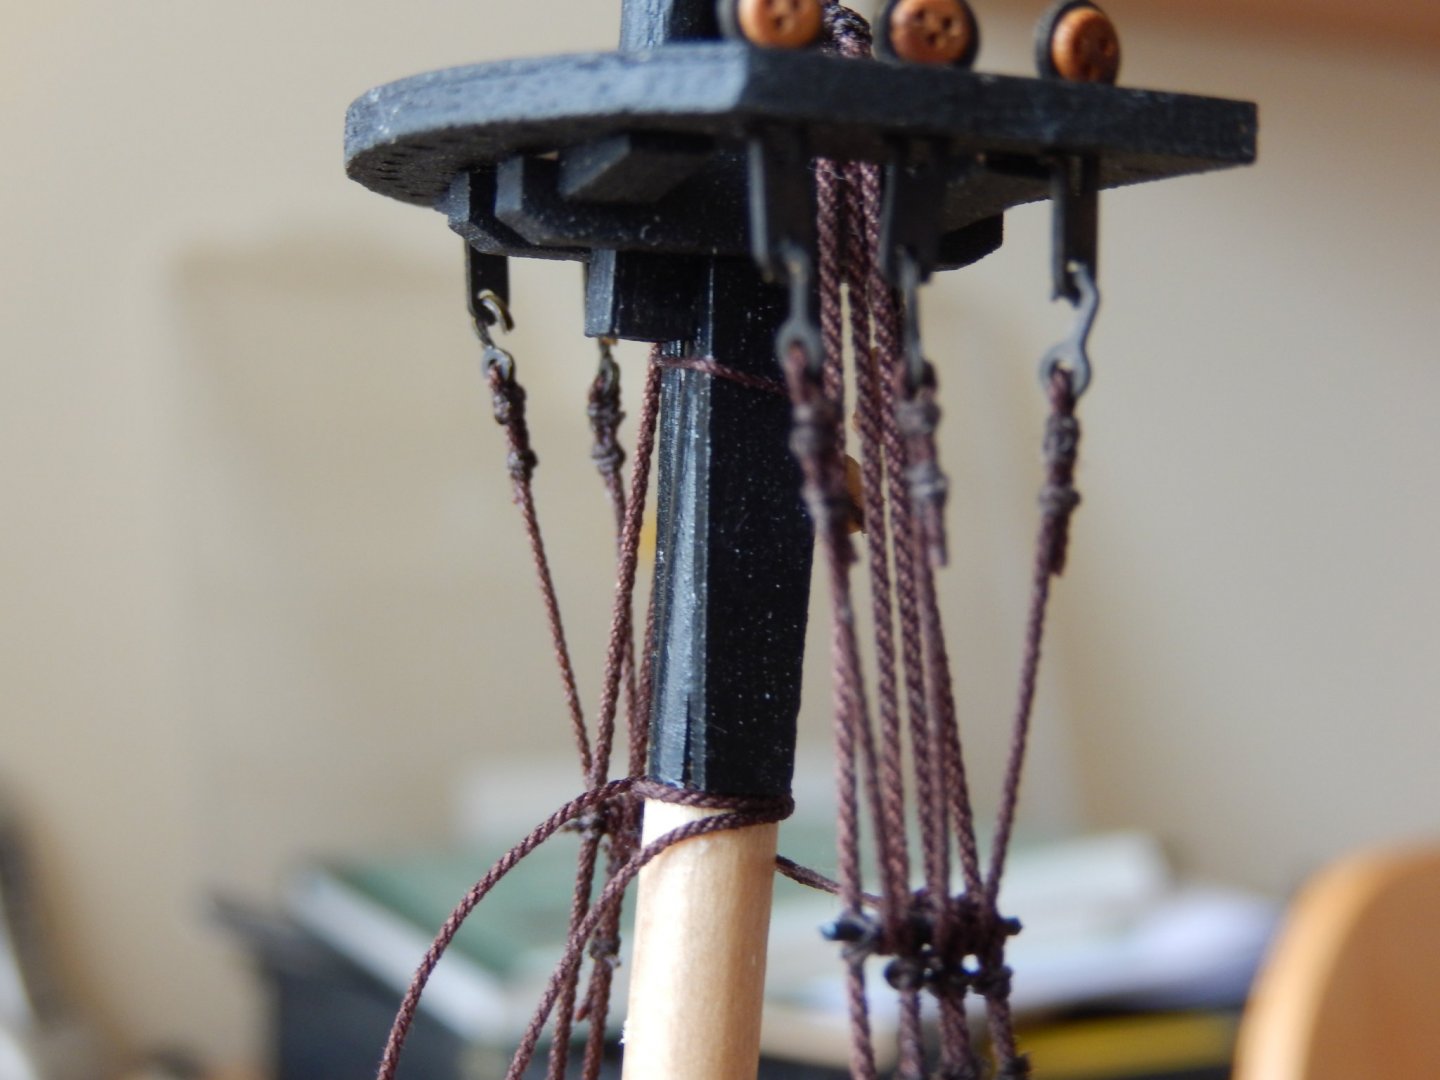
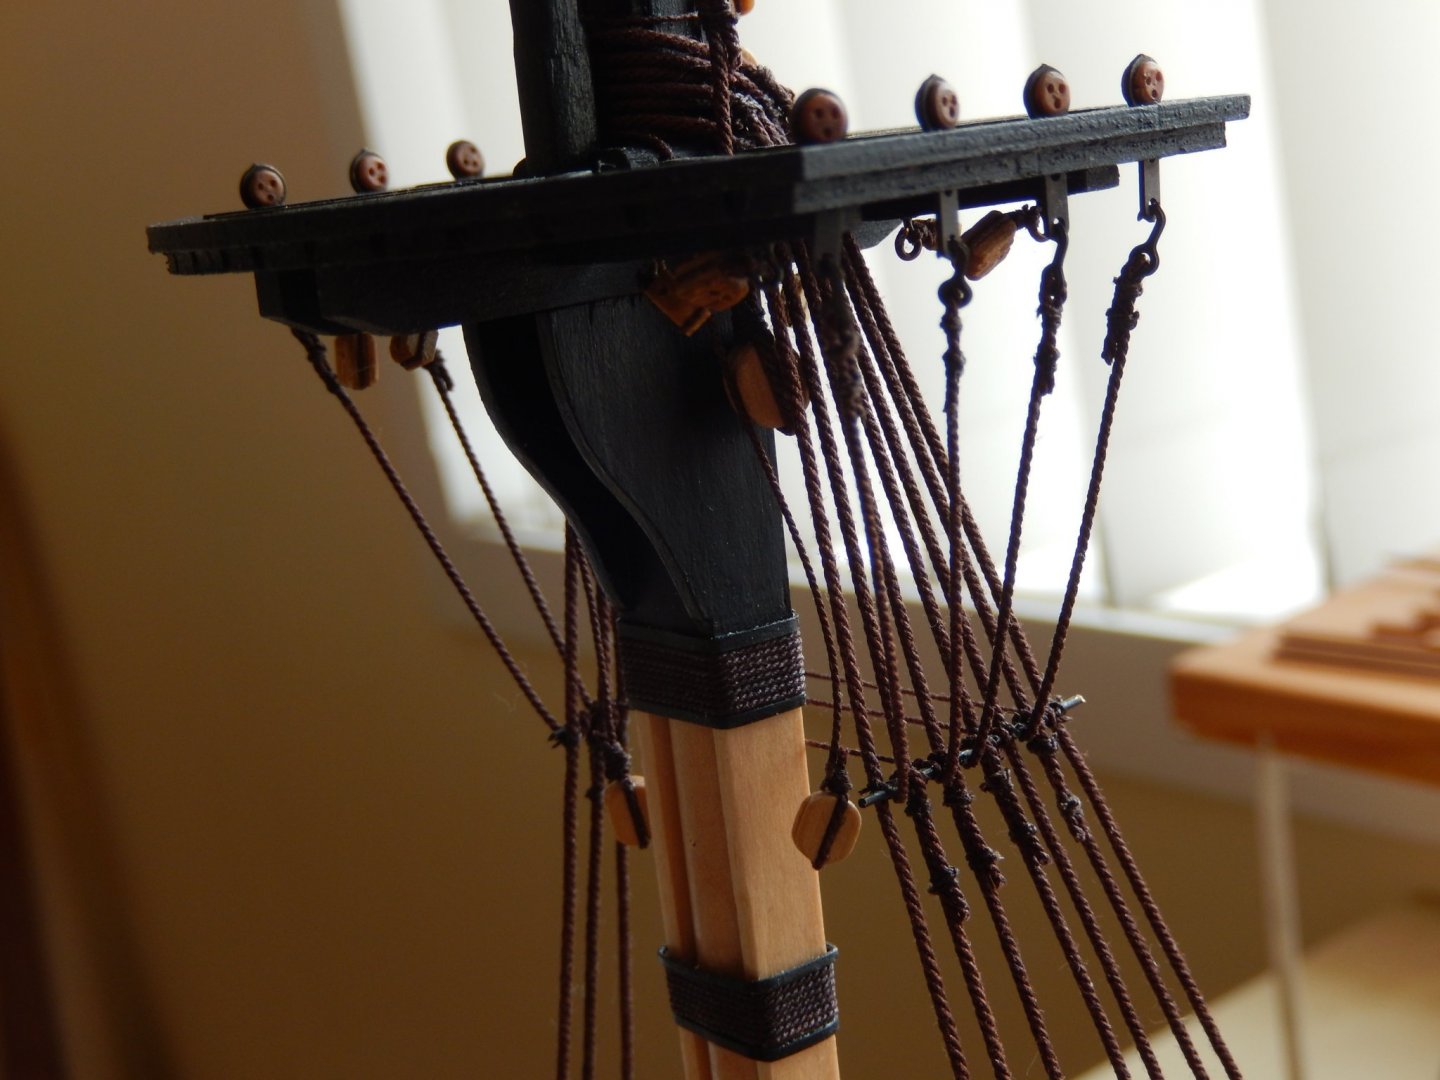
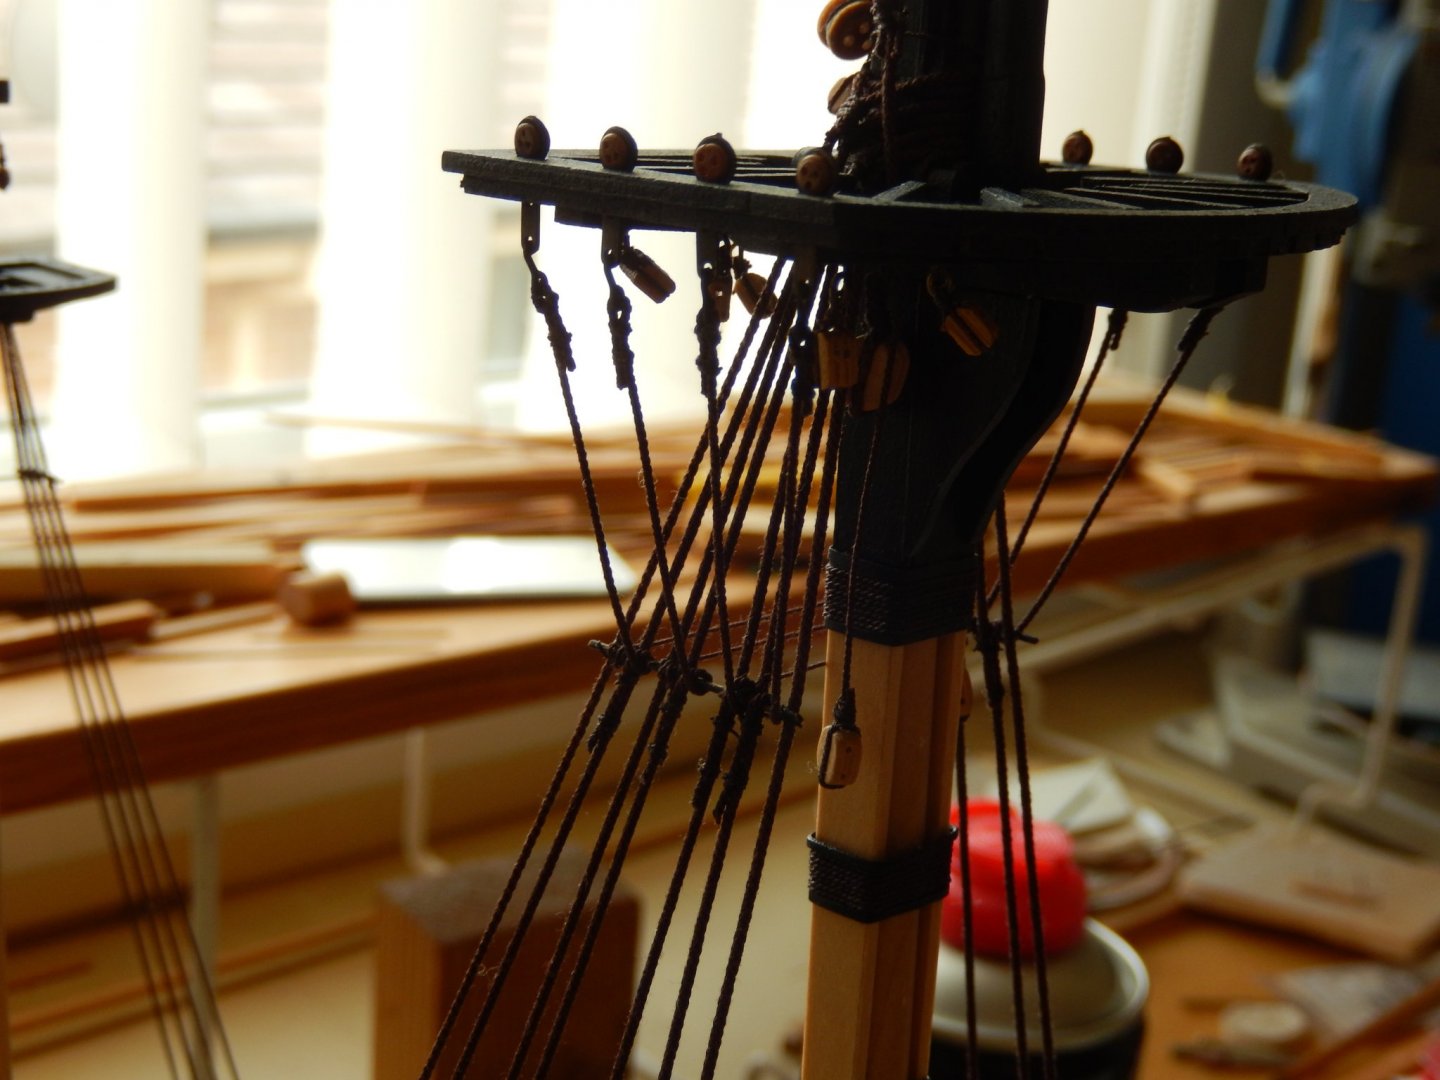
Thanks for the encouragement Kevin. The main futtock shrouds are now complete. The process proved easier than I anticipated. First the hooks were inserted to the strops. The 'ropes' (wetting it makes them easier to work with, and make sure they a longer than will eventually be necessary) are dropped down over the front of staves, then looped over them. They are then loosely tied to the appropriate shrouds. The futtock shrouds may then be pulled through the loose knot to the appropriate tension, then properly tied off.

- 421 replies
-
- 14
-
-
- caldercraft
- granado
- (and 1 more)
-
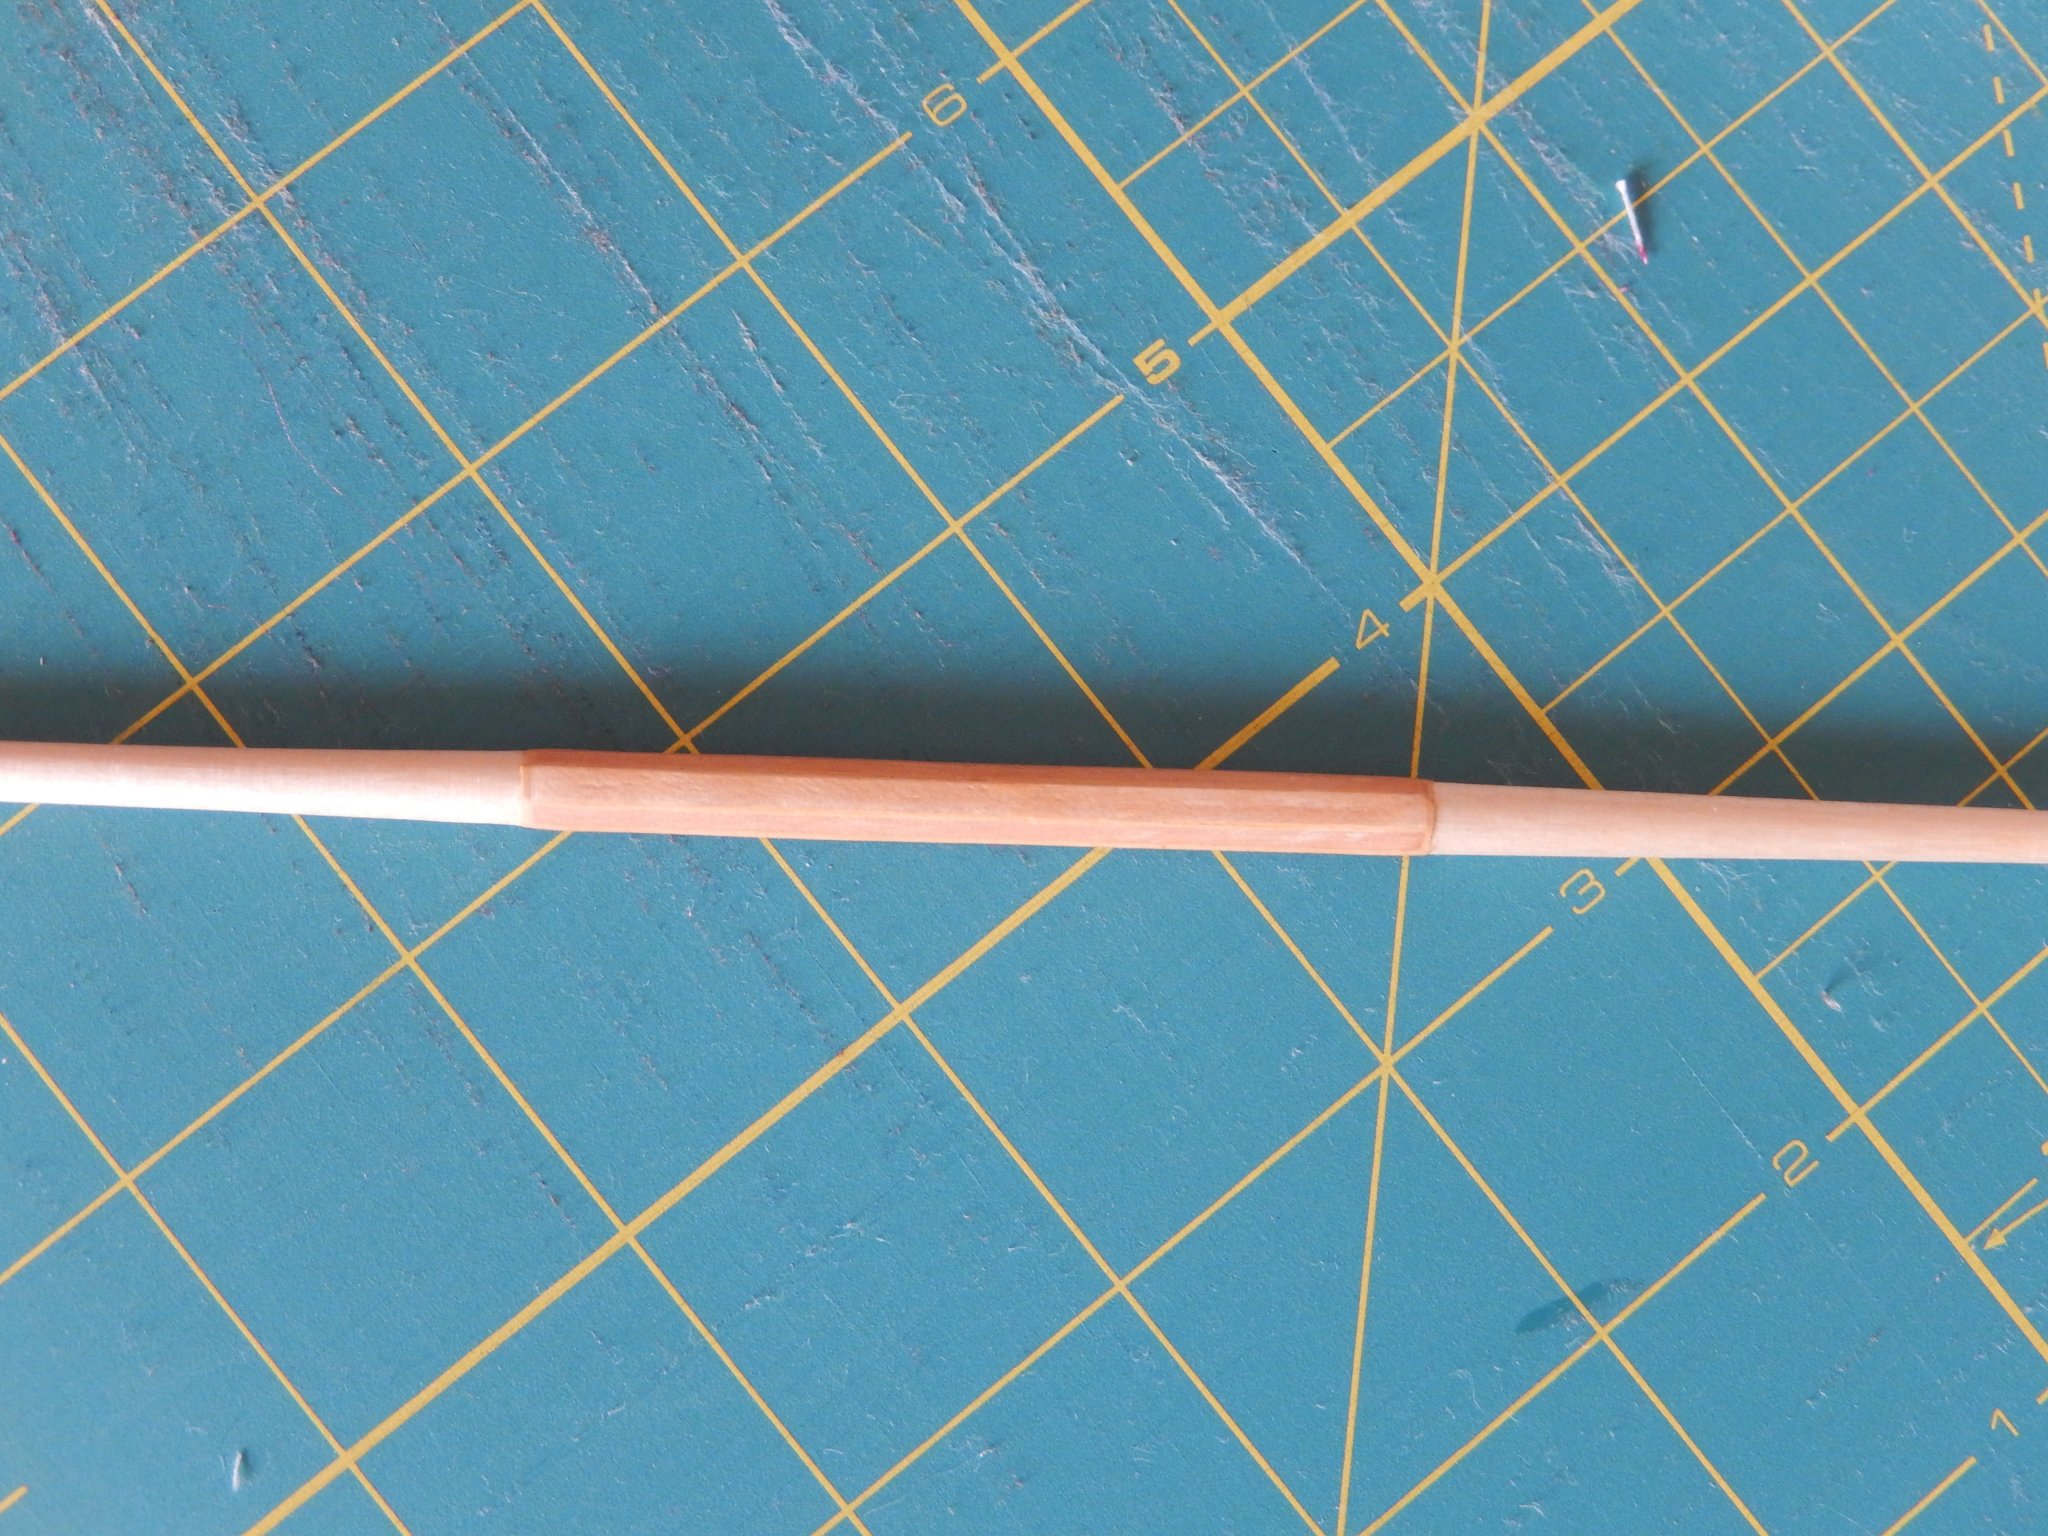
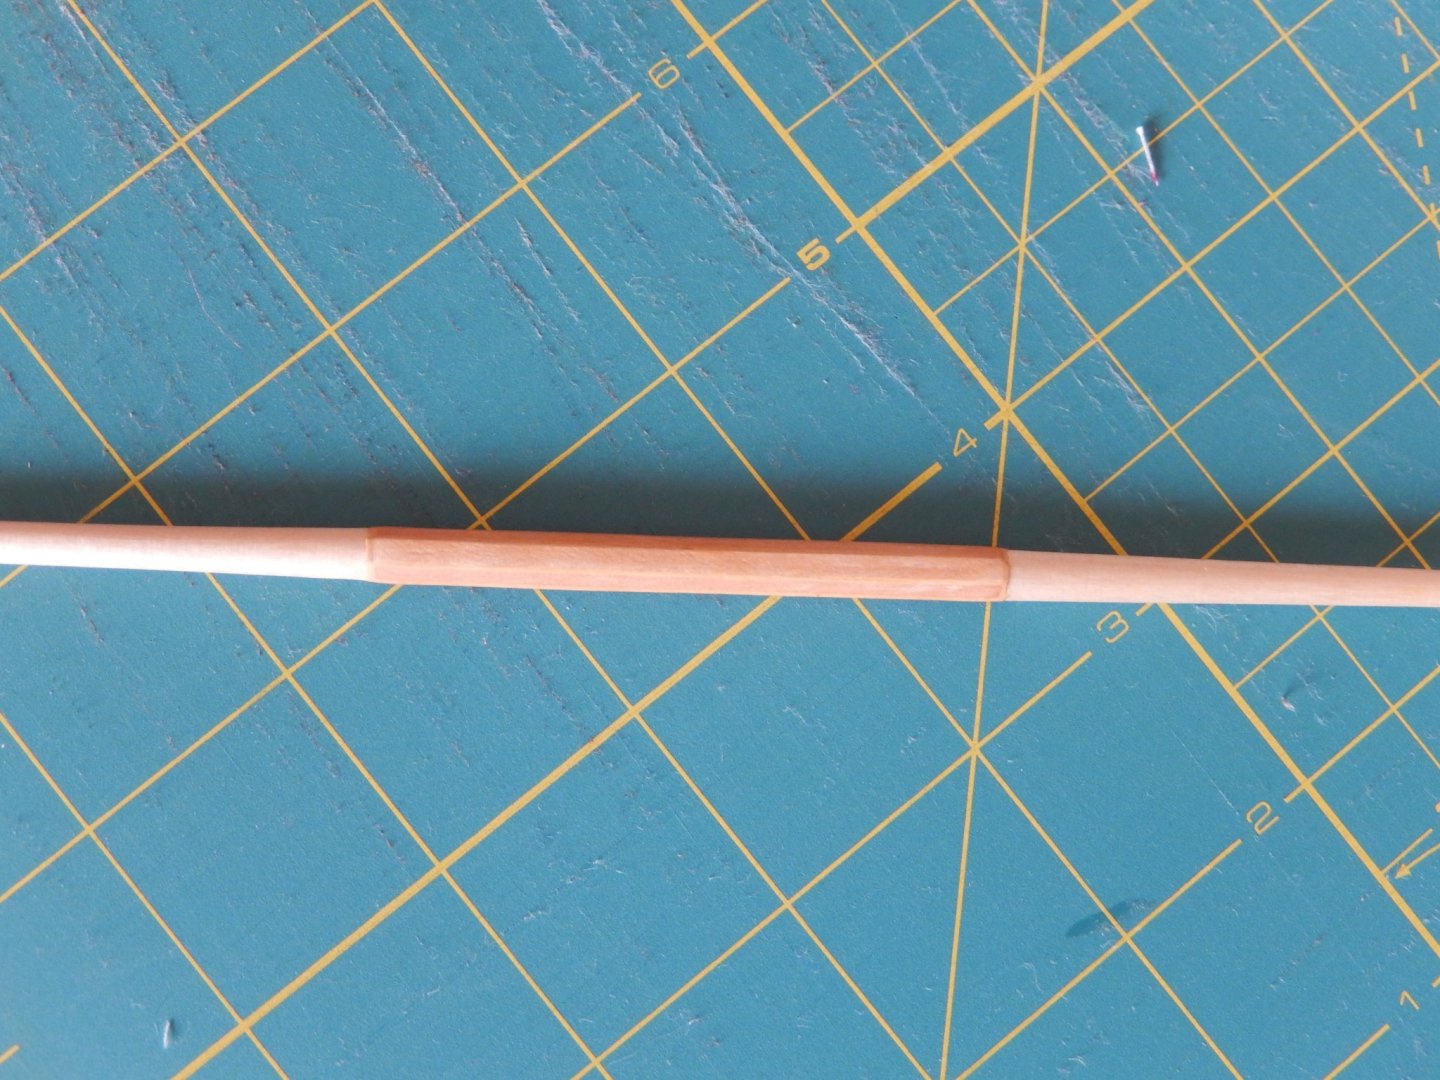
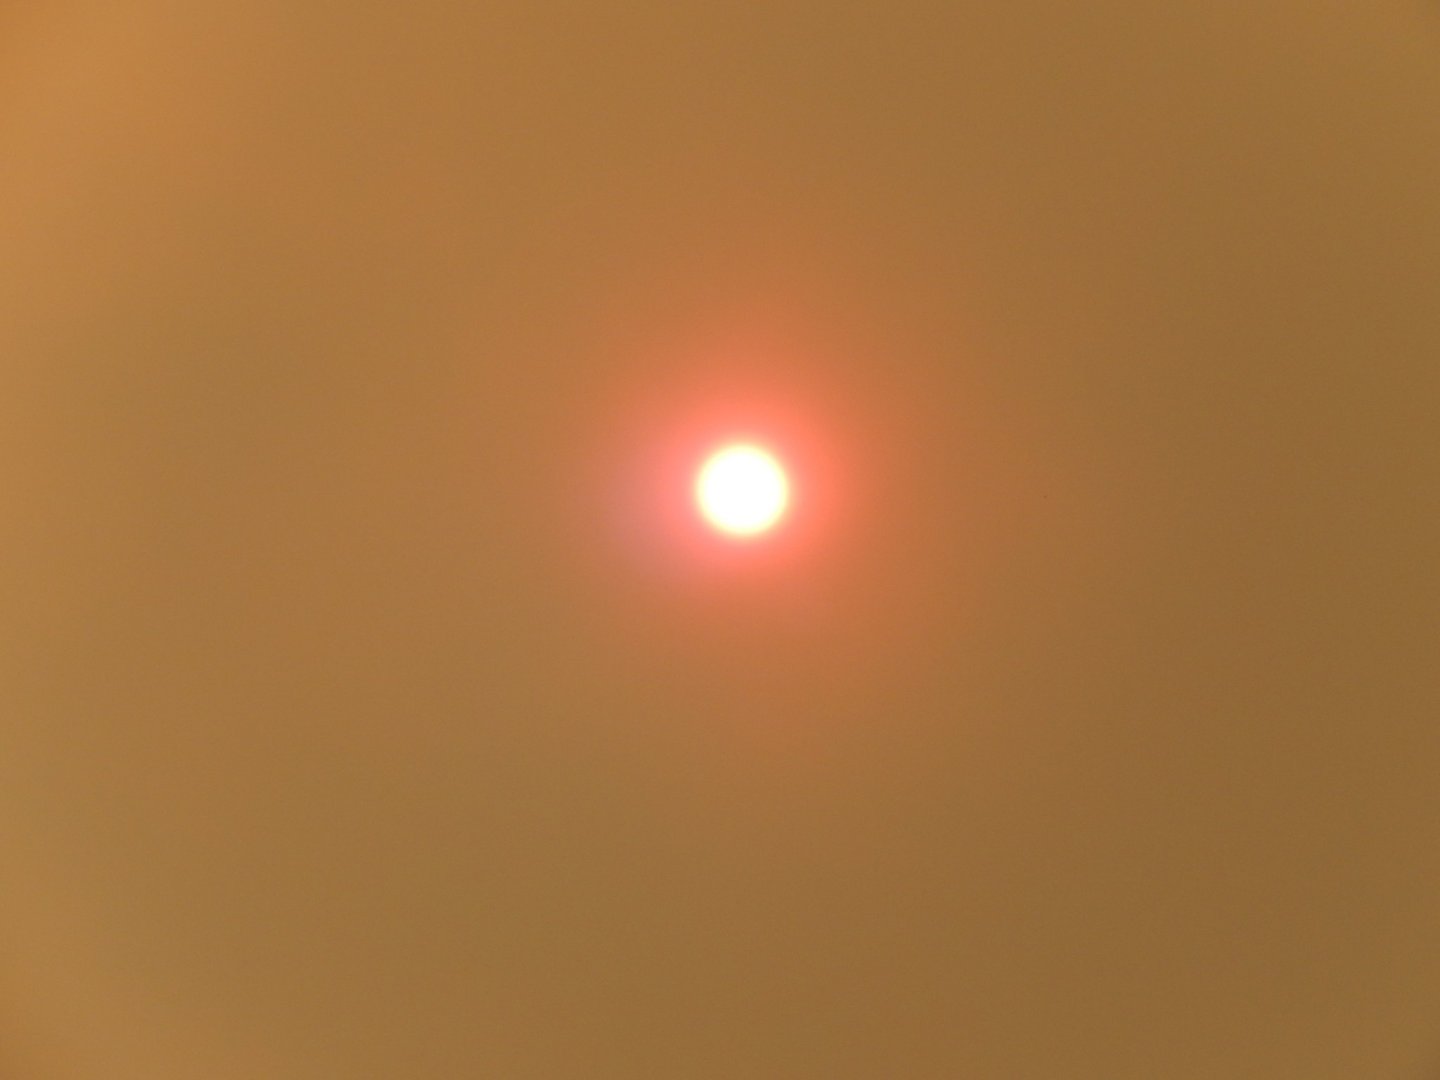
I made a rather silly mistake on the main yard. There is supposed to be a 6mm octagonal section. Unfortunately I took the centre section down to 6mm which made it impossible. Fortunately I had some 0.5mm thick timber which I cut back to the required width for the faces of the octagon. Here is the result. Painting to come. I took a photo of the sun today at about 3pm. The smoke here is off the scale. Interestingly the sun shows up in the photo as the 'normal' colour. In fact it is a deep red. The sky is orange.
- 421 replies
-
- 5
-
-
- caldercraft
- granado
- (and 1 more)
-
Thanks Grandpaphil and Vane for your kind thoughts. Vane: I'm glad to have helped. A lot of what may be useful to you may be found on my Vanguard log. If there is something I may be able to help you with, let me know. Kind regards to you both.. Bob
-
Thanks mugji and Kevin. A bit of encouragement is probably useful right now. With the fires, people in Sydney are stuck in their houses with the smoke, quite aside from the poor people at the fire fonts. We looked directly at the sun late this afternoon and it was a blood red ball. Never seen anything remotely like it, but didn't have a camera to record it. It makes boat building a bit trivial. .
- 421 replies
-
- 1
-
-
- caldercraft
- granado
- (and 1 more)
-
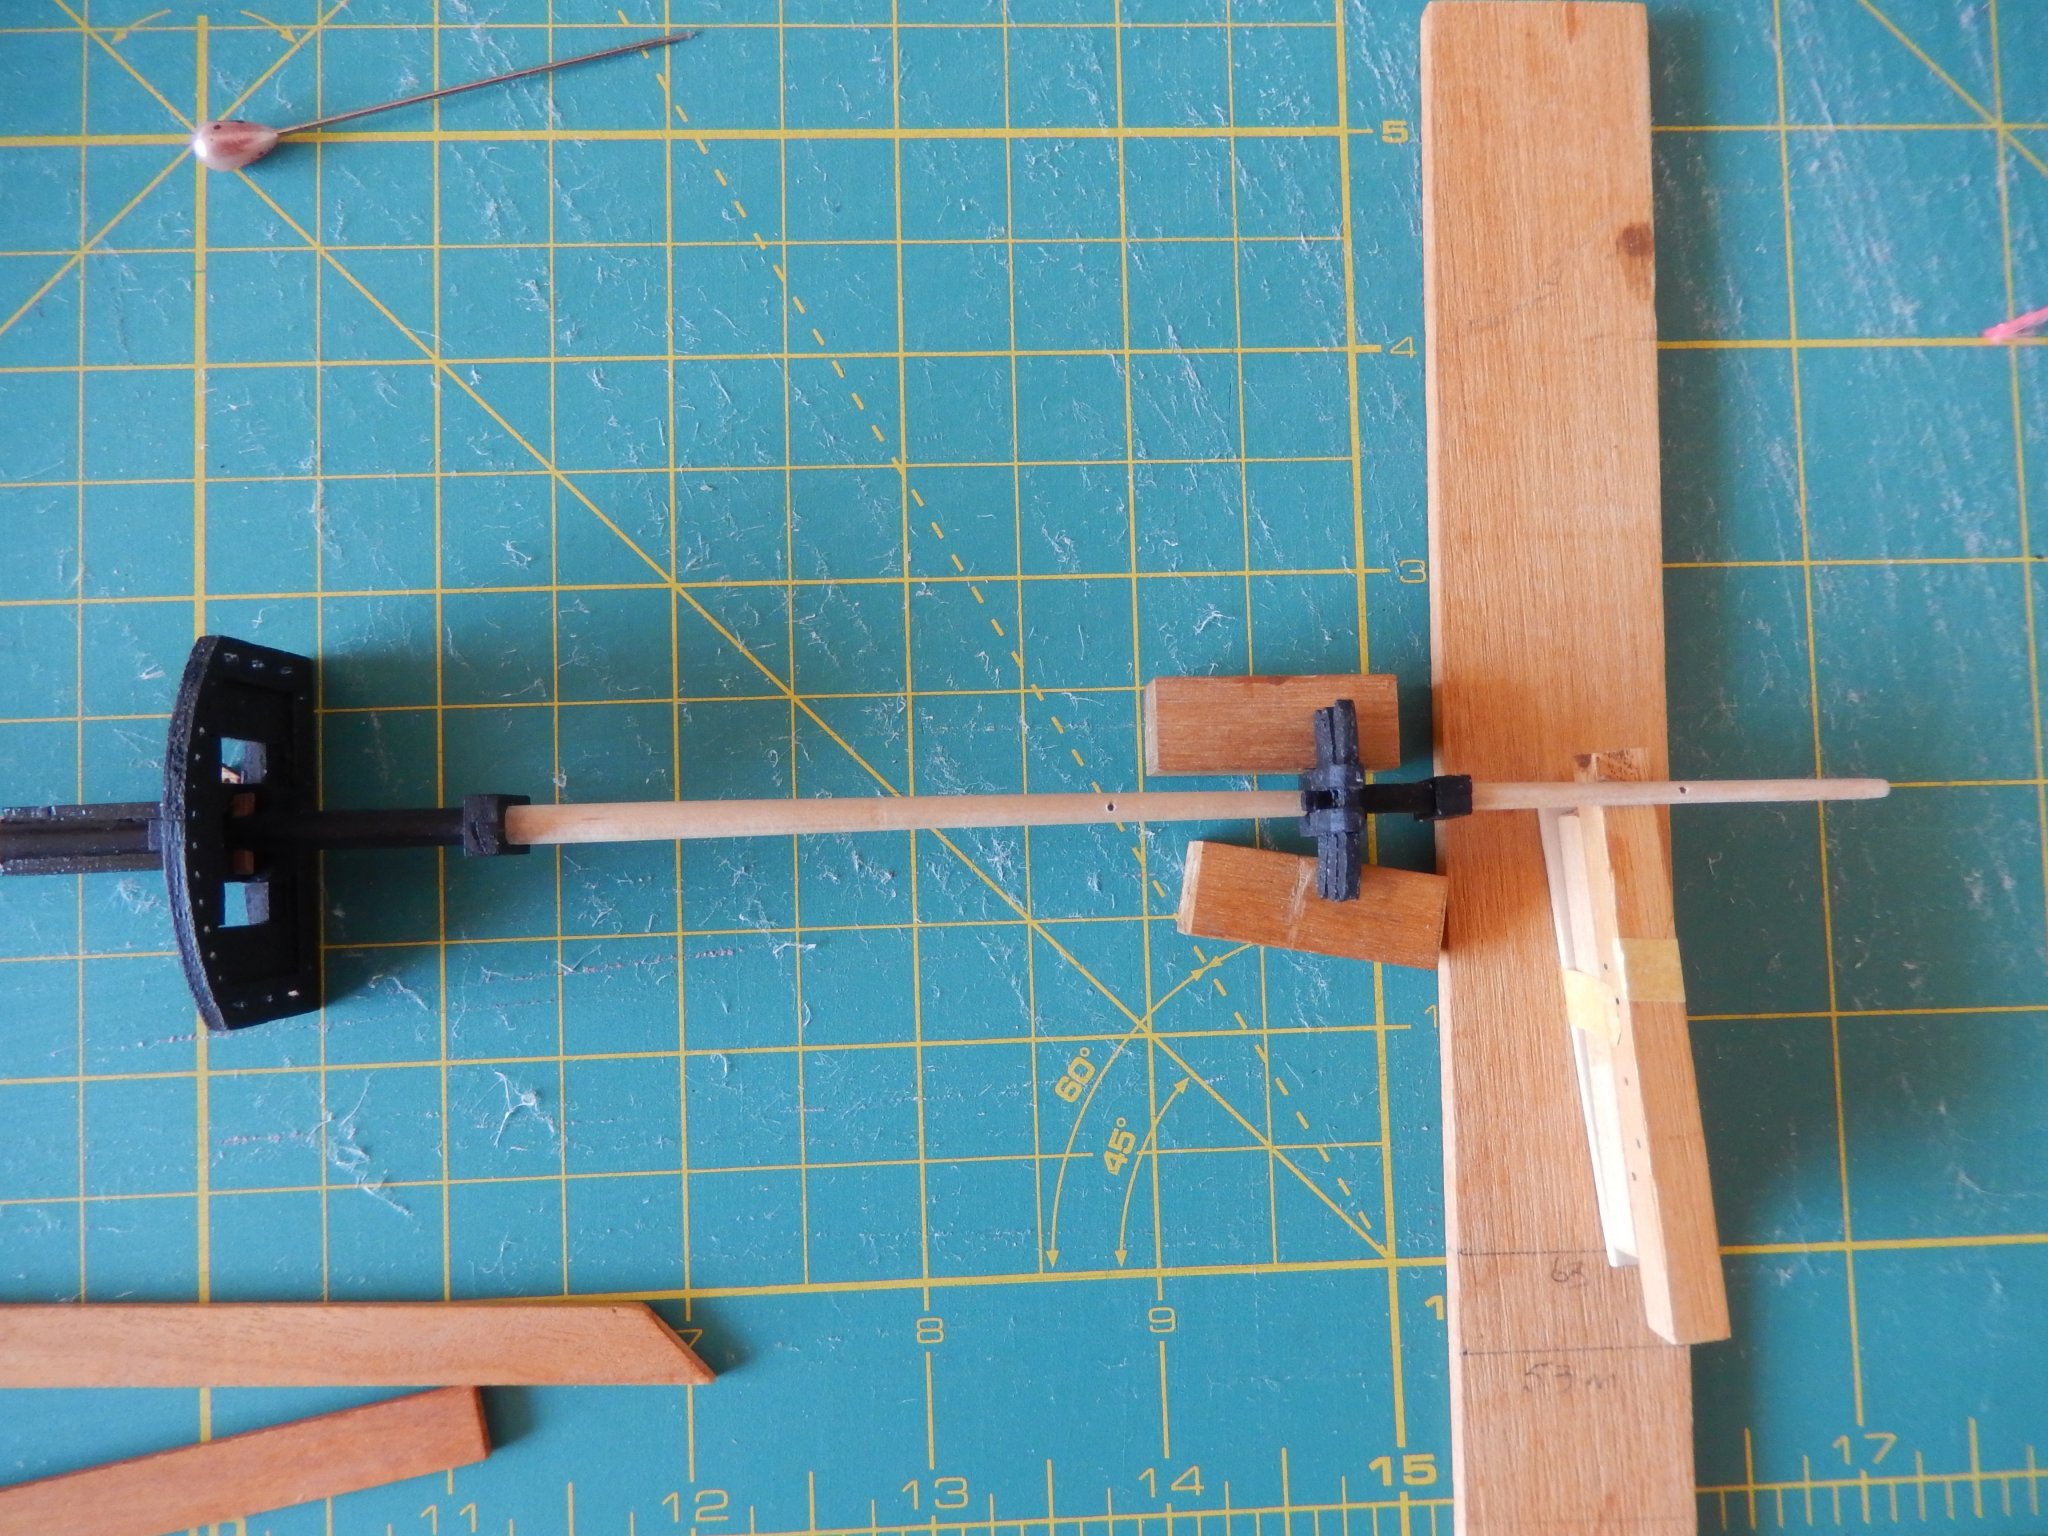
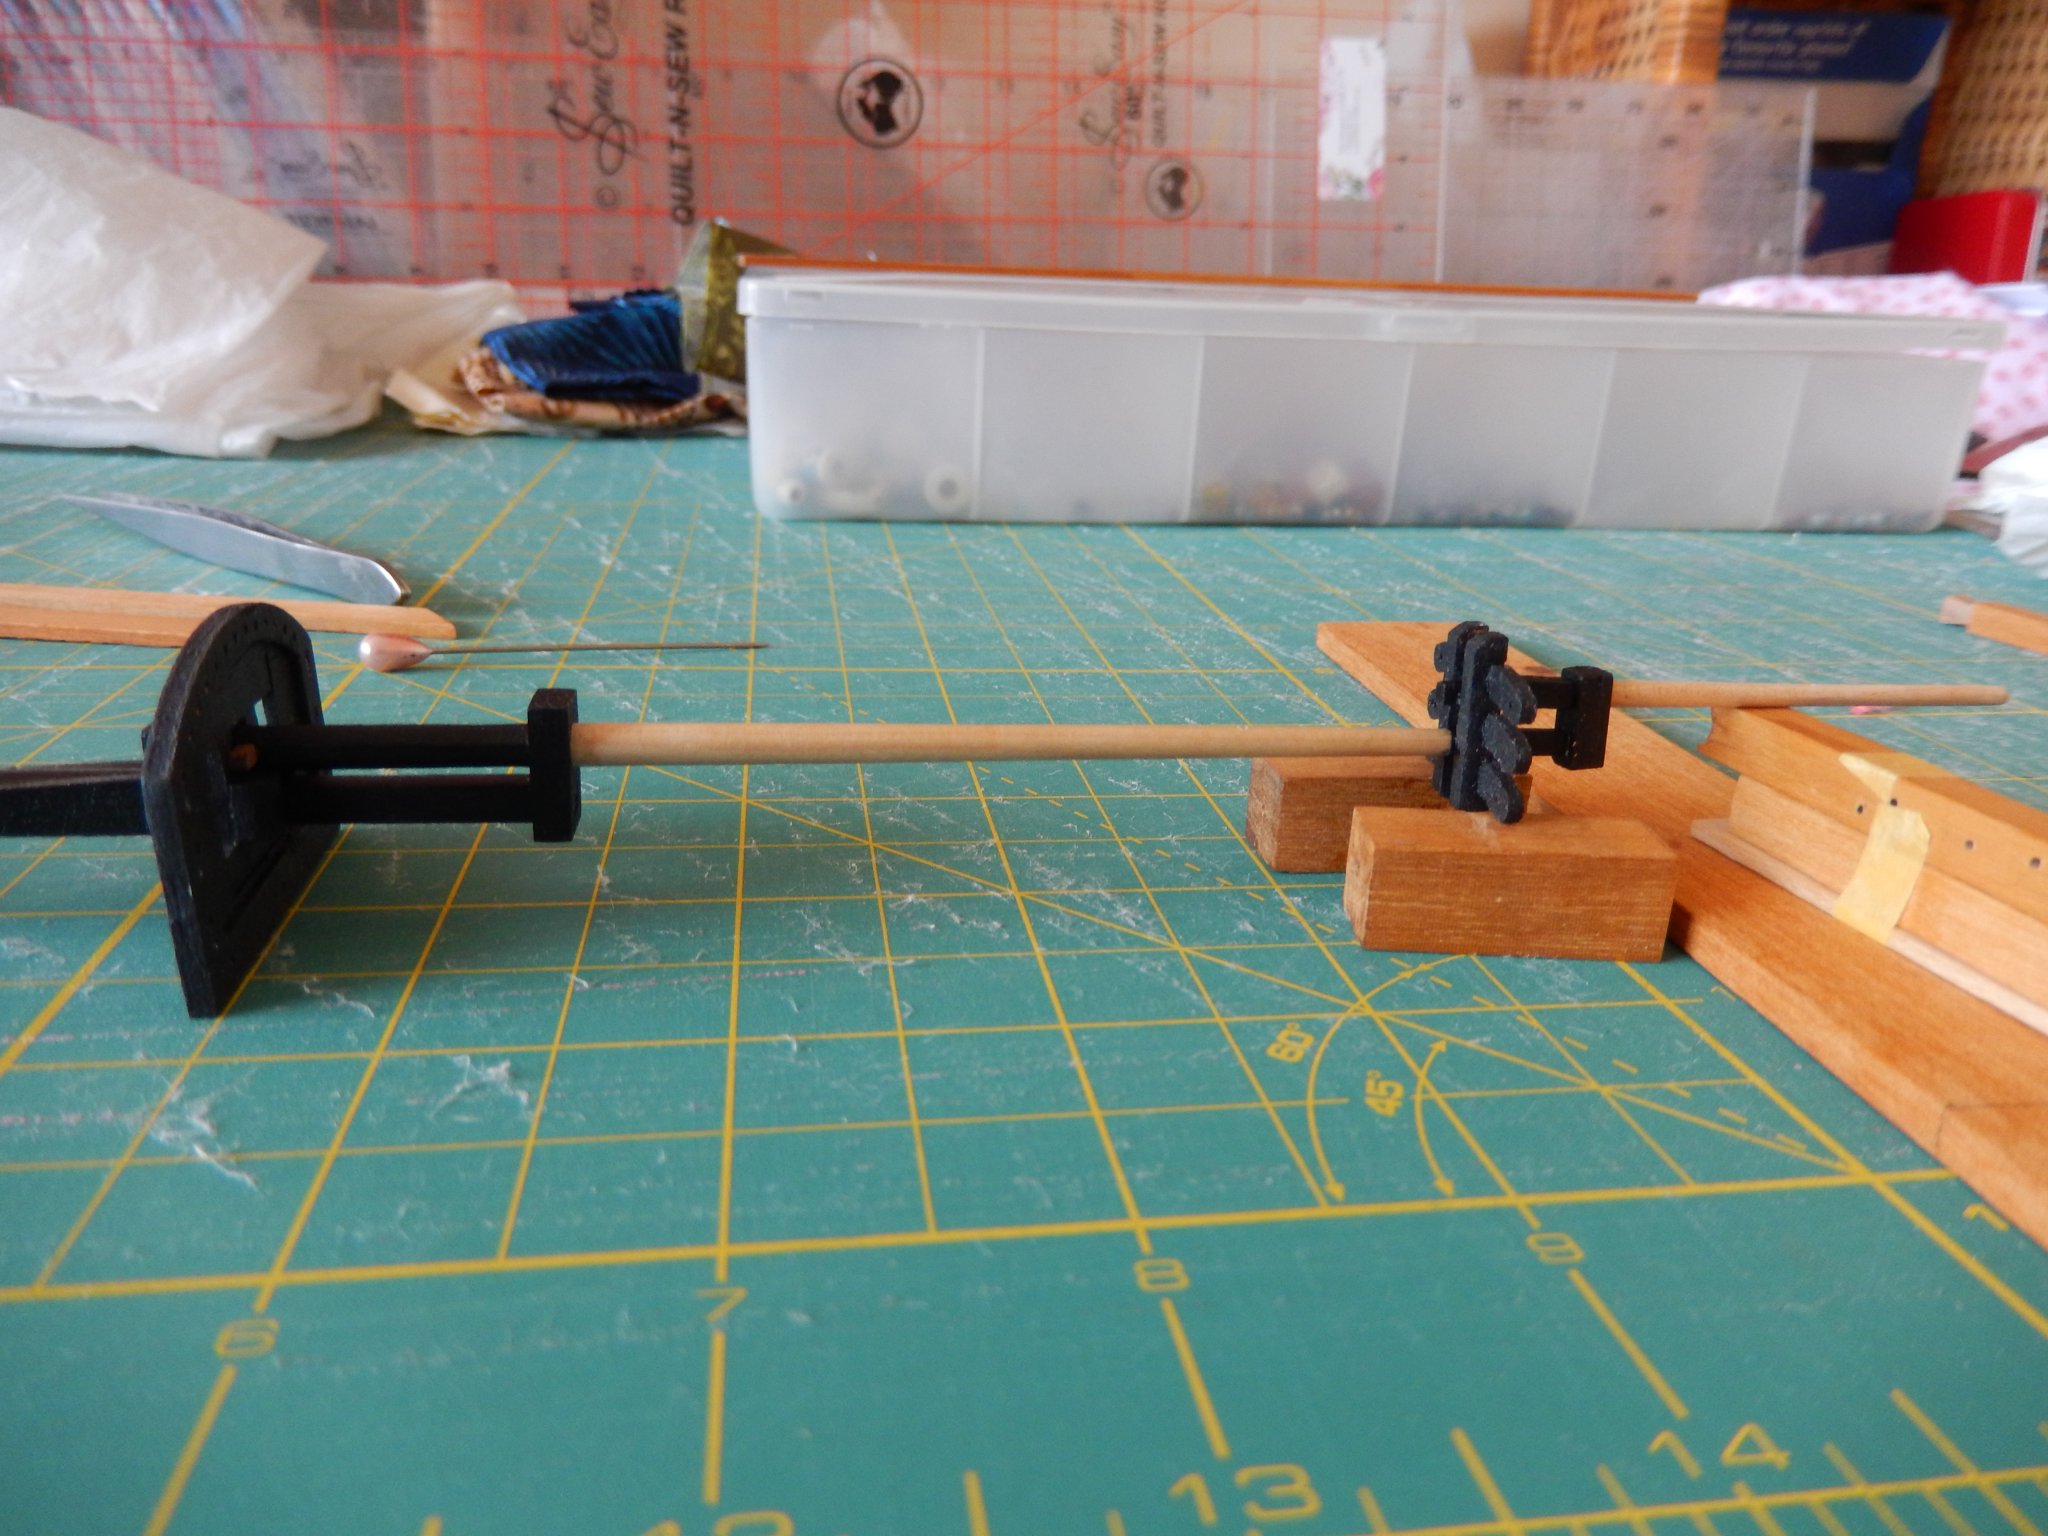
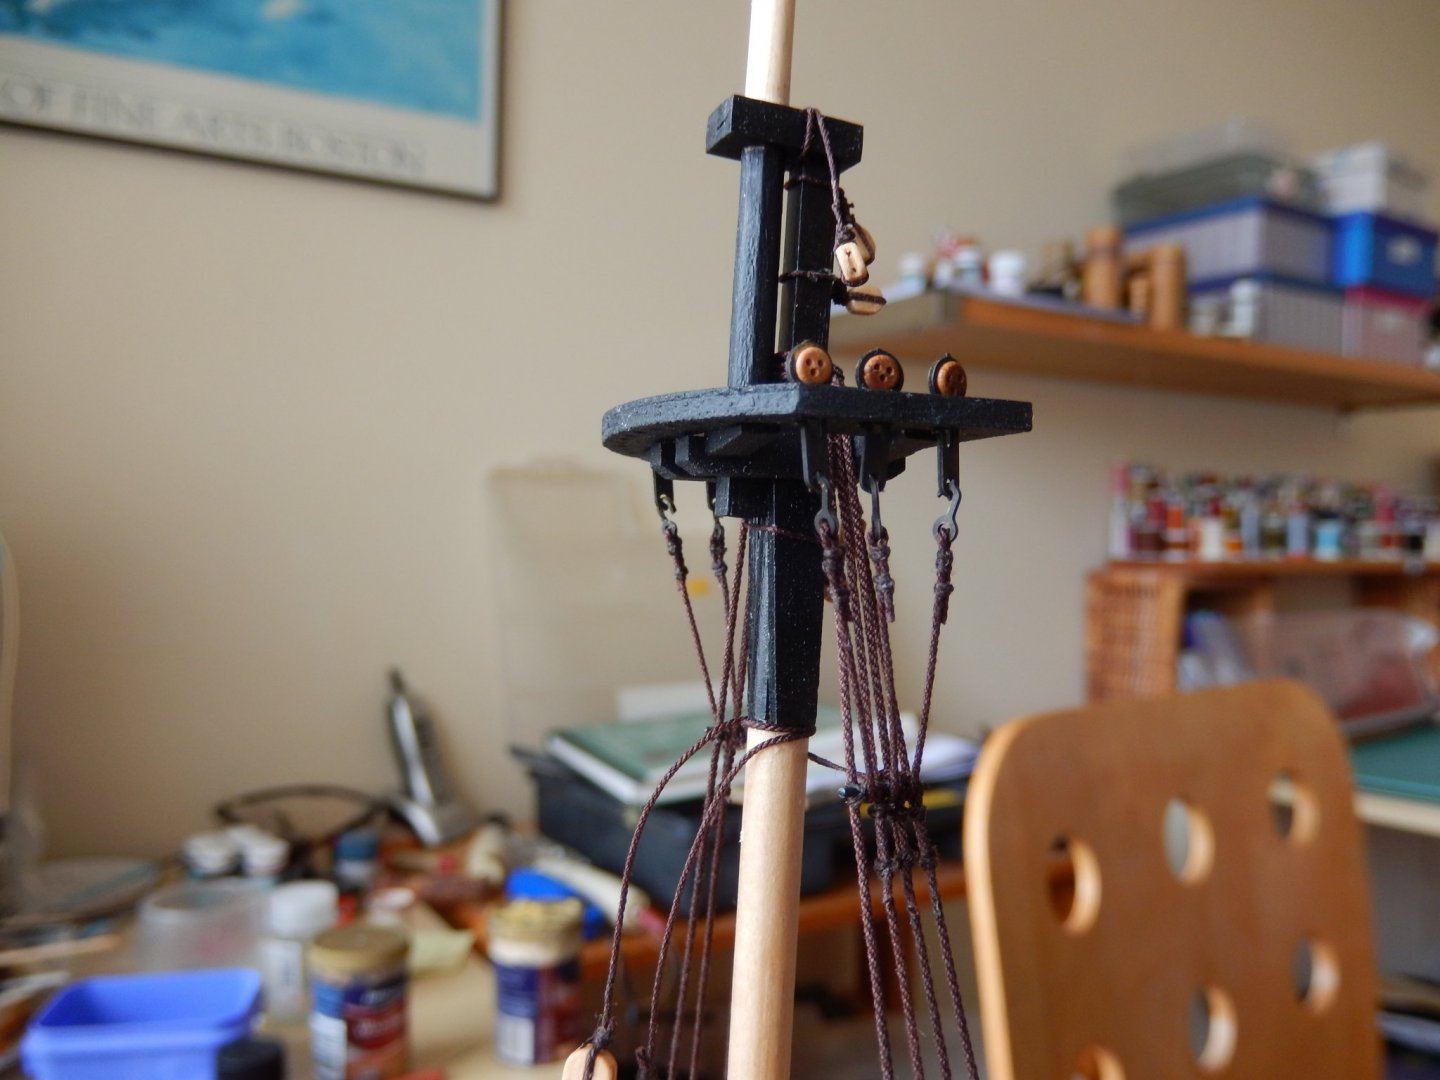
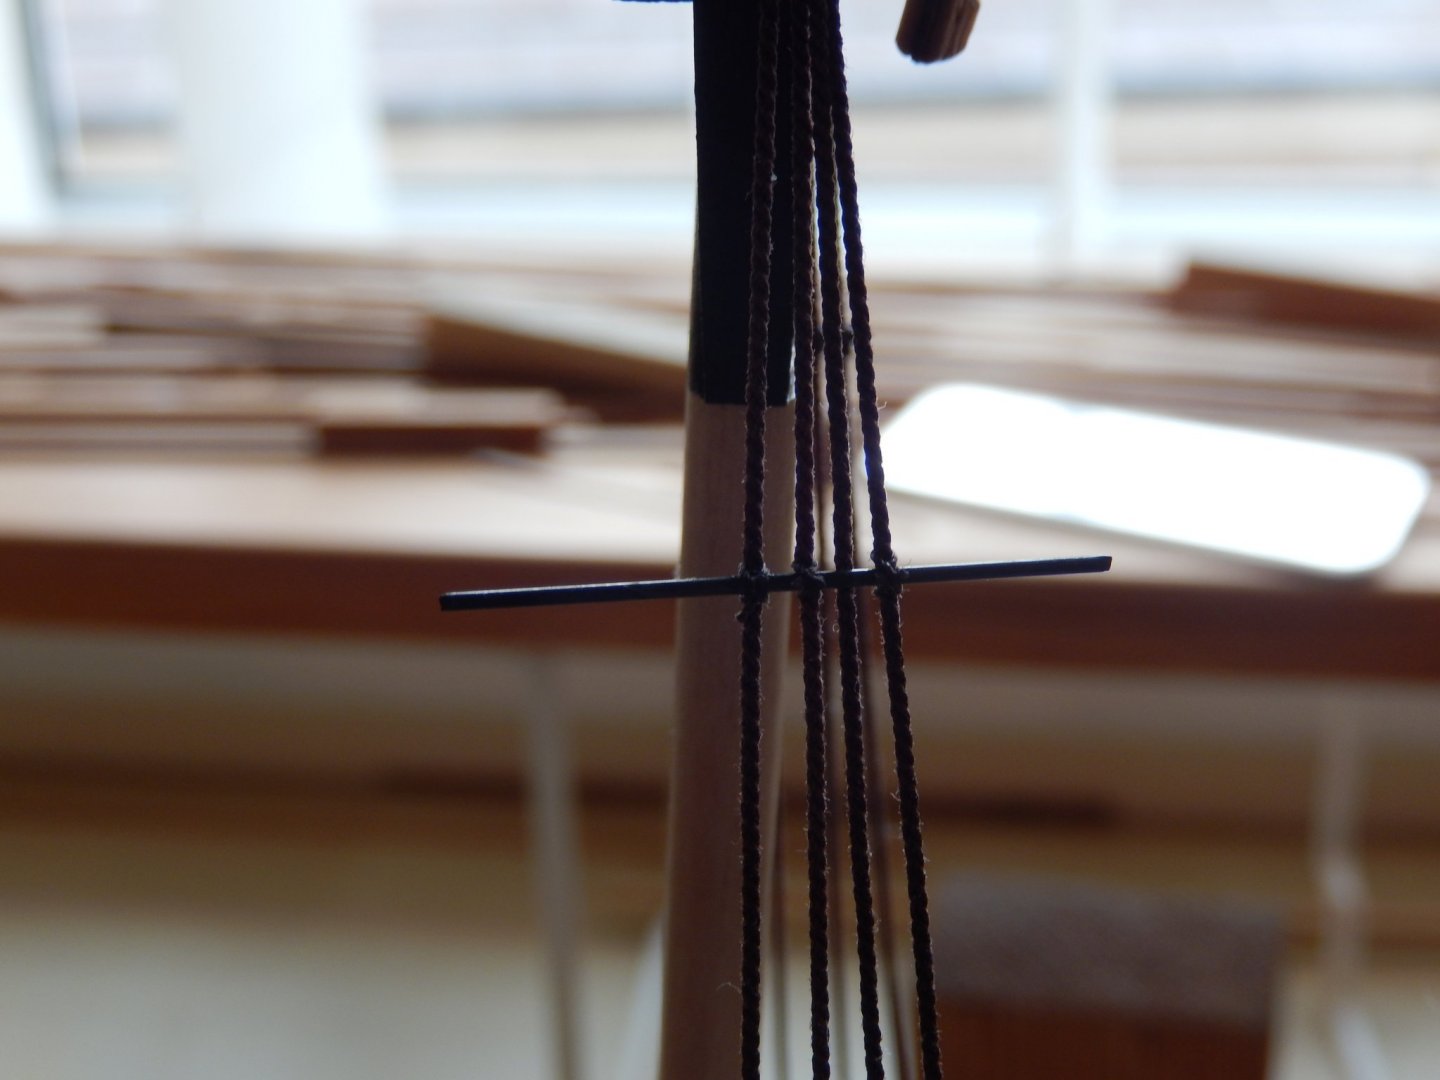
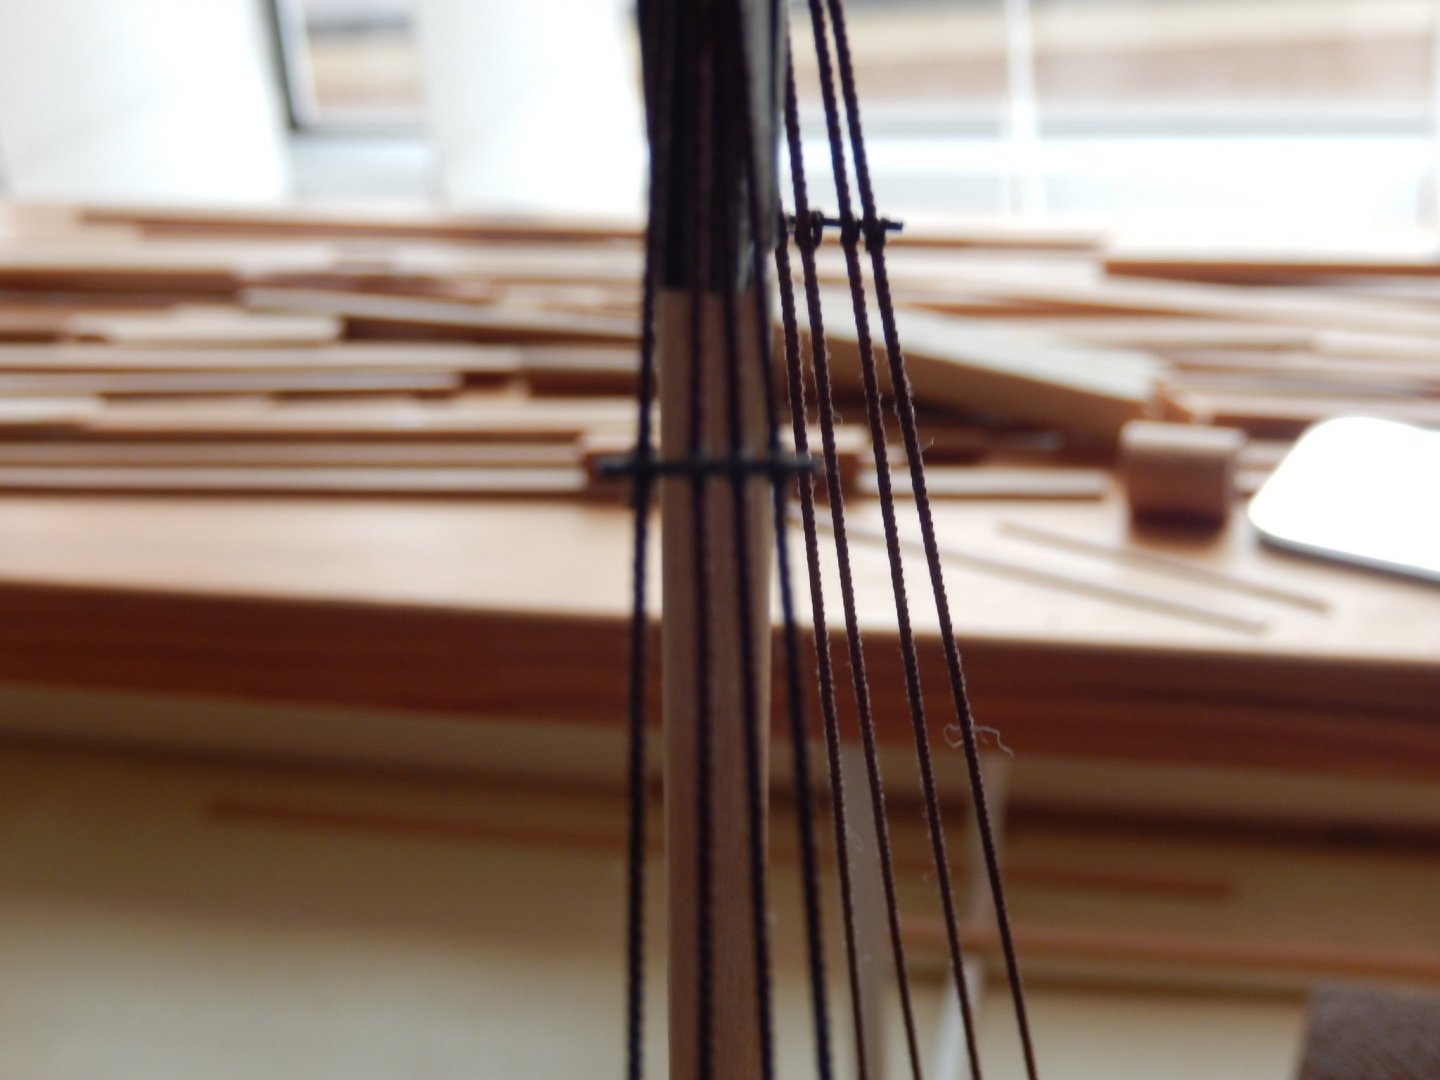
Very slow progress. The futtock staves and the catharpins are now finished. These are quite awkward jobs. The staves have to be in position to be tied, and gravity is not on your side. I used one of my wife's lightweight material clamps to hold the stave across the shrouds. I then tied off the stave to one of the shrouds. The clamp was removed, and the remaining shrouds (with some difficulty) were tied off. It is far easier to tie off by making the stave 'too long' and when in place, cutting it off to the required length. (See the last two photos.) It's a bit blurry, but here is the stave cut to length.


- 421 replies
-
- 12
-
-
- caldercraft
- granado
- (and 1 more)
-
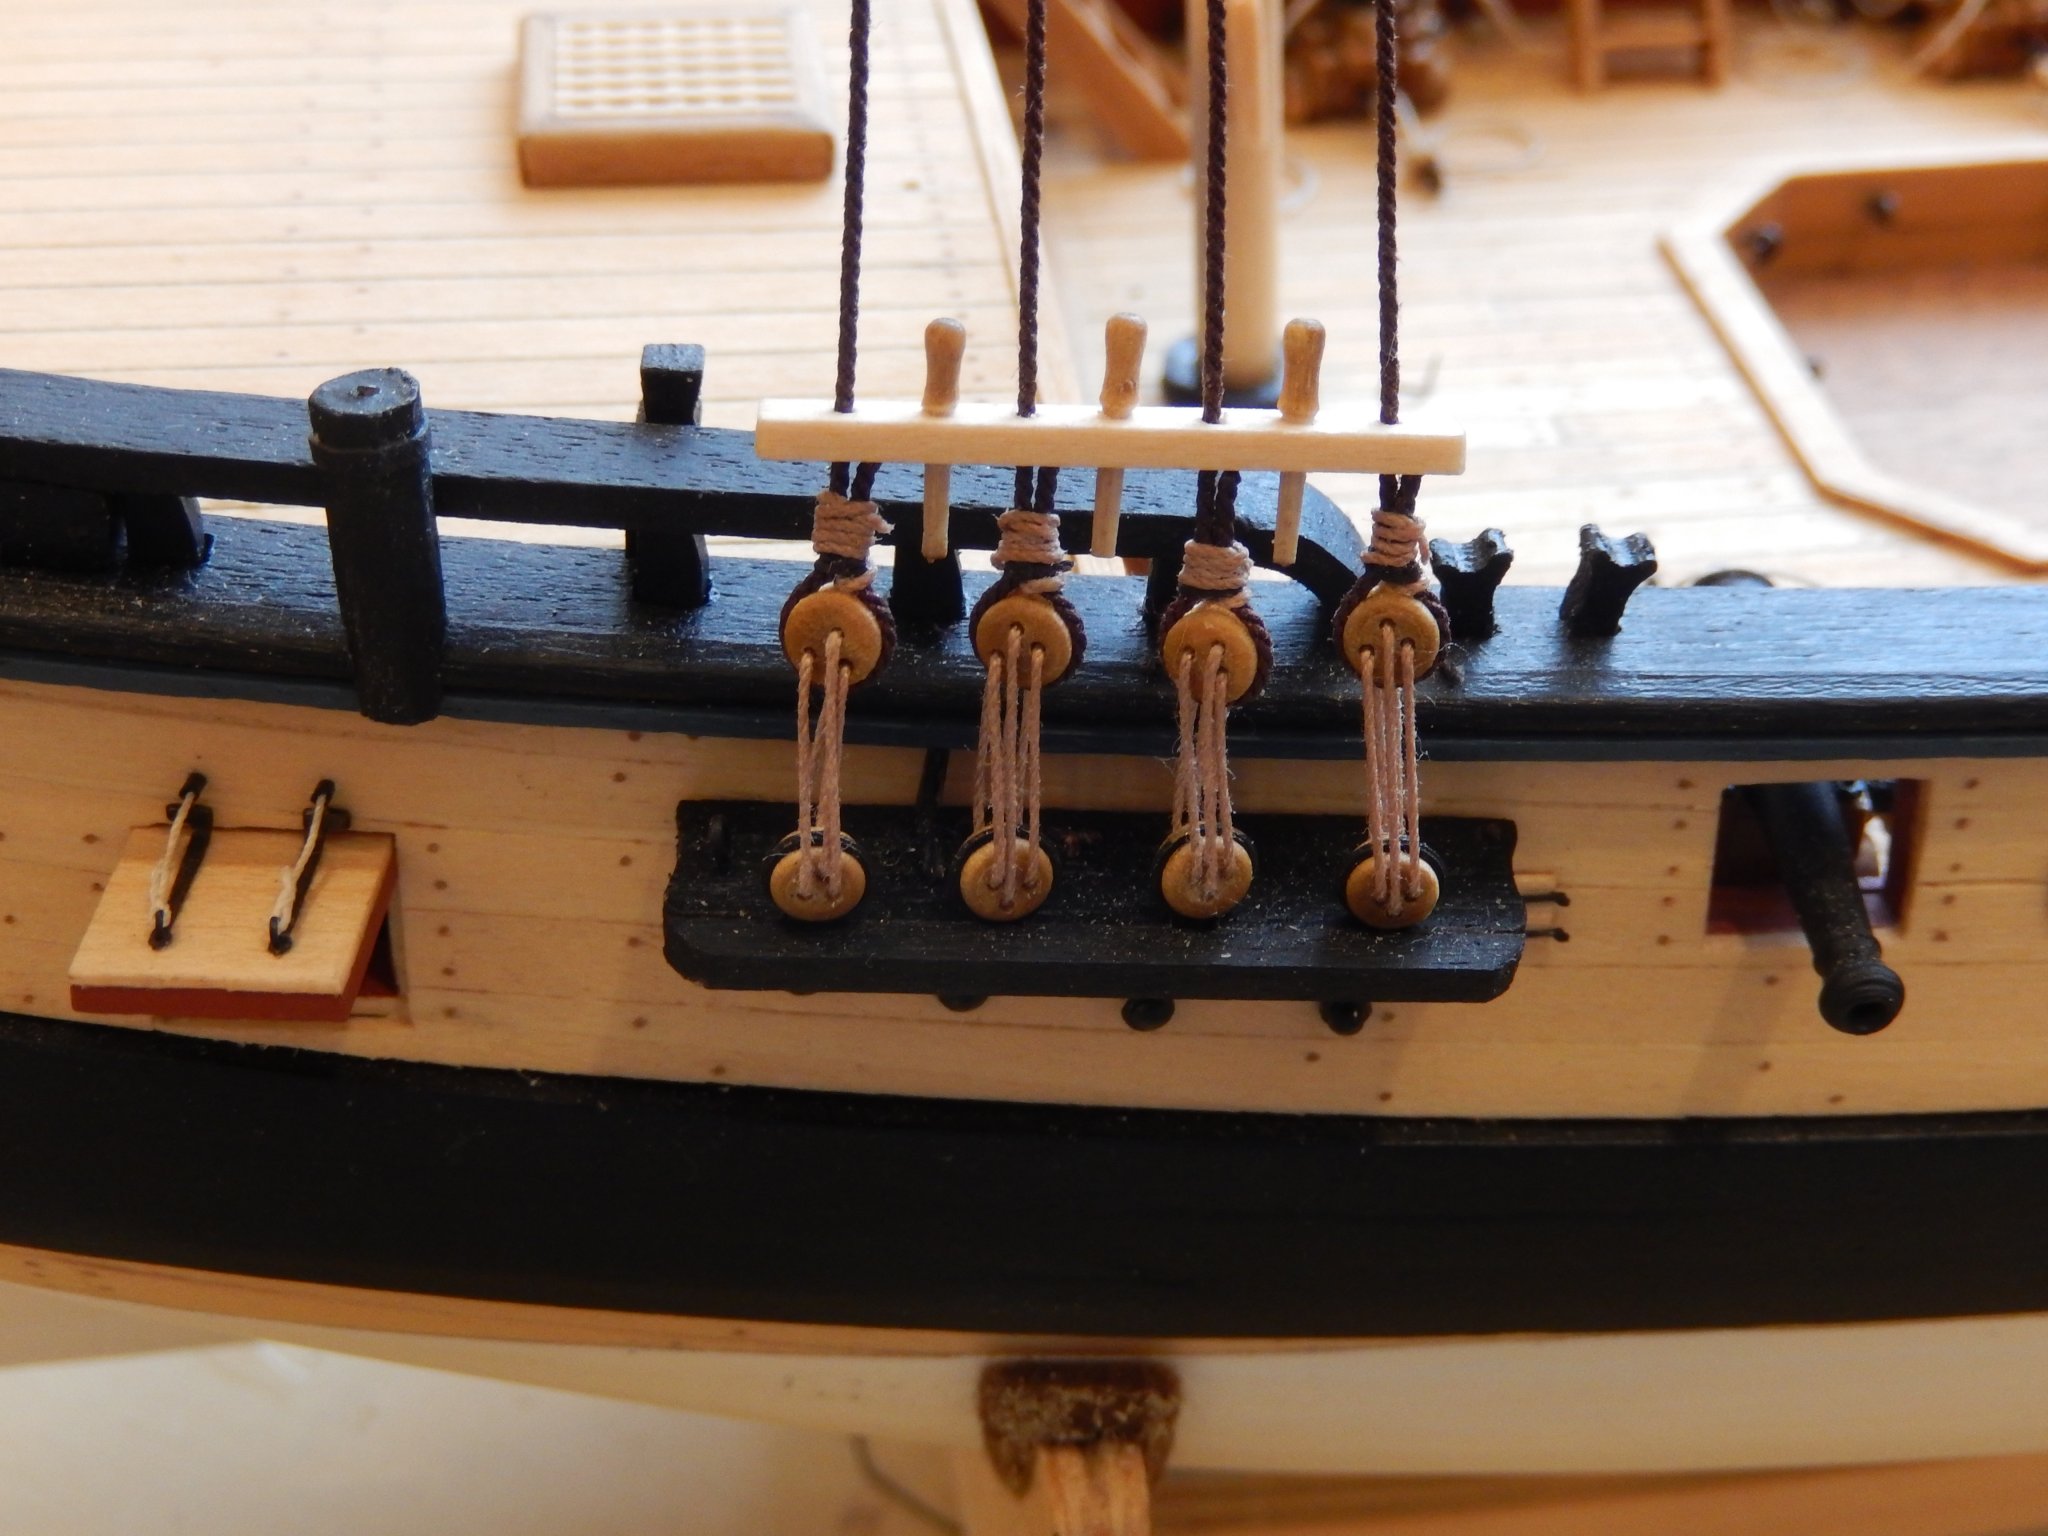
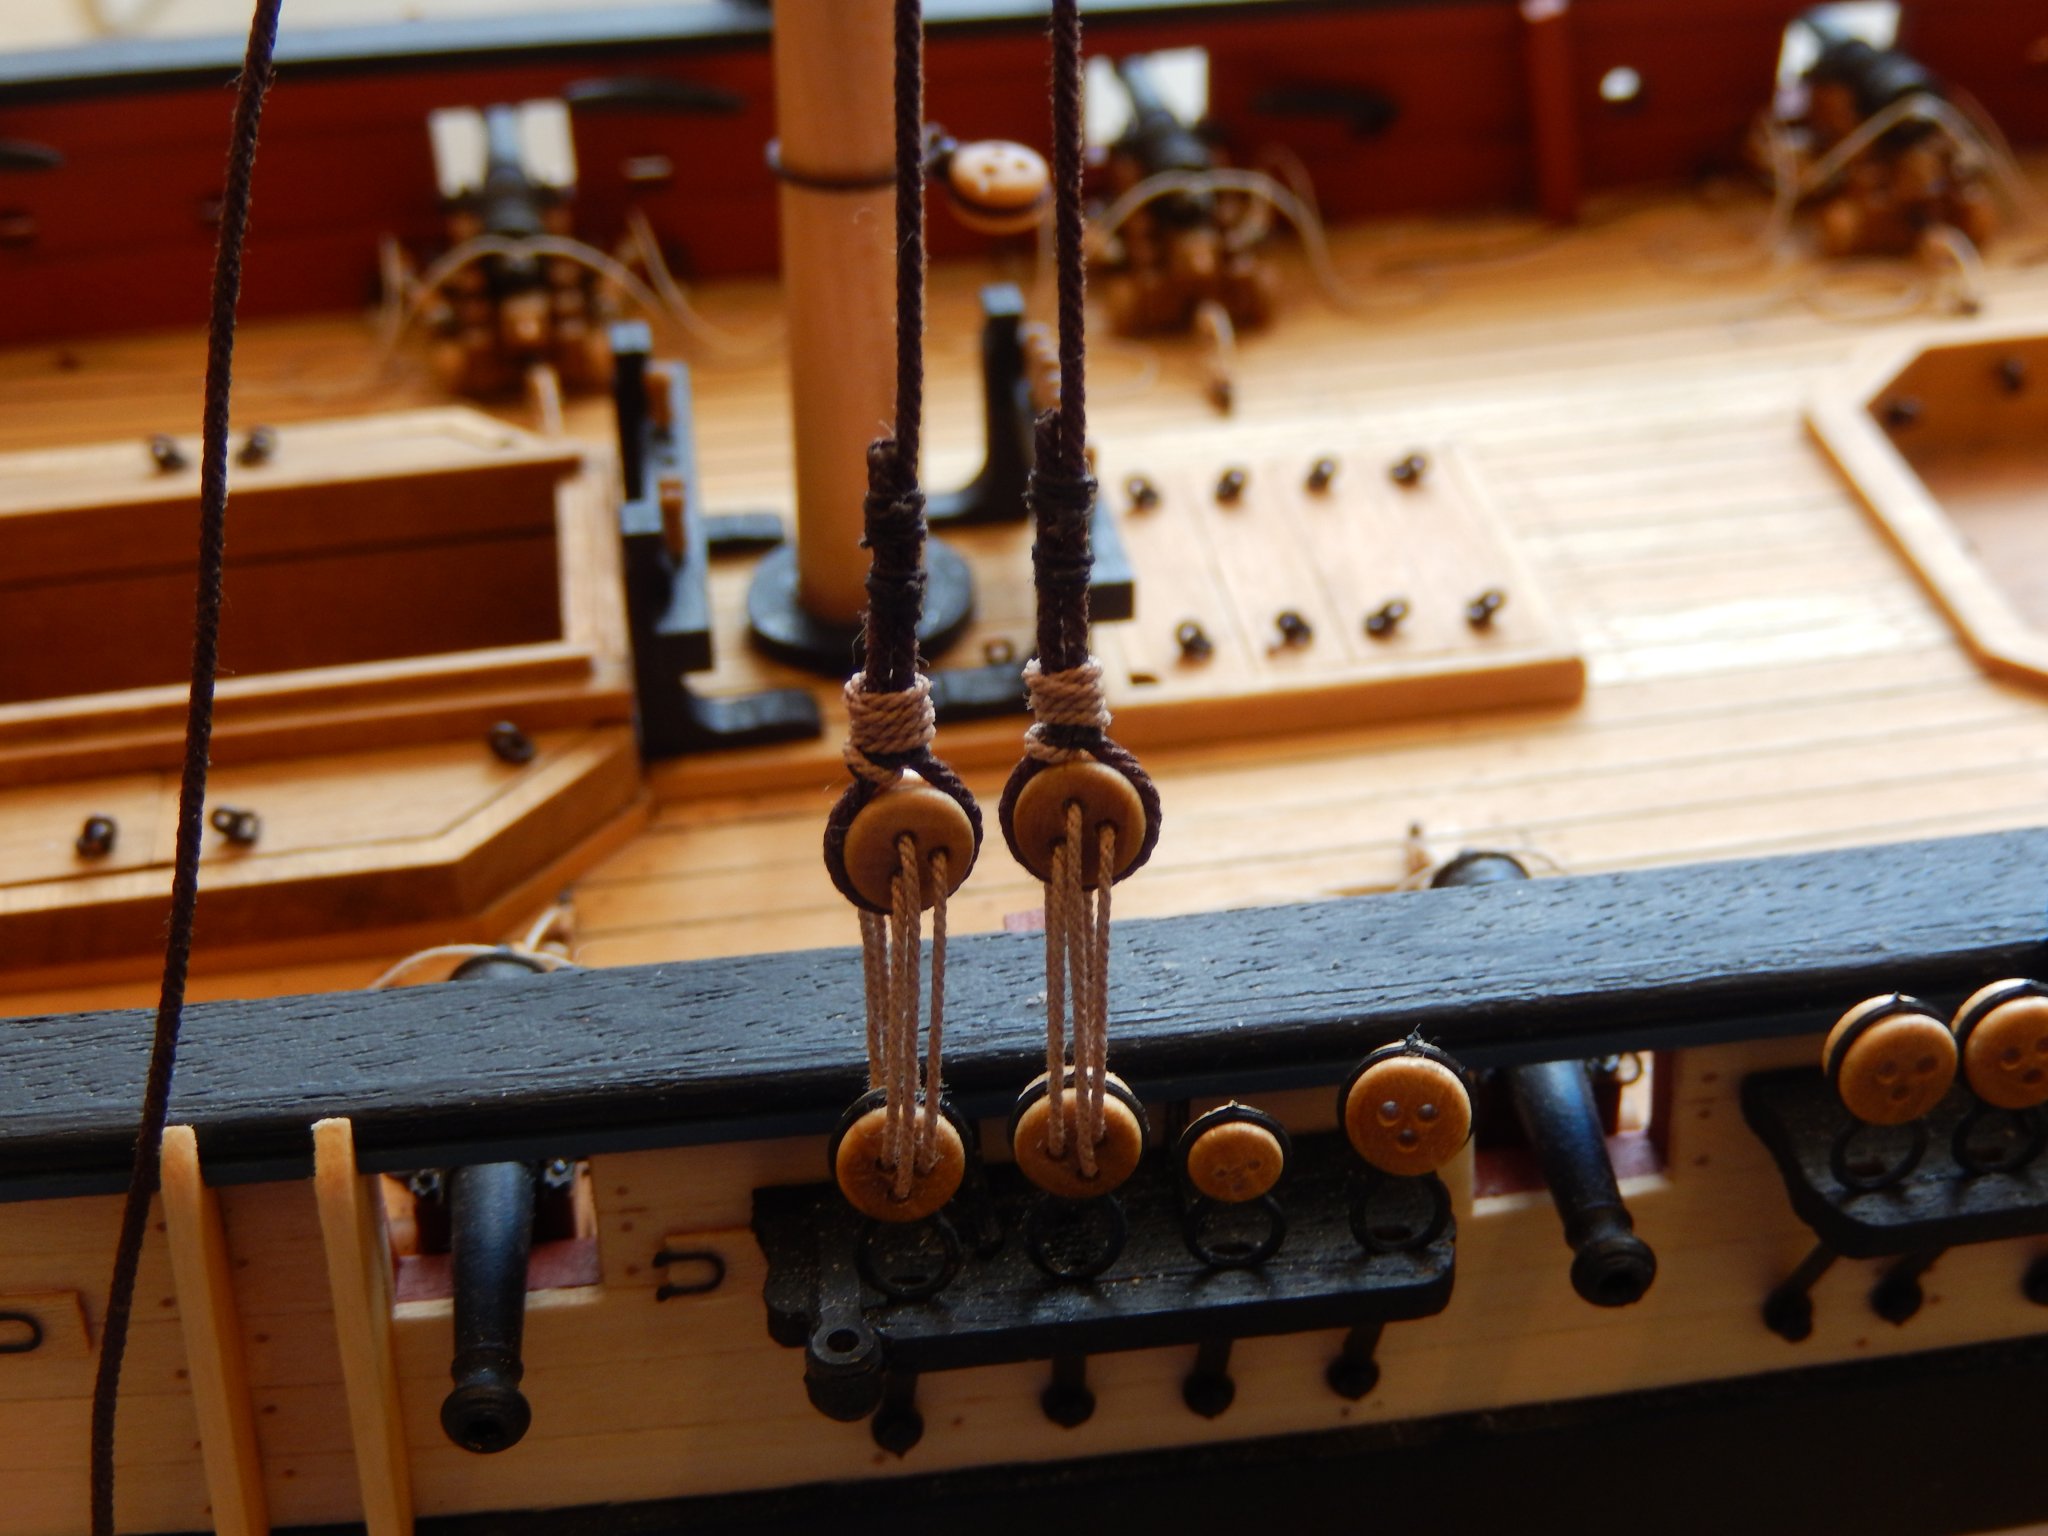
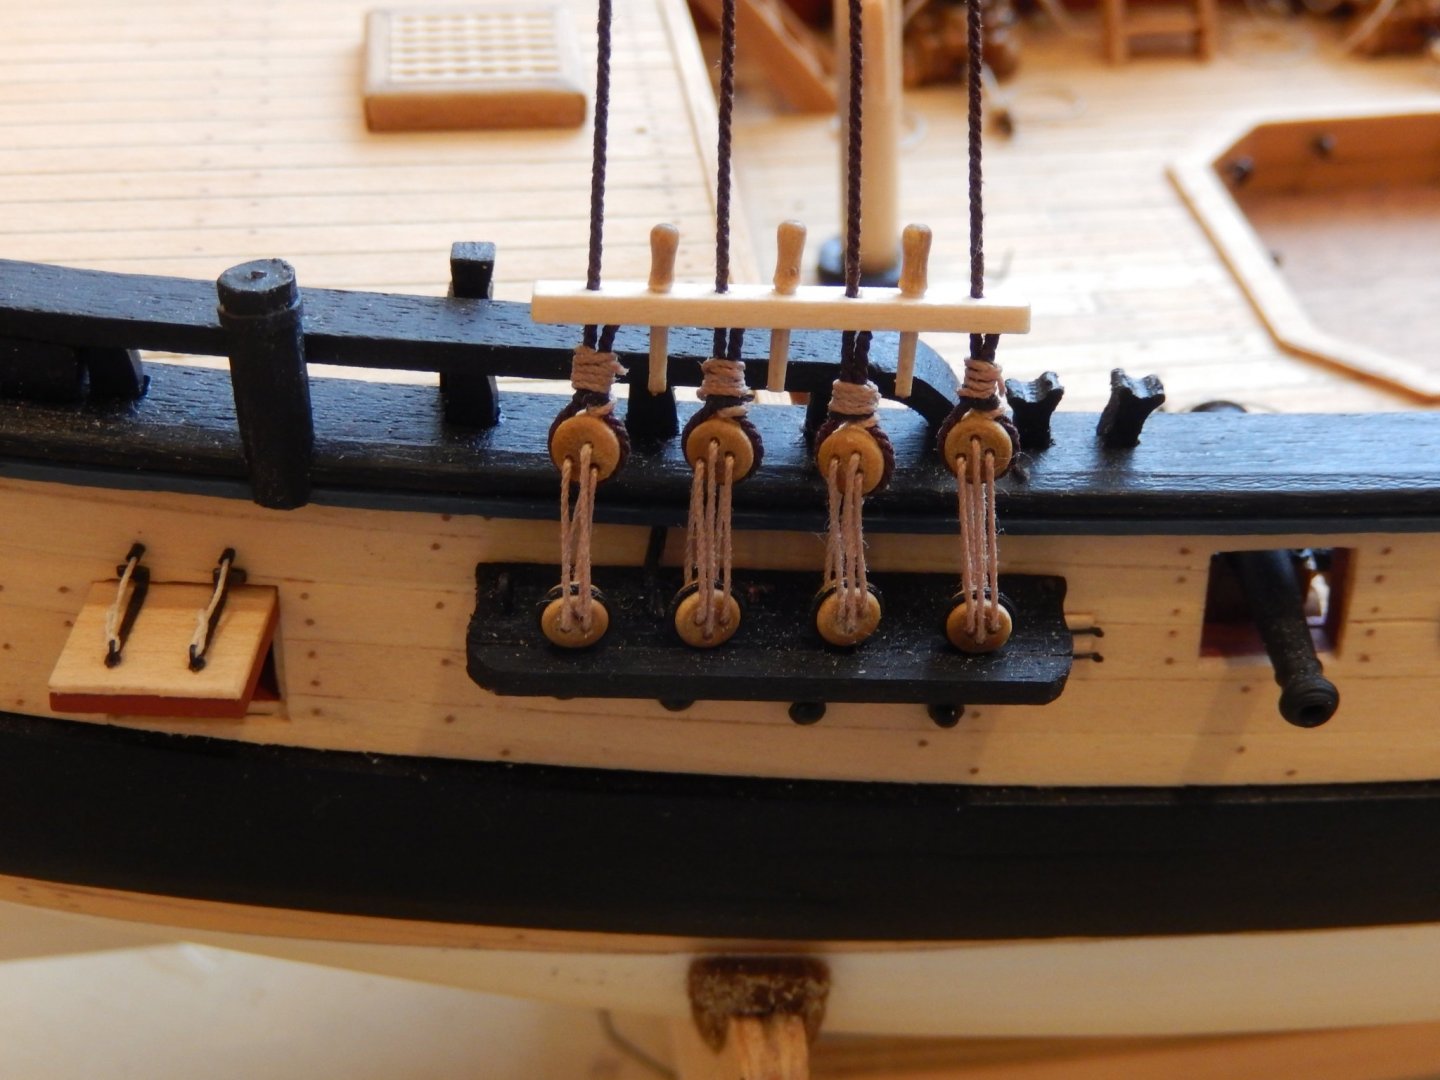
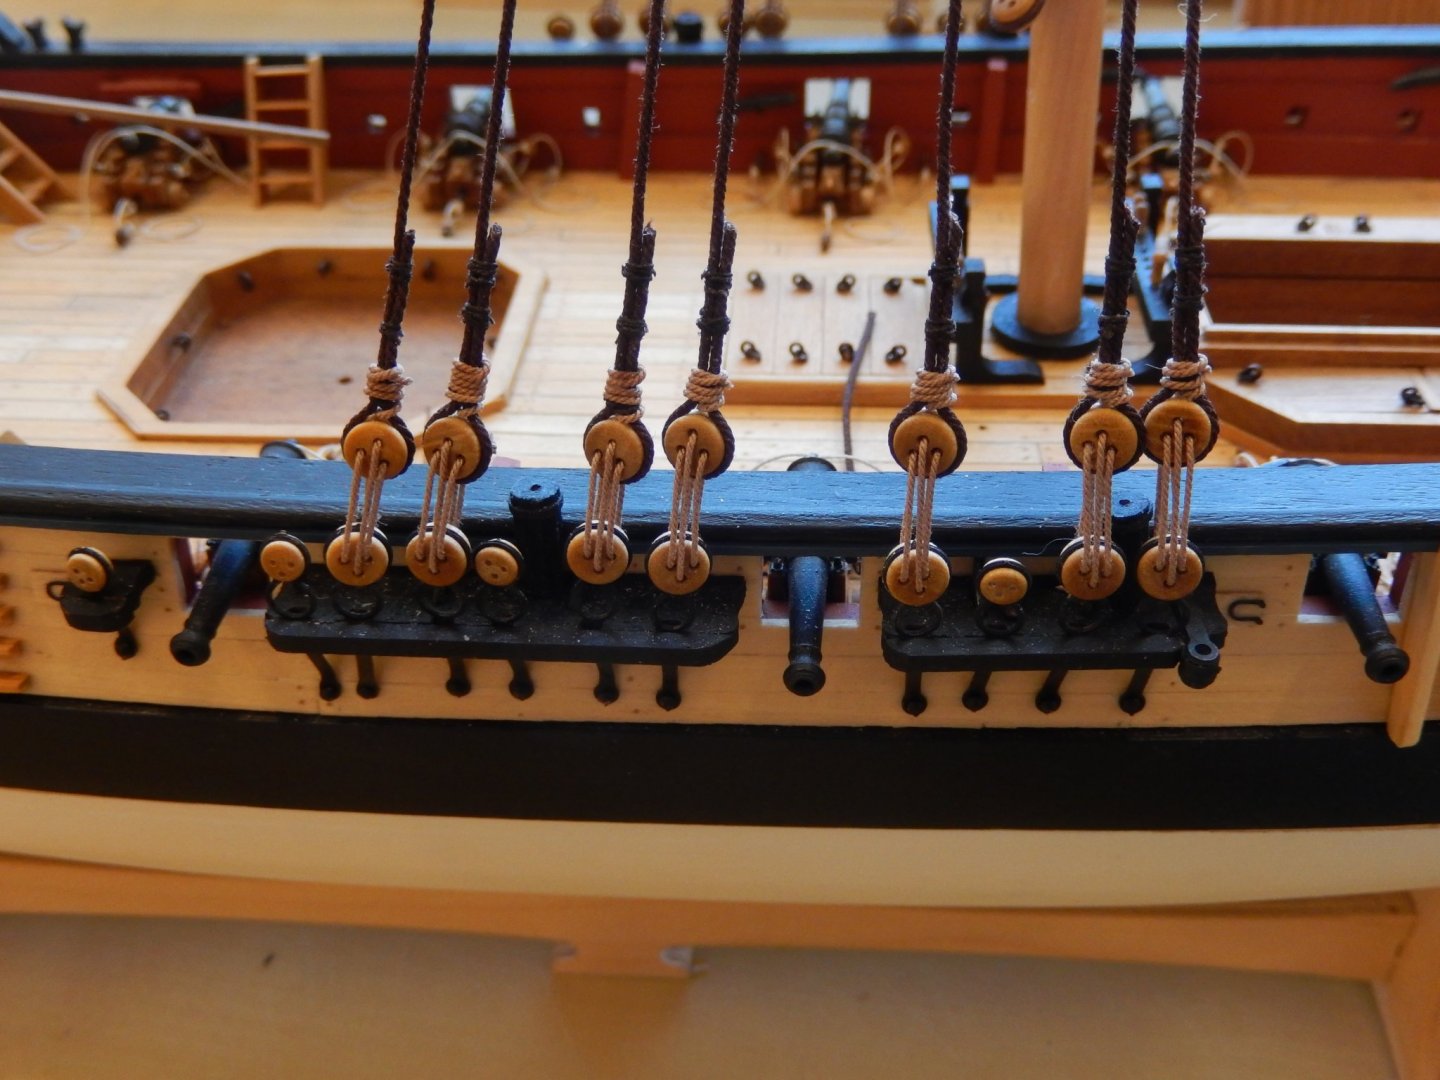
I have adjusted the heights of the pinrails. They do look a little better I think. The photo shown took four attempts to download so I won't bother with another couple. I notice the lanyard on the lefthand deadeye seem to overlap. That has been corrected.
- 421 replies
-
- 13
-
-
- caldercraft
- granado
- (and 1 more)
-
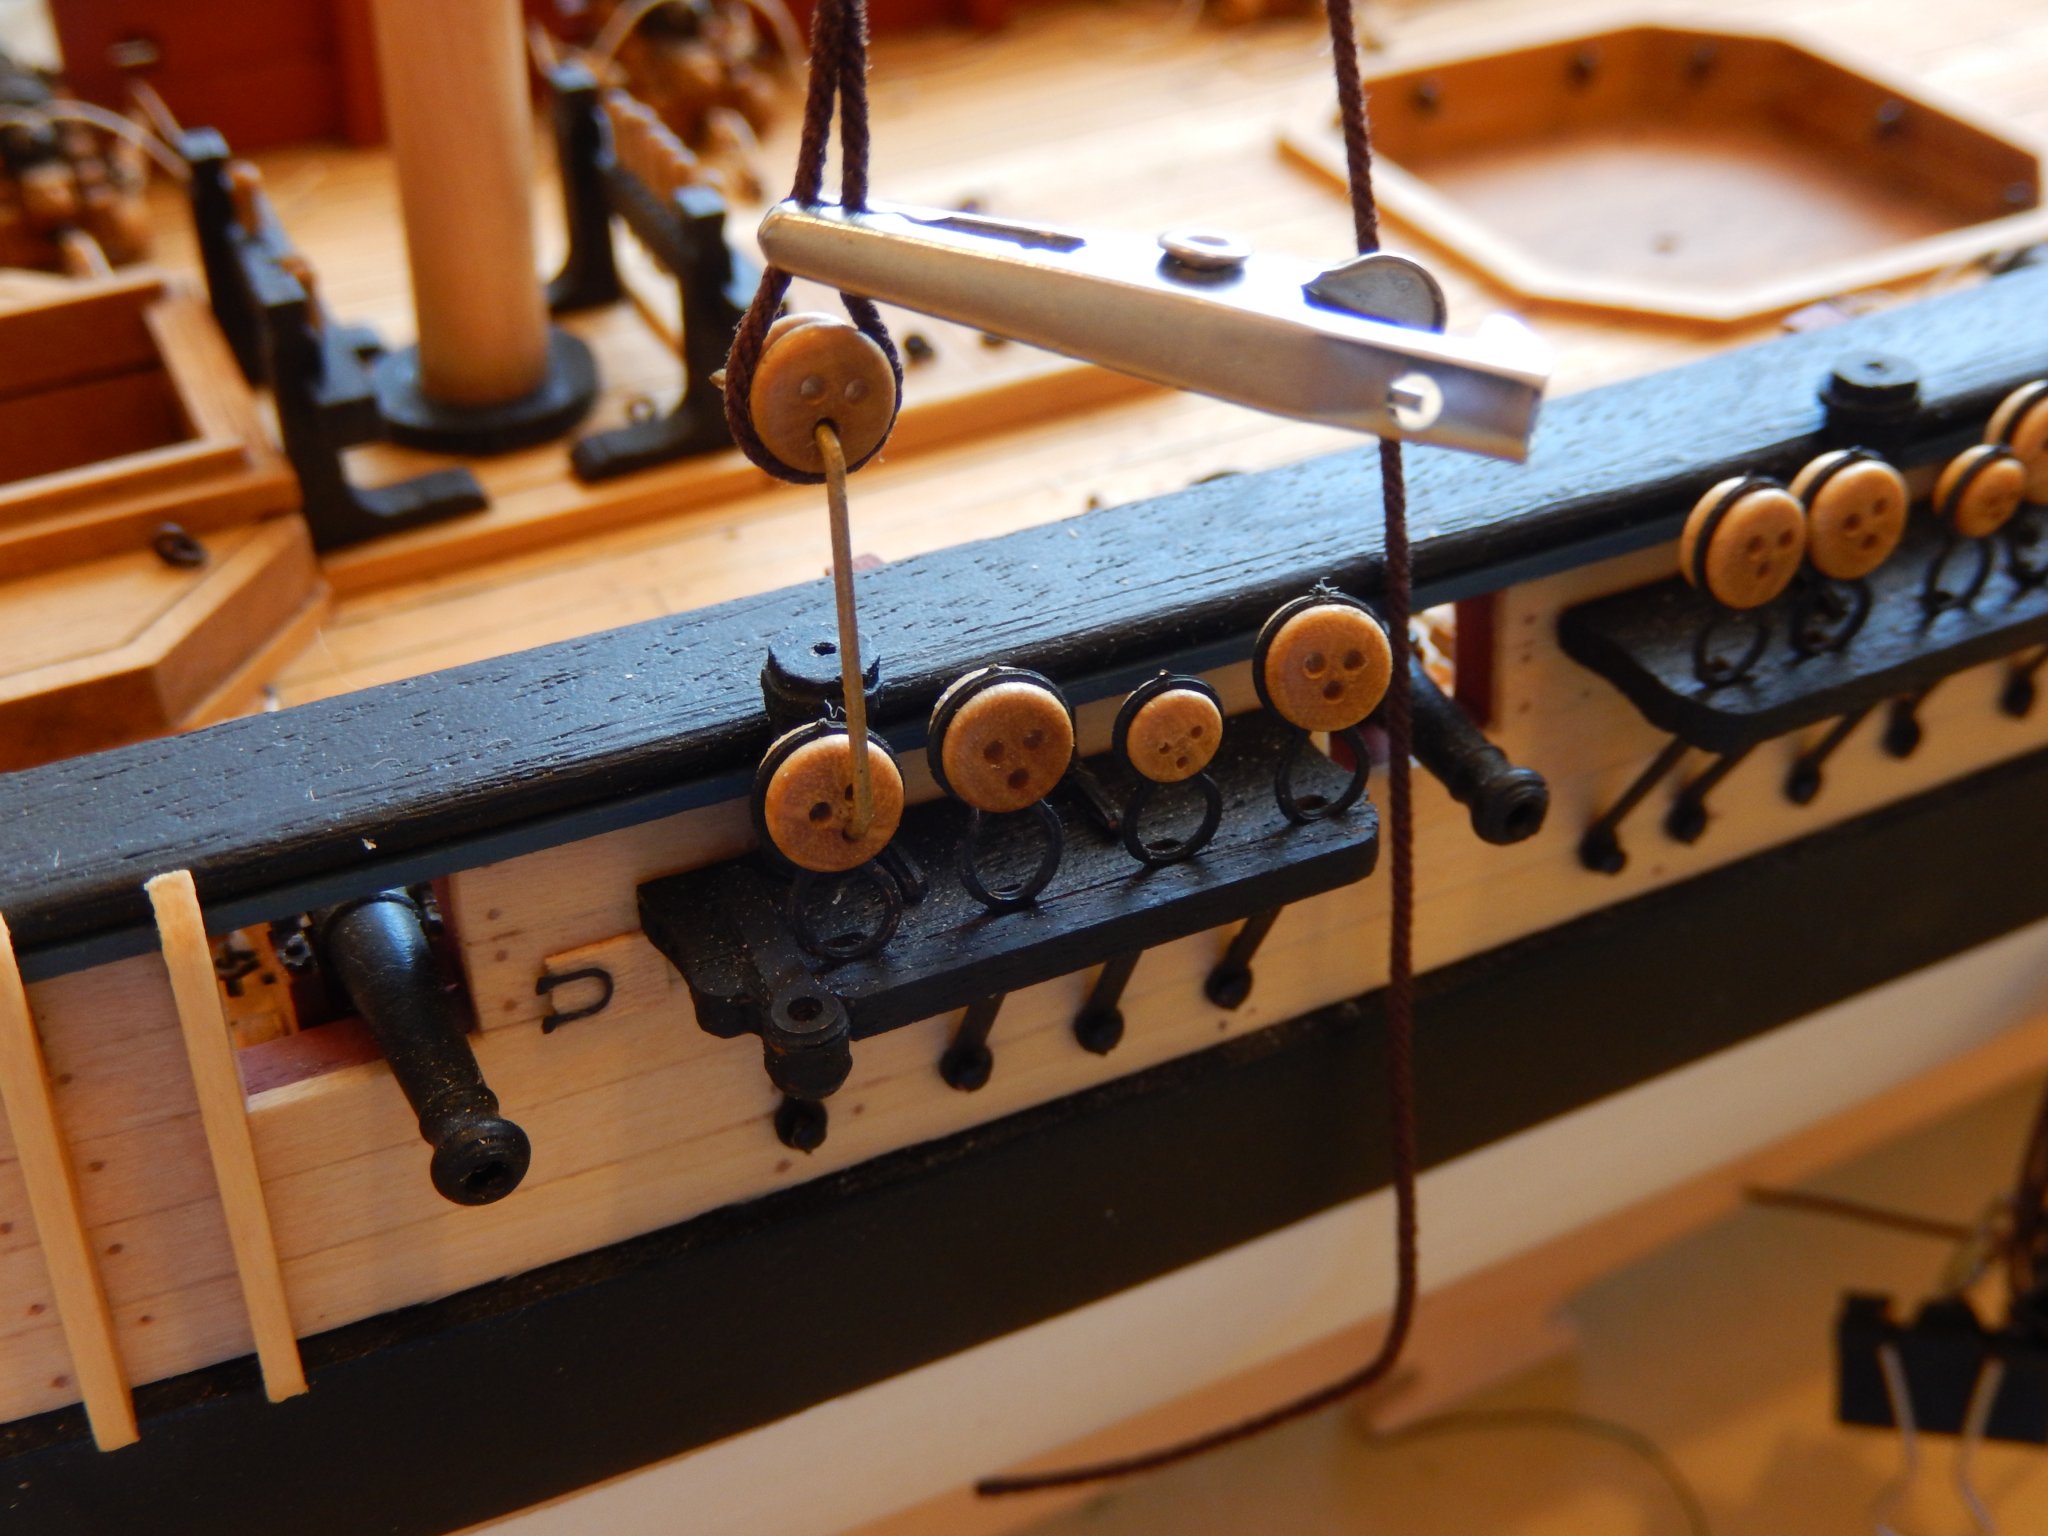
I changed my mind. I decided to get the lower shrouds over and done. Here is the starboard side. The pin rails make doing the mizzen shrouds a bit fiddly. Those supplied are of poor quality ply so they have been replaced. The photos show that I need to trim the thread a little better, though they don't look too bad in the flesh. On looking at it, I may have cut off the shrouds too high (and thus the pin rail is too high), though they are consistent with Petersson's illustration. I will think about adjusting all of this. Comments welcome. This is how I maintain the correct orientation of the deadeyes. Too High?


- 421 replies
-
- 11
-
-
- caldercraft
- granado
- (and 1 more)
-
Thanks for the comfort Peter. 🙂 The way the damn' thing is going I may need it again. As I'm rather sick of deadeyes and shrouds, I think I'll finish off some of the deck furniture next.
-
The main shrouds are finally finished. The process did not go smoothly and a couple had to be redone. Here are the results. I'm not especially happy with the port side, but it's OK, and later, with all sorts of other things going on, any inadequacies will be obscured. .

- 421 replies
-
- 17
-
-
- caldercraft
- granado
- (and 1 more)
-
No. I've used Syren thread. It's better quality than that supplied in the kit. Incidentally, it is easier to work with if you wet it when tying knots. The thread you see tied around the shrouds, for example, was wet - it 'behaves' (stays in place) far more easily than when dry.
- 421 replies
-
- 2
-
-
- caldercraft
- granado
- (and 1 more)
-
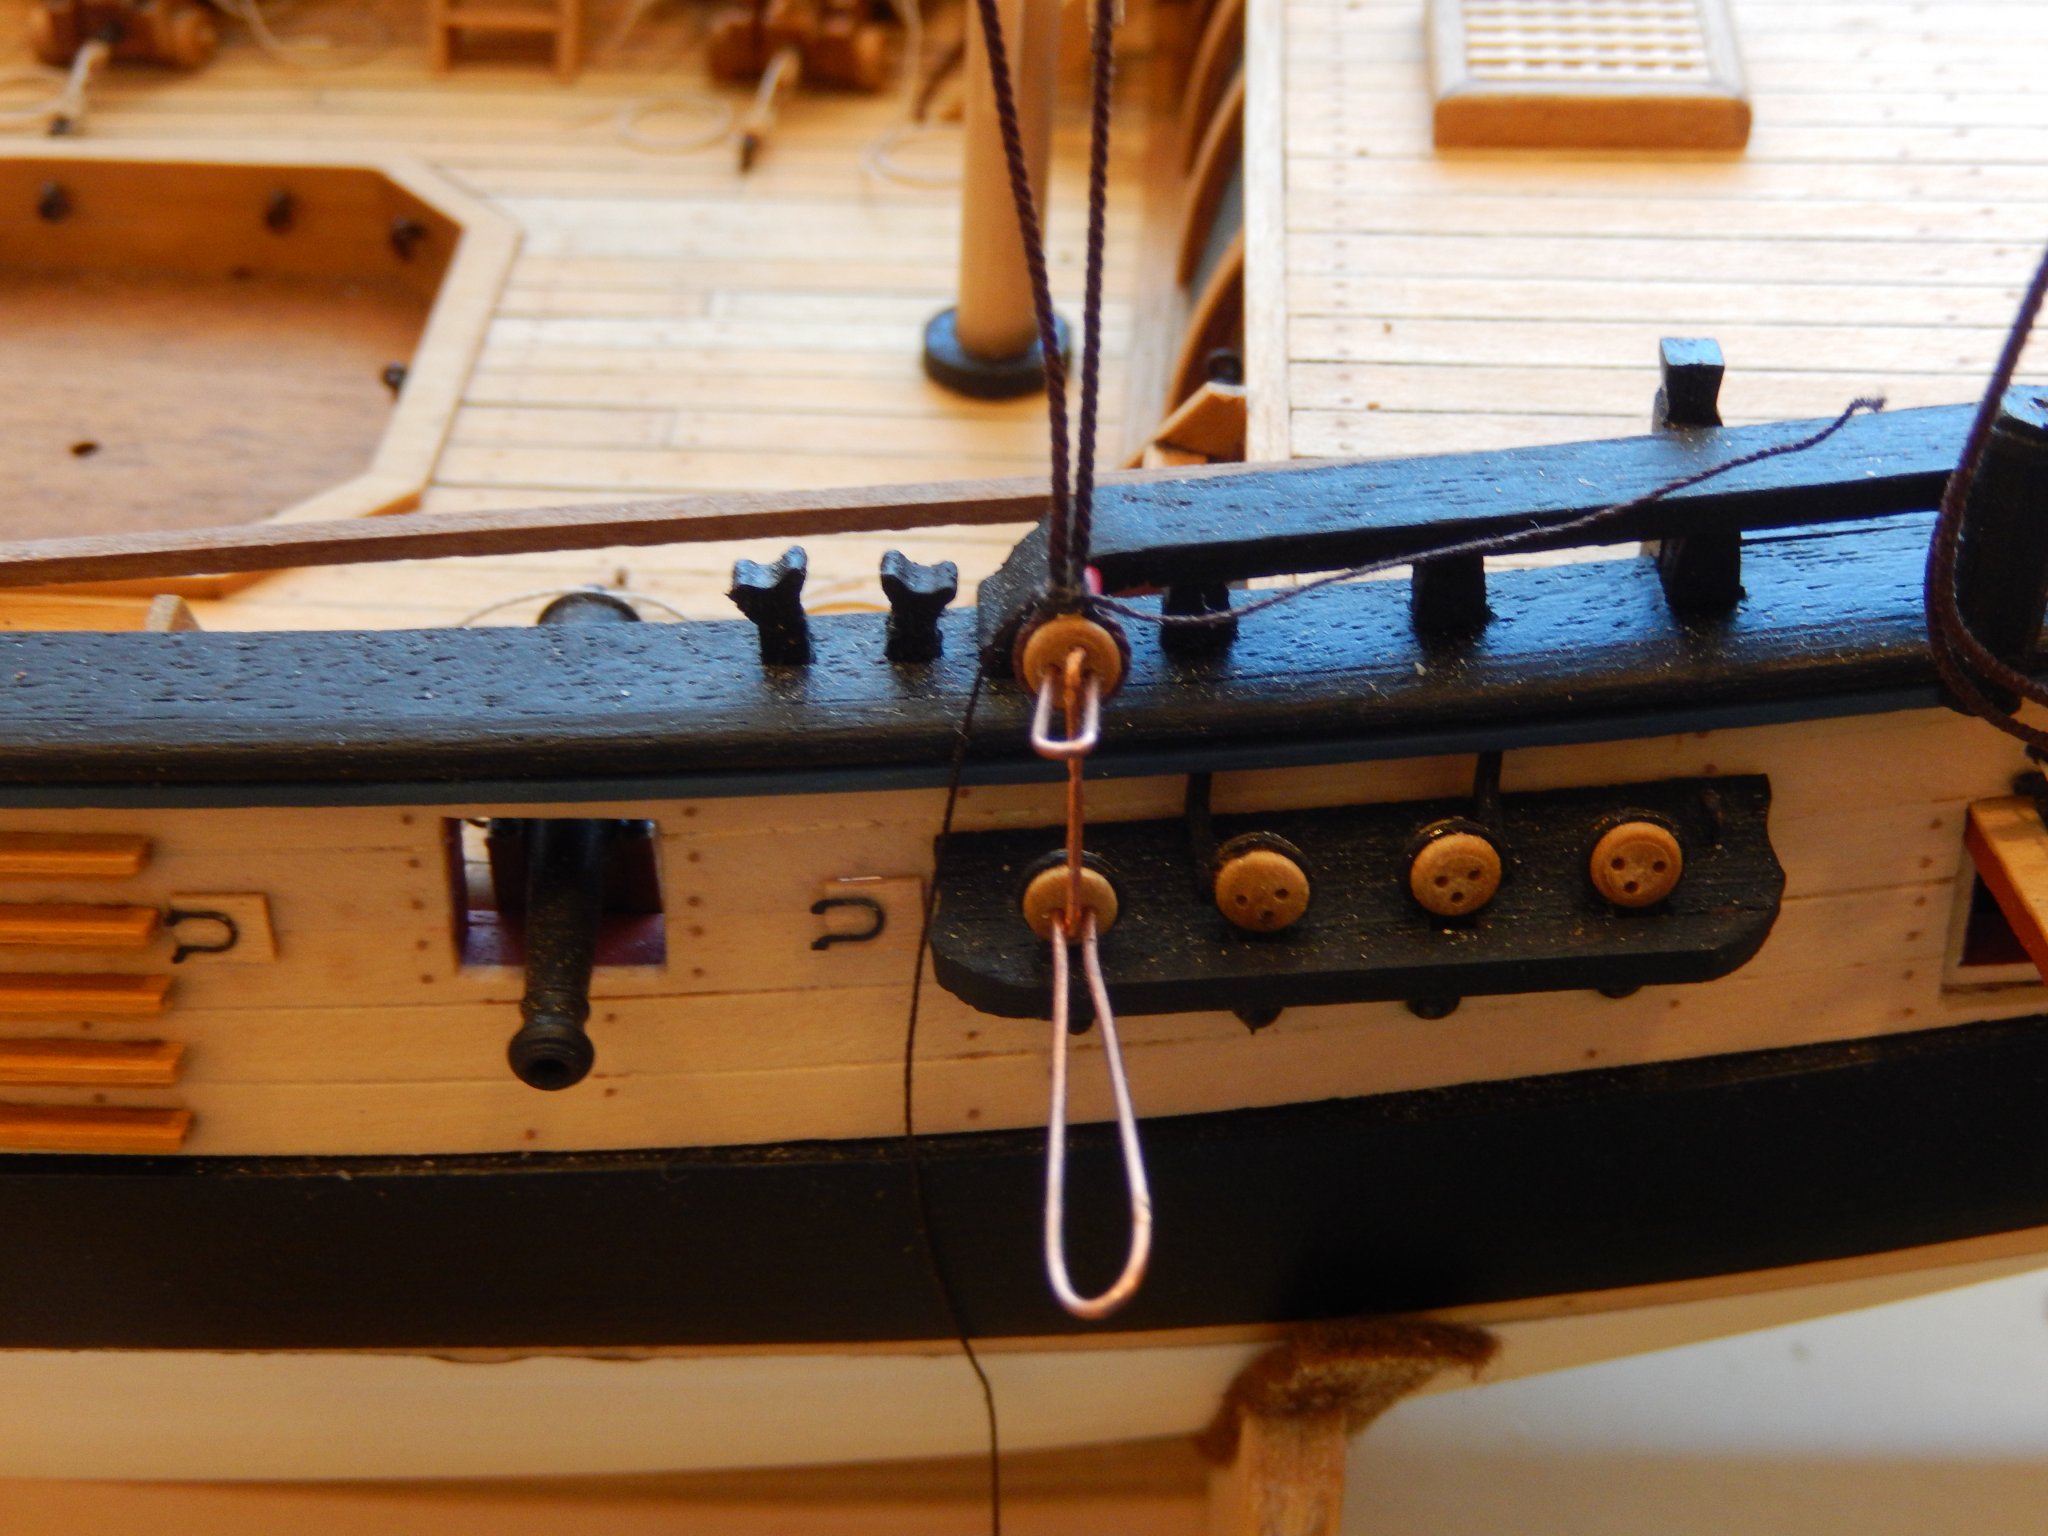
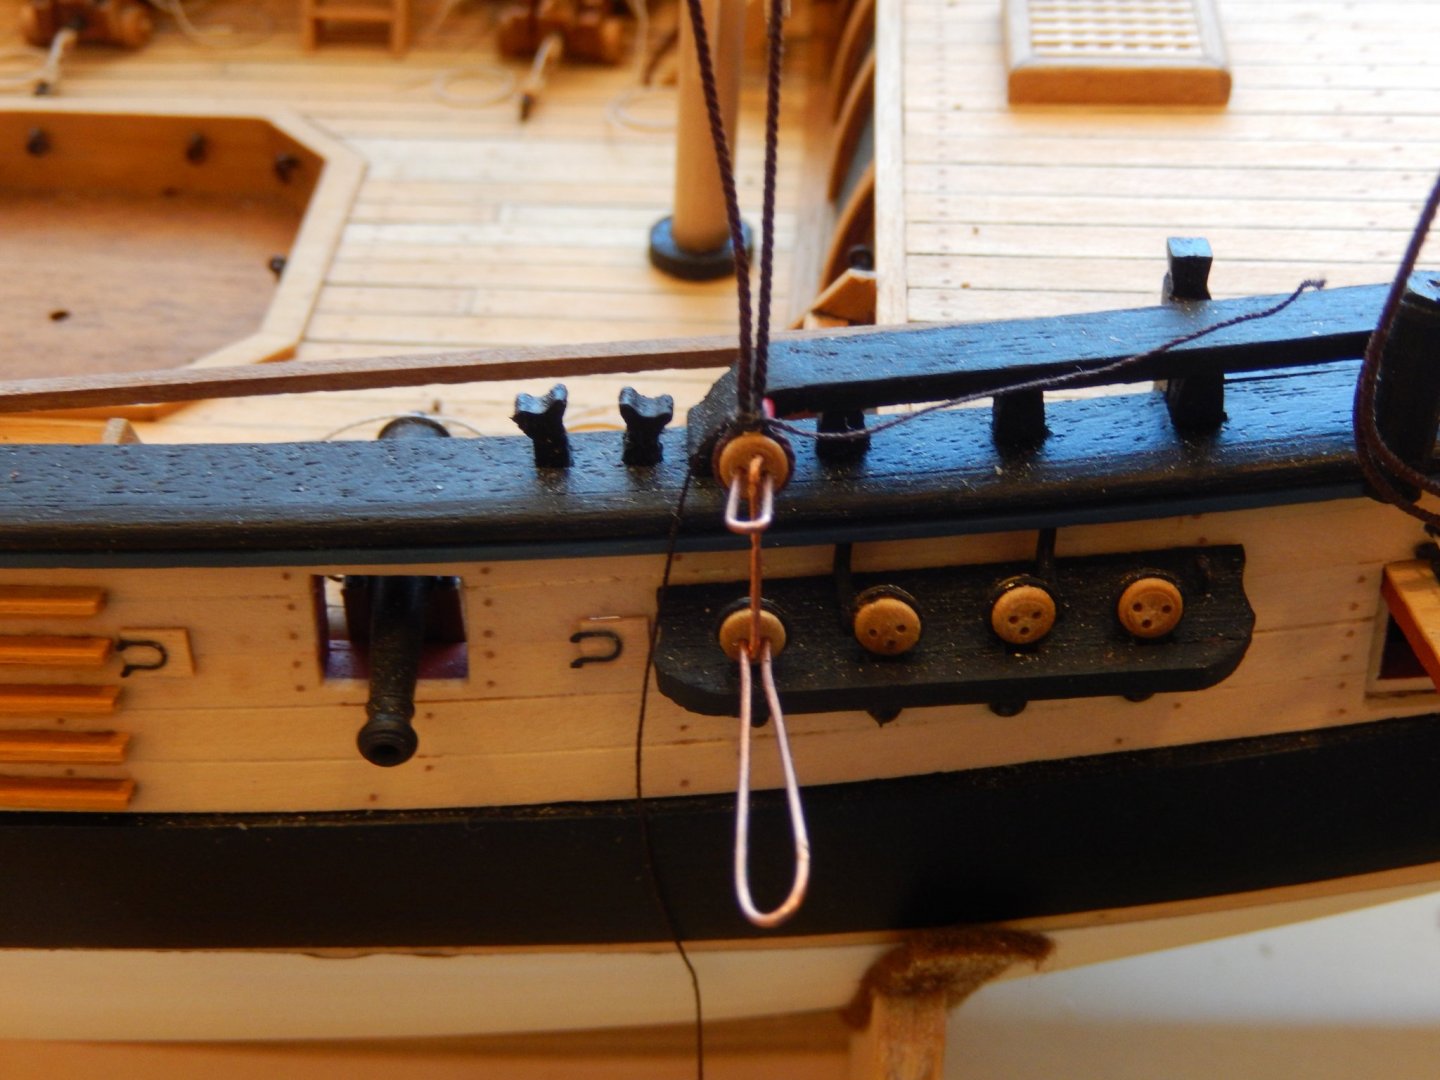
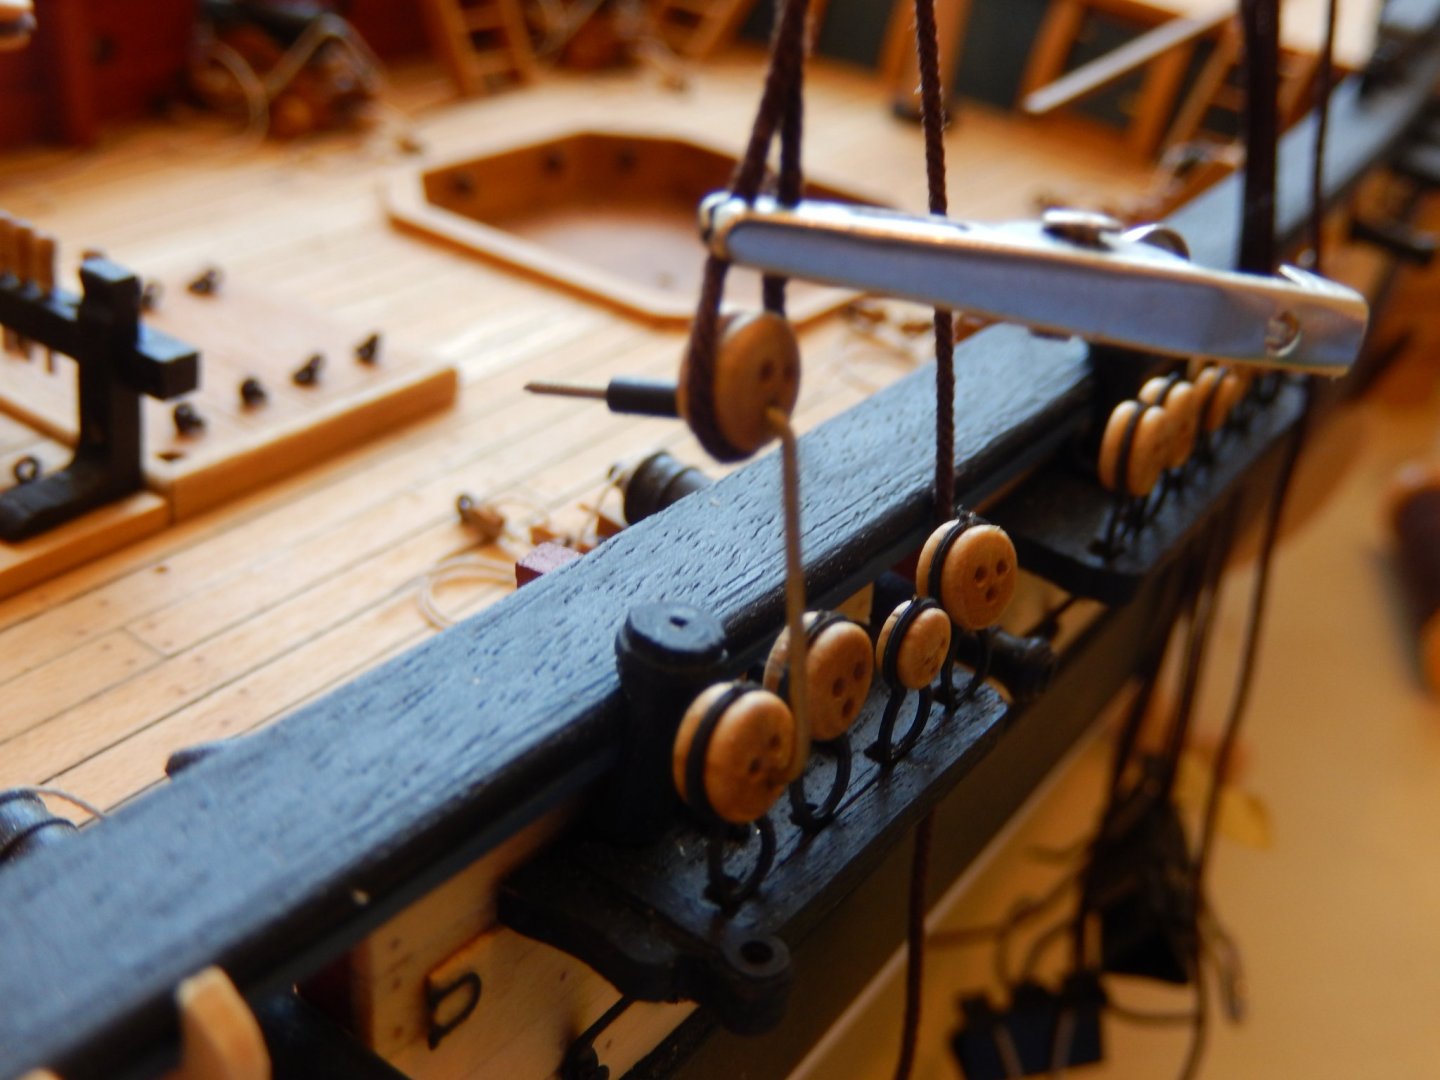
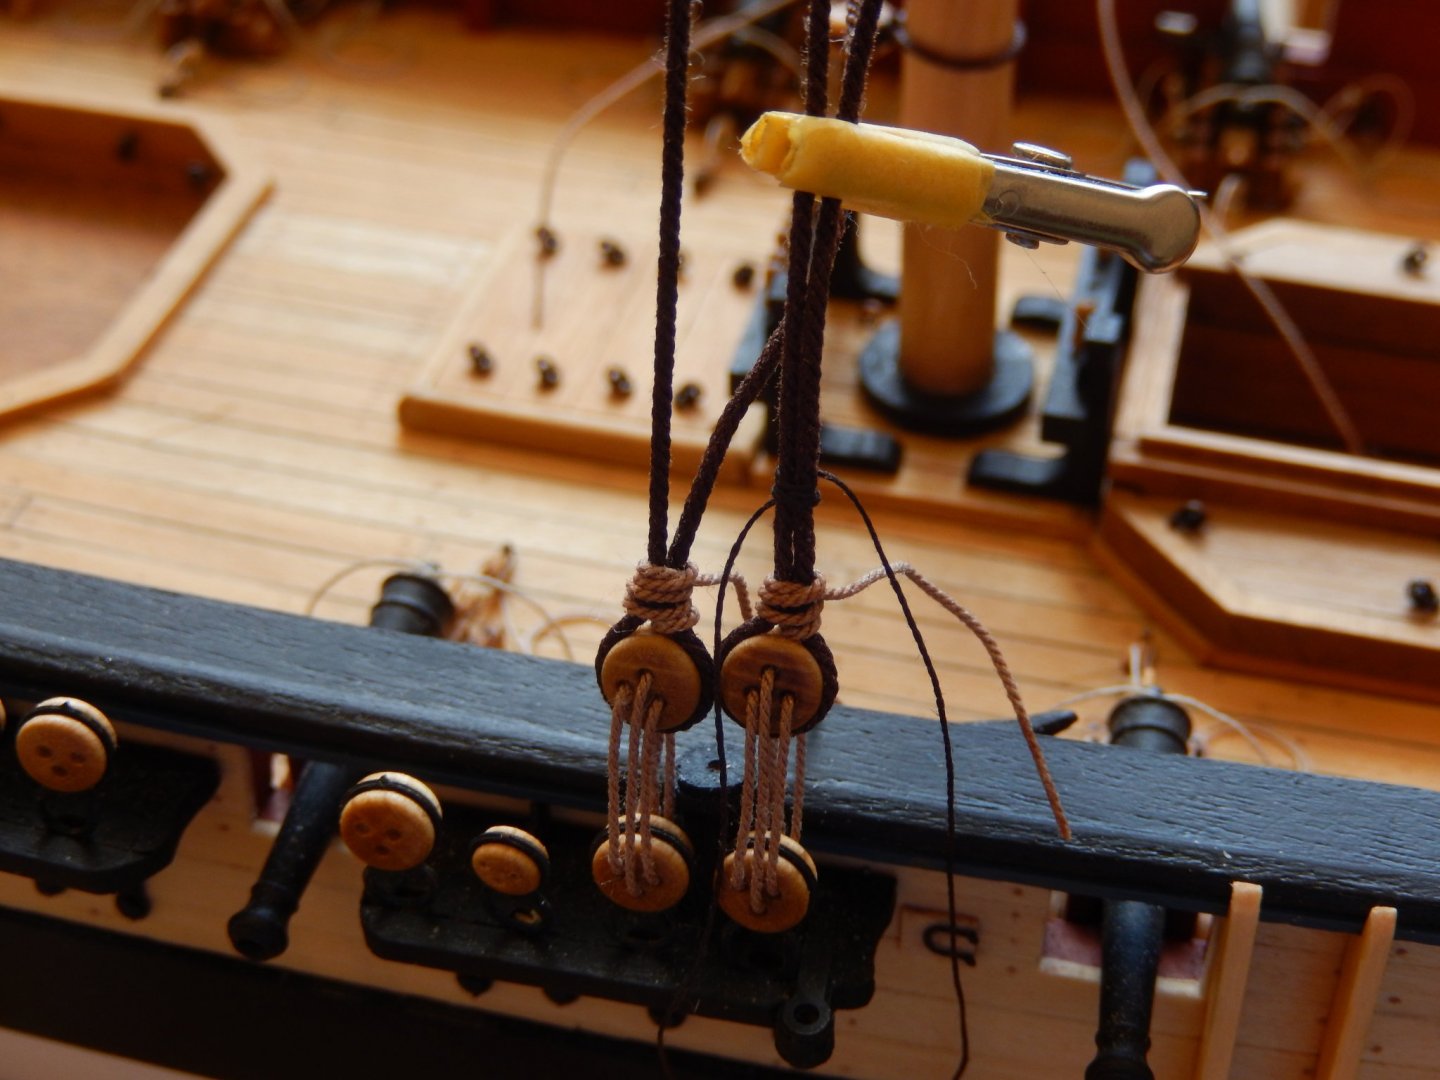
A start has been made in installing the deadeyes. It's a rather fiddly job. A shown, I use a piece of copper wire of the appropriate length as a jig, with a small piece of insulating off the wire to prevent the top deadeye from falling off. The two sides of the 'rope' are held by a small alligator clip. Partly finished - and finished.


- 421 replies
-
- 14
-
-
- caldercraft
- granado
- (and 1 more)
-
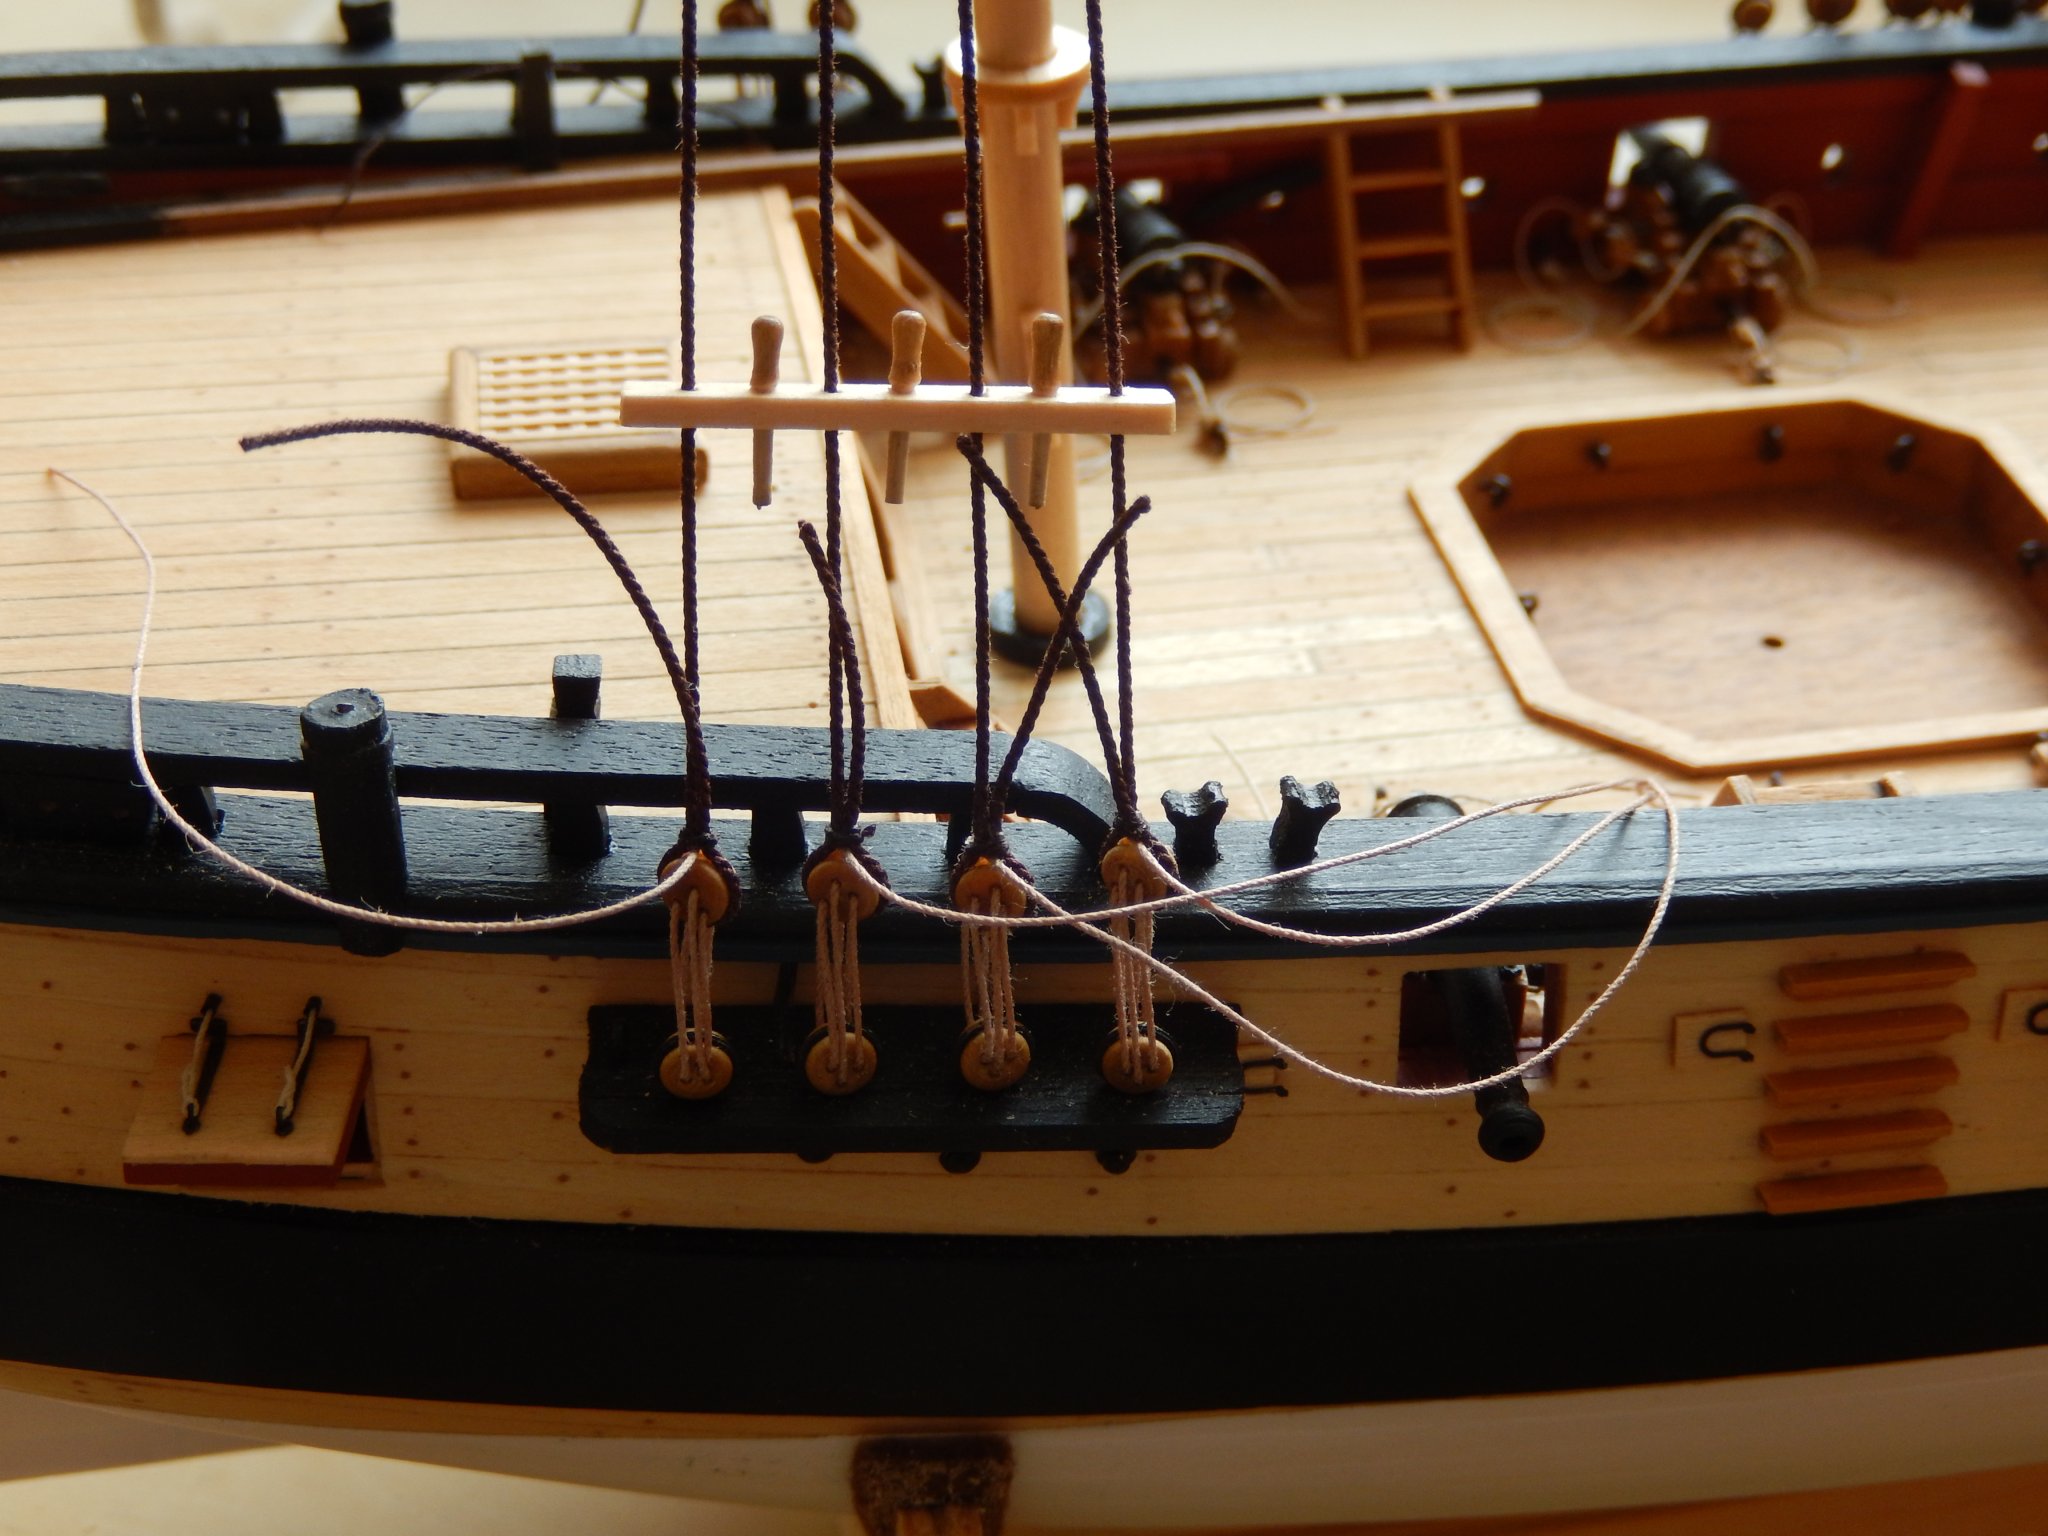
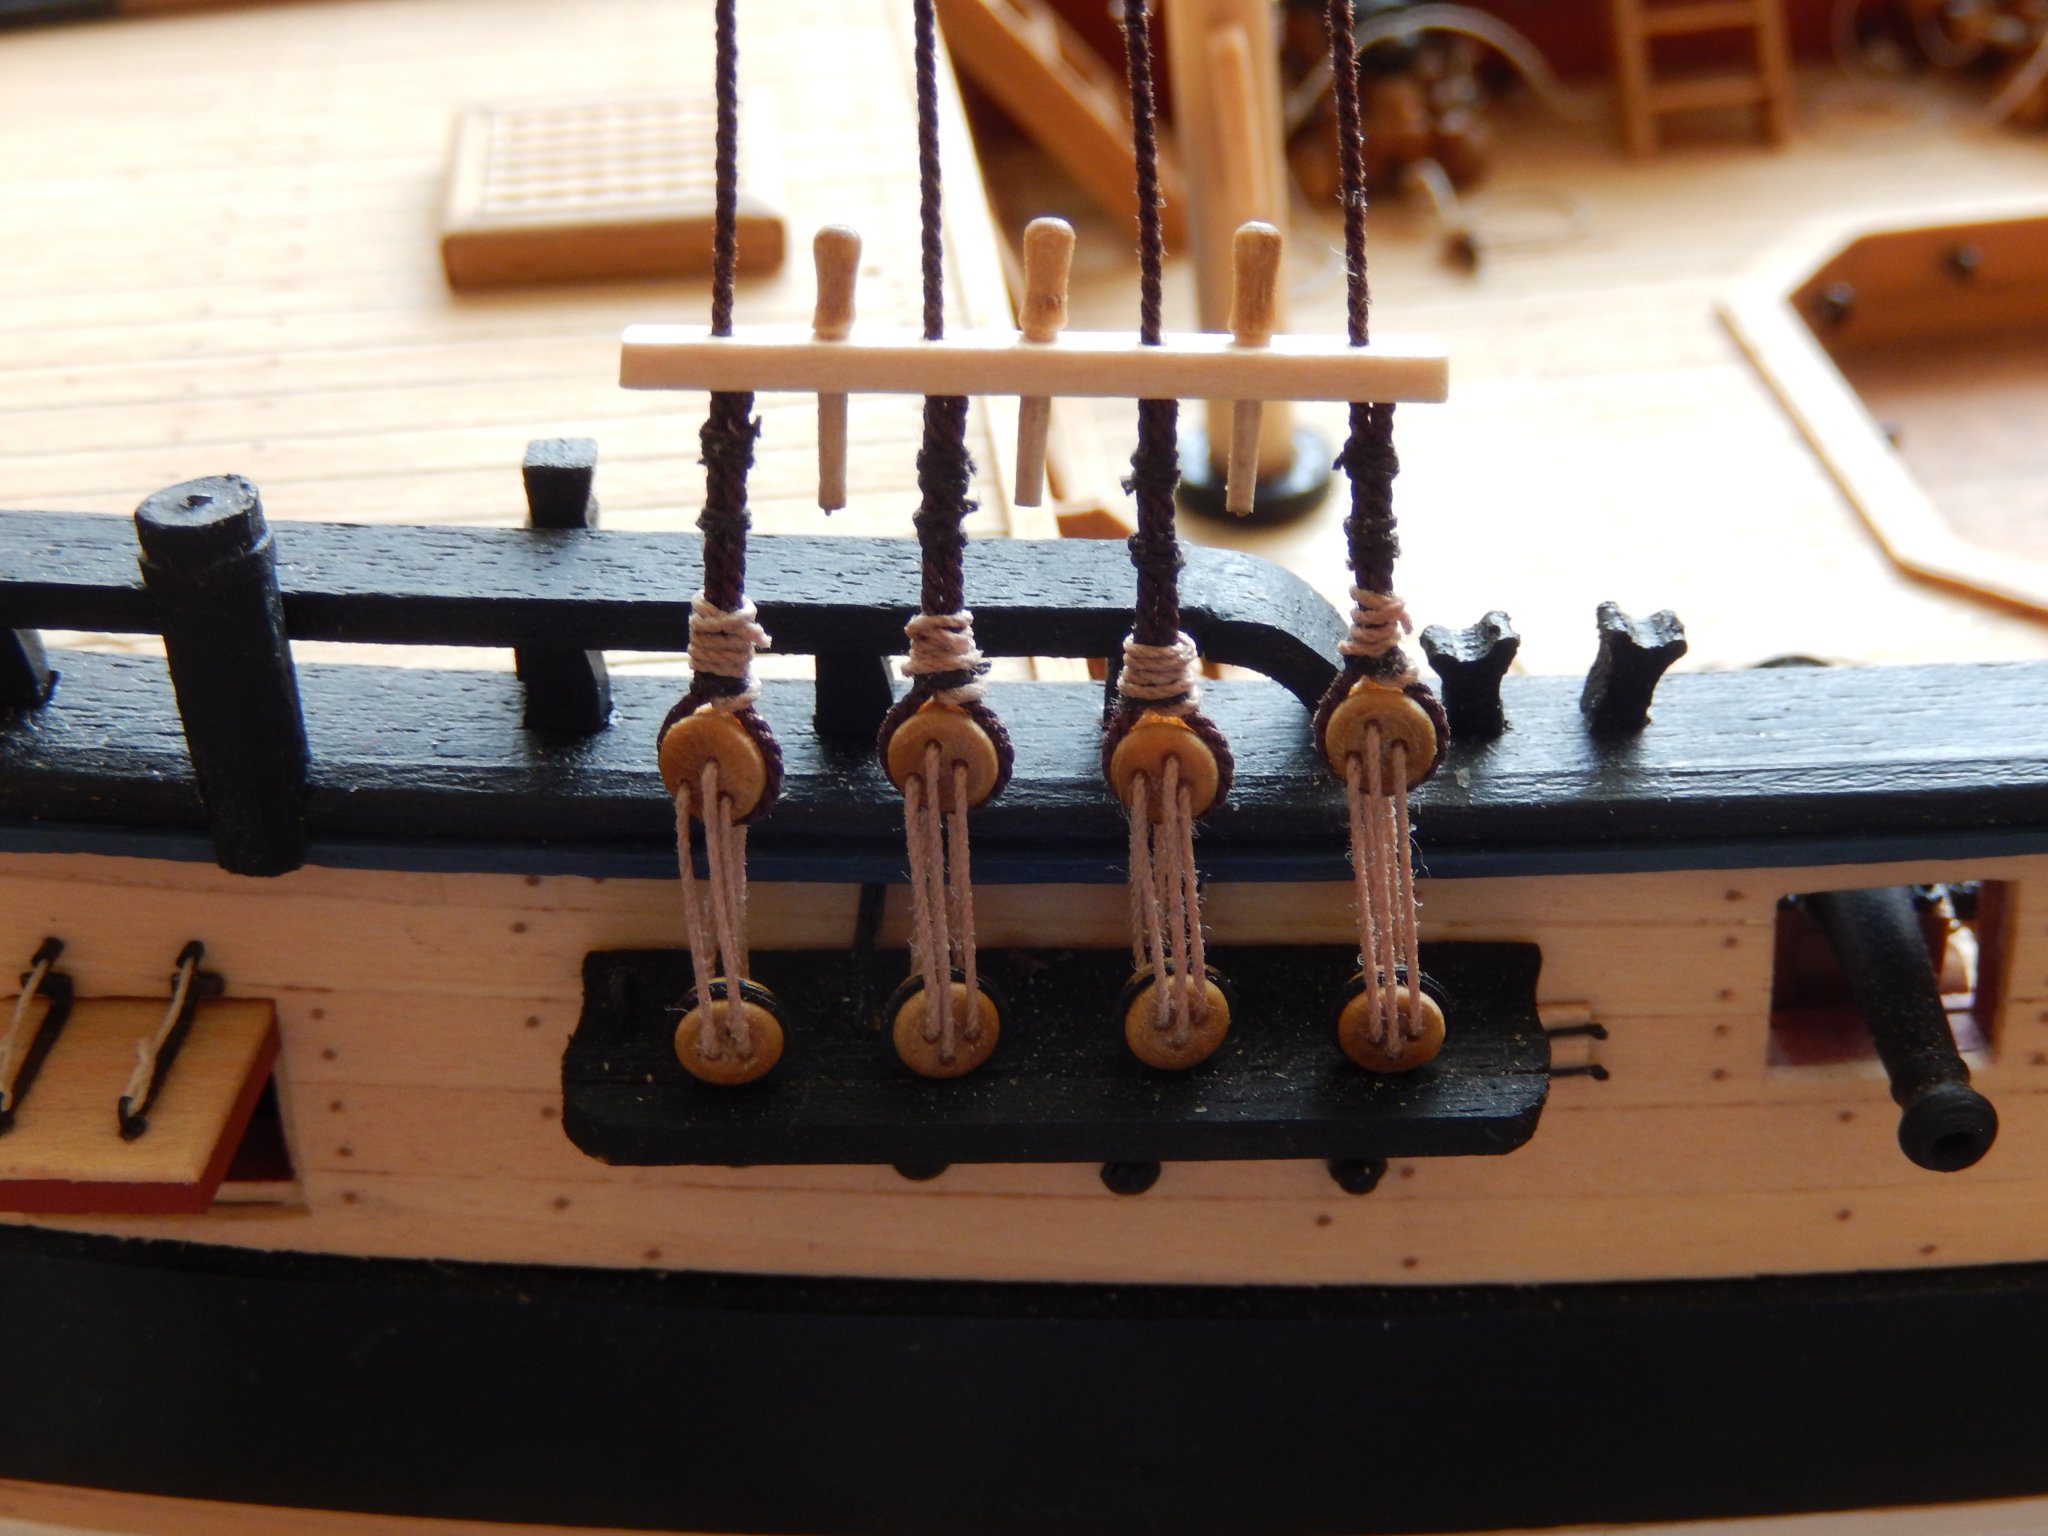
The lower shrouds are now attached to the main mast. I made things more difficult than I should have, but tying the shrouds on proved easier than anticipated and they turned out quite acceptably.. The photos give an idea how they were done. Once the shrouds are attached to the deadeyes and made taut, the respective loops should line up quite nicely.


- 421 replies
-
- 14
-
-
- caldercraft
- granado
- (and 1 more)
-
Unfortunately I'm thinking the same thing. As I said in my last post putting on the shrouds is going to be 'interesting'. It's a fundamental mistake, and will be difficult rectify, though I have a couple of ideas. Pity I didn't have them earlier.
- 421 replies
-
- 1
-
-
- caldercraft
- granado
- (and 1 more)
-
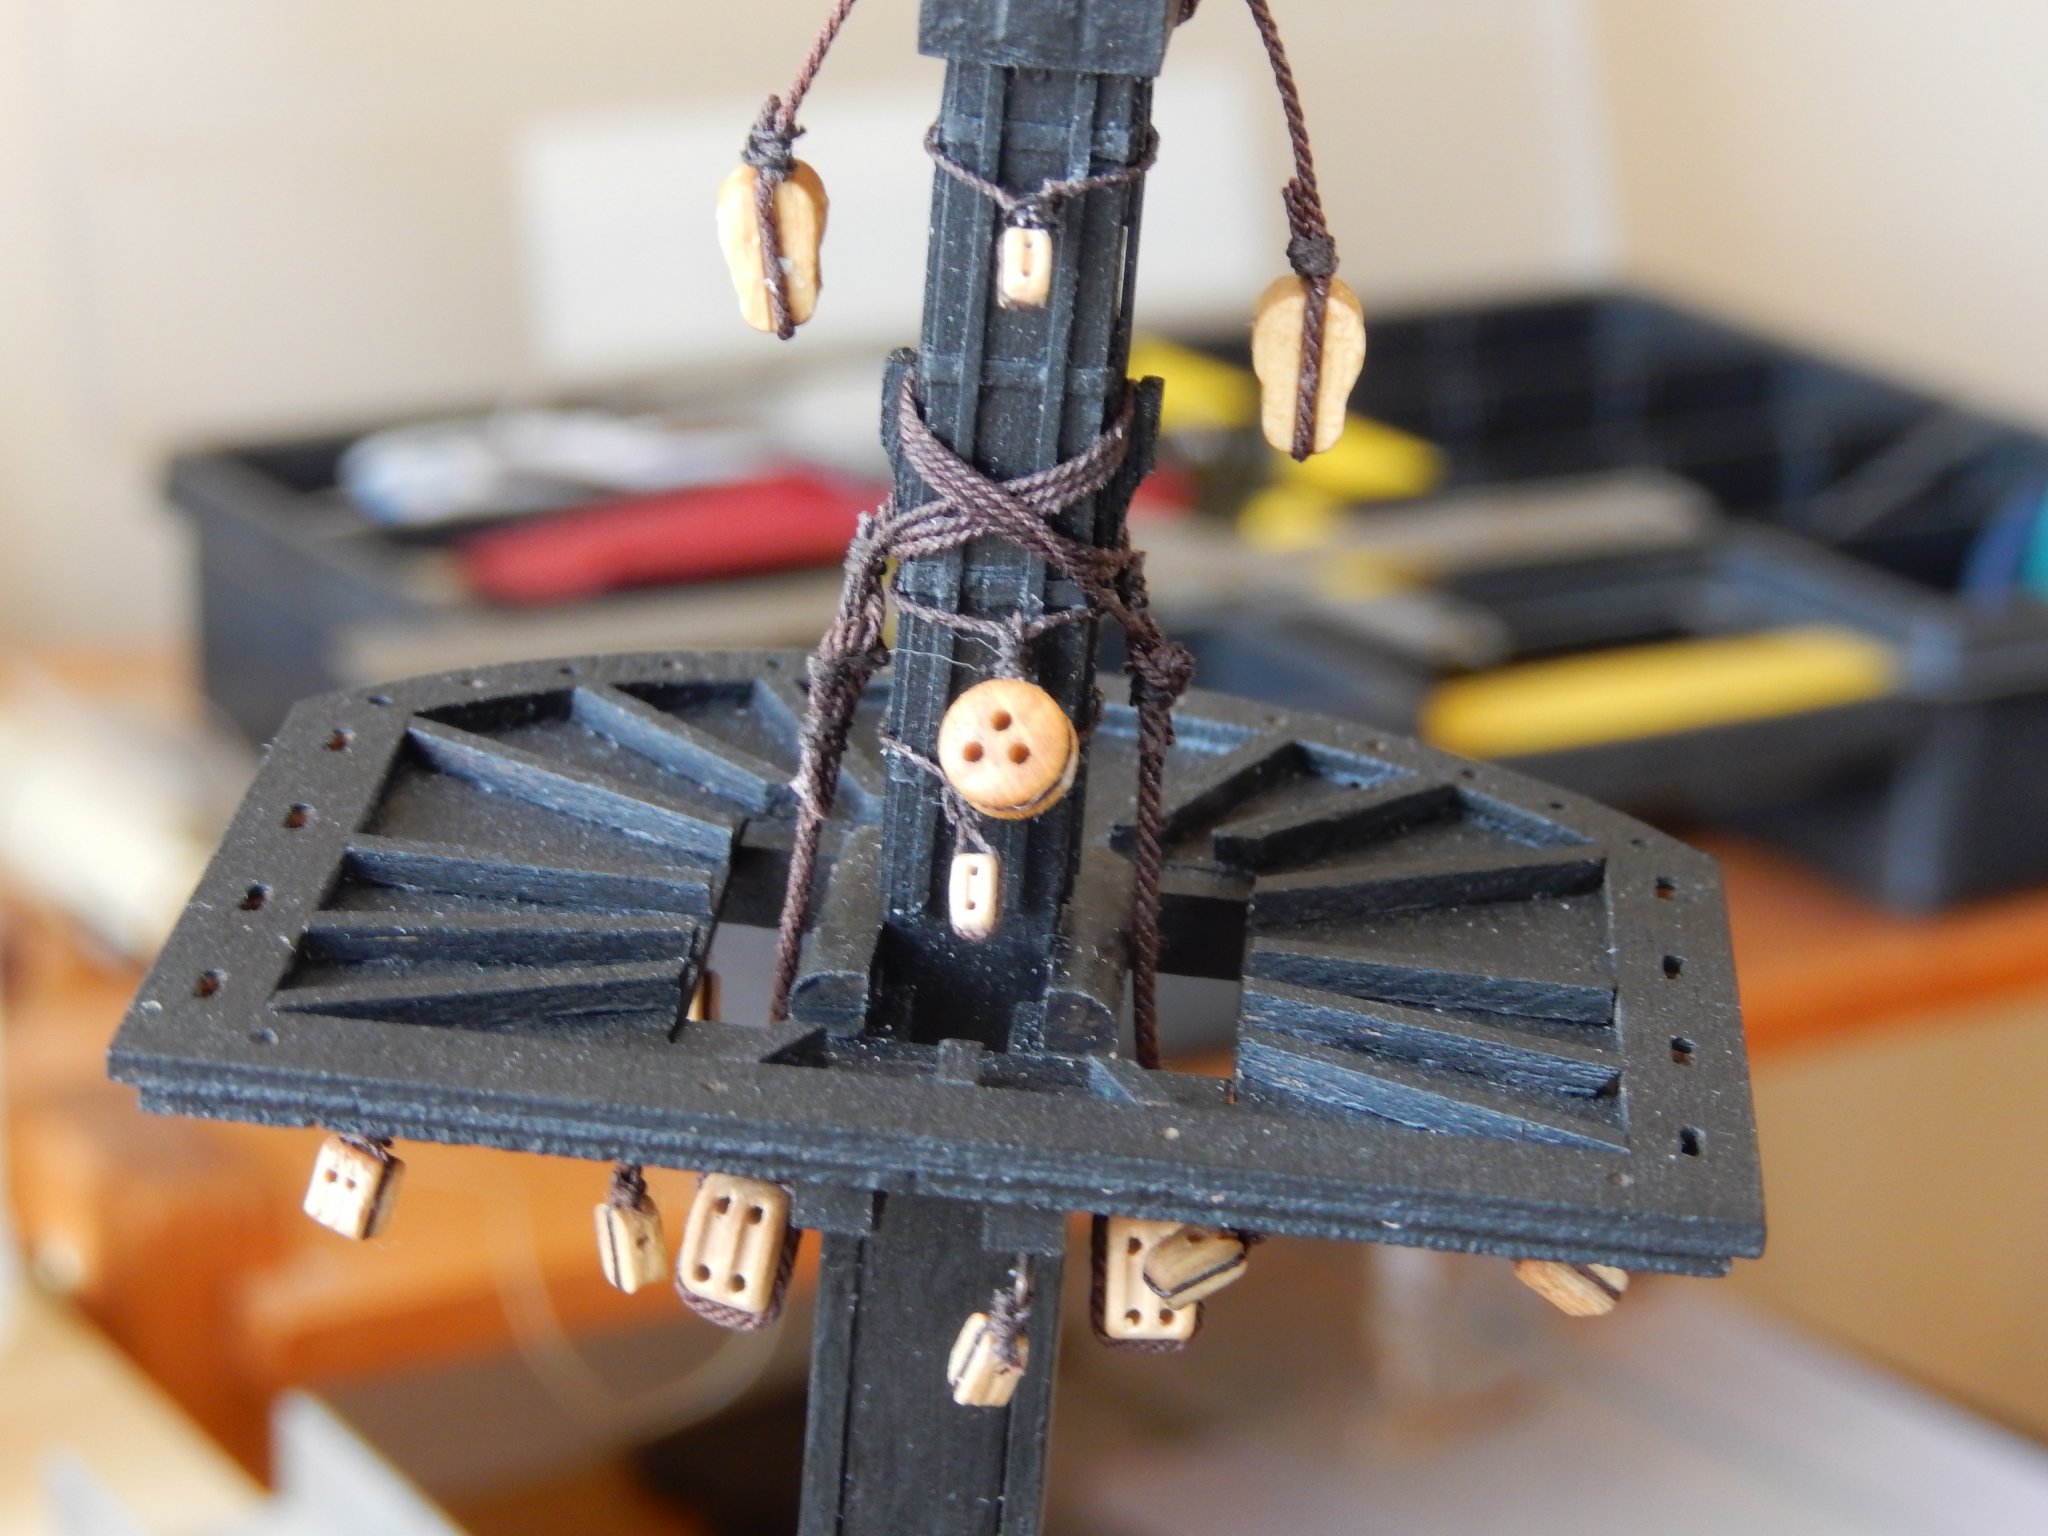
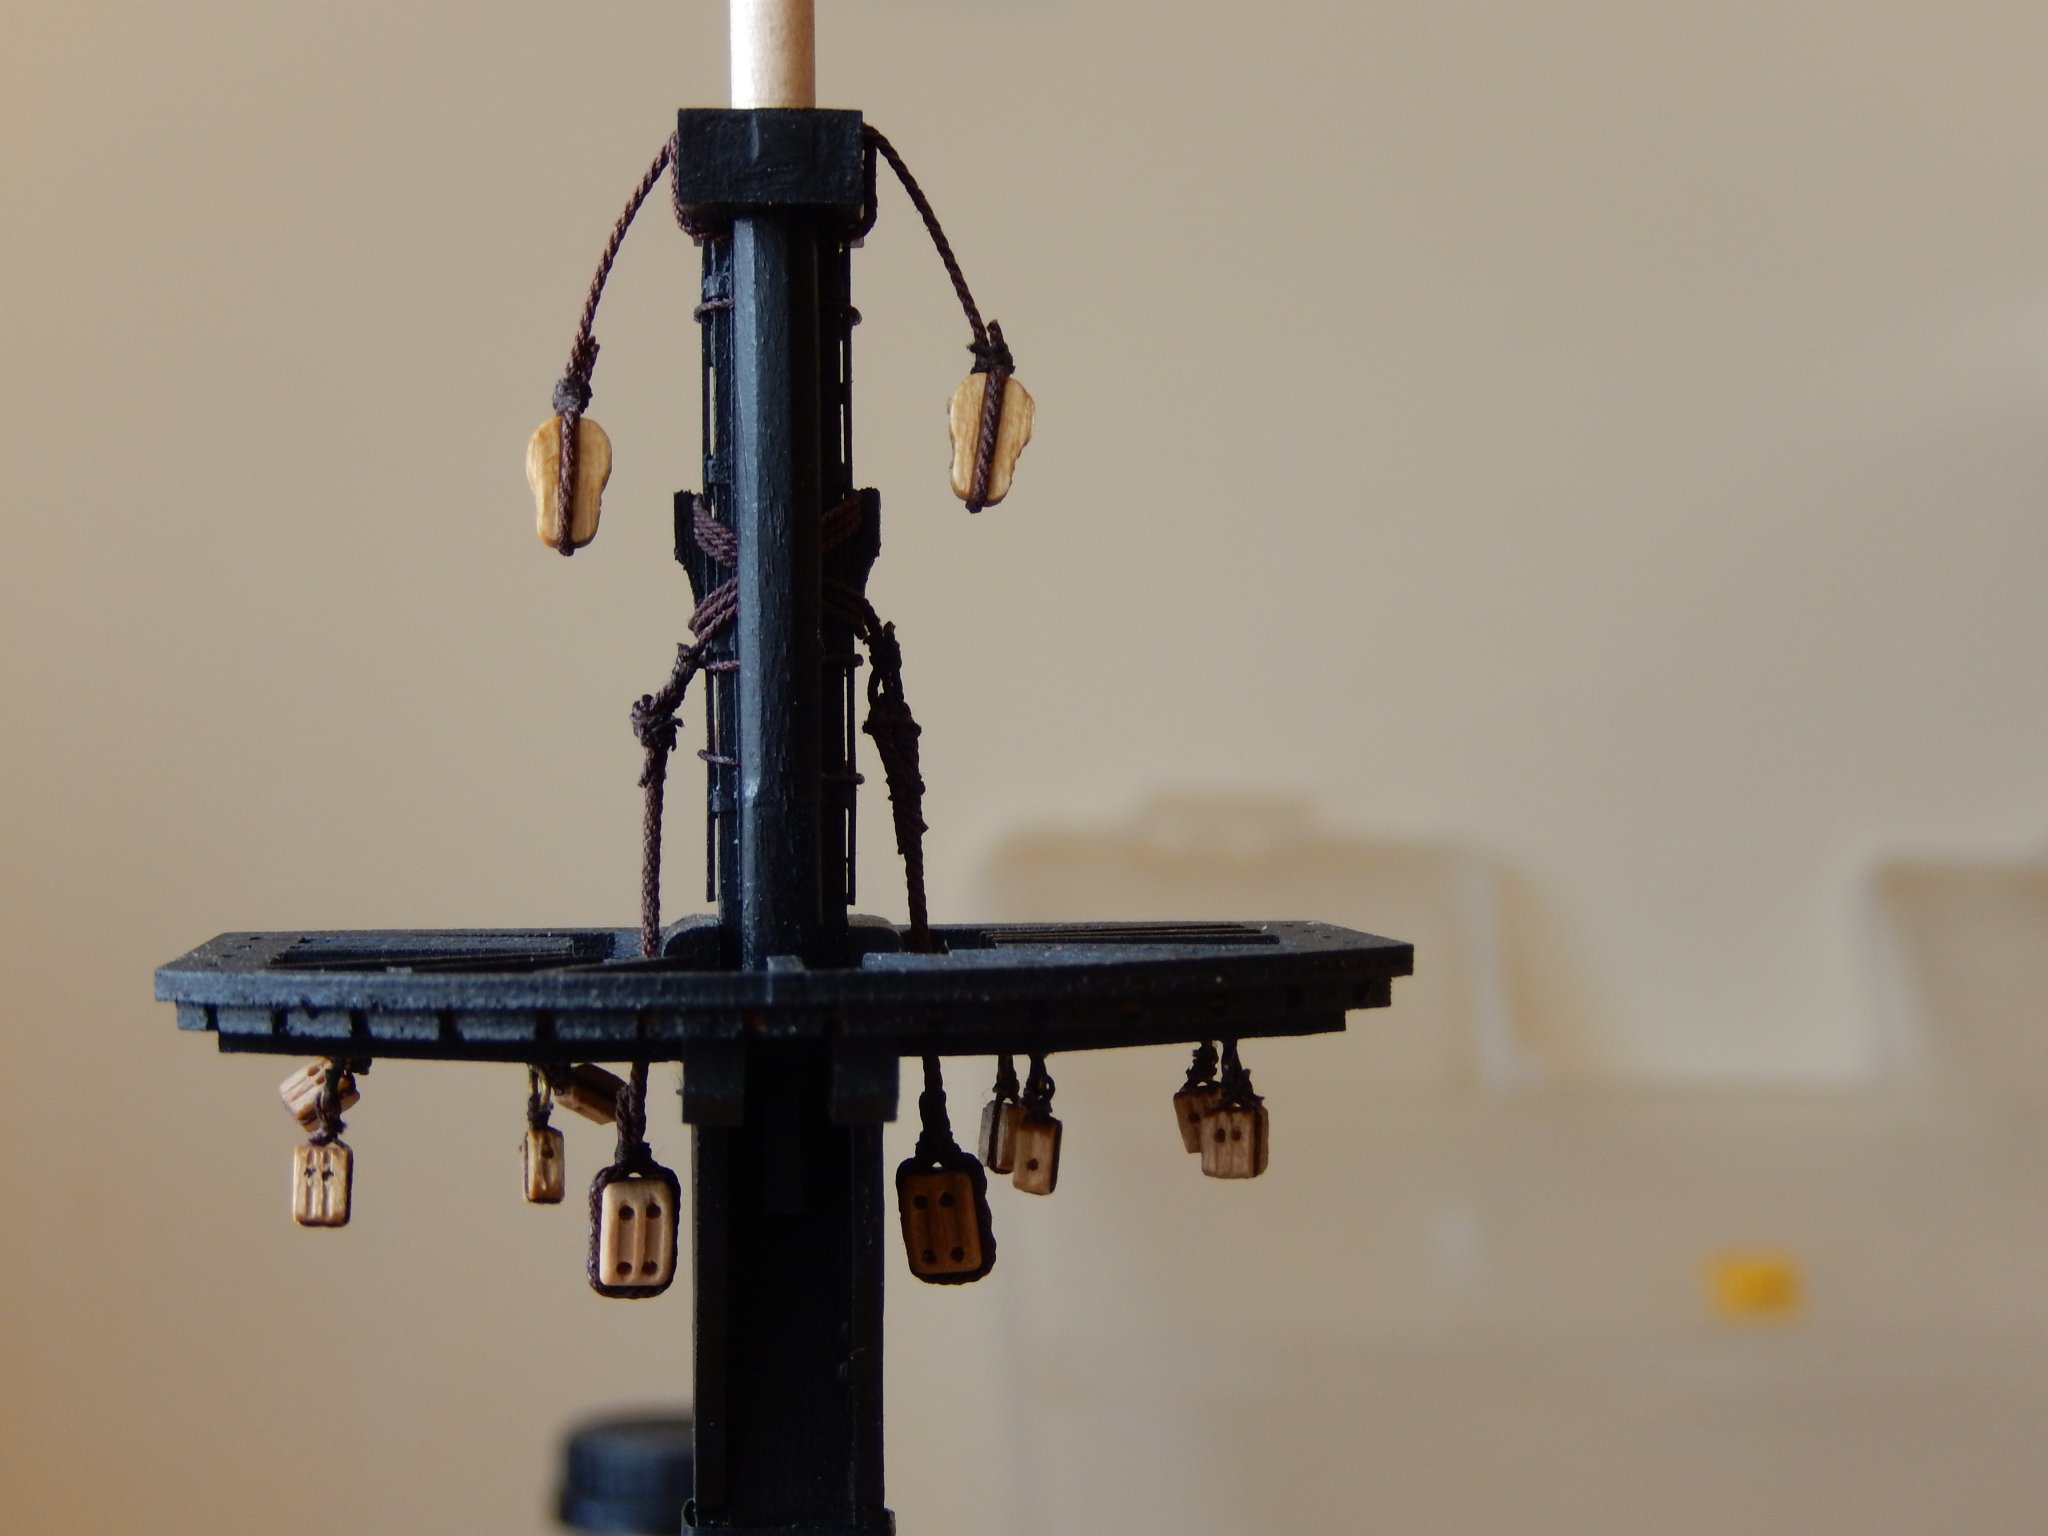
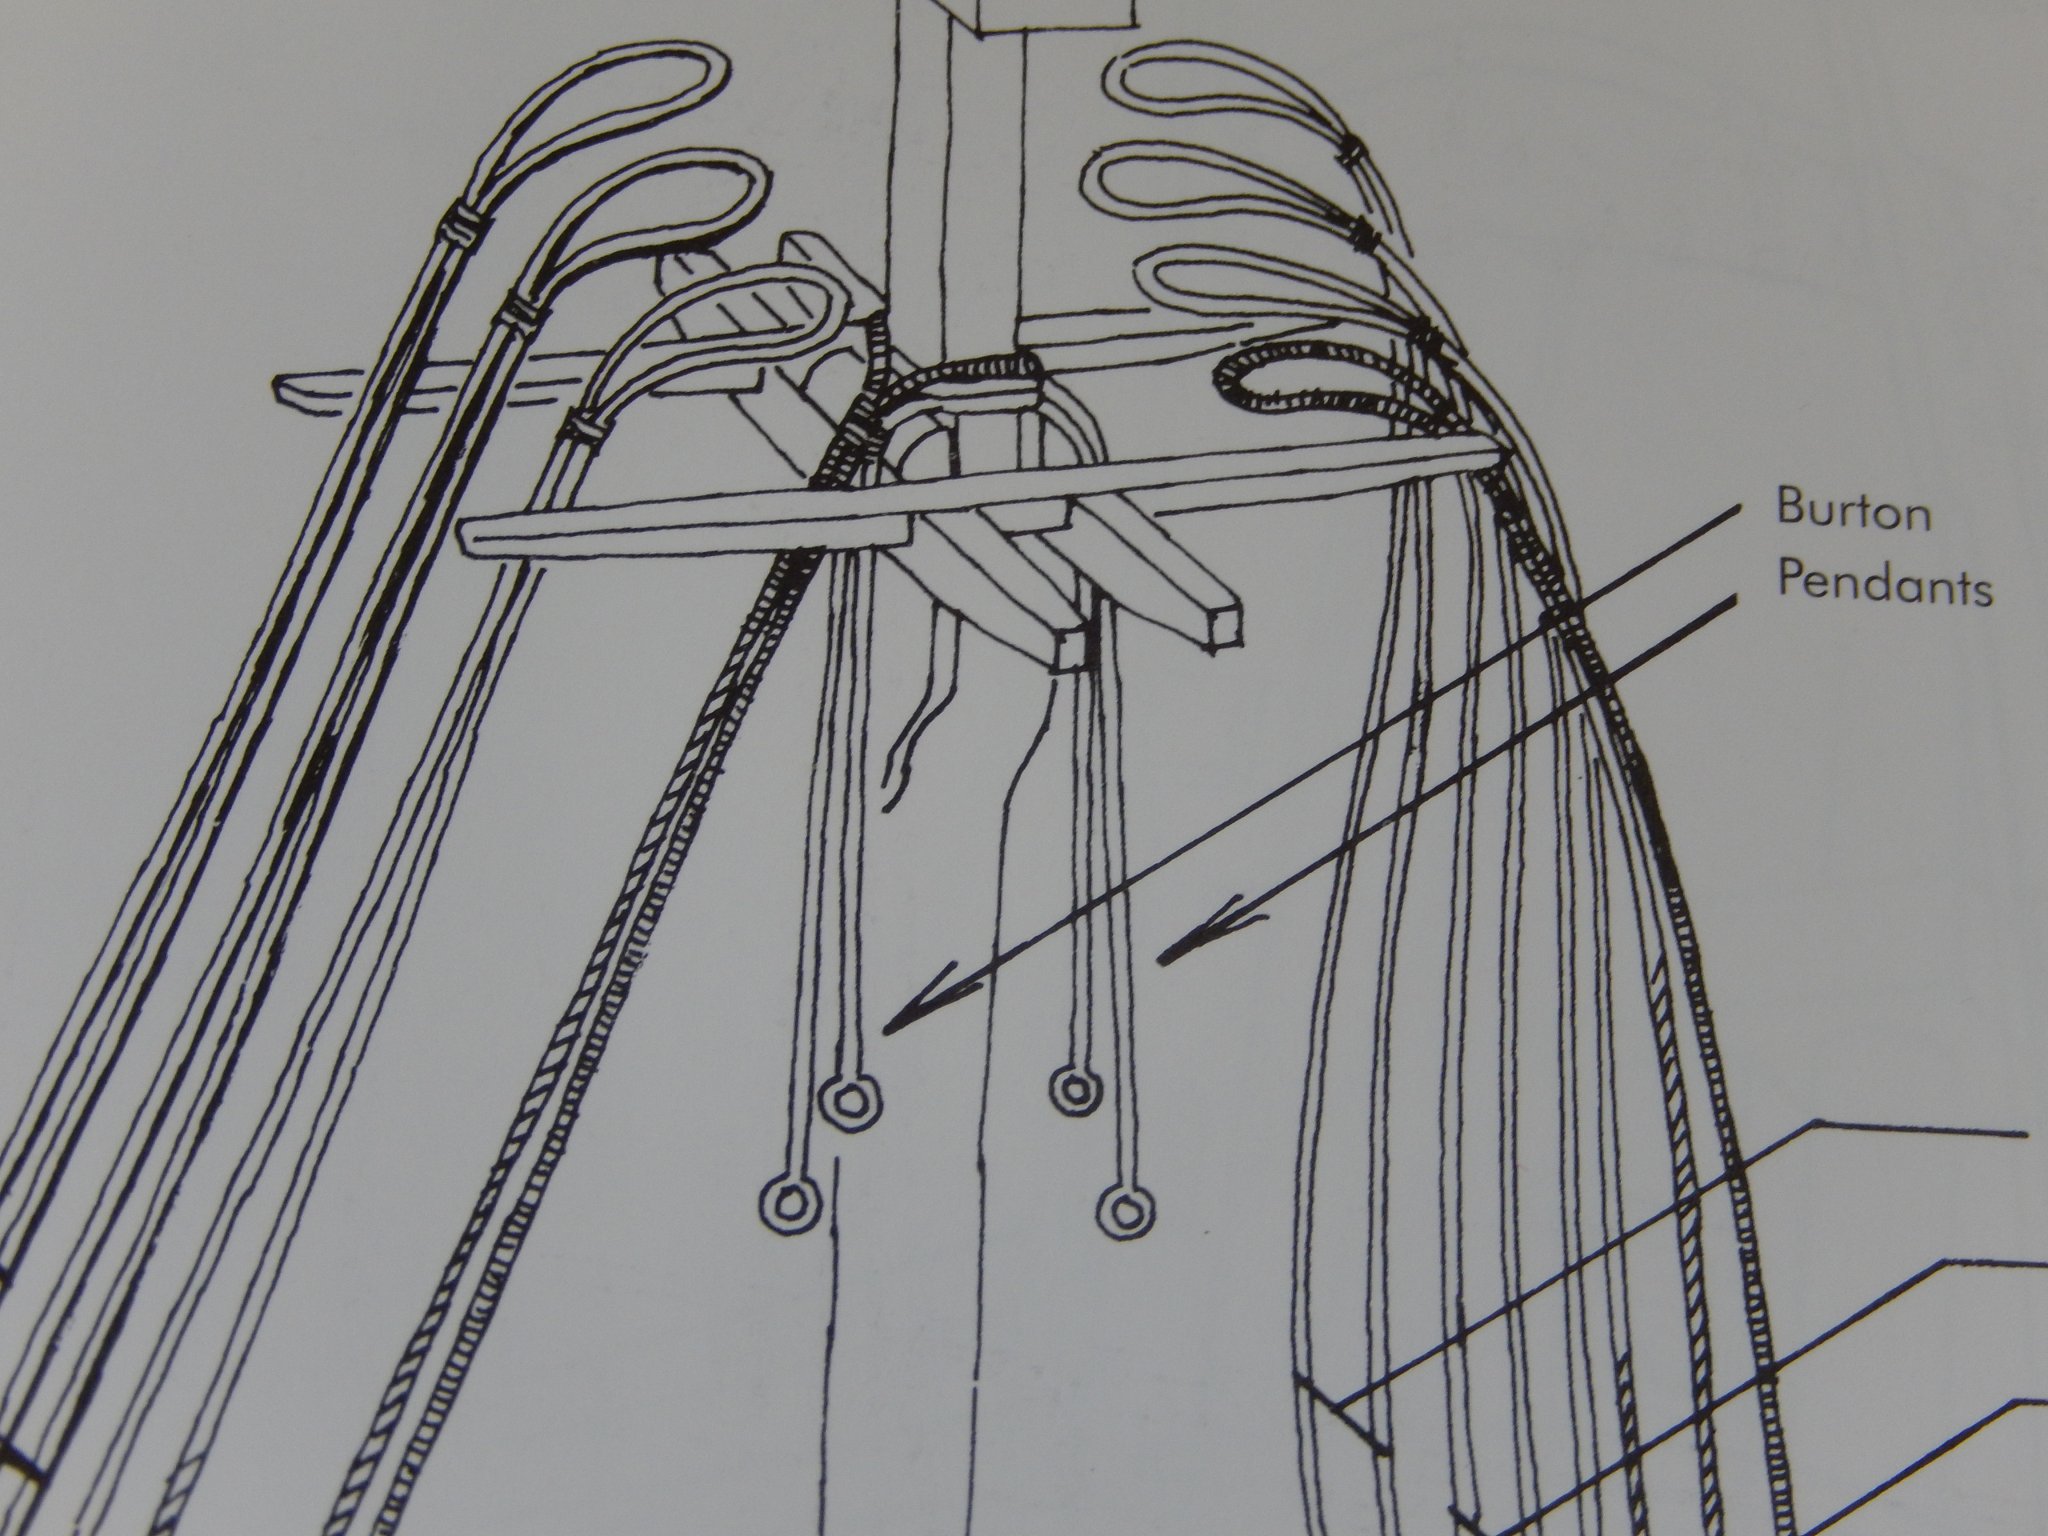
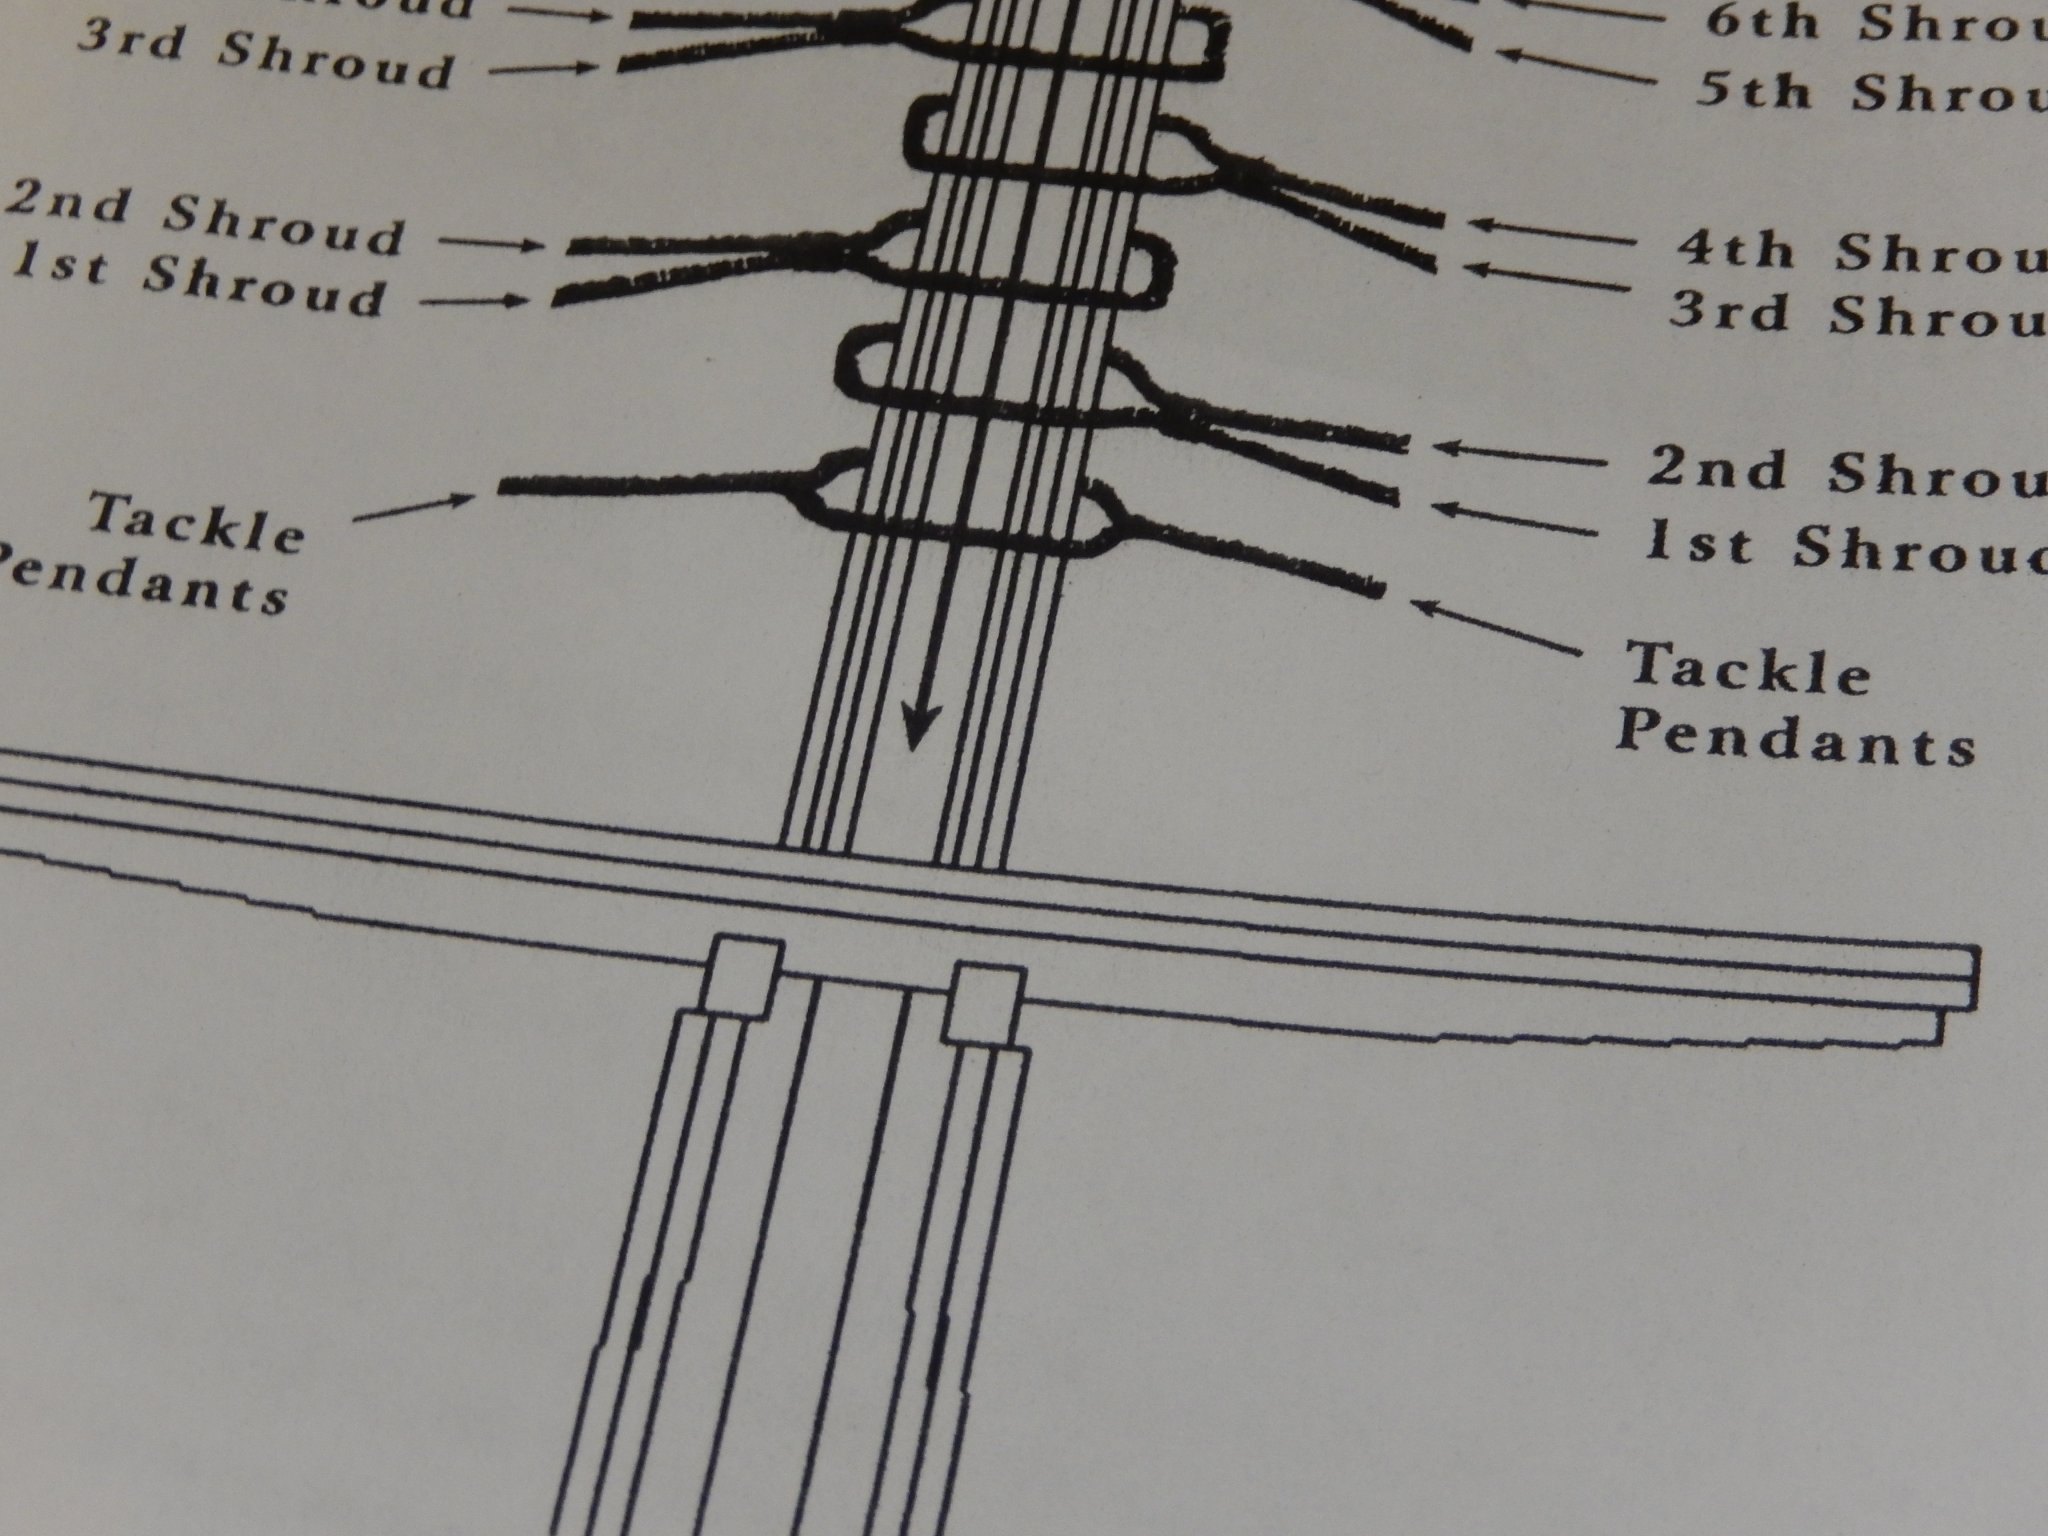
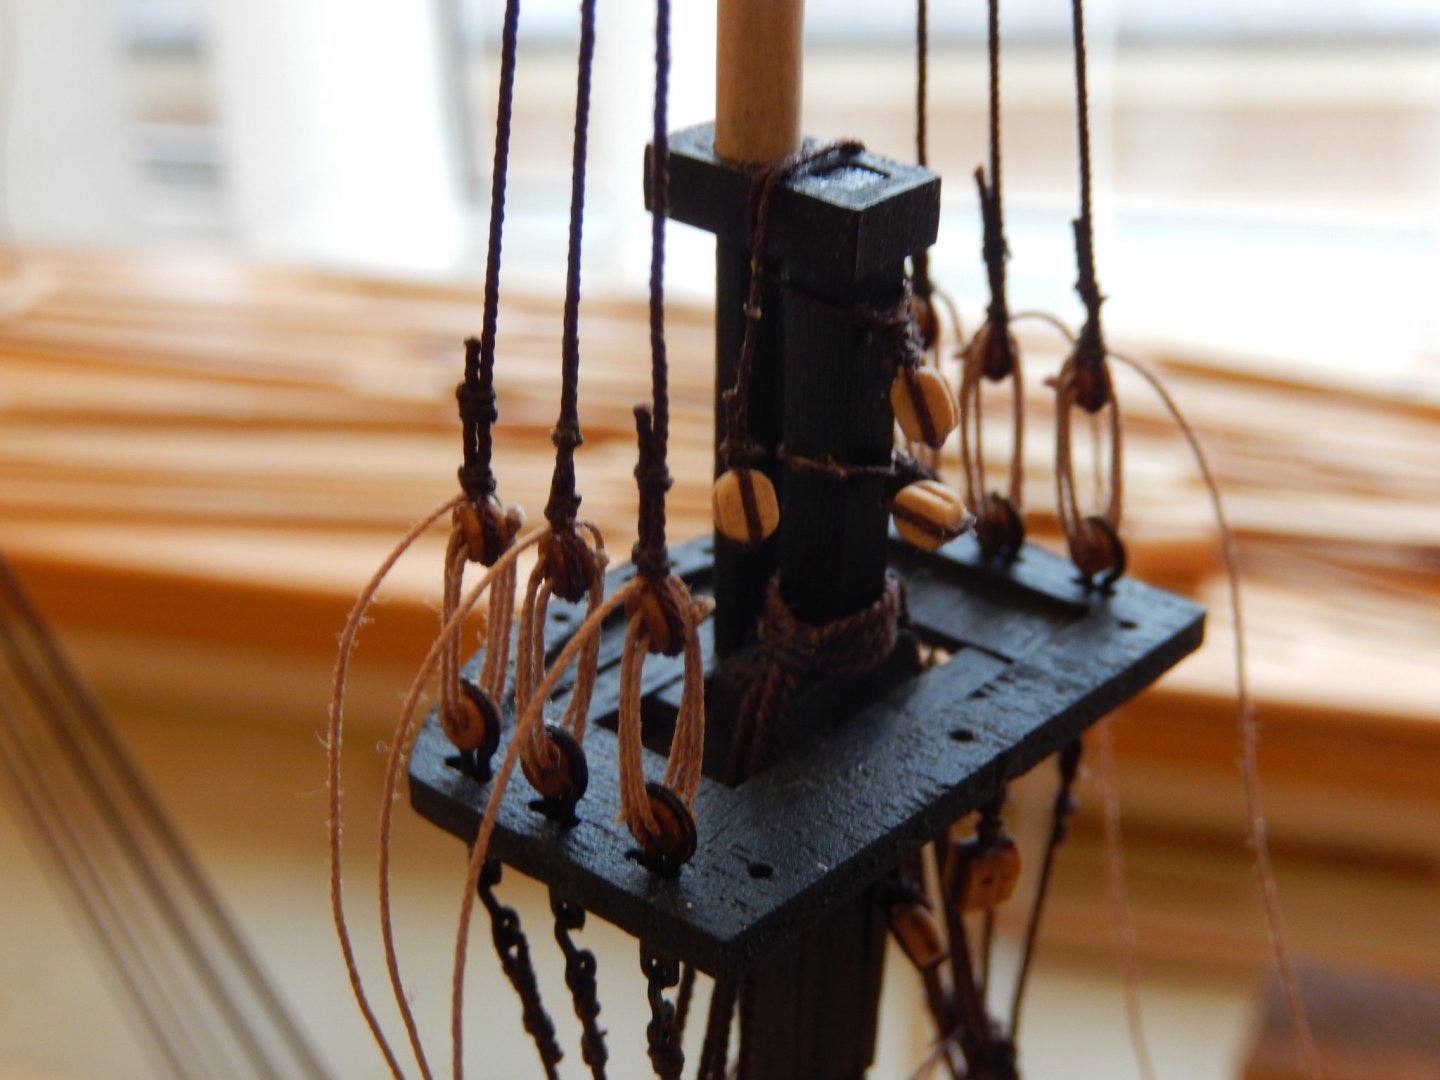
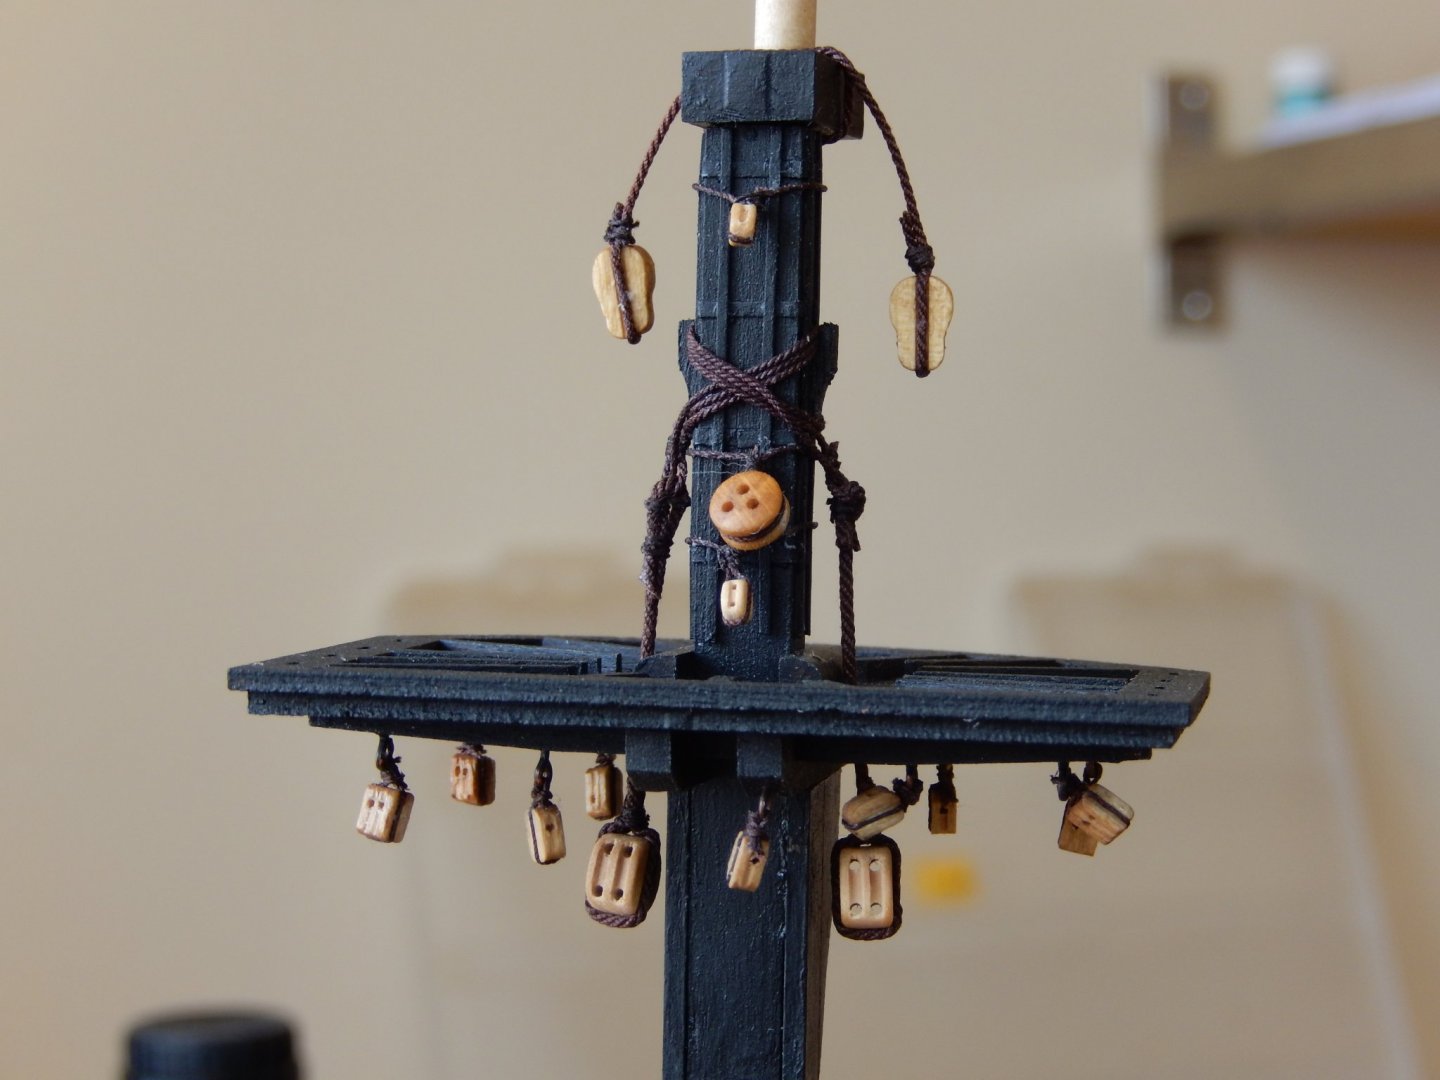
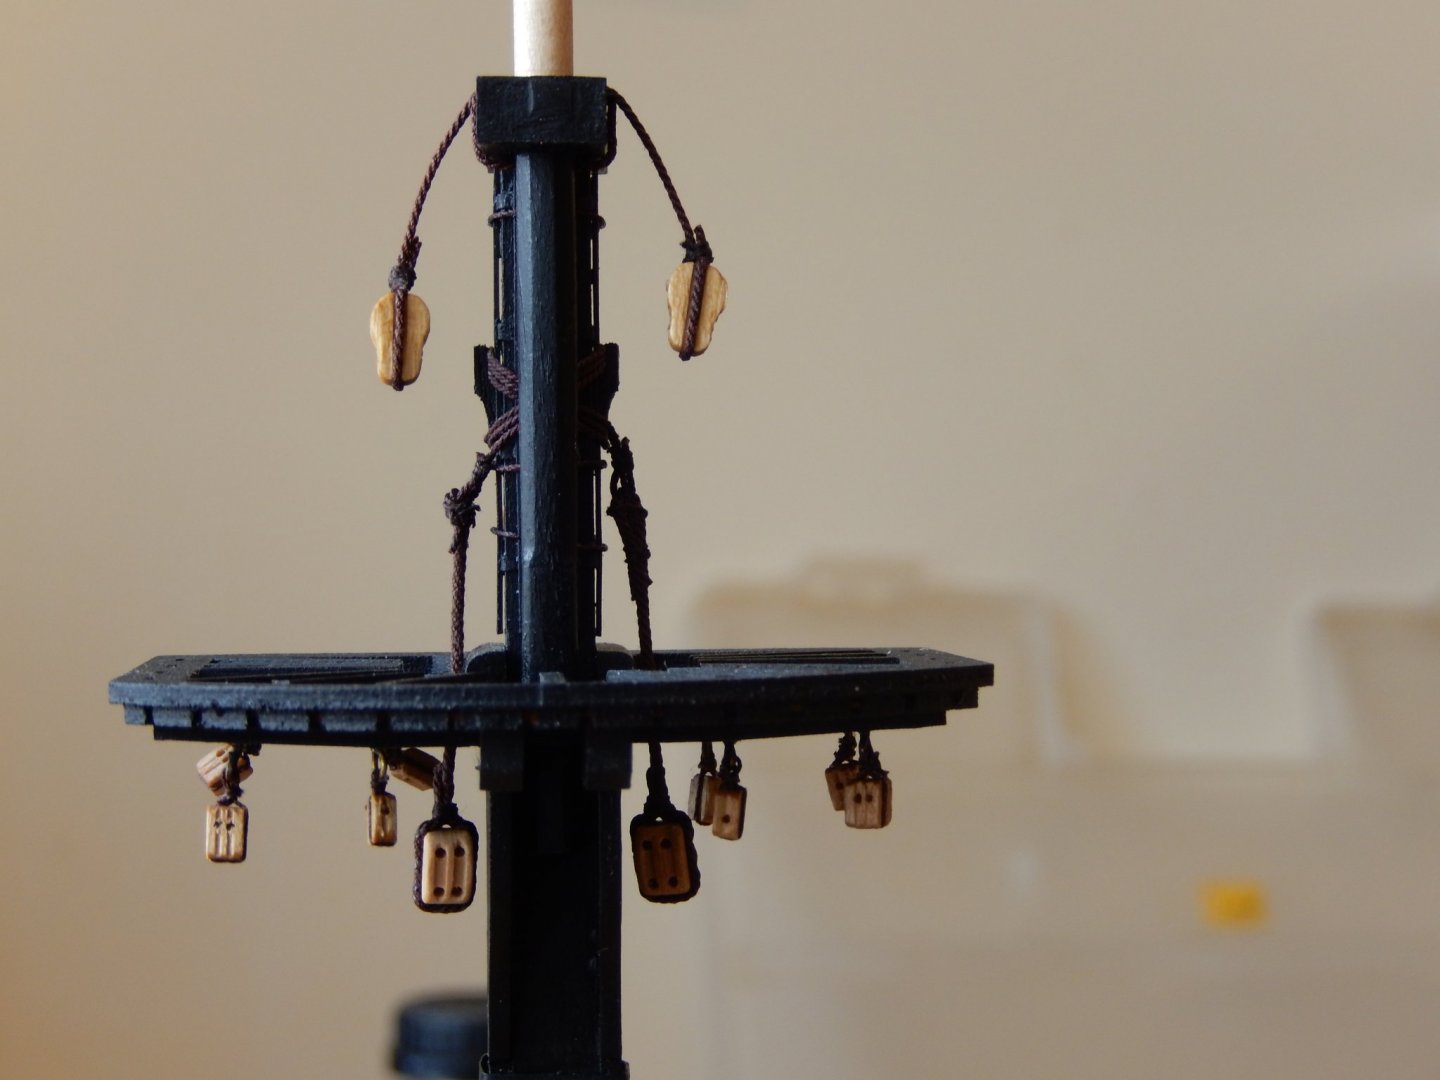
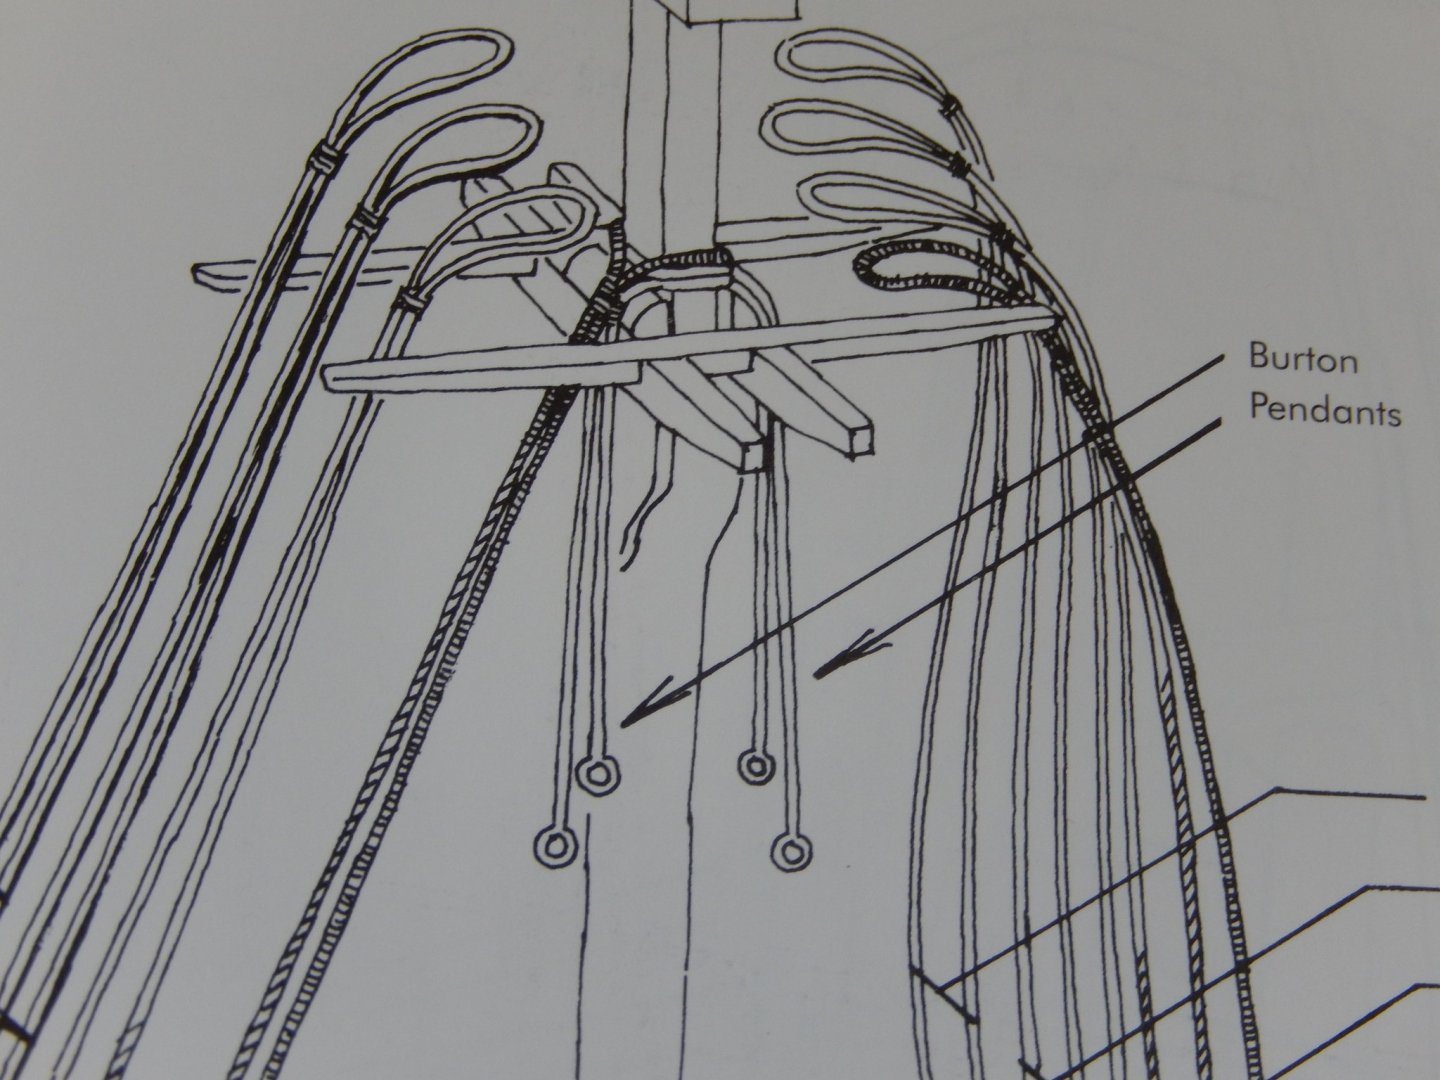
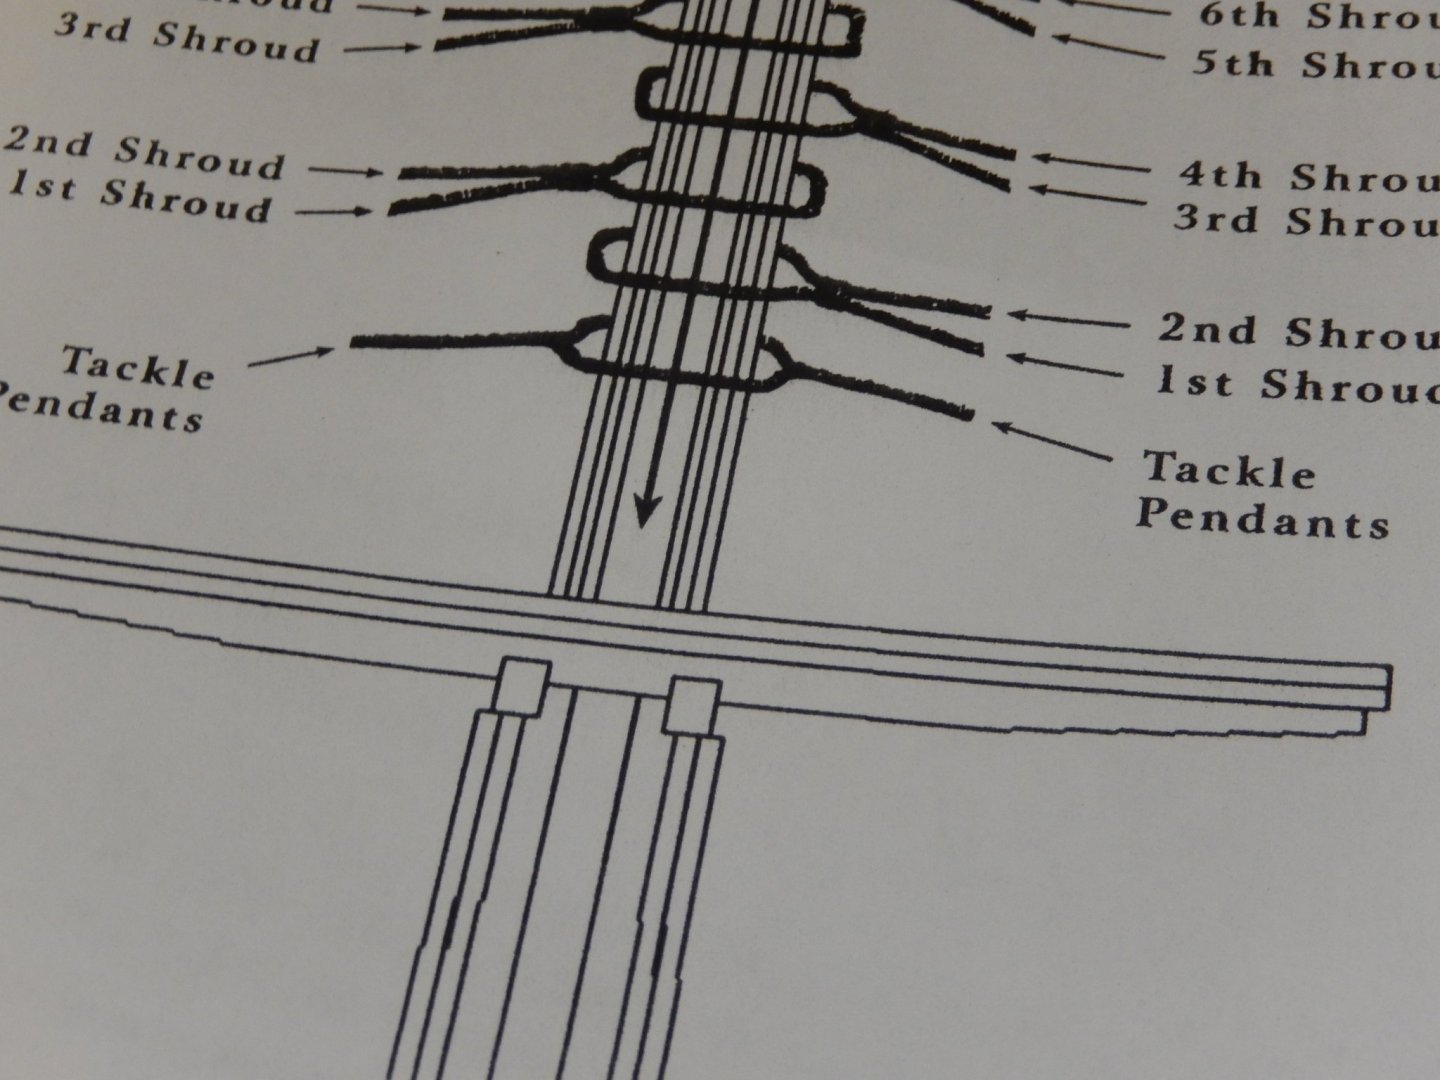
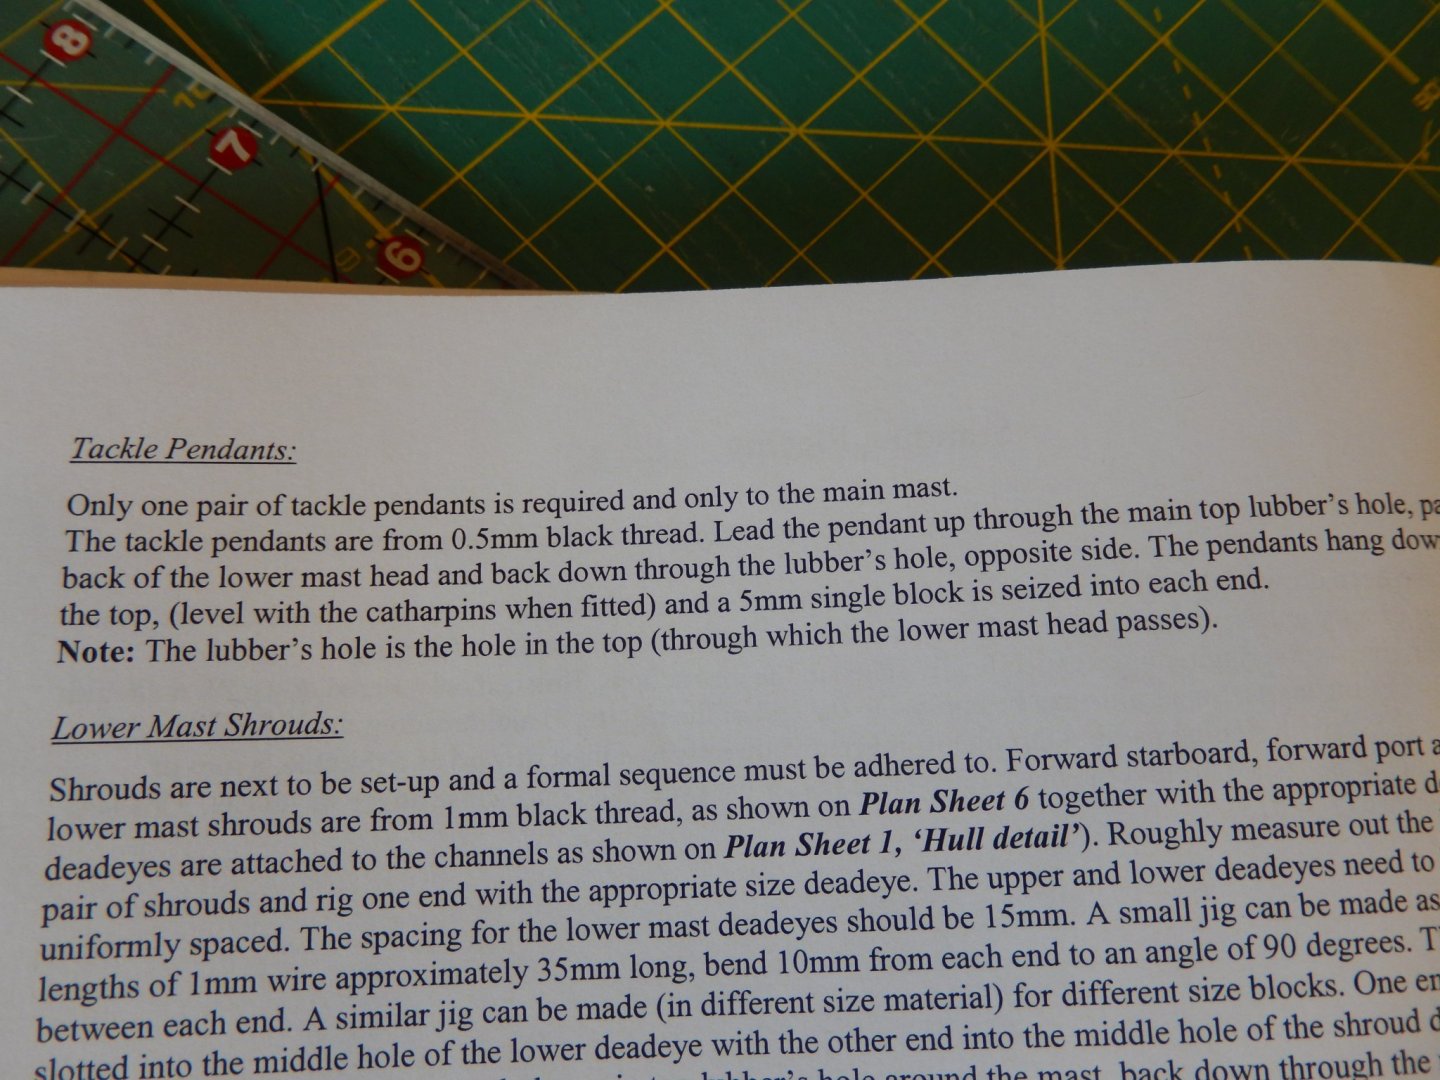
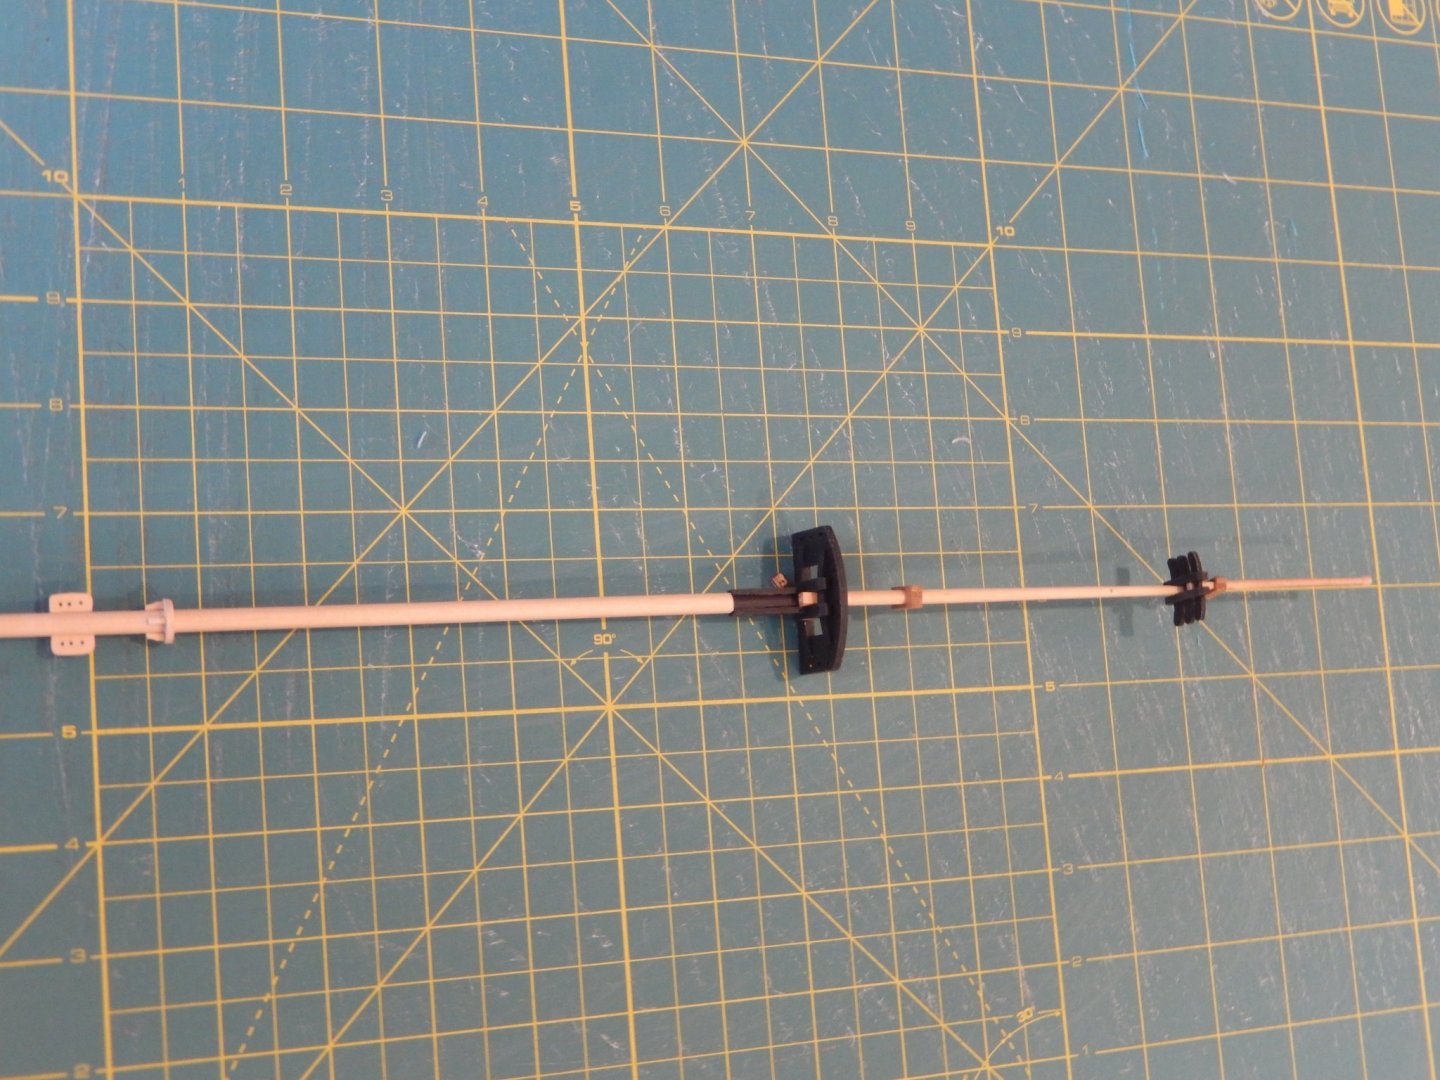
All of the blocks have now been attached to the main masts. I have latterly substituted Syren blocks for those in the kit, and the 'ropes' are also from Syren. Most of it has come out acceptably, though in assembling and gluing the masts before doing all of this, I have made things difficult for myself. Doing the shrouds is going to be especially interesting. I notice in the following photo one of the blocks is upside down. I have since replaced it. Before the shrouds go on, the pendants need to be attached. The instructions make no sense to me, and in any event, seem to be at odds with one of the the plans, though another plan (shown second, below) is at least partly consistent with Petersson's shown in the last photo. I shall use Petersson's method.

- 421 replies
-
- 9
-
-
- caldercraft
- granado
- (and 1 more)
-
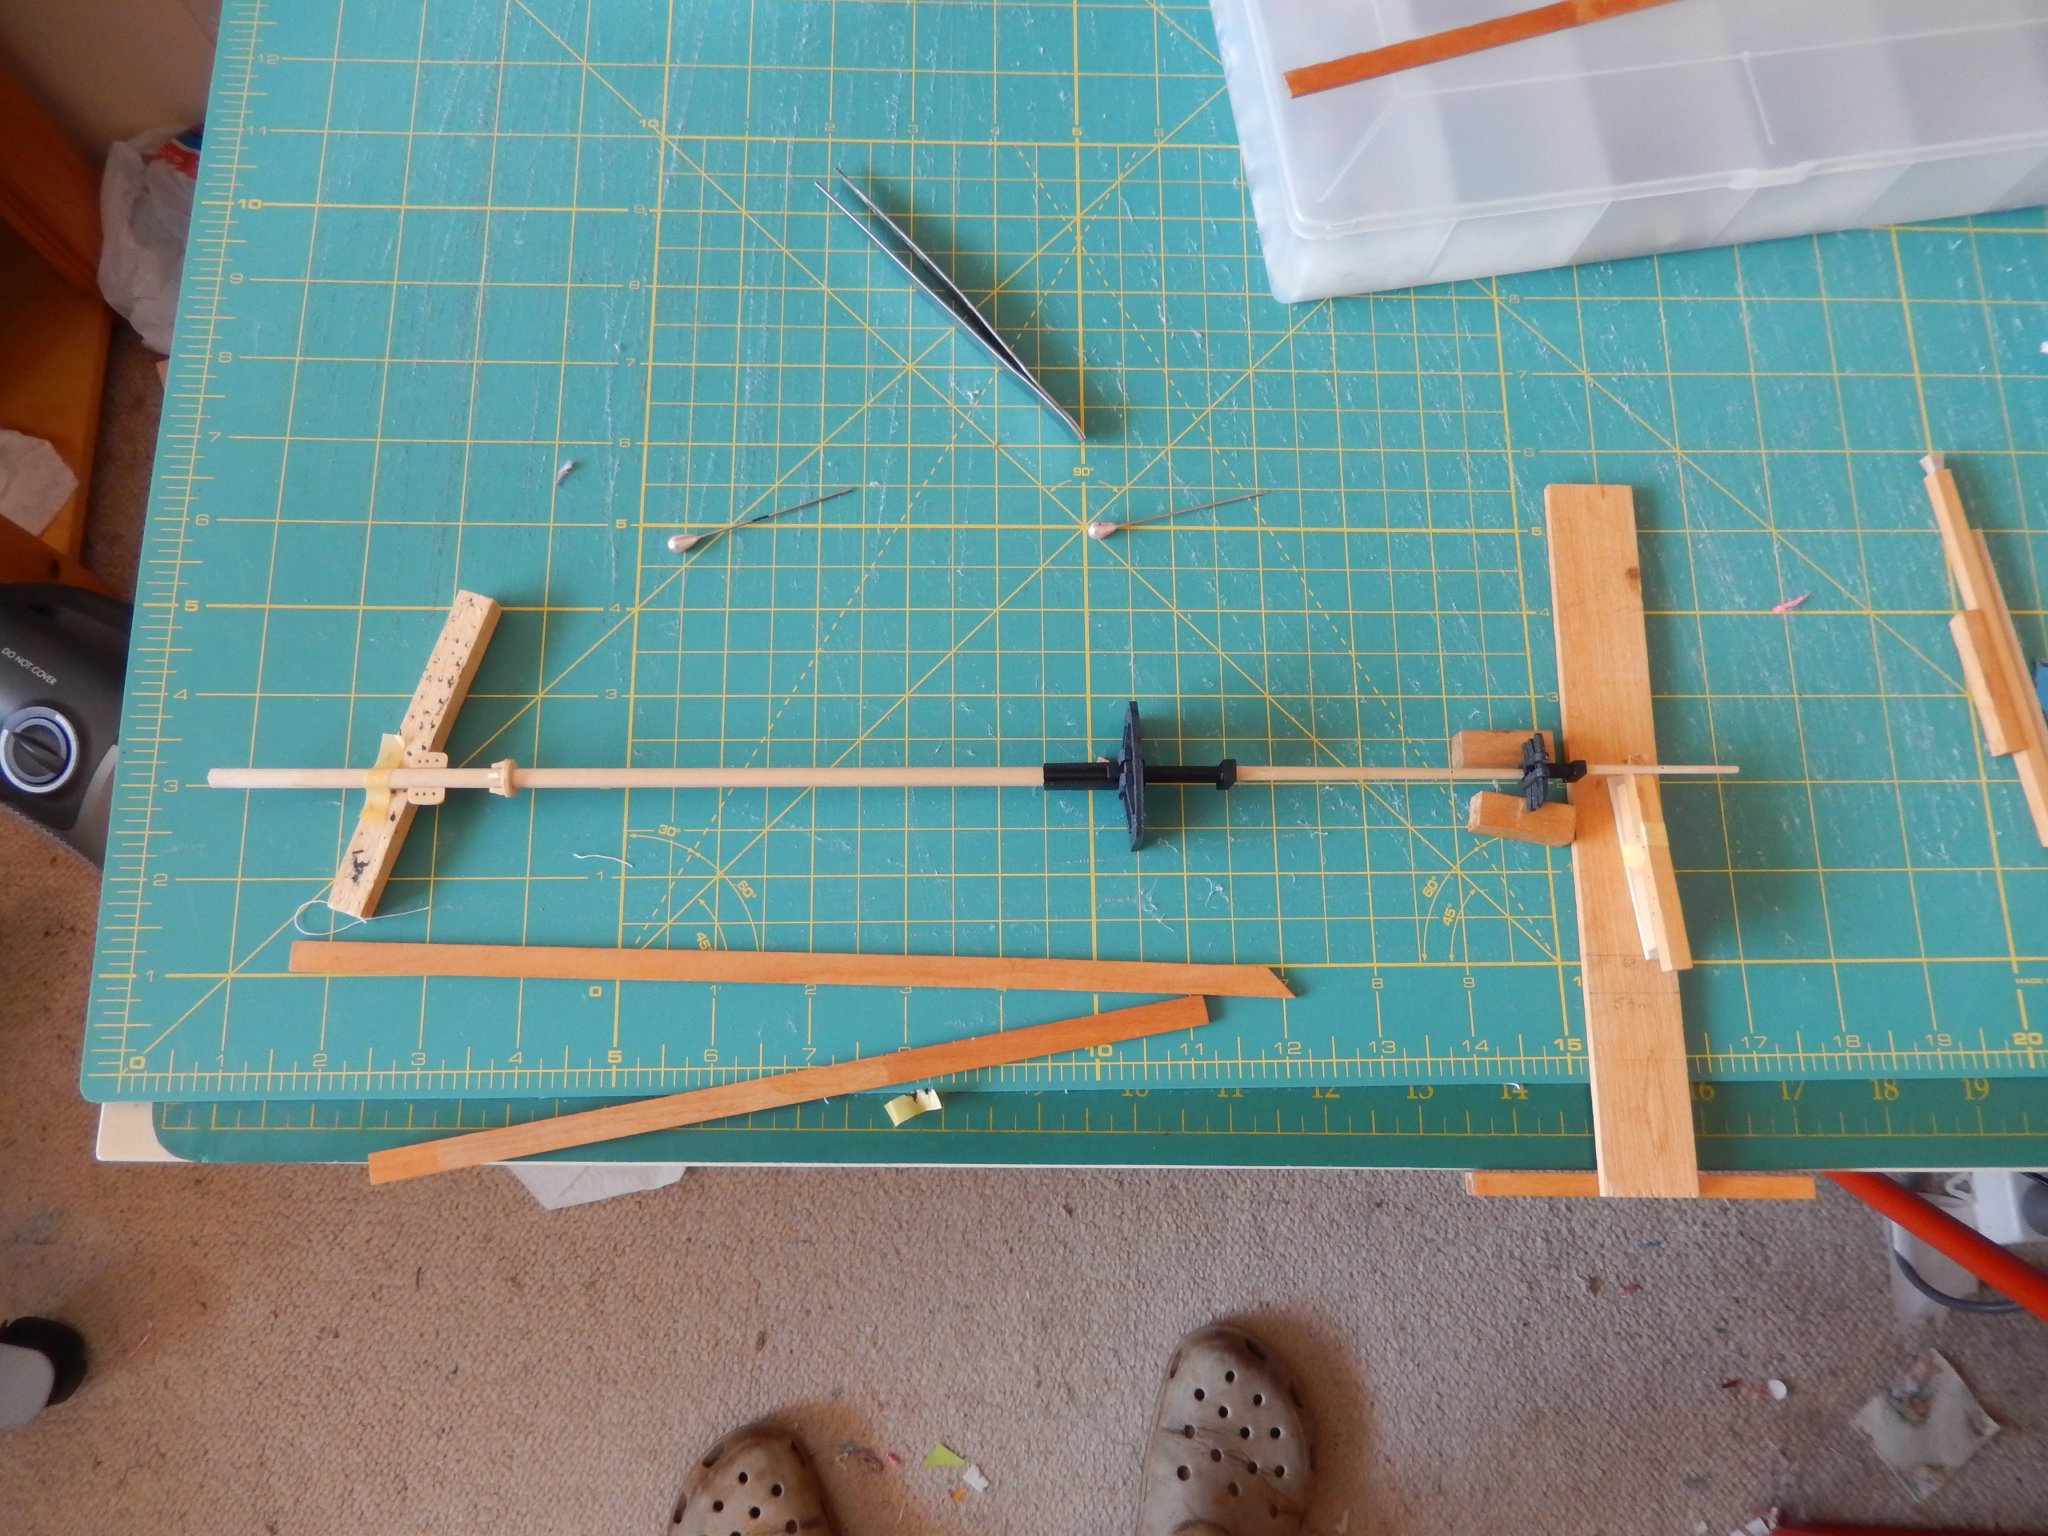
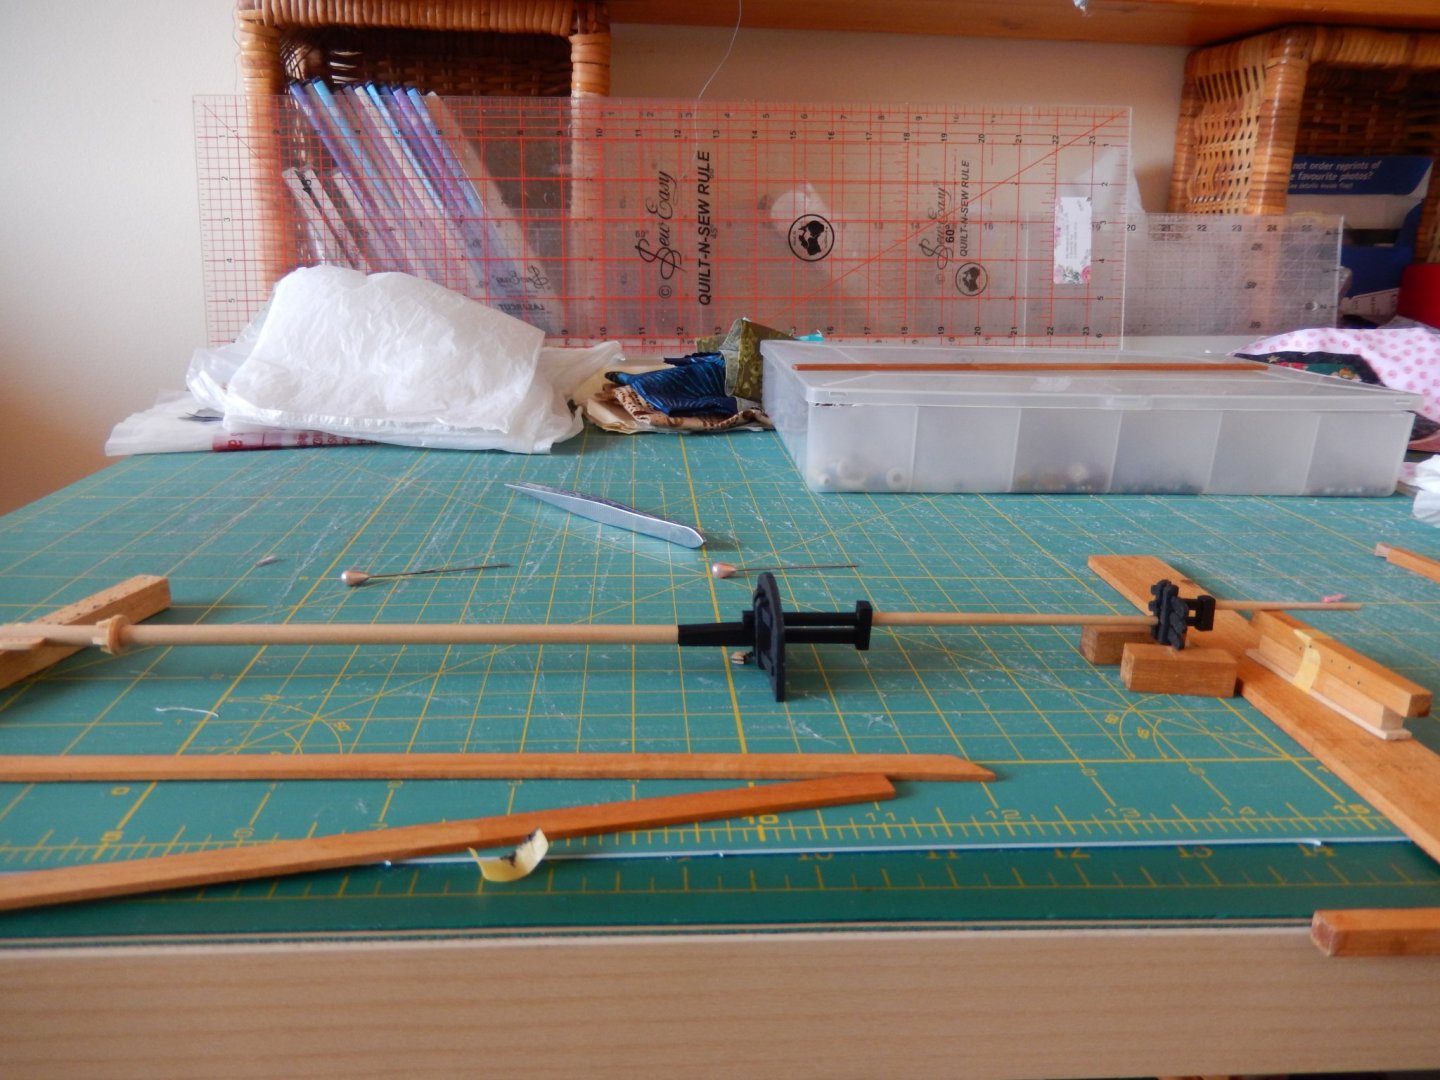
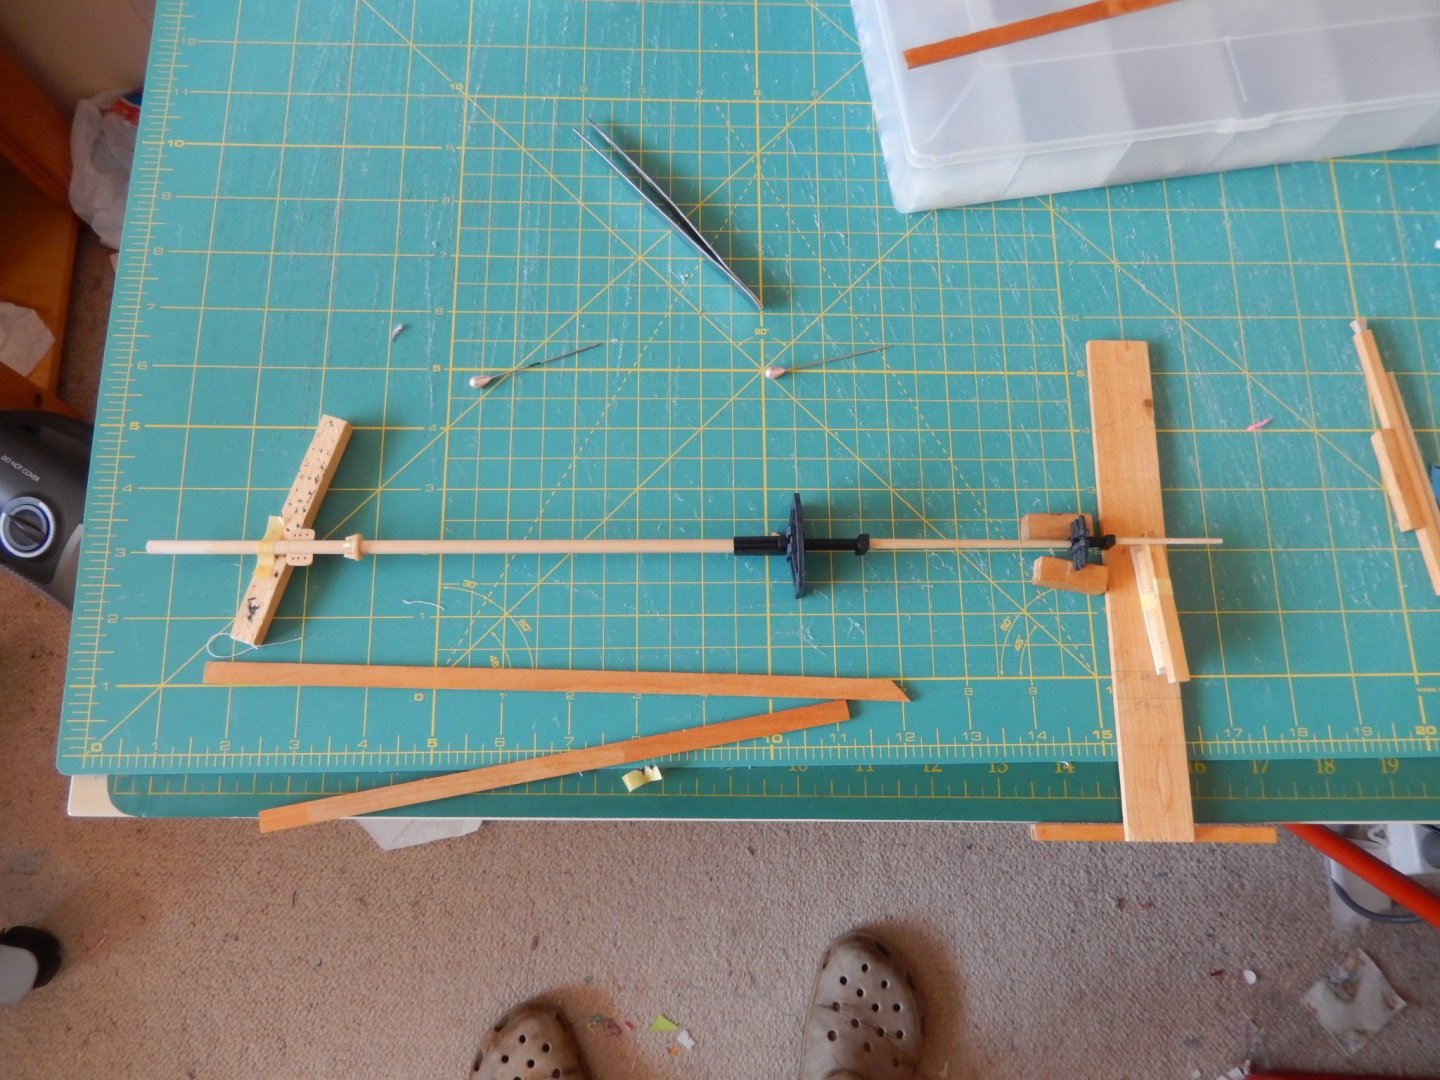
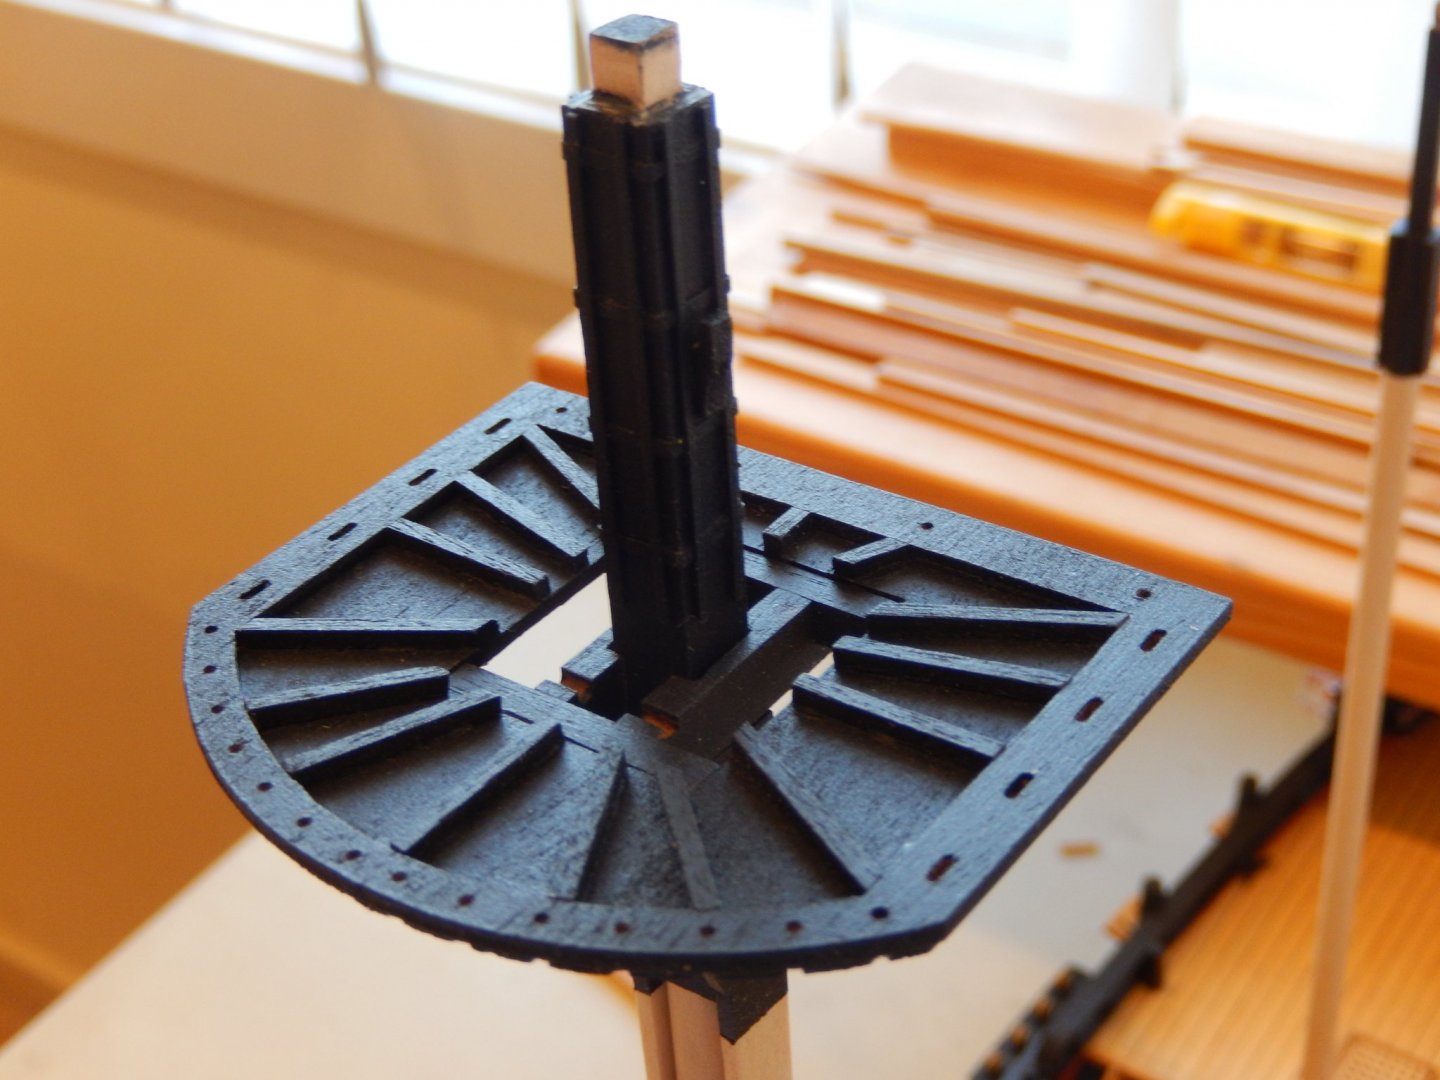
The mizzen masts are finally assembled and glued. Aside from some very minor touching-up and the mast truck on the topgallant it's finished. Tomorrow it's the mainmasts turn. Getting the three masts straight and square is not easy and perhaps the following photos will help others. Of course it helps if there is a spare quilting mat in the house.


- 421 replies
-
- 7
-
-
- caldercraft
- granado
- (and 1 more)
-
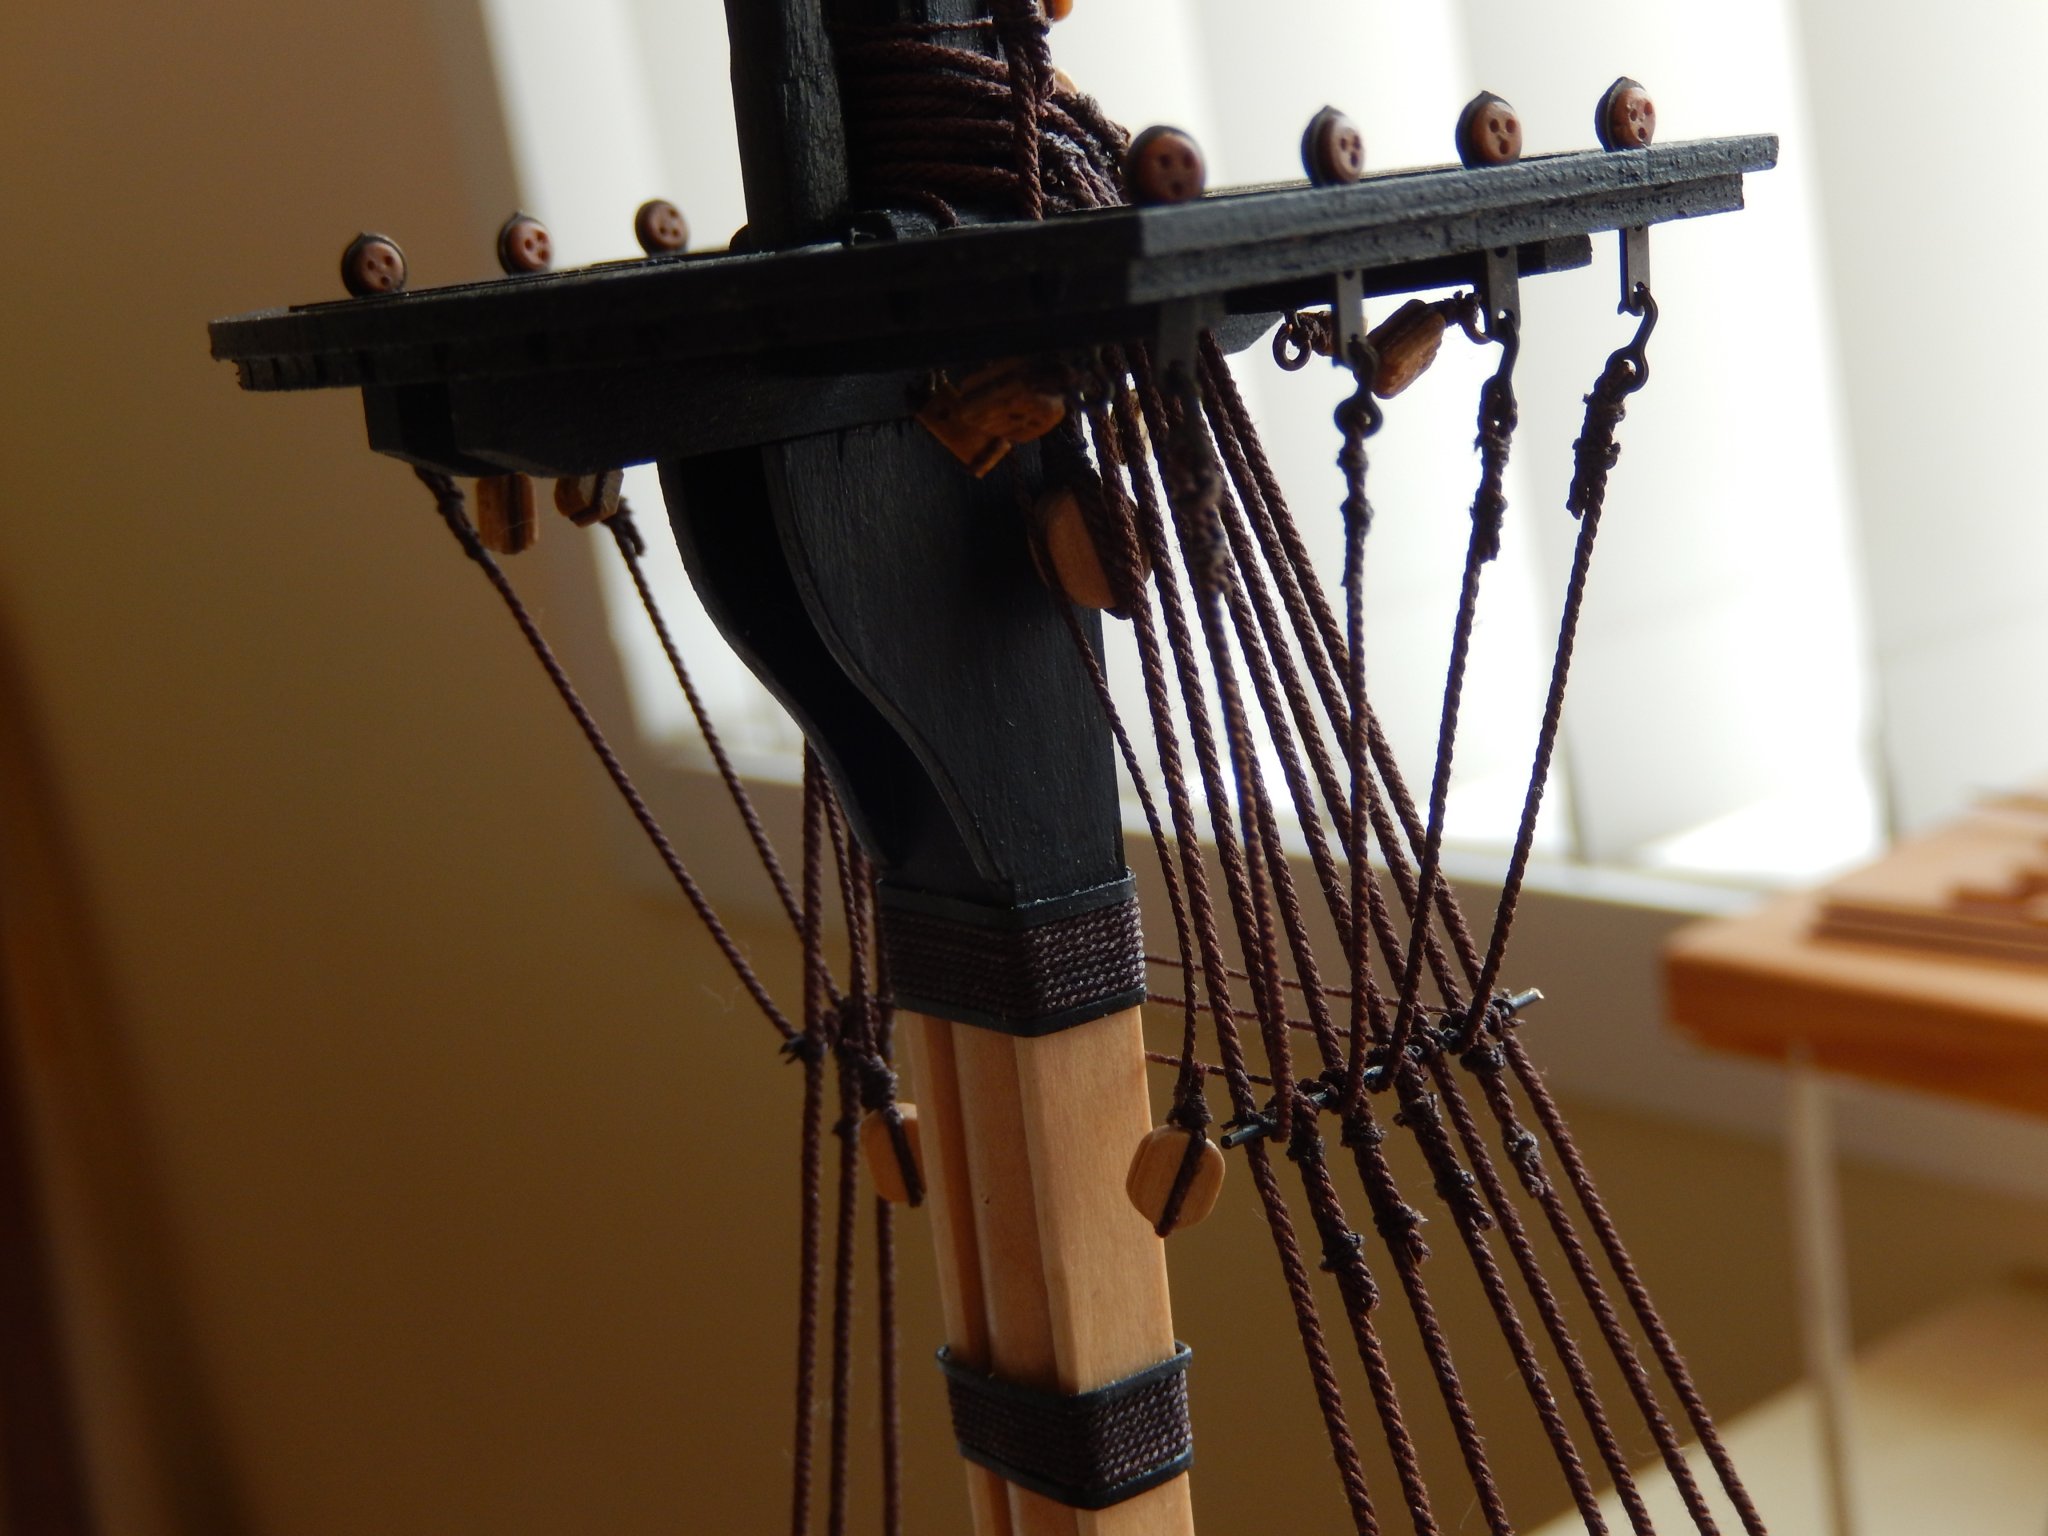
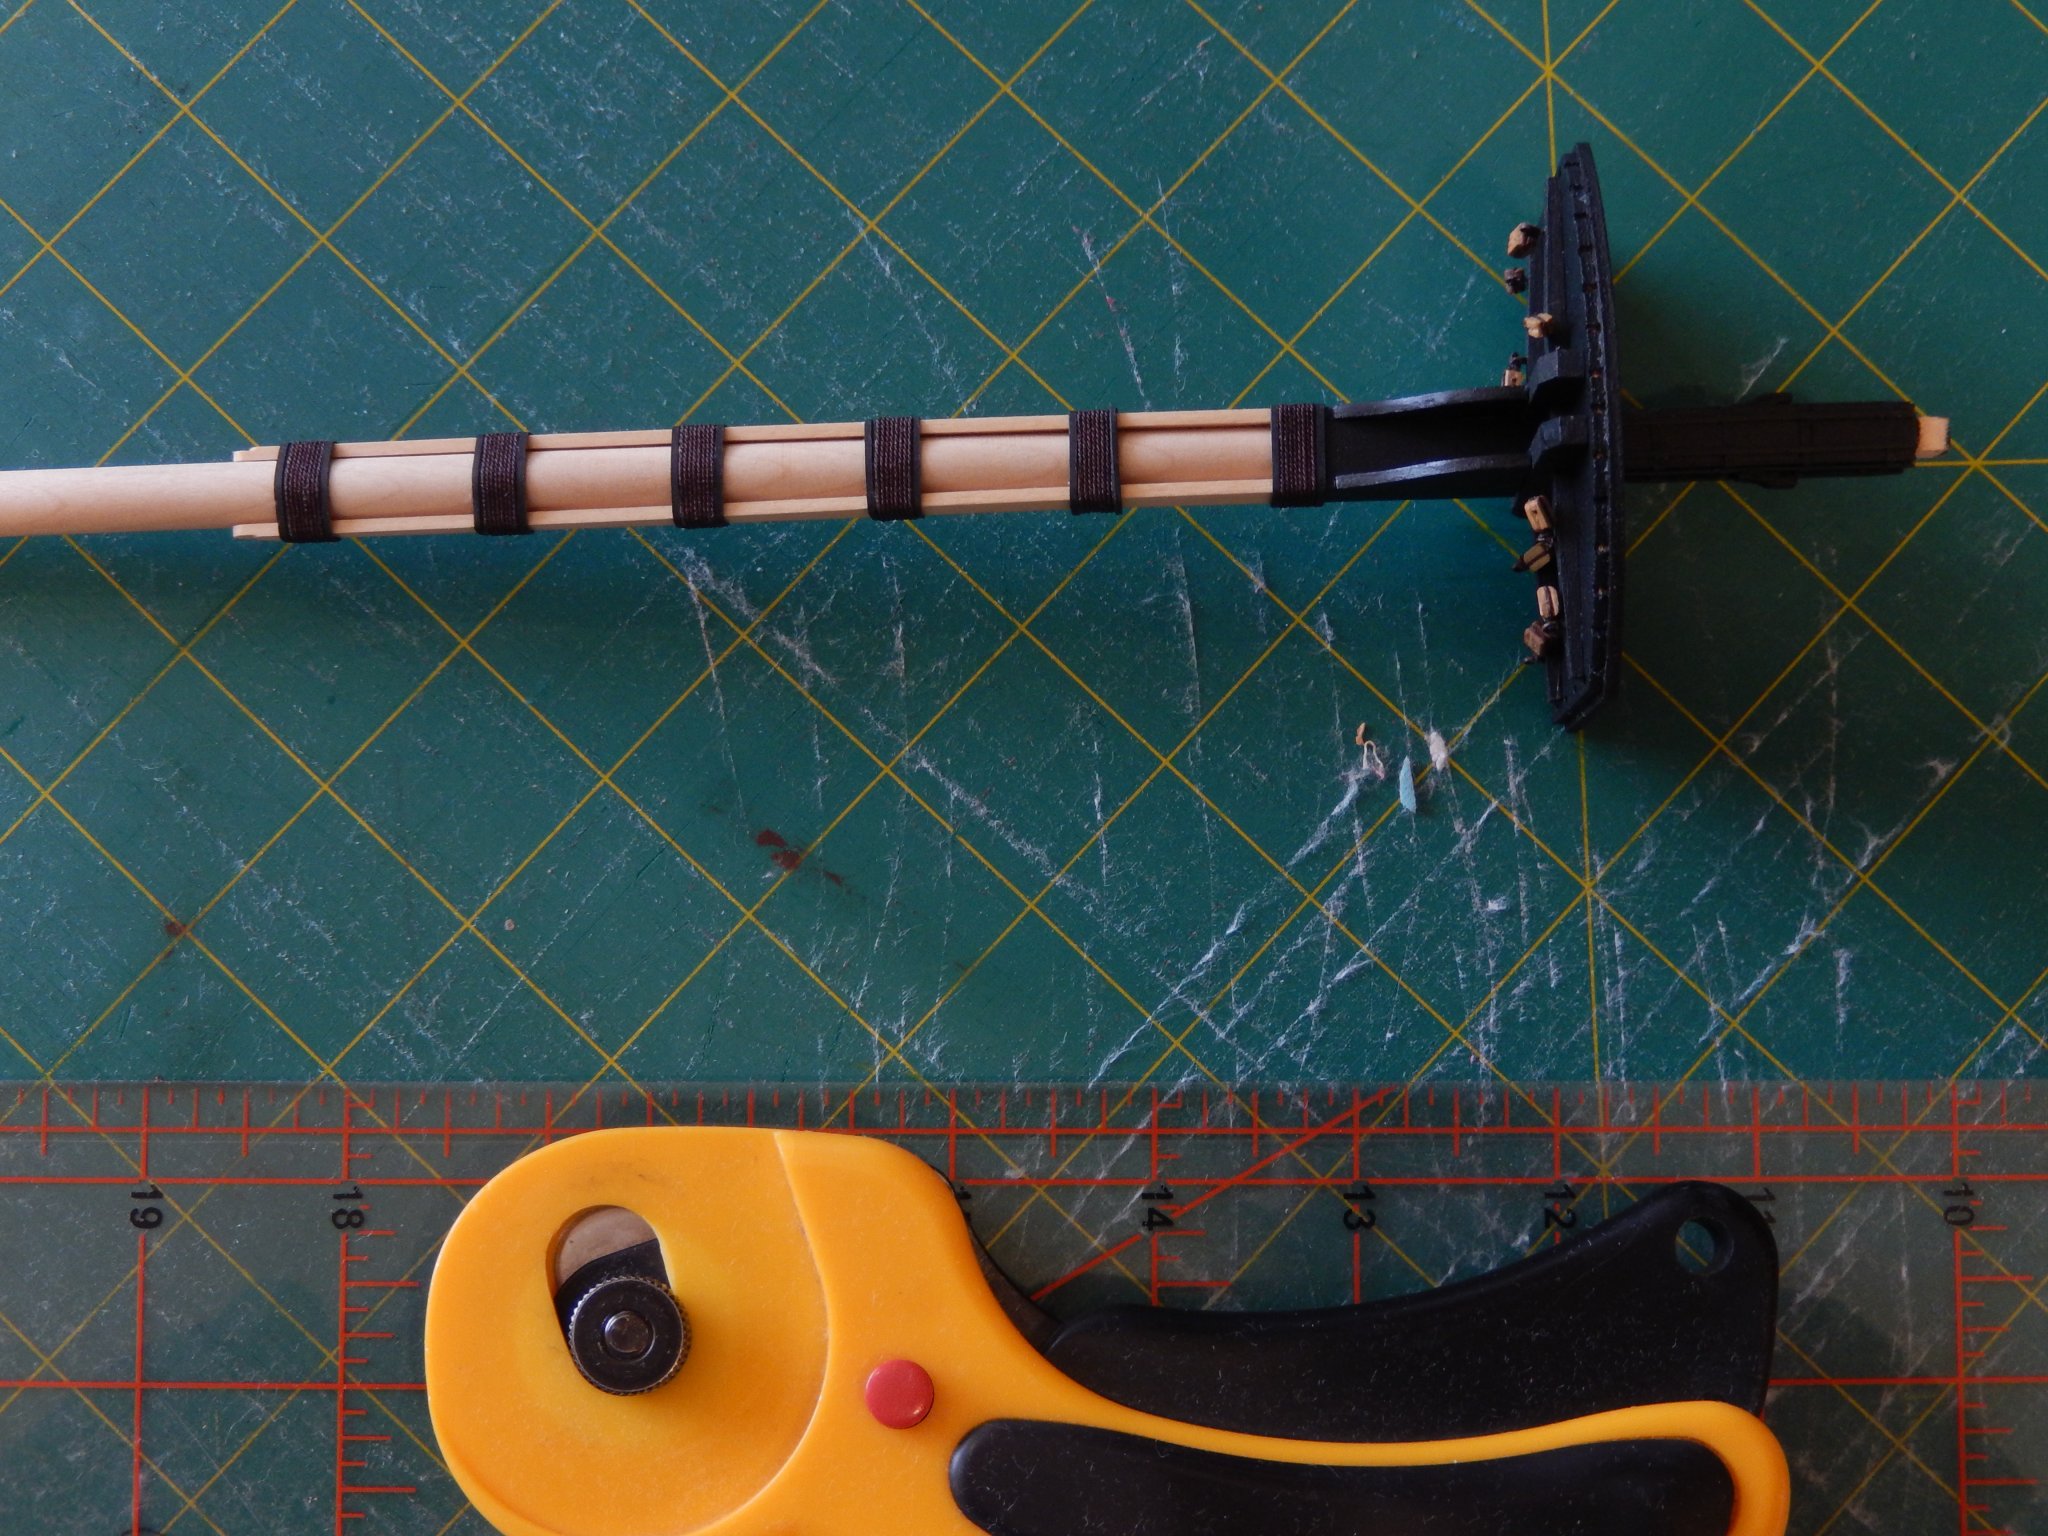
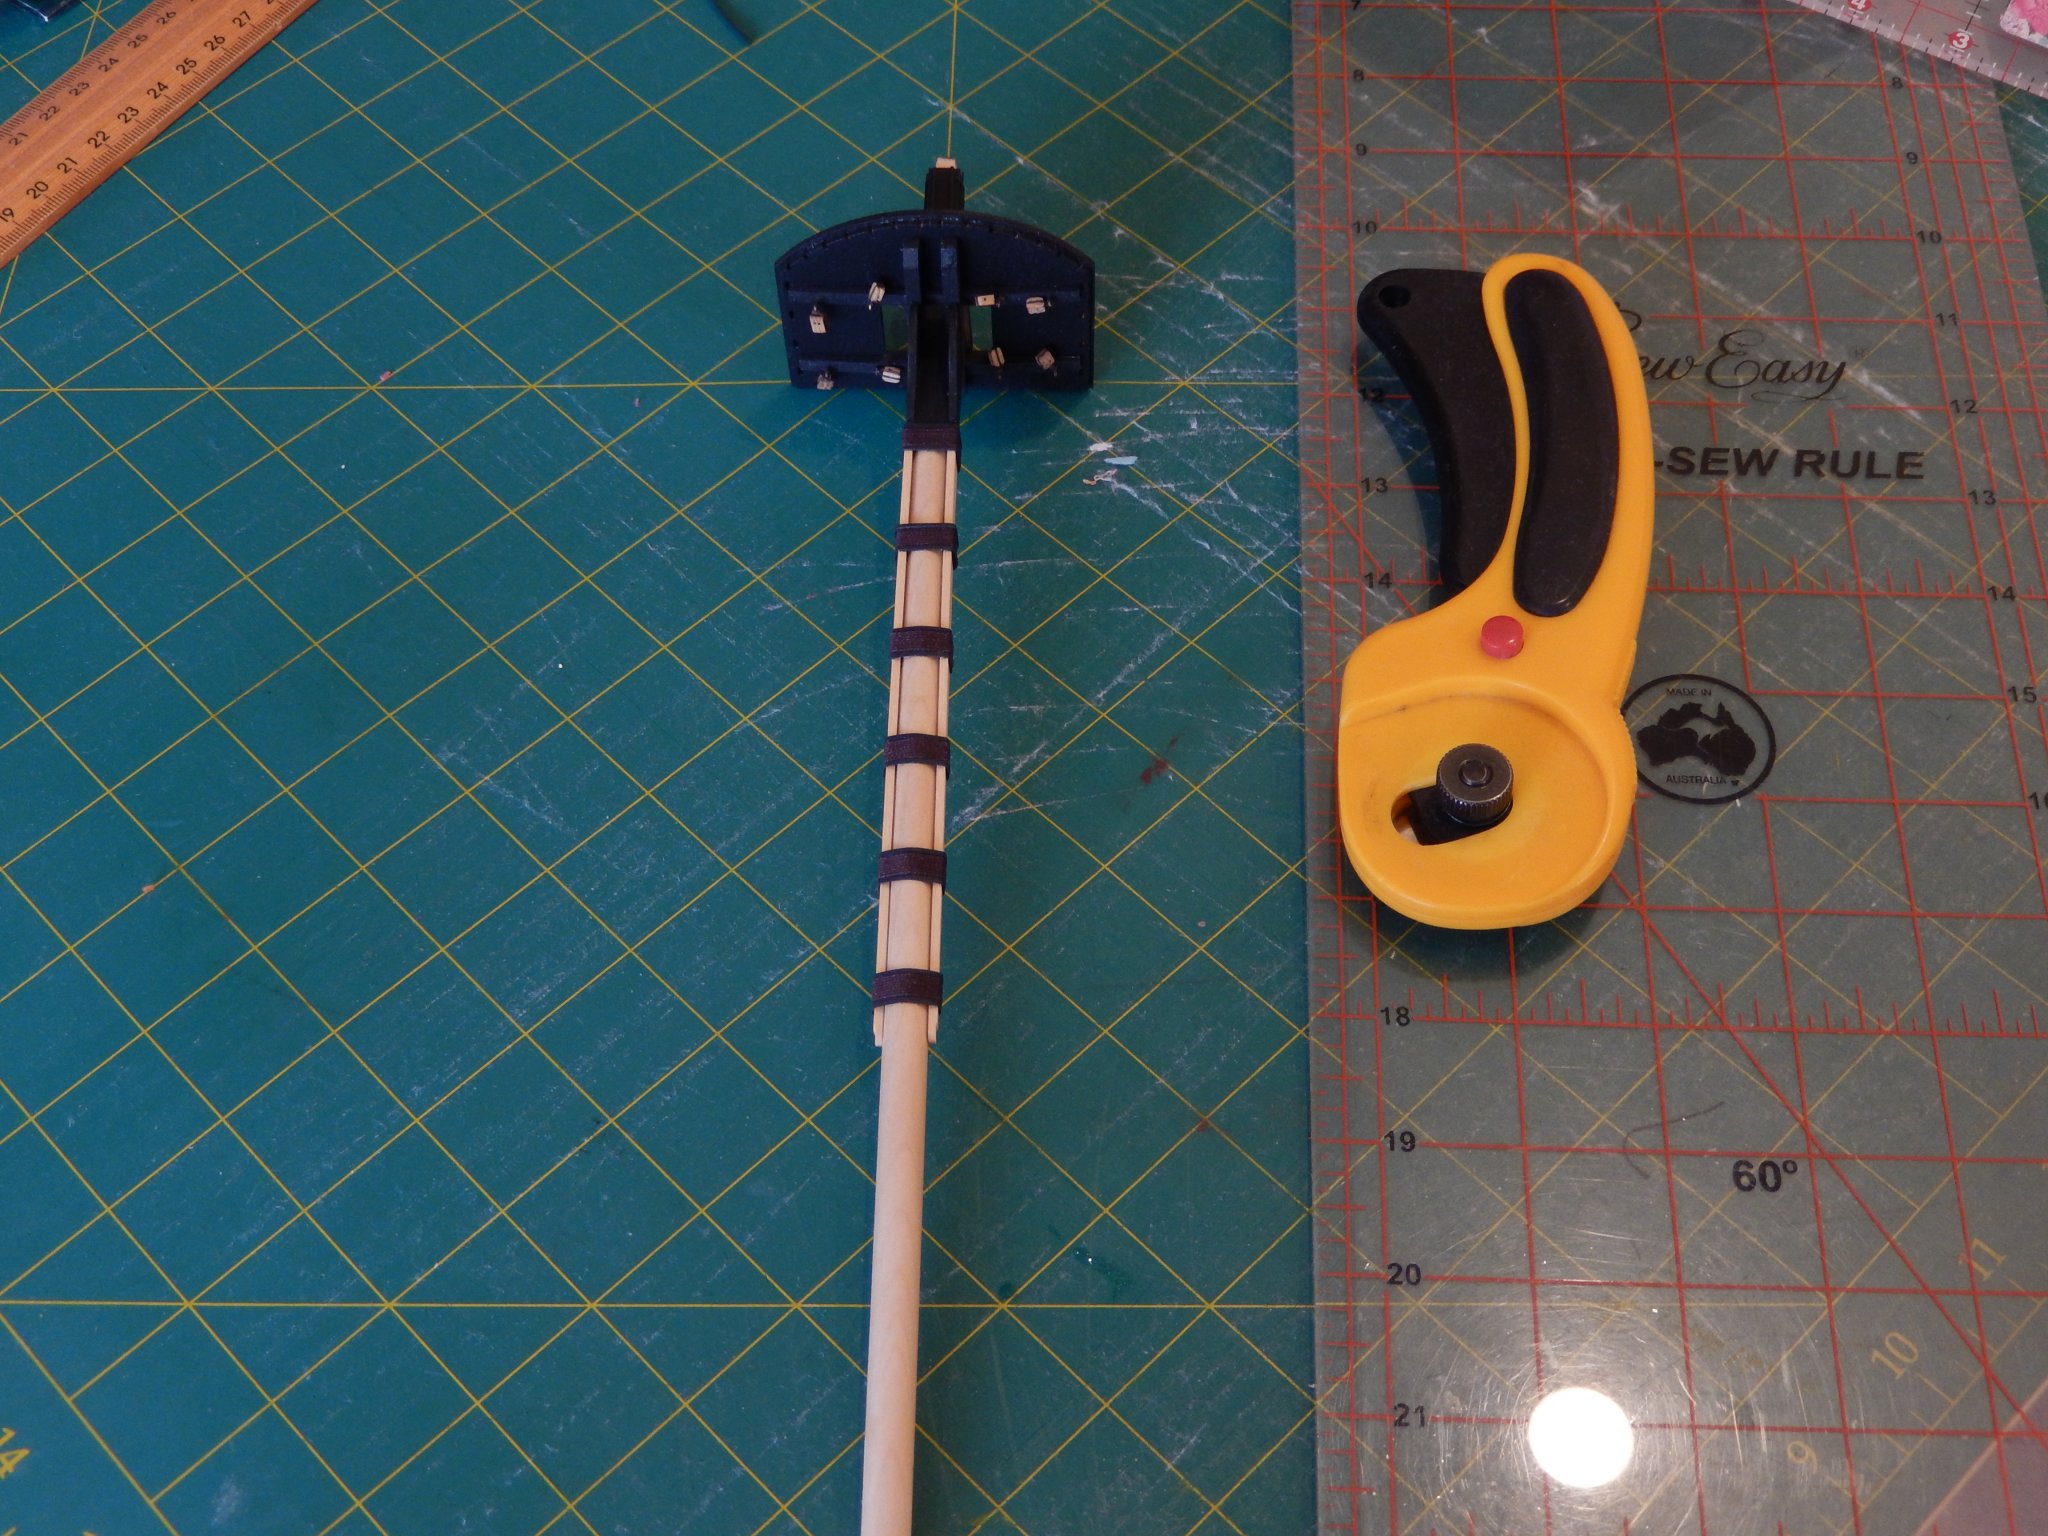
The masts have proved to be quite difficult. Getting everything square is vital. There may be an easy way to do it, but I certainly haven't found it. Here is the main mast with wooldings. Hoops added. The yellow gizmo is a cutter used in quilting. With a straight edge it may be used to cut the cartridge paper for the woolding very finely indeed. Here is a better photo. Finally, here are the various mizzen masts dry fitted. Everything goes together well at the expense of some angst and the use of a wider-than-usual vocabulary.


- 421 replies
-
- 10
-
-
- caldercraft
- granado
- (and 1 more)
-
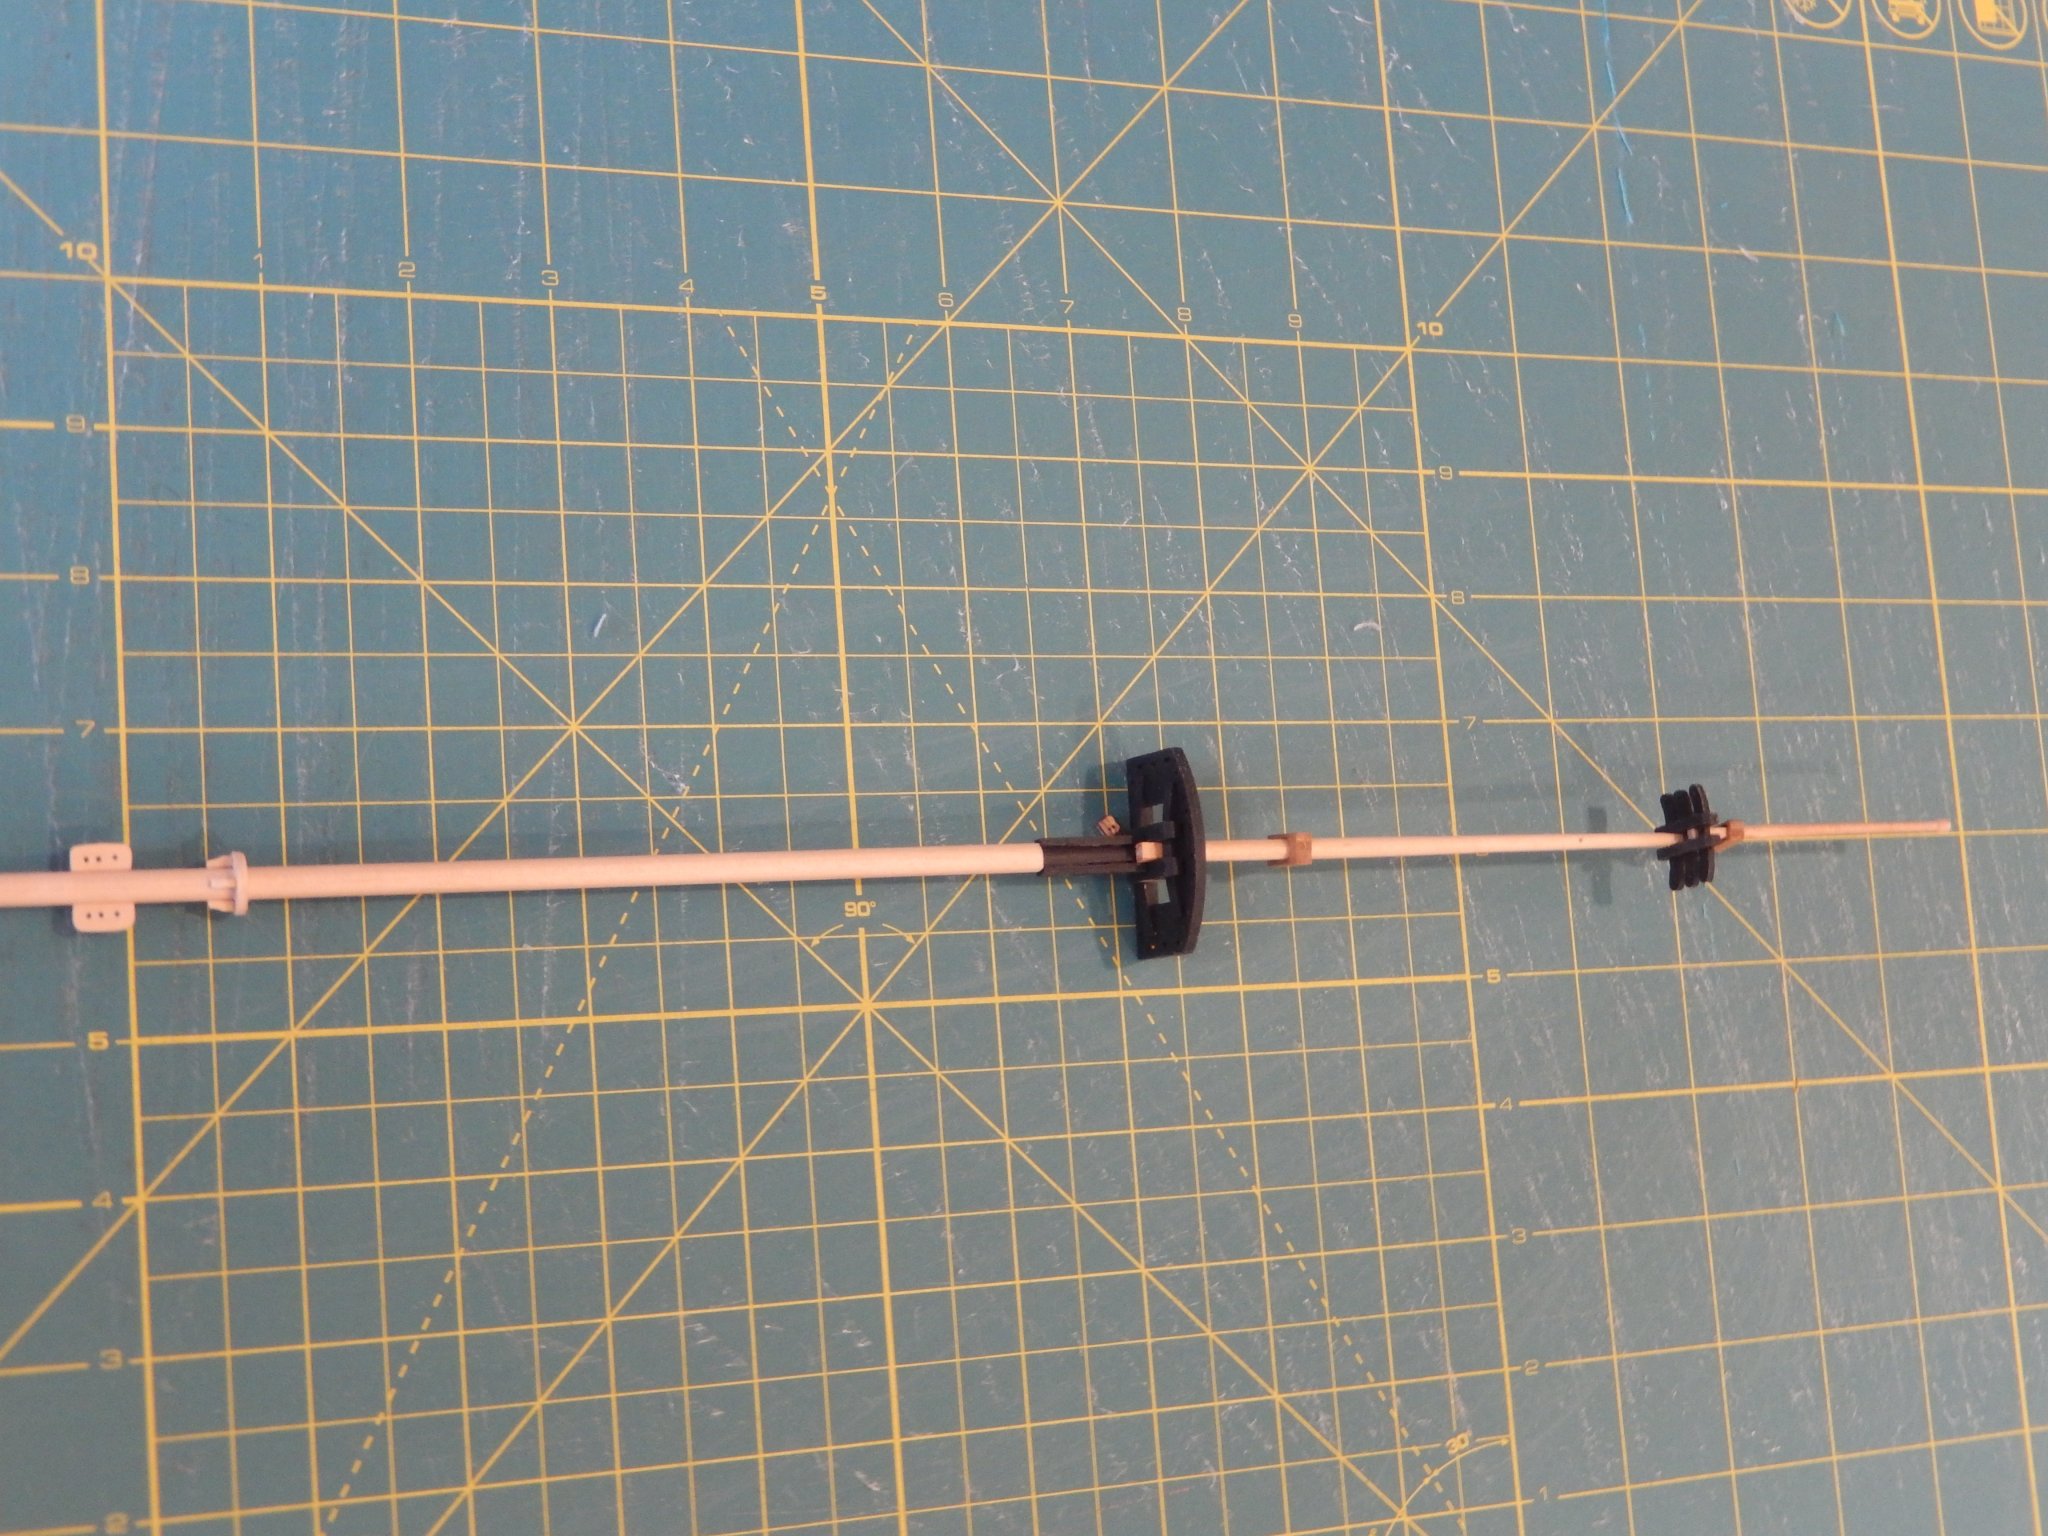
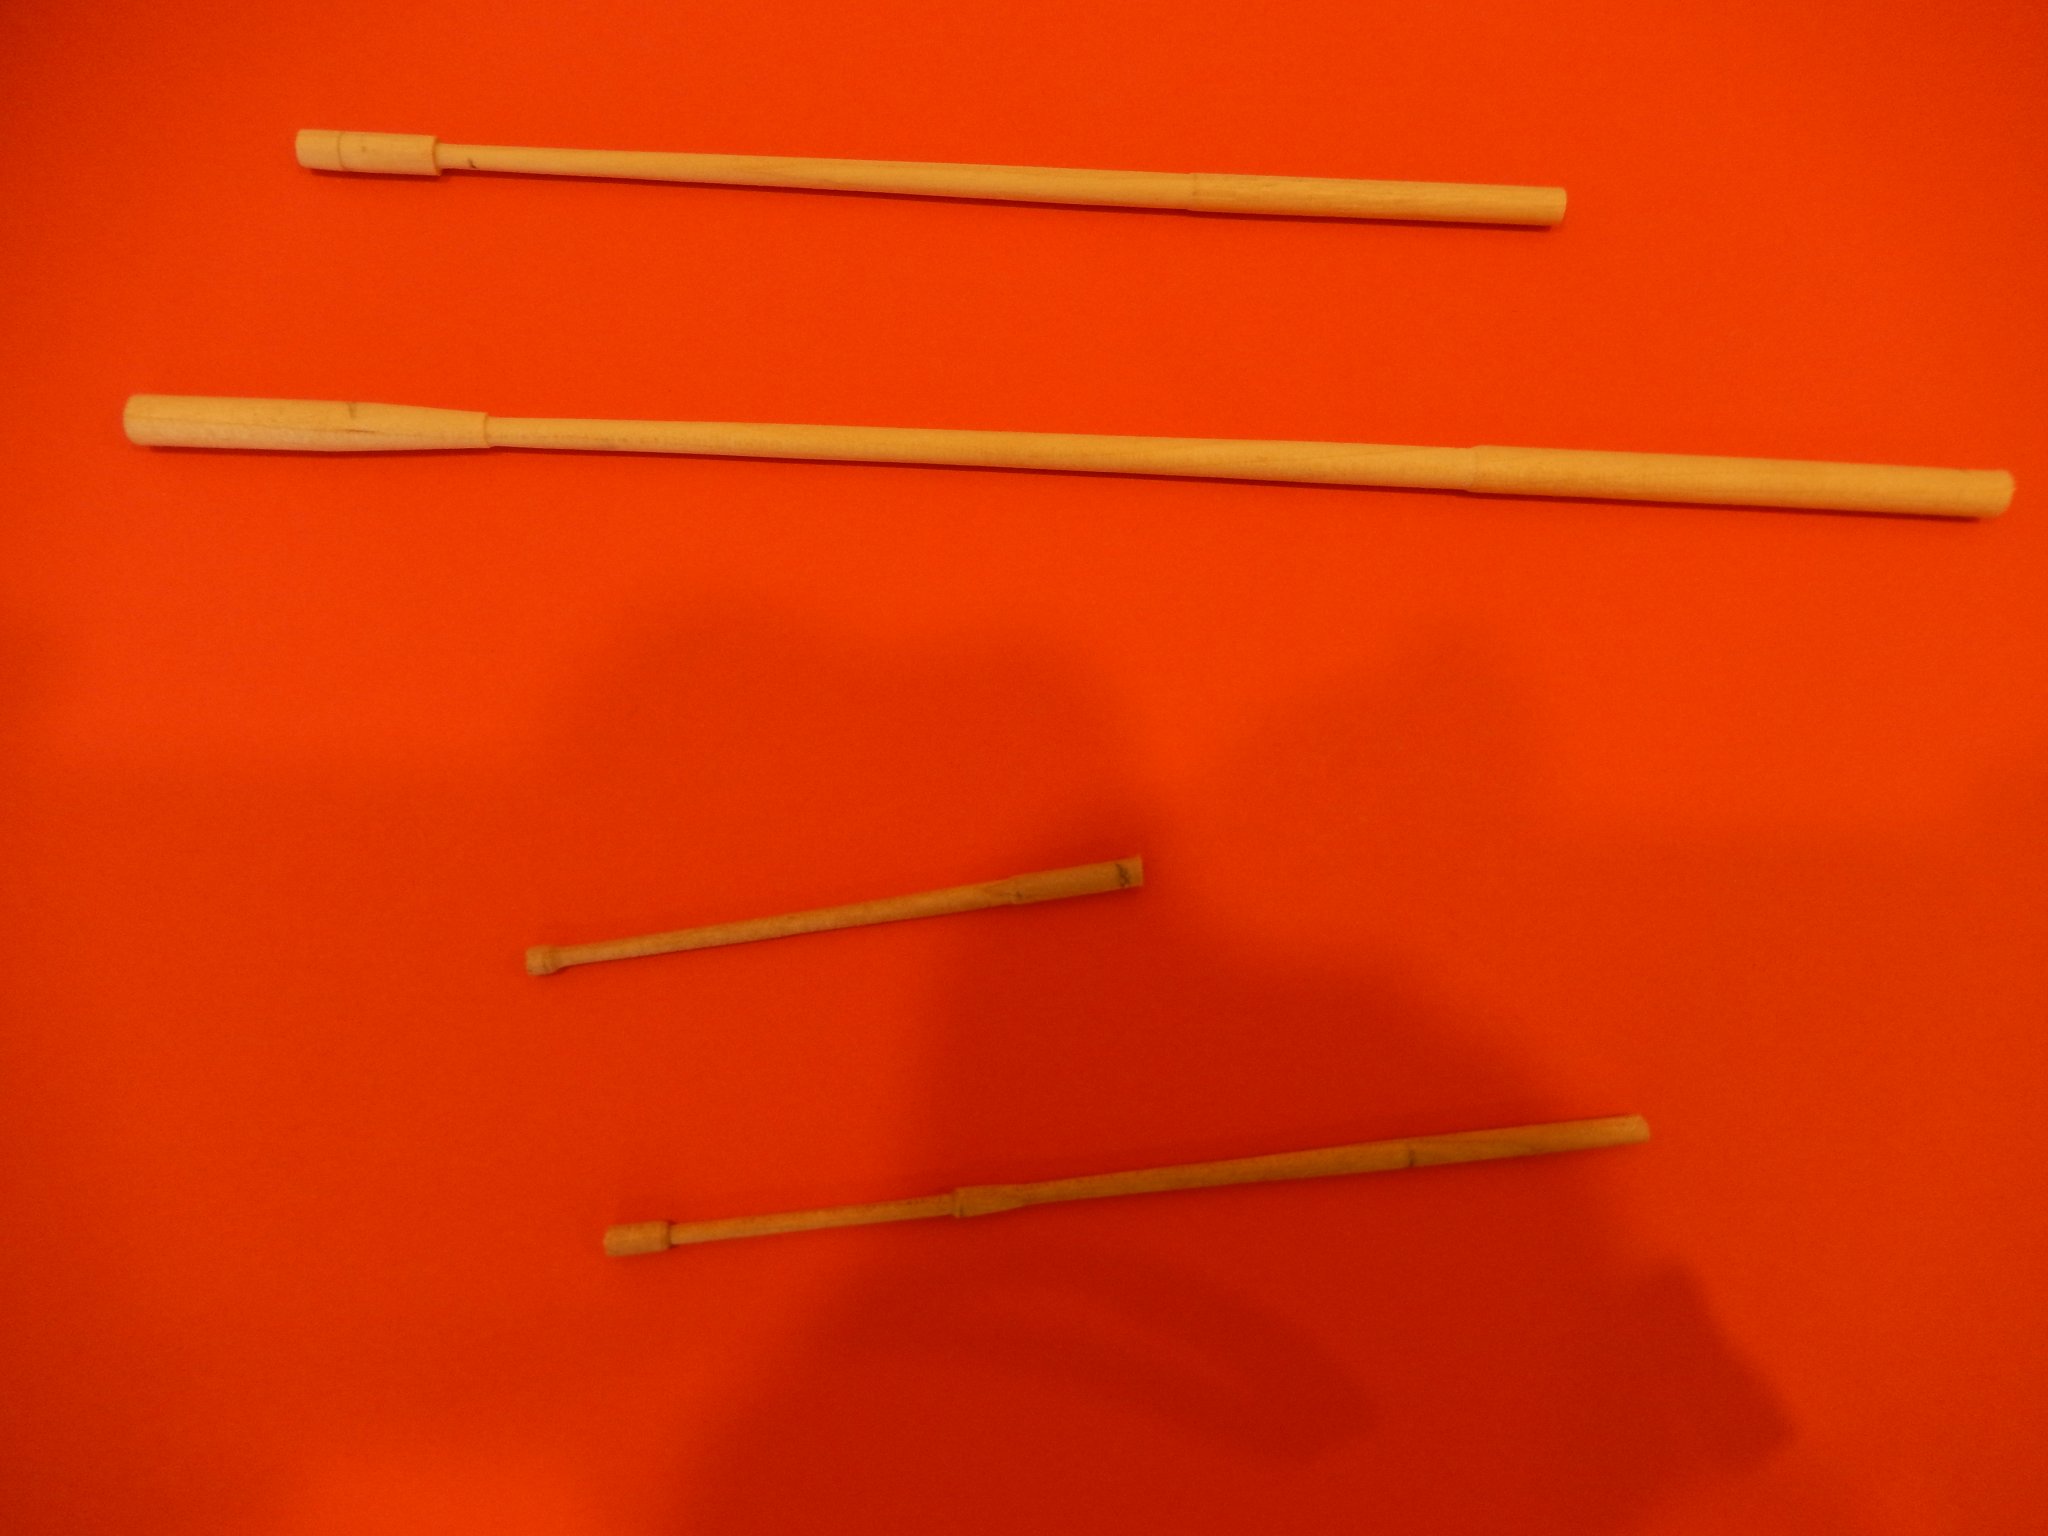
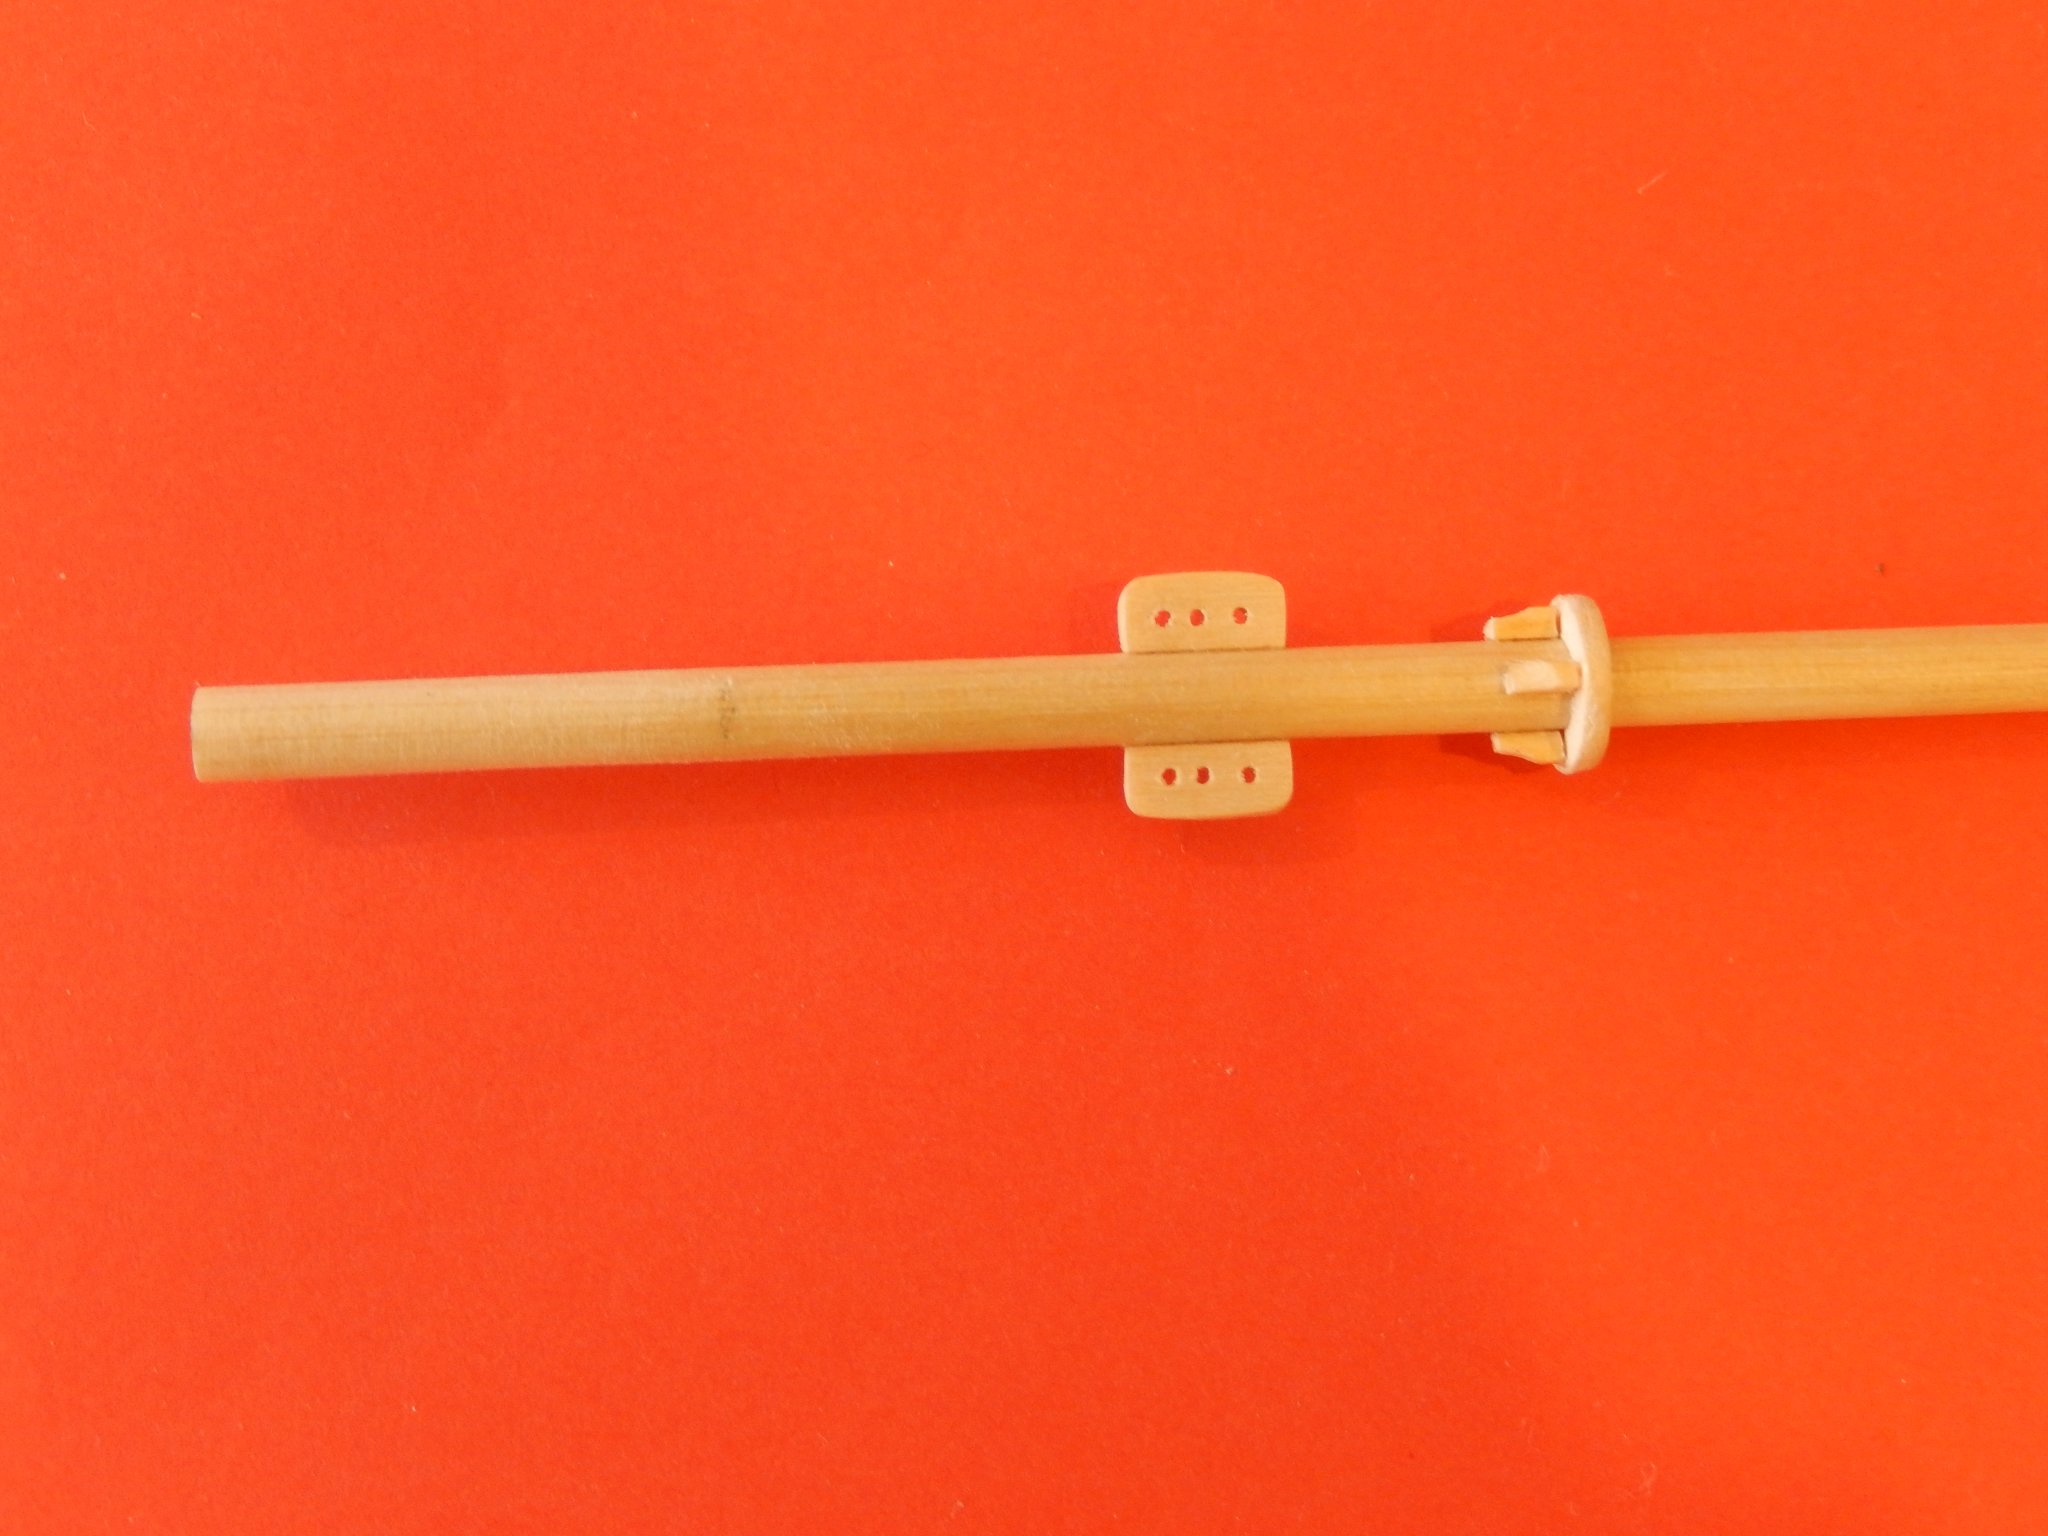
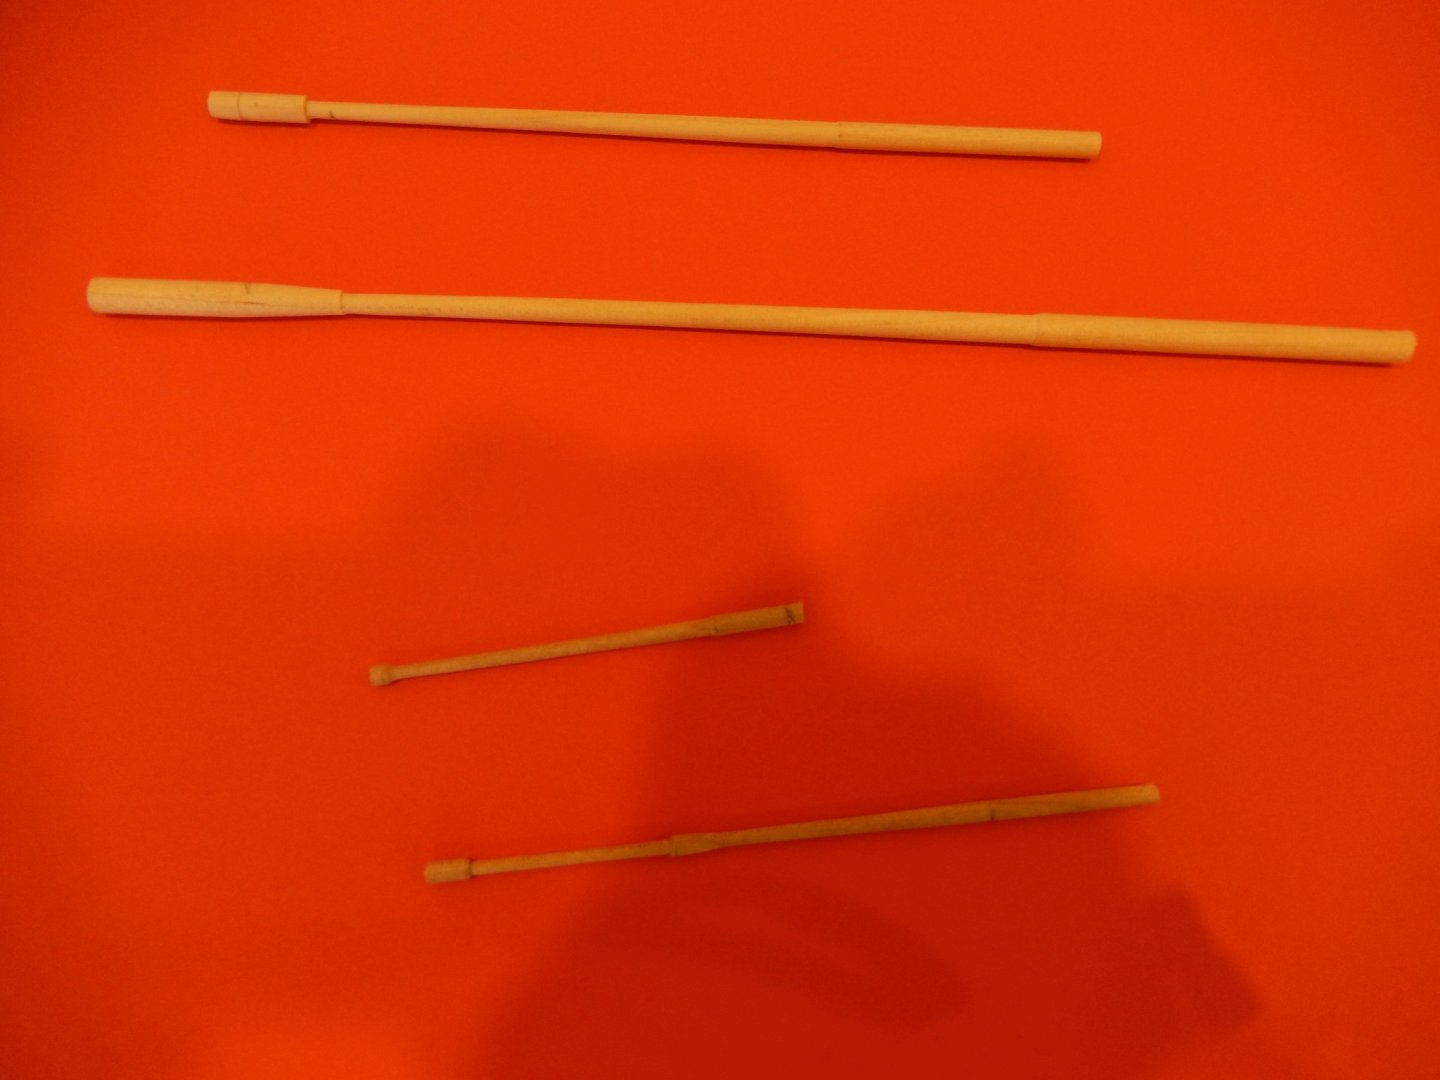
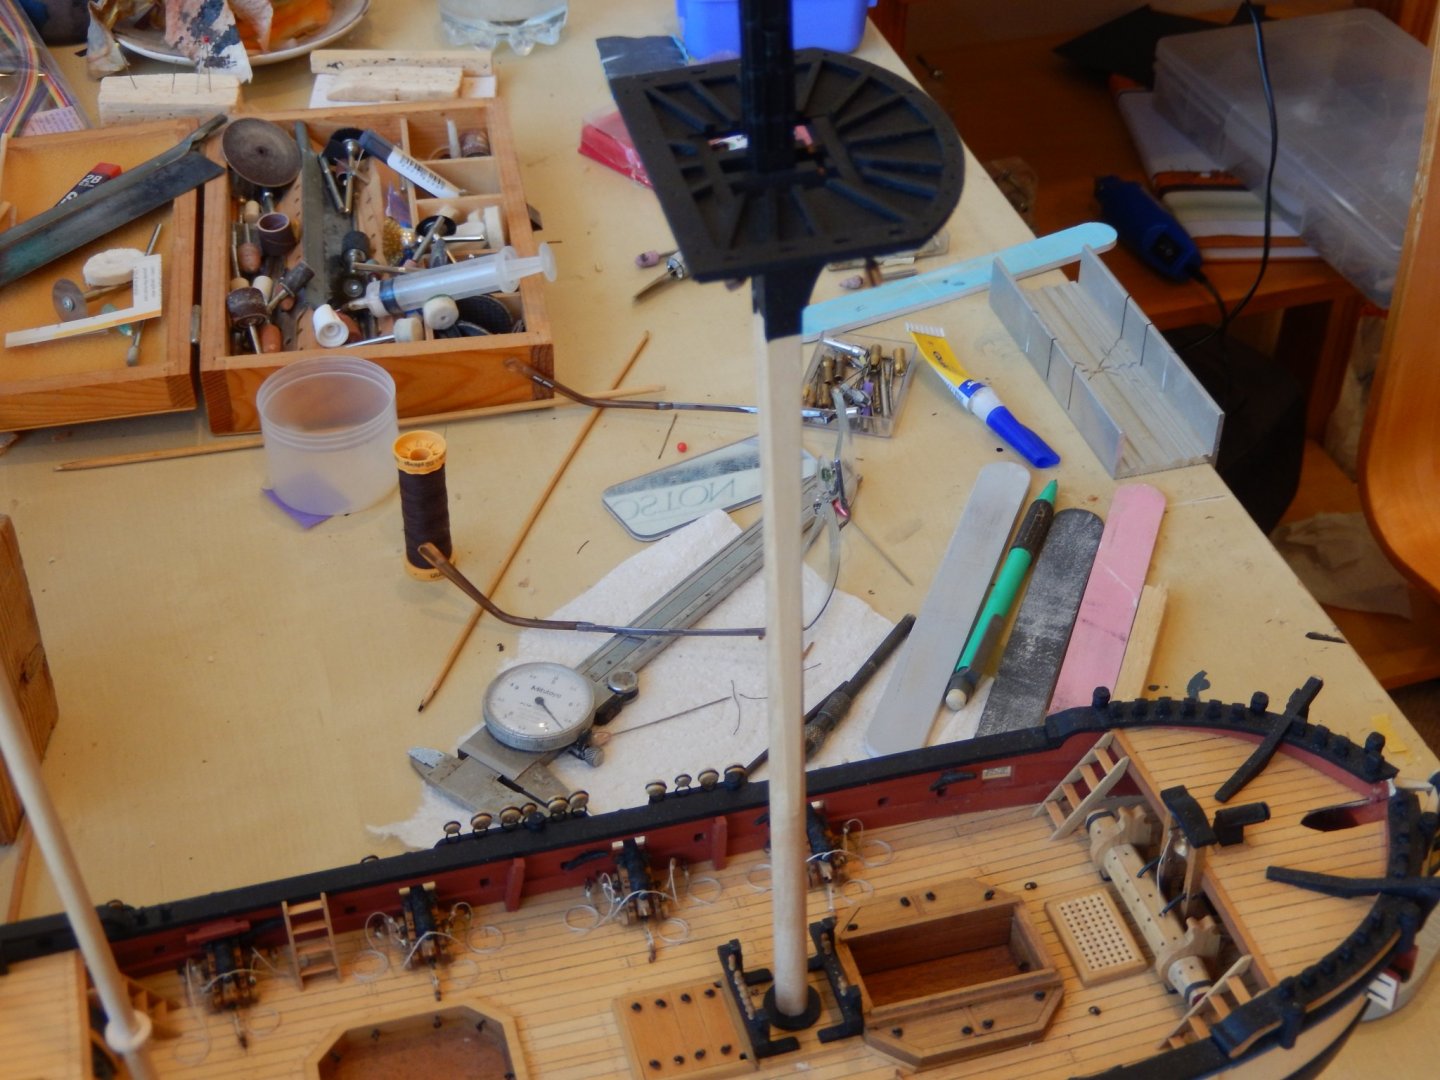
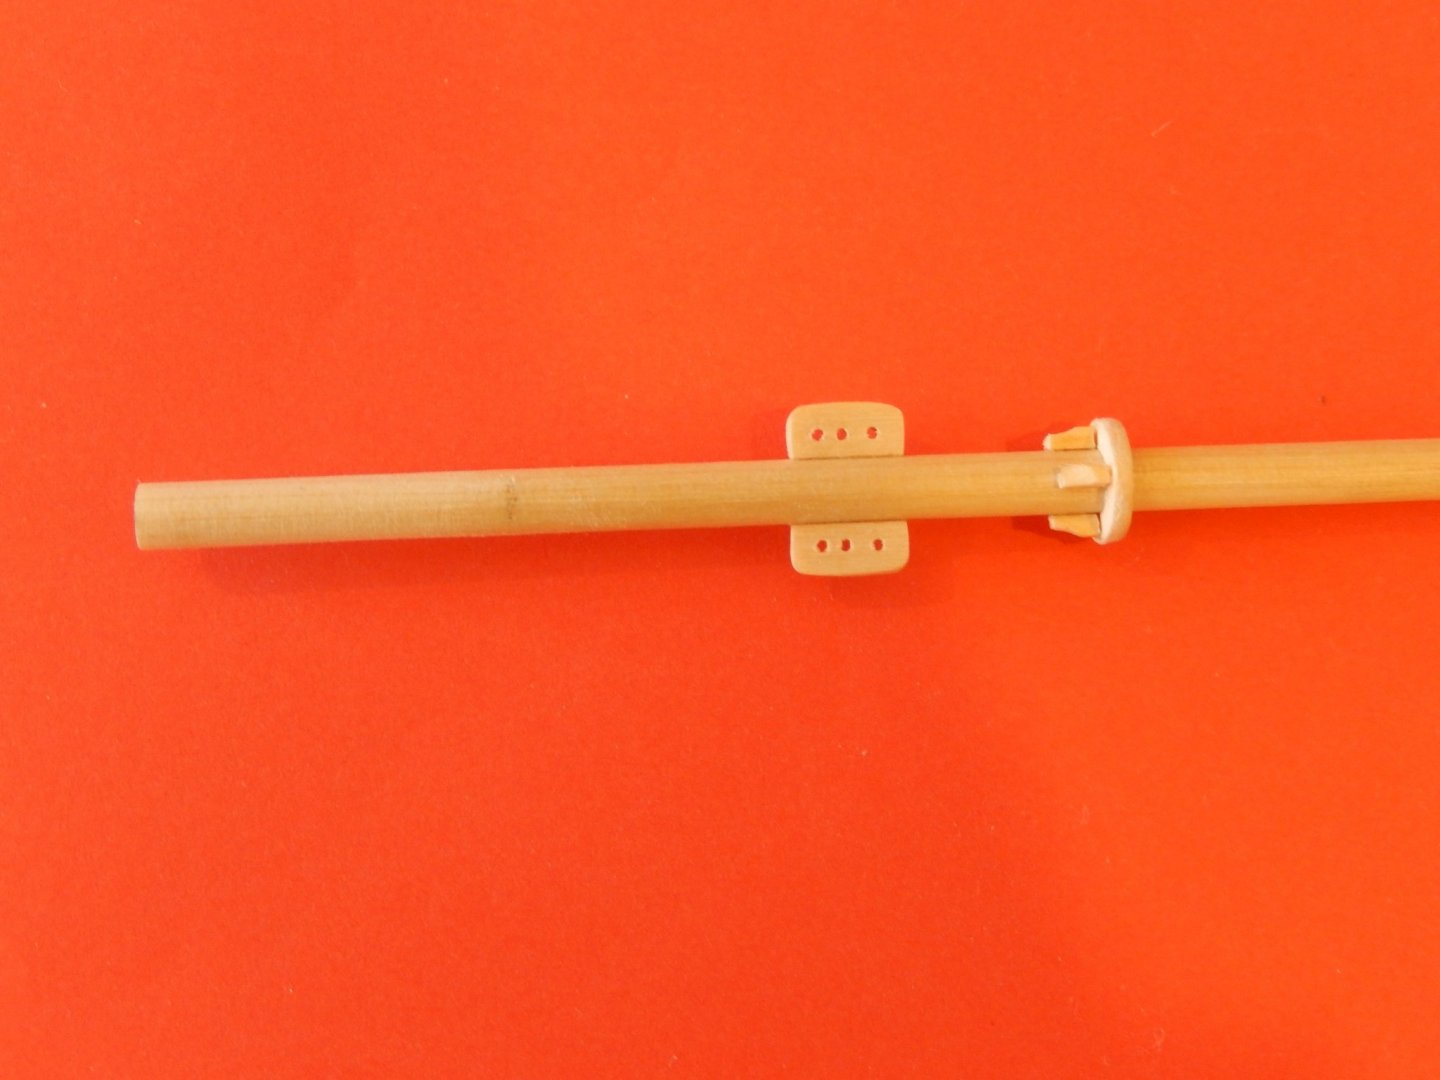
Slow progress I'm afraid. The masts are more or less done. The various different cross-sections are rather fiddly. In some cases (the octagonal sections for example ) it's a mystery to me just what functions they performed. Here are the masts after turning the various shapes, though the photos don't show much detail unfortunately. The octagonal cone shapes were first turned to be conical and slightly larger than the required octagon, then the cone filed down to the required shape. The top for the lower main mast is now fixed as are the bibs. There is still work to be done on it, but here is progress. The following photo shows the bibs, but more, the current chaos of my work table. I have replaced the kit's plywood mizzen driver boom saddle and the pin rail. Here is the mast, dry-fitted. It scrubs up pretty well. Whoops. I'll leave the duplicate below, just in case I screw things up further.
- 421 replies
-
- 12
-
-
- caldercraft
- granado
- (and 1 more)
-
Actually, I have just discovered that I made a rather silly mistake. Vane was trying to draw my attention to it (thanks Vane), but I didn't twig. It was only on checking before I finally glued the top on the mast that I discovered I had the trestletree the wrong way around. I had, of course, stuck everything together all too well. Getting all the bits and pieces apart was rather fraught. I shed blood in the process, and at my age every drop matters. Anyway, not too much damage was done - I'm in the process of fixing it - but it's all a bit of a pain.
- 421 replies
-
- 1
-
-
- caldercraft
- granado
- (and 1 more)
-
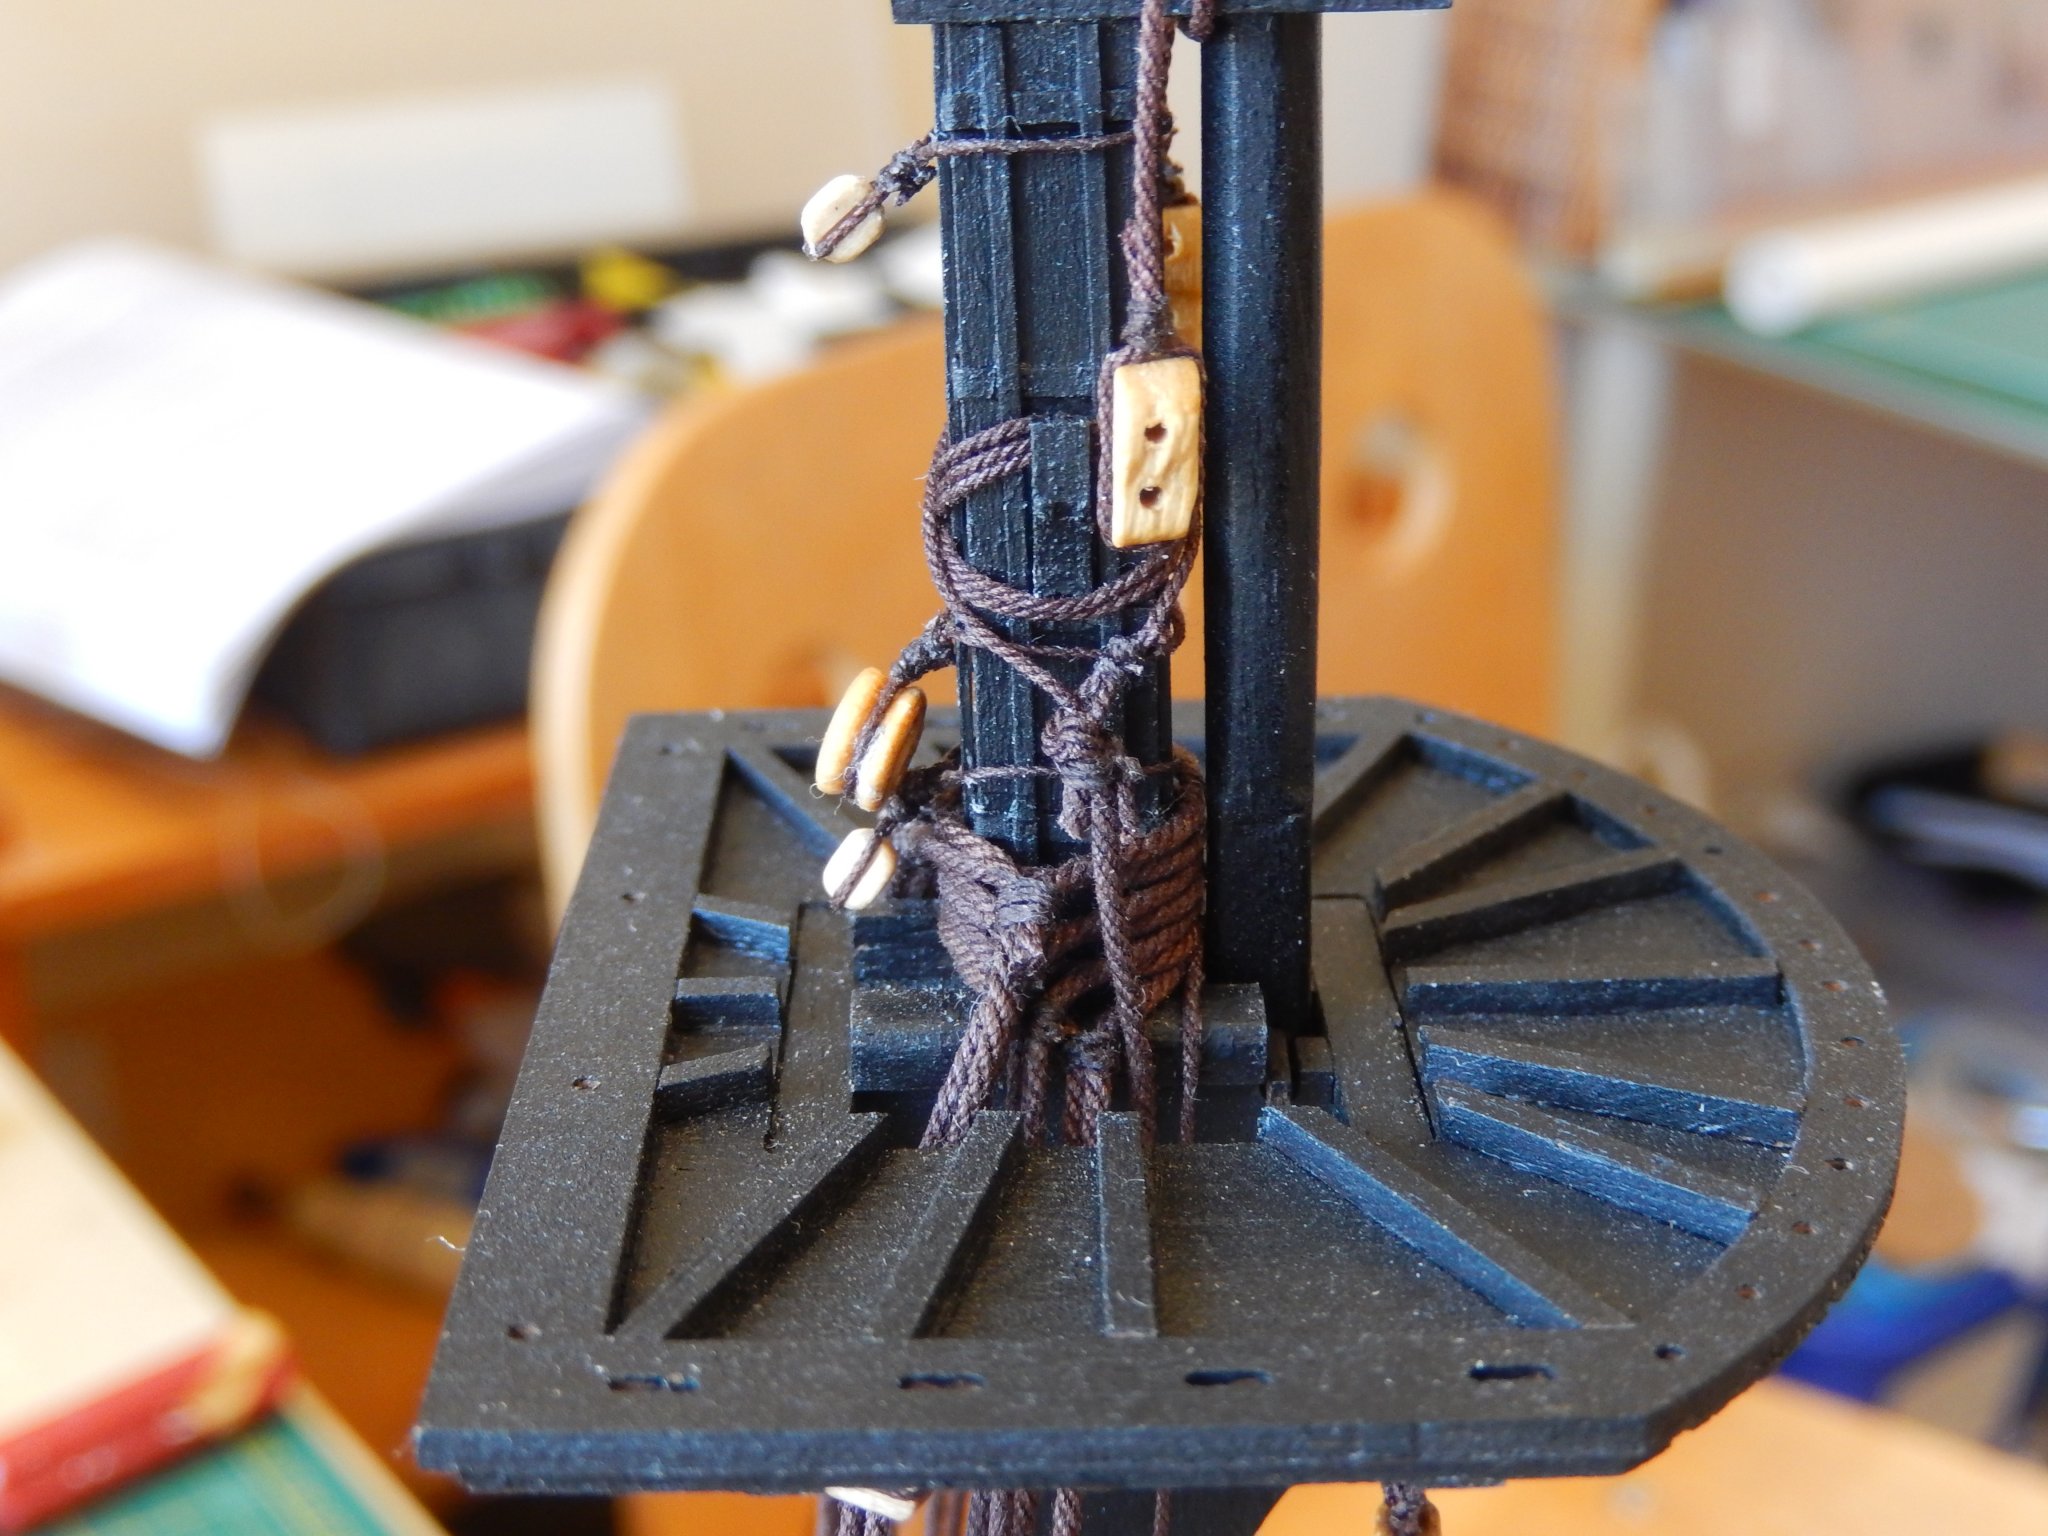
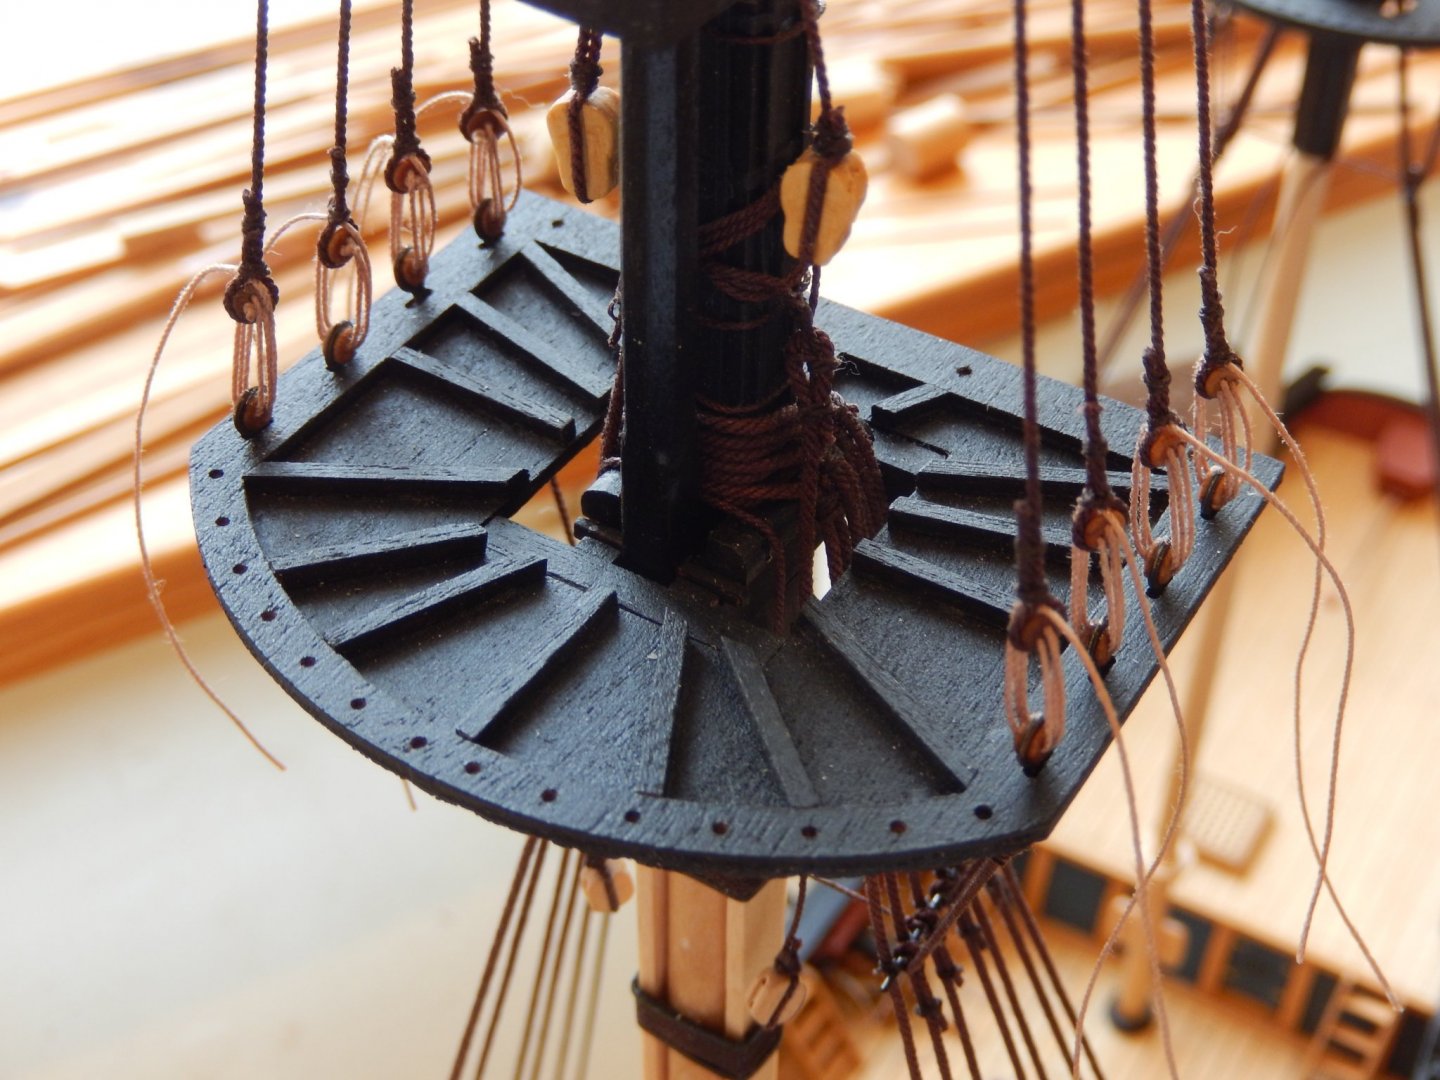
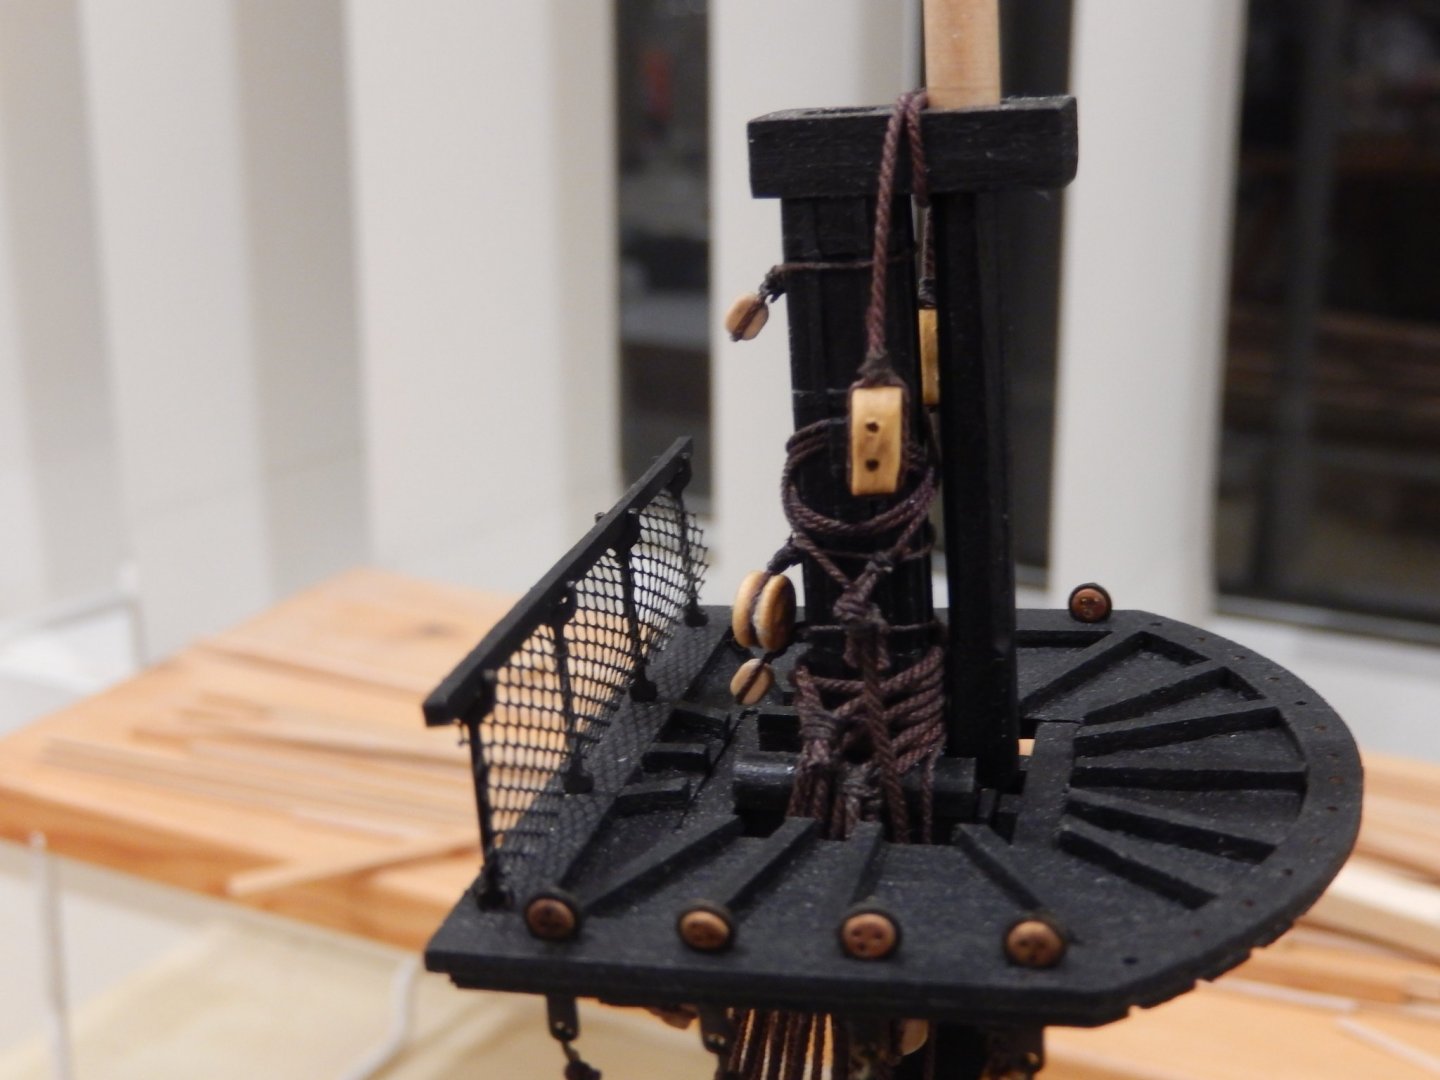
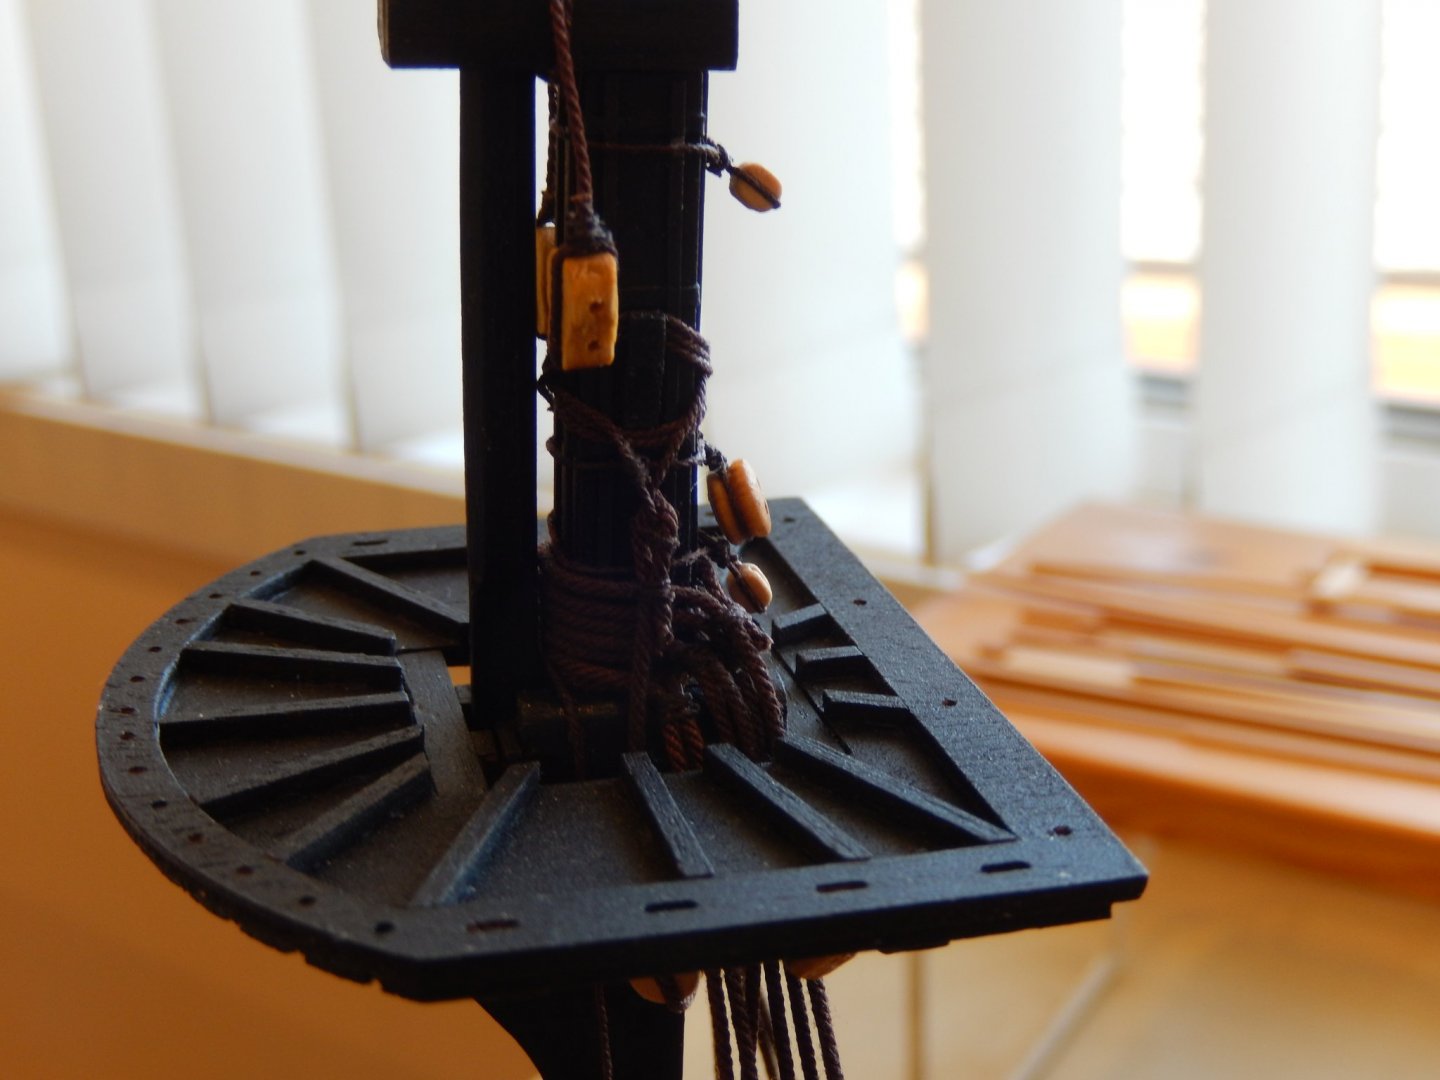
Yes, it is. I've shown the (er...) top and the bottom of the tops. I suggest putting the various blocks on the tops before stepping the masts. The hole you have circled is for another block that has now been mounted. I stuffed up the first attempt. Your top circle is around a bit of dust - now blown away 🙂.