RMC
-
Posts
933 -
Joined
-
Last visited
Content Type
Profiles
Forums
Gallery
Events
Everything posted by RMC
-
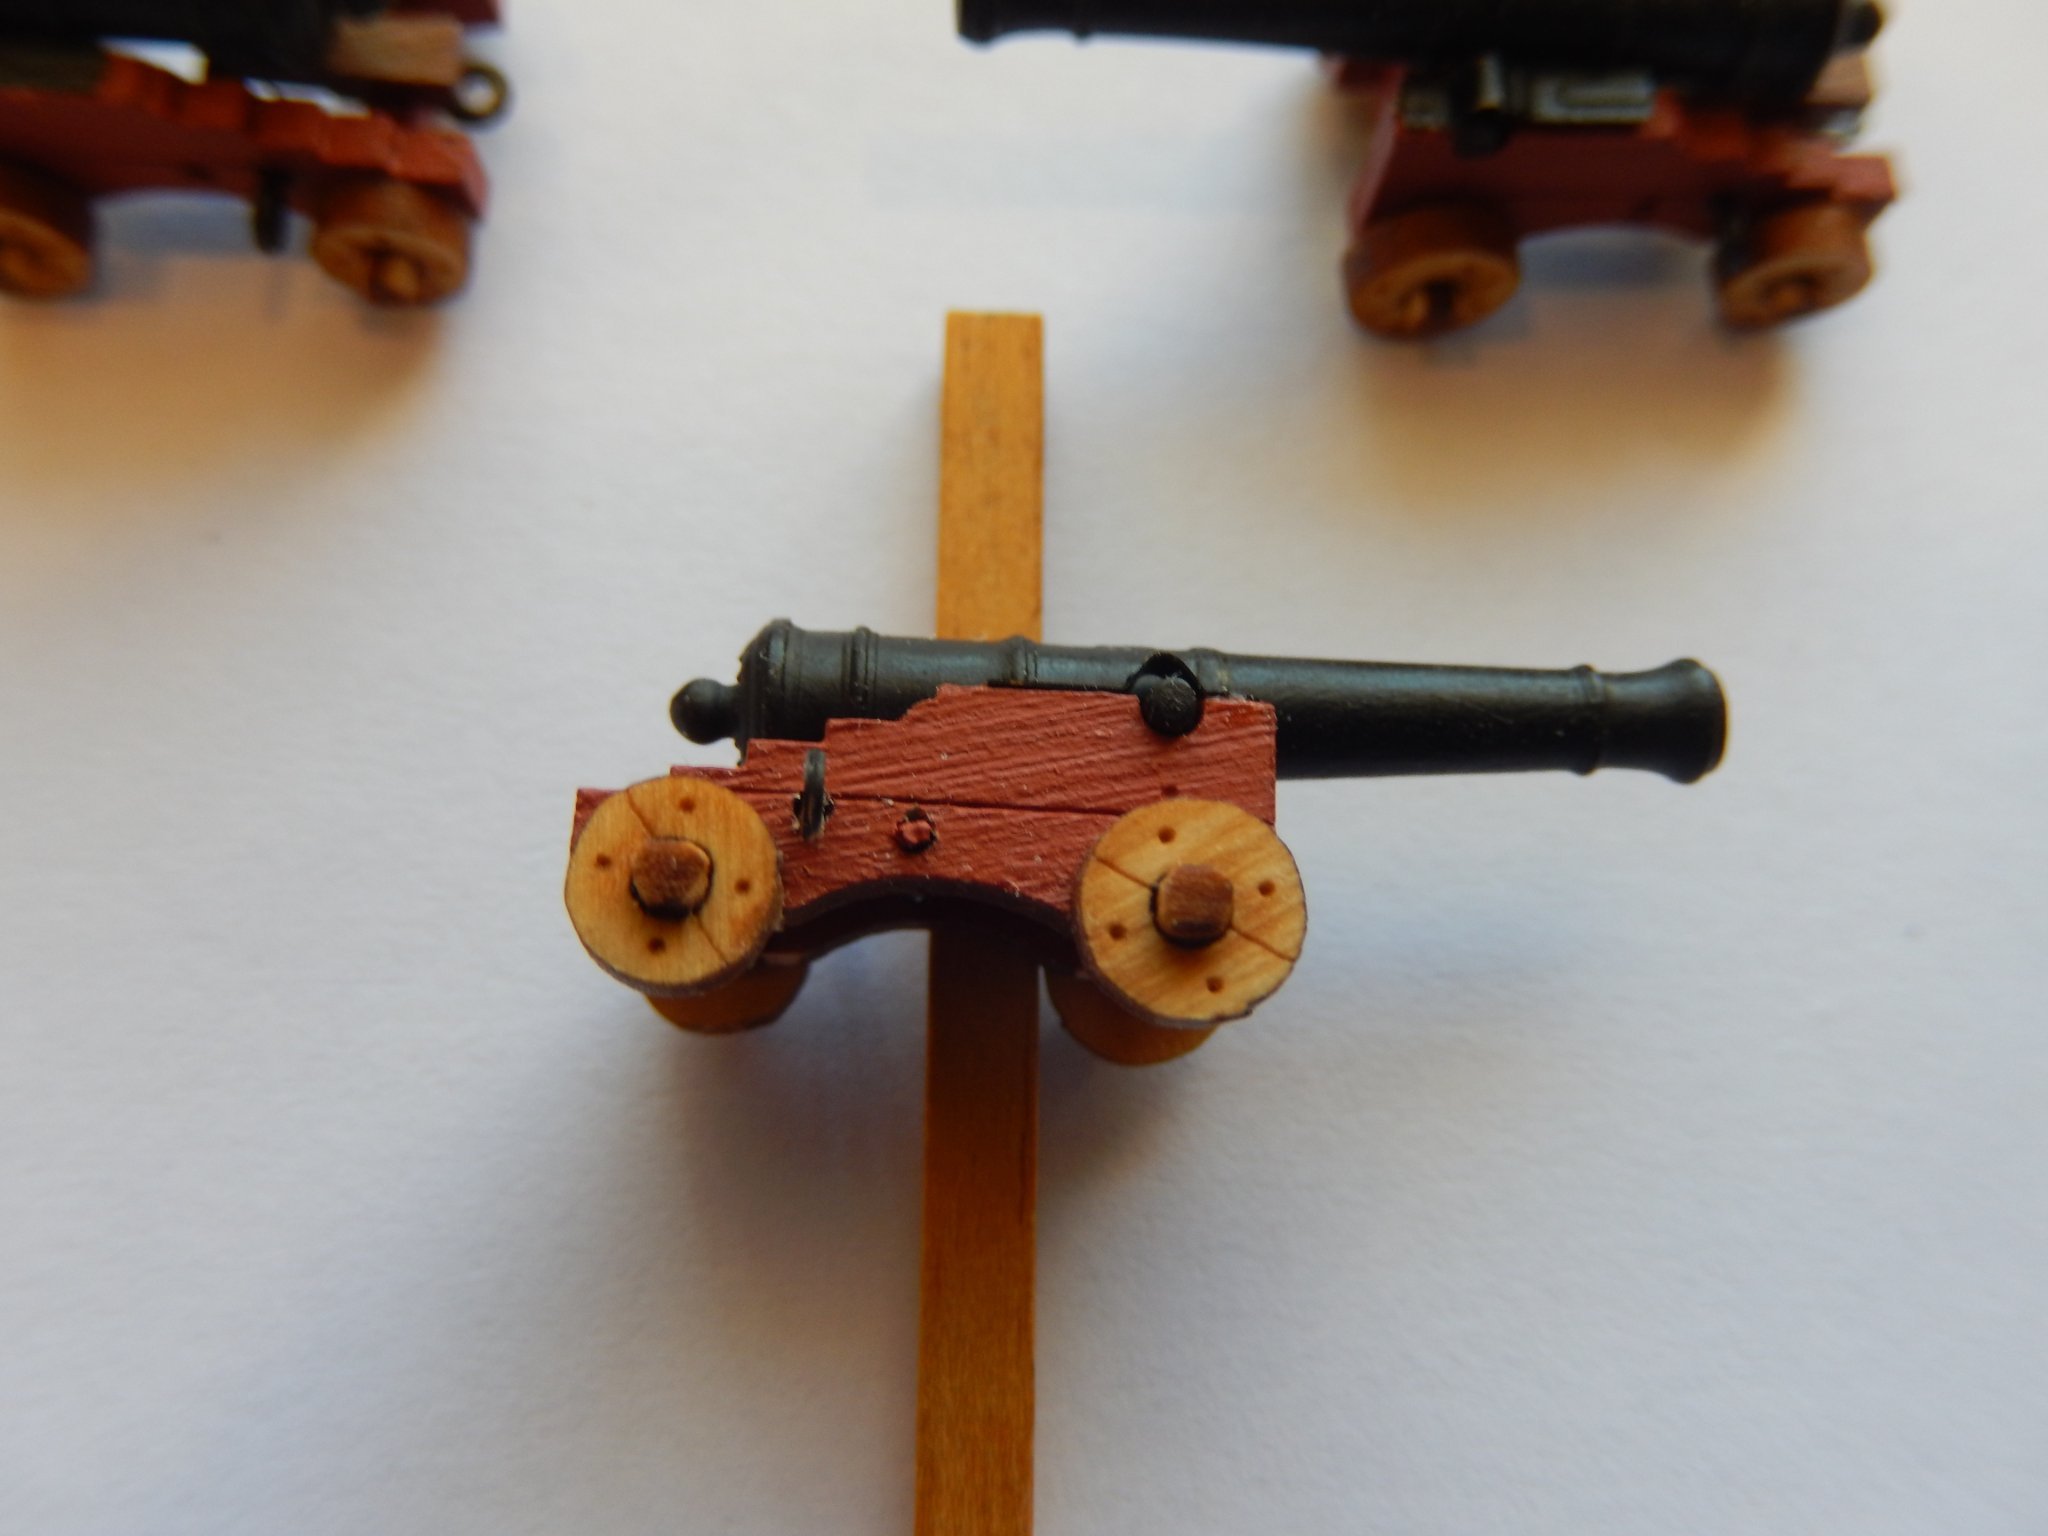
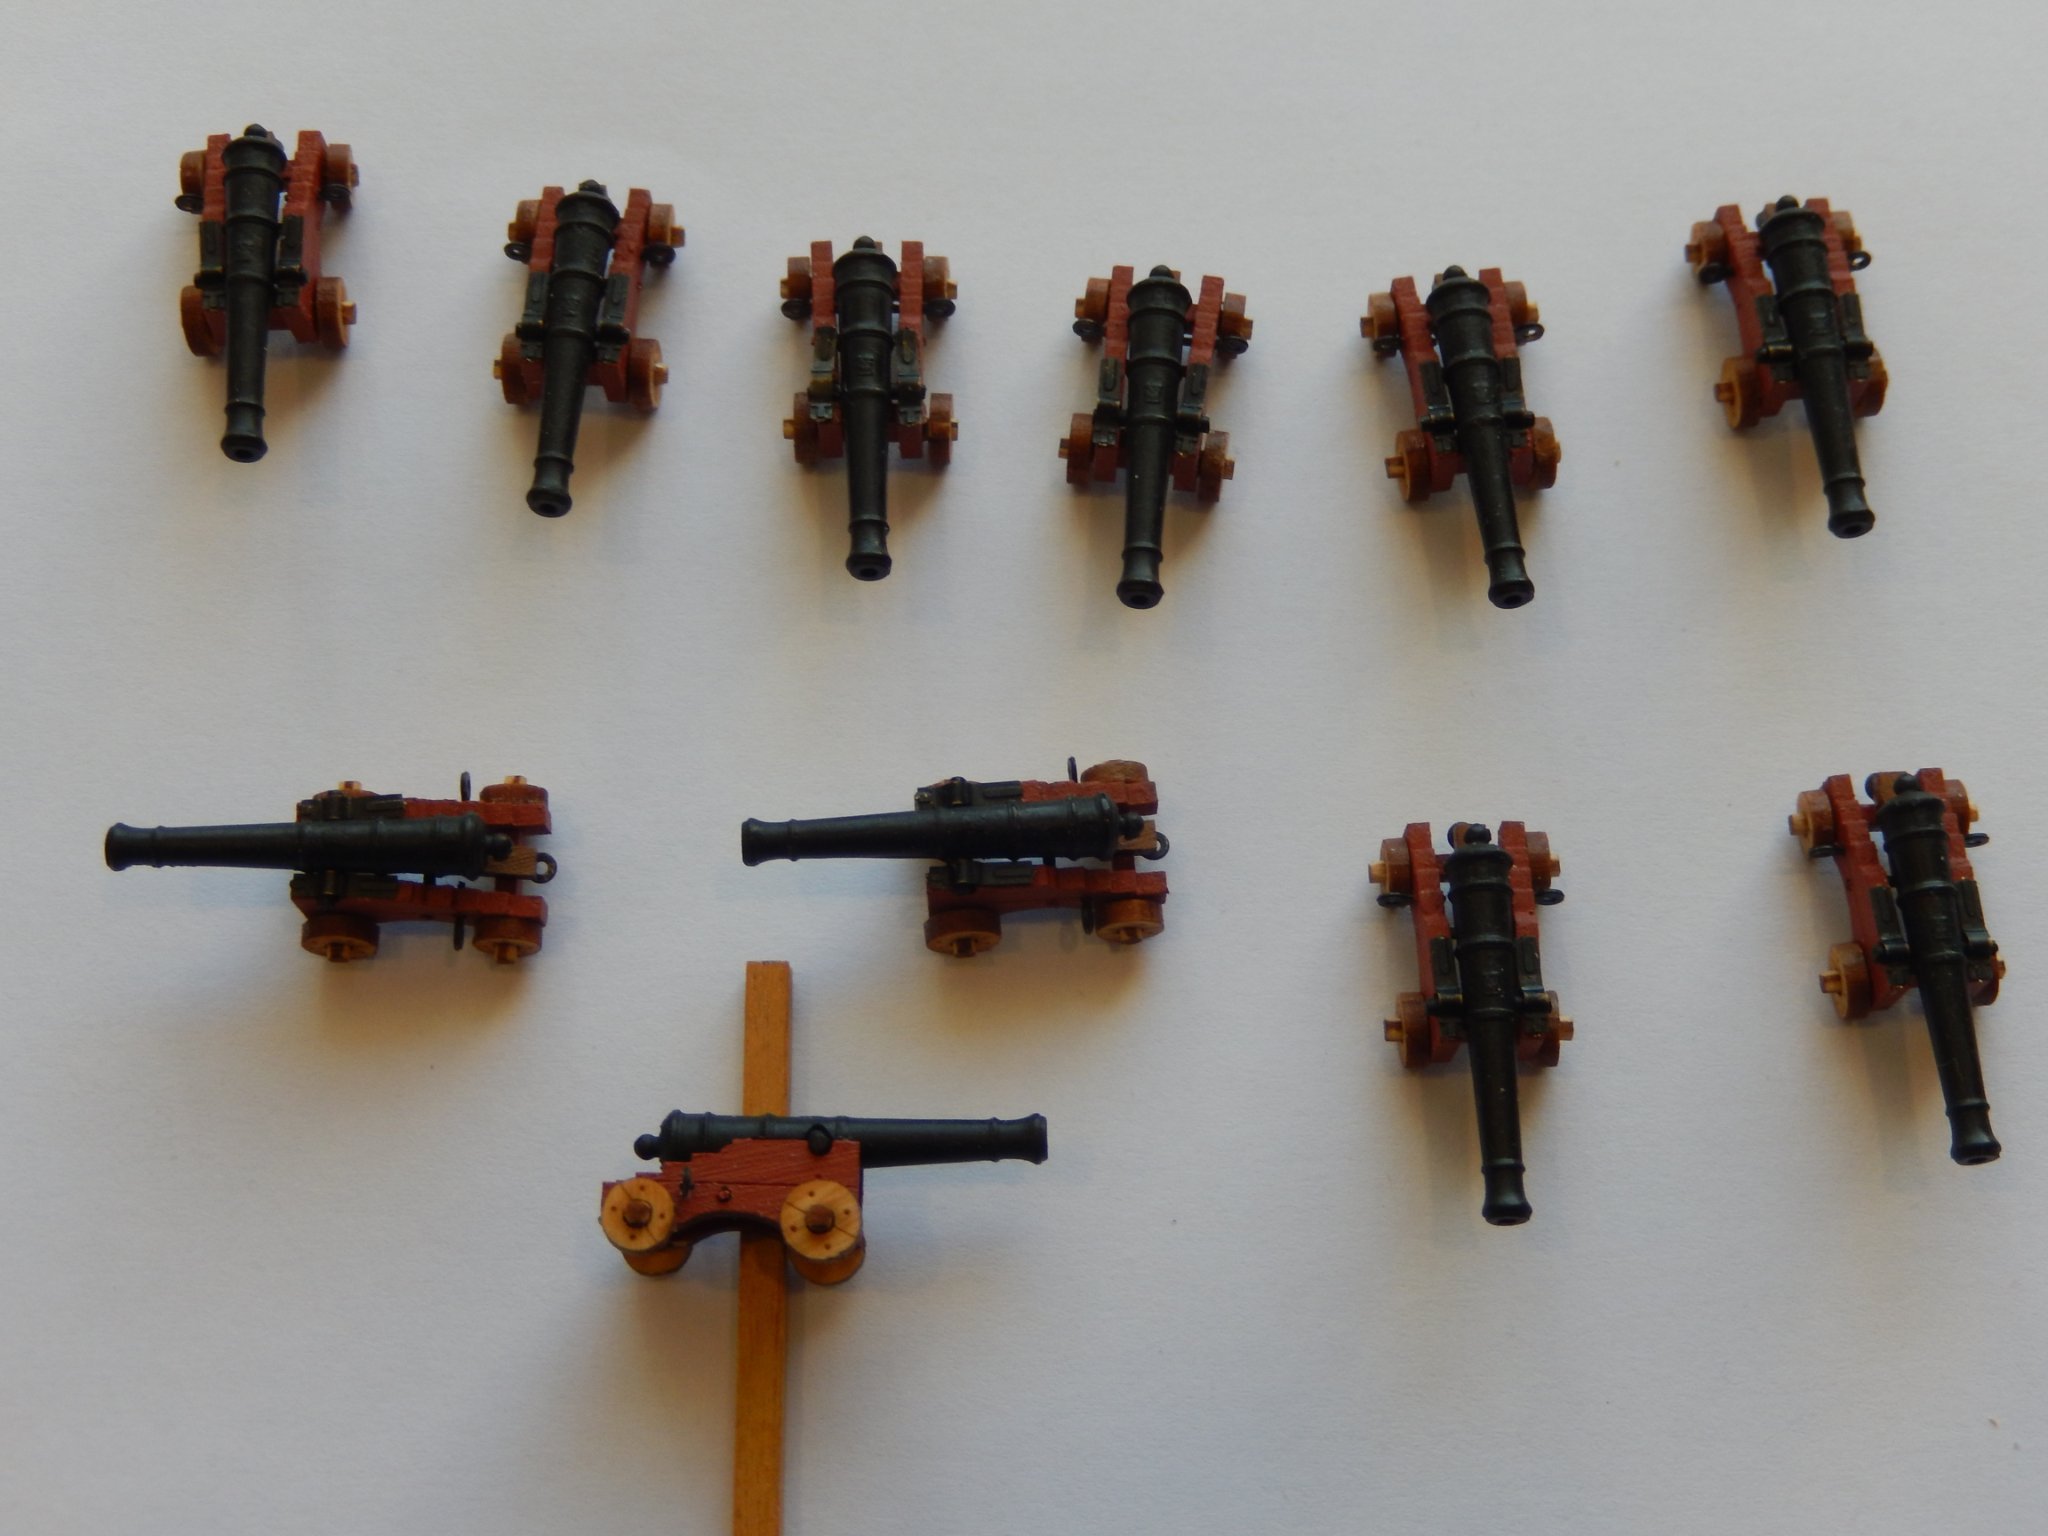
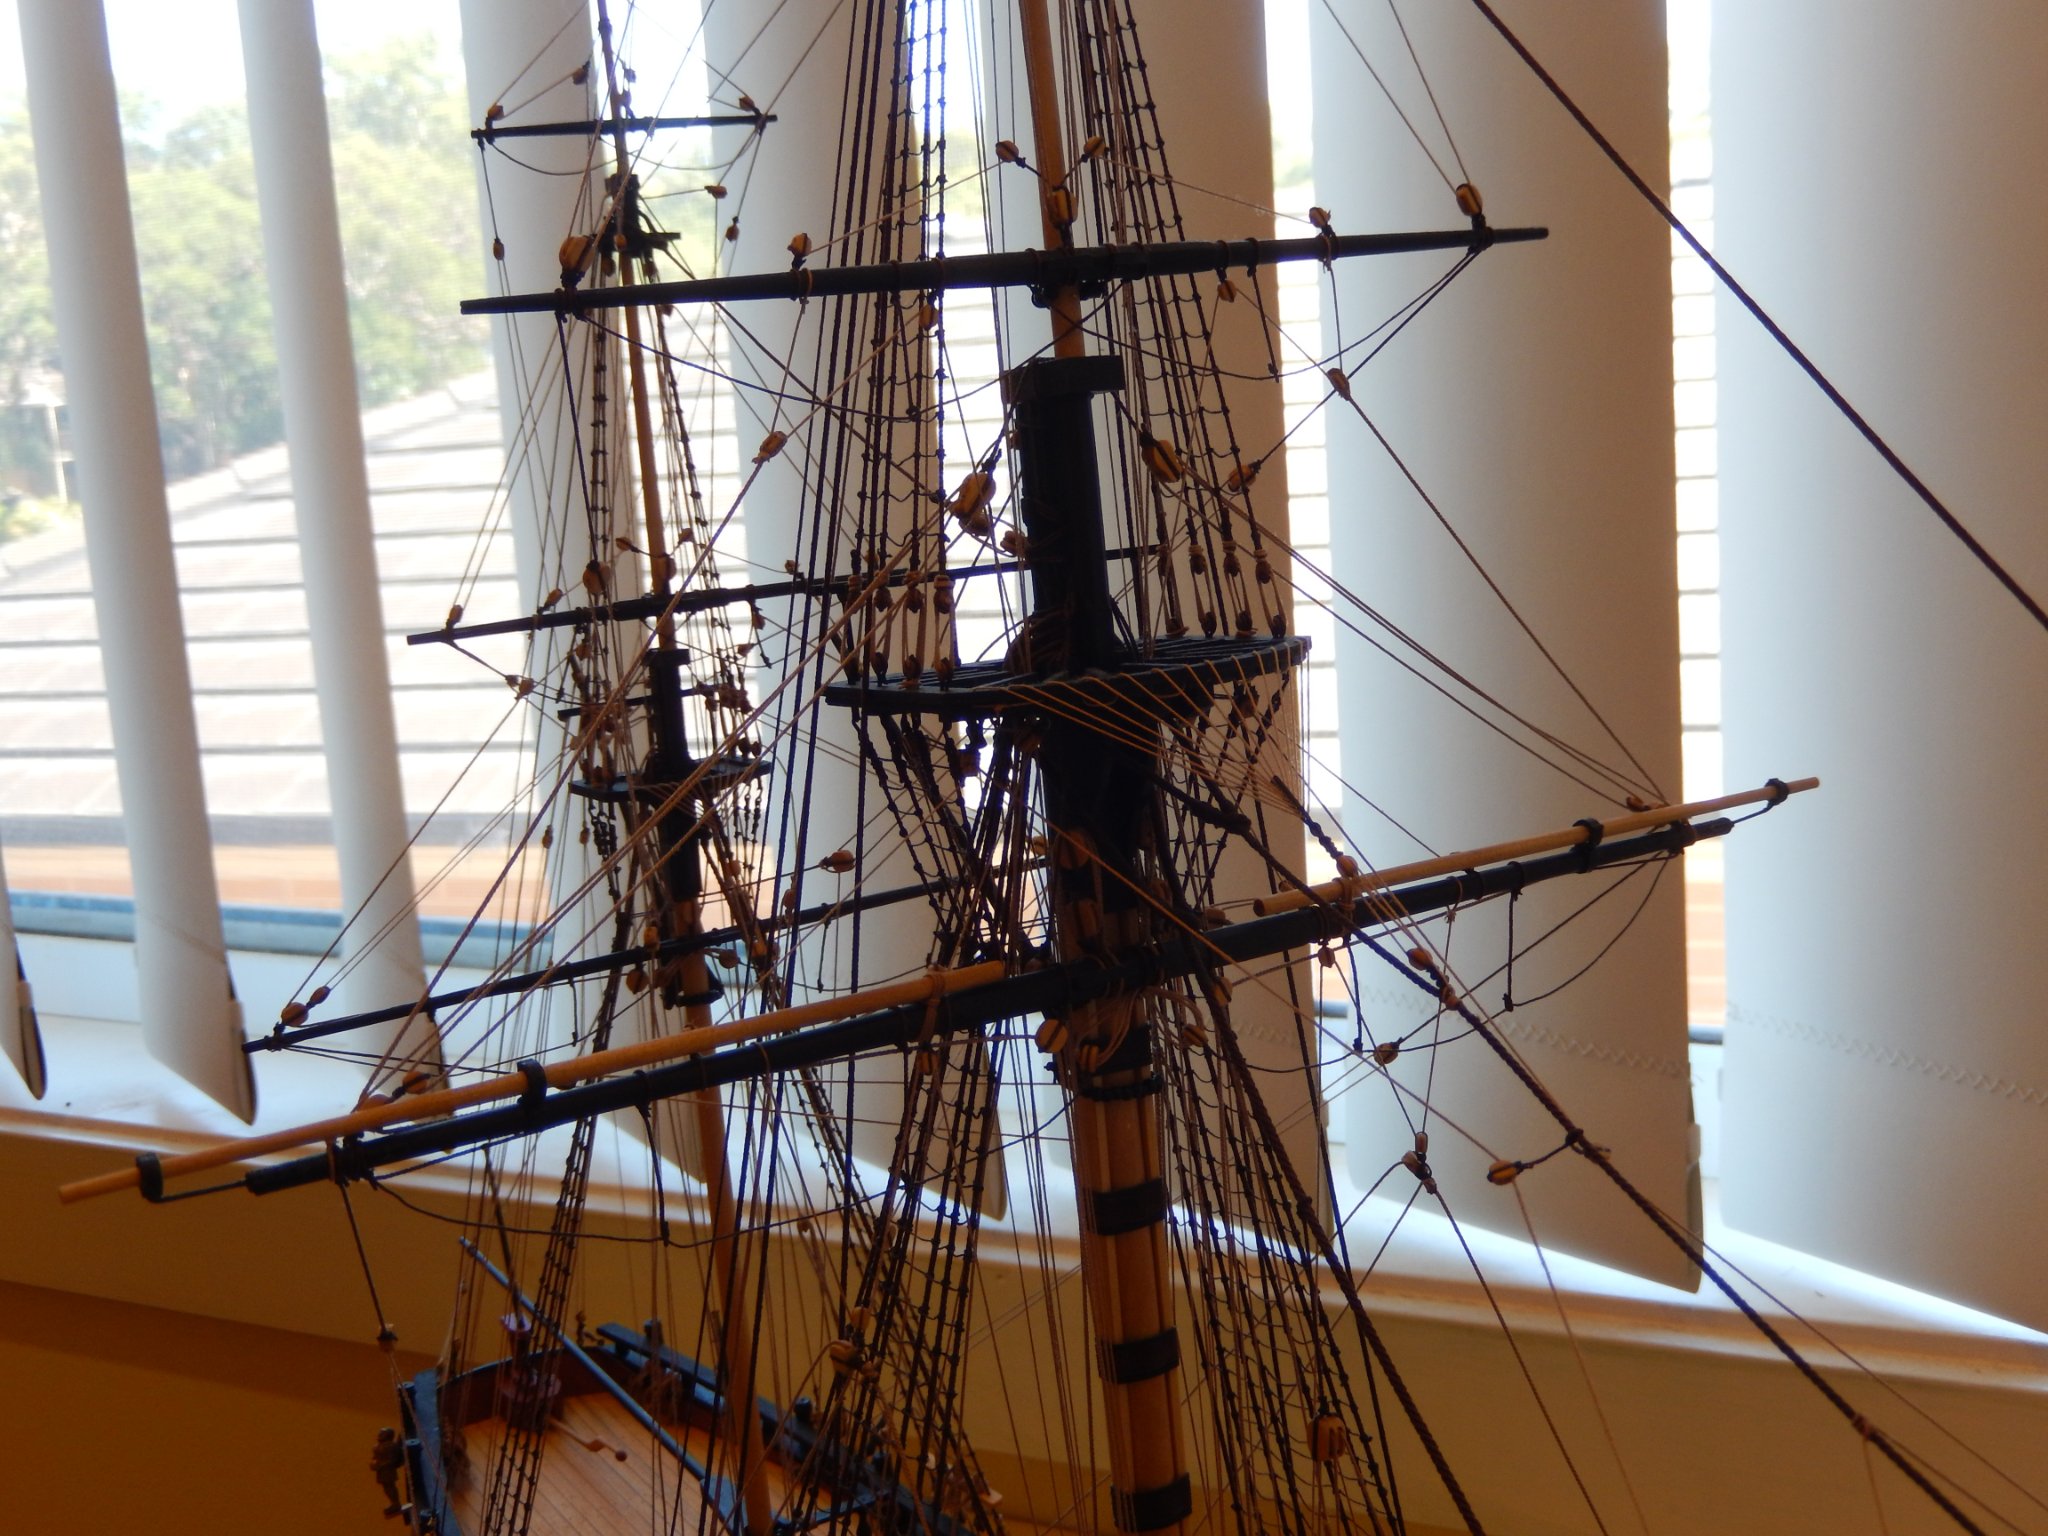
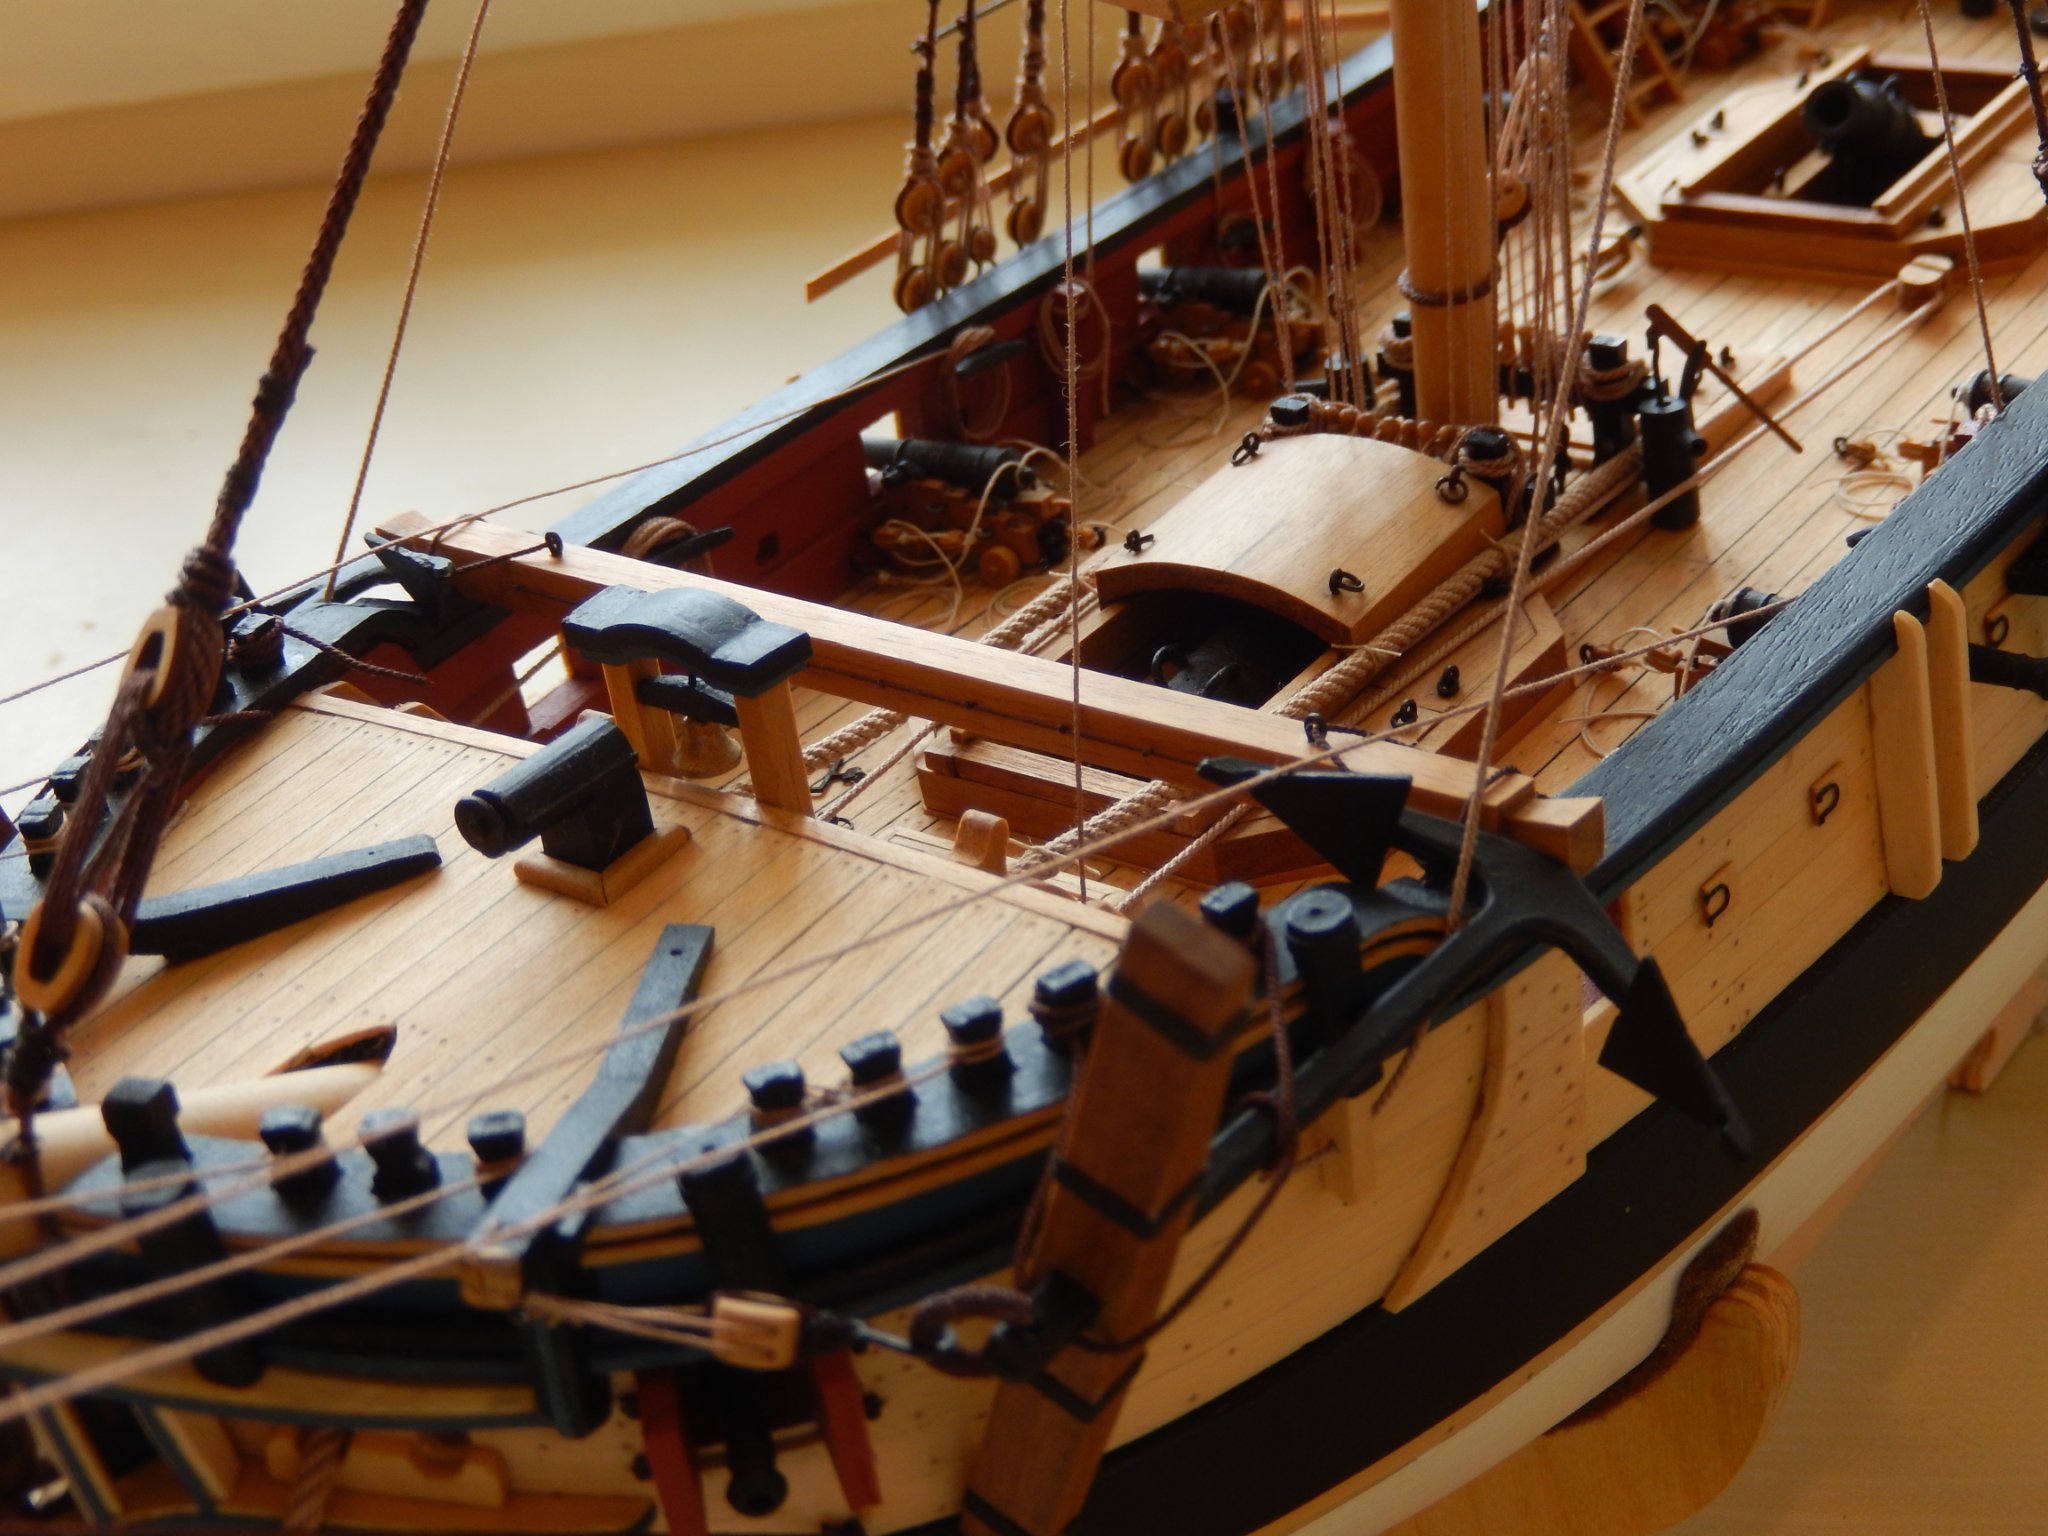
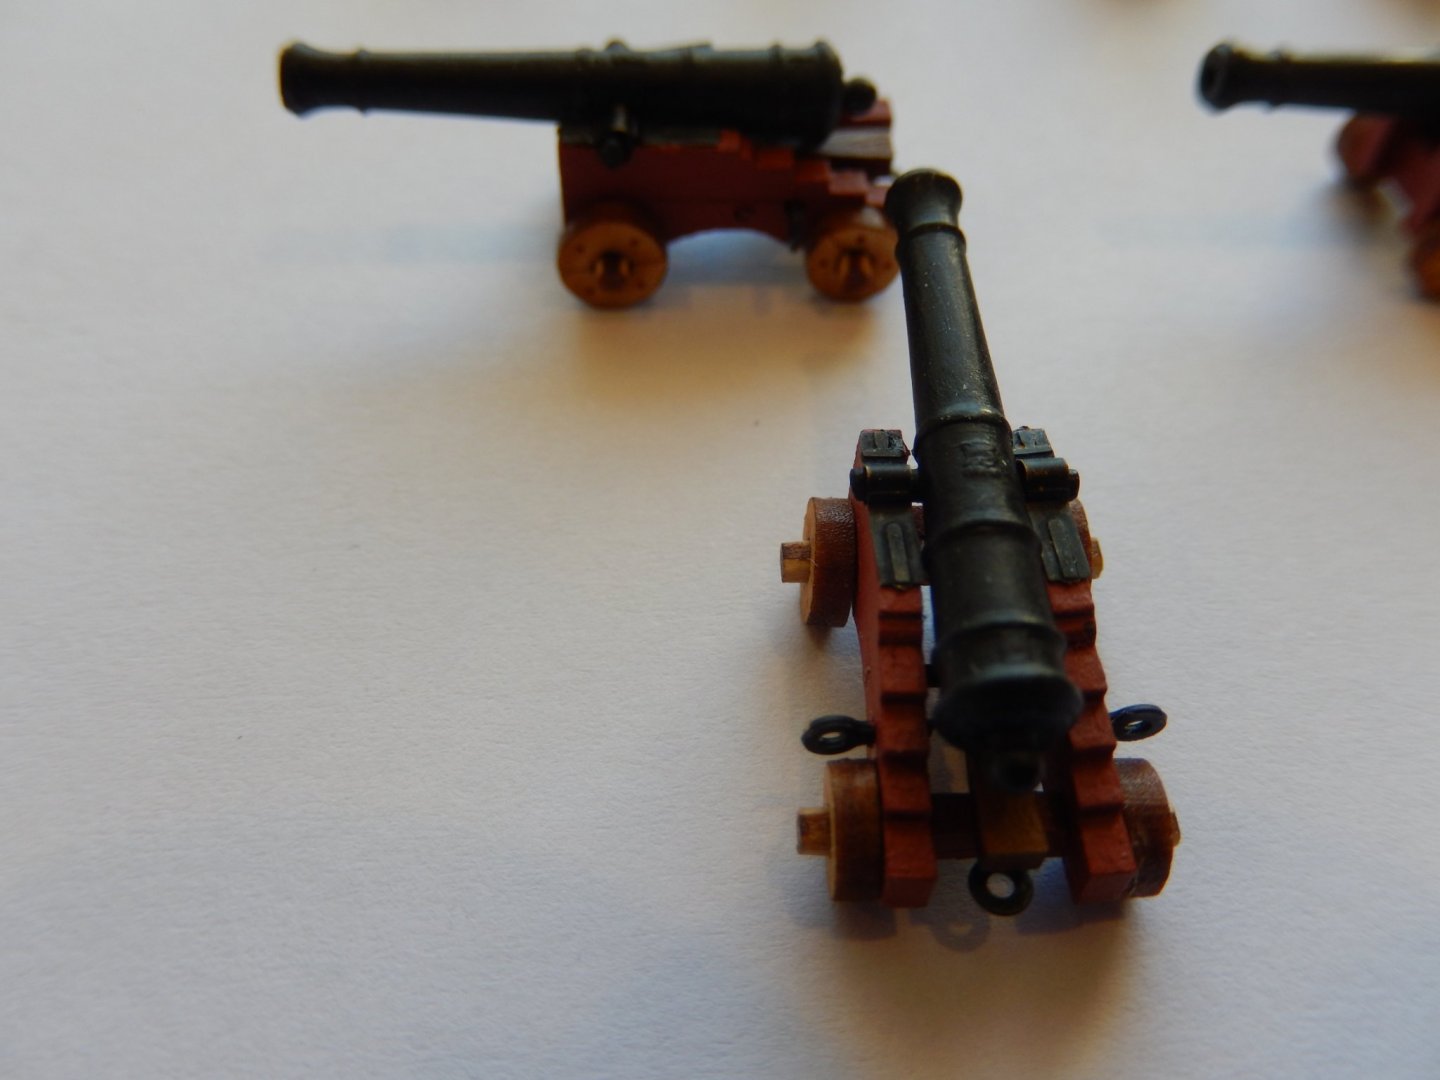
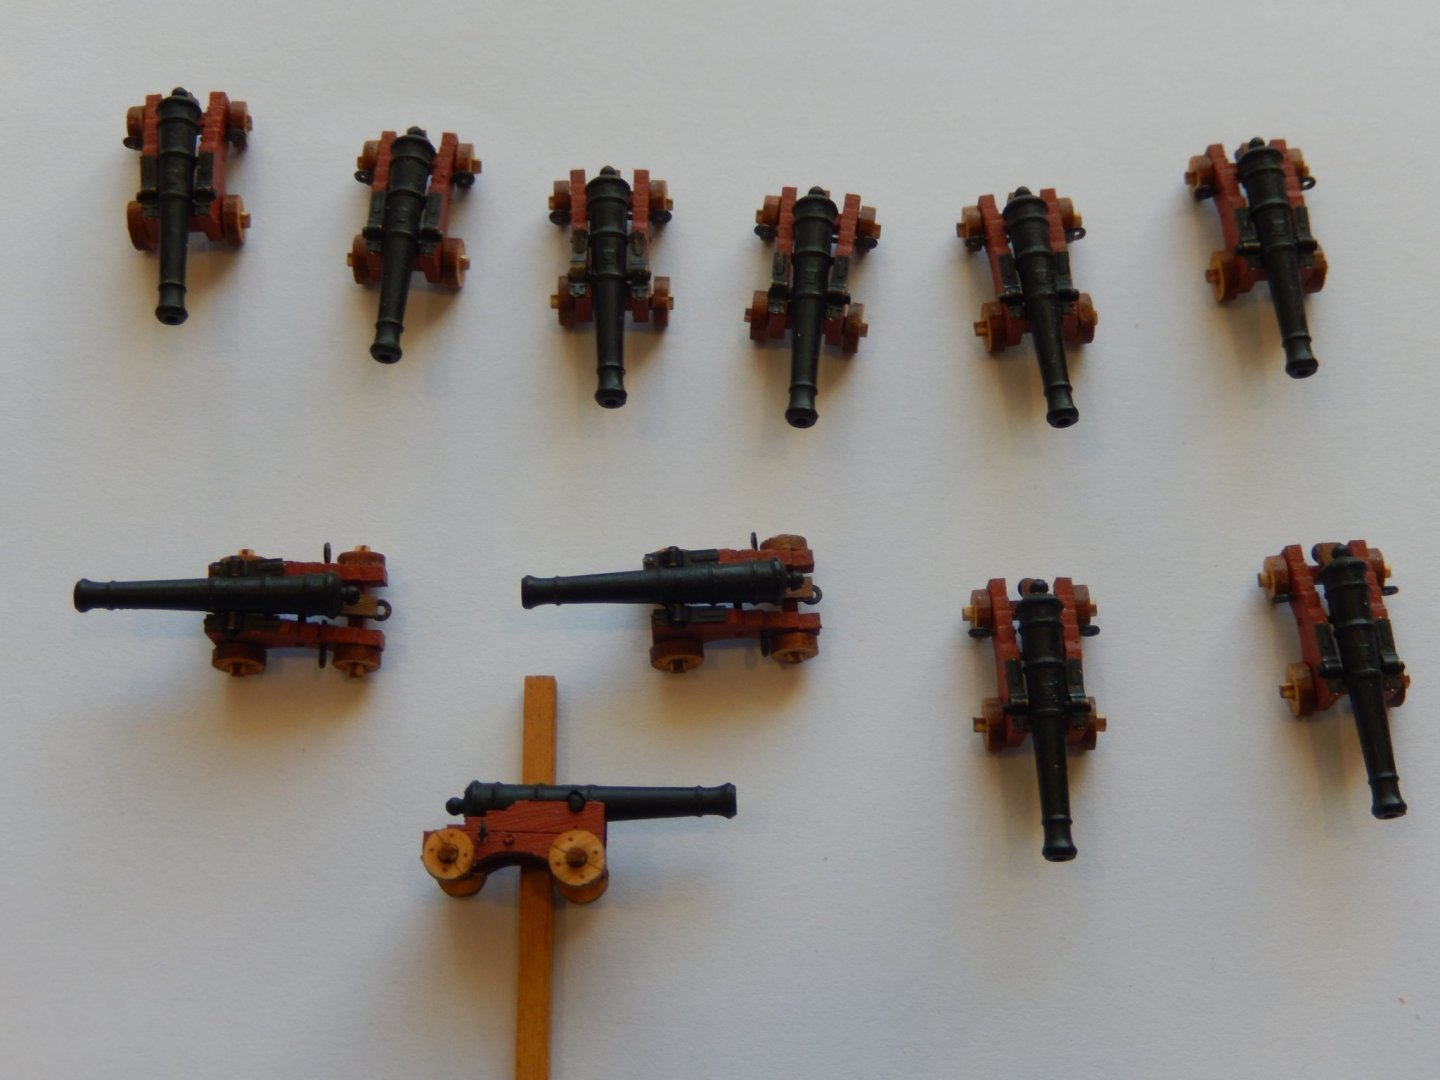
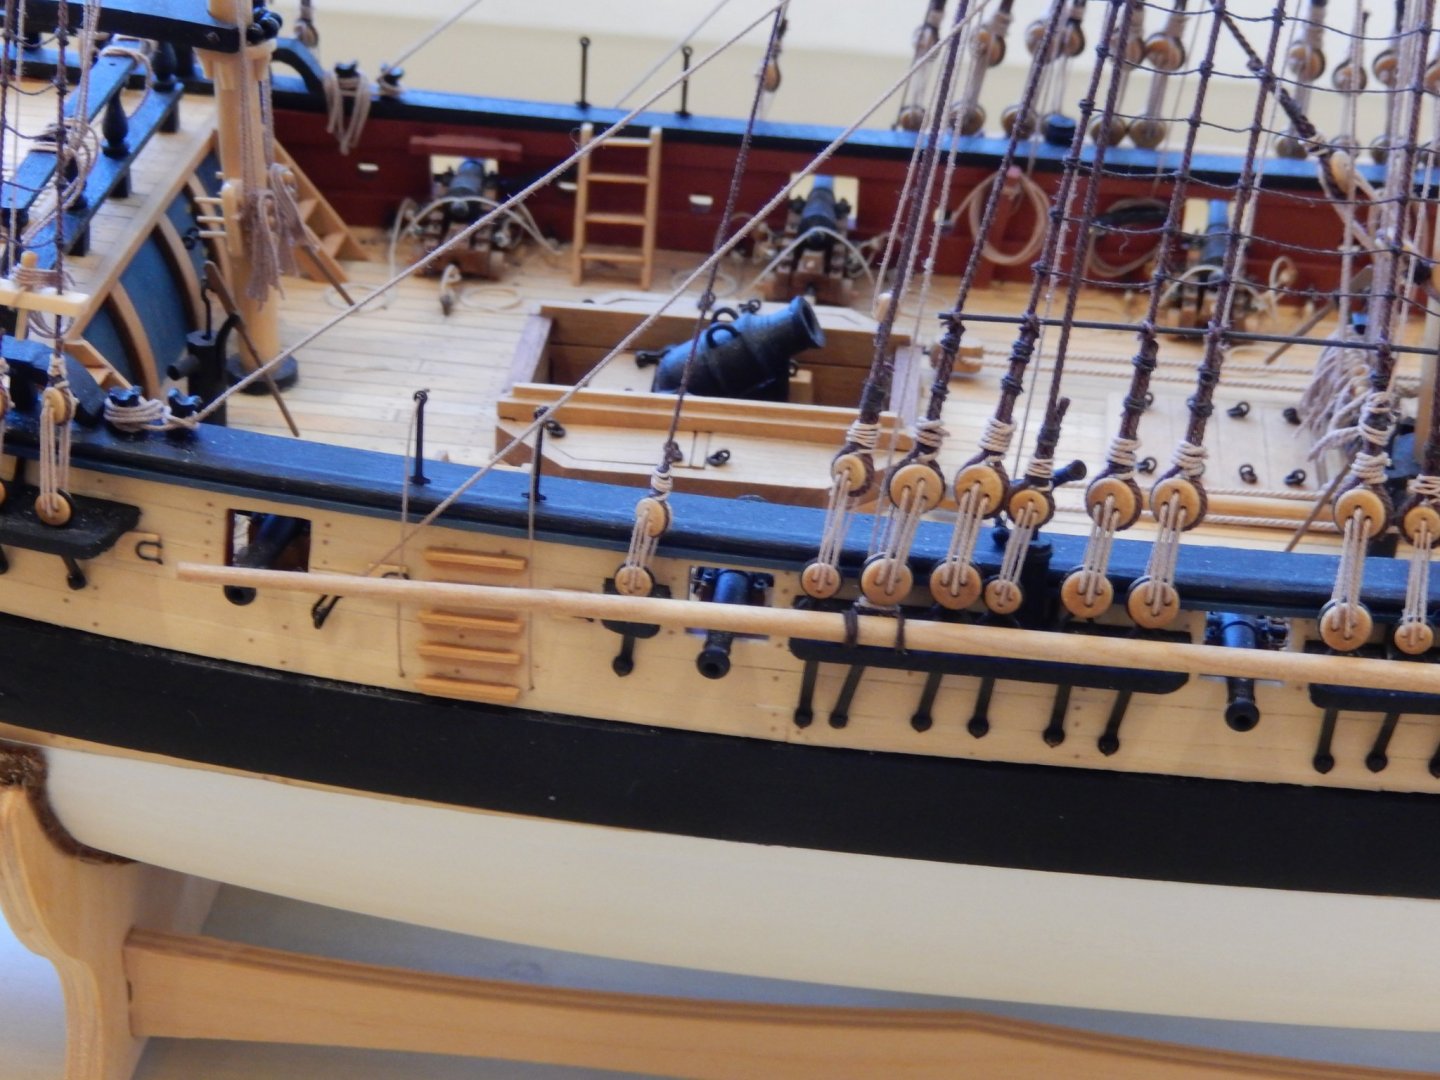
Still waiting for access to my miniature sander down the coast south of Sydney. In the meantime I'm trying to do all the fittings and am almost starting on the masts and yards. Here are the ships guns. They were quite time-consuming, but have turned out well. I now have to get some 2mm blocks to rig them. The swivel guns are now finished - photos later.

-
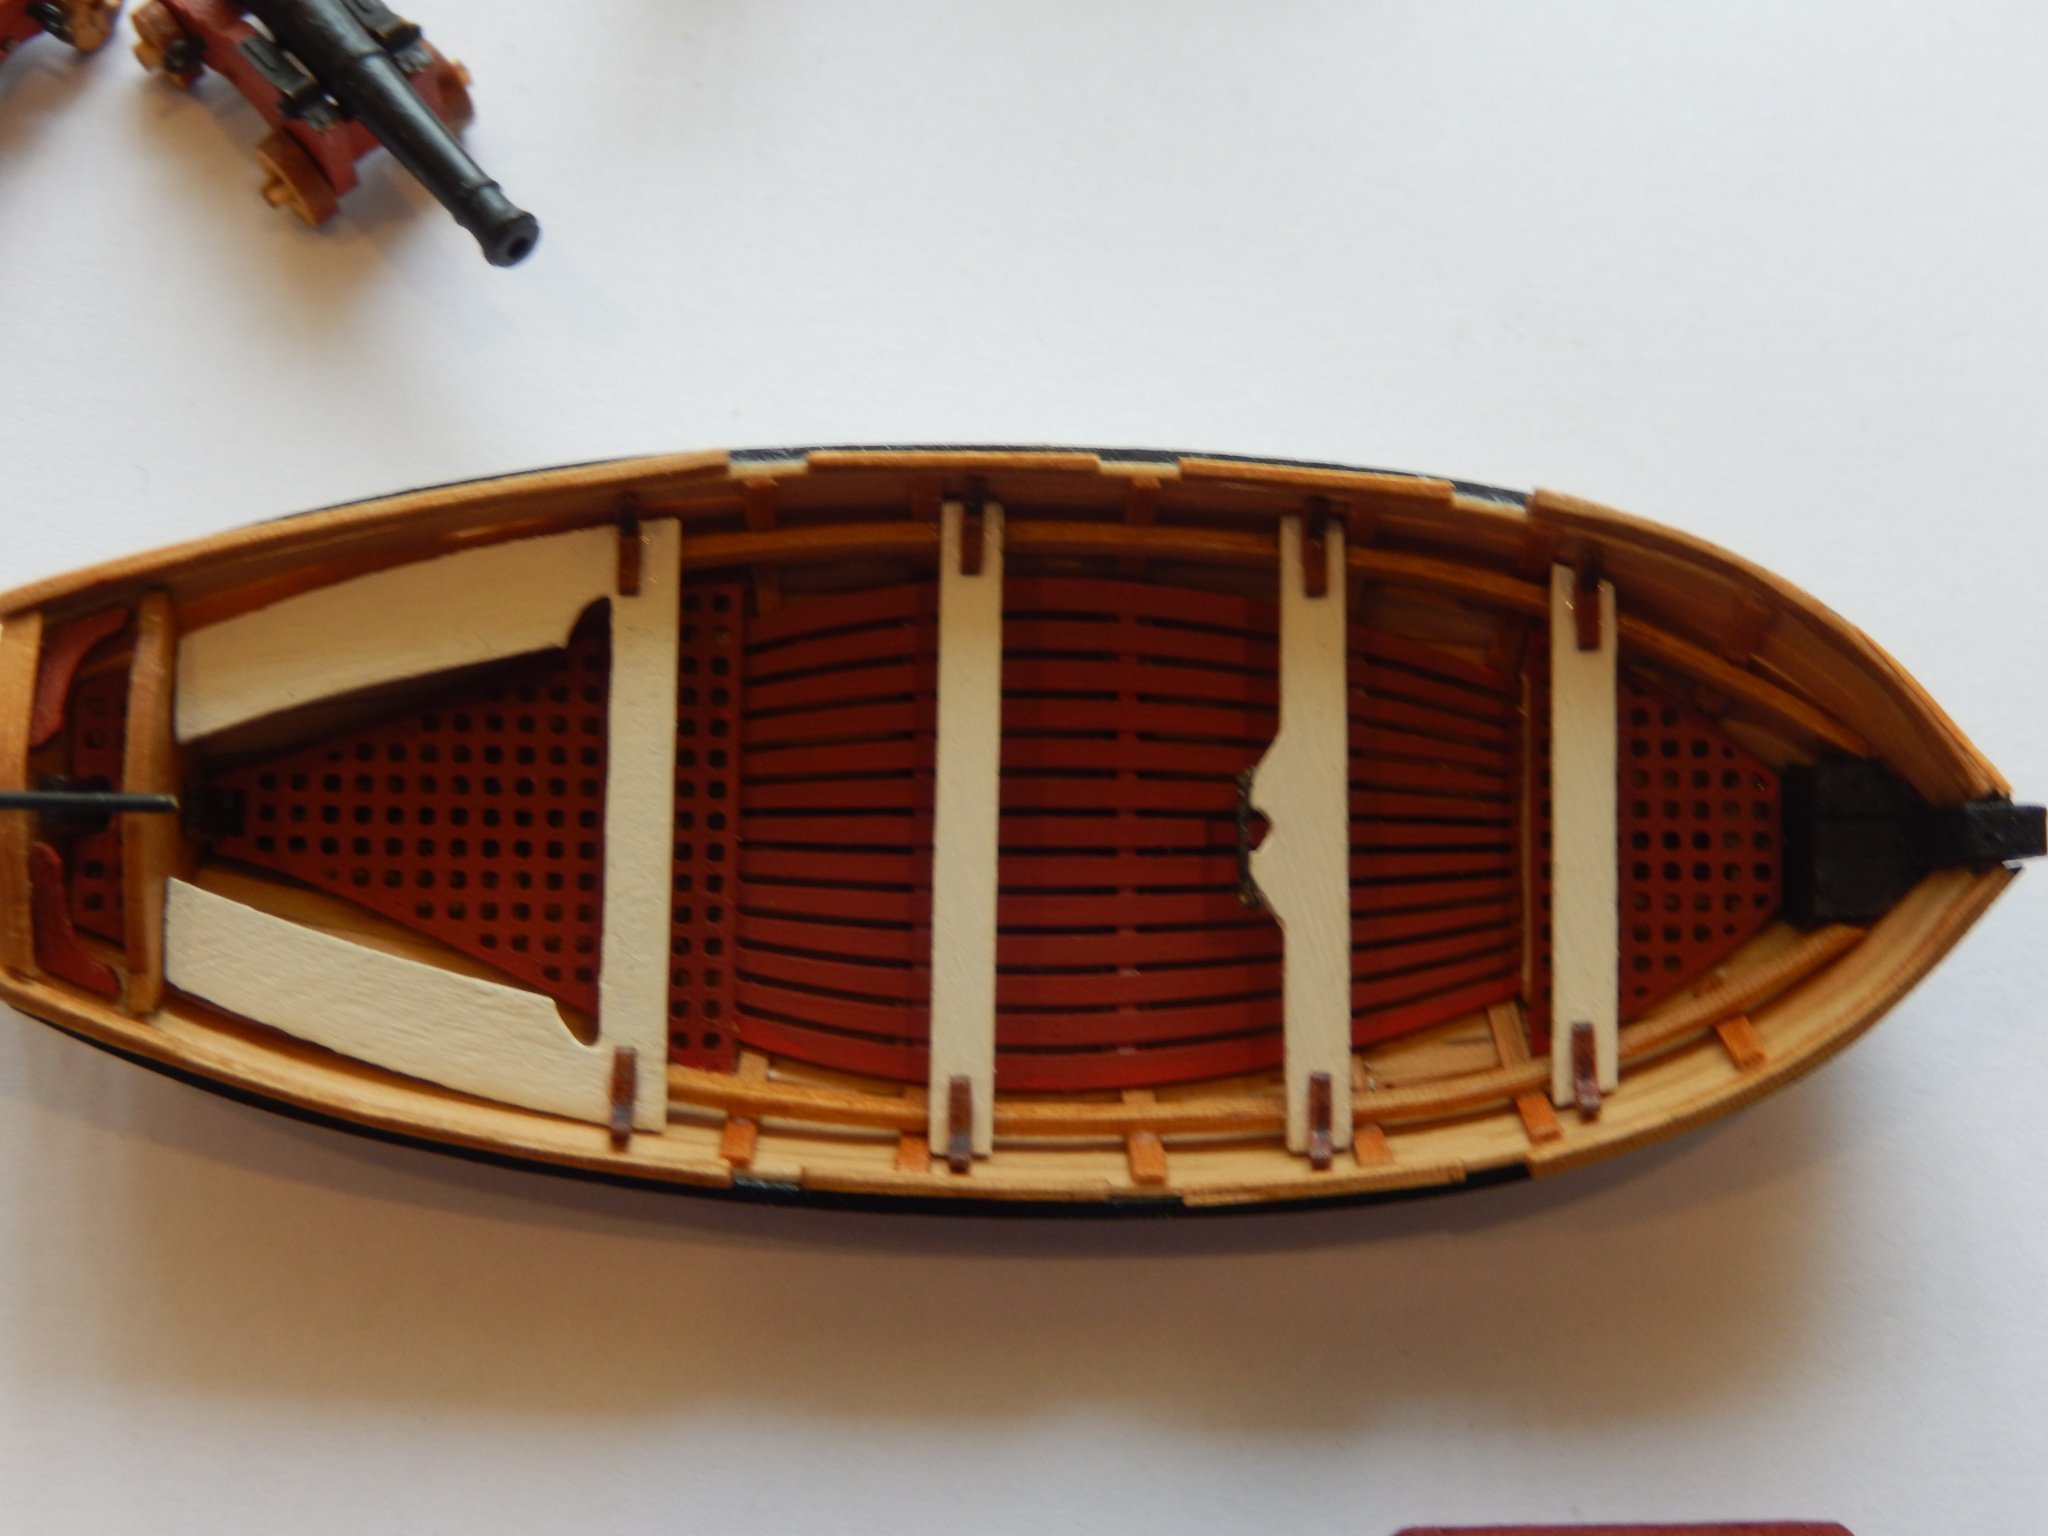
Thanks for your comment Spyglass. I can understand your reaction. I found the boat one of the most difficult little projects.
-
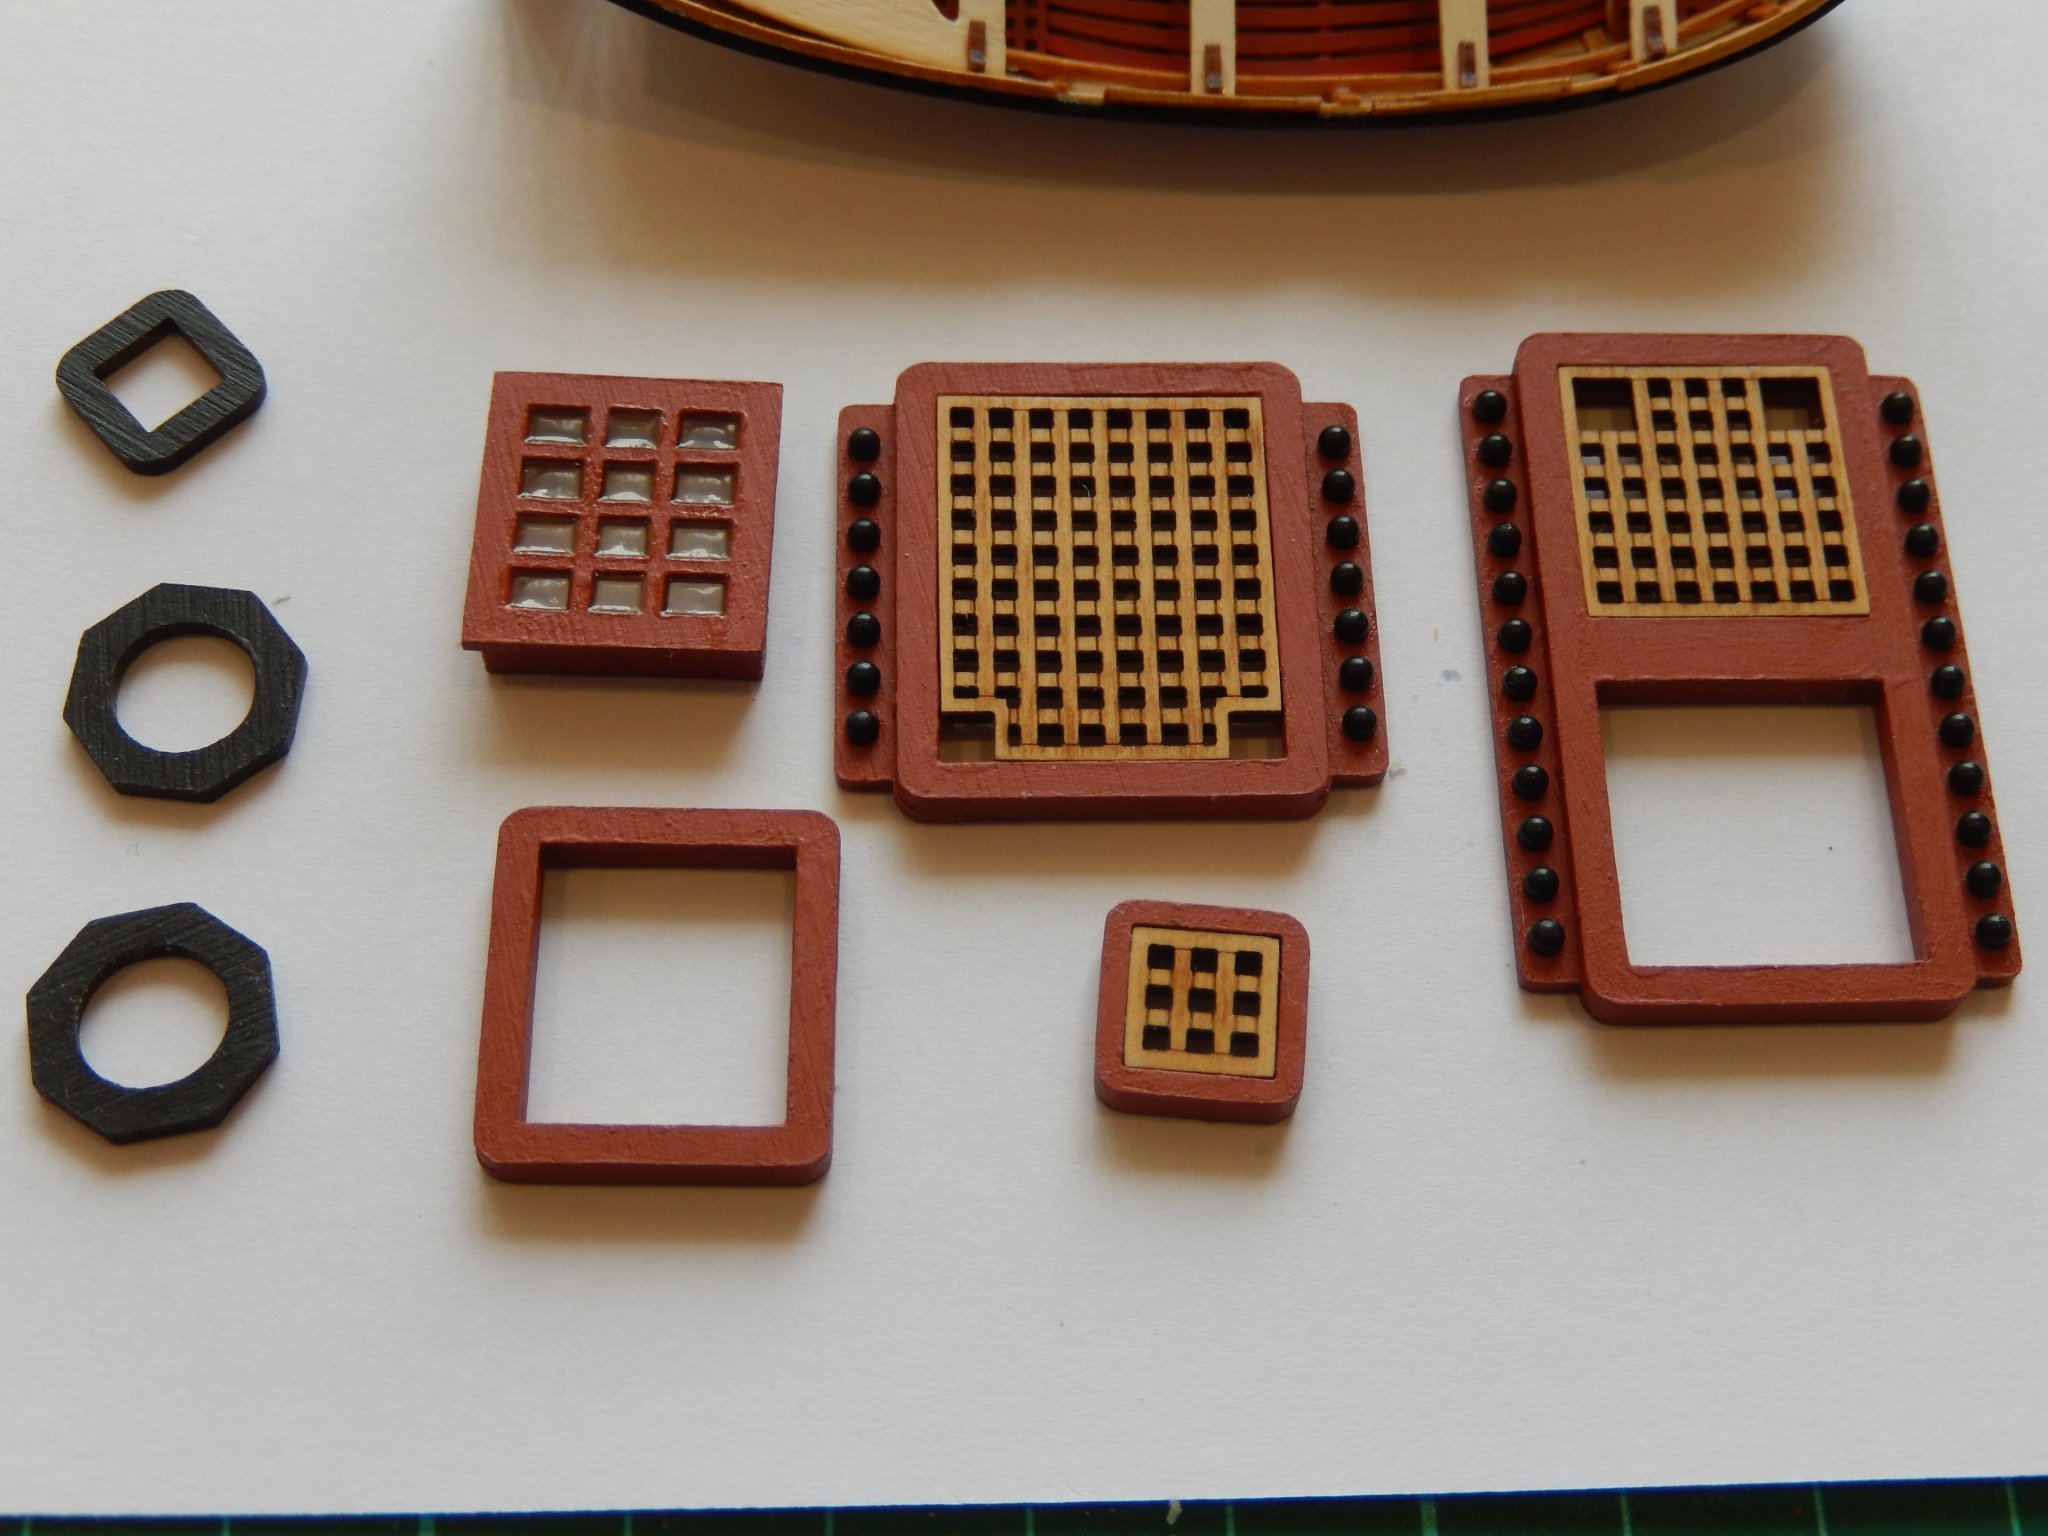
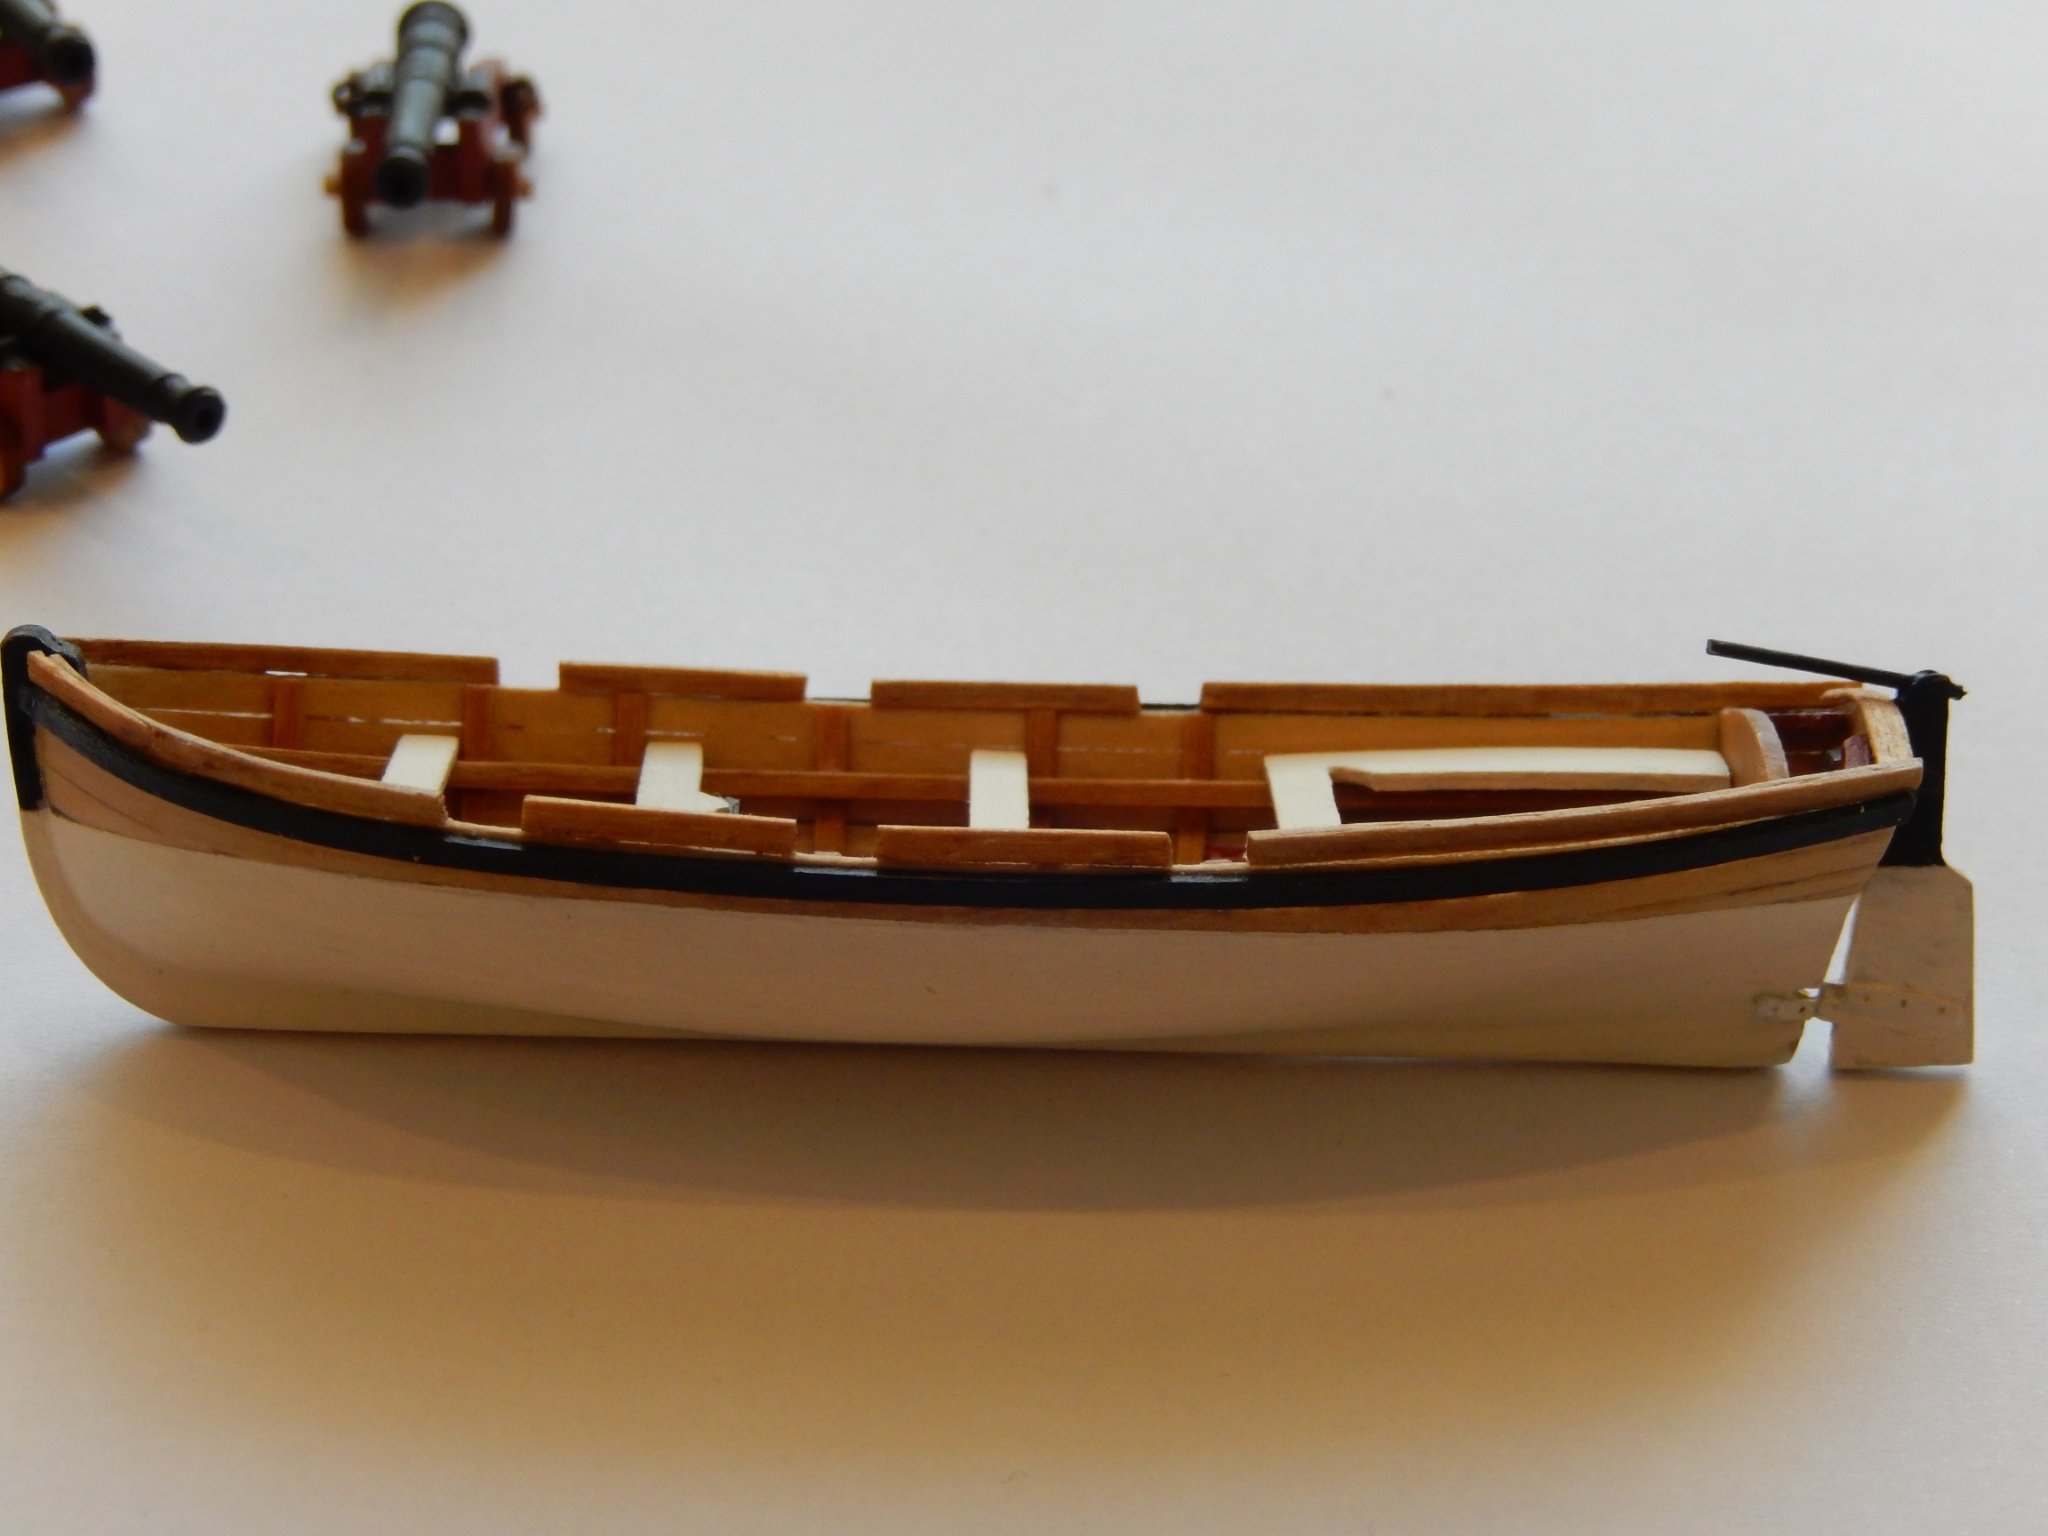
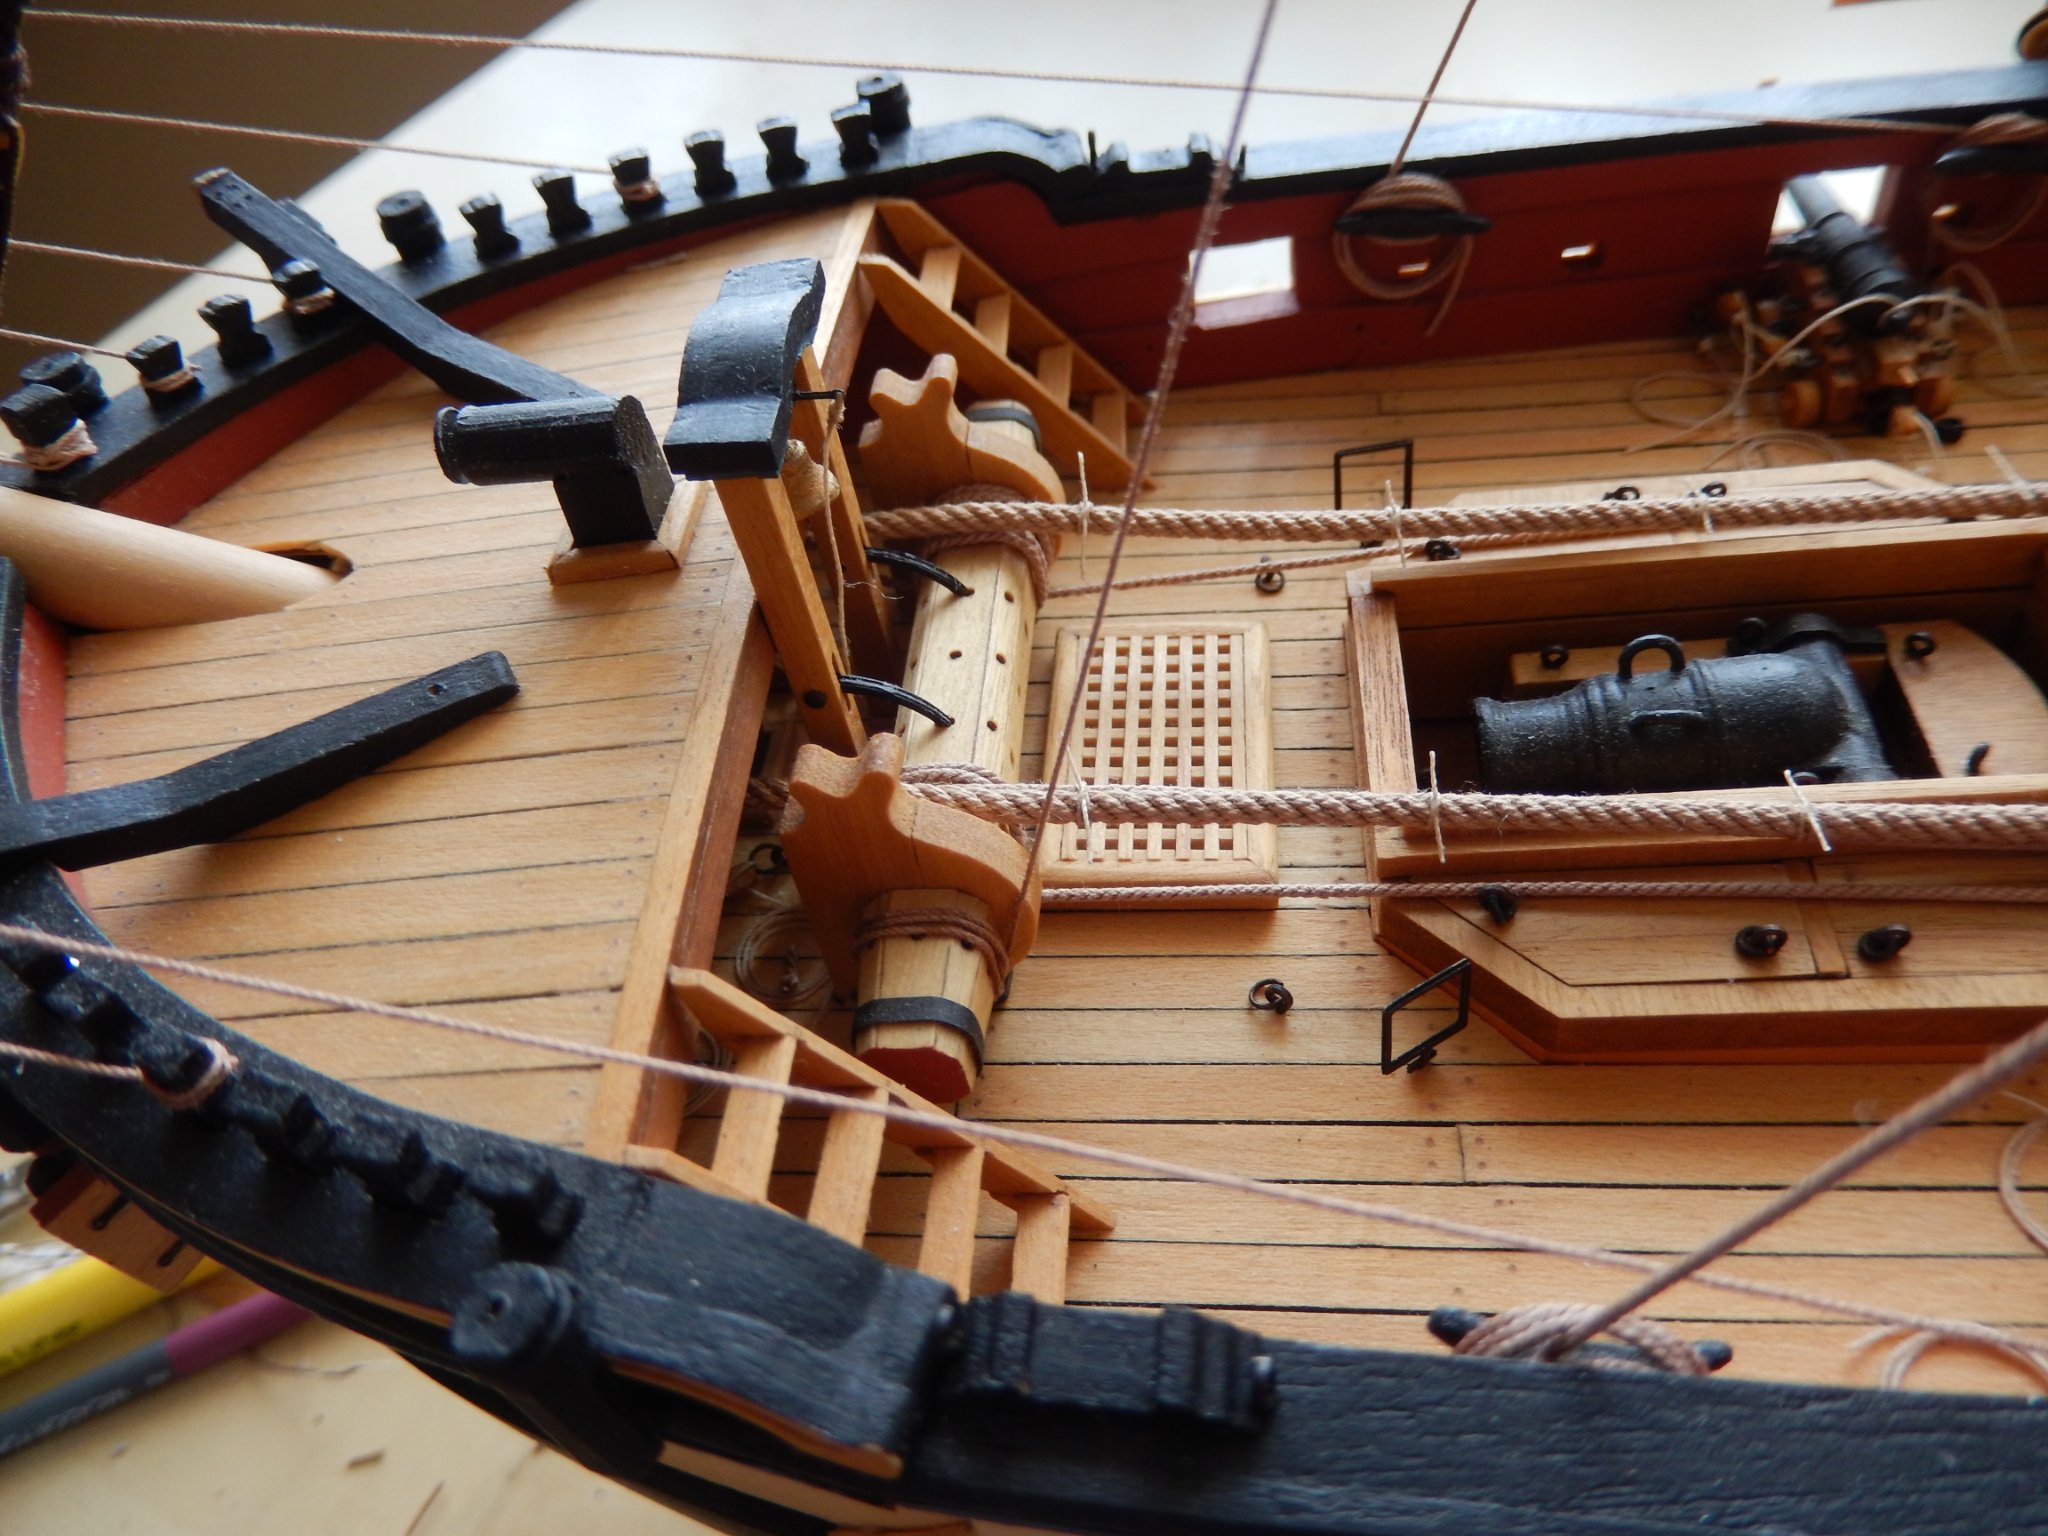
I had forgotten the seat brackets. They do finish off the ship's boat quite well. Here is some of the deck furniture. The windows for the skylight combing are done in Kristal Klear. It gives a far better result than the clear plastic.


-
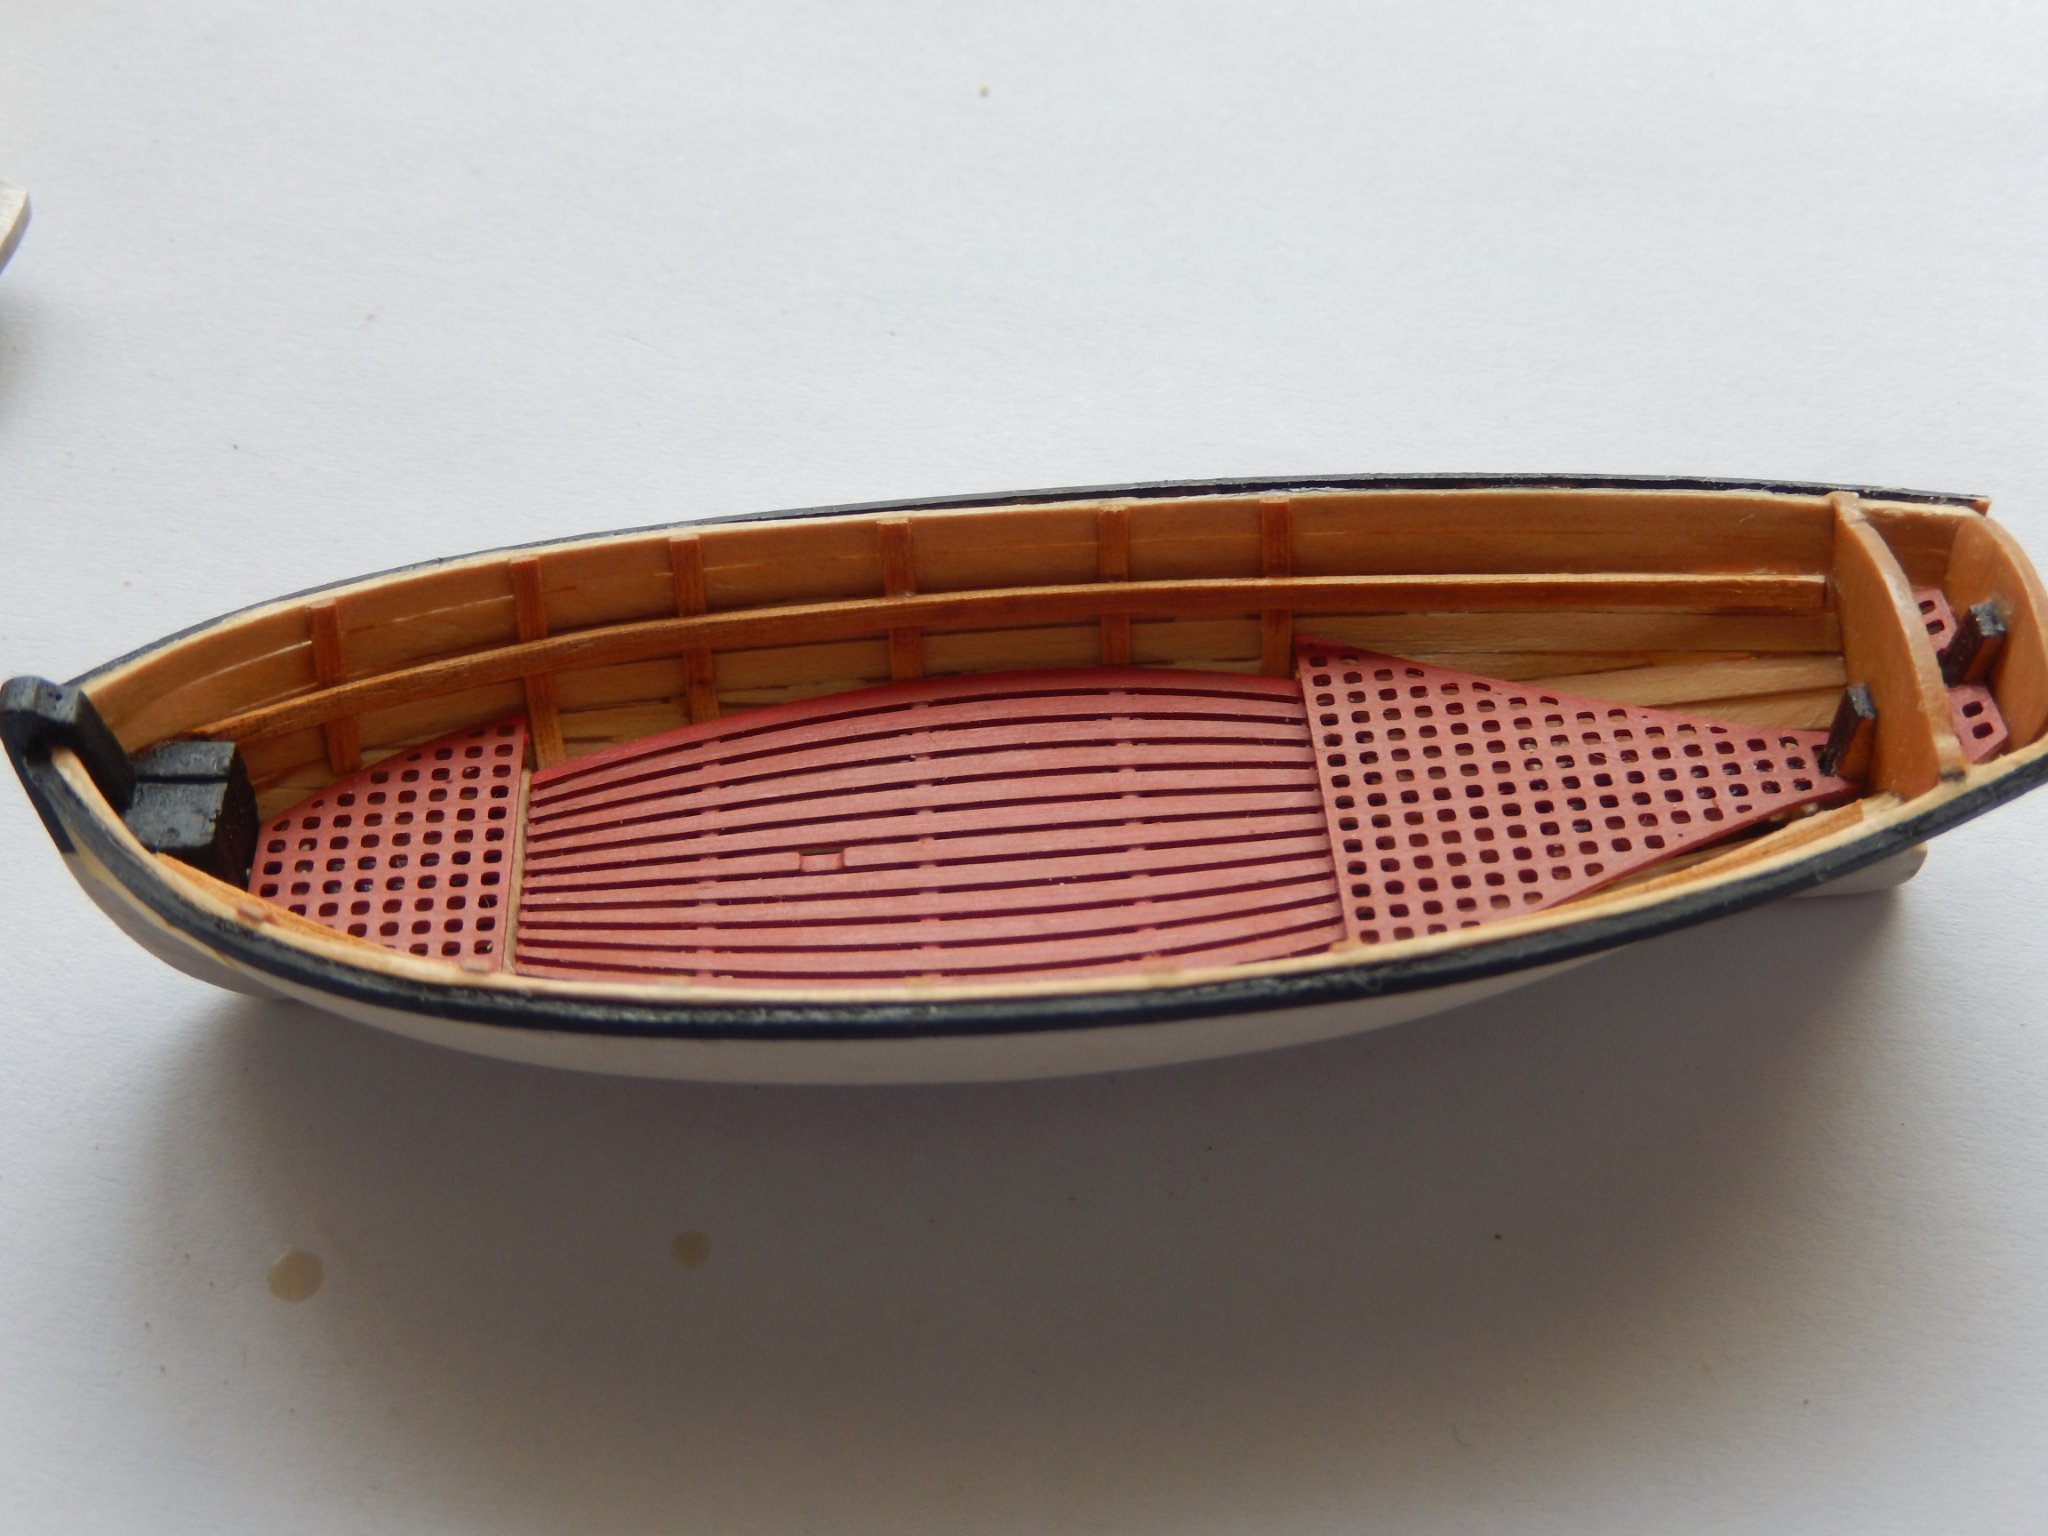
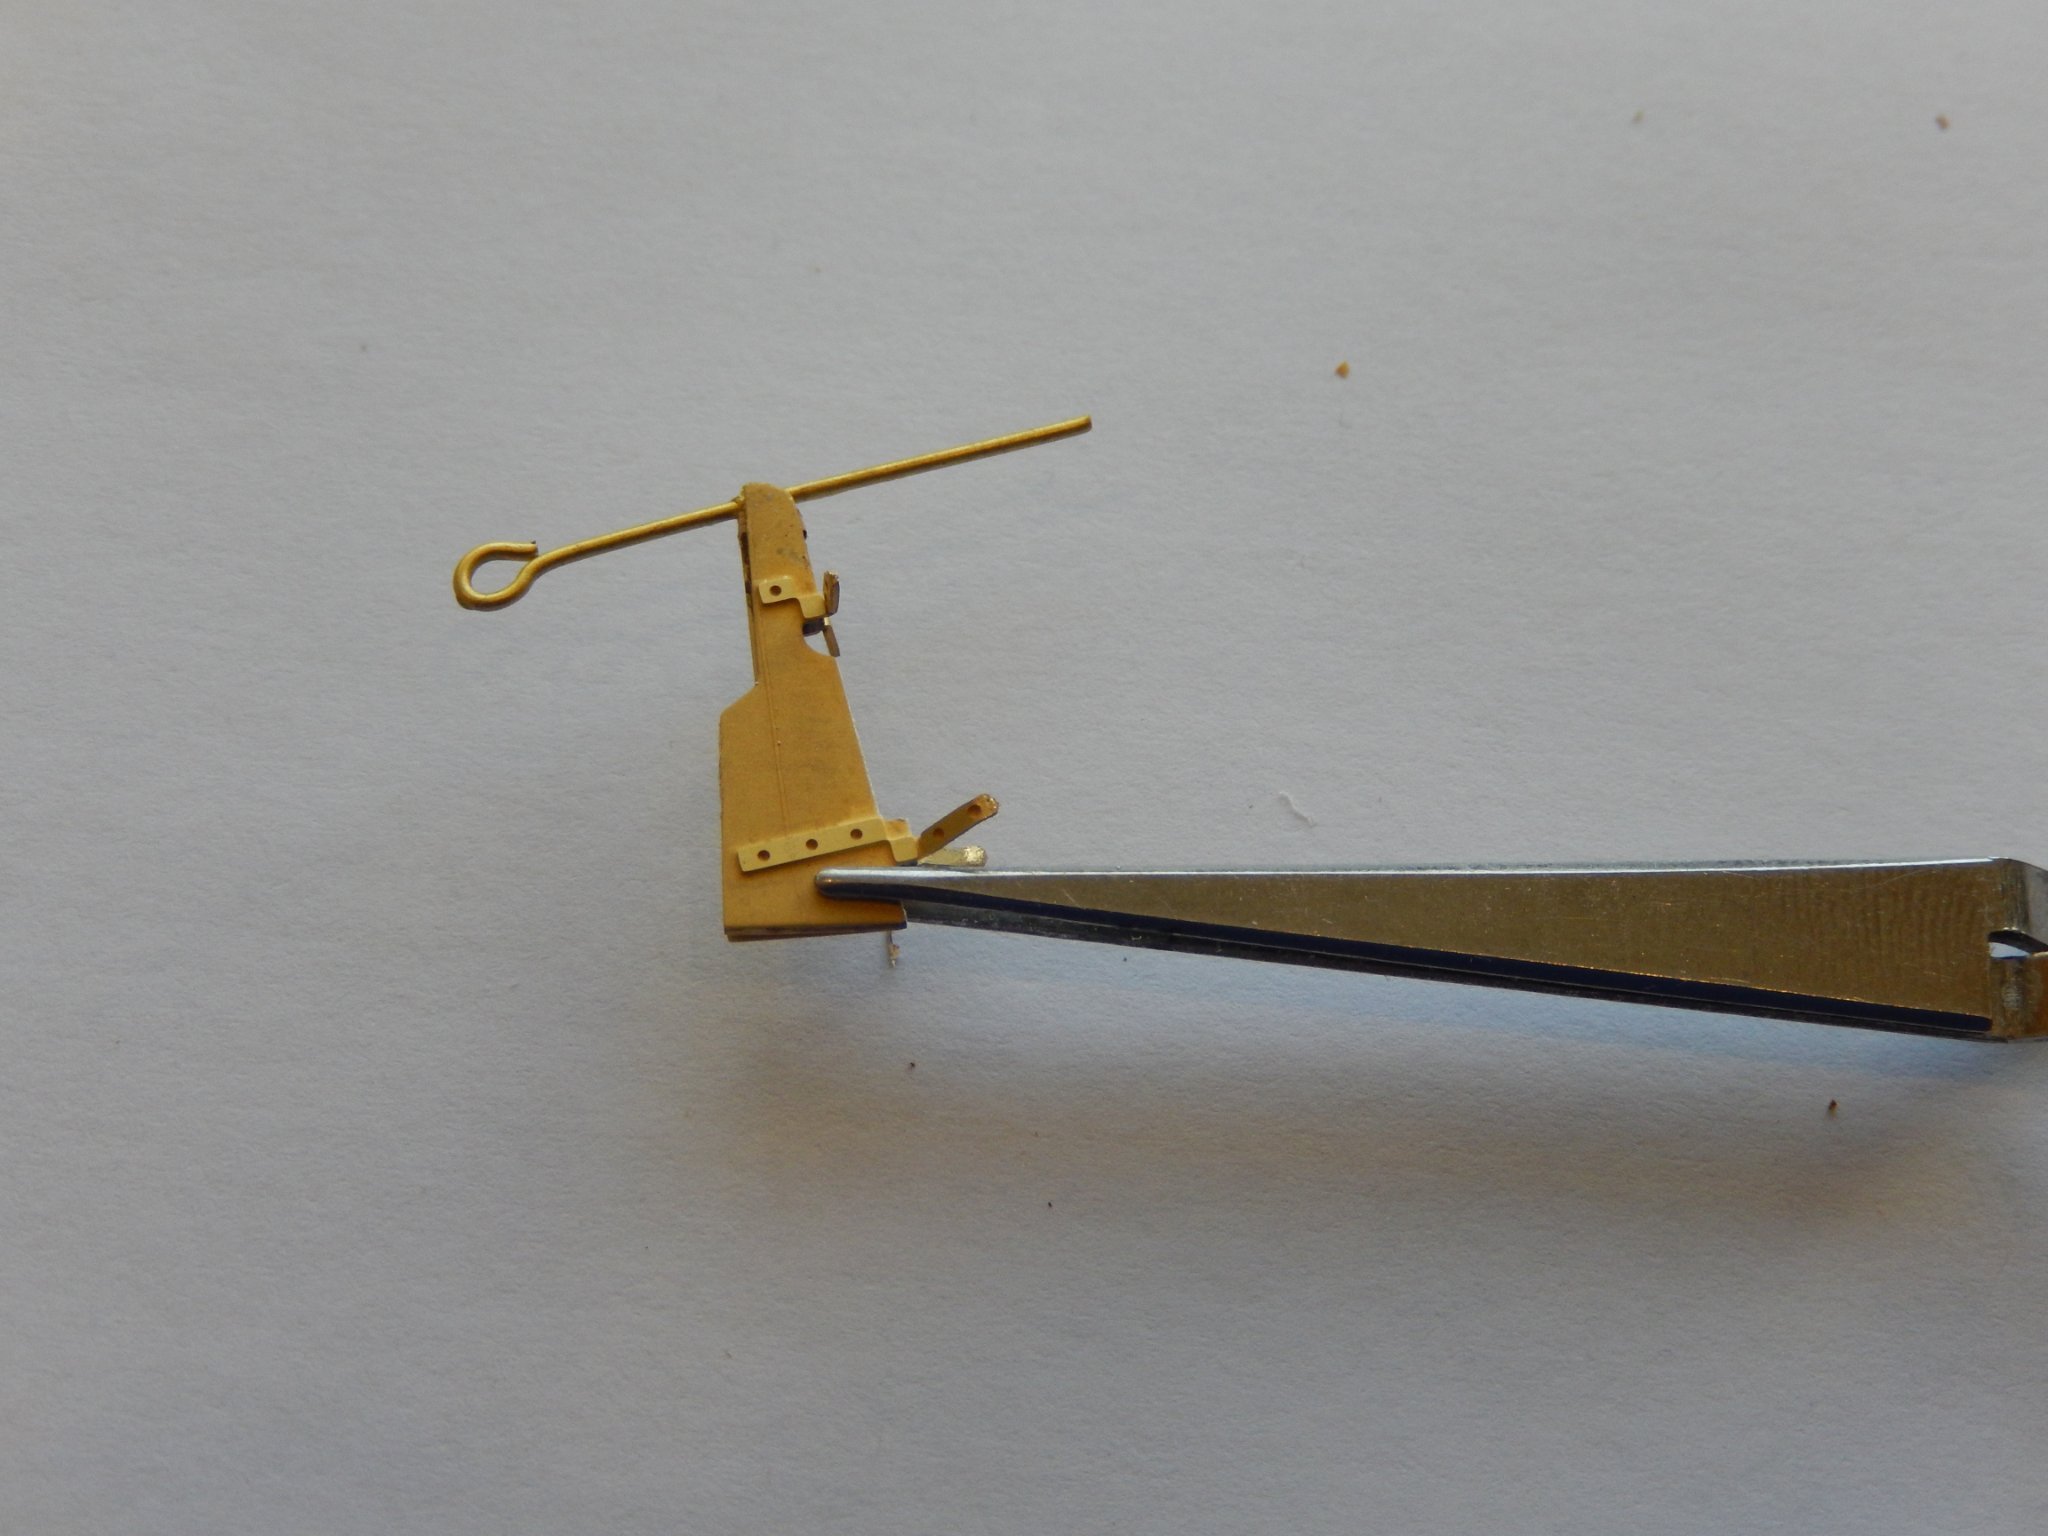
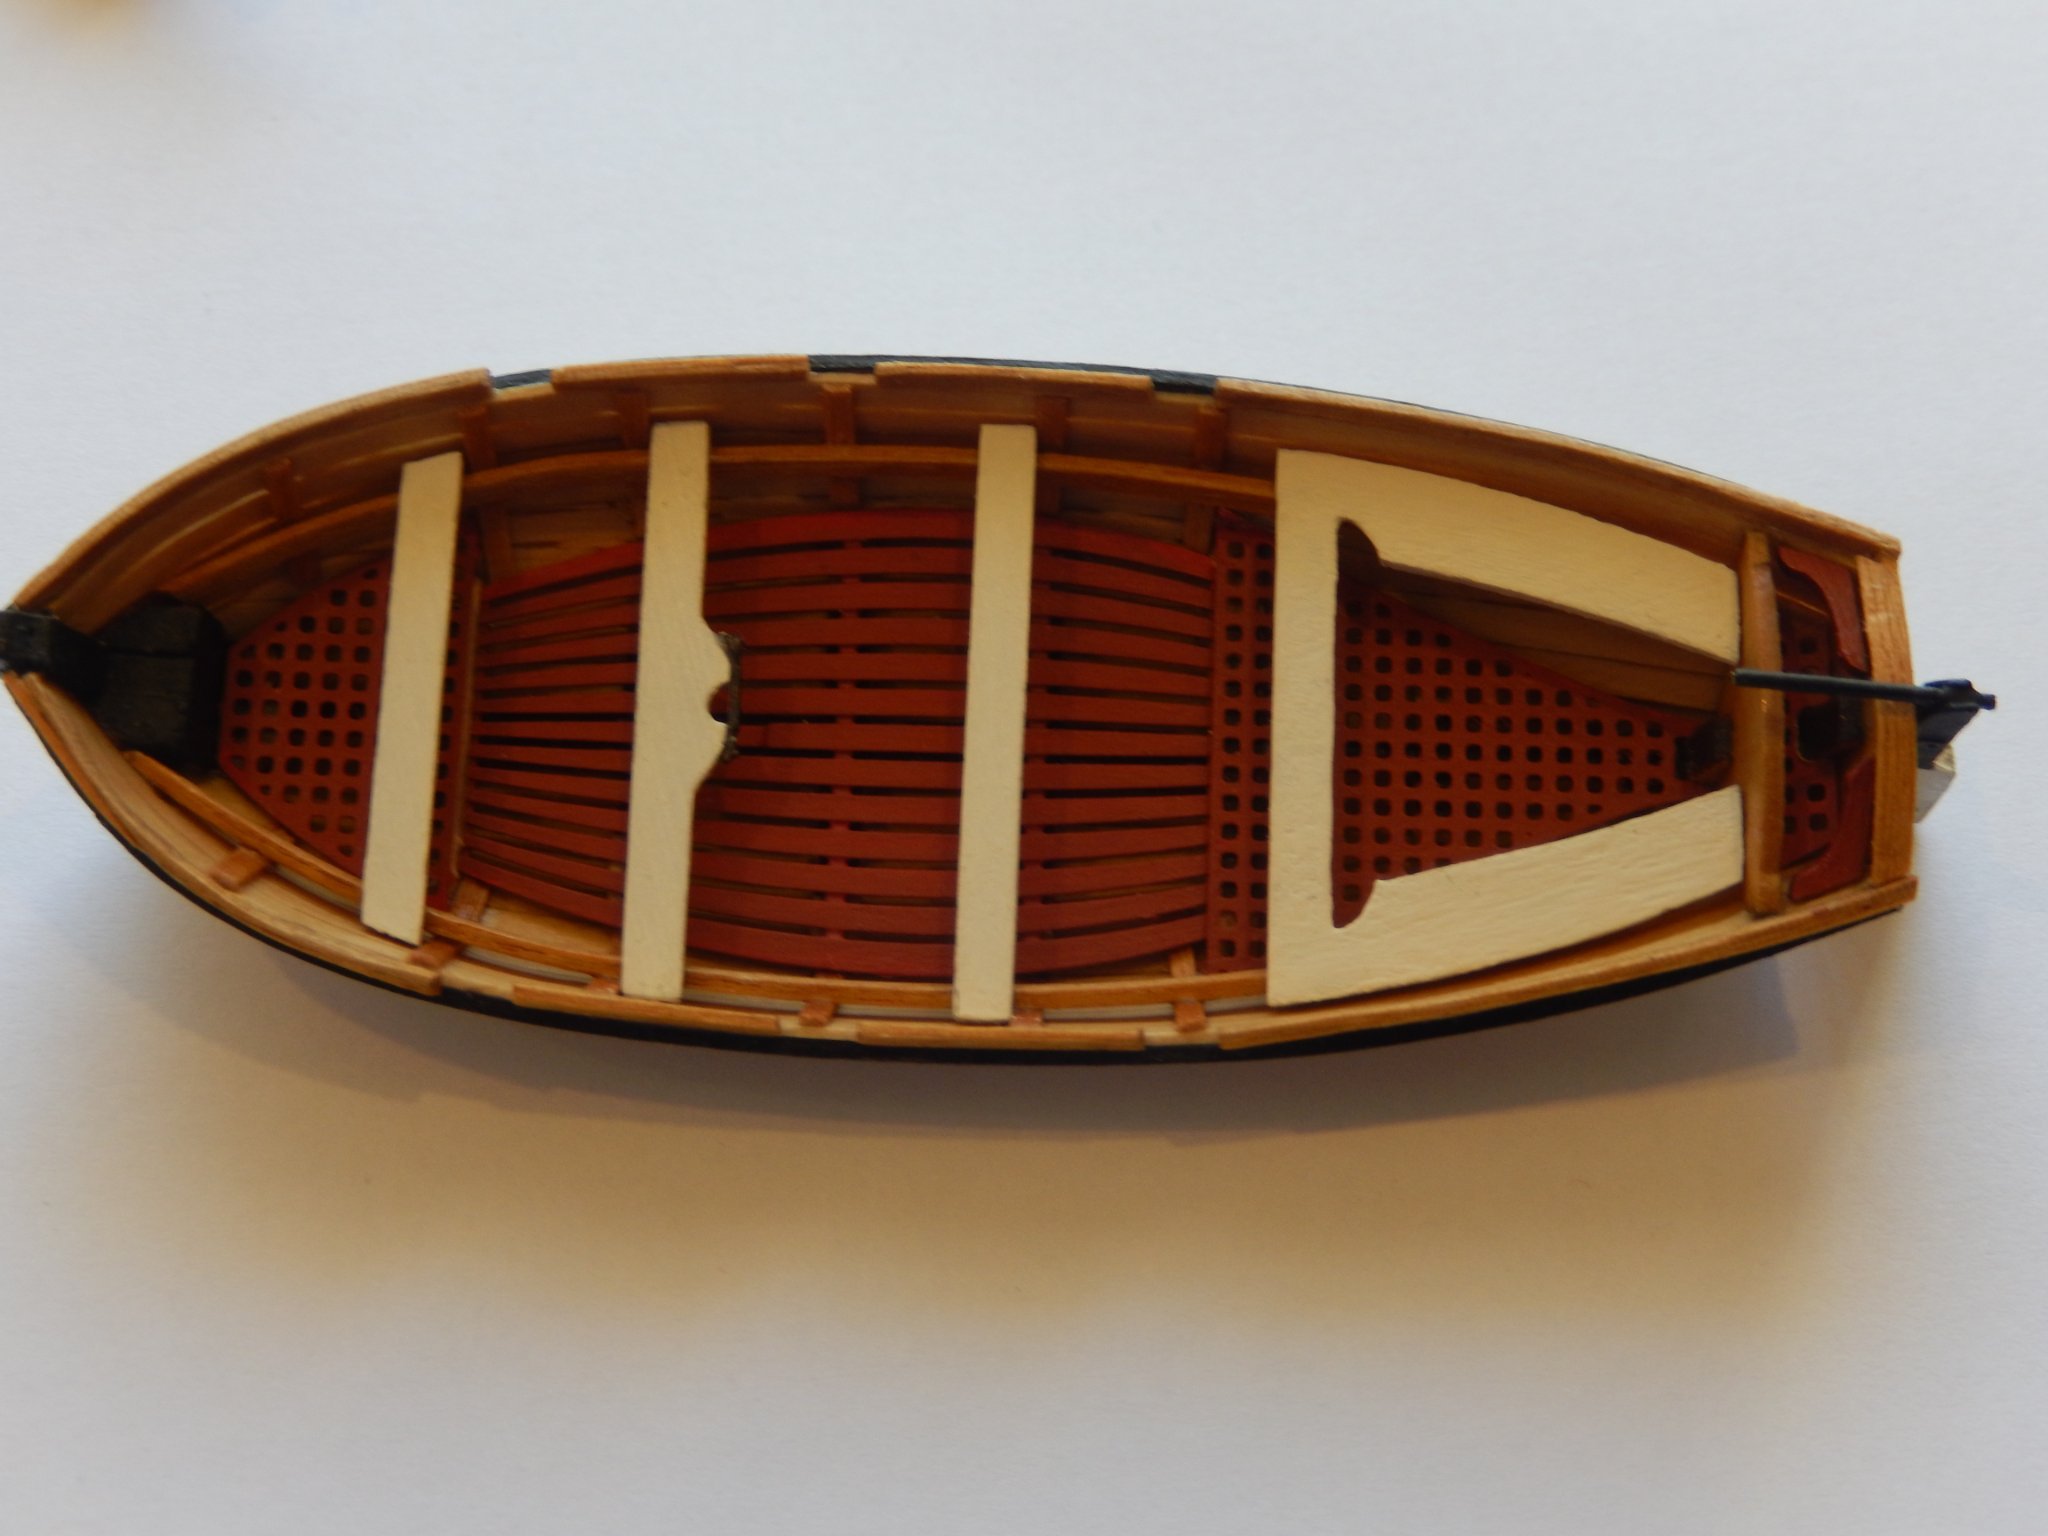
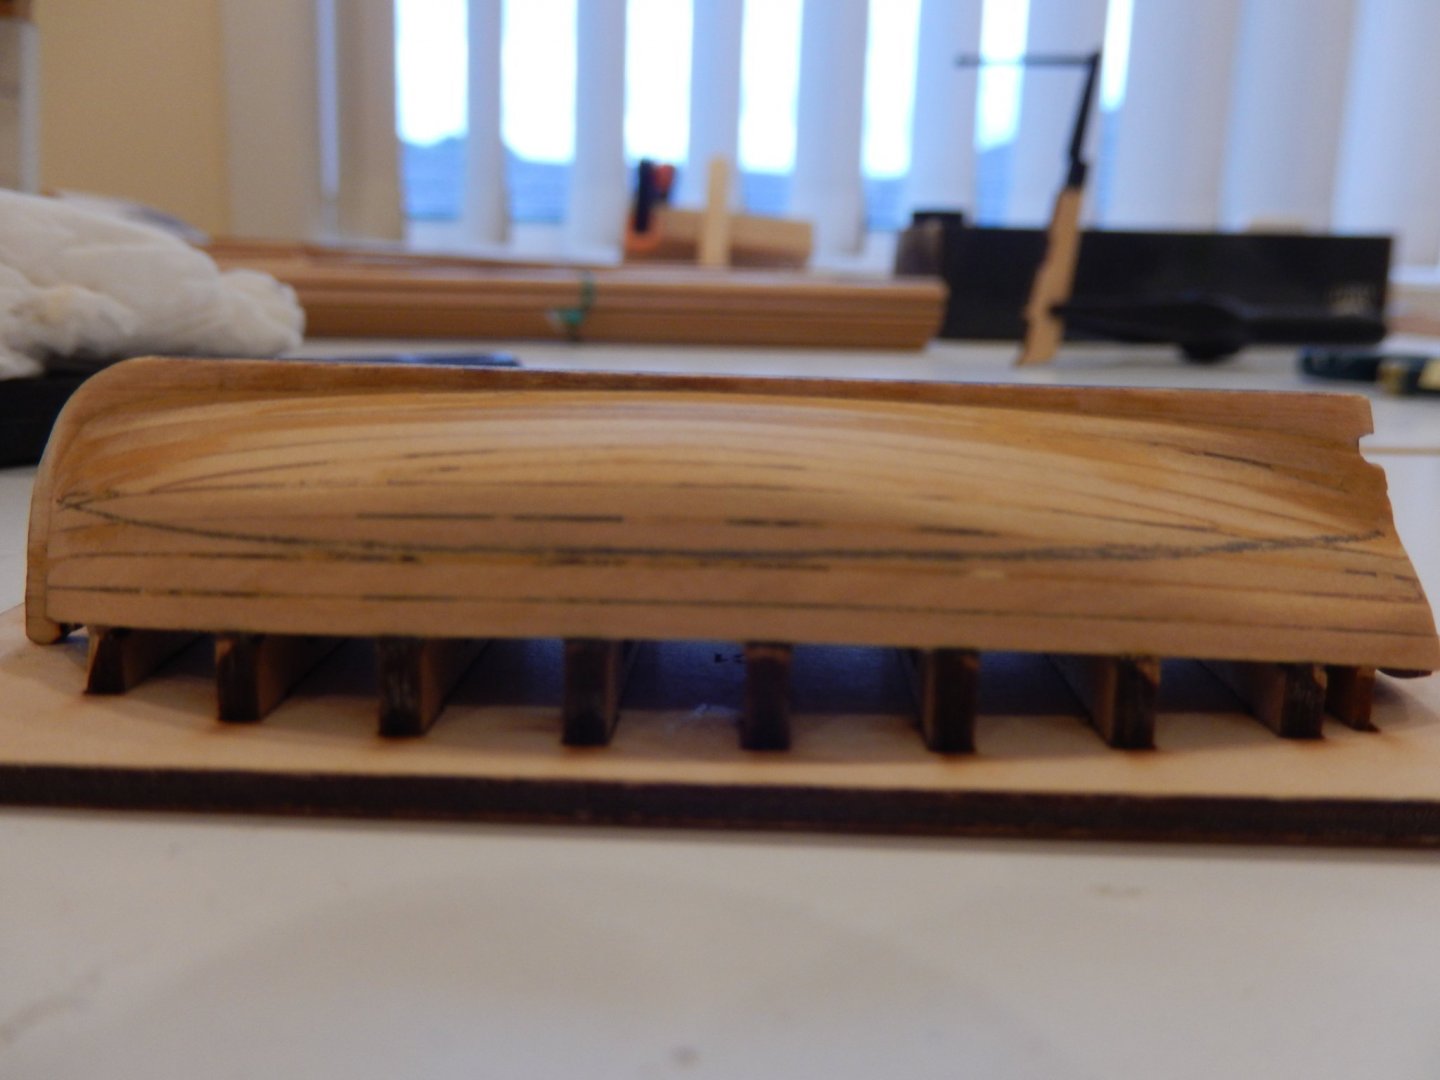
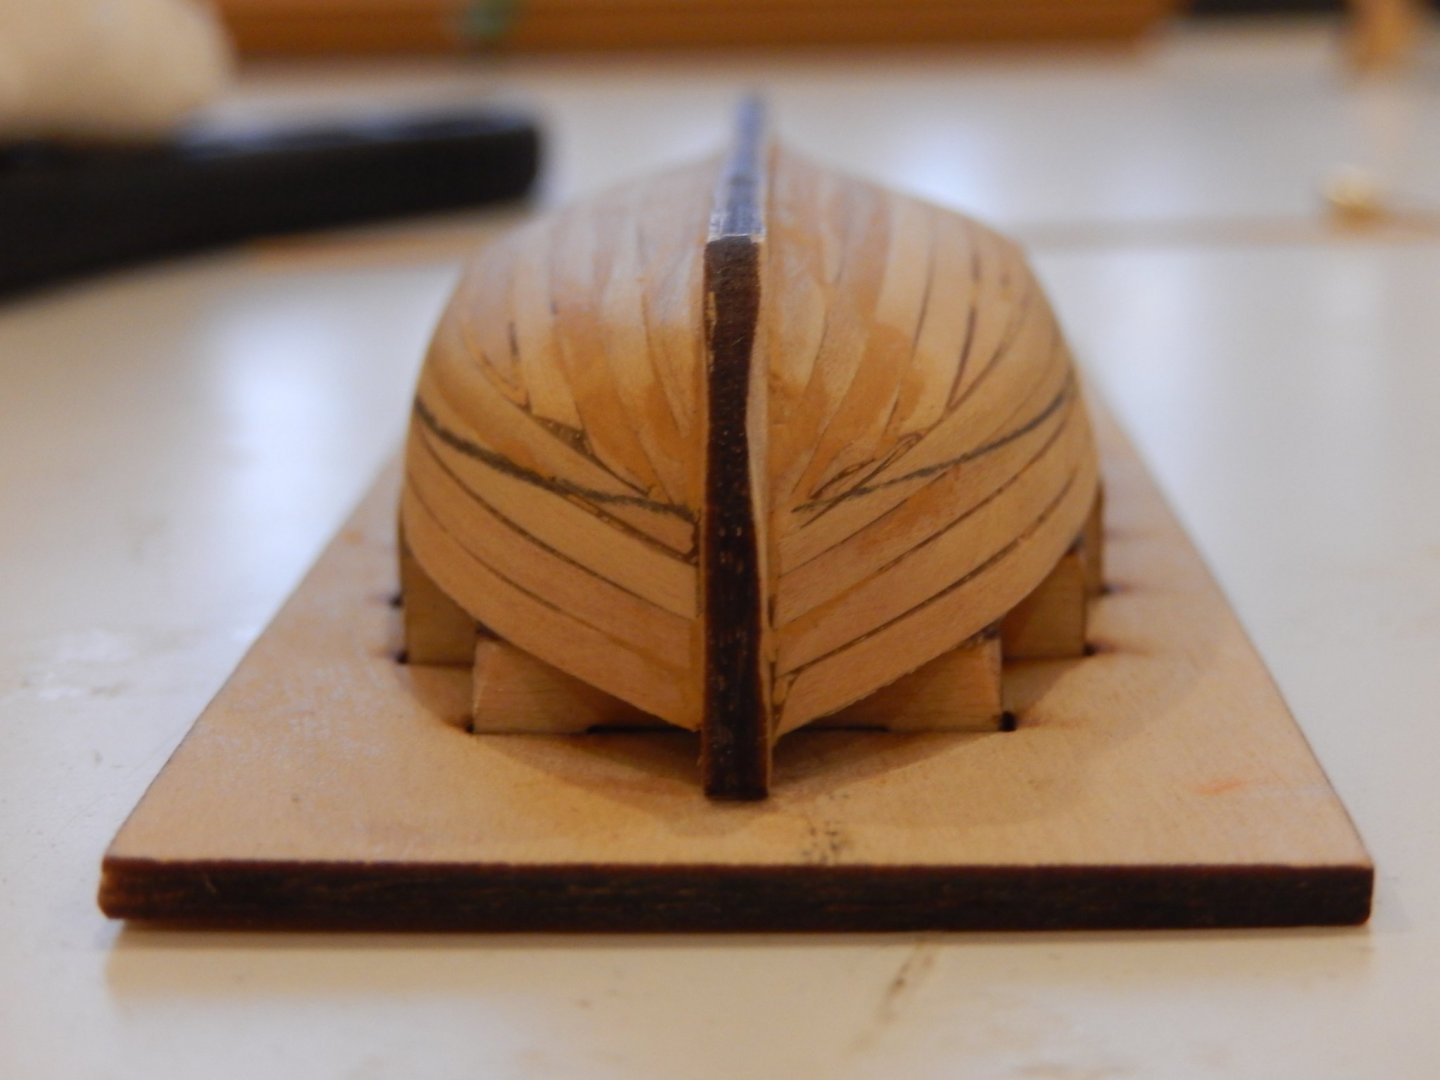
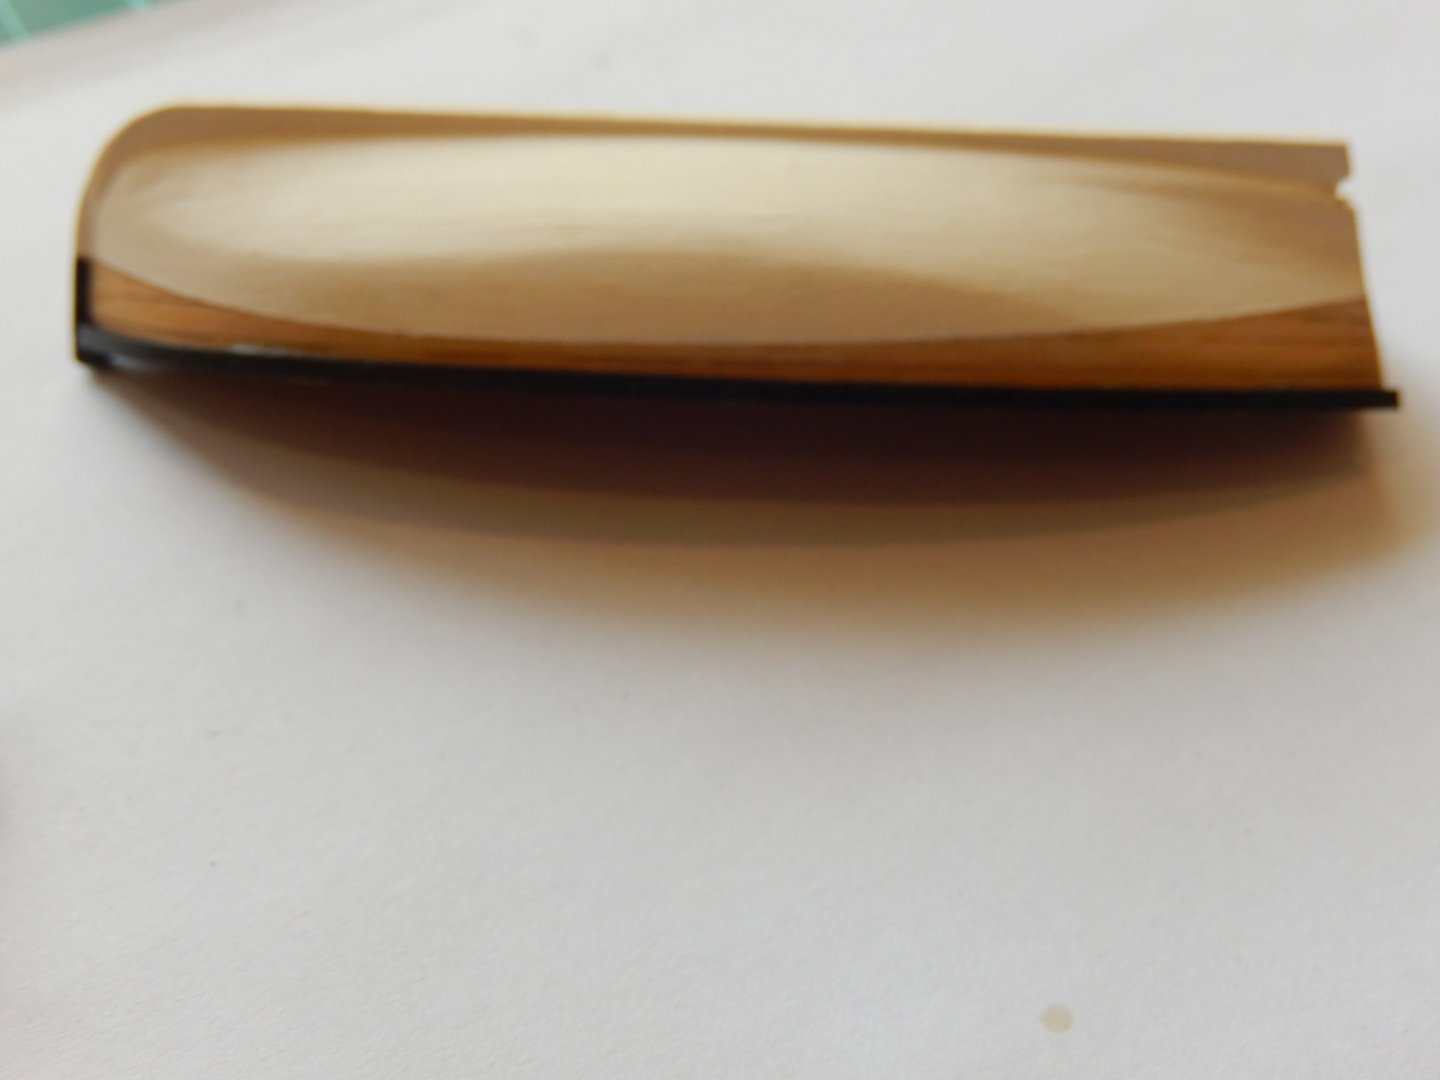
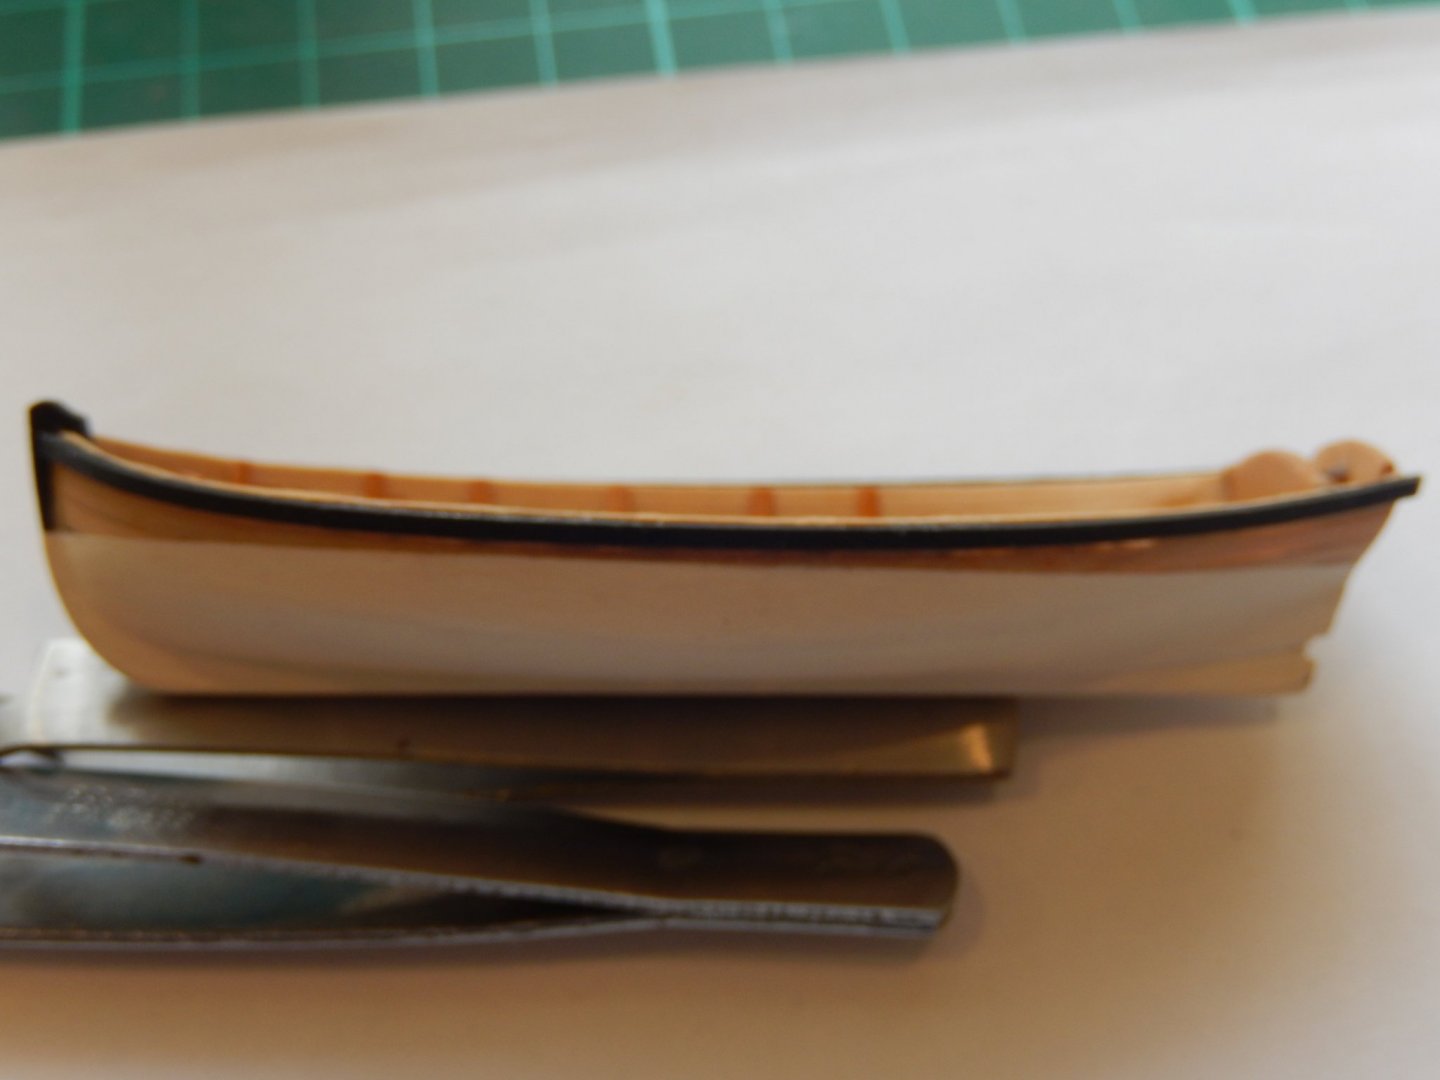
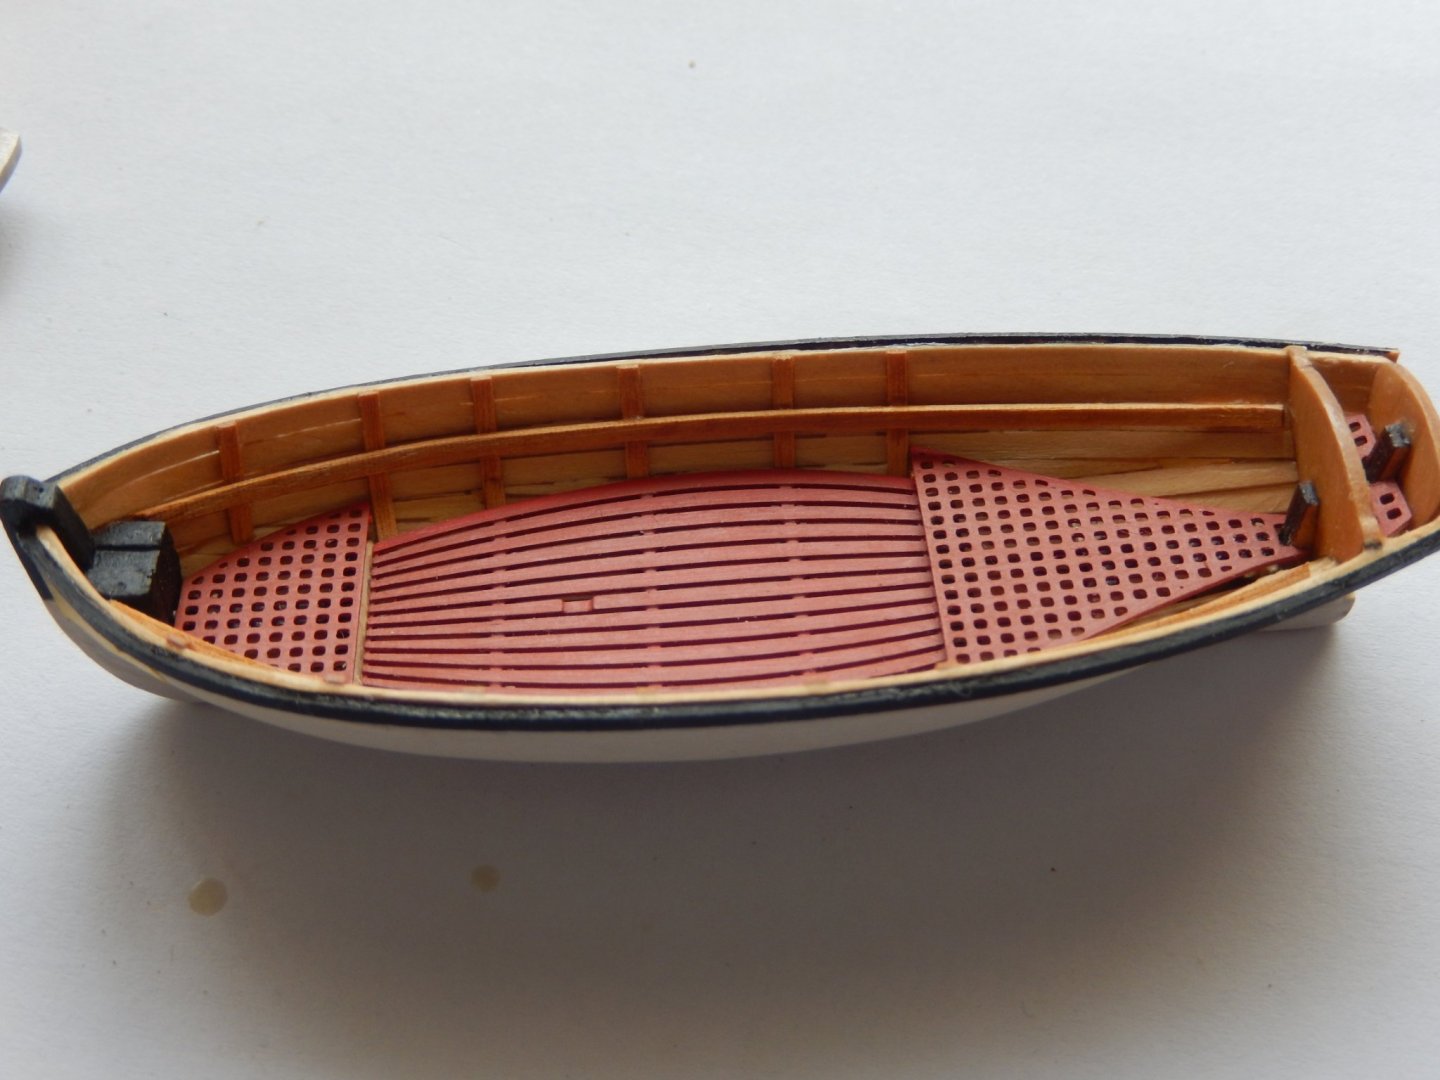
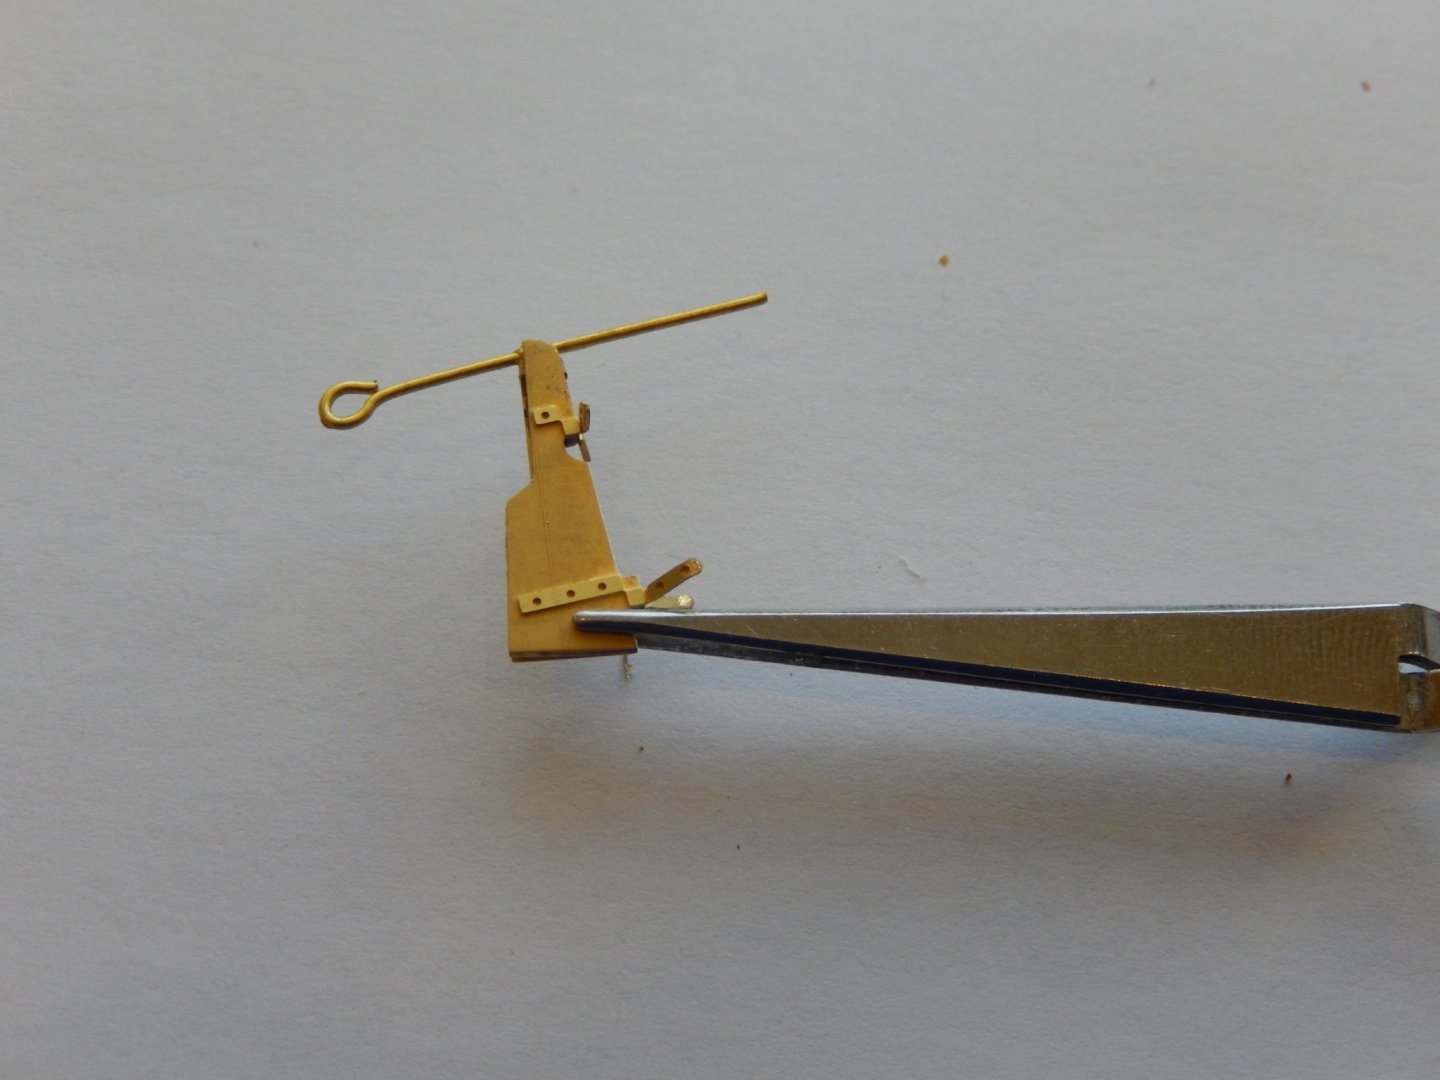
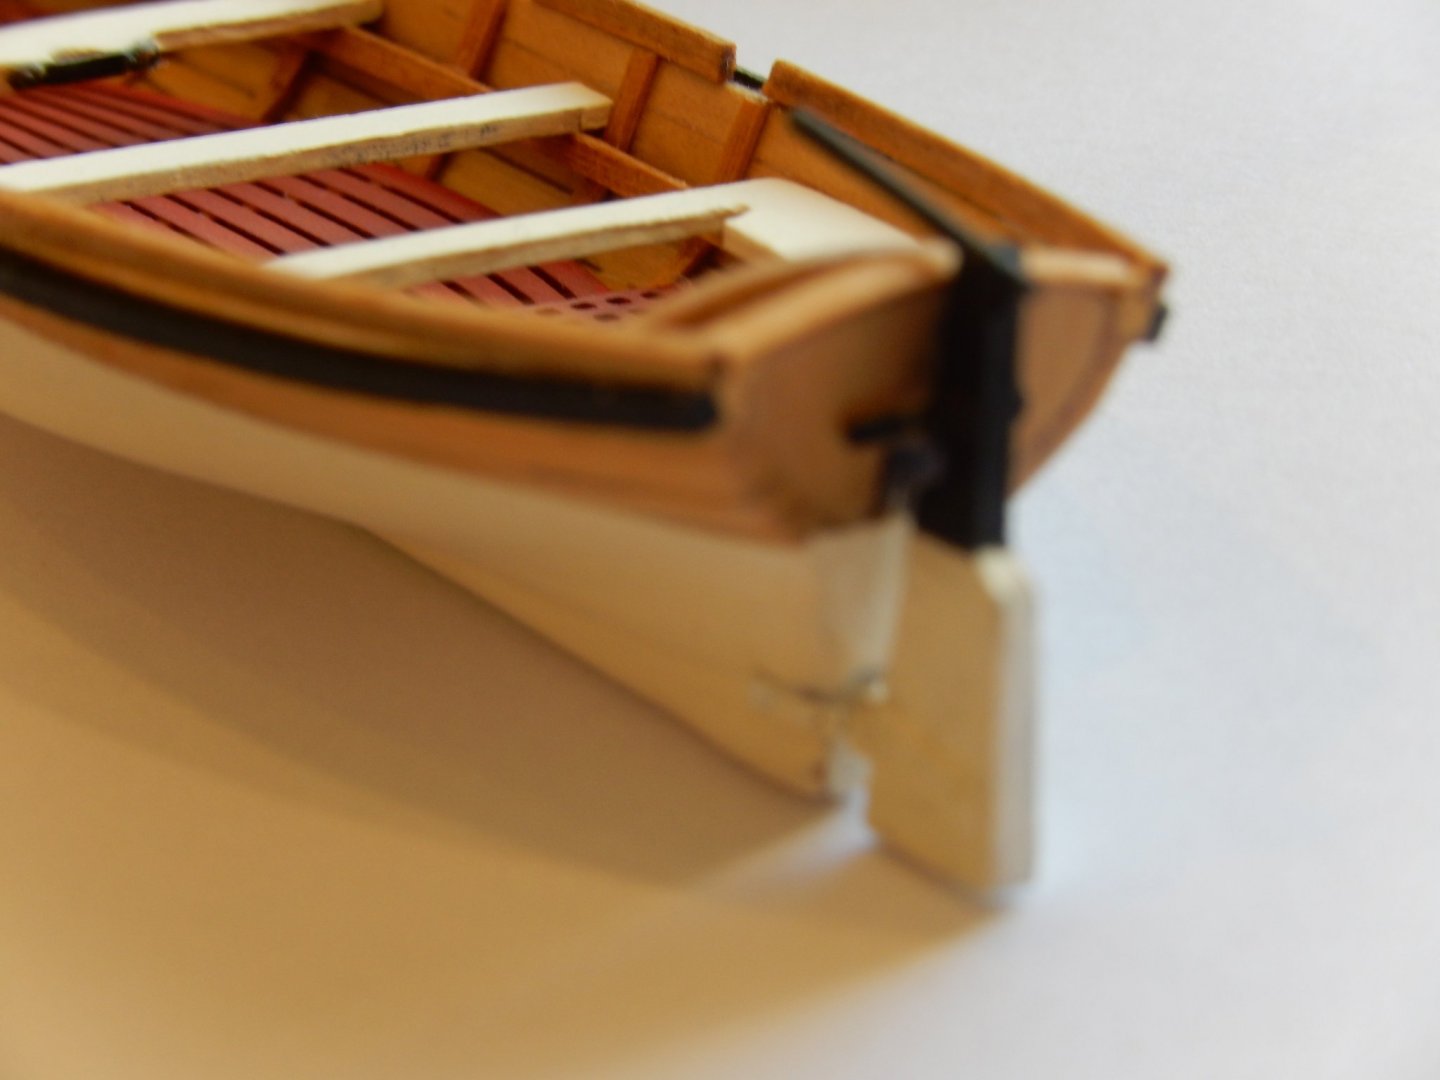
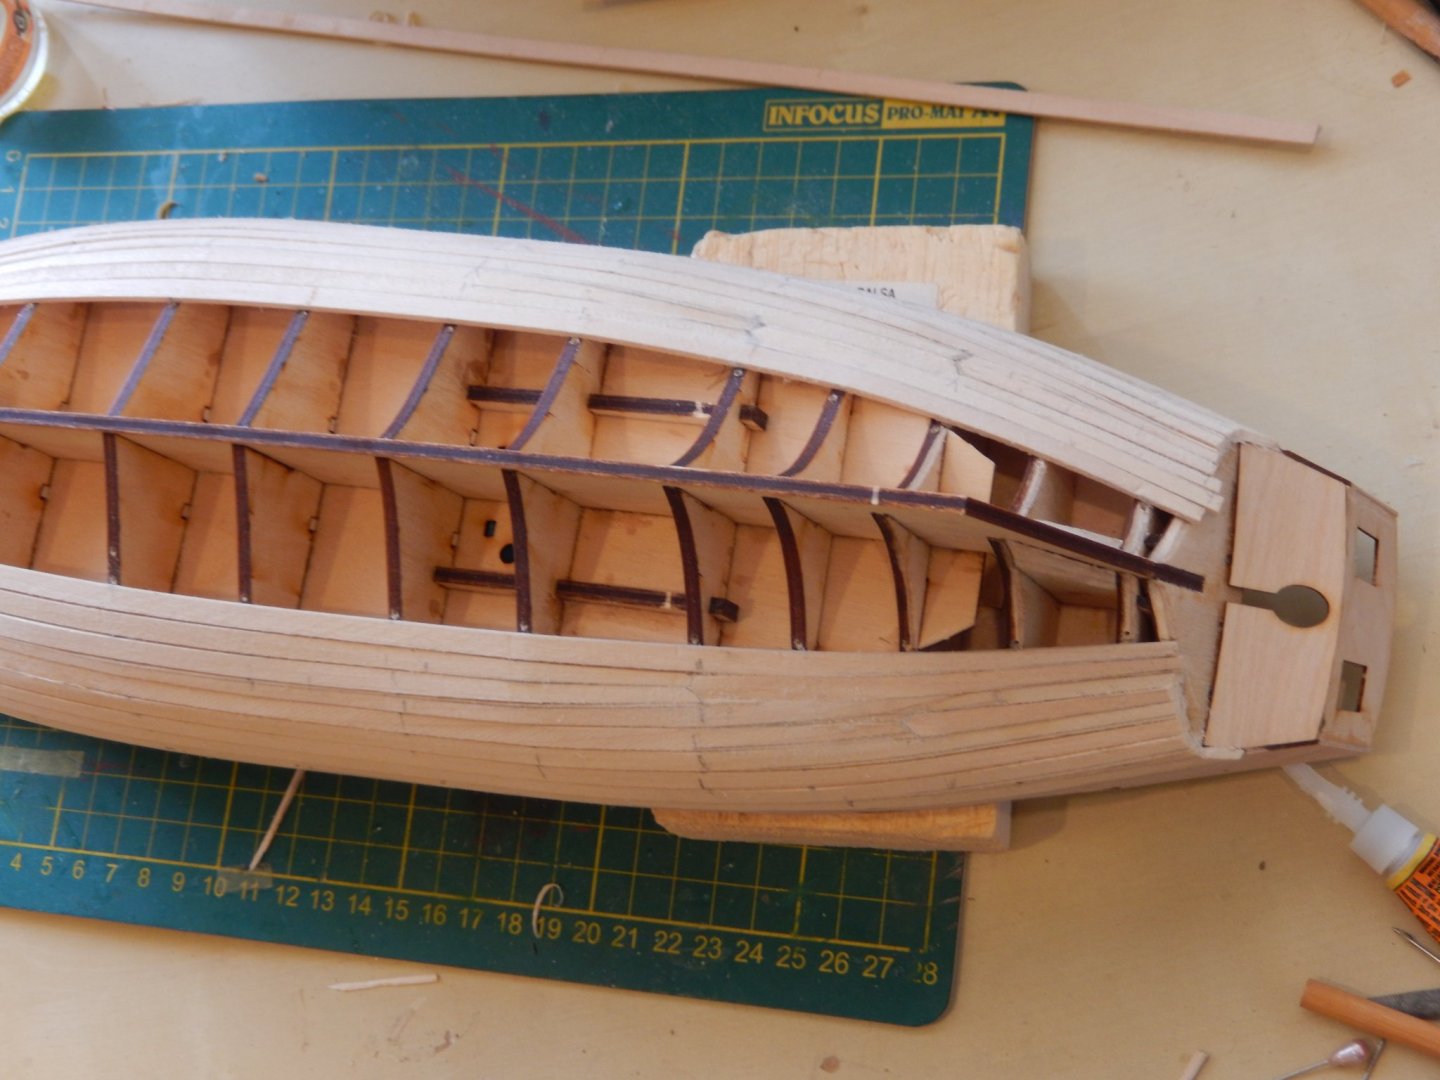
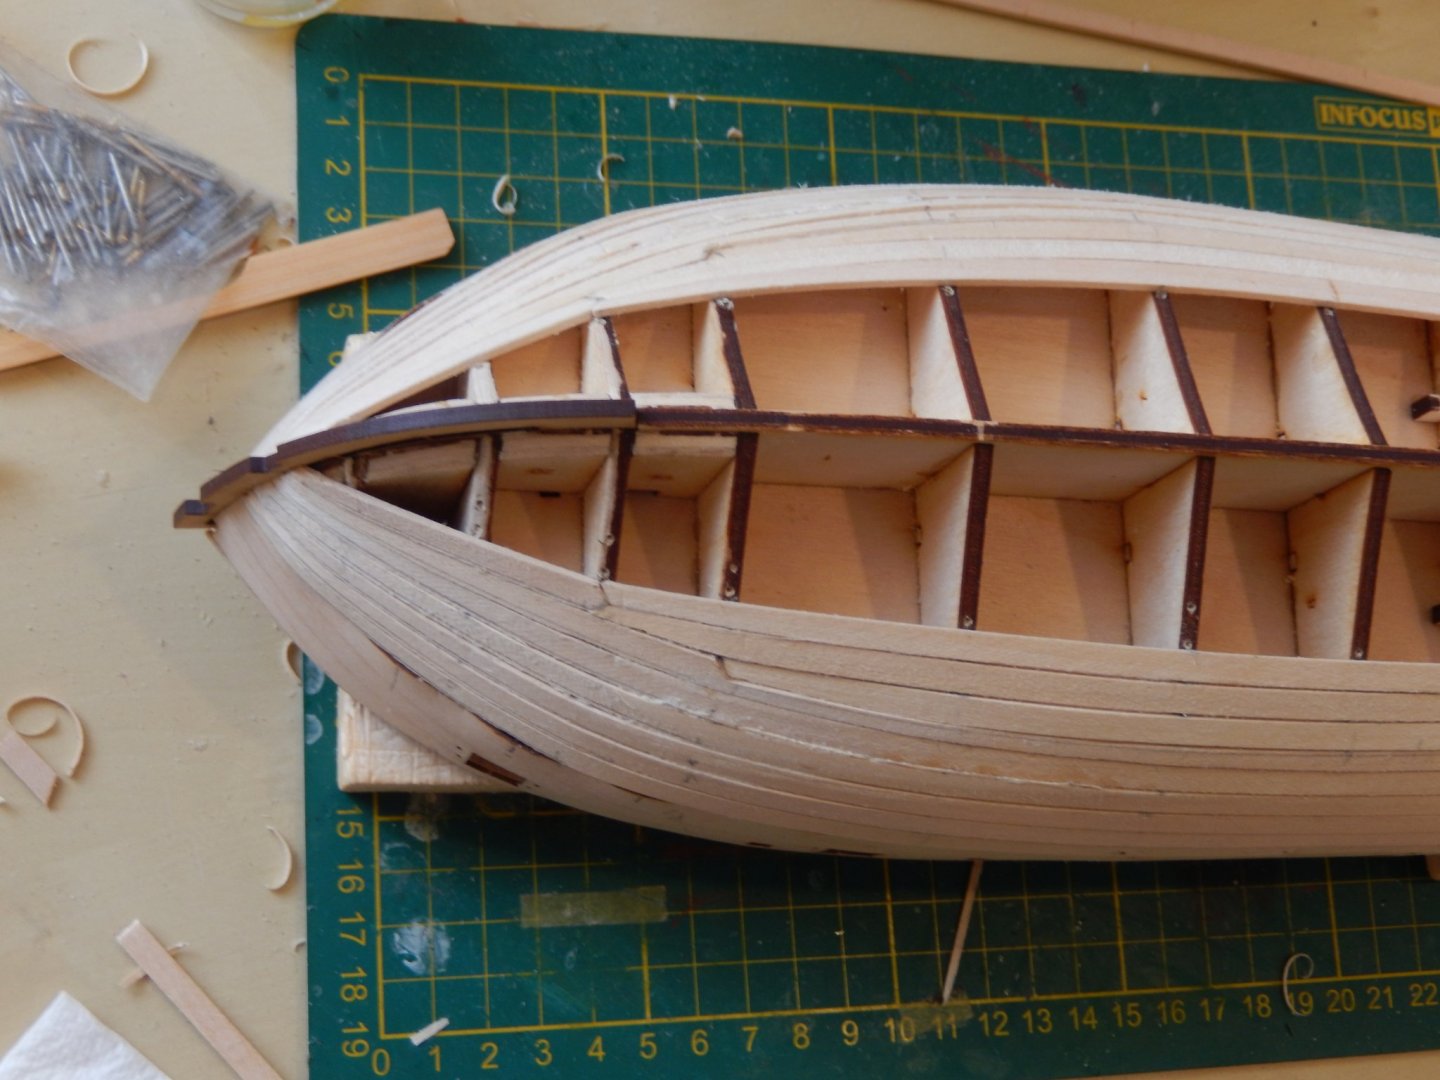
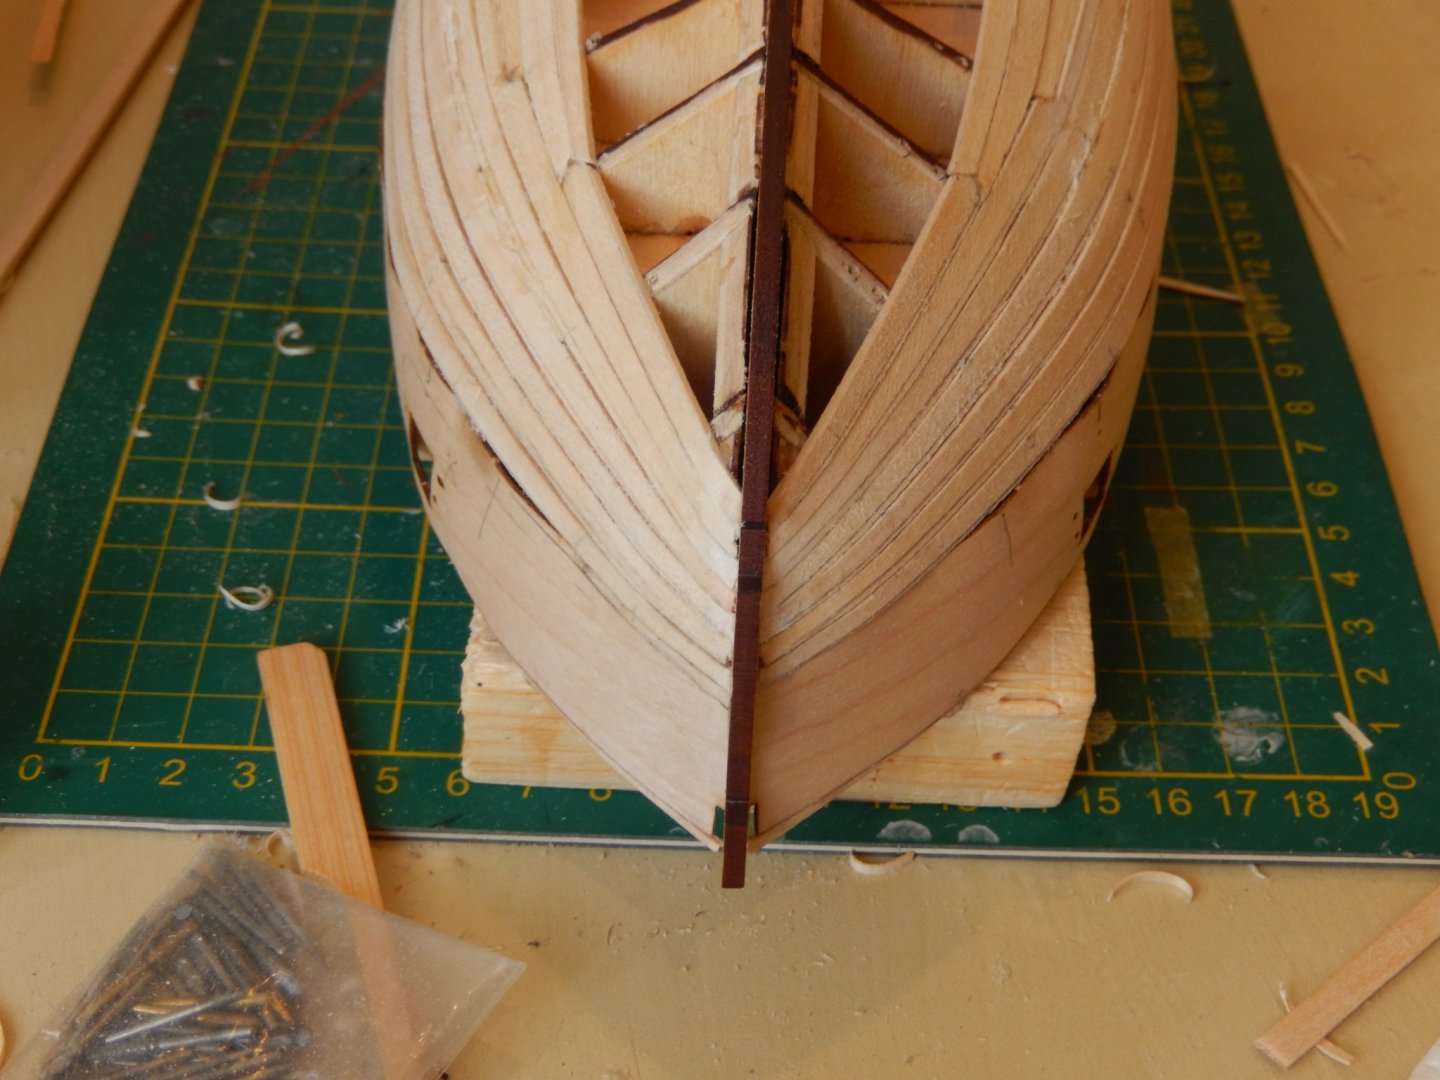
Here finally are some photos of the ship's boat construction. It turned out to be quite difficult and time-consuming. The jig for the frame very clever. It enables it to be put together very accurately indeed. Here is the hull painted and the gunwale added. I did not find the pear wood easy to work with. The interior frame for the seats and the ribs are ... er... challenging. The 1mm pear is, I think, unsuitable for the ribs. it needs to be bent considerably and doing it in situ risks damaging the hull. I used some 0.5mm, far more bendable timber strip. Again the gunwale proved difficult. Getting the pear to the right shape was done a piece at a time, entailed time and a very full vocabulary. I had put a little extra 0.5mm thick wood trim on top of the stern. It finished it off nicely. Of course it came back to bite me. The handle of the rudder would not go over it. Fortunately the solution to the problem gave, I think, a better result. You can see it in the last few photos


-
Thanks for the kind comments Hardee and Ben. With the covid lockdown in areas of Sydney I have been unable to travel to our house down the coast south of the city. There I have a special sander I need to finish the planking above the wale. I don't feel like buying another one for about 10 minutes use. In the meantime I have been working on all the deck fittings and the ship's boat. Photos when I have the opportunity.
-
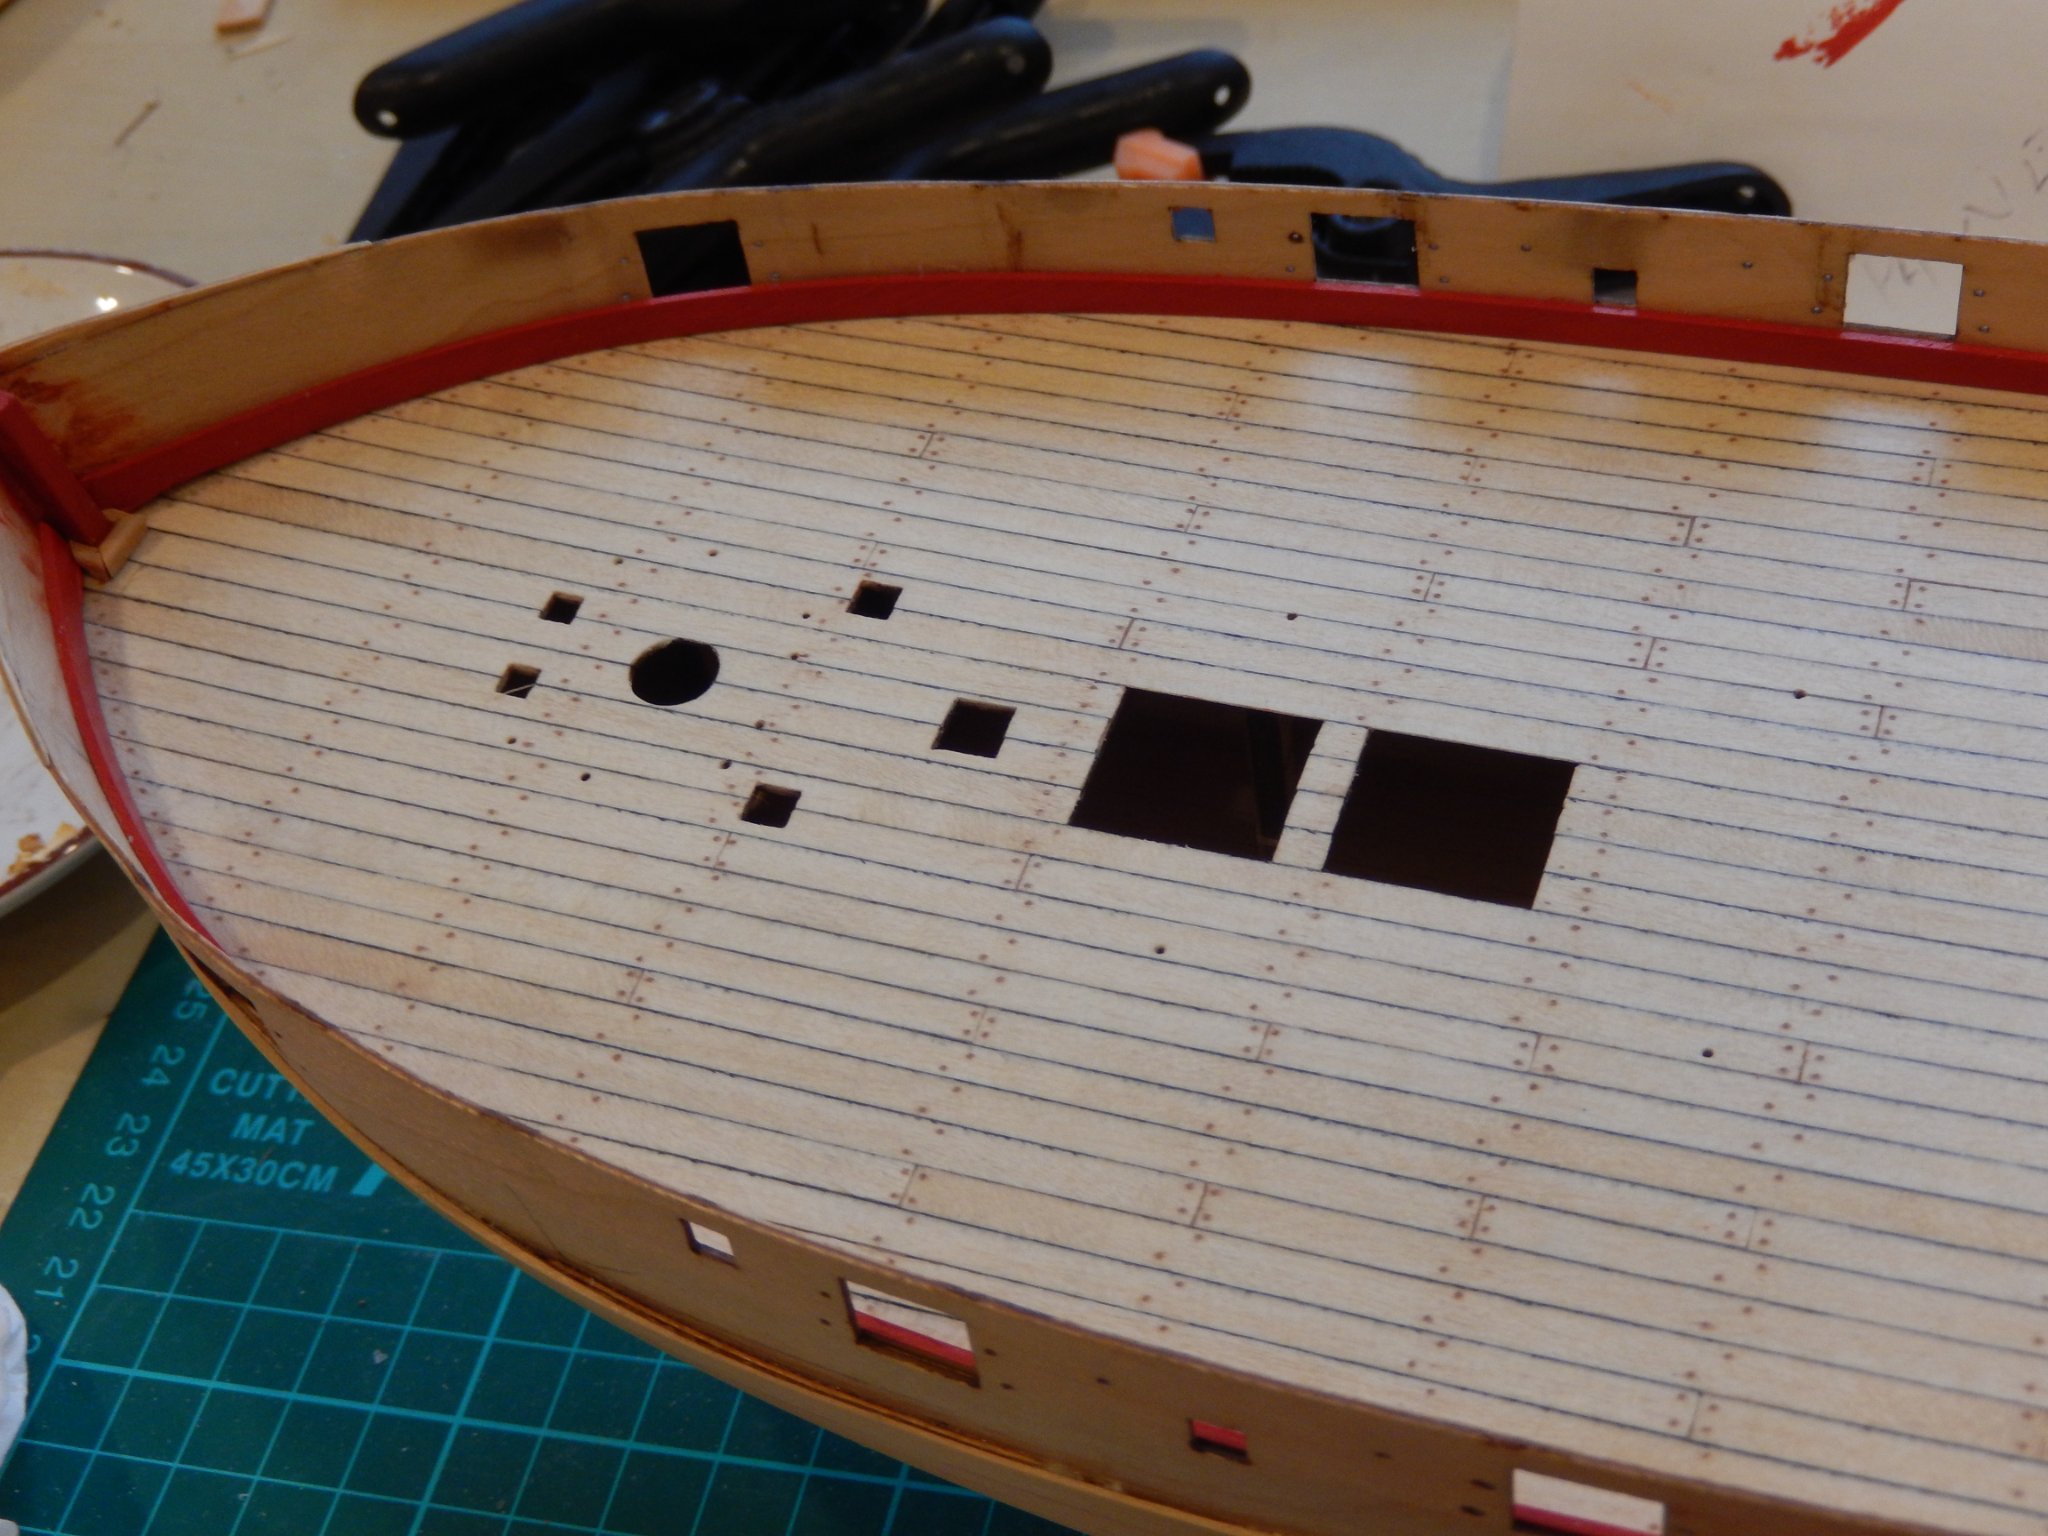
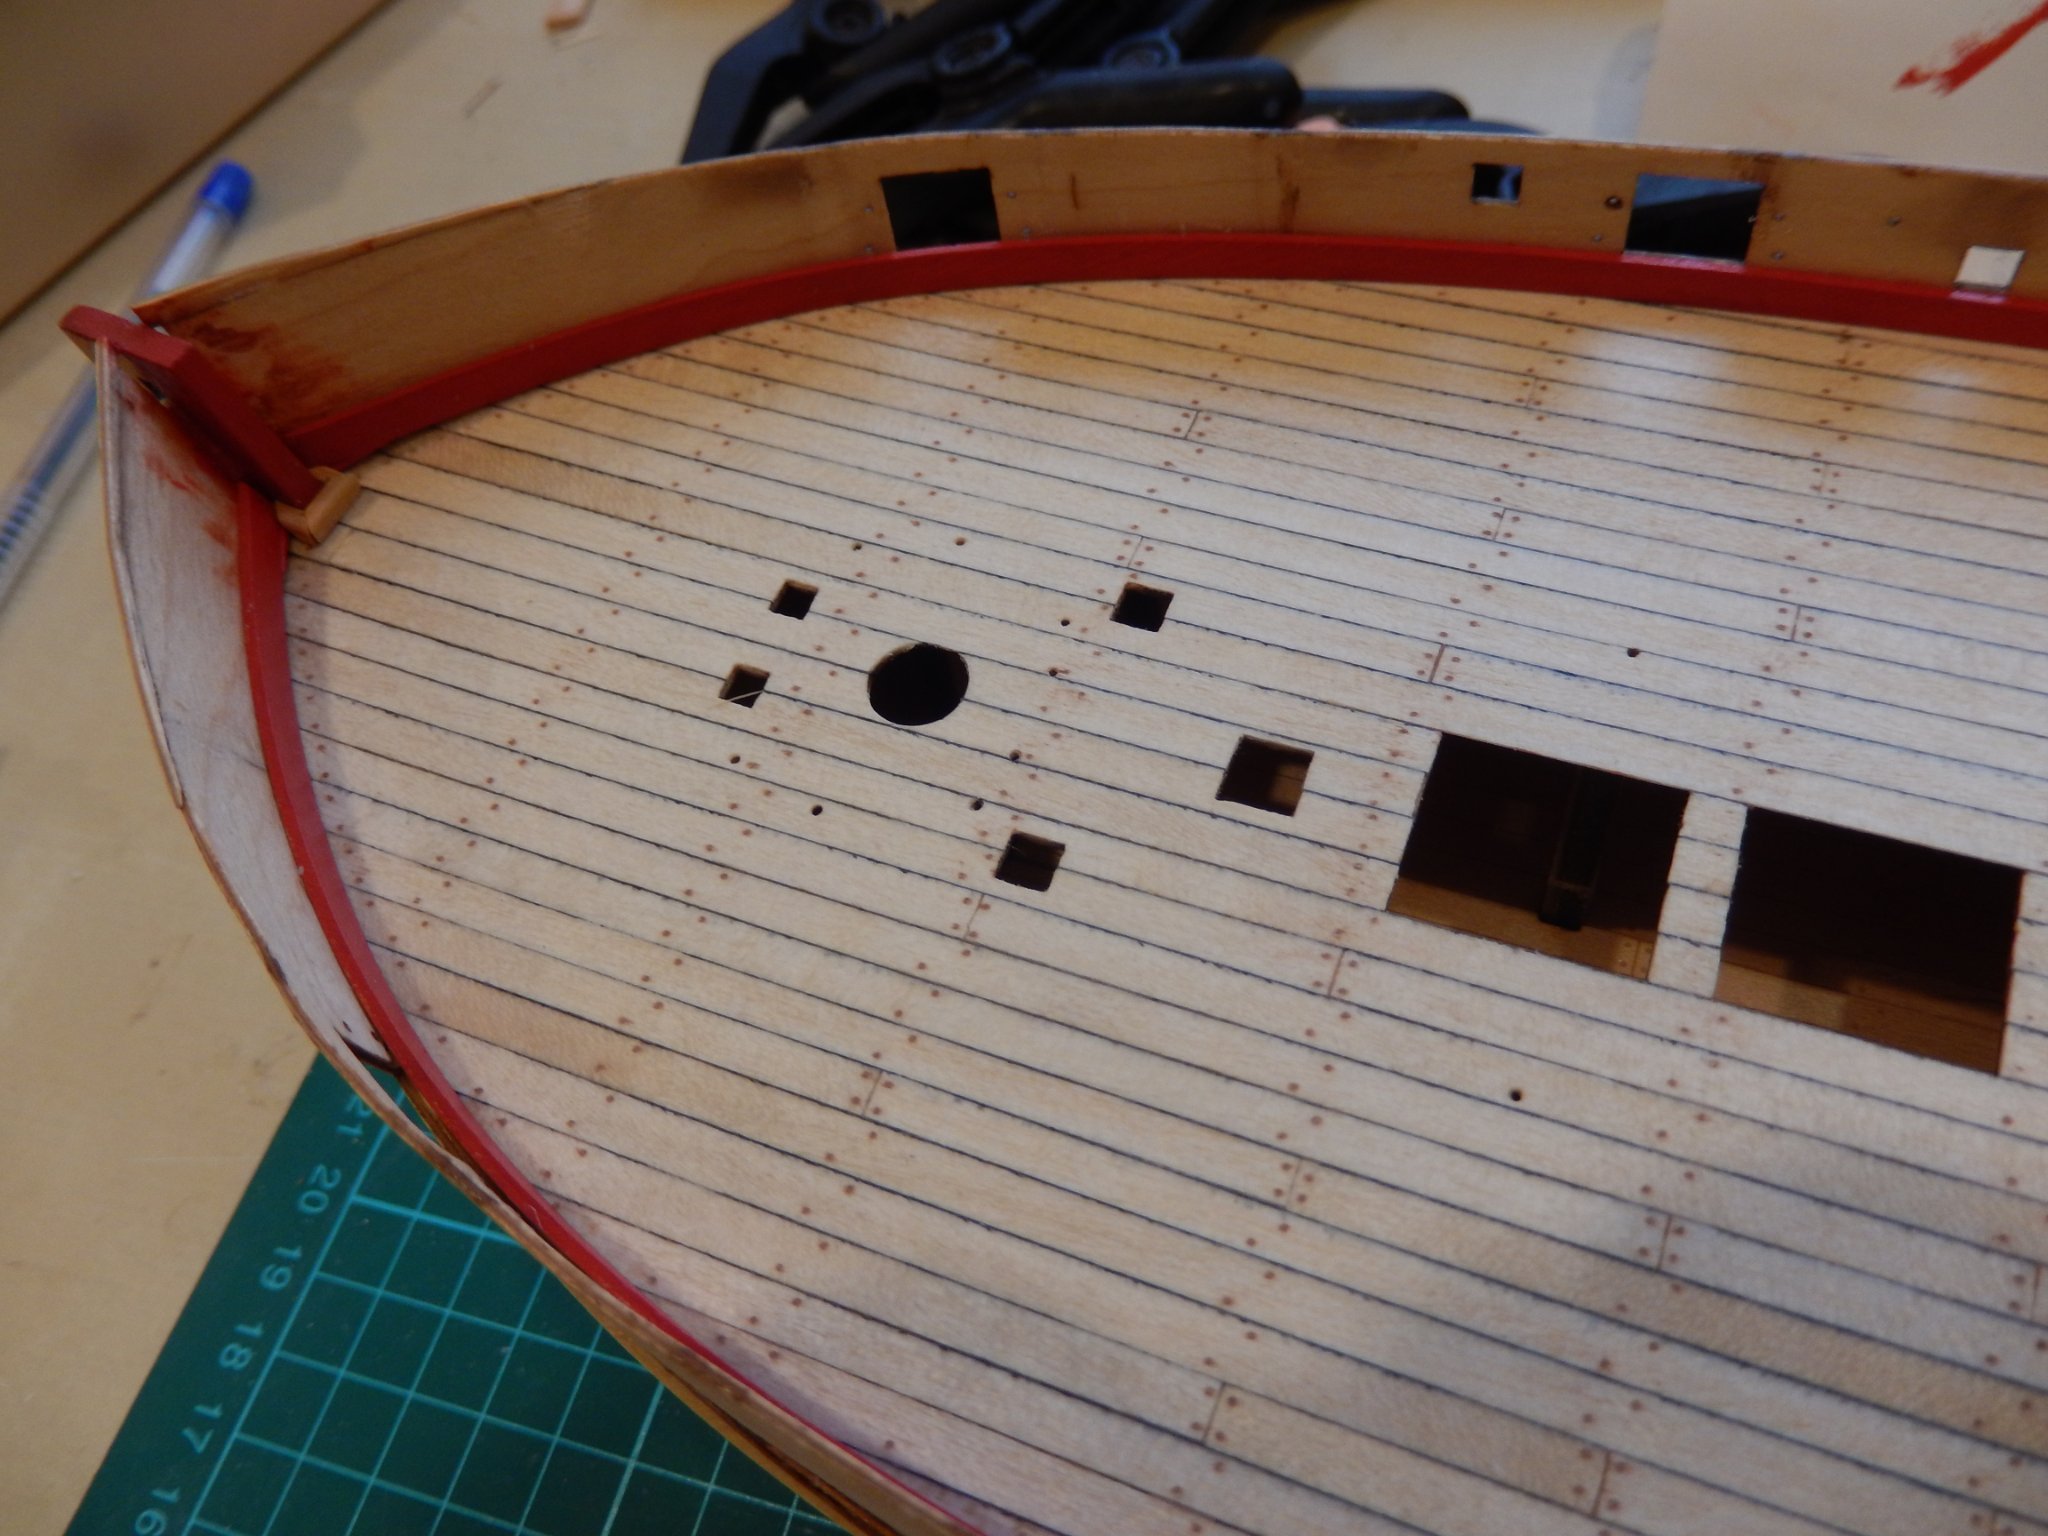
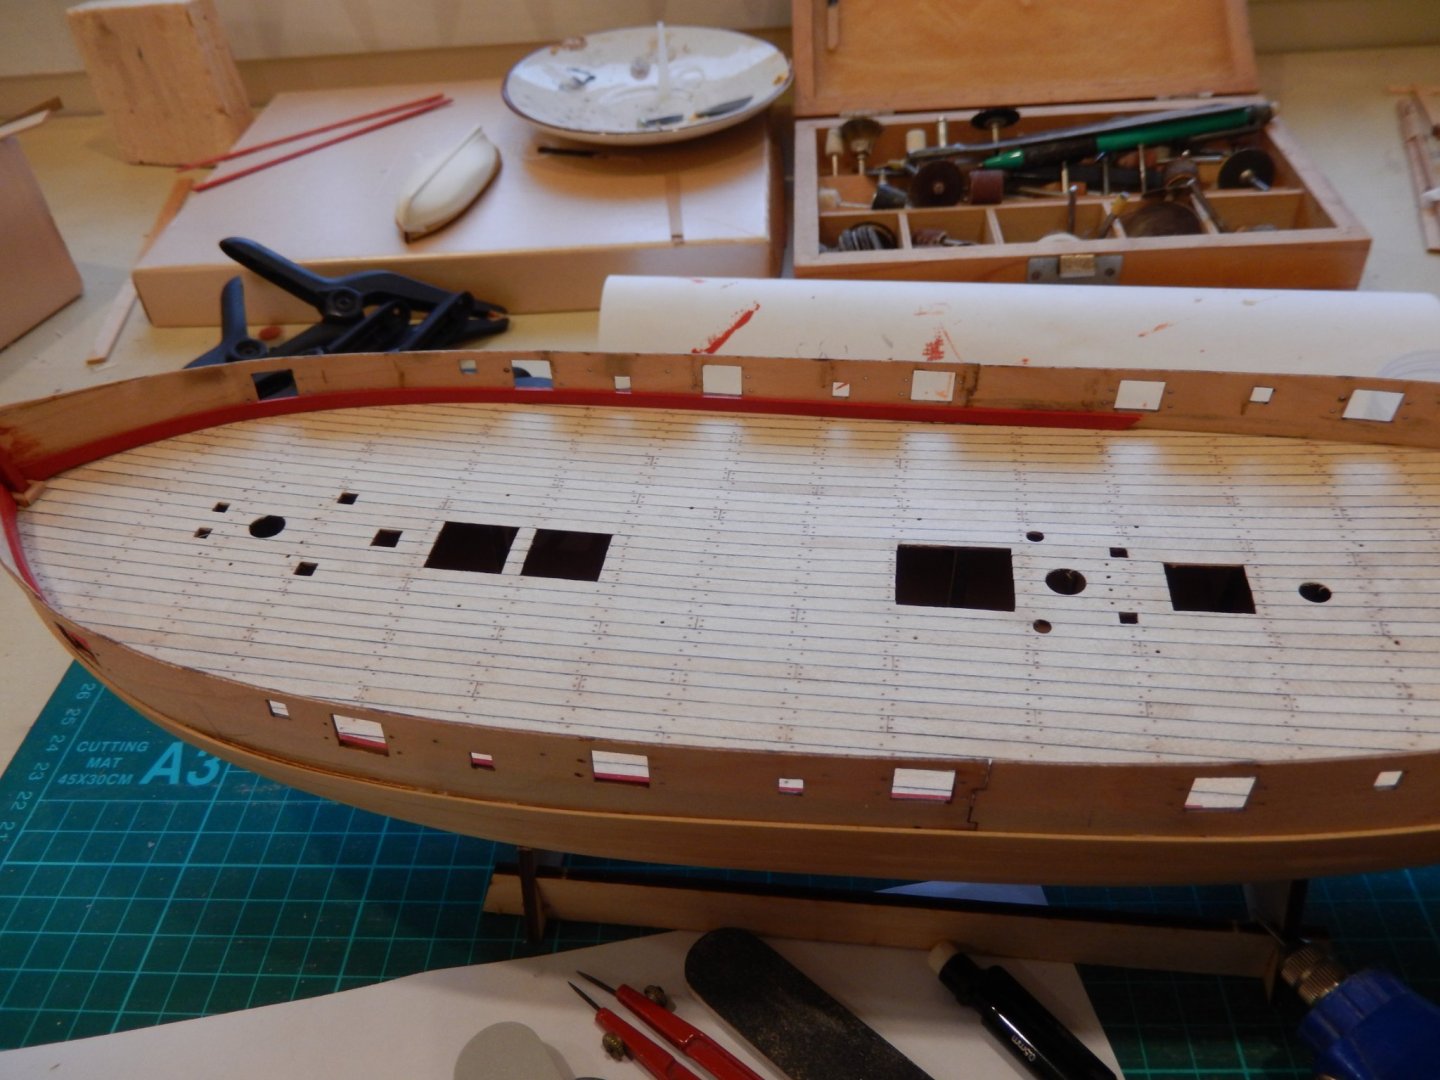
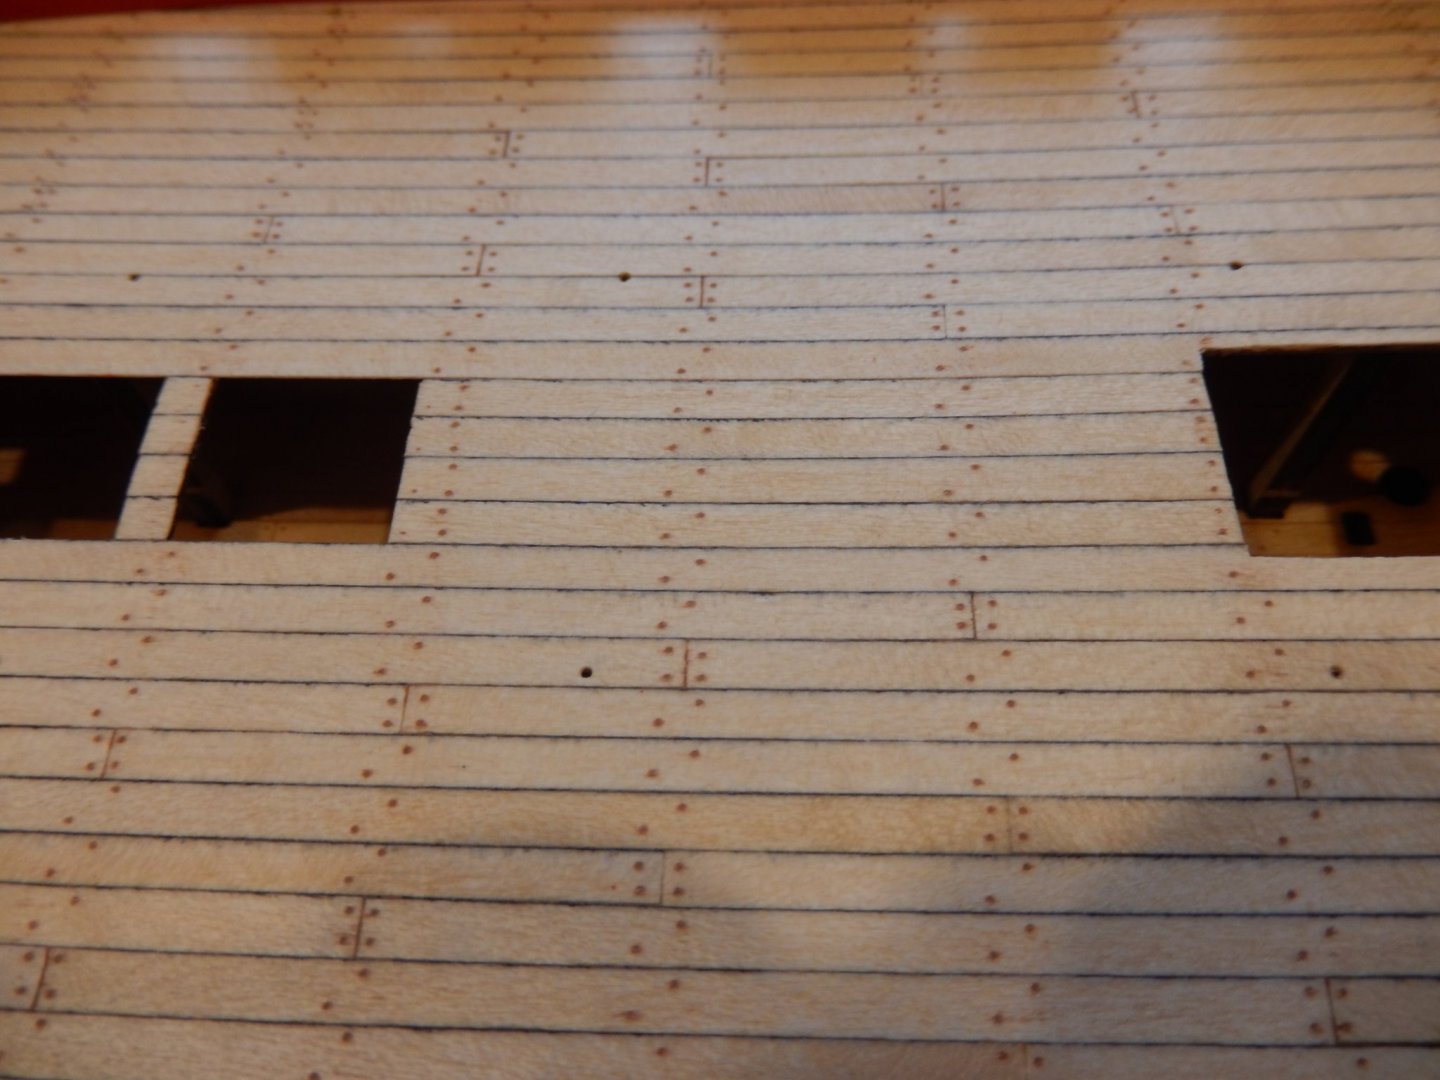
The decking is finally complete. Other things have intruded over the last month or so. The result of the planking has been acceptable, and I think looks less artificial than the laser-cut deck supplied in the kit, but I guess that is for others to judge. In any event a lot of it will eventually be obscured by guns, fittings and rigging.


-
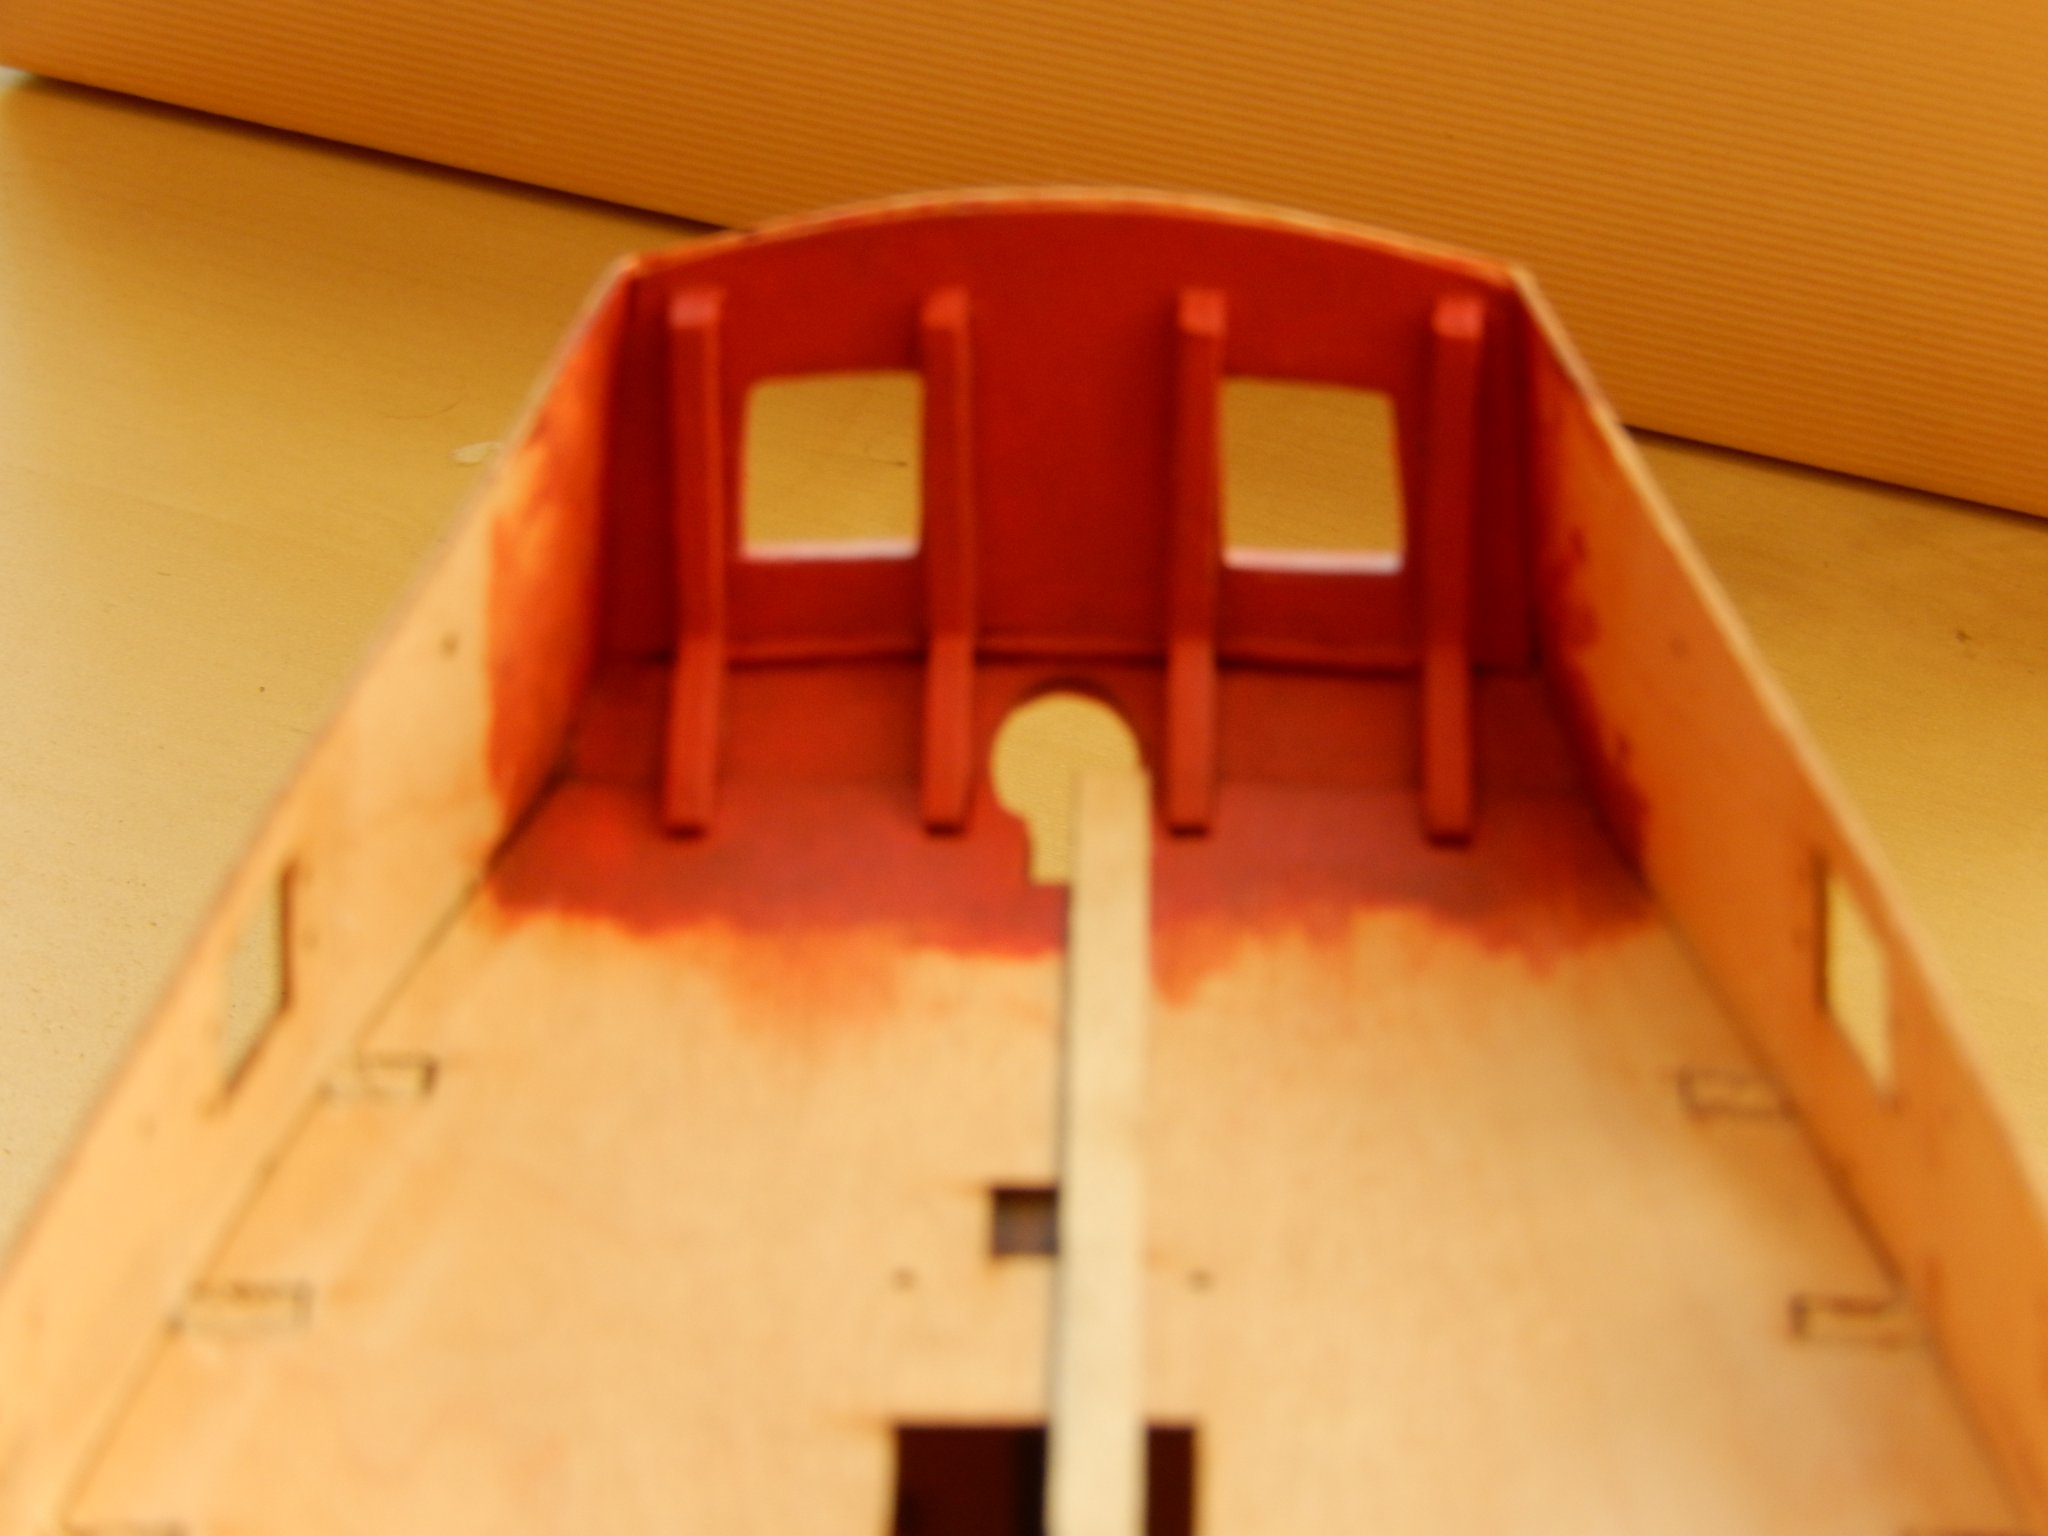
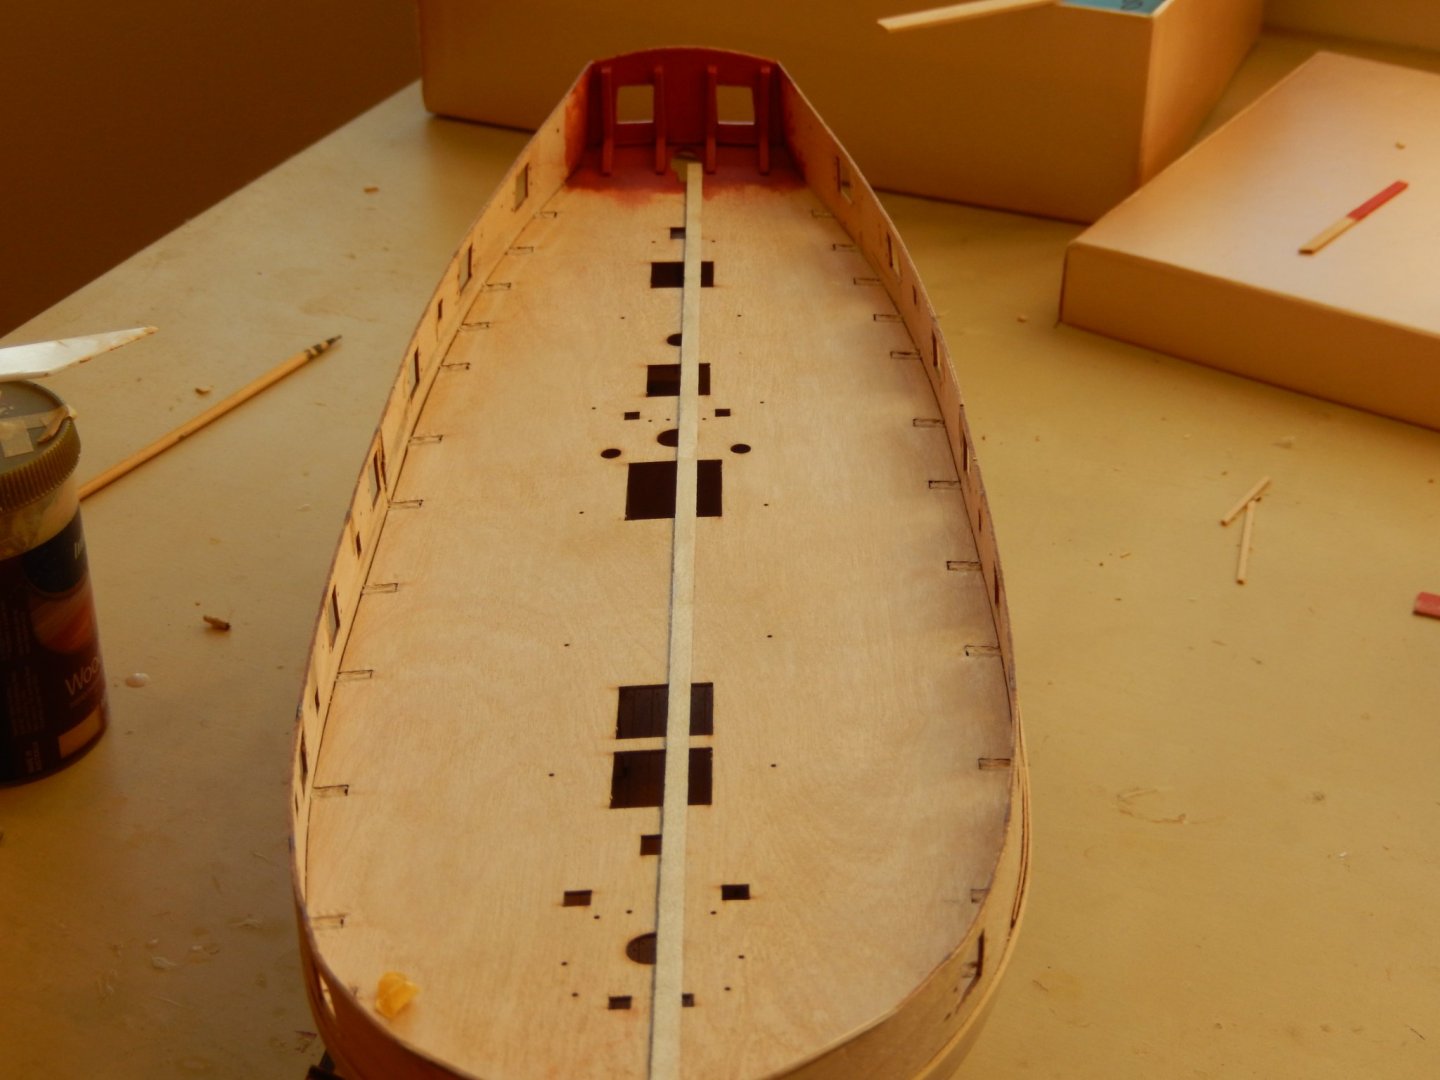
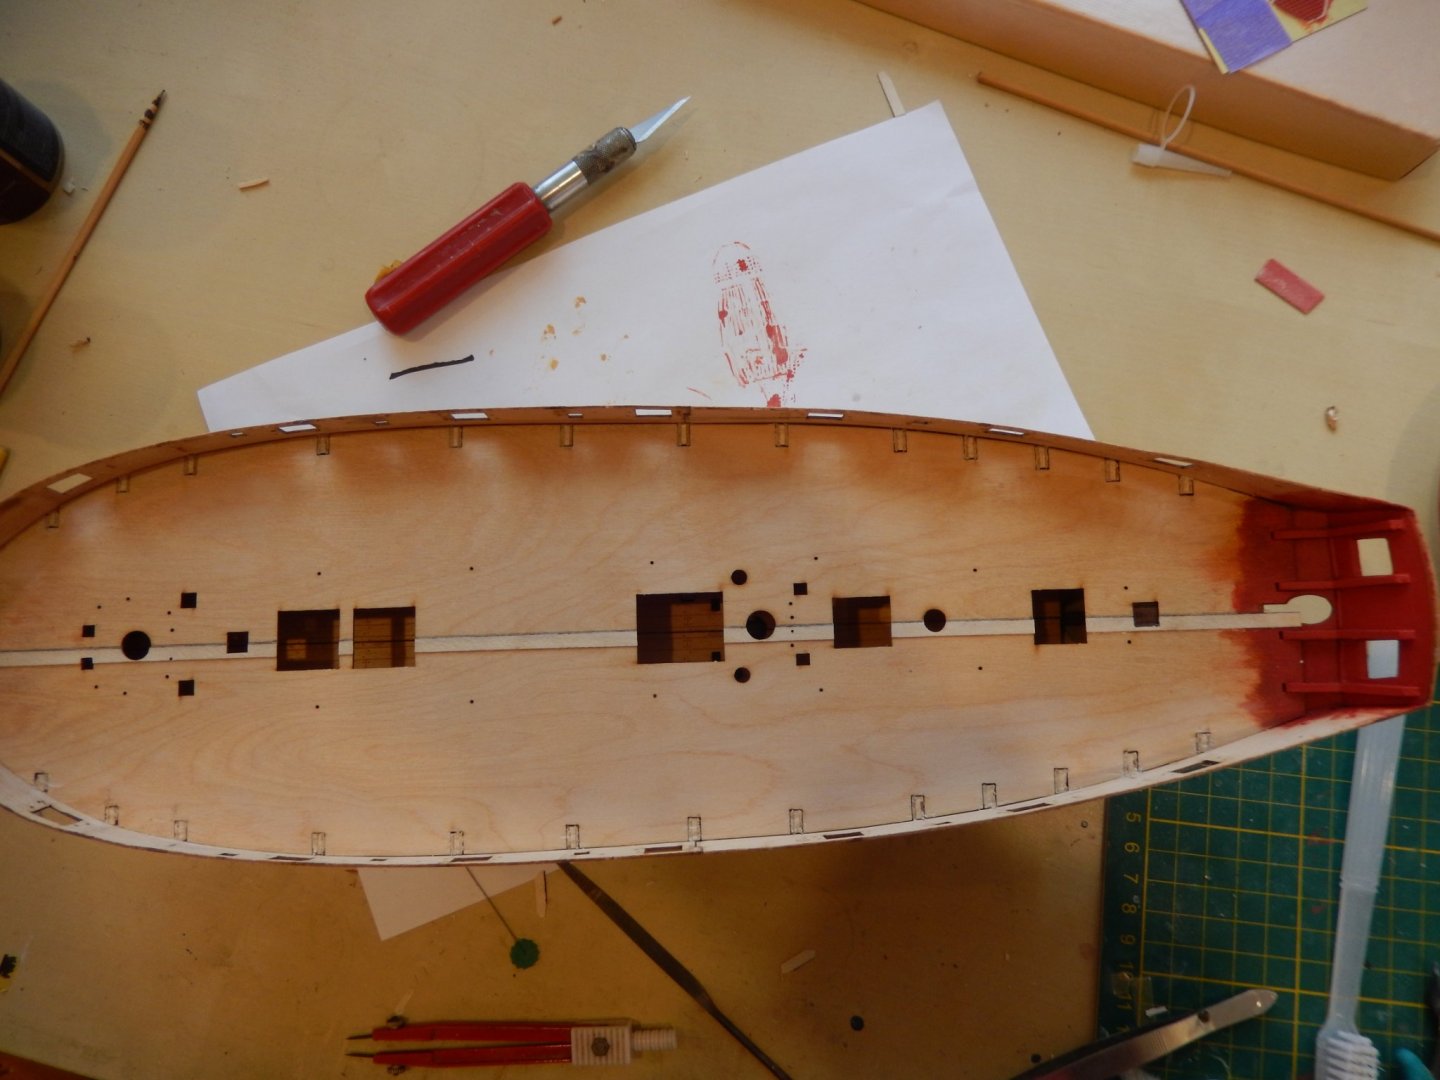
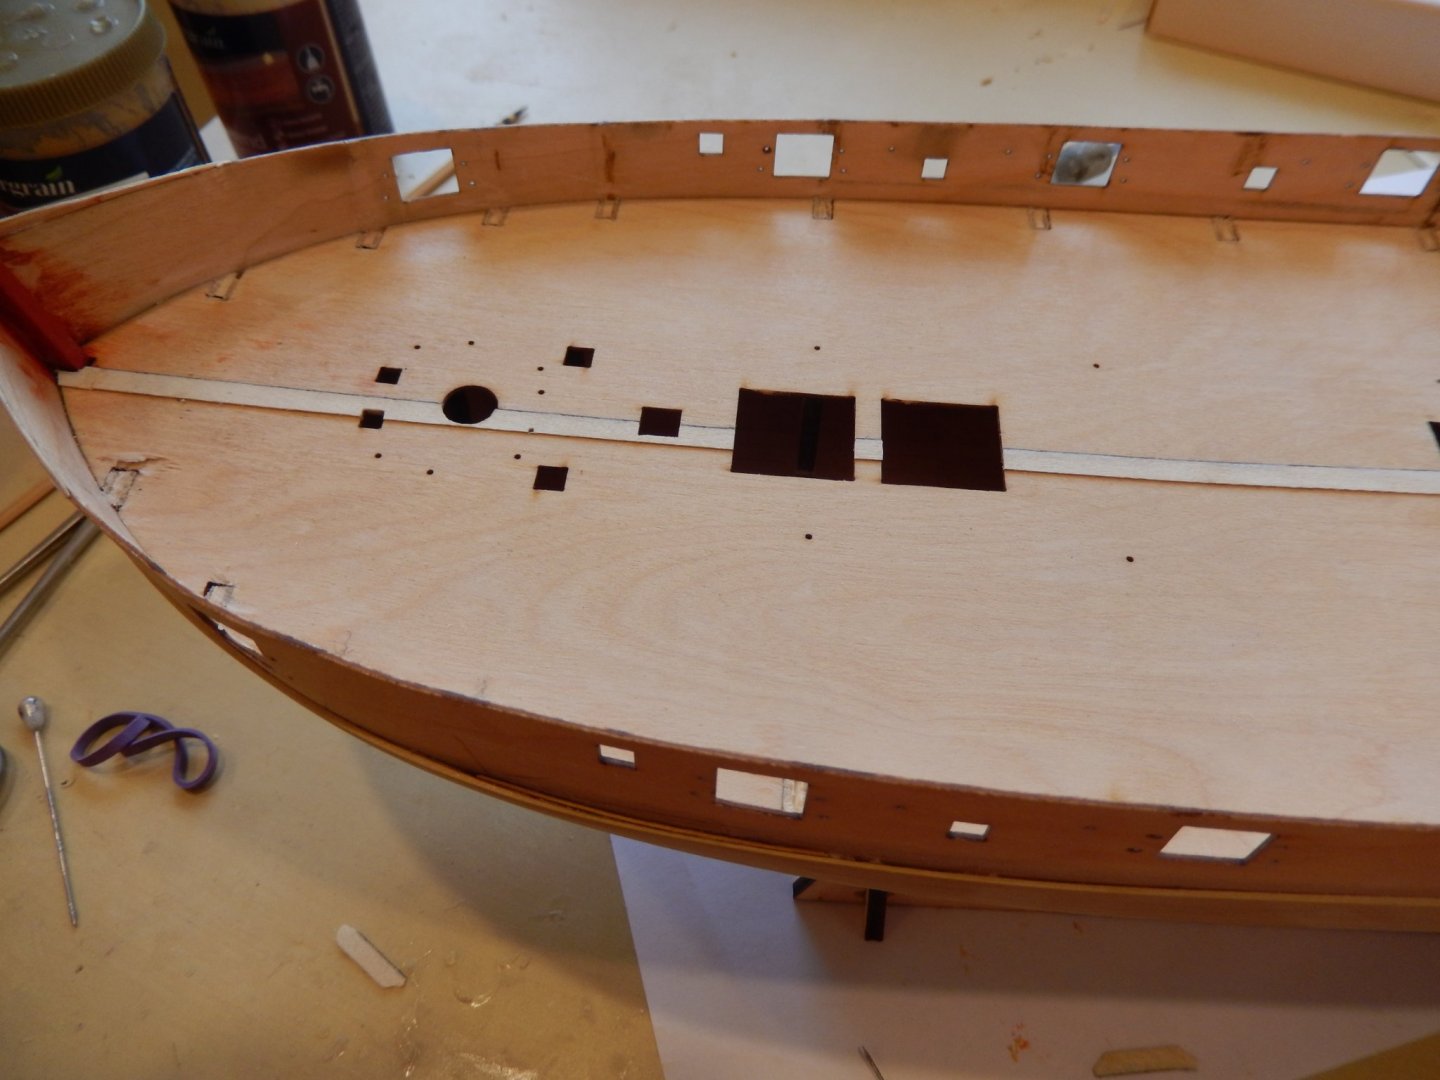
Progress has been very slow. lots of things have intruded. Painting the interior of the stern counter proved a real pain. I strongly recommend painting the components BEFORE assembly. Moreover the paint was very reluctant to stick to the surface of the parts, particularly the laser cut surfaces of the vertical supports. It took four coats to provide a reasonable result. Not a very good picture I'm afraid. As I mentioned earlier, I have decided not to use the laser printed deck. Here is the beginning of the substitute decking. The timber I chose - tanganyika (sp?) - imay not have been the best choice. I'll see how it works out. It's only 0.5mm thick, so if it doesn't work I will install the laser printed deck over it.


-
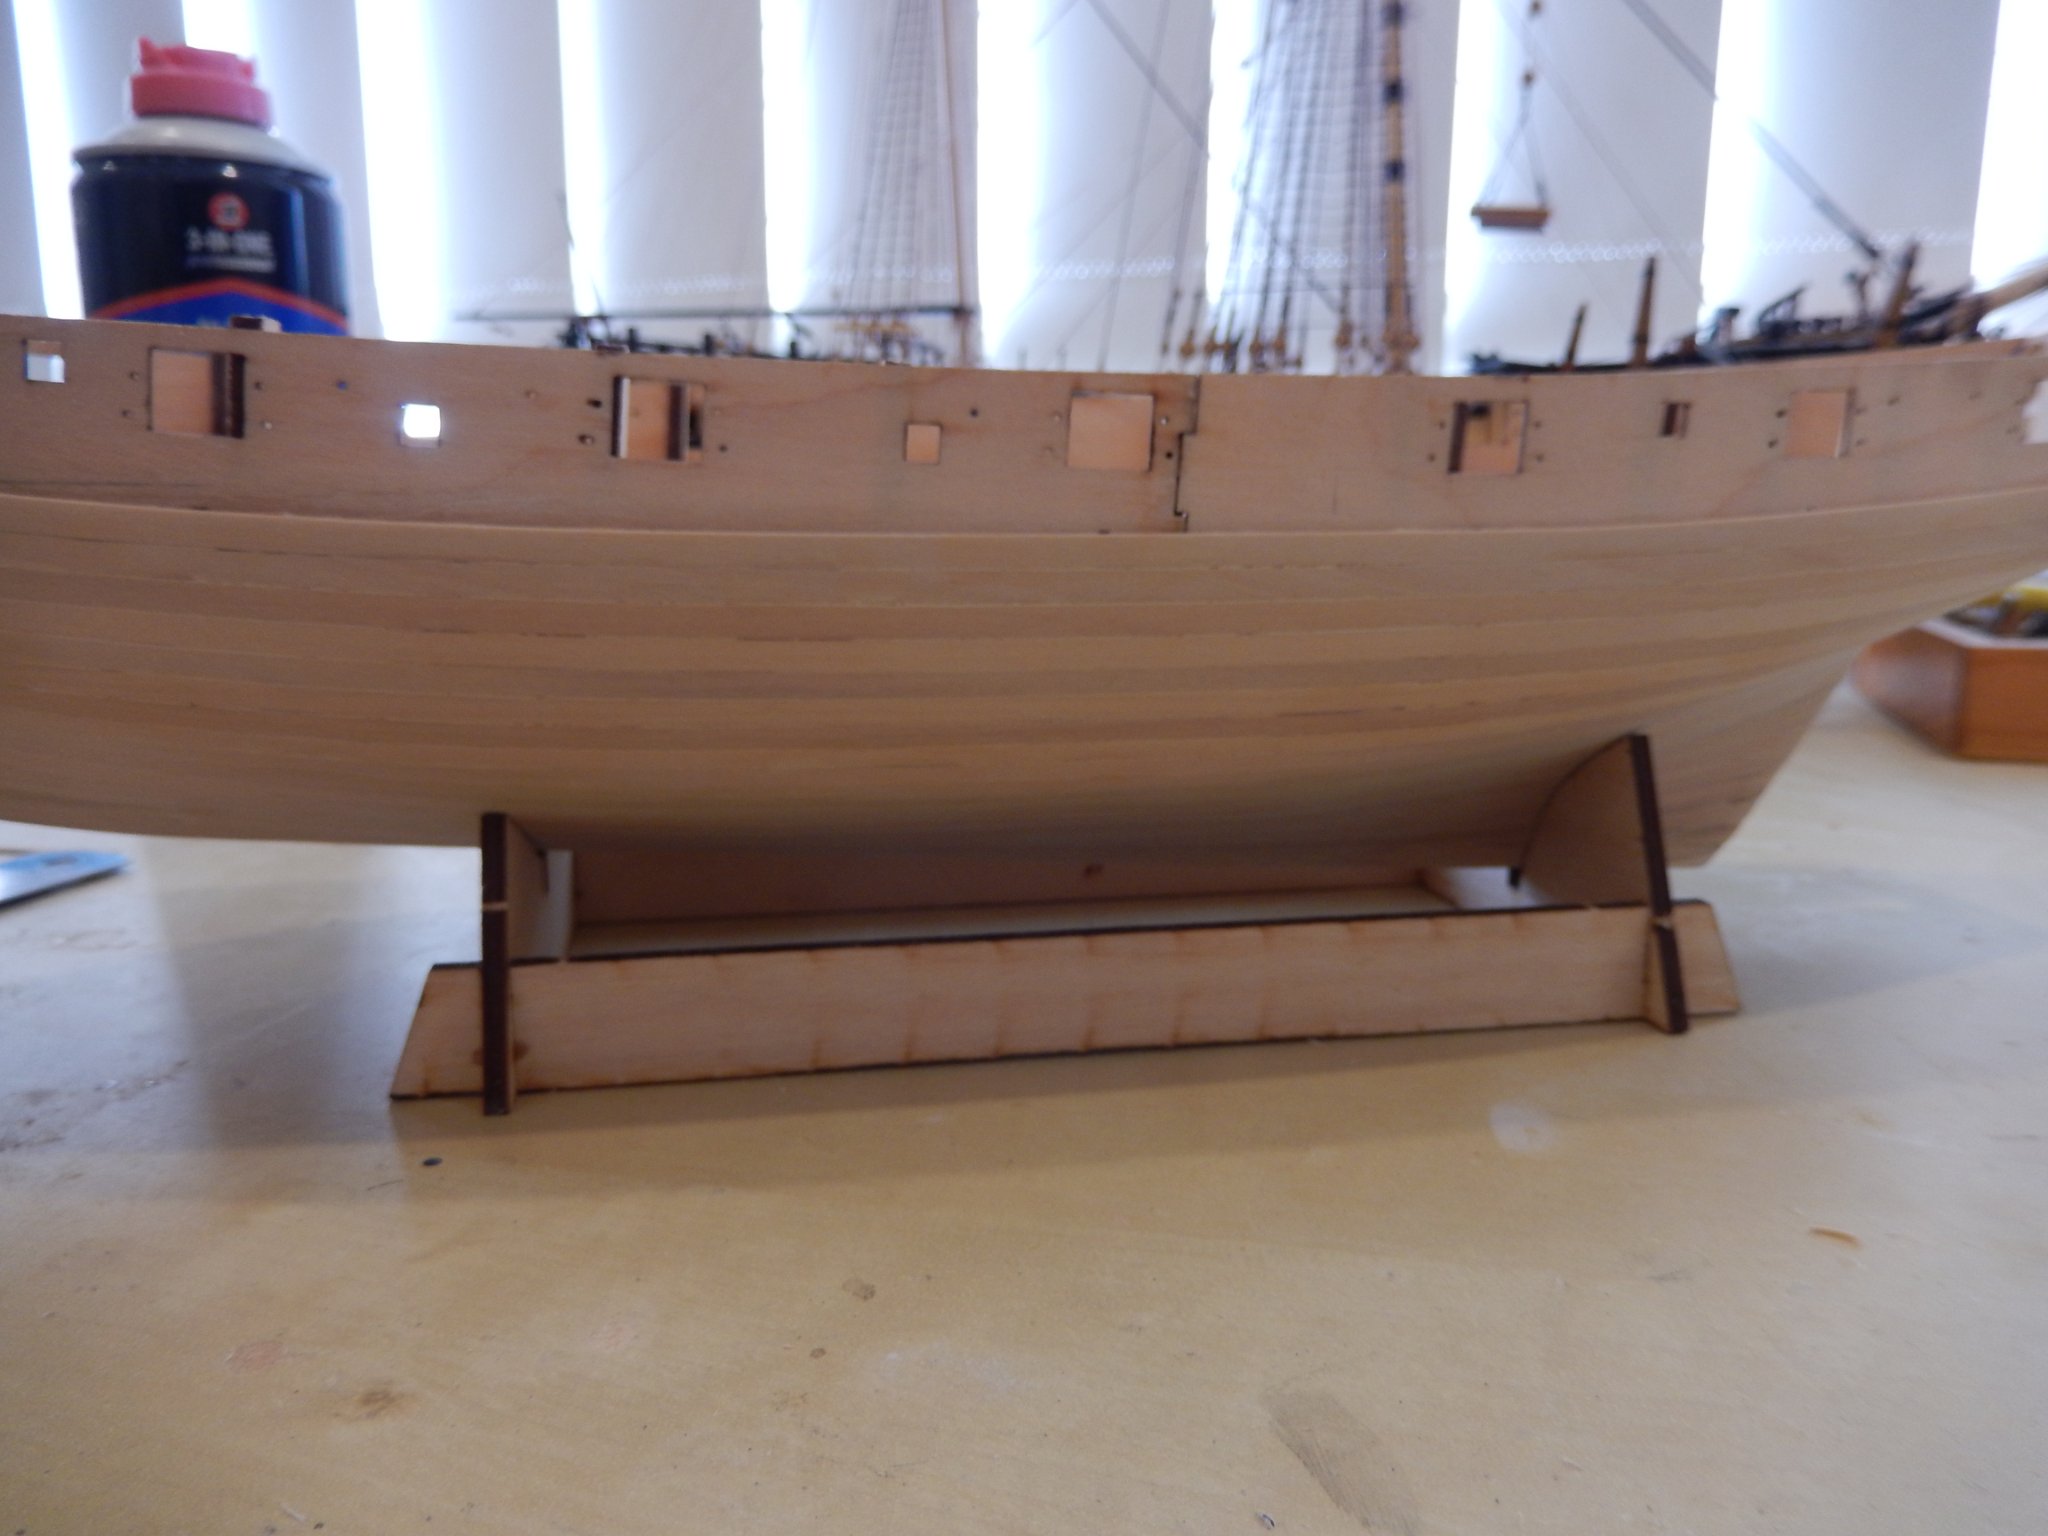
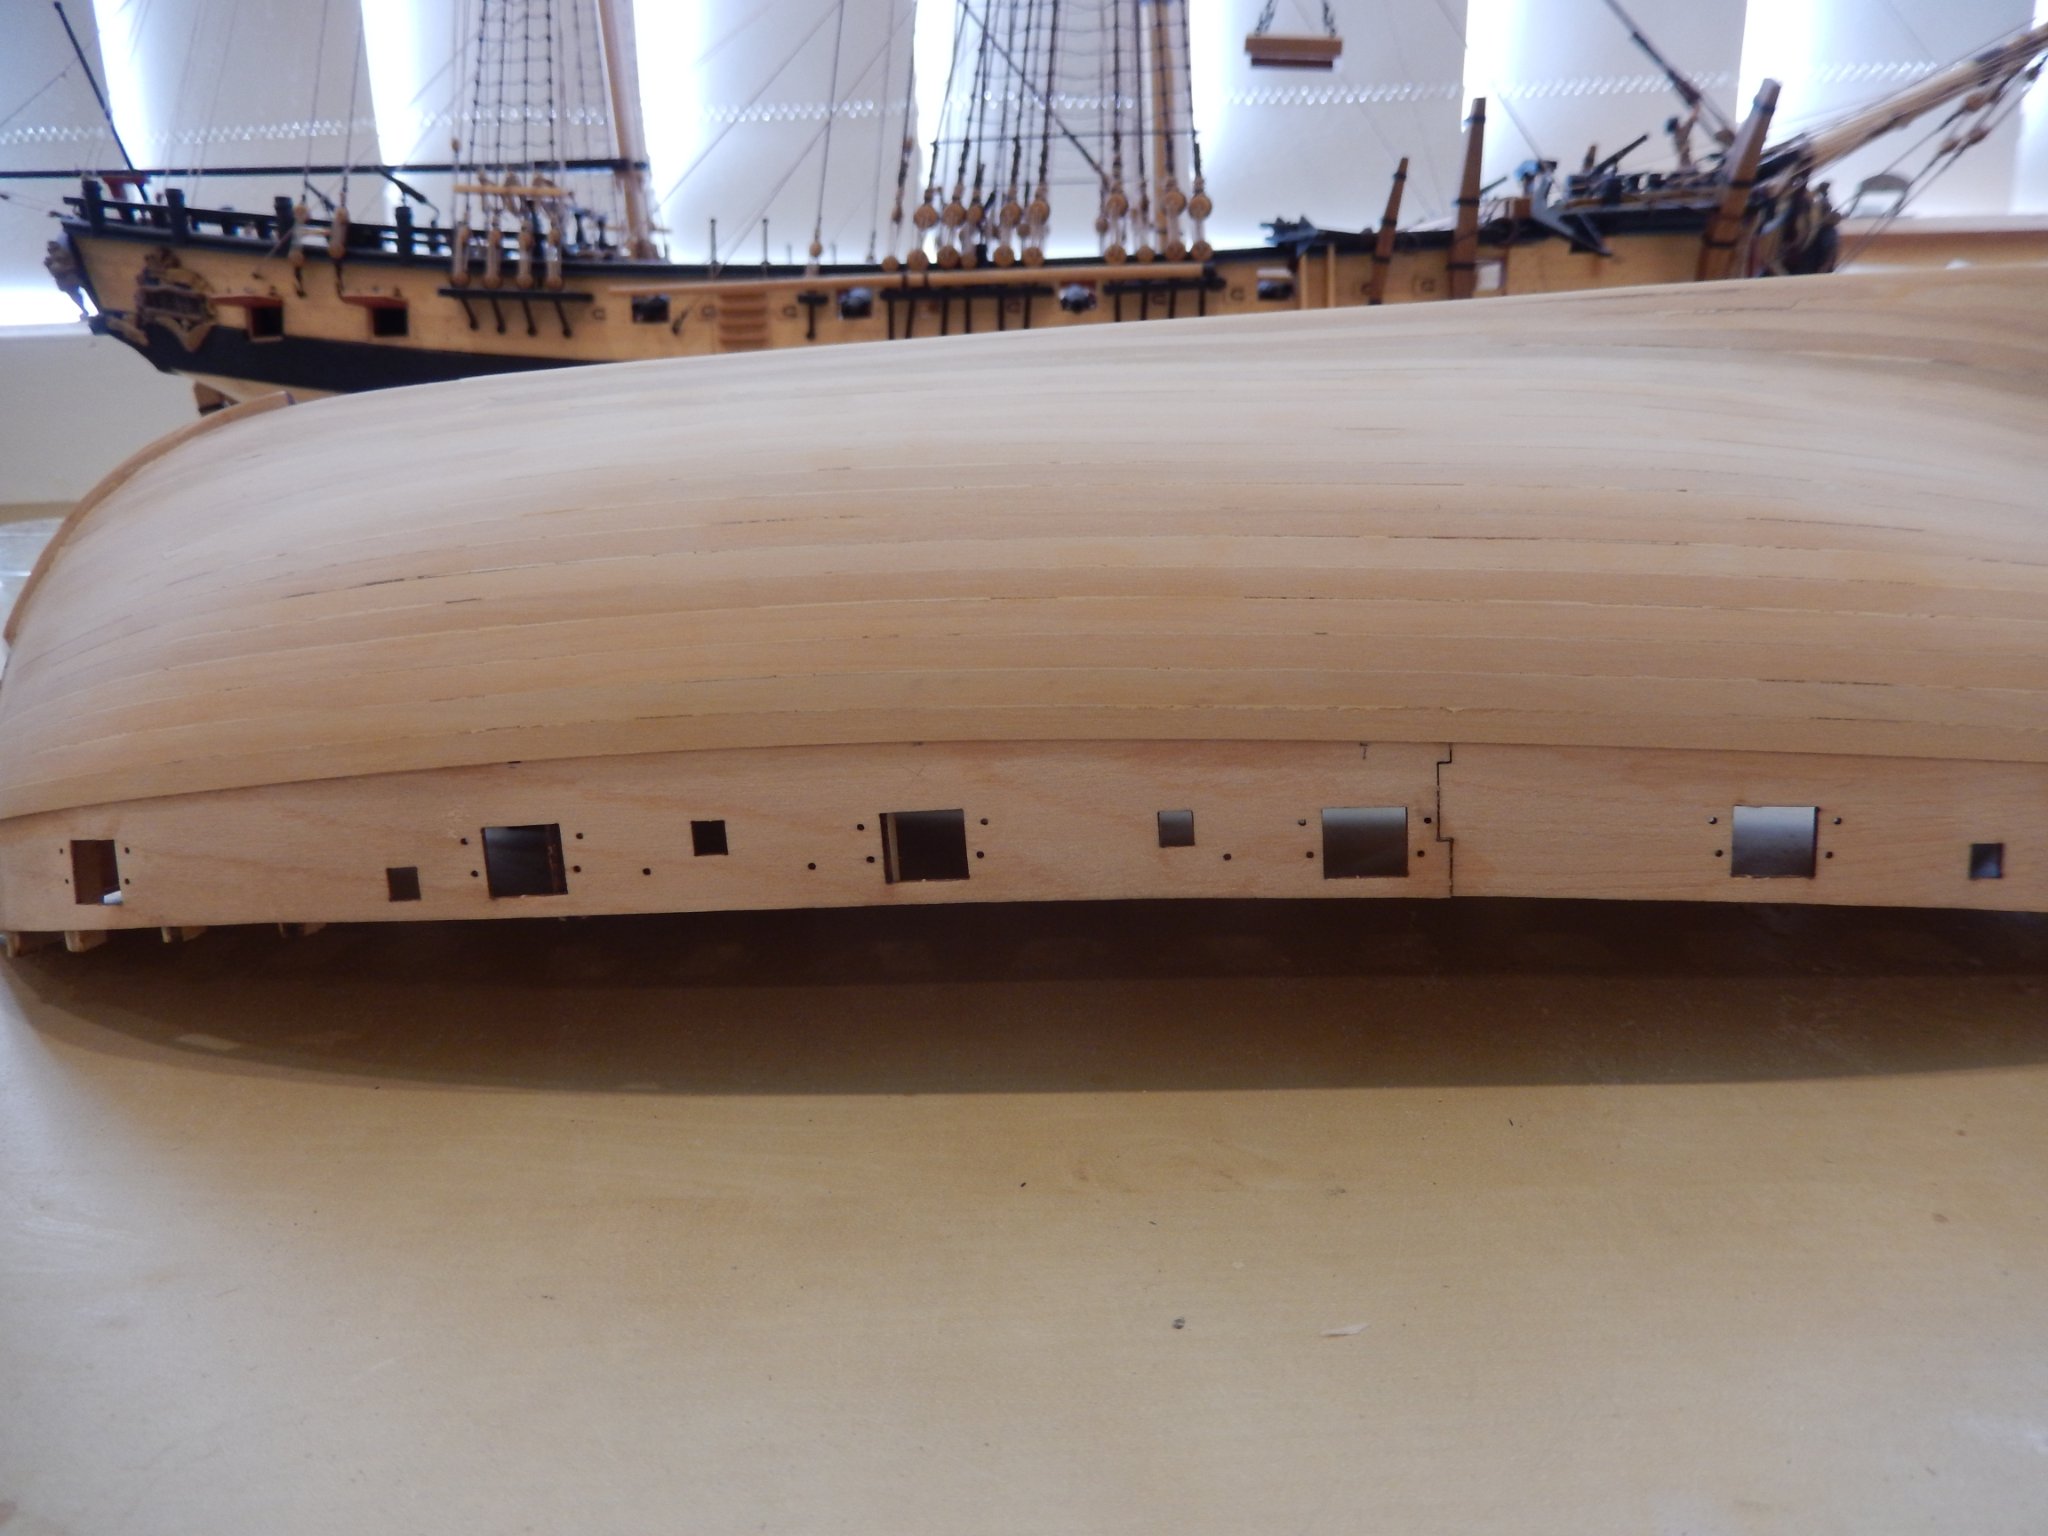
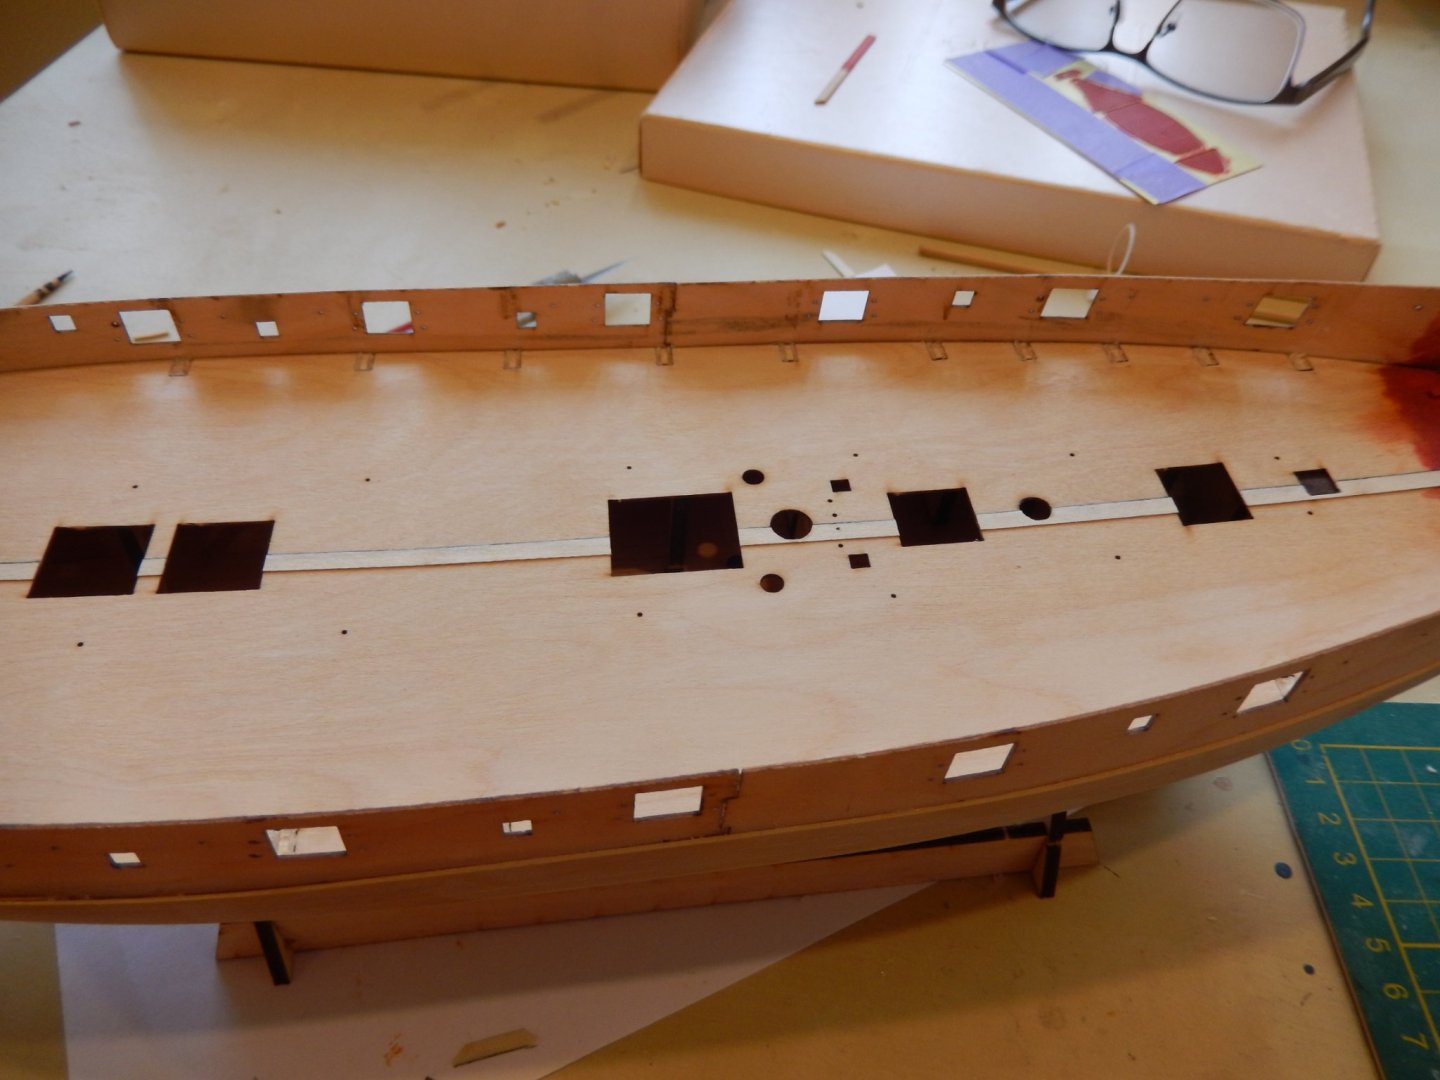
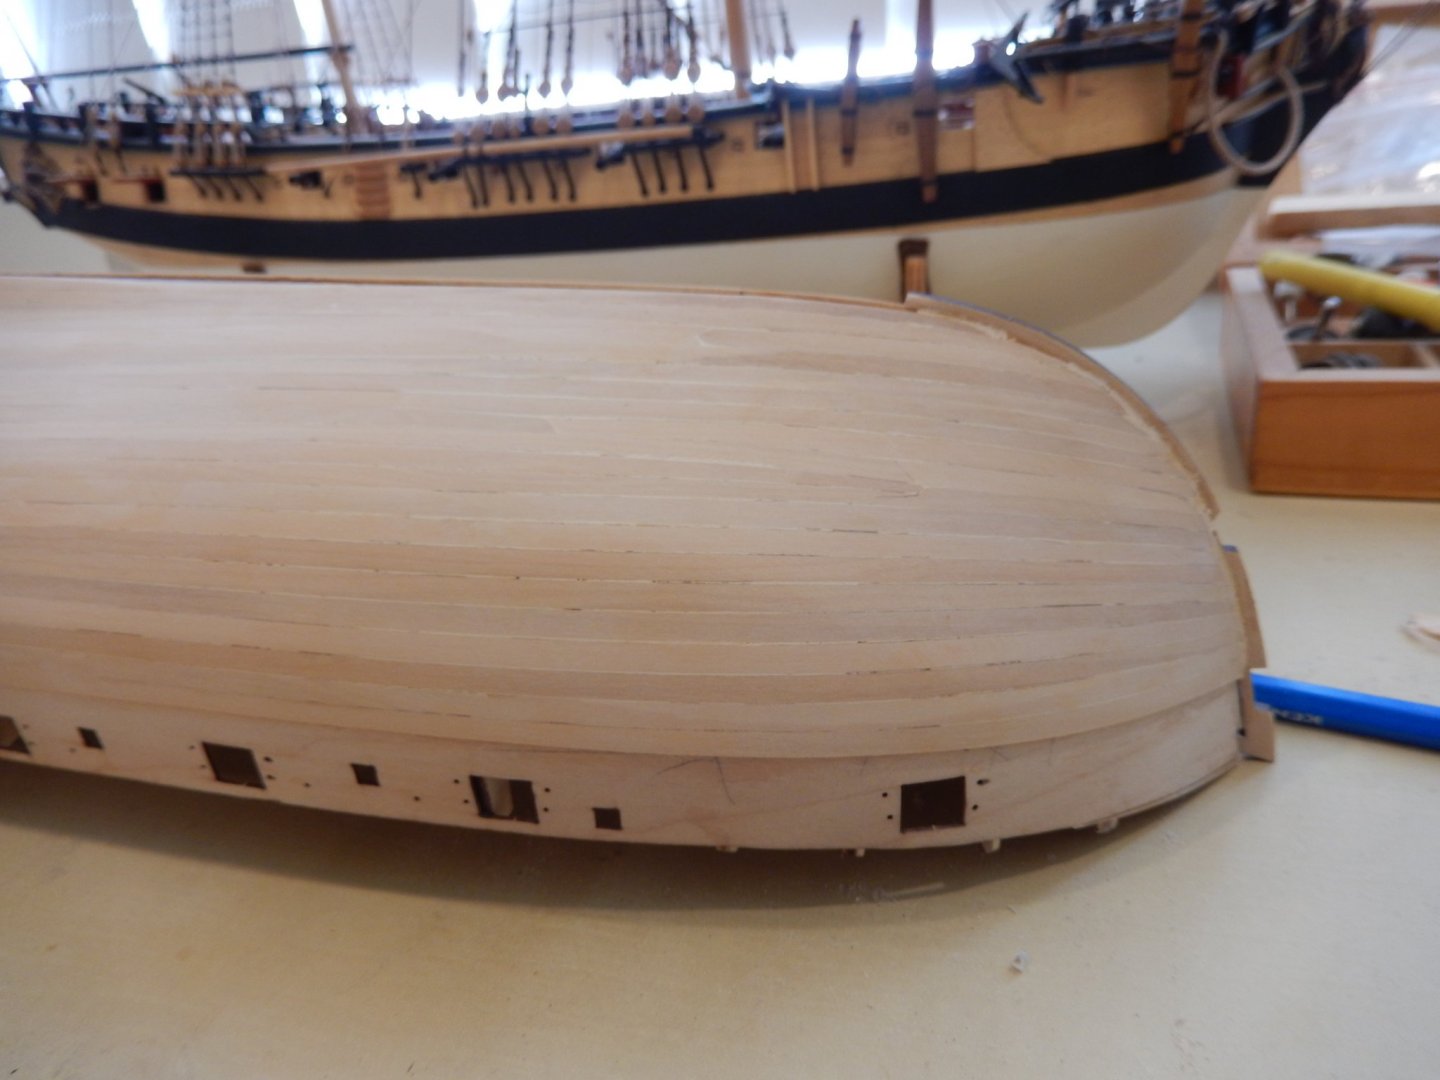
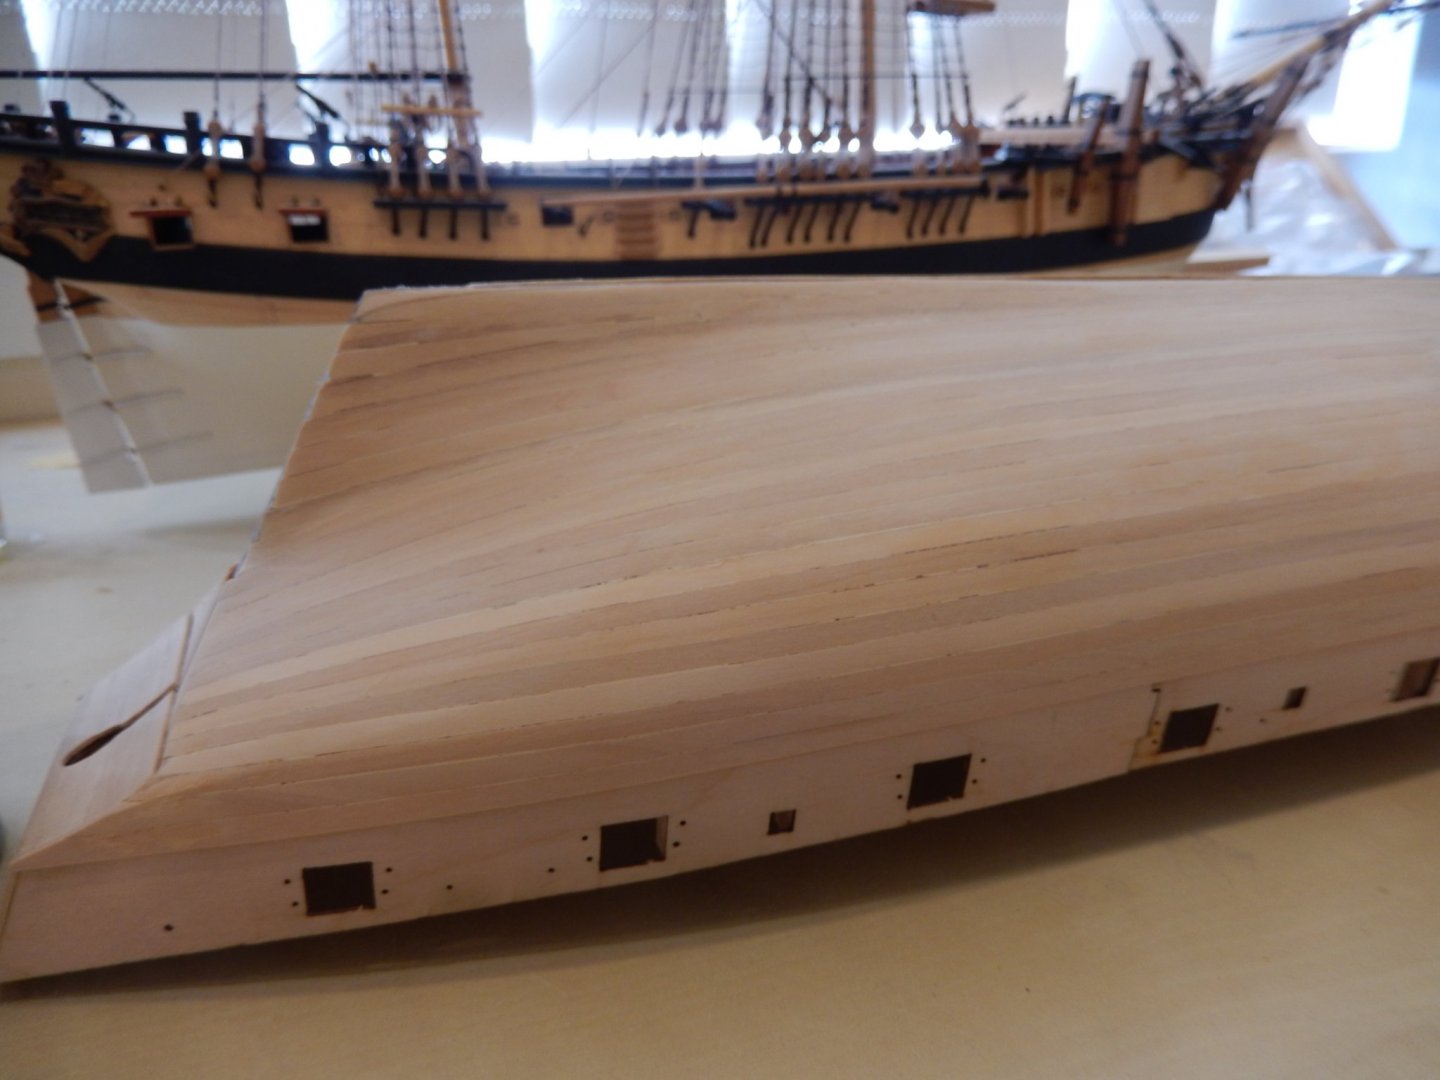
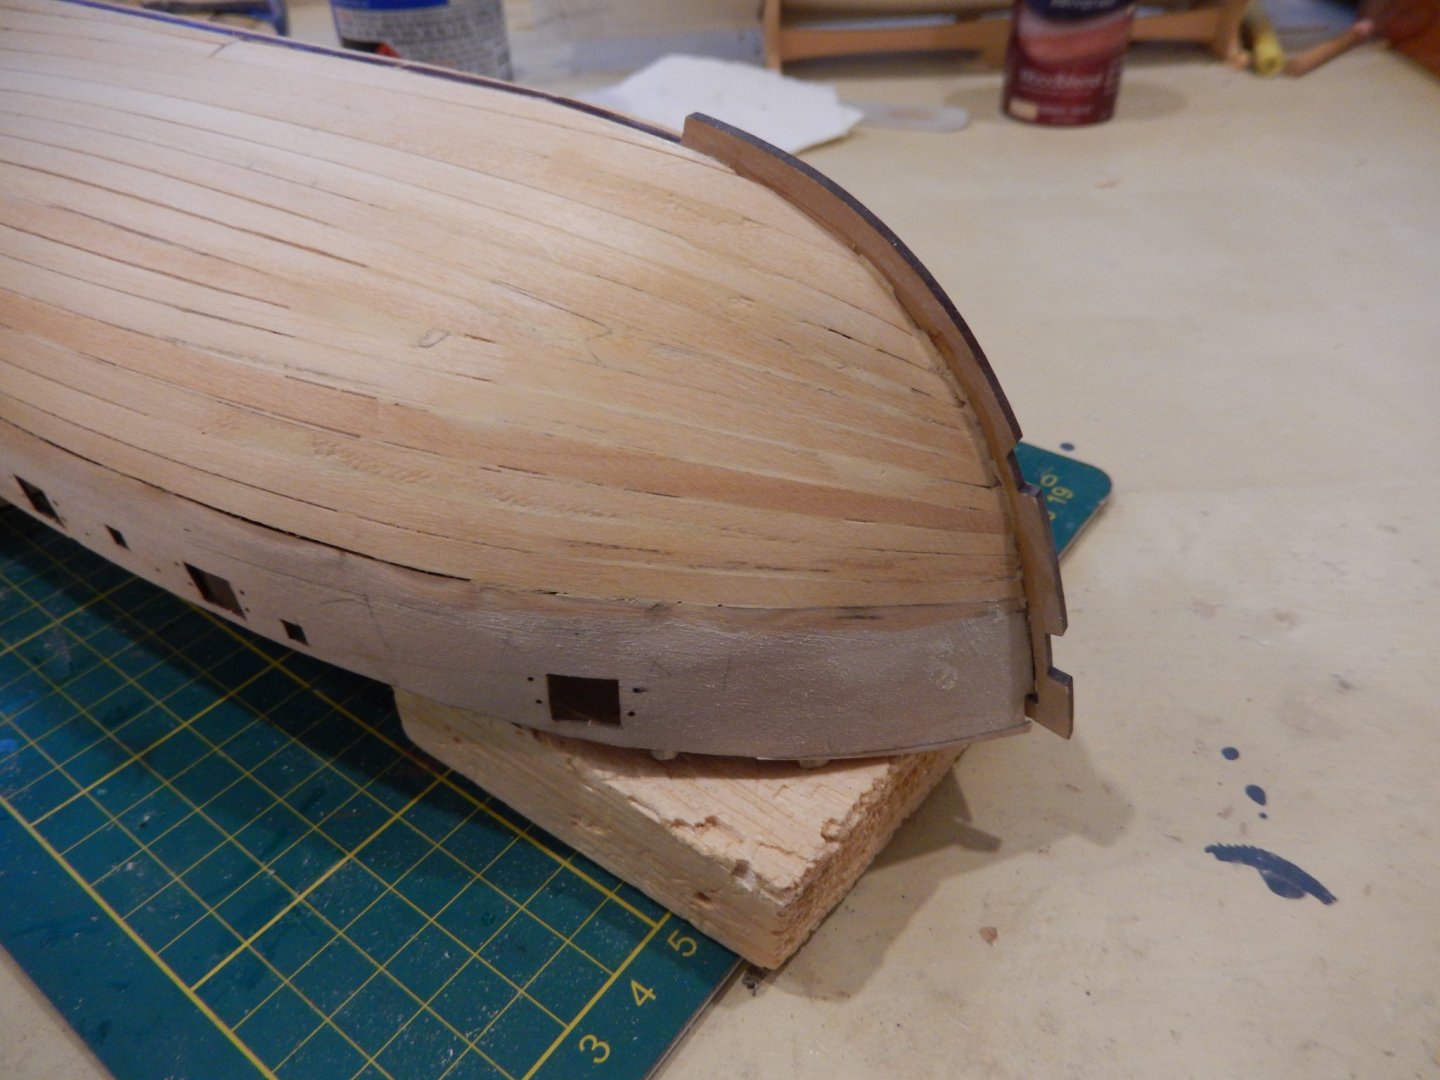
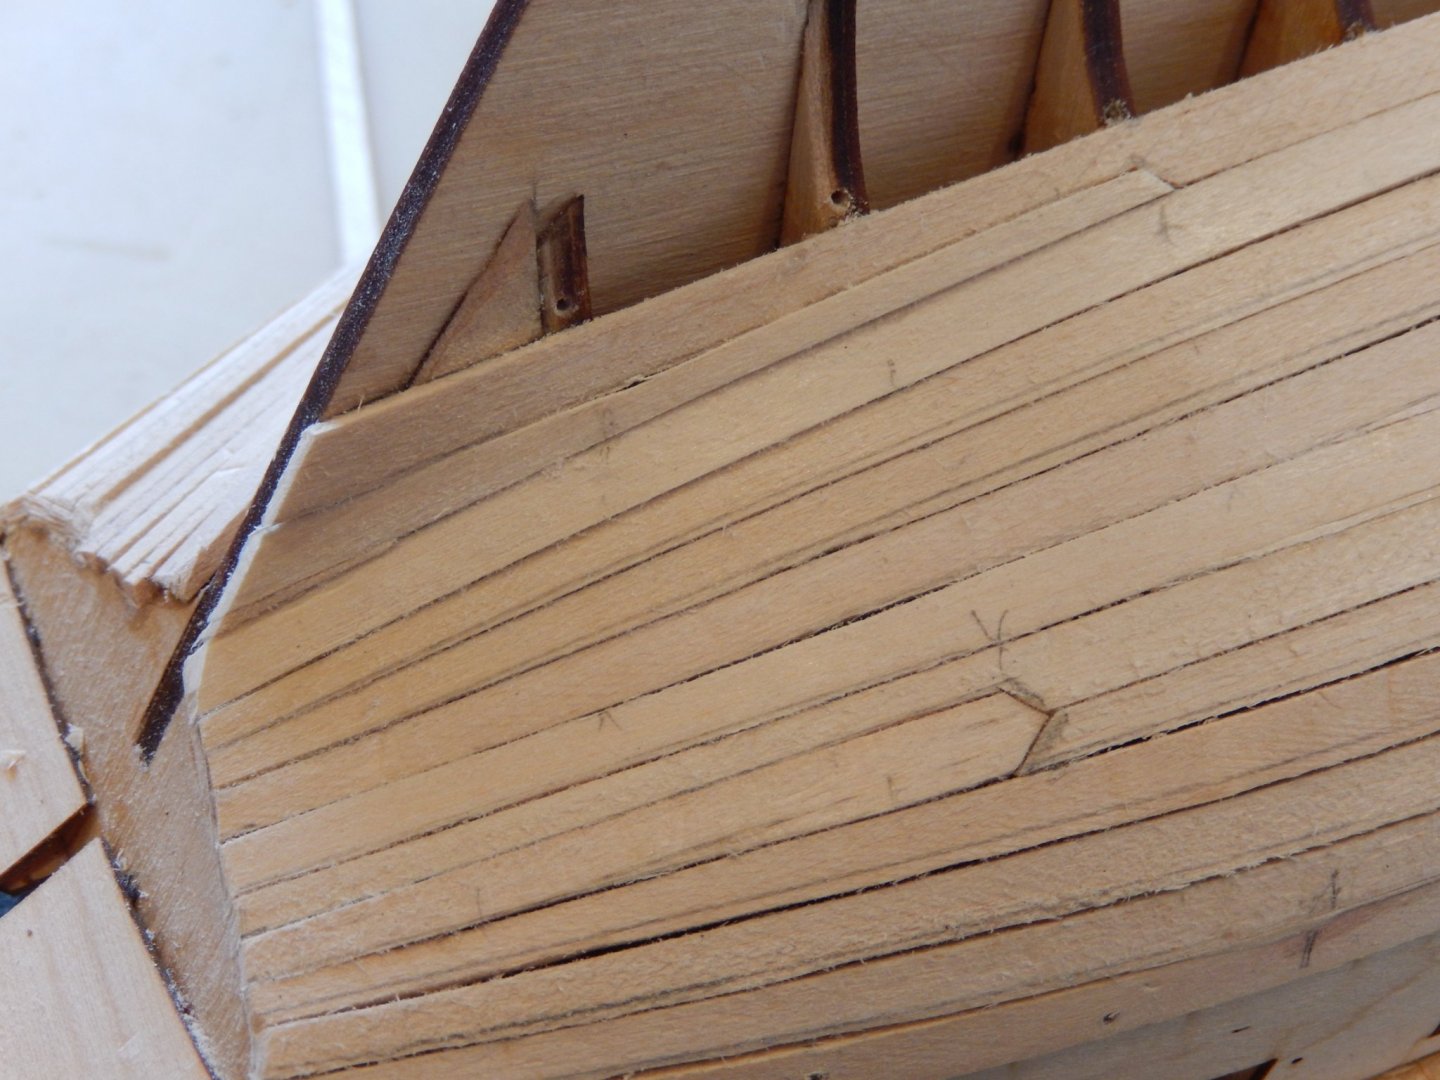
The second planking below the wale is complete and sanded. It has come out reasonably well, though not without difficulties. The timber strip is very reluctant to bend and without my planking screws, the planking would have been very difficult indeed. The most vital planks are those above the waterline. Those below will be covered with the copper. I have decided not to use the laser-printer deck. It's just too perfect. here is progress.

-
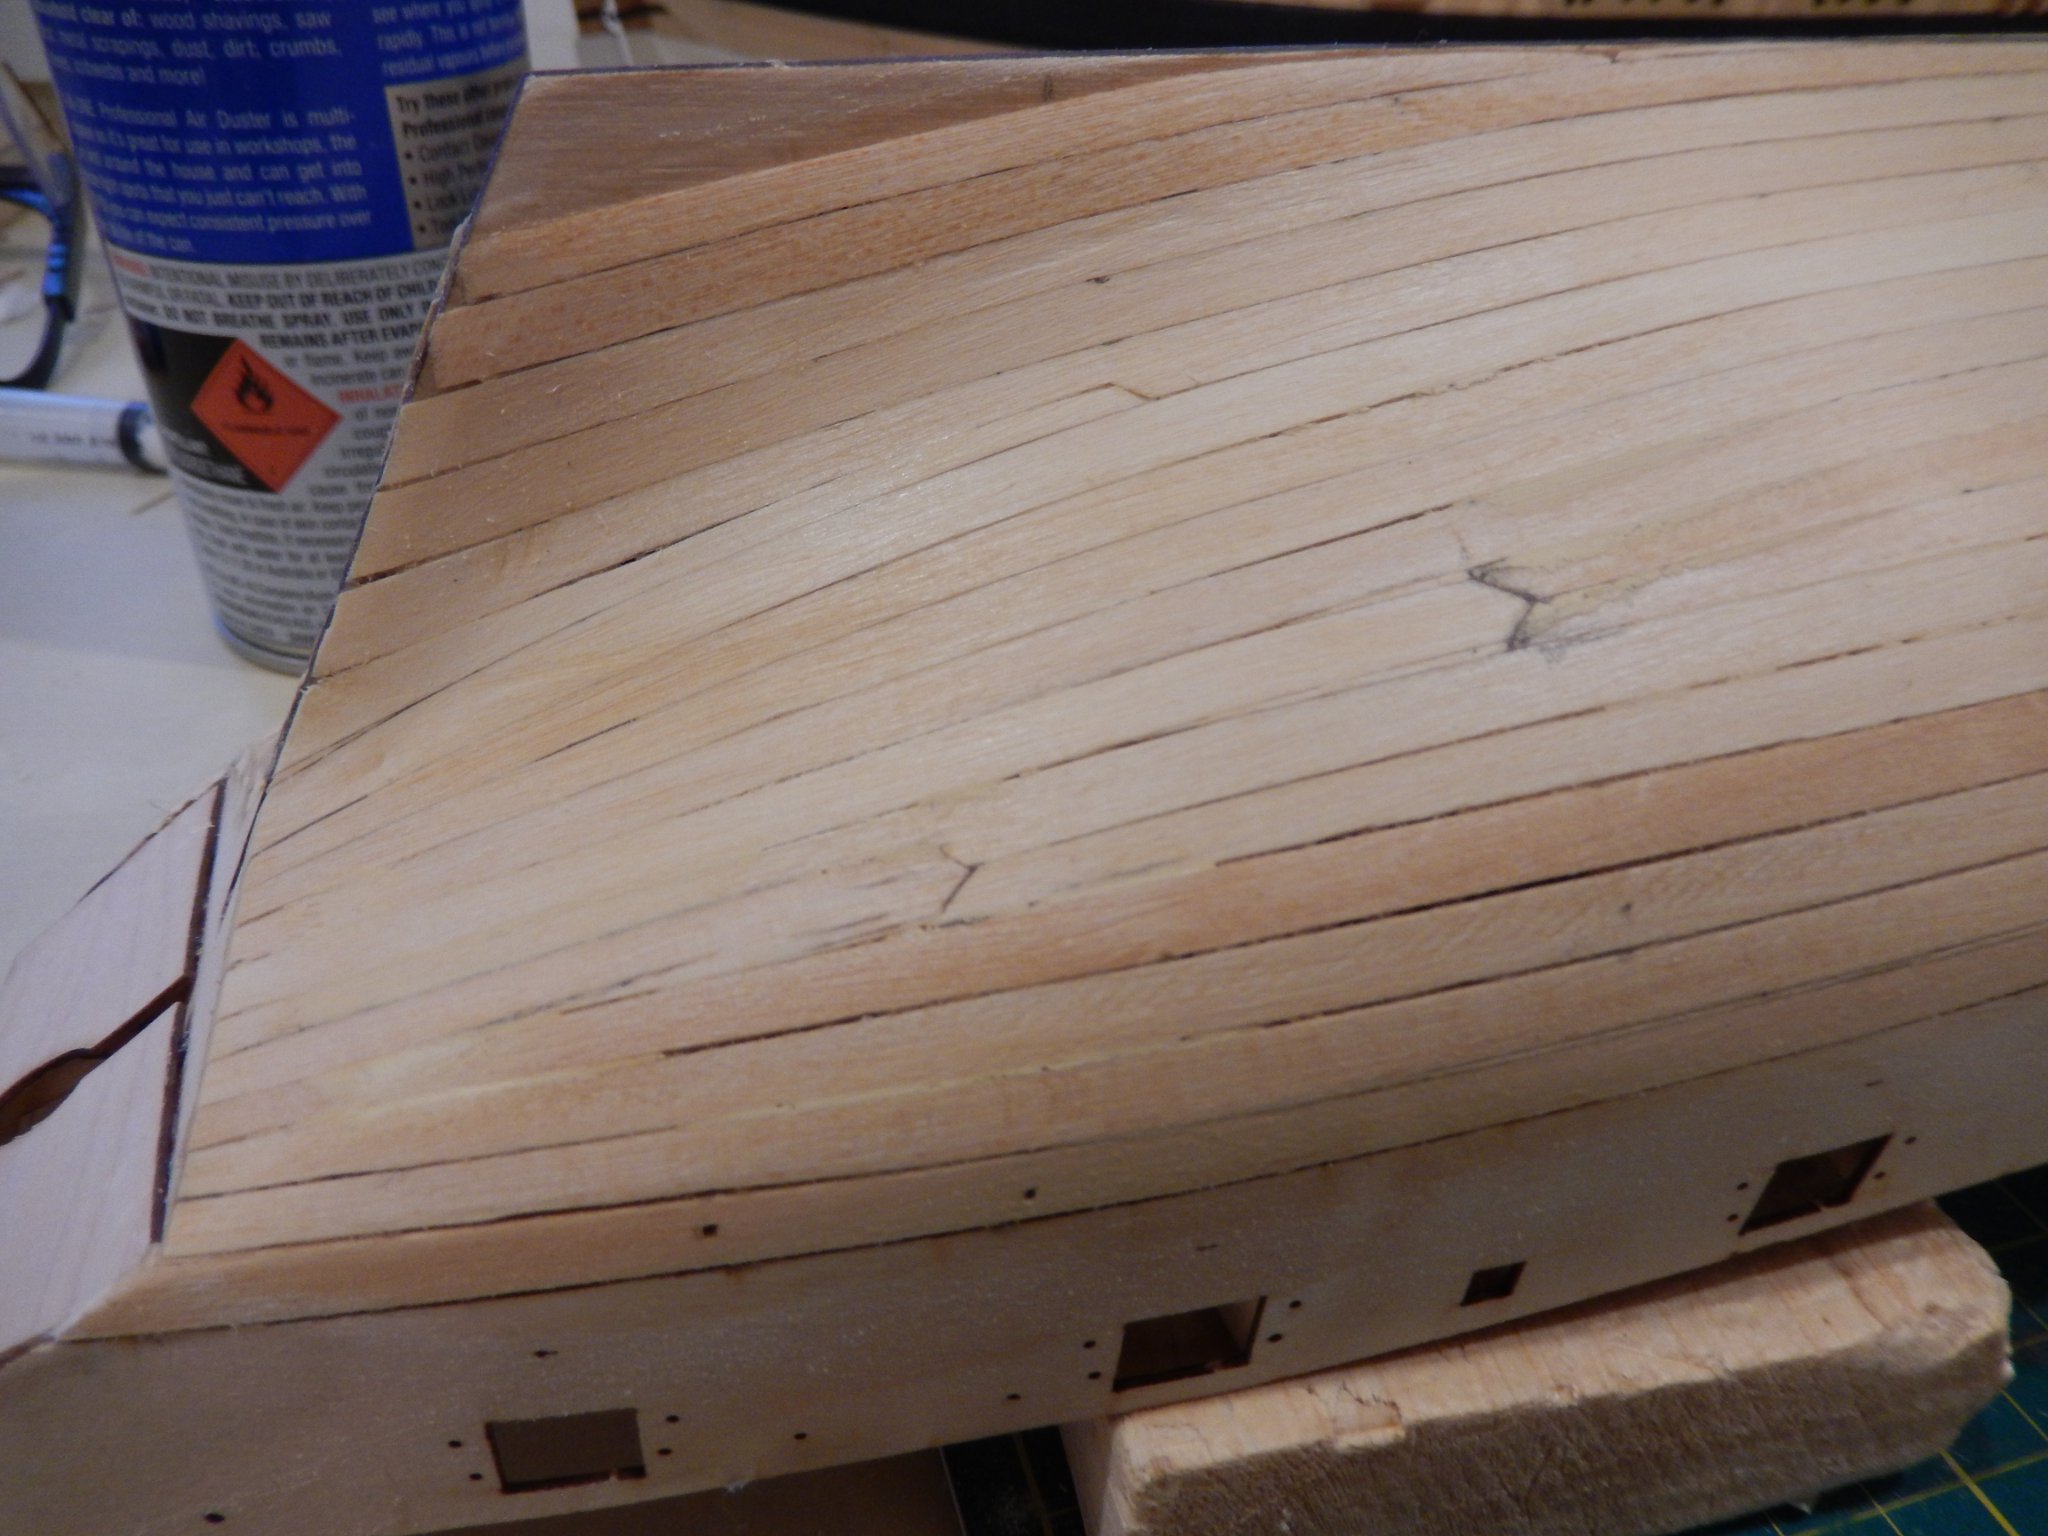
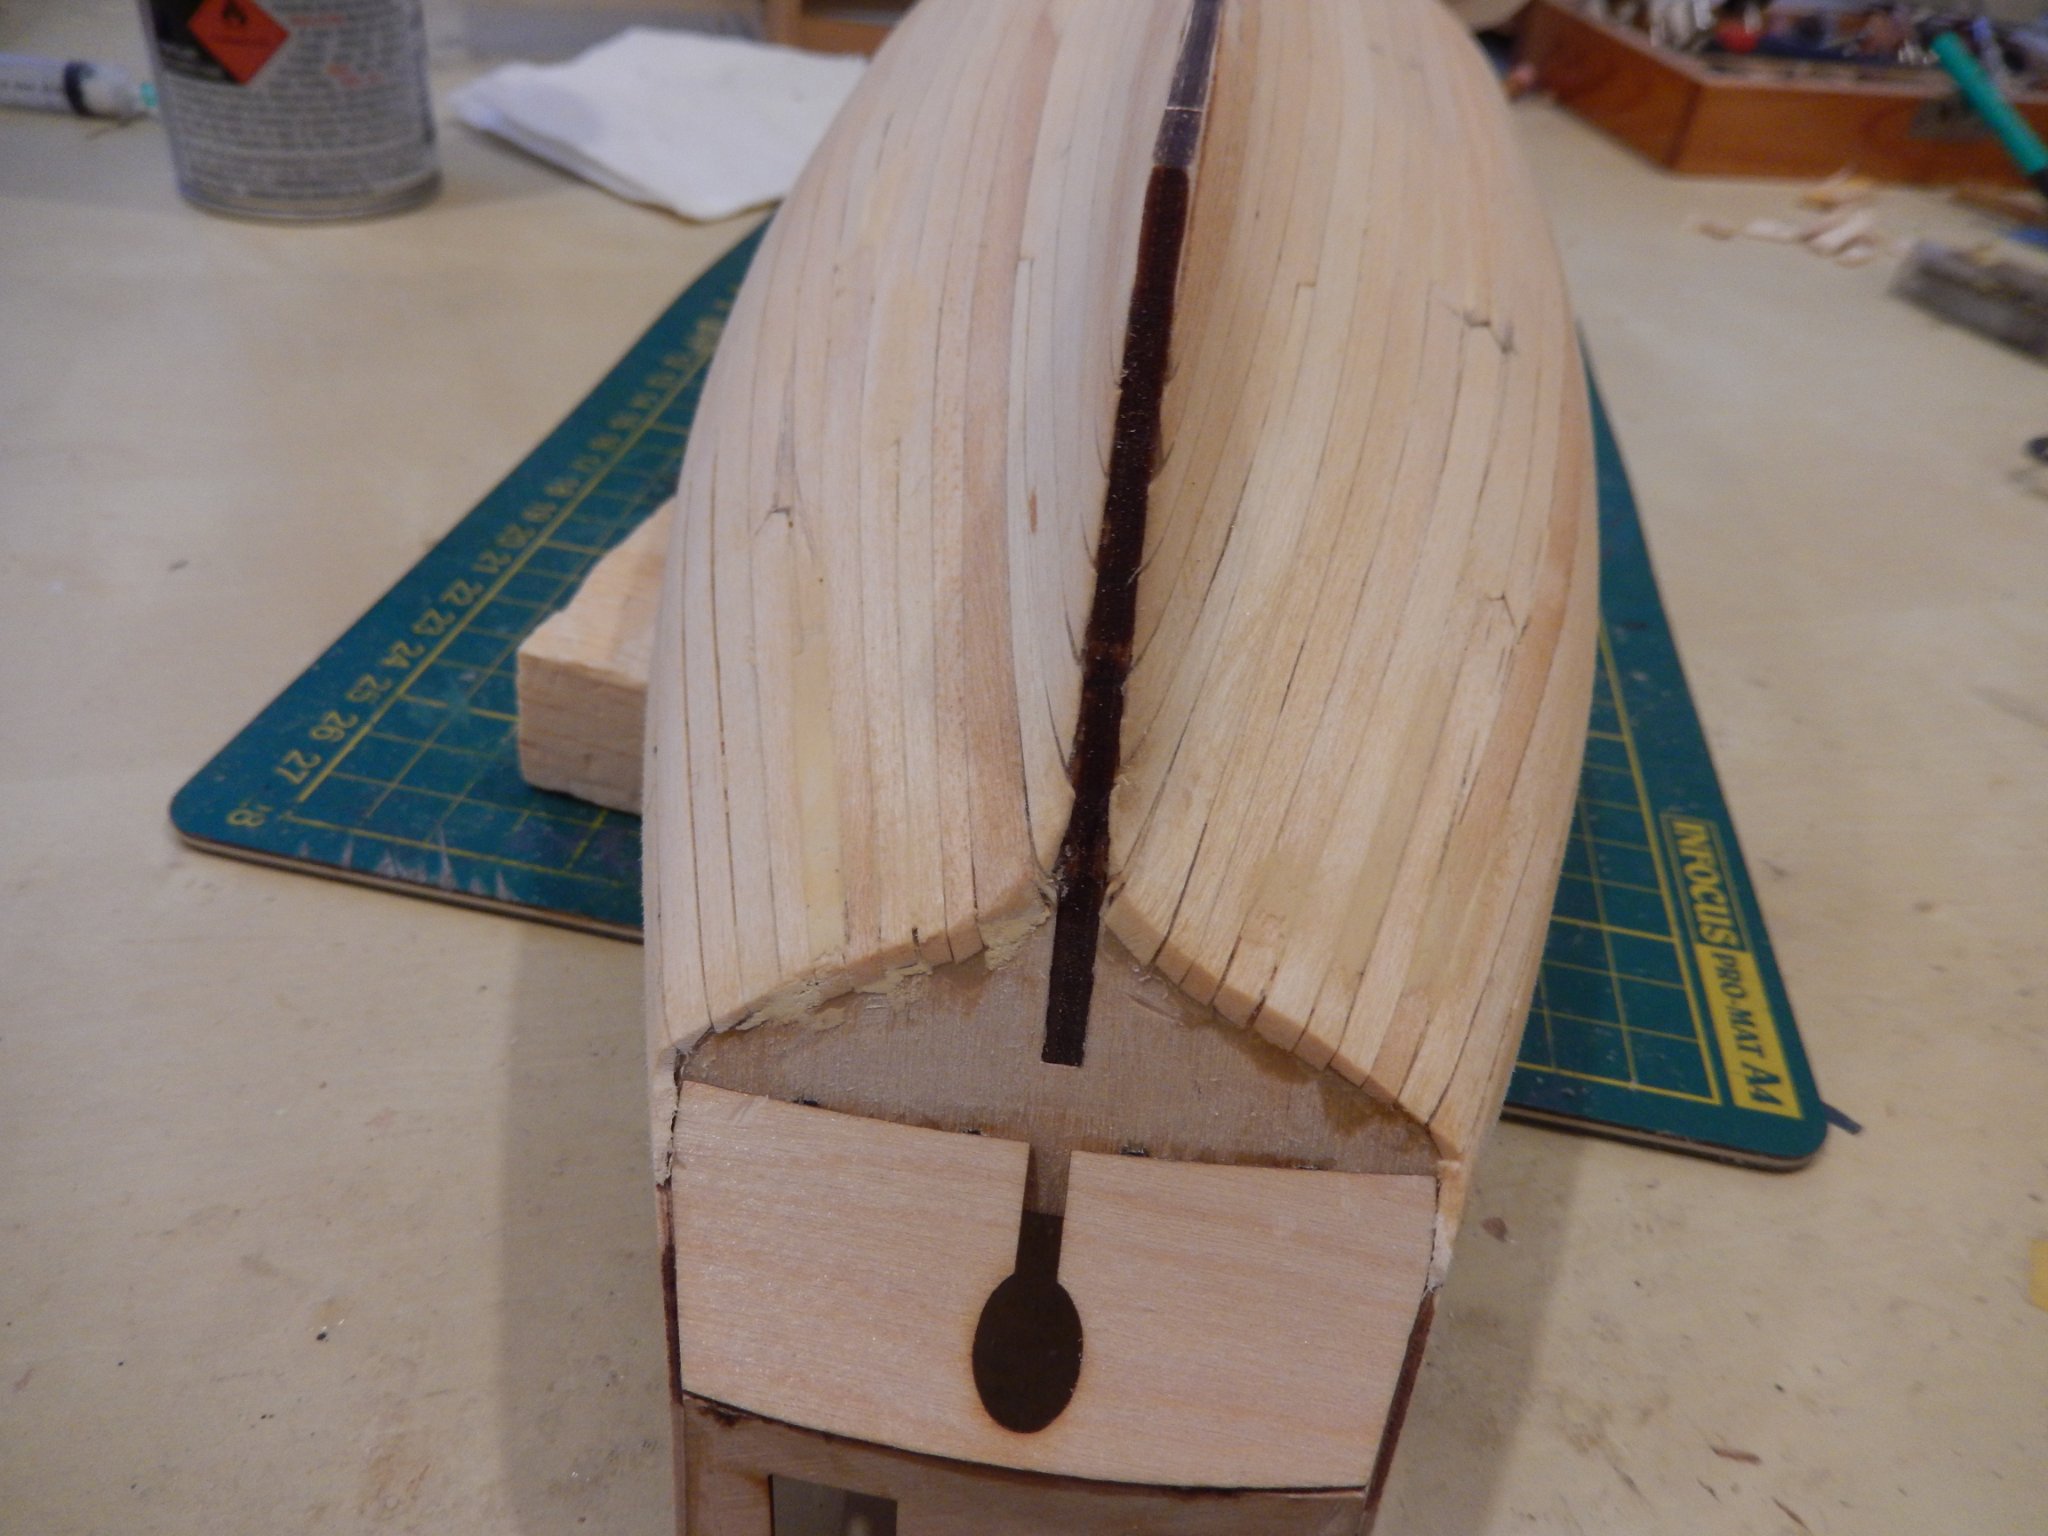
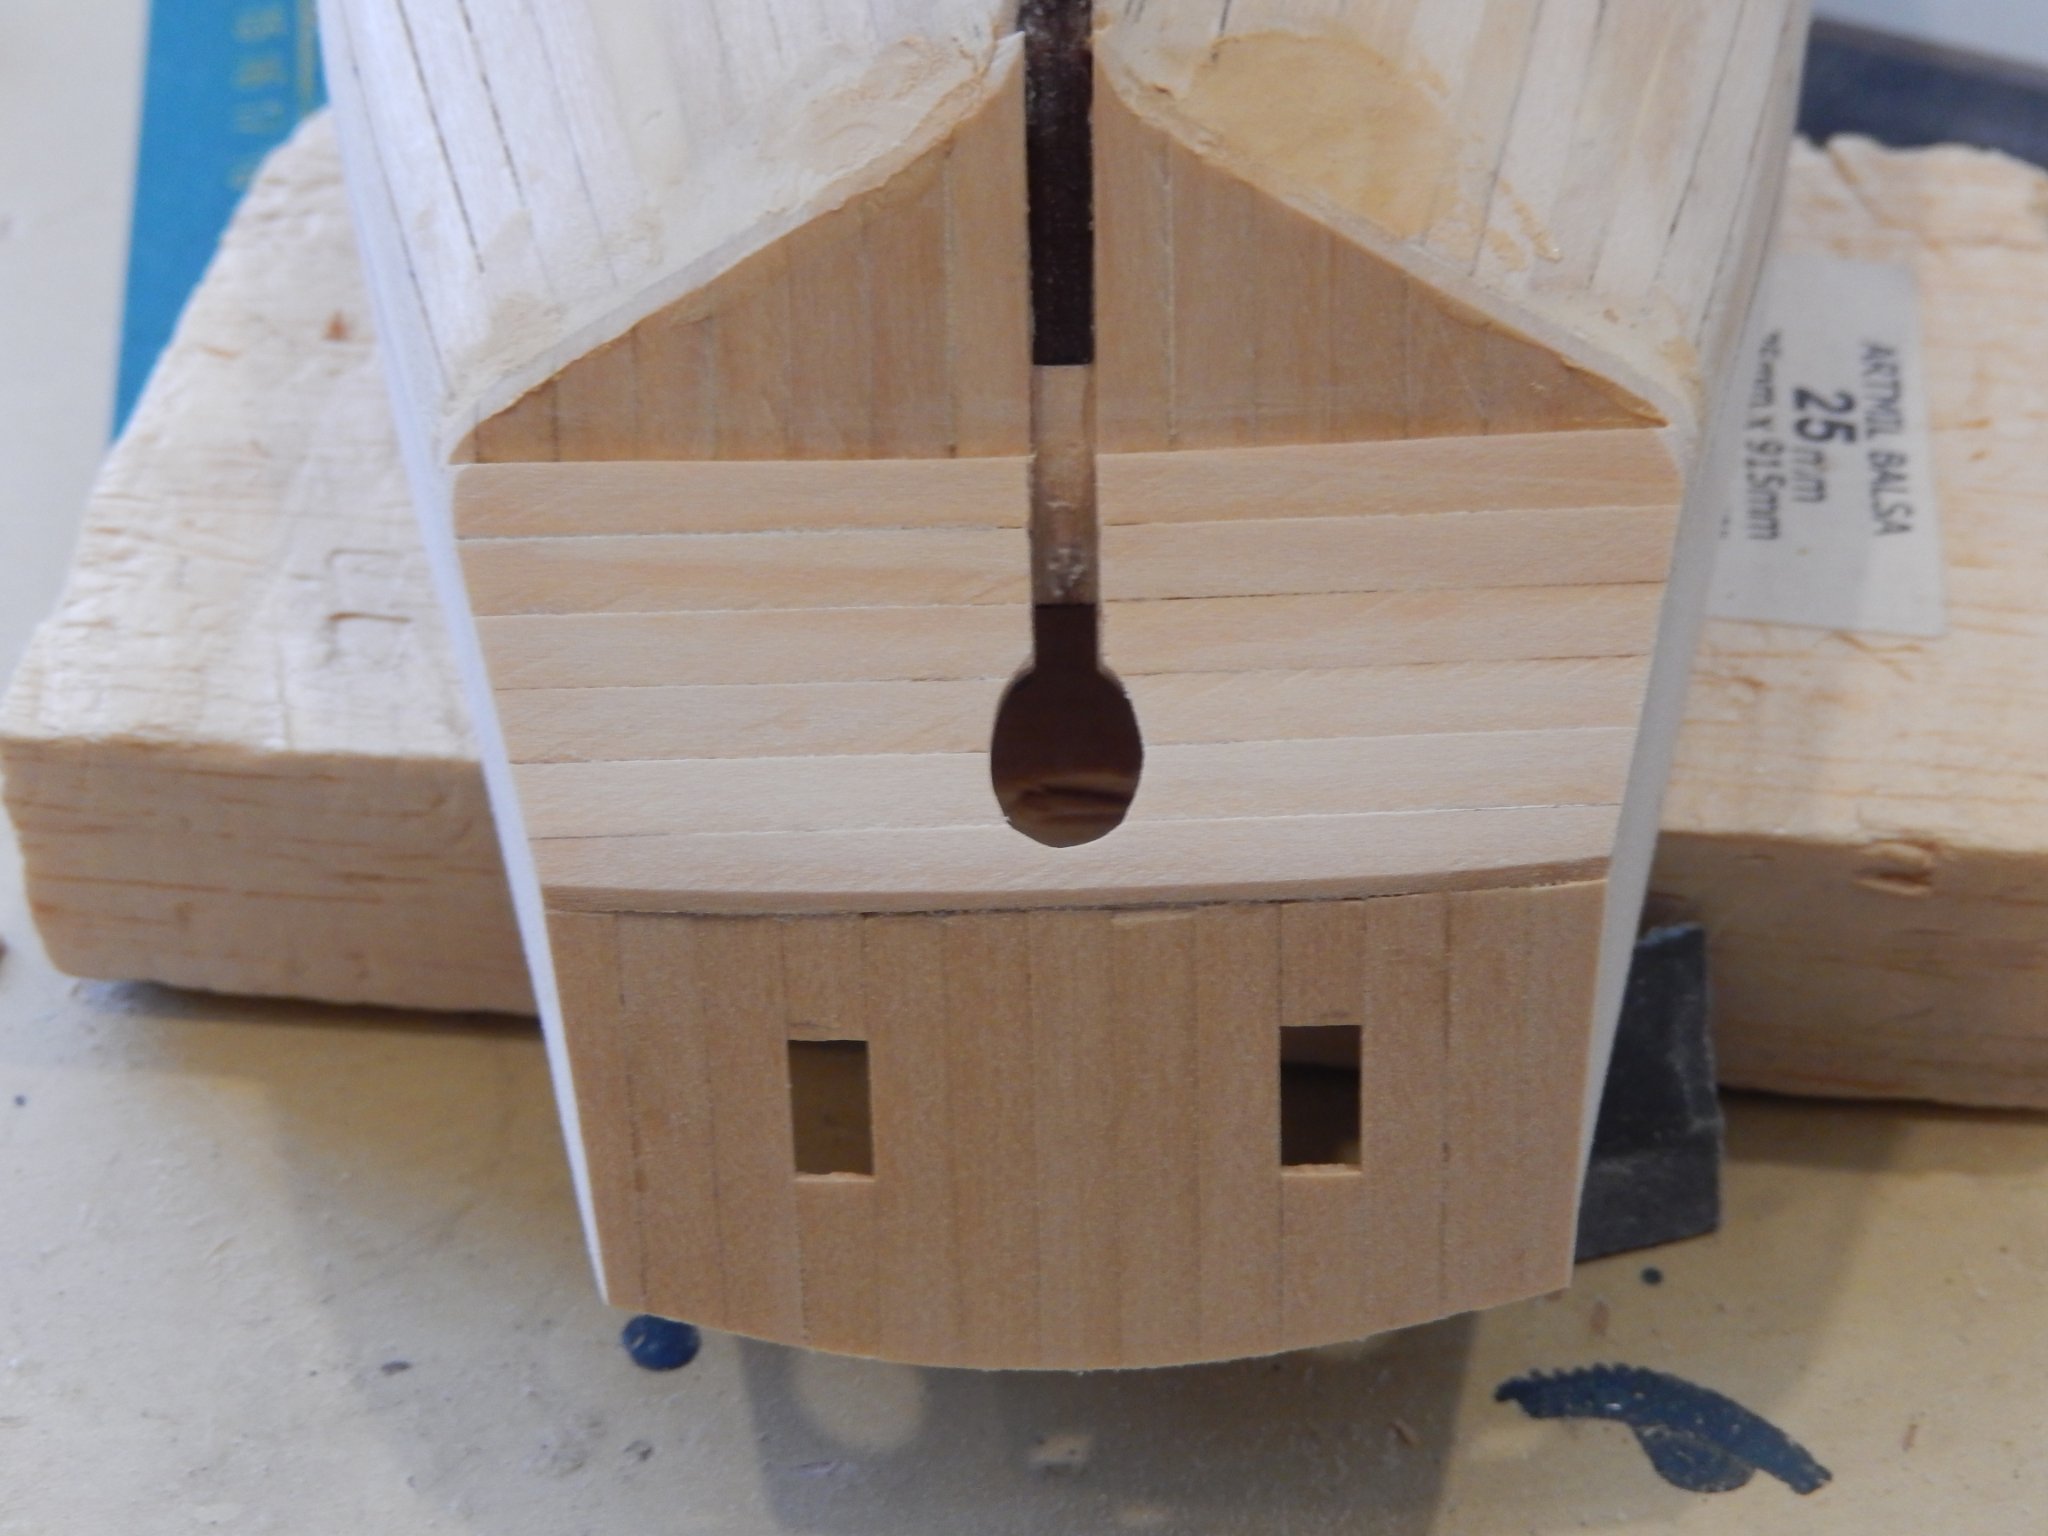
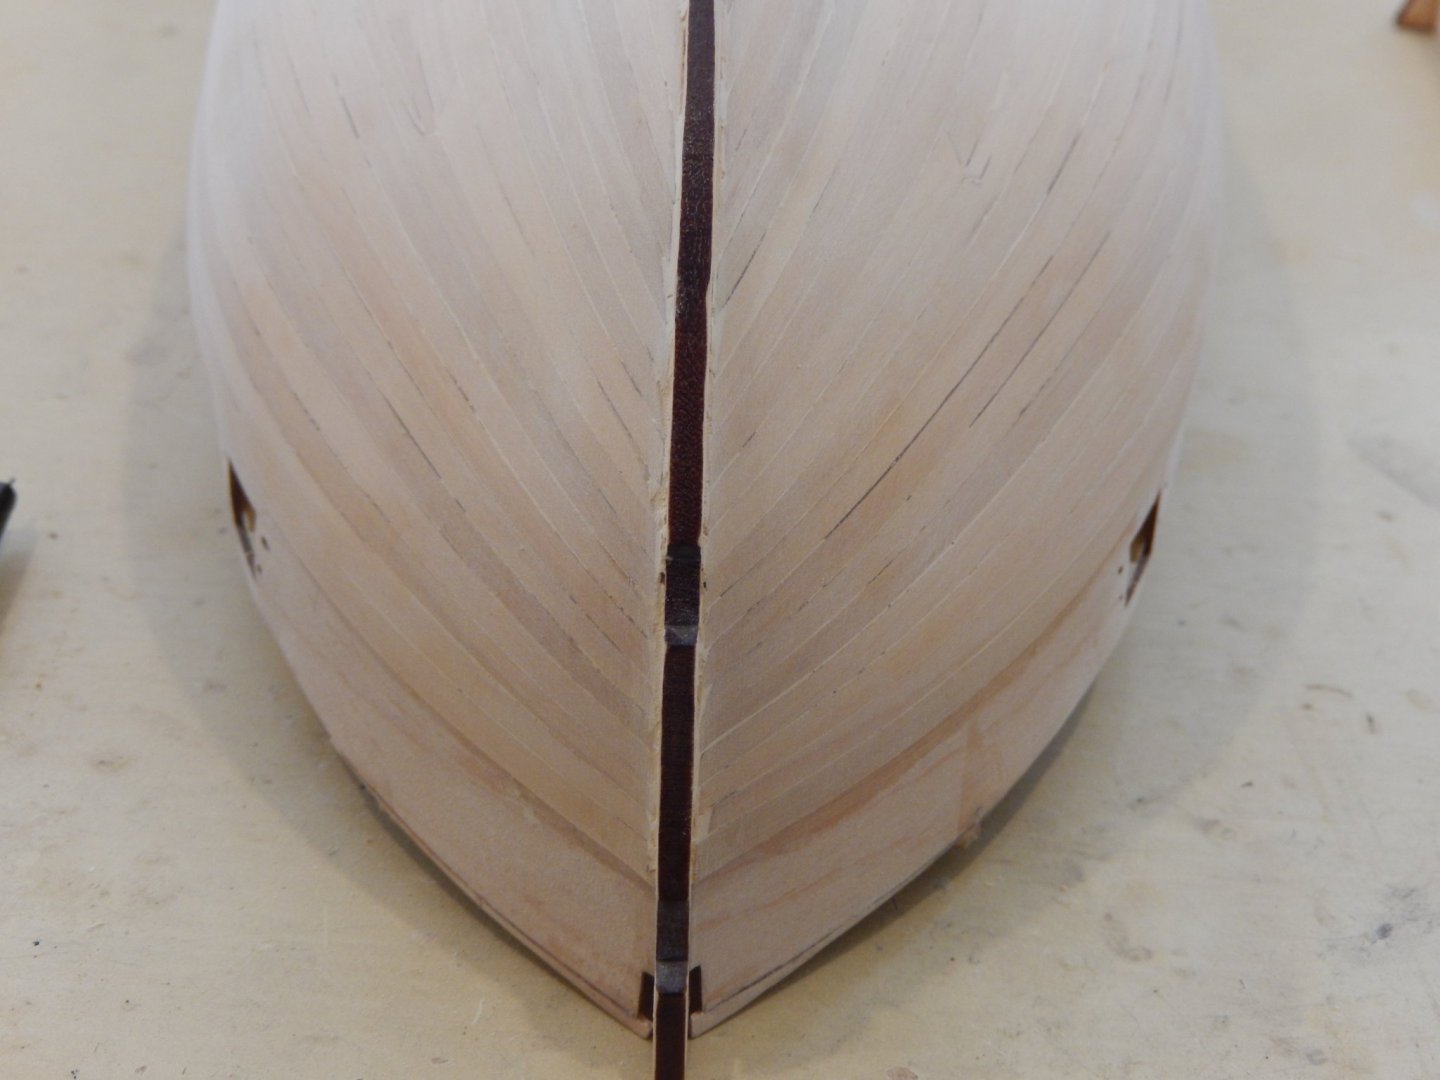
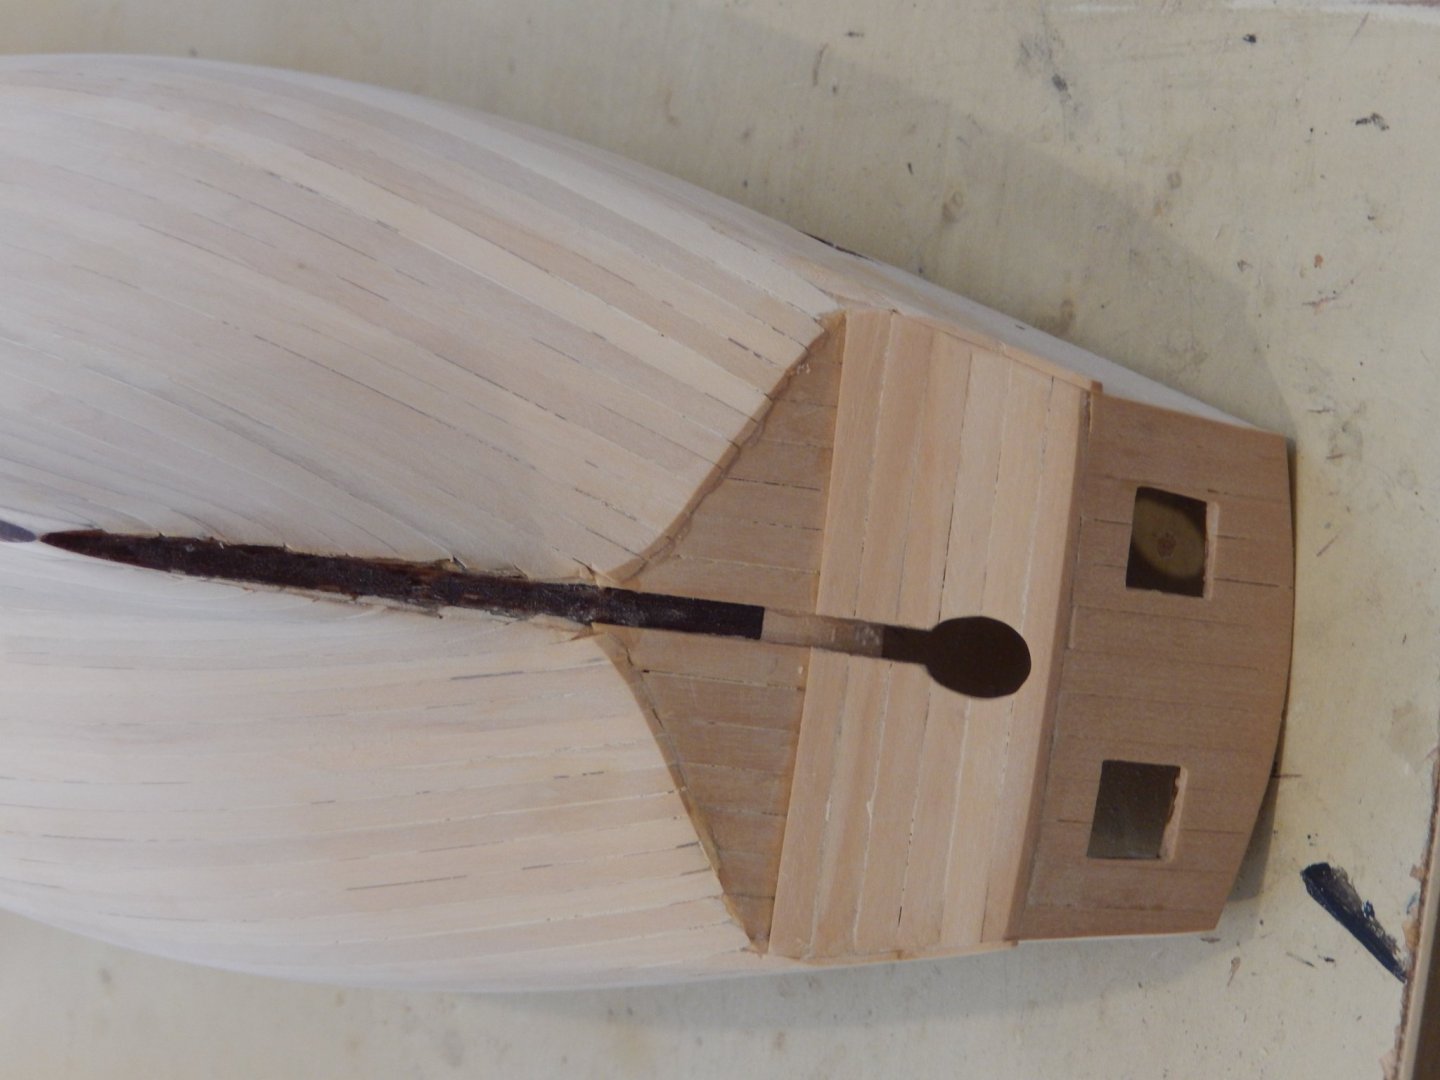
There is no need to thin the stern. Later the stern post (part 110) will be attached. It is the same thickness as the rudder. Moreover there will be a gap between the stern post and the rudder to allow for the hinges which enable the rudder to turn.
-
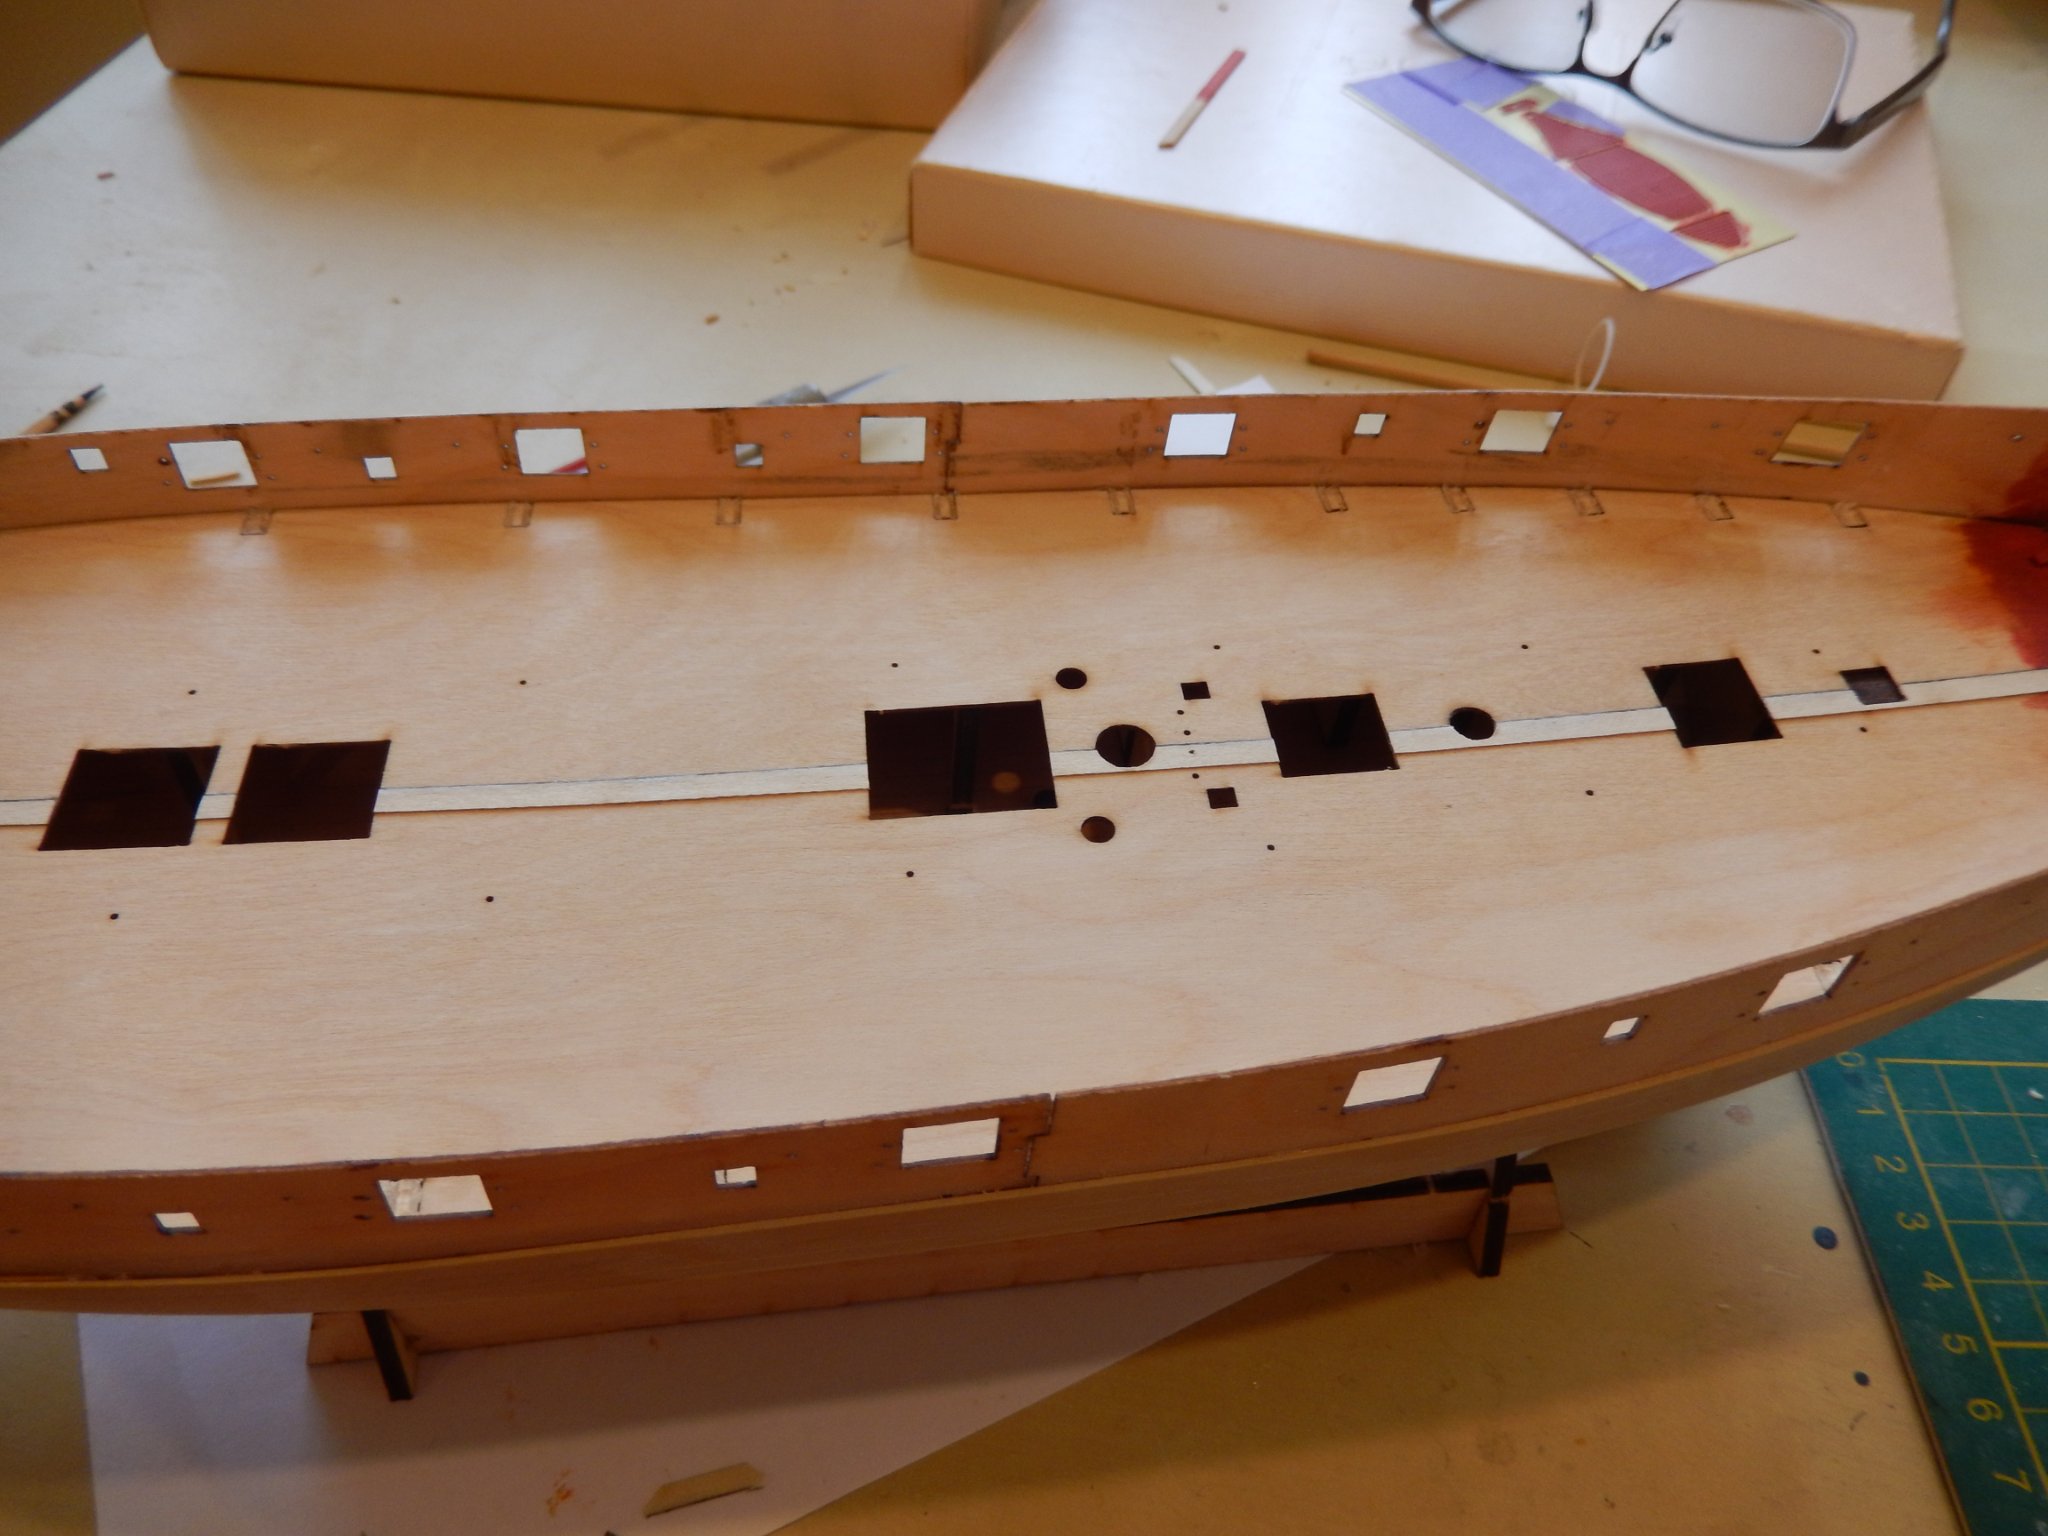
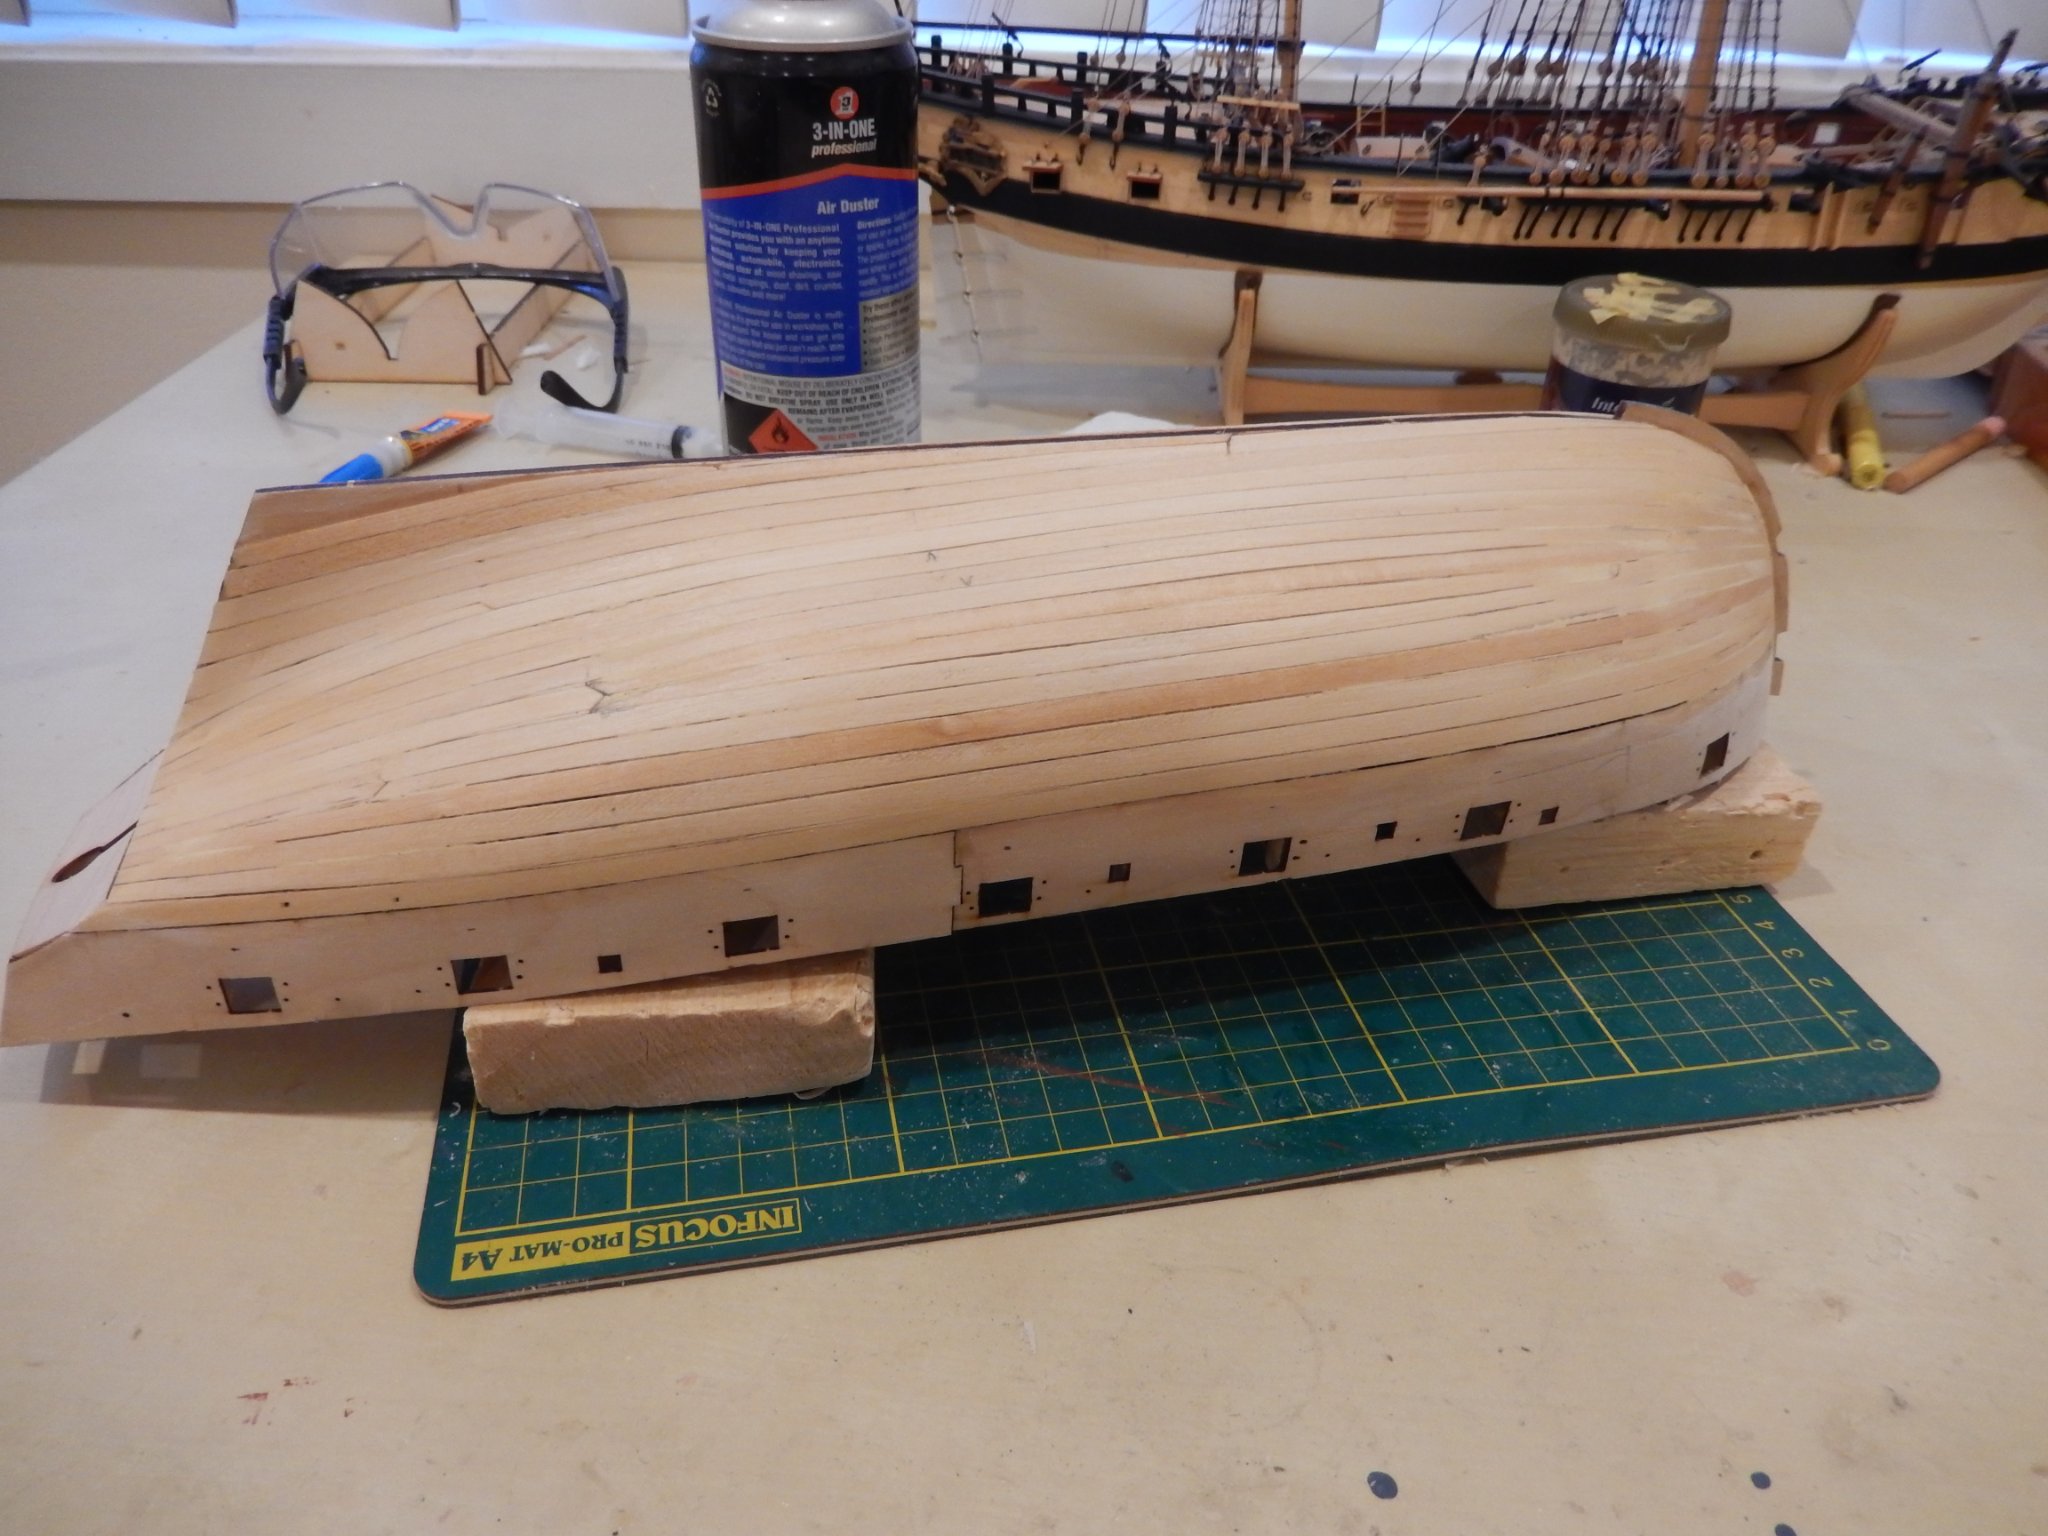
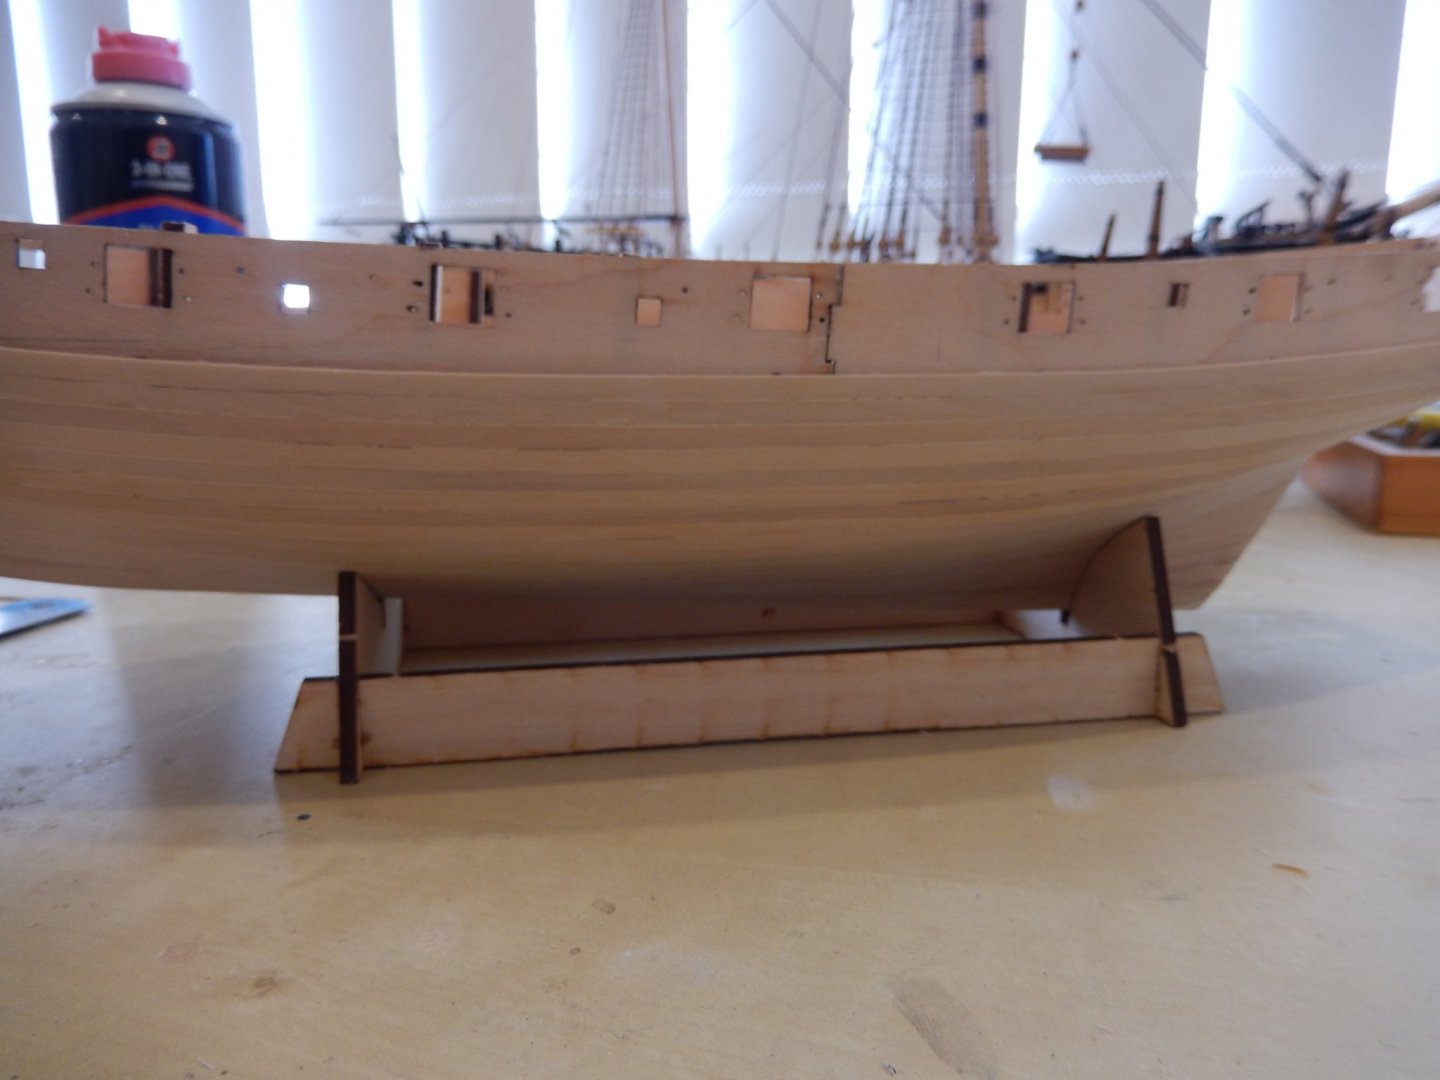
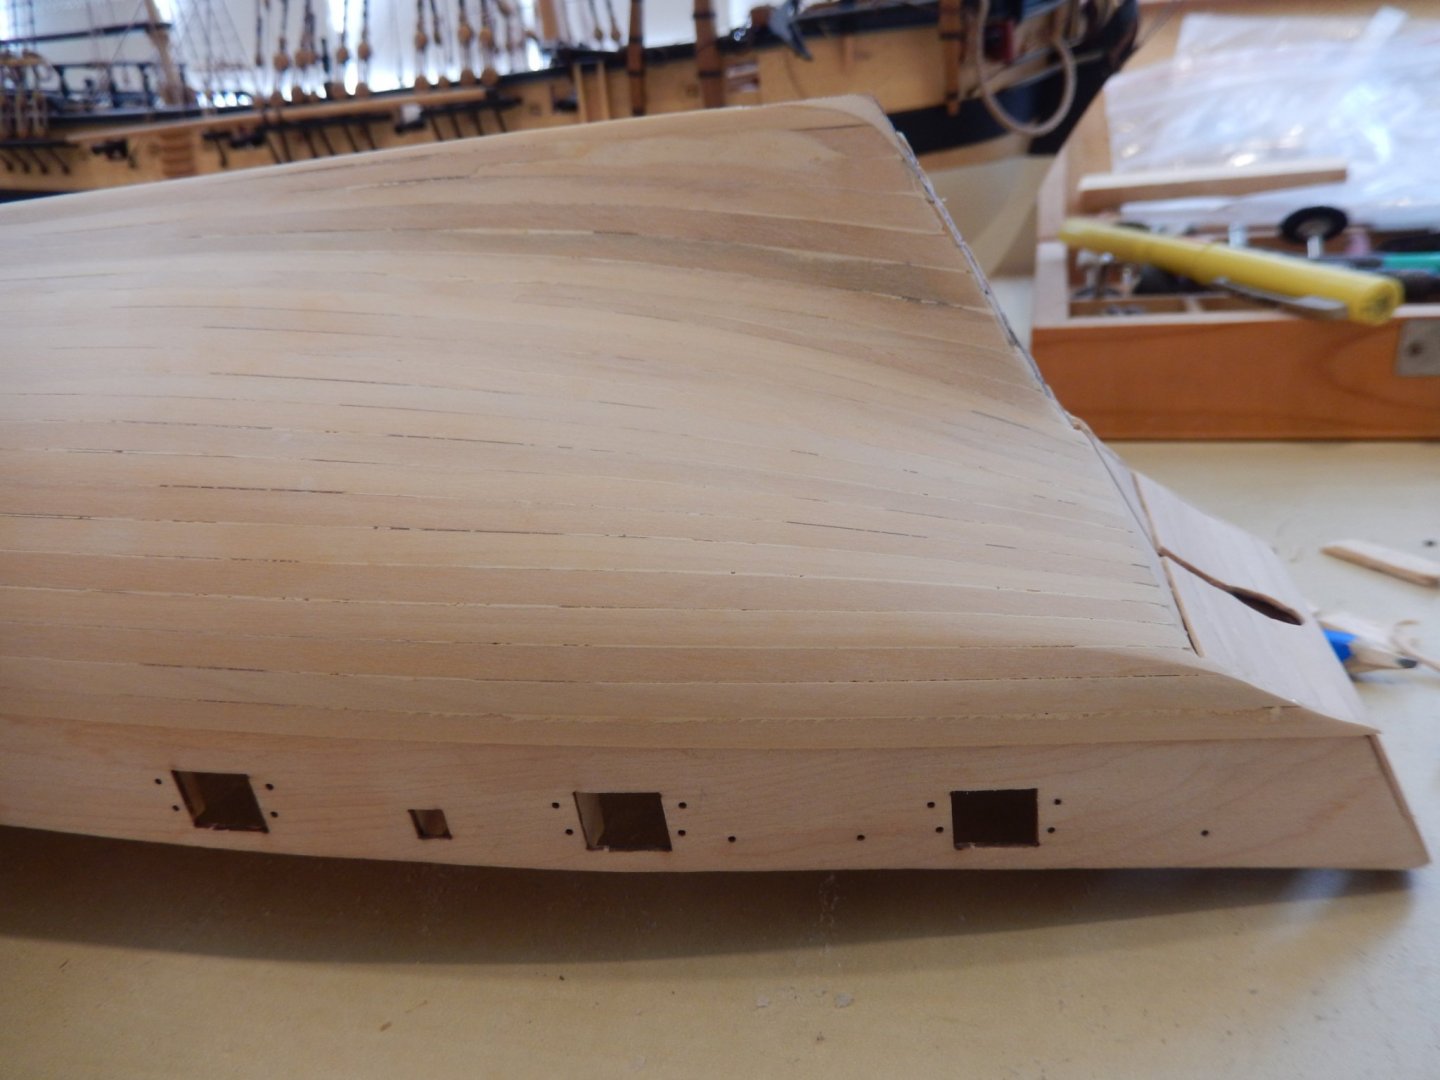
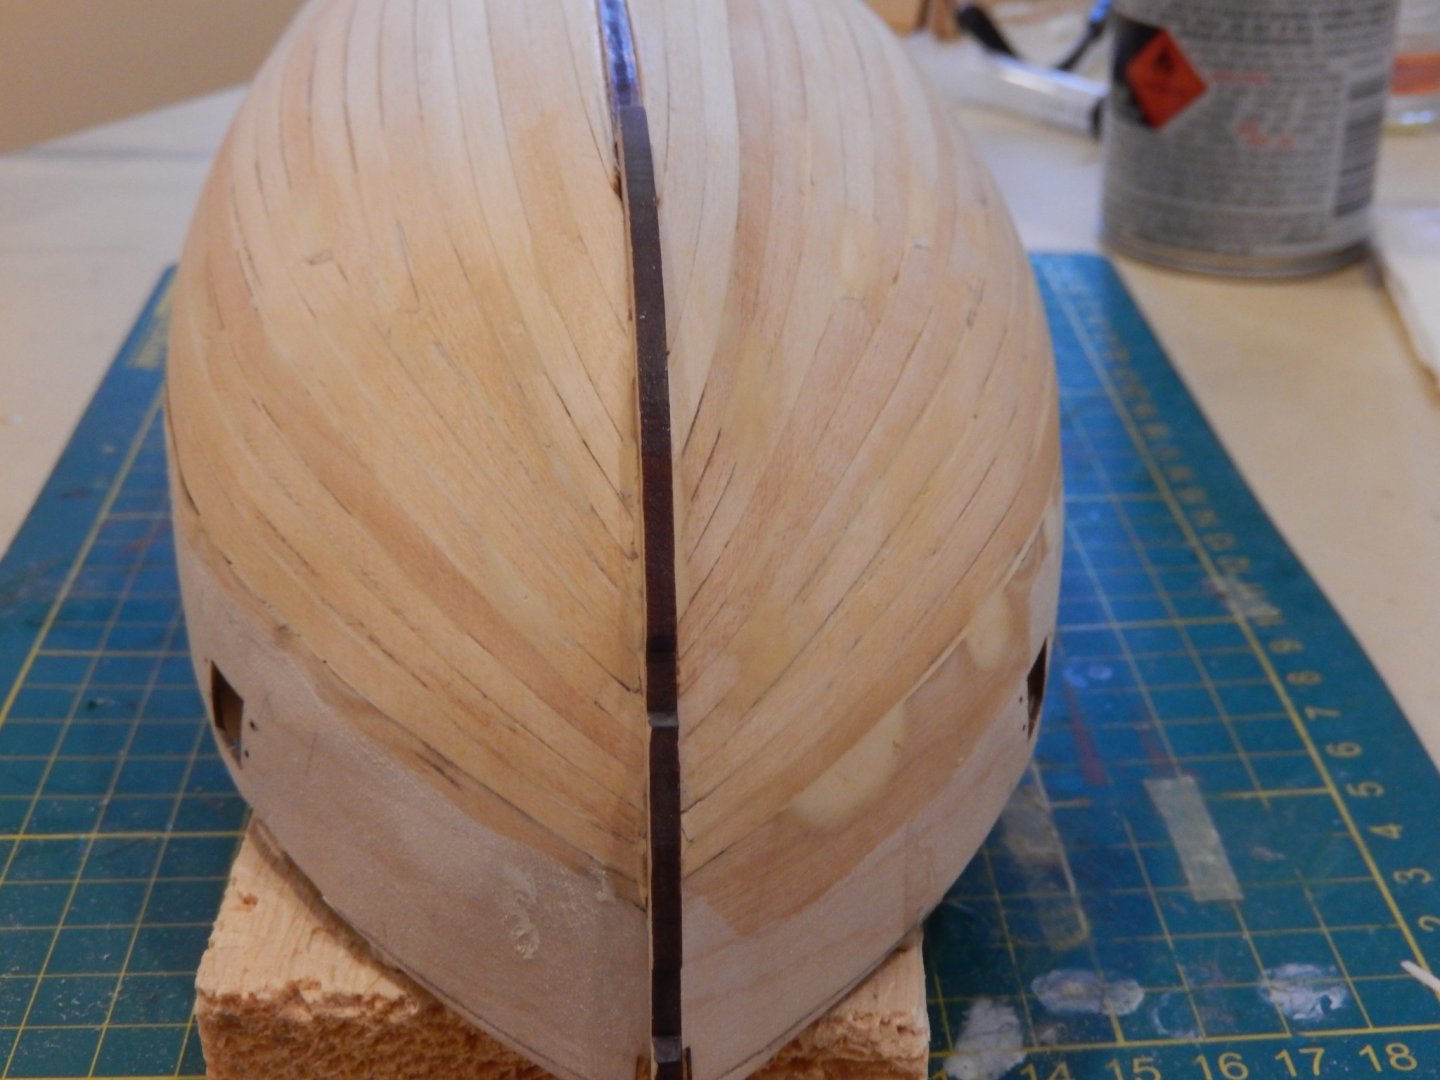
Slow progress. The first layer of planks is finally complete. Fortunately not much filling was needed. The second layer is now in progress. The final cladding around the stern has been tidied up since these pictures were taken.


-
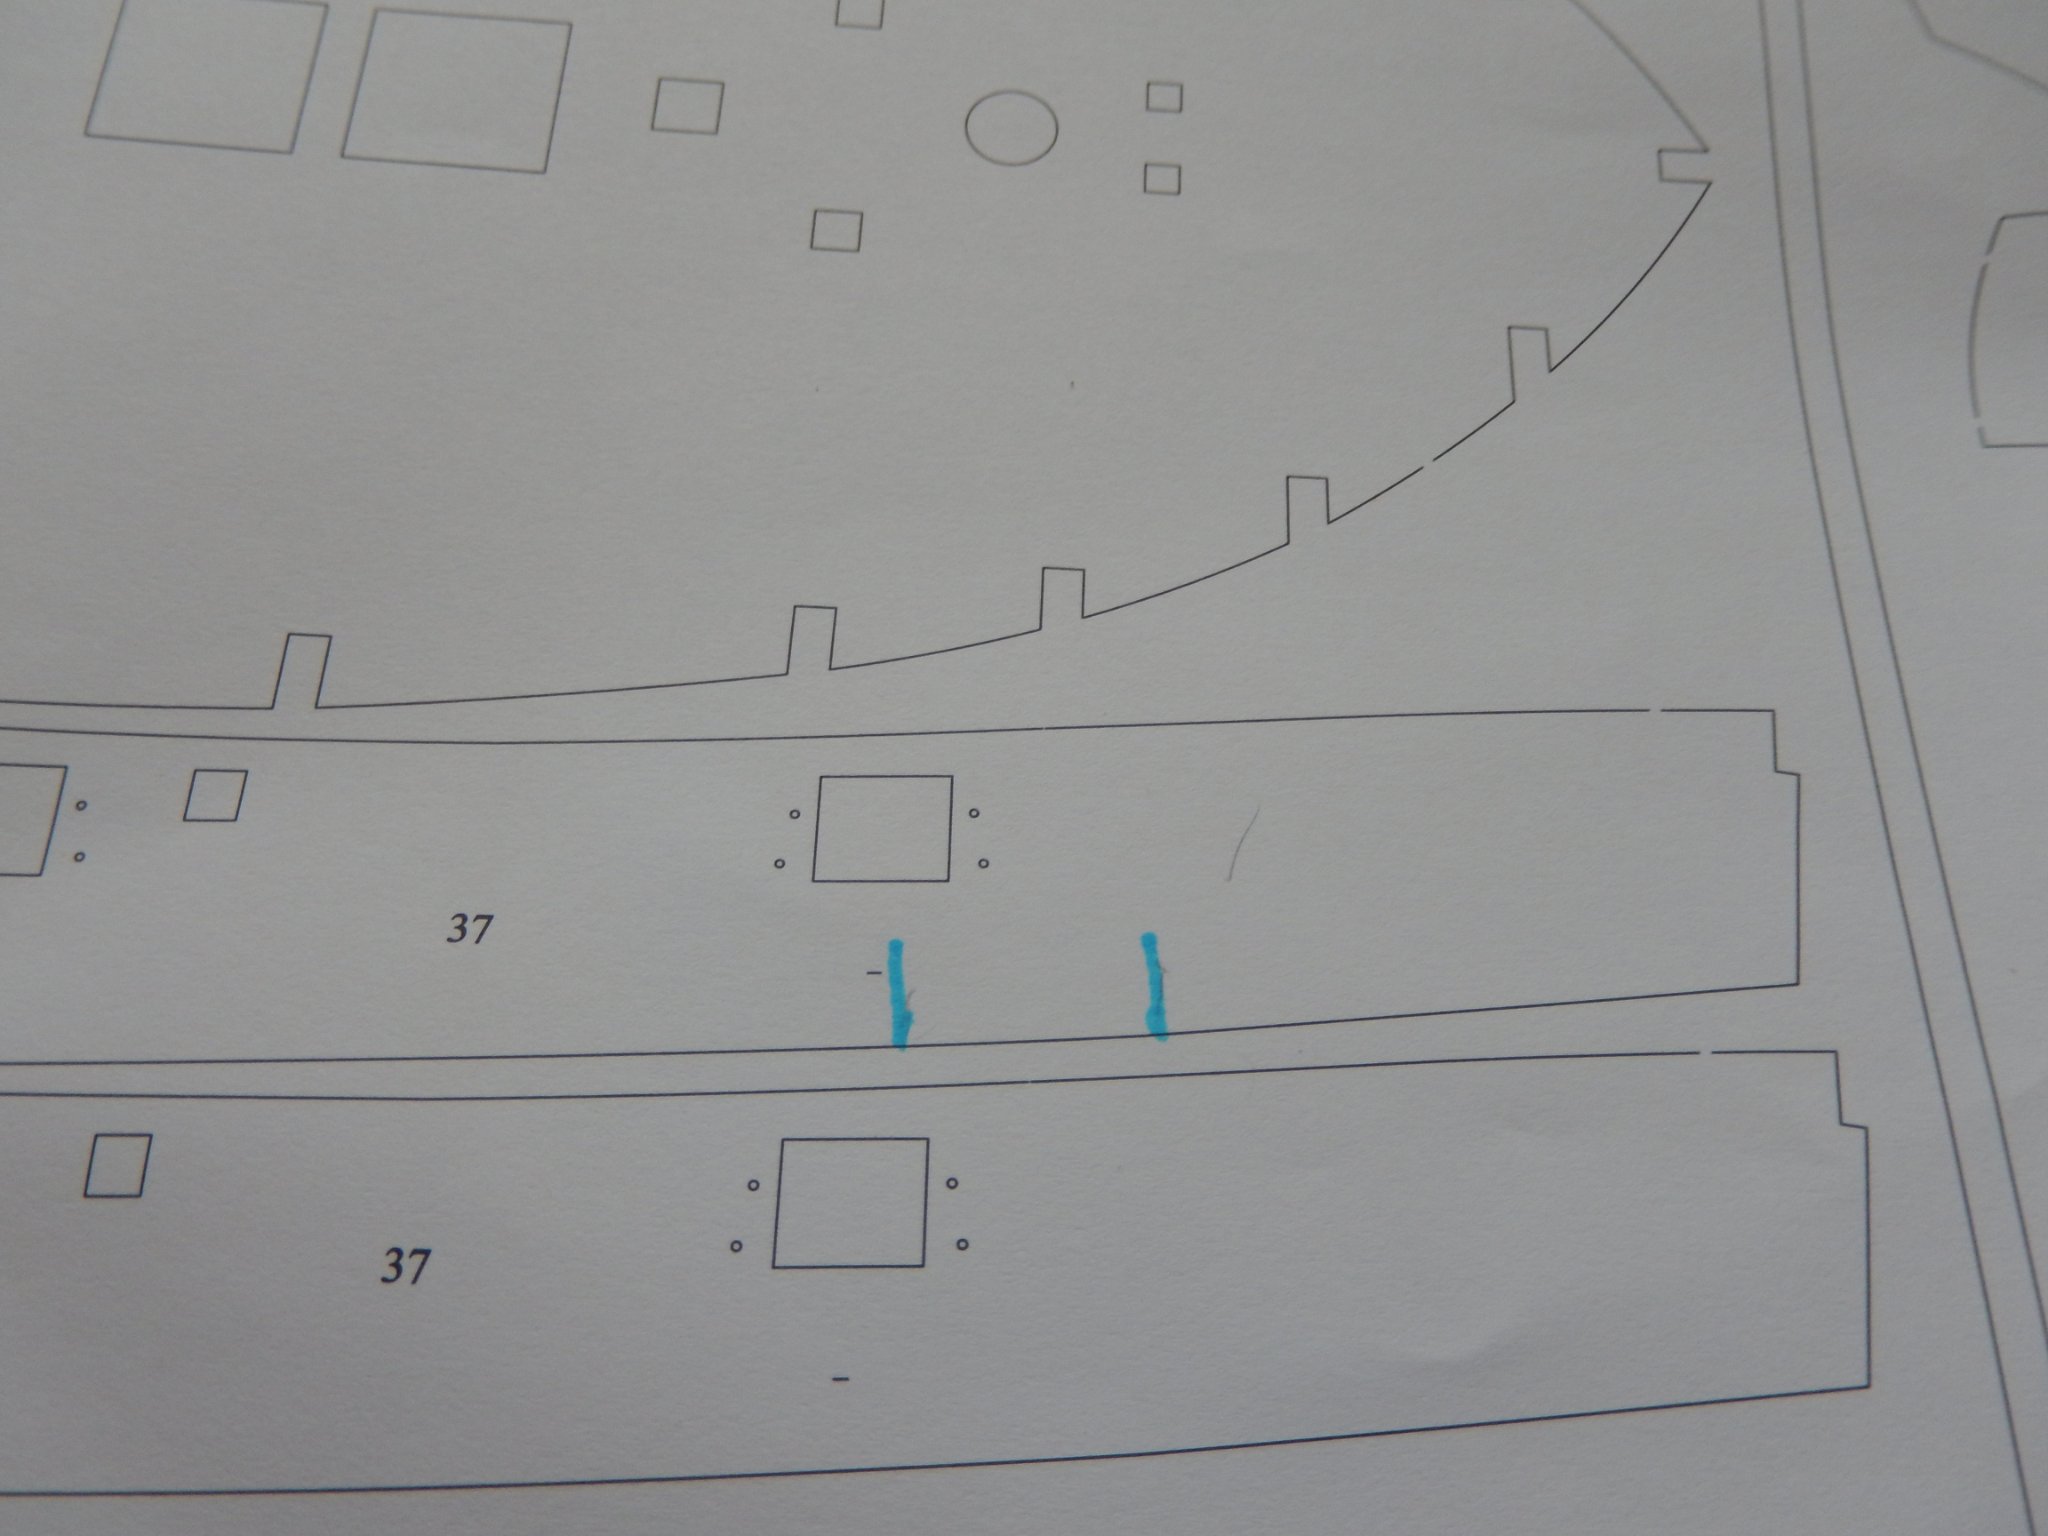
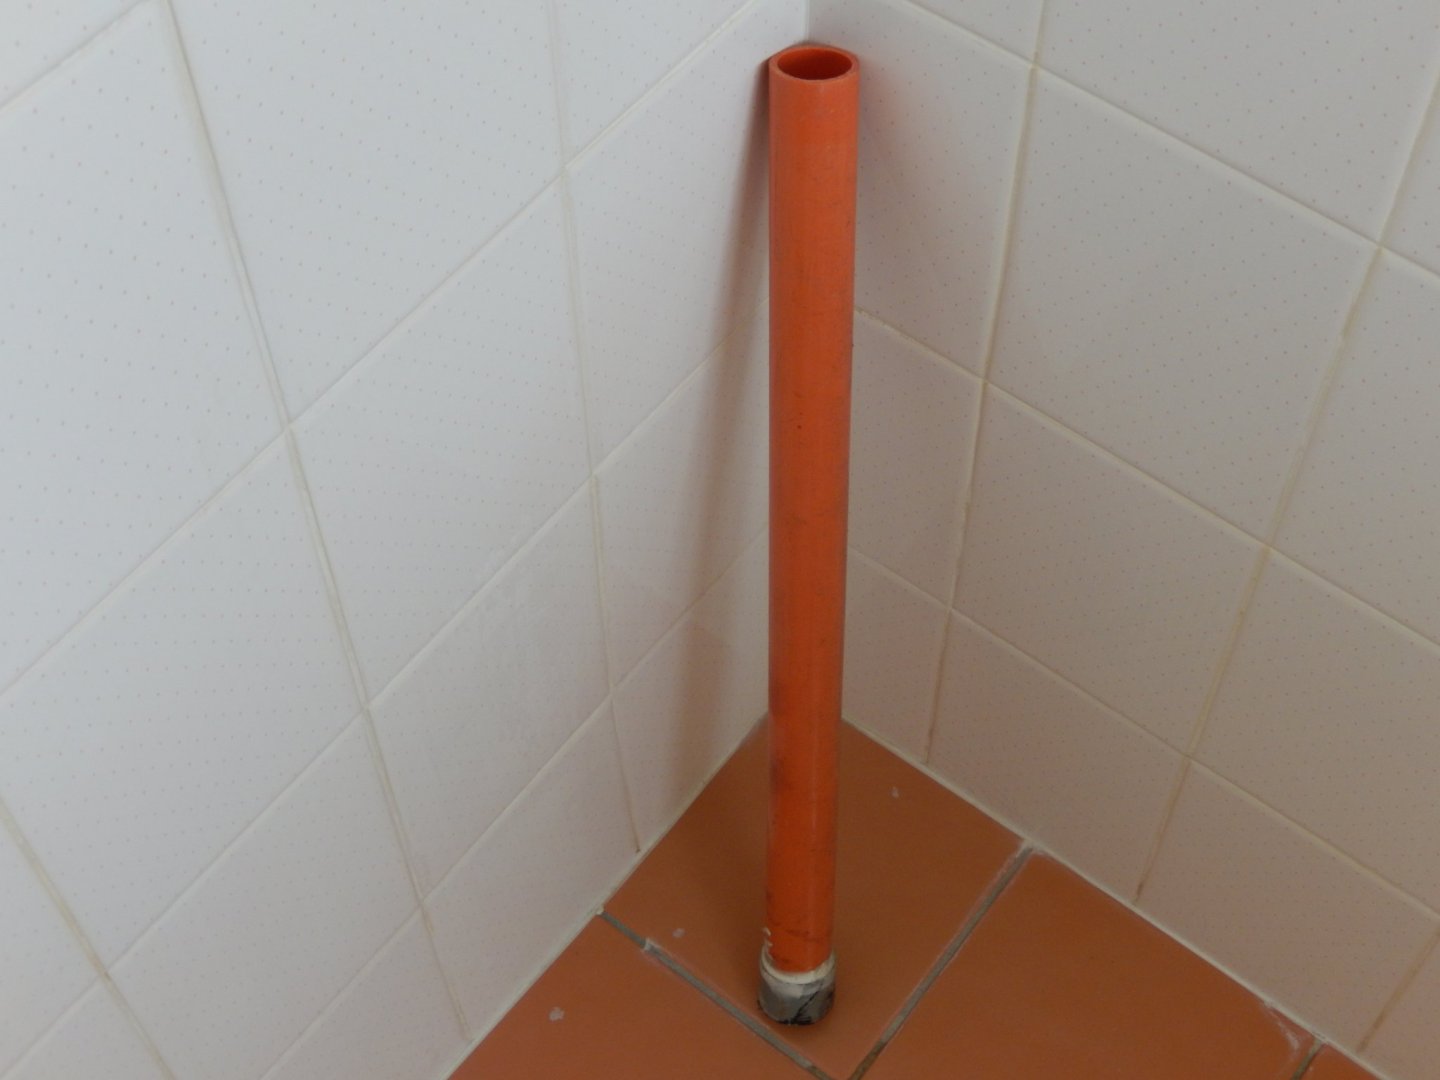
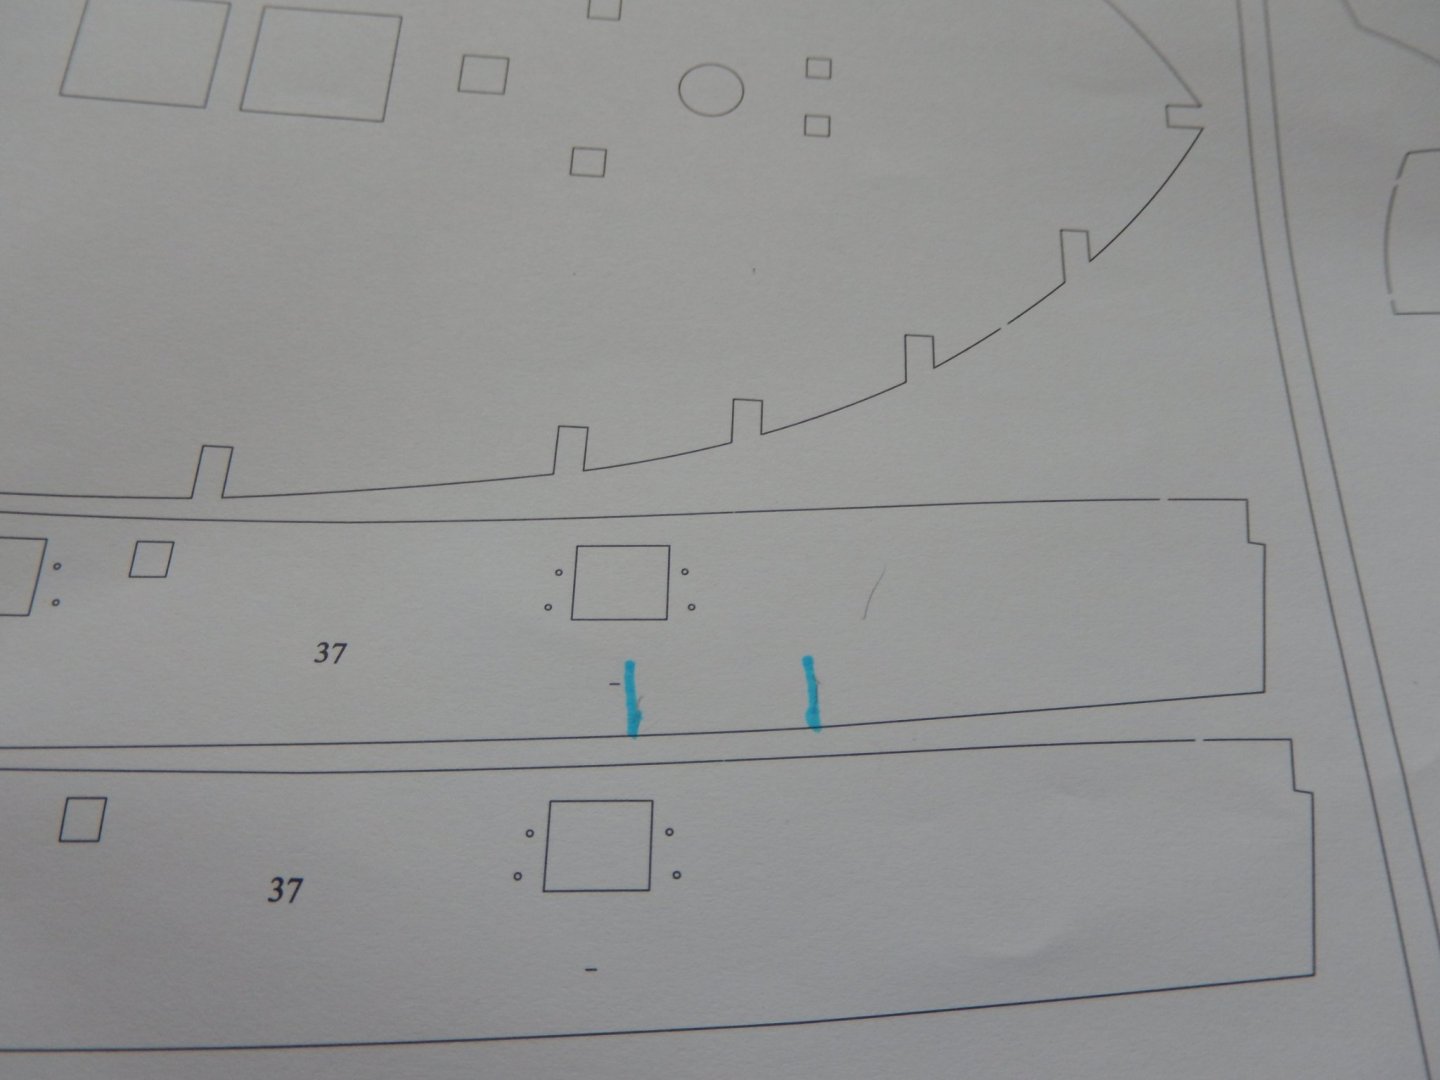
Long time etc. Other things have intruded. I am only now getting to the finish of the first planking. it's fairly straightforward but time-consuming. On the odd occasion when an entire plank is to be soaked I use a length of plastic pipe filled with warm water - works well. Here is progress. I have a suggestion for the side front bulwark pattern. It's too late for me, but it may help someone just starting. I commented earlier that when installing the pattern, it tended to bulge out because of the (vertical) curvature of the hull. I suggest two cuts, each about 1mm wide may solve the problem. See the blue markings below. One final comment - as far as I can tell, there is no direct photo of the finished stern of the mode in the instructionsl. It would be helpful in showing the painting/decoration.
-
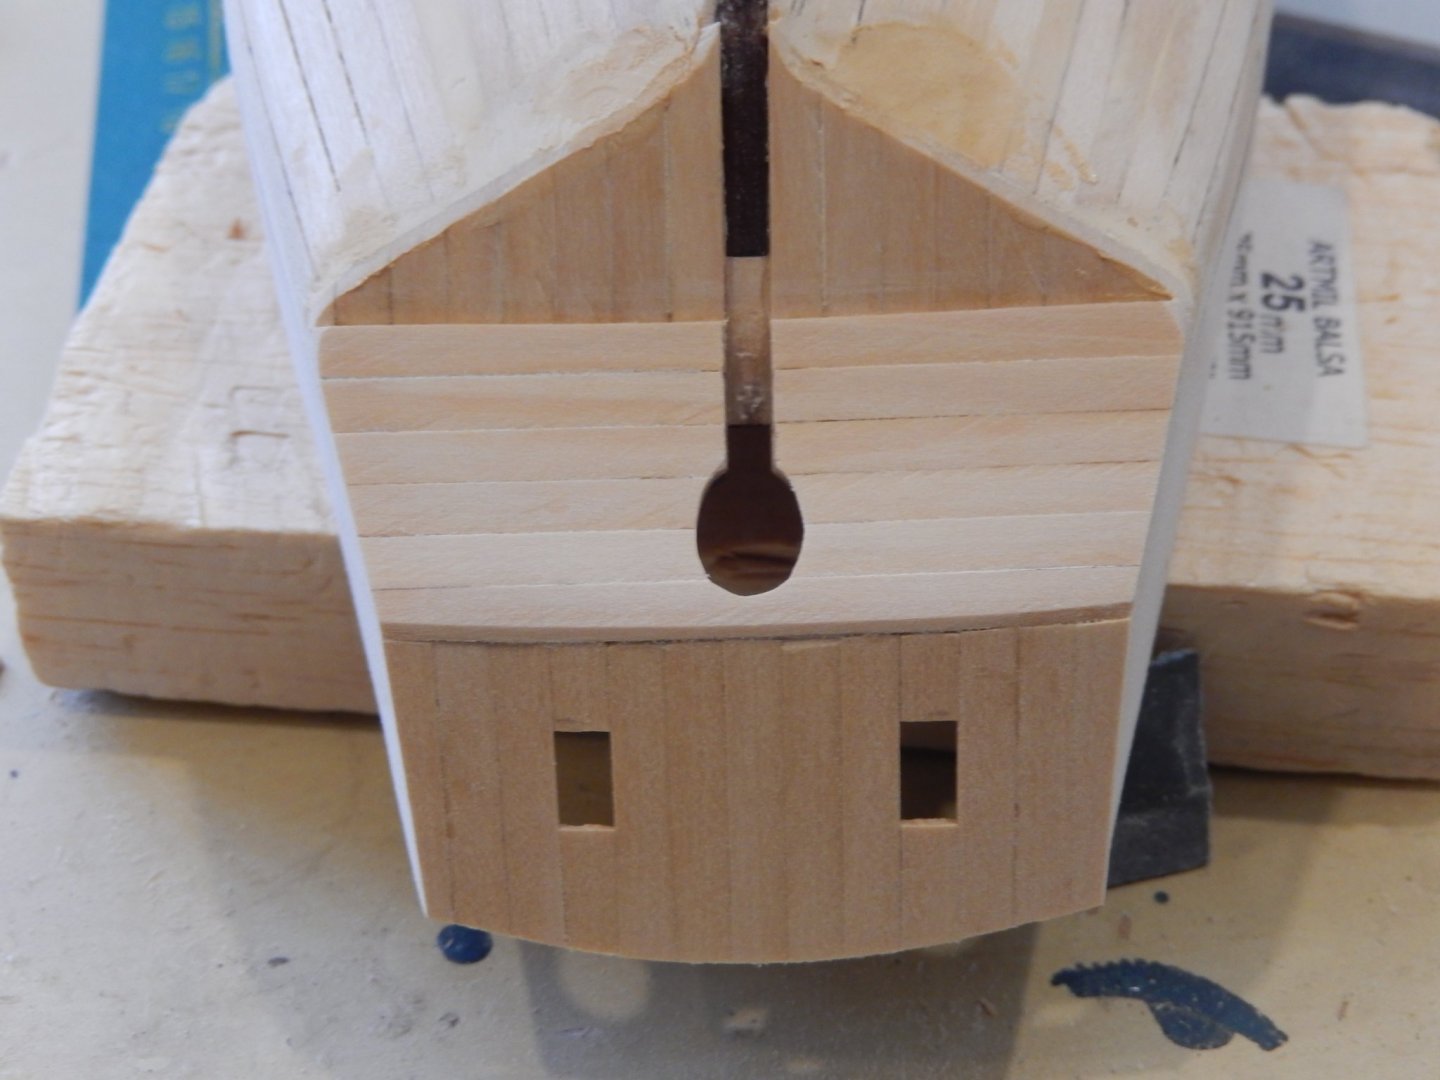
My aim was to have the top of pattern flush with the 8th bulkhead. This meant the top edge of the slot in the strip is about 1/2mm from the stem. No big deal. If you look at the instructions there is a note to the effect that it doesn't matter if the top of the pattern is not flush with each of the bulkhead tops. The way I have done it, the pattern falls naturally to the 8th bulkhead without stress and is a perfect fit.
-
Thanks Joe. Hi Jason. I bought the thing some years ago and can't now remember where on earth I bought it - that's age for you. it's been quite useful, especially for planking. I'm on my way down to the south coast in a few minutes, but when I return next week I'll see if I have some record of purchase.
-
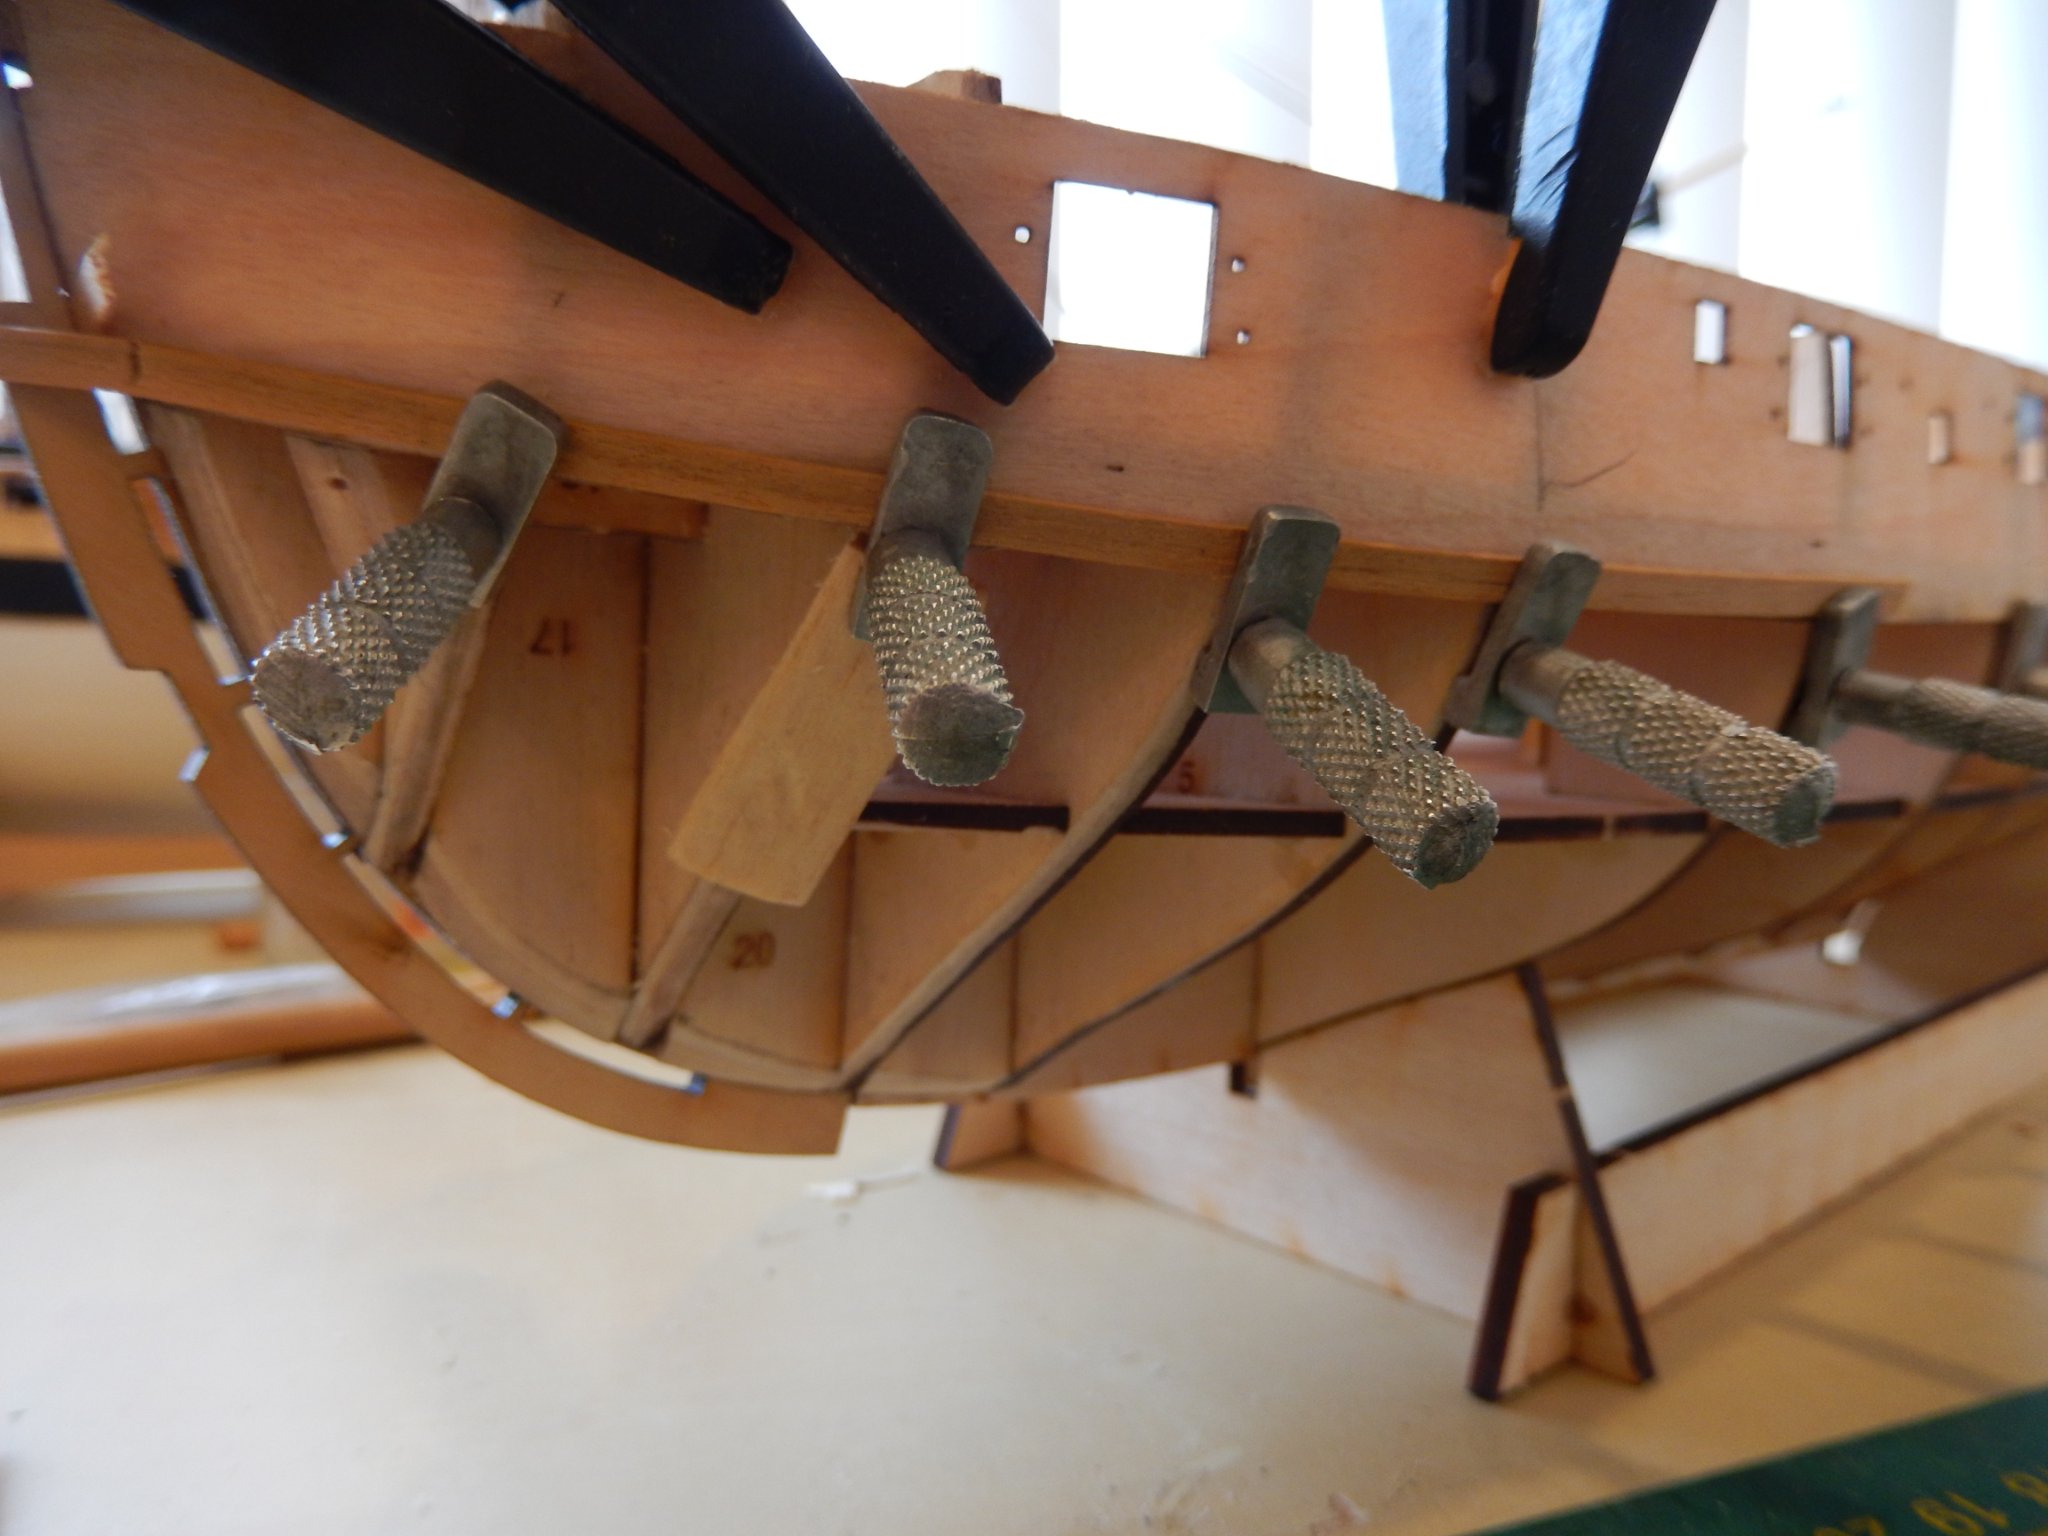
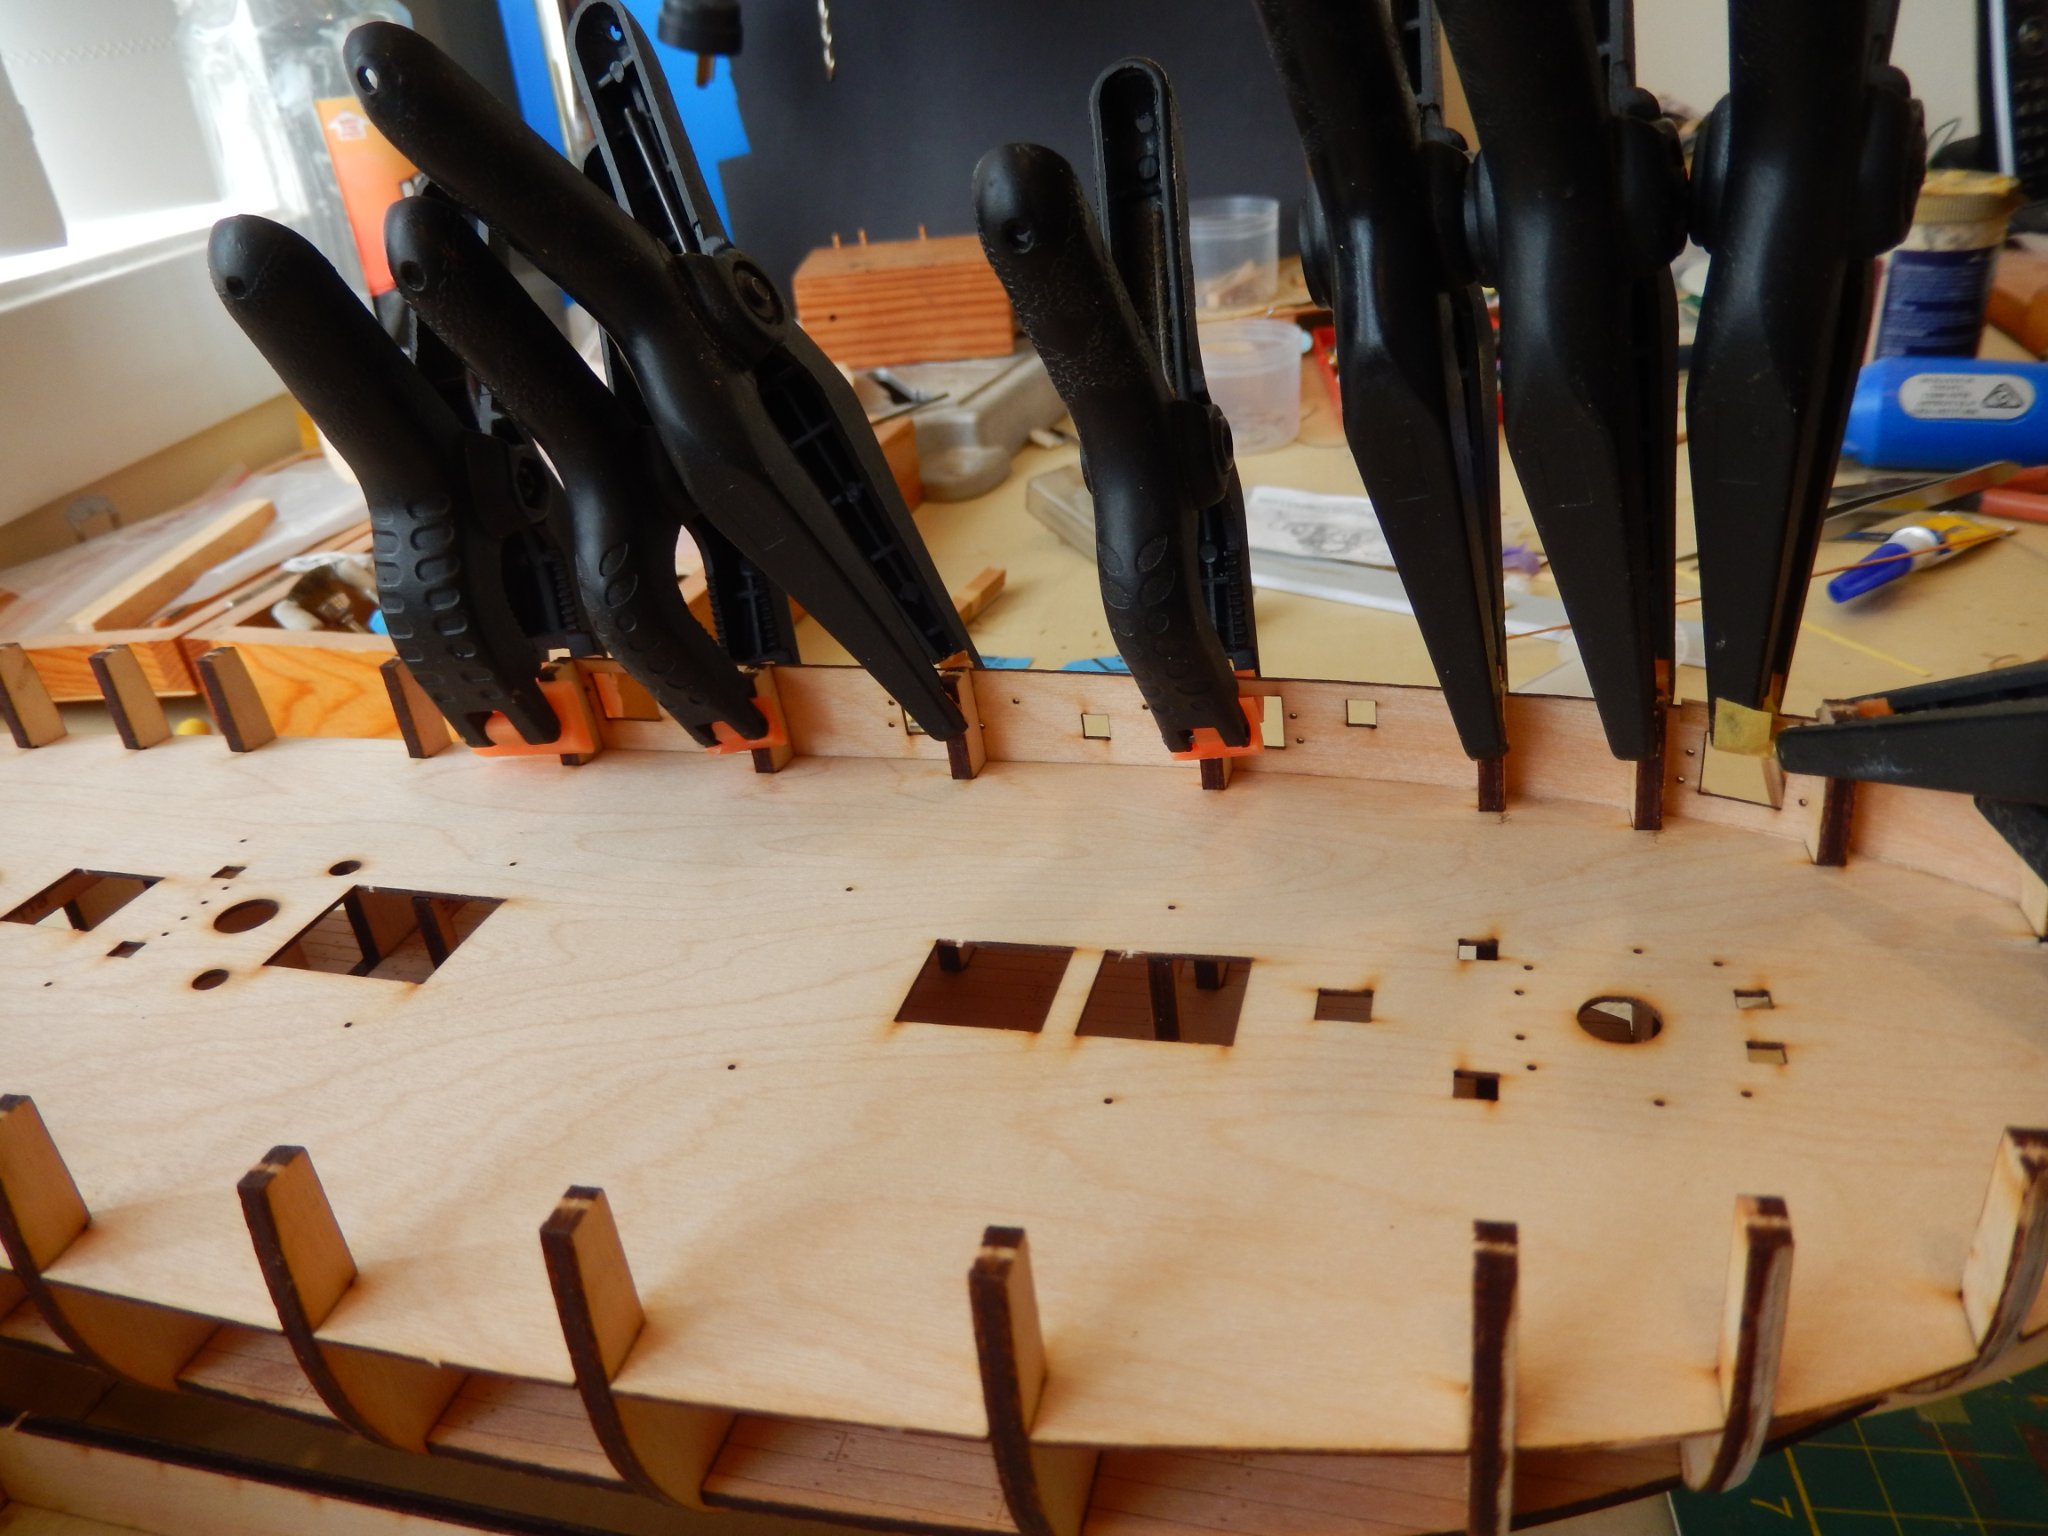
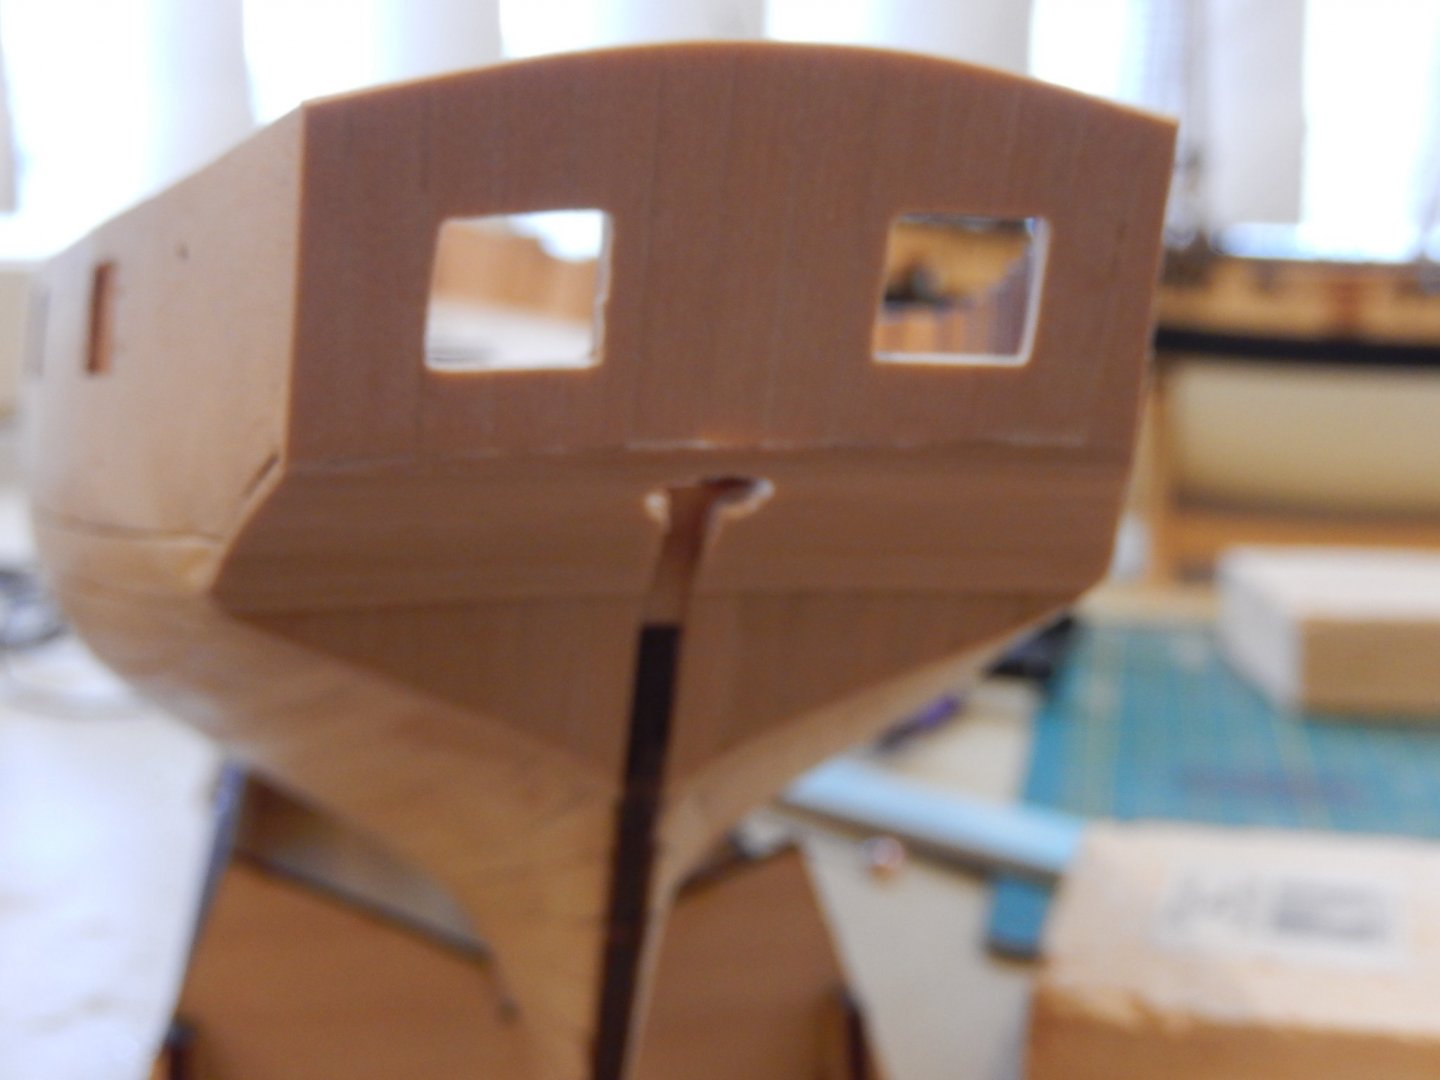
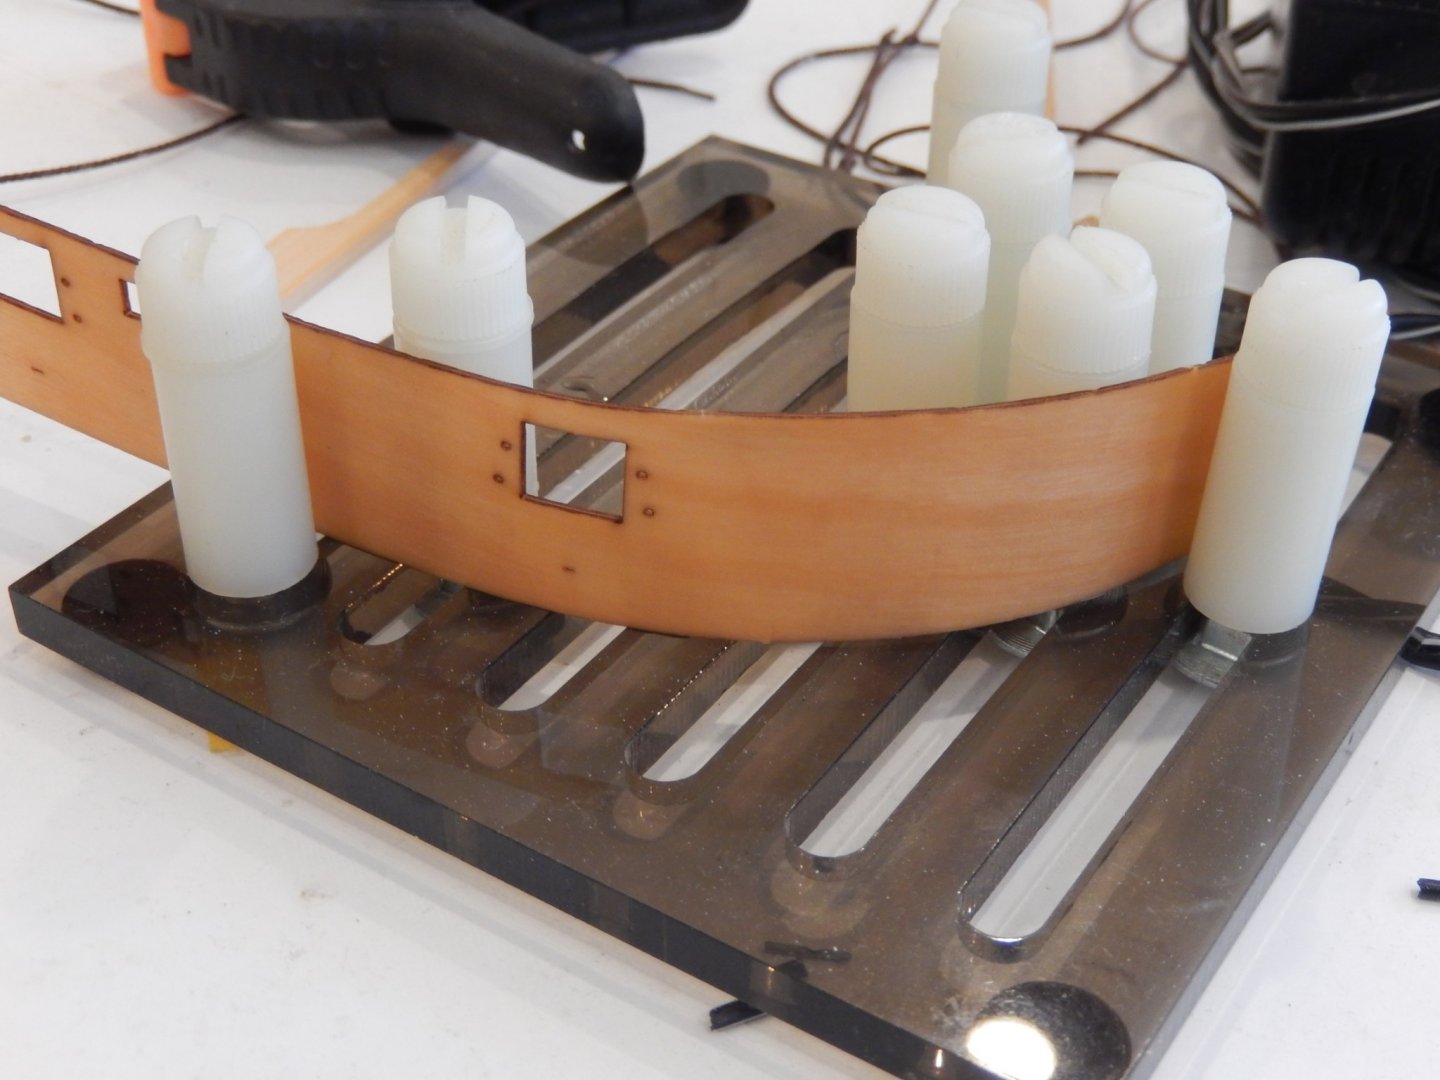
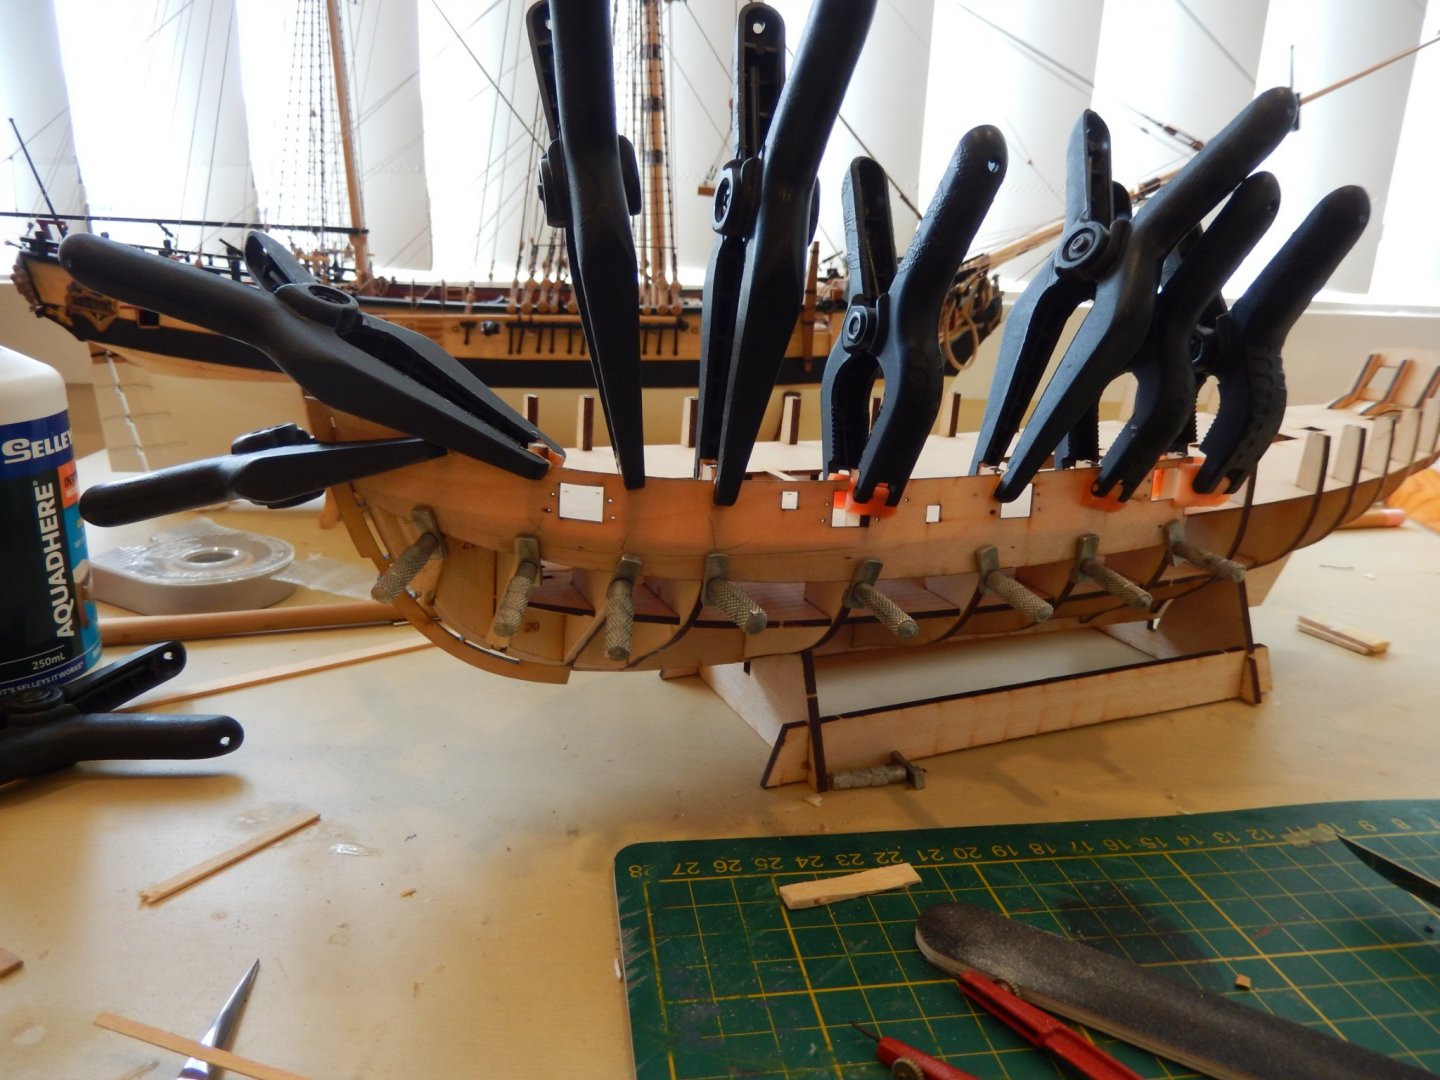
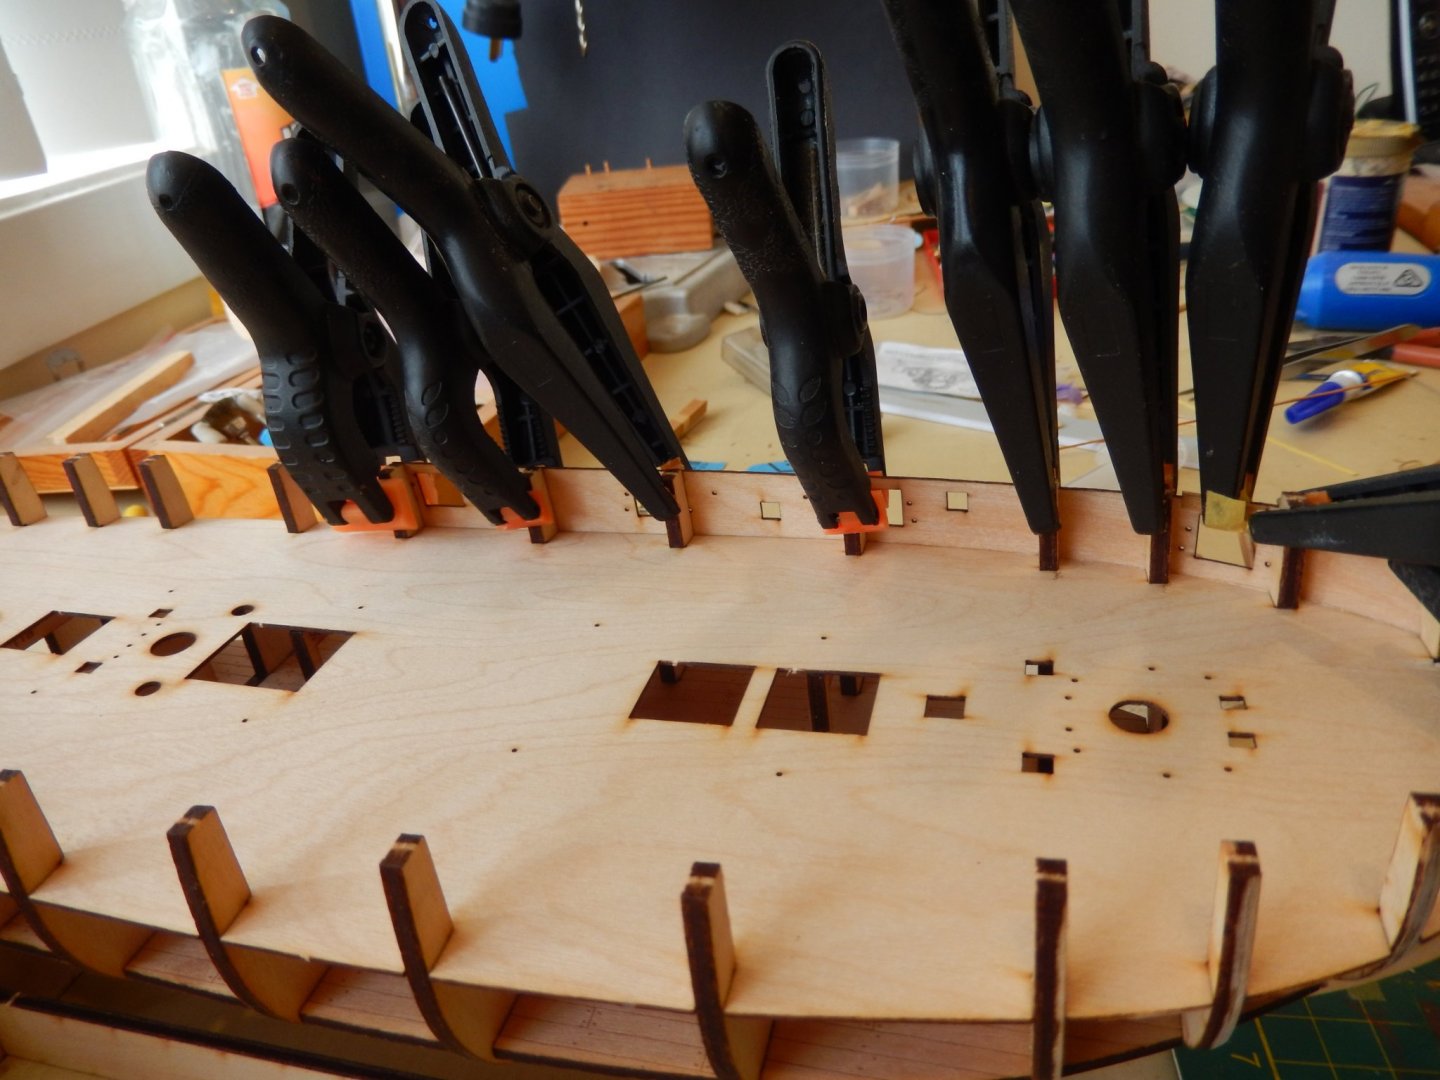
I have begun the installation of the gunport patterns. It has turned out to be quite difficult. The bow pattern was very reluctant to bend to shape - at least the shape I wanted it to be. I first gave the pattern a preliminary bending over night. This made the horizontal bend a little easier. The difficulty of course is withe the vertical beding to follow the line of the bulkheads. The instructions suggest pinning the patterns to the bulkheads. I made a halfhearted attempt, but the pins were very reluctant to go into the very hard ply bulkheads and I didn't persist. Fortunately I have some little clamps (?) which are able to do the job relatively painlessly. One problem is that when the patterns are attached to the part of the bulkhead below the deck where the curvature is greatest (near the bow), the part of the pattern between the bulkheads tended to bulge out. The problem was solved by clamping a piece of wood strip towards the bottom of the bulkhead to keep the bulge contained. All of this took most of the day with the usual exclamations - Oh golly! why did that happen? (or words to that effect). I hope the rest of it goes a little more smoothly. Below is shown the first pattern glued (PVA above the deck, CA below) and clamped.

-
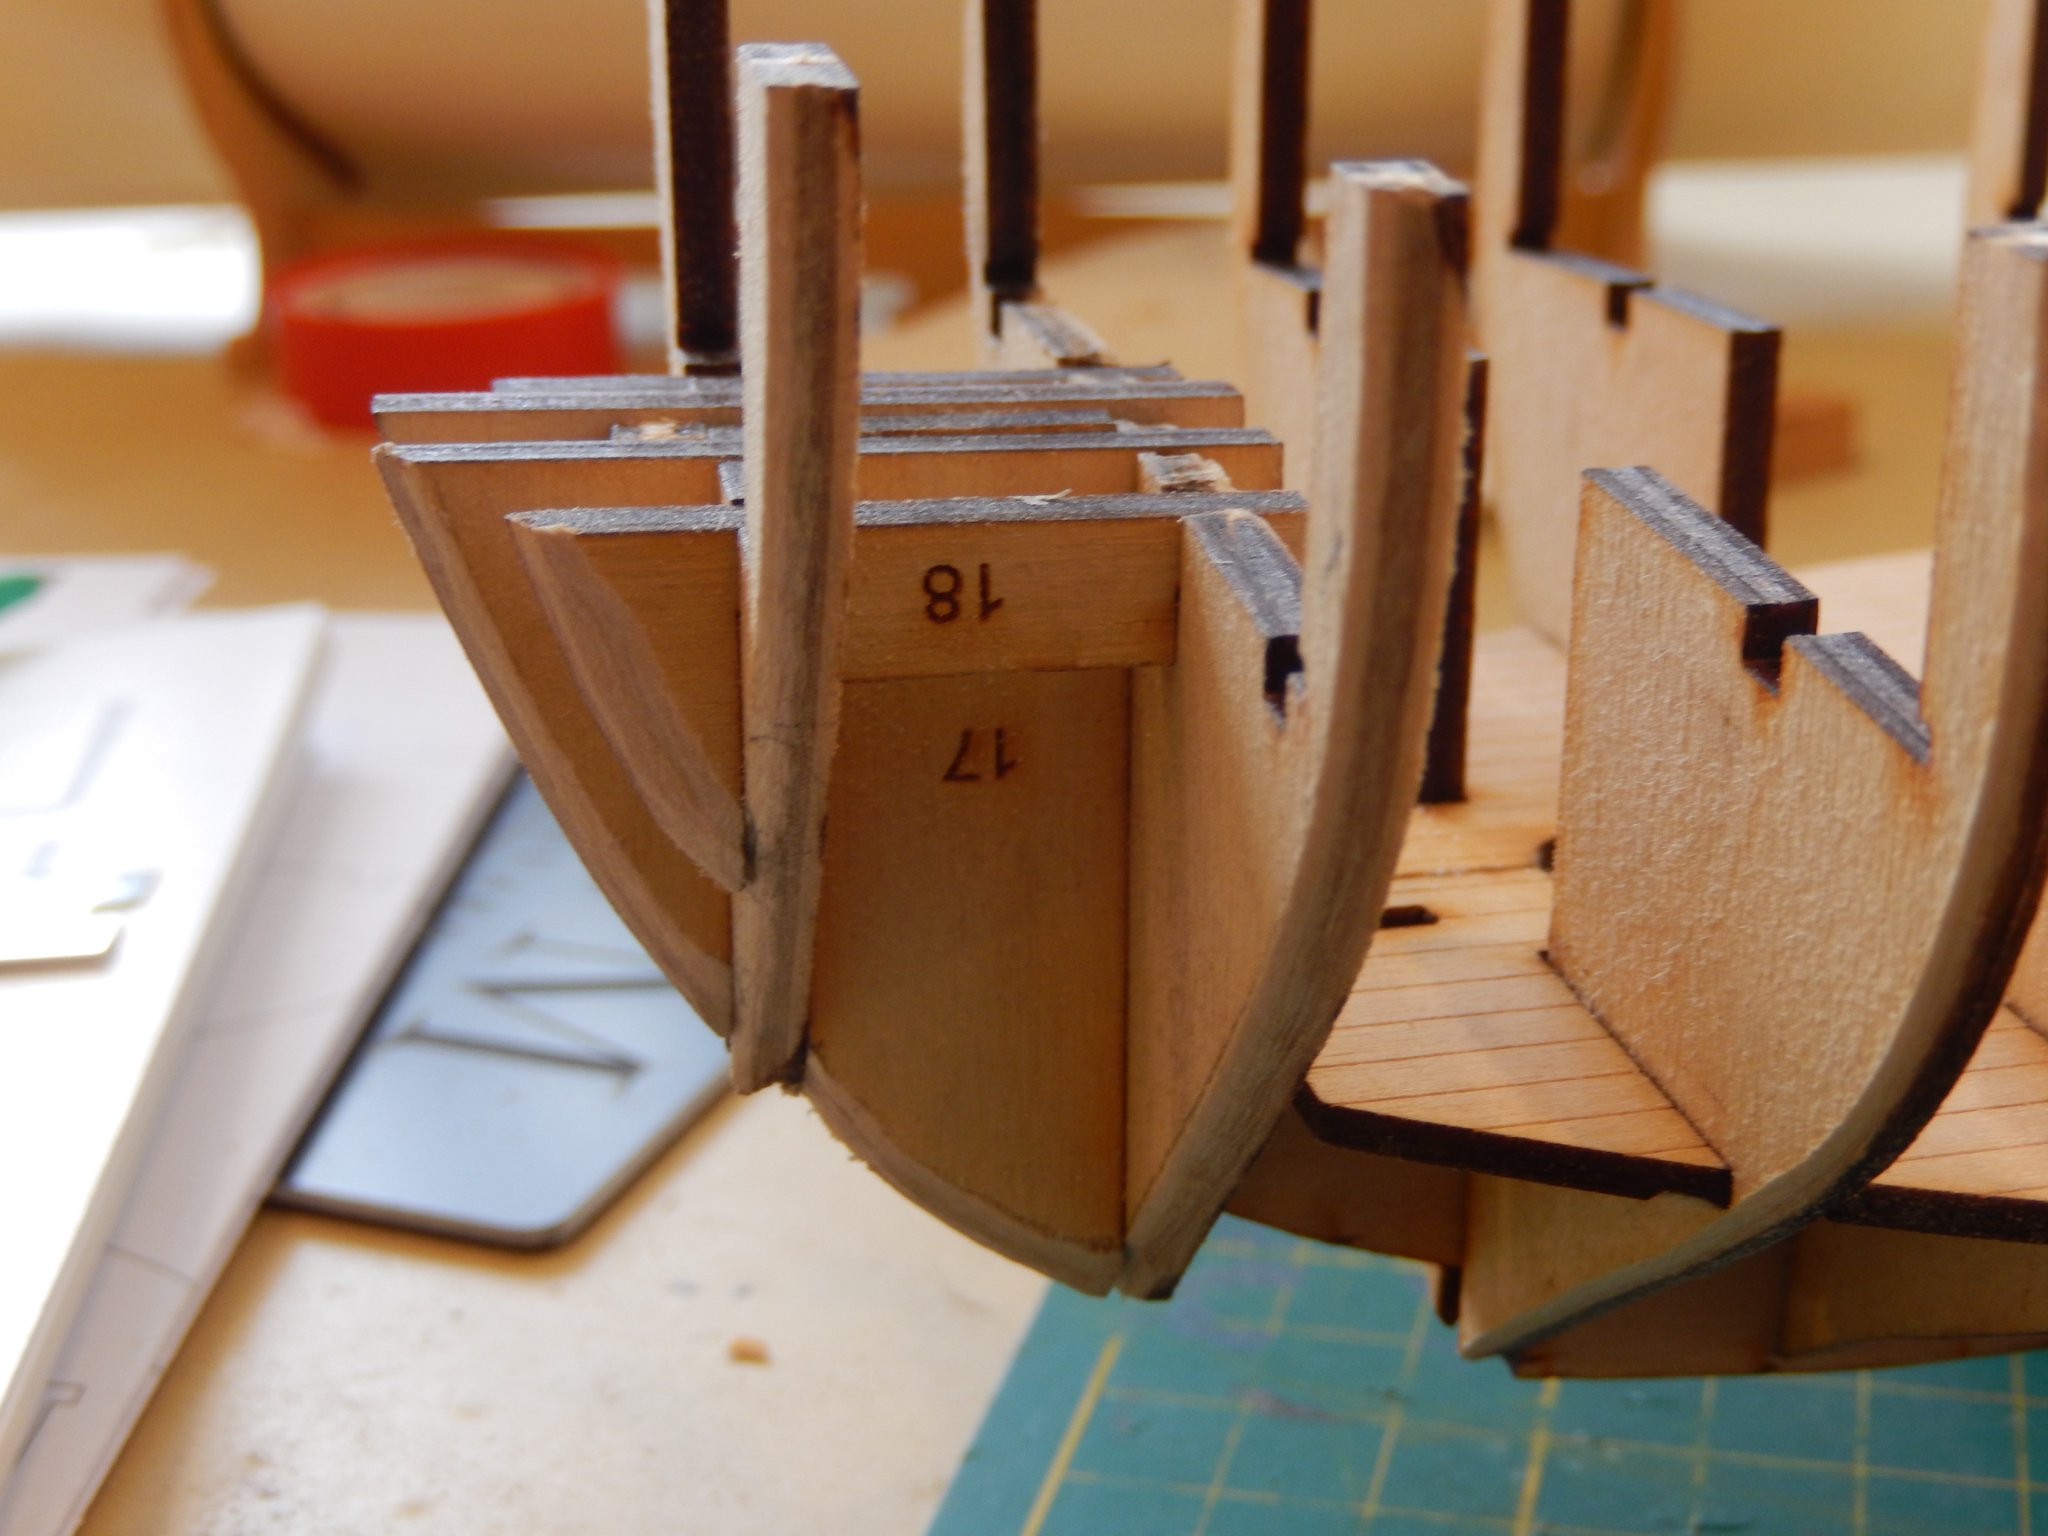
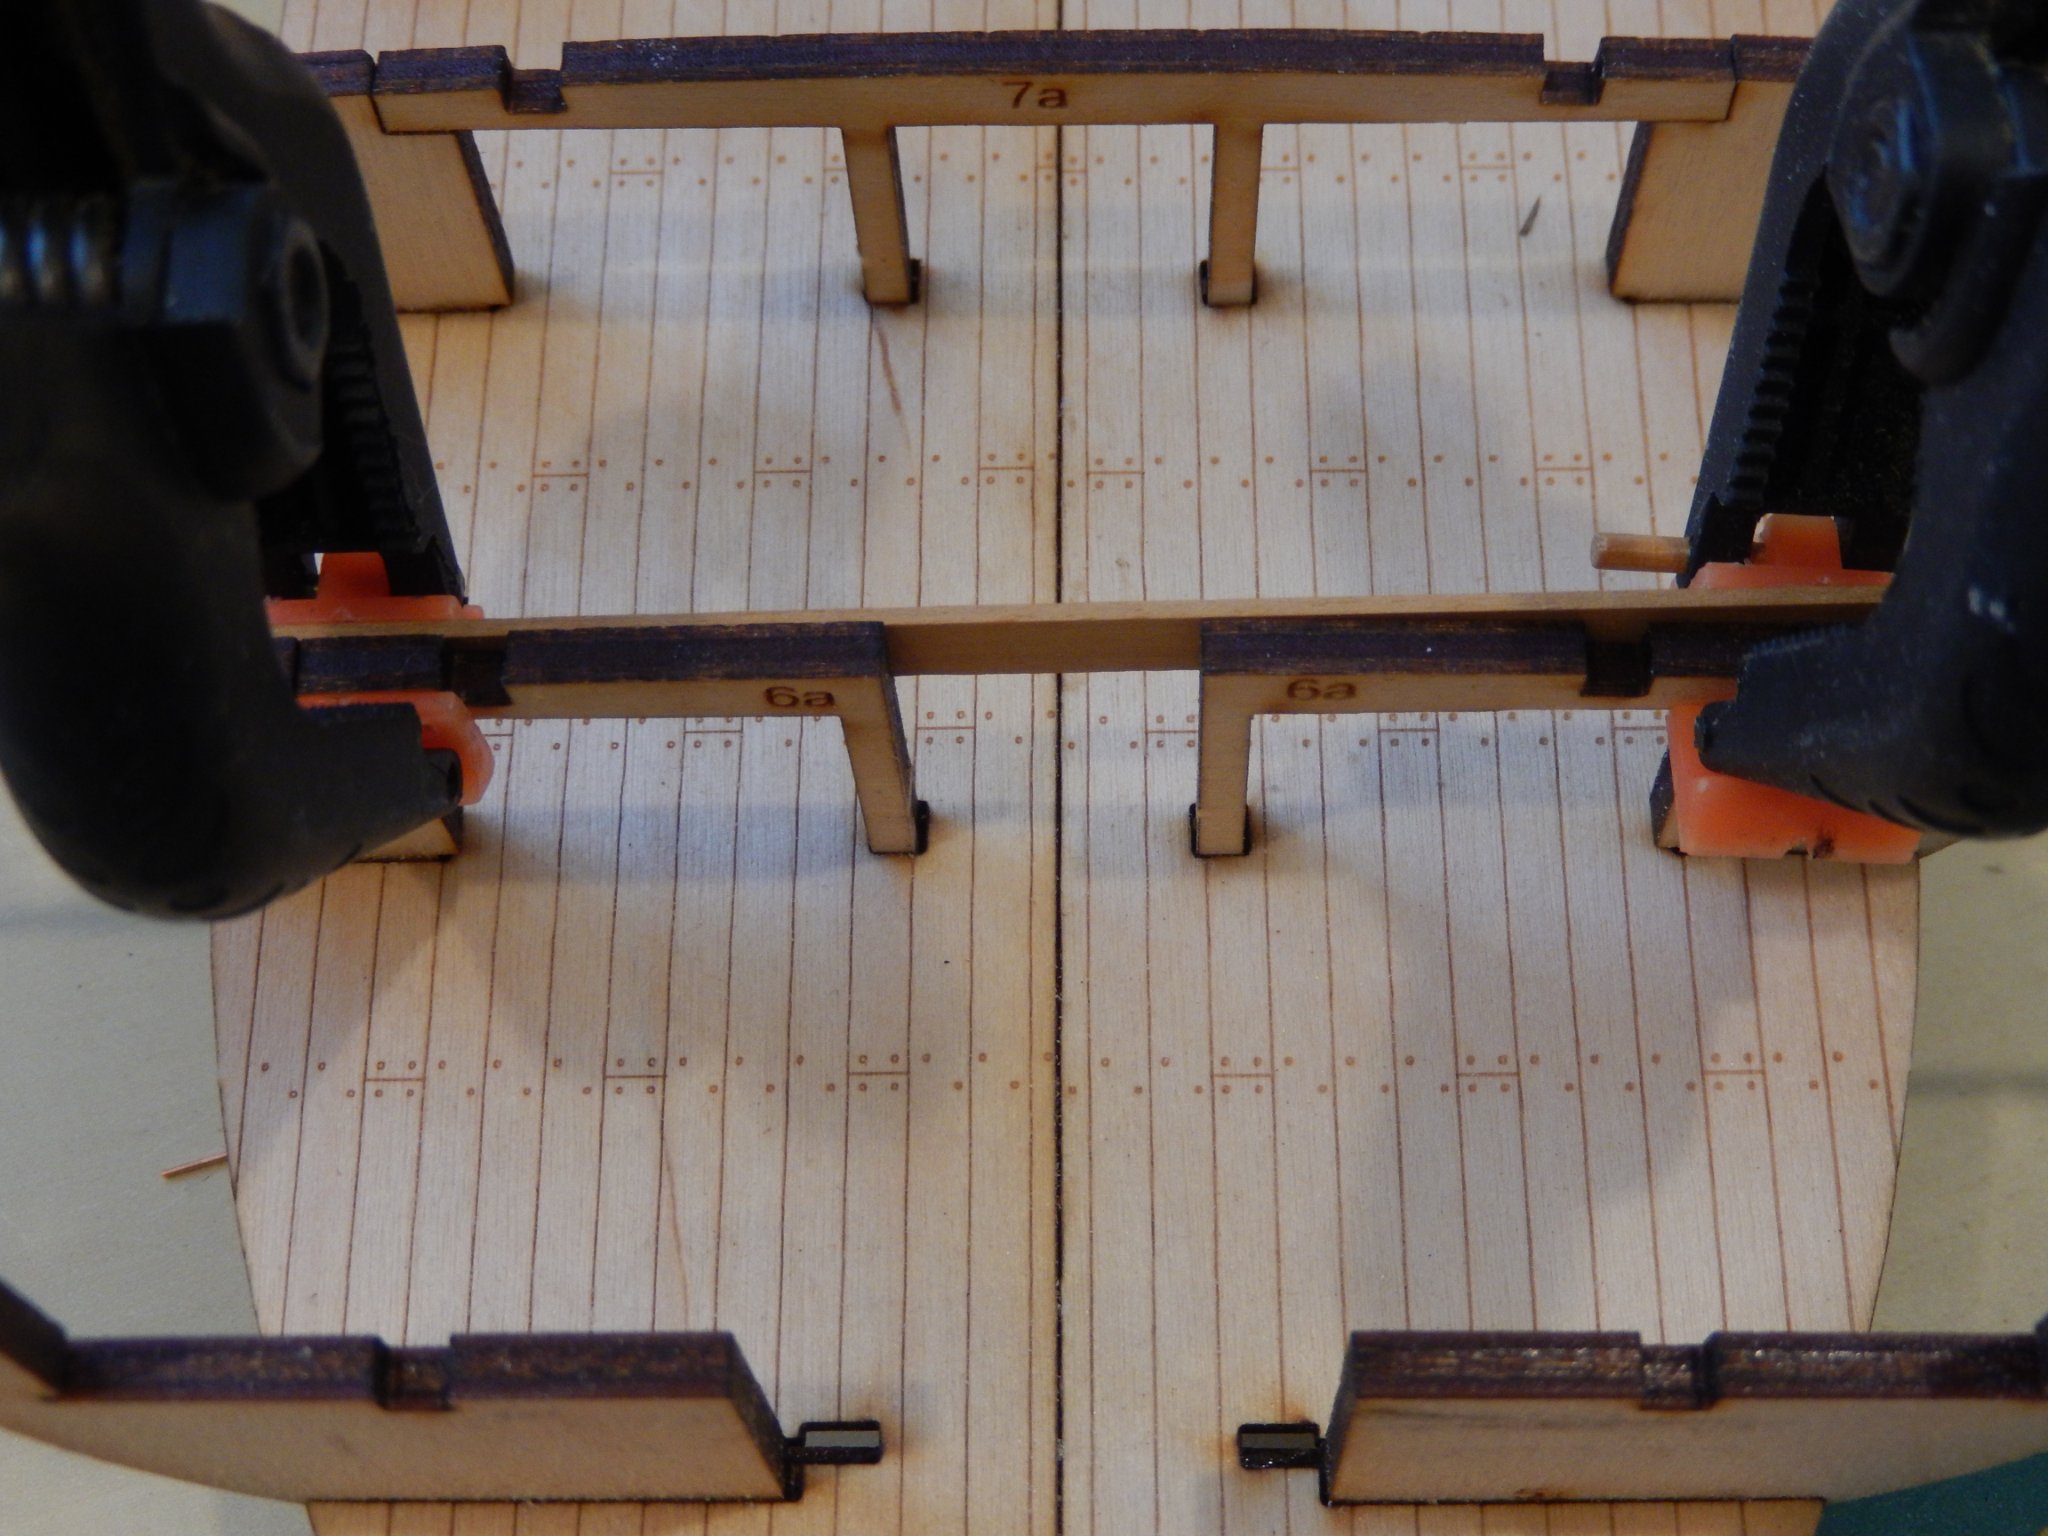
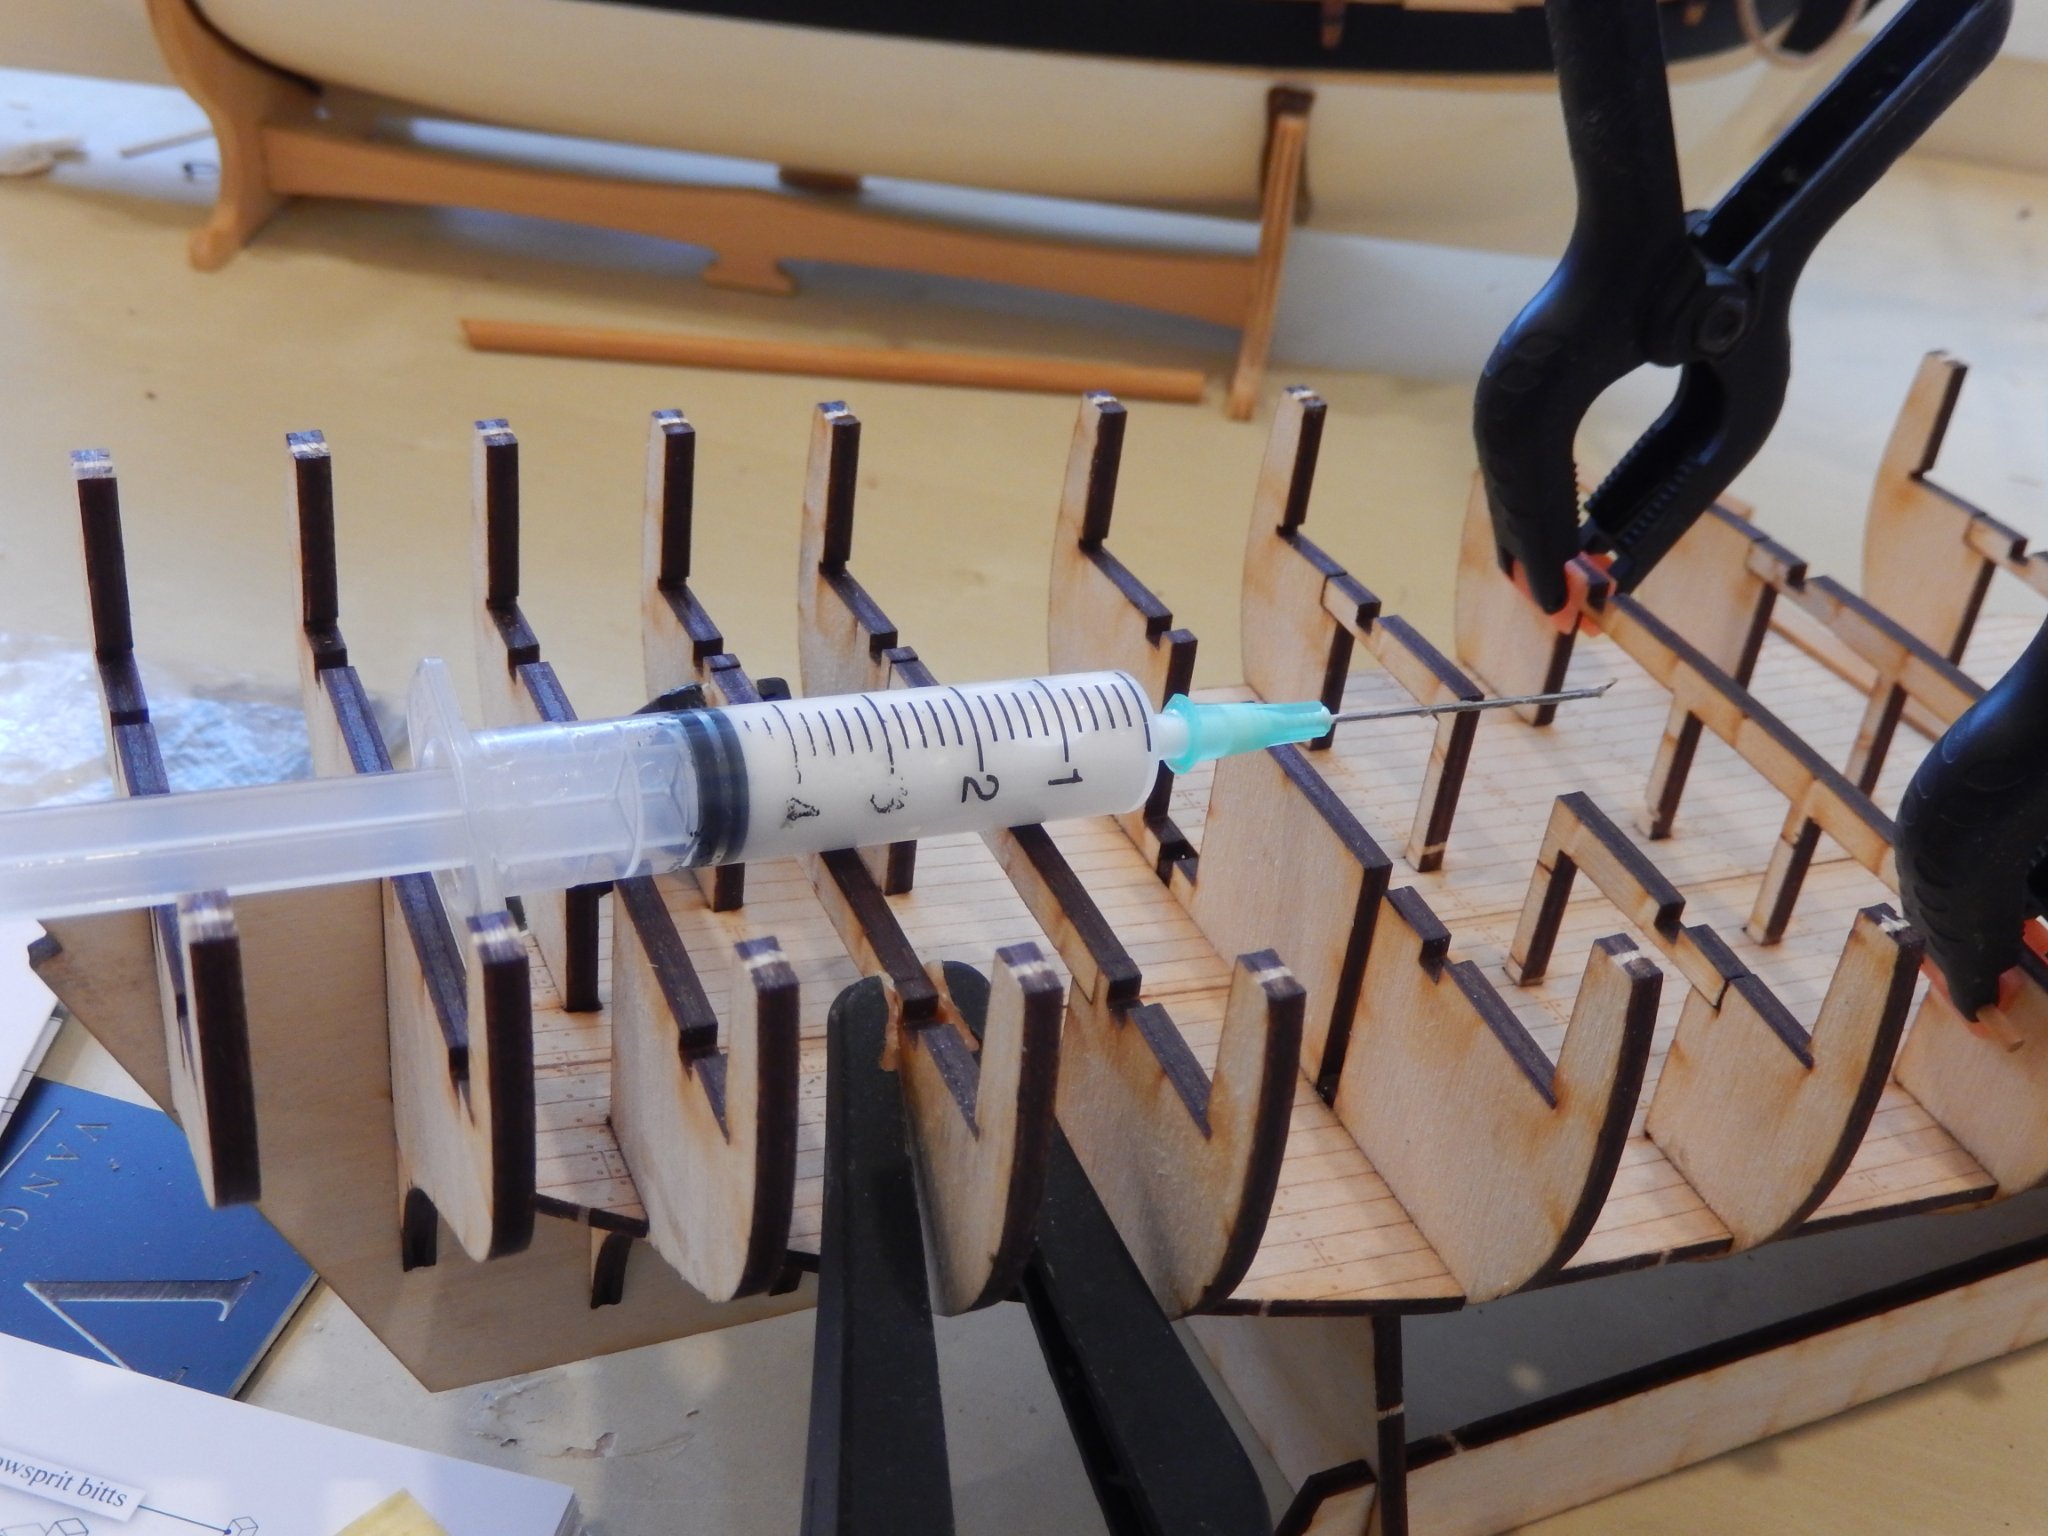
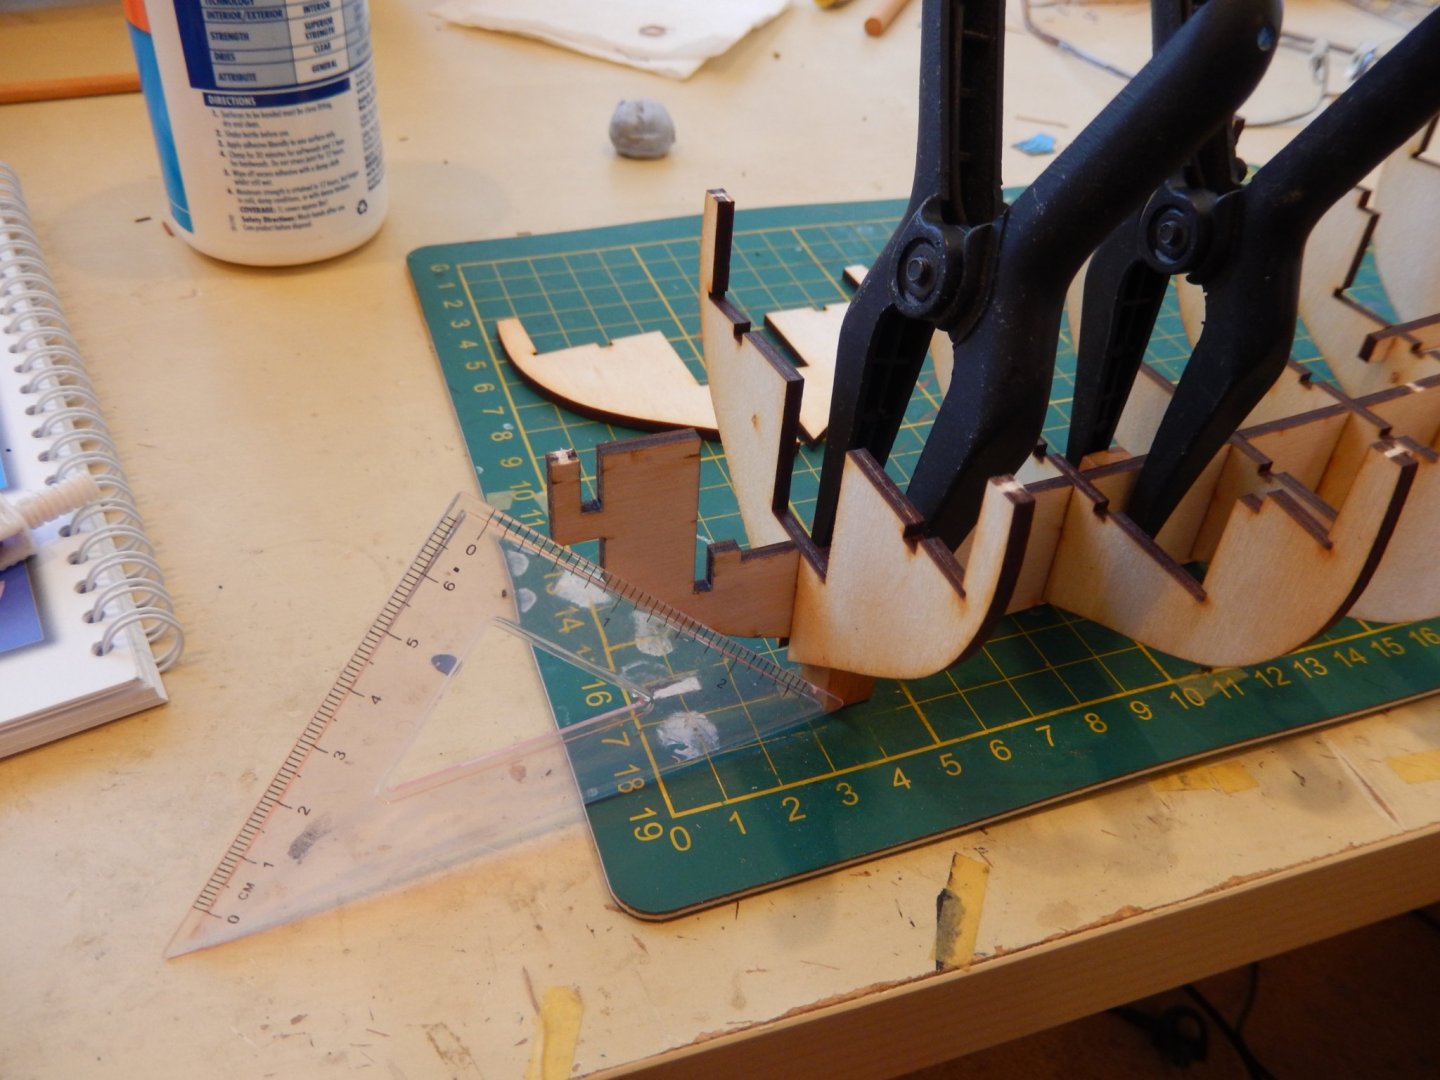
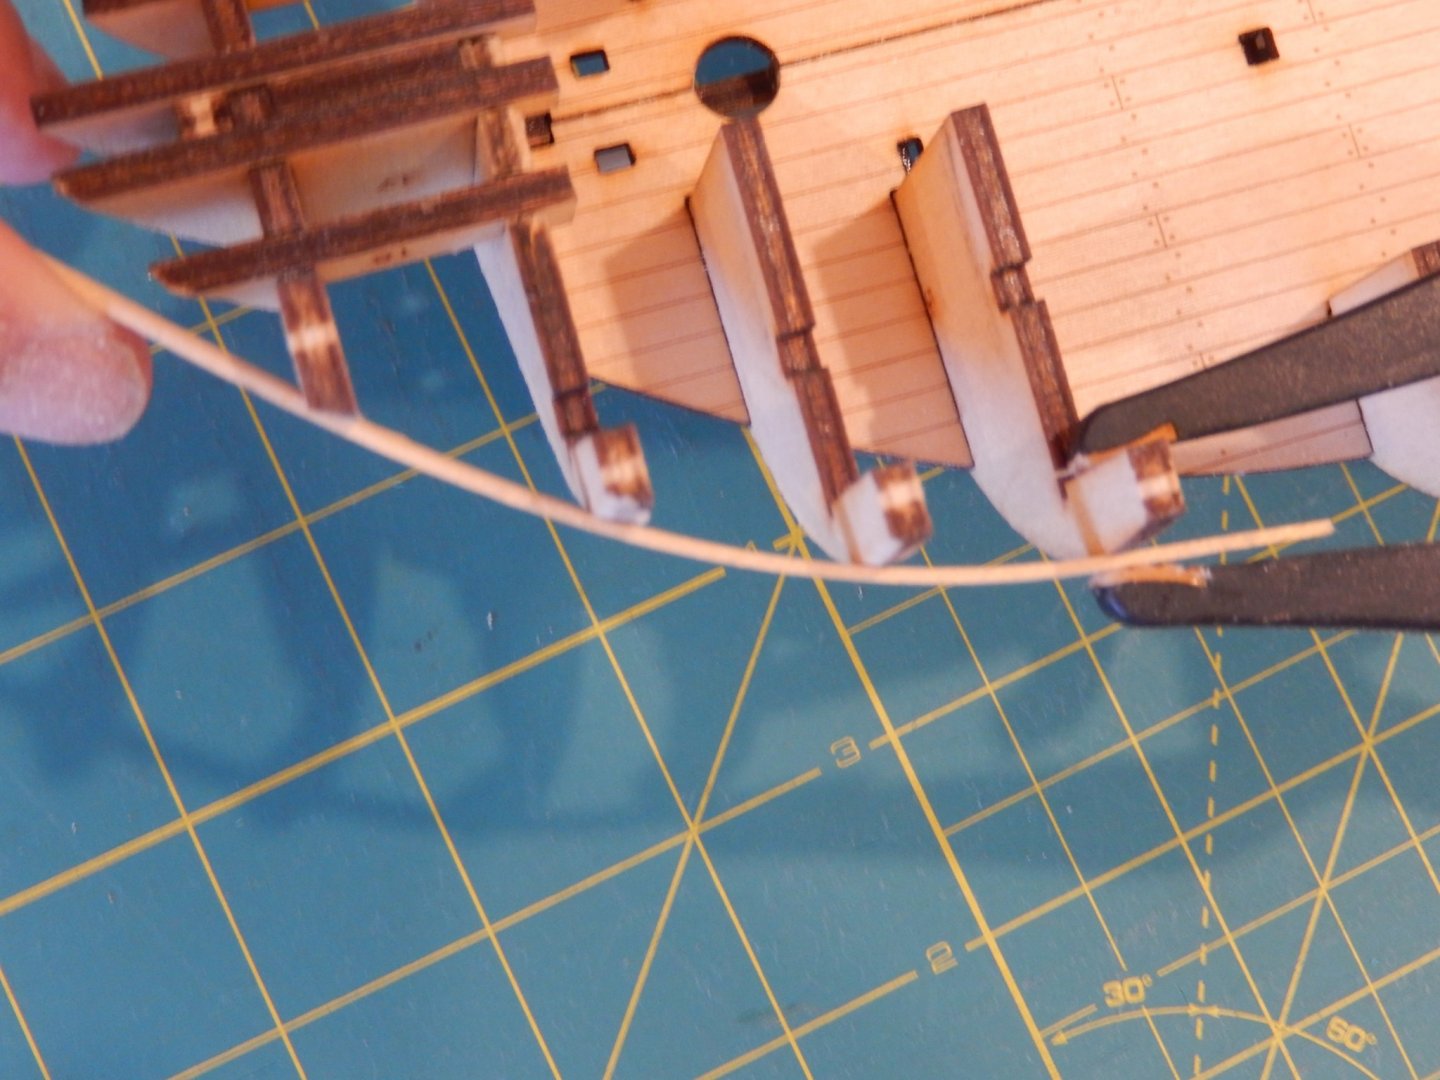
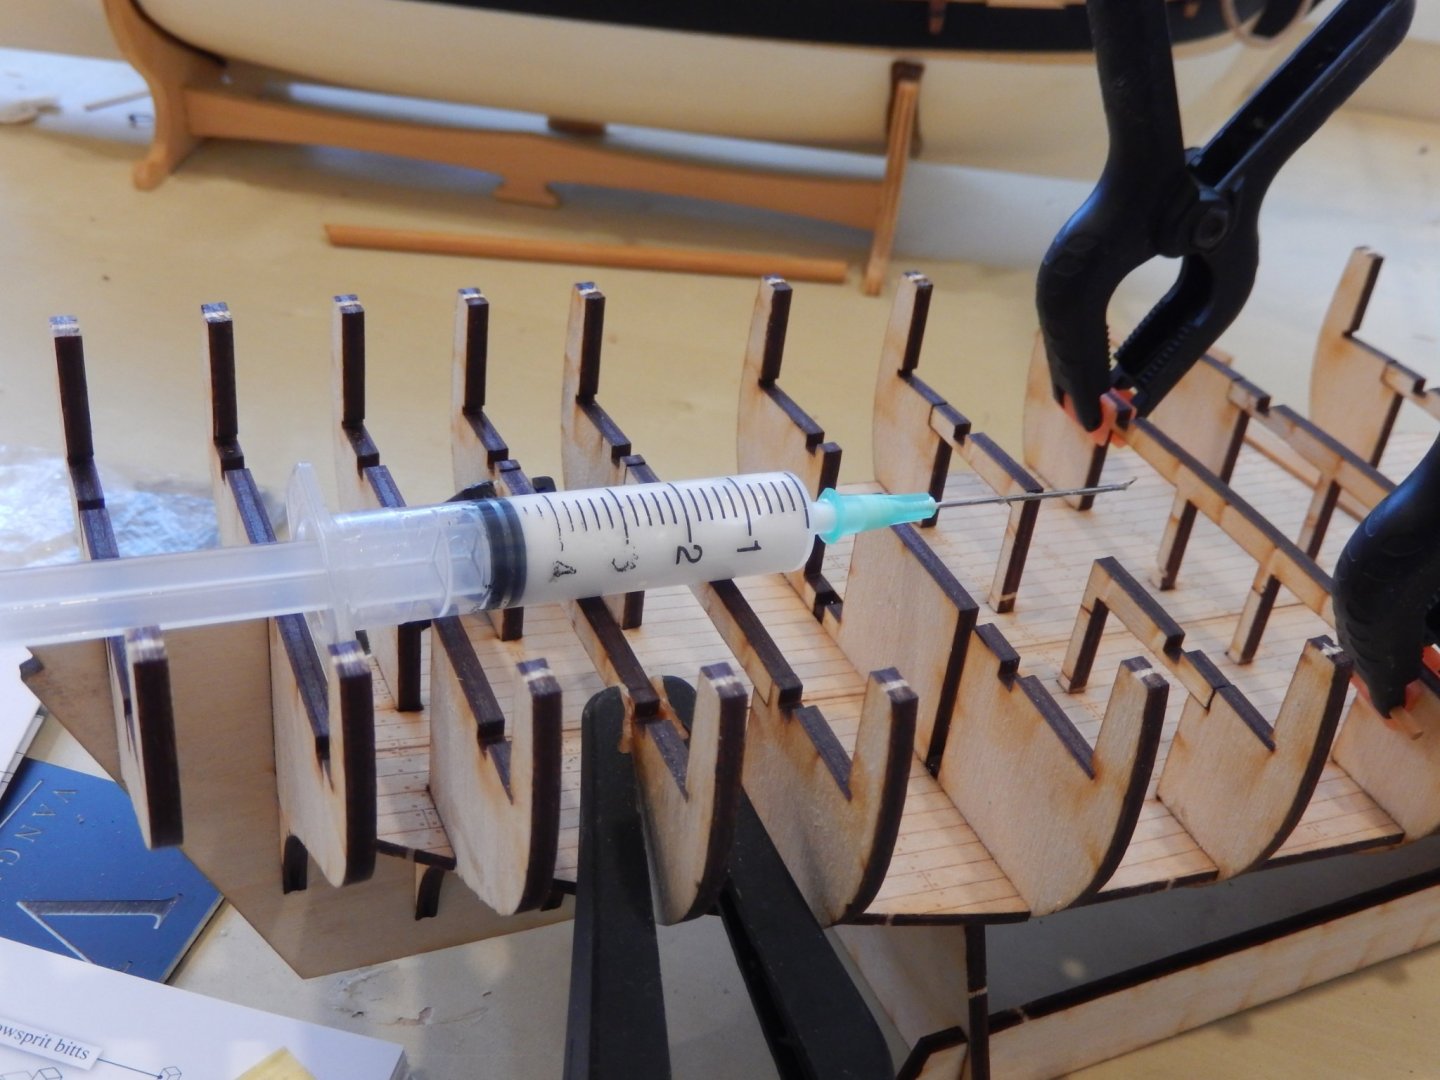
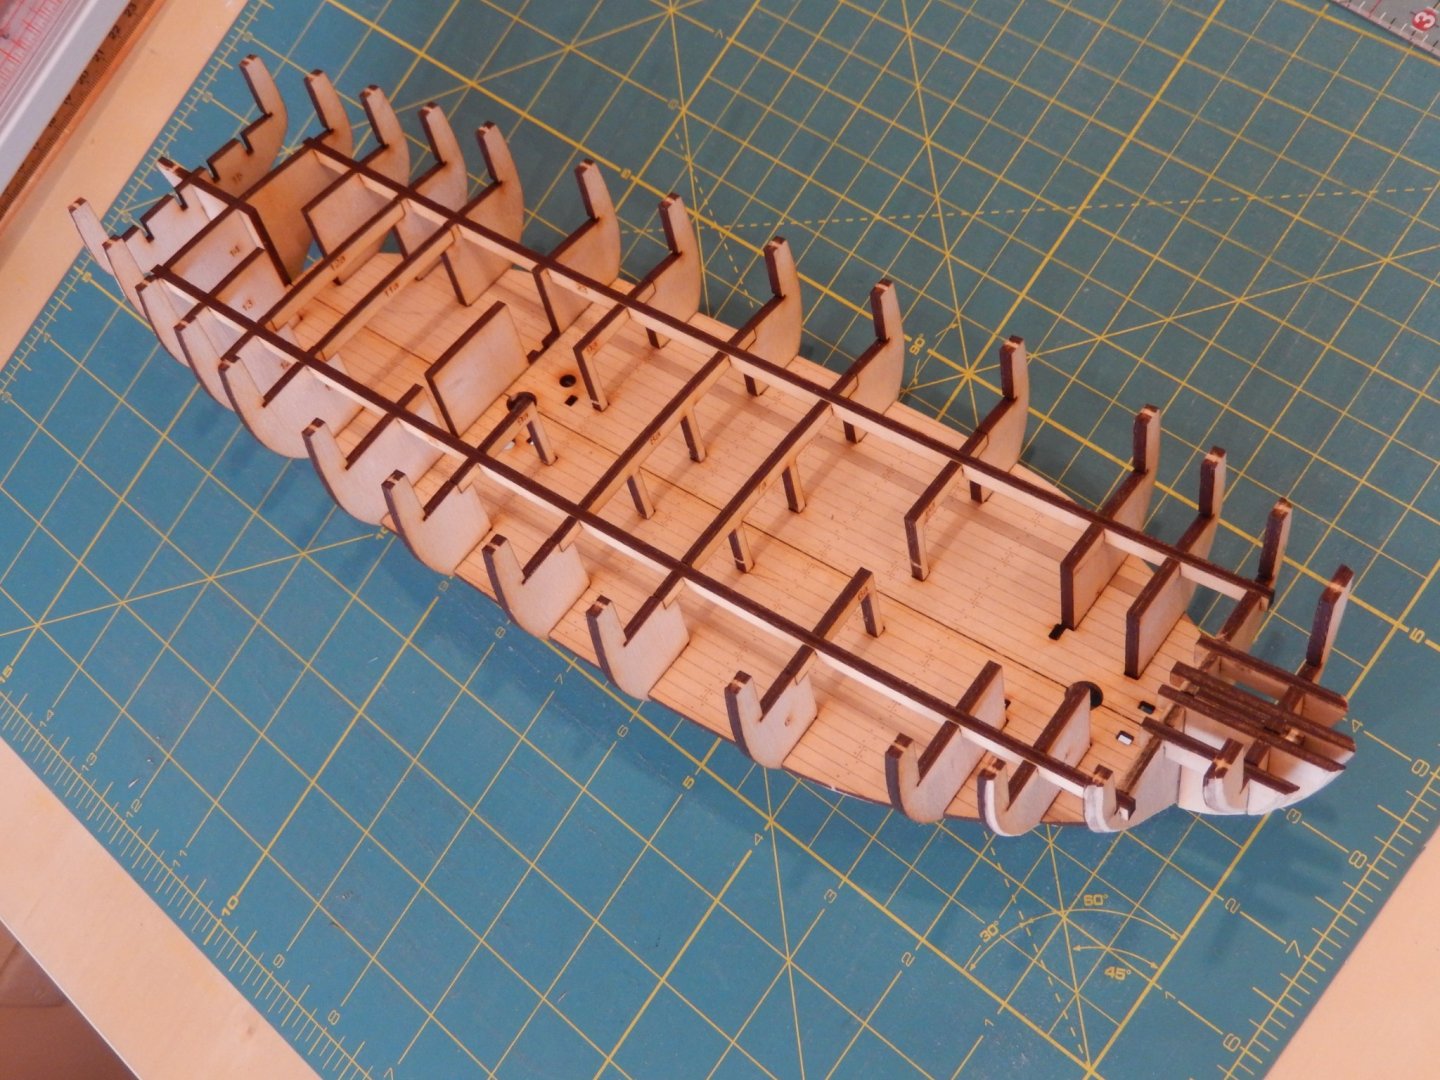
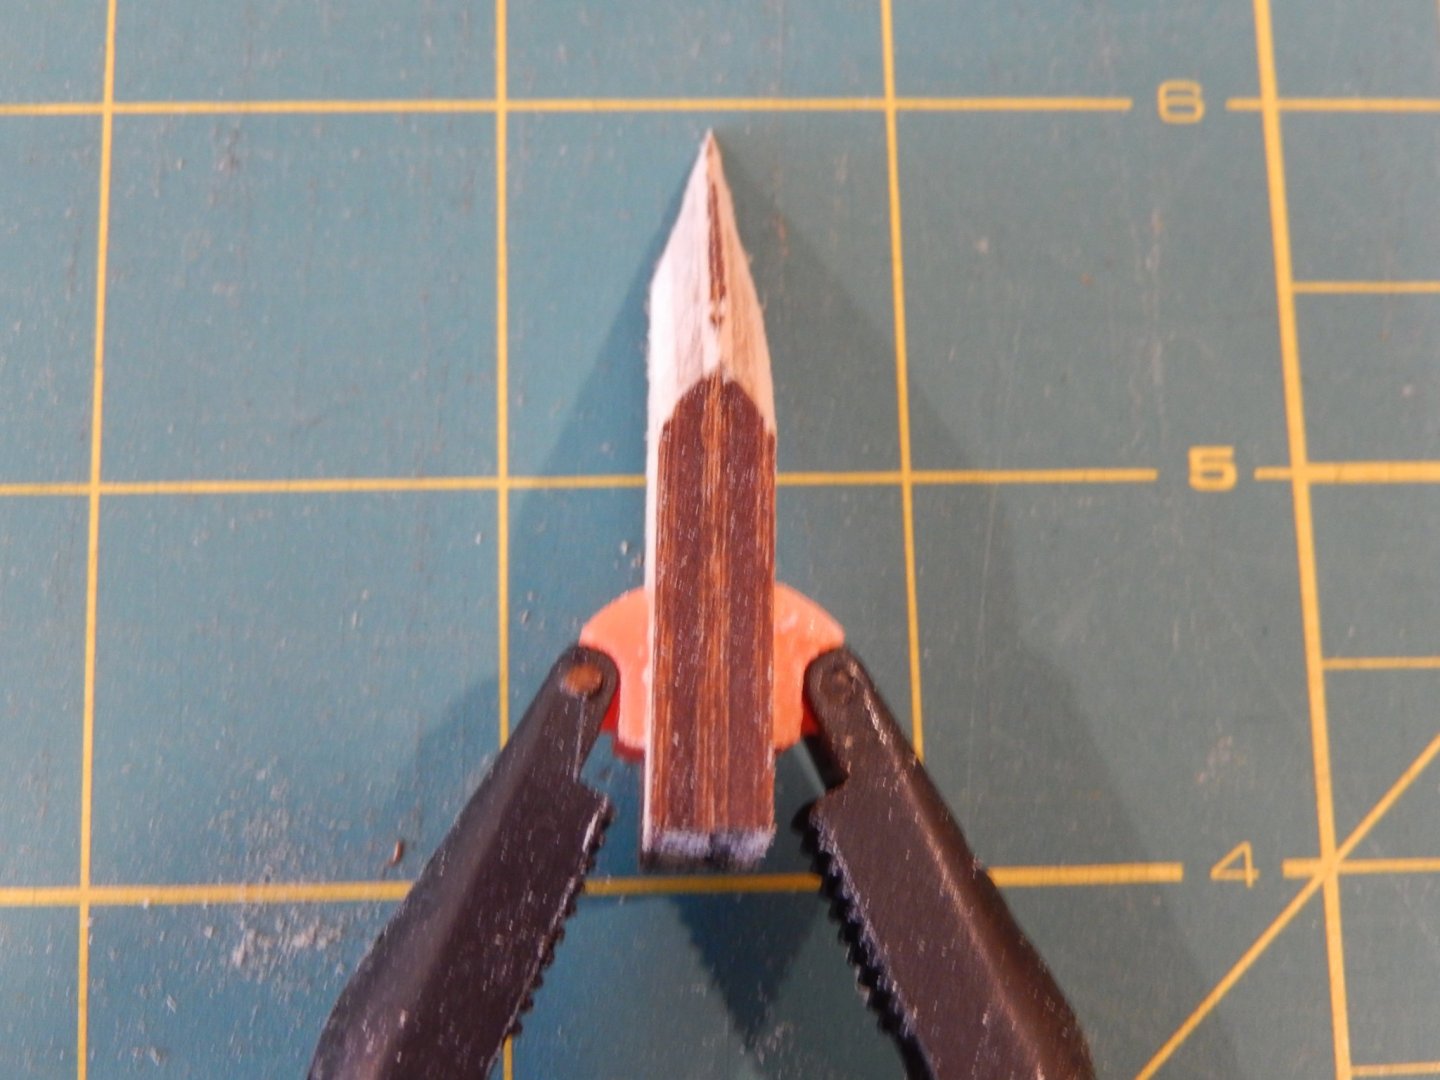
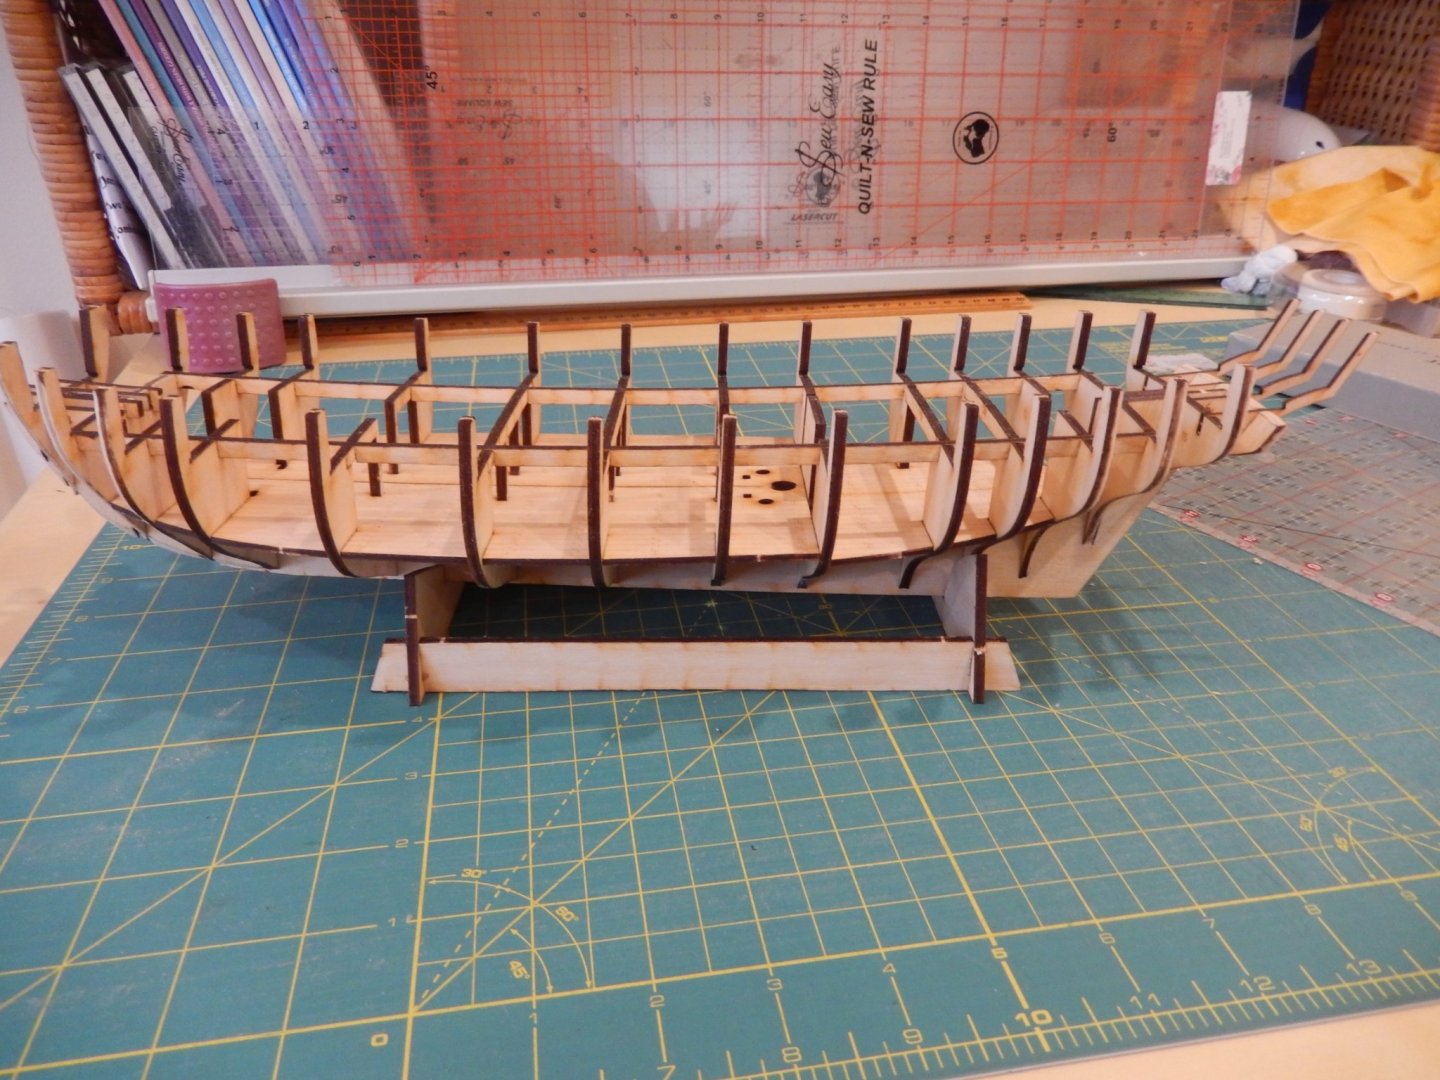
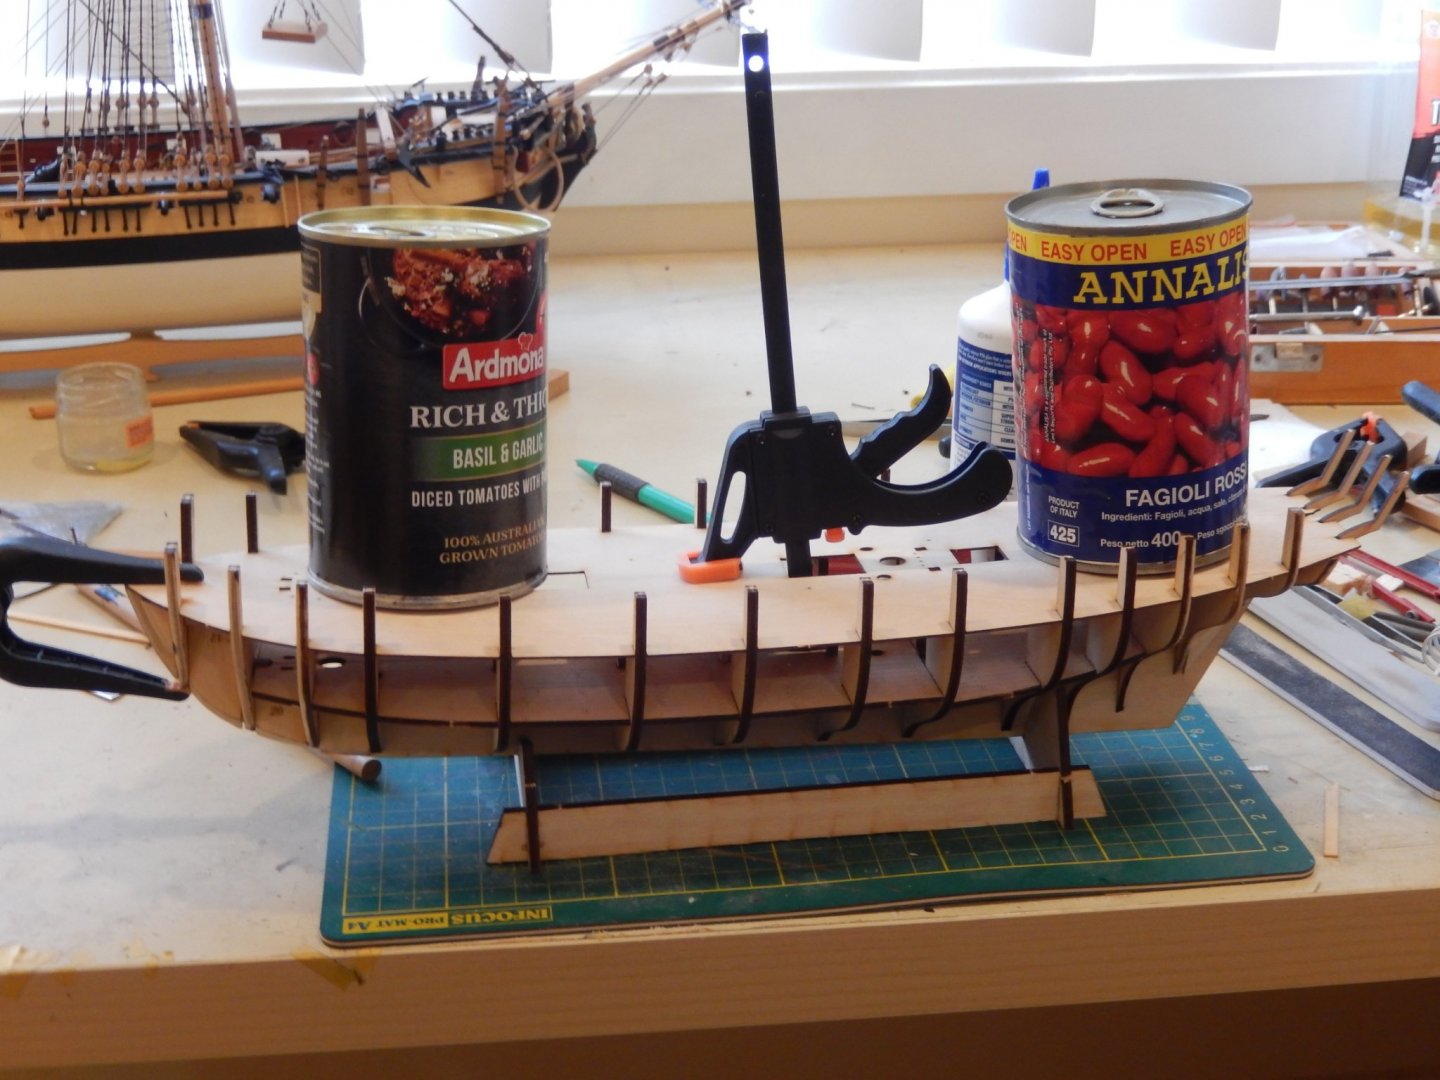
Before Granado I built HMS Vanguard designed by Chris Watton. His design, his plans and instructions proved to be outstanding. The result after only five years was a truly wonderful model (I may be biassed). There is a build log if anyone is interested. Chris has now set up his own firm and that was the attraction in my choosing Speedy. I hope this log may help those who are just starting the hobby. In putting the frame together it is crucial that the bulkheads are square with the keel. The laser cut parts in the kit are superbly accurate, but even so the there is slight 'give'. I use a small set square to check the angle and clamp a bit of square timber behind the bulkhead to hold it while the glue dries The bulk heads at the bow and stern are bevelled to accommodate later planking. This is one way to get the right angle. (In the kit the first 3 bulkheads are to be bevelled. I suggest the 4th bulkhead should also be slightly bevelled. This is how the bow bulkheads turned out. There will probably need to be some minor adjustment during the planking. Making sure the deck supports are square. A hypodermic needle is a really good means of putting PVA glue into difficult places. Here are the bulkheads and supports almost complete. The 'fit' of the parts is perfect. Here is the main deck fitted. This is quite an awkward job. The precision of the cut parts means there is no margin for even the slightest error in assembling the frame. The instructions suggest temporarily nailing the deck down to make sure the deck is securely glued to the supports. As you can see I have used a couple of clamps and a couple of weights to do the job .... and it looks like pasta for dinner tonight.


-
Having just finished Granado I am now starting HMS Speedy, Lord Cochrane's brig. He assumed command in 1800 and is the model for the fictional Jack Aubrey in Patrick O'Brian's wonderful series of books.
-
Fred; there are two pendants (one each side) and and two 3mm deadeyes lashed to the bowsprit.- again one on each side. If you still have trouble, I'll take a photo which I hope will make it clear. Good luck. I am now working on Speedy and will start a log later today. Bob
- 421 replies
-
- 1
-

-
- caldercraft
- granado
- (and 1 more)
-
Thanks Joe, Jason and Thomas, and thanks too for all those who have 'liked' the build over the last few years. We just arrived back from the south coast for what is supposed the be a heatwave over the next week.. Should have stayed at the beach. HMS Speedy has arrived which should keep me occupied for a while. I have had a quick look at the kit. It is beautifully presented and the materials are absolutely first-rate. I will start another build log once there is a little progress to report. Happier New Year to all.
- 421 replies
-
- 1
-
-
- caldercraft
- granado
- (and 1 more)
-
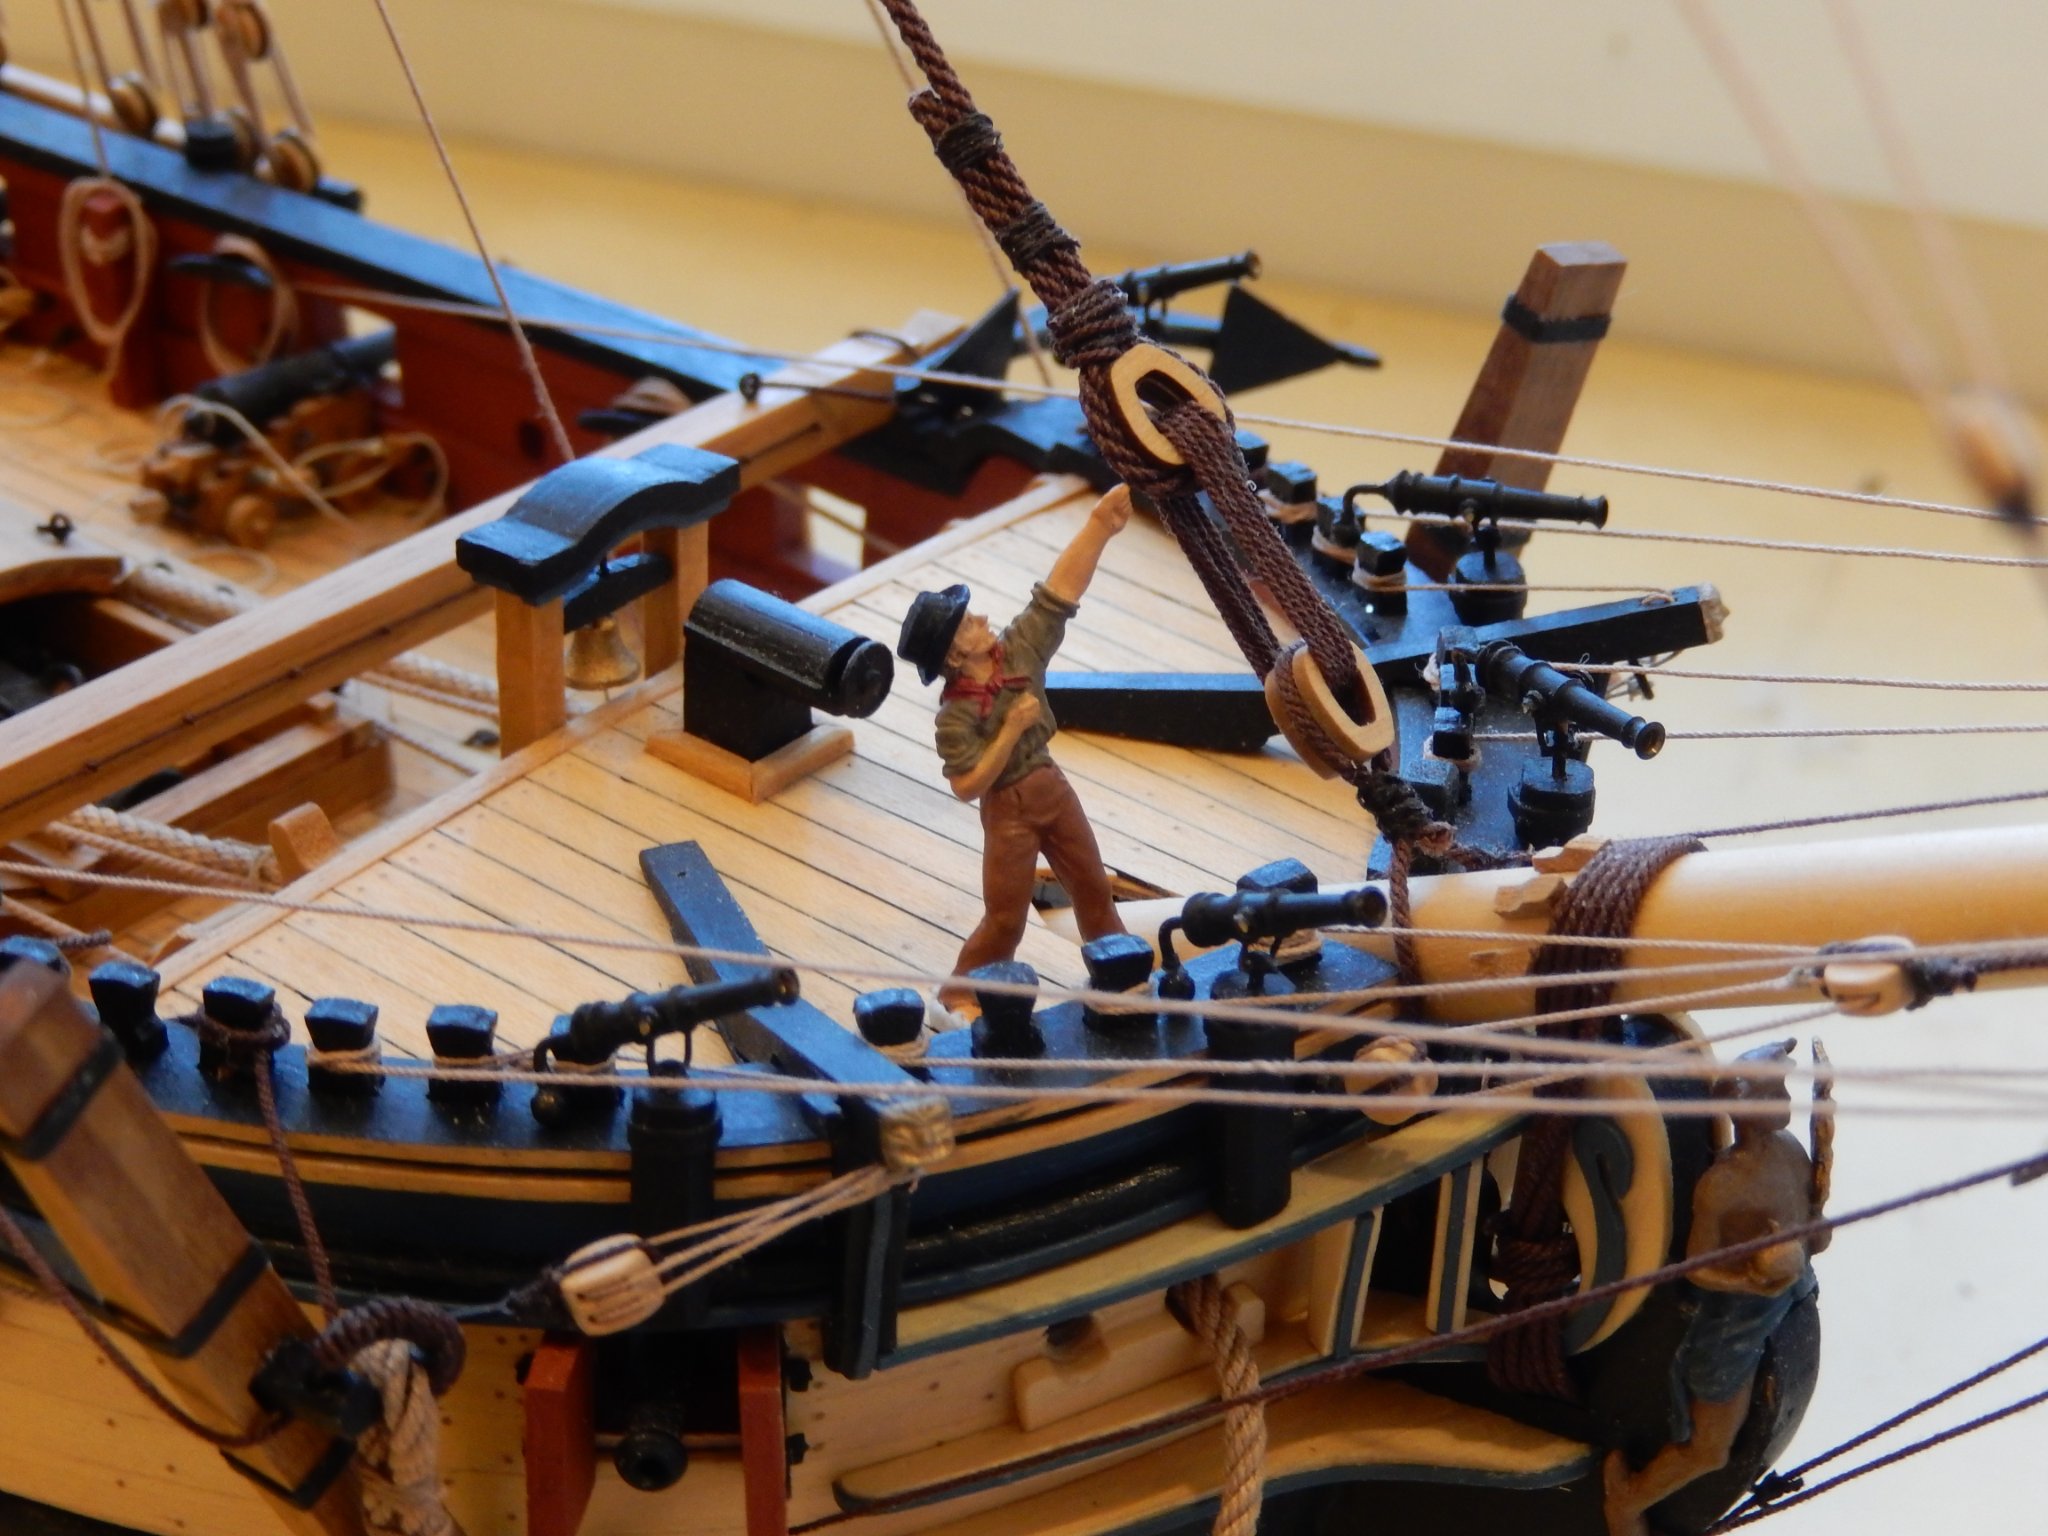
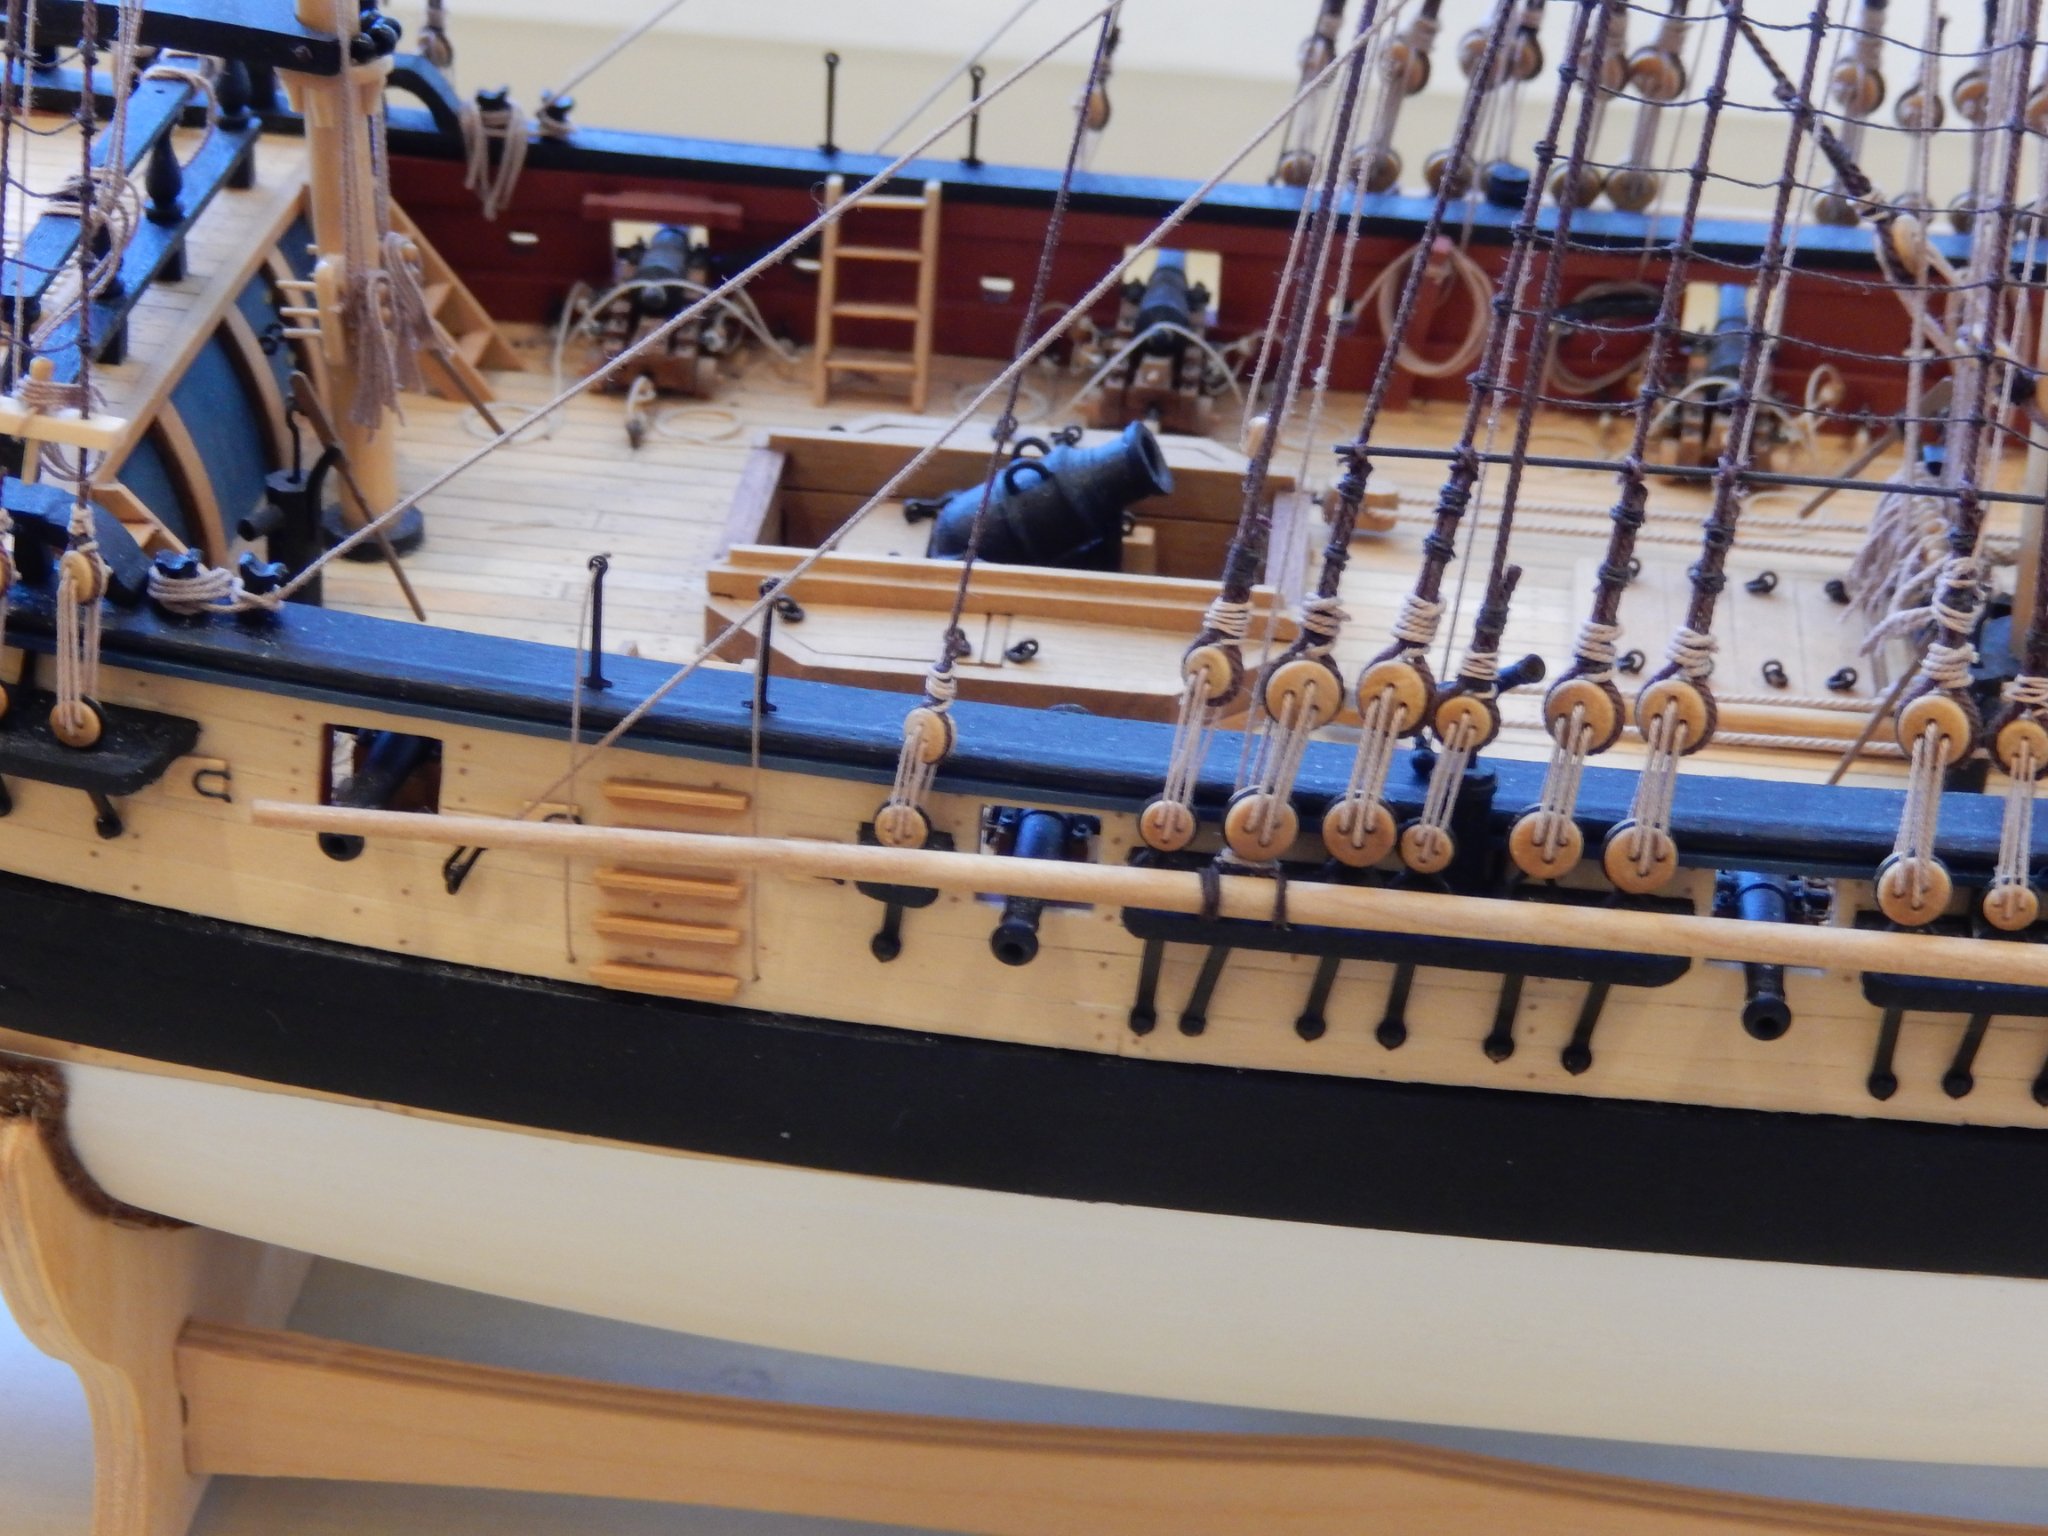
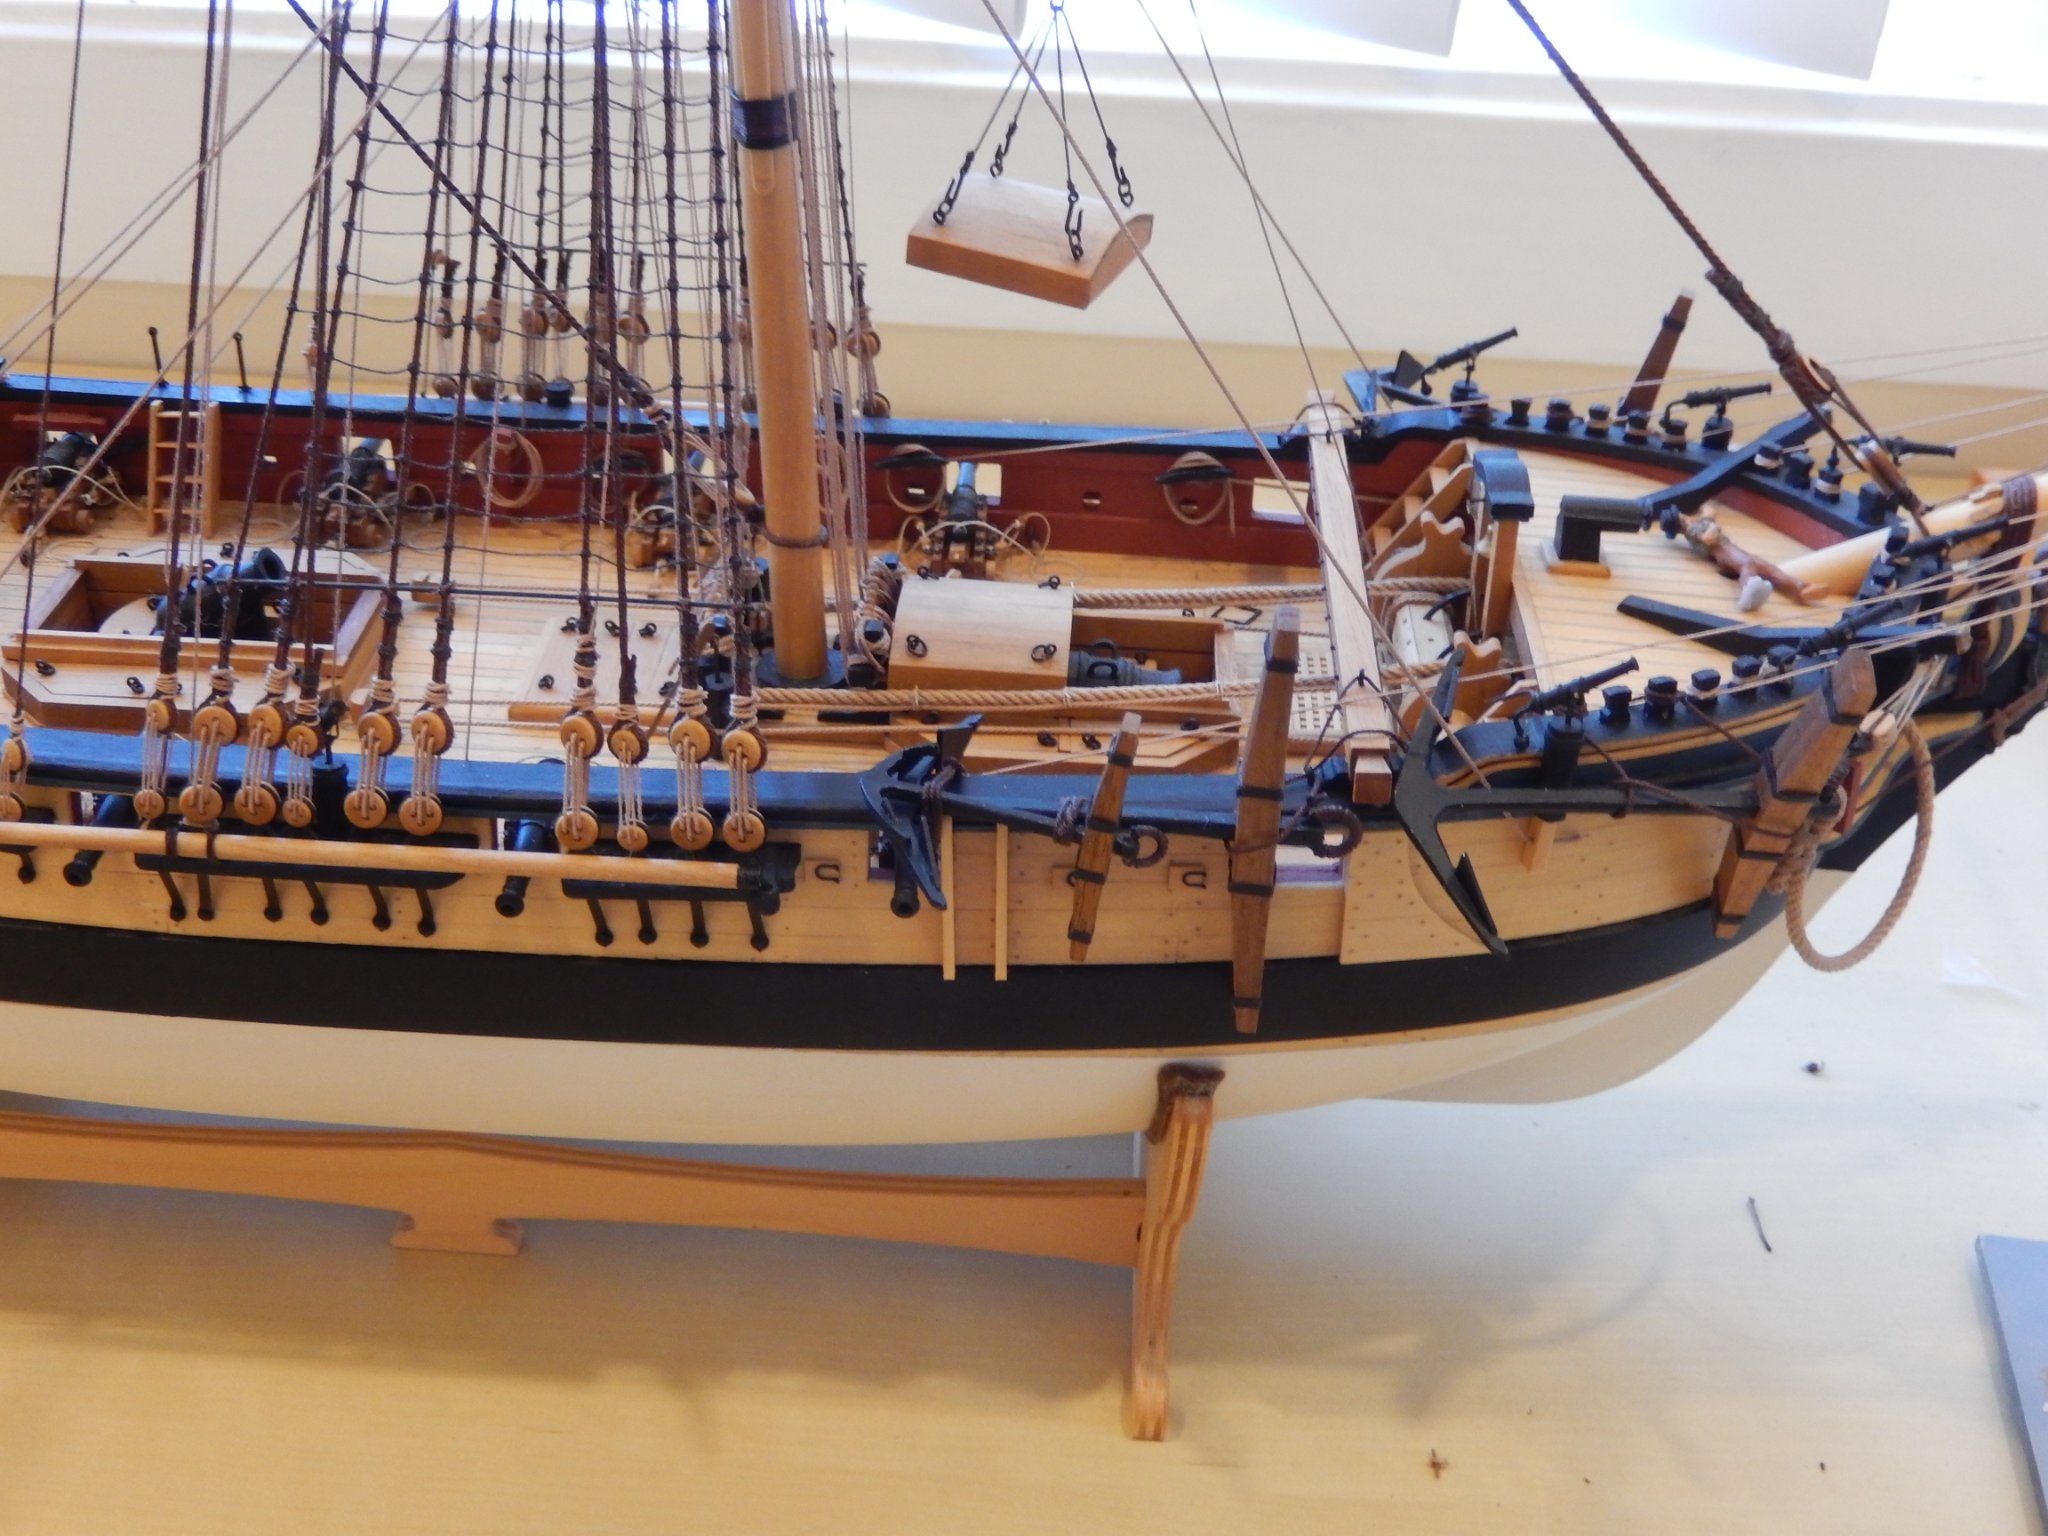
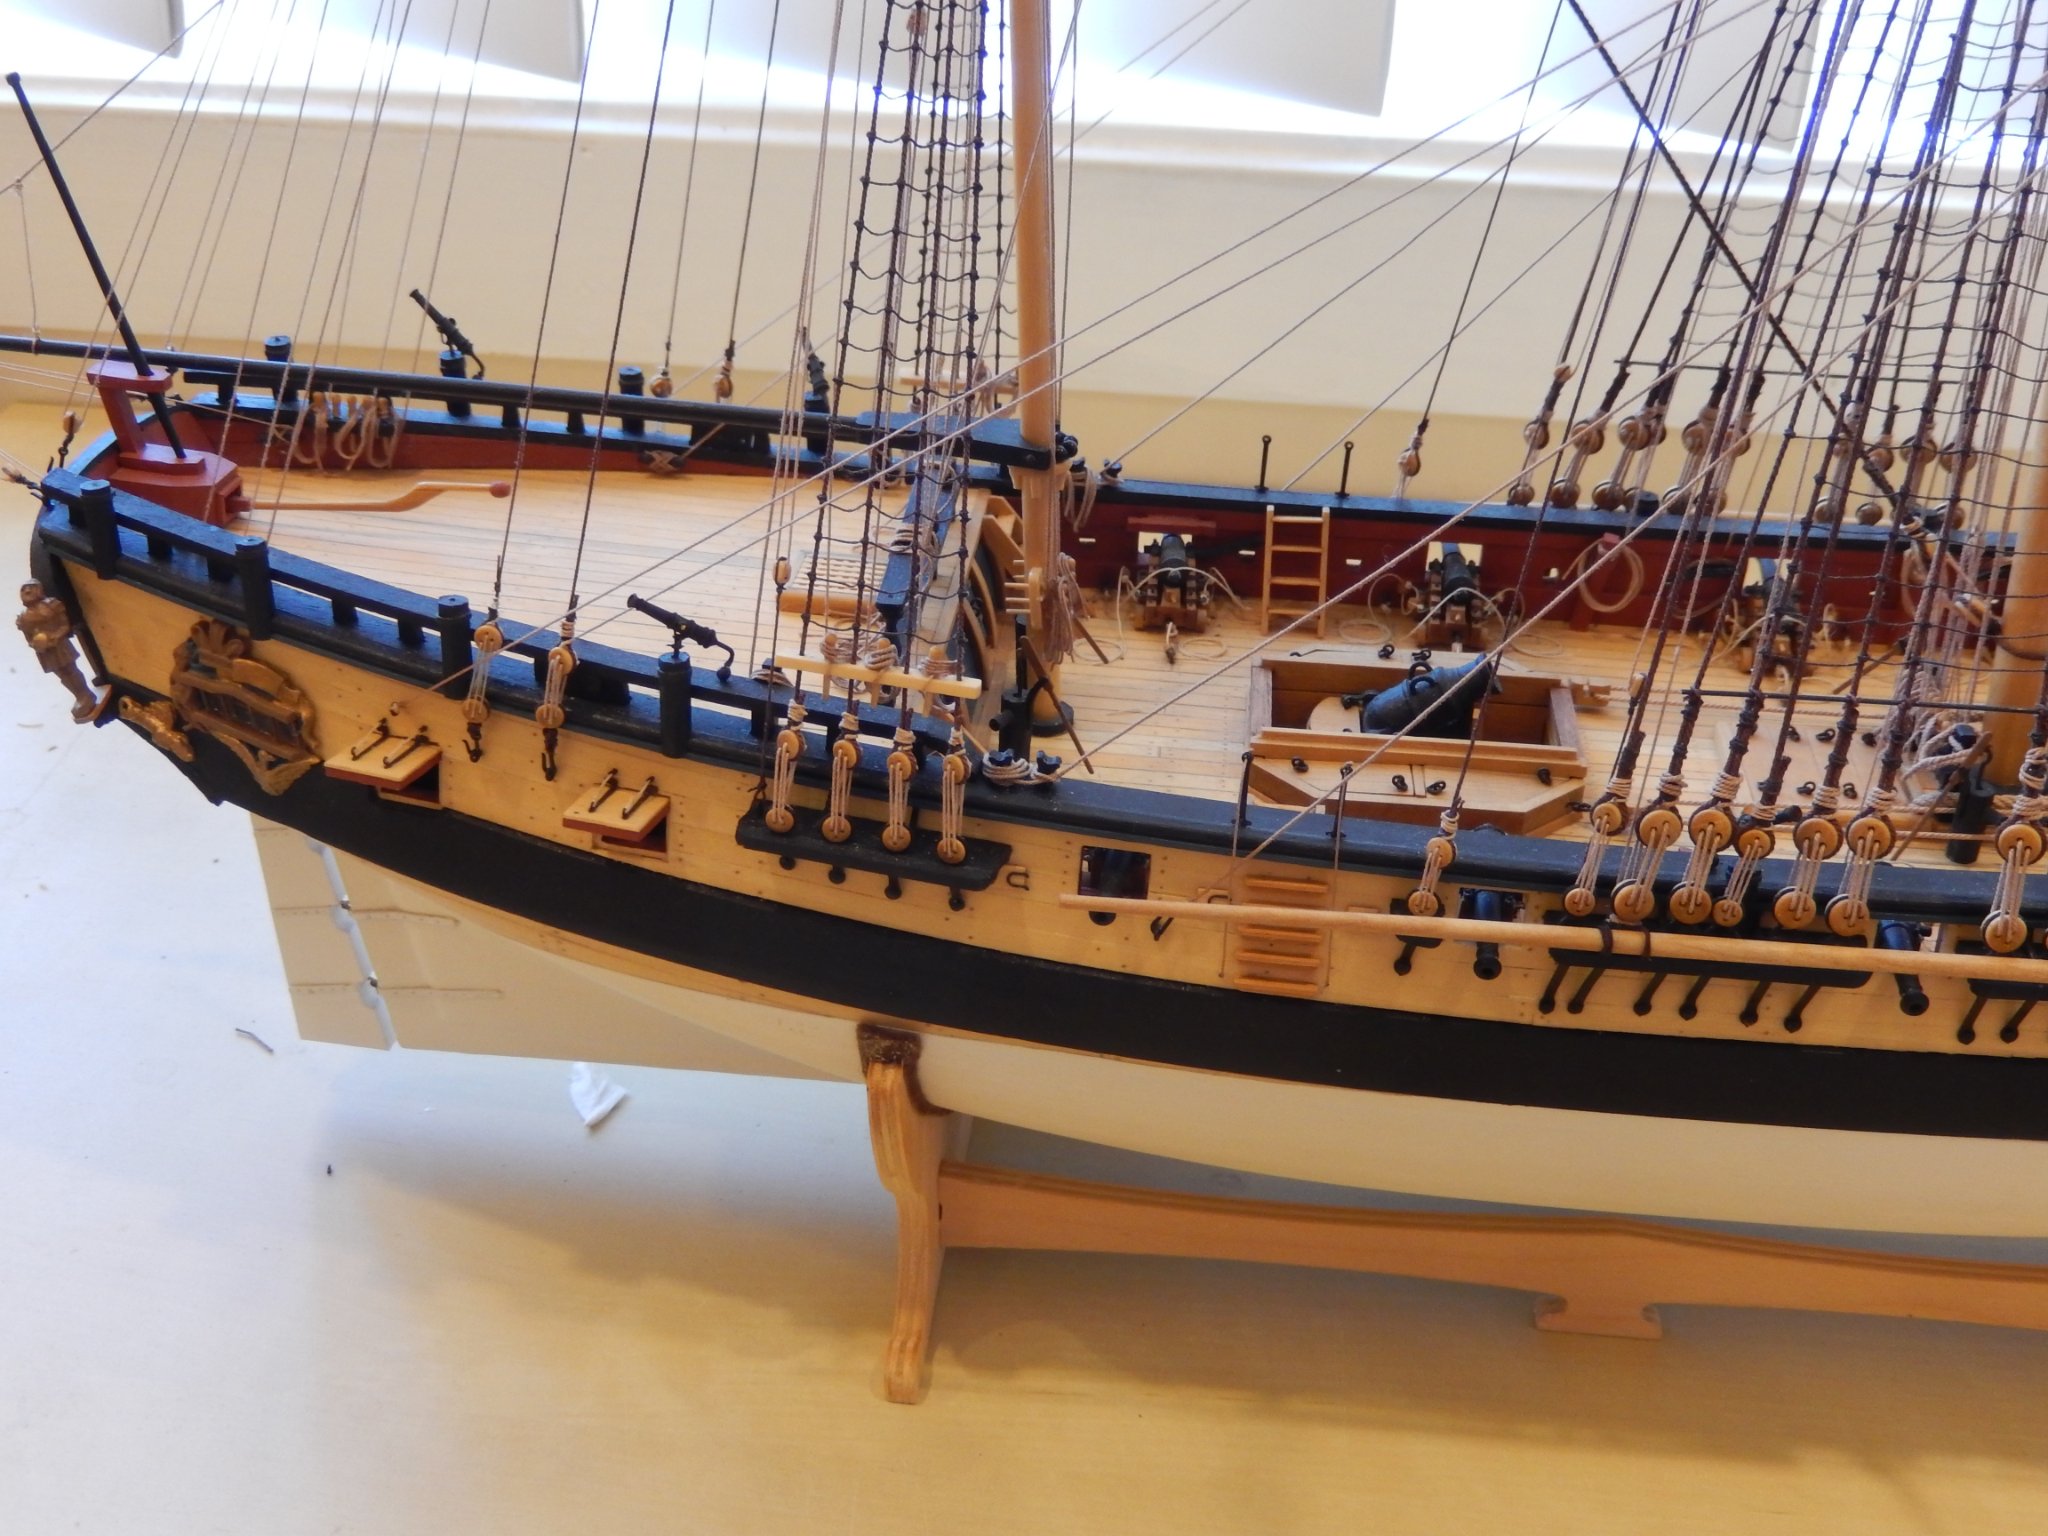
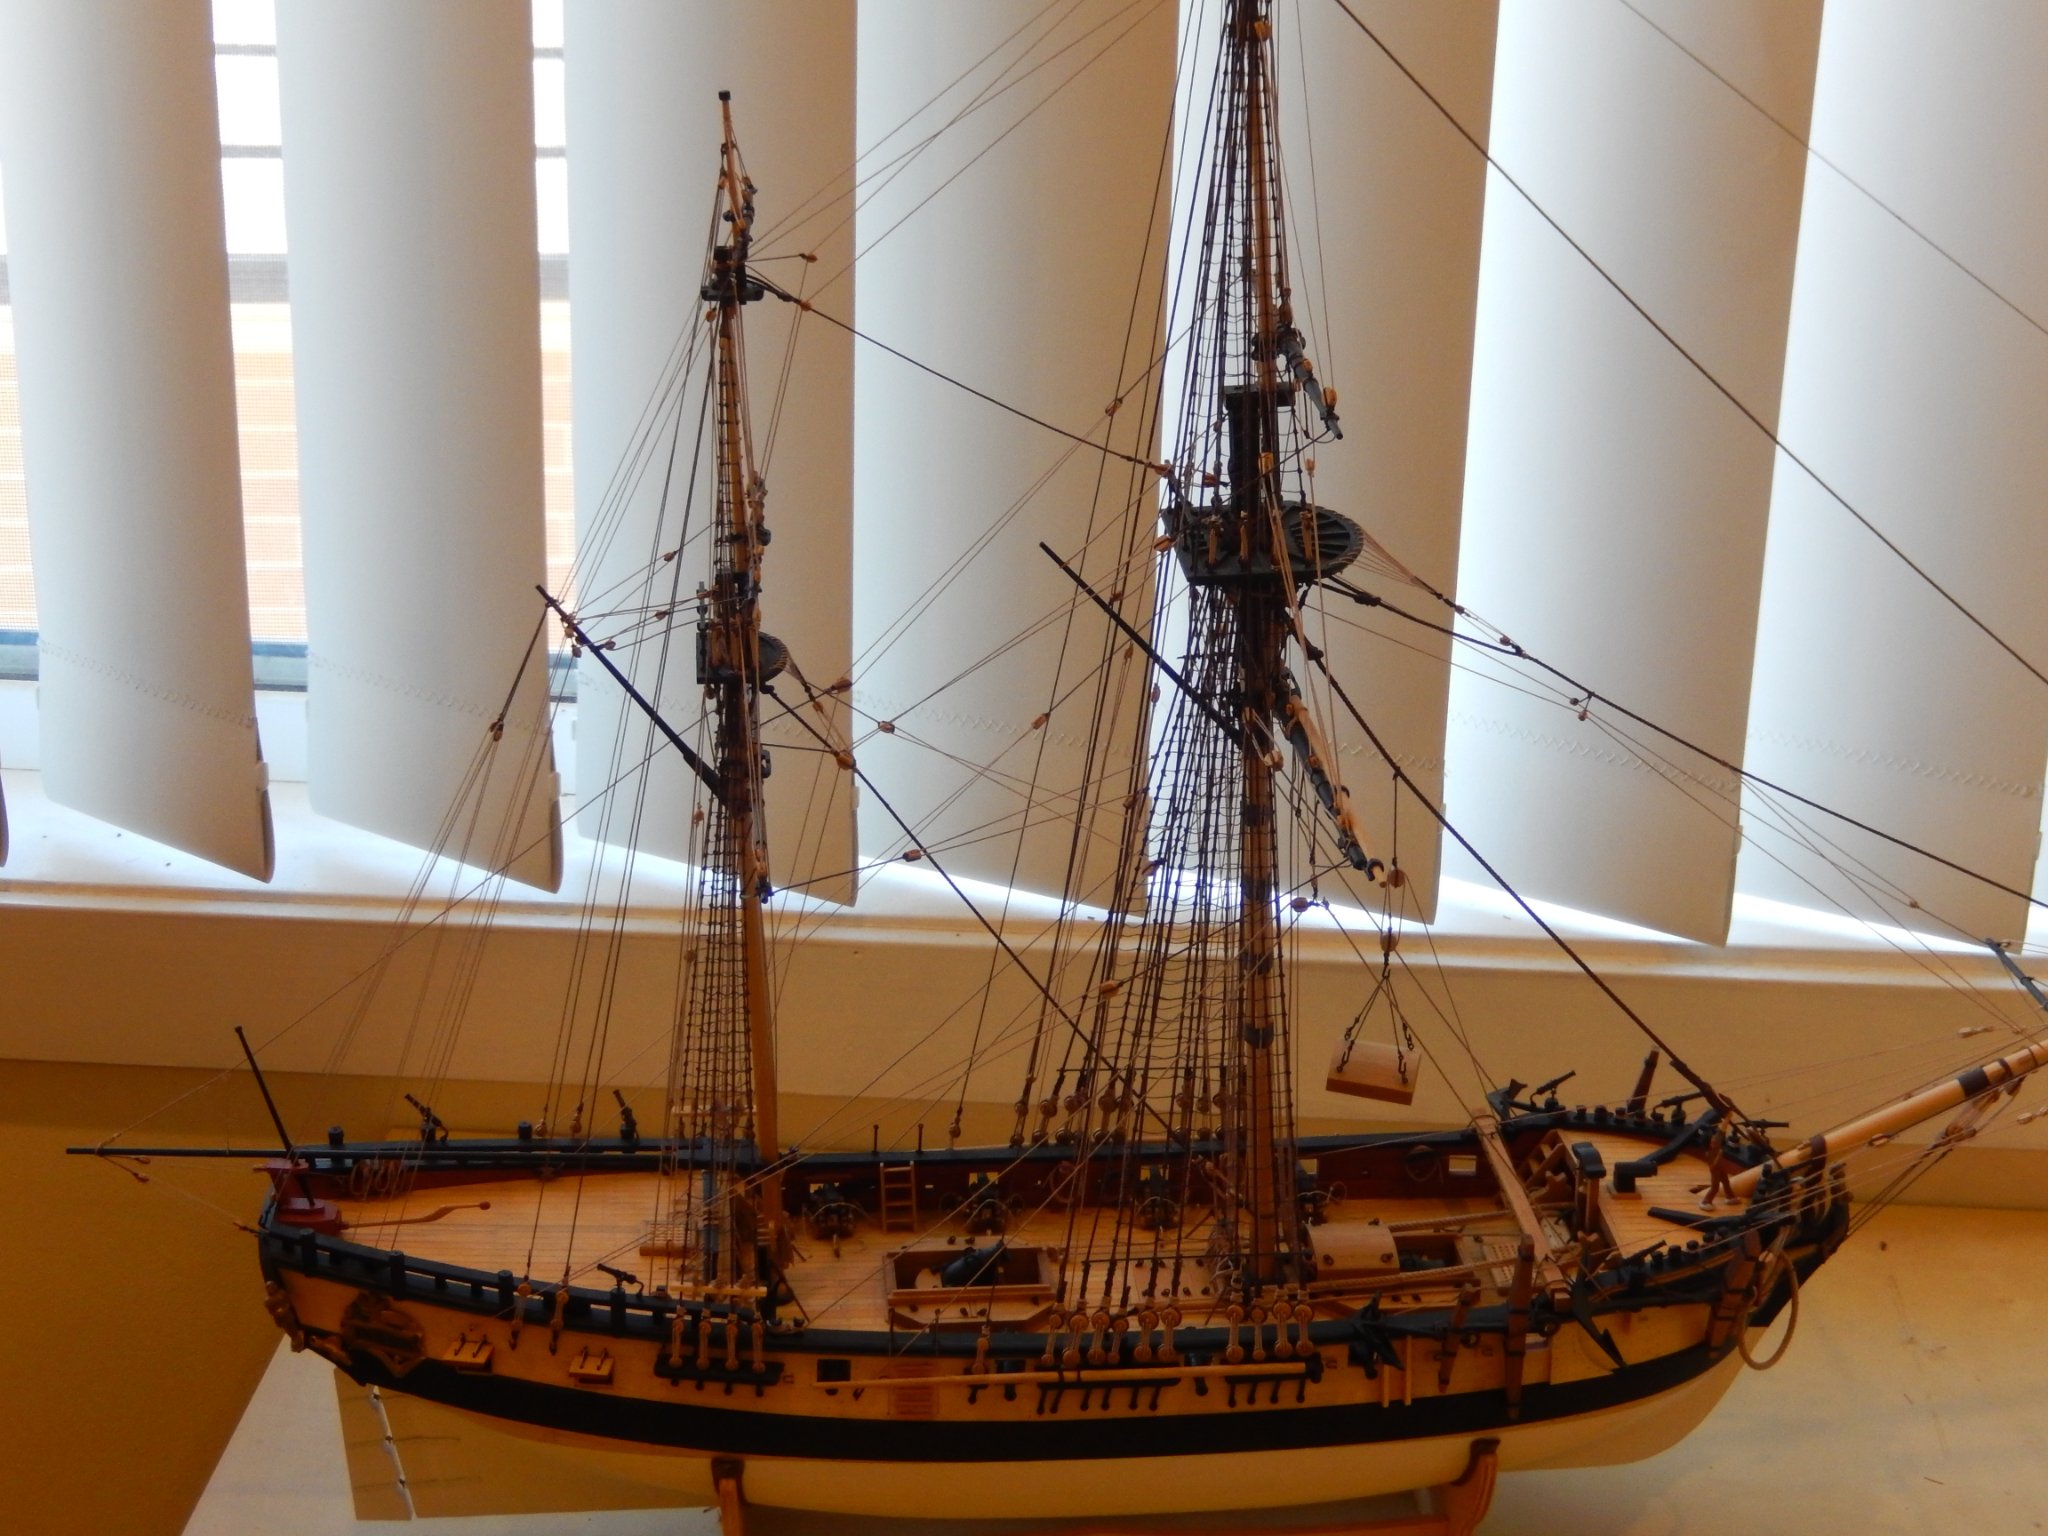
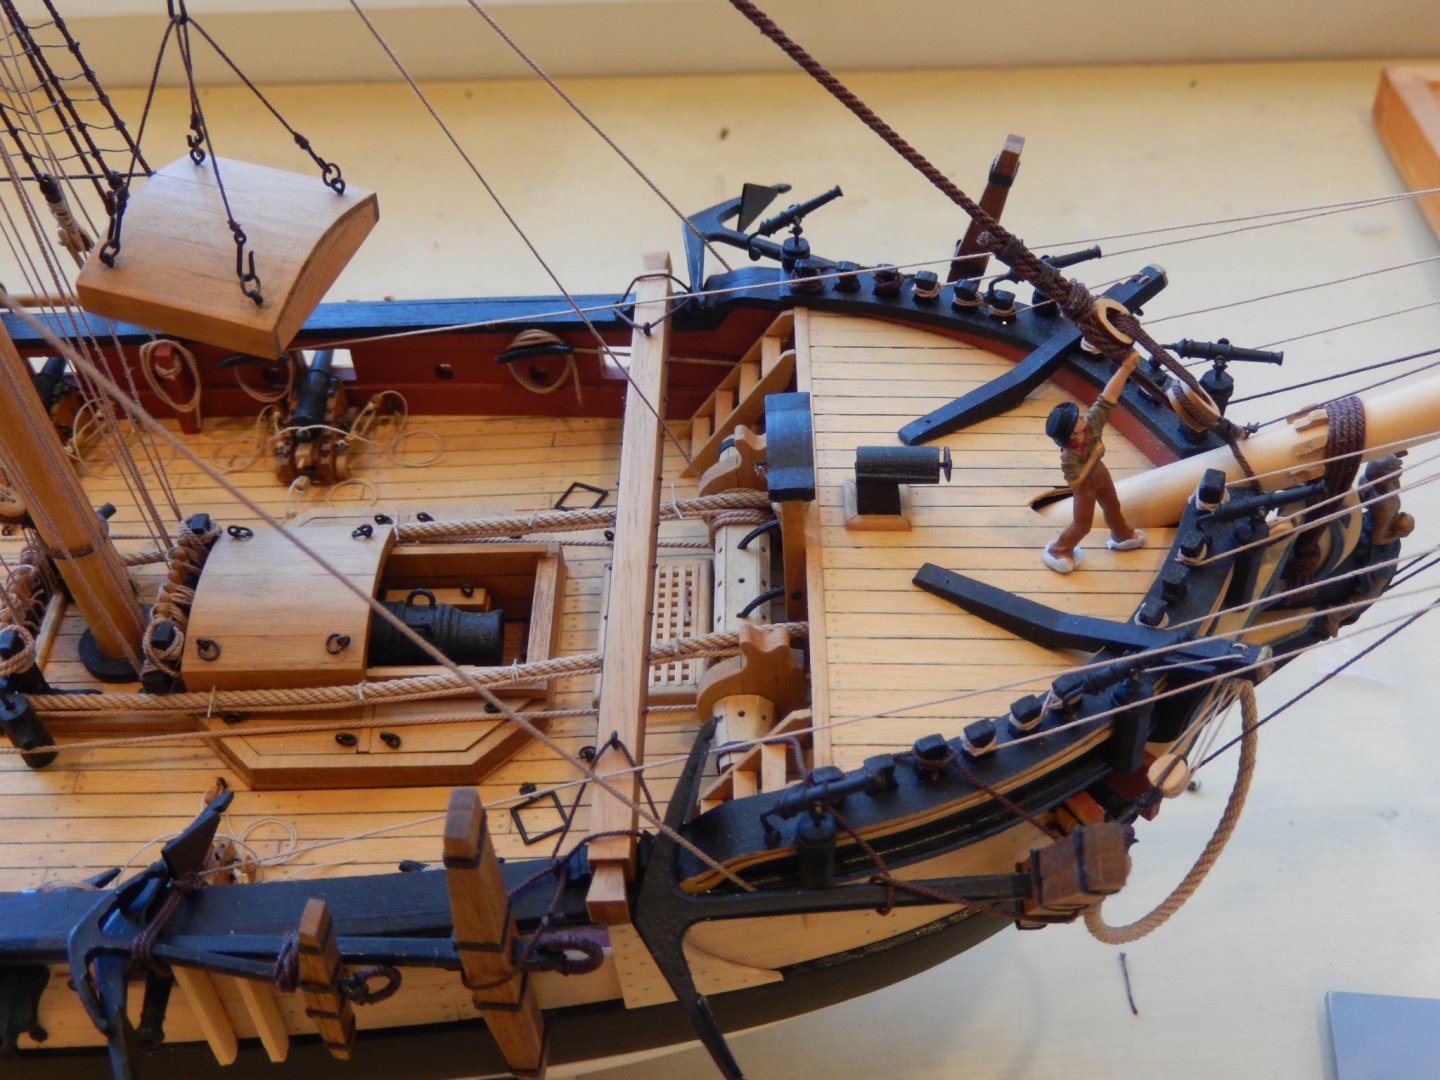
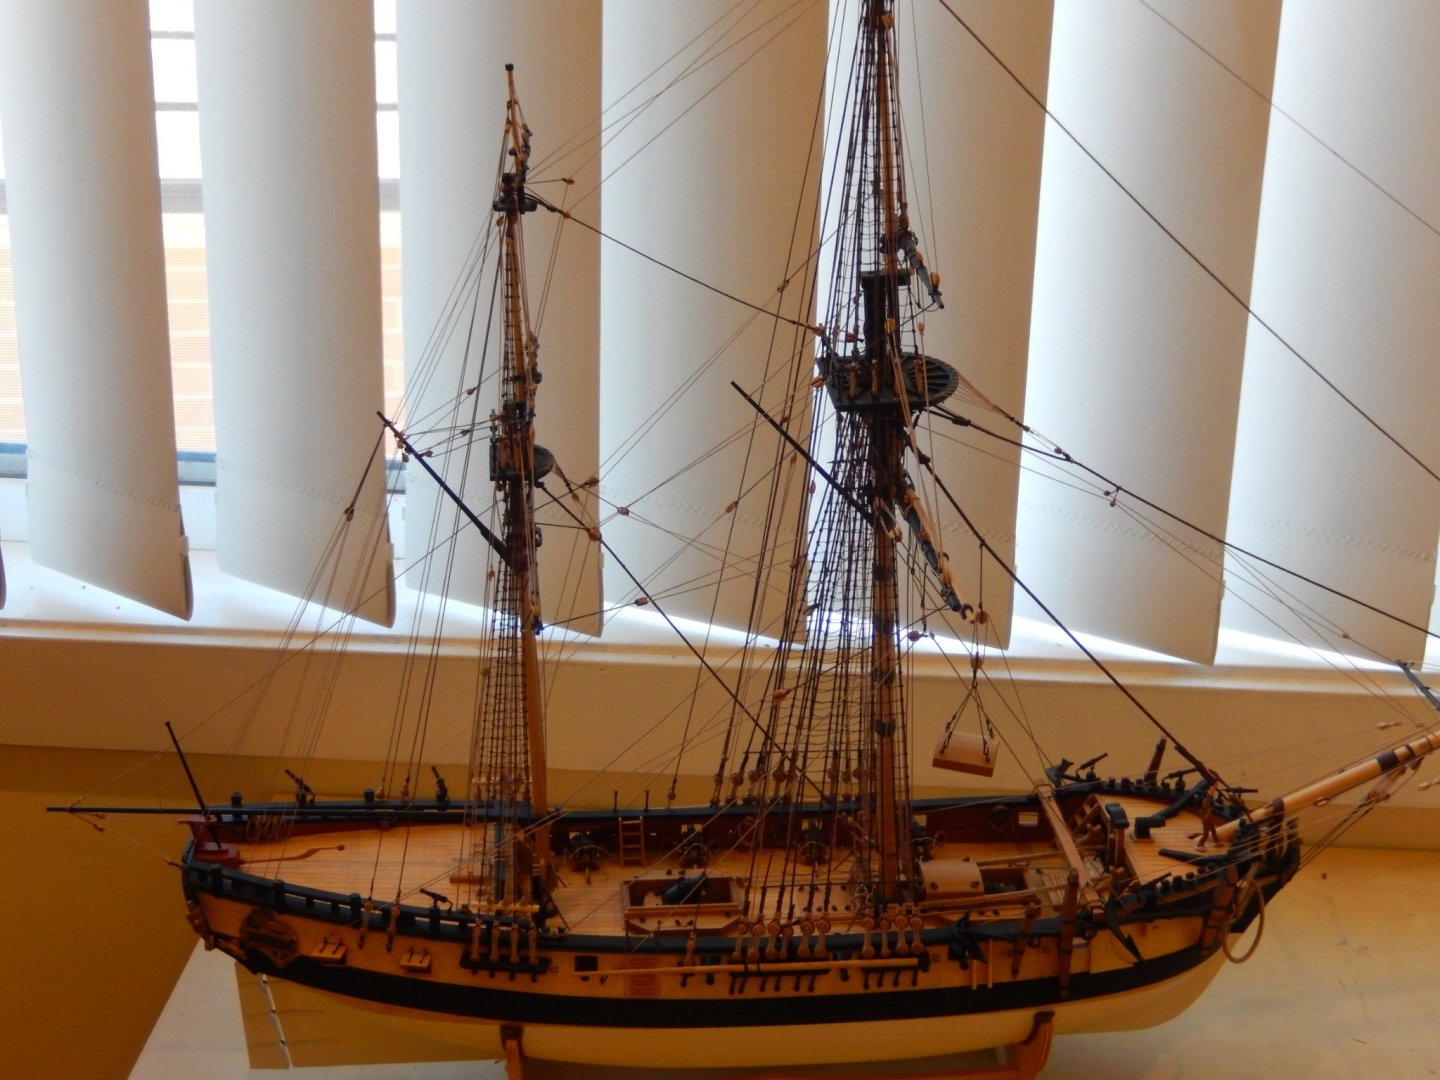
Well the thing is finally finished, though I will put a few rope coils here and there later today. It's quite a challenging model. As I have noted earlier in this log, the materials supplied were quite variable - some was really quite poor (some of the timber strip was unusable). The instructions were good and the parts list was really well done. This is how it's turned out. Here I have blue-tacked a very small crew member onto the deck to give some idea of scale. He is a 1:72 person and of course the model is 1:64. Once some of his 1:64 colleagues are delivered I will put him ashore. I don't know what to do with the 'lids' for the rear mortar. Leaving them strewn around the deck does not seem satisfactory. Whoops - my man seems to have been at the grog locker. We are returning to the south coast on Monday for a week and I had hoped to bring Speedy with me to make a start. It was supposed to be delivered on Friday .....


- 421 replies
-
- 17
-
-

-
- caldercraft
- granado
- (and 1 more)
-
I have finally successfully ordered HMS Speedy. The difficulties with the security controls on credit cards have been resolved (almost all of which were my fault). Chris Watton has been has been superb in providing help with what as been a software problem out of his control. I could not recommend him and his company more highly. Looking forward to a happy New Year and a new ship to build.
- 421 replies
-
- 1
-
-
- caldercraft
- granado
- (and 1 more)
-
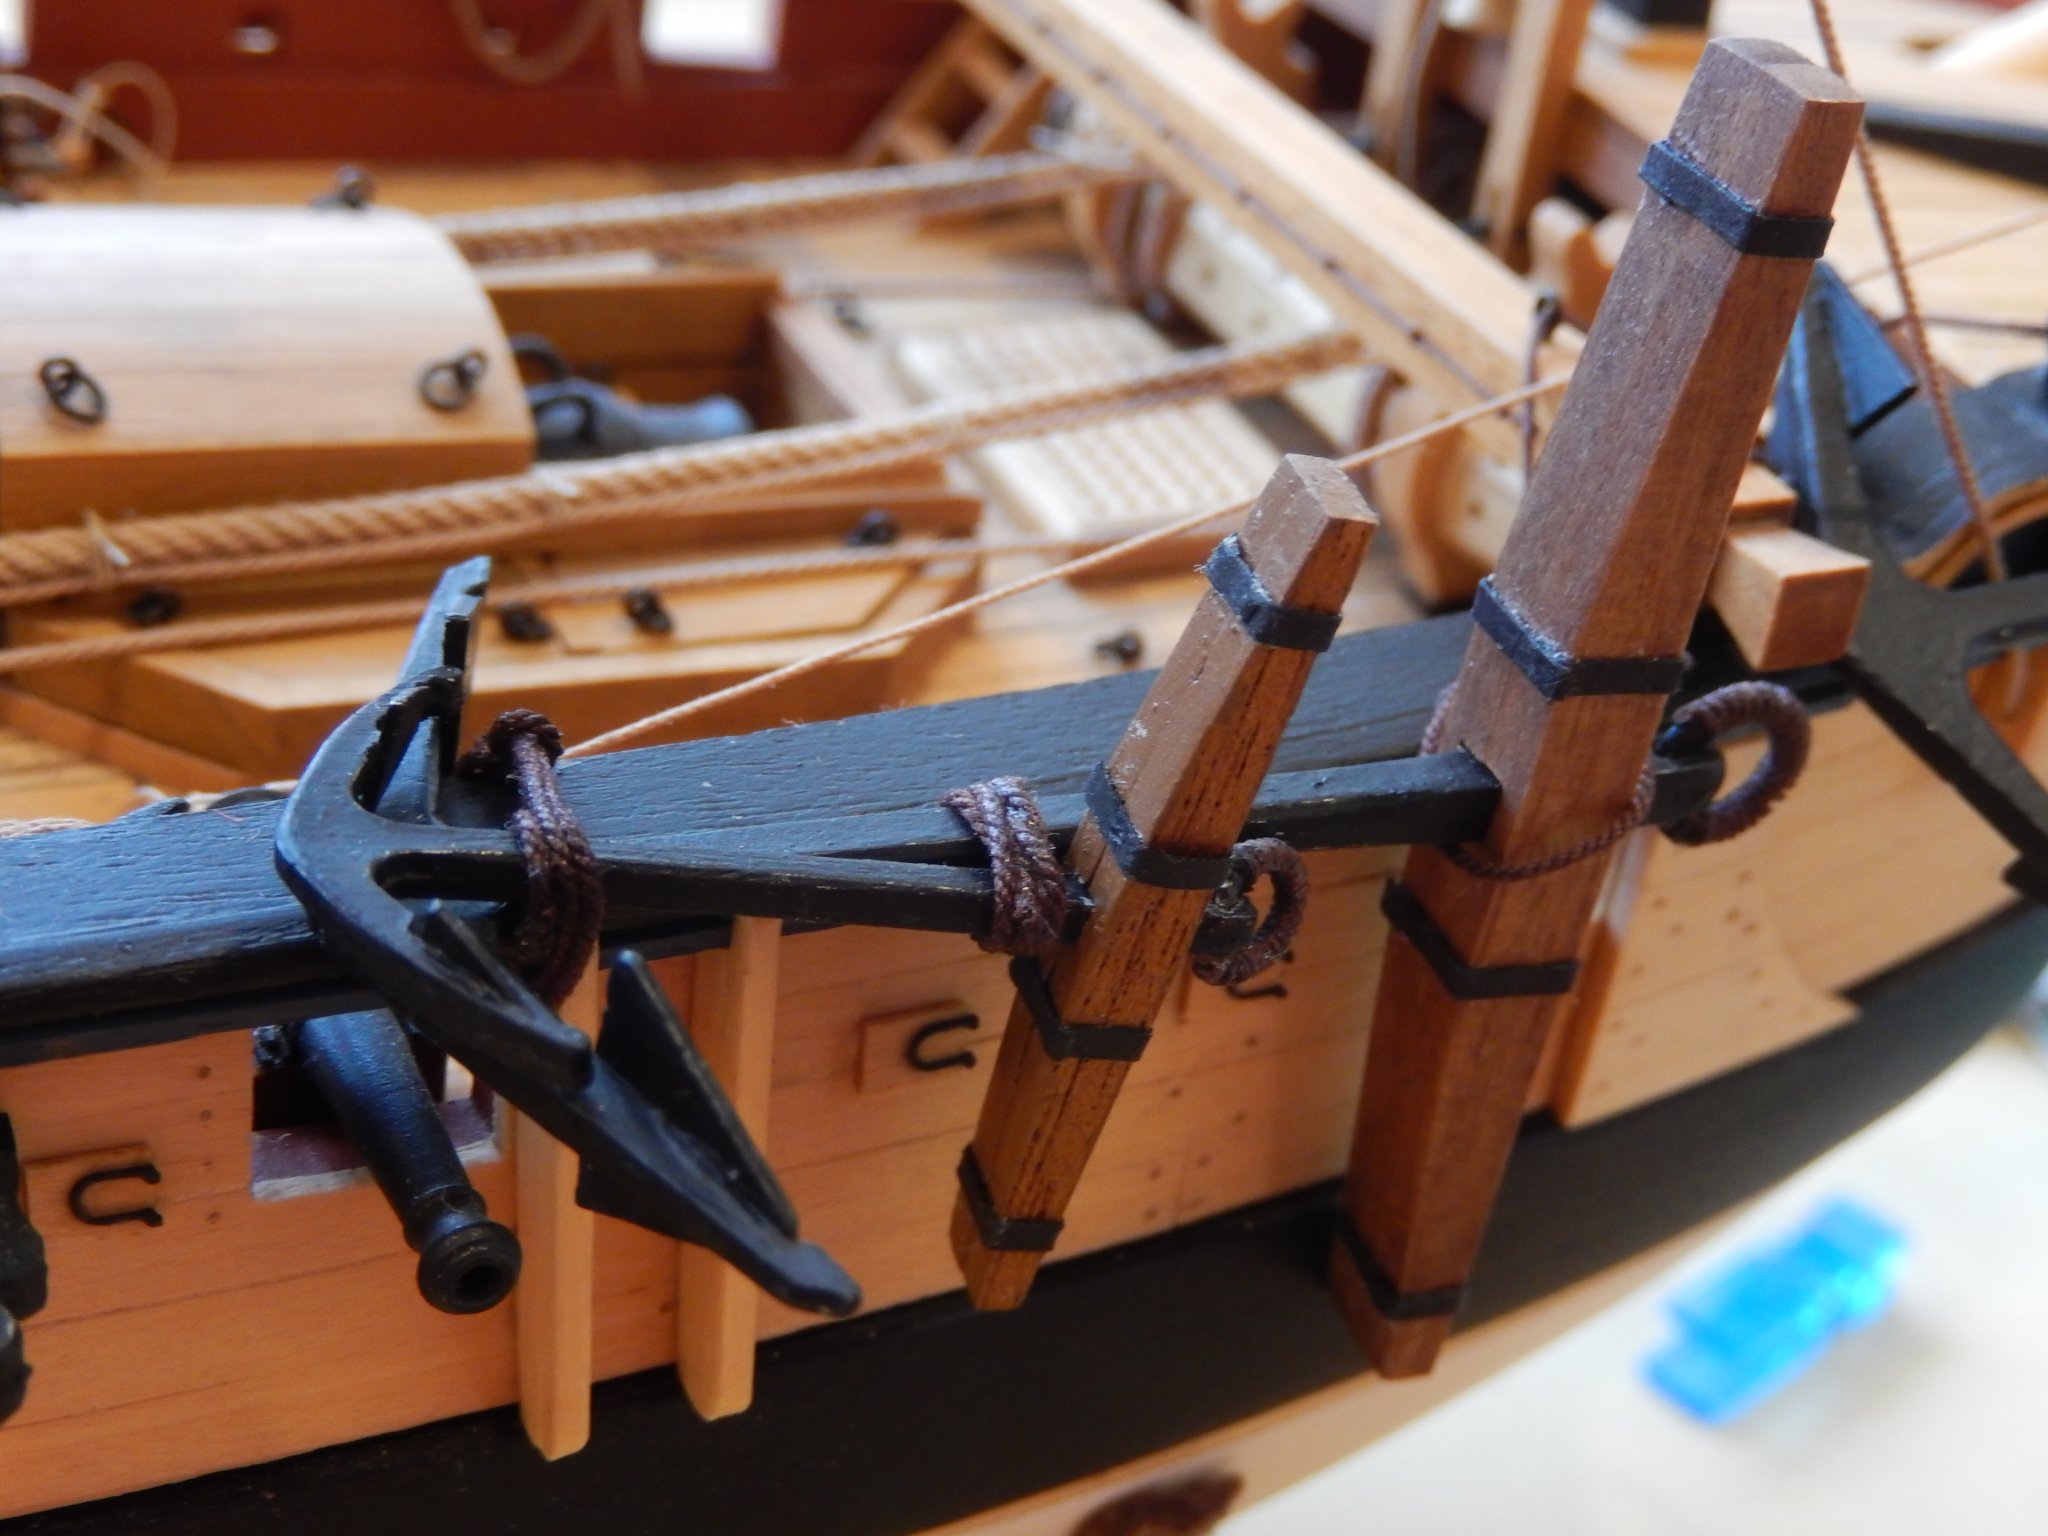
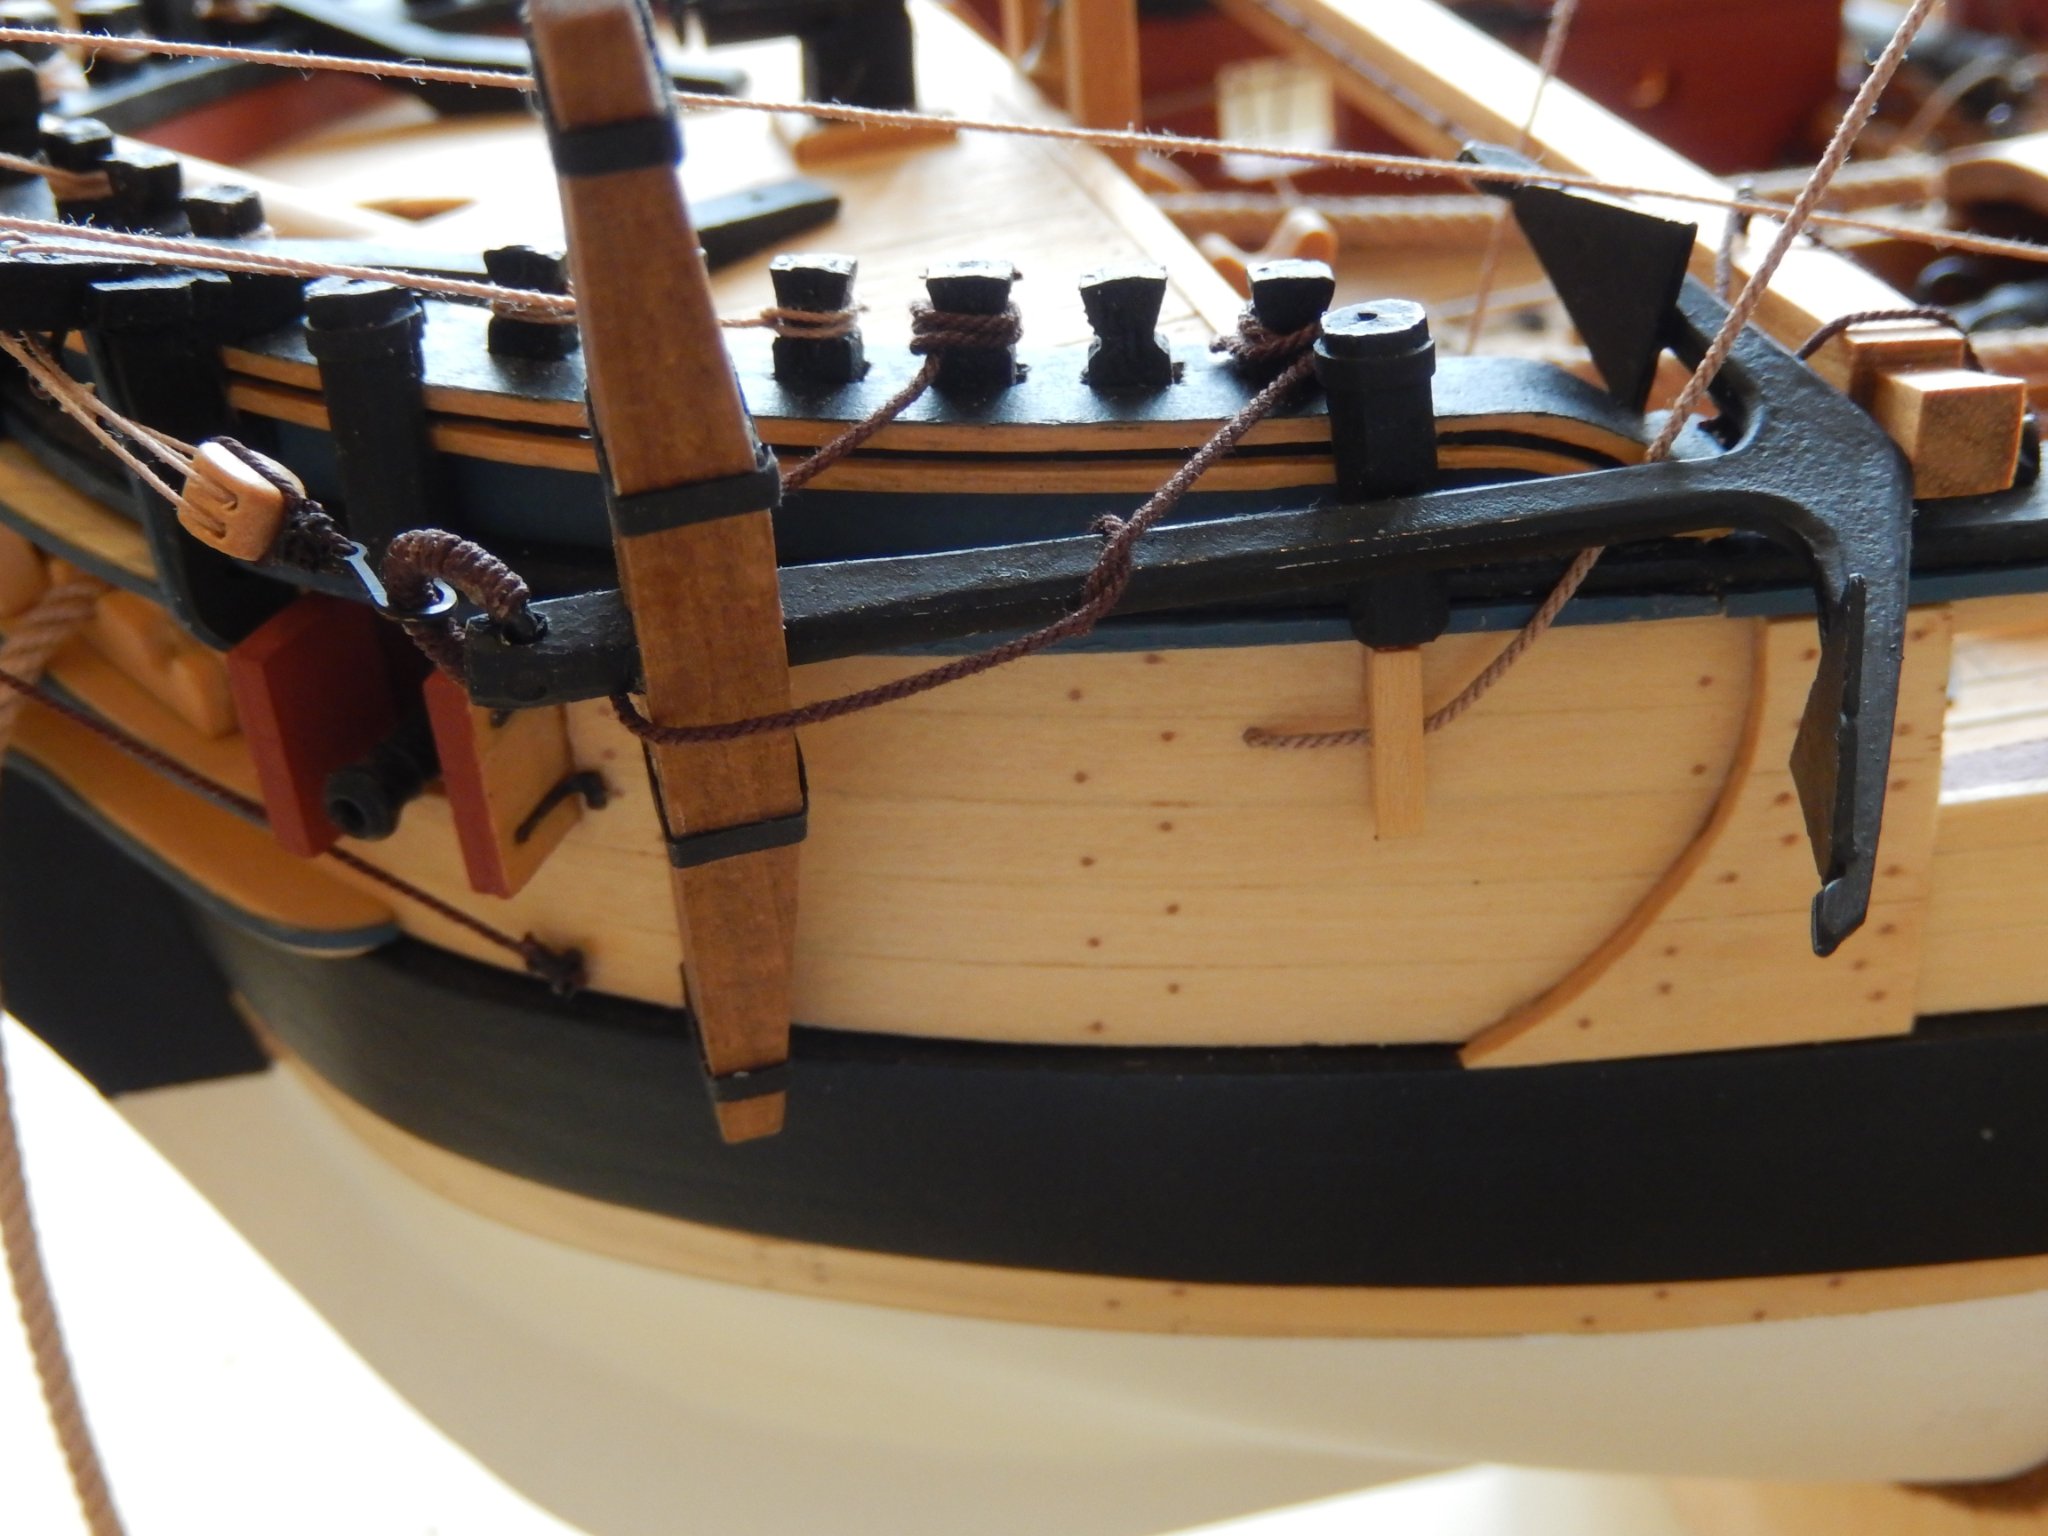
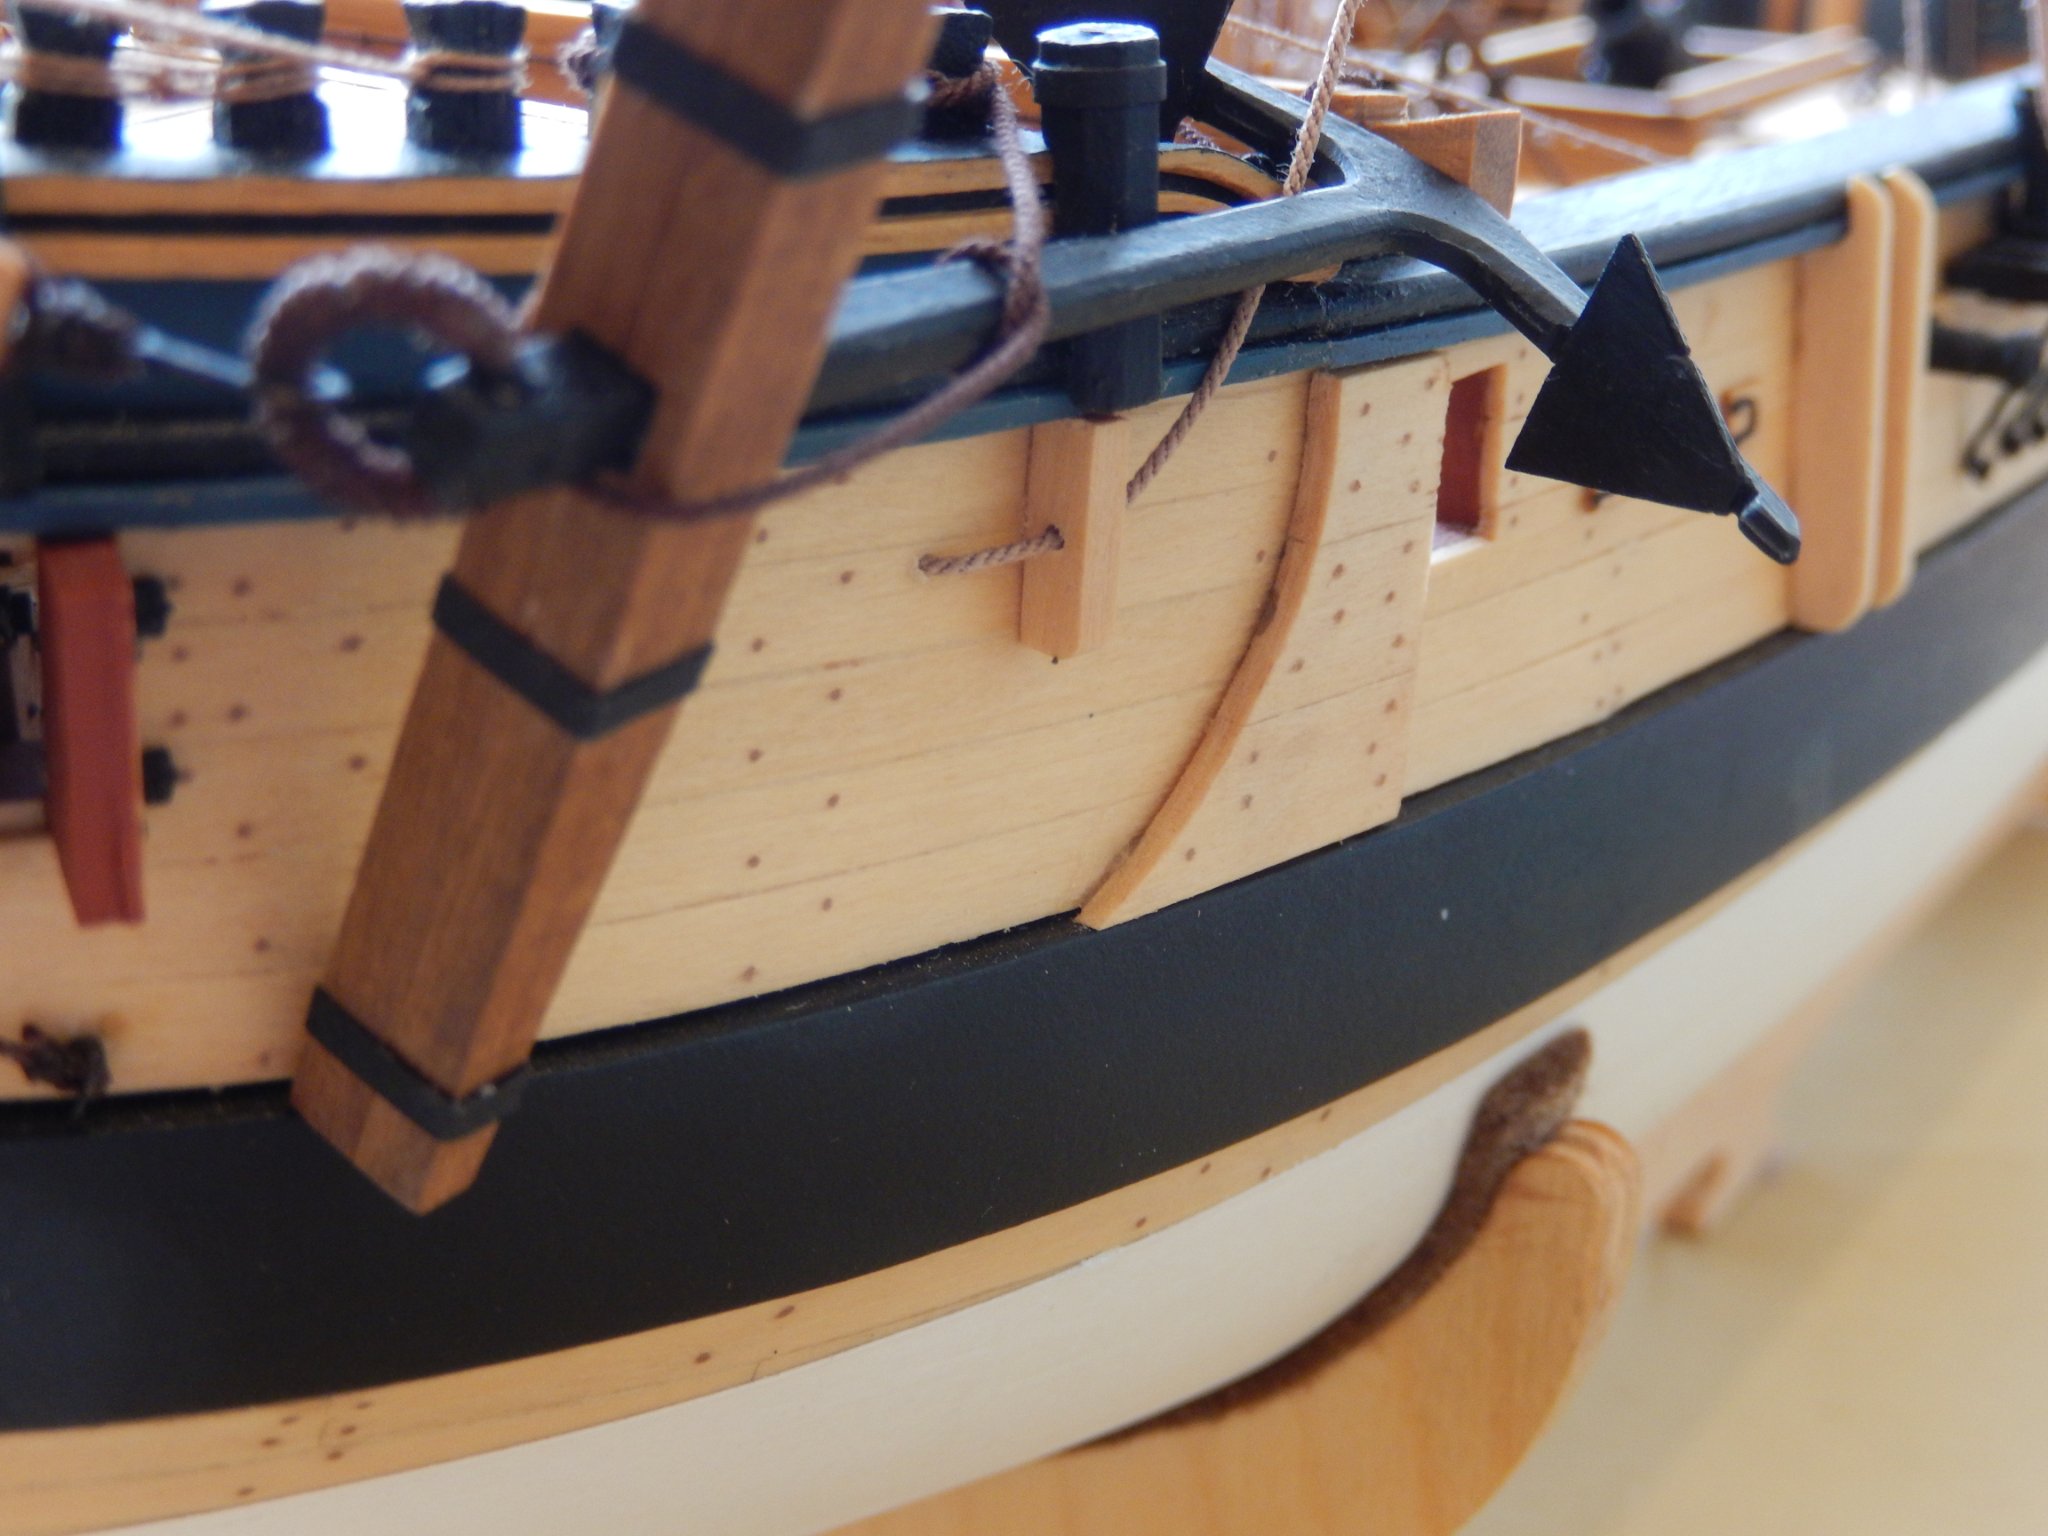
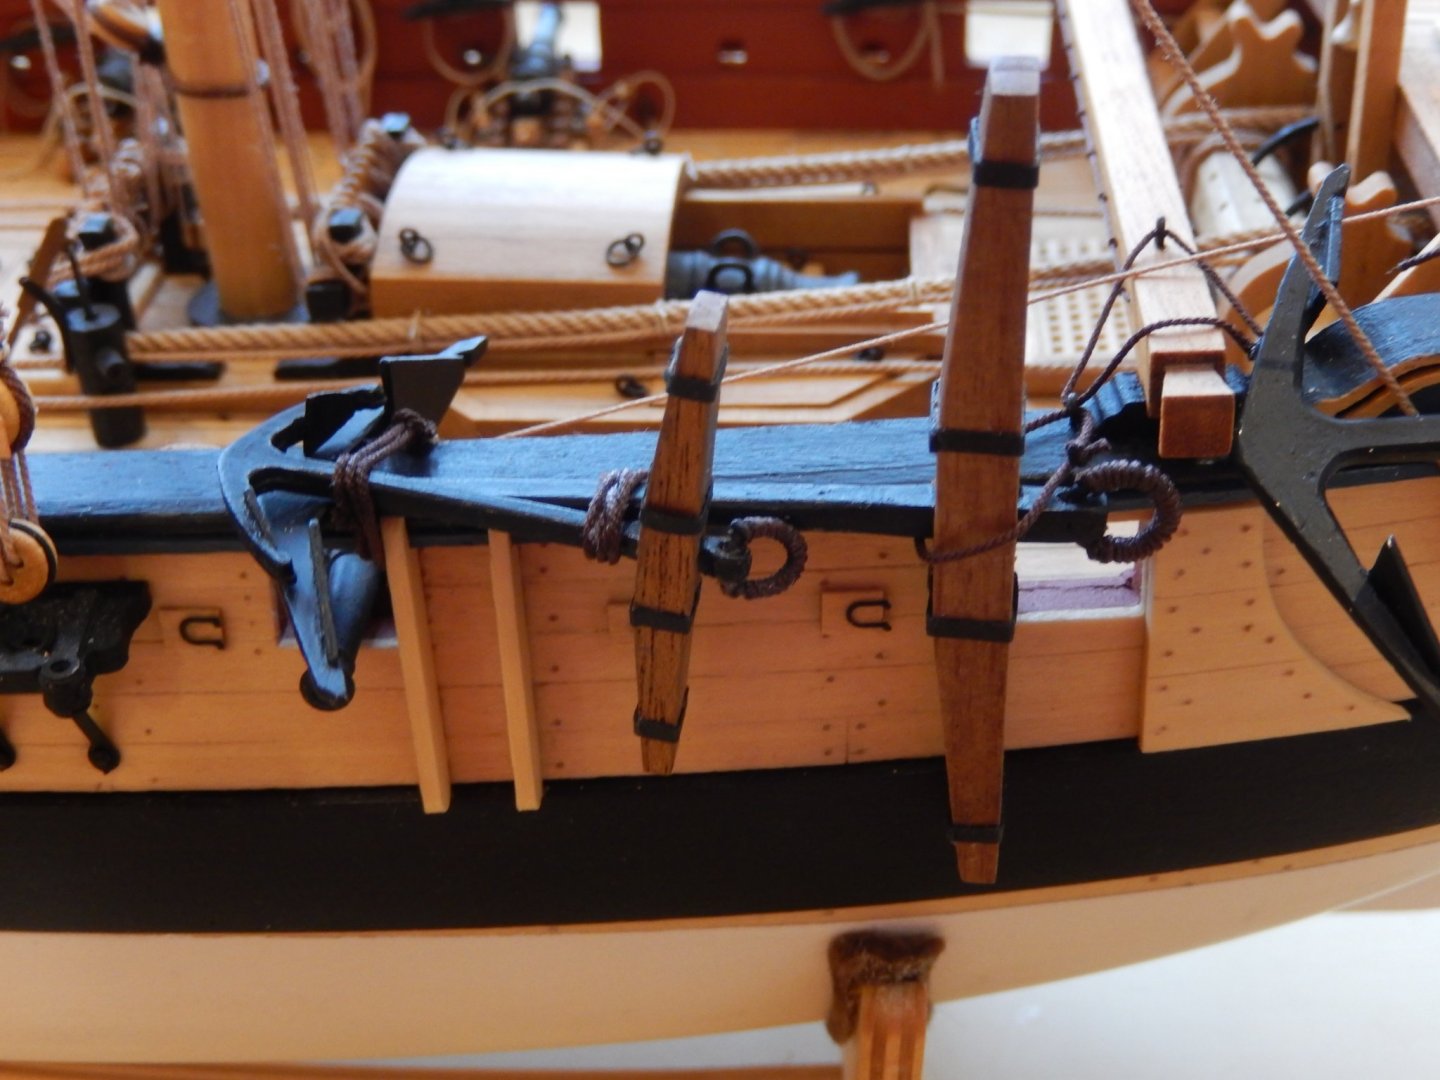
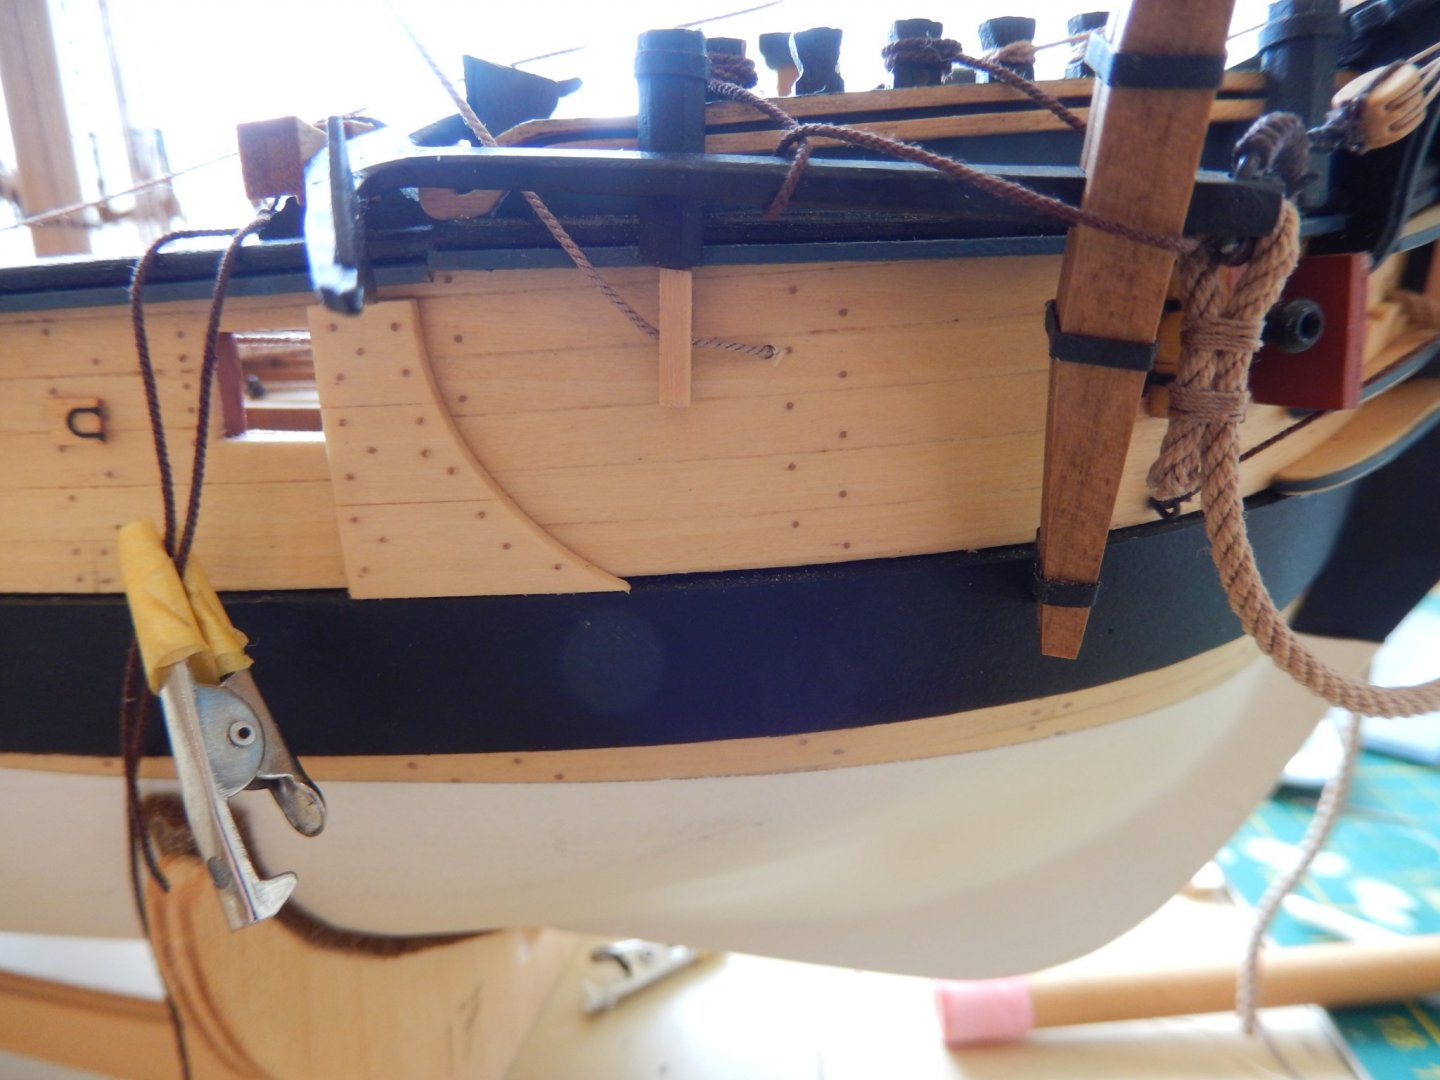
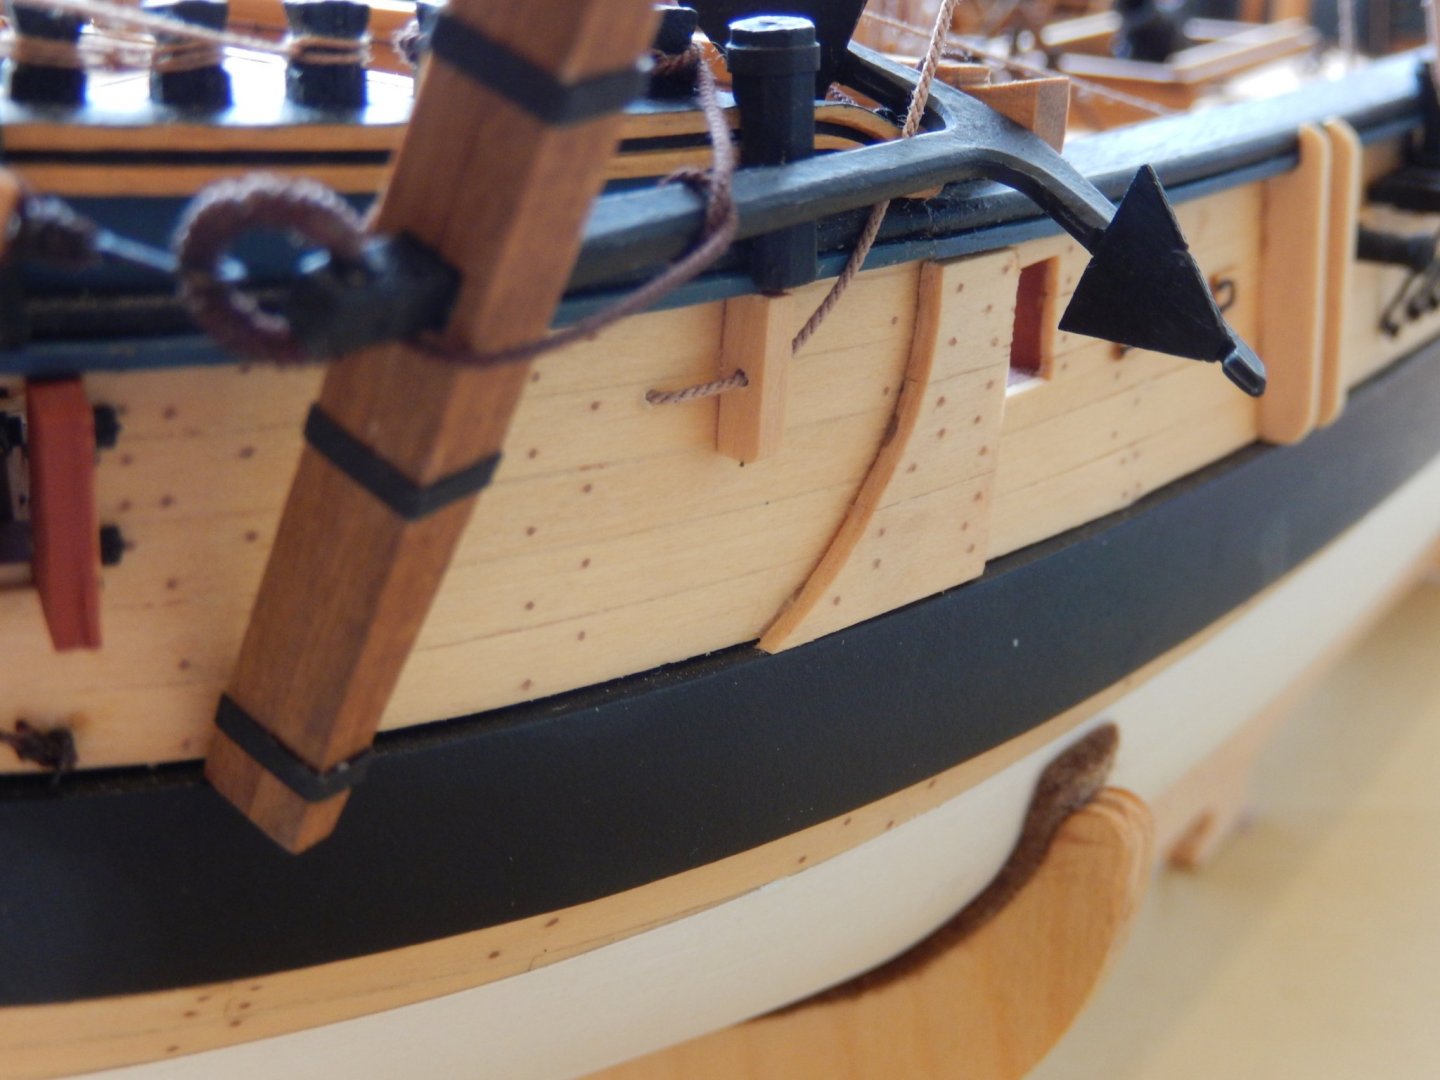
The anchors are finally rigged. It's turned out reasonably well. I think that's the end of ship-building for the year (and what a year!) and the beginning of three weeks at the beach - Pisco sowers, Sangria and perhaps a glass of wine. Happy Christmas and a far happier New Year to all. Bob

- 421 replies
-
- 10
-
-
-
- caldercraft
- granado
- (and 1 more)
-
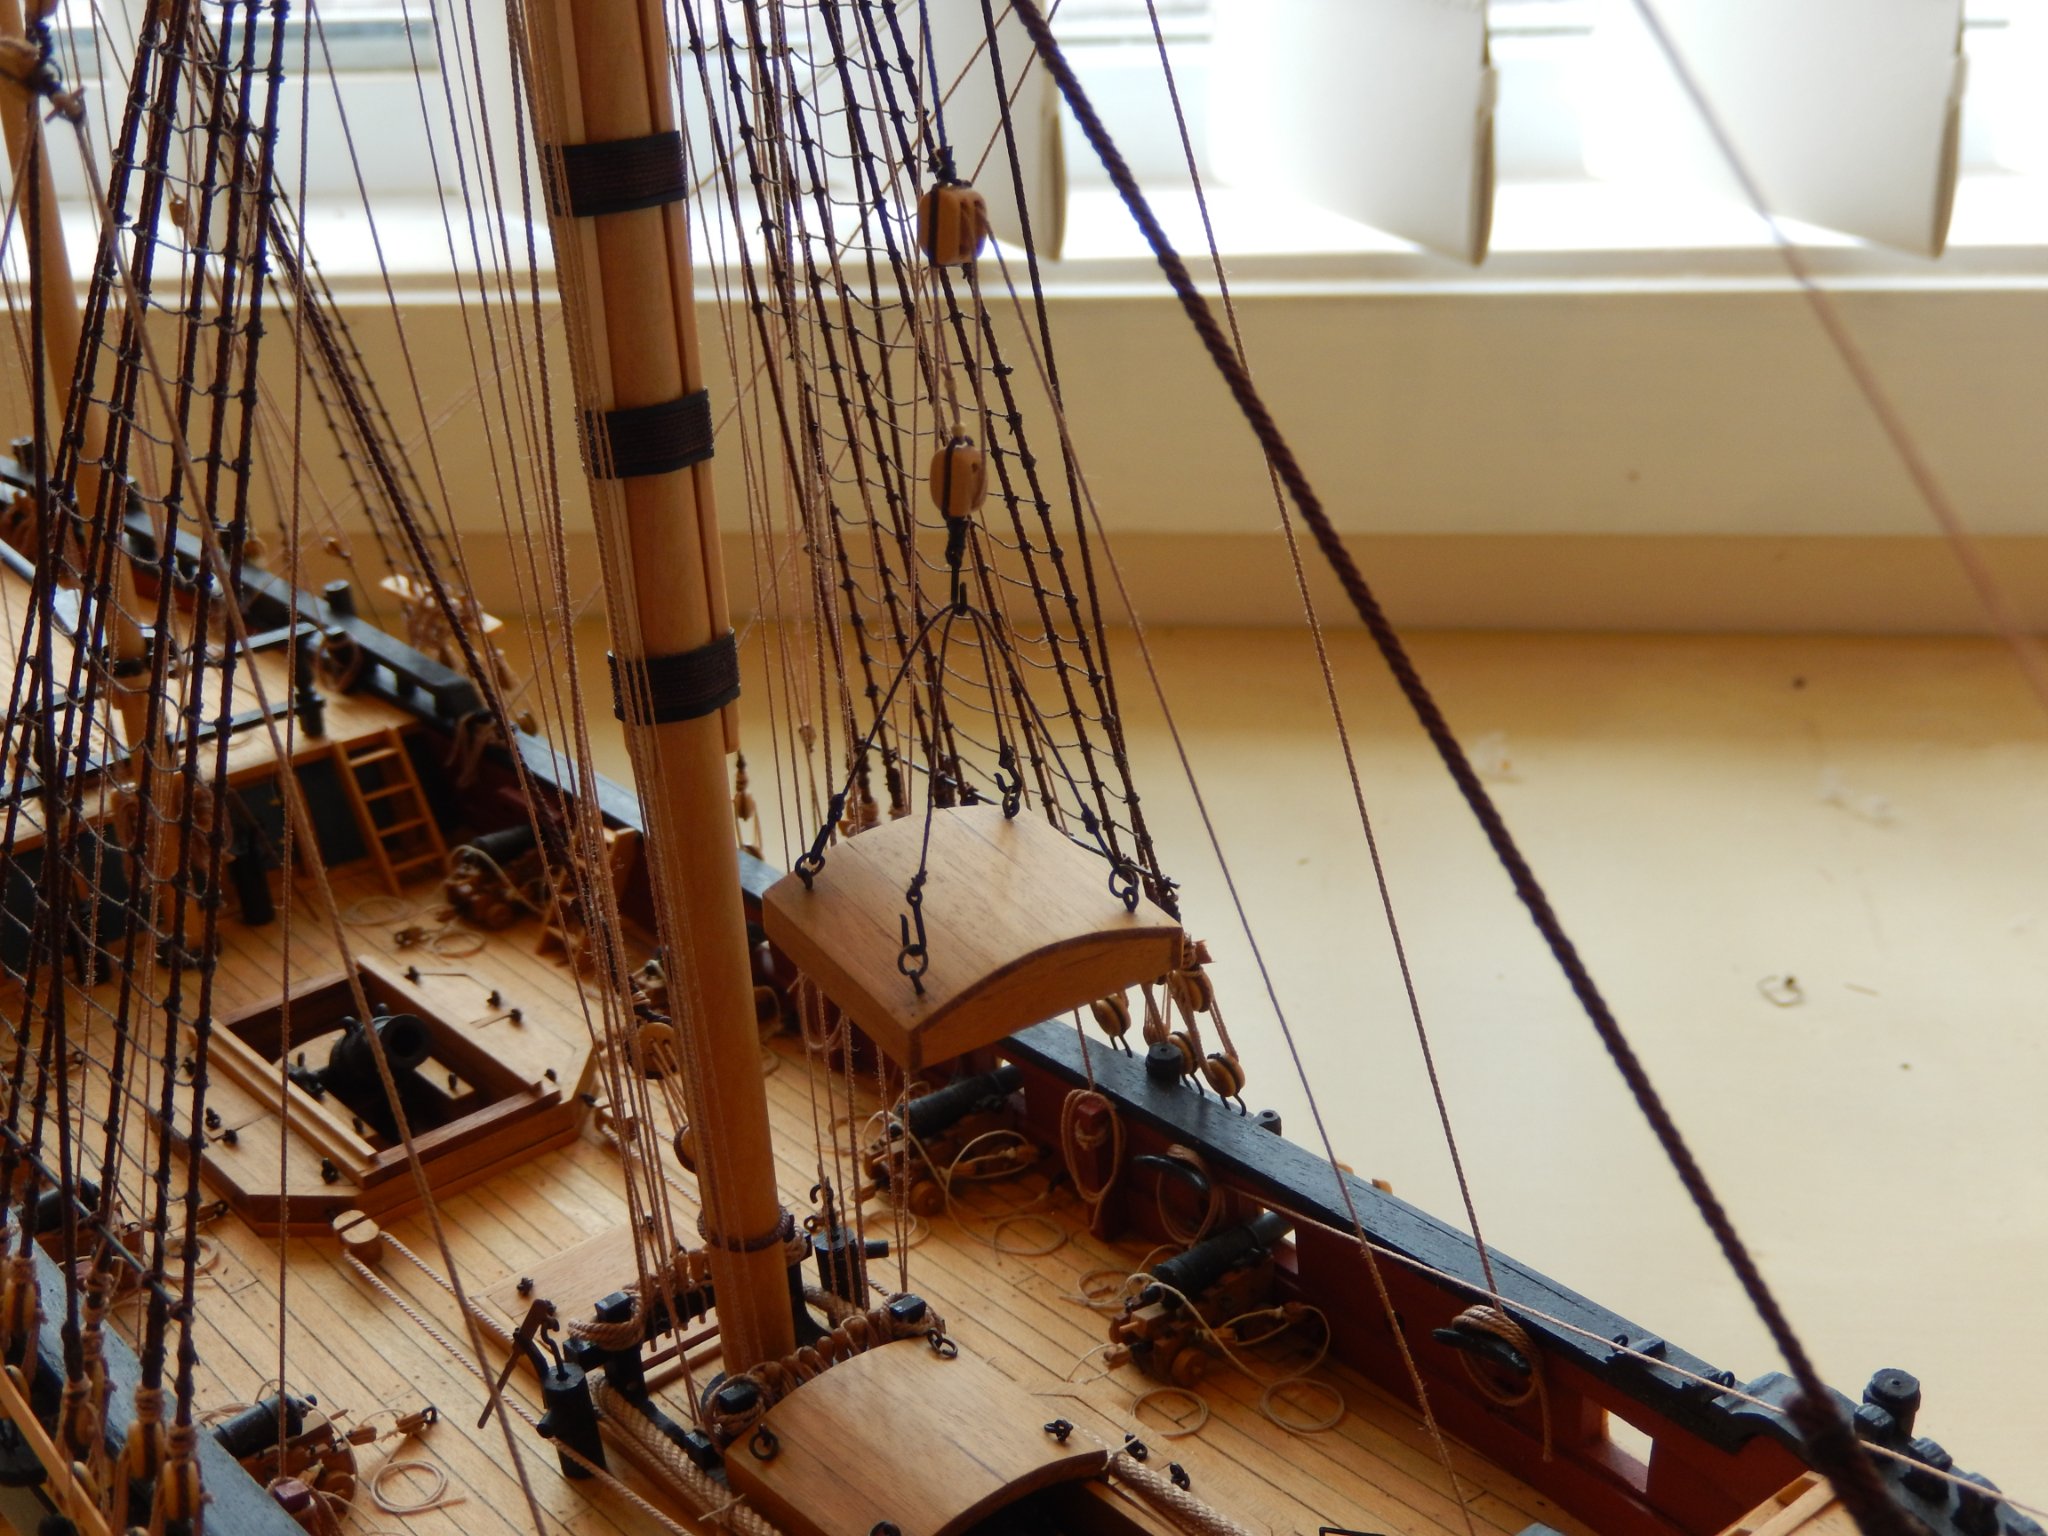
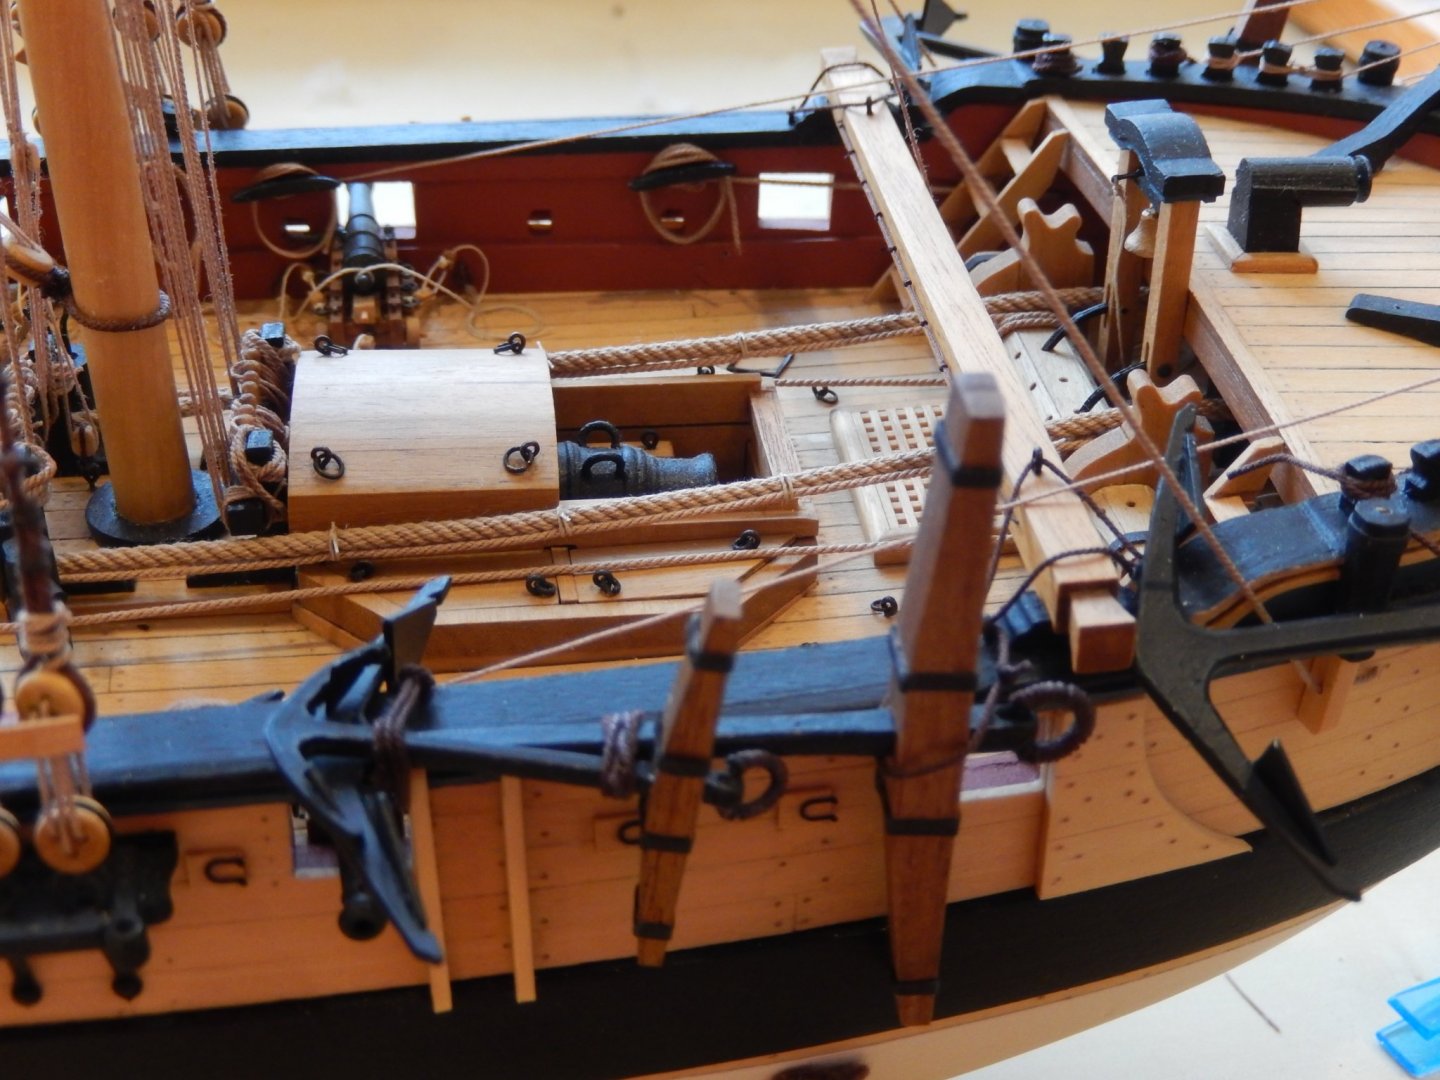
Well the niggle got the better of me - as I knew it would. Doing it at this stage was a little fraught with anchors and other bits of rigging in the way, but I am now a little easier to live with. I should complete rigging the anchors which more or less finishes the whole thing except for some tidying up and doing a few more rope coils. We go to the coast, south of Sydney for about 3 weeks on Monday, so that will be the finish of boating until the New Year. By then I'm hoping to have a solution to the HMS Speedy problem. This is how belaying the main tack now looks.


- 421 replies
-
- 11
-
-
- caldercraft
- granado
- (and 1 more)
-
Jason: unfortunately you're right. My mistake was merely referring to the belaying points on sheet 9, which shows the tack simply belayed to the cleat. It pays to read the instructions alas. It MAY niggle me enough to redo it. Hardee etc. 1. In the photo the shackle is dry-fitted. It is now glued and flush with the deck. 2. I have covered all painted surfaces with flat polyurethane. 3. The way I have done it, mortars are effectively fixed by the sides of the housings. Look at the Jotika website for photos of the alternatives. Best of luck. Bob
- 421 replies
-
- 1
-
-
- caldercraft
- granado
- (and 1 more)
-
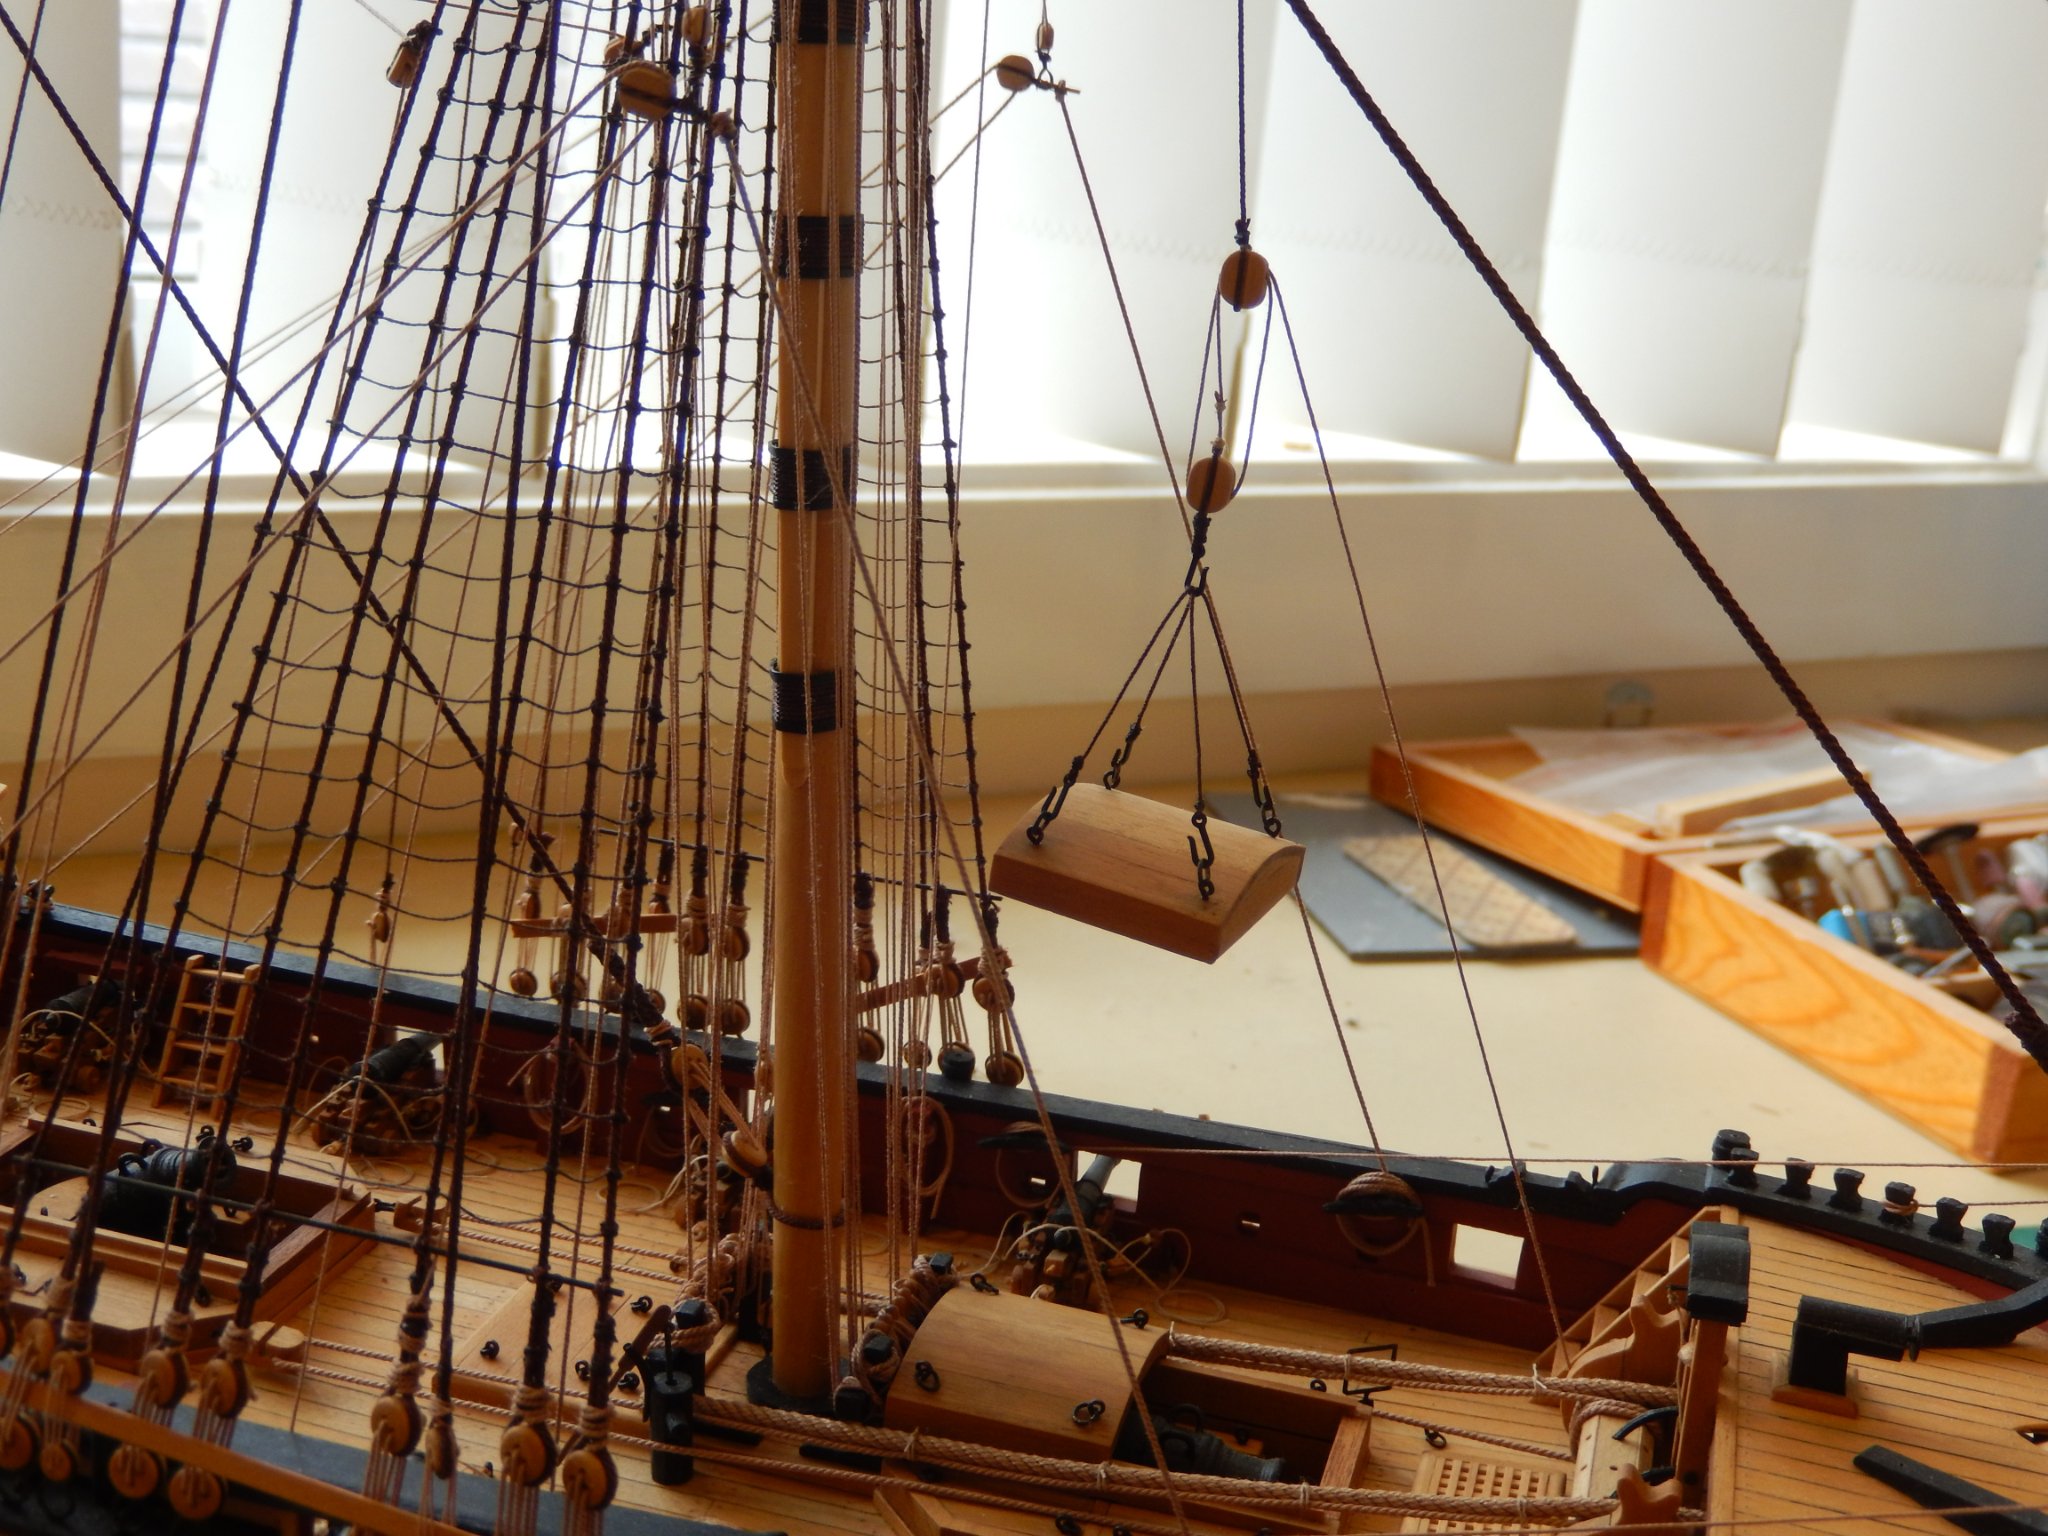
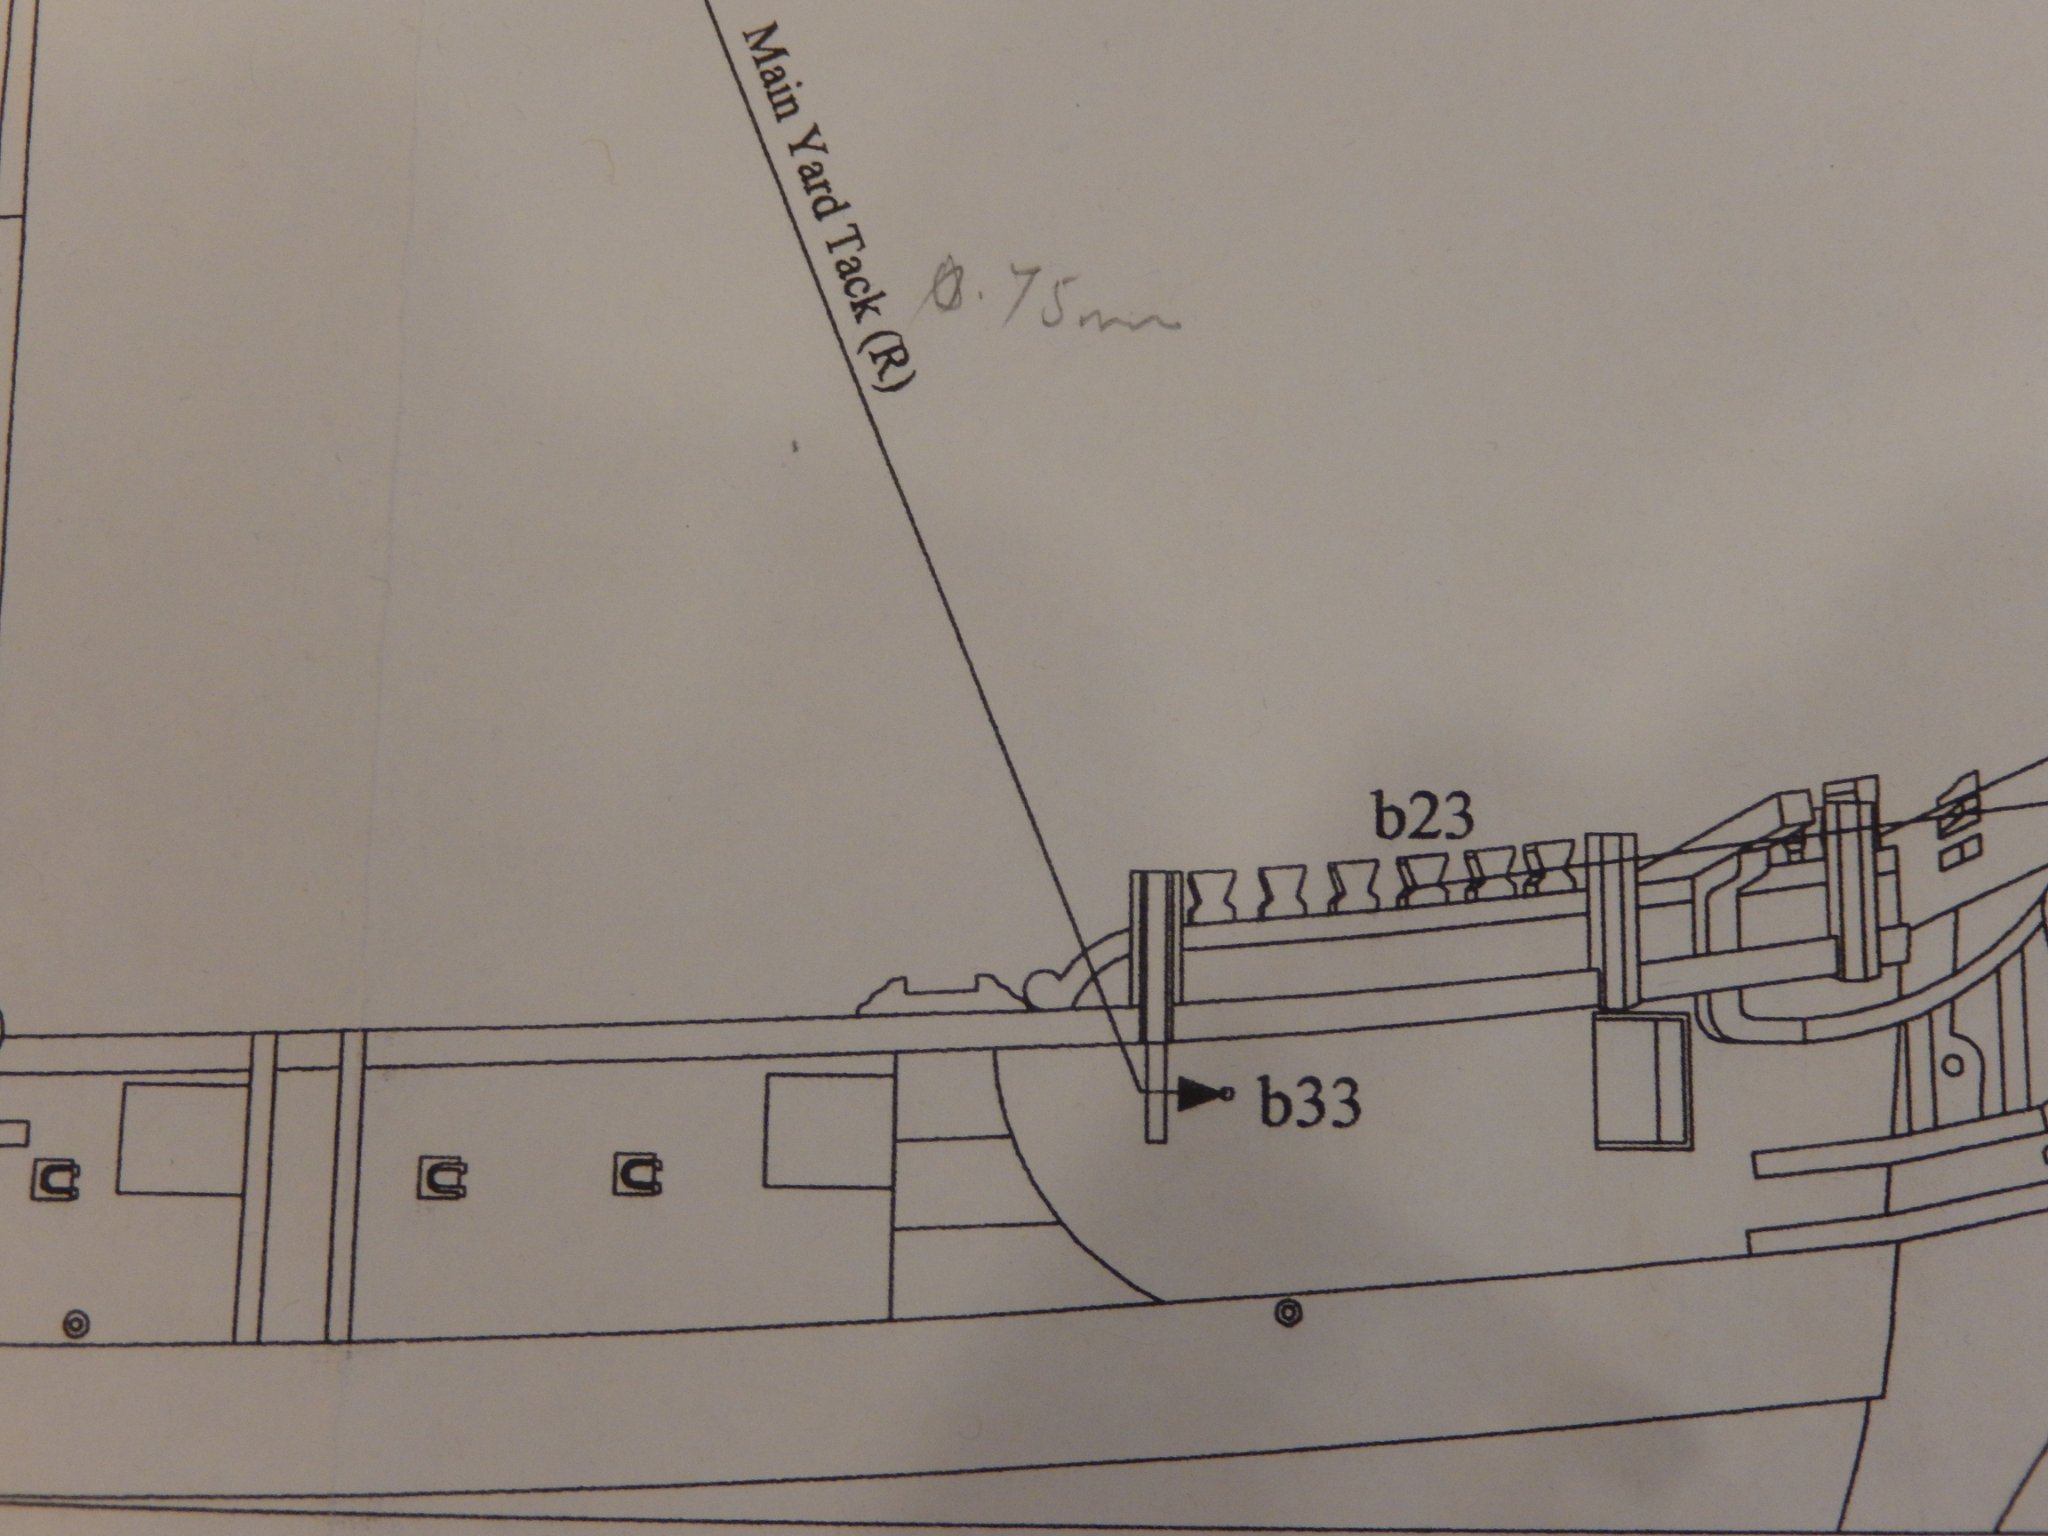
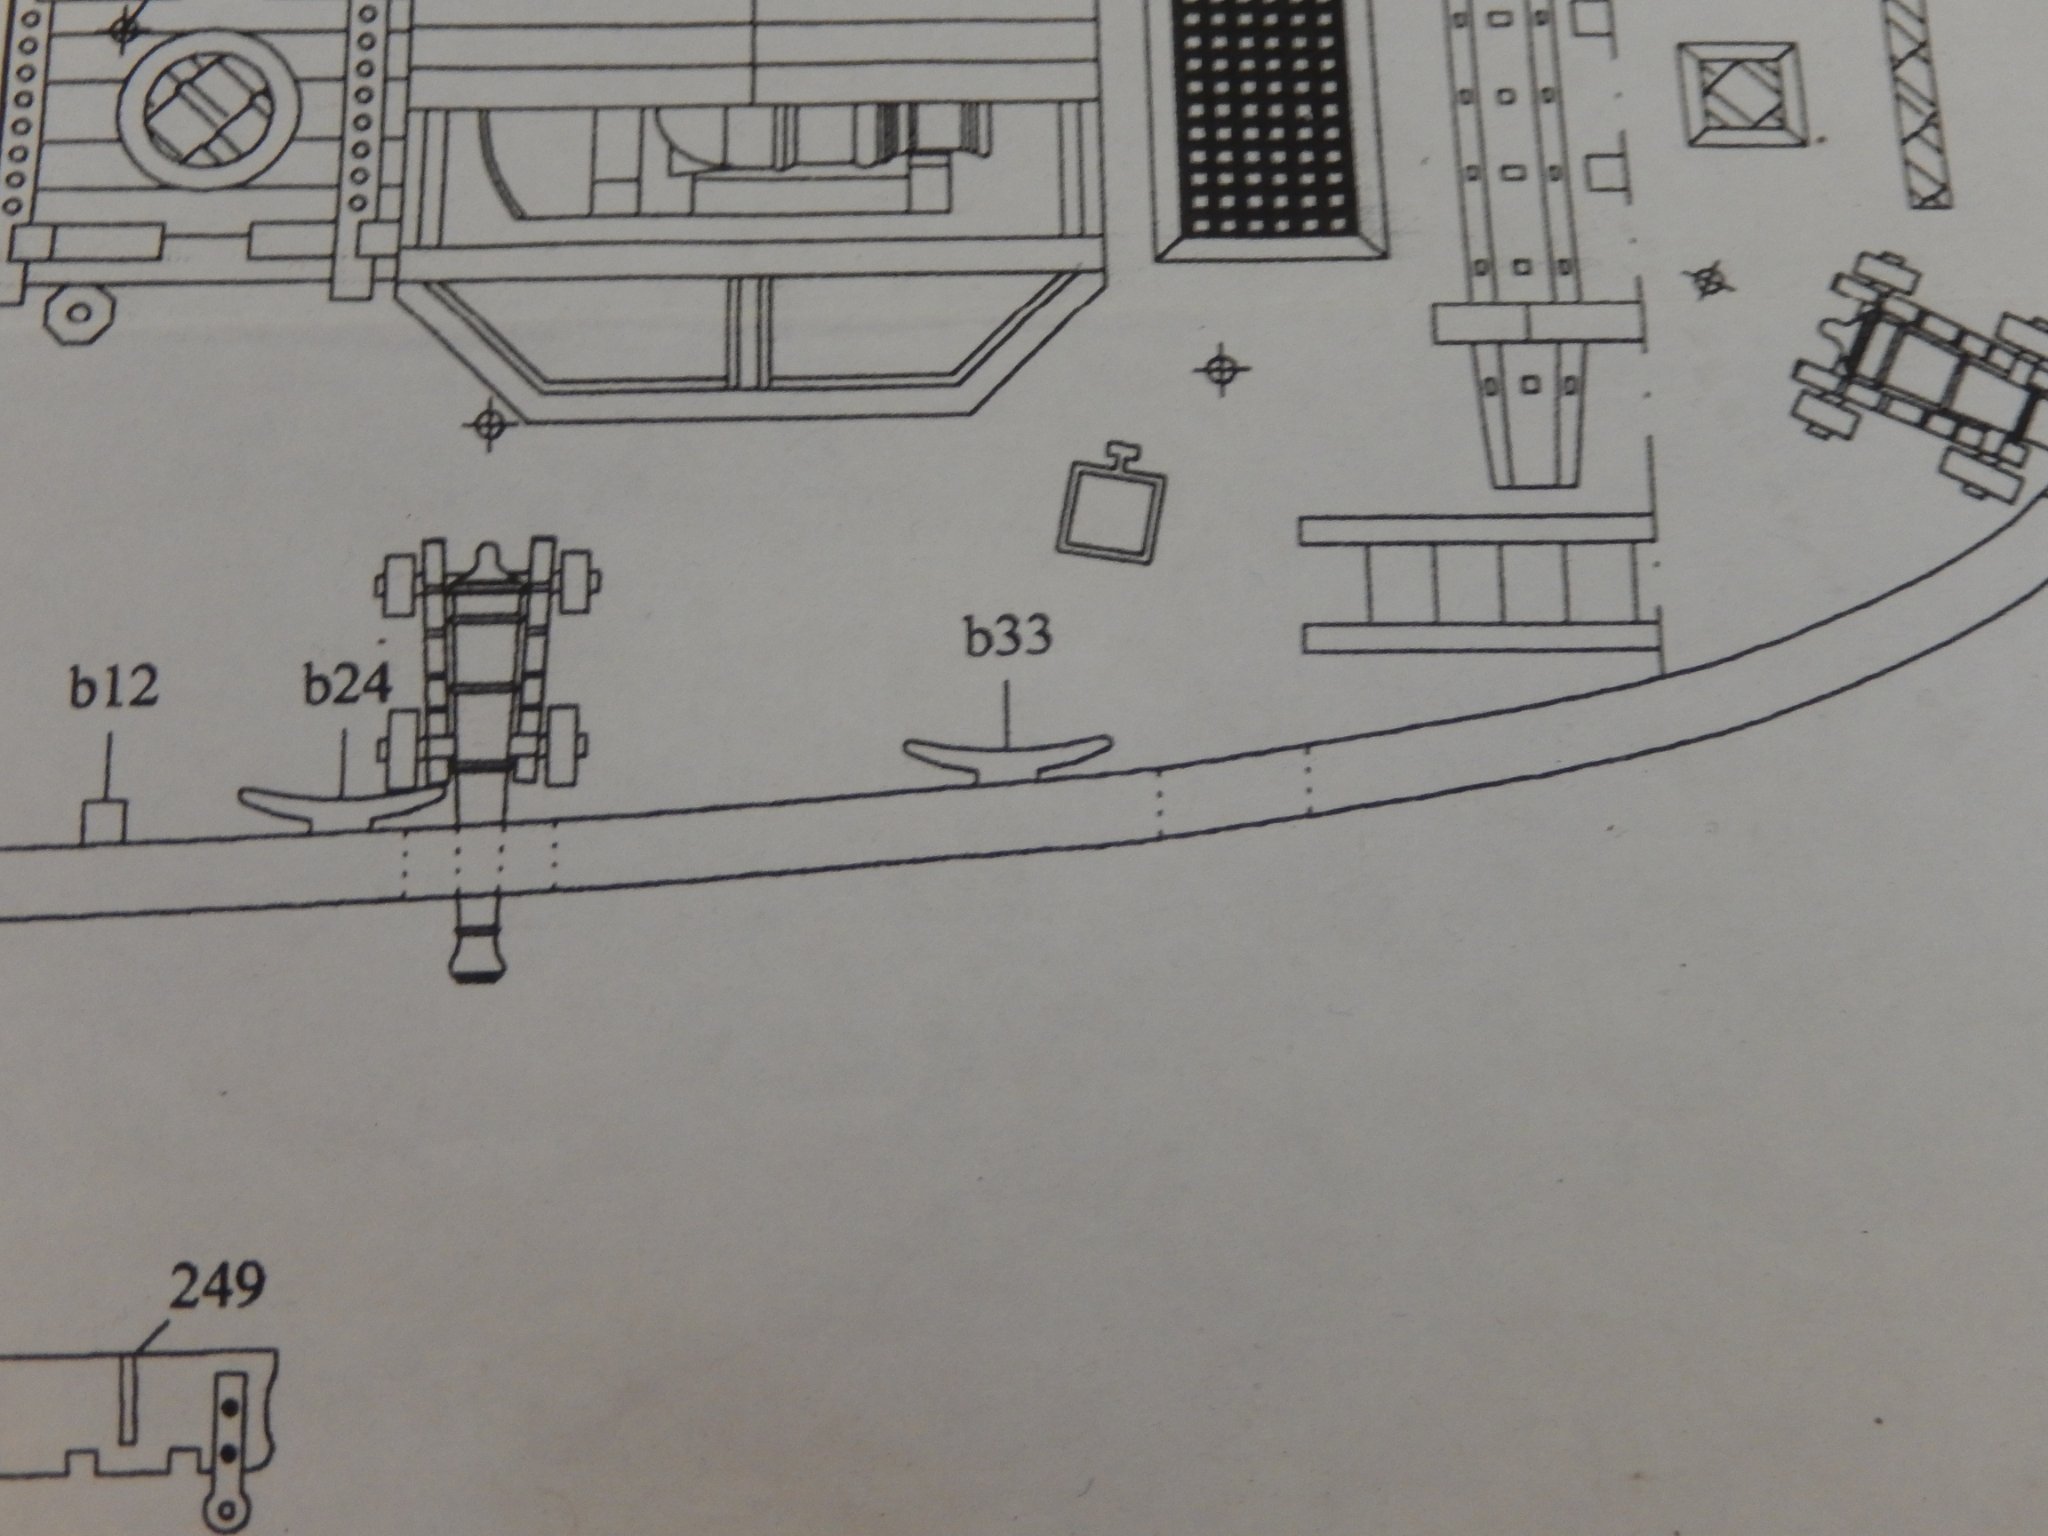
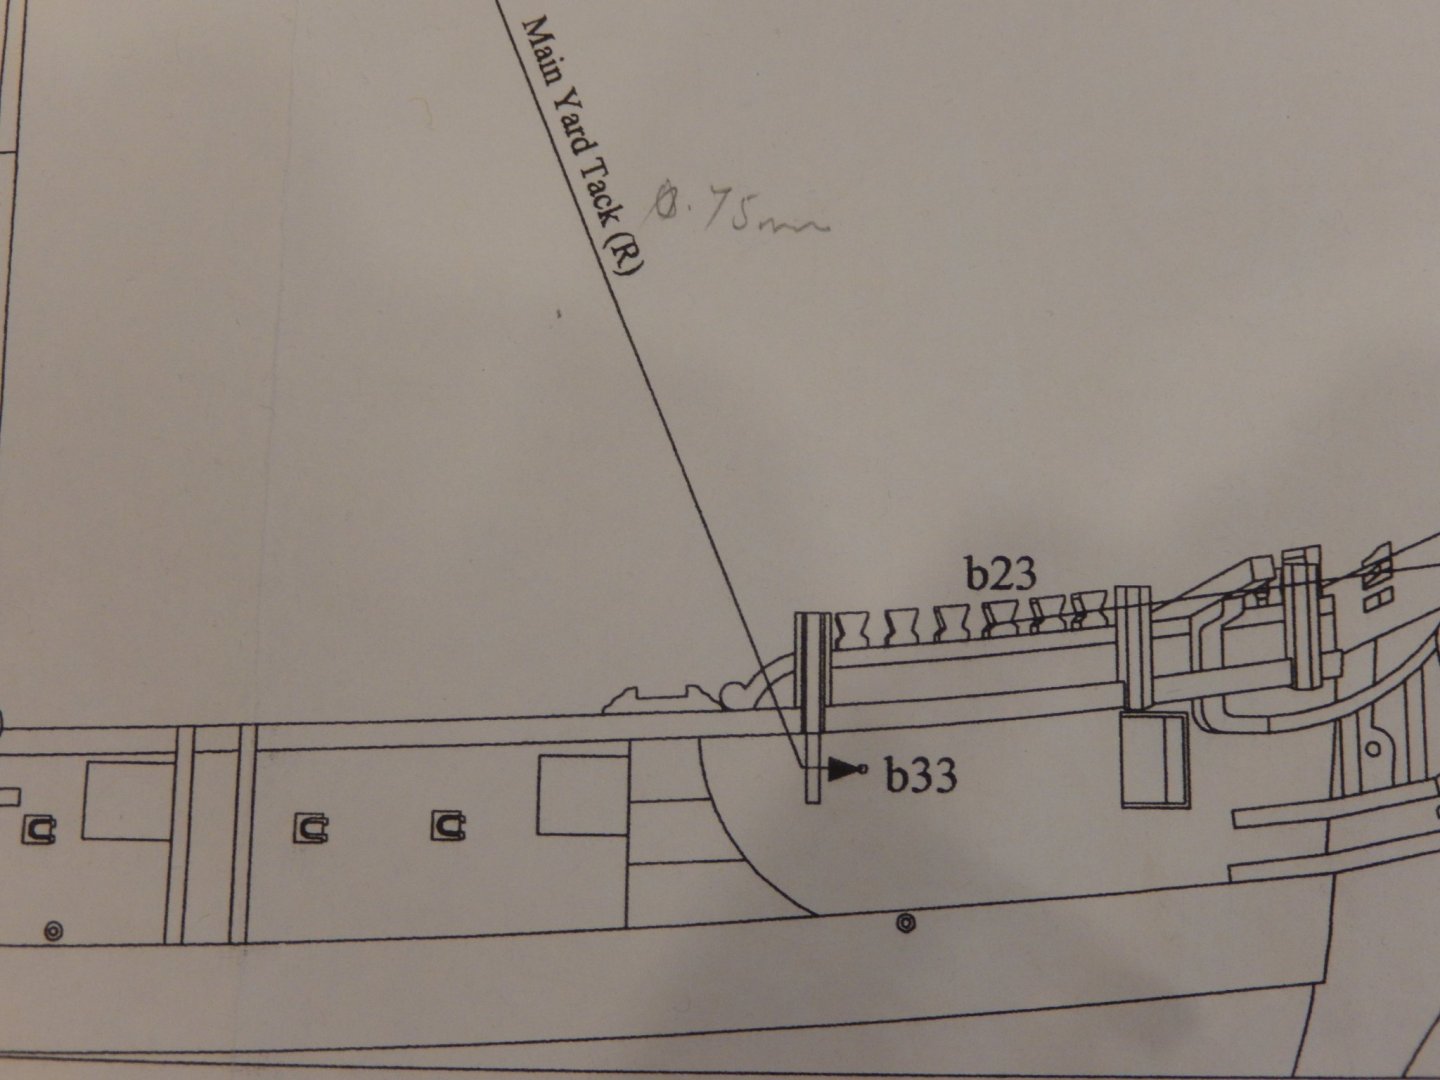
Thanks Sam. Here is the lifting gear for the mortar 'covers'. A note of caution: the instructions specify the circular part of the eyelets as ringbolts(?) for lifting the covers. Alas, the hooks shown in the photo below will not fit into them. Fortunately I had some rings to replace them, but it was a bit of a pain. I am now working on stowing the anchors, and should have the whole thing finished by next weekend. One more annoyance is the inconsistency in the plans for the belaying point for the main yard tack. I imagine the second is correct. Bad luck for me.


- 421 replies
-
- 10
-
-
- caldercraft
- granado
- (and 1 more)
-
Thanks Thomas and to others for your support. Encouragement is always appreciated. Granado is now almost finished. I will post a few more photos in the next day or so. Then, it's a matter of trying to organize a Speedy. Unfortunately it's unlikely to be this year.
- 421 replies
-
- 1
-
-
- caldercraft
- granado
- (and 1 more)