


GeorgeBaxter
-
Posts
3 -
Joined
-
Last visited
Recent Profile Visitors
241 profile views

-
 lb0190 reacted to a post in a topic:
Thermopylae by popeye the sailor - Sergal - 1:124 scale
lb0190 reacted to a post in a topic:
Thermopylae by popeye the sailor - Sergal - 1:124 scale
-
cristikc reacted to a post in a topic:
Thermopylae by popeye the sailor - Sergal - 1:124 scale
-
Piet reacted to a post in a topic:
Thermopylae by popeye the sailor - Sergal - 1:124 scale
-
GeorgeBaxter reacted to a post in a topic:
Thermopylae by popeye the sailor - Sergal - 1:124 scale
-
GeorgeBaxter reacted to a post in a topic:
Thermopylae by popeye the sailor - Sergal - 1:124 scale
-
GeorgeBaxter reacted to a post in a topic:
Thermopylae by popeye the sailor - Sergal - 1:124 scale
-
GeorgeBaxter reacted to a post in a topic:
Thermopylae by popeye the sailor - Sergal - 1:124 scale
-
ScottRC reacted to a post in a topic:
Thermopylae by popeye the sailor - Sergal - 1:124 scale
-
mtaylor reacted to a post in a topic:
Amati Loom-a-line worth using? (edited by admin)
-
Amati Loom-a-line worth using? (edited by admin)
GeorgeBaxter replied to bluenose2's topic in Masting, rigging and sails
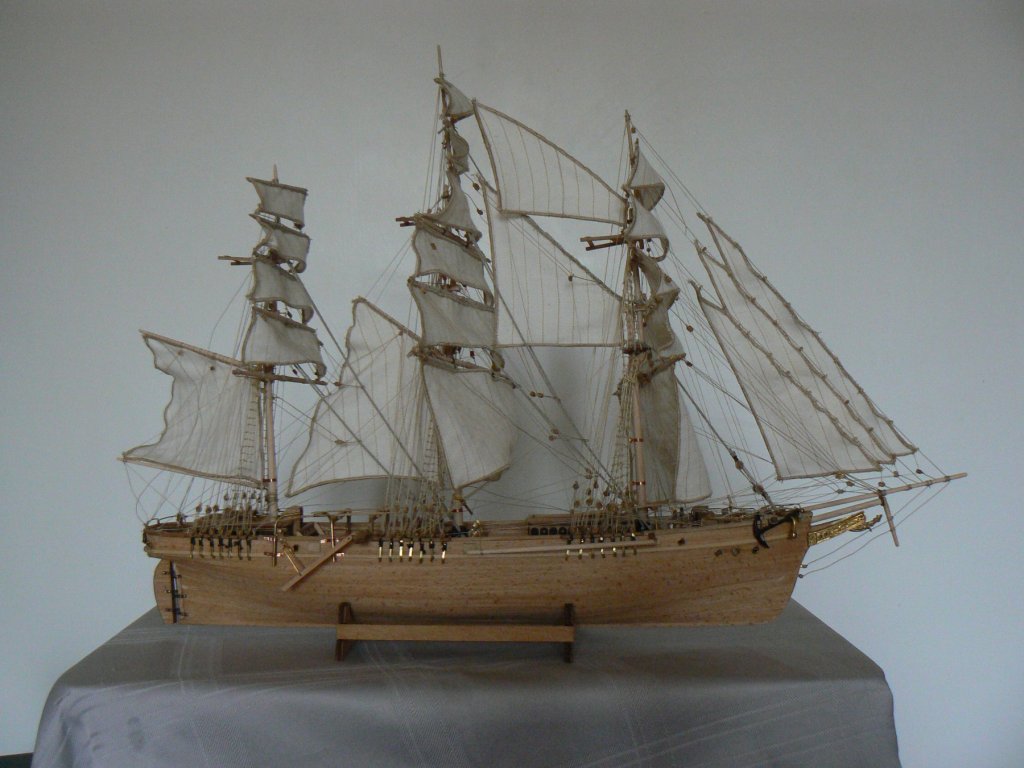
I accept that Allan does have far more experience and what he is saying it true for the larger craft. I am speaking from my experience on building a rather smaller and fiddlier scale ship. That was Sergal Thermopylae, scale 1:124 The shrouds are 10 mm apart at the widest, and taper down to 2 mm at the top. The rate lines are 5 mm apart. An additional difficulty ( for me ) was that there are some secondary shrouds near the top. The main shrouds seem to be fixed below the crosstrees and the secondary shrouds fixed to the crosstrees. The crosstrees are 30 mm across and 20 mm deep. I really could not see anyway of making the shrouds in situ and then put the ratlines. I did find the loom useful as I could make the shrouds all the same size and tension, and fix the ratlines and secondary shrouds in a reasonable way. I did have to augment the loom with an additional wooden block, to tie the secondary shrouds. I do accept that the loom does not have any real value for larger, and more accessible scales, of ships as the methods for construct the shrouds is fundamentally different. For the scales that I was working it did provide some real use. -
GeorgeBaxter reacted to a post in a topic:
Amati Loom-a-line worth using? (edited by admin)
-
Omega1234 reacted to a post in a topic:
Thermopylae by popeye the sailor - Sergal - 1:124 scale
-
GrantGoodale reacted to a post in a topic:
Thermopylae by popeye the sailor - Sergal - 1:124 scale
-
Old Collingwood reacted to a post in a topic:
Thermopylae by popeye the sailor - Sergal - 1:124 scale
-
GeorgeBaxter reacted to a post in a topic:
Thermopylae by popeye the sailor - Sergal - 1:124 scale
-
bluenose2 reacted to a post in a topic:
Amati Loom-a-line worth using? (edited by admin)
-
Canute reacted to a post in a topic:
Amati Loom-a-line worth using? (edited by admin)
-
Amati Loom-a-line worth using? (edited by admin)
GeorgeBaxter replied to bluenose2's topic in Masting, rigging and sails
Hi Bluenose2 If you have already got the Loomaline then it is probably worth giving it a go. I also have one, and used it with reasonable results. I would not simply take the plan's looming recommendations. I have seen them with recommendations such as use the horizontal pins A, B, D, F and vertical 8 but that will always be dodgy. I found that making a scale paper template of ratlines works for me. Then use pins A, C, E , etc and then adjust the vertical pin number to get the desired angles. You can either make the ratlines as one single continuous, up and down around the pins. Alternatively, you can tie off the individual lines to the lower pins, and tie the bundle to the top pin. The second method is harder as you will get variations in the tension but it may be necessary for special cases. As you can see from the picture, I put white paper to cover the bulk of the jig. I found the black frame hard for contrast. Having a simple white background helped, and I could put guiding lines there too, to help alignment and show the starting position. I am sure that others have their own favourite methods, with their own jigs, and maybe other tips too.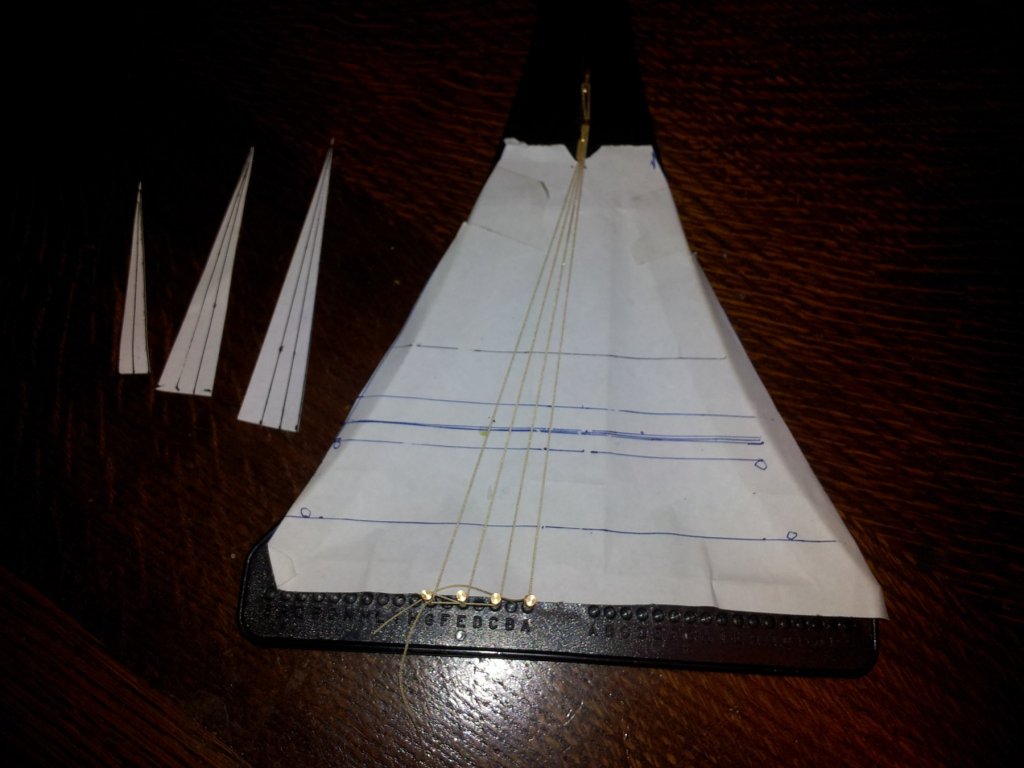
-
Hi Popeye. May I join you on your quest to build the Thermopylae? I am not an especially experienced model builder, but I did complete it last week, after a couple of years of sporadic spurts of enthusiasm with gaps of other worldly interruptions. I agree that it is fiddly. I feel that I could now do key-hole surgery . I do not have a build log as such. I do have some photos to share at different stages. I am happy to share my limit experience.
- 452 replies
-
- 12
-
-
- thermopylae
- sergal
- (and 1 more)

