shane762
-
Posts
36 -
Joined
-
Last visited
Content Type
Profiles
Forums
Gallery
Events
Everything posted by shane762
-

Byrnes Sliding Table -Input Requested
shane762 replied to glbarlow's topic in Modeling tools and Workshop Equipment
Those look terrific. Exactly the kind of thing I'm looking forward to trying out once my Byrnes saw comes in. -
I couldn't resist either. Order placed. I'm planning on placing an order for a Byrnes Table saw in the next day or two. Maybe I can find some interesting jigs or tools in this book to break the saw in with.
-
I just saw this topic or I would have piped in sooner. I order my building slip from Hobbyworld-USA last year. They were fantastic. Despite excellent packaging UPS managed to completely smash all four corners of the box and the base plates inside. I sent a message to Hobbyworld and in no time Matt Bole had sent me out replacement parts. Great service and great communications from them.
-
I started on this one and enjoyed it but not too far into it I realized that those thick planks were making it very difficult. I've long meant to return to it but get new wood for the planking. I started a build log on it which, though very incomplete, might have some useful bits of information for you. Mainly as a list of things not too do.
-
I'll second the positive comments about the Badger. It was my second wooden build and took me about 18 months (I am a SLOOOOOOWW builder) and I love the way it looks. It gives a great impression of complexity once it's finished and rigged but it's a straightforward build. Mike's comments about leaving the cannons off until later are a good idea. I only knocked two loose during the build but it was still aggravating. As far as material quality went my walnut and plywood were ok but the decking material, tanganyika I think, looked like it had been ripped down by beavers with dull teeth. Still I managed to use it and it ended up looking fine. Just involved more prep work and careful attention to which side I was going to use. All in all a great kit that has gotten a lot of compliments over the years.
-
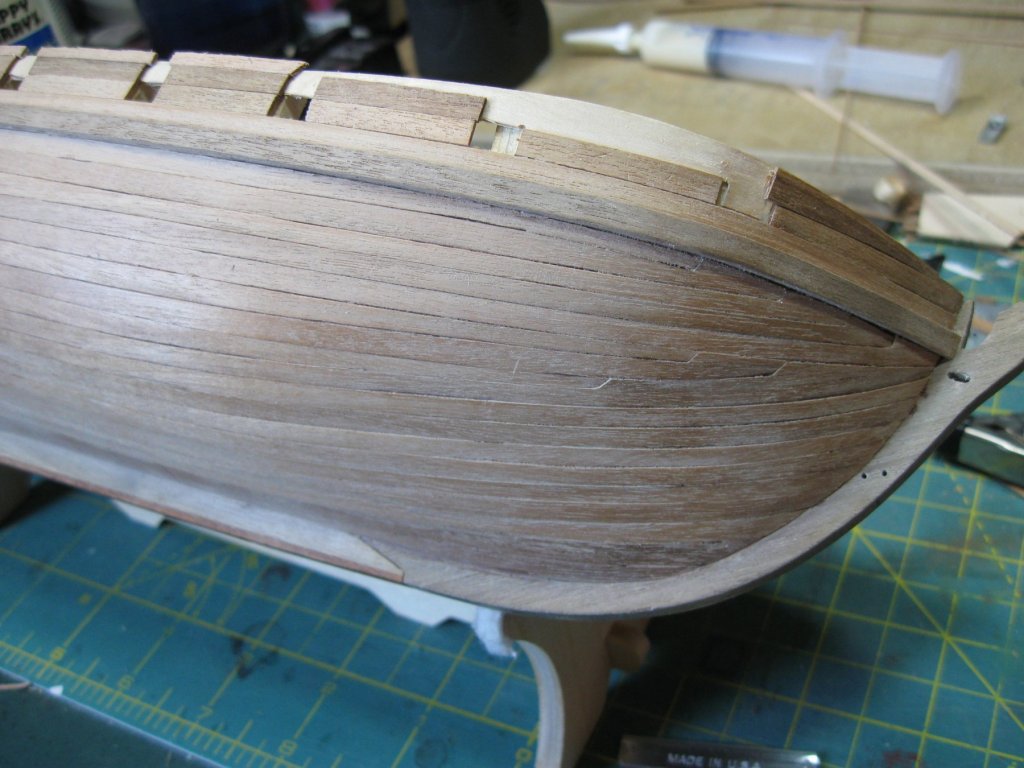
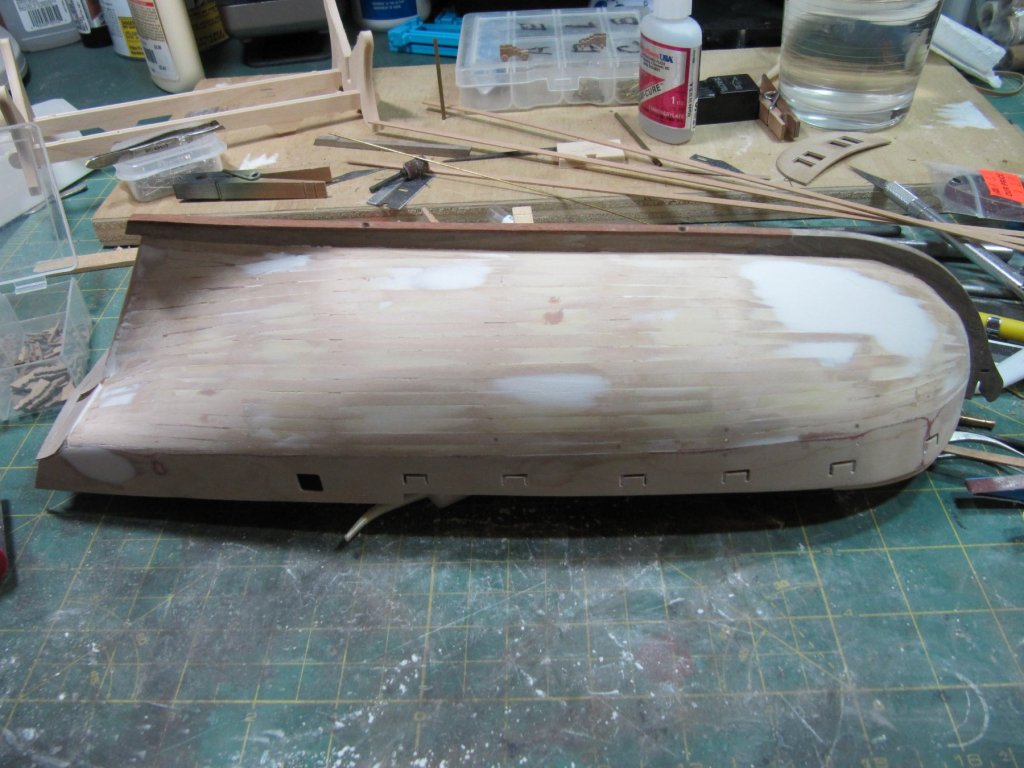
I can't wait to try this. I'm getting ready to start planking a Draketail workboat model. The hull will be filled and sanded smooth after planking so it's a great test bed.
-
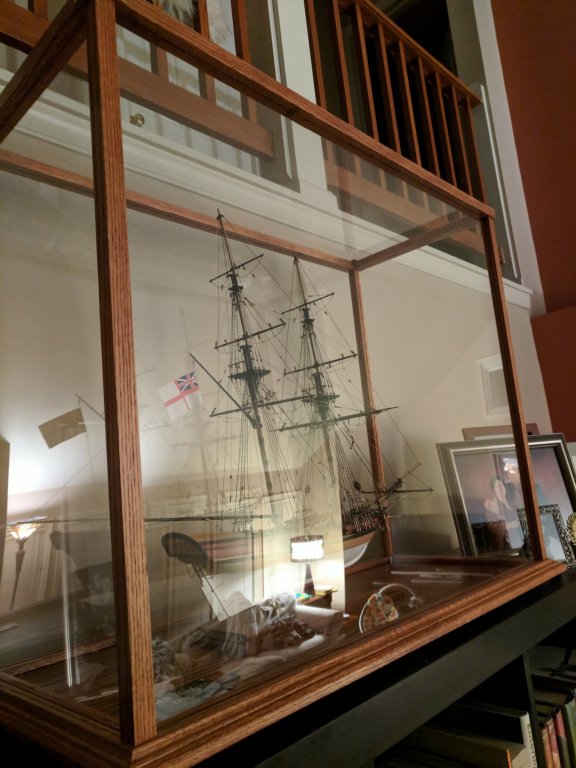
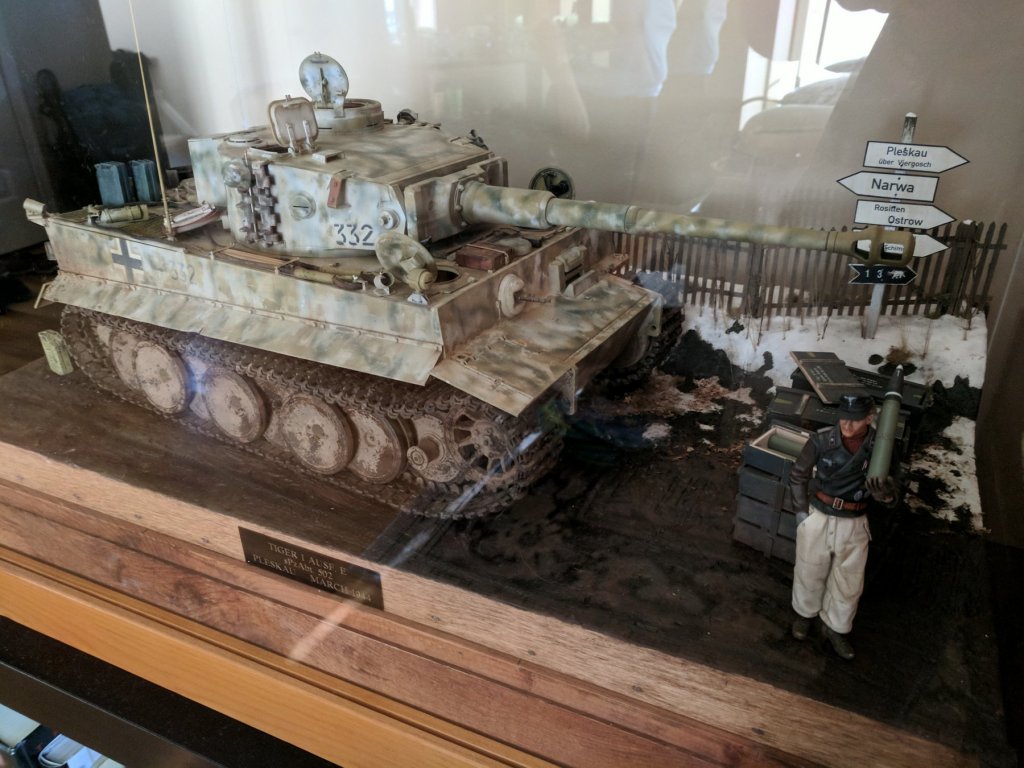
You can split the difference and get 3/16" acrylic. I used 1/8" for my Badger case and though the longest dimension is only 30" or I can definitely see a slight bowing in it. I tried purposely to get reflections in the glass on the picture so you can see the difference. The acrylic on the Tiger model is about 28" or so long and is 3/16". No bowing and very rigid.
-
I'll second that. I've been using the Tamiya tape for years and love it. The only thing I ever use besides the Tamiya is the very narrow 3M pin-striping tape. I used to use loads of both when I painted helmets for a friend's roller derby team.
-
It's funny. Looking at these pictures I just realized what my mistake actually was that caused me such problems in the bow area later in the build. I thought that I hadn't spent enough time fairing the frame in the bow area which caused it to be too bluff. Now I realize that I set the plywood gunport formers wrong. I think I set the very front of them slightly high which caused them to splay out more than they should have. it's why later on the kit's upper rails didn't fit and why the first hull planks swooped upwards excessively. Wow. Pretty happy to learn something from a mistake I made five years ago on a build that I finished two and a half years ago.
-
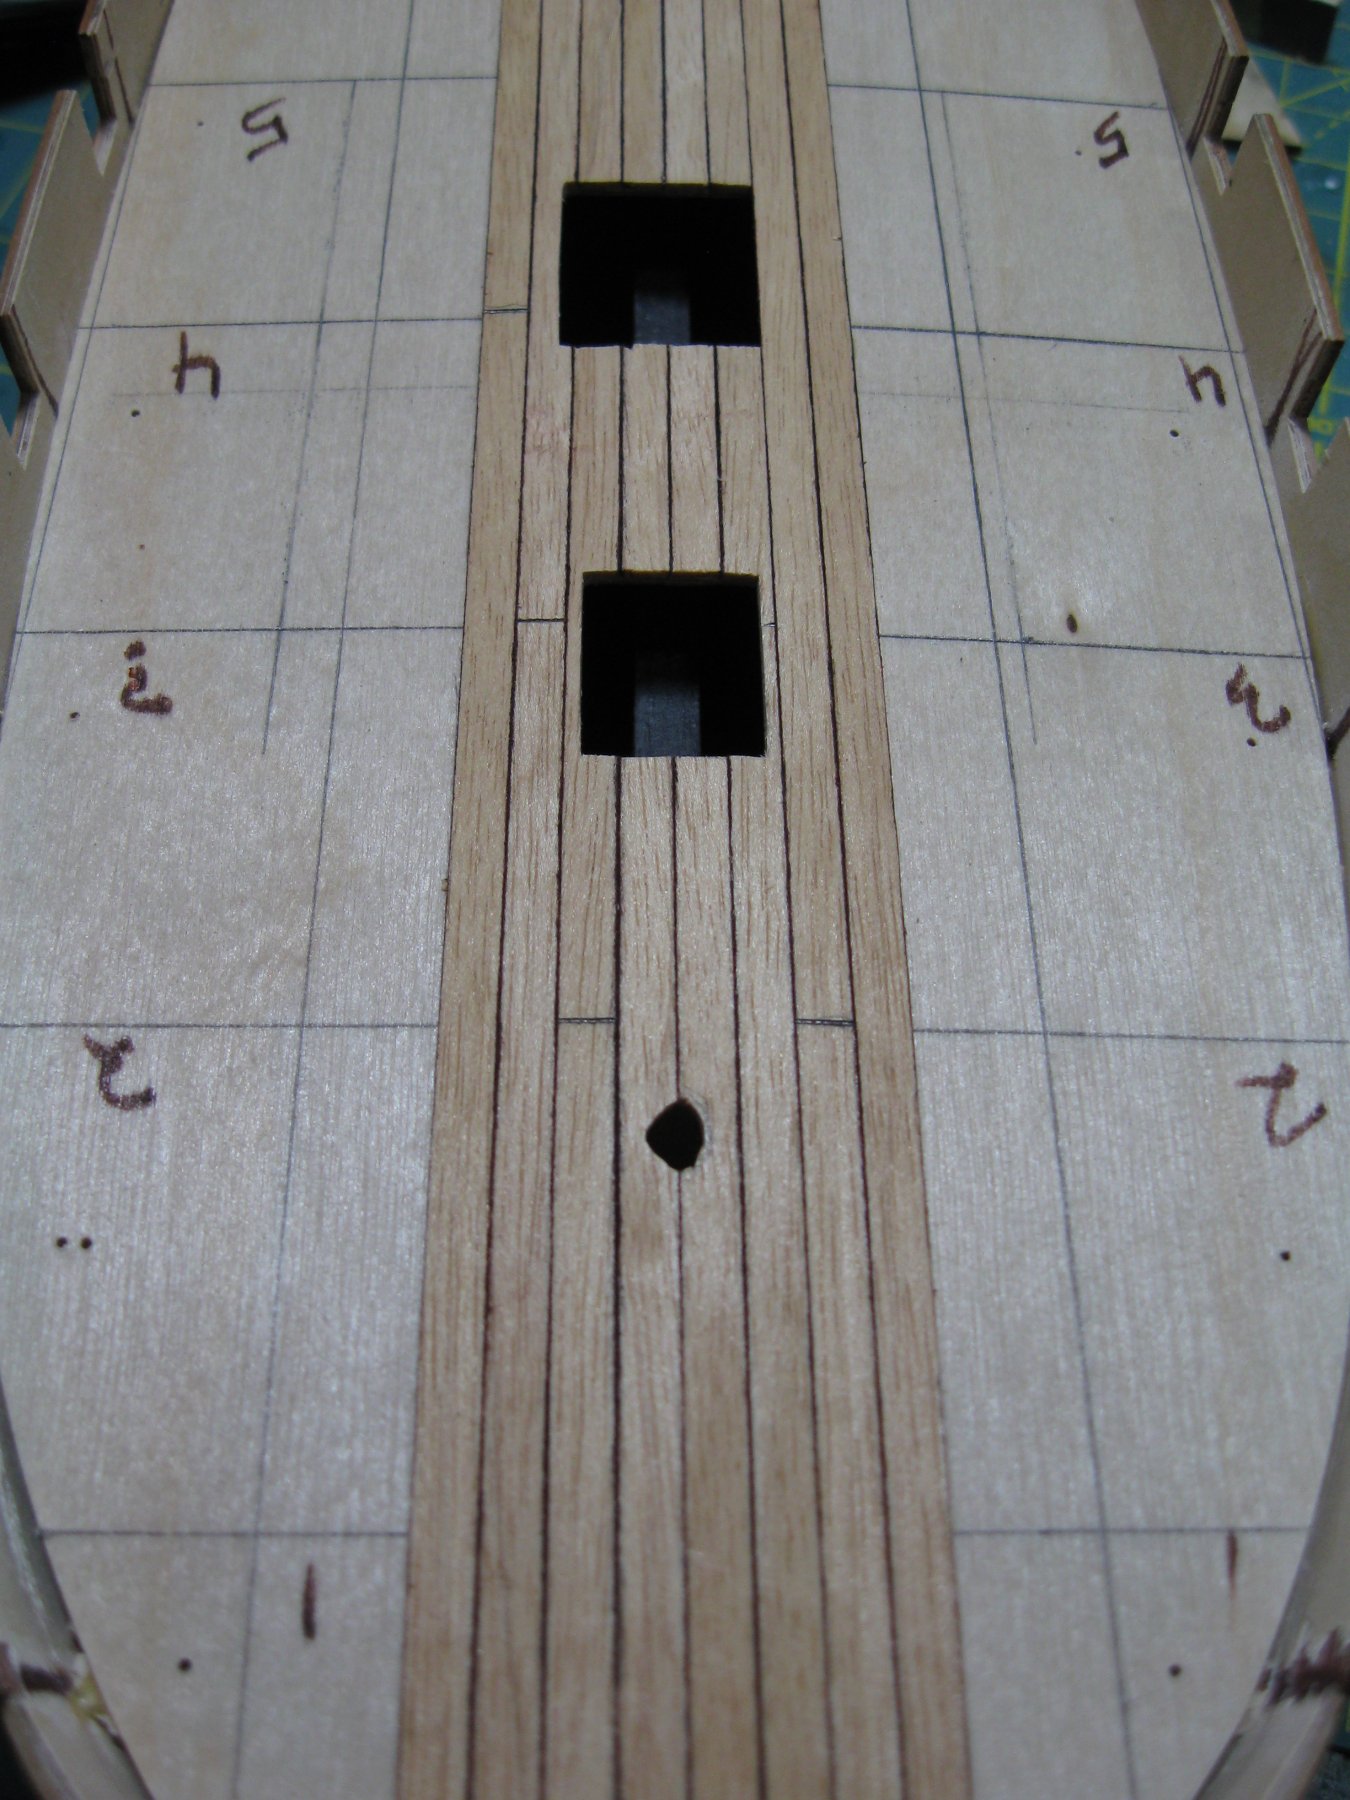
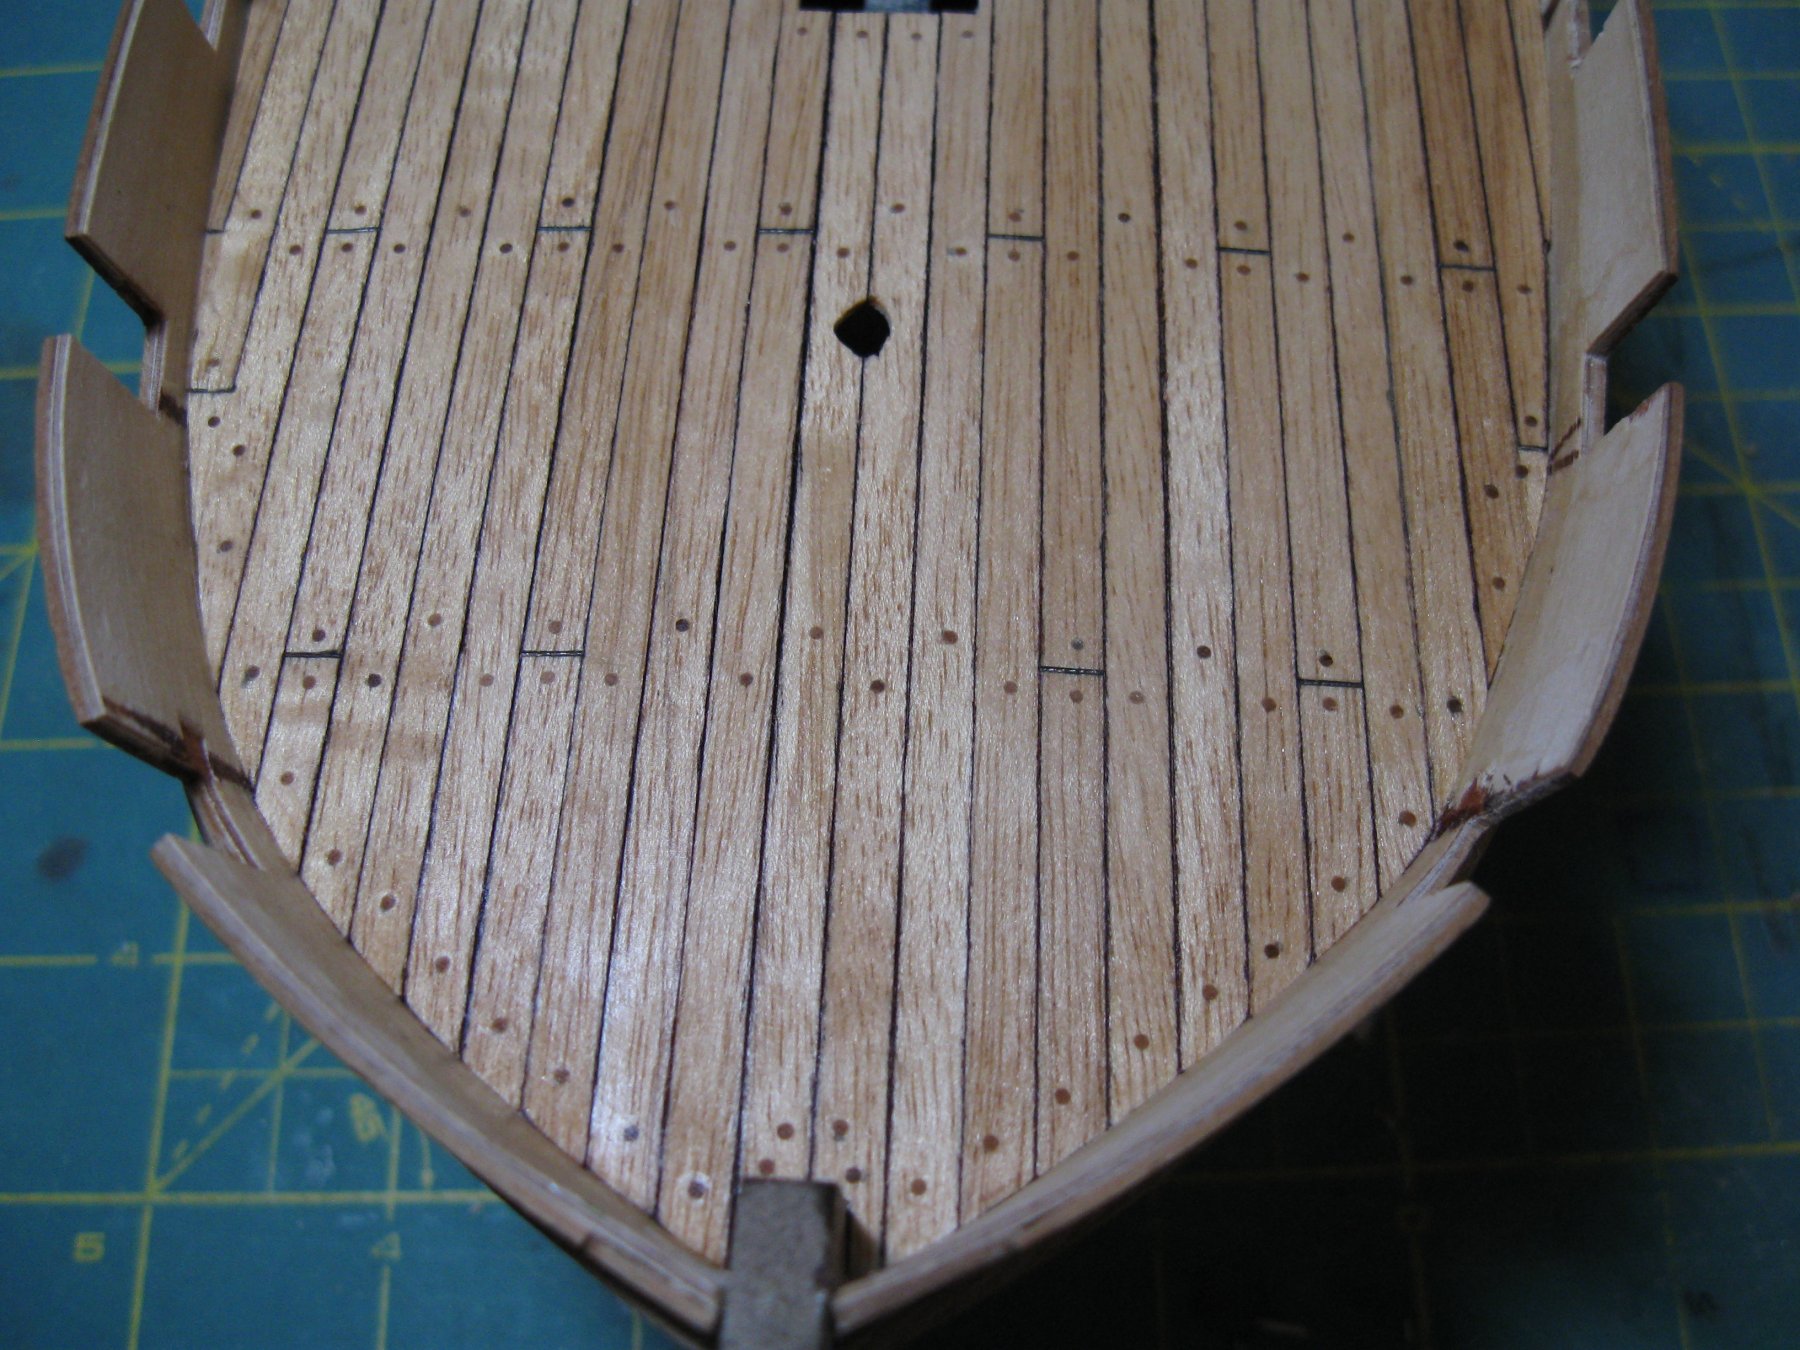
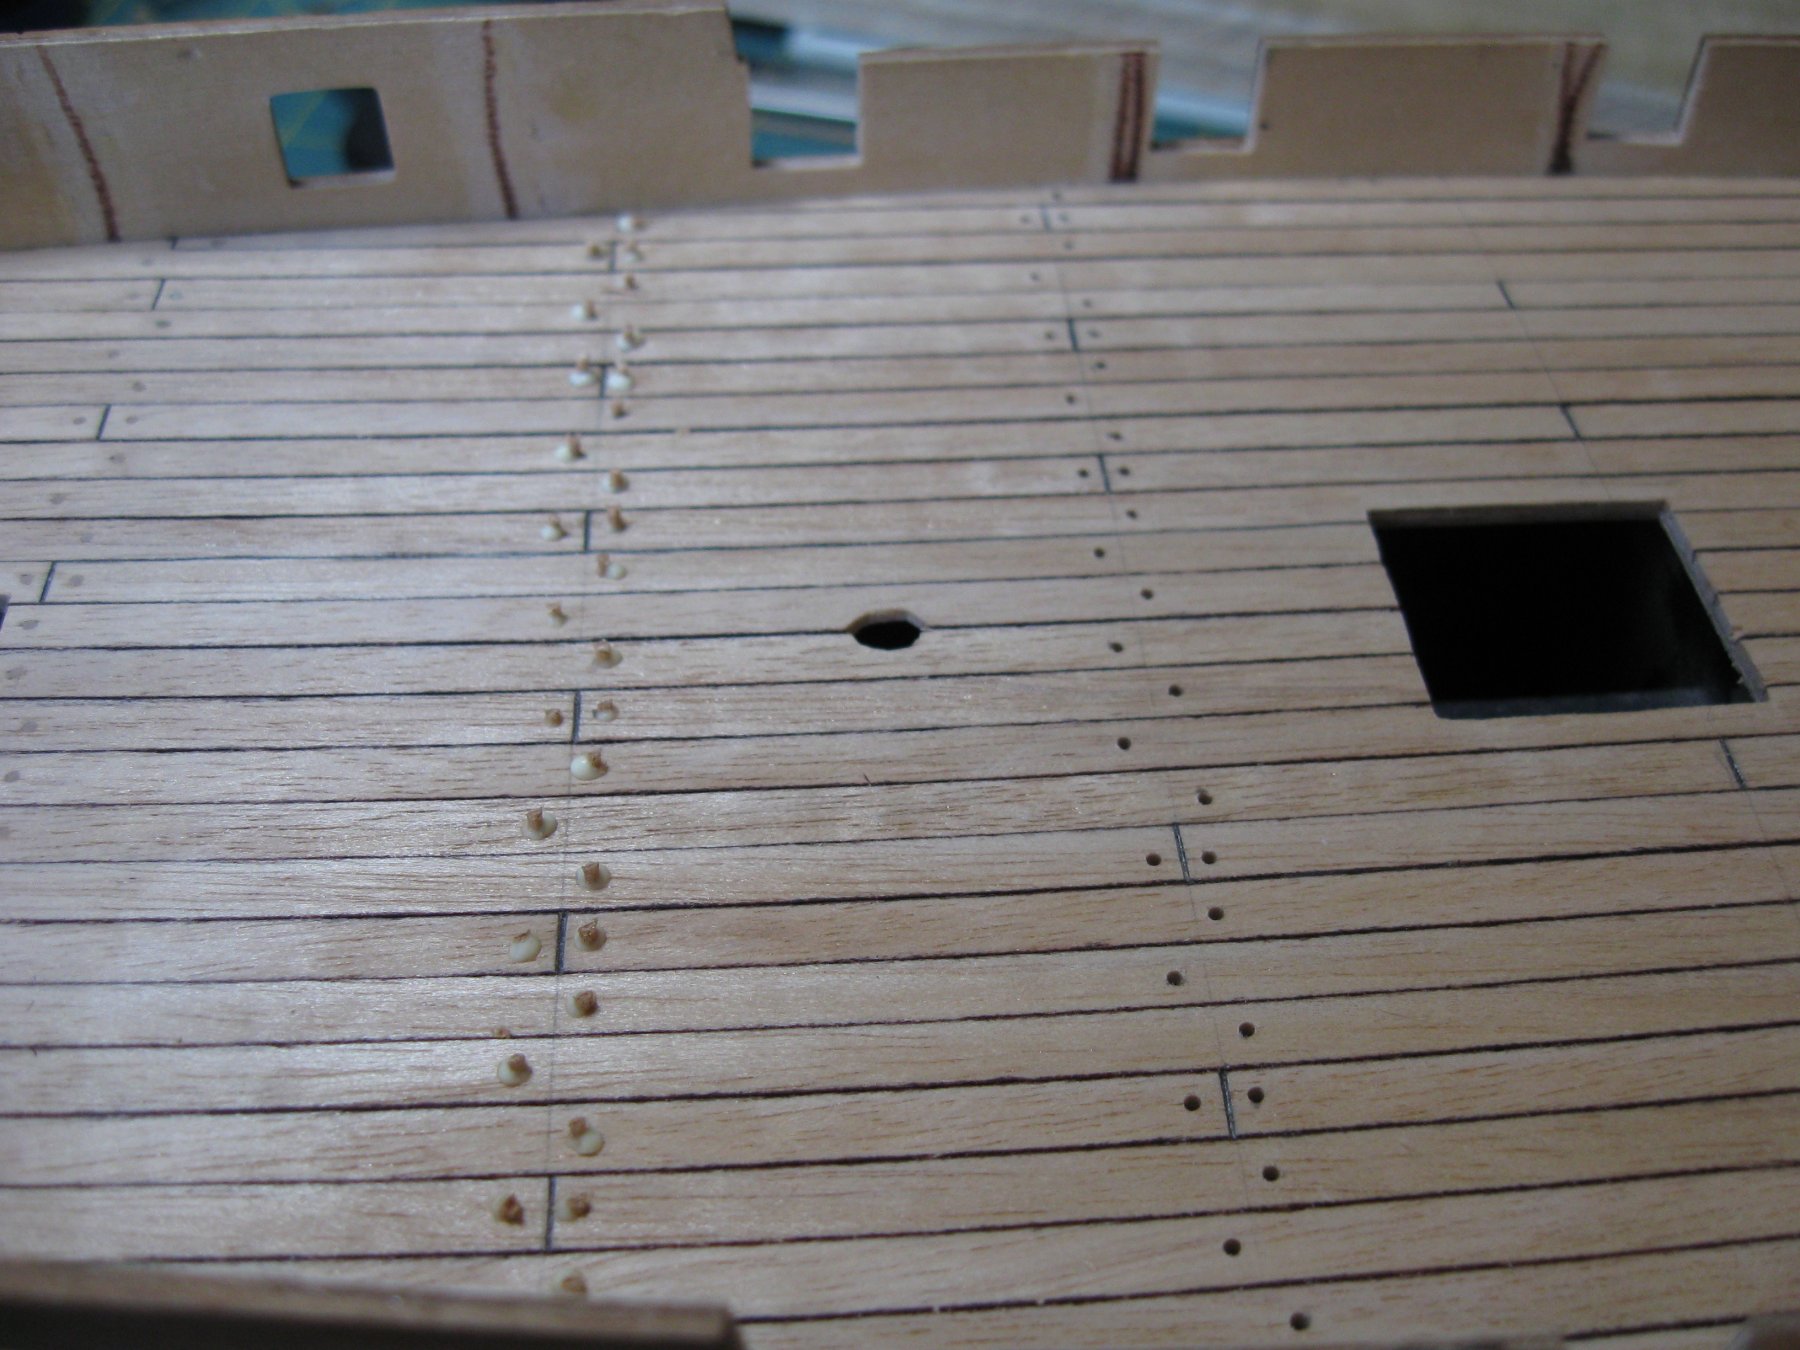
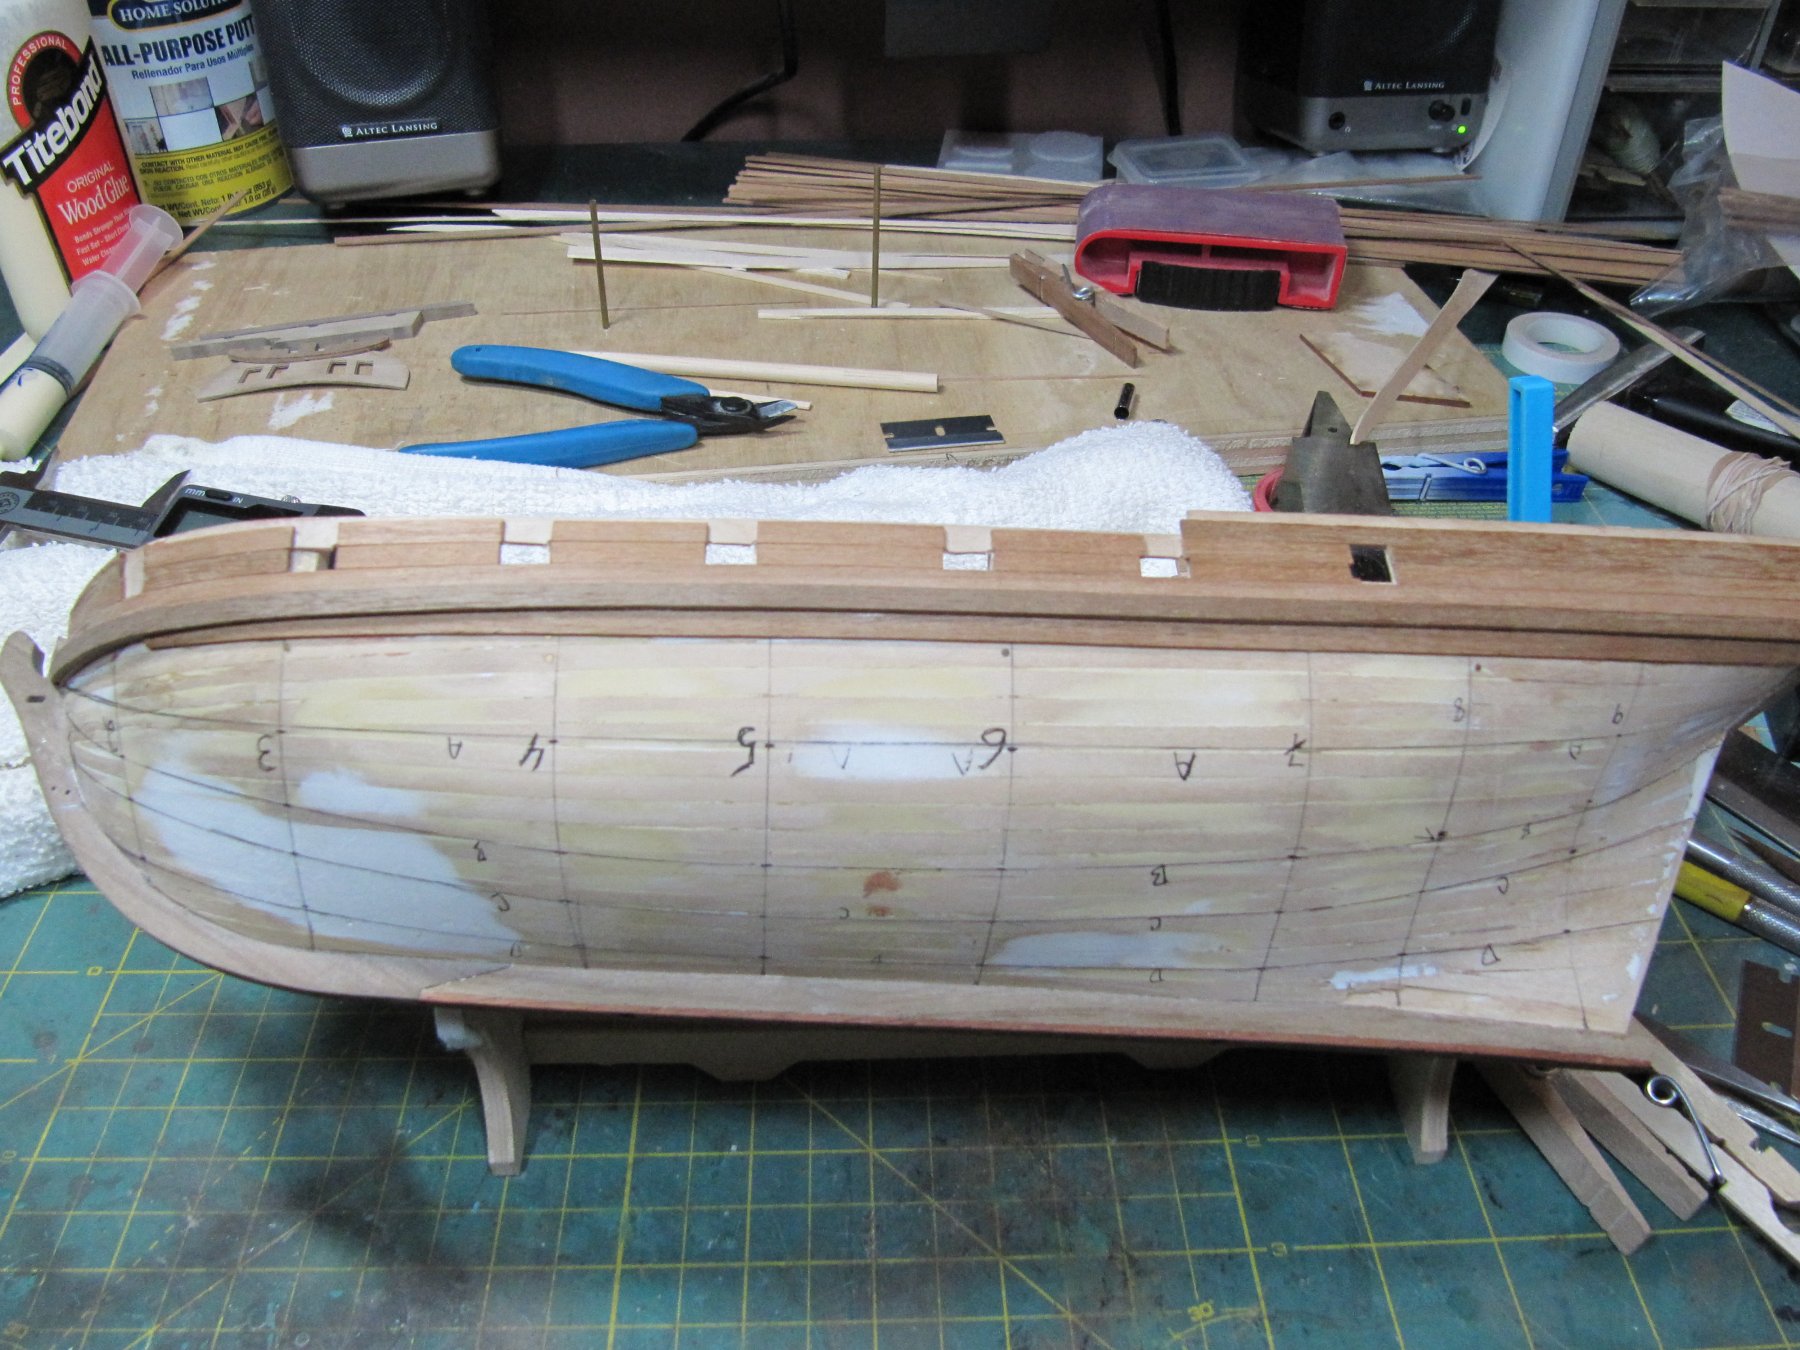
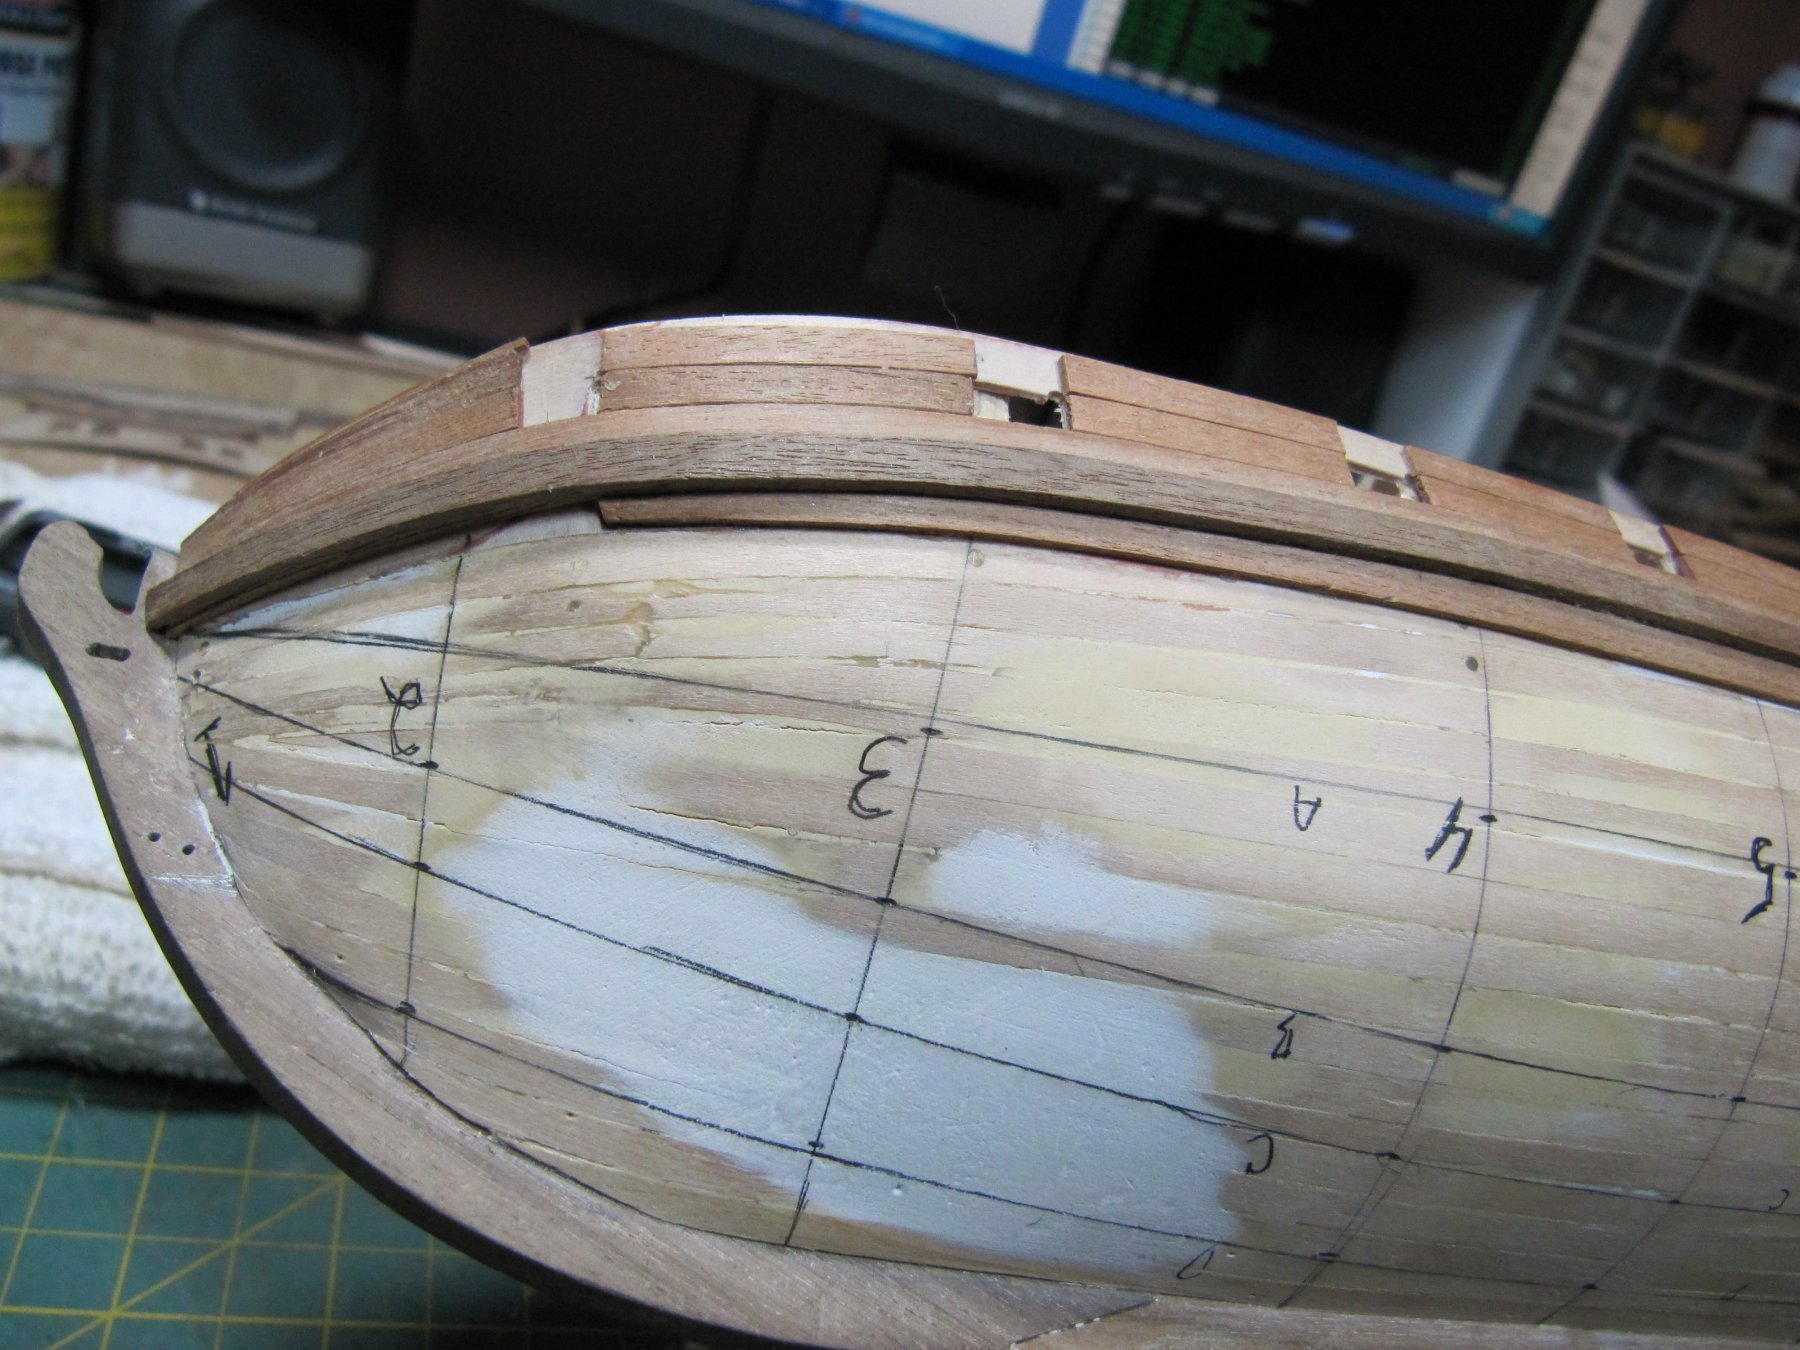
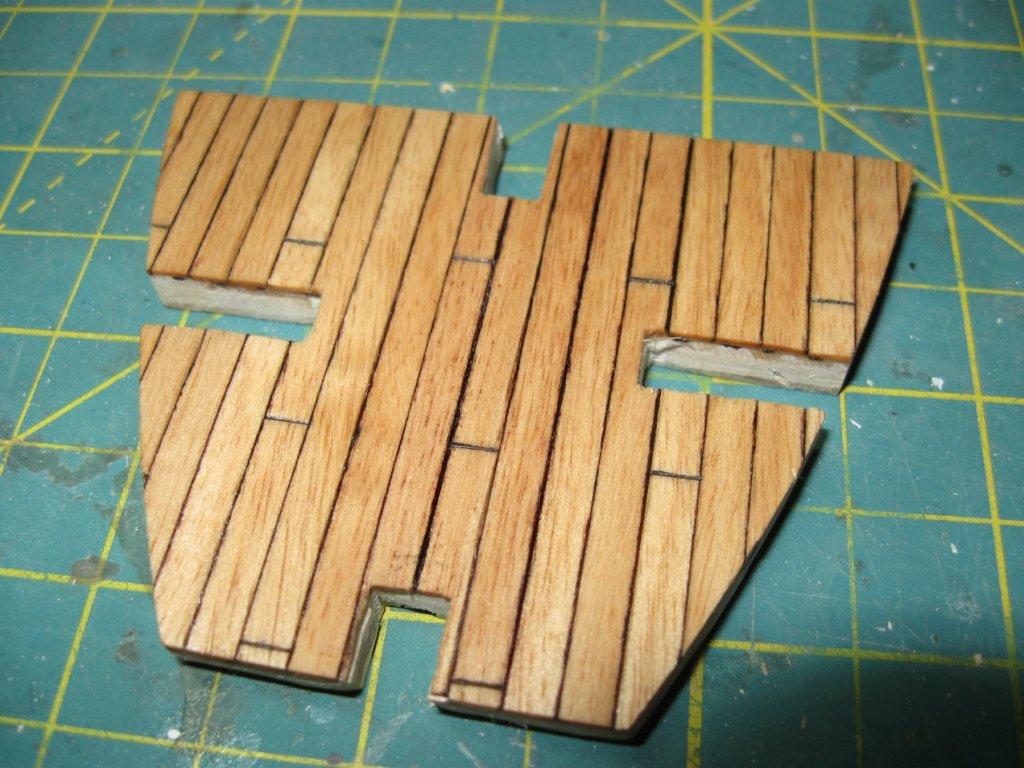
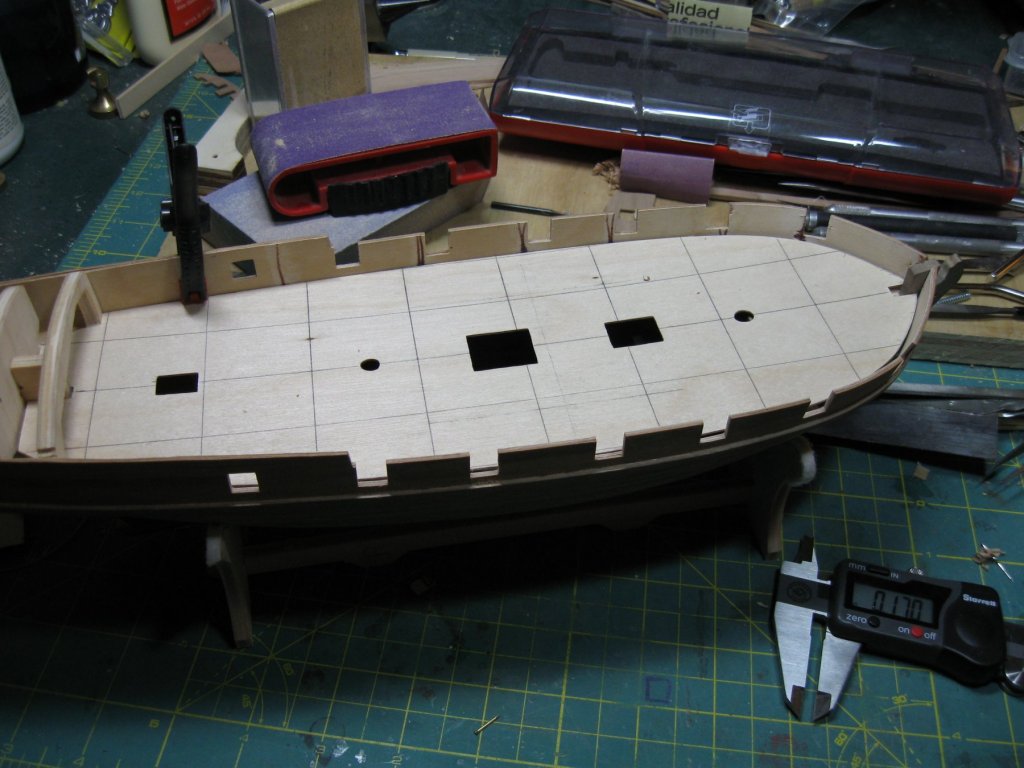
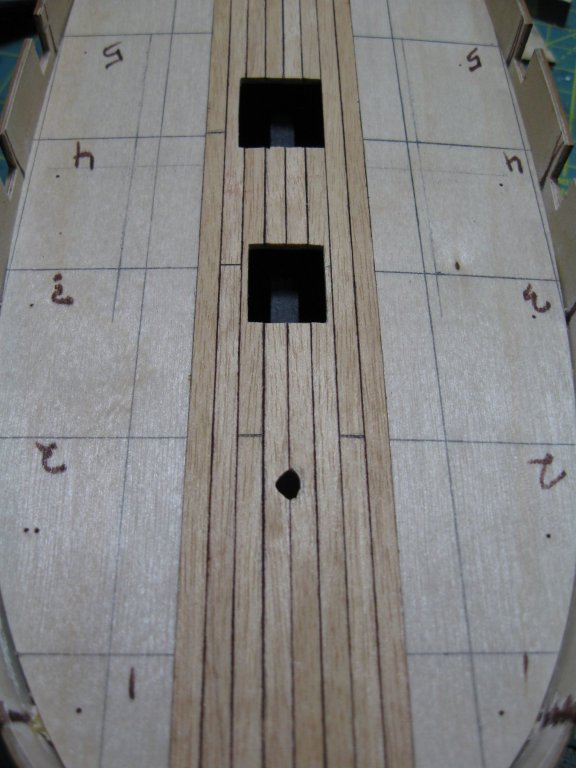
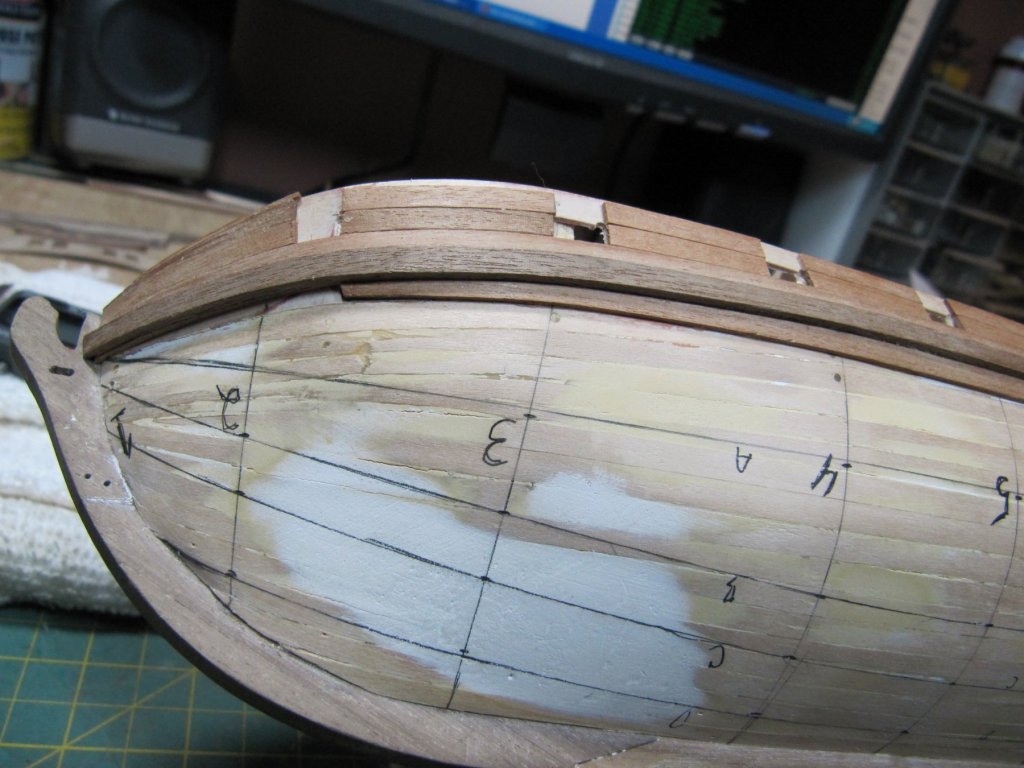
Finished planking. The completely invisible interior deck (orlop?). looks nice though. Fitting the false deck. I've marked out the centerline, points for plank shift and added several parallel lines so that I can make sure the planks are running true. Decking complete. I colored one side of each plank with a sharpie but I used a pencil to highlight the butt after they were down. I added treenails using basswood scraps run through a Byrnes draw-plate. I first tried an inexpensive draw plate from somewhere else but almost immediately realized that cheap really wasn't going to work. The treenails look a bit more prominent in this photo then they do in person.


-
You really hit the jackpot with that base. I have a Model Expo one on my Badger and it's pretty but your's is really nice.
- 1,348 replies
-
- 2
-

-
- constitution
- model shipways
- (and 1 more)
-
Ever since Trumpeter came out with the 1/200 Missouri I've wanted to build her. What has always stopped me was the mass of PE that would go into the build and just how difficult it would be to get all those minuscule rails and bits on and attached neatly. Watching your build has done nothing to allay those fears. Your work looks terrific. Very, very clean and precises.
-
That is just beautiful. I can't wait to see it finished. Your baseboard is great too. I may have overlooked it in the previous posts but is it walnut? I love the striping on it.
- 1,348 replies
-
- 2
-
-
- constitution
- model shipways
- (and 1 more)
-
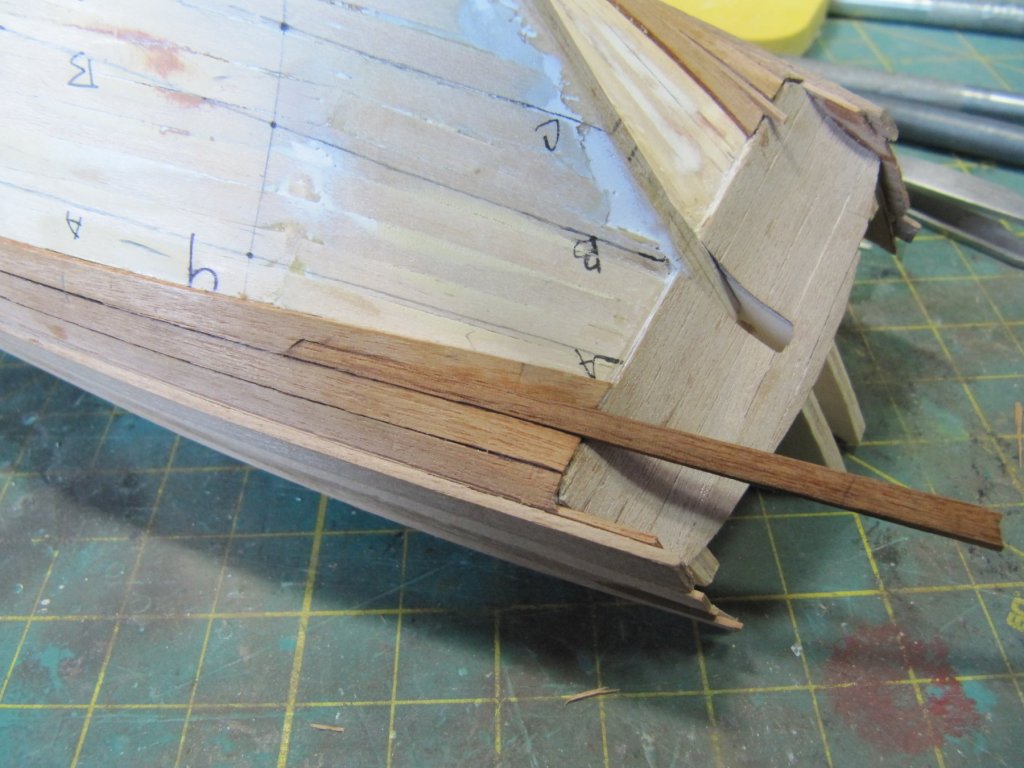
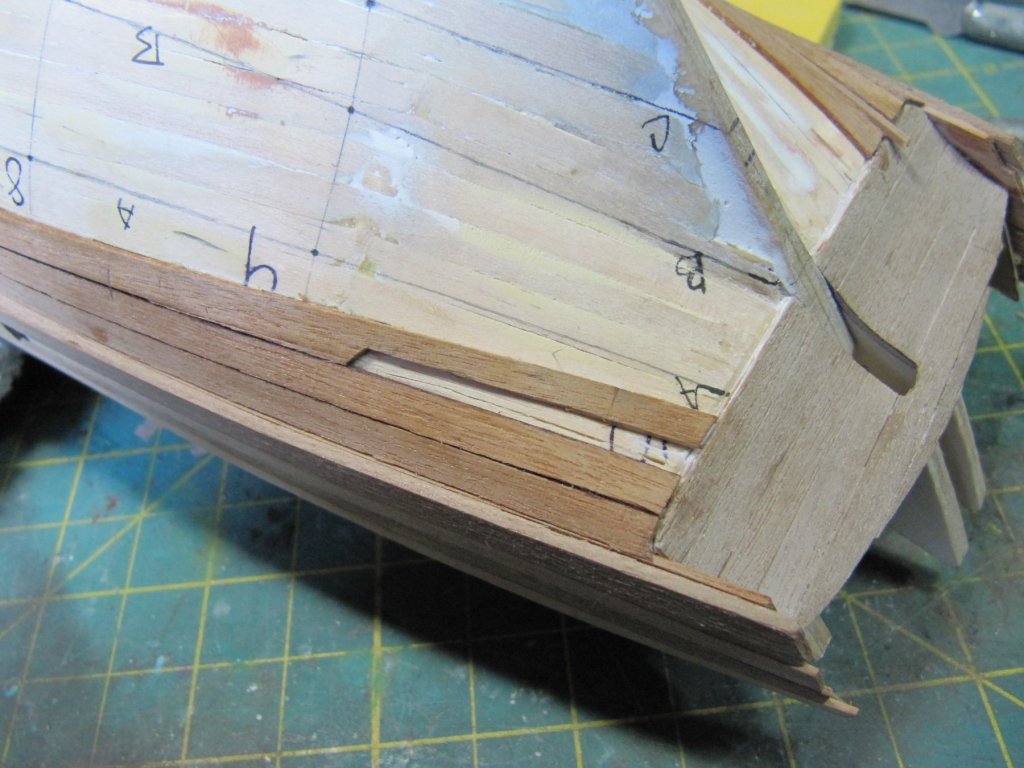
I also had to add a stealer or two at the stern.

-
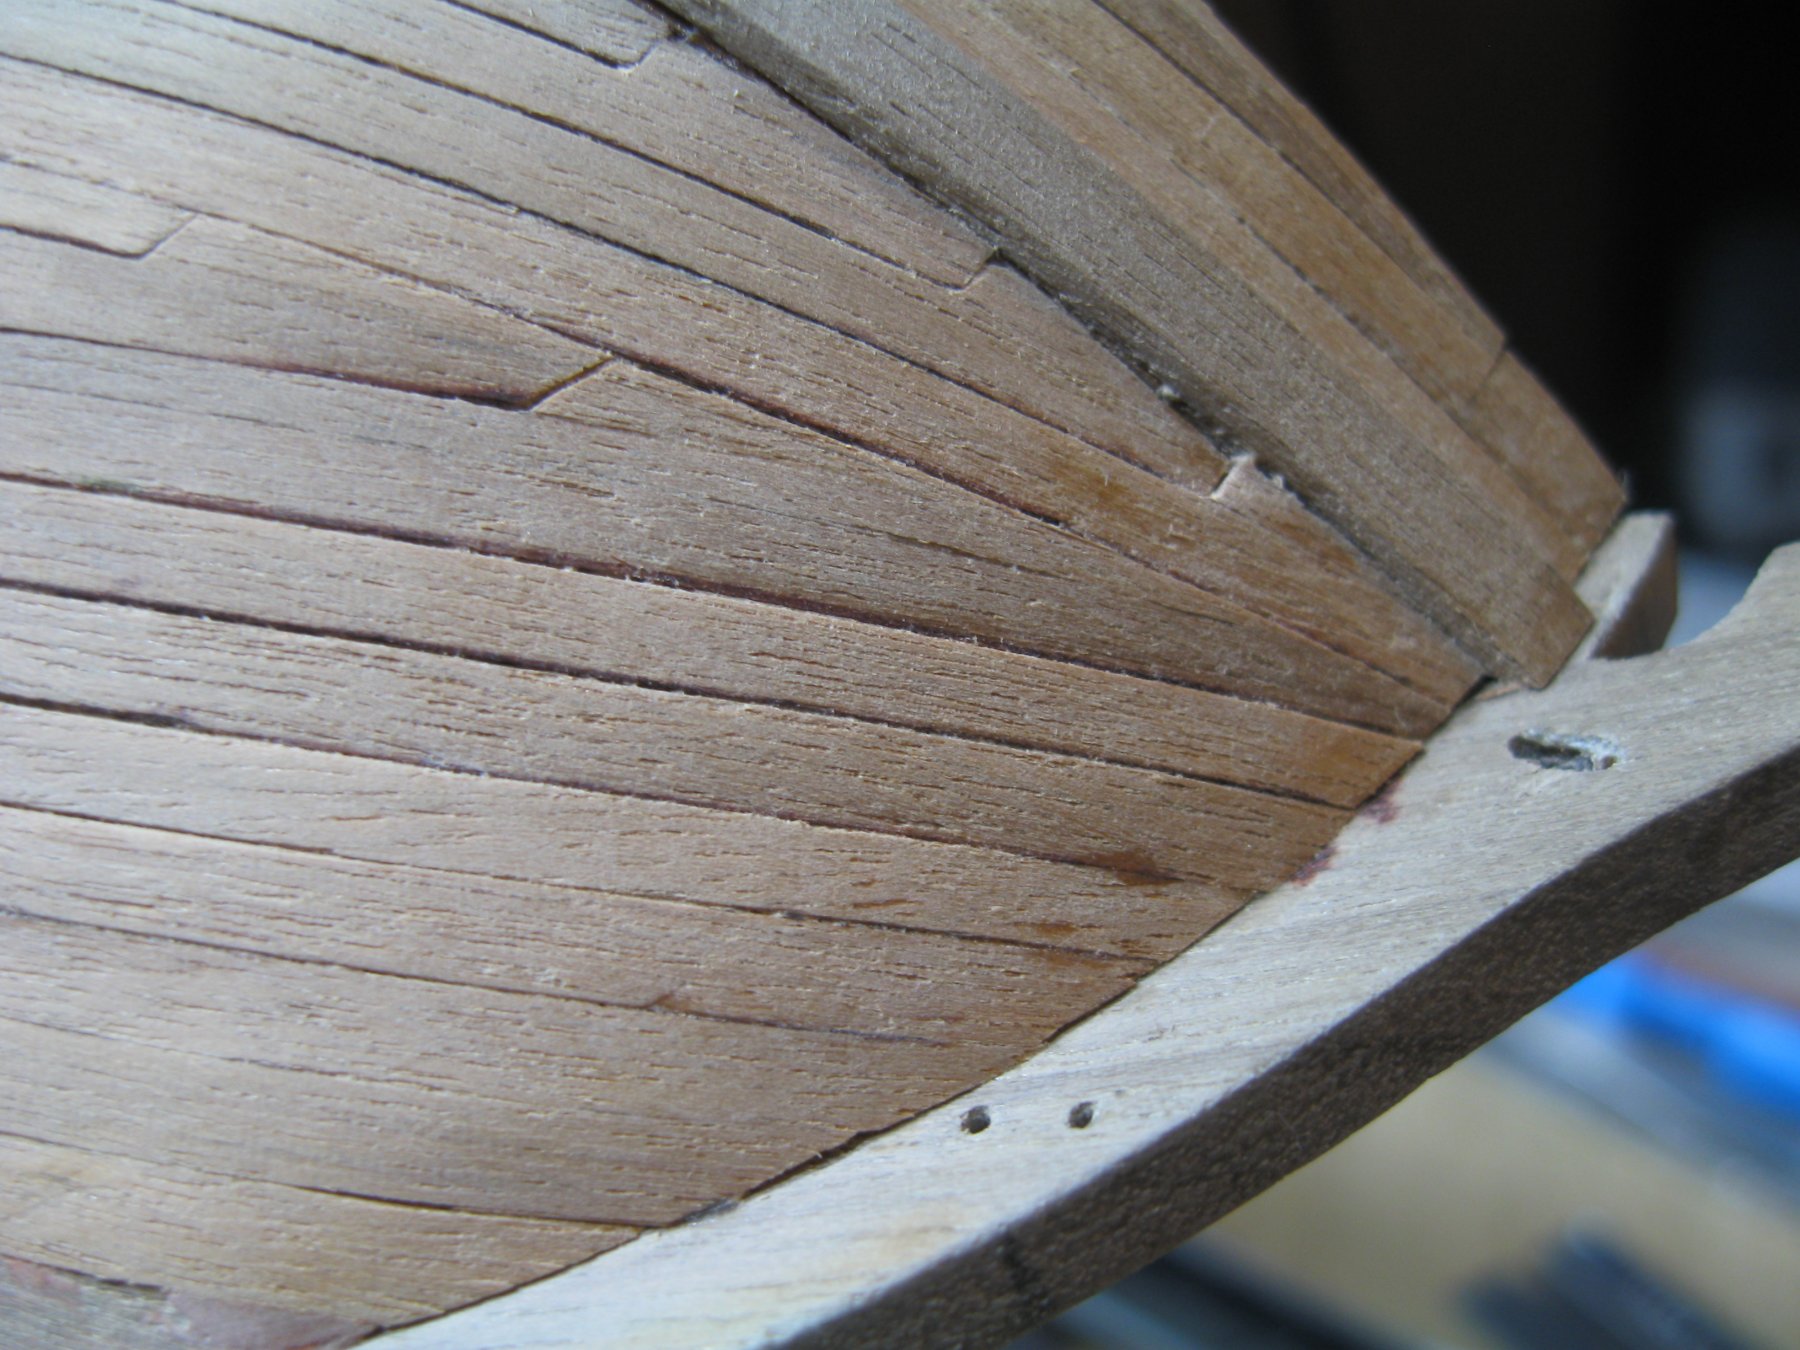
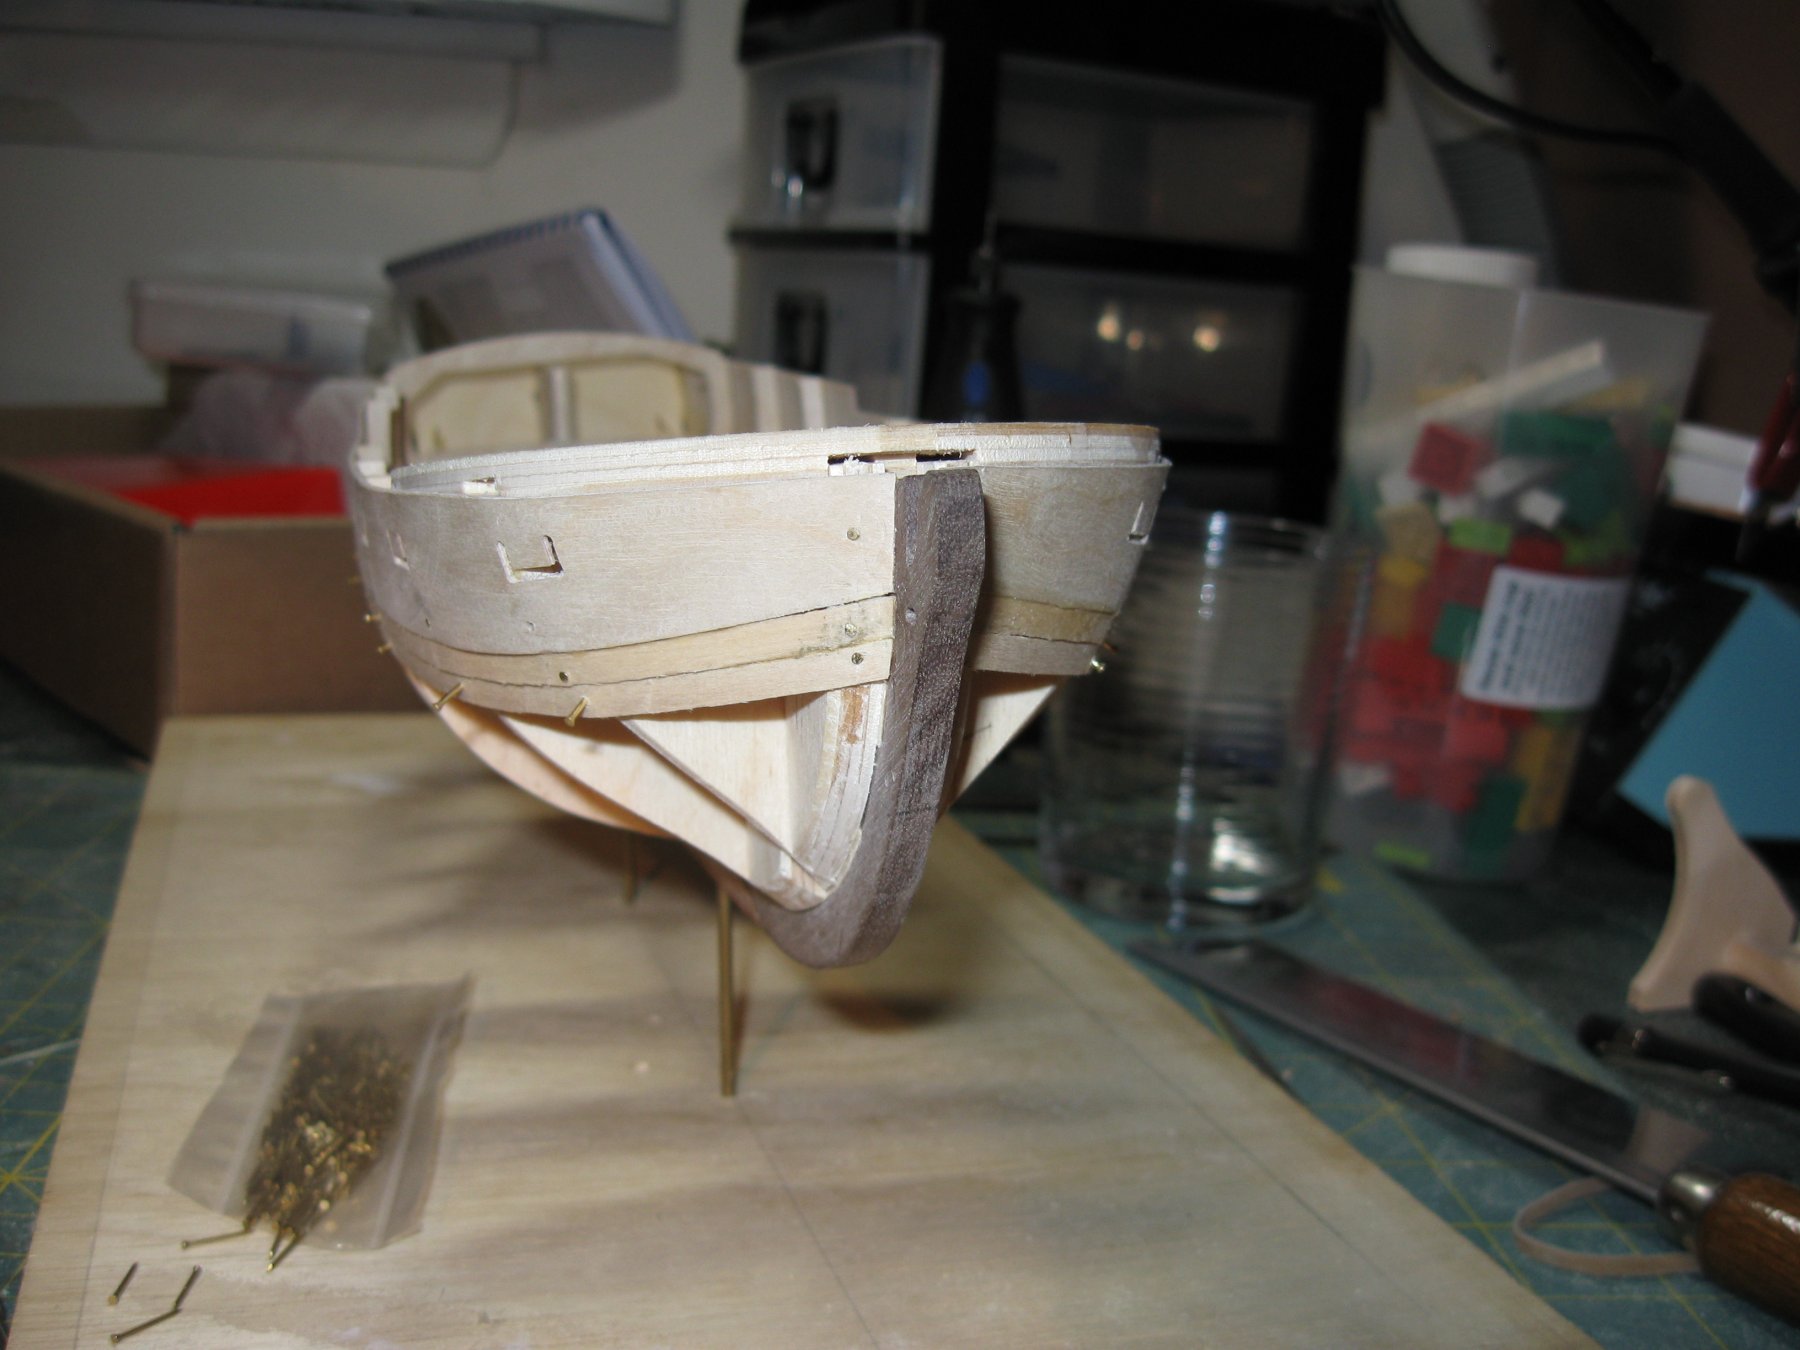
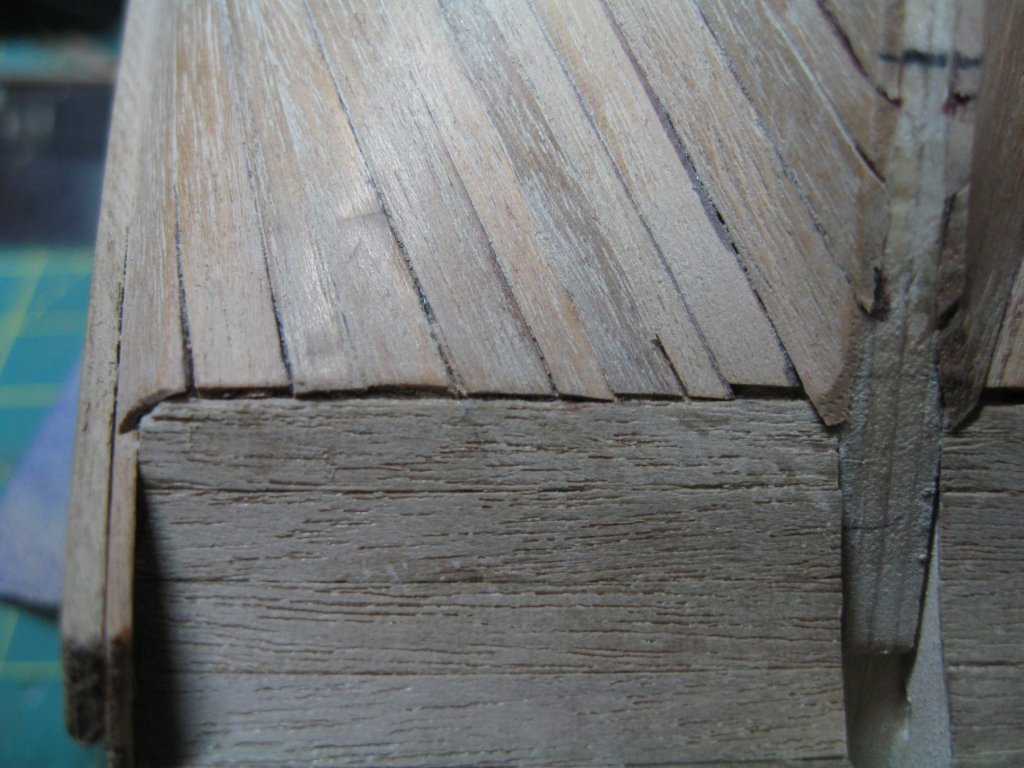
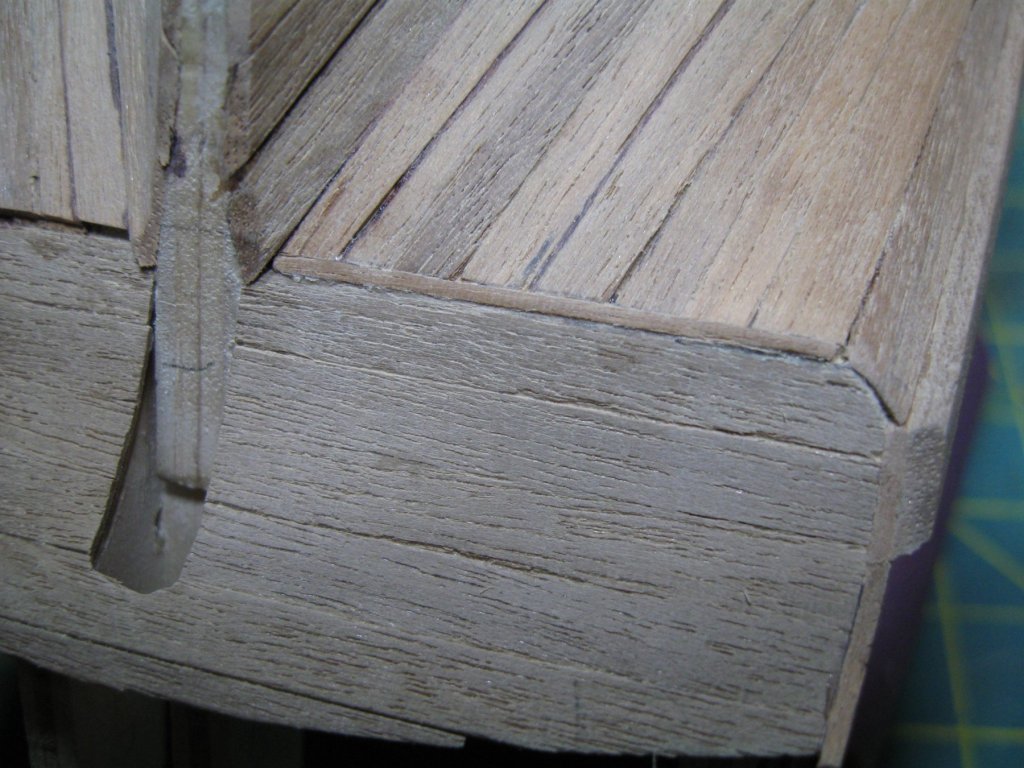
You can see in some of the pictures that the wood has some slight splintering on the edges. Sanding removed some of it but it's still visible in spots. Another thing I learned is the value of a good rabbet. While not the worst I've seen, if I had cut a rabbet into the keel this would look much neater. I had a good bit of trouble handling the plank termination at the stern. I probably should have planked the counter afterwards or at least left the bottom run. I was left with a kind of snaggle tooth appearance. I cut the ends of the planks evening them up and inserted a single piece cross ways to fill the gap. it left a nice clean appearance and is almost invisible on the finished model.

-
Following the kit instructions I started the second planking with the wale and the plank above it. The walnut in the good was of decent but not spectacular quality. it was cut crisply with good square edges but was a bit splintery. The first plank below the wale was already wanting to curve up sharply. I really should have taken a stab at spiling but I didn't think I was up to it. Instead i saw where Mondfeld in Historic Ship Models shows the Dutch method of handling stealers and it seemed like it would work. Working my way down. The effect wouldn't be appropriate for this boat but it looks pretty nice I think. The gaps between some of the planks look massive but in person they're much less obtrusive.

-
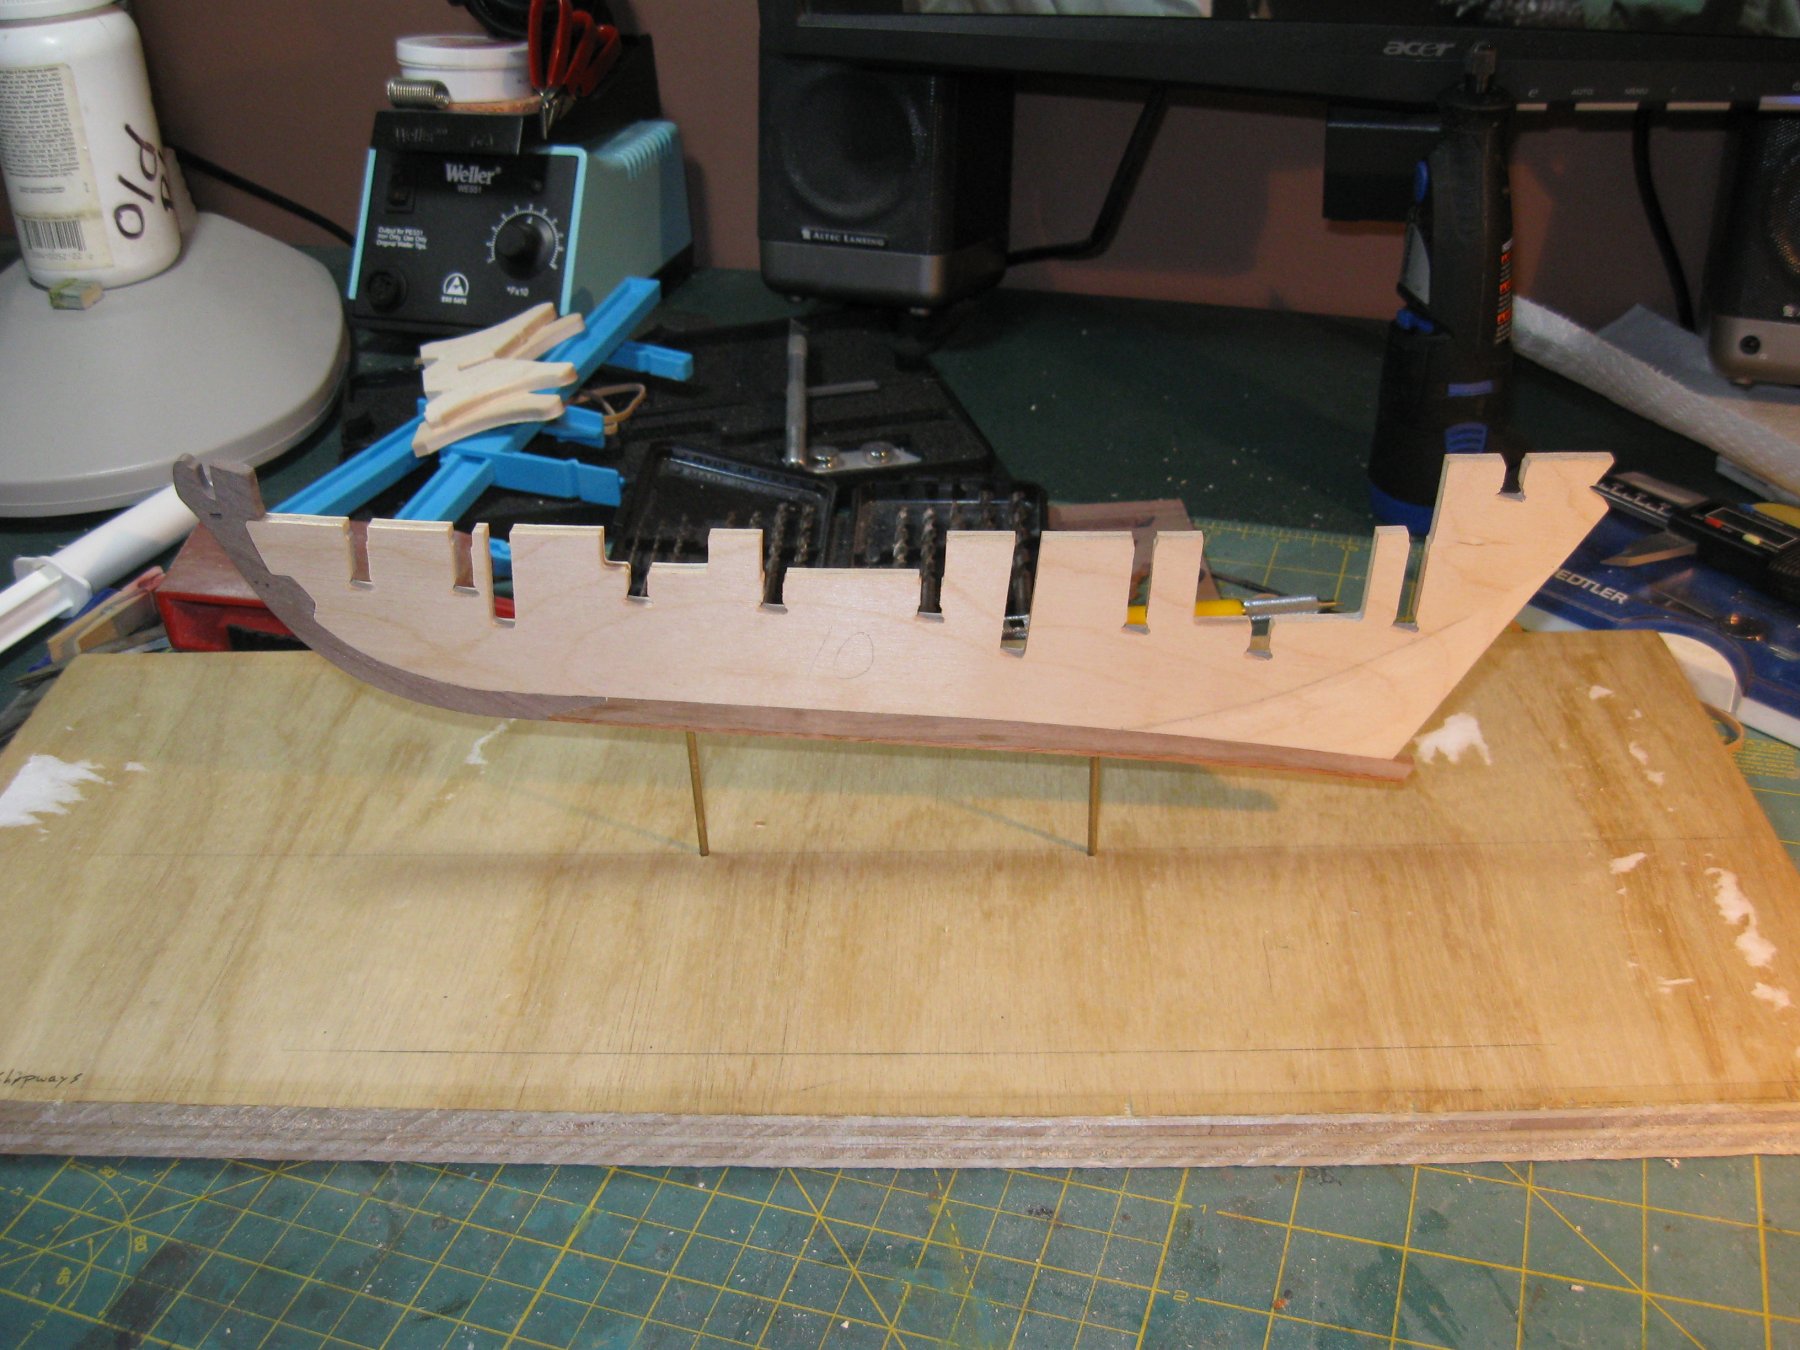
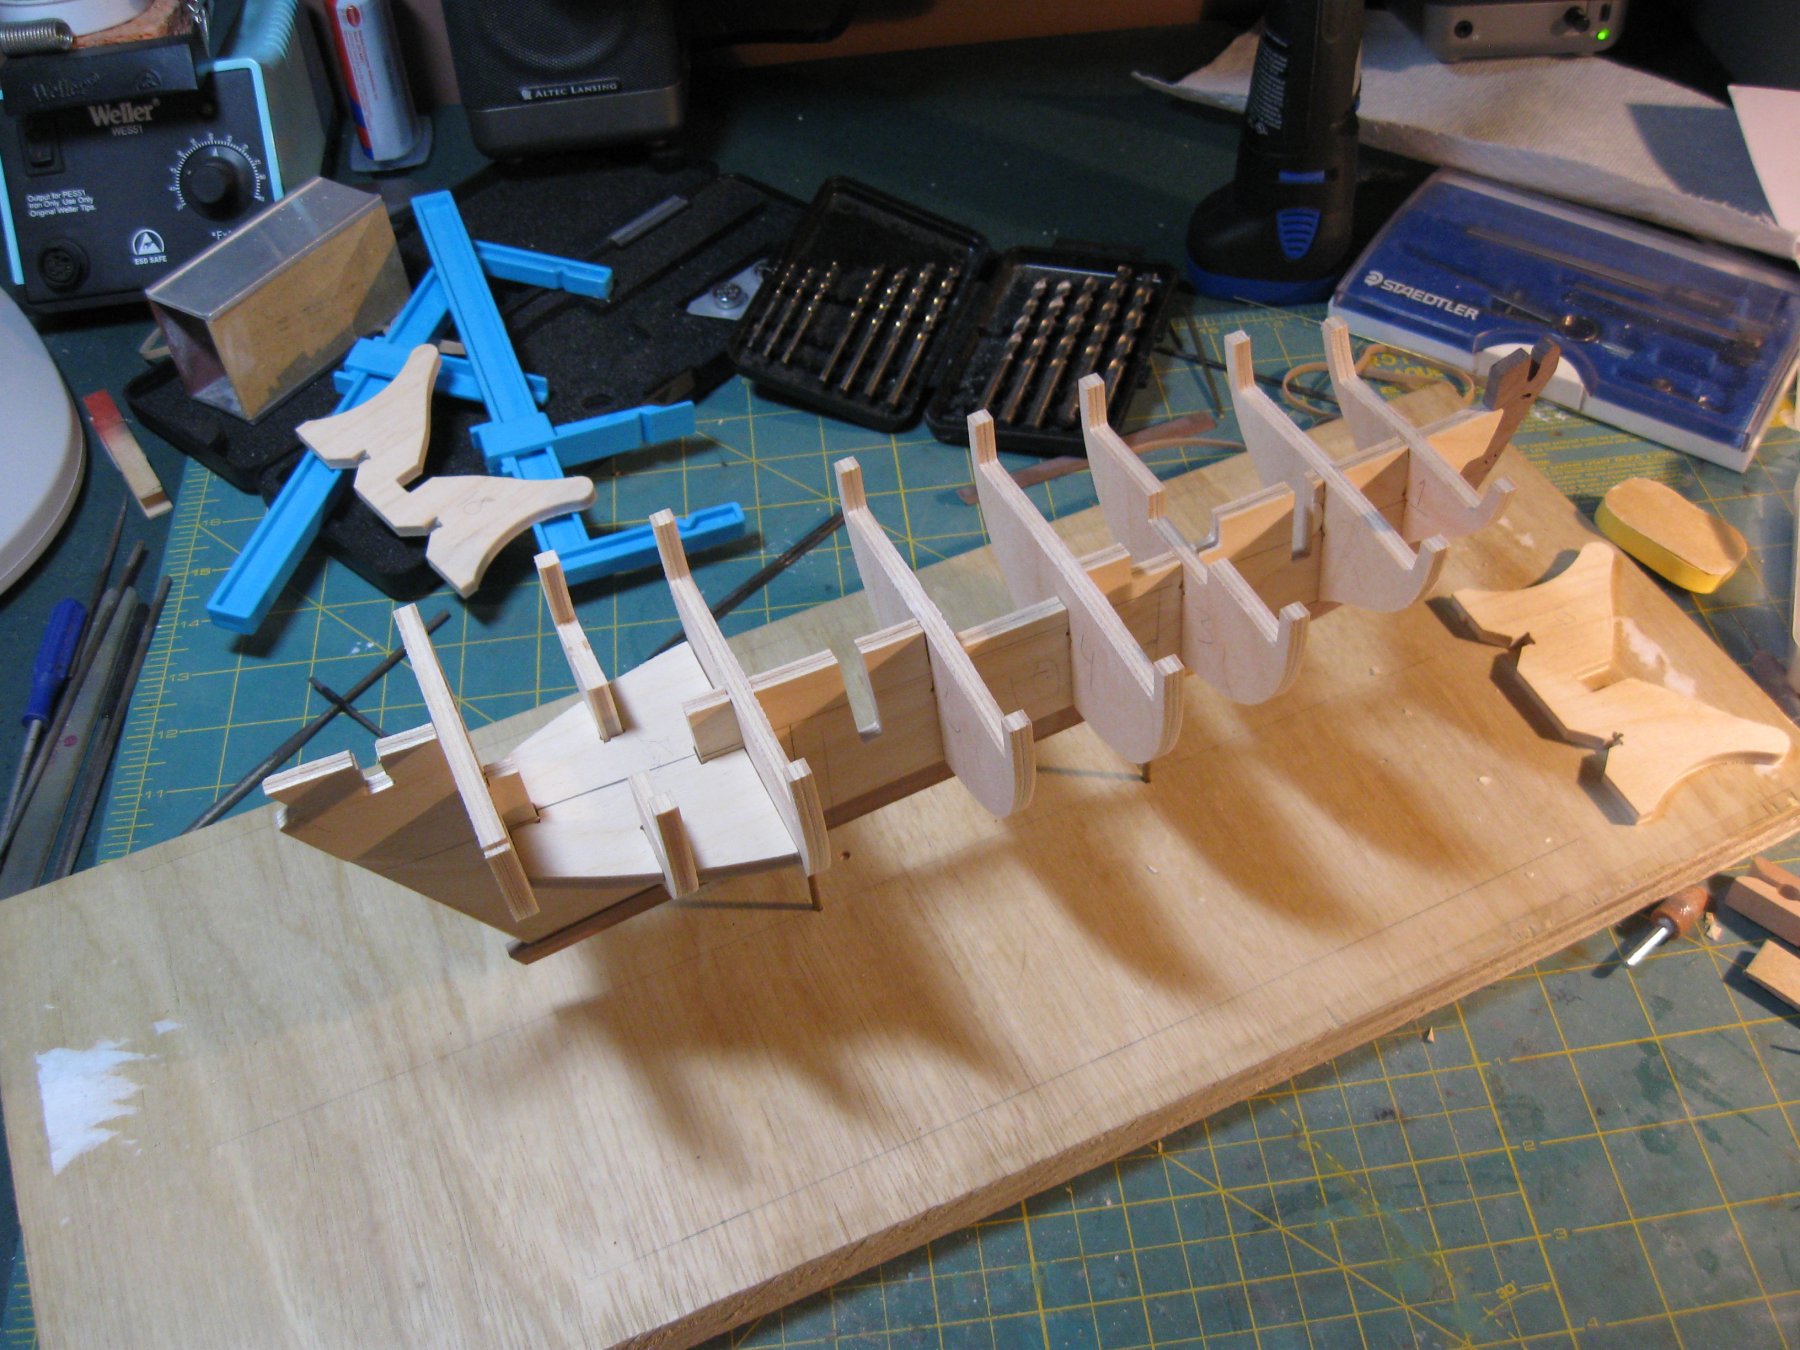
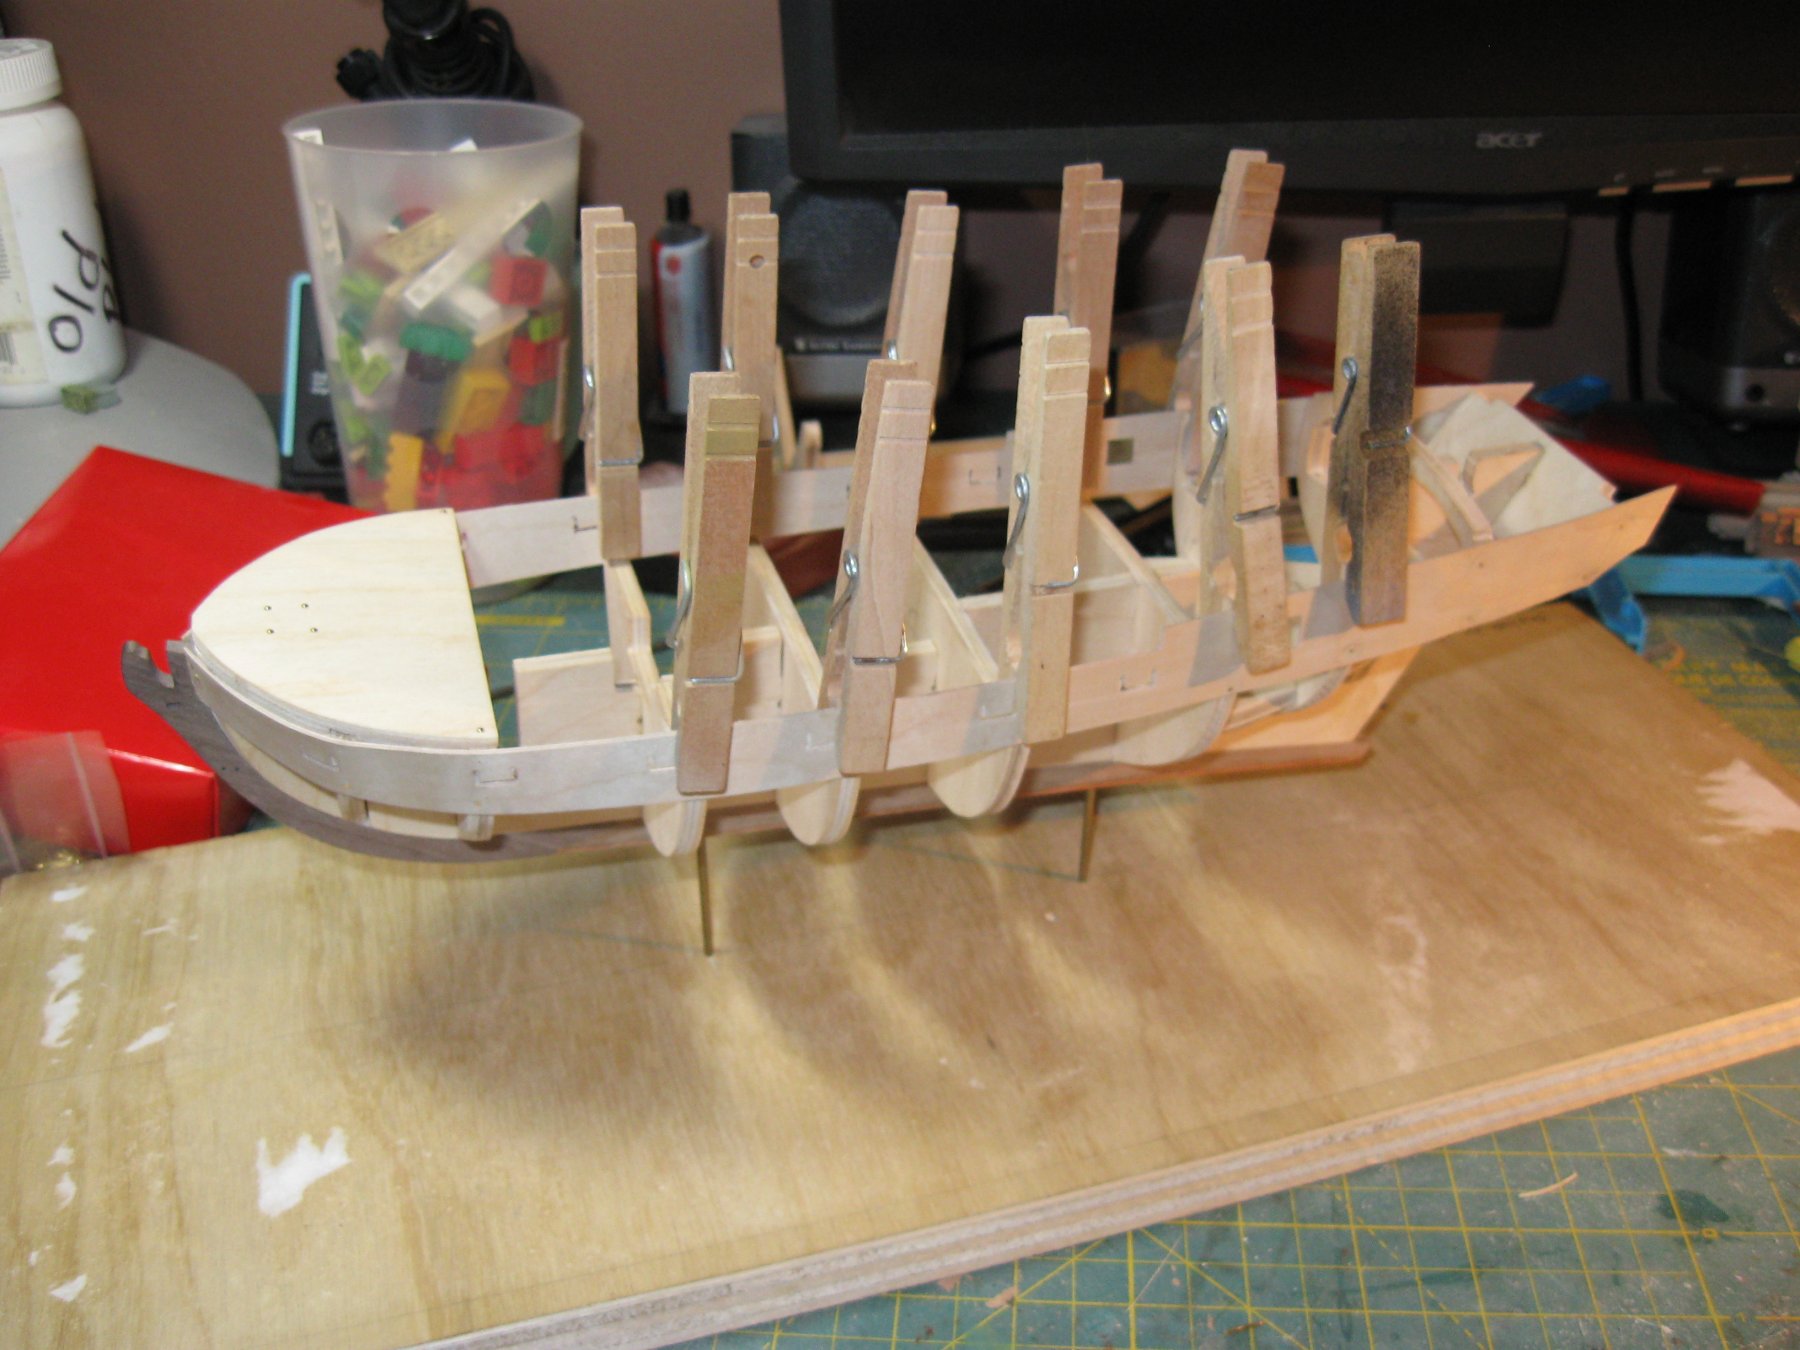
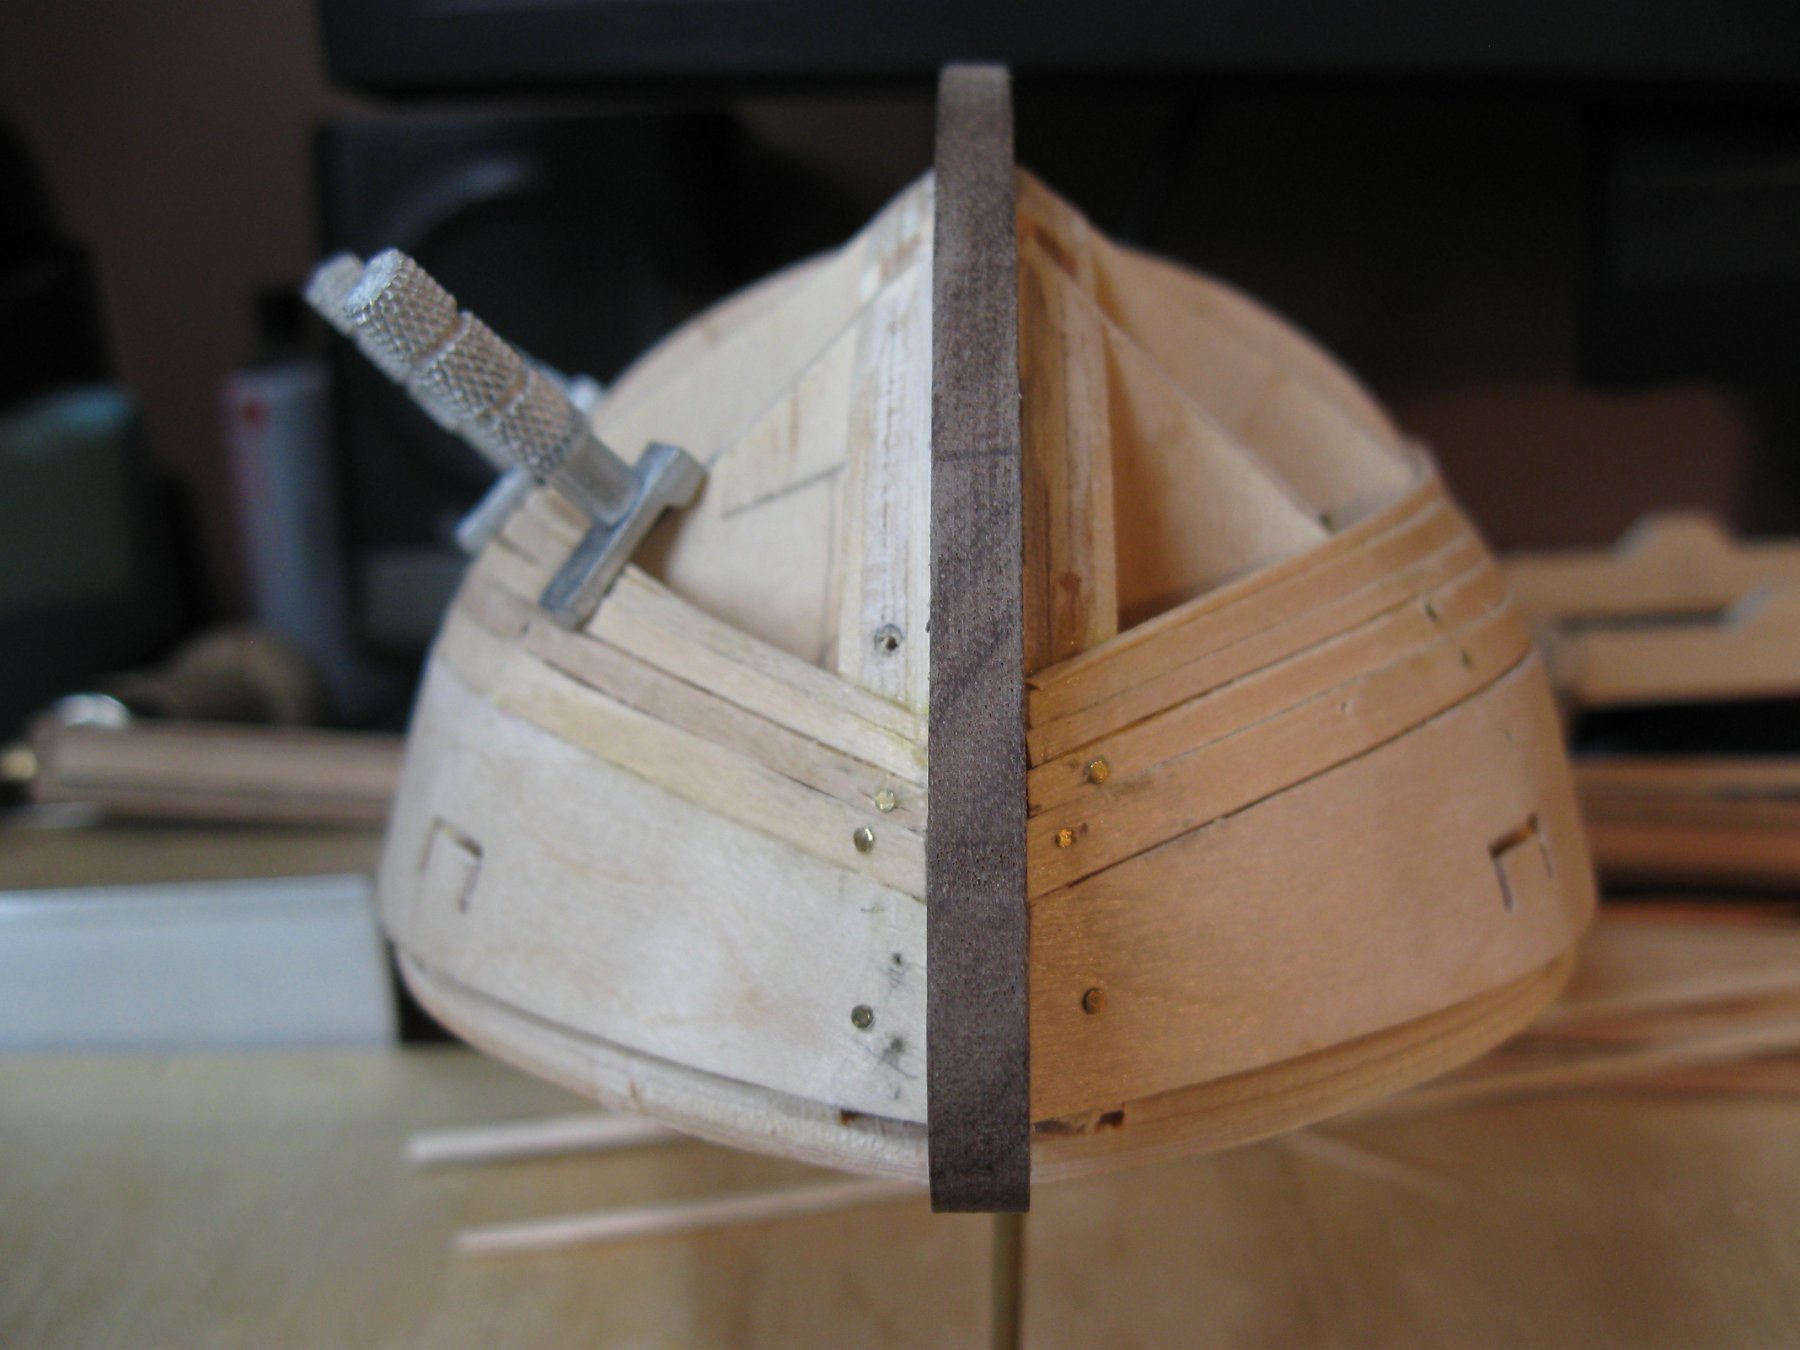
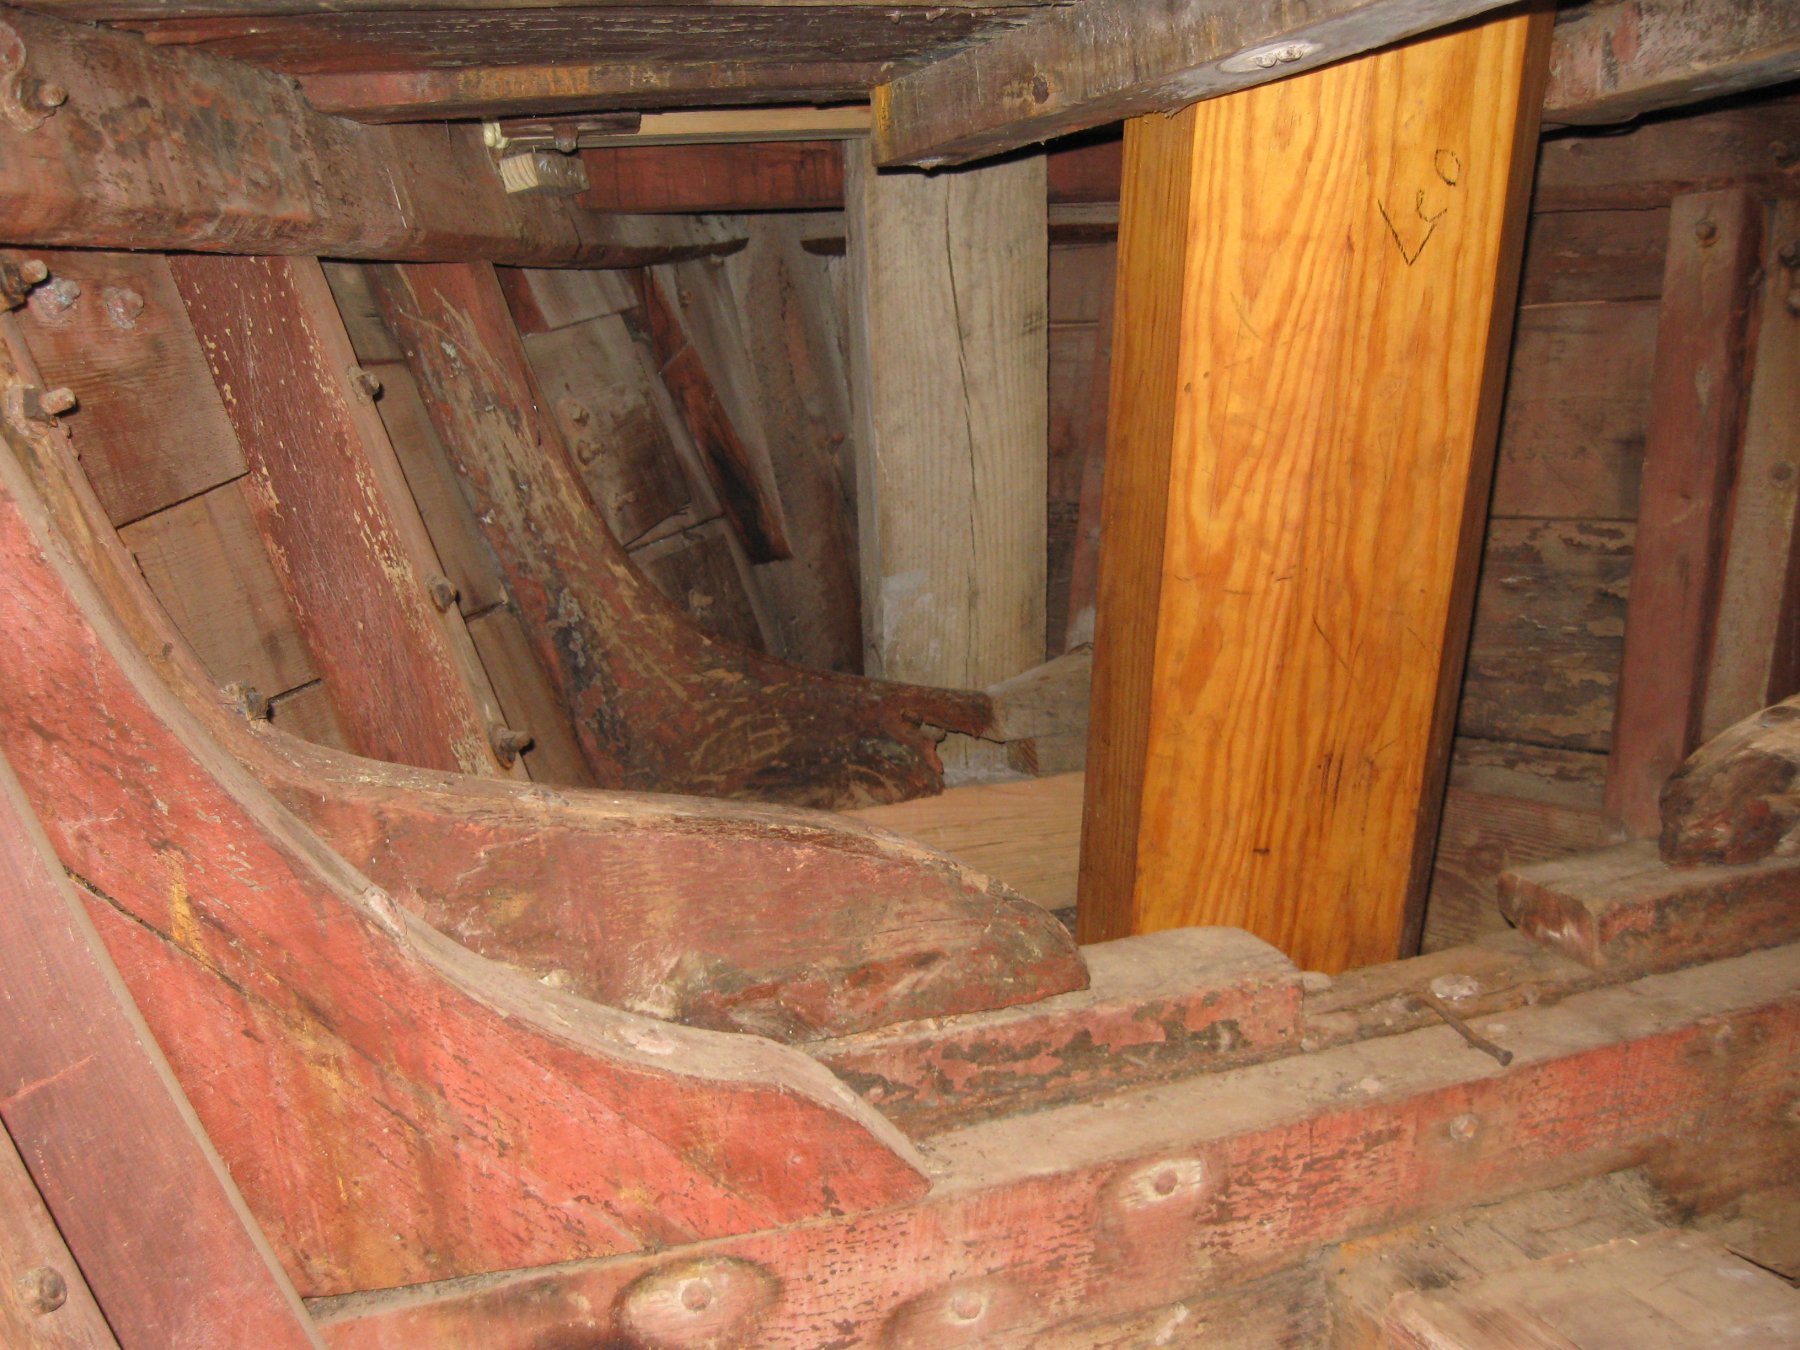
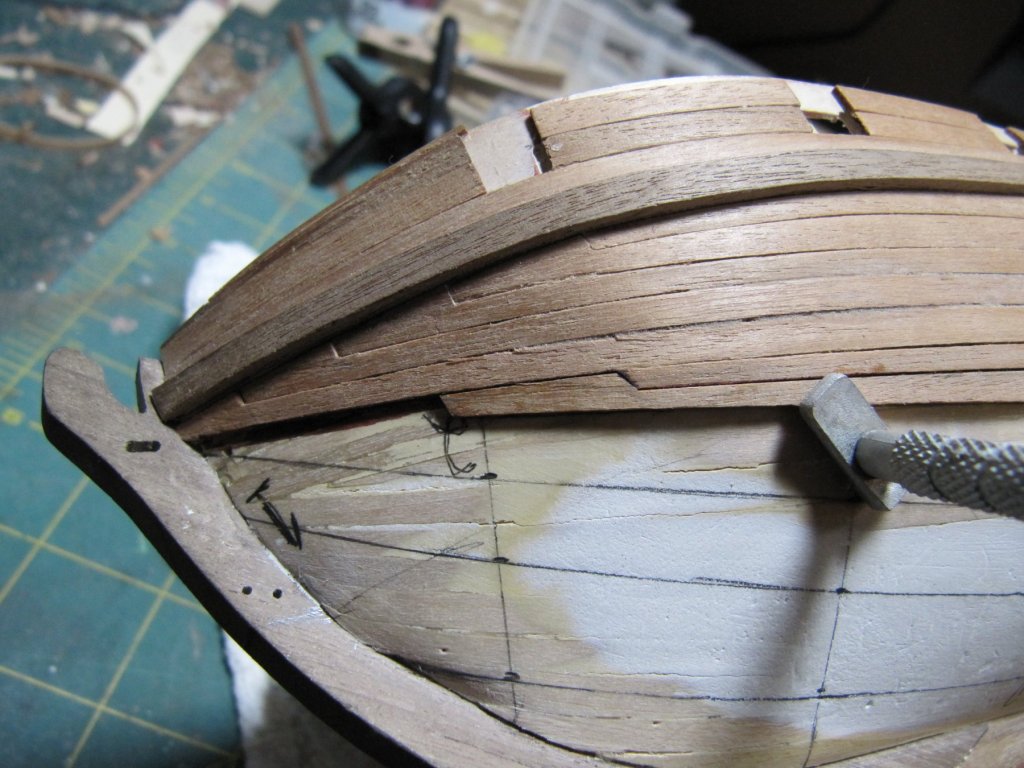
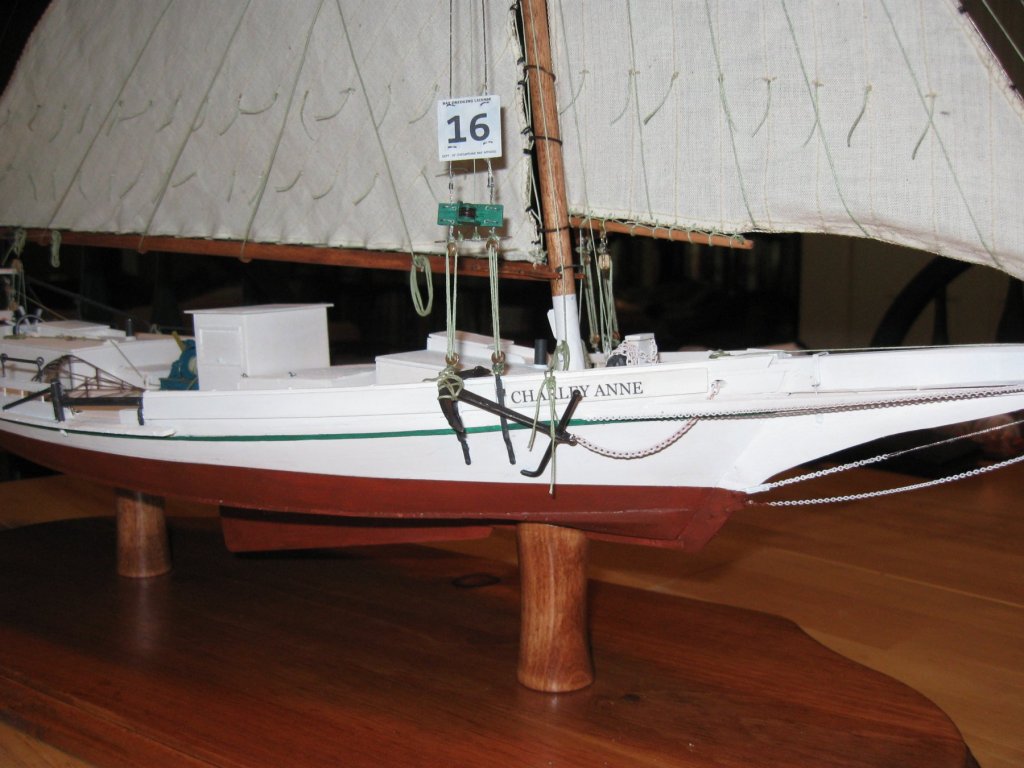
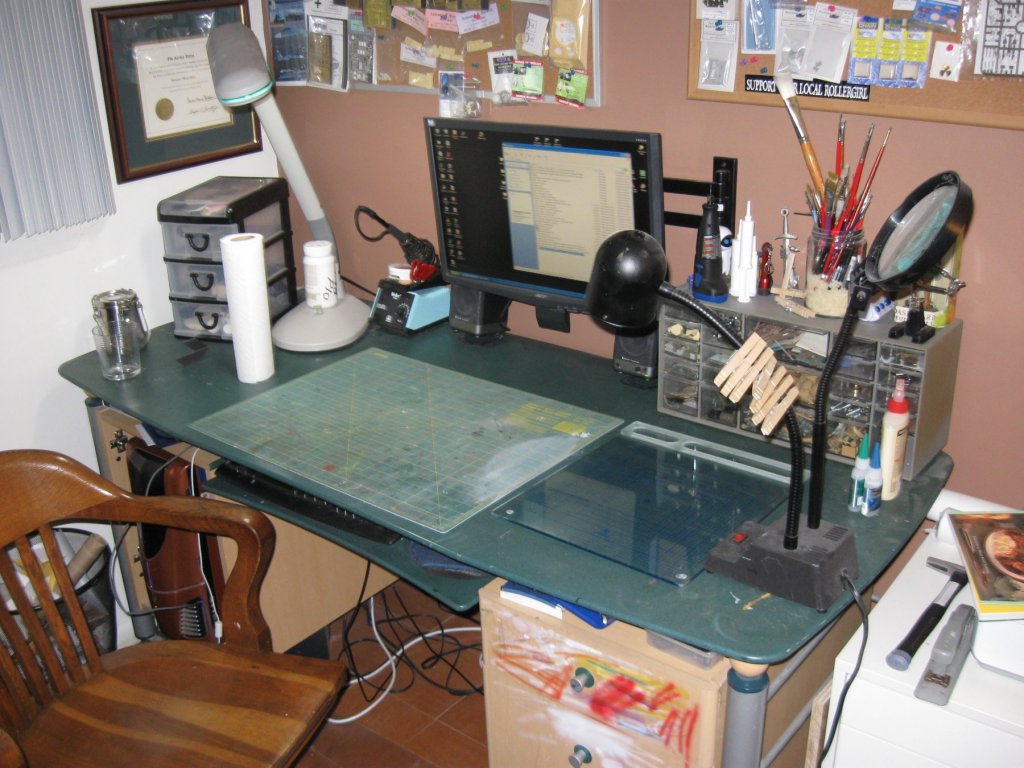
So, thanks to my very welcome but very time and energy consuming 3 month old son I really don’t have the time or energy for modelling. So instead I’ve decided to live vicariously through myself and do a build log on a model I finished a couple of years ago. The Caldercraft HMS Badger. The Badger was my second wooden ship model, the first being a build of the MS Willie Bennet. Before that I’d been building plastic model since the age of four. Mostly tanks or aircraft. I chose the Badger since it seemed like it had a lot of bang for the buck without being too ambitious. Two masts, cannons, complex but not ludicrous rigging a double planked hull. I figured it would be a kit I could build and decide if square rigged modelling was for me or another passing fancy. Note: Not built when I was four years old. The MS Willie Bennet built as a fictional Skipjack. I built it for my sister who lives on the Chesapeake Bay and loves sailboats. Charlie Ann was a beloved family pet and number 16 was my sister's soccer number. Spelling it "Charley Anne" made it look to me a little bit more archaic. I always like to take a picture of the modelling area cleaned and prepped. This picture marked the beginning of the build and was taken July 31st 2010. Jumping right in I've already sanded down the bearding line and attached the two piece keel. I'm not sure if I made a mistake or misunderstood the relationship between the two pieces but there was a significant step between at the join. I added a strip of walnut to make up the difference. One thing I learned on the previous build was that I wanted to firgure out the mounting as early as possible. You can see that I've marked the waterline on the frame and marked two perpendicular lines where the mounts will go. Just a quick check to make sure they are sitting the way I wanted. August 3, 2010Test fitting the frames. All of the pieces fit well on mine. None were loose and only a few need minor sanding to slide into place. I used Legos, squares, and several other things to make sure everything was clamped perfectly square when I glued them up. I double checked and triple checked before ever glue touched wood. Aaaannnddd of course I still screwed one up. I think it was frame number eight, the next to last one, was slightly out of square. Of course I didn't notice it until WAY, WAY later. After soaking, clamping the ply cannon port former into place. Just slightly apparent in this picture is my second mistake. I was too timid in fairing the frames and I've made the Badger a rather more Bluff bow boat than she should be. You can just see near the bow where the ply isn't quite conforming to the form. i thought at the time that it was just the ply not bending enough. Nope. Bad fairing. This one would also come back to bite me later. The planking begins. So far so good for my first ever planking. Here it begins to get a touch dodgy. I was thining the planks to sliver. In hindsight this would have been a great time to practice some spiling before I got to the top coat as it were. August 18 2010. Planking the stern. You can see more evidence of insufficient fairing. Instead of a nice sweep my planks actually angle upward sharply. November 11, 2011 BIG time jump here. The model sat idle for more than a year. I was able to correct the sharp angle by heavily sanding the area afterwards. if you look you can see spots where I literally sanded completely through the planks. To re-enforce these areas I filled the corresponding interior areas with a small (ish) amount of body filler. not the cleanest first planking ever but I don't think it was the worst ever.


-
That looks great, I bet I could make a five or six week project out of assembling it. Maybe I'll have the only Syren Rope Walk featuring Marquetry. Seriously though I'll definitely be picking one up.
- 5 replies
-
- 3
-
-
- syren ship model
- serving machine
- (and 1 more)
-
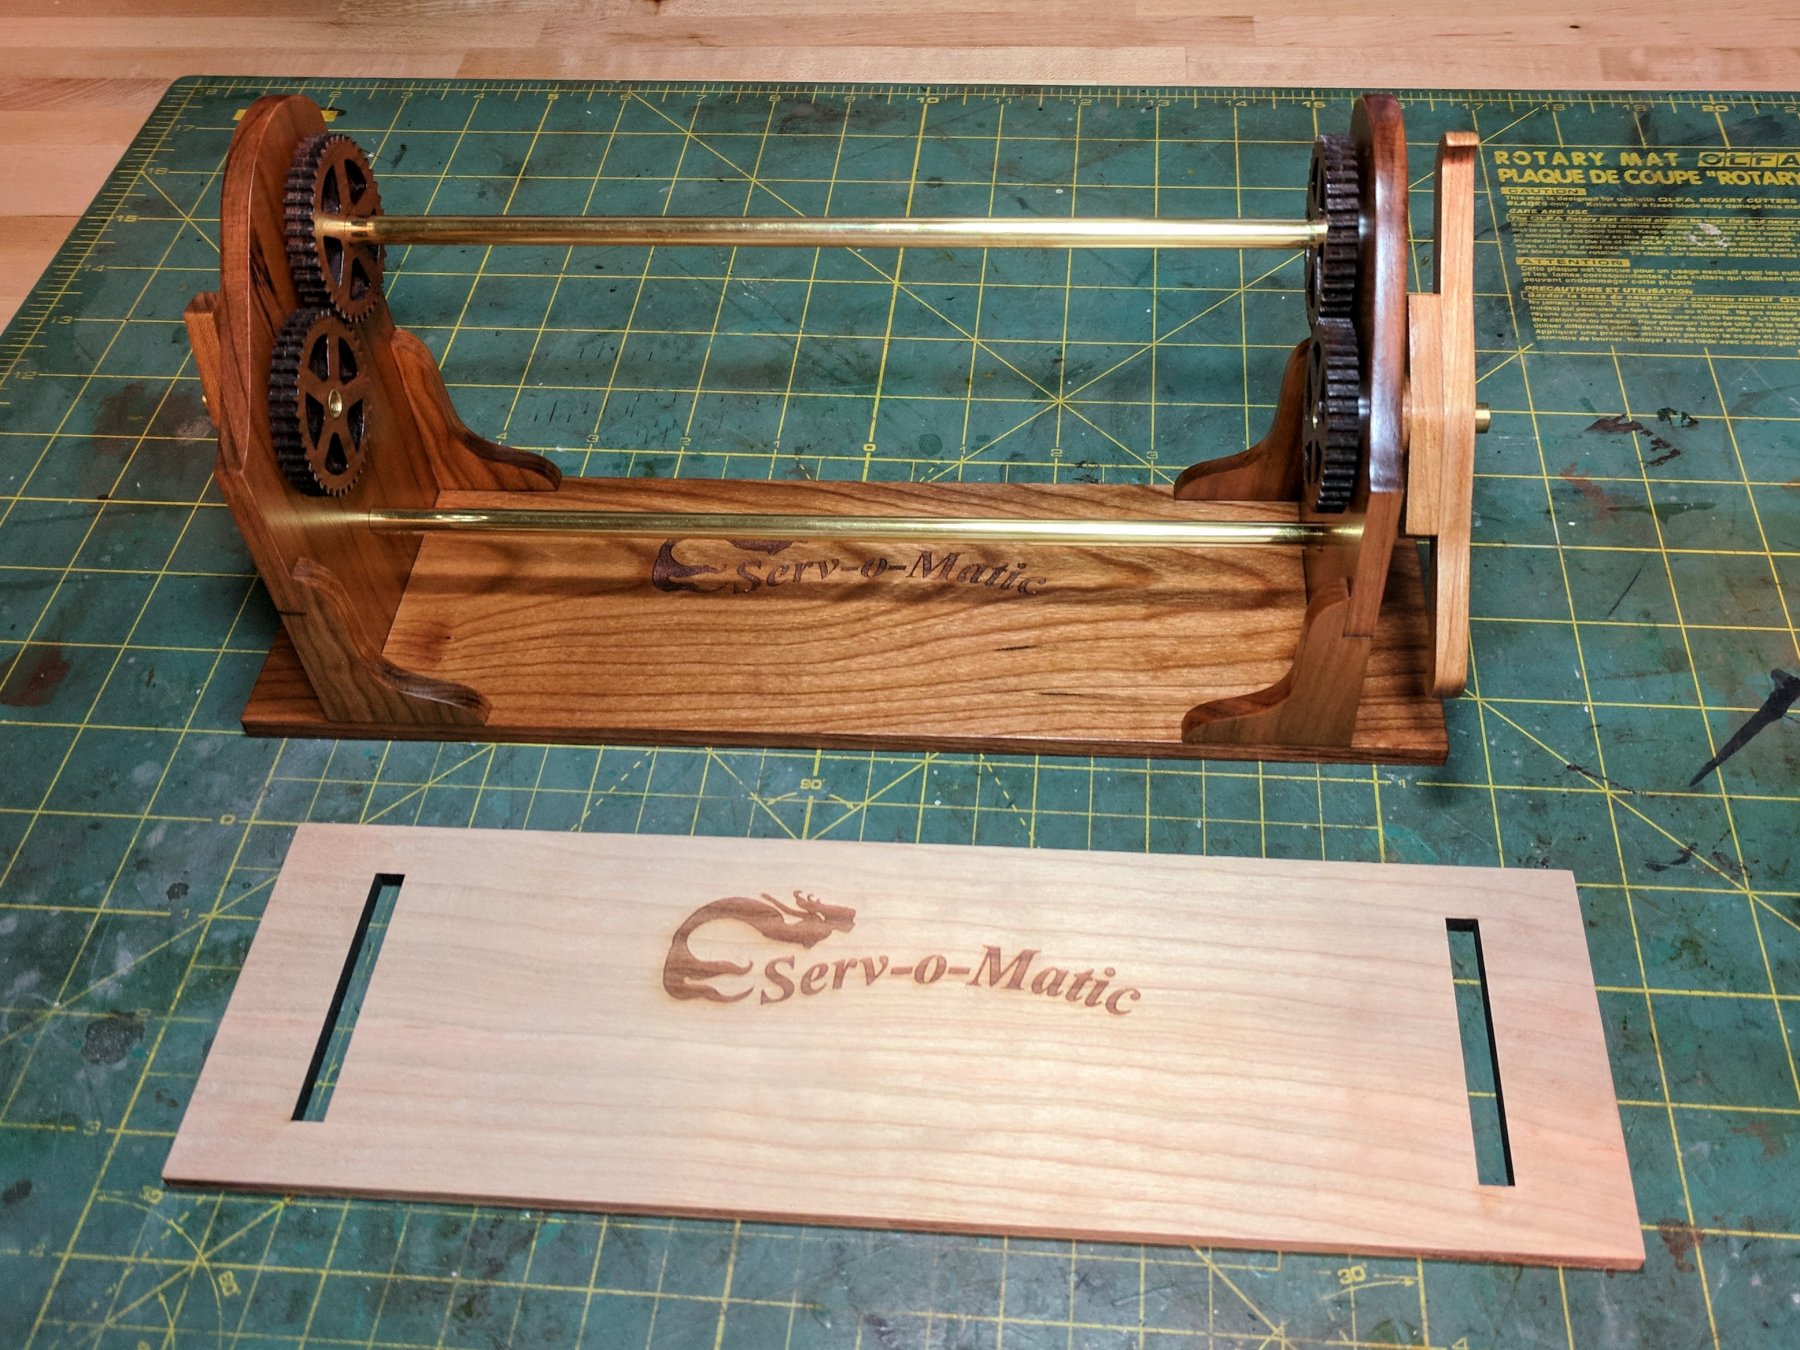
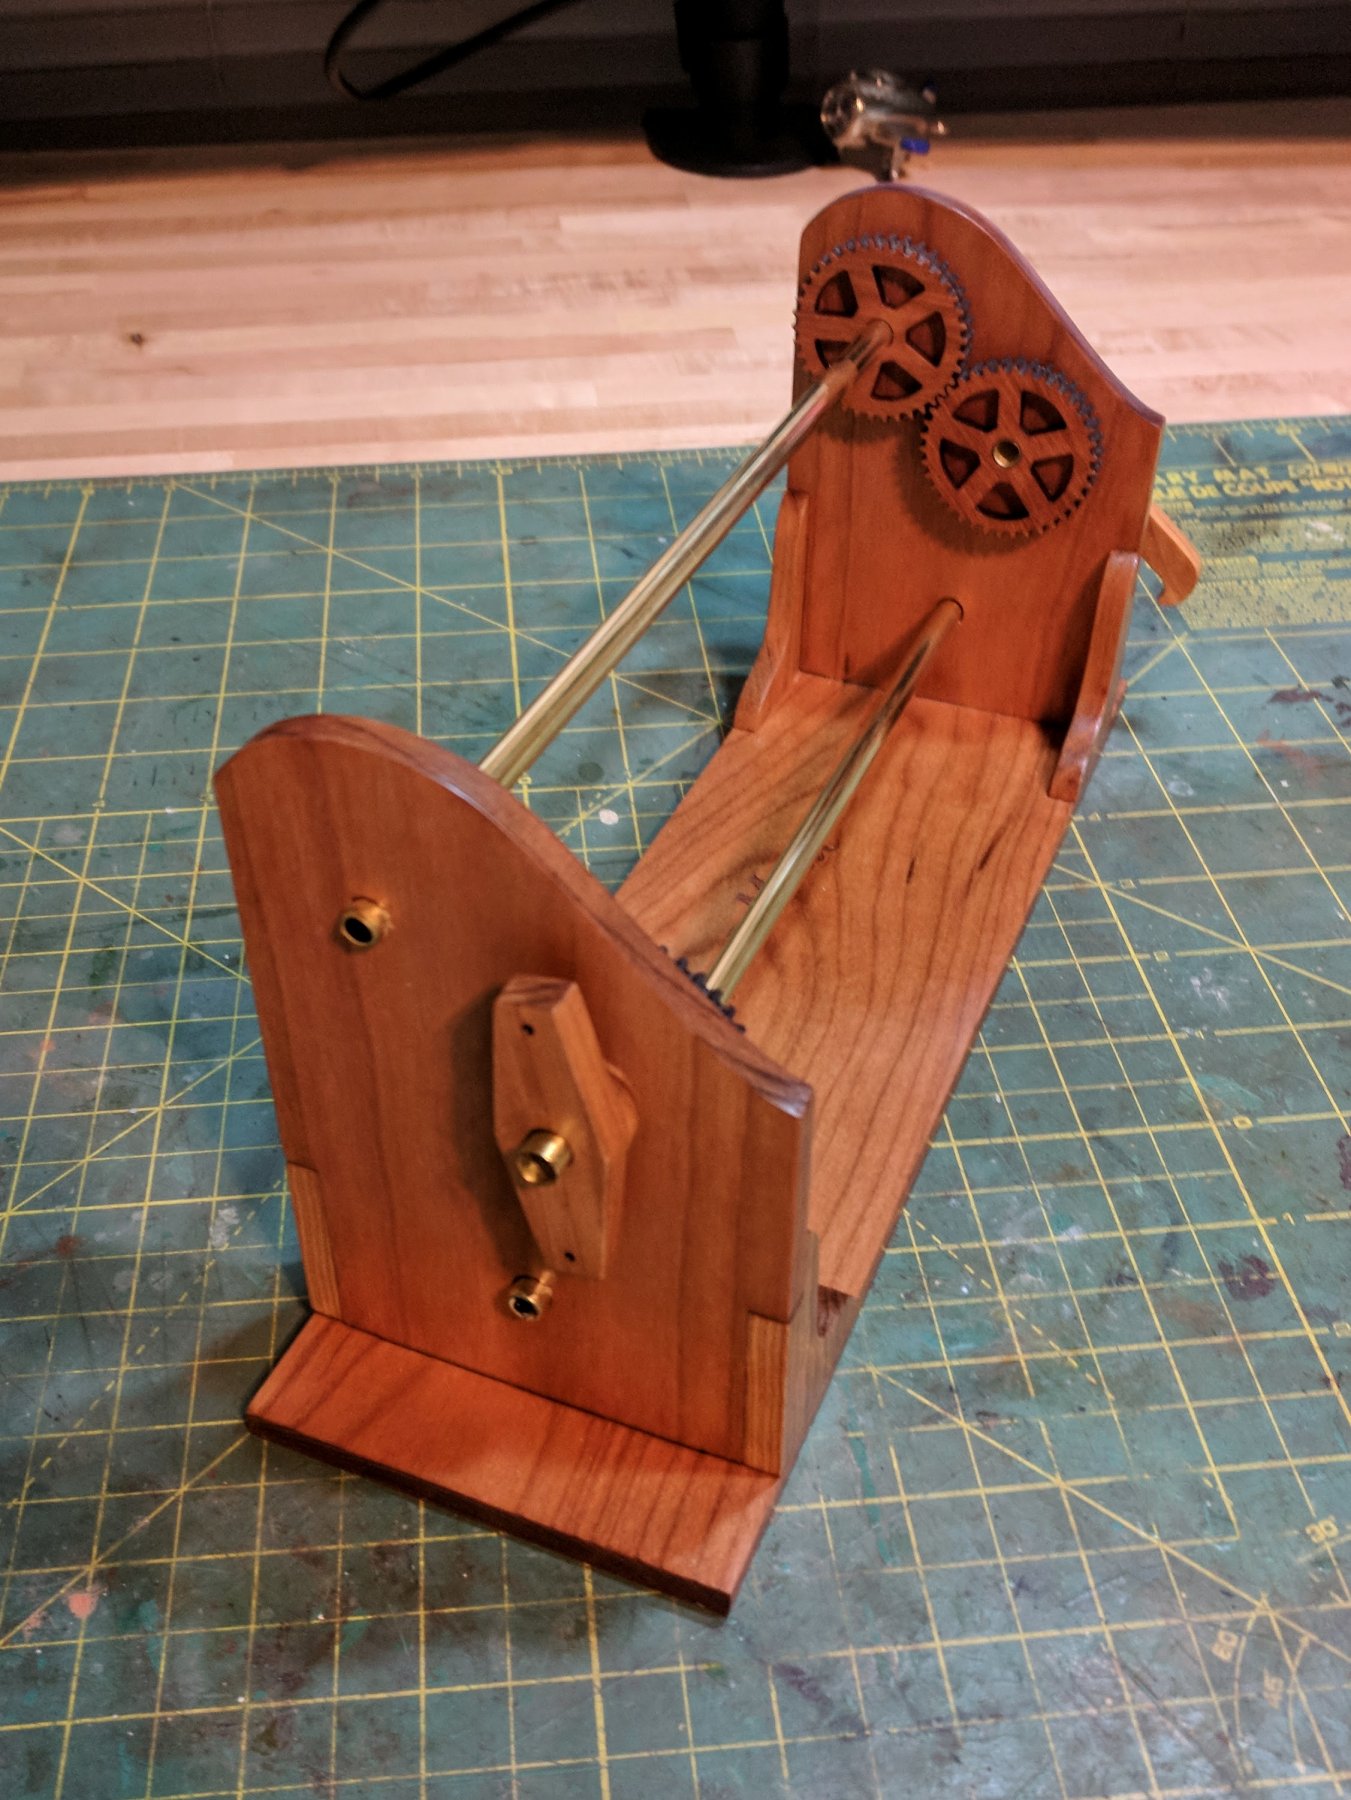
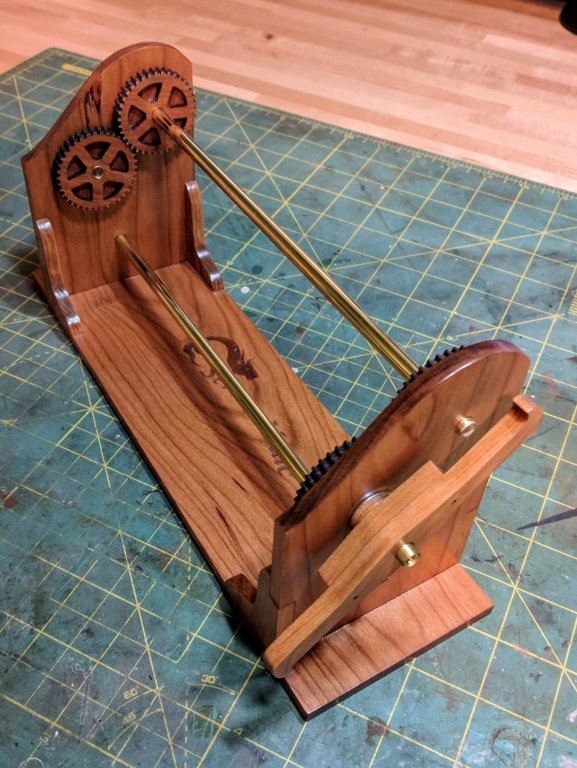
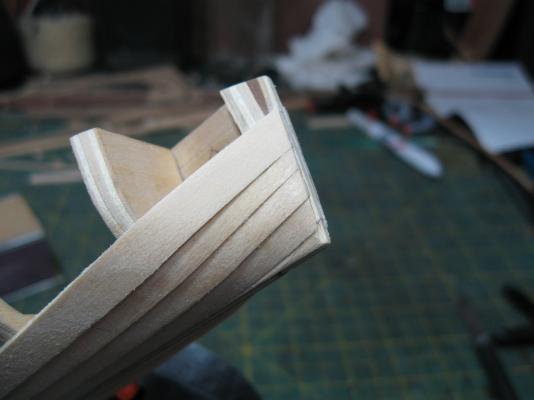
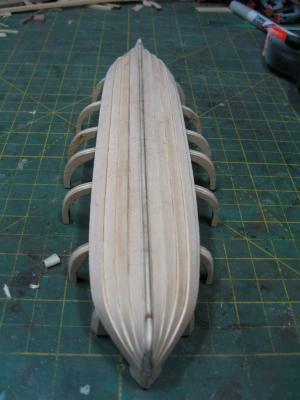
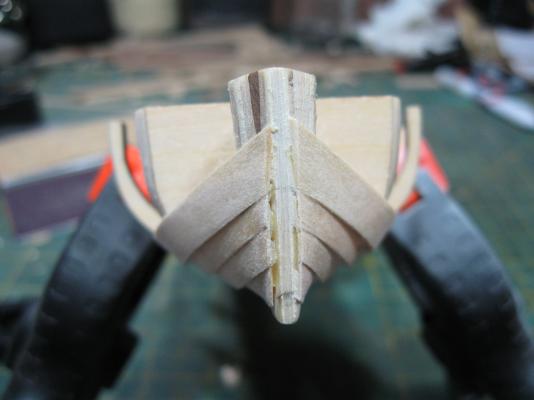
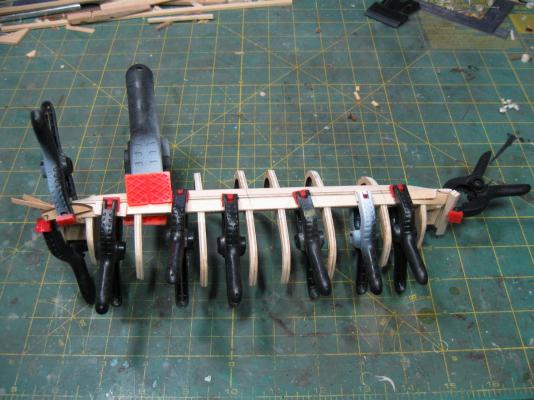
Howdy all. My modeling time is currently in short supply thanks to my three-month-old baby. Even though I don’t have the time, energy or concentration to really dig into a model I’ve still had the urge to work on something. ANYTHING. I had recently purchased a Serv-O-Matic from Syren and the cherry it’s made of was so beautiful I decided to make it my project. I don’t think I need to do a review of the project as I see so many of them in use on various build logs, but I’ll just say to anyone debating about getting one – Get it! The quality is terrific, and Chuck’s service can’t be beat. Mine had a very minor issue when I received it and Chuck had it corrected wicked quick. I followed Chuck’s instructions and spent a goodly amount of time removing all the char from the pieces. Time consuming but worth it. I used a true sander as much as possible to avoid rounding the edges too badly. After sanding to 220 grit I assembled everything but did not affix the gears or end pieces. Then I rubbed in by hand a coat of 100% pure Tung oil, wiped off the excess after an hour or so and then repeated the oil coat the next day. After that I allowed the unit and all the pieces to sit in the brightest window of the house for about a week turning the pieces each day to make sure they got even coverage. As most of you probably know Cherry darkens and reddens naturally and that process can be sped up by exposing it to bright natural light. Once I figured the Tung oil was as cured as it was going to get (not really at all but it’ll at least stop seeping) I applied two coats of semi-gloss water based polyurethane with a careful sanding between coats. Lastly, after allowing the poly a week or so to cure I applied a coat of past wax to get that soft burnished look. So below you see the result of me turning what most people would do in a few hours into a two or three week project. In one of the pictures you can see an untreated piece of cherry which gives you an idea of just how much a little work will bring out the color and character of the wood.


- 5 replies
-
- 17
-
-
- syren ship model
- serving machine
- (and 1 more)
-
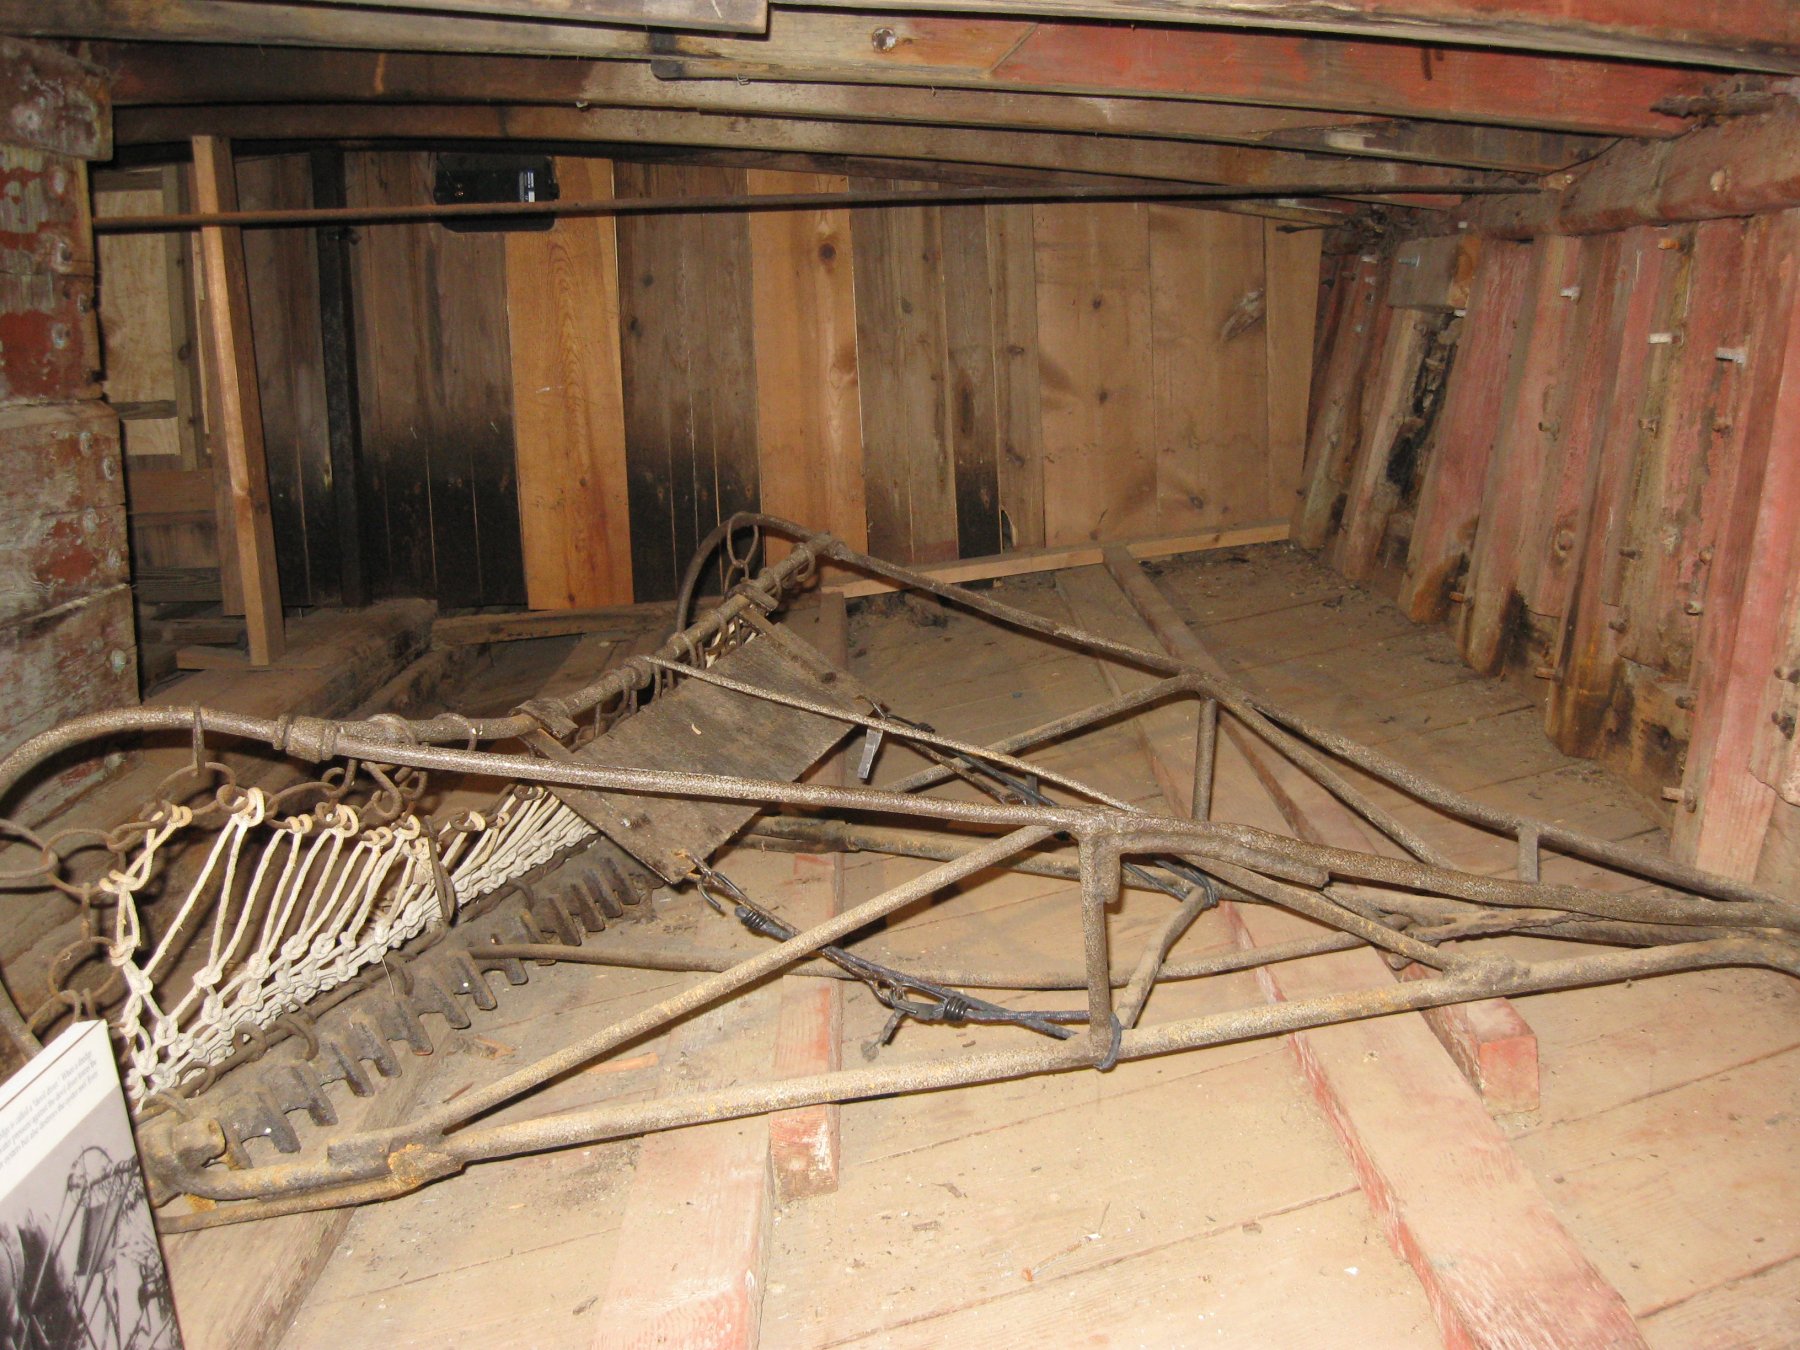
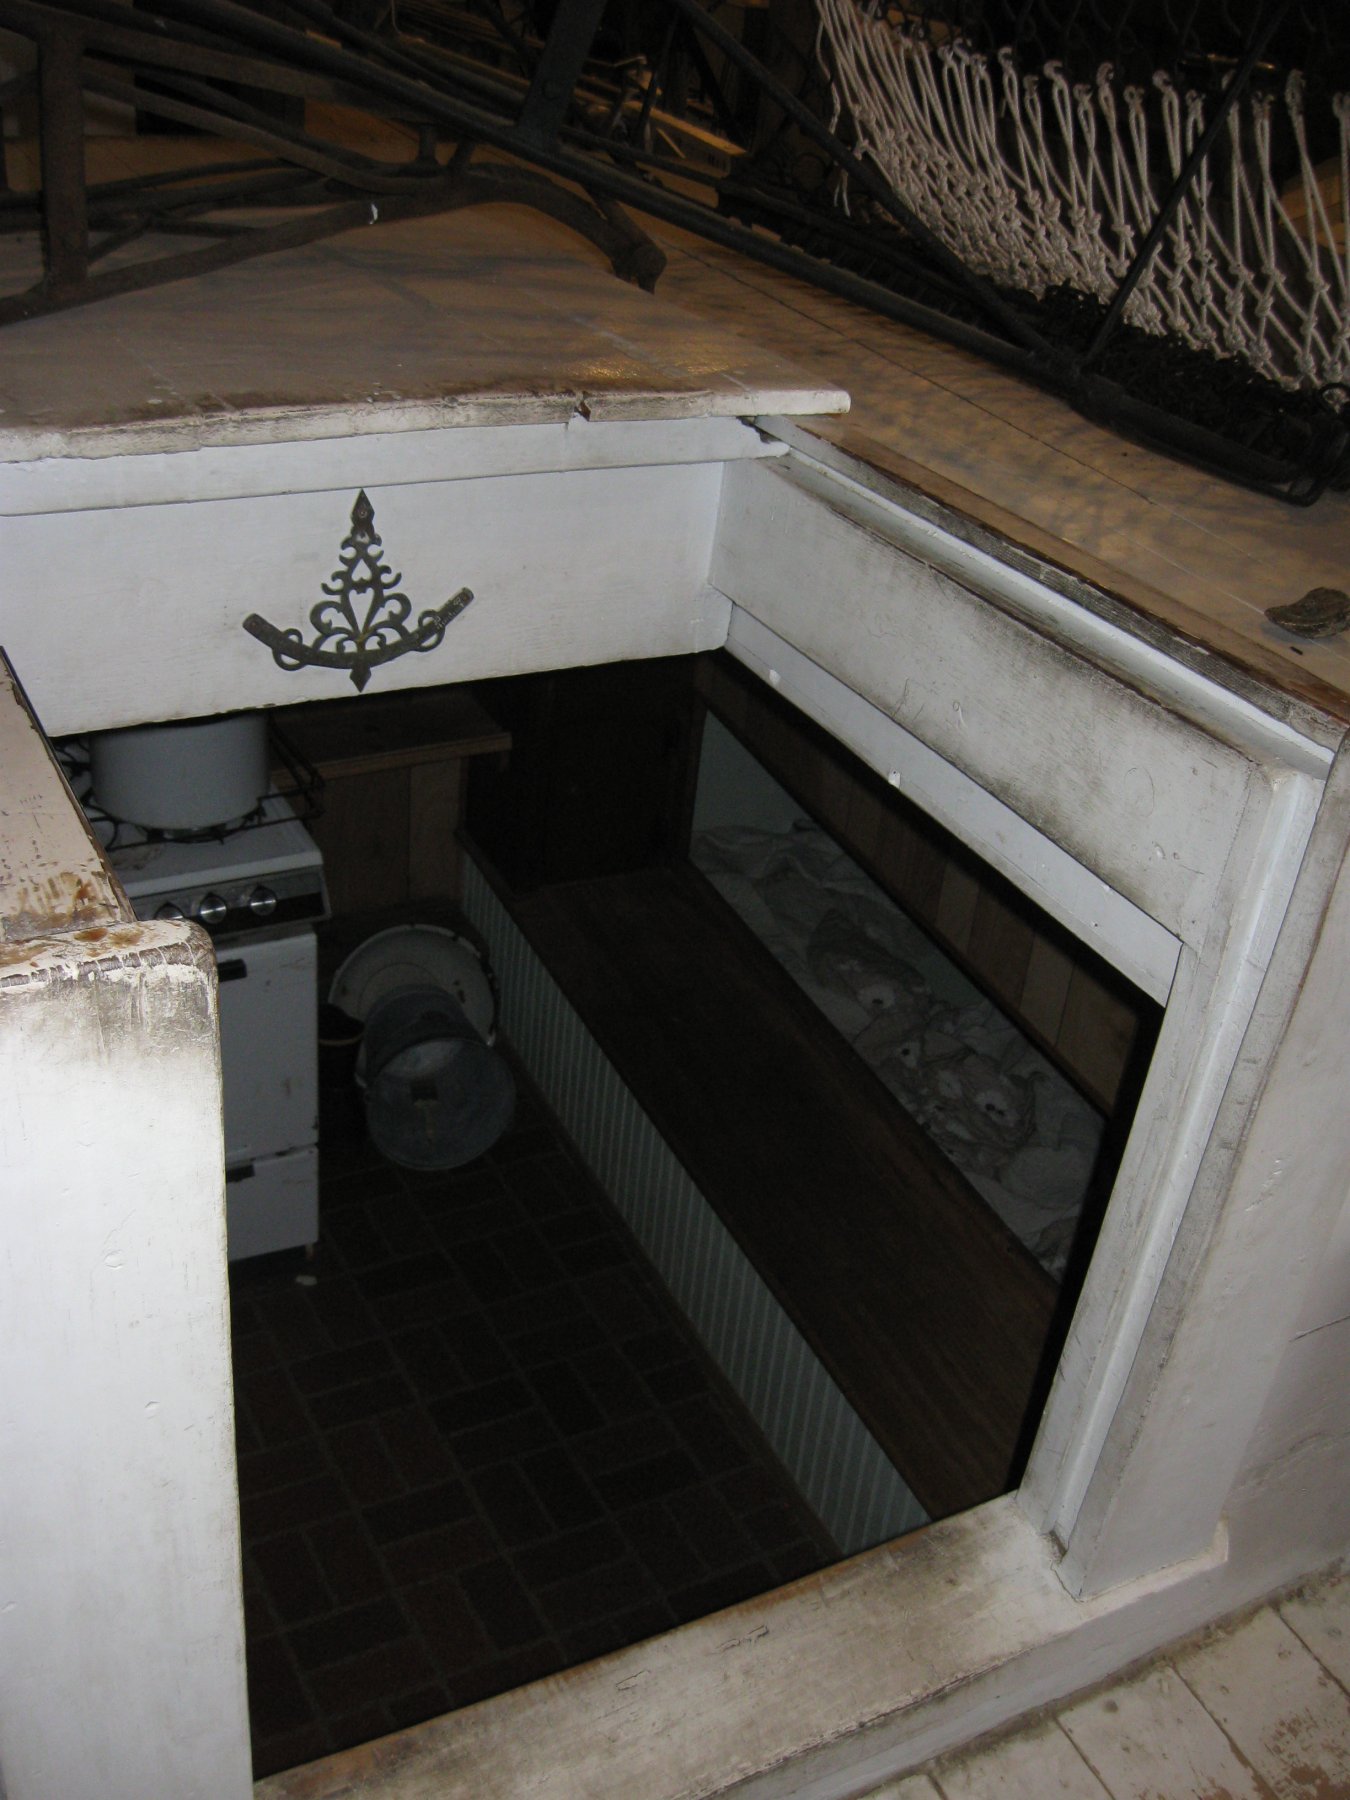
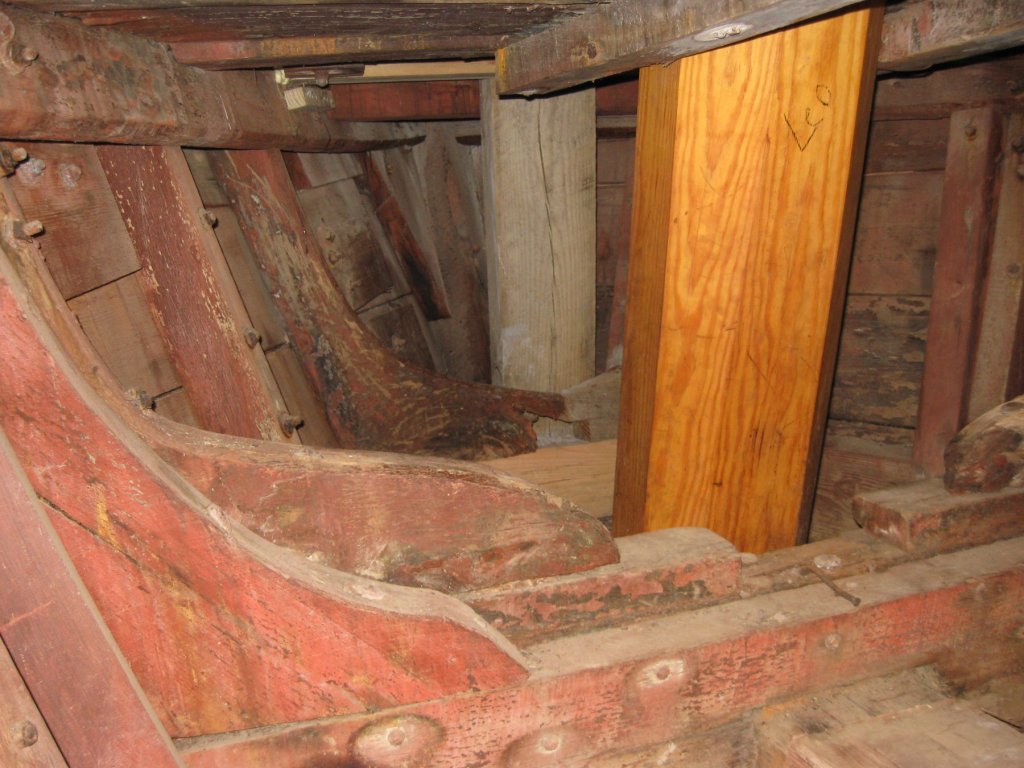
A little late to the discussion but here are some photos of the E.C. Collier's hold. She's on display out of the water at the Chesapeake Maritime Museum. And she's what I'm planning my next build to be. Unfortunately the last time I was there I didn't have any plans on building her so I didn't take that many photos of her. But you can see the hold used to be red similar to the hull color. The cabin could literally be any color you want just keep in mind these were working boats owned by guys who didn't have a whole lot of extra money. Probably the best way to determine a good interior color would be to go out to your garage, see what house paints you have left over from the last time you painted and use that. Ok, kidding but not by too much.


-
The new job has been keeping me busy but I've finally gotten some work done. Veeeerryyy slowing working the planking. It's my first ever clinker build so I'm not unhappy with it but I definitely see where I could have started it out better. Still, it's getting there.
-
I can't quite tell from the pictures but it looks like the tops of the bulwarks are going to need to be faired just like the exteriors do for planking. That's a really impressive upsweep on the deck. I'm looking forward to seeing your progress on this one.
-
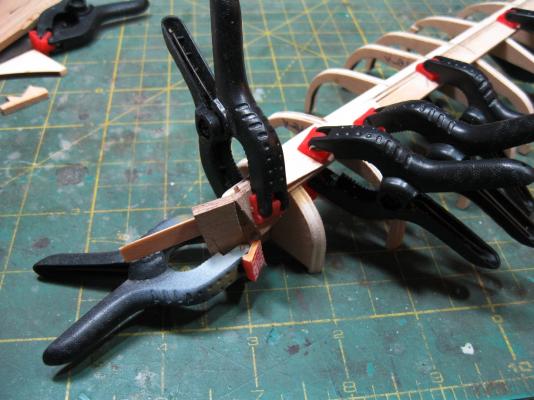
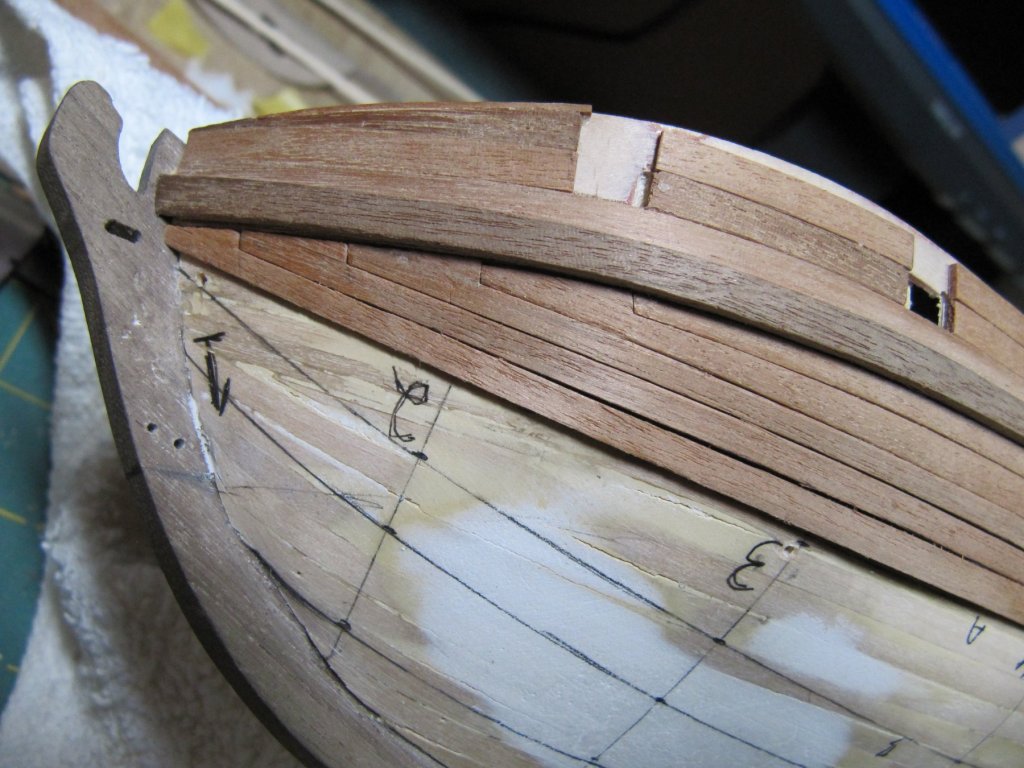
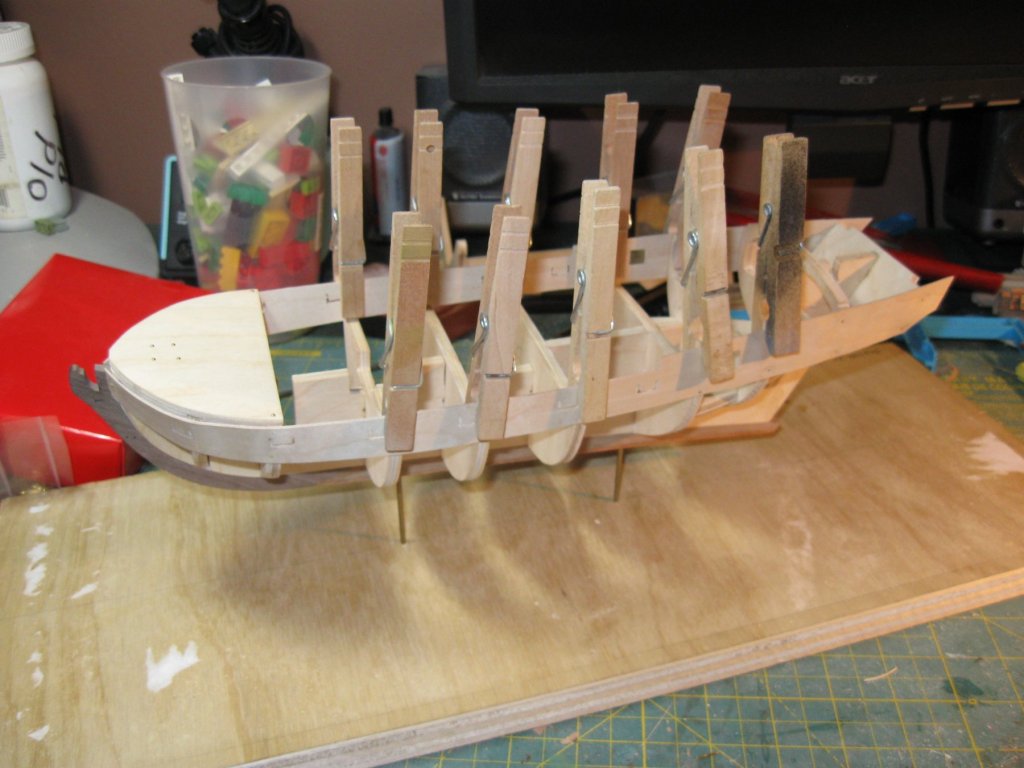
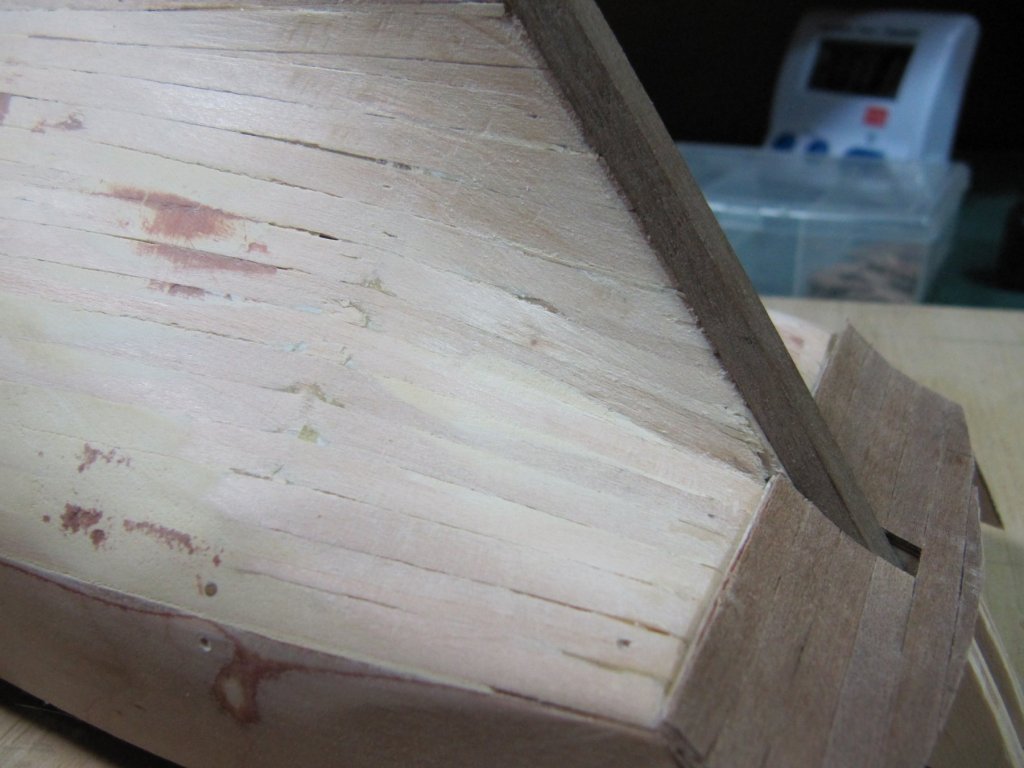
So after getting little or nothing done lately thanks to changing jobs I've finally made some progress. I finished and attached both garboard strakes. Once the glue set and I can remove the 753 clamps I can do the final smoothing on the planks. I am begining to think that I may regret decifding to use the kit planks though. They're really thick. I left the plank just slightly long so I can finish the edges all at once.

-
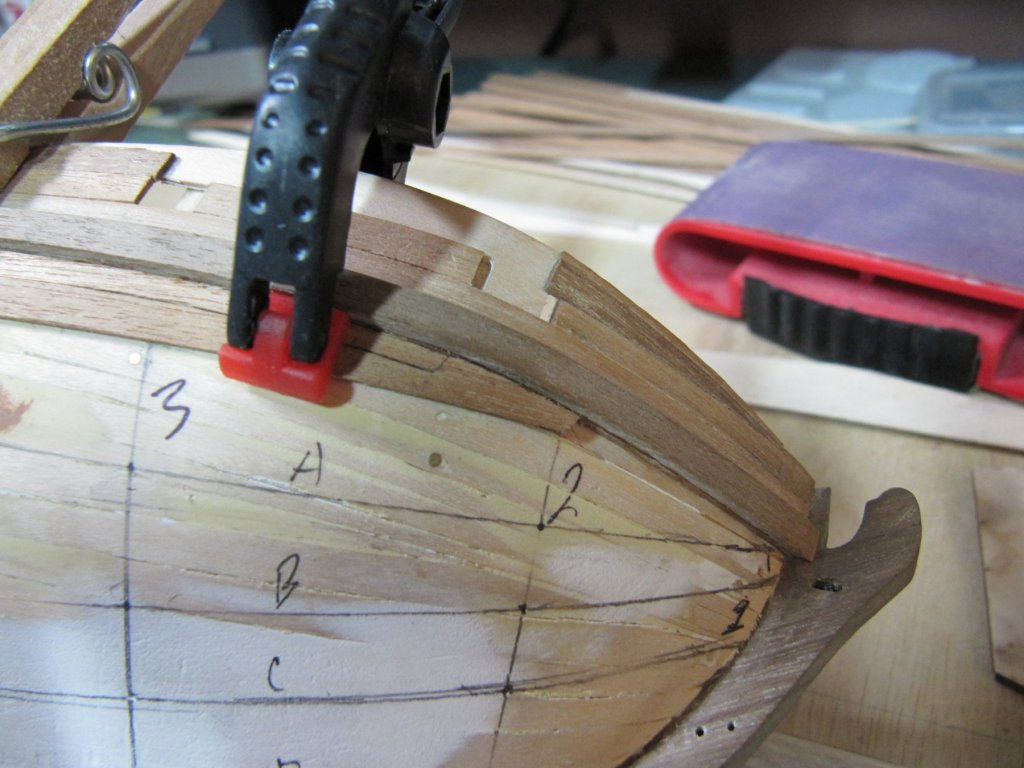
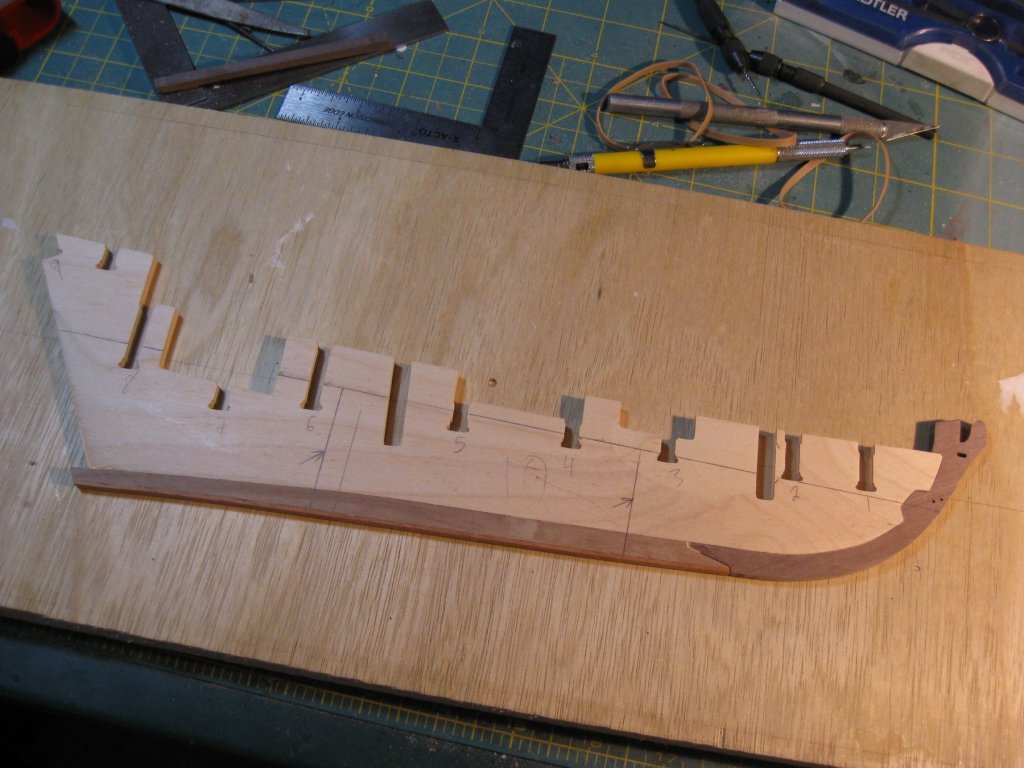
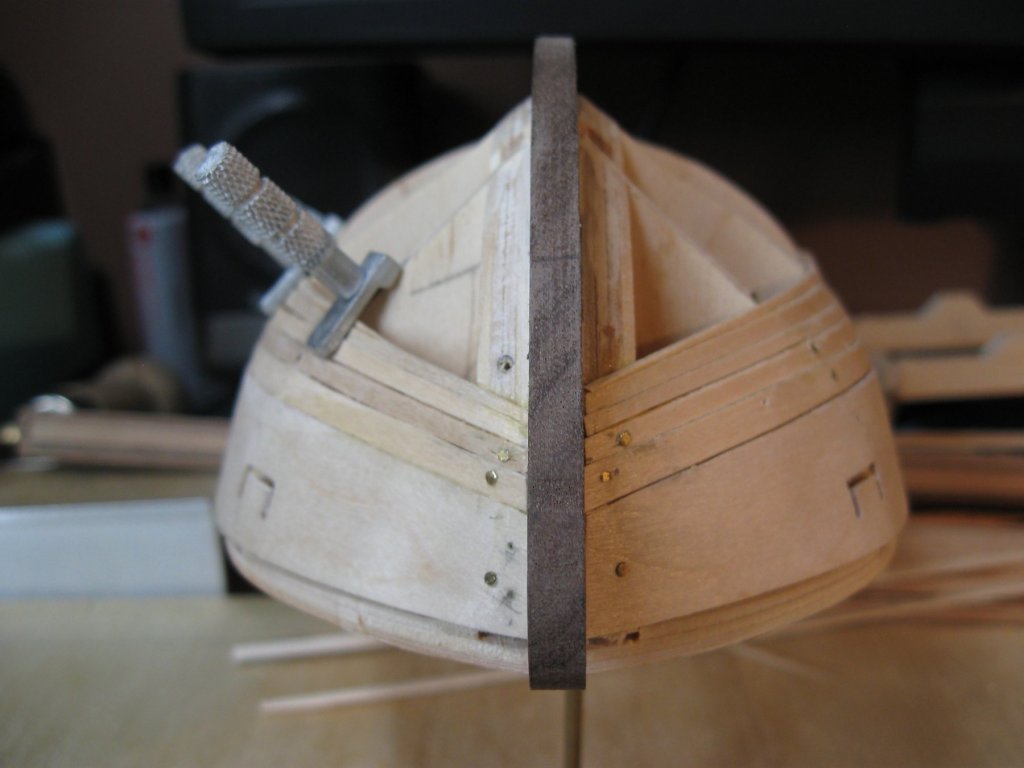
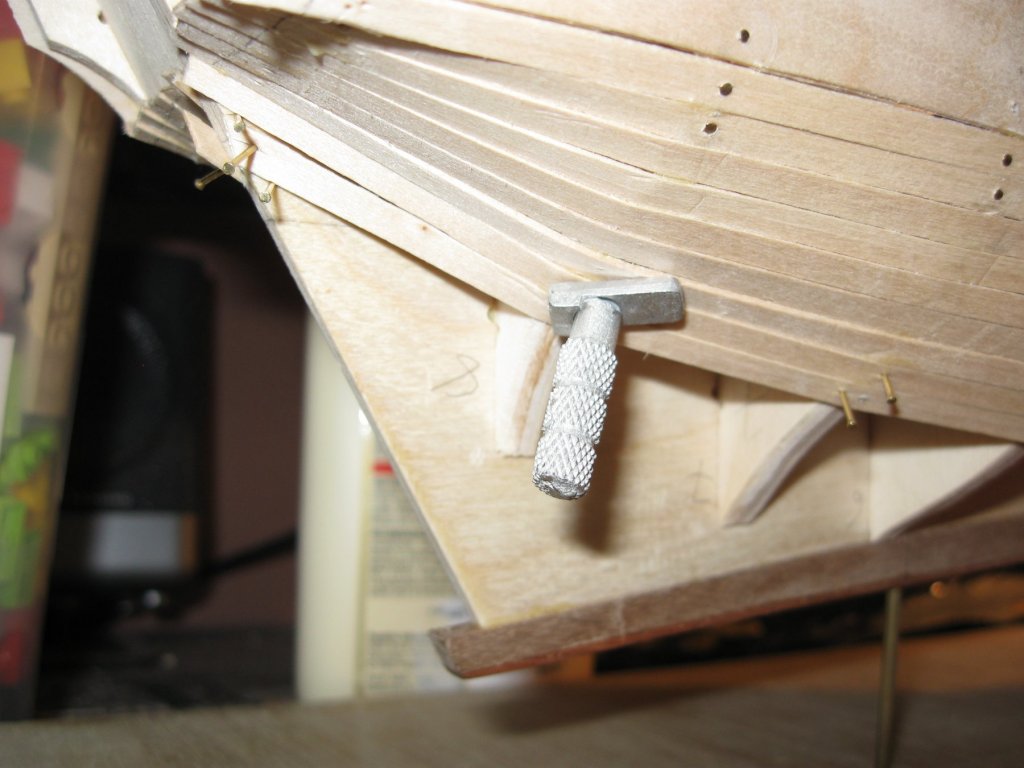
So after even more reshaping of the bow and stern the first plank has been soaked and clamped in place. It's funny how actually placing the and fitting the plank made the poor or wrongly faired areas so obvious and so much easier to correct. Since there's so much going on with the garboard strake I'm only fitting one end at a time. Tomorrow night I'll start fitting the other bow portion. I have a feeling that it's going to be a very slow planking process. At least I should have plenty of time to make the oars and figure how to improve those really awful life preservers.