


richardt
-
Posts
46 -
Joined
-
Last visited


-
 lb0190 reacted to a post in a topic:
Gluing Techniques and Associated Information
lb0190 reacted to a post in a topic:
Gluing Techniques and Associated Information
-
lb0190 reacted to a post in a topic:
Gluing Techniques and Associated Information
-
flying_dutchman2 reacted to a post in a topic:
Scroll Saw Blades
-
Jeronimo reacted to a post in a topic:
LE BONHOMME RICHARD by Jeronimo - Finished
-
Jeronimo reacted to a post in a topic:
LE BONHOMME RICHARD by Jeronimo - Finished
-
trippwj reacted to a post in a topic:
Nautical and Model Building Resources
-
dewalt57 reacted to a post in a topic:
Nautical and Model Building Resources
-
michael mott reacted to a post in a topic:
Nautical and Model Building Resources
-
justsayrow reacted to a post in a topic:
What is the best glue for cast metal parts?
-
Anja reacted to a post in a topic:
Nautical and Model Building Resources
-
What is the best glue for cast metal parts?
richardt replied to vas1949's topic in Metal Work, Soldering and Metal Fittings
A problem that often arises with cast metal adhesion is that the parts are coated with wax-like substances that are used as release agents from the mould. This presents problems with any adhesive. I suggest that the parts are soaked briefly in acetone and scrubbed lightly to remove these first and then allow them to dry before mounting. I prefer to use thickened CA over epoxy. Richard -
Hi Oli, You're looking good. All square and ship-shape. Richard
-
Hi Pete, As others advised, assemble the model first. I prefer to use 100% PureTung Oil and not stuff that has been adulterated or otherwise processed in any way. The key to getting a good finish is to use as little as possible spread as far as possible. Once you have coated the model, wipe off any excess and remove as much as possible. Use Q-Tips etc. to remove excess oil that accumulates in corners. Only then allow the model to stand for a couple of days to allow the oil to penetrate the wood. It should be looking quite good at this stage but i find an improvement in applying a second coat working exactly as before. Further coats do not seem to enhance the finish and are more likely to just thicken the coating. Always experiment first to satisfy yourself beforehand. Richard
-
ancre La Belle 1624 by cabrapente - FINISHED
richardt replied to cabrapente's topic in - Build logs for subjects built 1501 - 1750
Hi cabrapente, I think your troubles started when you glued your templates to the planks. If you rub your glue stick onto the paper template it can distort the template and any distortion will be transferred to the part when you cut it out. What I do is rub the glue stick on the plank and then carefully place the template onto the glue. Then put a piece of scrap paper over the template and then gently press it down. When it is properly in place, carefully remove the scrap paper and your template will be perfect. Instead of sticking the template on the wood, you are rather sticking the wood on the template. Before gluing the futtocks together, first compare everything against the plans and make sure that the butt ends are square and the parts follow the hull curve properly. I'm sure that you will still end up with a nice hull with careful sanding but it can be done without sweat and tears. Cheers, Richard -
richardt reacted to a post in a topic:
Scroll Saw Blades
-
Hi Helmsman, You gave good advice. The Sawbird blades are made in Germany rather than the junk that comes from Inner Mongolia or other places in the East. Richard
-
richardt reacted to a post in a topic:
La Belle 1624 by cabrapente - FINISHED
-
Hi Guys, As you well know, Larry and I are trying to develop some reference material on adhesives and you will be introduced to the result in due course. We will be calling on your knowledge and input in due course and I thank those who have already expressed some of their views in the meantime. However, I am concerned about the information requested pertaining to medical issues. We are not qualified to comment on this and it will not form a part of our research. However I can provide some background on what I know and accept to be truthful: The substance emanates from research into low m.w. esterification conducted by the Eastman Chemical Co. about 80 years ago. An accident with one of the intermediate products landed in the eyes of a lab technician whose eyes were immediately glued closed from, as it was later discovered, the presence of water that activates the adhesive properties and even the minimal pressure exerted by the closing eyelids that set up sufficient pressure to promote adhesion. The only action that could be taken was to open the eyes by surgery. This story was told to me a long while back by a senior staff member of Eastman and I had no reason to disbelieve him. Alarmed as Eastman may have been, they immediately saw the potential value of the substance and it was put on the market soon afterwards and was called Eastman 910. More recently it would appear that patents expired and there was a prolification of new producers with similar products. These are what we call CA (cyanoacrylate) adhesives. Slight modifications by the new manufacturers led to the production of products with varying degrees of viscosity. Selective additives also produced substances with gap filling properties and other desireable properties that make them attractive to hobbyists. The thin very mobile product was the first and the initial application was, ironically, medically related because it was used to seal wounds instead of using sutures in certain instances. I am not aware of any specific toxicology studies and other than a temporary reaction to contact with the skin, it does not seem to have any lasting negative effects. This is not the the case with inhalation of the fumes and I urge all to avoid this under all circumstances. There are many reports of allergies that should be brought to the attention of your doctor. I am also led to believe that fumes generated by burning CA are particularly dangerous. In this respect, many modellers make a small fork from grinding back the eye of a needle to produce two tines. This is useful to lift and transport a small droplet of the material. There is no harm in this but do not burn the excess off the needle and inhale the smoke. I urge you to use the substance in the smallest possible quantity of the material and never take the bottle to your model. Always use a suitable disposable surface from where you can lift the required quantiy. The fumes of the material are suffocating and reaction to the smallest trace in the atmosphere will alert you to its presence. Take due care. Richard
-
Hi again Oli, I forgot to stress that you must be very careful that you don't misalign the squareness of the fit when you do the sanding. When I look at the pic of the pile of bulkheads it would seem that the slots tend to open slightly at the mouth. This could have been caused when you tried the dry fit. It could also be a shadow or just my imagination but it may indicate the cause of the problem. Richard
-
Hi Oli, You don't want them so tight. Inspect the slots to see if they are correctly shaped and without projections that could be the problem. Otherwise you will have to sand them down a bit. They also must not be so loose as to wobble. You may find it easier to sand the keel below and the bulkheards above the slots on both sides rather than opening up the slots. It should end up with a nice comfortable sliding fit. Check the mast steps at the same time and make sure that they will accept the dowels nicely or adjust them accordingly. Cheers, Richard
-
Hi Larry, That sounds like great news and I think that the next step would be for you to contact, say Chuck, by pm and make your proposal and ask for board approval and support. We don't want to tramp on any toes right at the start. Cheers and Good Luck, Richard
-
Hi Mike, This link will open a page on scrapers. Once there, open the link Instr that will reveal care and sharpening info etc. http://www.leevalley.com/en/wood/Page.aspx?p=49548&cat=1,310,41069 Richard
-
Hi Larry, Adhesives form a vital role in almost every aspect of our hobby yet we have no tutorial or standing guide for our members to refer to. You are obviously very interested in this topic and I would suggest that you do some research aimed at covering all aspects involved with this objective and to compile a good review for our Senior Officers approval who, I am sure will support and assist you. I am prepared to help you draw up a skeleton of what I think can or should be included in the work but I'm afraid that I can not be deeply involved in the actual project other than to provide my own knowledge. Would you like to take this on? I am making this suggestion as a junior member of our Group and have no influence in any decision-making. Richard
-
Lanterns
richardt replied to figuerres's topic in Discussion for a Ship's Deck Furniture, Guns, boats and other Fittings
Hi again figuerres, Sounds like a plan and that is better than nothing at all. The reason that I suggested the original casting be a regular square block or cube is that much of the work will need to be made while the part is mounted in a vice or similar. Once the innards are in place the final shape will be very much easier to achieve by filing and polishing. I expect that the finished lantern surfaces port and starboard should be mirror images but it is most unlikely that the fore/aft surfaces are. You will need to establish this for your particular need but it is very doubtful that you will be able to clamp the final shape while you work on it. I have not looked at Tom's link and there may be good ideas there. Richard -
richardt reacted to a post in a topic:
CHALOUPE ARMÉE EN GUERRE 1834 by Jeronimo - FINISHED
-
Lanterns
richardt replied to figuerres's topic in Discussion for a Ship's Deck Furniture, Guns, boats and other Fittings
Hi figuerres, I doubt that you will find anything available "off-the-shelf" that you could use and suggest that you try to scratch build your own. I have seen several examples of beautiful work so the idea is not inconceiveable. However, I have not seen a lantern with a led installed and this will be an added problem but I have no doubt that modellers have overcome this. Basically what I have seen is a solid cast block of polyester resin (the stuff that comes in liquid form and cosists of two parts that are mixed for encapsulation work) shaped according to the size and shape of the lantern. A suitable framework is then made to surround the shaped block according to the plan and support. The key would be to first cast a suitable size rectangular block and drill a hole through it to accomodate the led (with the wiring attached). The wire should then be drawn through a length of brass tubing bent according to the plan and the hole can then be plugged with a small quantity of resin that will support both the led and brass tube with wiring exposed at the end. Do not close the upper part of the hole that should remain open. The led does not create a great deal of heat but I don't know what will happen if it is entirely enclosed. Once this has been done, the block of resin can then be shaped according to your requirements and the framework assembled from wire or brass strips. An upper cap will be needed as part of the framework and this should have a small vent above the top of the led. I do believe that the work will be a challenge and I wish you success. Richard -
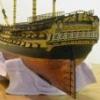
Hi Guys, I agree with Andy's sentiments. I used Zap-a-Gap to anchor my plates on my Aggy (see Avatar). What helped me greatly was that I noticed that if the bottle was lying on it's side, a small bead of glue would form at the tip of the nozzle. The development of this bead coincided very nicely with the rate that I could lift the plate in my tweezers, touch the reverse side of the plate on the nozzle and transfer it to the hull and press to secure. Once this operation was completed, sufficient adhesive had collected for immediate repetition of the cycle. Of course my system was slowed when I reached the gore lines and the boot topping and the plates needed to be "spiled" but the tedious work had been avoided. My kit came with 3000 plates and I had a reasonable number left over (perhaps some 200). Not a single plate came detached, then or since. Richard
-
Hi Mike, Good to see that you weathered the crash OK. Good to see you back and good to see your Aggy again. She looks great. Richard