
boris279
-
Posts
168 -
Joined
-
Last visited
Content Type
Profiles
Forums
Gallery
Events
Everything posted by boris279
-
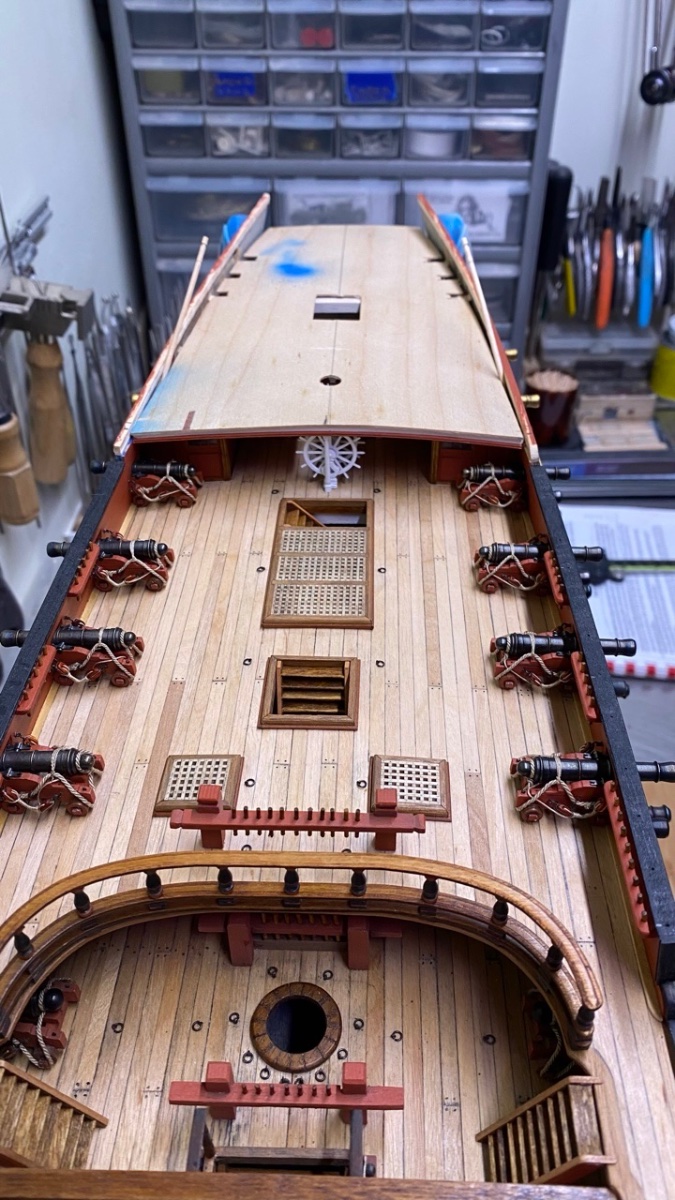
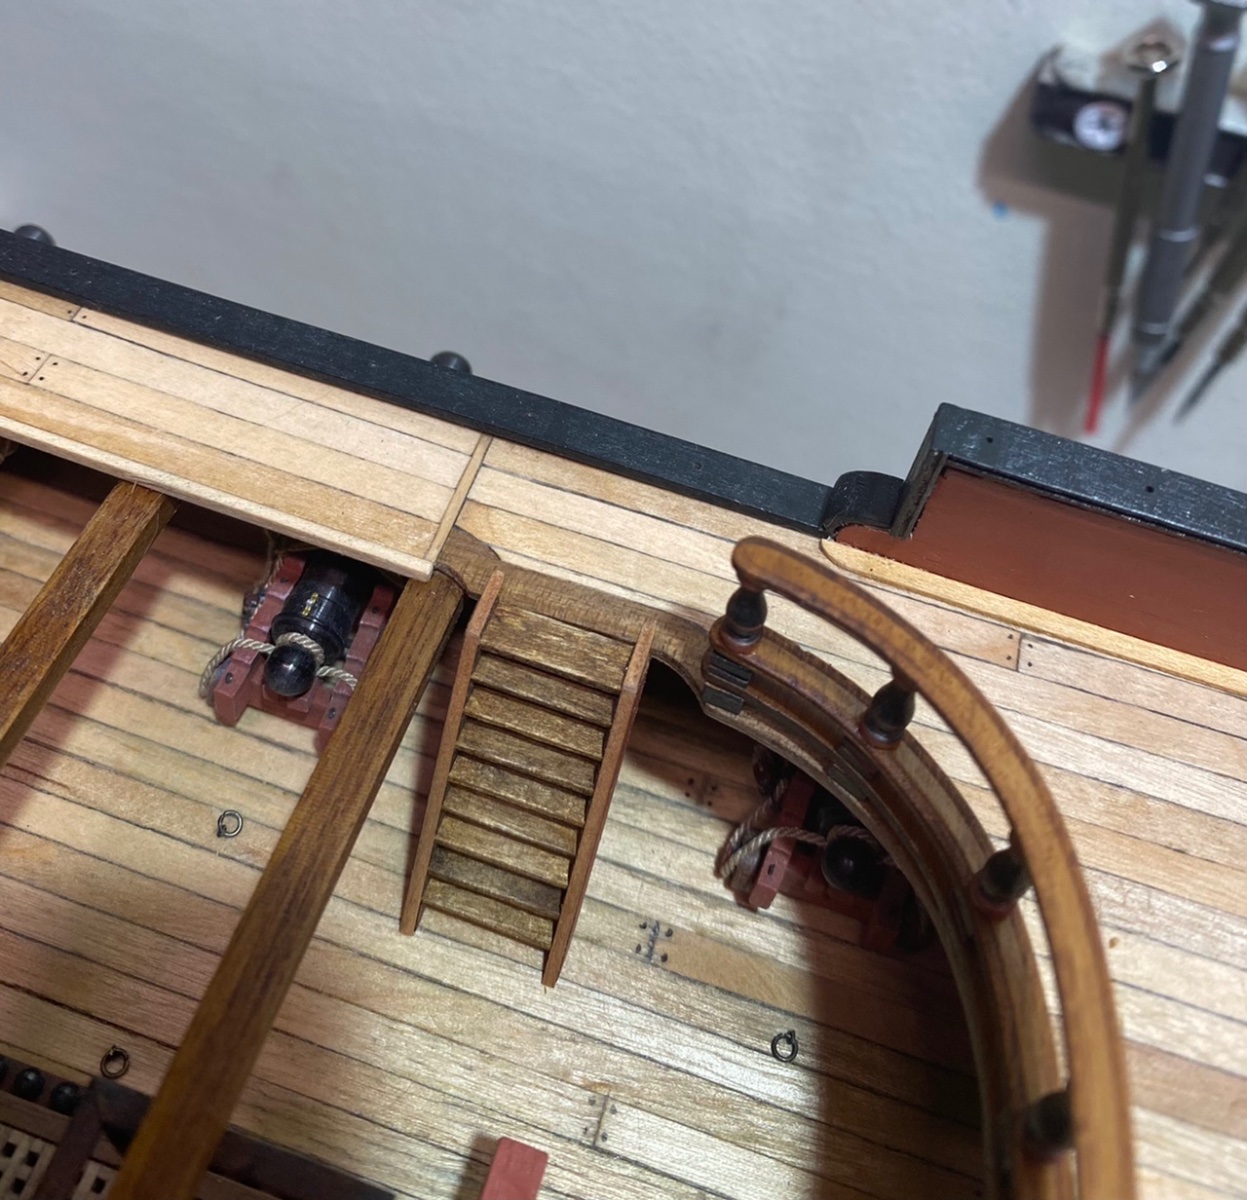
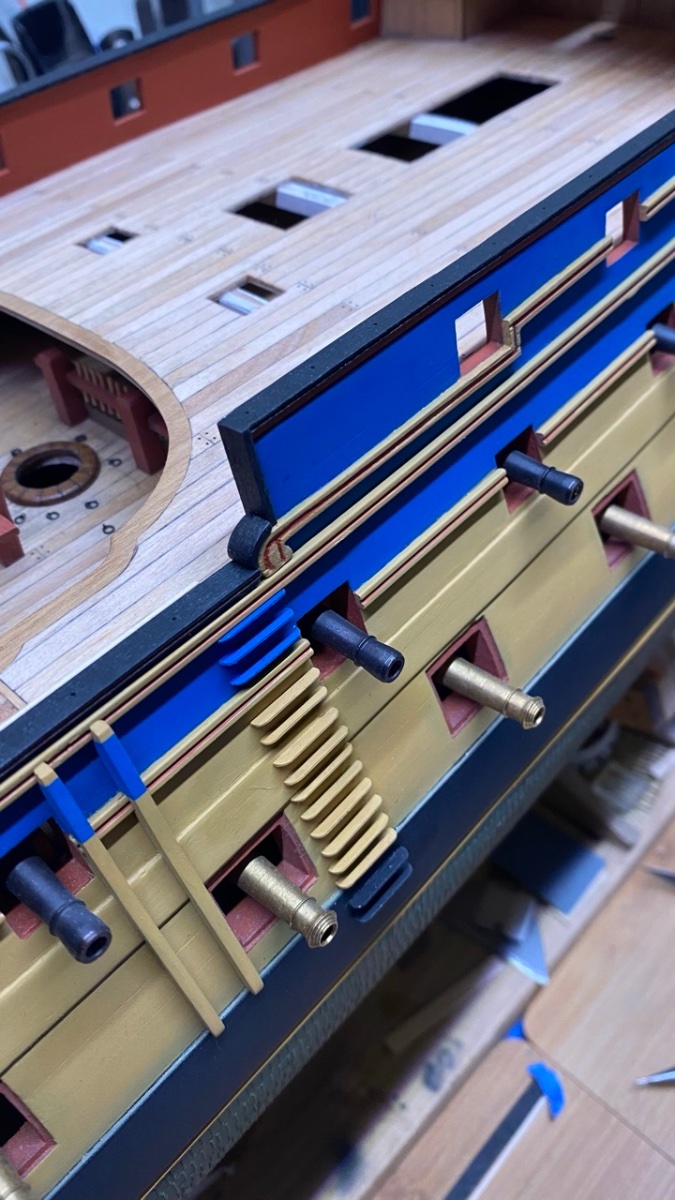
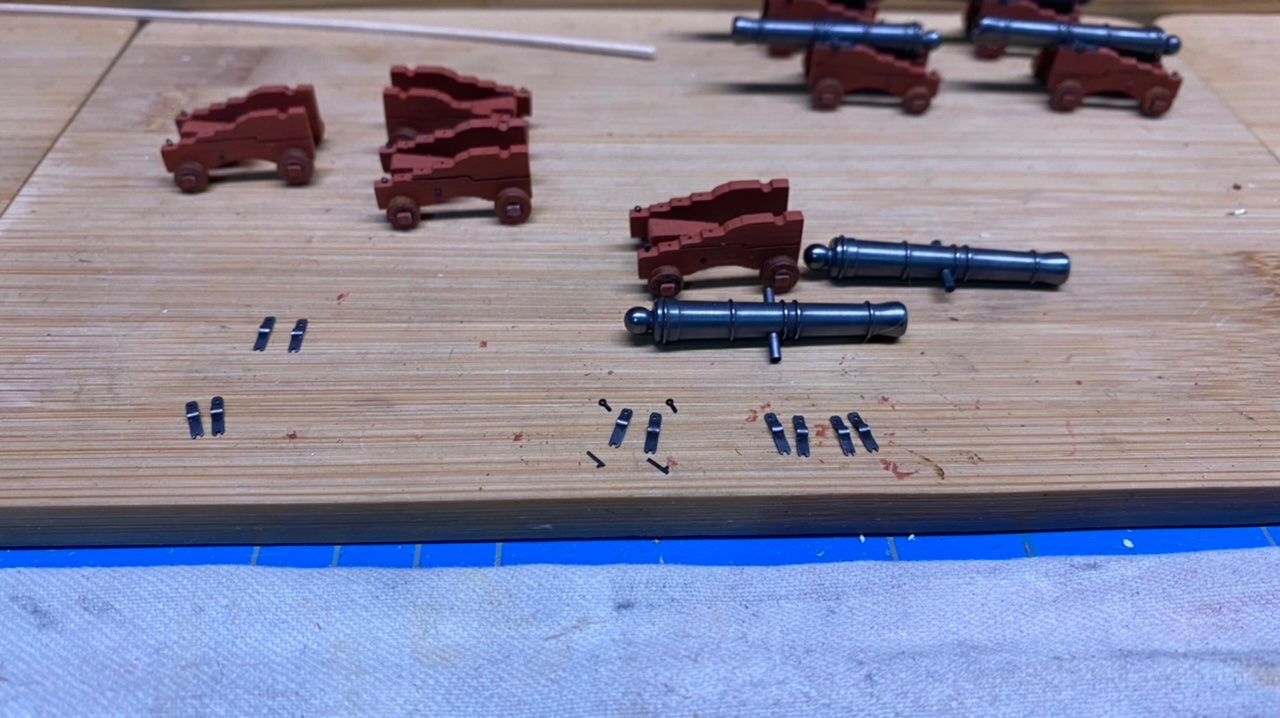
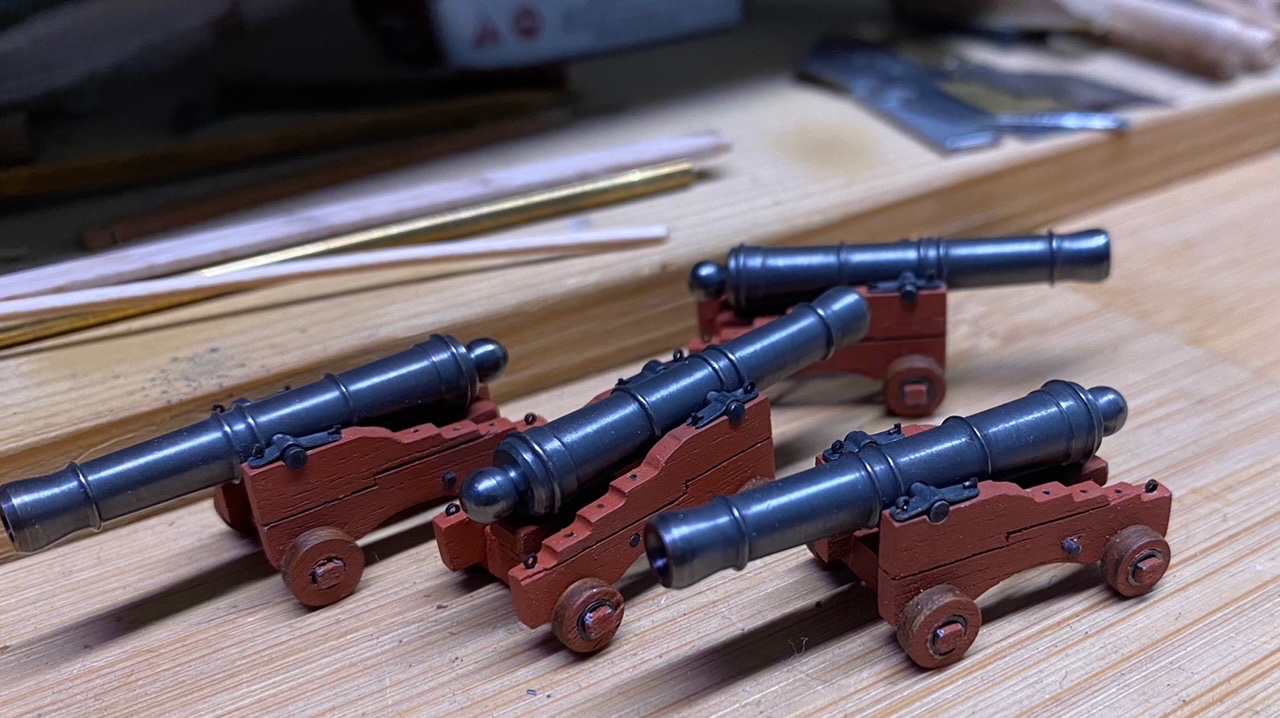
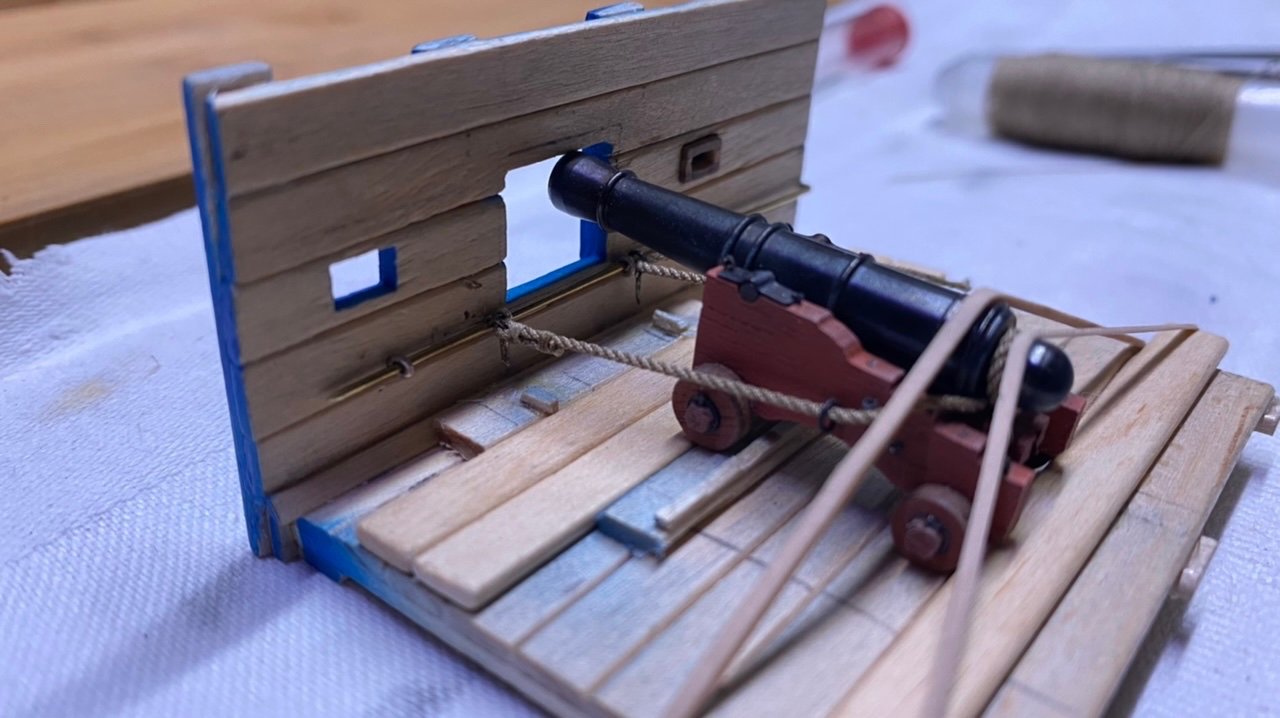
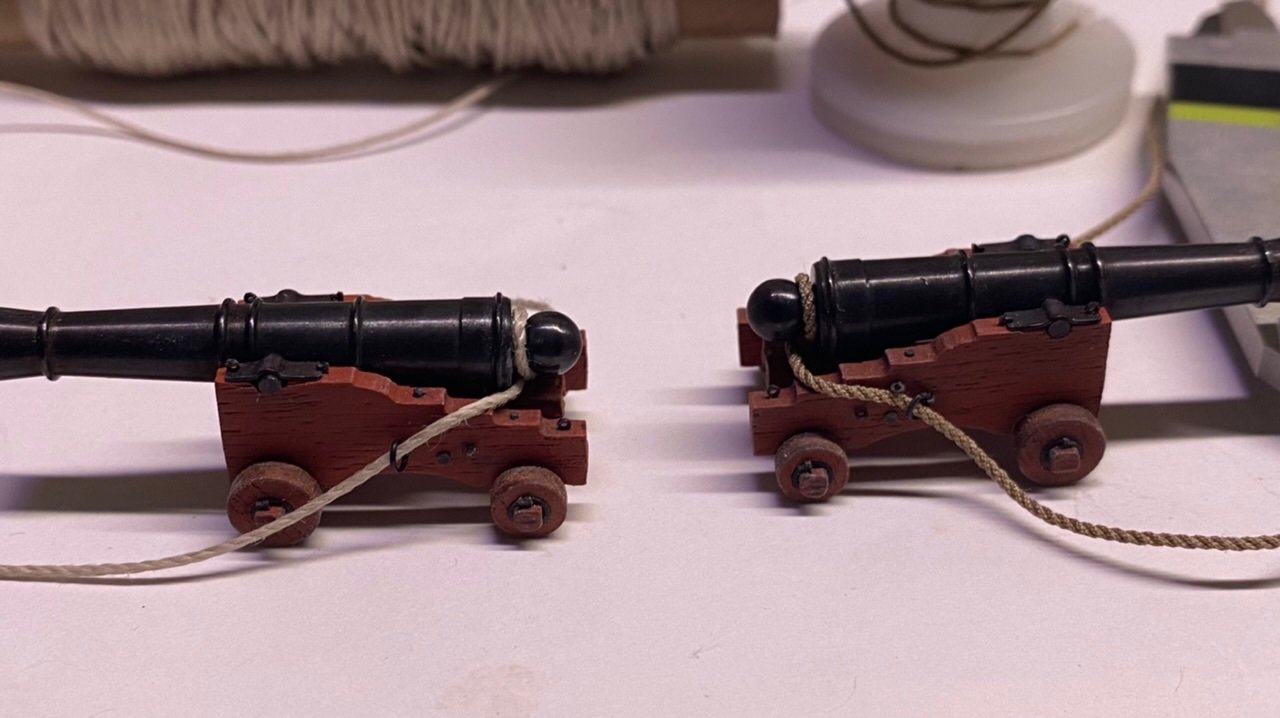
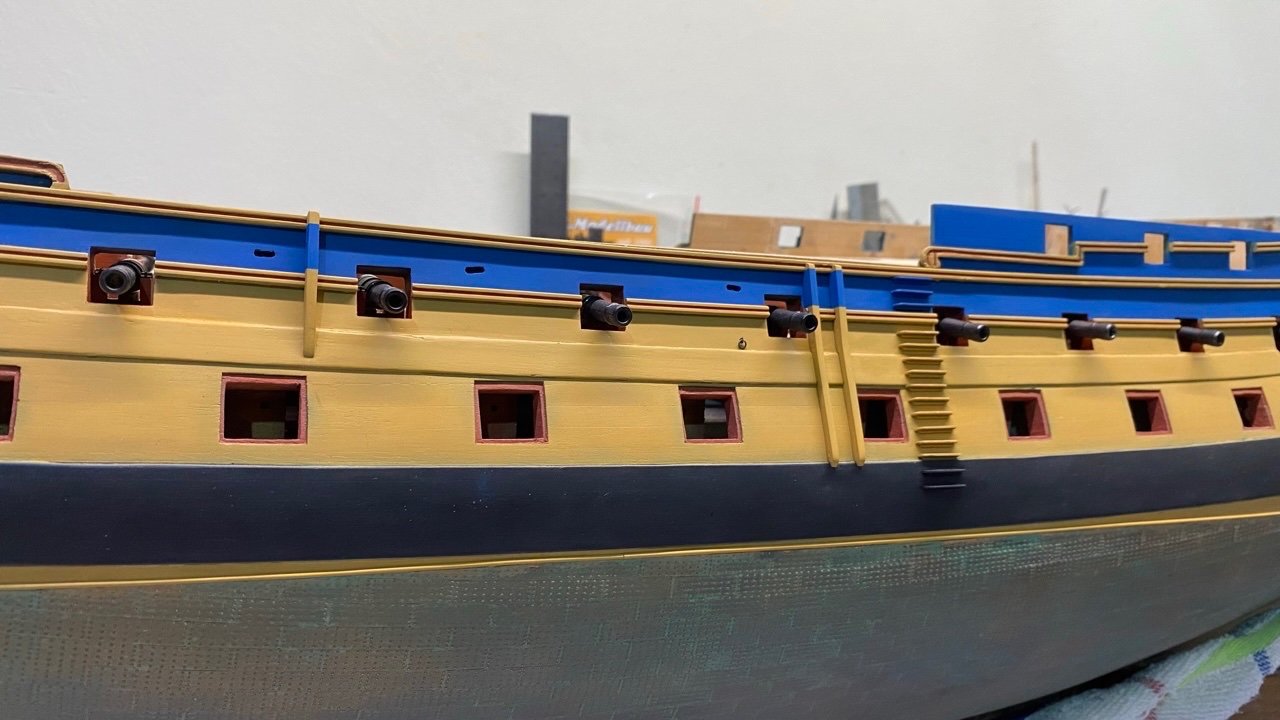
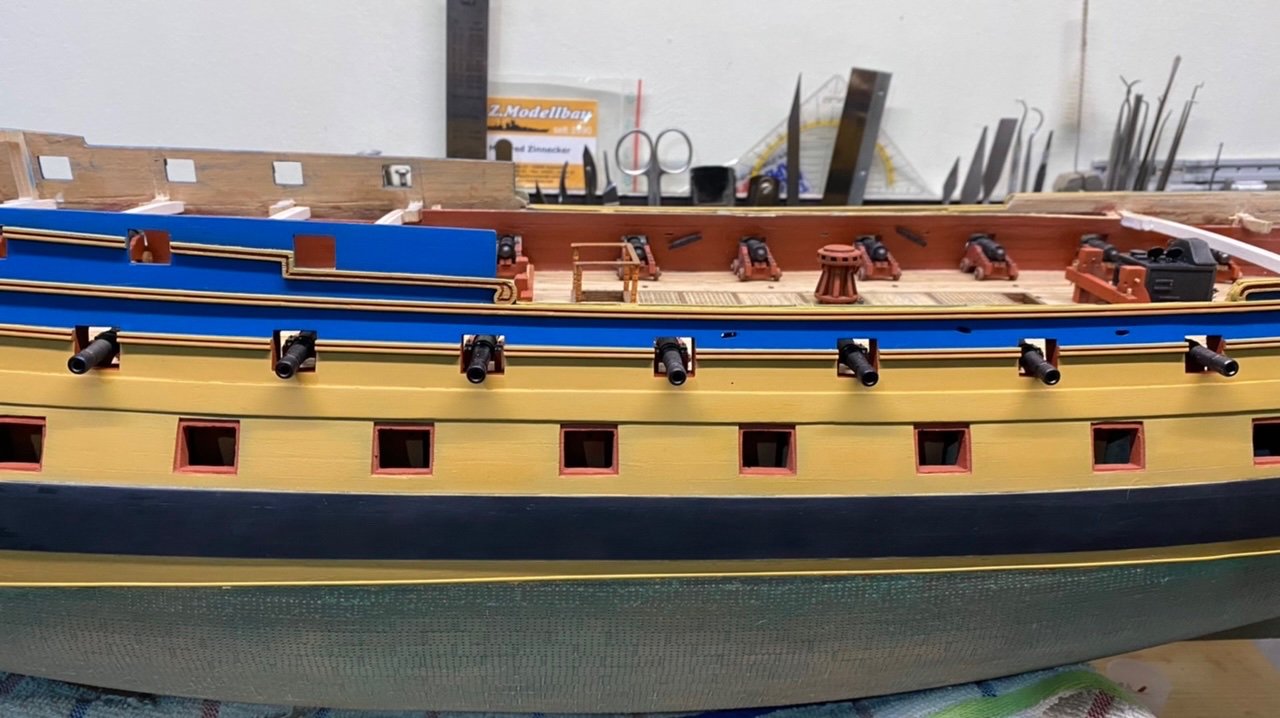
 Thanks everyone for the responses and watching in answer to your question: I first blacken the barrels with a brunning liquid. And then I dip them for a moment in a so-called gunblue liquid, which gives them a specific colour, then very briefly lightly polish and done. So we are moving on a bit, have started rigging the 9 pounders, below a few pictures
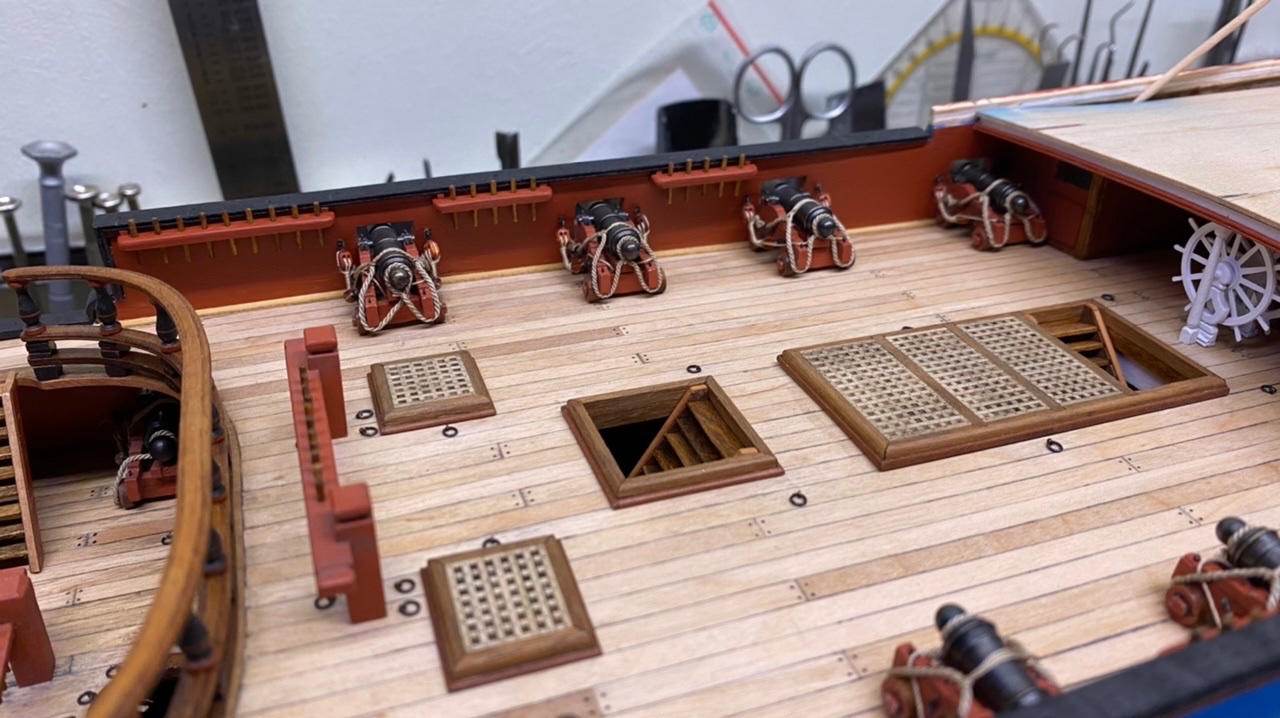
-
Working on the 9 pounders
-
Today no words, just some pictures


-
Everyone thanks for the thumbs up and looking. today not much words, as said before, pictures explain more than words.

-
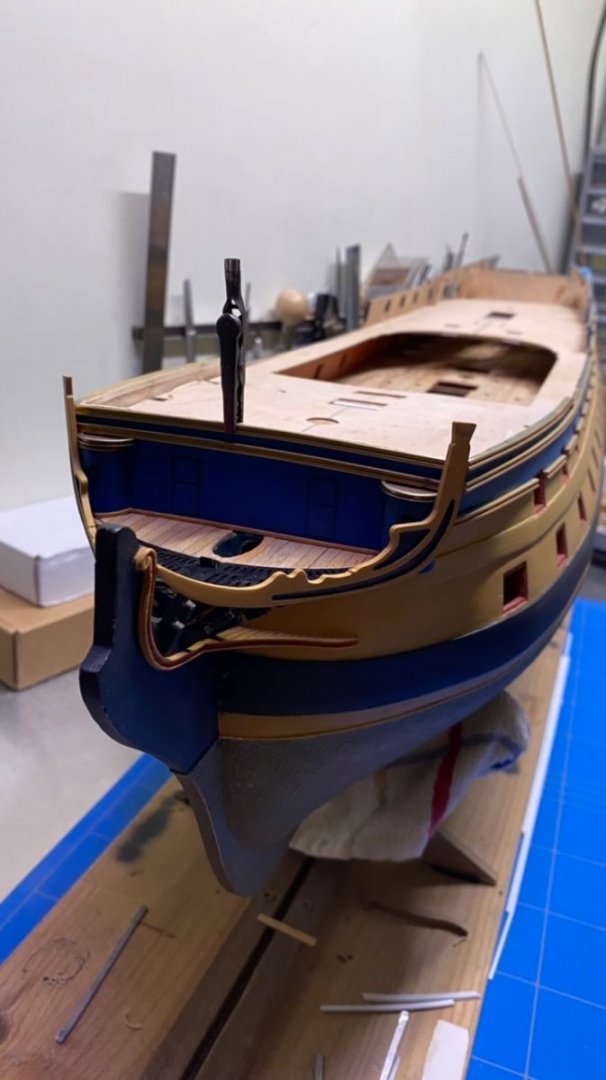
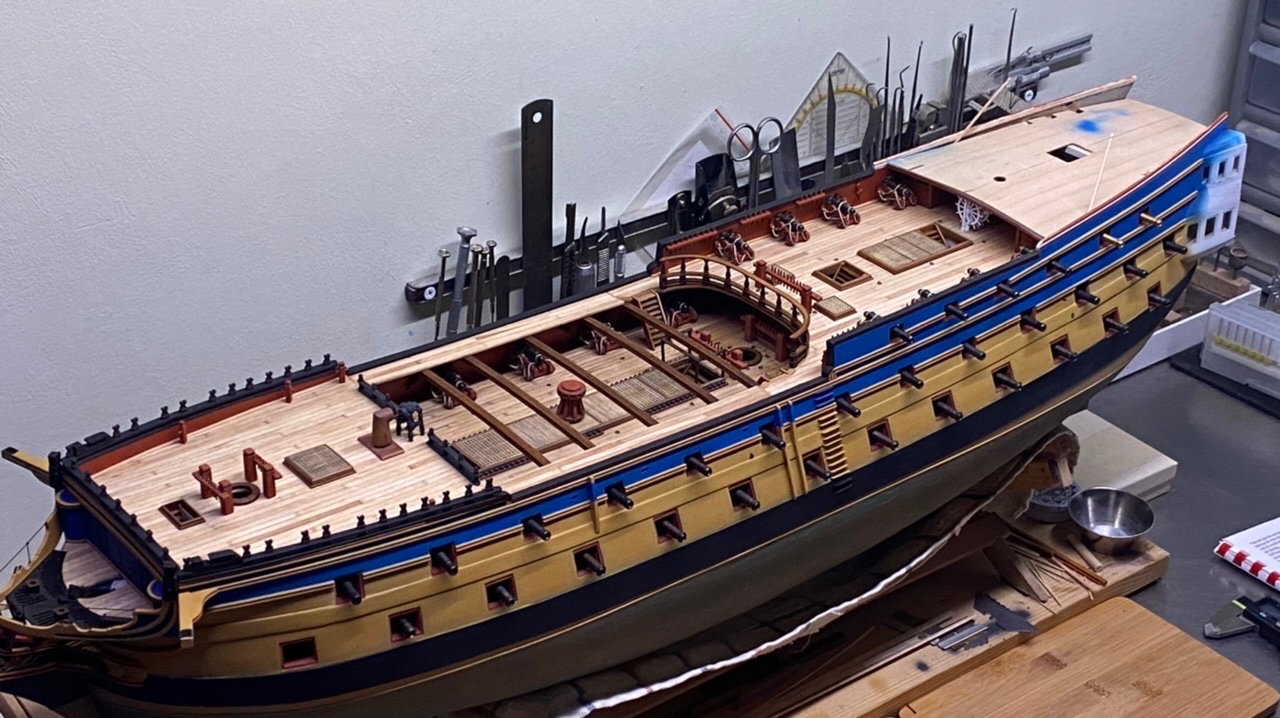
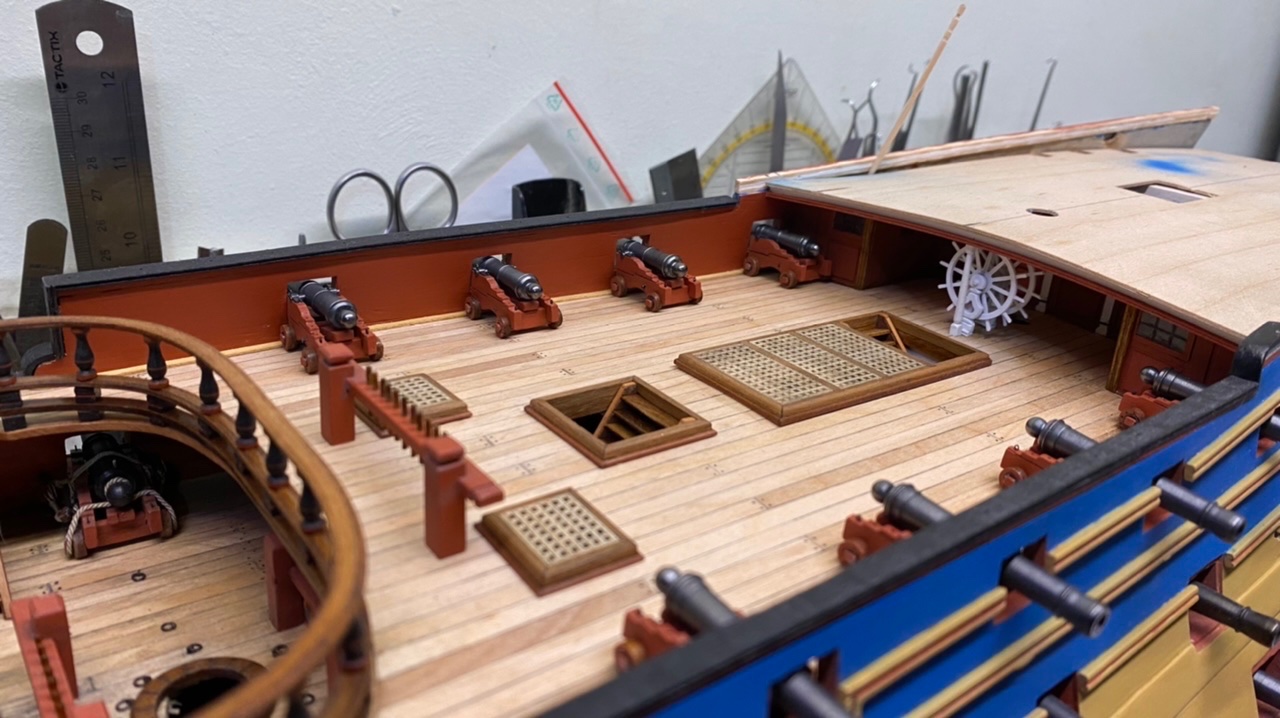
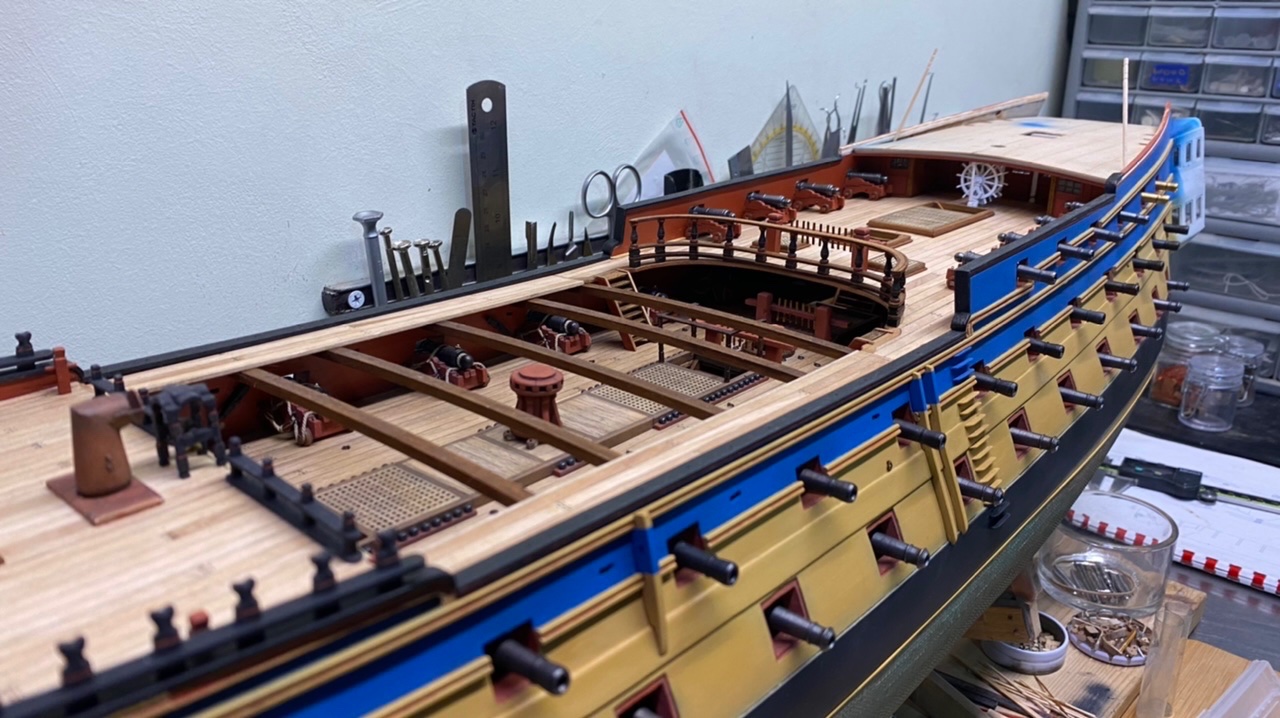
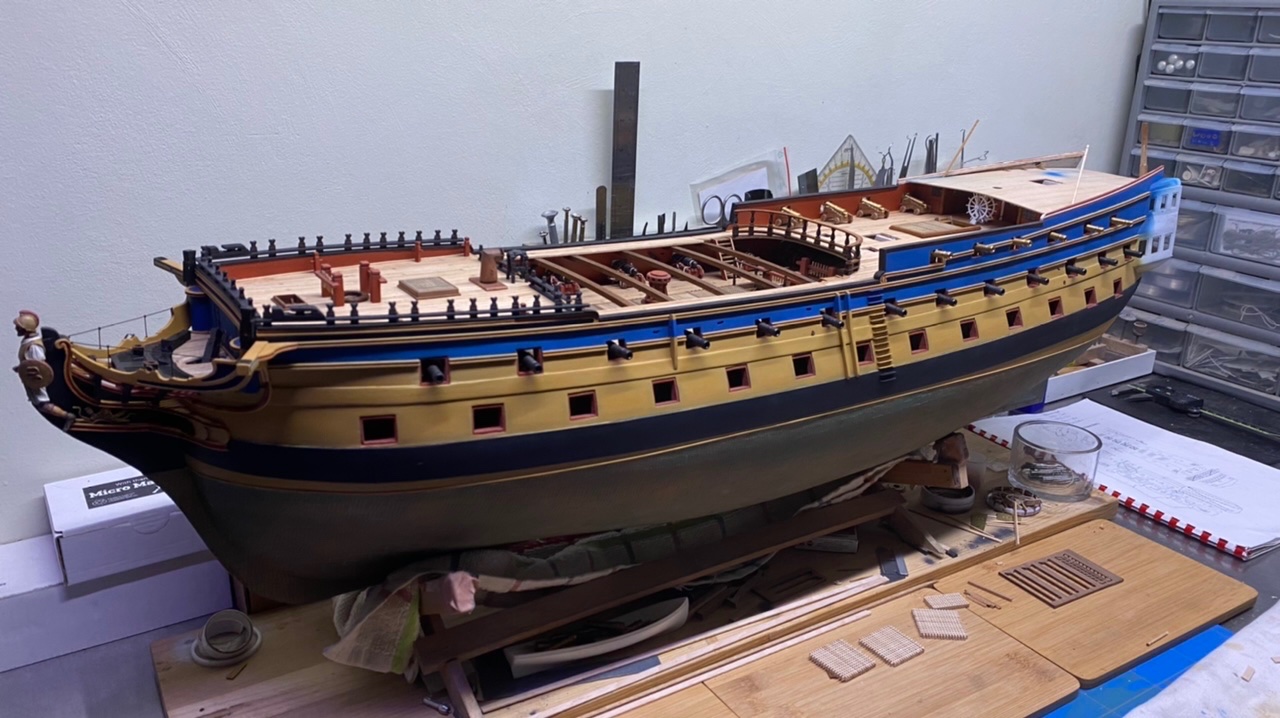
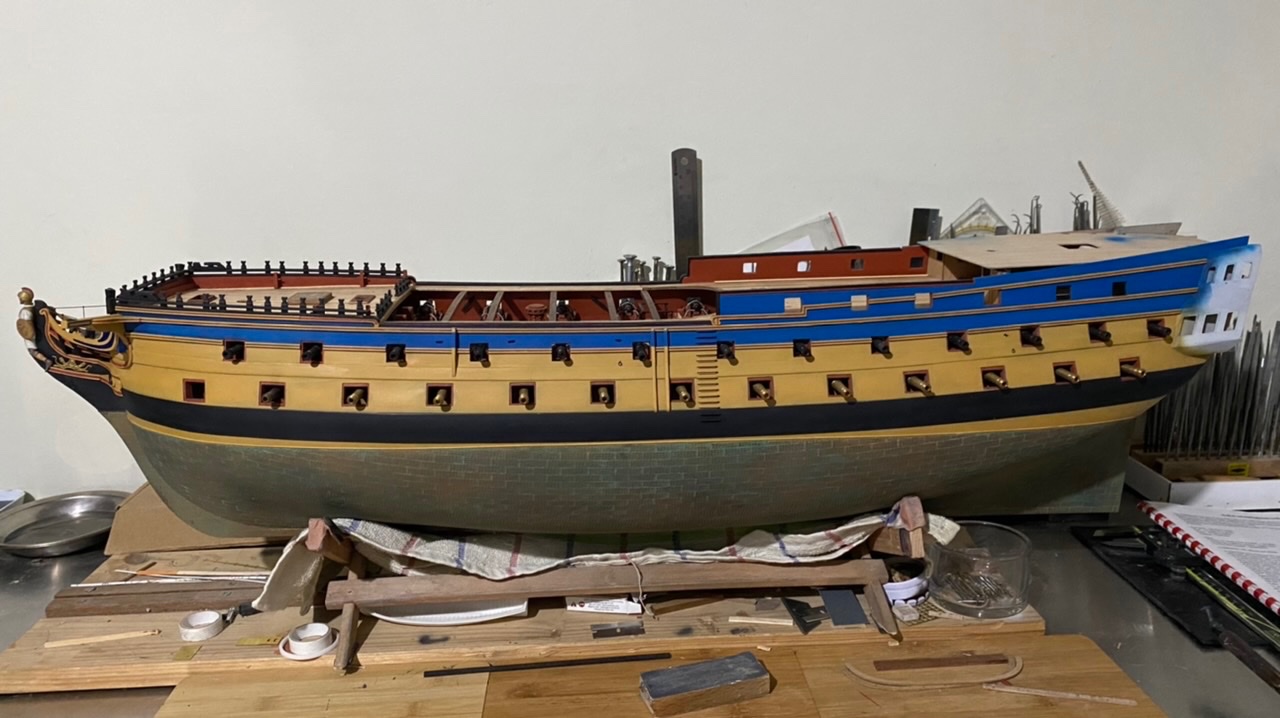
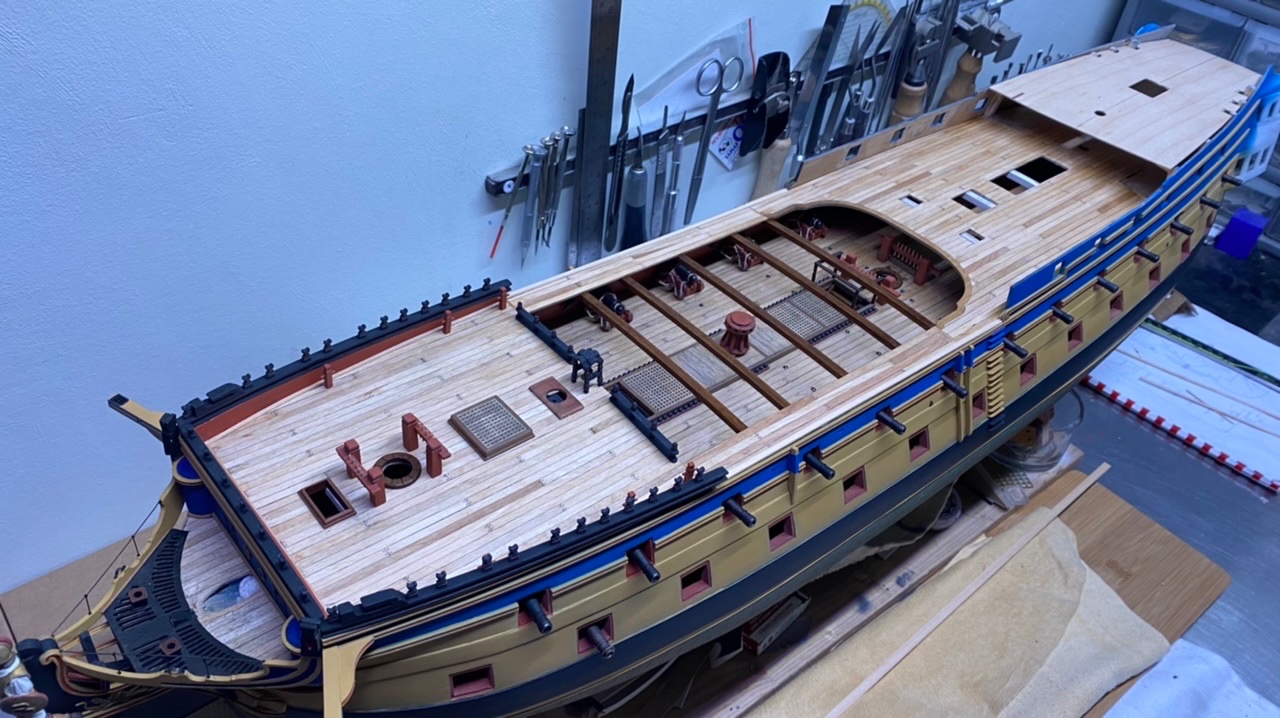
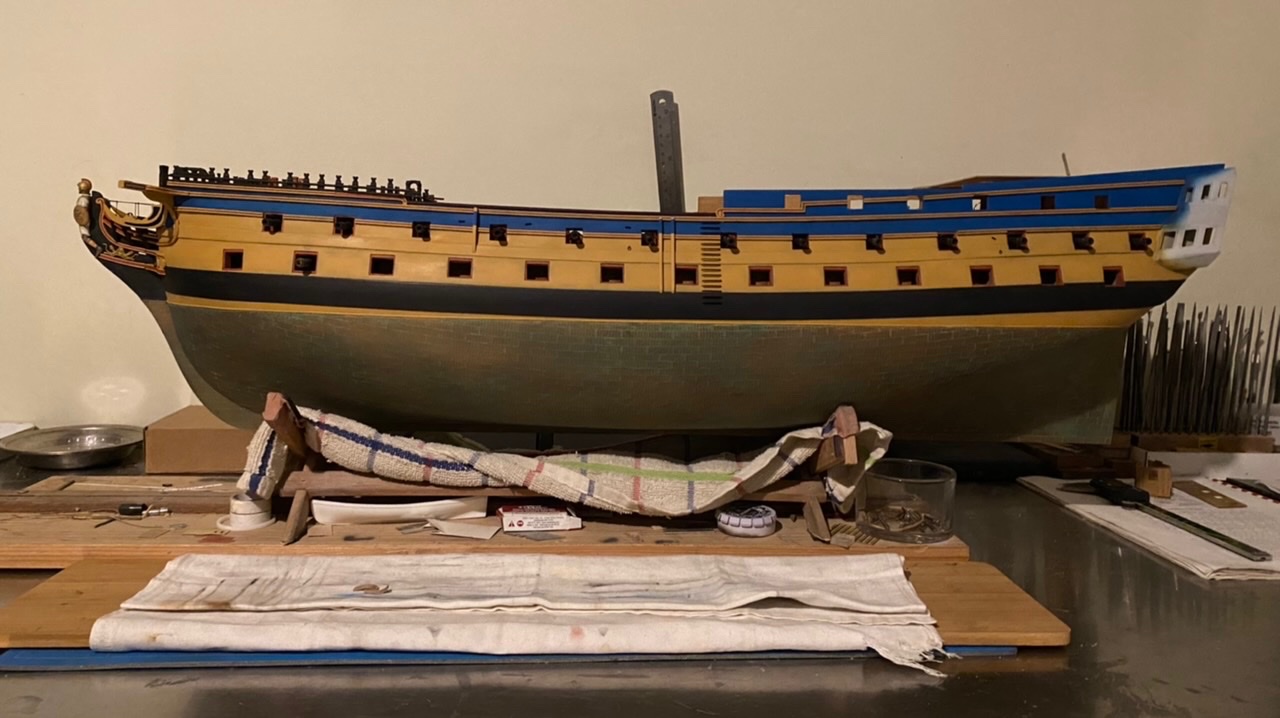
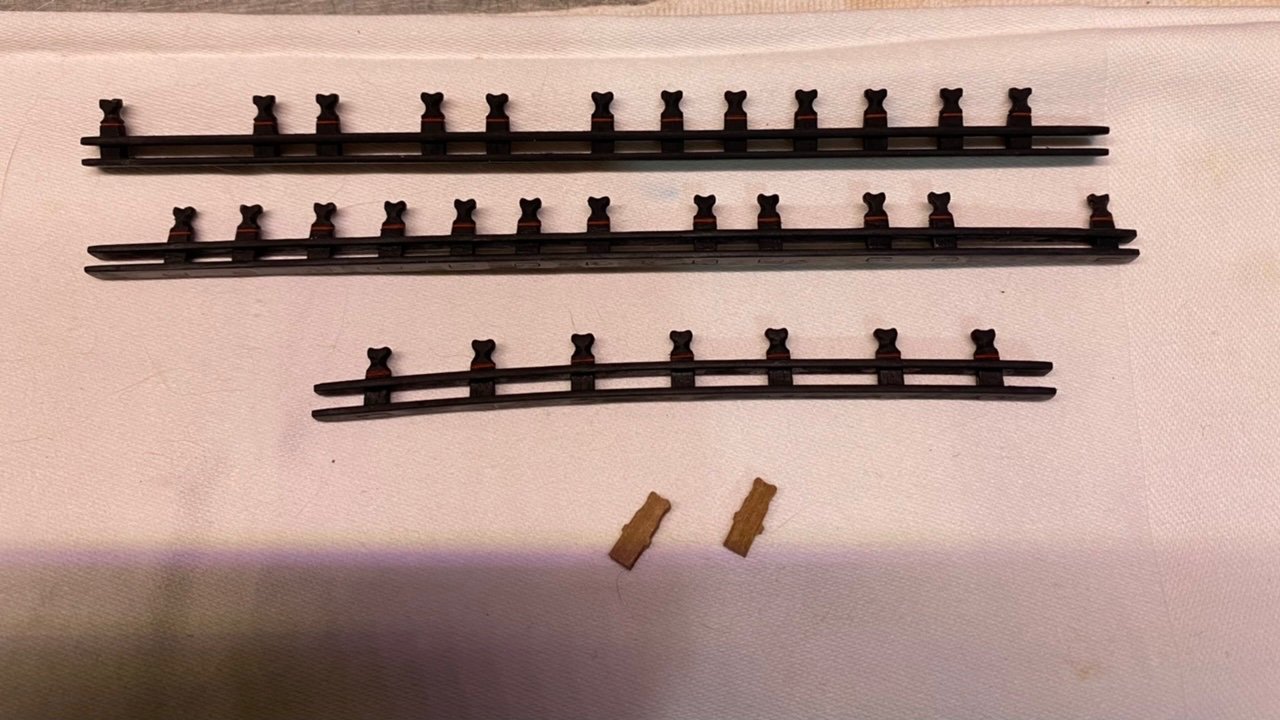
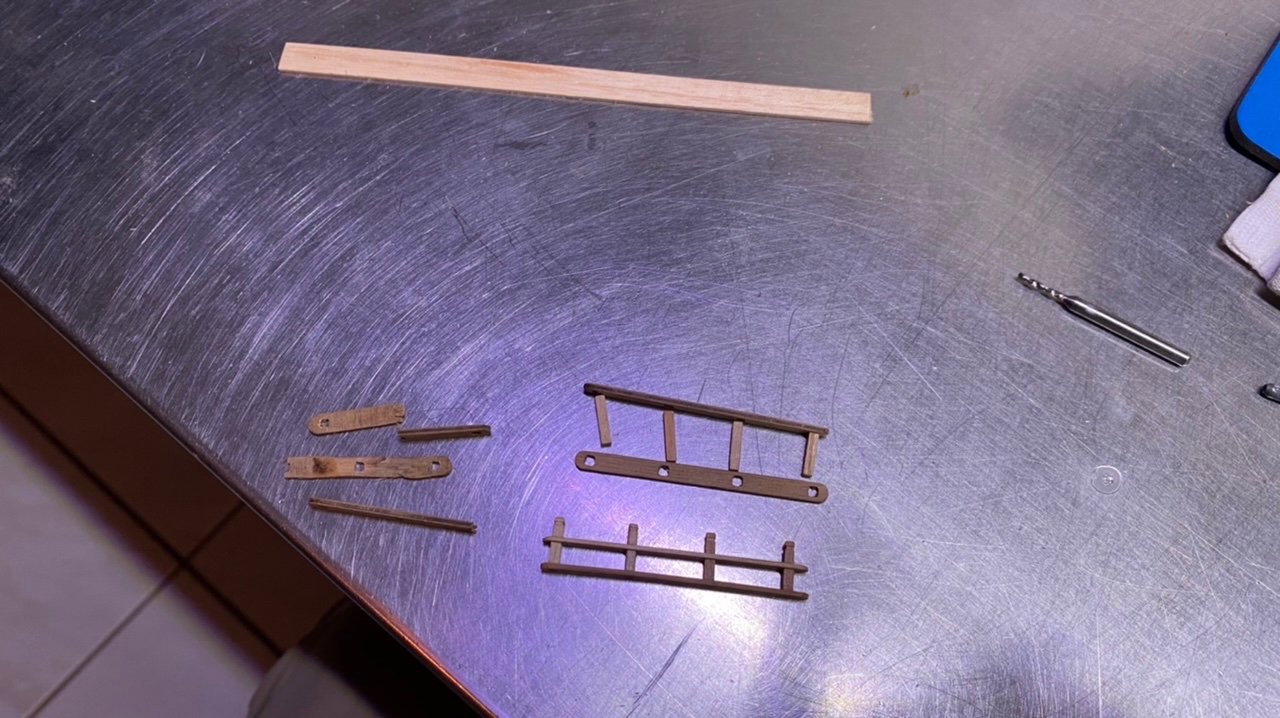
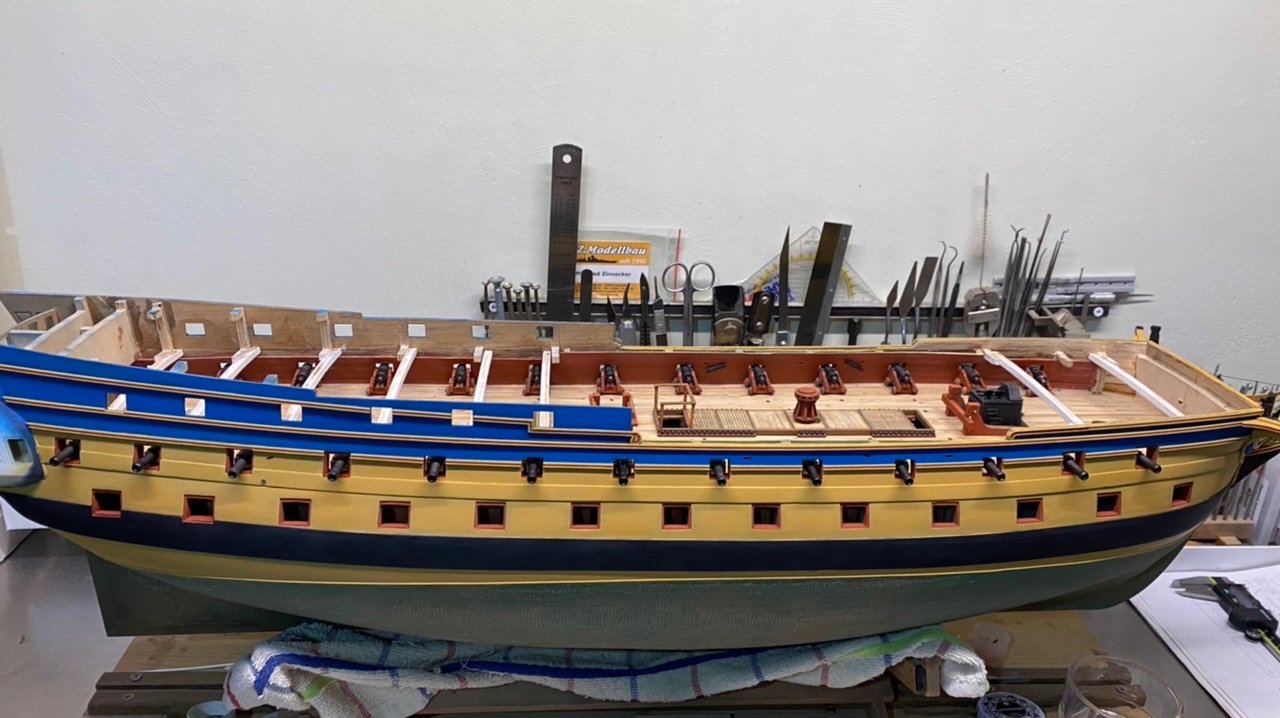
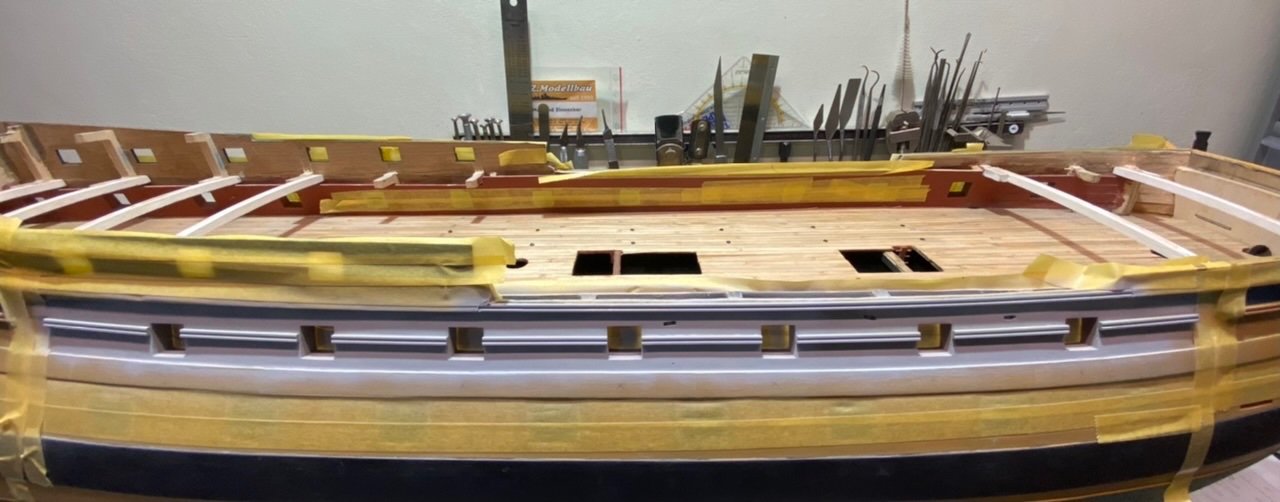
Everyone thanks for the thumbs up and Iooking It is appreciated, A bit further on, I have planked the upper deck, there is a slight difference in colour compared to the lower deck, but that will change in the course of time, as I have used the same materials and techniques, it has only been 10 years since I made the underlying deck. I have also made a start with the connecting railing to the foredeck, for this I did not use the supplied walnut but made one myself from beech, as I found the walnut a little too coarse in structure, The photos below explains it all.


-
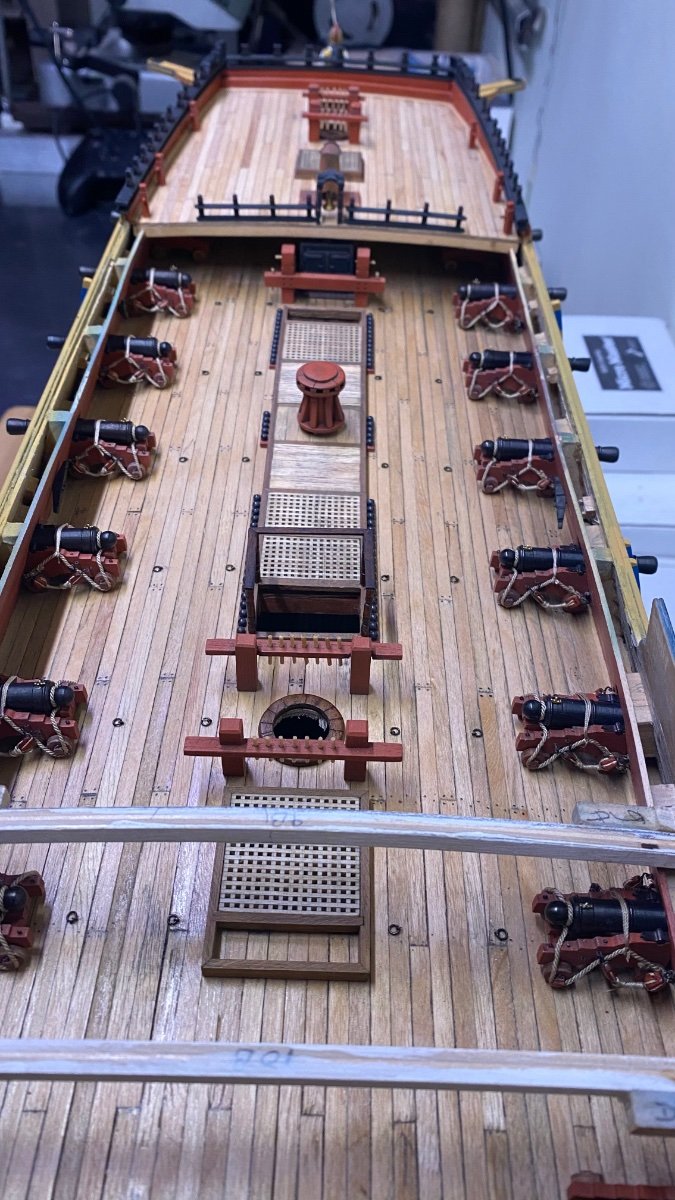
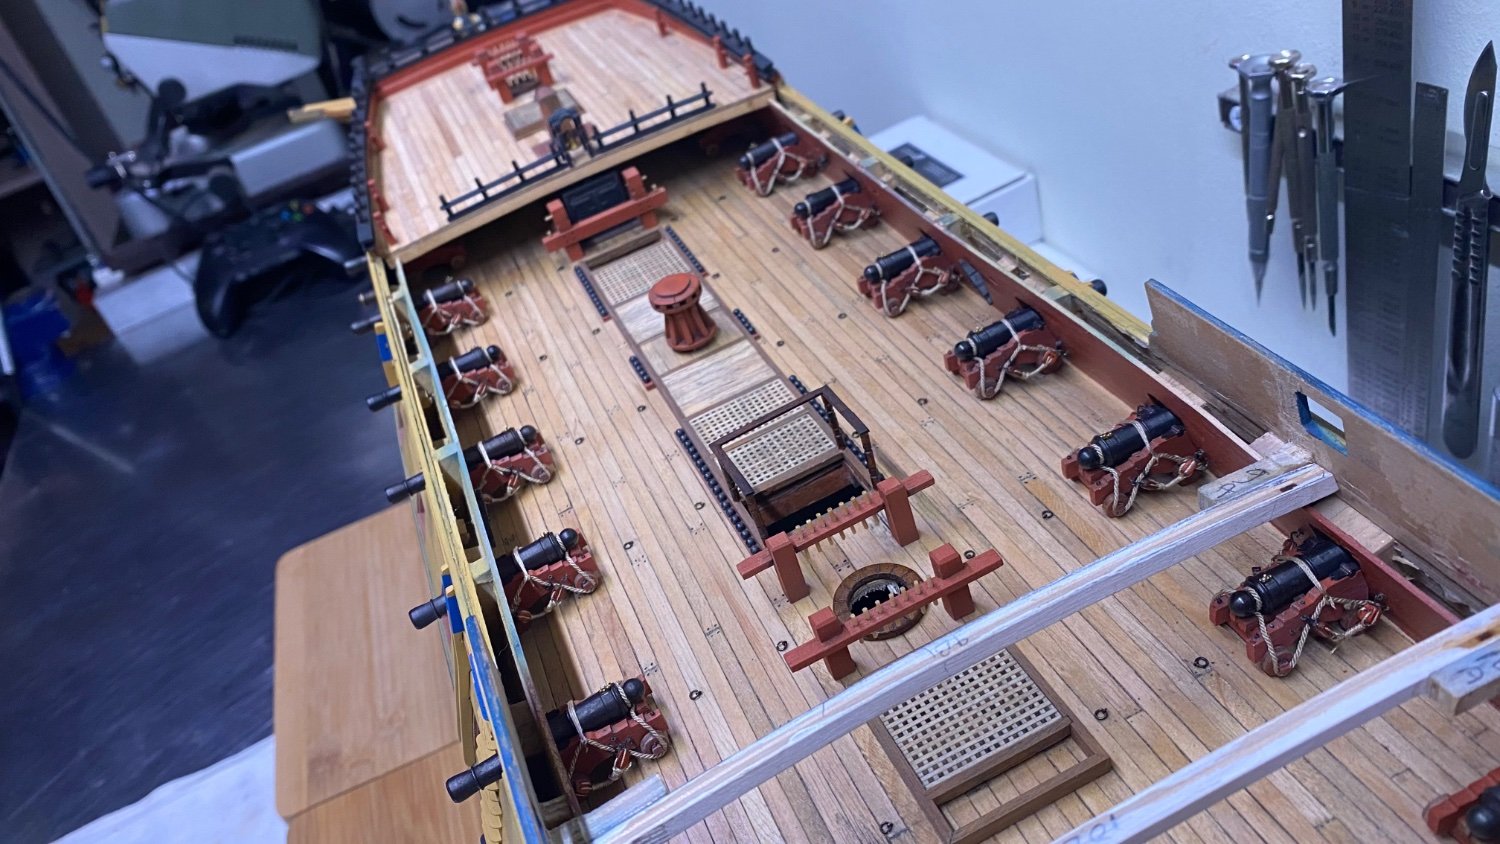
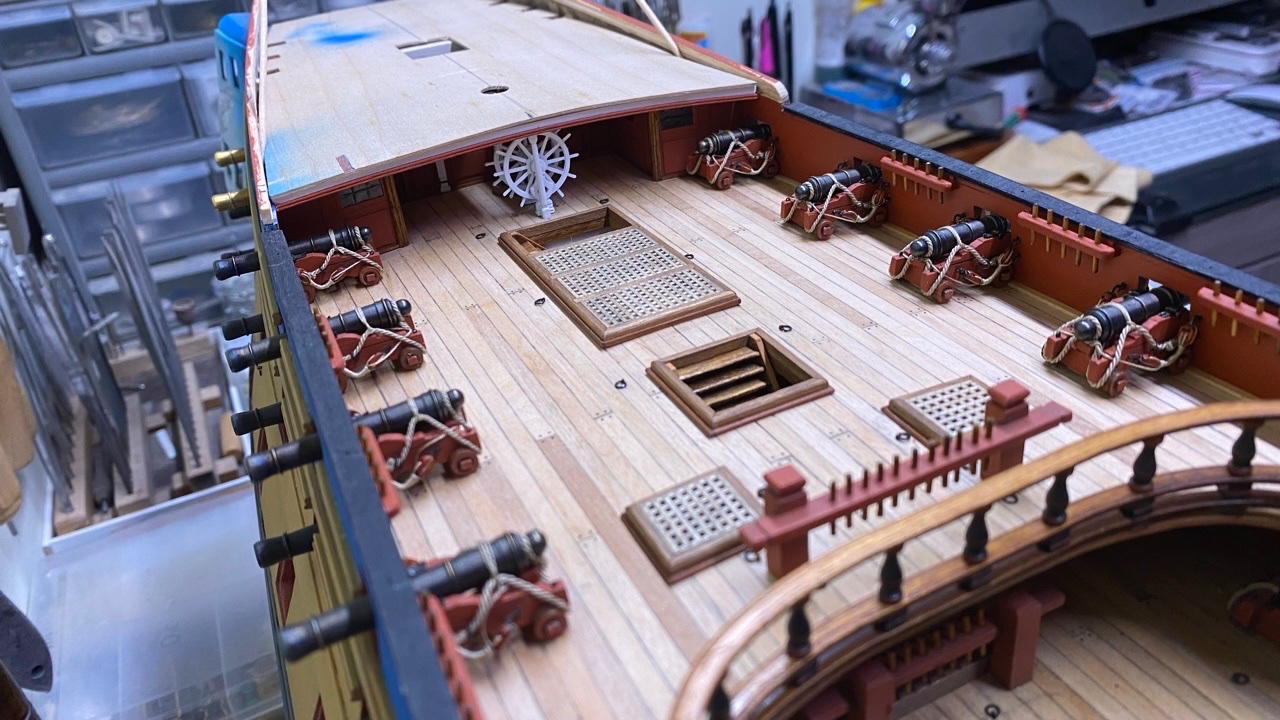
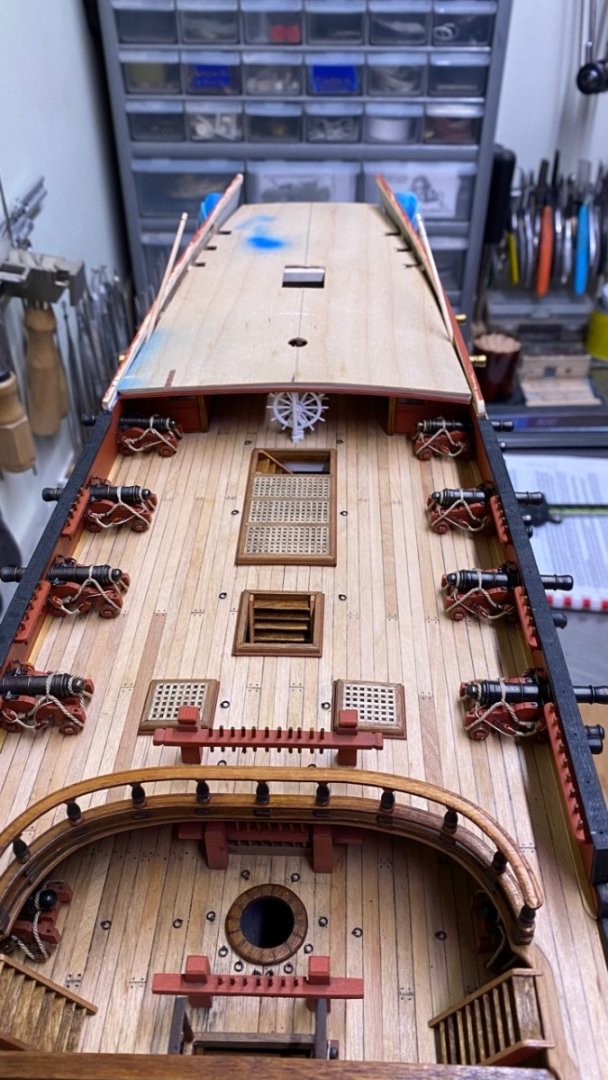
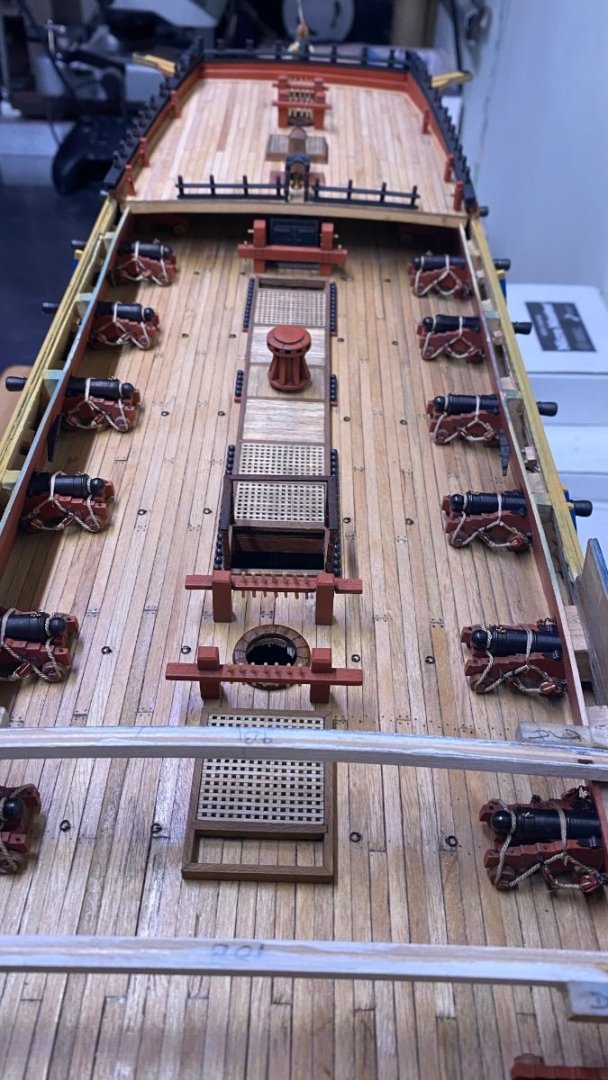
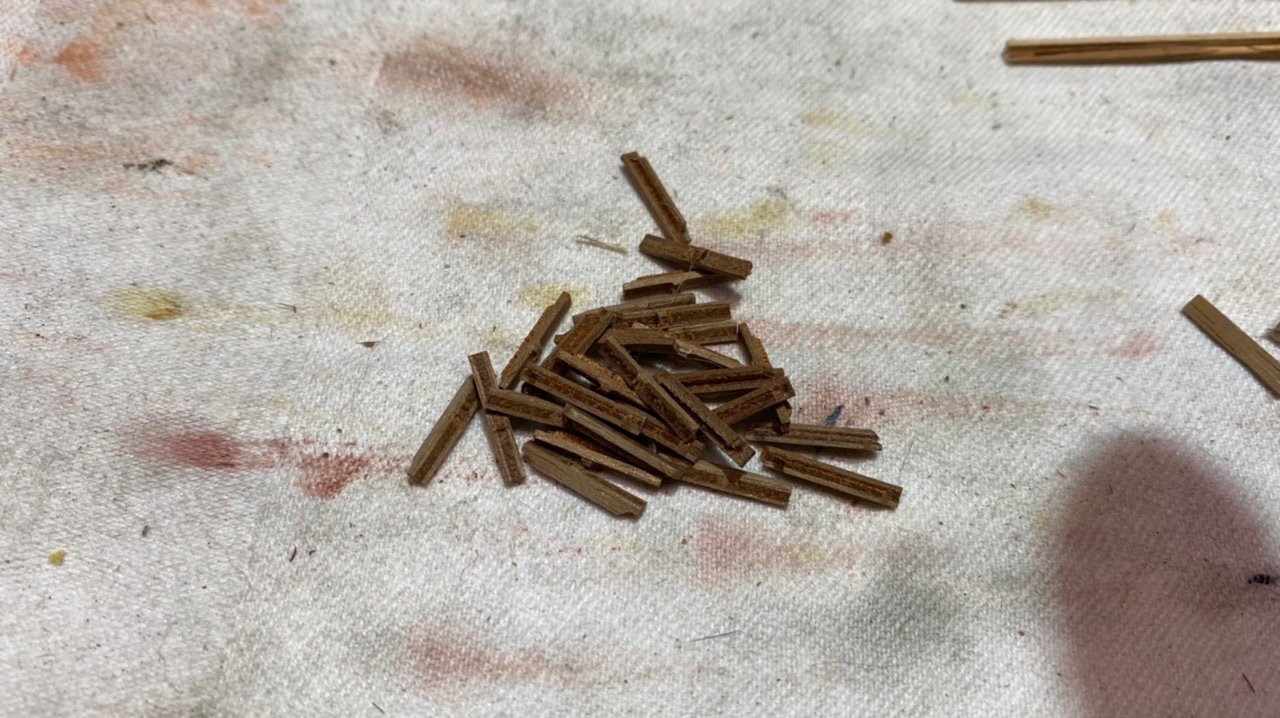
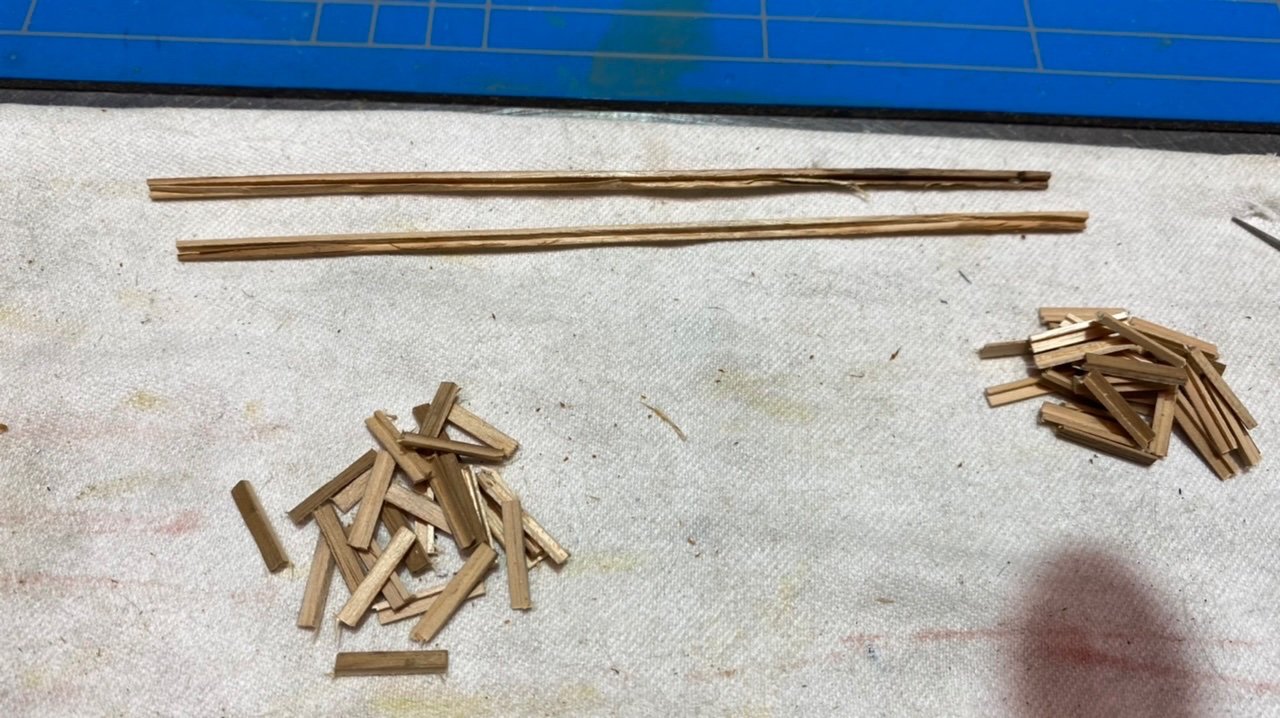
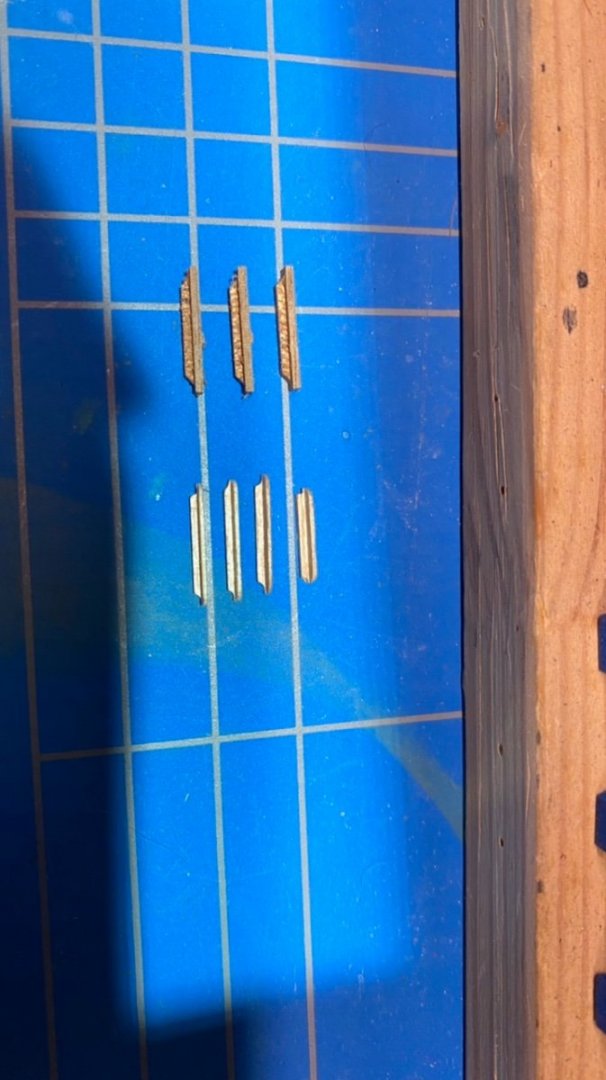
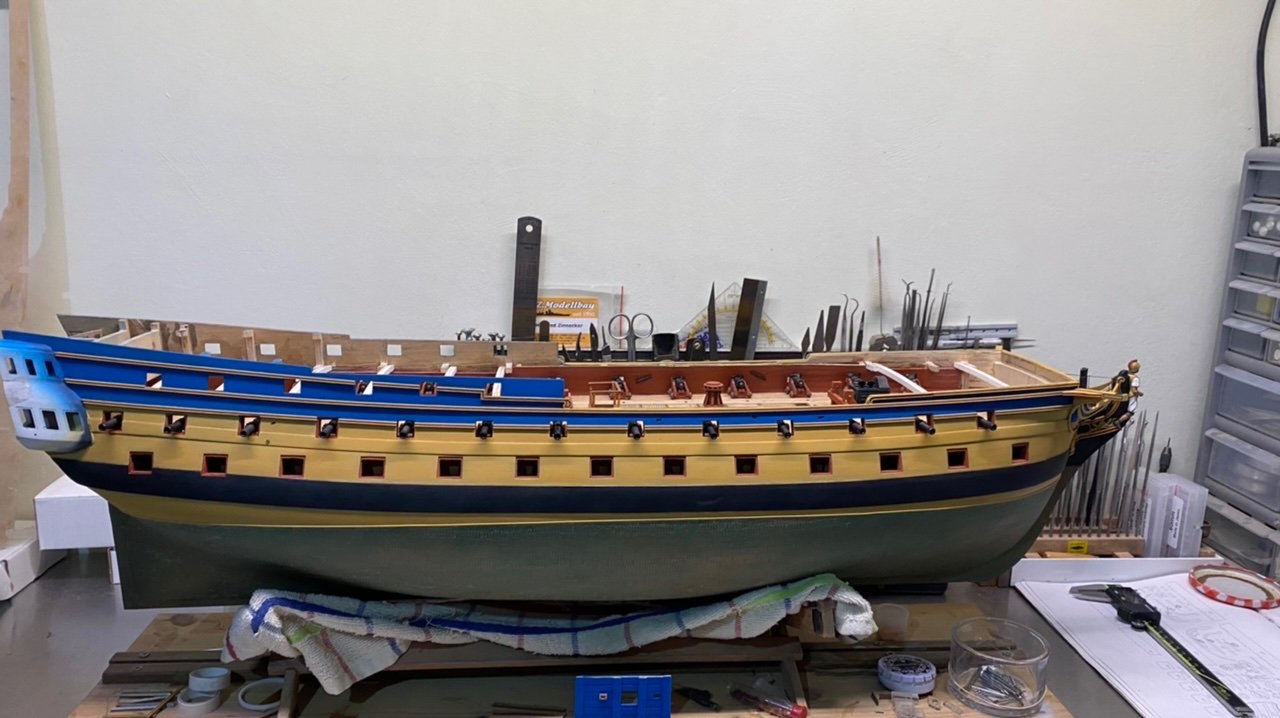
A bit further Made the gun tackles and gun breeches. as said before, pictures explain more than words, so a few pictures

-
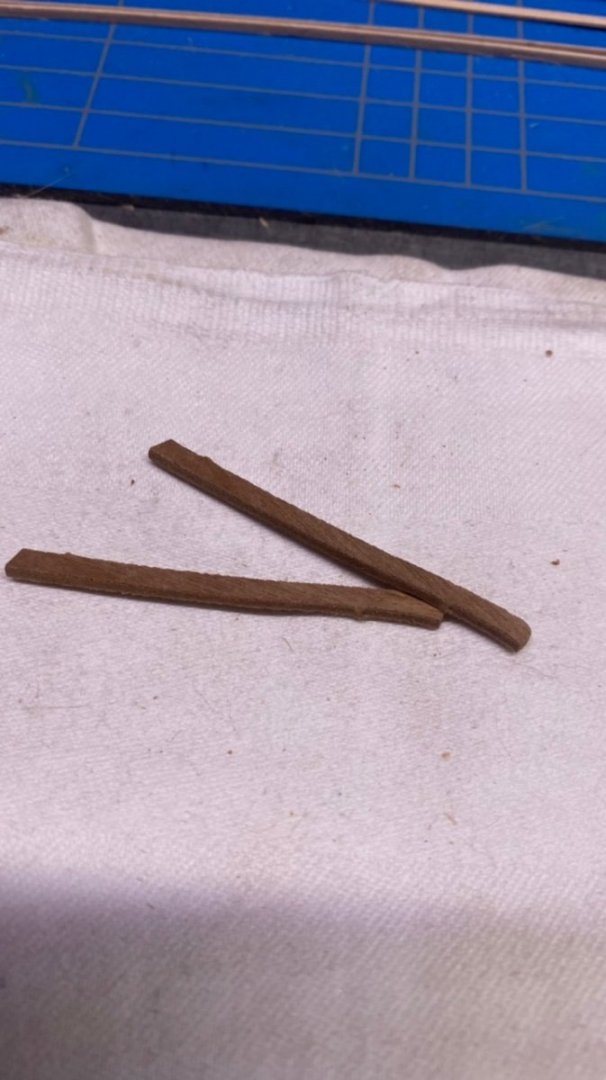
Your right on that !, unfortunately that’s how they came with the kit, and I do not have a good enough lathe to turn them uniform down a bit, so I had to make a compromise with my self on that, most of the parts on the model I remade or improved, but the gun button …..
-
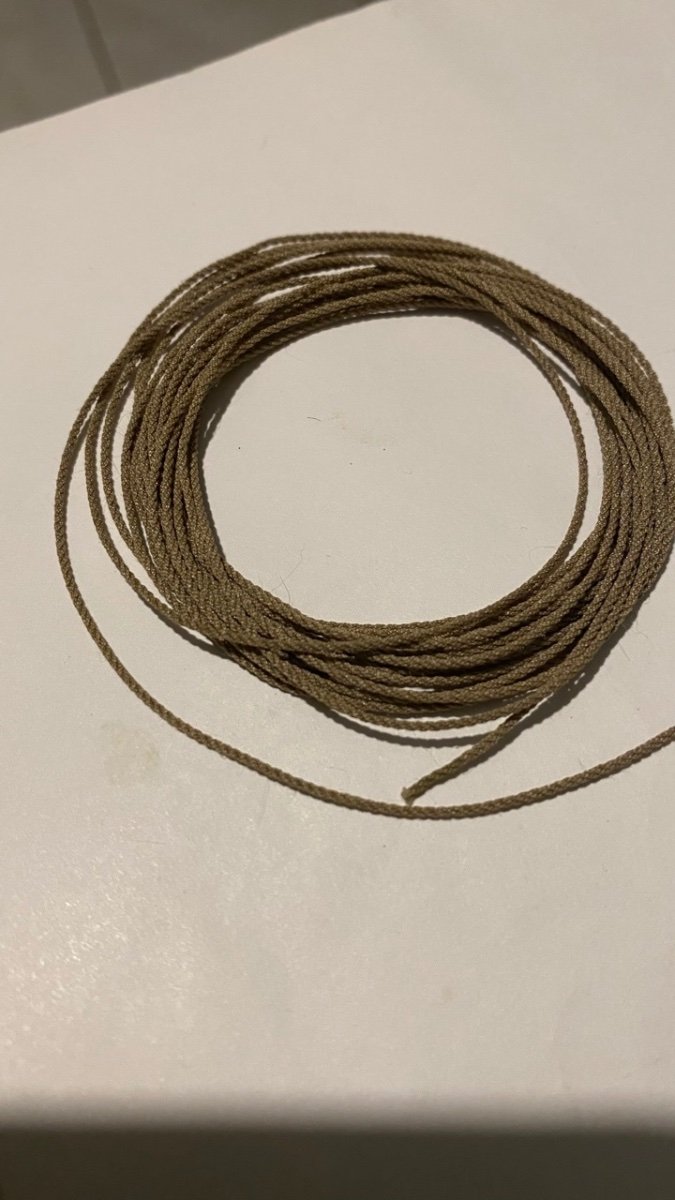
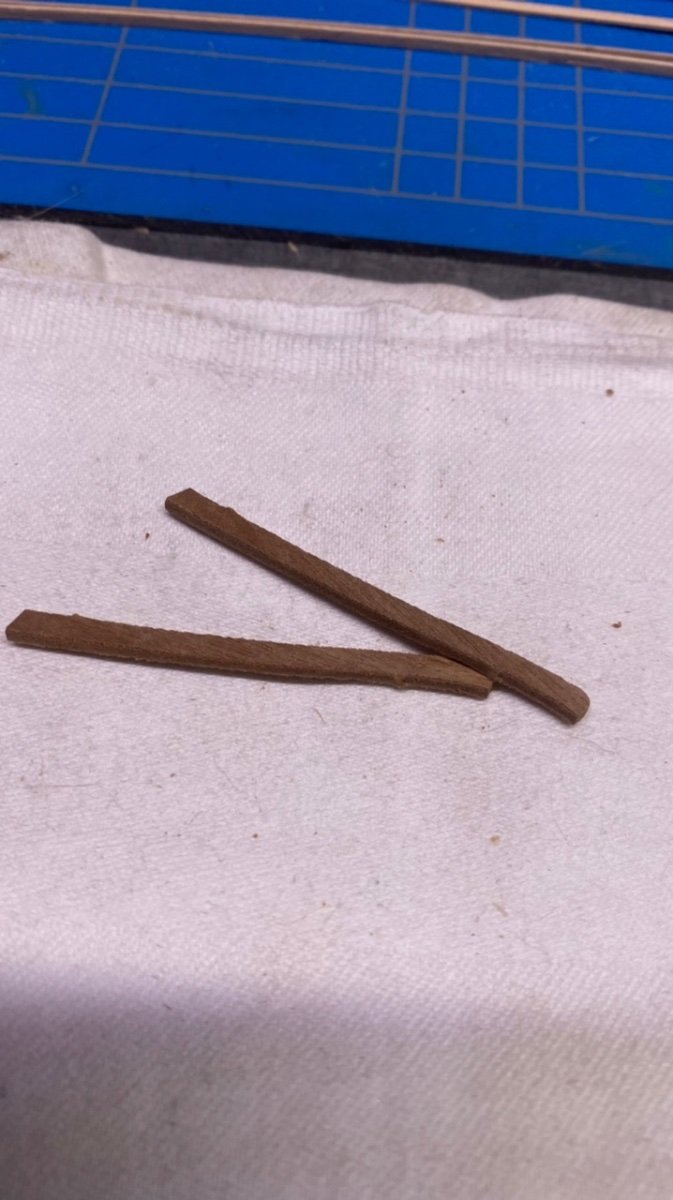
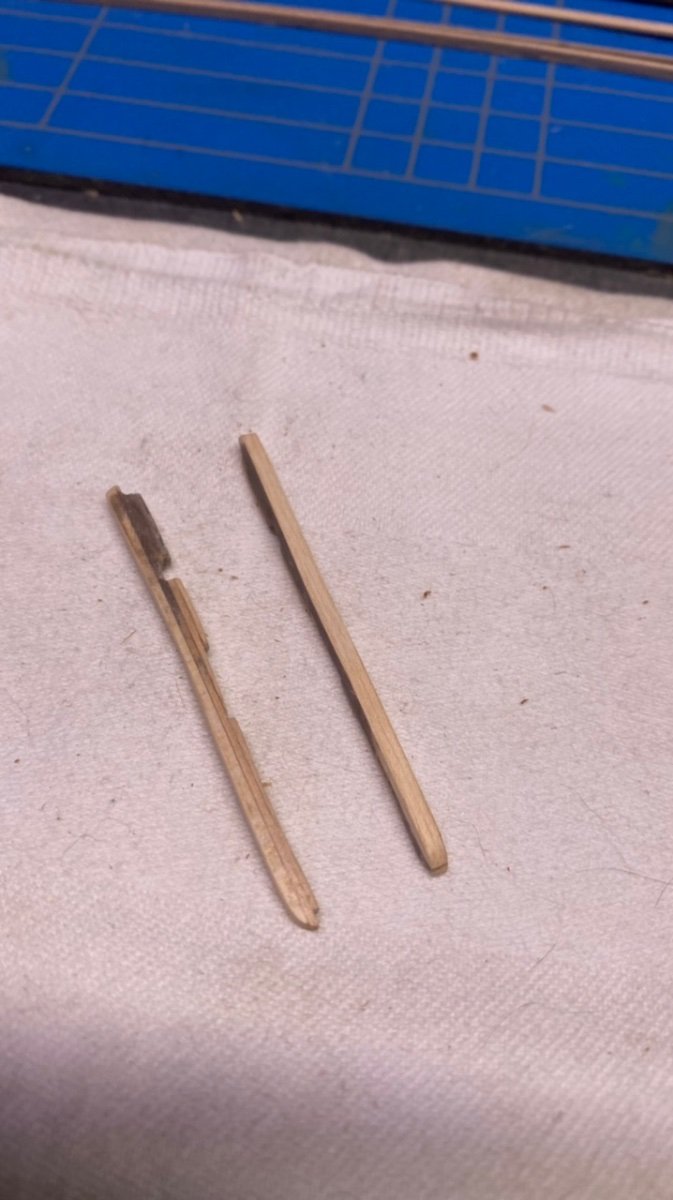
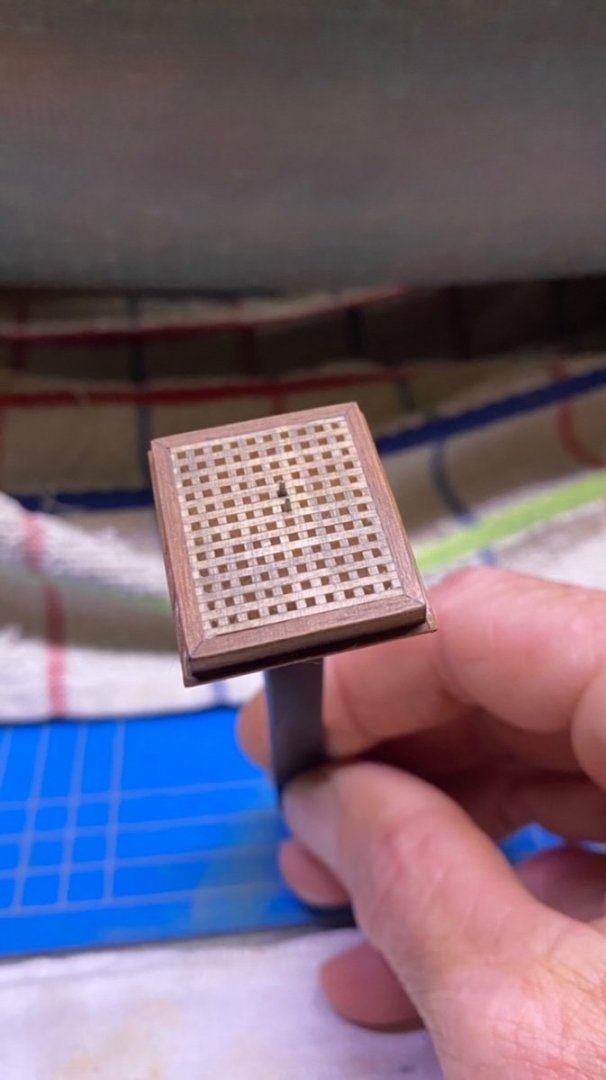
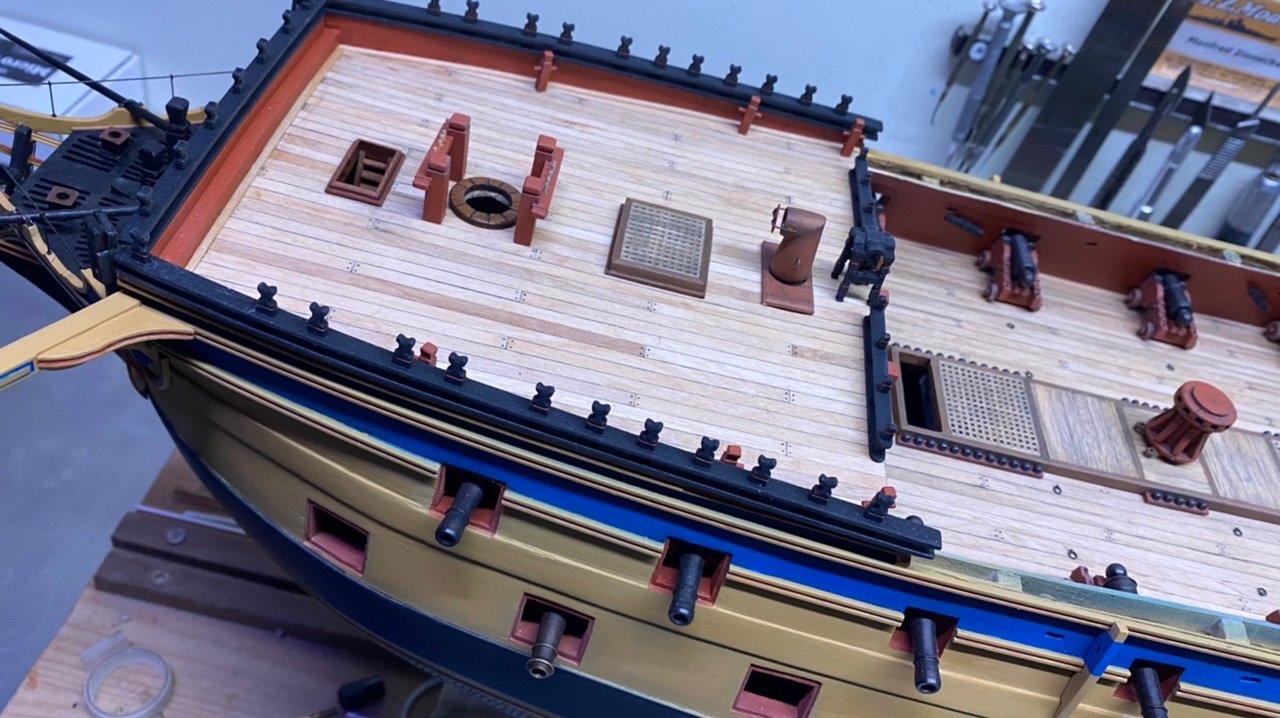
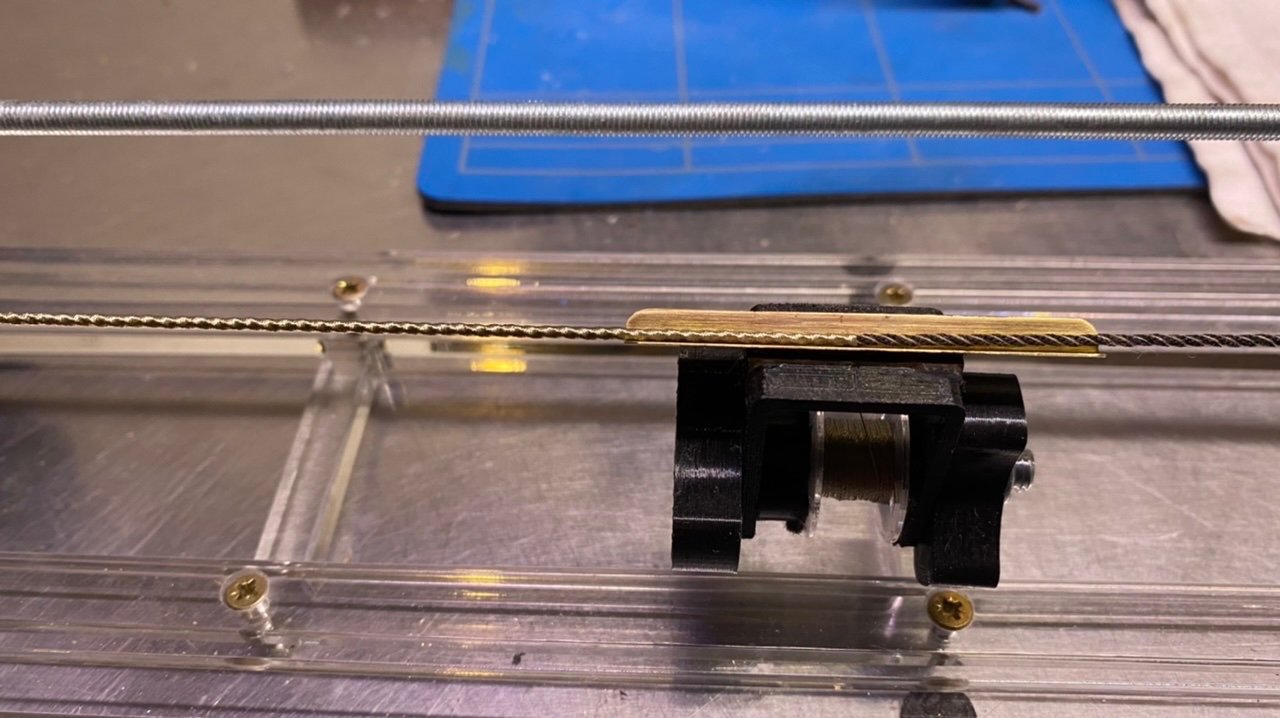
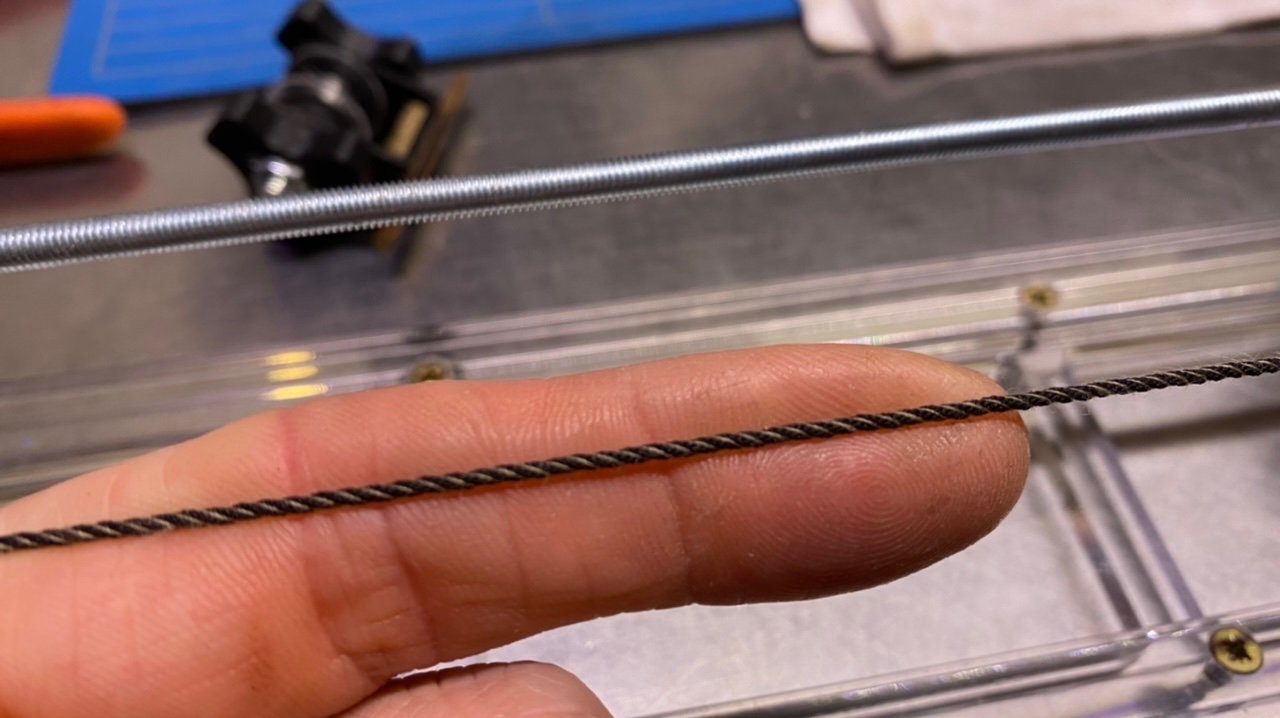
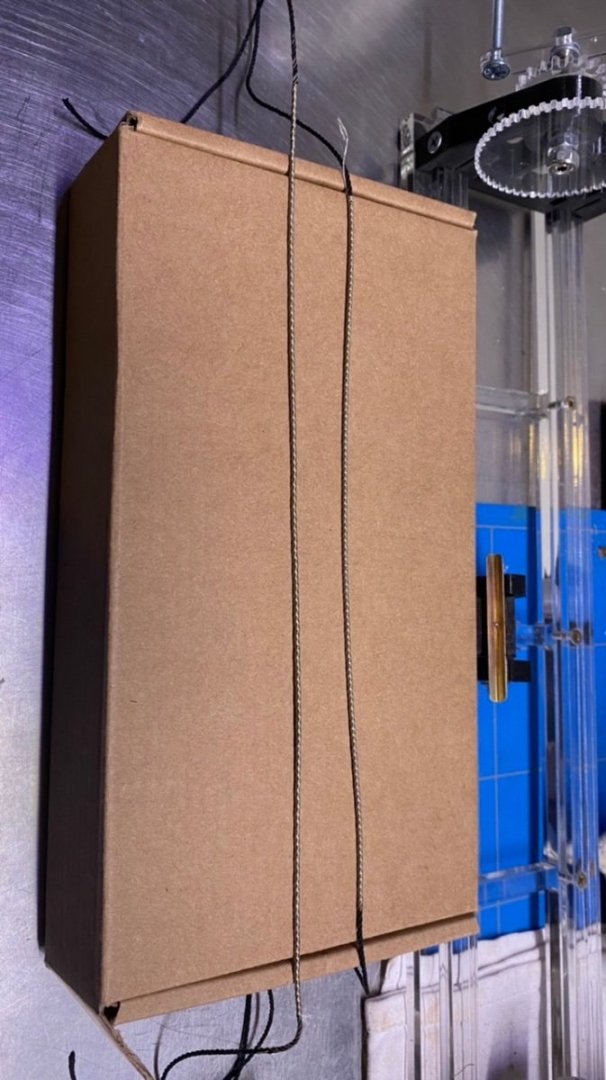
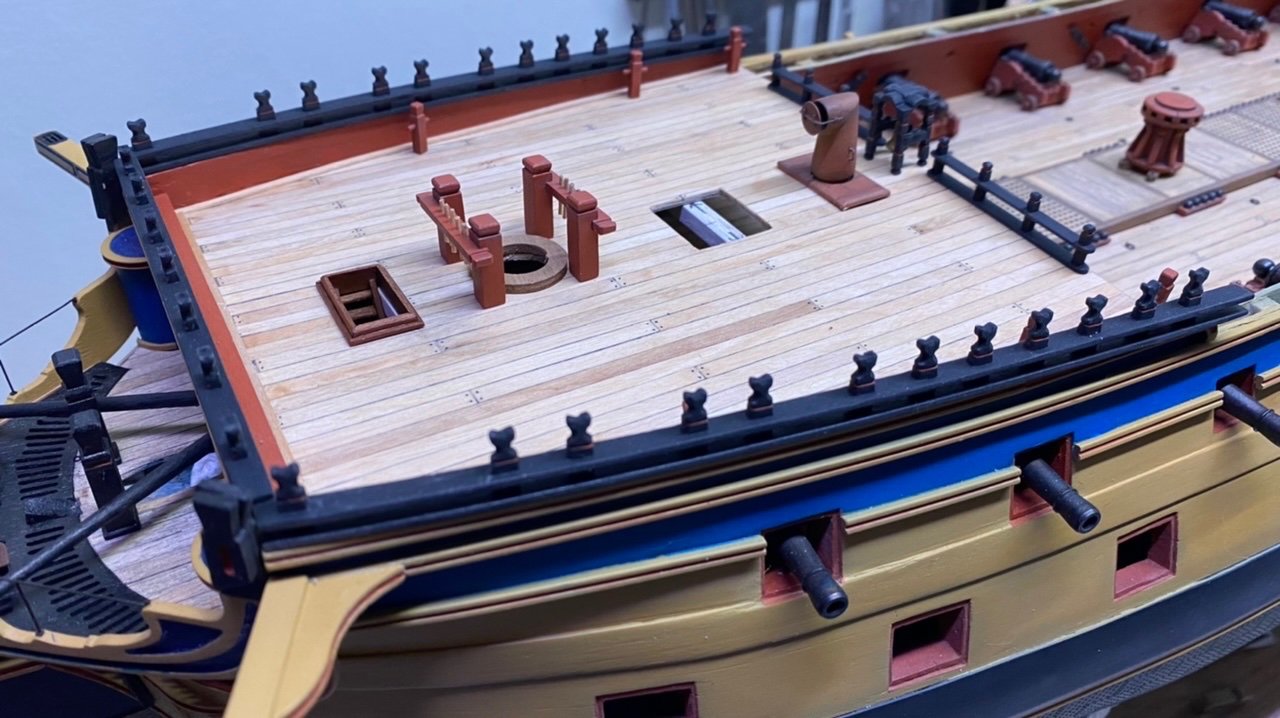
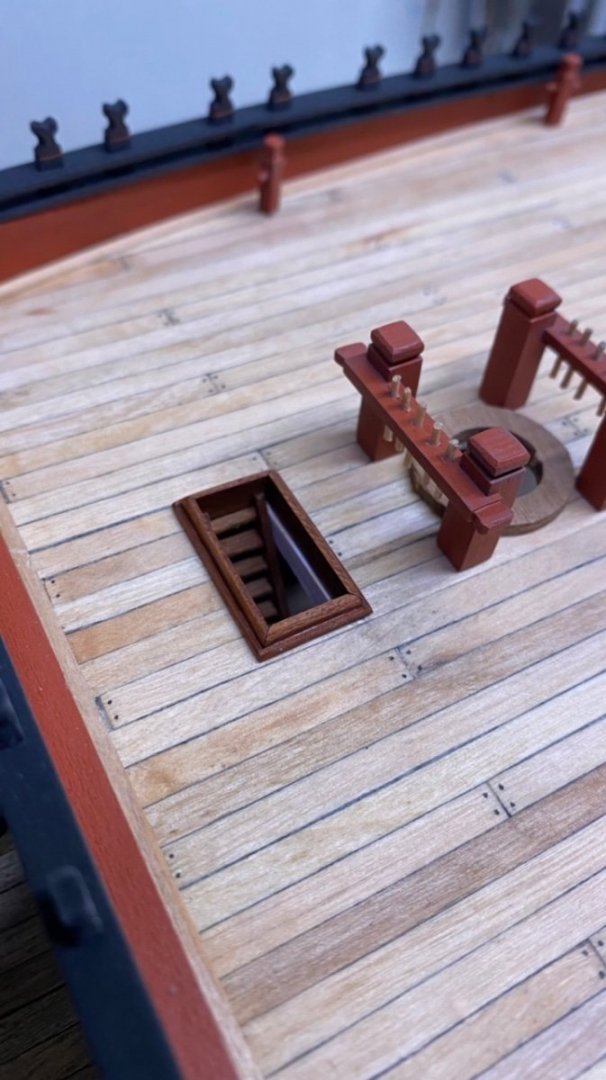
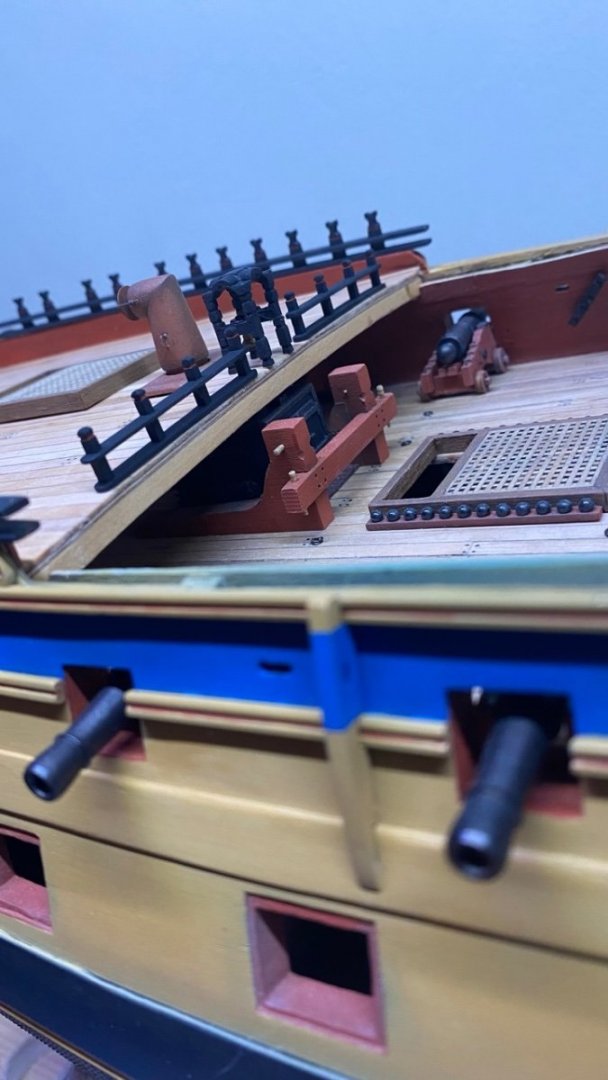
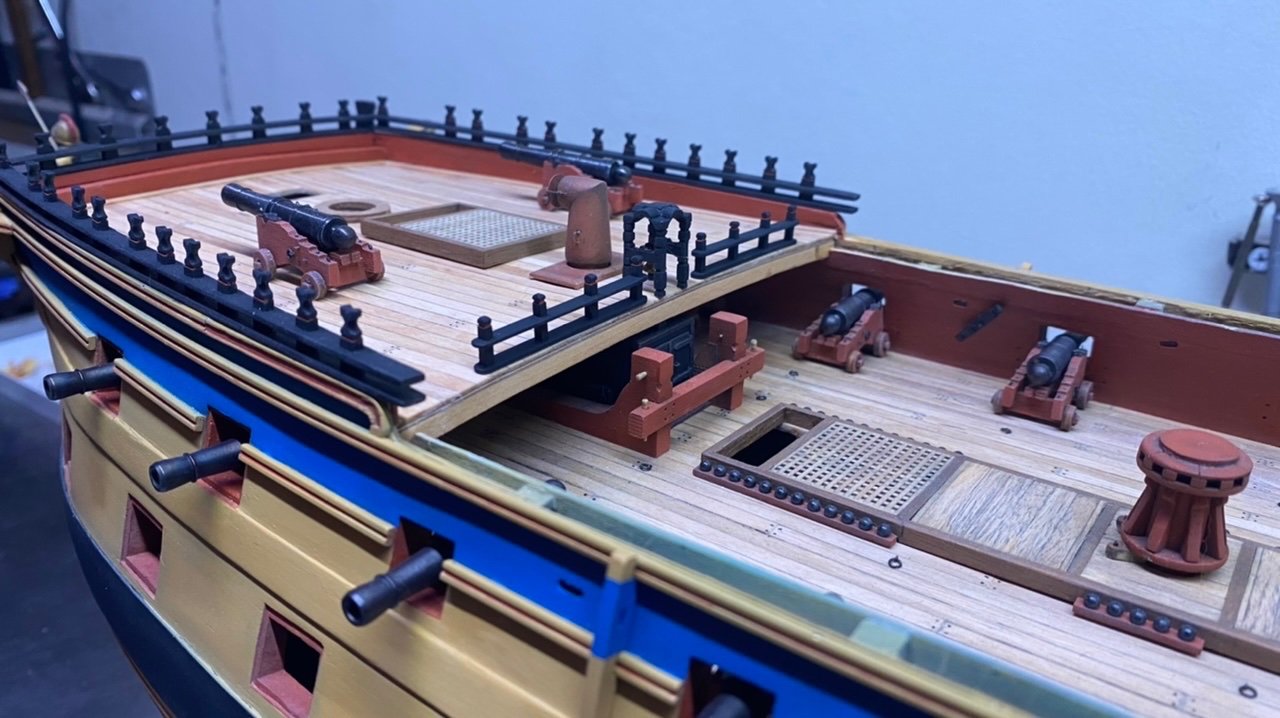
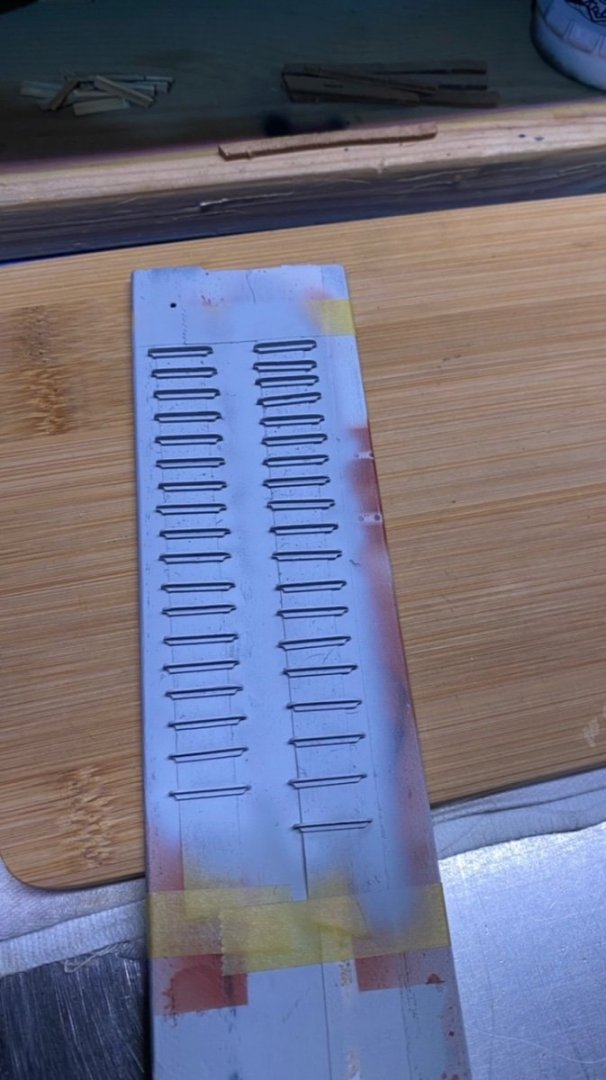
Everyone thanks for the thumbs up and looking A little bit further on the foreship, made the deck grid, and the so called forecastle snatch cleats. Now the attributes that will be placed on the foredeck are more or less ready. So that I can now begin to manufacture the rigging for the gunwale, I have milled the rope myself on a rope making machine. Is all still in the test phase but gives an idea.

-
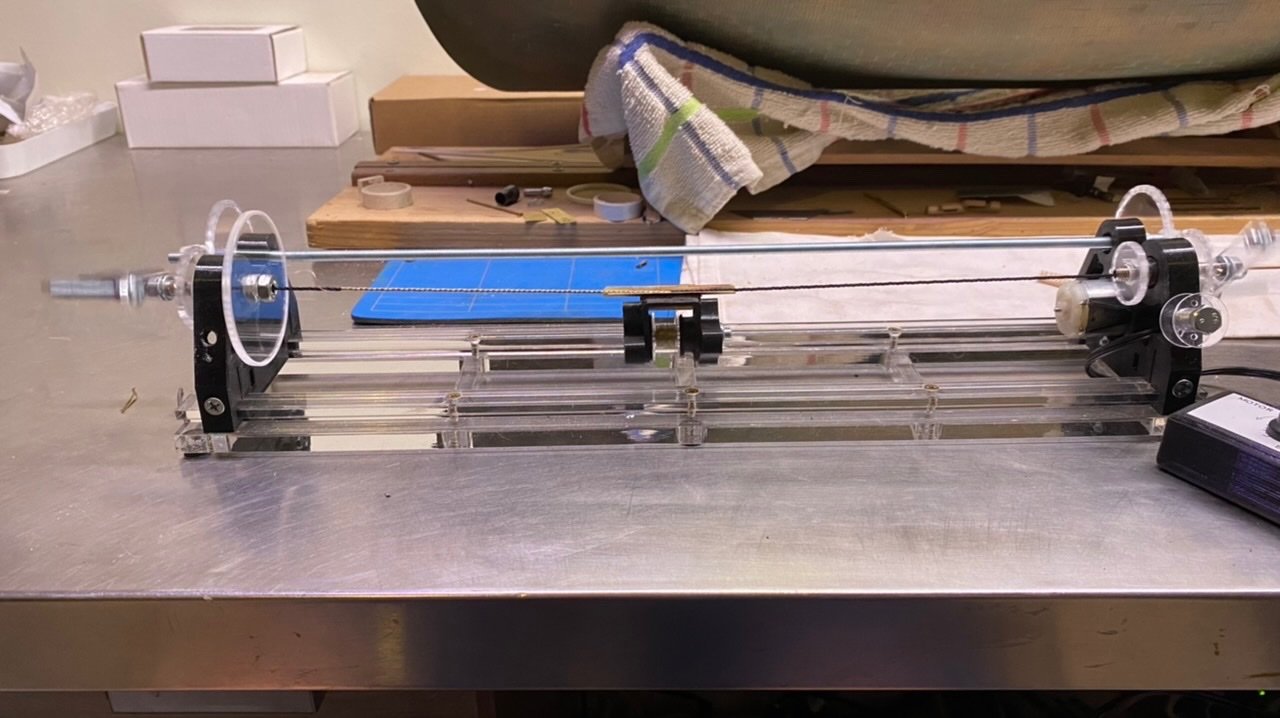
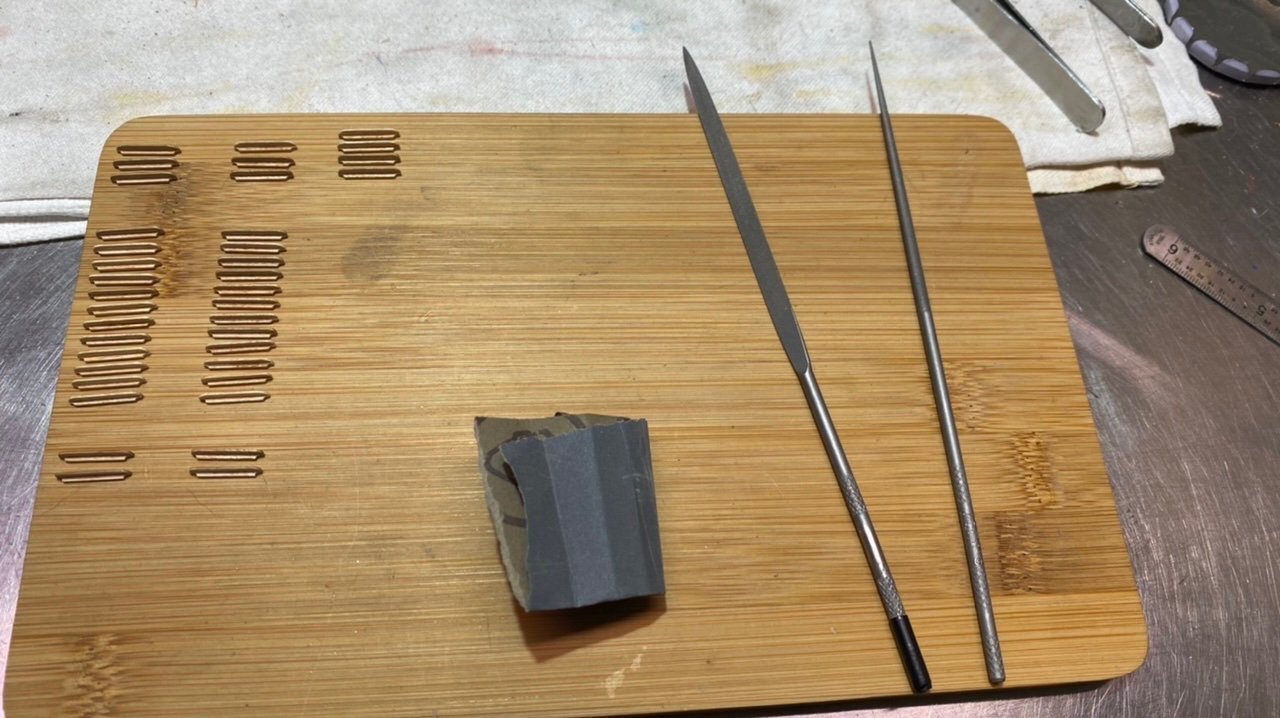
Well after a 3 week vacation at customs, I finally received my serving machine, package came in good order without missing or defective parts and components, the assembly is quite simple and was also done fairly quickly. I had bought the so-called endless version, but I did not like the attachments that came with it, so I removed them. During testing I came up with the idea to modify the so-called endless rope fittings, and make an attachment of it to make winding a bit easier, and so after some soldering and sanding and grinding the result is satisfactory and I am extremely satisfied with the result. (It’s still testing but gives a impression) See the pictures below for an explanation In between I also worked on the attributes on the fore deck.


-
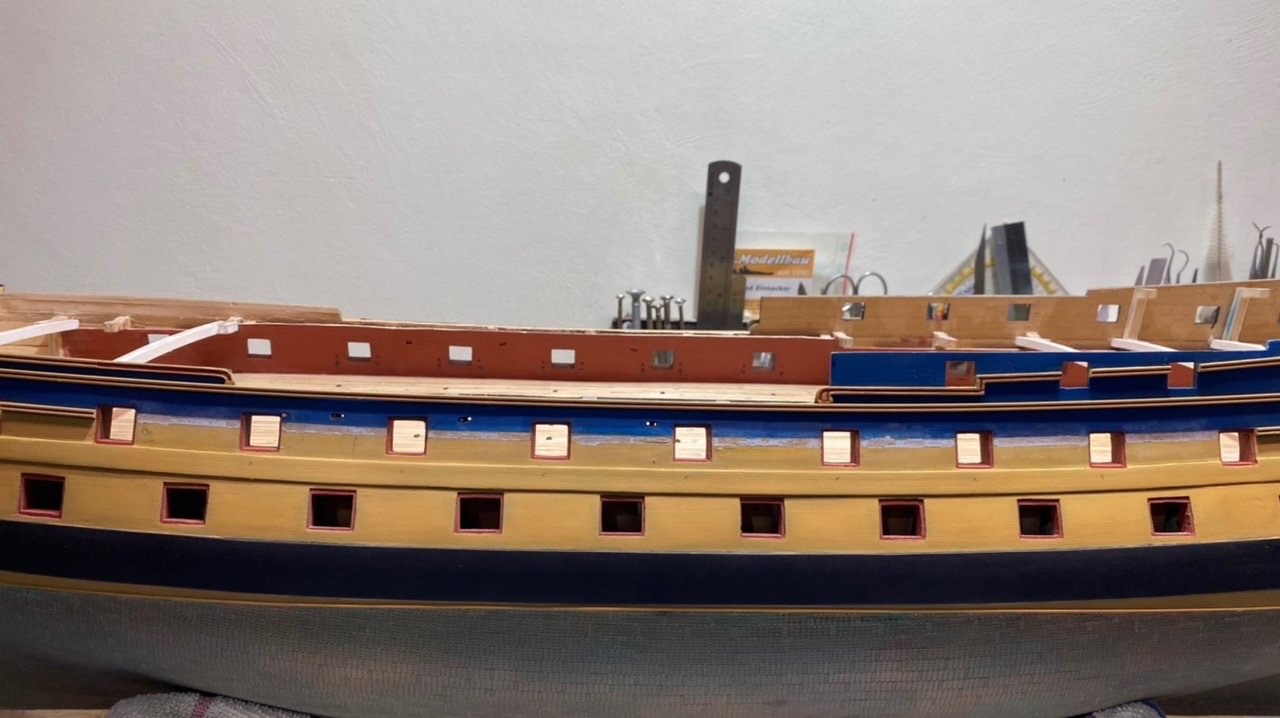
Thanks for the reactions Then I think we found the same drawing, indeed I also found a drawing of the Ardent. The models I found on the internet are models built from a kit as I can judge. and we go just a bit further. Got the deck in place for the foreship and then planked it. There is a difference in colour, but this will be the same in the end, I laid the first deck 10 years ago. I made the railing and adjusted it a bit as I thought the one supplied with the kit was rather stiff and coarse. Below some pictures explain more than words. (Everything is still standing loose)


-
Hi Allan according to my build instructions and plans that comes with the kit, they should be there, also most models I found pictures from on the internet have them, but I also found a few “original plans” on the internet without the side stops only top and bottom. So that’s a bit of a bummer, but decided to leave it as it is for now, made a study for my self, need to break things, that most likely never gone be nice again. so I have to live with that but anyway thanks for pointing me out, appreciate it. thanks Boris
-
Allan, Thank you for your response, Sorry for my ignorance, but what do you exactly mean by “portstops on the top sill as well as the bottom sill and the frames (sides)” Thanks.
-
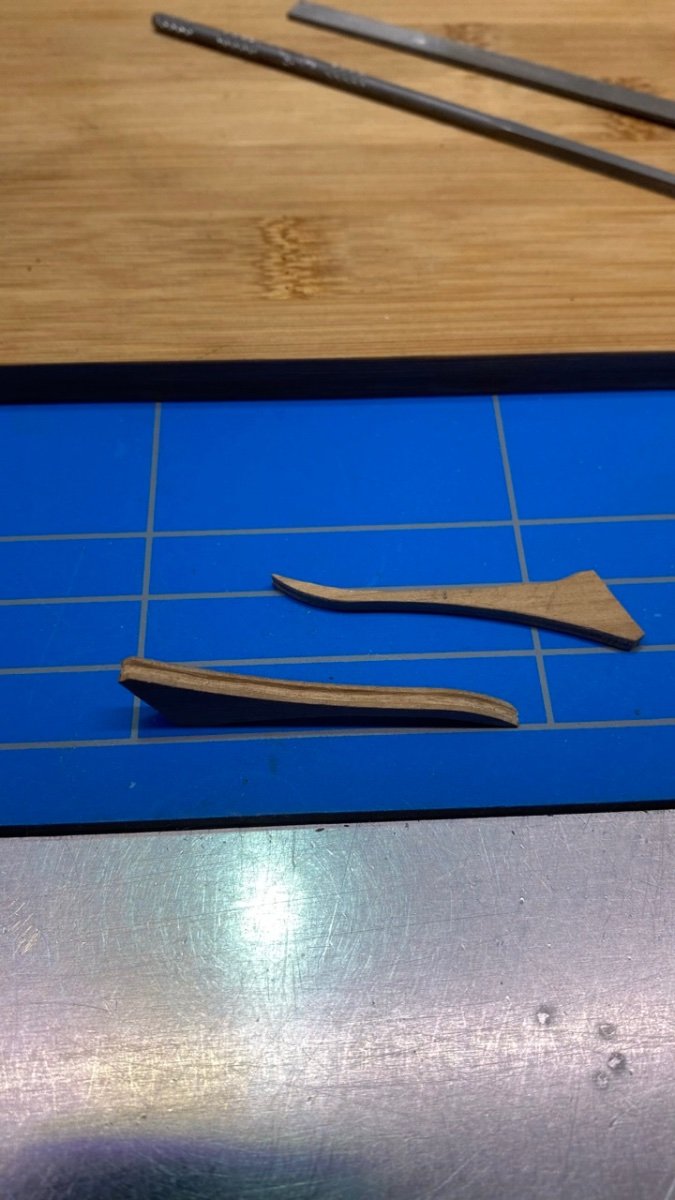
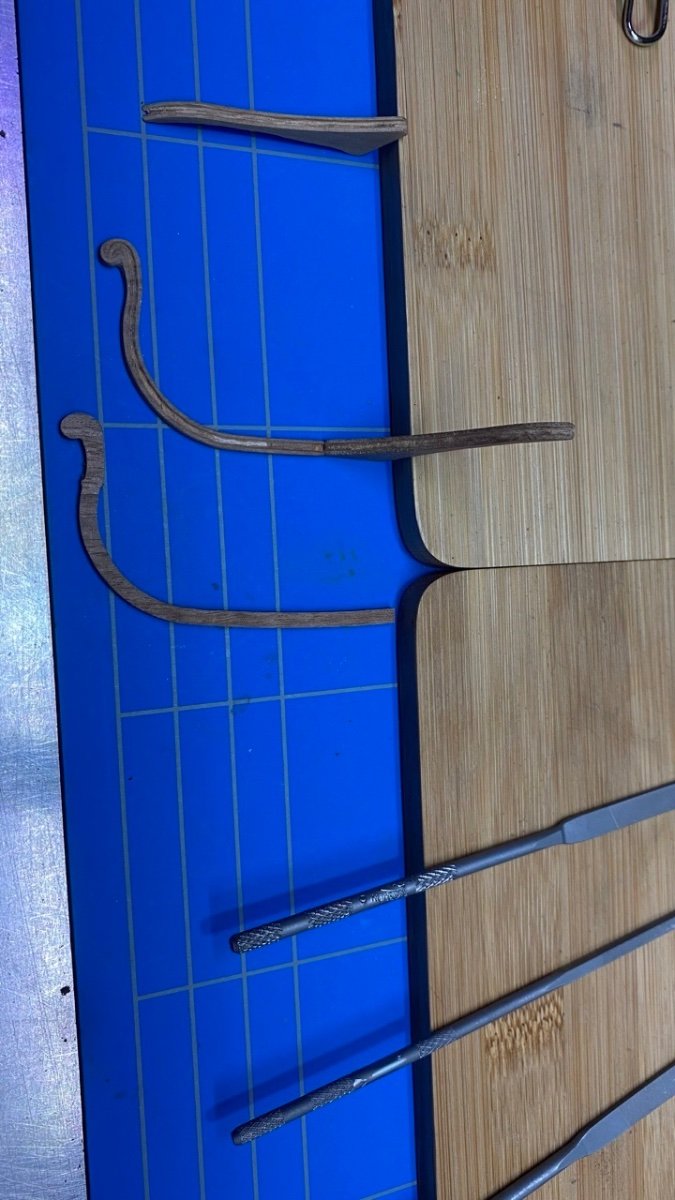
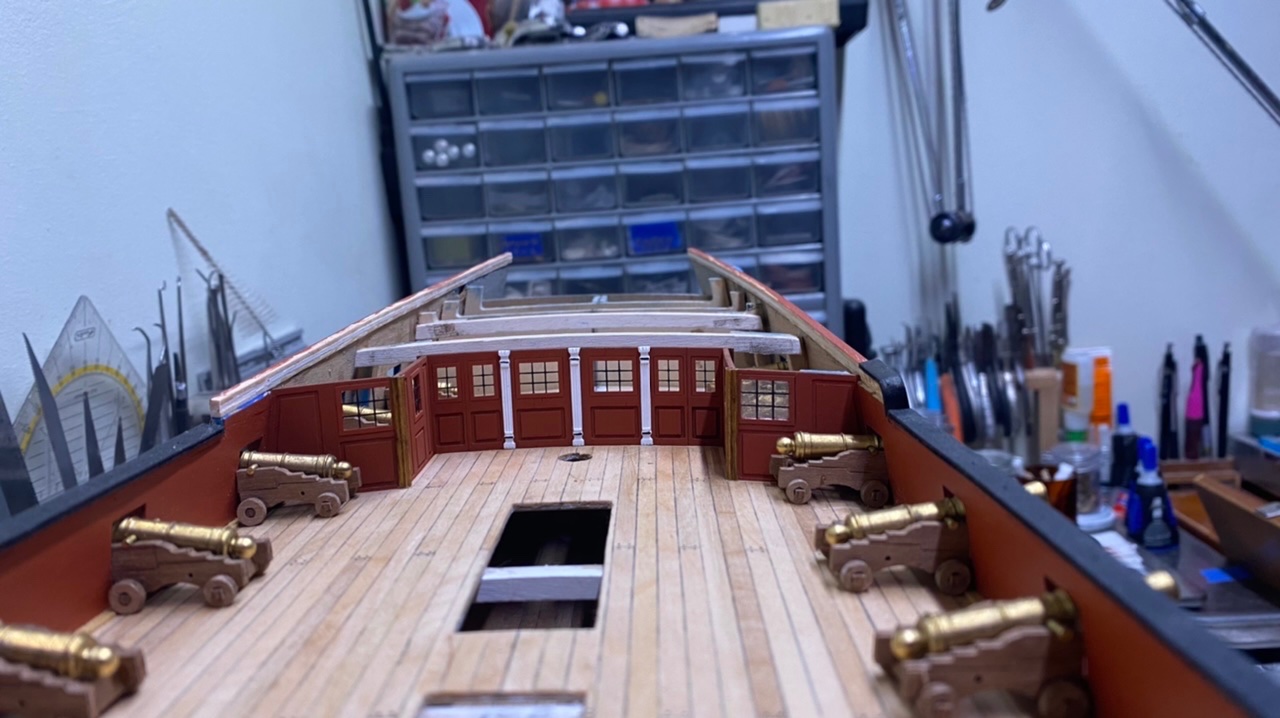
Thank you all for your reactions and for watching! A bit further on I rebuilt the fenders and the chess trees because I didn't like the plywood version and thought it was too coarse. So I made them again from a finer kind of wood. Below some pictures


-
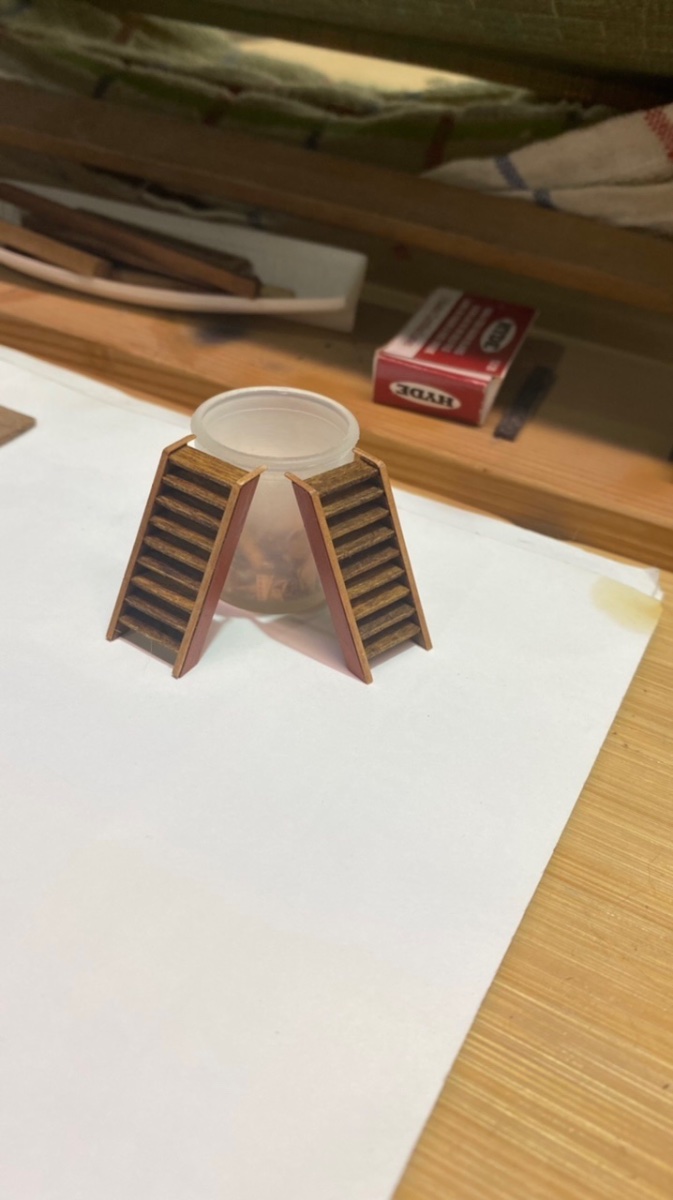
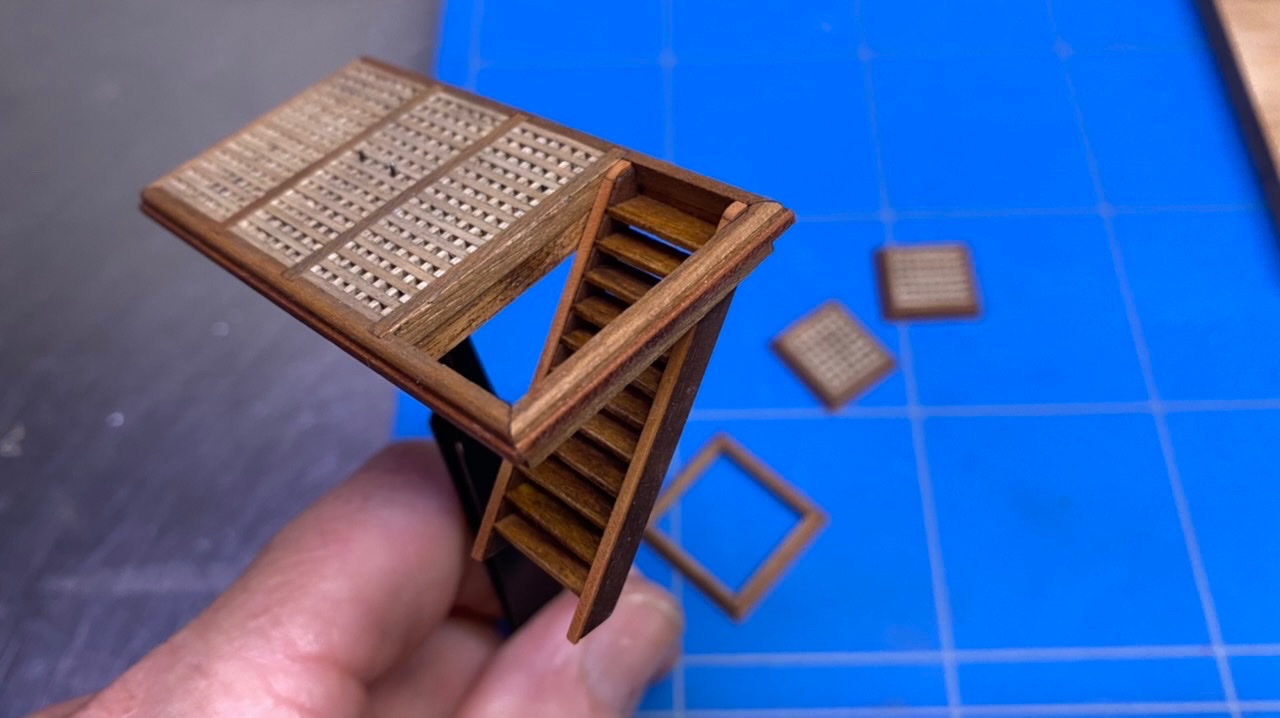
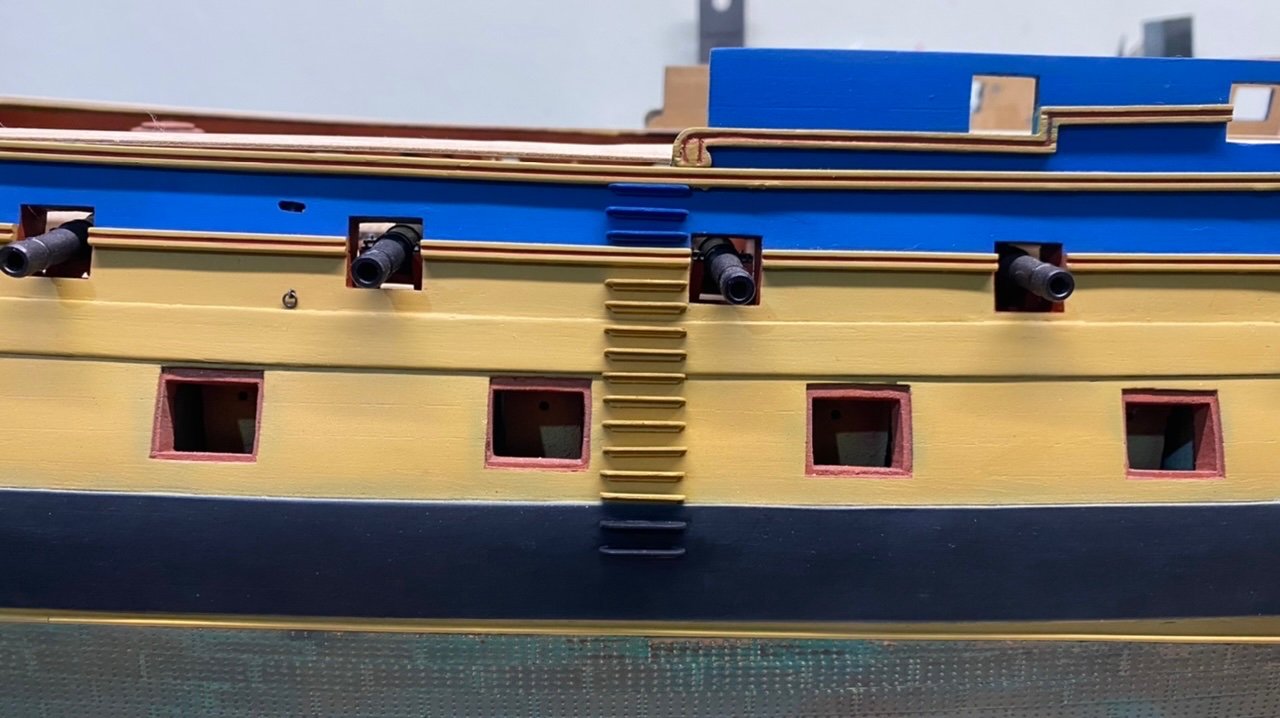
Thank you all for your feedback and watching, @yvesvidal The guns are all still loose, I am waiting for my serving machine that I ordered , so I can rig them further, some of them I will rig further, the rest which will be under the deck and therefore not visible I will not rig further. -Blimbing ladders outside ship's hull- Given that I find the milled walnut plywood (splintering too) supplied with the kit ladders too coarse and not pretty. So I decided to make them again, which in my opinion seem more realistic than the supplied ones. The pictures below explain it all.

-
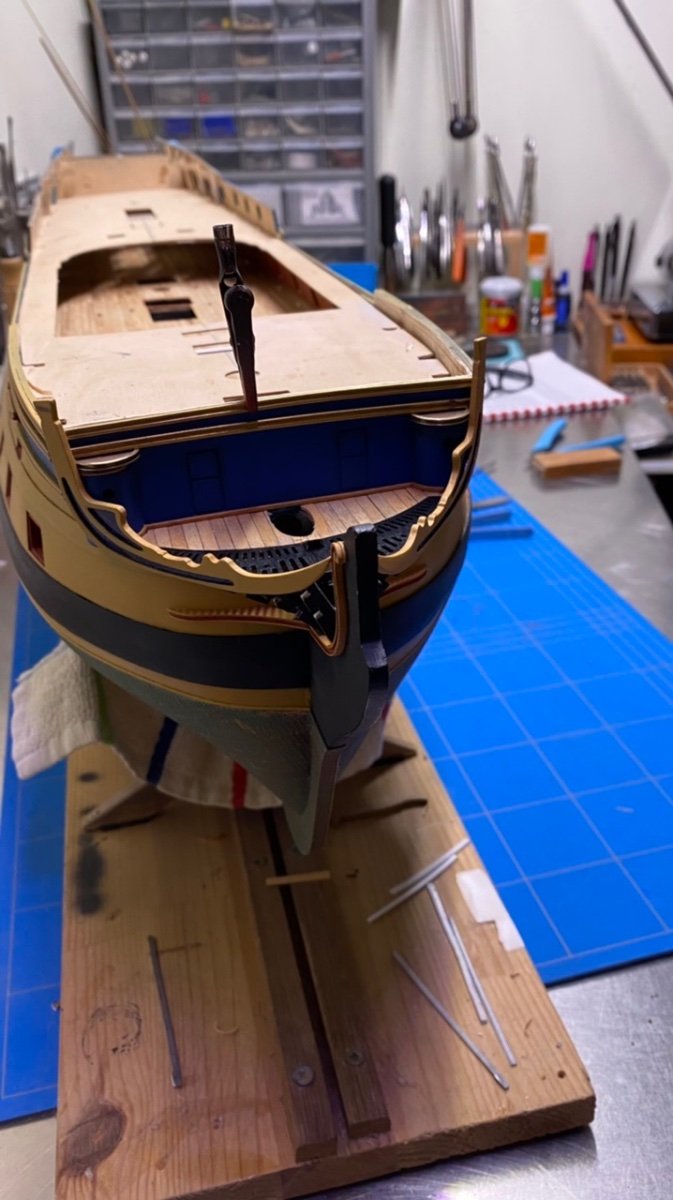
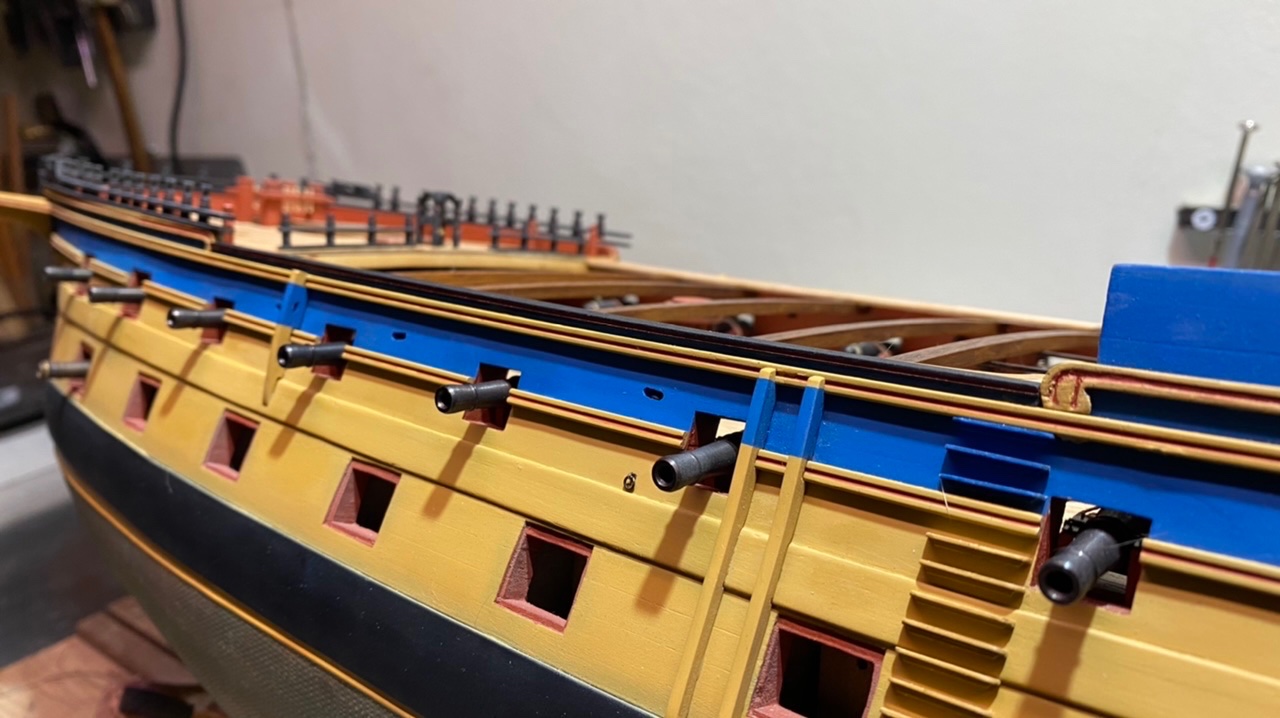
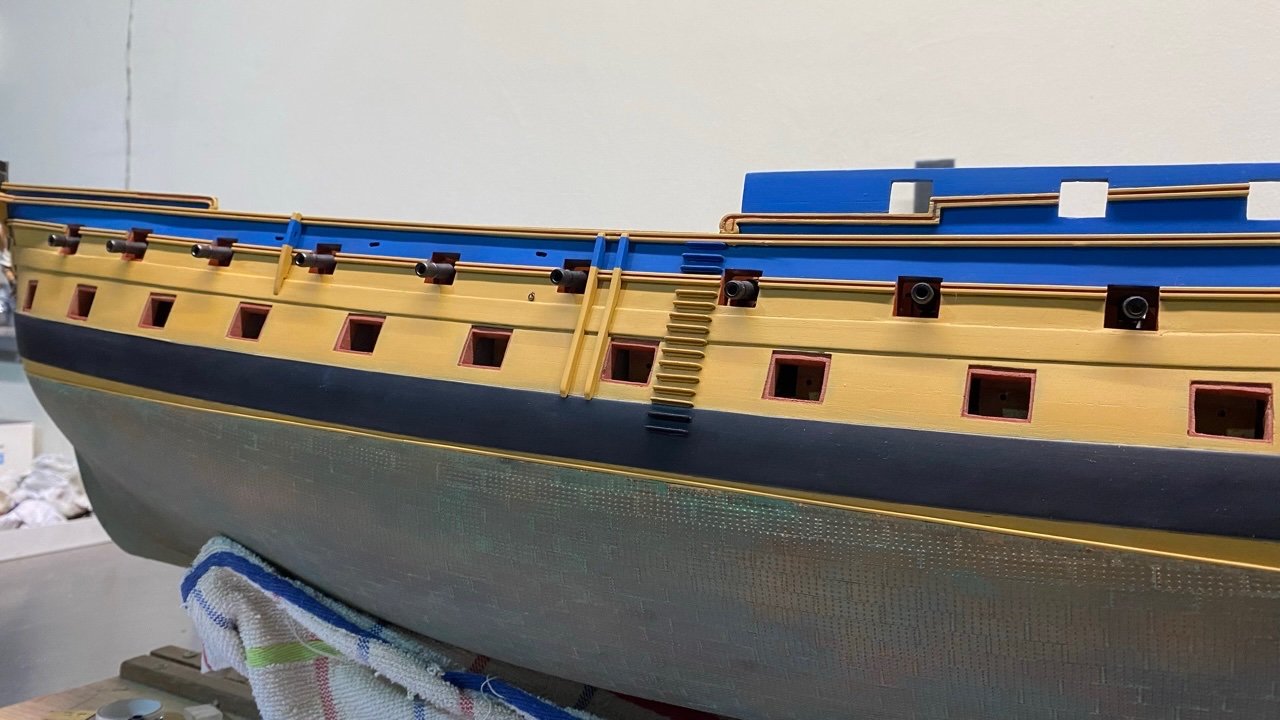
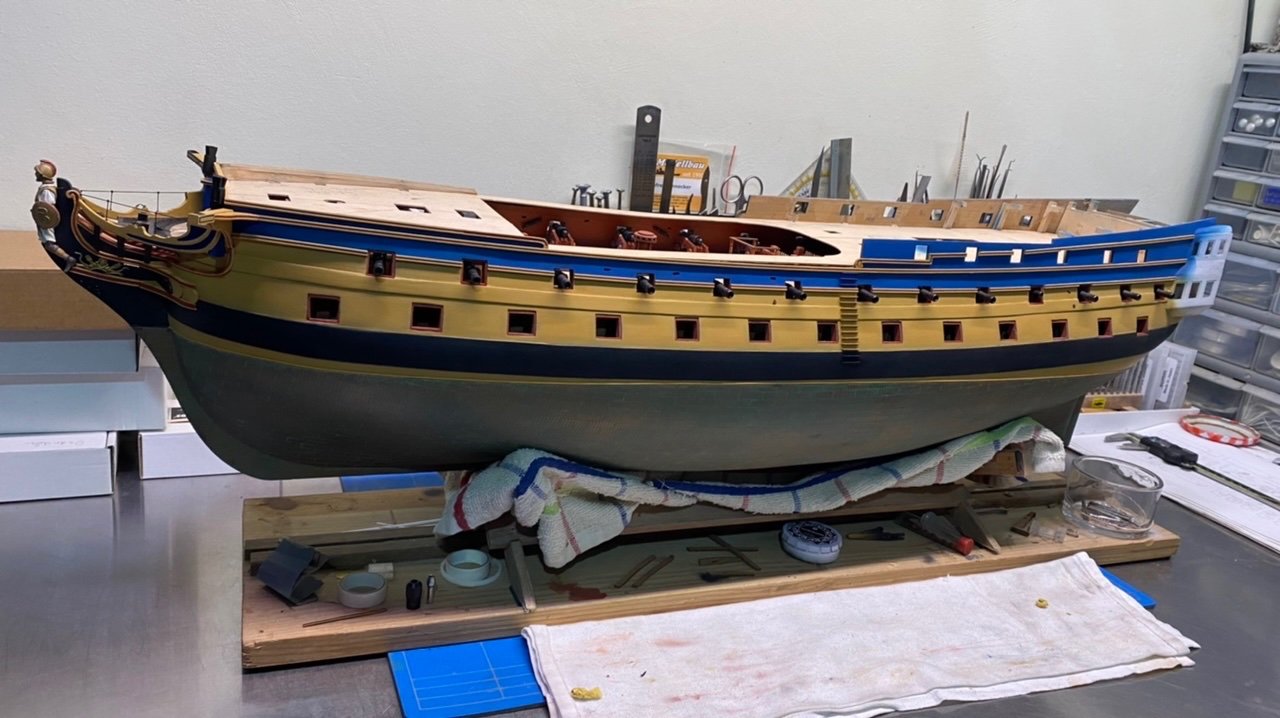
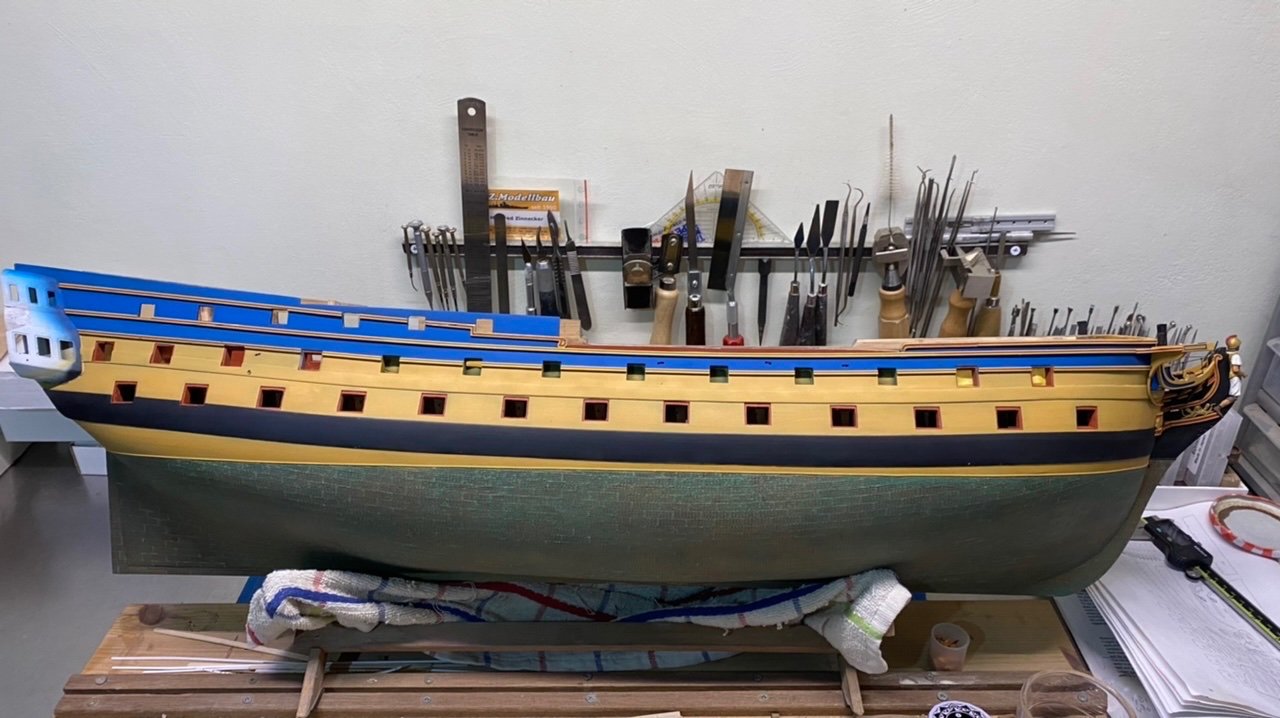
Thanks for the nice words and thumbs up. A bit further. Put the model outside in the warmth for a few hours (not in the sun) and the result the paint hardened nicely, so I could paint the gun ports on the inside and add a red trim to the trim. Plus repaired some minor damage. The result "we are back to square one". So can now start with the the stairs on the outside of the hull again, plus the necessary things,
-
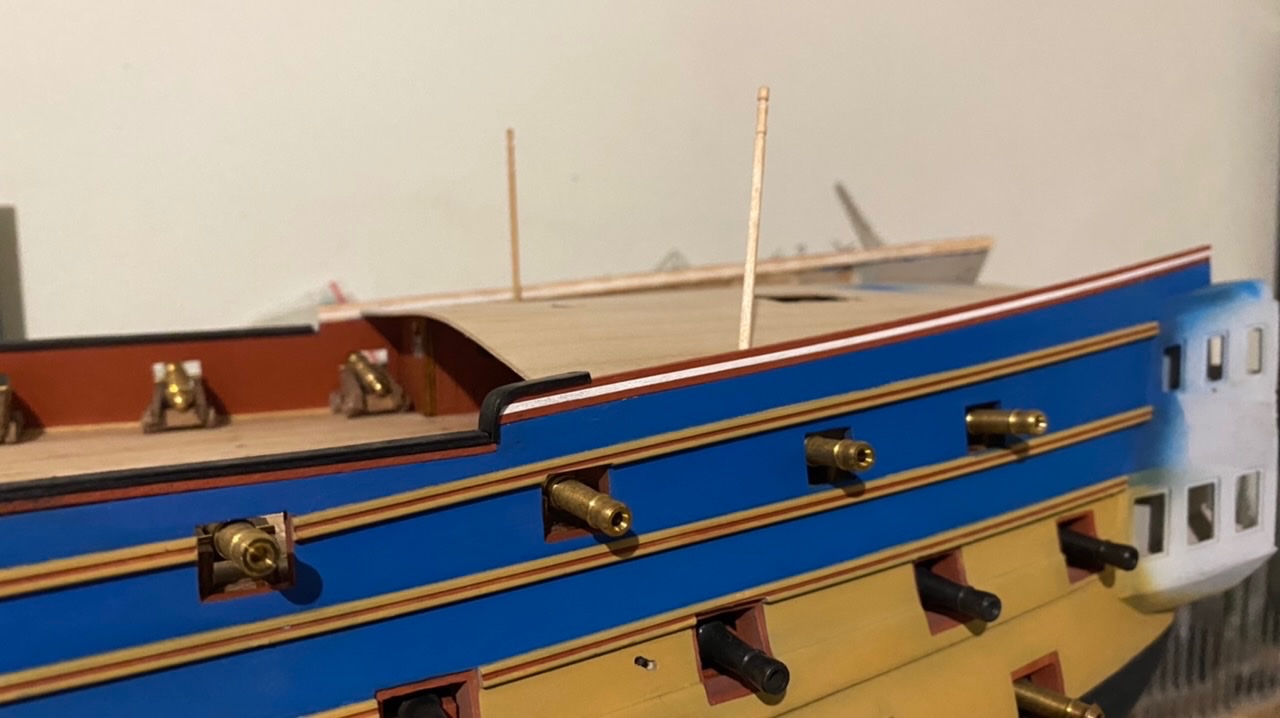
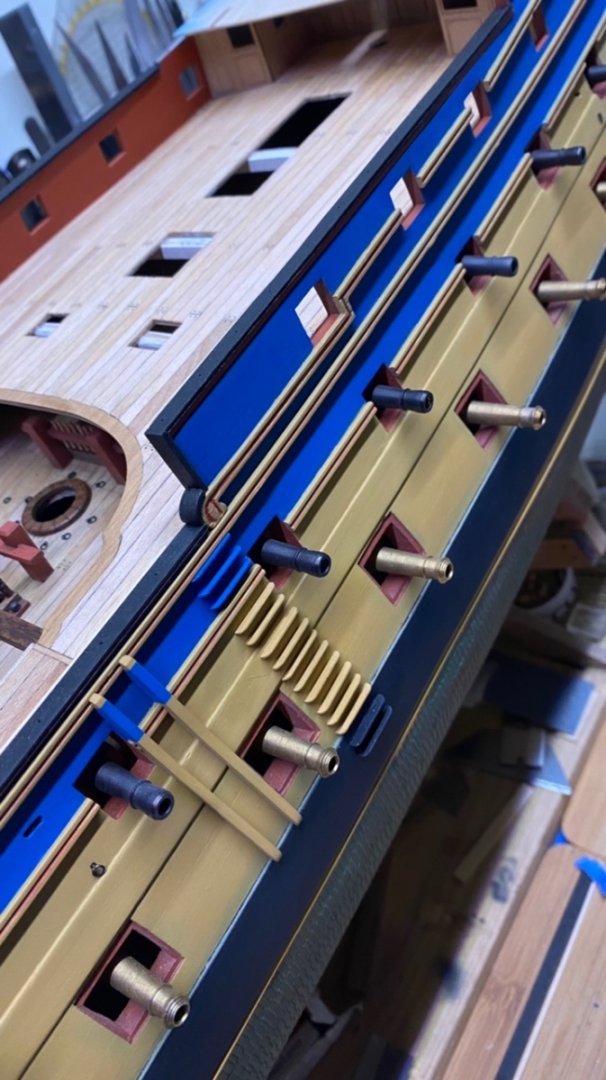
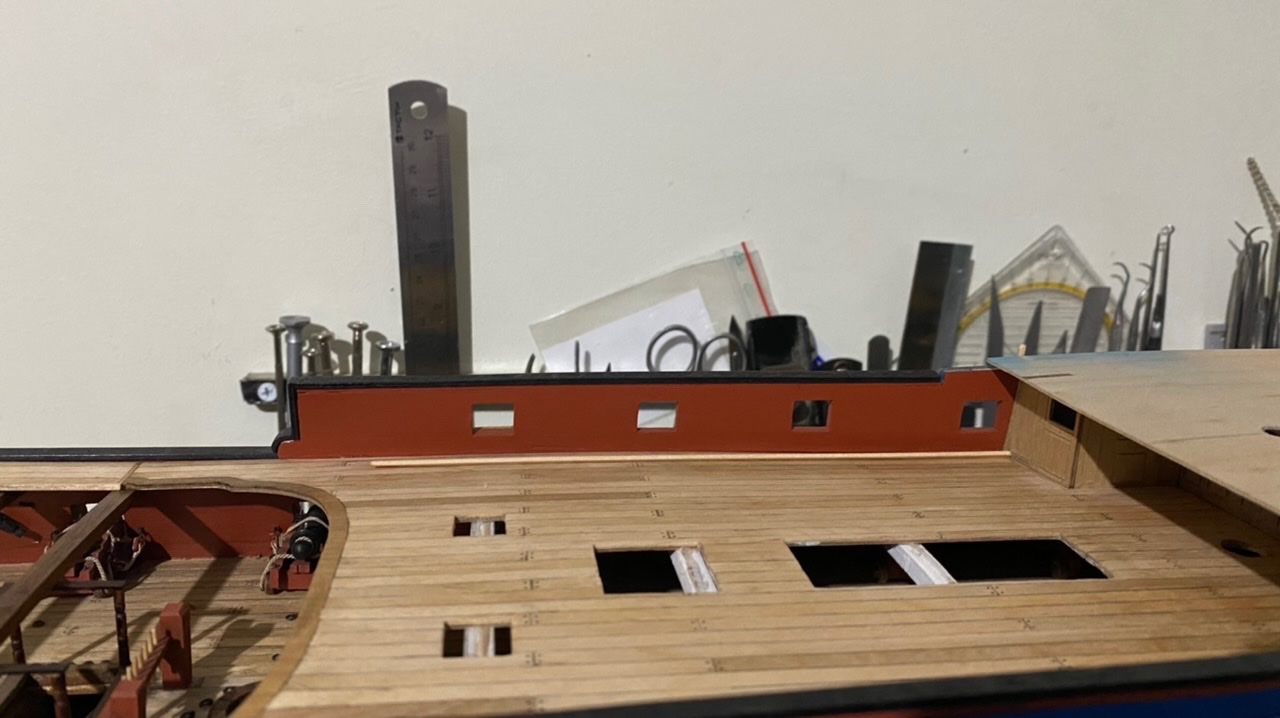
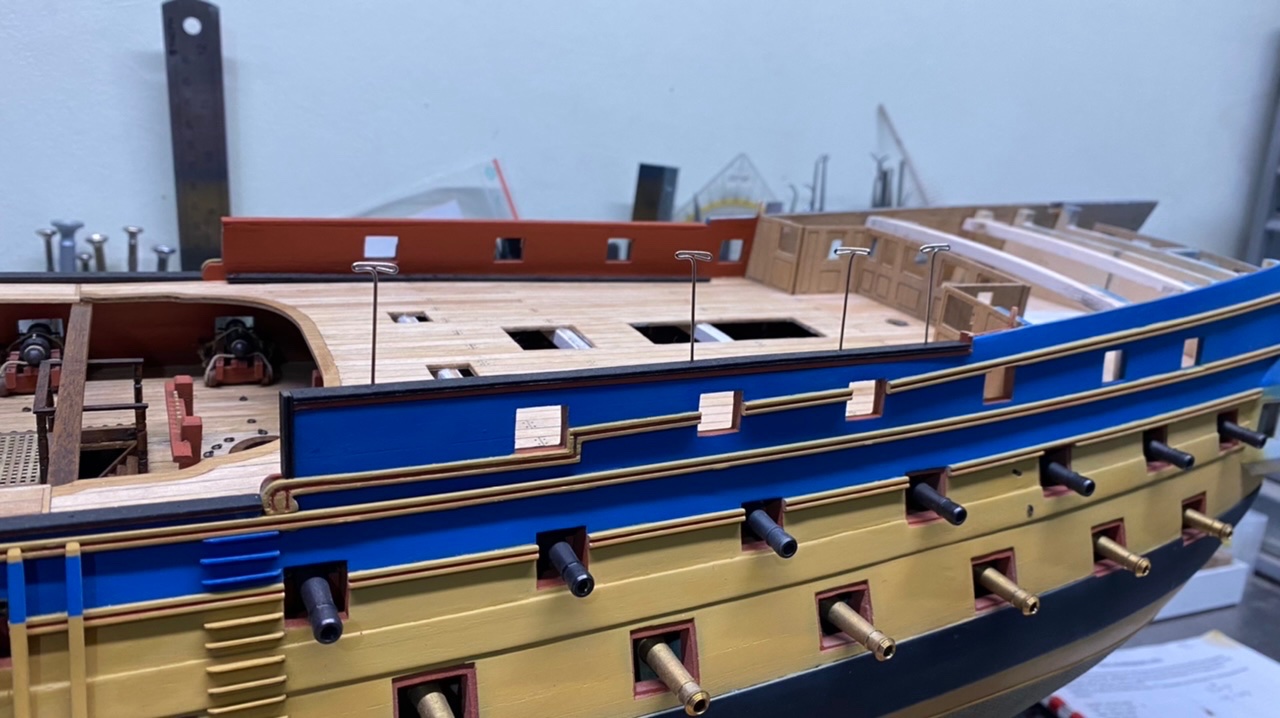
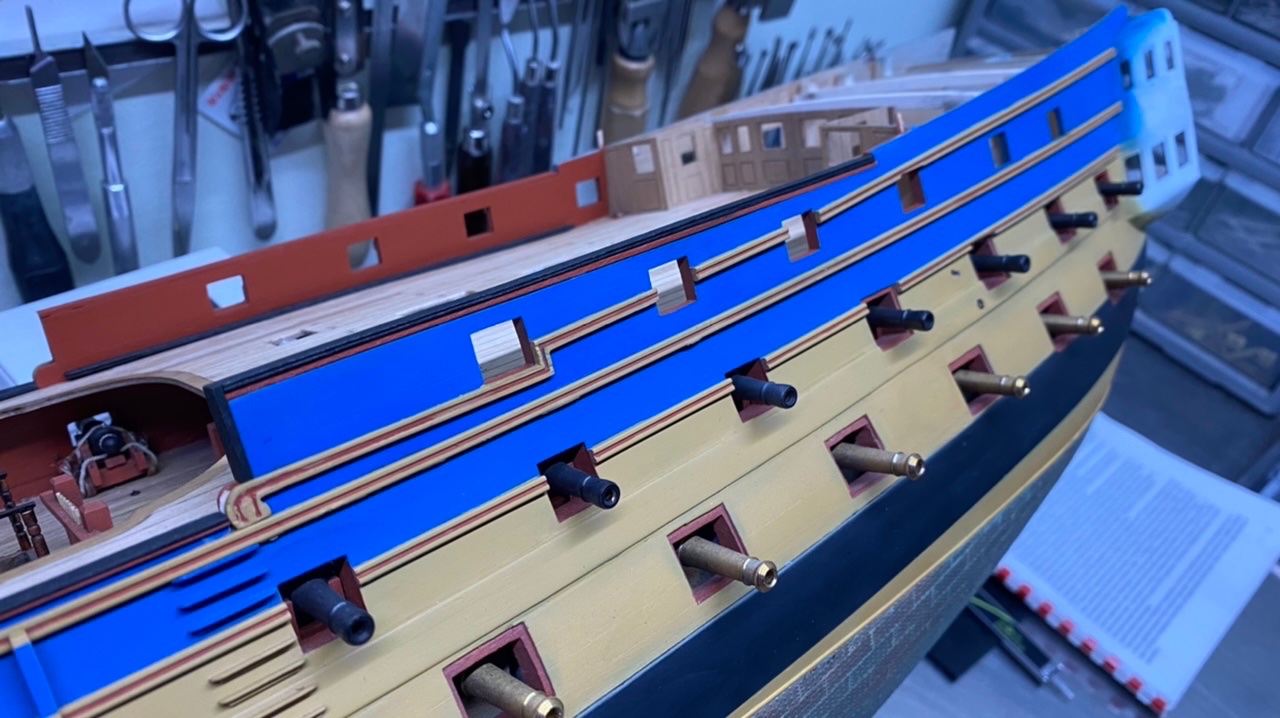
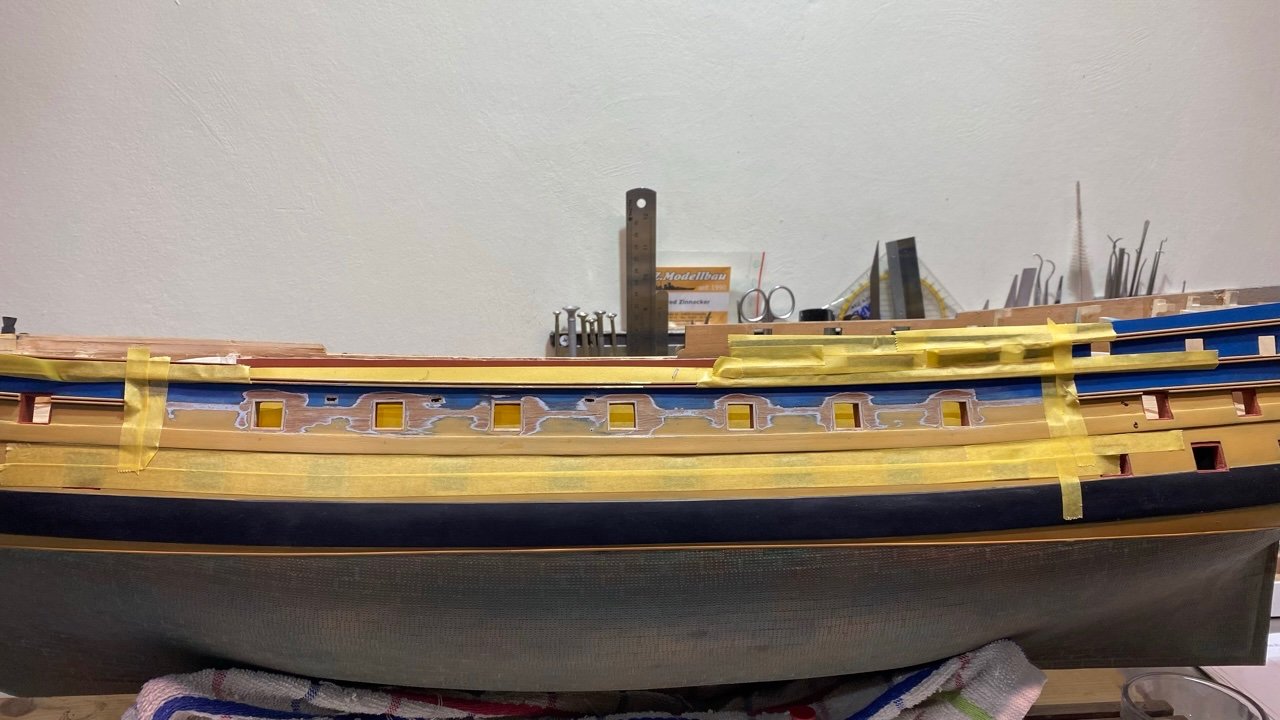
A bit further on Given that I am waiting for a serving machine. To make the rigging for the guns. In the meantime I started with the stairs on the outside of the hull. While determining the location on the drawing, my eye fell on the edges (rebates) of the upper gun ports, these are at some (6 piece) and at some not (7 piece) Oops, how stupid of me, while cutting out the gun ports I blindly assumed that they would all be executed with hatches, …,not so! So acting like I never saw it and just kept going and ending up fooling myself or taking everything off and redoing it. Then just swallowed and took everything off and redid it. Broke all the mouldings away and then filled the rebates with 1x1mm strips, Sanded and filled where necessary, then placed new mouldings, primed everything again, and then sprayed it in the right color, only the red of the inside of the gun ports and painting of the red frame remains. It was a job in itself, but I am satisfied with the result.
-
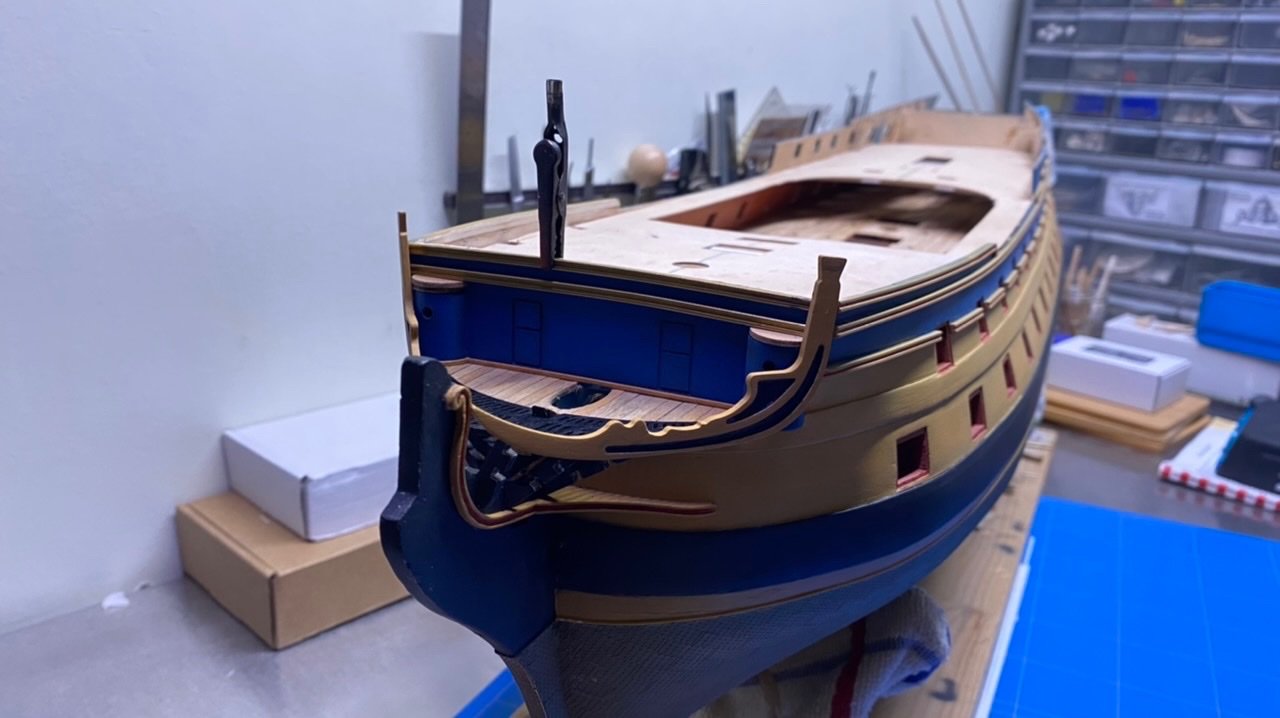
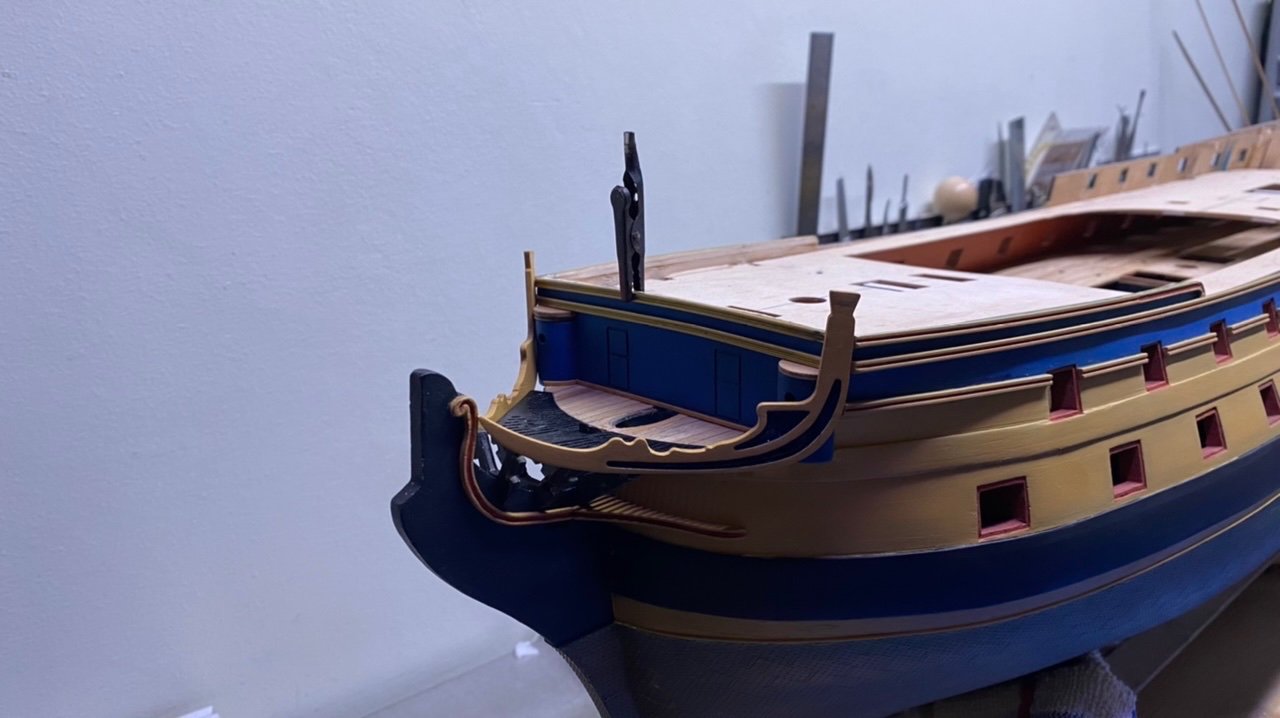
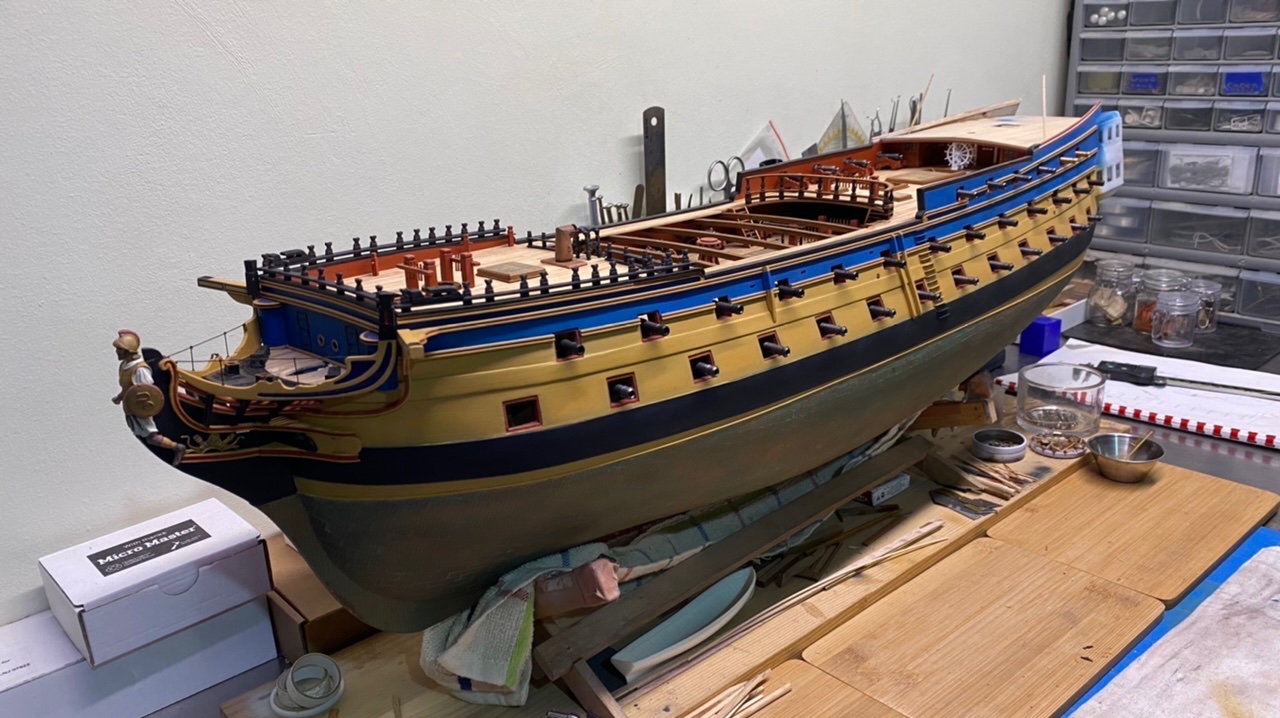
And added the railing to the galleon hereby I consider the chapter galleon finished up to the next chapter…….


-
Everybody thanks for the likes and watching. Went a bit further with the galleon, and made the catheads, As there is little mention of them in the building description, I took a number of contemporaries, including the Victory as a guide, and came to the following. and made the last mouldings and gave them a colour, also gave the rest of the construction a colour. Only the railing remains to be made, and then the galleon chapter is finished. Below some photos.


-
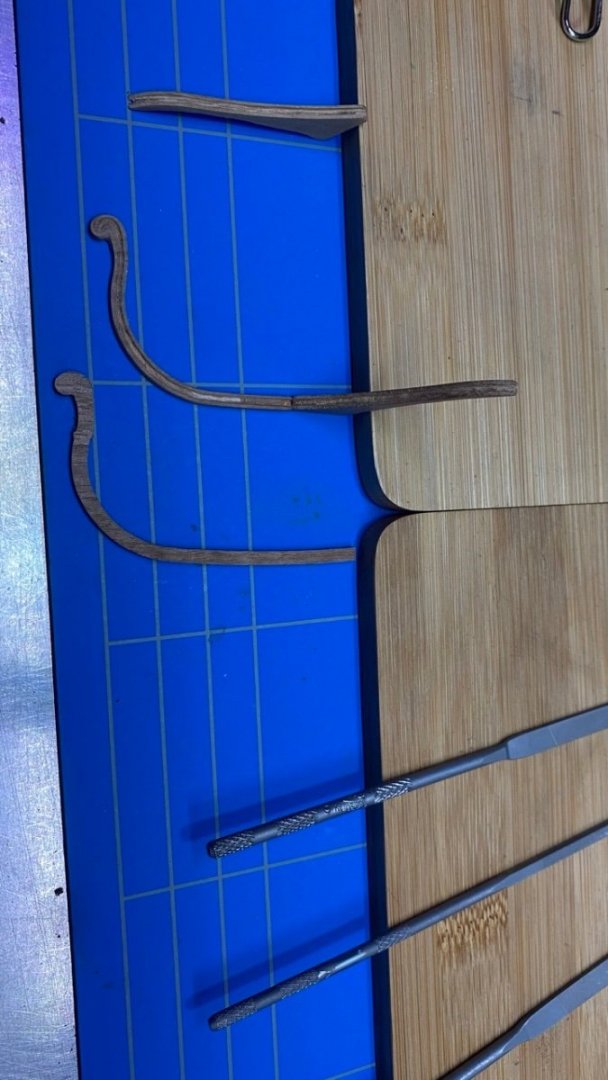
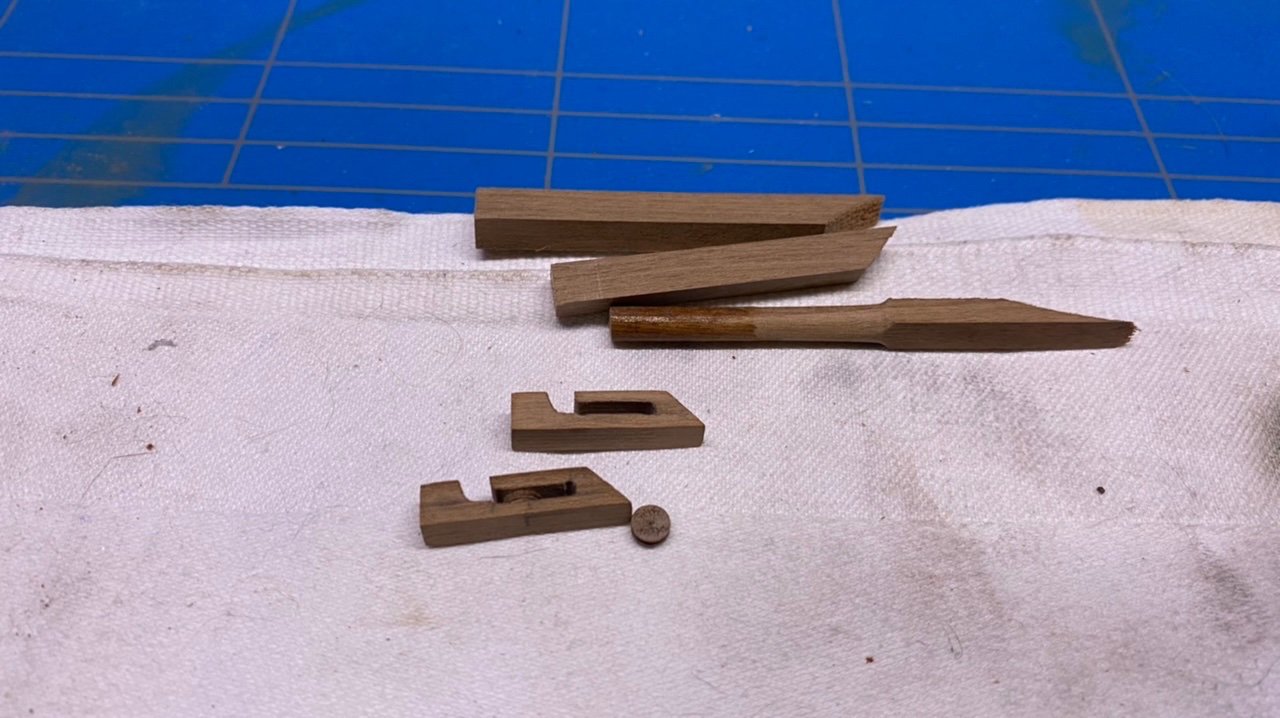
Thank you all for your feedback and watching. still working on the galleon, made the toilets and placed them, also the "knight heads " a bit adjusted, that is to say made some fittings and placed them (eyes to later attach a block and 2 frogs) I also started with the "boomkins", which I turned out of a piece of 4mm round, These will be put in the front in a 65 degrees angle, for which I made and placed a rosette. To make it look a bit neater. And then attached with a couple of brackets to the railing which I made of brass, I will later place the blocks that are attached to the end of the boomkins. Remains the railing and the so-called "cat heads" plus a number of decorative strips.


-
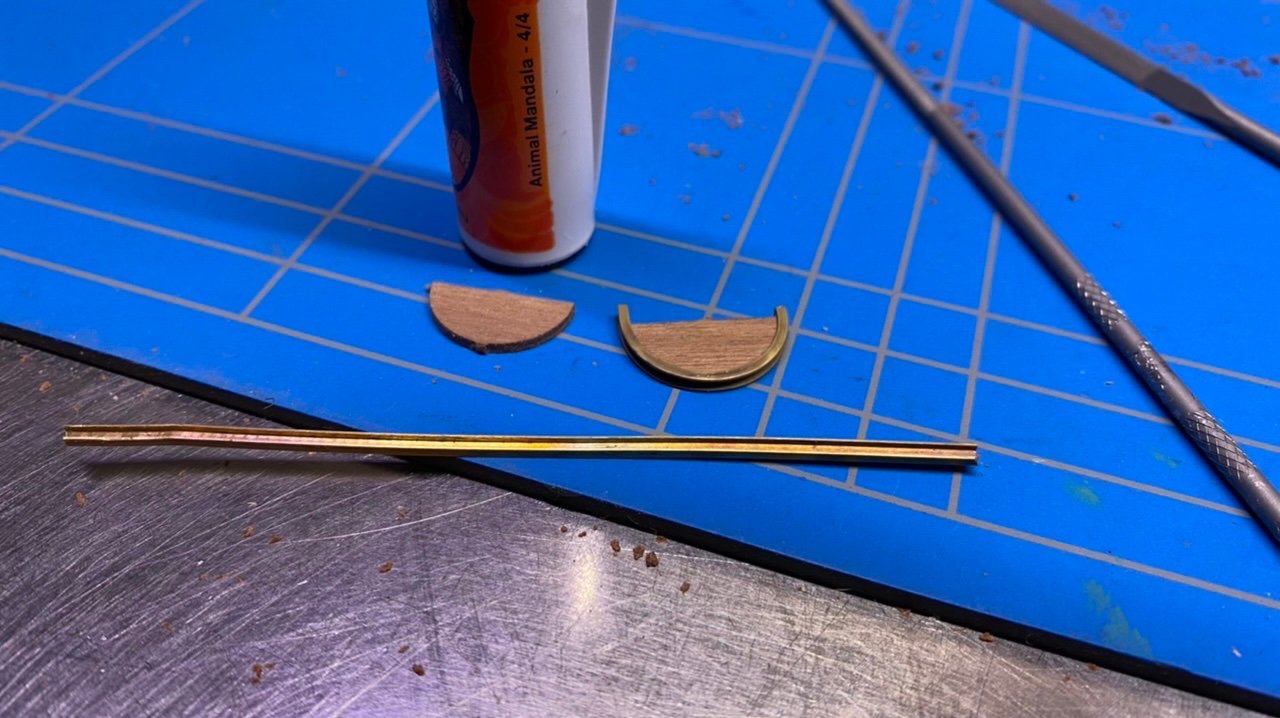
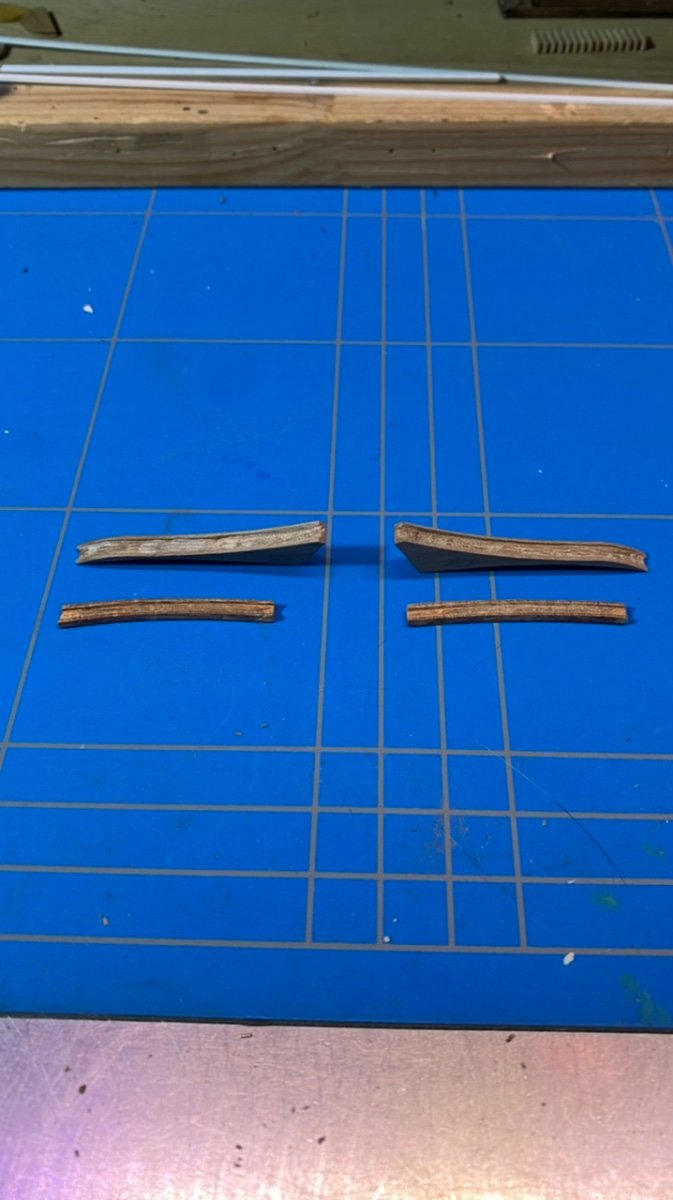
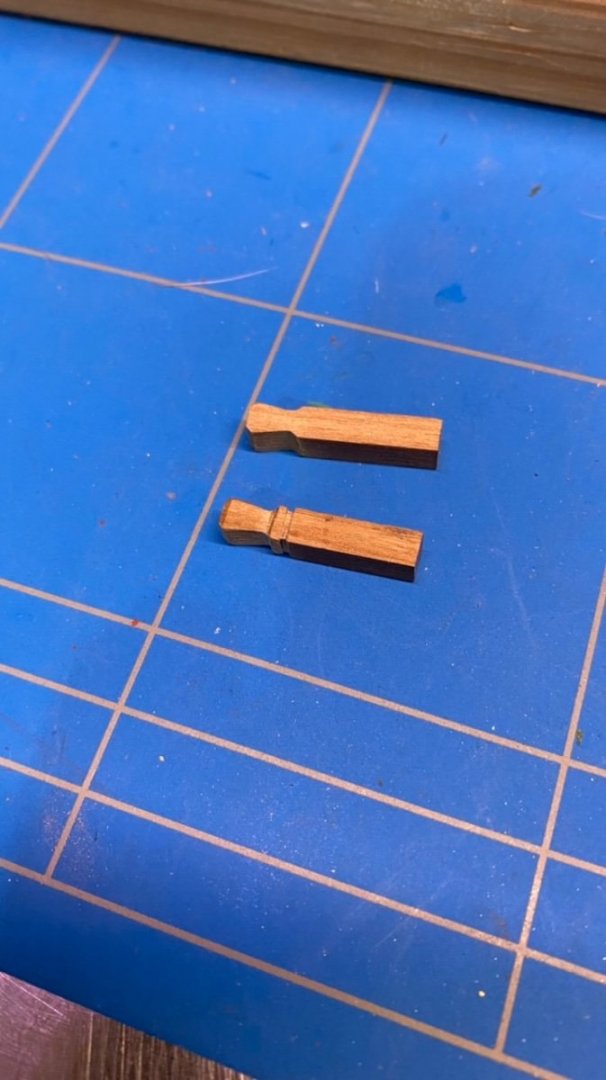
A bit further on. The last 2 ornaments were finished, and then given a bit of colour. Also made the 2 (bettings ??) or whatever they are called, out of 5x5mm walnut. And then made black, they are still standing loose. Below some photos for the impression.


-
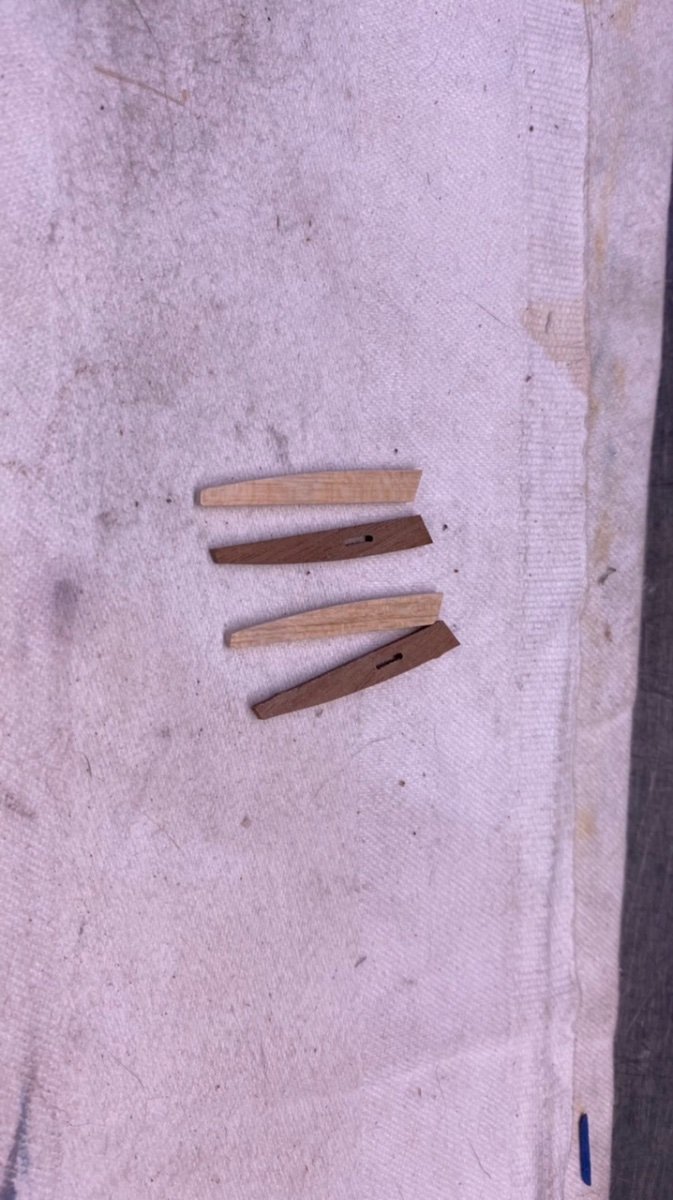
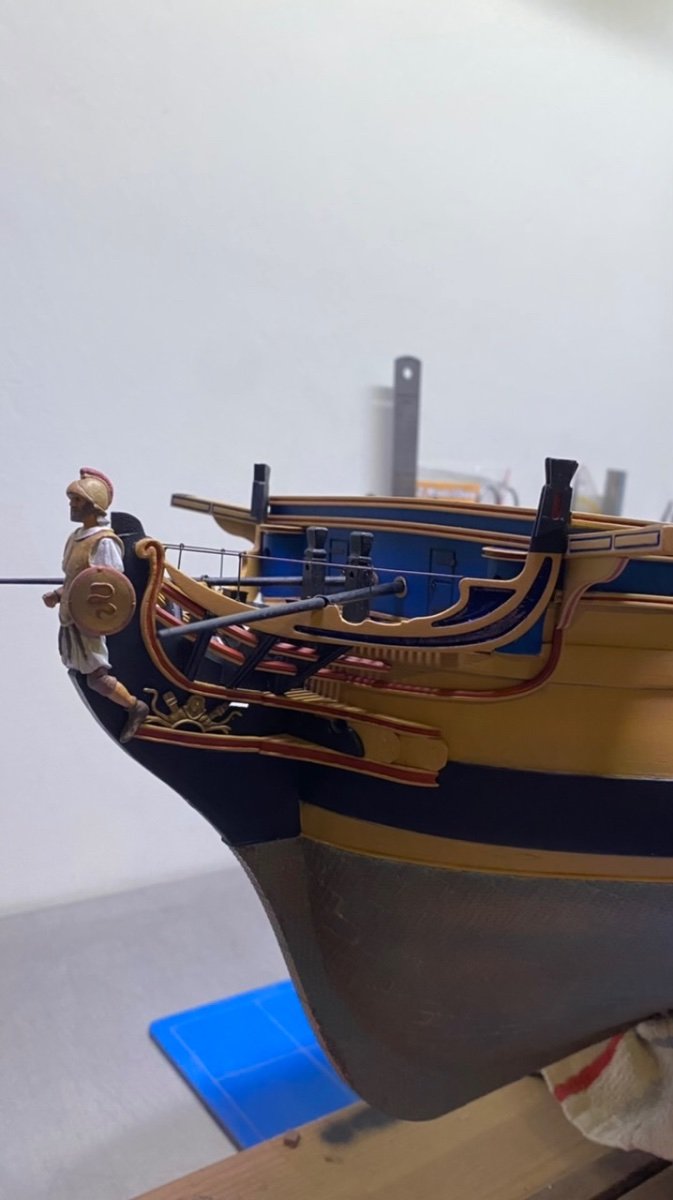
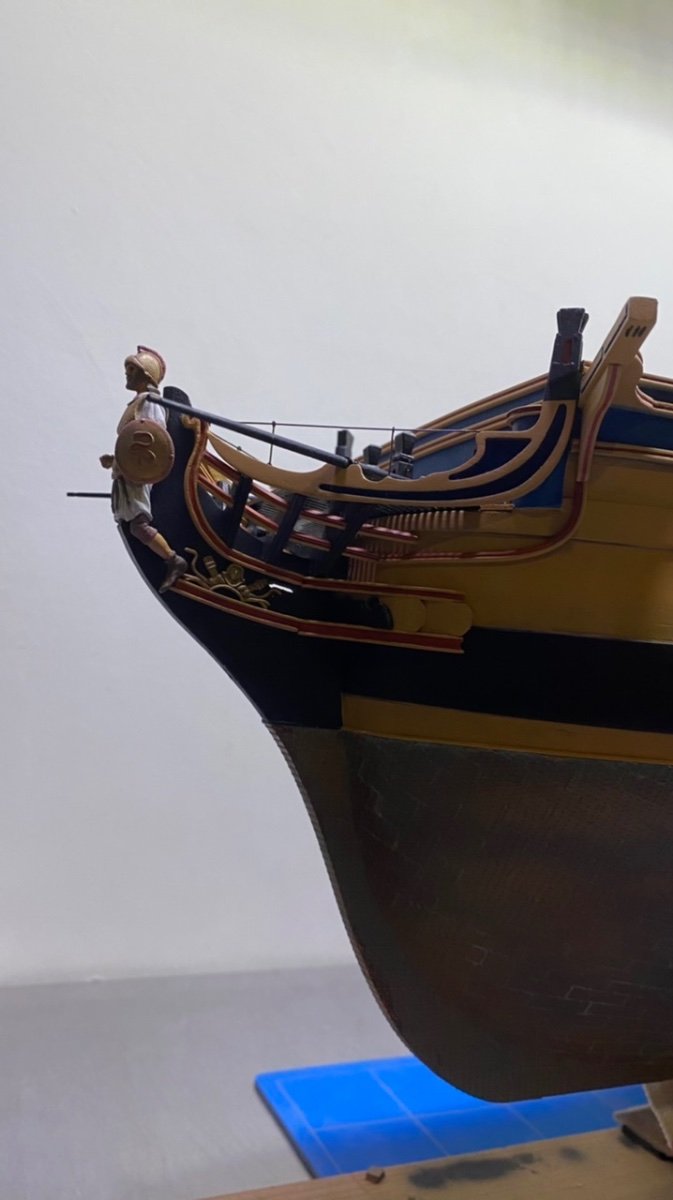
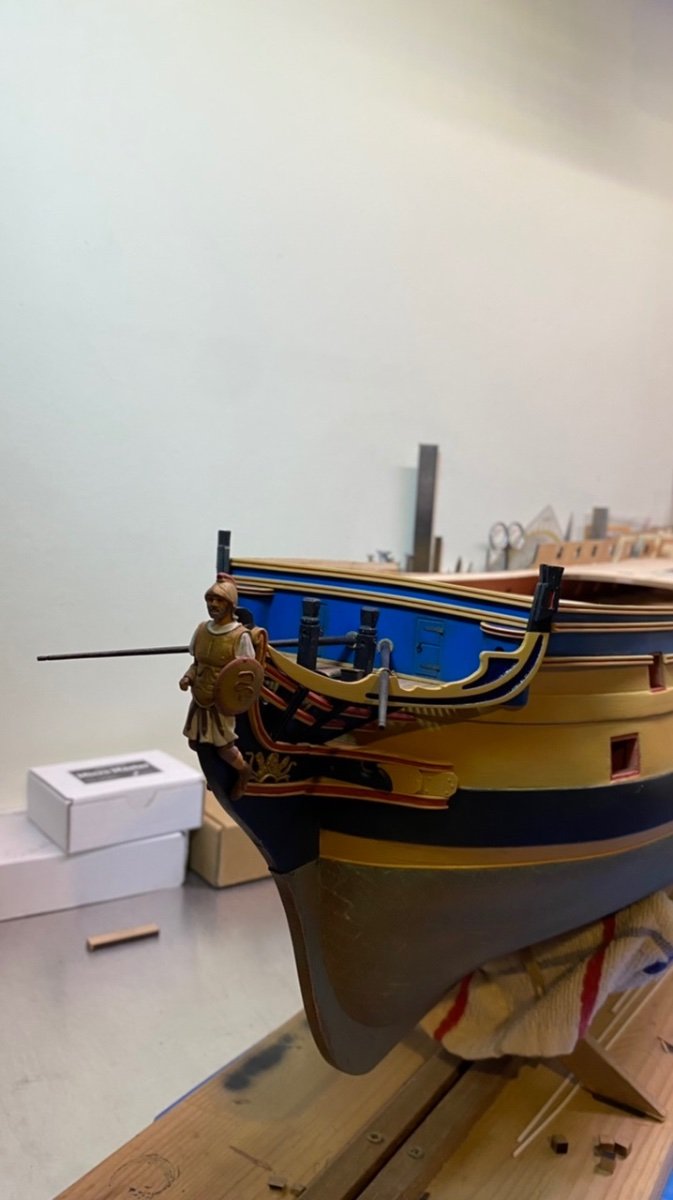
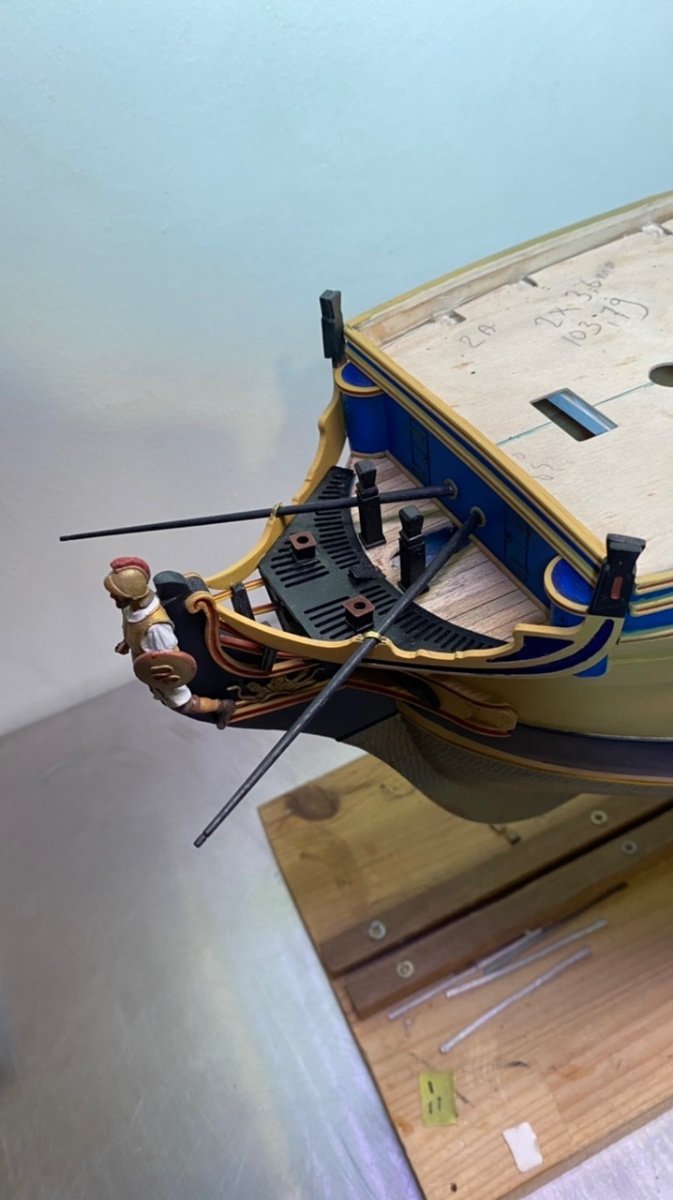
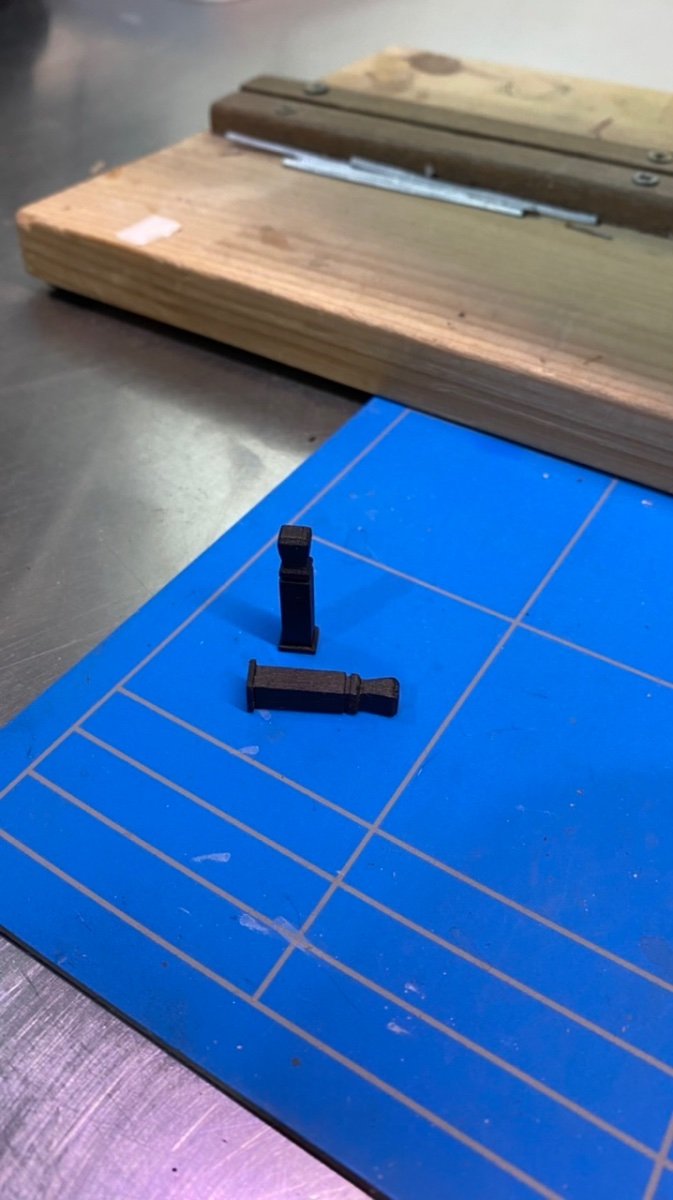
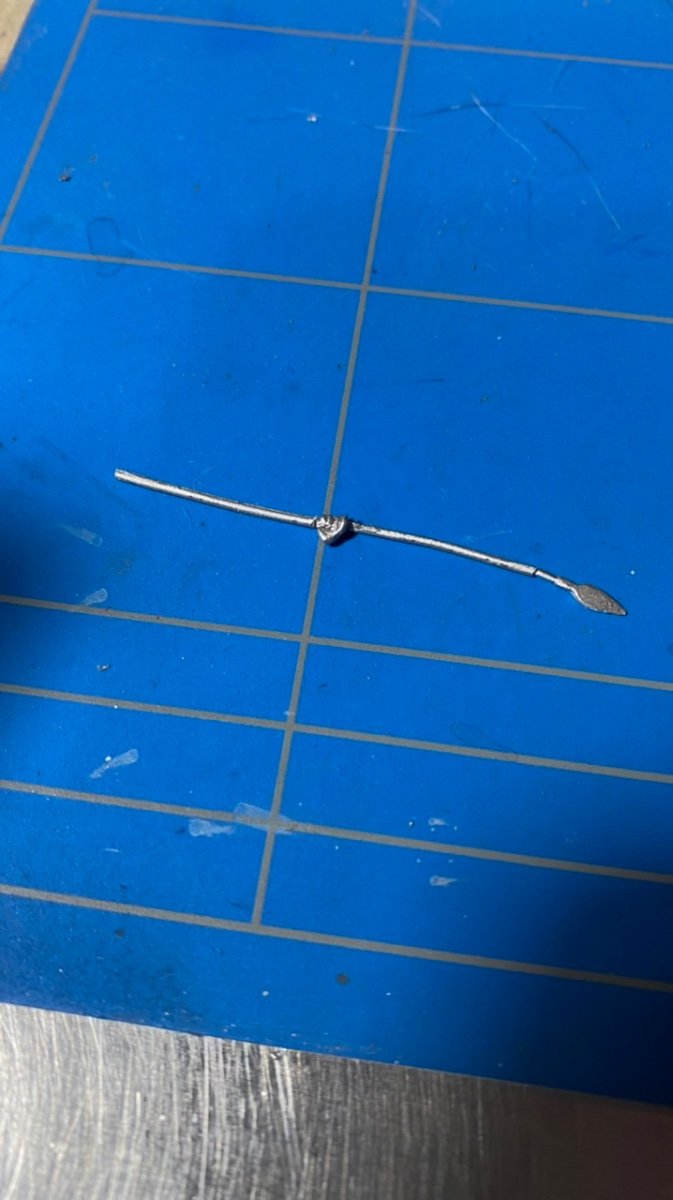
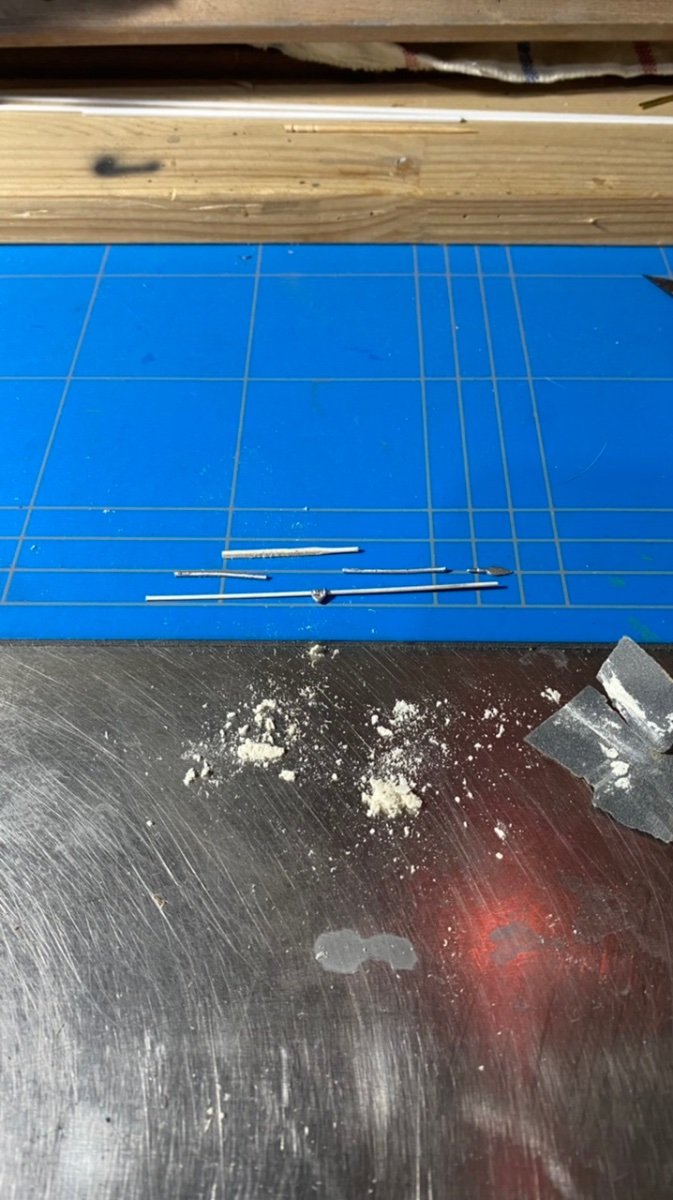
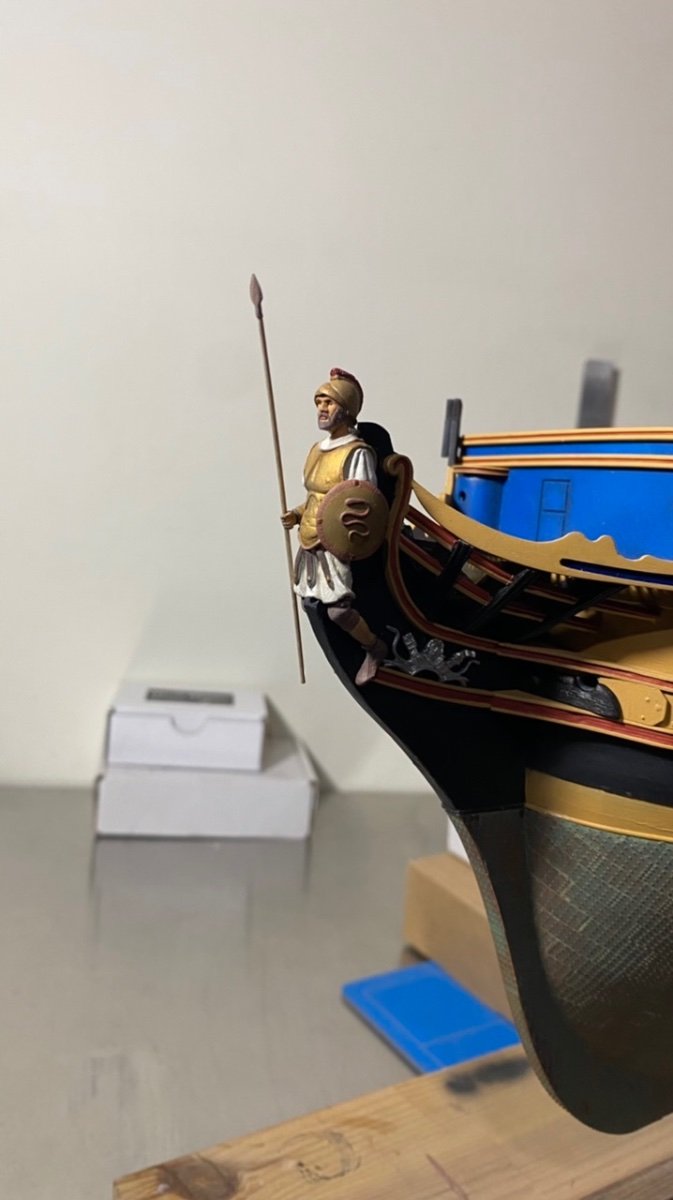
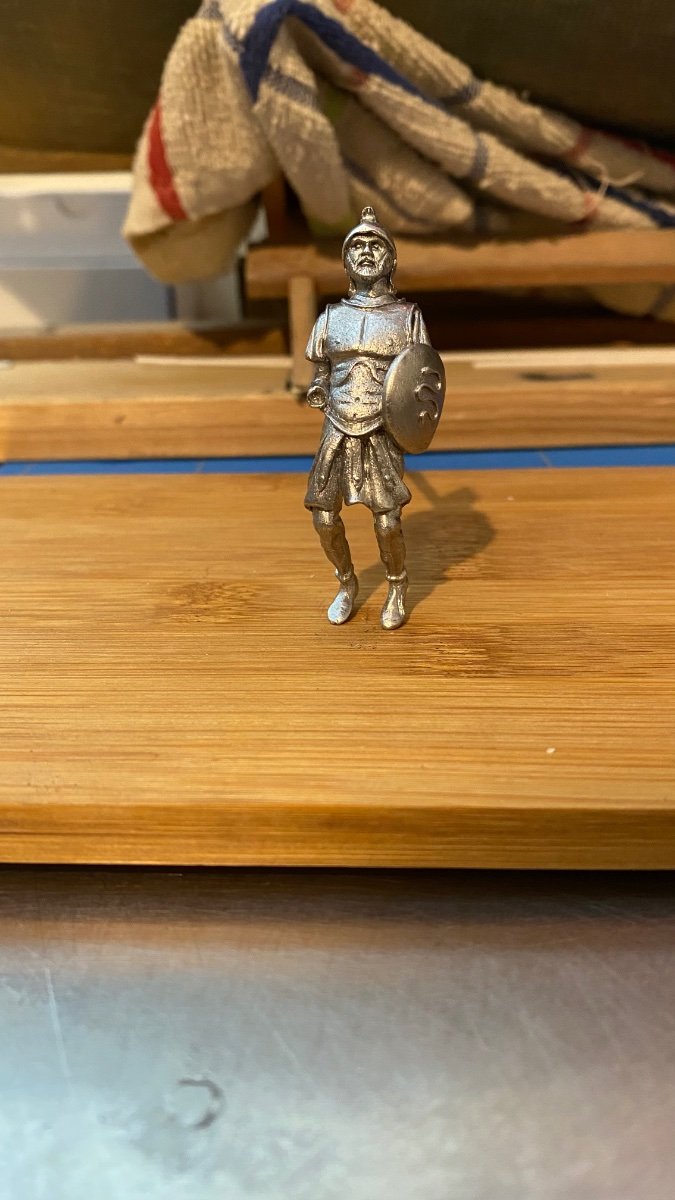
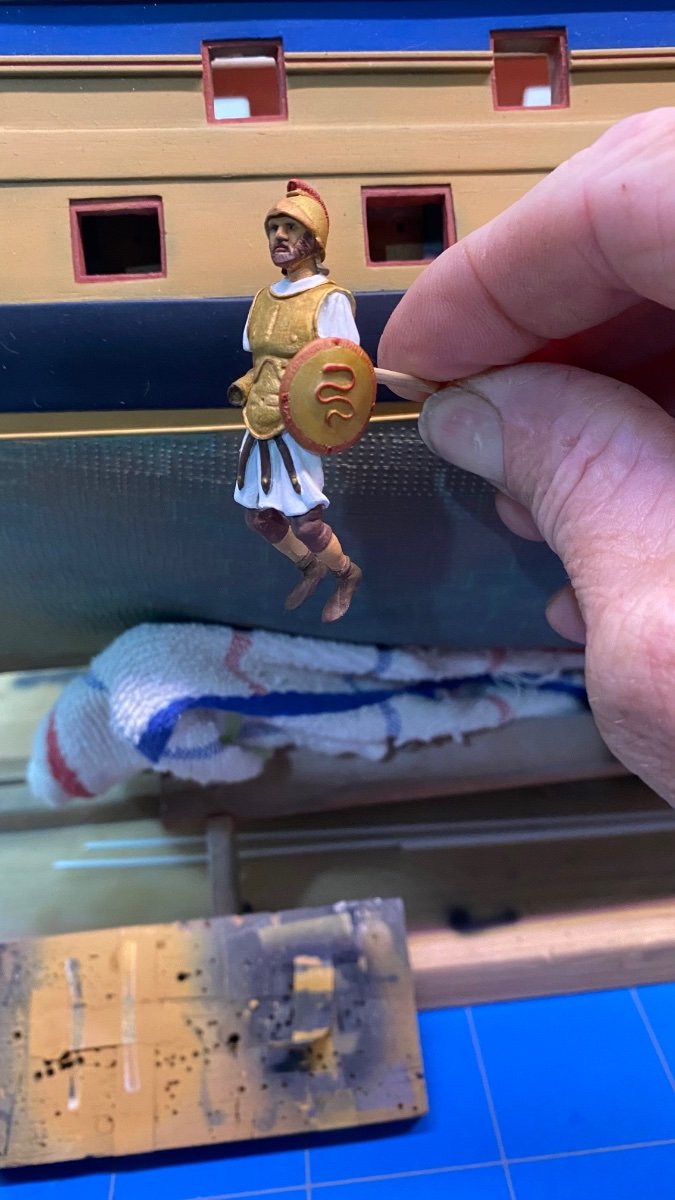
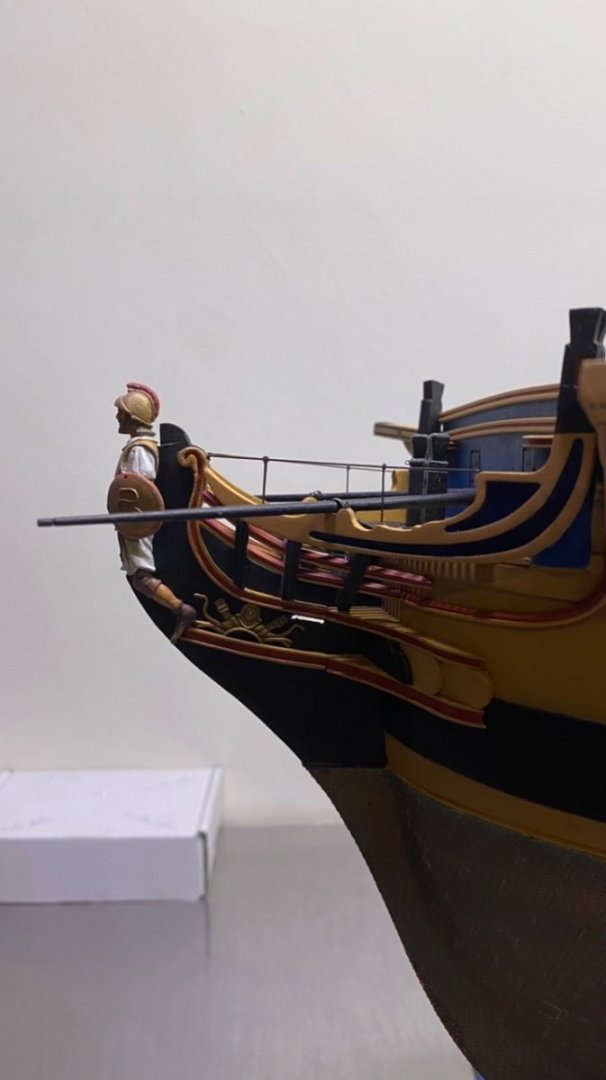
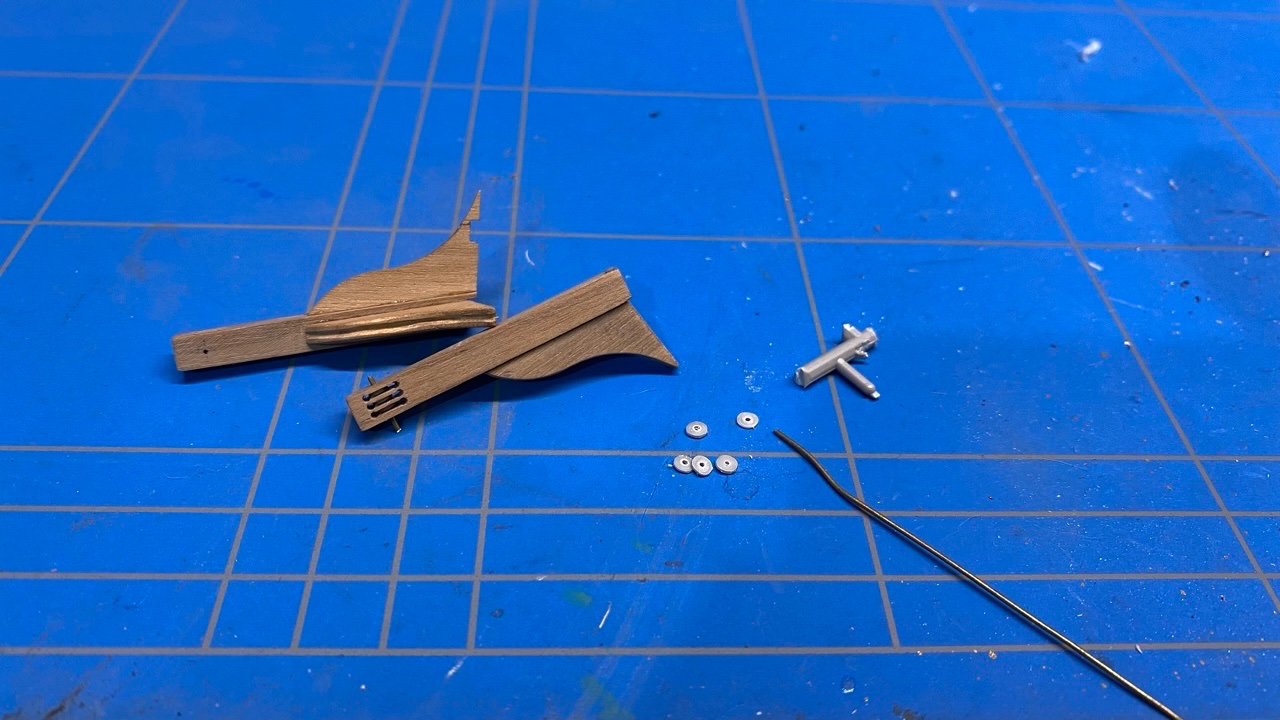
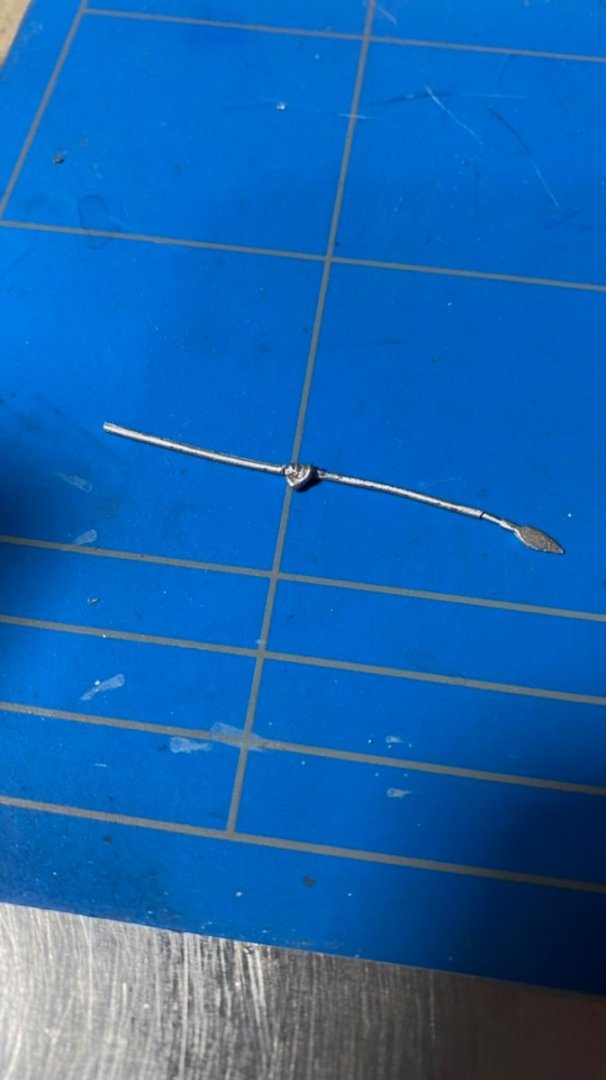
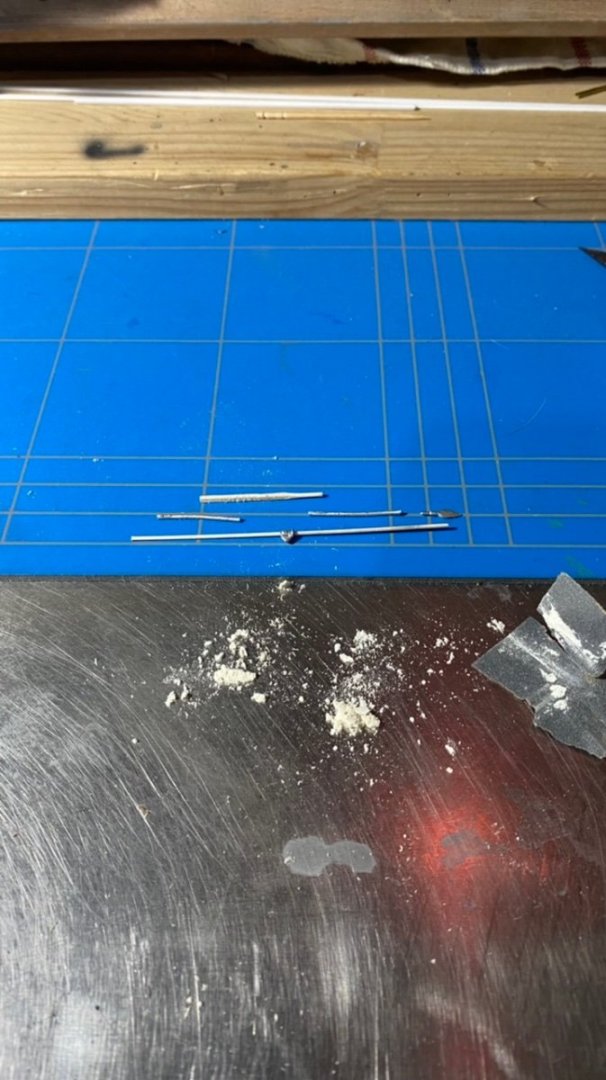
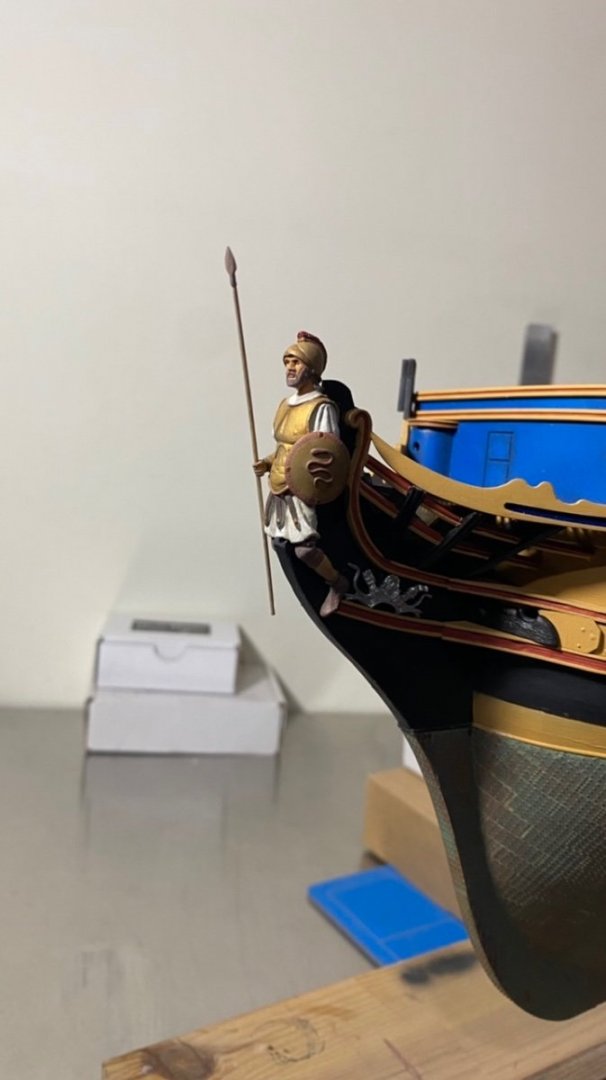
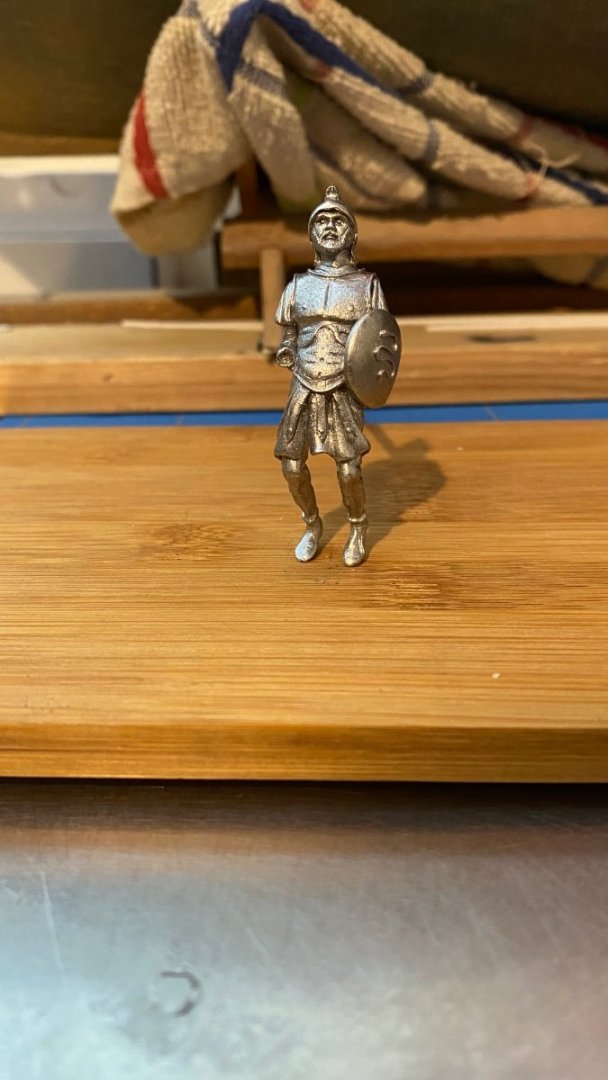
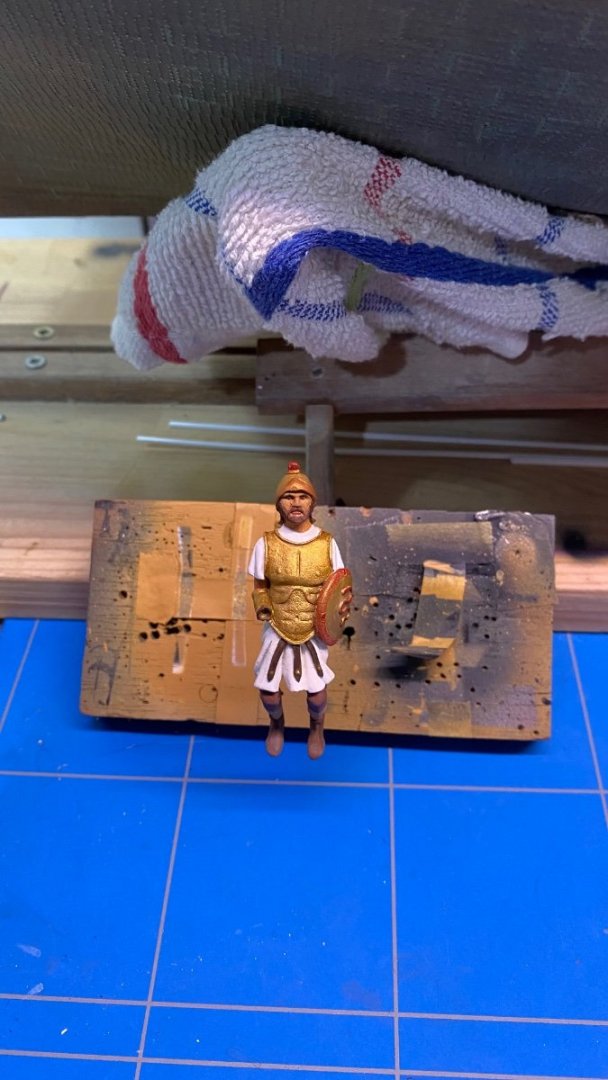
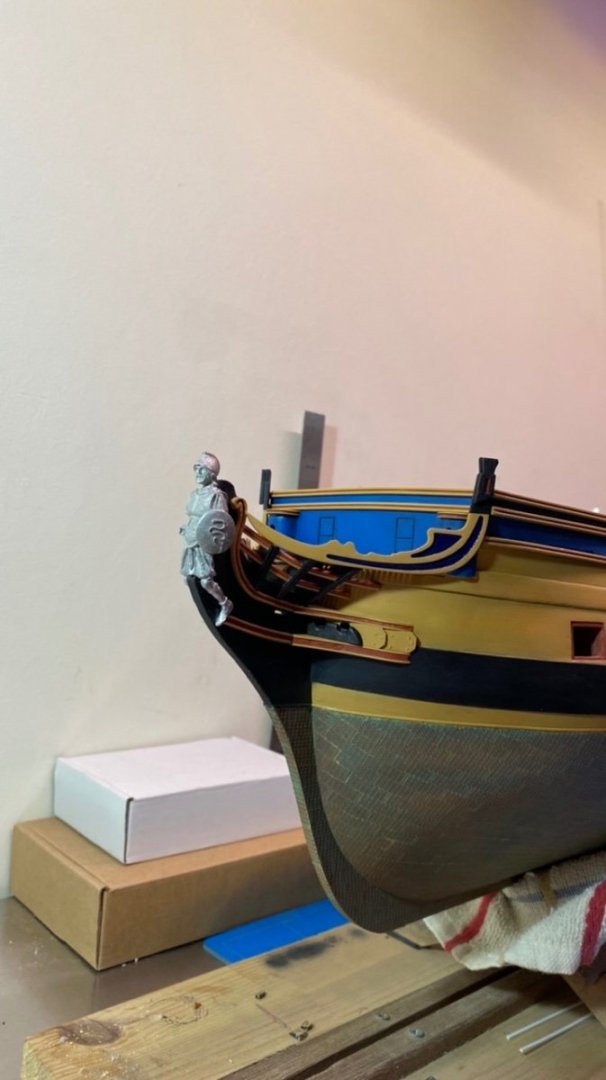
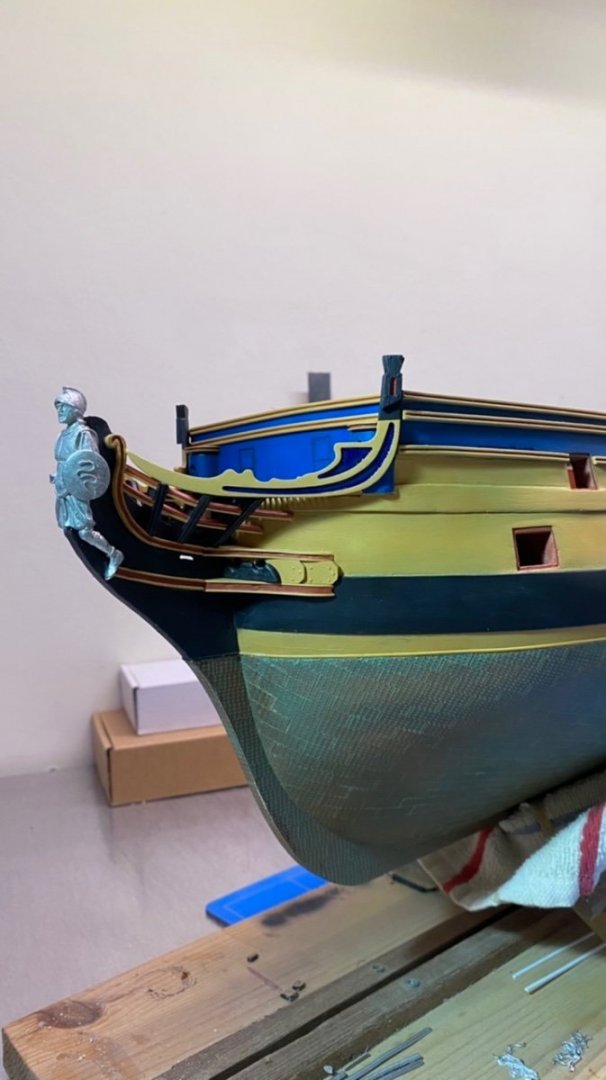
Thank you all for your thumbs up and for watching. Still "quickly" made his right hand and spear. I found the supplied spear/lance a bit on the coarse side, so I decided to make a new one. First, I removed the old one, and then I pierced his right hand (sounds very dramatic, but it wasn't that bad 🙄🙄 Then made a new shaft from wood. And drilled out the spear point, so that the shaft fits well. And then placed the right hand. Now I can place the shaft in the hand, or remove it to prevent damage. Will adjust the length later if needed. Below some pictures.
-
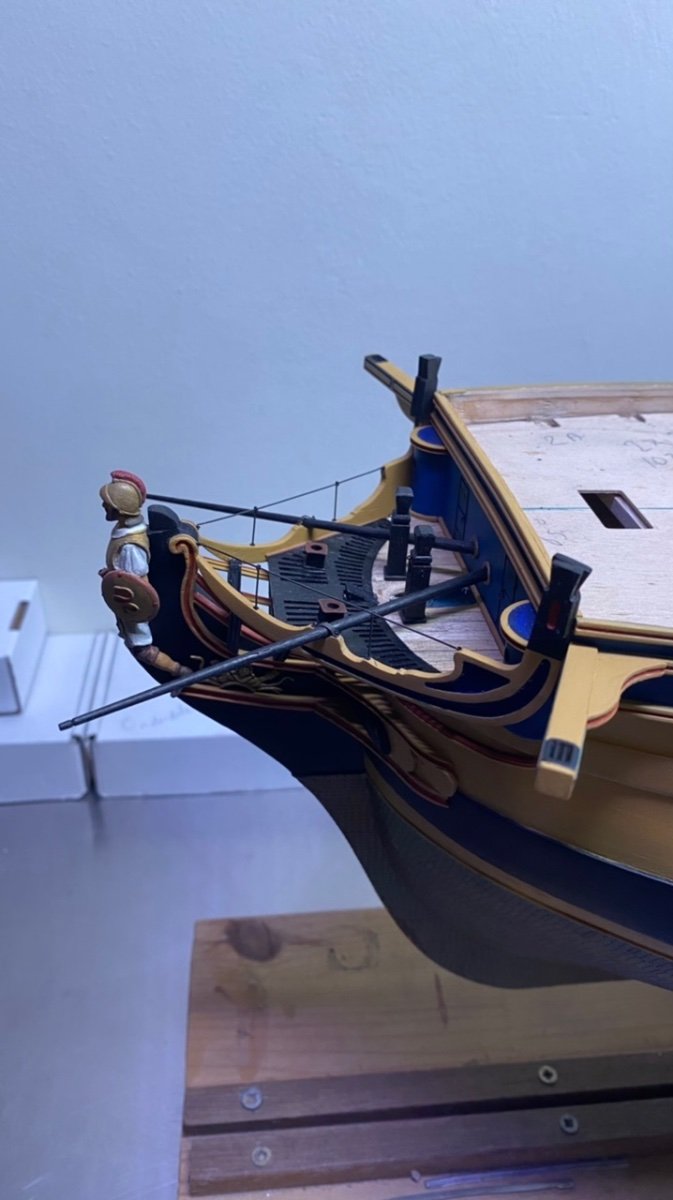
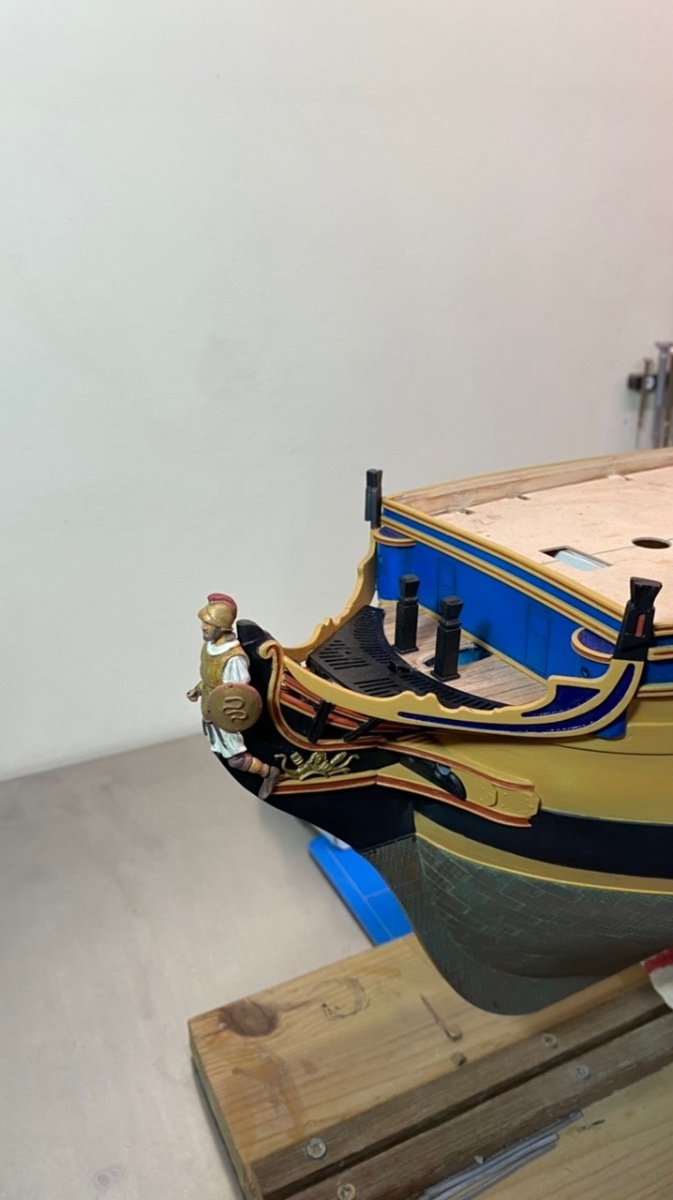
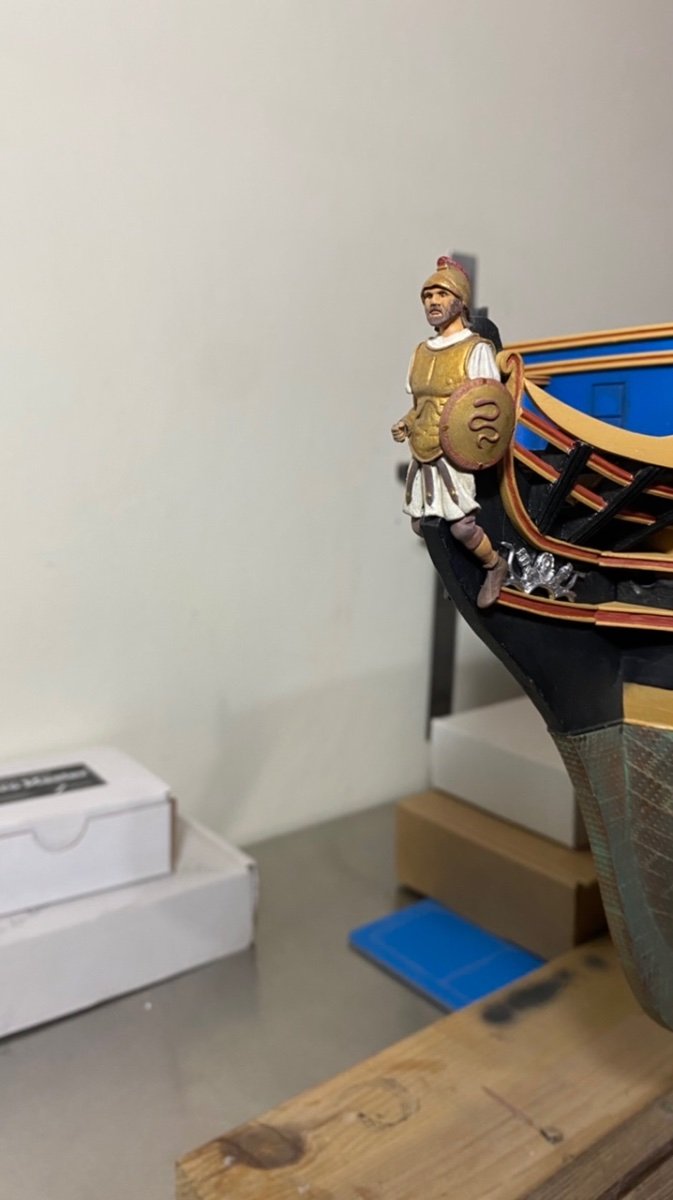
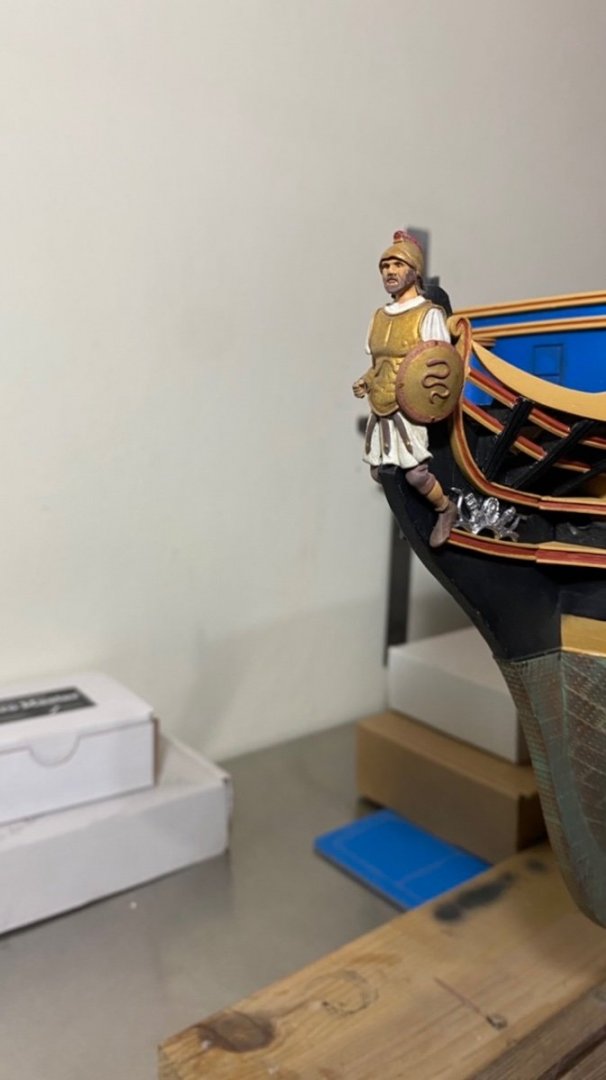
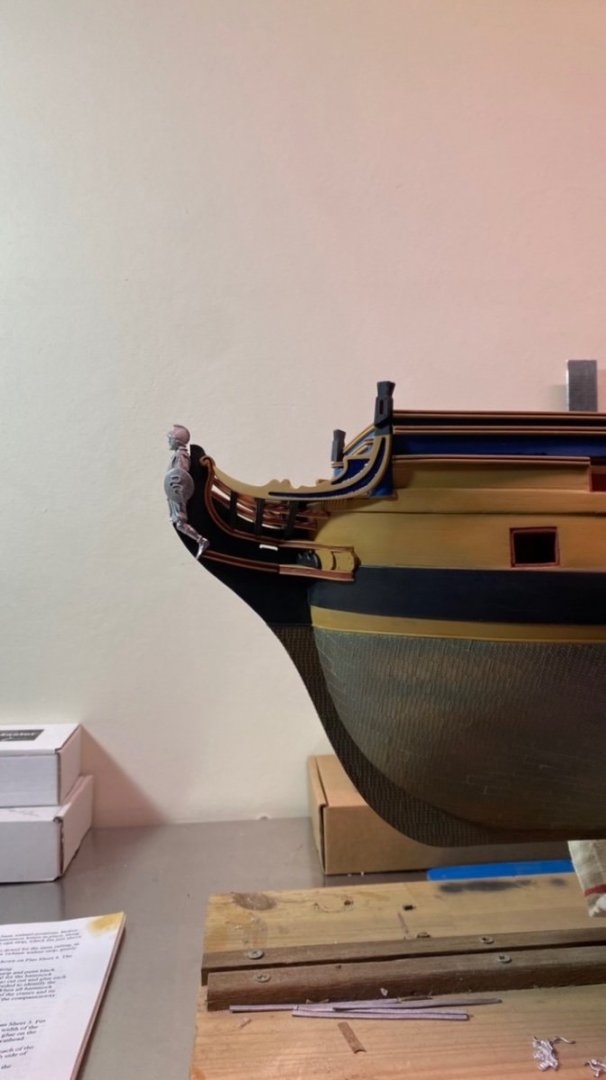
Thank you all for yourfor watching and the thumbs up. I have adjusted the colours a bit in some places, and touched up some details. But I think it's ok now, it's a wooden figurehead and it has to stay that way. I will place the right hand and spear later on, because of the vulnerability of the spear.

-
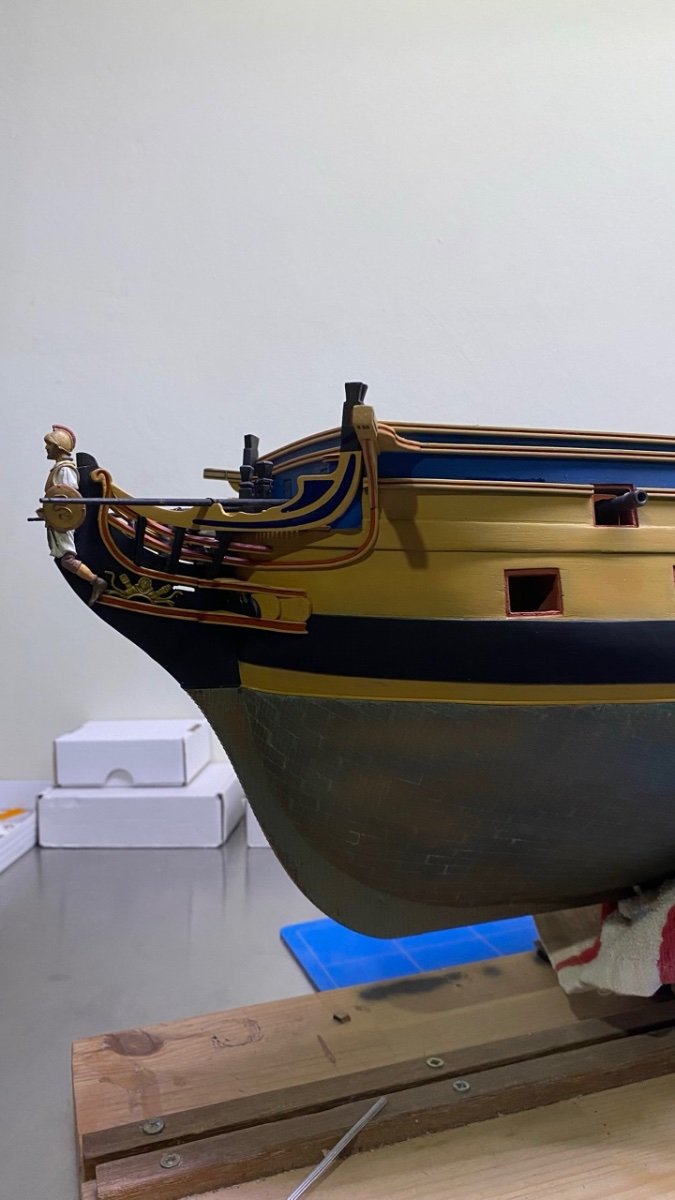
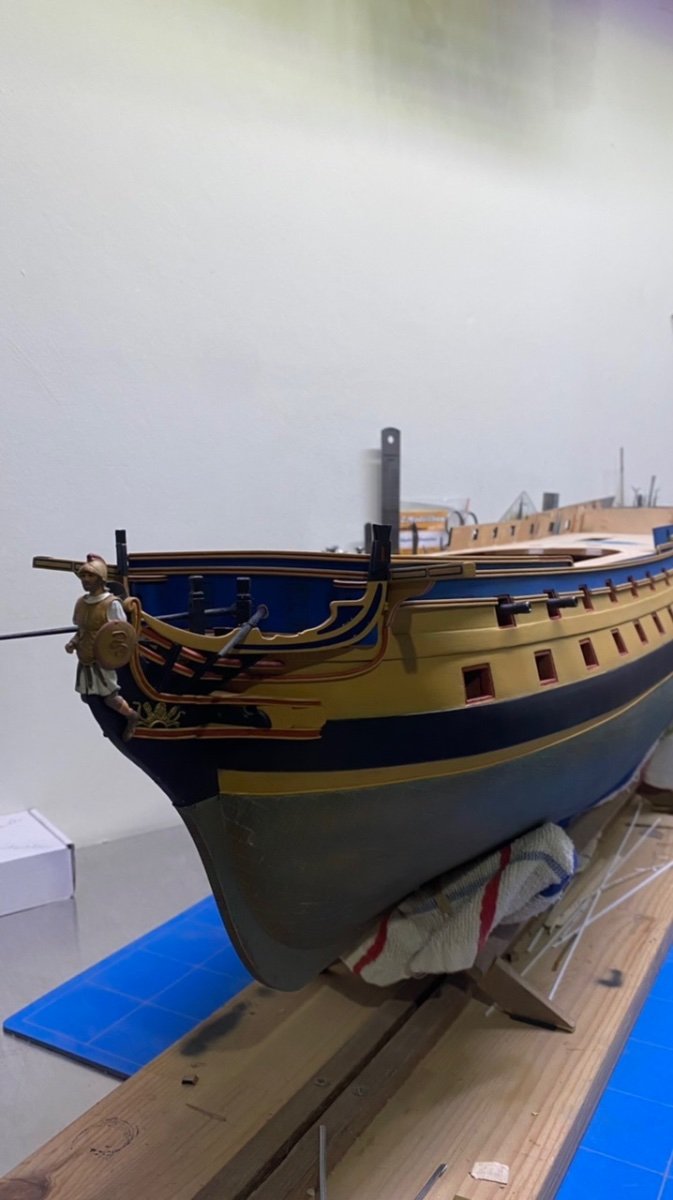
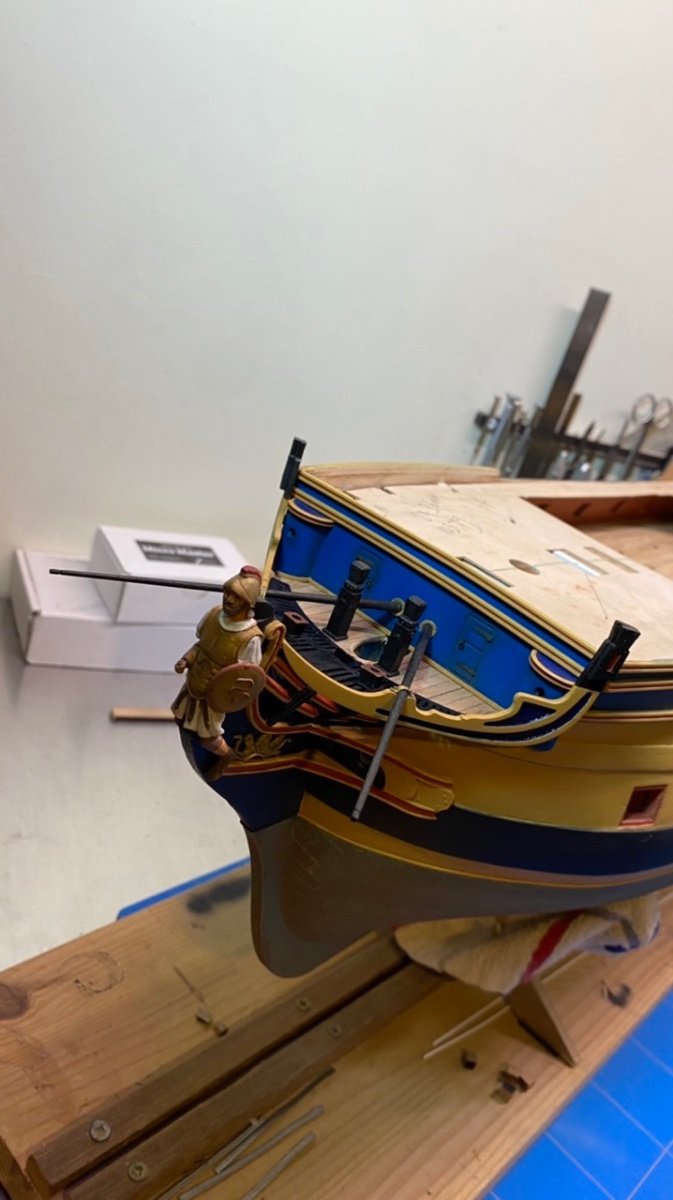
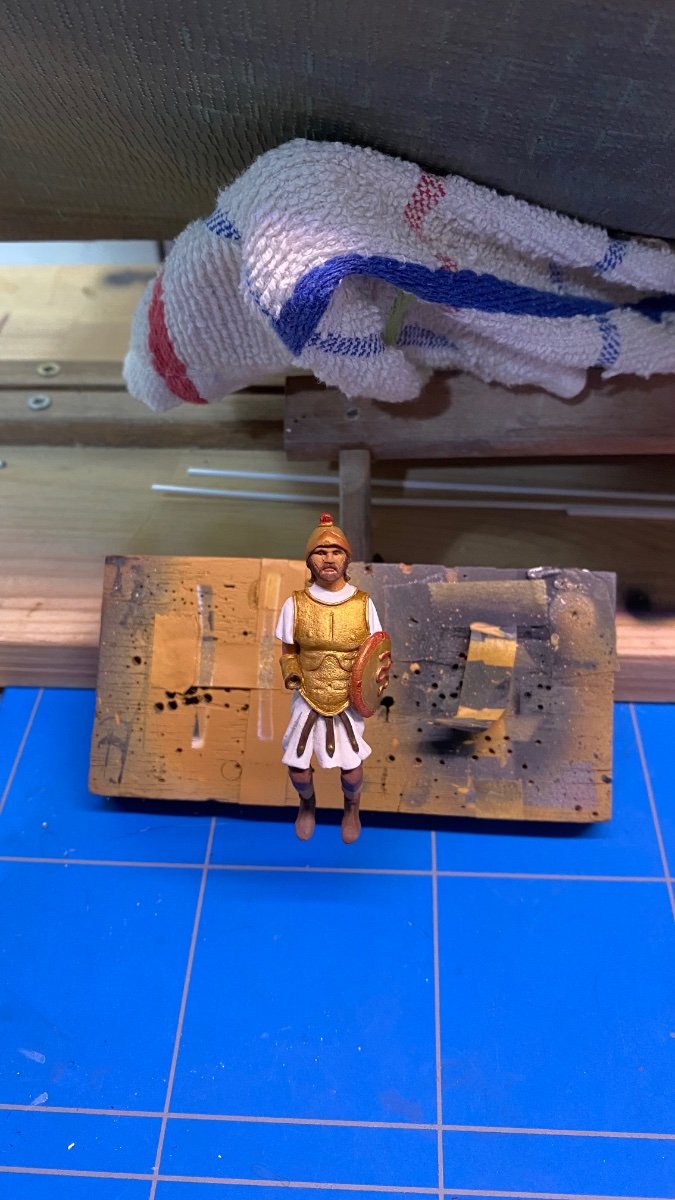
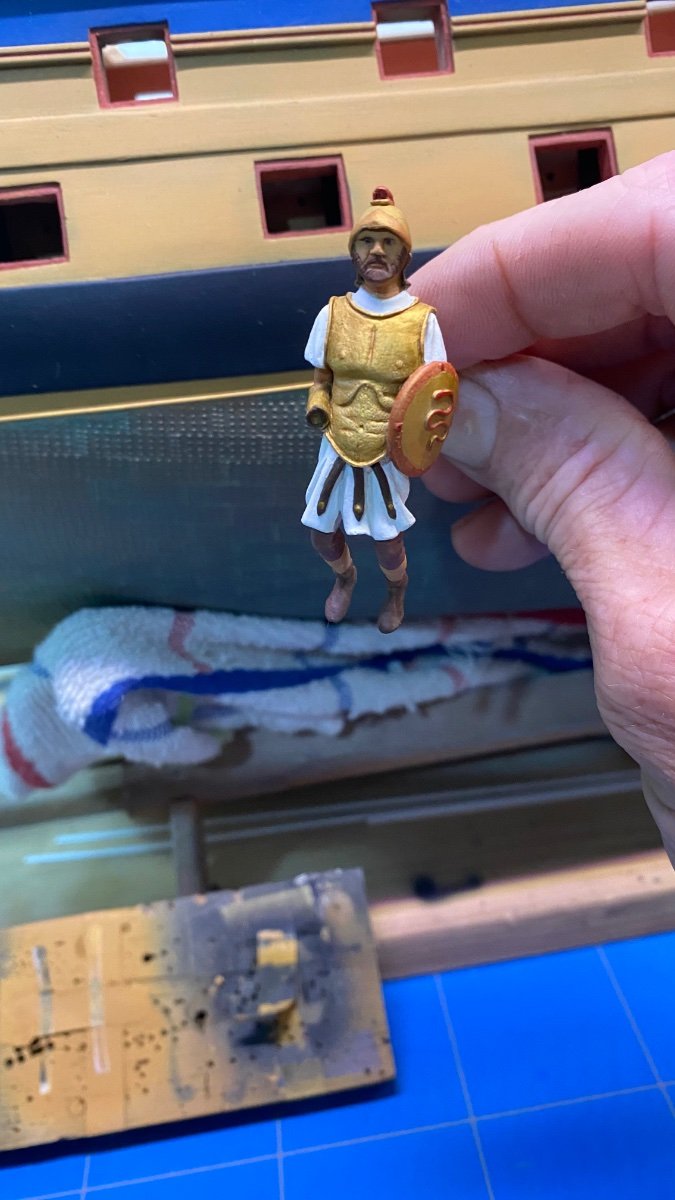
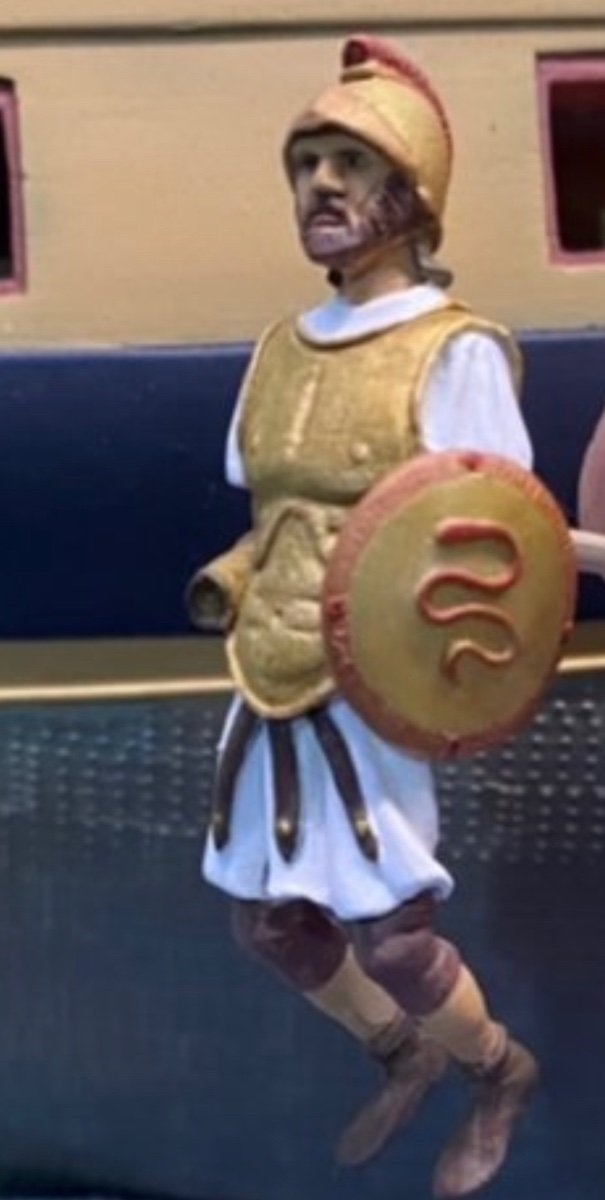
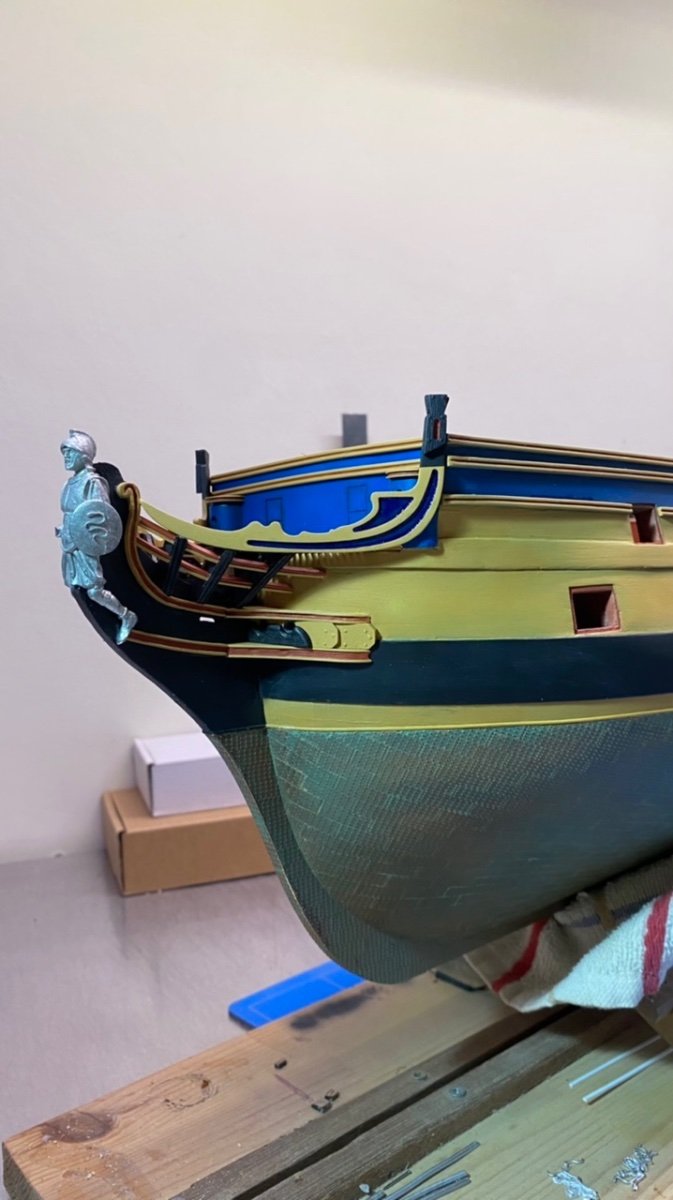
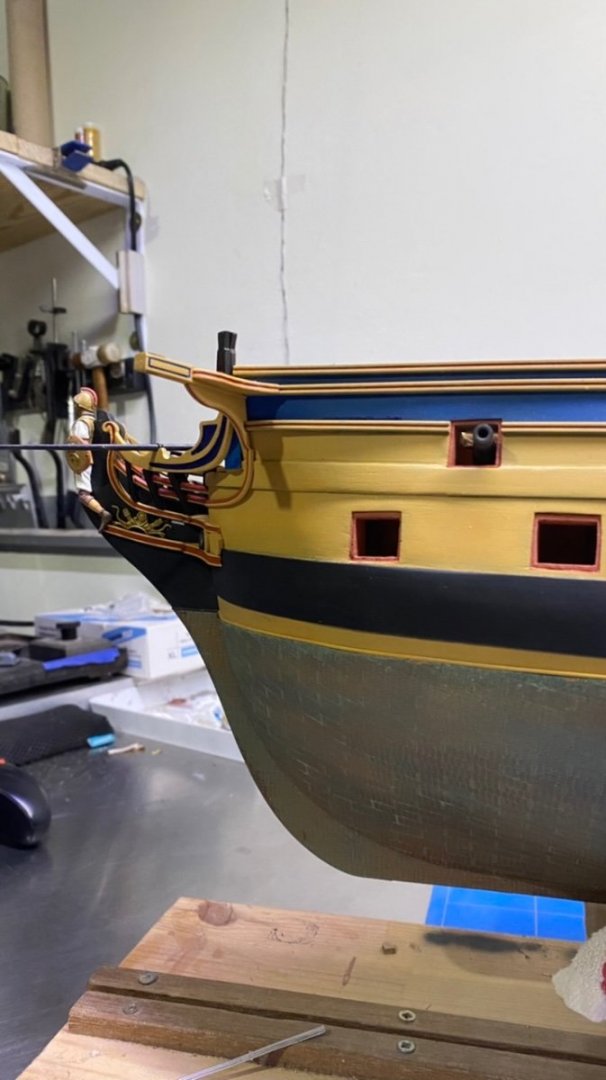
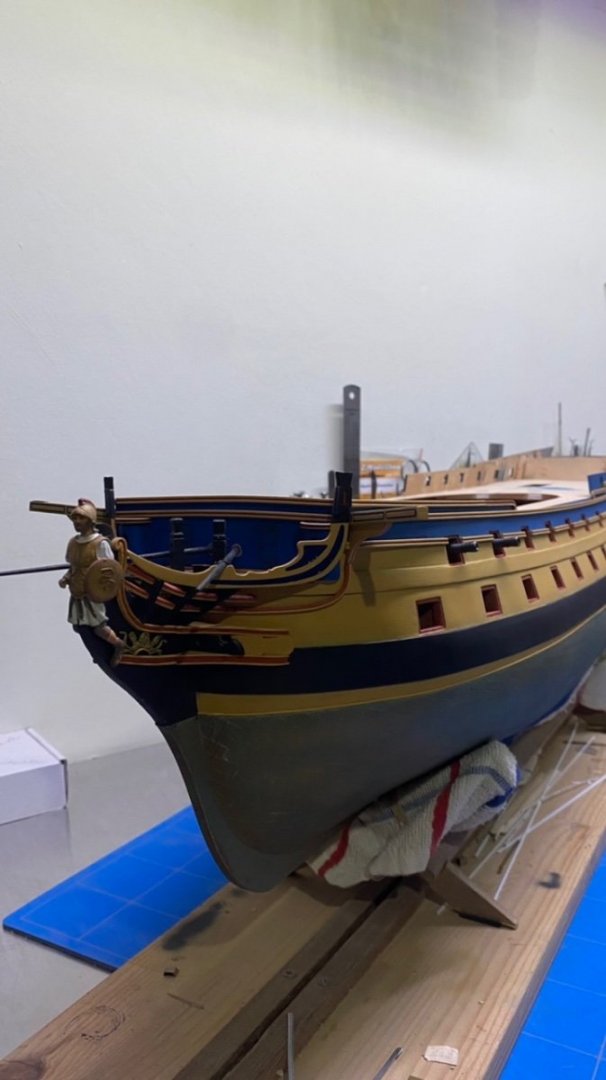
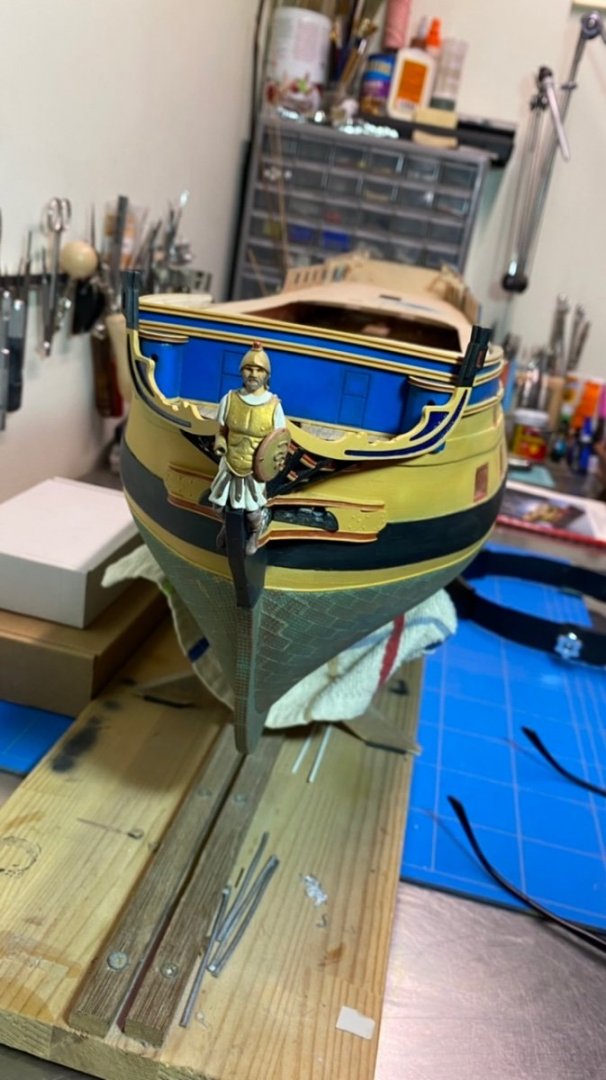
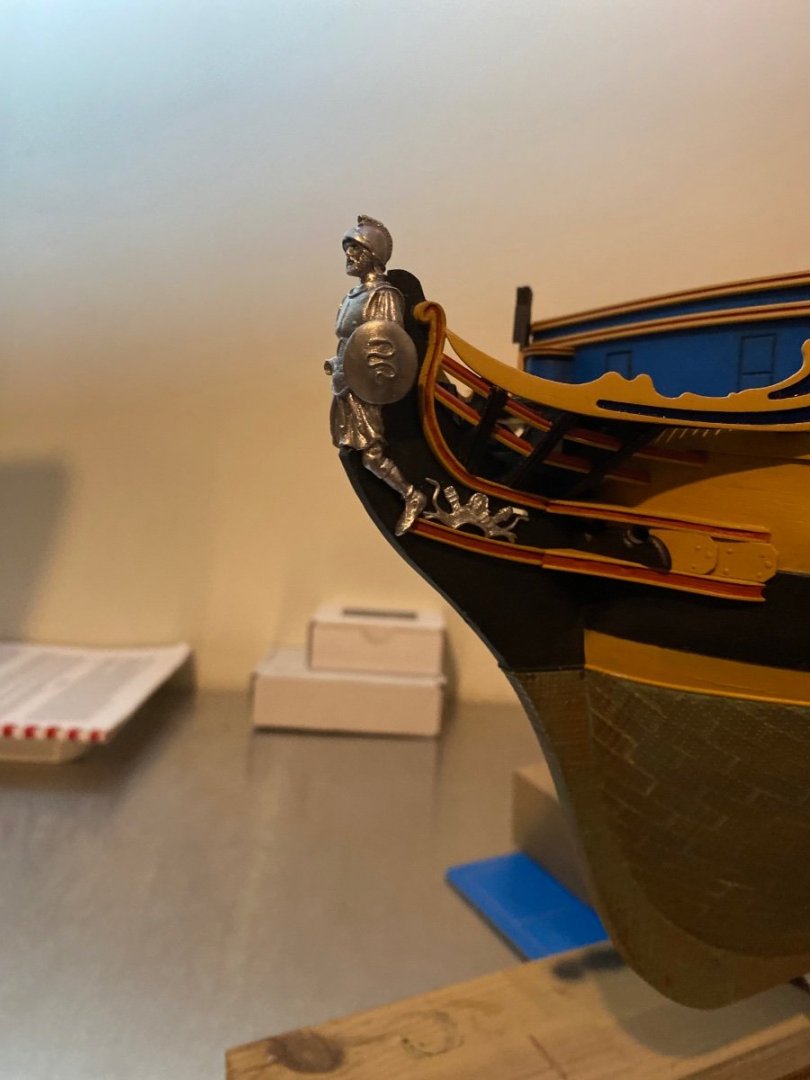
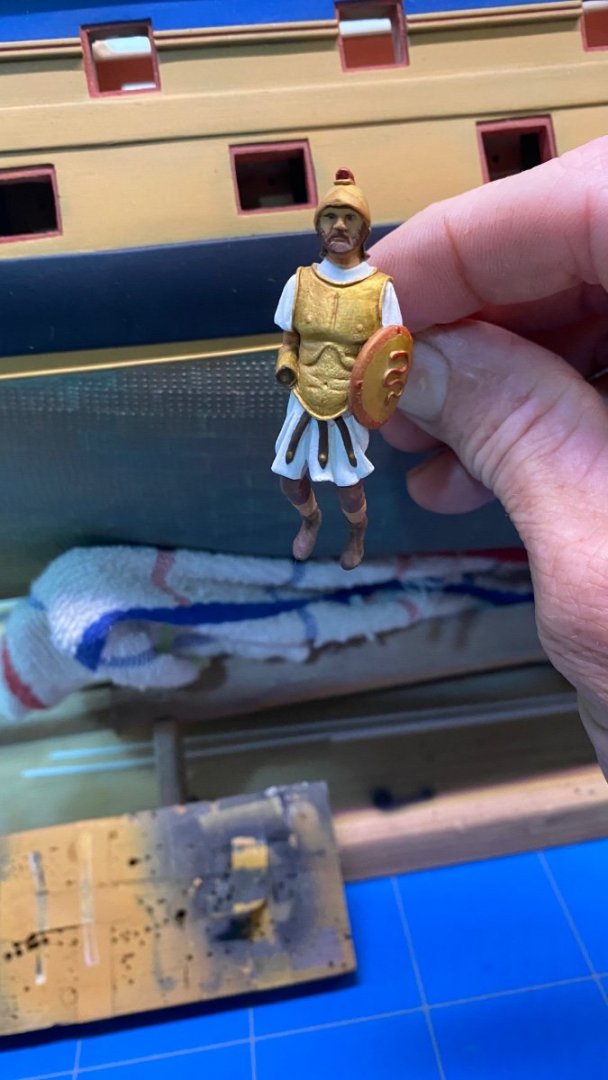
Thanks for the response, plans do not mention it, but I corrected it anyway, thanks for pointing it out. everyone for the thumbs up and looking. Thanks to everyone for the likes and watching. Little to report so far, recently I've been busy detailing the figurehead, thought the figurehead looked a bit rough, so after many hours of looking through a magnifying glass and sore fingers, I've used an engraving pen and some key files, adjusted the image slightly so it looks better to me. And I made a start with painting the figurehead, which took a long time to decide which colours to use, as there are many examples on the internet. With undoubtedly everyone's own motives. I have chosen these colours because, in my opinion, they must have been colours based on natural raw materials which must have been used in that period. But it is in any case a free interpretation of what I think it must have been like. Below some pictures, so I would say judge for yourself, the necessary finishing and treatment must still be done to work out the colours a bit better, but it will give you an idea.


-
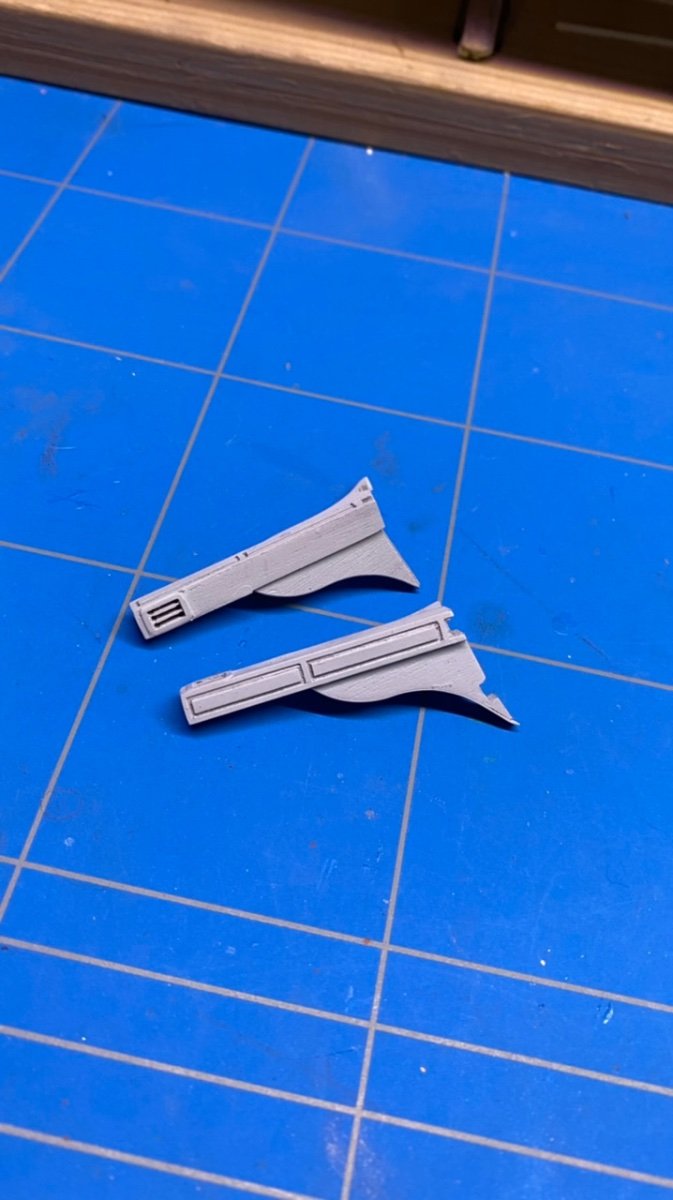
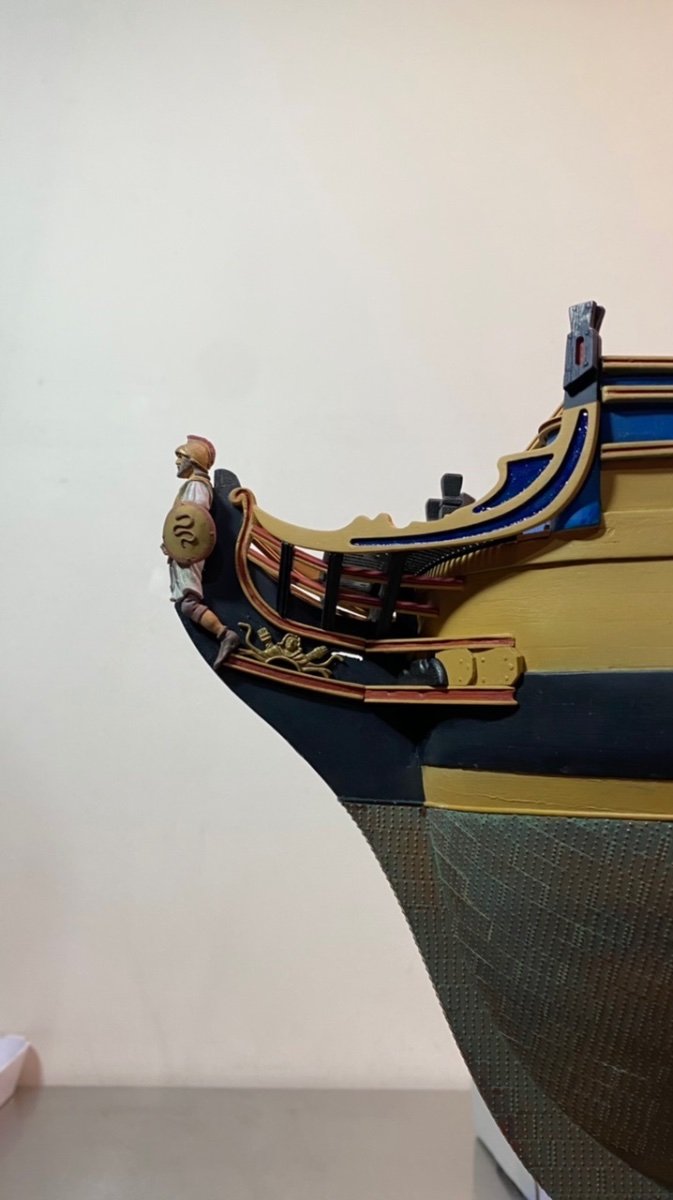
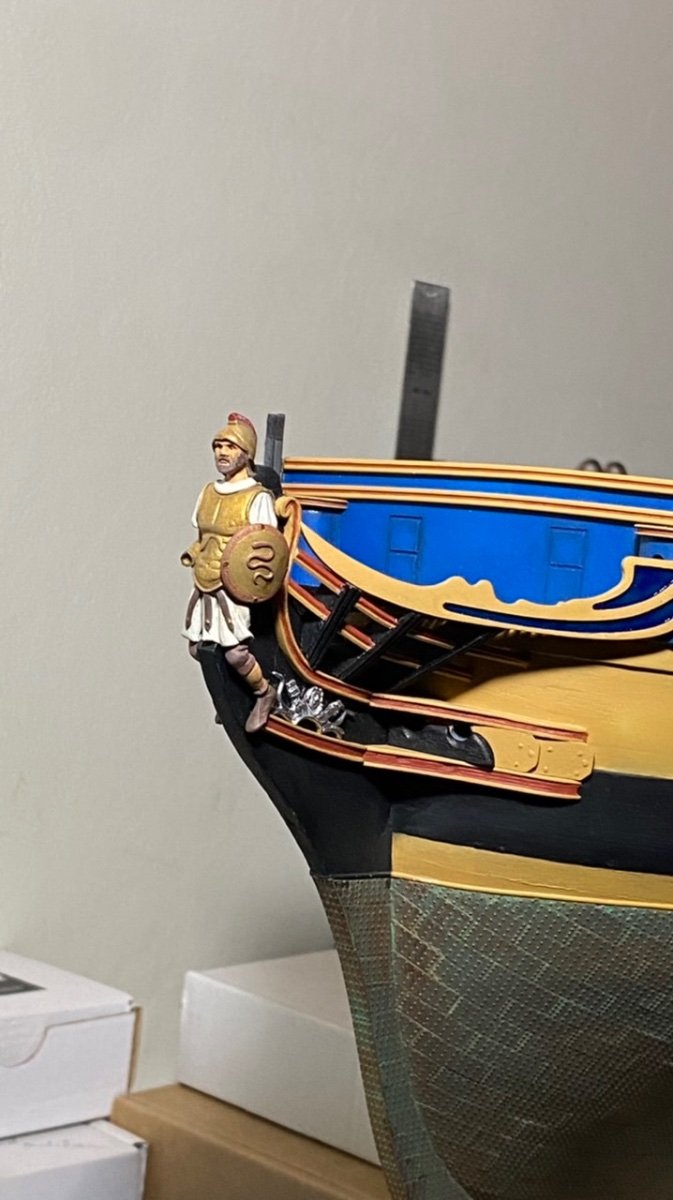
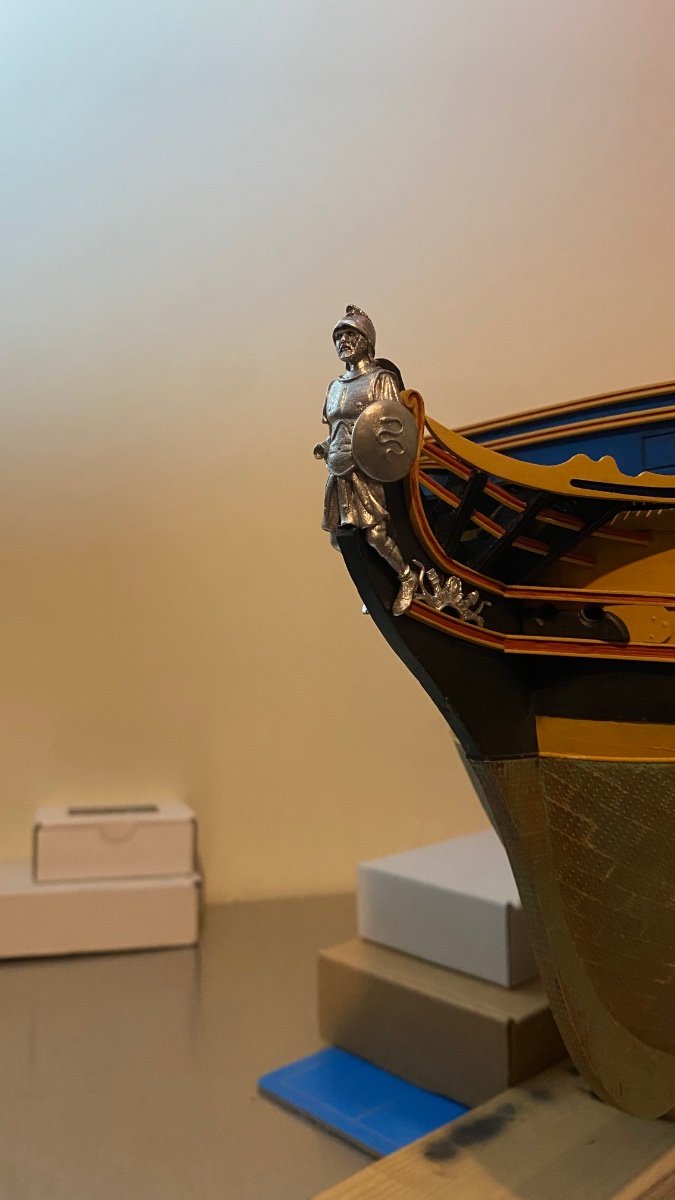
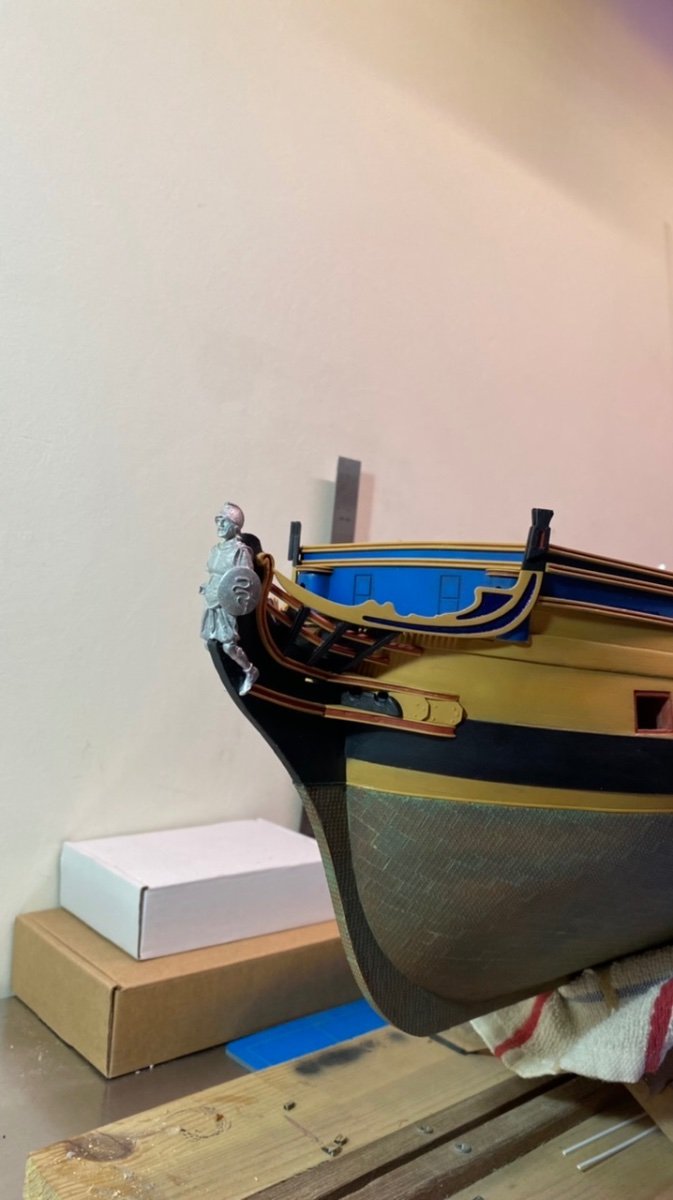
I made the necessary mouldings and supports, and adjusted the bow to make it more in line with the figurehead. Below some pictures, which speak louder than words.

-
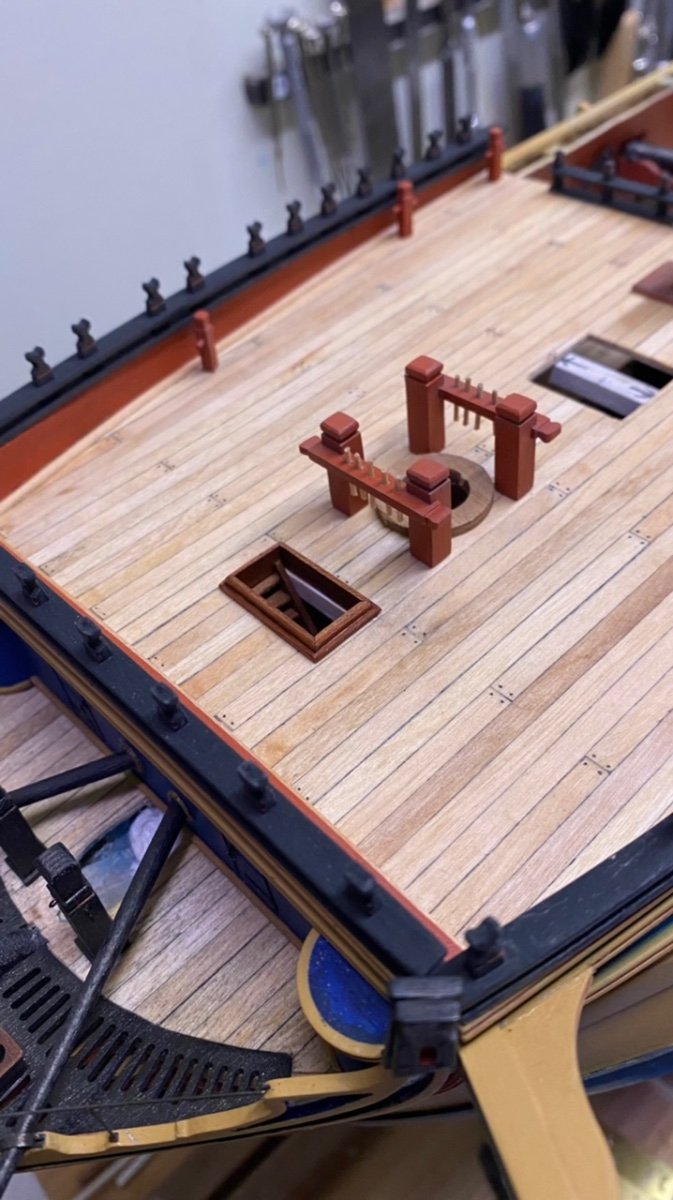
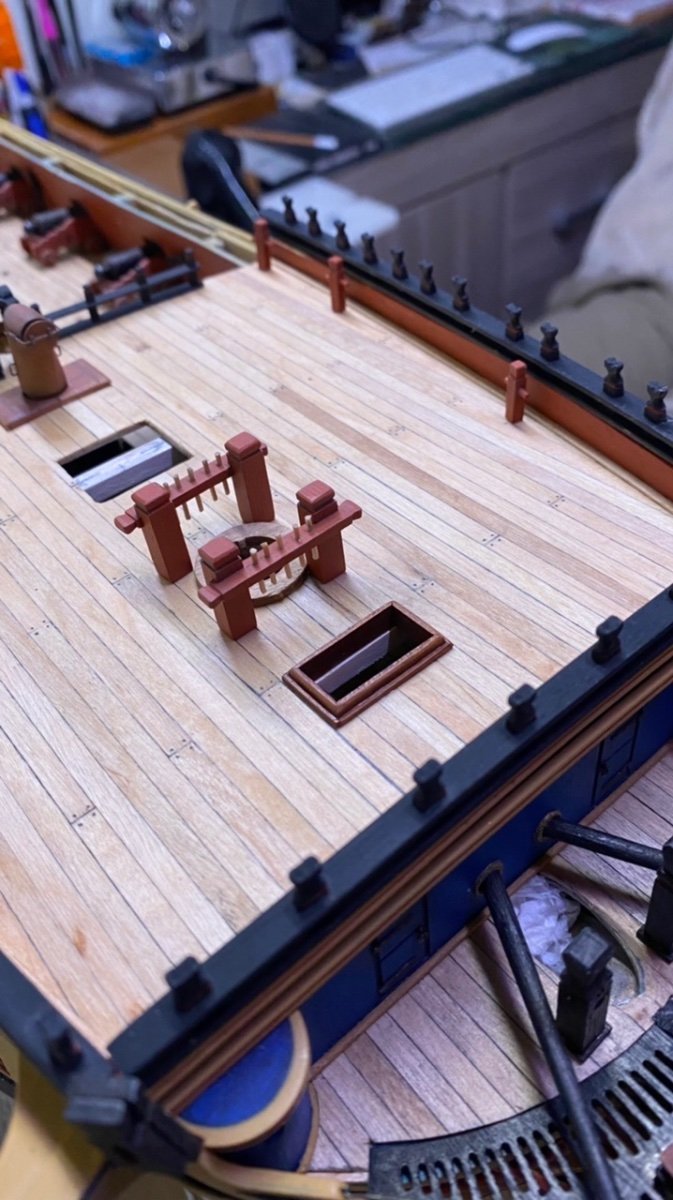
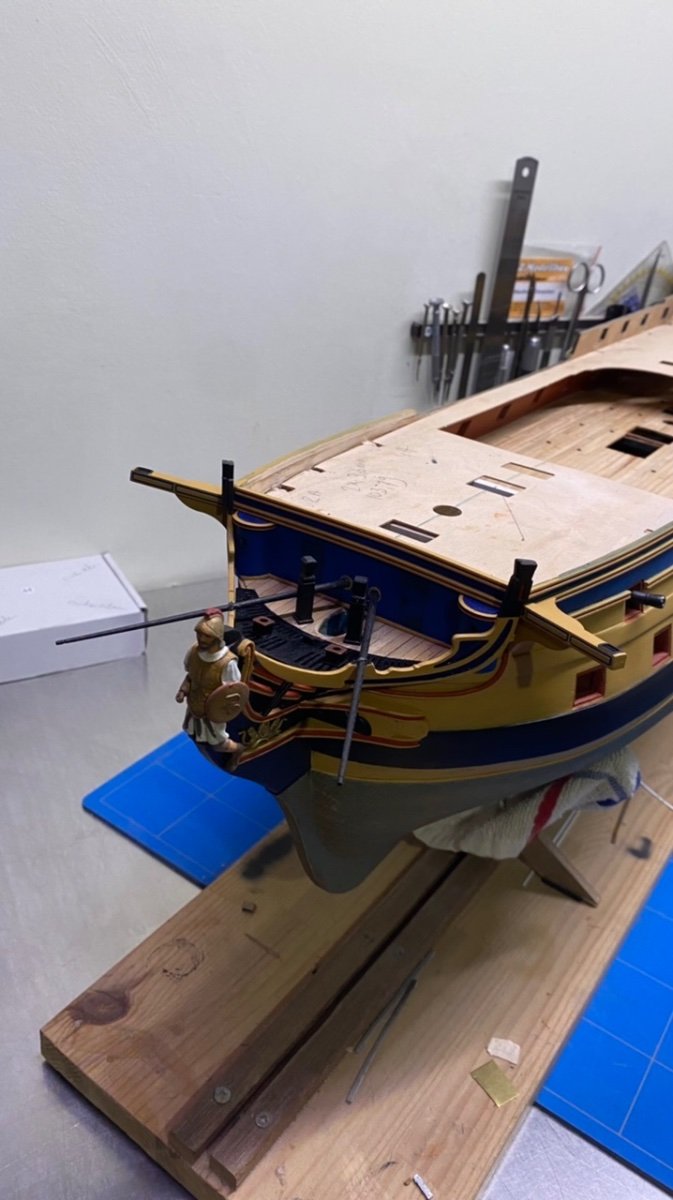
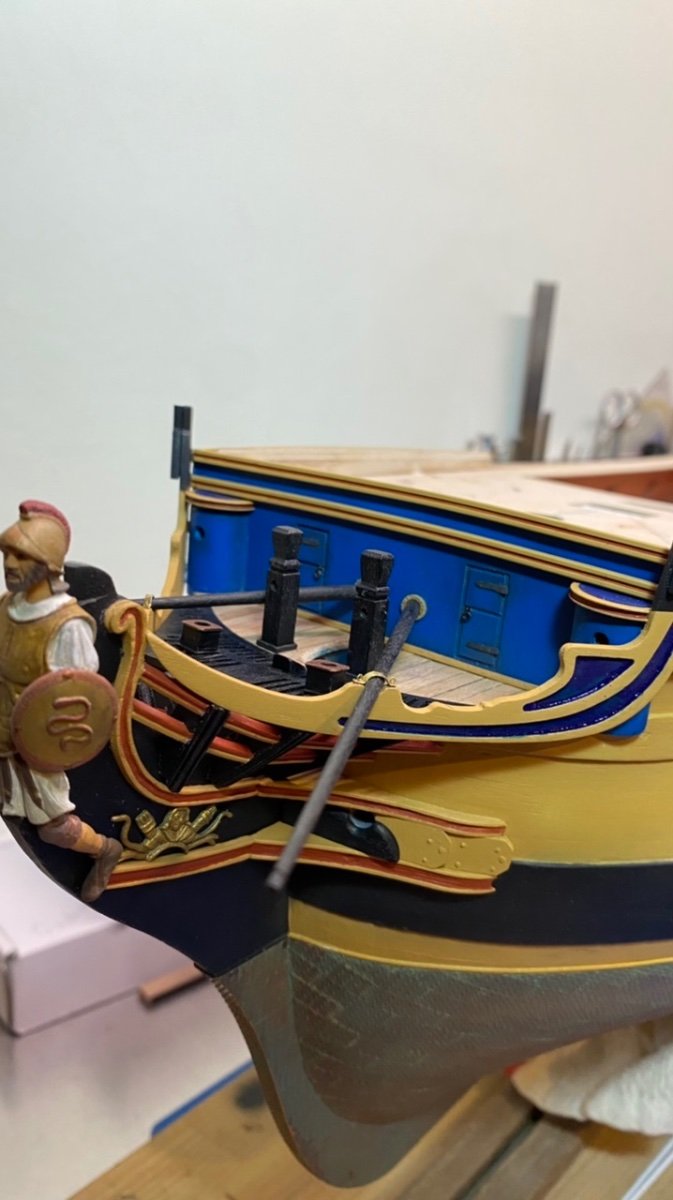
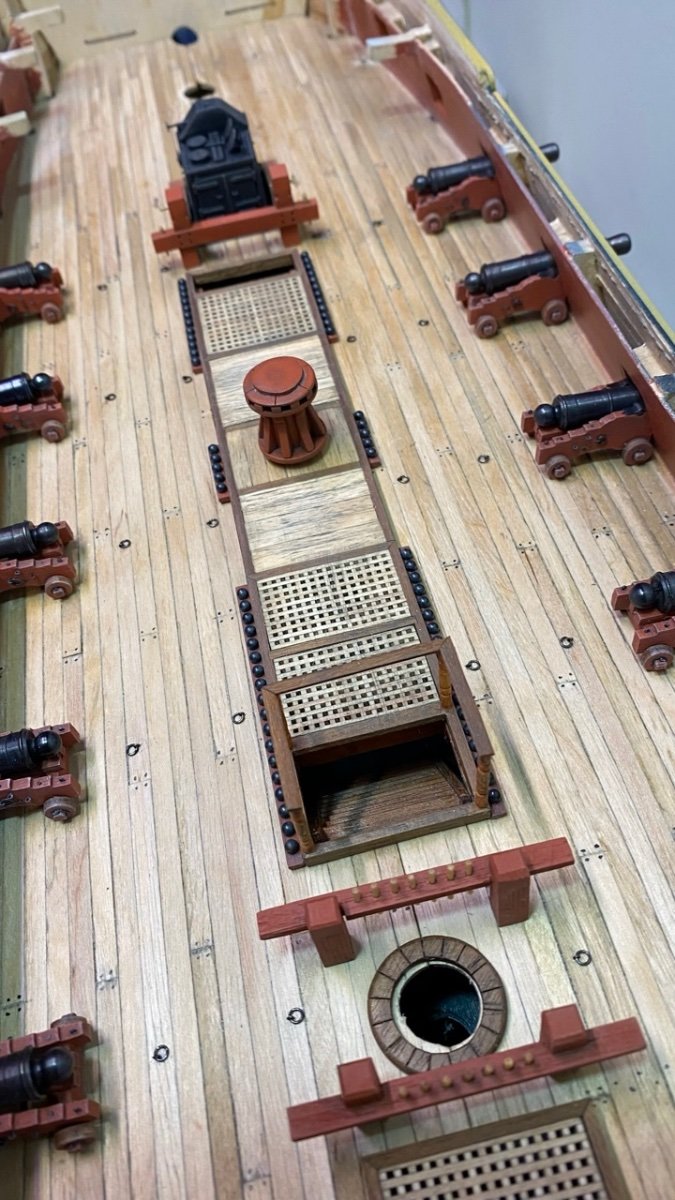
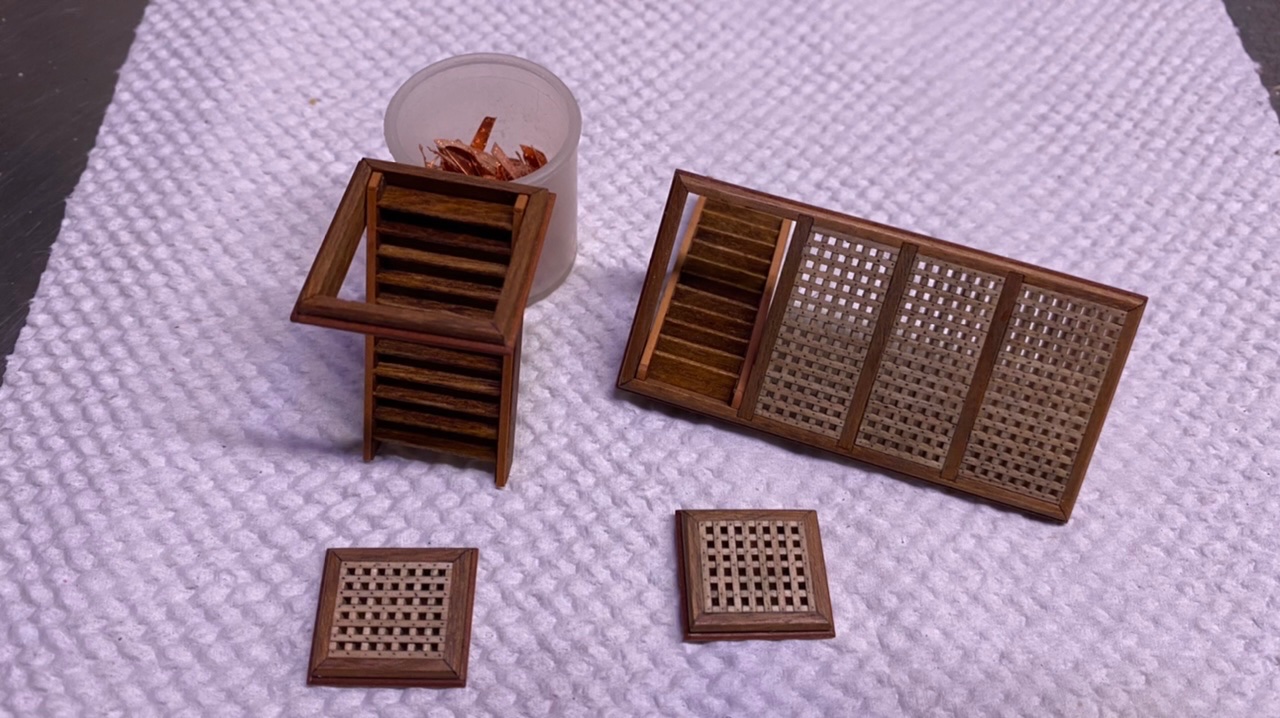
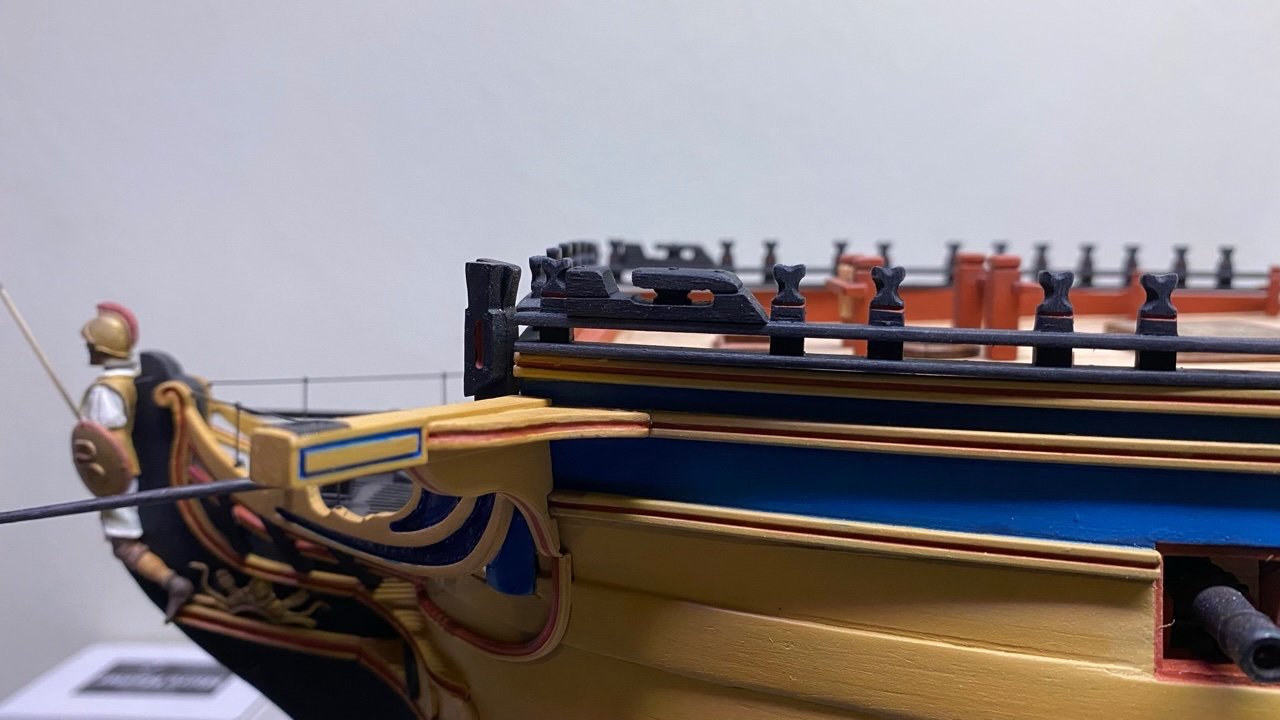
Thank you all for your reactions and for watching. In the meantime I placed some more rings on the deck. And made some nails to Some detail to the deck. I also started with the bow section . And made a start with the upper knee and cornice, which I milled out slightly to give it some grace. I made the grids fit further and placed the front deck plus made the skirting boards for the front bulkhead. And I made the roofs of the roundhouses, I also wanted to add some elegance, so I made a frame of I profile, and glued it to the front. And made the remaining mouldings. All this still needs to be painted, and will be placed later on. Below some pictures, which speak louder than words.