newbee
-
Posts
163 -
Joined
-
Last visited


.thumb.jpeg.ffac2f8a24d212961a83eab4efb06a6c.jpeg)

-
 allanyed reacted to a post in a topic:
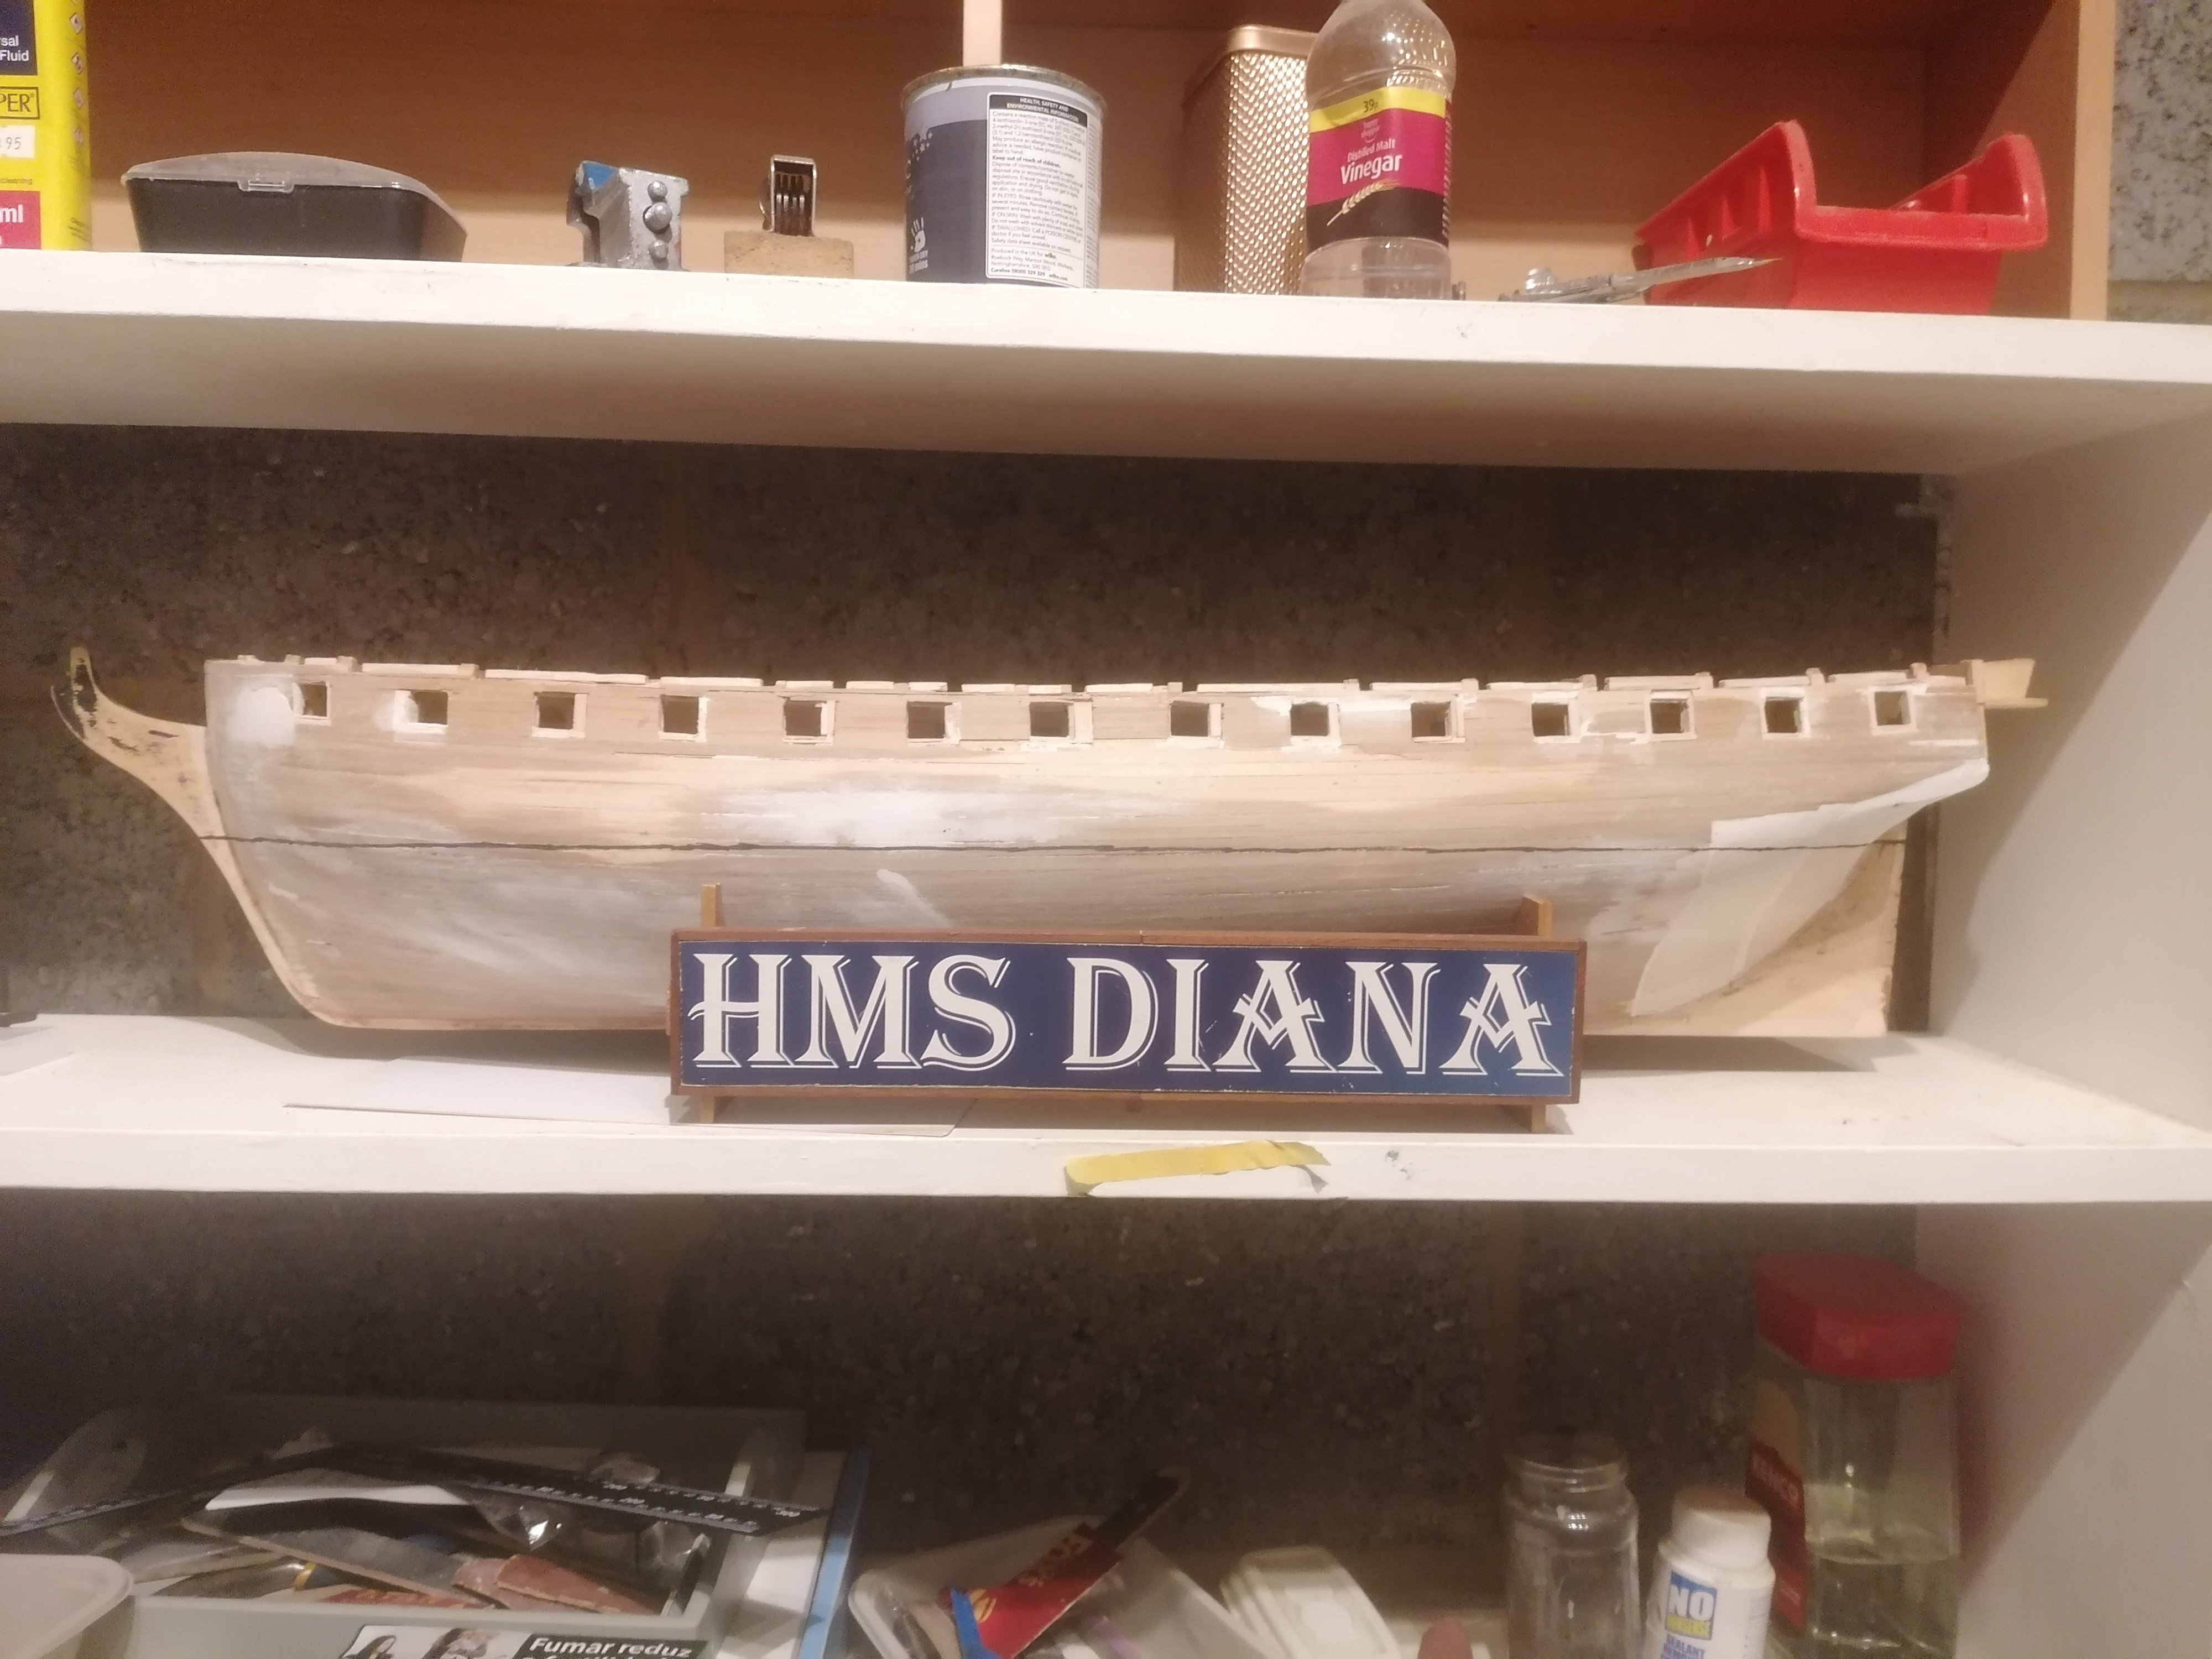
HMS Diana 1794 by newbee - Caldercraft - 1/64
allanyed reacted to a post in a topic:
HMS Diana 1794 by newbee - Caldercraft - 1/64
-
allanyed reacted to a post in a topic:
HMS Diana 1794 by newbee - Caldercraft - 1/64
-
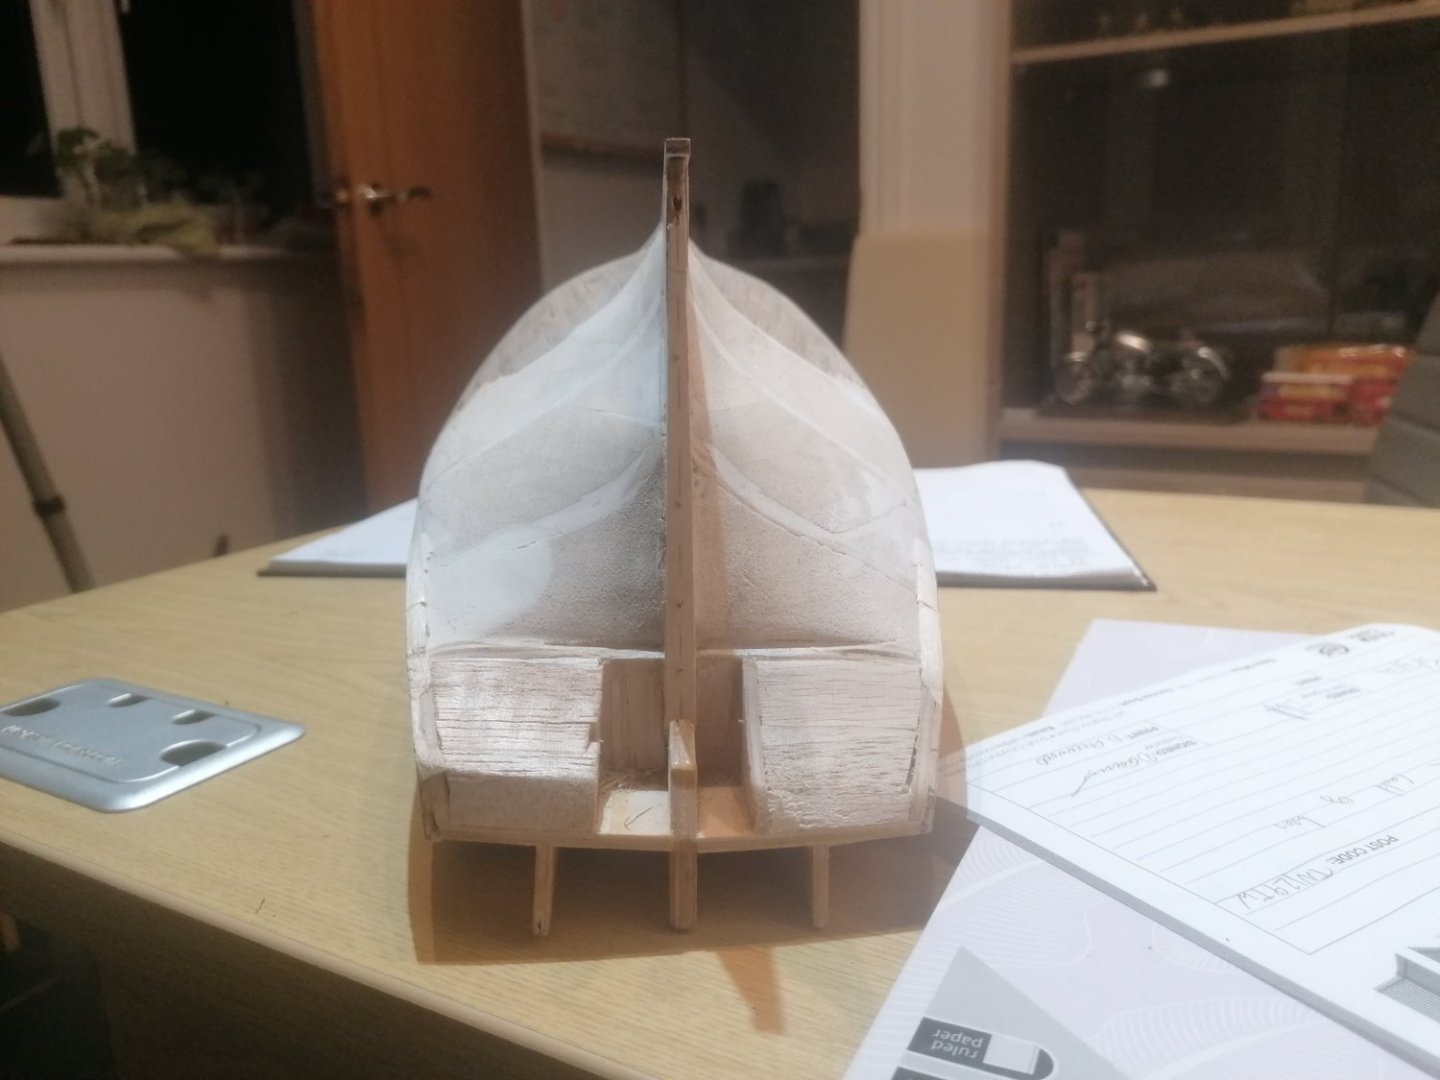
I have just looked at your document and it looks like the wale should be 17. 9 mm wide. I was planning on 16mm but with the black strake being 2mm, the instructions say it should be 3mm. Also, by the way, if the stern counters were a little lower it would give a slightly flatter shape to the hull either side of the stern post/ deadwood. Yet another thing to consider. This could be very useful if time consuming. This ship would be a challenge for me in kit form but I don't give up easily though have felt like doing so. I don't have the knowledge or tools to make this millimetre perfect but fully intend to make a good looking ship in the end. However long she takes. Thanks again Allan. David.
-
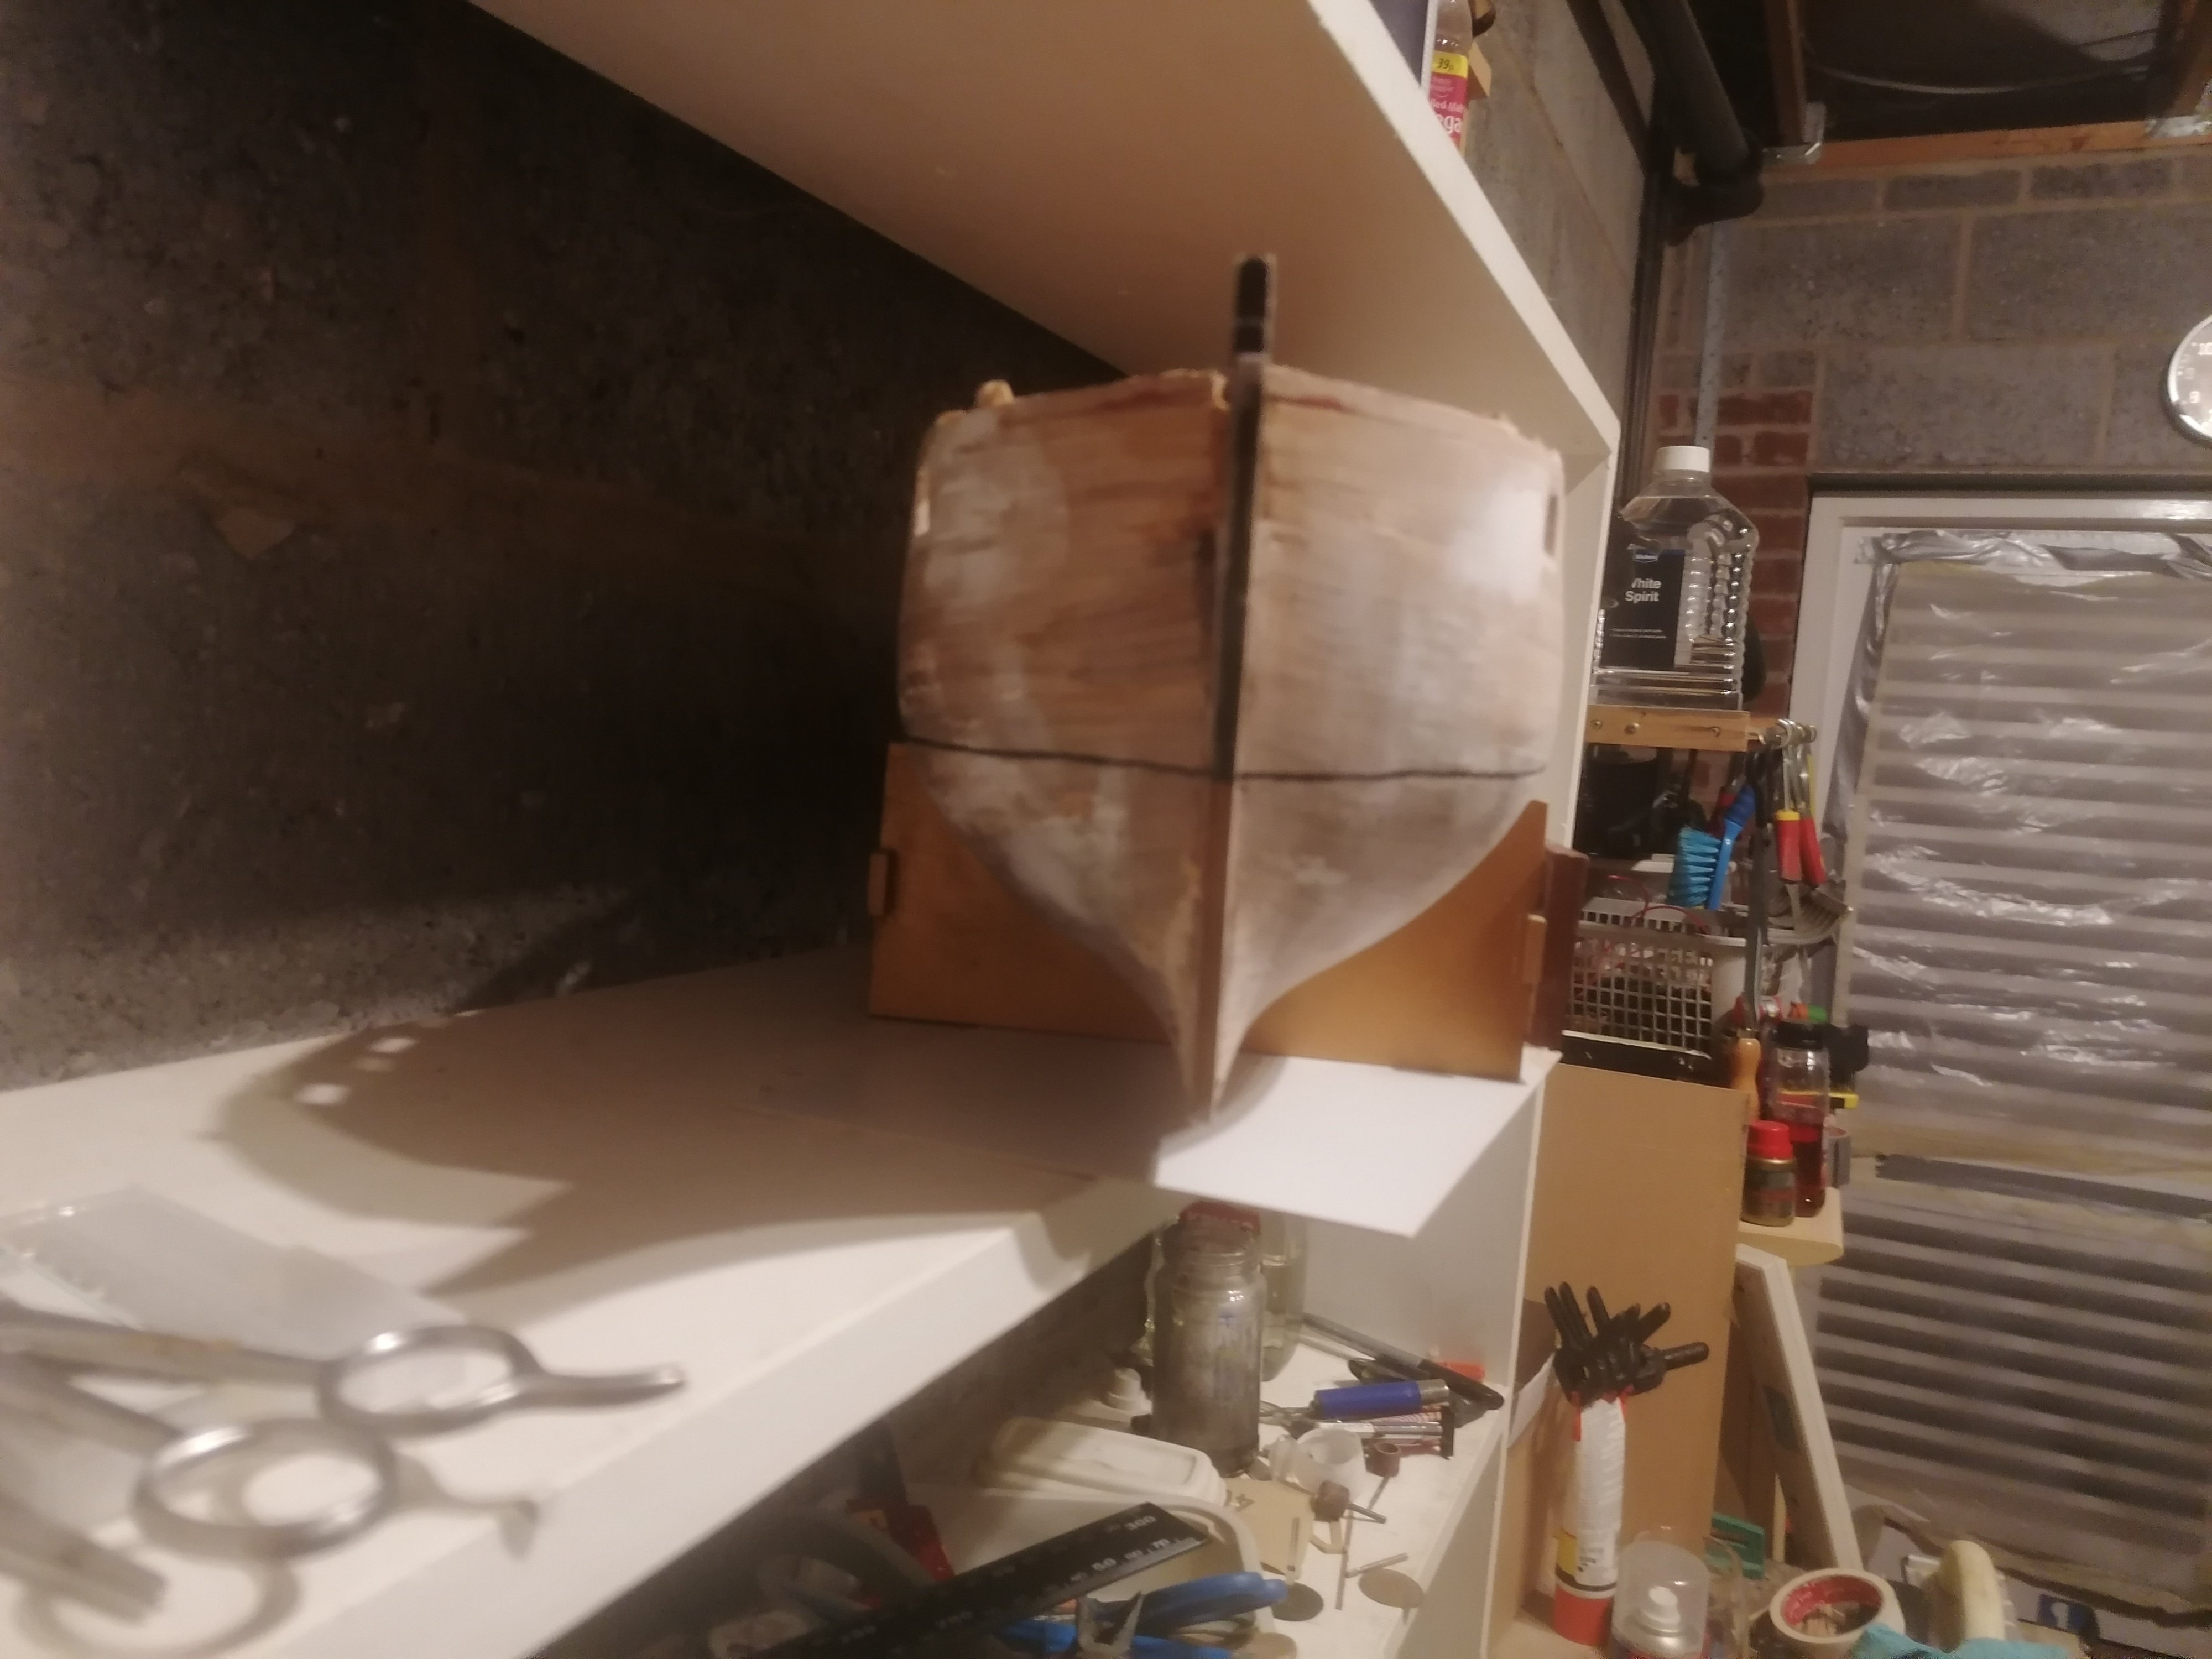
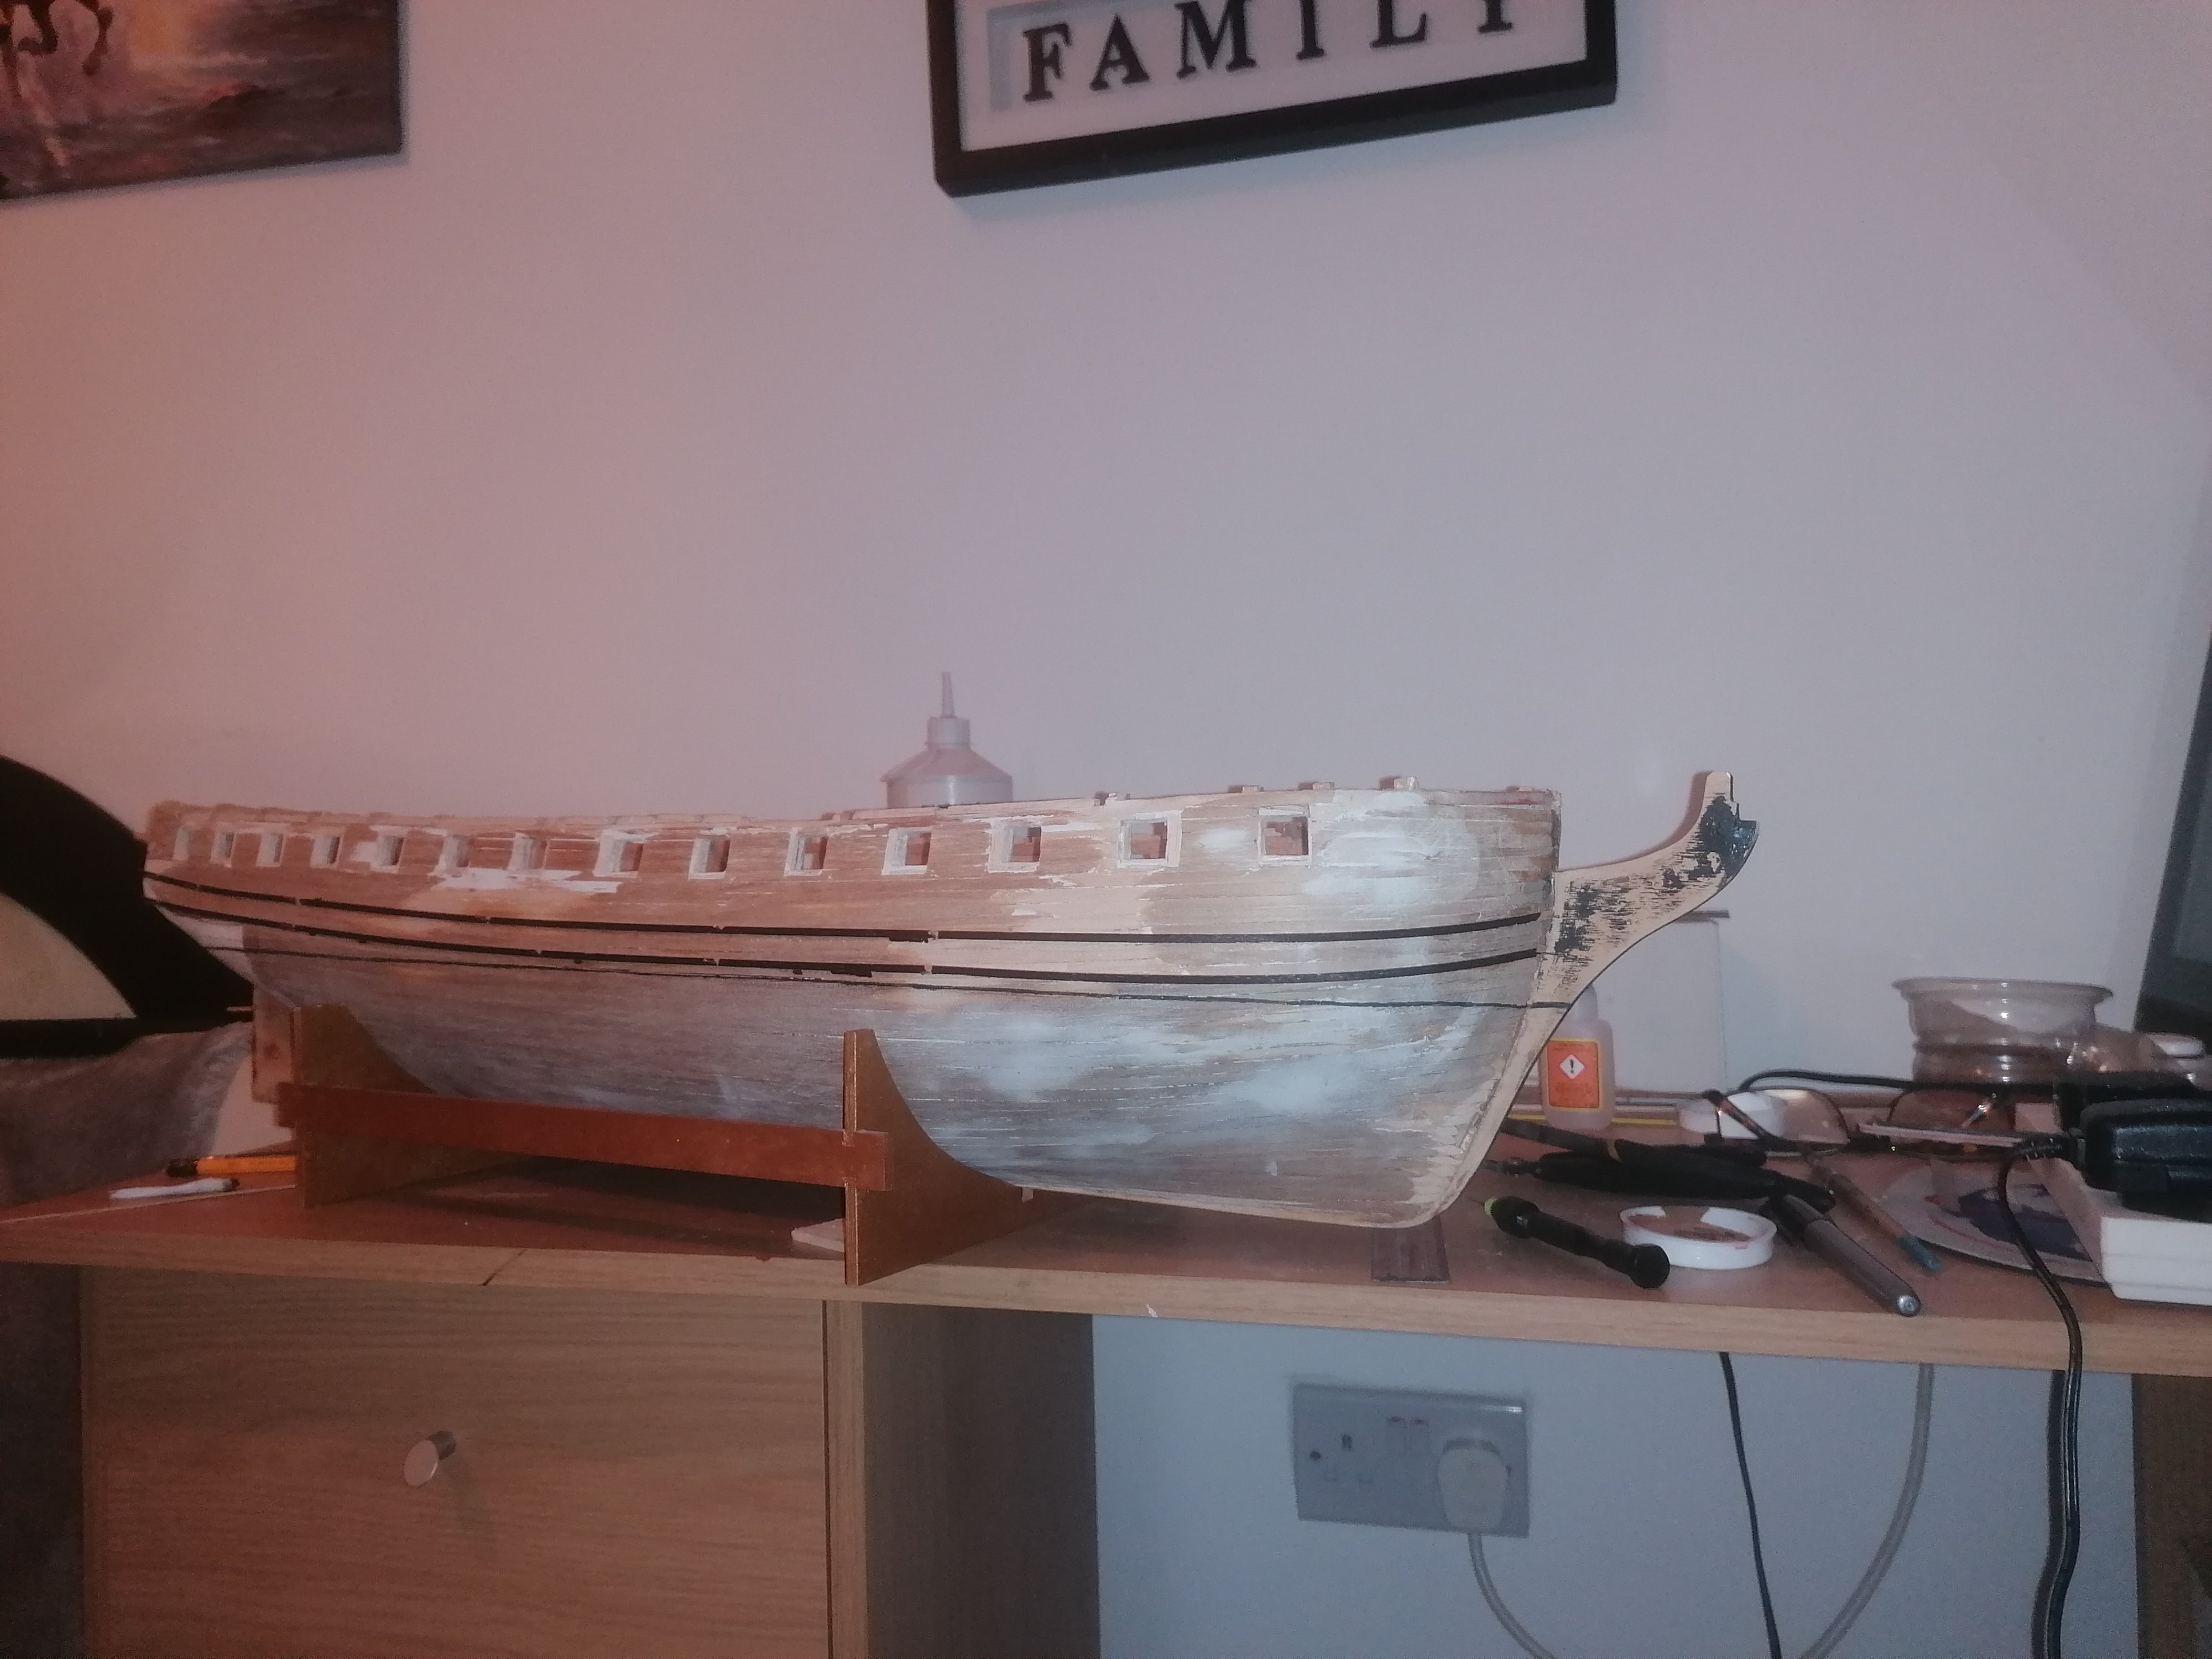
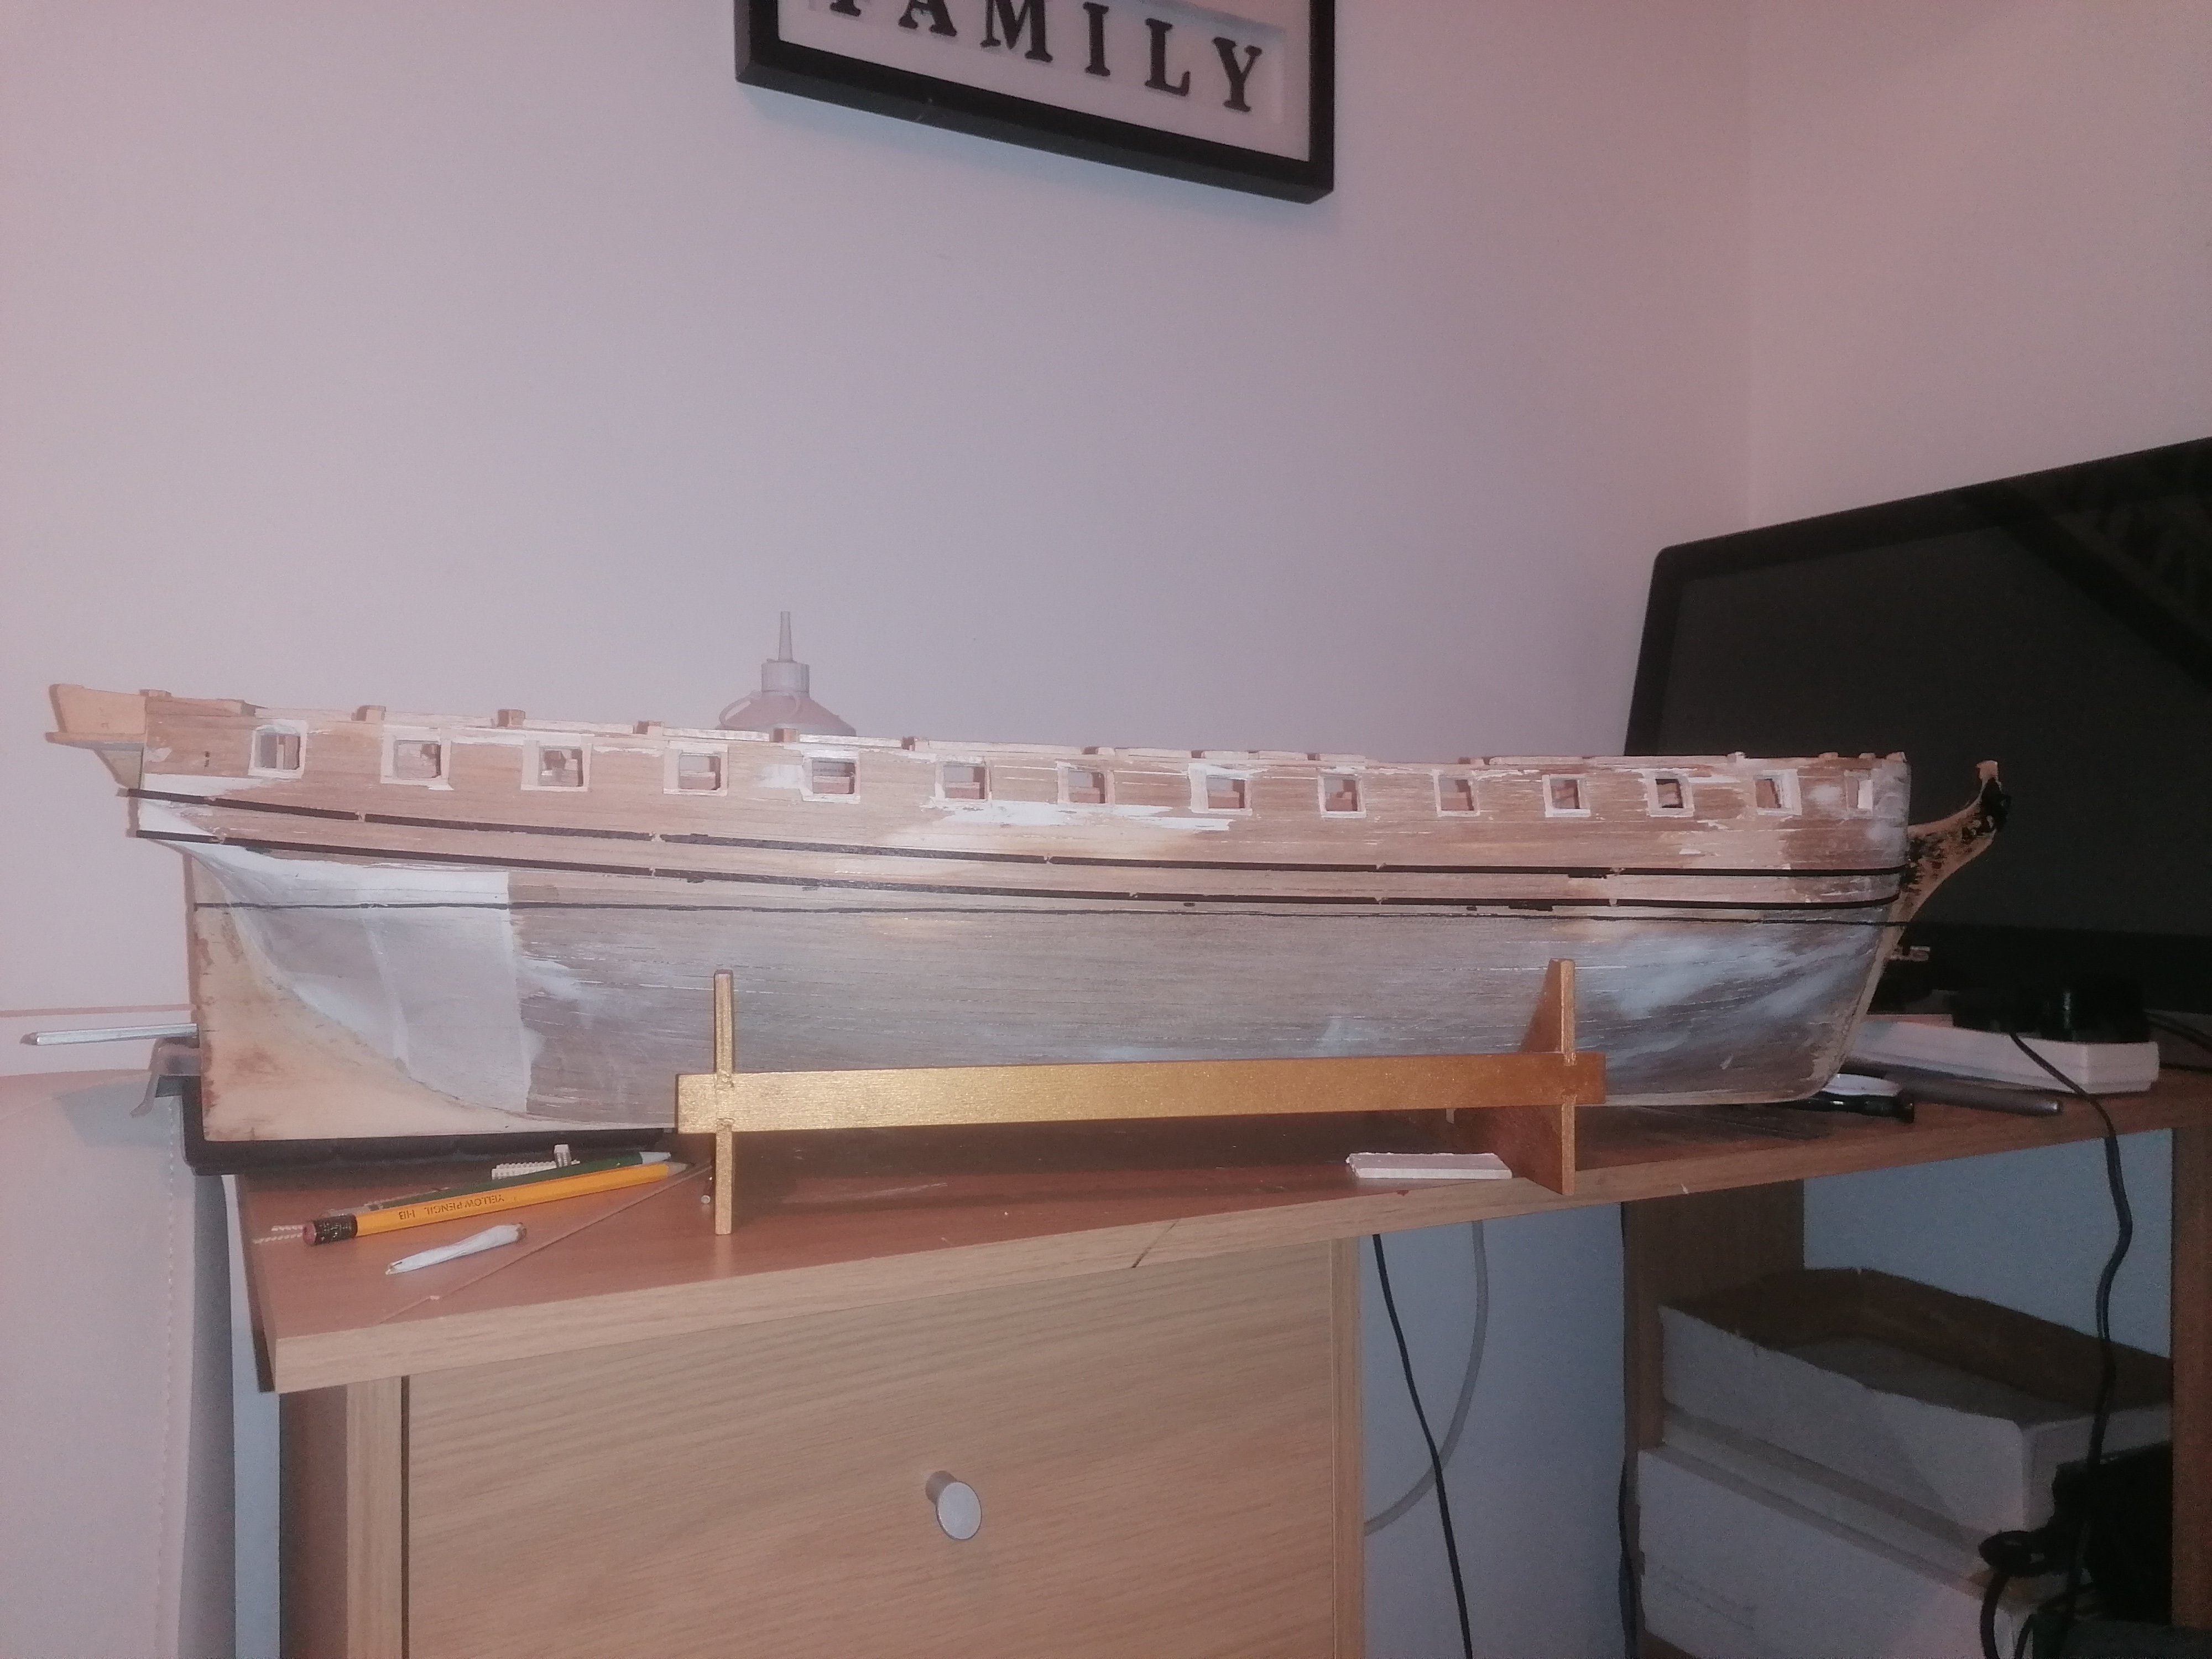
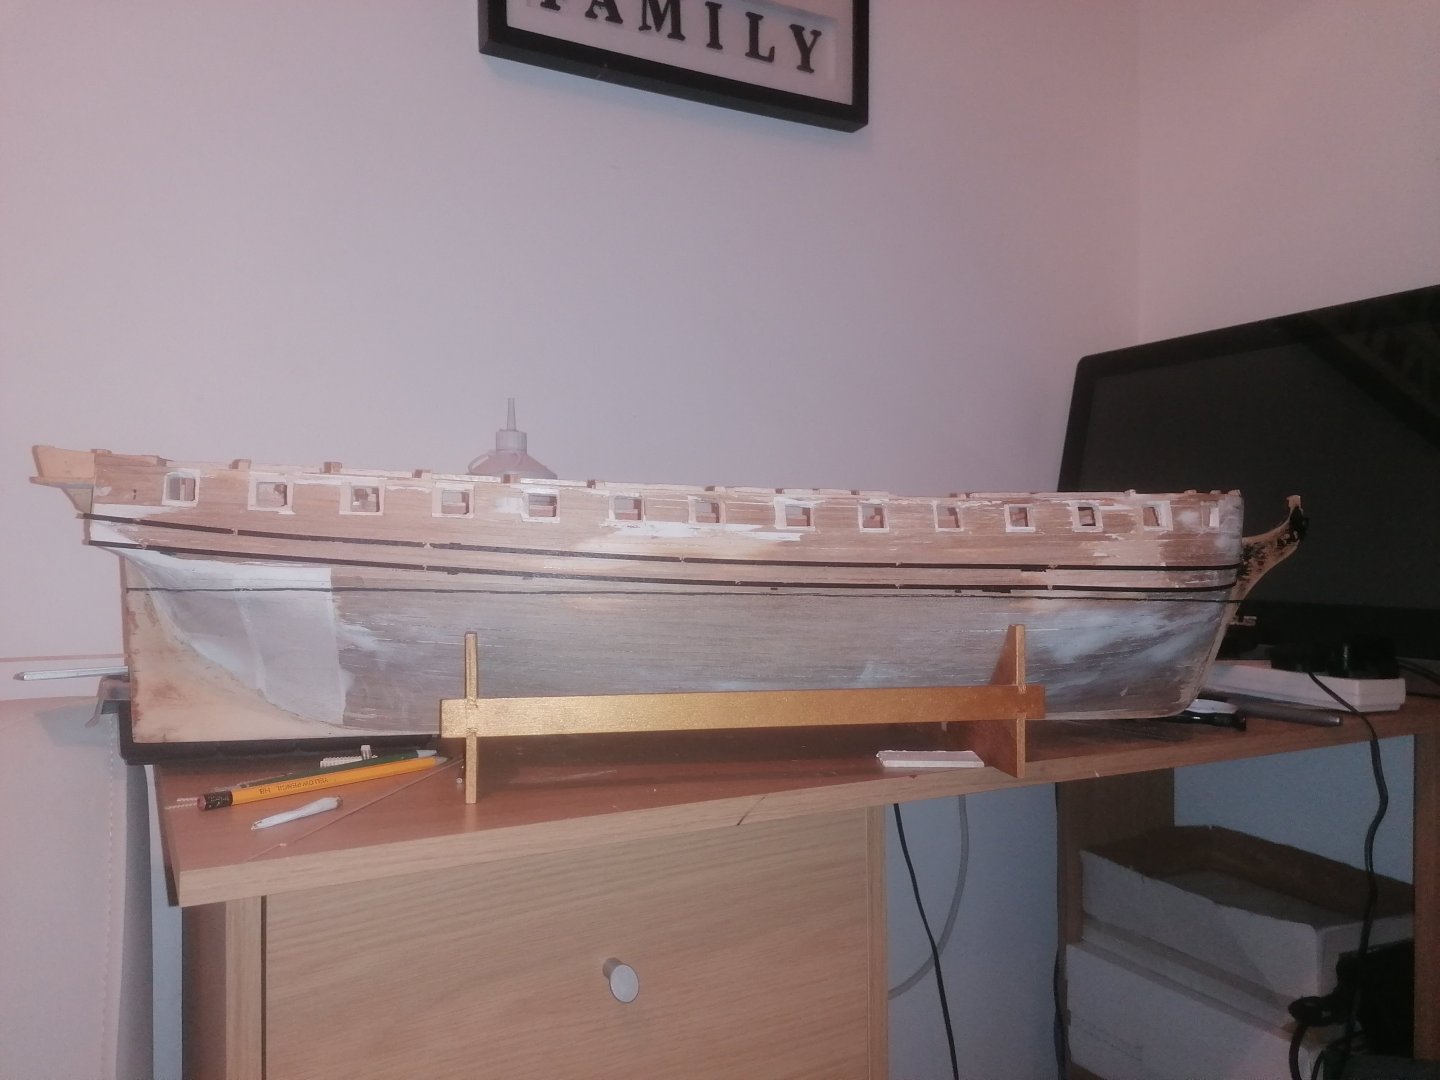
Many thanks again Allan for your advice. In my case it's more determination than perseverance. It's your knowledge that's commendable. The thinner line is the waterline. The 2 thicker strips are 3mm wide strips to mark the upper and lower edges of the wale. They are just an approximation to see how I need to shape the upper and lower stern counters. This morning I looked at the photos again and assumed my measurements were wrong. After finishing work today I had another look and realised that it was the curve of the wale that was wrong. I pinned the lower strip below gunports 3 and 4 and allowed the strip to curve up to the correct height at the stem. I should have used a couple more pins further forward to obtain the correct curve. I've also realised that the strip sags a good bit below gun port 1 and the upper strip is closer to where it should sit. The stern, however, still involves some guesswork, as other builders have noticed, that the stern galleries sit a few millimeters too high. I may still have to adjust the depth of the stern counters to allow for this. The most difficult problem to solve is the actual shape. Now this is almost done I have something to work with. I will have to scratch build the stern and quarter galleries, more or less, so having the correct shape beneath them is crucial. Thanks again for your input. It's really appreciated. David.
-
dunnock reacted to a post in a topic:
HMS Diana 1794 by newbee - Caldercraft - 1/64
-
dunnock reacted to a post in a topic:
HMS Diana 1794 by newbee - Caldercraft - 1/64
-
dunnock reacted to a post in a topic:
HMS Diana 1794 by newbee - Caldercraft - 1/64
-
brunnels reacted to a post in a topic:
HMS Diana 1794 by newbee - Caldercraft - 1/64
-
Beef Wellington reacted to a post in a topic:
HMS Diana 1794 by newbee - Caldercraft - 1/64
-
Mr Whippy reacted to a post in a topic:
HMS Diana 1794 by newbee - Caldercraft - 1/64
-
Mr Whippy reacted to a post in a topic:
HMS Diana 1794 by newbee - Caldercraft - 1/64
-
Mr Whippy reacted to a post in a topic:
HMS Diana 1794 by newbee - Caldercraft - 1/64
-
I have noticed now that the wale needs to be raised up to sit higher against the stem. One of the best things about taking photos as you govis they can really highlight errors before they become a problem. Cheers for now. David.
-
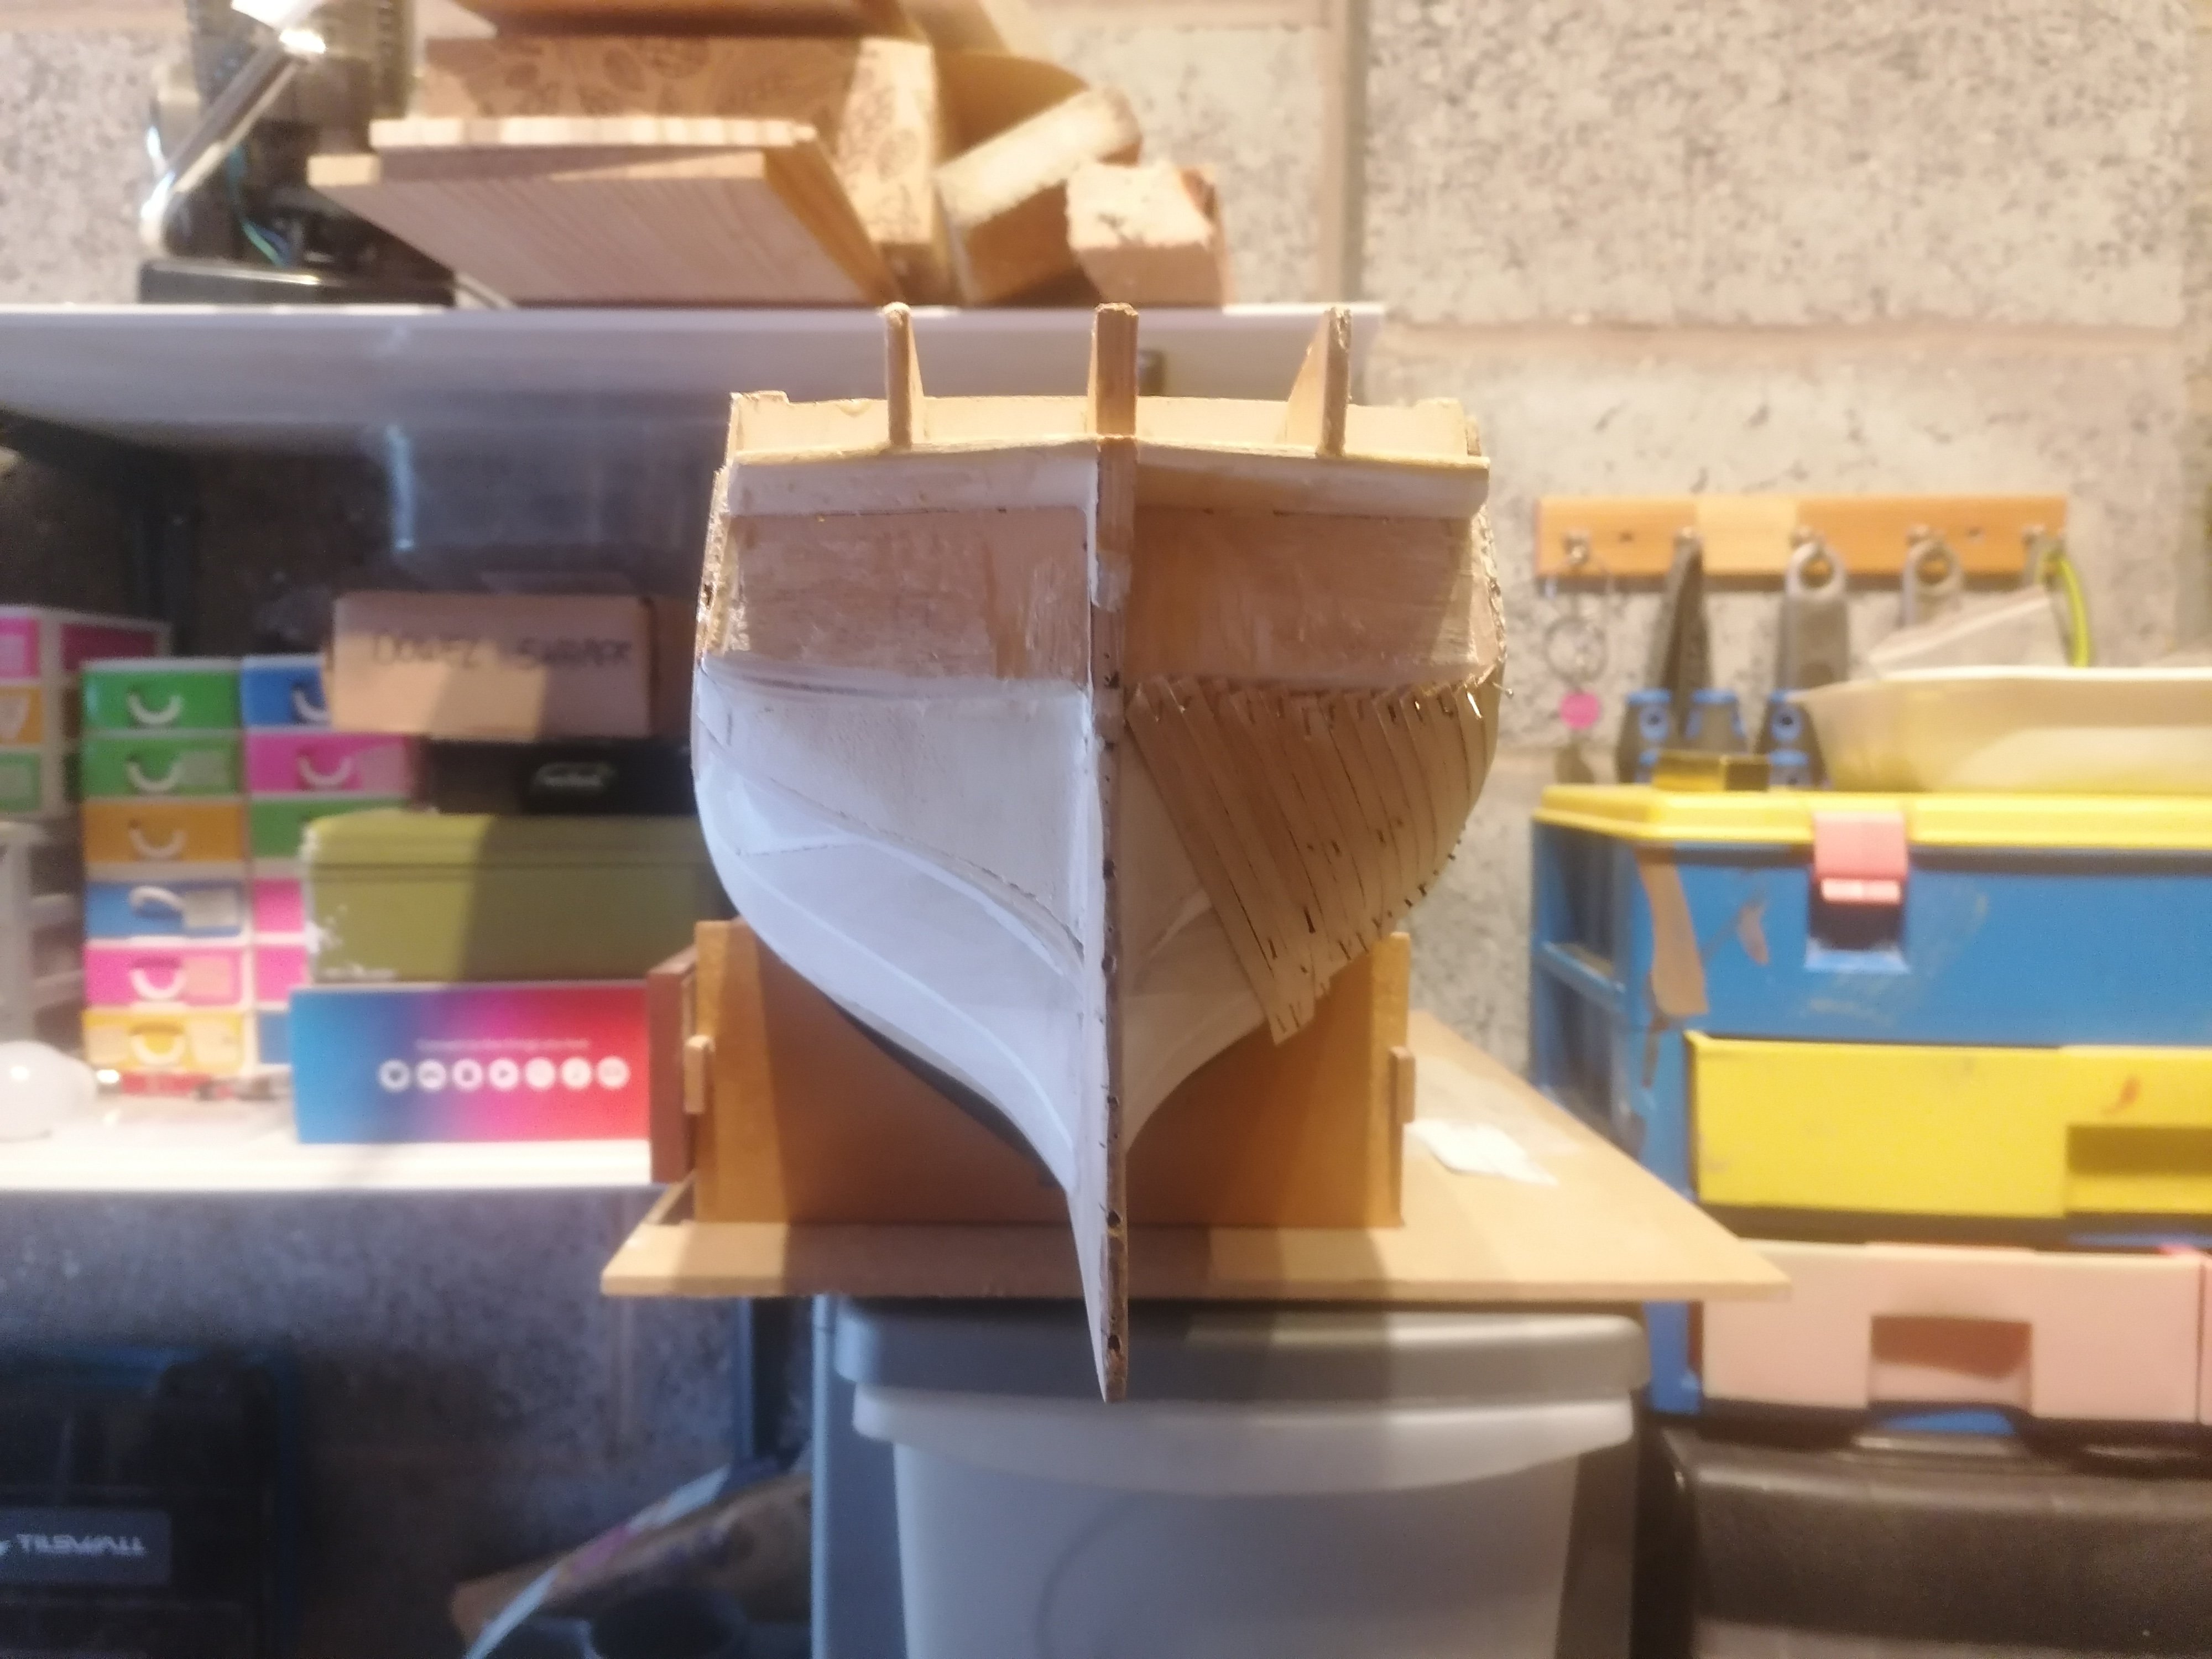
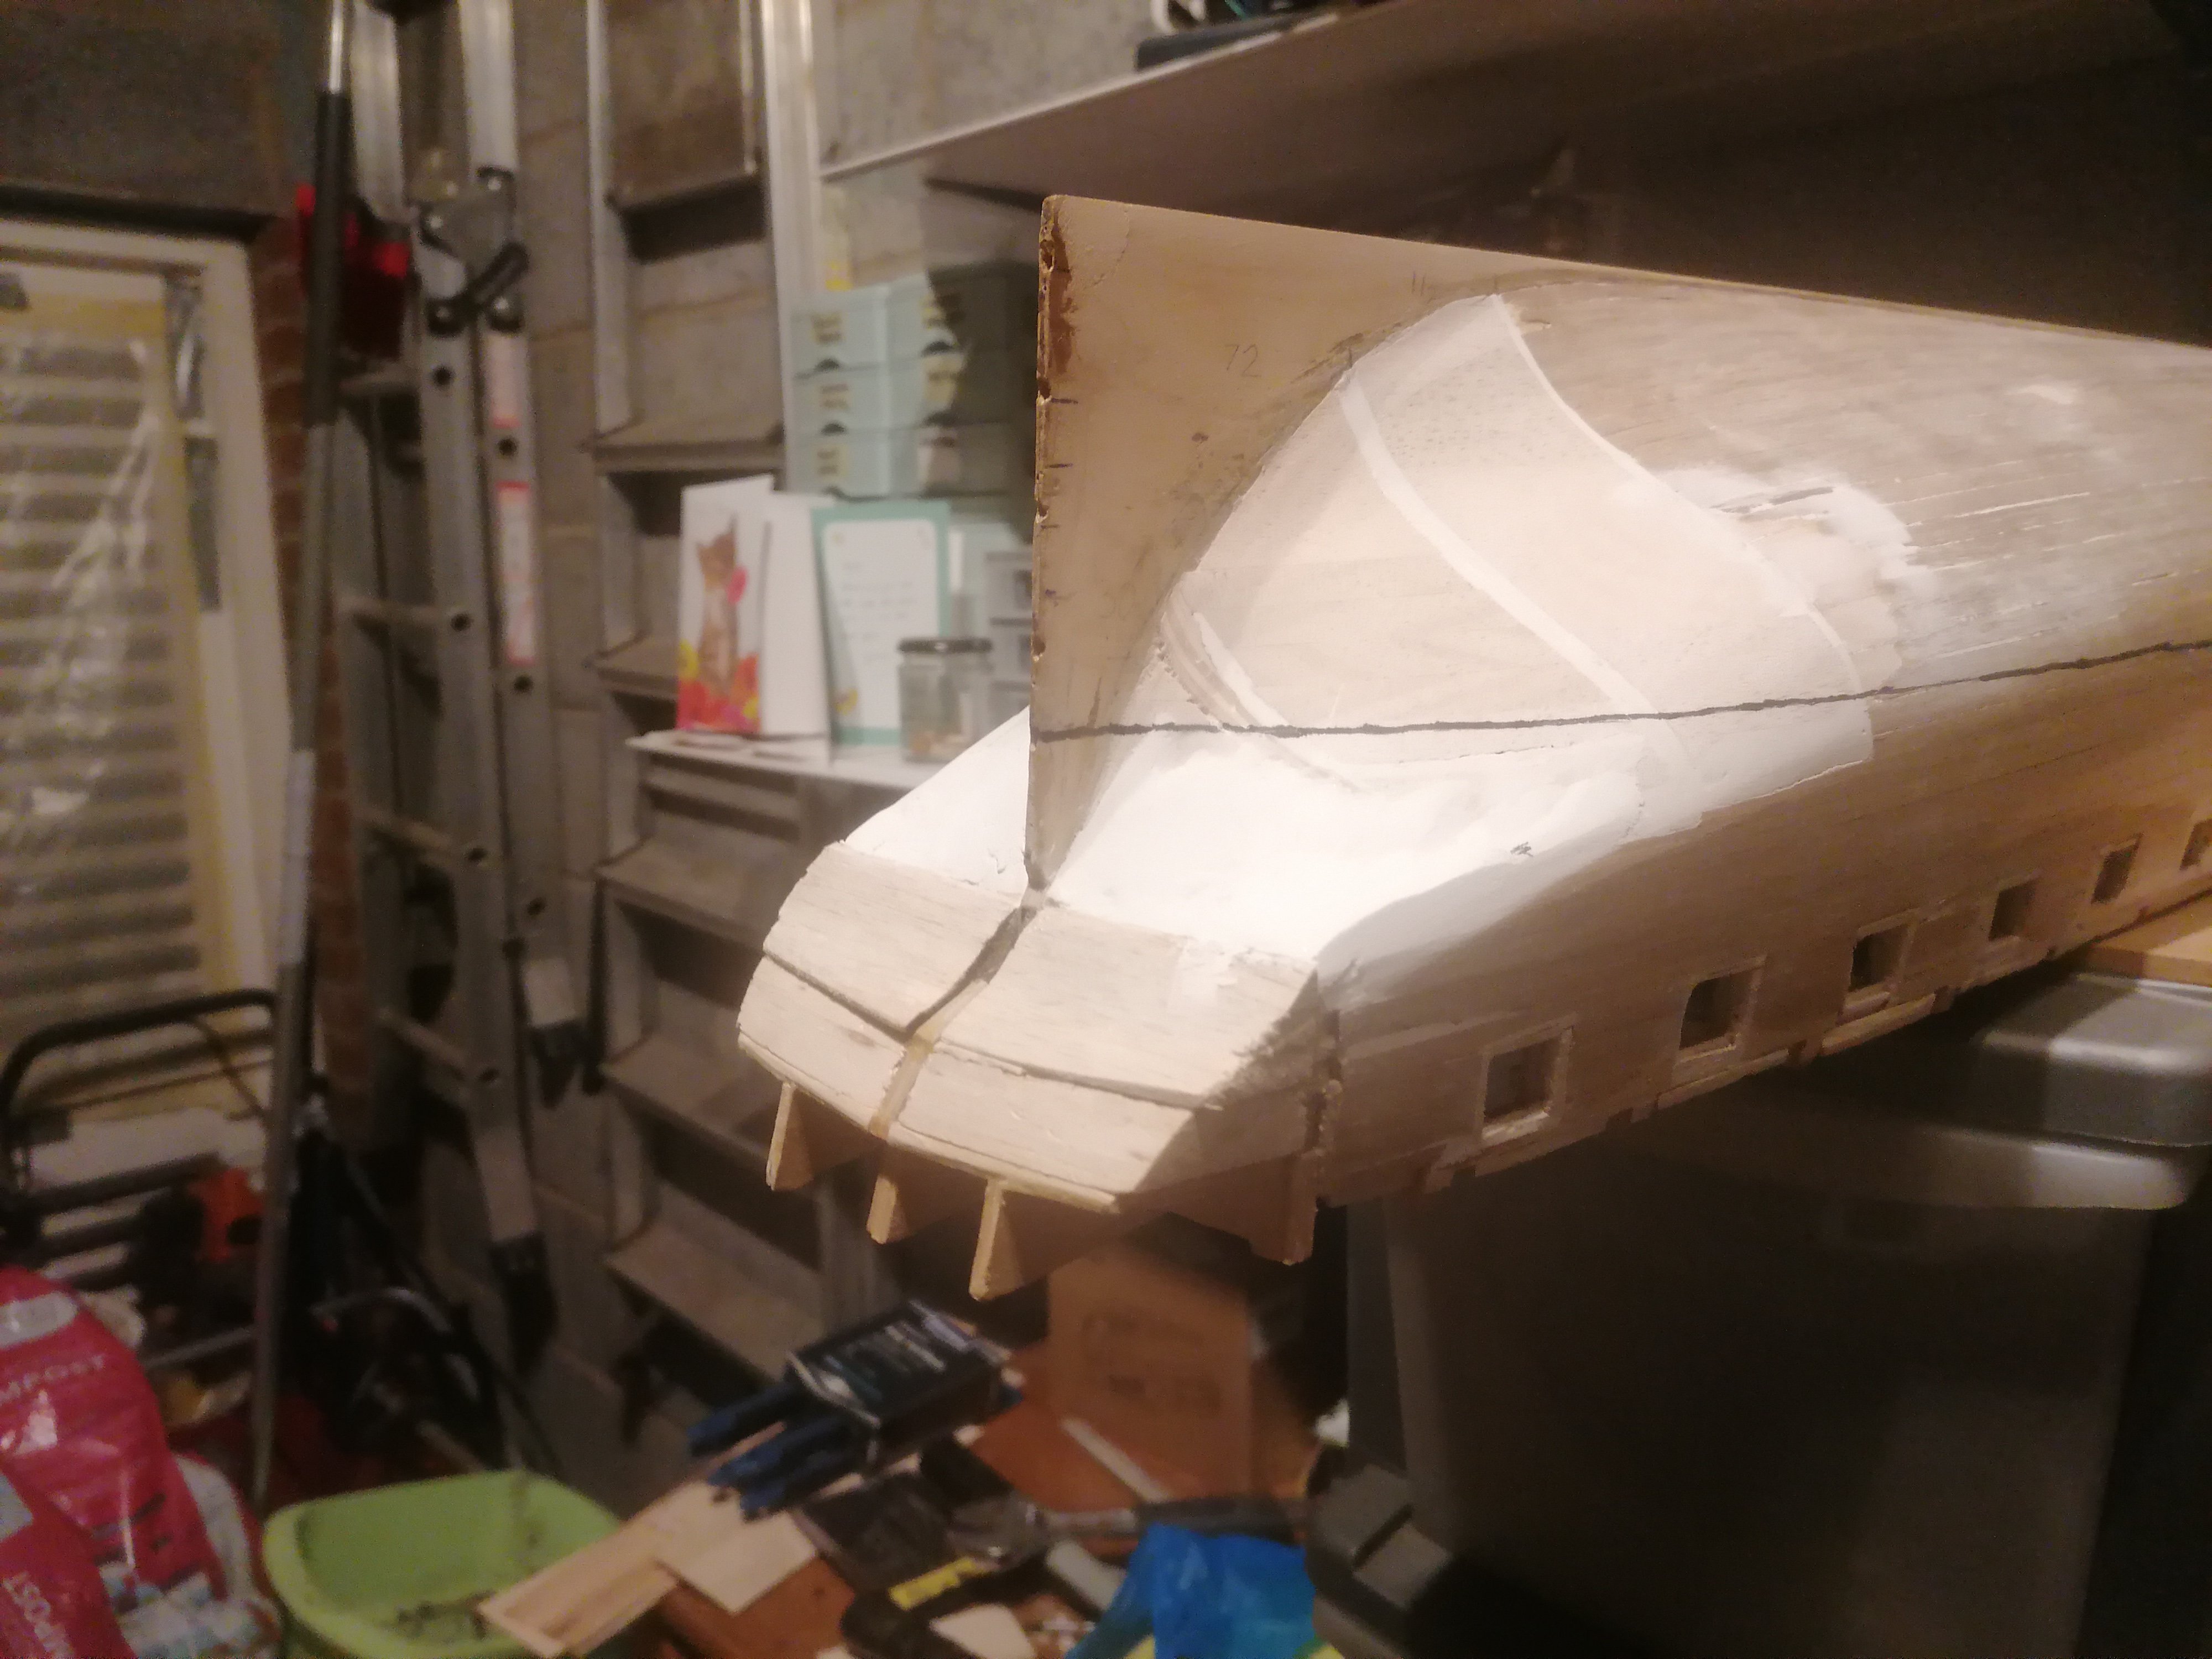
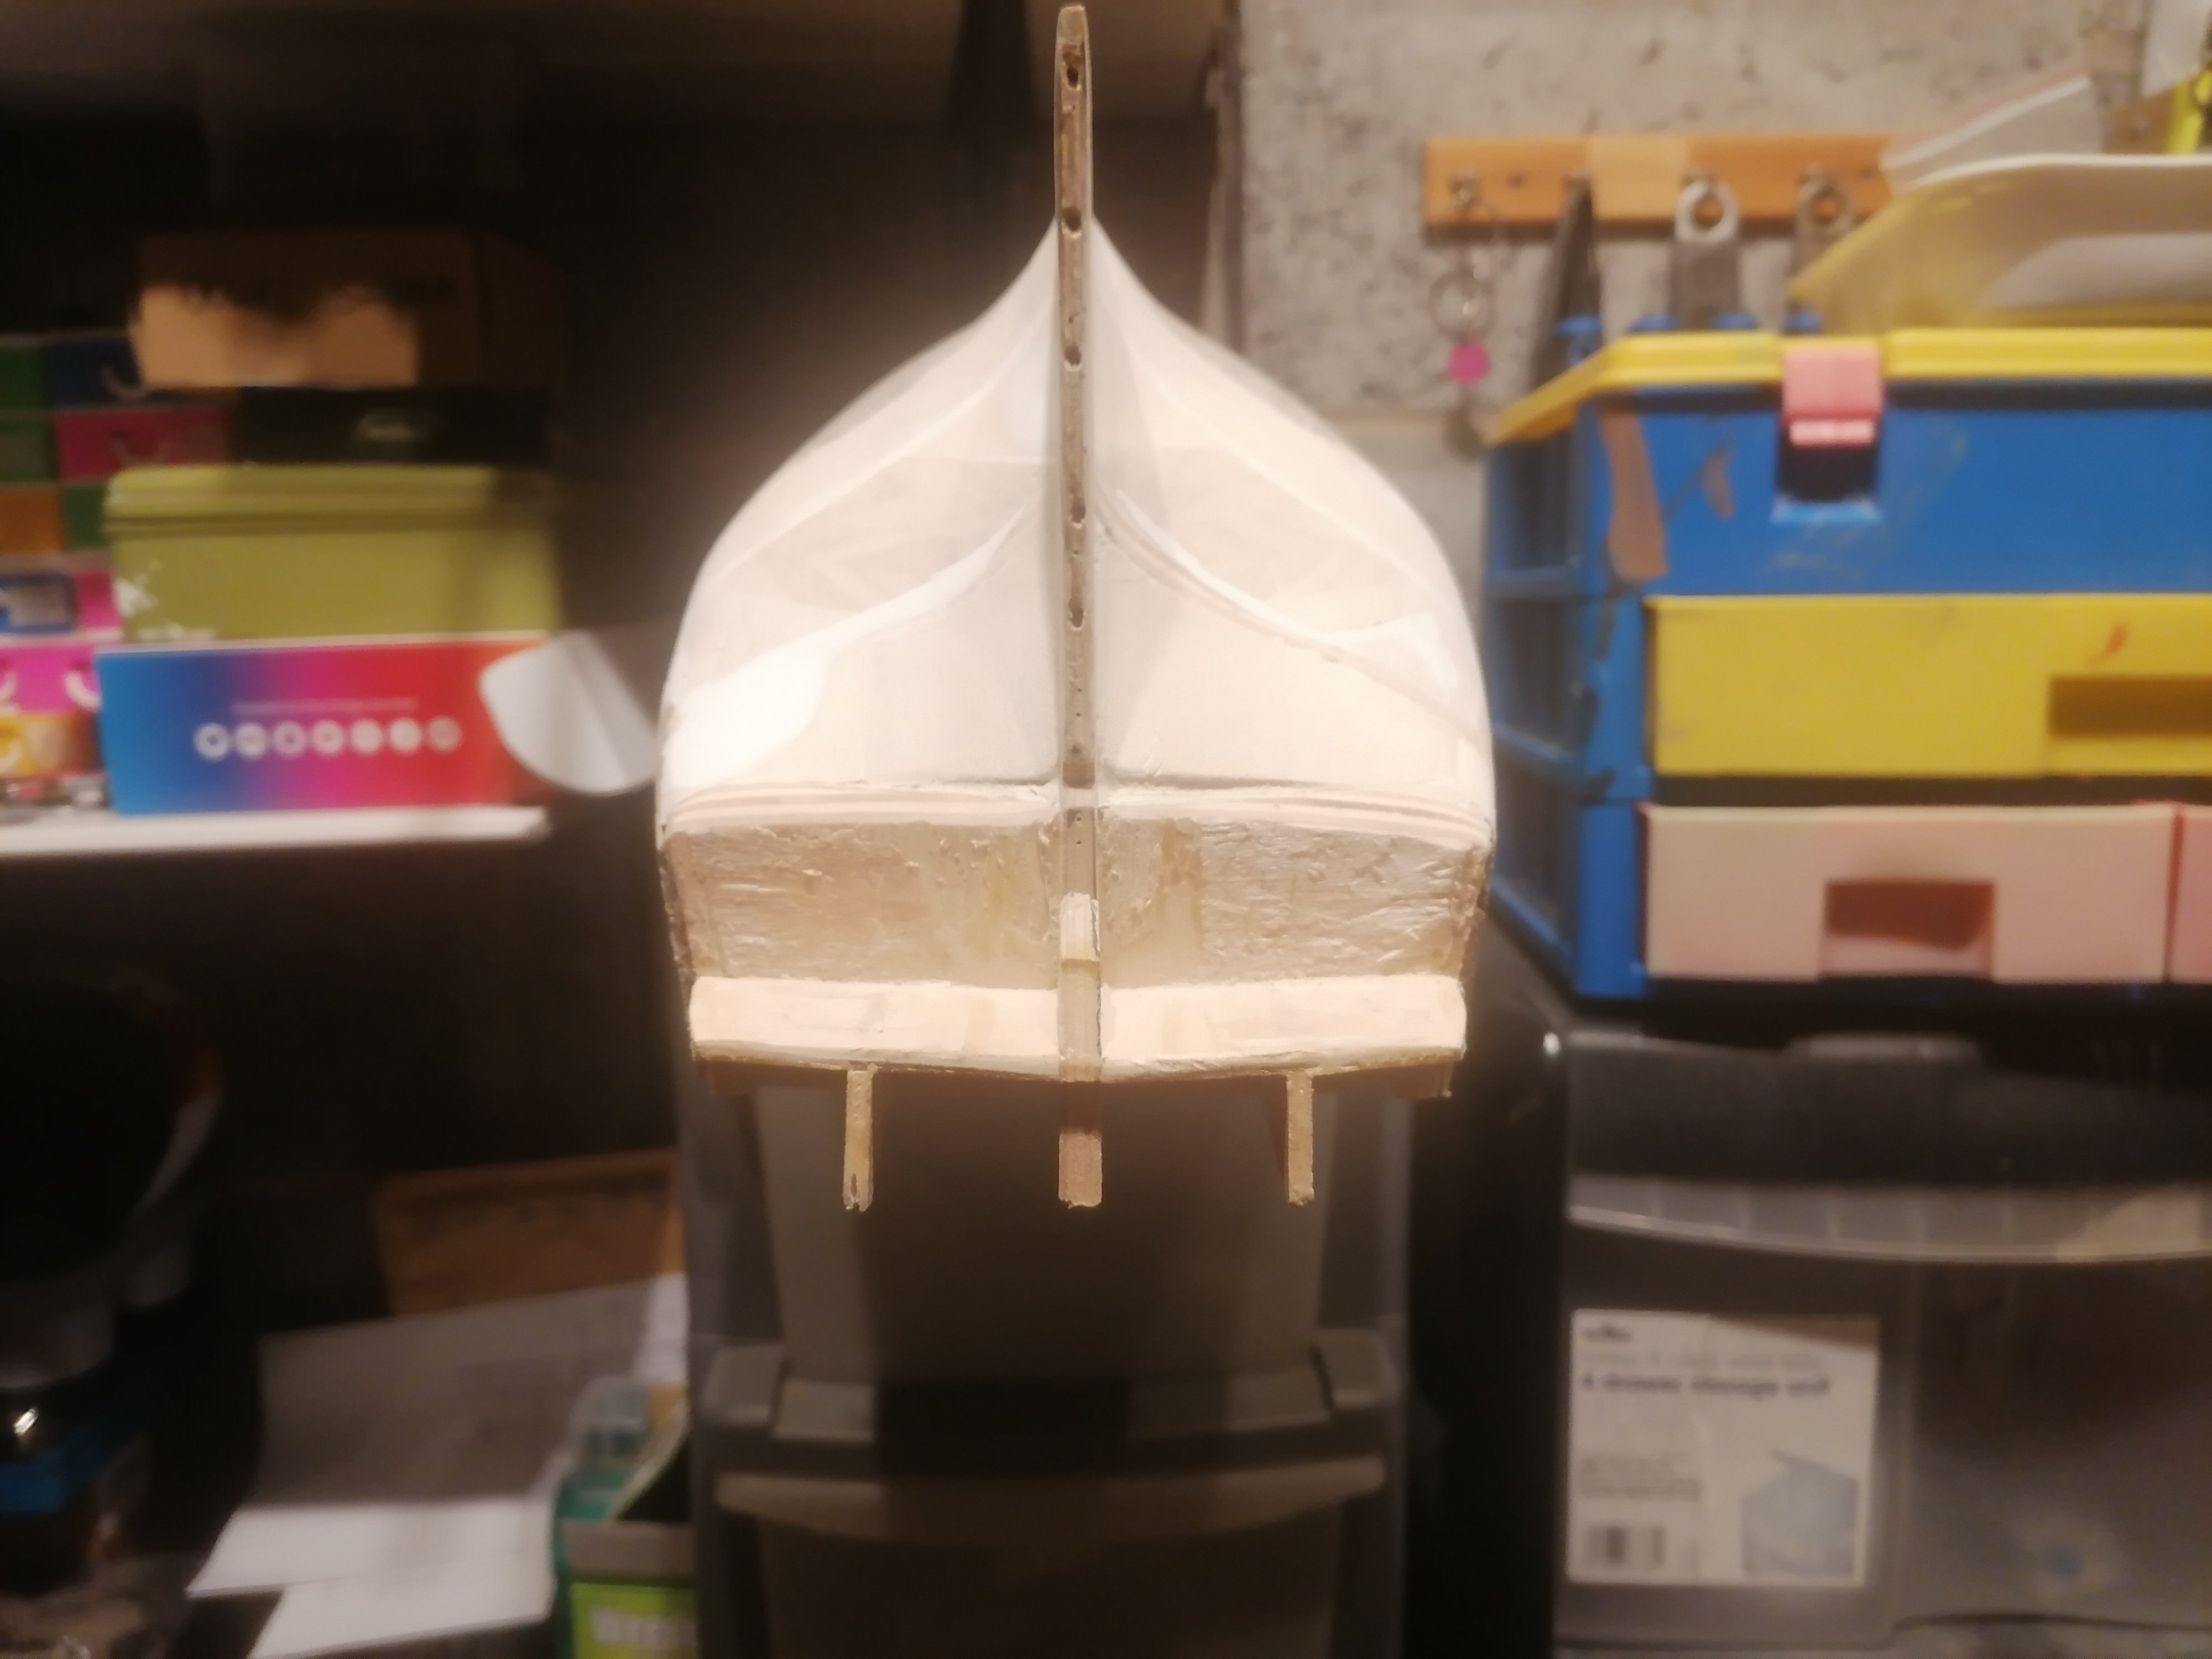
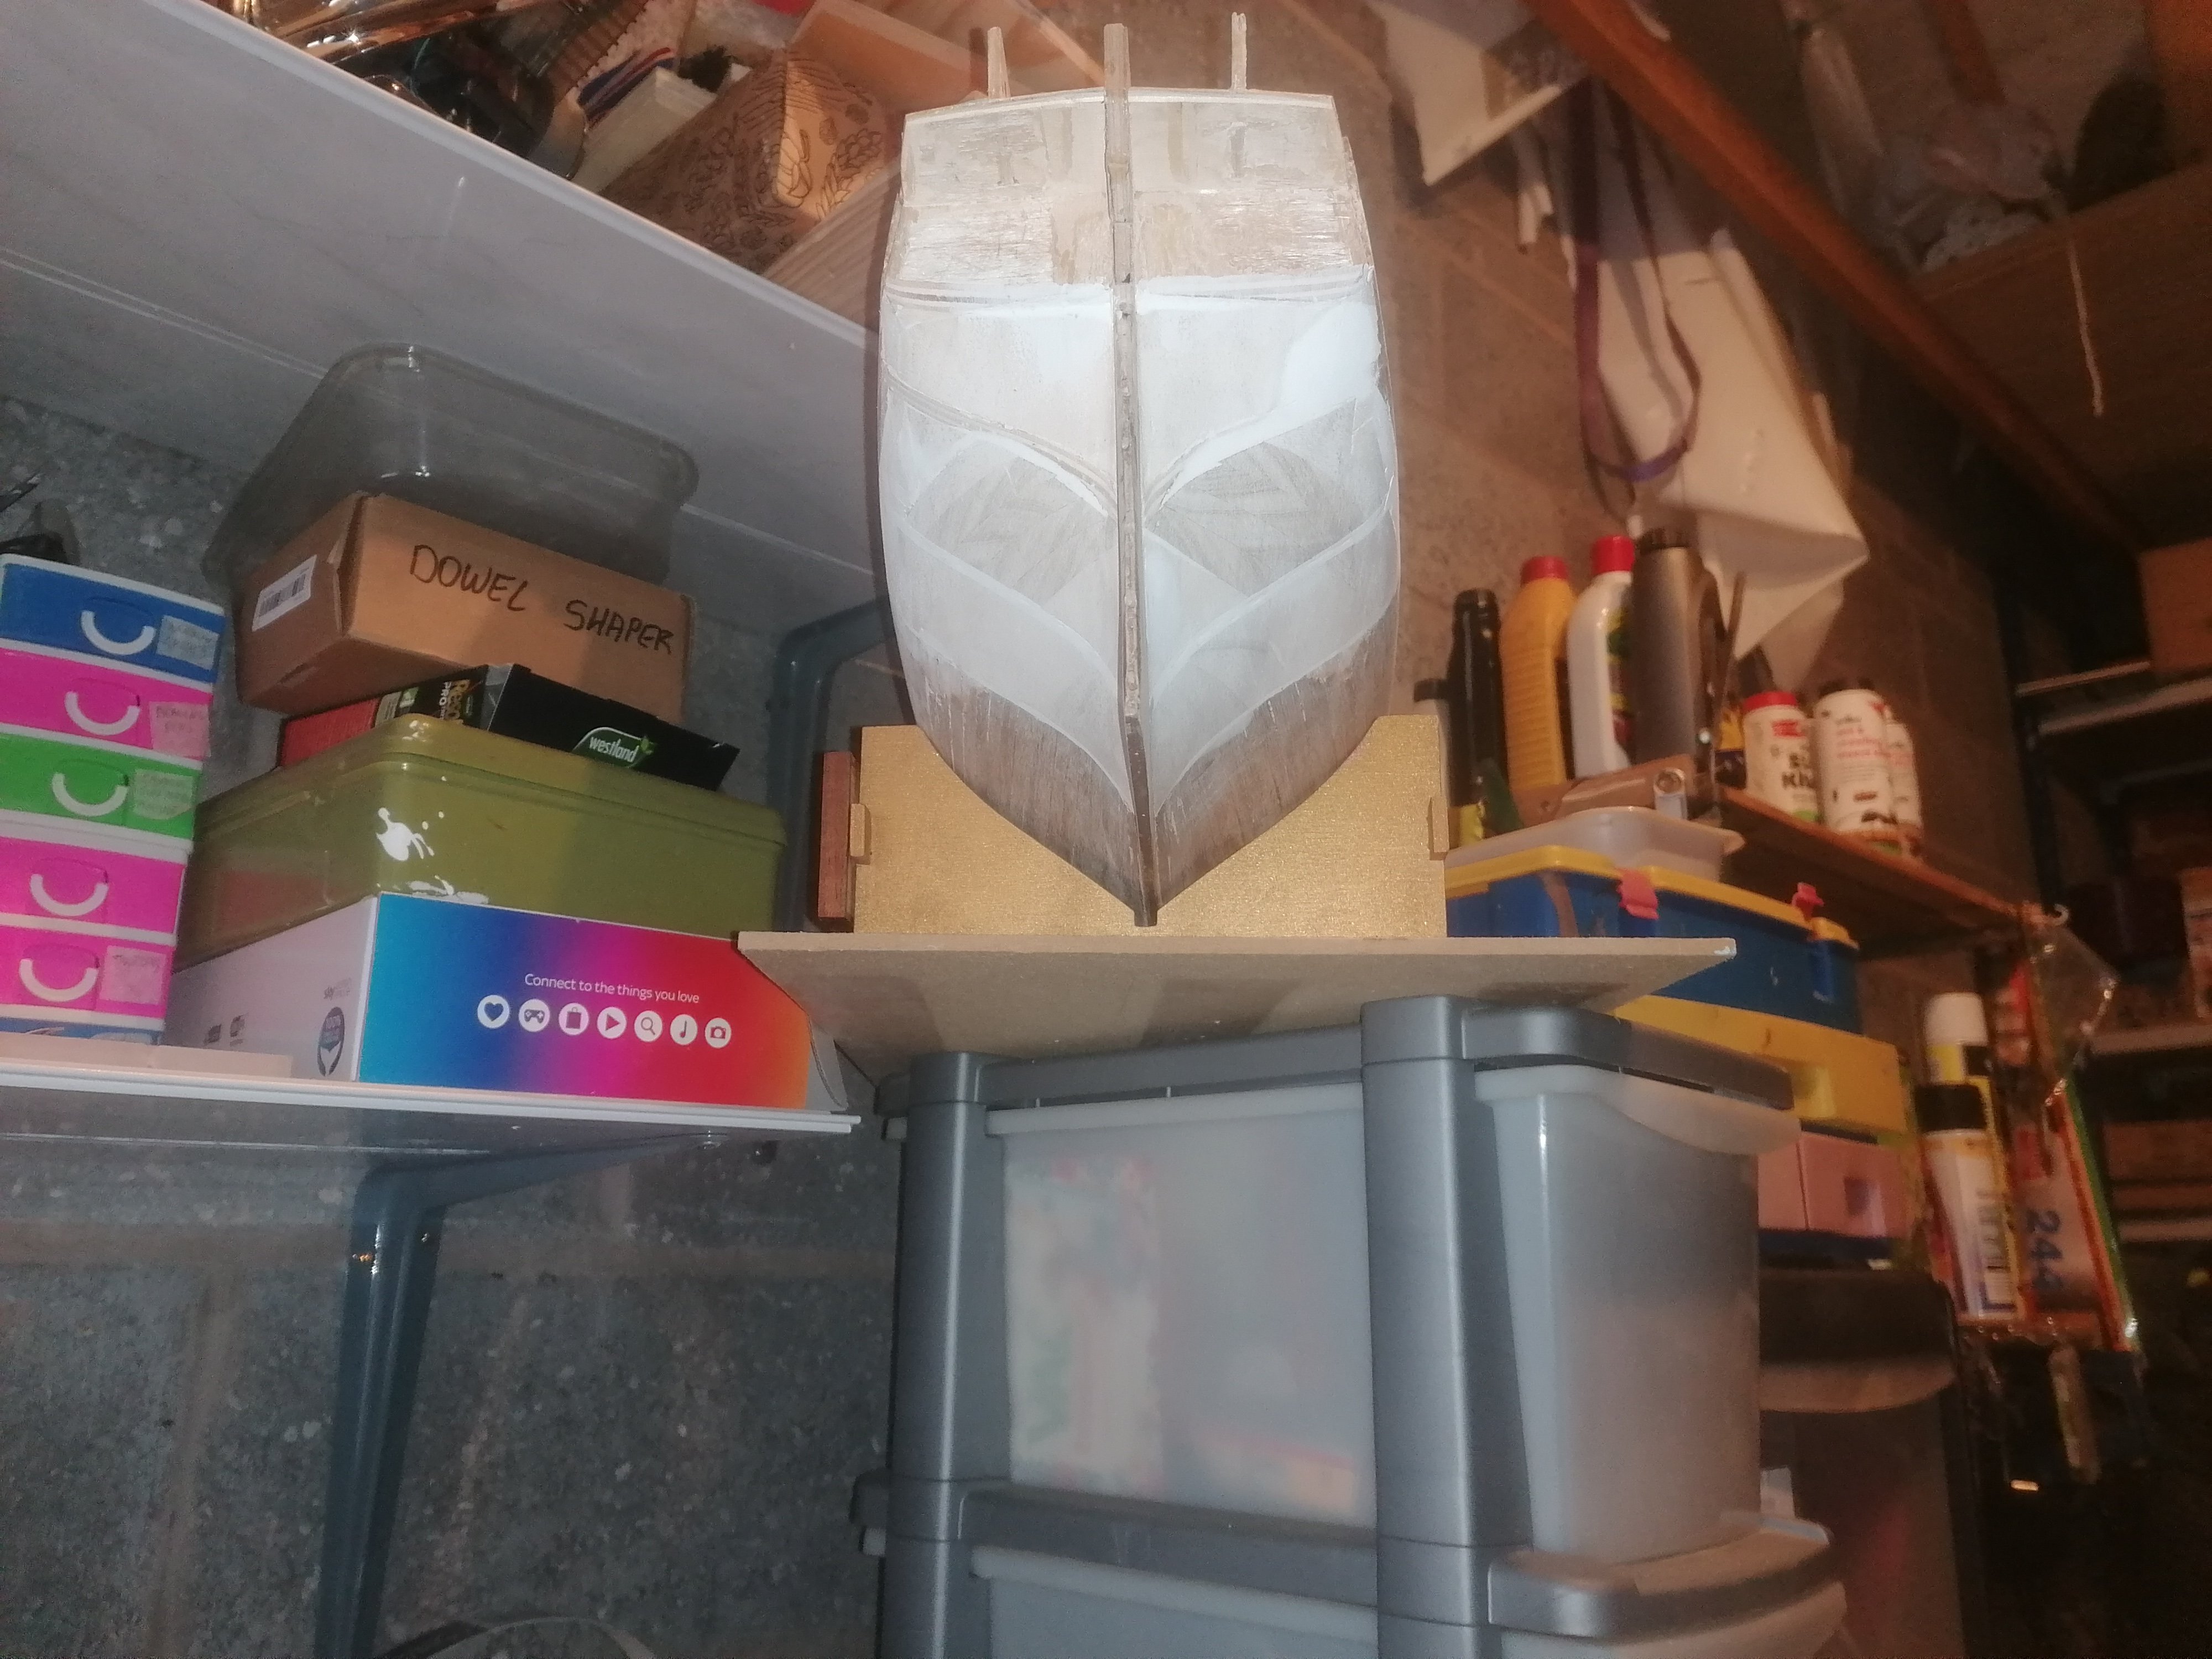
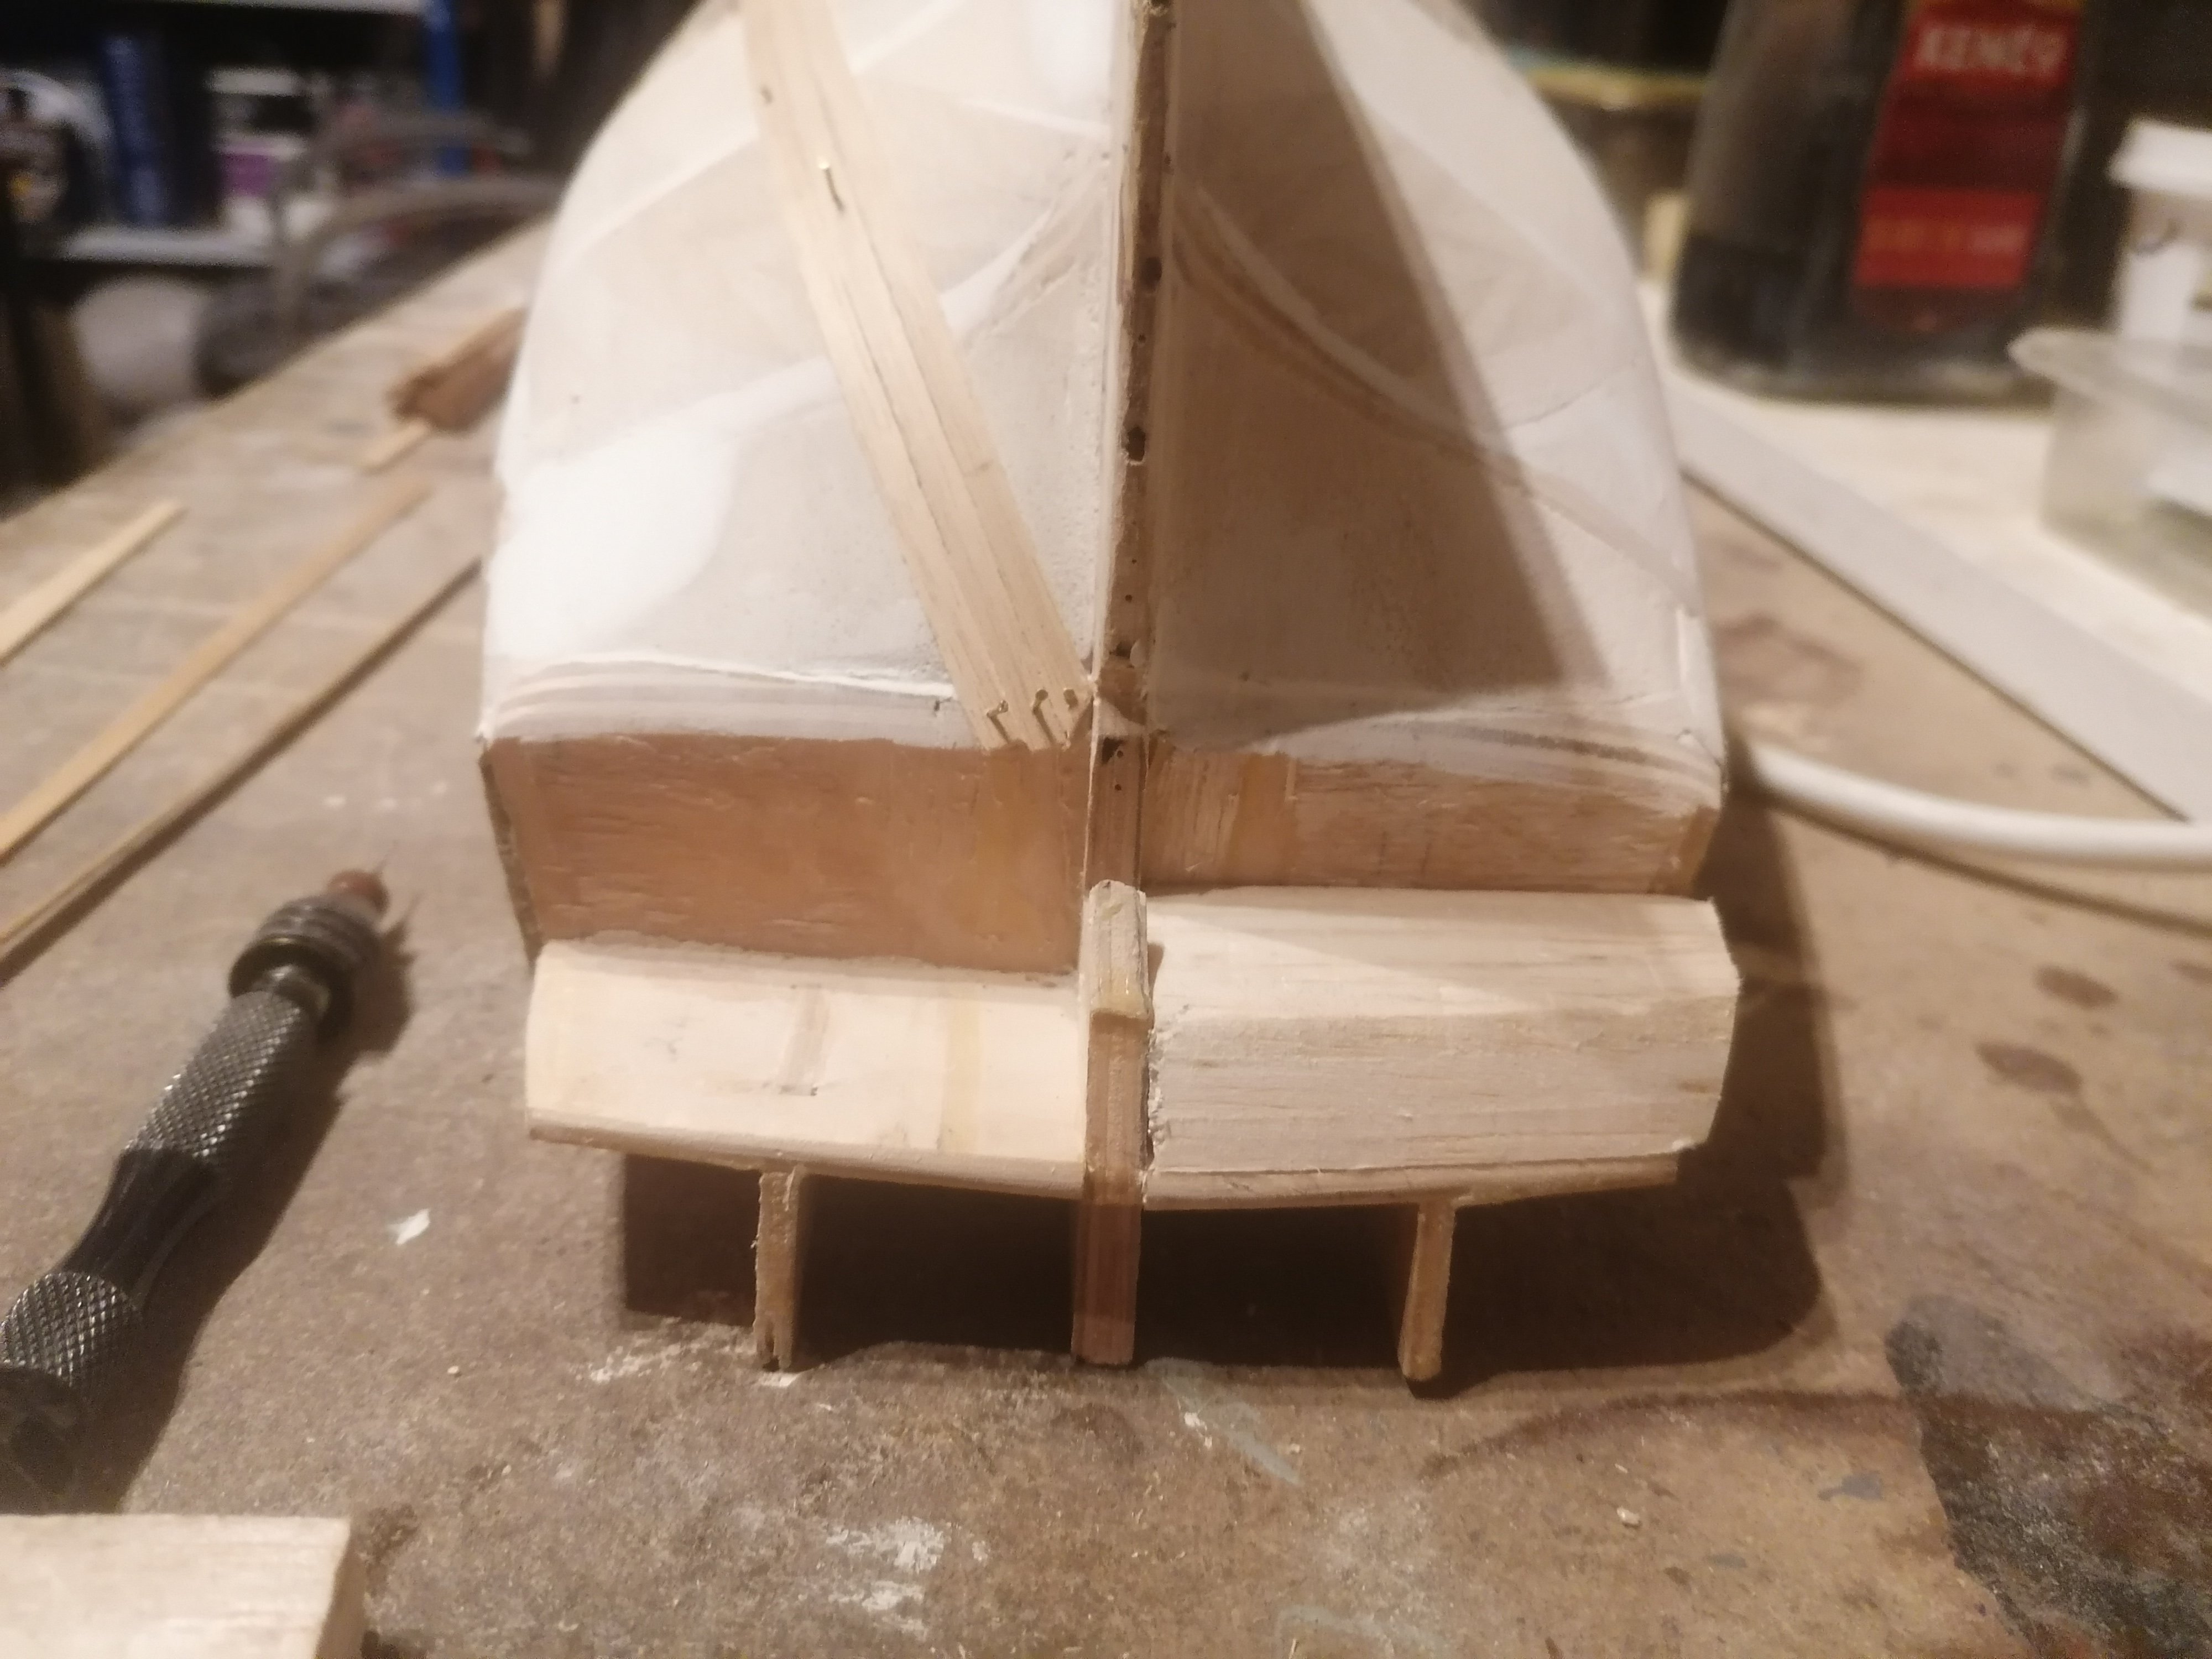
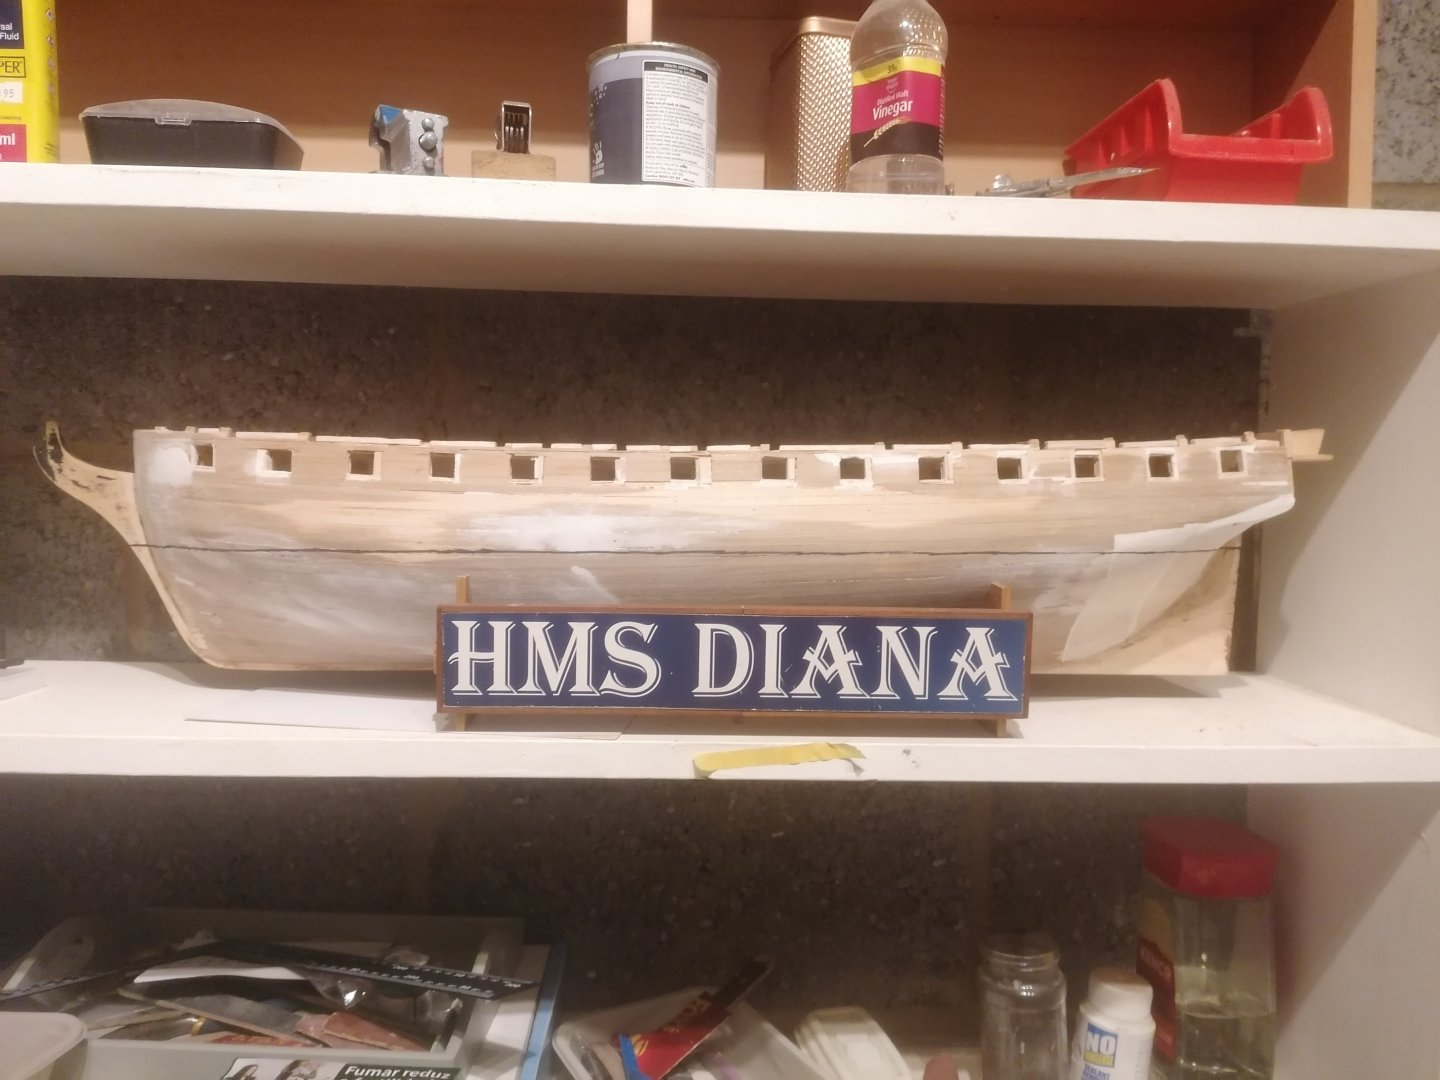
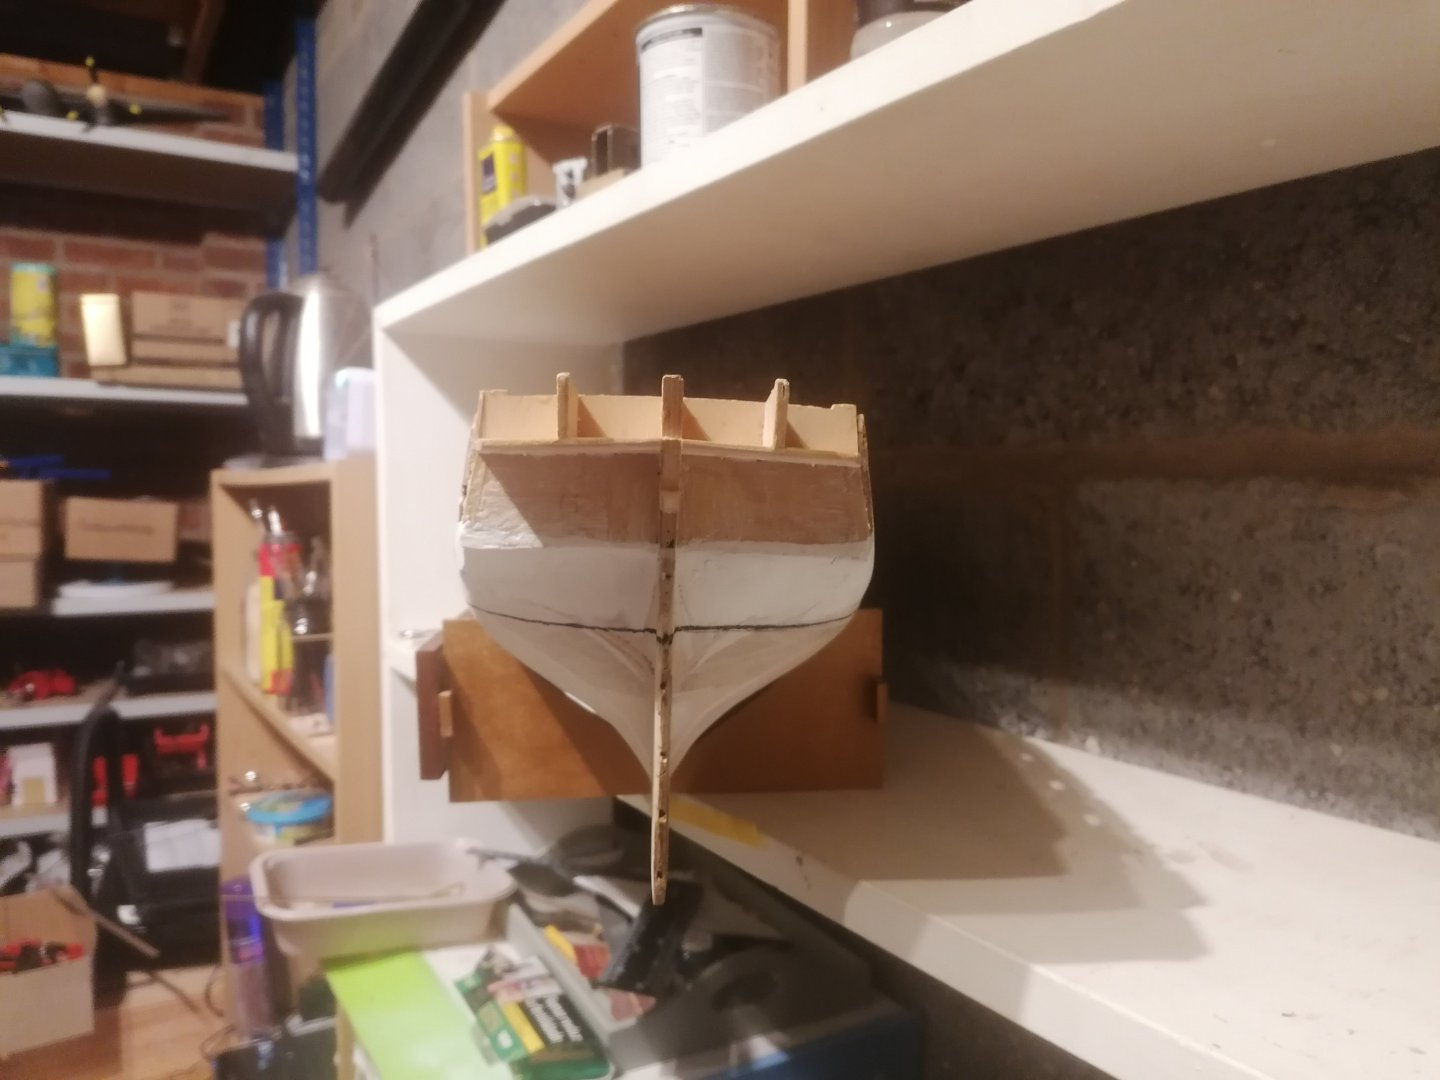
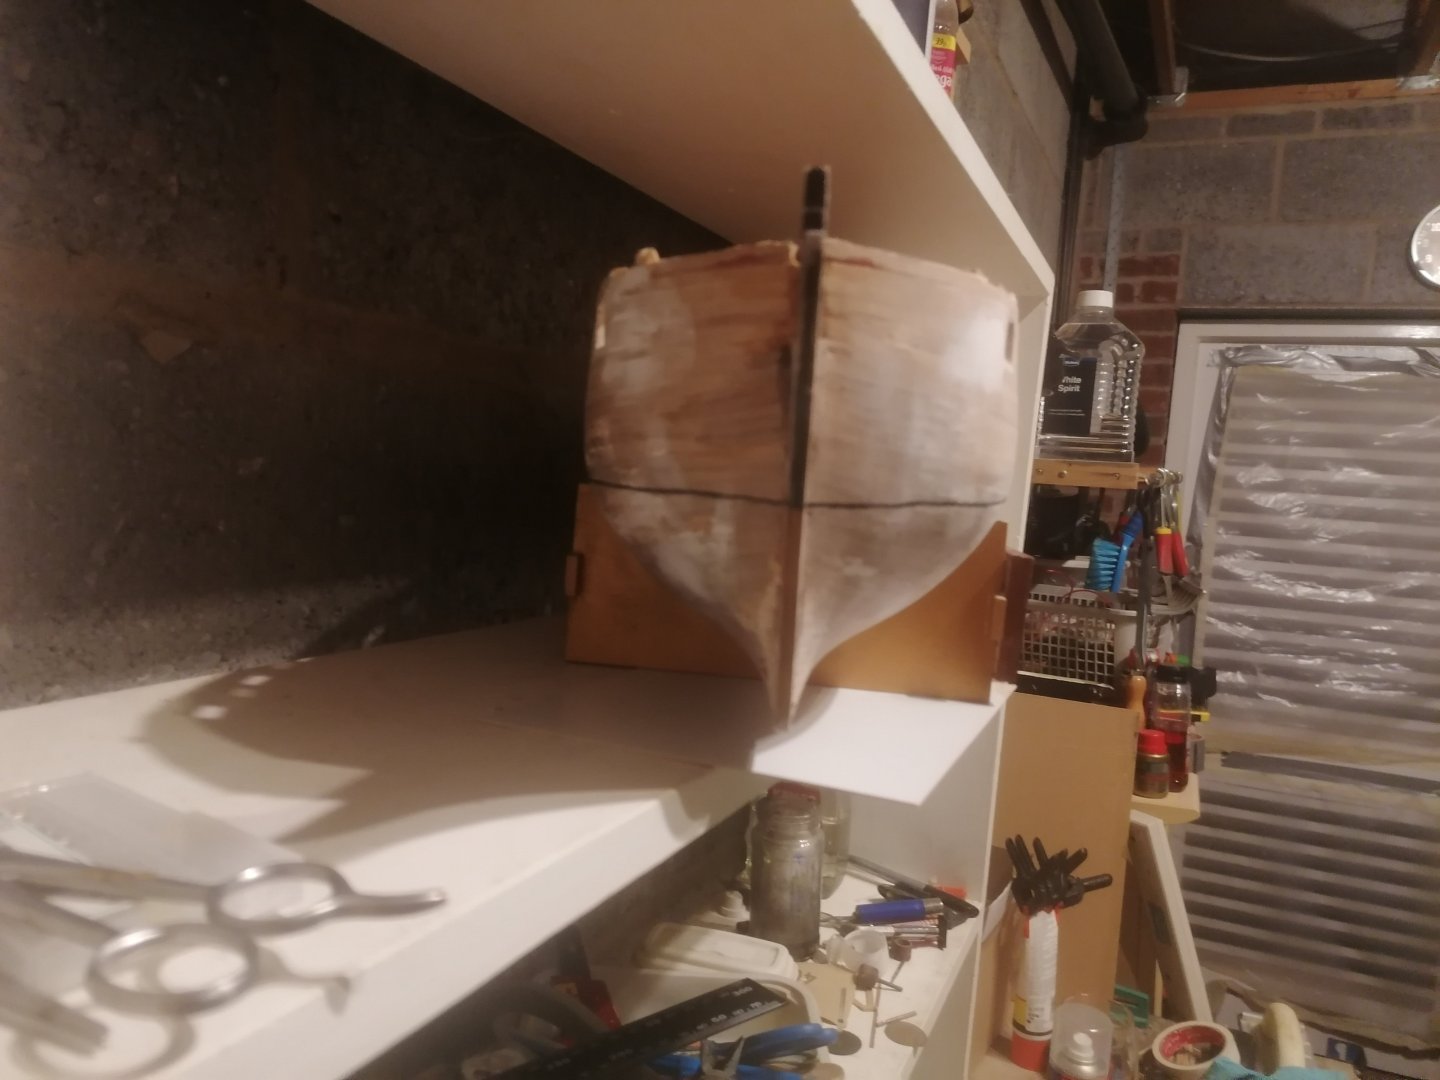
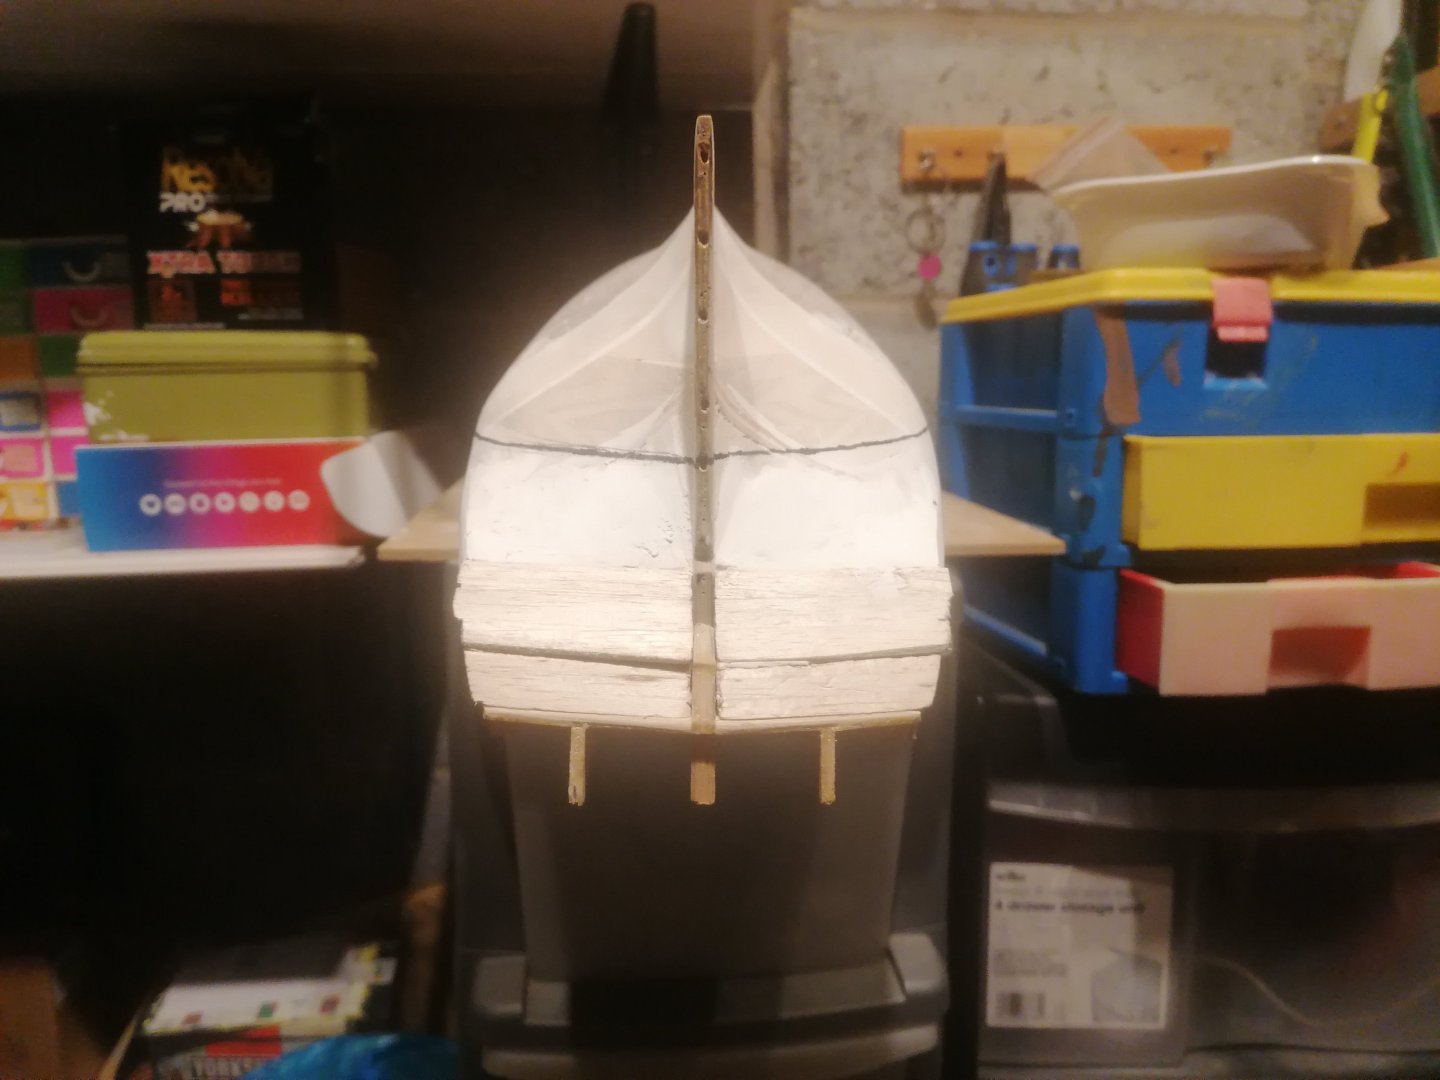
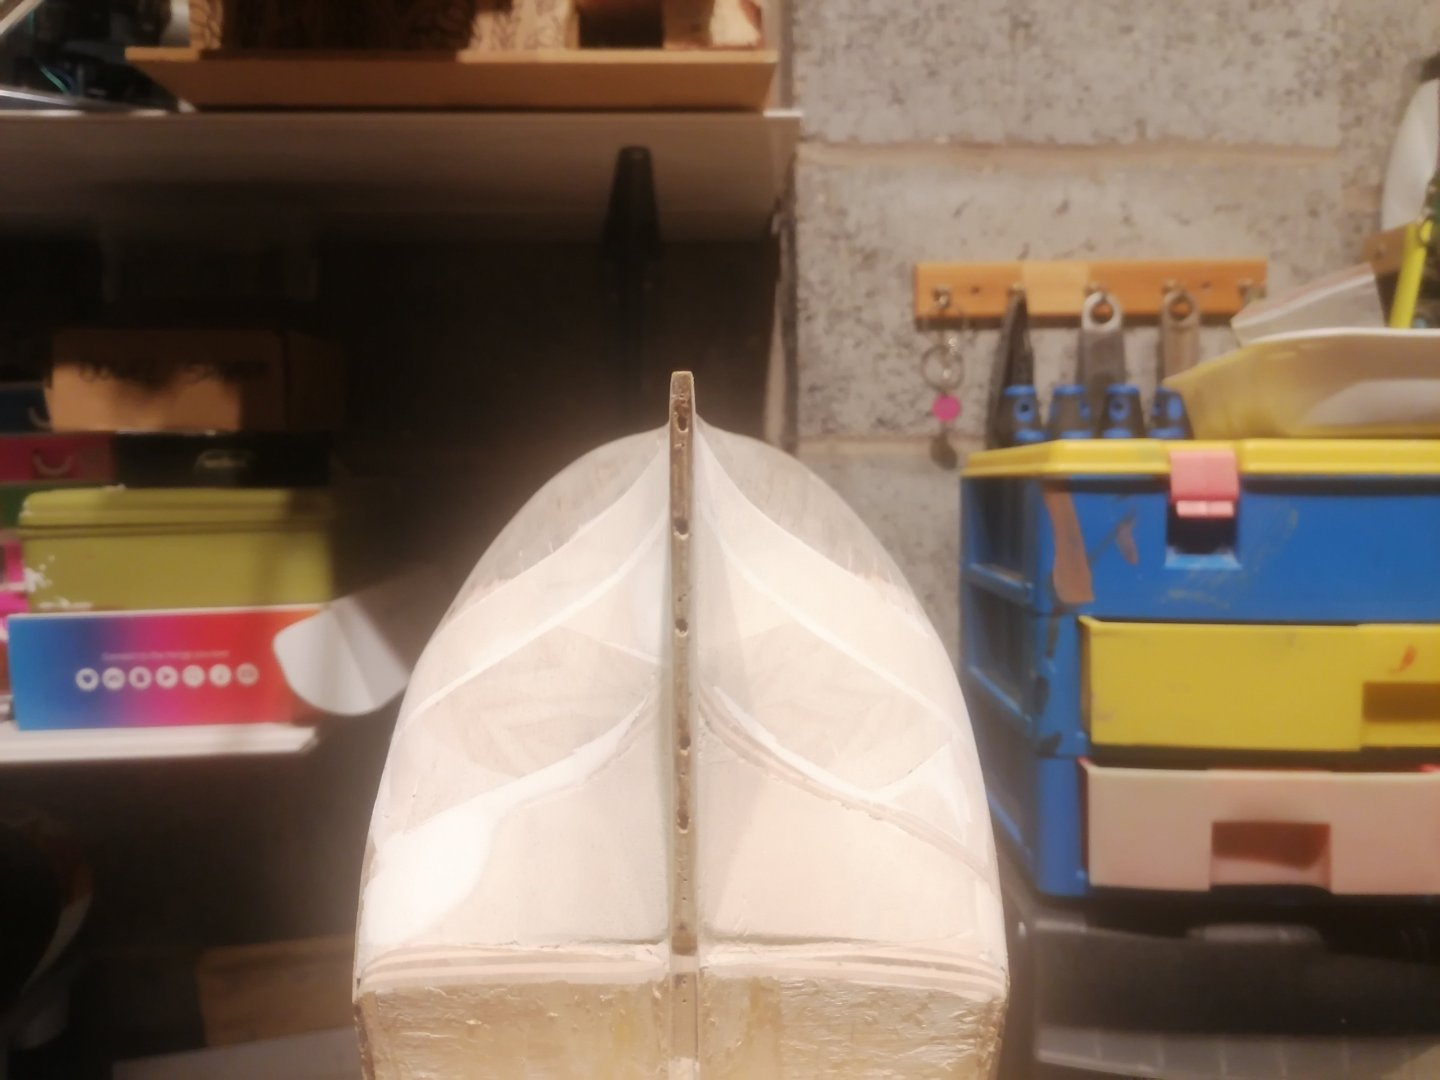
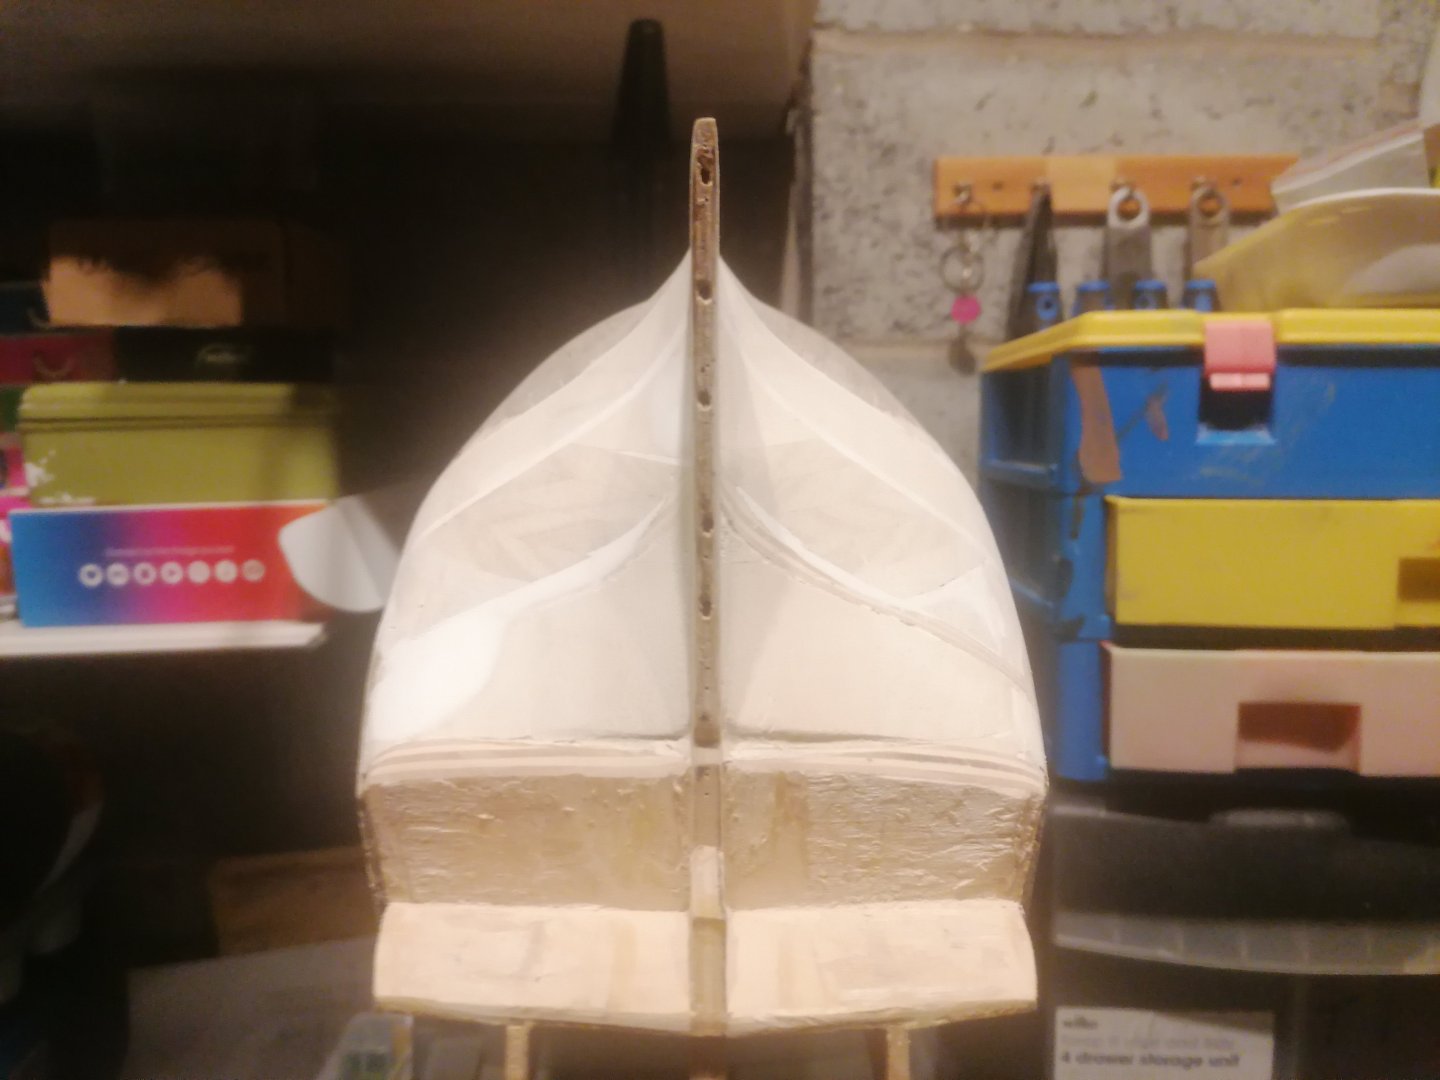
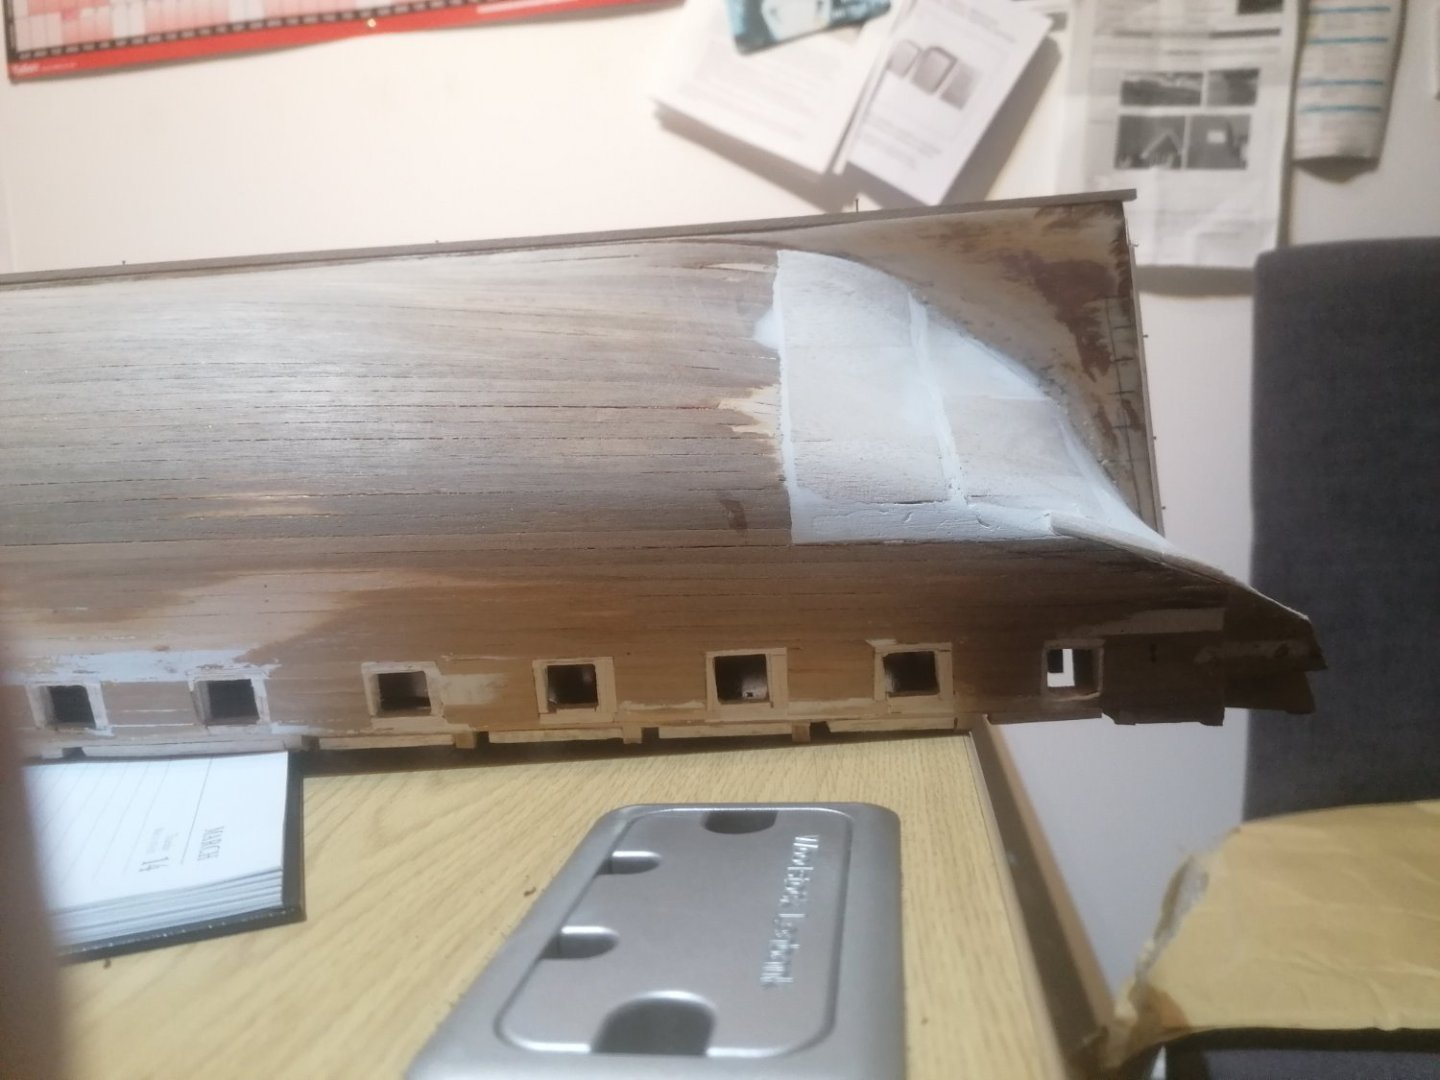
Once again, thanks for the likes. It's always nice to know folks are dropping in. I forgot to mention before that I pinned some 1X 4mm strips to see how the planking will look. I was quite happy with this trial run and it seems I am going in the right direction. I have made some good, all be it slow, progress since my last post. I have made the lower stern counter from balsa and roughly shaped it on both sides. However, this has highlighted just how much of the stern shape I have lost. To try rectifying this I used a 1 X 10mm strip pinned to the side of the hull and a strip of balsa held to the stern. I then built up the space in between with filler and allowed it to set, after 3 goes at this I had the shape I required. It's cosiderably different to the shape I had and a huge improvement. This area still needs to be sanded a little more. But, before shaping it any further, I decided I need to work out the waterline position followed by the lower edge of the wale. I thought the "helping hands" device would work but one or other croc clips would move. I resorted to the"paper cup method" only with a platic bottle. The hull was propped up with long balsa strips and the bow raised by 6mm , when the hull was level I used a couple of heavy monkey wrenches to hold everything in place, and then drew the waterline. I next measured the lower edge if the wale from below various gunports and marked the edge. On my laptop screen I zoomed in to 365% which practicaly takes the hull profile to 1/64 scale and took measurements from this which pretty much agrred with my measurements. I have pinned strips of 1X3mm wood to mark the upper and lower edges of the wale. when I took a few photos these were hard to see so I highlighted them with a black marker pen so I can check the look of their postitioning. The lower edge of the wale sits pretty much exactly where I need (and hoped) it should be, which, should allow me to slightly round off the hull without having to bend the 2nd planking into severe bends and, instead, curve smoothly. That's the idea anyway. My next task will be to finnish smoothing off the hull below the wale and hopefully achieve a perfectly symetrical finnish. The waterline has shown up a slight discrepency between port and starboard. My one concern at present is attaching the planking to so much filler. I am thinking of adding a 2mm wide strip under the lower stern counter to glue the planks onto and just use the filler as a shaping support. Here are a few photos to help explain things better. I will add more soon I hope. David.


-
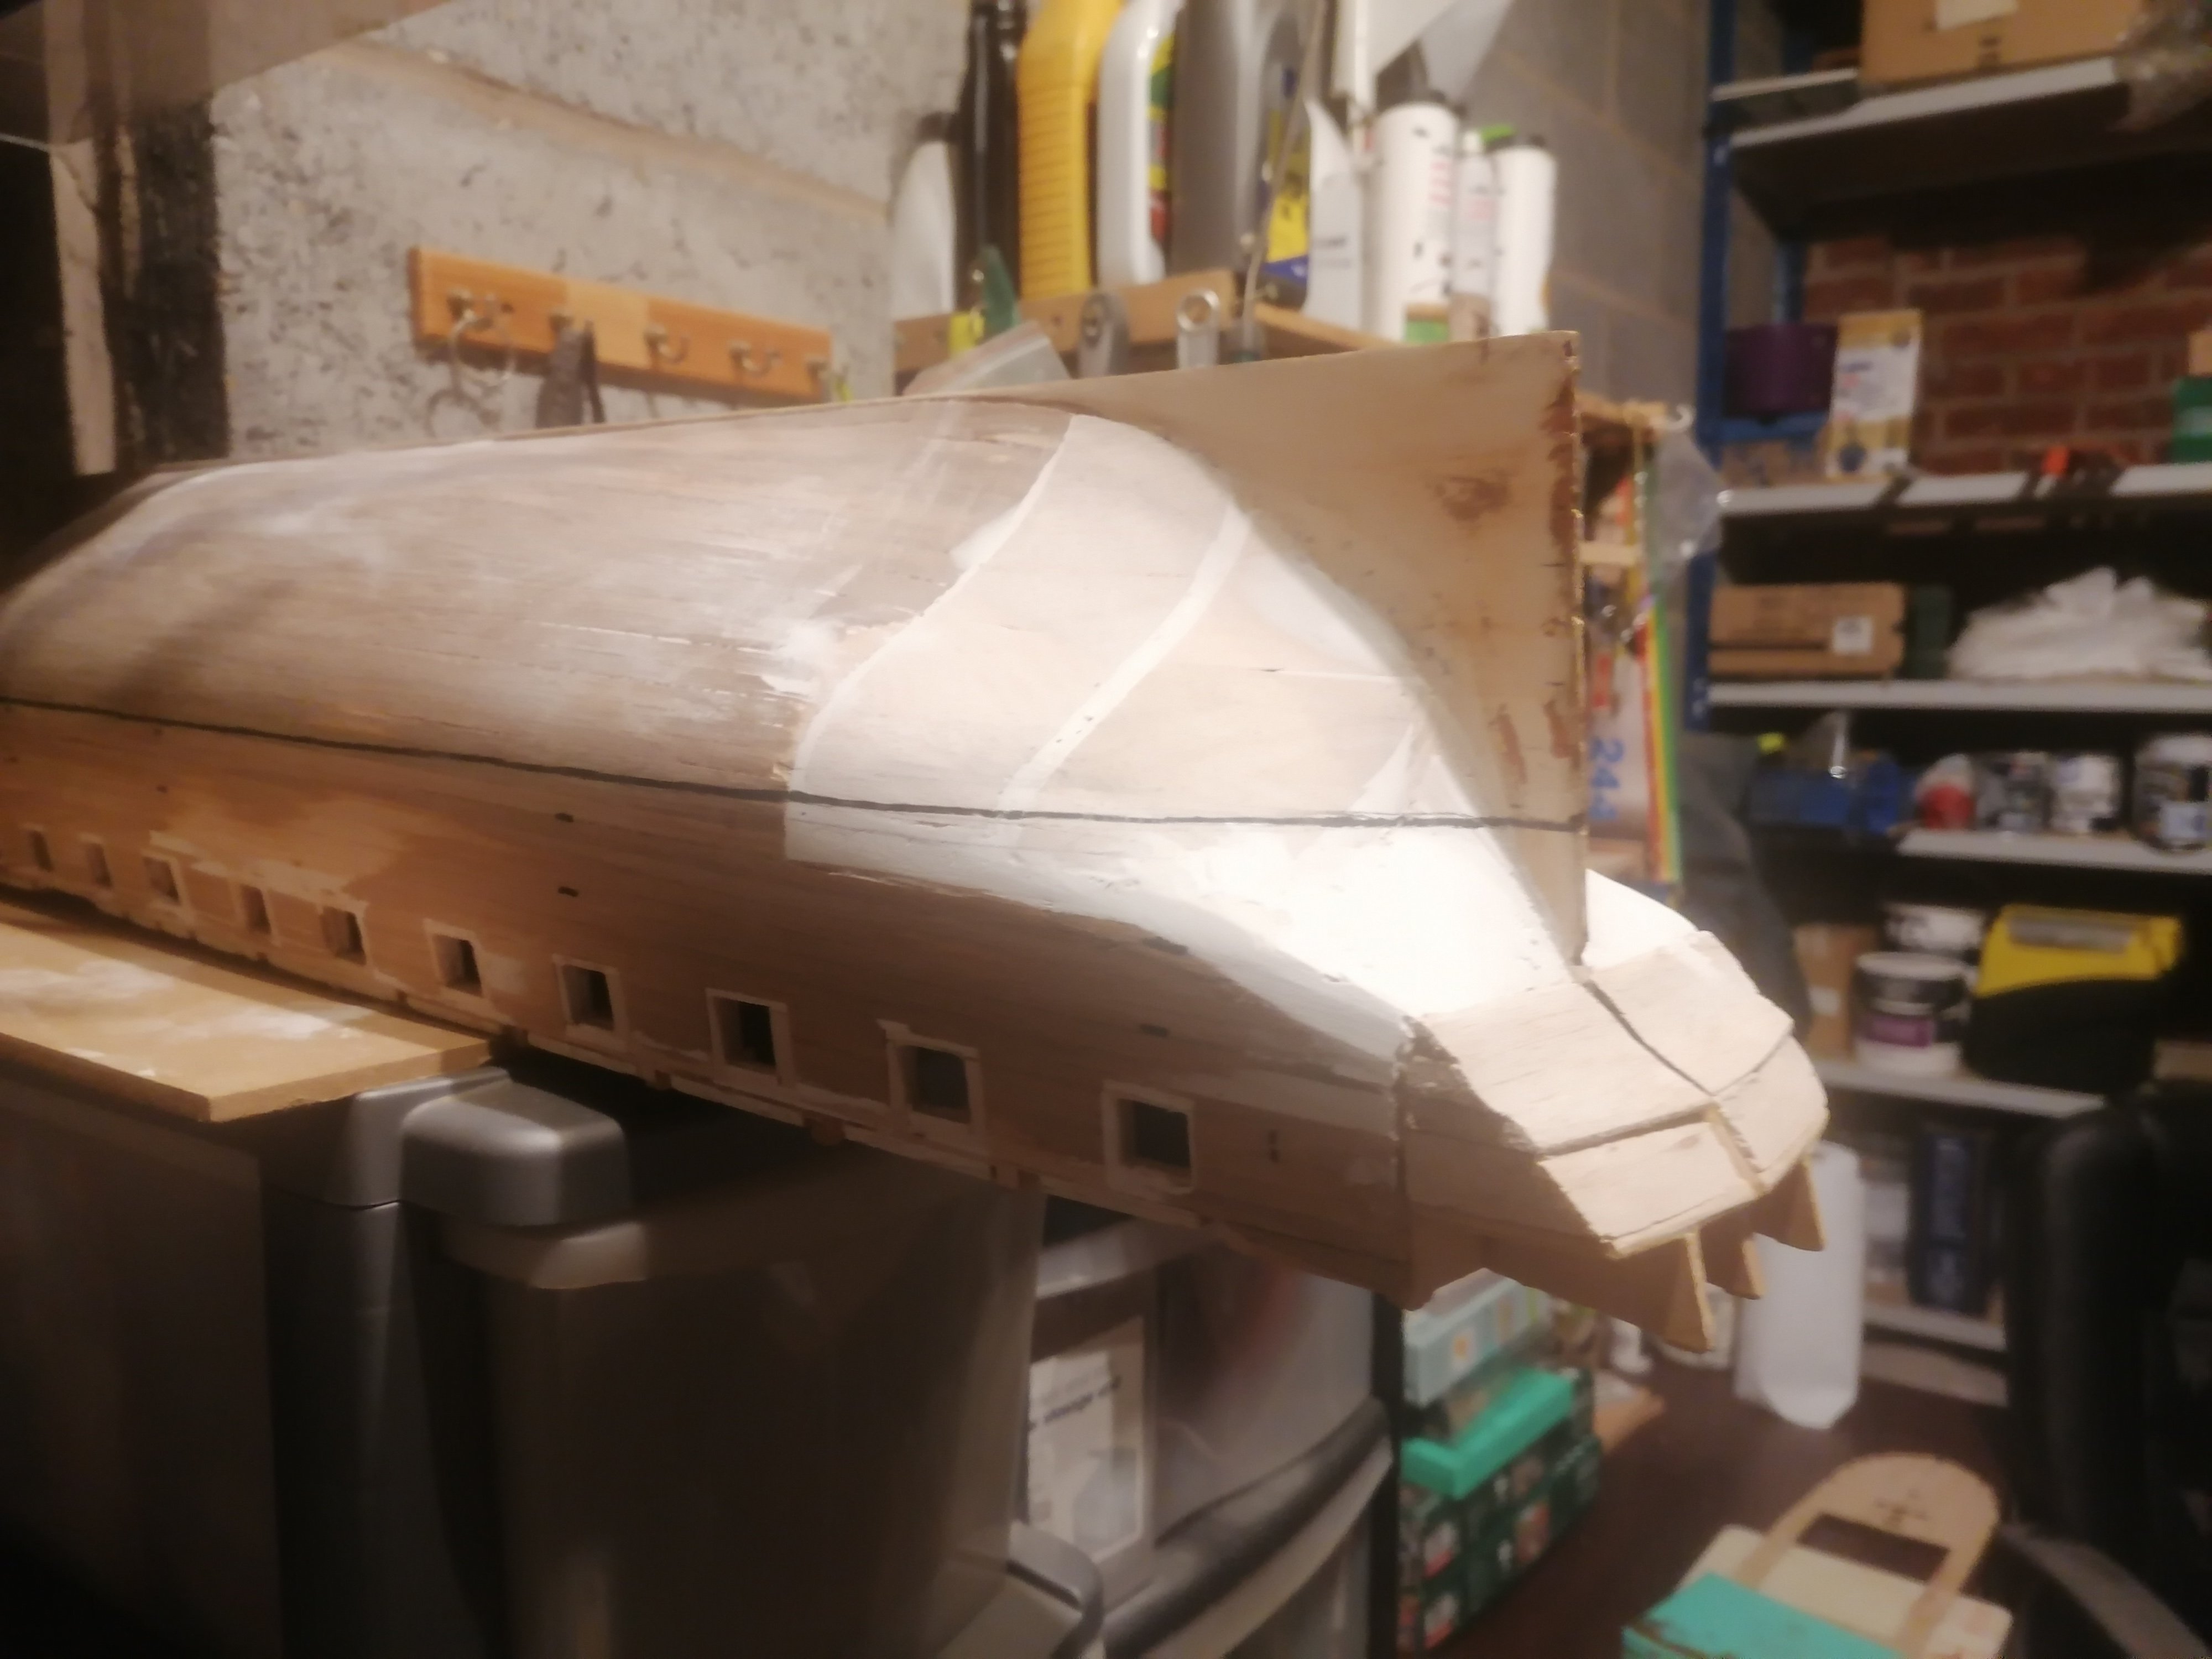
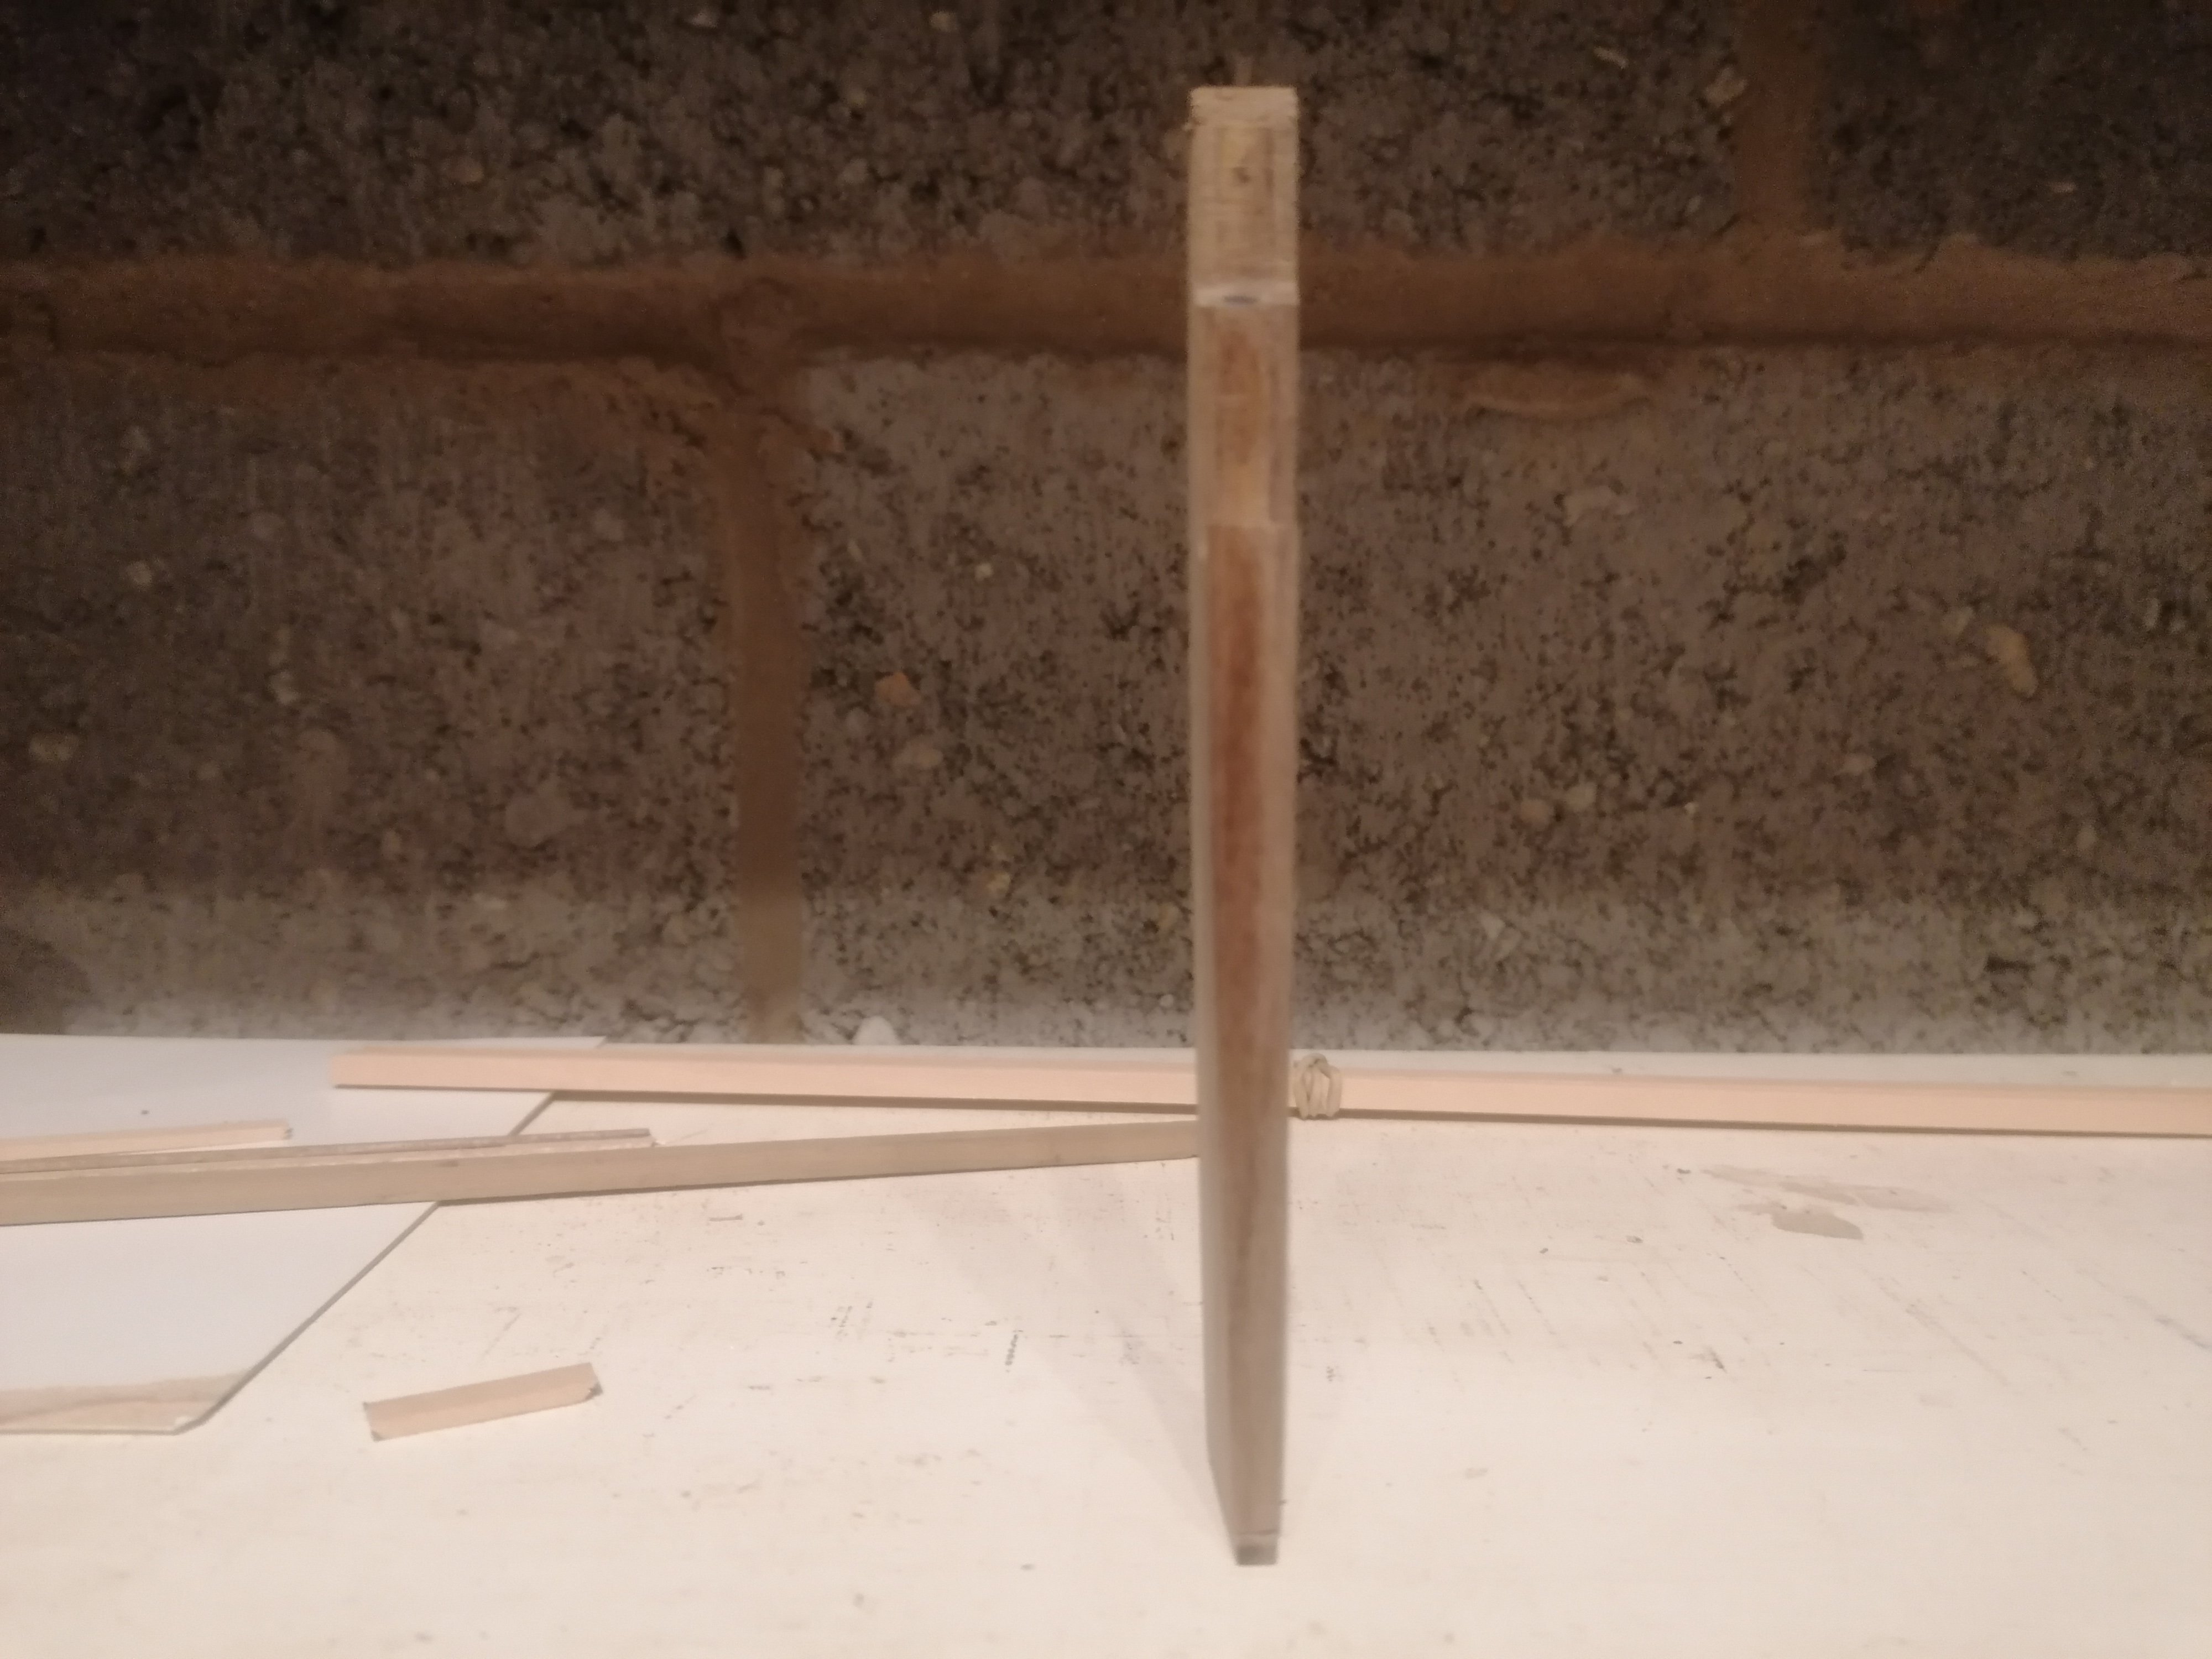
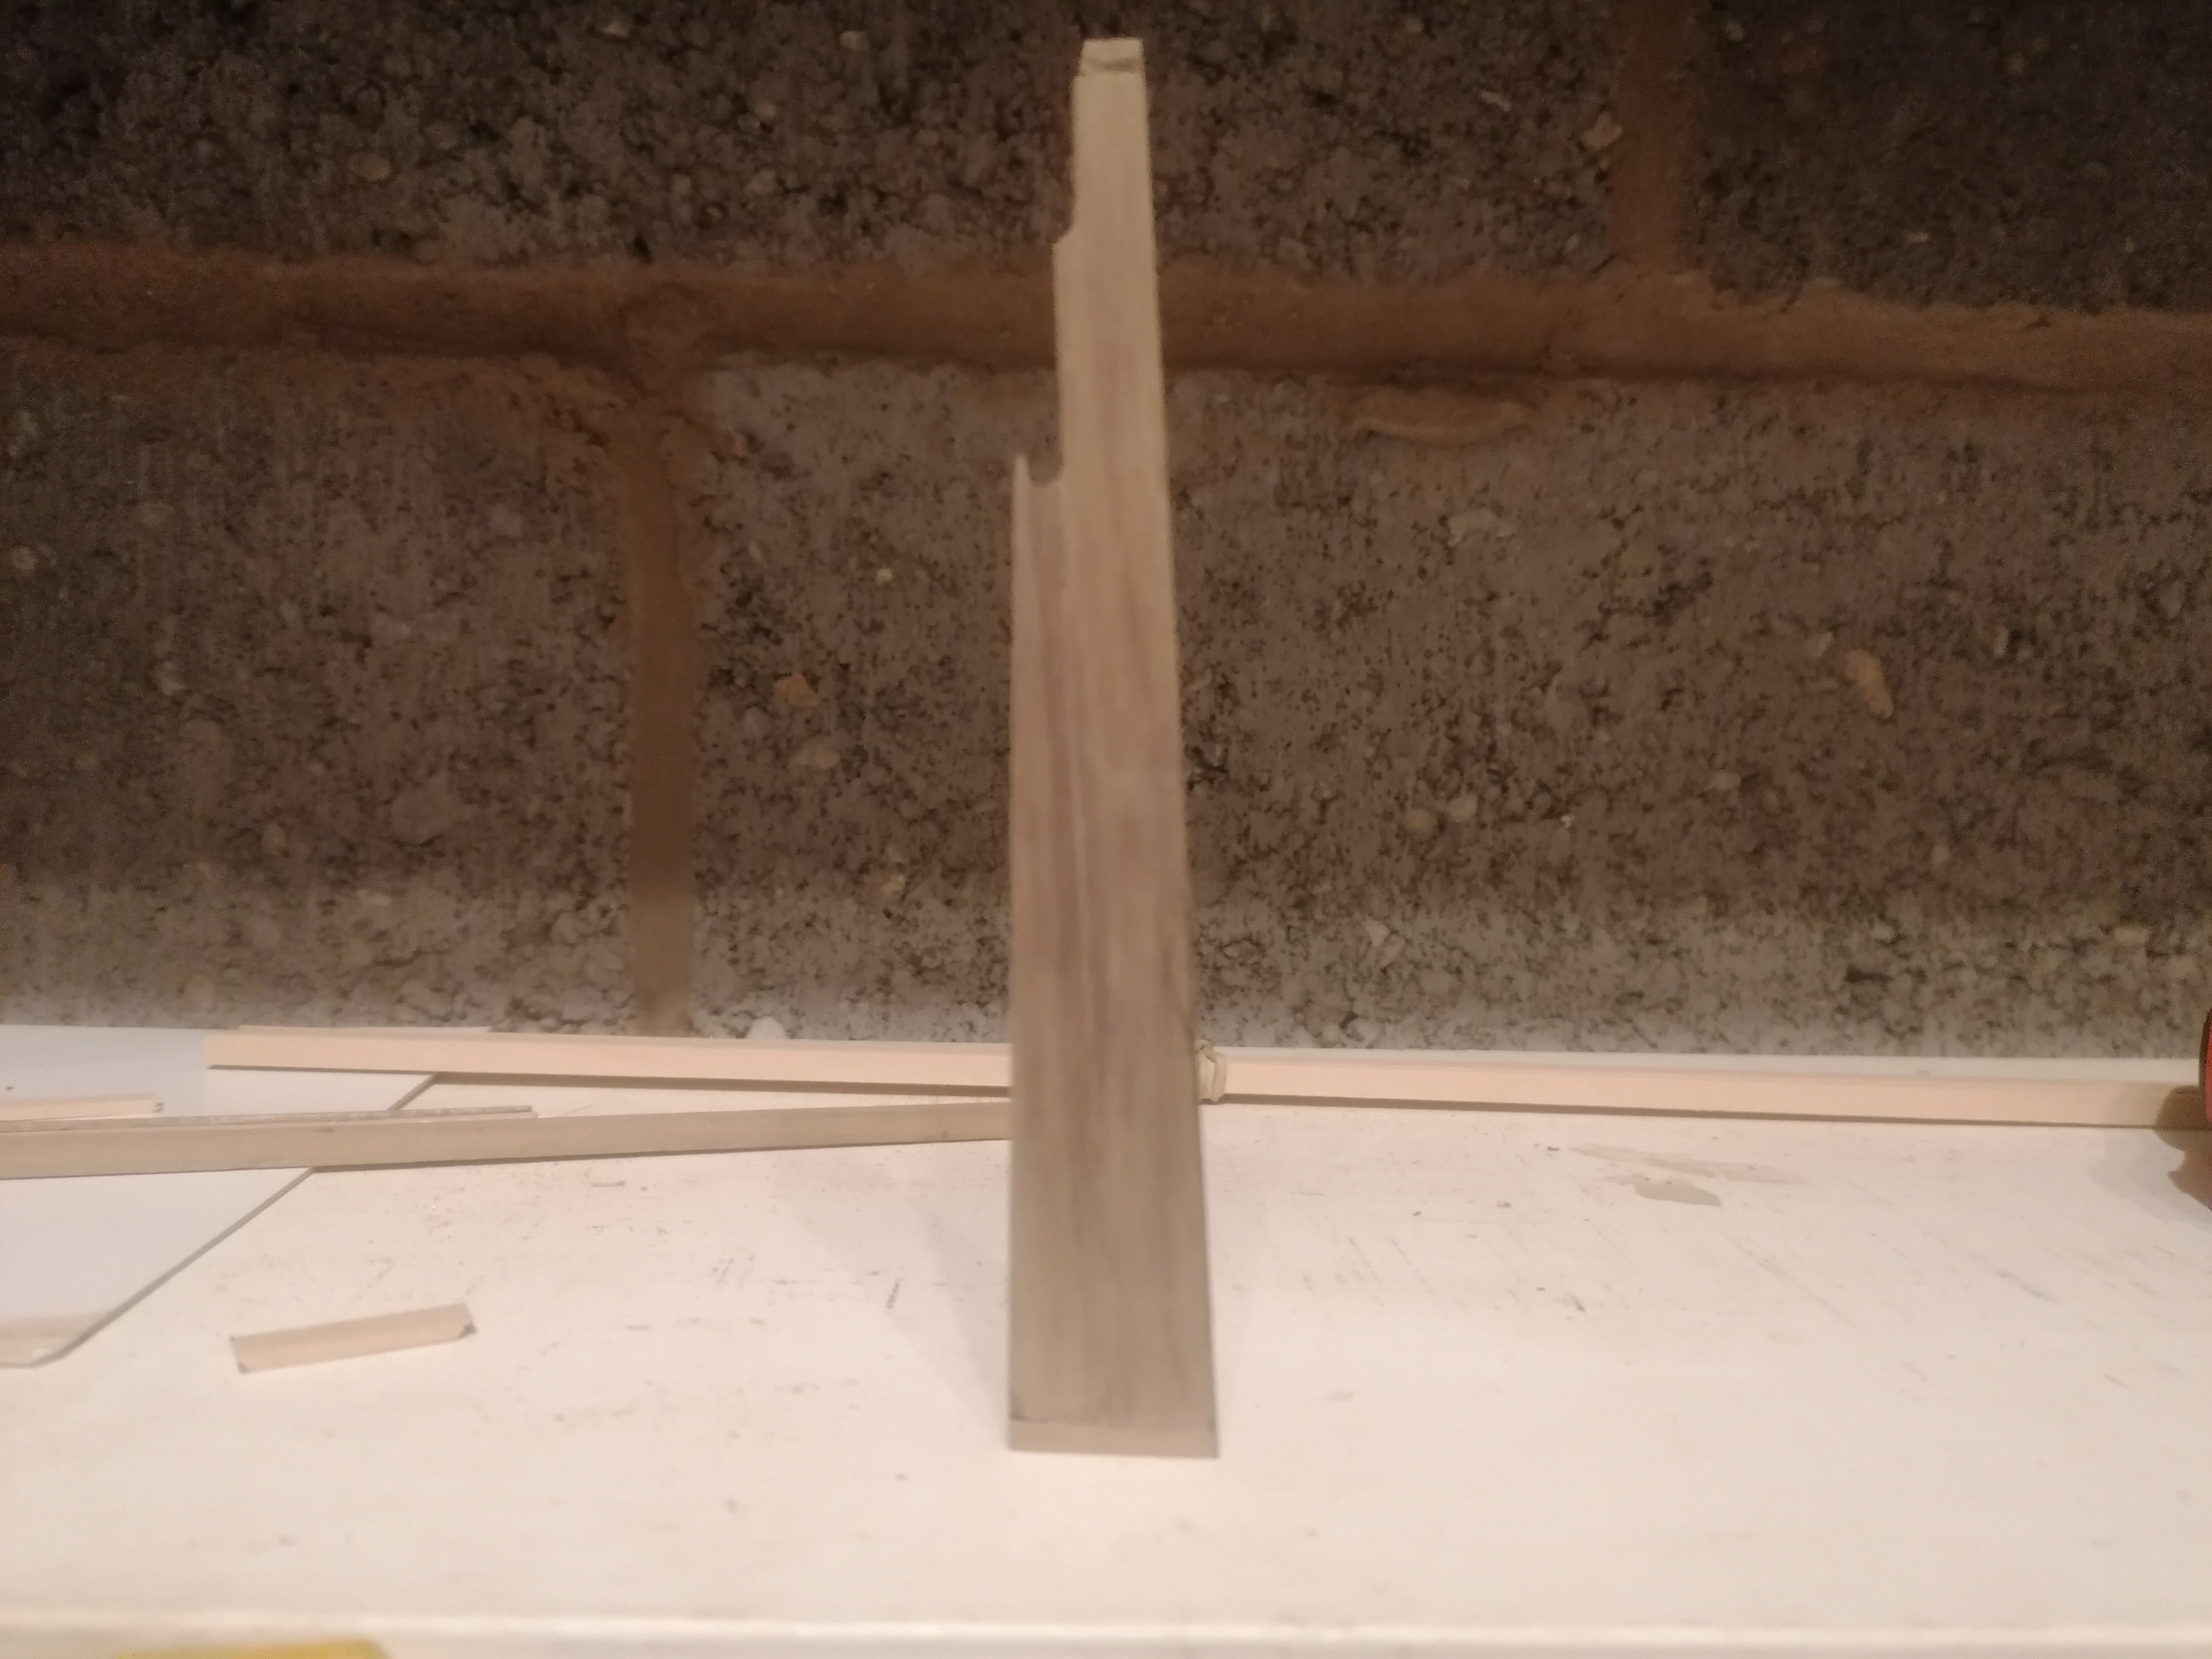
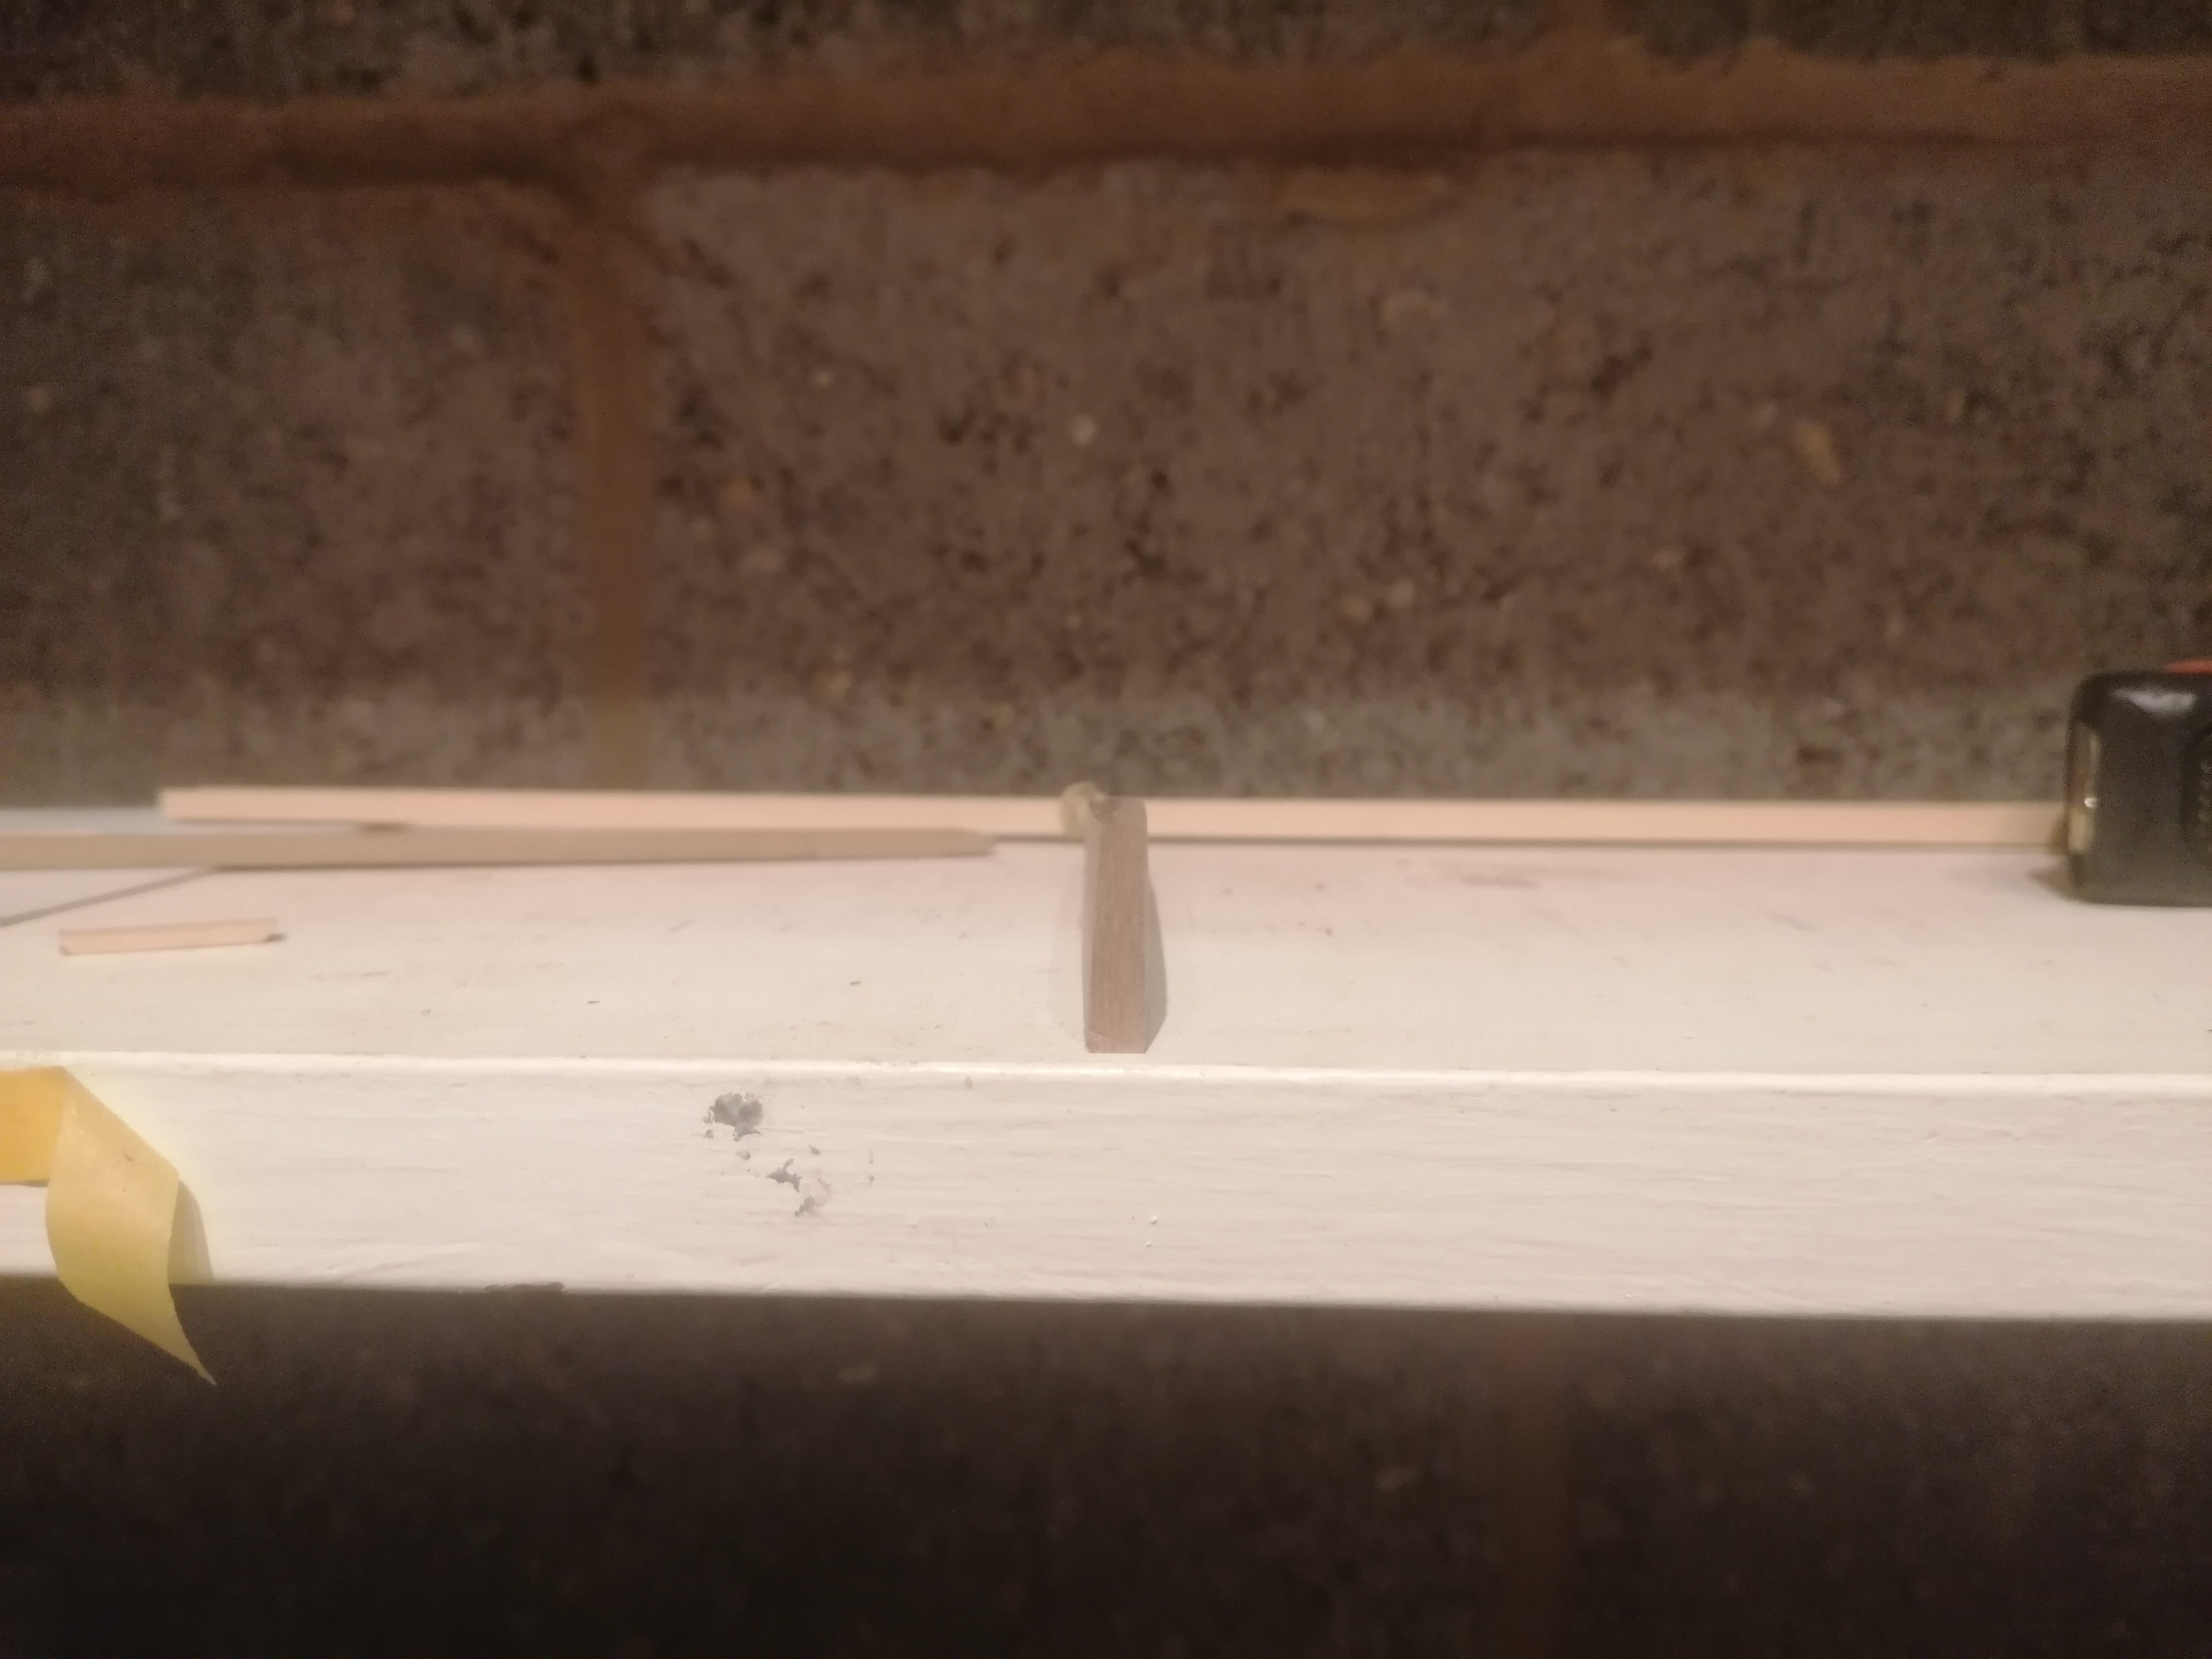
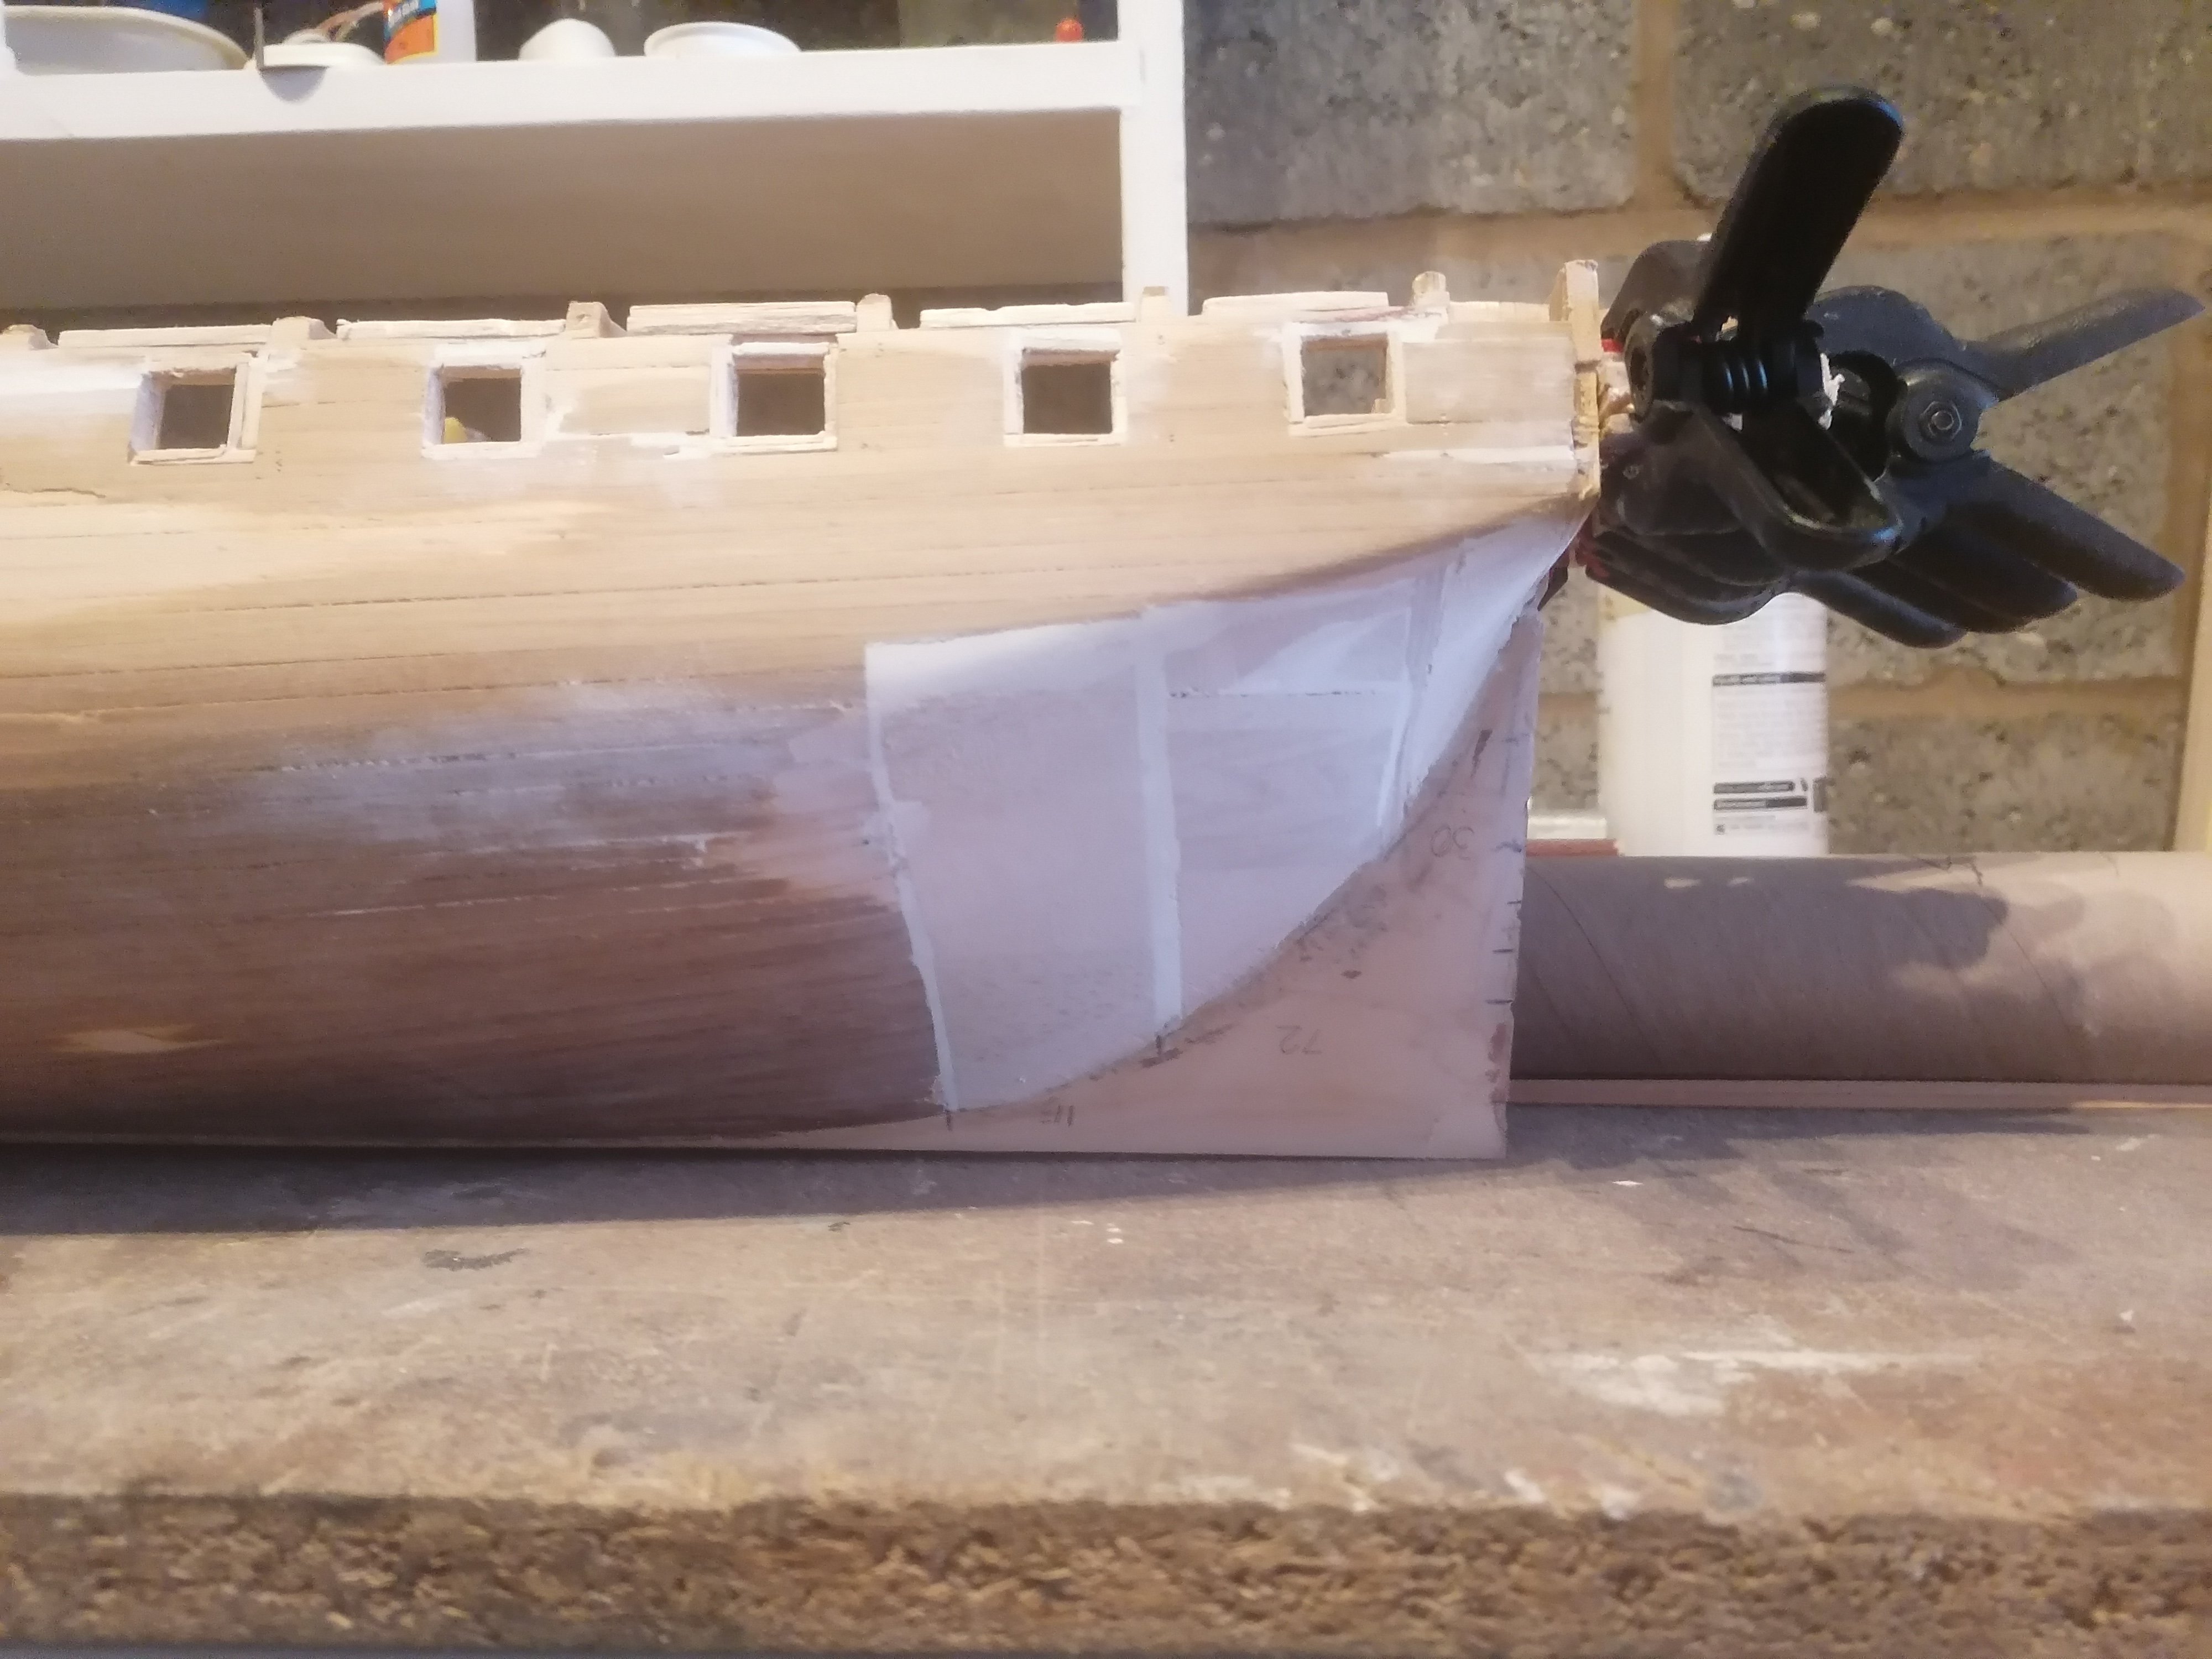
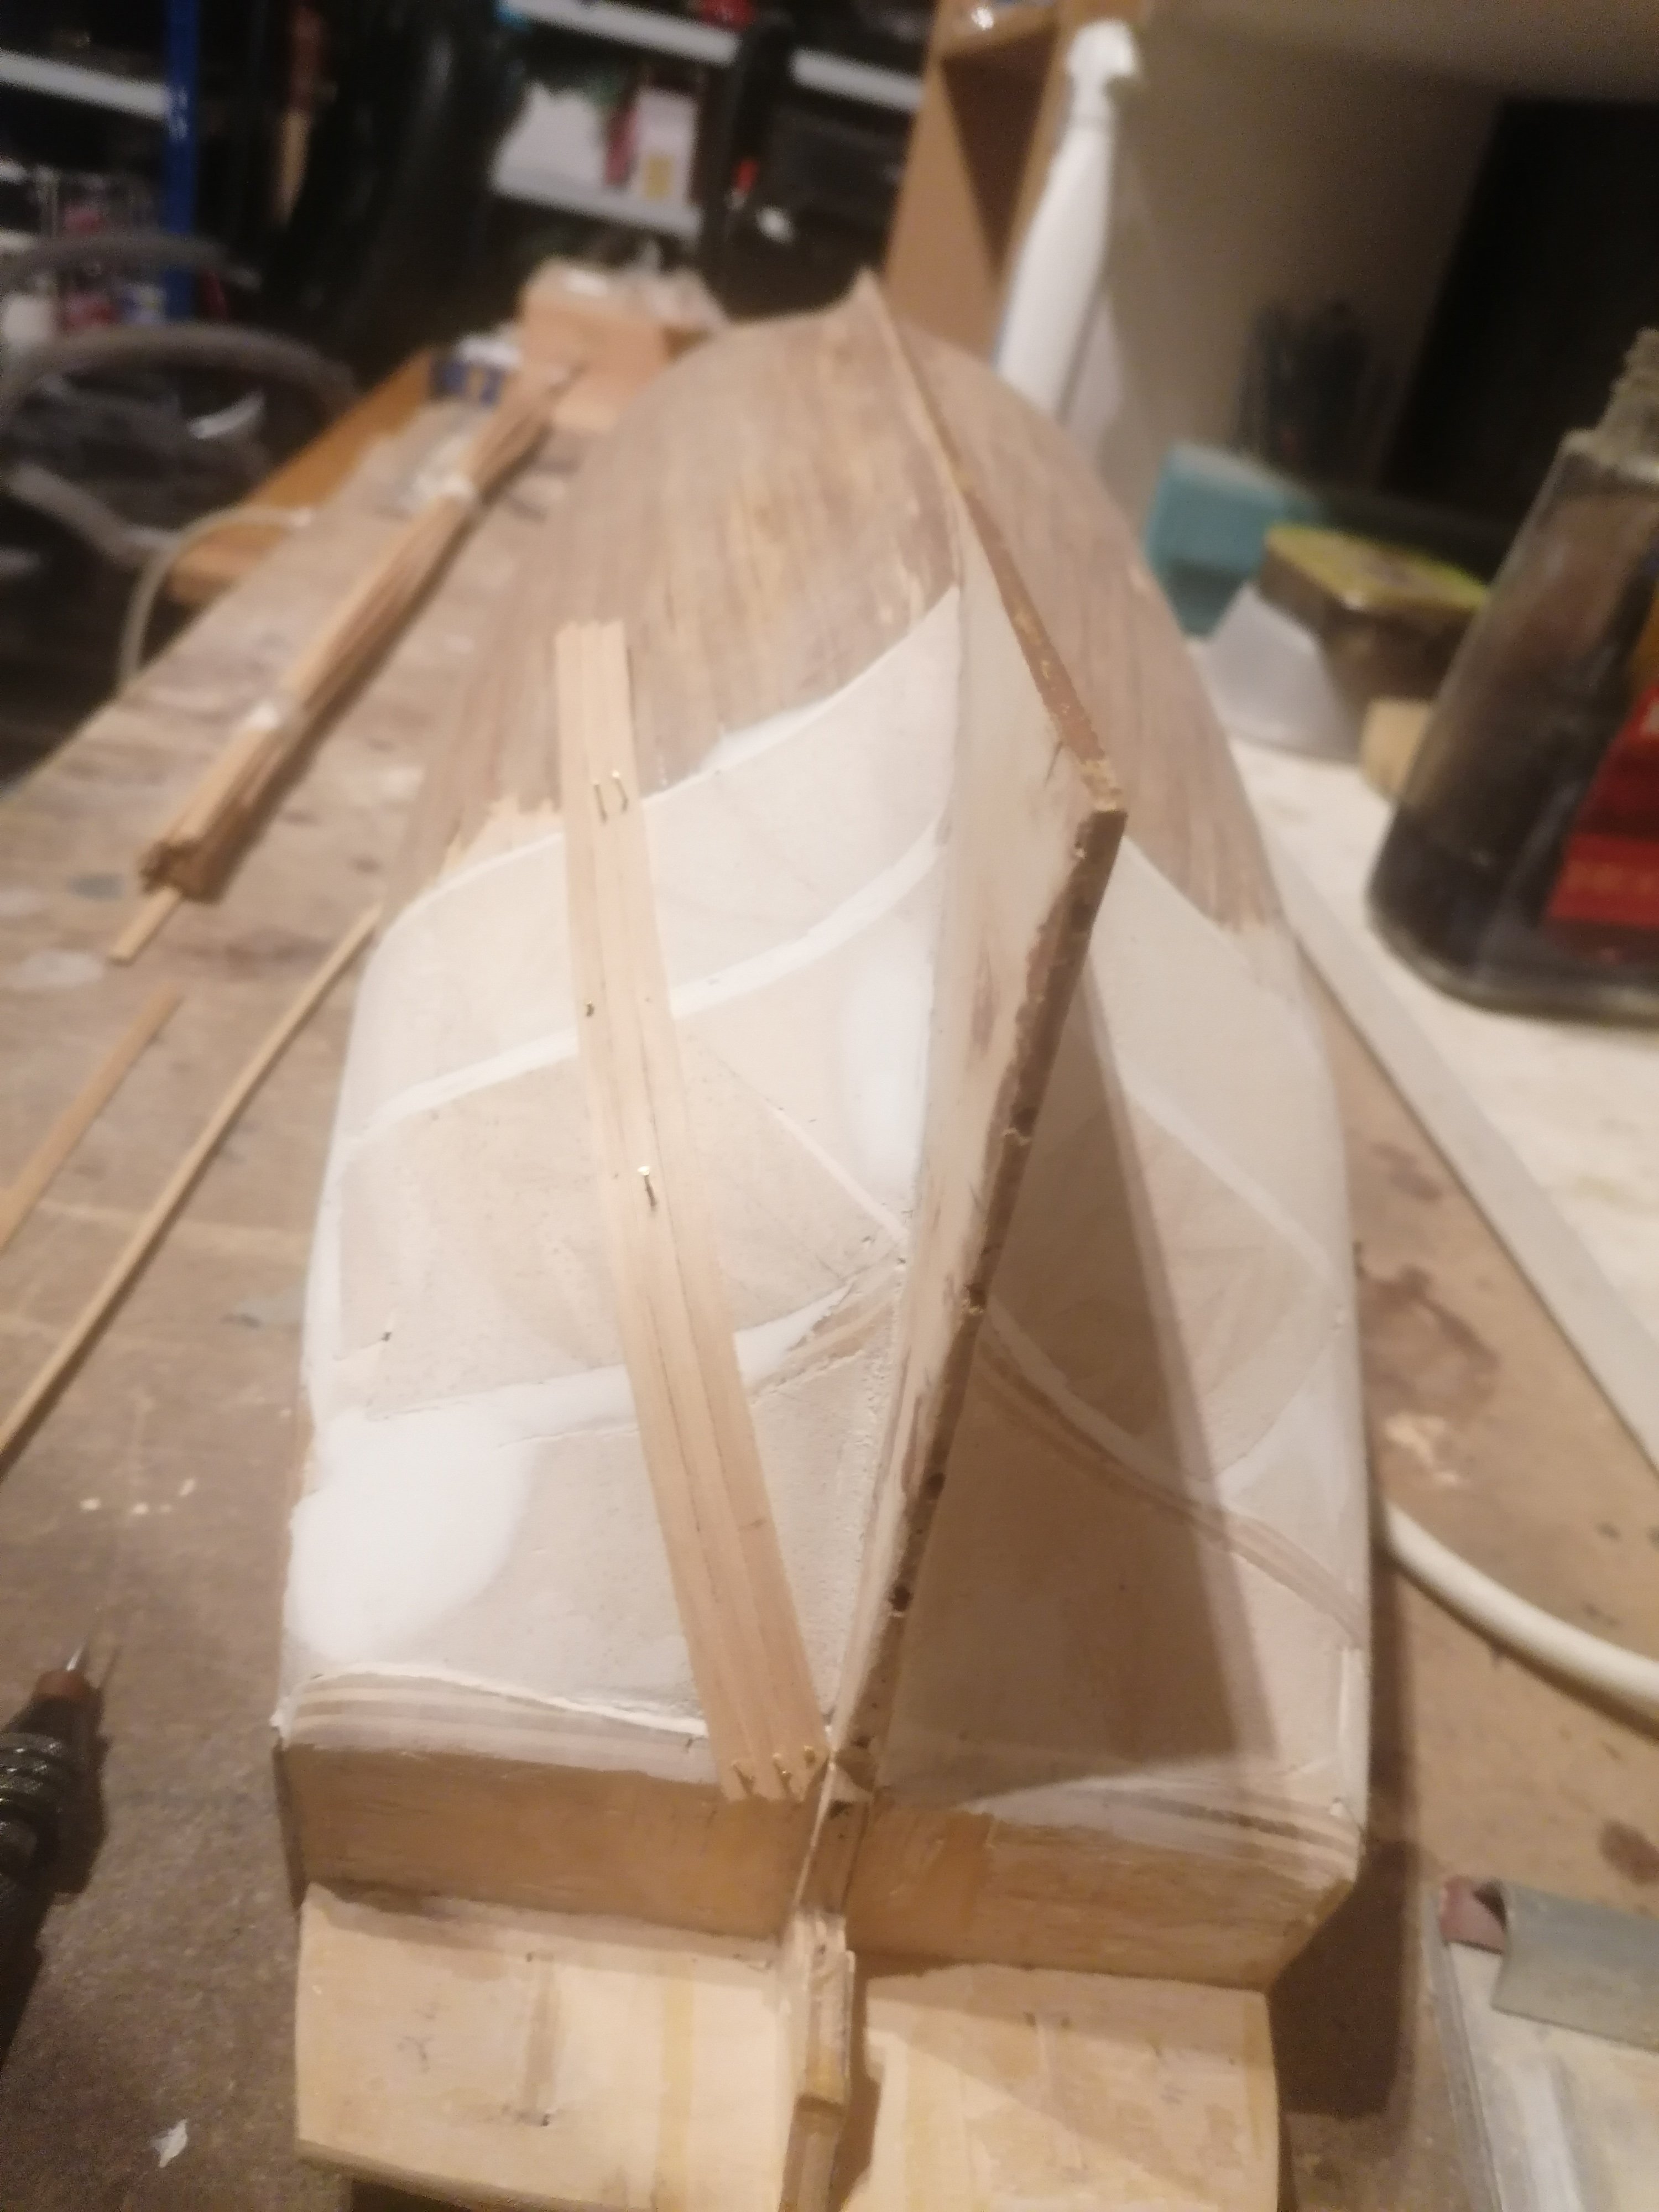
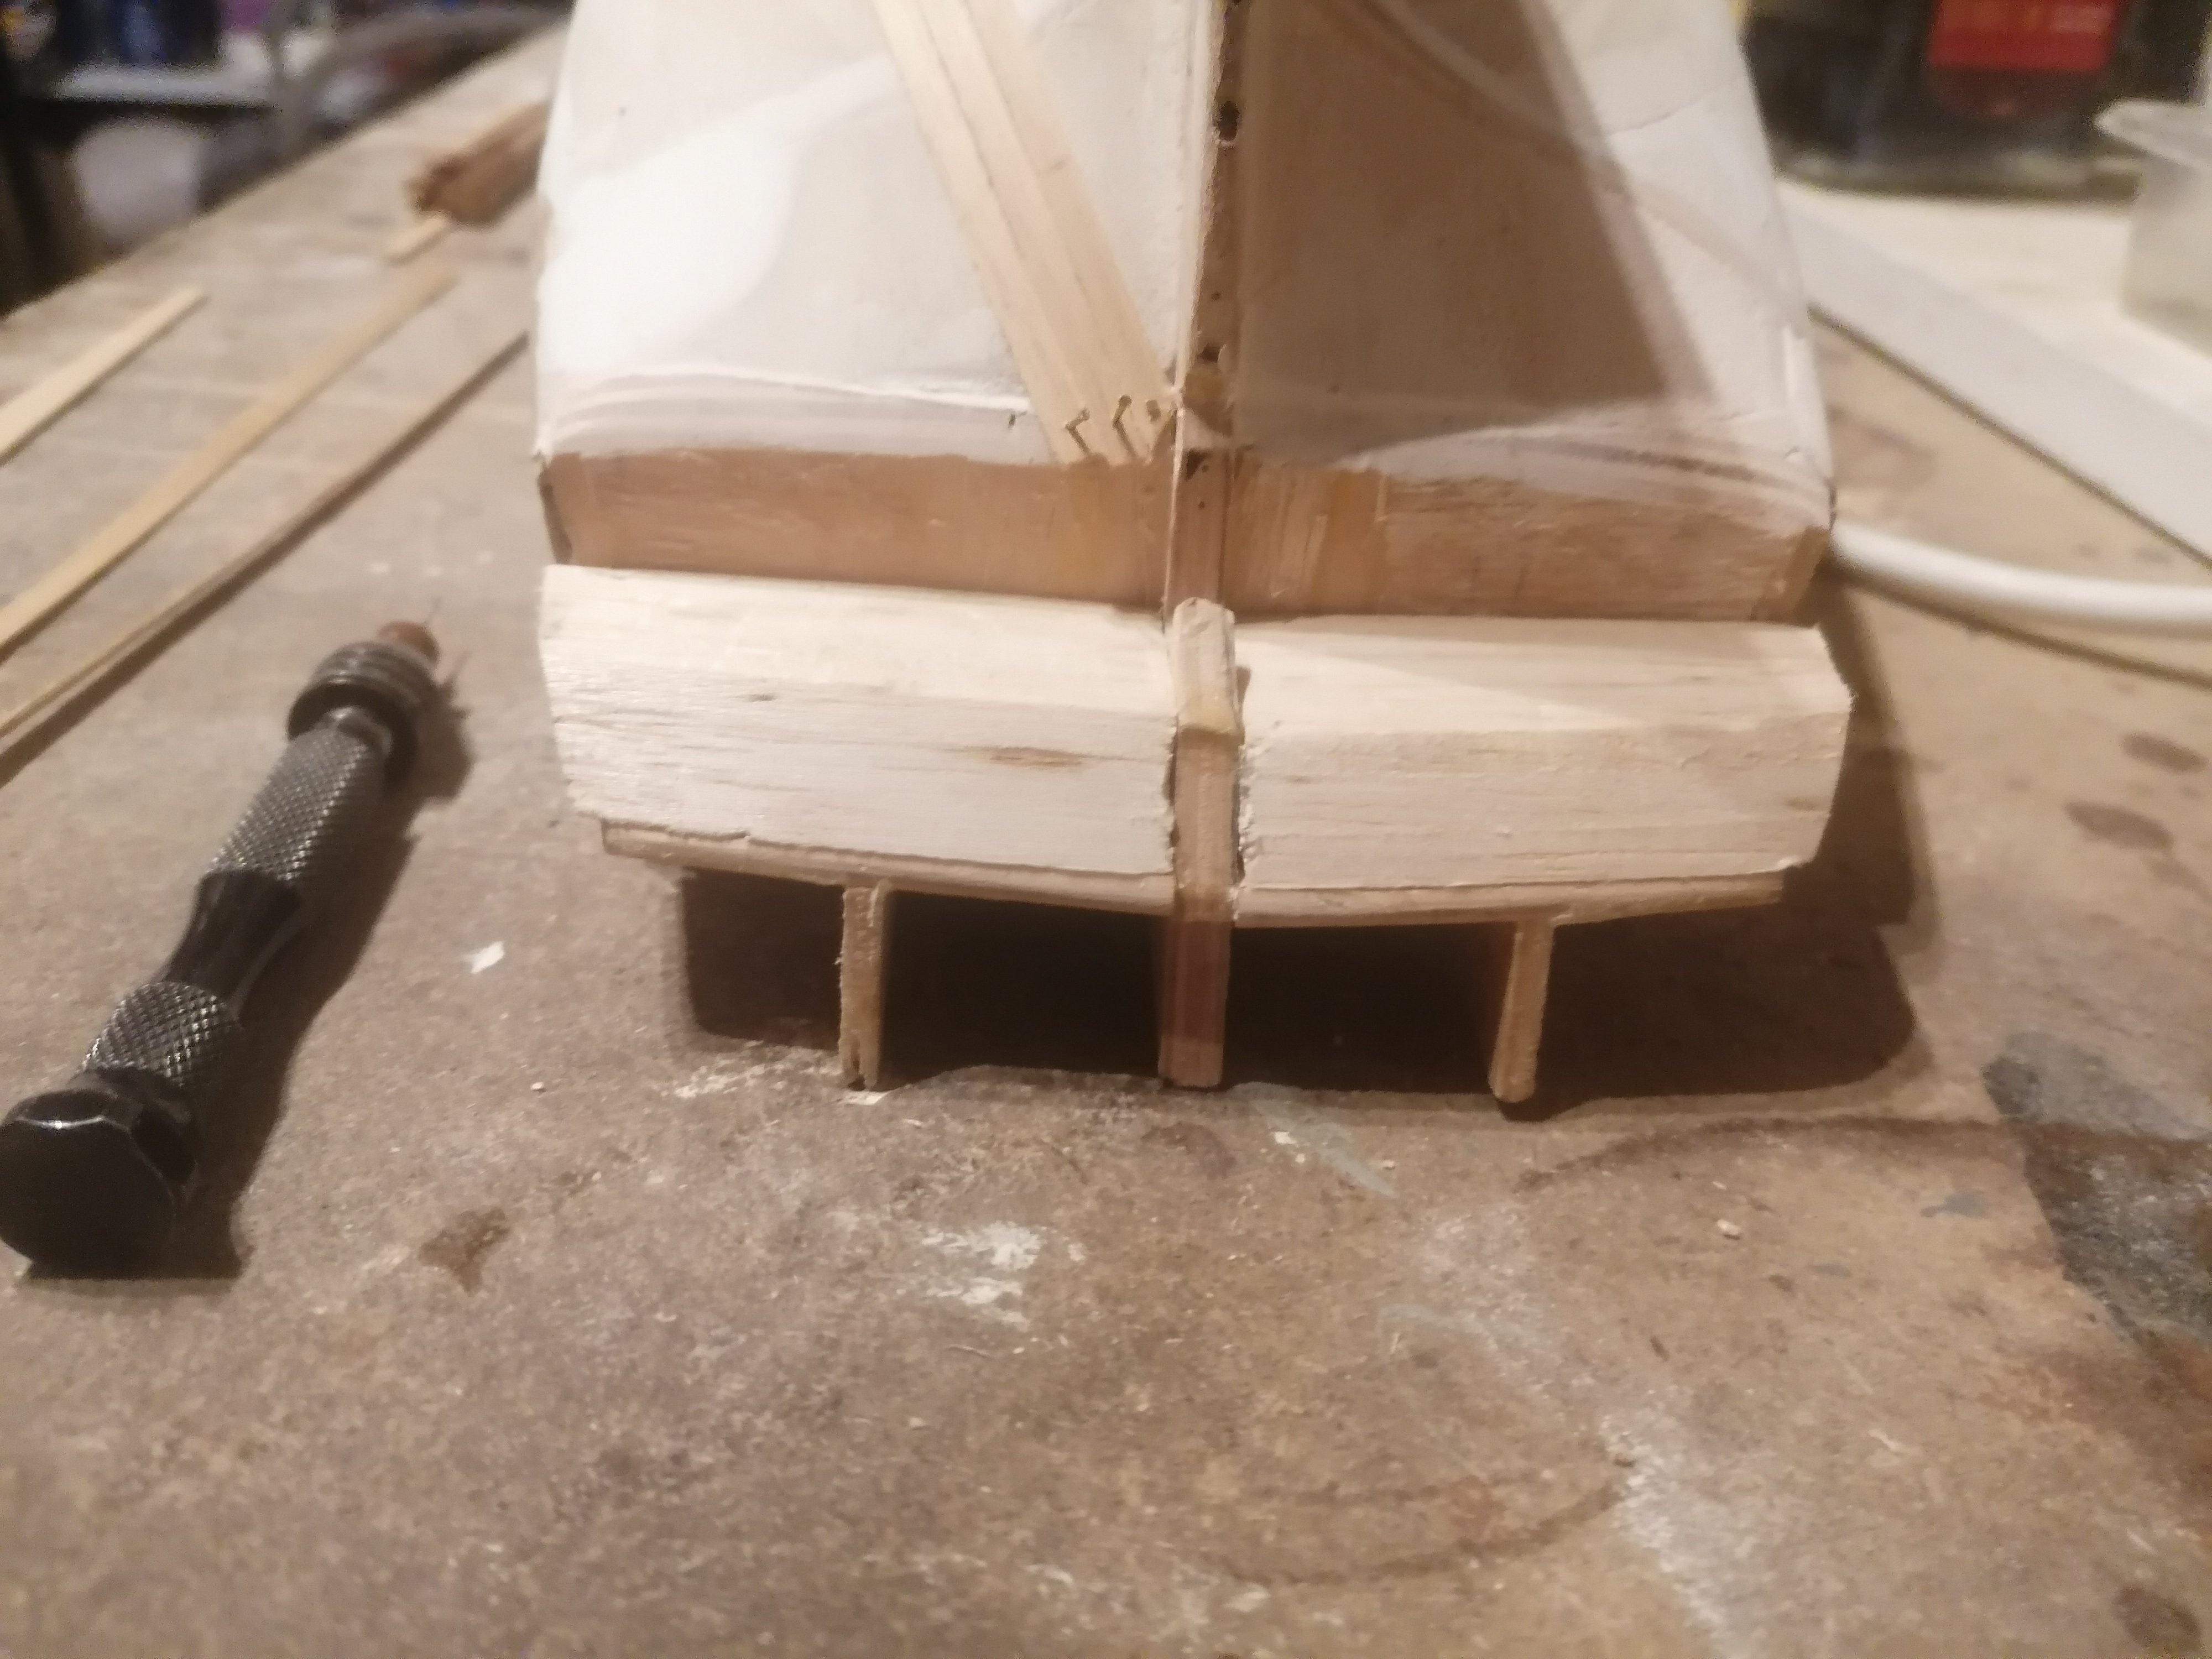
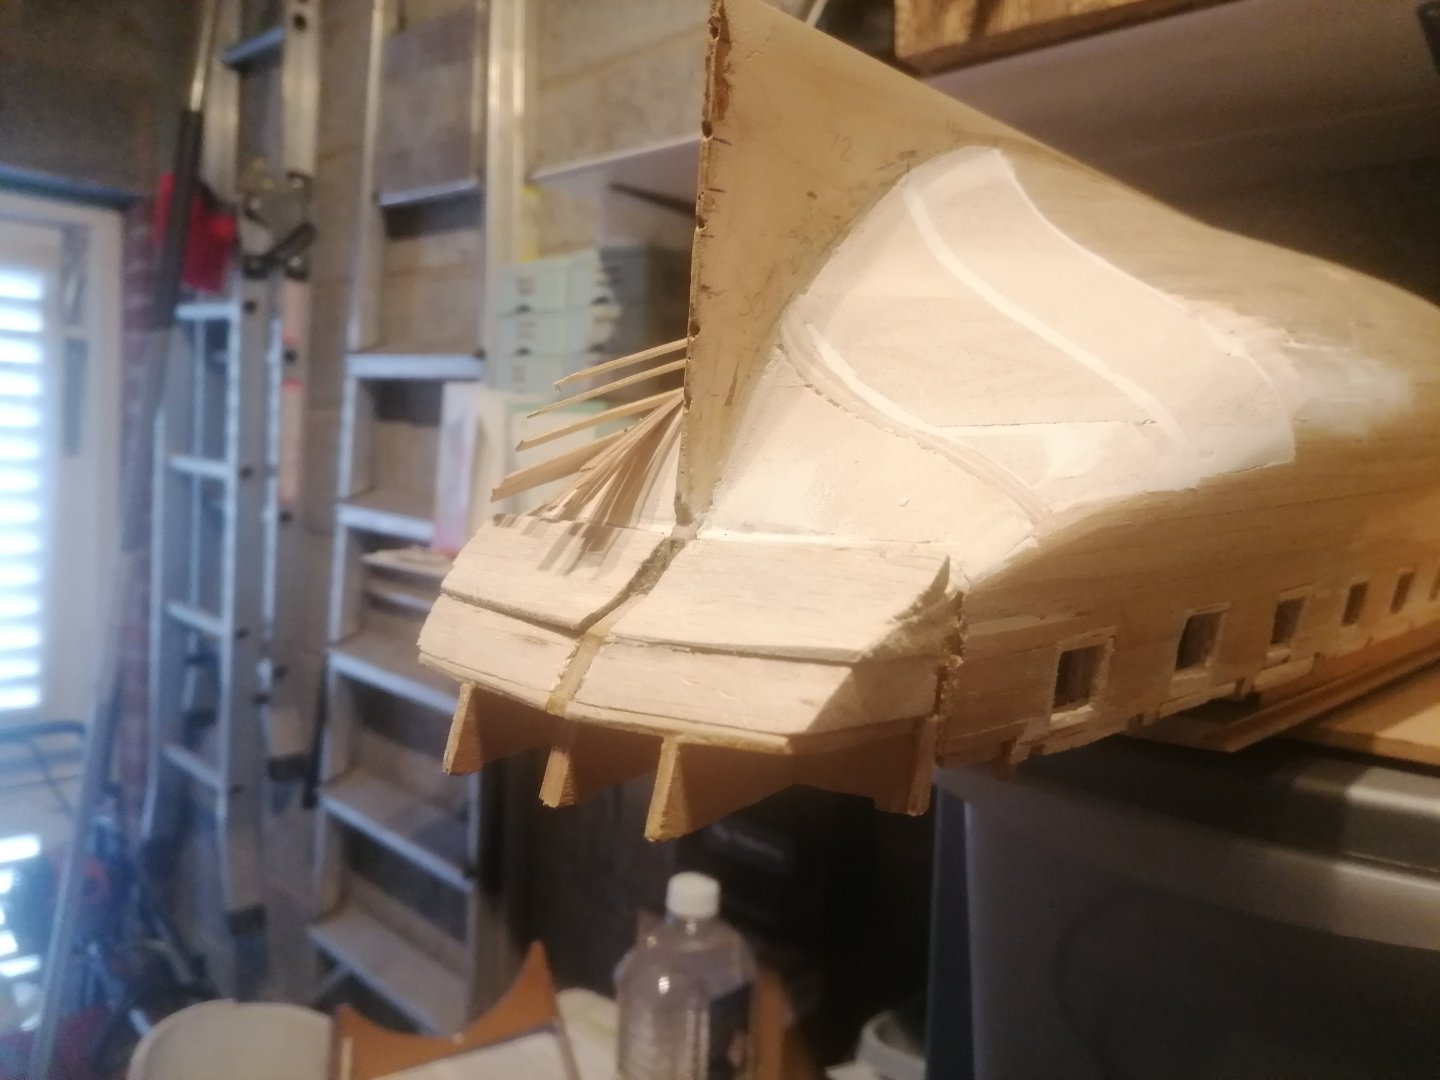
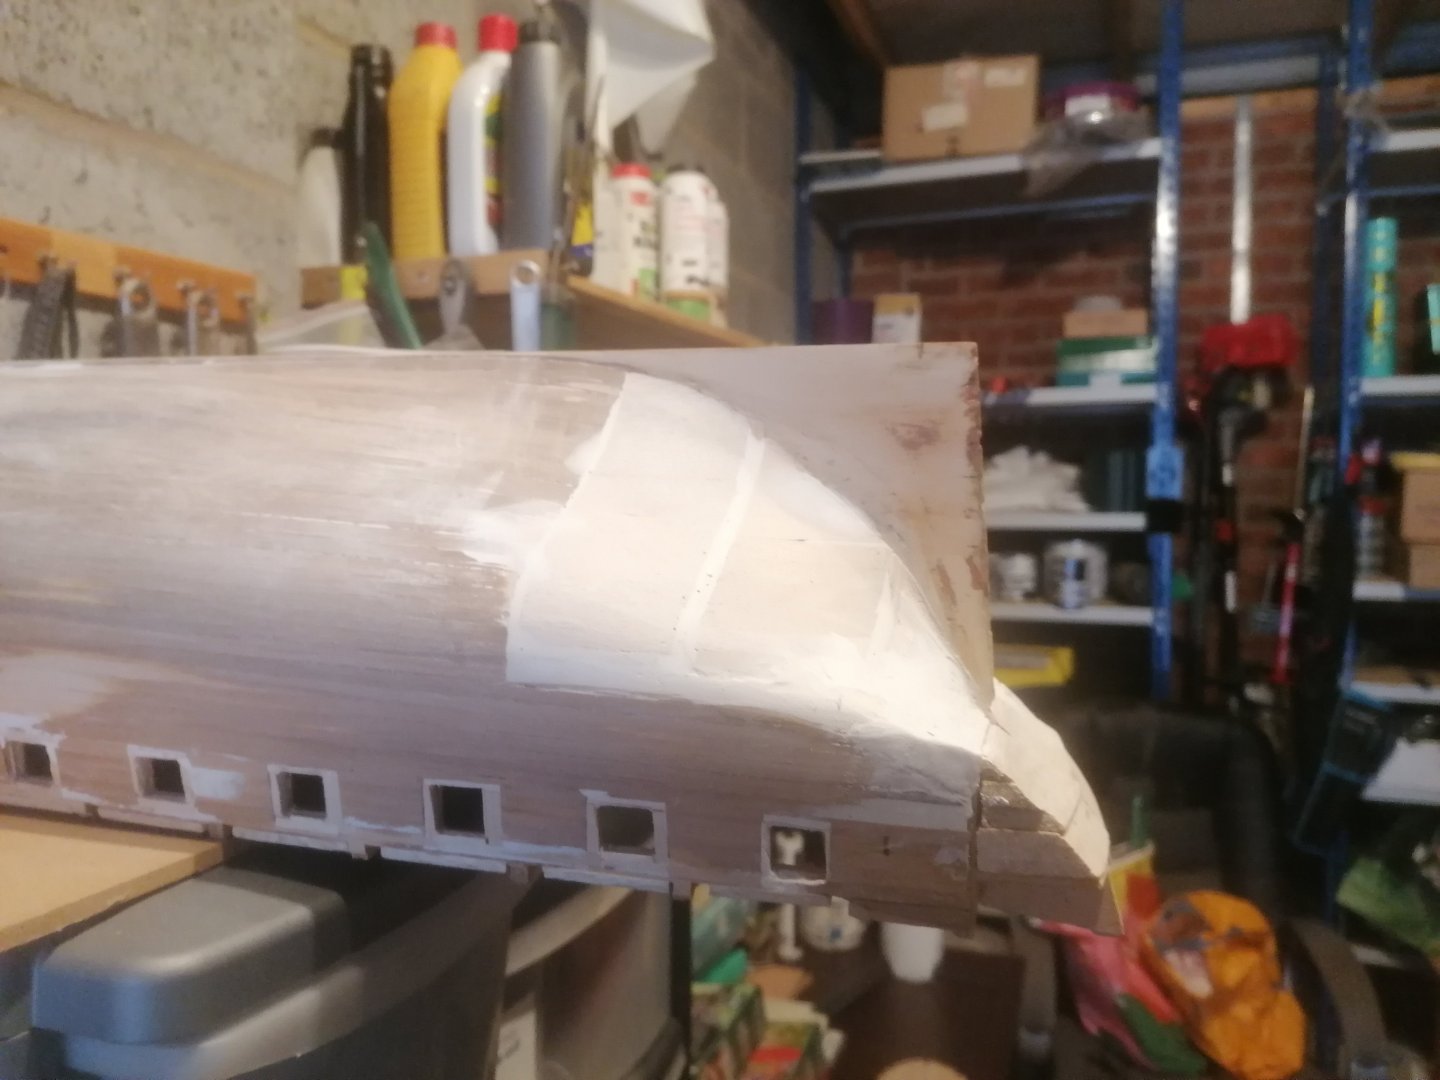
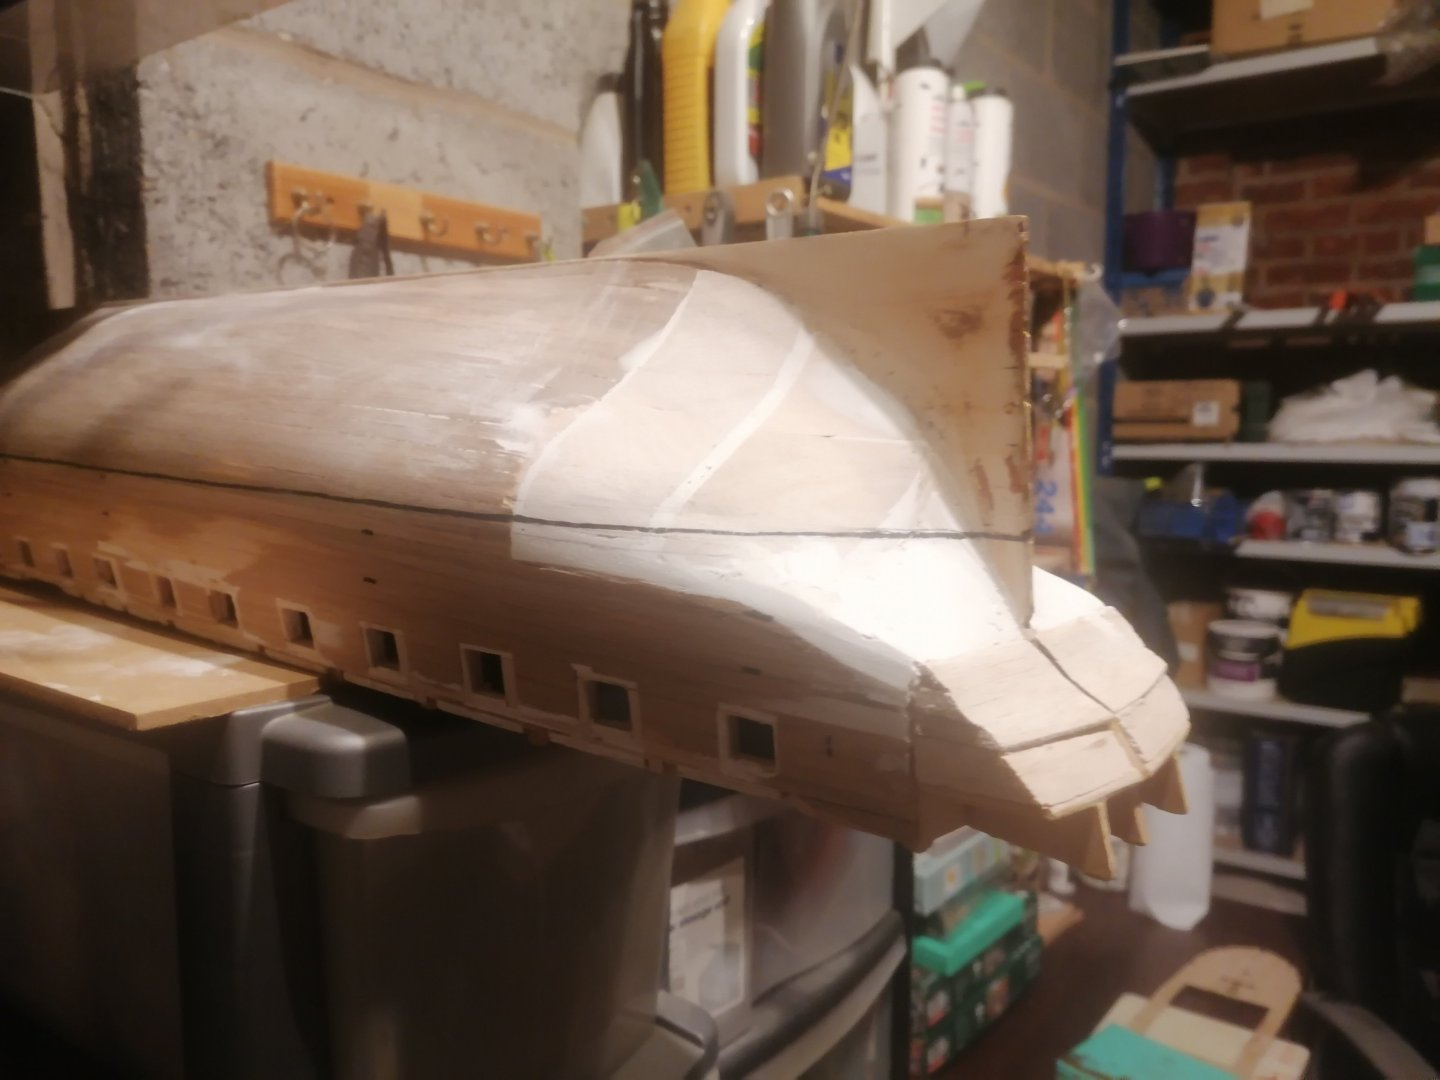
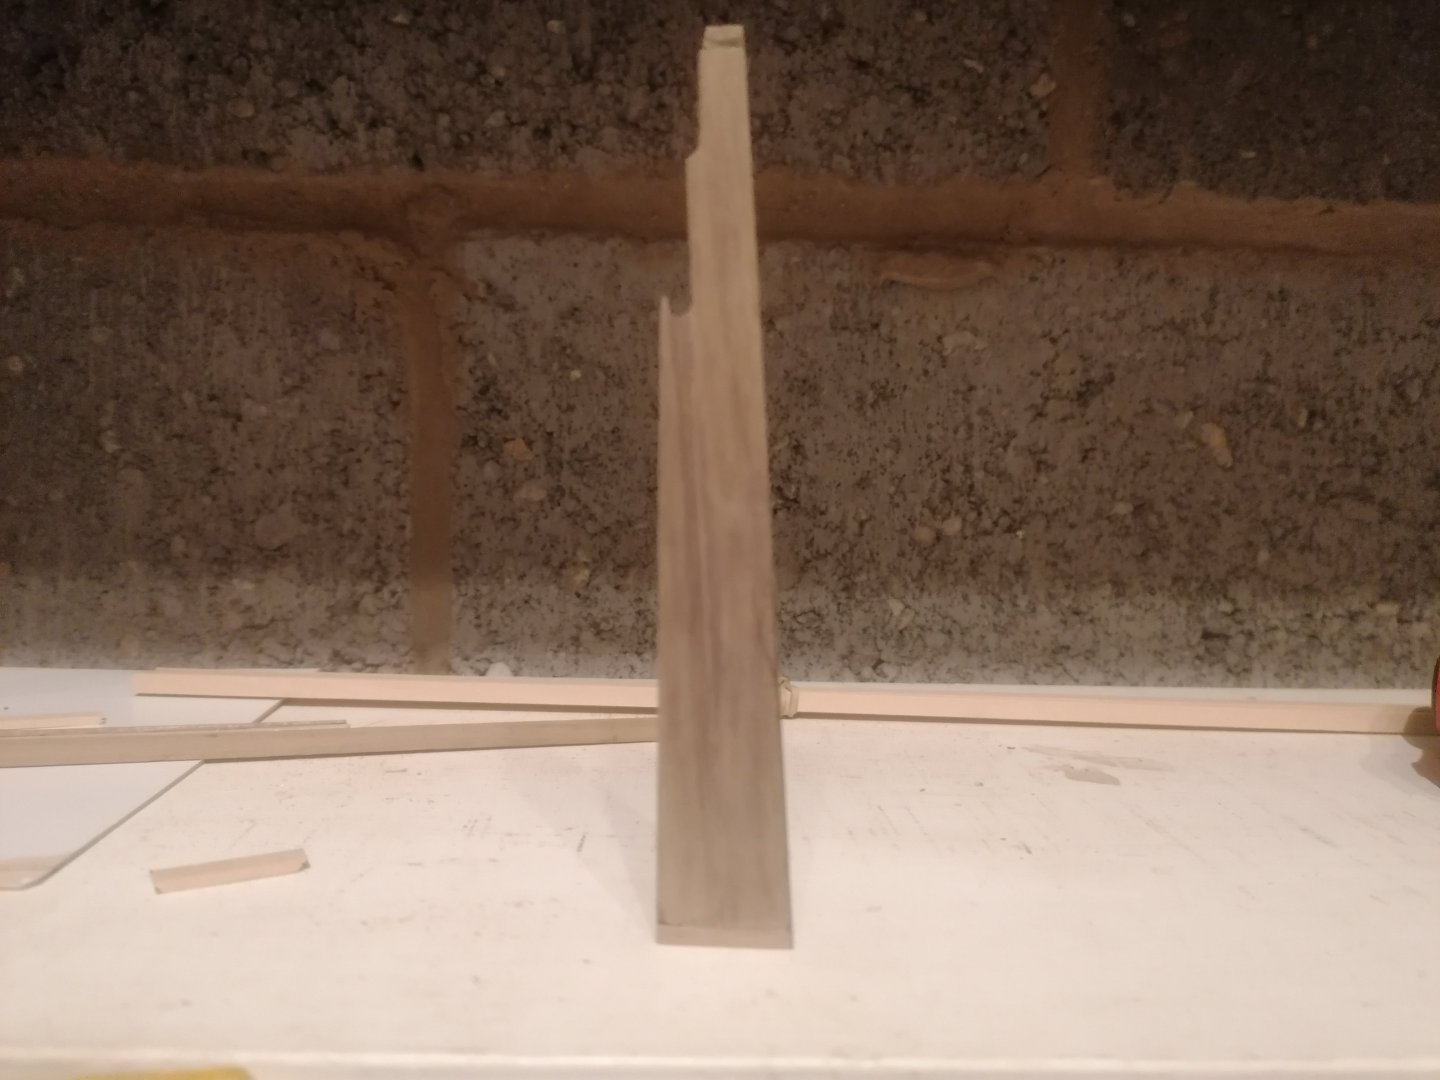
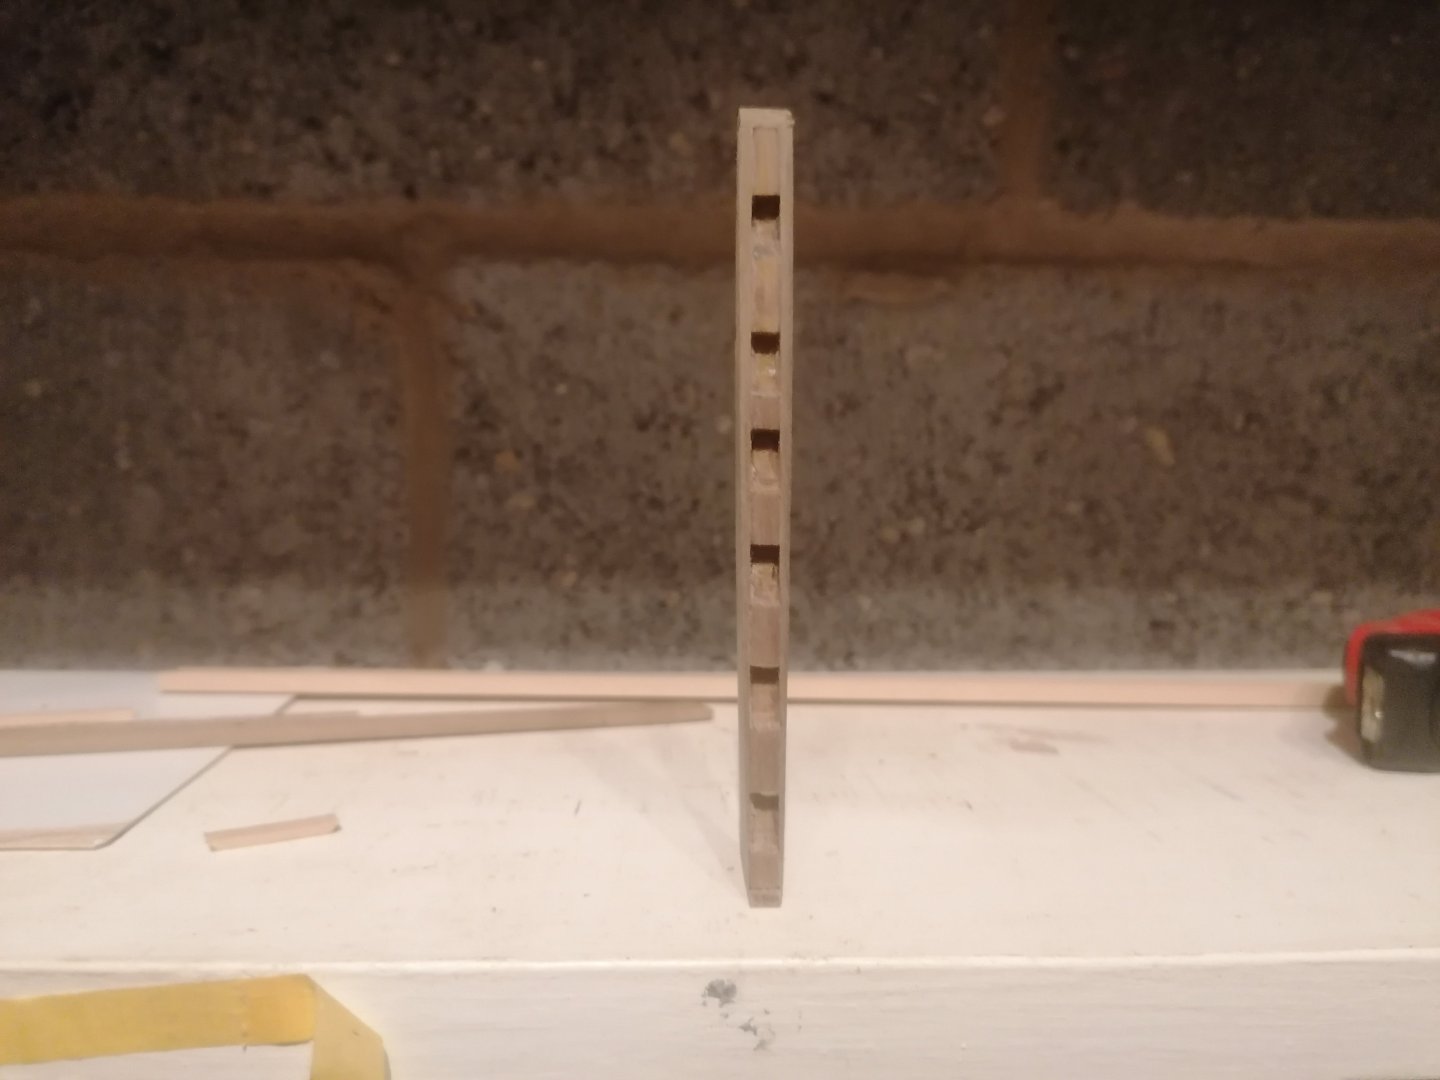
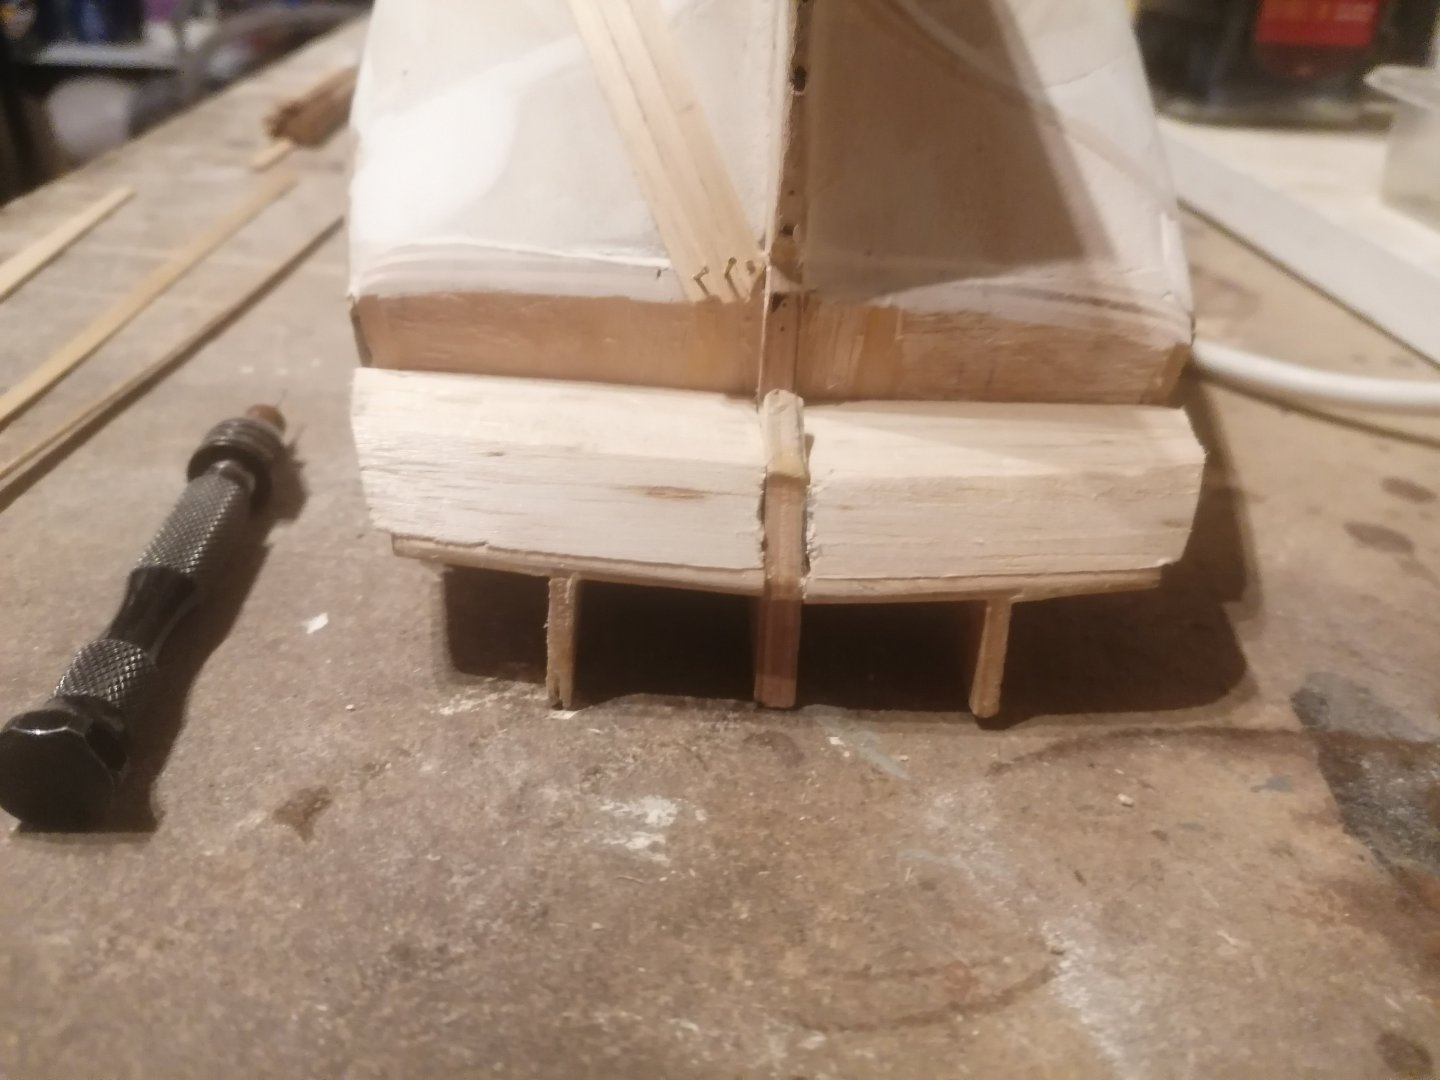
I have returned from holiday and started back to working on the ship. I was going to start on the inner lining of the gun deck but, decided to again tackle the stern first, as this will be more difficult. While looking at the stern section as it is, I thought I would form the rear face of the stern post from 1mm by 10 mm strip, taper it from 9mm at the top to 4 mm at the bottom and pin it to the end of the false keel. Next I roughly sanded the deadwood area. I then added 2mm thick walnut strip to each side of the rudder along with a 3mm X 5mm block at the bottom and removed the strip from the stern and pinned it to the inner face of the rudder as a guide and sanded the rudder to the approximate shape. This was then tapered both from top to bottom and also from fore to aft which was much easier than I expected. At this point I realised that I had done myself a favour as, I had forgotten that the stern post needs to be 1mm wider on each side of the false keel for the 2nd planking to butt upto ( I need to keep reminding myself that I am finnishing this as the first planking). At present I have 1mm either side at the base and 1.5mm at the top of the stern post so I can hopefully taper the rudder to fit properly. My next task was to finnish shaping the hull from frame 17 to try to achieve the curve required. To be able to do this I removed the parts 26 (stern counter frames) as these were preventing me from getting the required angle to shape lower edge of frame 17. With a little sanding at a time I have been able to achieve the shape I want but still needs a little fine sanding to obtain the correct run of the planking. It is very close to being correct though. Having decided to remove the stern counter frames I decided to also remove the outer ends of the hull. The idea being that I shall build up the upper and lower stern counters with balsa sheet/blocks and then plank over them. It seems the easiest way to obtain the correct shape and can also be roughly done off ship and added later. The upper counter has now been done and I will start on the lower tomorrow night. I hope that this all makes sense and here are the latest photos of the progress. Thanks again for the likes and comments so far. David.


-
Hi Jason, It's great to see you back. I know I am not alone in thinking you've not only provided a fantistic build log, but also a beautiful looking ship. Having read through every build, saving photos and taking notes over the last few weeks, I think I confused myself and hadn't realised you hadn't added the head gratings and thought you had finnished. I am really wishing I had another 20 years of model making ahead of me to get anywhere near the standard you have achieved. She is truly a work of art and am looking forward to the upcoming installments. As you are moving forwards I seem to be going in reverse but am looking forward to hopefully learning from your log once I start progressing in the right direction. She is truly a beauty. Well done. David.
-
Many thanks Jason. I really appreciate your wishes, especially having read your entire build log on your version. ( I must admit I've saved quite a few of your photos too) I really take my hat off to you for the amazing quality and detail you achieved. I am afraid my version will not make your standard nor a few other builders, but, it is certainly a challenge, and I am enjoying it immensely (though with much less hair by the end) especially the research and learning. This will probably be my last ship build so I am starting to feel I should really put in the extra effort to get a good looking ship. I may follow your lead and make her hull only or possibly just add the lower masts. Mainly due to her overall size. The jury is out on that at present though. Many thanks again for dropping in. I will need to check in on your latest build soon. Cheers. David
-
I have been on holiday for a week now and am still away for another 10 days. However, this has allowed me some precious time to study the build logs and techniques to hopefully make a decent job on the hull, without the distraction of work and the ship. It's also given me the chance to think through what I still need to do and, more importantly which order it needs to be done. I wasn't happy with the inner lining between frame 2 and the after edge of gunport 2 so had removed them so this will be completed first. I will be adding the 3 X 5mm strip under the keel and will use the original rudder but will build it up on each side and add a block of wood to lengthen it before shaping it to a taper. From previous posts I've realised that many builders have noticed the stern galleries can sit a few mm higher so I will then mark the waterline and the position and width of the wale. This should show me where lower stern counter should sit along with the rest of the stern pieces. I am contemplating then removing the filling blocks that I over sanded and refitting them as well as building a frame to replace the area in front of the stern facia with supports running up in-between the lights. I will use the frames that are in place for the shape required before removing them completely. Having looked at where the water line will sit, I have realised that it is closer to the keel at the bow and higher at the stern so the bow needs to be raised before marking it out. Once I have attached a false wale then I should be in a position to finally correctly shape the stern and deadwood areas. That's my thinking at the moment but, if anyone has any suggestions or advice please let me know. Any advice is highly appreciated. I will update properly in a couple of weeks time. David.
-
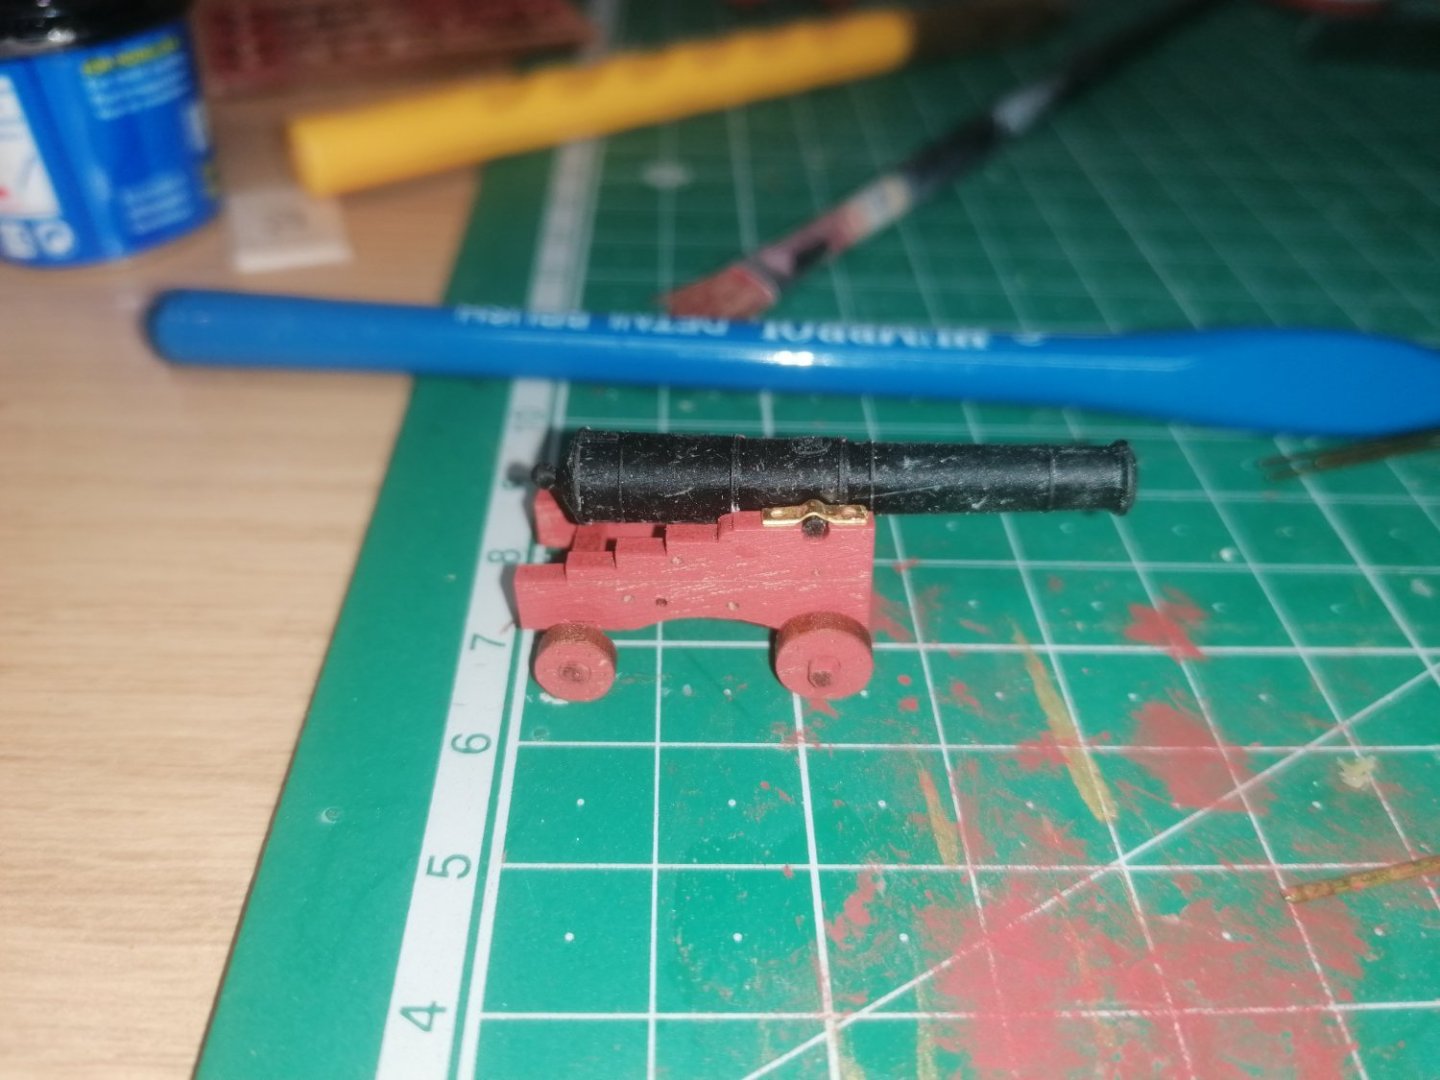
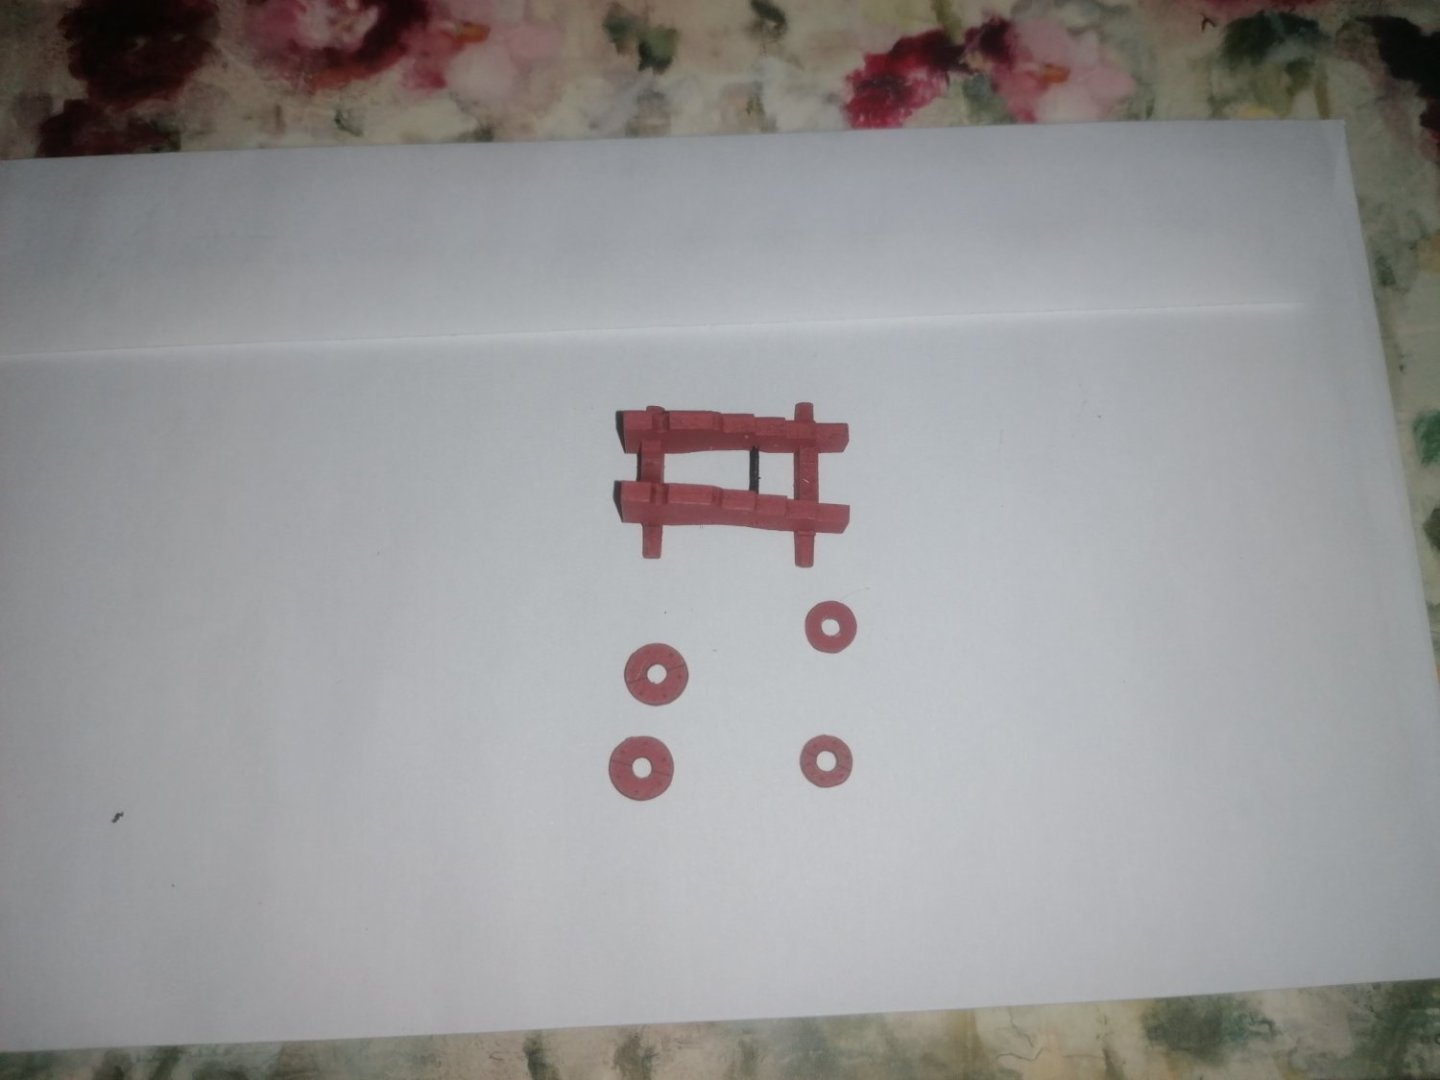
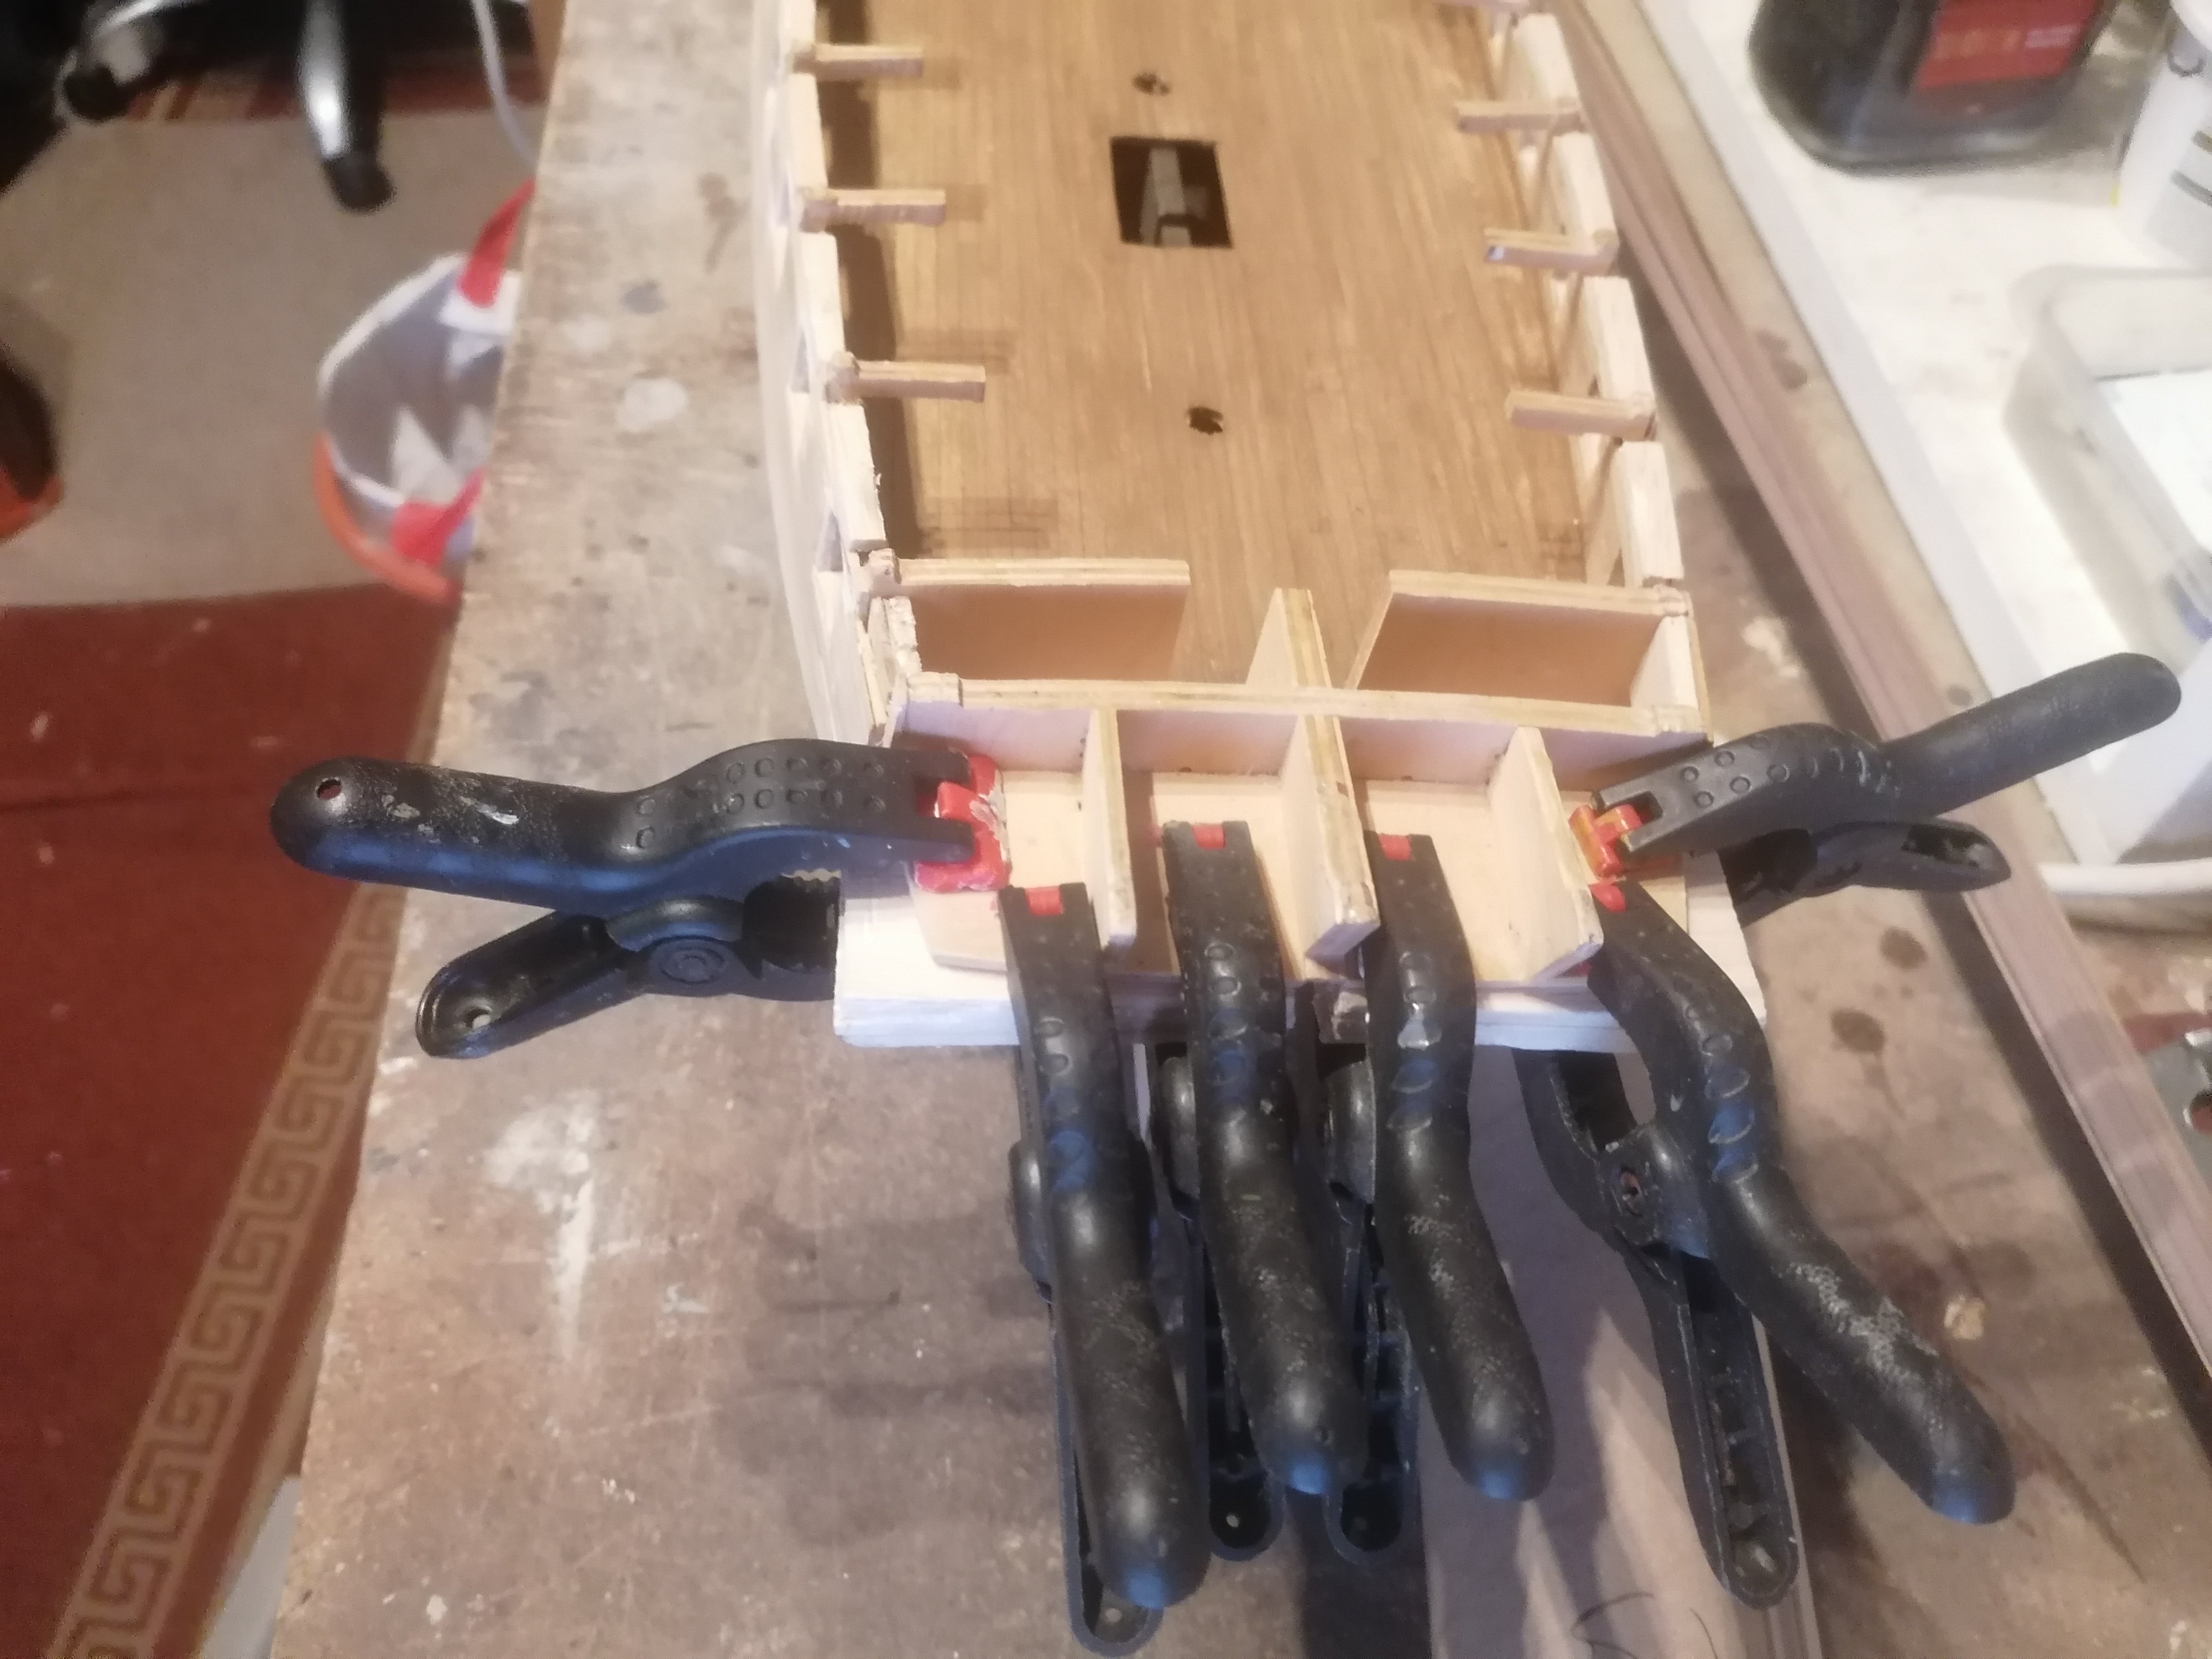
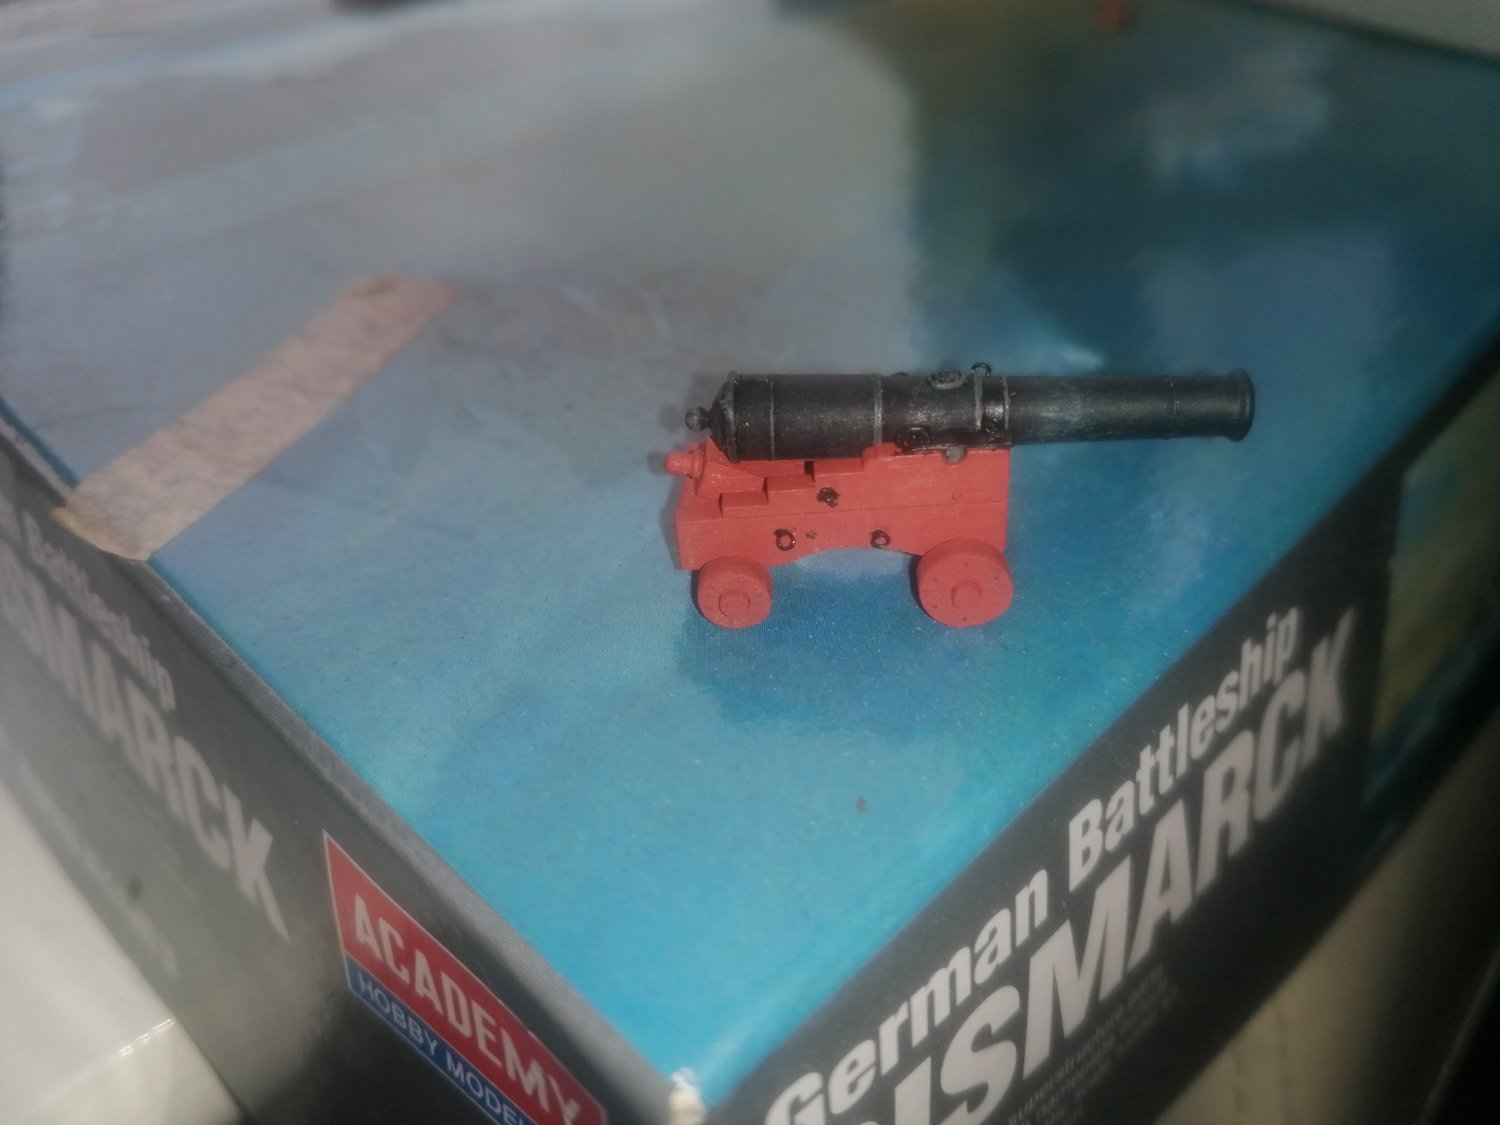
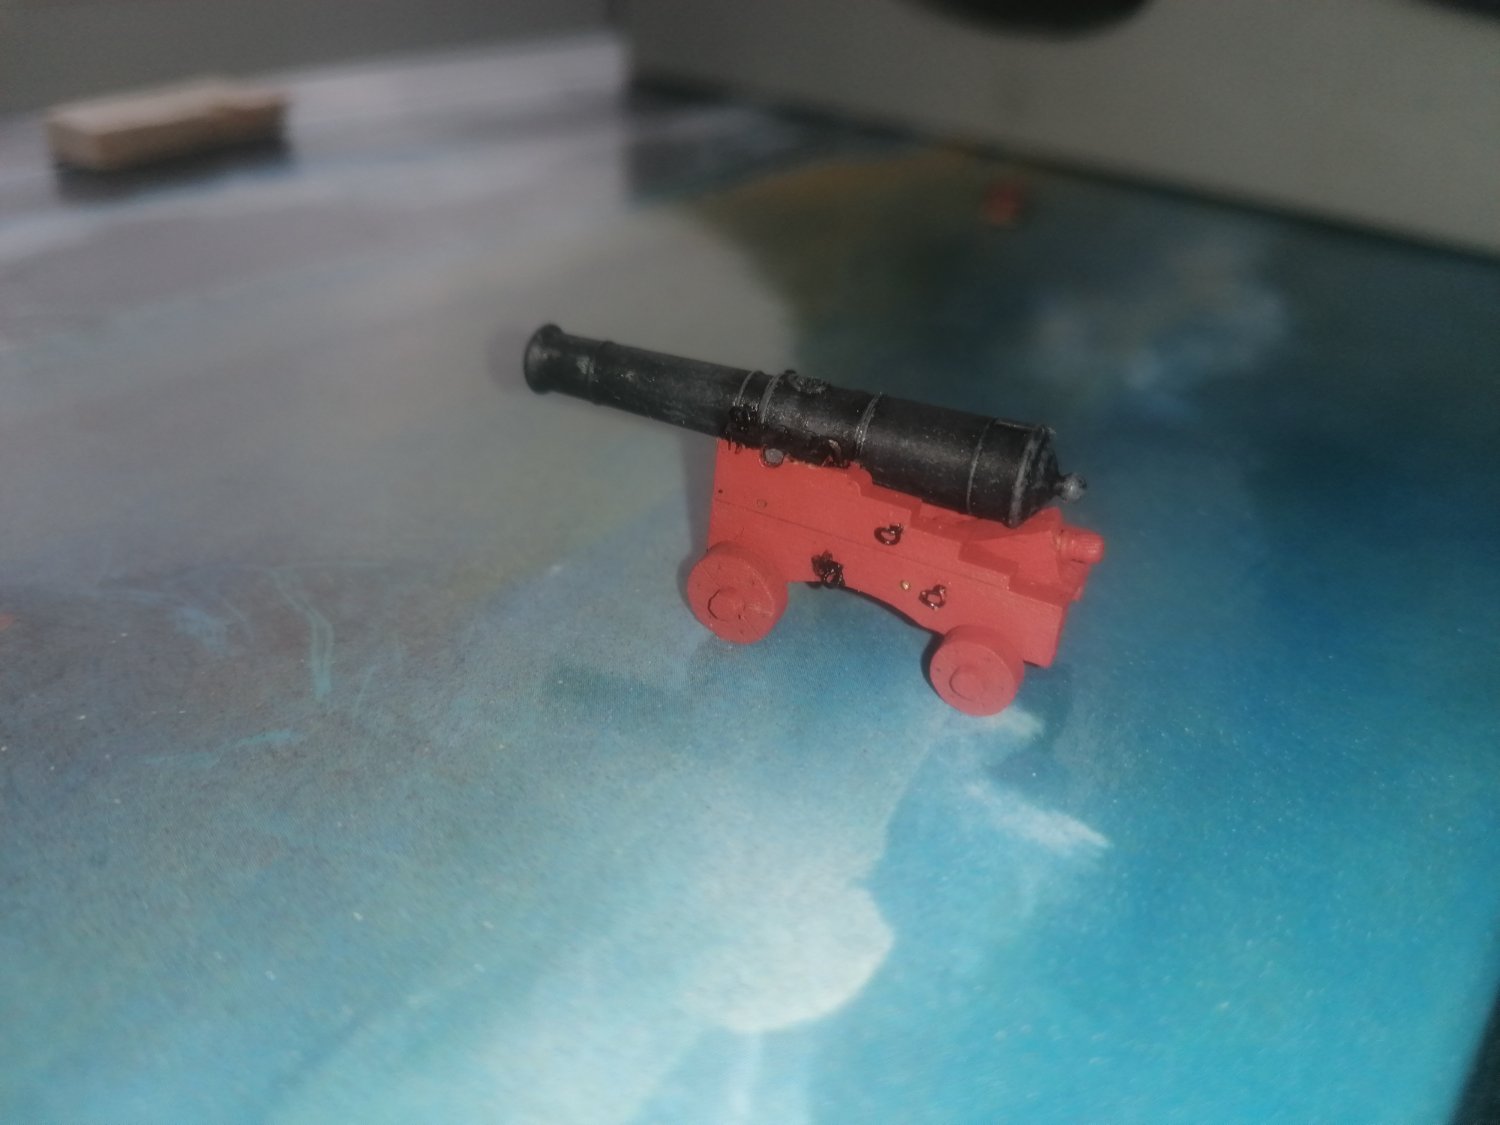
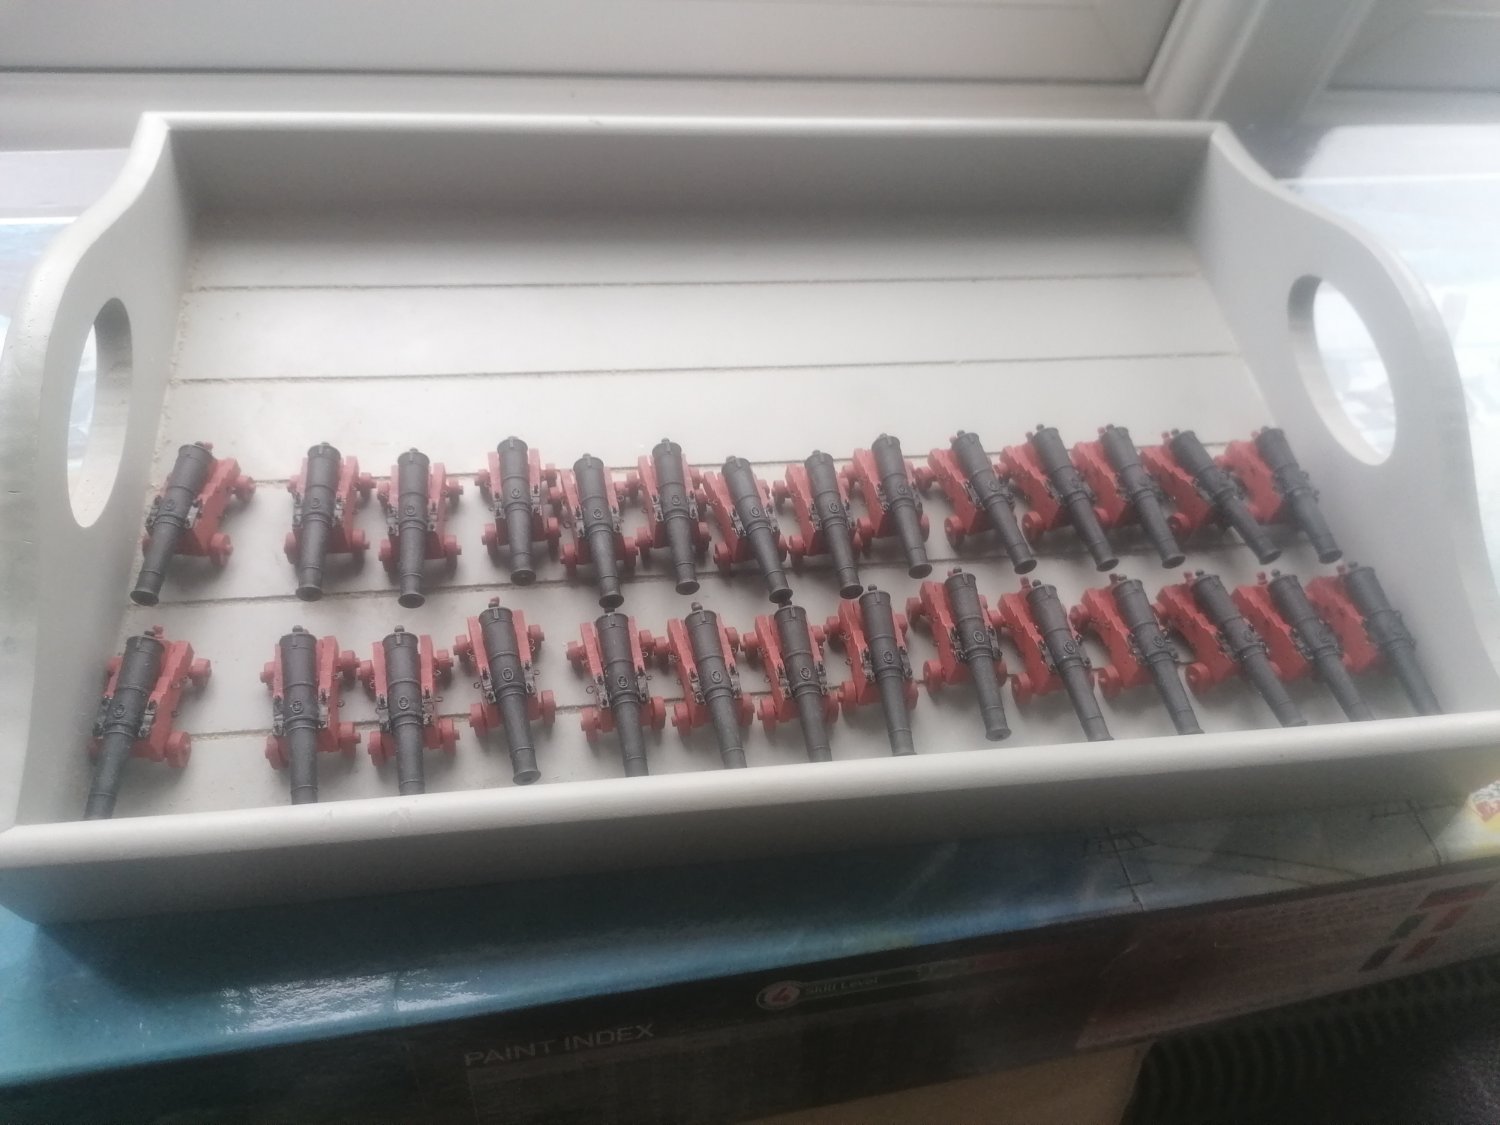
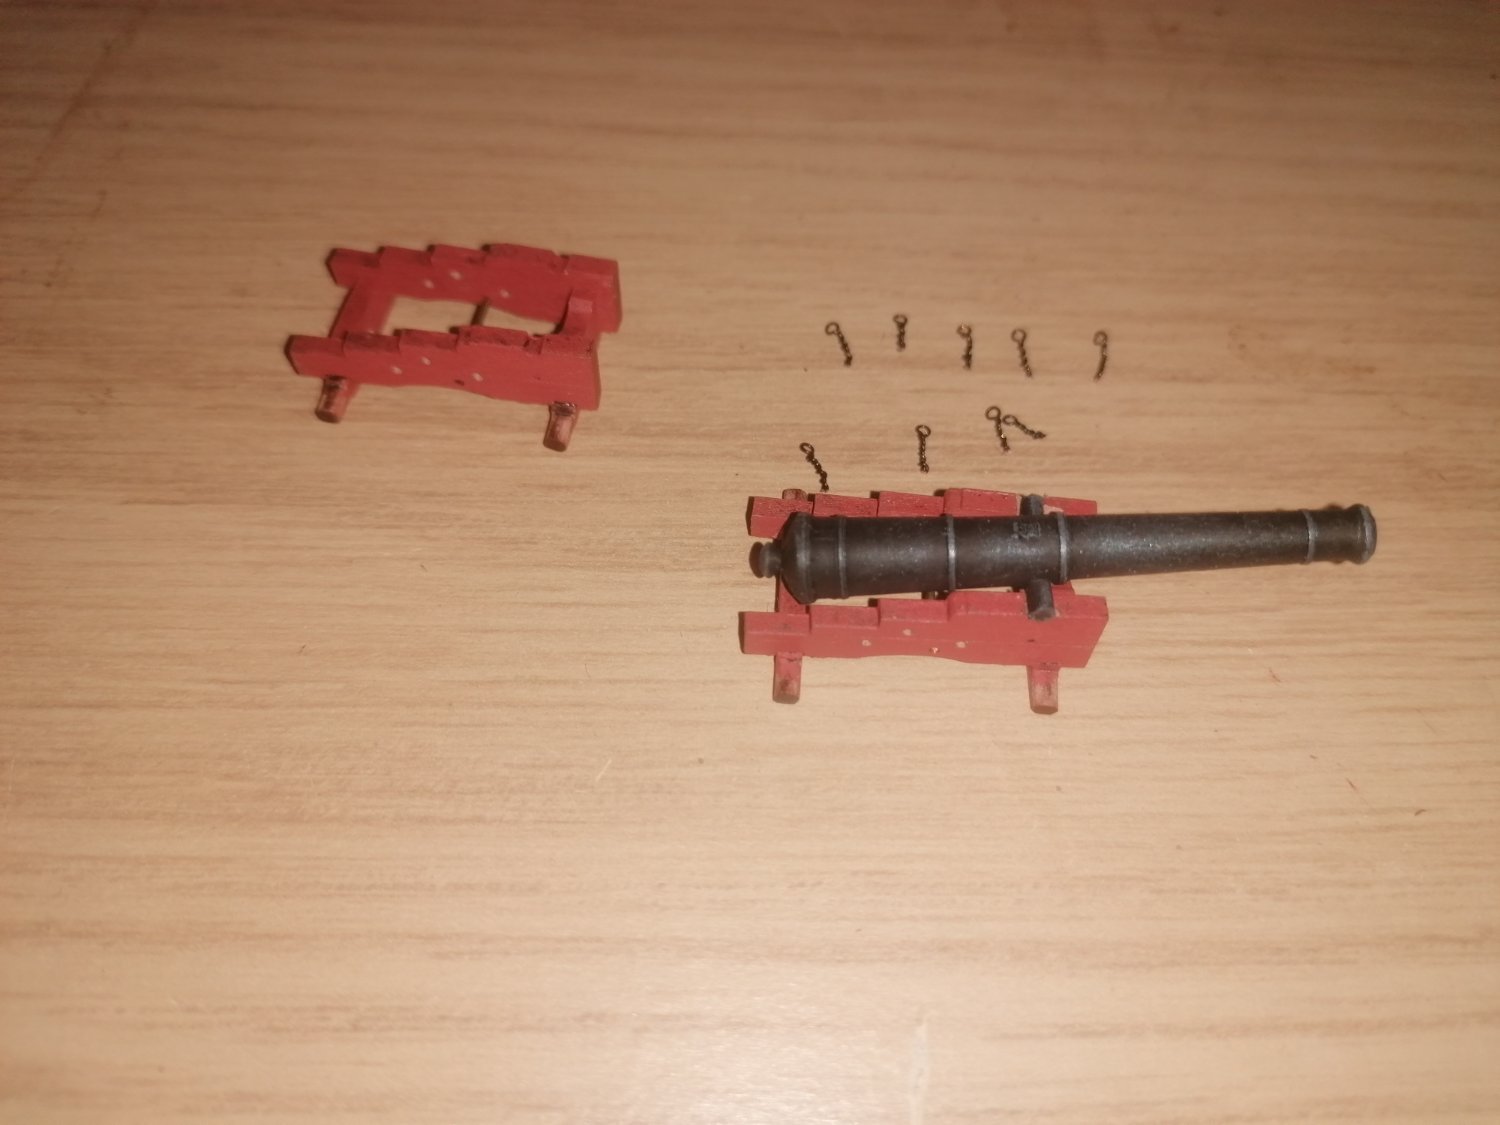
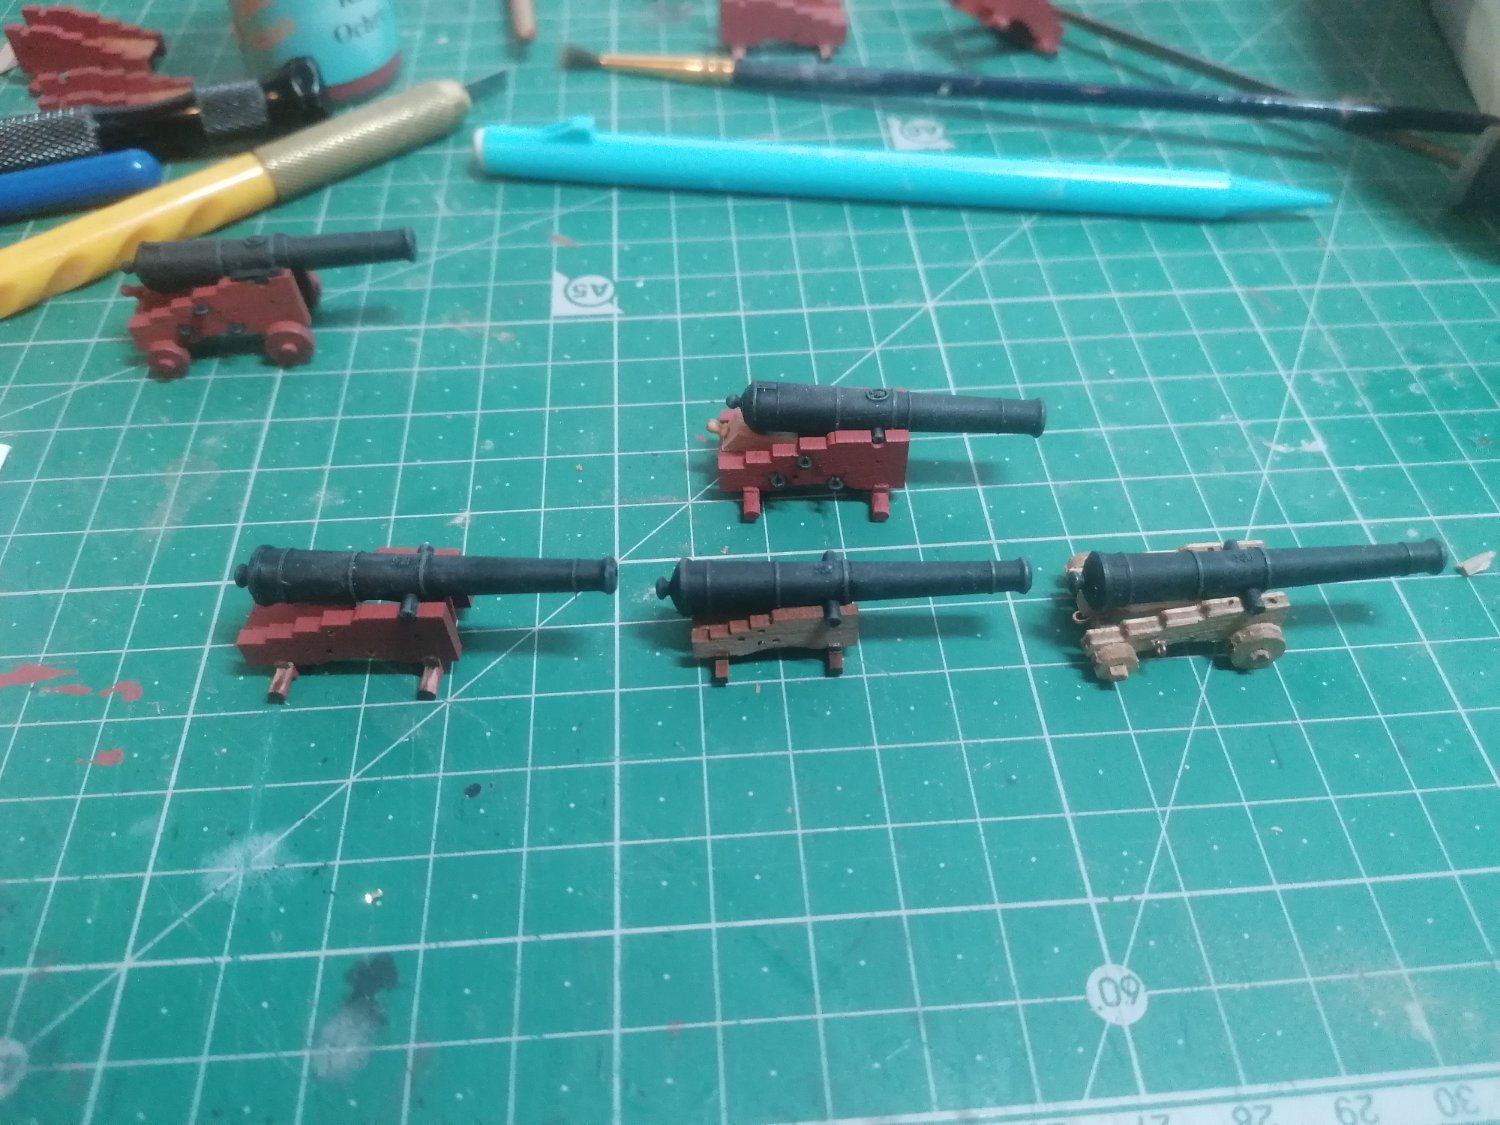
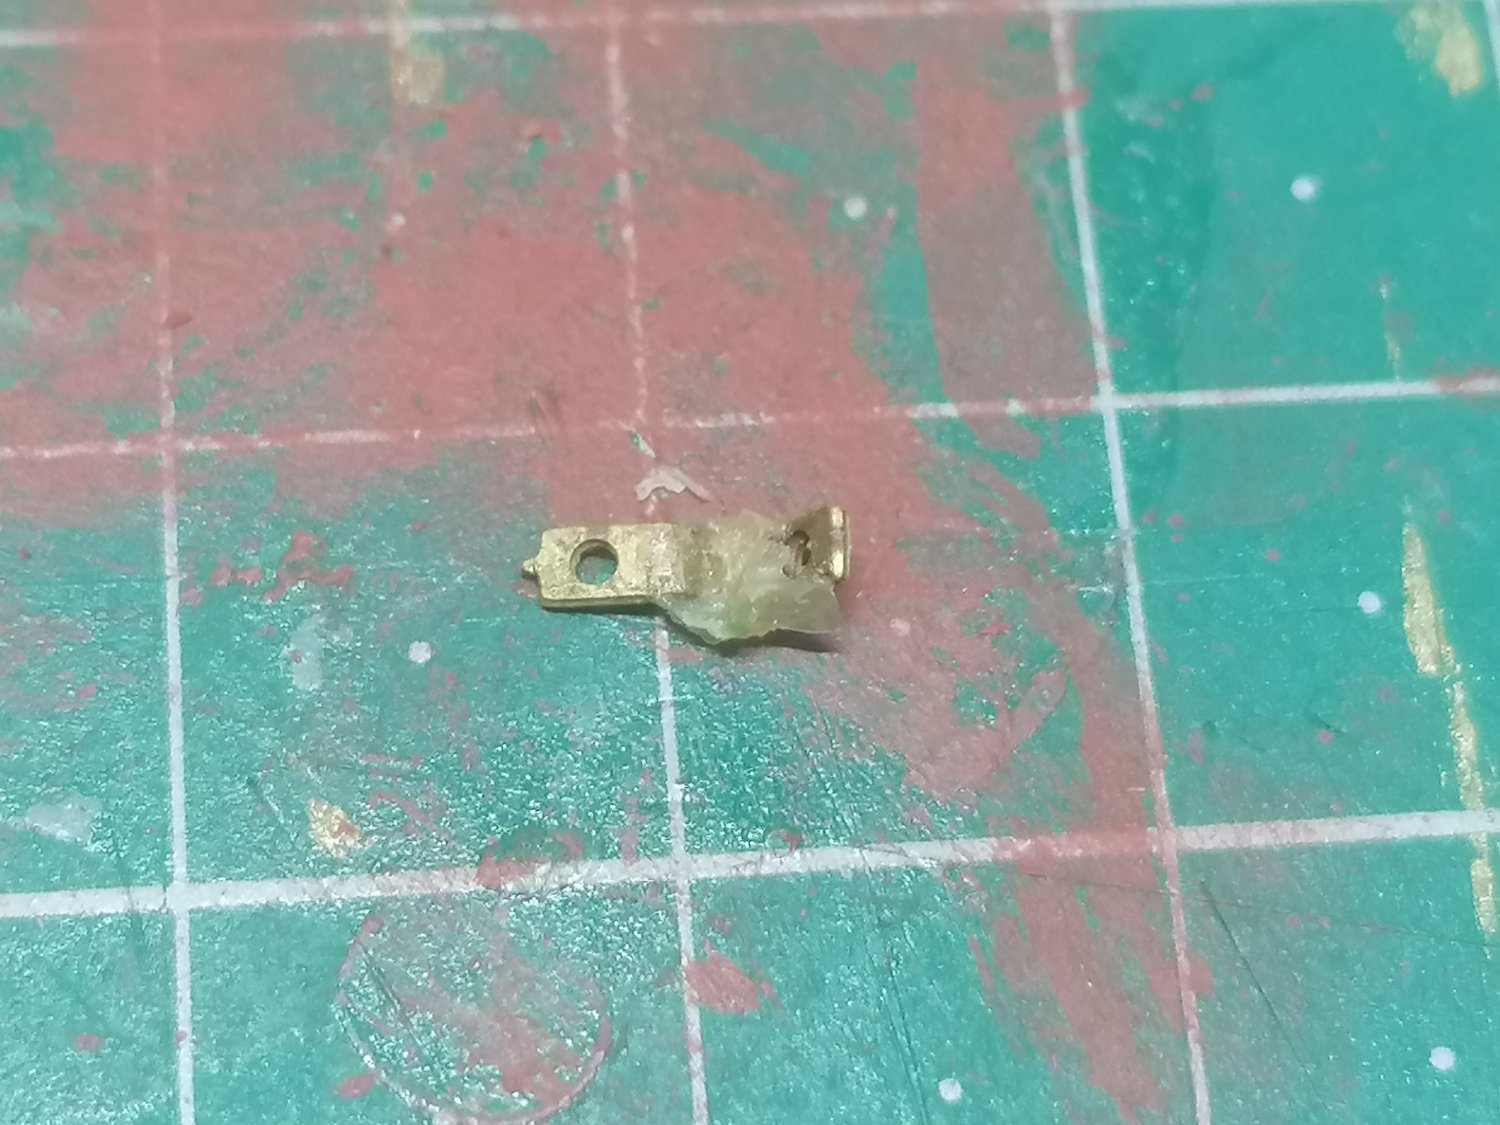
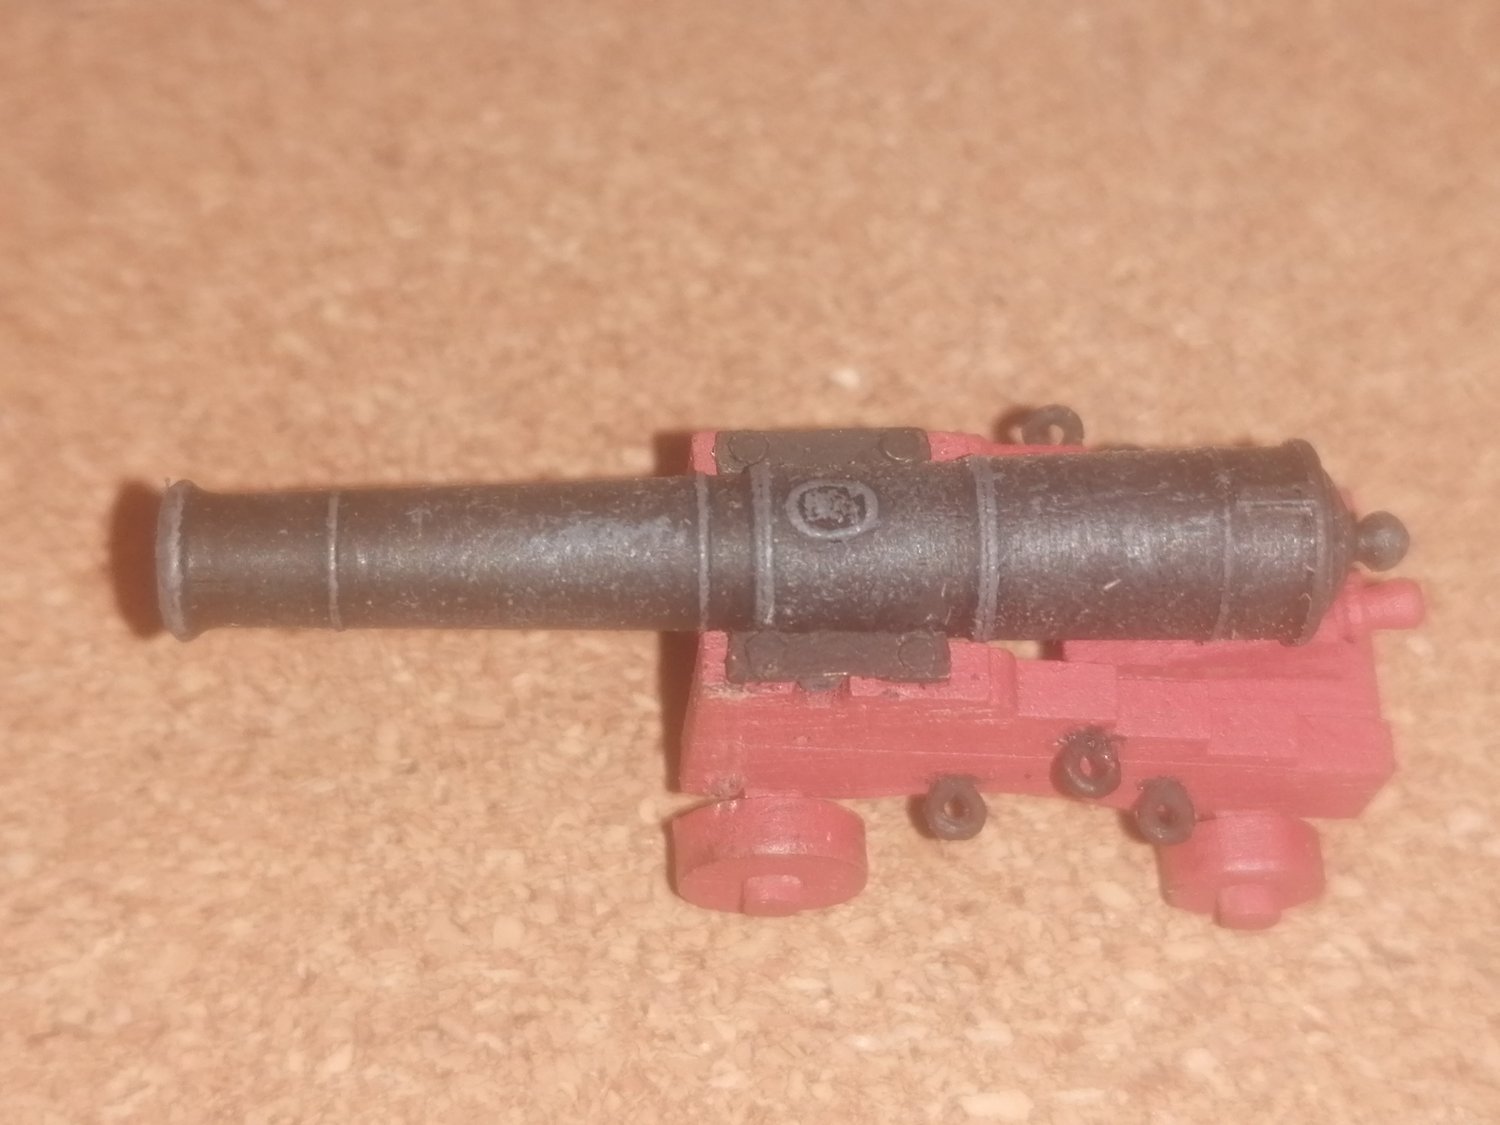
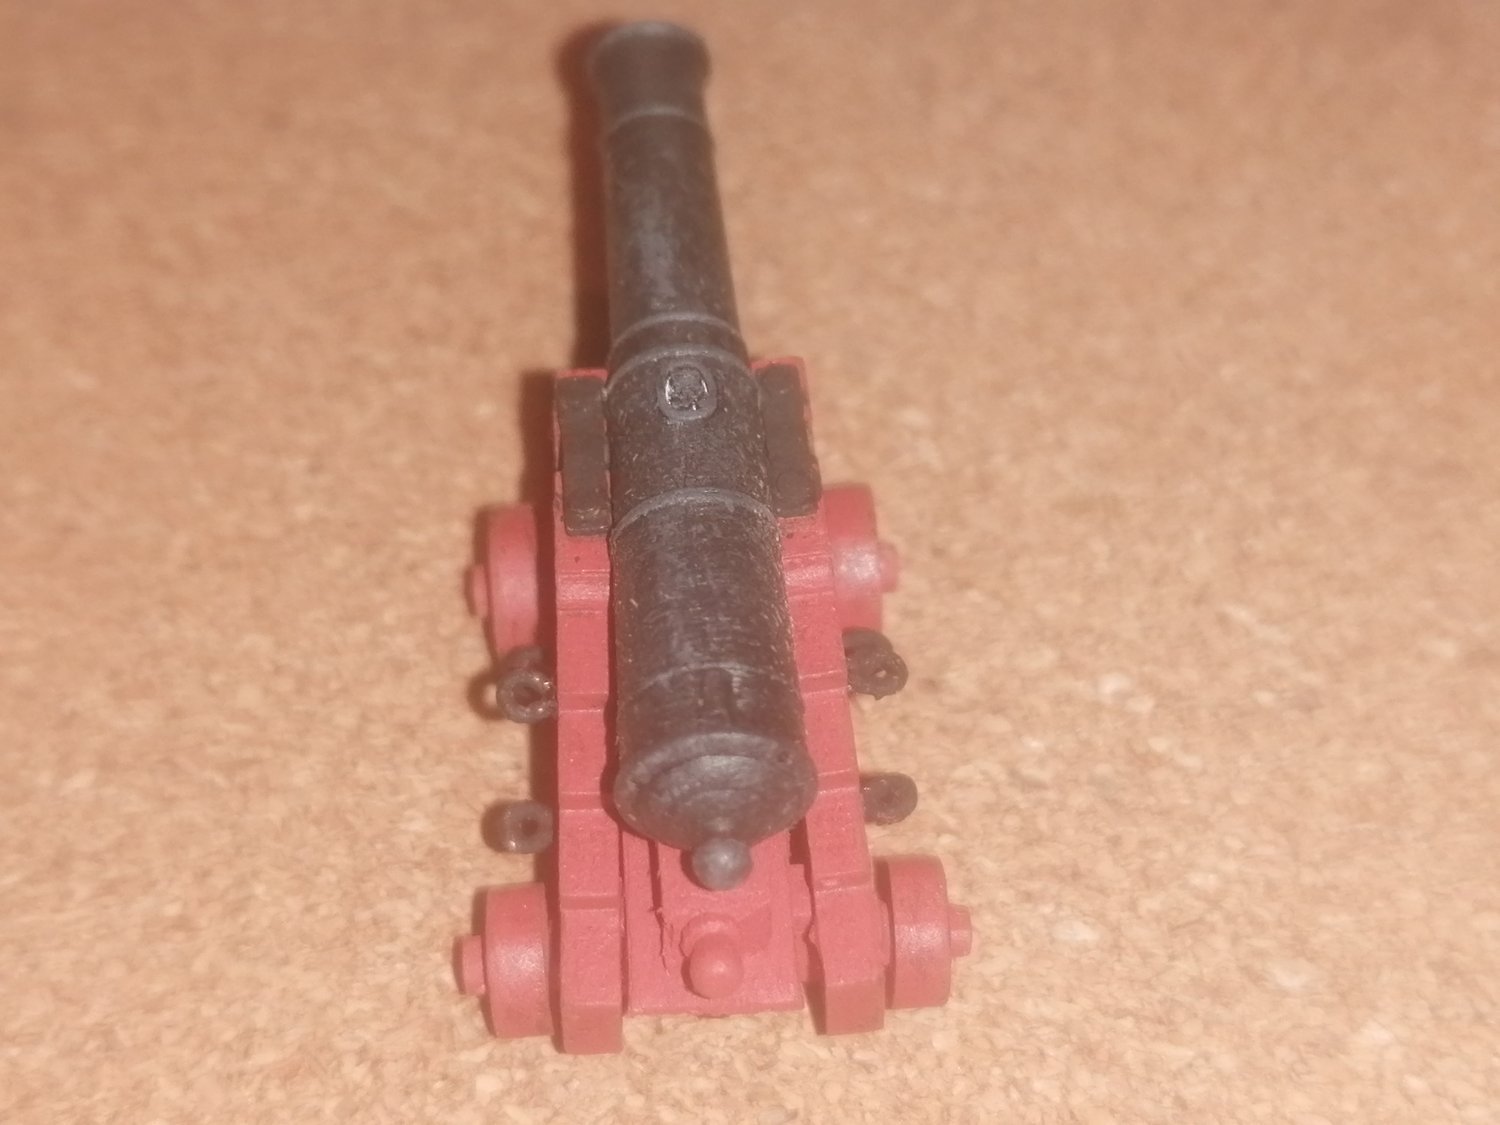
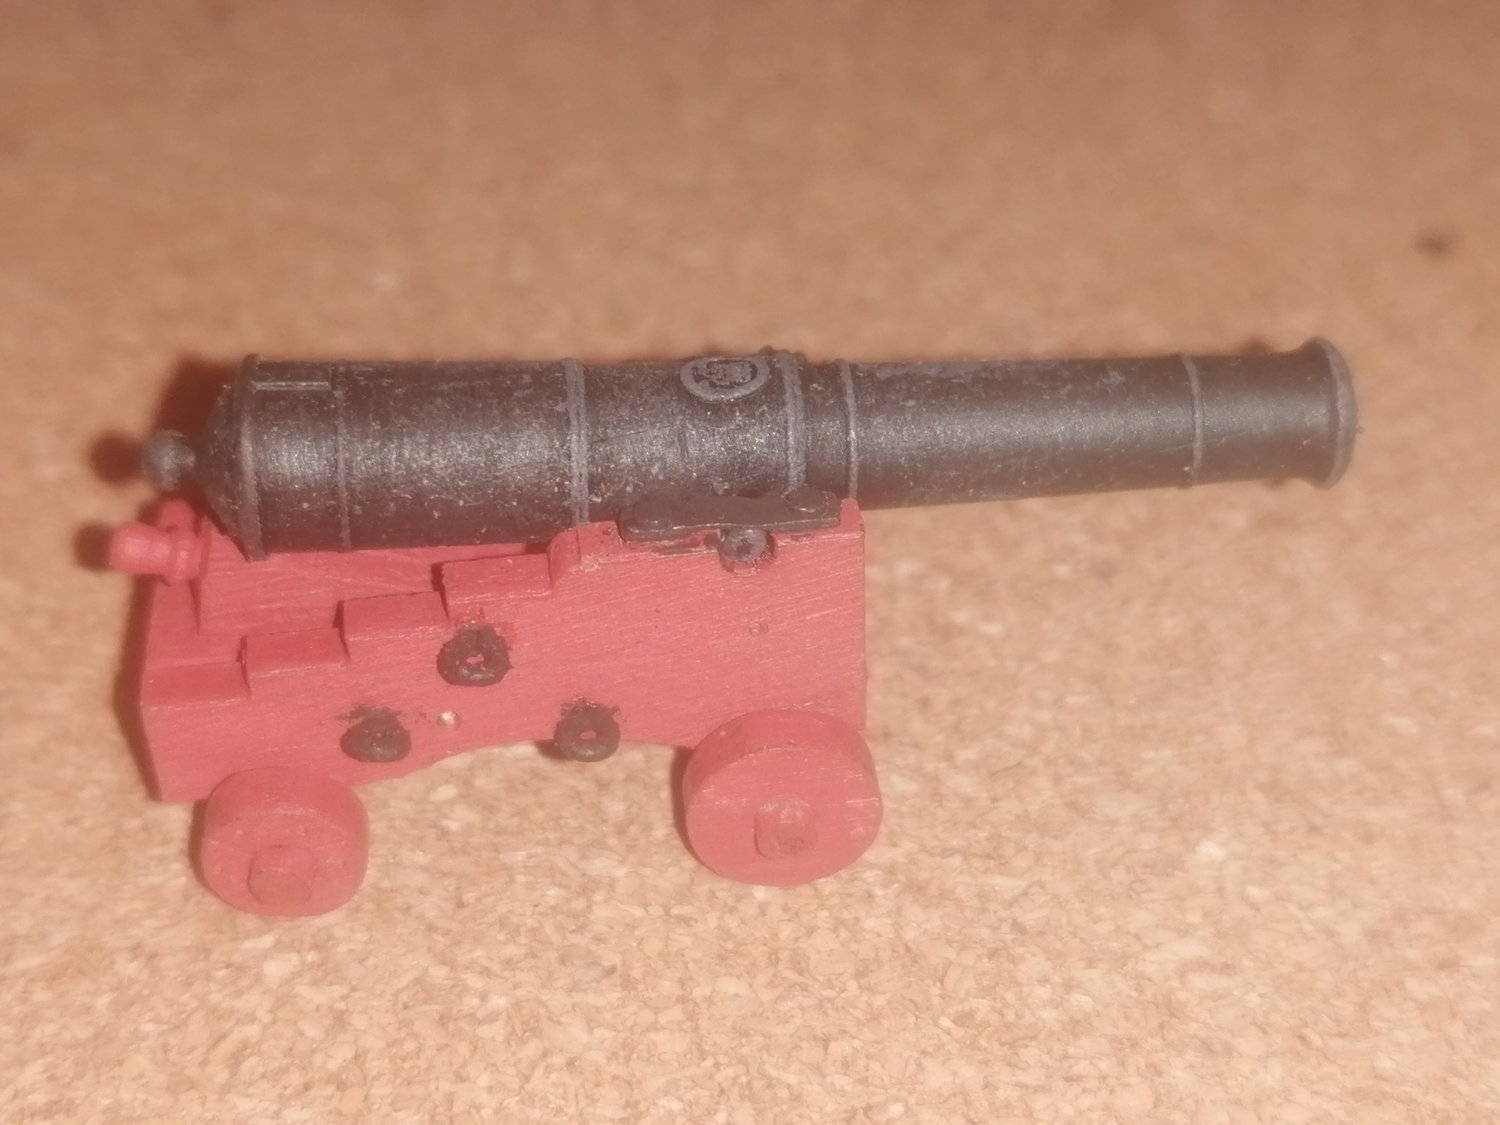
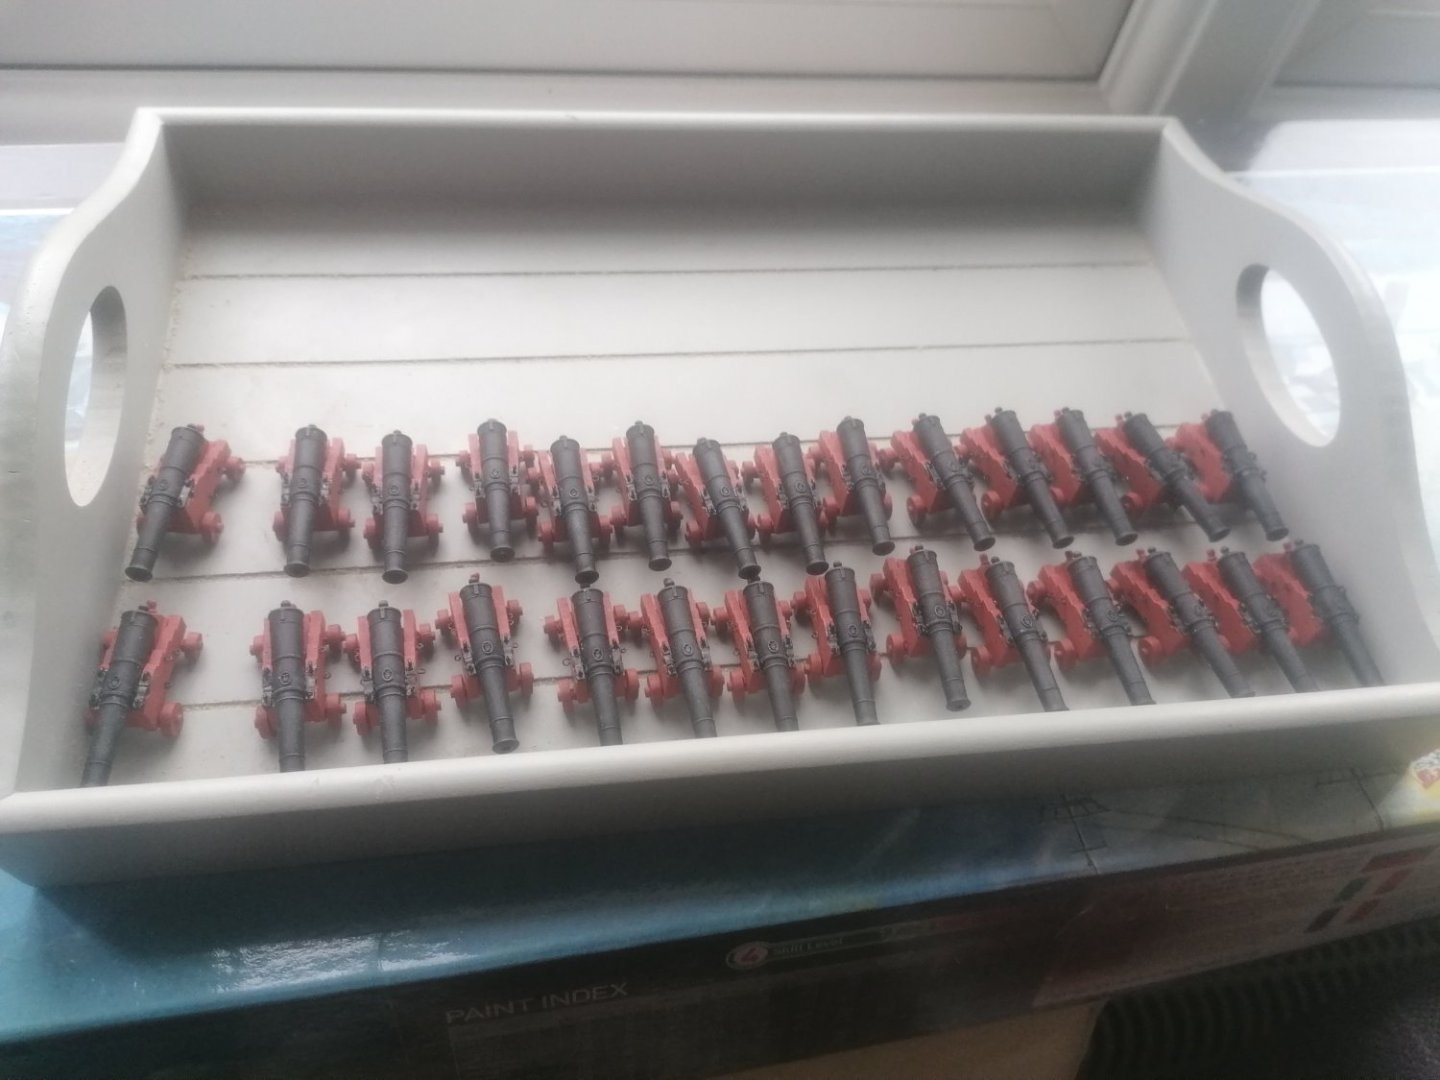
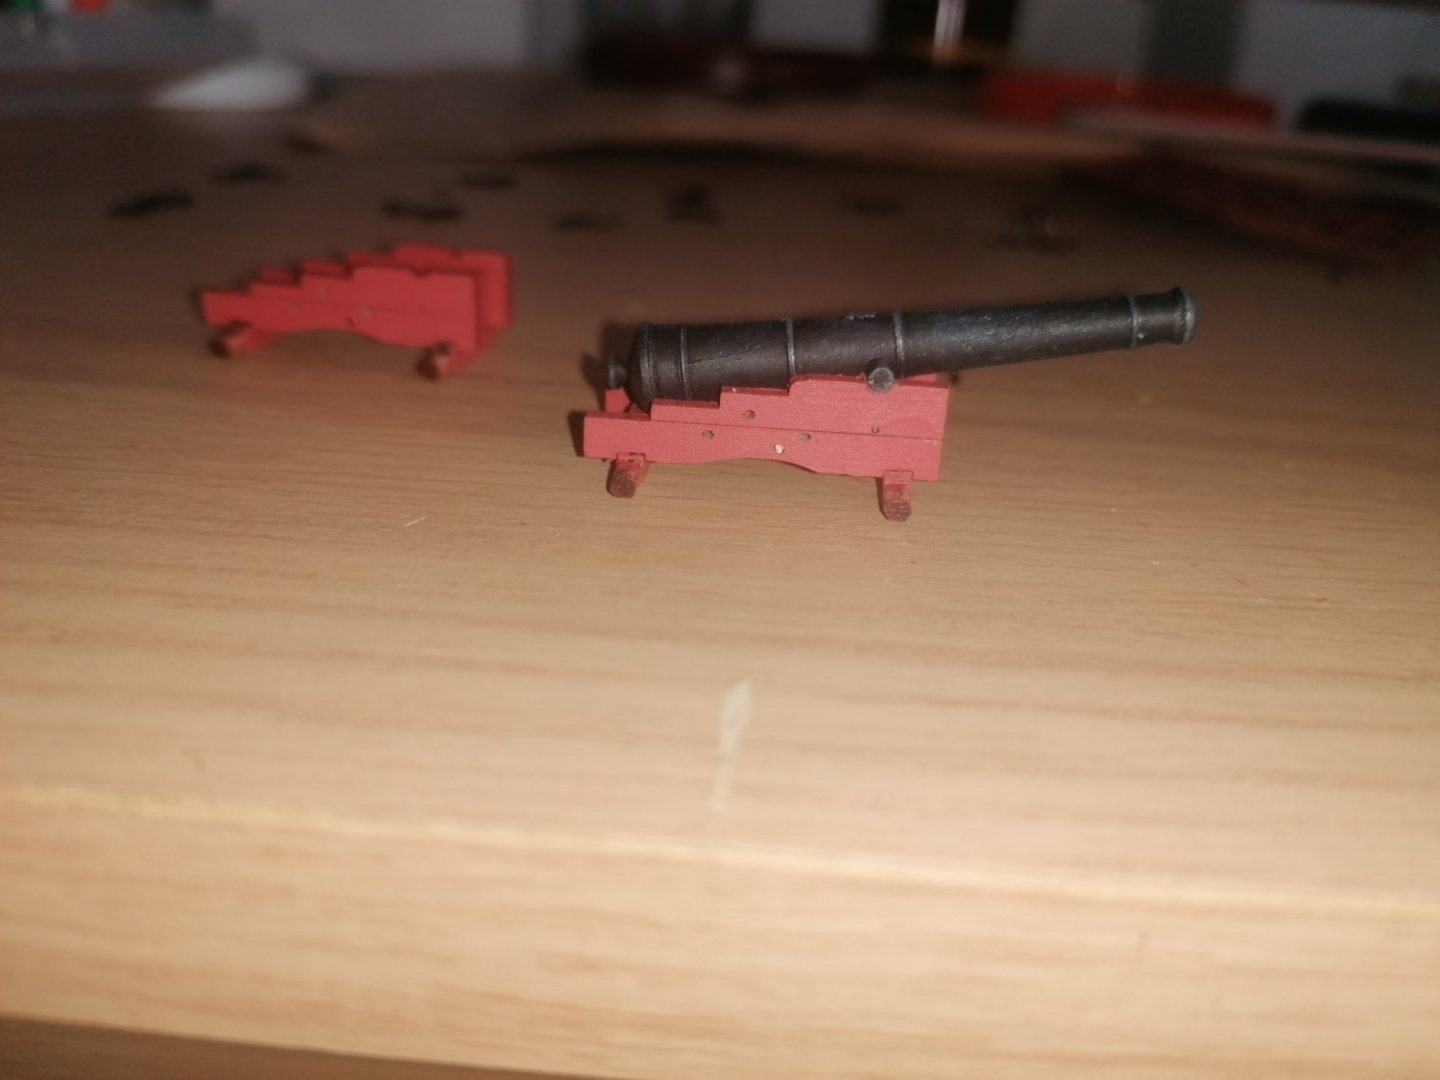
Thanks for the continued likes. At last I can now supply an update. The 18lb carraiges are finally complete apart from the rigging tackles. I originally used the smallest copper eyepins I had, but, having made the eyelets on top of the capsqares, I thought they looked too large so made more of the eyelets for the carraige cheeks. They are maybe a little small now but they look much better I think. The hinges I made from the left over copper eyepins. I next turned my attention to working on the hull along with figuring out the 9lb carraiges. Following the lead of previous build logs, I will try to taper the stern post from 8mm wide at the top to 4mm at the bottom. I am also contemplating adding a 3 X 5mm strip along the keel to give it some extra depth, and improve the shape of the bow section. In the instruction book it says to terminate the end planking 5mm away from the stern and add a 1X5mm strip to represent the stern post. Judging from the photos from the maritime museum it looks to me that the stern post is almost twice as wide at the keel than at the top. rather than being a consistant width all the way up. I have also added another problem if I proceed with deepening the keel, it will alter the shape of the deadwood aswell as requiring the waterline to be lowered followed by the wale also dropping down. This would only be a mm or so but it looks like the shape of the deadwood would change a fair bit. This in turn will alter the curve of the hull up to the stern counter so I am now planning to build from the keel up and see how it goes. I have ordered more timber from CMB which will arrive on Monday. As well as wider strips of walnut for the stern post, I will also have 1.5mm lime strips for the skid beam clamps and spirketting. I tested 1mm strips which looked too thin and also 2mm strips which I thought were too thick. The 9lb carraiges were a challenge as both the Vanguard versions seem too short for the long 9 cannons. I decided to order 10 12lb carraiges as they were about the same length as the 18lb but the cheeks, I hoped, would be slightly lower. Thankfully I was correct and although the rear of the carraige looks slightly too wide, the other dimensions are perfect. I widened the holes for the eyepins before painting the sides of the carraiges and wheels. I have the eypins ready to fit and just need to deepen the trunnion holders for a better fit before adding the capsquares. While sanding down the stern counter I have removed too much balsa so this also needs to be built up again. I will try sorting this once I am happy with the shape of the stern upto the lower edge of frame 17. I may try rebuilding the complete stern above this point and maybe build a frame behind the stern facia so the false keel doesn't block the middle window but again I will wait and see. At least I am still proressing although much slower than I would like. David.


-
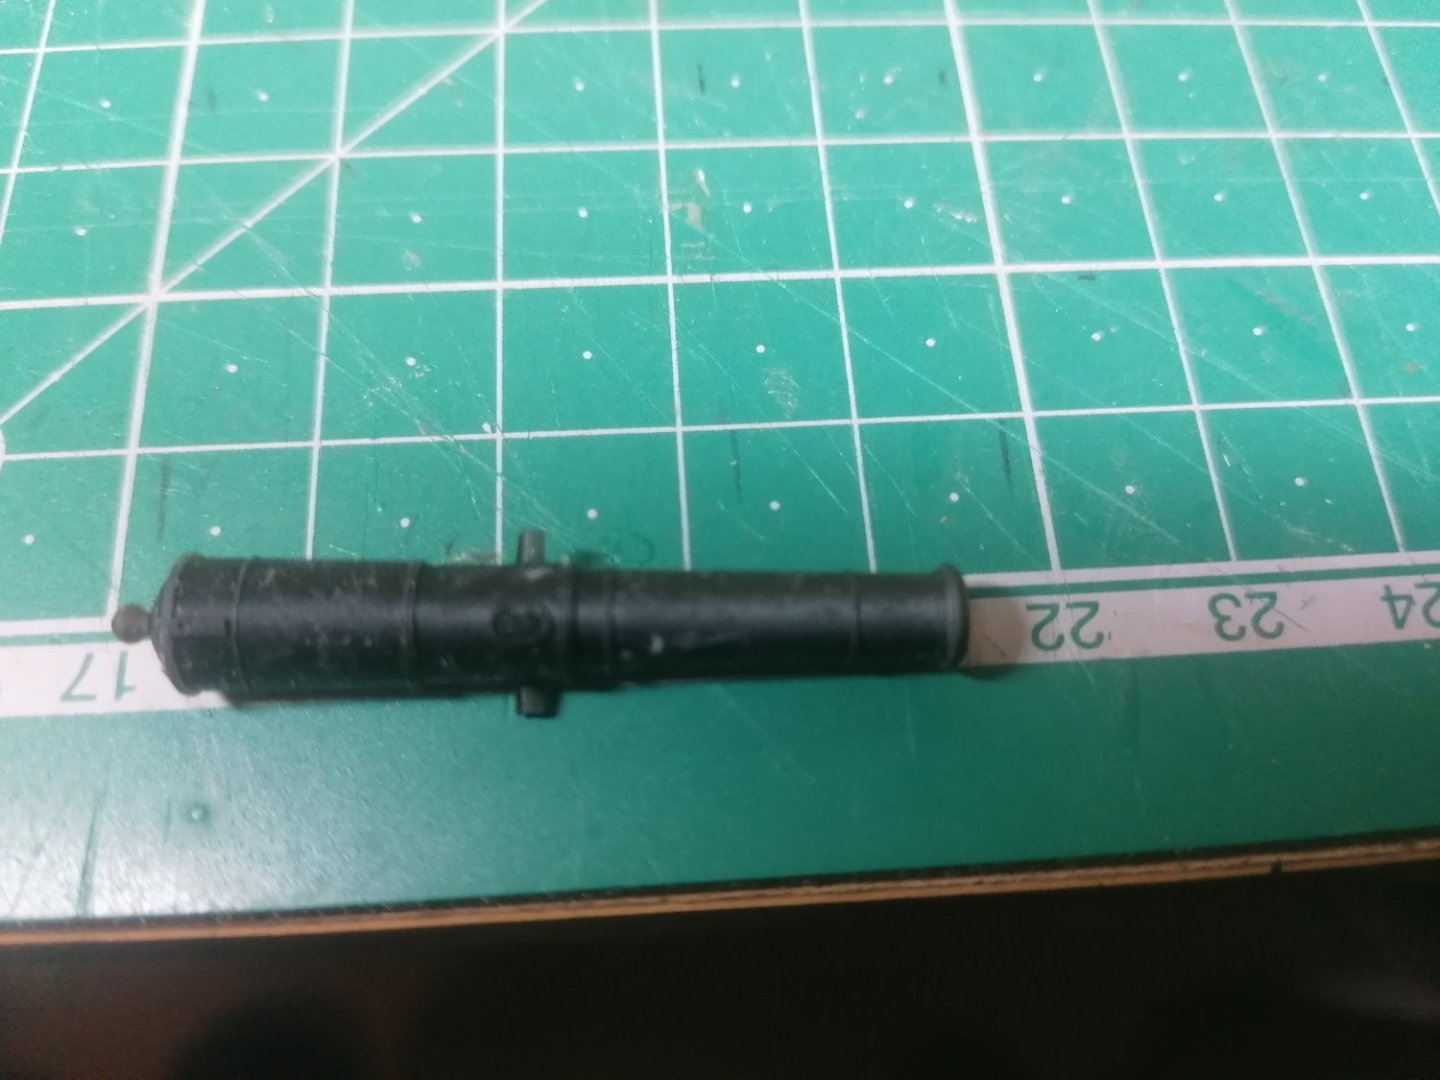
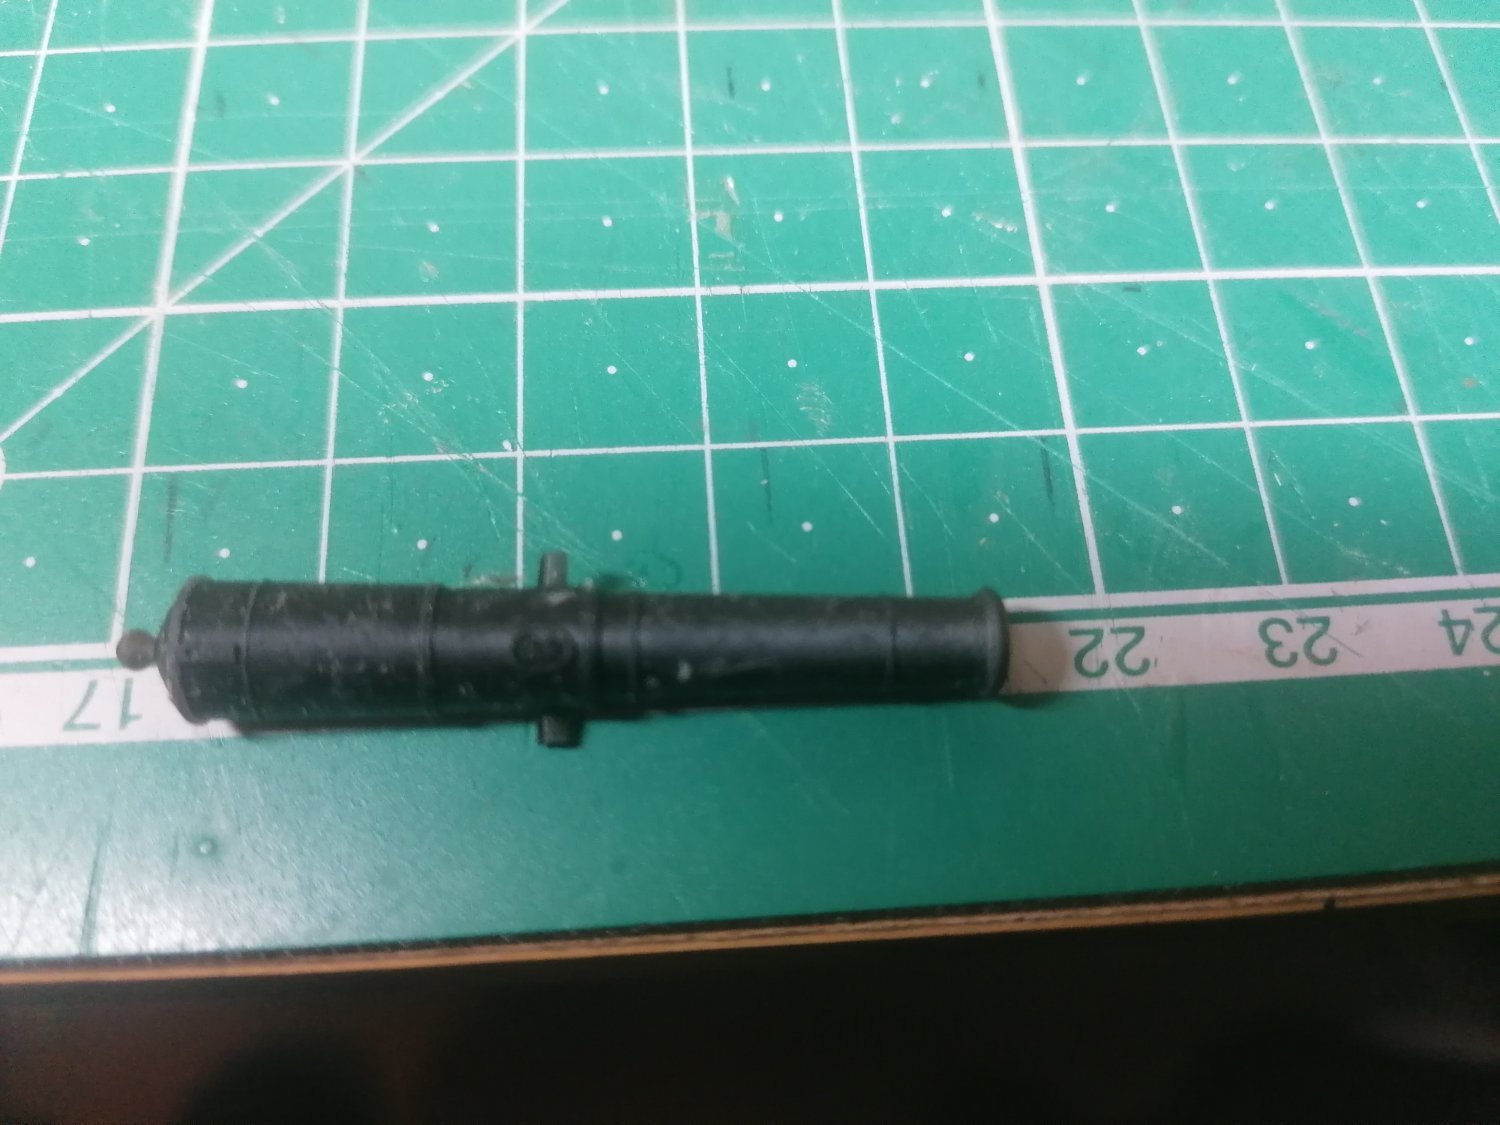
Thanks again for your input Allan, The barrels are from Vanguard and I believe are the Armstrong versions. I painted them matt black and then dry brushed with rubber black and then a little matt black mixed with sea grey. I'm pretty happy with the final results. David.
-
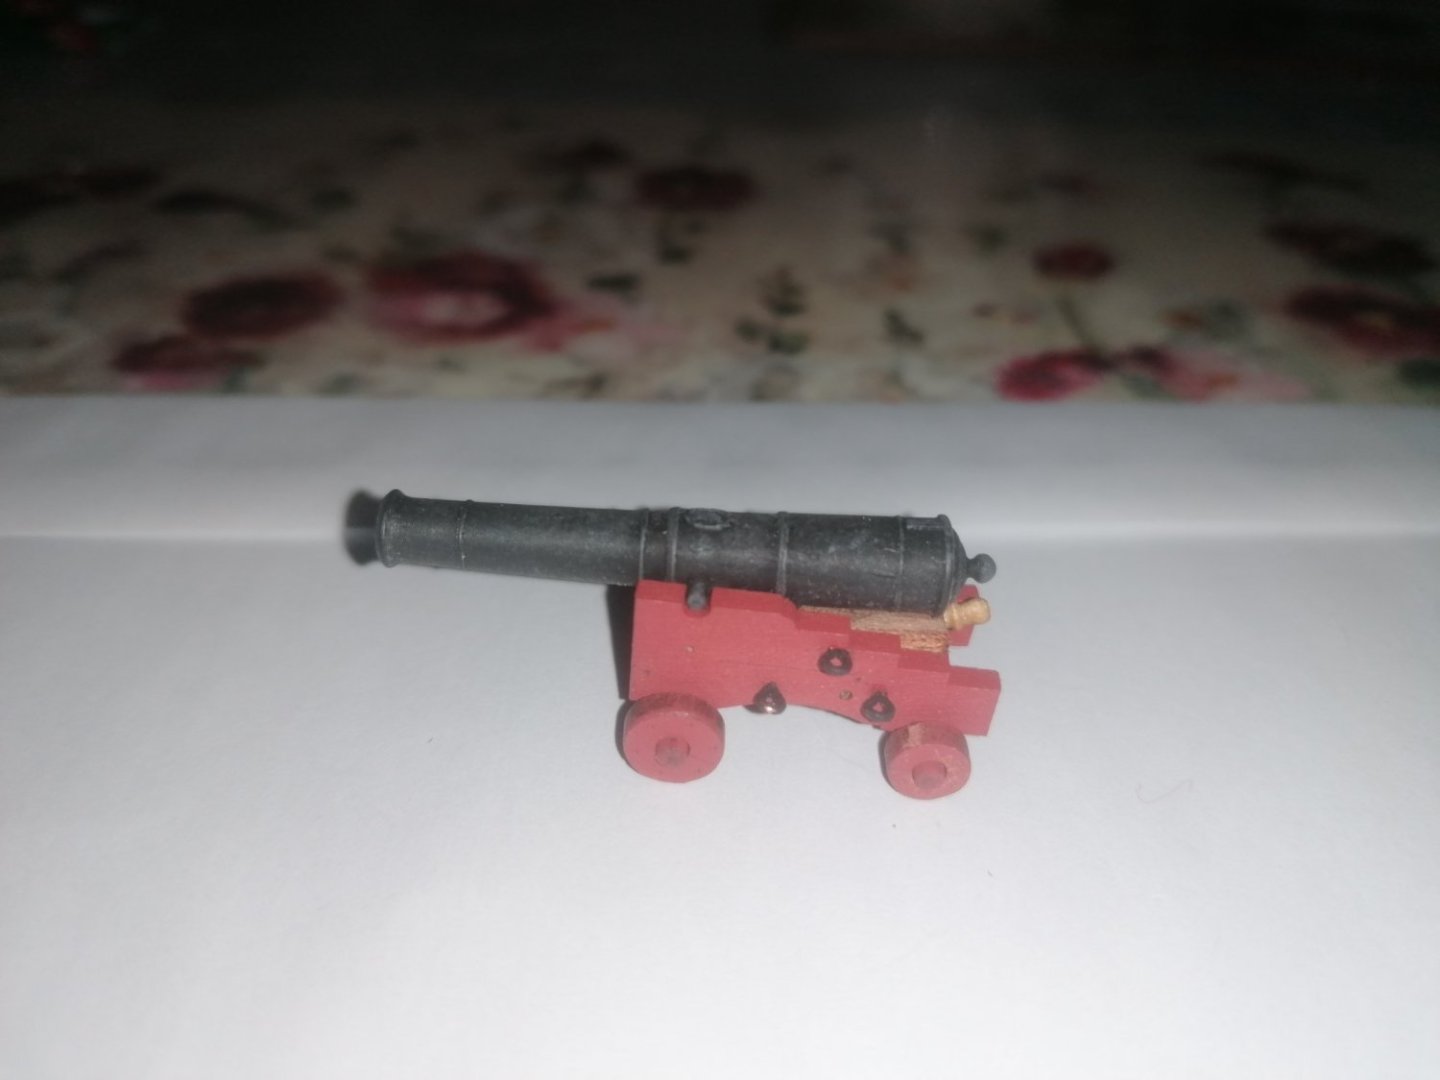
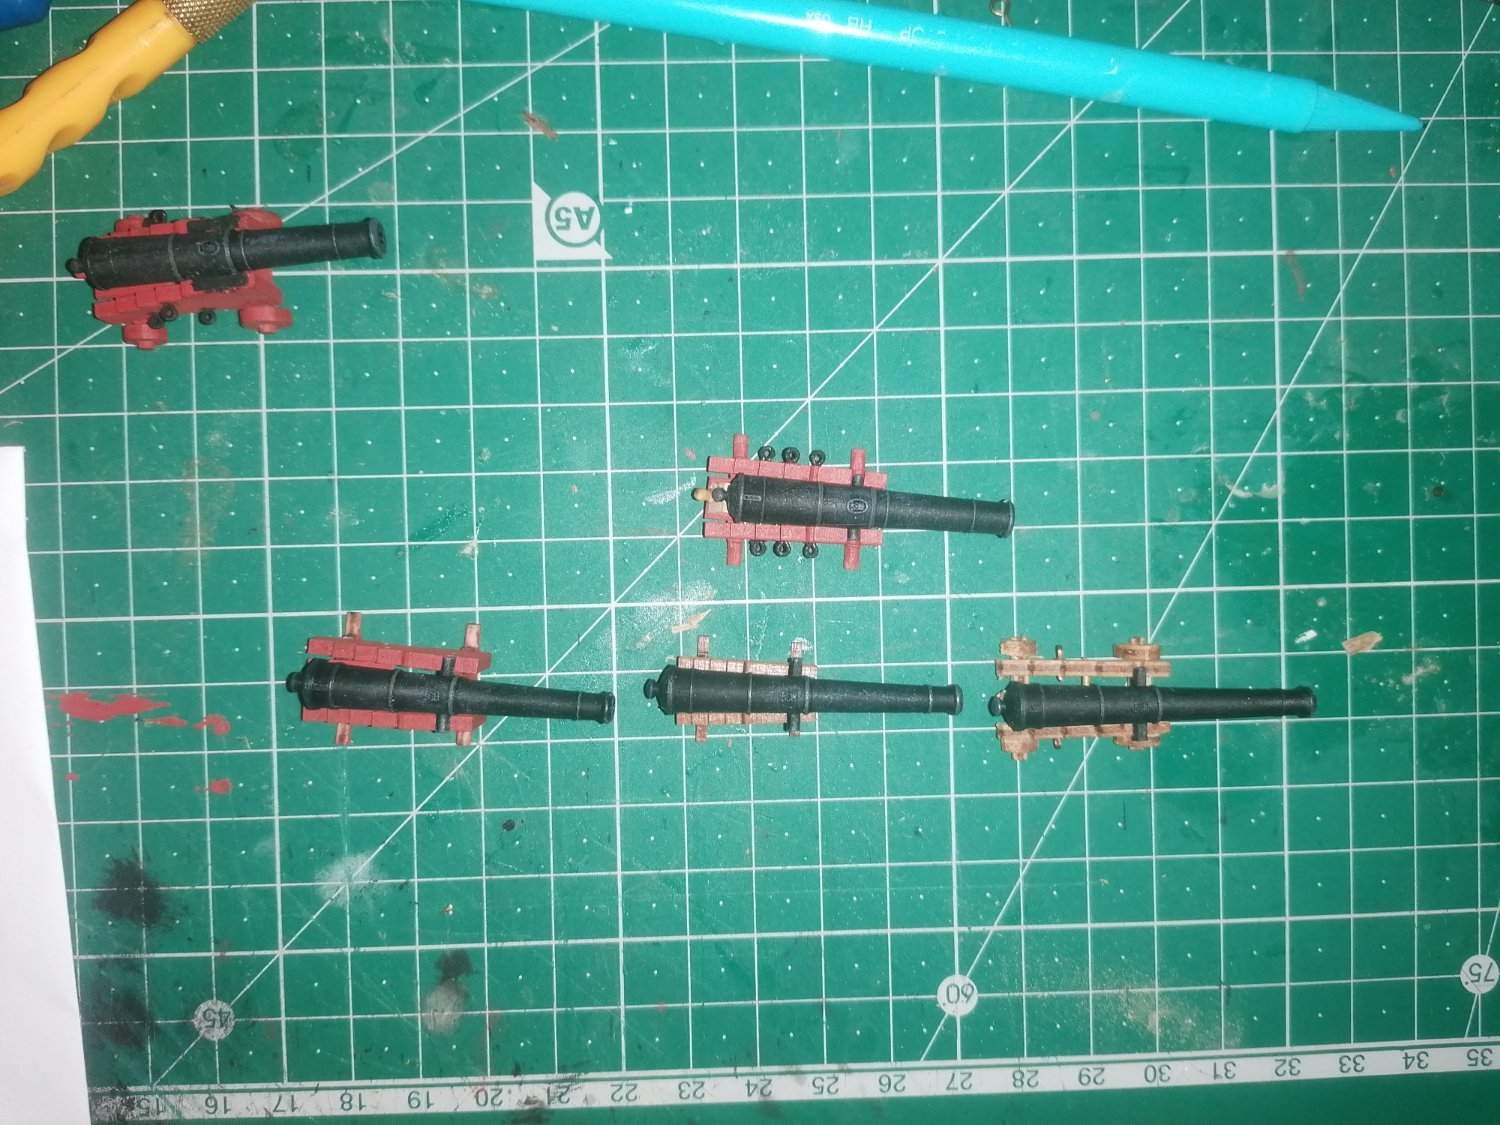
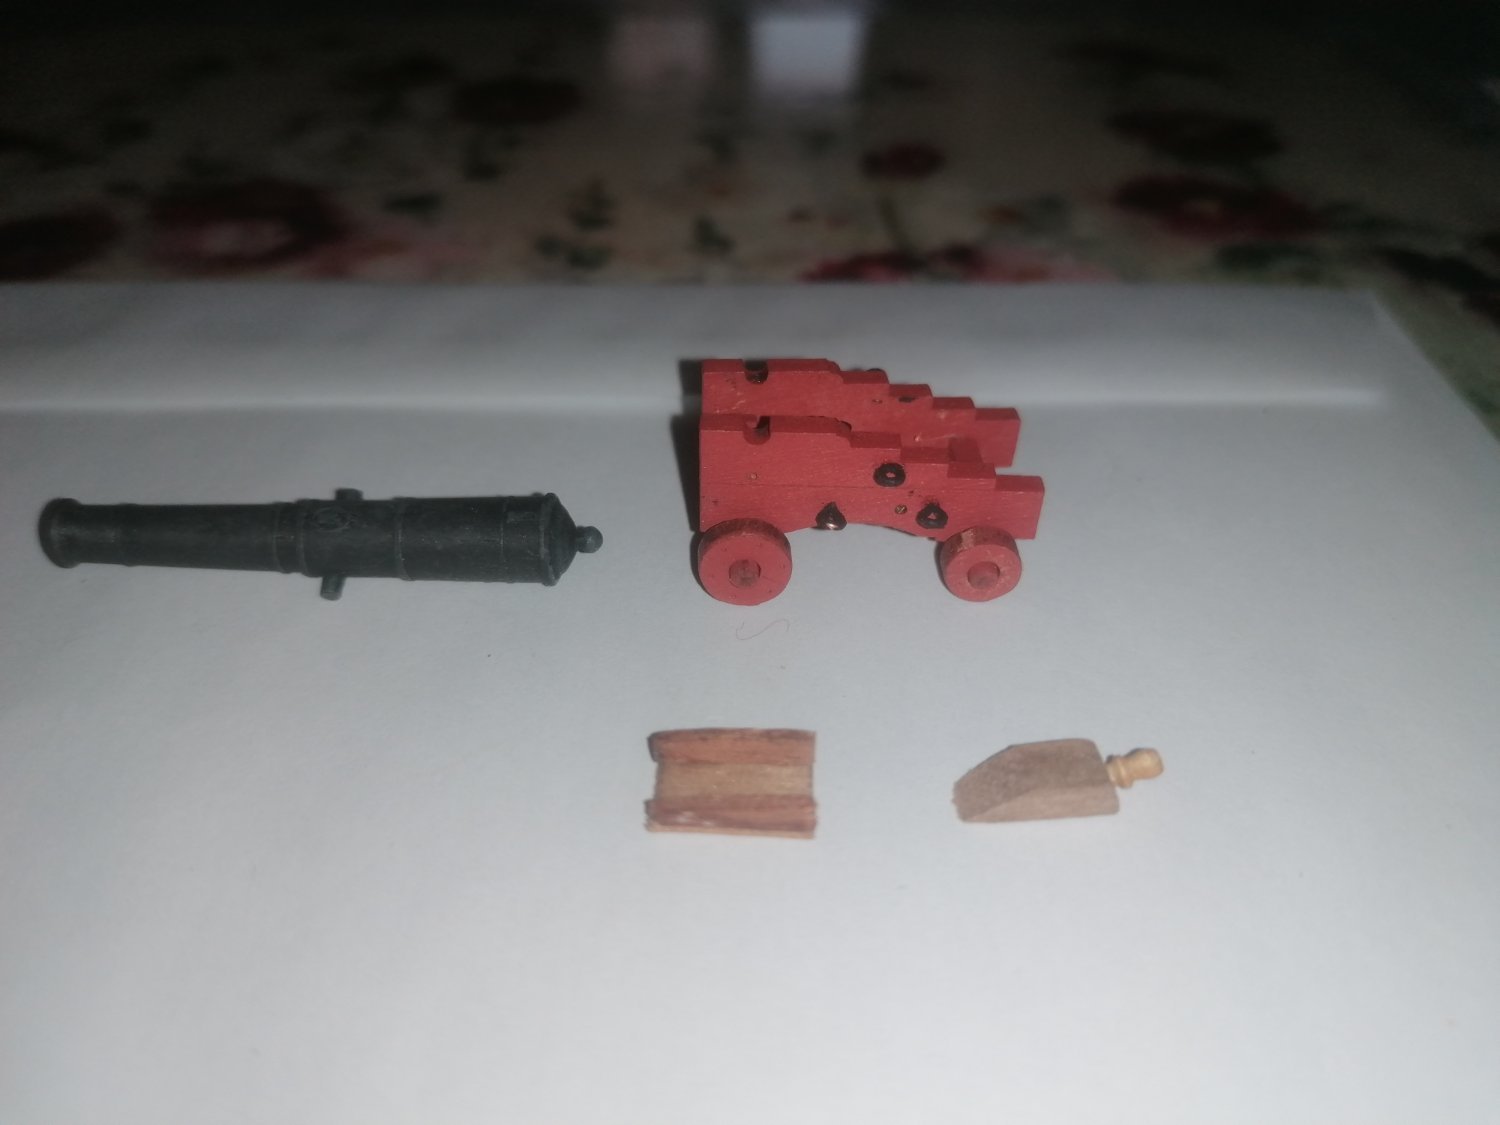
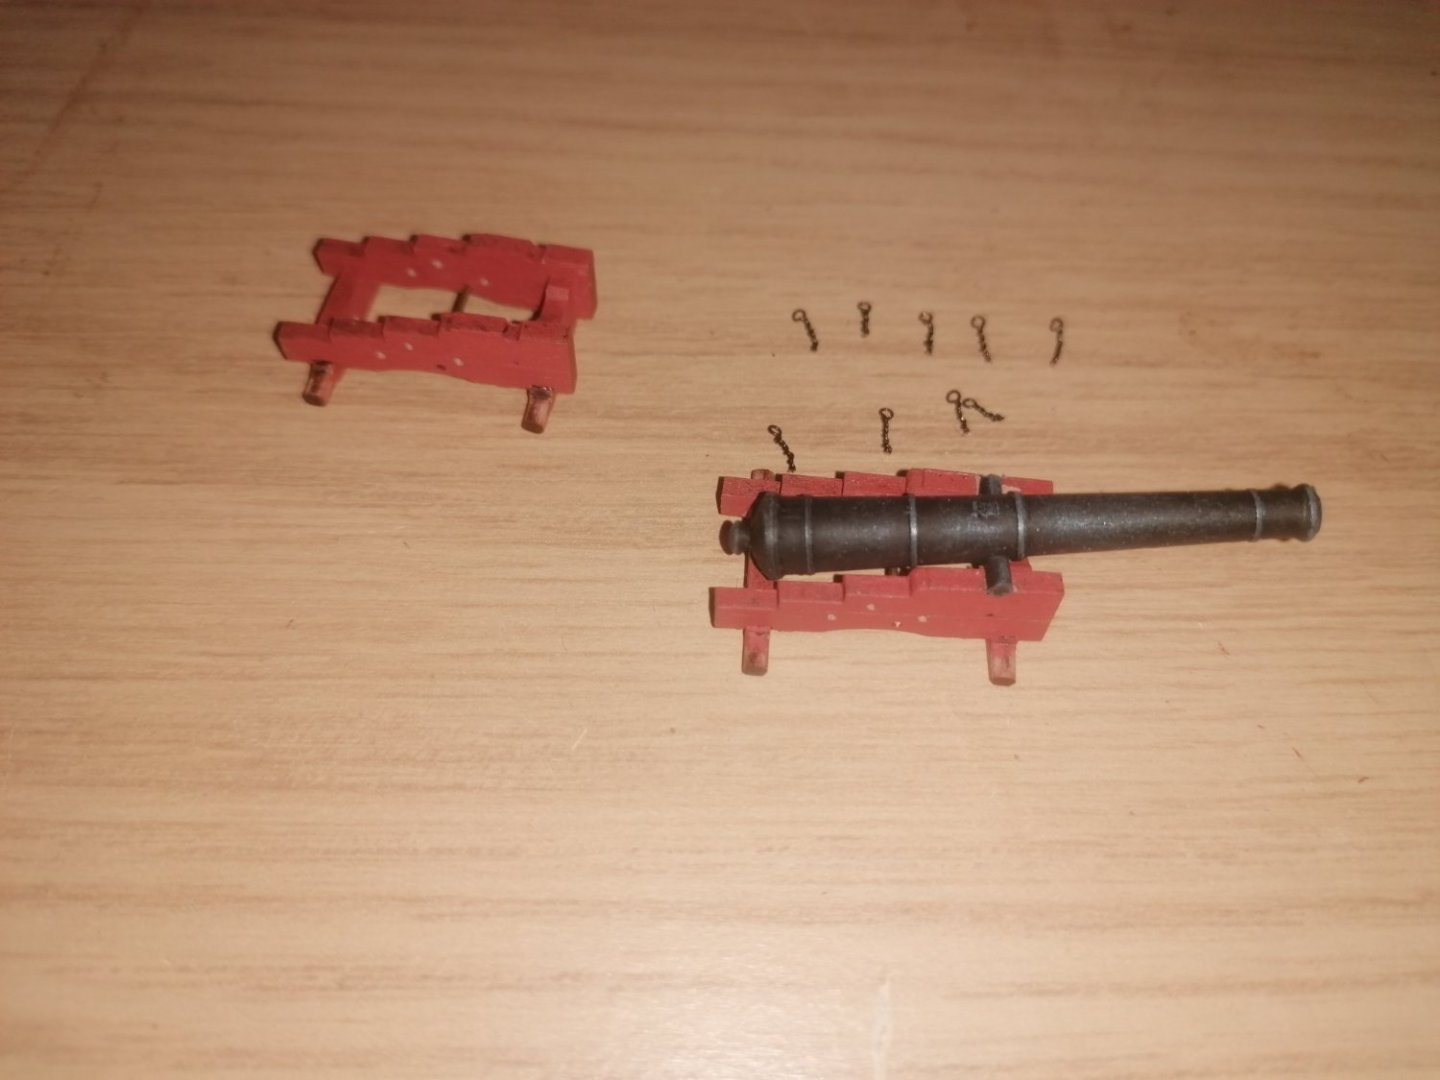
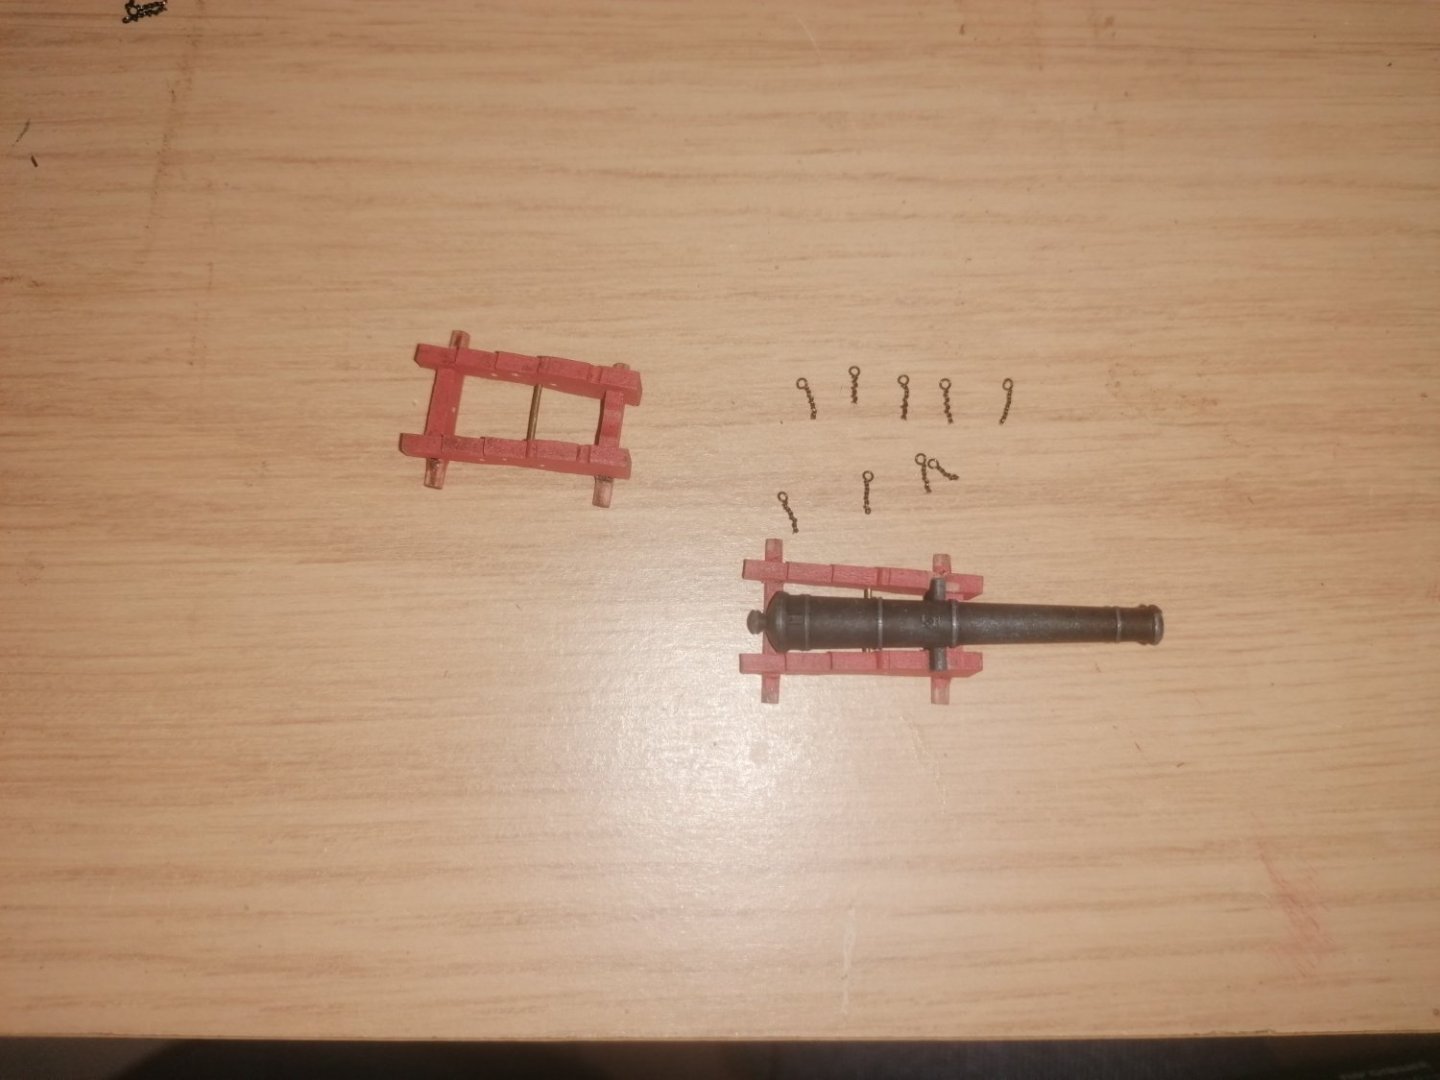
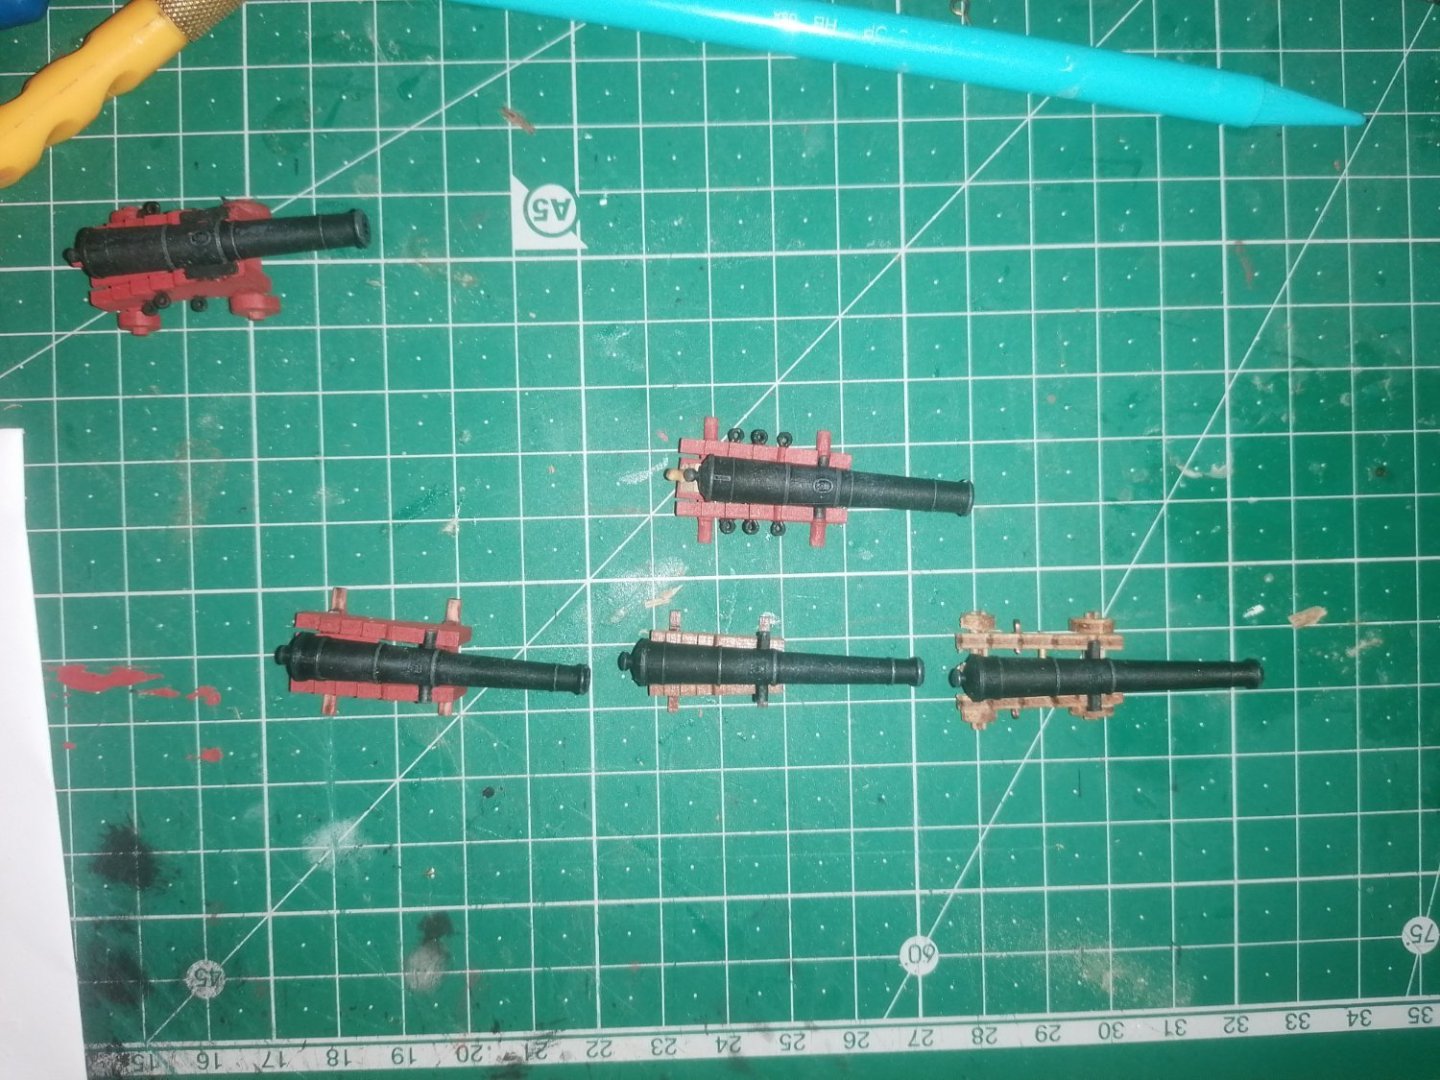
I am sorry I didn't get any notifications on your responses. Thank you all for your input. Alan, I thought you would have some knowledge of this. In between posting my question and now I remembered that Chris (Vanguard) had expanded his range of cannons and carriages after I had ordered the carraiges I bought. I had another look earlier and found that, indeed, he now has different sized carraiges for the long 9s and the shorter ones. I should have included photos to help show my dilemma, which I will do now. Hopefully this can help others. The top cannon is the 18 lb'er. Below left is the long 9 on the 18 lb carraige, middle is the 9 long on the standard 9lb carraige and below right is the long 9 on a carraige bought for a previous build but never used. Thanks again fir your help guys. It's very much appreciated. David.

-
It seems like I have the answer to my question above. I remembered seeing that Vanguard have extended the range of guns and carriages. From the quality of the carraiges, previously bought, I went back to the website and looked at the 9lb'ers again and Chris has longer carraiges for the 9lb long than for the shorter barrels. It's only millimeters but looks like the longer barrels won't protrude beyond the rear of the carriage. I am not sure if they sit higher but am guessing they will. Chris, if you look in on this, would it be possible to post a photo of the long 9 on its carriage compared to the long 9 on the smaller one. It would be handy to see the difference, not just for me but others as well. I also need, in the near future, to plan the foc'stle and quarter deck bulkheads. Thanks. In the meantime I am getting on with the 18lb'ers and am getting to the point where I really want to get back to finishing the hull. I really expected to only take a couple of weeks away from the hull but it feels like months now. Now I am hoping to complete the the 28 carraiges for the 18s. I am hoping to get get back to the hull again sometime next week. I will post more photos once these carraiges are done. David.
-
I have posed this question on my build log but thought I would also try here. I will try to keep it simple. Basically I am stuck with the size of the carraiges required for the 9lb long cannons. I believe that all the dimensions of the barrel and carraige were determind by the bore. My problem is that the 9lb long barrels are too long for the carraiges I have. The ship I have taken on is HMS Diana which I believe would have carried the long 9's on the fore and quarter decks. Should the carraiges for these be larger than the standard 9lb carraige. I've searched online for a couple of evenings and have had no luck with this. Any help would be really appreciated. Thanks. David.
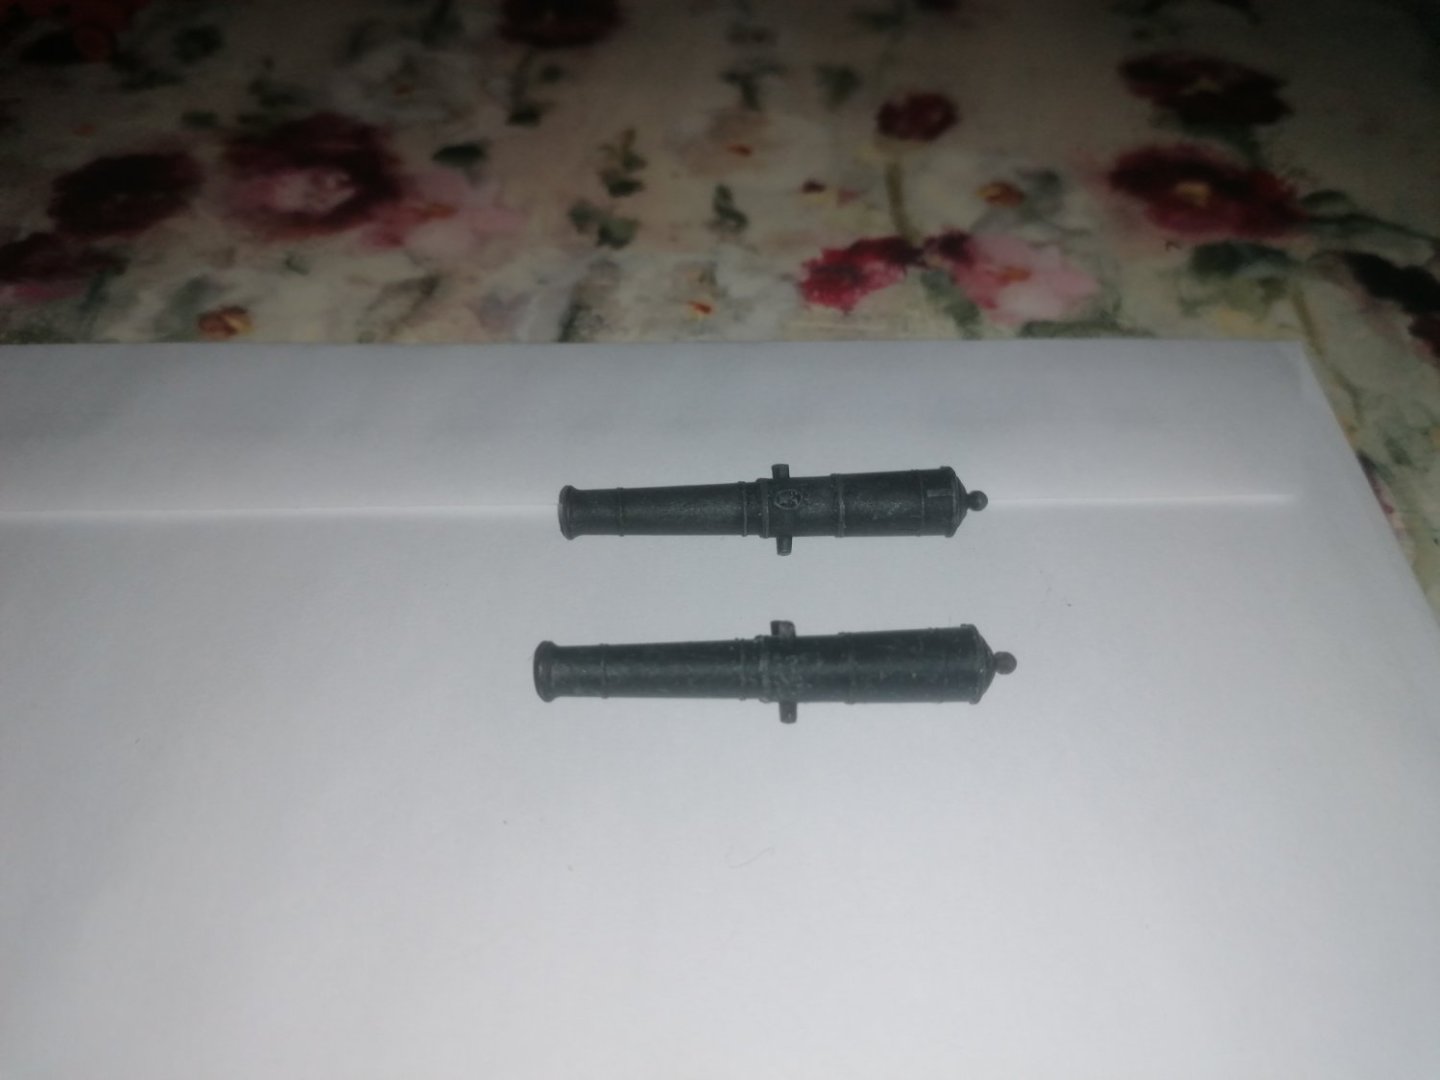
-
Unfortunately, progress has been extremly slow over the past couple of weeks. I have made up the quoines for the 18lb'ers and made extra for the 9lb'ers. I knew they would be too large, but, thought I could shape them to fit. Having tried shaping one as small as possible I found it was still way too big. I also found that the 9lb long cannon barrel is way too long for the carraige. While researching cannons and carraiges for the San Fransisco II, I remebered that all the measurements for the cannons and carraiges are calculated from the size of the cannon ball, (ie the cannon ball determines the width of the bore, this determines the width and length of the cannon which in turn determines all of the measurements of the carraige, length, width, height, position of the trunnion ans well as the size of the trucks. I have spent the last couple of evenings trying to search if the carraiges for the long 9lb'ers should be larger than for the shorter barrels, but to no avail. I maybe overthinking this but, as I will probably have quite a few things that aren't quite right with this build in the end, but I would at least like the cannons looking correct. From what I have found the carraiges I have are the correct size for the 18lb'ers and also the 9lb'ers with shorter barrels, but the long barrels are too long for the carraiges. As these barrels are actually longer than the 18lb cannons, should the carraiges for them be a little larger than the 18lb ones or just a little longer but about the same height. In the mean time I will finnish the 18lb'ers and hope for some help with this from the experts among you. I've attached two photos which I hope will highlight the problem. The uppermost gun is the 18lb cannon with it's carraige, the 3 below from left to right are the long 9lb'er on the 18lb carraige, the same on the 9lb carraige and on the right, again the same barrel on a previously bought carraige which is about the same length as the 18lb carraige but a little lower. This last one would require a lot of work to match the quality of the ones I have never mind drilling identically drilled holes for the eyepins. The trunnions on the last two also extend beyond the sides of the carraiges, another problem. Any help with this would be really appreciated. thanks. David.


-
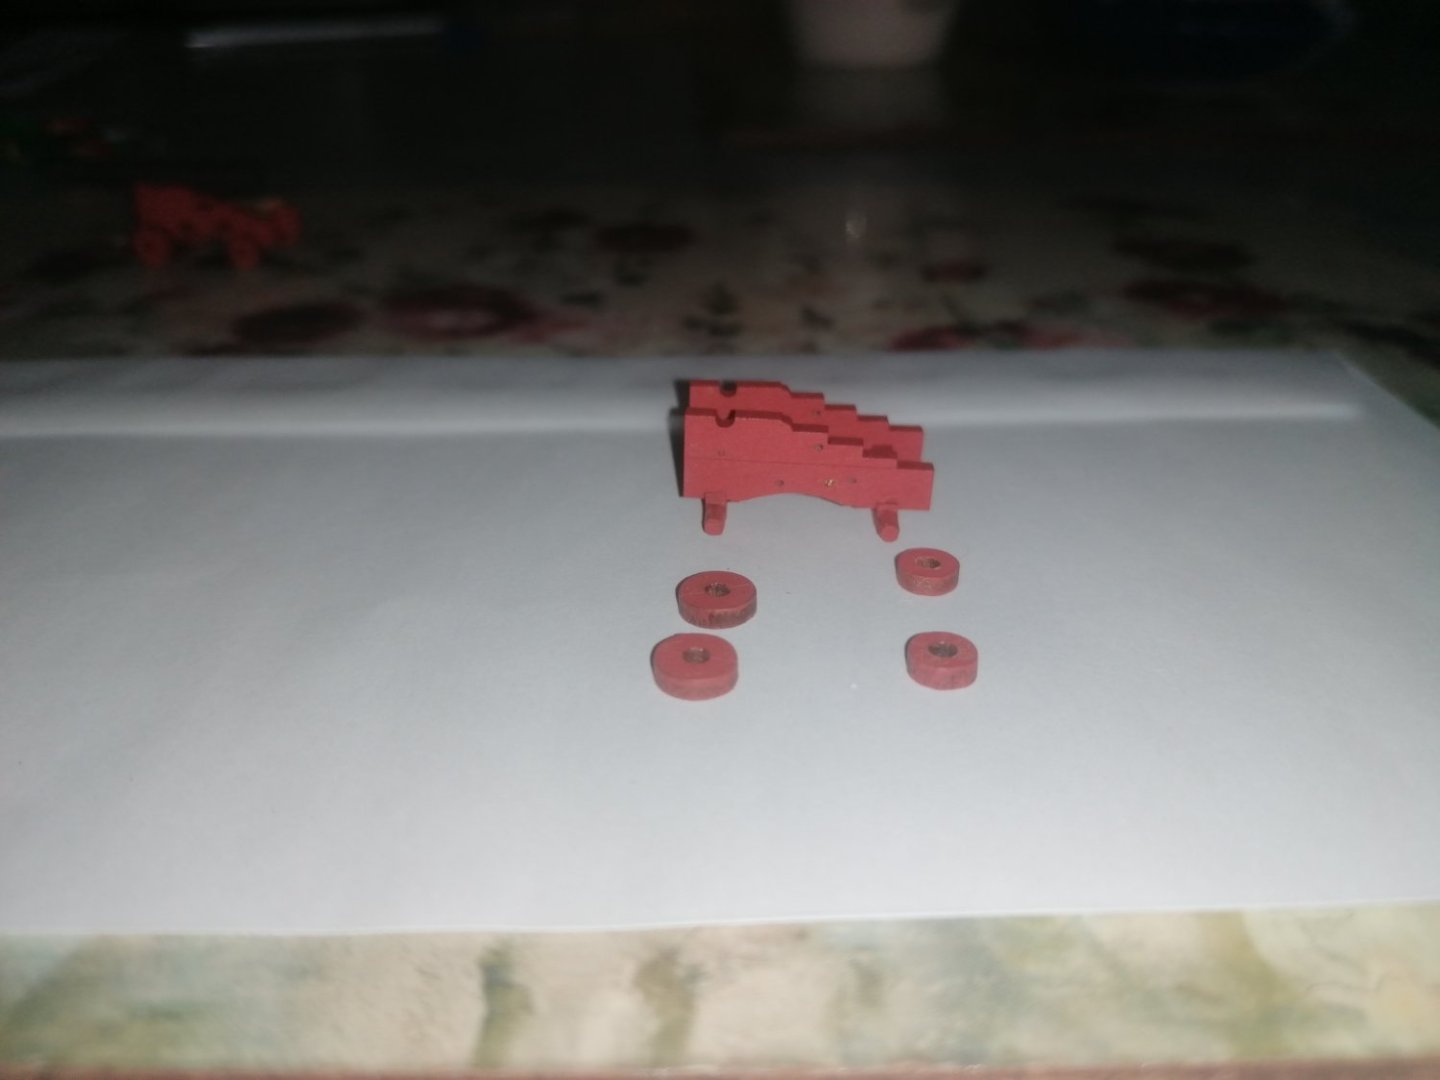
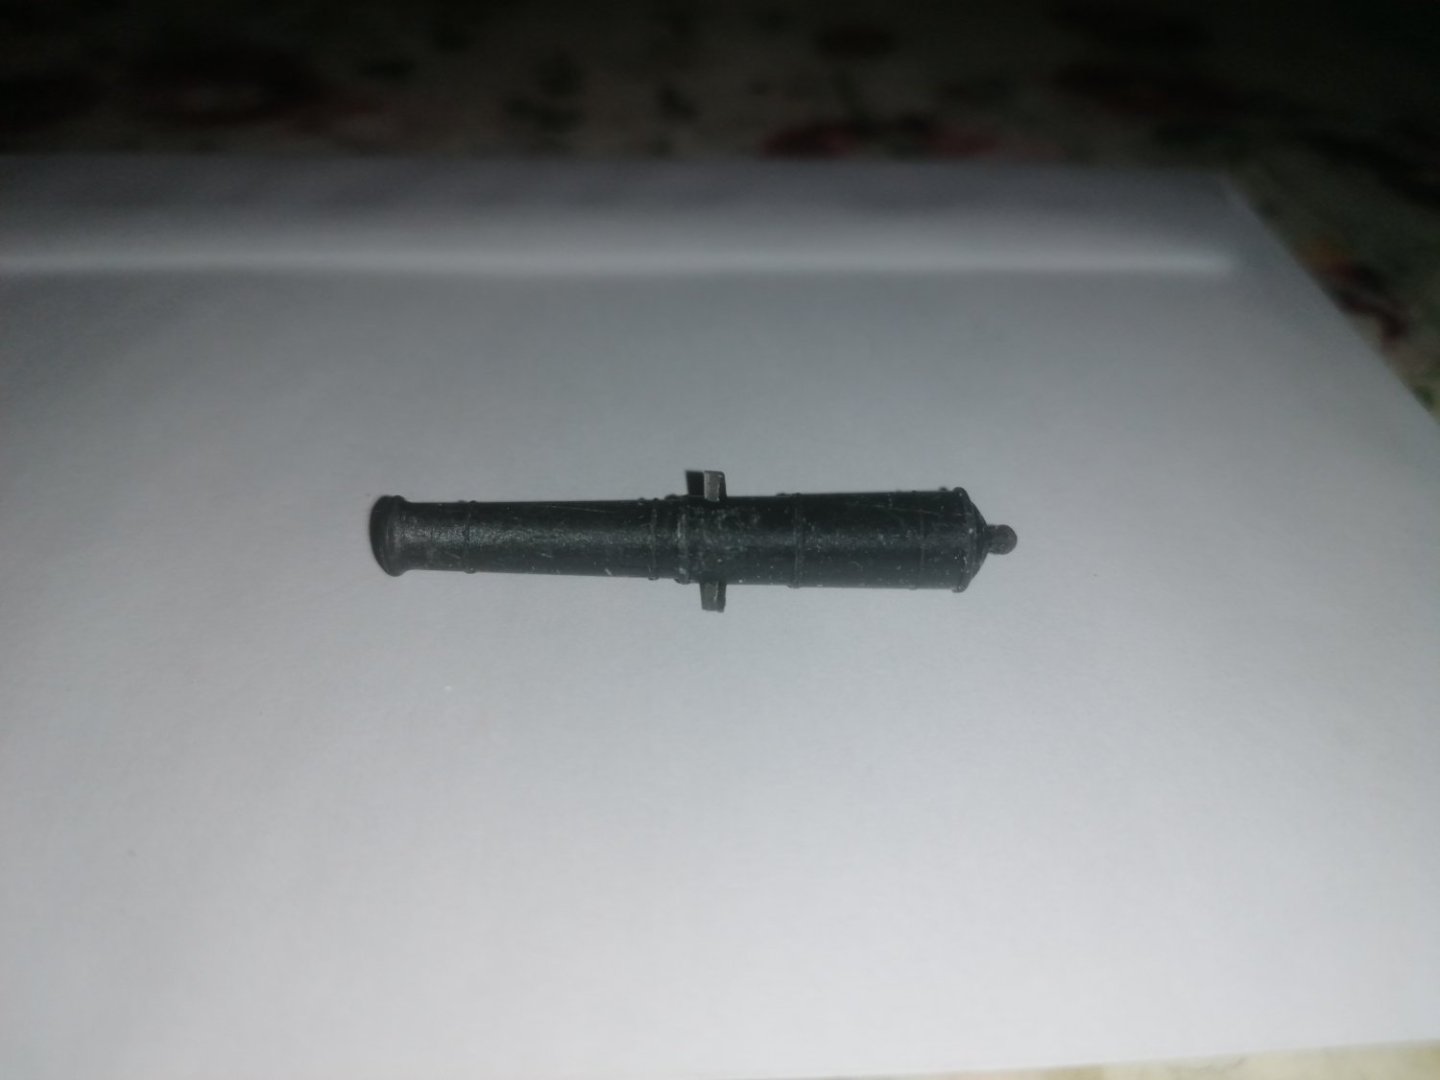
While I decide how to progress with the hull, I have started construction of the 18lb guns. I started painting the cannons first with vallejo matt black as a base and then dry brushed tyre black followed by a mix of enamel dark grey and matt black to highlight the details. I am pretty happy with the final look of these.The carraiges, as previously mentioned look great, and easy to put together. To begin with I only started assembling one of the carraiges as a prototype. I found I needed to drill the 3 holes on each side for the pins to fit into a little larger. I then built up the carraige as per instructions. I used very little pva glue at first to avoid any excess oozing out when clamping the pieces together but, however, the bond wasn't strong enough so I resorted to a litte super glue applied with a tooth pick to the joints. This worked much better. With the sides and axles glued the assembly was painted red. Next I stuck the eyepins into a block of balsa wood and painted them black. These were then glued into place. I also added the qoine bed support with a section of a long eye pin that just happenned to fit into the hole, and coincidentaly, I have enough for all 38 carraiges. With the barrels and carraiges painted I started on the capheads which, after scraping off the glue, straightening and removing the burr from the ends, wasn't as hard as it looked. I then pinned 2 of these down onto the balsa block and painted the black. With this done I test fitted the barrel onto the carraige and realised the qoines supplied were too low and the wrong shape for my needs. After several failed attempts at making the qoines and particularly the beds for them to sit on I compromised and did without the lip on either side of the bed and just used a 1 by 6mm strip of beech cut 11mm long. I then added the qoine on top with a 1mm belaying pin from a previous kit (that was from a wasn't used but may come in handy one day box). God I've got so many of those!!! Anyway here's photos of the cannon. Hopefully it looks pretty decent although a little touching up and highlighting is still required especially the trucks.