Desert_Sailor
-
Posts
93 -
Joined
-
Last visited
Recent Profile Visitors
784 profile views


-
 Ian_Grant reacted to a post in a topic:
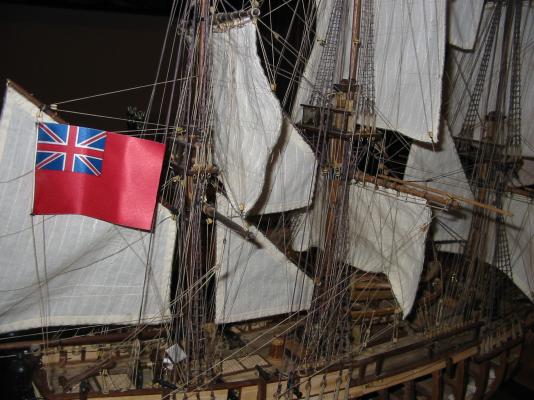
HMS Surprise, kit.
Ian_Grant reacted to a post in a topic:
HMS Surprise, kit.
-
ruben_dominguez reacted to a post in a topic:
What does everybody think of this model?
-
Fright reacted to a post in a topic:
U.S. Flag Decals
-
Grendel reacted to a post in a topic:
Artesania Latina HMS Bounty questions
-
Jaxboat reacted to a post in a topic:
HMS Surprise, kit.
-
ScottRC reacted to a post in a topic:
HMS Surprise, kit.
-
ScottRC reacted to a post in a topic:
HMS Surprise, kit.
-
mtaylor reacted to a post in a topic:
U.S. Flag Decals
-
Here's what I've done... 1) Use Google Images to find a .JPEG of the flag you want.. 2) Transfer the image into a Word file.. 3) Adjust the size of the image to accommodate the desired scale. 4) Create the mirror image using Word tools 5) Print either on decal paper or regular paper.. 6a) if decal paper, soak and slide then fold at symmetry line.. 6b) if regular paper, cut out, scrape non print side to get a "wavy" look" then apply a very light wash of white glue to the non-printed side, fold over on symmetry line 7) attach to halyard works every time, you get the exact flag ( size) you want and costs practically nothing.. good luck fold images to creat the two sided flag.. Works ever
-

What does everybody think of this model?
Desert_Sailor replied to Elijah's topic in Wood ship model kits
Unfortunately, I do not.. But I'll be glad to answer any questions, if you have any.. -
What does everybody think of this model?
Desert_Sailor replied to Elijah's topic in Wood ship model kits
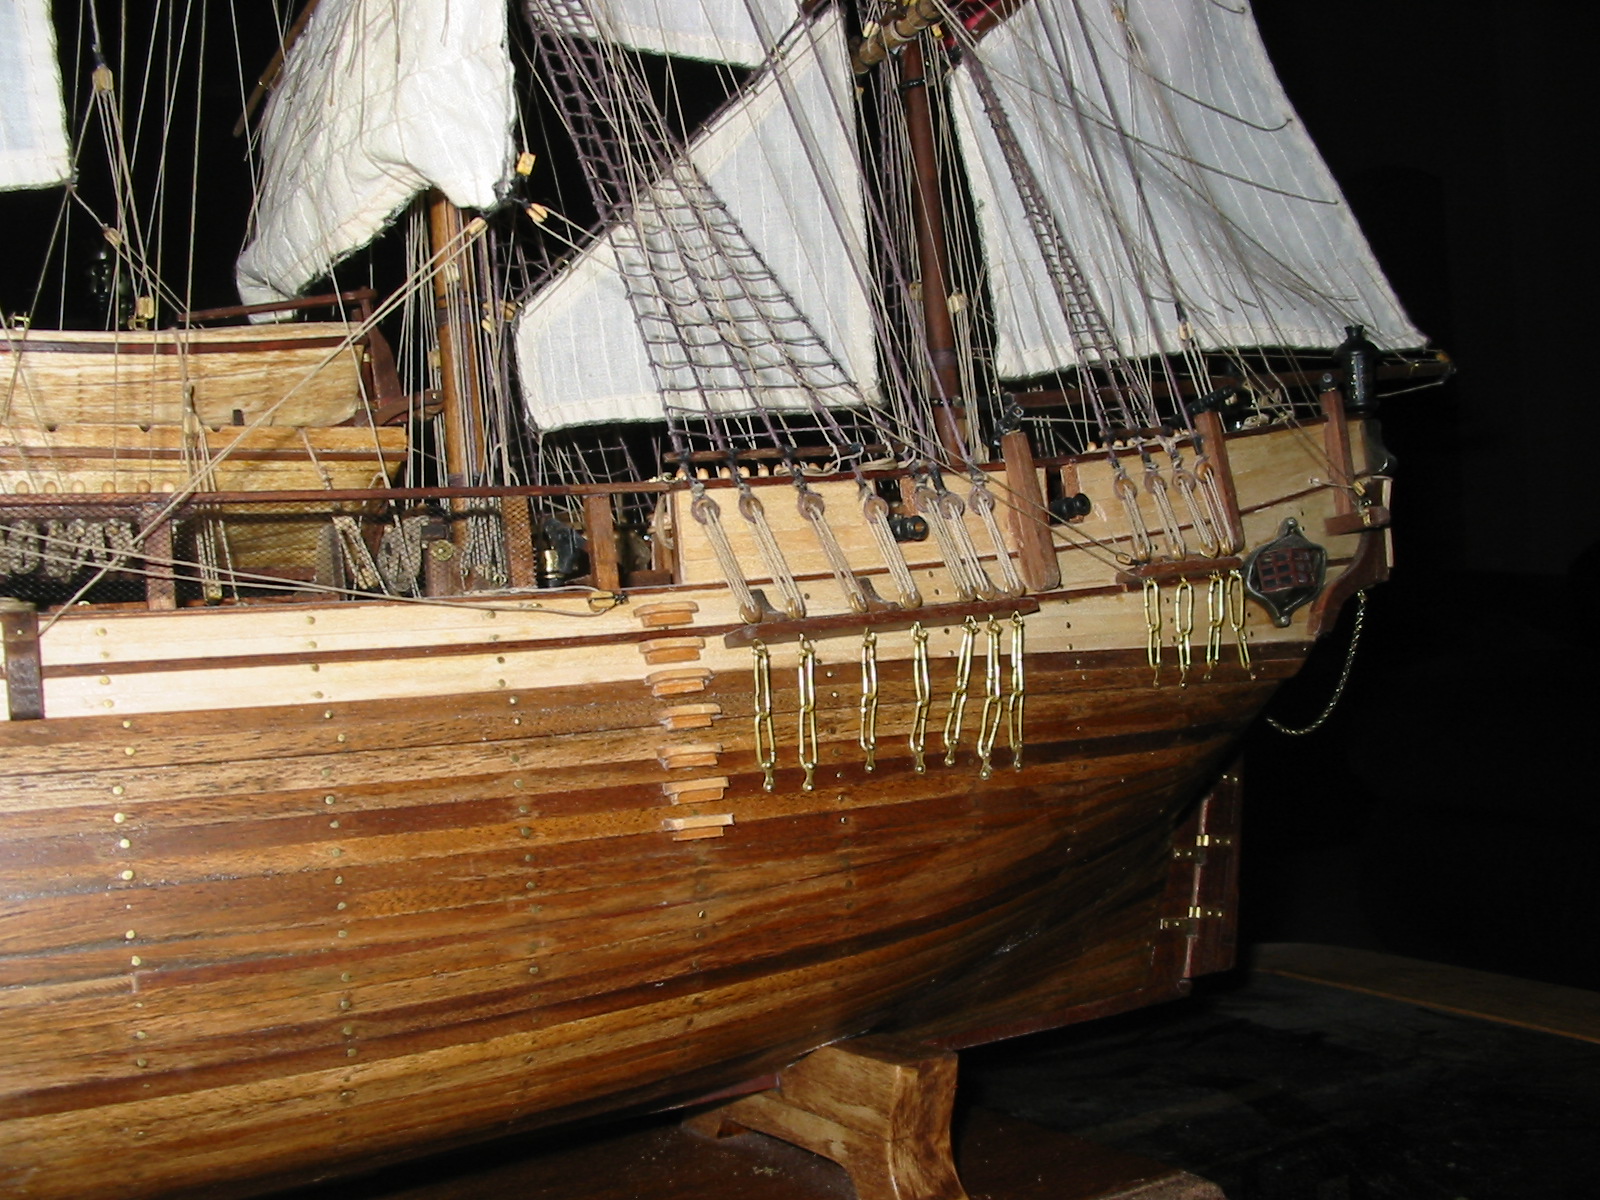
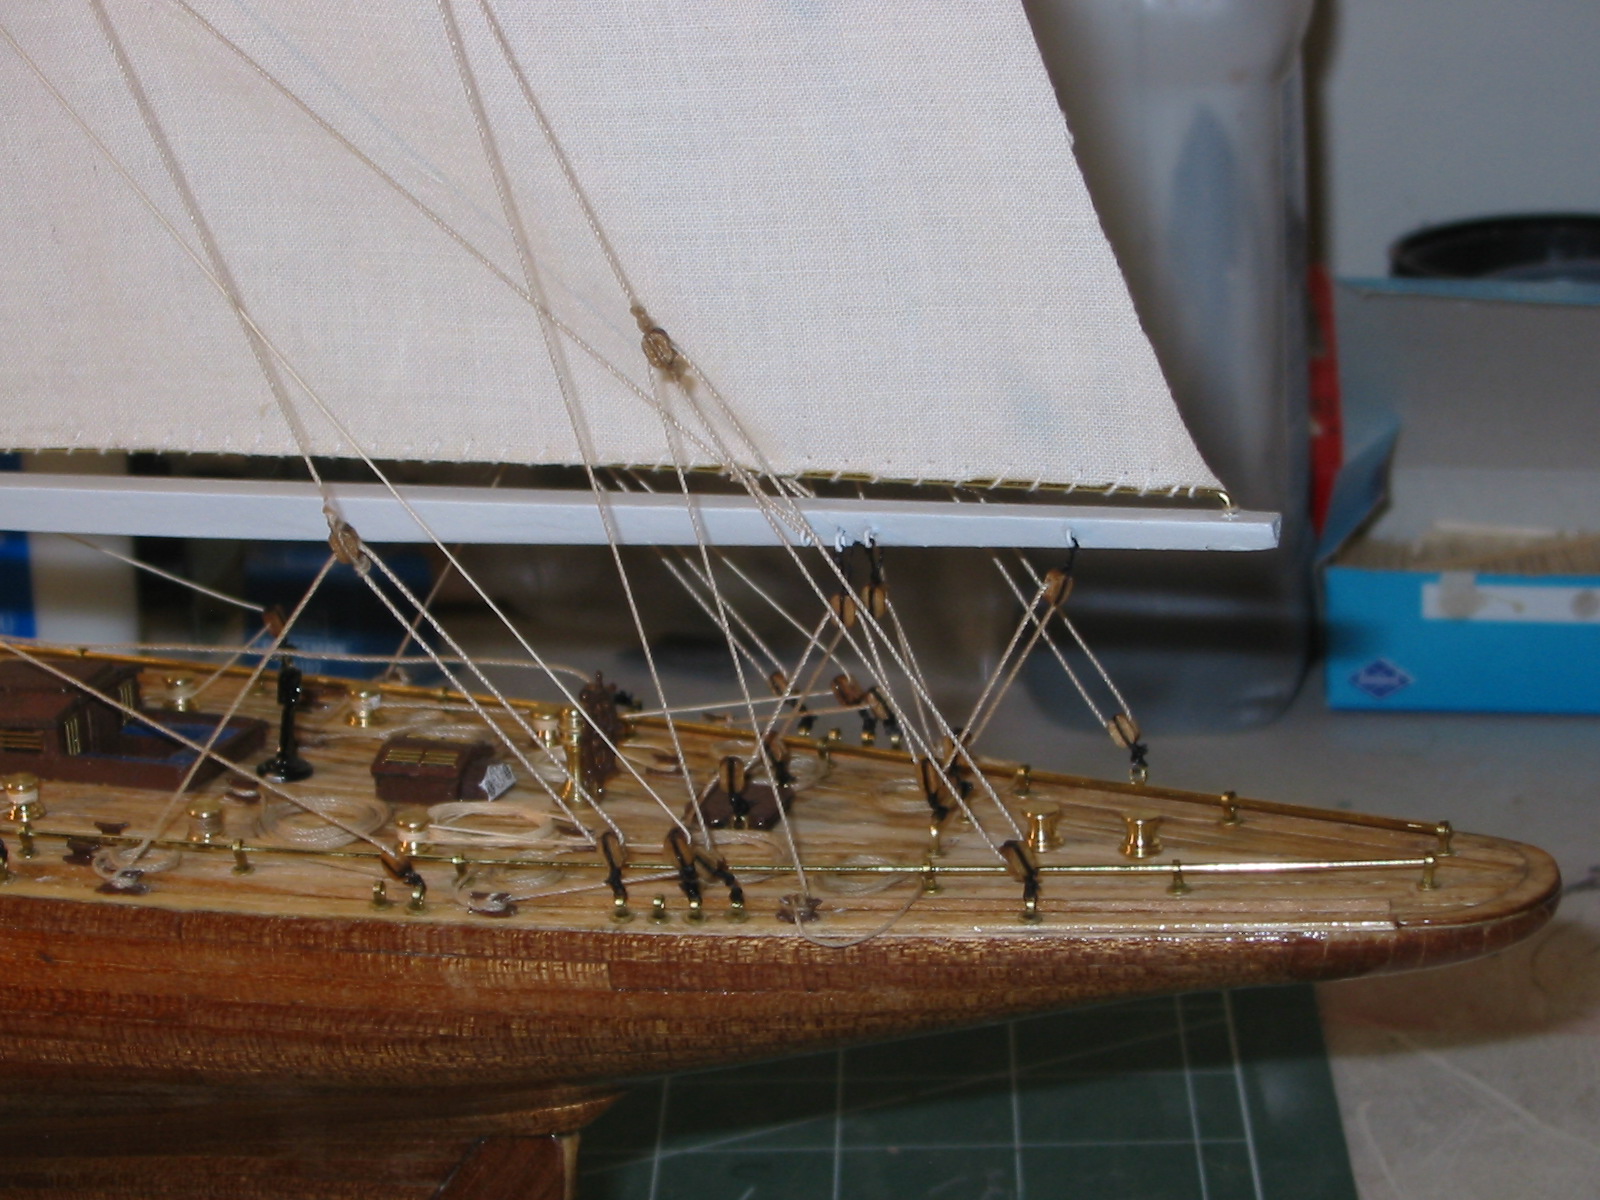
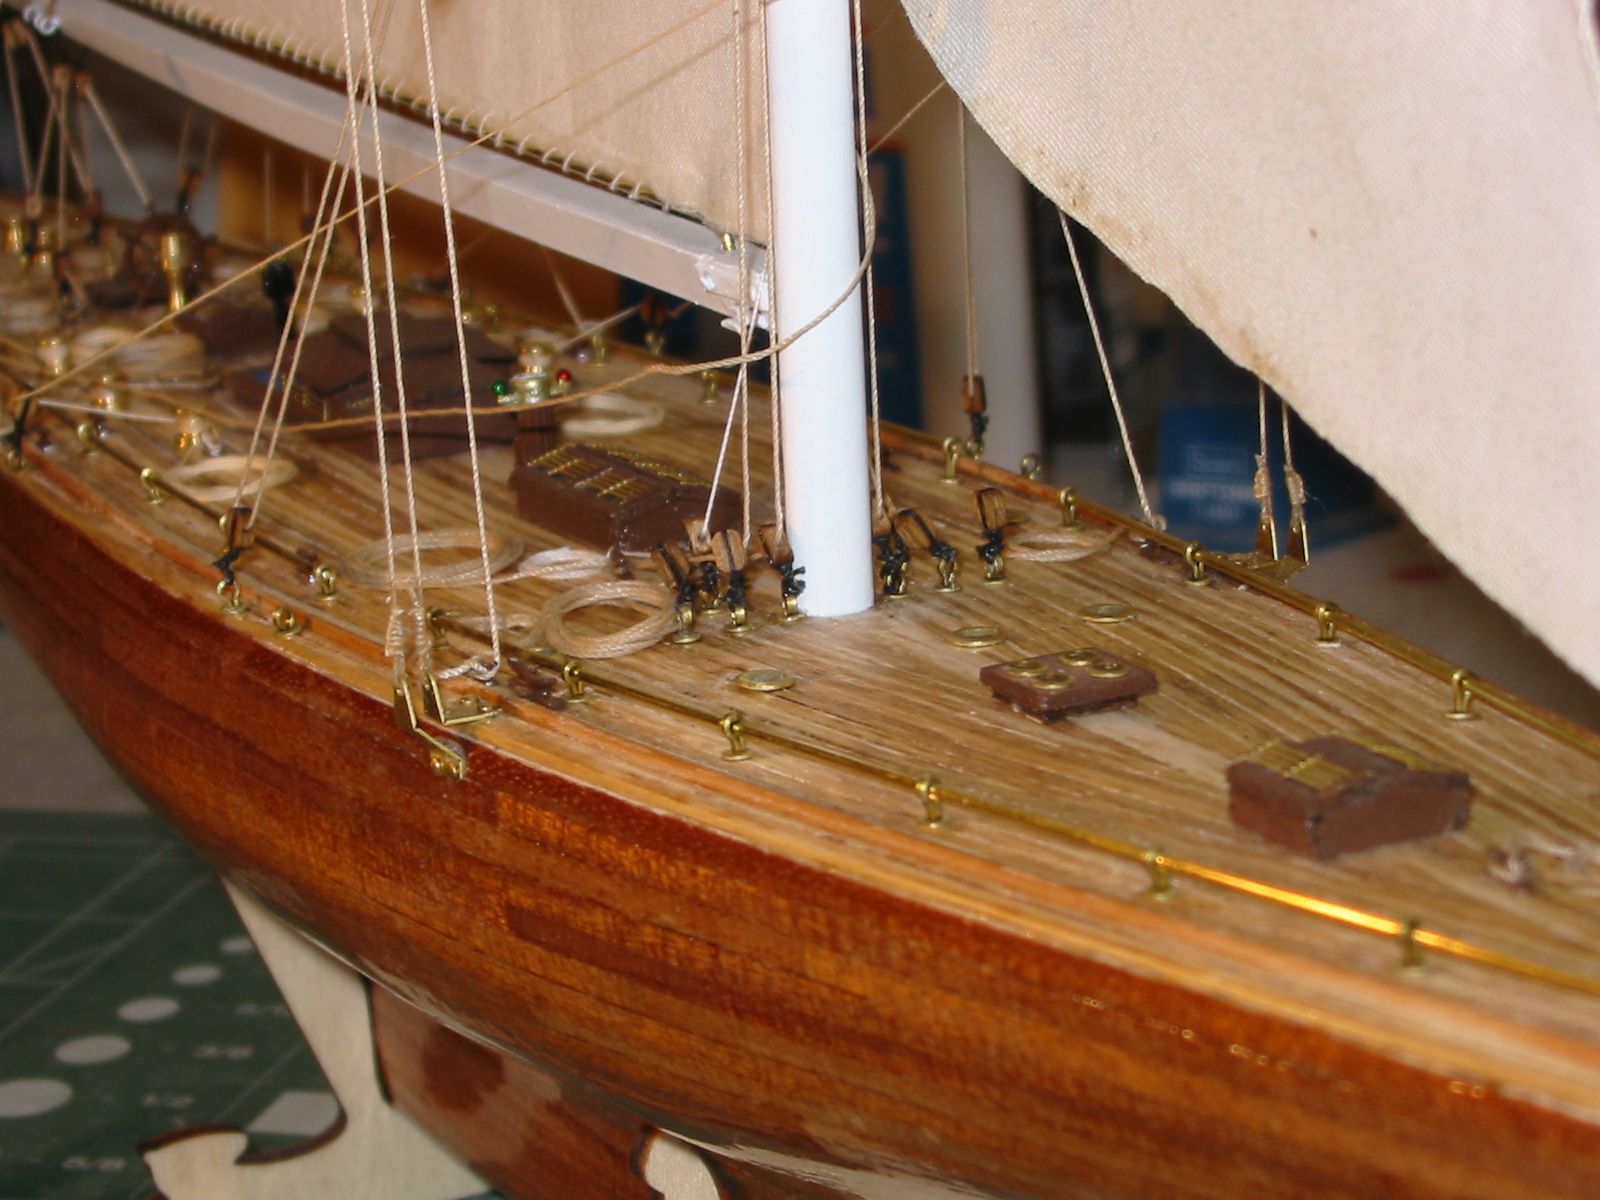
I had fun with it. Took about 6 months. Probably the hardest part was aligning and drilling out the scuppers(?) those oval portals just below the gun ports..


-
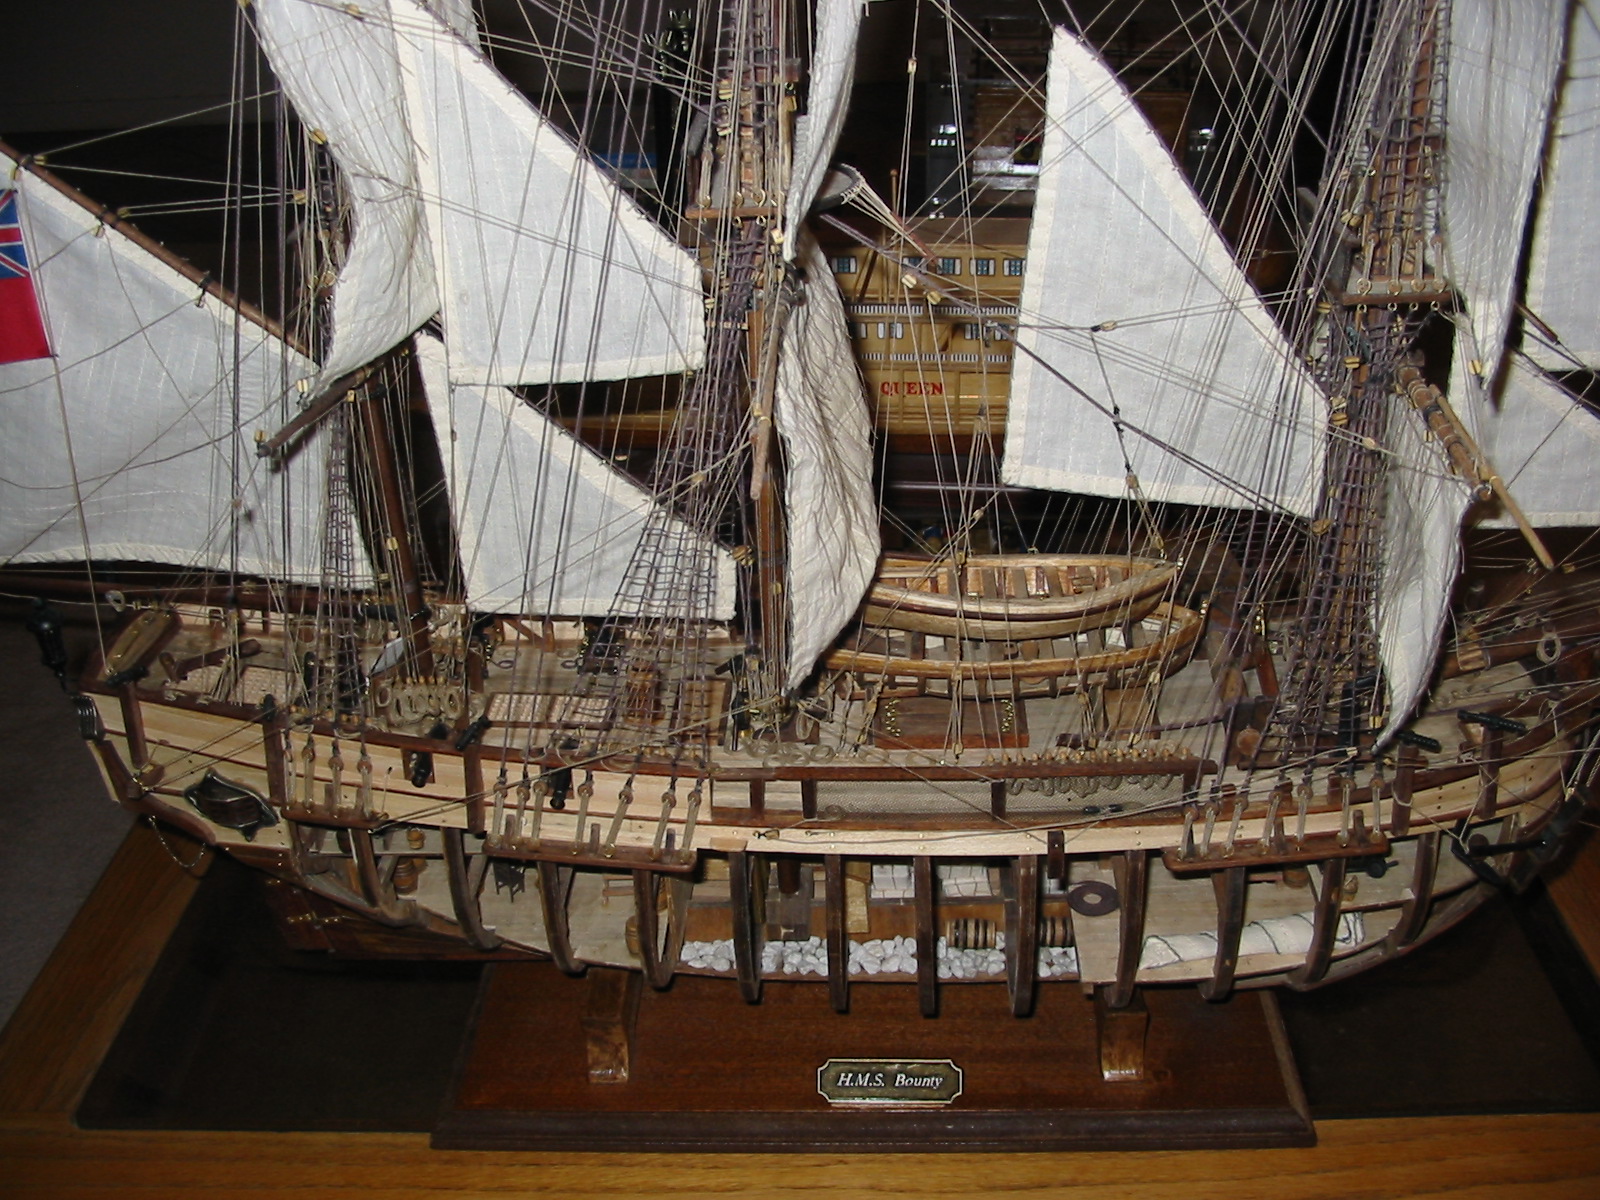
Here are my only two pix of the finished bowsprit.. I tried to follow the supplied plans and it wasn't easy. Not sure of the accuracy to the REAL Bounty.. but it looked OK to me when done If you have any other q's, just ask...

-
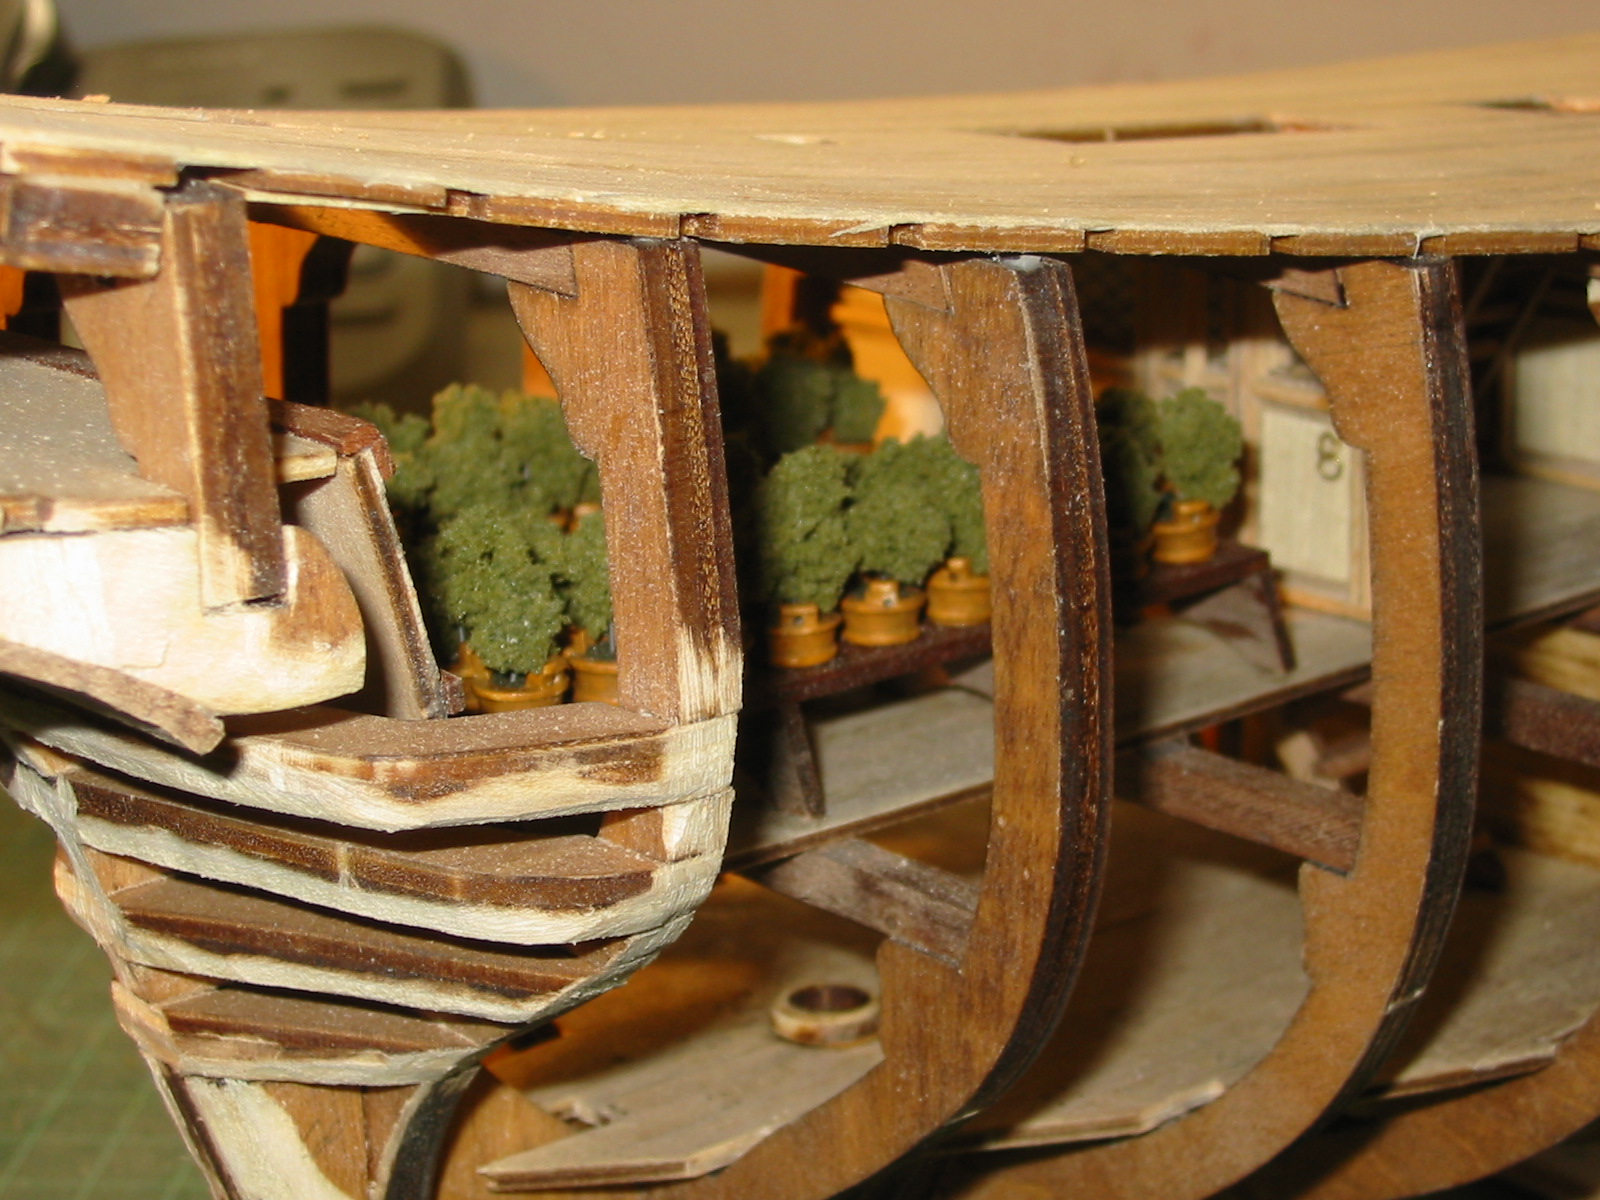
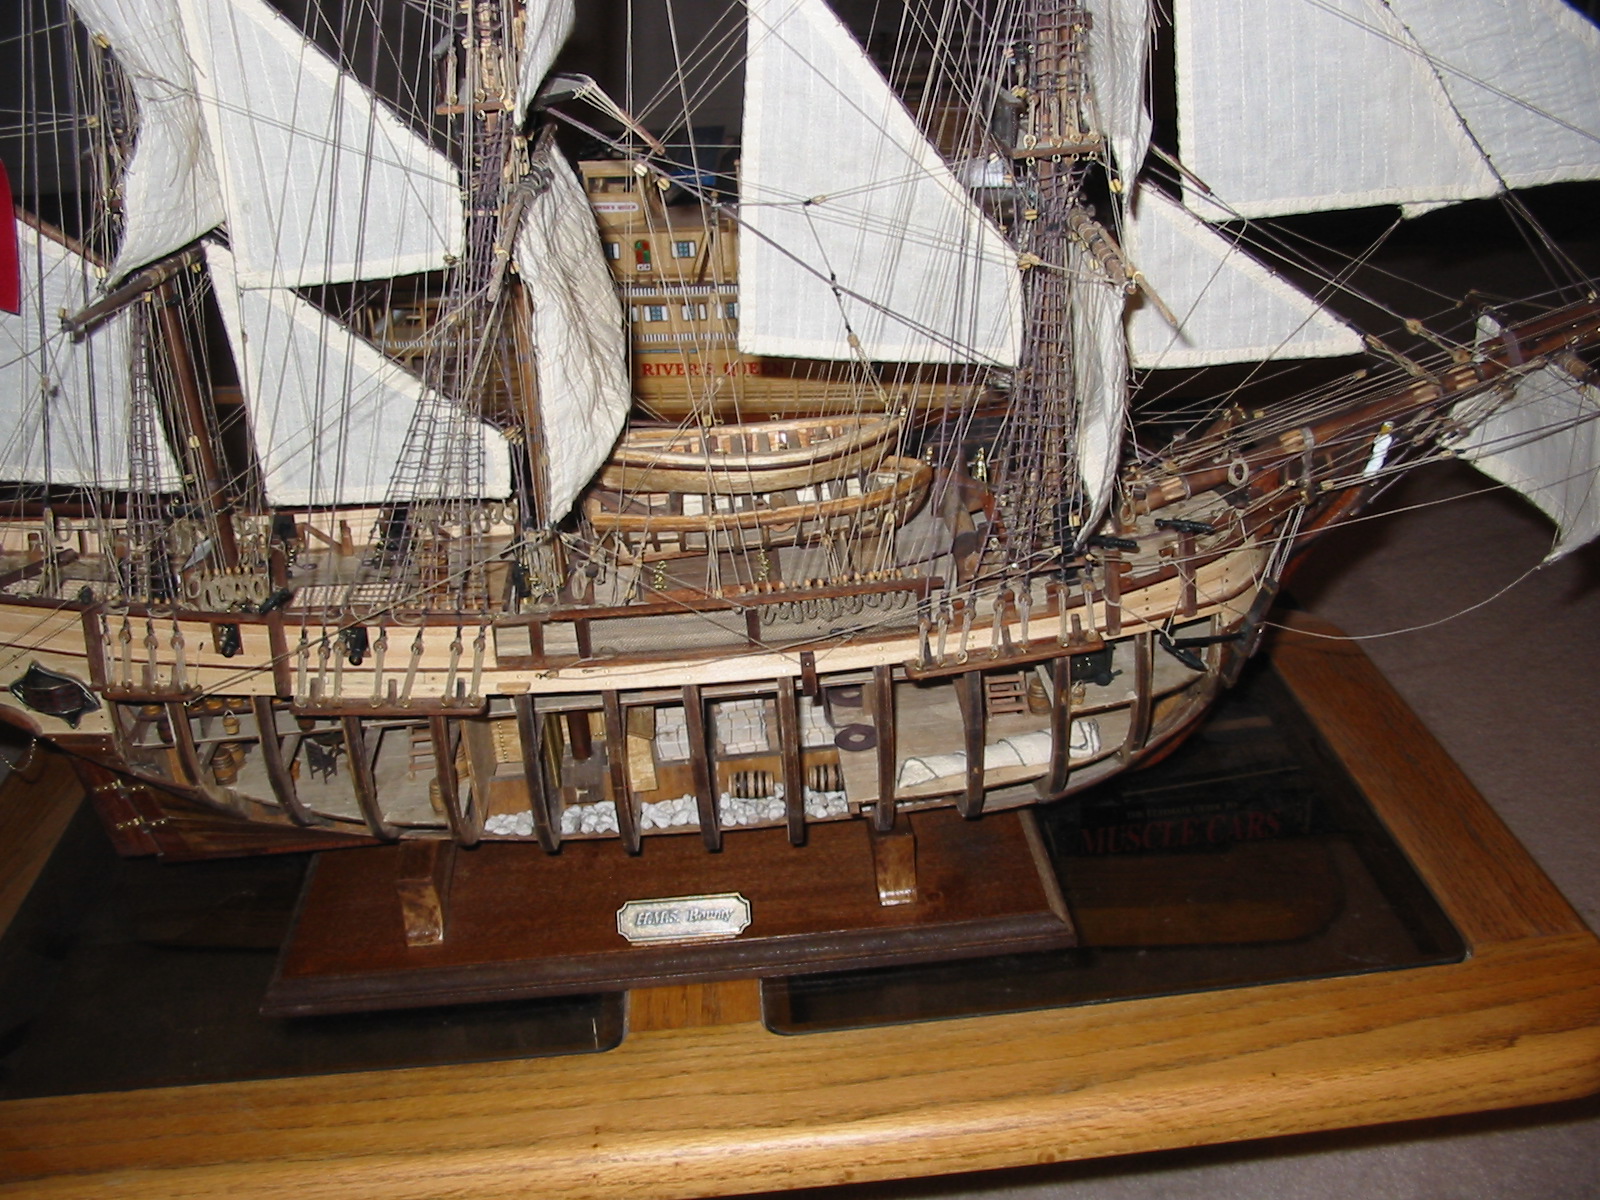
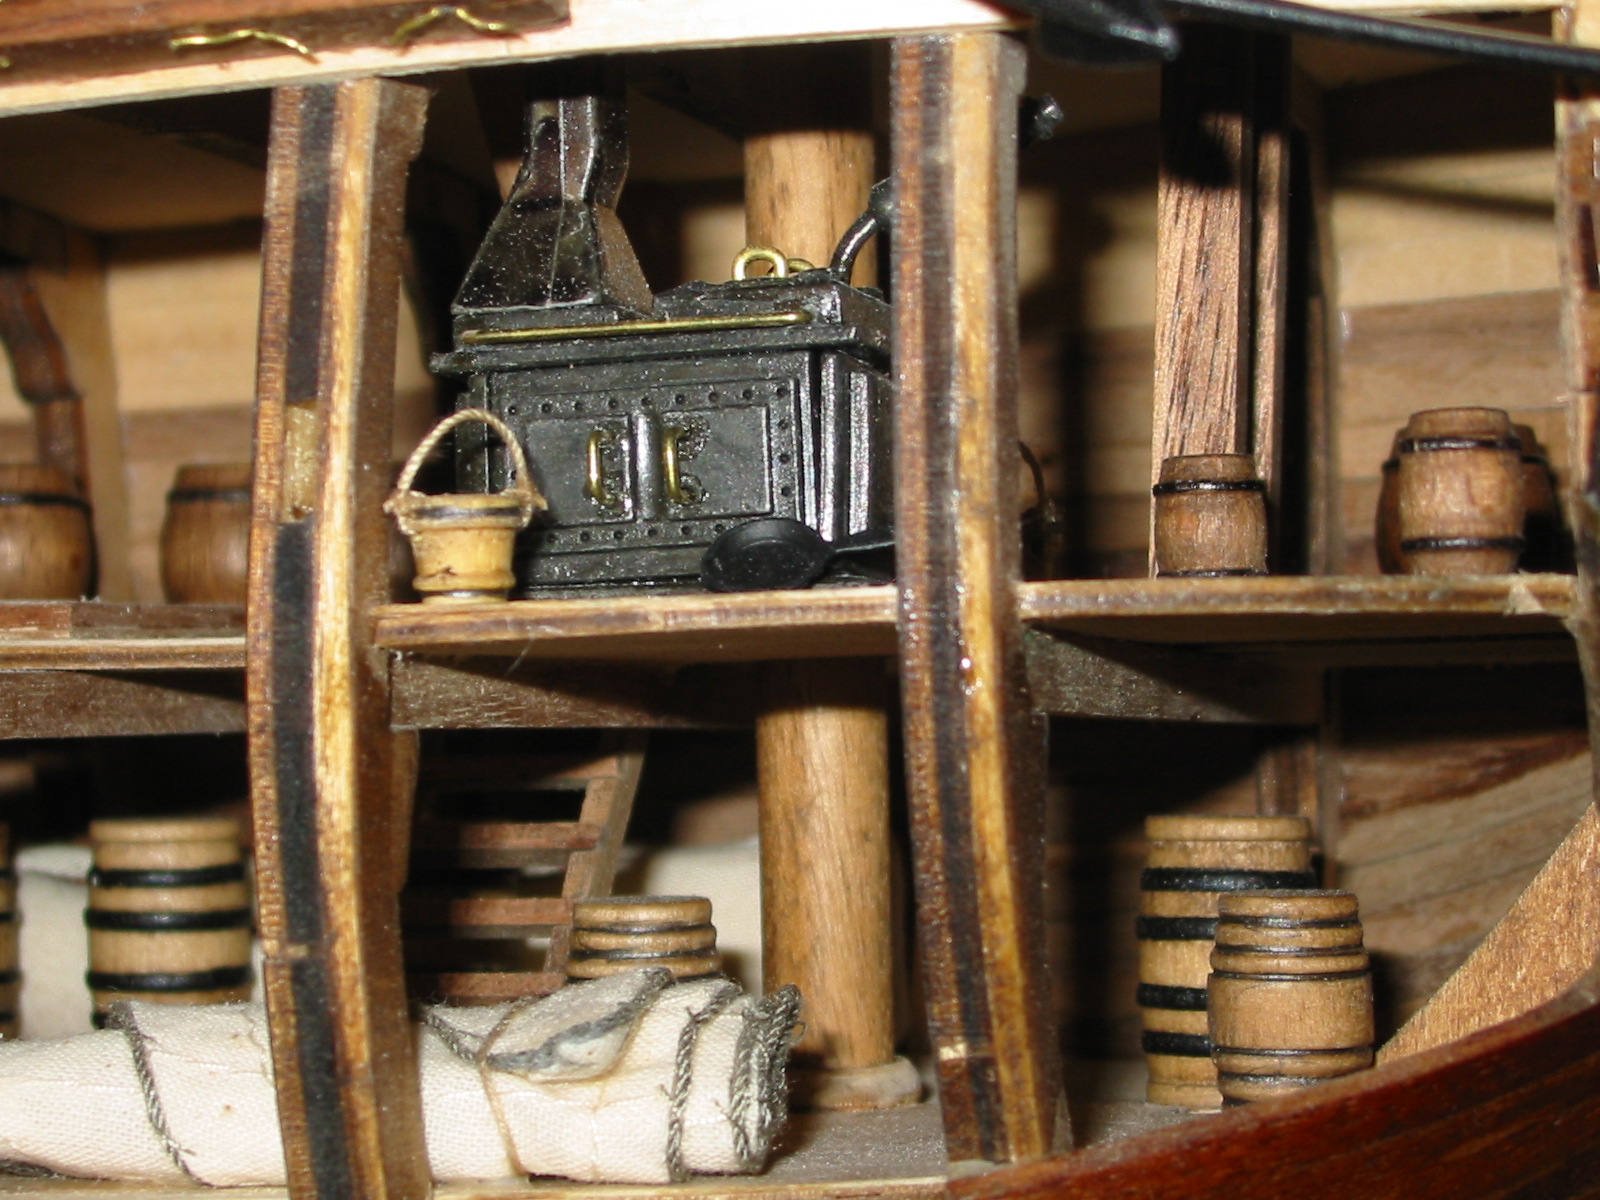
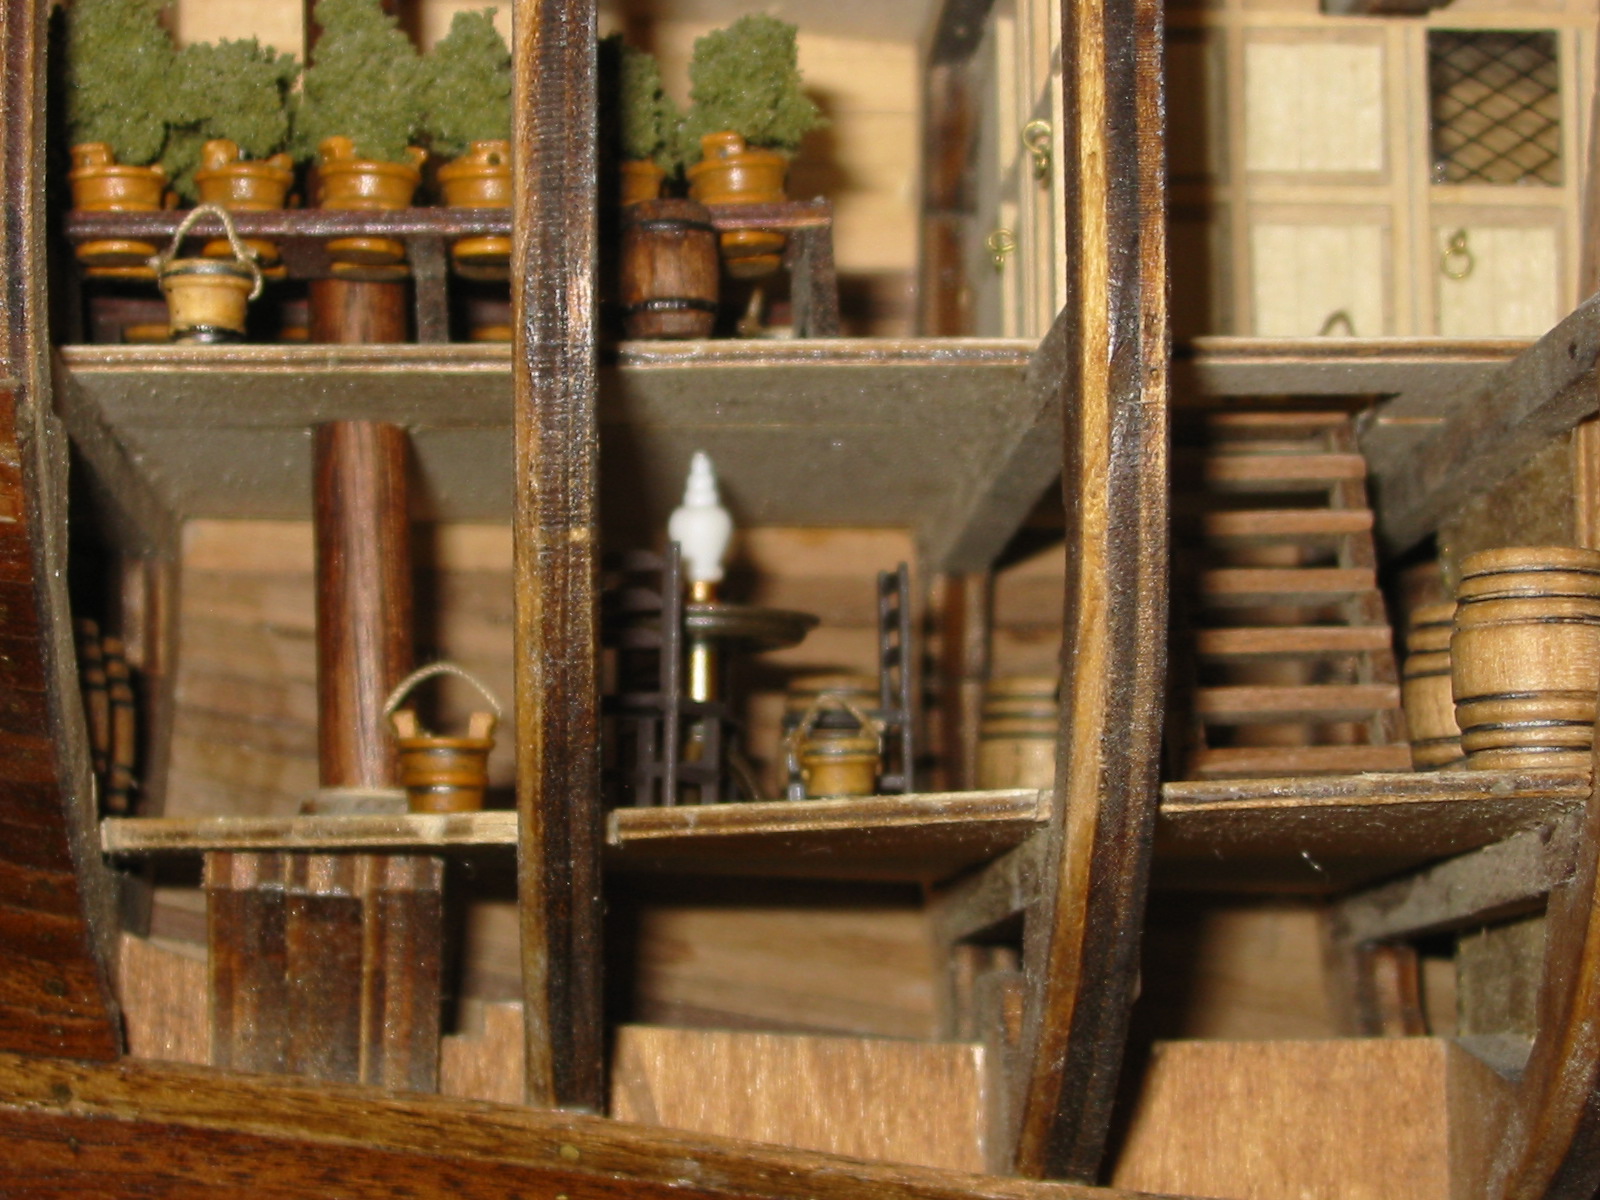
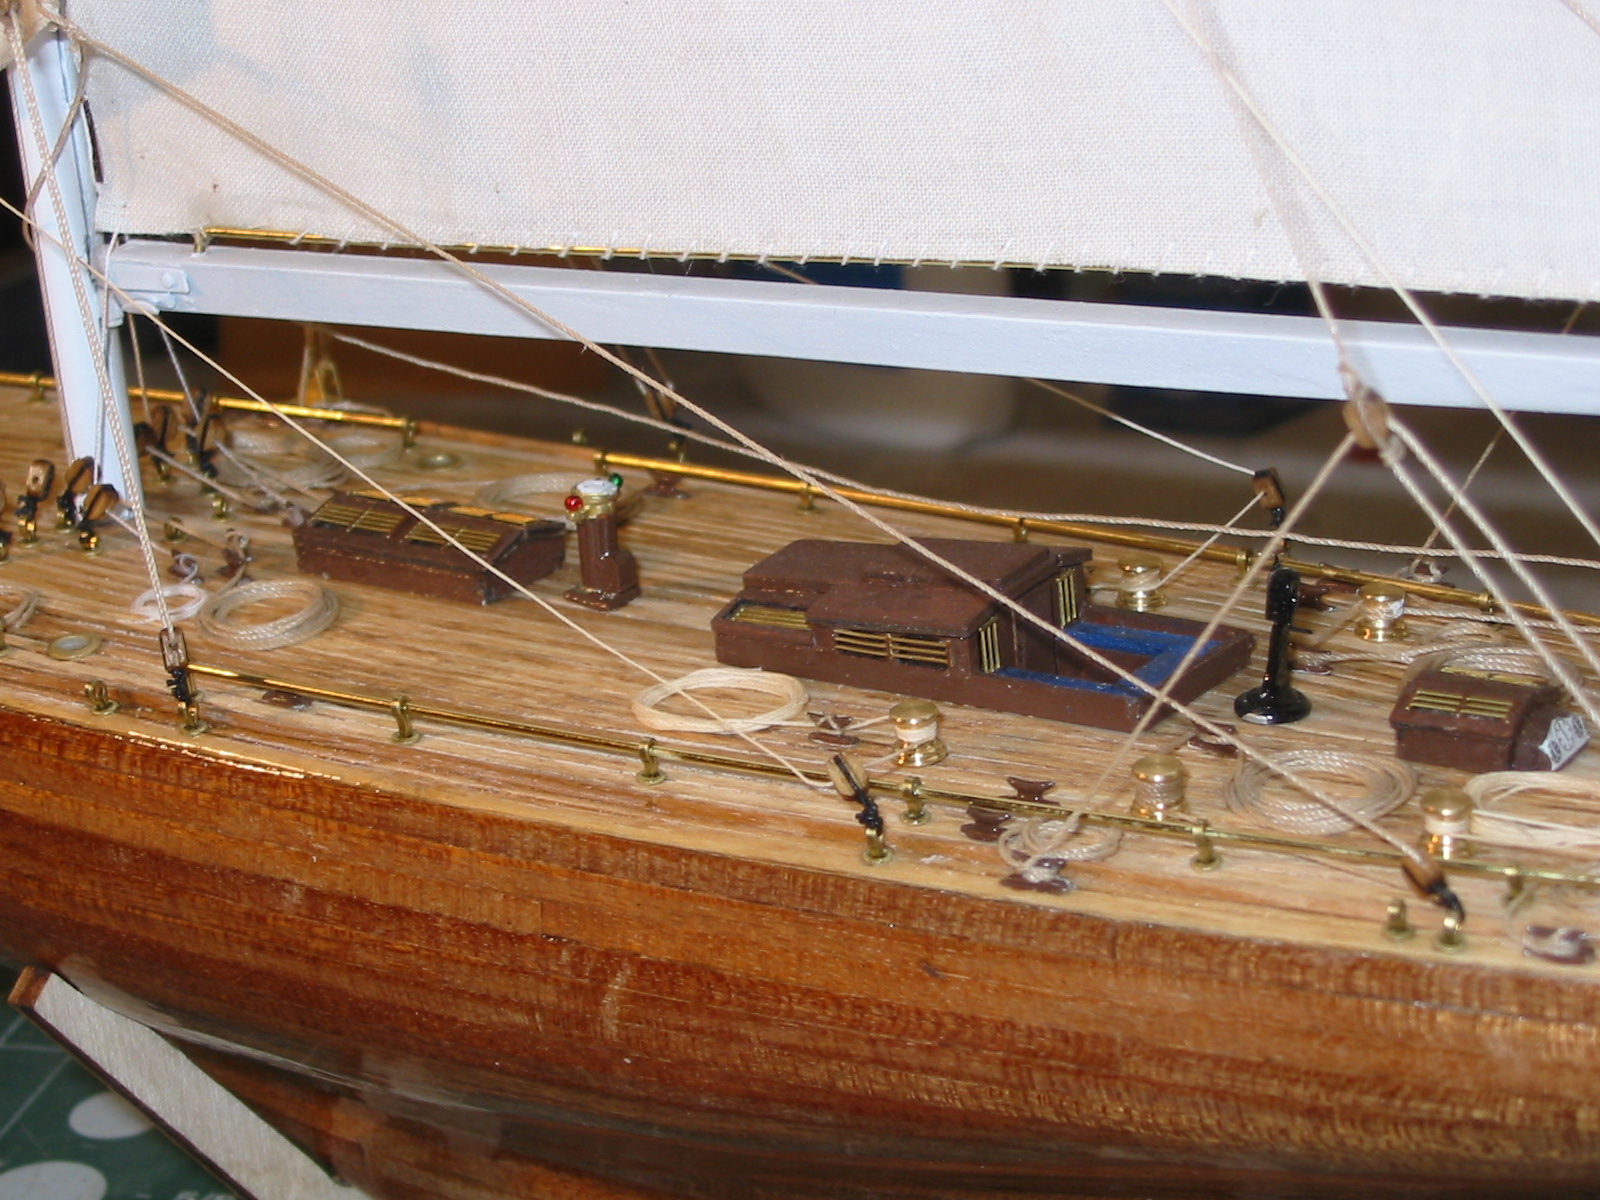
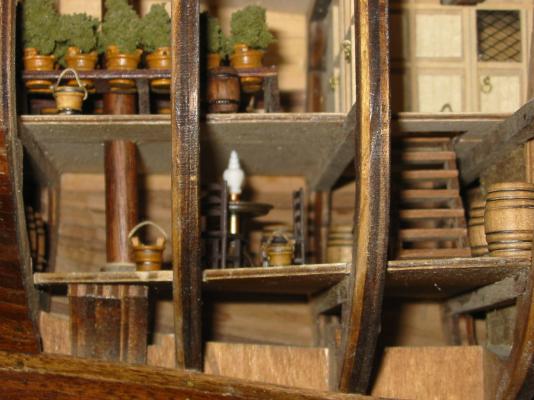
Thanks I call this my sea going "doll house." In fact, I got a number of the interior furniture details (i.e. tables, lamps, chairs..) from a doll house store... The rock ballast came from my LHS which has a large stock of model train supplies. The extra casks came from Model Expo May not be the most accurate Bounty, but it was fun to build and that's what counts!! The breadfruit plants could have been more accurate but what do I know of botany? Given the beauty of the wood I couldn't bear to paint the hull.. and my work space hasn't been that clean since.....


-
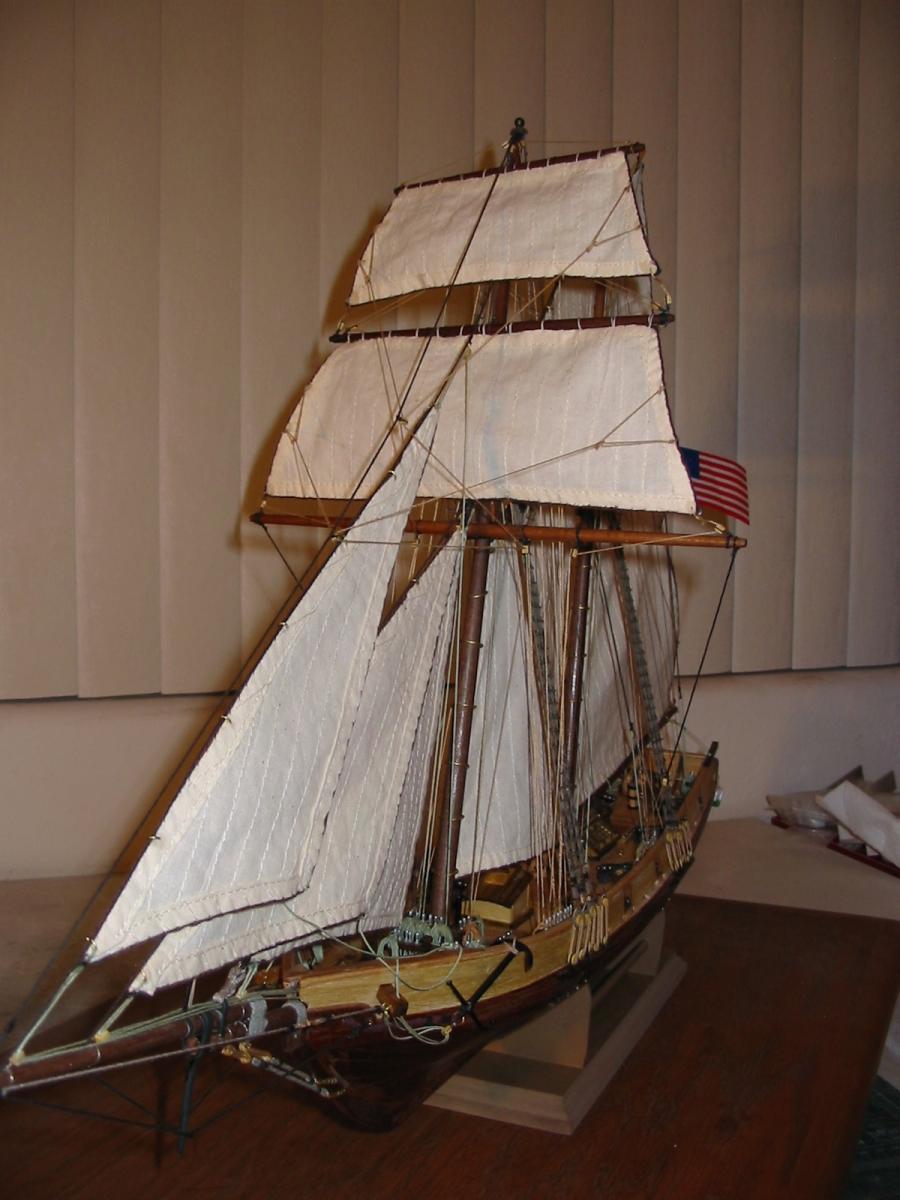
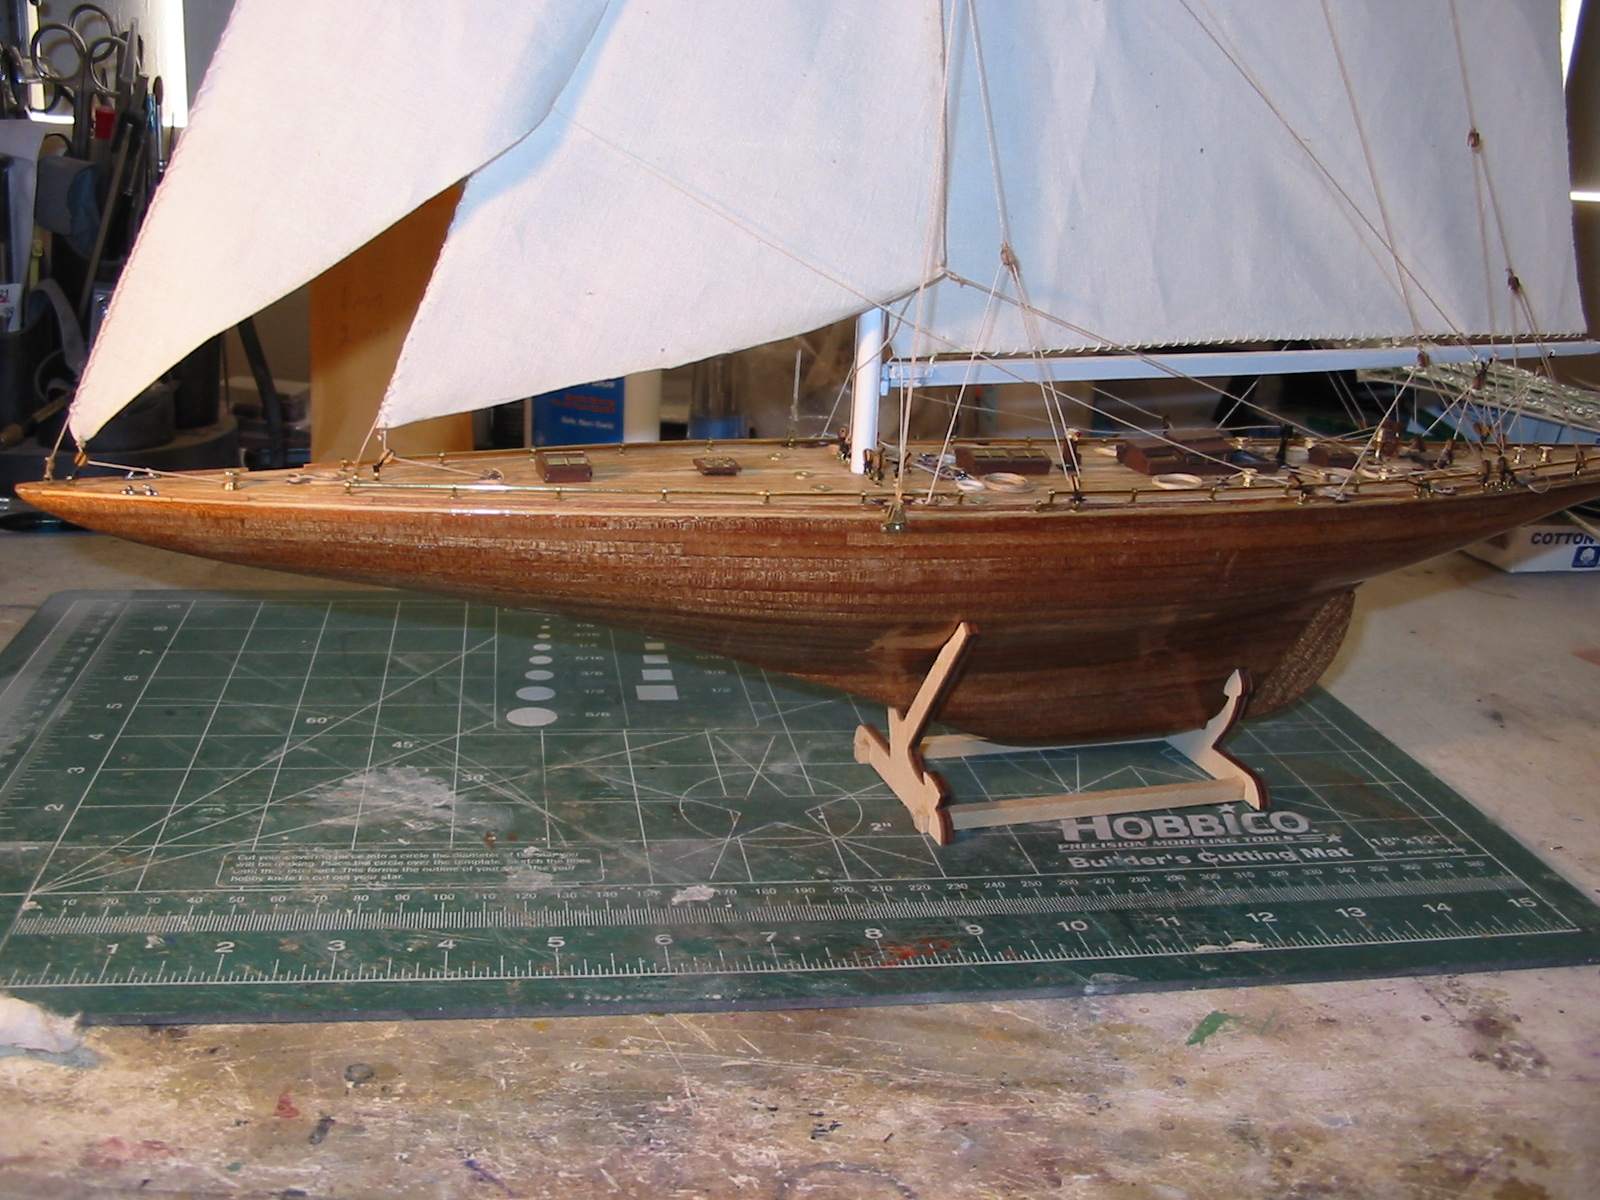
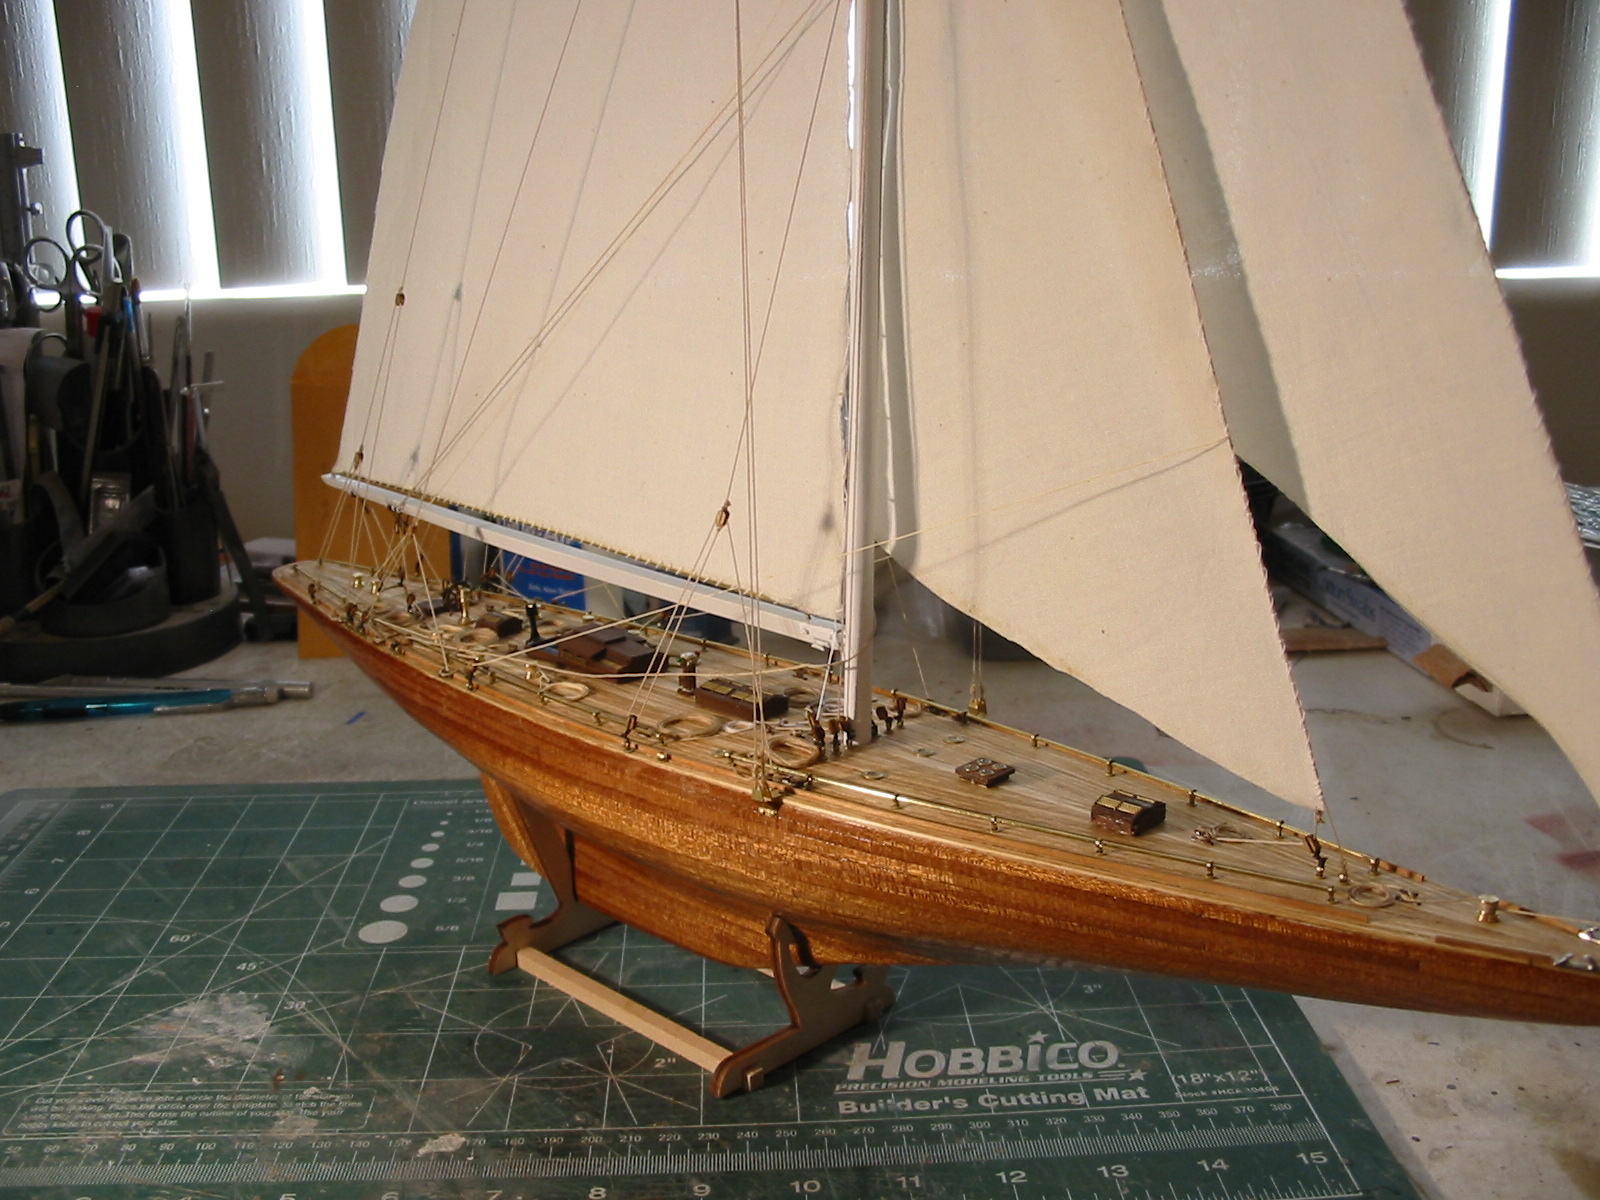
Here's how mine turned out... about 10 months in the making I have more pix if people are interested... DS


-
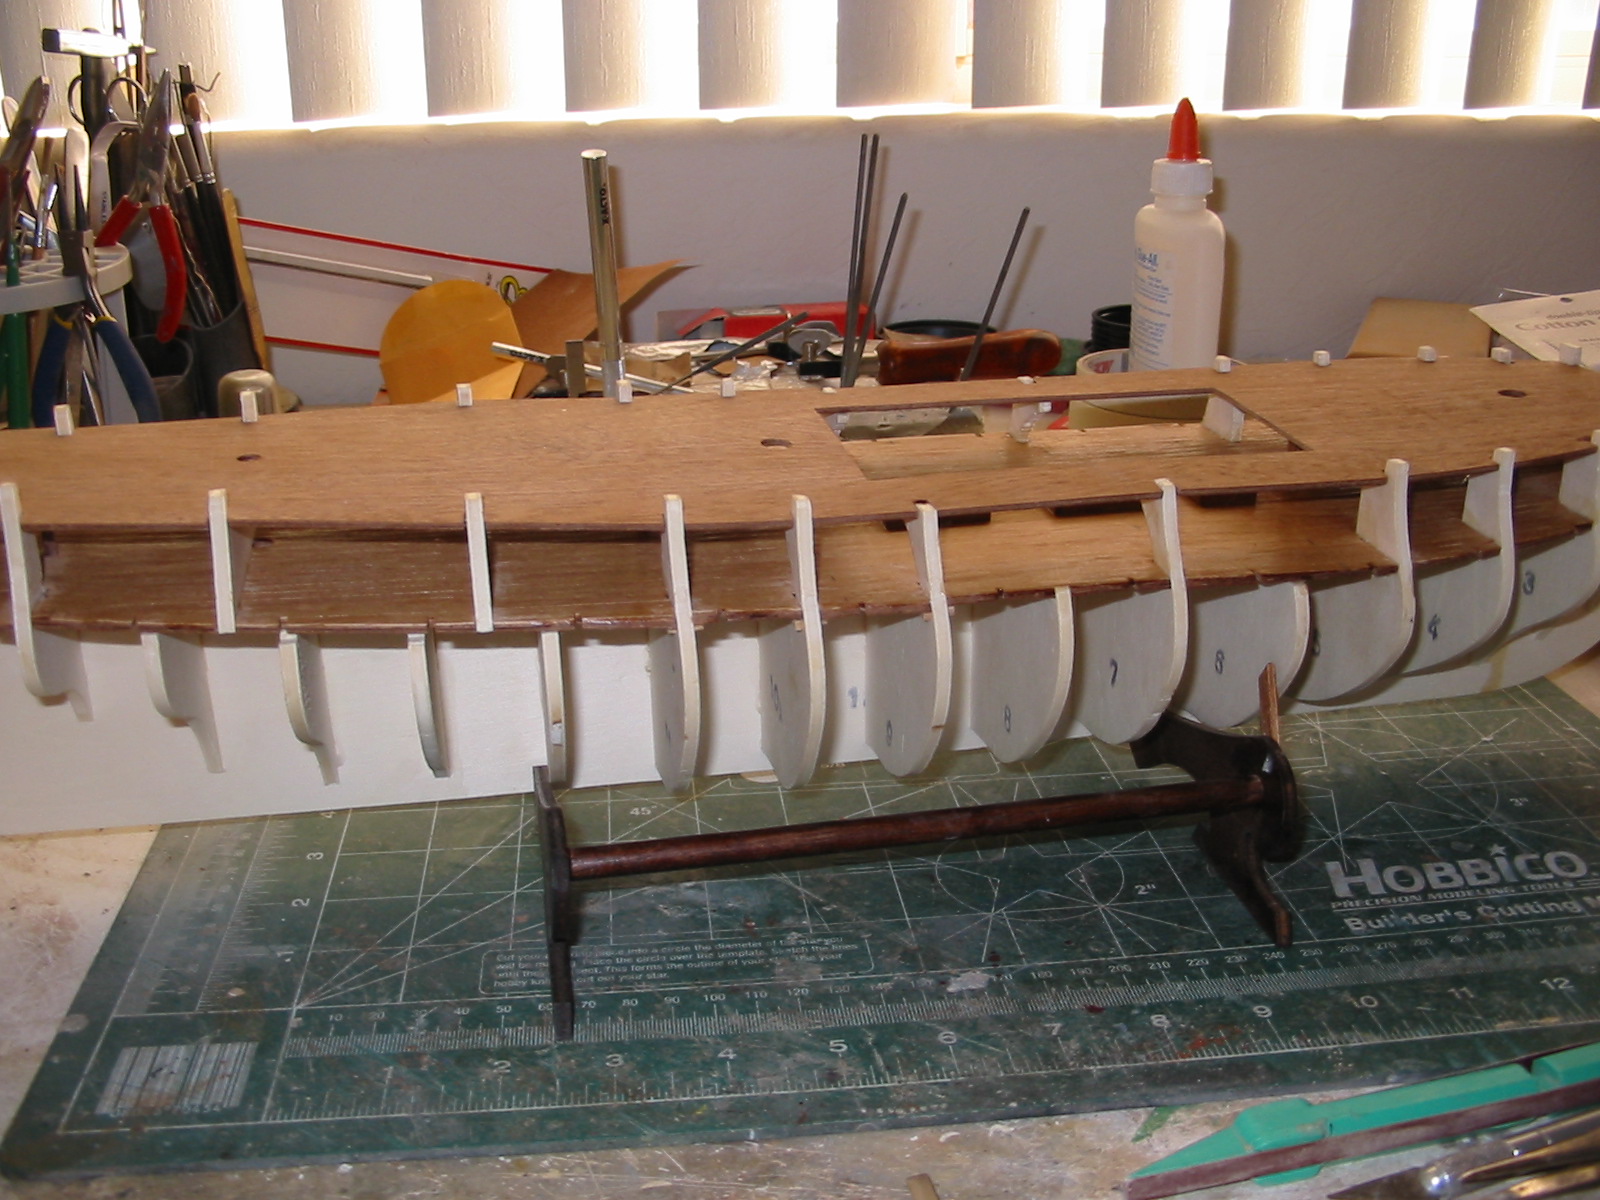
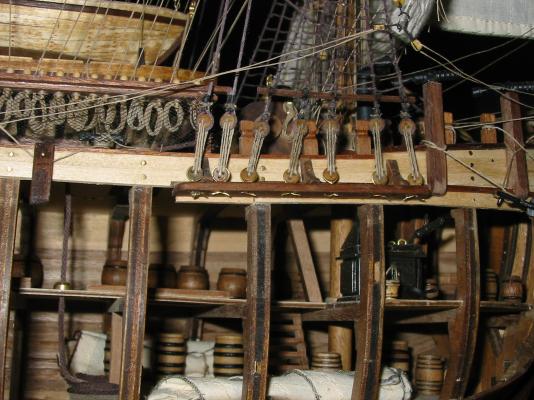
I probably should have ditched the metal frames, too.. But I didn't know enough.. So: 1) I prepositioned the frames using the guide notches in the deck... 2) assembled the guns/carriages but didn't glue the barrels in place 3) used the gun/carriage assemblies (port and strbd) to align and secure the frames at the right height. 4) Glued the carriages in place.. 5) removed the barrels and set aside until later 6) Finished 1st planking the hull such that the planking fit in with the gun port frames and then sanded everything smooth and flush... 7) Installed the weather decking and the gunwales 8) did the second planking so that the gun port doors would fit flush into the hull when closed... 9) when the entire model was finished and painted I used a tweezer to insert the gun barrels onto their carriages through the open port.. and used CYA to fix them in place ( one drop on each pivot works great) 10) then the port doors were attached.. 11) Then came the rigging, being VERY careful not to dislodge a gun barrel.. Note: an assembled gun/carriage will not fit through the port .. Might not have been the simplest approach ... but it worked...
-
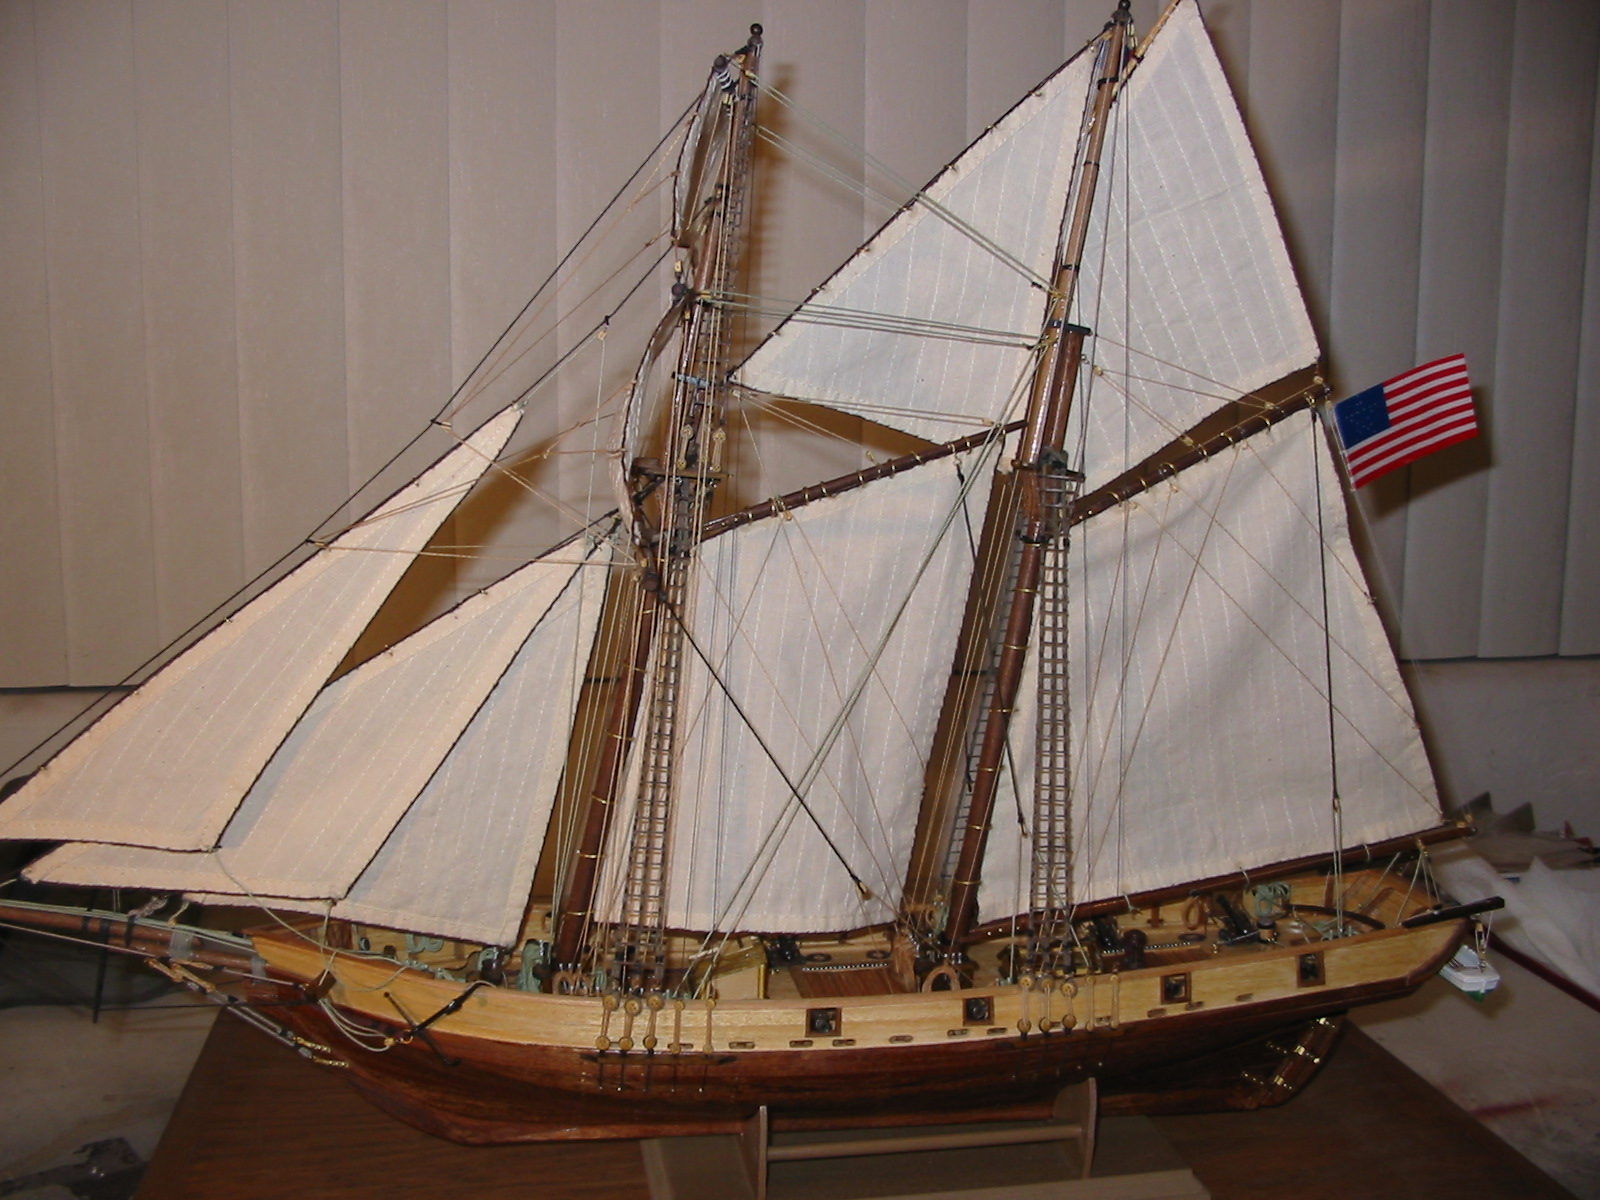
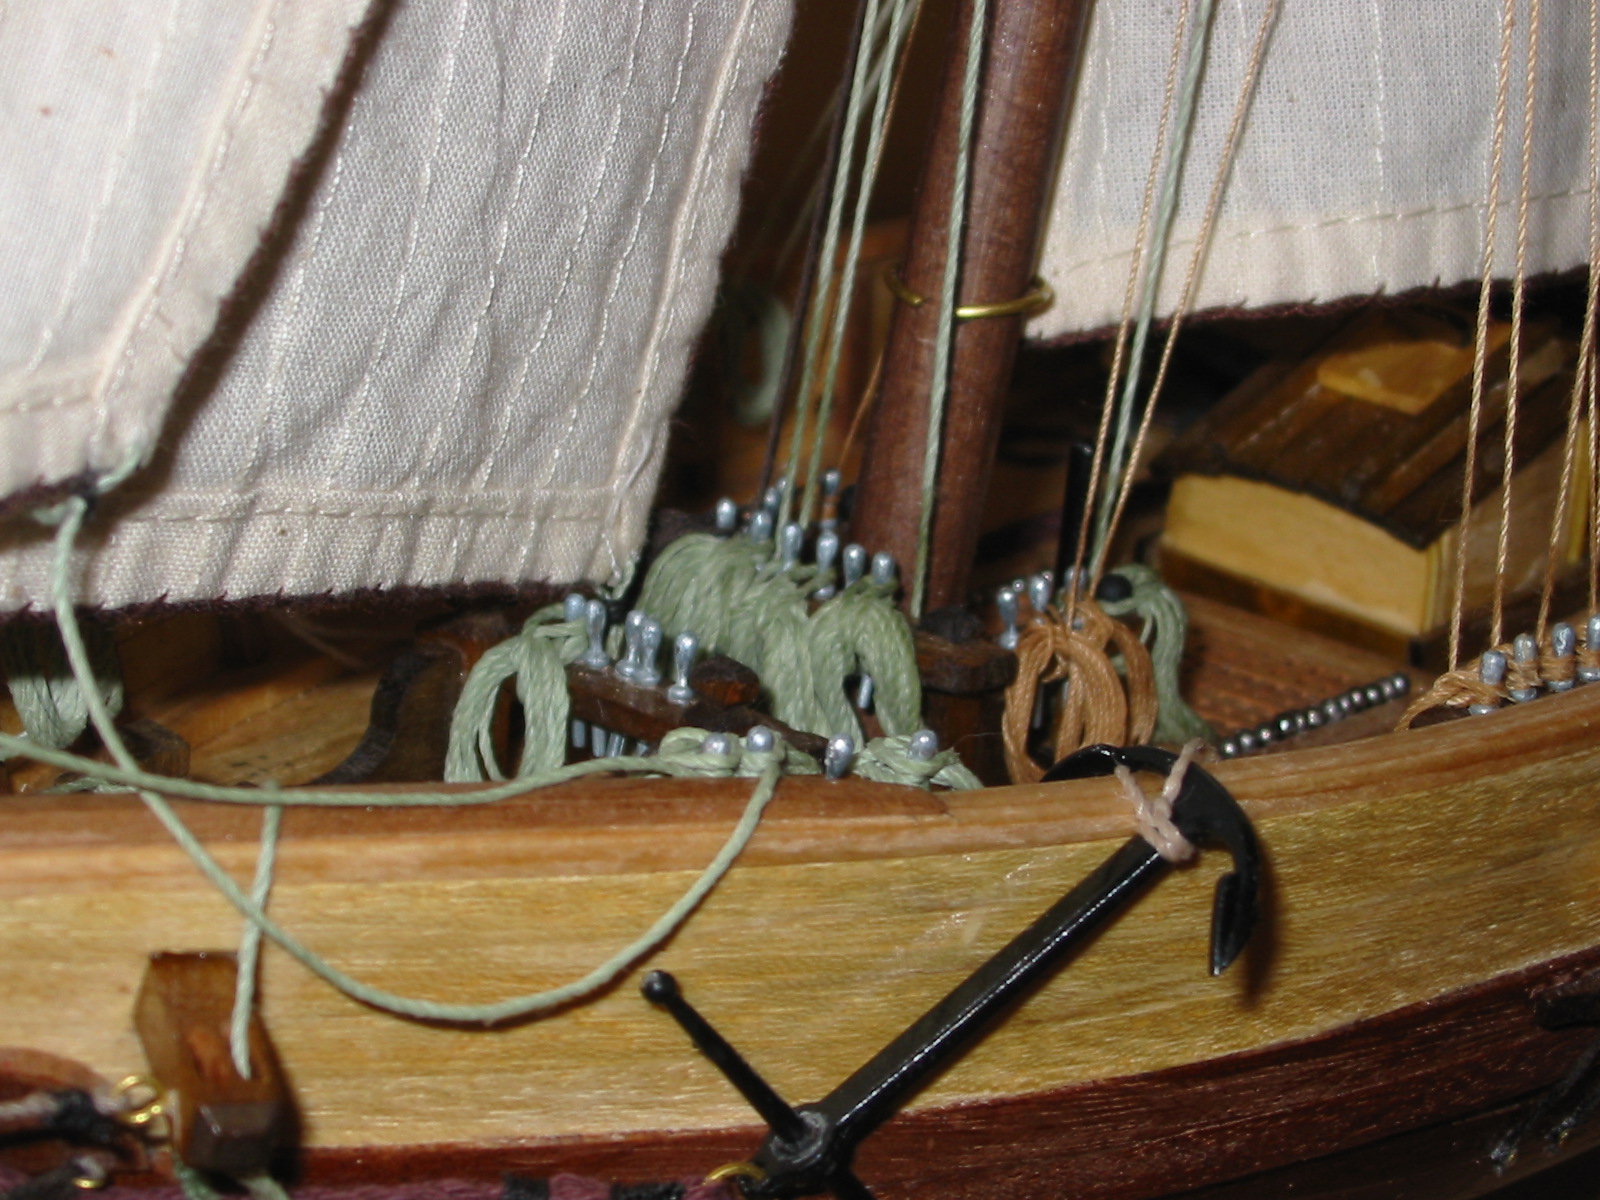
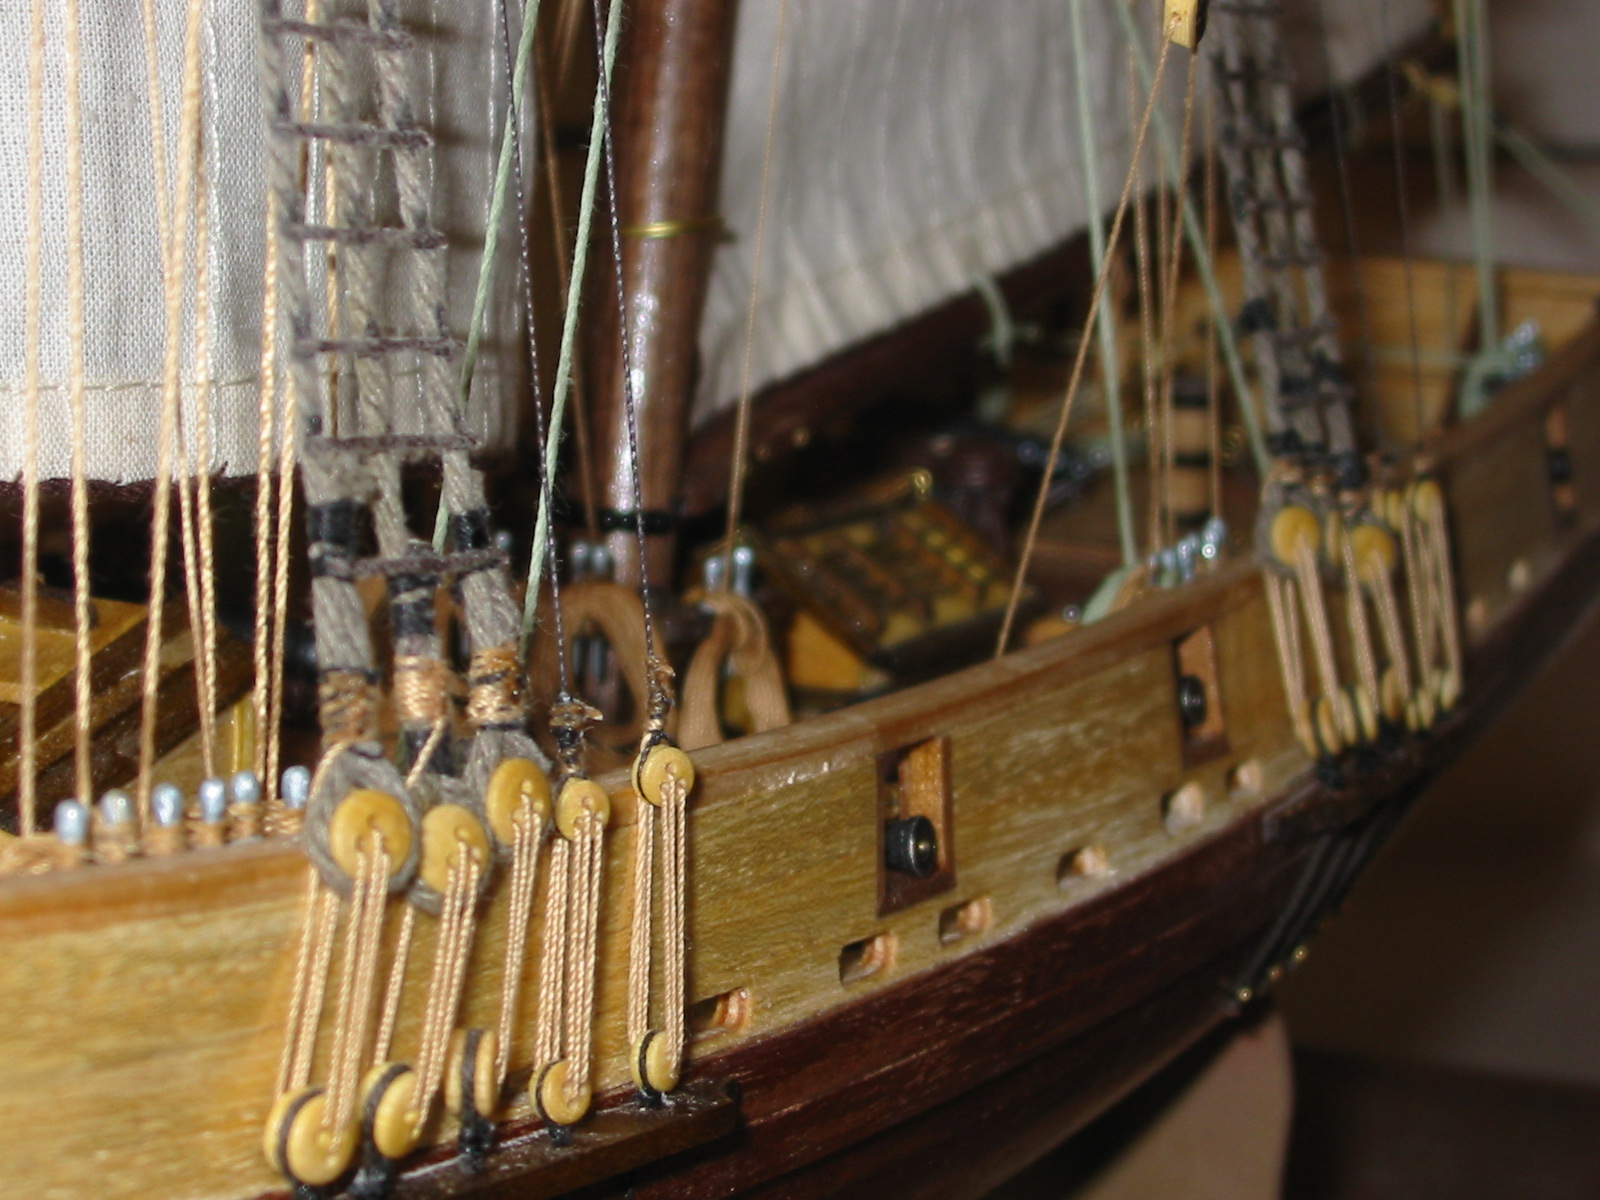
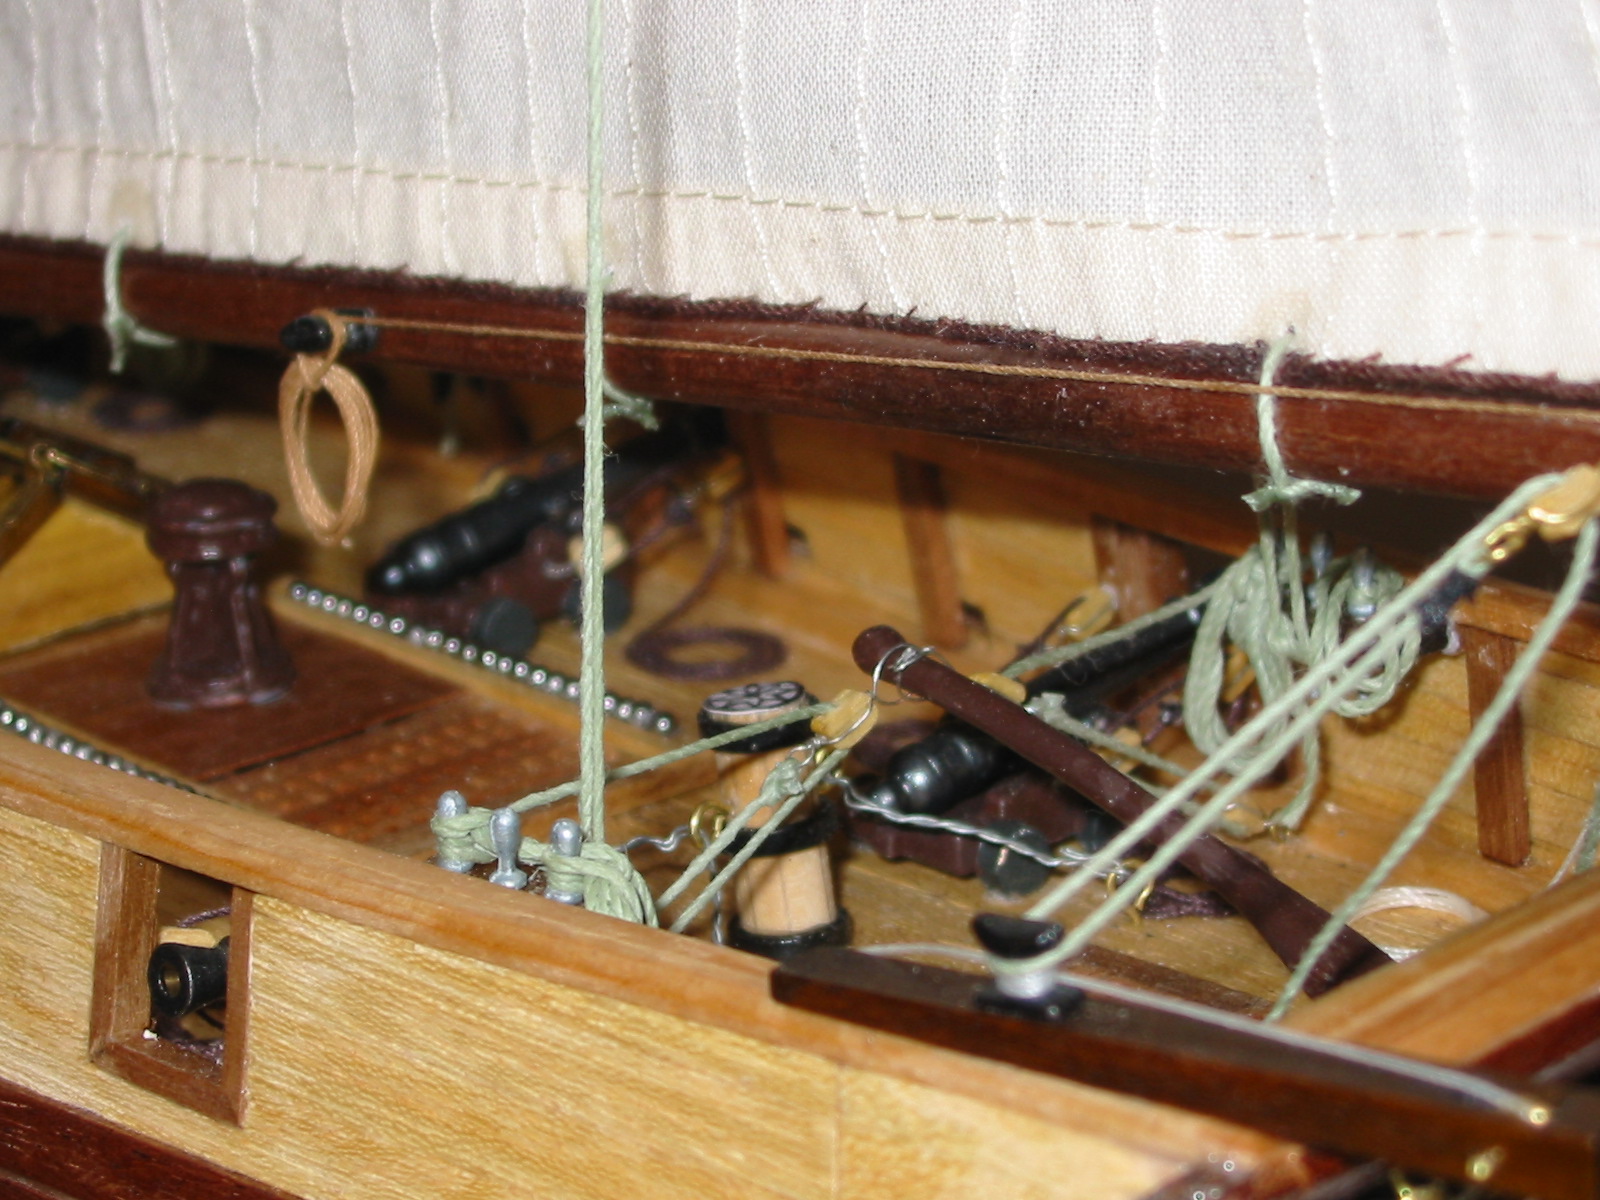
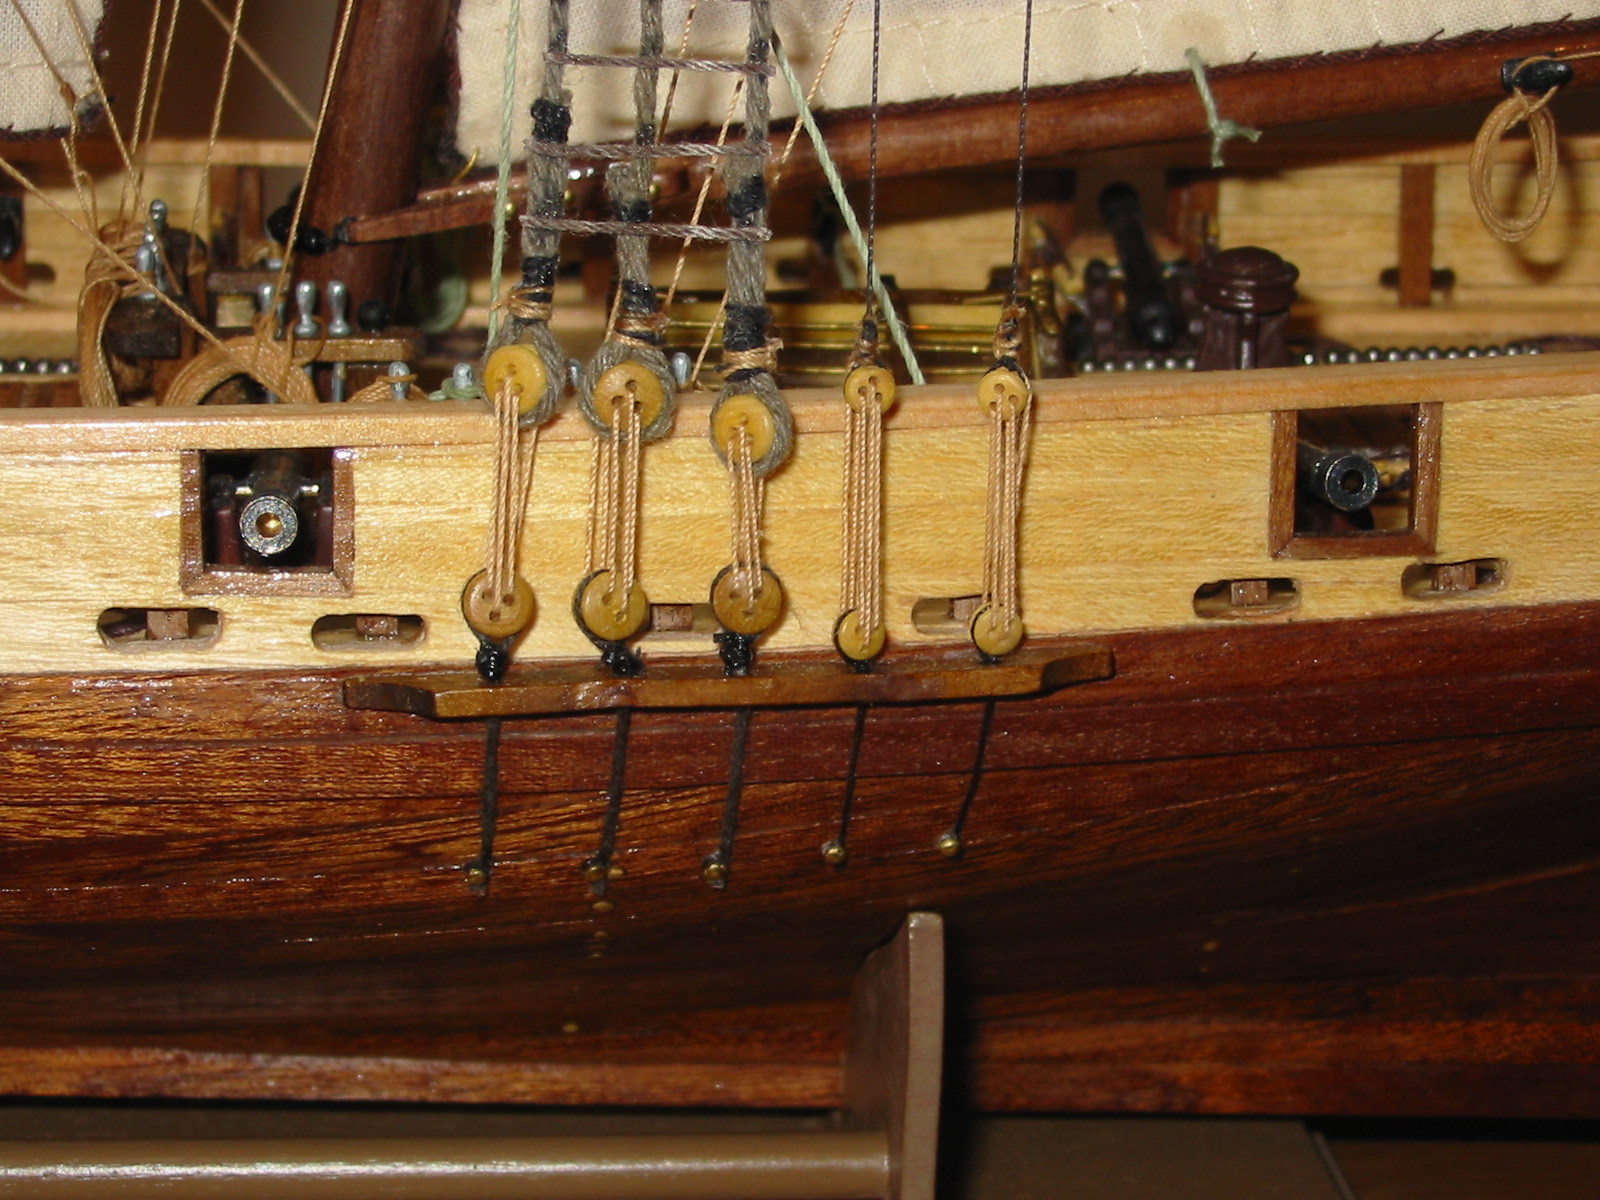
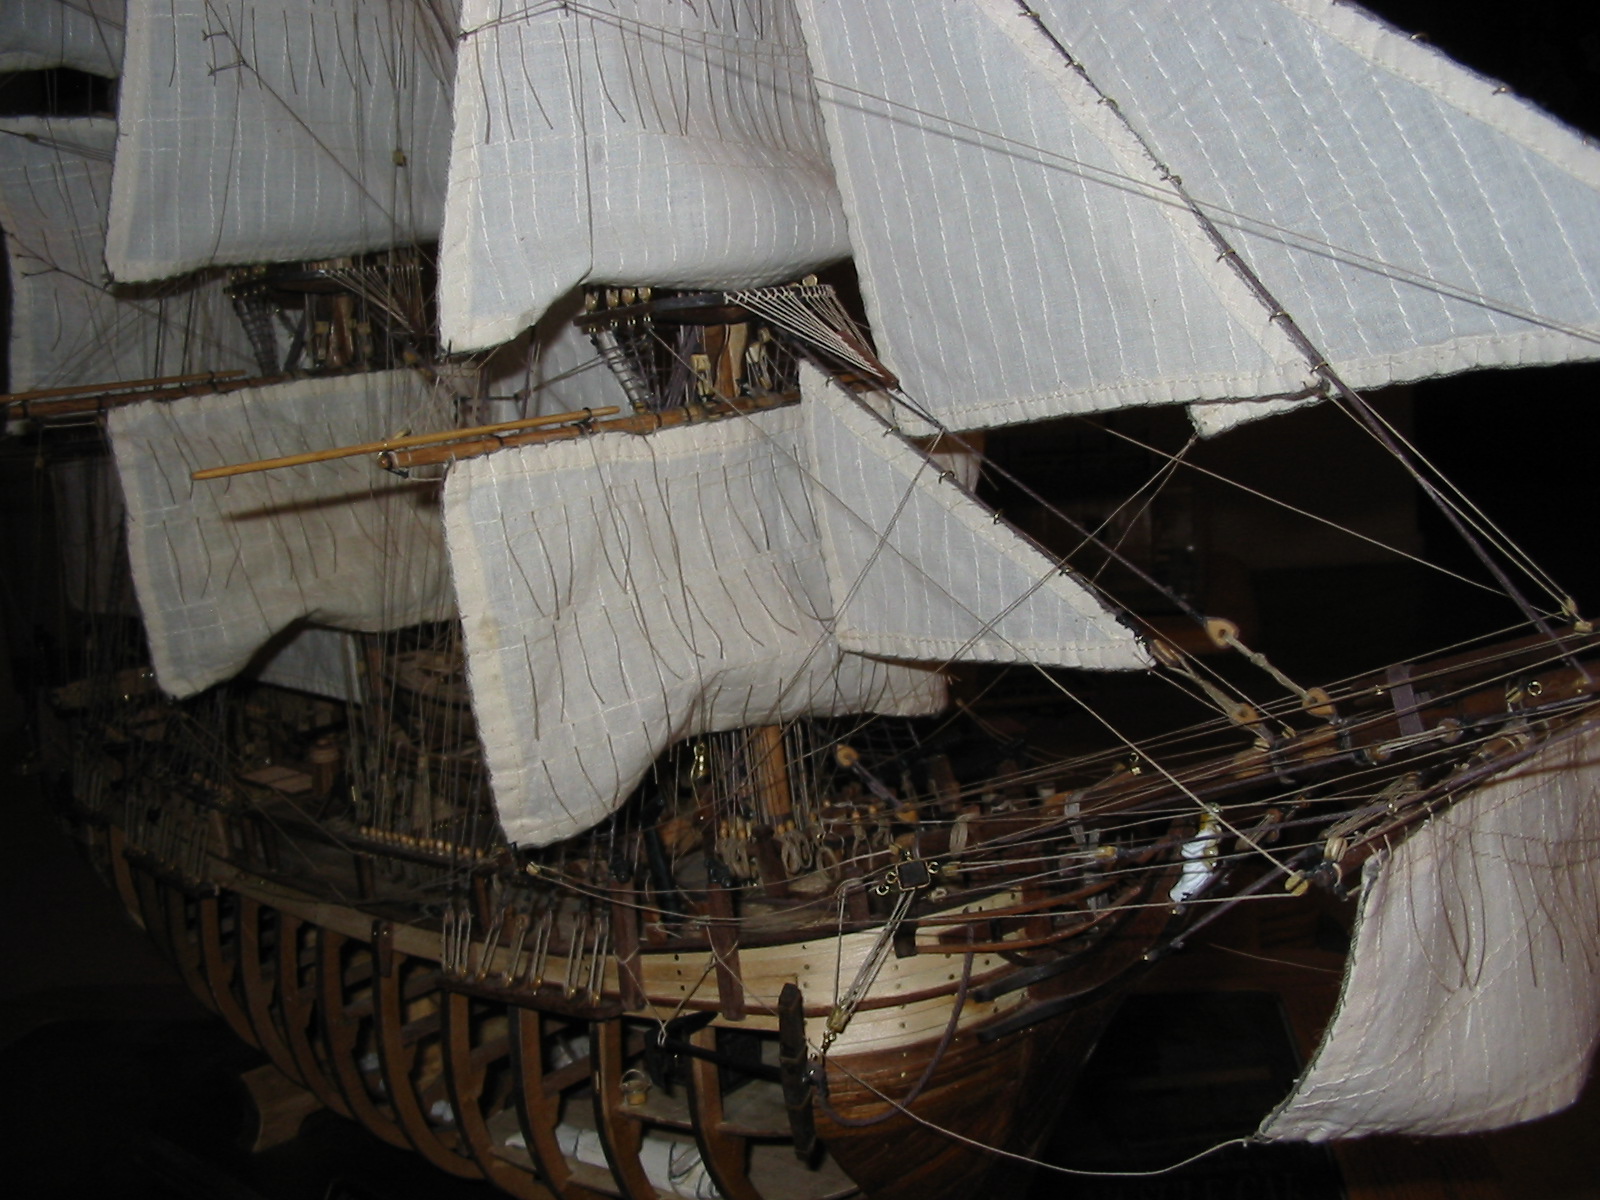
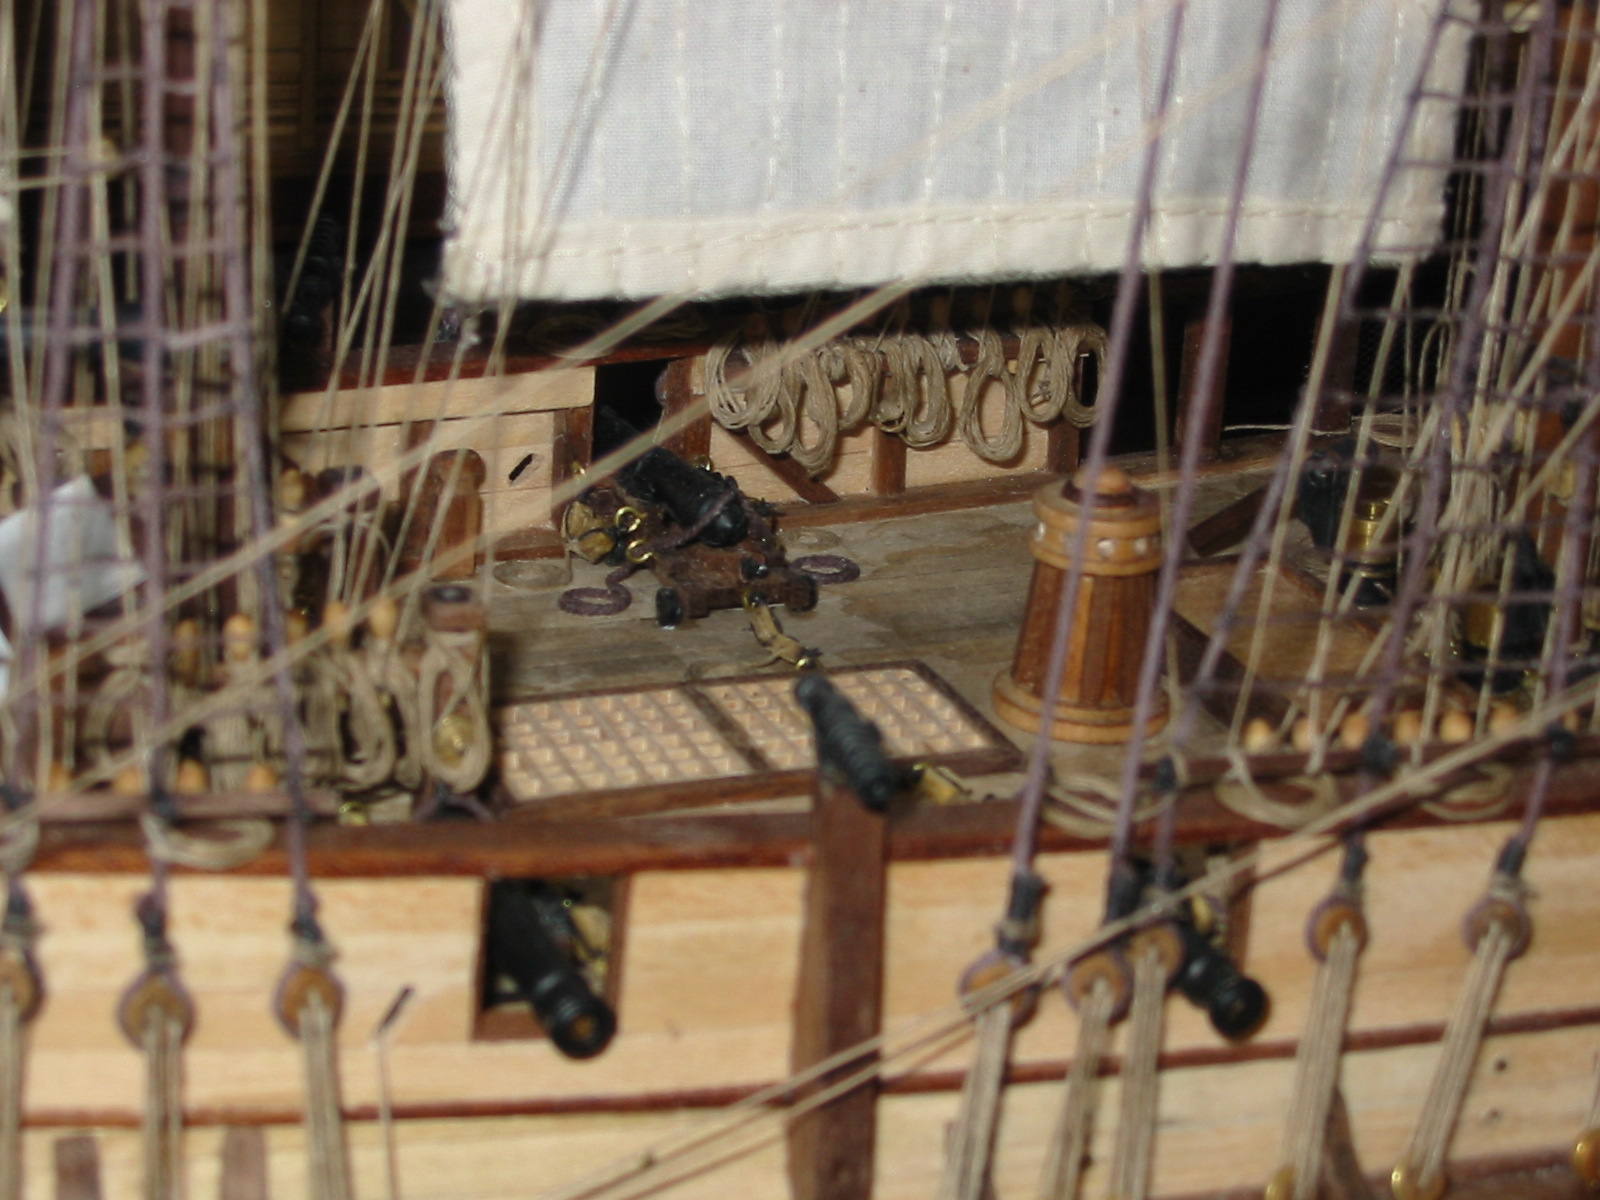
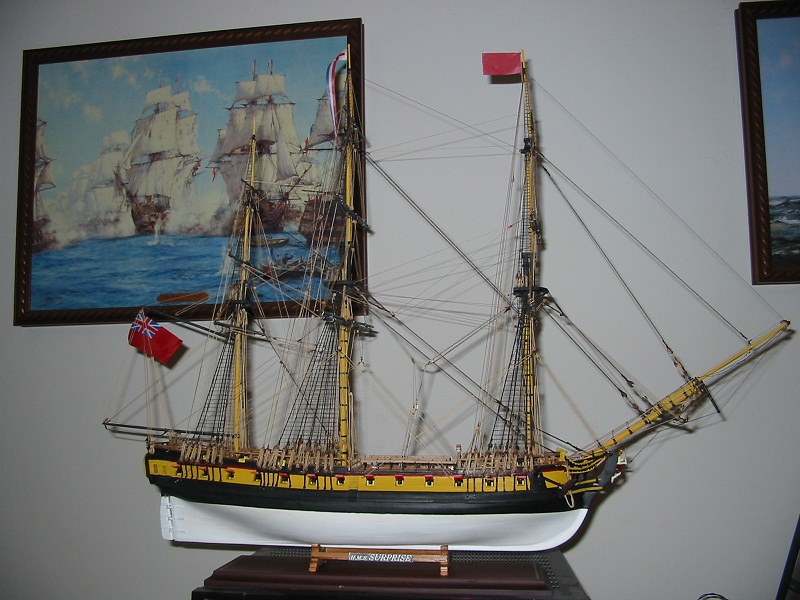
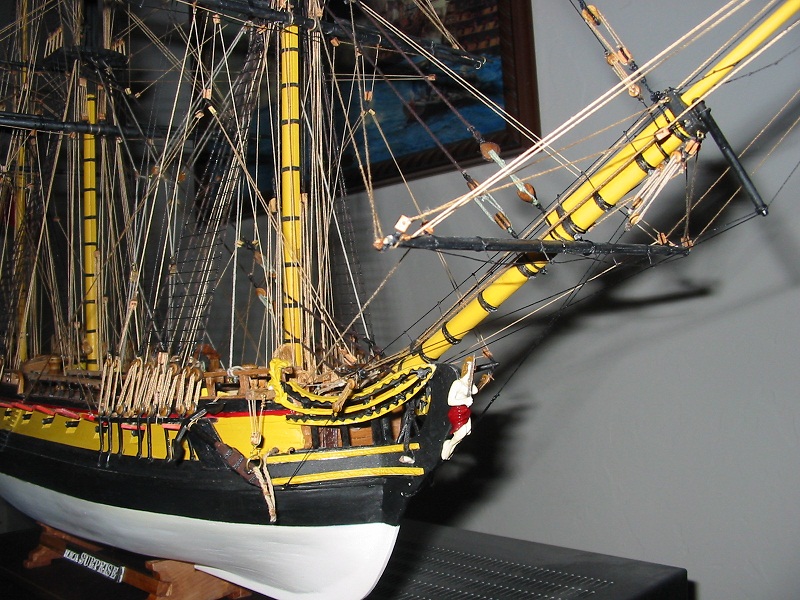
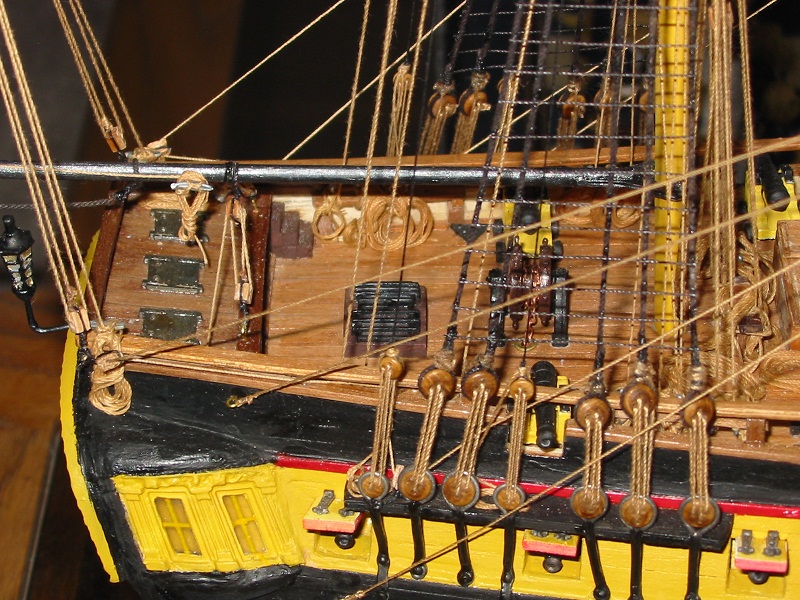
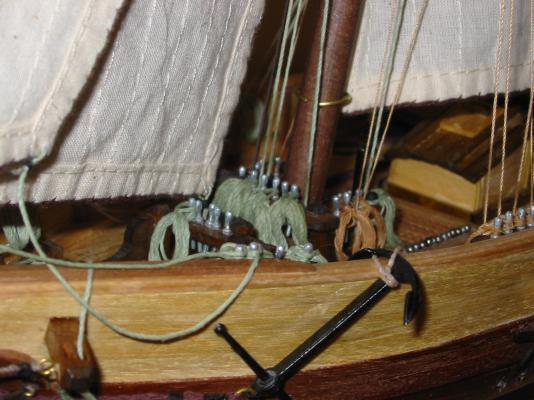
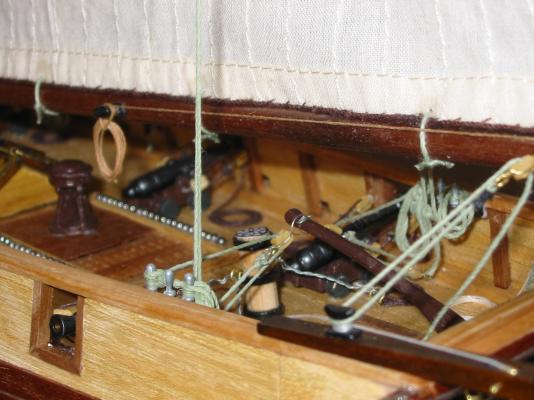
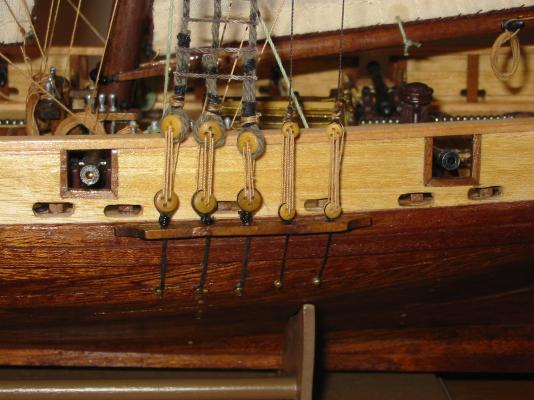
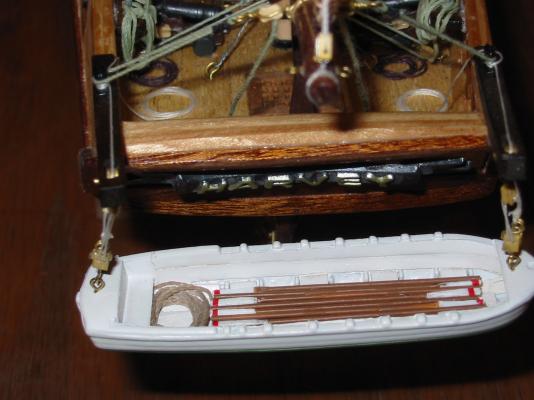
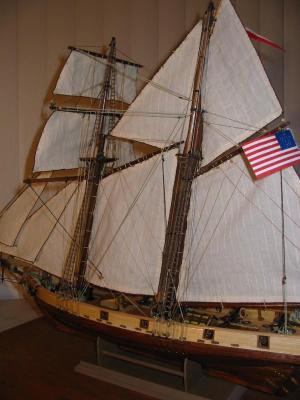
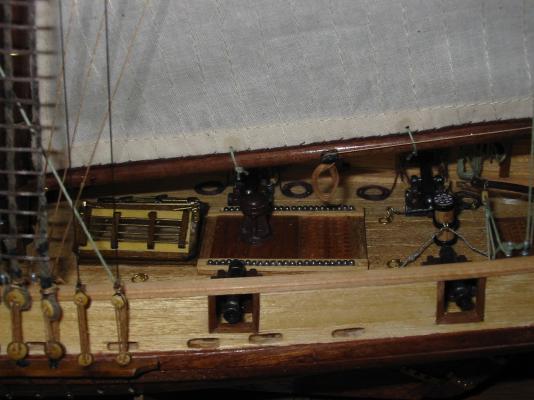
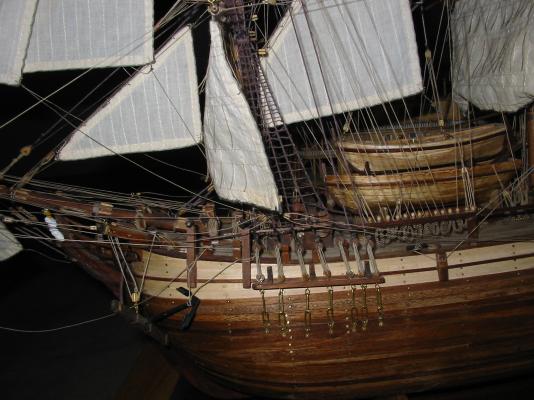
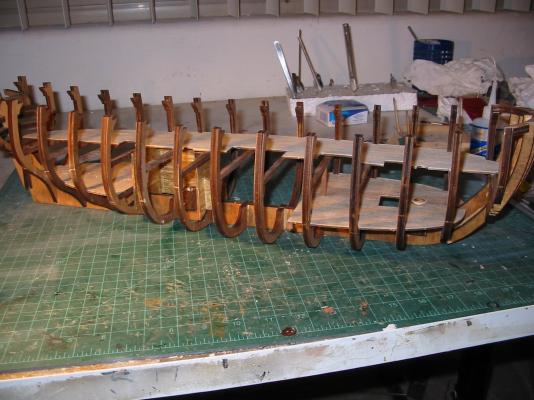
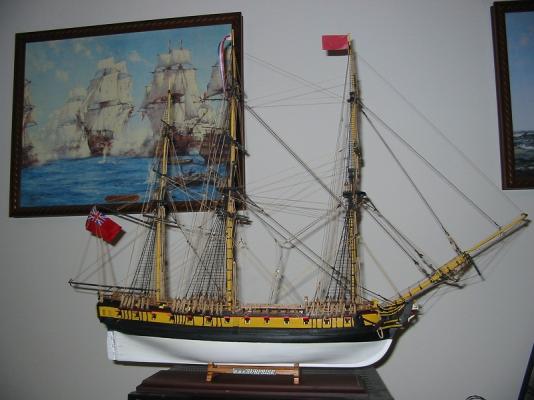
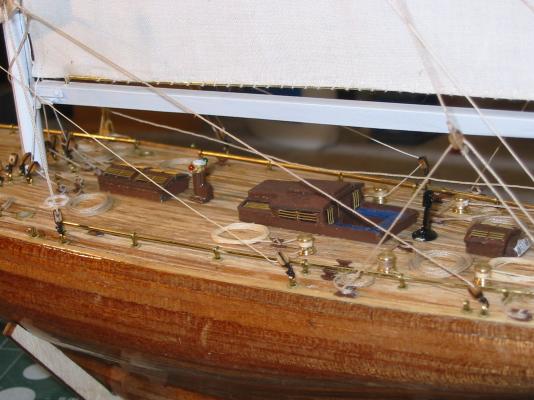
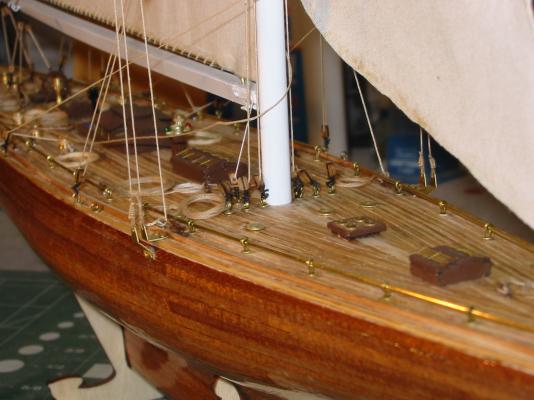
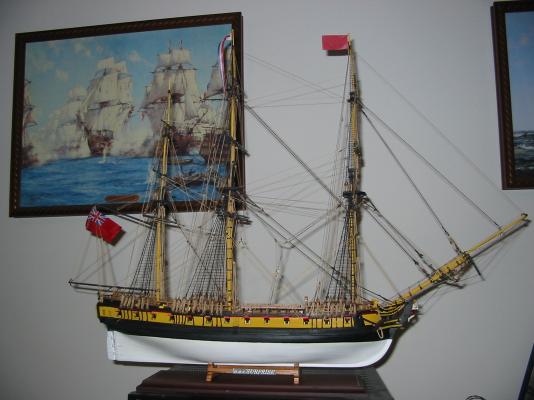
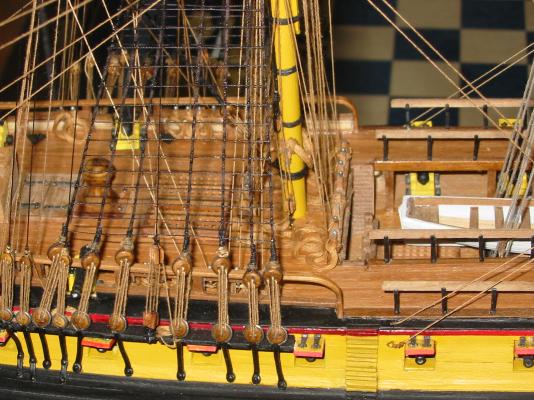
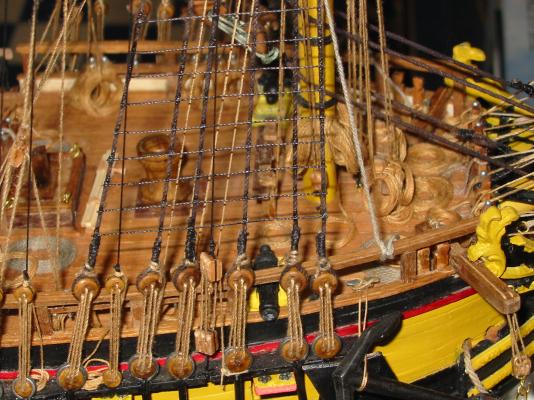
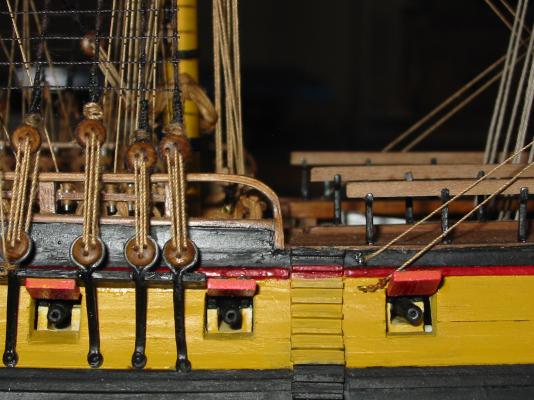
I built the Mamoli Surprise a few years ago... What an exercise.. I had to learn/teach myself lots of new techniques.. especially for installing the guns on the lower gun deck.. DO NOT put the weather deck in when the instructions say to.. If you do, you'll never get the gun deck populated.. I'll be happy to share what I learned if you need help... Here are some photos..


-
Artesania Latina HMS Bounty questions
Desert_Sailor replied to thomaslambo's topic in Wood ship model kits
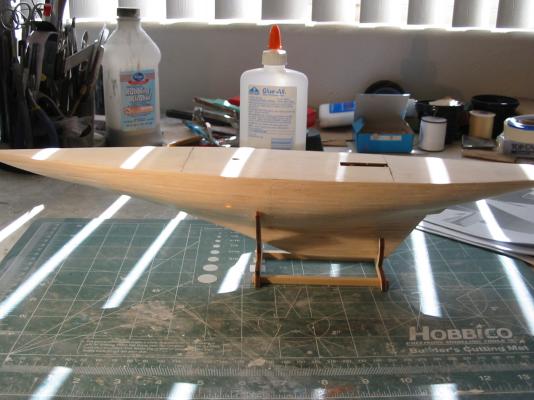
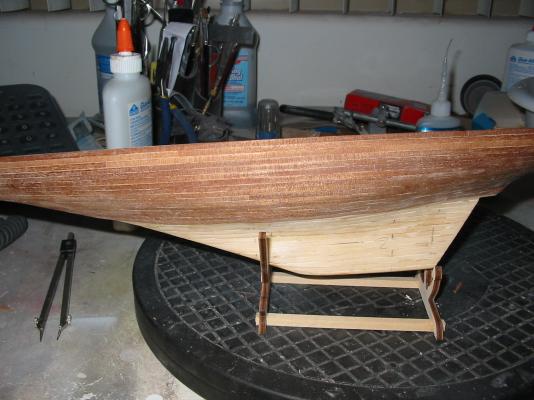
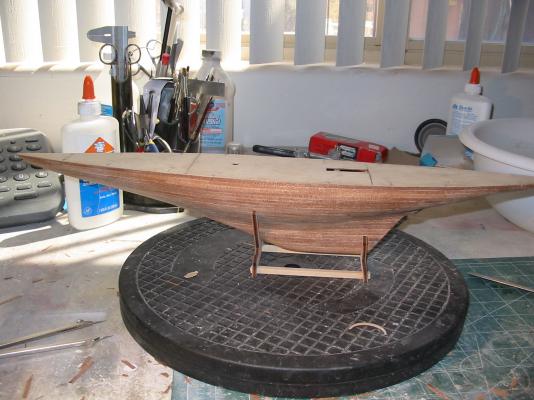
Here's mine.. Took about year...


-
Built this several years back I used double planking with the supplied mahogany veneer for the second layer. Used a 3 plank overlap pattern with the main plank 10ft long ( in scale). then some urethane to finish the surface..


-
I built the Surprise a few years ago. Straight forward build if you have some experience.. The hardest part was aligning the guns and gun ports on lower gun deck.. You MUST put the ports in before planking and then align the guns/cradles BEFORE planking everything and installing the weather deck. The cradles will NOT fit through the metal ports after the fact ( see photos) .. Once you clear the gun issue, patience is the watchword.


-
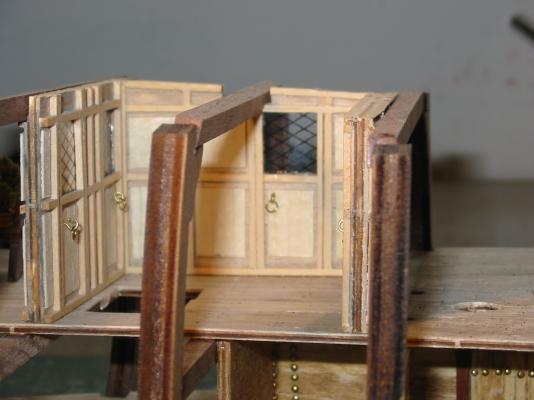
OcCre Bounty with cut-away section
Desert_Sailor replied to hamilton's topic in Wood ship model kits
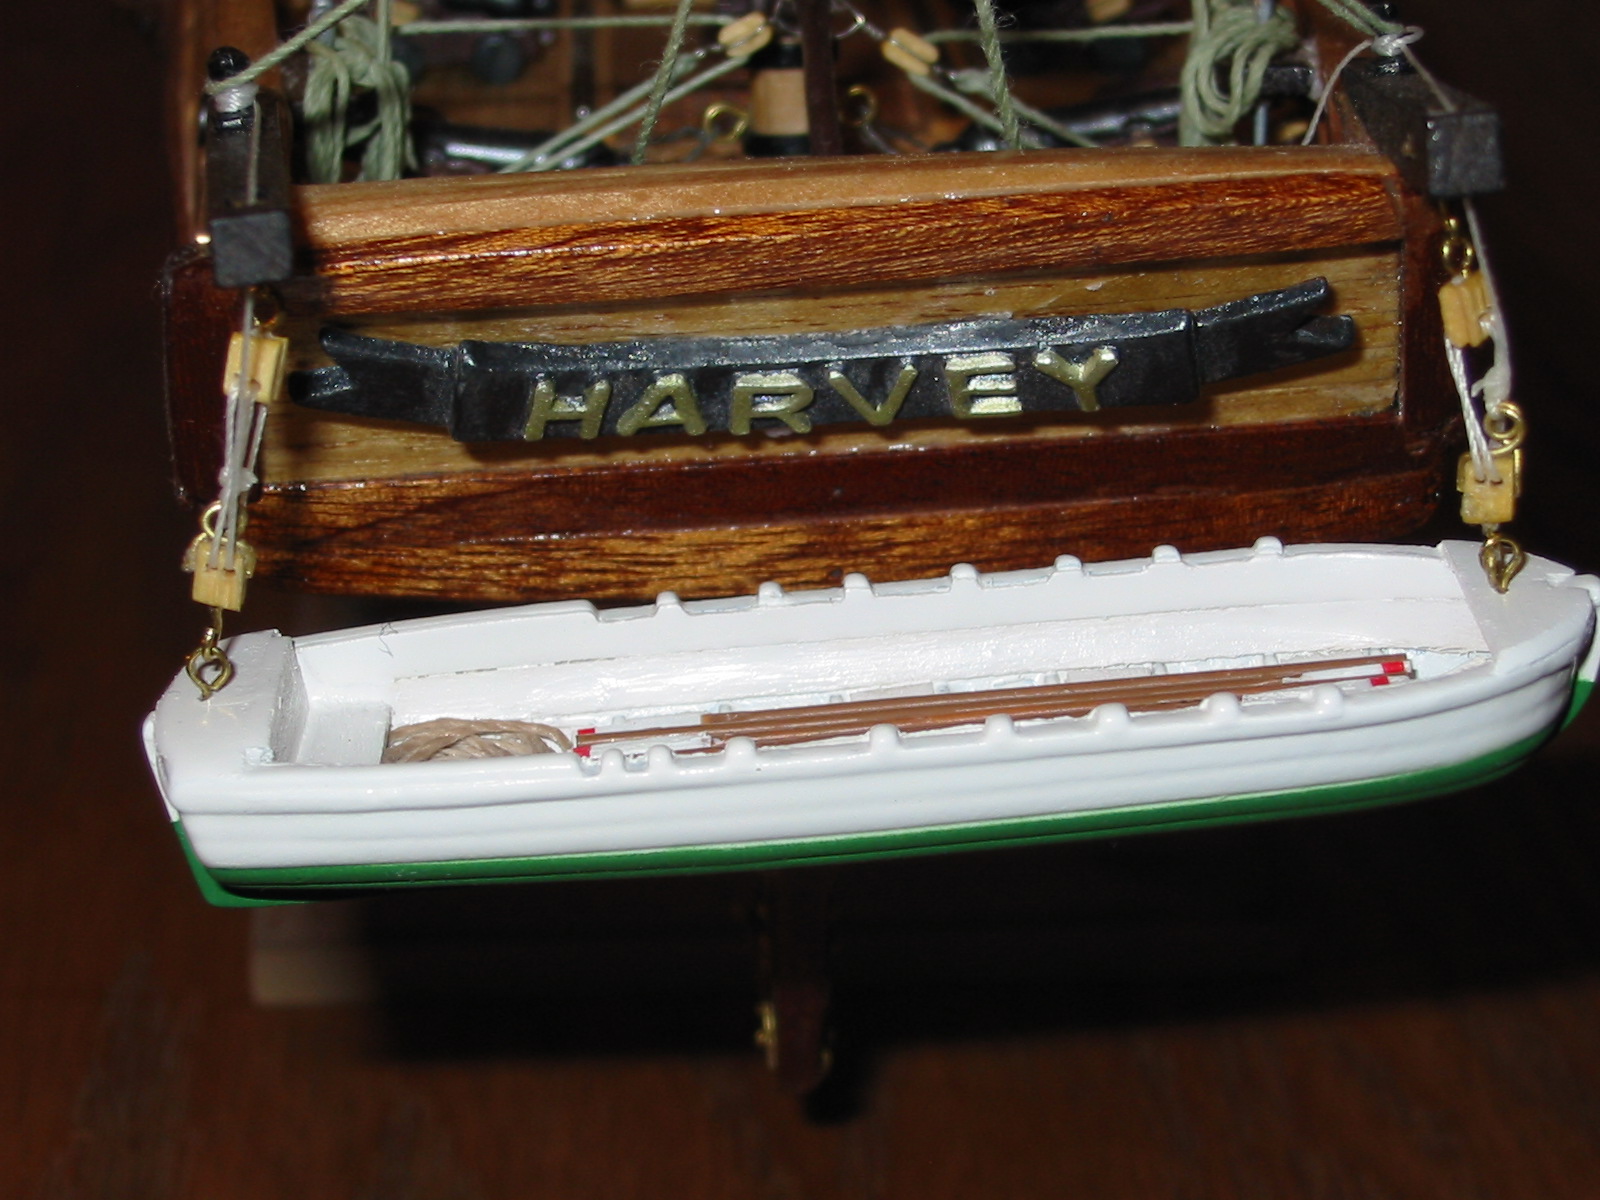
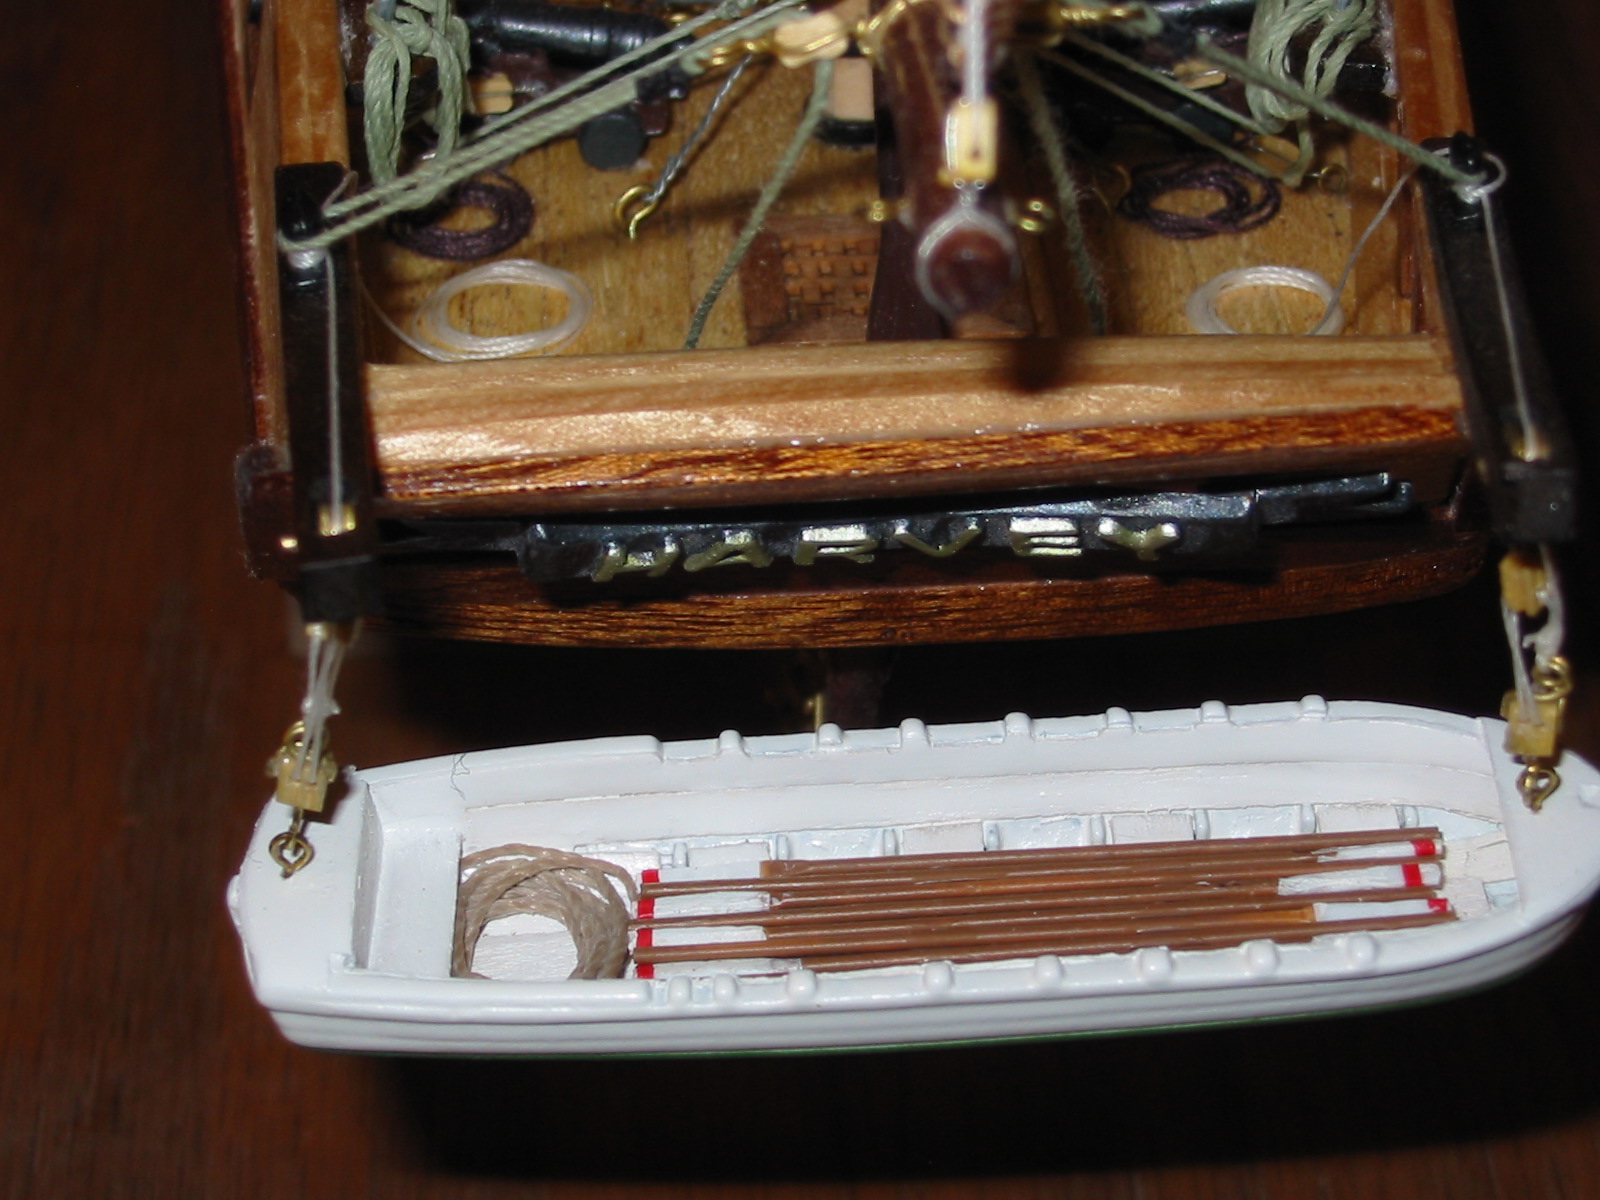
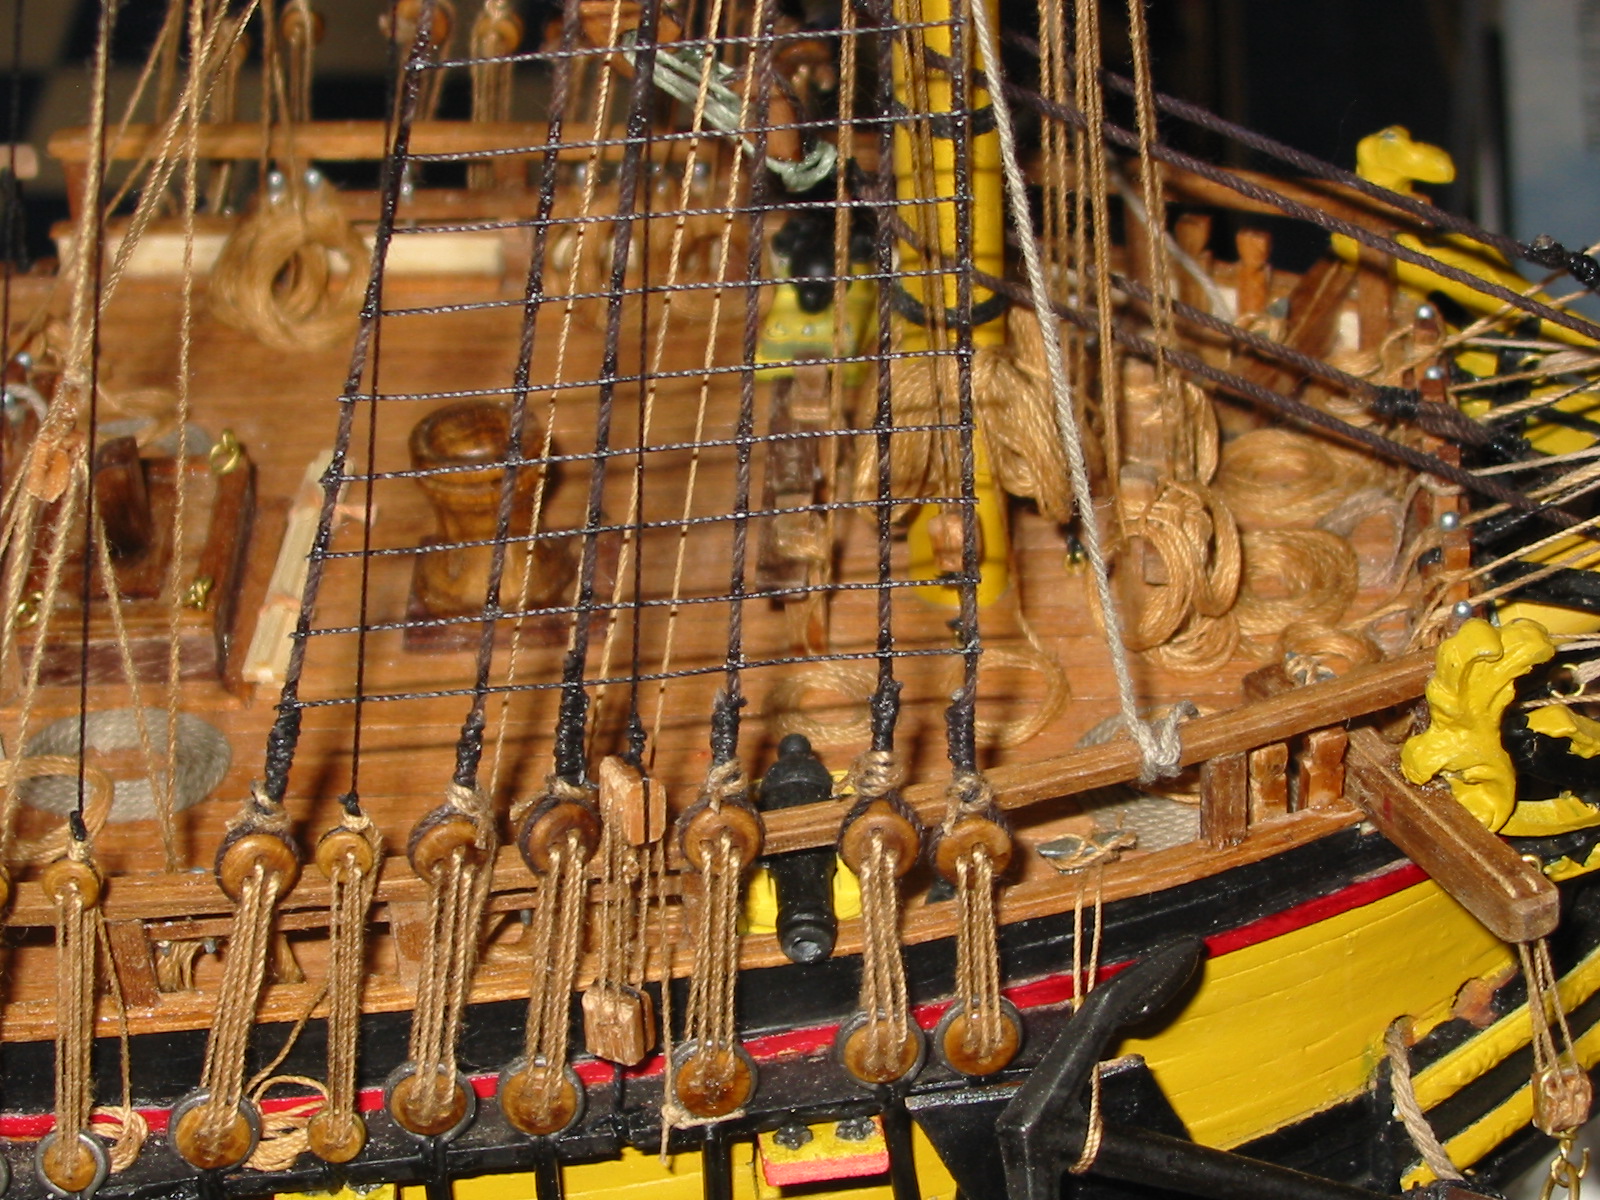
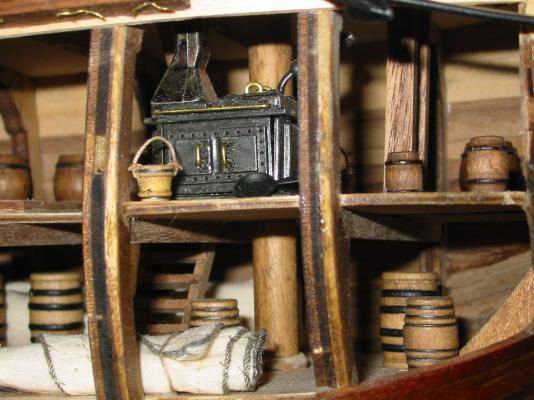
Here's my AL Cutaway Bounty.. about a year in the making.... It's not small...and building the interior was lots of fun....I used the kits supplied parts plus some scale furniture from a doll house store for the Blyhe's dining room


-
I just used Google Images with the search parameter "crosshatch" Picked the one i liked, adjusted the size, printed, and cut.. I made the line thickness based on stained glass window techniques. Why make things complicated..?
-
My issue was with the interior door windows. The openings seem way to large for a single pane of glass. Glass was very expensive. I figure they probably used lots of small panes like in a stained glass window. That way, they only had to replace the broken element. My solution was to print on acetate film ( the kind used with in overhead projectors ( assuming anyone still does!!)) a diamond pattern to simulate the panes and their frames. I cut the acetate to size and cemented it in place.. The effect worked pretty good (IMHO) and to scale. What do you all think..?


-
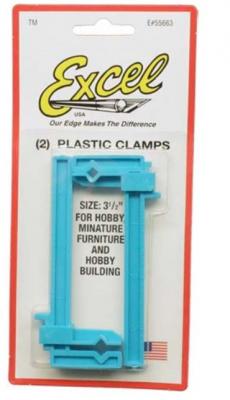
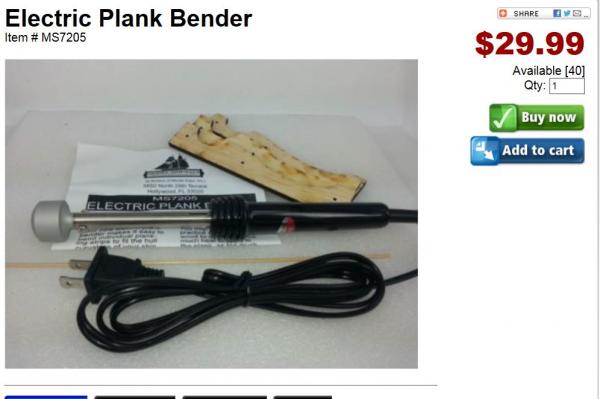
Capt Al, here's a simple trick to ensure your ribs are aligned . I use a 3" plastic adjustable clamp. I take off the "lower jaw" and I'm left with a perfect 90 deg alignment tool. See pix: I'll use another clamp to hold the one end to the keel and the other clamped to the frame/bulkhead and its a perfect 90 deg every time.. Curving the planks isn't too hard, either.. Get the "electric plank bender & jig" ... soak your planks, then use the iron to steam bend the planks to the right curvature or shape.. It does take practice so use scrap planks first from an older kit.. Once you get the hang of it, no hull shape will intimidate you....