jablackwell
-
Posts
304 -
Joined
-
Last visited
Content Type
Profiles
Forums
Gallery
Events
Everything posted by jablackwell
-
 Congratulations! Lovely build. Thanks for letting me follow along. ~john
- 109 replies
-
- 1
-

-
- model shipways
- kate cory
- (and 1 more)
-
An update, since it has been a long while. As many of us have noticed, the world is in a bit of chaos right now. My job and life surrounding my family and job have been really... "wild"... and unpredictable. I am still working (good), teaching astronomy and physics (good, too) and almost all remote (also good). I got back to the Syren build this week, which has me excited and happy. It offers some respite from the world's craziness. Right now I am continuing with the boxwood planking above the wales. I've decided to finish off one side first, perfect my methods then work on the other side... maybe the second side will be more presentable! Ha! So that places me some place in the early stages of chapter 5 on the build. One...plank...at...a...time 😉 ~john

- 90 replies
-
- 5
-

-
- syren
- model shipways
- (and 1 more)
-
Sopwith F.1 Camel Build Log
jablackwell replied to jablackwell's topic in Non-ship/categorised builds
Ray - happy tp help out. Enjoy the build! It's a good one, and the results are great to look at. Be sure to see Mike Dowling's build here, too. He also did the Fokker Dr1 ~john -
Your K Cory is looking absolutely lovely - good solid work there. A case will really be a nice touch, as mentioned above. Oh, and I really like your whaleboat color work. Good job there. Such fun! ~john
- 109 replies
-
- 1
-
-
- model shipways
- kate cory
- (and 1 more)
-
Jesse - it has been a real pleasure watching you work through the build: those flags are gorgeous. Nice work all around. You have given this old guy the urge to get to the shop and resume work on the Syren which has been an idle build for about a year. Congratulations! ~john
- 1,306 replies
-
- 3
-
-
- syren
- model shipways
- (and 1 more)
-
I am definitely going to pull up a seat to watch your build. I have heard all sorts of good things about this version of the CS, and hope to accomplish this some time in the future. Happy building! 😃 ~john
-
All, Still working on the Syren - I haven't given up, honest! I hope y'all have had a marvelous season and enjoyed the holidays. With some of that luscious time off, I got back to planking the ship. It's slow going, but I am enjoying the pace, taking my time and slowly seeing it all come together. Some images of the current progress. The boxwood has been making this a real pleasure: ~john

- 90 replies
-
- 5
-
-
- syren
- model shipways
- (and 1 more)
-
Thanks, Mike - I will check this out for sure! ~john
-
Mike, Where did you find the pilot? Thanks! ~john
-
Awesome work on that netting: I am taking notes! Nicely done, Jesse! ~john
- 1,306 replies
-
- 6
-
-
- syren
- model shipways
- (and 1 more)
-
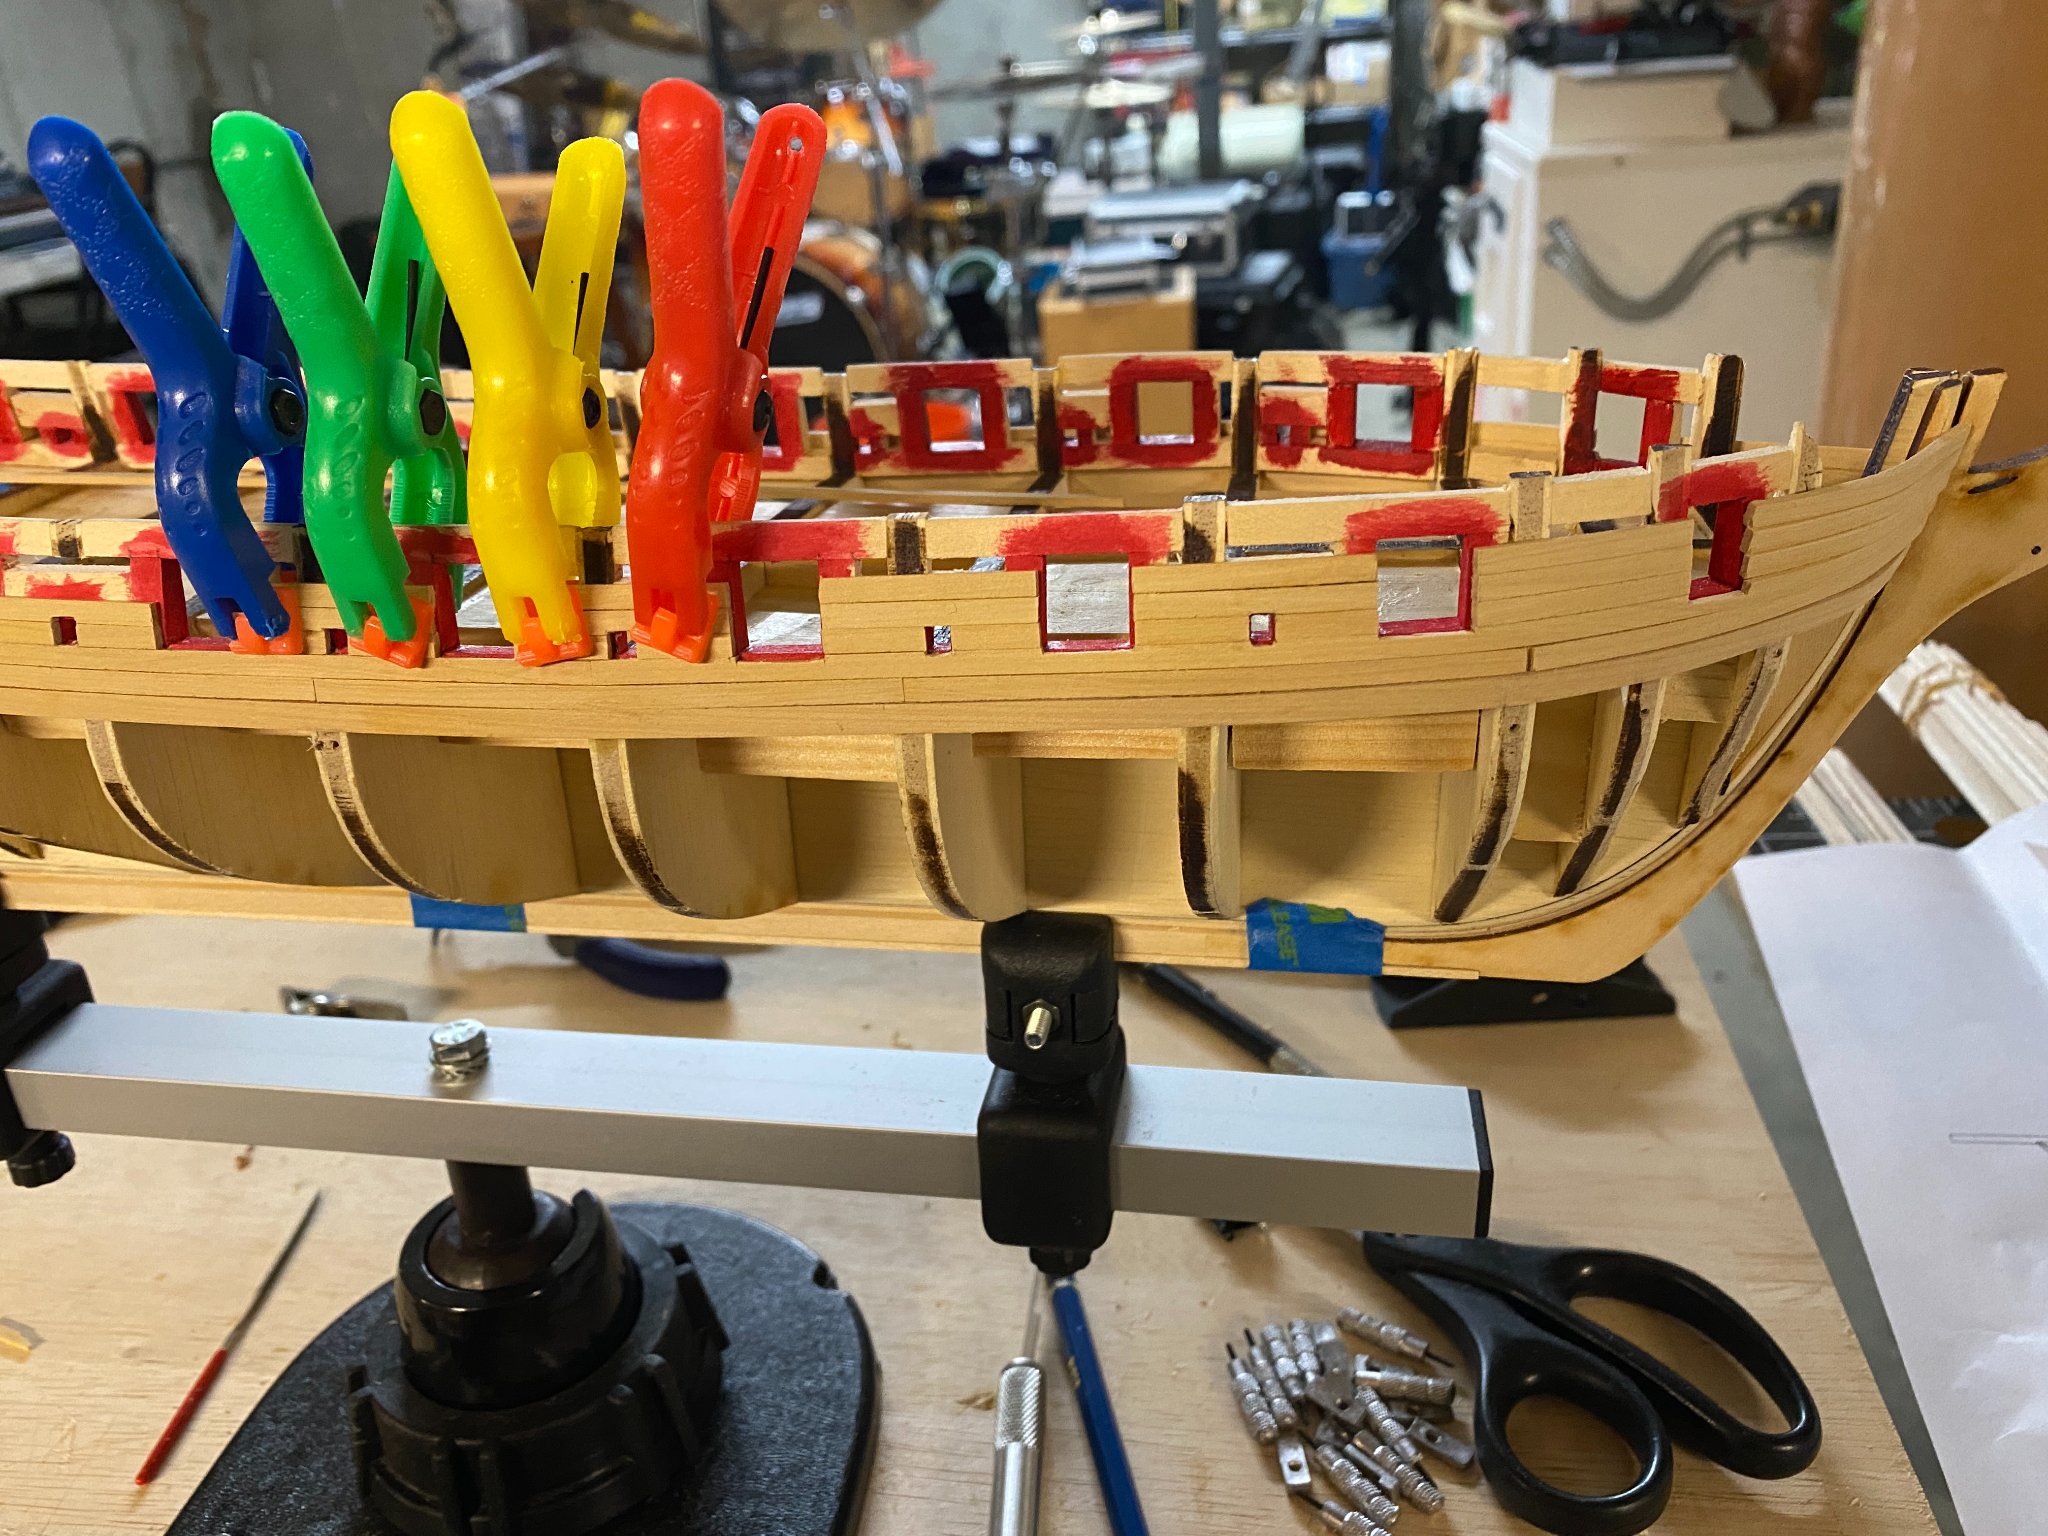
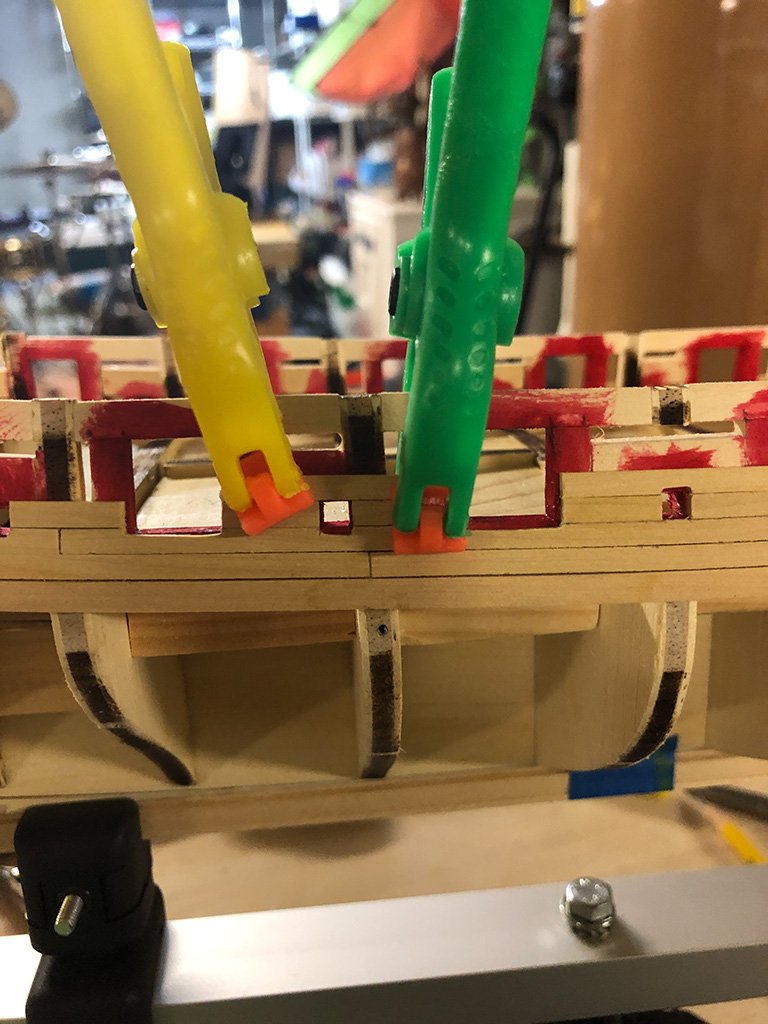
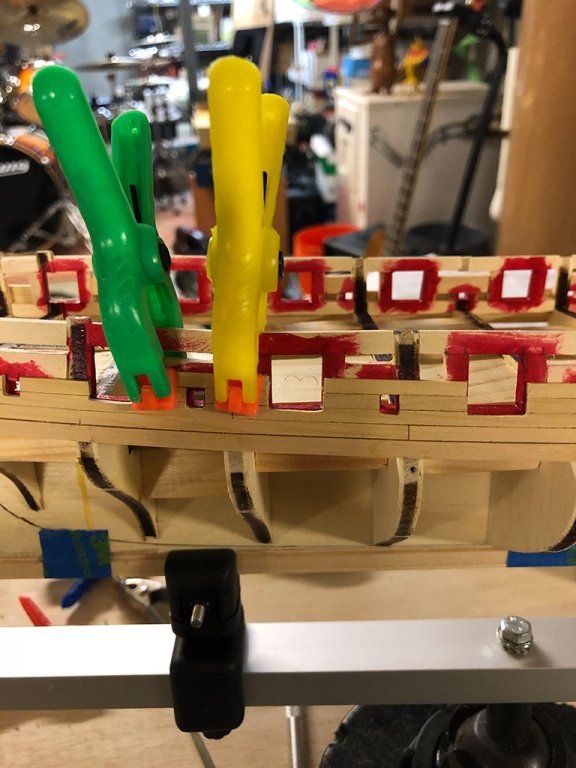
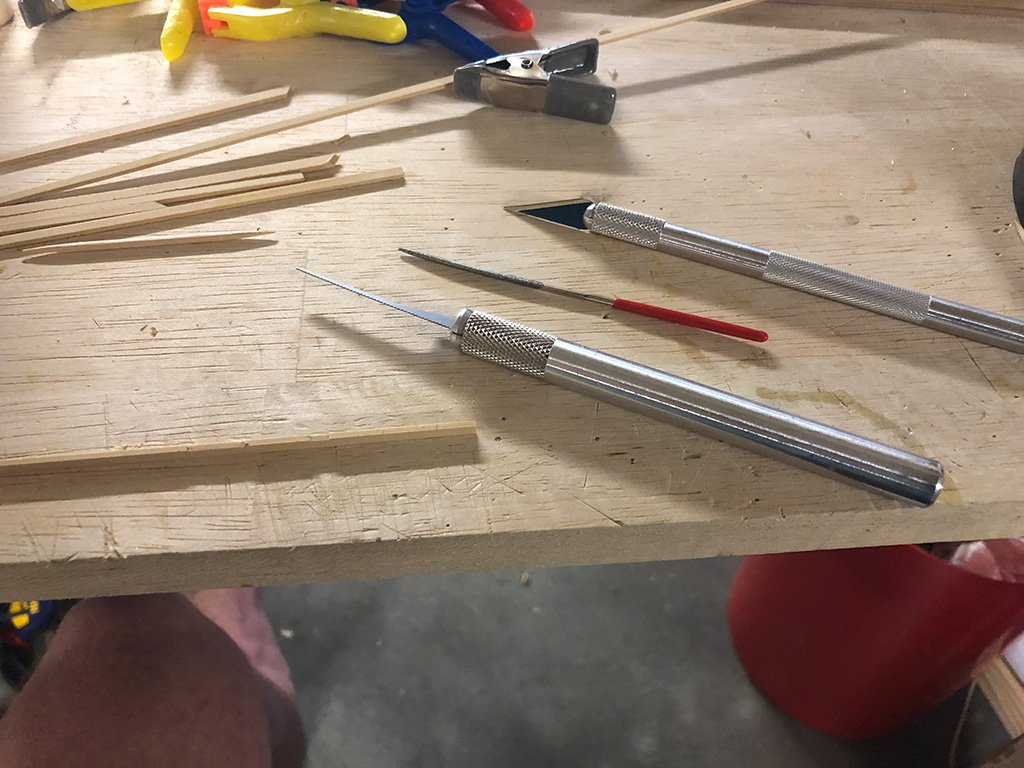
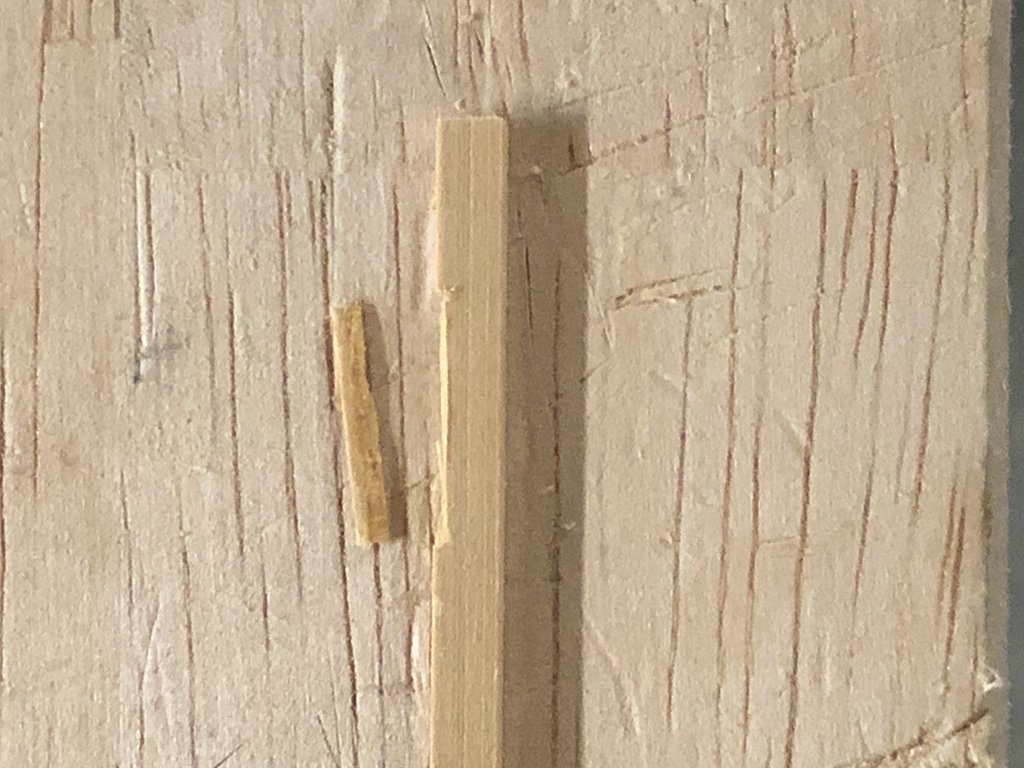
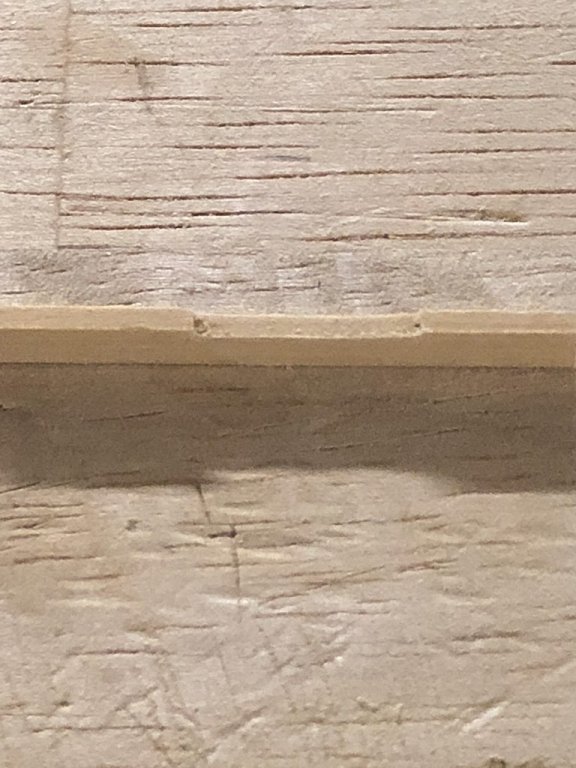
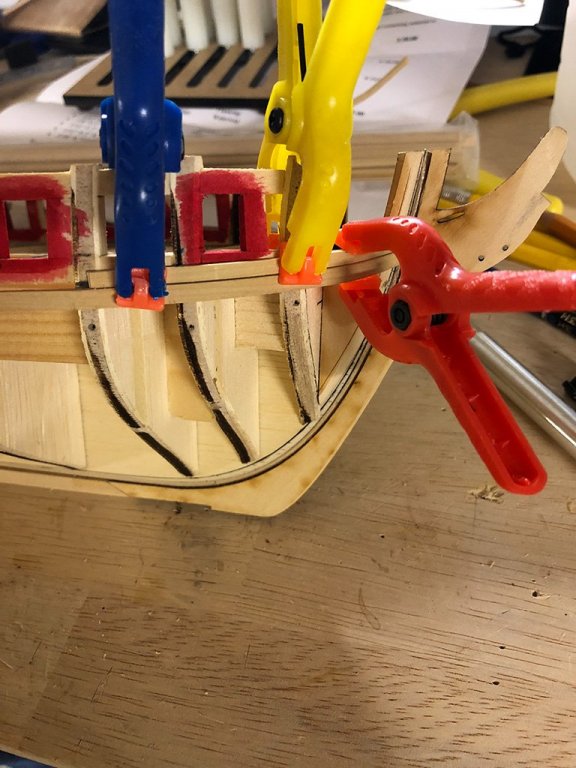
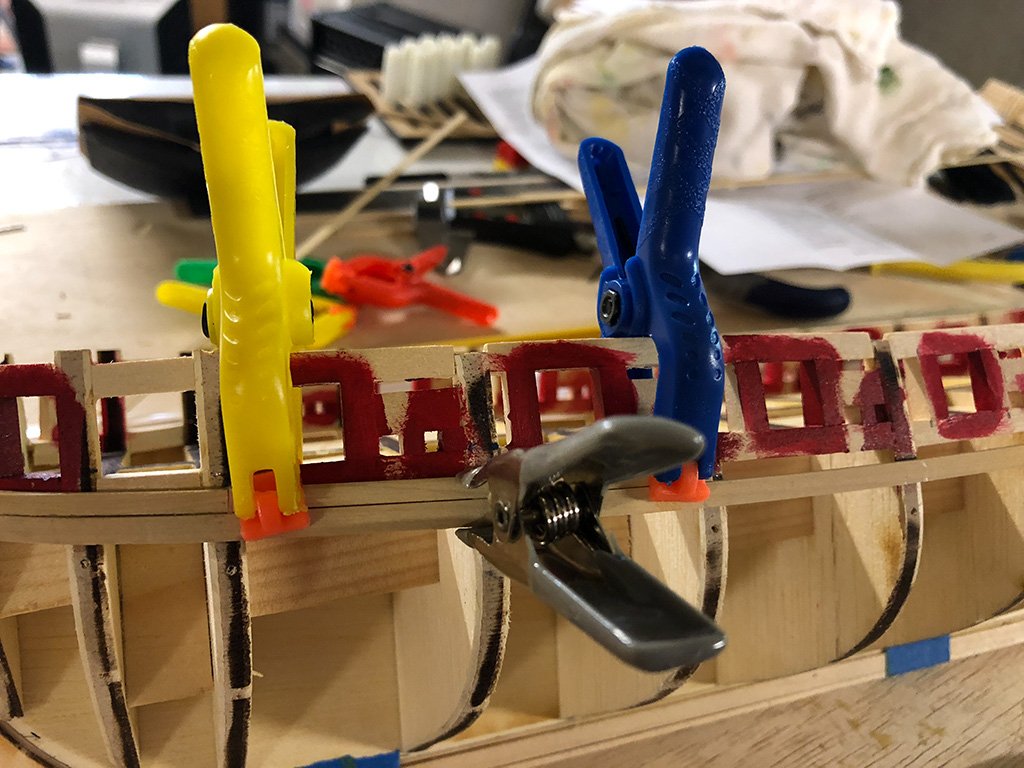
Yep - a teacher - astrophysics during the school year and researcher during the summer months. It's good work, and allows for some interesting off-time hobbies. Been working the planks up to the port openings. I have some images here to show how I am handling the cutting of the notches into the planks. I am using a small saw to notch the planks first, to the depth of the needed notch, then I use a #11 blade to remove most of the wood, then a small file to finish it off. It looks pretty good. It was a trial and error type thing at first, with a couple of horribly failed attempts. I am sure there are better methods, but this one is working for me thus far ;-) The colorful clamps were a bargain at the Dollar Store... they are poorly made, but do just right for this work. ~john


- 90 replies
-
- 7
-
-
- syren
- model shipways
- (and 1 more)
-
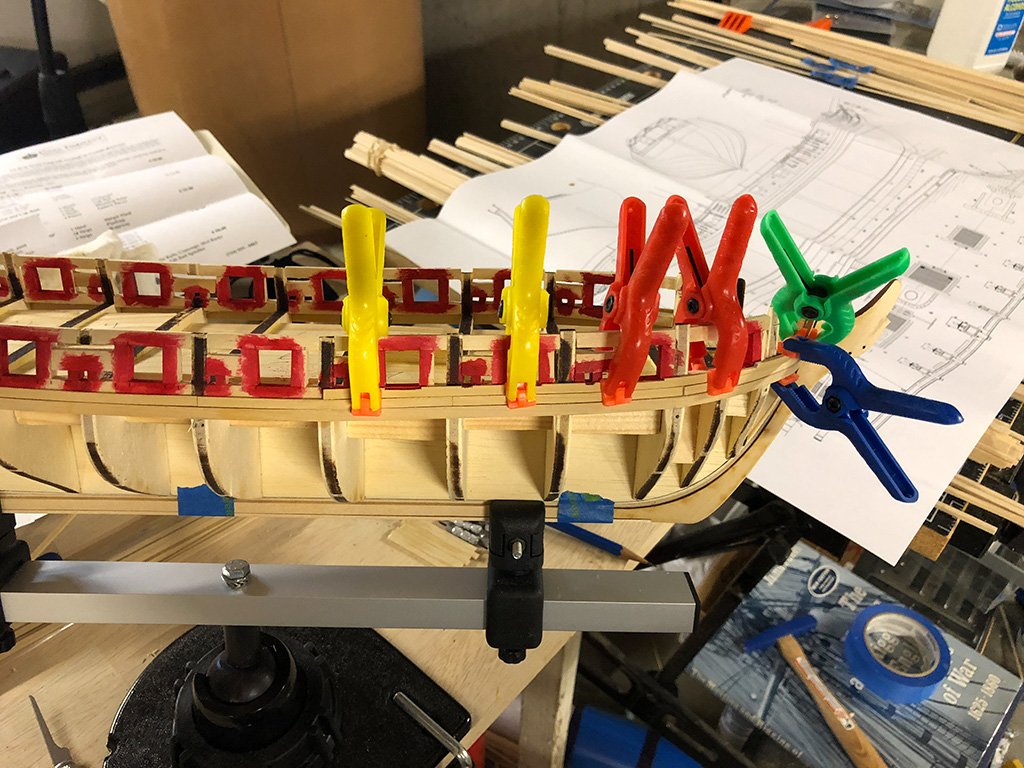
Some free time has evolved into my schedule - namely, school is over! 3 X Huzzah! I've been working on the upper planking with the boxwood, and it is moving along nicely. Made a "wall of planks" to use as a test for the total height above the wales, and it looks to be just about spot on. So far, so good. Using PVA, and going slowly to allow things to set overnight. Some pics of the process.....
- 90 replies
-
- 4
-
-
- syren
- model shipways
- (and 1 more)
-
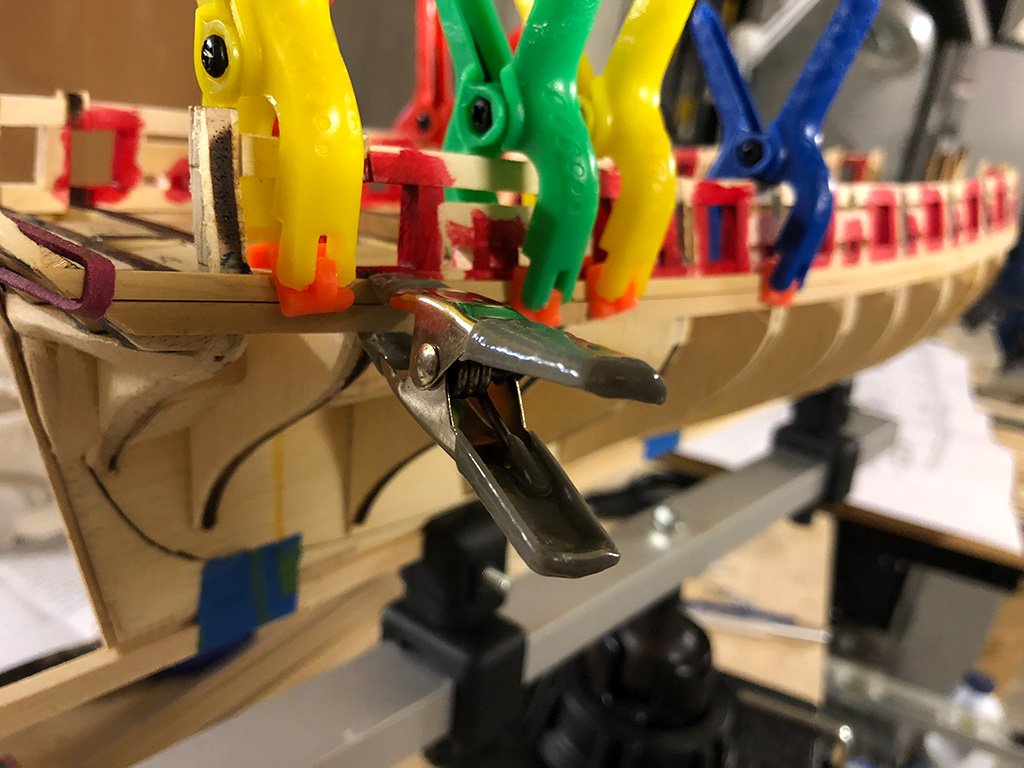
Patrick: no worries! I am doing well to remember my name on most days ;-) All: Yep I have TONS of binder clips.... best thing ever for frame clamping, as long as there is a bulkhead in place to attach the clamp to. Their price is right. ~john
- 90 replies
-
- 3
-
-
- syren
- model shipways
- (and 1 more)
-
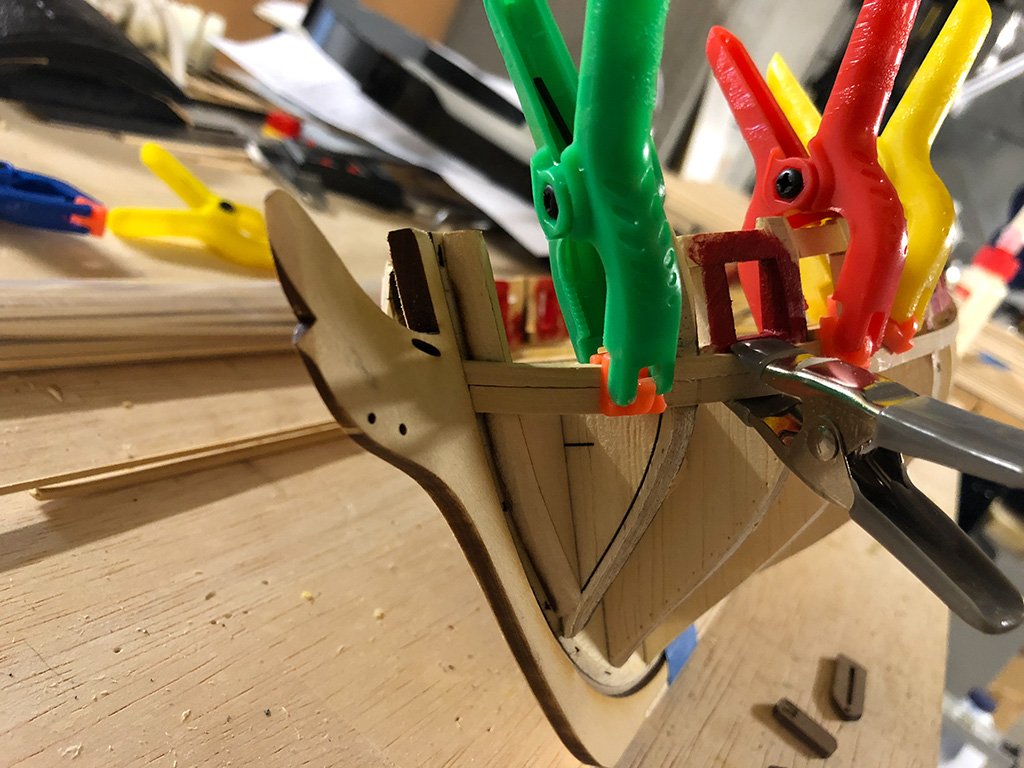
I am using a little peg stand that I built for a plank bender. The pegs align with the curve at the bow, and have some adjustment. Works well enough, but not as precise. The clamps are there to hold the plank onto the bulkheads long enough for the wood glue to set. I will be looking into additional plank bending methods (heat, etc) when the planks get to be needing bi-directional curvature, as it does towards the stern. I have a surface mount solder station that might just blow hot enough air, so I will be giving that a try some time soon on some scrap. ~john
- 90 replies
-
- 2
-
-
- syren
- model shipways
- (and 1 more)
-
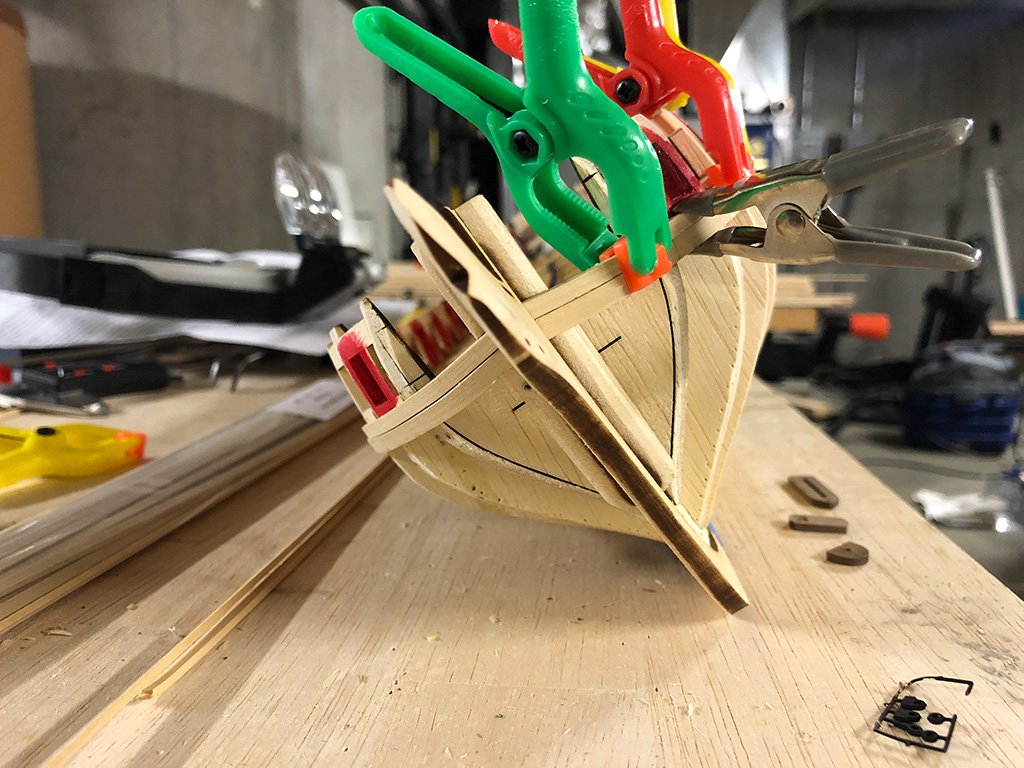
Started planking this week. The key learning moment this time around was in trying to figure out how to get the boxwood shaped just right. The best I could get was to soak it for 6 hours, then shape it into a board with pre-placed pegs for the correct bow shape... and leave overnight to dry. The wood is pretty brittle, so small sharp curves are a no-no. Lessons learned! So, the first plank has been set on both starboard and port sides. They may be incorrectly placed, but they are symmetrically aligned! ;-) I can be happy with that! ~john


- 90 replies
-
- 8
-
-
- syren
- model shipways
- (and 1 more)
-
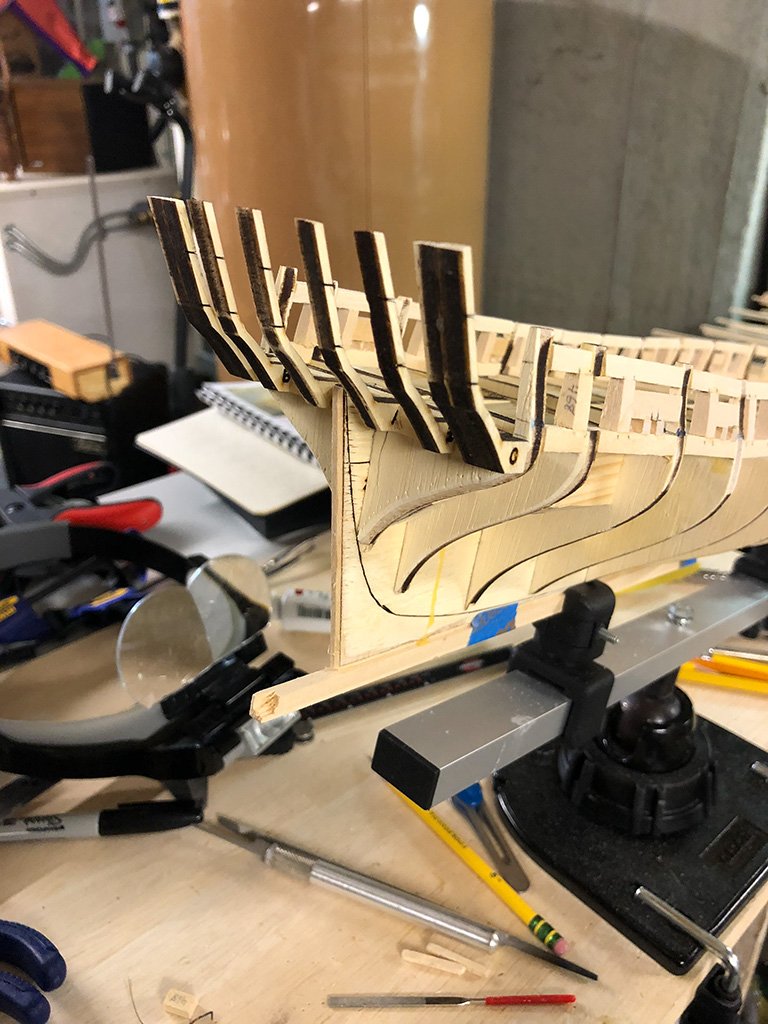
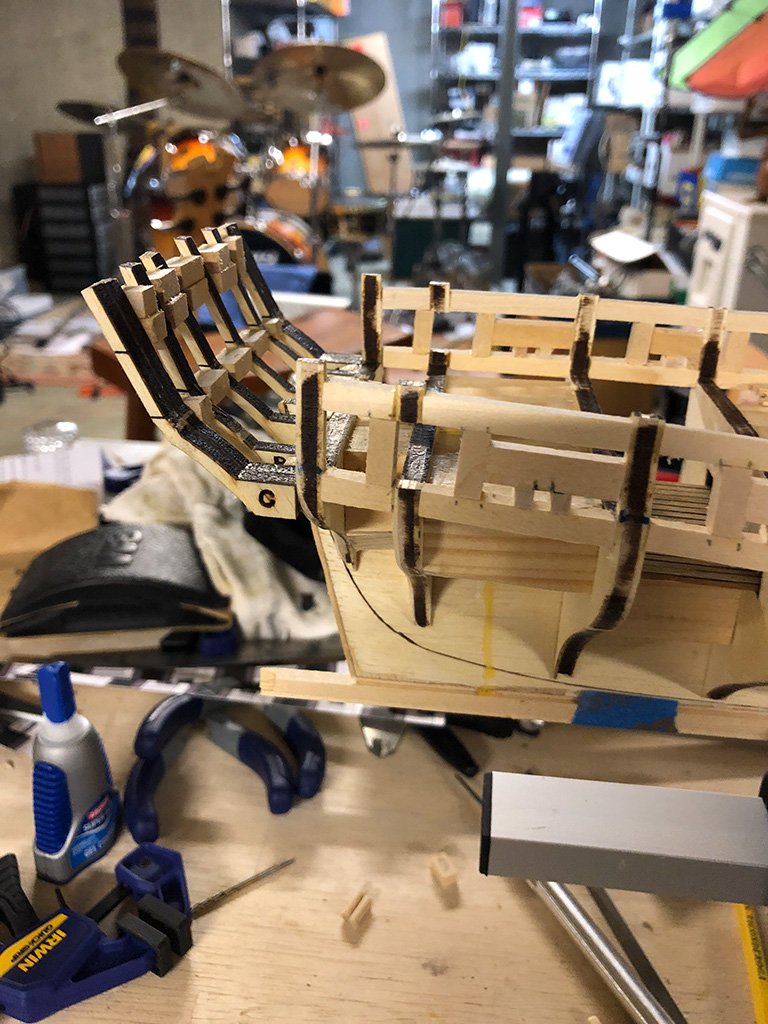
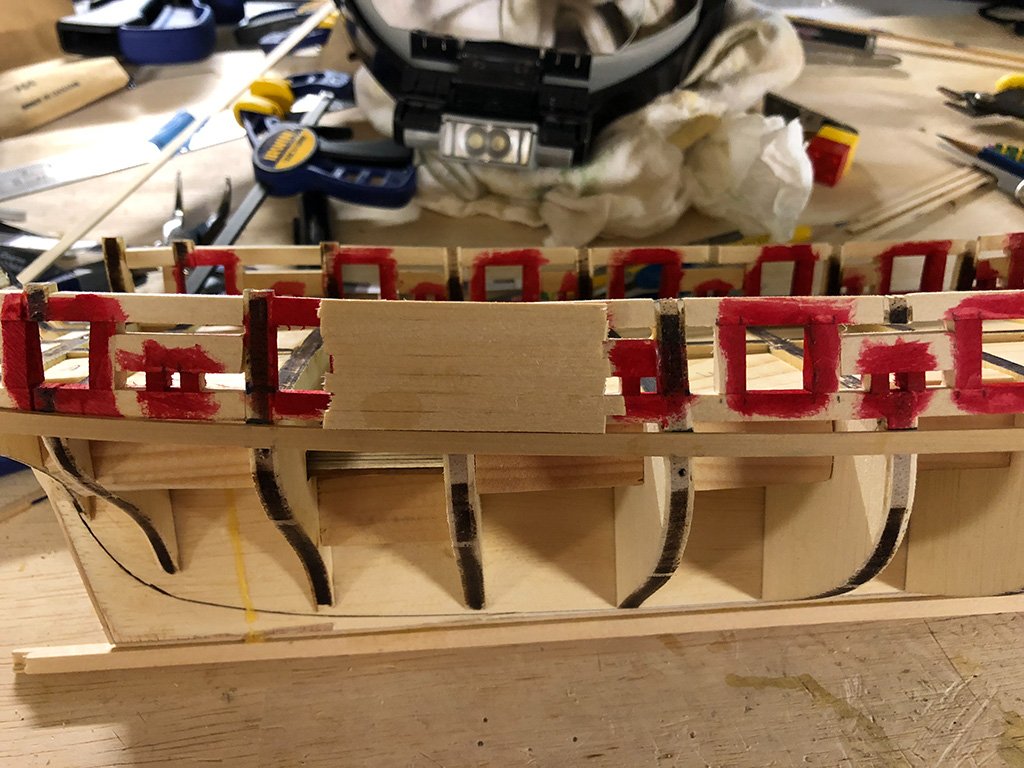
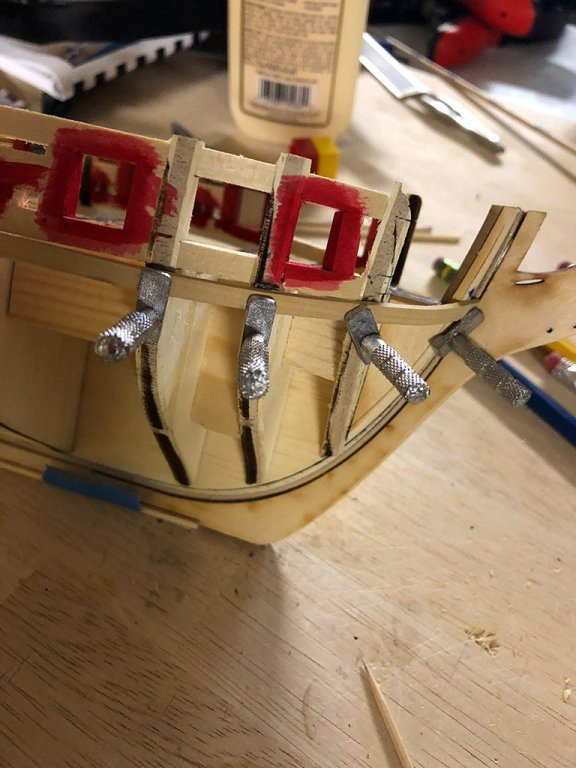
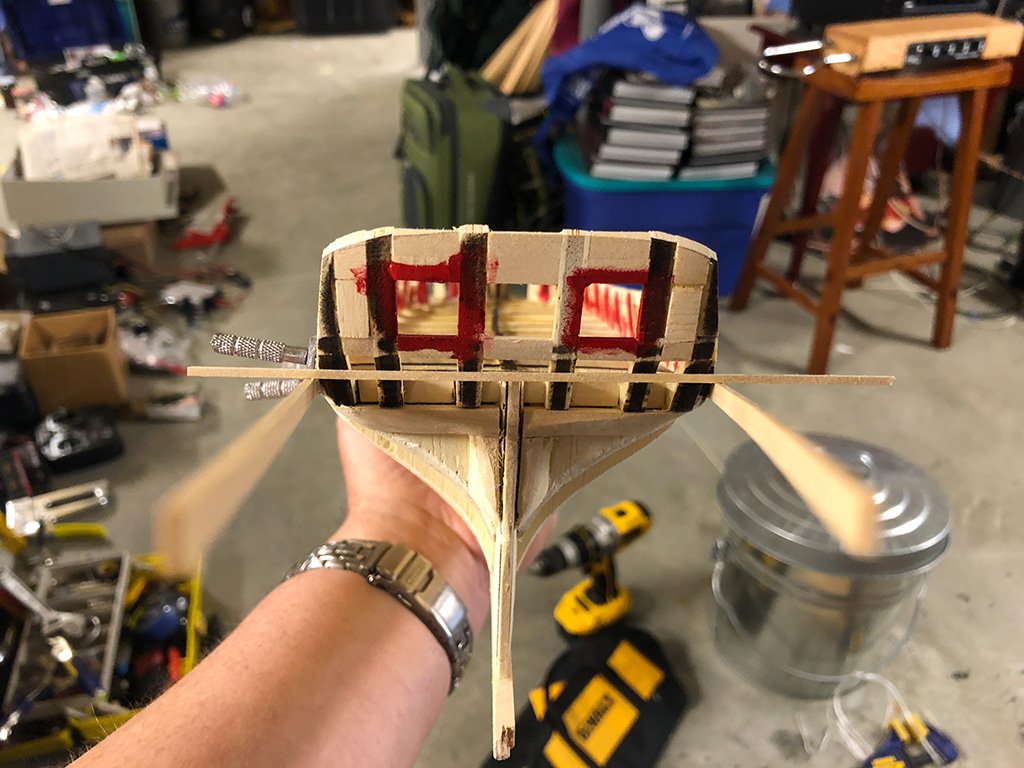
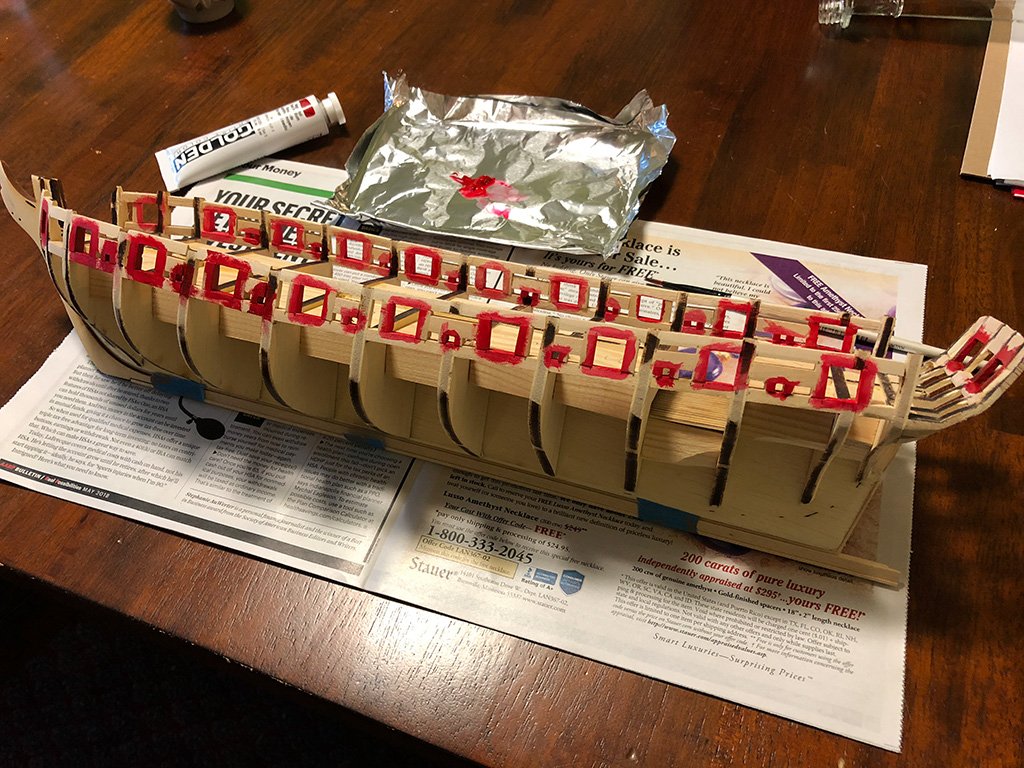
All, Still here! ;-) I was waiting on some boxwood to continue on with the build The next step is the start of planking. Got the stern framing completed and the ports all painted red. The wood has arrived, so onto the next part! It's coming along. Some images below. ~john


- 90 replies
-
- 8
-
-
- syren
- model shipways
- (and 1 more)
-
That is just excellent: quite a build! I would love to see more pictures. ~john
-
Fab!!!
-
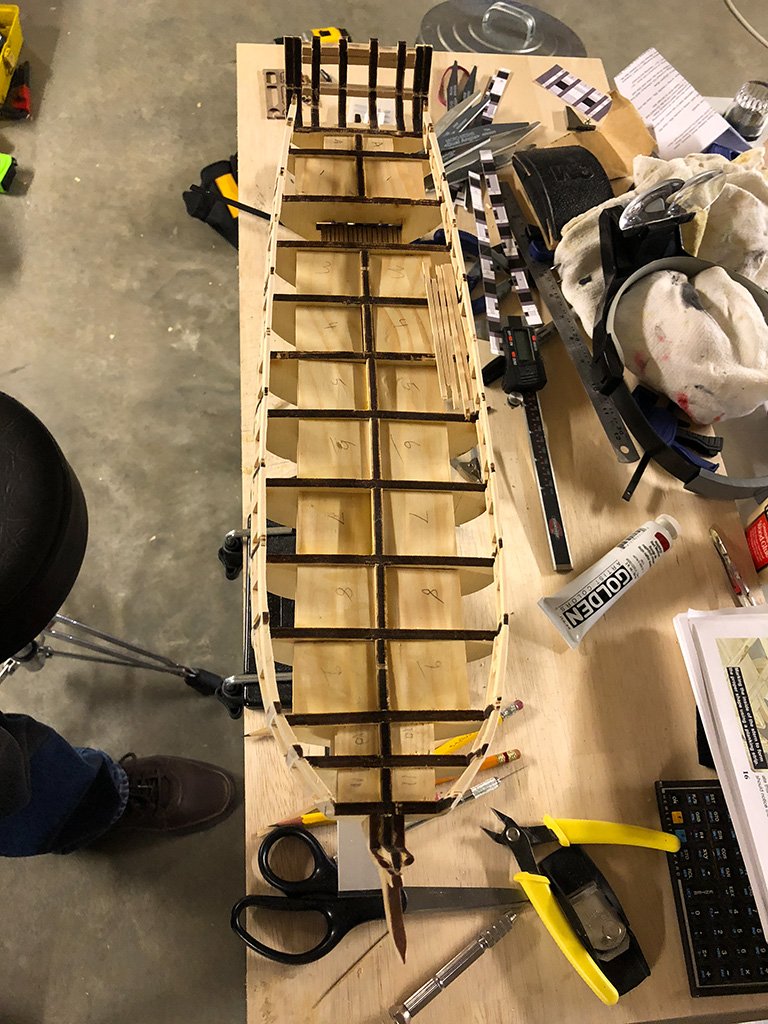
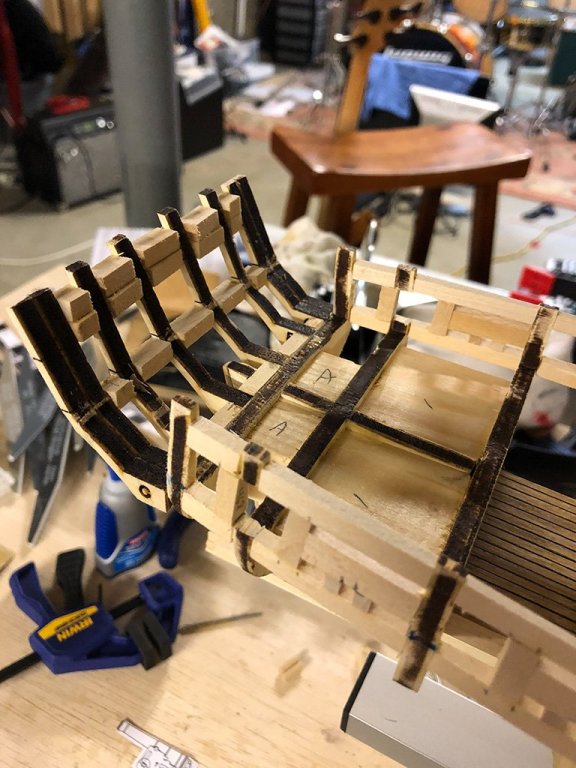
Worked on getting through the stern framing today between watching games of soccer. Got the sills and lentils sanded down. For sanding the exterior I used a DeWalt finishing sander. That is the best purchase I have ever made for building the Syren. It has saved me endless time in all the sanding of the gun ports. For the interior, the finishing sander will not fit, so I used a small pencil-like vibrating sander tool I picked up a while back when making the whale boats for the Kate Cory. That did the trick in no time at all. I then cut some spare sheet wood to fill in the two outboard gaps in the stern framing and then sanded the stern sides to fair against the future plank lines. Nothing broke, so I must be doing something right! :-) ~john


- 90 replies
-
- 7
-
-
- syren
- model shipways
- (and 1 more)
-
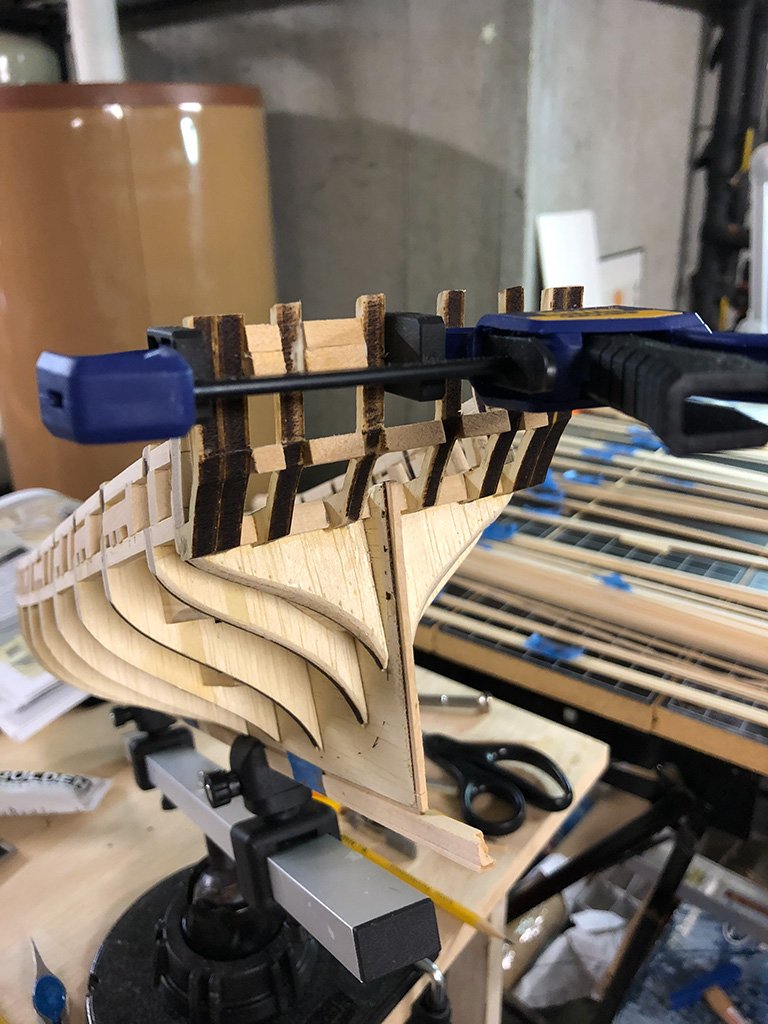
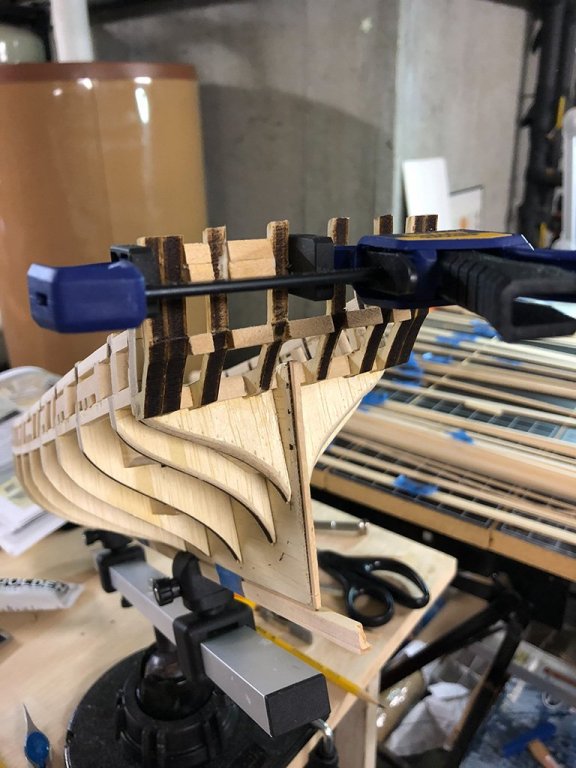
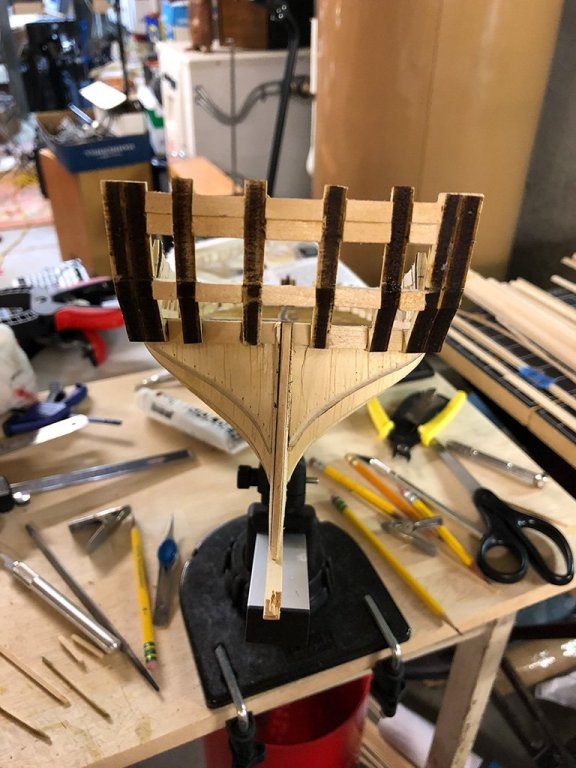
Got the sills and lintels in place.... now to the VERY gentle job of sanding and shaping the stern. I have already cracked the frames a couple of times. Slow going... ~john

- 90 replies
-
- 6
-
-
- syren
- model shipways
- (and 1 more)
-
Welcome, Tim! I hope this build goes as well as the Cory. We shall see! ;-) ~john
- 90 replies
-
- 1
-
-
- syren
- model shipways
- (and 1 more)
-
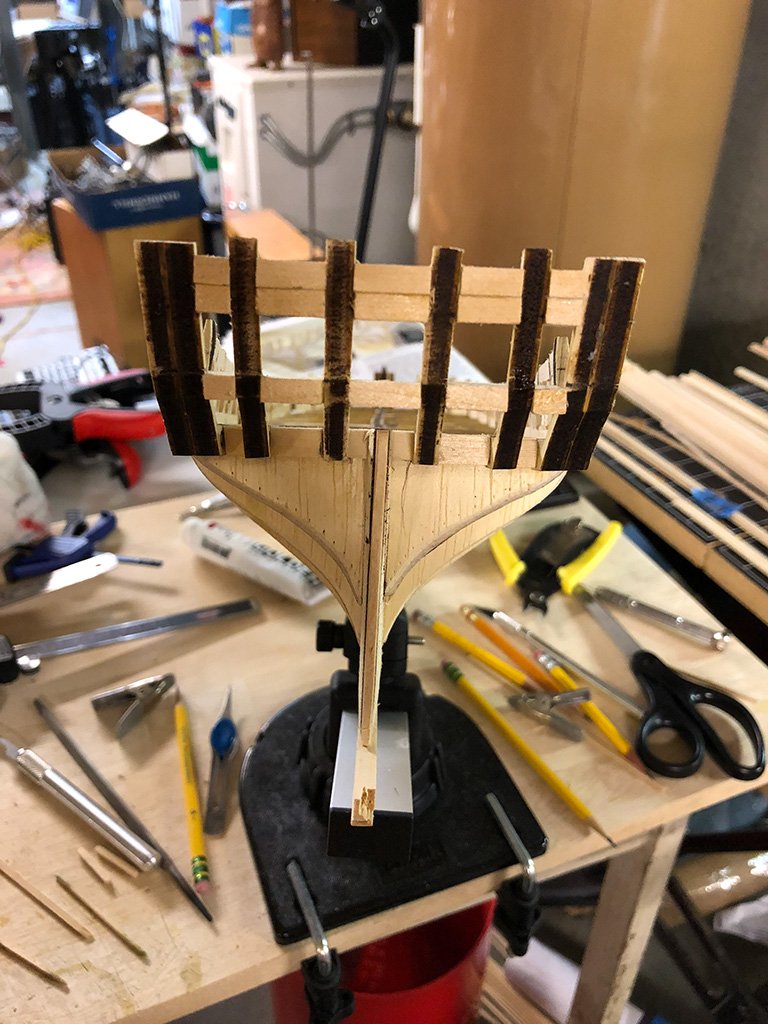
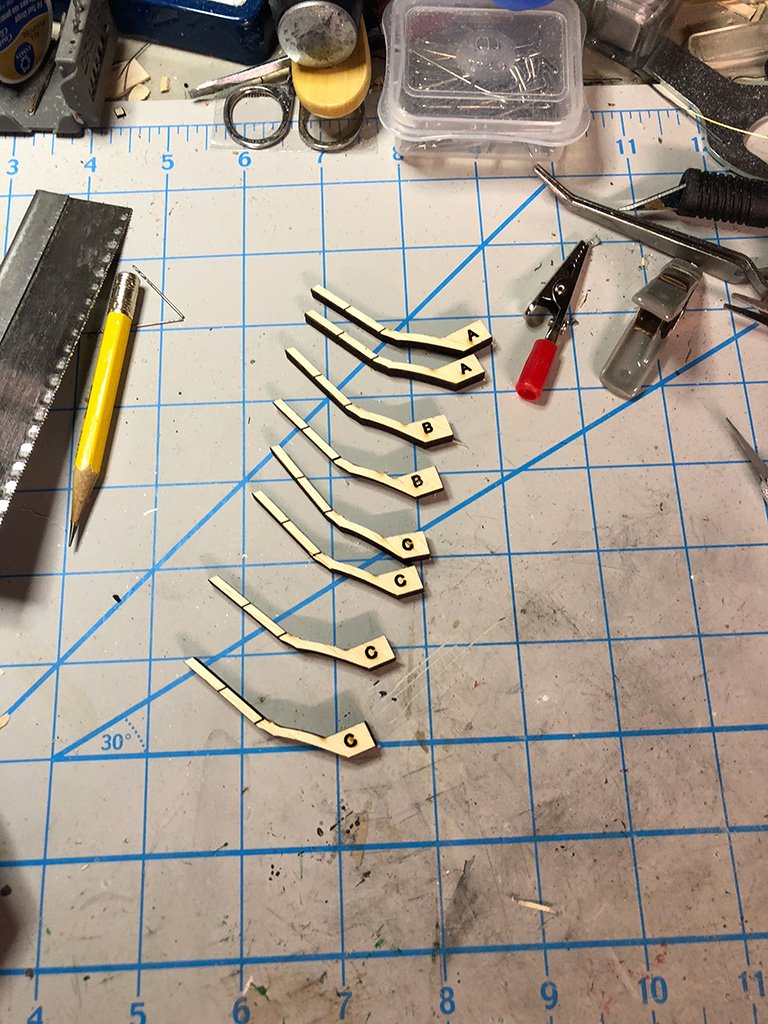
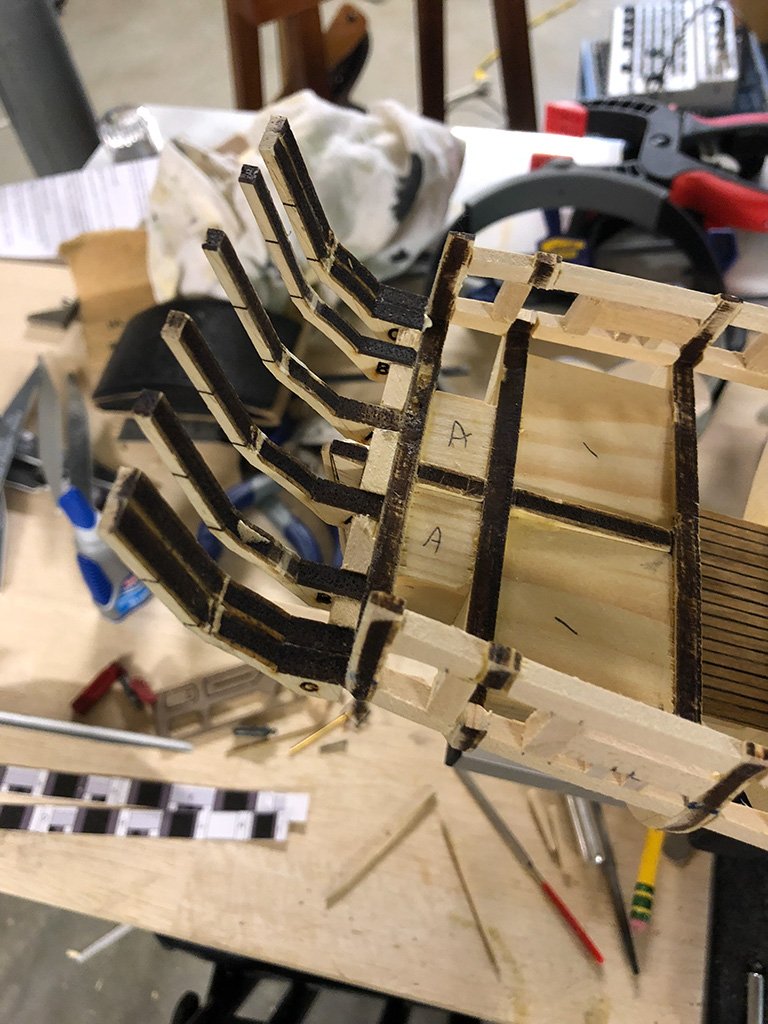
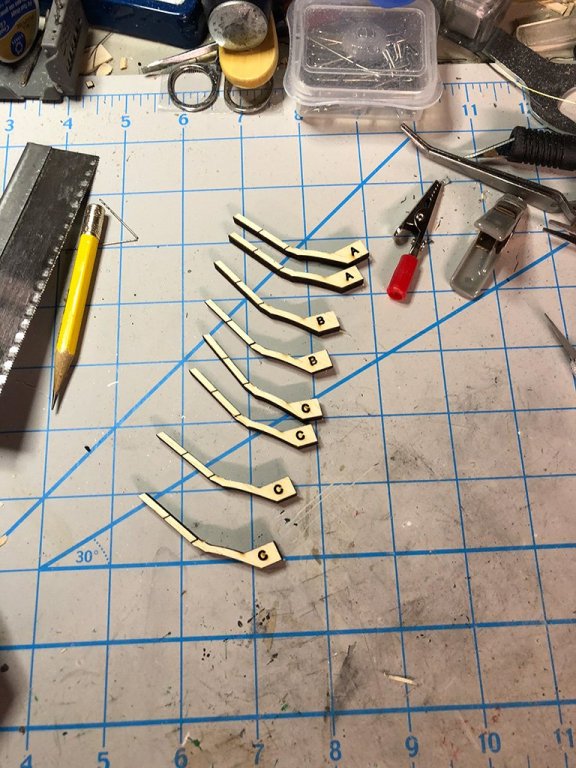
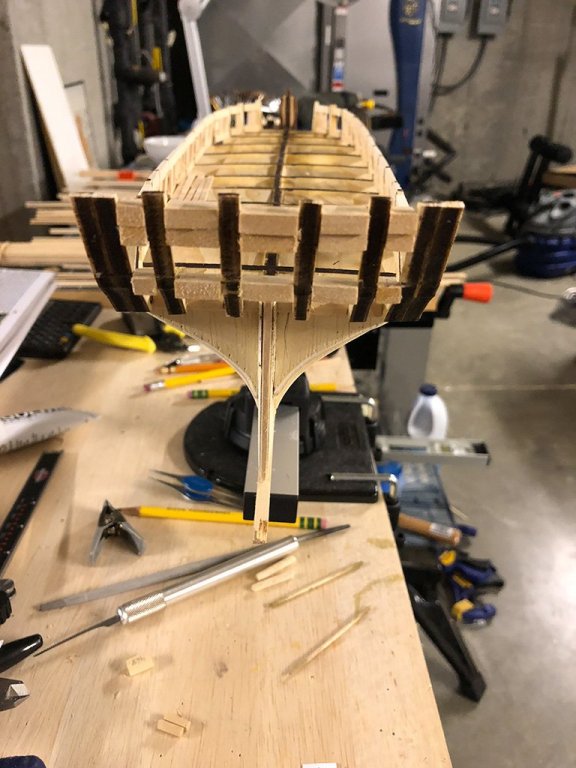
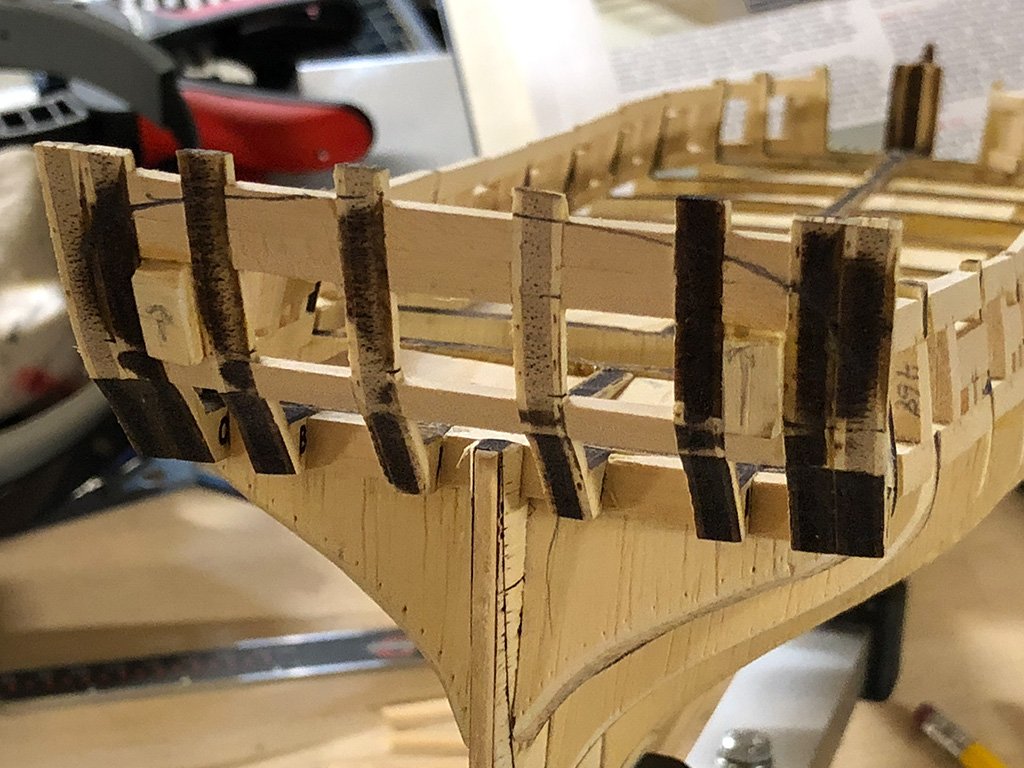
More progress this week between classes and grading papers. I have started to work on the stern. Yep - those little ribs are quite fragile, particularly where they have been inscribed with the laser cutter... so they tend to bend then break away from those marks. Cyanoacrylate to the rescue. I'm going to let this set overnight before continuing the stern framing. ~john


- 90 replies
-
- 8
-
-
- syren
- model shipways
- (and 1 more)
-
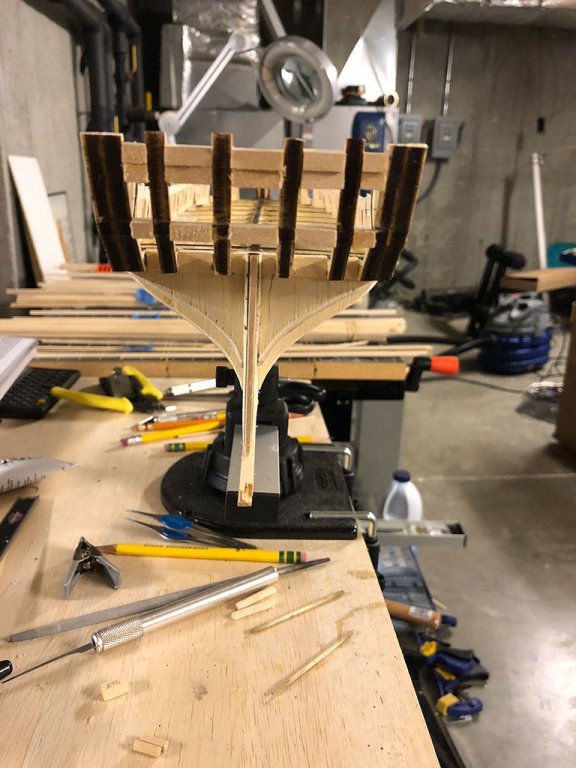
I always bend away from the grooves....
-
I'm pulling up a chair for this ;-) Looks good, Mike!