Search the Community
Showing results for tags 'Artesania latina'.
-
 Hi everyone, I am a bit hesitant to open my first build log, as I am a complete novice to boat modelling, but have opted to post my progress on-the-go in case other newbies can benefit from the perspective of digging into a new hobby. On a whim, I purchased the San Francisco S. XVI second-hand. I've always secretly dreamt of trying my hand at modelling, and finally found the space, time, and finances to allow such an indulgence. Interestingly, some online posts note that the original SF model only has one layer of hull planking, whereas the SF II is double-planked. However, my specific model (AL 20408) definitely features a double-planked hull, leading me to believe that it was released sometime between the original SF and the SF II. In many ways, this definitely does not appear to be the best option for a beginner's model! I only started reading up on boat modelling techniques after the purchase, and soon realized that the San Francisco S. XVI poses some peculiar complexities. Secondly, the original owners had already started building the galleon, and even with minimal research it was possible to detect some basic errors that had slipped in. Thirdly, I am fully prepared to find that the opened box may have parts missing, when it comes down to the crunch. That being said, I can't help but feel that all these downsides actually removes quite a bit of pressure to "get things right". No doubt I will make many more mistakes, the best of teachers. But it's less stressful going in, knowing that I did not fork out a fortune and can practice new techniques and try out different tools on a second-hand kit. I've slowly been buying the essential hand-tools to get going, holding off on buying more expensive tools until I know exactly what I want or need. Progress will likely be slow, as I do work two day jobs, but I do plan to post updates as things come along. And so the journey begins!
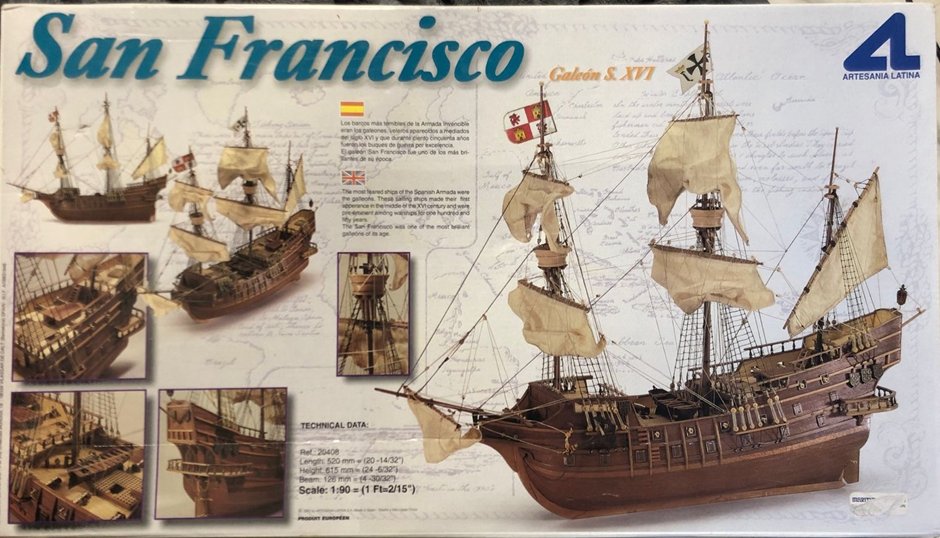
-
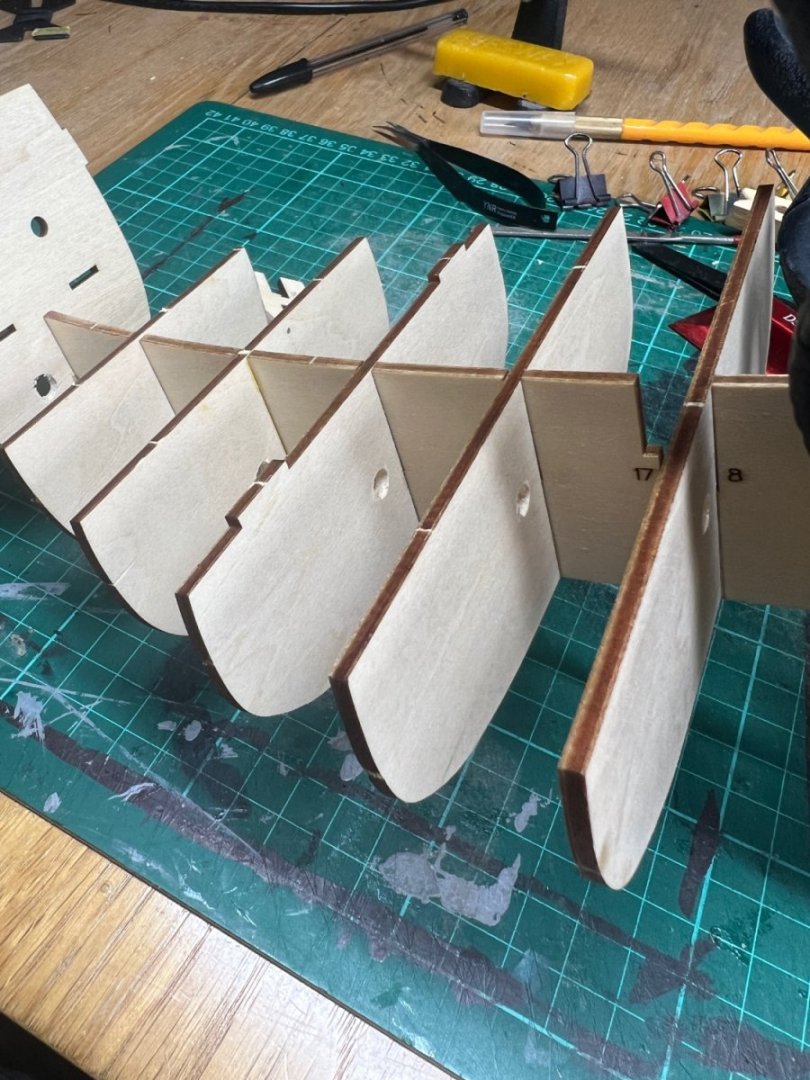
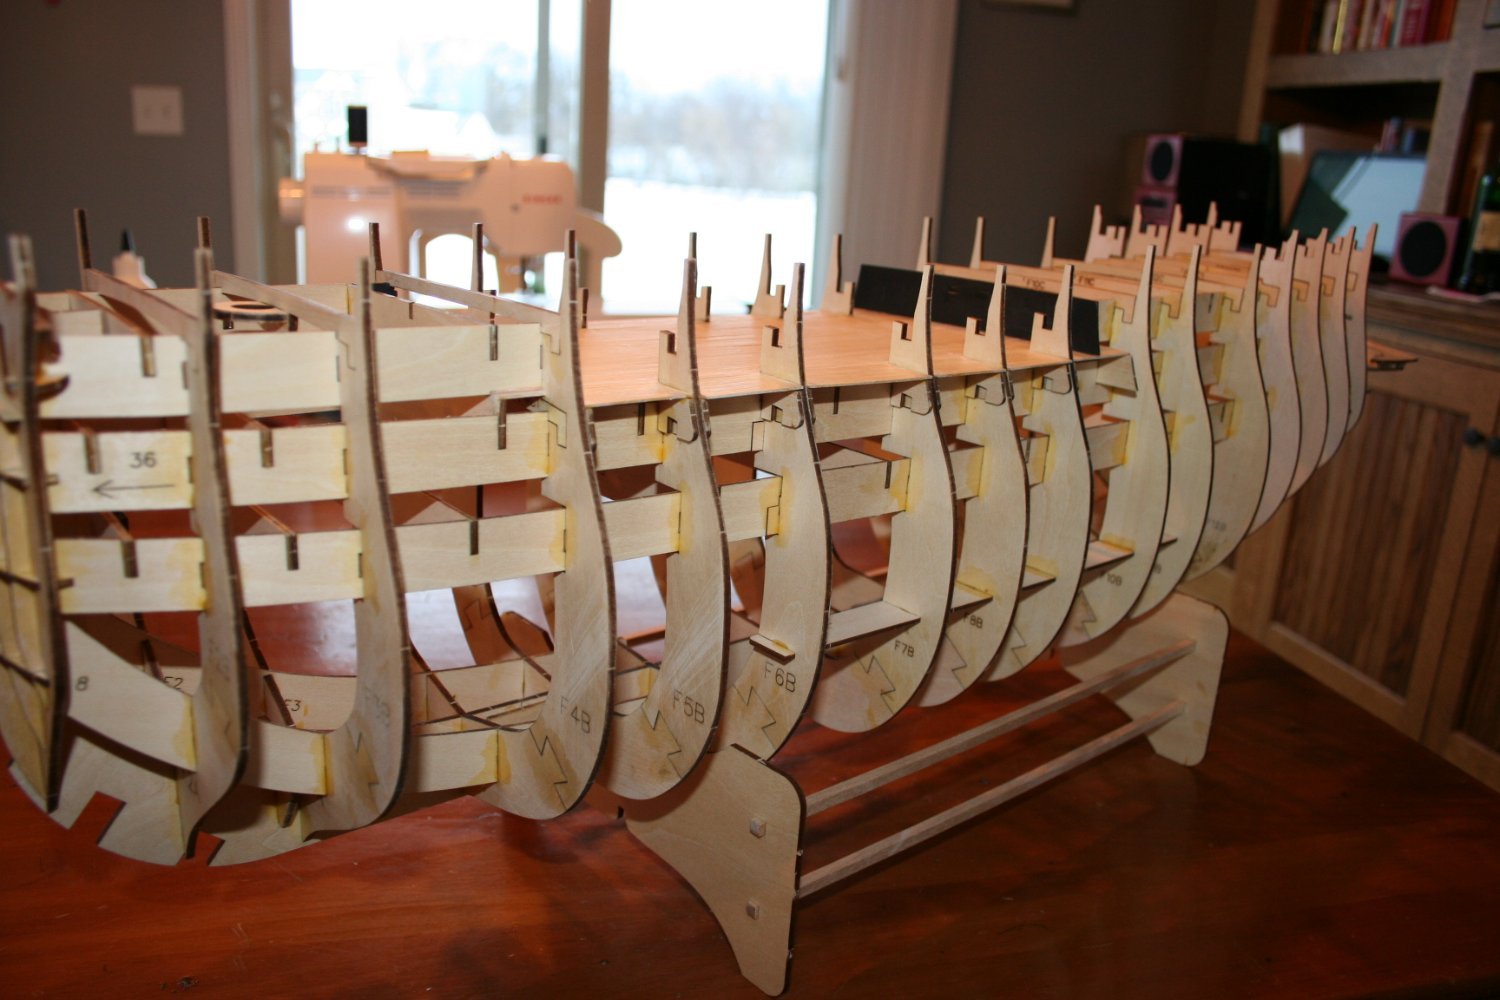
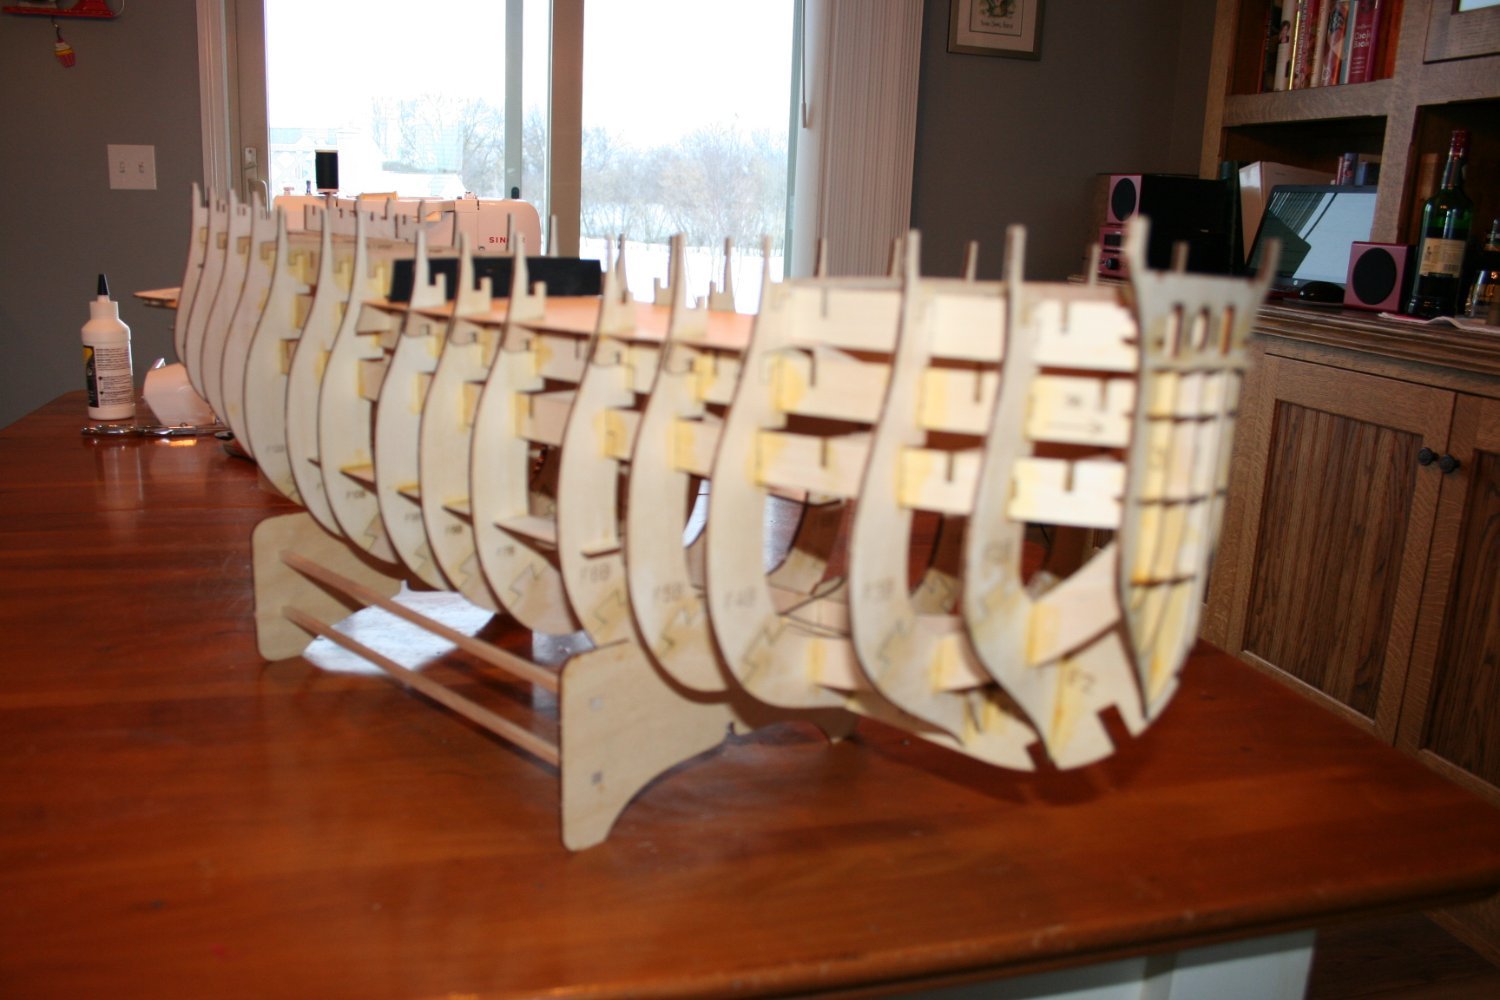
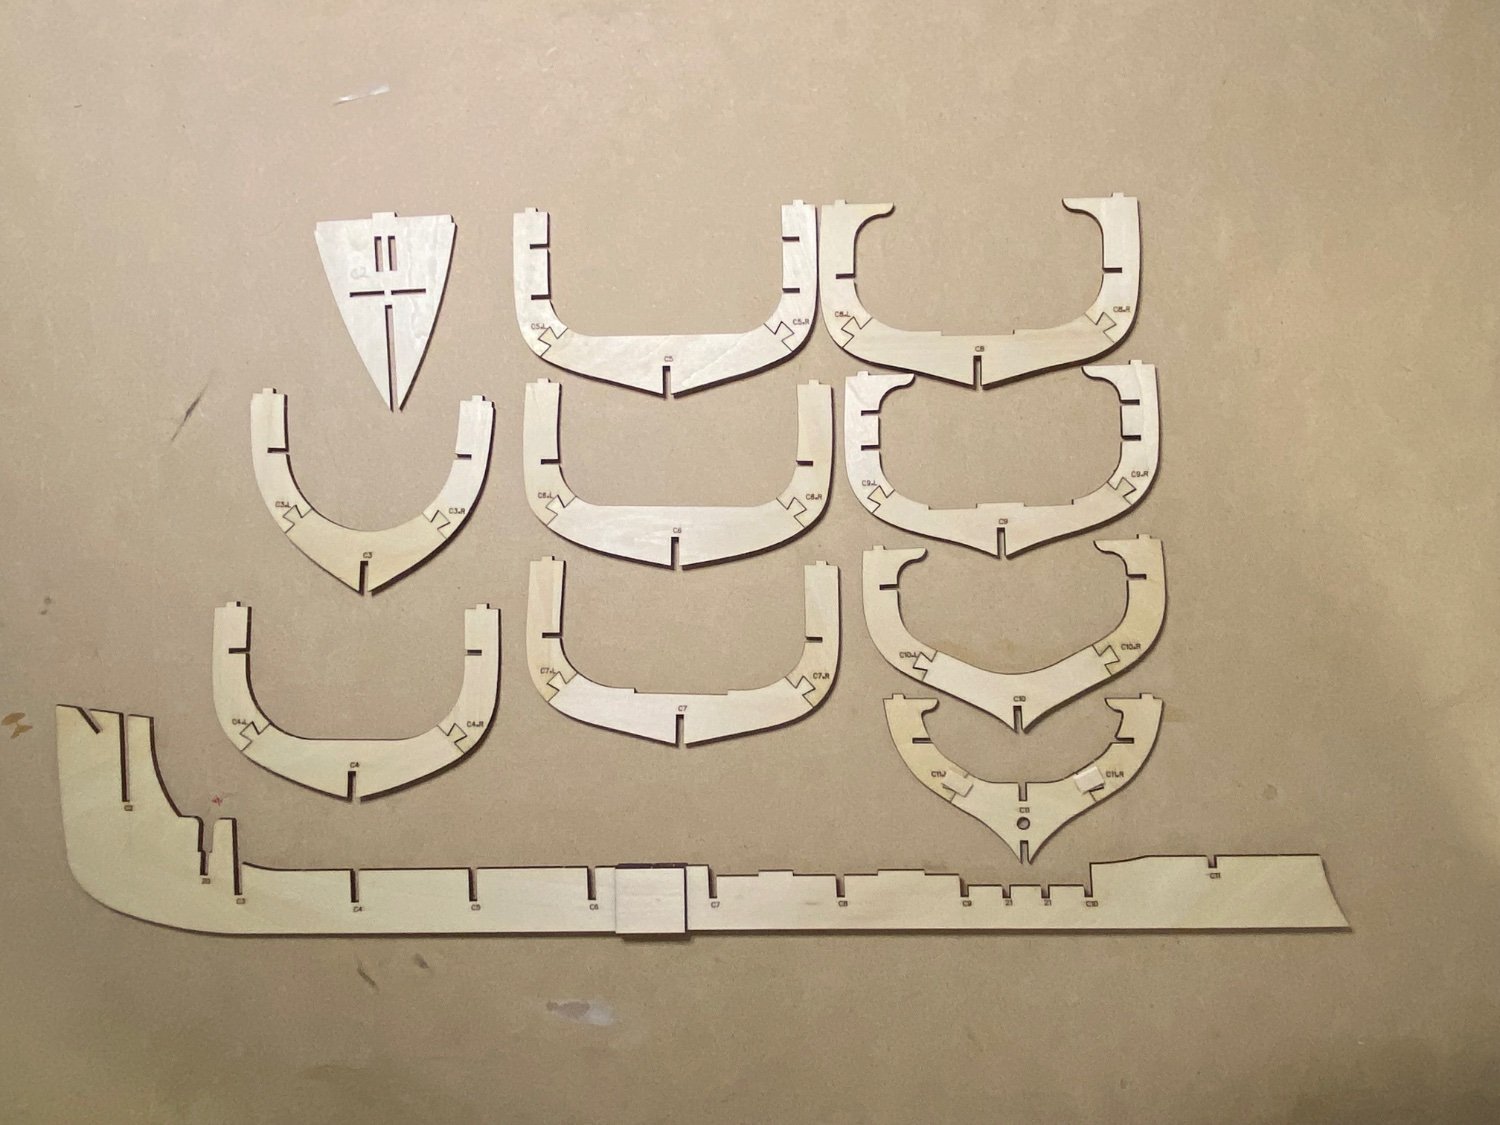
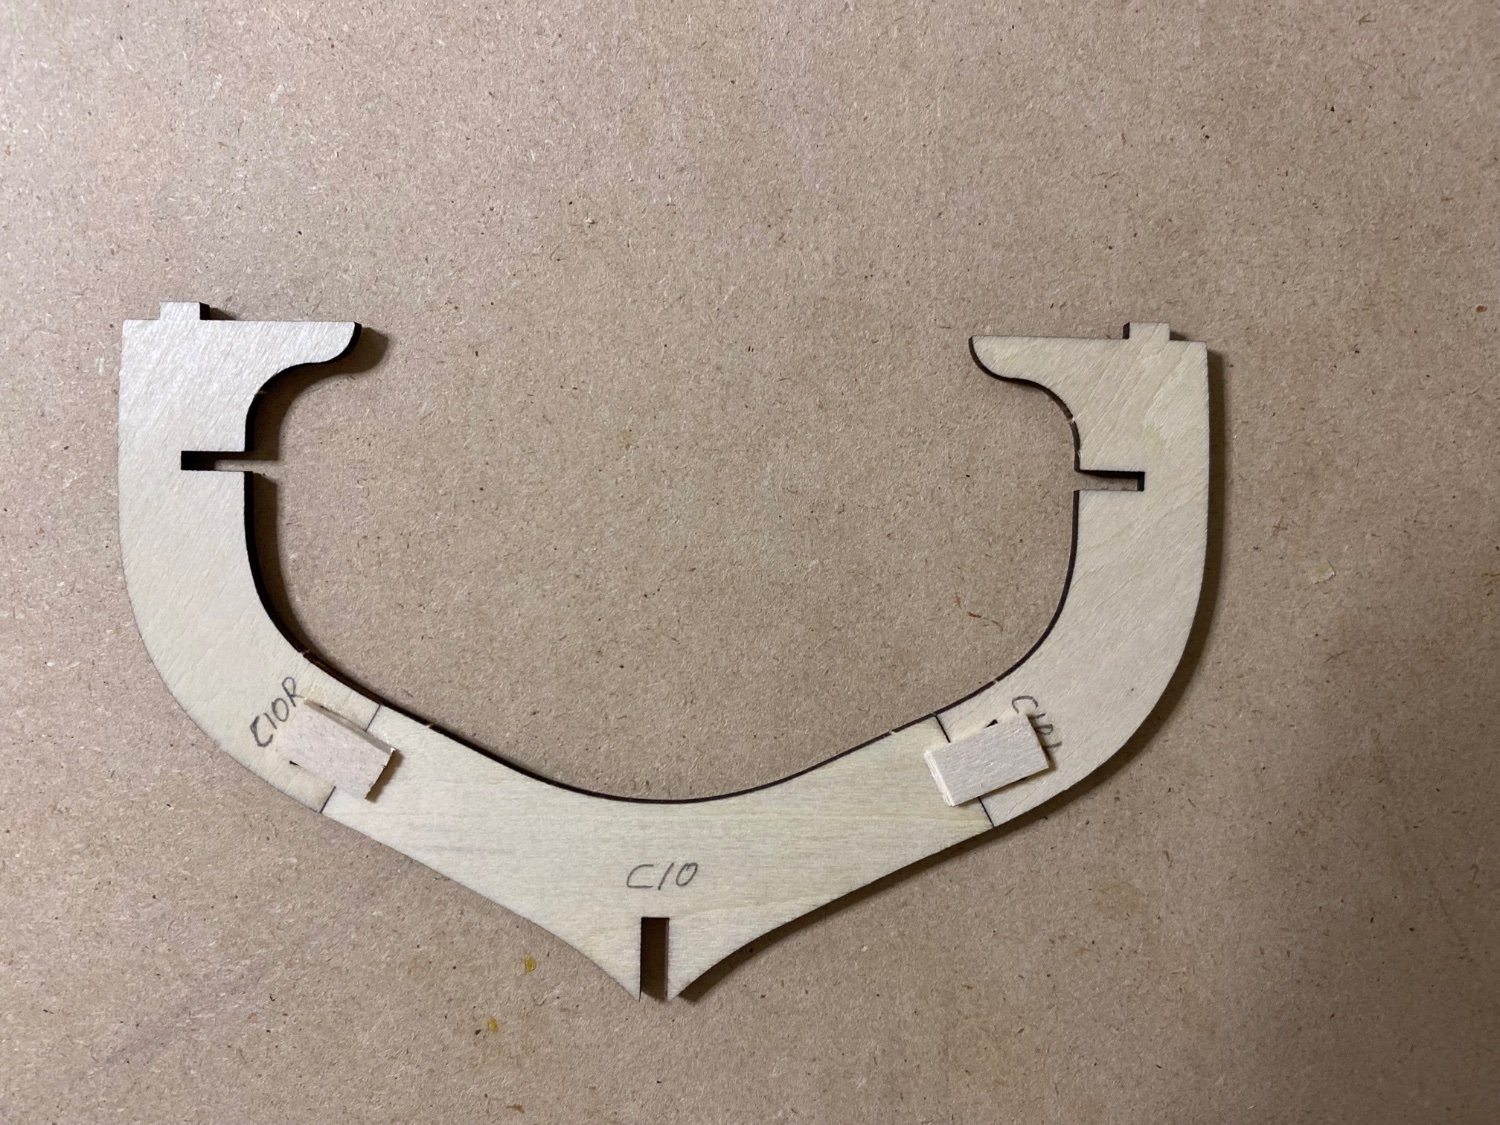
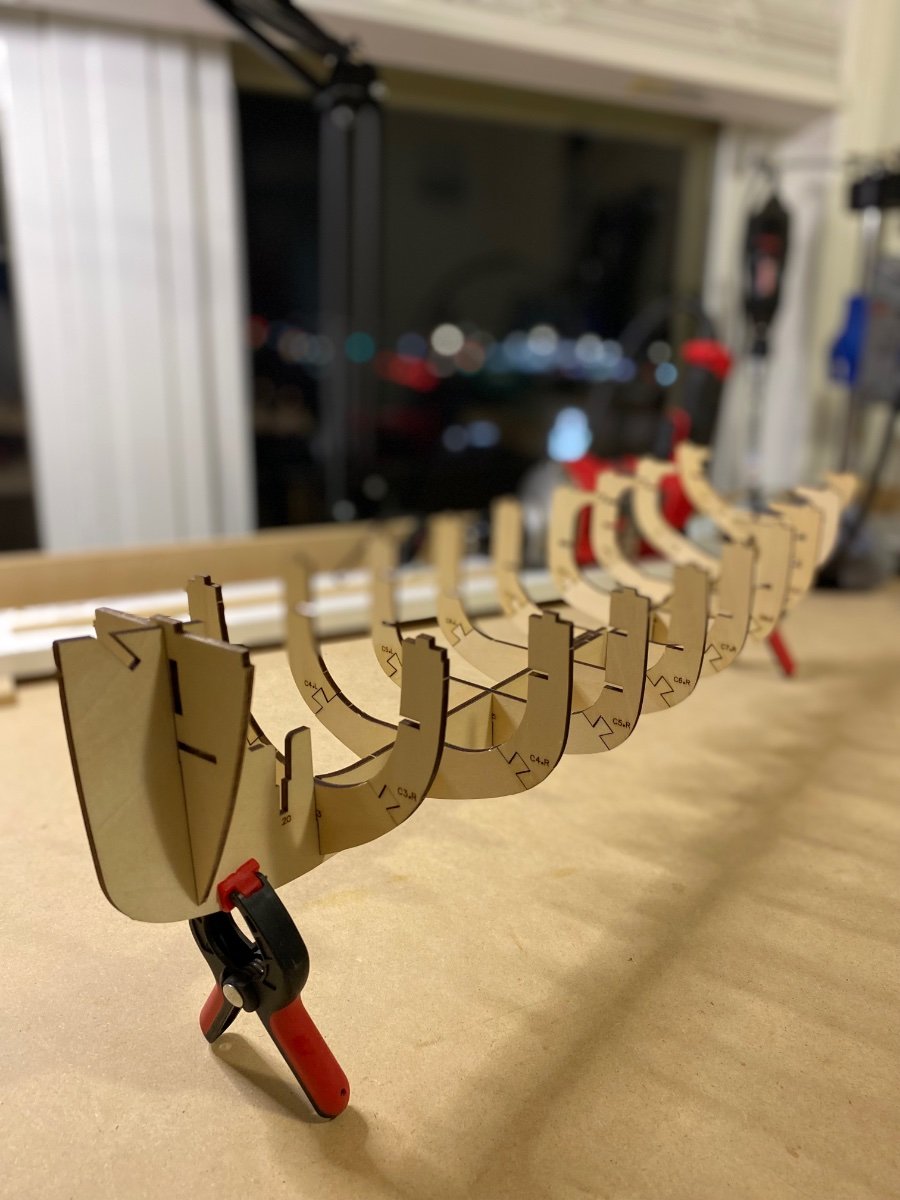
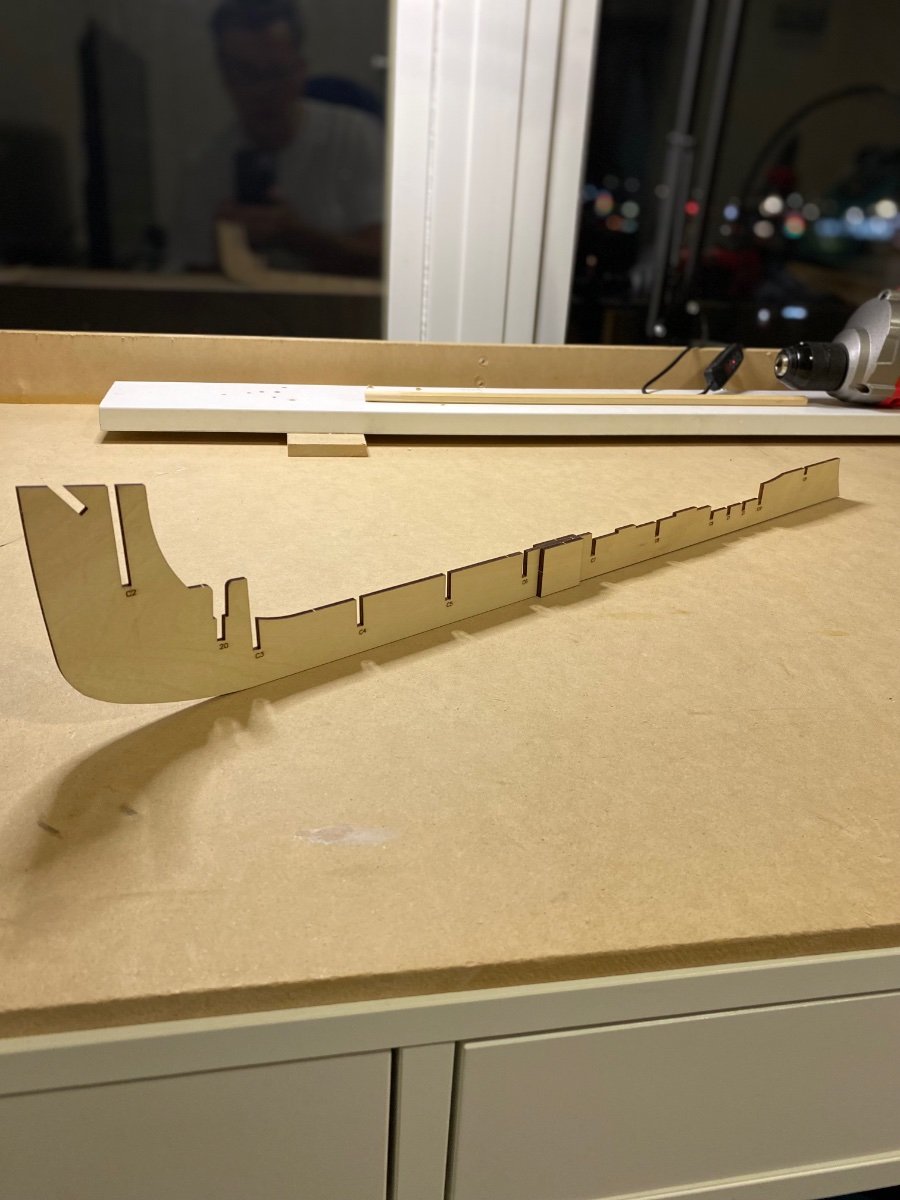
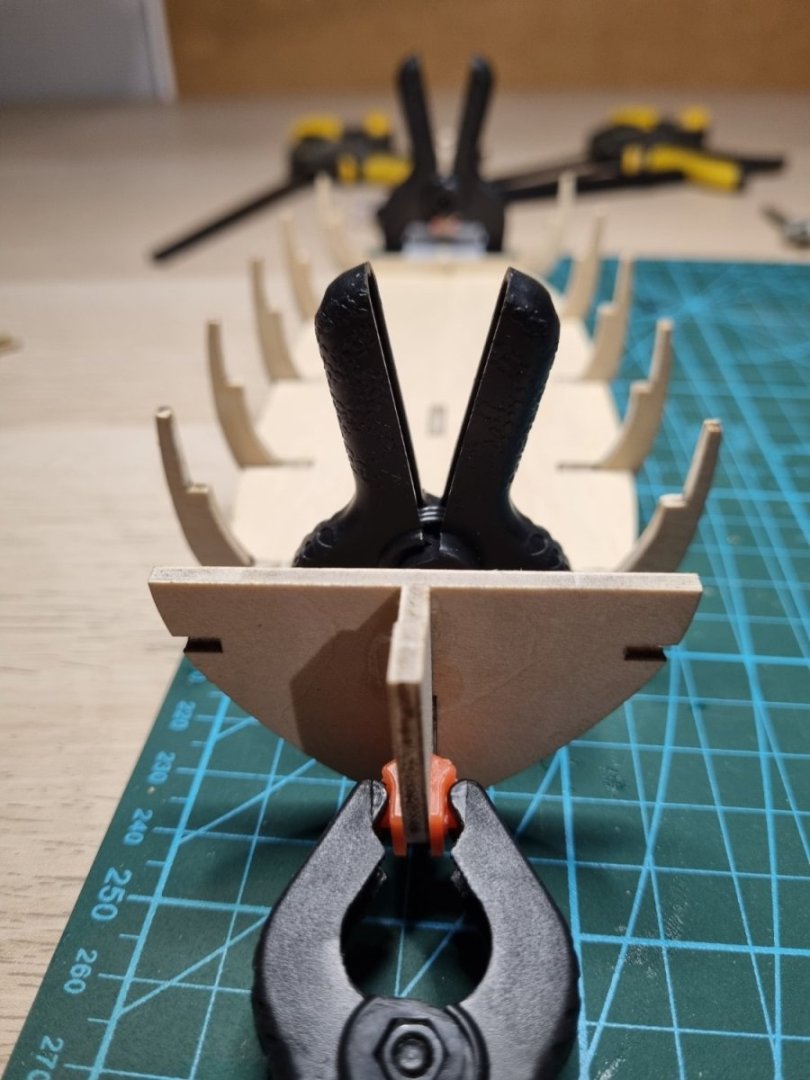
 I said when I got the kit that I would start the kit after I got close to the rigging stage on my Pegasus But I made a mistake and thought I'd see how the frames go together ,one thing lead to another so I've almost finished the framing😏😄 Parts are clearly marked and the youtube instructions are ok But some stages are in the wrong order after their editing ,it's also a prototype from the look of it but it is all there ,just needs some going back and forth in the video! The Laser cutting is very fine and precise so little clean up other than cleaning the char and the small nubbins left after their cut from the sheet! When i started I thought it seemed pretty flimsy but once you've fully built the side it's solid! pictures are front on and Starboard frames finished! ,the gun port and entry port framing is separate and are attached to the dowels. link to the whats in the box post
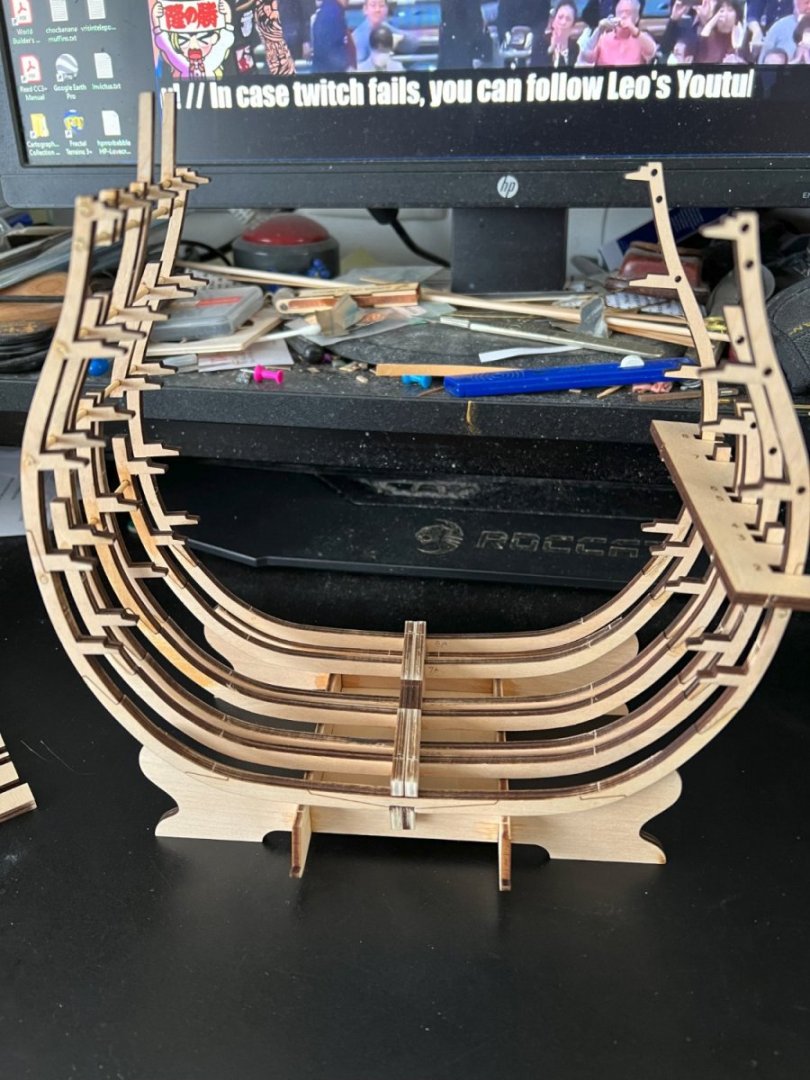

- 25 replies
-
- 3
-

-
- Victory
- Artesania Latina
- (and 1 more)
-
 Hi Everyone I picked up this kit off eBay recently for about £30. Up to now I have never built a wooden model kit, although I have a build log for an Occre Polaris on here, I haven't started it yet. I commute between the UK and Belgium so this will be my UK project, the Polaris is already waiting to be started in Brussels. I'm hoping that I can try, fail for sure and then learn with this one. The instructions are wordy and relatively brief so I imagine there will be a fair bit of head scratching coming my way. But there's schematics included as well which I'm hoping we'll guide the way. Looking forward to having a go. Any and all advice would be very welcome.
-
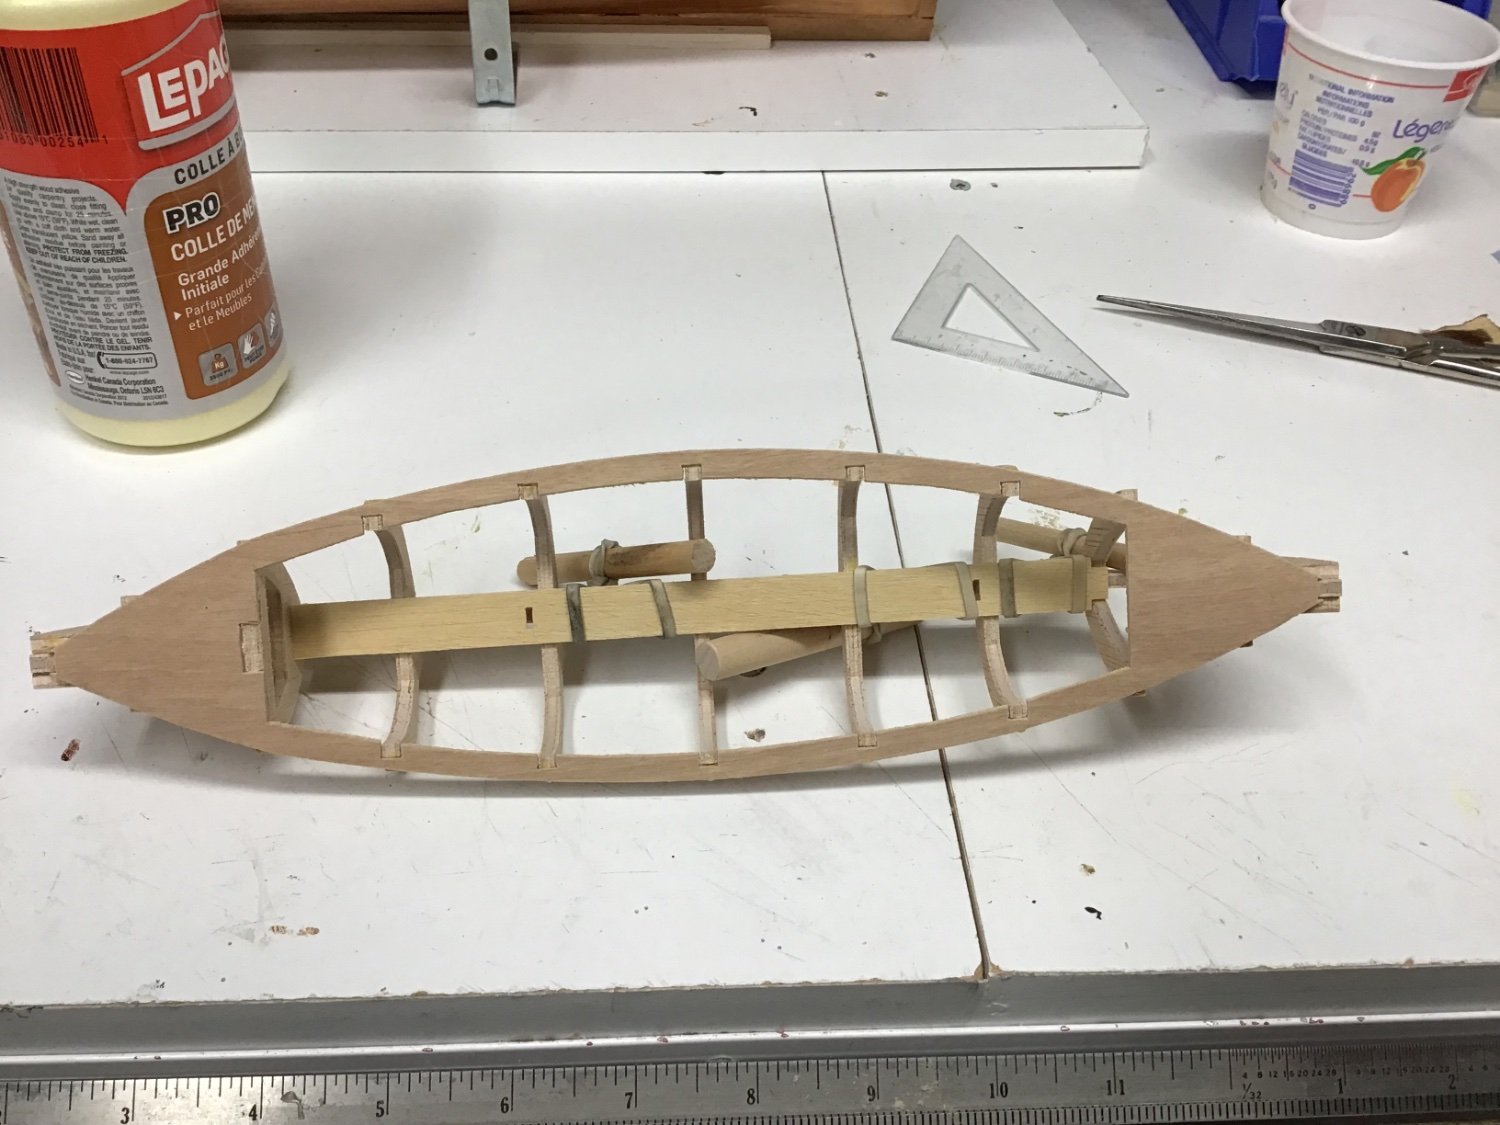
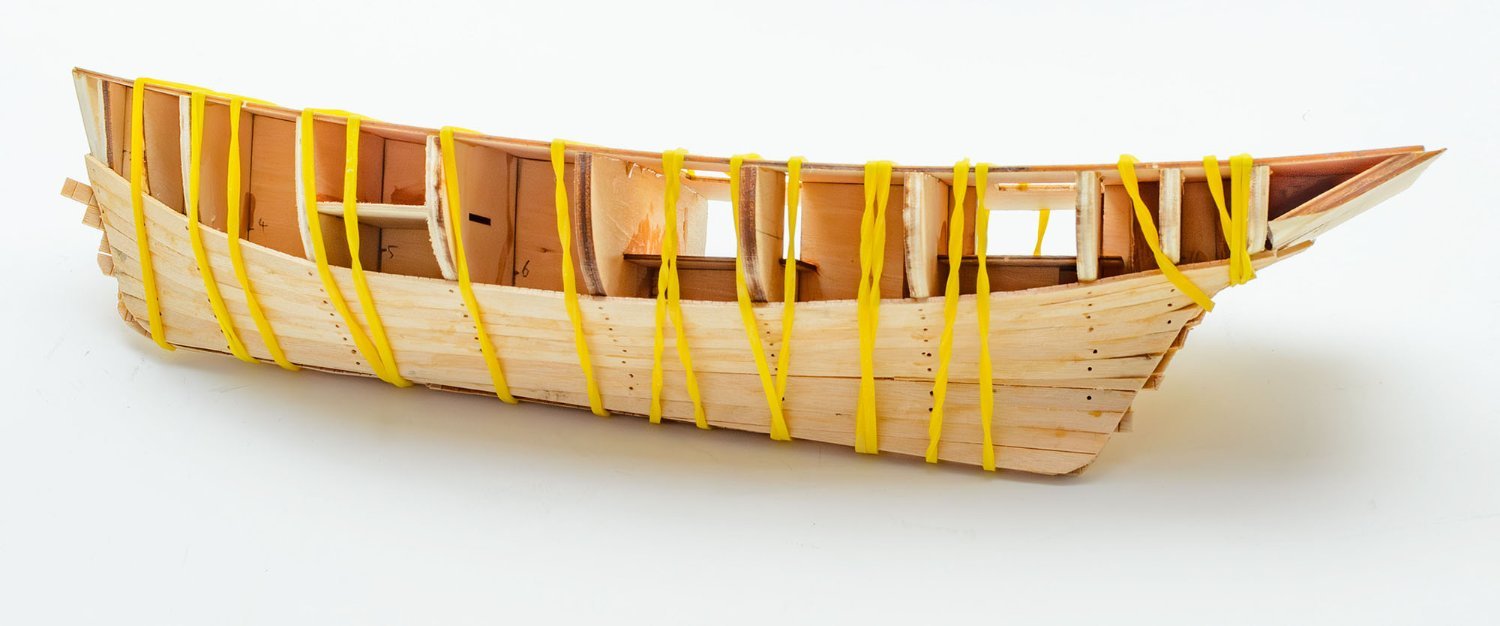
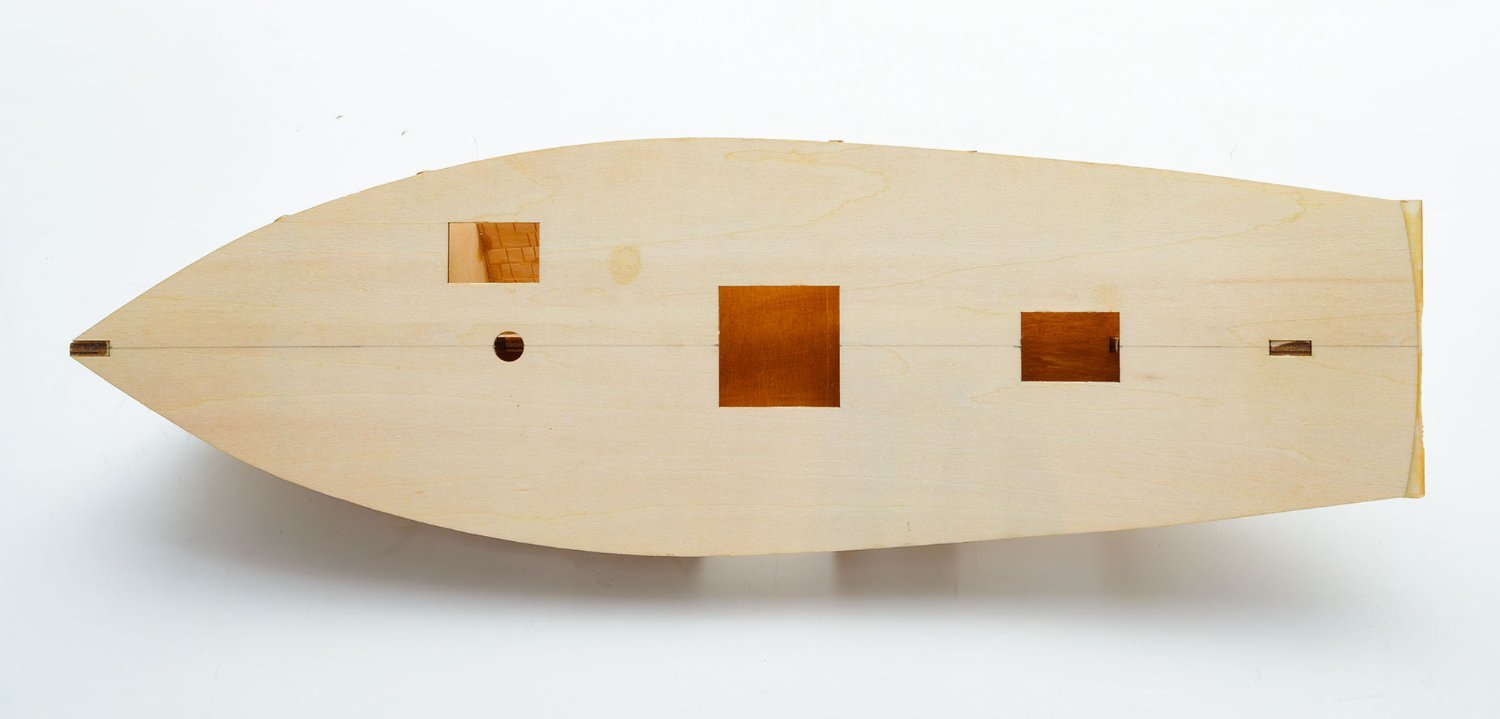
 I decided to begin yet another of the models on my shelf. it is a whaleboat of European origin, I assume i can work on this while glue dries on other models I am building 😬 here are some shots of building the frames
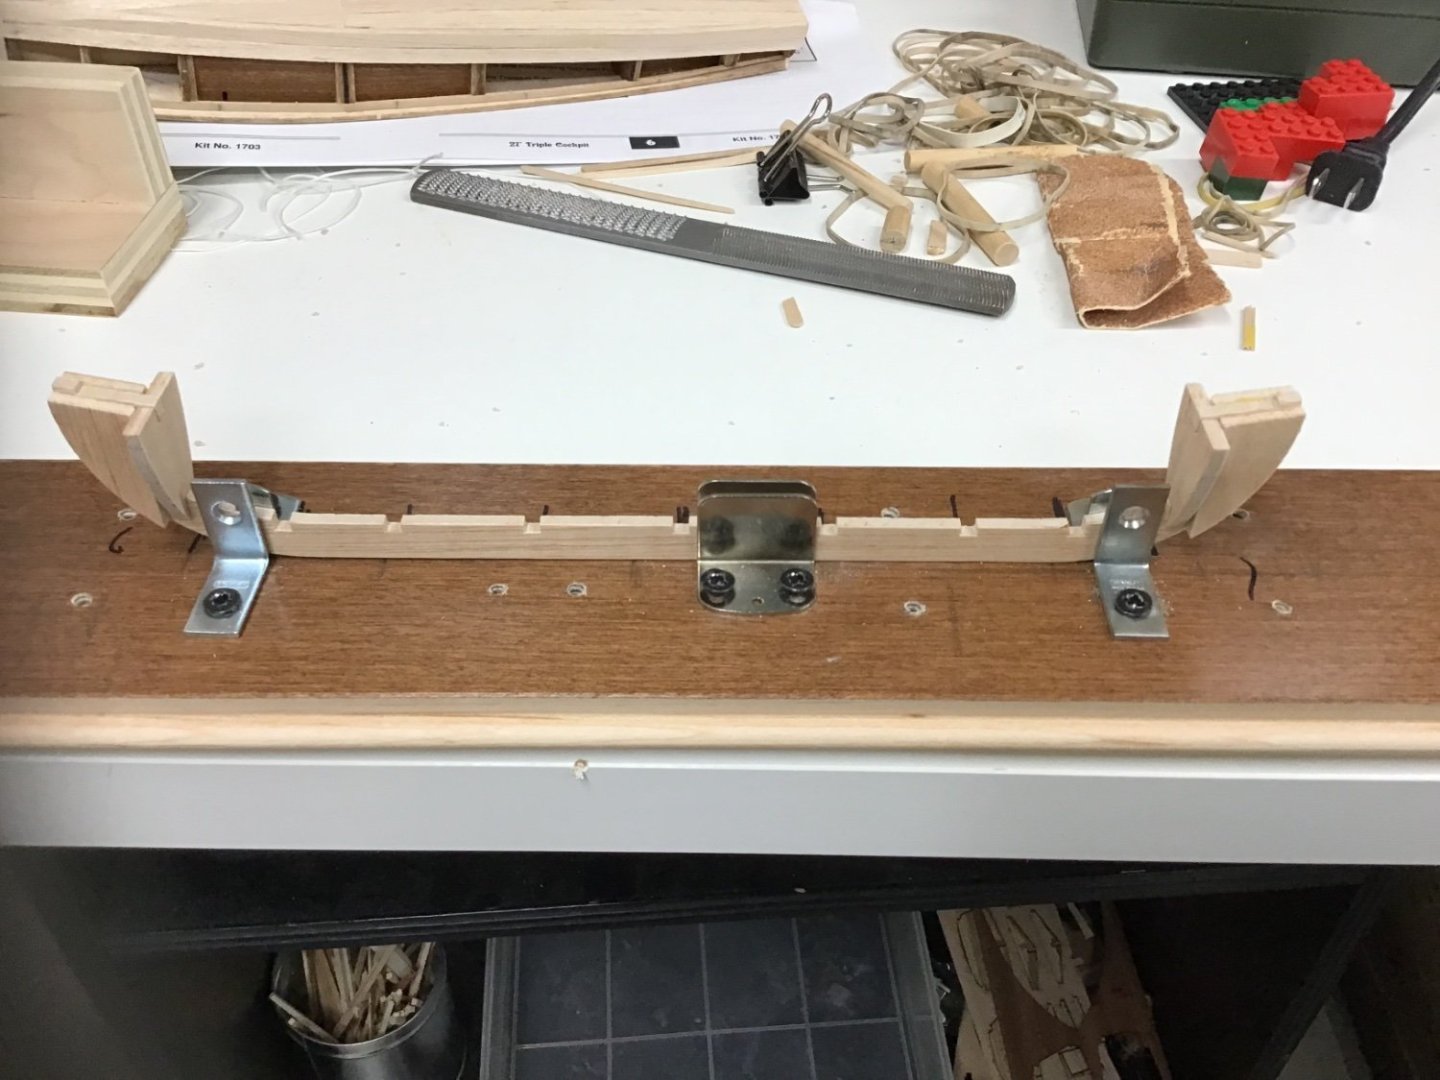

- 1 reply
-
- 4
-
-
- Whaleboat
- Artesania Latina
- (and 1 more)
-
 I need to buy a lottery ticket! After years of being unable to assemble even a basic plastic kit I have recovered enough to contemplate improving my motor and mental skills with a wood kit and spent a morning in the library, browsing the history of unusual RN ships that have captured my imagination over the years, I narrowed the list to three: Bounty, Beagle and Endeavour. From there I went to the internet (no model shops still open in my area, sadly) and was horrified at how prices had jumped. Spotting a likely subject I put a hail Mary bid on it, and to my amazement won. Endeavour, a Colier ship built in Whitby and commanded by a Whitby native when bought by the RN, and arguably one of the most famous ships of all time. Tainted by madness and producing the infamous Captain Bligh, I love it, I like to immerse myself in the history of any model I build, and this ship has history to spare. The main problem now is winner guilt, I feel I have robbed the charity shop I won it from, I suppose I should make a contribution rather than buy lottery tickets! I will record the build, with apologies from the start, it is ten years since I completed a model, and it has been a long road back.
-
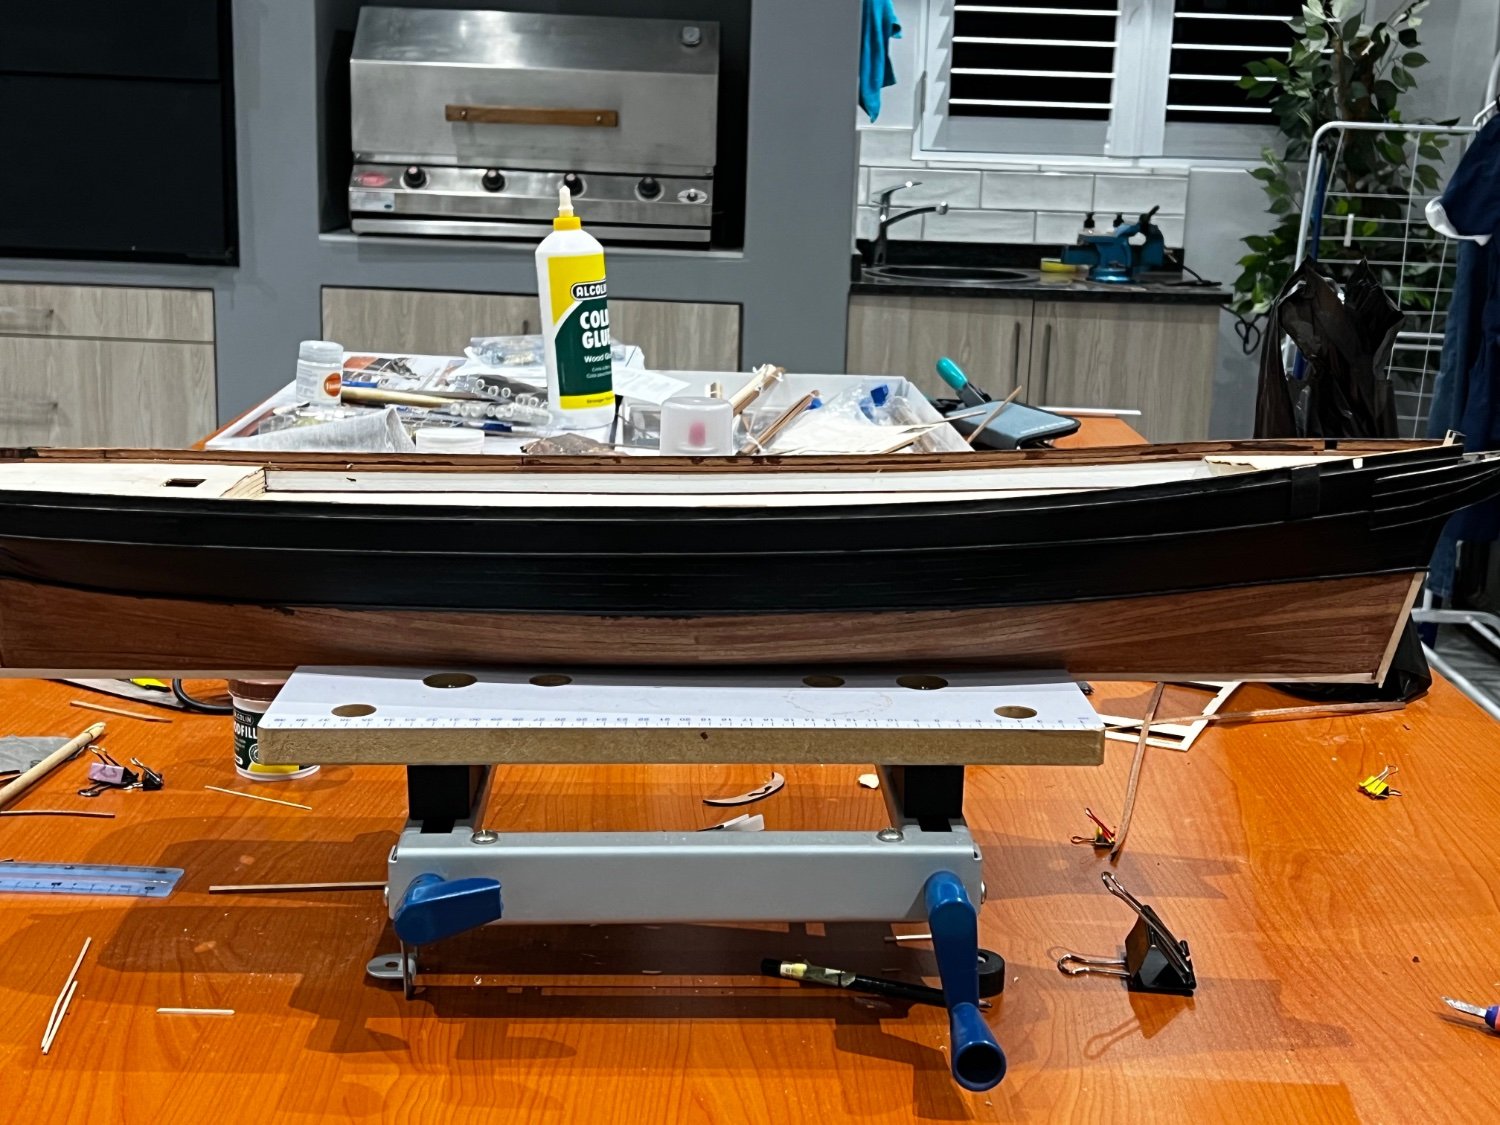
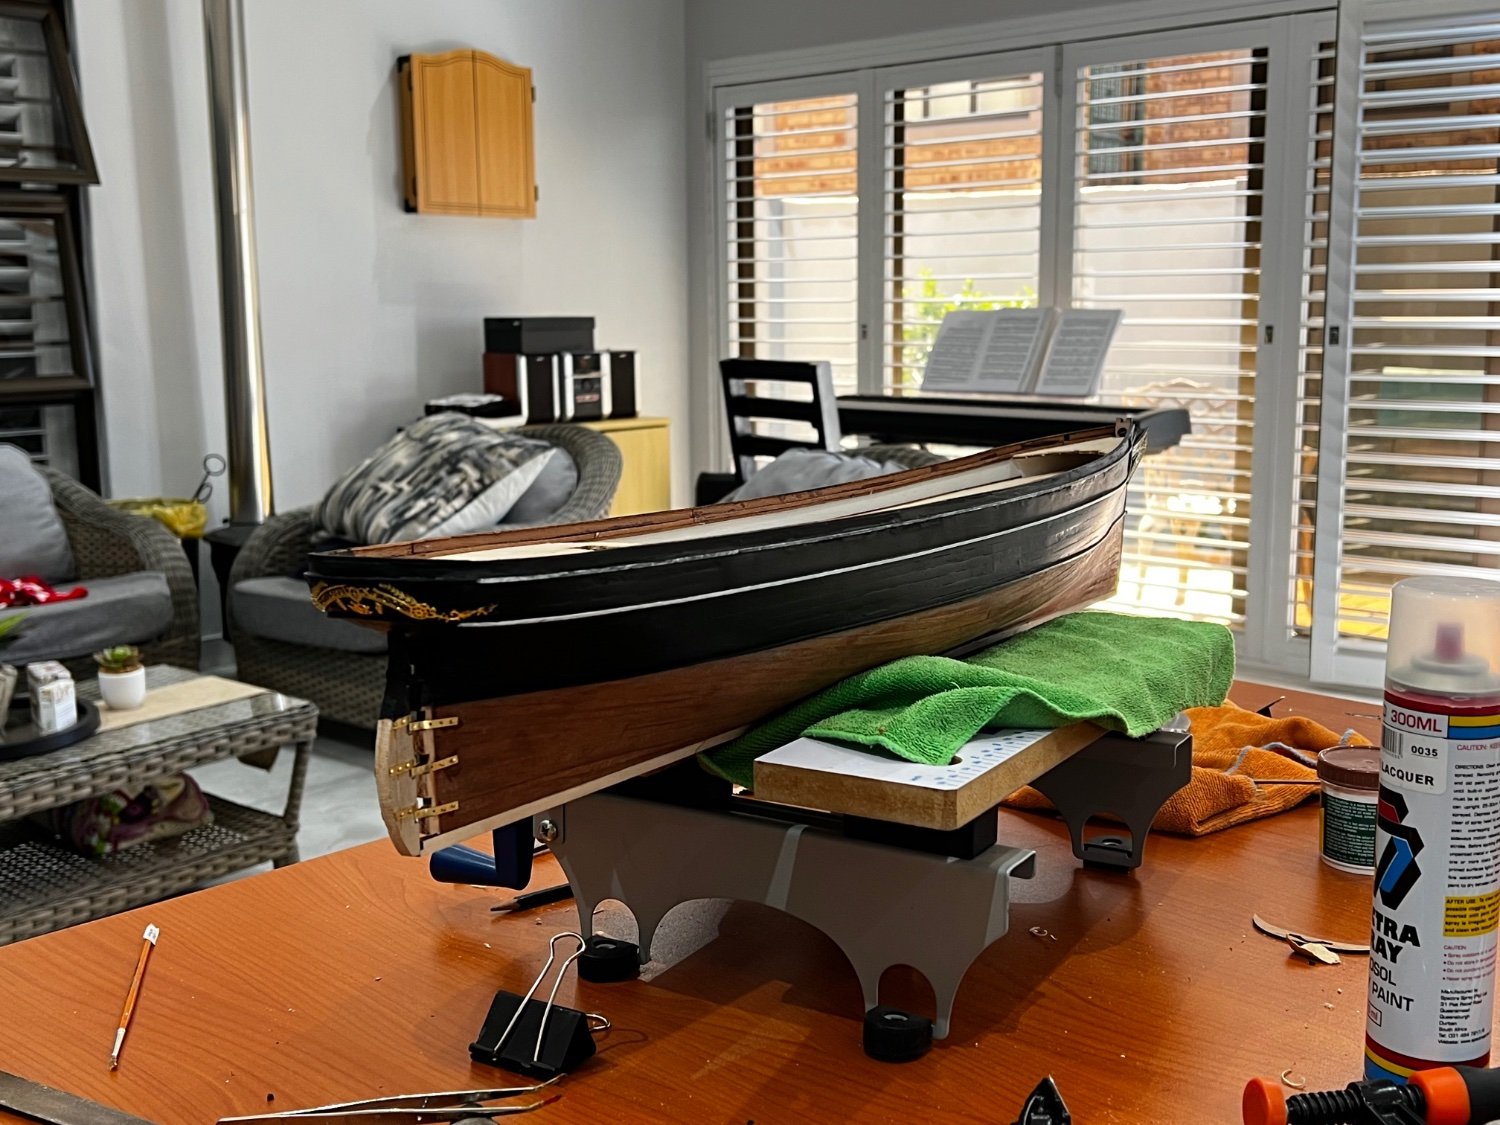
 I decided, after I had made a start on the hull, to install the lighting kit. Unfortunately, the lighting kits now seem to be out of stock everywhere and so the build has come to a bit of a halt. I was concerned that the hull might be a bit flimsy, but after having got this far, I have ended up with quite a stiff one, No problems were encountered getting to this stage; the fit of the parts was excellent. Having no printed instructions is a pain - but does have one advantage at least - viewing the pdf on, say, an iPad, does allow one to easily enlarge the pictures if more detail is required. Another plus. Whereas, say, the OcCre Montanes comes with NO stand, the Santisima Trinidad comes with TWO - a temporary building stand and a more permanent display stand.
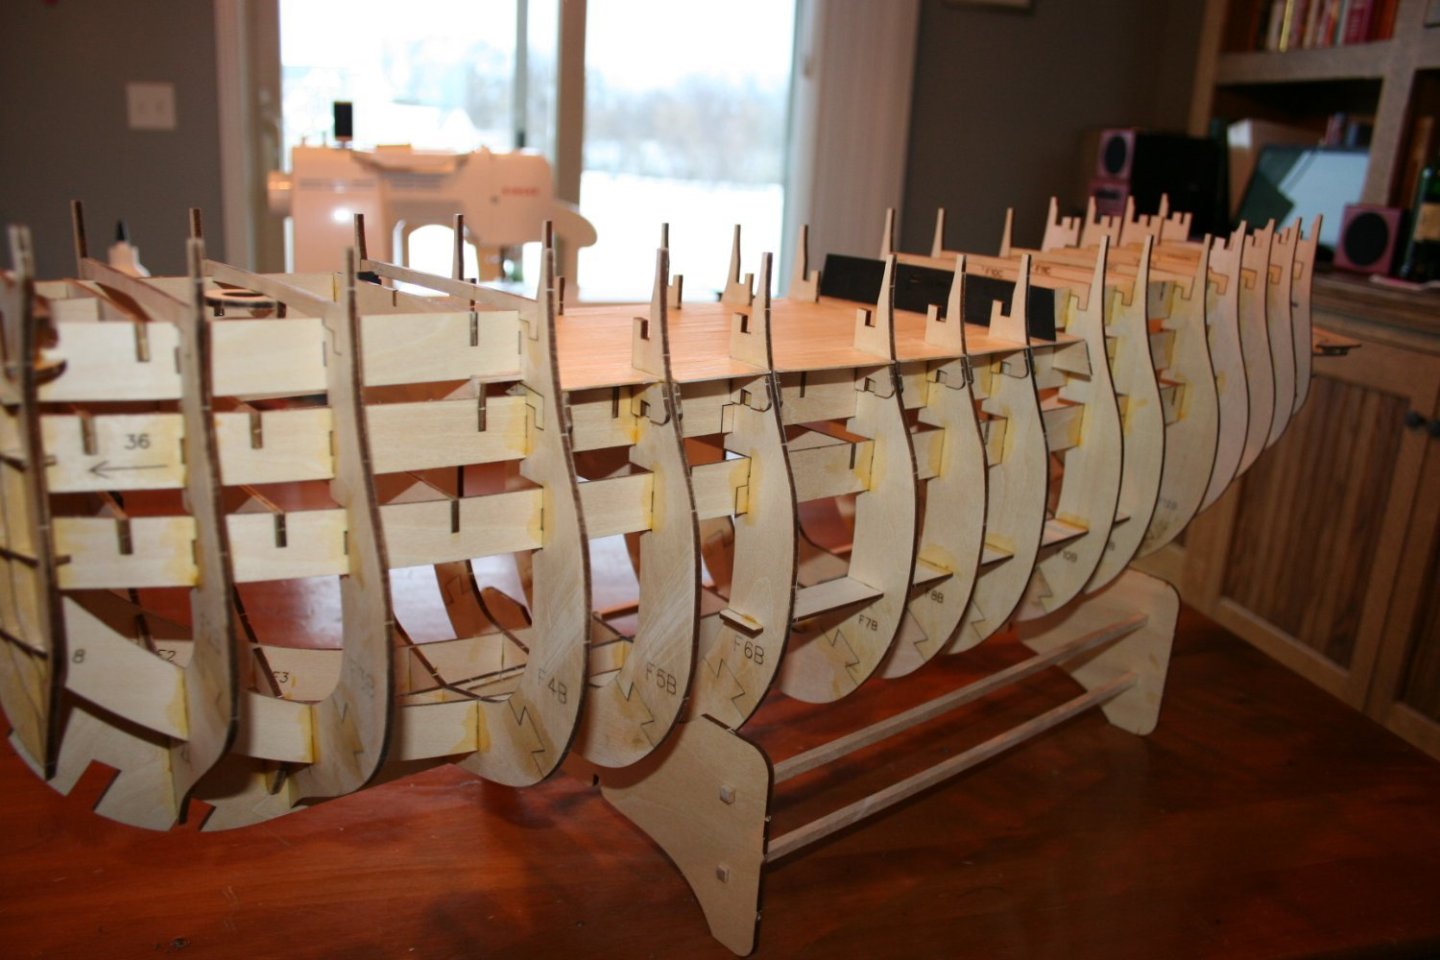

-
 First build and log for me, slight delay in getting started when AT sent the full HMS Endeavour instead of the Longboat version, but all sorted quickly by AT and am now building. Managed to get all the ribs dry fitted, quite a bit of play in the parts, but some lego blocks seem to have worked in making sure everything was square. I dry fitted the deck after gluing the ribs to make sure alignment was OK and so far seems OK
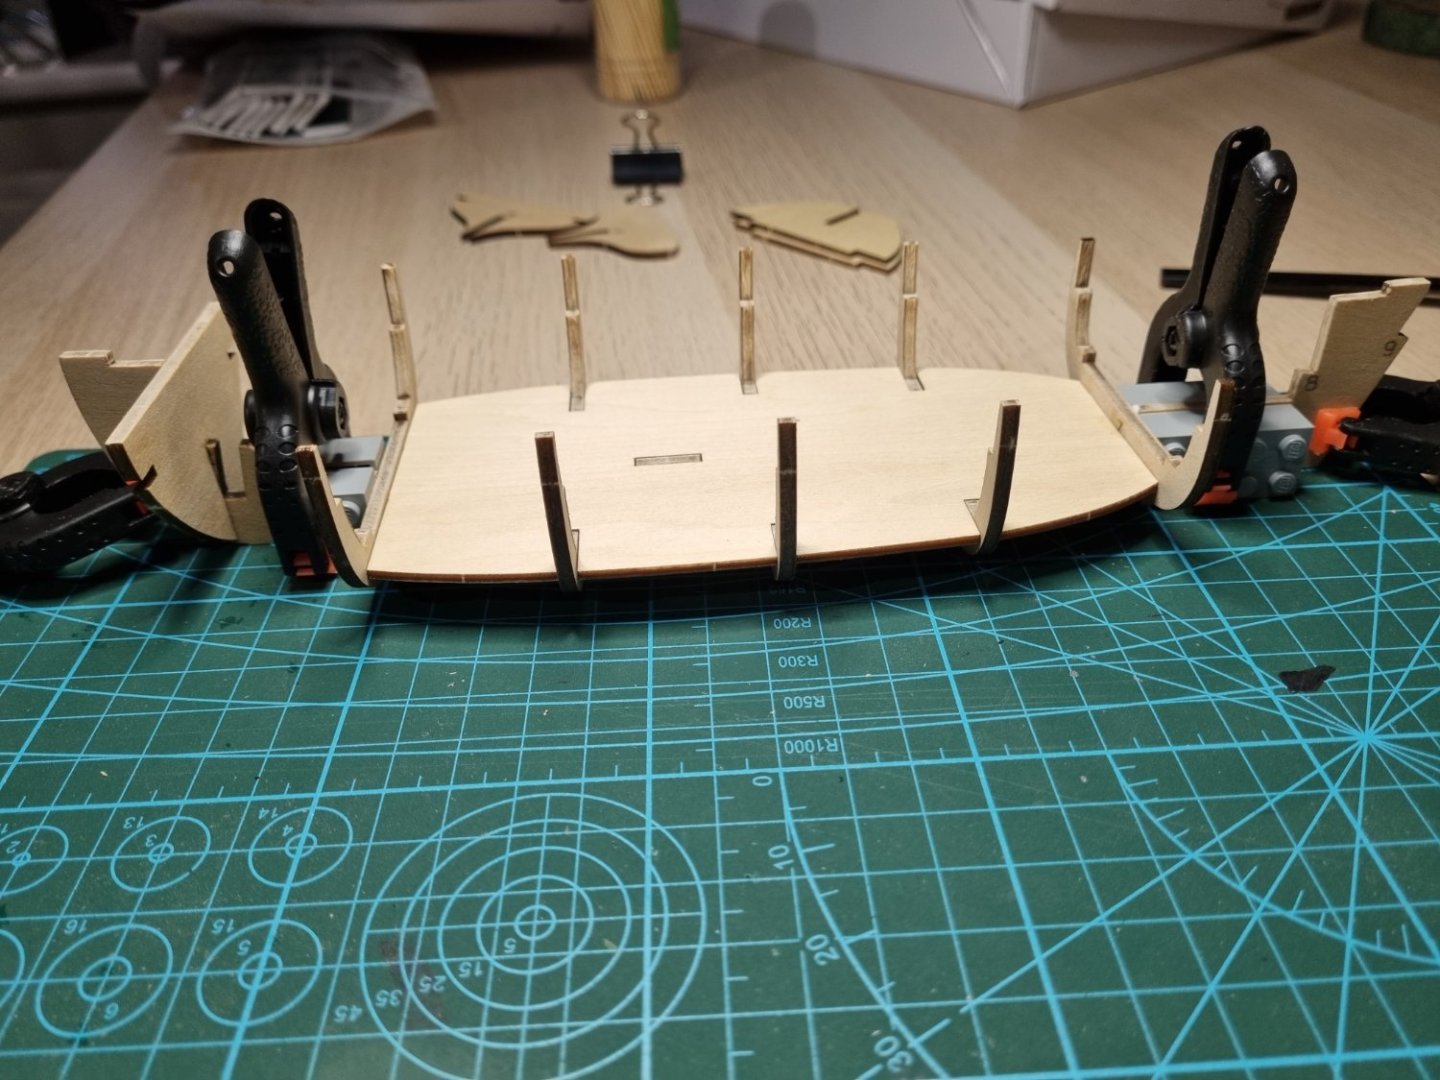
-
 I haven't finished my latest project, Victory-Corel, and as I wanted to embark on something new this year, I decided to pull Artesania's Hermione from the shelf....a very promising kit. Upon opening the box and unpacking its parts, the high quality is evident from the first glance
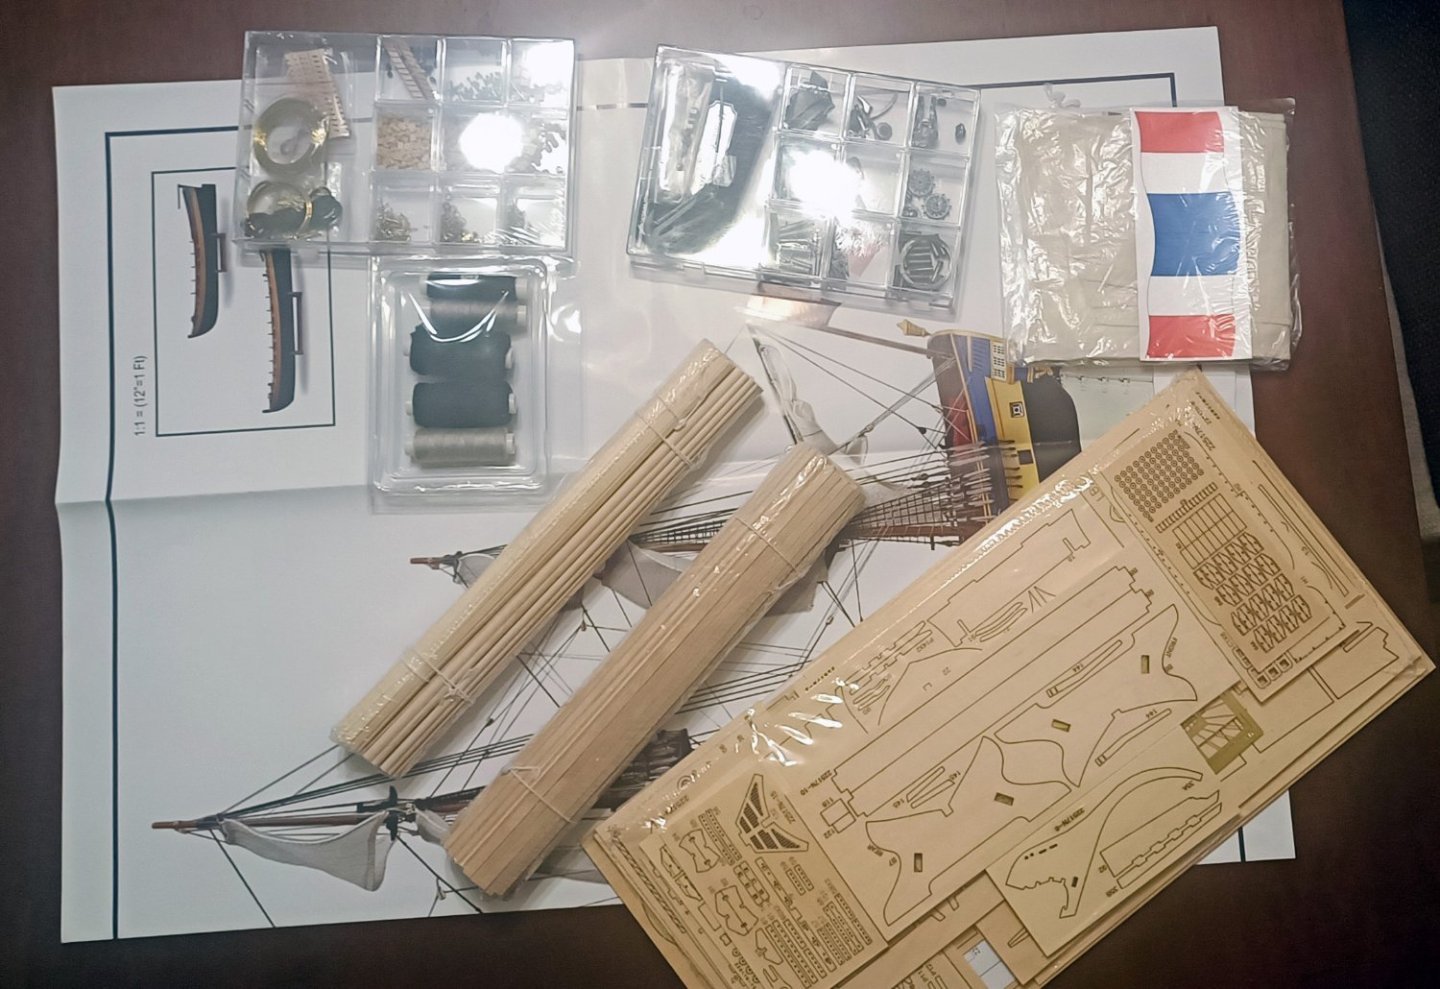
-
 Have started the Artesania Latina kit for a French built Newfoundland dory. Build wise there are several things I am curious about, for example, that the masts have no stays. Also, the oar being used as a bow-spit to stay the mast forward, when you have the sturdy bow? That said, I've seen references that each dory "skipper" could rig his dory as he liked it. So there could be a lot of variations used. Two masts also seem a complication for a rig that would need to be rigged down for transport on a schooner. If you have information on such dories, please let me know.
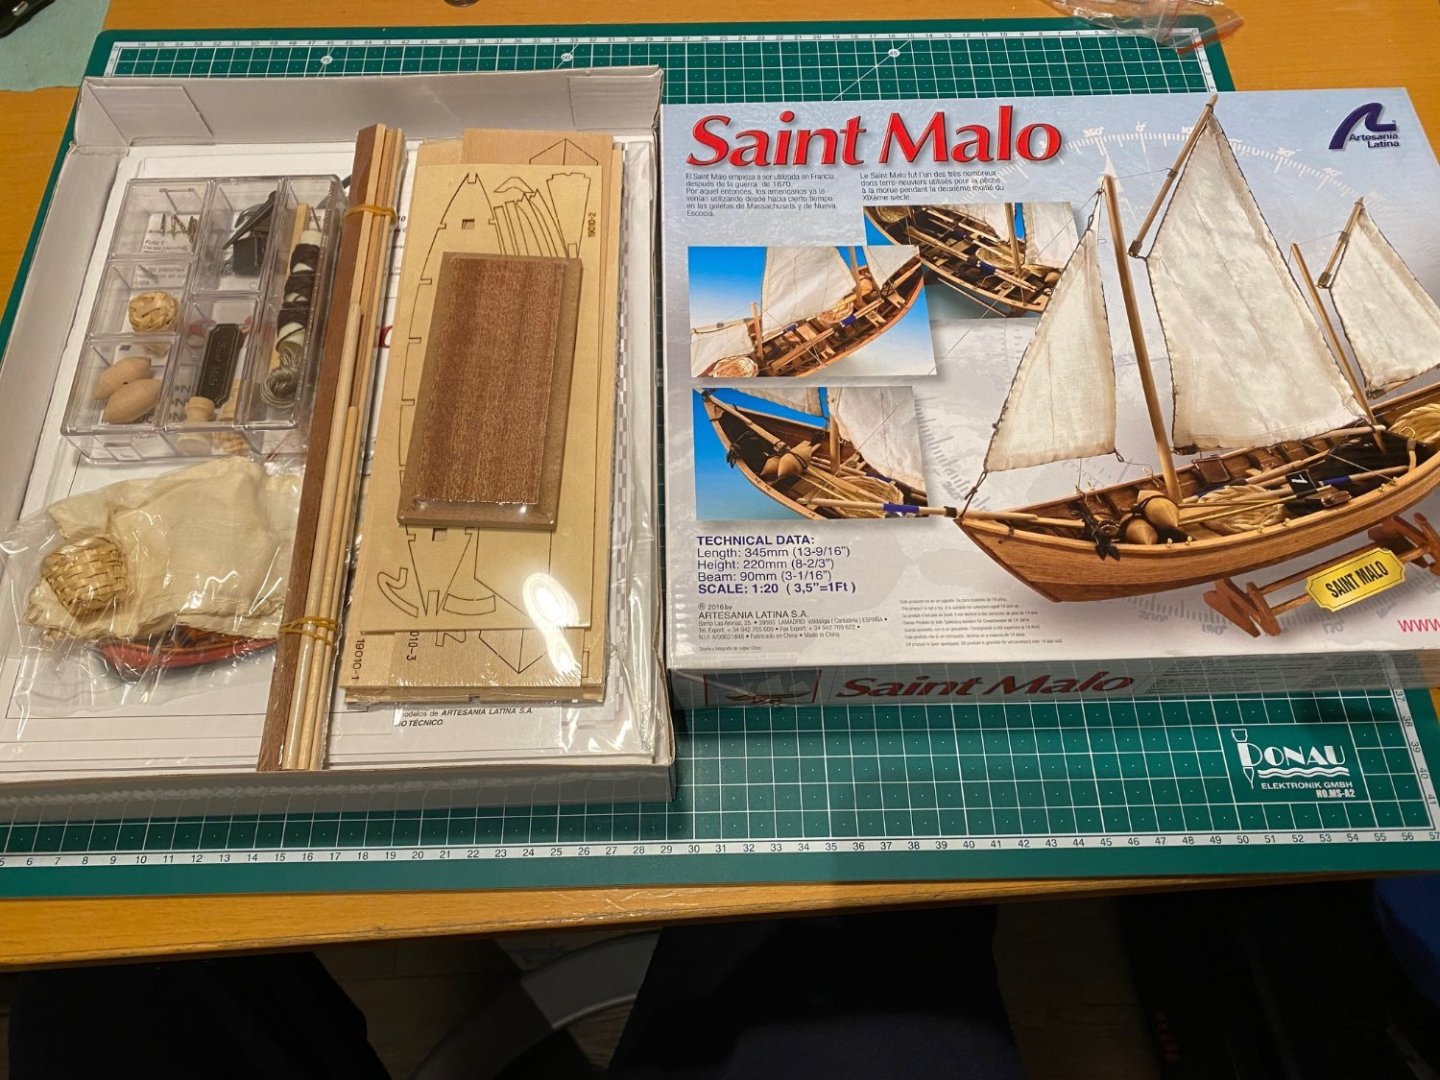
- 31 replies
-
- 1
-
-
- Saint Malo
- Artesania Latina
- (and 1 more)
-
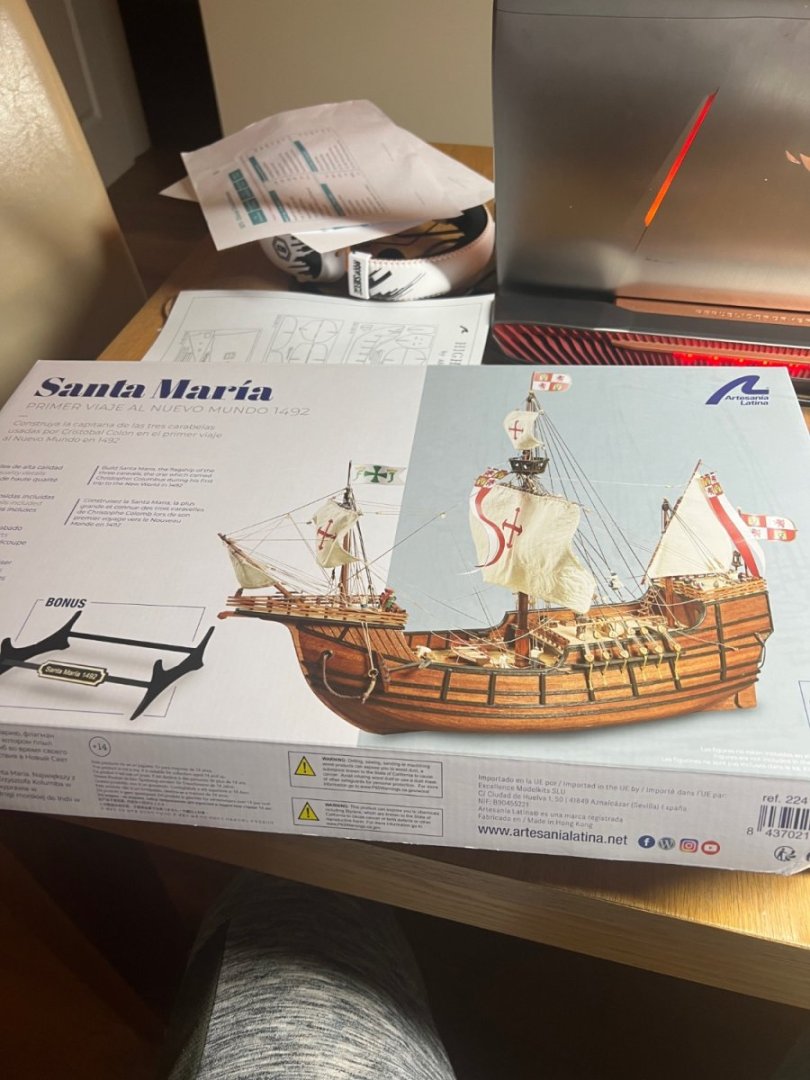
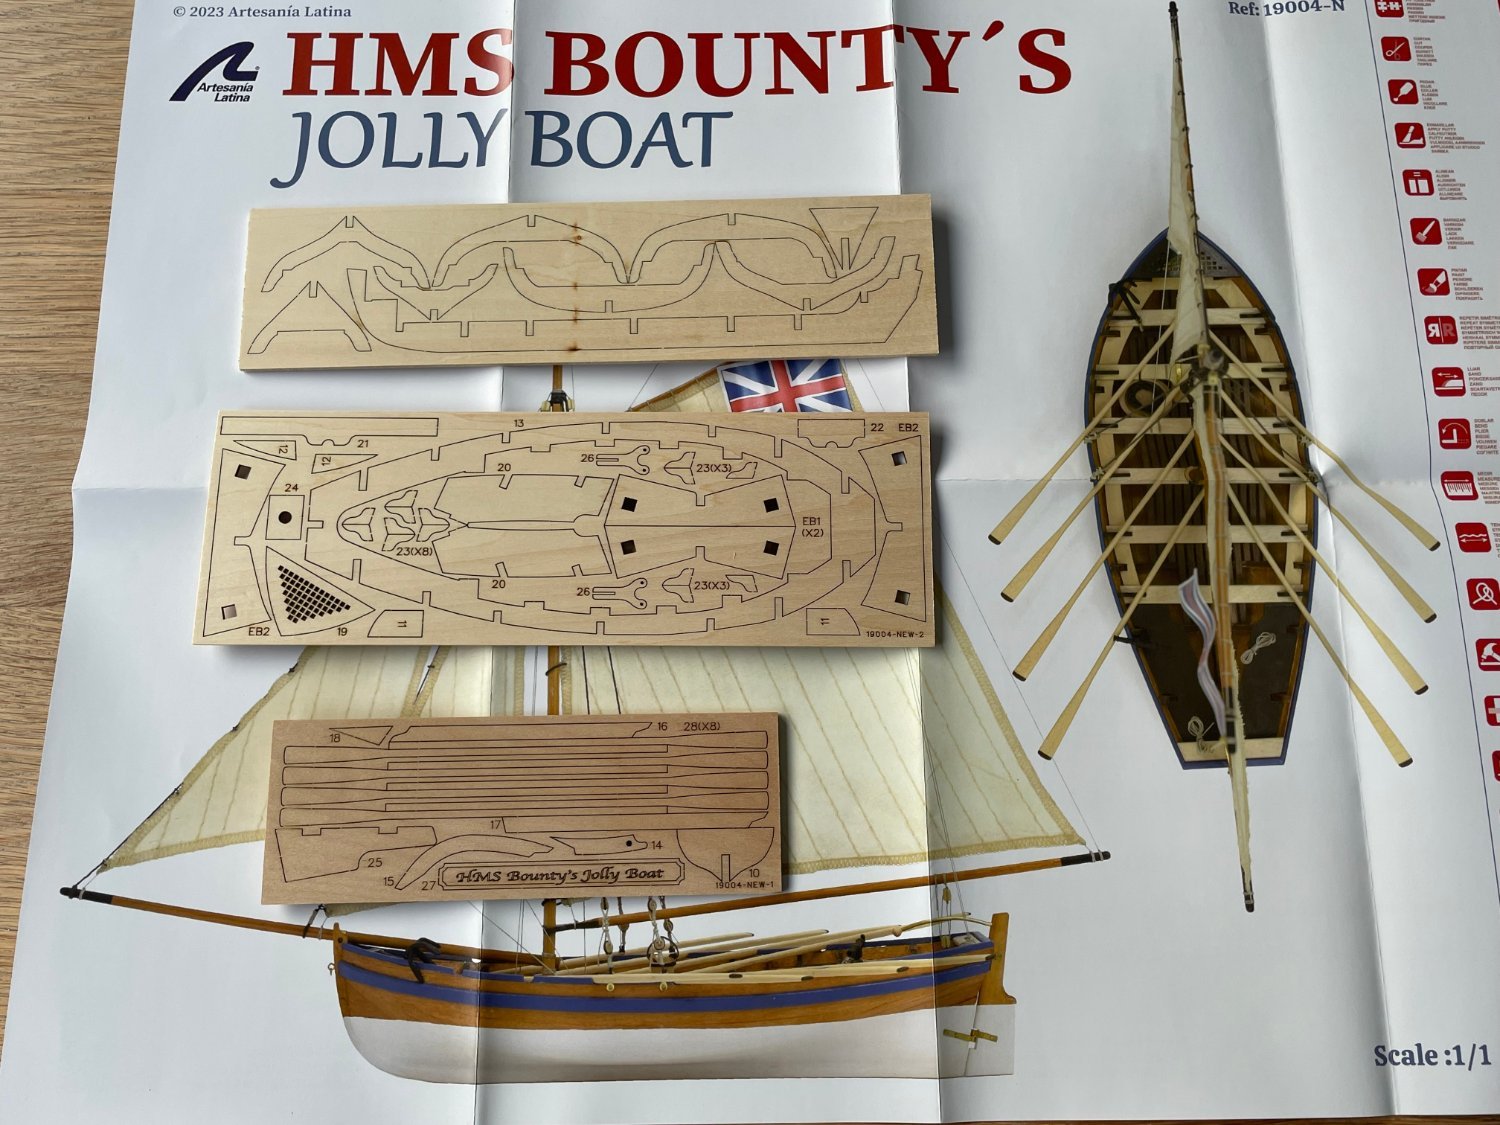
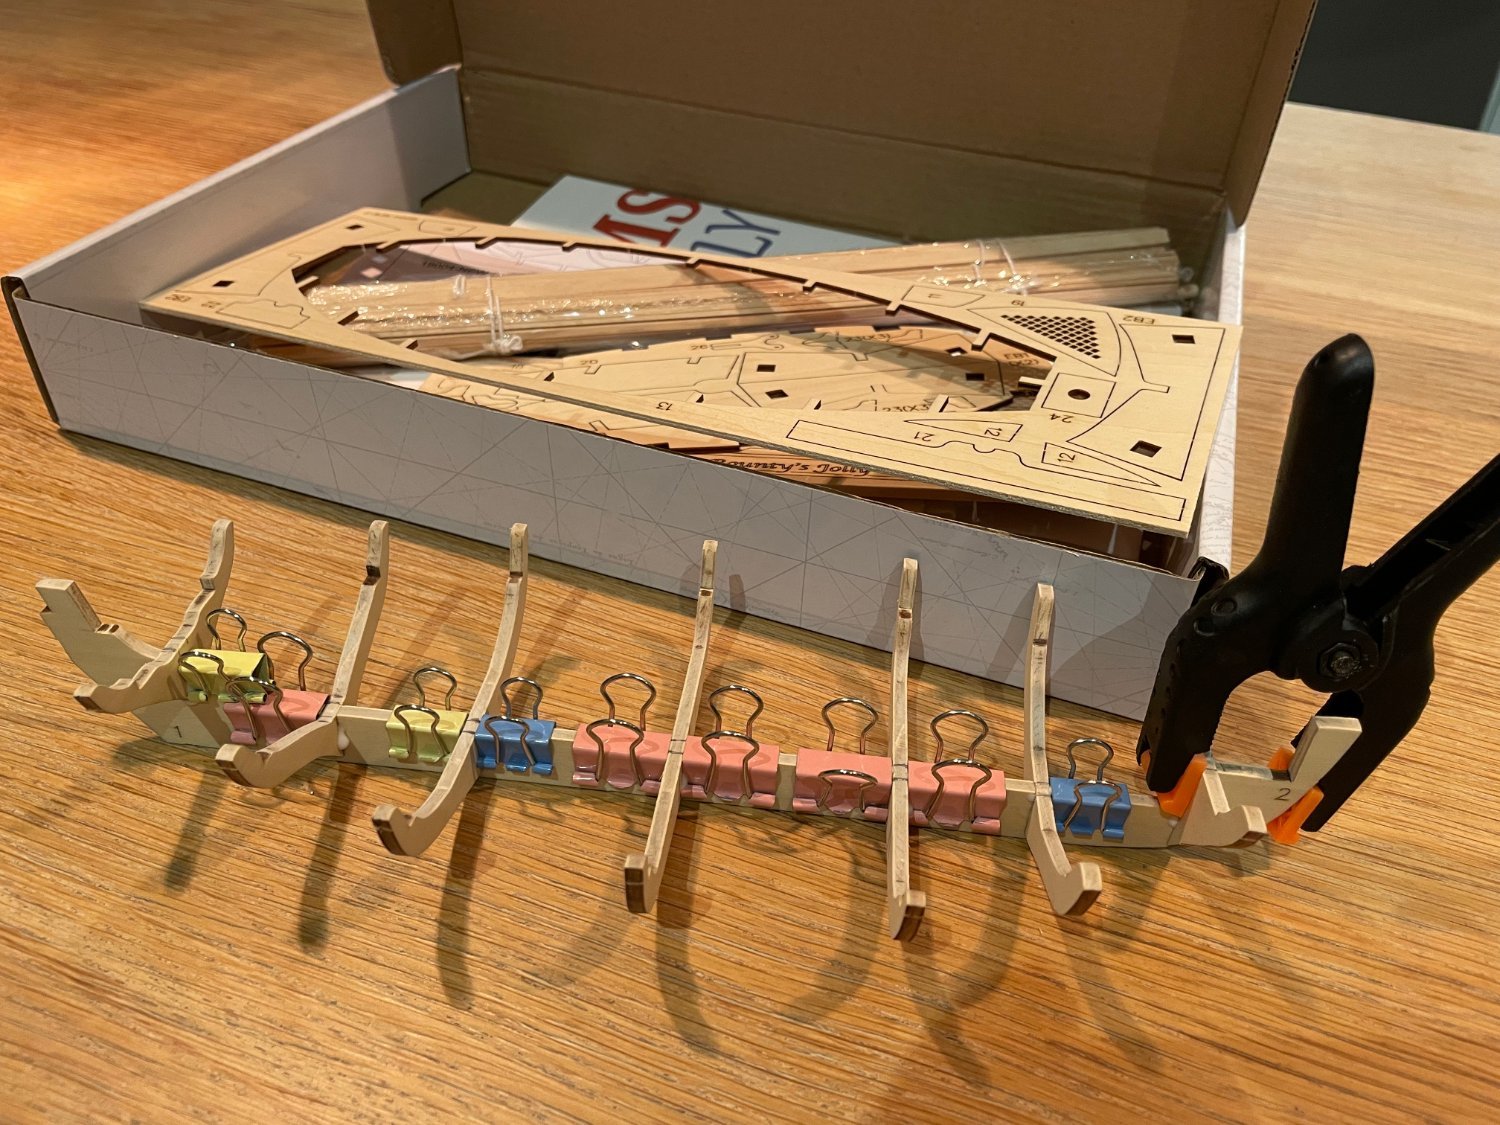
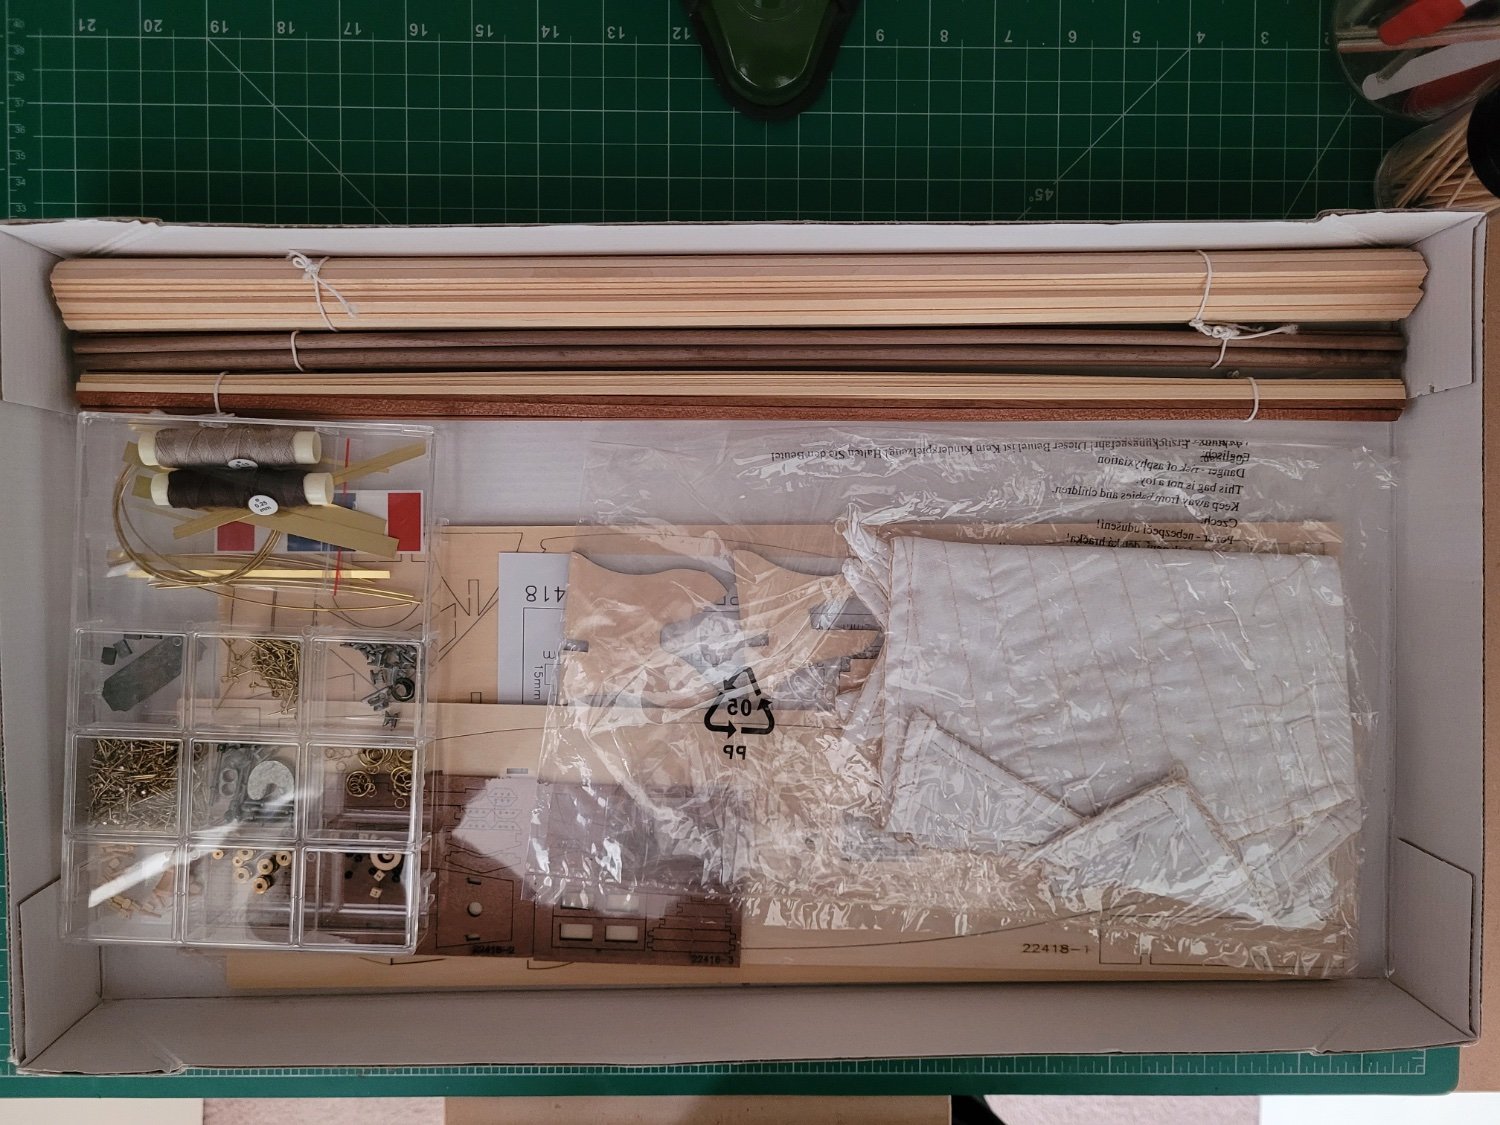
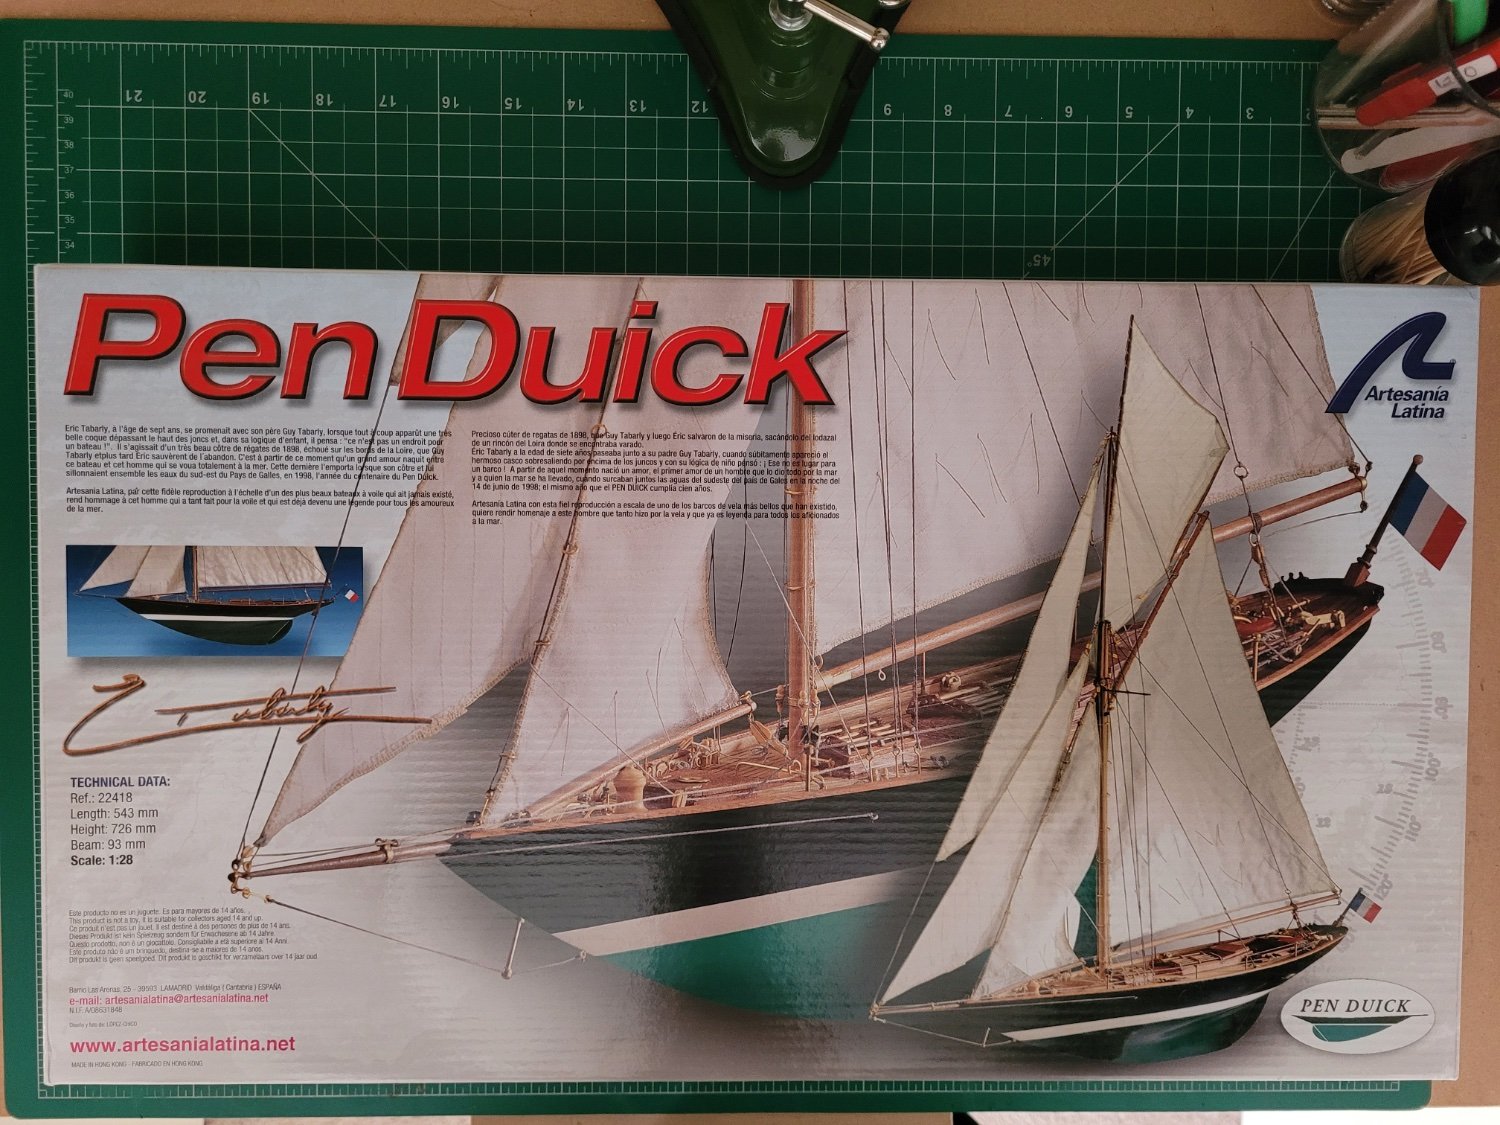
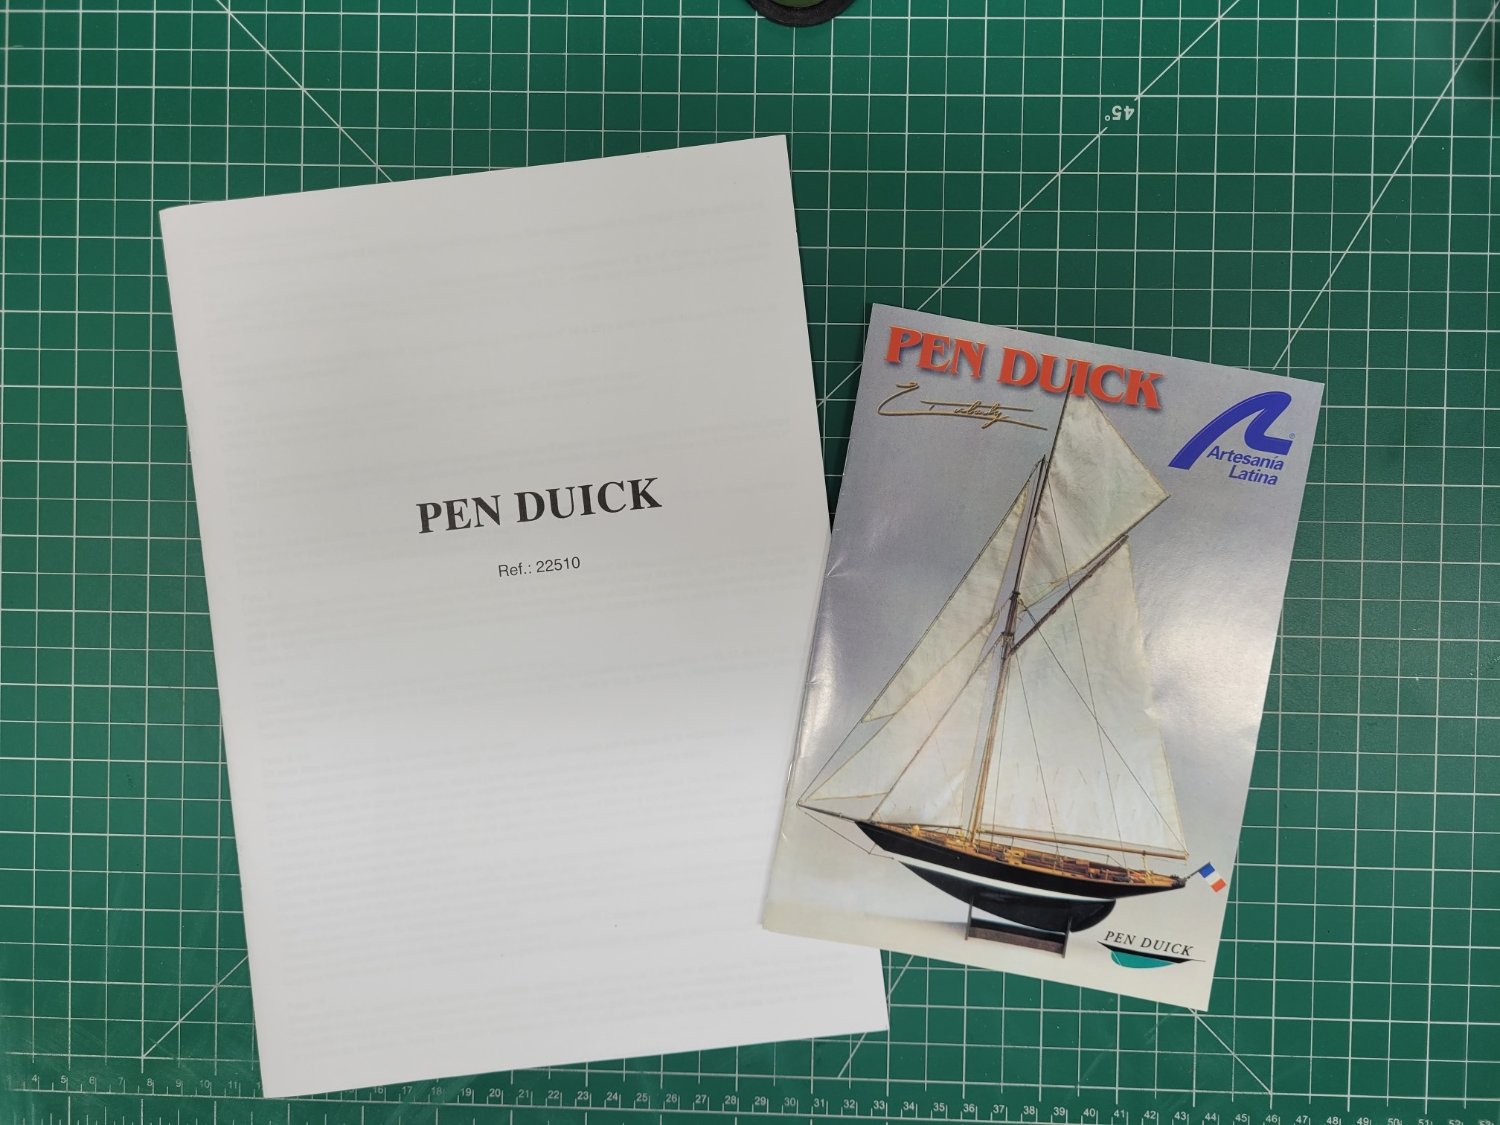
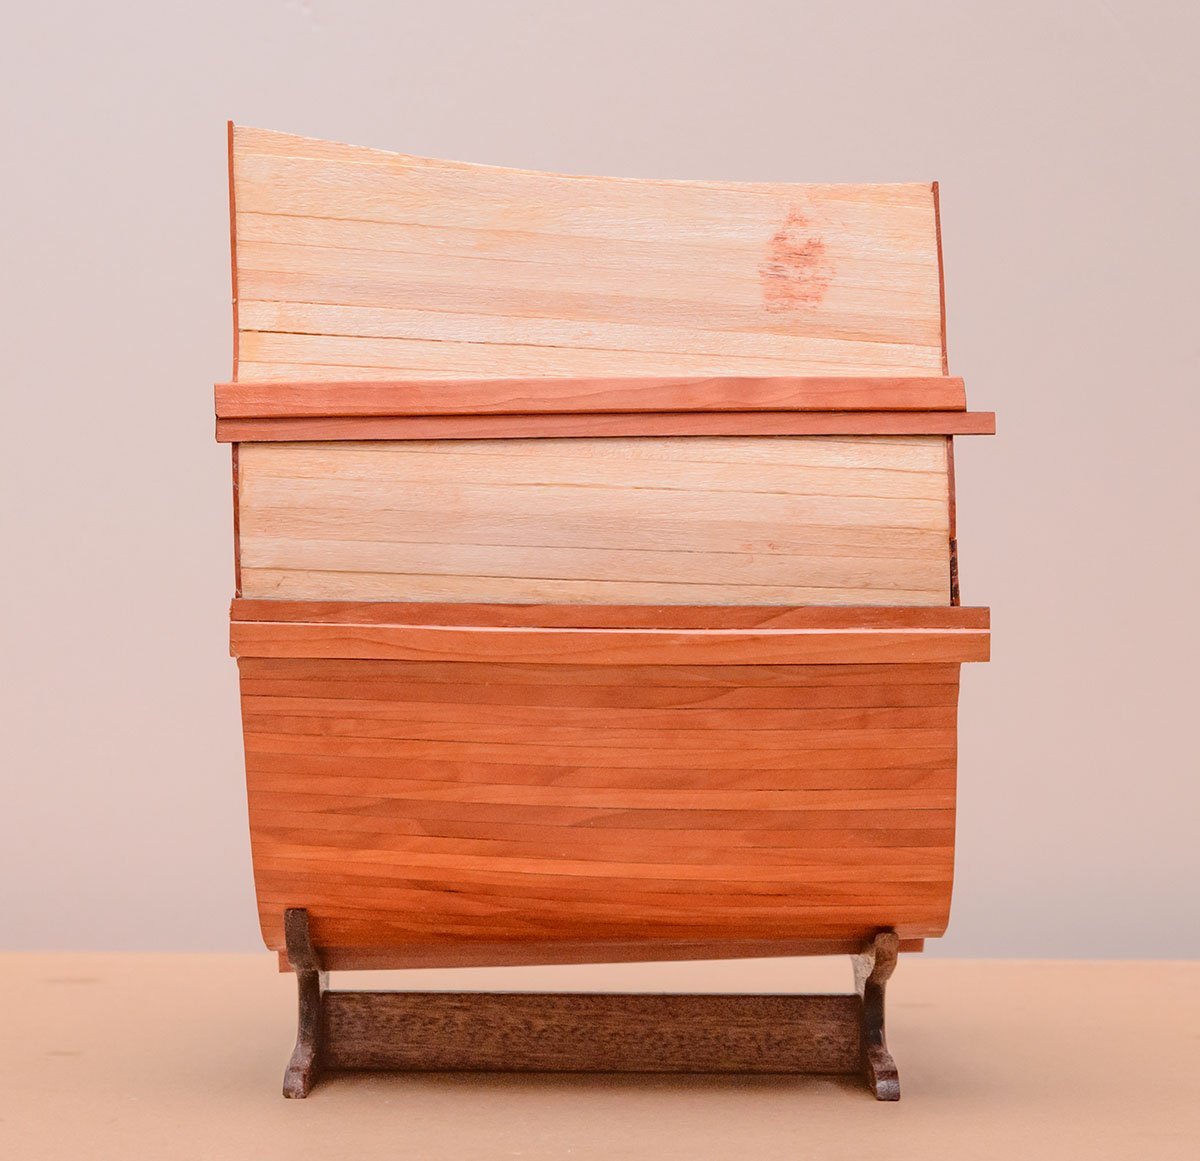
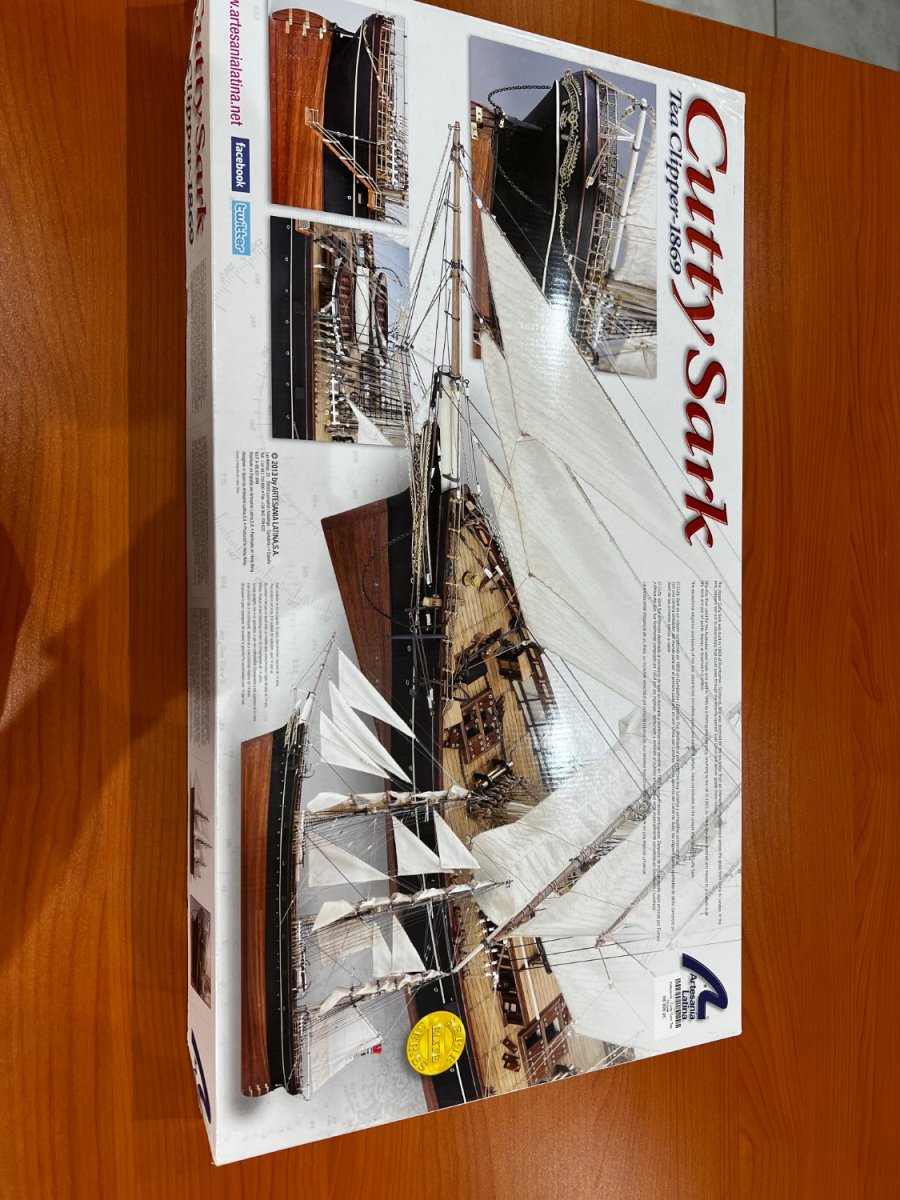
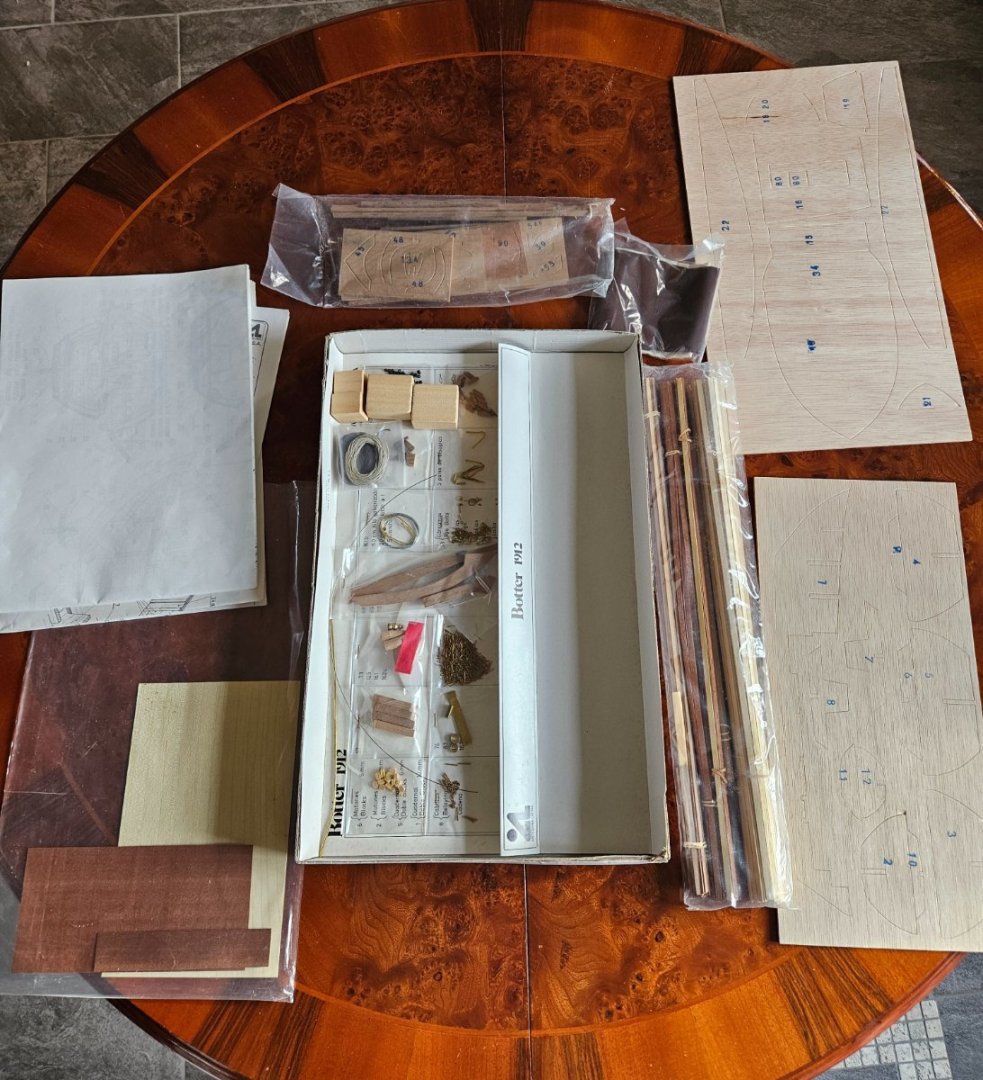
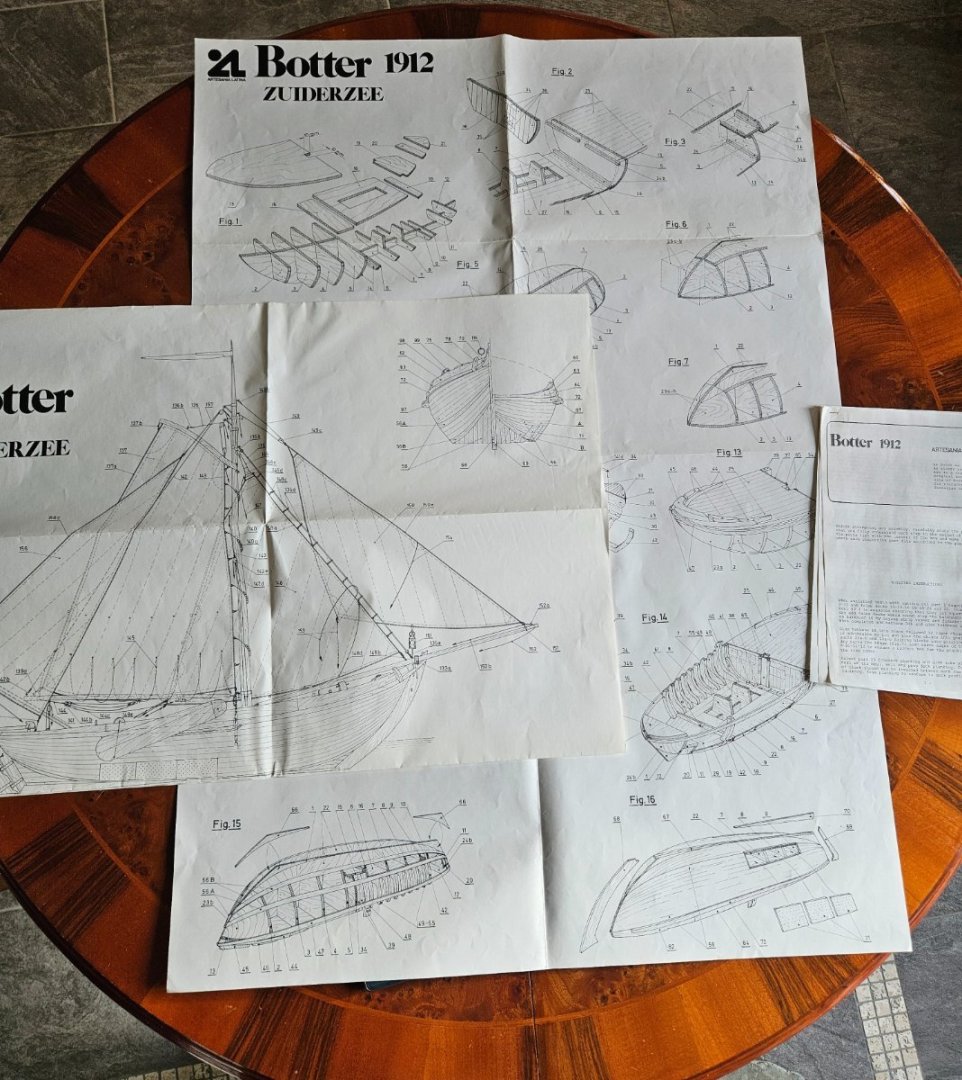
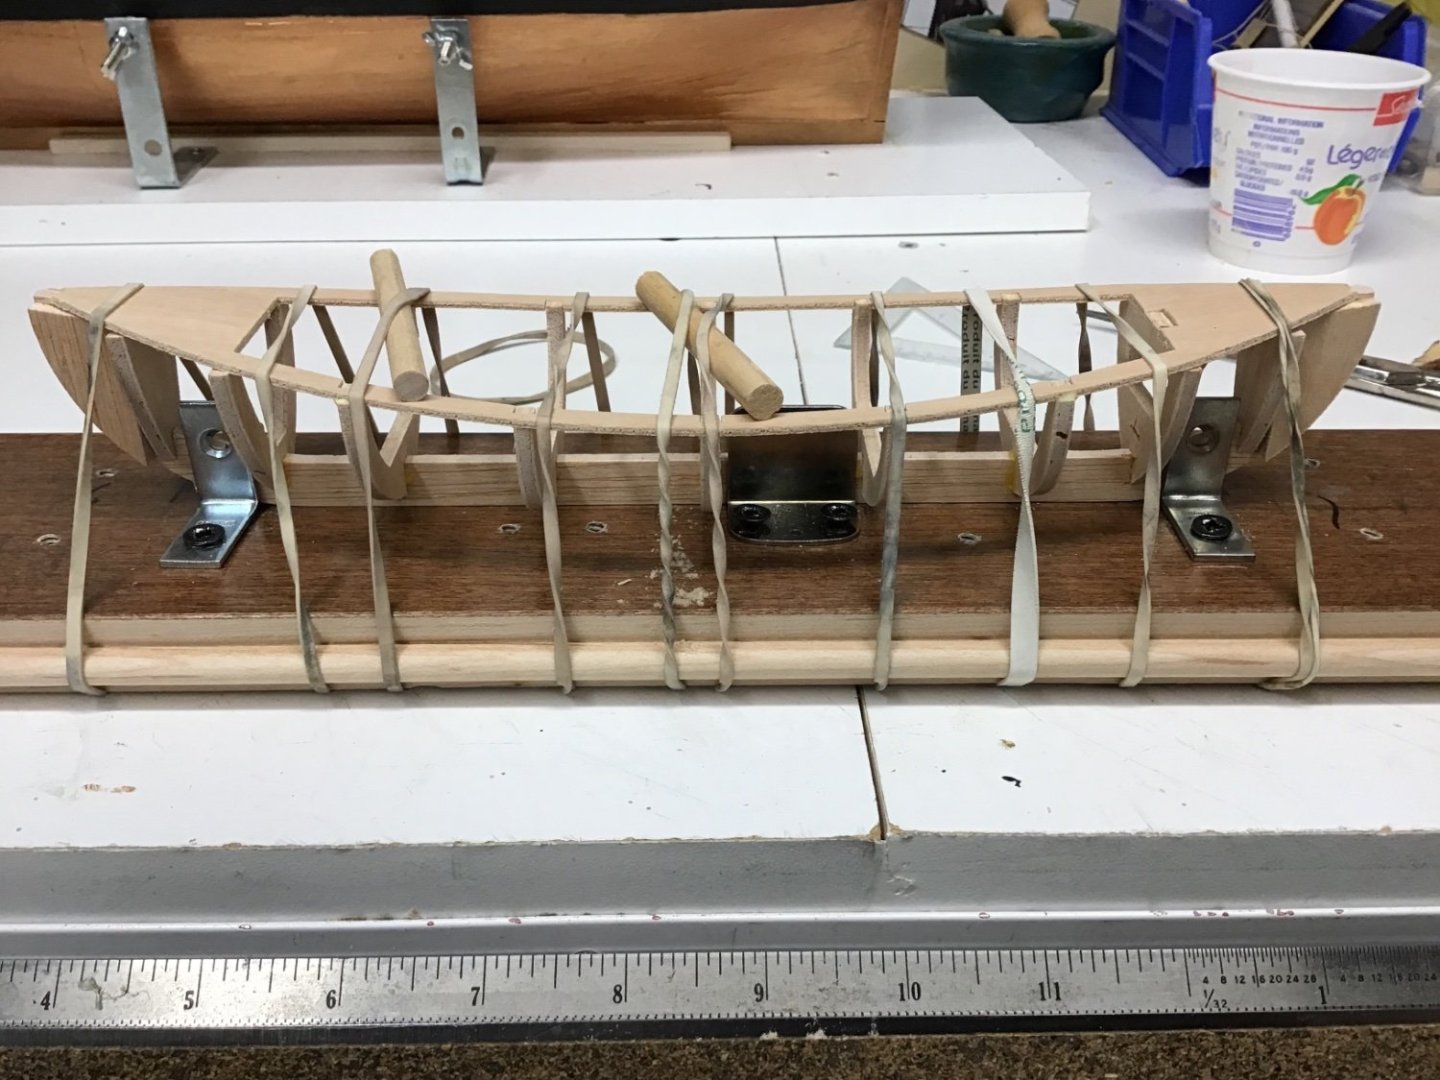
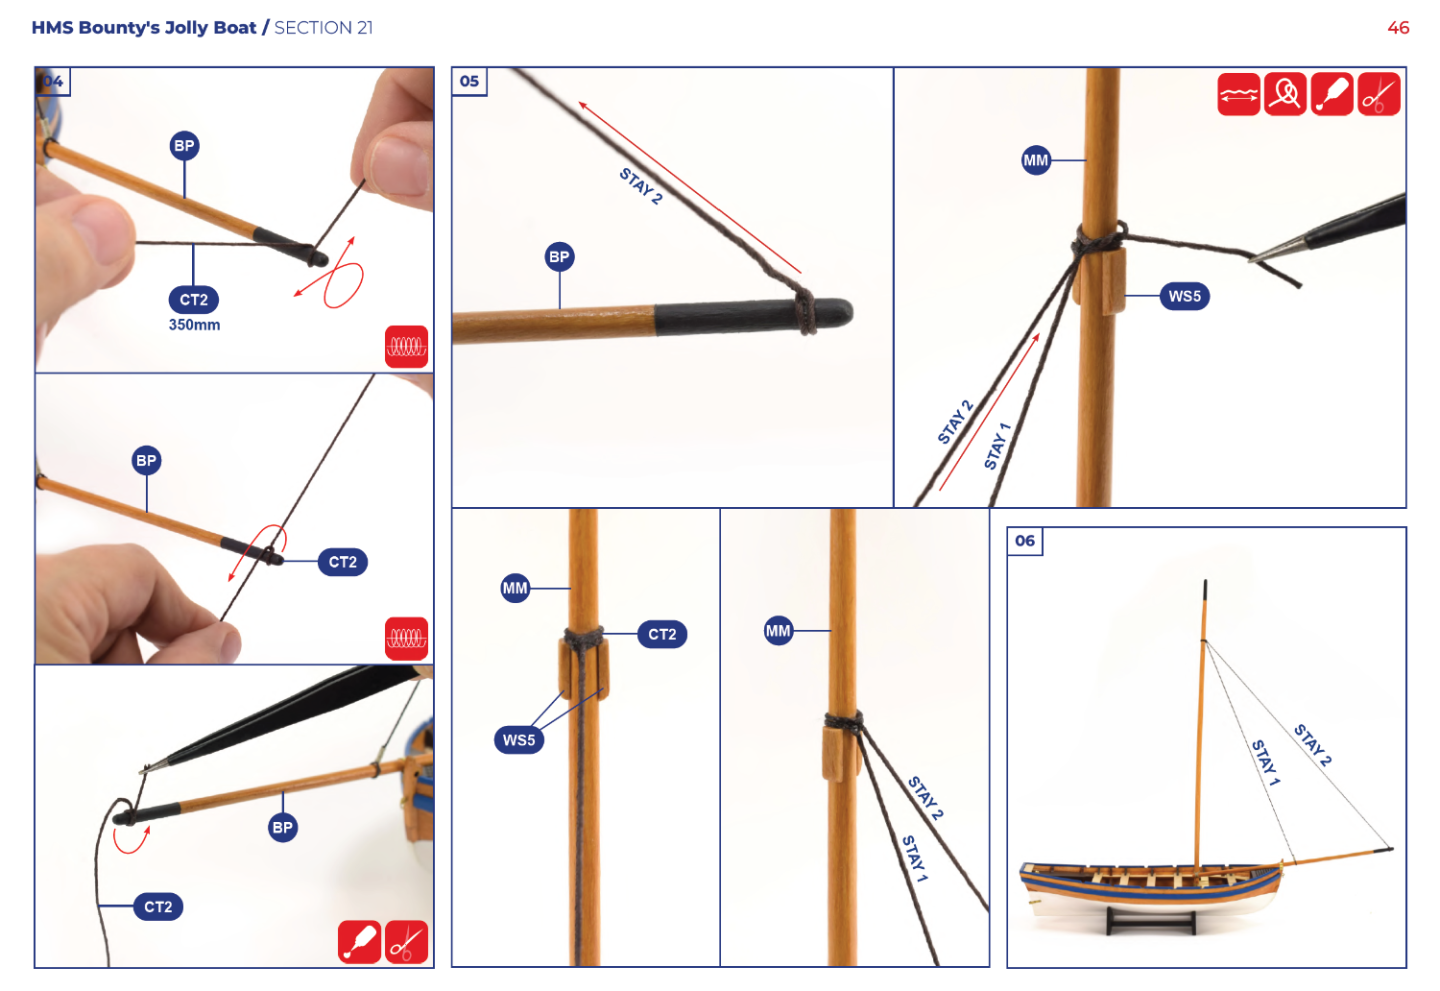
 Having just finished a very simple rowing boat model as my first build, Midwest’s Dinghy, this model will undoubtedly be more challenging. It is single lay plank-on-frame hull, so I am painfully aware that I have little scope for correcting mistakes if the planking goes wrong, unless I decide to fully paint the hull (which I may do, have not decided yet). The Bounty Jolly Boat kit by Artesania Latina has been around for a while, and there are plenty of build logs on this forum, which I have read with great interest and will undoubtedly be very helpful in my own build. However, Artesania Latina has renewed the kit this year, and there is a number of differences to the old kit. This appears to be the first build log for the new kit. A first change in the renewed kit is the box (see image below). The older kit is still available for sale from some retailers, so if you want to make certain you are getting the newer kit, make sure you get the kit with number 19004-N, not the one with number 19004. I have found the instructions for the older kit online, allowing me to compare the old and new kit. The new kit is very similar to the old one but there are some differences. An oft mentioned problem with the old kit was that some of the sails where much larger than on the plans. That problem appears to have been remedied. The new stand, now being of the ‘cradle’ type, is different from the old one. The new kit includes a grapple, which appears not have been included in the older version. The inside front of the boat is now covered by a grid, which is also new. The plywood that the false keel and bulkheads are made of is of a different style than in the past, looking more like solid wood with a thin veneer on it than ‘traditional’ plywood. This makes it less visibly ‘fake’ when seen from the side, which makes for a cleaner build where the plywood sides are visible. The oars are now in one piece, requiring rounding of the shaft; in the old kit, blades and shaft were separate. I am sure there are more differences, but these are the ones I noticed so far. One significant difference is in the instructions: an instruction booklet is no longer provided. Instead, the instructions are provided digitally. This means you either have to print the instruction booklet yourself, or to use the digital document directly. Since the instruction booklet is quite thick, I opted for the latter, meaning I have to make sure to have a charged tablet or laptop near my model shipyard (=my kitchen table). This sounds less convenient than the older, printed, colour instruction booklet and, in some ways, it is. However, the new instructions are truely excellent. They are super detailed and much more extensive than the old ones. Virtually every little step is giving its own photographic explanation, leading to an instruction booklet of eighty A4-sized pages, with on average six photographs per page (see image below for a sample page). It leaves very little to the imagination, which is excellent for a kit aimed squarely at beginners. I was very impressed. No one-to-one scale plan drawings are provided, only a one-to-one scale photograph of the completed model, but that should not be a problem given the excellent instruction booklet. This print, plus all the contents of the kit, can be seen on the photo below. The front of the box mentions multi-media instructions, that is, an online build video. Such online videos do indeed exist for some of the other renewed beginner kits, but not for the Jolly Boat, at least not yet. Maybe Artesiana Latina is in the process of creating it? A six-colour paint set is available as an extra purchase. I started the build today, by removing the false keel and bulkheads from their sheets. All the parts were straight and came out easily. I sanded the laser burn from the edges that would be visible, for aesthetic reasons, but not on invisible edges because I have read elsewhere on this forum that the laser burn does not affect the strength of the glue bond – hope I have understood that correctly. The bulk heads fit easily into the false keel, perhaps even too easily. There is a degree of wiggle room up, down, and sideways. To ensure that the bulkheads were perpendicular to the keel in all relevant directions, I used foldback clips (as shown in the photo below). Will leave the white carpenter’s glue to set overnight and continue with the hull tomorrow.


- 32 replies
-
- 6
-
-
- Bounty Jolly Boat
- Artesania Latina
- (and 1 more)
-
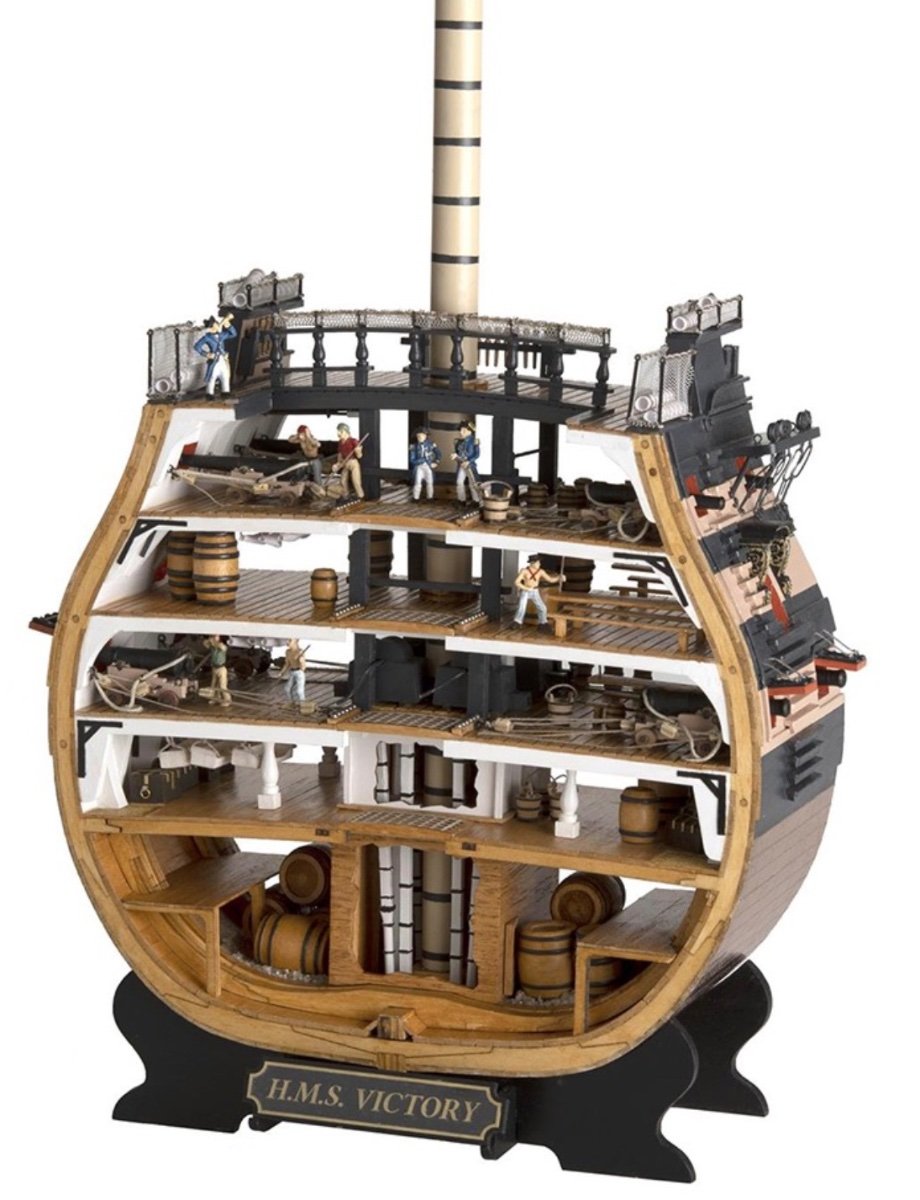
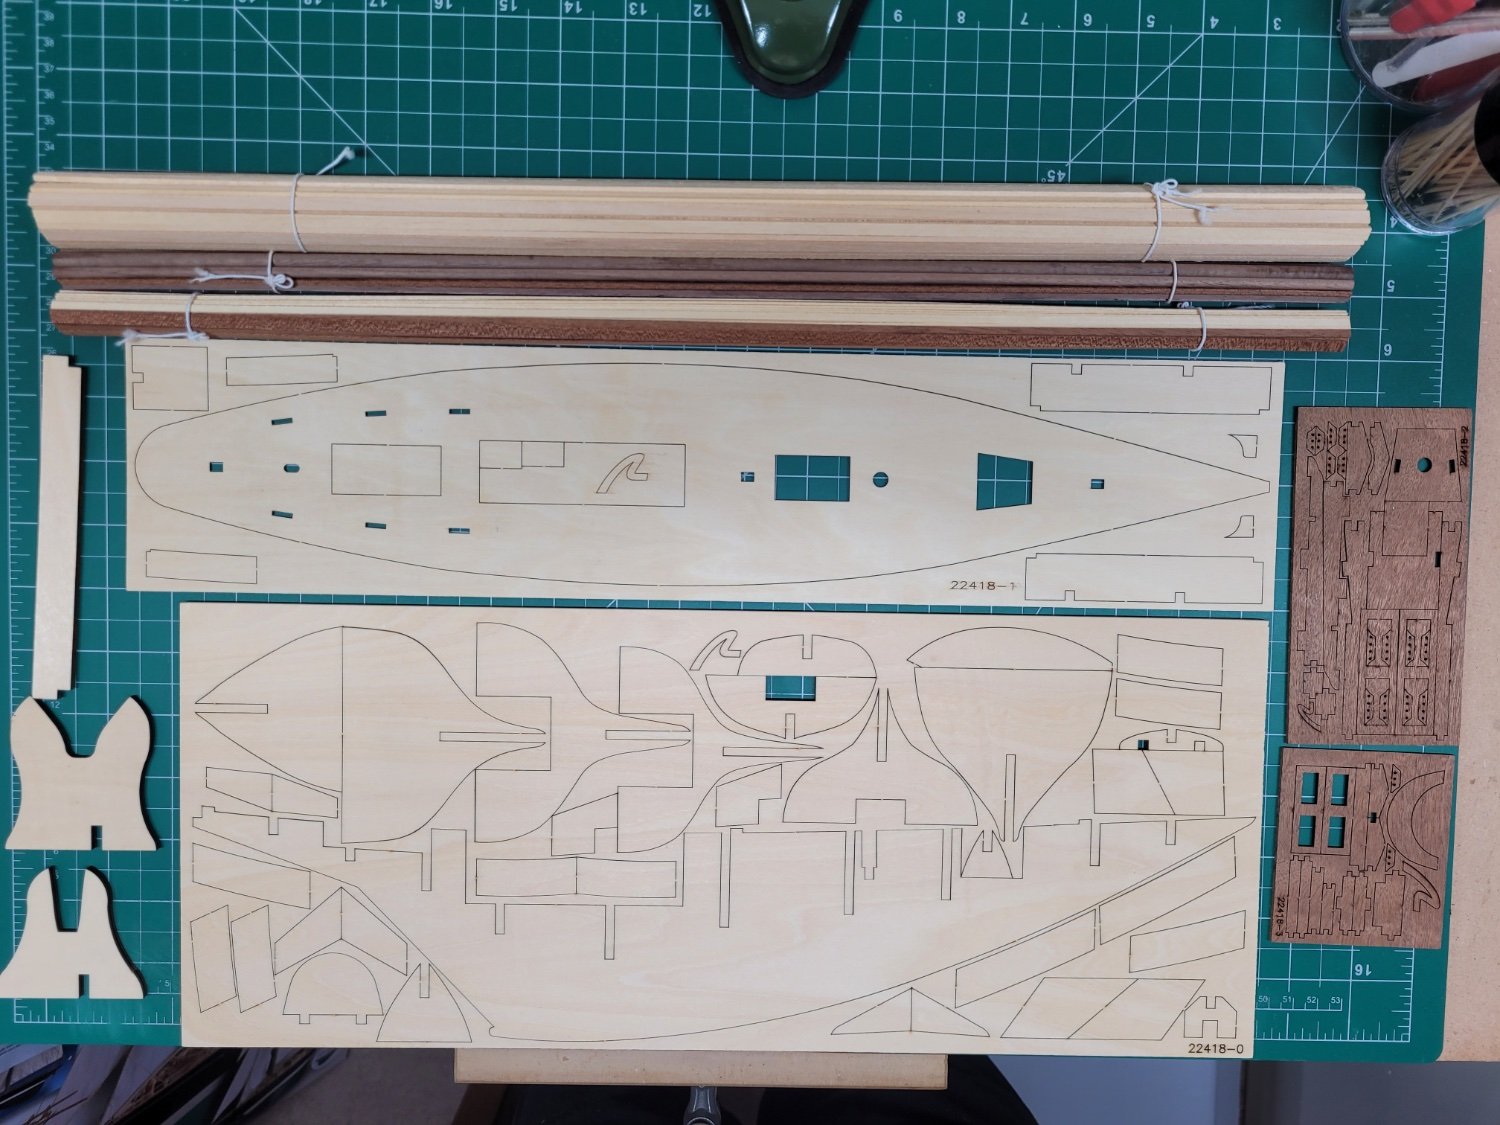
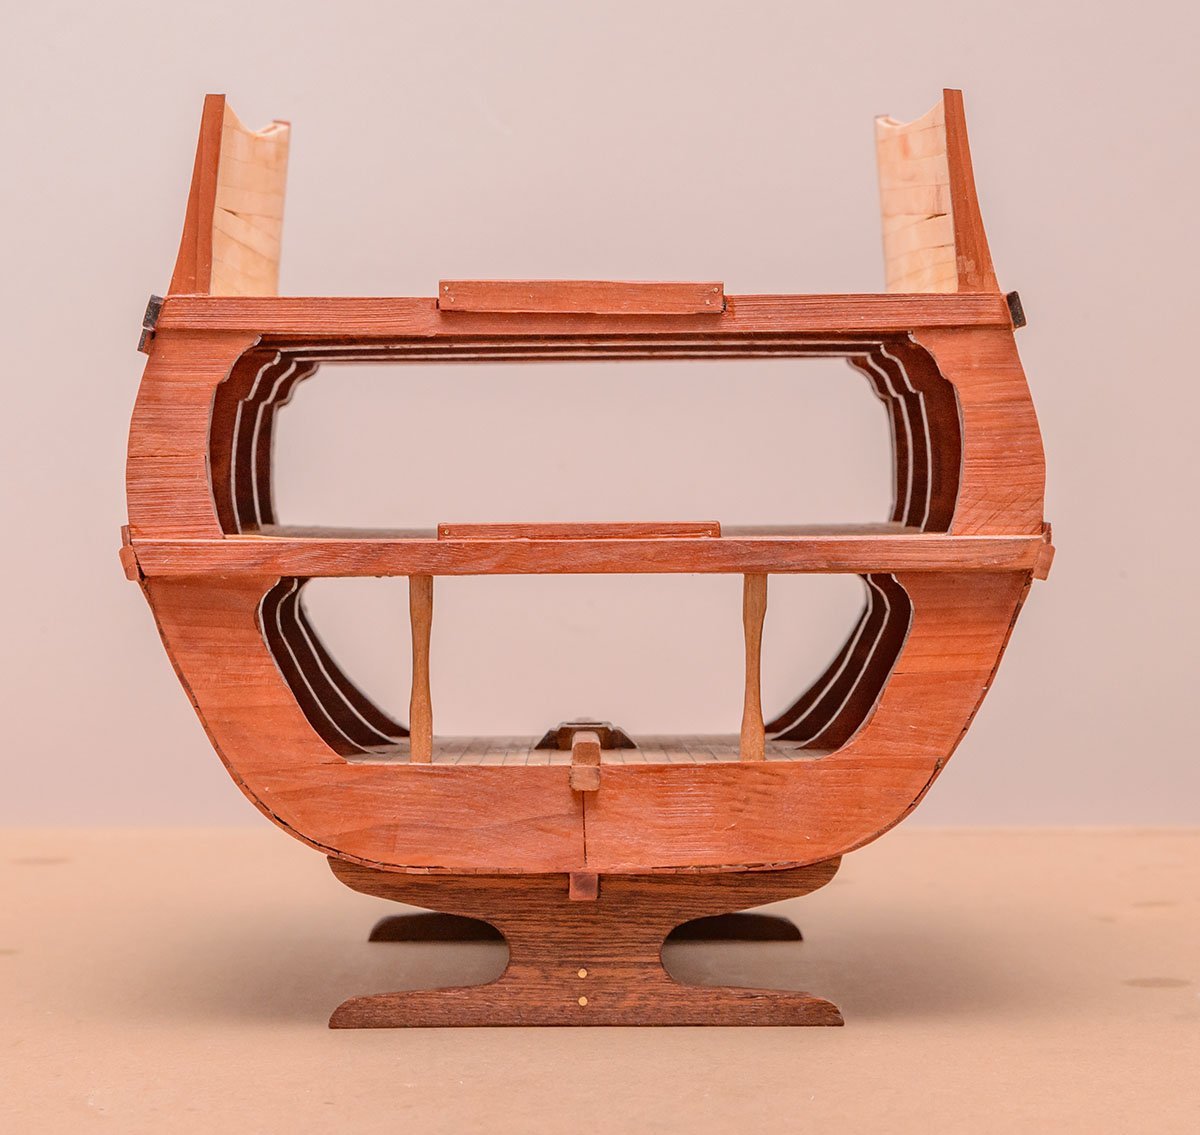
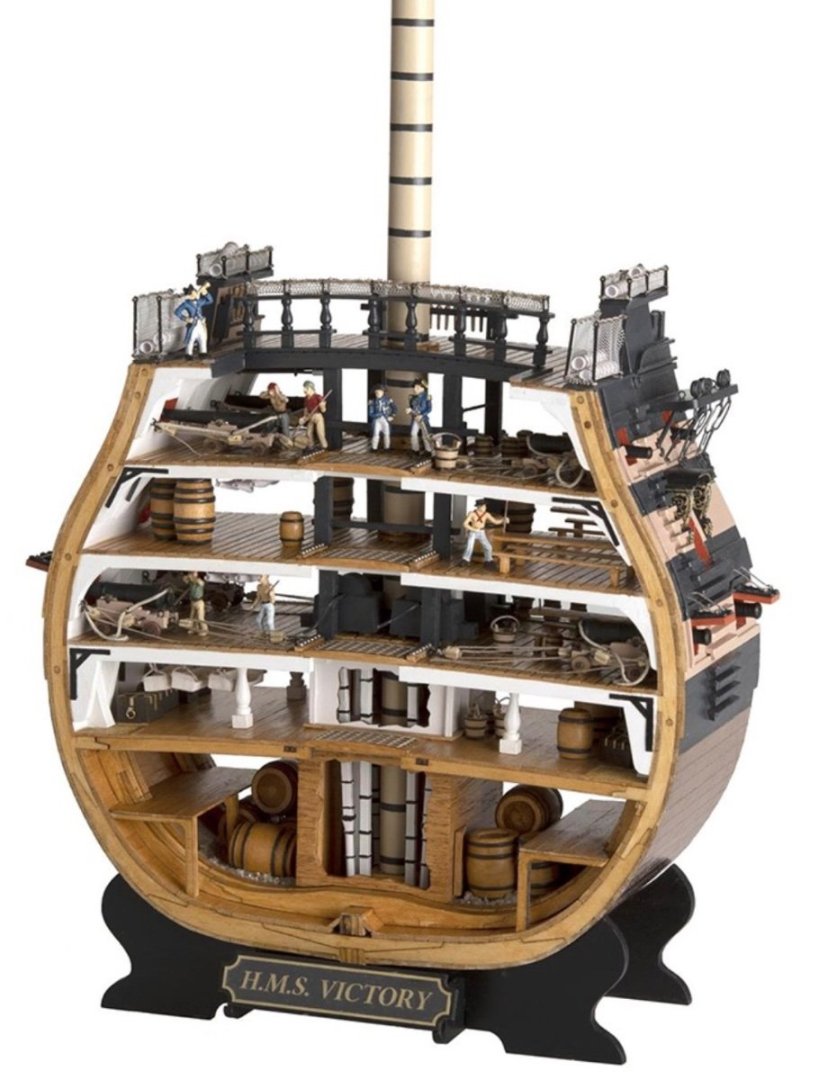
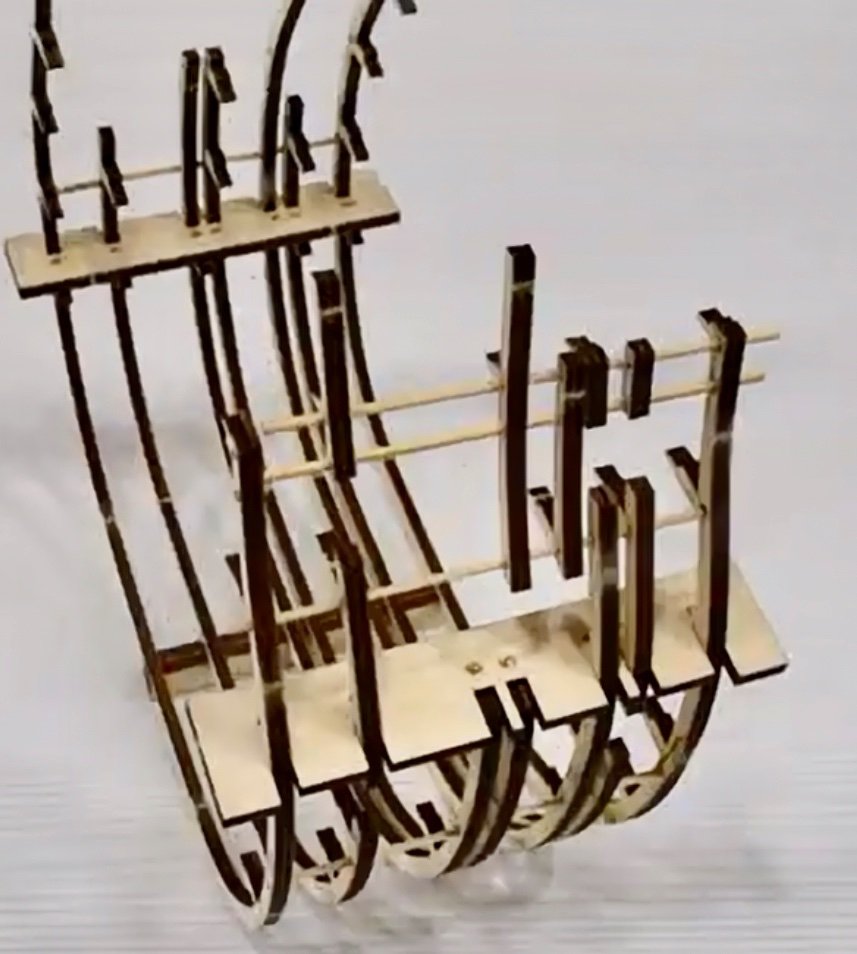
 At the time of commencing this build log (November 2023) I have already been working on Part 1 of the project since 2015, which amounted to researching the ship herself and what Victory really looked like at Trafalgar. Now I know people will point to the Victory herself in Portsmouth and say that’s what she looked like, after all they have been restoring her off and on for a century so you would think they (NMRN) of all people would know, but actually no, it isn’t what she looked like. It may be that is how they label her, and that it has been the objective of her restoration since the 1920’s, and has been ongoing ever since. It was clear to me back in 2015 that the present Victory did not look like some of the strictly contemporary images I had recently been viewing, this is described in the attachments, and of course you will need to read the work for the background and results. You will see I use the term ‘strictly contemporary’ throughout the paper, and this is important, it both highlights and describes primary sources of works of evidential value from 1801 to 1806. Art Works and other records of Victory first produced at a later date, of which there are many, especially after 1814/16 when the ship was radically altered, are voluminous whilst passingly informative, do not carry the same provenance when considering her Trafalgar guise. Unfortunately, a substantive body of the Nelsonic art works, including images of the Victory, grew in preponderance in the 19th Century, and these works continue to dominate the visual record. Accordingly, there is a lot of myth that surrounds Victory, much of this grew up in the century after Trafalgar, especially with the Victorians recasting Nelson, Trafalgar and HMS Victory to reflect the values of their time. Much of this ‘doe-eyed romanticism’ hung over into the early 20th Century and made its way into the restored Victory and Nelsonic cannon of the time. The accompanying volume to this build-log looks back to the records before this dreamy rose-tinted time, but I also draw on the modern research that can be validated. I deliberately caveat my references to modern studies, as even some of today’s authors, including some of the biggest of names in maritime history, are not beyond repeating the hyperbole and mistakes of their Victorian antecedents. Neither are they beyond repeating the ‘findings’ of others, which upon examination of the historic archive do not hold up to scrutiny. I have labelled the result of my research ‘Nelson’s Victory Revealed’, my intention is to release that work in PDF format in conjunction with this build log. Included in this first part is the first instalment, principally the contents, introduction and review of the background research materials. I’ve also enclosed numerically the final 2 parts, the Bibliography and End Notes as they will be needed throughout for cross reference purposes (parts 12 & 13). There is a separate dedicated thread for the Research under ‘Discussions for ships plans and Project Research ….. etc.’, I’ll also post these over there as well. So, after enough waffle, on to ‘Part 2’, of the project - the build! Whilst I would have liked to have built the Victory in 1:64 scale utilising the prospective Amati Victory as a basis with the ability to detail all decks, it is not available at this time, and I am keen to make a start so waiting isn’t an option. So, I have purchased the Caldercraft 1:72 version from Jotika. I had considered scratch building, but I am being realistic about my abilities. I have scratch built HMS Trincomalee in 1:64 plank on bulkhead, or rather more correctly, part built – I’ve completed fitting out the Gundeck, but a First Rate is an entirely different proposition. I had though initially about opening up the Caldercraft Middle Gun Deck and detailing it, however, it just happens that Artesania Latina have also just released a 1:72 scale Main Mast Cross-section, timing couldn’t be better. I’m going to build this in tandem with the Caldercraft kit, or more accurately slightly ahead of it. This will allow me to detail items such as the double height chain pumps, Riders to all decks, pump well and multiple shot lockers, and multiple gun patterns. In terms of reference material, well there is that small volume I’ve already mentioned, and I have also collected in pursuit of my research a substantial volume of reference material, all of which is listed in the Bibliography. Then there are also in 1:48 scale all available Victory draughts and plans from the NMM, together with those of the Boyne. In addition, I have Bugler’s 1:48 plans and a set of John McKay’s drawings in 1:64 – so no shortage conflicting materials to draw from! Then there are the prints I have also obtained from the NMM, including both Turner and Stanfield’s Trafalgar works, as well as those of EW Cooke and Pocock. Some of these are now framed and adorn the library by kind permission of the Admiral, I’ll get around to posting a few photo’s of these. I claim they are for inspiration, but truth is sat in front of an open fire next to a decanter of Talisker Whisky there is collectively more of a soporific effect (cue Master and Commander on the iPad and miss the end of the film again 😊). I will also need to capture some side profiles early for the later fabrication of the many fenders, and the head chutes. At some time there is the stern and quarter gallery shapes to confront and reconfigure, but this will be an iterative process as these can only be done when the hull is at a stage that the quarter gallery patterns can be fitted and shaped., which in turn help establish the stern shape. The kit will be augmented with an authentic mix of Blomefield and Armstrong-Frederick guns – spoiler alert, Victory did not carry a uniform pattern of guns throughout at Trafalgar, like much of the British Fleet there was a fair bit of mix and match. Also, forget 104 guns, there were 96 + 2 Carronades, speaking of which, there will be some bashing of carronades to get something akin to the prevailing pattern in the early 1790’s when Victory’s were probably cast, rather than the poorly formed replicas we see aboard the ship today. The Upper Deck will get its steam trunking, sick berth, and internal galley chimney. There will be more supplements to the kit as the build progresses. Painting will be in the new colours as I’m a believer in the science and the research undertaken to establish these, particularly when combined with the Rase Mark analysis on the ship. There will be some tonal adjustments to the palette to account for the optics at scale. She will also get the pattern extending around the stem, NO black gunport lids – that is wrong, and lower white masts with the hoops painted out and white underside fighting tops as were worn at Trafalgar. I’m not going to do an un-boxing, there are enough of these around already. What I do need to sort is either a building board or cradle of some form, but I think I’ll address that when I’ve got the skeleton assembled and have more of a feel for handling the model in the space available. Below is a photo of progress to date, first up were modifications to the stem. The kit provided stem reflects the present Victory, but is both too short and low for 1805. This necessitated some amputation and the insertion of a filler piece to throw the head further forward and upwards. There was some additional shaping and profiling with the horizontal bow filler pieces to obtain the necessary profile, which itself was thinned down from the stempost forwards and from where the third cheek down to where it is affixed to the keel. A sacrificial profile or template for the placement of the bearding line at the bow was added at this point, this follows the correct profile and will require further refinement as the work progresses. I also took the time to replace the kit keel which as supplied is a uniform 5mm x 10mm. Based on the Bugler midship section it needs to be 7mm x 11.5mm plus a false keel strip. In addition, it needs reducing in width at each end tapering down from 63mm out to fair-in with the stern and stem posts. Elements of the keel were pre-rabbeted to match the bearding lines. All of this will be covered in copper plates anyway. A new stern post was fabricated using the kit version as a template, instead of a uniform 5mm the correct width at the top is 8.5mm tapering down to match the keel. This will be fitted after planking. Brass rod is used throughout to strengthen the joints of these pieces, much of which is capped over with pear strip. I have also blasted the dummy gunport liners and cabin spaces with some rattle can paints, these areas won’t be seen directly, but I felt some appropriate colouration wouldn’t hurt. For those who haven’t seen the AL cross section yet I’ve attached two images below, one shows the frame they are using to build up the cross section, and the other is of their finished product. That’s it for now. Gary Nelson's Victory Revealed Pt. 1 Background Materials.pdf Nelson's Victory Revealed Pt. 13 References Endnotes.pdf Nelson's Victory Revealed Pt. 12 Bibliography.pdf
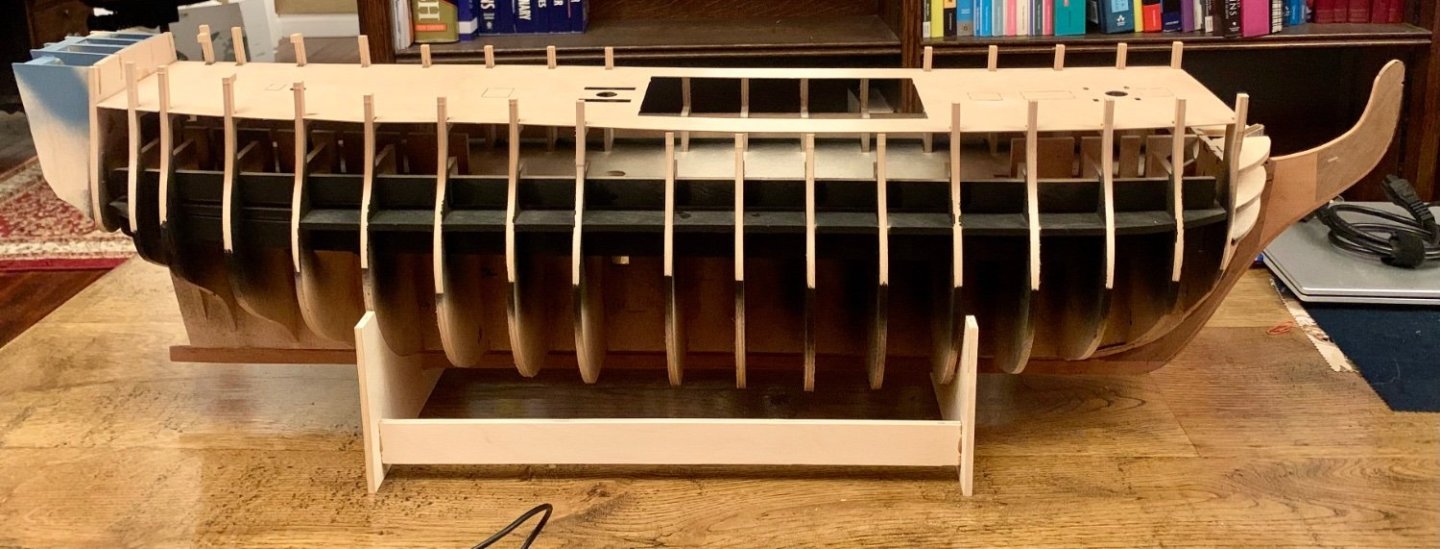
- 2 replies
-
- 7
-
-
- HMS Victory
- Caldercraft
- (and 1 more)
-
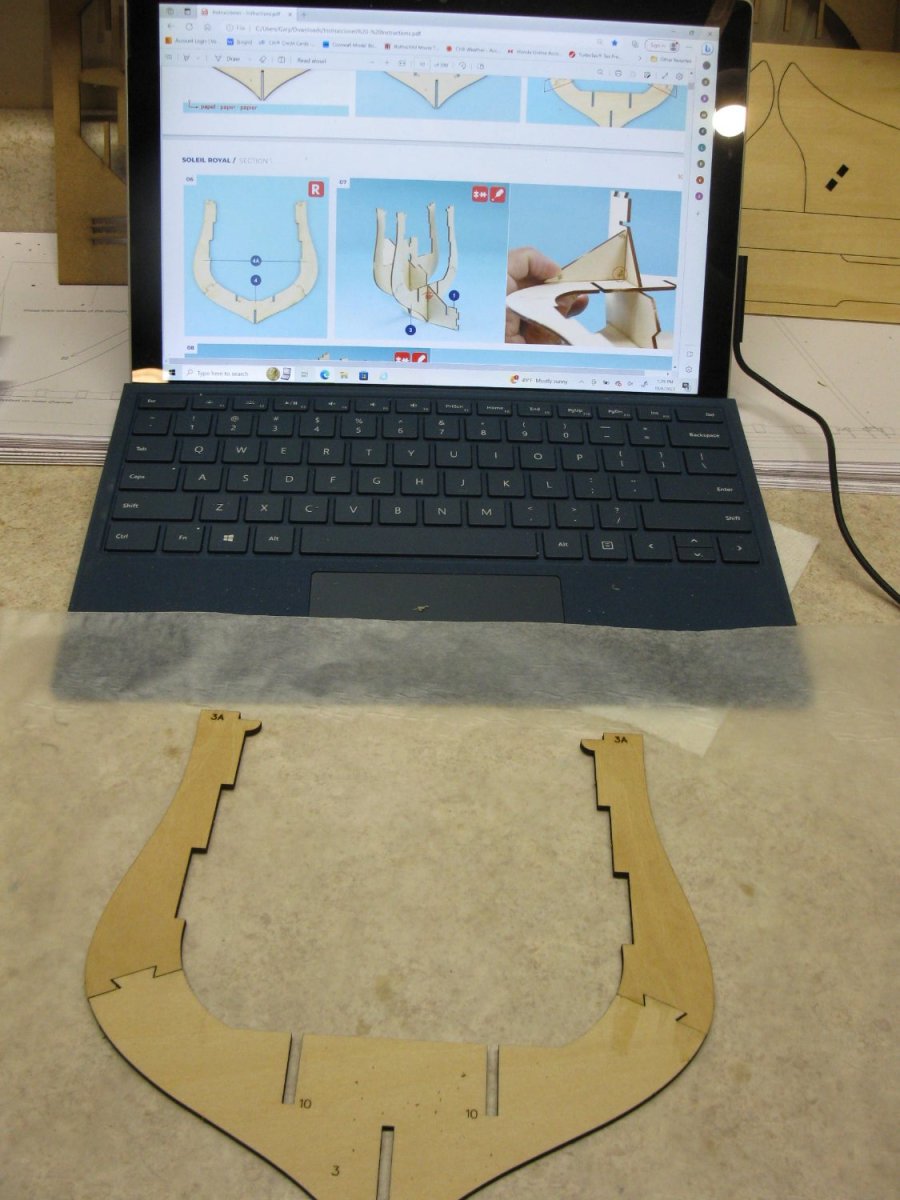
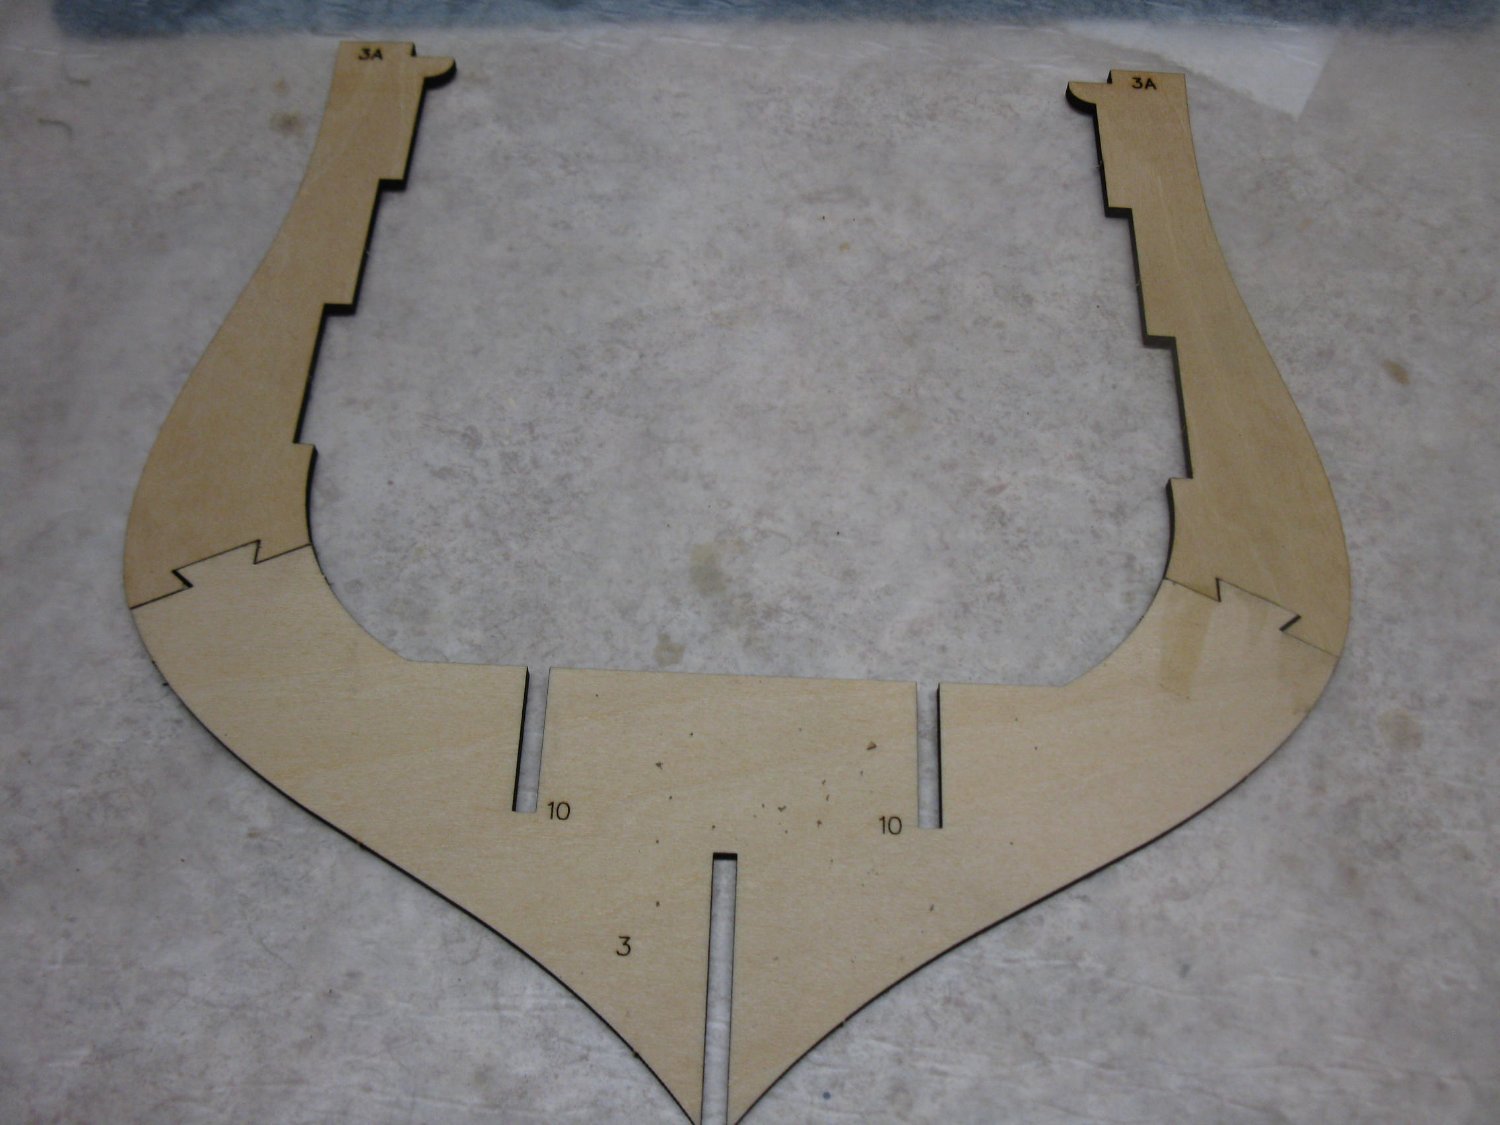
 Hello all. Glad to be back after a long hiatus. I am starting this build log of my A.L. Soleil Royal after a few months of having started the build. At this moment I have almost finished the decks planking, hull planking, gunports, and a few other minor things. Don't ask me why, but I don't like painting my ships. And in this case I went one step ahead, and decided to make it looking "used and abused". Some may argue that Soleil Royal never looked like this, and thus this can't be "named" Soleil Royal. Well, sorry... it is my ship and I will do as I please. So, here are a few photos. At this point I still had not decided on the weathered finish The porcupine. I used bamboo toothpicks glued to a previously drilled hole, to simulate the nailing Jig to cut the gunports frames. This is how it finally looks Making doors using toothpicks That's it for today. Bye all!
.jpg.925615dbea94a2c1439088f7fb6e92b4.jpg)
.jpg.6f2da8b56e82861a617b14b1b1c5a583.jpg)
.jpg.69dfed9f647a4c69bd5fe073bf2ea8b7.jpg)
.jpg.73d5b1dcbfe60f63b1879dd64bfbbef2.jpg)
.jpg.500d21cf32a07a1388d24ce7e4de6a67.jpg)
.jpg.da408b9ab0426182b07b92838b46777f.jpg)
.jpg.5f499a10686152379e5454336a954ceb.jpg)
.jpg.d91e6c3c574d3000b171be418b0a9ca9.jpg)
.jpg.5962bbdcf2376d7cbaba9ed5010031a4.jpg)
.jpg.8fa96b97ec461483f850620508fb794c.jpg)
.jpg.8f4f580c66d625d567901214836ddd1c.jpg)
.jpg.fc819df780e98bc925c8baf46aef2d80.jpg)
.jpg.60edade7361baf307523b11365b18dc3.jpg)
.jpg.6d1e999ac51314d235ab4d2eb82e605c.jpg)
.jpg.2dba9c6f717f92924648d2f43aee2084.jpg)
.jpg.8bab9f9b303aa84071430eea13c9eb62.jpg)
.jpg.5b5ad7ae8605df7b444e59e6c27aef71.jpg)
.jpg.60844c6194c9053795ad6e232a527941.jpg)
.jpg.846343b140302b8d7cb69839d9c91bd1.jpg)
.jpg.780fc5e4dce0b2c067531ed2e6e98565.jpg)
.jpg.883451f362aebf4bb9a01cb0660bf2b8.jpg)
.jpg.e4aa87d997cb08600b401d6fc24a3614.jpg)
-
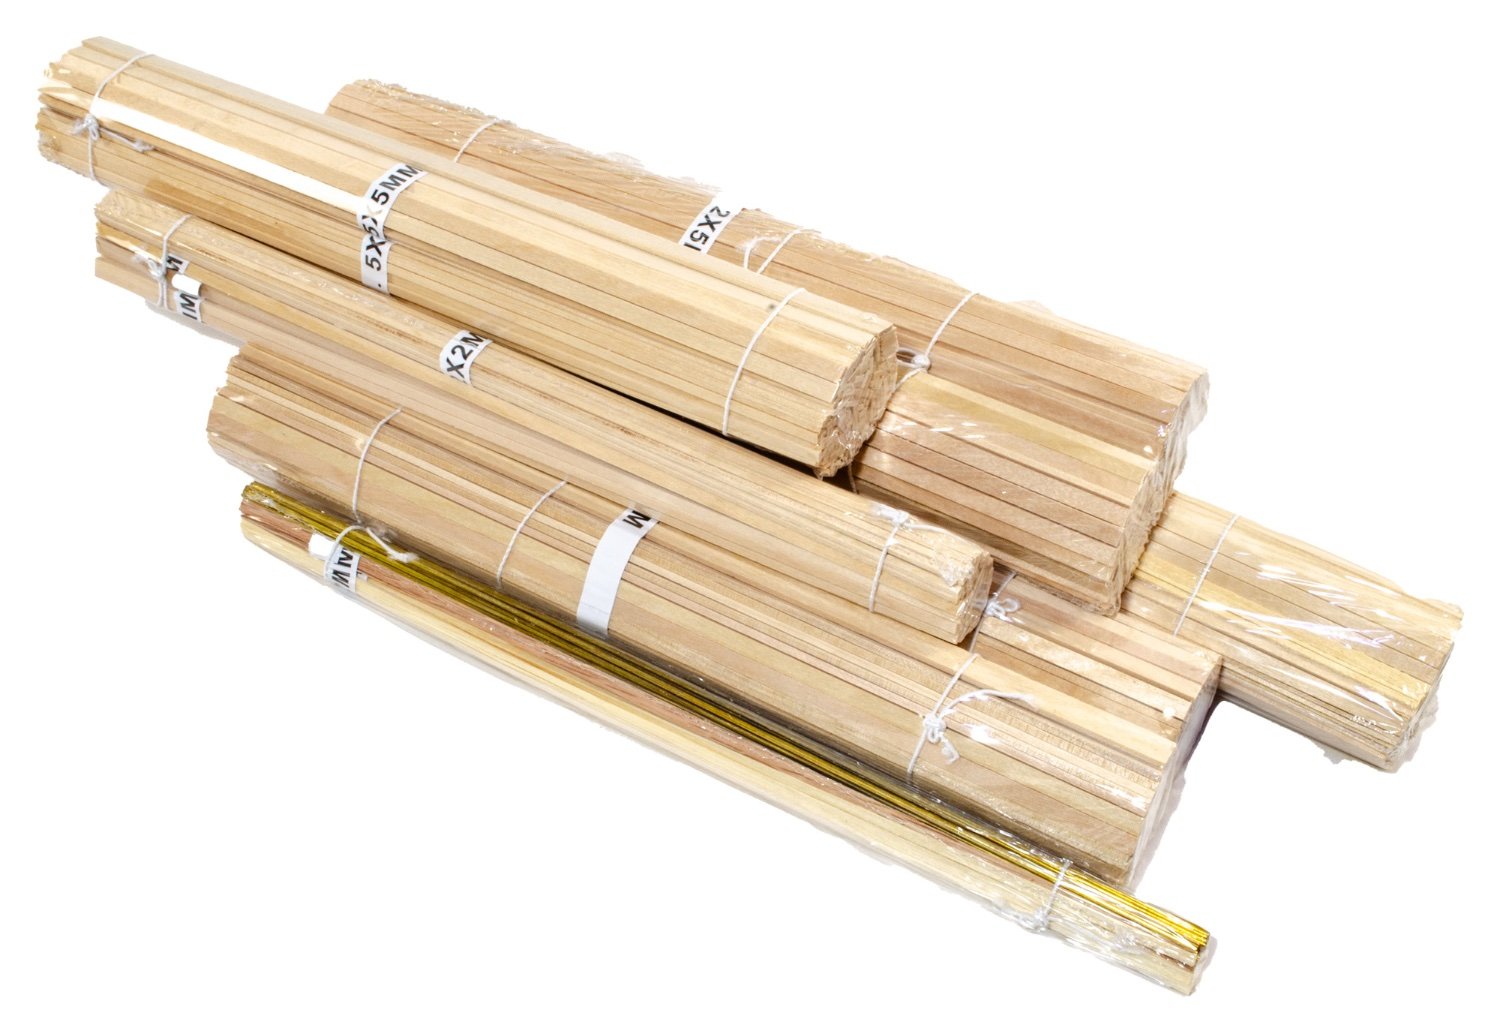
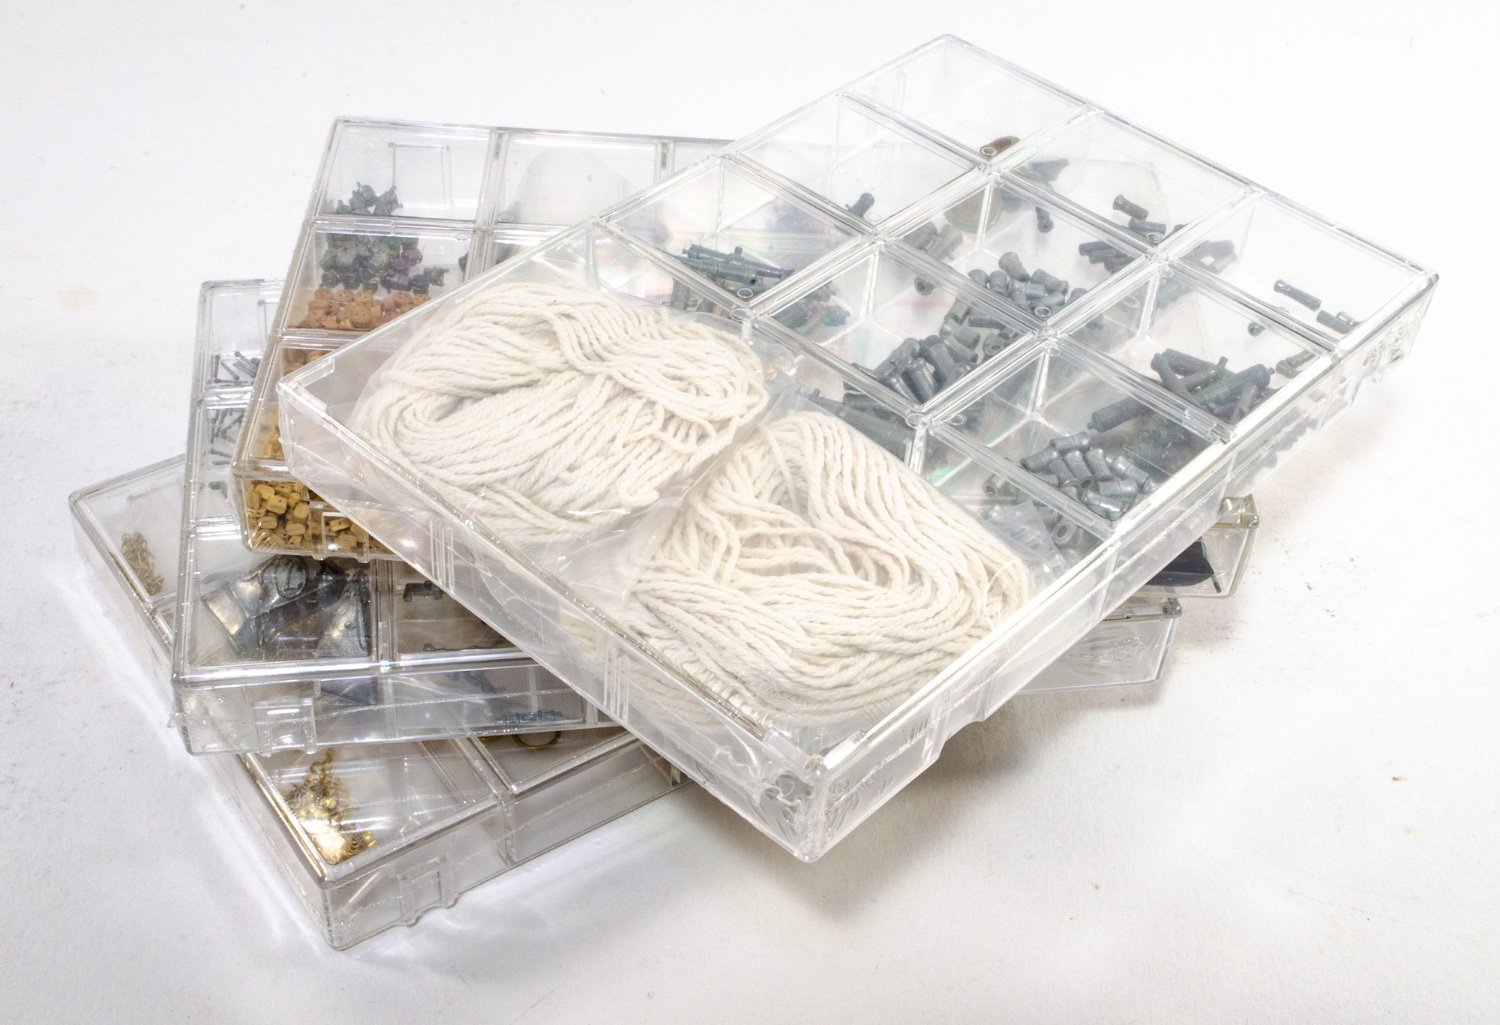
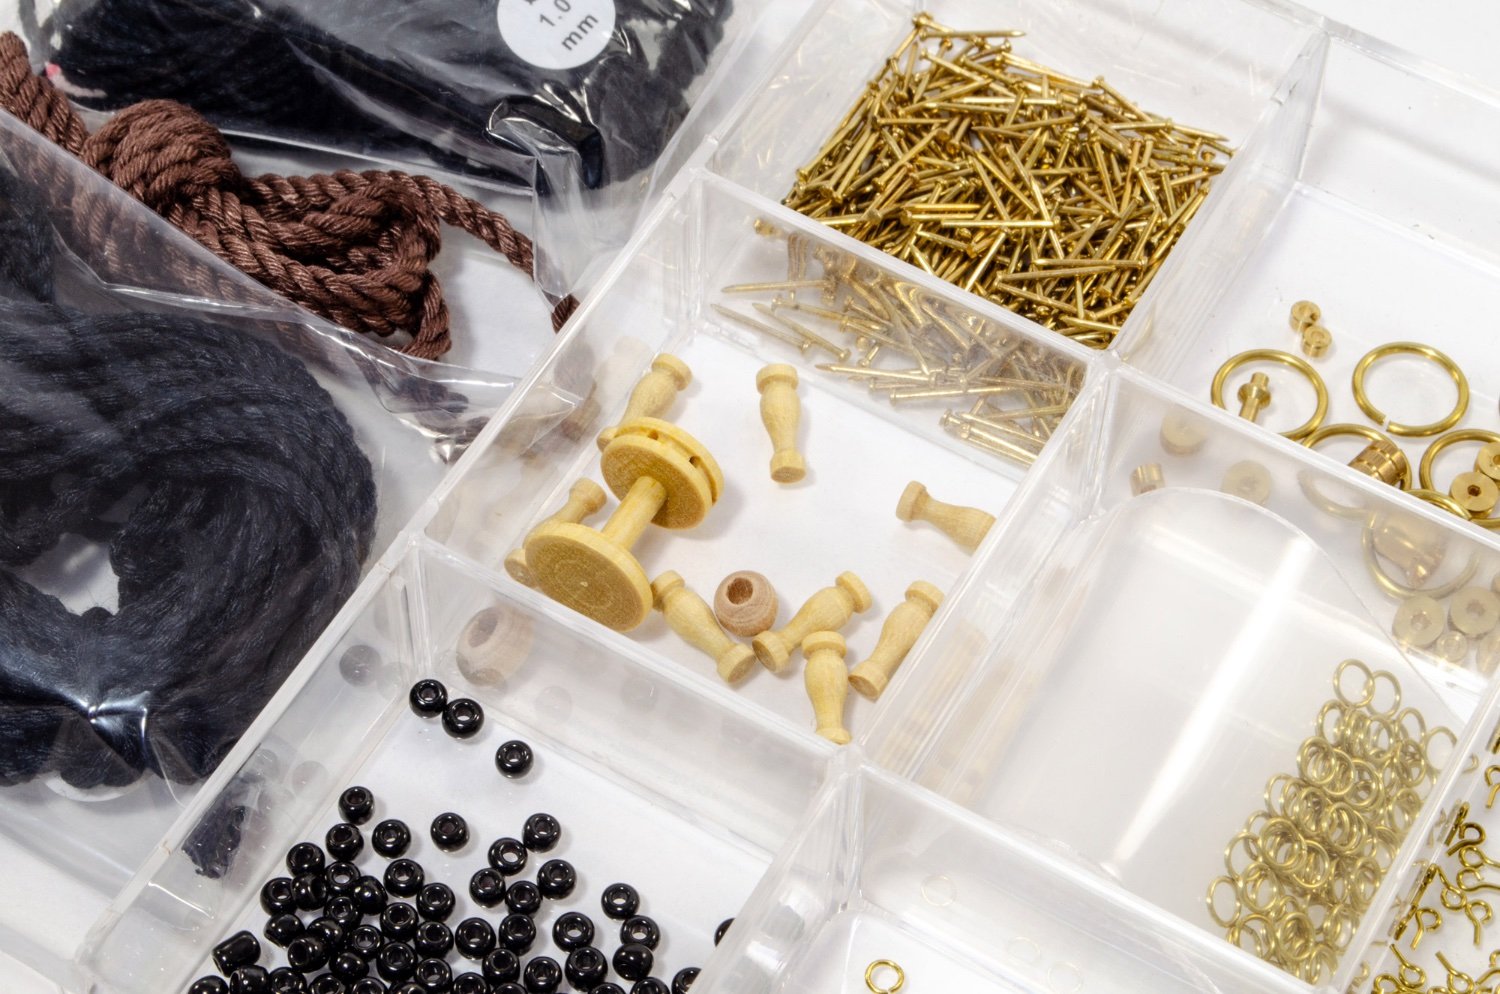
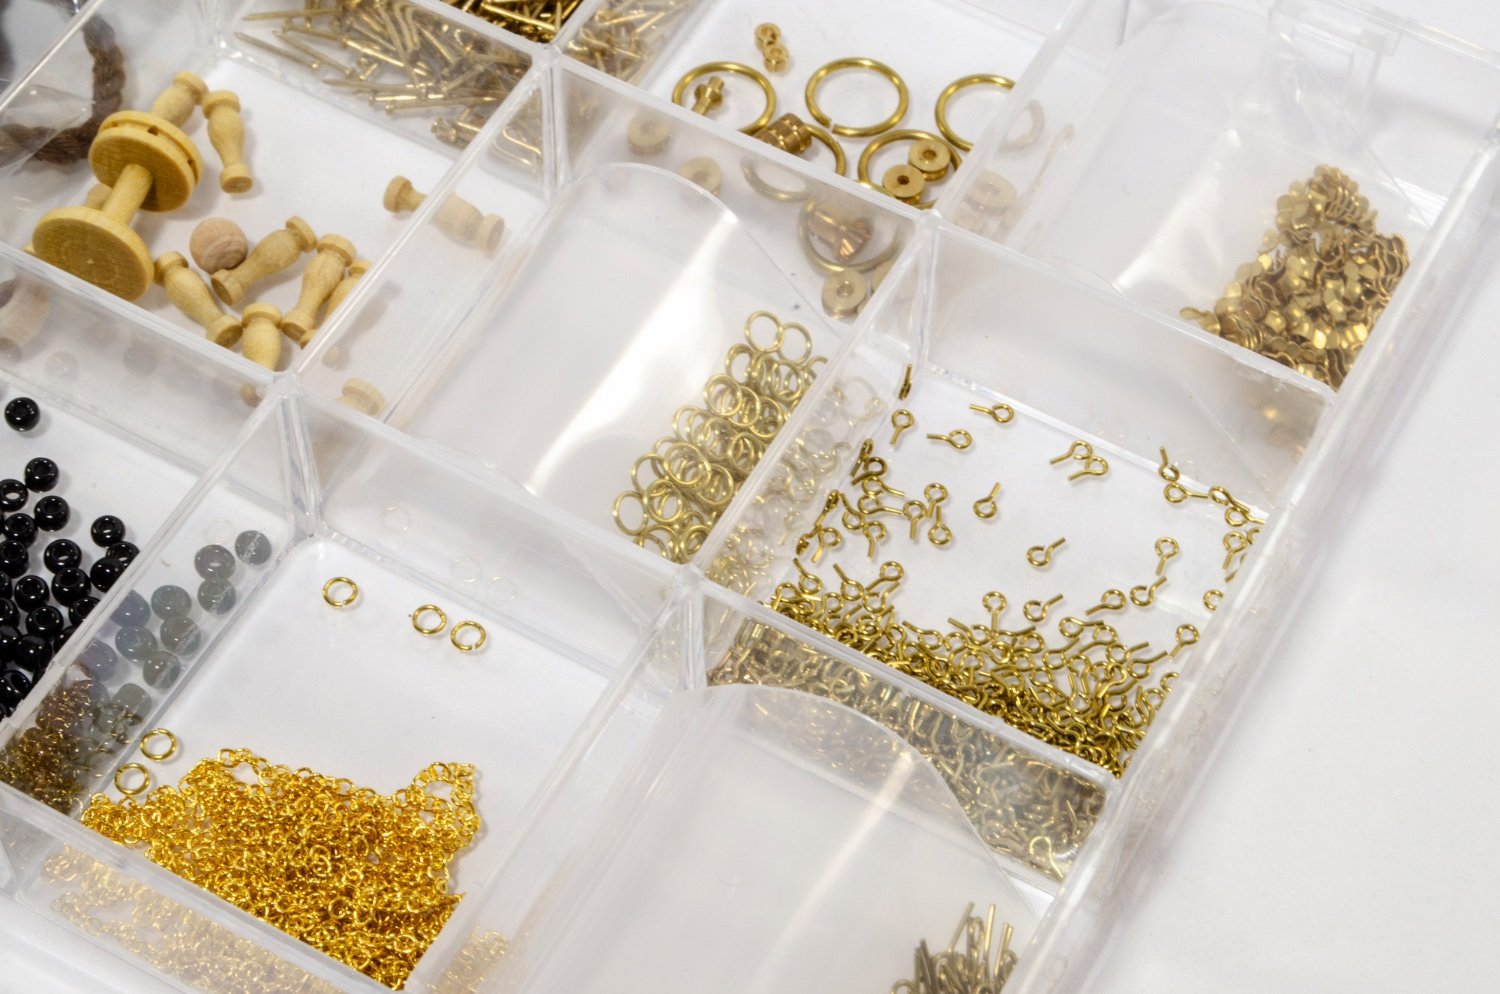
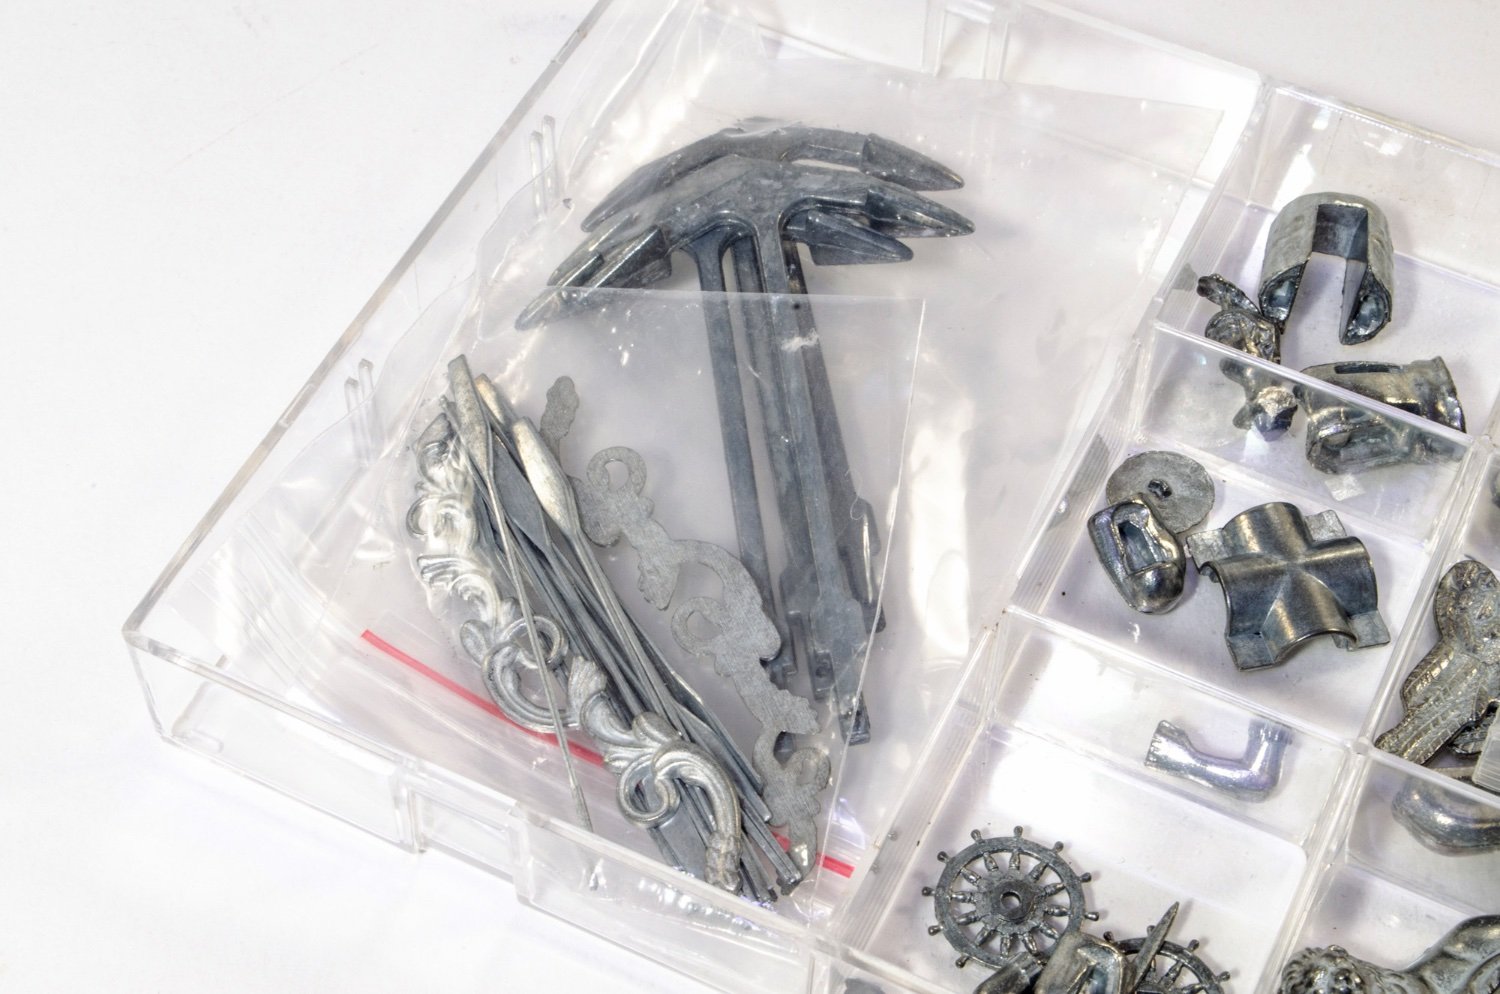
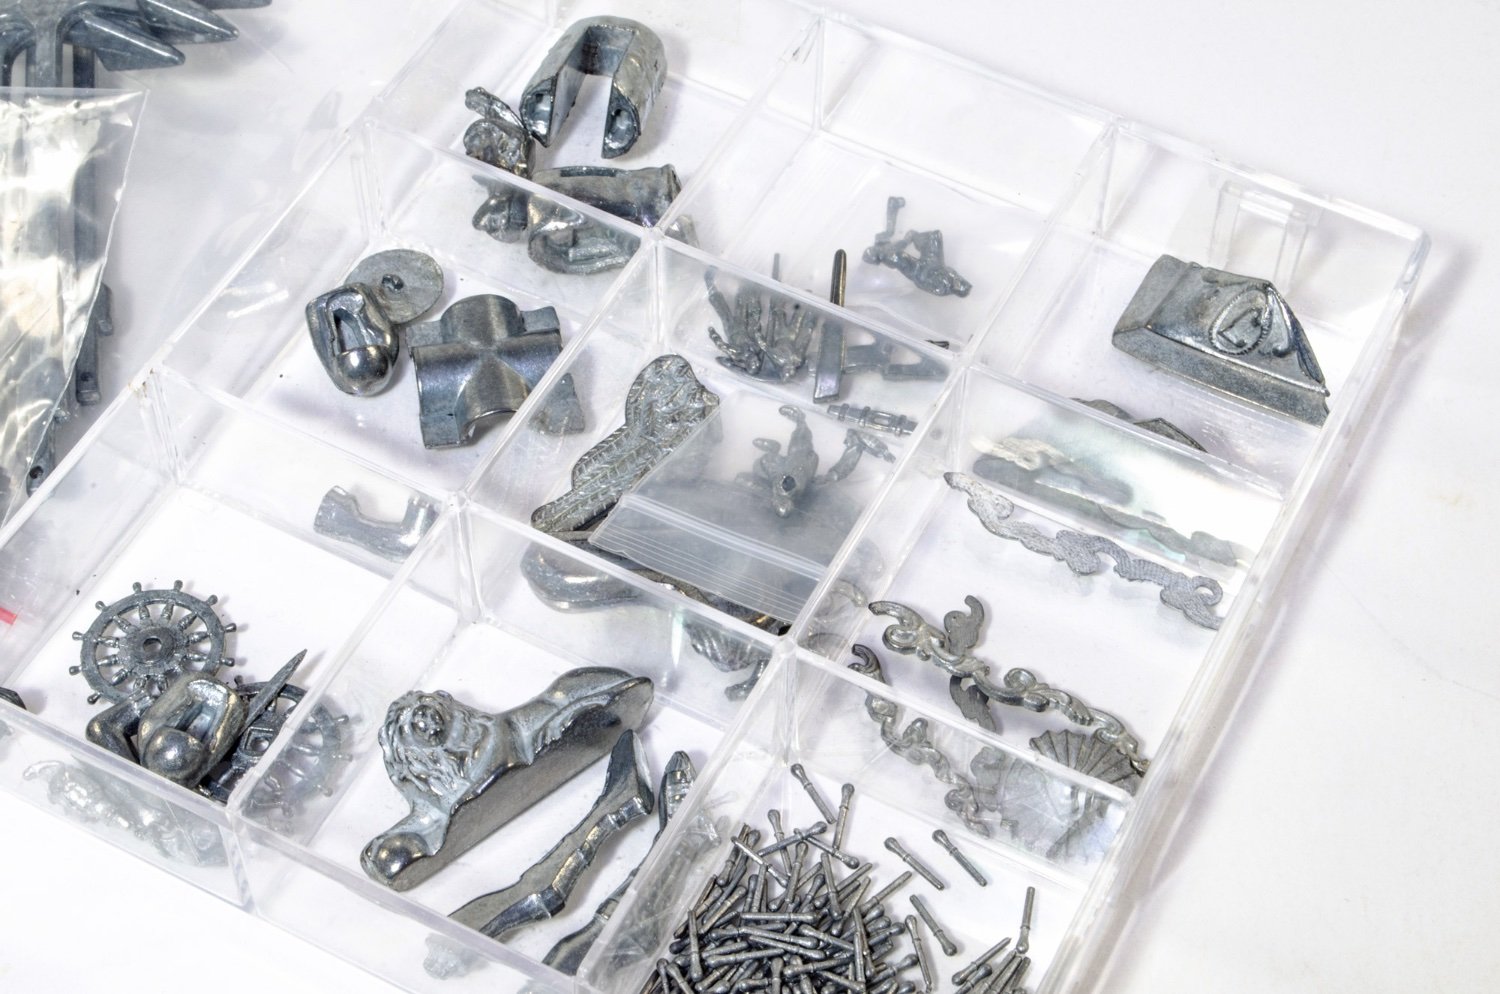
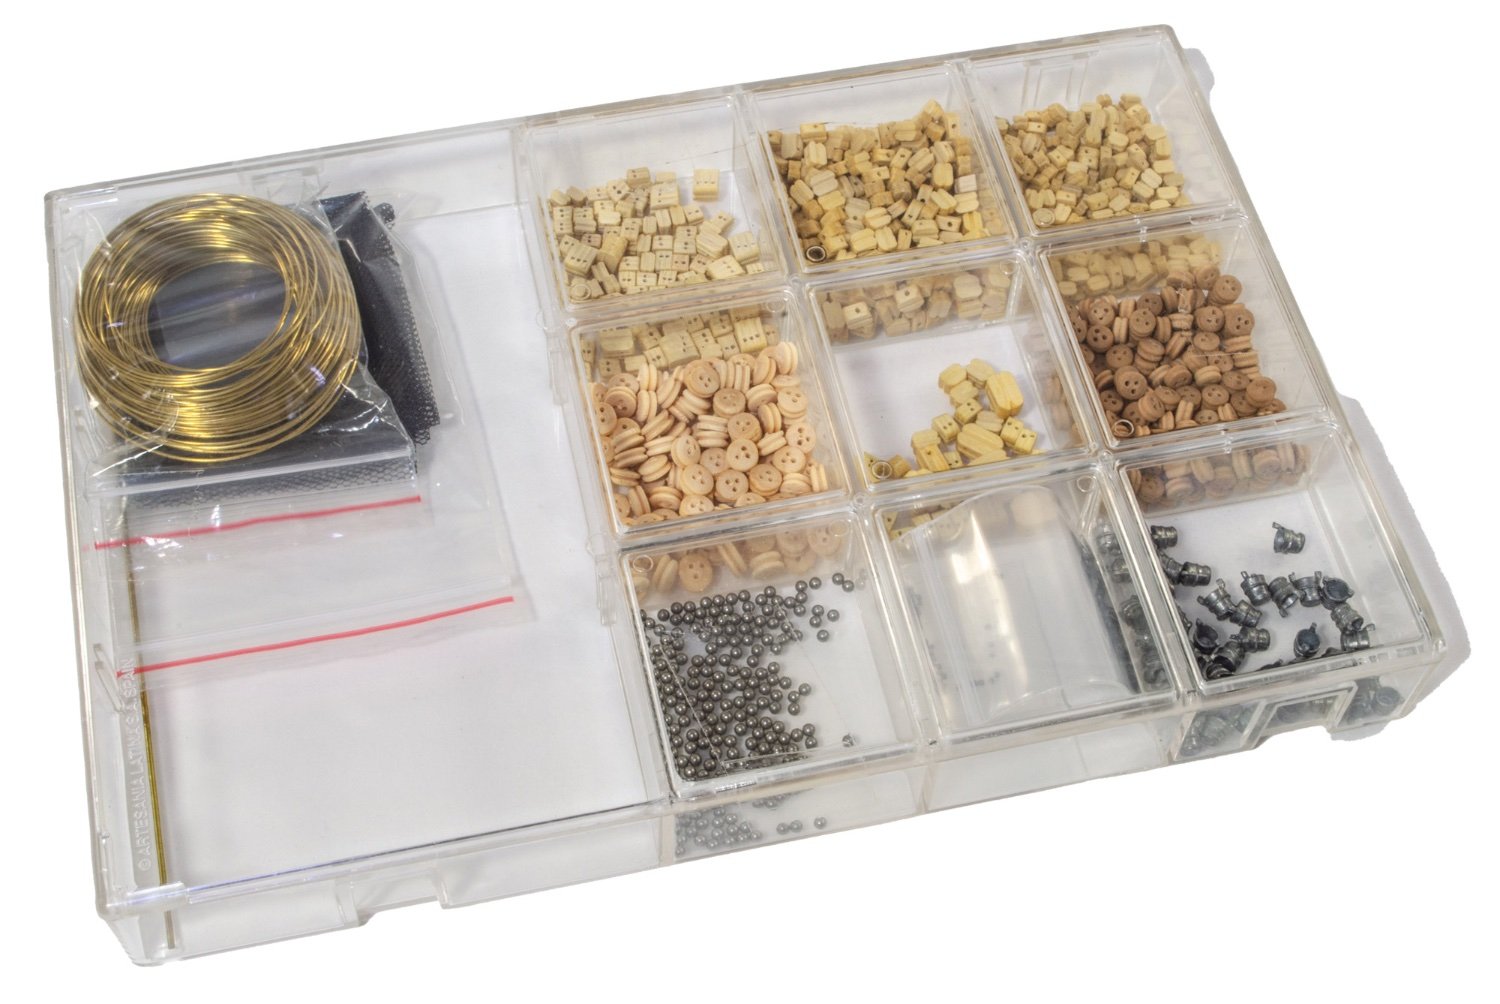
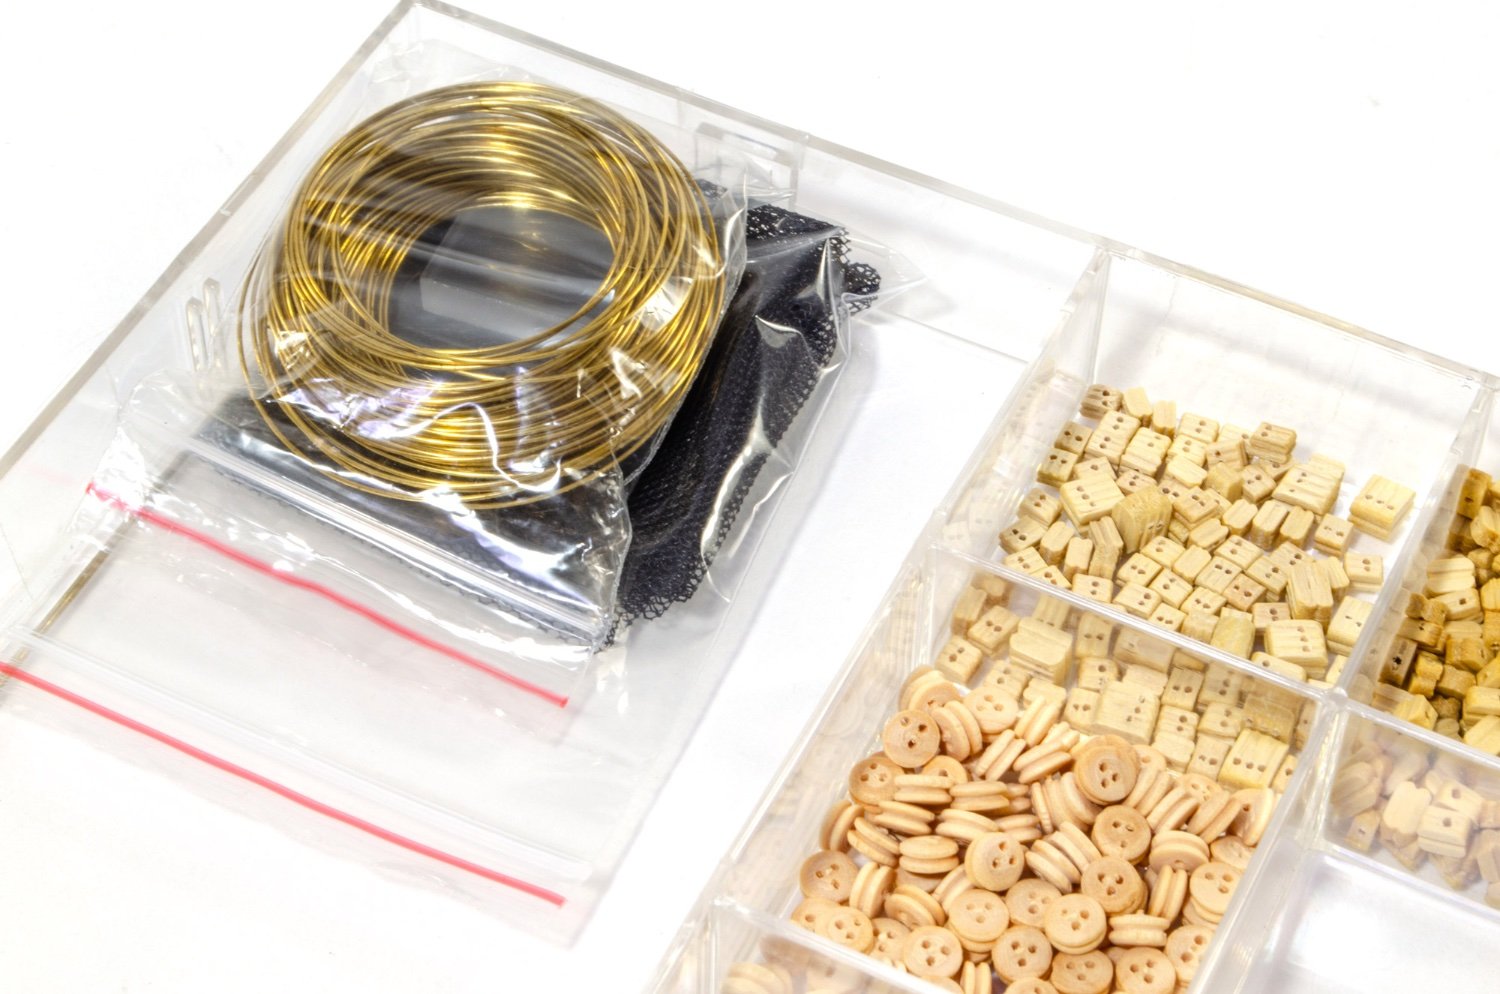
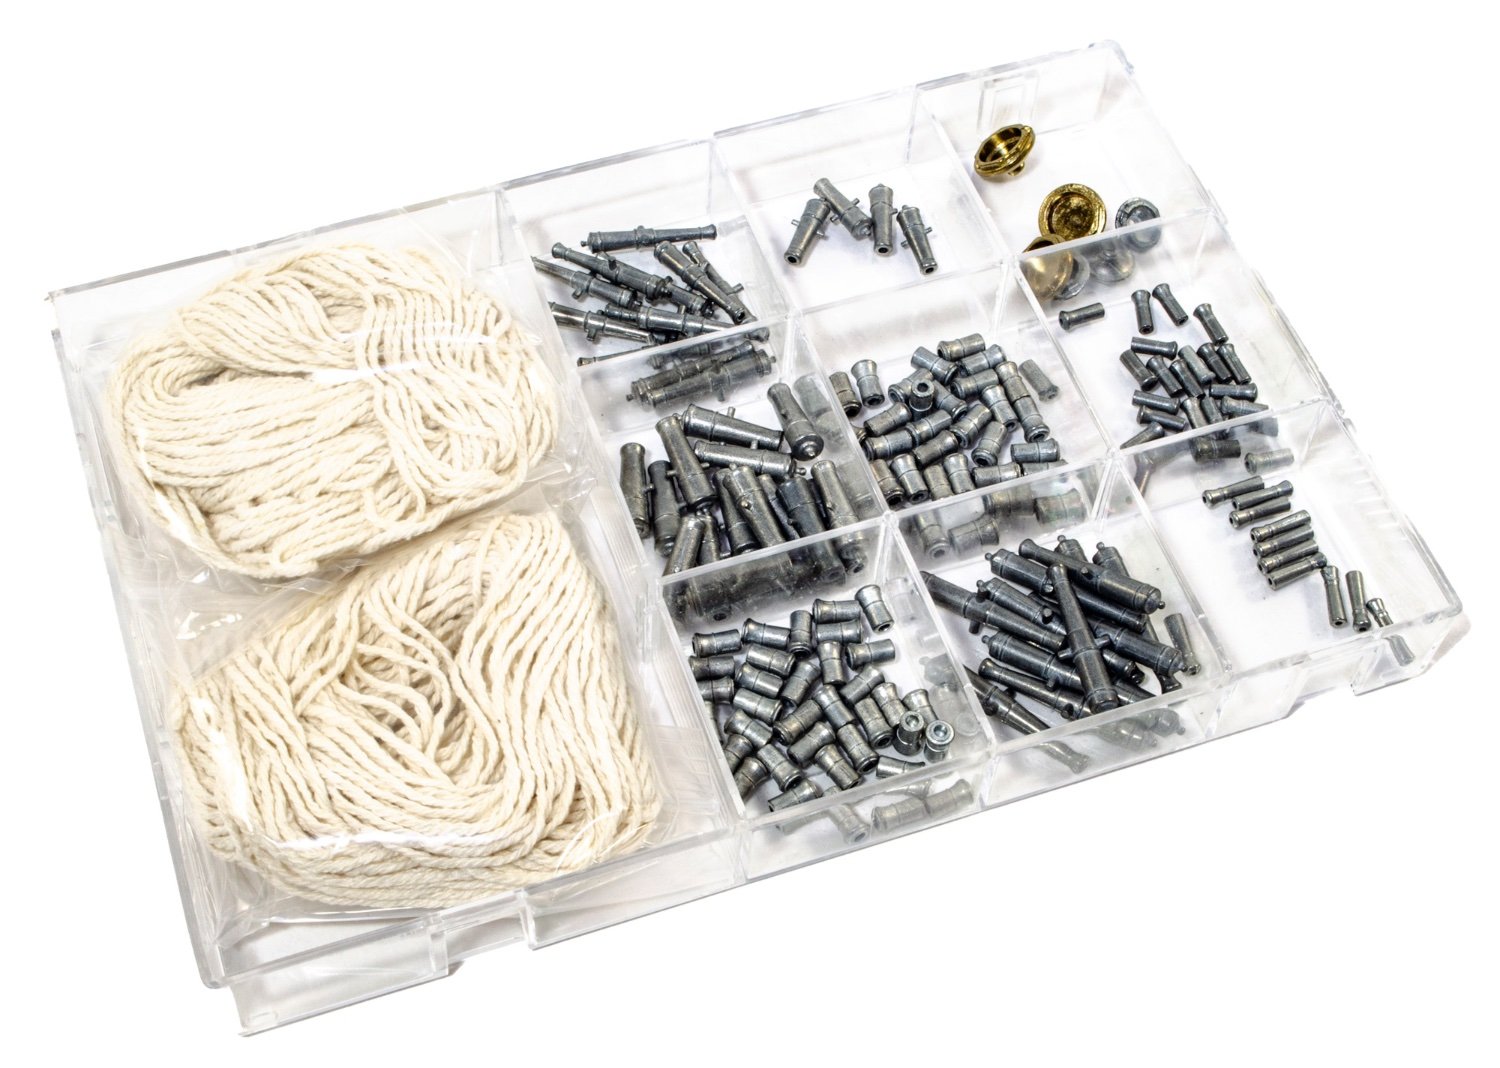
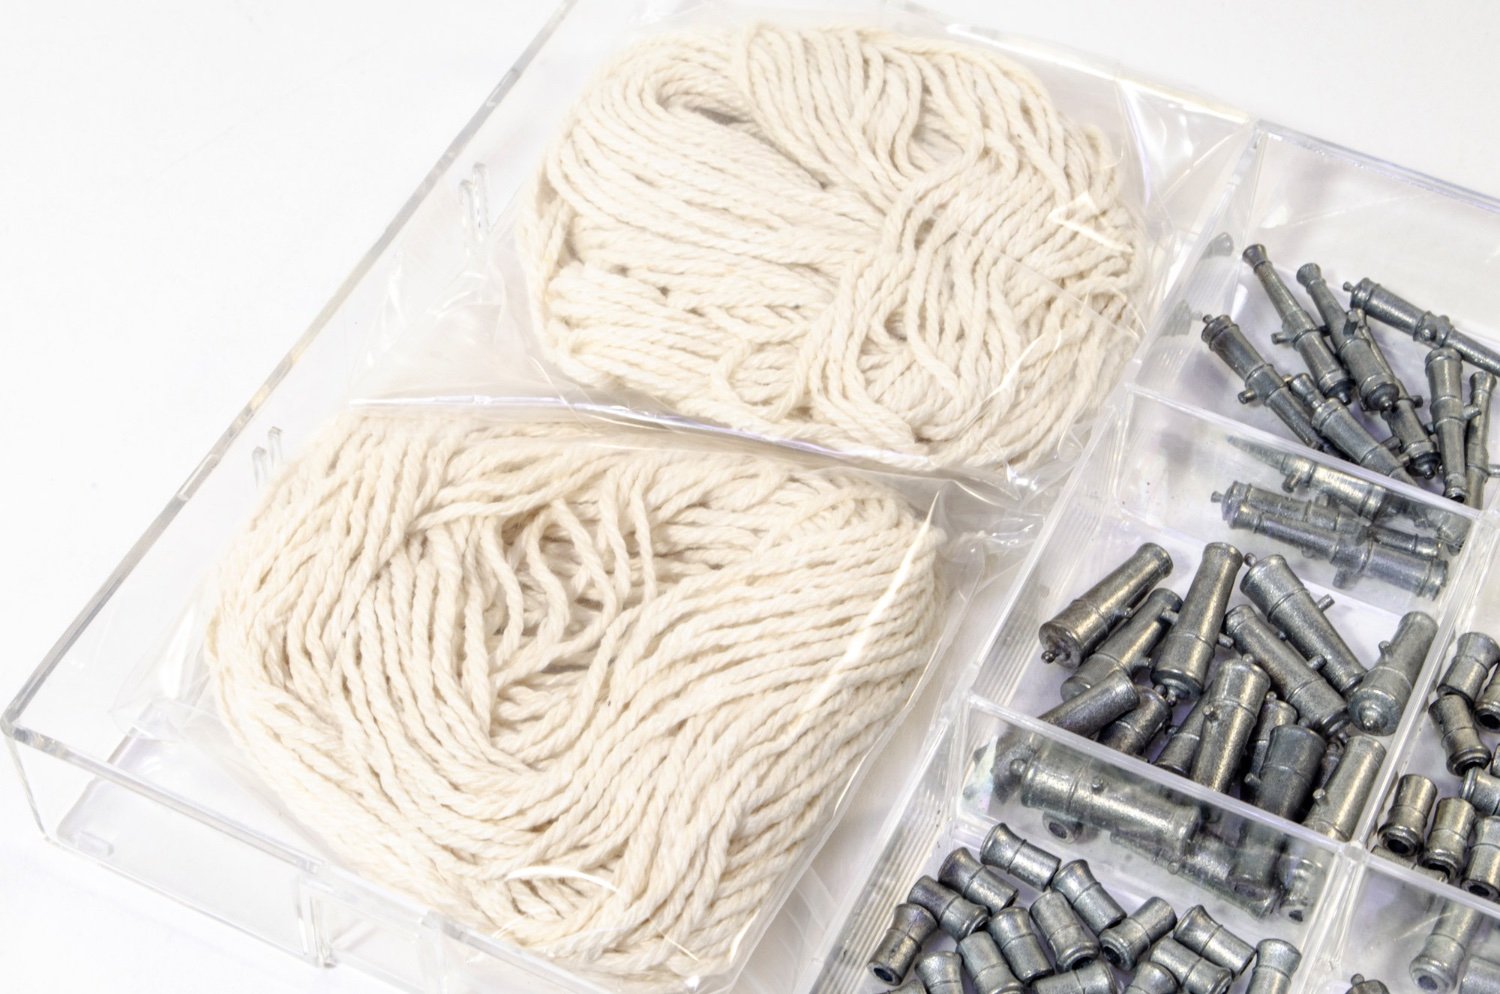
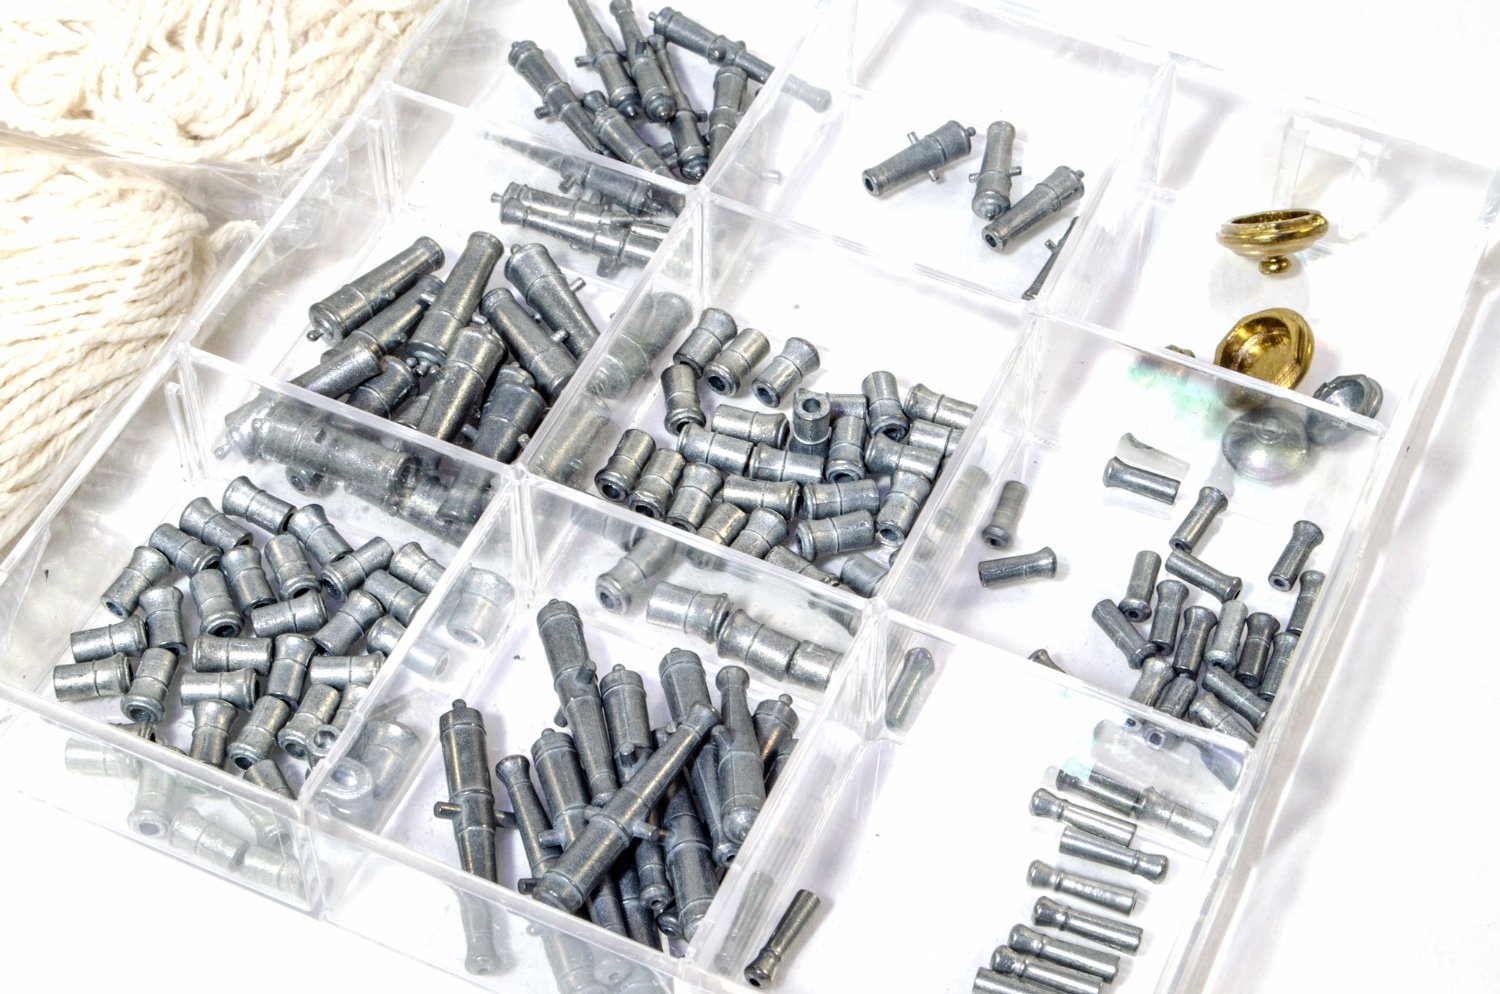
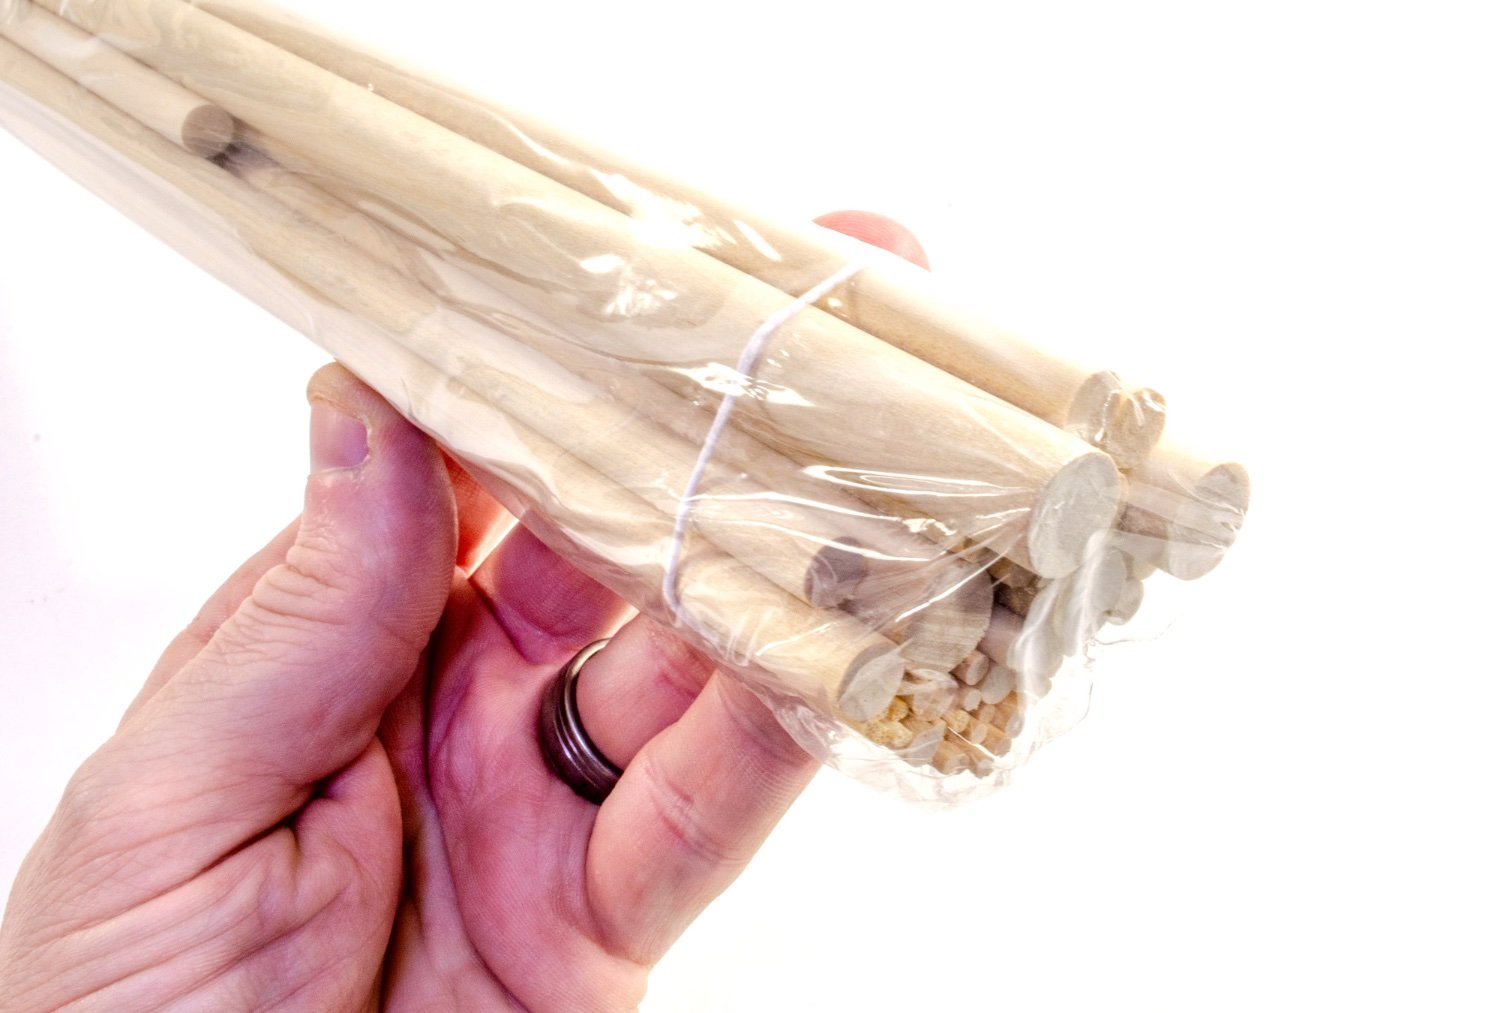
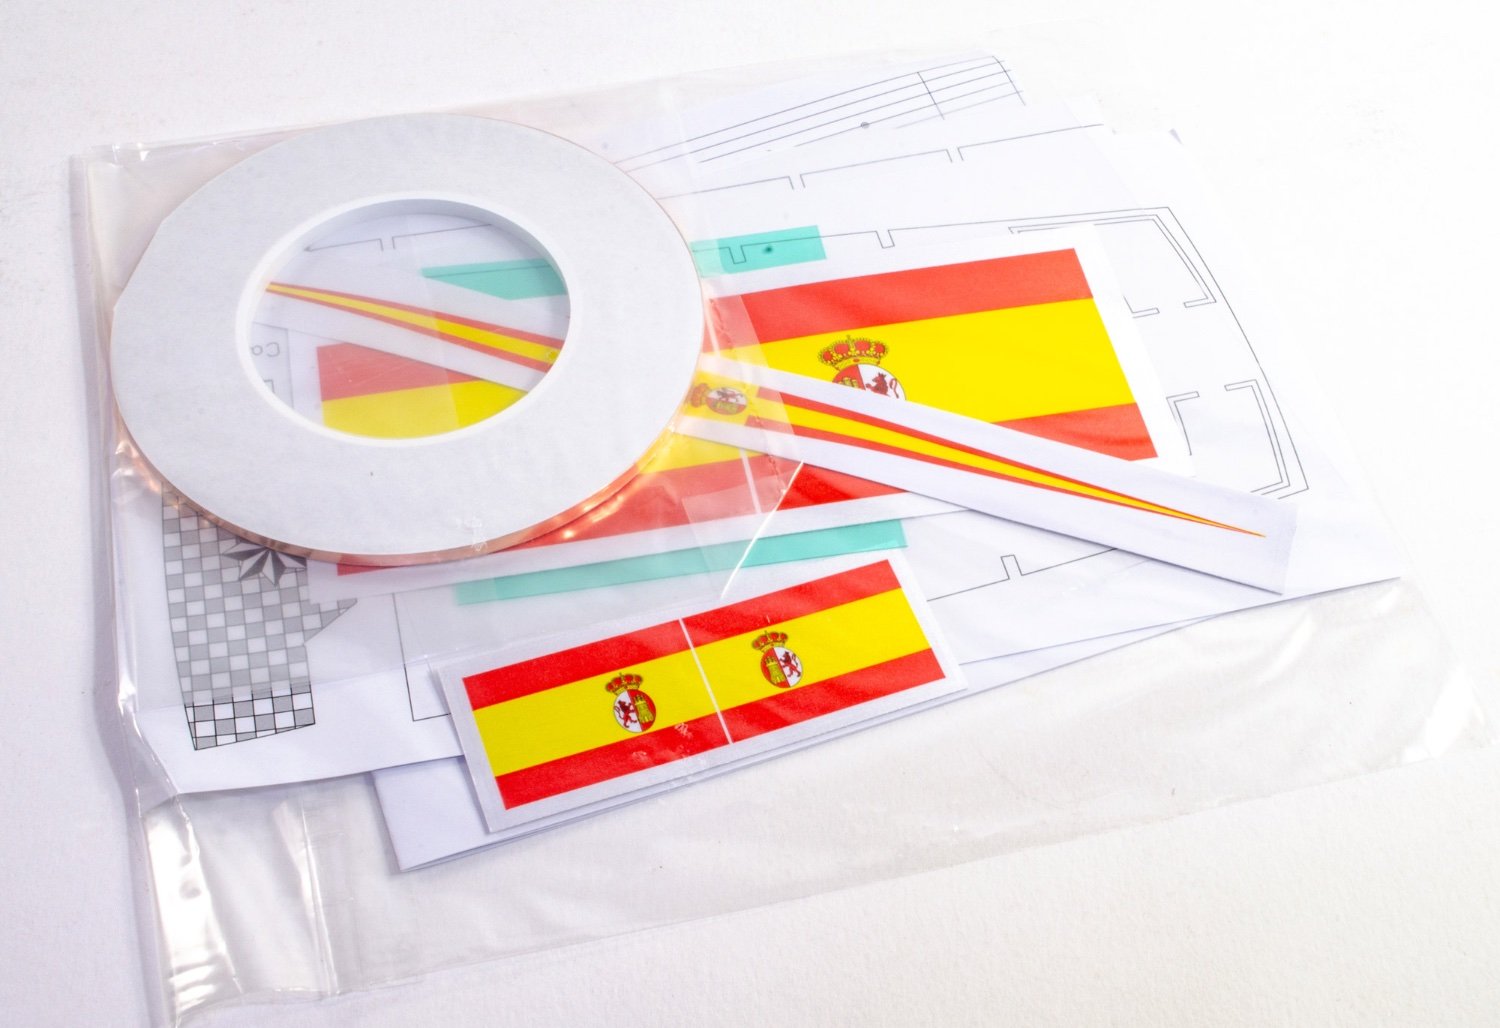
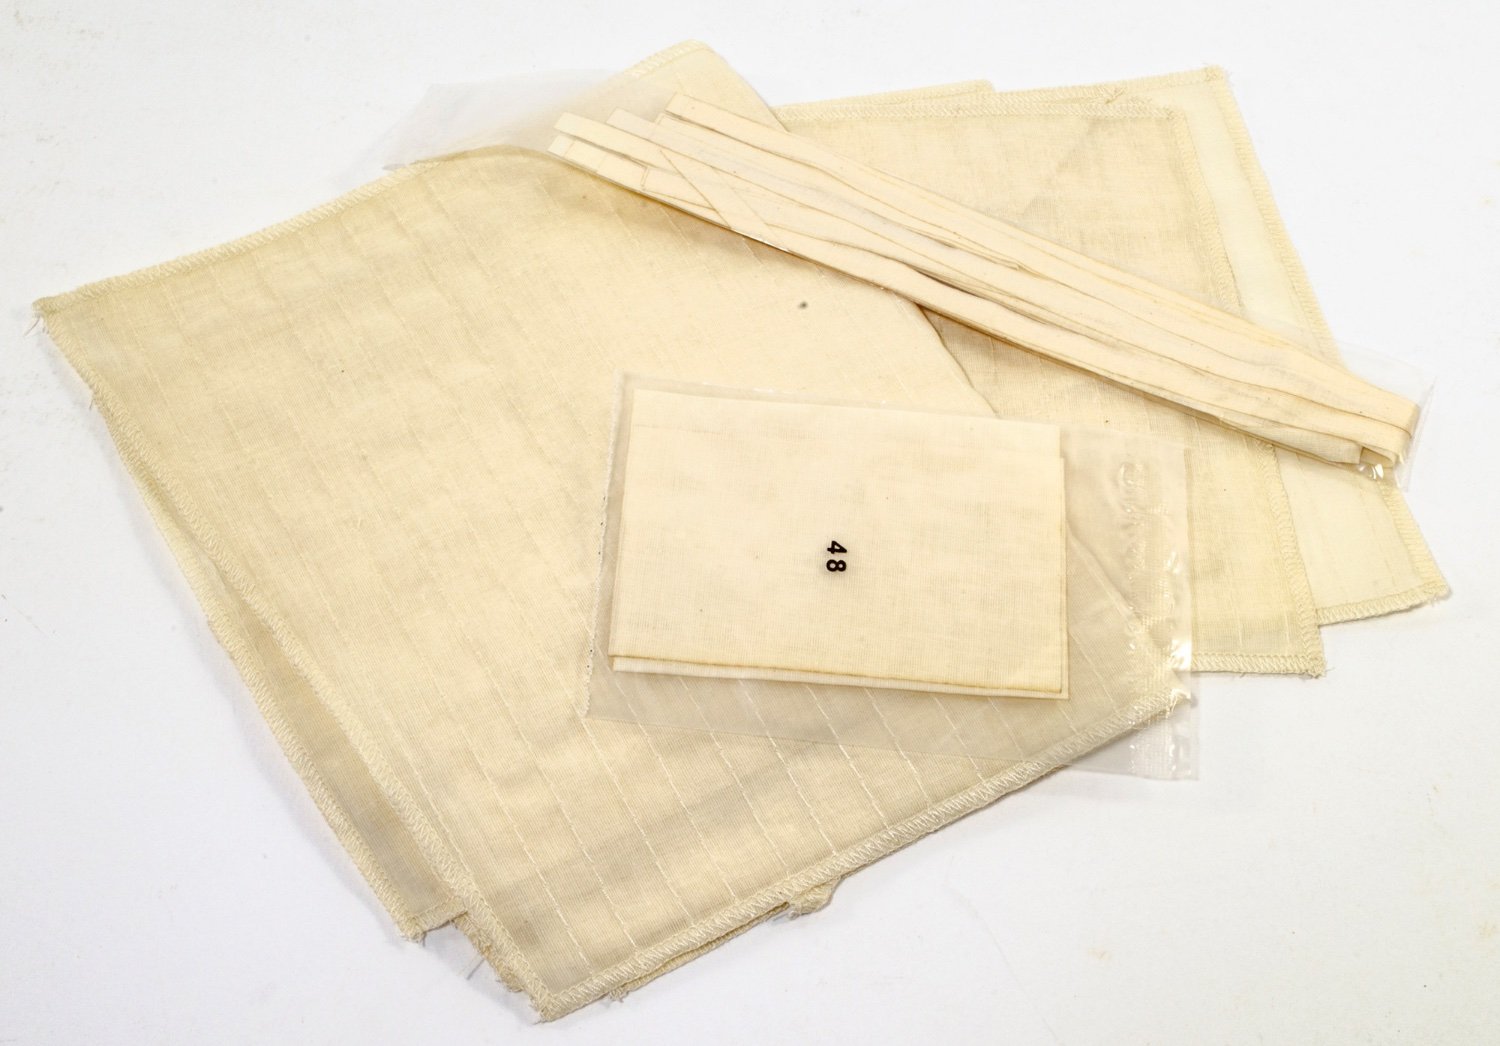
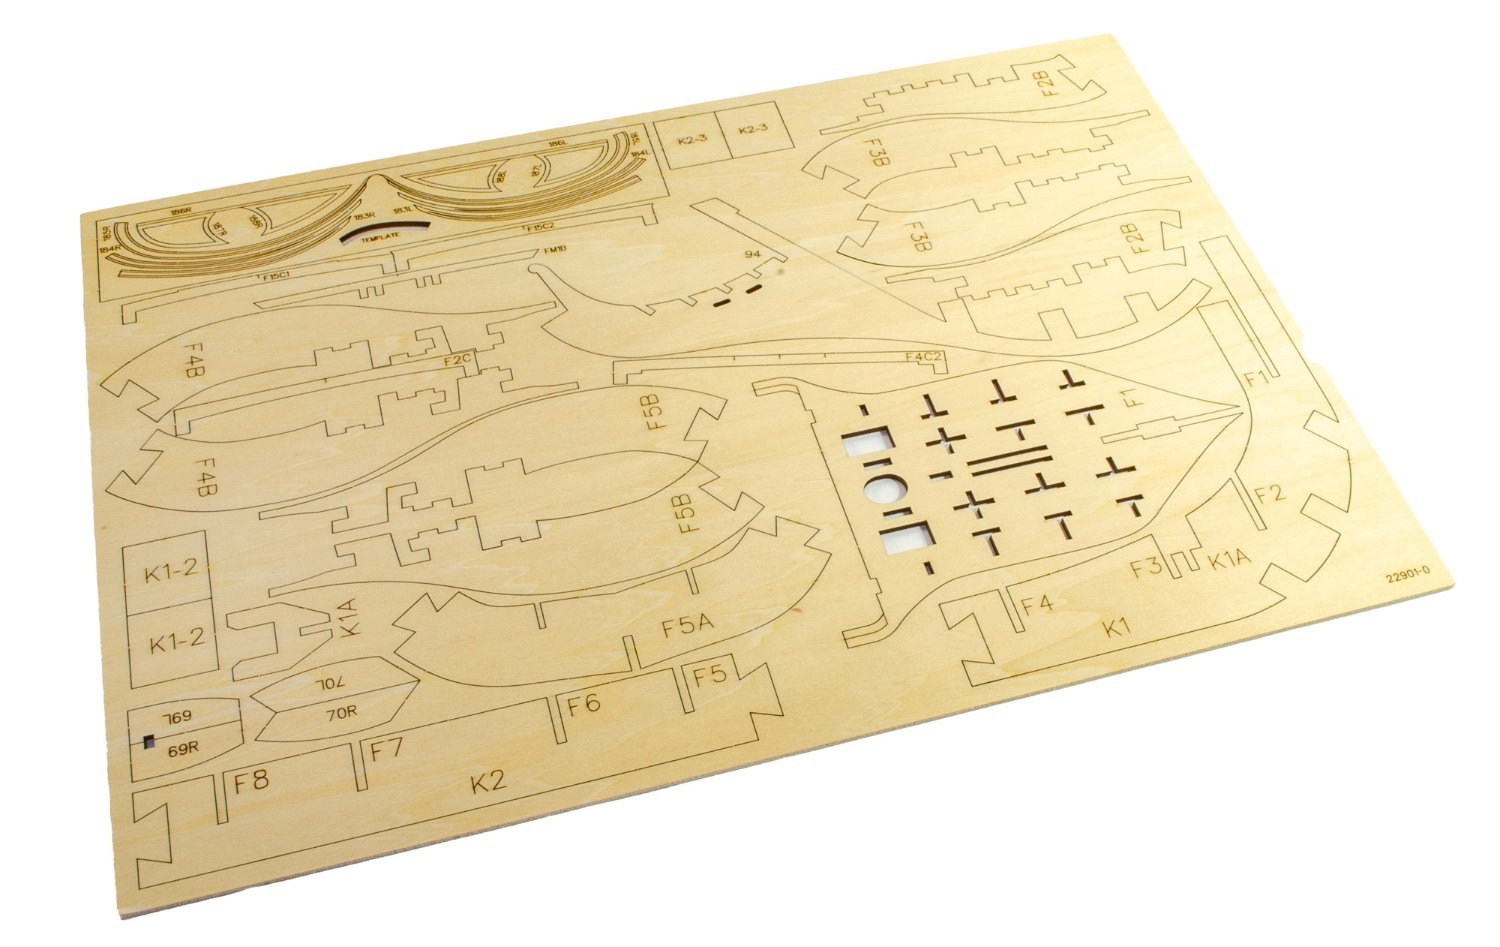
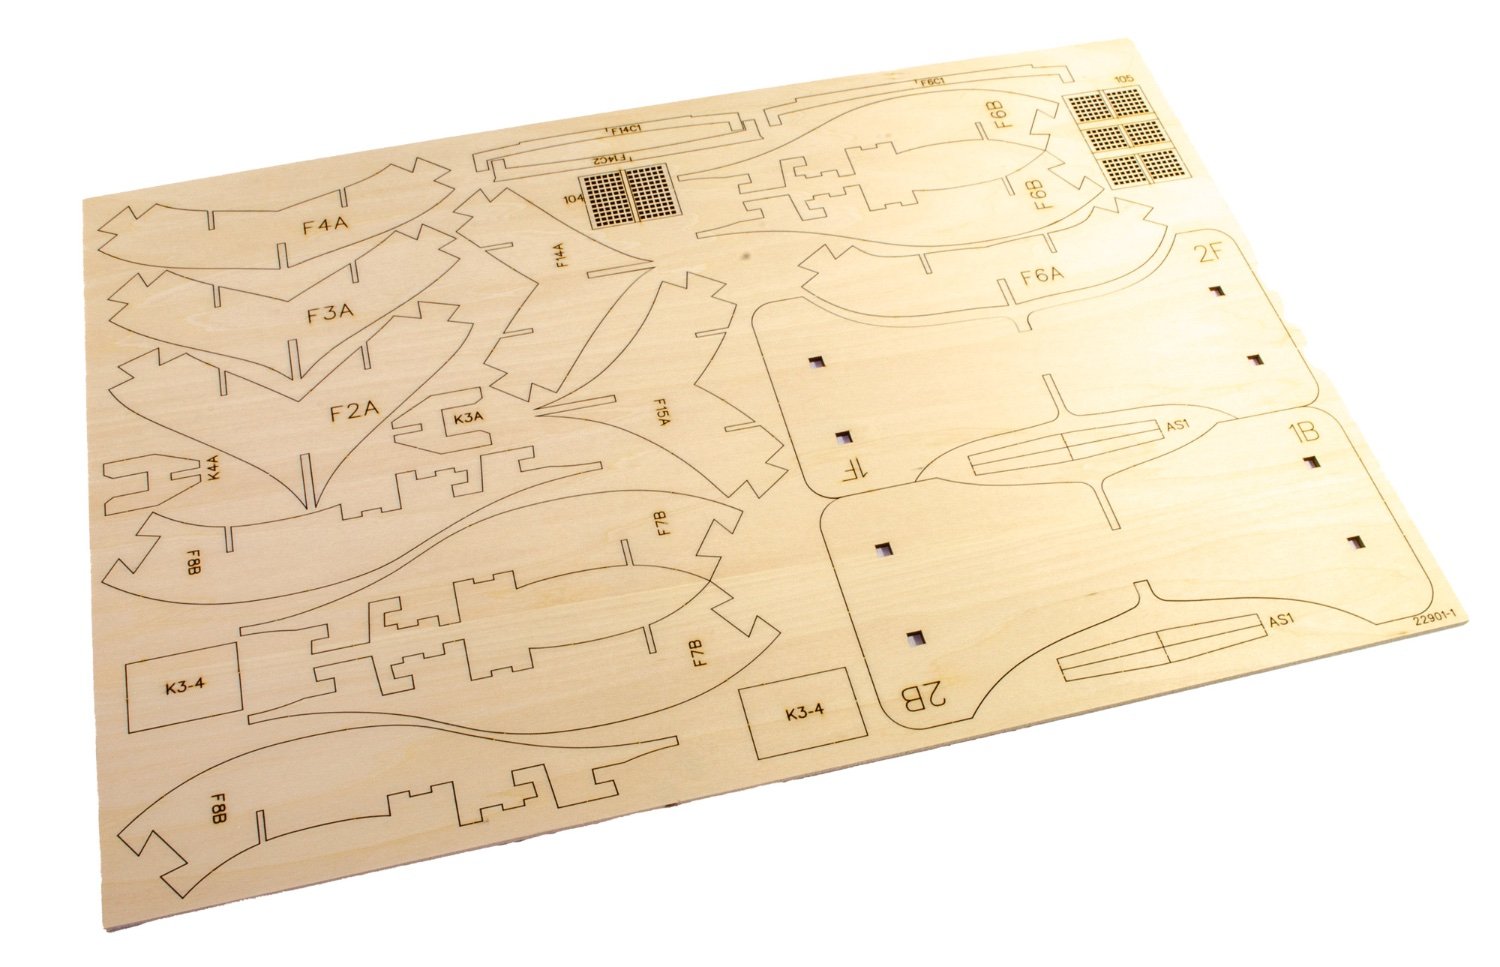
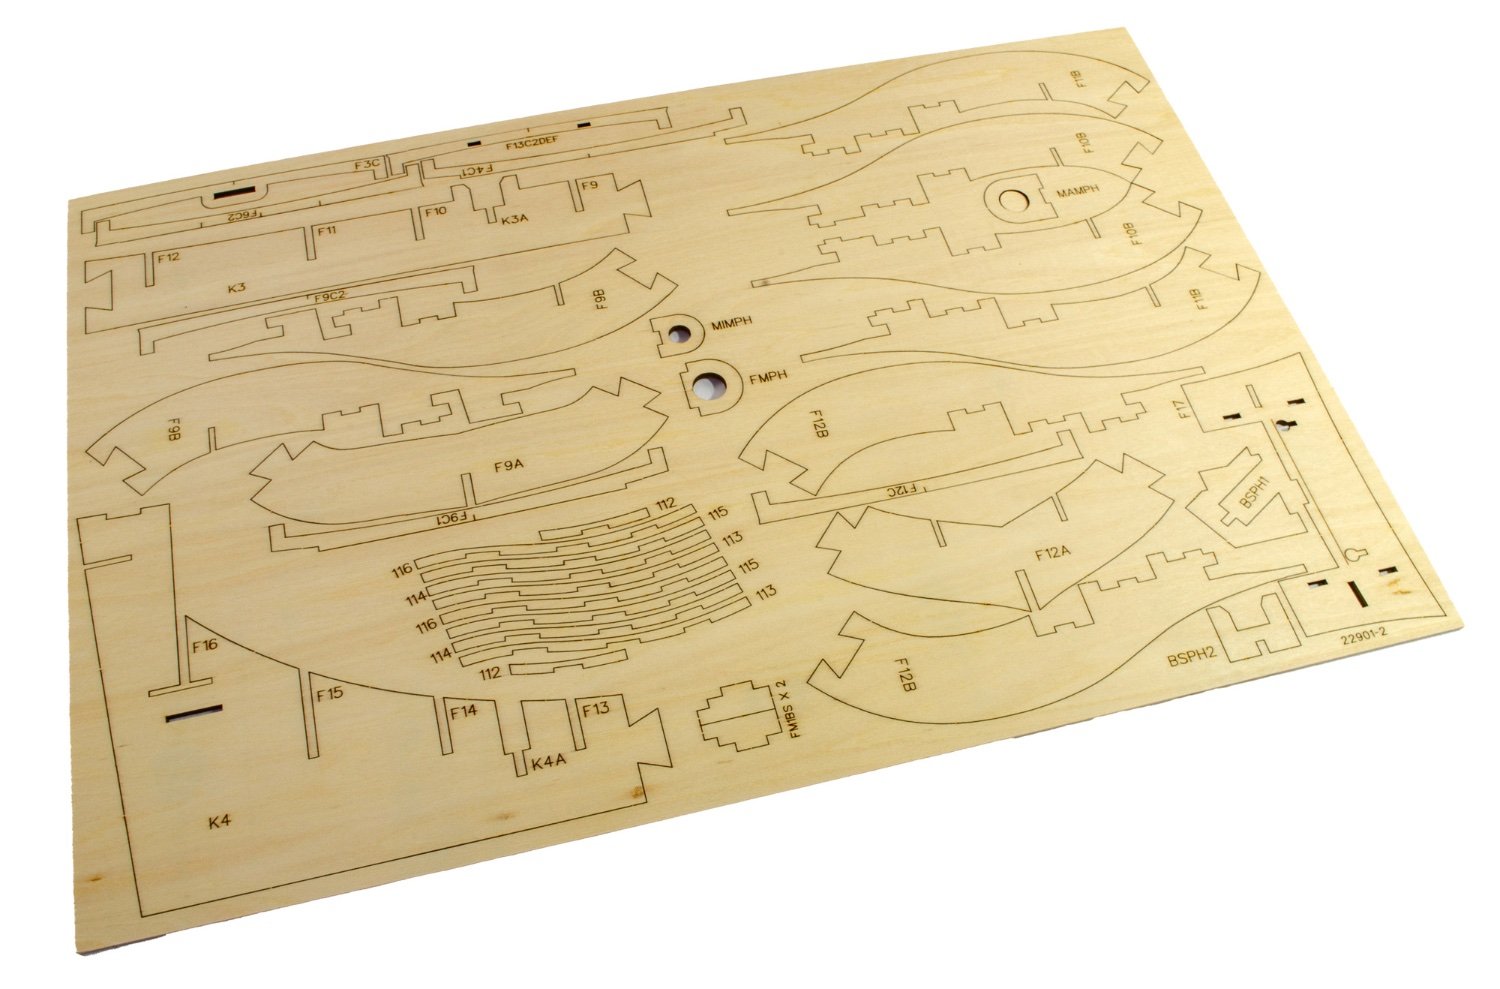
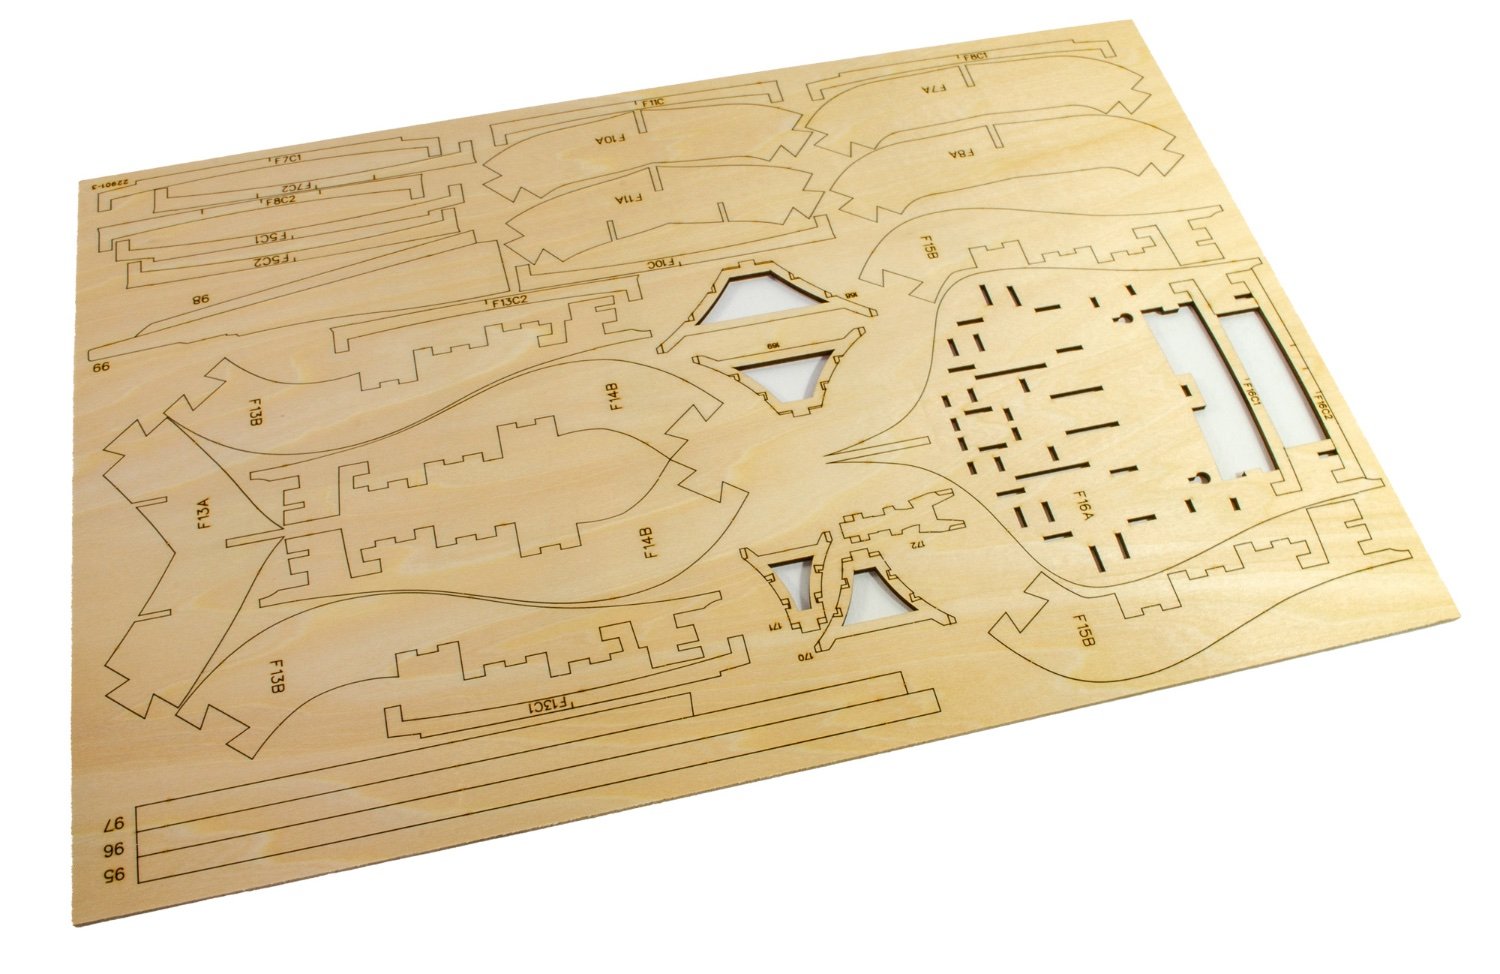
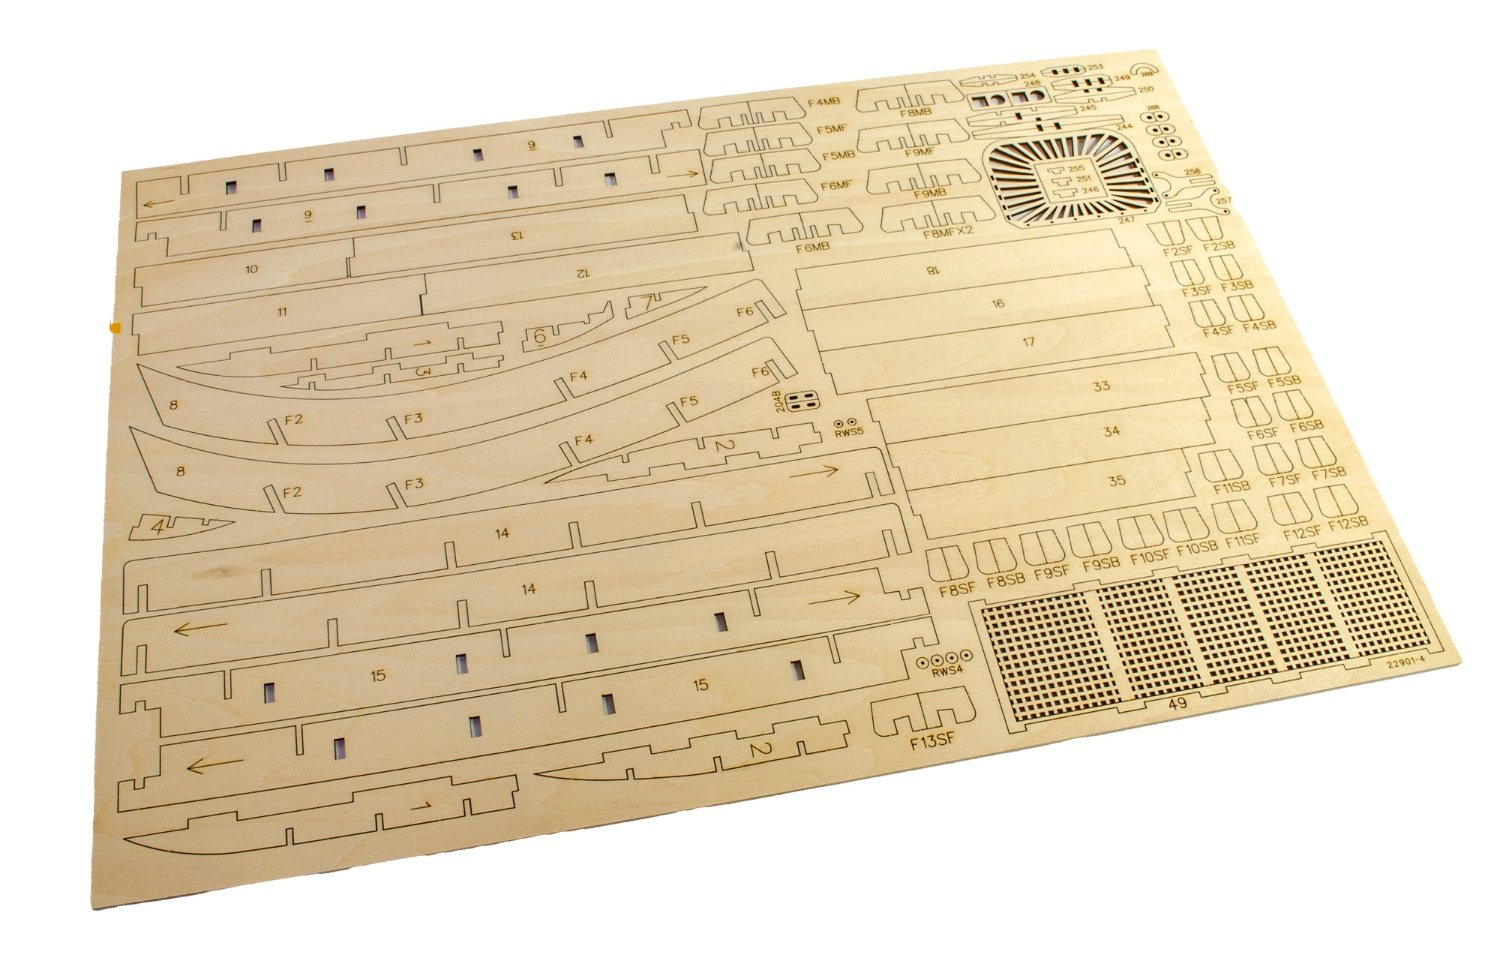
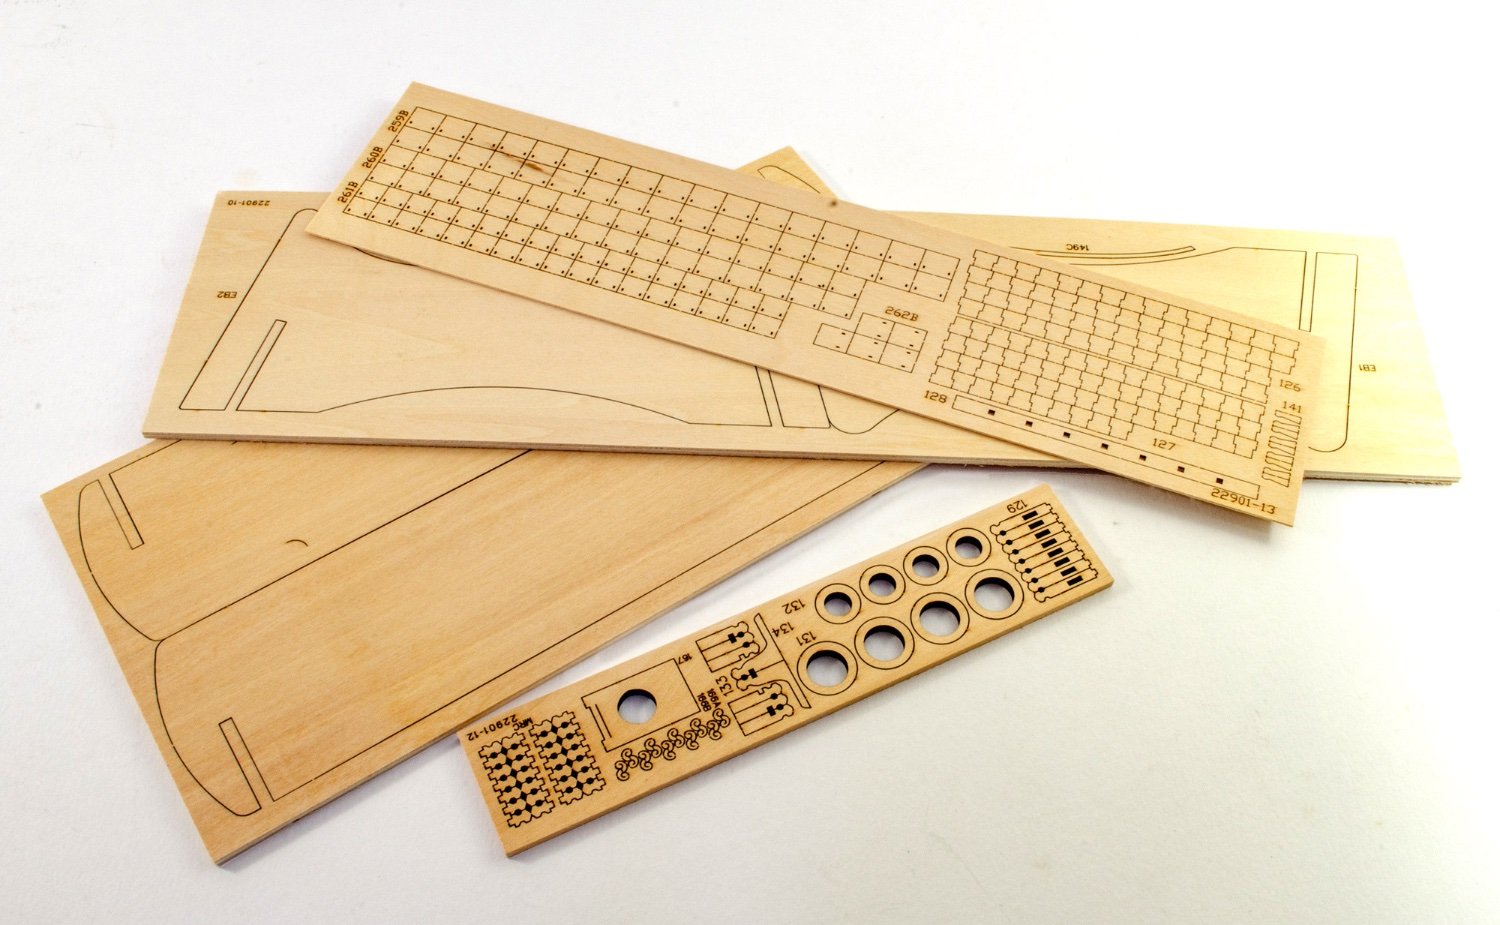
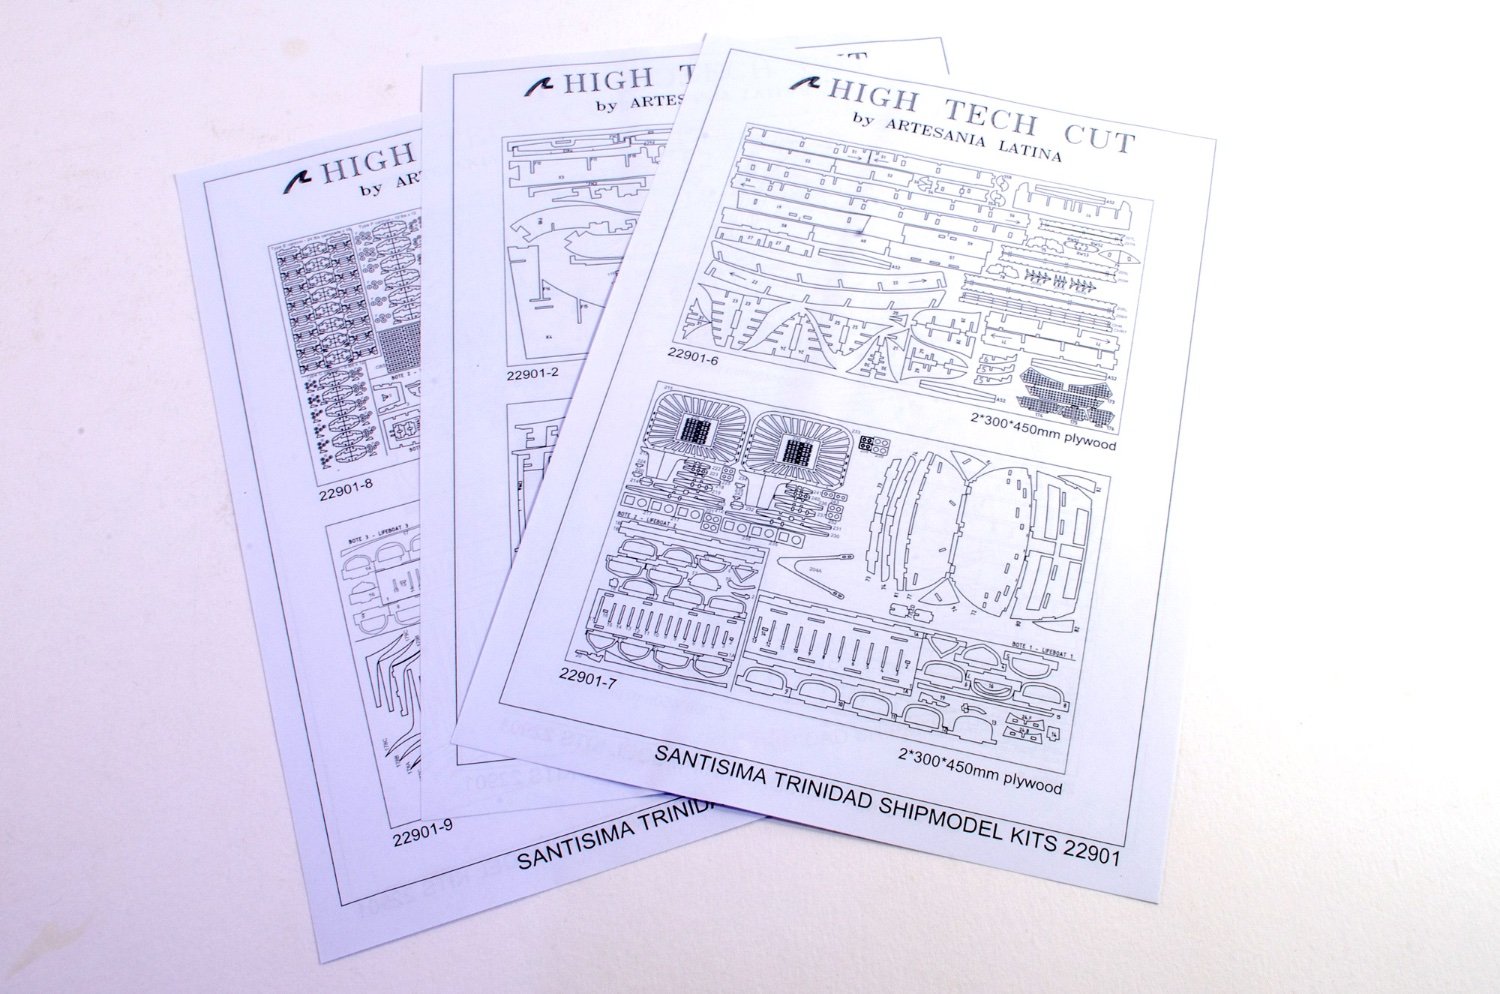
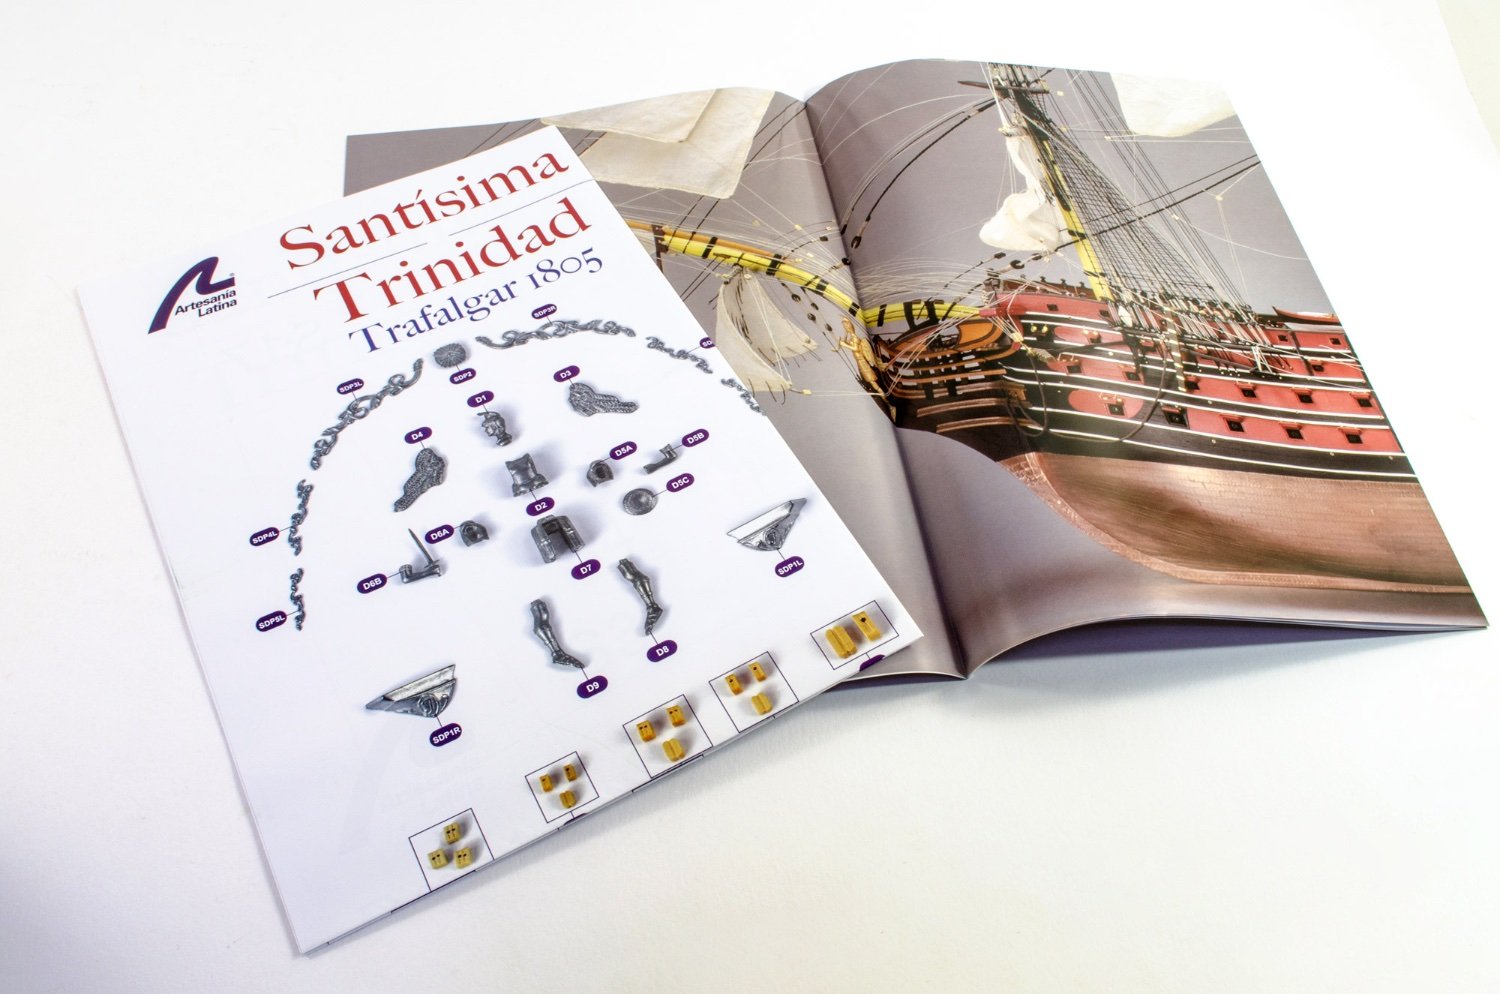
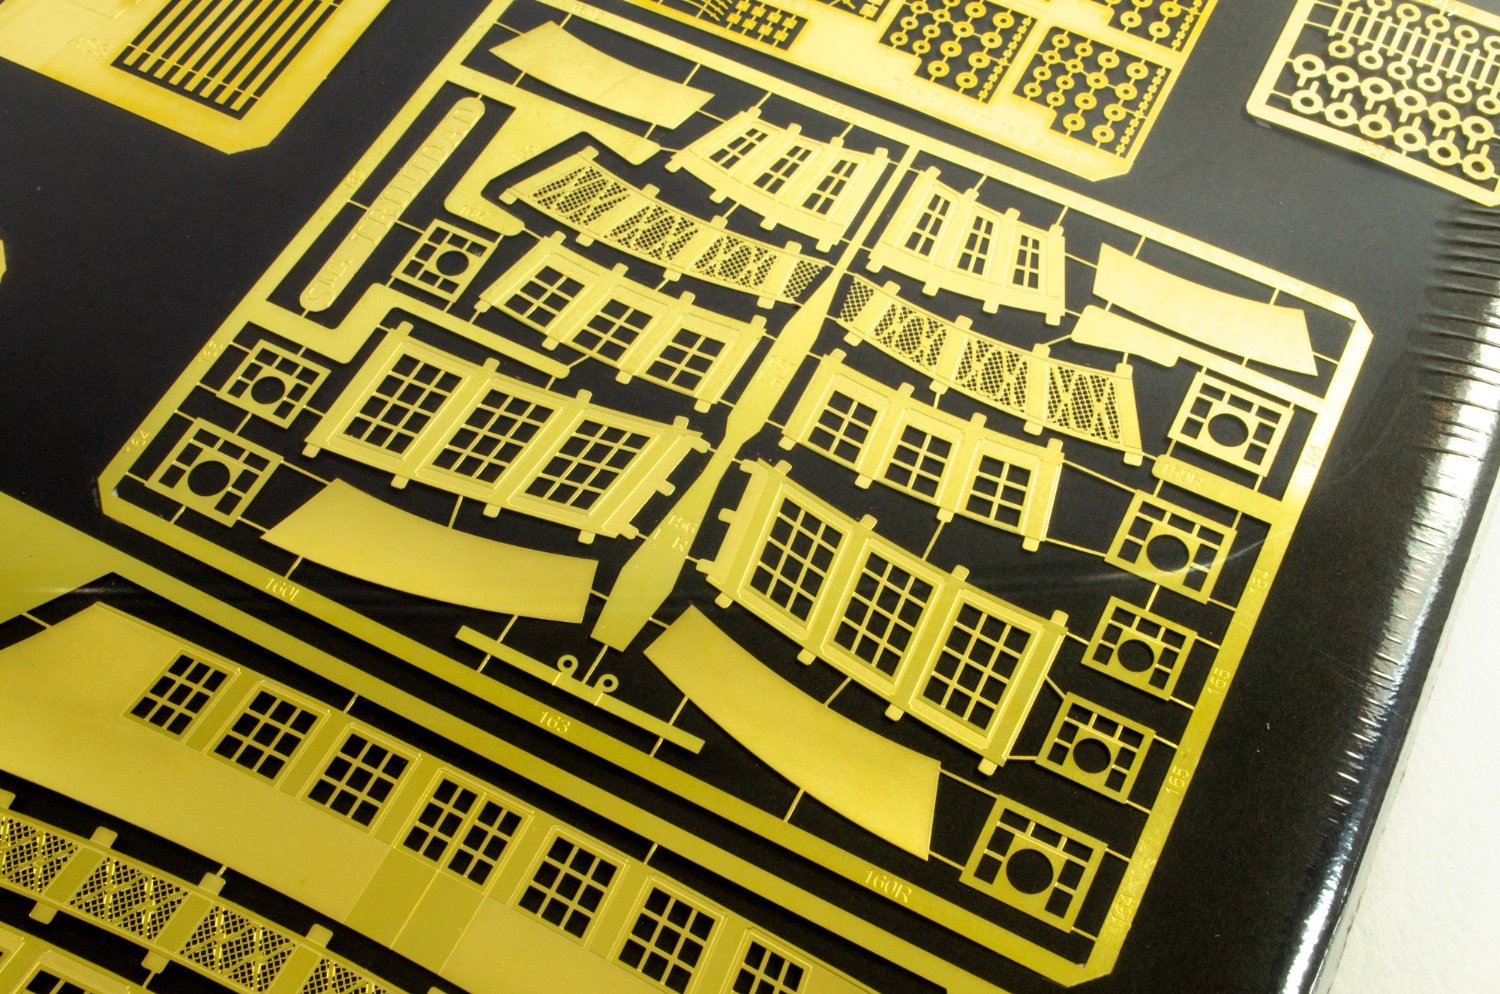
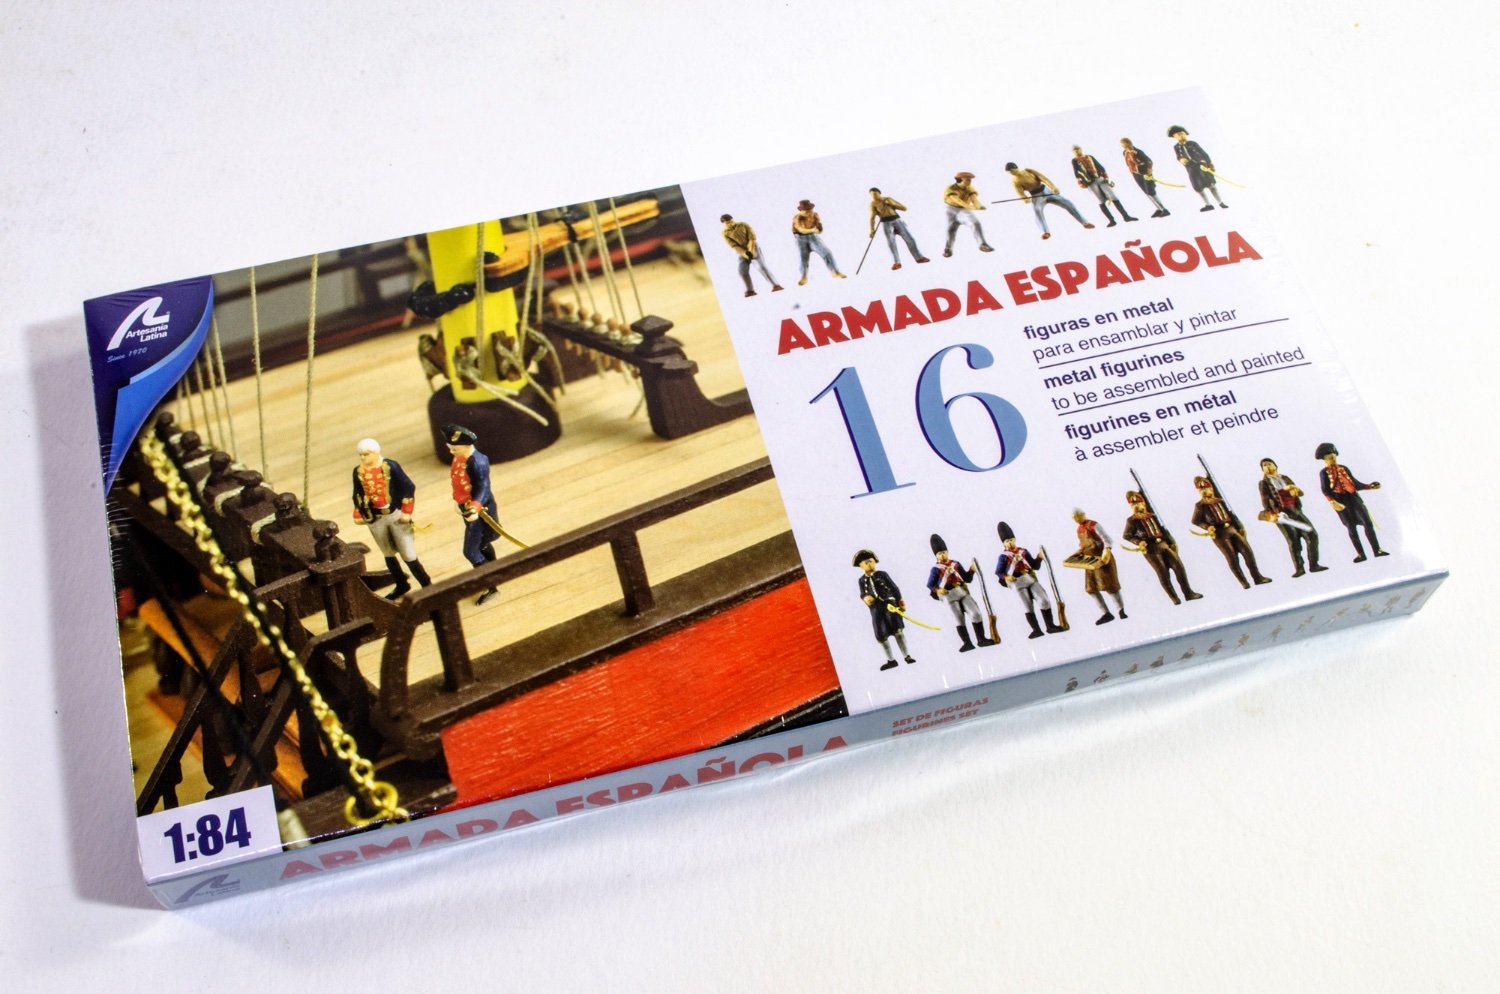
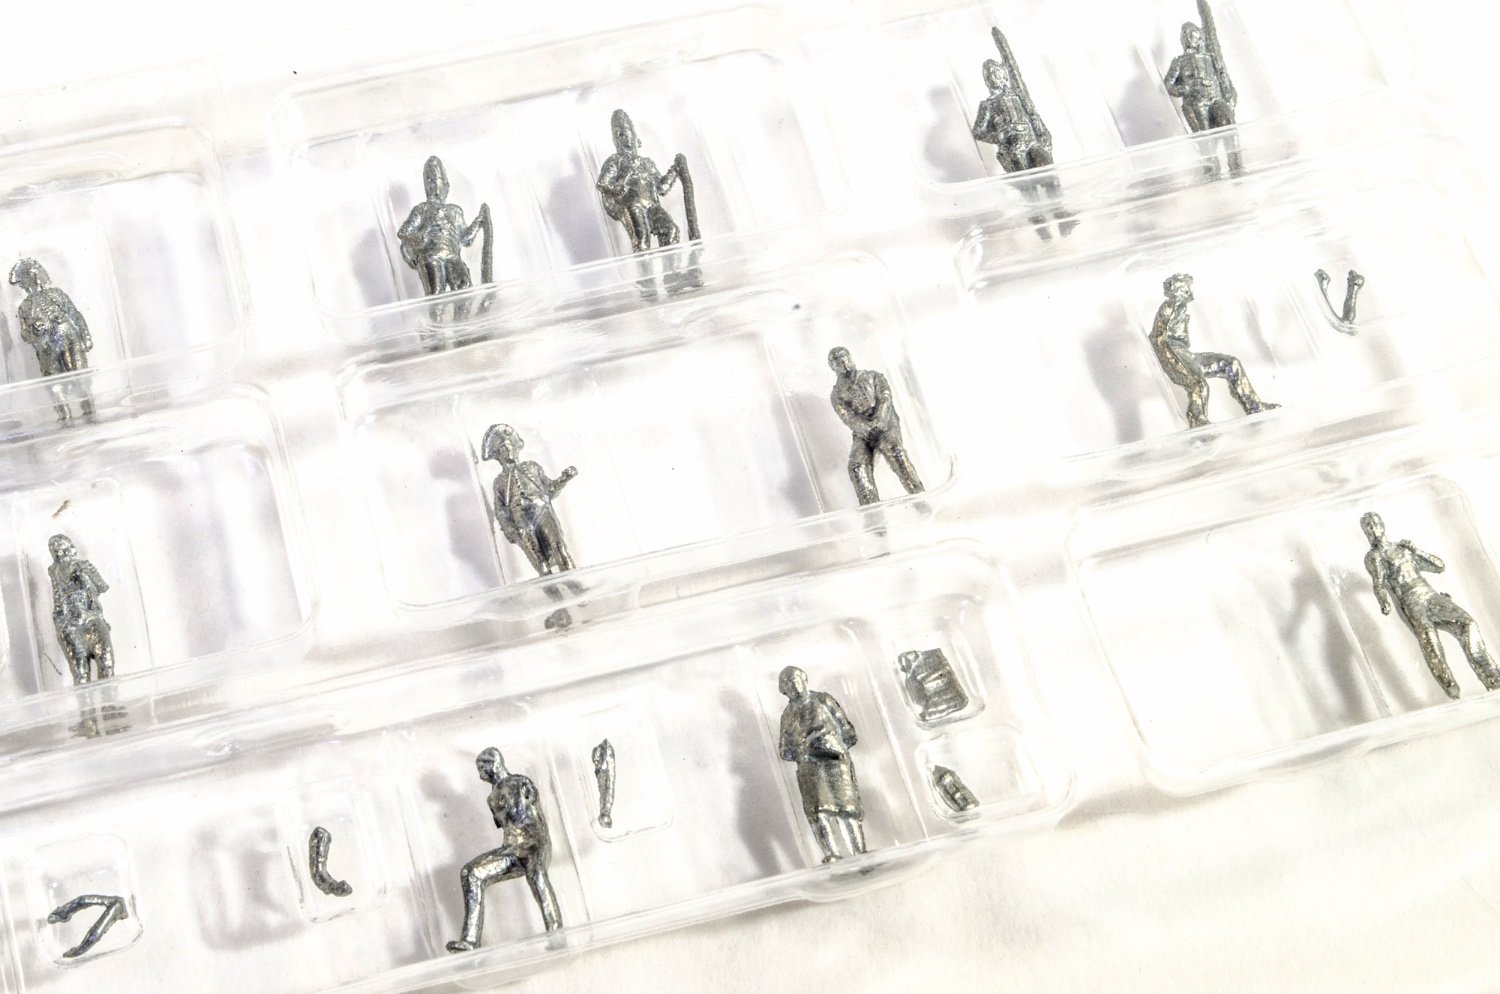
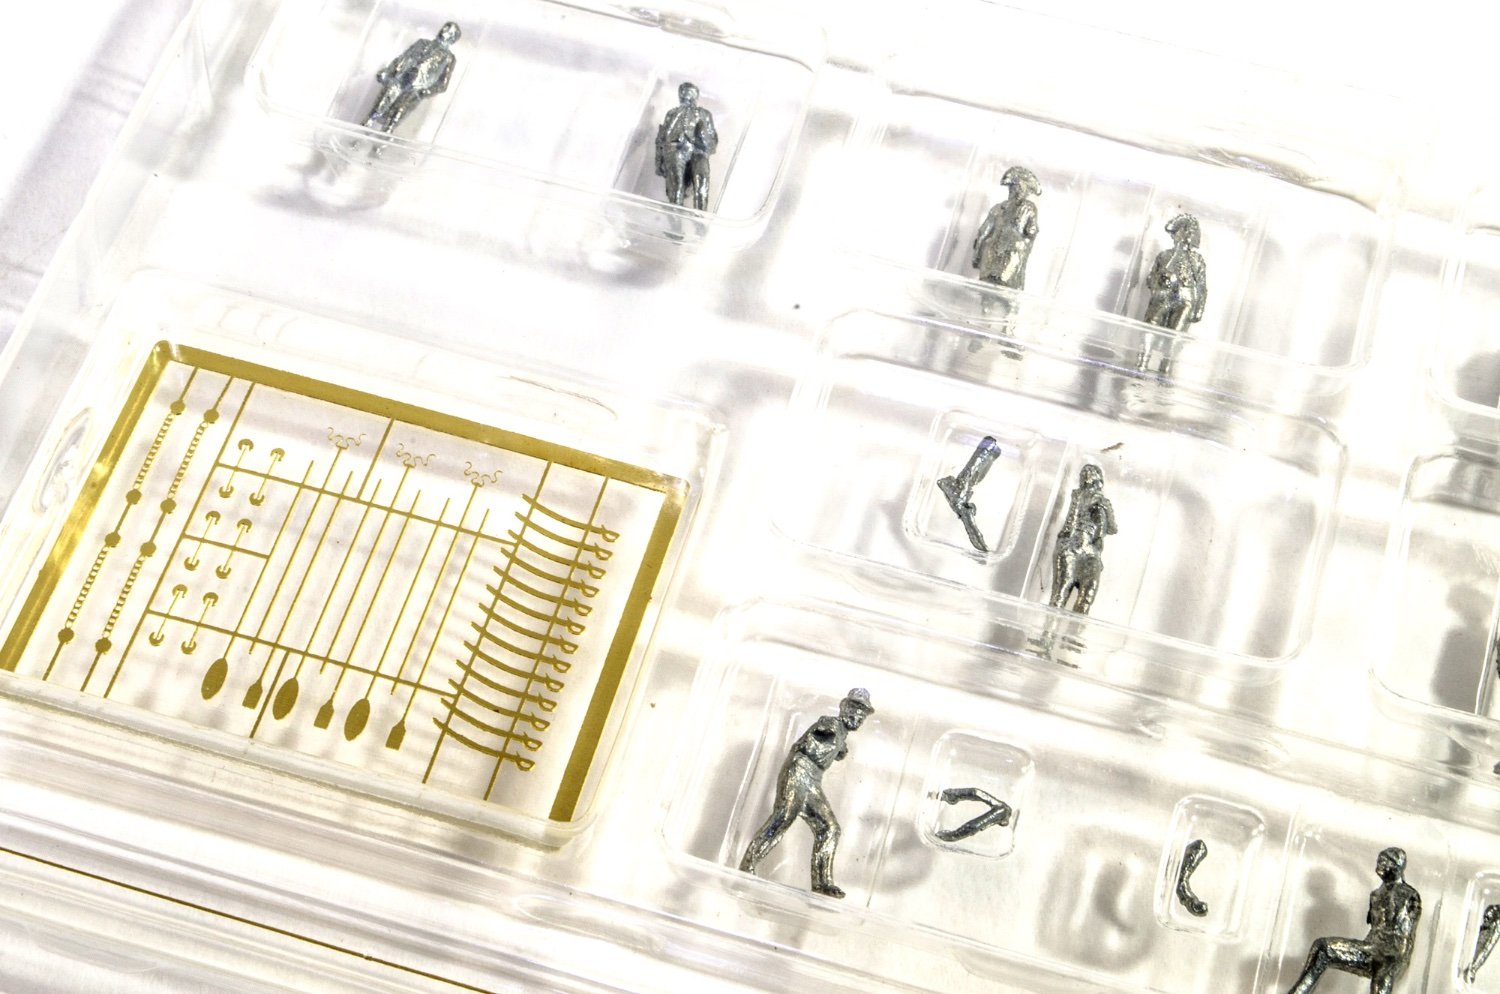
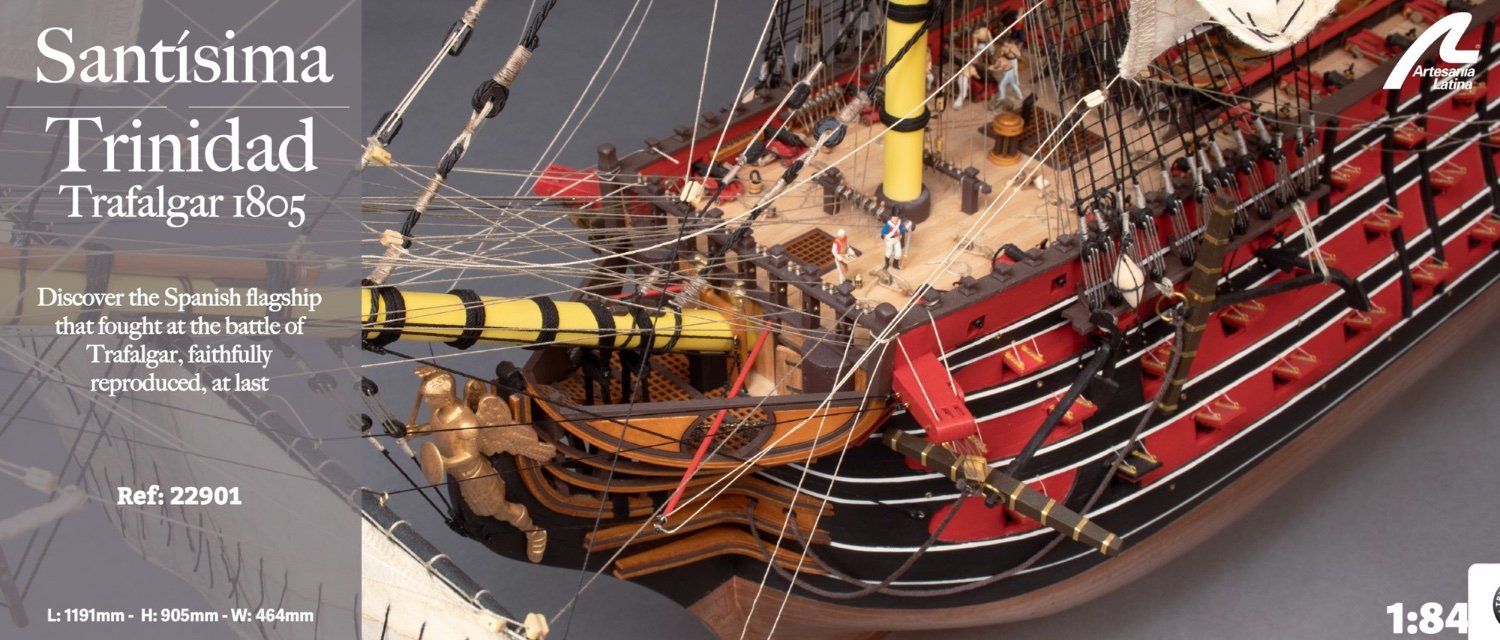
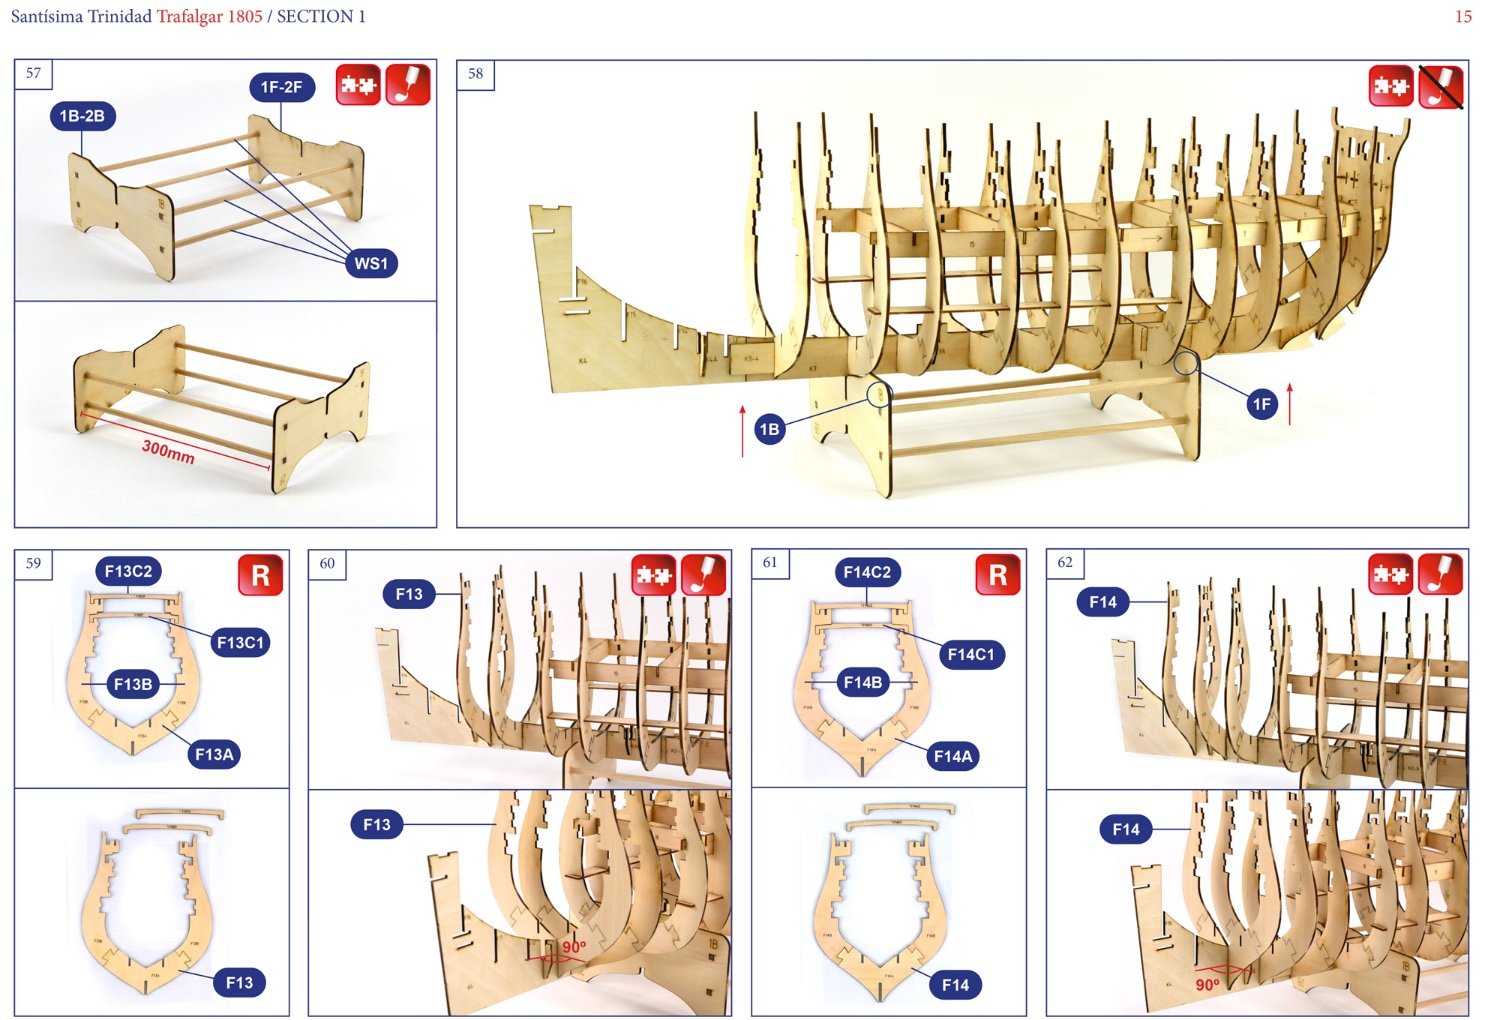
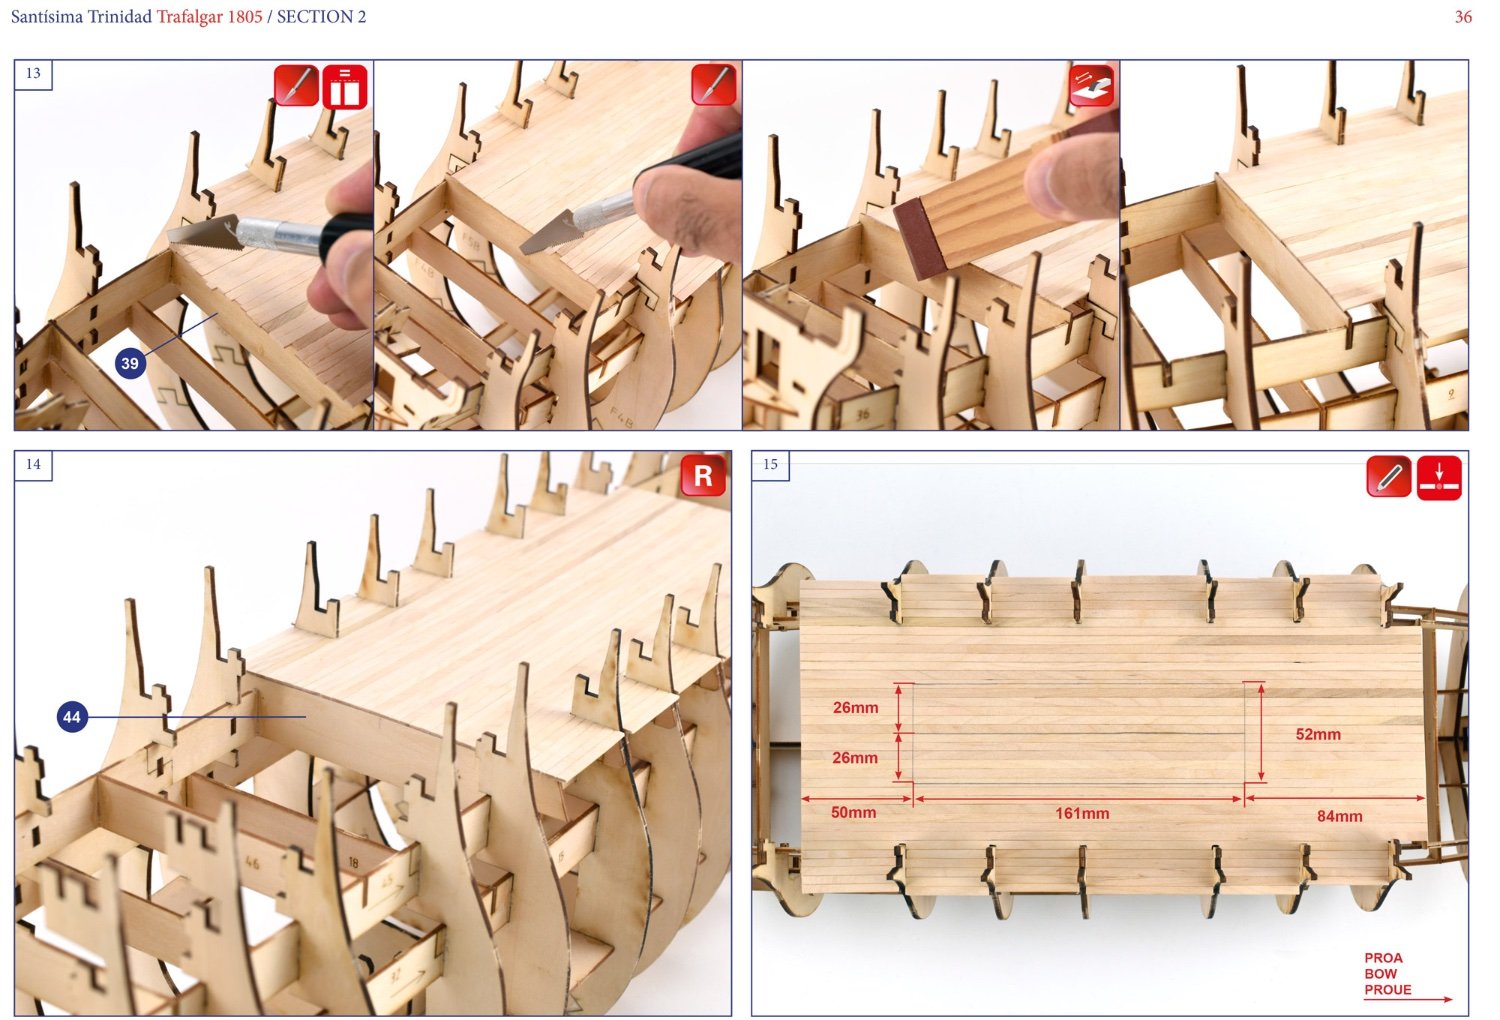
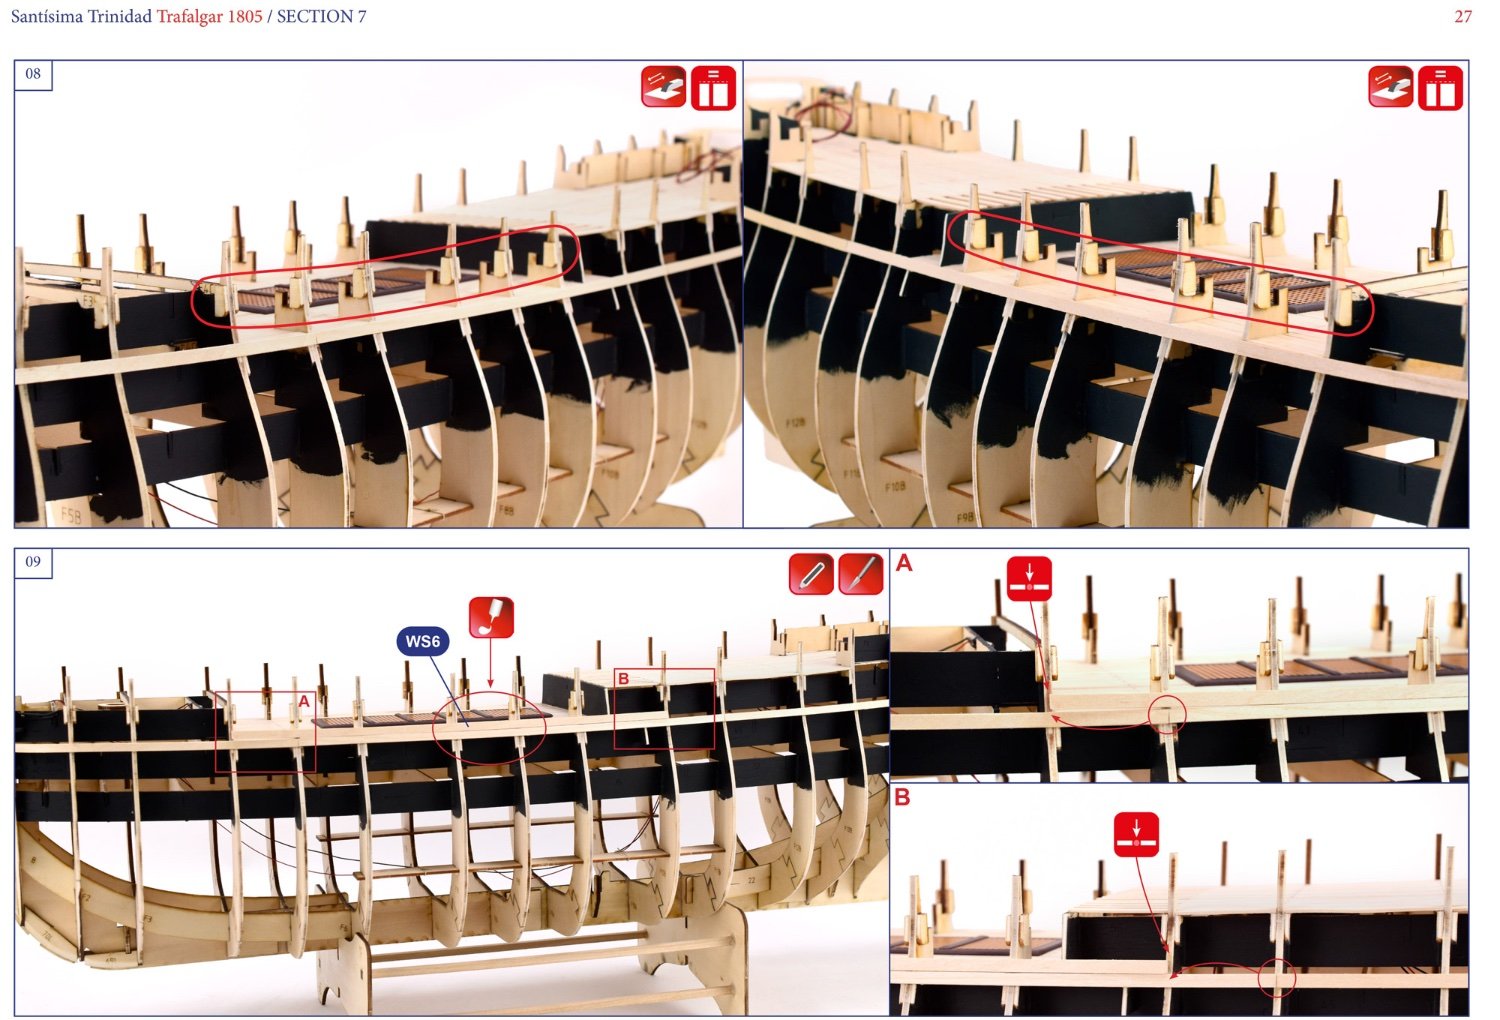
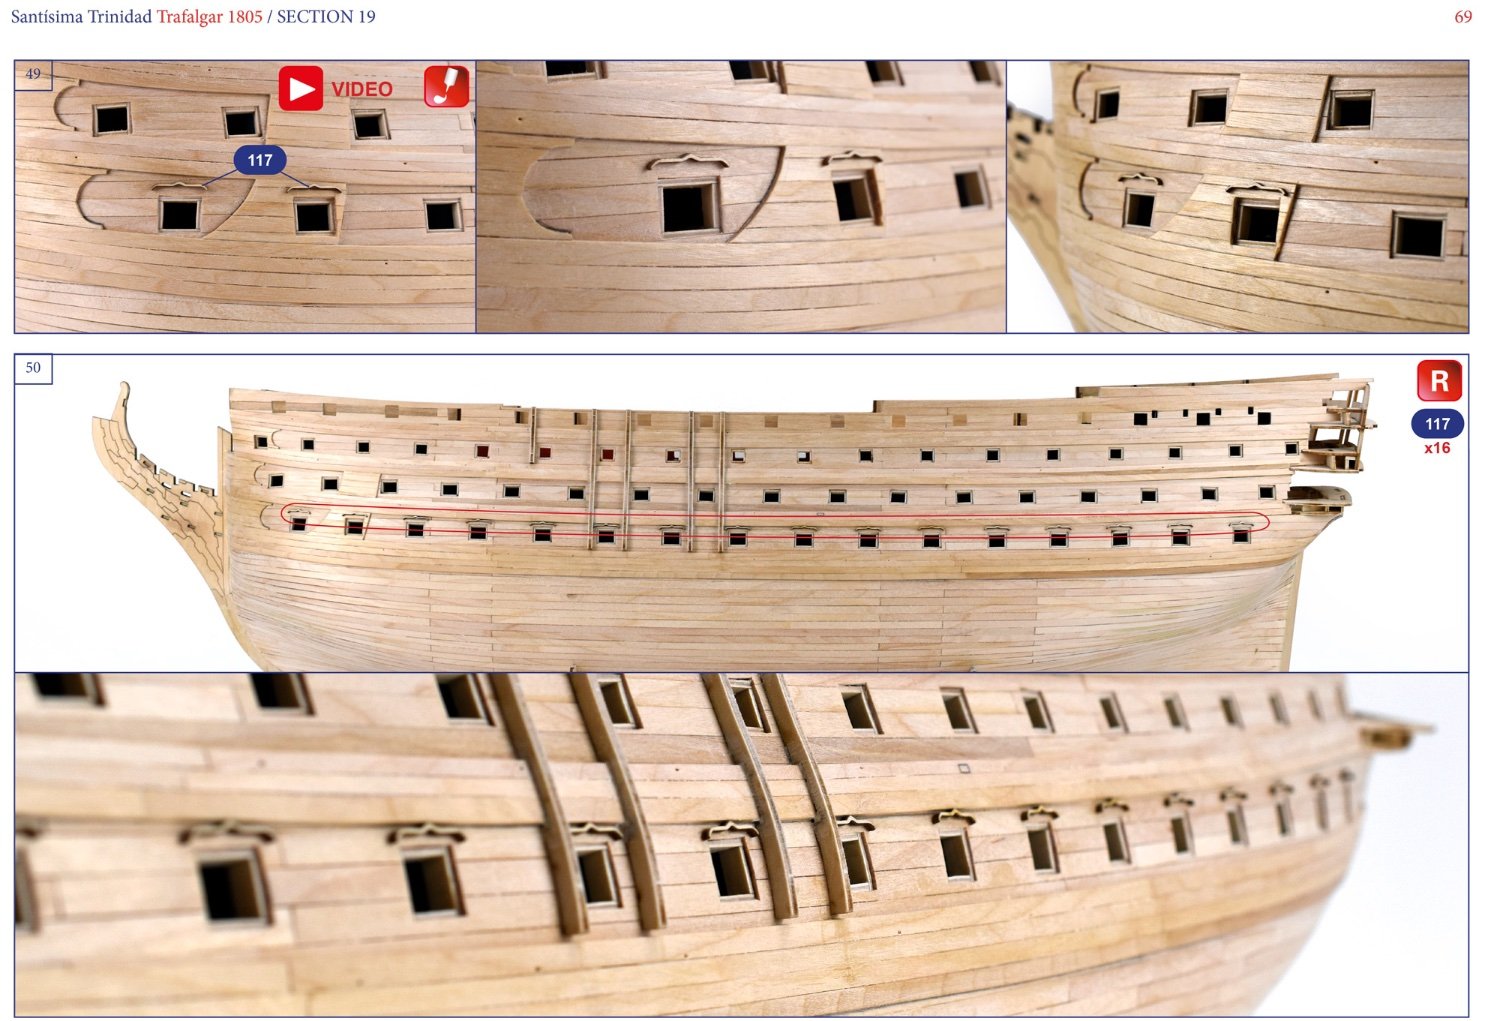
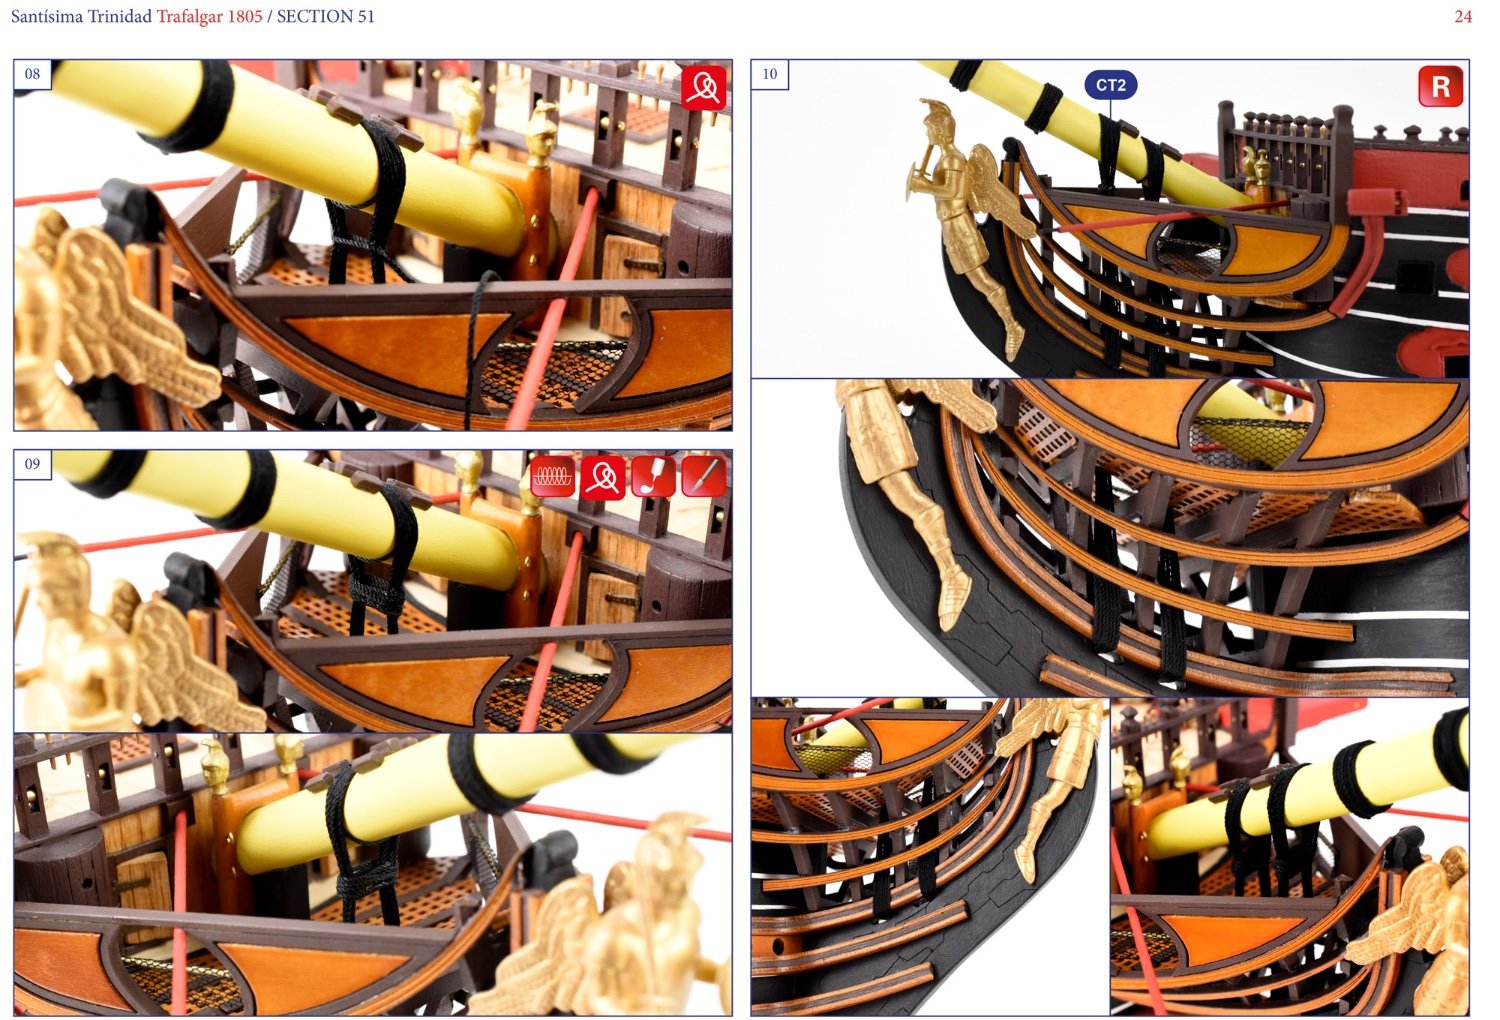
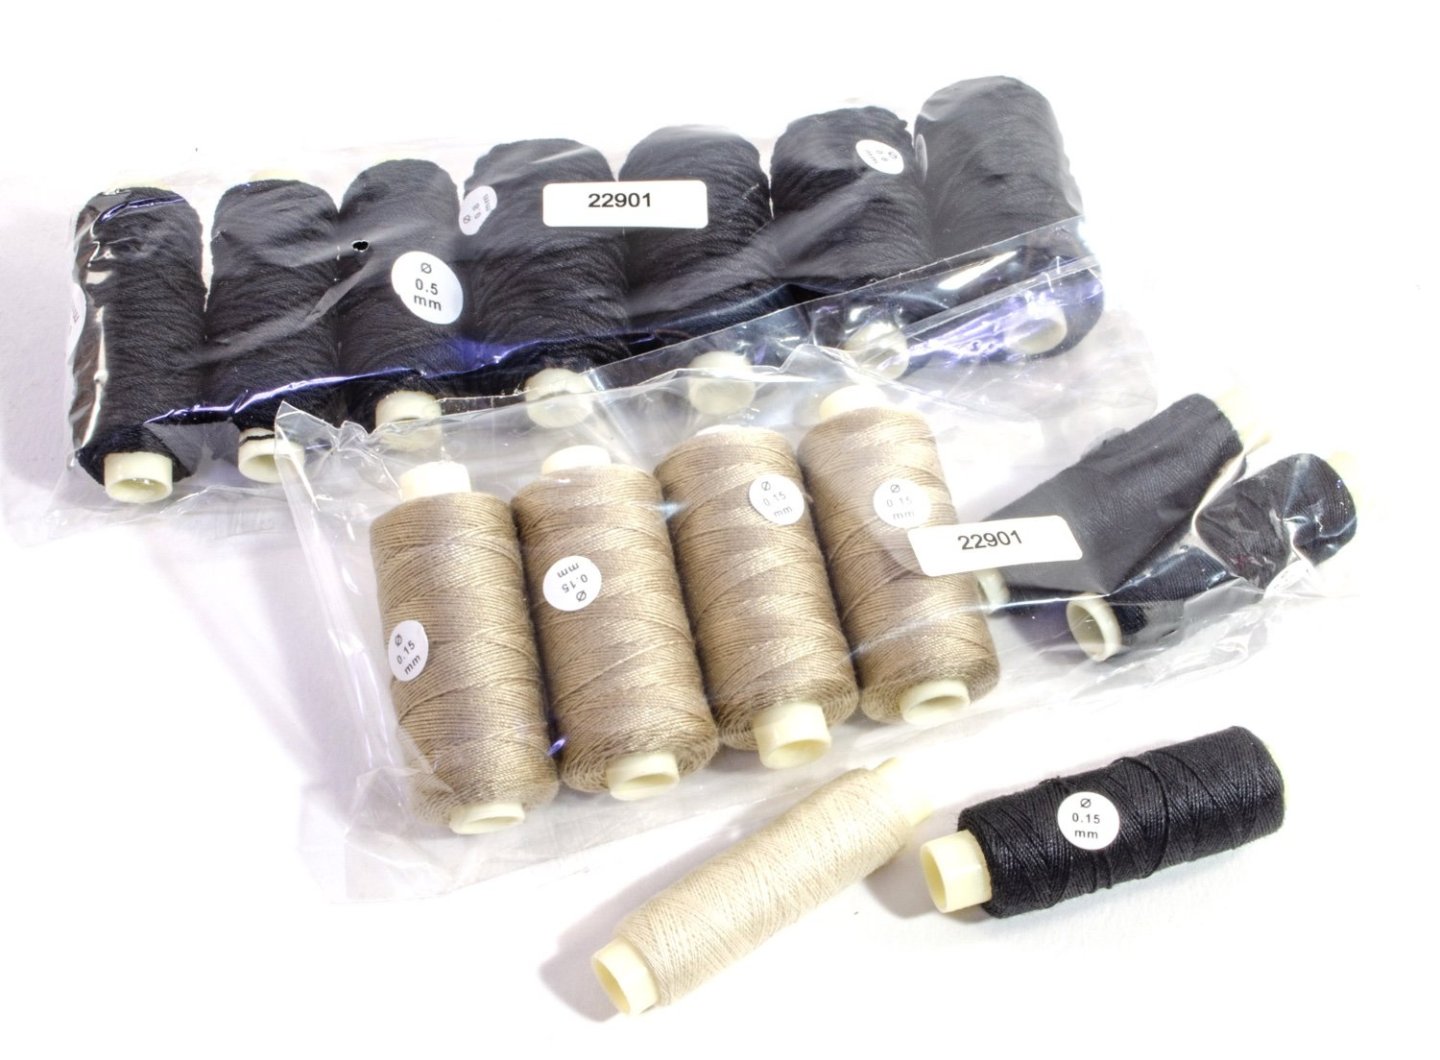
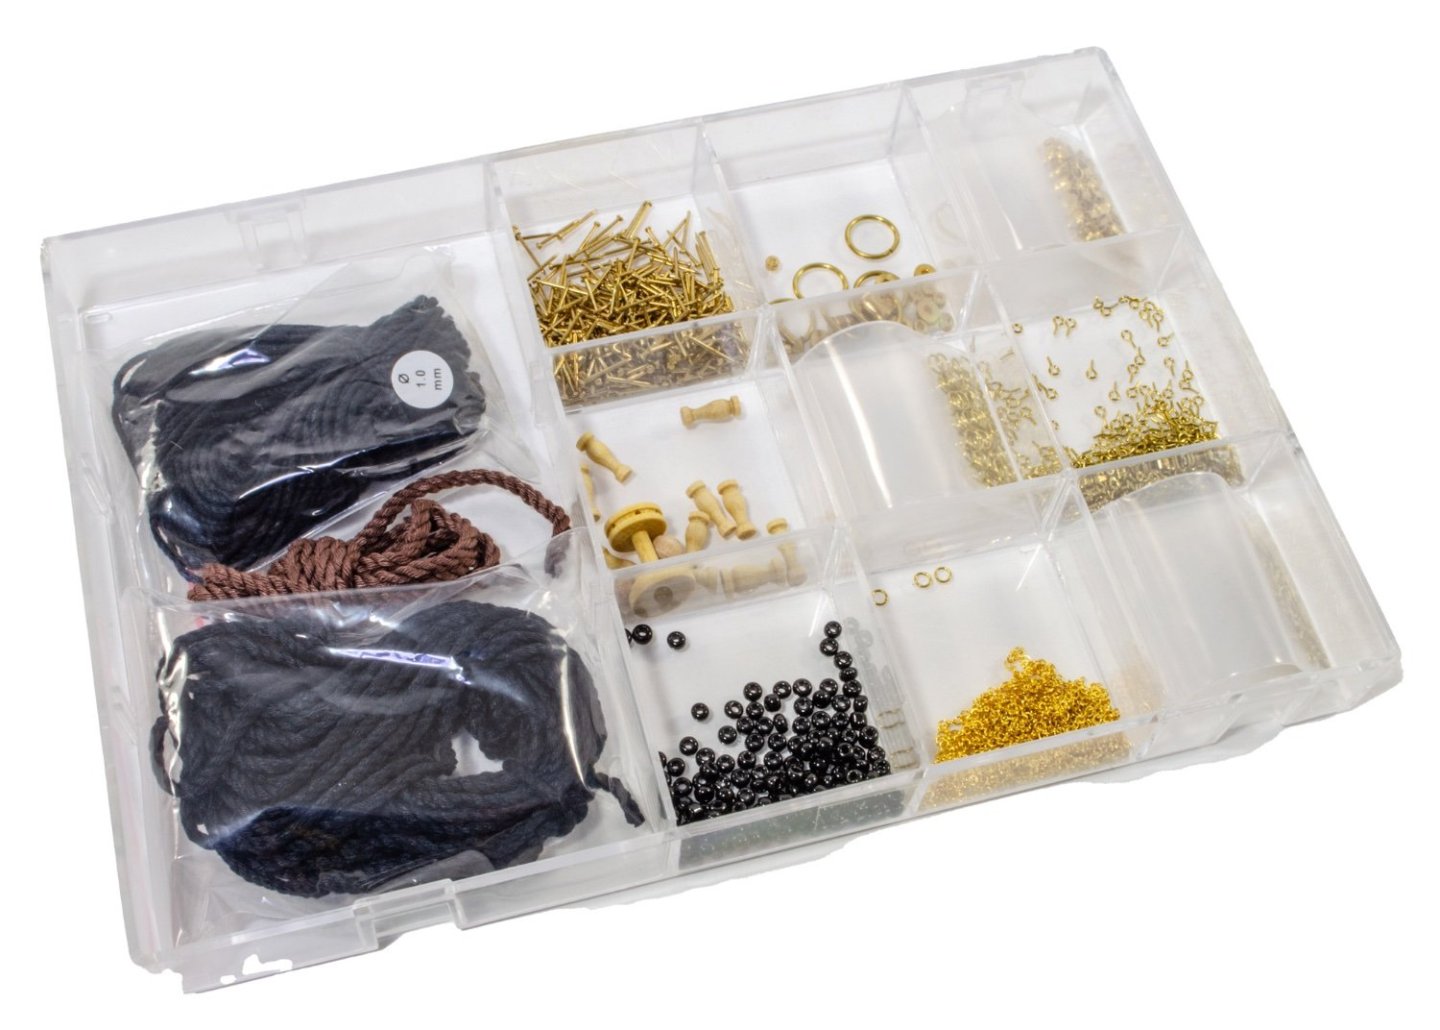
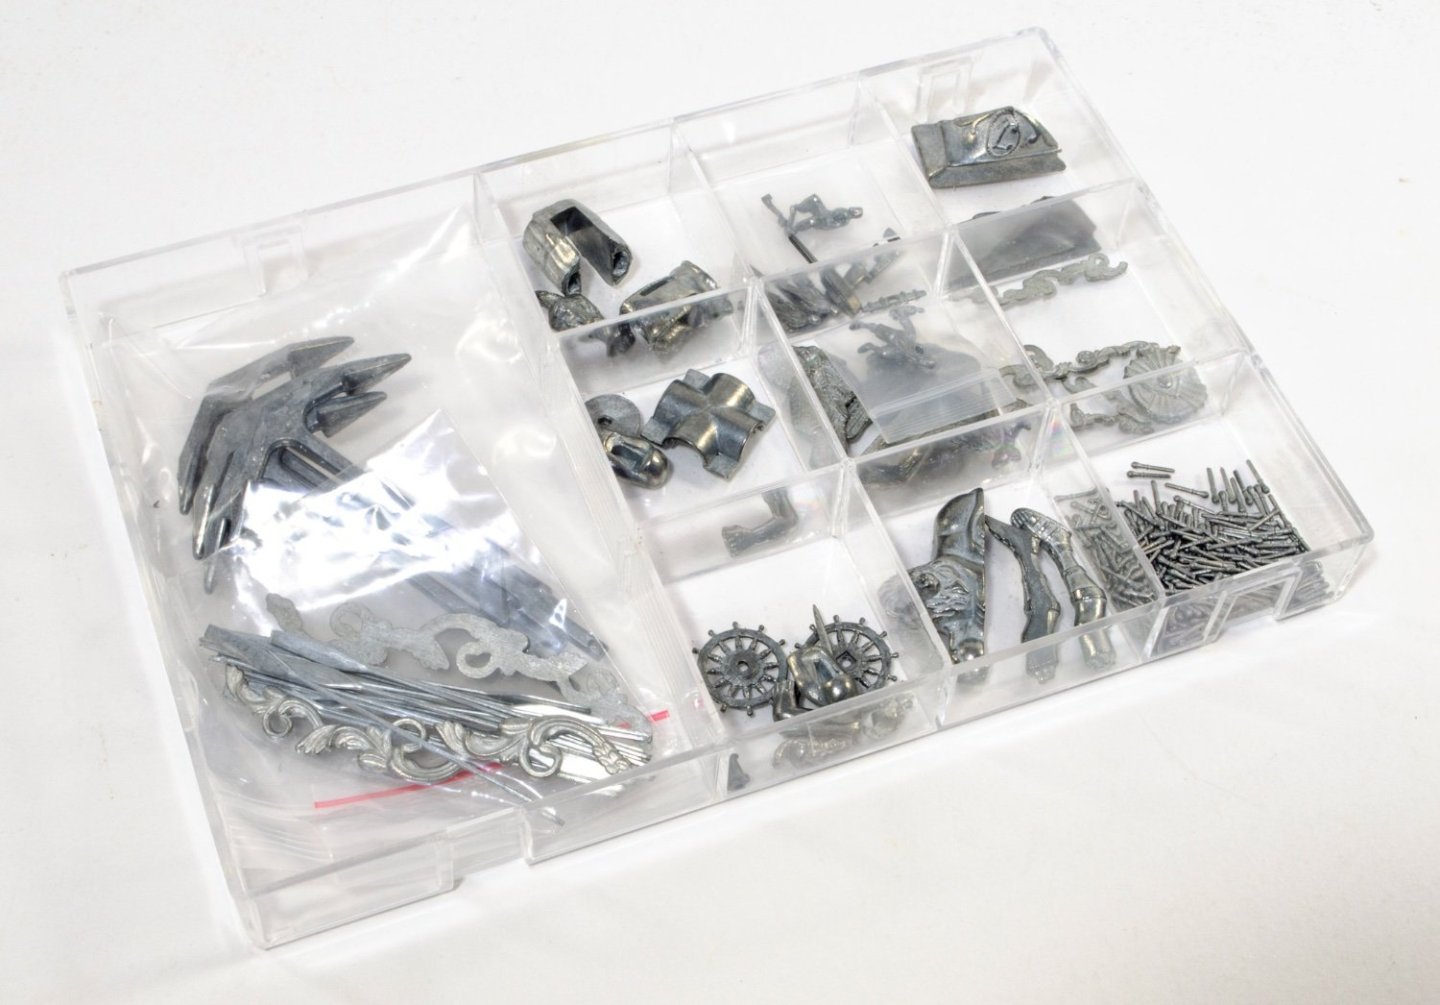
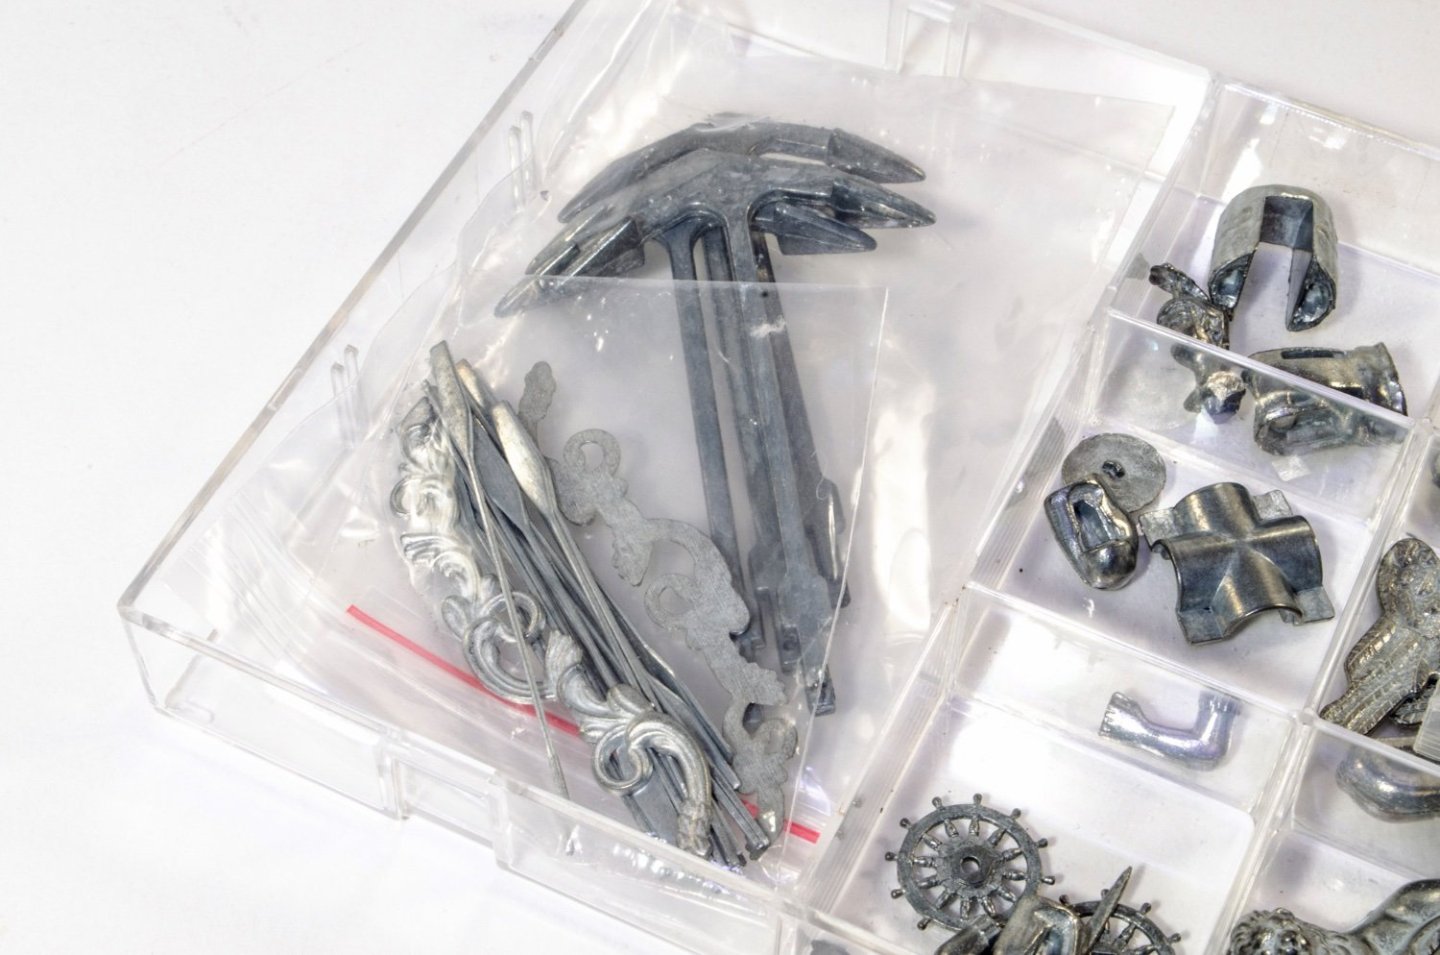
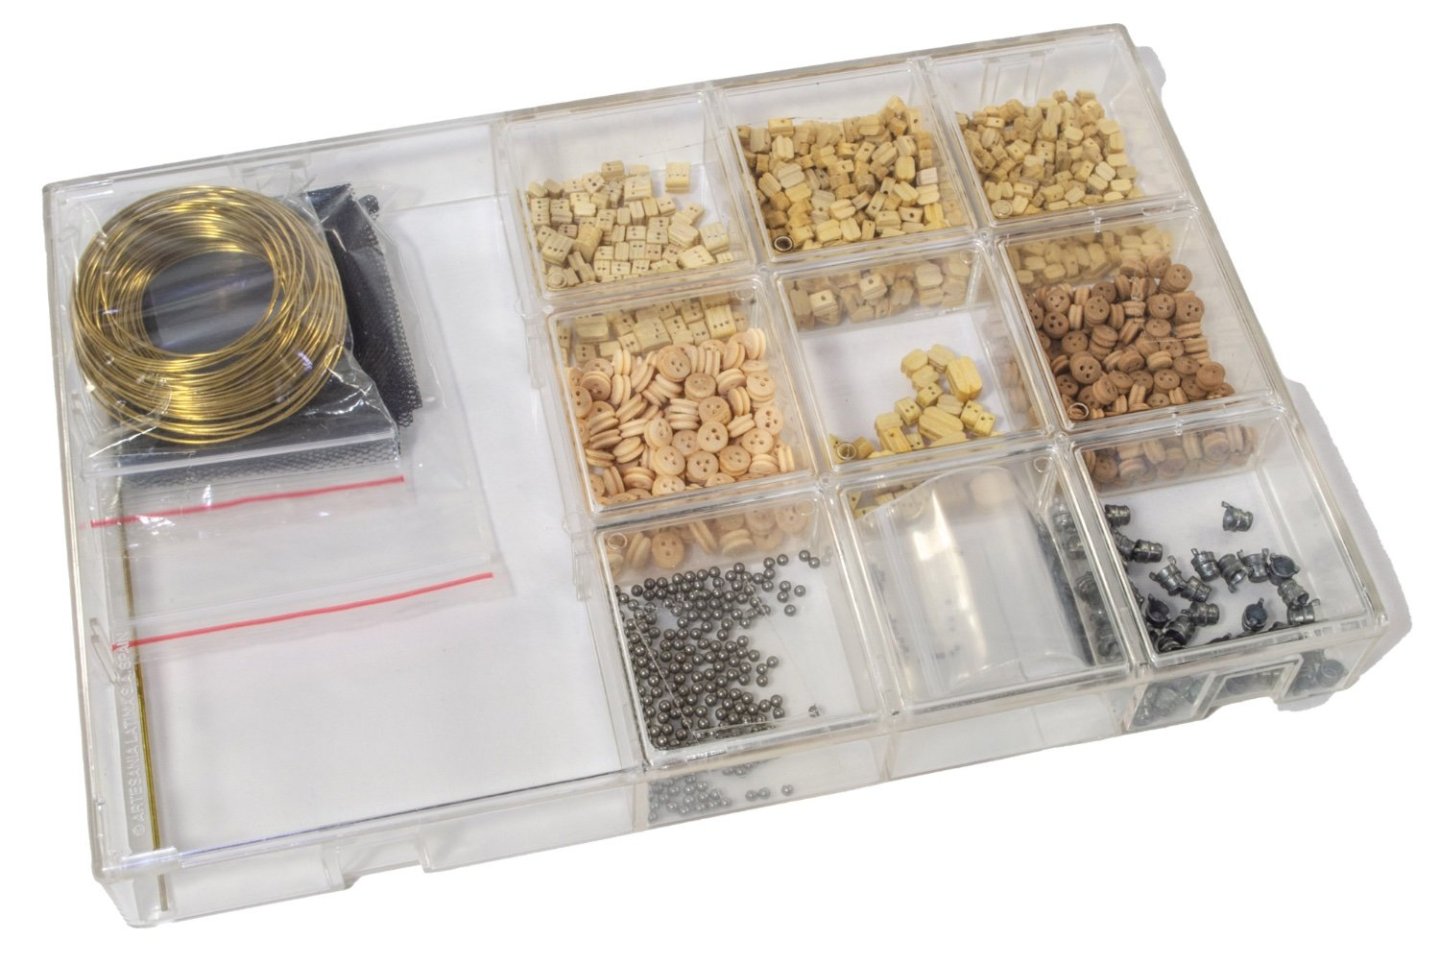
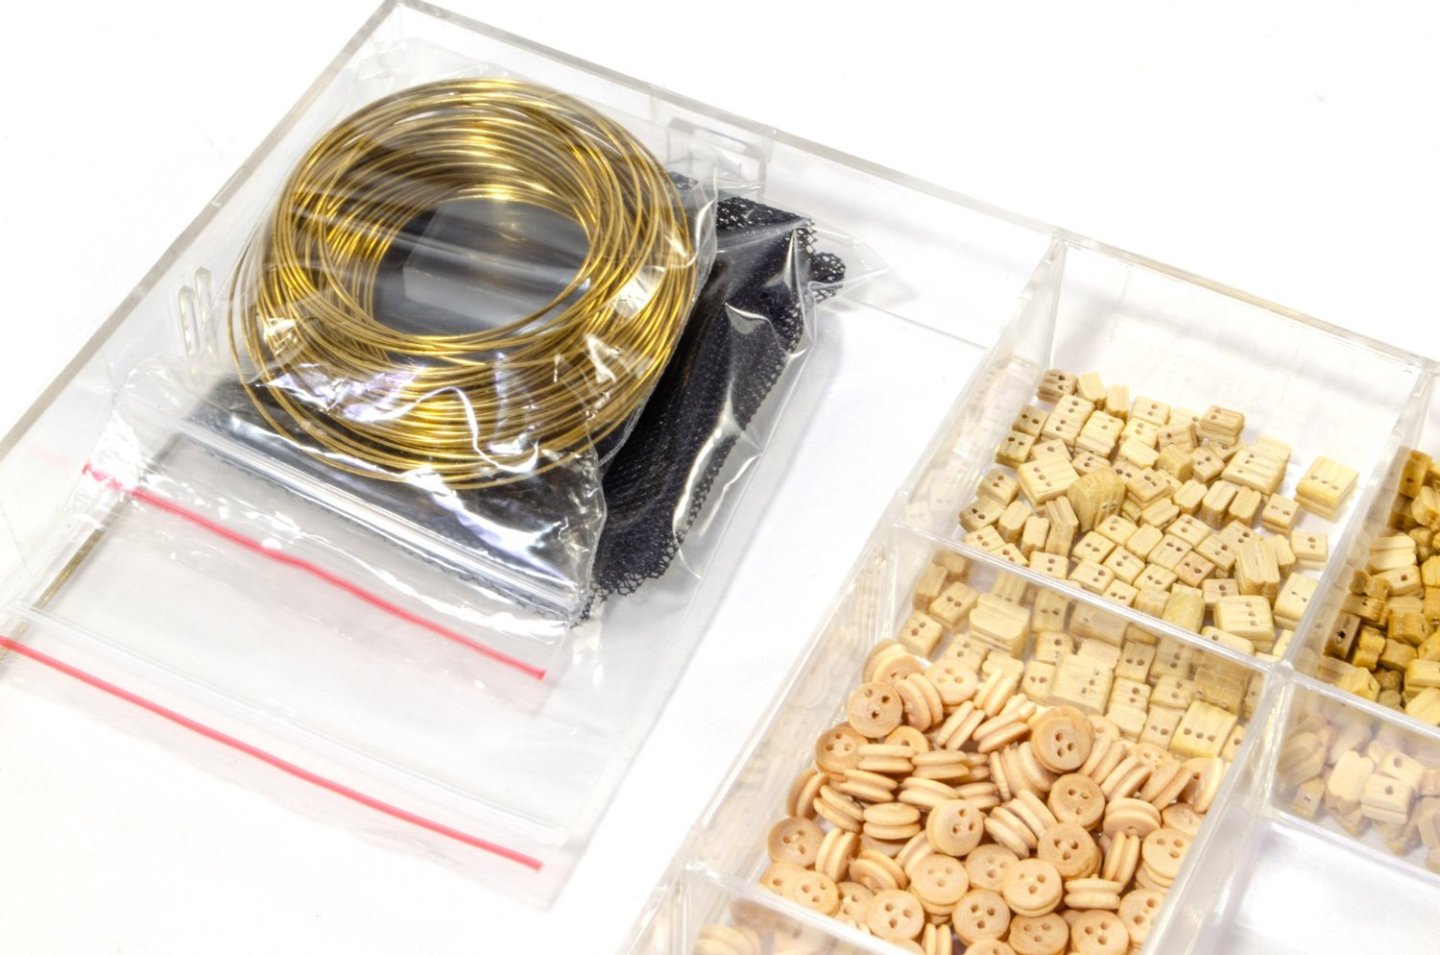
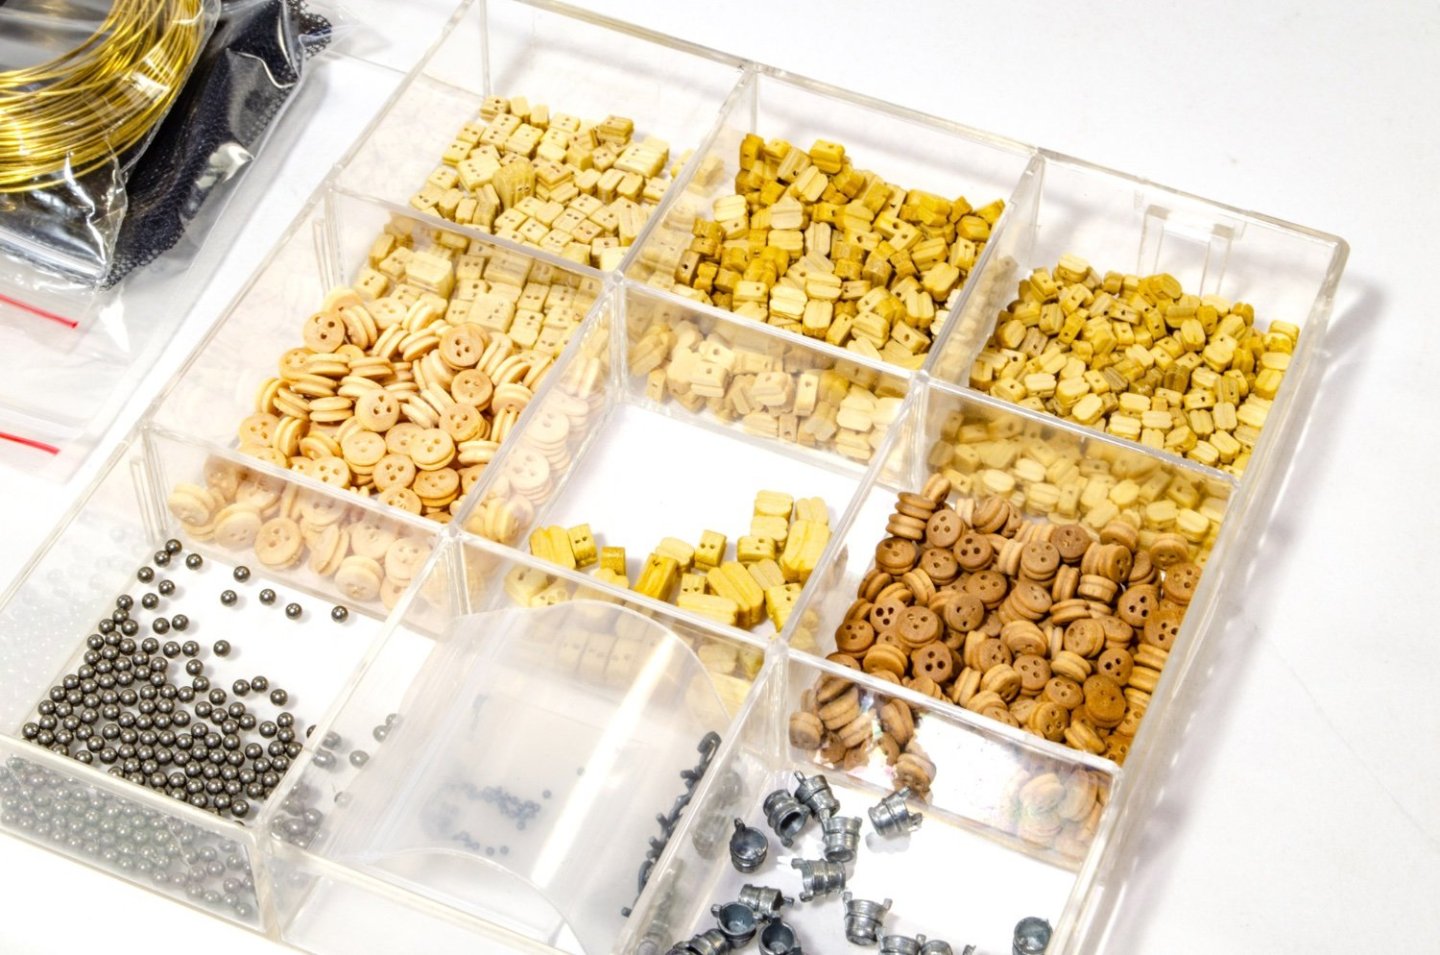
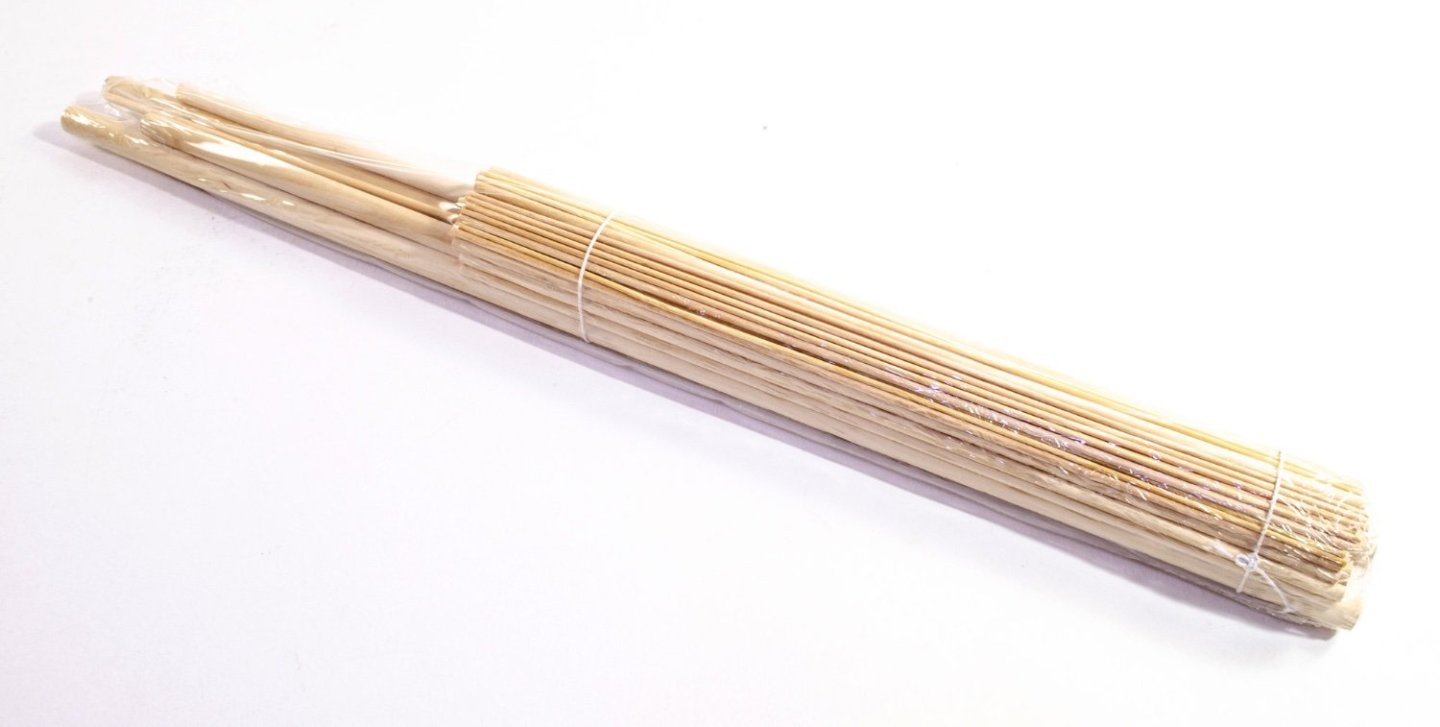
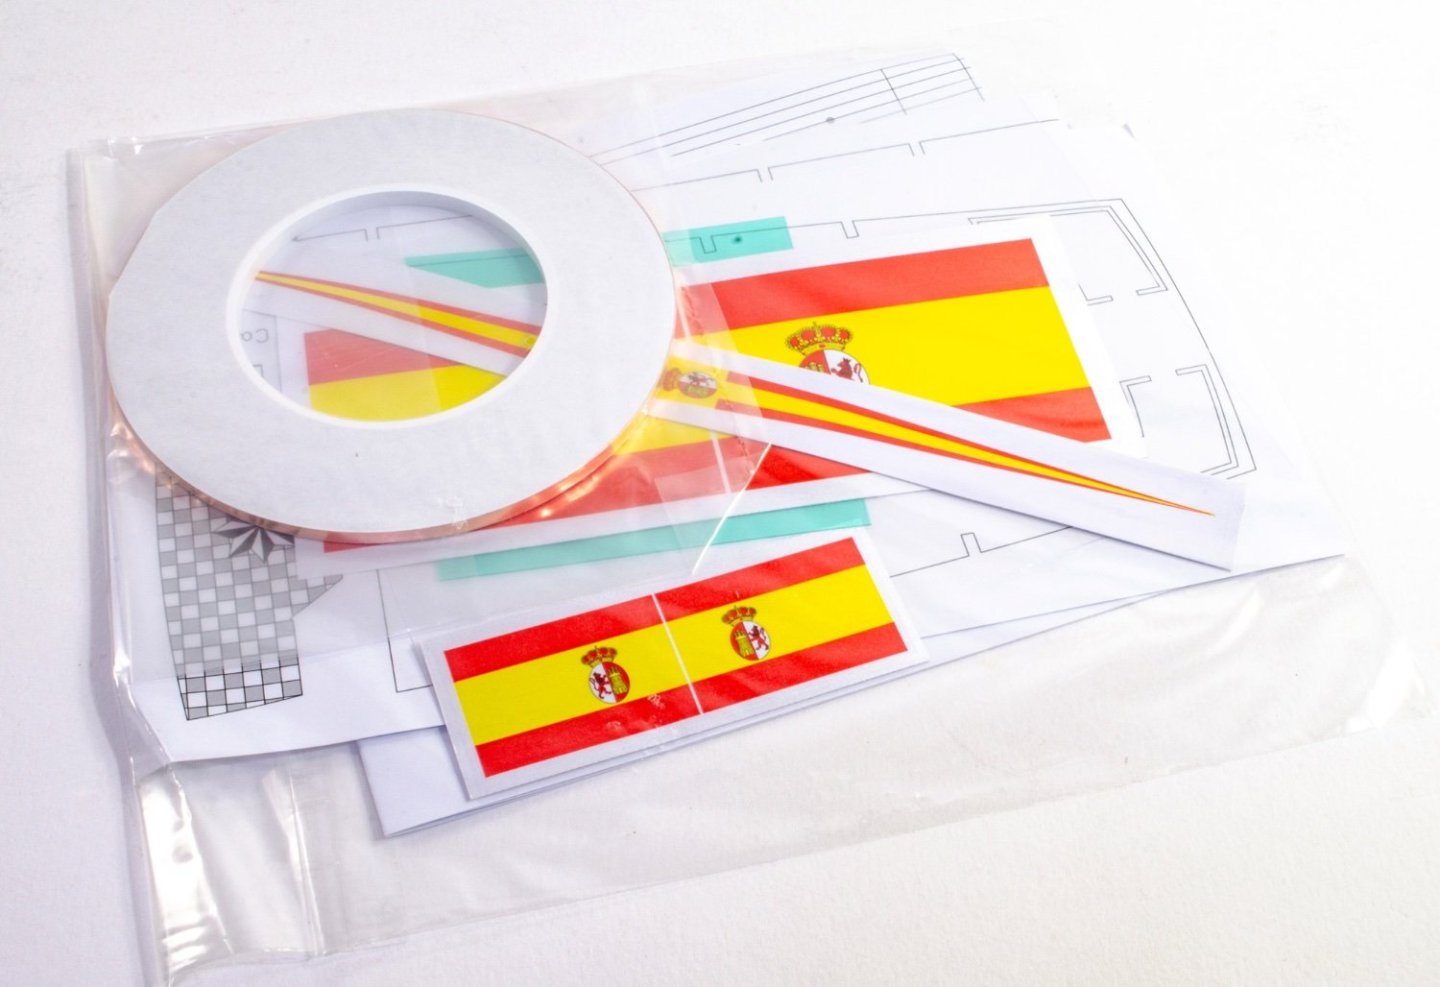
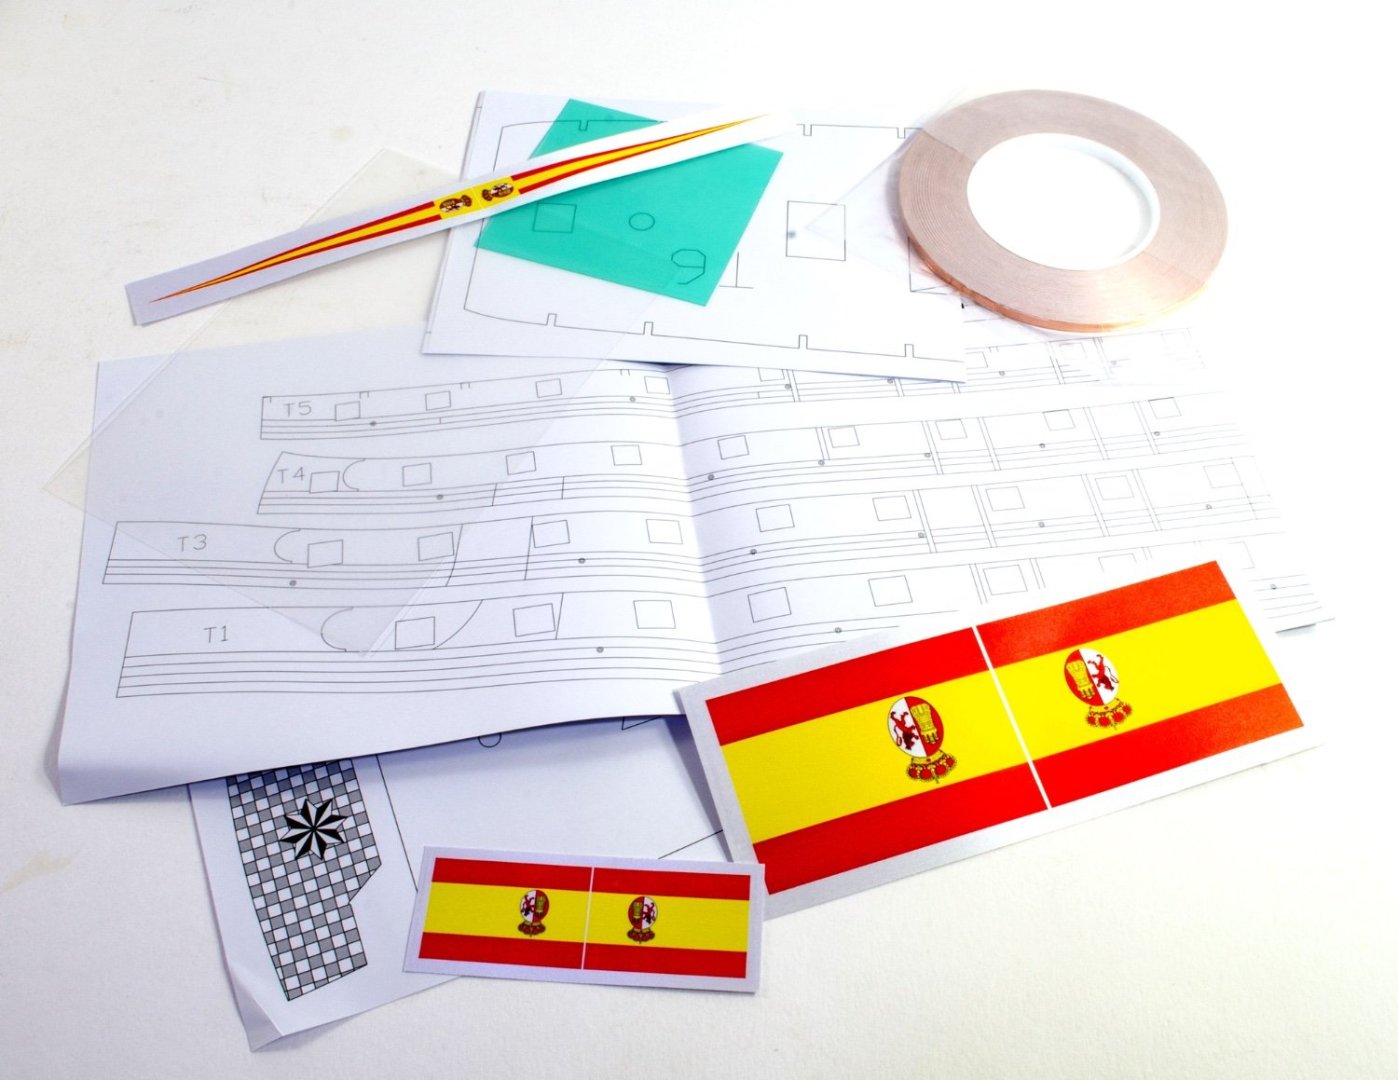
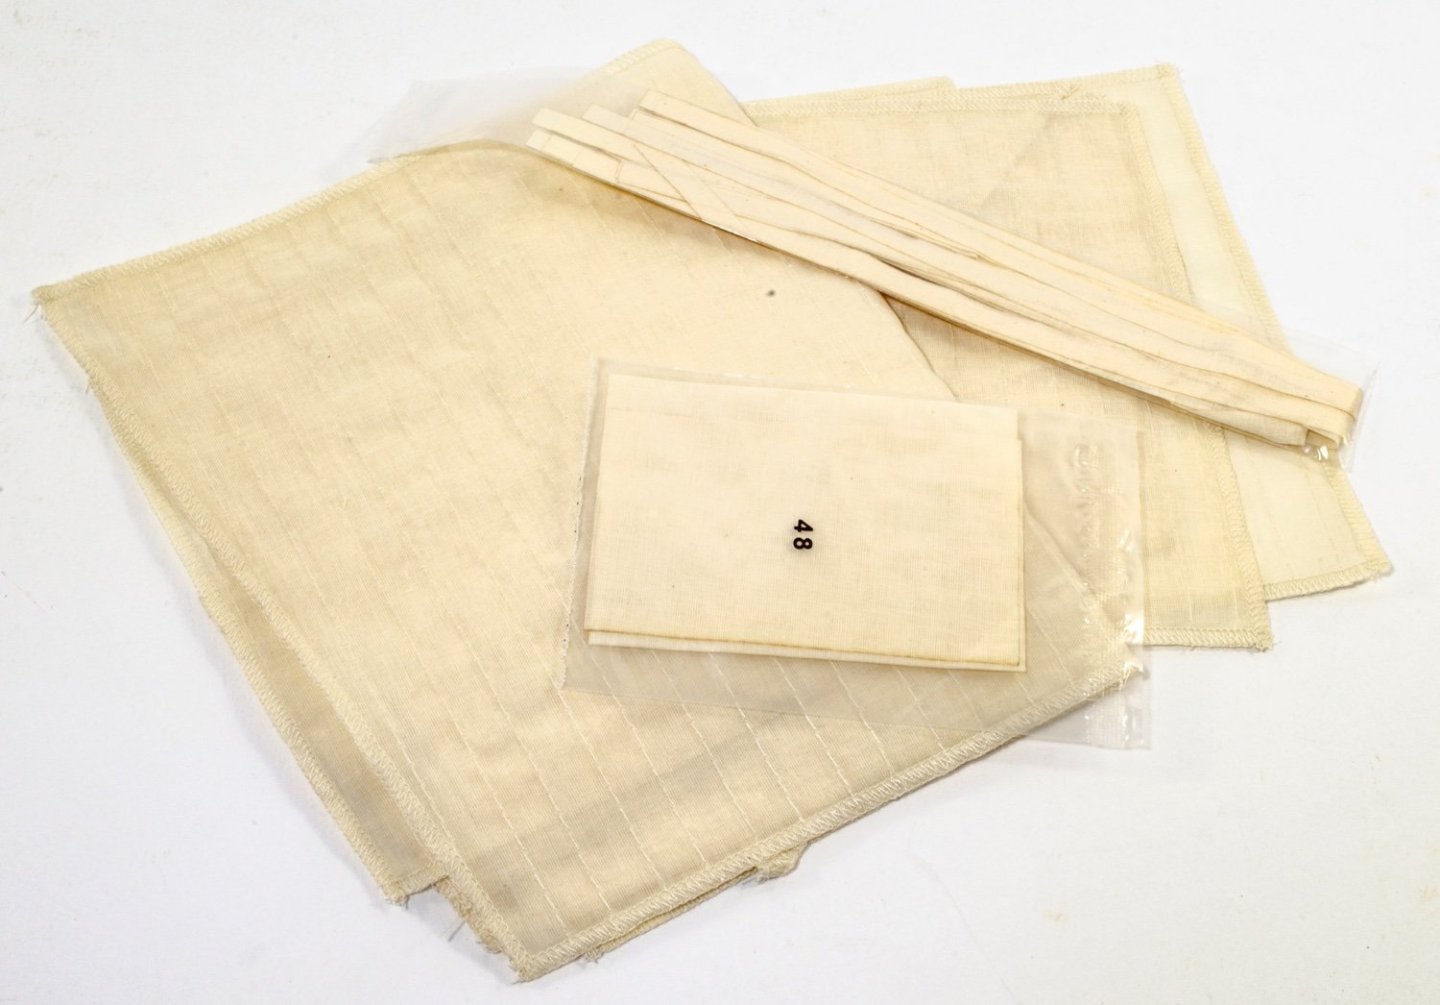
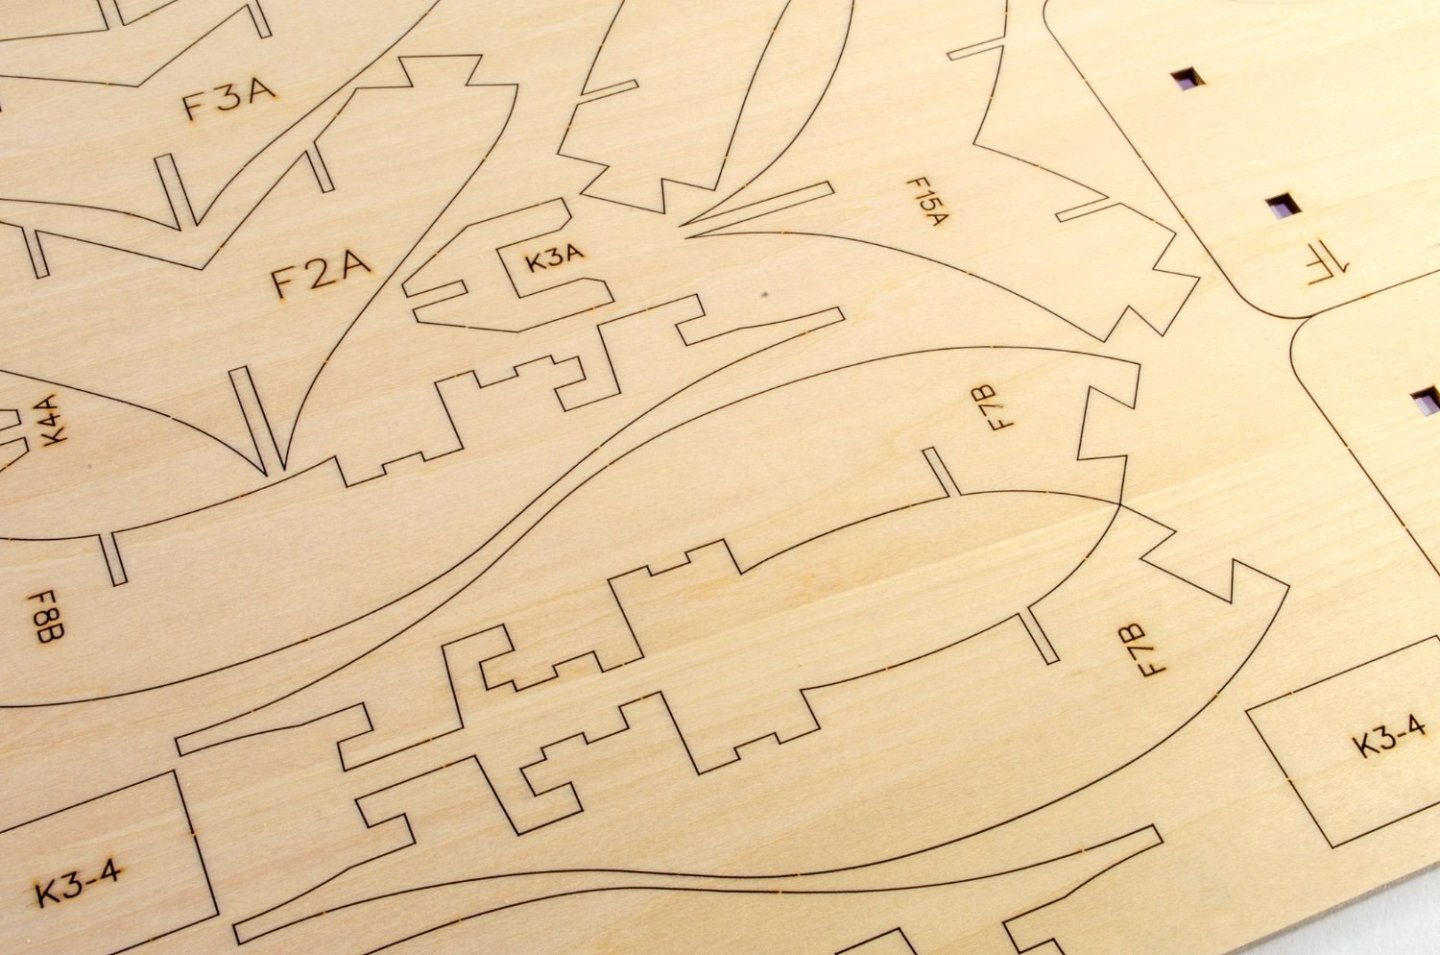
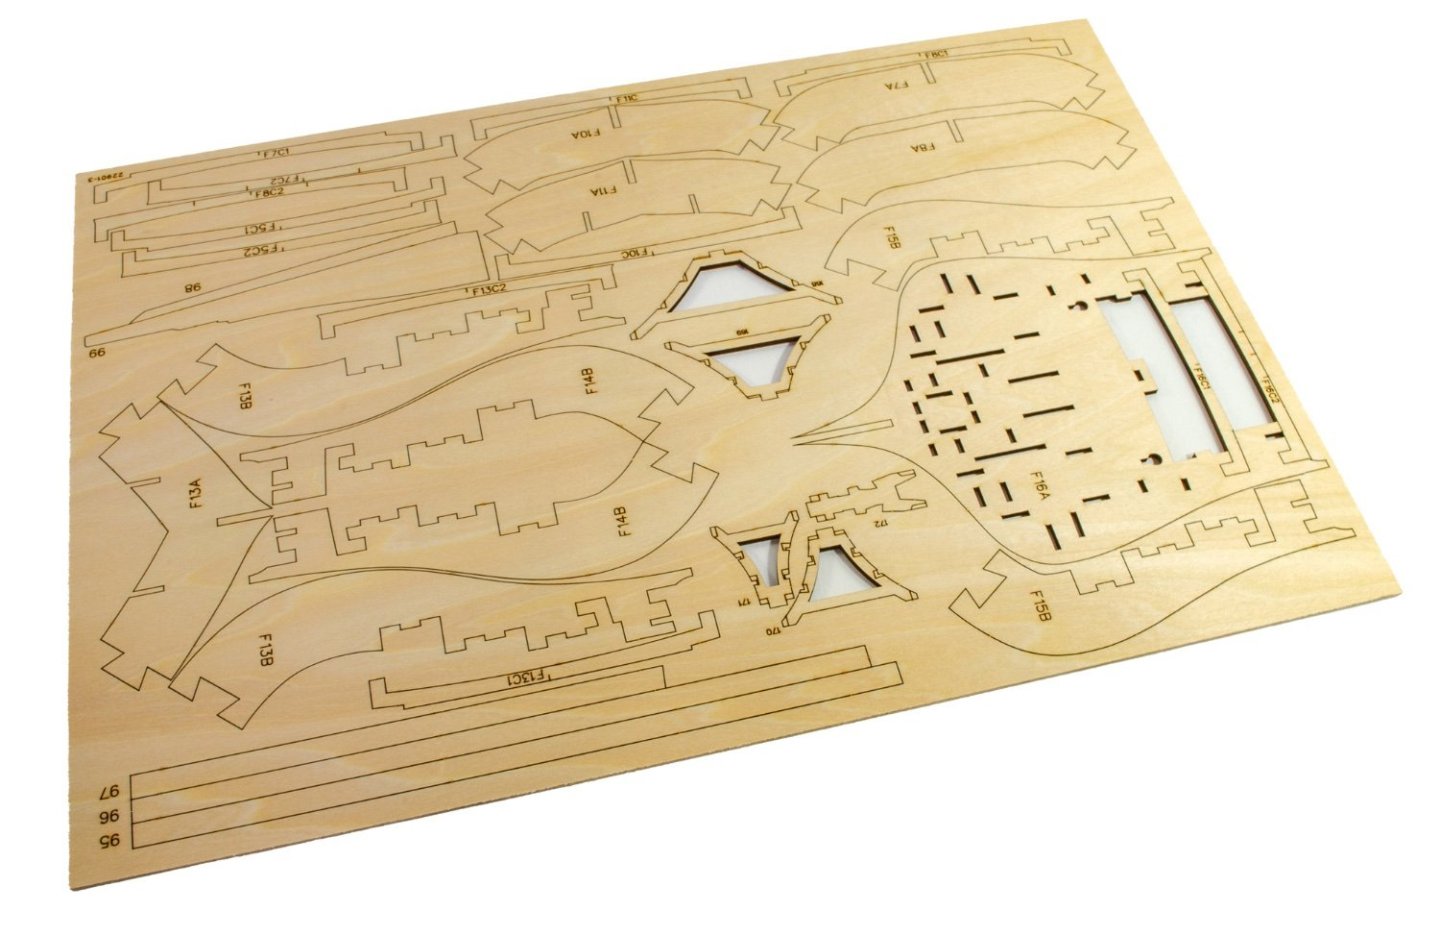
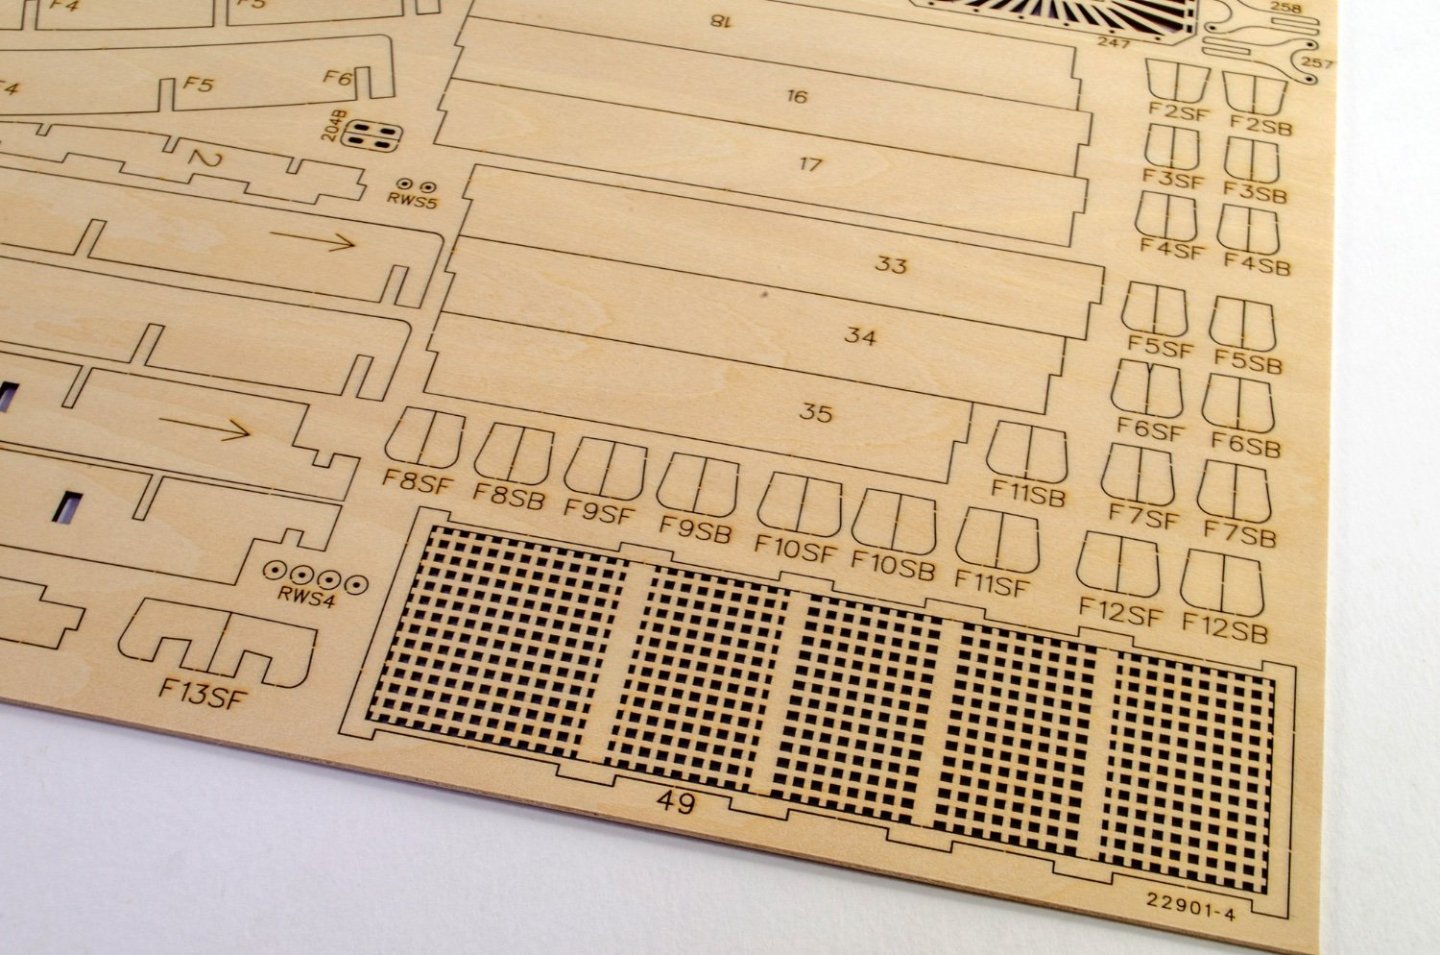
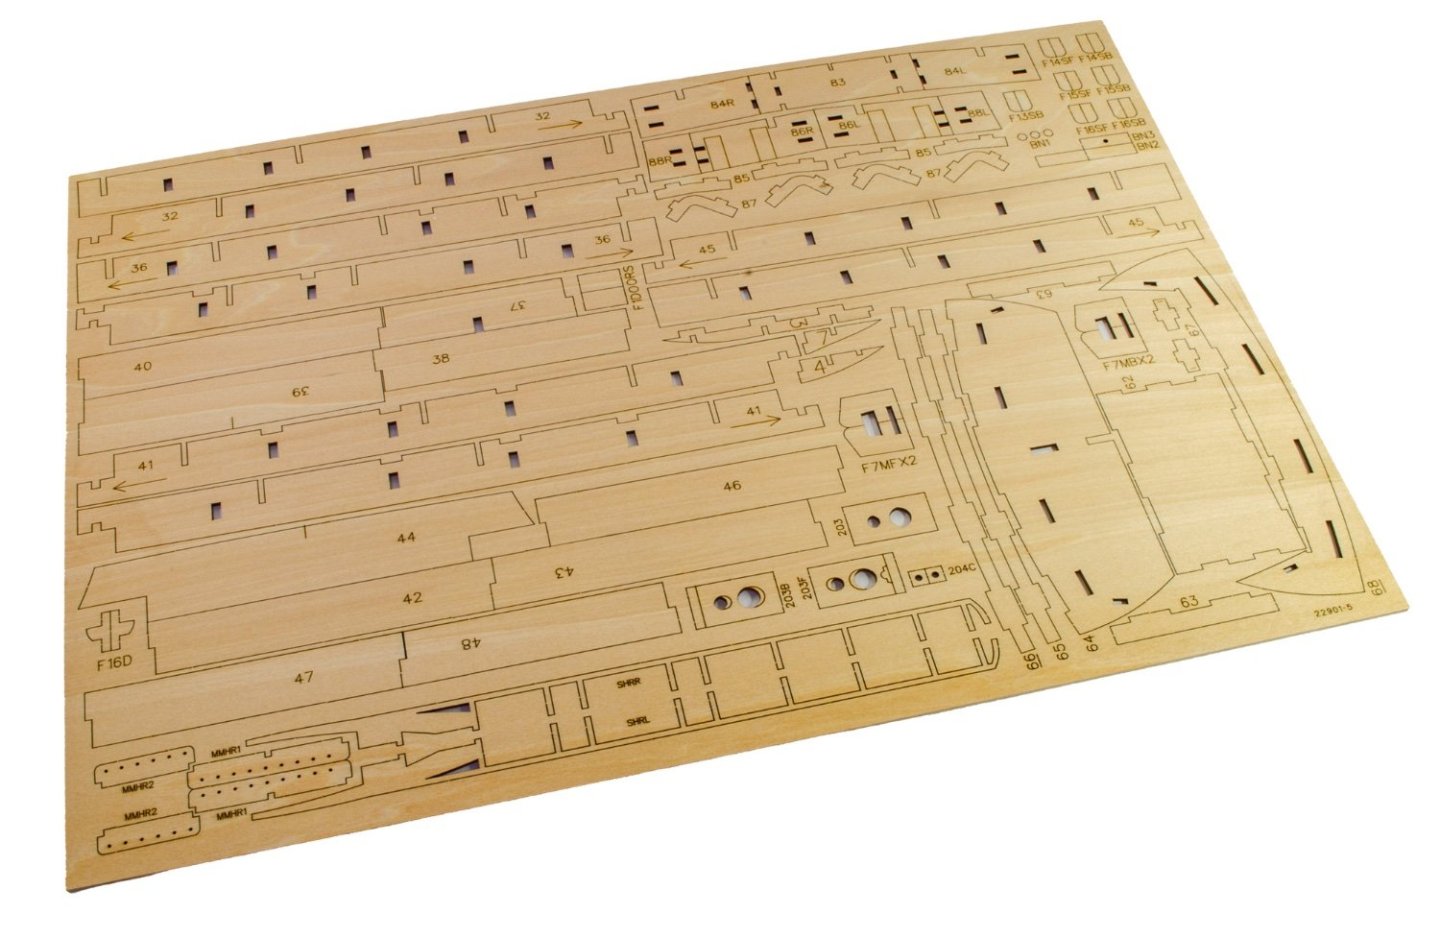
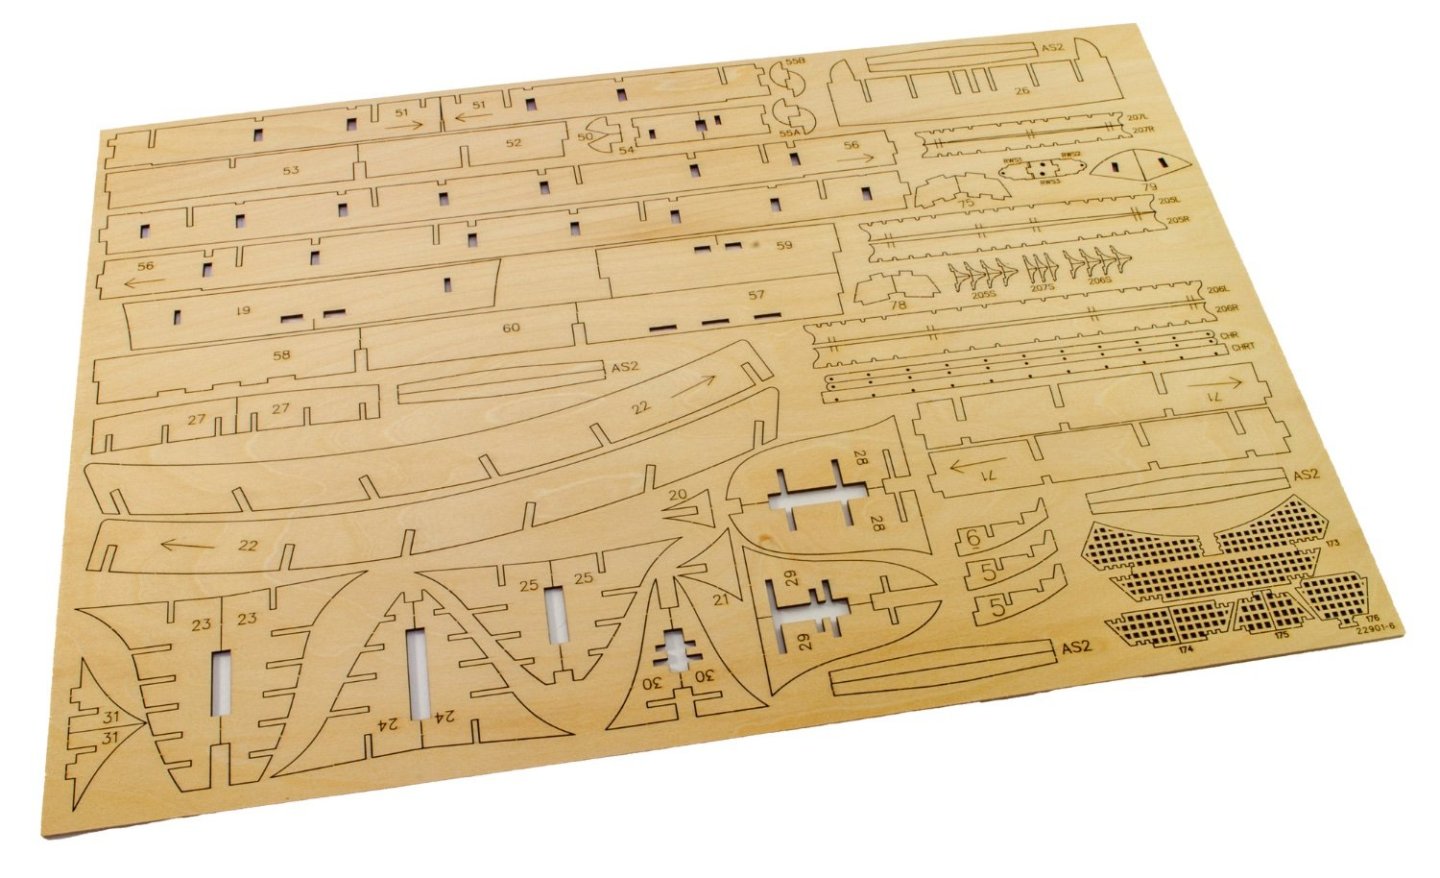
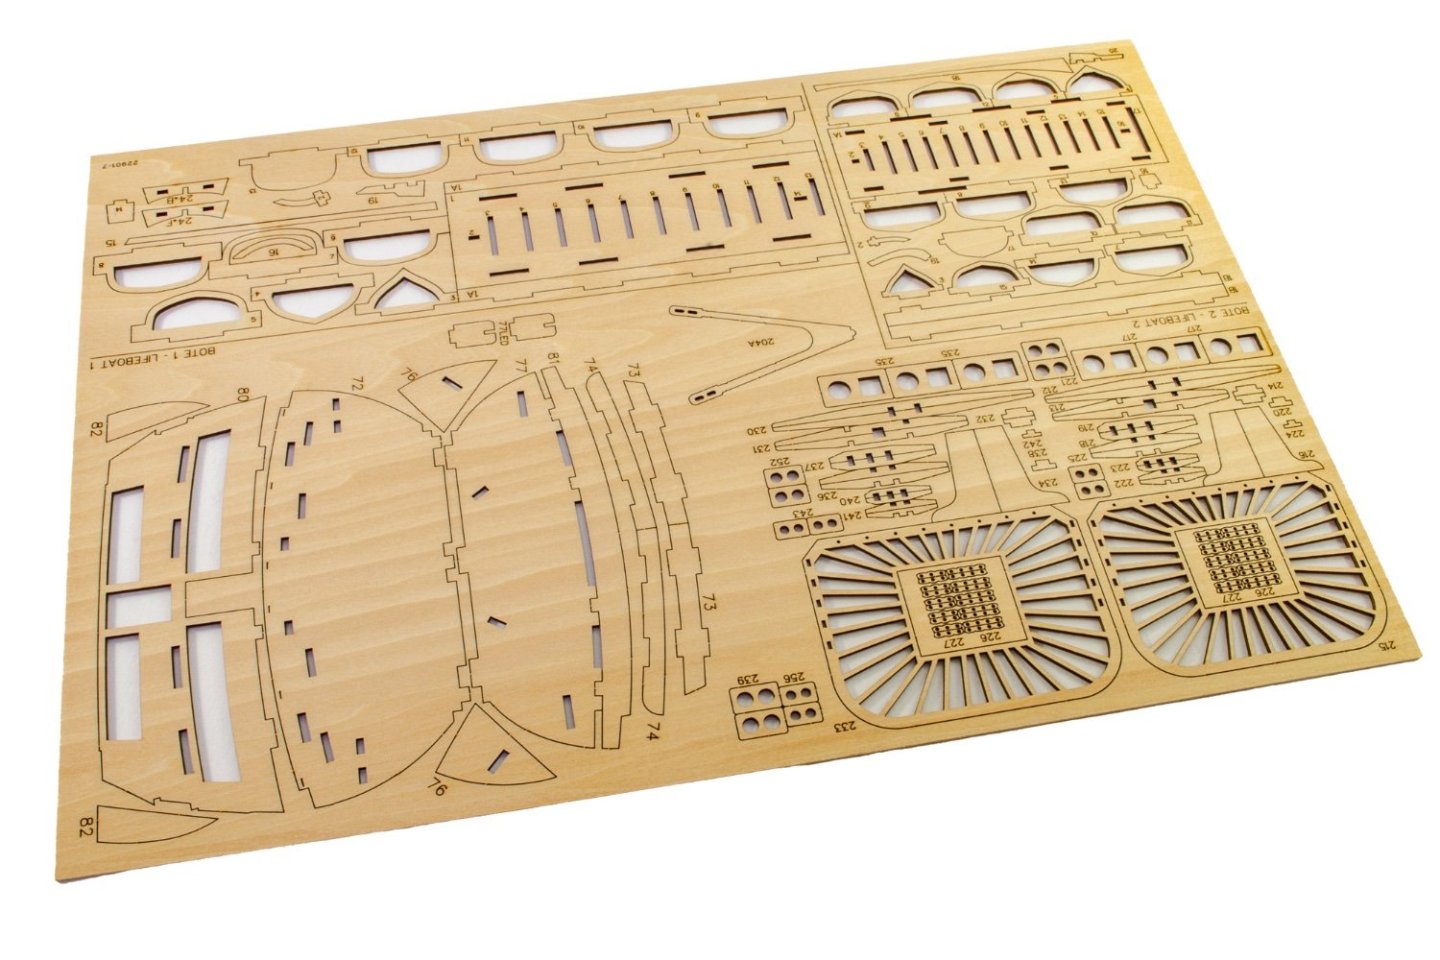
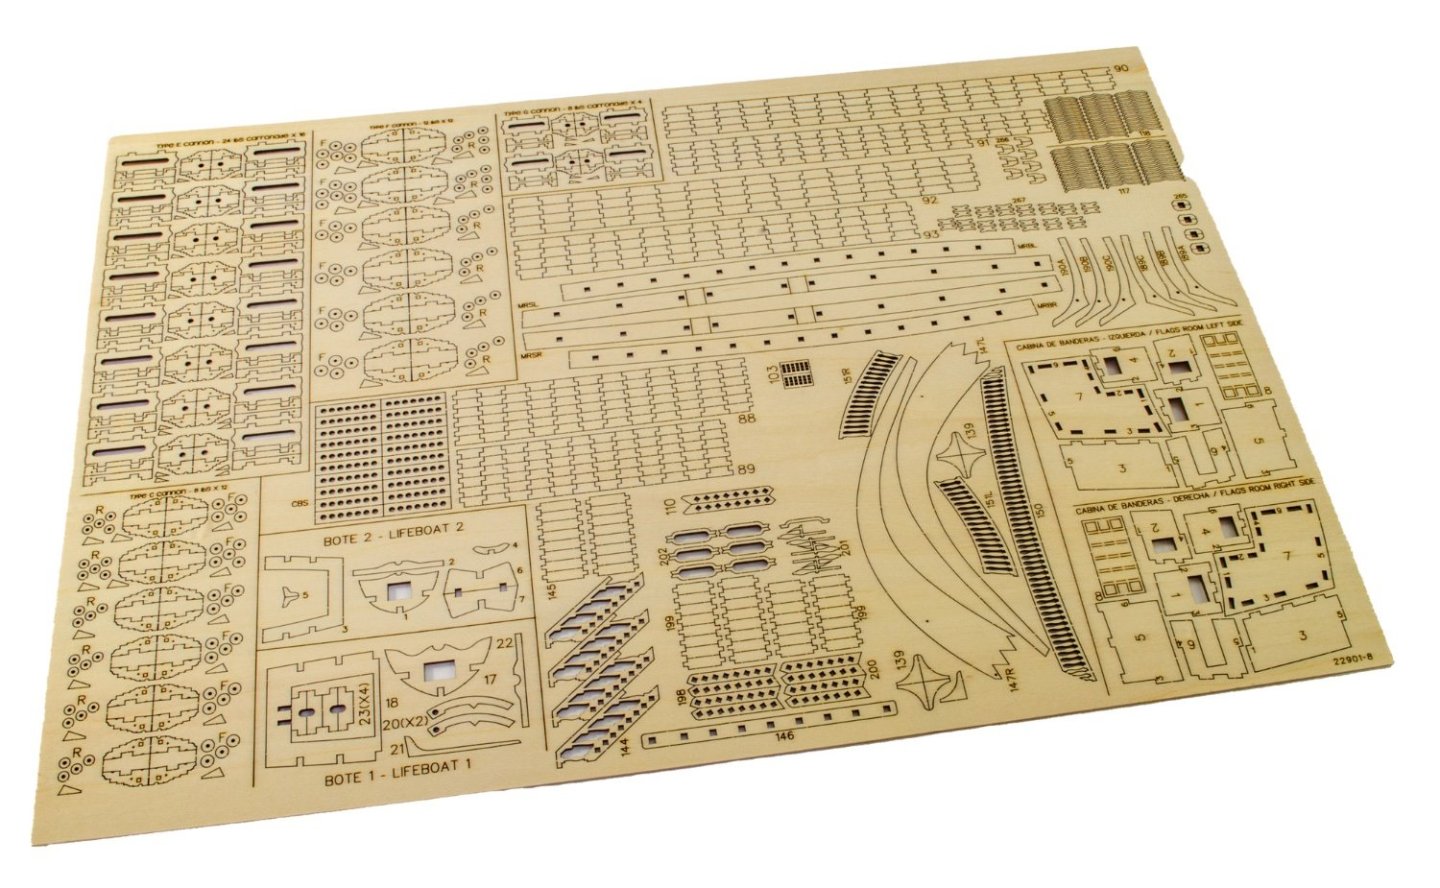
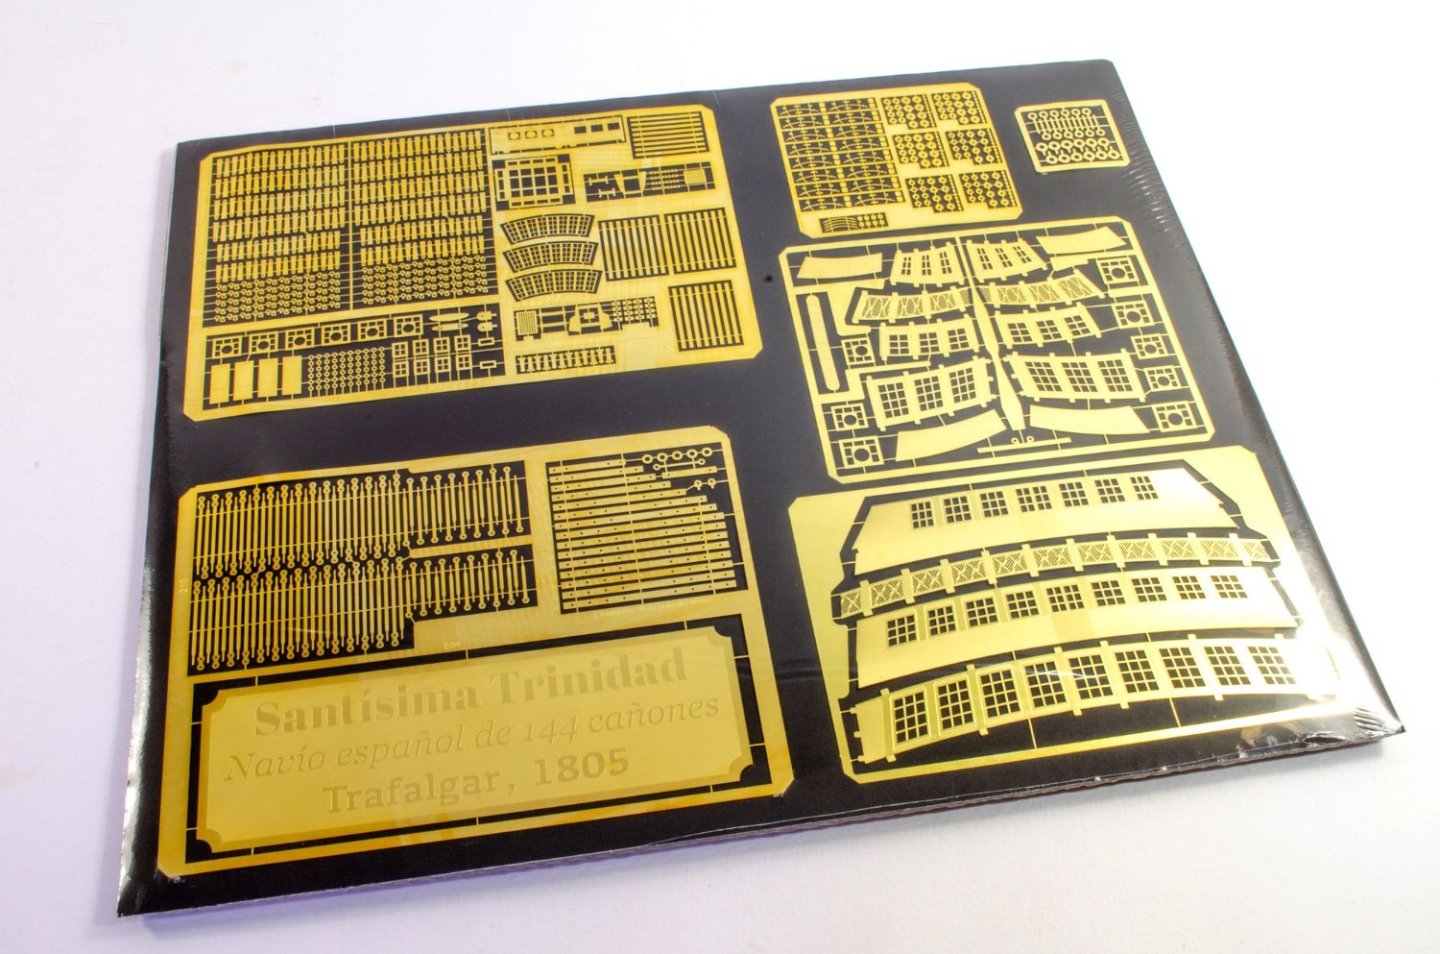
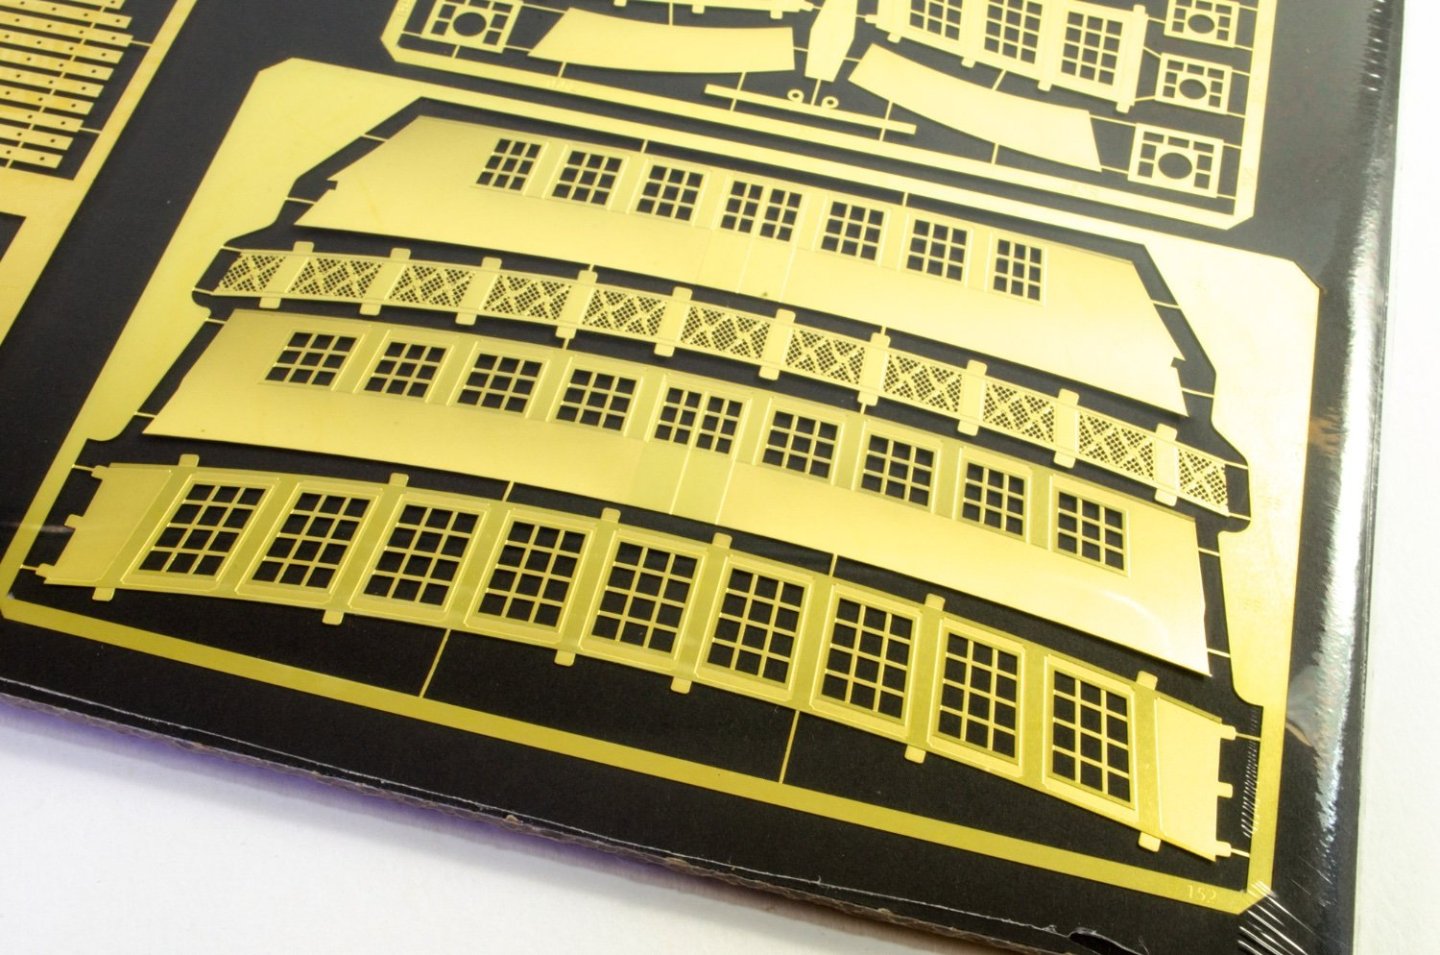
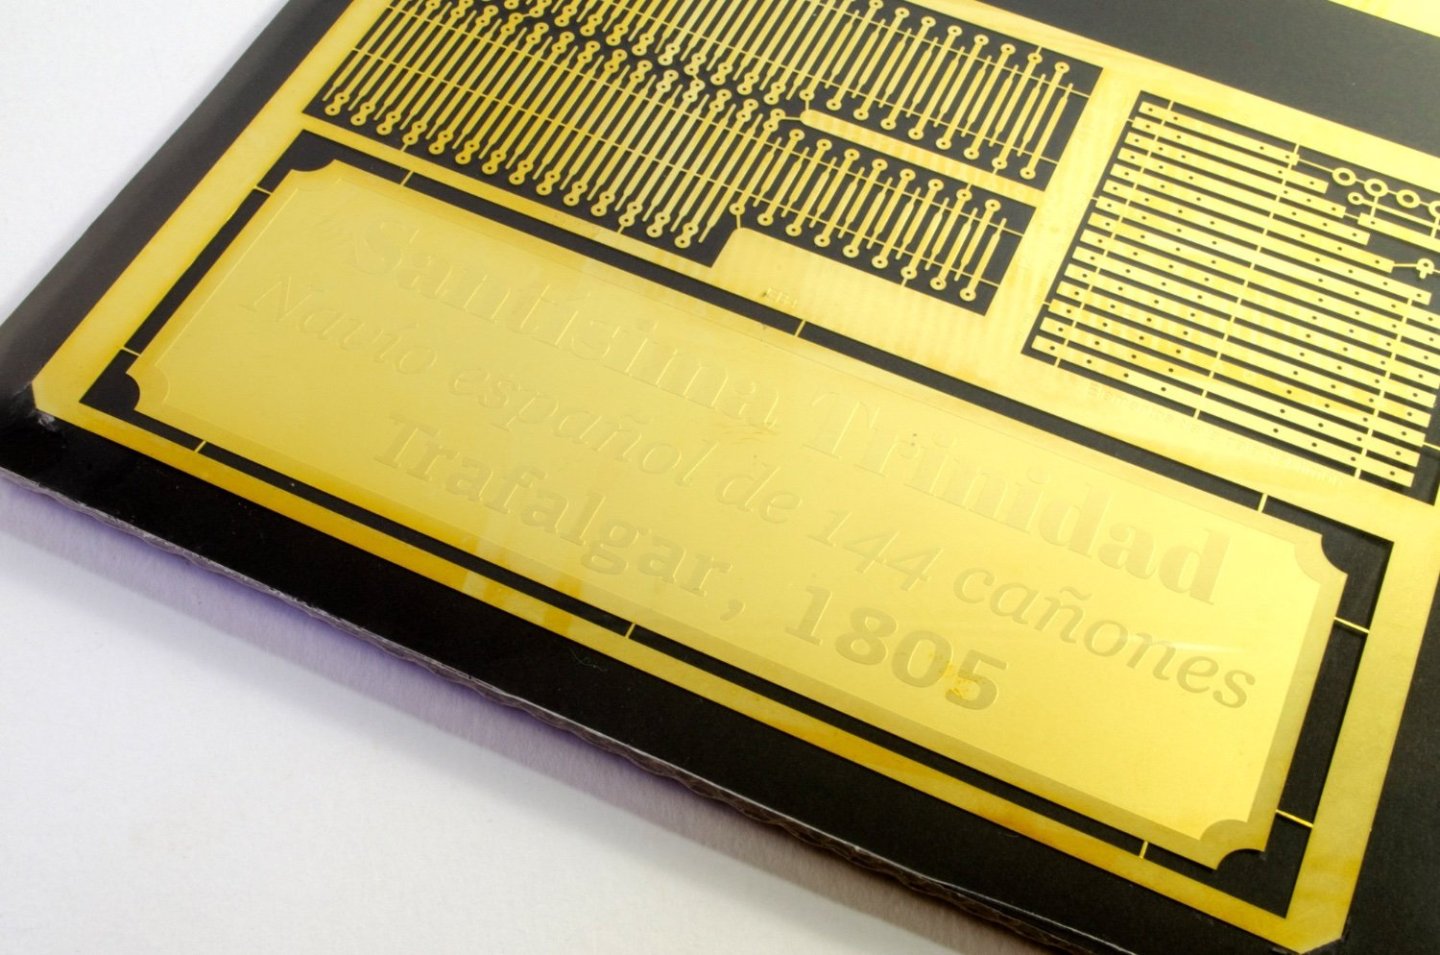
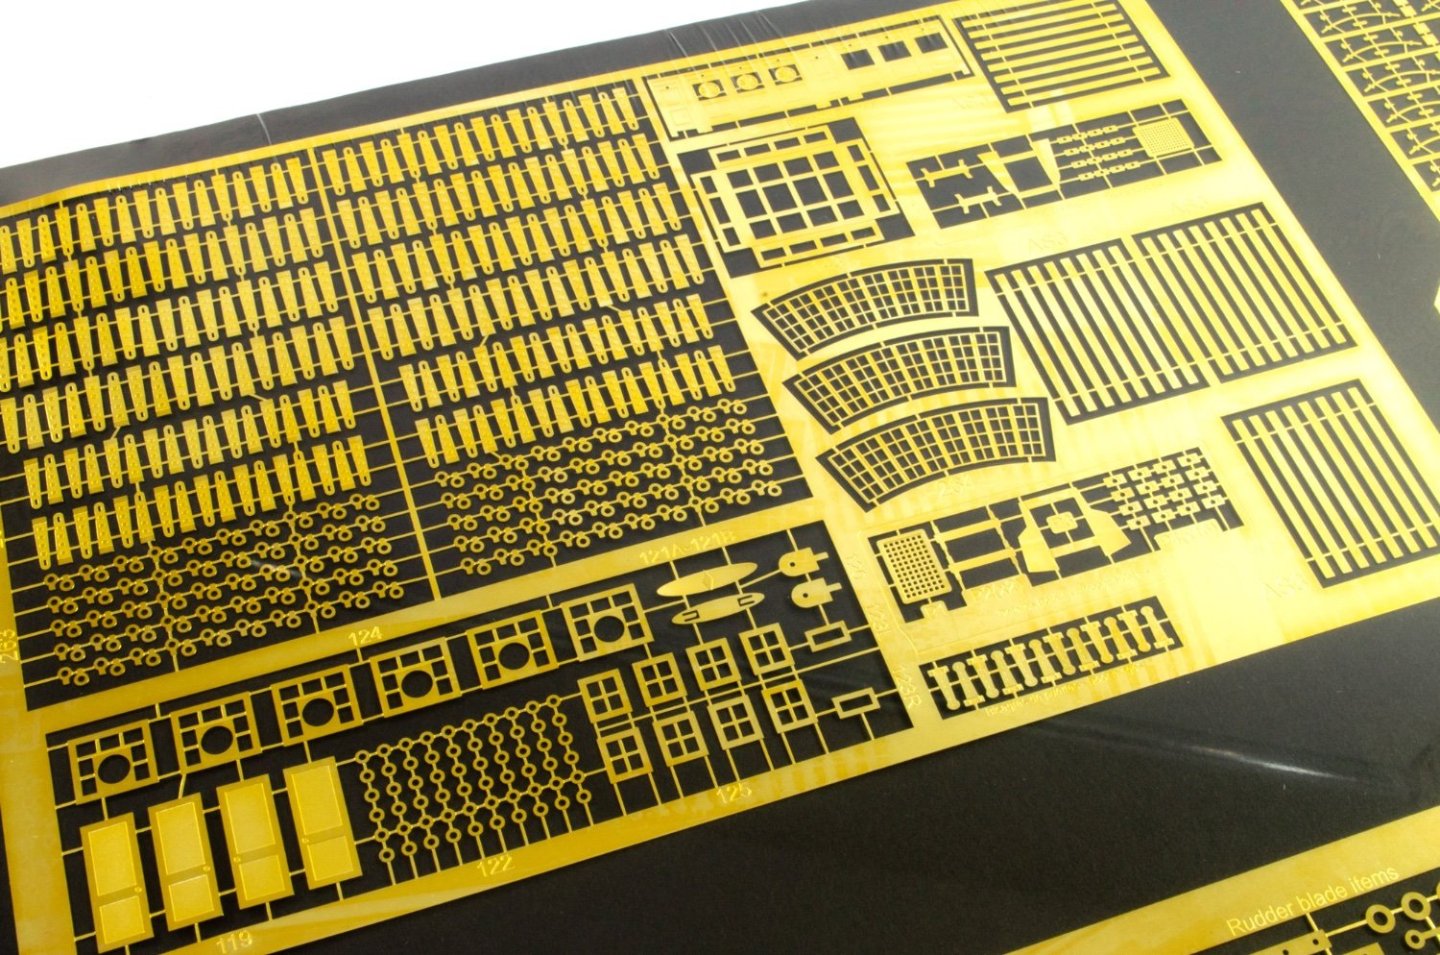
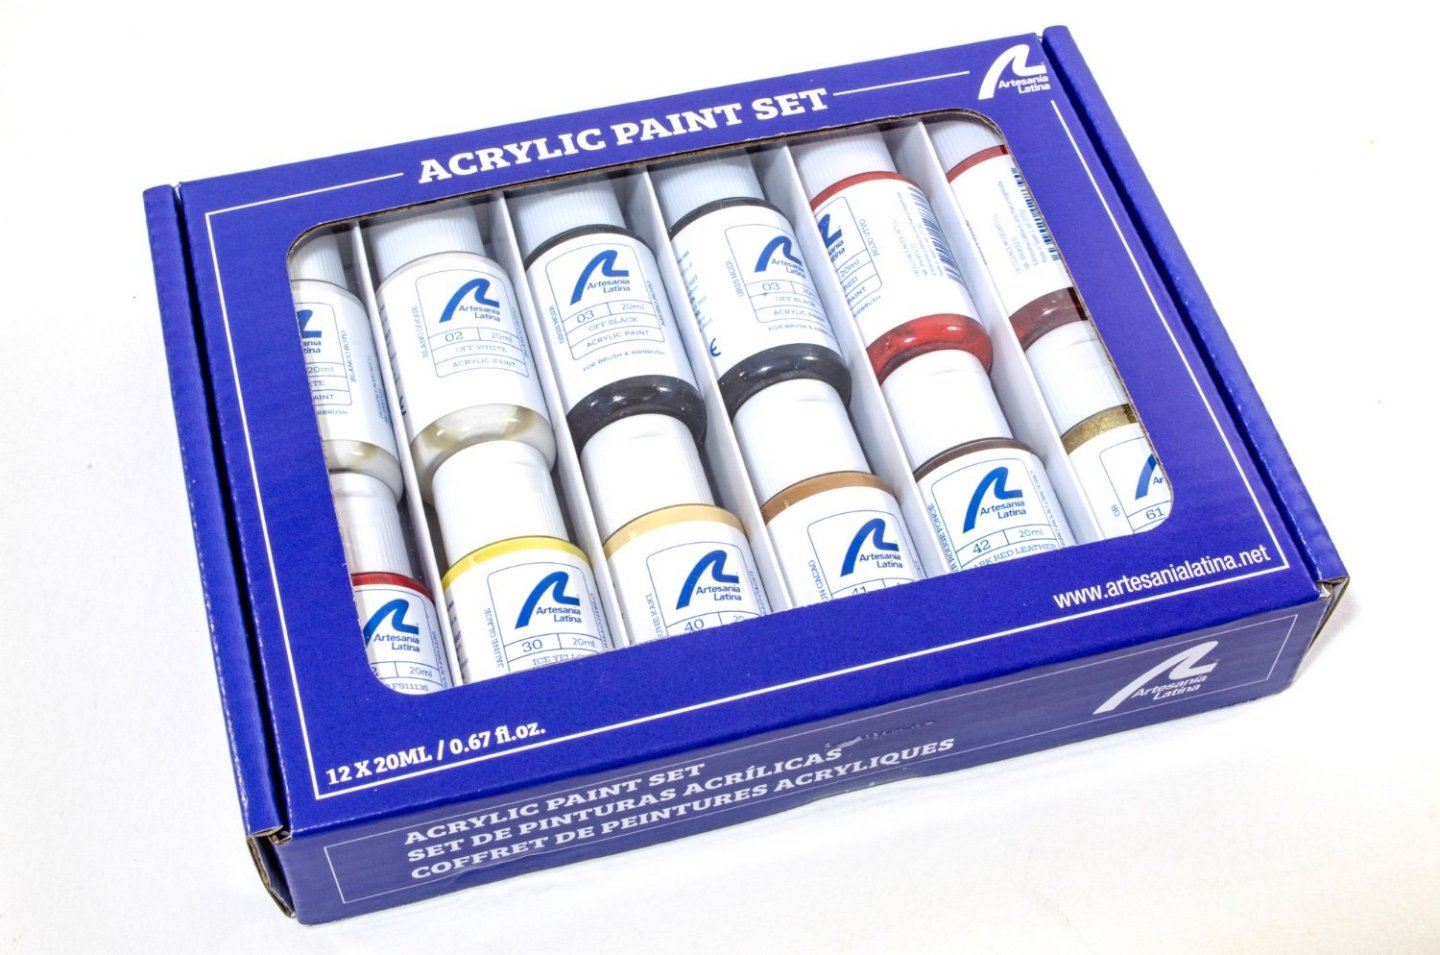
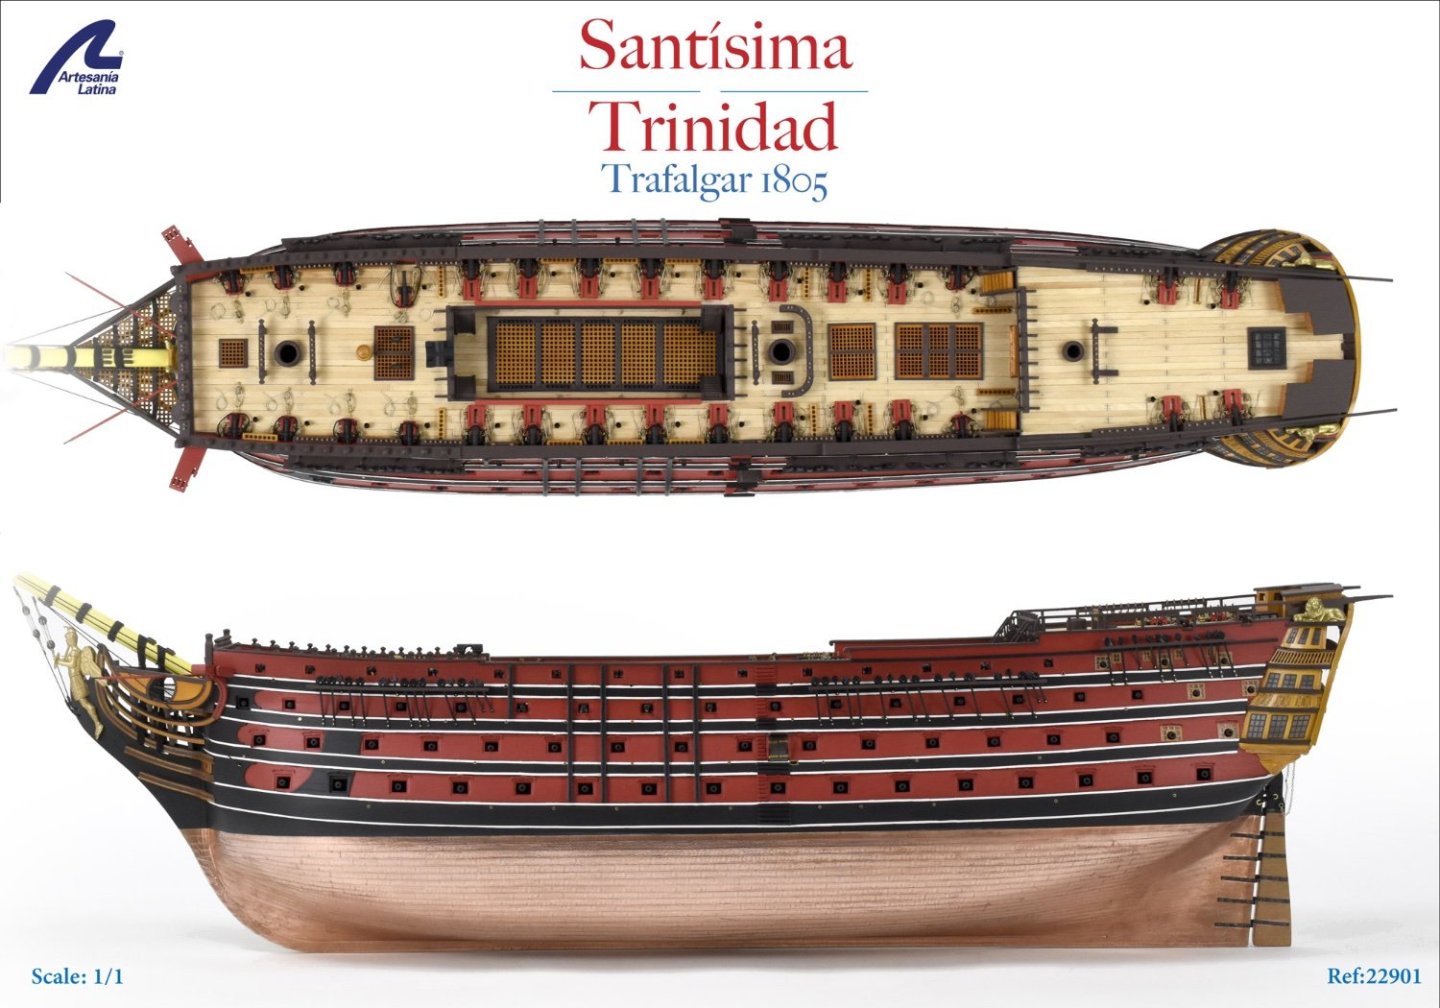
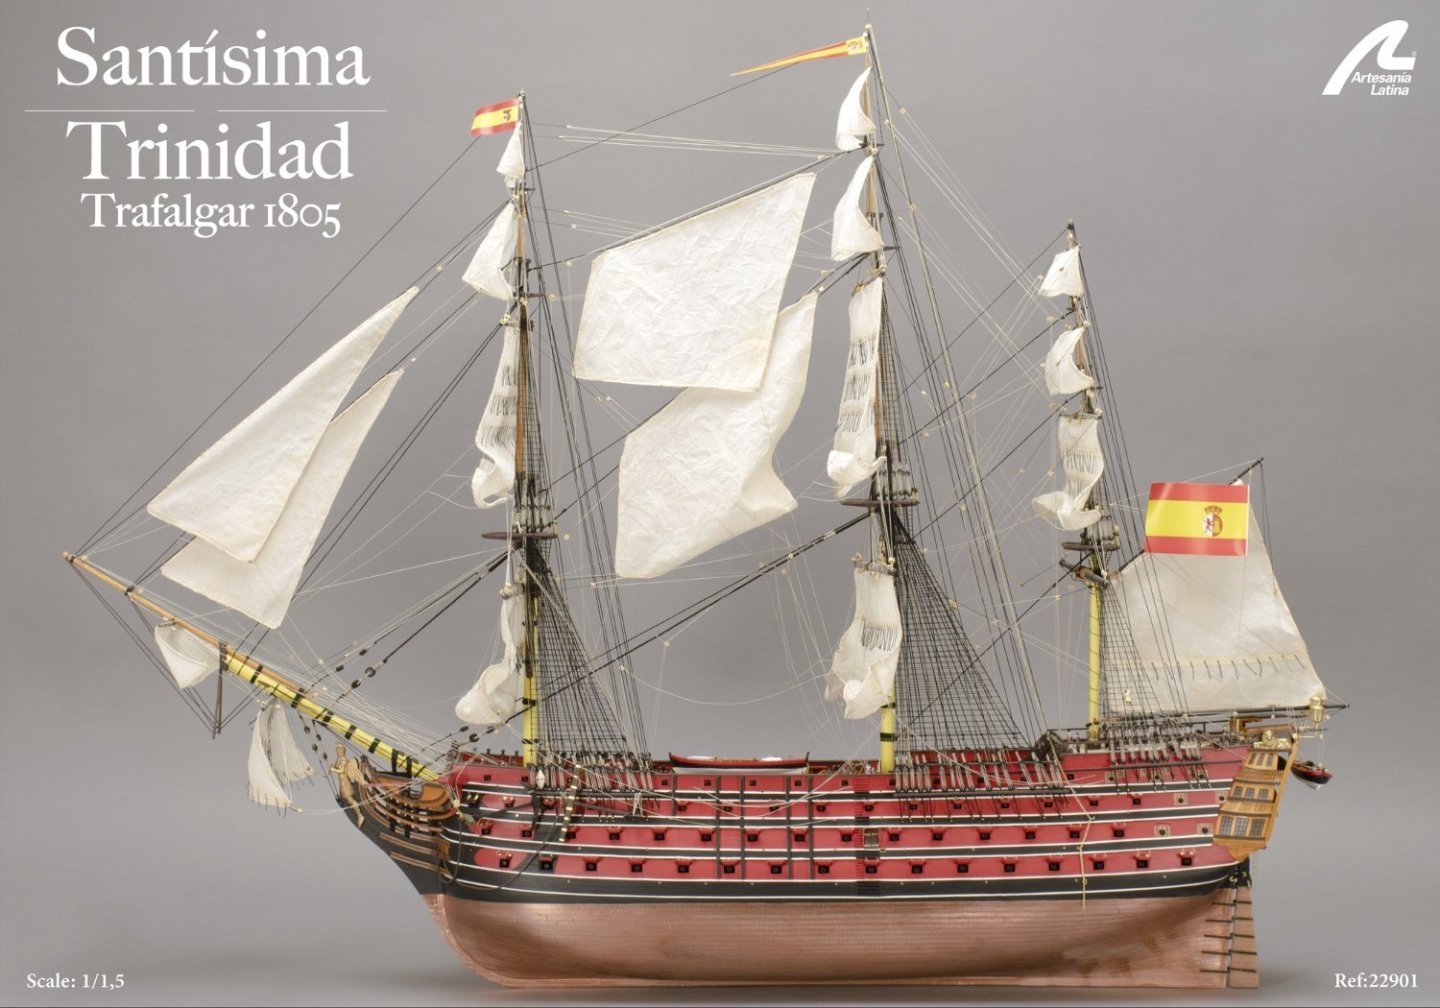
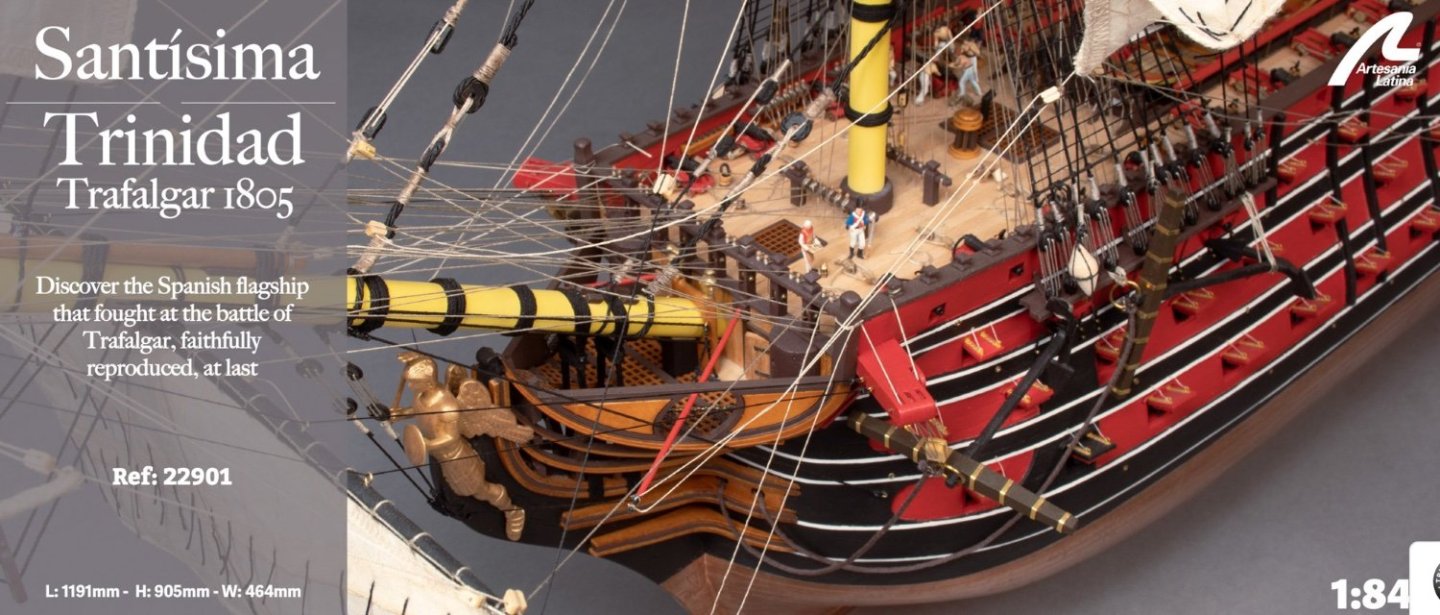
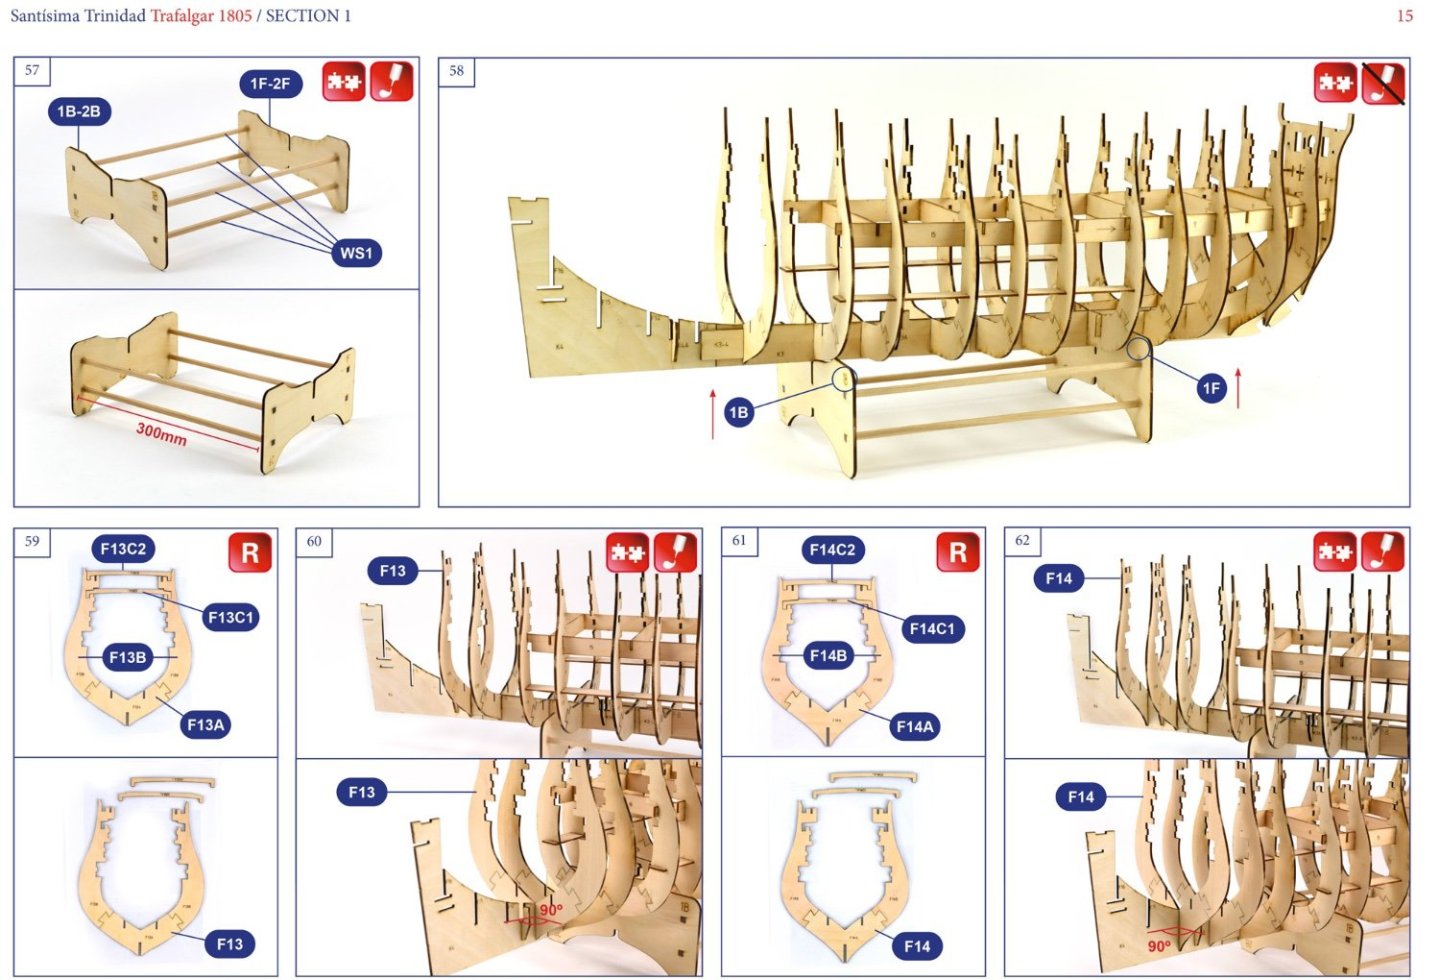
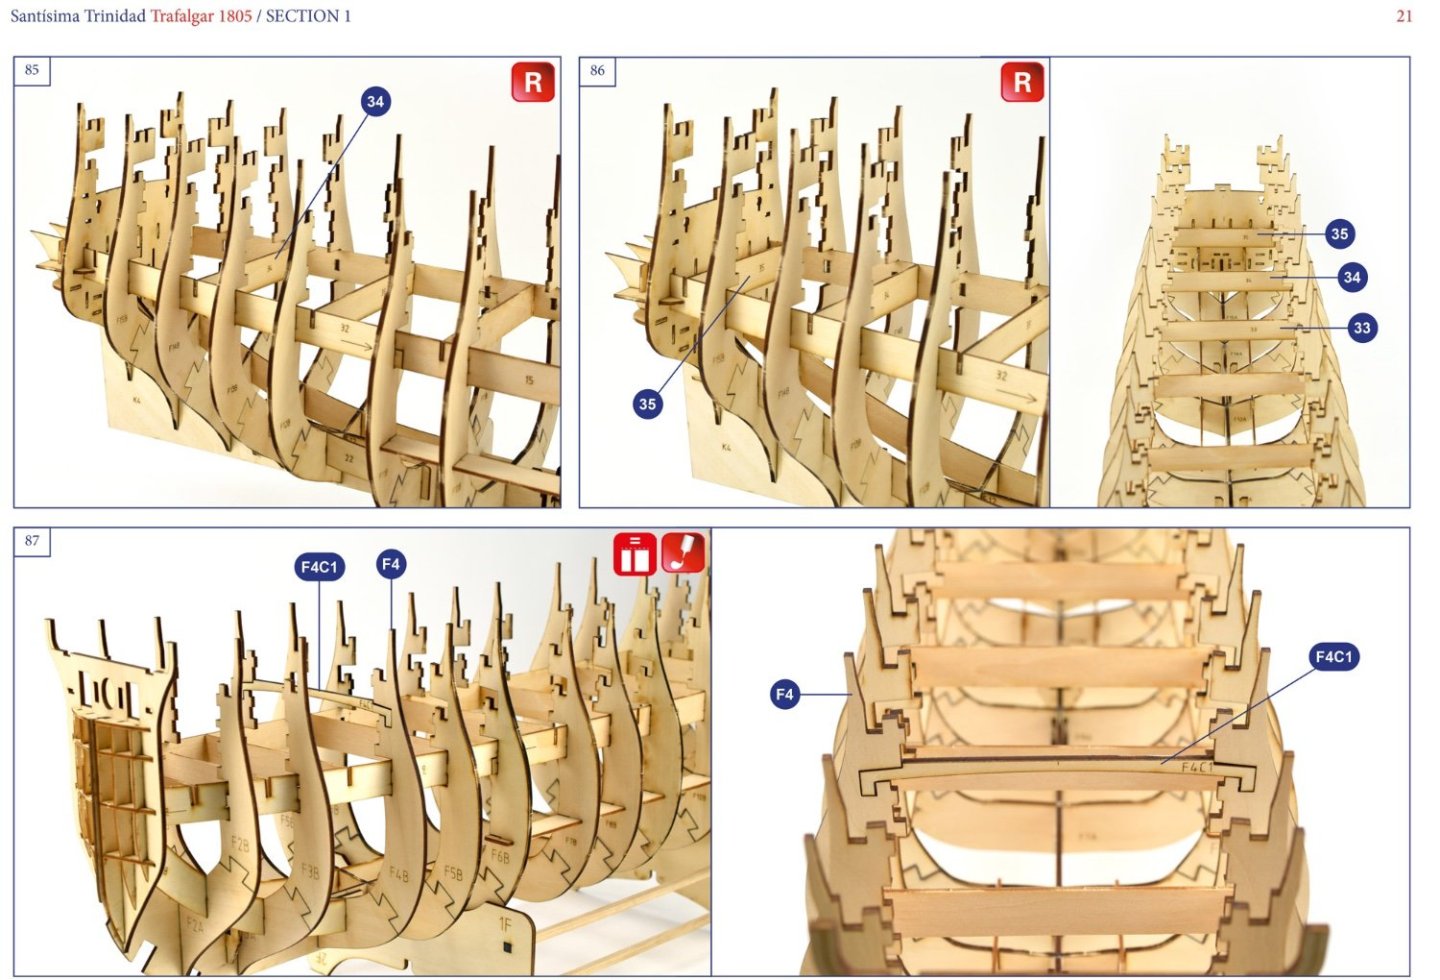
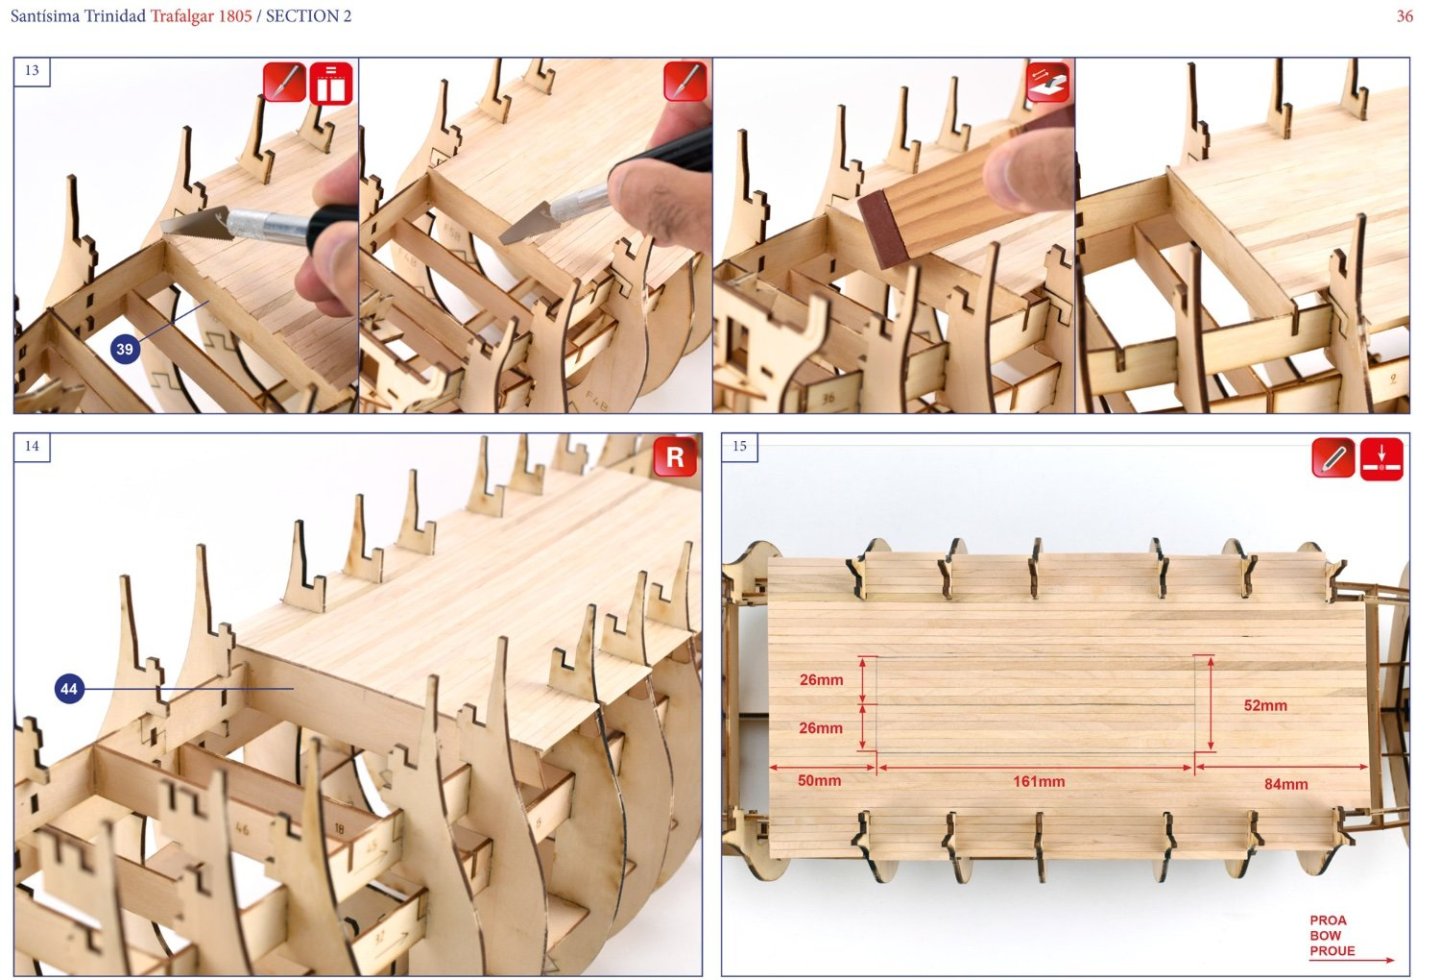
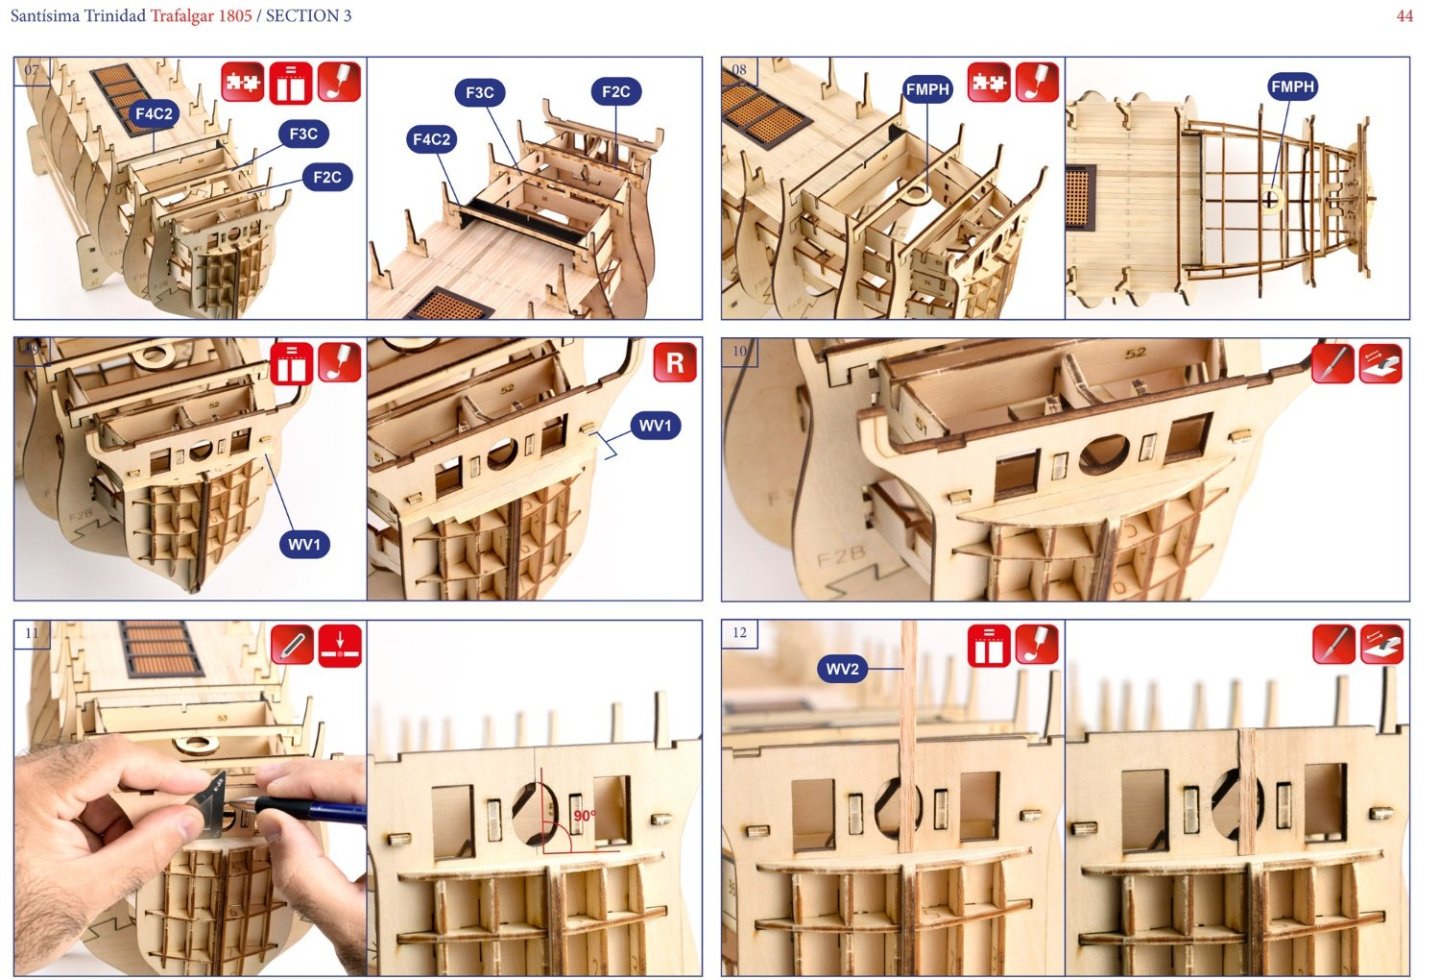
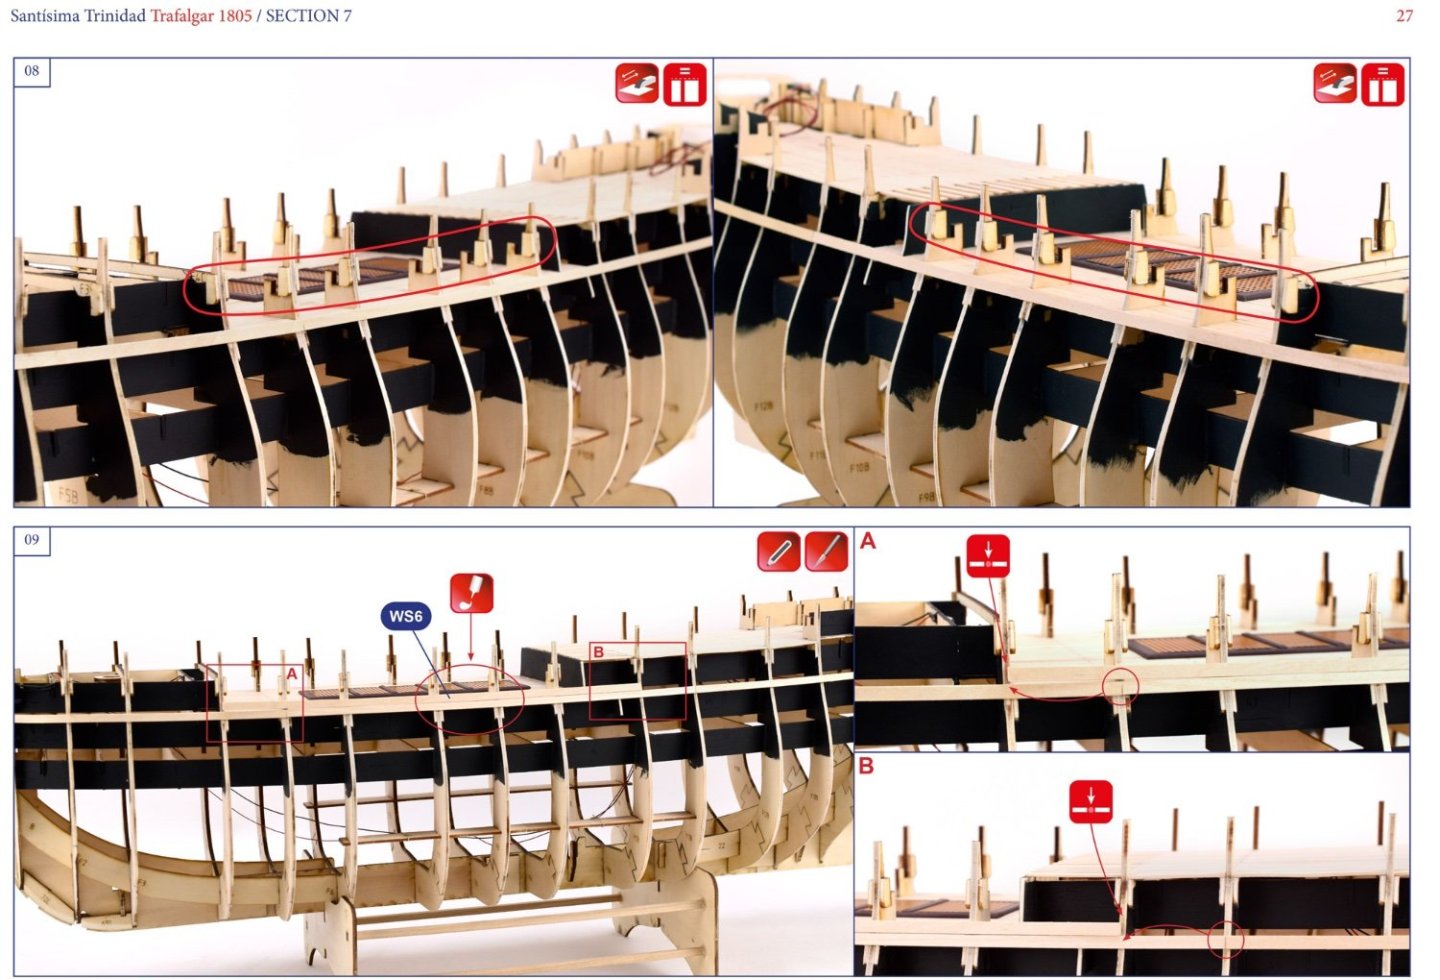
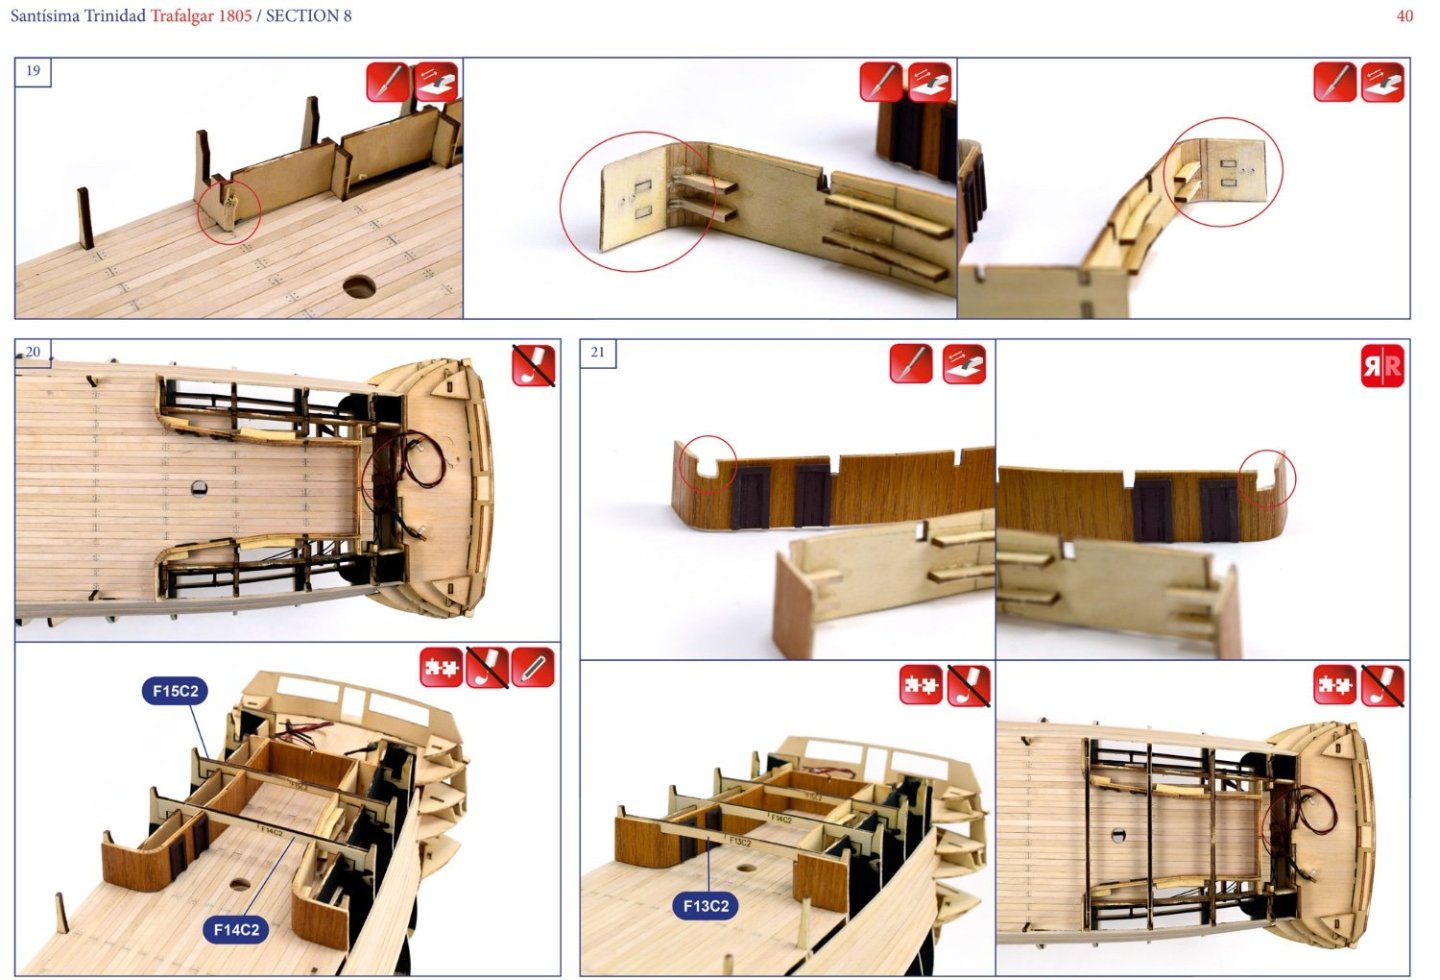
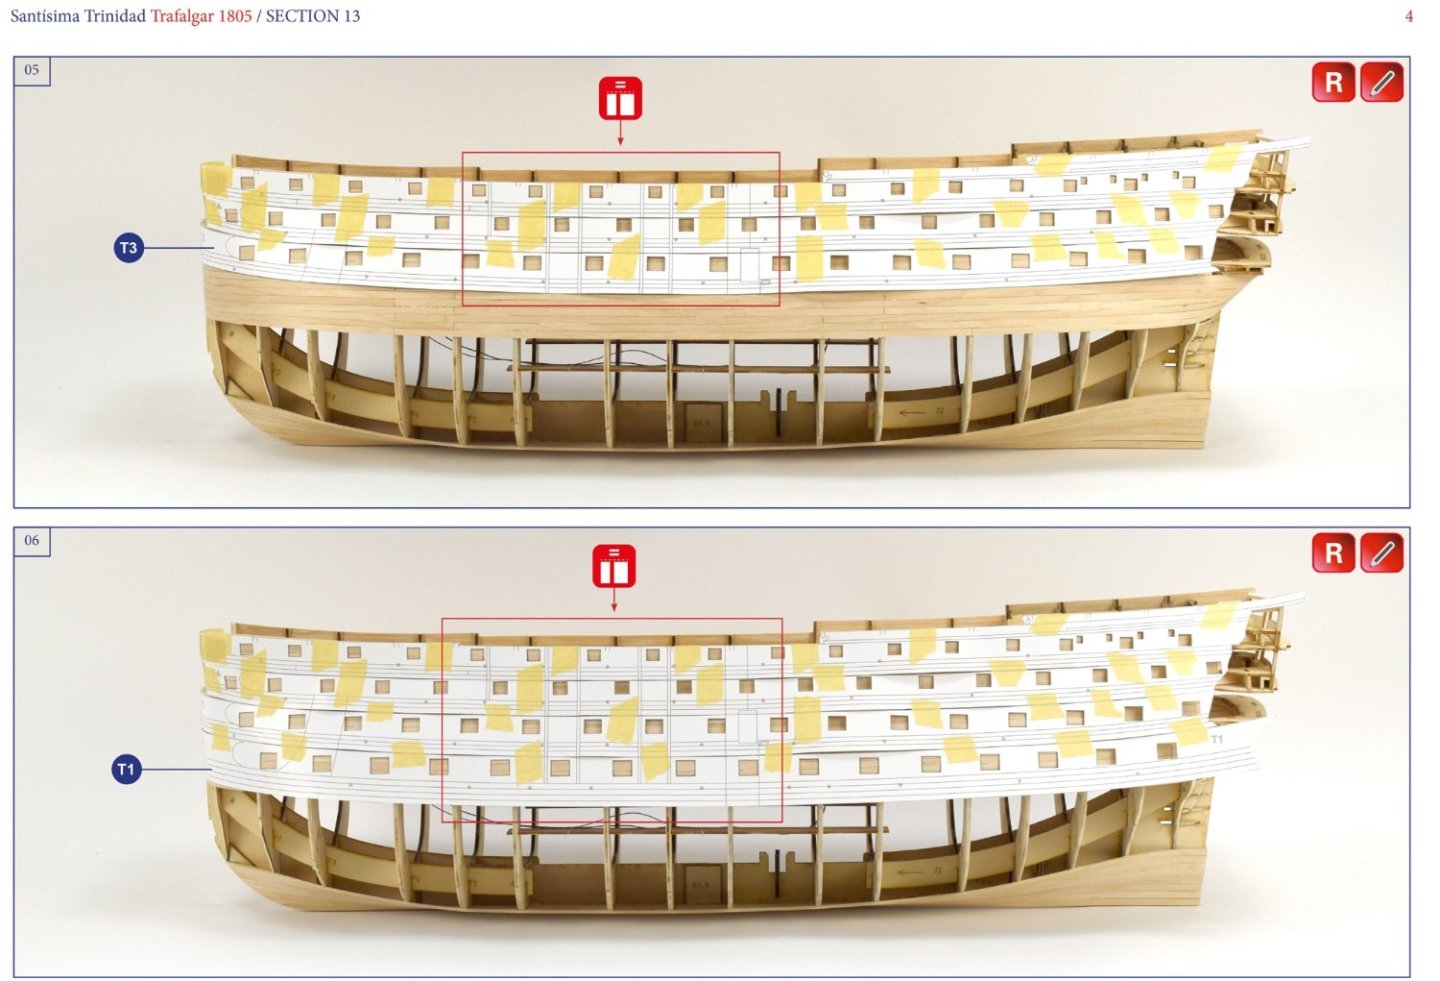
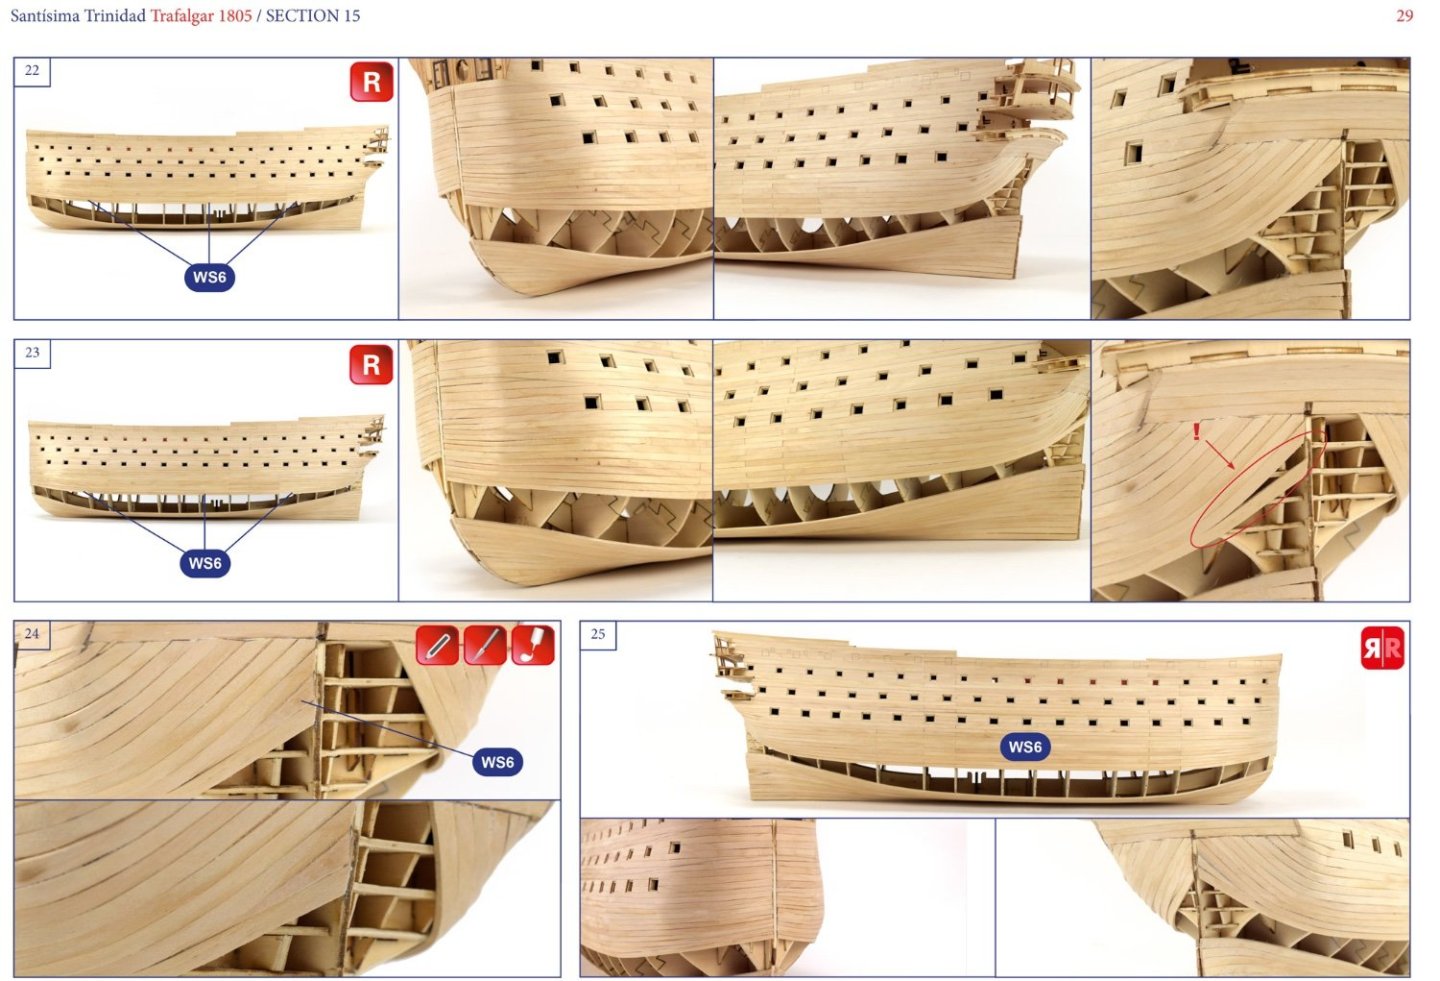
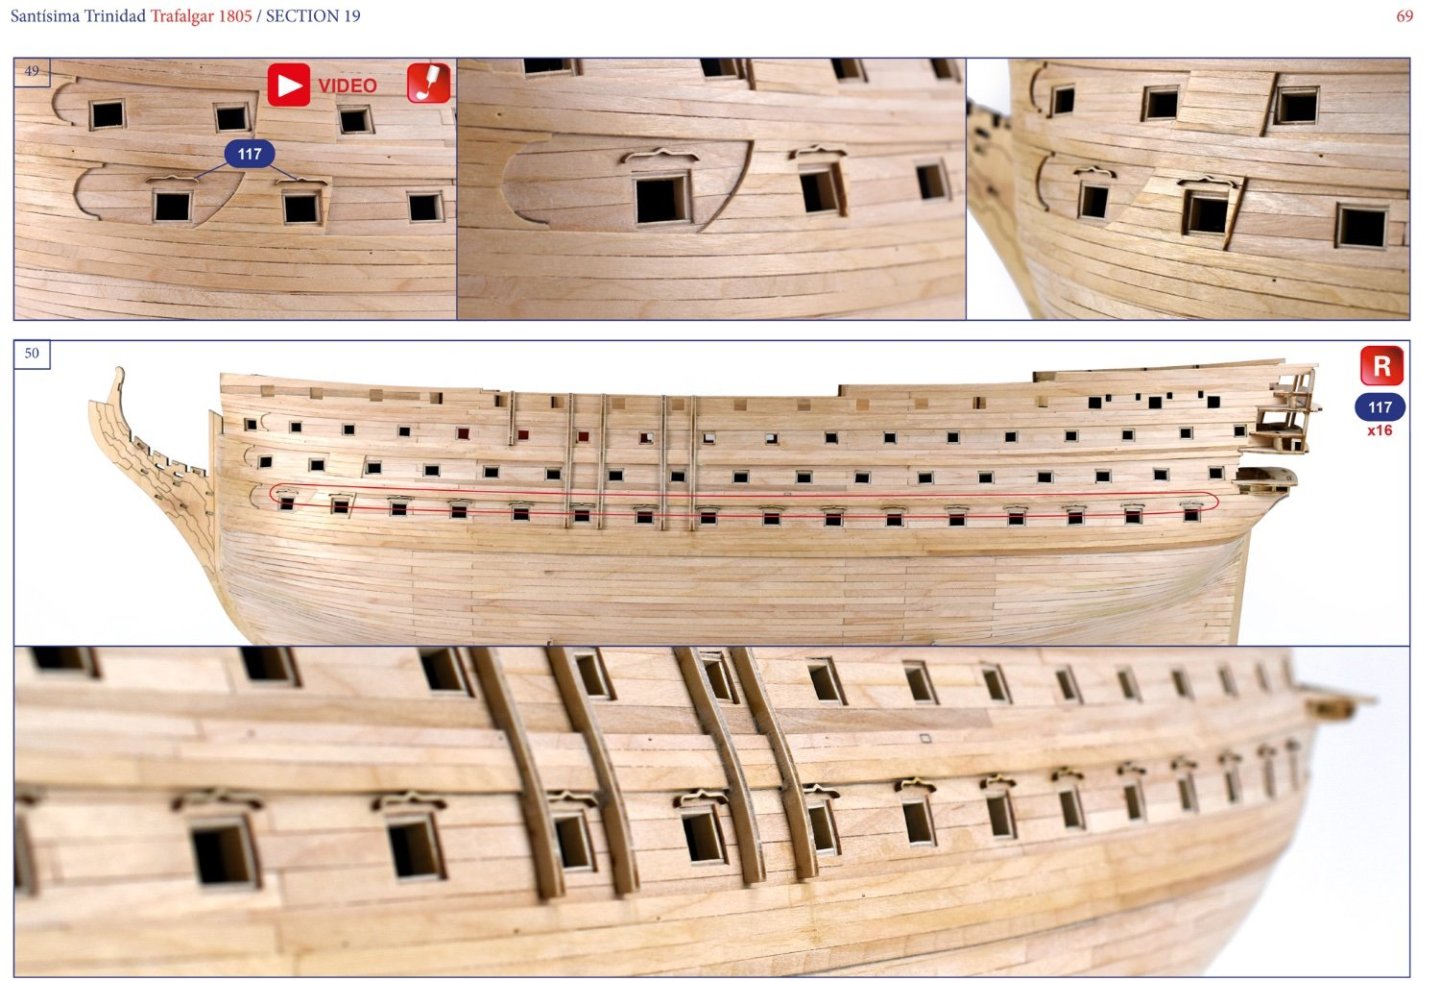
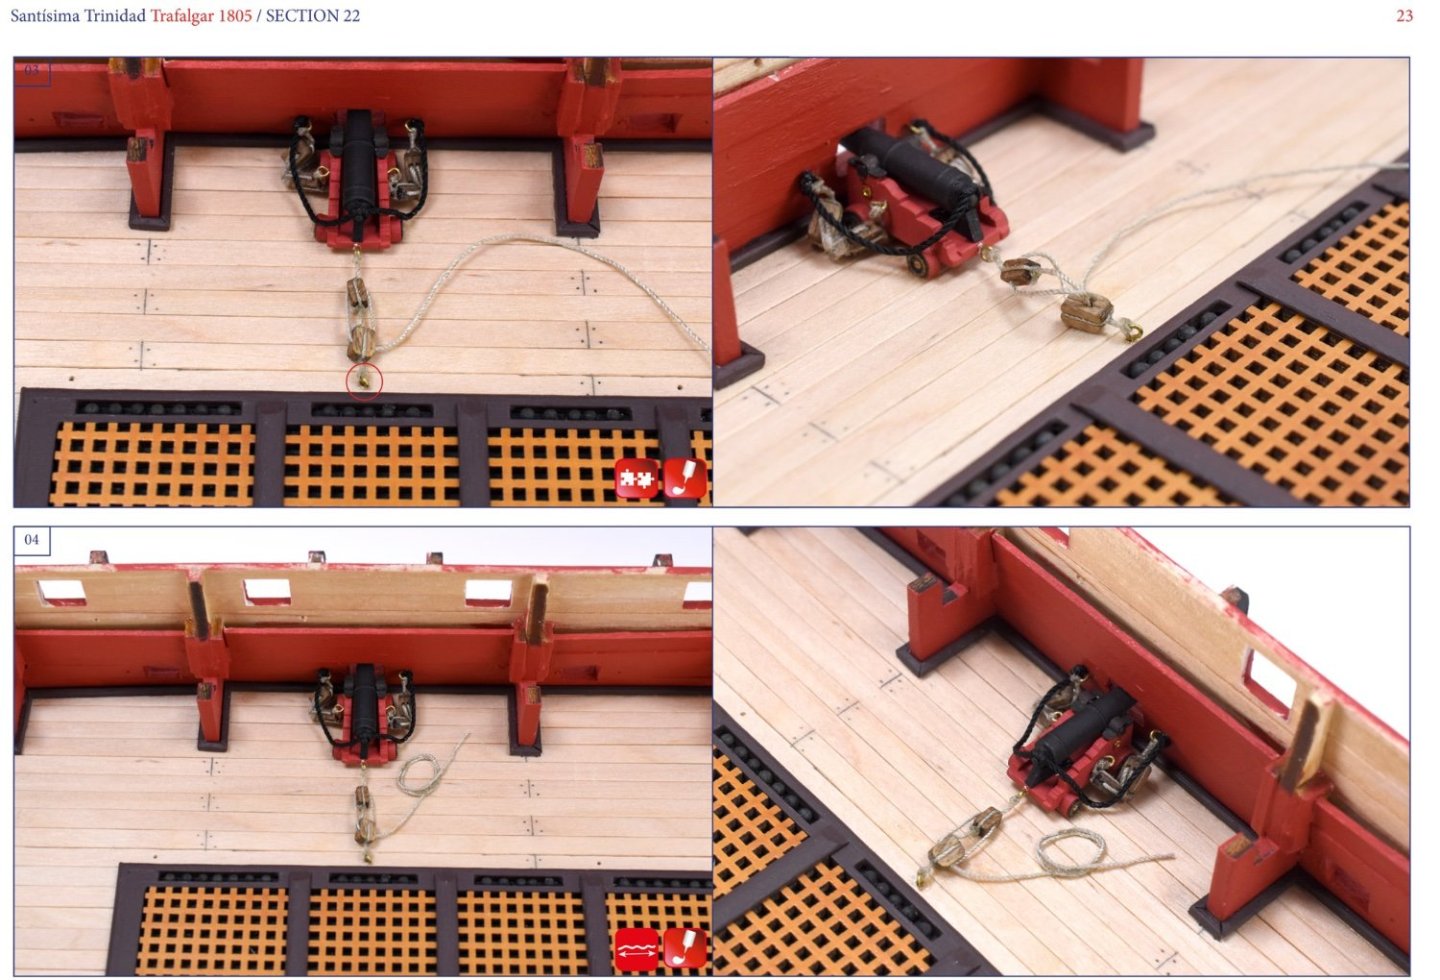
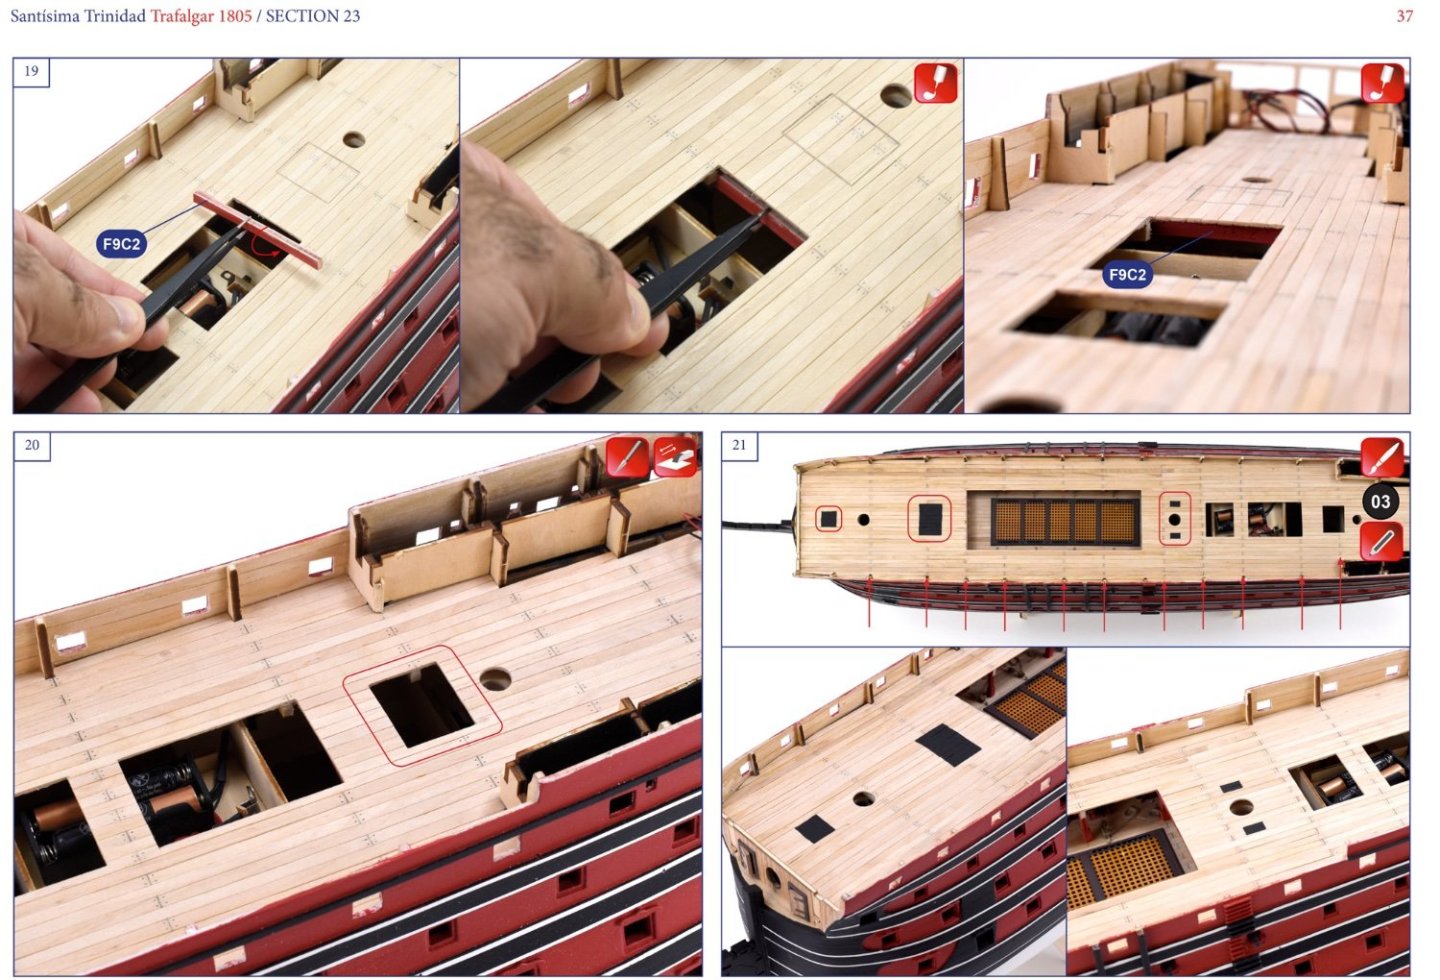
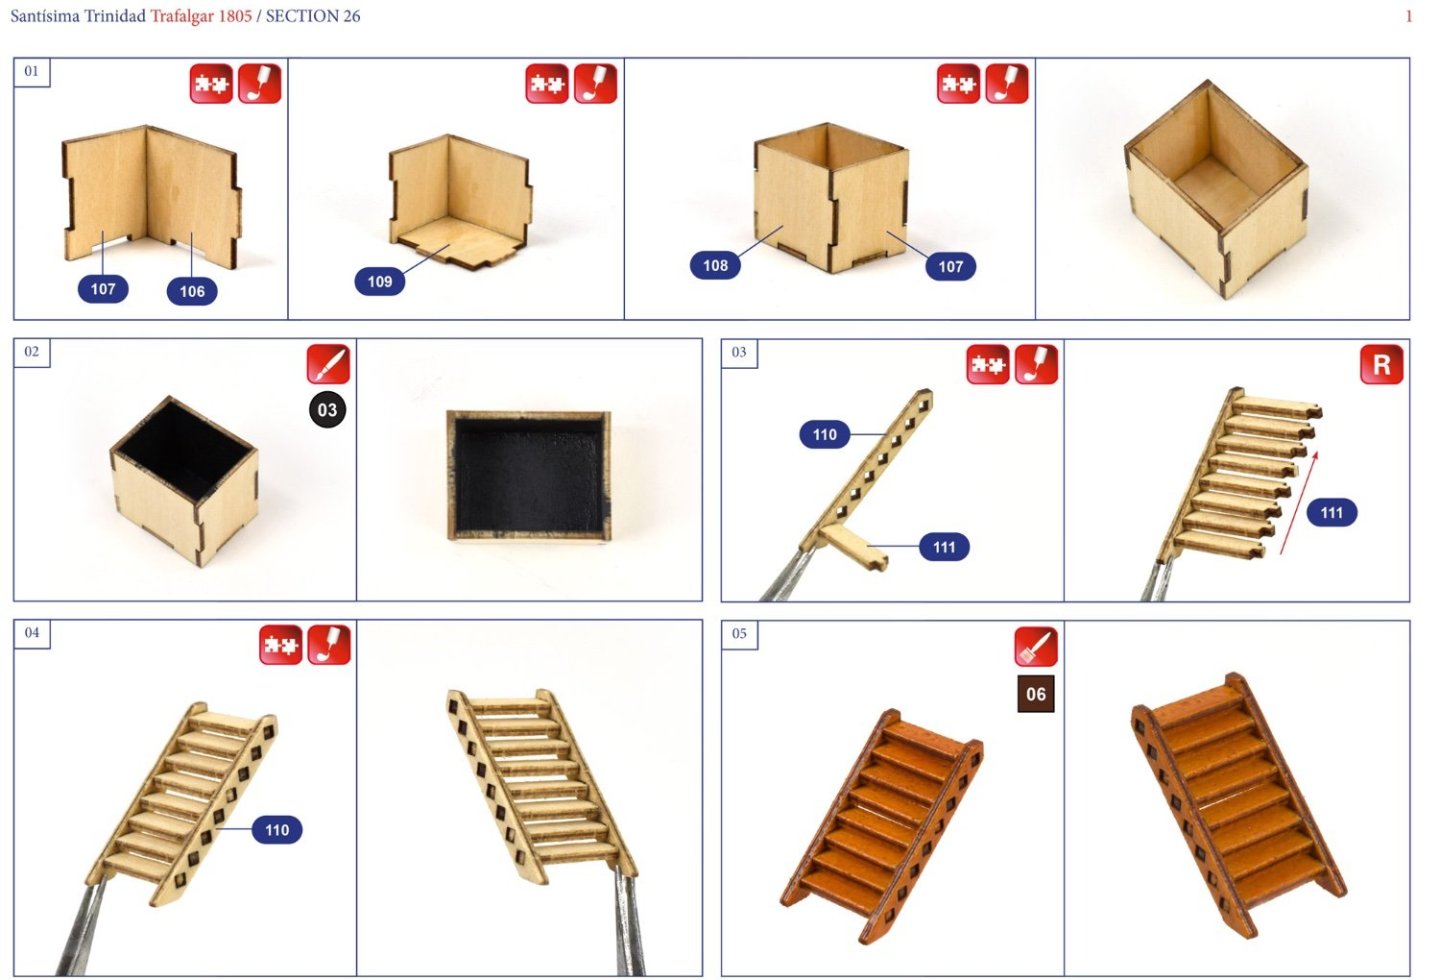
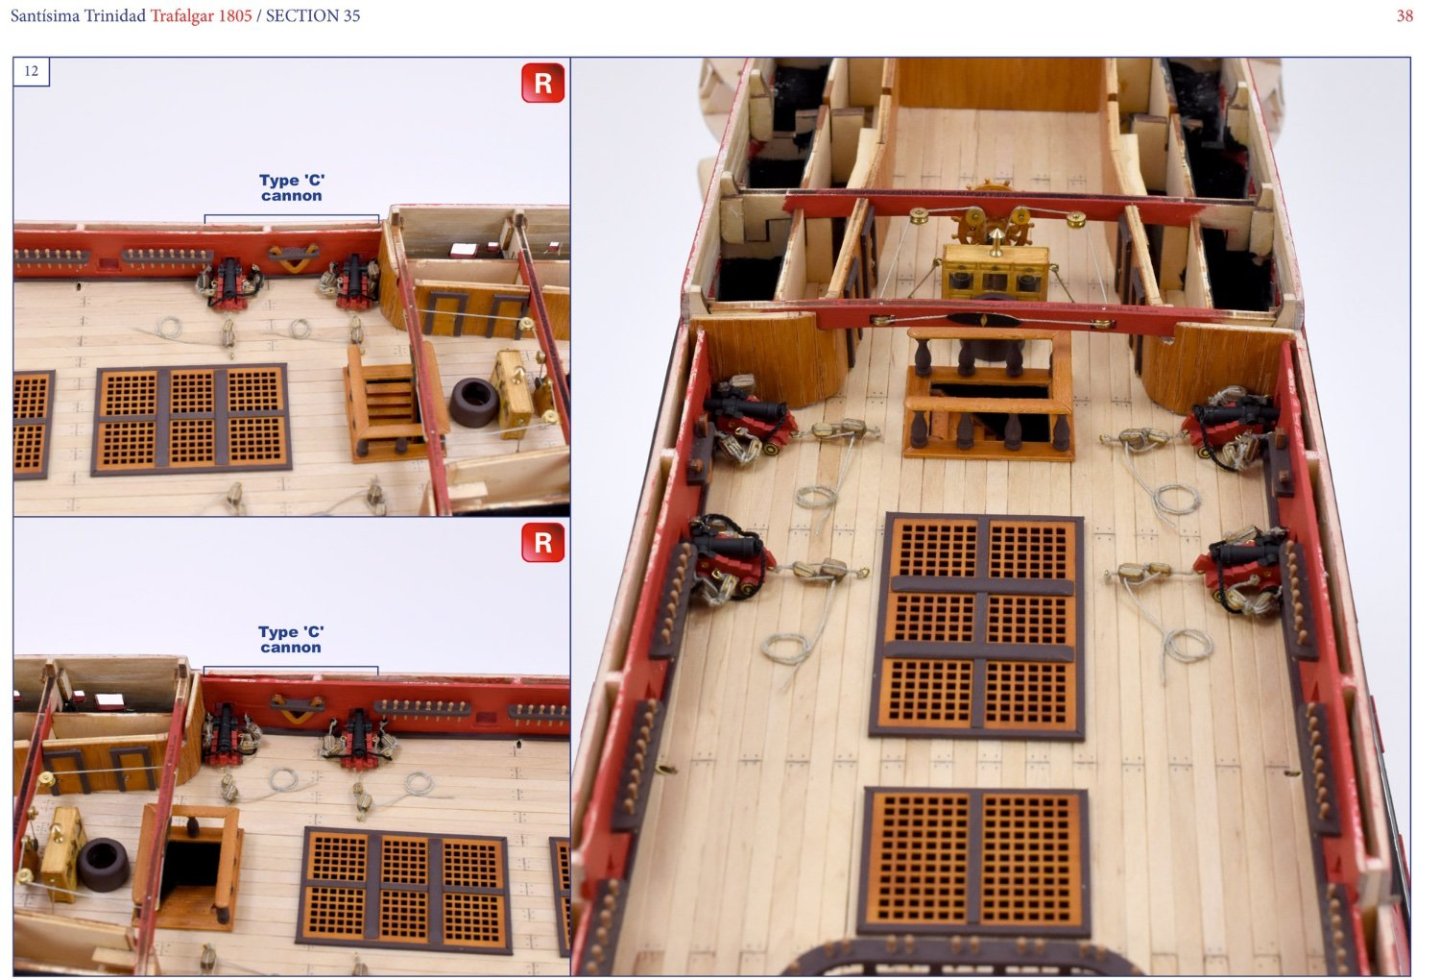
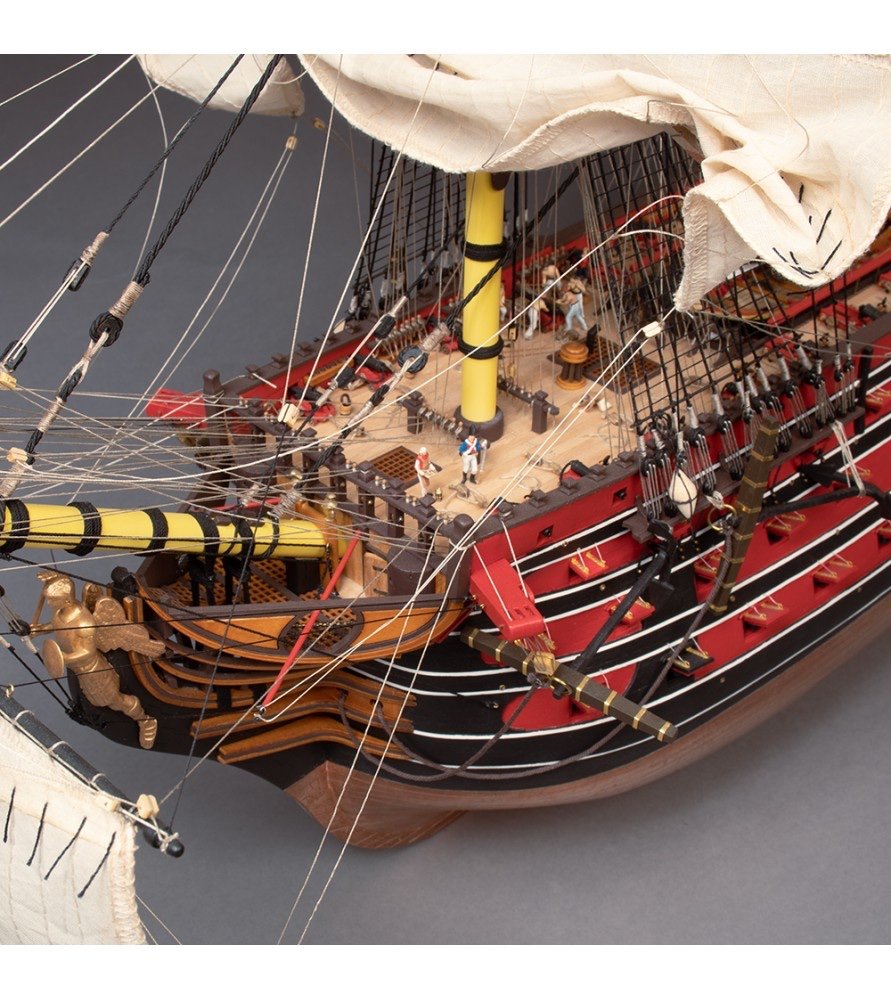
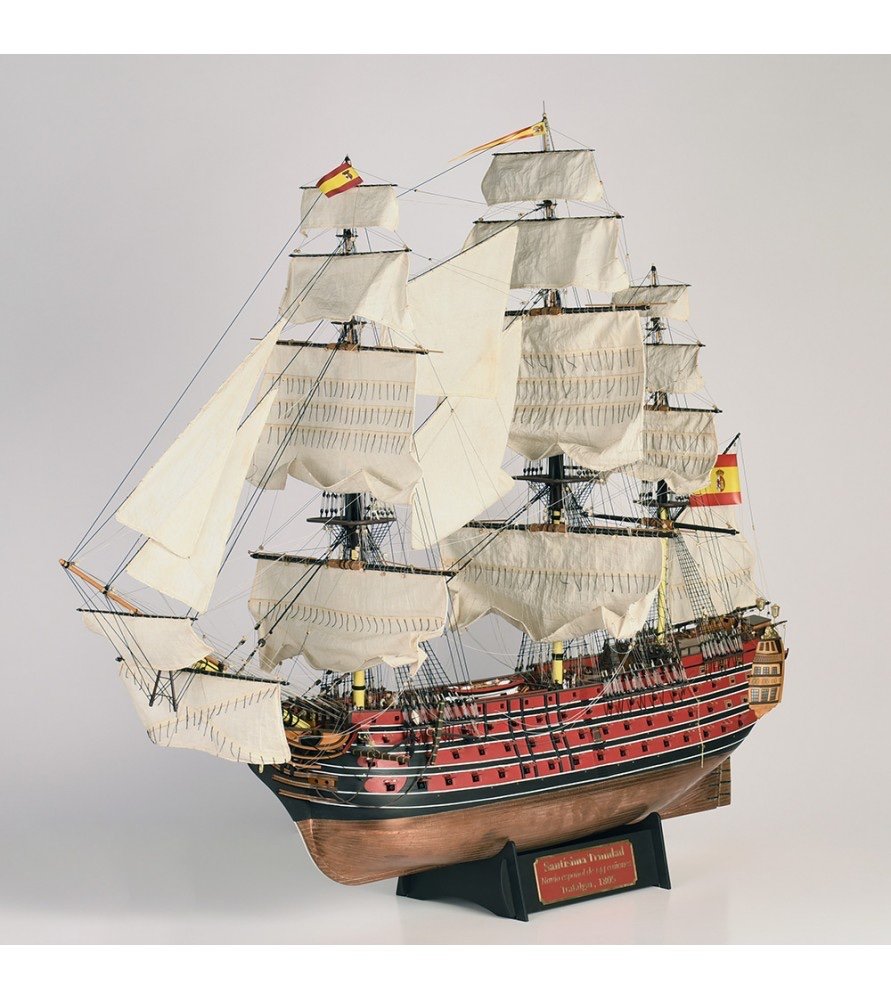
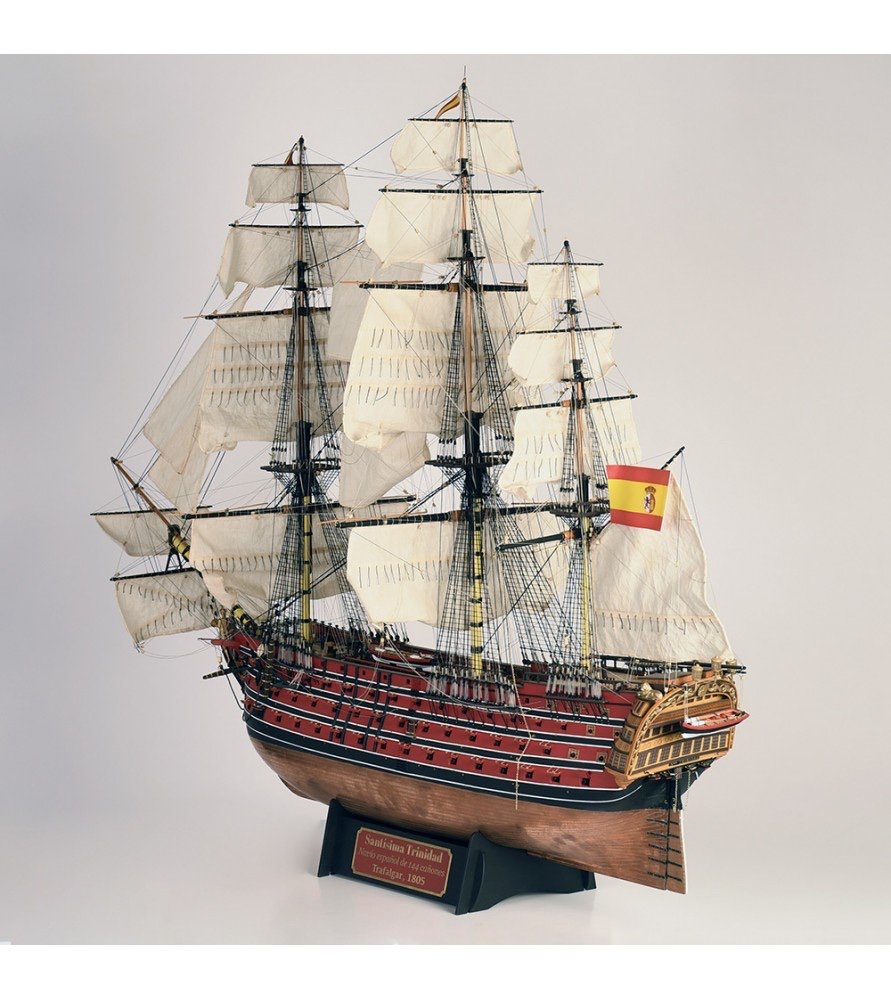
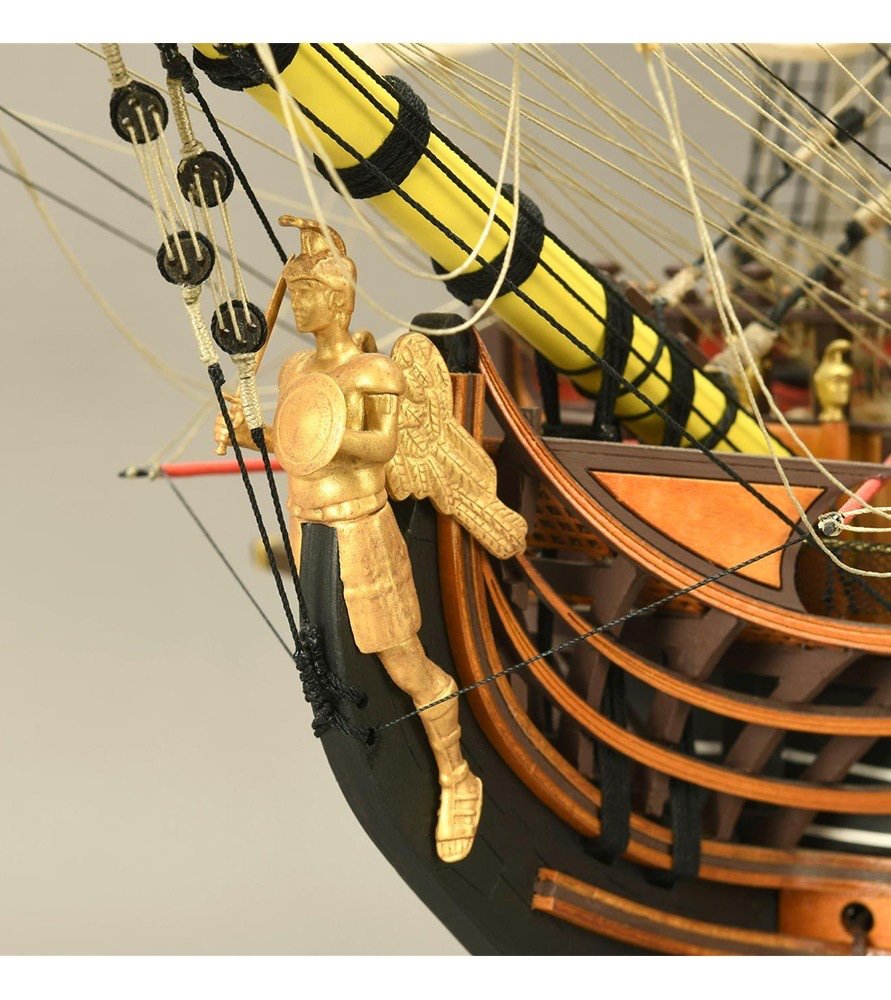
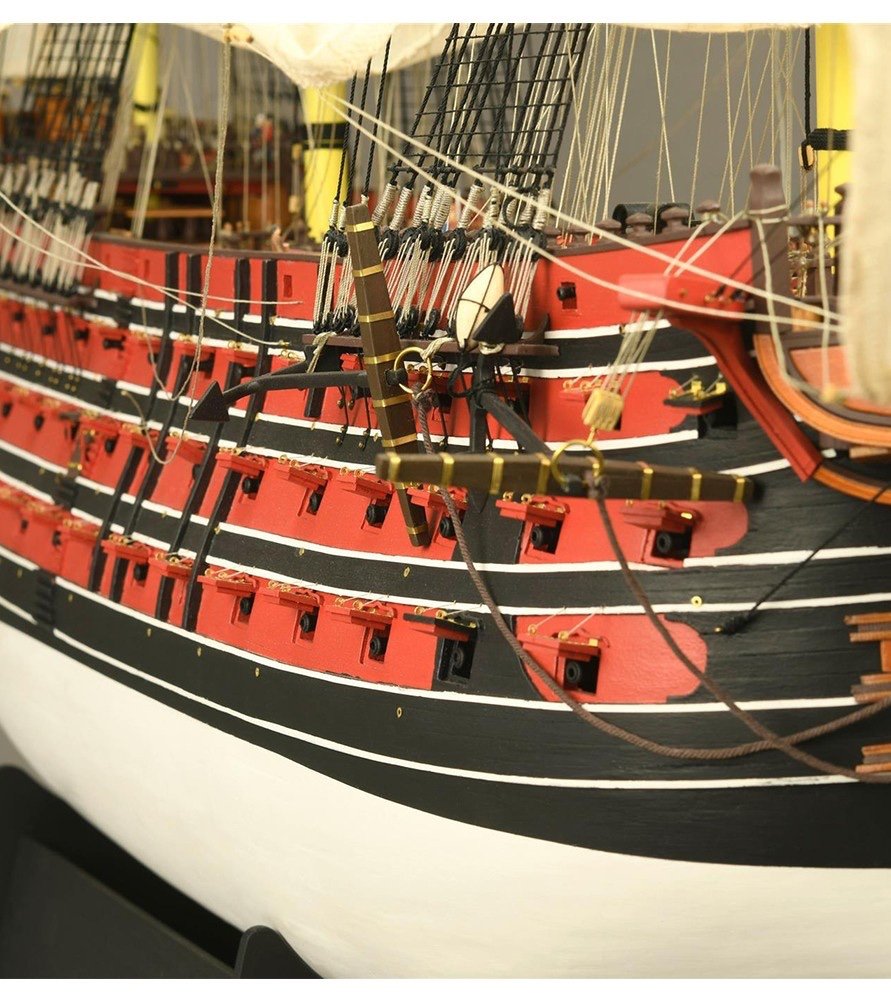
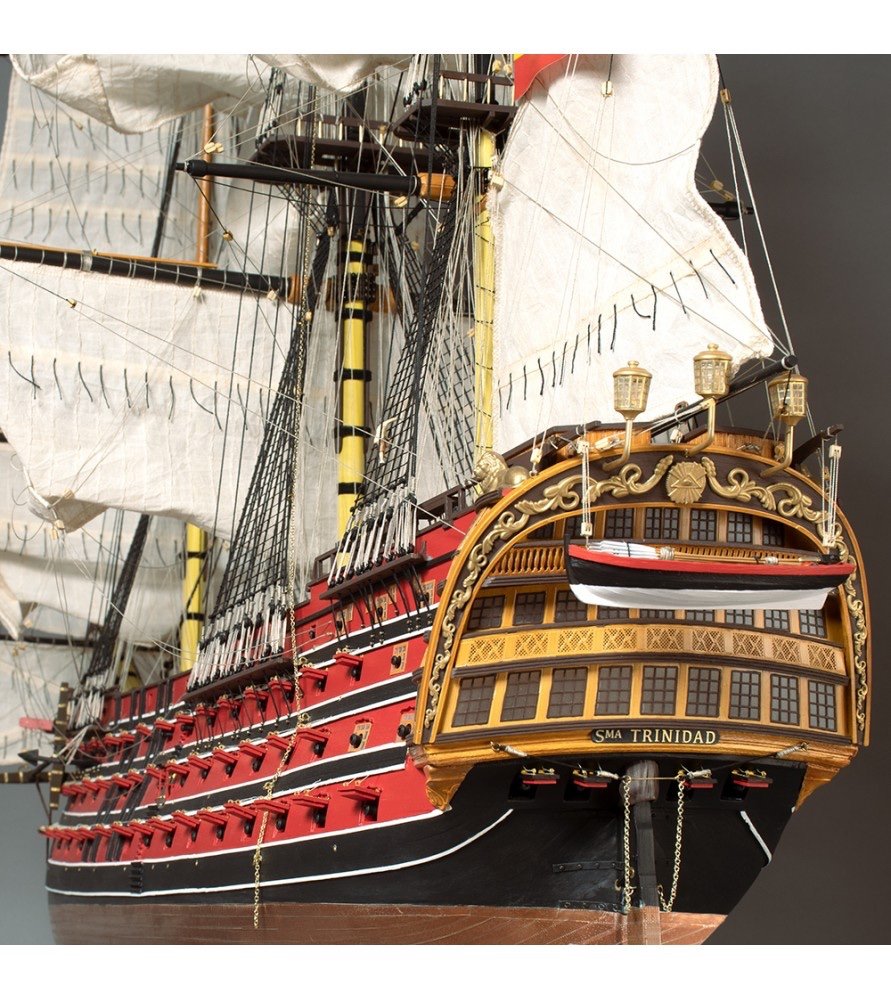
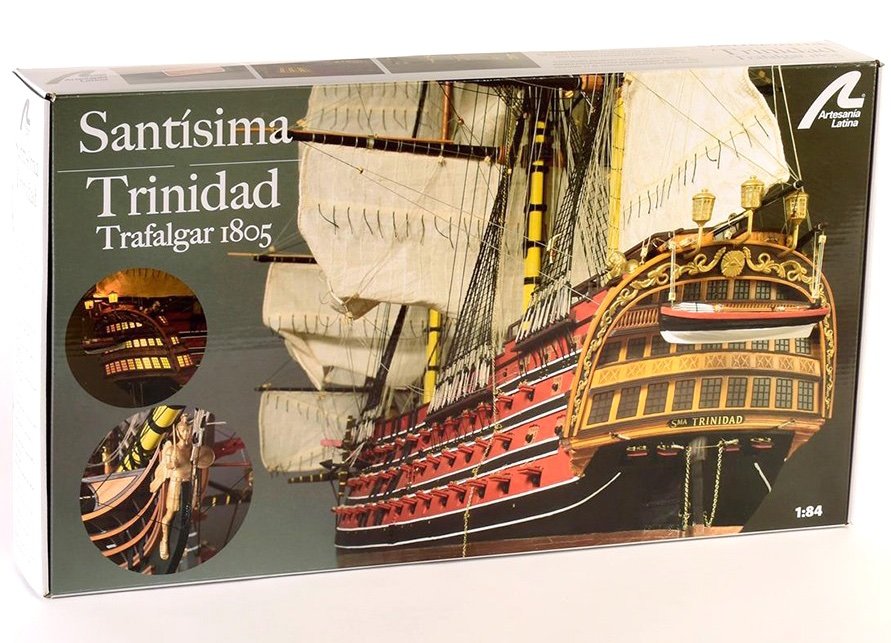
 1:84 Santisima Trinidad – Trafalgar 1805 Artesania Latina Catalogue #22901 Available from Artesania Latina for €749.99 The Santisima Trinidad (full name: Nuestra Señora de la Santísima Trinidad), was a Spanish first-rate ship of the line with 112 guns. This was increased in 1795–96 to 130 guns by closing in the spar deck between the quarterdeck and forecastle, and to 136 guns around 1802 (plus 4 small guns on the poop), thus creating what was in effect a continuous fourth gundeck although the extra guns added were actually relatively small. She was the heaviest-armed ship in the world when rebuilt and bore the most guns of any ship of the line outfitted in the Age of Sail. She was built at Havana, Cuba, to a design by Irish naval architect Matthew Mullan (domiciled in Spain under the name Mateo Mullán), originally intended as a ship of 112 guns. He died on 25 November 1767, and the construction of the ship was continued by his son, Ignacio Mullán. and the ship was launched in March 1769 and completed in August 1769 as a 116-gun three-decker. She was considerably larger than her British contemporary Victory and somewhat bigger than the French Bretagne. Commanded by Francisco Javier Uriarte and the flagship of Rear Admiral Baltasar Hidalgo de Cisneros, she took part in the Battle of Trafalgar on October 21, 1805, as part of the combined Franco-Spanish fleet. Due to her great bulk, her helm was unresponsive in the light winds on the day, contributing to her ineffective service in the combined fleet's cause. Her great size and position immediately ahead of the fleet flagship Bucentaure made her a target for the British fleet, and she came under concentrated attack by several ships. She lost her mast and eventually surrendered to the Neptune; a 98-gun second rate commanded by Captain Thomas Fremantle. She was taken in tow by the 98-gun second rate Prince but was eventually scuttled by her British captors northwest of Cádiz. History abridged from Wikipedia. The kit Before I post my own information on this new release, I’ll give you the details of the kit, as per Artesania Latina’s own blurb. “In addition, the naval modeling kit of the Spanish vessel comes with several paper templates to make the building process of the model easier. Among other functions, they are used to arrange the elements on the decks and to place the embrasures and other objects on the sides of the hull. Speaking of the hull, its structure can be assembled as if it were a 3D puzzle. With this faithful 1:84 scale replica, you can represent correctly the appearance and artillery of the Santísima Trinidad in the battle of Trafalgar since it brings the howitzers that the ship carried in great detail -144 cannons-. Likewise, modelers who wish to line the hull of the magnificent model of the Spanish ship are in luck because the kit includes copper tape to be able to do it below the waterline. Once it is assembled, the model of Santísima Trinidad (22901), measures 46.88'' (1191 mm) length, 35.63'' (905 mm) height and 18.26'' (464 mm) width. Its design using a false keel and frames brings its assembly closer to the real ship. As a bonus, the kit of Santísima Trinidad comes with 5 die-cast figures.” This new generation of large Artesania kits certainly pack a whole load of contents for your money, and of course, the boxes are very large…and heavy. Definitely another kit where you need to try hard to fit everything back under the lid if you intend to repack for a later date. This new release comes with FOURTEEN sheets of laser cut and engraved ply sheet in a varying number of sizes and thicknesses. The material, in my sample kit, is perfectly flat, without warp or defect, and all of the cutting and engraving is clean with no laser blow-back. All parts are also laser numbered too. Included with the timber sheets is a set of three A4 parts plans which you can use to quickly locate the part you want without fumbling through the actual sheets. All of the timber parts in this kit are cellophane wrapped and not too tightly as to cause deformation. As you look through these sheets, you’ll see the unusual manner in which the parts are supplied. You won’t find a single-piece hull, or even a two-part solution. The hull is built up from three parts, and the bulkheads are multi-part creations that use dovetail joints to hold the parts under glue. The hull itself is built up in sections and expanded as you progress from bow to stern. This is a lot like the system used in the monthly magazine partwork builds. The various elements of construction should mean that the build proceeds with minimal risk of the keel being twisted (although I would always ensure this is the case, as you build). You will find a number of parts on these sheets that relate to things which aren’t frames or bulkheads etc. such as the deck grates. I’m not absolutely sure I like this aspect, as these aren’t engraved. To fix this, you would need to varnish, then score along the grates to show the main batons running bow to stern, and then apply a dark ‘wash’ to make the grate look like it’s made from individual parts. You also won’t see any deck sections in the parts sheets. There aren’t any. All decking is single planked, directly onto the top of the various frames/bulkheads. You will need to ensure that your plank joints are very tight together, and I would also think along each edge too, or the deck wouldn’t be solid. Another point that’s important to mention here is that the hull is single-planked. You will need to tread carefully here if you are used to double layer planking. You will need to ensure that your timber doesn’t sag anywhere as you won’t have the fallback of another layer. The good news is that the planking timber is superb quality and it’s 2mm x 5mm (300mm long). You also won’t see any bare timber in the finished build, so you have a little extra leeway too. The lower hull is coppered (5mm wide tape) and above the waterline, the colours are black, red, and white. Multiple packs of high quality strip timber are supplied in cellophaned bundles, and clearly labelled for size. I very much do like the quality of the timber elements in this kit. They are a world away from my first build…ironically, an Artesania kit! Another pack of timber is included. This time its dowel of various diameters. The material used is birch, with the small quantity of 2mm being bamboo. Thankfully, the latter does look fine, but I don’t go a bundle on bamboo for mast/yard material. There are FOUR fittings boxes with this kit. Here are the photographs to see for yourself. The rigging blocks are deadeyes are perfectly good as far as quality goes, with the metal parts being cast in a zinc alloy. This includes the cannon. Some seams are present on some of these parts, and you’ll need a rotary tool to remove these. Other zinc alloy metal parts include buckets, anchors, stern décor, ship’s wheels, lower quarter gallery sections, belaying pins, belfry roof, etc. The figurehead is also far nicer than many of those supplied in other contemporary releases, with this one being cast in multiple pieces to eliminate the problems with single-part casting techniques. There are some brass parts too, such as the lantern tops, bell, anchor rings etc. The fittings boxes also include brass wire, netting, eyelets, glass parral beads, brass nails, turned metal stanchion, capstan, brass chain, metal cannon balls etc. You will note that the lower decks have stub barrels and not whole guns. You won’t see them down there anyway, especially in 1:84. Love them or loathe them, Artesania has supplied a full set of sails. The material is quite thin, and the stitching is good, apart from that which edges the material. This is way too much and not nicely done. If you want to use these sails, I suggest picking out that stitching and redoing in yourself. However, I would simply leave the sails OFF a model of this type. A number of other items are packed within another clear sleeve. These include some very nice silk screen printed flags, a roll of 5mm copper tape, acetate sheets for glazing, and various paper templates that you lay onto the planked hull, in order to position gun ports, fenders etc. If you like photo-etch, then this kit has in in abundance. All of the SIX sheets of this is produced in brass, using multi-layer etching processes, and cellophaned to a thick card backing to protect it. You will see that a lot of the parts, certainly the larger ones, concern the stern fascias. While these are very nice, I would use them in conjunction with timber to enliven them further and produce something which looks more 3D. The same applies to the quarter galleries, but if you install the supplied materials properly, then you will still have a very nice result. Now…rigging cord. There is quite a lot of this, as you would imagine, and generally the quality is ‘ok’. There is a small degree of fuzz on the spools I looked at, although not as bad as that of a number of other manufacturers. I would consider either replacing the rig or using one of a number of techniques to reduce the fuzz. This kit supplies a few printed sheets, and what looks like a full-size colour side profile photo which will be very useful for reference. A full colour parts list and fittings sheet is also included. At this point, I have to tell you that there isn’t a printed manual. All of the instructions are available for download from the product page on Artesania’s website. There over FIFTEEN downloads too, so you’ll see why this isn’t included in print. Ideally, you could do with a laptop or tablet in the workshop and access the instructions from there. The instructions are graphically driven, and the sheer number of photos is astounding. Around 8000 photos are included, over 800 pages. I know Chris would kill me if I submitted that number for his kits! Everything looks extremely easy to understand with just about every angle of the build covered, multiple times. I’ve included a few photos from the various instruction downloads. If you head to Artesania’s YouTube page, you will also find a number of tutorial videos for this specific kit. Conclusion While I’ve seen numerous unboxings of some of Artesania’s recent large kit releases, this is the first time I’ve seen one for myself. Construction is generally quite different to what you’d expect with regards to bulkheads and hull skeleton construction. I’m not at all averse to this methodology at all. In some respects, it seems almost modular, and highly unconventional. It does appear to work well for the builder, having researched a number of online builds. I still have to get my head around a single-planked hull. It’s something I need to try and align with as I do intend to build this in the future. The hull is fully painted/coppered, so there is a lot of flexibility with the underlying timber if you need to fill and cut back…albeit carefully. You most certainly will need to be more careful than you perhaps would normally be on your lime planking. I know I’ve certainly improved in that area over the years, and you’re best employing a good method of tapering, such as the one that many use here…Chuck’s method. Another unusual element here is that ‘missing’ manual I mentioned. There is a QR code that you can scan which will take you to the product page on the AL website. Here you can download the manual directly. If you like a printed manual, you’re going to need some serious ink to print this. I know this aspect can be difficult for those that like a manual supplied, as is traditional. In all, this is a kit I actually quite like, and I know Artesania are proud of their products. I’ve been discussing their products with them over the years, and this is one they are excited about. As far as price point is concerned, I think this is pitched correctly, considering the size of the overall model and the quality of materials supplied. Another contemporary manufacturer has released a limited-edition kit which is twice this price, and around the same scale, and slightly smaller. In comparison to that, minus the other kit’s gimmicks, this kit still stands head and shoulders above that with regards to quality and value for money. I’ve often said that I have a fondness for AL kits as that is how I started in the hobby, but I wouldn’t steer you wrong. This is a very nice kit; with the caveats and things I’ve mentioned. If you have the skills to build an intermediate to advanced kit, this is definitely one to consider. My sincere thanks to Artesania Latina for the kit you see reviewed here on Model Ship World. To buy directly, click the link at the top of the article. Related Products Before I mention these, Artesania have also designed this model so that the grand cabin can be illuminated. Installation of the specific AL set is shown within the many photographs for this kit. The lighting set can be bought from AL for €24.99, here. Ok, I have been sent two additional sets that are designed to be used with this kit. These are a figure set (to add to the small number included within the kit) and a paint set. The paint set, which is available here for €31.99, includes TWELVE 20ml bottles of acrylic paint. These paints can be applied with a brush or thinned for use in an airbrush. The website says they can be thinned with alcohol or thinner. From this, I presume you can use either isopropyl (rubbing) alcohol, or possibly something like Tamiya X20A. For the latter, do a small test to make sure the paint doesn’t congeal. The paints in this set are: · Off White x 2 · Off Black x 2 · Bright Red x 1 · Red x 2 · Ice Yellow x 1 · Buff x 1 · Cocoa Brown x 1 · Dark Red Leather x 1 · Gold x 1 The Figure set I have for this release, can be bought here for €29.99. This set consists of SIXTEEN figures and accessories which are period-correct. The figures appear to be cast in zinc alloy and look quite nice for this scale. Included in this kit are: · Captain x 1 · Officers x 4 · Surgeon x 1 · Marines x 2 · Grenadiers x 2 · Gun Crew x 5 · Sailor x 1 Also included are accessories, such as sabres, gun crew tools, ammunition etc.


-
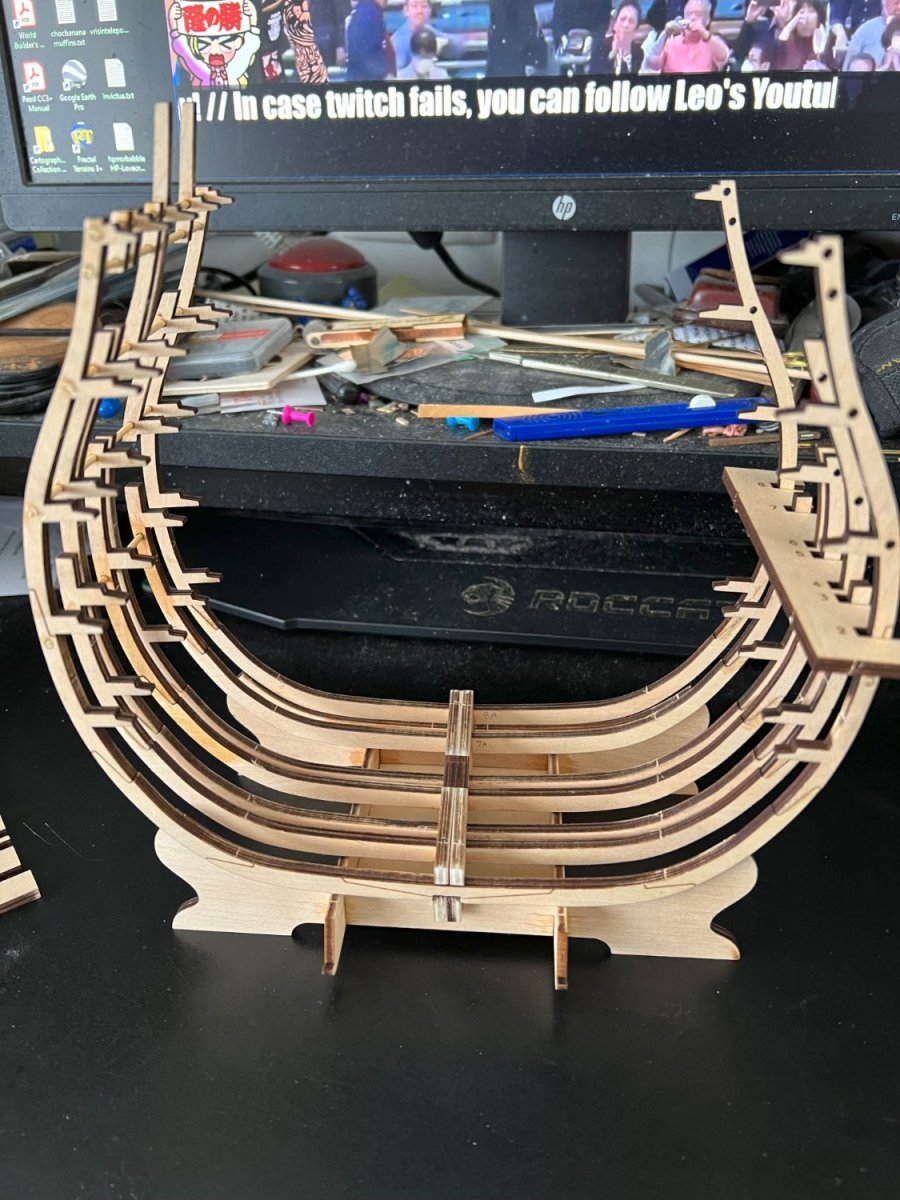
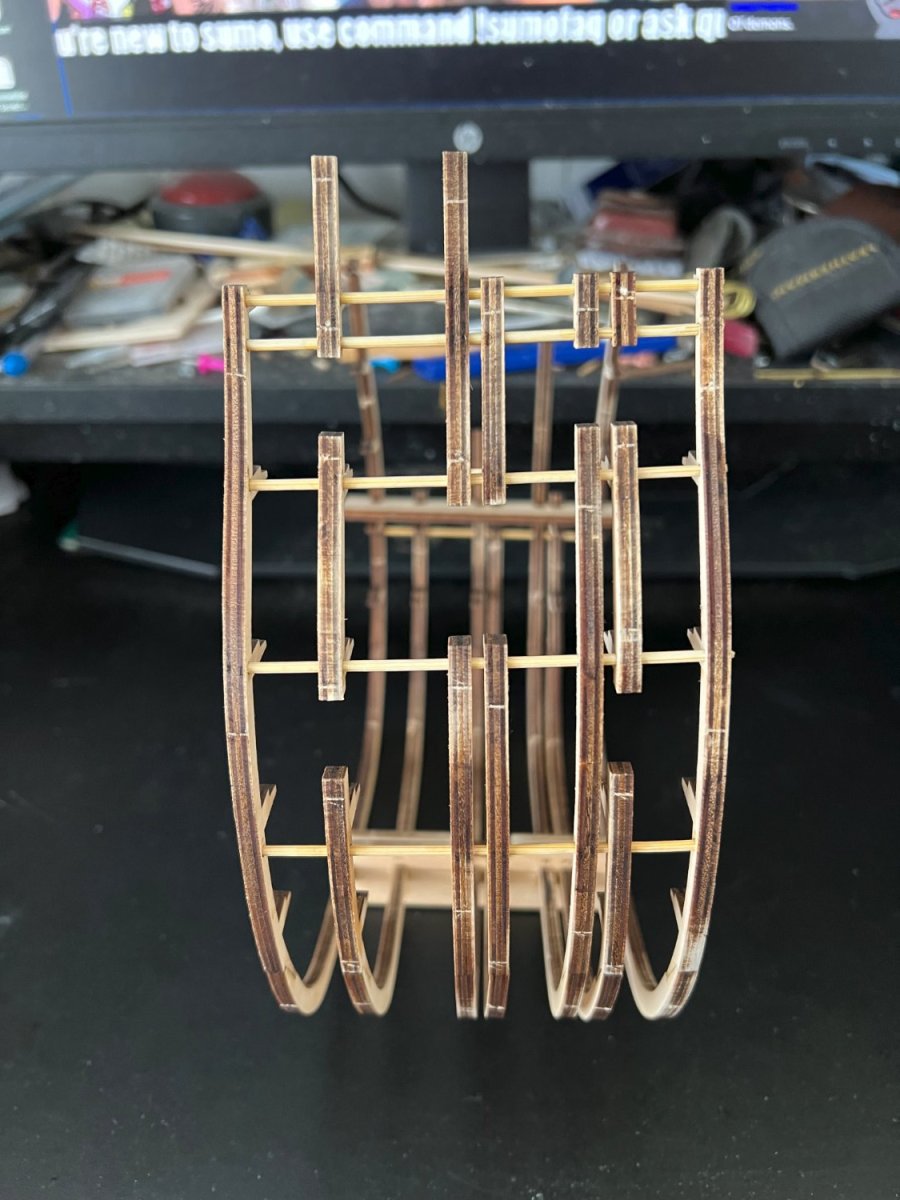
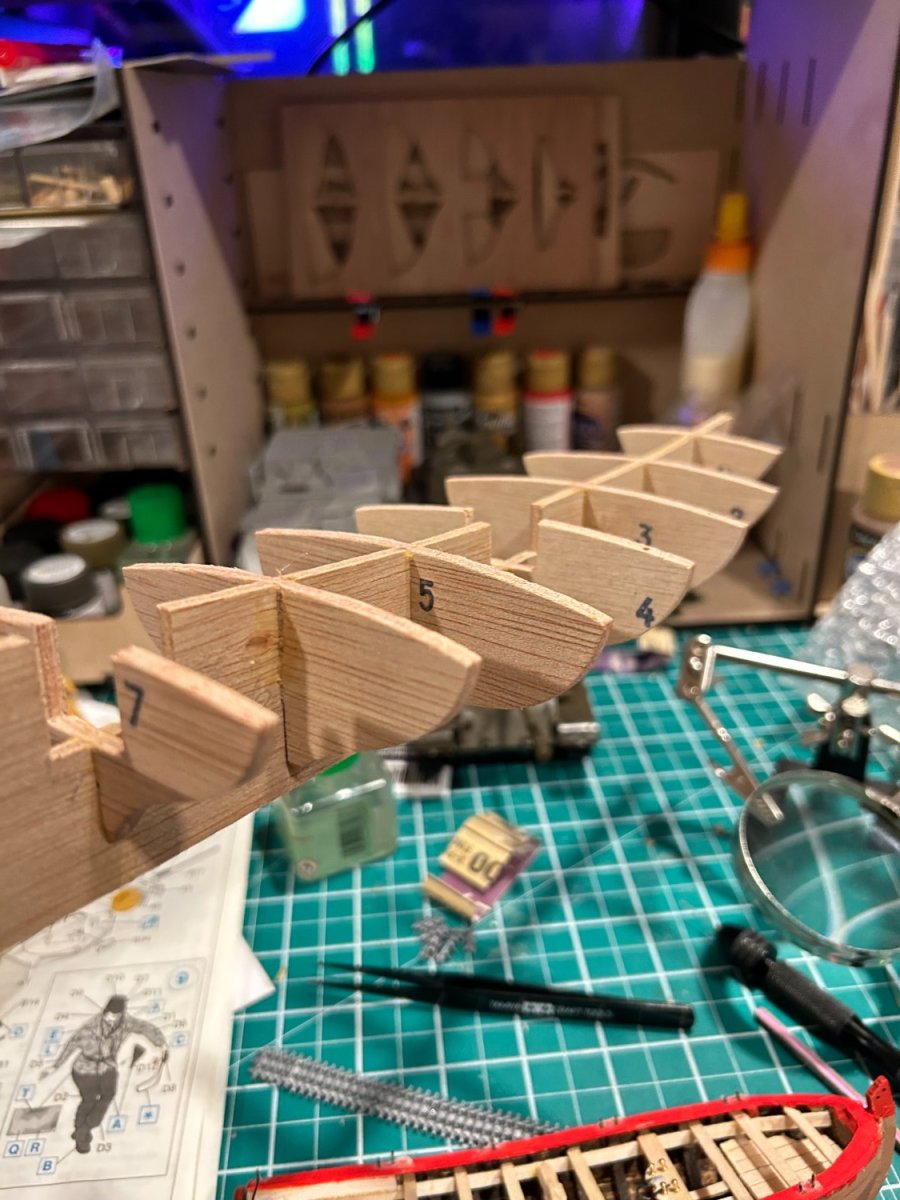
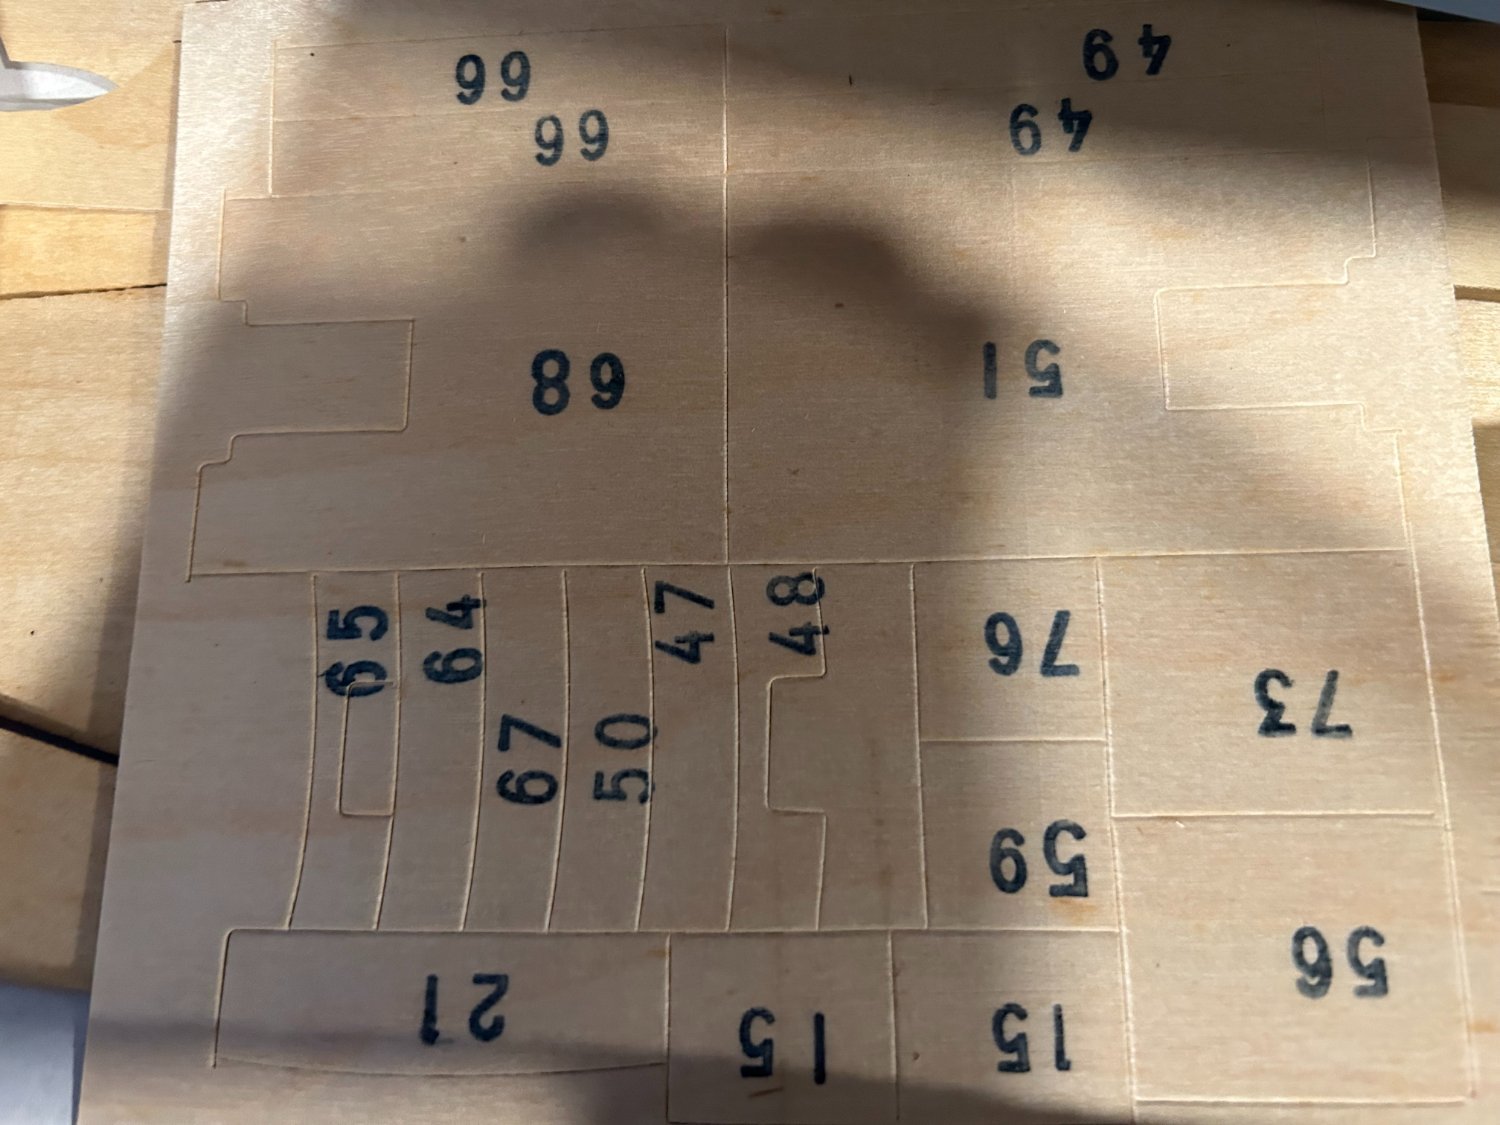
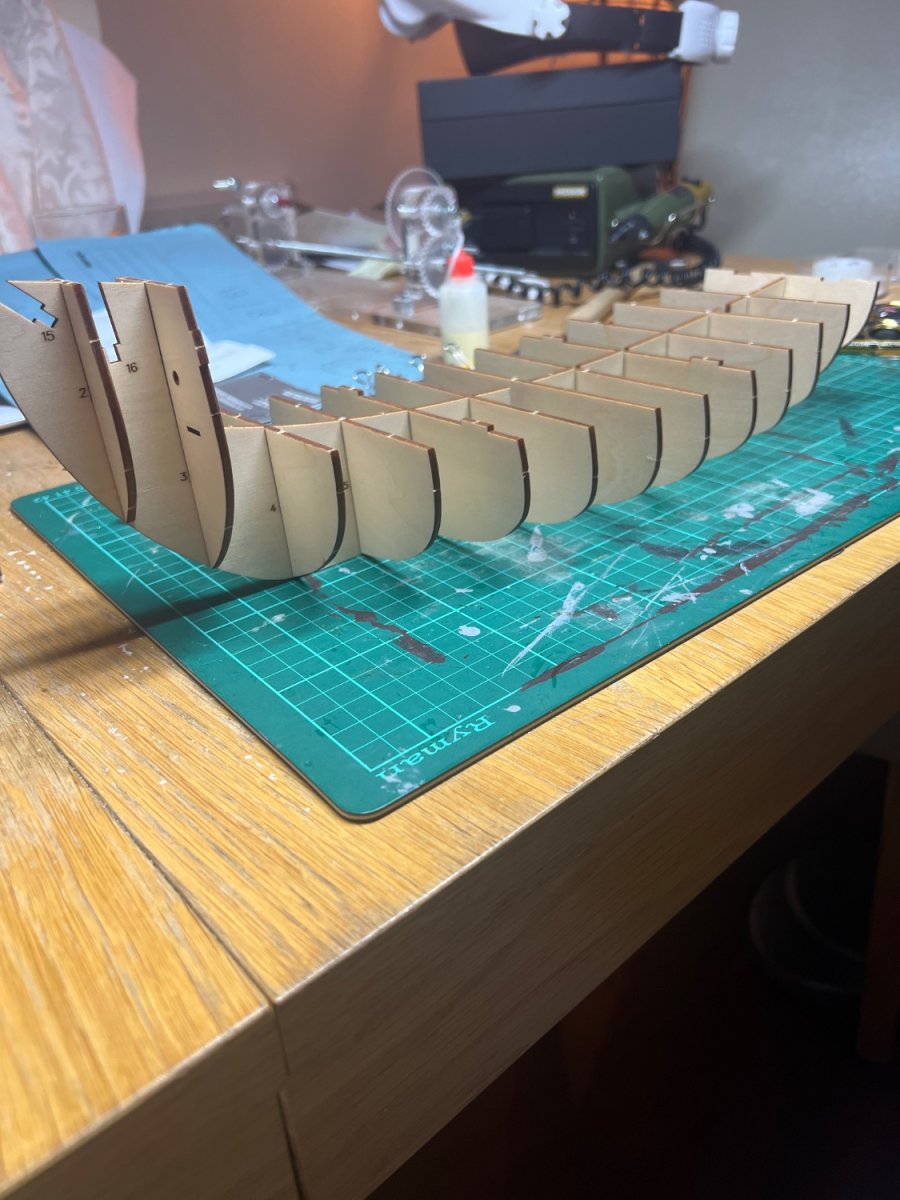
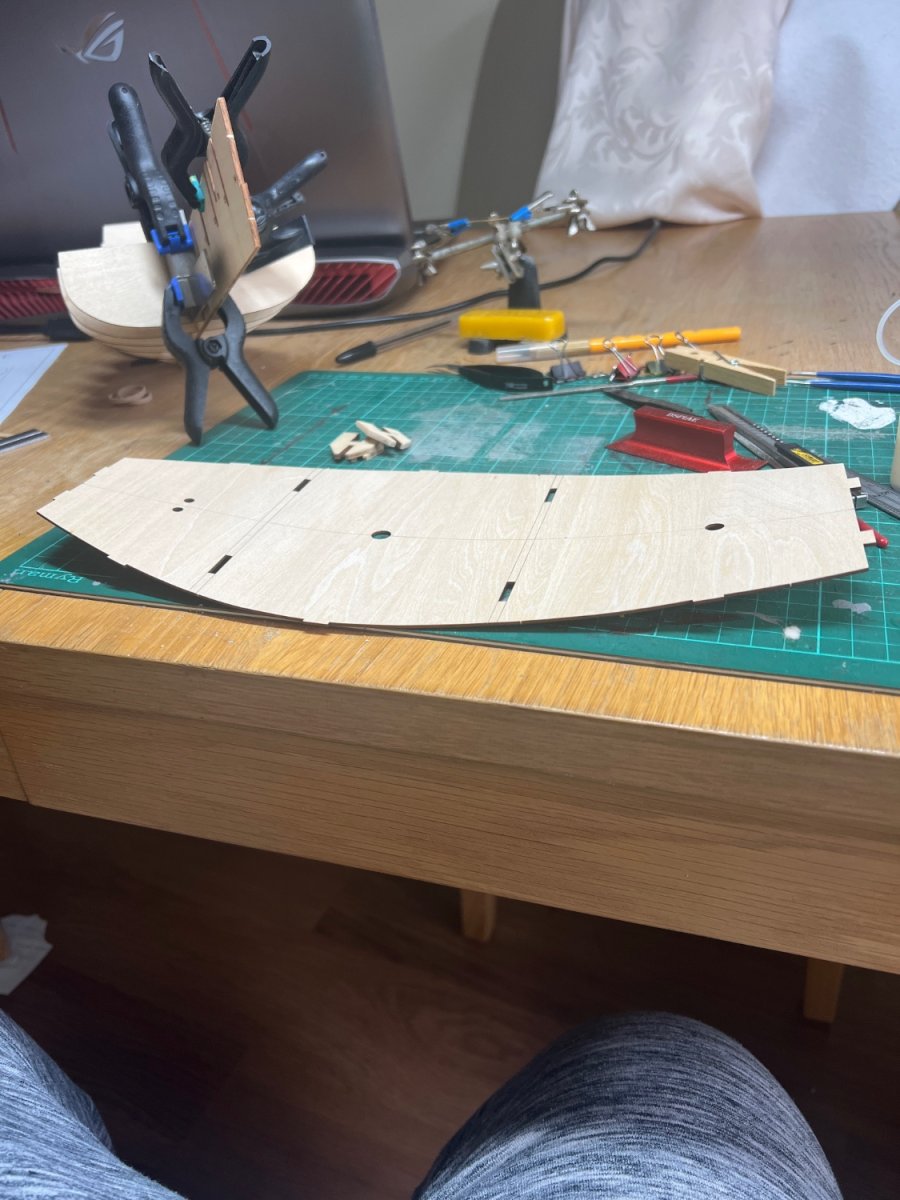
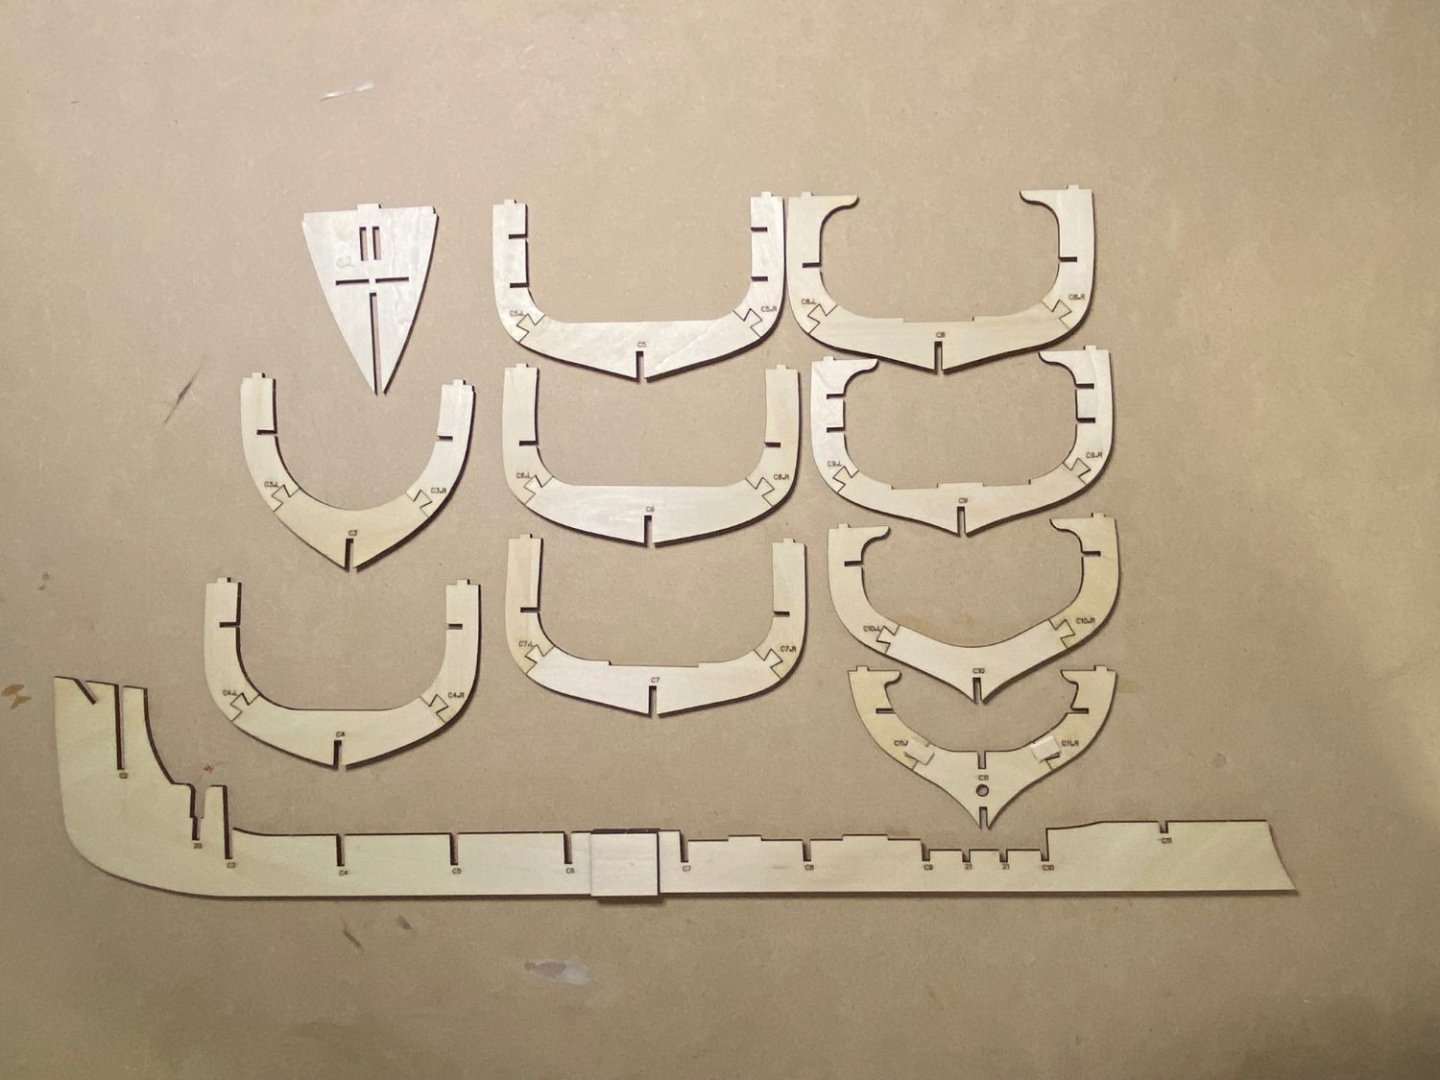
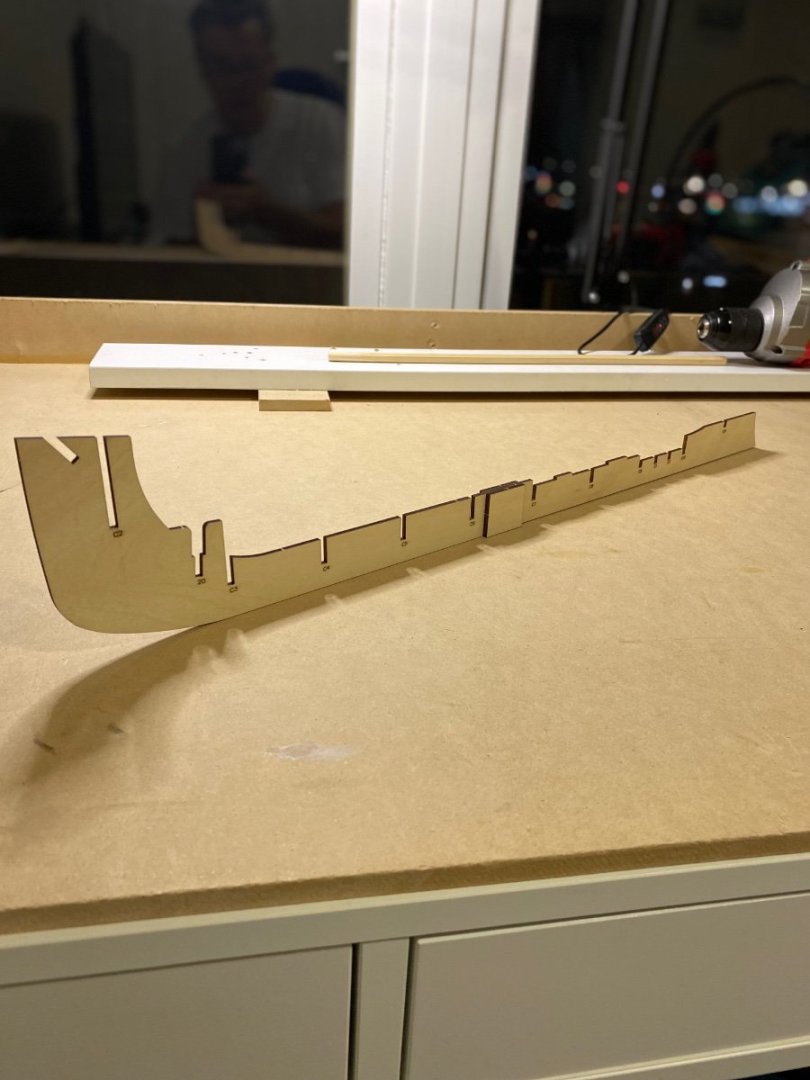
 I have started my second build, the Sanson Tug. There are no instruction included with this kit, it is done through You Tube videos, 18 in total. The 3 piece frames and keel are all glued up. The dove tail joints are all a bit sloppy so reinforcement was added to one side. I will add the frames to the keel next and add the longitudinal braces. #11 frame is very loose so special care will be taken.
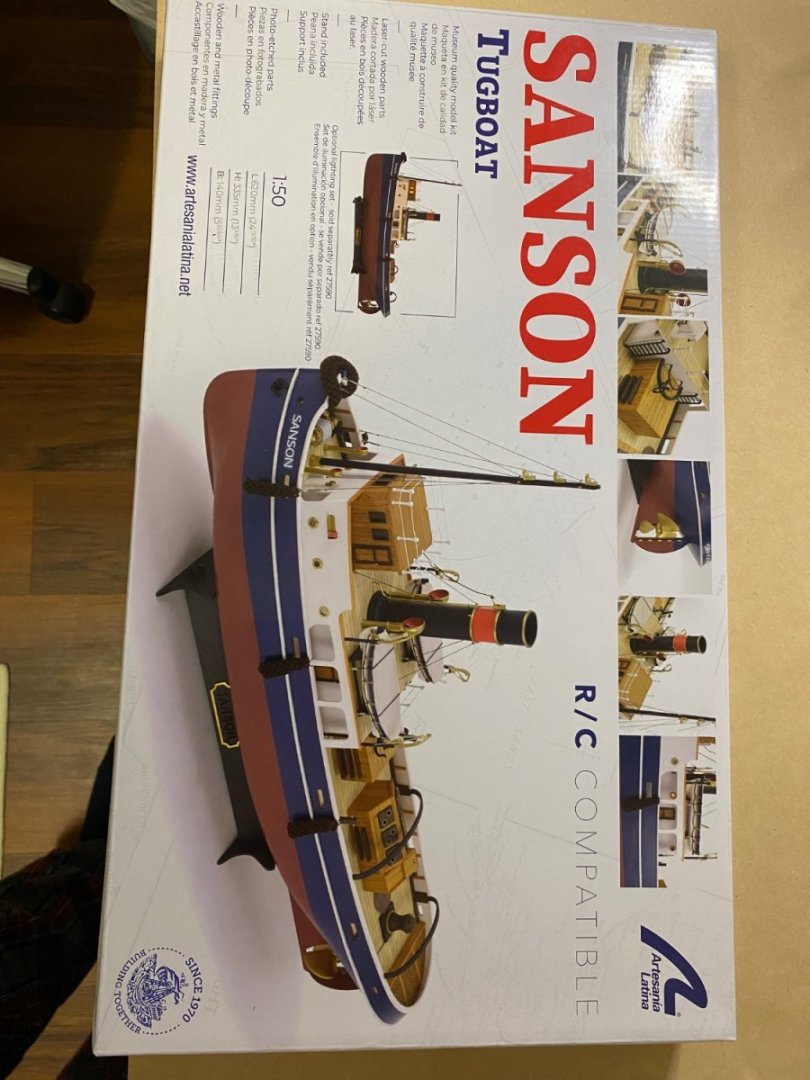


- 42 replies
-
- 8
-
-
- Sanson
- Artesania Latina
- (and 1 more)
-
 I have begun to work on this kit. As per my usual process, I have two kits going. My primary kit will be the Vanguard Grecian, but while waiting for glues to set, and for a change of pace, I will work on this kit. I will build this kit pretty much out of the box with few modifications. Although I will opt to use other manufacturer's deadeyes, single blocks and belaying pins. In this kit the deadeyes and single blocks are laser cut on the plywood sheets and would require drilling holes and painting. The belaying pins would have to be fashioned from wood stock. As to contents of the kit I would refer people to the YouTube videos which give a very good description of what is inside the kit. As you can see from the pictures I have placed by SurfacePro computer at my work station as all the instructions are on a disc. The only paper in the kit are the porthole templates and a guide to the plywood sheets showing where each piece is. As I have reviewed all the instructions I believe there might be some issues with not having physical instructions or plans but we will see. The bulkheads, for the most part, consist of 3 pieces. So far the fit of these pieces has been excellent. Quality of the wood has also been excellent.


-
 Hello, this is my ongoing project. Dundée Thonier was a type of tuna fishing boat in France during the early to mid-20th centuries. Actually, The AL's thonier Marie-Jeanne wasn't in my interest. I purchased the Heller's thonier Armor because of the beautiful box art. While I was building the plastic kit, I felt limited by the small 1/125 scale. While I was searching reference for the thonier ships, I was surprised that the AL's 1/50 thonier has exactly the same hull as the Heller's. I decided to move to the AL's kit, but the painting will be the same as the Heller's thonier Armor. By the way, my AL kit is outdated 22170. The newer 22175 kit has better box art with clearer instruction. I think AL may need an artist, rather than a photographer. Also, the Heller kit is very helpful, despite its small size. I referenced the hull's planking line. This is my best strategy for framing. I hope kit makers draw the check lines on frame parts. The AL's old kits tend to offer unreliable manuals and plans. As you see, the 1:1 plan paper didn't match with the kit's parts. Those small differences come together and form an ugly, twisted hull. I made an effort to build straight hulls against the pervasive issues. The check lines on frame parts are my best solution, for now. Instead of laying a deck sheet, I used many short temporary batterns. I was able to set an accurate distance between frames, and the batterns offered better sight. * I recommend using hardwood-dark strips, such as walnut. The basswood-white strips are too weak for use of temporary battern. These square bars help to hold frames. The first planking was easy and smooth. After I filled half of the first planking layer, I removed the temporary batterns and placed a deck sheet. There is one more error. As you see, the deck didn't fit the hull tightly. I needed a day to fix the problems. The result is extremly, enormously, gorgeously fine. It is the first hull I've ever made that didn't twist in any direction. In other words, "museum quality."
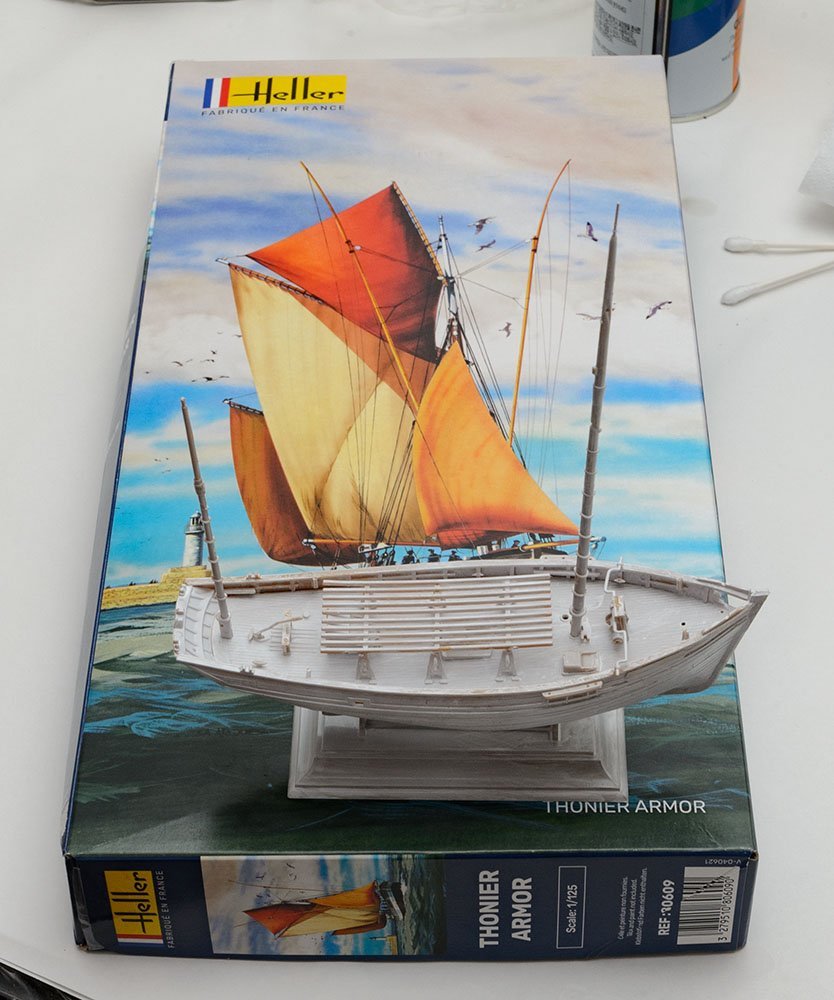
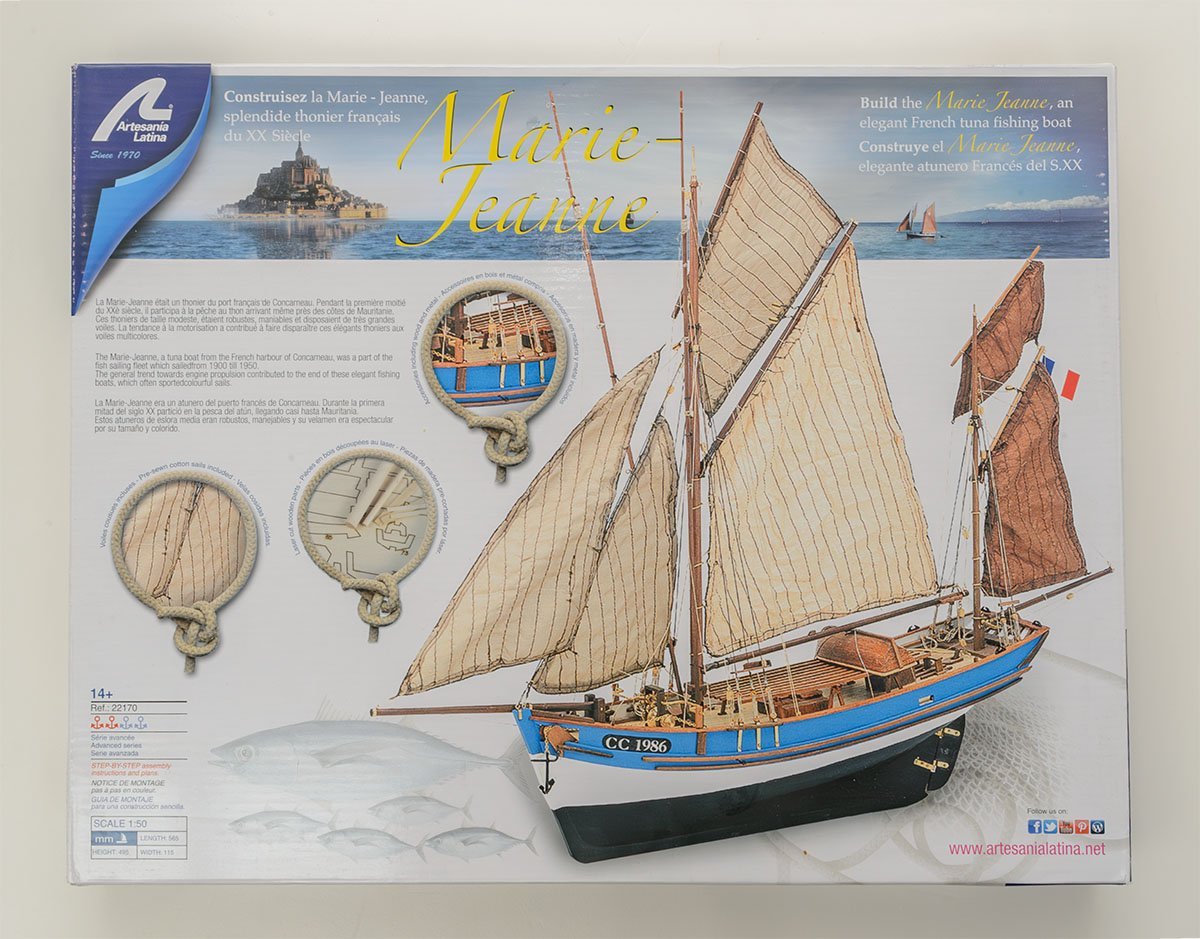

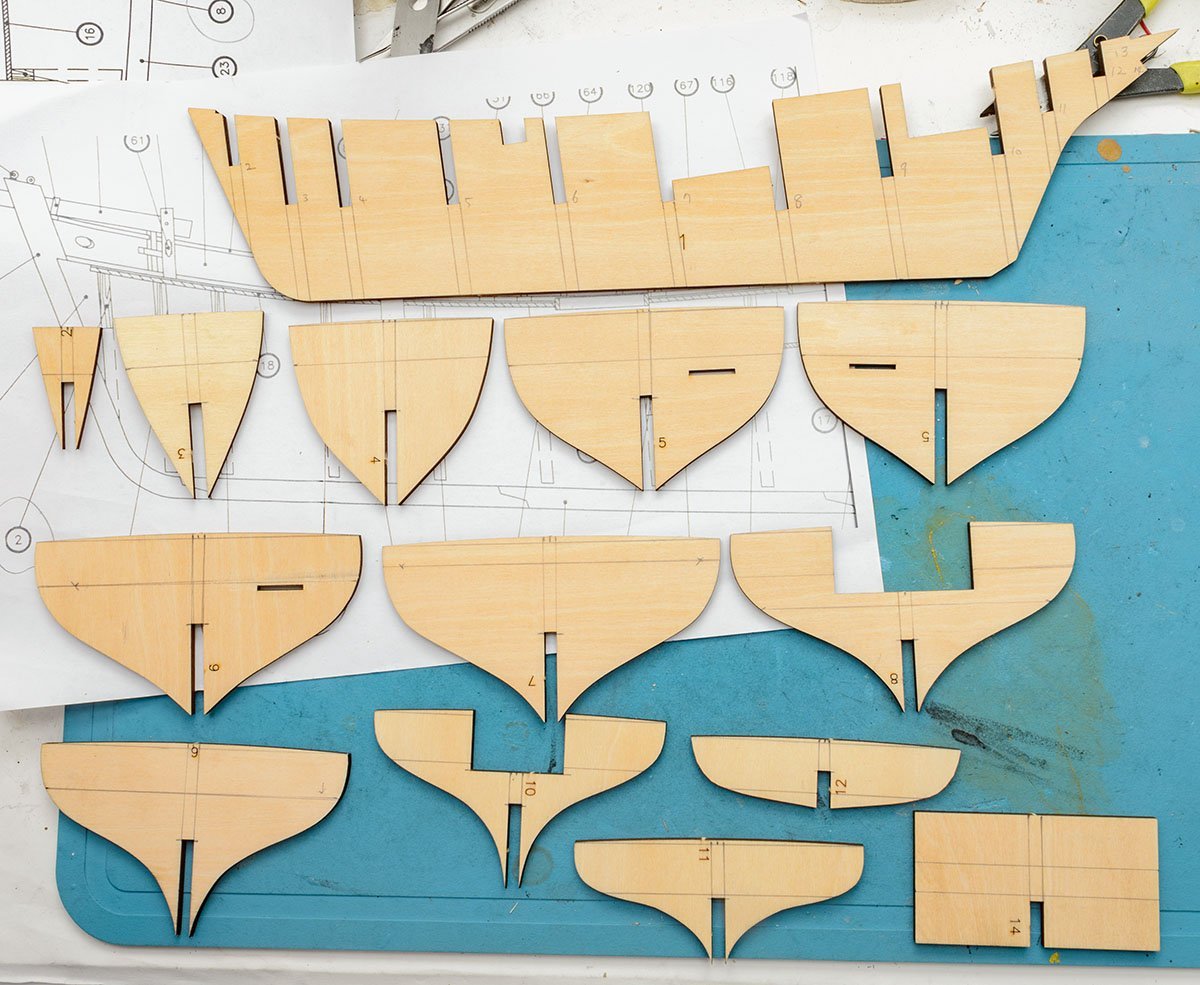
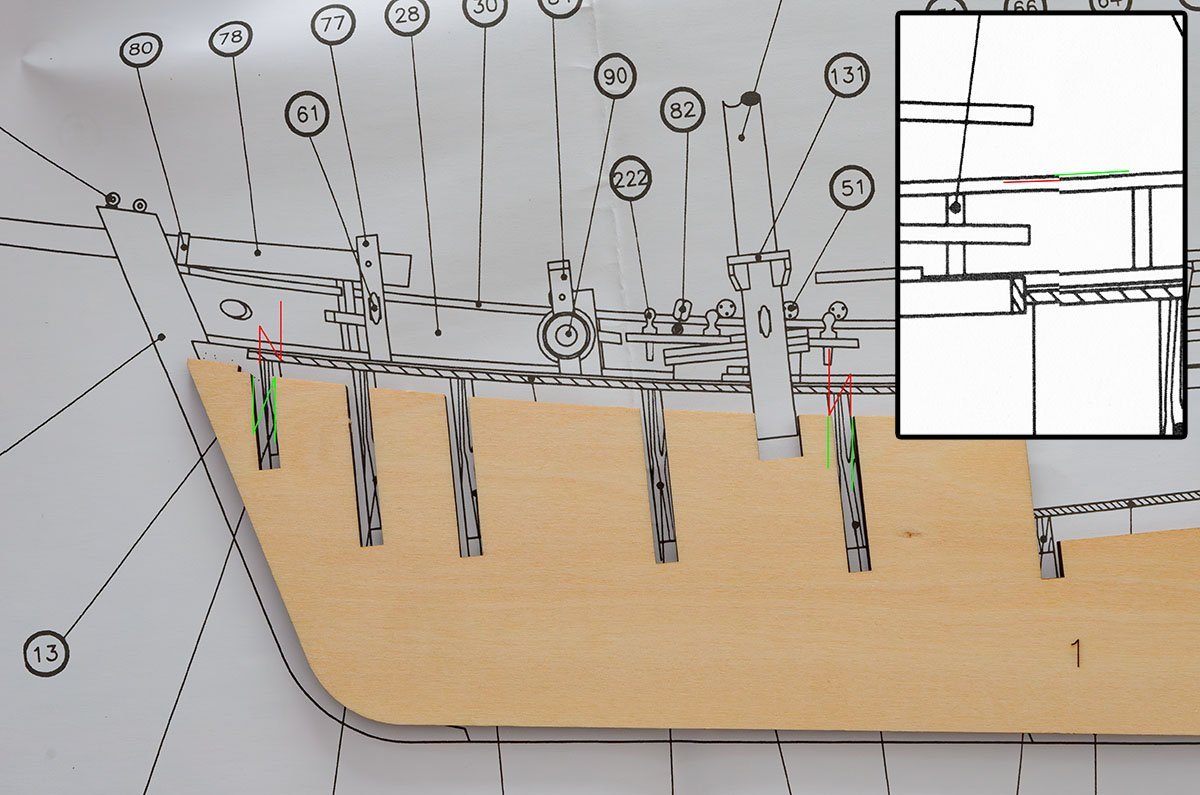
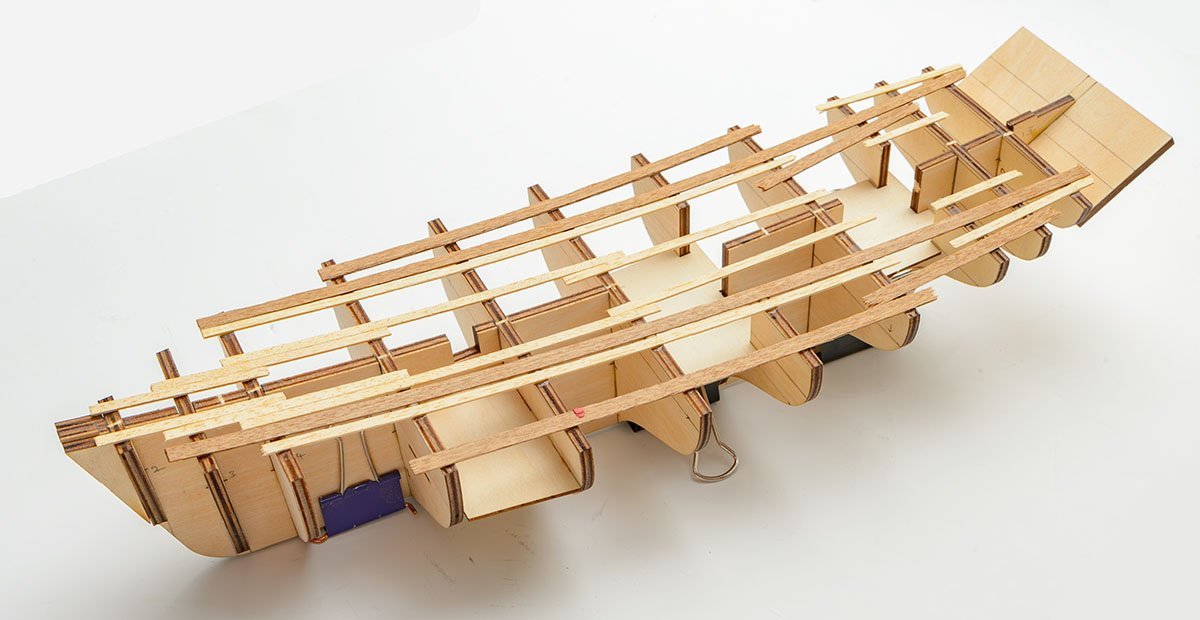
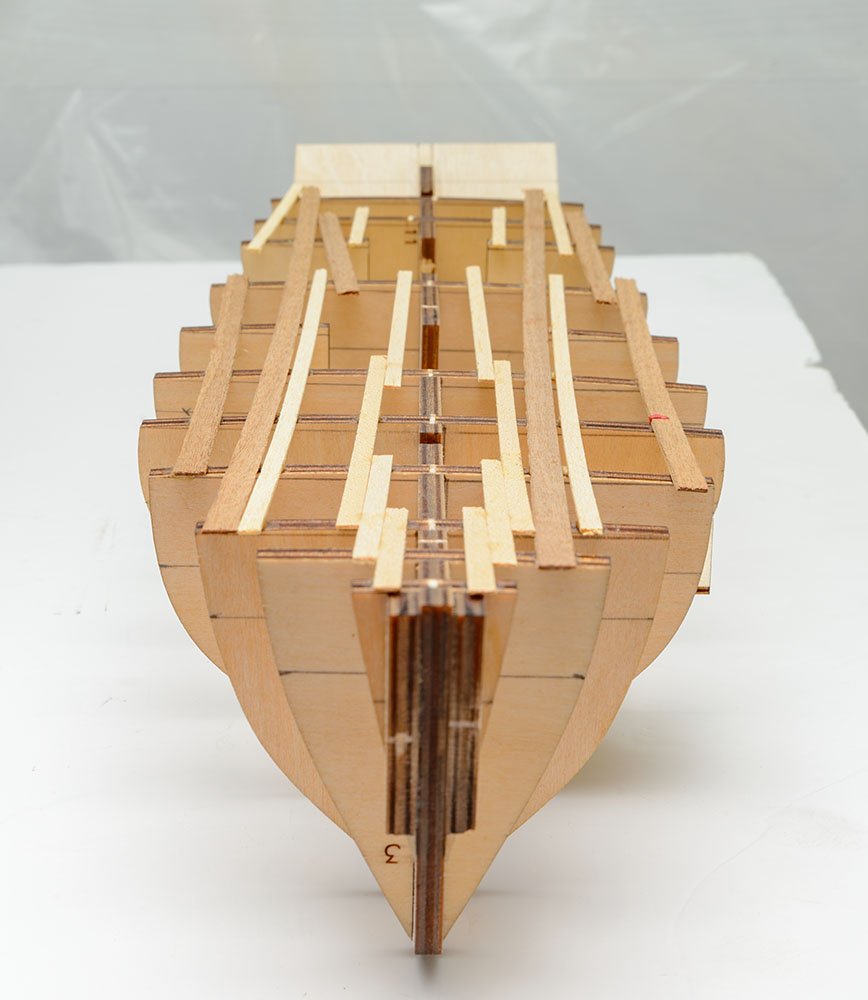
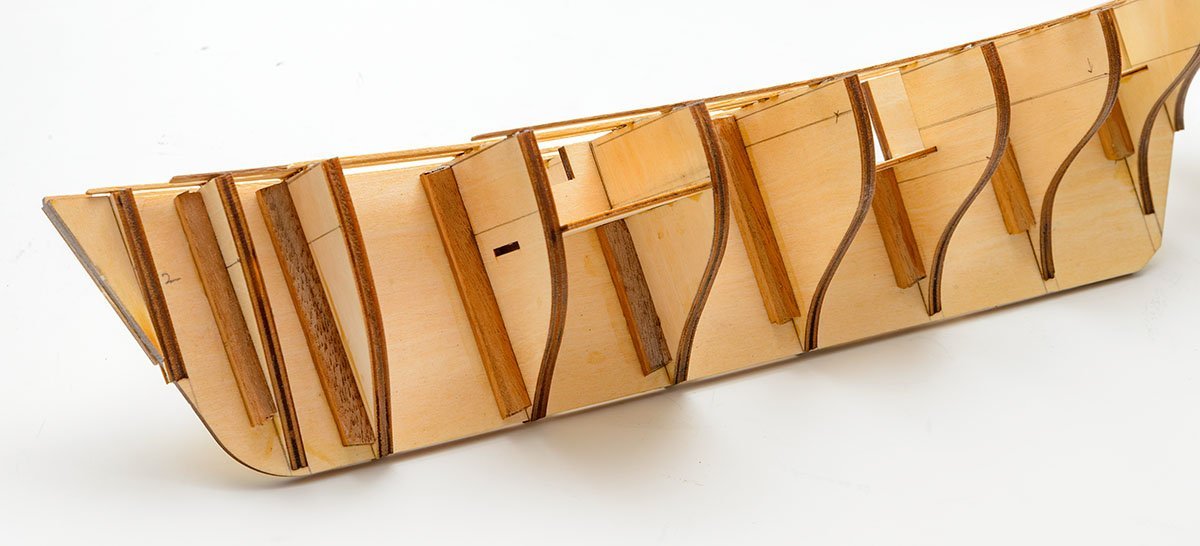
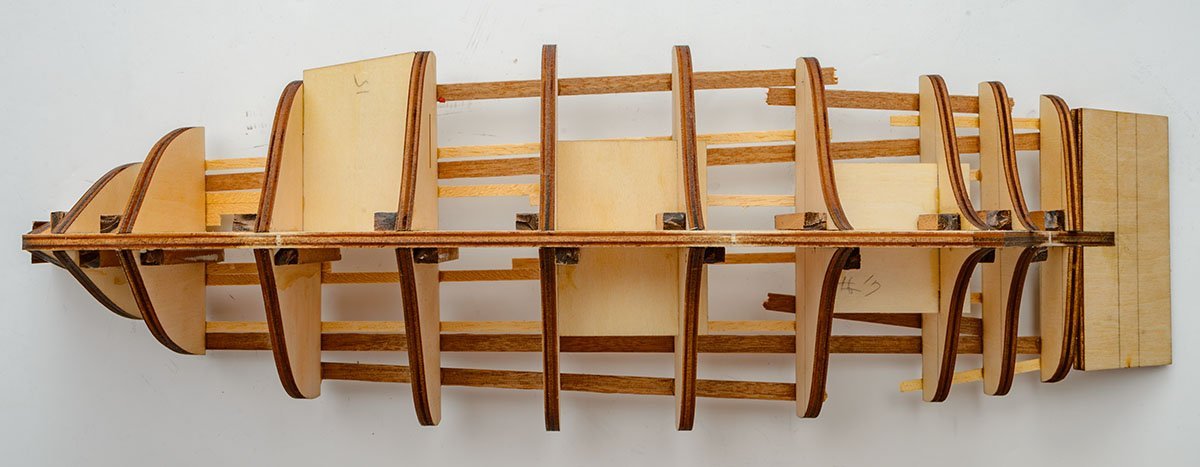
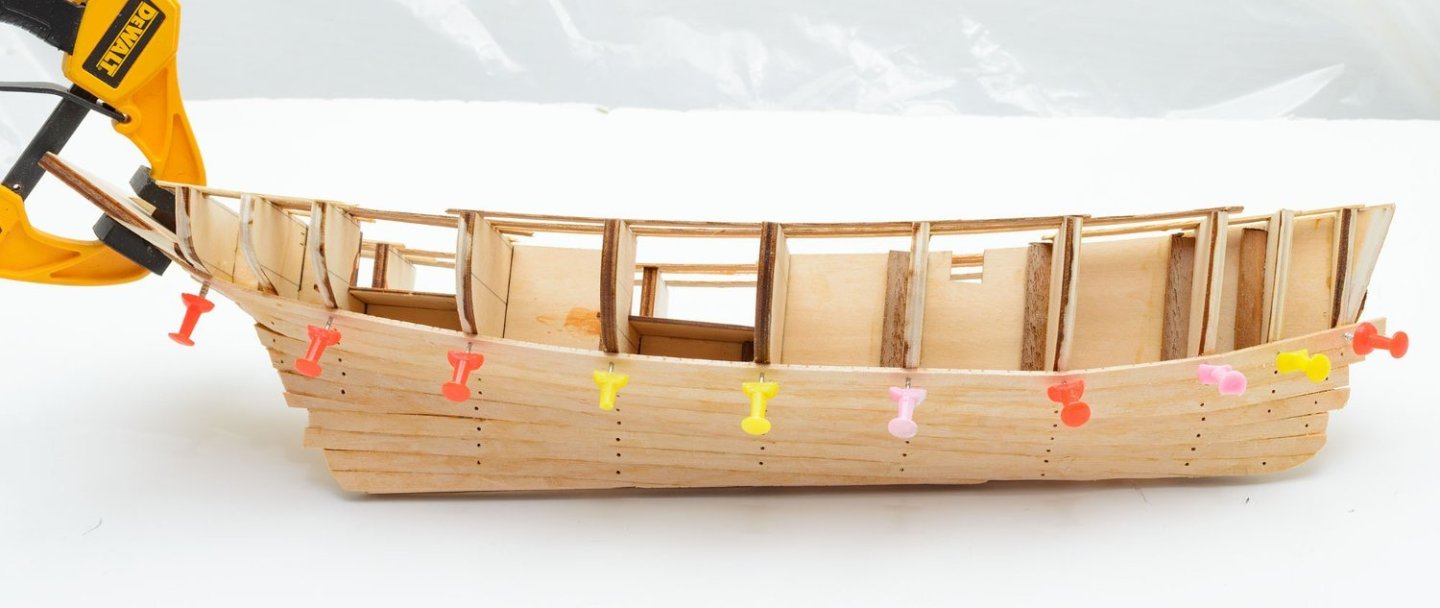
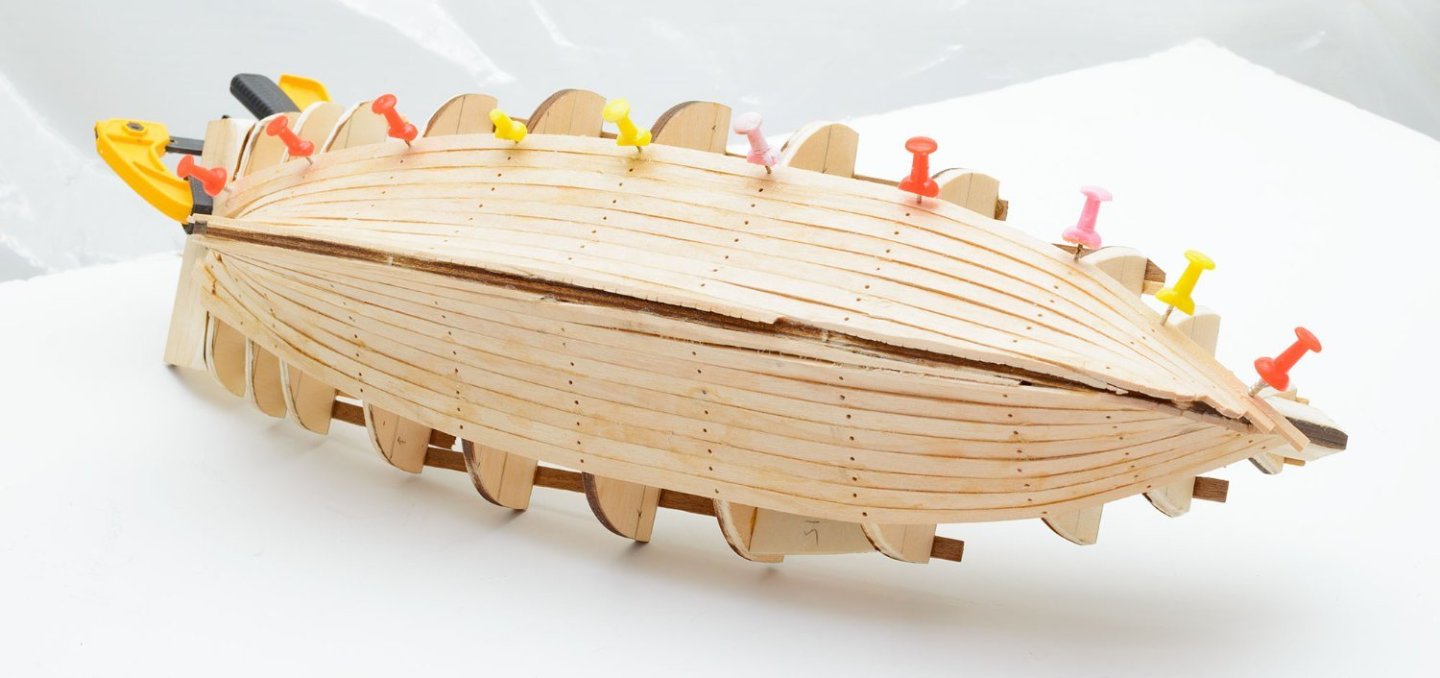
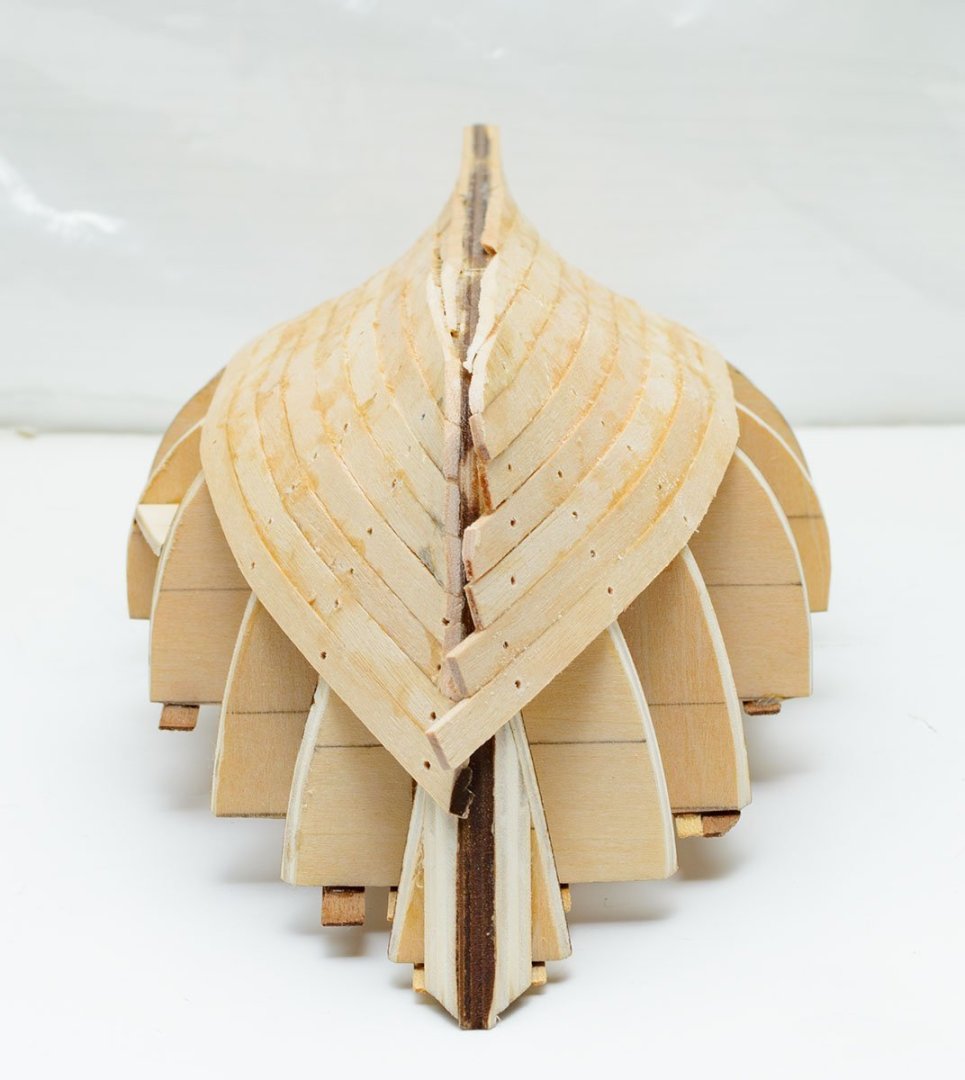
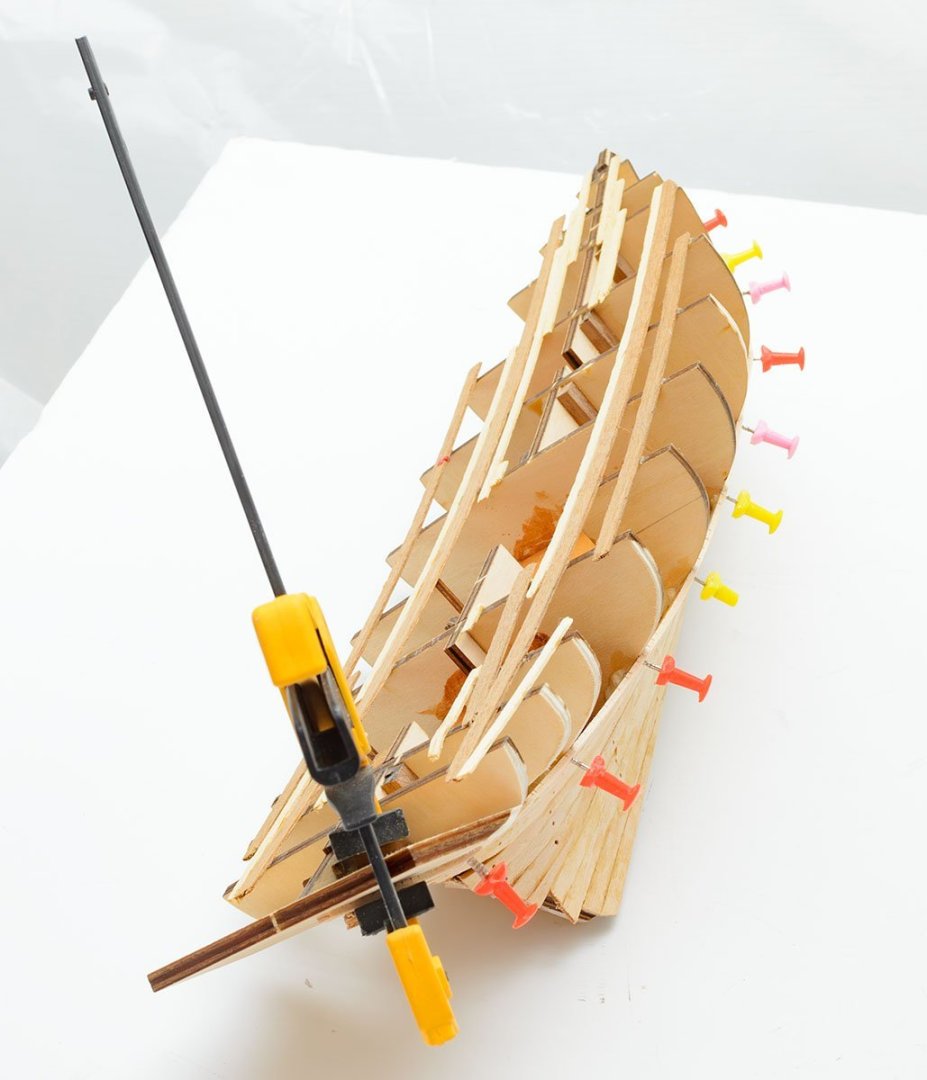
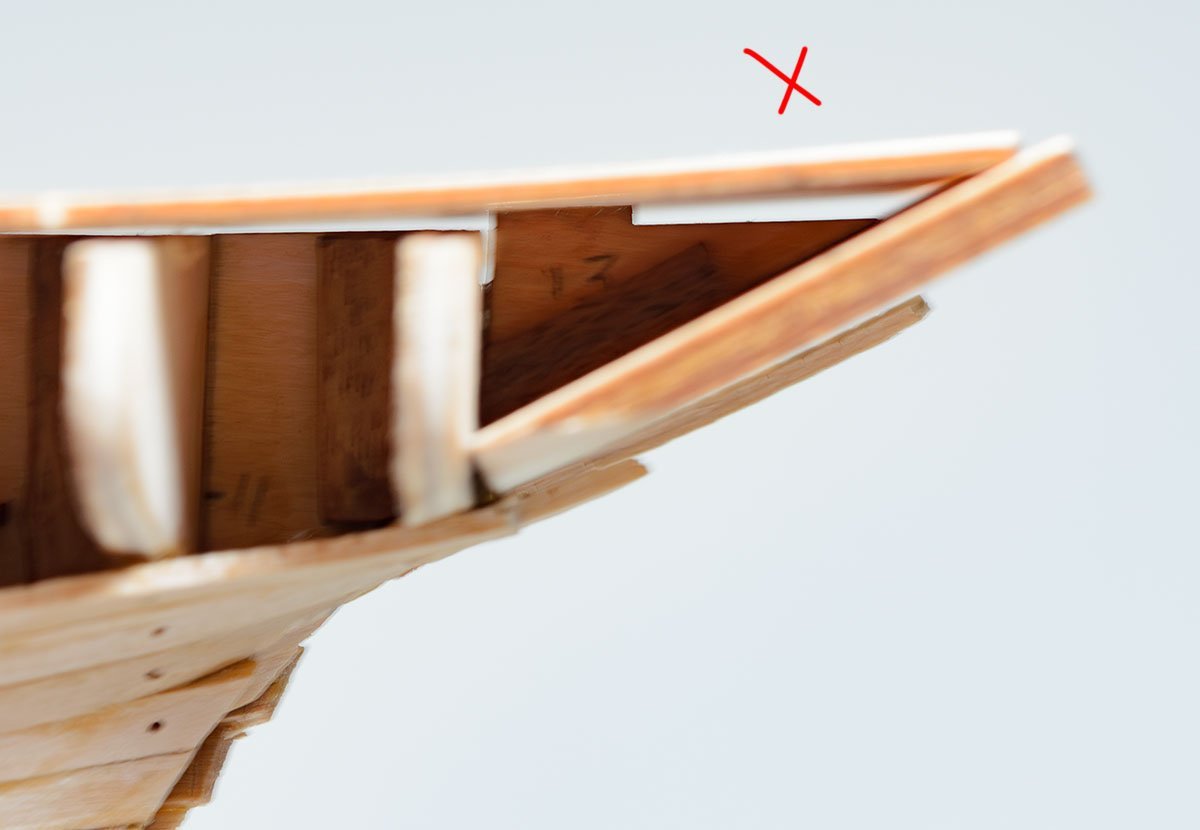
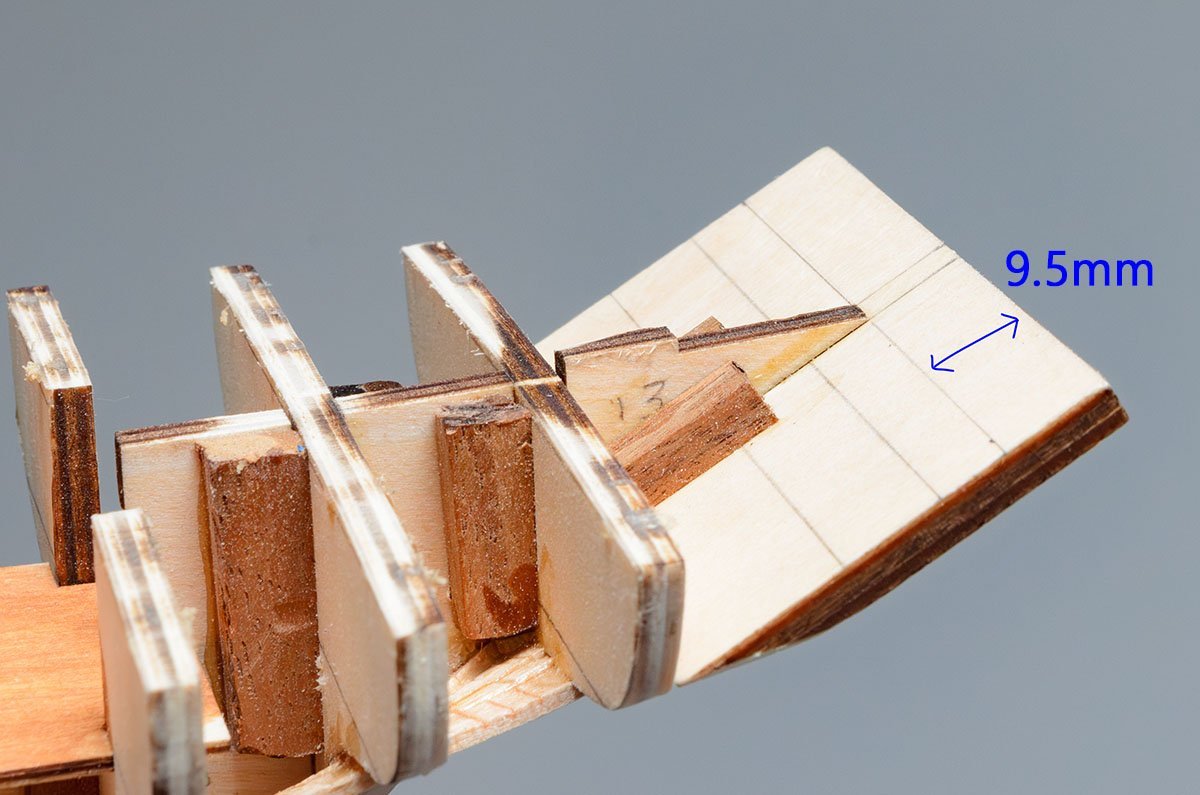
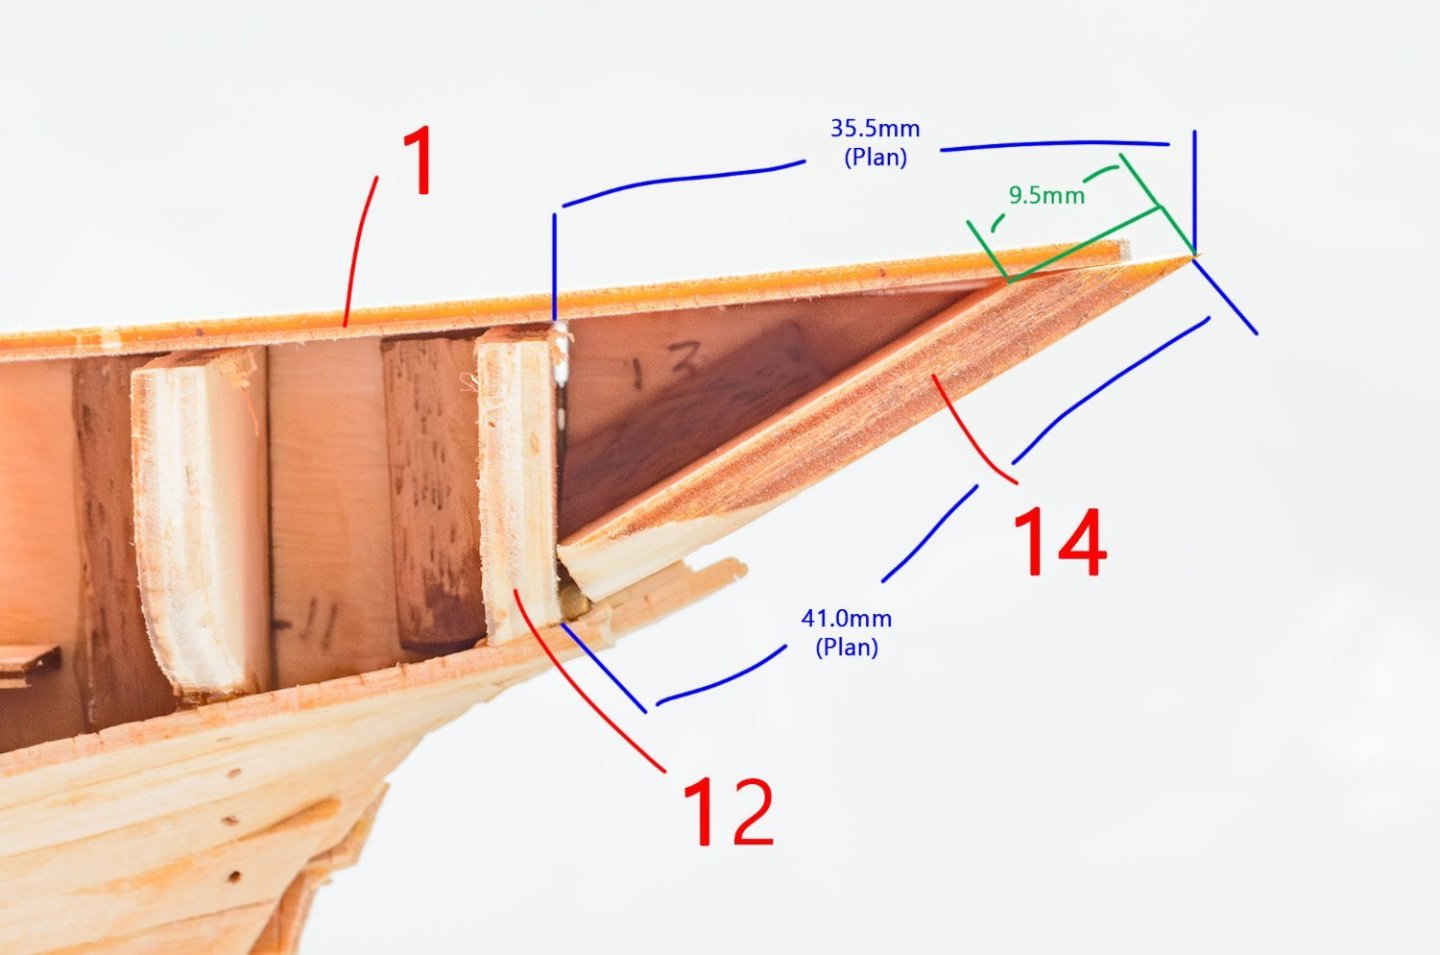
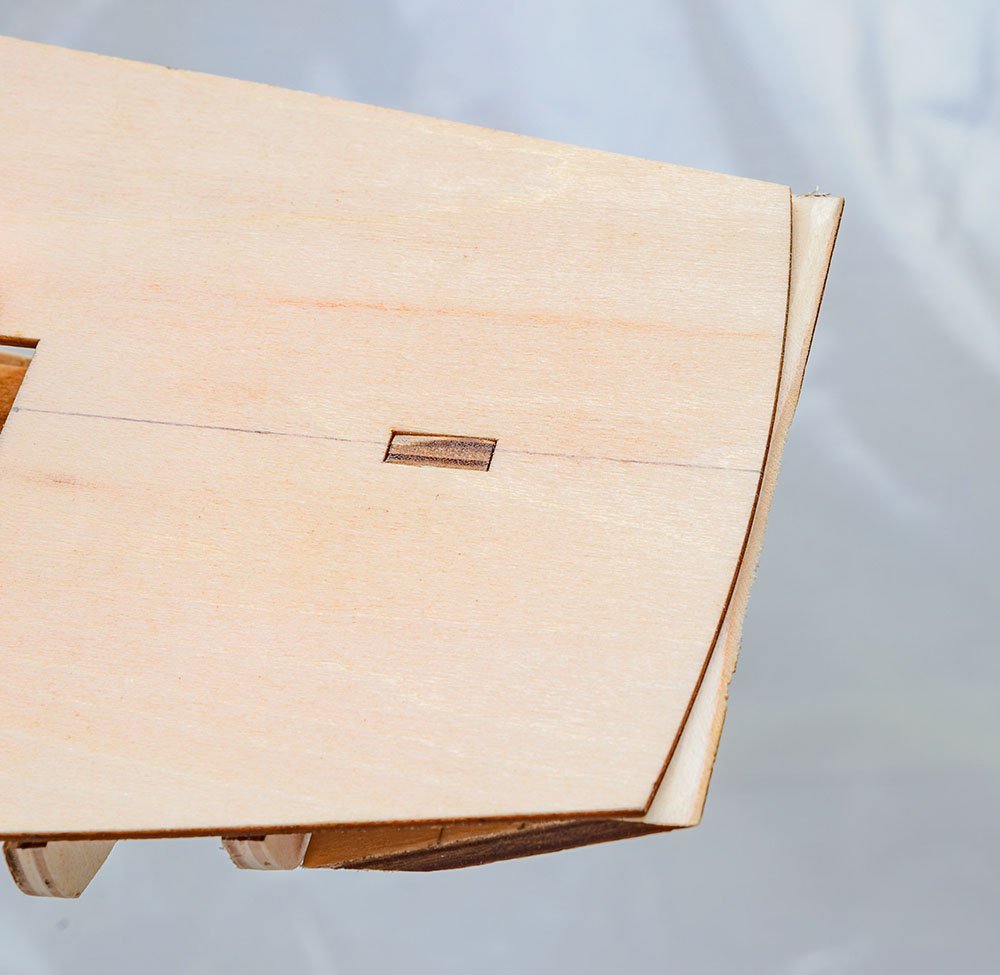
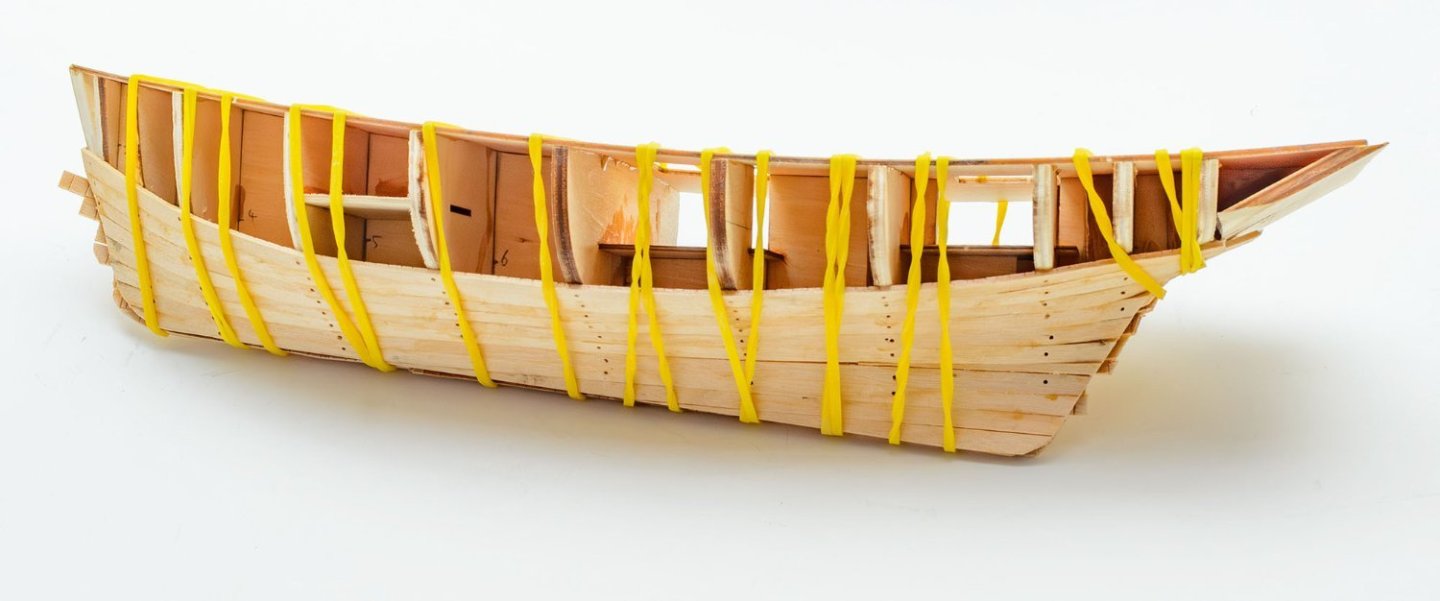
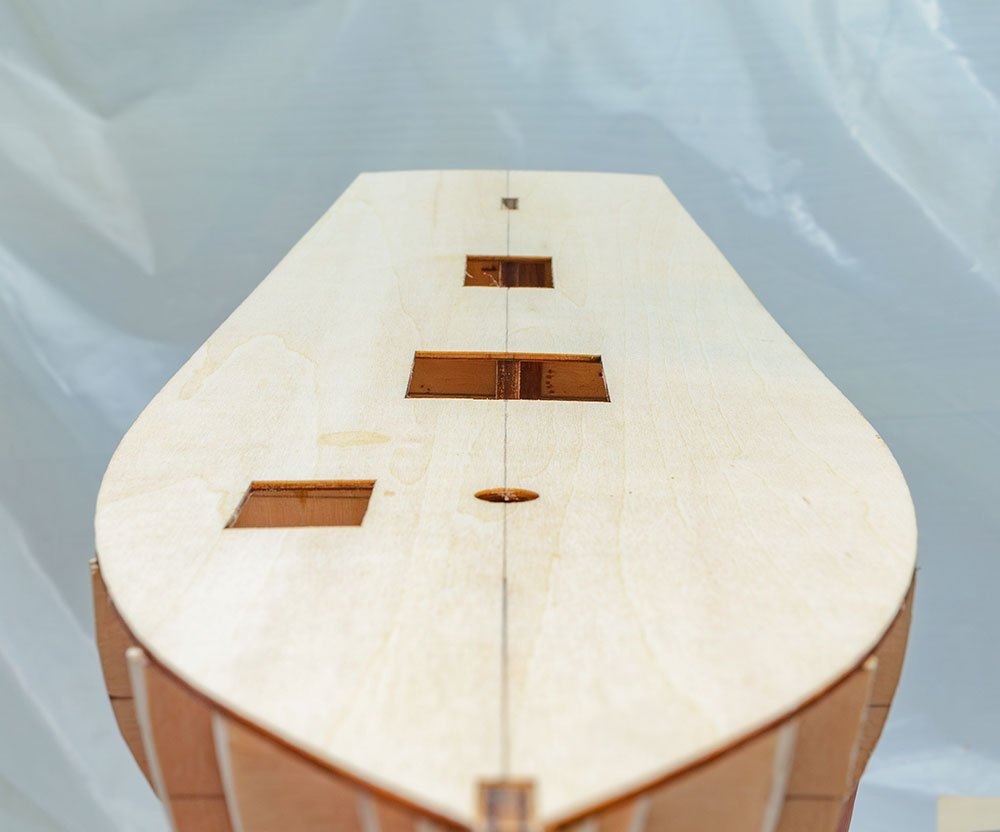
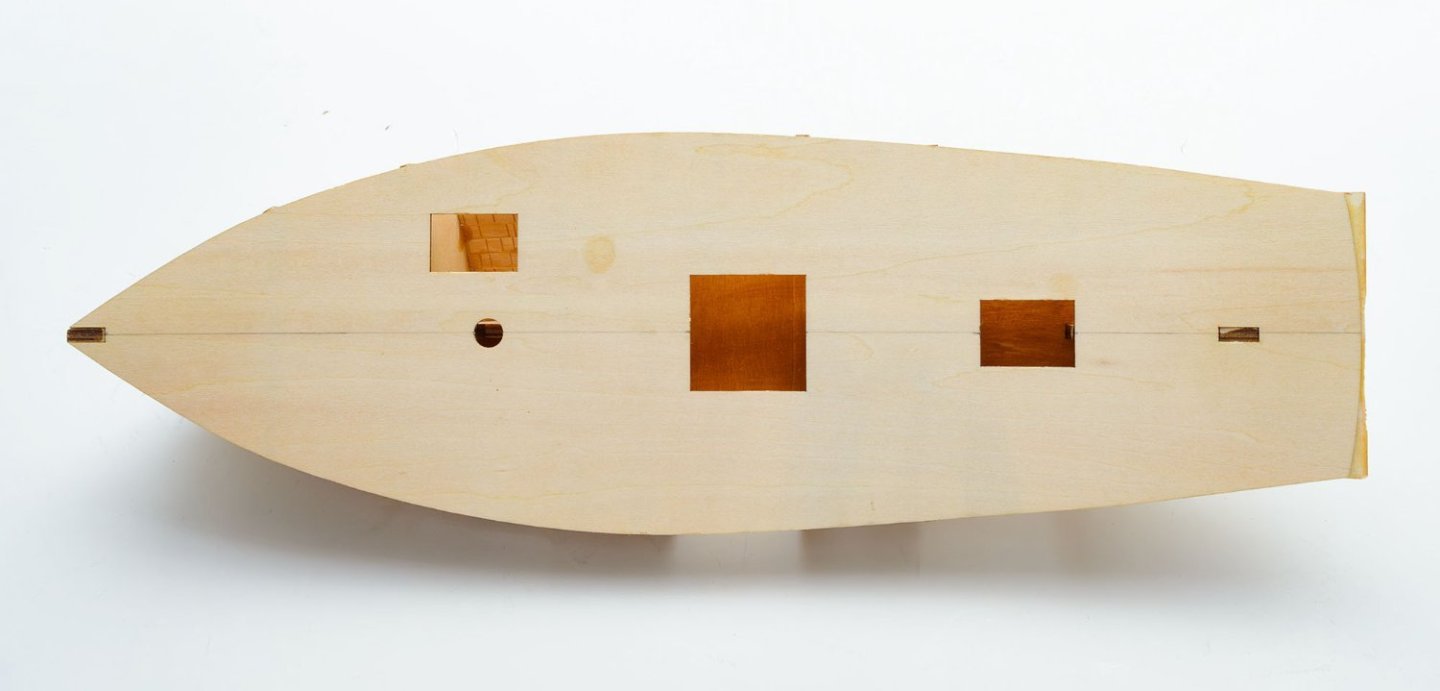
- 17 replies
-
- 4
-
-
- Marie-Jeanne
- Artesania Latina
- (and 1 more)
-
 Well, I probably shouldn't have but.... As I said in the title, this is an earlier version not the current laser cut one. It looks to be a fairly easy build but one perhaps difficult to build well. We'll see how I go. First off I checked the moulds/bulkheads, production errors do happen and it's best to know if there's a problem. I would normally check them against the drawing but there aren't any so I placed each one on a piece of paper, traced around them then flipped them over and checked. Two were a tiny it out but fine to use so long as I knew about it. Fairing will fix them. I fitted the moulds to the false keel making sure they were square to the keel and that the tops were square to each other (there's a bit of slop in the slots). When I got to the mould on the stern I found the false keel wasn't cut square and of course there wasn't room for my squaring blocks, so I decided to stop before I made a mistake. I did however dry fit the false deck (and found out I can glue the mould on the stern to it, yay win) and wrap it in many rubber bands so it will take the deck curvature overnight. Oh, that small cast metal boat in pic 2 feels like it weighs more than my 16' Cutter (see sig.).
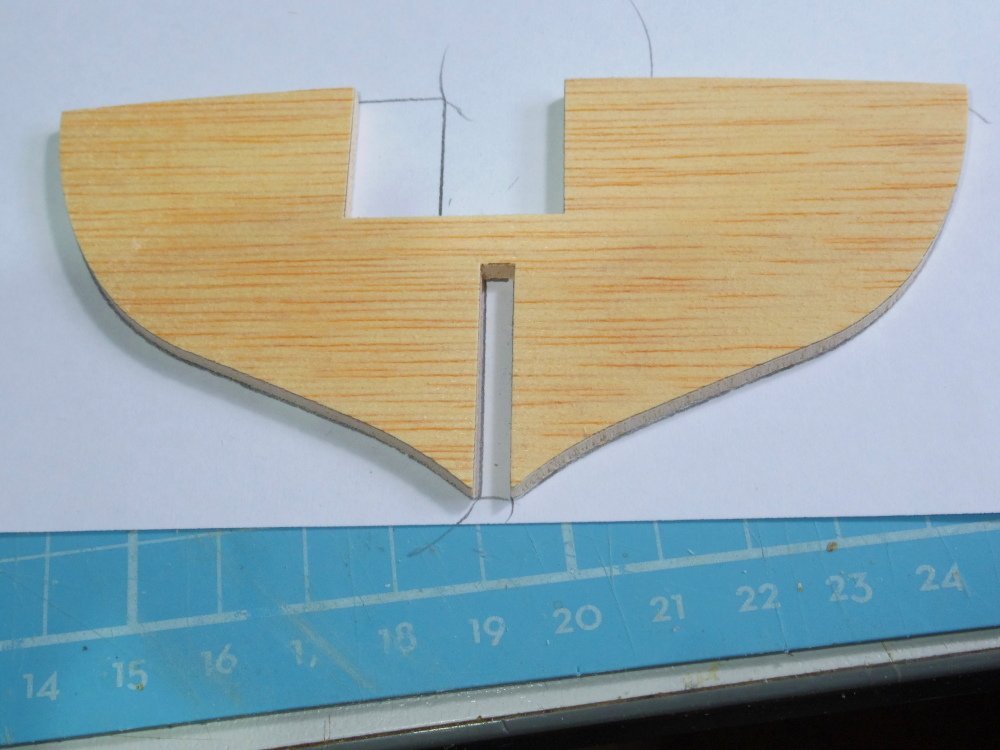
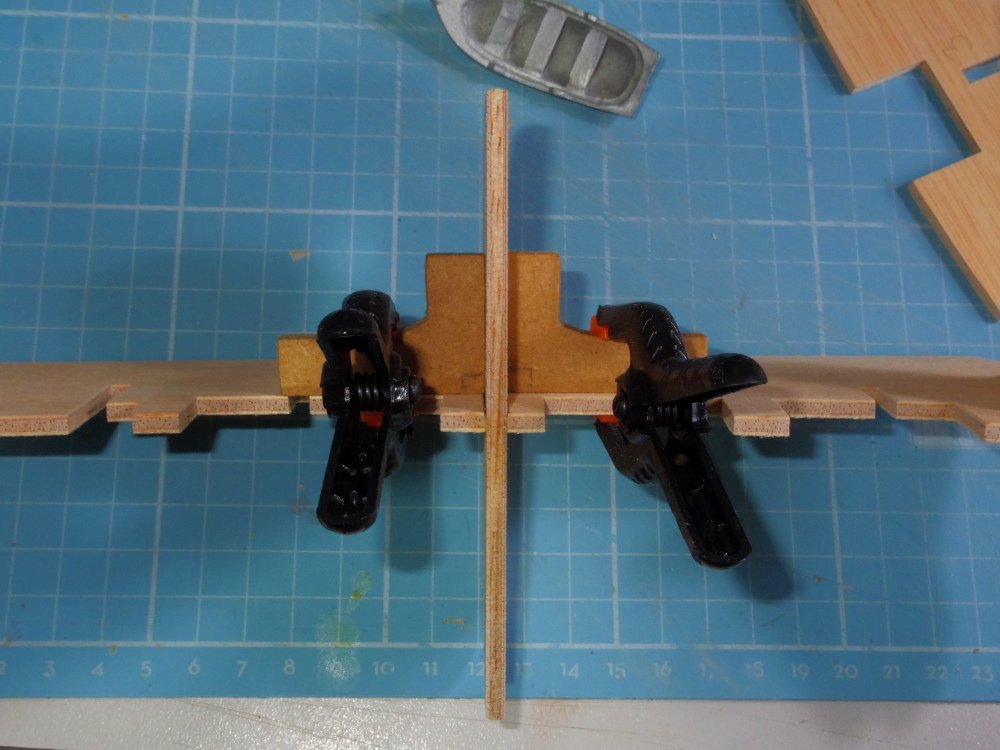
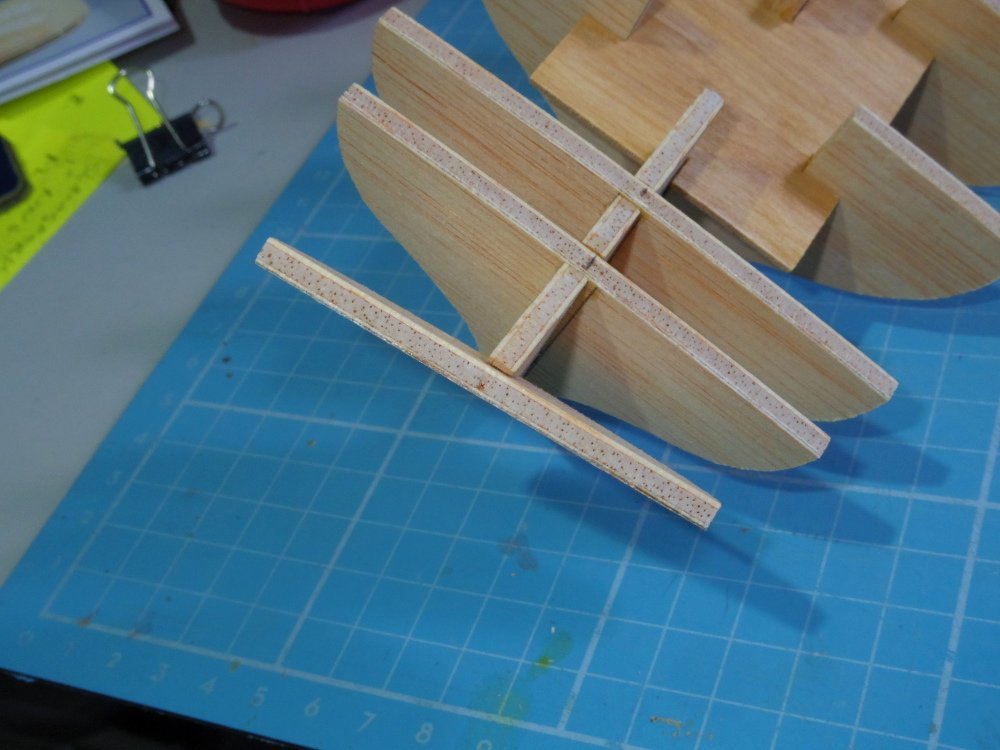
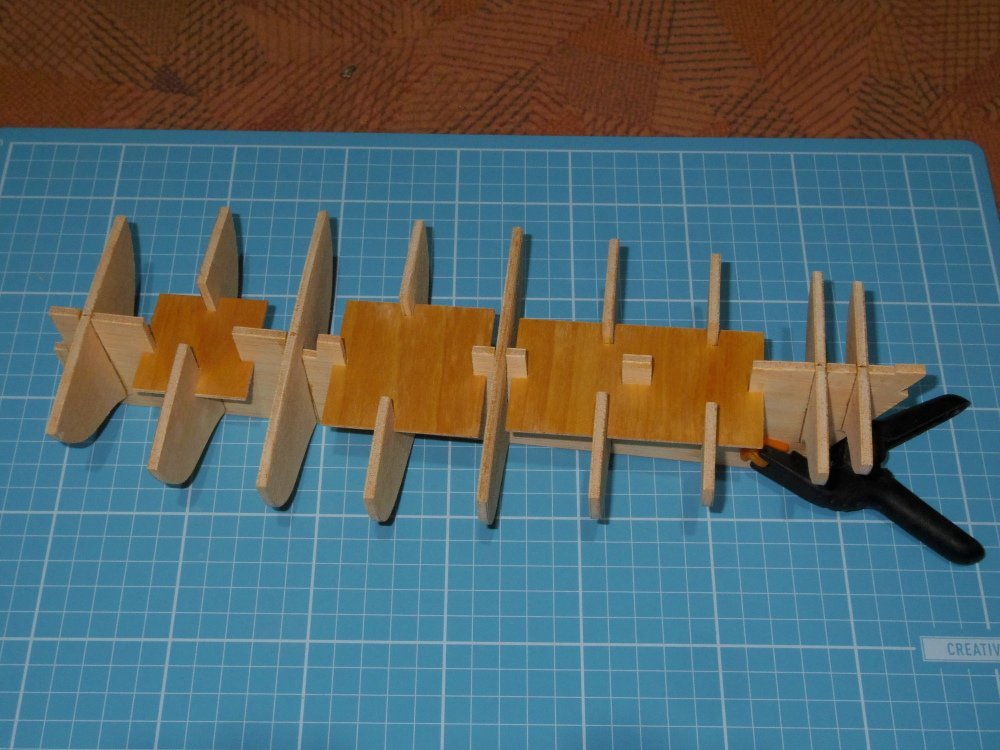
-
 This has been a long term build. I had never built one before. I hesitated to post this build log because I am nearly finished but I have received help from other members here, so I thought my experiences may be of help to others. I tried to document my progress to an extent through the years it took and will post it here as I am nearing completion. Artesania Latina # 20500 Bluenose-II This kit was bought around 1986 from Hobbycraft Canada of Toronto. It was a gift from my wife to her Dad but was left untouched by her Dad until given to me in the summer of 1996. It was like this…. ... and under those trays... A glimpse of one plan sheet is shown here, too. I started looking at the kit and its VHS video cassette (“You Take the Helm”) in November 17th 1996 -. I began construction the following week. The VHS video was by Model Expo and shows model-maker Frank Mastini building the kit. His kit does not have the foam boxes though; rather it has the parts in plastic bags attached to paper sheets. Some of the advice in the video was useful in the beginning but as time went on and my experience grew, I ignored it and followed my own ideas. December 1996: With the hull frames assembled, adjusted, glued and trimmed to plans, I pinned the deck plywood onto the frames, using a tiny hammer for the brass nails. Then I started cutting planks for the deck. I laid black cotton between each plank and their ends to simulate caulking; the cotton set into the white glue nicely. I drilled 'nail holes' at each end then put a dab of glue into the holes and gently sanded over, to fill the holes and represent the wooden plugs of the real ship. 1997 Jan: Deck planks were finished; I began the first layer planking of the hull but by March 30th had to leave it for everyday life issues and by 1998 I had started night computer courses, to retrain. 2000 January 18th; my journal says I started again; heating & bending hull planks, using our old laundry flat iron. I finished the first planking by the 30th and had it all sanded nice and smooth, then couldn’t see how to fit the bulwarks. They seemed to be not long enough or tall enough so wouldn’t join at the front and I didn’t know how they should line up at the back. I rang a model shop about it then began doing the deck structures. By March I had fitted the bulwarks then transom, but then summer garden work took all my time. Then life became busier again with my night school studies. I had bought a computer by now to use for the studies and these carried on all the way through to 2005 to get a software development diploma. Feb 17 2008. I started the ship again, doing the second planking with walnut veneer planks. This picture shows two rows of walnut planks, starting at the caprail position, as per the AL instructions. I had a digital camera by then! March 2008: In the following picture, the walnut outer planking is on, down to where the planks wrap around under the hull, and the stern badge and transom are also planked. You can see where I had sanded the first planking and false keel down towards the stern post, to ensure the second planks will lie flush with the post. At the prow, with the planks cut to fit tightly against the keel. Finished them by the end of March. April- I bent the waterways to shape by wetting and steaming with an iron, then cut to final length and glued onto the deck around the bulwarks. Then I cut the stanchions and fitted them to the bulwarks (now painted white inside) by May. Next post I will continue with the rudder.
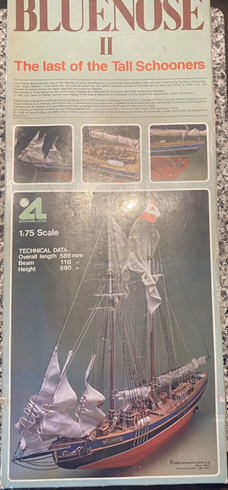
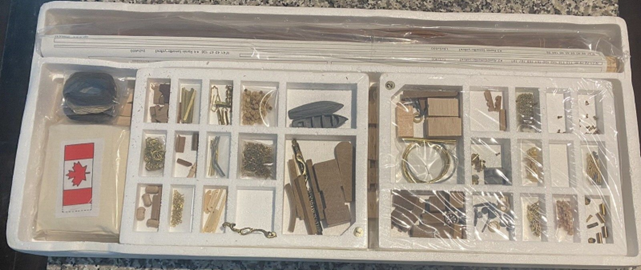
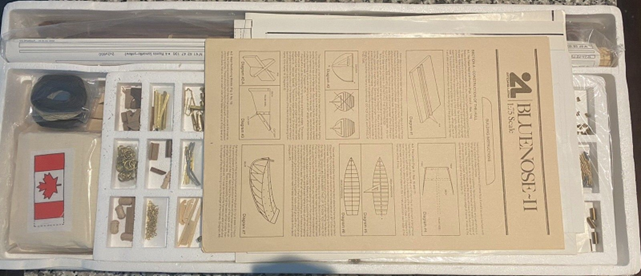
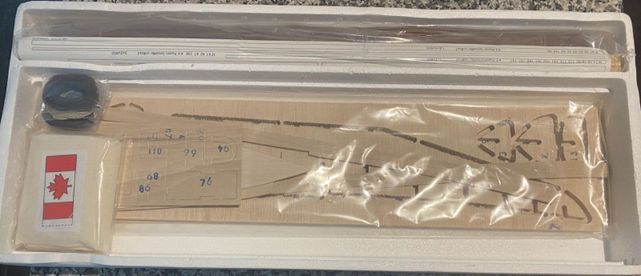
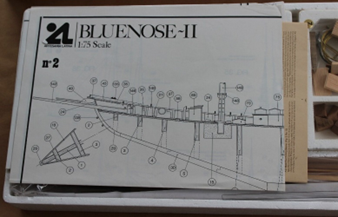

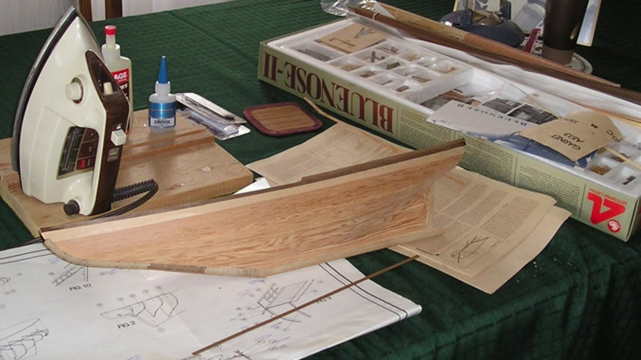
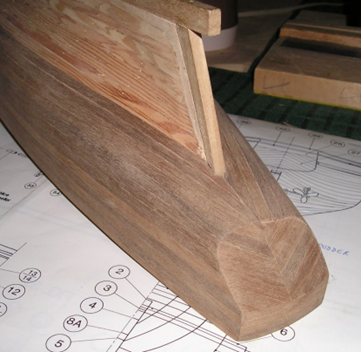
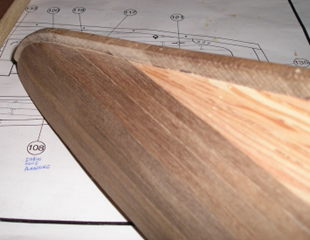

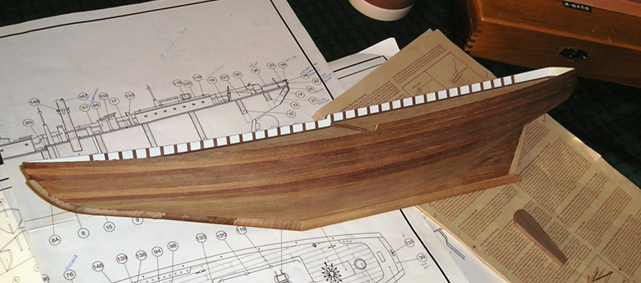
- 15 replies
-
- 1
-
-
- Bluenose II
- Artesania Latina
- (and 1 more)
-
 Good day, So it starts. I purchased the San Francisco in a hobby store in Ottawa Canada. This is perfect for practicing and learning my new hobby. As well as won't have to contend with planking a full hull. I'm using carpenter glue in this case. It dries Yellow-ish so I'm not sure if this matters or I should just use the normal white PVA. I'm planning to use Legos for squaring. I used Legos years ago to square other wood projects I did..so why not.
- 8 replies
-
- 1
-
-
- San Francisco
- cross-section
- (and 1 more)
-
 I bought the boat model from Model Expo back in 1989 along with the solid hull Phantom which will be another re started build! I framed it up and planked the deck and used toothpicks for the treenails, using a sharpie around the edges of the deck planking! I then performed the first hull planking and this is how I left it since 1989! My hopes are with my renewed interest in model ship building I will finally finish what I started decades ago! Tonight I added one more plank to the hull both side of the hull since then now understanding tapering! More building and pics to follow!
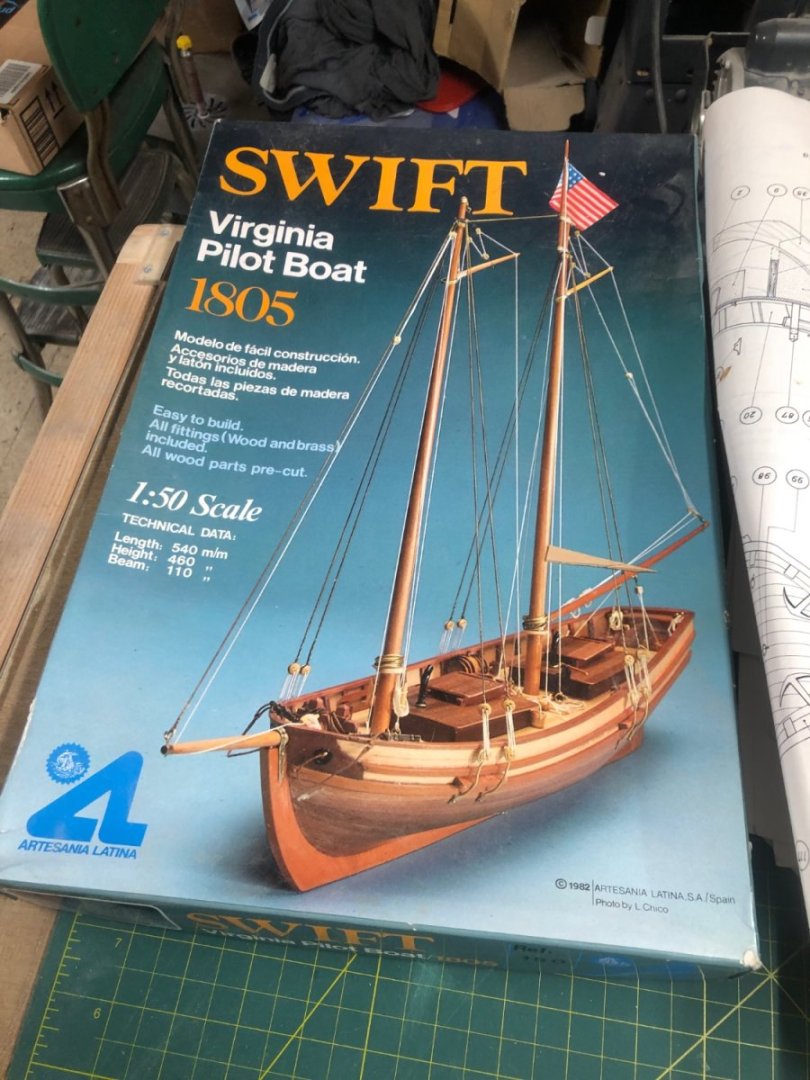

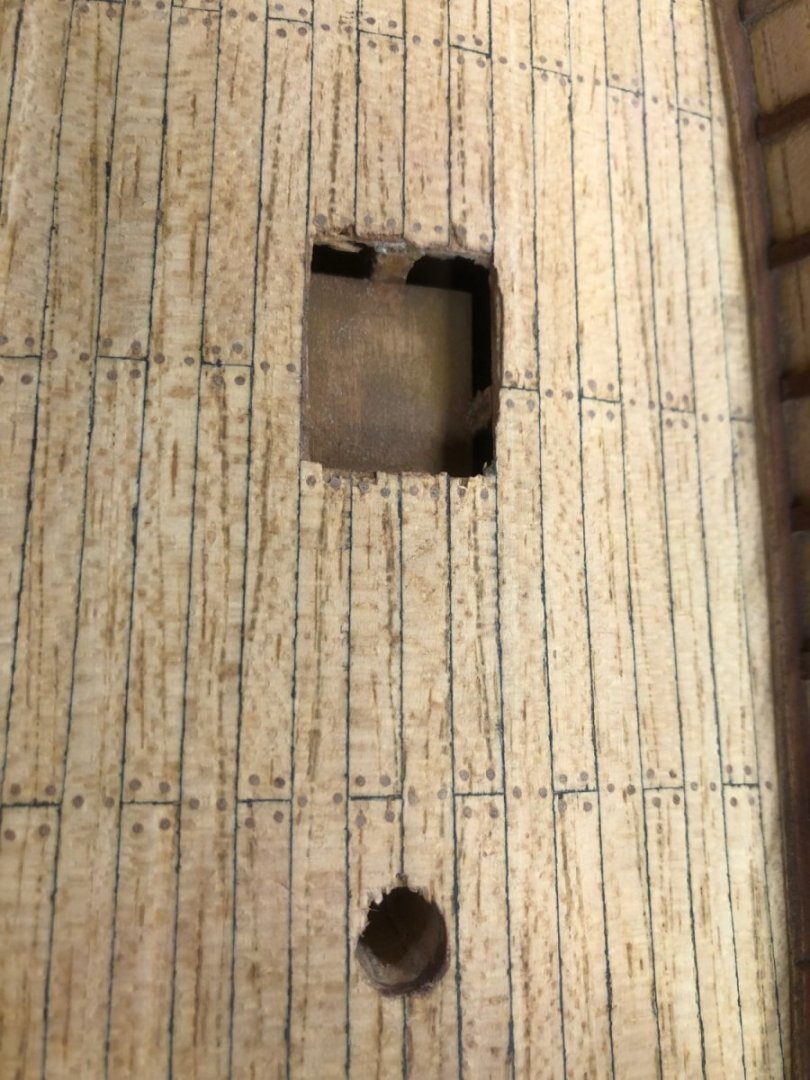
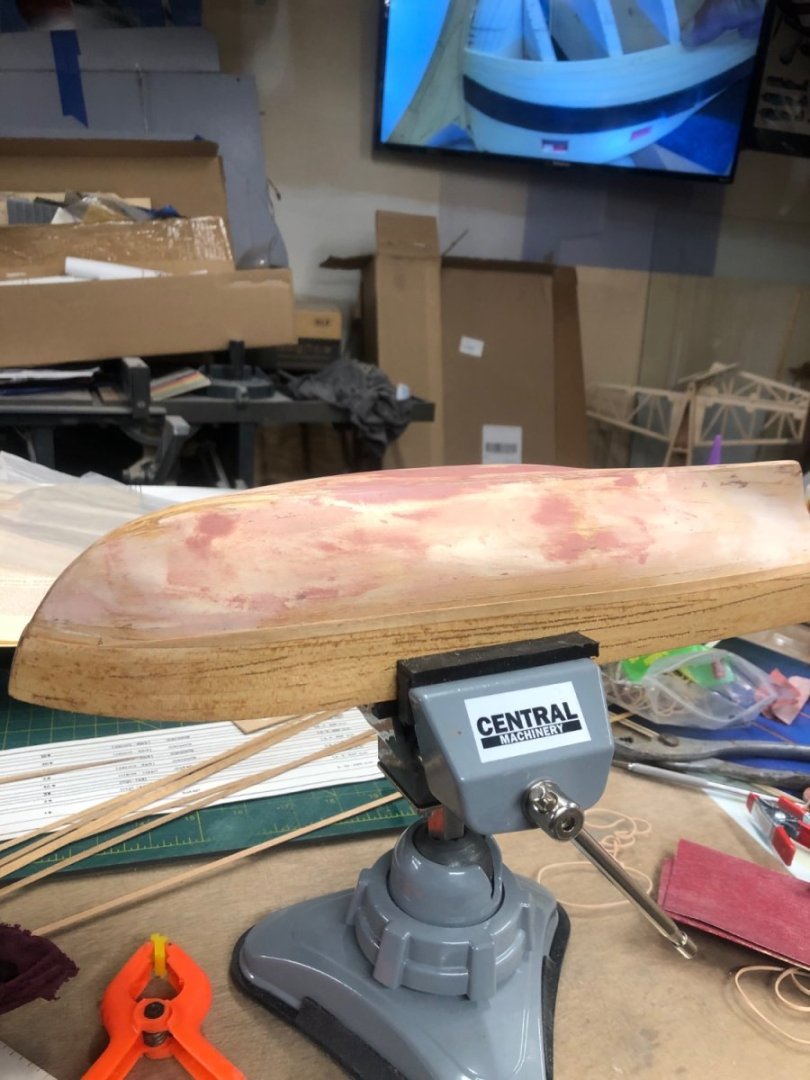

-
 This will be my first build log on MSW so I hope I can provide something that may be interesting. As the title indicates this will be a build log of the Artesania Latina's Pen Duick. According to the article on Wikipedia, 'The YRA 36ft linear rater Pen Duick (formerly Yum) was designed by William Fife III and built in 1898 by Gridiron &B Marine Motor Works at Carrigaloe in Cork Harbour, Ireland for Cork yachtsman W.J.C. Cummins. The gaff-rigged cutter was quickly noted as a successful racer in Irish, British and French waters'. I like the fine lines and design of this historic yacht and decided to try a build of this type of vessel, and so hopefully I can do justice to this and end up with an attractive model. I have already received a lot of inspiration from the other build logs on this site and I will no doubt rely heavily on the work of @BobG, @hof00 and @Reci when progressing with this project. Here is a look at the kit. The kit comprises a plywood false keel and frames, and according to the pictorial guide a selection of basswood planking strips and some sapelli and walnut lasercut pieces and dowels. However, the parts list gives the woods as ramin, walnut and mahogany, so I'm not quite sure which to believe! (Or maybe they are just alternate names for the same thing?) There is also the usual collection of brass and other metal accessories in the familiar perspex box. The kit also comes with pre-sewn sails although a comparison of these with the plans show that they seem a little undersized. In my case they are also under represented, there are five sails needed for the rig but my kit only contains four! I am considering displaying the kit with sails which will be the first time I have tried this but that will be a long way down the track so I will see how things are going before deciding later on whether I have the skills to make my own sails. The kit comes with a leaflet of instructions in a variety of languages, a pictorial build guide and two large double sided plans. The plans detail the sail templates and a rigging plan on one sheet and a full sized profile and deck plan and mast and spar plan on the second sheet. As with many of the older Artesnaia Latina kits, the instructions are pretty basic, only one and a half pages of text for the whole build. Having come from building some of Chris Watton's fabulous Vanguard Model ships with their impressive manuals this will be something of a challenge again. I have built a previous kit from Artesania Latina though so if I was able to do that then I am sure I should be able to manage once more. I have bought a few items as upgrades to the kit offered accessories as the Artesania Latina components are not the best in the world. I have some blocks from Vanguard Models and rigging line from Syren. I also have some alternate strips available for planking as the kit provided ones are 2mm thick which may perhaps prove tricky to bend appropriately - I have some 1mm limewood planks which I may use. Thanks to the information in @BobG's log I have also been fortunate to collect a few resources to help with the build. These include a few French modelling and sailing magazines with useful articles about the Pen Duick and her history. There are also a lot of images available online which will help with the details of the deck fittings etc. Finally in this first post I thought I would also show my build area. This is in one of the spare bedrooms and is actually one half of the wardrobes - do many other modellers on this site work in a cupboard? Despite its size limitations it is actually quite convenient because when I am done for the day I can simply shut the doors and everything appears nice and tidy. It is therefore convenient sometimes to just to spend 20 minutes or so working on a particular part of the build and not have to worry about getting everything out and setting up a work area elsewhere in the house. On the downside the bedroom carpet has claimed an awful lot of small parts which find their way onto the floor! Oh, I'm also not a particularly quick builder so this may not be a log with regular updates but I will try to do my best to keep things ticking along!


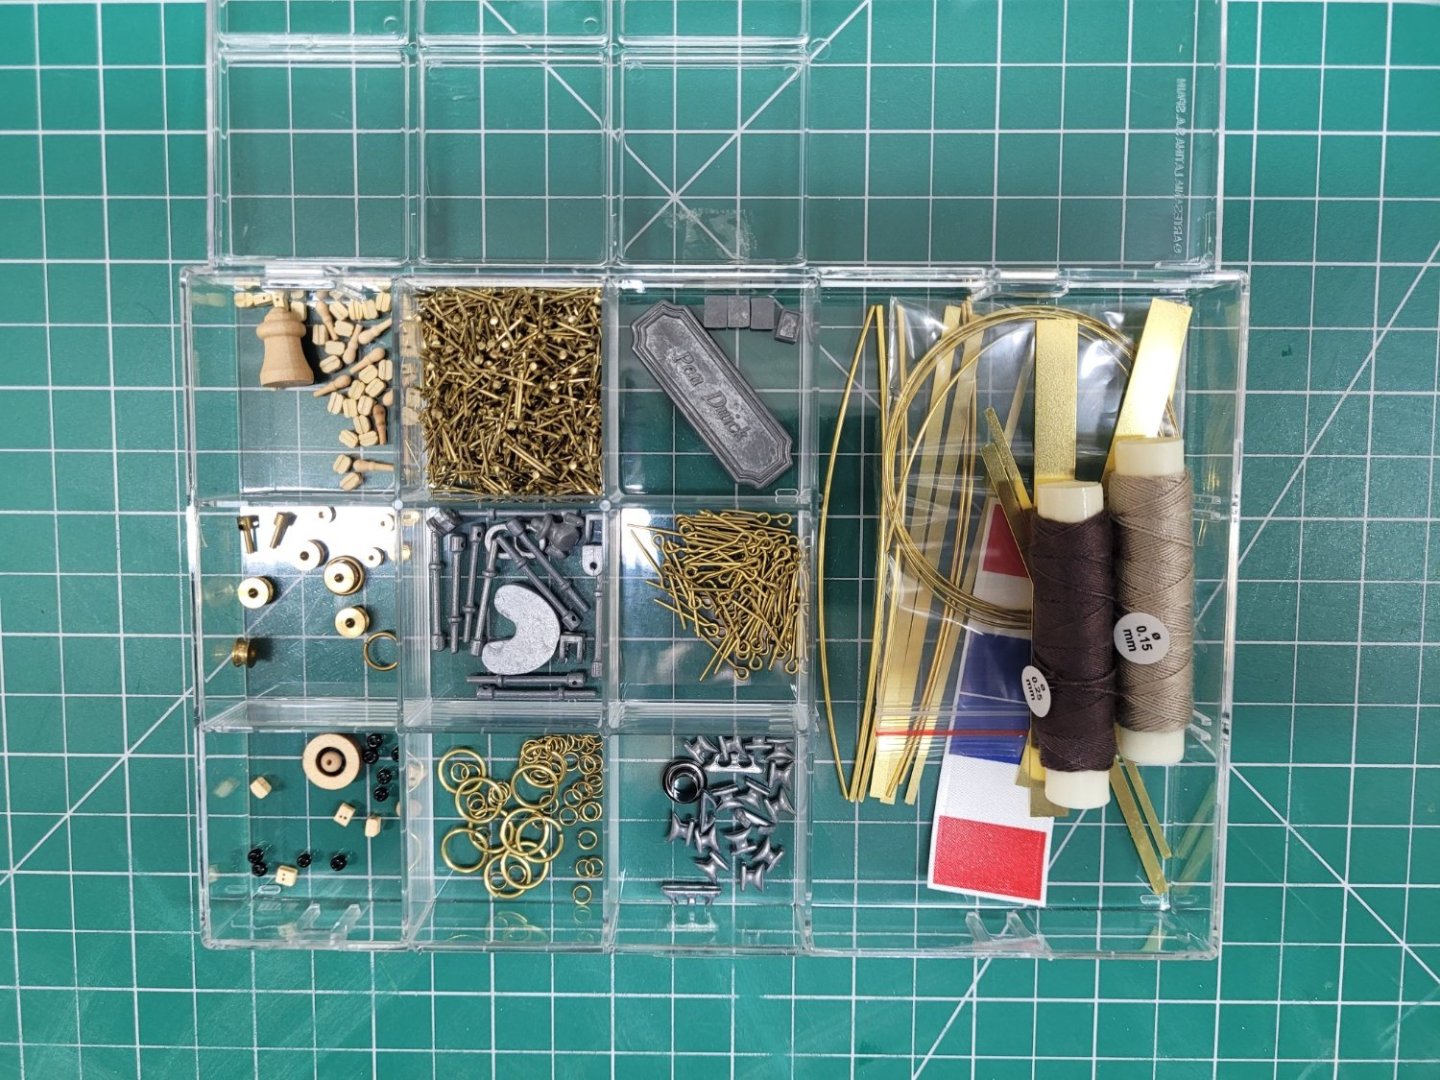
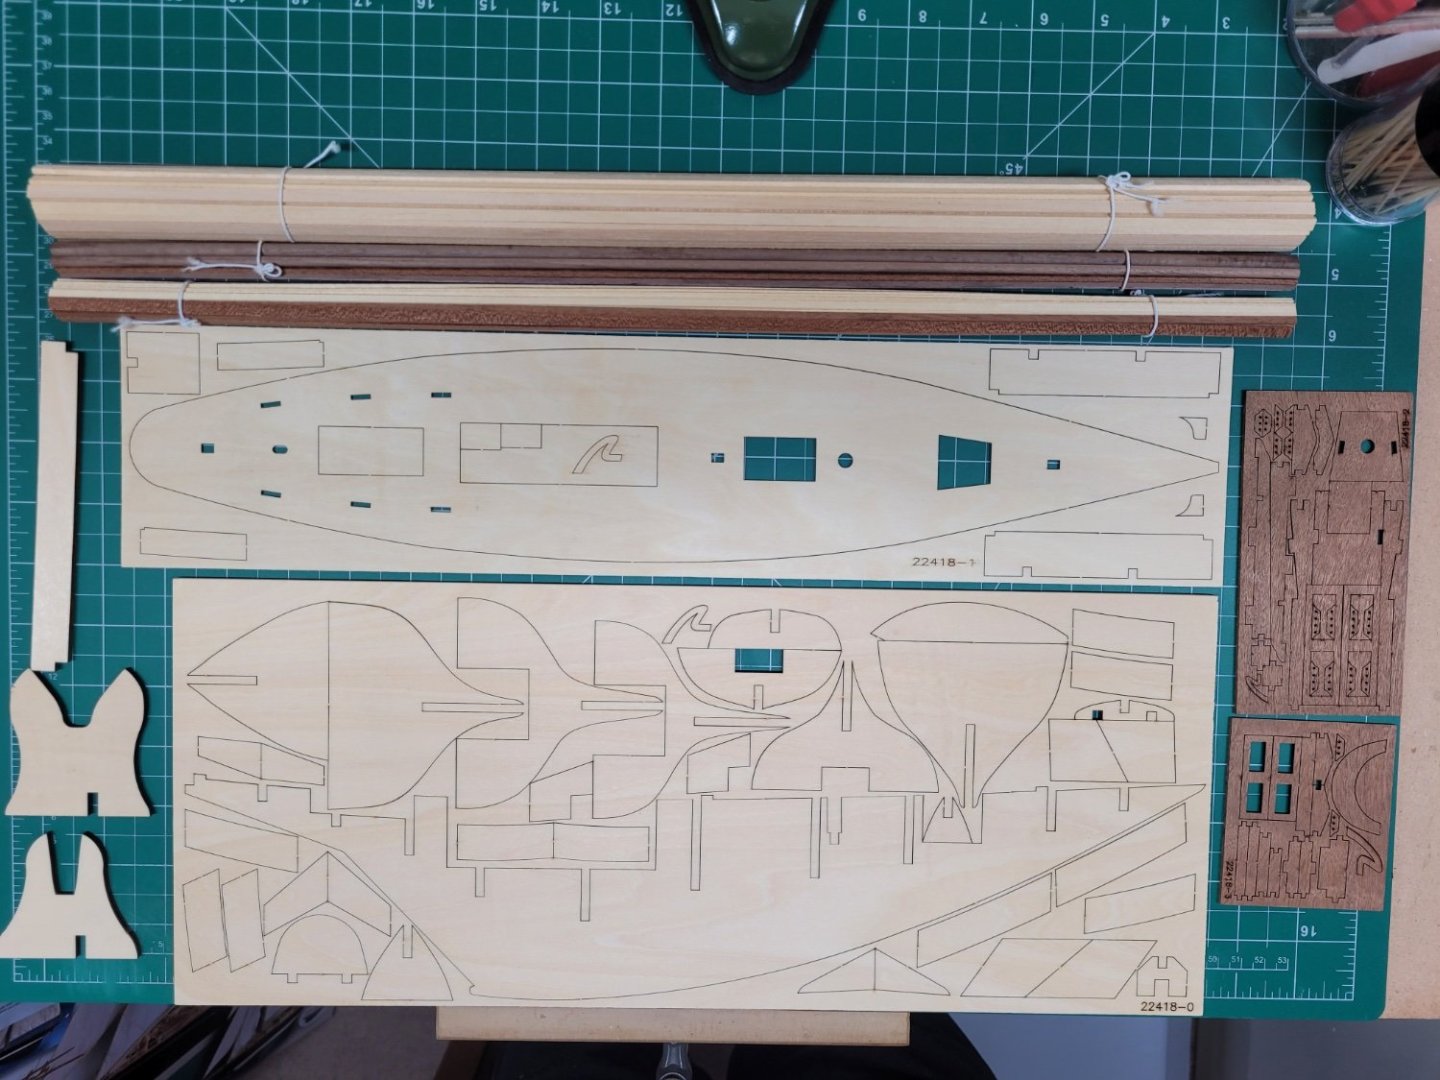
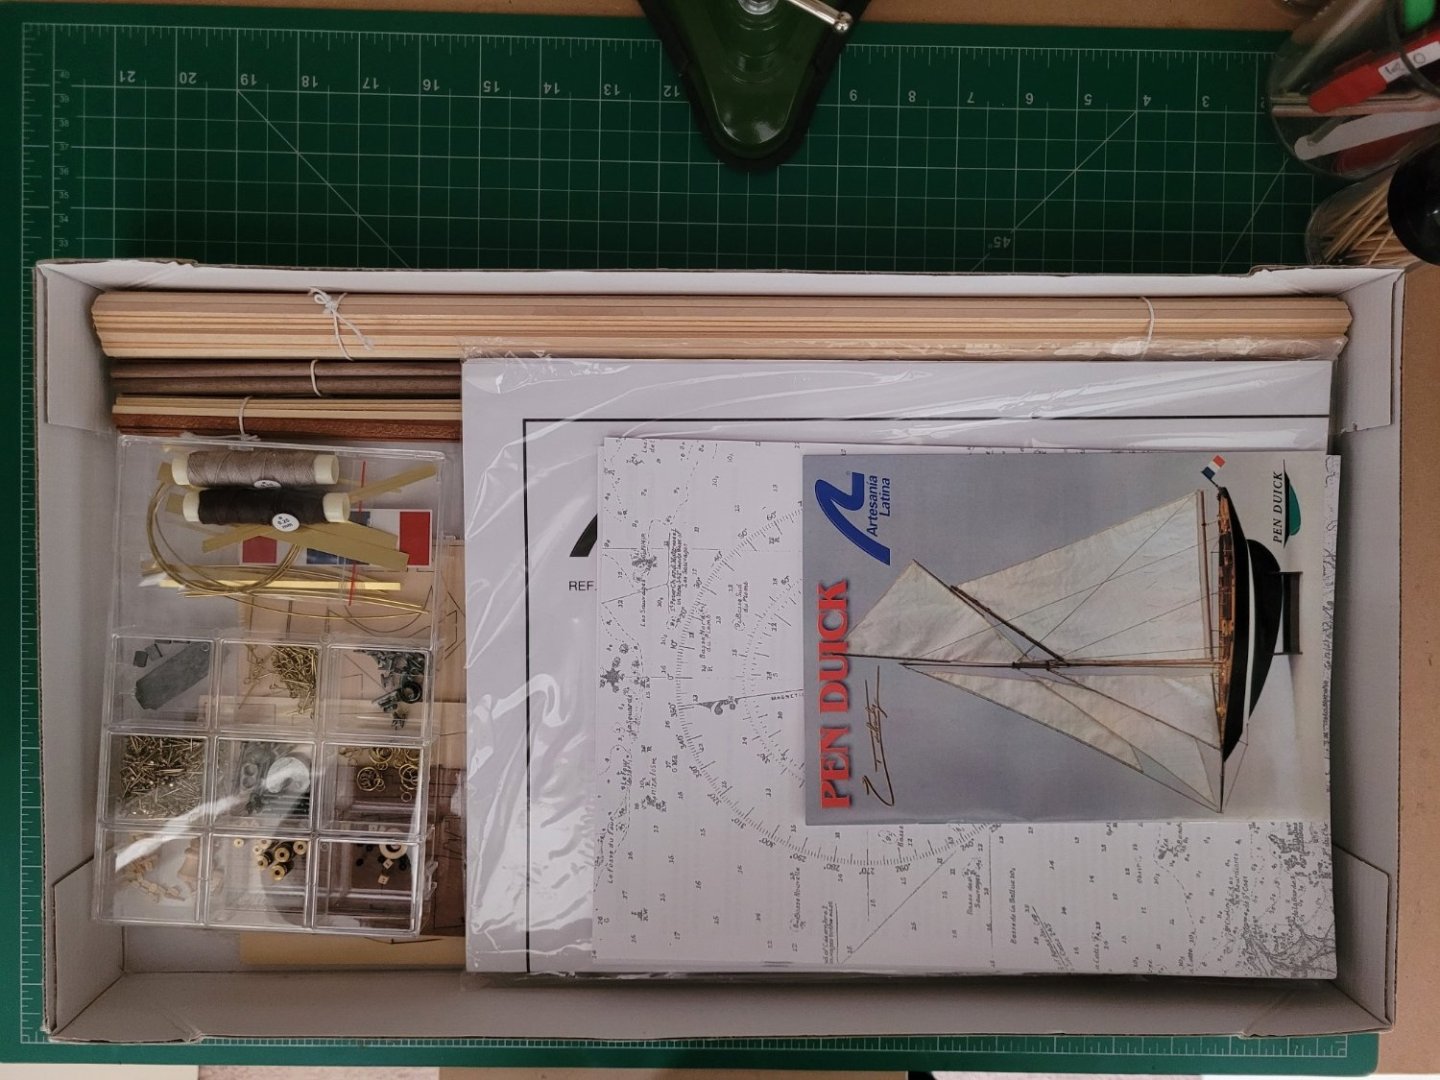

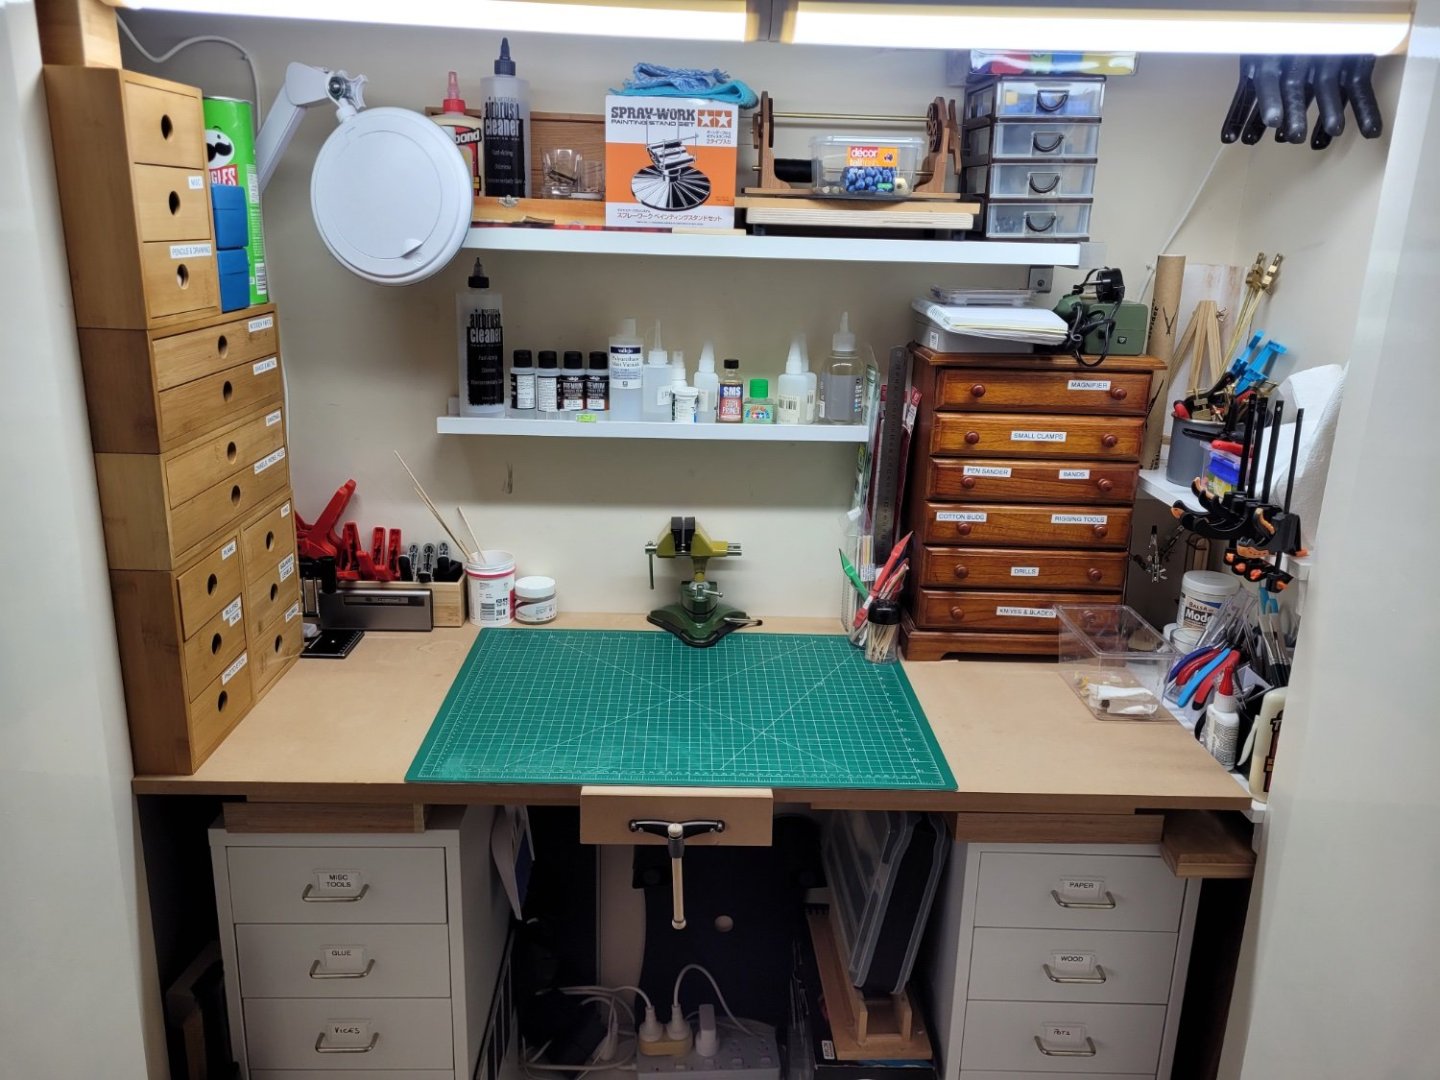

- 122 replies
-
- 12
-
-
- Artesania Latina
- Pen Duick
- (and 1 more)
-
I wanted to forget a memory that I lost some parts of the Papegojan 1627. 😱 The AL San Francisco Cross Section may heal my wounded heart. Because of the kit's unreality, its assembly ability is extremely good. I would say that children are able to build this kit without much difficulty. I added some temporary planks (yellow arrows) to harden the frame's shape. The 1st planking is done. At this point, I decided to change the second plank from stock sapelle to my Asian pearwood. After some trial and error, I made straight strips using a laser cutter. As I said, the kit has many fatal errors. It just combined every detail that people might like. - The ladders (Red) are too slow, and the width is narrower than shoulder width. - The grating frames are on the beams (Blue). - The cross sectional diagram is not realistic (Green). I referred to the cross sectional diagram from the contemporary wreckage ship. ( Source : https://albaola.org/proceso-de-construccion/ , https://www.patrimoniocultural.gov.pt/media/uploads/trabalhosdearqueologia/18/22.pdf ) But, I stopped in the middle of modification. I didn't want to pay more than a month for this kit, so I left the cross sectional diagram incomplete. Also, I I cut the beam to expand the space for grating frames. The thicker beam was part of the modification for realistic structure. By the way, I decided to skip the ladder. I thought it made more sense. This is an internal painting. I applied a cherry-colored gel stain. The outside and cross section are Asian pearwood. I love the pink wood. The next step will be gunports.
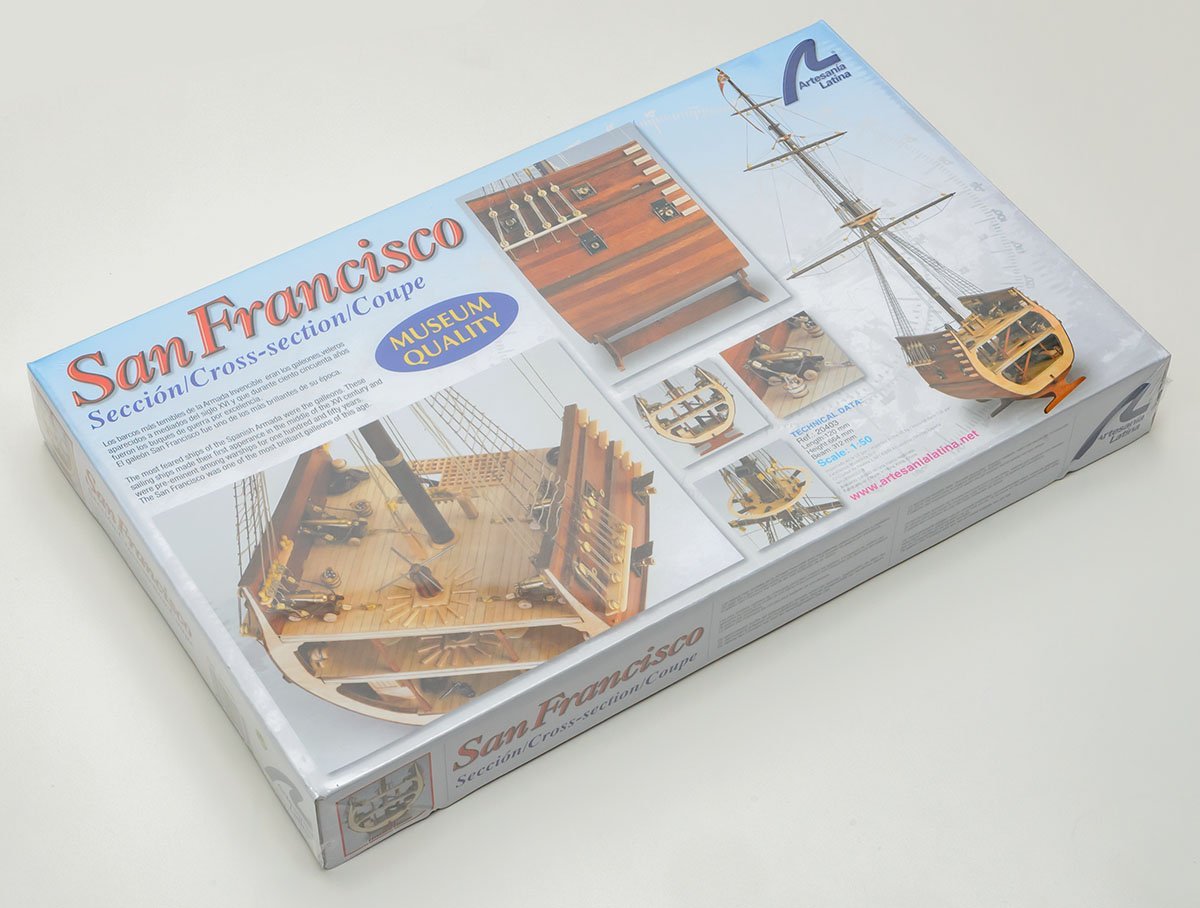
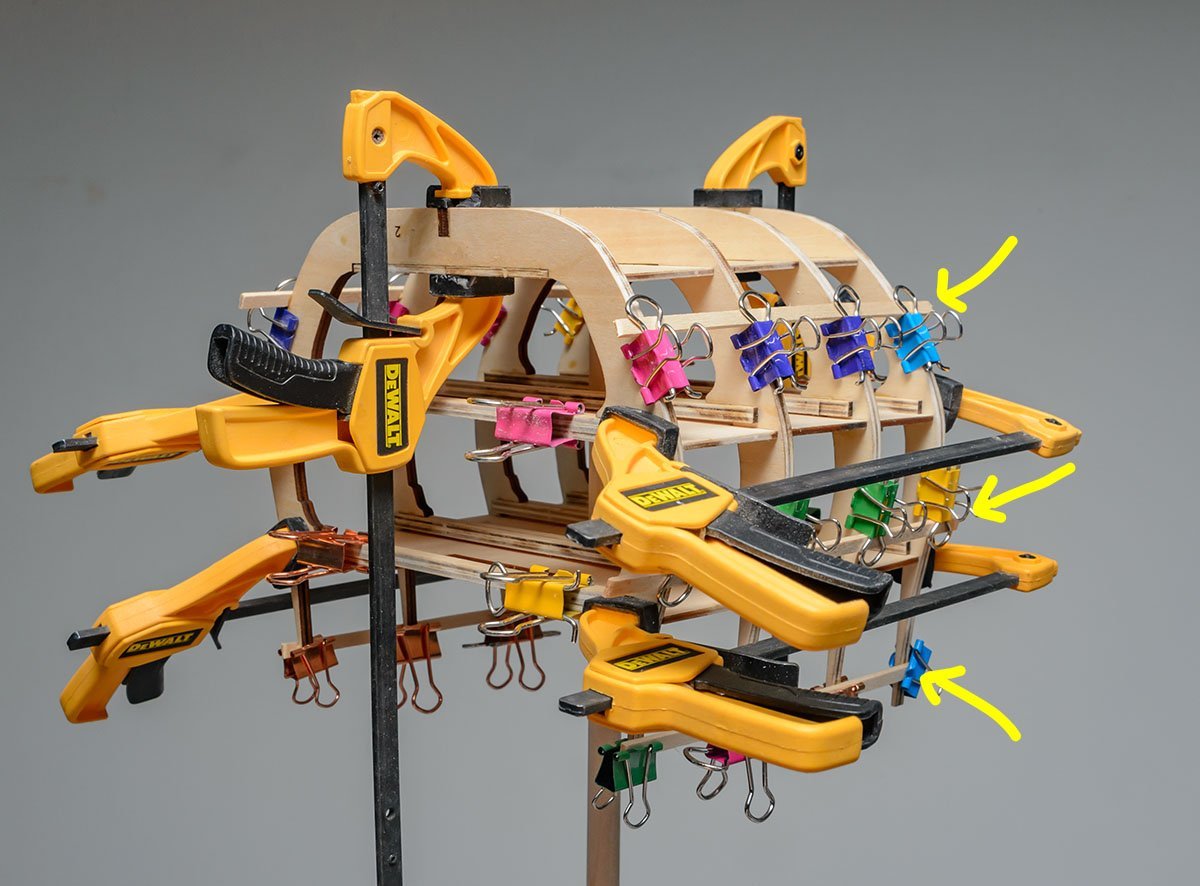
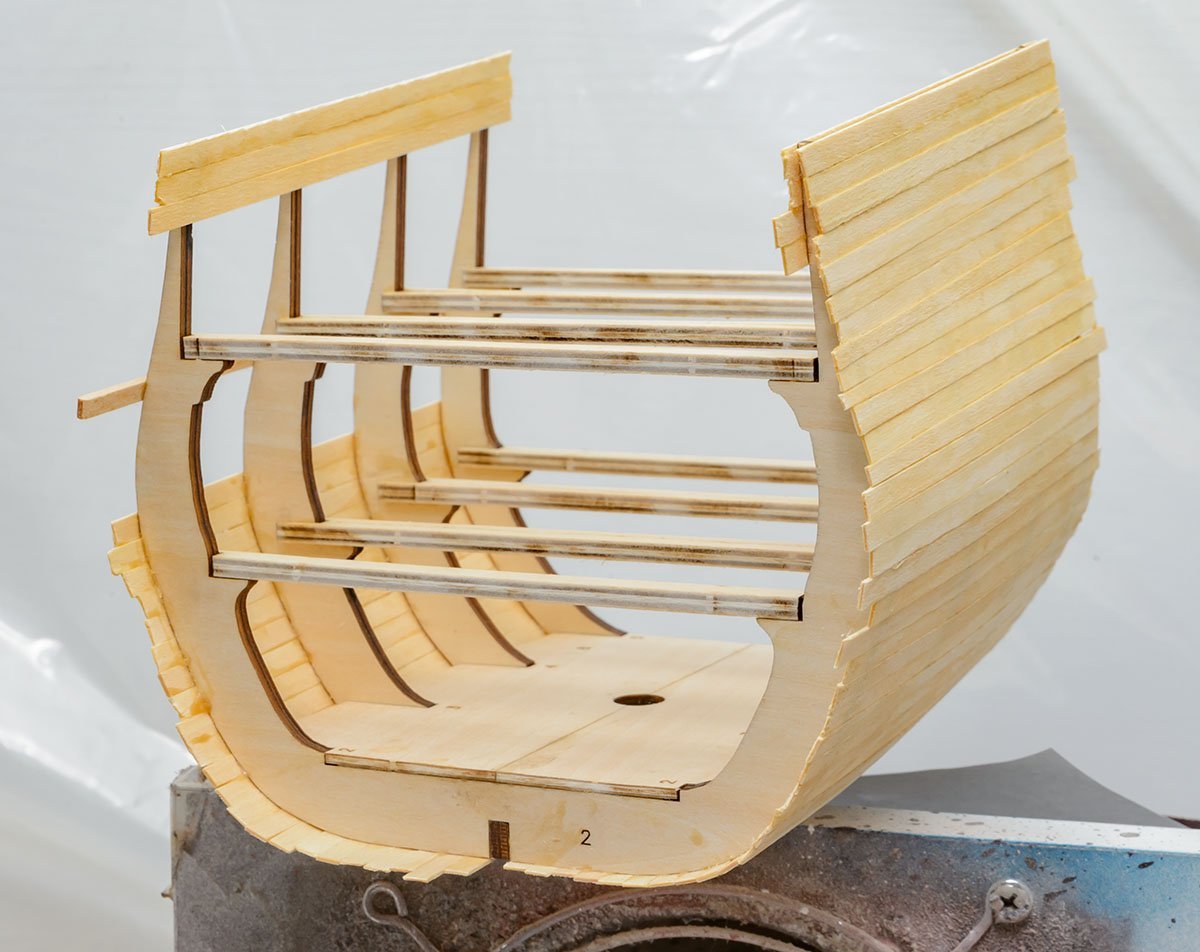
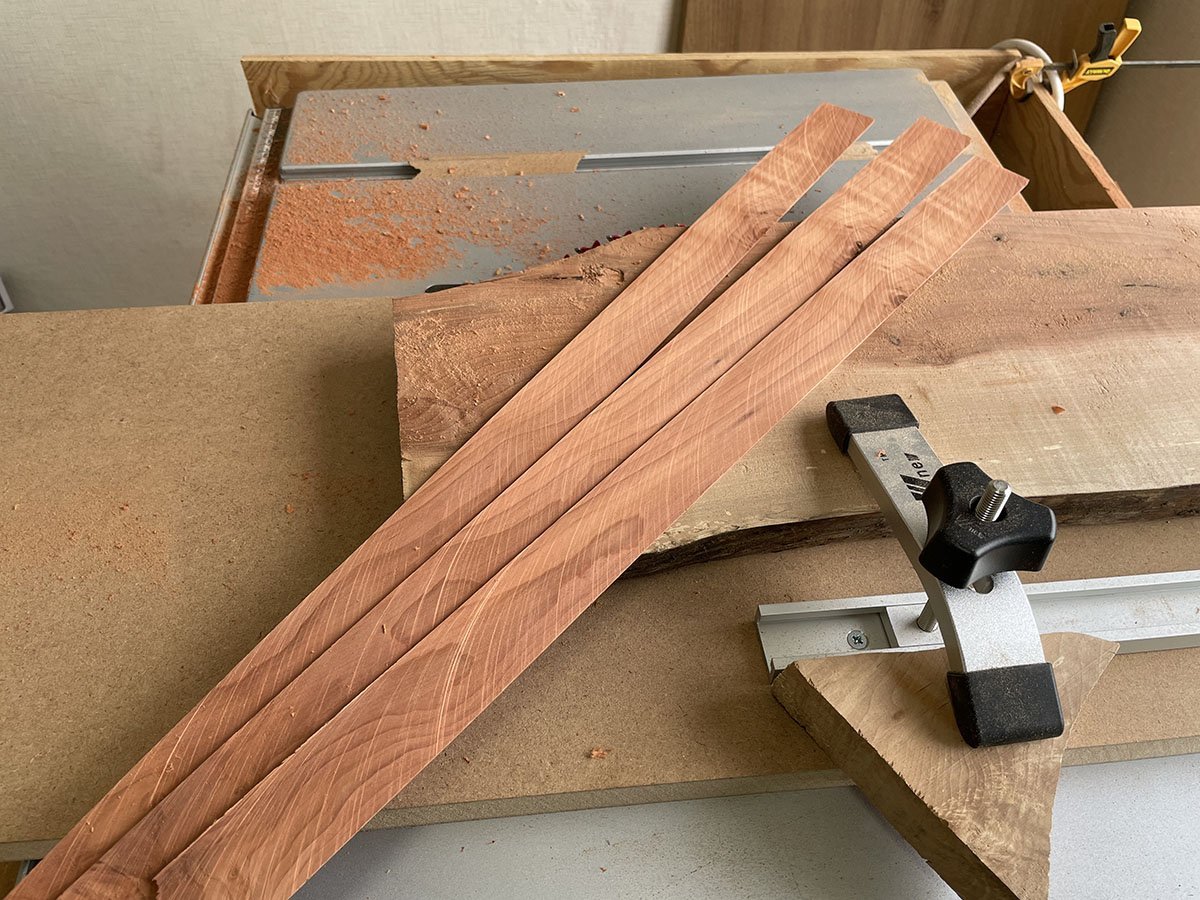
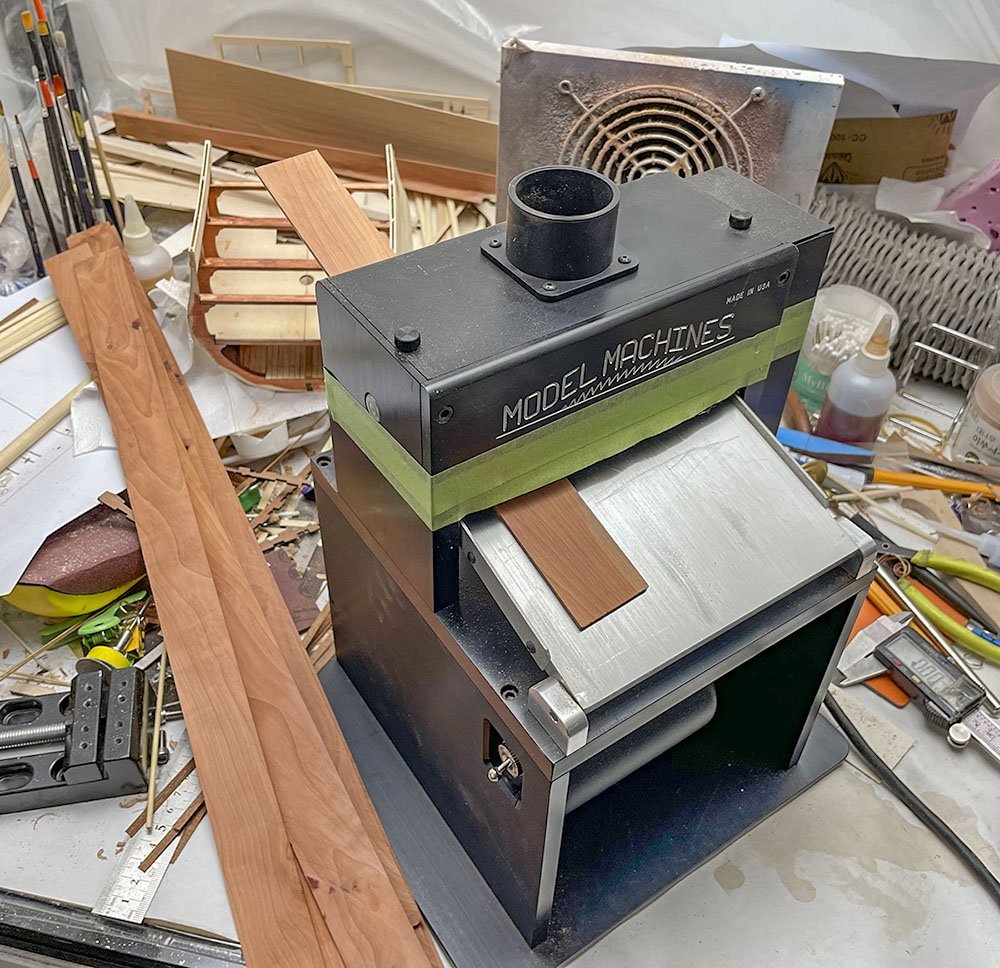
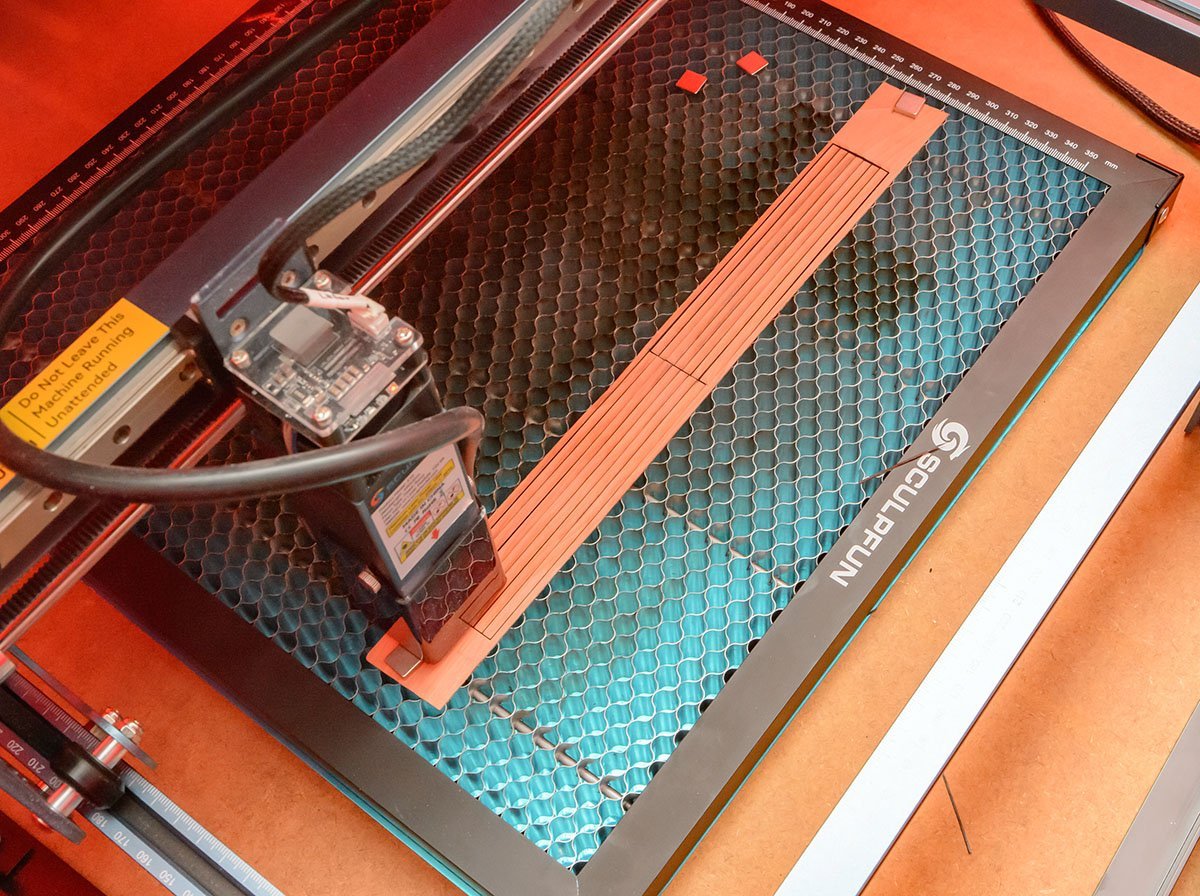
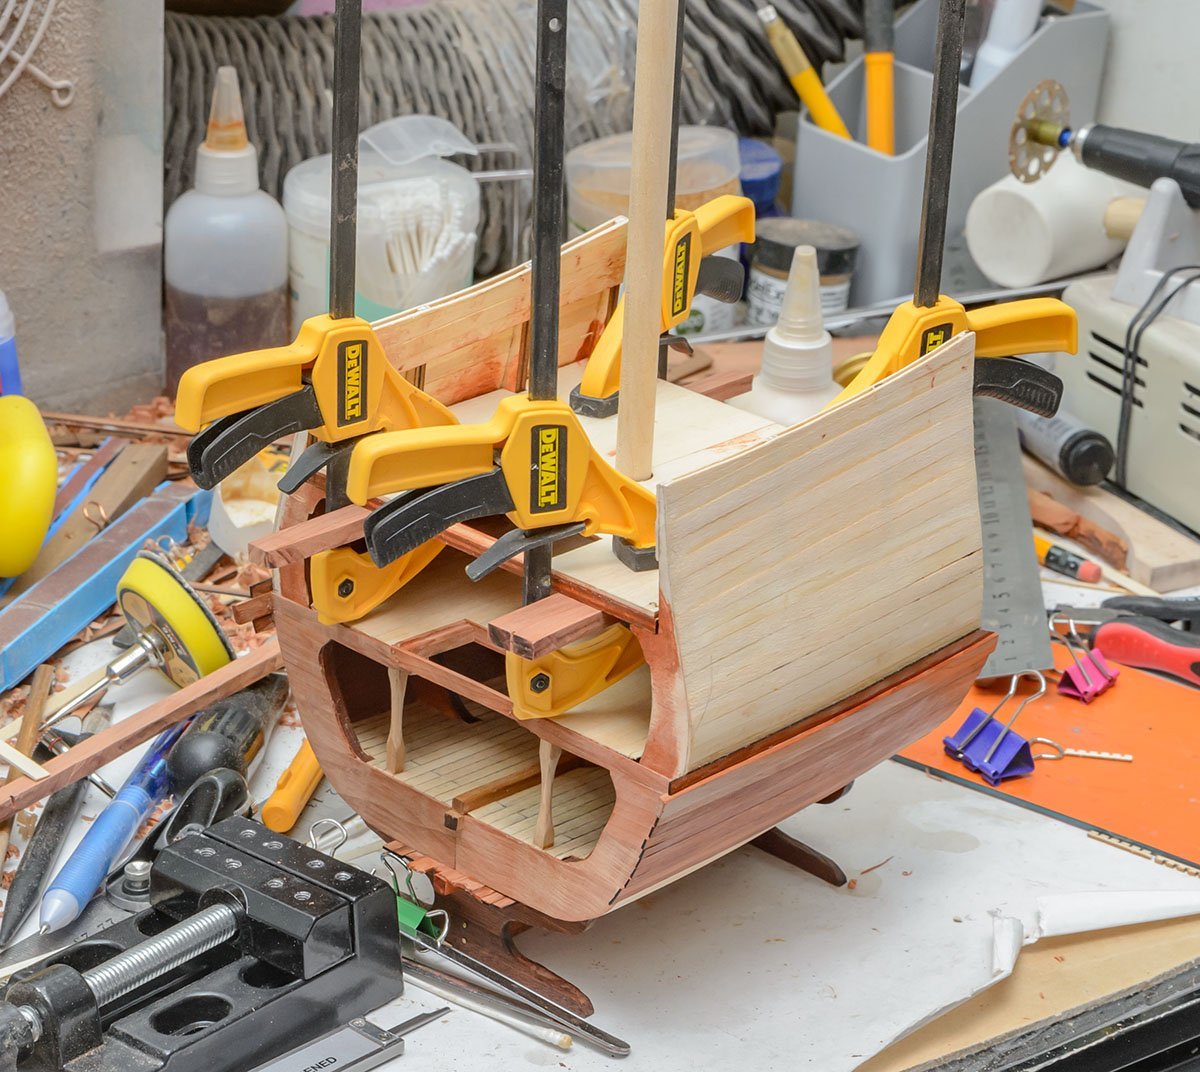

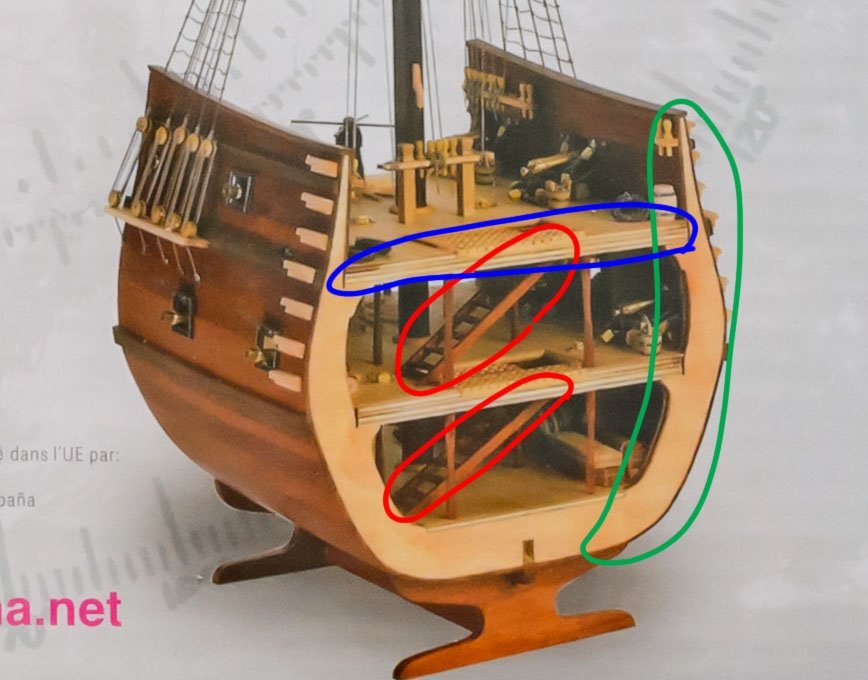
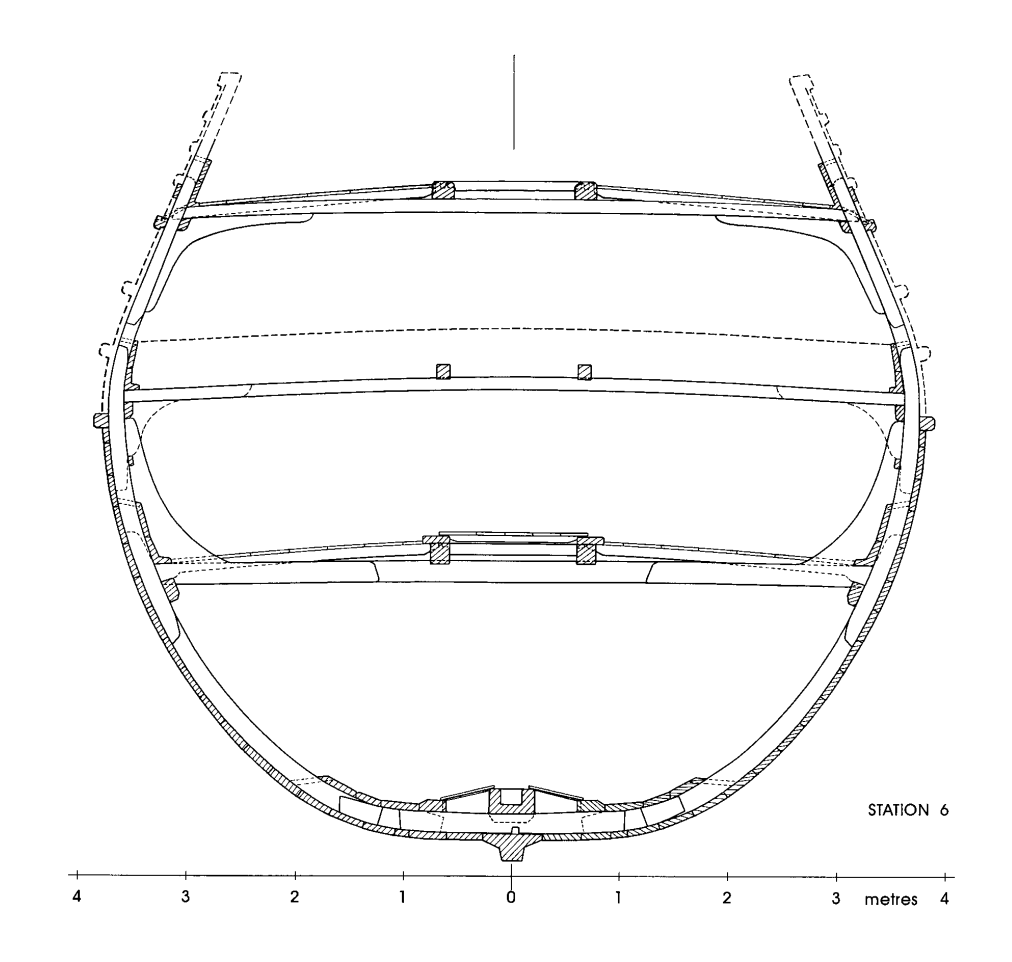
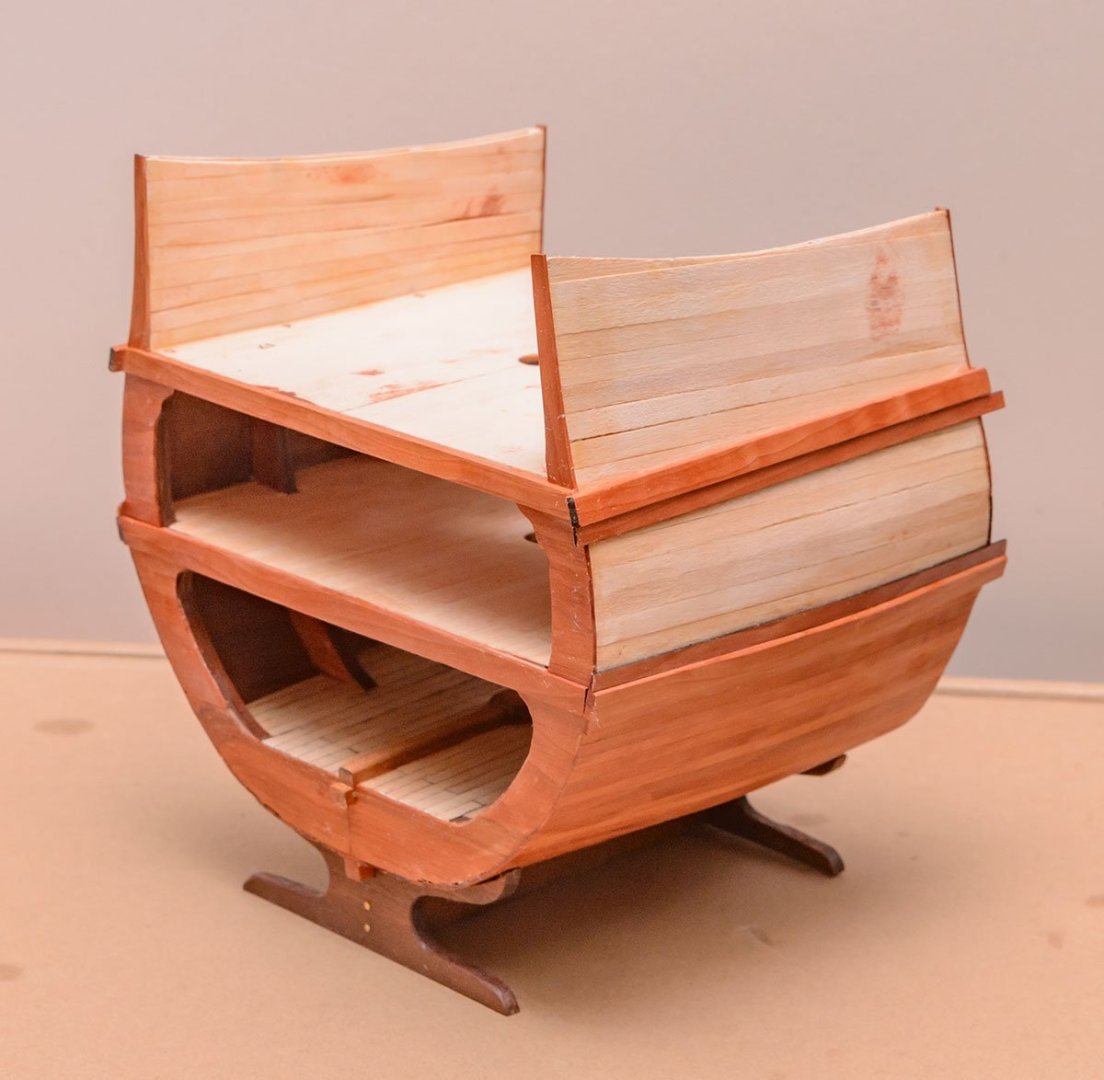

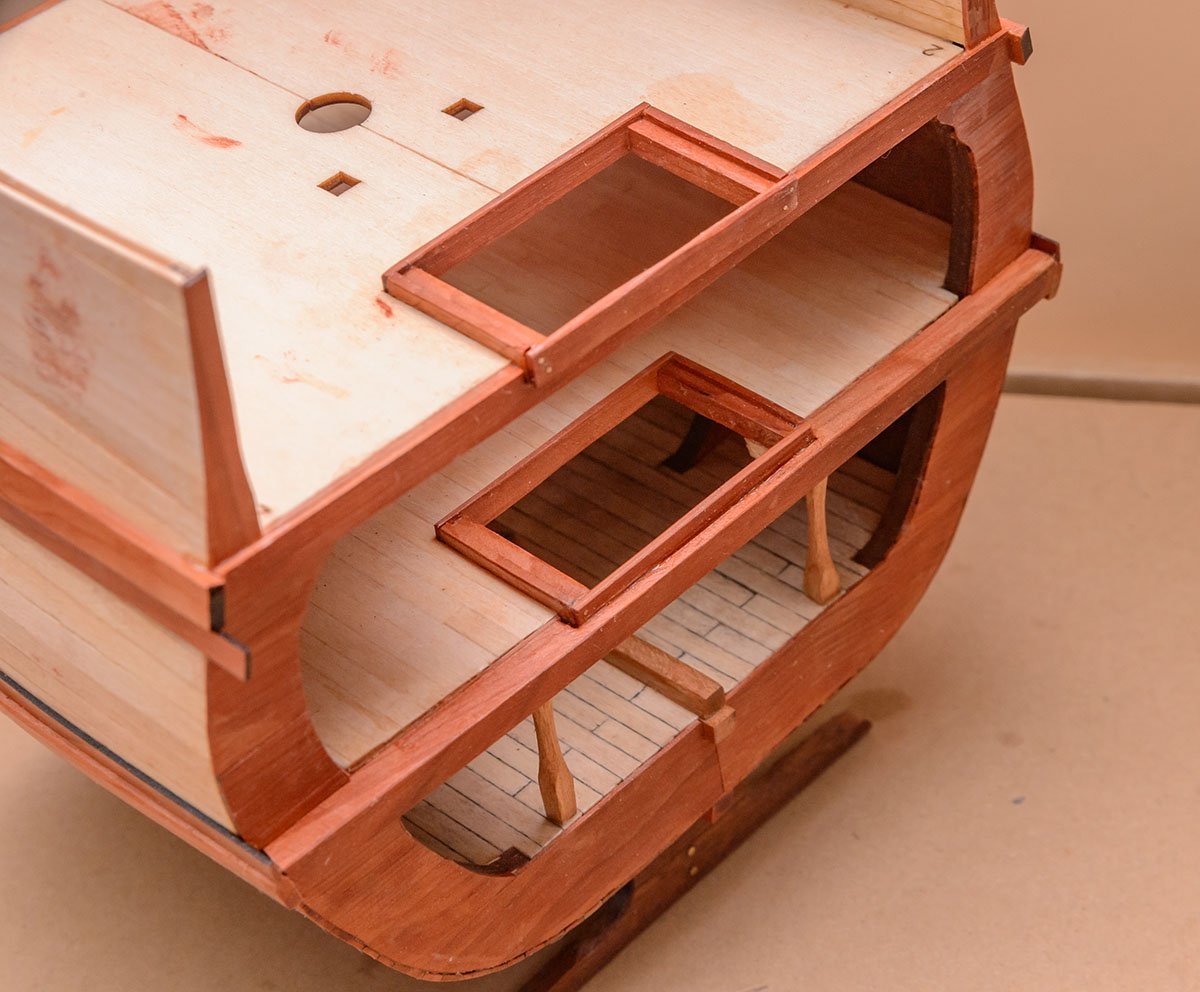
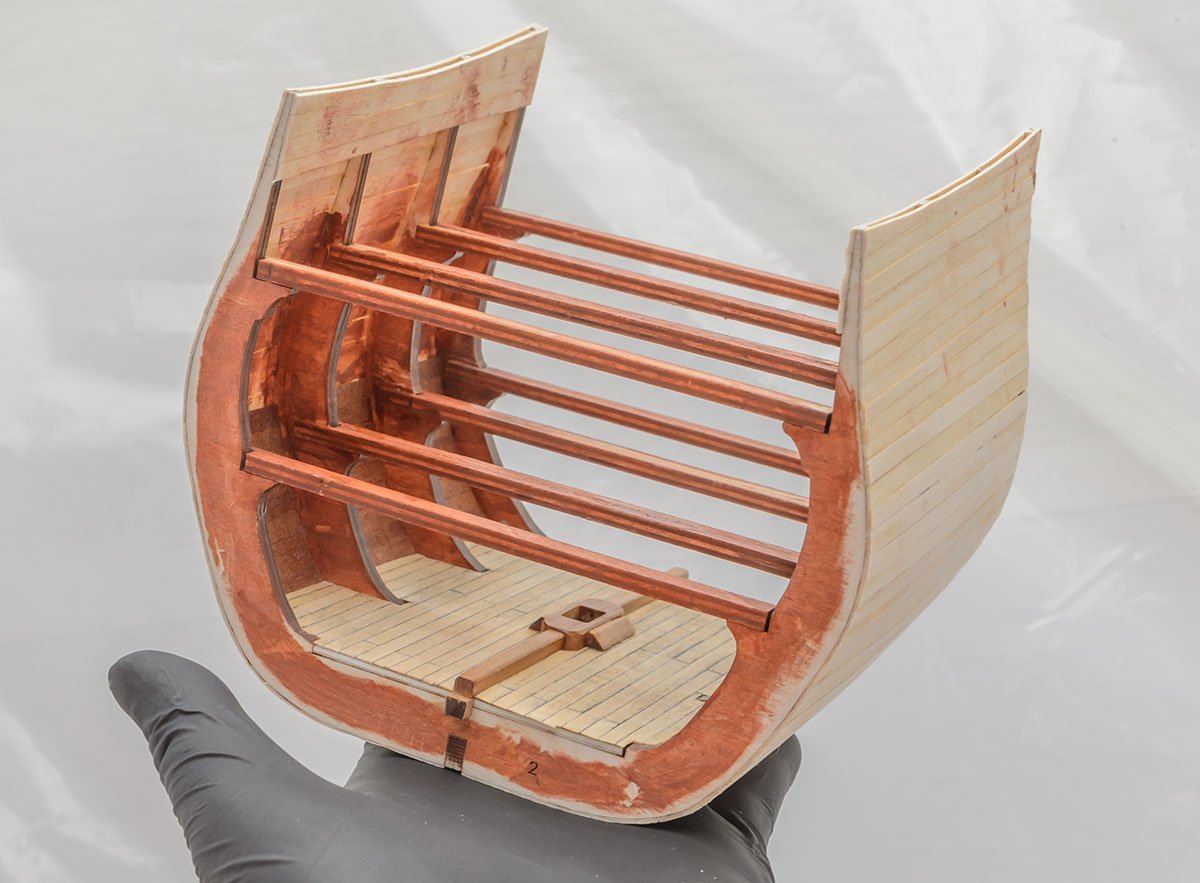
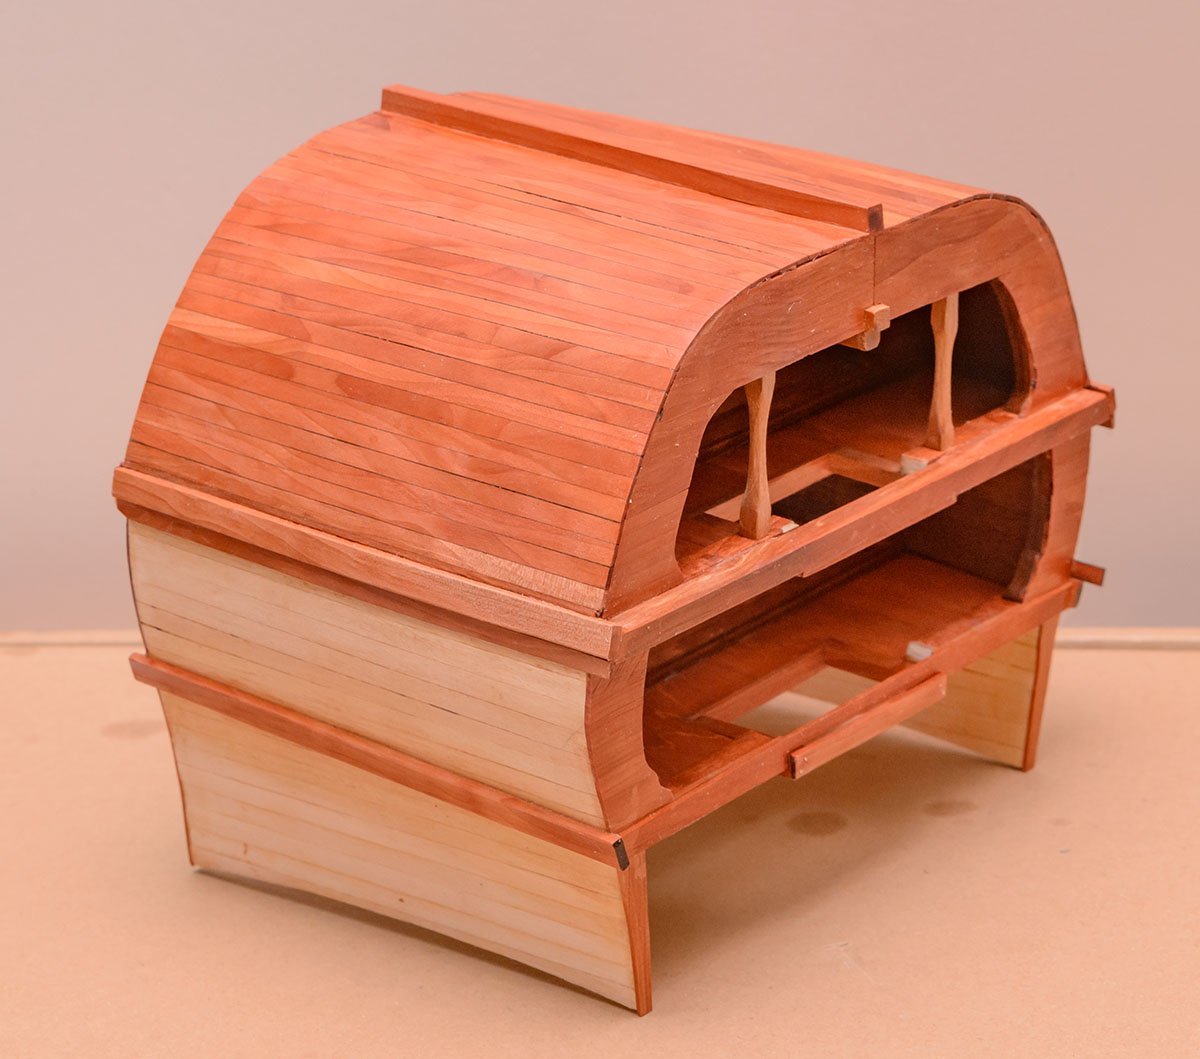
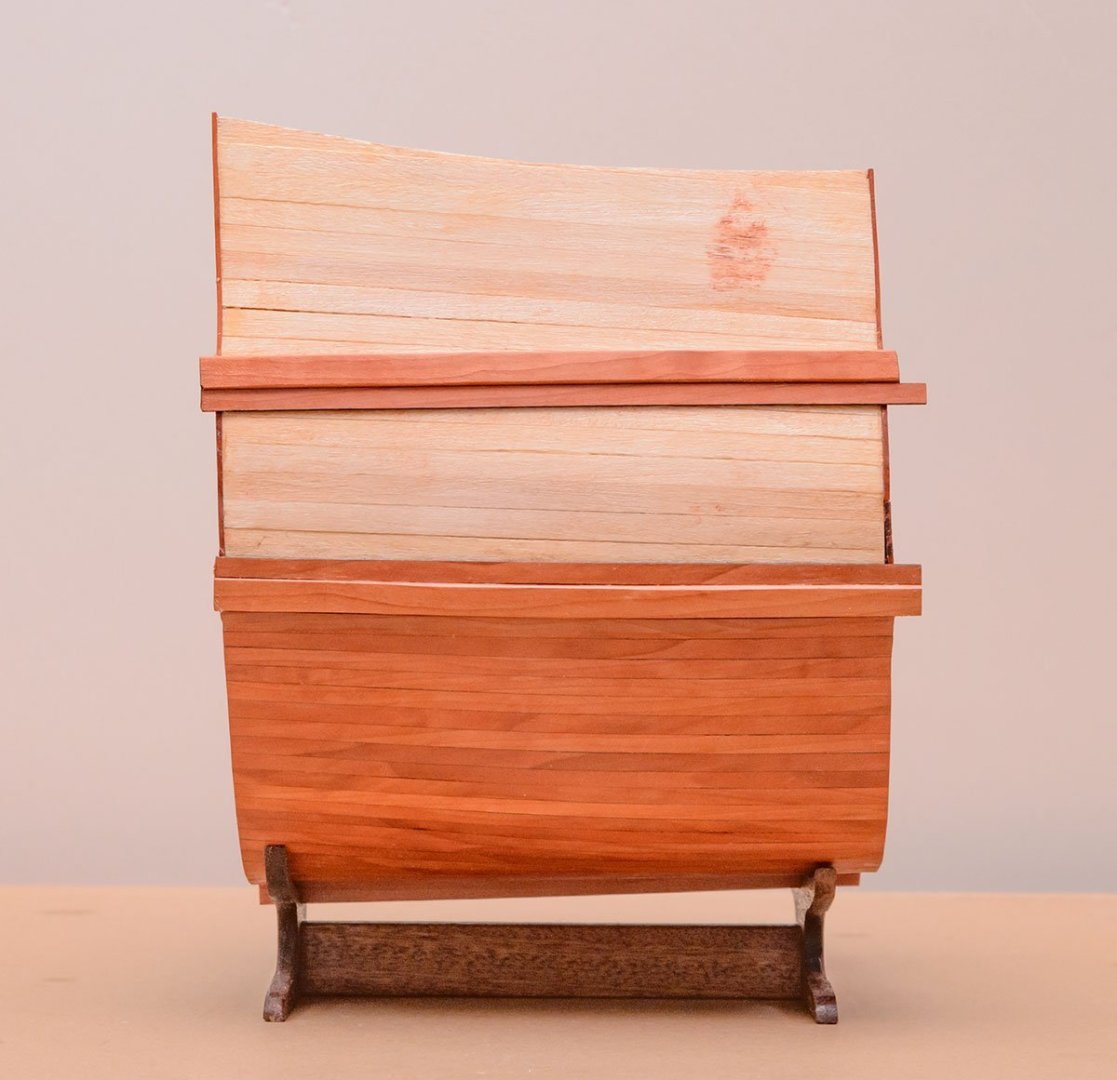
- 4 replies
-
- 5
-
-
- San Francisco
- Cross Section
- (and 2 more)
-
 Hi all. This will be my first build log and will be of my 3rd model ship kit. I started this build back about a month ago and have only now thought to do a log. Not many photos have been taken up until this point. I will post the photos that I have up until today. I will then update you all as I go on to another step.
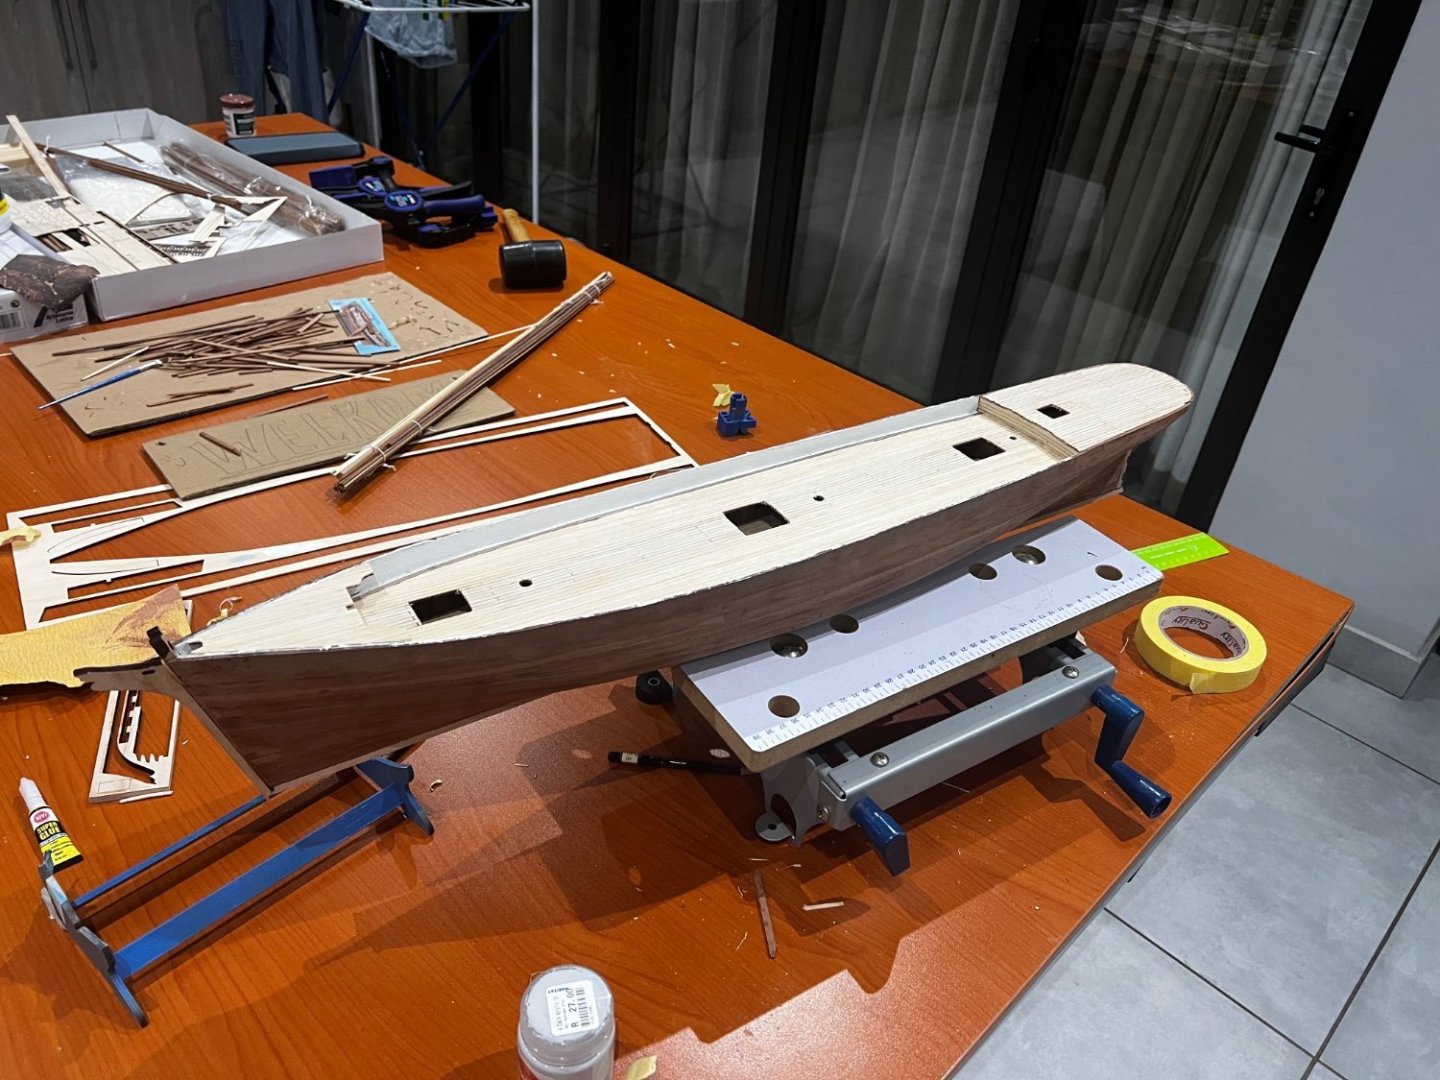

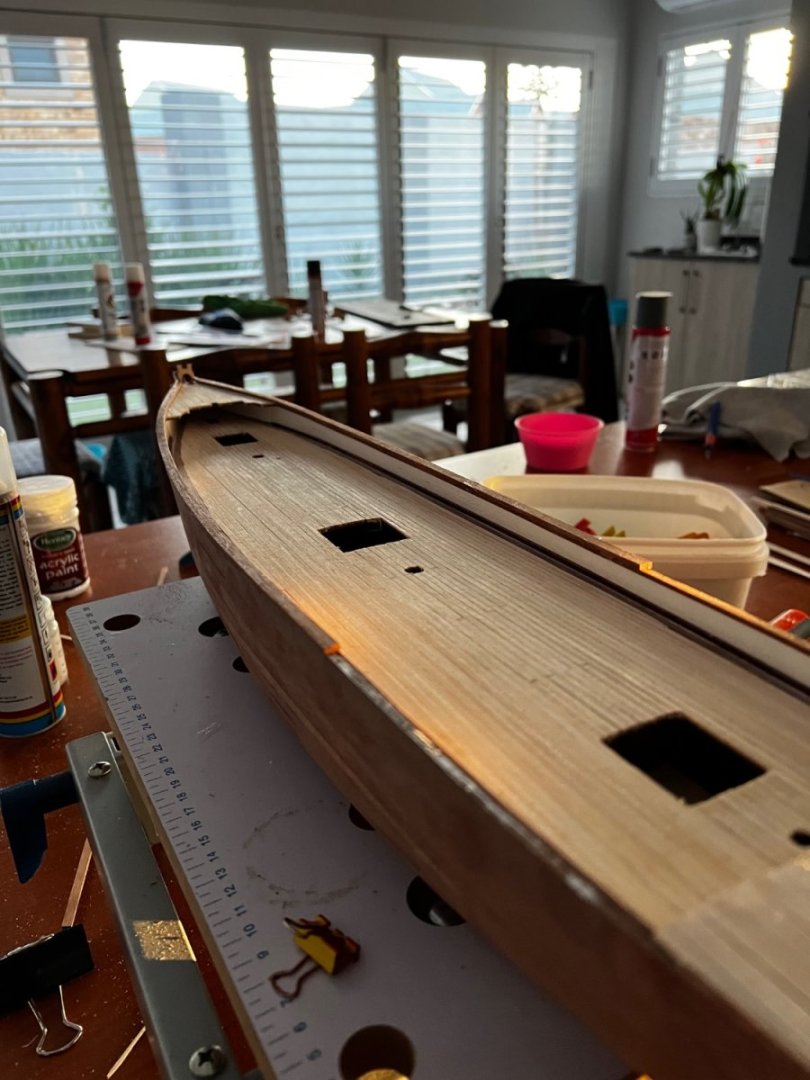


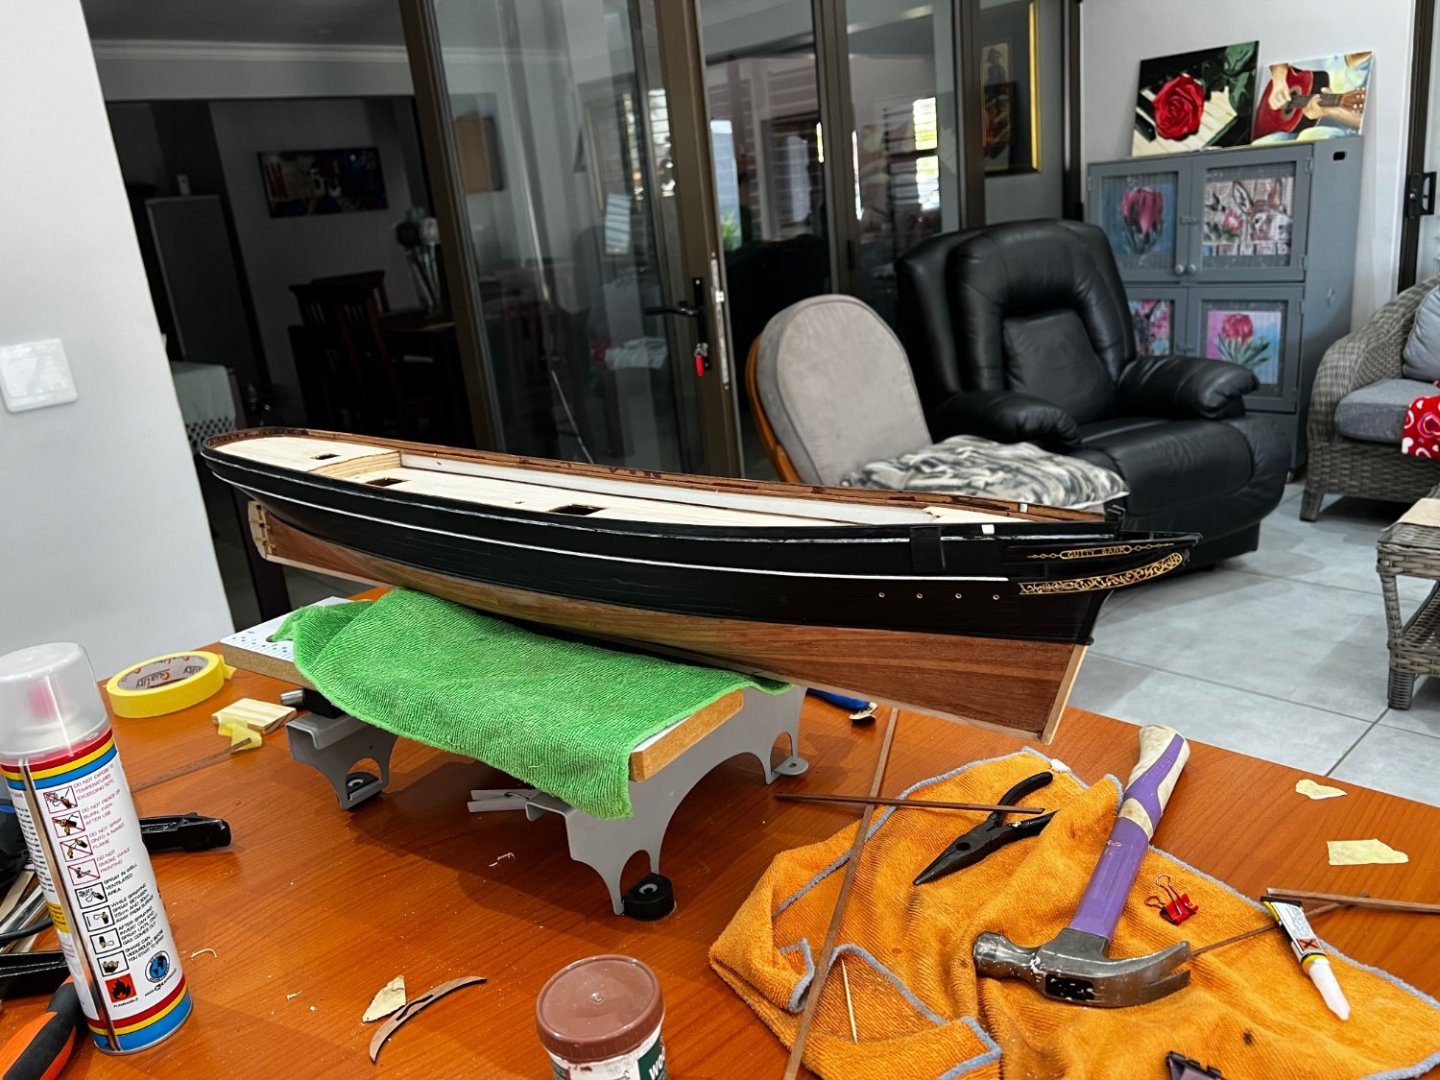

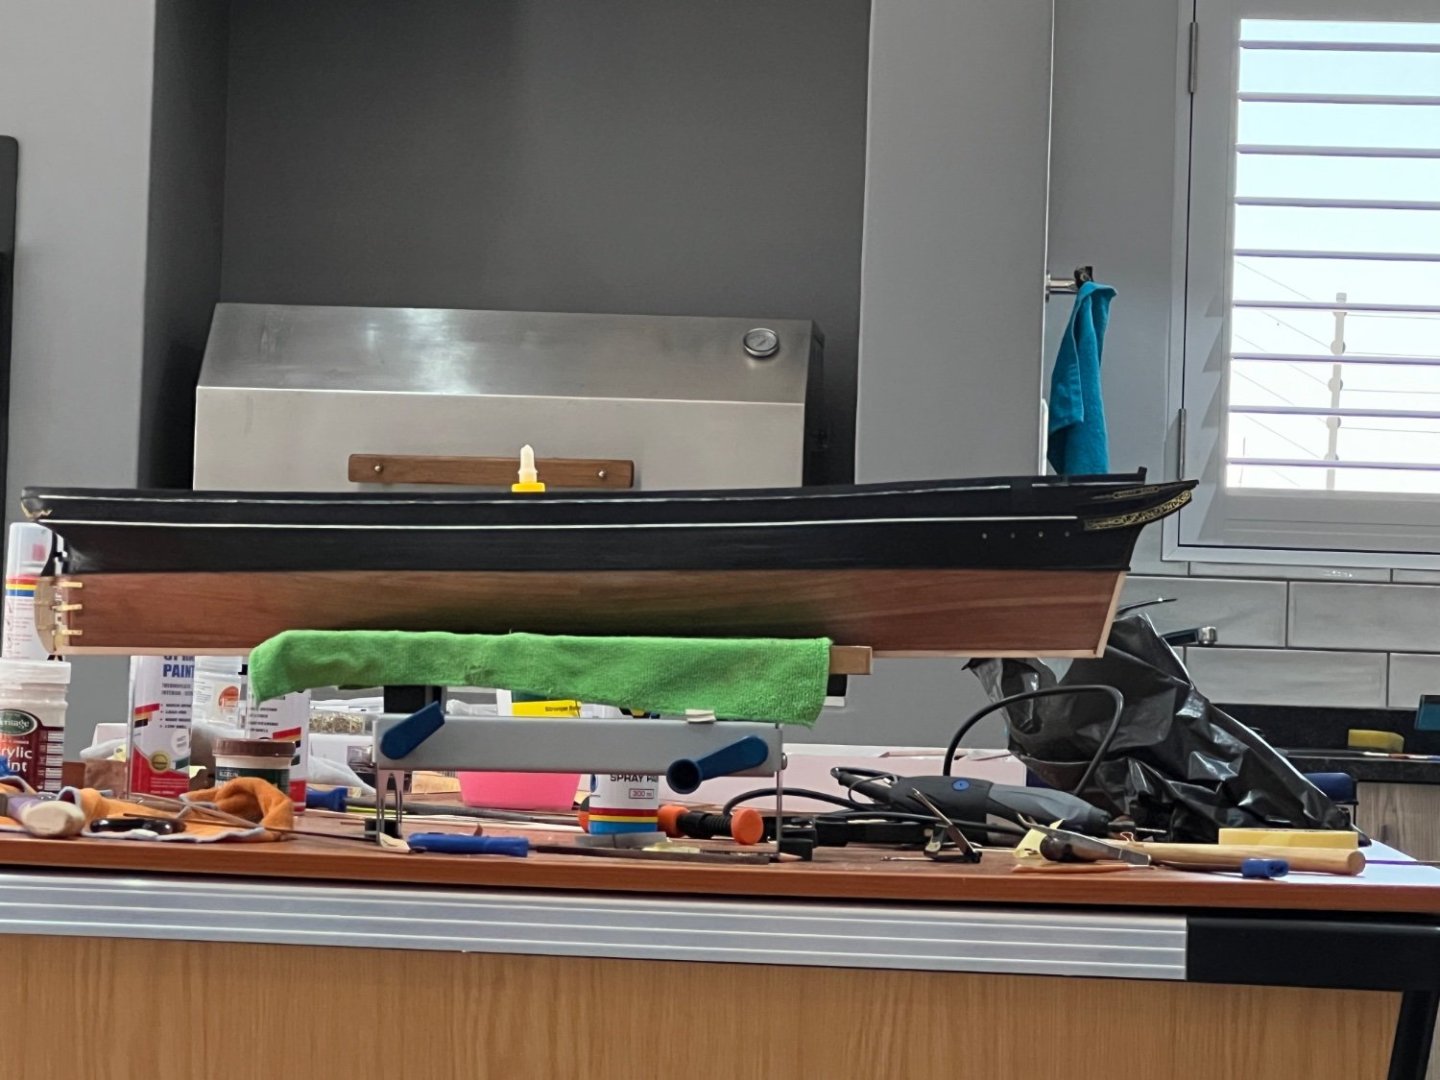
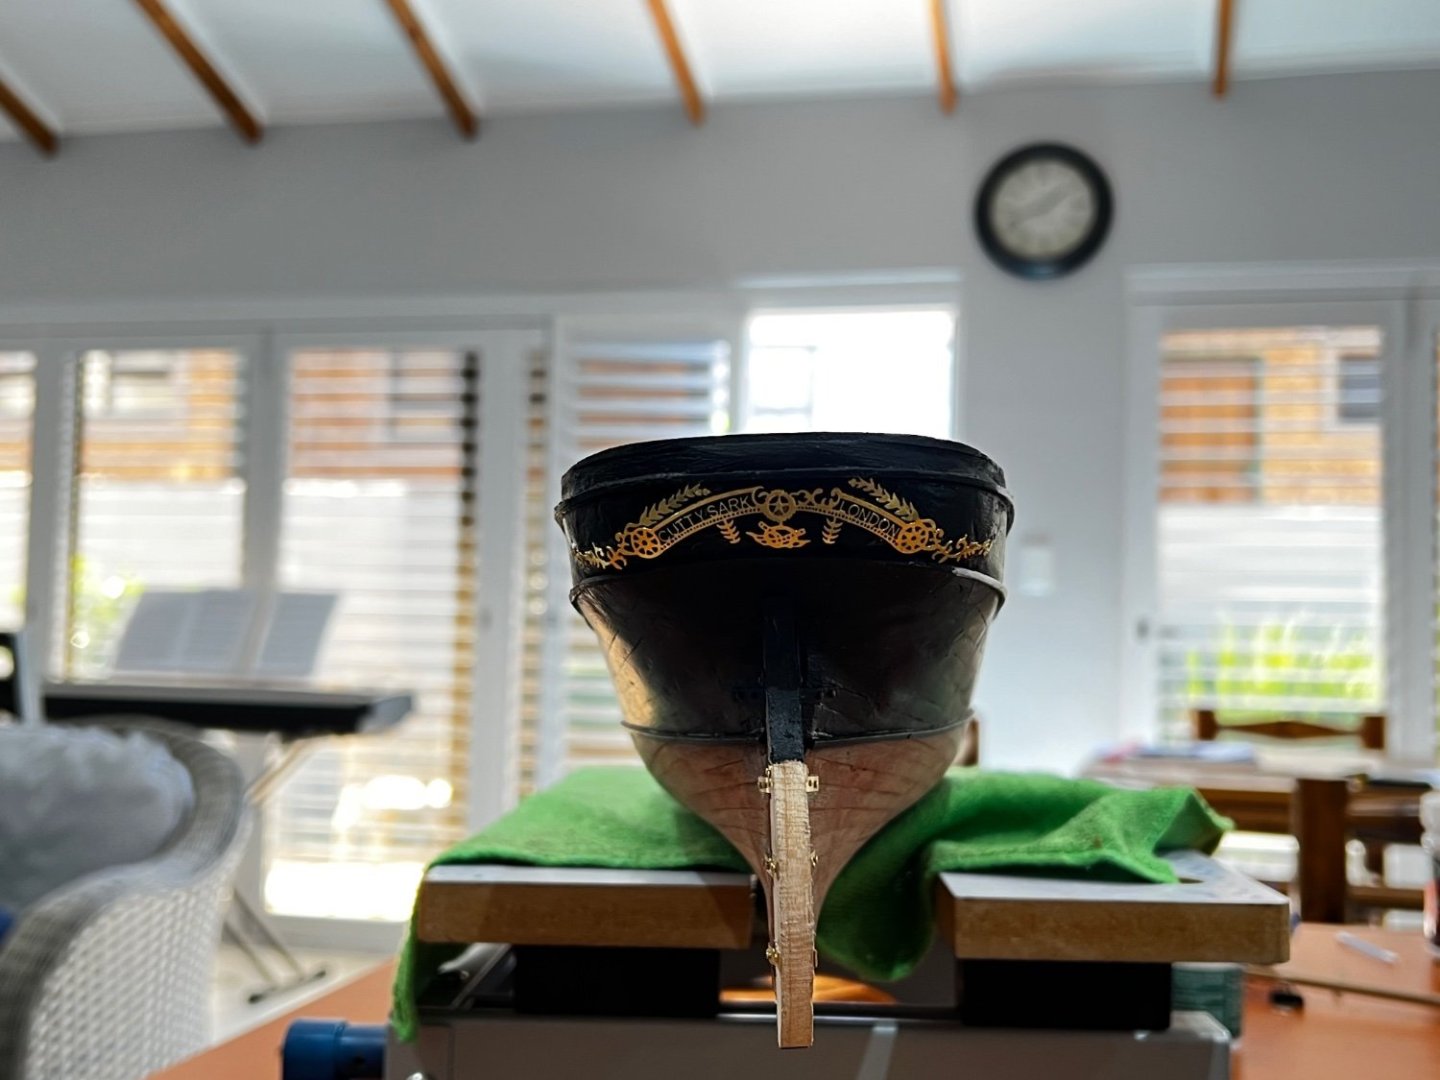


- 47 replies
-
- 6
-
-
- Cutty Sark
- Artesania Latina
- (and 1 more)
-
 So while I am waiting on some tools I started the Swift. I got it off Ebay and it came with the original receipt. It was first purchased in 1983. It looks like they were die cut in 1983 versus laser cut. Laser Cut didn't exist then. Looks like everything is there. Only is issue is mold on the spacing blocks. That is not a problem. I do mold remediation for a living so this will not be an issue. I put the frames on.
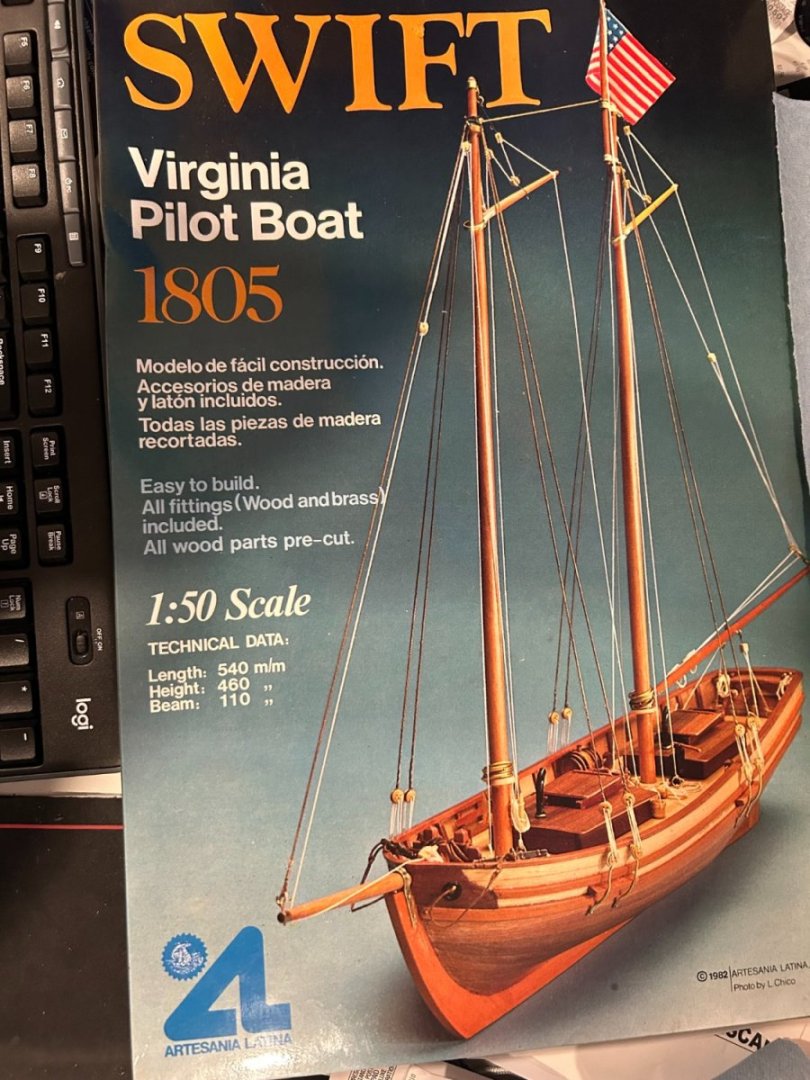

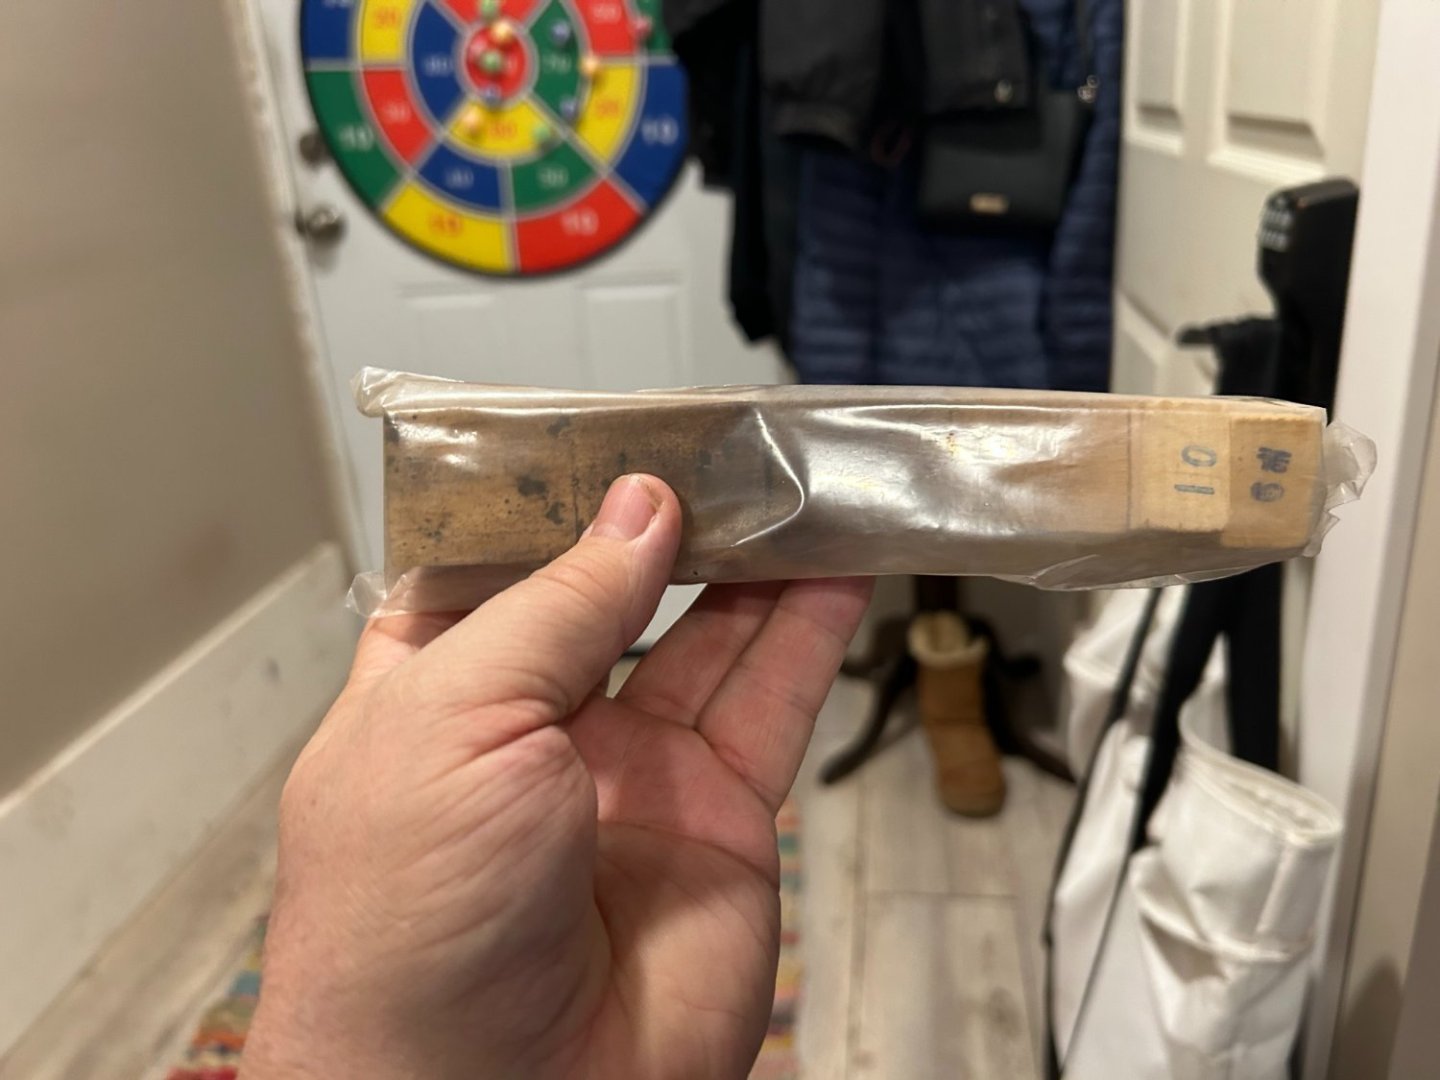

-
.thumb.jpg.91c8789375242261c06827360a127727.jpg) I will try to build something looking like the Santa Maria using new edition of Artesania Latina kit. I have to say it is a very high quality kit. Even plywood looks like they polished it. Dryfitting looks promising The quality is so good, they even give me a pre bend false deck😂 But with the sails it is screw up what I suppose to do with those sails margins??🤔 But on the bright side, my plan is to give her some lights. It will be my first ever attempt to use LEDs. Already drilled holes in the bulkheads for the wires.
I will try to build something looking like the Santa Maria using new edition of Artesania Latina kit. I have to say it is a very high quality kit. Even plywood looks like they polished it. Dryfitting looks promising The quality is so good, they even give me a pre bend false deck😂 But with the sails it is screw up what I suppose to do with those sails margins??🤔 But on the bright side, my plan is to give her some lights. It will be my first ever attempt to use LEDs. Already drilled holes in the bulkheads for the wires.