Search the Community
Showing results for tags 'First Build'.
-
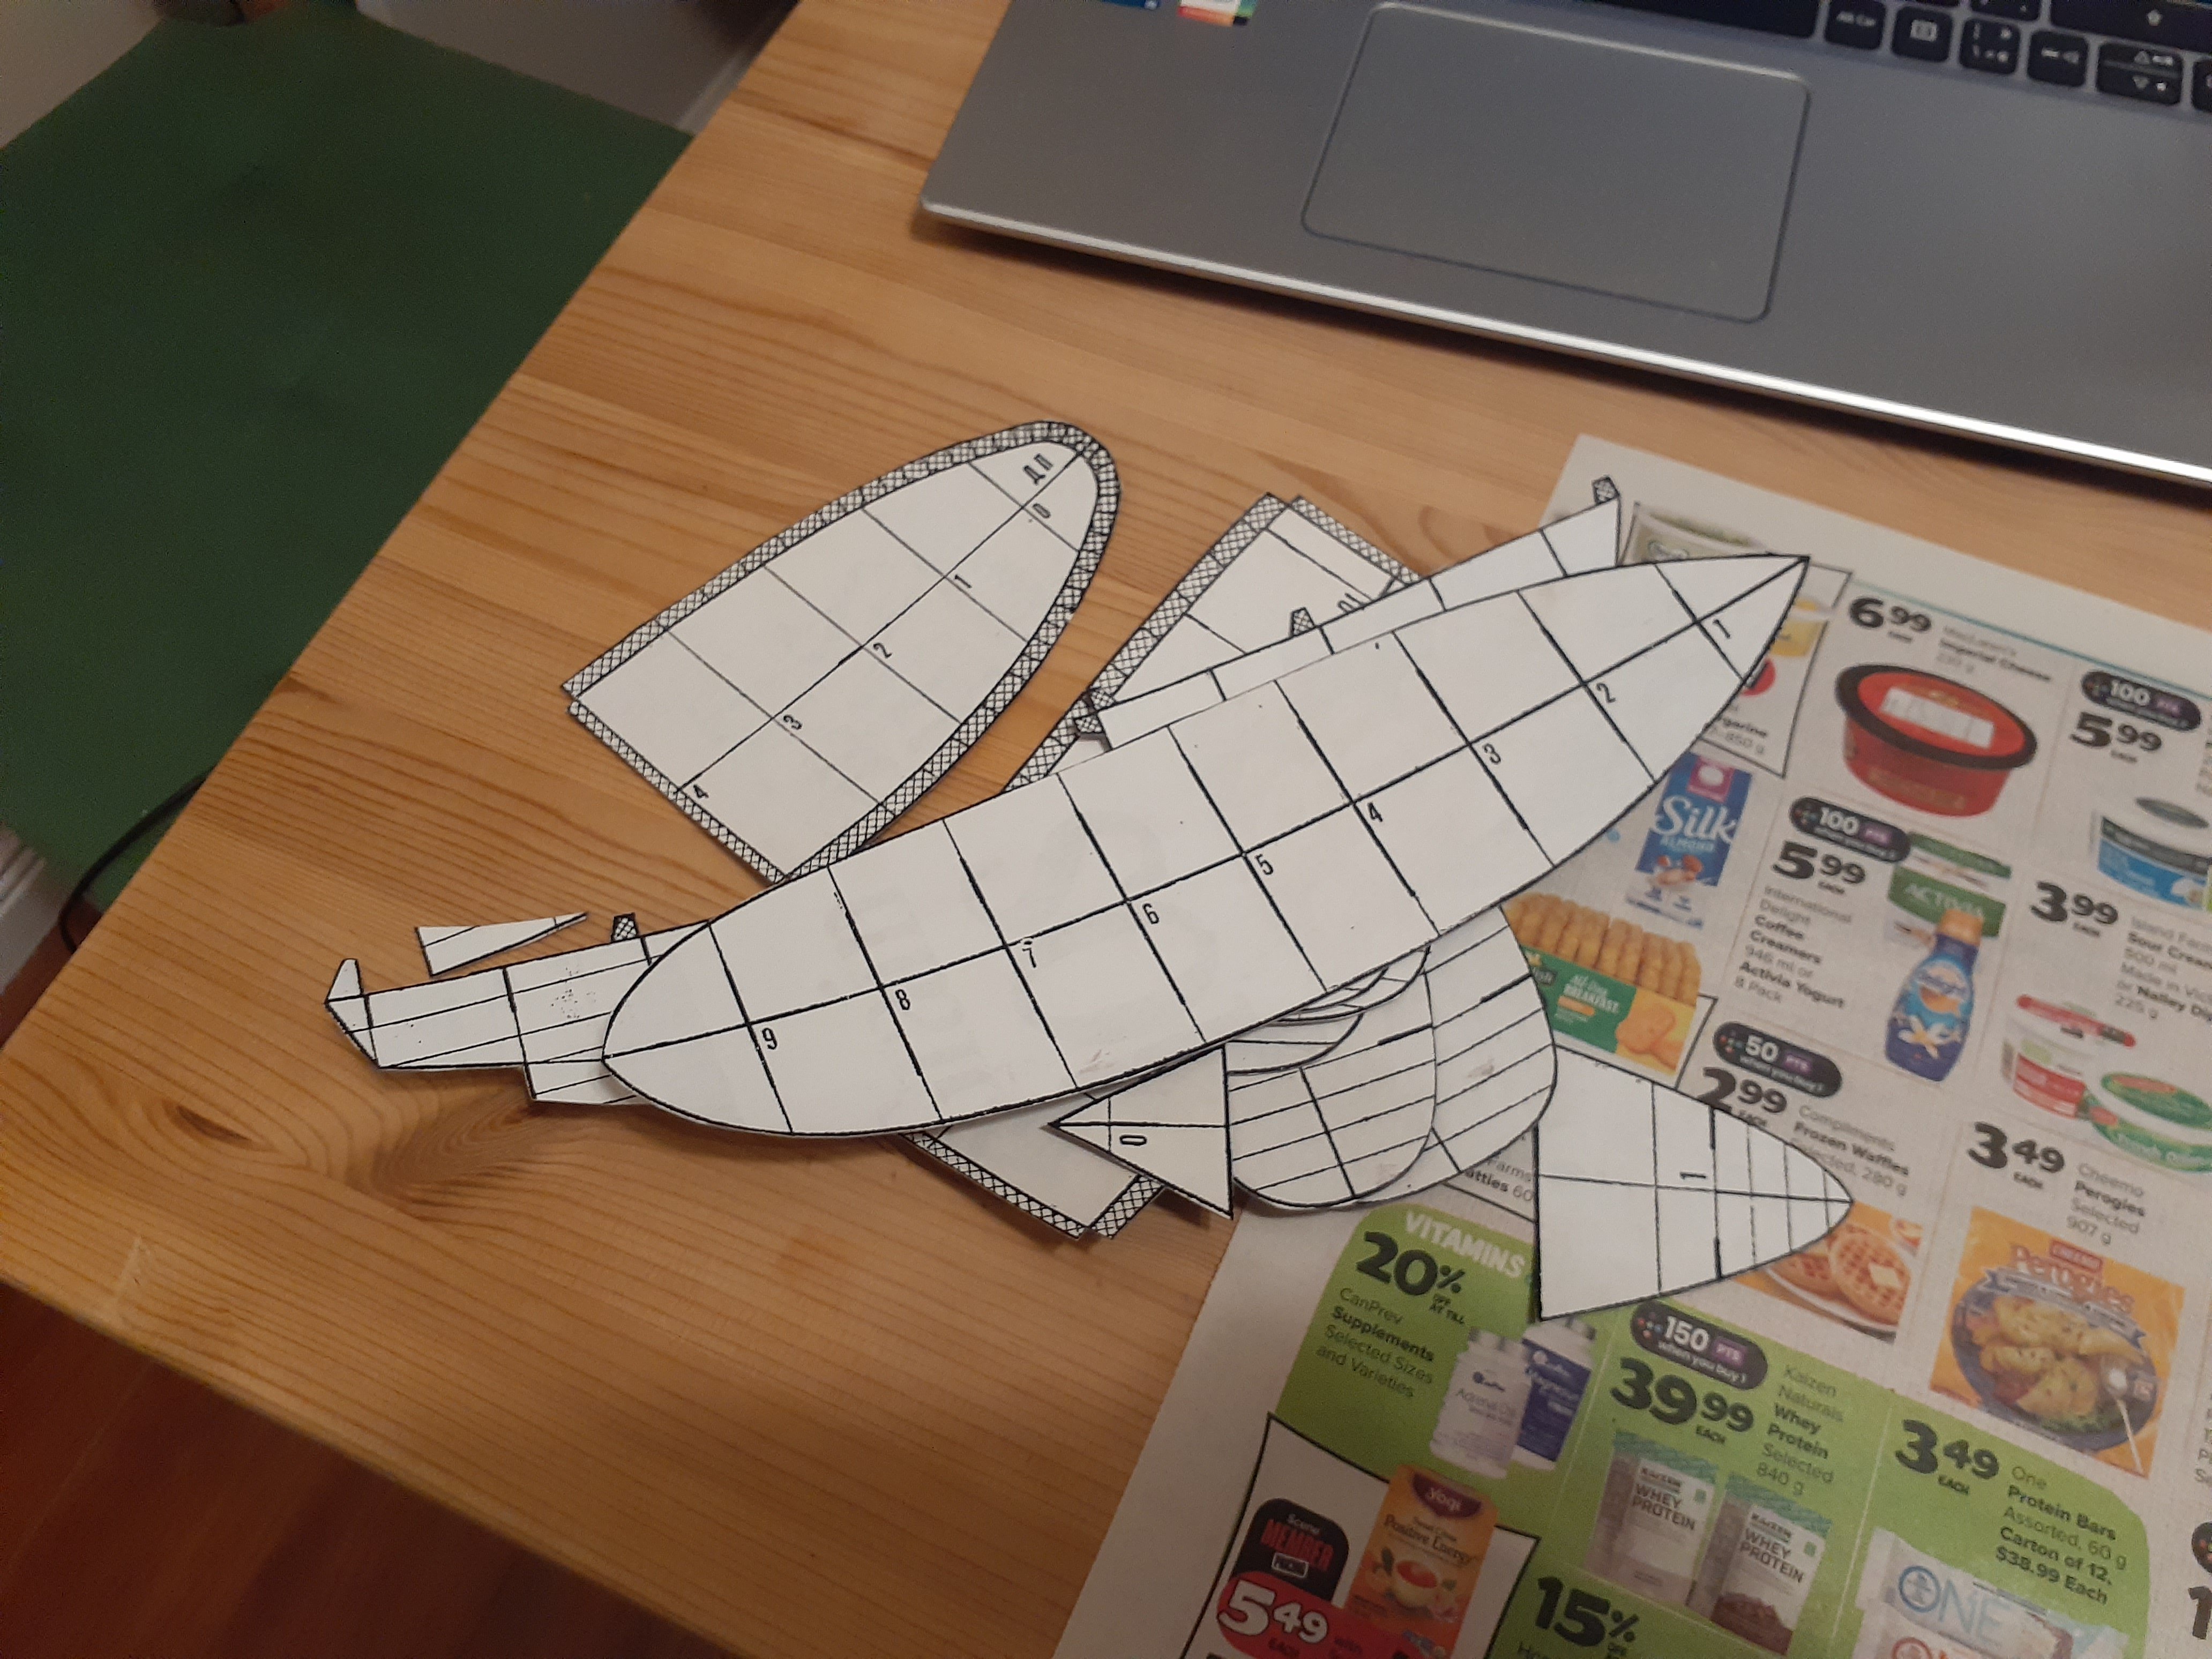
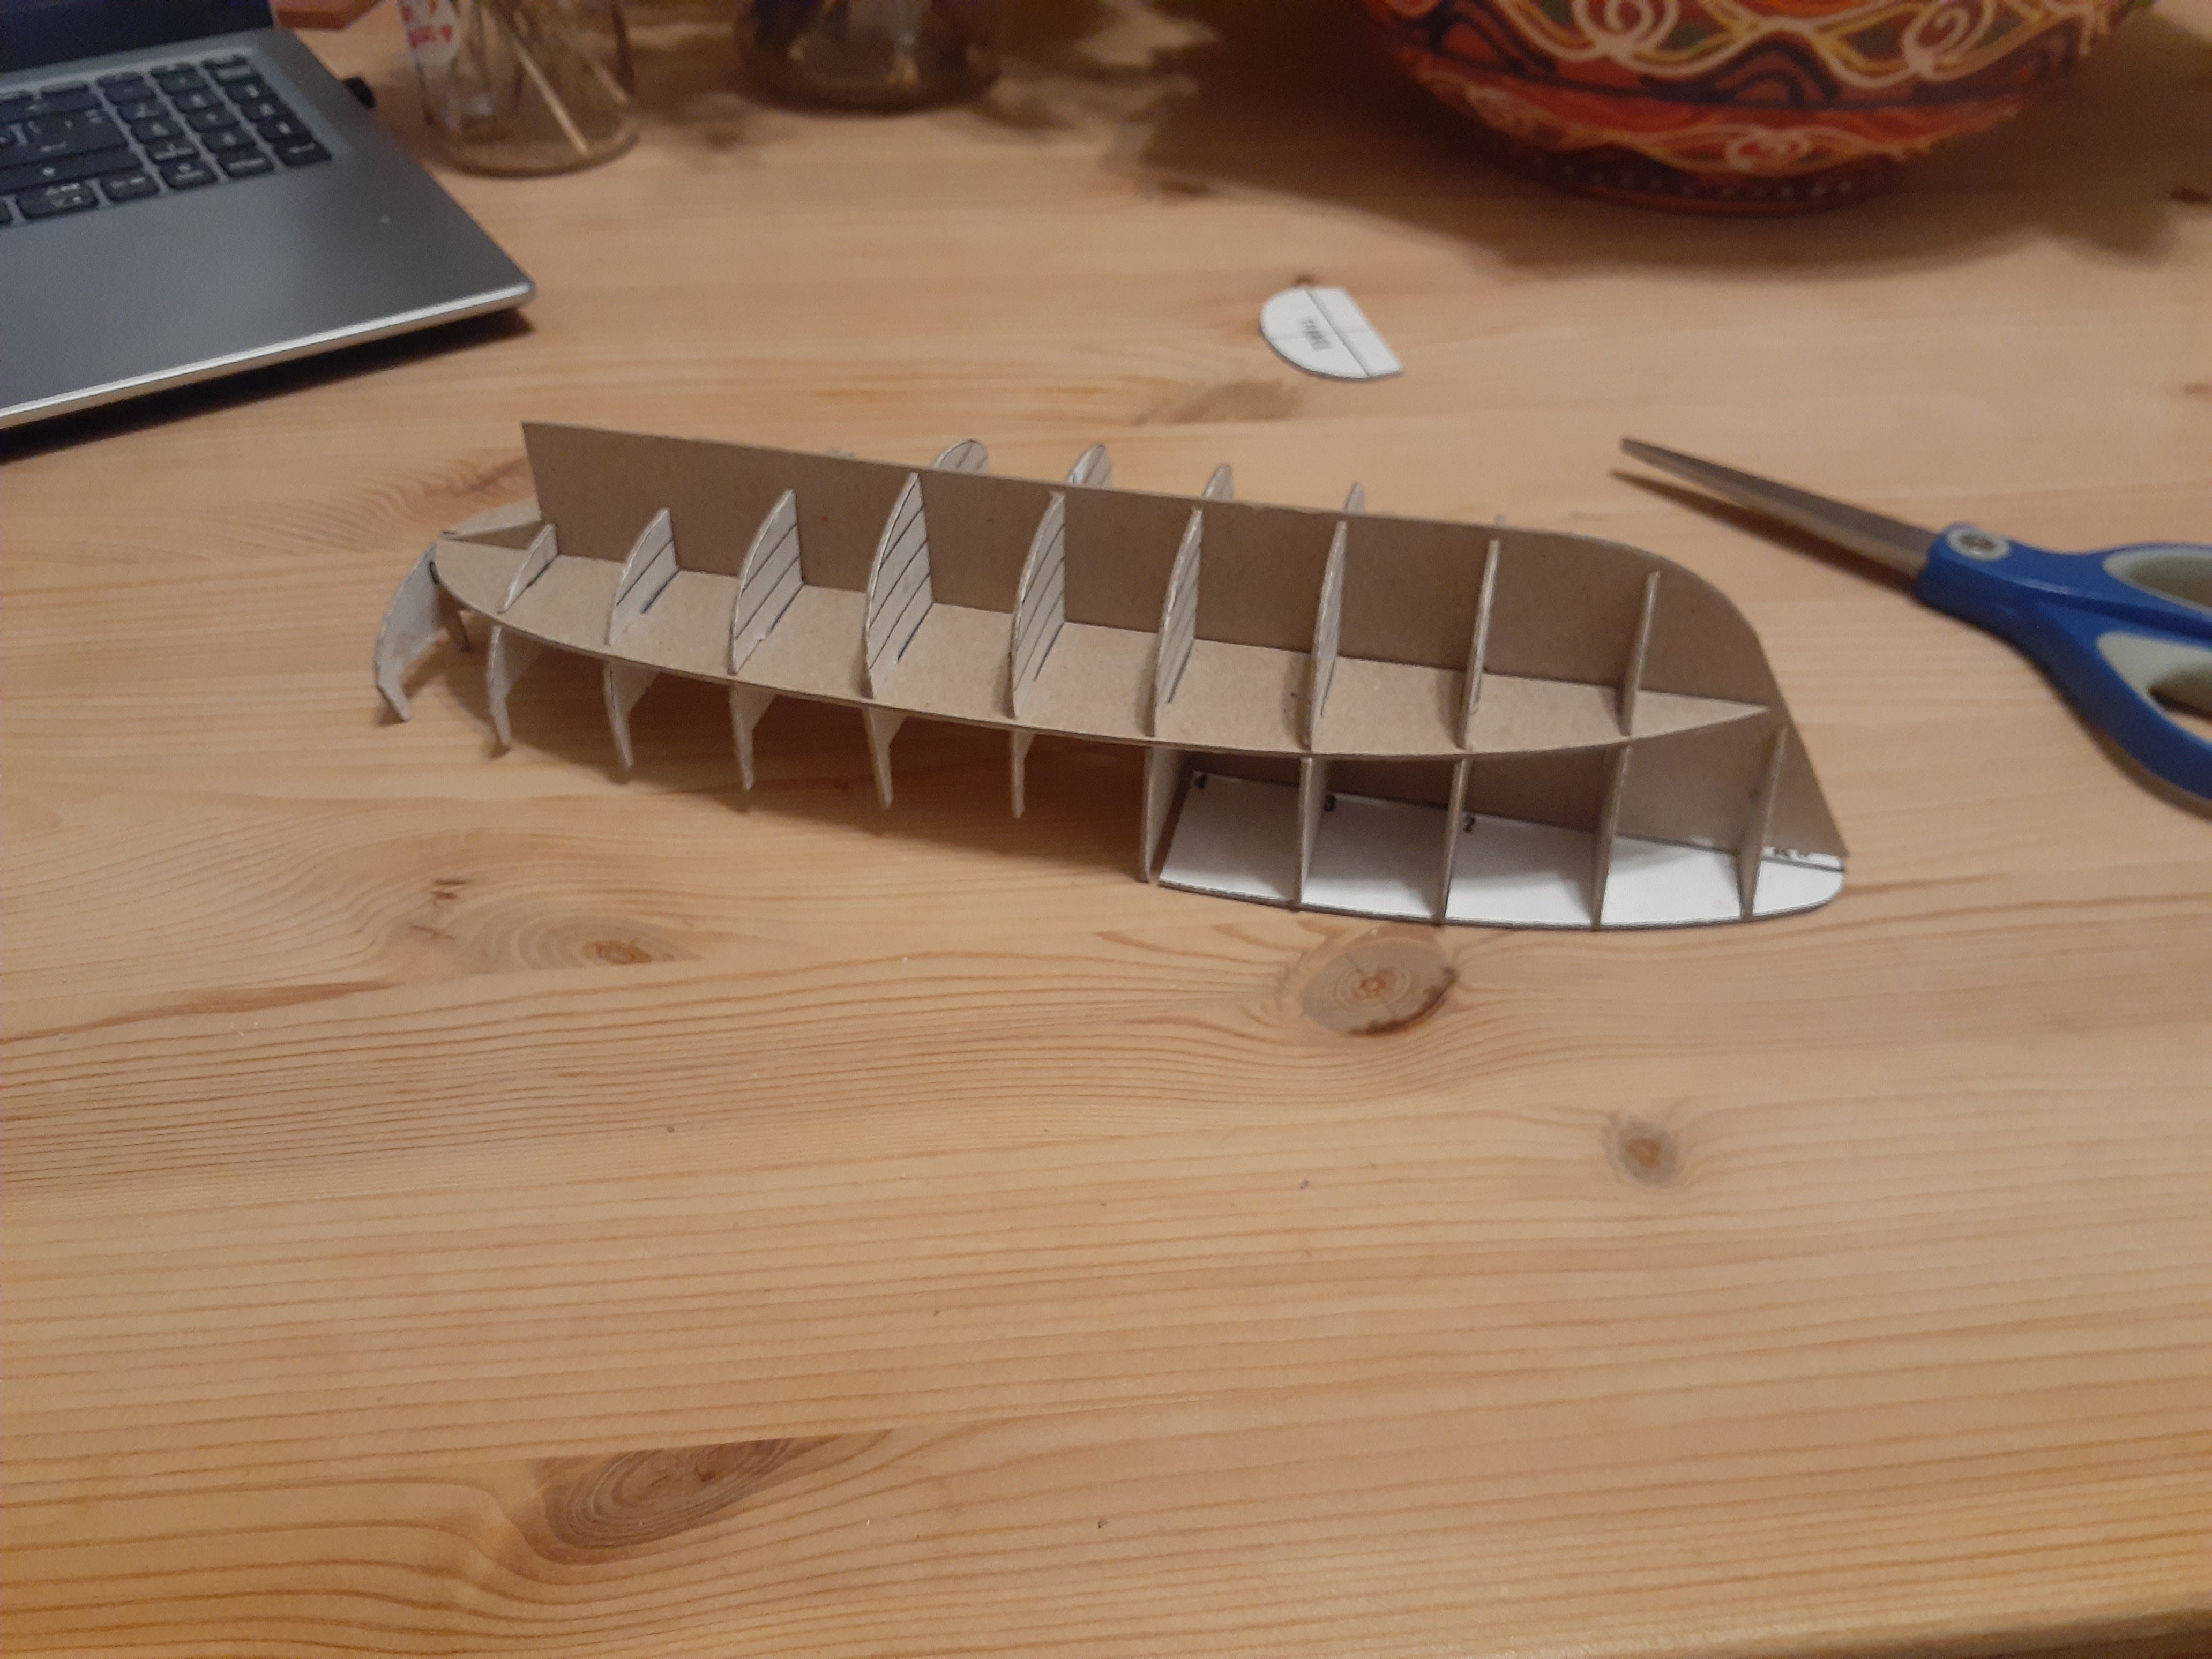
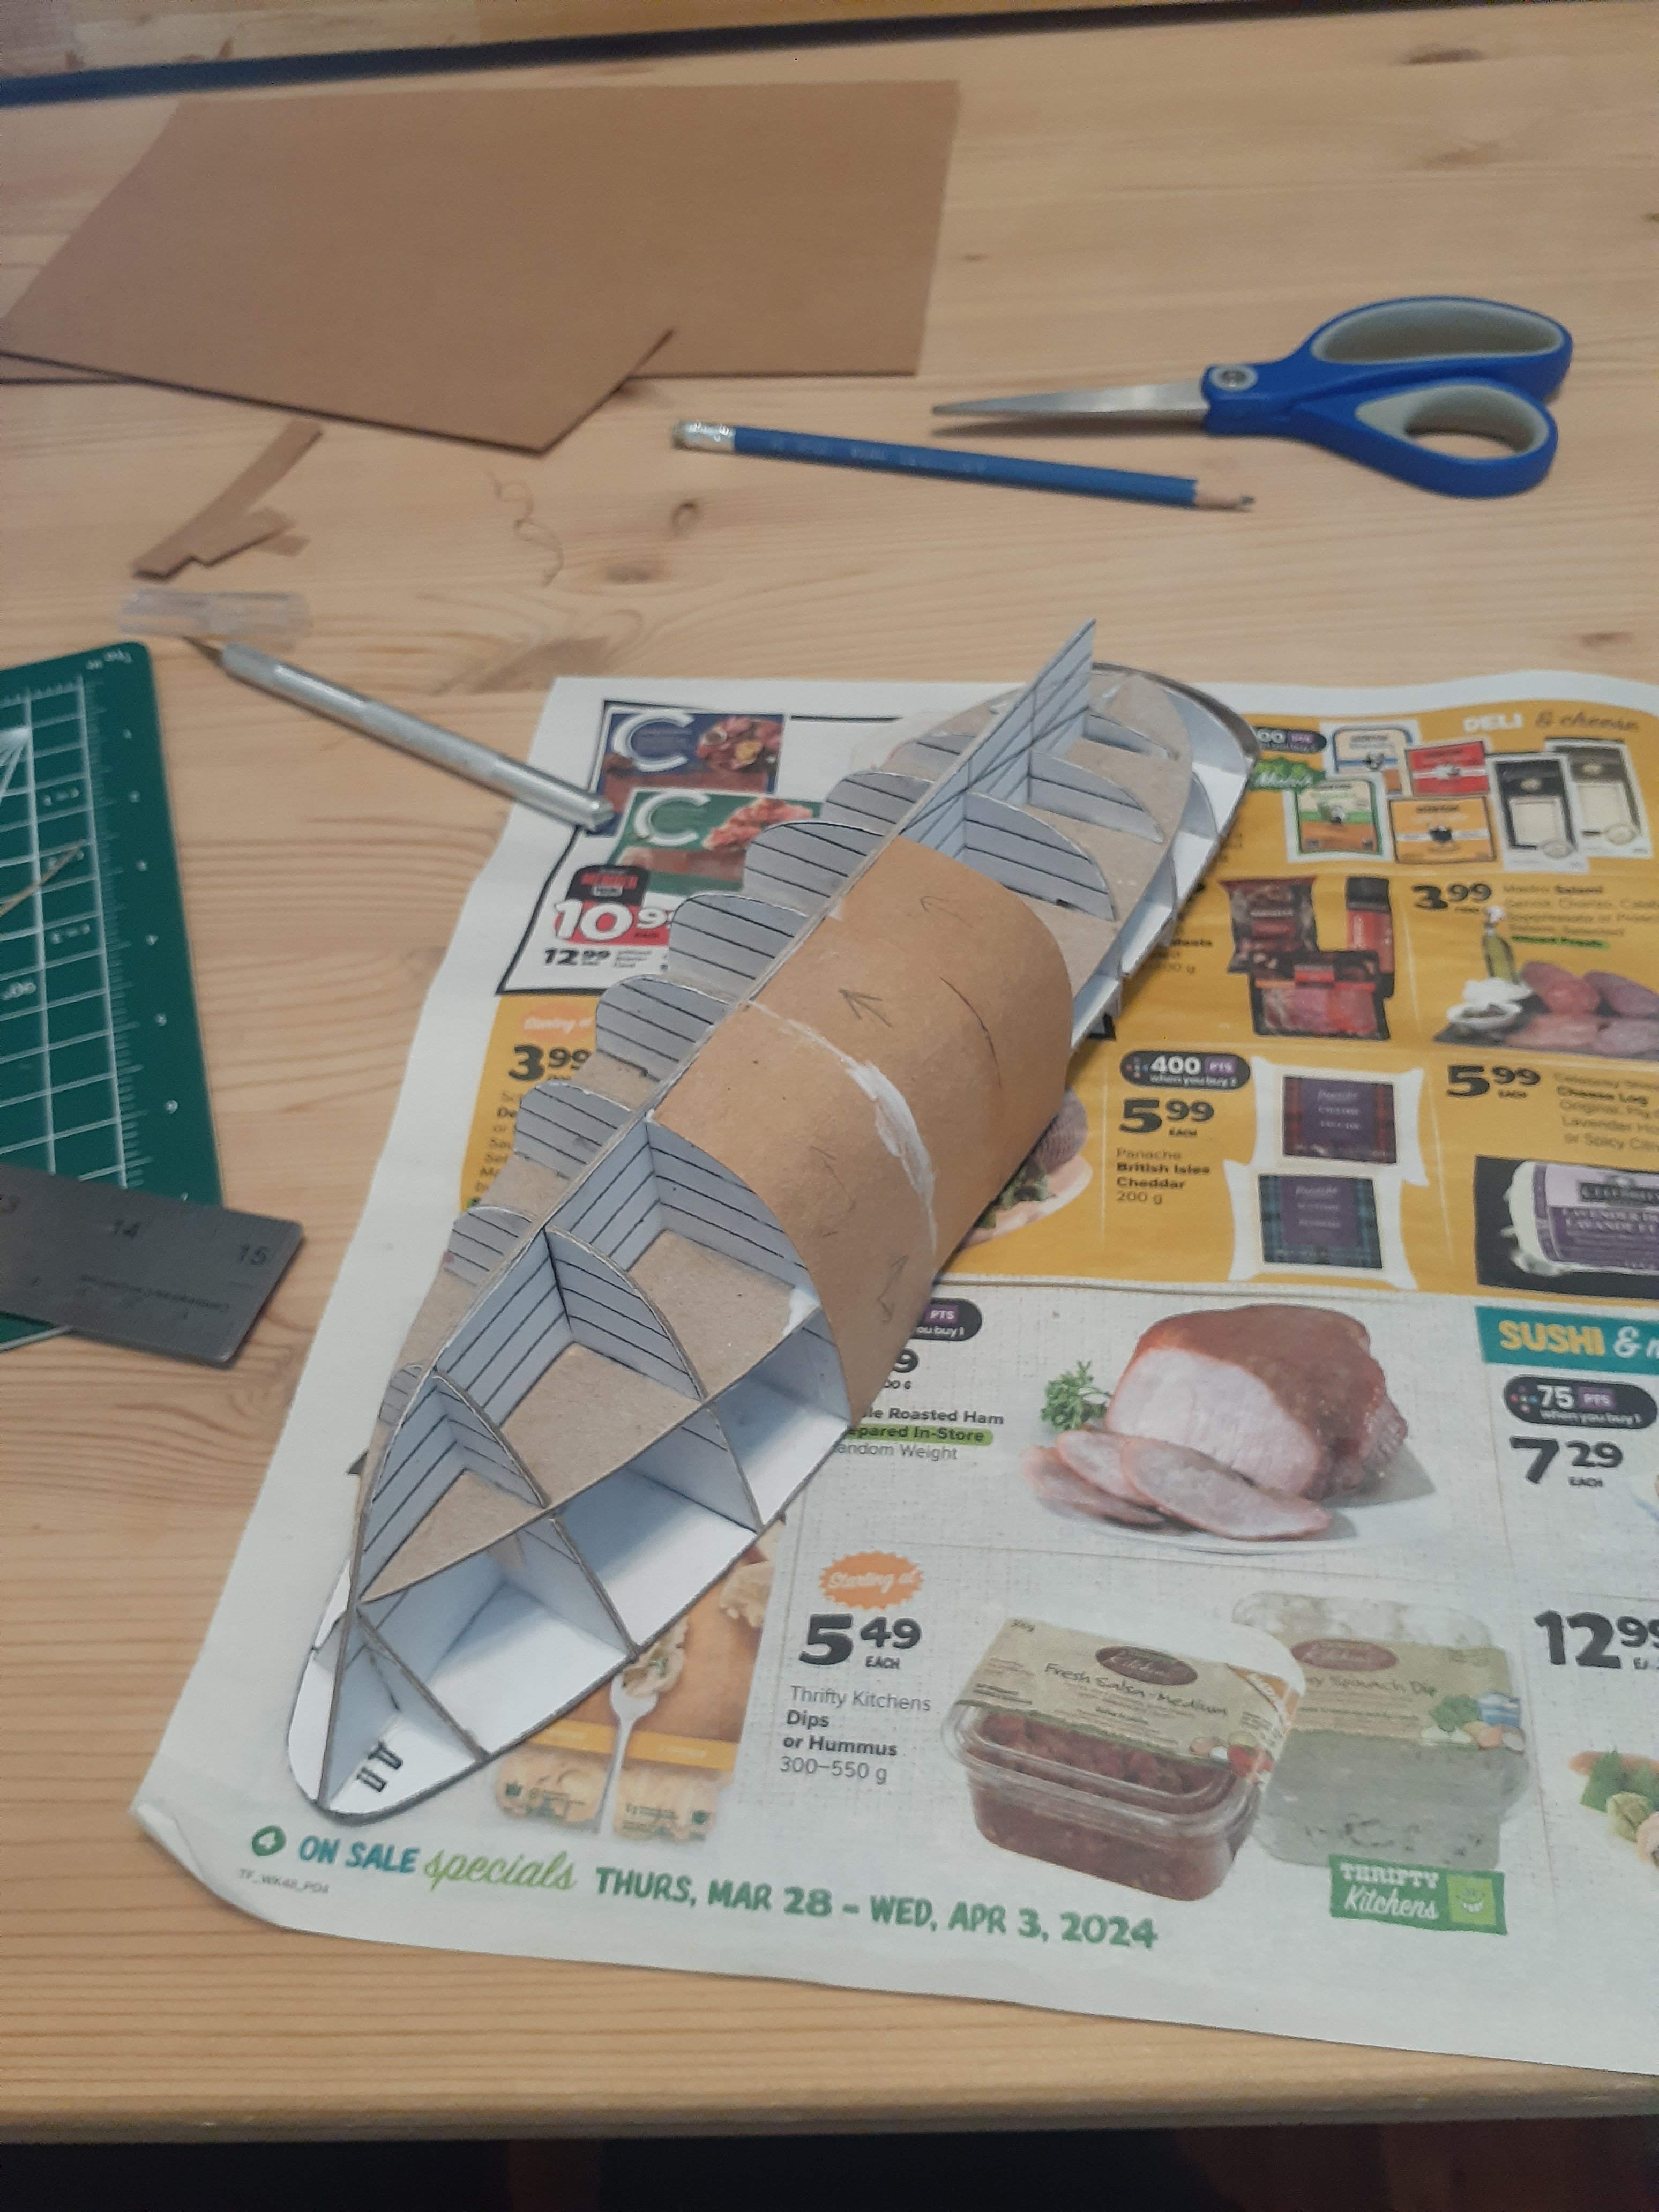
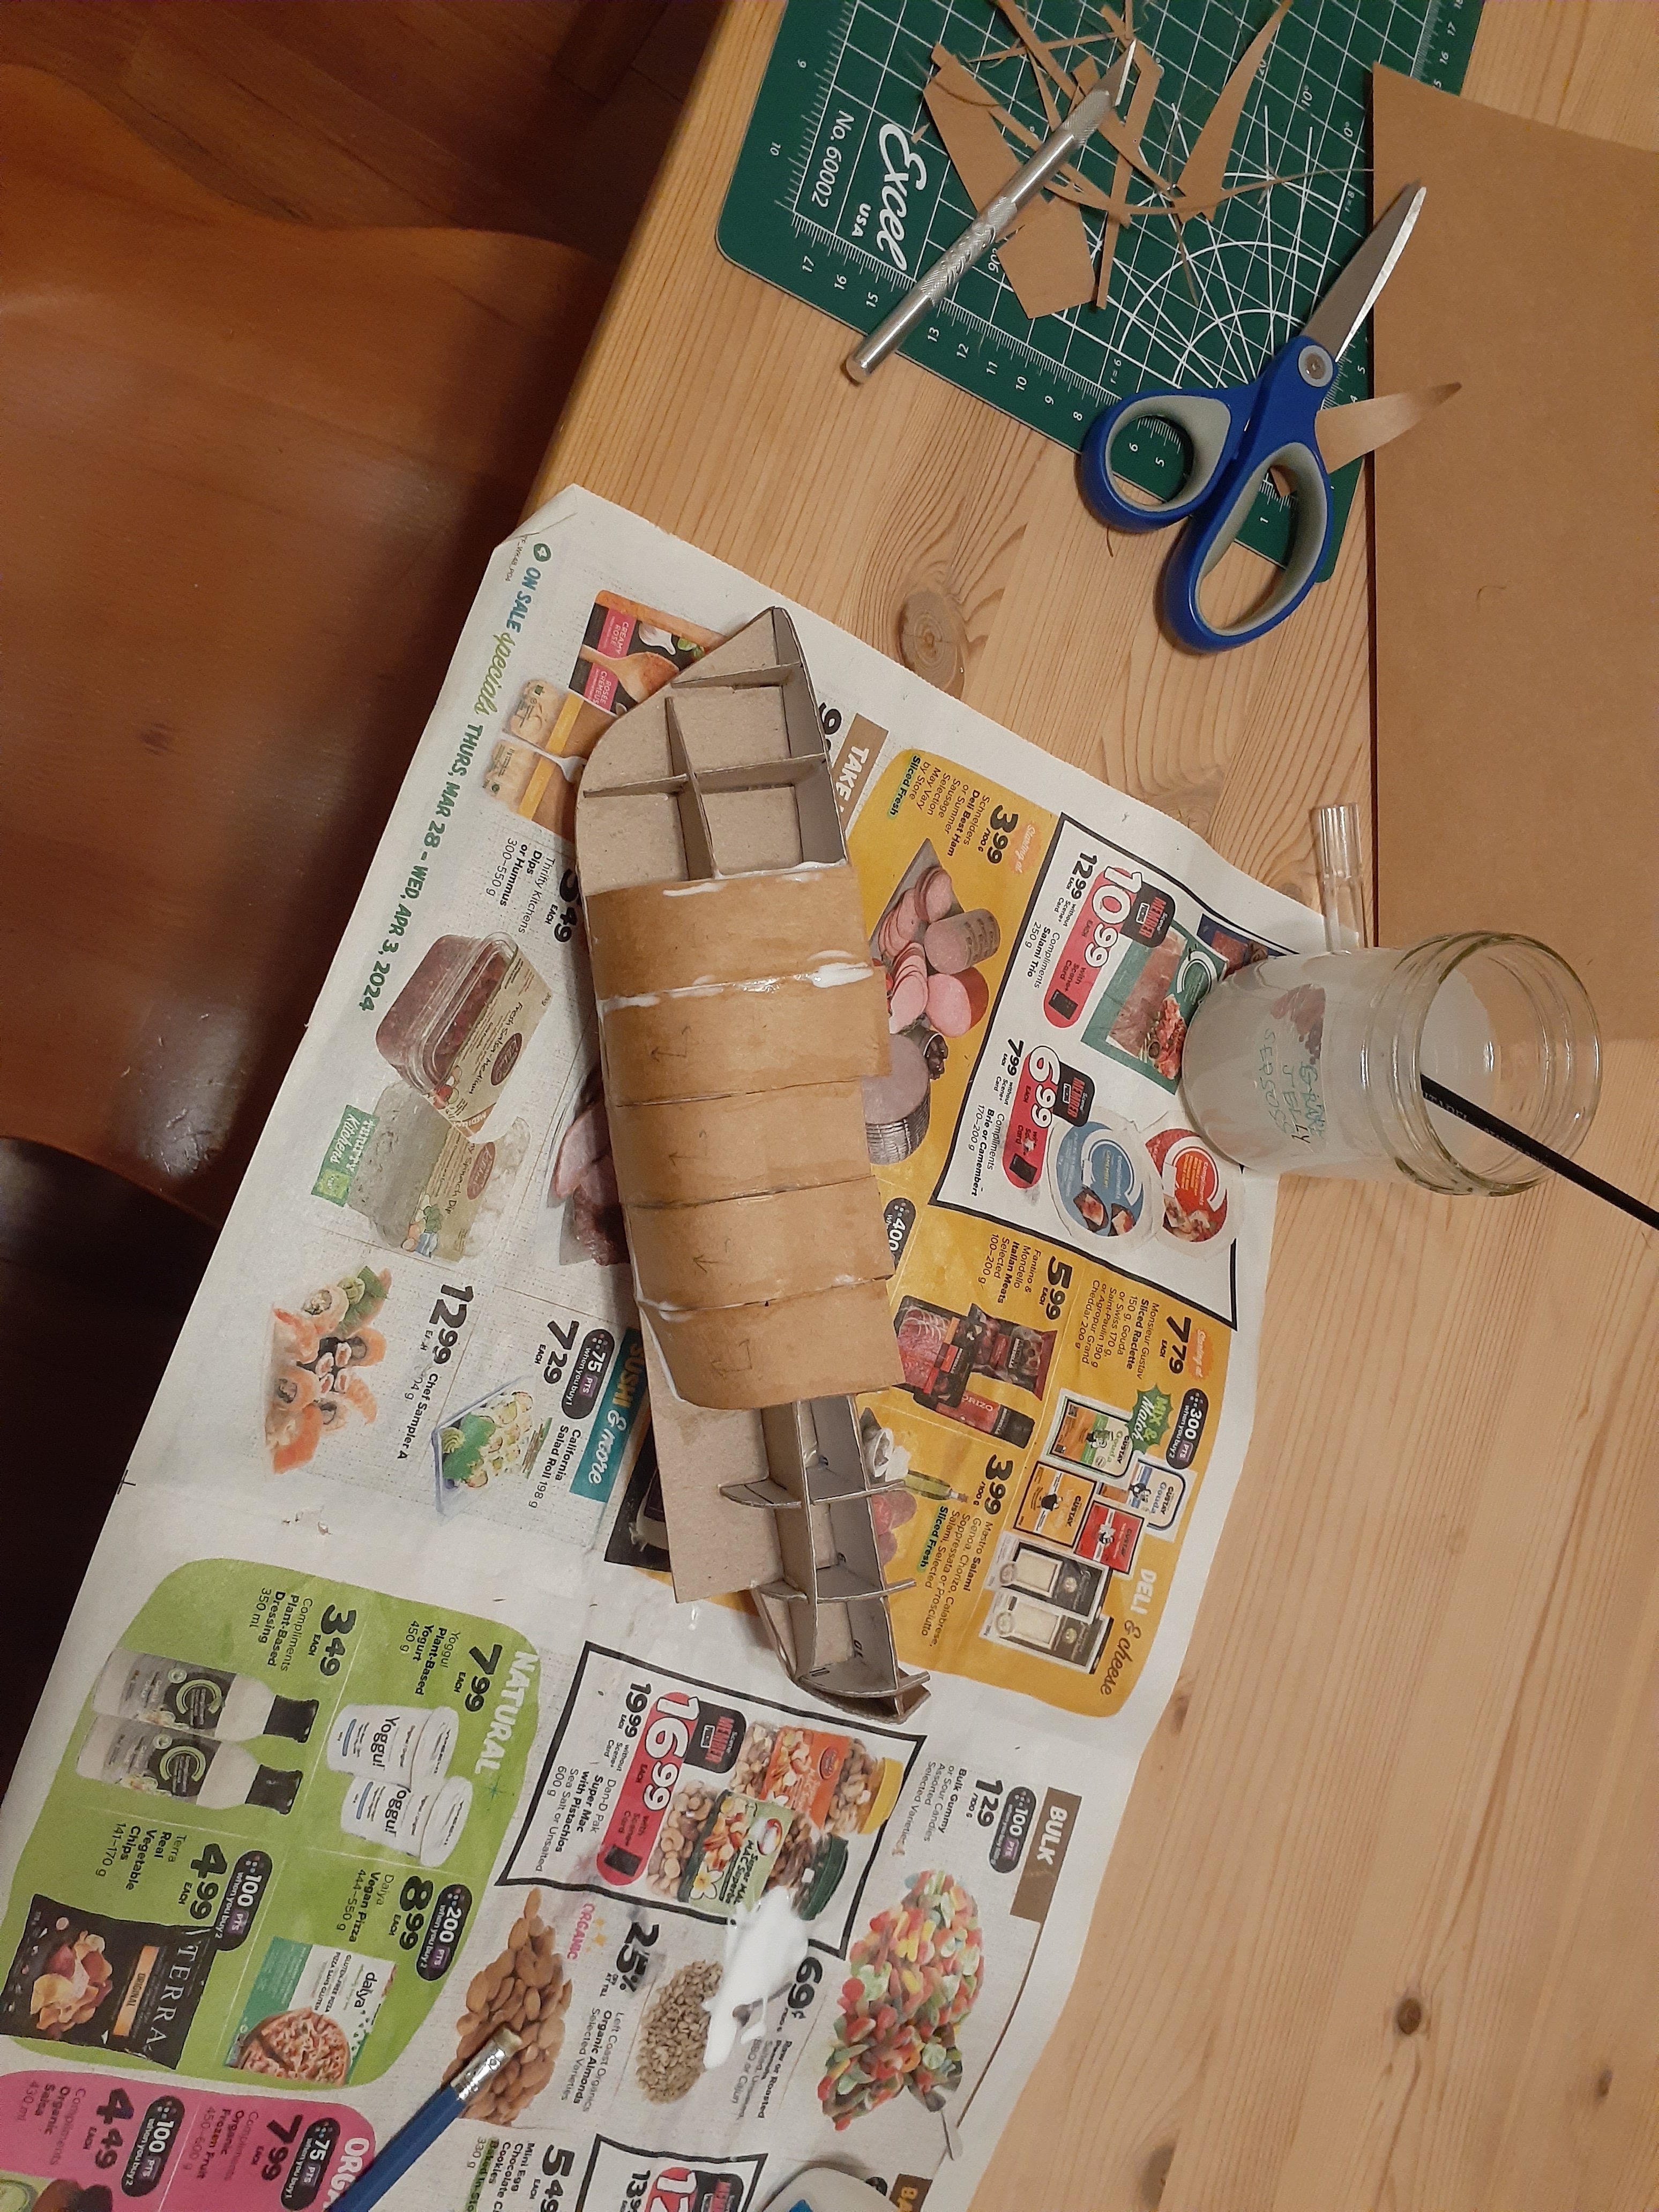
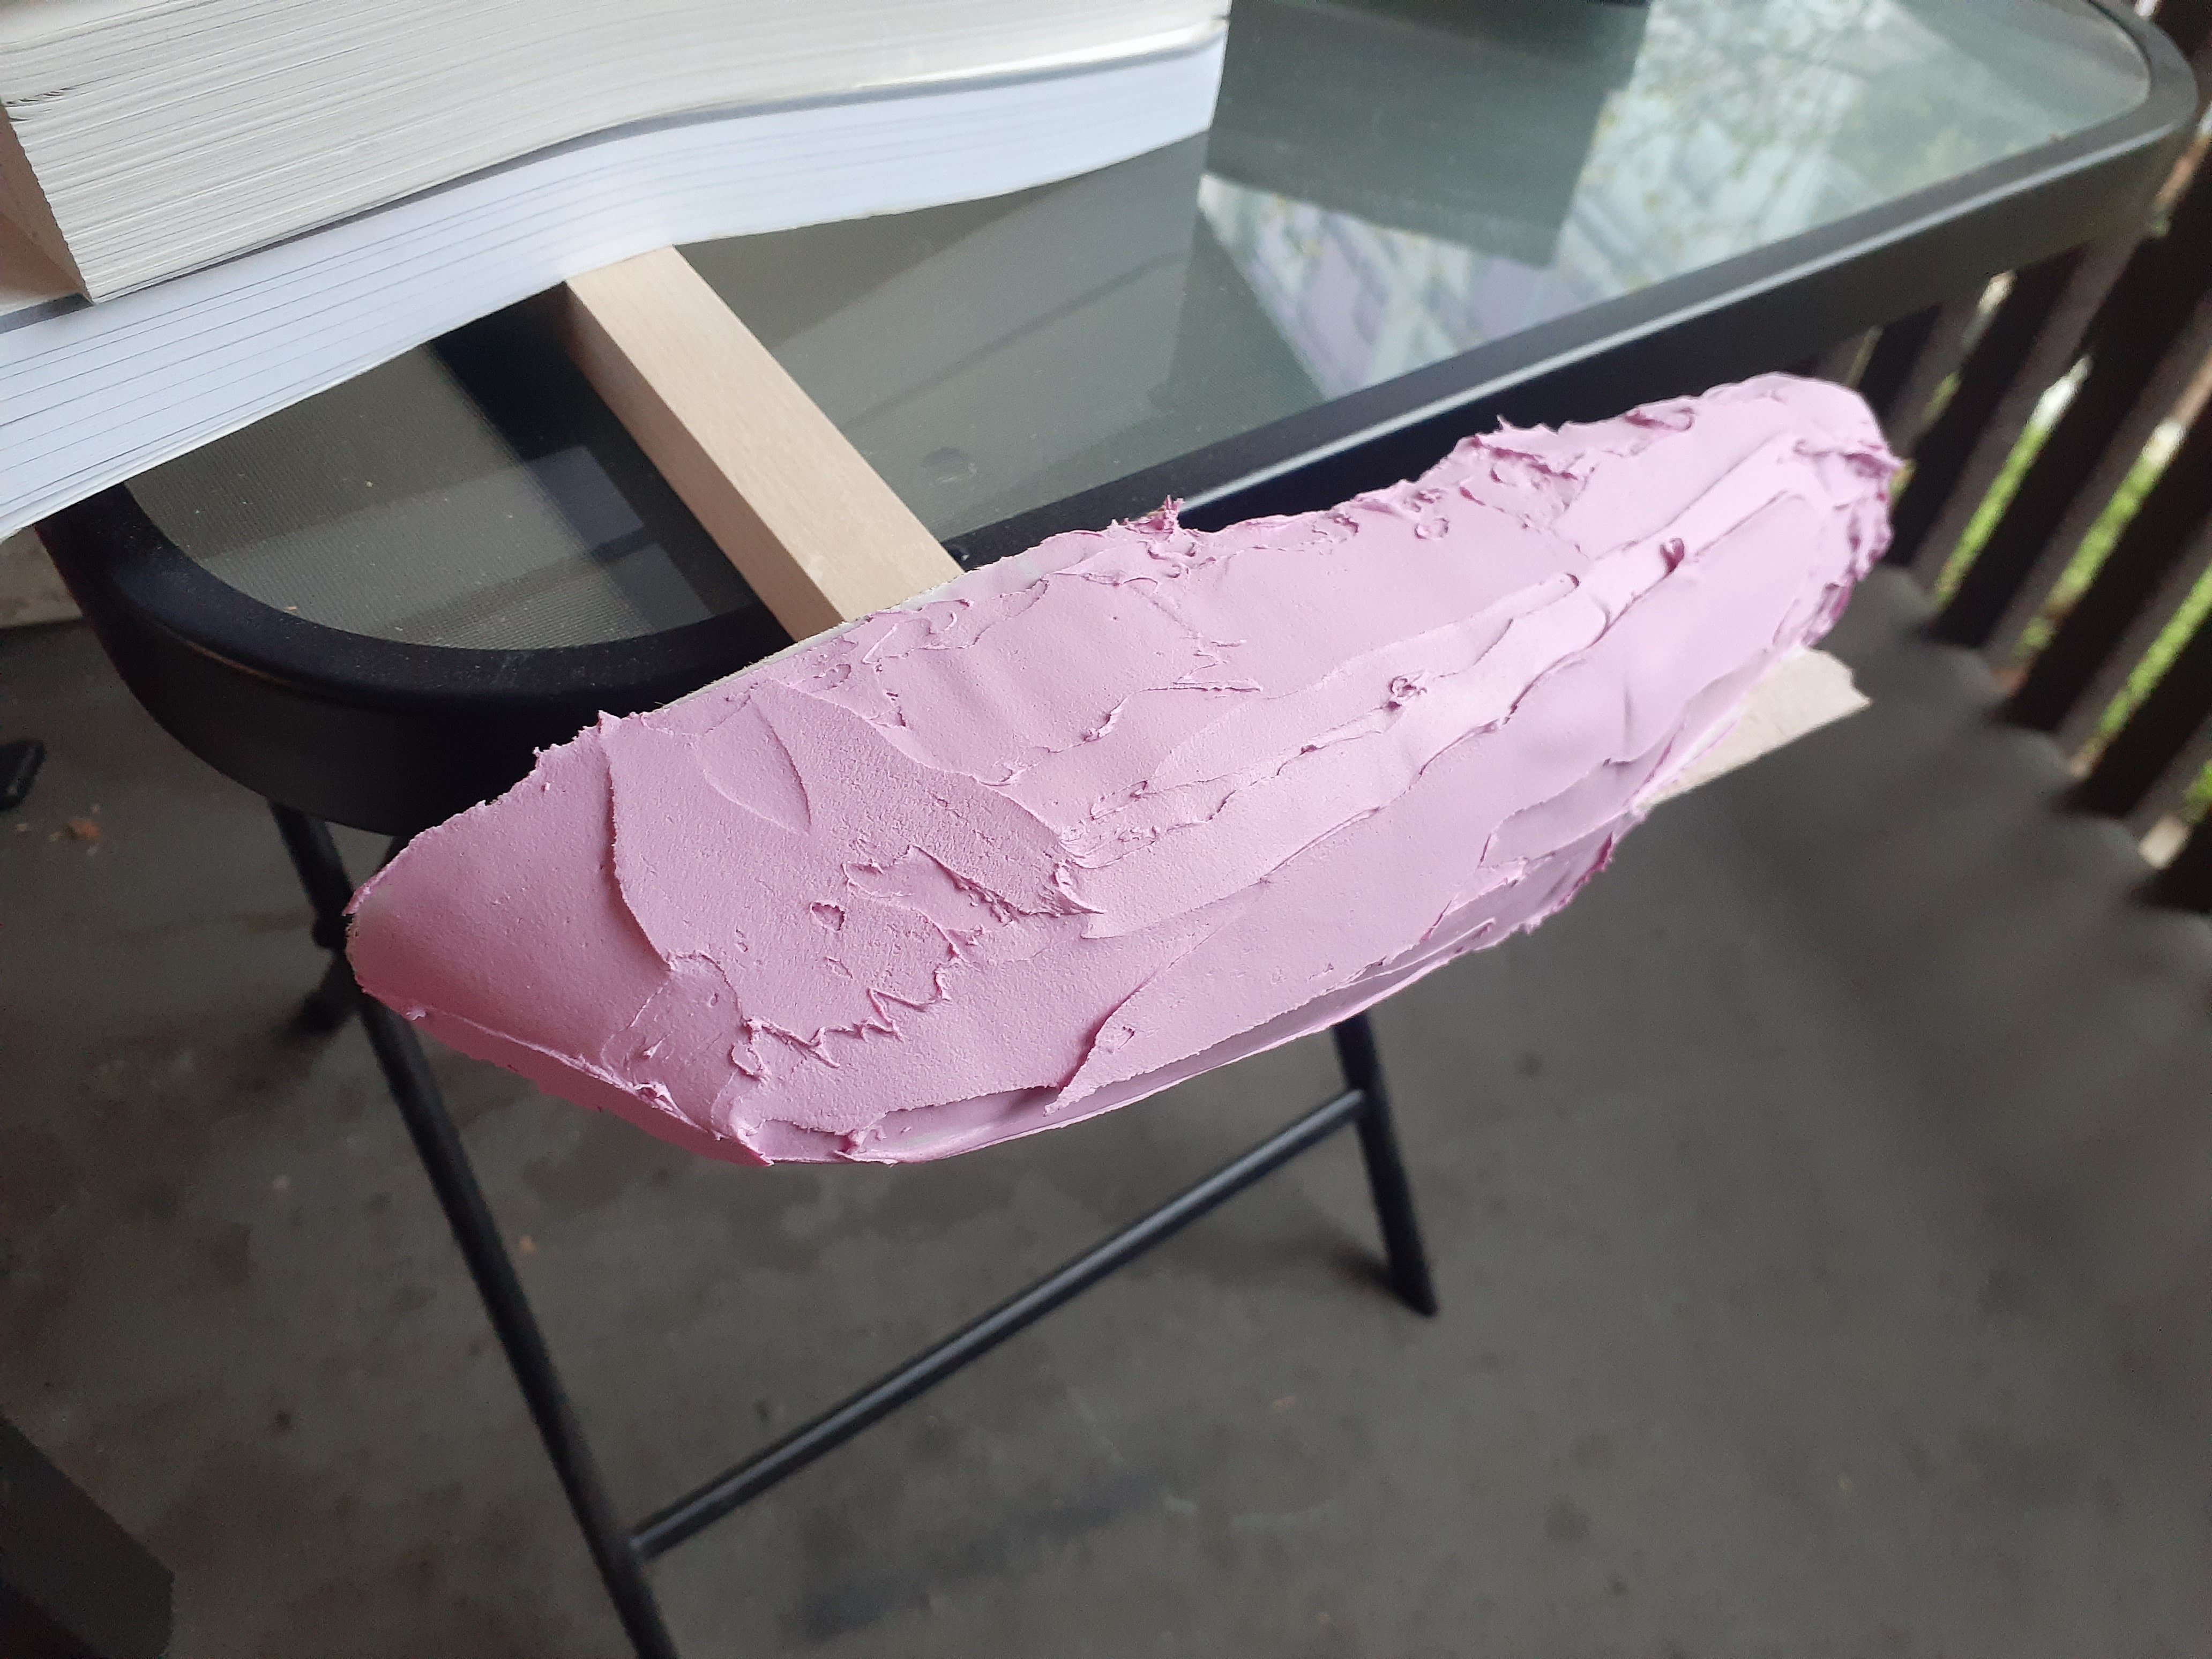
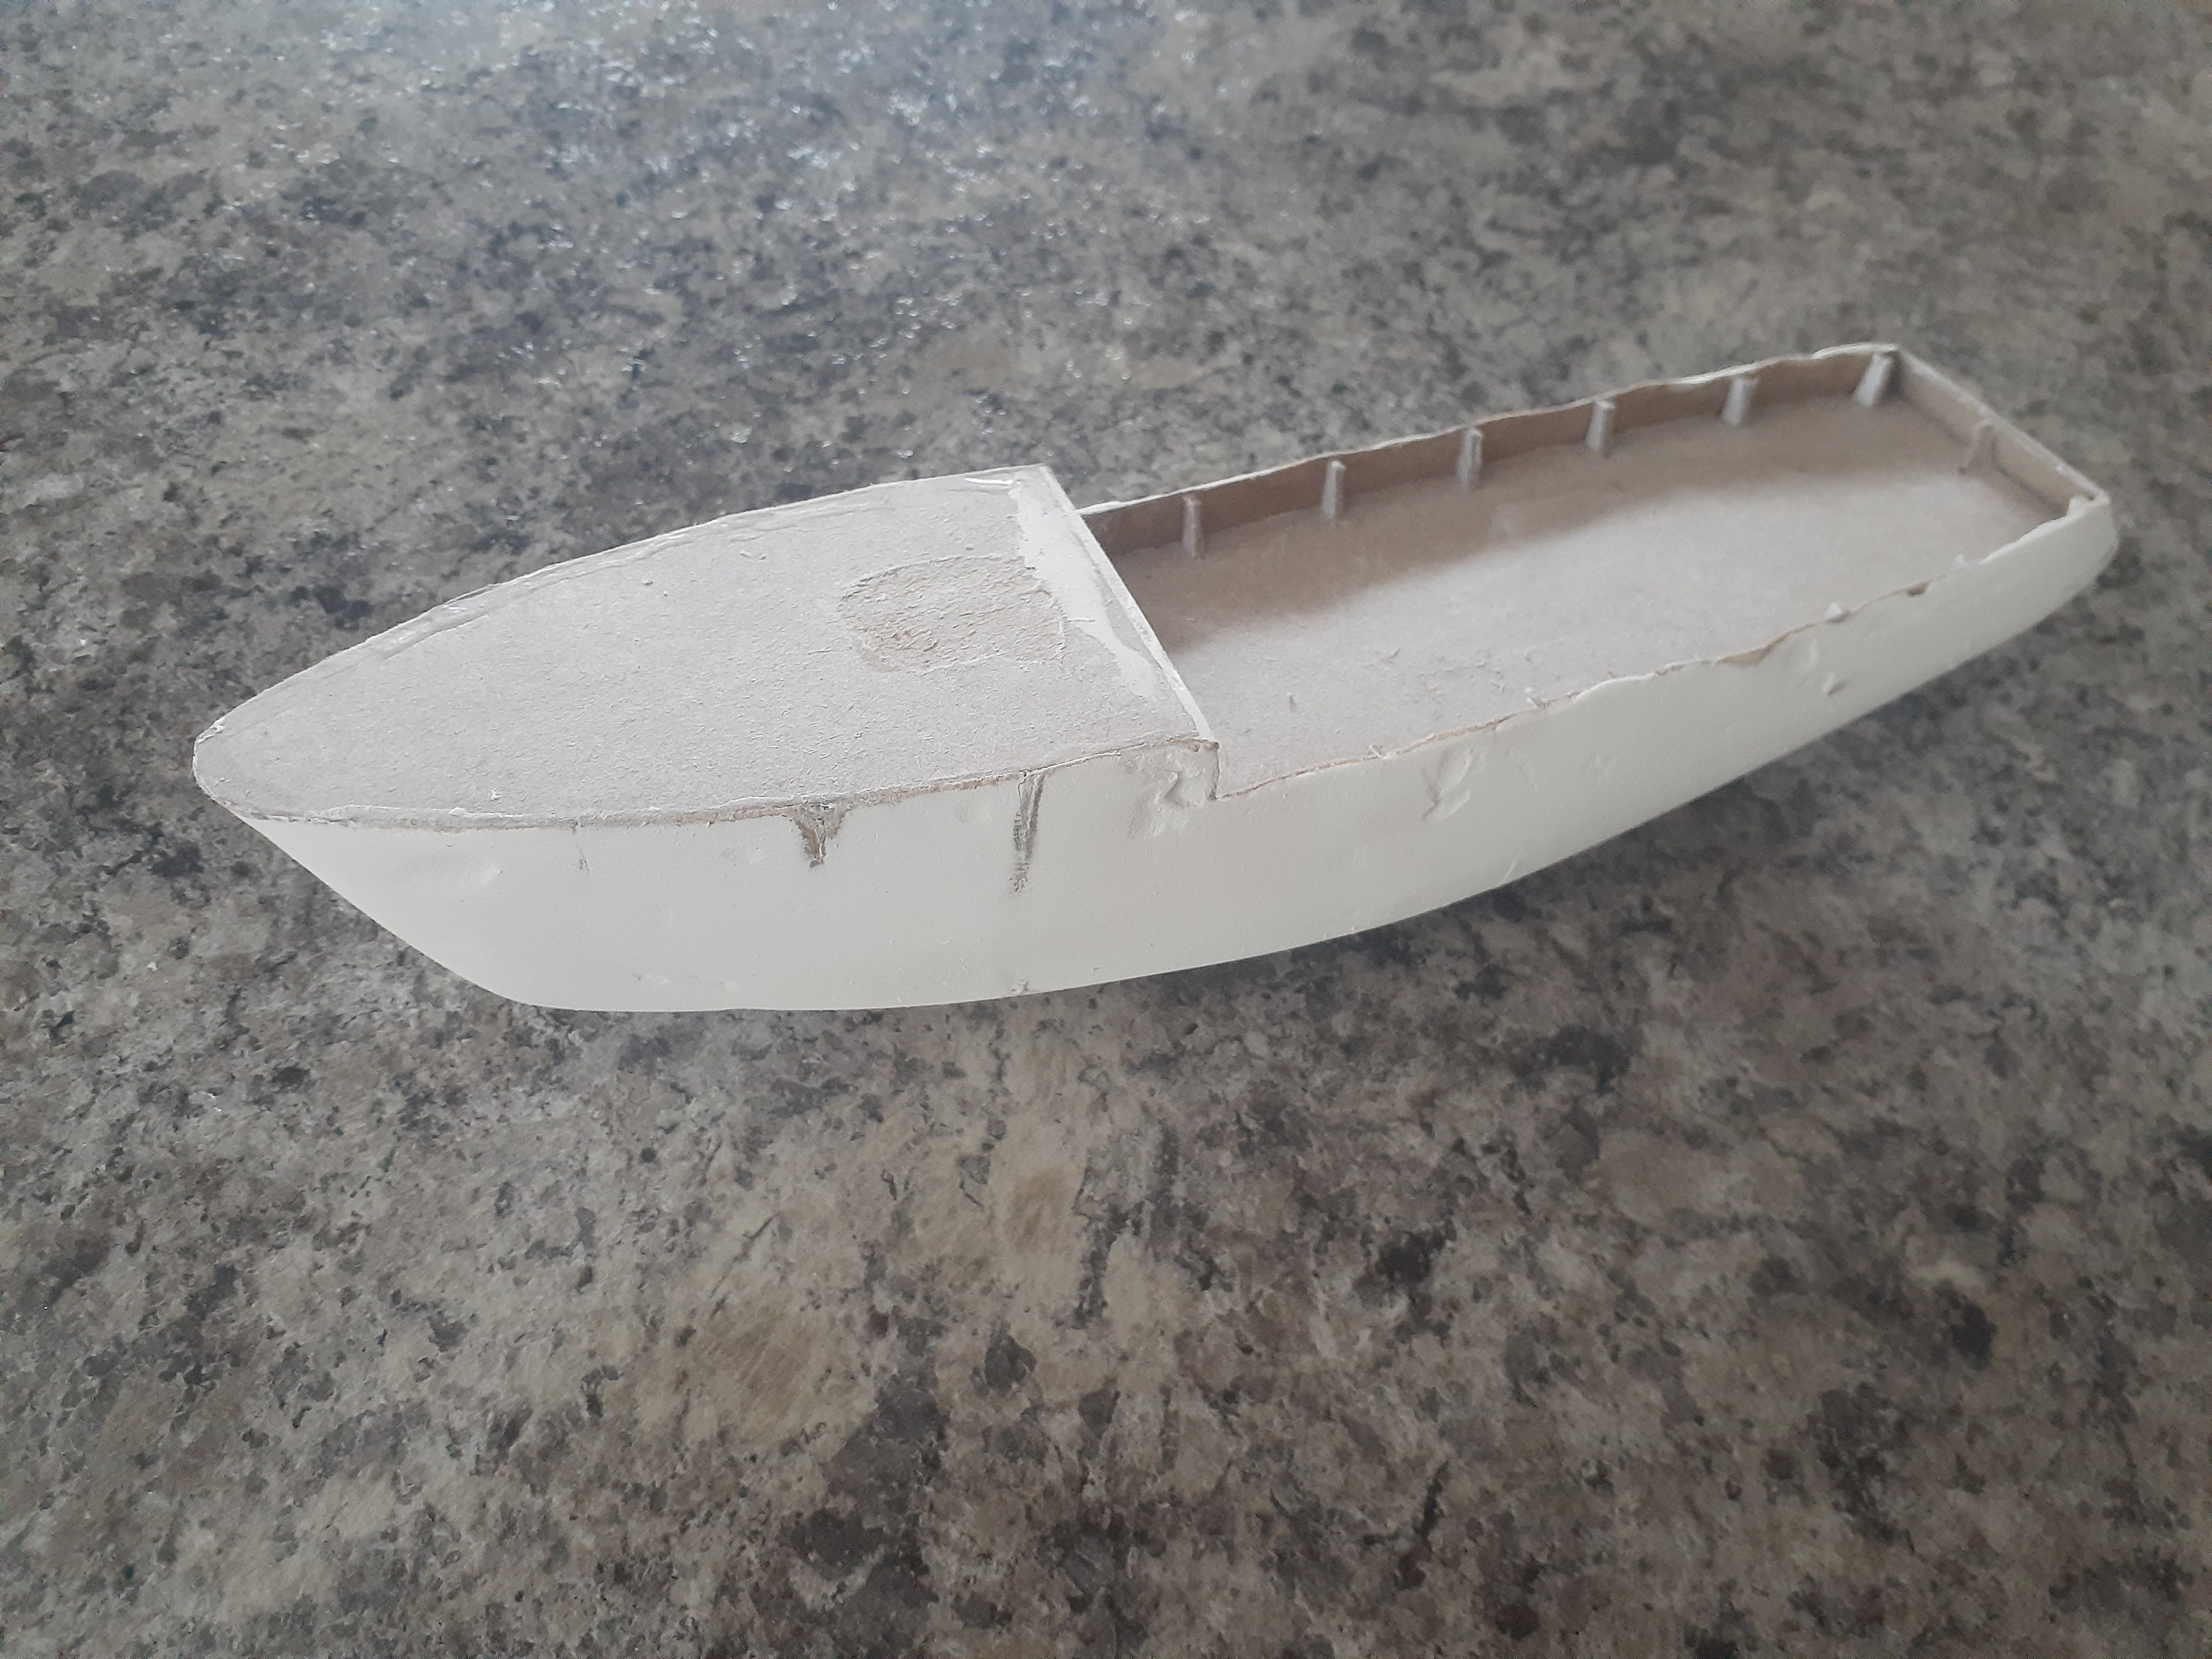
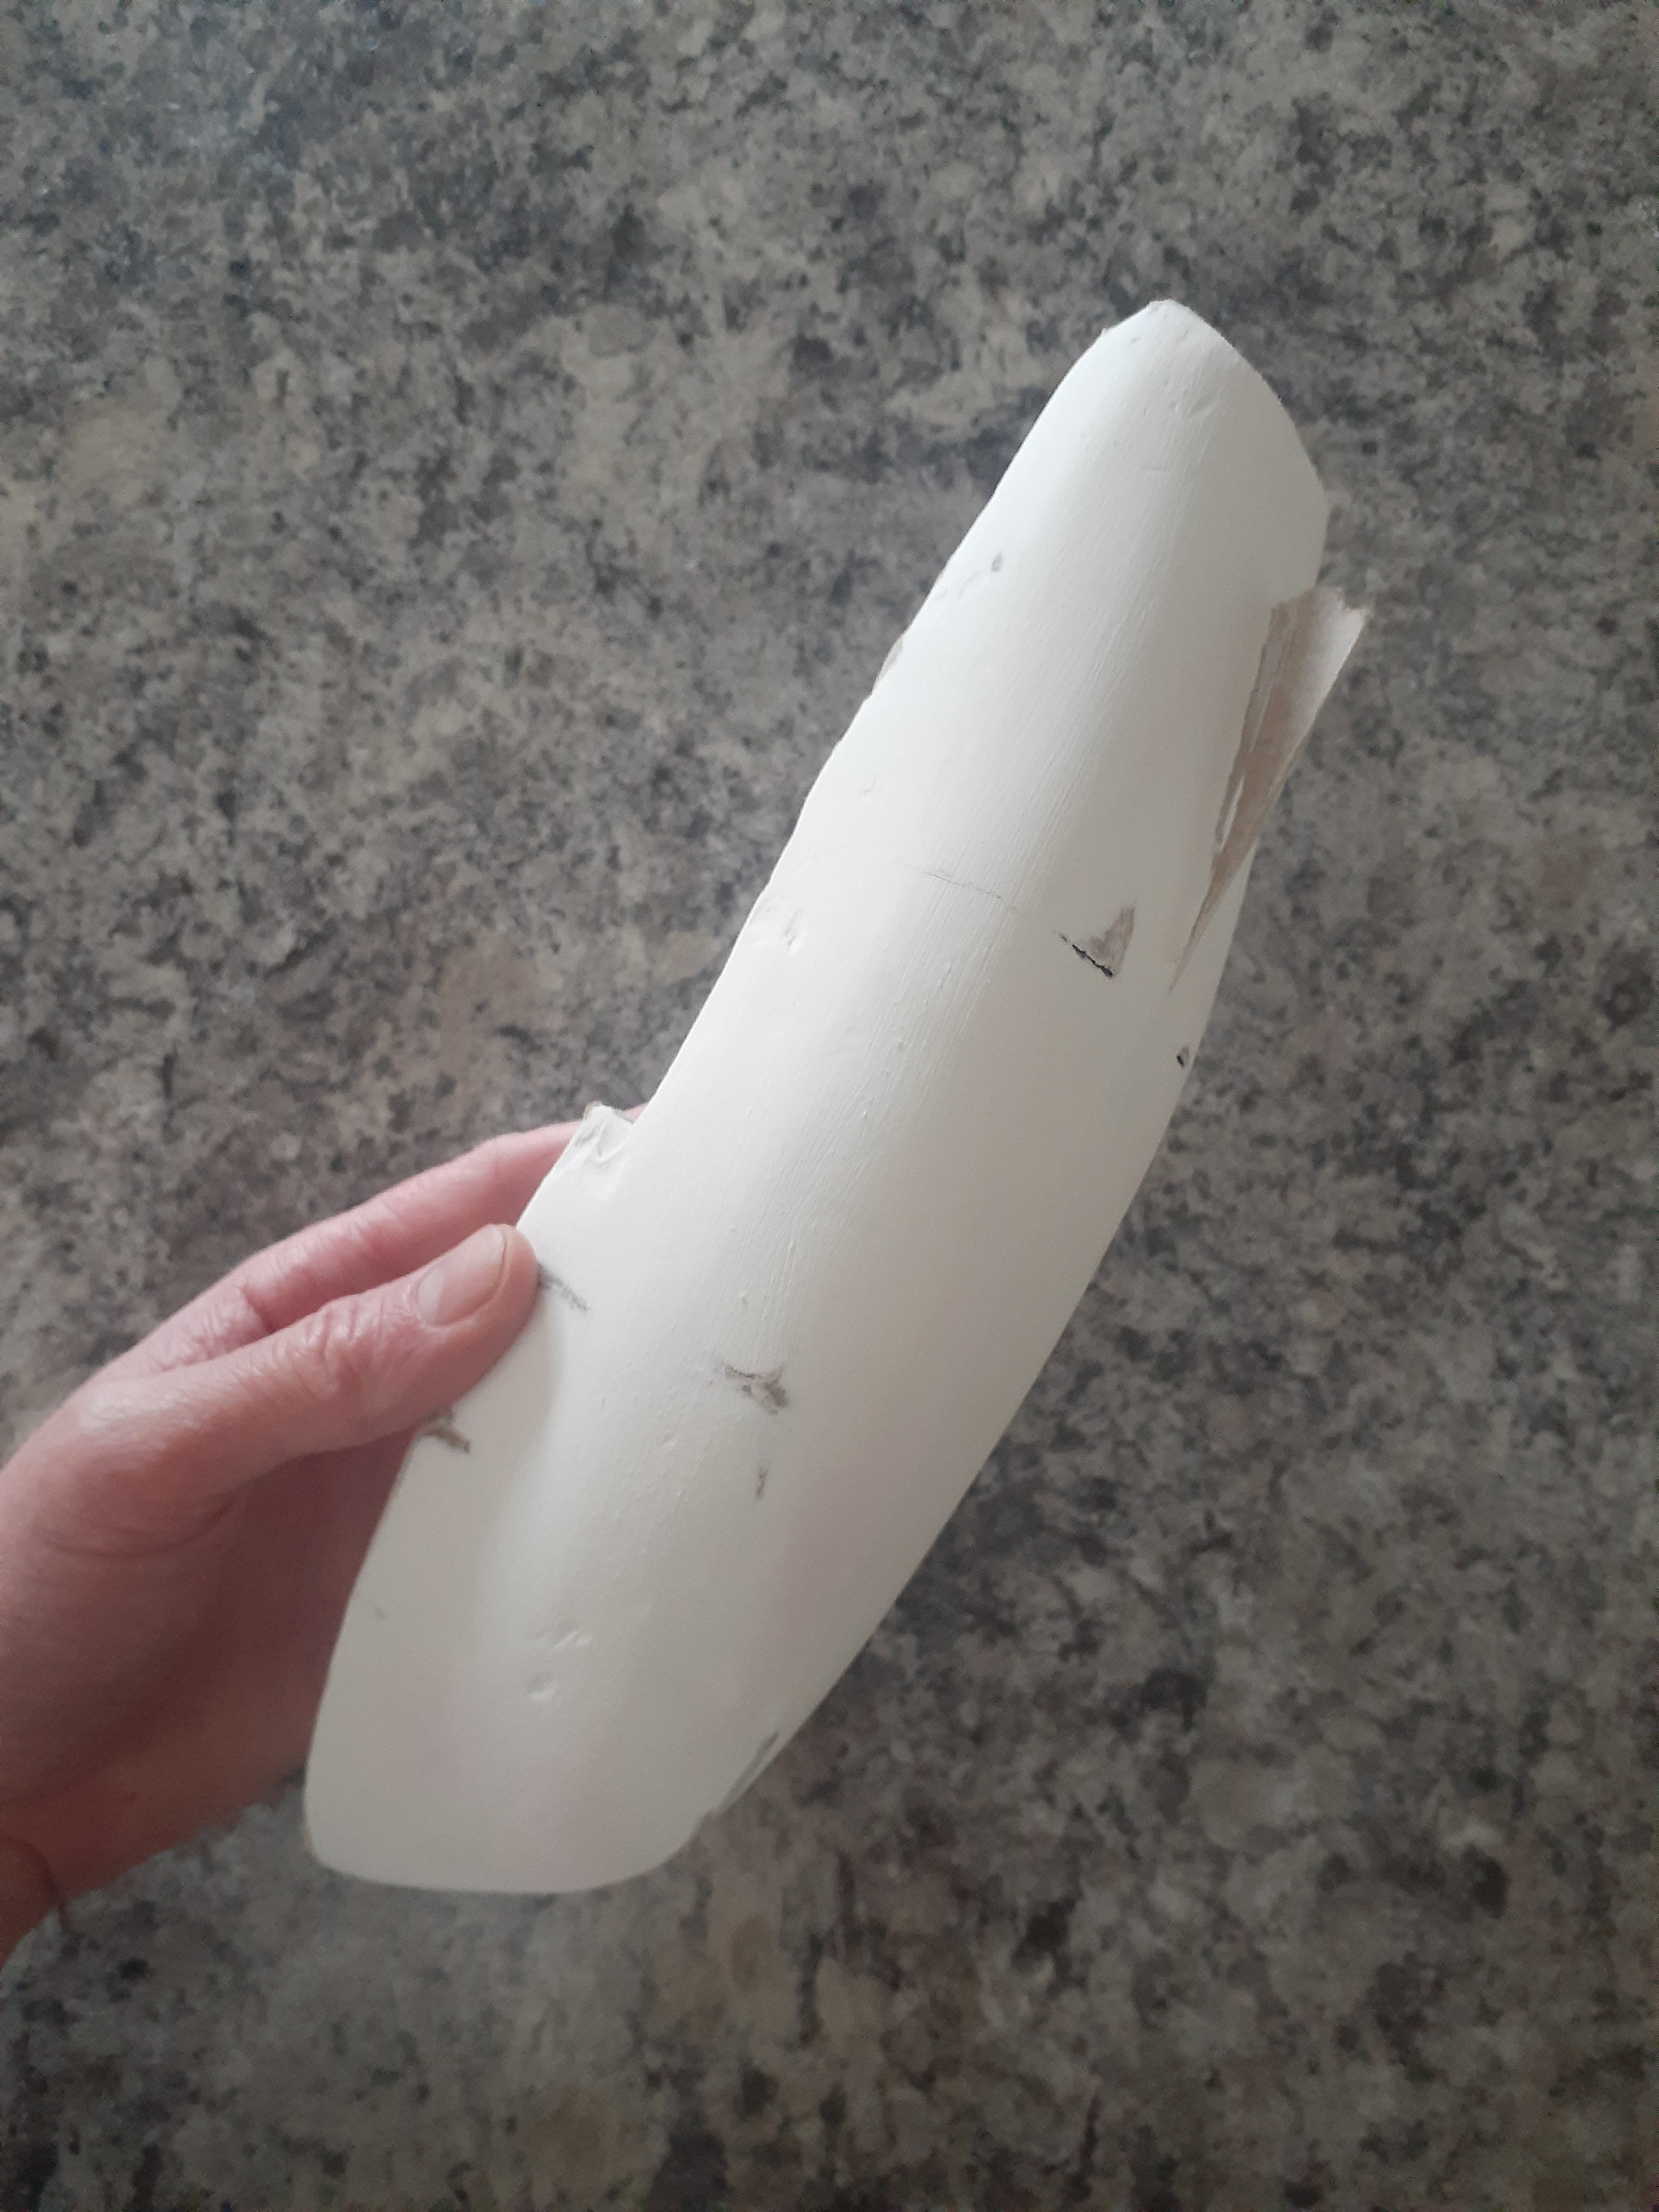
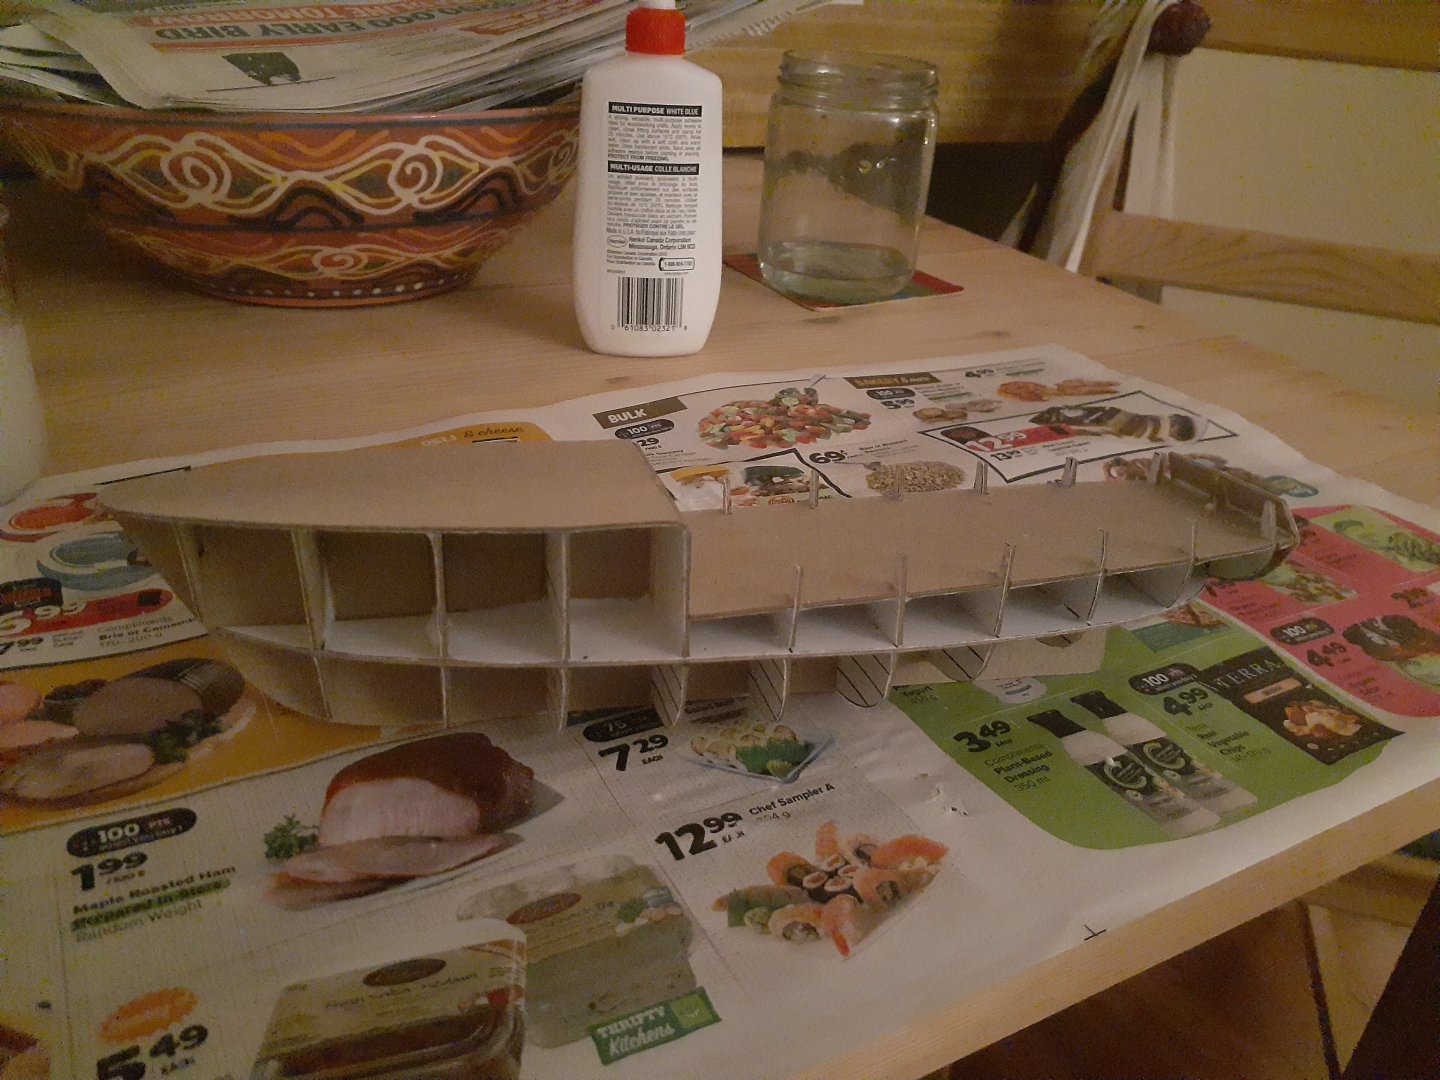
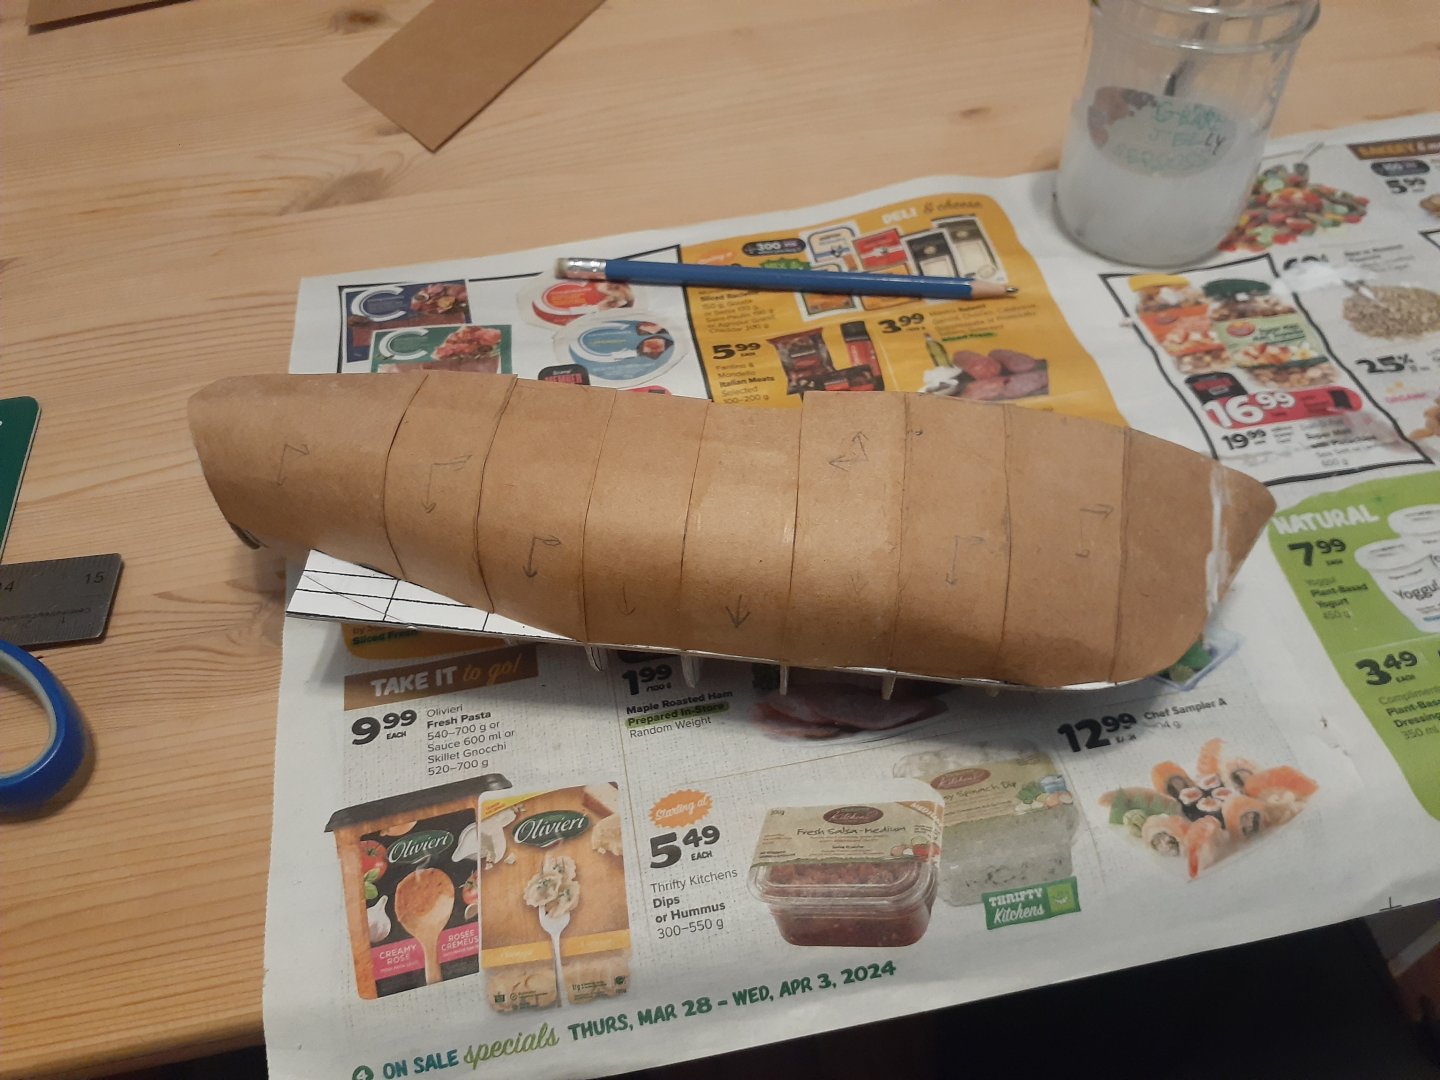
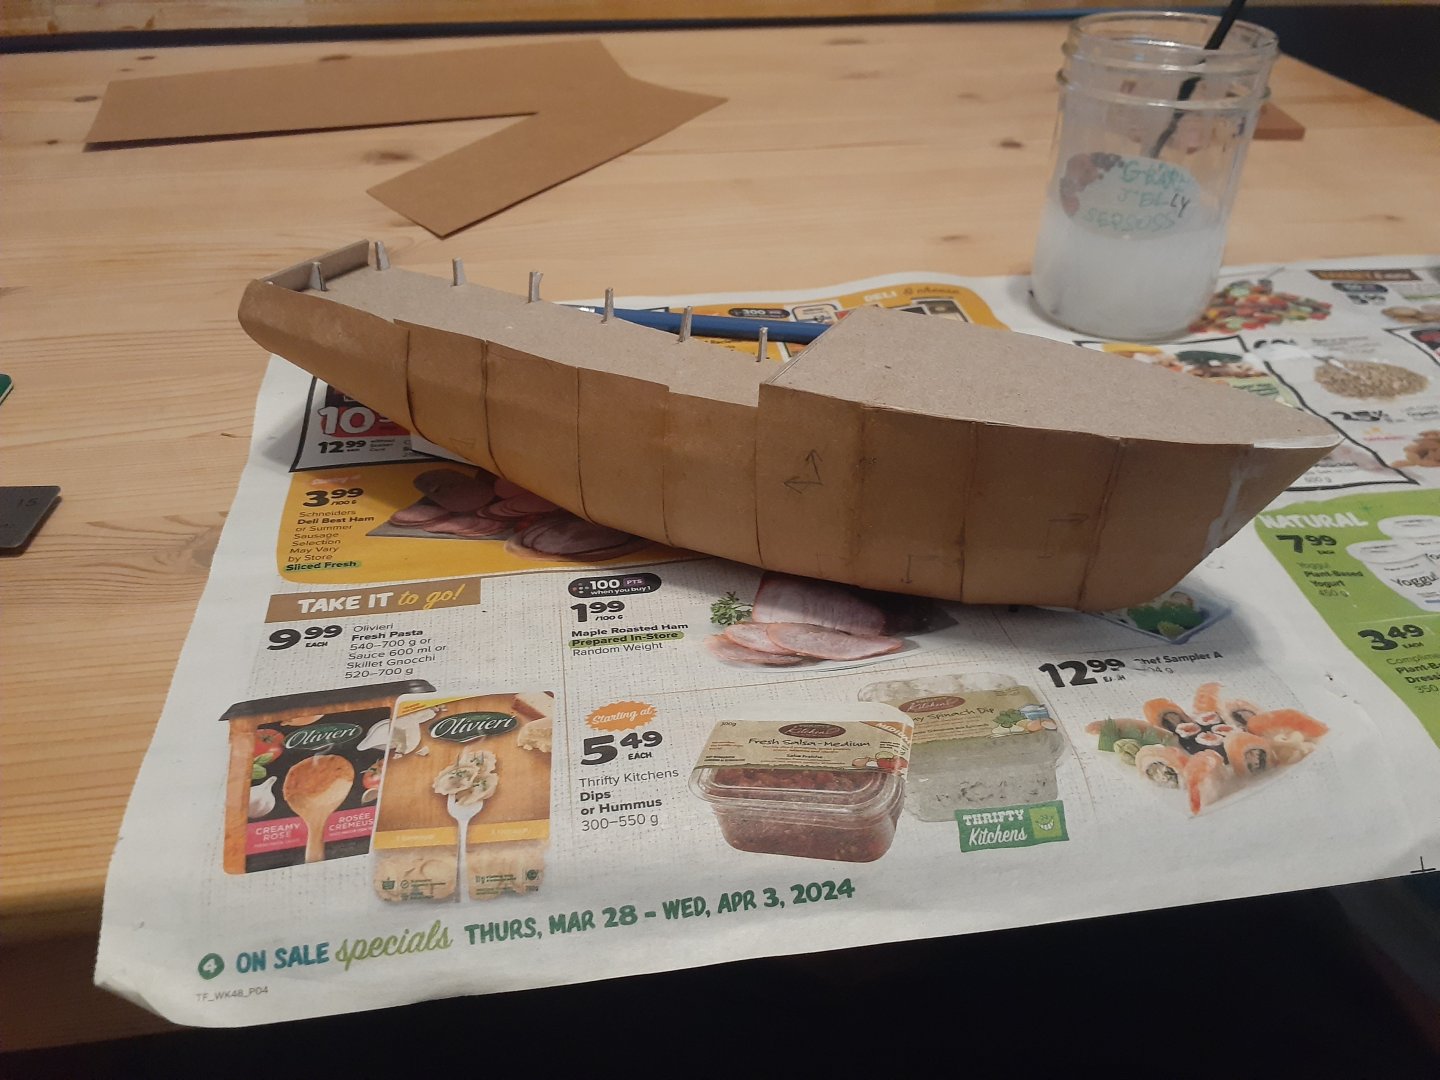
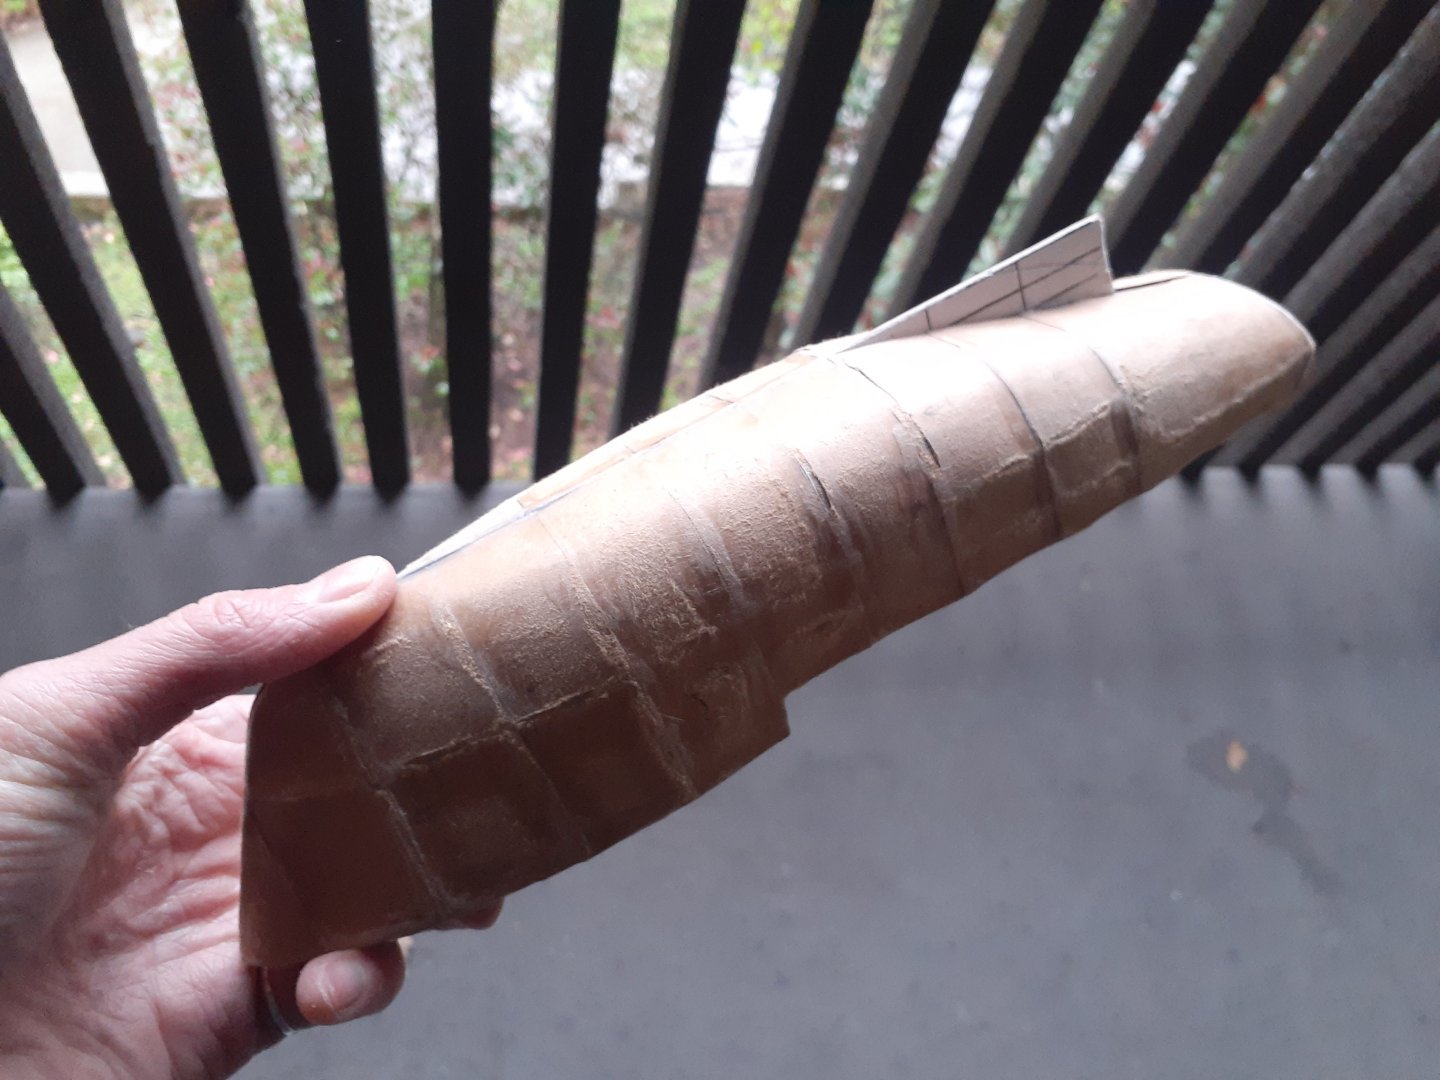
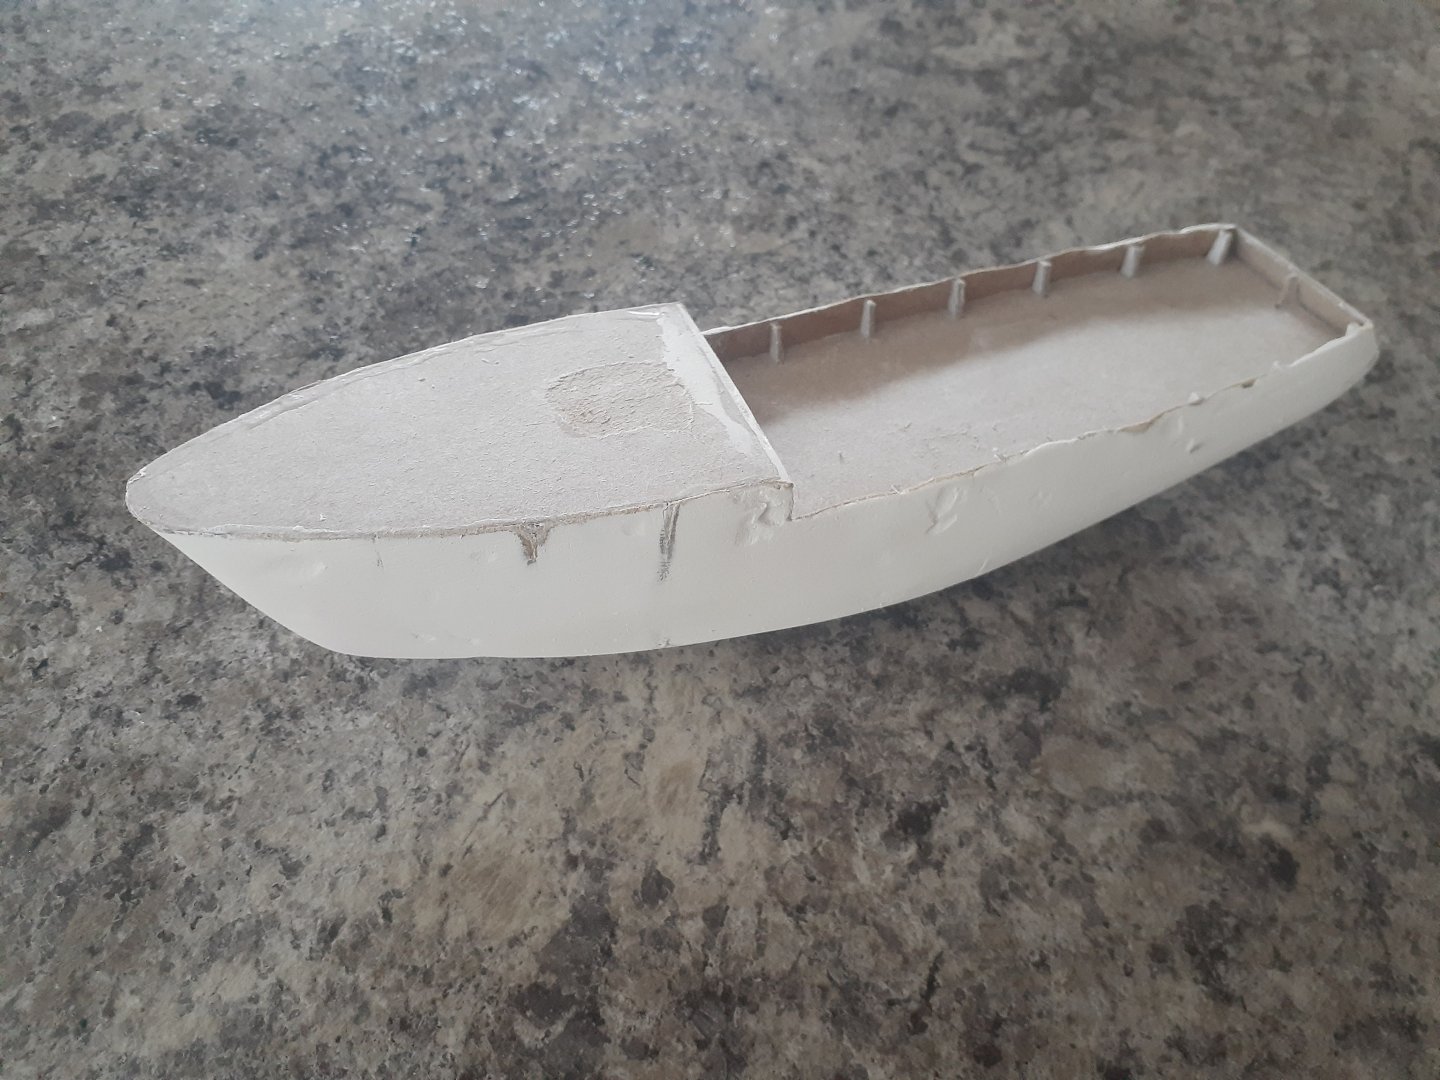
 Hello Model Ship Worlders! Having recently found some more free time in my schedule, I thought it might be time to start a new hobby. Being inspired by the impressive work of GrandpaPhil and Ab Hoving, I have decided to undertake a card model build. My aim isn't necessarily to create a perfect scale replica, but simply to learn more about ship modeling, have some fun and make something I'm proud of! I have chosen to follow some plans I found on http://www.freeshipplans.com for a Soviet shrimp trawler named "Krevetka". I have found very minimal information about this ship online, and only one photo. However, the simple hullform serves my purpose well, and the deck fittings should be an interesting kitbashing challenge! I've been working on this project for a few weeks so far. Here is the progress so far... Plans printed and backed with cereal boxes. As you can see, I mistakenly sliced off part of the keel... This was fixed when I double layered the cardboard. Crisis averted. First dry fit of the model! after this is when I decided to double the cardboard layers, as it wasn't as stiff as I liked. Gluing up the frame and bulkheads! I was going to reinforce the bulkheads with popsicle sticks, like on BH5, but decided it wasn't worth it and just laid the glue on in thick fillets. The plating process. I used thin cardstock instead of wood pulp board, as I couldn't find any in local stores. This seemed to work okay. However, by this stage I had made a few mistakes. My cuts for the frames and bulkheads weren't perfect, and I forgot to fair that out before I started plating, leaving some pretty pronounced ridges and bumps. In addition, my bulkheads weren't thick enough to glue the planks down properly, so I had to overlap them, leaving more ridges. Thankfully, putty covers many sins! Before applying putty, I did some fairing. Better late than never. I went through the cardboard in some places, but nothing major. First layer of filler applied! I used the same product recommended by GrandpaPhil in some of his builds, which seems to work great. The final update for this first post! The first sanding is complete. I'm quite happy with the progress so far. I have learned some lessons but haven't had any major obstacles. However, I have some questions on how best to proceed. The ship this model is based on has a metal hull. I'm considering a few options to achieve this look, and am wondering which one those who have gone before me would recommend. 1. My first thought is to simply continue applying the spackle I have and sand it down to a high grit. I'm concerned that it won't smooth out as nicely as I want, or that it will leave pockmarks like those shown in the pictures above. This is probably the easiest option for me, and I'll probably do a second layer regardless. 2. I have seen many impressive planking examples and tutorials, and its definitely a skill I'd like to learn. However, I'm not sure this method will give me the smooth look I'm looking for. 3. I have also thought about using a different product, something like Bondo, to fill the small pockmarks and achieve a smoother finish. However, if I can just use the spackle I have, that would be preferred. I am going to continue my research and have a think about this. In the meantime, I will start the superstructure and deck fittings, also out of cereal boxes! Sorry for the long post, I tried to keep it as condensed as possible. Thanks for reading and following along! I'm looking forward to posting further updates. David


-
 Just started building the keel today, Ive followed the instructions and cut pieces to the picture, and when I assembled the keel there was this rather large hole on the stern of the ship. I didnt glue the together keel, and I need sugestions on how to fill that hole
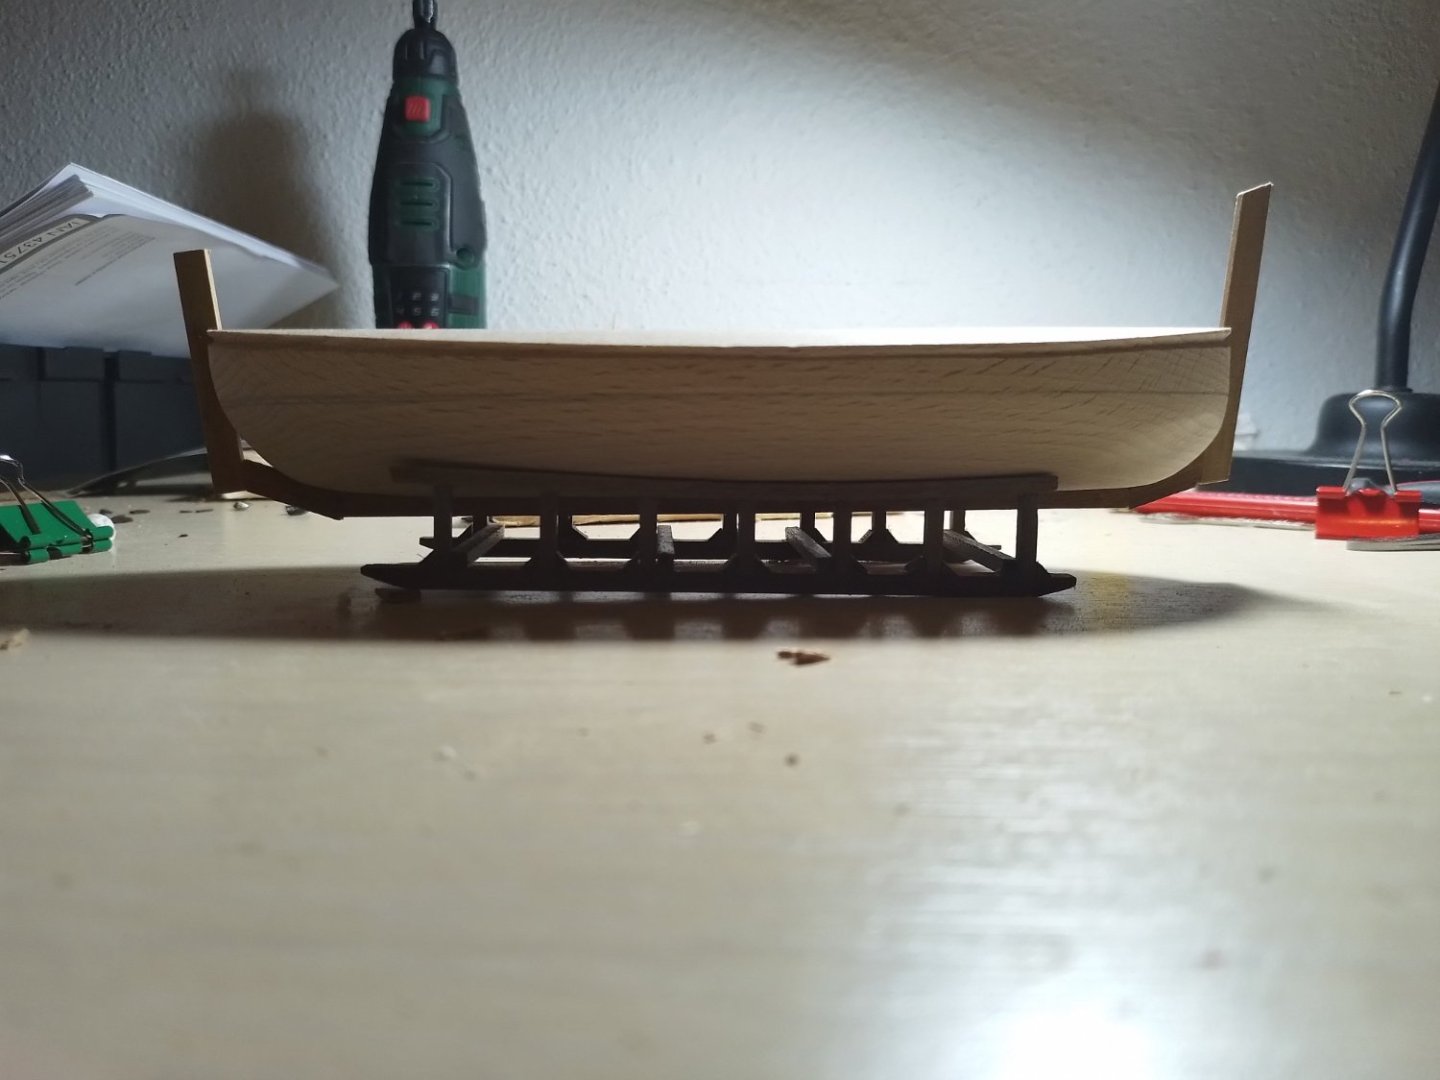


- 14 replies
-
- 2
-

-
- Solid hull
- Bregante
- (and 2 more)
-
 Hello! so being new to the ship world and to modeling them, I thought the Polaris build from Occre was a completely random kit specifically designed to help you into the world of wooden models. I have since learned the Polaris WAS actually a real ship! And a steam one at that, so this kit is not completely accurate, from what I read this vessel was procured by the US Navy and was actually known as the USS Periwinkle prior to being an arctic expedition ship? That being said, I took a lot of artistic liberty. I have been learning some terminology in the nautical world, what parts and pieces are, how things work— but slowly. I have some learning disabilities so PLEASE don’t judge me too hard for sounding so basic with what I post! I know there’s measuring involved to make the strake planks accurate, Occre is very difficult in the sense that they just shrug and have you figure out how to hodgepodge the pieces. You’ll see I followed Occre’s instructions up to the second layer of planking, where I tried to fiddle with things a little to make it easier. anyway! I used a 90 degree ruler to make sure that the ribs were PERFECT, and of course they were! Until I tried to glue the deck on. Thankfully the wood glue I used it rather forgiving and a bit rubbery when it dries, so I could gently crack the ribs into place without breakage. I learned the cement I was used “contact glue” was garbage. I must have gotten a bad bottle because the planks didn’t stick to the wood very well. It was a frustrating process of using the glue I bought from Occre to get everything to lay down well AND HERE IS WHERE I MADE MY FIRST MASSIVE MISTAKE I followed the instructions TOO precisely. Using the varnish. That was a big whoops. It was after I applied the varnish I looked at other finished kits and saw that they stained the deck to get richer colors… Well, I guess I’ll be getting back to this—- and you can already tell what’s going to happen. All in all, I was feeling very proud and excited to be getting this far
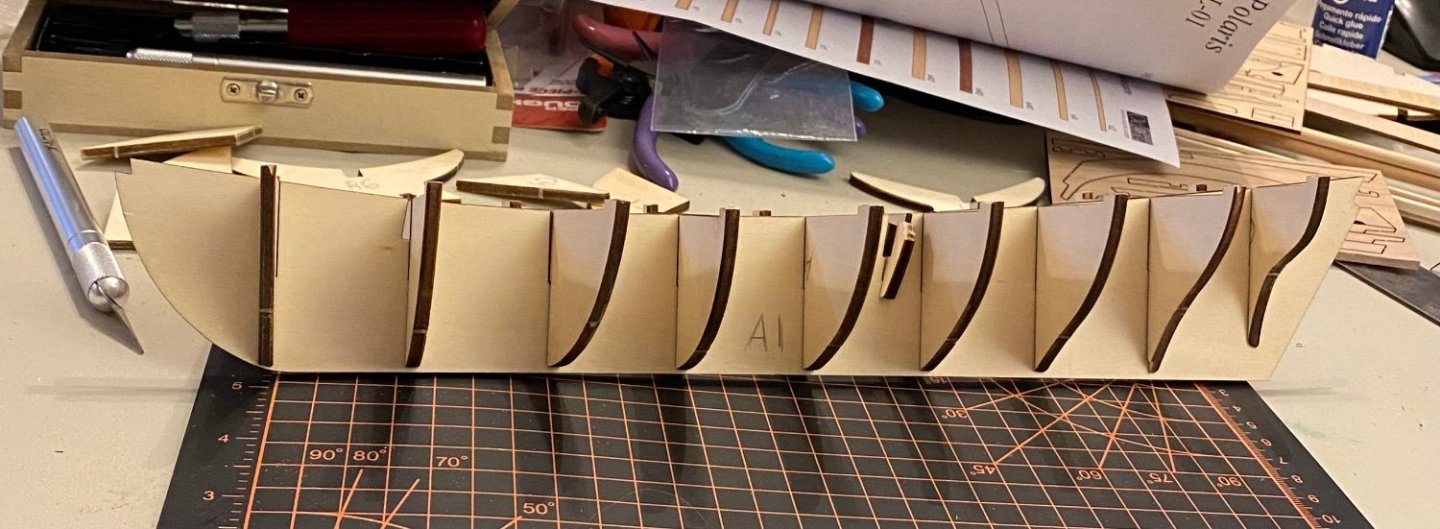

-
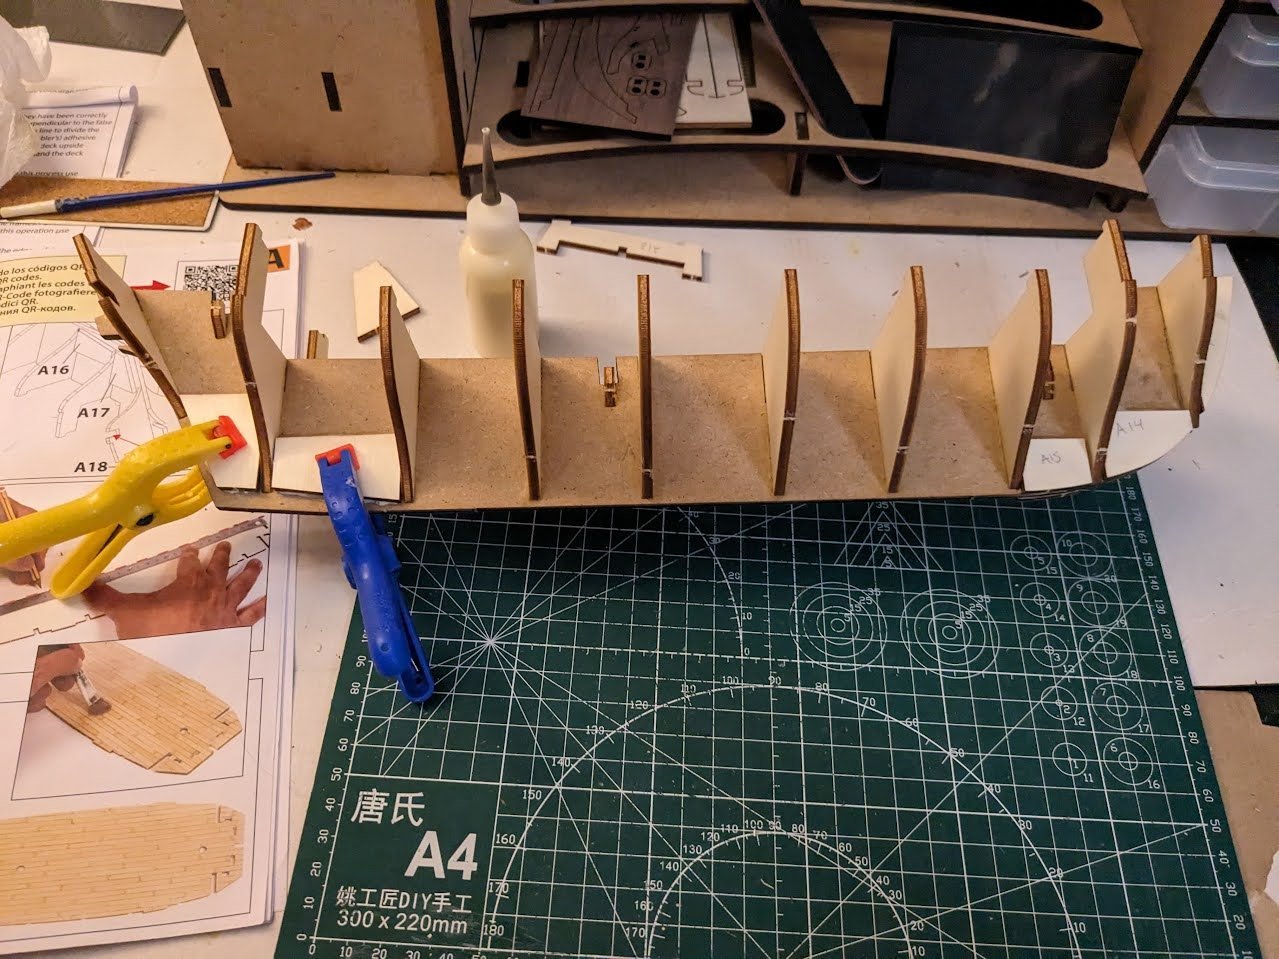
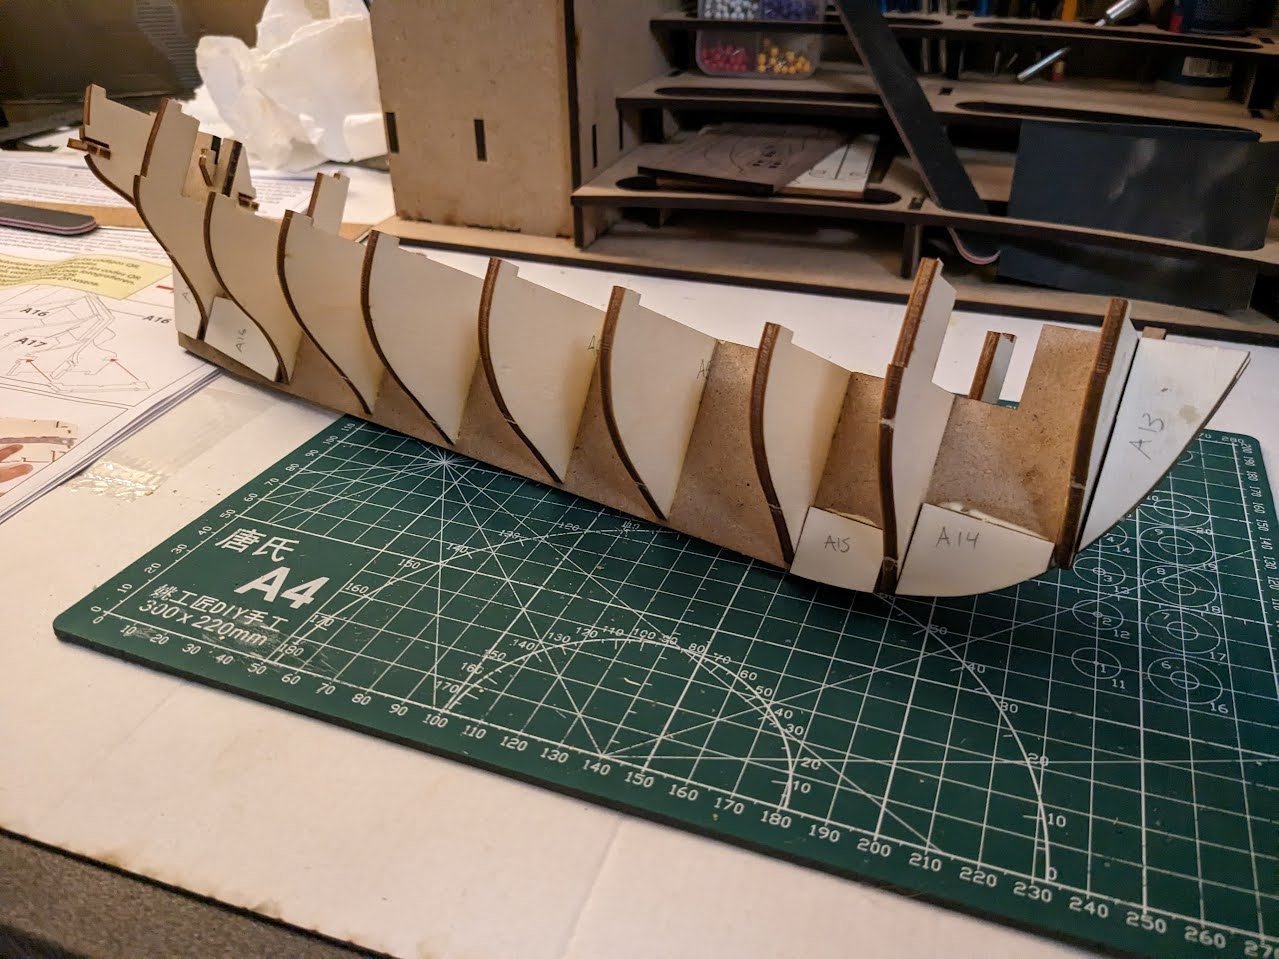
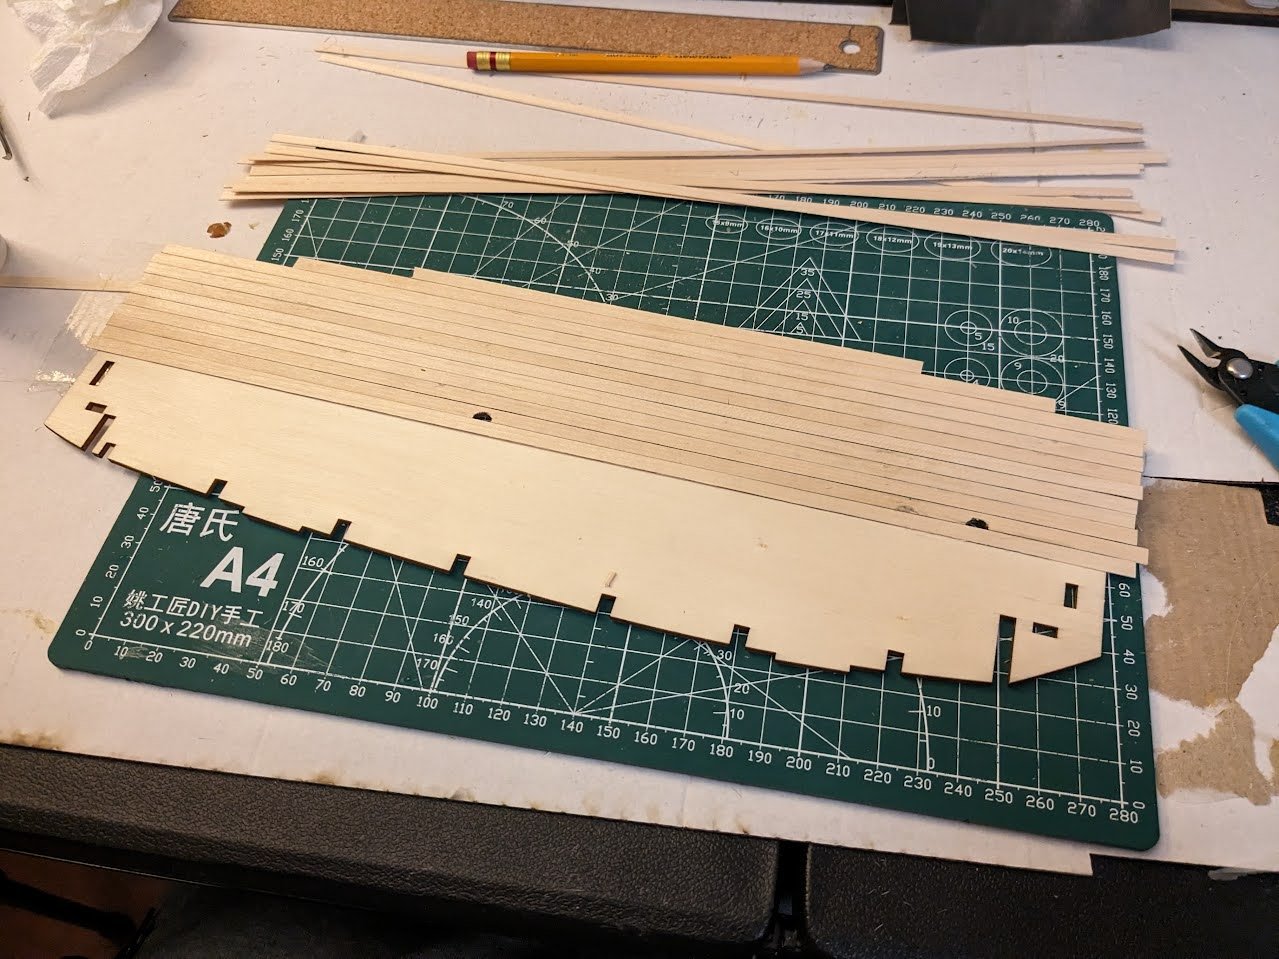
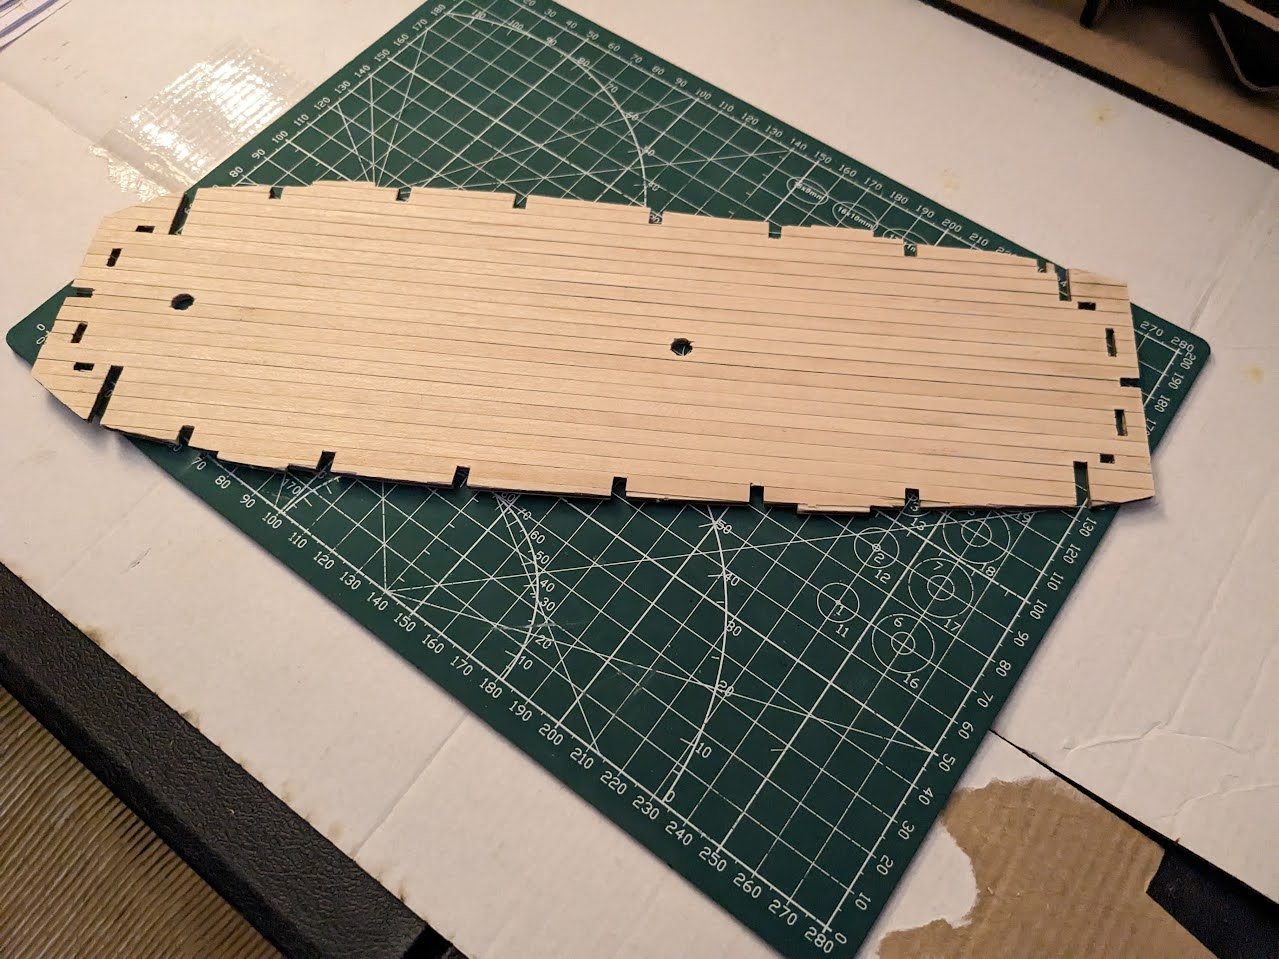
 Finally made a start, after getting the work area cosy. Good to read through the instructions, as recommended, as found a few errors in the bulkhead and other pieces indentification. Also found the bulkheads were a little loose in the keel piece. One of the many videos I've watched suggested Lego blocks for a perfect right angle. And they have worked a treat. False deck just gone on. Again, from watching many videos I wont be putting the stern and bow posts, or keel piece until first planking complete. Im sure there are many mistakes already, but I'm quite happy, so far, for this first attempt.
- 3 replies
-
- 3
-
-
- Lady Nelson
- Amati
- (and 2 more)
-
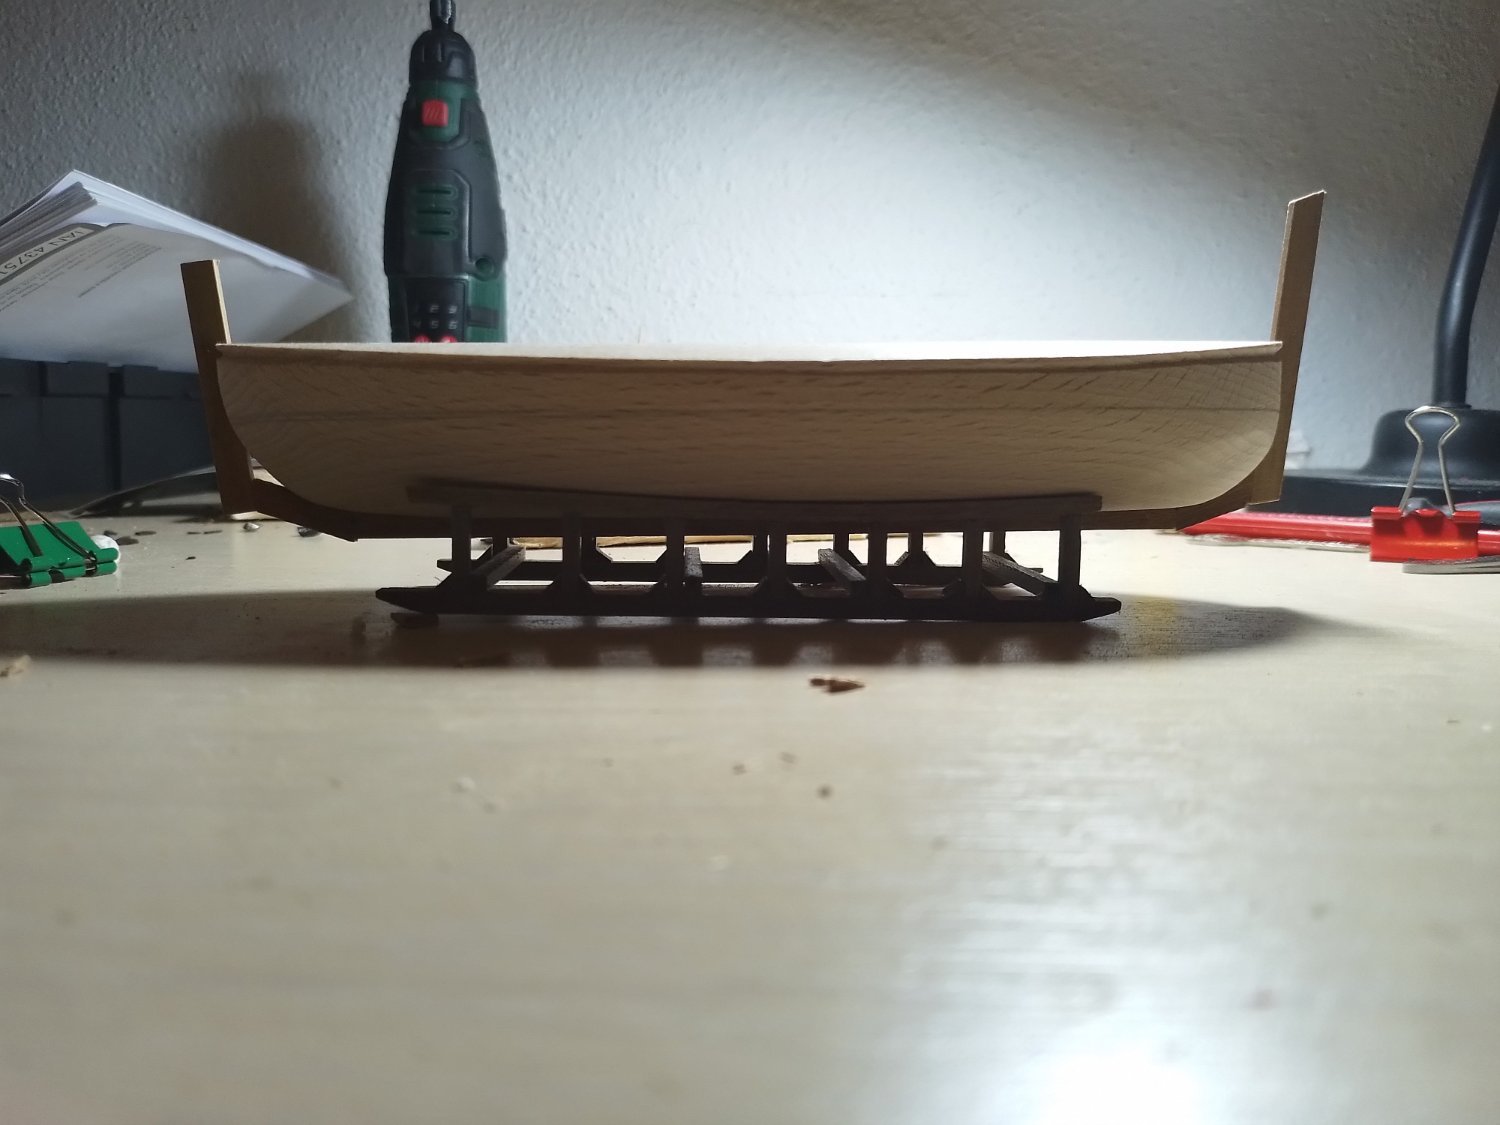
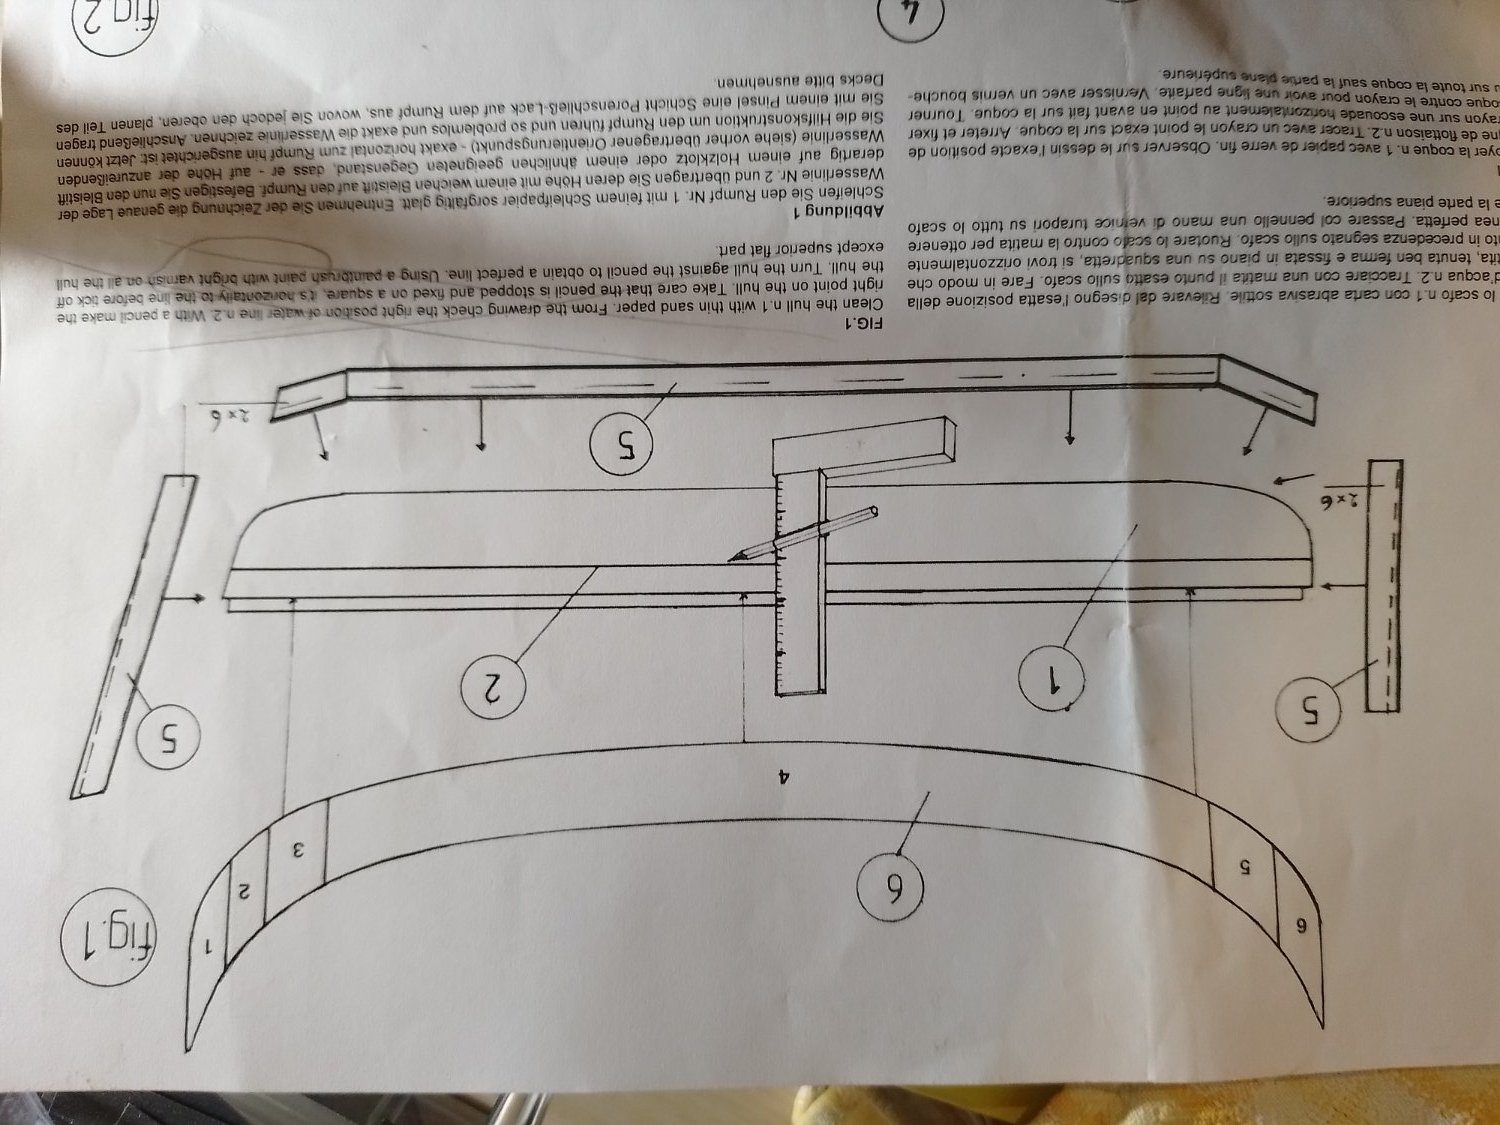
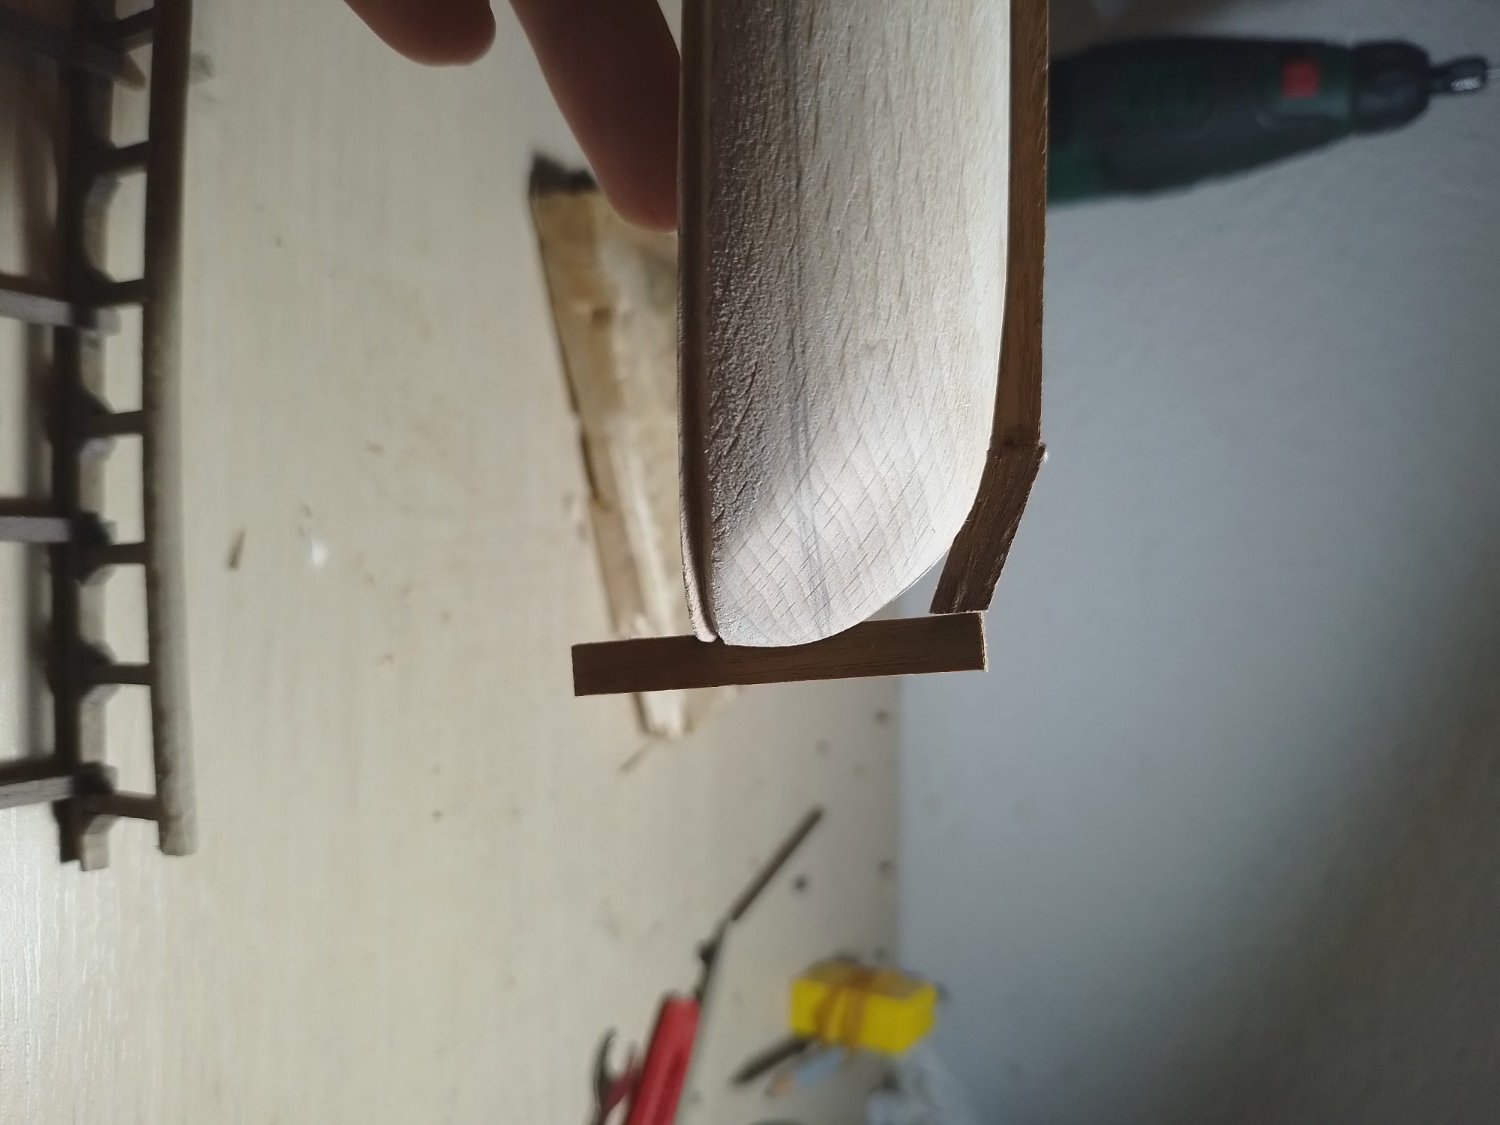
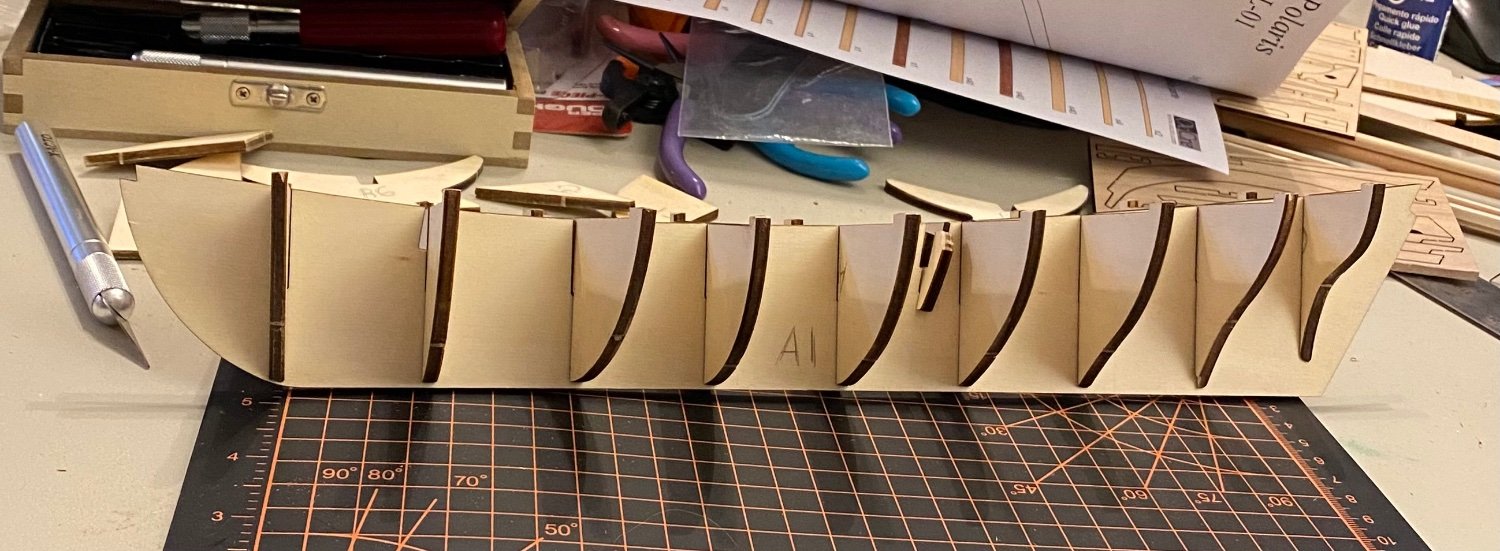
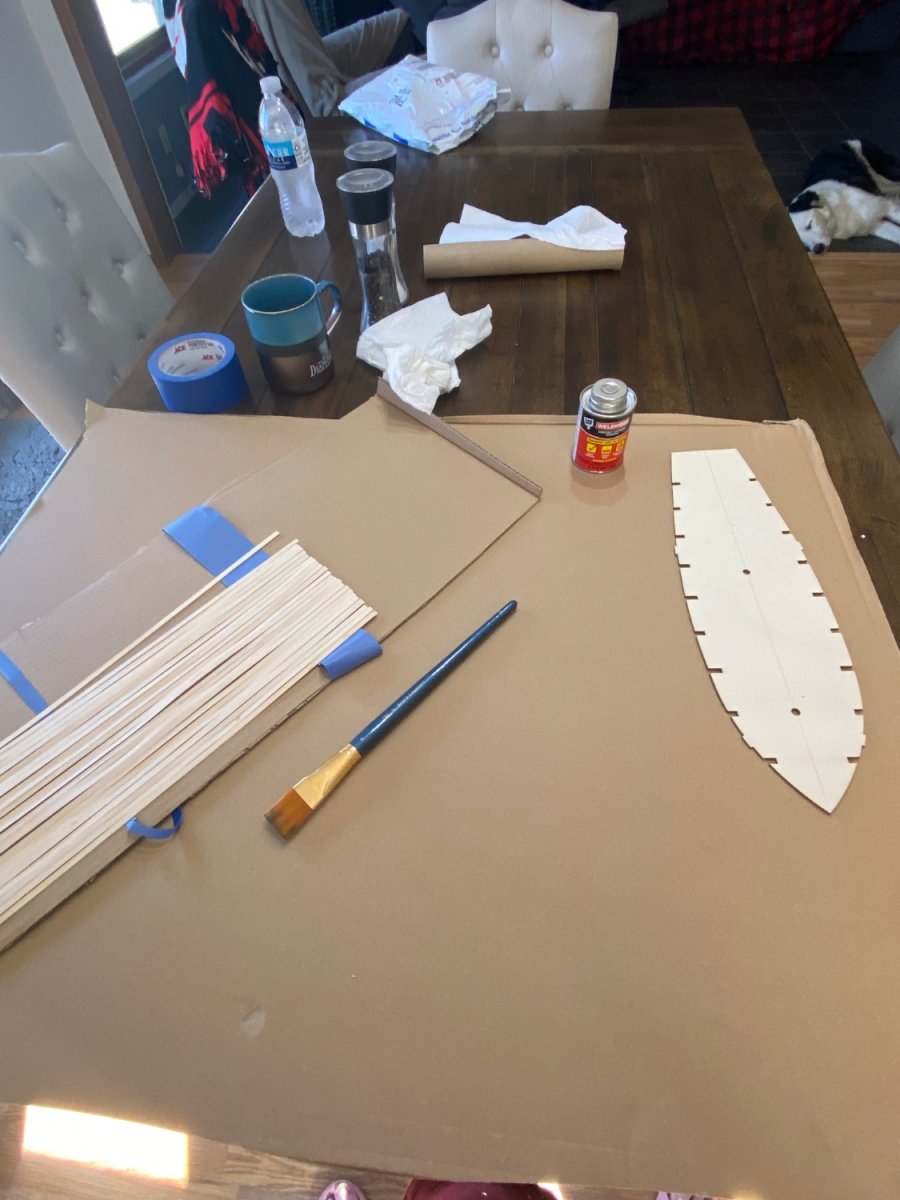
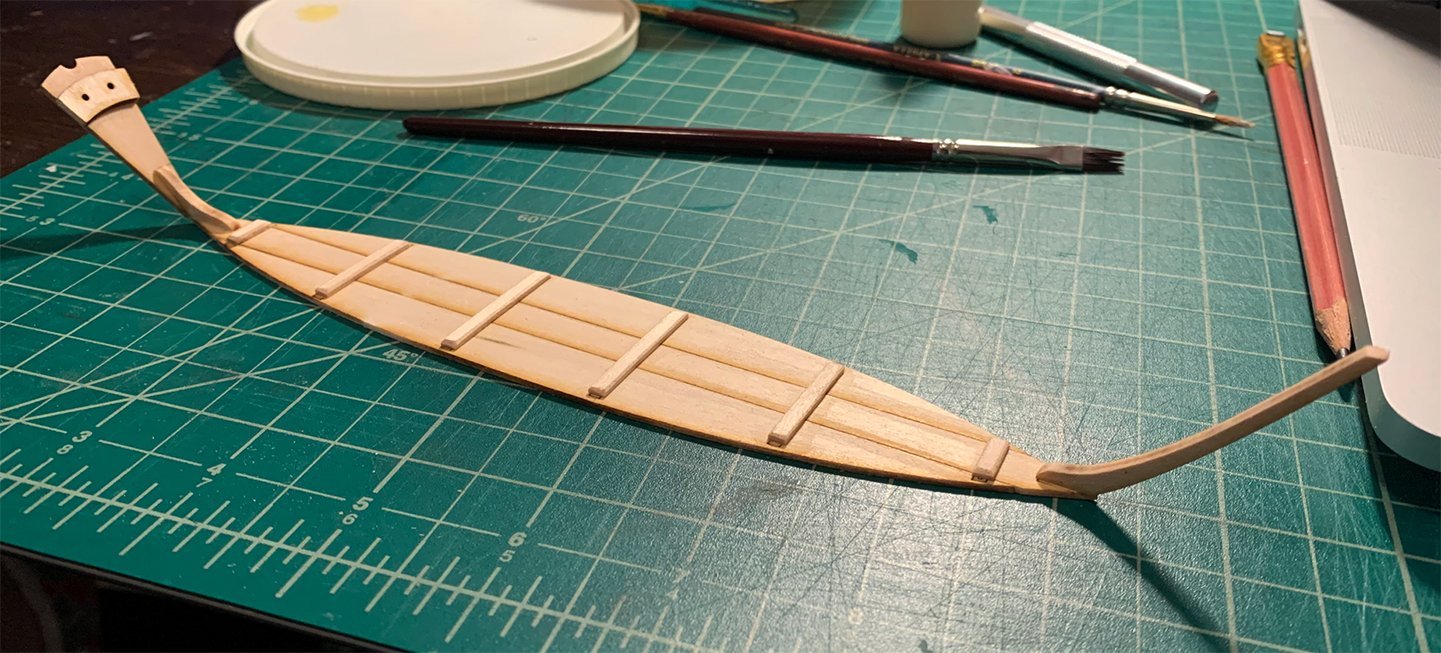
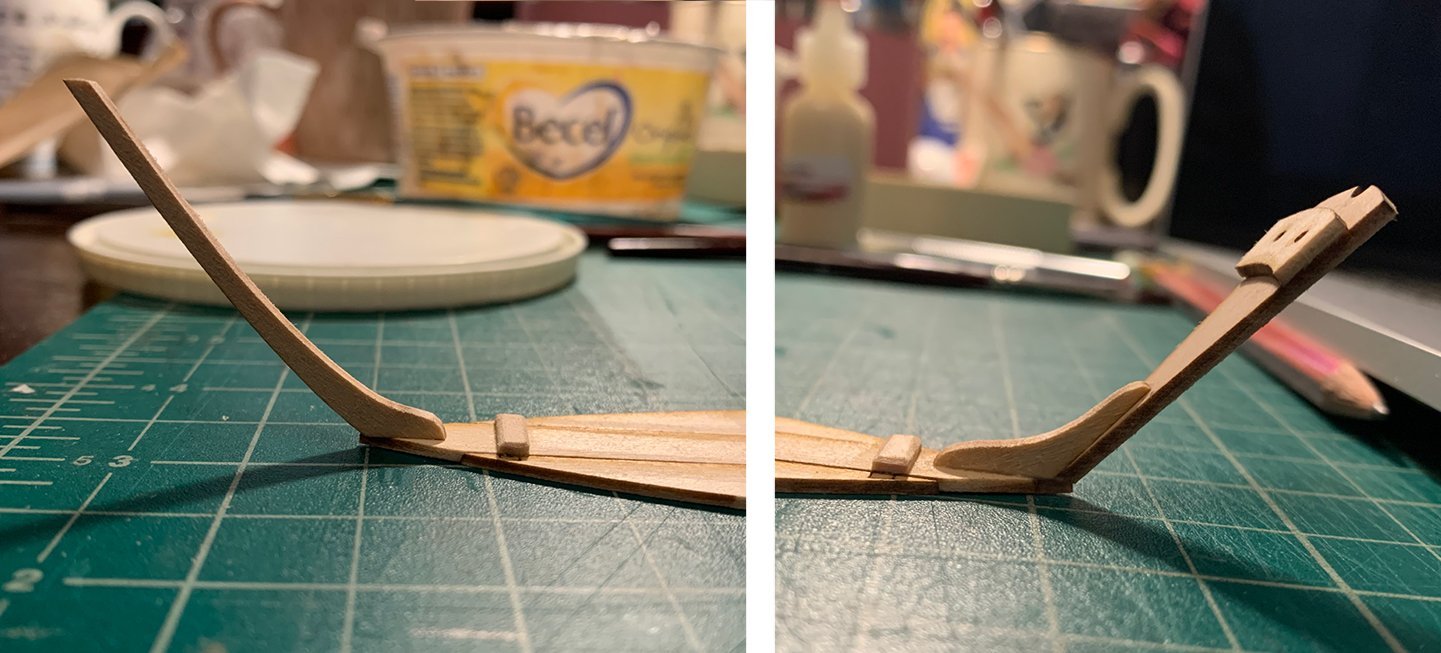
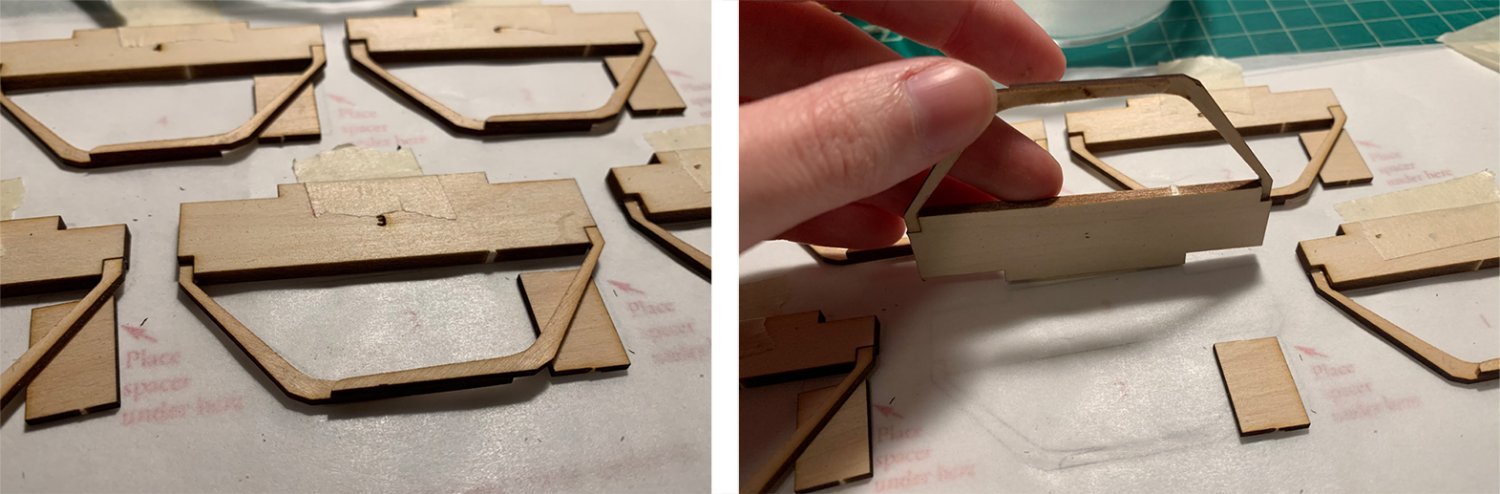
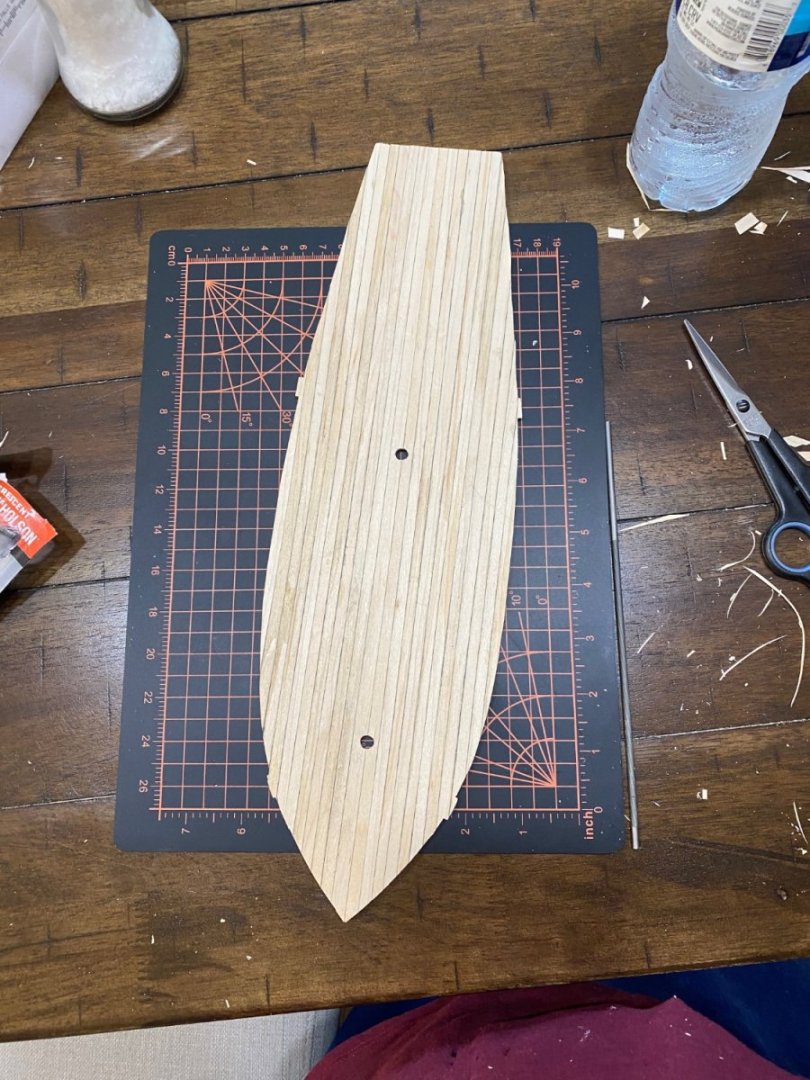
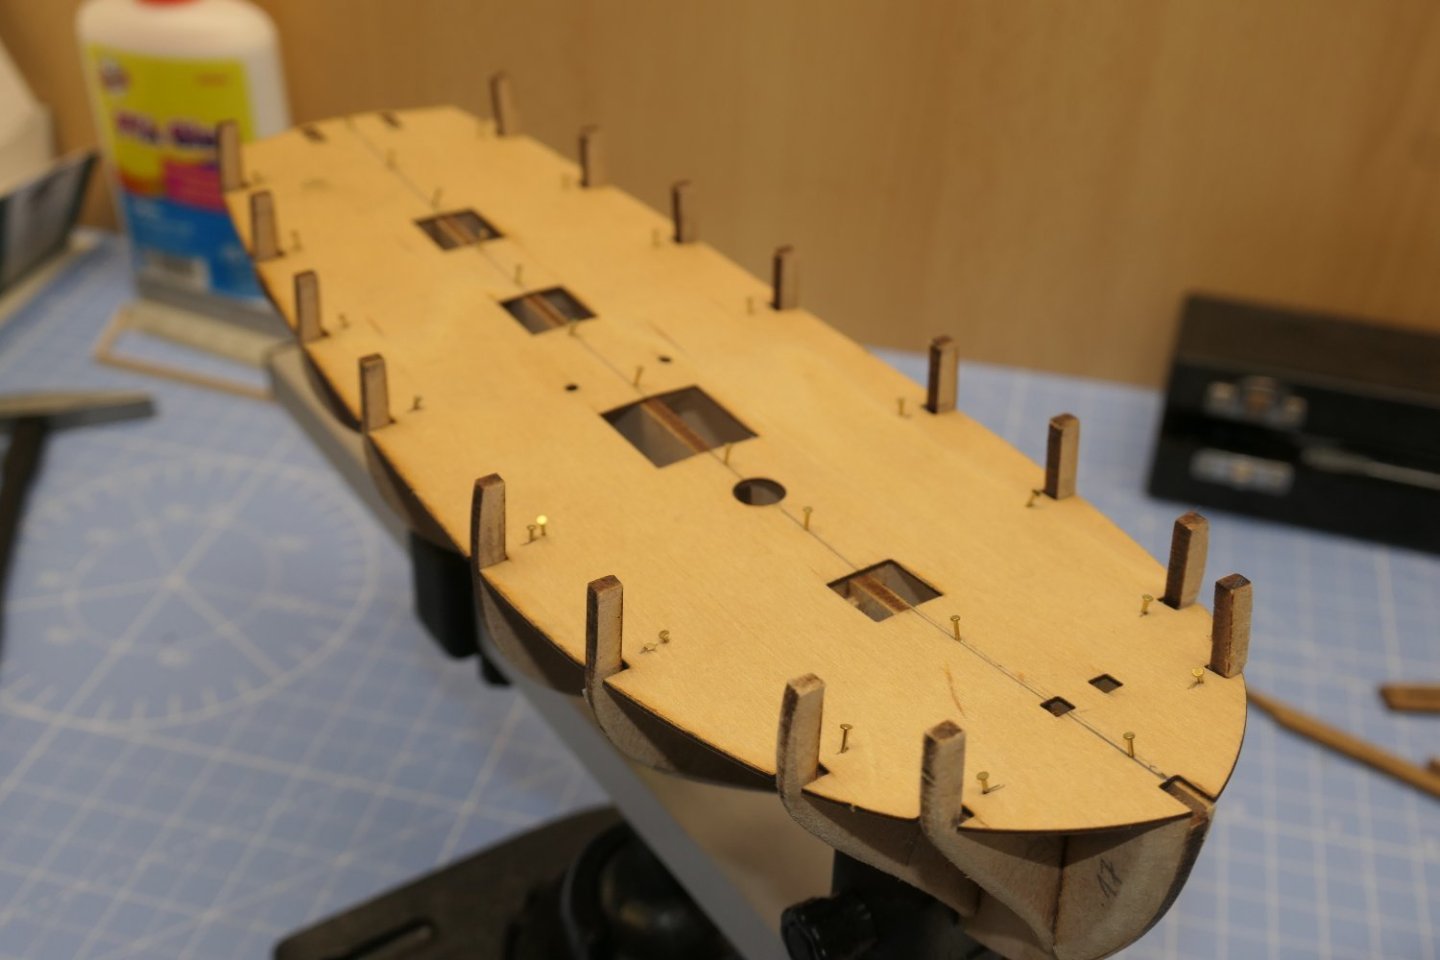
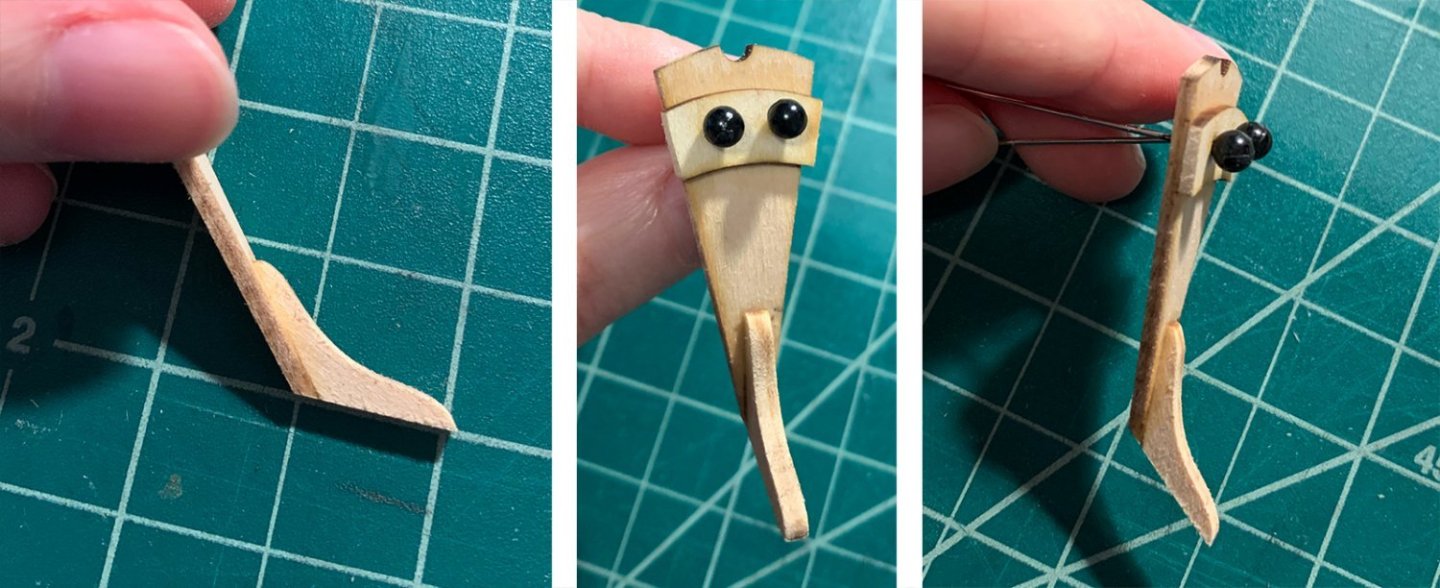
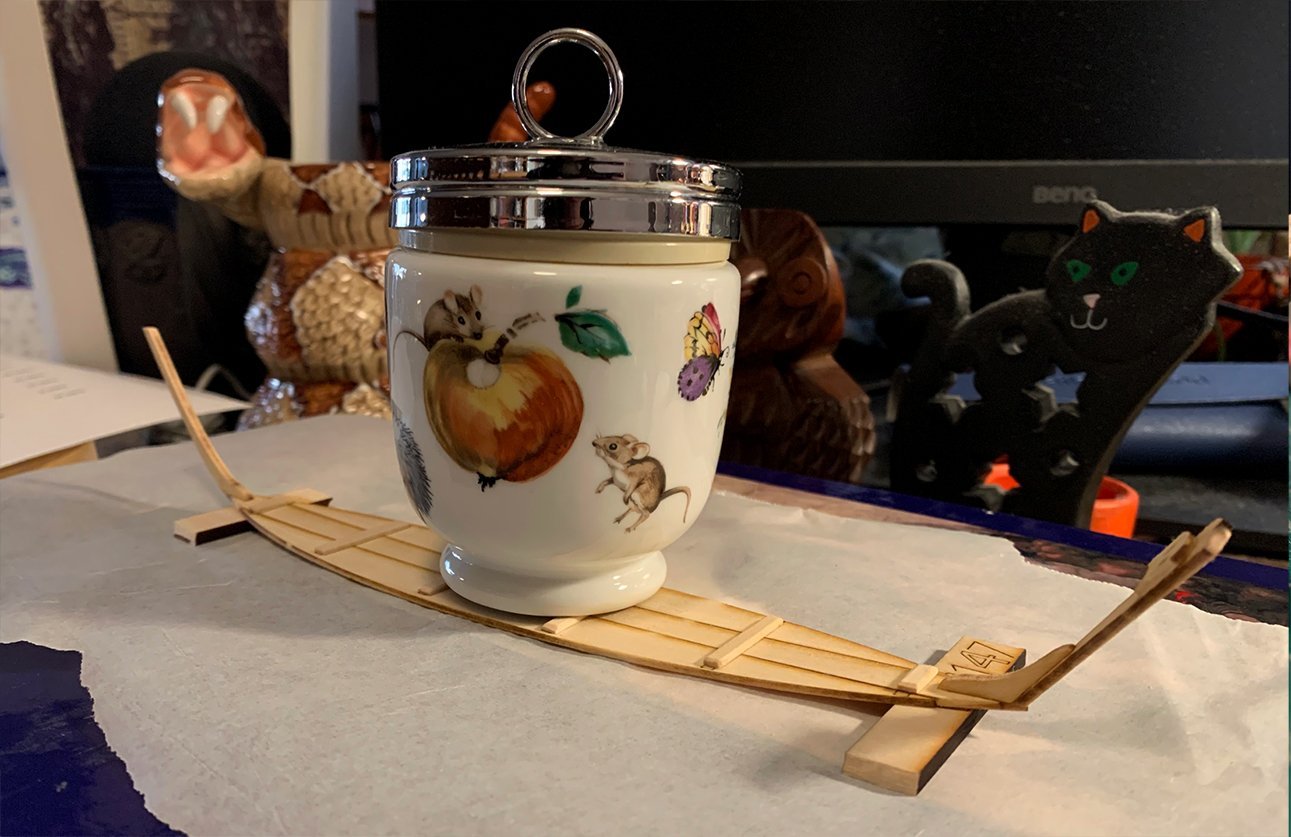
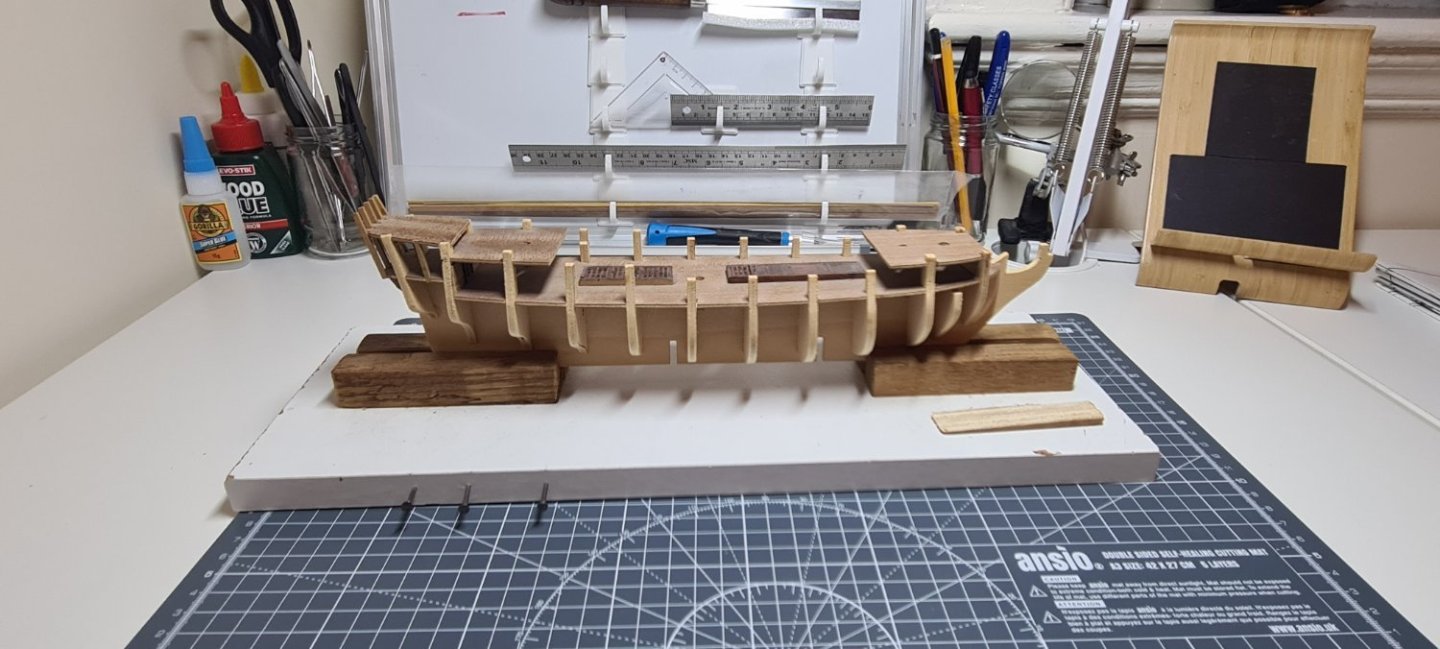
 My first build! As exciting as it is intimidating. After staring at the box for a bit, getting over my nerves, I cracked my knuckles and cracked open the lid. Step one admittedly wasn’t photogenic—I made sure all the pieces were present, gave the full instructions a careful read, and then poured over multiple build logs. The next day, the real fun began. I opted to build the bottom from scratch rather than use the pre-made piece. This meant cutting, gluing, and sanding—so much sanding. I was skeptical at first, but low and behold, the instruction’s tip about moving the piece rather than the paper worked. Instead of a sanding stick, I opted to just tape some sandpaper flat to my working surface. A great decision for these long, straight pieces! Not so great for others. (More on that later.) Hoping to spare my fictional sailor a tumble into a sharp corner, I studiously over-sanded the edges of my cleats. The instructions spoke about removing edges to prevent injuries—but…what about the thole pins? They make sense to have, but I can’t help but think they’re a stab wound waiting to happen. A poor fate for a clumsy sailor… When sizing the cleats, I ignored the length of the burnt guidelines. Instead, I followed what other builders had done and made sure each one had some breathing room before the edge. After sanding and gluing the stem without incident, the transom gave me pause. I decided to go a little off-book, sanding it and the stern knee together before attaching the stern cleat. It seemed to me like a choice between vigorously sanding three freshly glued, breakable parts or two. (I opted for two.) I’m really proud of how it turned out! After adding glue to the transom and plopping the stern cleat on, I strung the two together with sewing pins. This let me squish the pieces together without fear of misalignment or gluing the holes shut. It also made it a million times easier to brush away excess glue. A simple strategy, but very effective. Should the edges of the stern cleat be softened as well, for our clumsy sailor? The instructions didn’t mention it so I refrained, but I feared once again for his poor noggin. After that, I was humbled. I spent far, far too long attaching the pieces to the bottom. I thought about it, researched it, did it, fussed with it so much the glue gave up, then had to do it all over again. I just couldn’t decide on the alignment. Should I follow the burnt template line, allowing a bunch of the stern knee to hang over the edge? Should I keep the point of the base and the outside of the transom lined up? Other build logs seemed to differ, and I couldn’t find many clear shots from the side to compare. I’ll upload pictures of mine. If it turns out I made a bad choice, others will know what not to do. If it works out—whew! One of the things I’ve enjoyed most about these dory build logs has been seeing what random things people scrounge up to use as weights. For mine, I made use of an egg cup my grandfather gave me. The whole kit and caboodle was set aside to dry, with a few other rejected weights keeping watch behind it. Onto the frames! I’ve seen many people comment on the template being the wrong size. I actually found it to be exactly 1:1—which makes me think I’m either lucky or doing something wrong. A few things I found helpful: I taped a sheet of parchment paper over the template to avoid gluing the paper. I numbered and labelled each left and right piece in pencil before cutting them free. This saved me almost immediately when I cut out and sanded a “2R” instead of a “3R”. It occurred to me I could have used this labelling as an opportunity to practice “port” and “starboard”. Then I realized I’d be adding additional challenges to an already daunting project. Left and right it was. A note to myself for next time: this worked great, but the pencil was difficult to erase before gluing. I’d write lighter next time. I prepped the frames one at a time but held off on gluing. The process: pick a number, label the two frame pieces, cut them out, sand them down with a scrap of sandpaper, then dry assemble it on the template. Once all of the frames were sitting primly in place, I could go through and glue them all at once. Since the glue dries so fast on my palette, I found this more economical (and it saved me some brush washing). I taped down the crosspieces. I’m so thankful I taped down the crosspieces! It meant I could easily lift the whole thing upward to clean the excess glue beneath, then settle everything right back into place. Free spacers were helpful to tap the freshly glued bottoms against, ensuring they were flat. This stage was when I really started feeling my lack of a sanding stick. I’ve got an old wrist injury, and it was starting to complain. So were my fingers, which had been slowly filed down alongside my pieces. Ah well. Funny how every tip I followed treated me well, and I regret skipping the one I didn’t. Almost like I should listen to the experts… After gluing up the frames, I checked the status of my now-dry boat bottom and found it lacking. Out came the water again, and a book was added to the weight mix. That’ll show it. I seriously debated continuing, but as I’d just spent half the day squished up at my table, a break seemed in order. I’ve got the itch now! But planking is intimidating. A problem for later…after my new sanding stick dries. 😄


- 9 replies
-
- 12
-
-
- Lowell Grand Banks Dory
- Model Shipways
- (and 1 more)
-
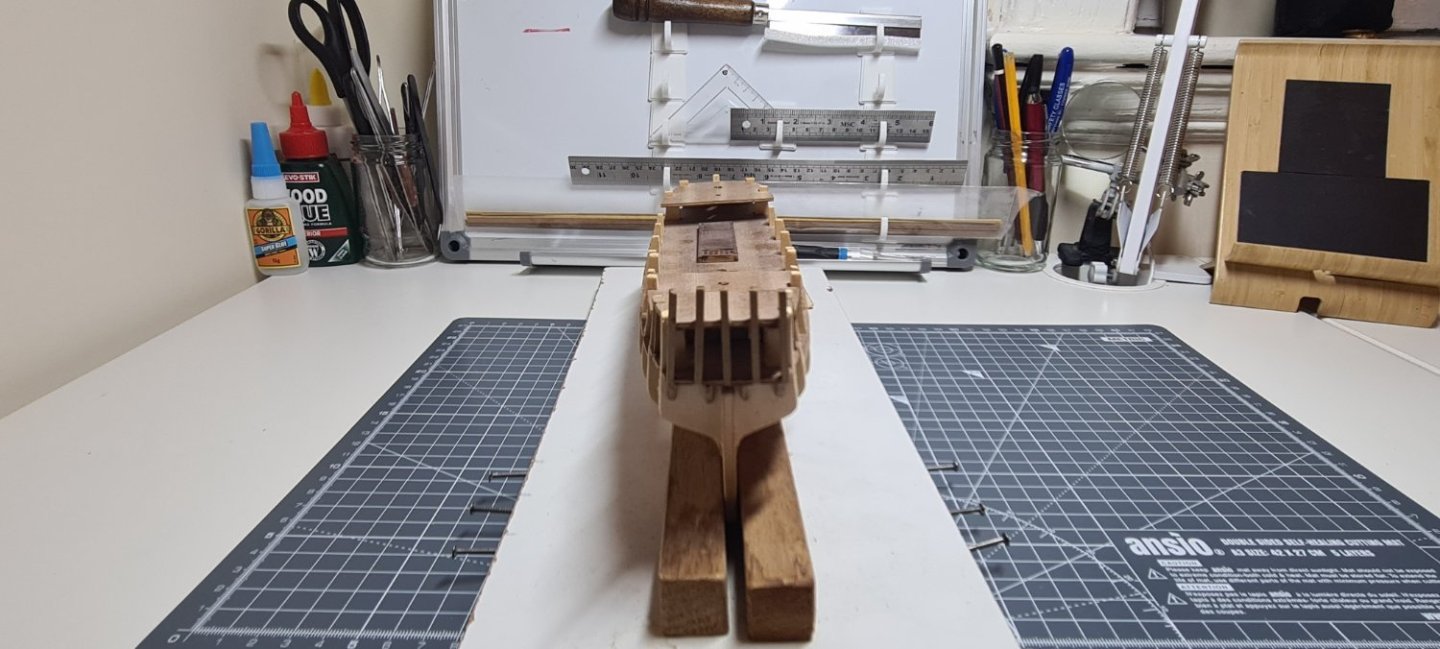
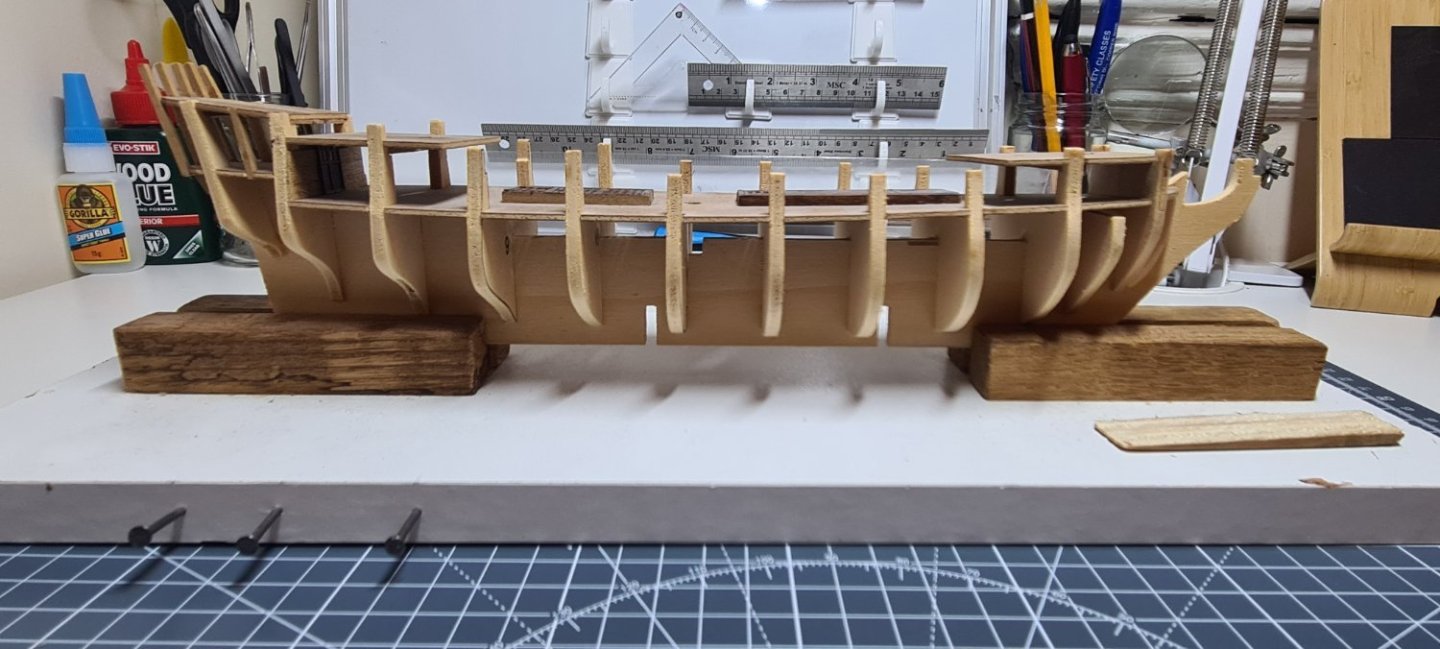
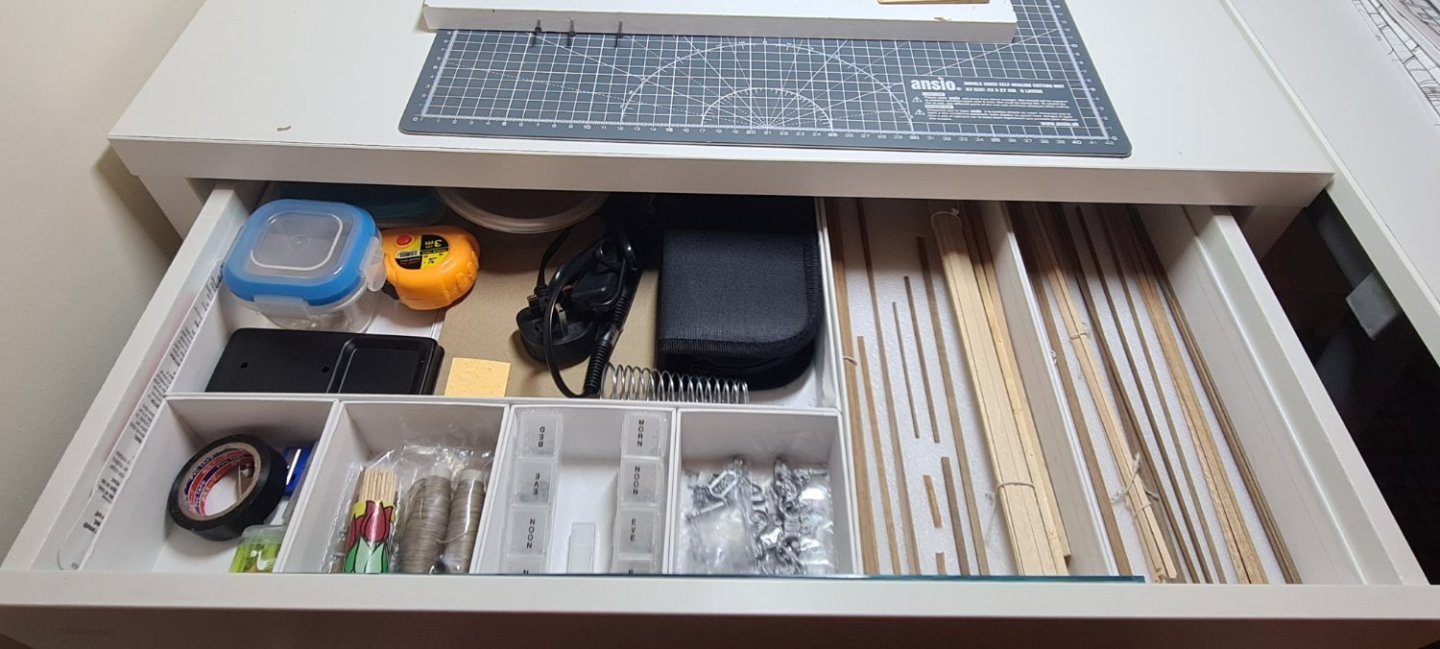
 Good evening all, This is my first log and first ship as i delve in to the world of model ship building. I have a fair bit of Sci-Fi model building and painting behind me and i am hoping that I can bring that patience across to ship building. The model I have is the lovely HMS Peregrine by Corel, it is slightly bigger than i would have liked for a first ship, however, as it was given to me by a friend of the family that had lost patience and given up was not going to look a gift horse... So where am i at now? Well the model came with the hull already built and it looks although they had an initial crack at planking and that is where they gave up. I have spent the initial few hours organising the pile of jumbled up wood, translating the instructions from Italian and researching wood colors to allow me to identify the correct planks. This to my deliberate and need for organised structure brain was fun in itself. I have then spent a bit of time measuring and checking symmetry where i found that the hatches were 2mm off centre, so they had to come off, next comes removing excess glue and sanding the bow. Now this is where my first disagreement comes with the instructions which is telling me to fix the gunwales and planking before the decking. however, it would appear if I did this then getting a nice smooth deck flush with the planking will be nigh on impossible. So it looks like i will be going off piste, i will update later and tell you all if I regret or approve of this. Due to working away for weeks at a time the updates may be infrequent or splurges of progressive. Please see the photos attached of the ship so far and prior to fixing errors (you can see how off centre the hatches are), also my organised drawer of wood that I spent far too long doing.
-
 Question, In the instructions it shows gluing the ship to the stand early in the build. I worry that might restrict flexibility in painting. Can/should I wait until closer to installing masts etc? David
- 55 replies
-
- 2
-
-
- Cutty Sark
- plastic
- (and 3 more)
-
 Hi everyone, I just got done (kind of) with the shipwright series and decided to make a small step up and do the Polaris by OcCre. I botched the lobster smack and it’s now somewhere in our local landfill. I’ve never done a build log before and don’t really know all the part names and honestly will never figure out what side port is and if the front is aft or not lol. I’m sure this stuff will come, but for now I’m just enjoying building! I haven’t documented the process that well but here’s where I’m at. I’m getting a bit ahead of myself and have started putting together a couple things that go on the deck. Some of those little features are already on it. Hopefully that doesn’t cause probs for me later. id love for anyone to point out any places that need work. I’ll try to keep this updated, but I am a two job guy so my time is a bit limited. -Travis


-
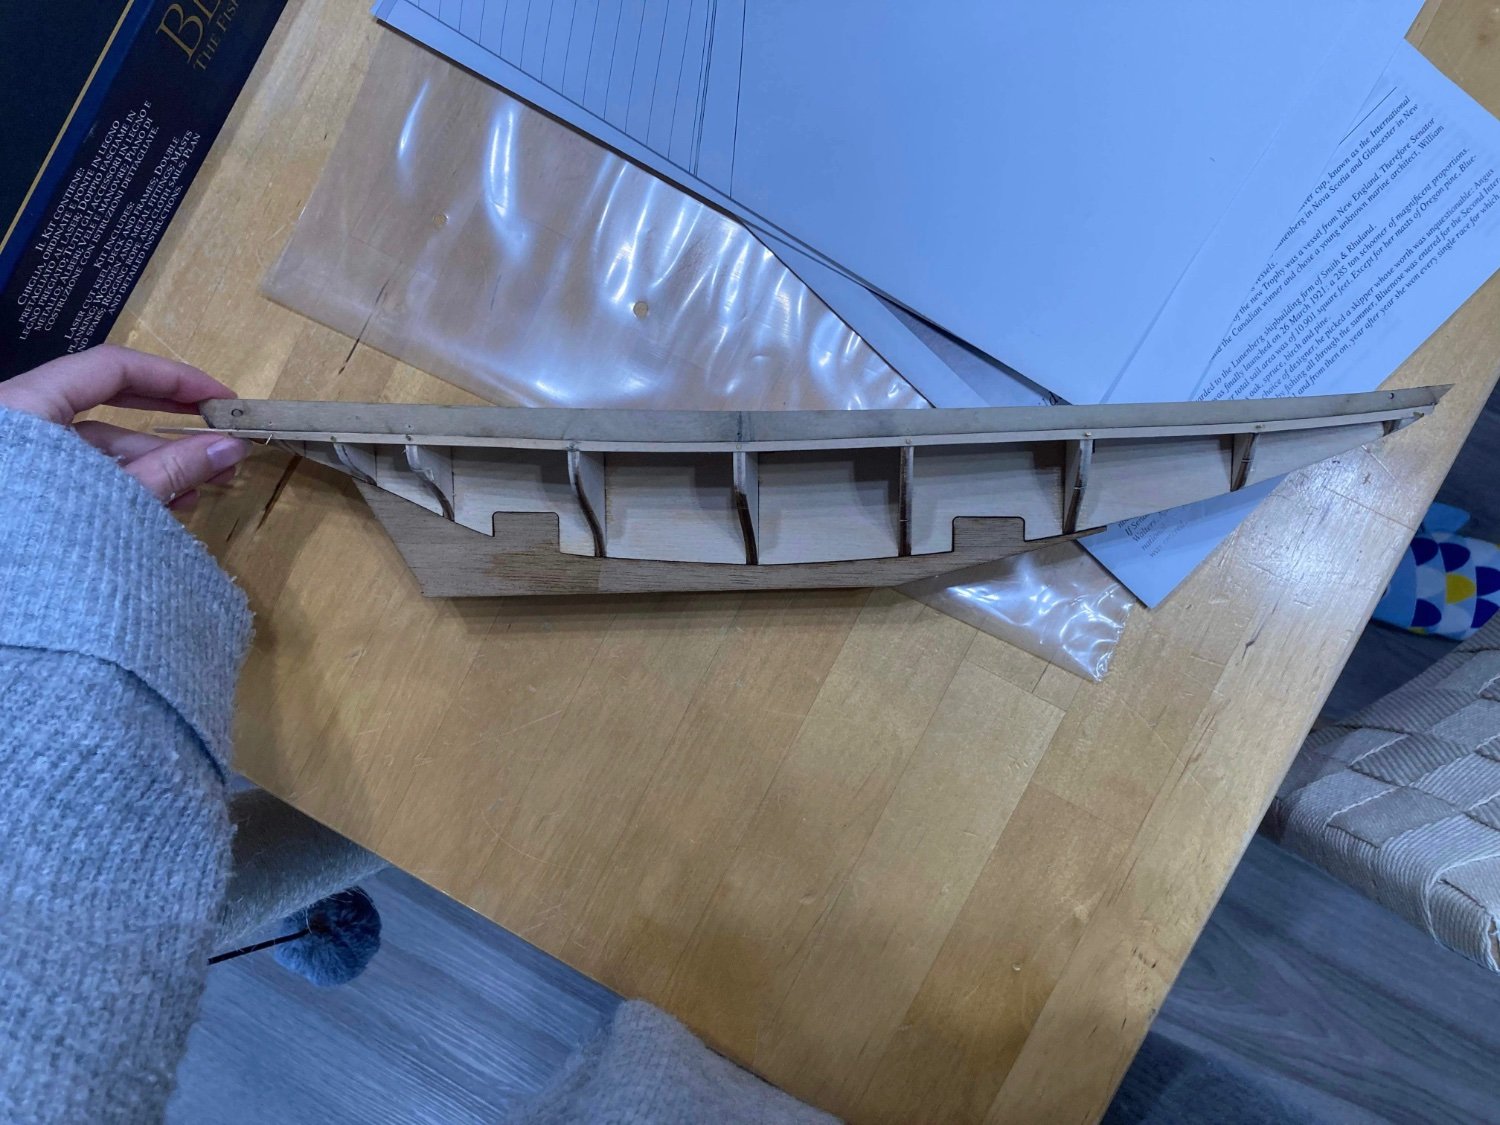
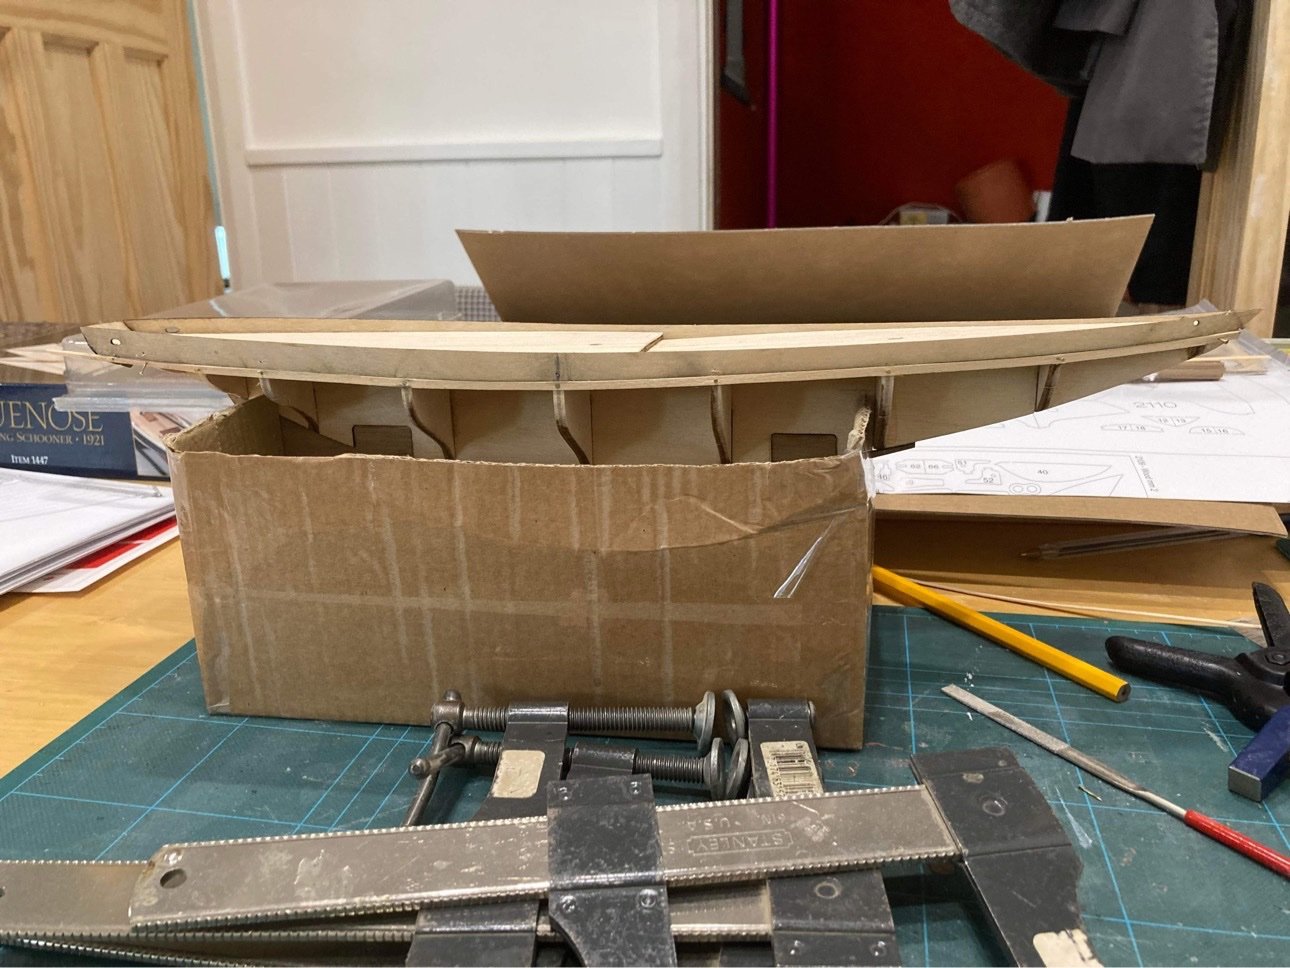
 This is my first ever build but it is something I have wanted to try for years so thought I would jump in the deep end despite reading lots of horror stories of those who have started something too complex for their first build. Anyway I started after Christmas after looking at some of the other build logs and thought I would share progress as a complete newbie.
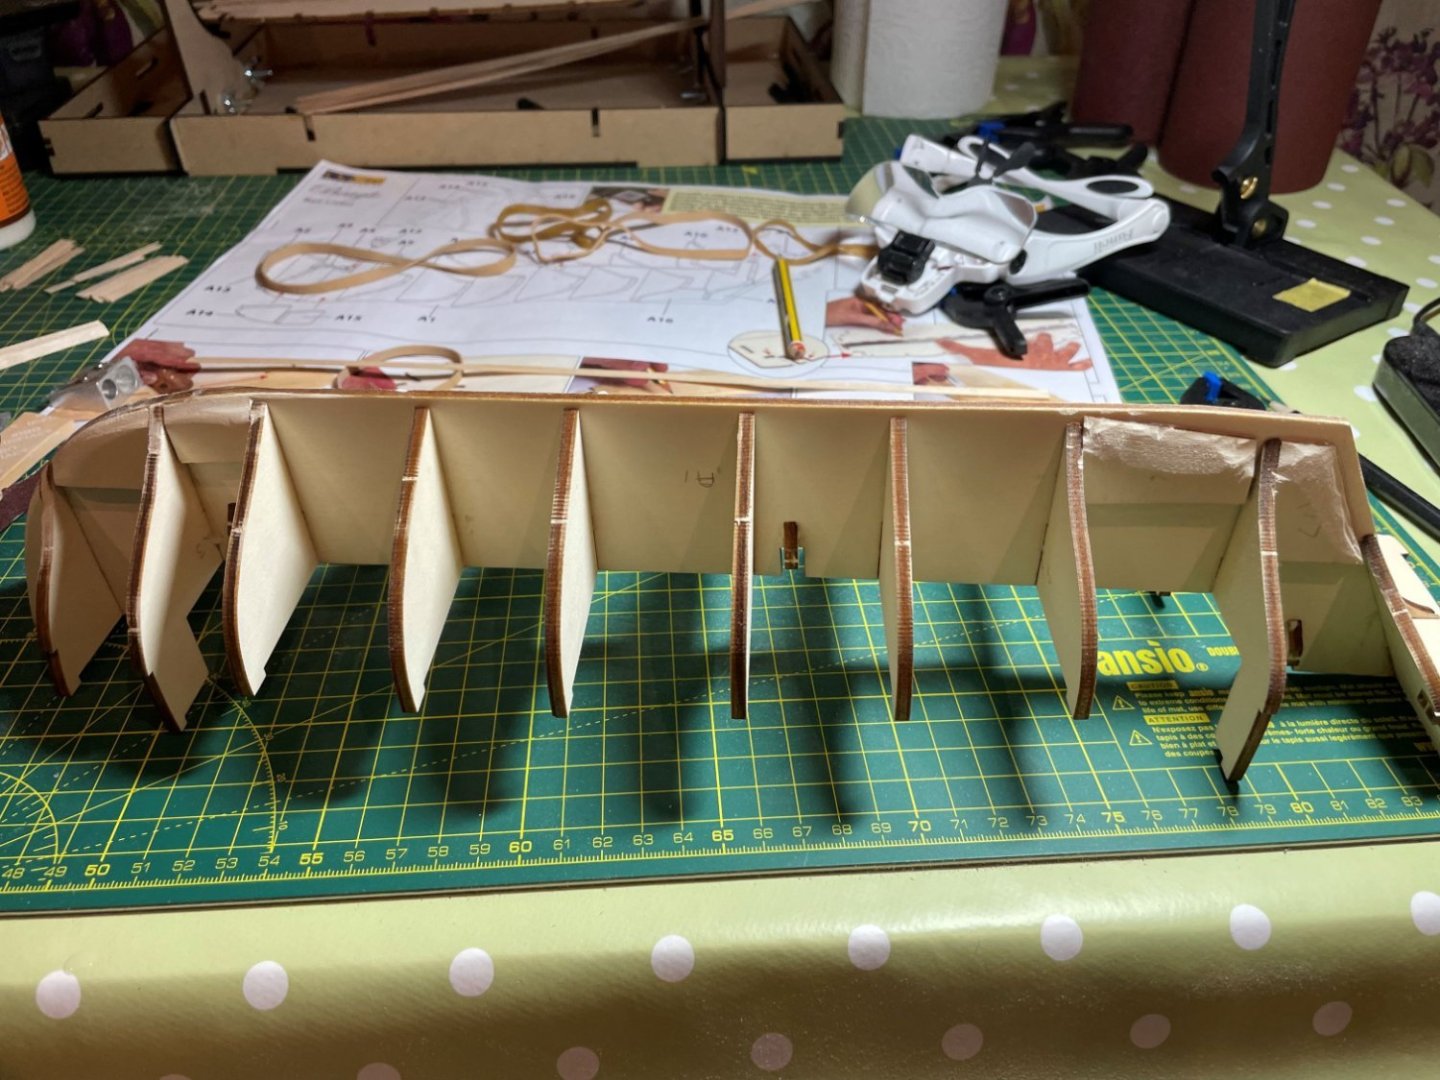
-
 Started my build in November 2023. Found this website and it has been a great help from many of your builds. And thanks for those that replied. Looking forward to this build more than ever. Will update my progress. Just starting to paint. Most of the build going forward looks quite intimidating! Sure will need help. My only comment on this model so far is the directions & plans are a real challenge.

-
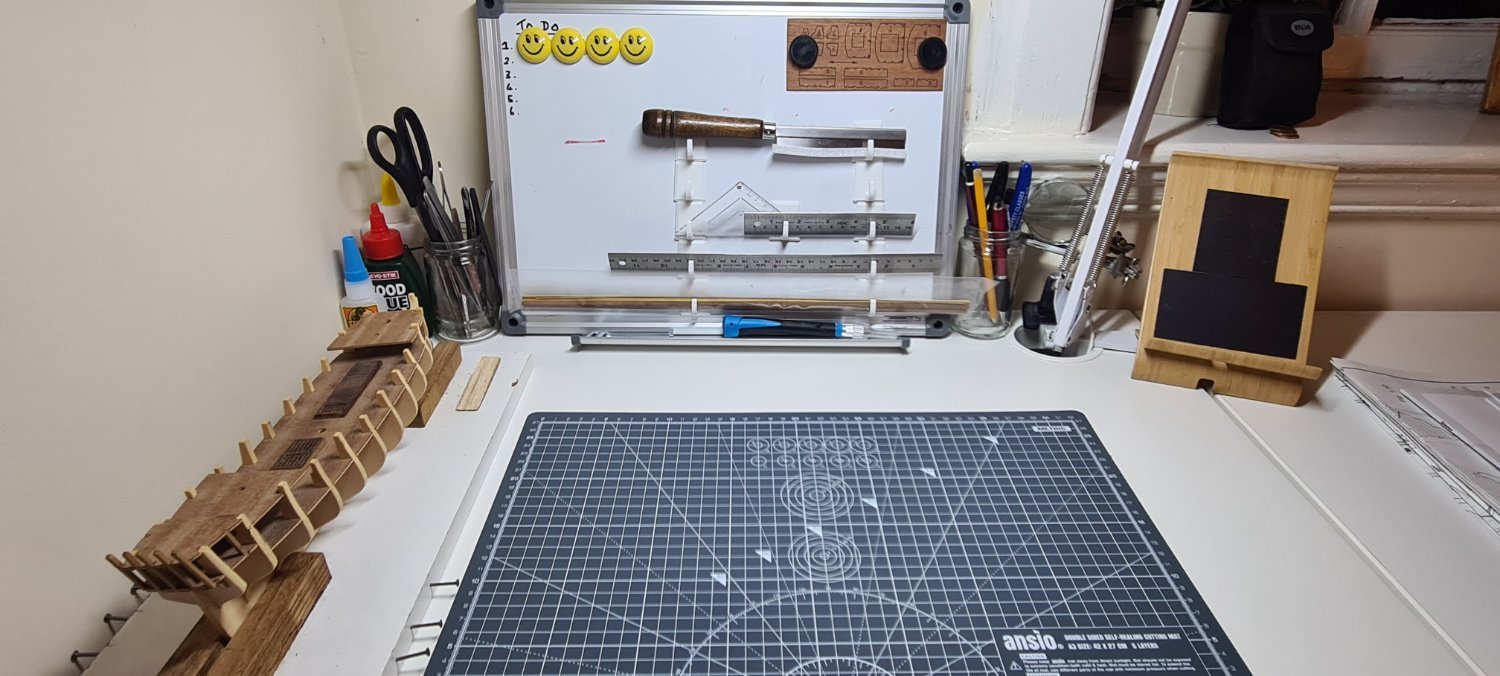
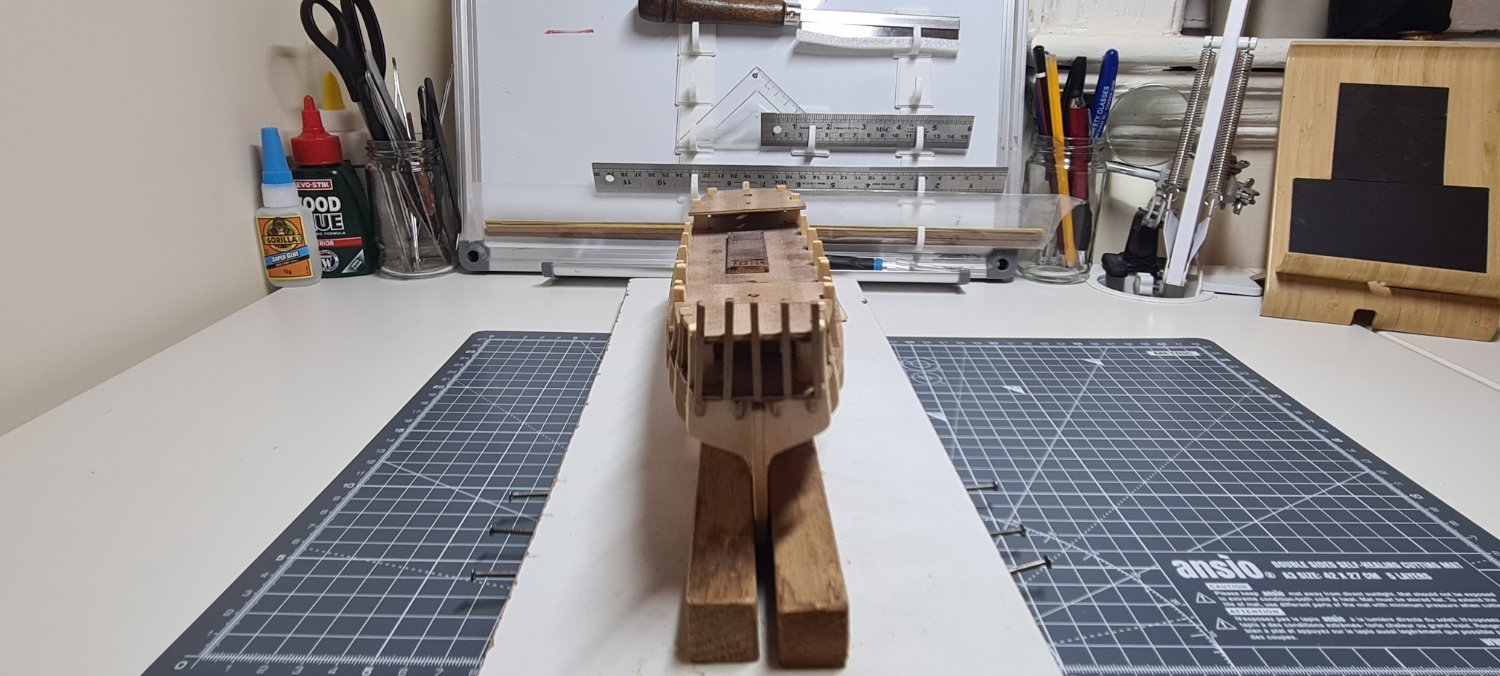
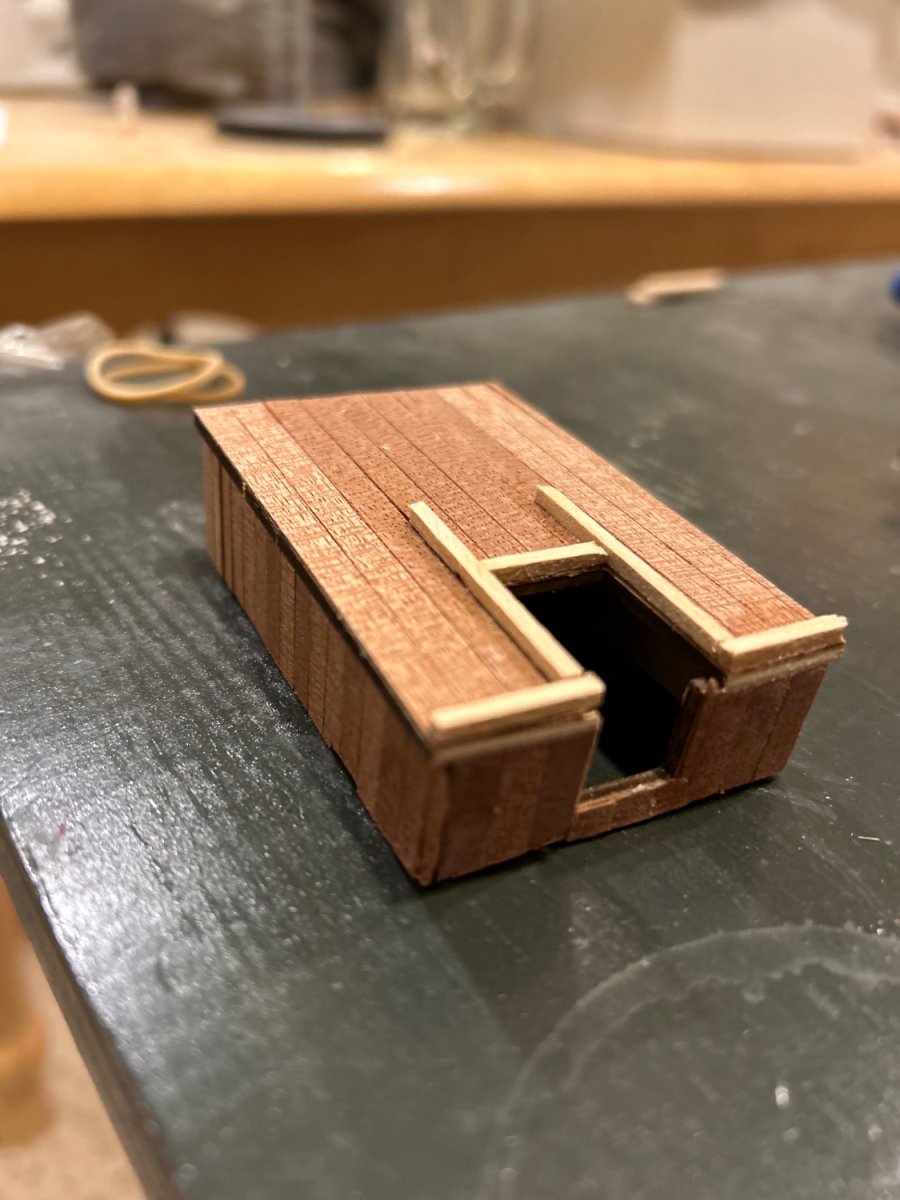
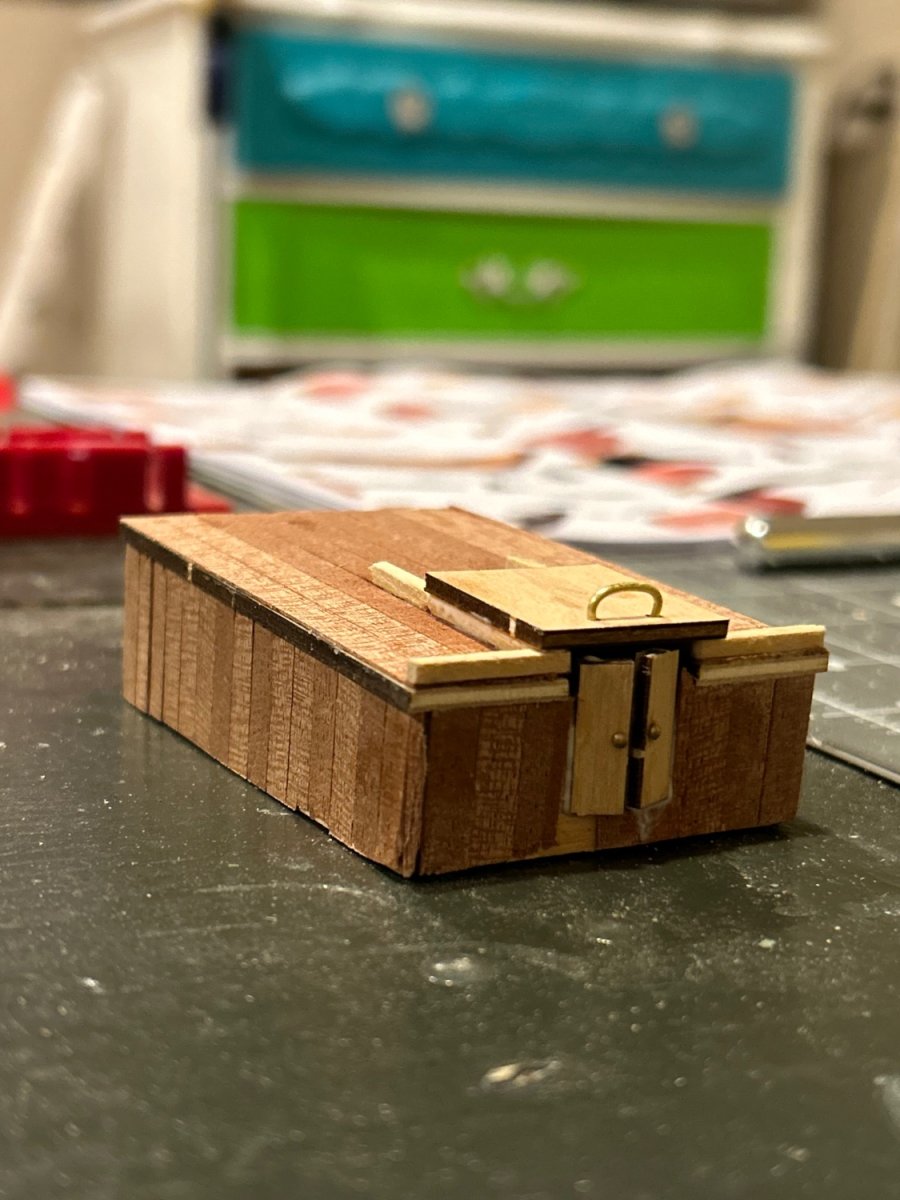
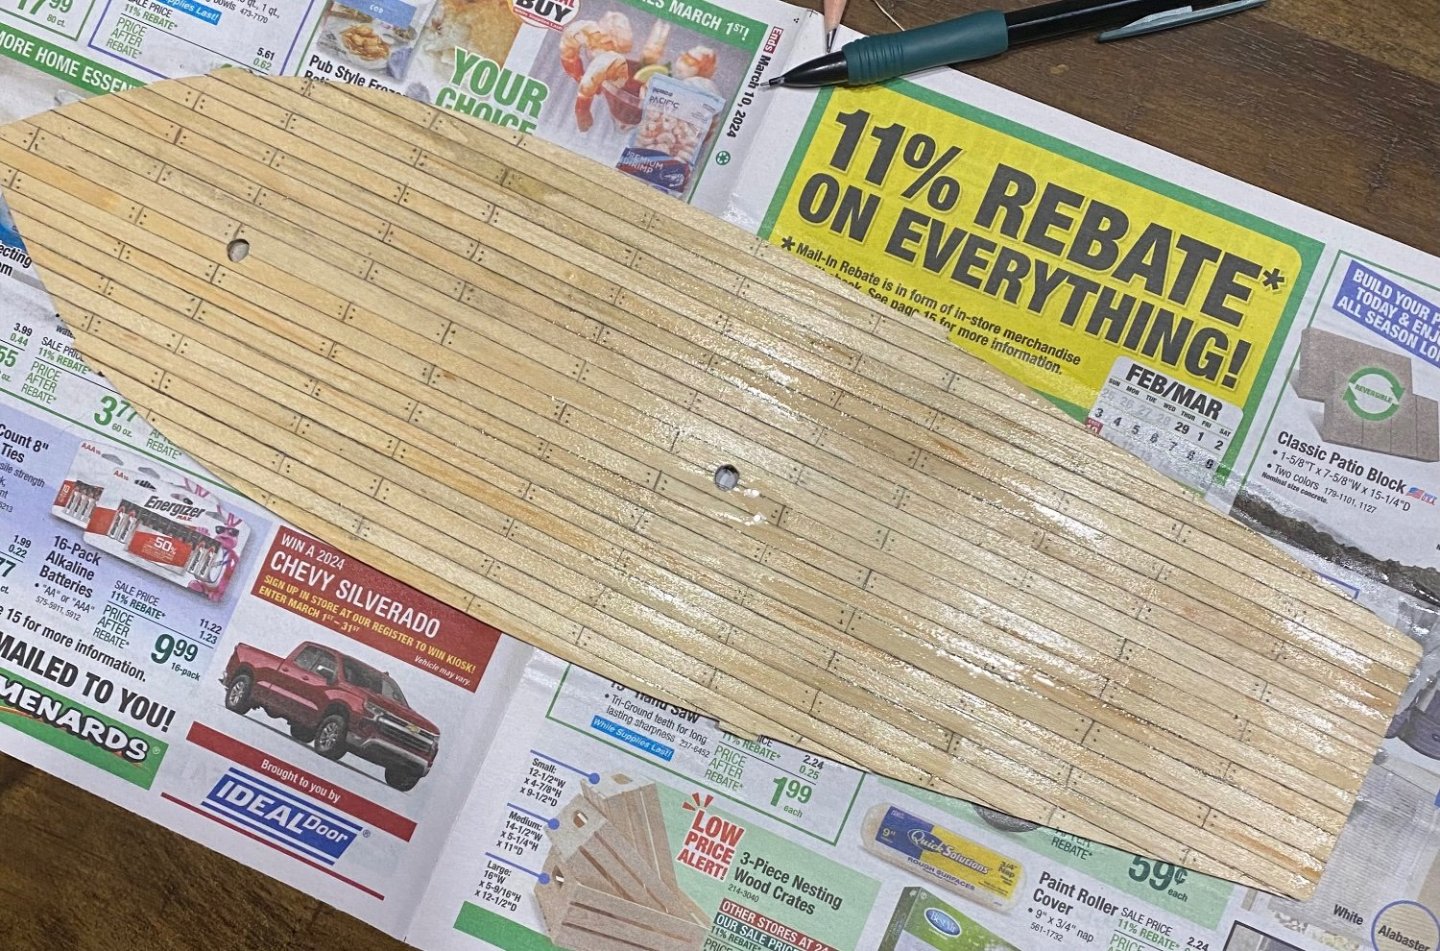
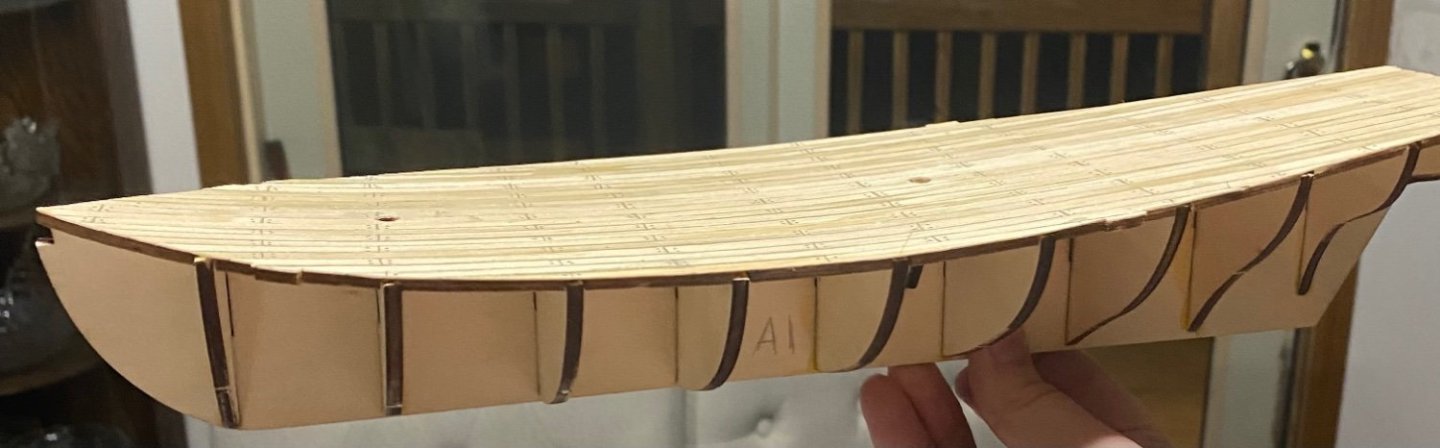
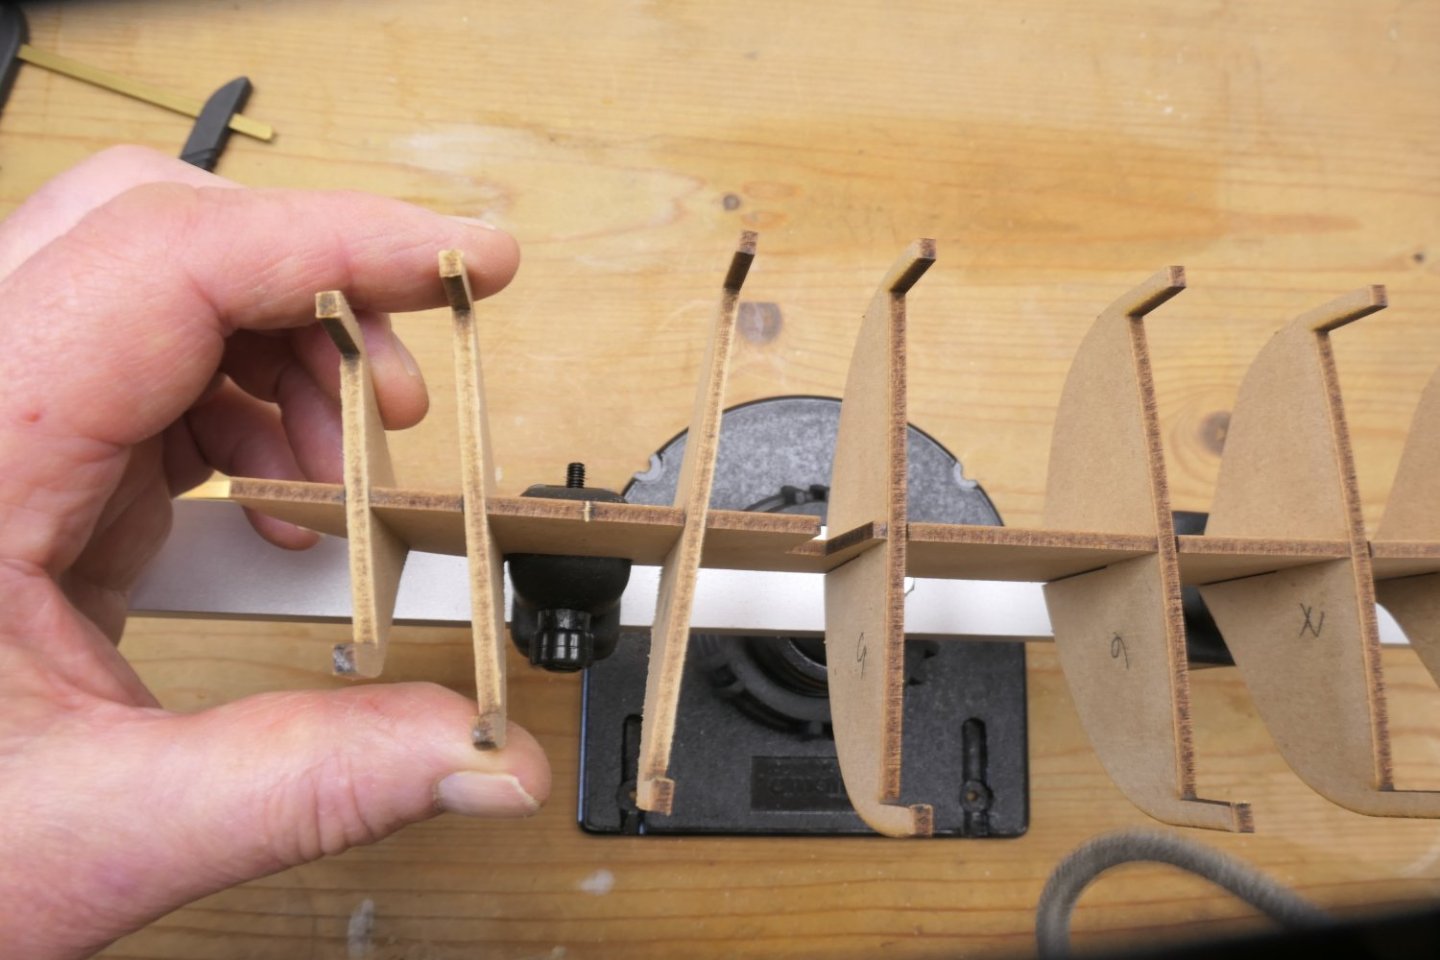
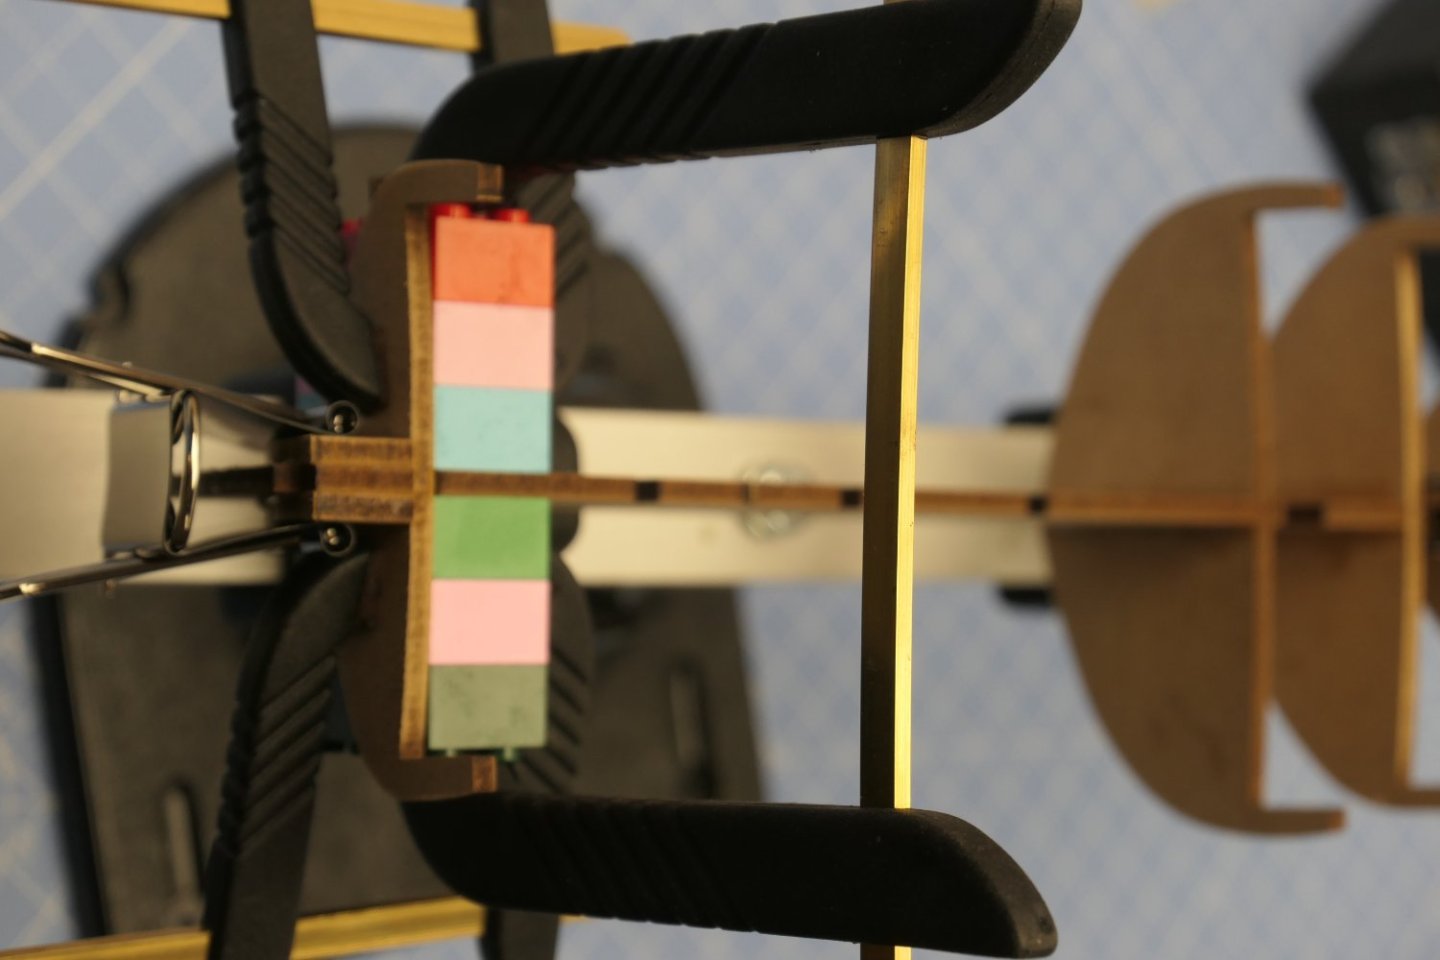
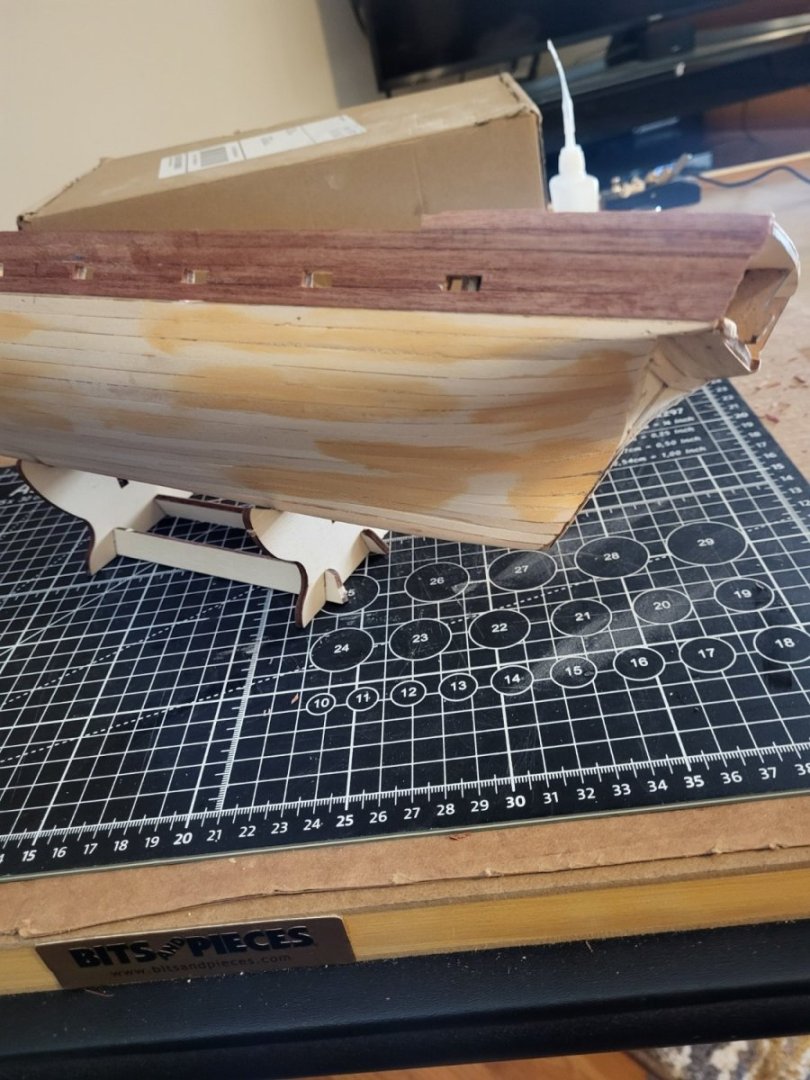
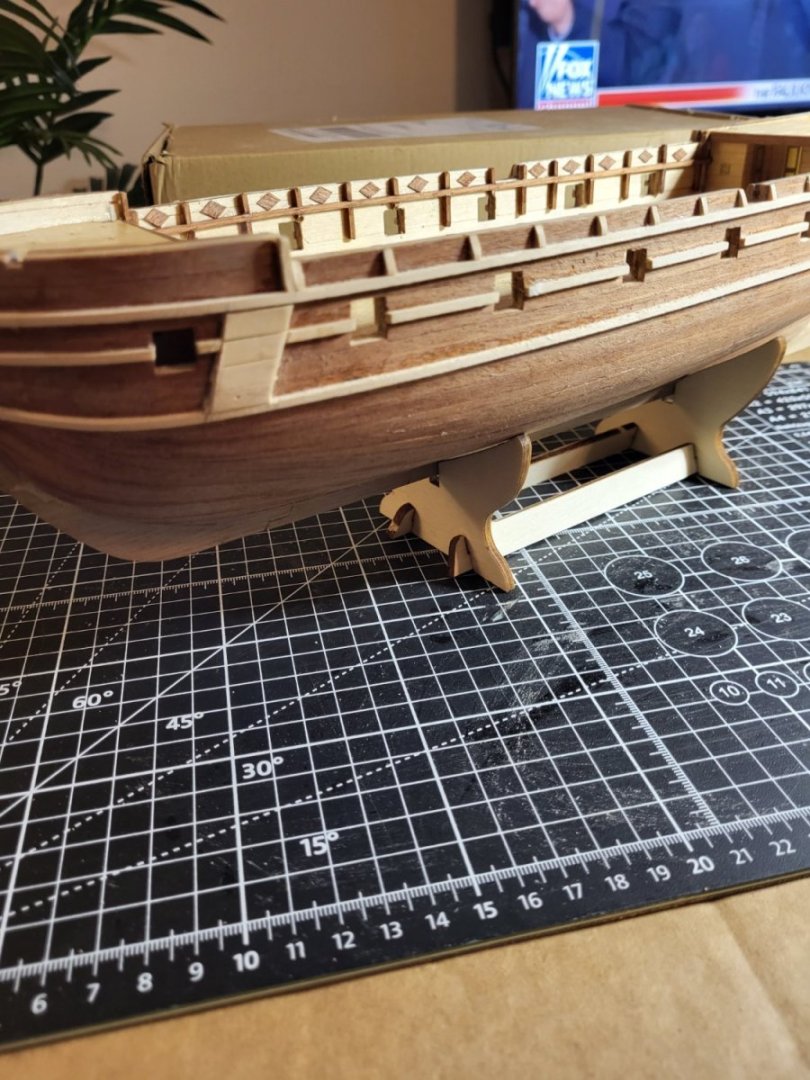
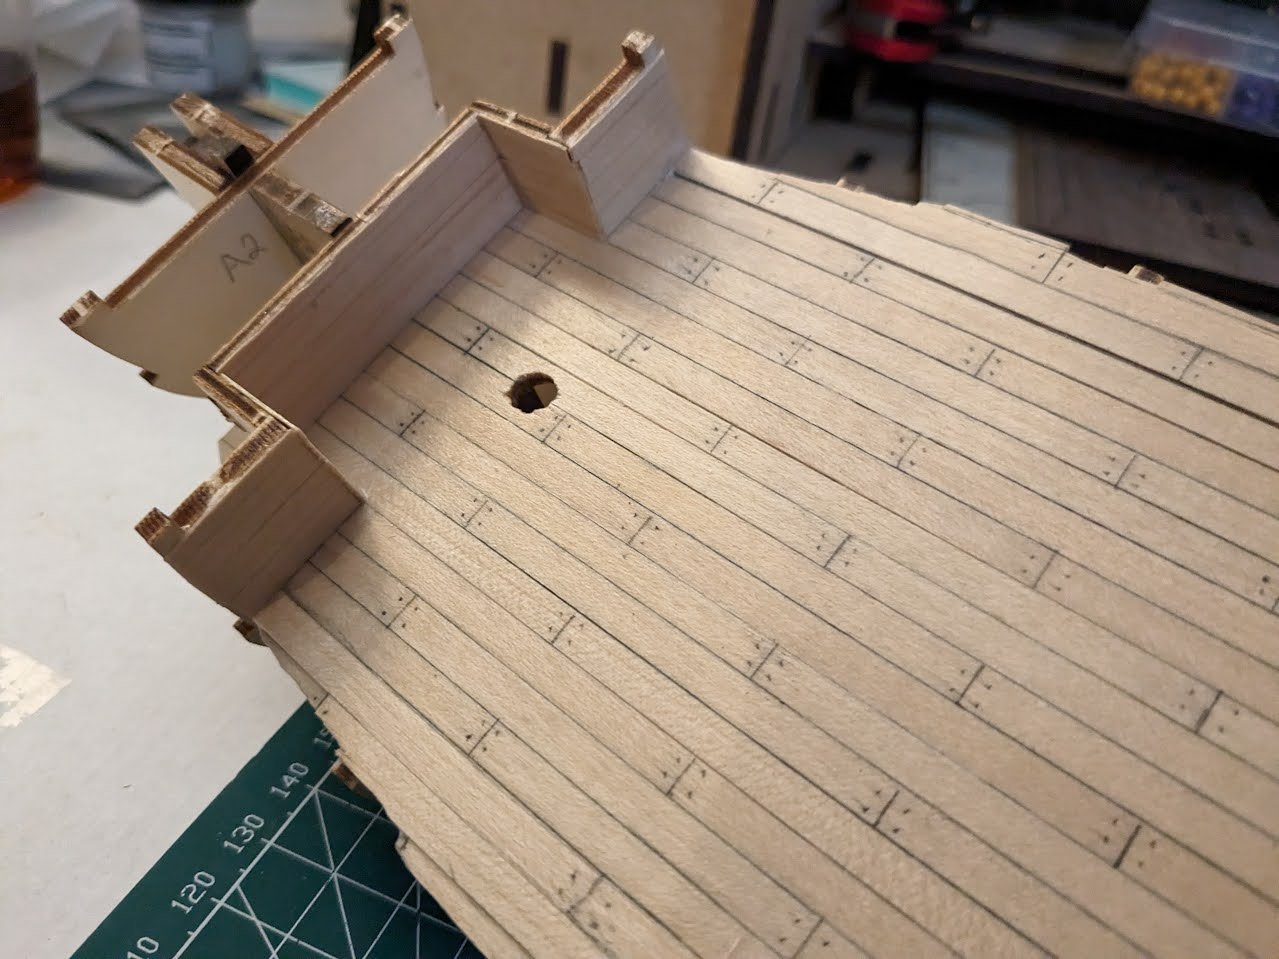
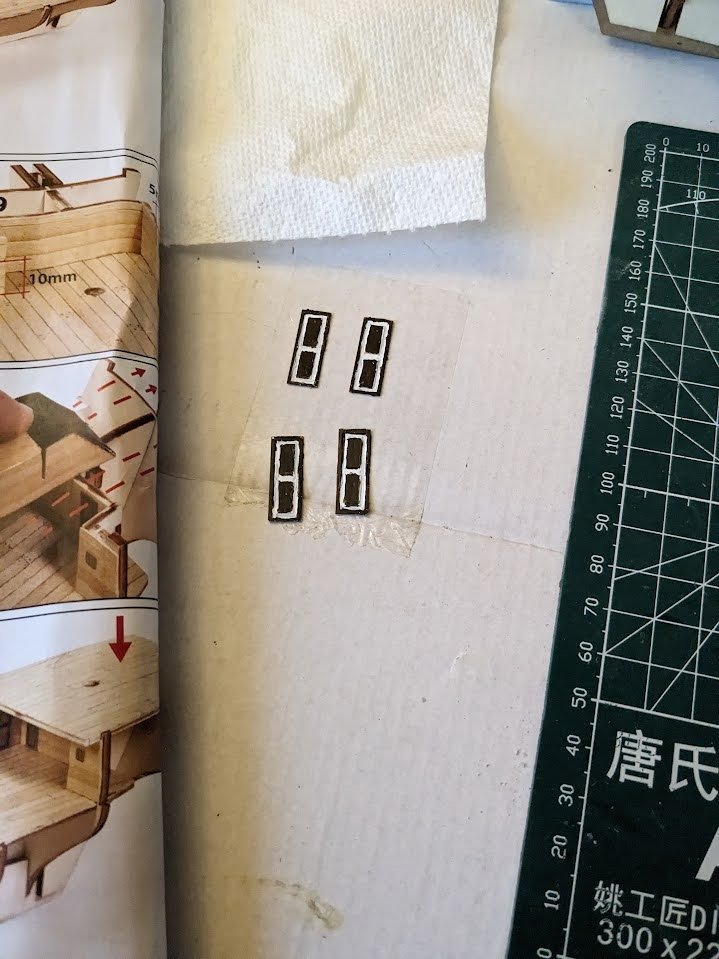
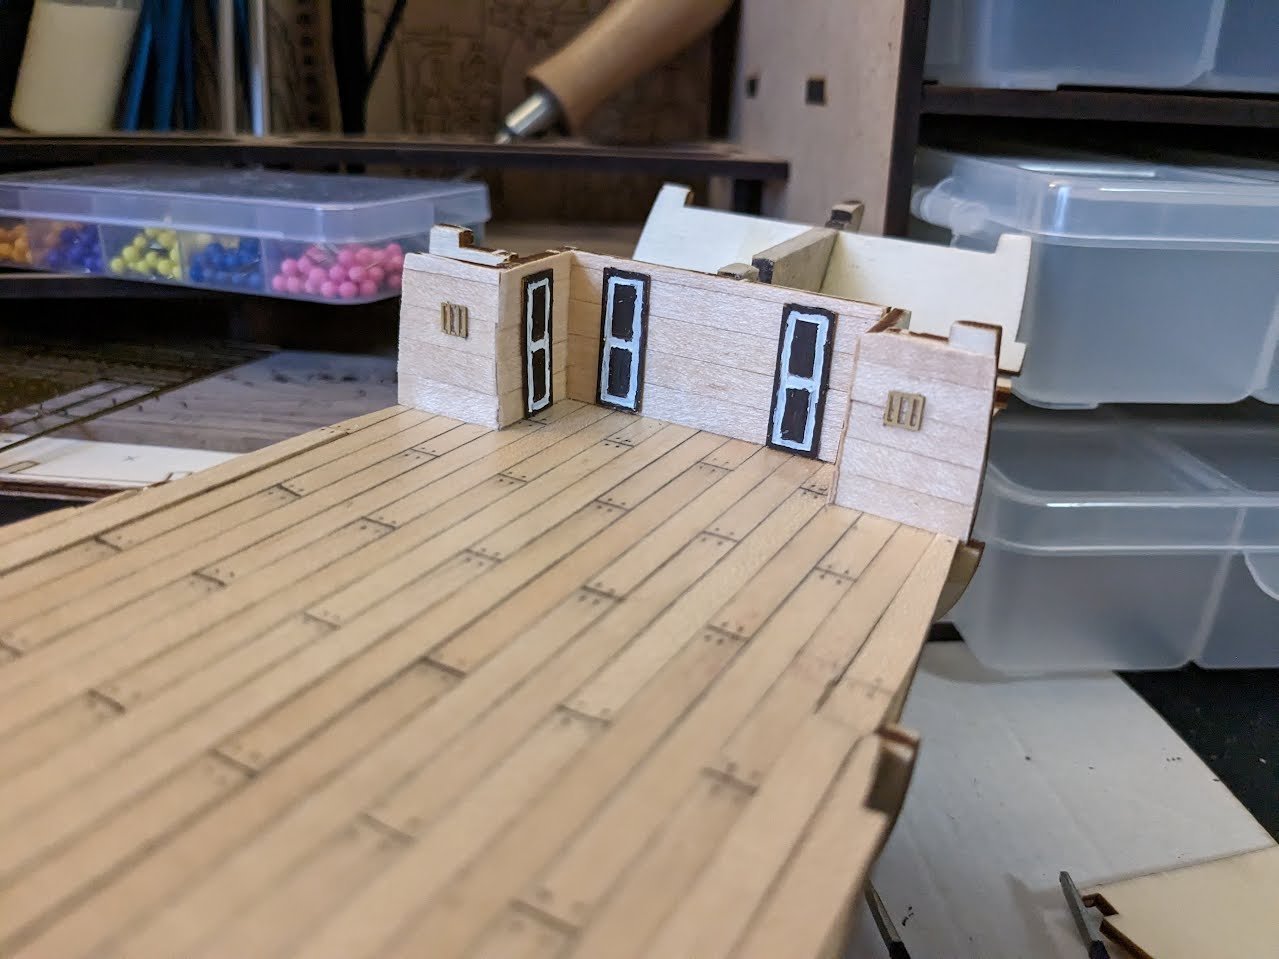
 Hello all, I got a start on my first wooden ship model over the weekend. I have had a great time so far, with a few frustrating moments created by myself, an injury at the dockyard and a realization I am terrible at small scale painting. I do have some modelling experience, I built quite a few plastic model airplanes, cars, and military equipment in my youth so I do know some techniques but it has been 20 years since my last model, and as I have found out wood is a completely different animal. I do have some questions on the paint colors, other than the picture on the box it doesn't seem like there is any guide in the instructions on what color parts should be painted. I bought a paint kit for HMS beagle from Model Expo, but I'm just not sure what colors should be used for, I could definitely use a hand explaining some of these colors I have never heard of. I'm still learning sailing/ship terminology so please be patient If I name something incorrect. Anyways here is my start on the HMS Beagle log. Here are the colors that came in my kit, any help on these would greatly be appreciated. Here is the assembly of the skeleton of the ship, nothing much to look at yet just lots of glue and making sure pieces are squared away. Once I had the frame glued together my next step was to start planking the deck. I used a pencil to line the boards, and then lined them at 60mm and added nails. I know the pencil caulking and nails are controversial, but I wanted to try the process out for myself and see how it looked. Veterans of this kit will notice a mistake I made at this point, I still wouldn't notice it for another night. The next day I started to assemble to fore and aft interior ship walls and started to add planks to the walls. After dinner I sat down and started to look over the instructions, I then noticed my deck looked "off" compared to the instructions, and it hit me that I got a little carried away trimming the deck cutouts. Maybe I shouldn't watch American Football Playoffs while I work on the model...... This is where the dock workers should have stopped for the night and started fresh the next morning. A little frustrated at my mistake I decided to try and see if I could pull up a few of the planks and replace them. The only tool I could find to fit the job of prying the piece up was a razor blade, I got one piece up without too much trouble and then started on the second piece. This is when the razor blade slipped out from the wood and straight into my right hand behind my thumb, it was a very deep cut. The dock medic quickly came over and we cleaned the wound and closed it up with some super glue, no workers comp granted for this dock worker. Getting back to the model I decided just adding planks on top of the old planks and sanding them down a bit was the safest solution. The spouse says you can hardly notice the mistake, but as most model builders know your own mistakes are the most obvious. I also finished planking the fore and aft walls, you can also see a closer view of my correction, not super noticeable from afar, but if you inspect closely you can see the extra wood. Next up was the doors. I wasn't a fan of the solid laser cut brass doors and couldn't find much info on what color the doors should be so I settled on using the American Walnut paint (not stain) that came with the kit and giving it a white outline to kind of match the ships color. I have not painted with material this small in a long time, and I understand why so many of you have magnifying glasses now. My doors look terrible, but I came to the conclusion that it was the best I personally could do with what I have, and to not spend too much time getting hung up on them. I'm still not satisfied and may come back to them, but I'm really not sure I will be able to do much better. That's all I have for now. If you read through all of that, I appreciate your time. I am new to the hobby so any advice, tips, hints are greatly appreciated. Being a new student is one of the most fun parts of a new hobby. My main lesson I've learned so far is you really need to pay attention to the instructions on these kits, and I am starting to follow other Beagle build logs to help along the way.
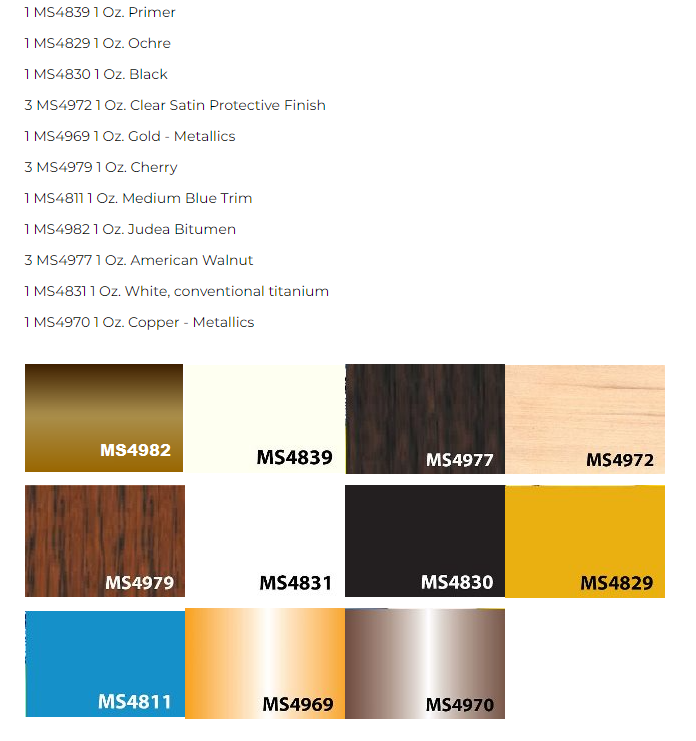


-
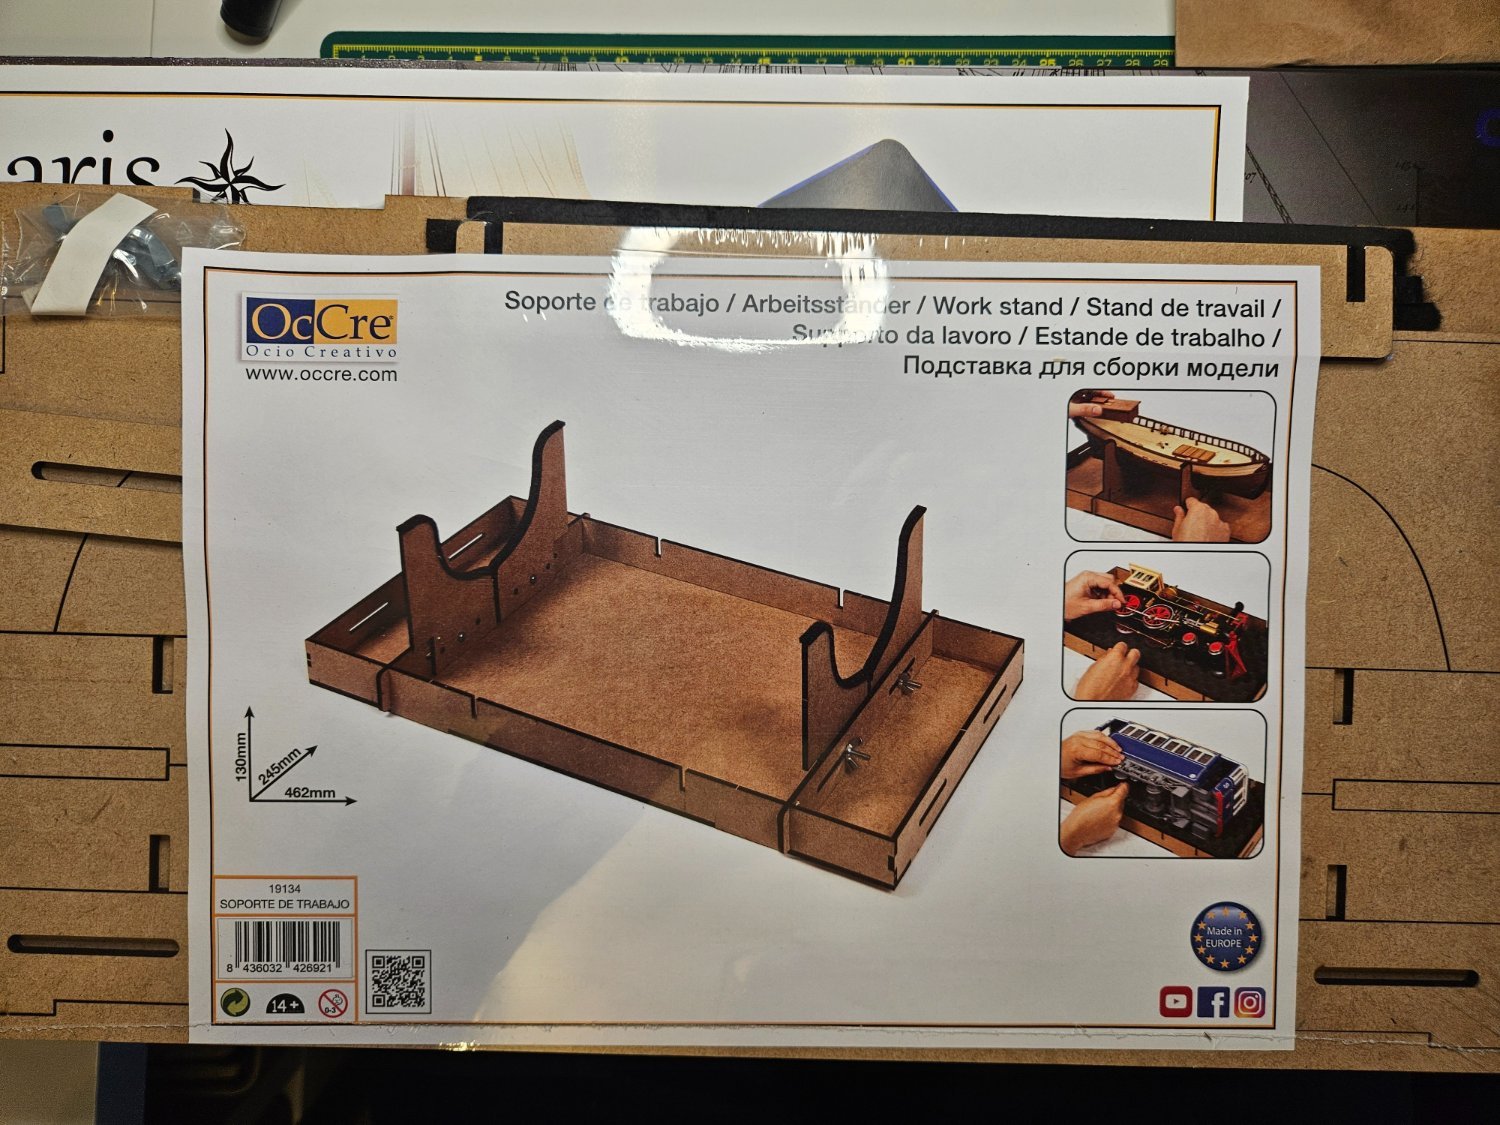
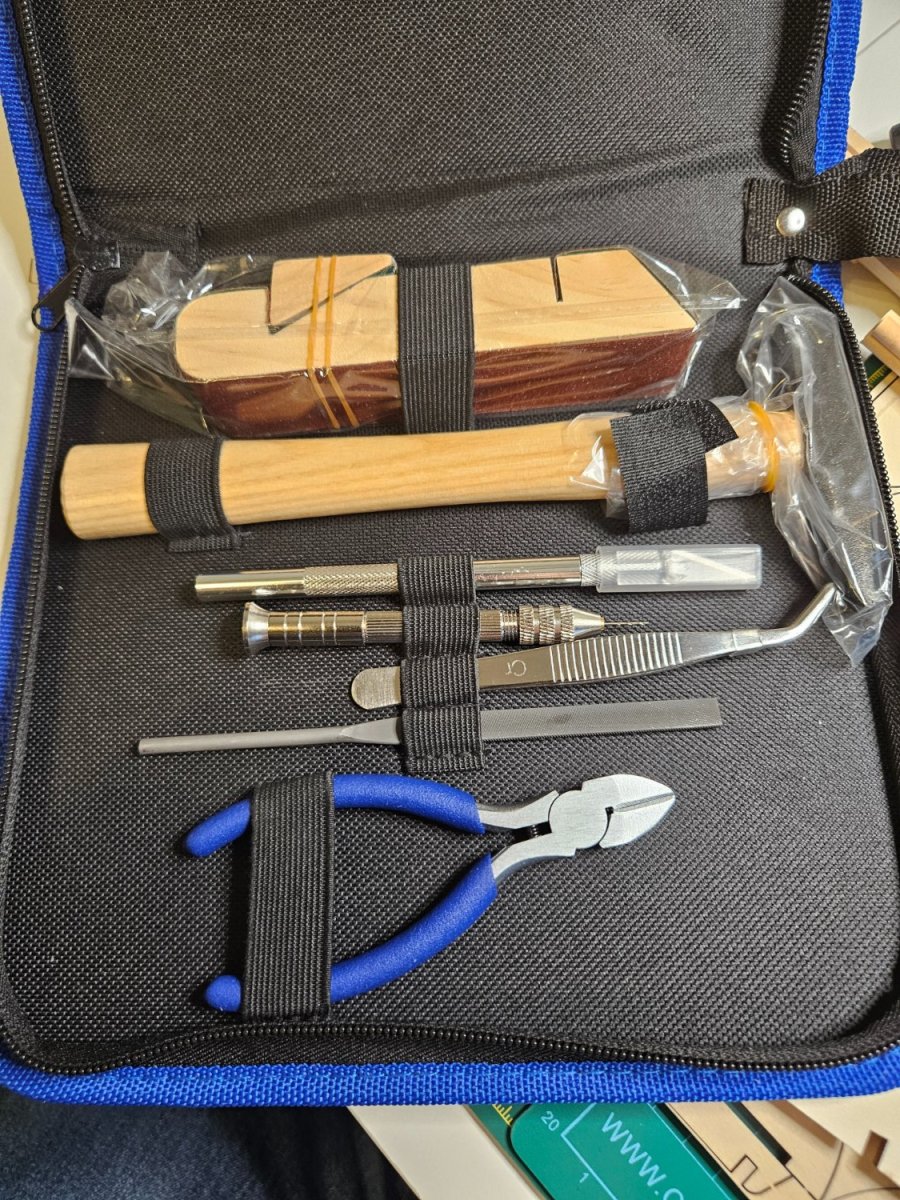
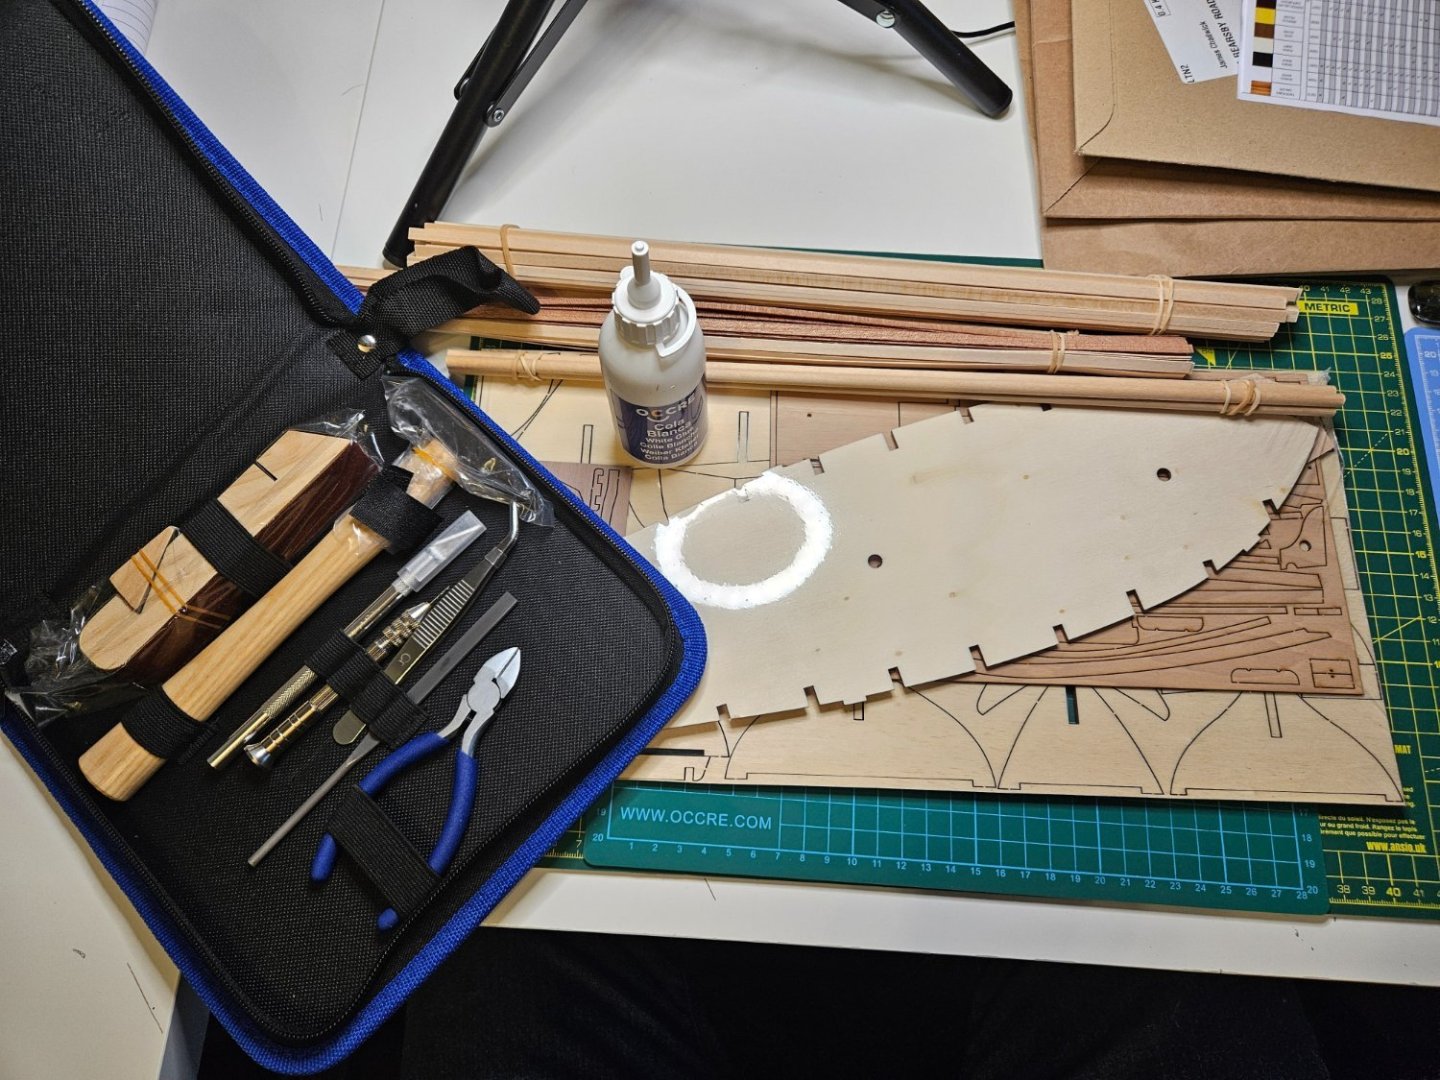
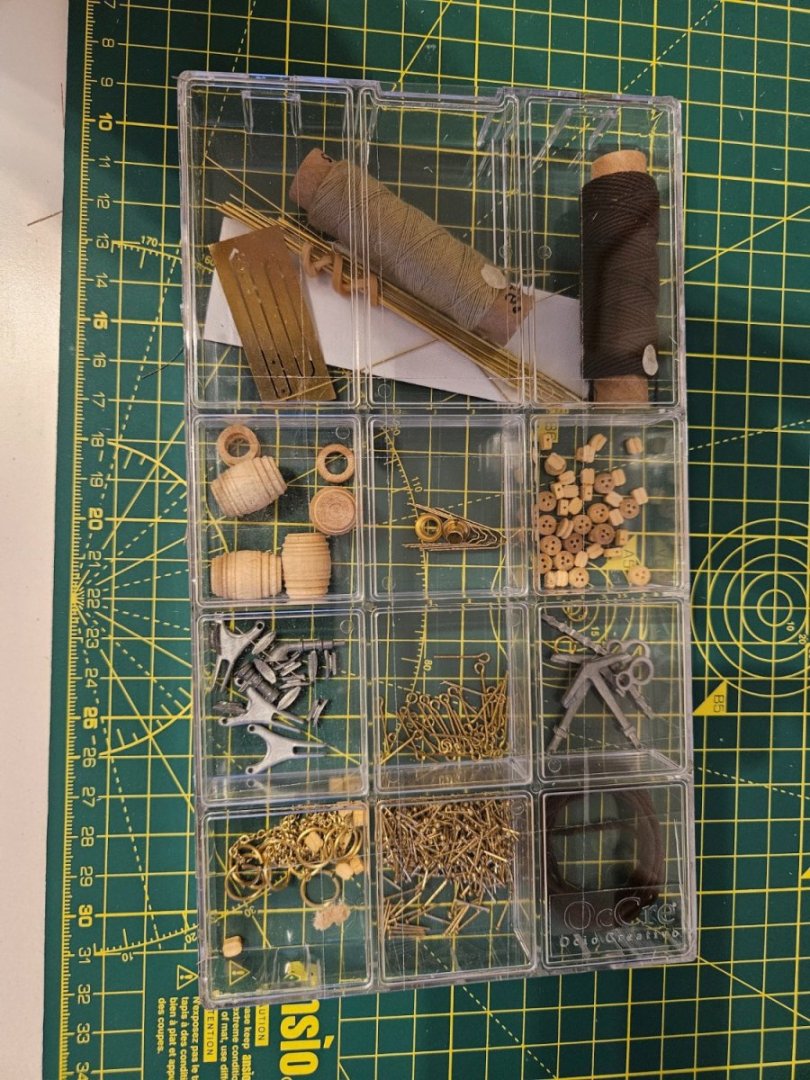
 Hi All, So my Polaris has arrived, along with the Occre Work Stand, starter kit tool pack and paints recommended by Cornwall Model Boats, who have been very helpful, which were quite a bit cheaper than the Occre paint set. I've also invested (a term I use often when explaining all the parcels arriving to my very understanding and supportive Wife) in some files, a pin pusher, sanding sticks, glues and filler. I suppose there will be other purchases along the way. It's coming with me to Brussels and I'll start her once I've finished my Airfix Titanic. I've been reading through Ilia's build log, what has completed a fantastic Polaris and I'm sure I'll be returning a lot for inspiration and tips!
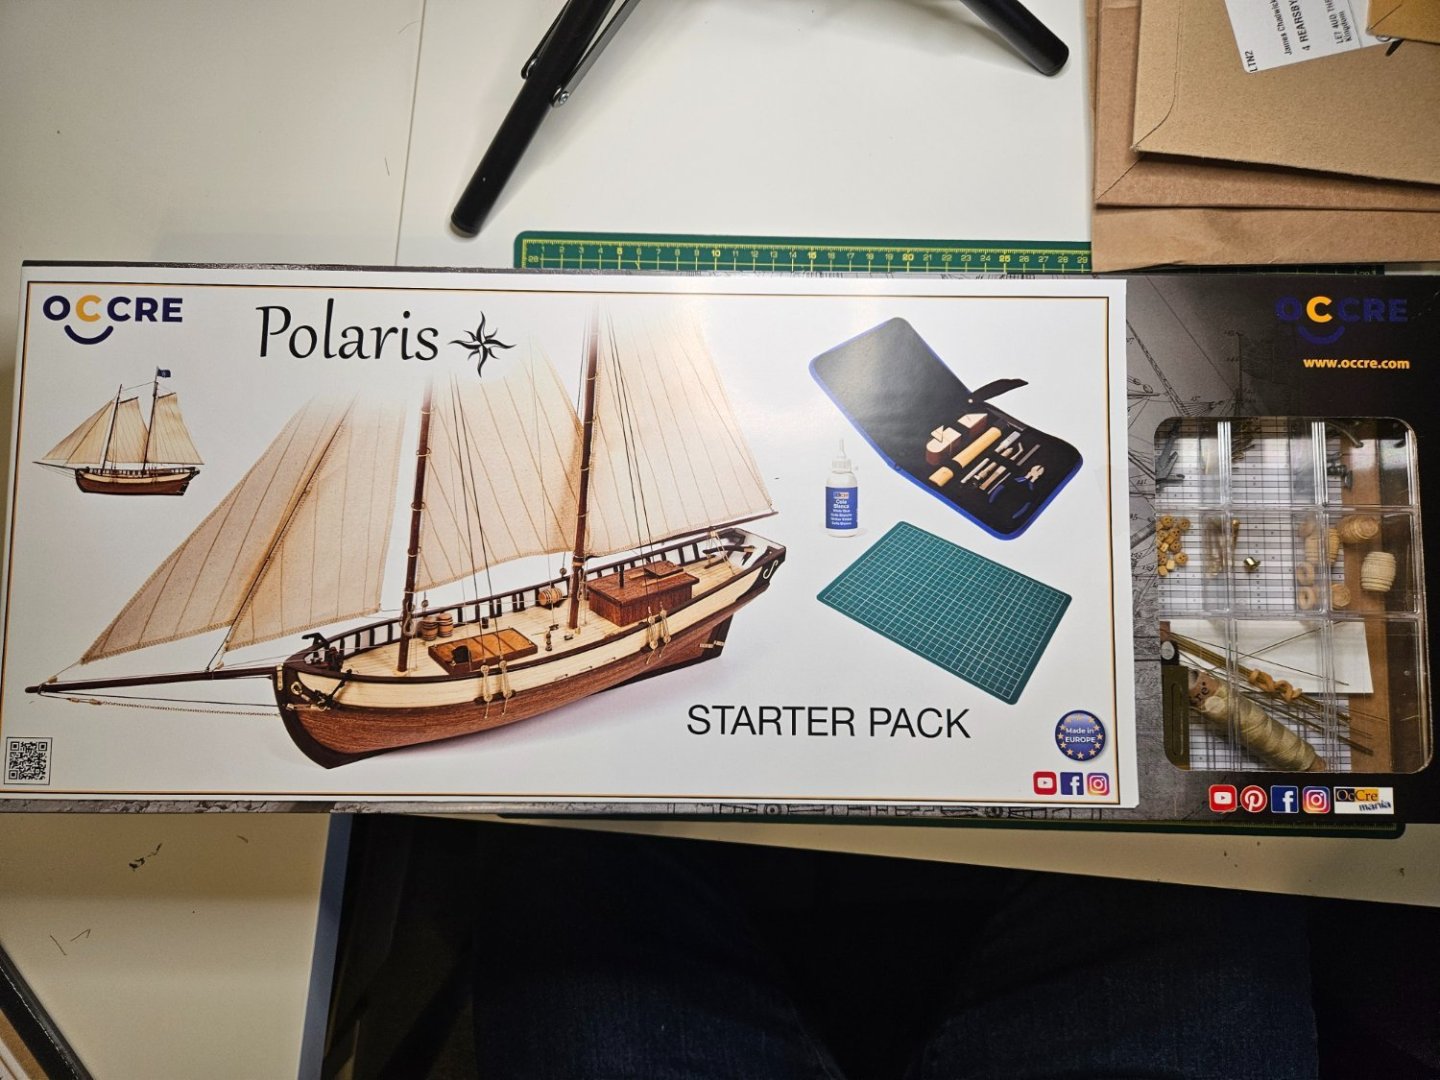


- 9 replies
-
- 4
-
-
- OcCre
- First Build
- (and 1 more)
-
So , here goes, I've decided to have a go at modelling and having always being fascinated with the Titanic I thought I would start there. I've completed about half of it so far and thought I would build a log, as much for me to look back on as also to gain some expert tips from members here. I have also bought an Occre Polaris, which will be next project, I thought I would try plastic and wood and see which I like best, although I think in the end I will continue with both for variety. I've been looking at the amazing build logs on here for this model and I'm already learning, which is why I started in the first place. Anyway, here goes....
-
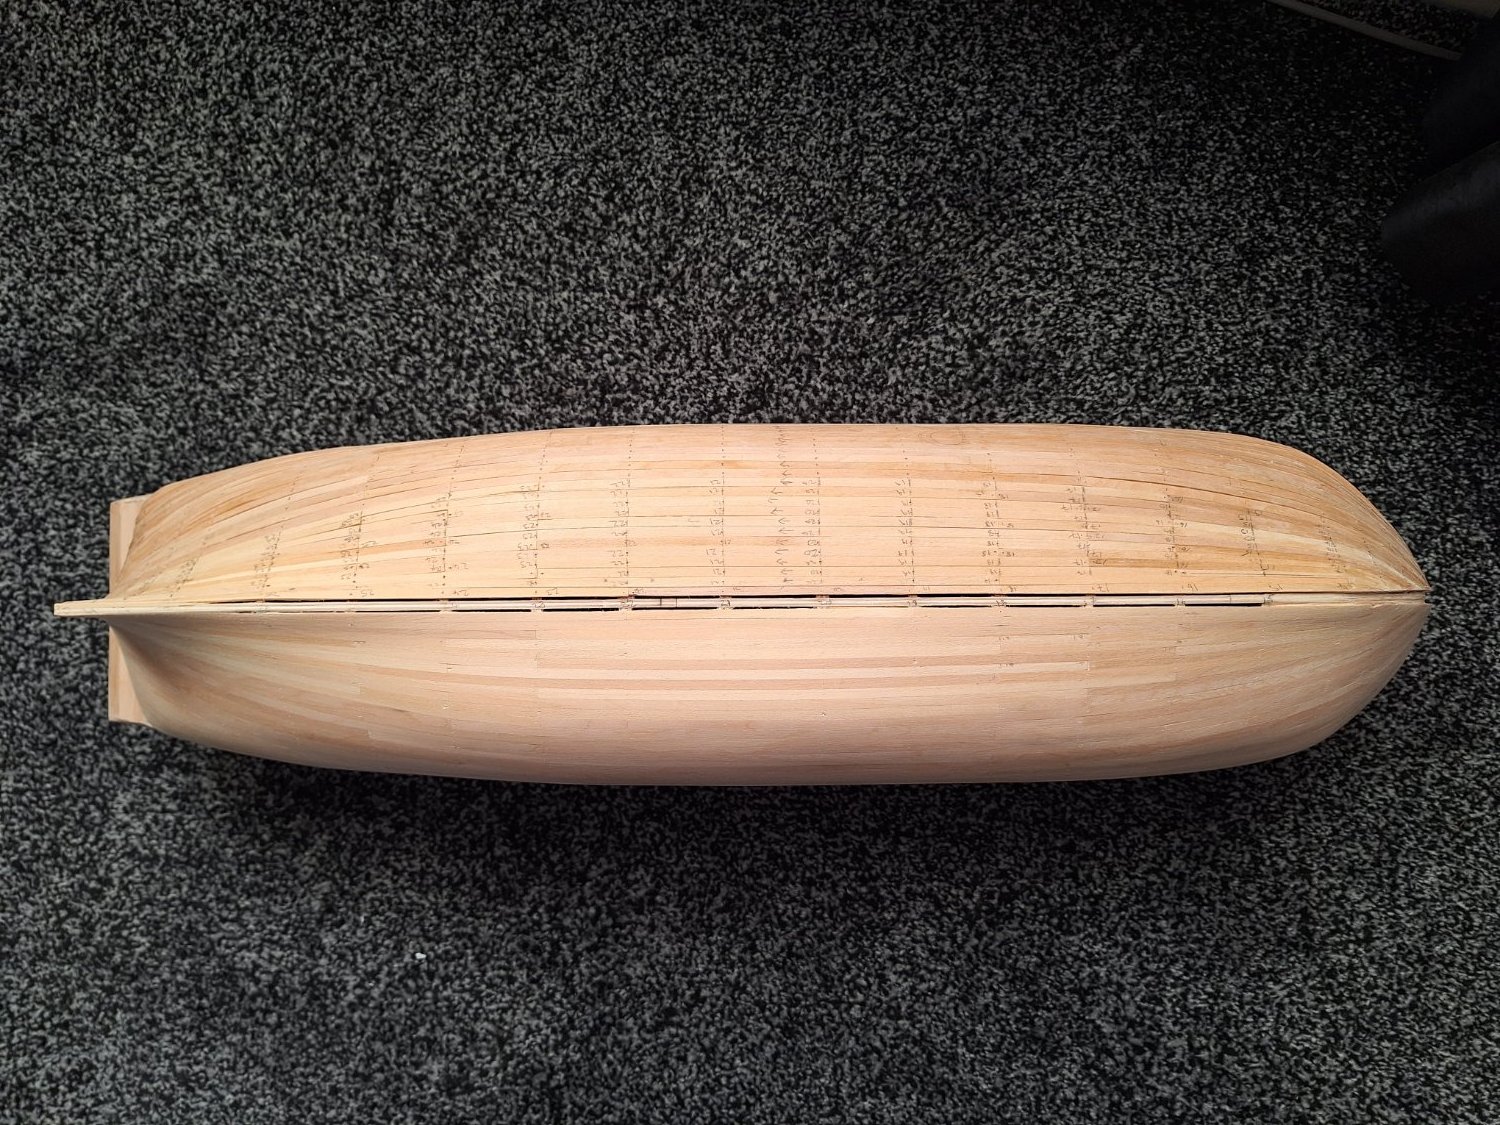
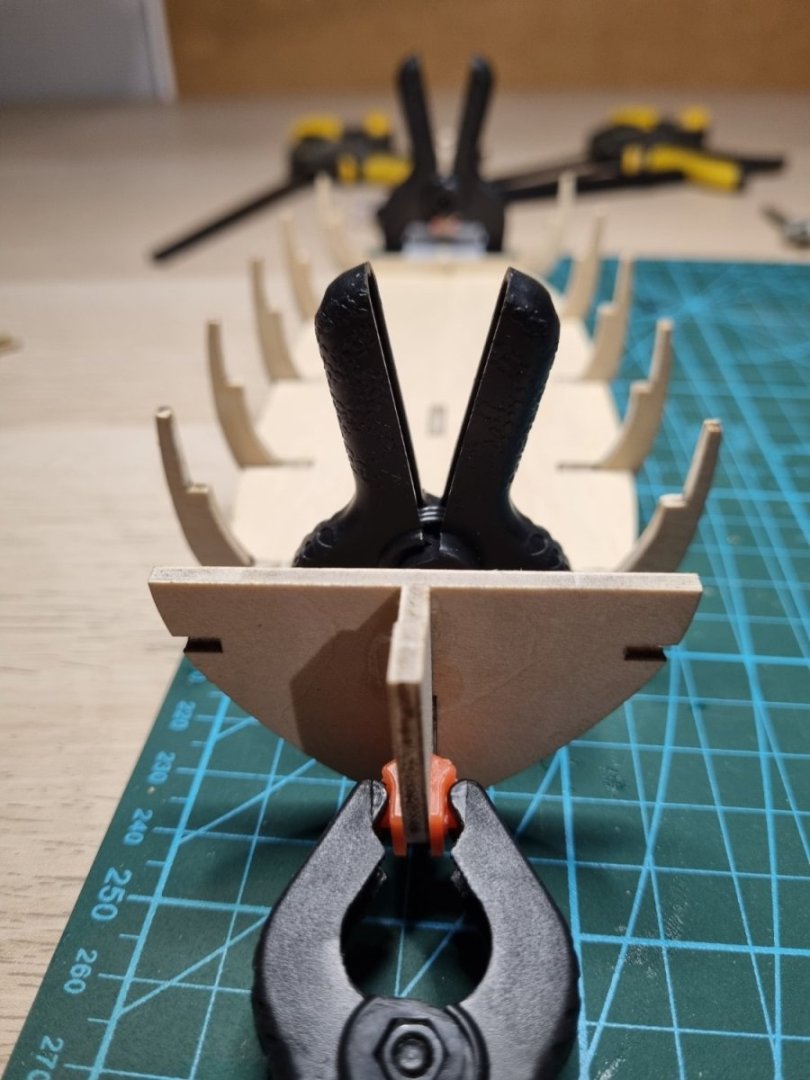
 Hello all, I Just want to announce that I started my HMS Victory build last January, but have only just gotten around to starting this build log, I'll add a few posts over the next few days to bring the log up to speed of where I am currently (78 hours in) with accompanying pictures. Opening the Box, numbering the parts, building the Slip and assembling the keel and the Hull Bulkheads took me to about 21 hours
- 11 replies
-
- 4
-
-
- victory
- billing boats
- (and 1 more)
-
 First build and log for me, slight delay in getting started when AT sent the full HMS Endeavour instead of the Longboat version, but all sorted quickly by AT and am now building. Managed to get all the ribs dry fitted, quite a bit of play in the parts, but some lego blocks seem to have worked in making sure everything was square. I dry fitted the deck after gluing the ribs to make sure alignment was OK and so far seems OK
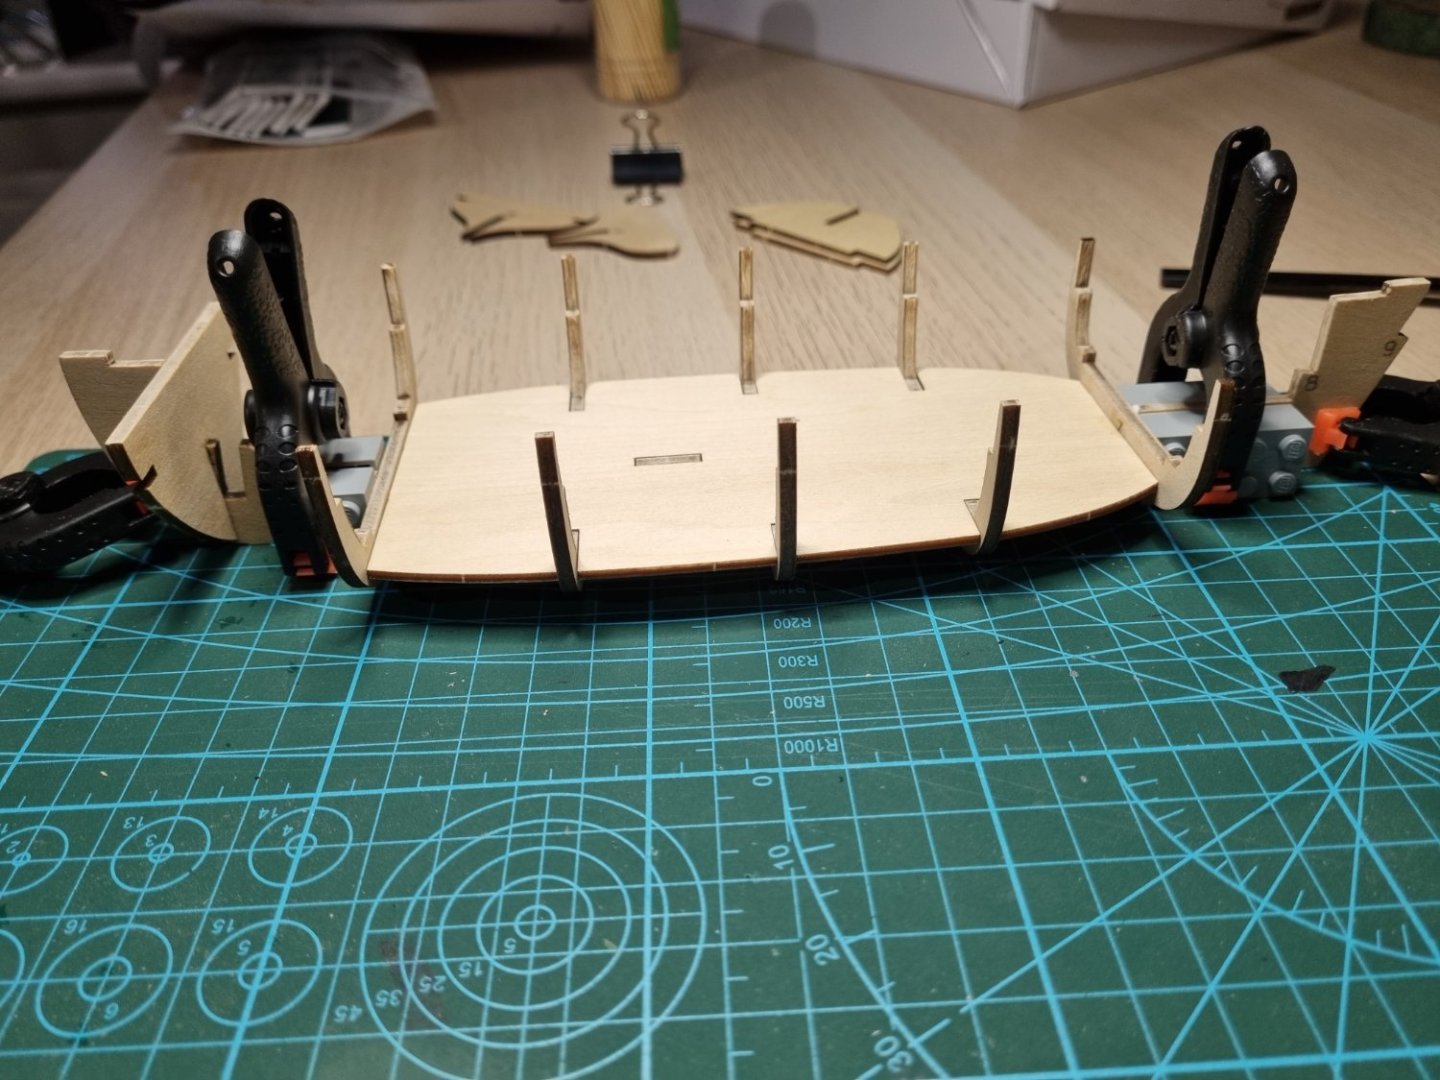
-
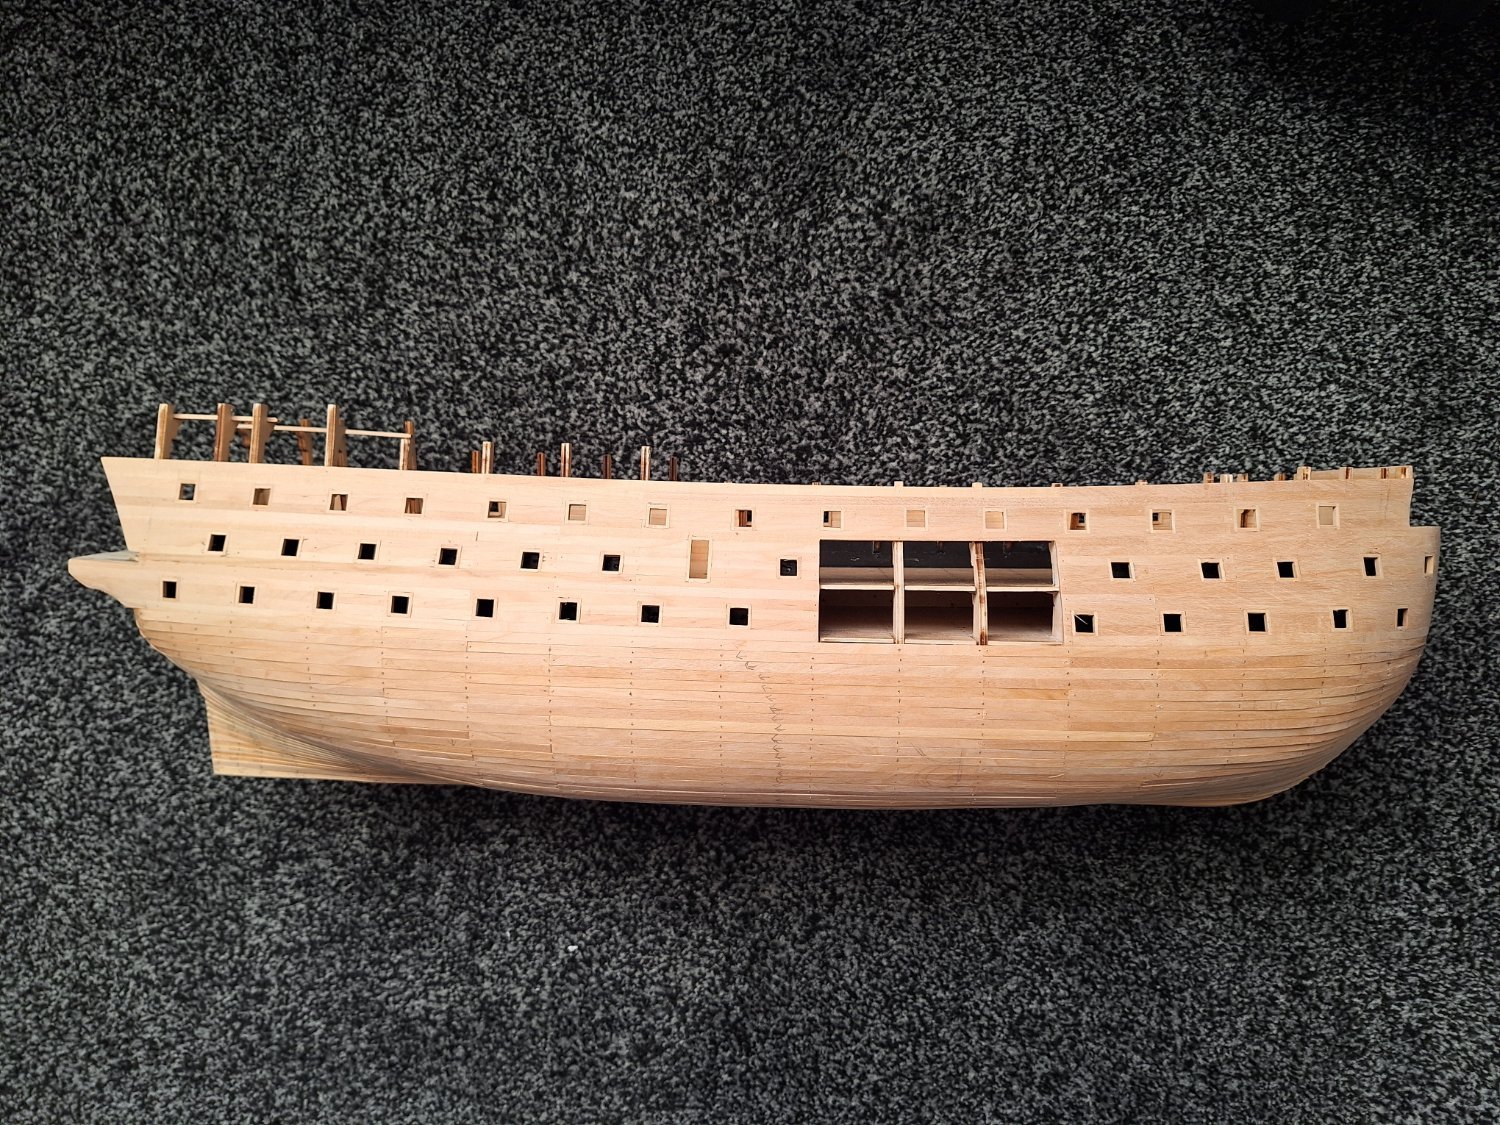
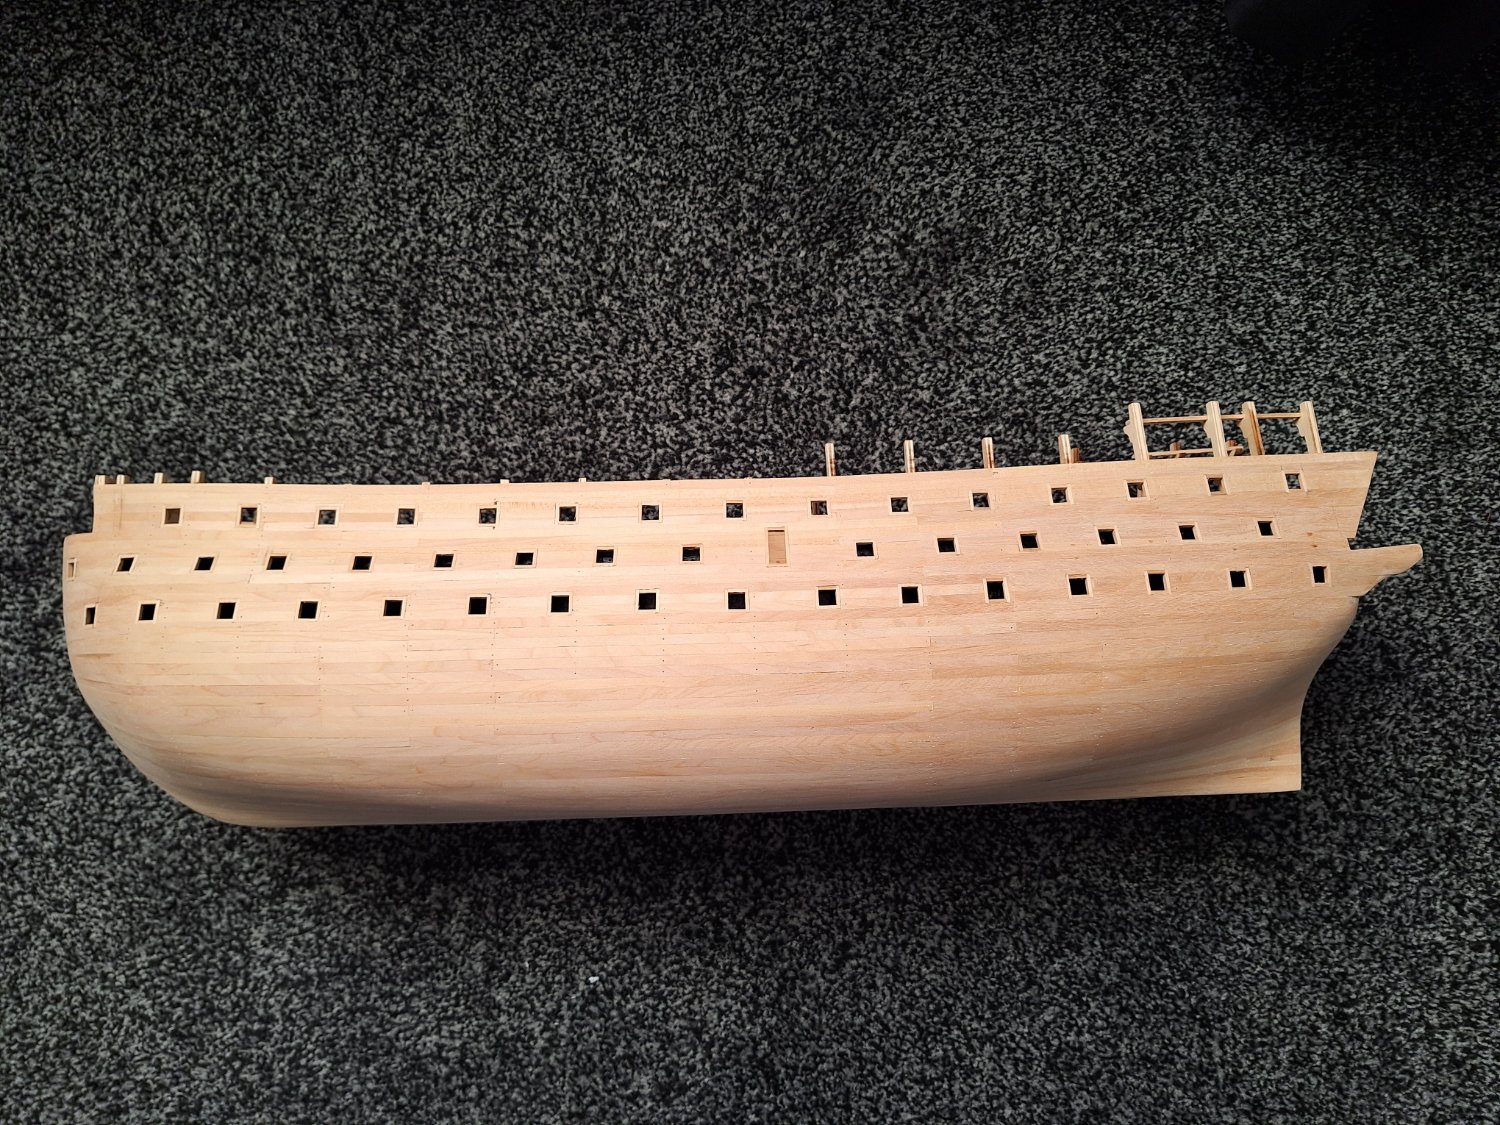
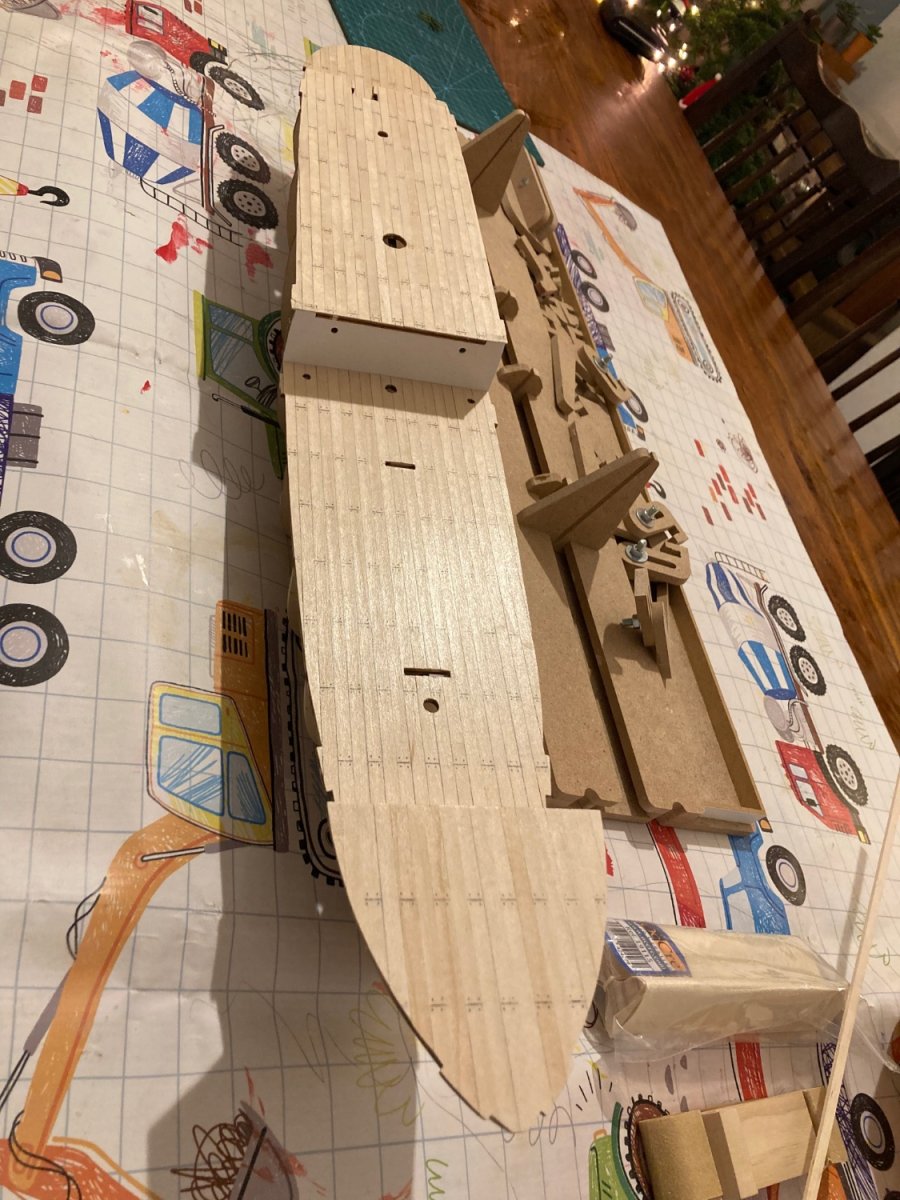
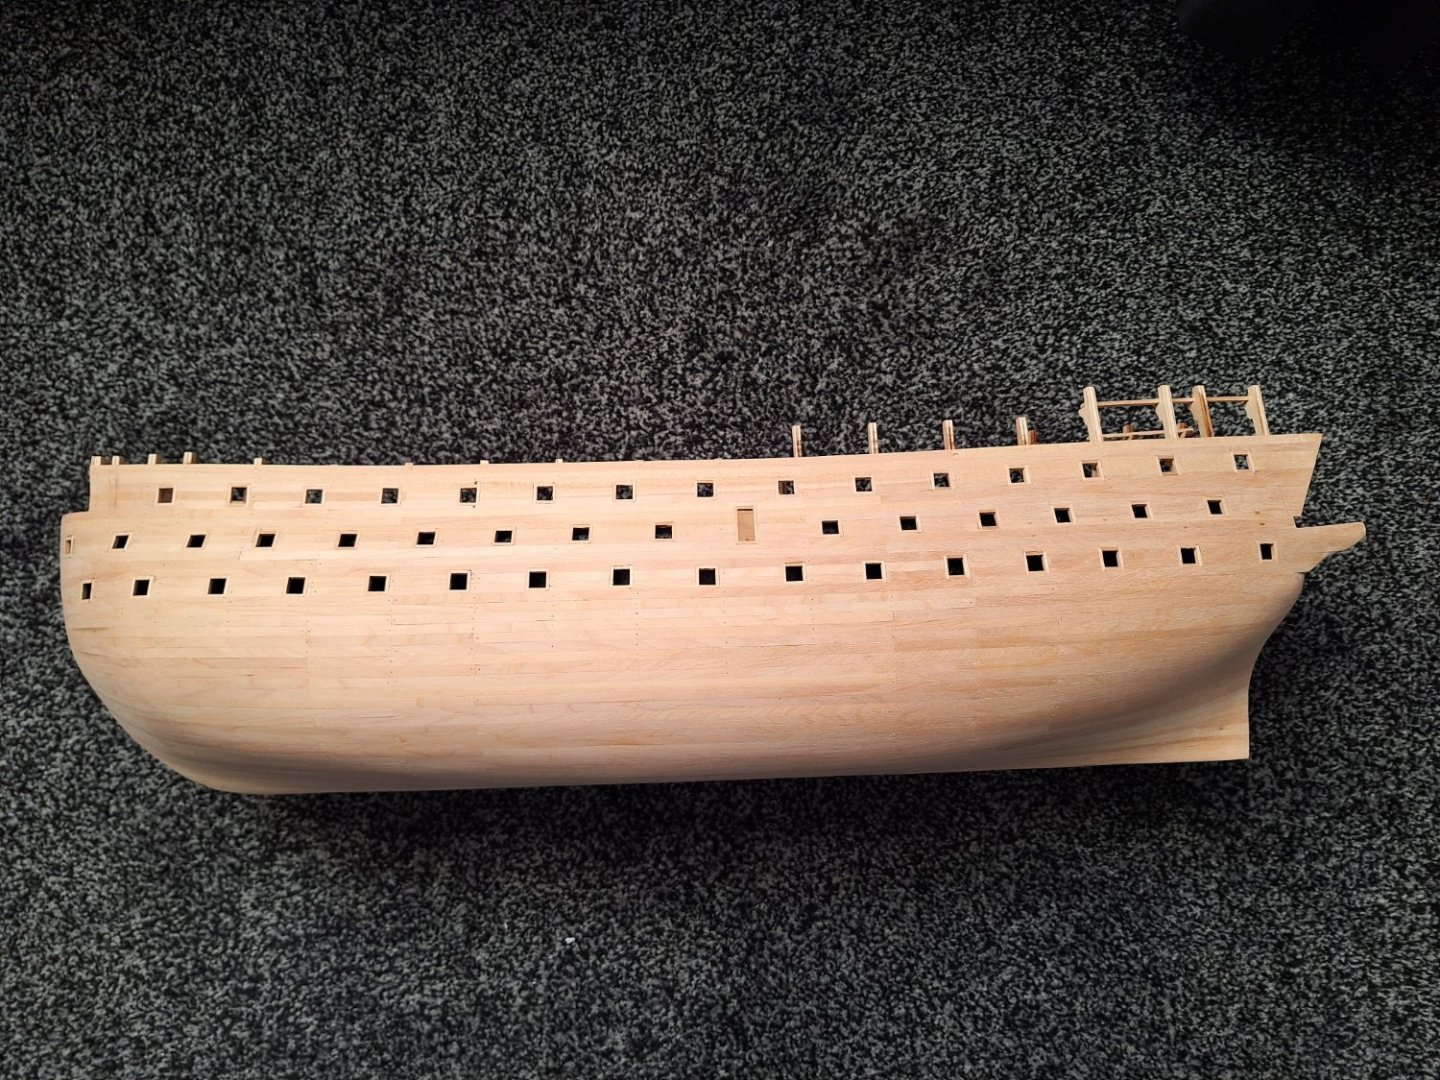
 Hi All, This is my first build, I started it in April 2023. This is the stage it is at. Port side which has had its first sand 24/12/23. Not had any wood fillers applied yet so will need a touch up Starboard side that still needs its first sanding. Hull as you can see Port side has had its first sanding. Top View of middle deck which I stencilled all the floor rather than just a section.
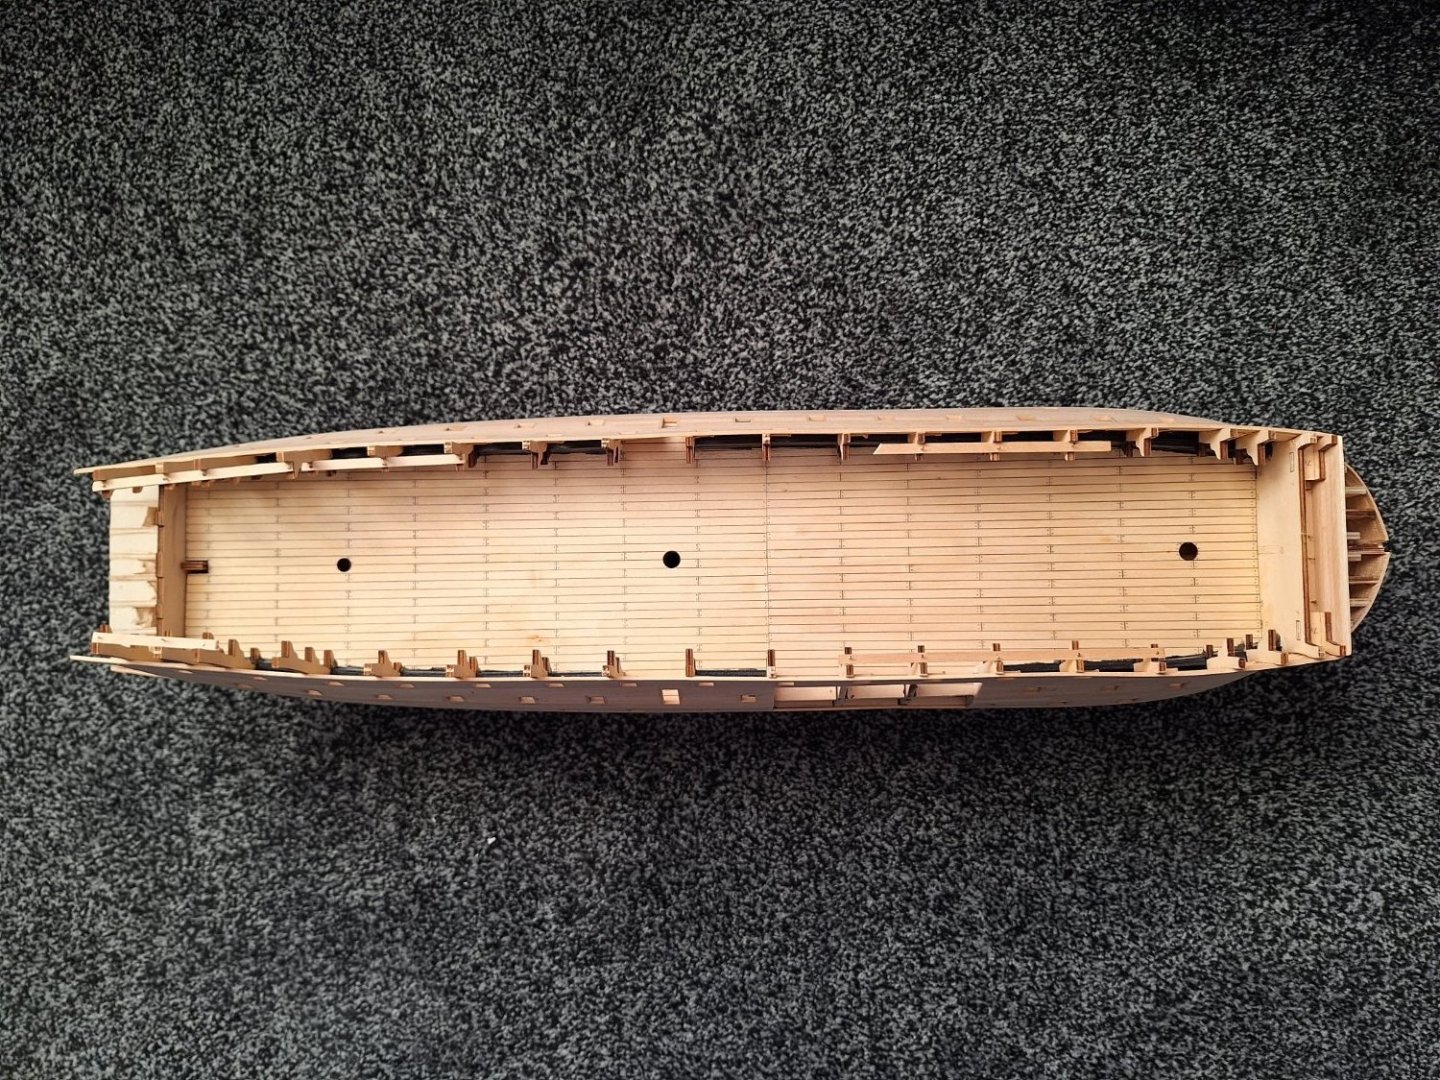


- 33 replies
-
- 12
-
-
- Victory
- DeAgostini
- (and 1 more)
-
 Thought I’d start a build log (hopefully right location!). Im a total newbie and already getting lots of great help so thanks to you all. I’ve been fascinated by Shackleton and his crew my whole life - my father was a BAS member and has the honour of painting Shackleton grave monument on South Georgia so it’s in the blood! I’ve had a lot of fun doing the bulkheads and the deck so far. Mucked up a small bit of decking I lovingly cut off only to discover it had to remain. I think it will get covered but I’ve done an ok job of patching it… I think anyway!

-
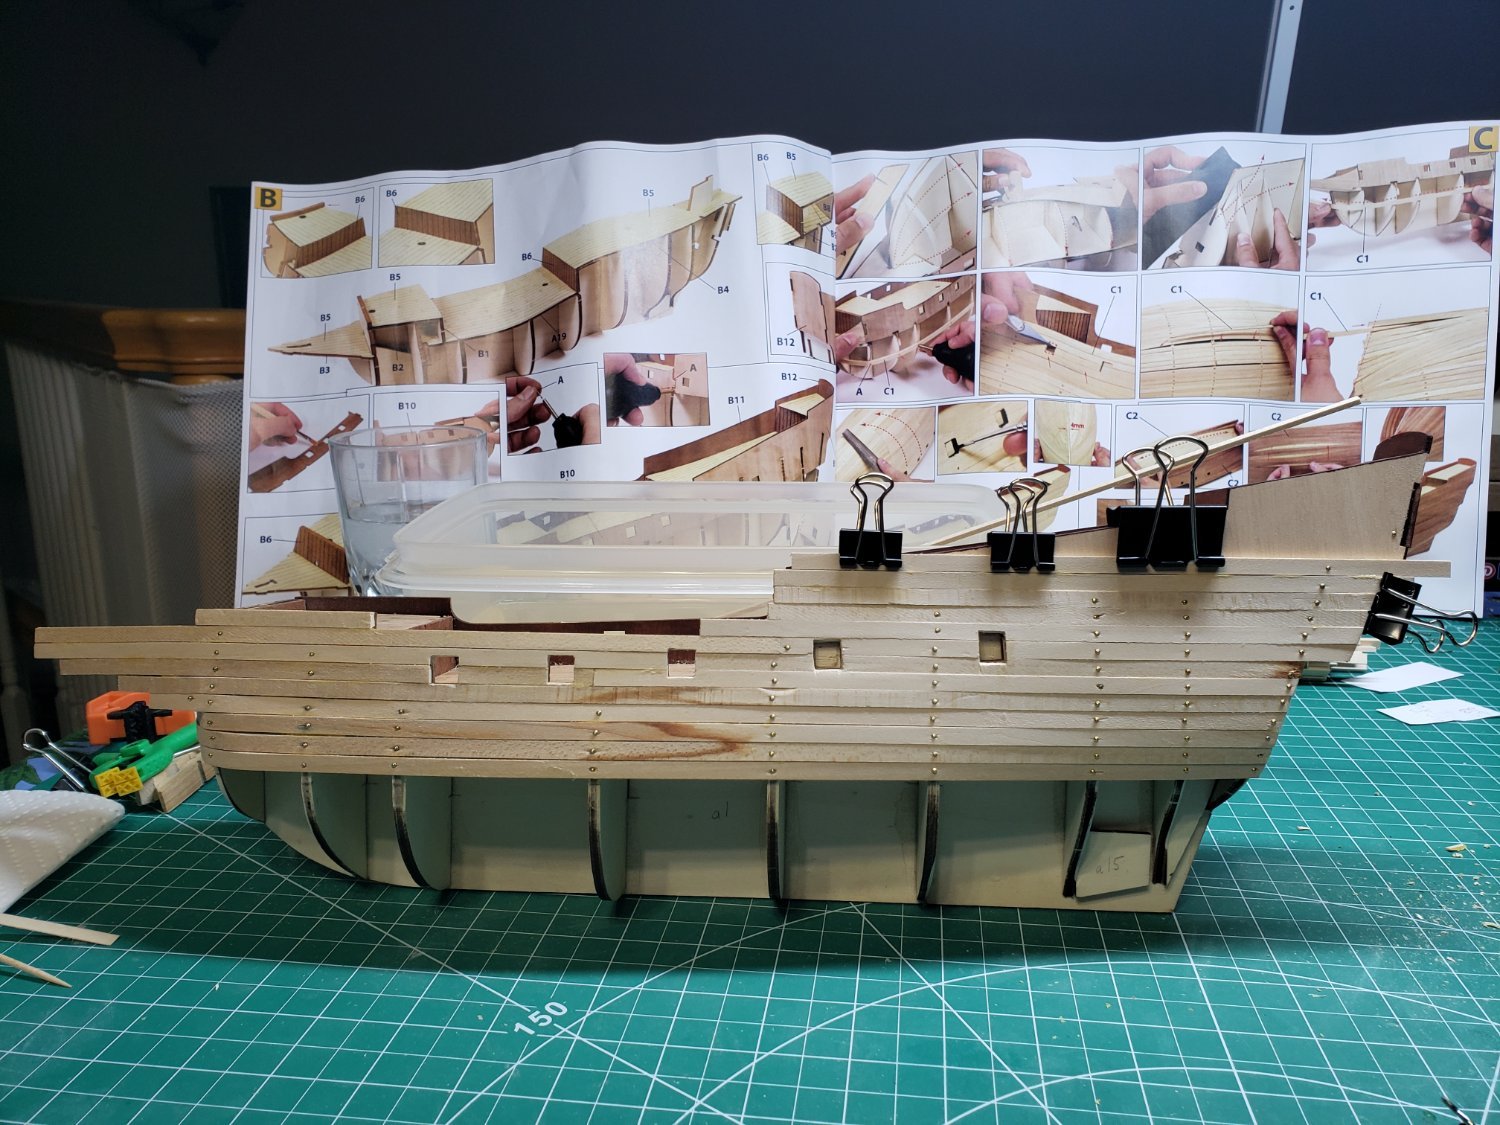
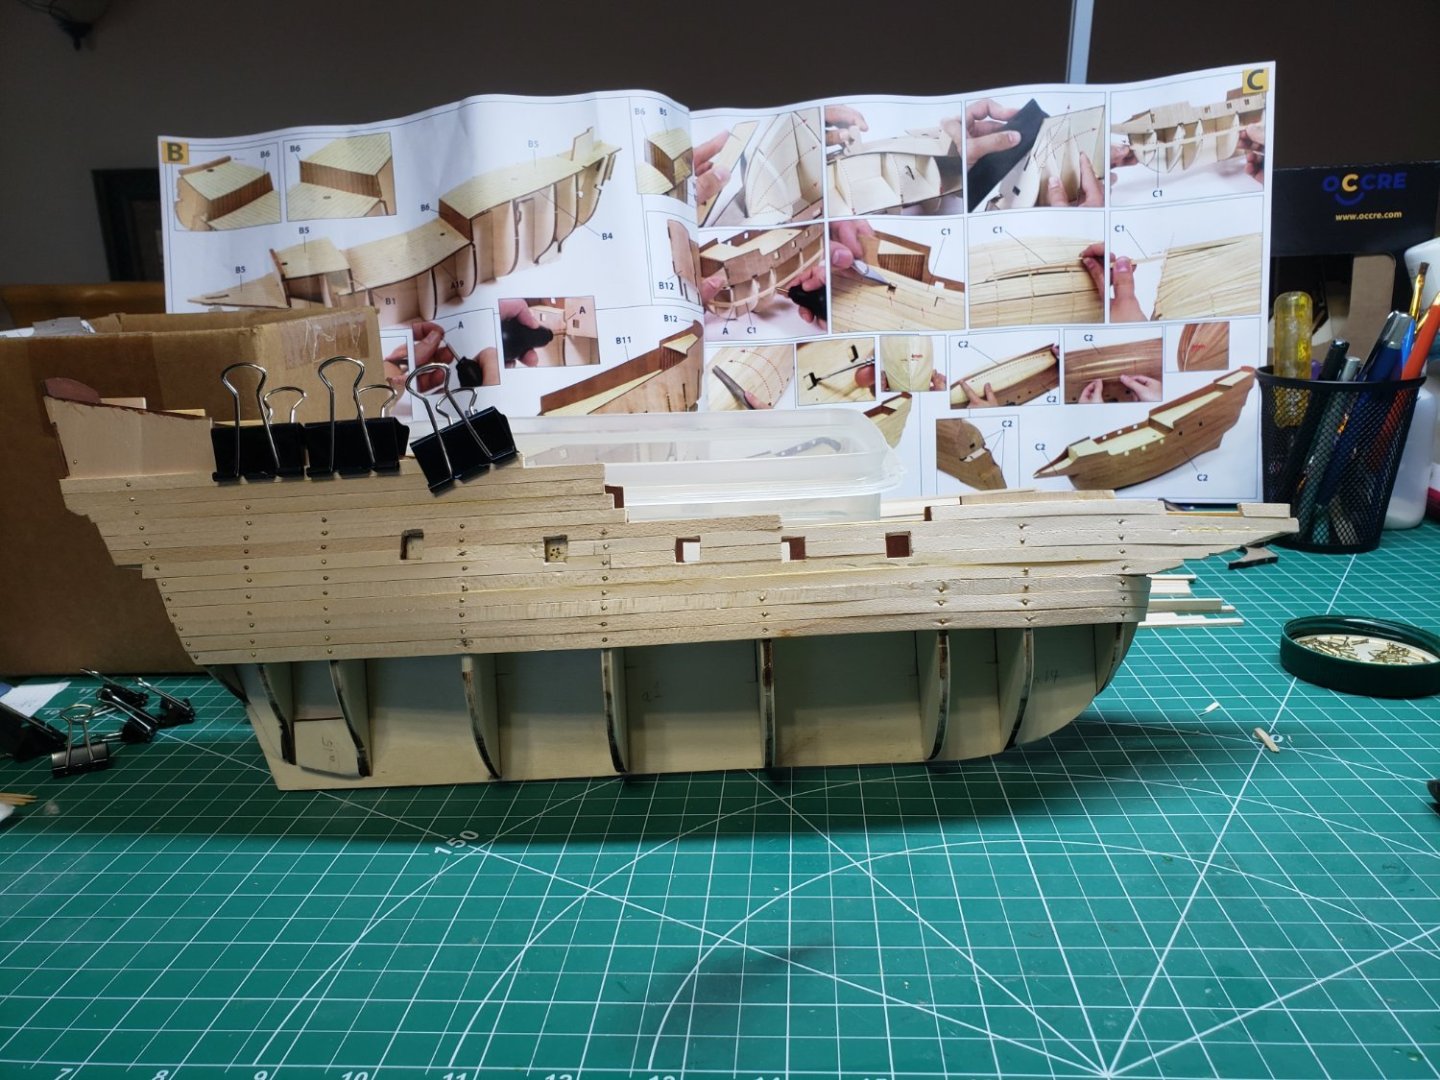
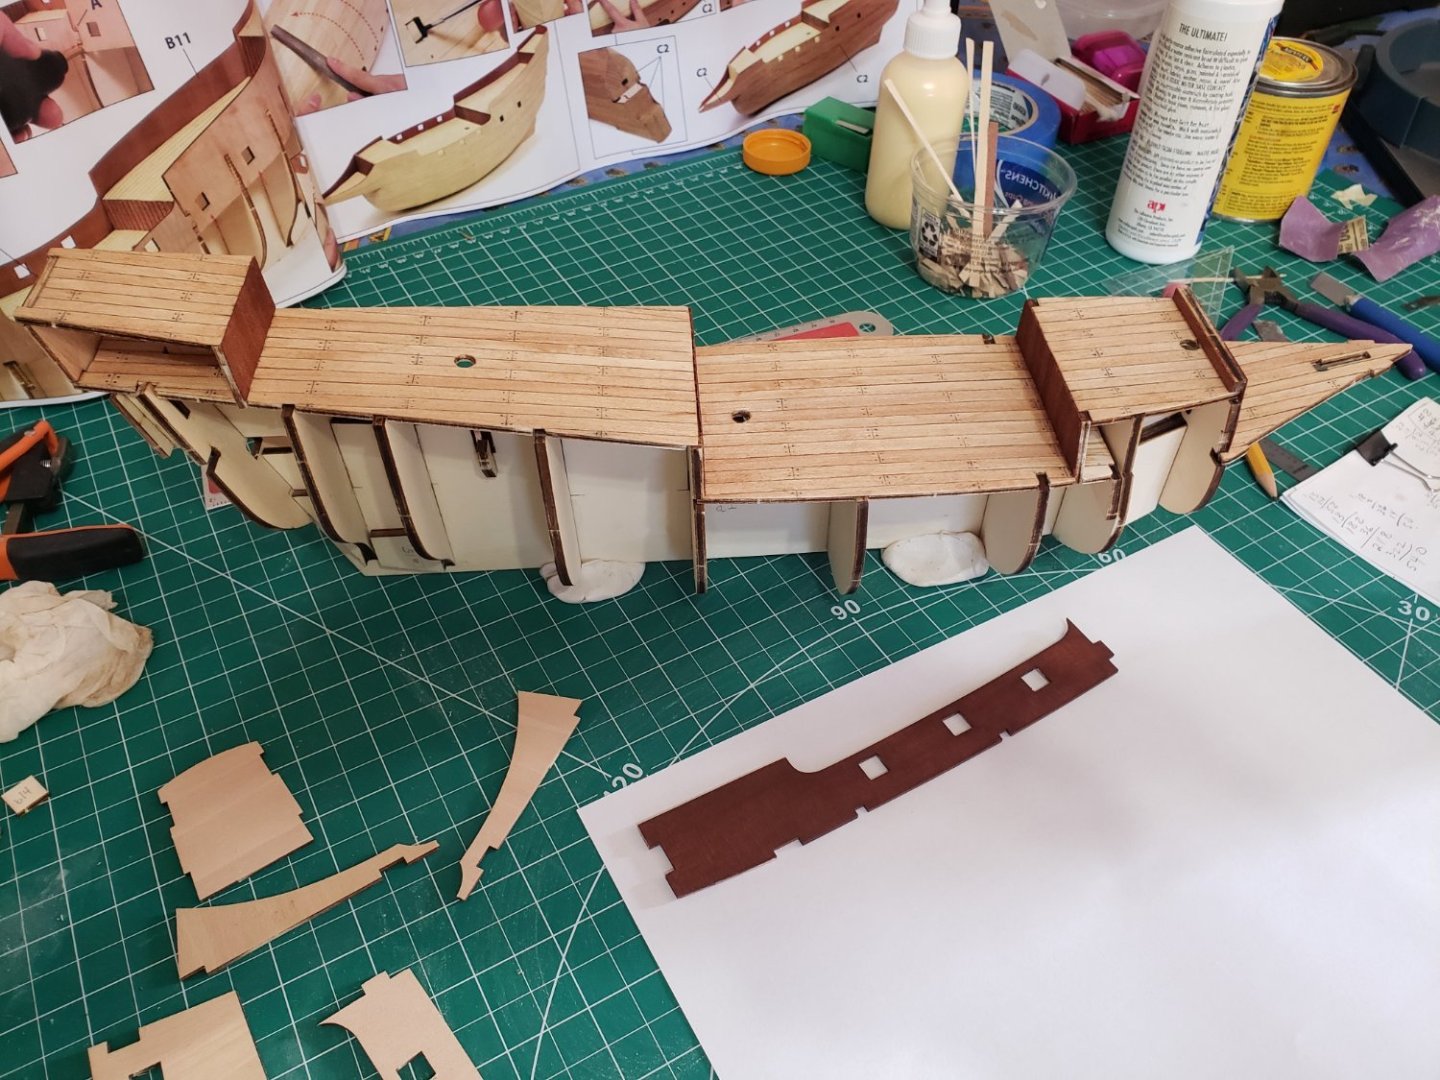
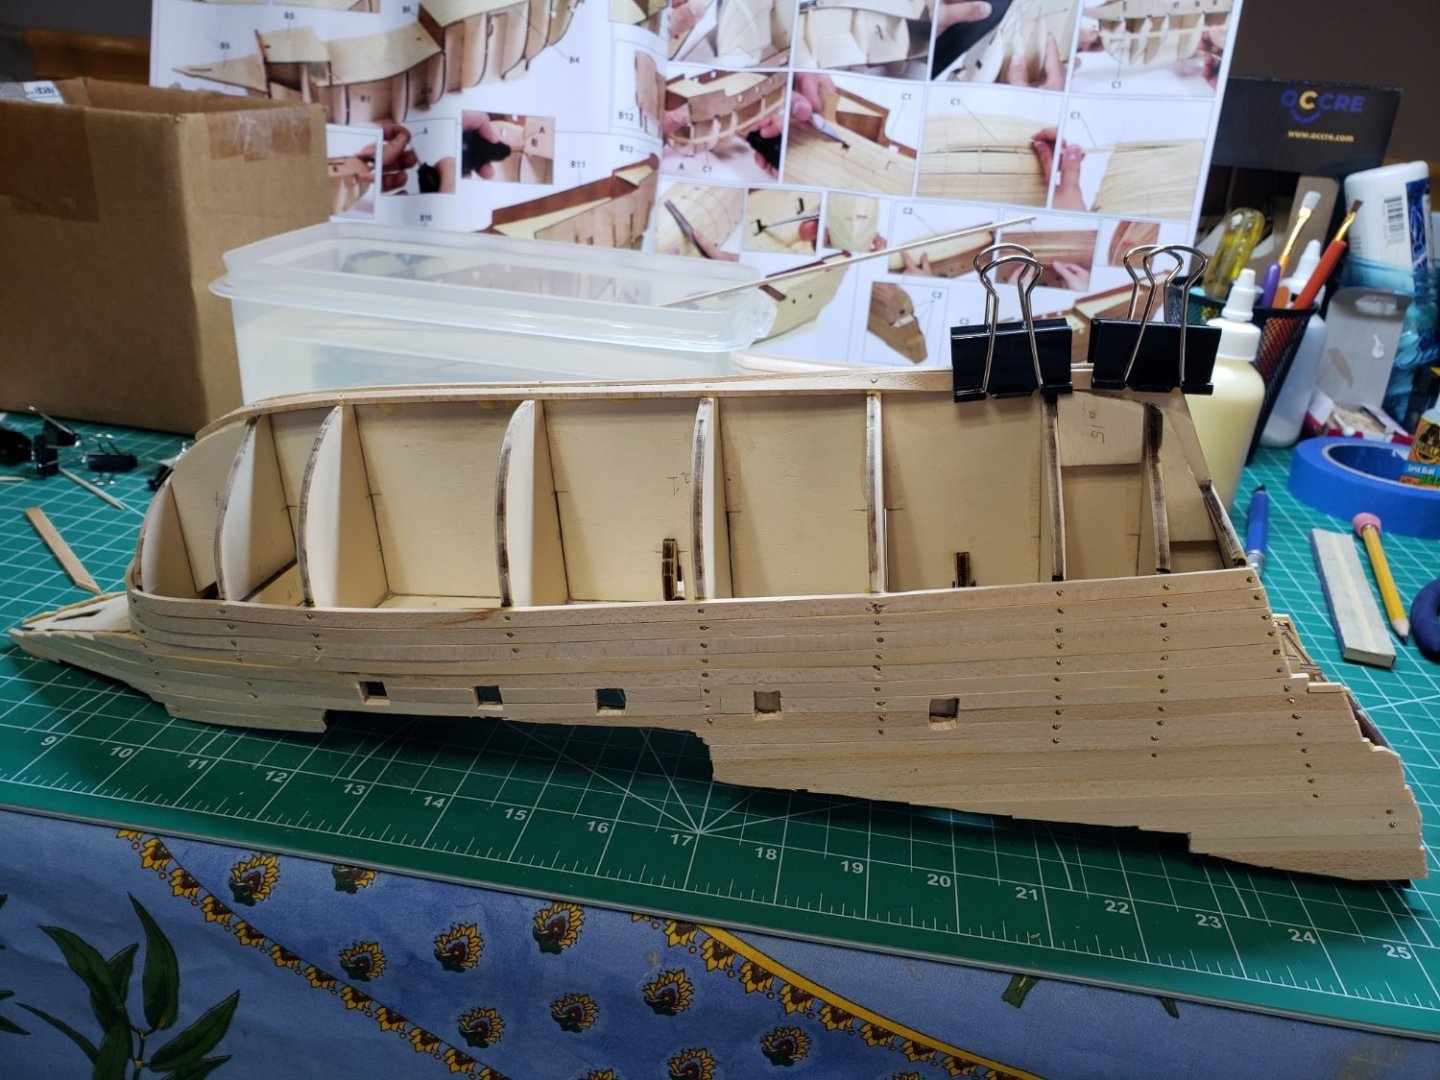
 Hello, everybody. I'm a first time ship builder starting out with the Buccaneer by Occre. So far, I'm really enjoying myself but have quickly come face to face with my lack of knowledge and experience about anything and everything relating to ships. The first planking is kicking my butt but I'm trying my hardest and not giving up. I do have a bit of experience building dollhouses and surprisingly that's been of great help to me so far. But, we'll see. I've only taken a few pics so far but I'll share more as I move forward. If any of you spot obvious mistakes that I'm making or have any suggestions how I might do a better job, I would love to hear from you. Thanks for reading and thanks for having me!
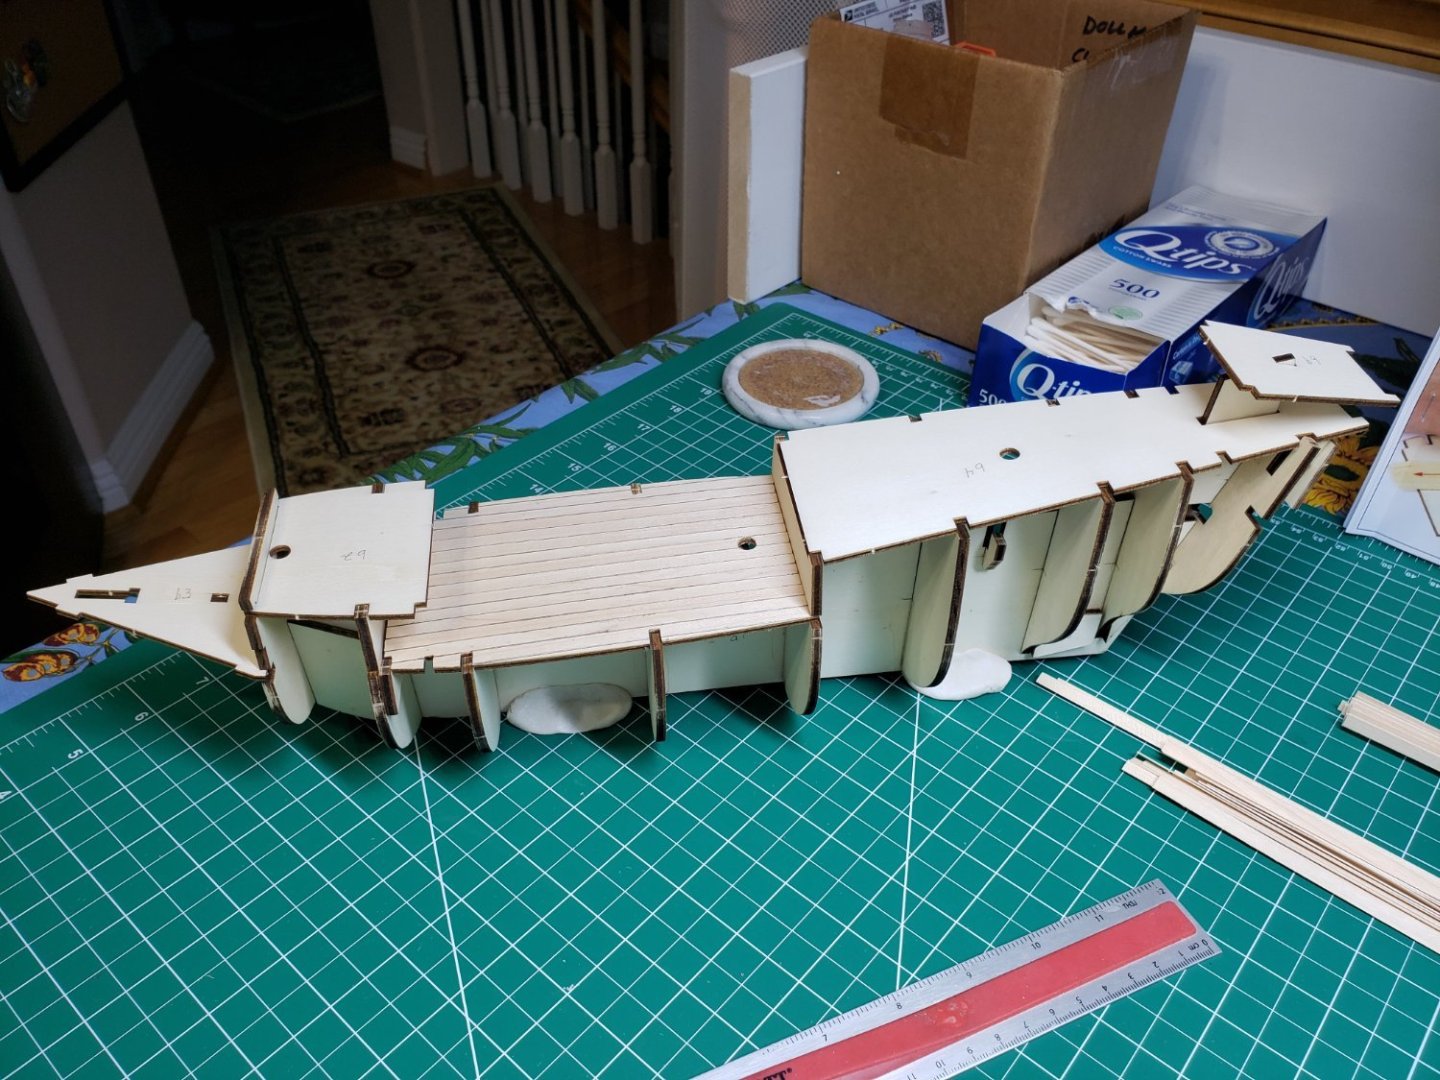

-
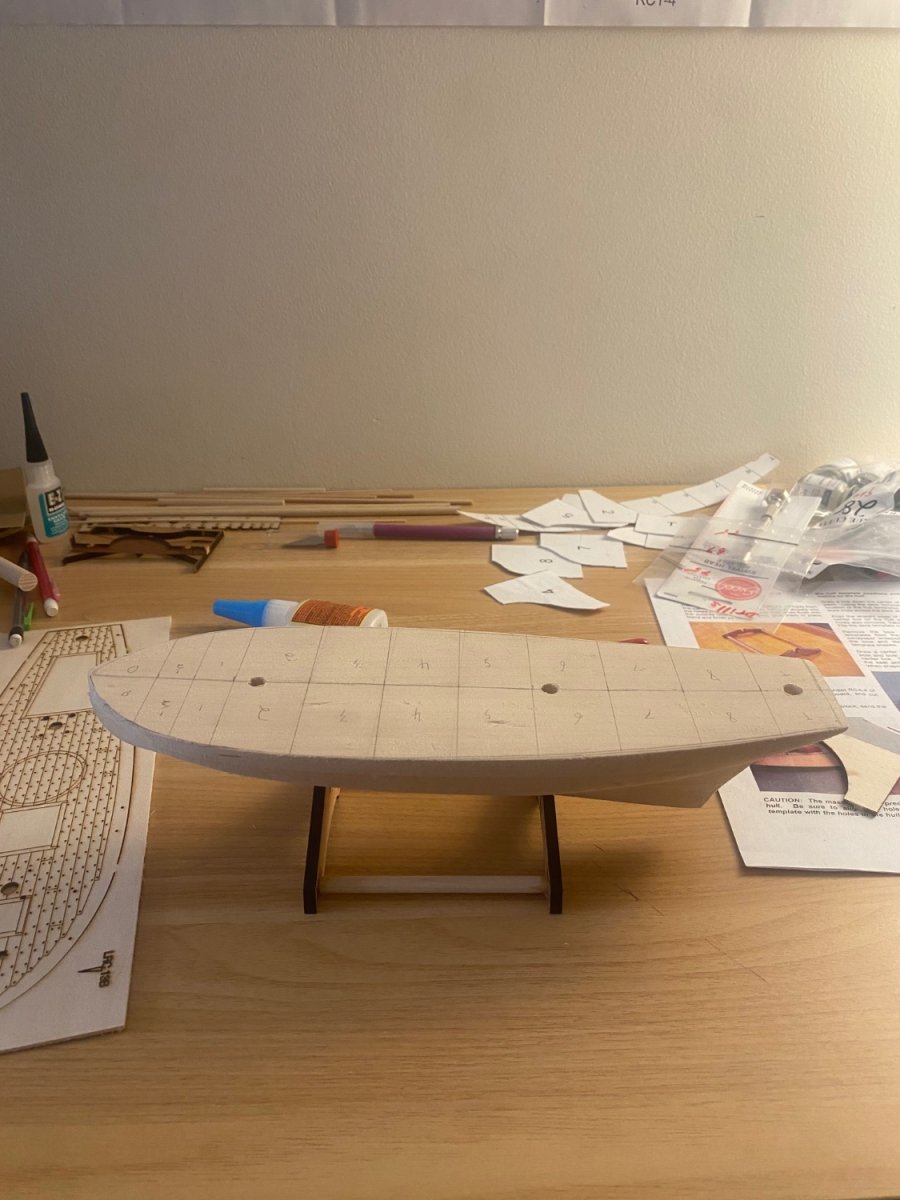
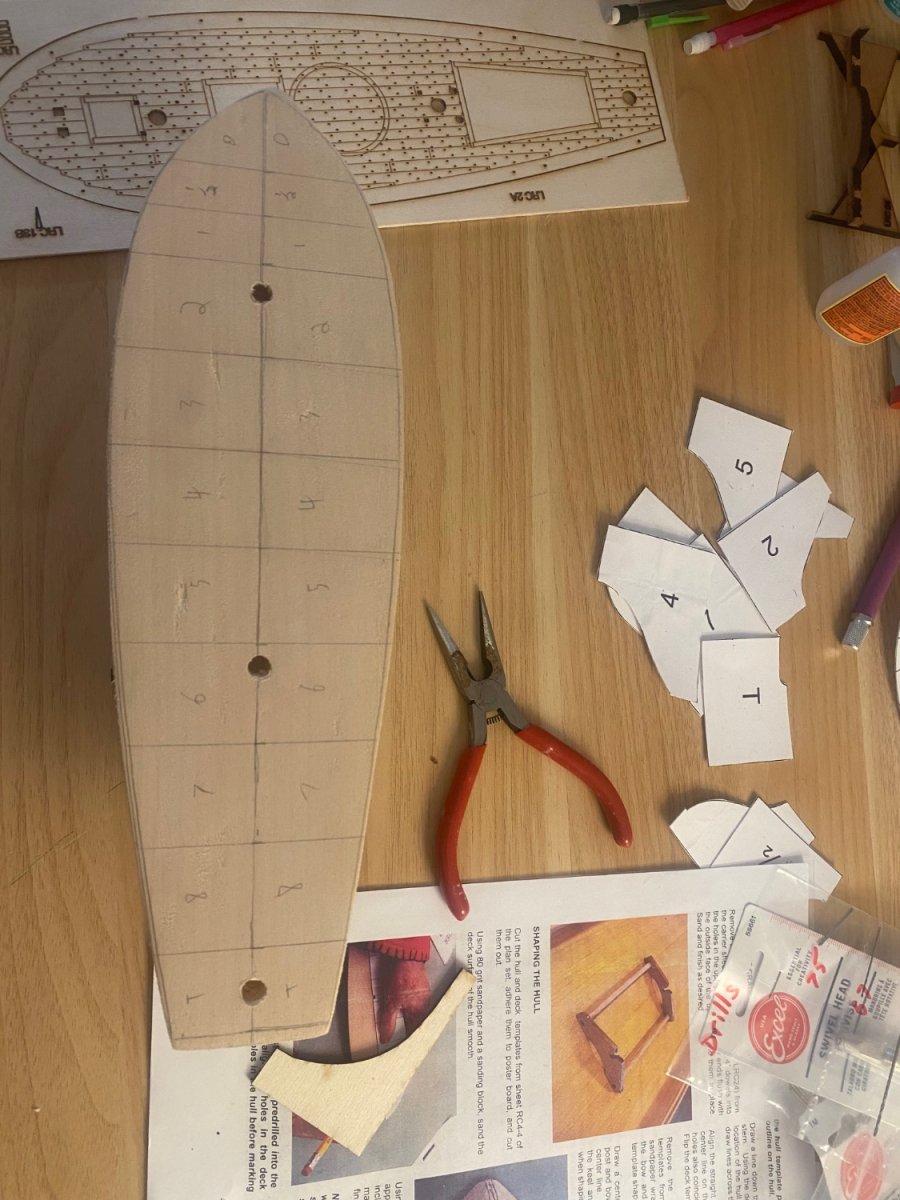
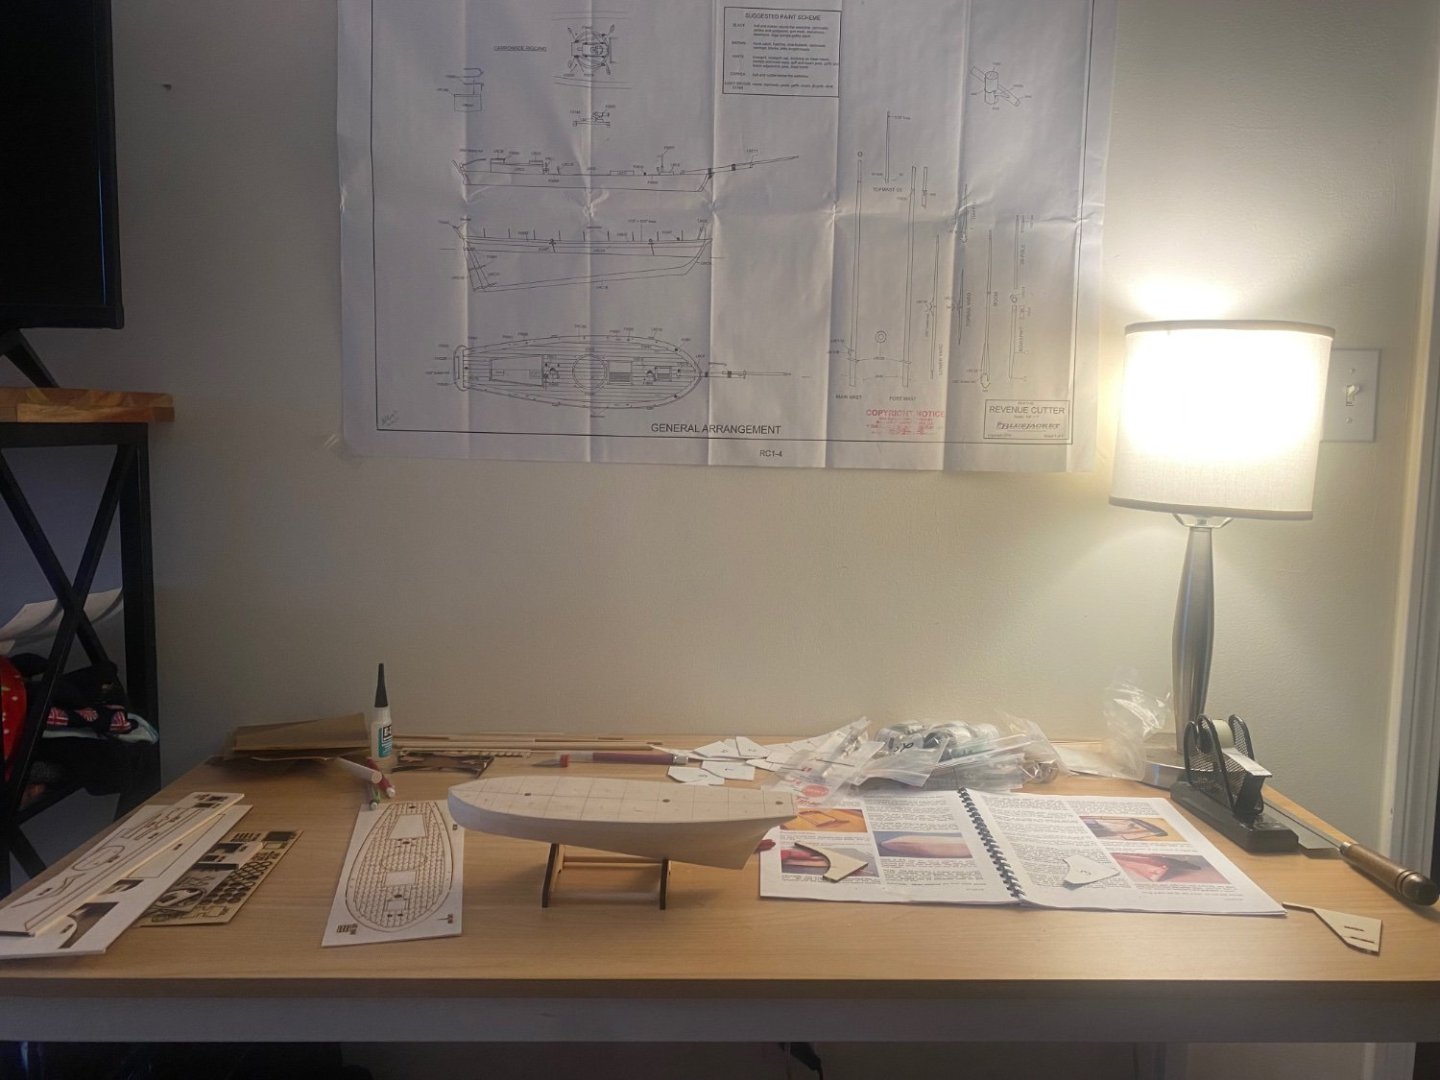
 Hello all! This is not only my first post or build log but also my first foray into the world of model ship building. Long story short, I’ve been talking about wanting to try it out for awhile now but was too intimidated to pull the trigger and get started. Eventually, my partner got tired of my talking about it but not doing anything and surprised me with the Bluejacket Revenue Cutter Ensign Kit for my birthday last month! I’m incredibly excited to get working in earnest but have been intimidated by it and haven’t made much progress beyond building the stand and cutting out all the templates. I know this might be a bit ambitious of a build for my first attempt but at this point I just want to start actually trying and hopefully posting on here will allow me to get some pointers when I inevitably get stuck. Anyway, I’ve included some pictures of the kit and where I am right now but like I said not much has been done. Going to go slow and pray I don’t mess things up ~too badly~.

-
- 7
-
-
- Revenue Cutter
- BlueJacket Shipcrafters
- (and 1 more)
-
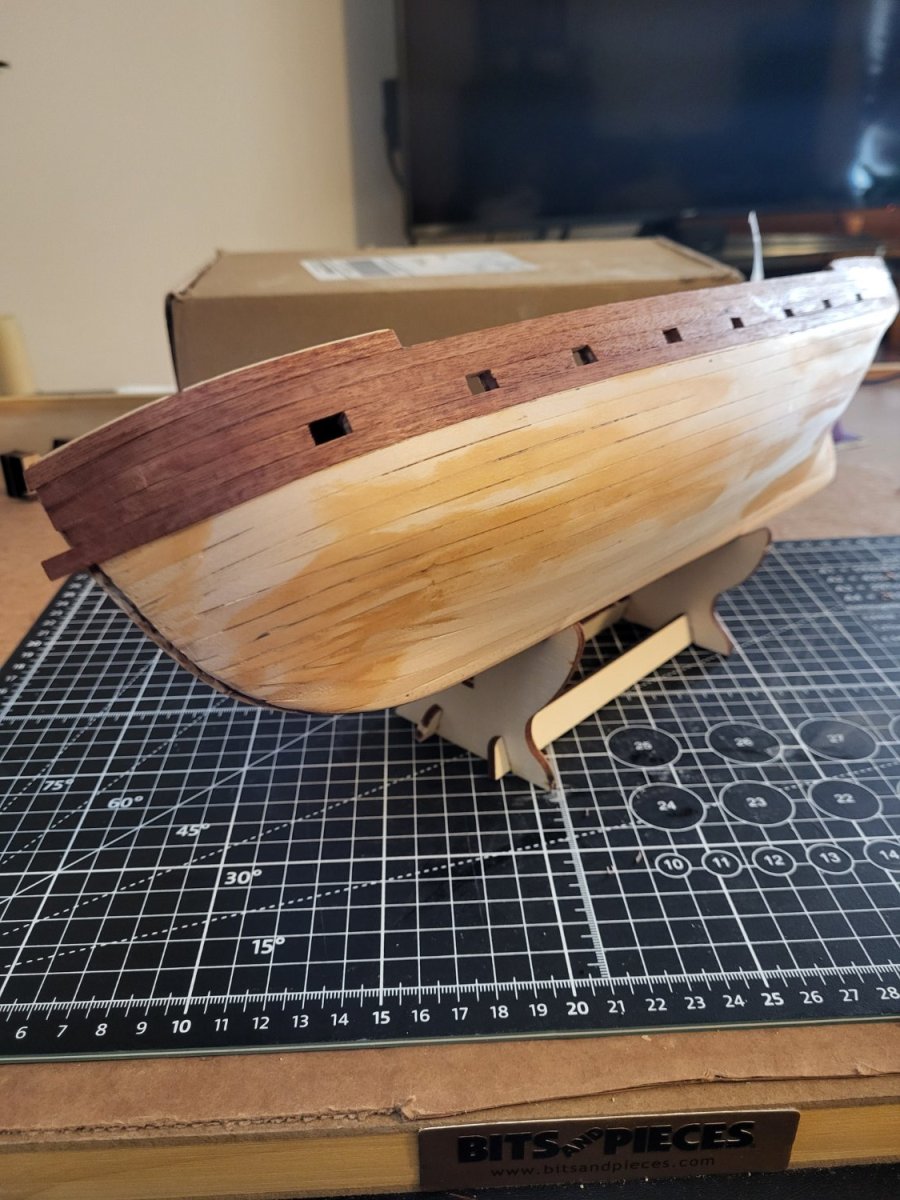
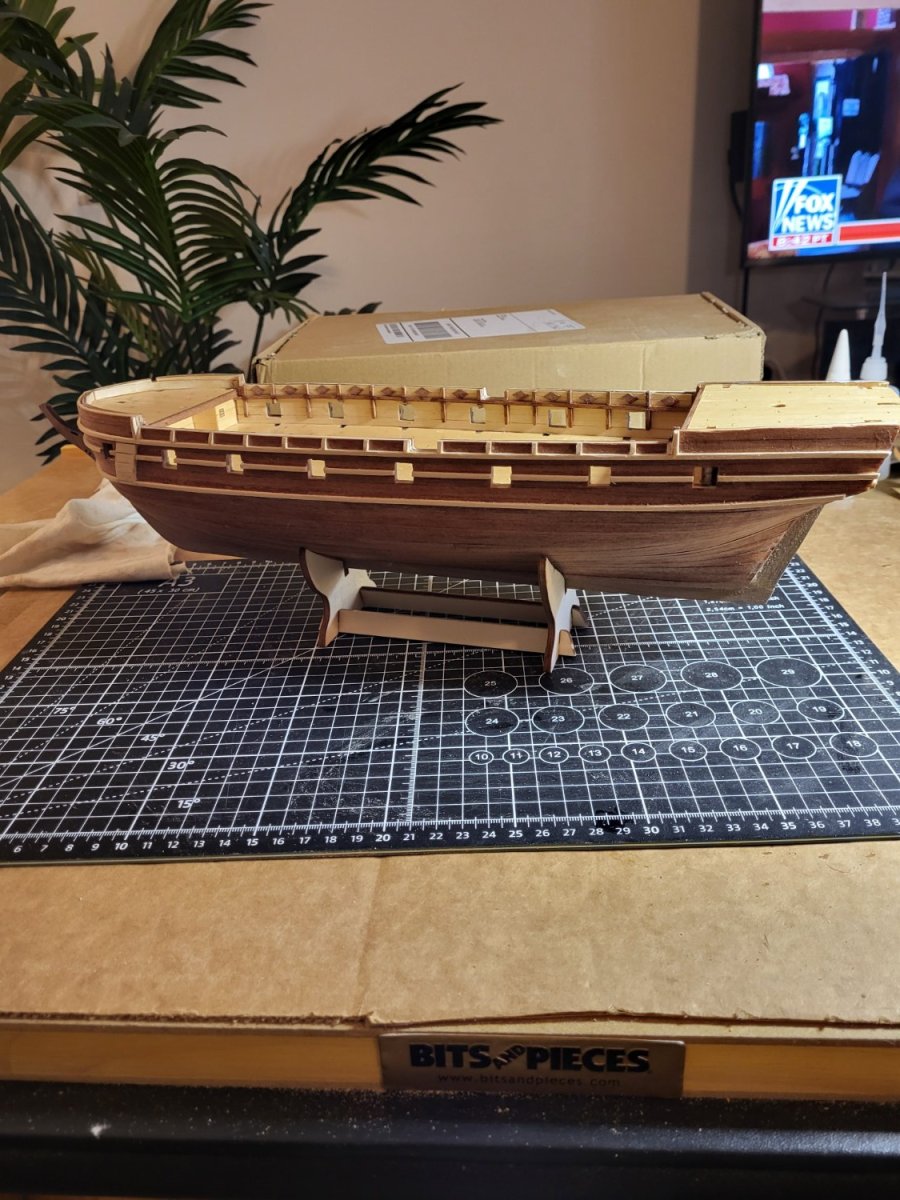
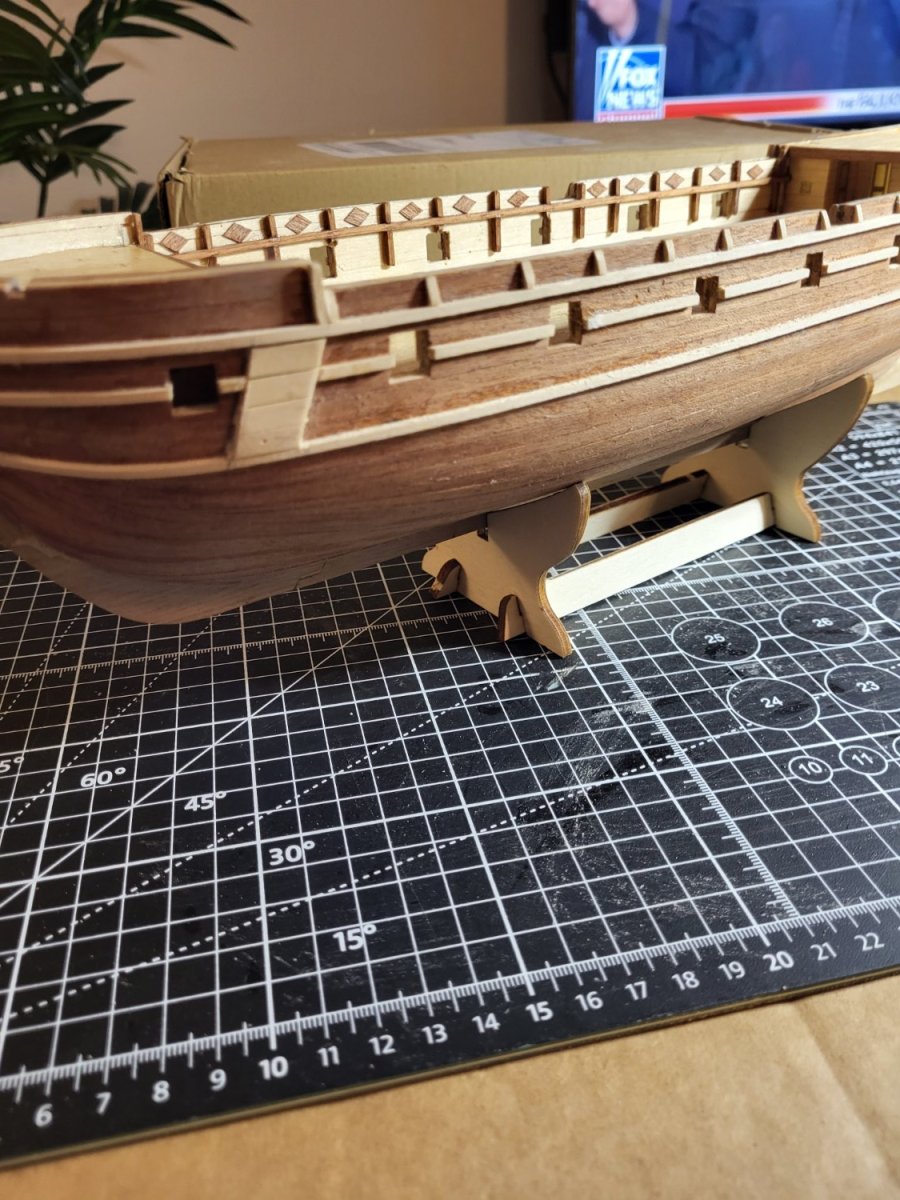
 Hi all. I’ve started my first build. It was a 50th Birthday gift from the in-laws. Made an okay start but now struggling. I’ve always fancied a go at model shop building and finally now have the opportunity. As you will see by the photograph below, I’ve made an okay start but now approaching a difficult section. I’d wrongly assumed that instructions would be specific, accurate and helpful. What I have in front of me now reads as follows… “Apply first planking. Some nails will help. At stem, leave enough space for cutwater positioning. Check thickness of keel.” It then goes on to say sand hull prior the second planking. okay, so that’s the entire planking instructions!?? Great. Q1) what is leave enough space for cutwater positioning on this ship specifically? Q2) check thickness of keel. Can anyone explain why? What do I do? I’ve read and watched many videos on planking but nothing is the same as this hull. I’ve also seen many videos now all showing several different methods of planking so no idea what to now do. As you will see, the deck is complete, bulwarks on…now the planking. any help will be much appreciated!
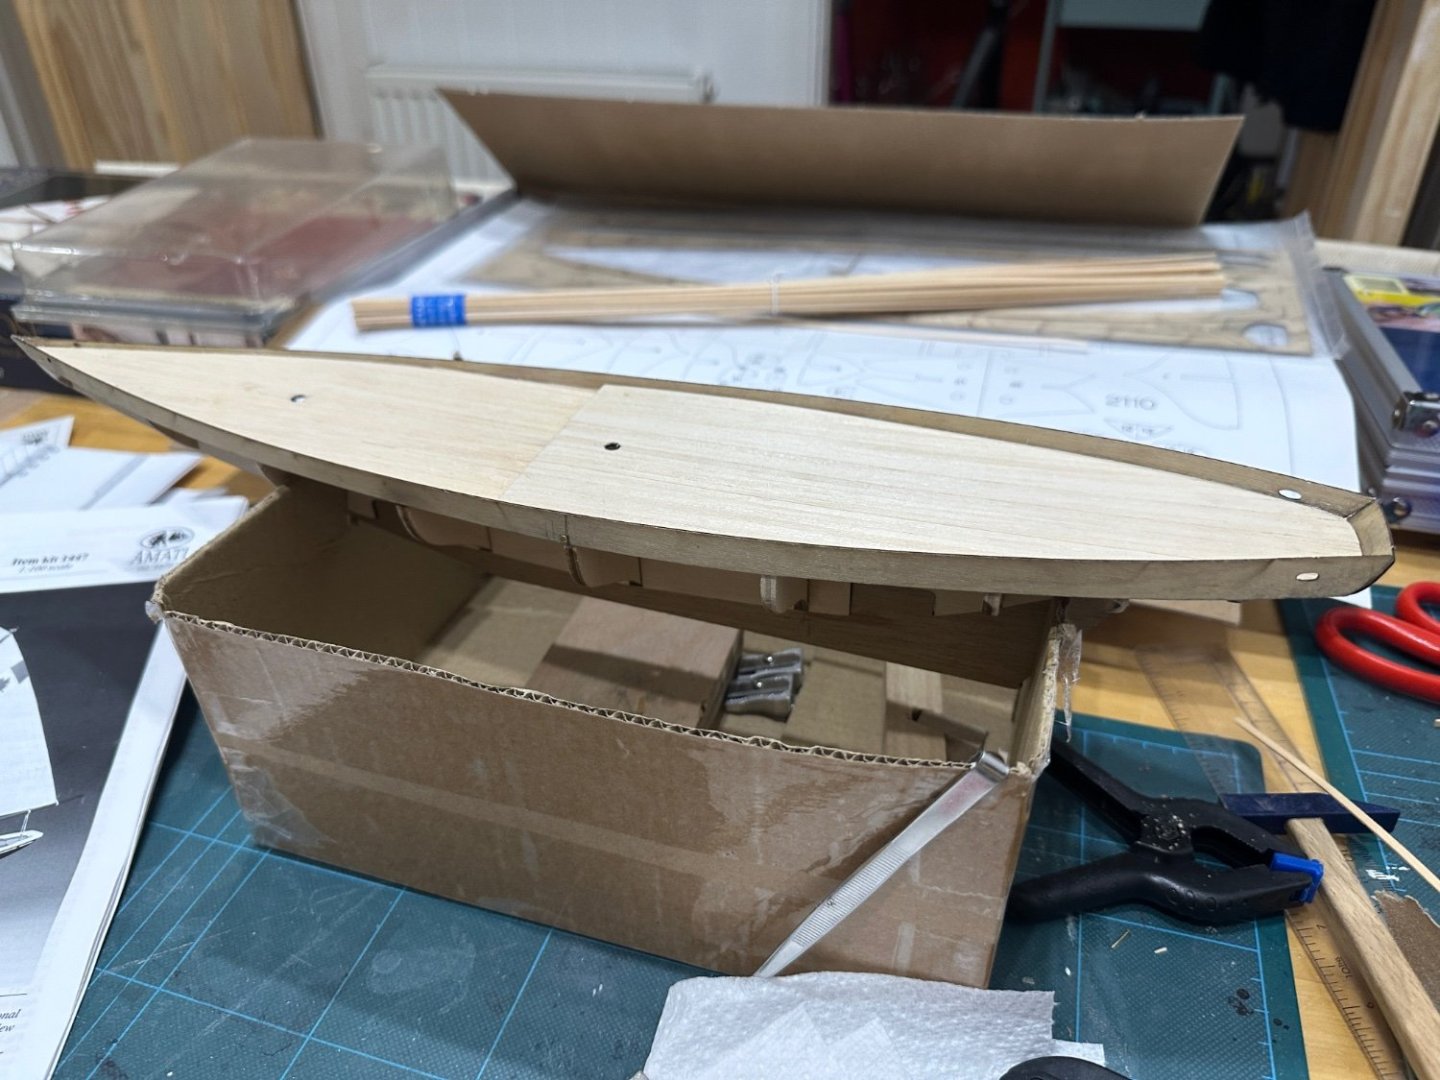

-
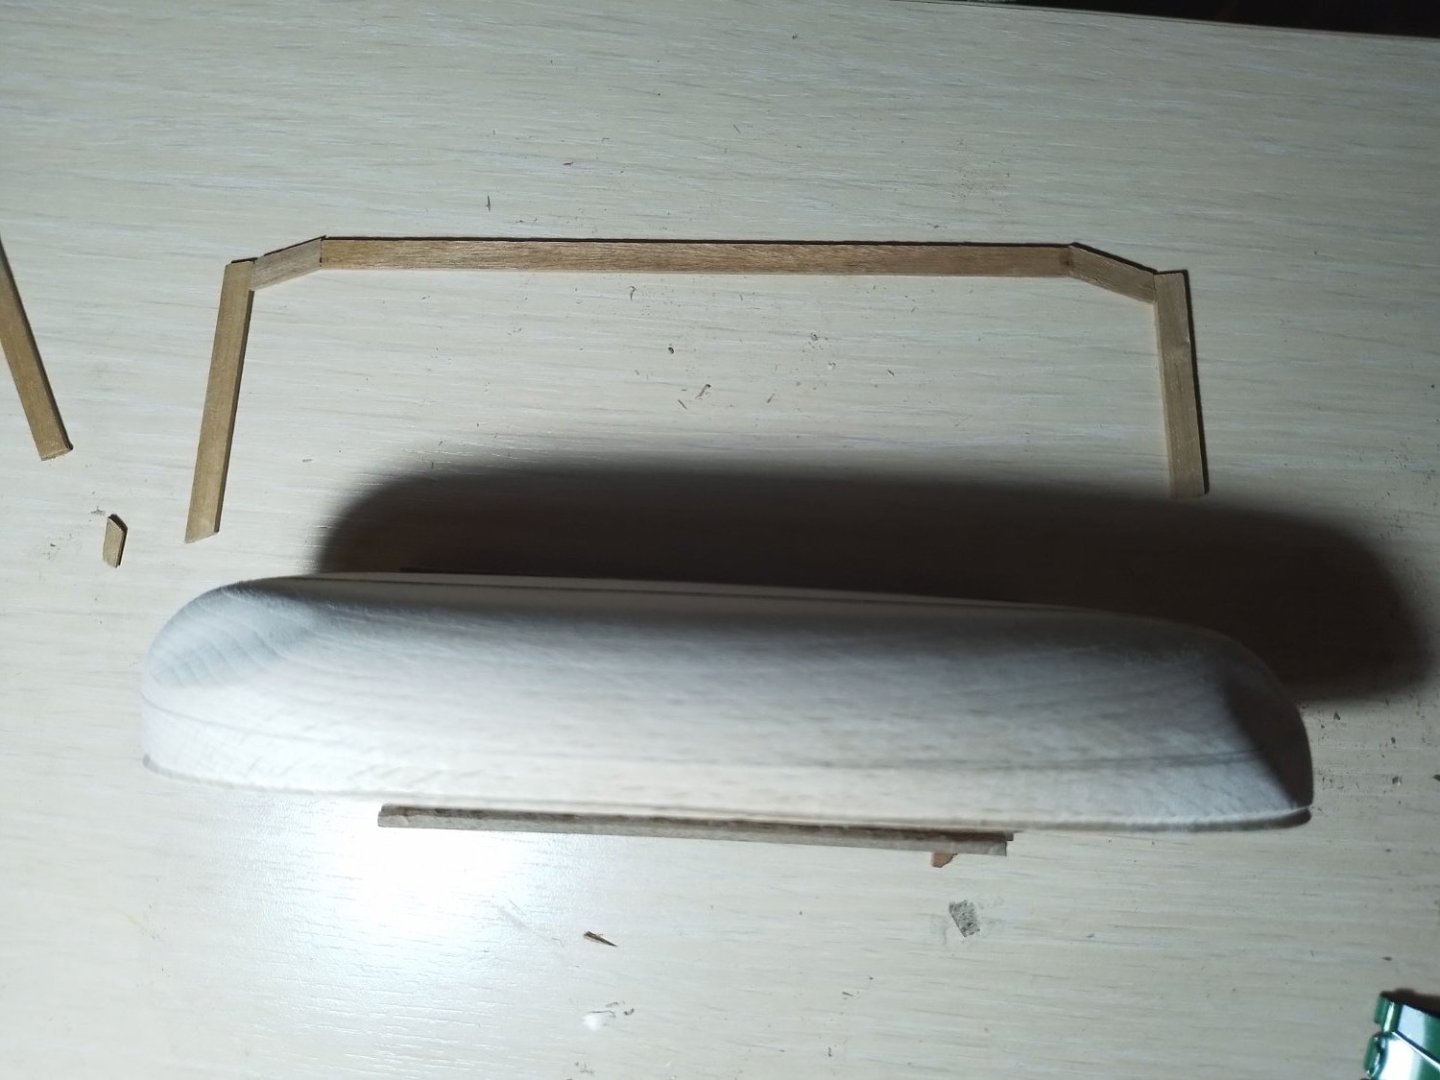
 Gentlemen I'm not getting any younger so here we go. I have had my eye on the little whaling boat for a while now...but ran into this the other night here on the forum. After taking a closer look I decided it was the place to start for me. I know it's simple but I love the lines of this little boat, and for the $$ it was a no brainer. It came in yesterday. I had time this afternoon to do an initial unboxing. It was well packaged, no damage, and came with a parts list with a date the kit was made....signed by Miroslava. I like that, When I saw one of the build logs here of the kit I did some googling to see what I could find out about the subject matter. That's what peaked my interest and firmed up my decision. I'm sure all of you guys are aware but here is the link. I'll be posting progress. Thanks for looking. History | Lowell's Boat Shop & Museum (lowellsboatshop.com)
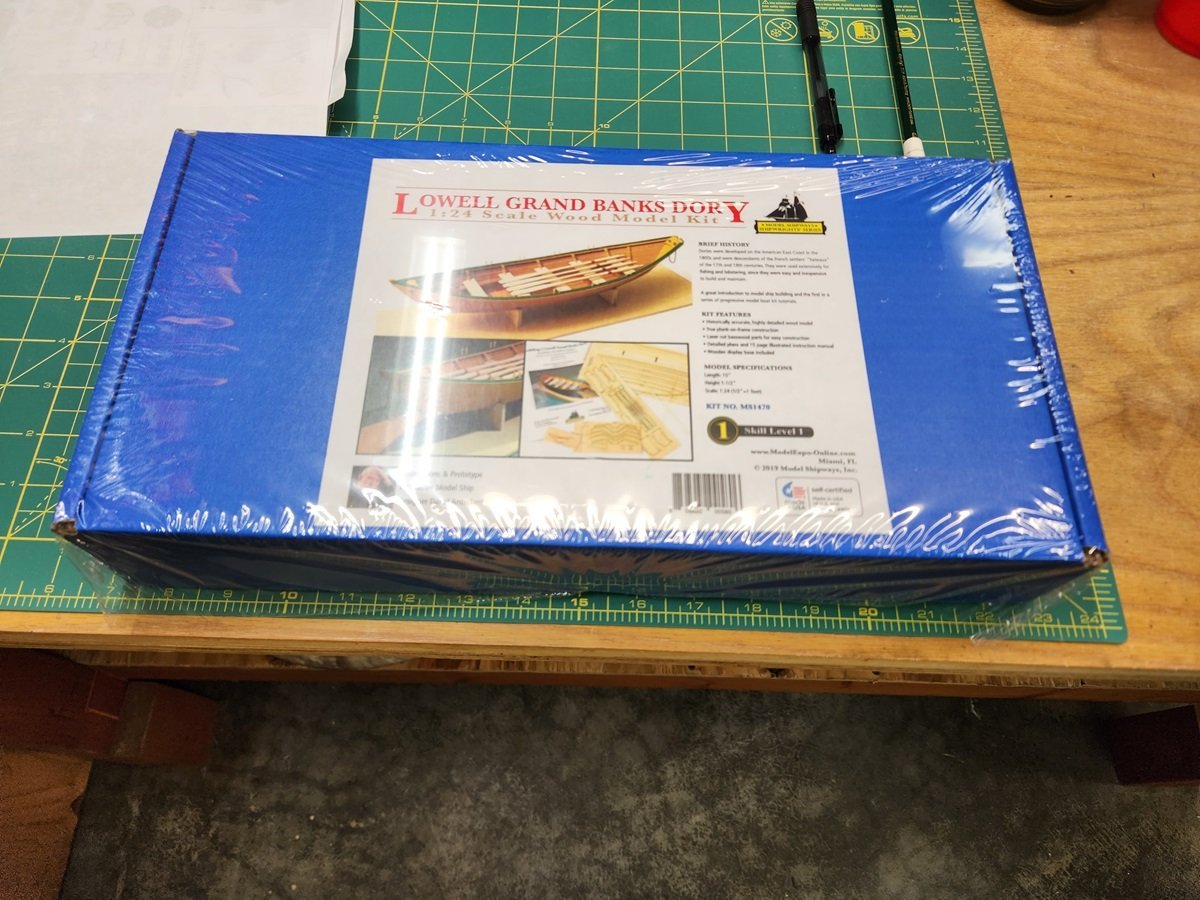
- 3 replies
-
- 6
-
-
- Lowell Grand Banks Dory
- Model Shipways
- (and 1 more)
-
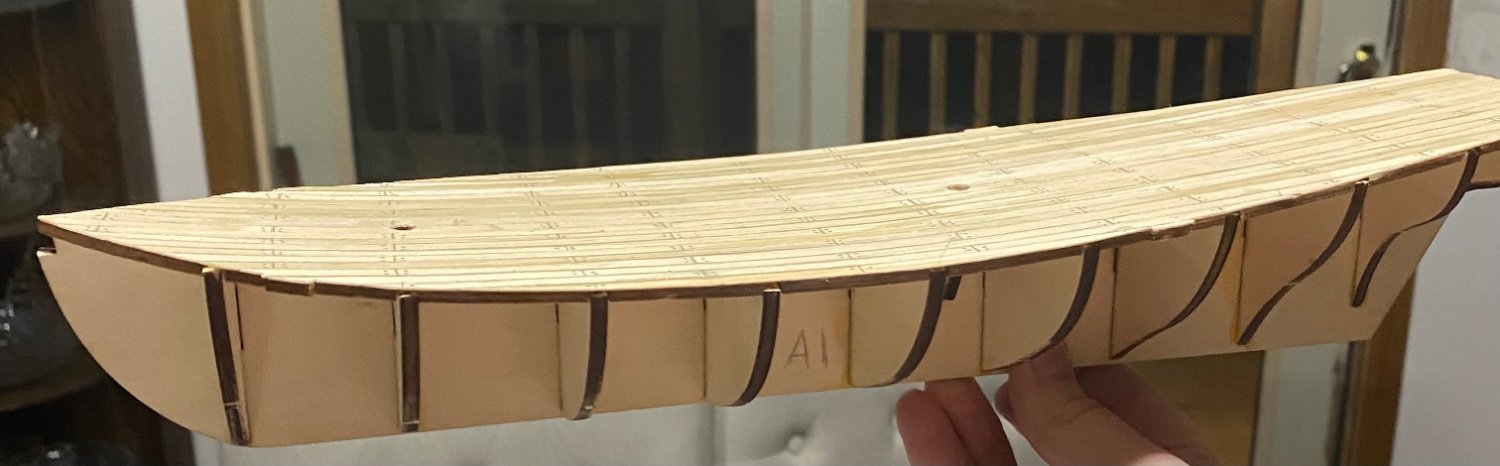
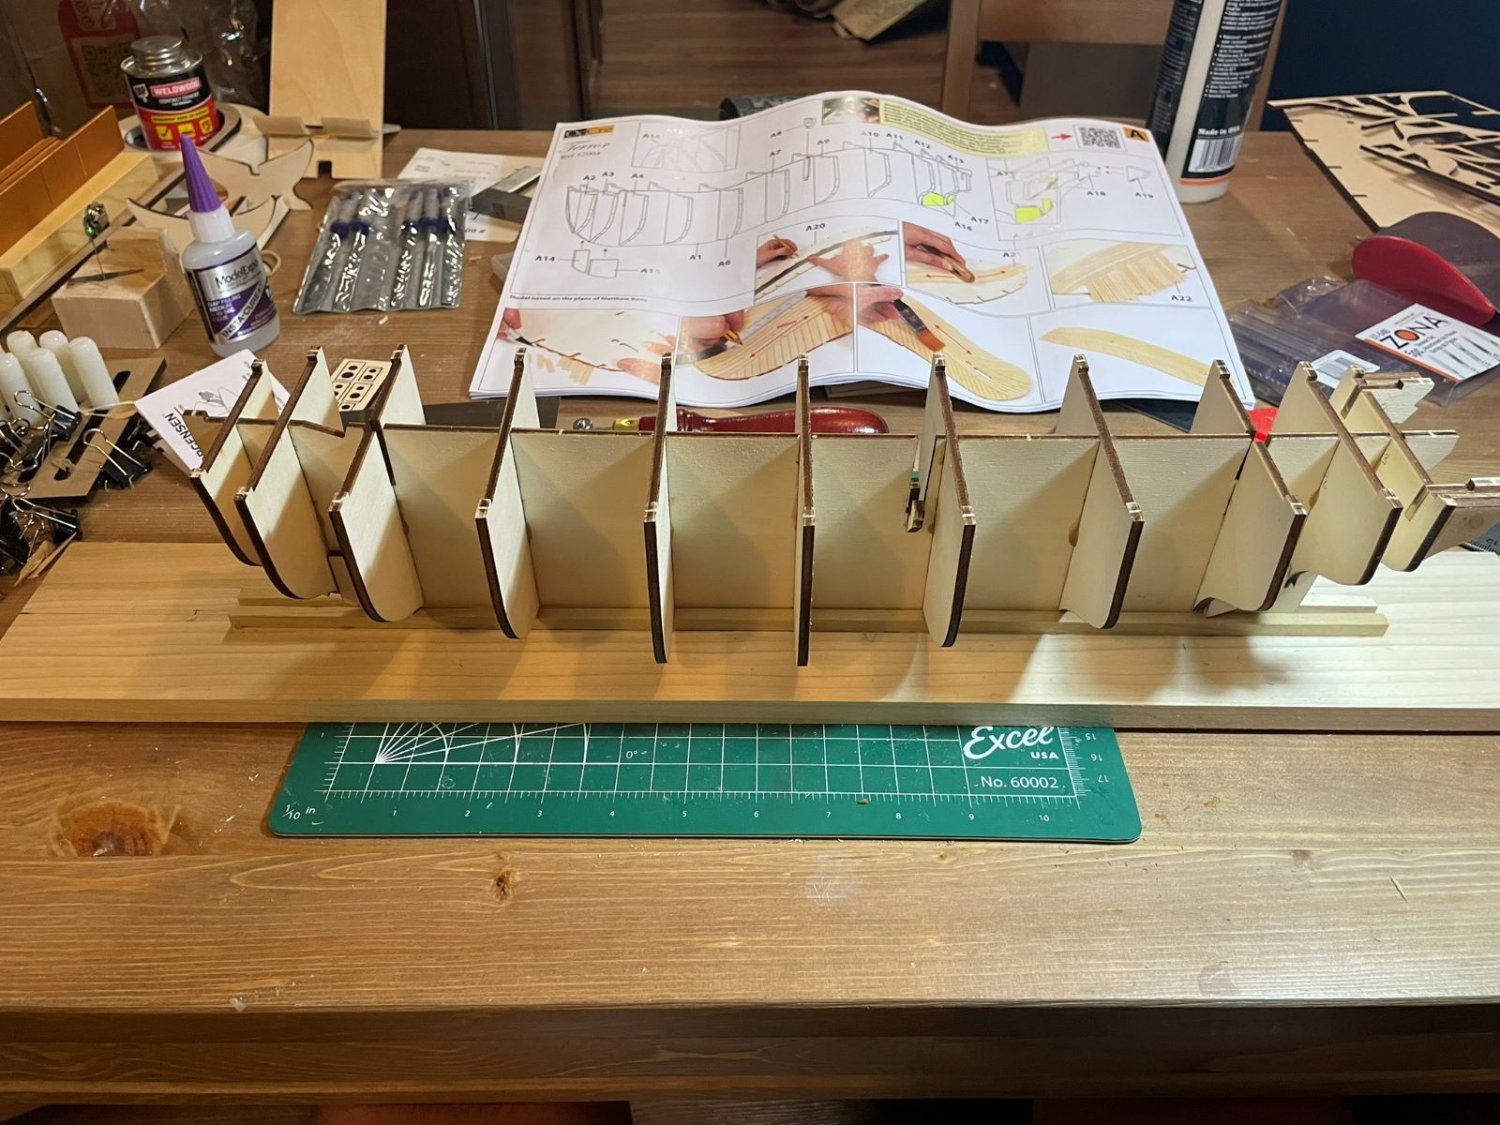
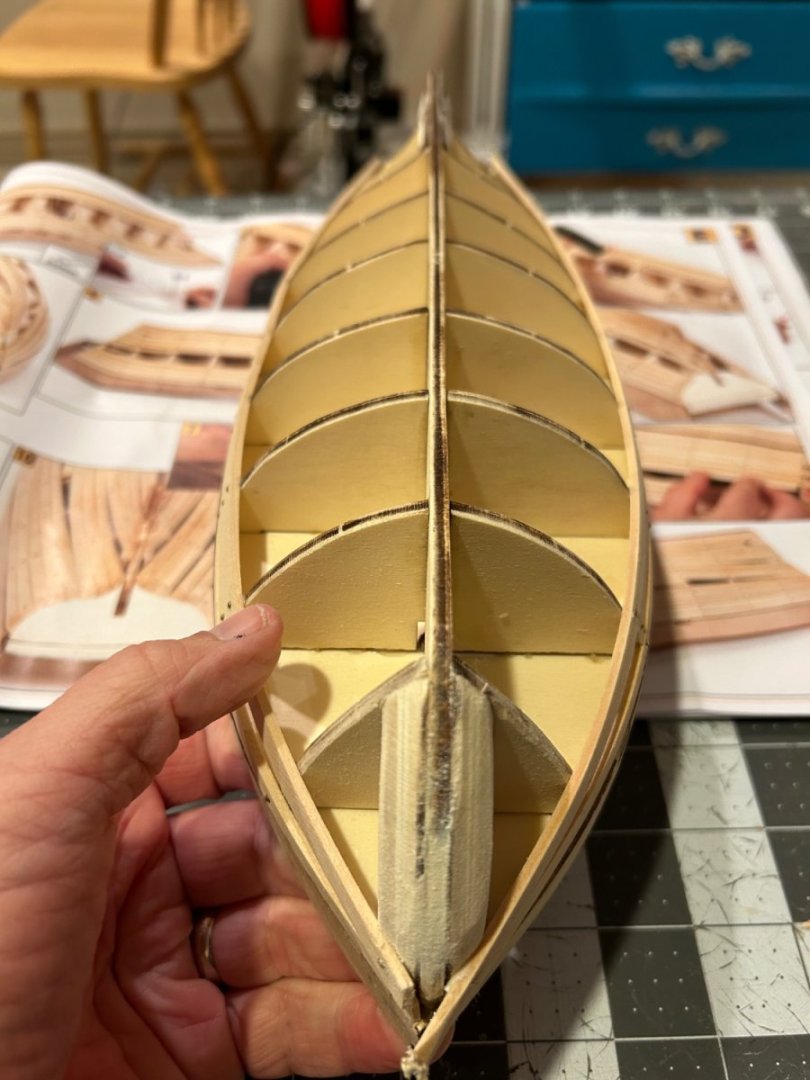
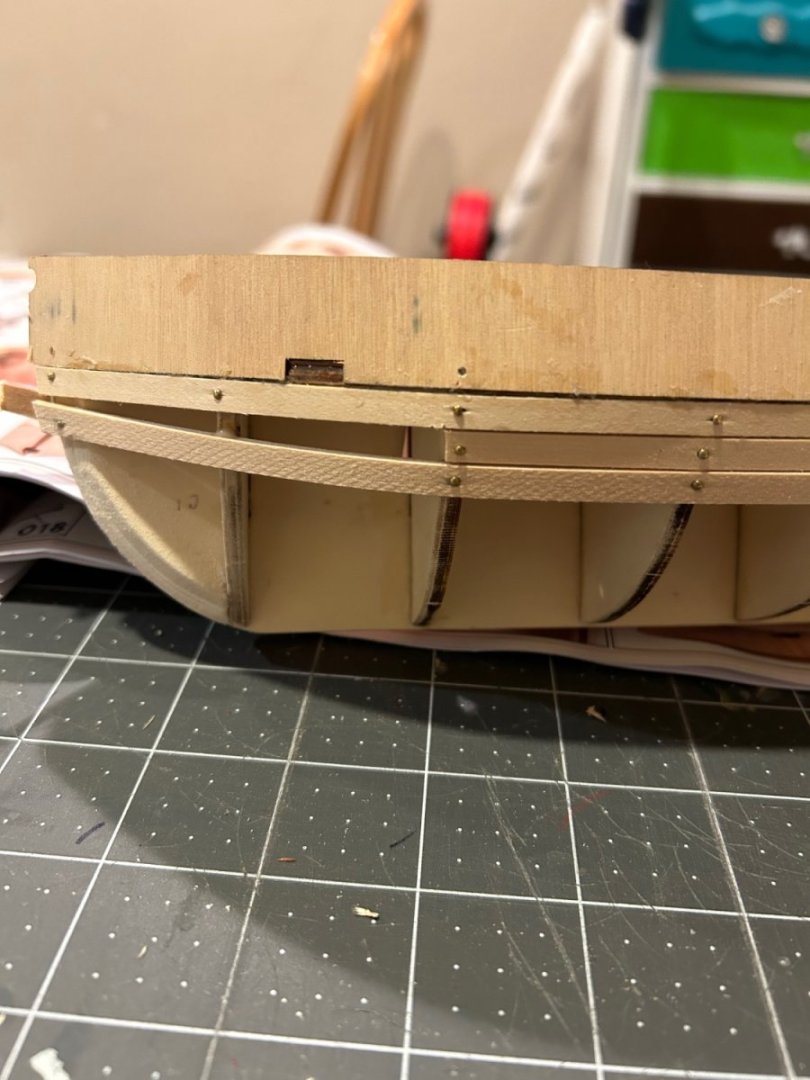
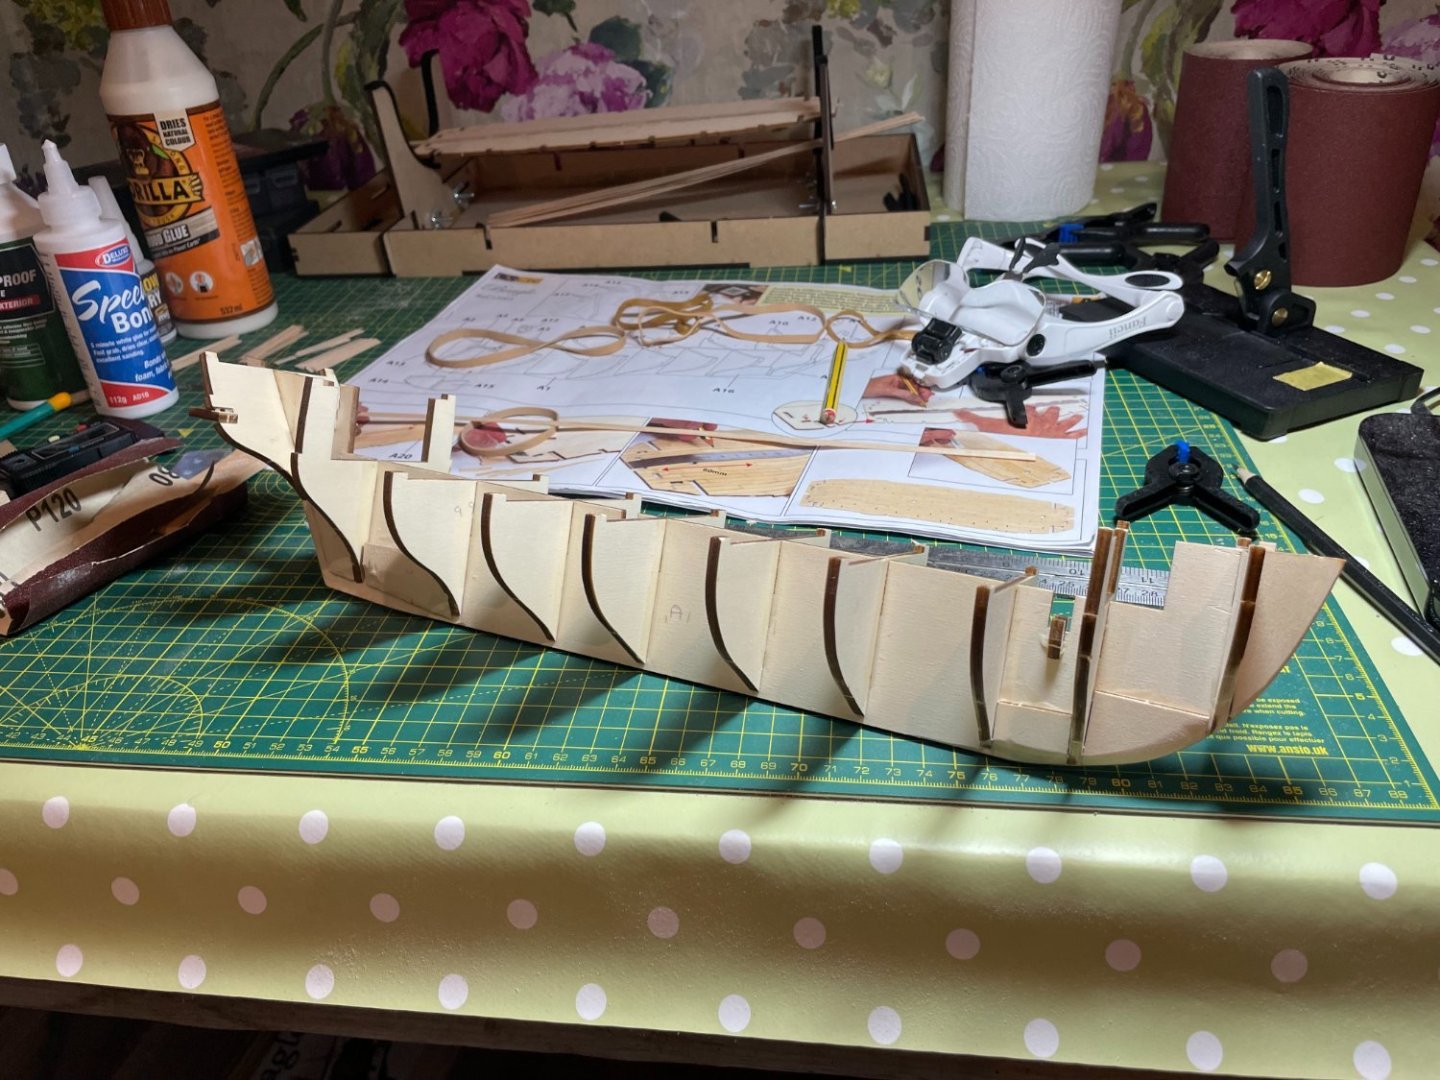
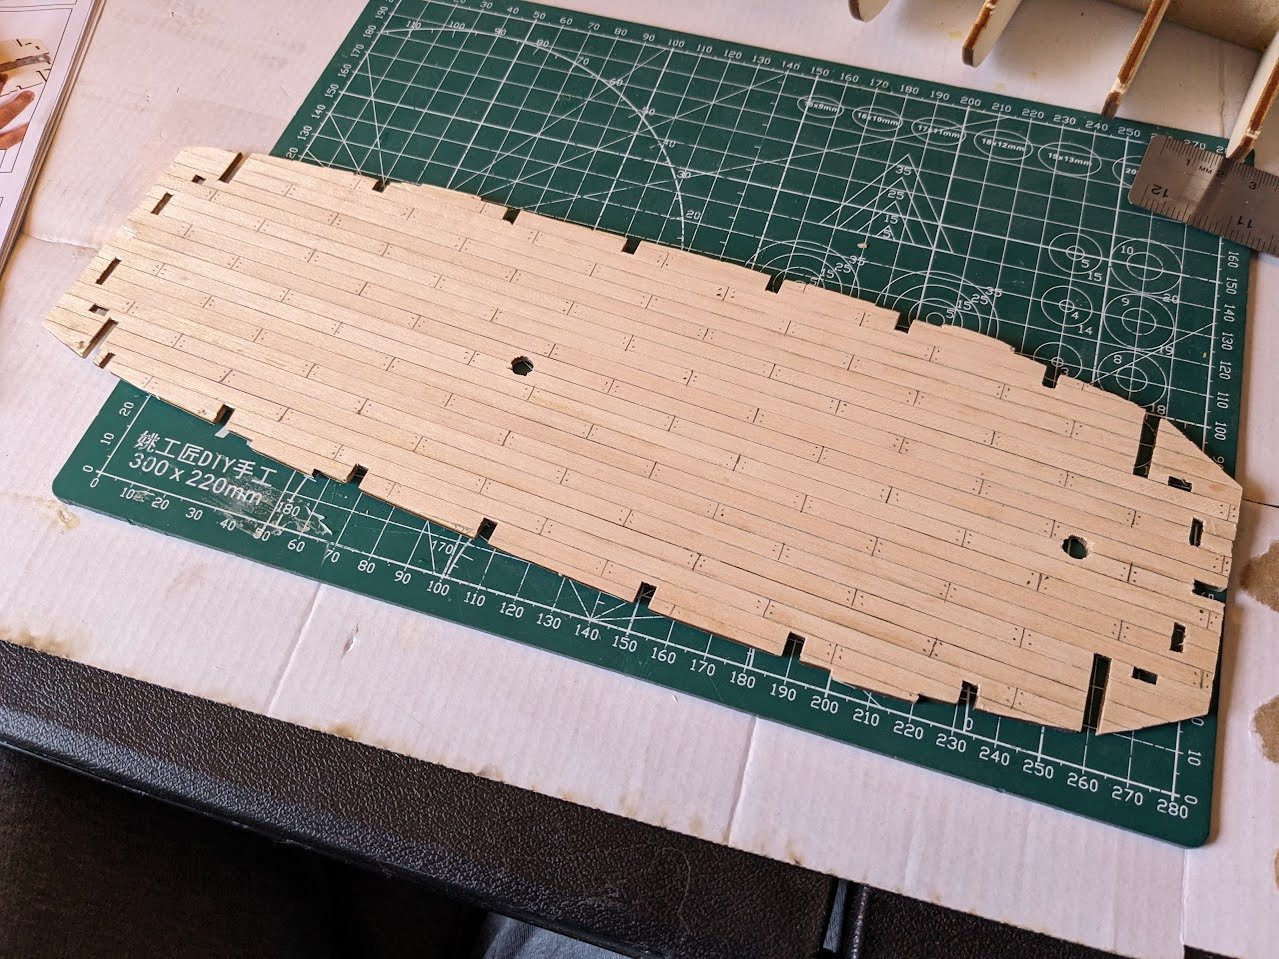
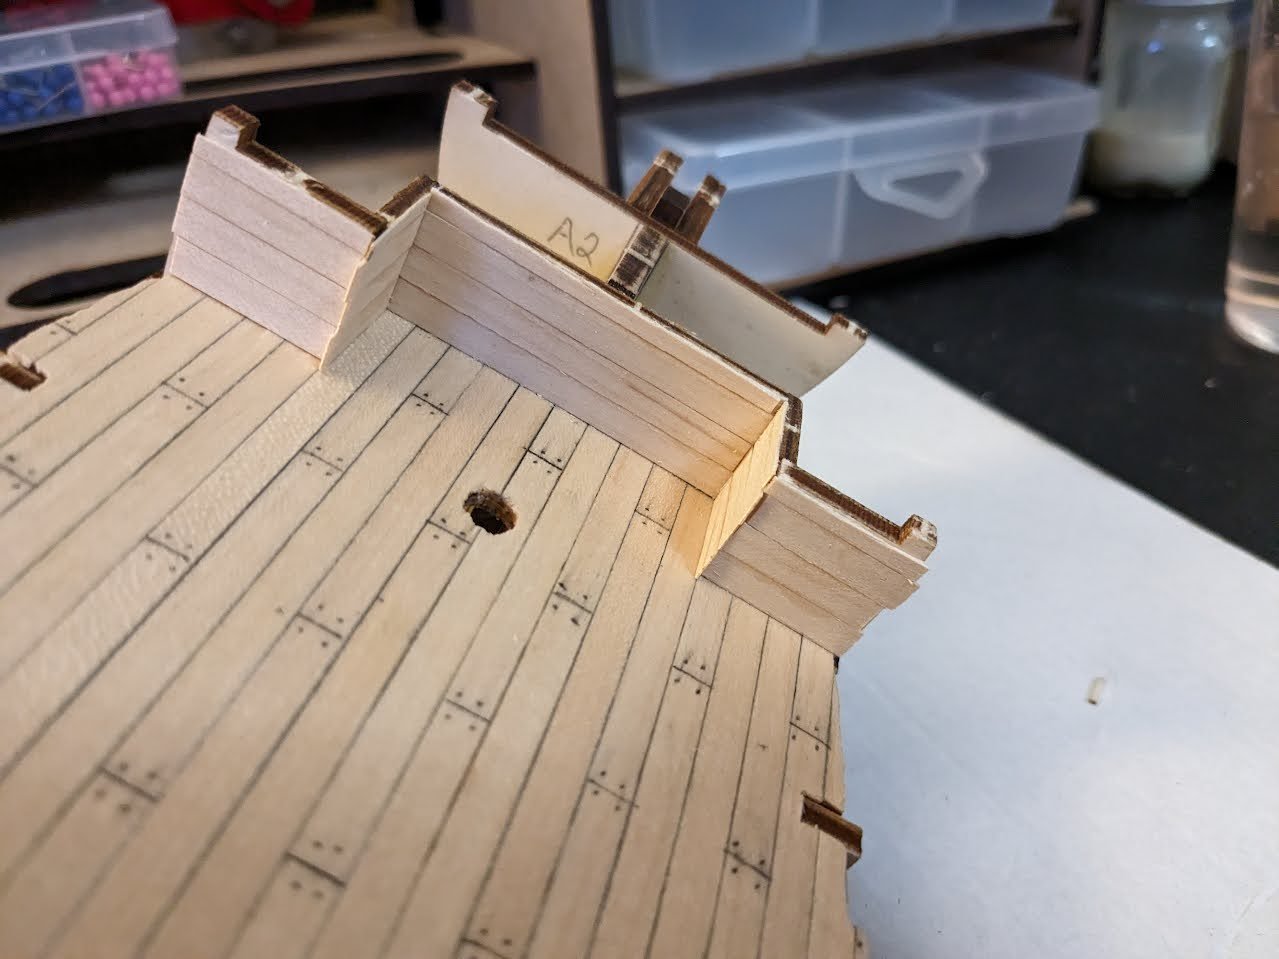
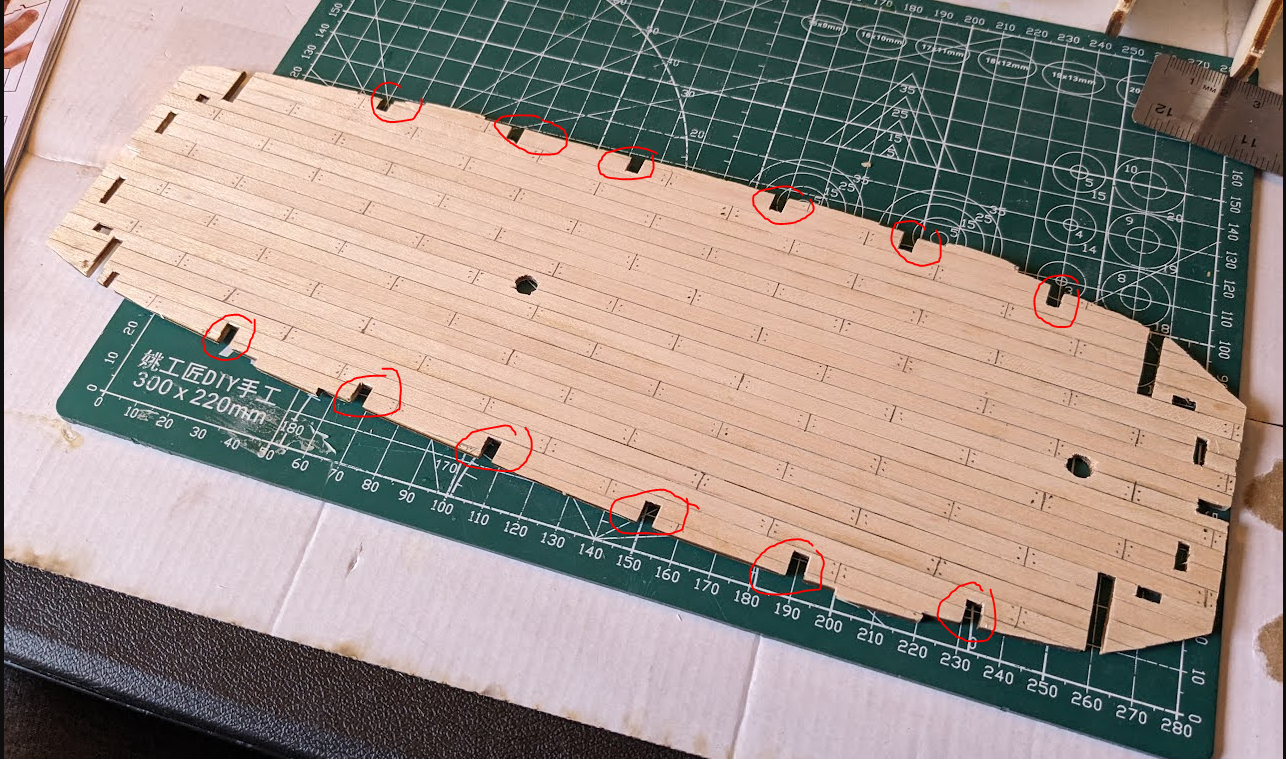
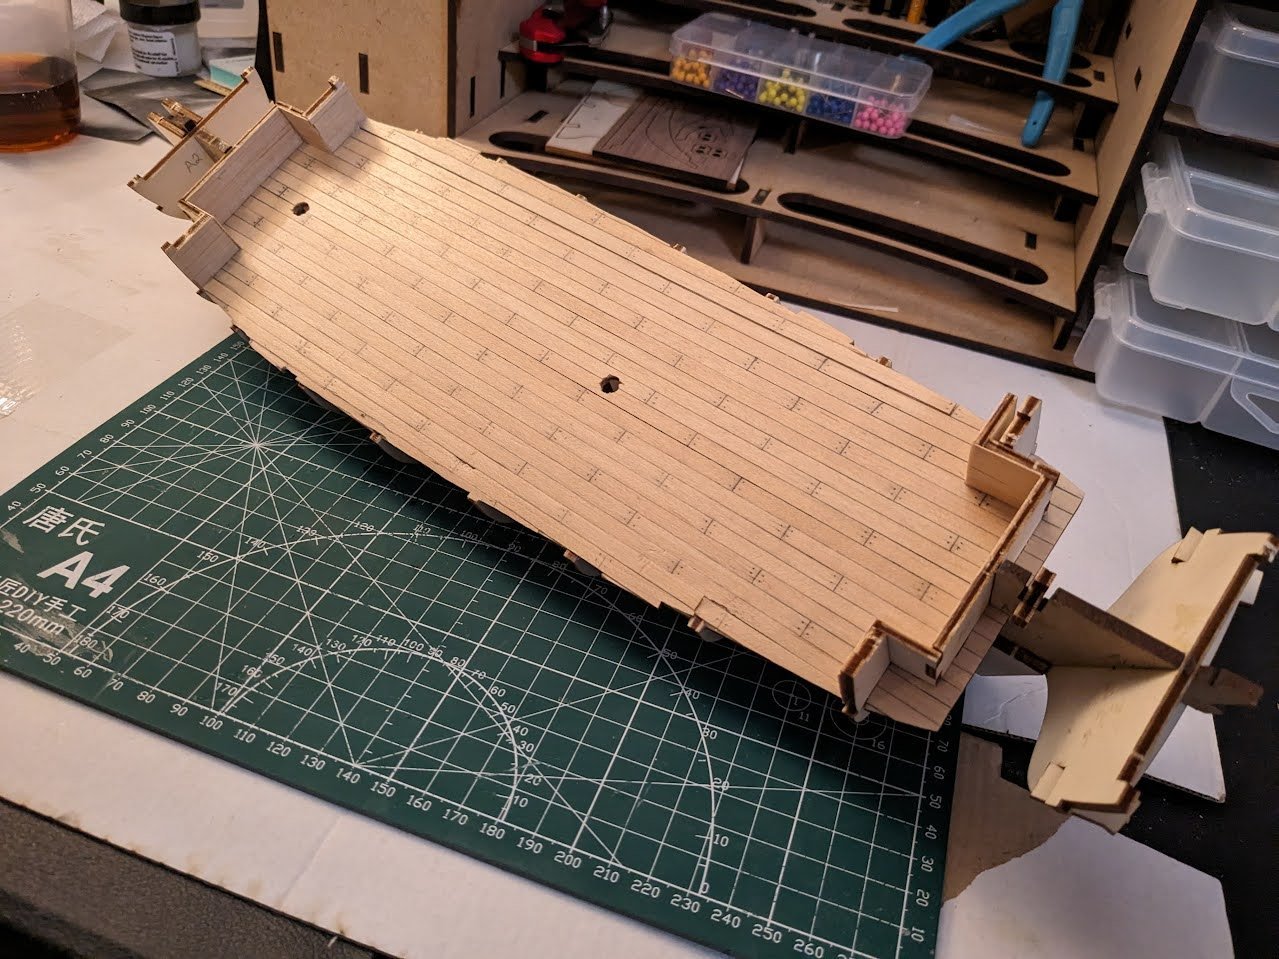
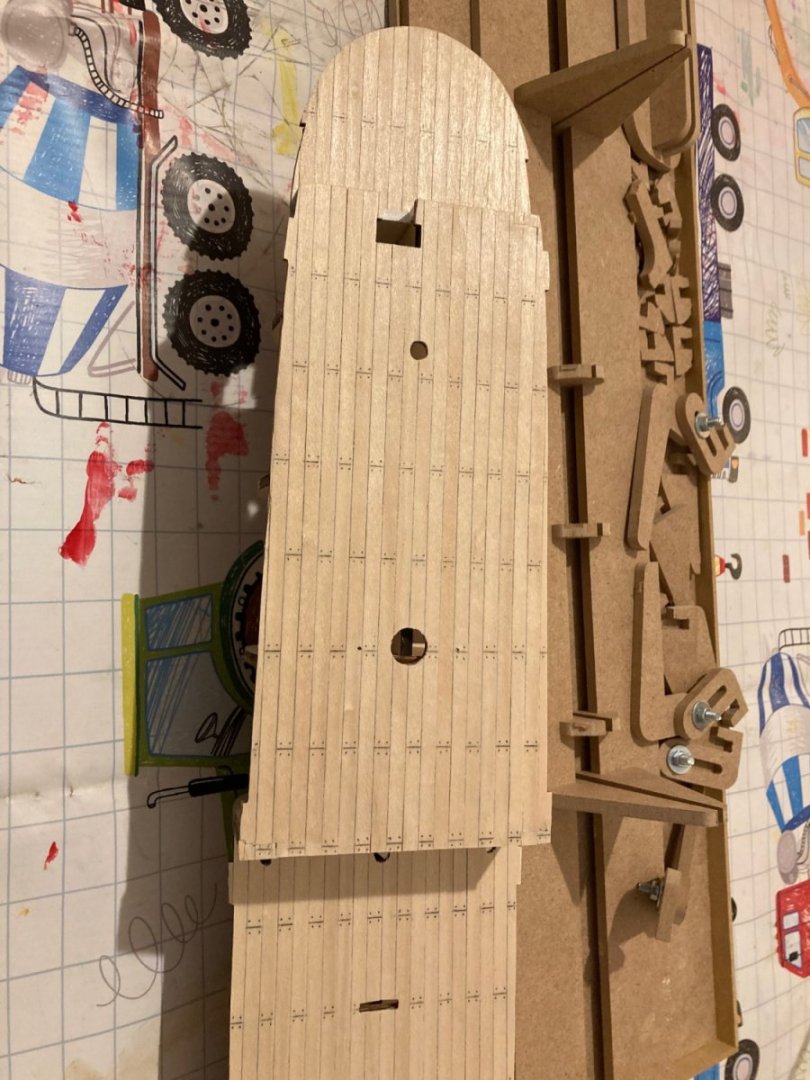
 Hello to all! The construction of the HMS Terror - Northwest Passage edition will be my first ever build log and model. My goal with this model is to somewhat accurately represent the ship as she was for her final expedition. I have been reading a lot of the previous build logs along with the now famous Blog and book by Mr. Betts for tips and ideas on the changes needed to accomplish this goal. I do want to point out that my intention is not to copy what others have done, but to research each aspect of the construction for accuracy as I follow the kit assembly instructions. Unfortunately I had a momentary lapse of reason and began installation of the deck planks prior to reviewing the available information only to realize that Terror had a total of 11 central strakes and not the 6 as depicted on the model. Since the strakes had already dried and I decided to proceed on with the understanding that I would be more diligent moving forward. So with out further ado here is my progress thus far.

-
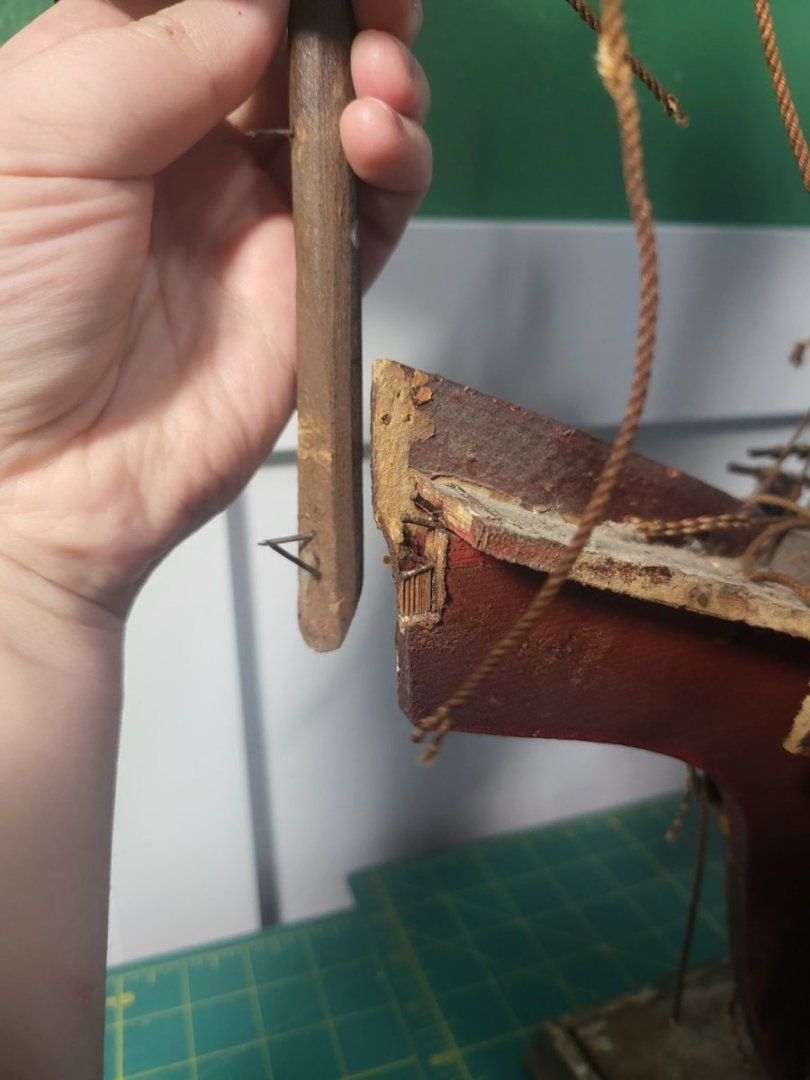
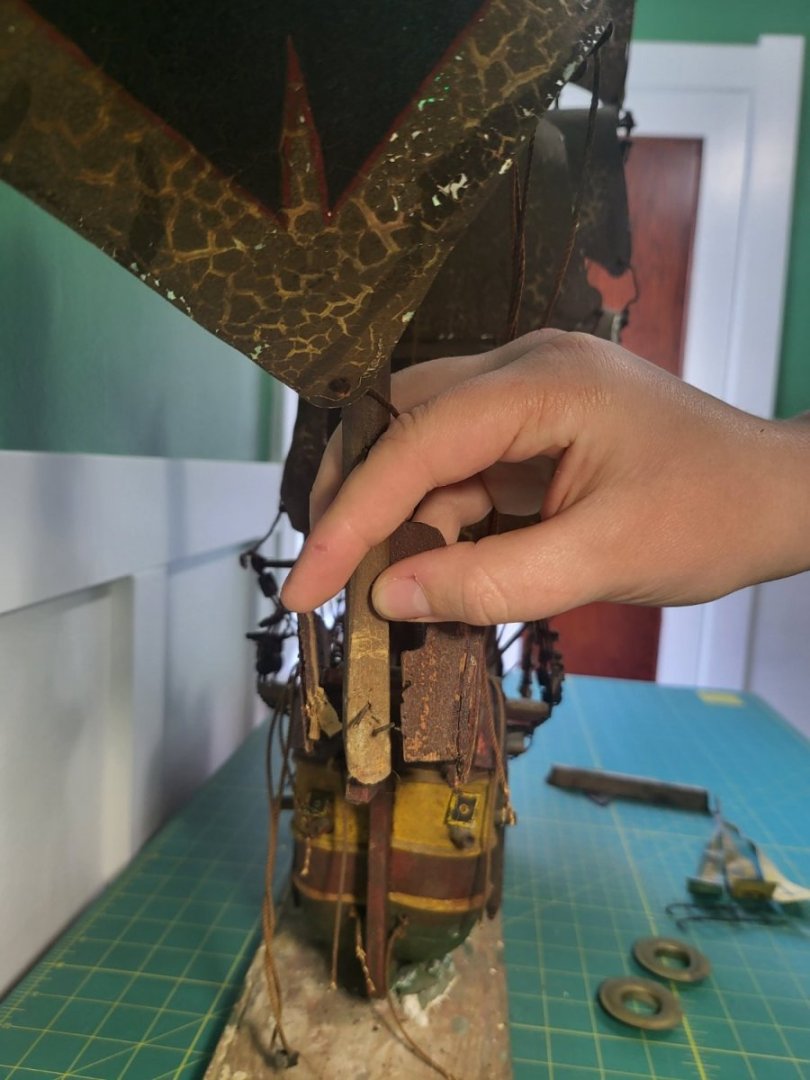
 Hi there - new member and new to the world of wooden model ship building. Like many new builders I have some experience with plastic models, and went to school for aircraft maintenance. But knowing that wood requires an entirely different skill set I wanted to start fresh at the beginning and set myself up for success. My interest in wood actually started back in the spring: after a visit to the Mystic Seaport Museum's model workshop and a long discussion with a gentleman (I can't remember his name) they had a free raffle for what I believe was a Midwest kit (I remember the signature yellow box, but not which model). I didn't win, but was inspired to get a beginner model anyway. After trying to find the same kit they were giving away I naturally found my way to the Model Expo website and was very pleased to discover their Shipwright Series. I ordered the 3-kit combo and as the cool weather begins I hope to enjoy the journey of developing the skills of this wonderful hobby. Beginning with the Dory has been a pleasure so far - glad to report I'm really enjoying it. Started the kit yesterday afternoon and have completed the bottom planks, stem, and transom. I also installed the frames on the building board. So far everything looks as though its dried square. I will come back tonight to remove the remaining char and make sure everything had stayed in place.
- 19 replies
-
- 9
-
-
- Grand Banks Dory
- Model Shipways
- (and 3 more)
-
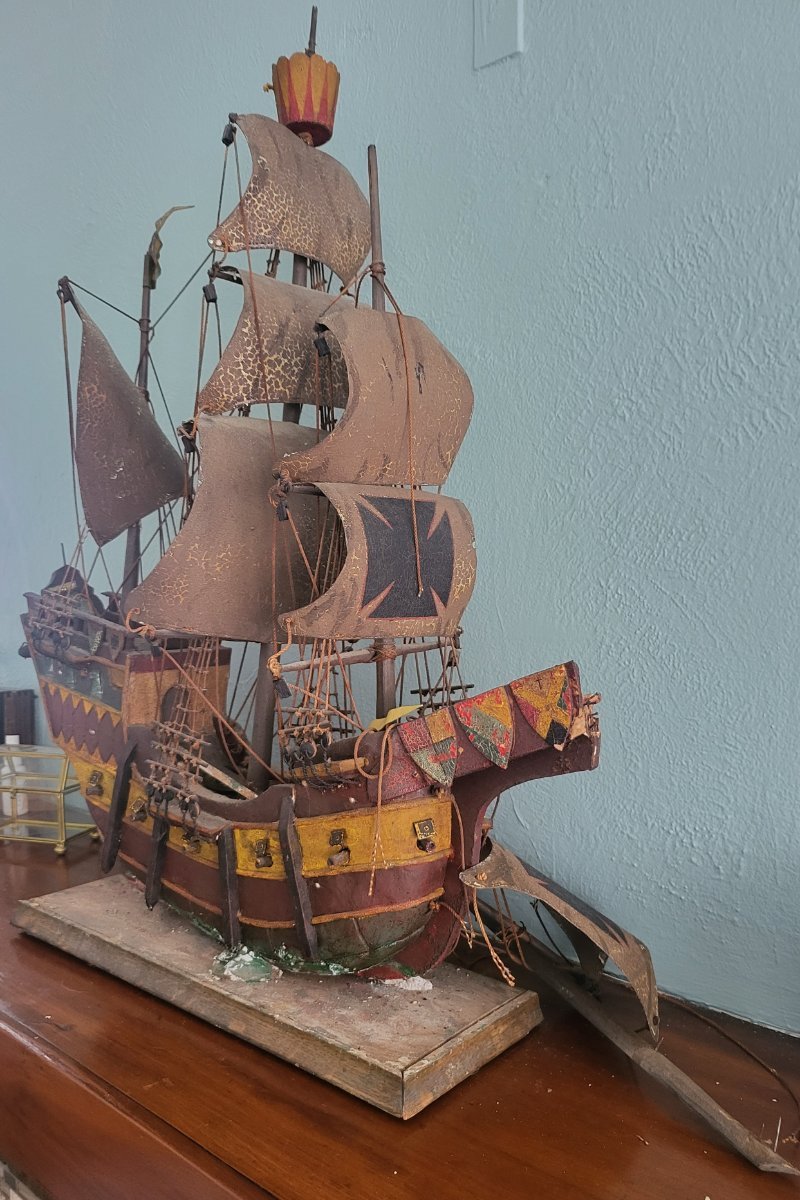
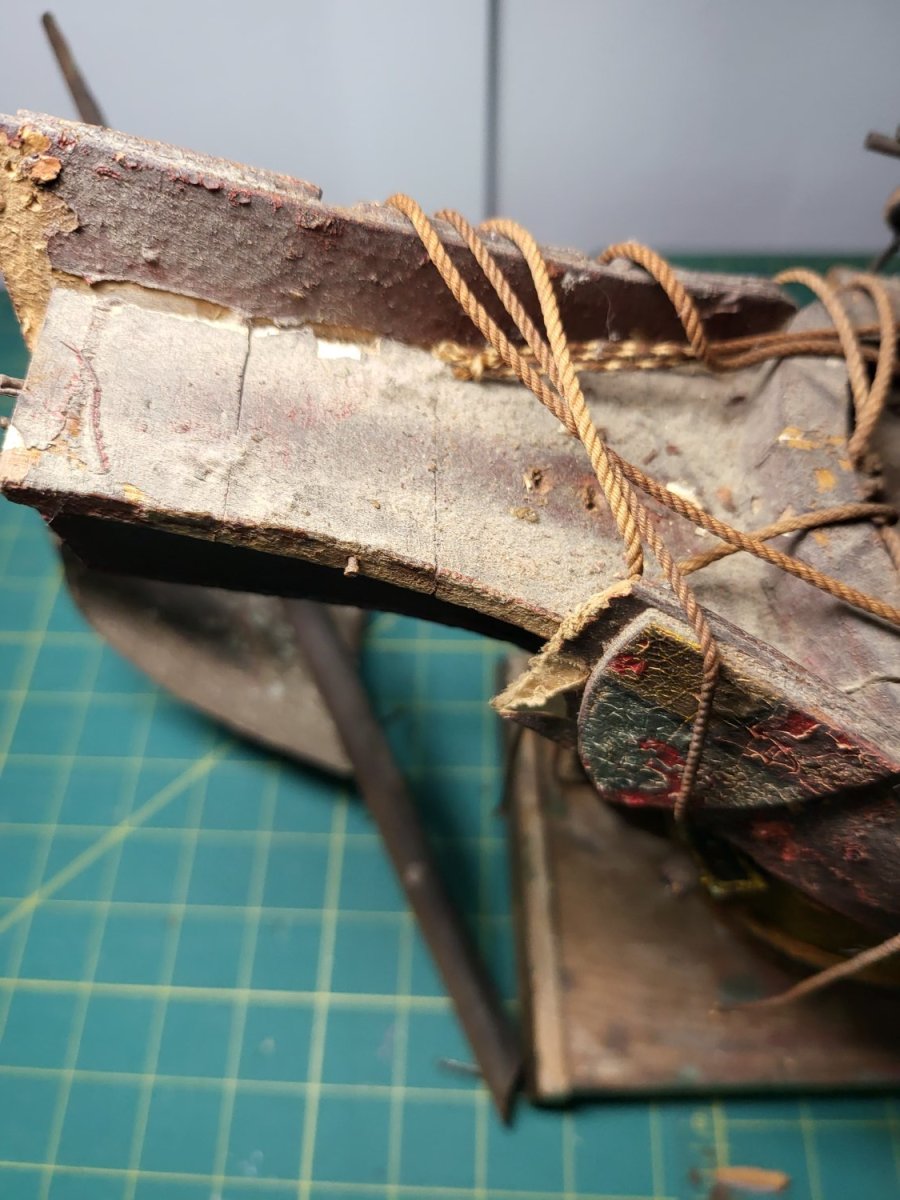
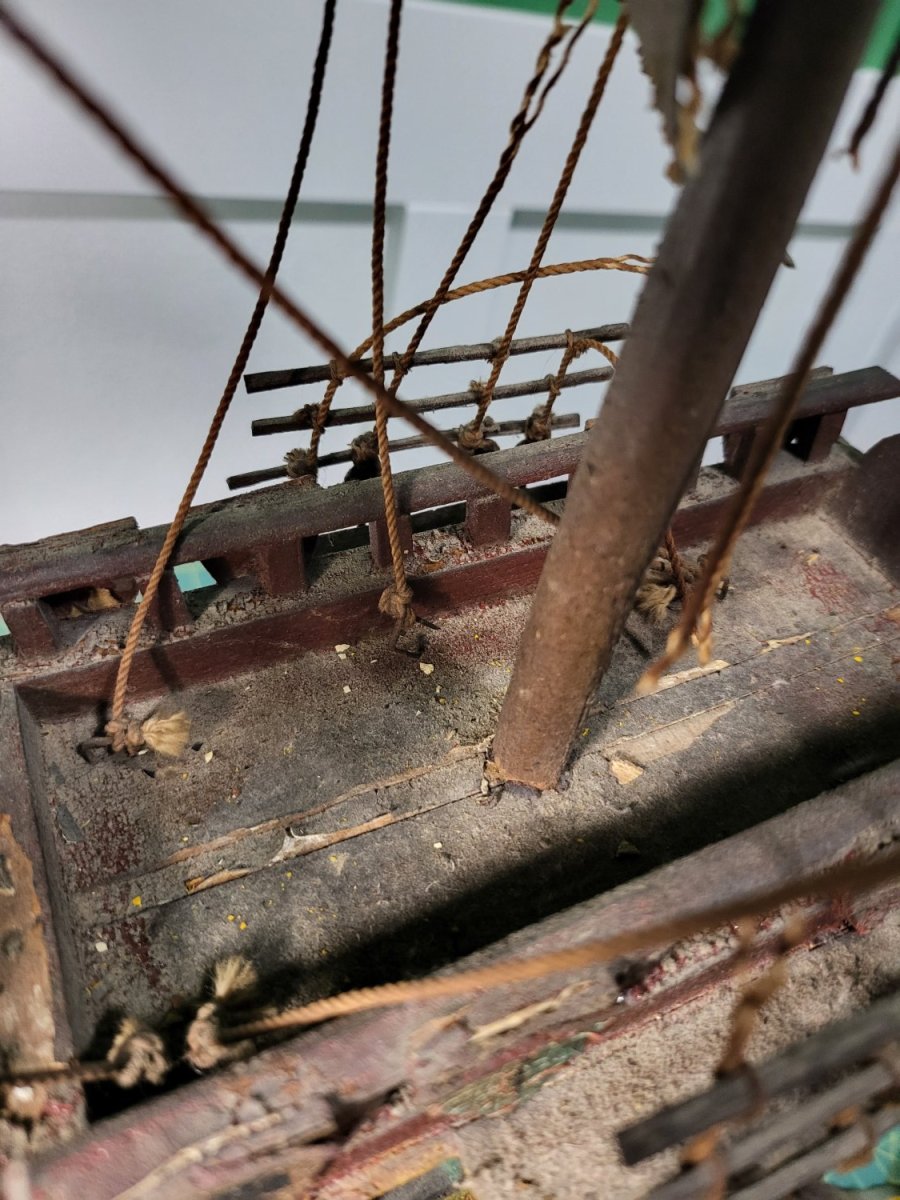
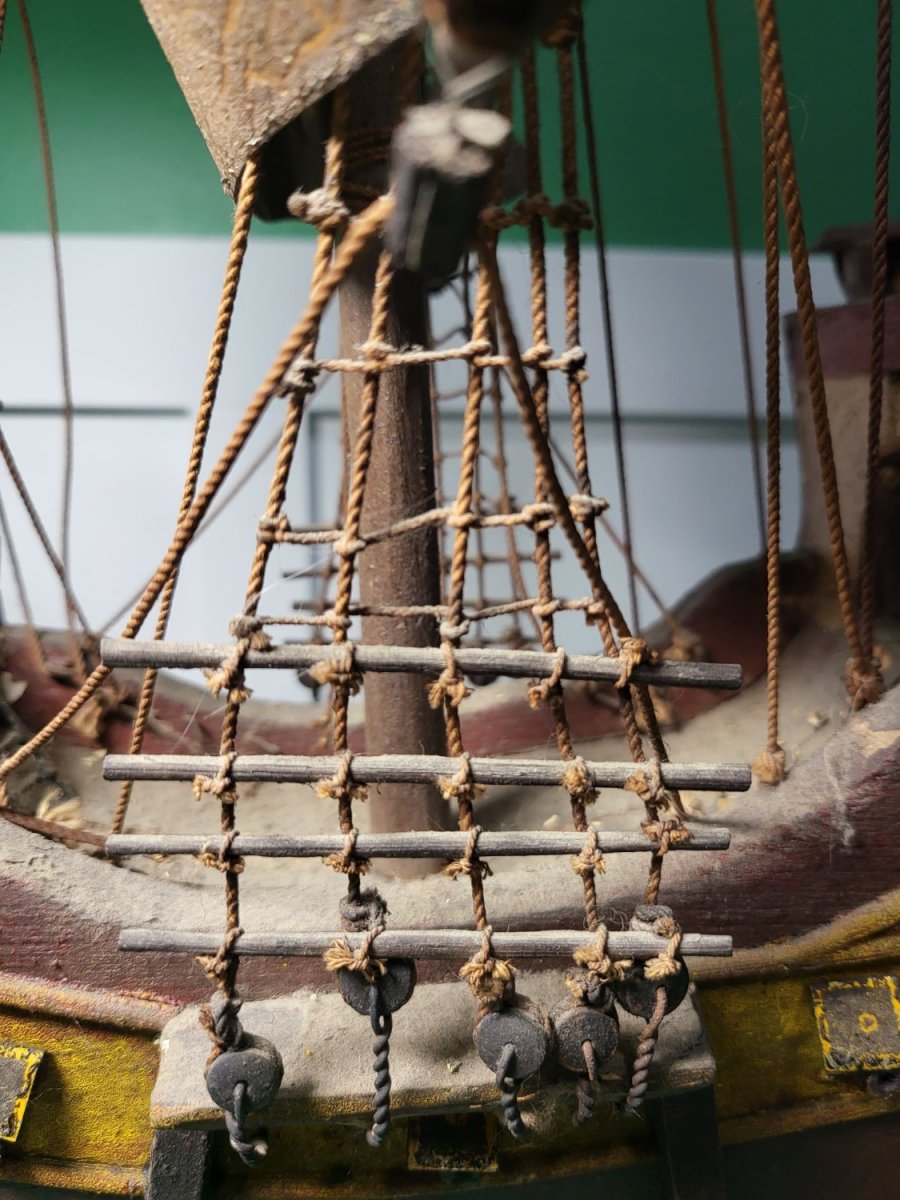
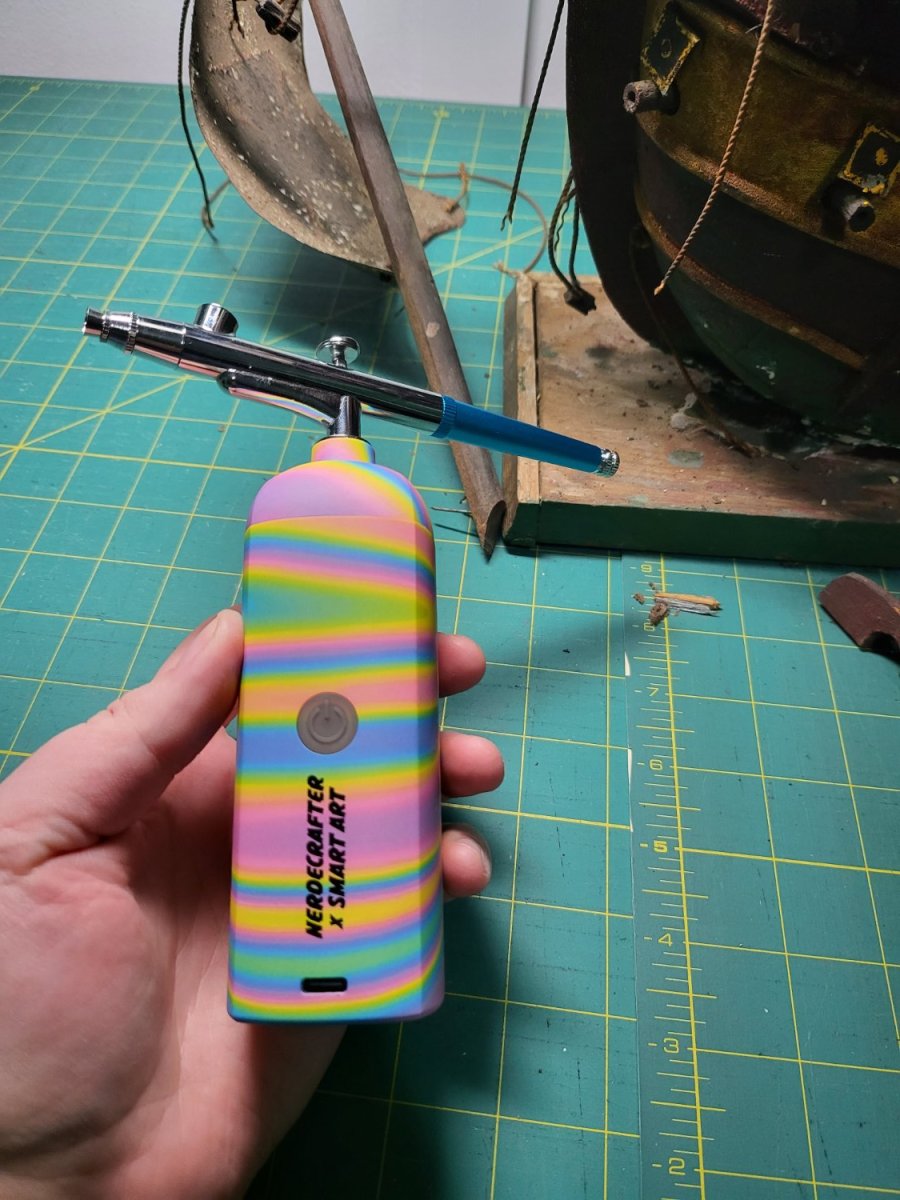
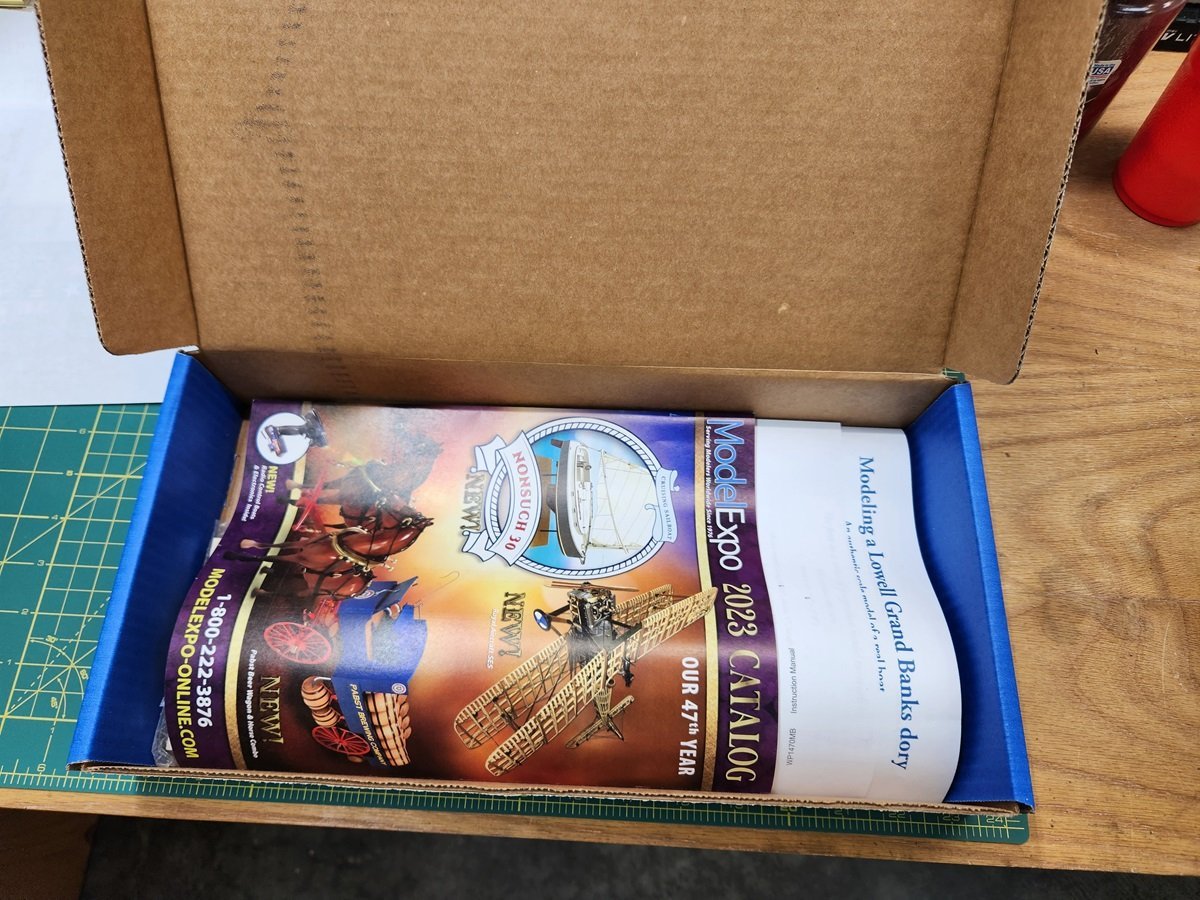
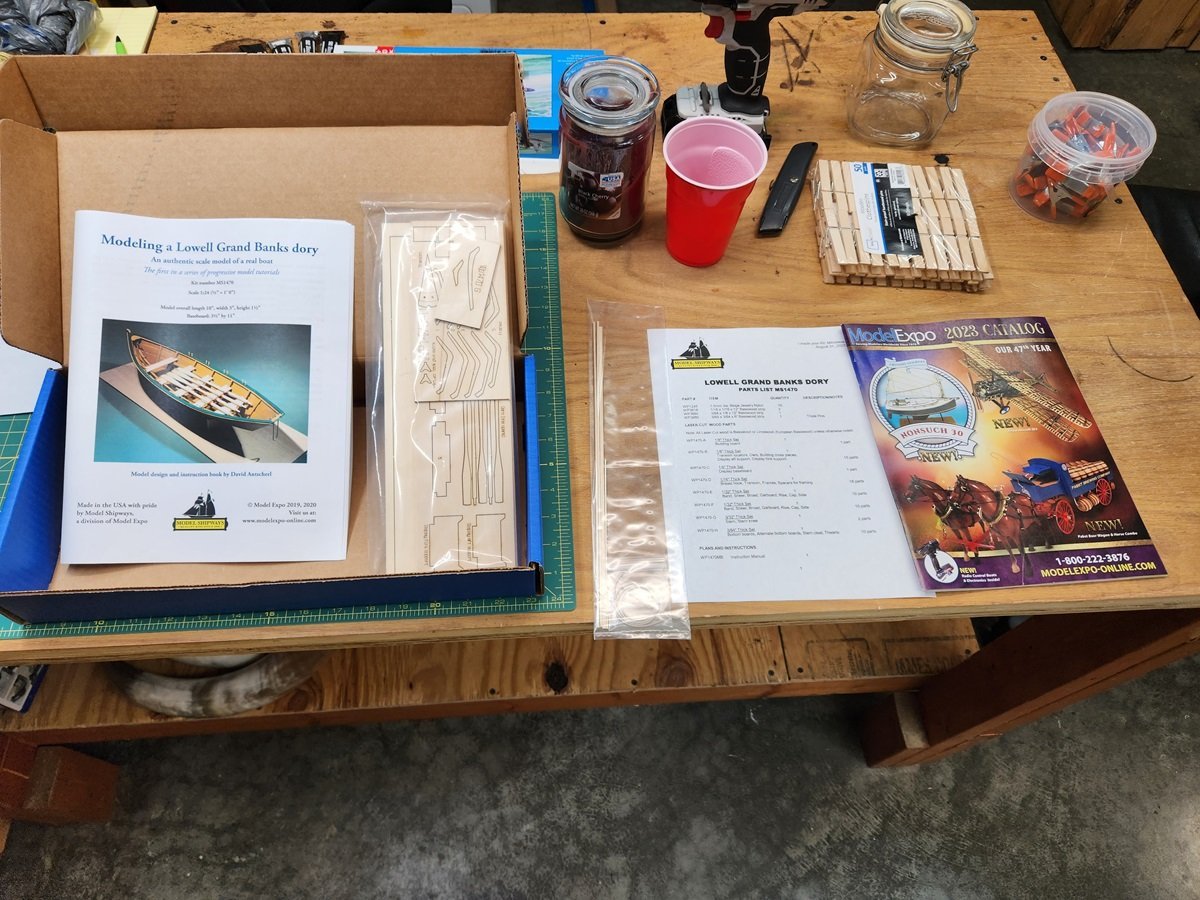
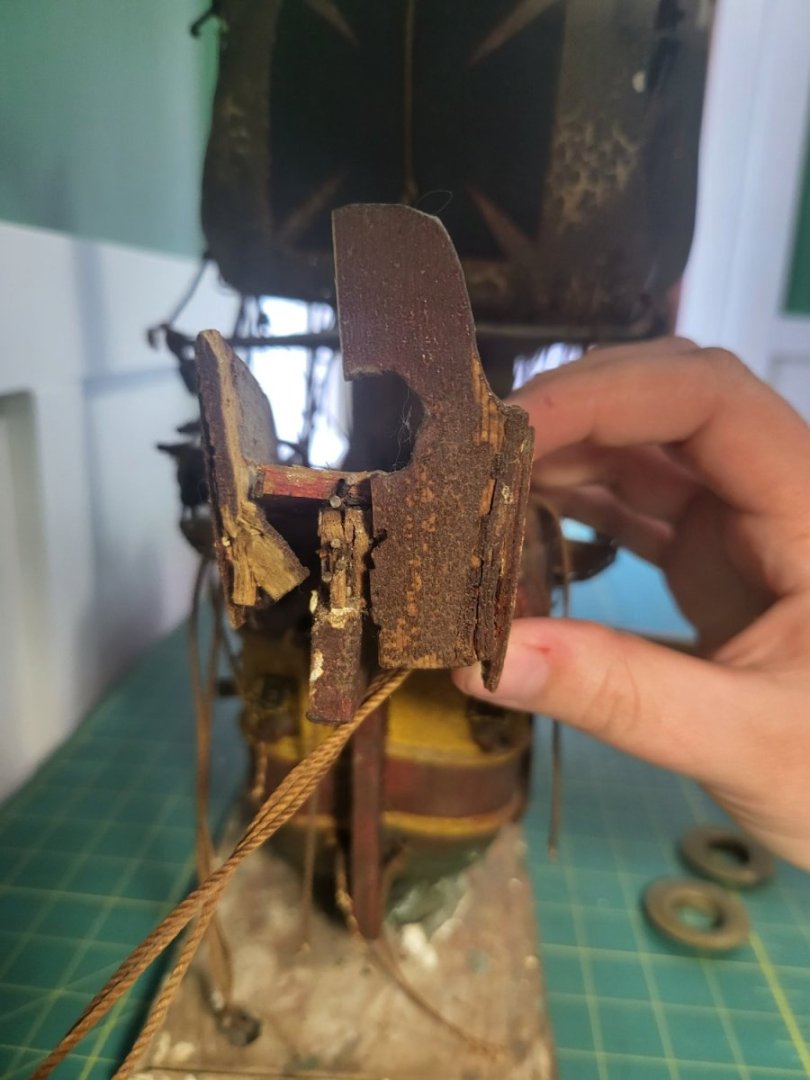
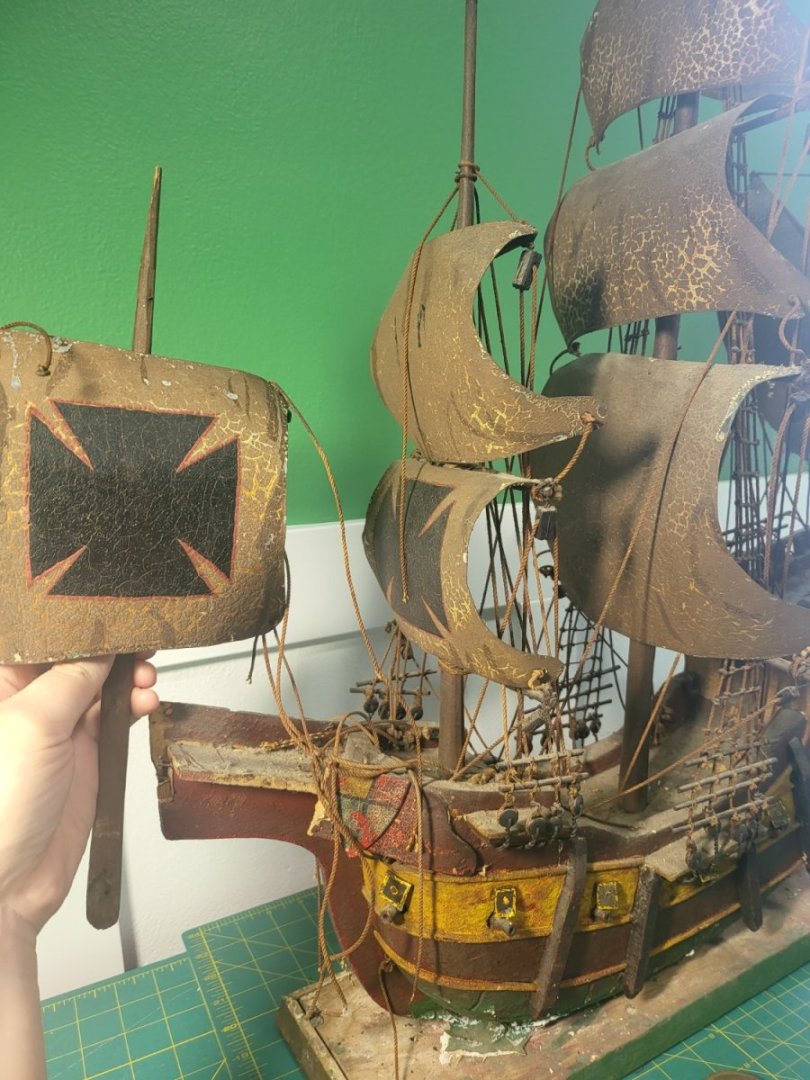
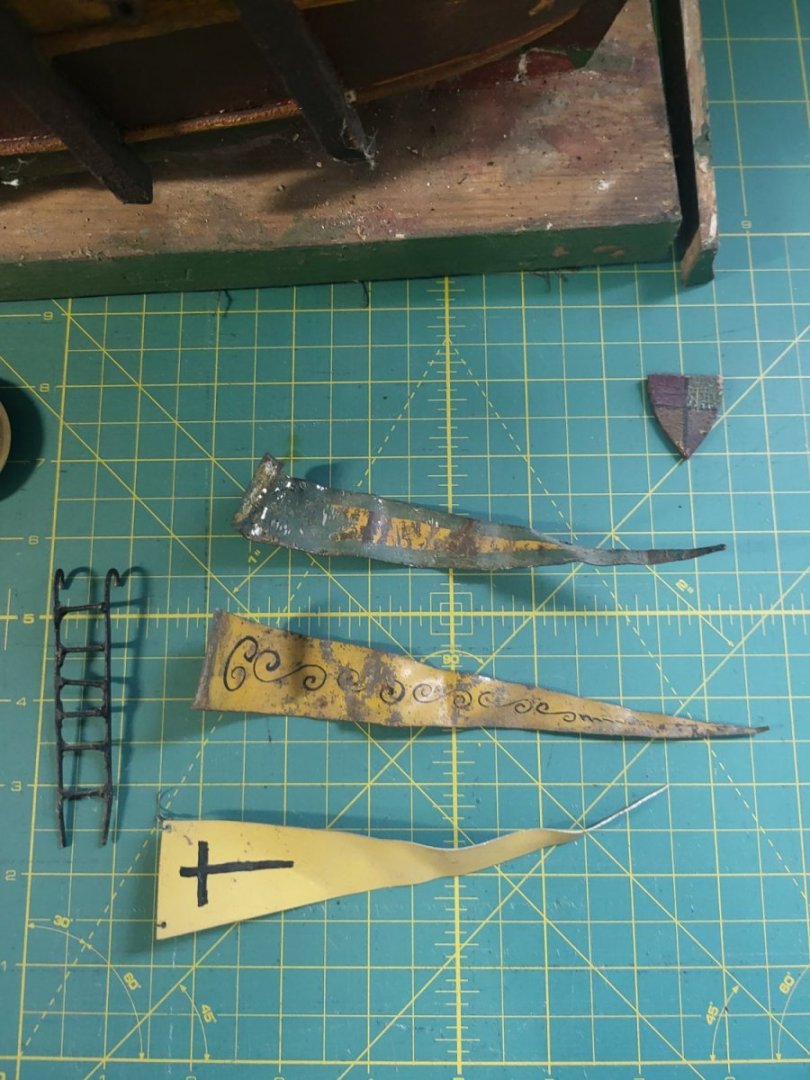
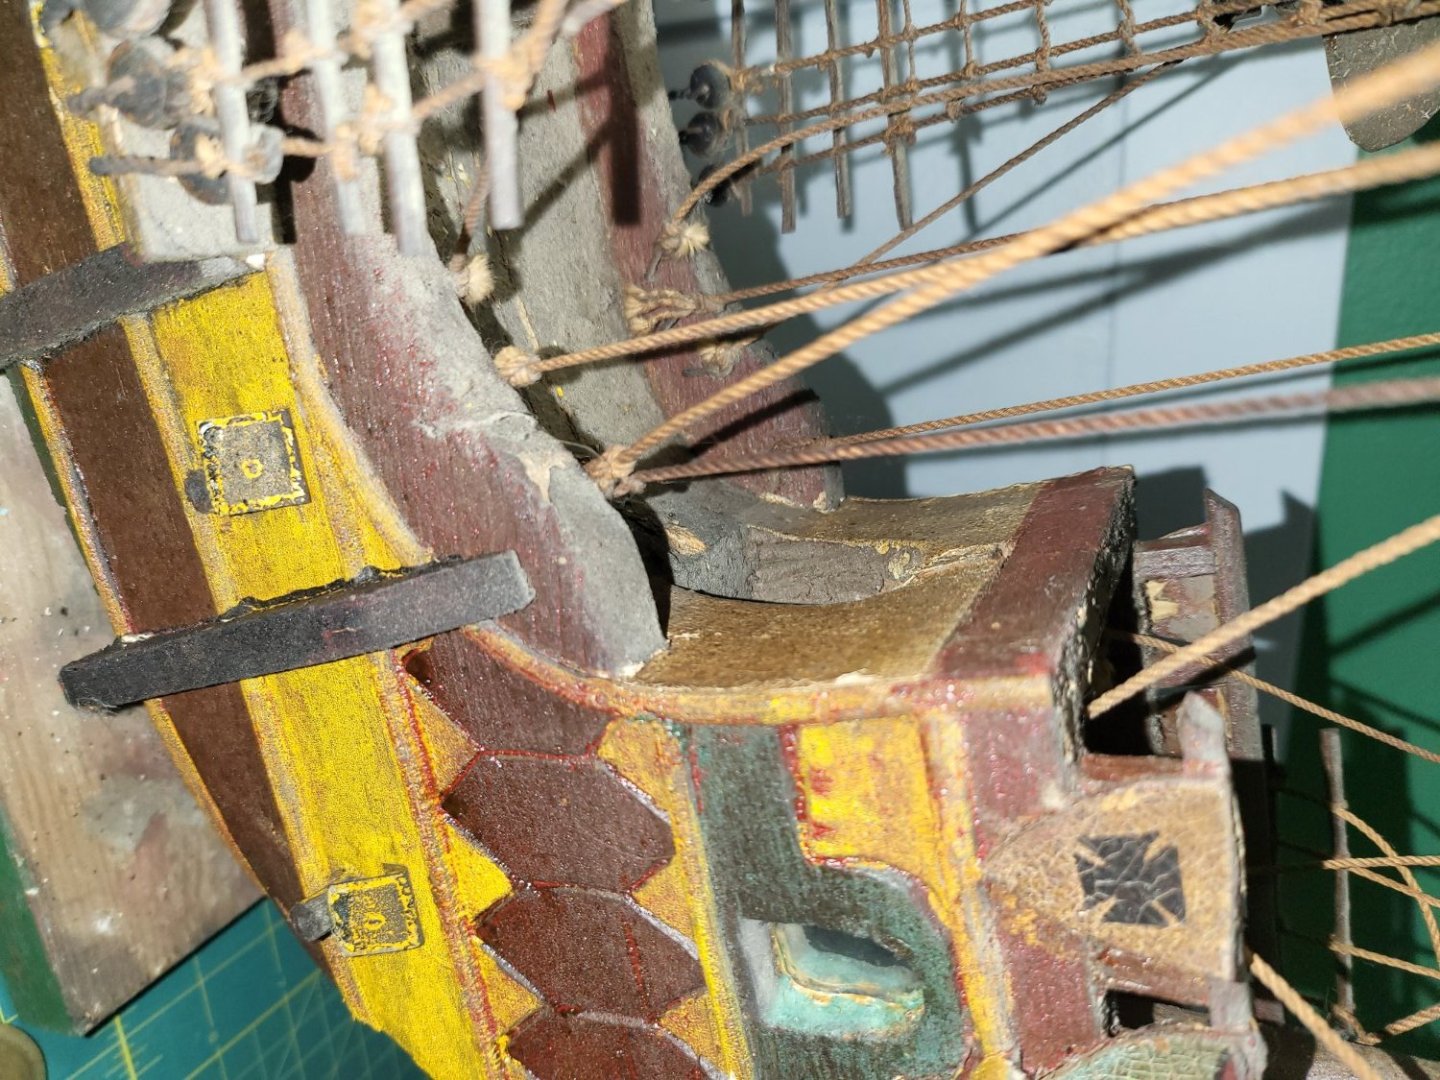
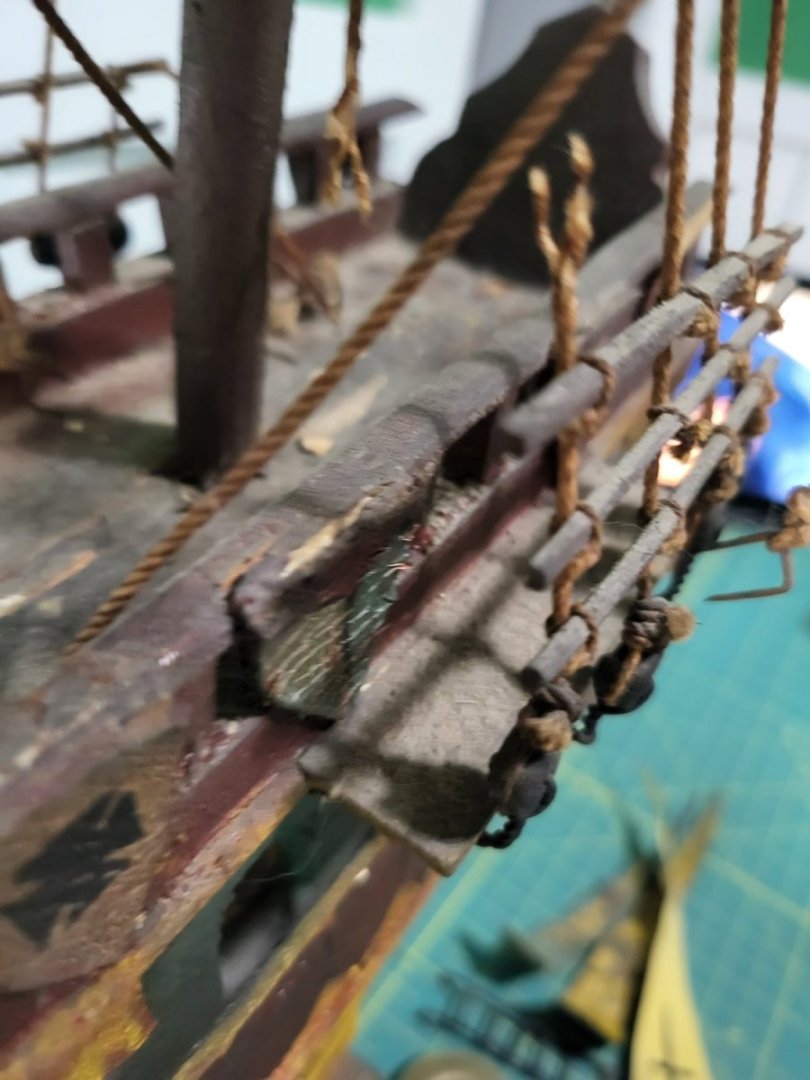
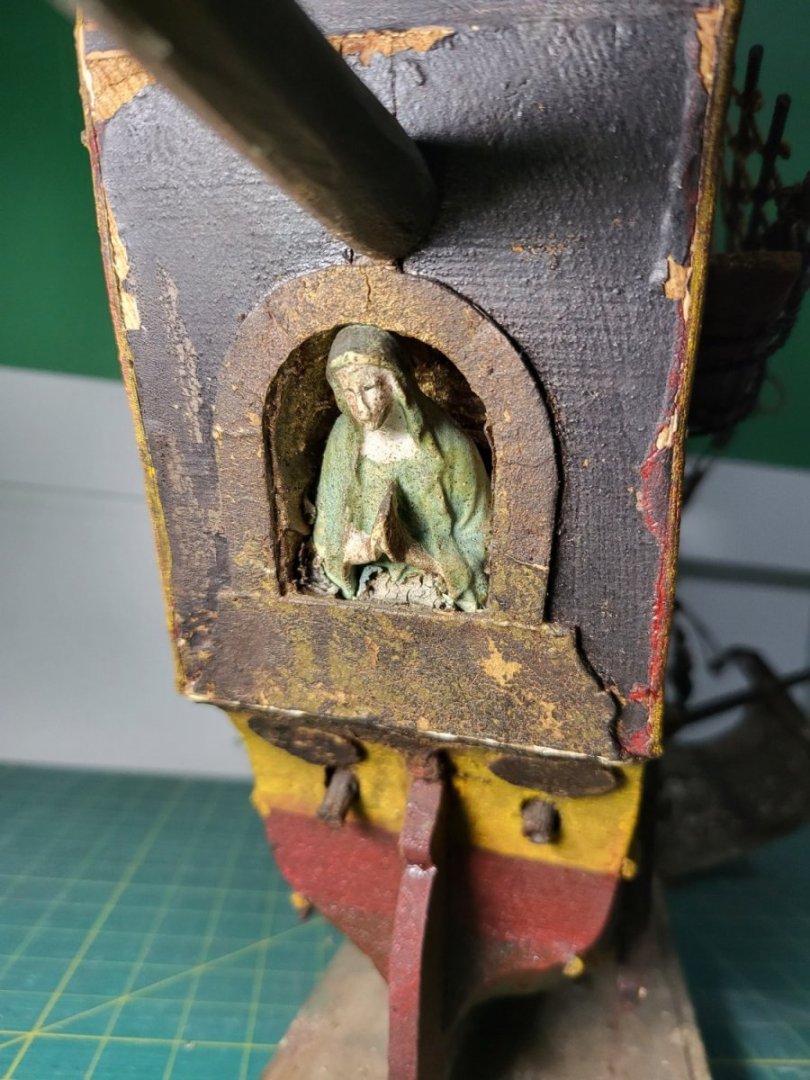
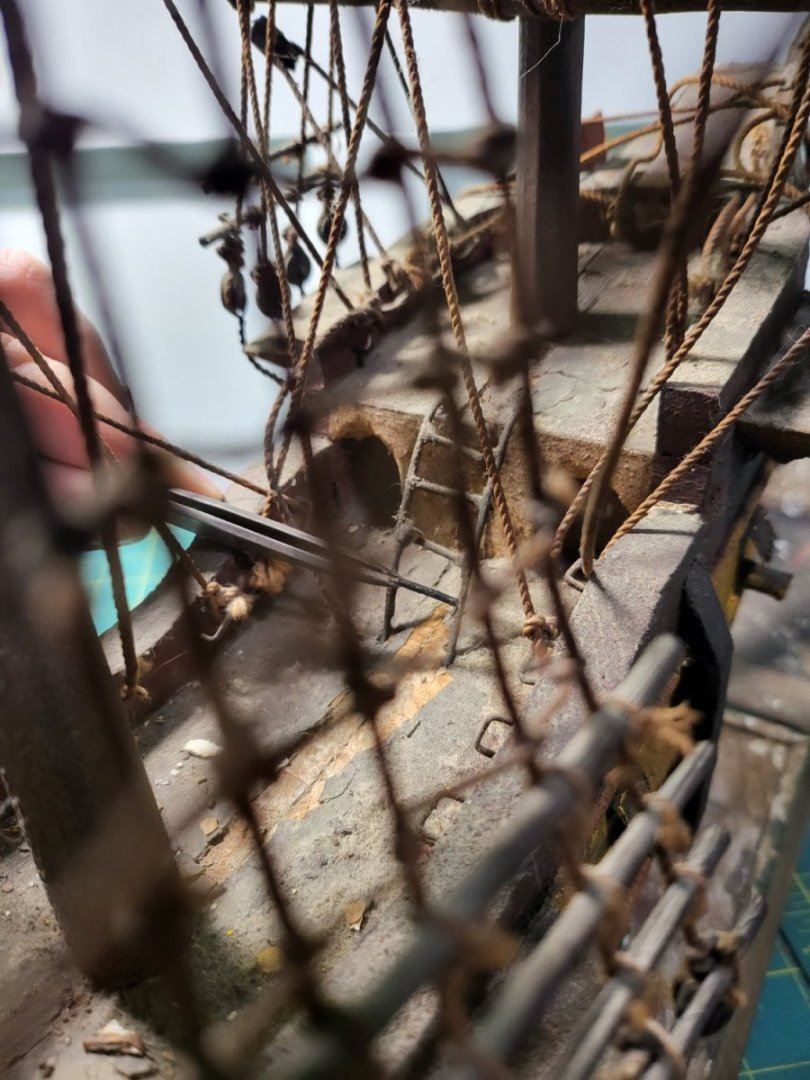
 I have fond memories of this sitting on a tall dresser in the spare bedroom growing up, climbing to the top of the dresser to marvel at it...at least until my parents made the room mine then up into the attic it went. After getting stuck in a hot attic for the last 25 years I am finally in a place to work on this. I just bought my first house and in the sweap to get things for myself I claimed it, now I just need to fix it up a bit so that it's not falling apart. The goal is to not destroy anything that I can't fix, which means the rigging has to stay and I'm trying to keep as much of the paint on it as I can. One good thing is the sails and cannon covers are made of metal. I think tin? Whatever it is it didn't rust at all and where the paint flakes off it's shiny underneath. Plan for them is to let them be as much as I can. The major damage is the front mast and railing is a bit busted. The way the front piece looks it's missing half of it, so I'm going to have to make a new piece. I'm thinking of making it out of some thin wood to match the other half. Also the hole in the center makes me think I'm missing a pointy bit, like the rear has. Sorry that it's sideways. These bits have fallen off, but shouldn't be too hard to put back The other major issue is the 2mm of dust coating everything Look at this little lady drowning in dust. I don't have an air compressor, but I did get this little rechargeable paint sprayer in a craft kit. I haven't used it to paint with yet so it's clean and has a gentle air stream. 2am is really not when I should be writing a log...so off to bed


- 6 replies
-
- 4
-
-
- decorative models
- Restoration
- (and 1 more)
-
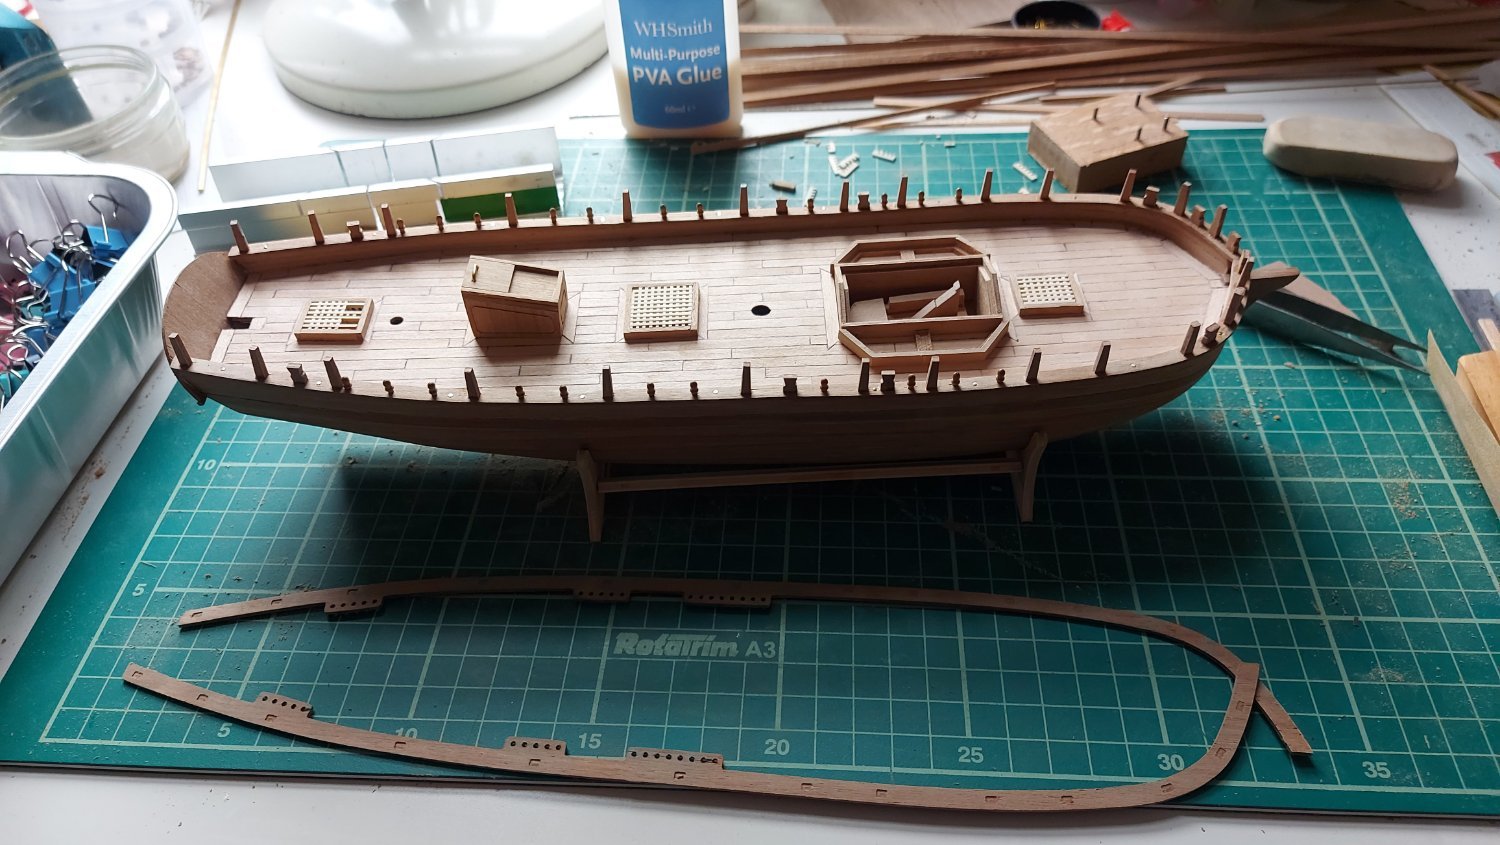
 This is my first build. I bought the model second hand with the keel and bulkheads all glued in place. The had the false keel stem and stern also glued in place. I was lucky as I also purchased HMS Supply, in the same state as Convulsion, together with HM Bomb Vessel Grando, HMS Bounty and Albertros together with lots of tools and equipment. I started the build in February and did not take any photos until I had finished the second planking.
- 11 replies
-
- 3
-
-
- Convulsion
- Caldercraft
- (and 2 more)