Search the Community
Showing results for tags 'Rigging'.
-
 Gentlemen, I am working on a Revell 1:96 scaled plastic model kit of USS Constitution (Kit # 85-0398). Somehow, according to instruction manual, the number of eyebolts needed seem to be way more than what came in the kit. And then I lost a couple while trying to pick up with forceps. They just jumped out of the grip and evaporated in thin air. So, I was wondering if there was any place I could call and purchase a set/packet or something. They are soooo tiny !!! At one point I thought I would make some from the plastic sticks remained after I took out the real parts. But that would be too time consuming and not always accurate. I have already called Blue Jacket, but they only have brass fixtures. Revell is no help. They just washed their hands off it, saying that they are not processing any spare parts orders for "Old" plans from "Revell - US". I'd appreciate any suggestions.
 -
I hope to rig my Revel 1/96 USS Constitution. I purchased 120 feet of Syren rope in three sizes (.012, .018, and.035) in dark brown, light brown and tan to represent Revel's small, medium, and large callouts in their instructions. I never rigged a ship and do not have a clue as to weather 120 feet is adequate, Anyone haven suggestions? Thank you!
-
MAY 20TH THROUGH THE 24TH 2019 (MON-FRI) BlueJacket's rigging class is a popular event. We run it from 9 to 3 for 5 days (although some people leave early on Friday.) IT IS A CLASS FOR NOVICES. We don't assume you know anything about rigging a ship model. All tools and materials are provided with the class fee of $400. You get a hull to work on, all the sticks and dowels, the glue, blocks, deadeyes, threads, wire, beeswax, and the following tools: Excel hobby knife and blades Pin Vise Assortment of drill bits tweezers needle nose pliers flush cutters cuticle scissors (best for clipping rigging) and probably some other things I forgot If you use magnifiers for your modeling work, you should bring them. By the end of the class you will have learned how to use the tools, tie a multitude of various knots, and will have completed what you see in the picture below: You can see shrouds, backstays, bobstays, gammoning, vangs, topping lift, ratlines, hearts, throat halyard, peak halyard, sheet tackle on a traveler, lifts, braces, forestays, etc. Obviously, we don't waste a lot of time to make the model look pretty! We want to concentrate on the rigging. At the end of the class, BlueJacket will ship your model and materials to your home, again all part of the tuition cost. Monday will include a pizza party for lunch and a behind the scenes tour of the BlueJacket facility. In addition, all students will receive a 10% discount on anything they buy during that week. Kits, tools, books, gift items, you name it! The hours of 9-3 are flexible, we have the hotel conference room available 24 hours a day for the week. If you bring a family member, the 3:00 PM cutoff lets you do some sightseeing around the area. But if you need to catch up a bit, the room is yours! Classes will be at the Fireside Inn in Belfast, 4 miles from BlueJacket on Route 1, tel# 207-338-2090. You can ask for the BlueJacket corporate rate if you choose to stay there. There is a pool and Jacuzzi, exercise room, a decent breakfast bar, and all rooms have an excellent view of Penobscot Bay. If you are the camping type, Searsport Shores is also nearby. Class is limited to 12 people with payment in advance. Full refund up to 2 weeks before, 50% refund up to 1 week before. Unfortunately, cancellation less than a week in advance cannot be refunded except by extreme circumstances, which we reserve the right to determine.
-
Hello, I just ran across my daughter's copy of Ashley's Book of Knots by Clifford W. Ashley. It is probably the definitive work of knots for rigging ships and other ropework. It is an excellent reference work for modellers, but if you intend to apply the knowledge in everyday life, be very very careful to form the knots correctly. https://archive.org/details/TheAshleyBookOfKnots
-
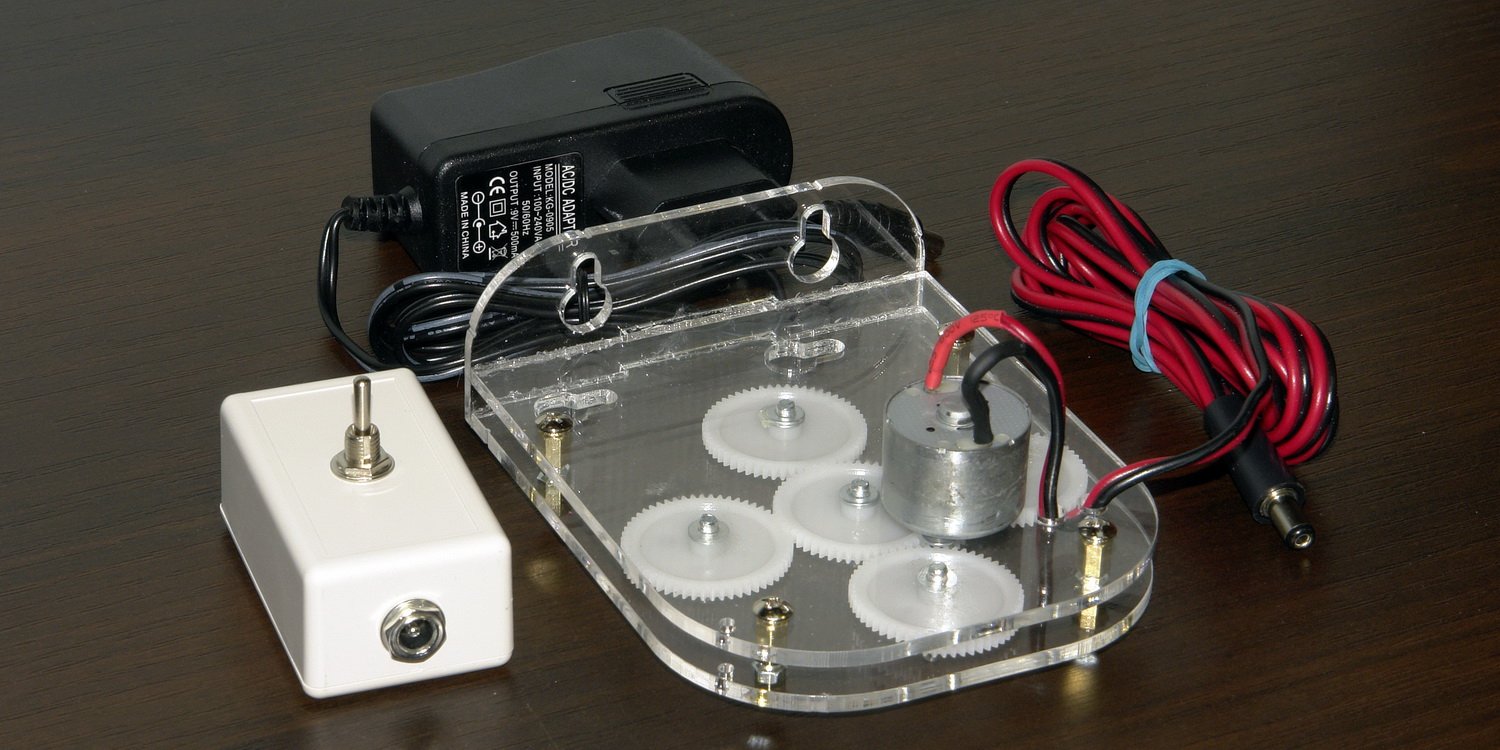
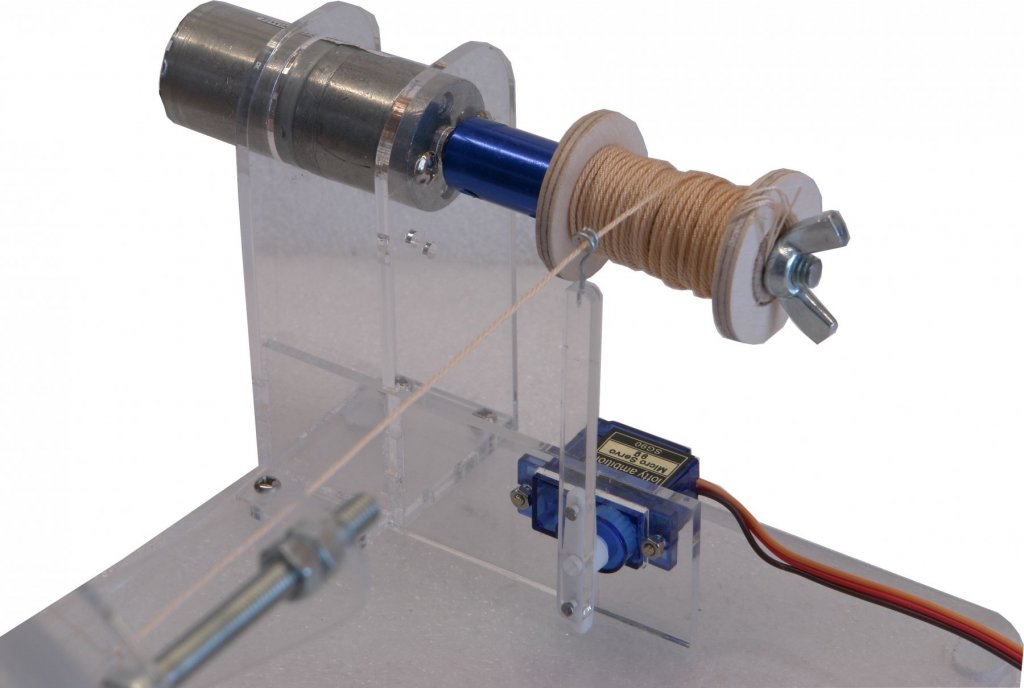
 Dear friends, I proud to present next version of endless rope making machine (video to come soon): https://shipworkshop.com/products/tools/pl-3.2-endless-rope-making-machine PL 3.2 Endless rope making machine with traverse Fully automated ropewalk with traverse (rope making machine). Minimal control is needed. Basic features PL Endless rope making machine with traverse ("PL machine") is intended for making professional model ropes: 2-, 3- or 4-stranded; With/without the core; Plain laid or cable laid; Left or right lay. What's new: PL = Planetary ropewalk. New version of former ropewalk "Planetary". New traverse unit. New Smart Control Unit v3.0 Endless means extra long result ropes. User manuals: PL Endless rope making machine Smart Control Unit v.3.0
-
Dear friends, I proud to present next version of rope making machine (video to come soon): https://shipworkshop.com/products/tools/vr-31-rope-making-machine VR 3.1 Rope making machine (HD adaptable rope making machine. Former Ropewalk "Prosak") What's new: VR = Vertical ropewalk. New version of former ropewalk "Prosak". No need to reassemble for 3- or 4-stranded ropes. Can be secured on both horizontal and vertical surfaces. HD adaptable. Can be transformed into HD (Horizontal Design) machine. Not yet available. There are notches on the machine that will help to mark screw holes for securing the machine. Here is user's manual: VR31.pdf

-
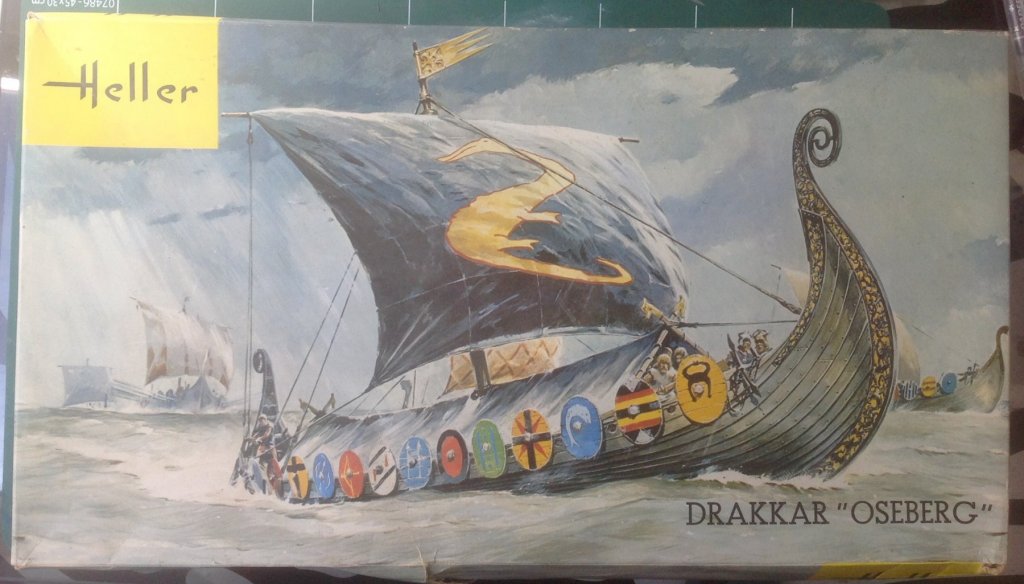
I recently found a complete Heller Drakkar "Osberg" plastic model kit at a vide grenier. It's the version with the lighter yellow Heller panel on the top left of the box, so from about 1971! 5€ seems like a bargain. As was standard, glue and rigging and paint are not part of the kit. l have three questions:- 1.) What glue, other than that currently sold by Heller online is appropriate for this kit? 2.) The notes say use Number 16 thread for the rigging. The inevitable Google search identifies how complex thread description can be. The only ‘16’ I can find is a weight of 16, the equivalent of Tex of 105, denier 950, cotton count of 5 and a metric number 9. Is there a more suitable alternative ? 3.) The major pieces look very shiny. Is there any prep required before painting, other than a light sanding ? 4.) What paint is appropriate for a plastic model of this sort ? Many thanks in advance for your help.
-
Hi guys, I was wondering if anyone that has done the Mamoli 1:90 victory and got to the end of the rigging and found they had enough string to complete the job? The more I look at people's builds on here the more I think there isn't gonna be enough string in the kit to do the job... The bag with the different sizes of string that came with my kit looks a little small to me. I haven't opened the bag yet to have a really good look at the strings, but from memory there doesn't look like there will be enough. My question is: Where can I buy some spares from? I would rather have more than enough and use the extra to tie some fancy knots with!!! than get halfway through and run out... I live in the UK, but getting stuff posted from abroad is easy enough. I eagerly await replies with hopefully some good news/tips/advice Till then, Kindest regards Spider
-
I have just completed the hull and the deck on the Amati Bounty. I am now ready to start the masts and rigging.. Does anyone have better instructions on this as the Amati one is really bad. I assume the one big plan with the rigging diagrams is to scale Can I use that for measurements and tapering of the Masts. There is no area that show actual lengths or dimensions. So I assume I use that. Any help would be great to get the shrouds going and their placement. Thanks
-
I am about to rig my longboat model and while the rigging is simple, I would like to do a good job of it. There has been discussion on the forum about the use of fly tying thread thread and some mention of fly tying tools. Can anyone who has used fly tying tools comment on which tools they have found to be useful and how they are used? Thanks, Roger
-
Good morning all, I am at the point of rigging my model of HMS Liverpool. Liverpool is a 28 gun, Coventry class, 6th rate, frigate. She was built in 1758. My model is as she would be about 1775, 1776. By that time, she had two rebuilds. Modelshipwright published Modelers Plans in one of their editions. Sadly, after doing much research, and consulting the Admiralty drafts, I found several inaccuracies. For example, it shows the pumps, capstains and such in their original position as designed. The admiralty drafts clearly show that they were relocated one deck higher, and this is noted in the book, The First Frigates. The Modelshipwright plan also has spars and rigging plans. These are in different scales (not noted) and clearly show a gaff and boom on the Mizzen. All of my sources (lee's, Steel, Lever Harland) note that the boom did not show up until 1790. It also appears that the ship still carried a mizzen yard. Would that be correct because some books show a gaff with a loose footed mizzen course? Now to the problem. Both Lees and Lever show the mizzen yard suspended by a jeer block. On the fore and Main masts, the jeer blocks hand from sling around the mast head above all of the other rigging (shrouds, stays etc). In lever, the jeer for the mizzen yard hangs from a sling around the mizzen masthead. Where does it hang and reave to the block on the mizzen yard? The crojack yard, for the period, had a truss. Below the crojack is where the mizzen lard lies against the mast. If the mizzen jeer block is slung from the mast head, and goes down the starboard side of the mast, how does it not interfere with the shrouds? In Lees, there are two pictures of the mizzen top for HMS Medway. The pictures don't show the detail very clearly, but it appears that the jeer block hangs abaft the mast. Am I interpreting that correctly? I suppose that I could make this easy and use a gaff instead of the yard, but I don't think that it is correct. All opinions welcomed. Regards, Tom
-
Hi all I'm building a 1:12 yacht model, the actual boat would be 28 foot hull (around 9m) & a 20th century yacht - so the shrouds would be wire perhaps 8 to 10mm diameter actual (or 0.65 to 0.8 or 1mm diameter to scale). The actual rigging would be stainless steel, so it would be nice for it to look like that. It needs to be straight when tensioned a bit, it won't look any good with kinks. Also, I think that some texture is preferable, to replicate the texture of the SS wire, but I'm open to solid... I'm be grateful for any suggestions, thanks Mark
-
I am researching the Sovereign of the Seas (1637), but this question could pertain to many other English and Dutch ships of the same era. Specifically, RC Anderson, in his book "The Rigging of Ships in the Days of the Spritsail Topmast", notes that the knights associated with the fore and main masts were between decks (see pages 76-77 of his book). This implies that the ropes leading to the knights went through a hole in the deck. Is that correct? If not, how did they travel to the knights? If this is correct, then I have several questions: (1) Are there any "rules of thumb" for how big to make the hole? (2) Was the hole directly above the knight or somewhere else? If somewhere else, where? (3) Was the hole covered in any way (such as with a leather flap) to keep water from leaking through it to the lower deck where the knight was? (4) Was there any protection on the ropes that led to the knight to protect them from abrasion? Thanks so much for your help!
-
Dear friends, would like to present Ultimate Rigging Tool kit which includes my rigging tools but for the special price. This kit includes (click the links for more details): Ropewalk Planetary 3.1 Serving Machine 2.6 + "endless" option ropewalk Prosak 3.0 - free bonus What you could do with this kit: -make different authentic rigging lines for you models: 2-, 3- or 4-stranded, with/without the core, plain laid or cable laid, left or right lay. -serve ropes, make beckets, strop blocks, make eye-splices, lay seizings, make stay mouse (diamond knot) and do other jobs where one rope is to be wound round the other. Why there are two ropewalks? -Planetary and Prosak complement each other. Planetrary is very useful for making long 0.2-1.2mm regular ropes which are many on a model. Prosak is super tool for making special ropes like thick cables. Free shipping. For more details on pricing - please contact me directly I have also special offer for returned customers. regards, Alexey
-
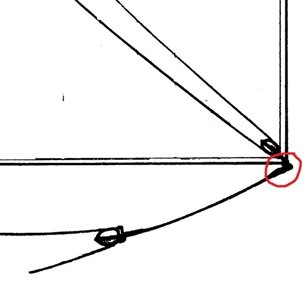
Just out of general interest, I am trying to work out what they did with the sheet (sheet line) when furling the spritsail on a 17C square rigger. The following diagram shows the sheet pendant attached to a bottom clew. What sort of knot would have been used ? From what I can ascertain, when the sail was furled, the sheet and its pendant was temporarily attached further inboard along the yard ? Any help would really be appreciated. Pete
-

Scootish Maid rigging problems - gaff and boom
gthursby posted a topic in Masting, rigging and sails
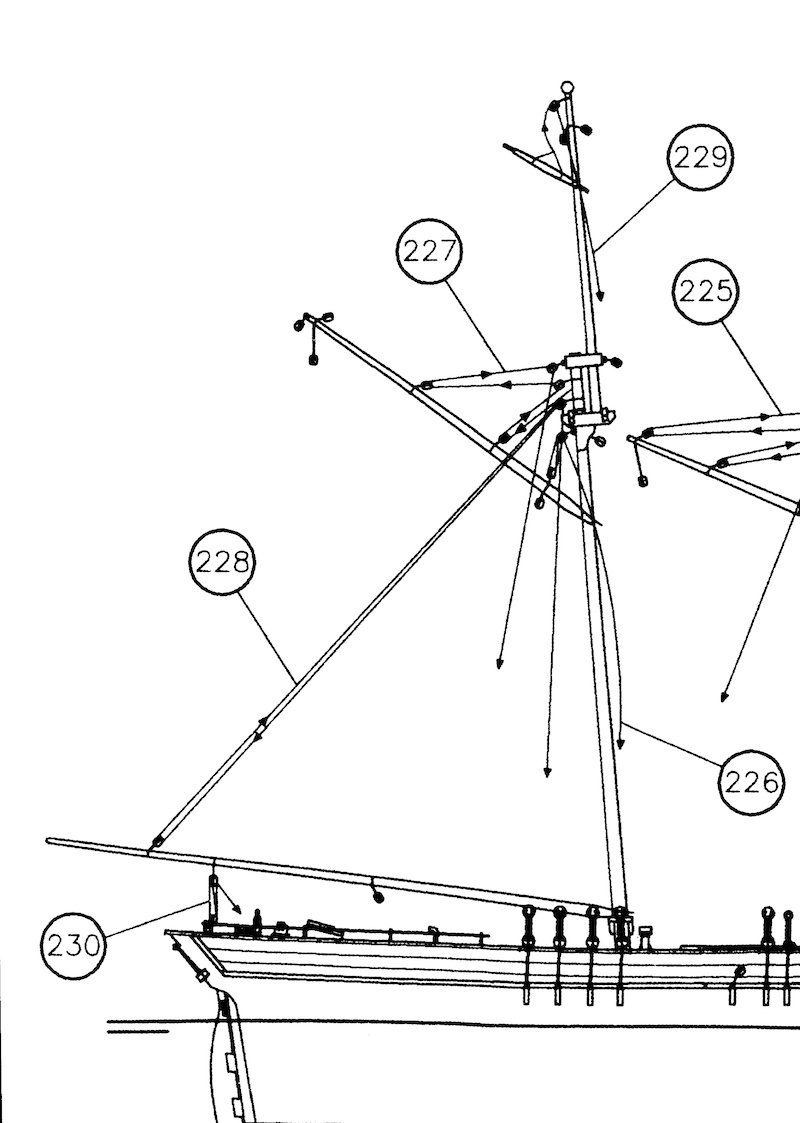
As I wrote in a post a few days ago I am starting to rig a model of the Scottish Maid using an Artesania kit. I find the rigging instructions confusing to say the least (this is likely to be the first of many!) In the Artesania diagram the rigging for the gaff and boom is very confused. Firstly, I would have thought that the halliards should be attached further along the gaff to give a sensible amount of leverage. Secondly, there doesn't seem to be enough blocks to rig both the gaff and the boom. A diagram that I found in Underhills book shows the boom lift as 2 blocks attached to the tree trestles as shown. Does this seem a sensible arrangement for the Scottish maid? I'm also unclear as to where on the deck these ropes would be anchored. In the kit instructions, after describing planking the hull they say that all the hard work has been done and all you have to do is rig the model as per the diagrams - Ha!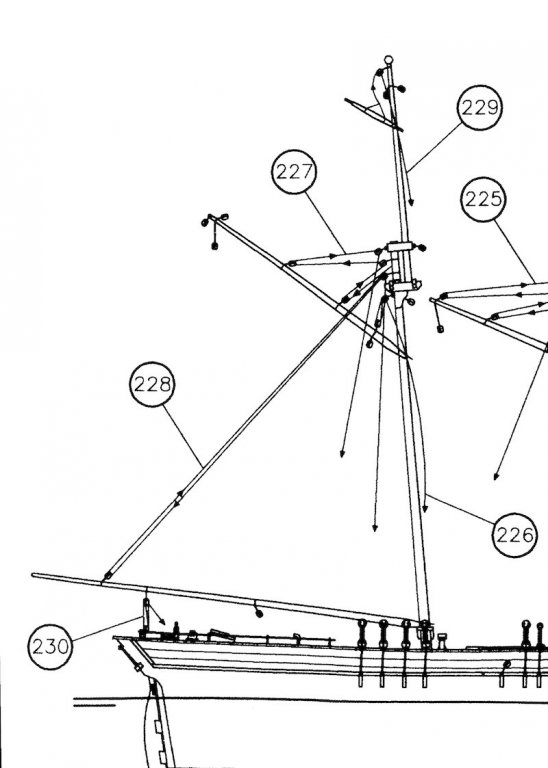
-
I'm building a model of the Scottish Maid and am in the early stages of rigging her. I'm using the kit guides and also the Underhill book volume 2. The Underhill guide is far more detailed, but uses so many technical terms that I find it very hard to follow. Basically what I would like is a way of understanding which part of the rigging does what as that would help me to get it right (albeit in probably a simplified form). In some cases it is fairly obvious, but the function of some lines I find obscure. I realise that the answer to my question will depend on the type of rig and the era in which the vessel was built.
-
Have a question for the group... I am looking at building either the Rattlesnake or the Niagara kit. Of the two, which is the most difficult when it comes to the rigging? I have experience in build wooden ship kits, with some experience with rigging (primarily on 1/96 Revell Constitution kit ) I have been following both the Niagara and Rattlesnake builds... Any and all responses welcome... TIA
-
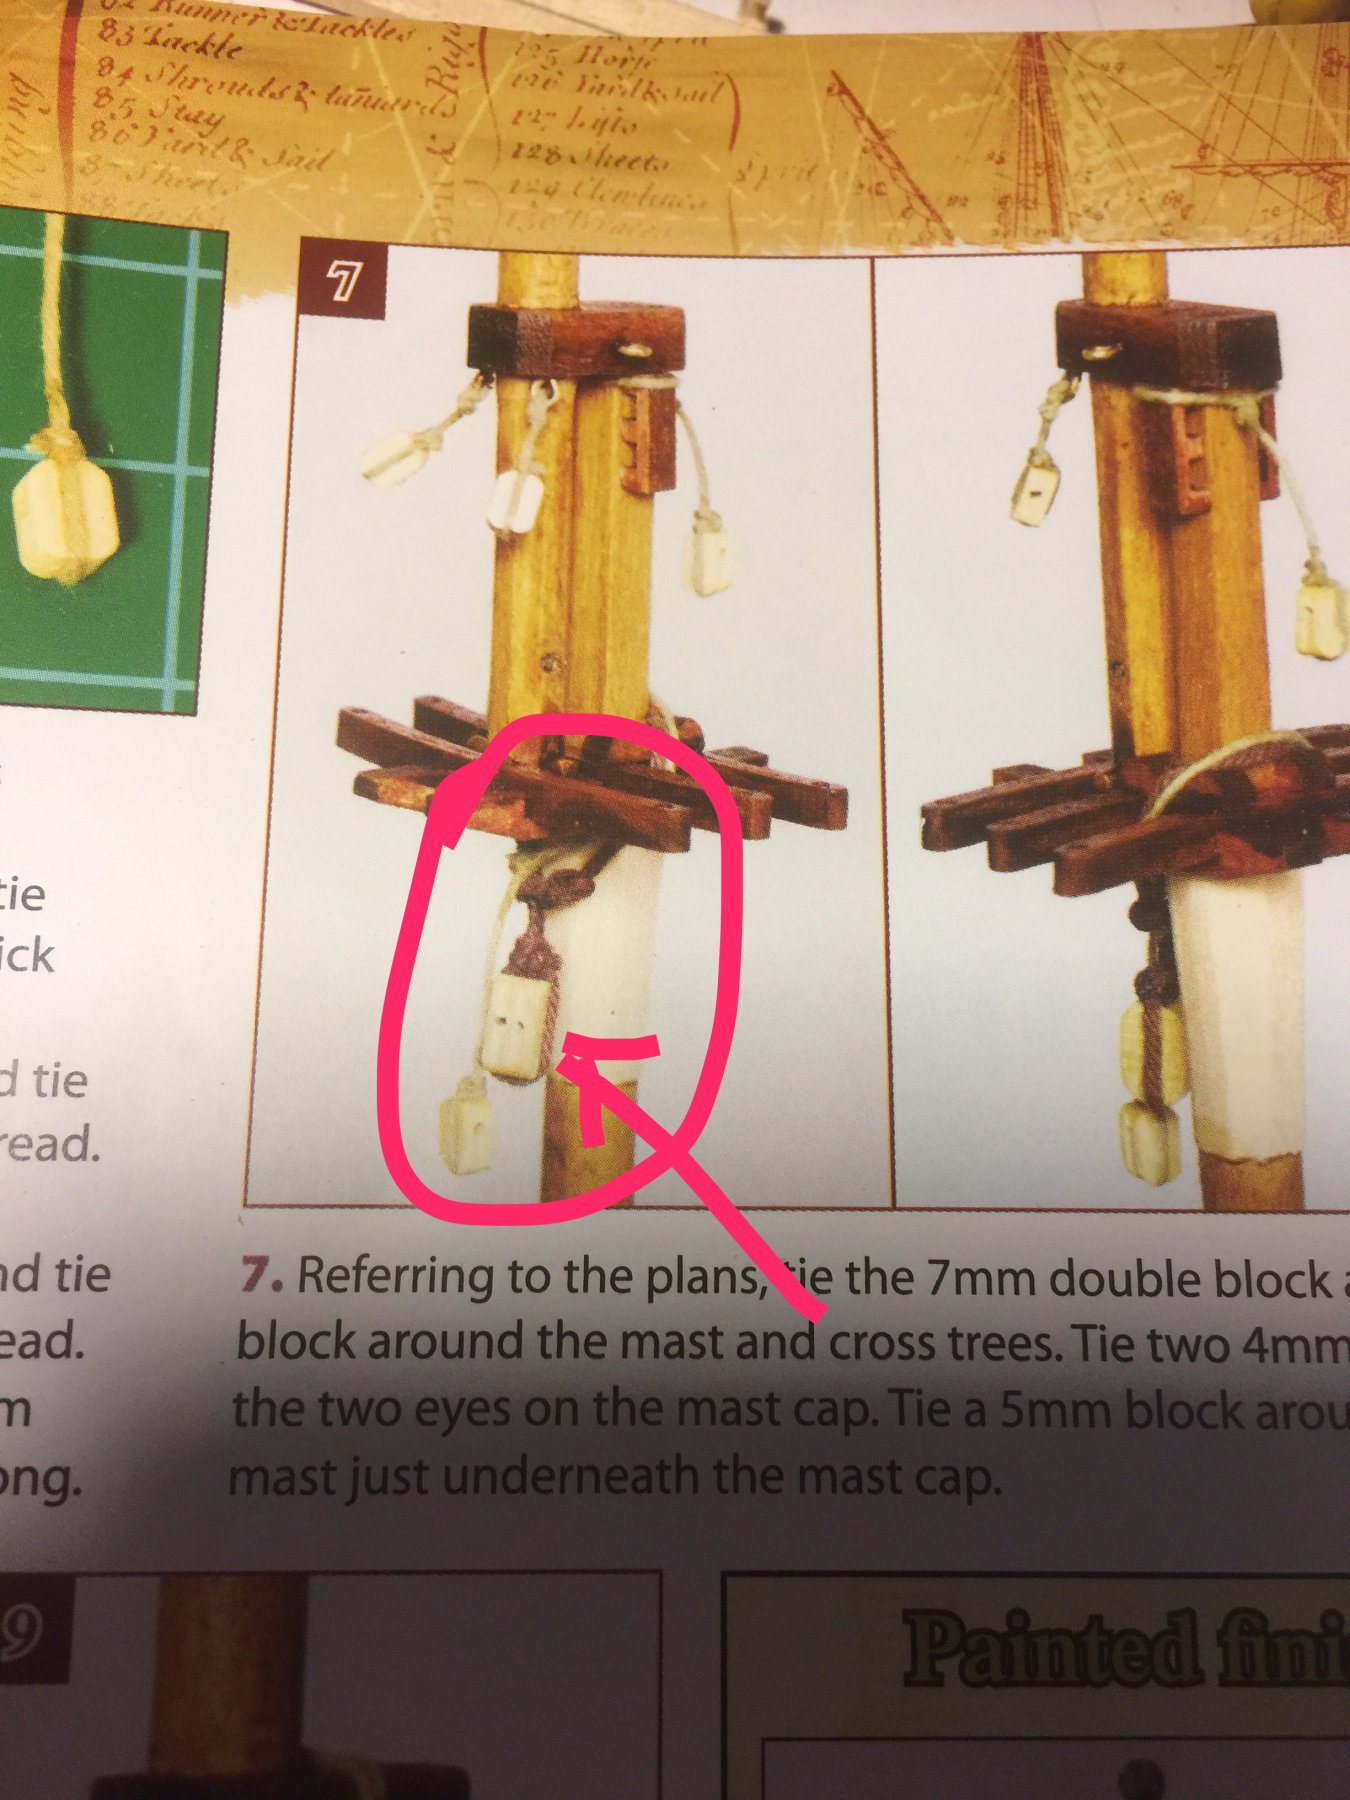
Hello friends, i have searched my books for a correct term, hope i found it... i am looking to find out how to tie one double block to a main topgallant crosstree on my Vic model. for those who would be also building victory from model space kit, its the 7mm double block from step 7 stage 64. i cannot seem to see how is this block tied to the mast... i assume that it would be same as the 5mm block that is also mentioned in there, which i also dont have a clue how to do. thank you in advance. pavol

-
Over the last few months, I have worked through a very challenging task of creating a set of files that cover the rigging of the Royal William. They include text, diagrams and photos arranged in a sequential order of rigging. They are freely available for anybody who wishes to make use of them and it is my fervent desire that they will add to the joy of creating this mighty ship. Having said that, there is still some work to be done on these files to fully complete them. Hopefully, the MSW members will 'jump in' and make this a real community effort through a range of ideas, suggestions and criticisms. I feel that this task is more than one person can handle so I will wait to see what happens. The files concerned range from RW.06 through to RW.10. The link to the Euromodel website is .... https://www.euromodel-ship.com/eng/royal-william-i-i.php Pete
-
 I'm struggling with a rigging question for my current built, the Corel Ranger, which is a fictional version of a US Revenue Schooner from around 1820. The plans for the standing rigging show only one normal shroud per mast (per side), with no allowance for ratlines. Then it shows two other lines from the top of the mast, through the crosstrees, down to blocks along the rail and deck, which appear to serve as shrouds but are not listed as such and don't use deadeyes or blackened lines. My confusion is twofold: One, what are these other lines for, as they don't appear to be operational (don't attach to any sails, yards, gaffs, etc) but aren't treated as standing rigging either. Two, with only one shroud per mast and no ratlines, how would sailors reach the crosstrees and the upper yards/gaffs for handling the topsails and any other repairs? One respondent in my build log suggested a bosun's chair, which might make sense for occasional access, but the crew would have to get up there quickly and commonly in normal sailing operations. Below is my attempt to diagram the situation. Most of the contemporary images I can find show these schooners with two or three shrouds per mast (per side) with ratlines, as I would expect. So is the kit just full of guano when it comes to this rigging plan, or is there a reason to do it this way? I would greatly appreciate any advice.
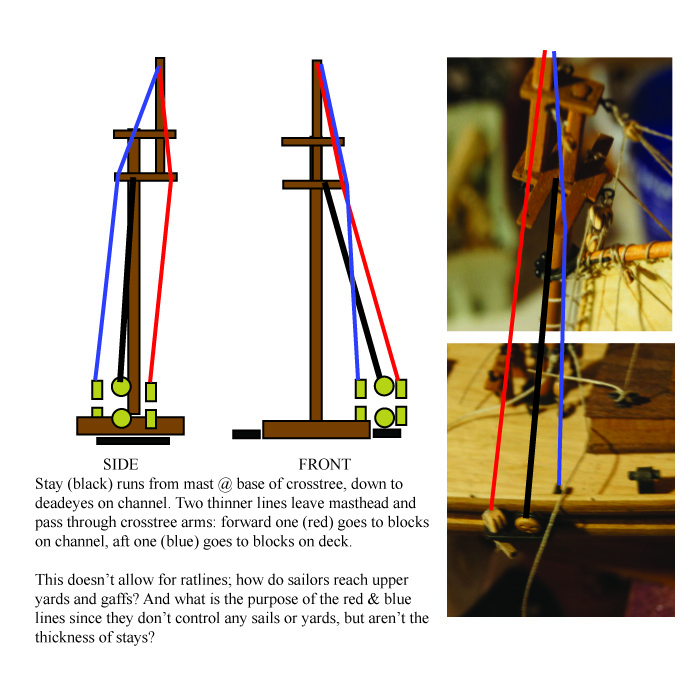
-
On the Royal William (launched in 1650 and final refit by 1719), the lateen yard is shown in the attached image as being supported by a truss made entirely of rope and not the usual trucks/ ribs that I associate with a parrel. Can anybody throw light on this form of truss. Did it actually exist ? When ? Any information would be appreciated. Pete
-
Hi all, in preparing the mast before attaching yards and stepping. I'm confused by these pendants, once served with an eye splice, is the main stay passed through the splice and back down to be secured? Or is a hook attached to the stay and attached to the eye slice loop. I'm trying to get needed all standing rigging on the masts in place so when the yards are hung any additional standing and running rigging (stays and back stays) will be easier to install. Hope this is clear. Thanks for your help in advance. I wish you all and all those near and dear to you a joyous season. Mark
-
Hello Everyone, I have a question about making the yard parrals. About a month ago my wife took me to HOBBY LOBBY for her to get jewelry supplies. While there I noticed that they have "seed beads" that are made of wood and the same size as the blue/black glass beads that are supplied in kits for the parrals. I thought wow! I went and purchased some. Am I correct in my thinking to use these wooden seed beads for parrals? My thinking is that in ancient ships they would not have used glass due to the fracturing/manufacturing issues and depending on the time frame are manufacturers trying to simulate iron? Any advise and comment would be welcome. As my wife says, I am too much of a perfectionist at this hobby (I LOVE IT, fits my old sarge personality!) .
-
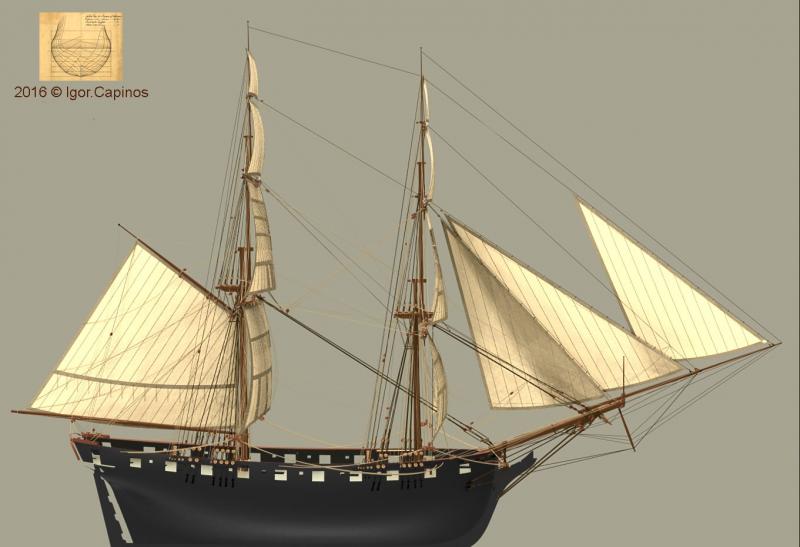
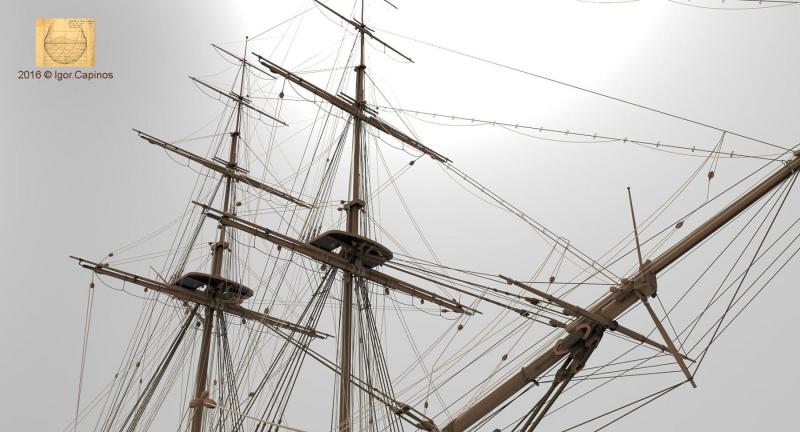
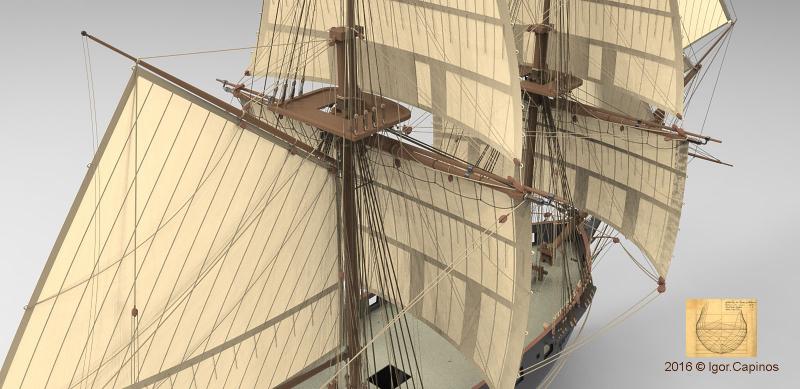
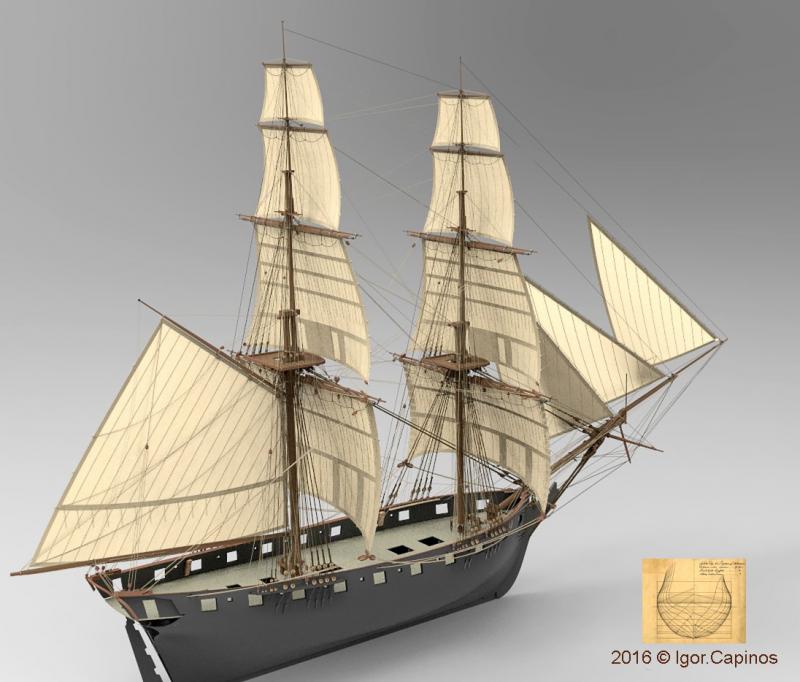
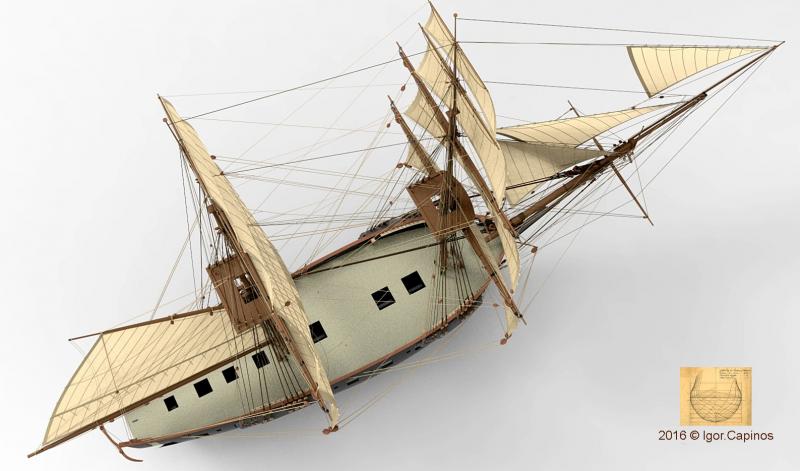
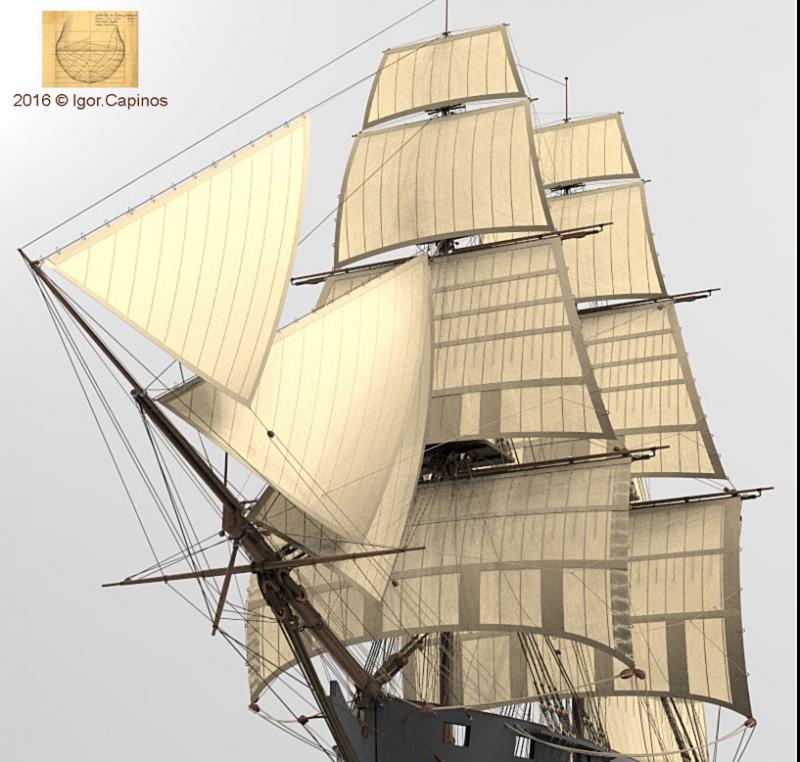
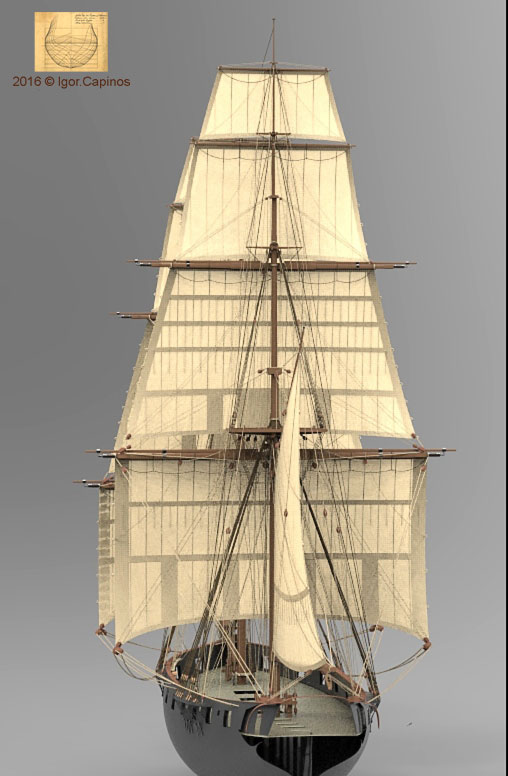
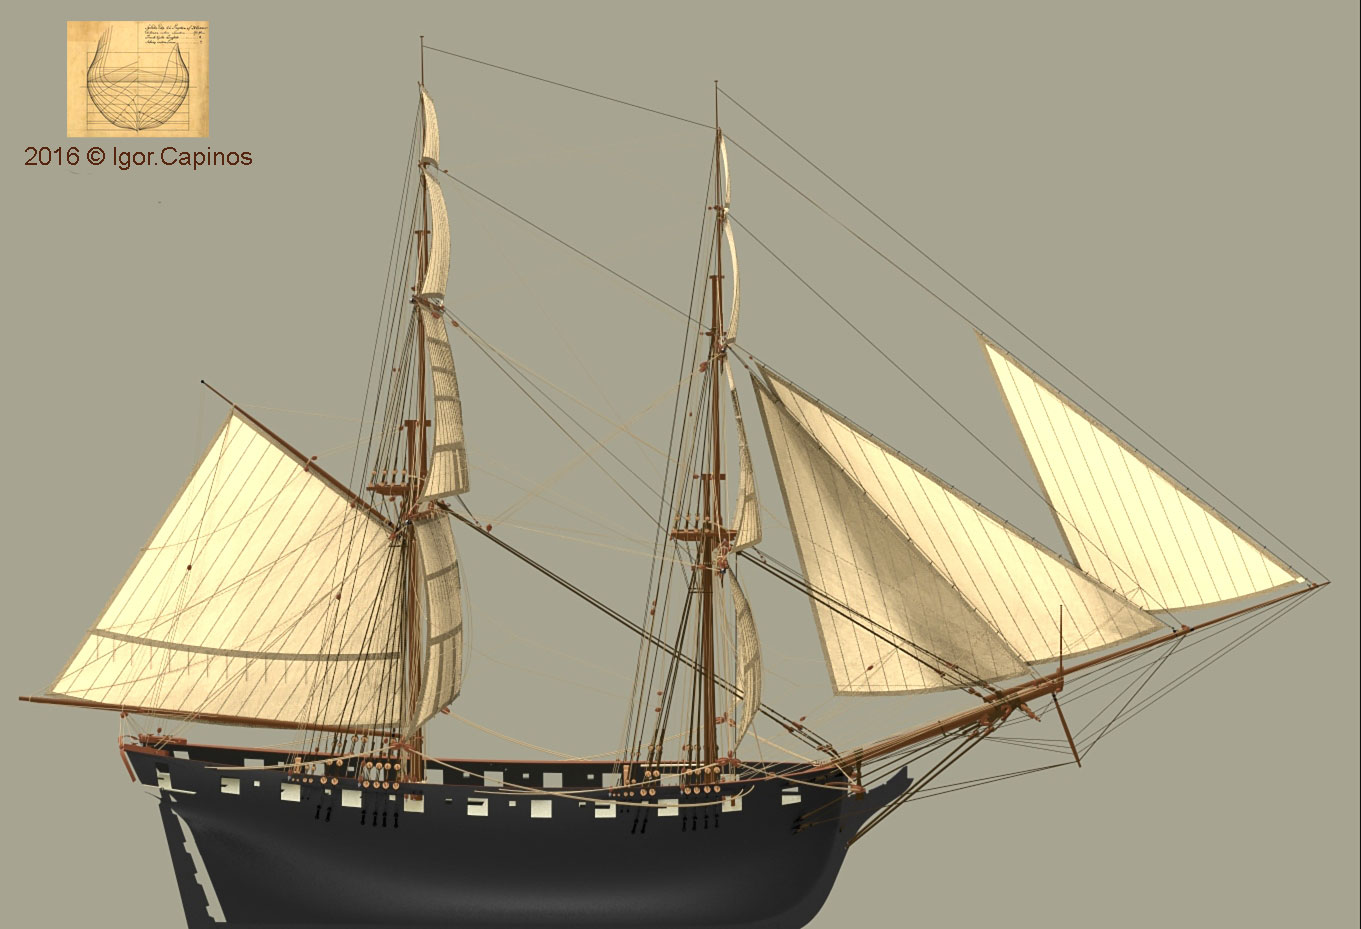
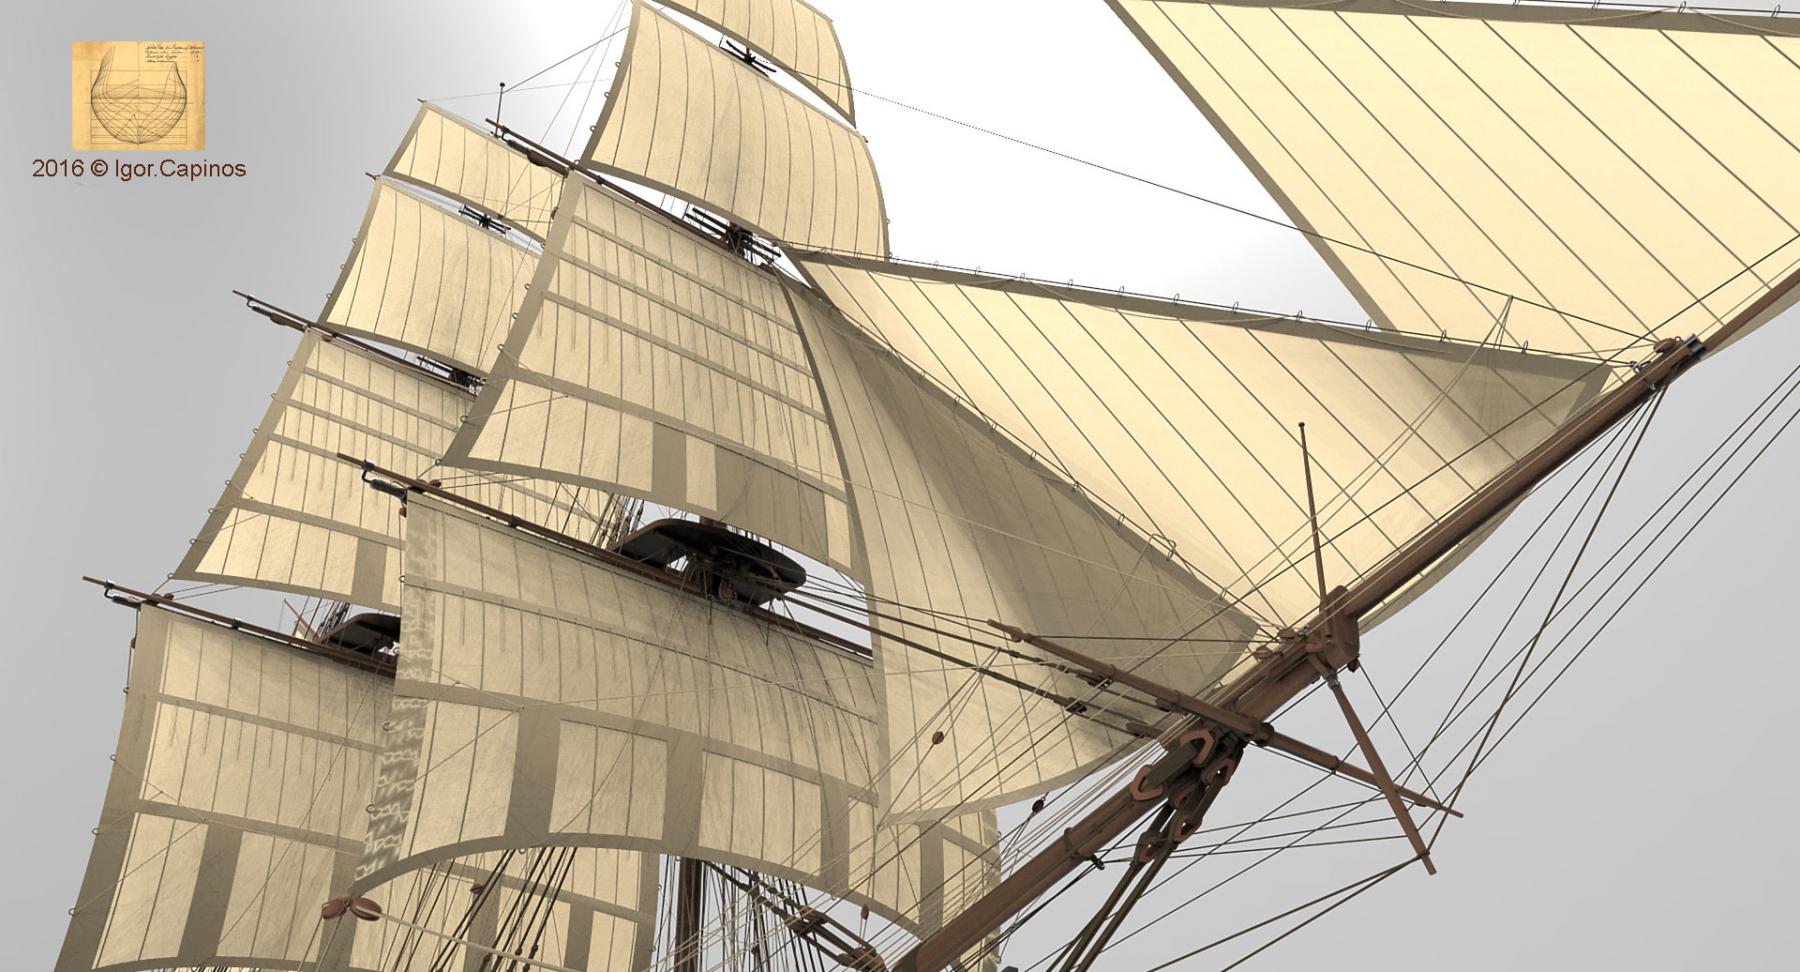
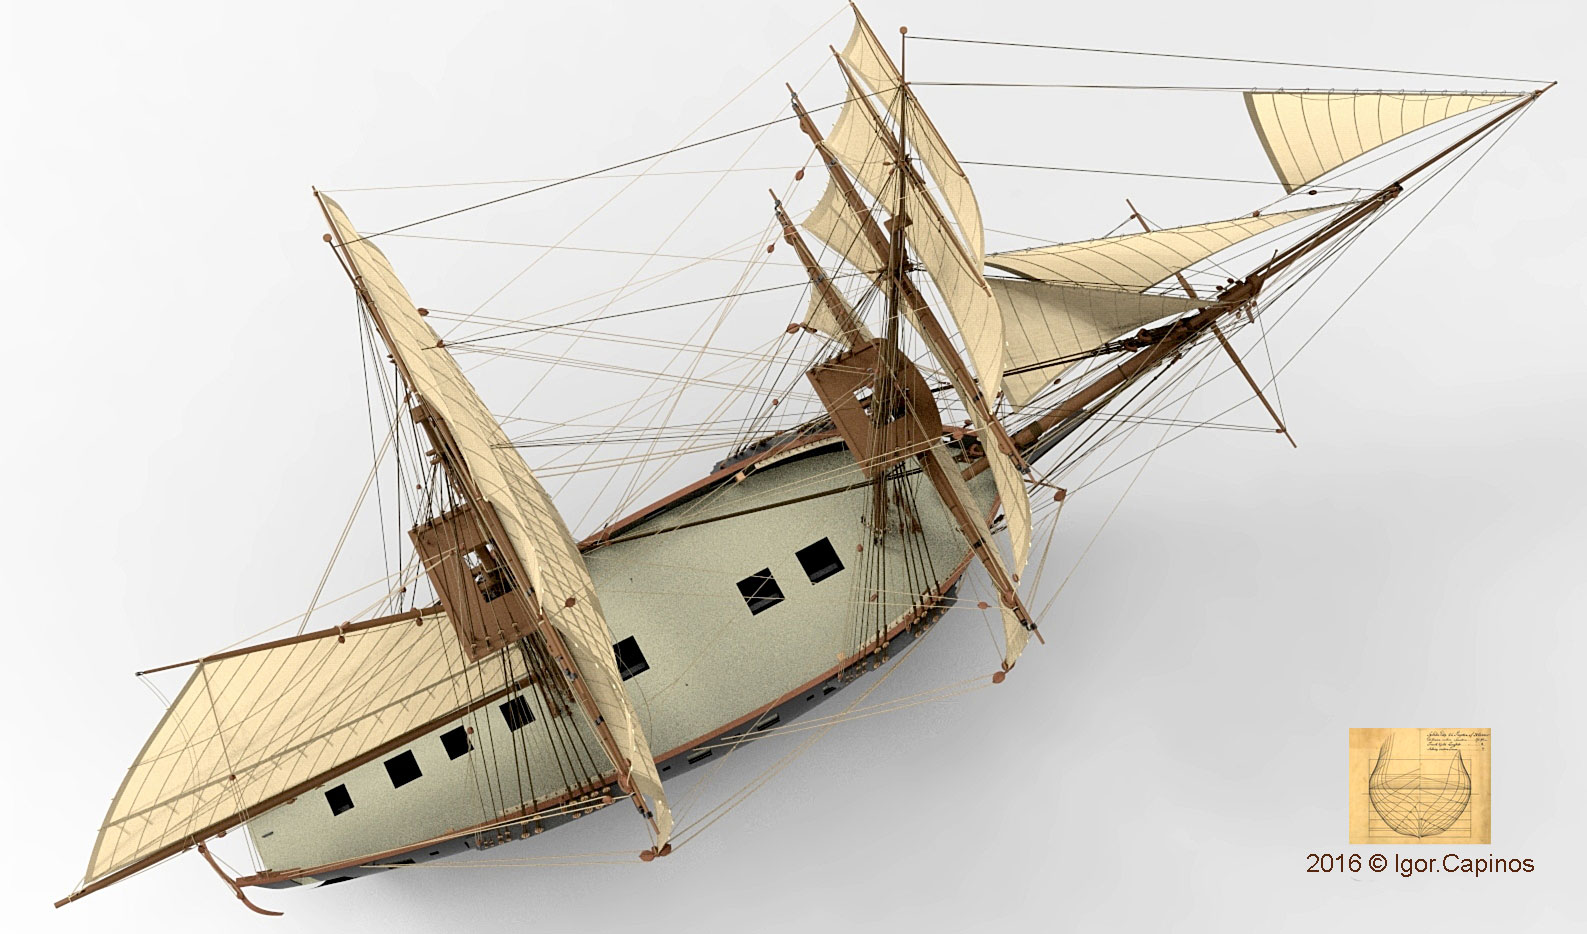
 Hello everybody! I finished 3D model rigging of the brig Mercury. Only rigging and sails