Search the Community
Showing results for tags 'billing boats'.
-
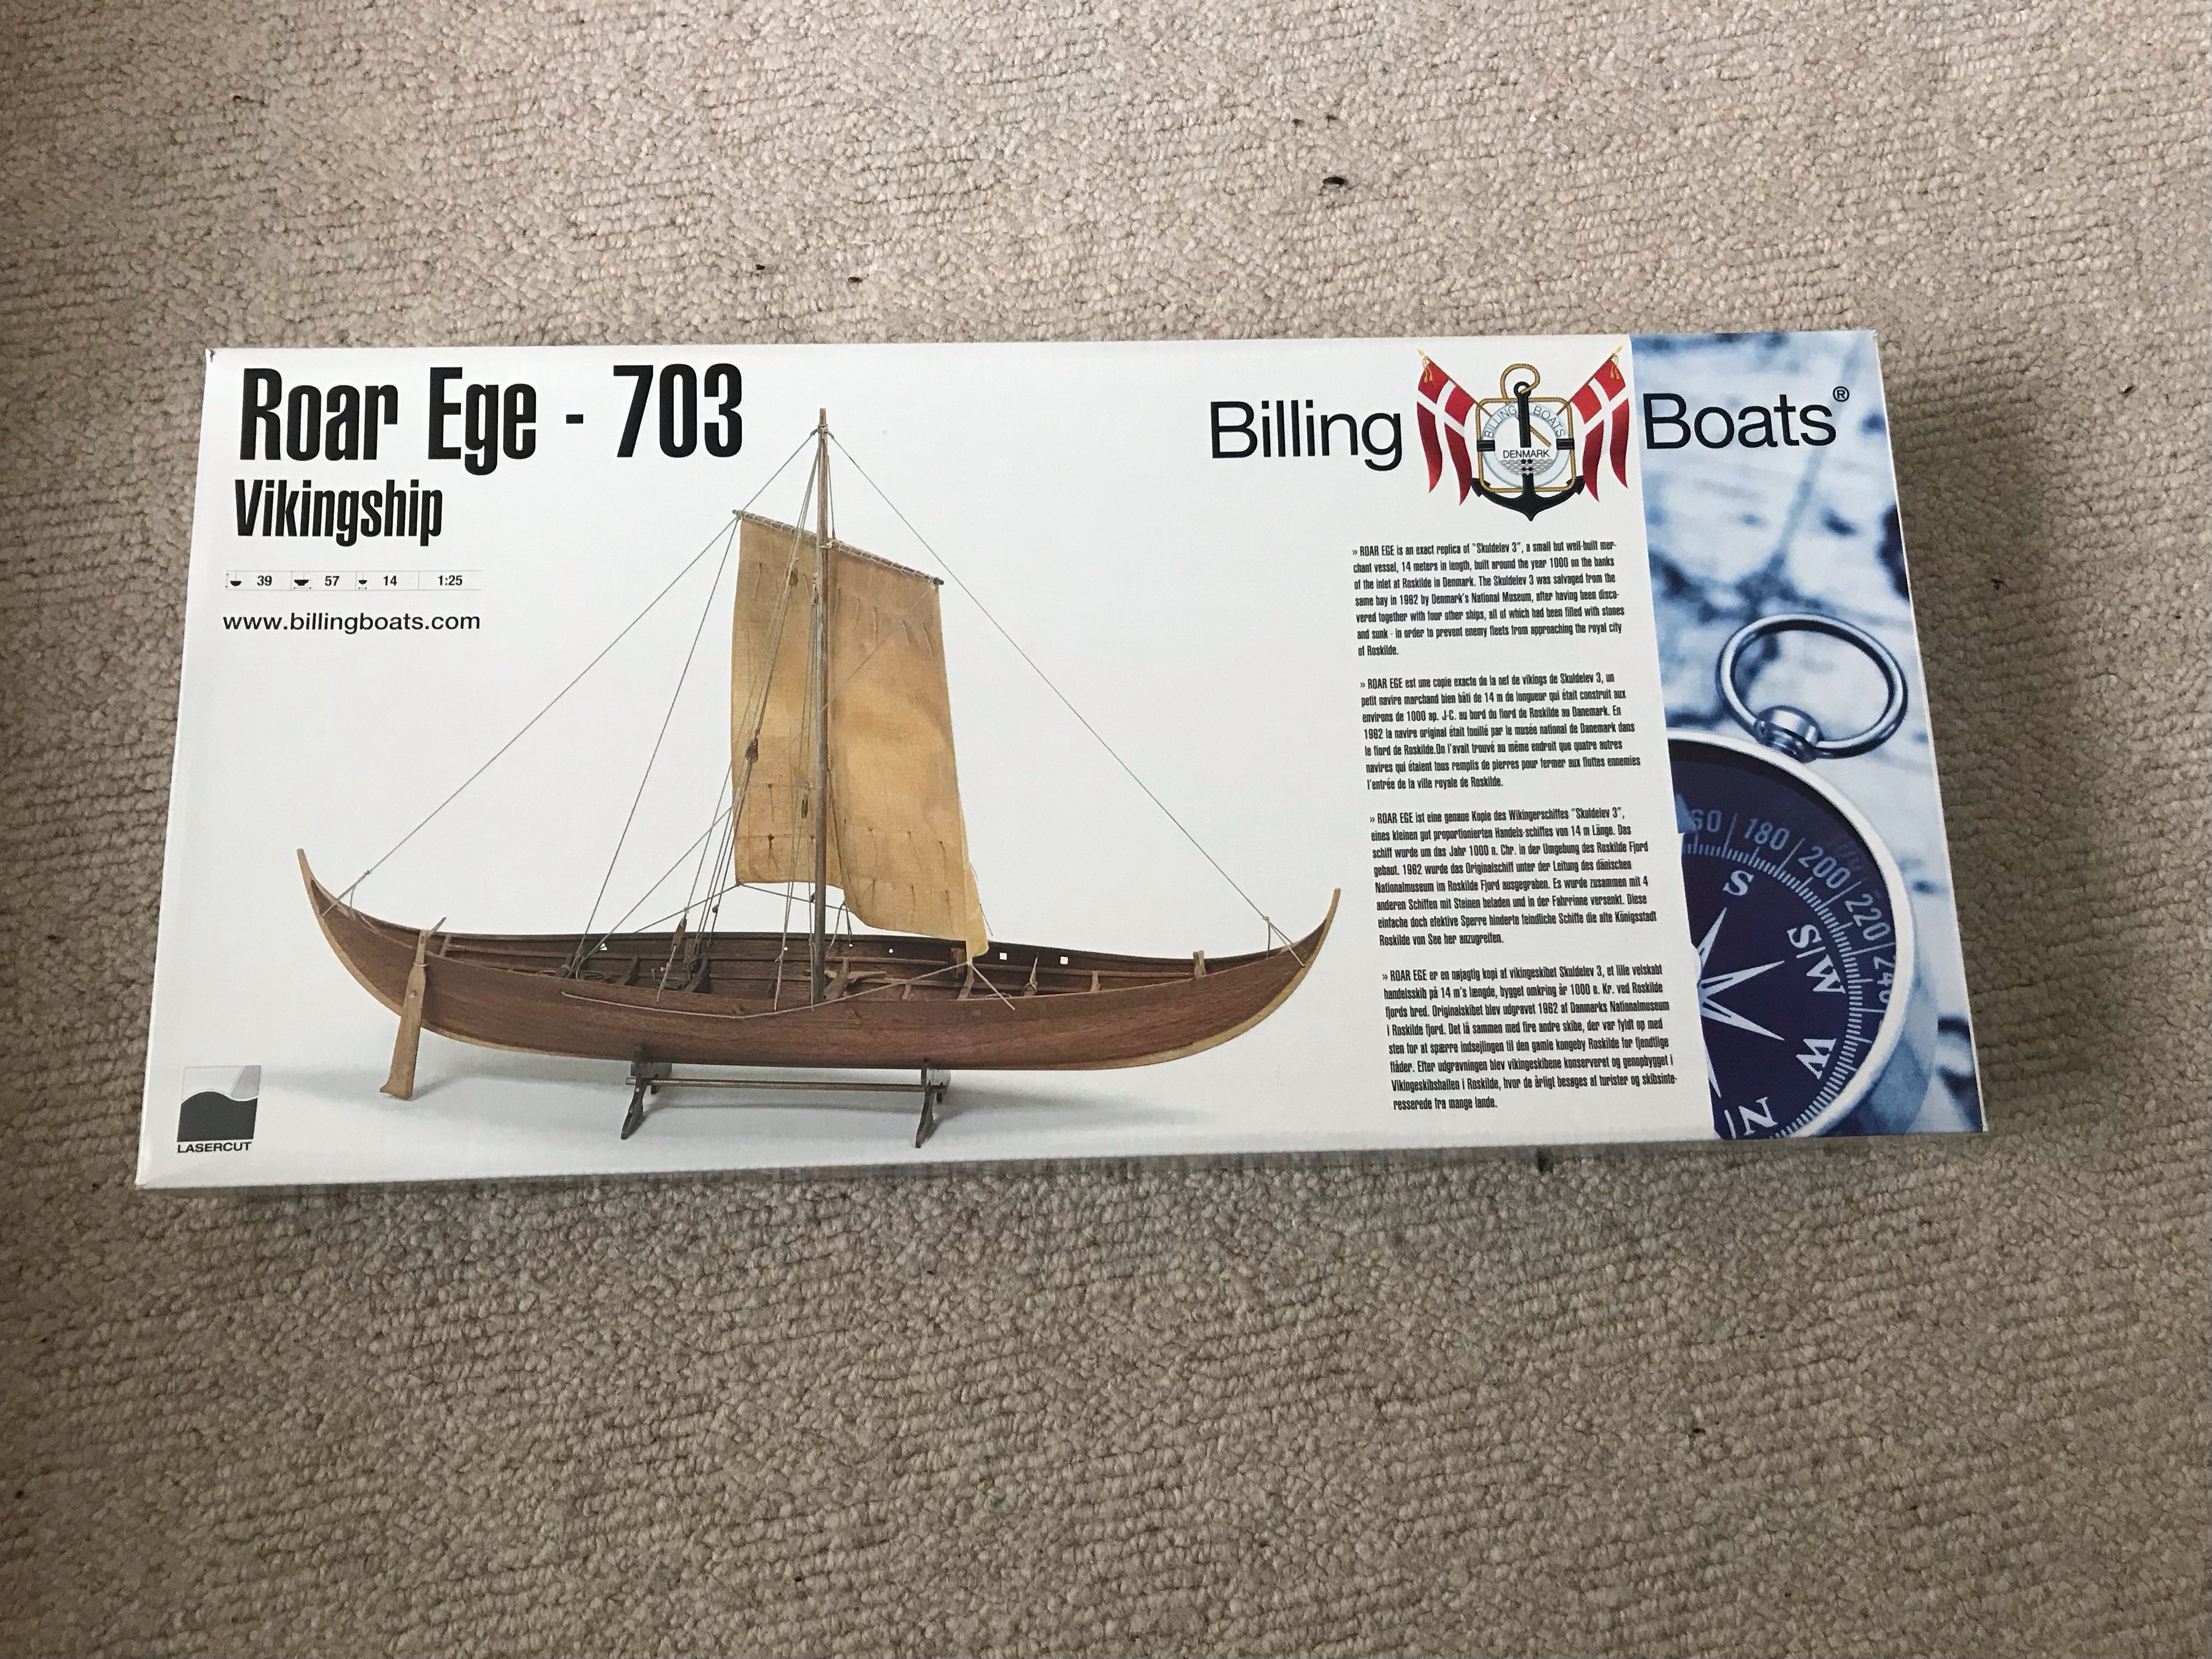
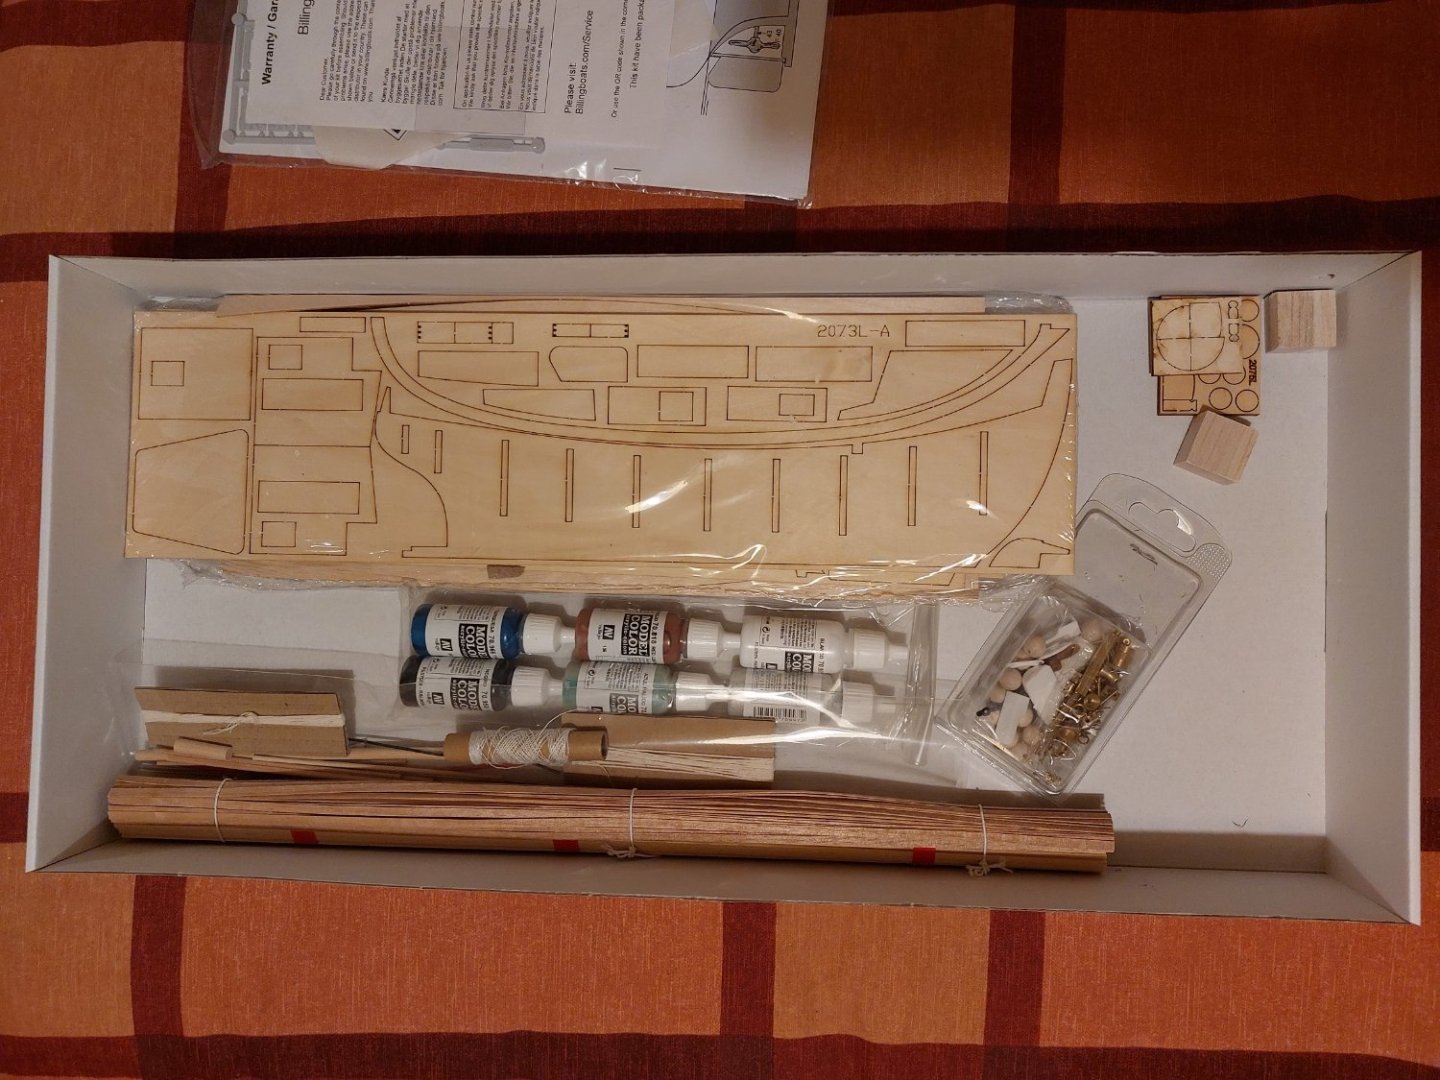
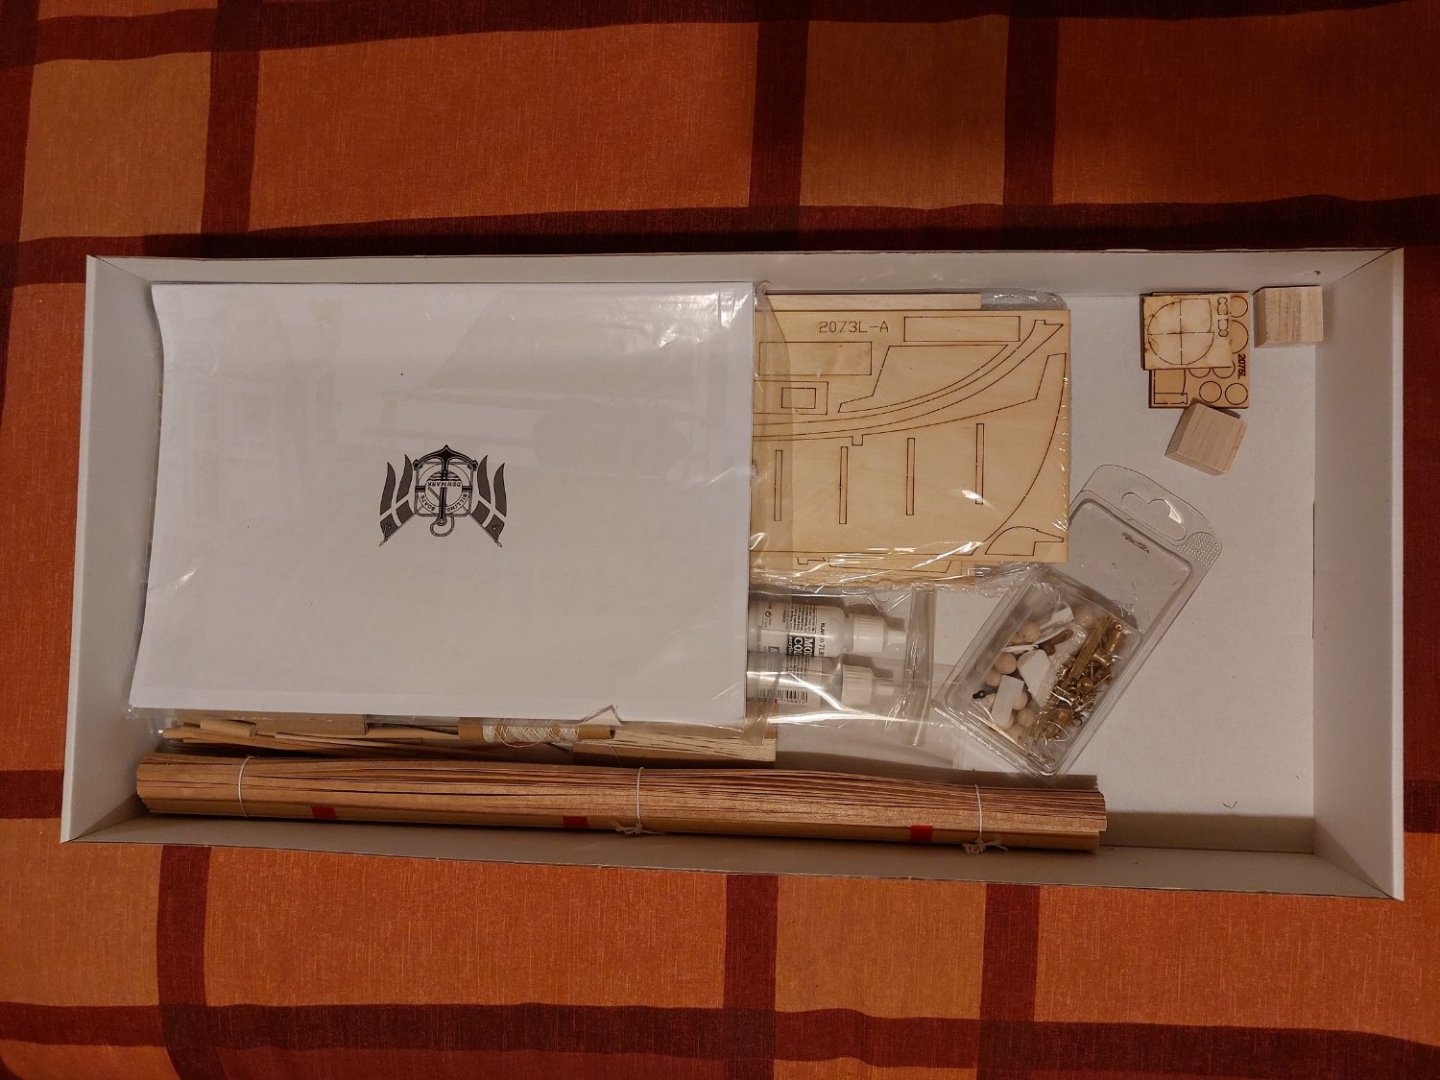
 Welcome to my LOG for the Billing Boats "Roar Ege" in the scale 1:25. The parcel just arrived today. This is my first wooden ship ever and I hope that the journey will be a great one and that I will gain a lot of experience working with wood instead of plastic. I don´t even know what kind of glue I should use, my preference would be the Gorilla Wood Glue (using this one for all other wood works) but not sure if this will be the best option for wooden ship models. The model is a "exact" replica of the "Skuldelev 3". The Skuldelev 3 was a small merchant vessel (LOA 14 m) which has been built around 1,000 AD near the banks of Roskilde in Denmark. The remains have been found in 1982 with four other ships from the same era. The remains have been salvaged and are now displayed in the National Museum of Denmark. On Saturday I will do the unboxing and I will post here the pictures of the unboxing.
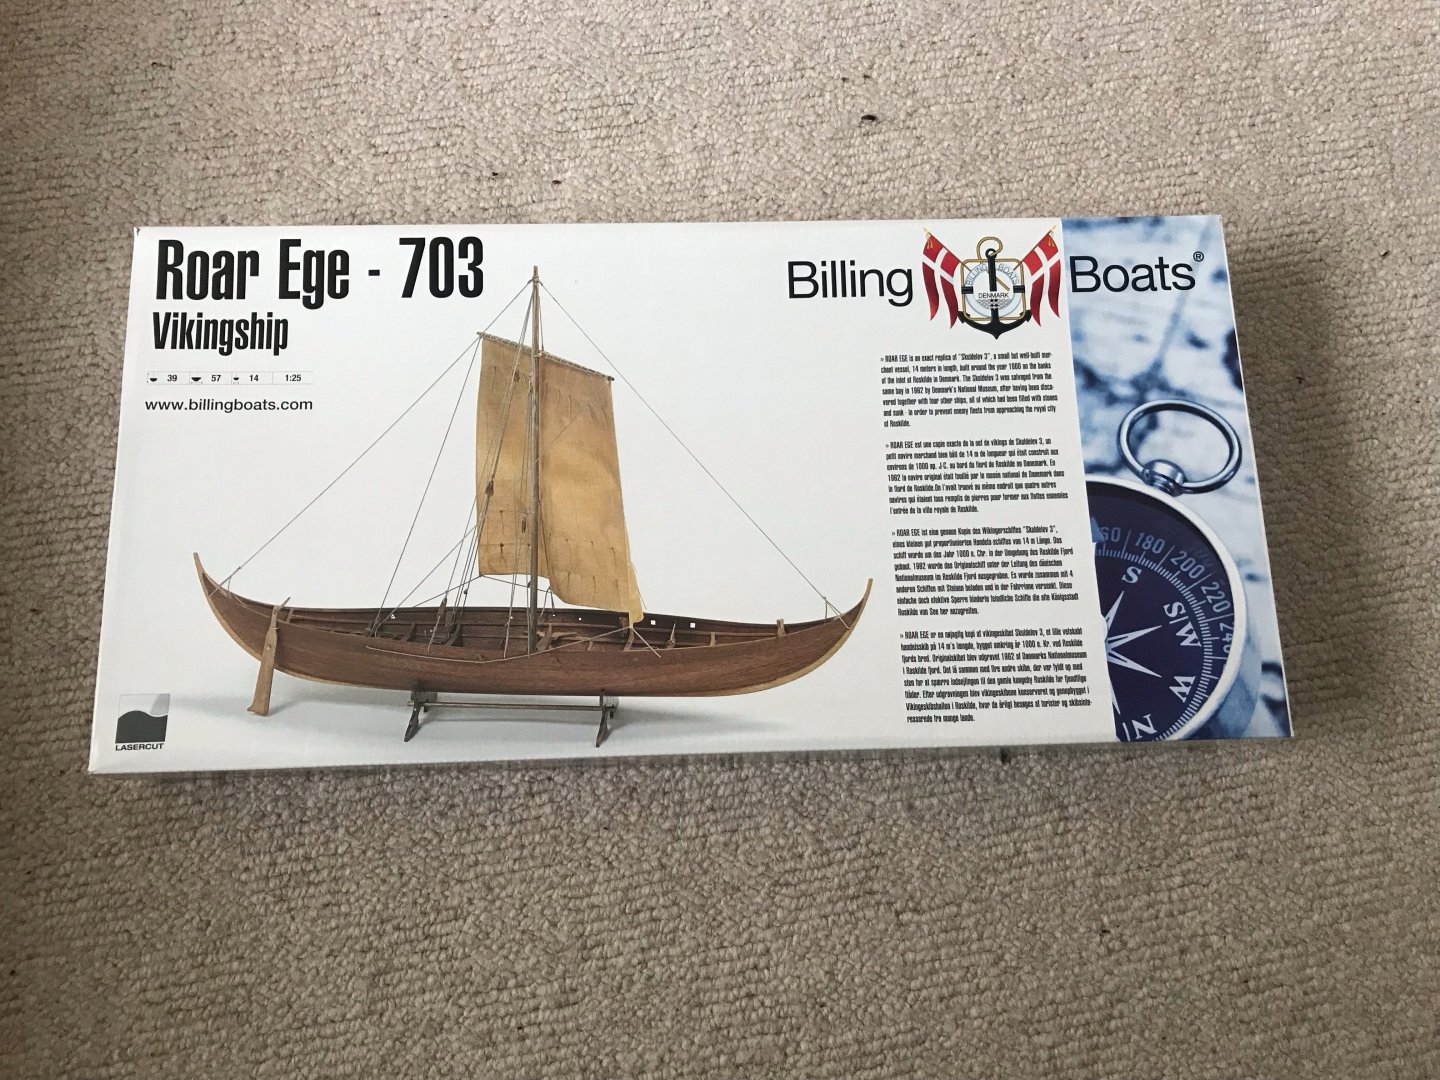
- 69 replies
-
- 6
-

-
- Roar Ege
- Billing Boats
- (and 2 more)
-
 I think I mucked up, I thought I was starting a Build Log, but it appears my first Post was in the "Introductions" folder. So I will now try and start a Build Log here. And I'll start again. Hello, my name is Wayne and this is my first Post here, I joined the group a couple of weeks ago. I’m 74 and in Melbourne Australia and I’m currently building the Billings African Queen. And this has been a quest of mine all my life, I saw the movie as a very young boy when my parents went to the Drive In Pictures, around 1953. And I have always remembered different scenes from the movie. So I have now finally got around to building it, and with live steam. And intend to have RC for the steering, I will just let the steam engine chug along. Yea being an open launch I don’t want to have servos etc spoiling the look of the model. I hope to hide a small servo for steering under the rear seat. And the vacuum formed plastic hull will be water tight when on the water. But I’m thinking of planking over the hull, I hope that will be OK. And I must say, the most important tip I picked up while researching the build was to leave the top extra mounding there, not cut it off until the hull internals and deck were completed. I have the ‘Miniature Steam Models’ plant #4034 here to go into the boat. I must thank gjdale, (Grant) for guiding me to that plant, and it looks spot on for the Queen. And MSM are in Melbourne too. Just ordered 2 universals, 5 to 4mm, and a brass prop from ‘Float a Boat’, also in Melbourne, and they were very helpful. Will have to see if I use the Billings prop shaft or have to buy a longer one.
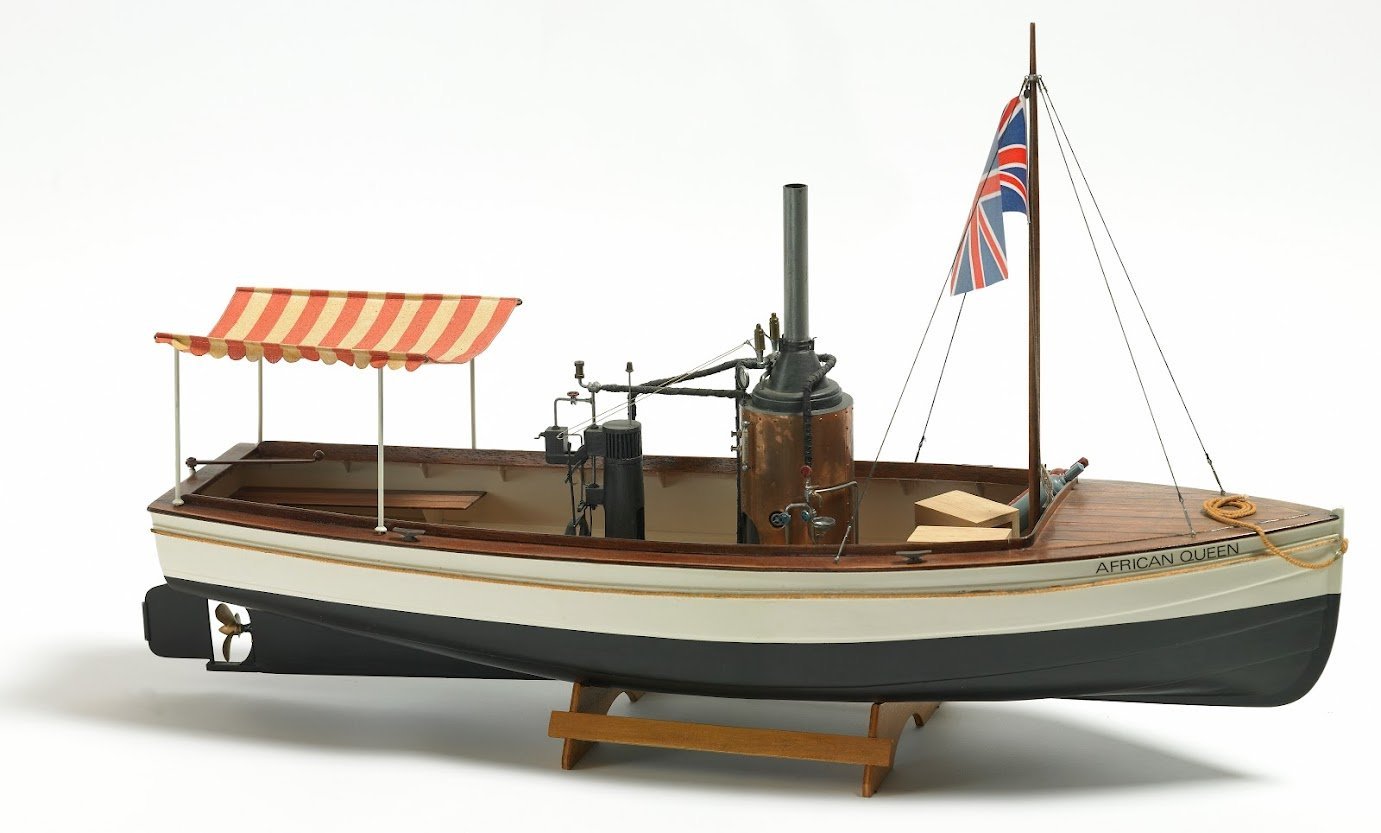
- 30 replies
-
- 6
-
-
- African Queen
- Billing Boats
- (and 2 more)
-
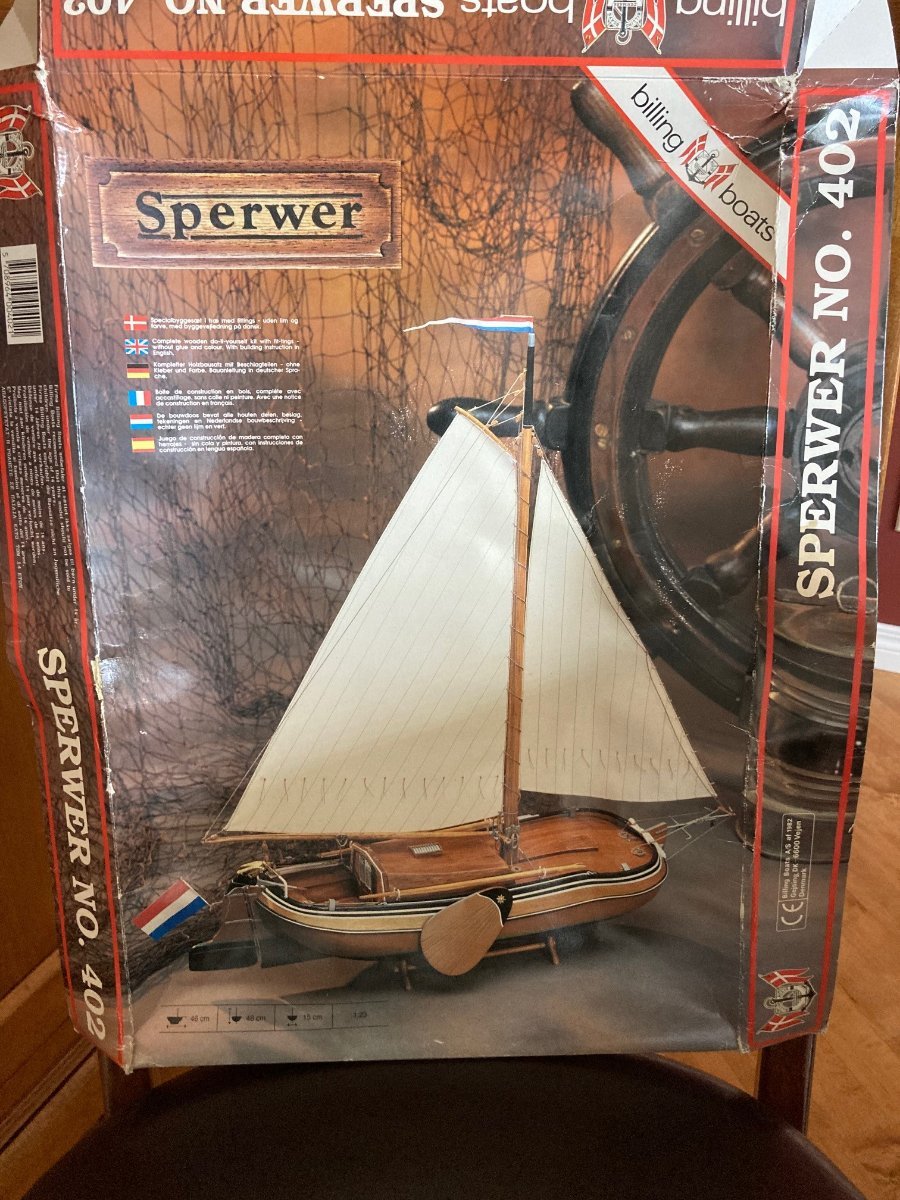
 Was debating doing a build log for this older kit that was given to me from my brother, as he received it from a co-worker that had recently passed away, and wished to pass it to him and thus to me prior to his passing... It is classified as a beginner build but these "beginner" kits from Billing Boats are in my opinion so basic in design and parts and given the poor tolerances for fitting out of pieces and parts, that it in fact it is not a beginners kit. The high end large kits (now laser cut) with fitment being so perfect, that though classified as advanced, it perhaps could be qualified as much easier to build... anyway my thoughts. I decided to do the build and pass it back to my brother given the emotional connection is truly with him. My wife is Dutch descent and given my trips to Holland and having seen my fair share of Dutch river barges... I do find them absolutely beautiful! I have decided to build it completely out of the box with no upgrades with the exception of the sails. I started this in the fall and worked on it here and there... I did forgot to take some early pictures but this is what I have to show for... This thing was not easy to plank at the bow for me and given it is single planked construction, I knew really quickly that this was a plank and paint project... which all of the working Dutch barges' hulls are anyways - painted.
-
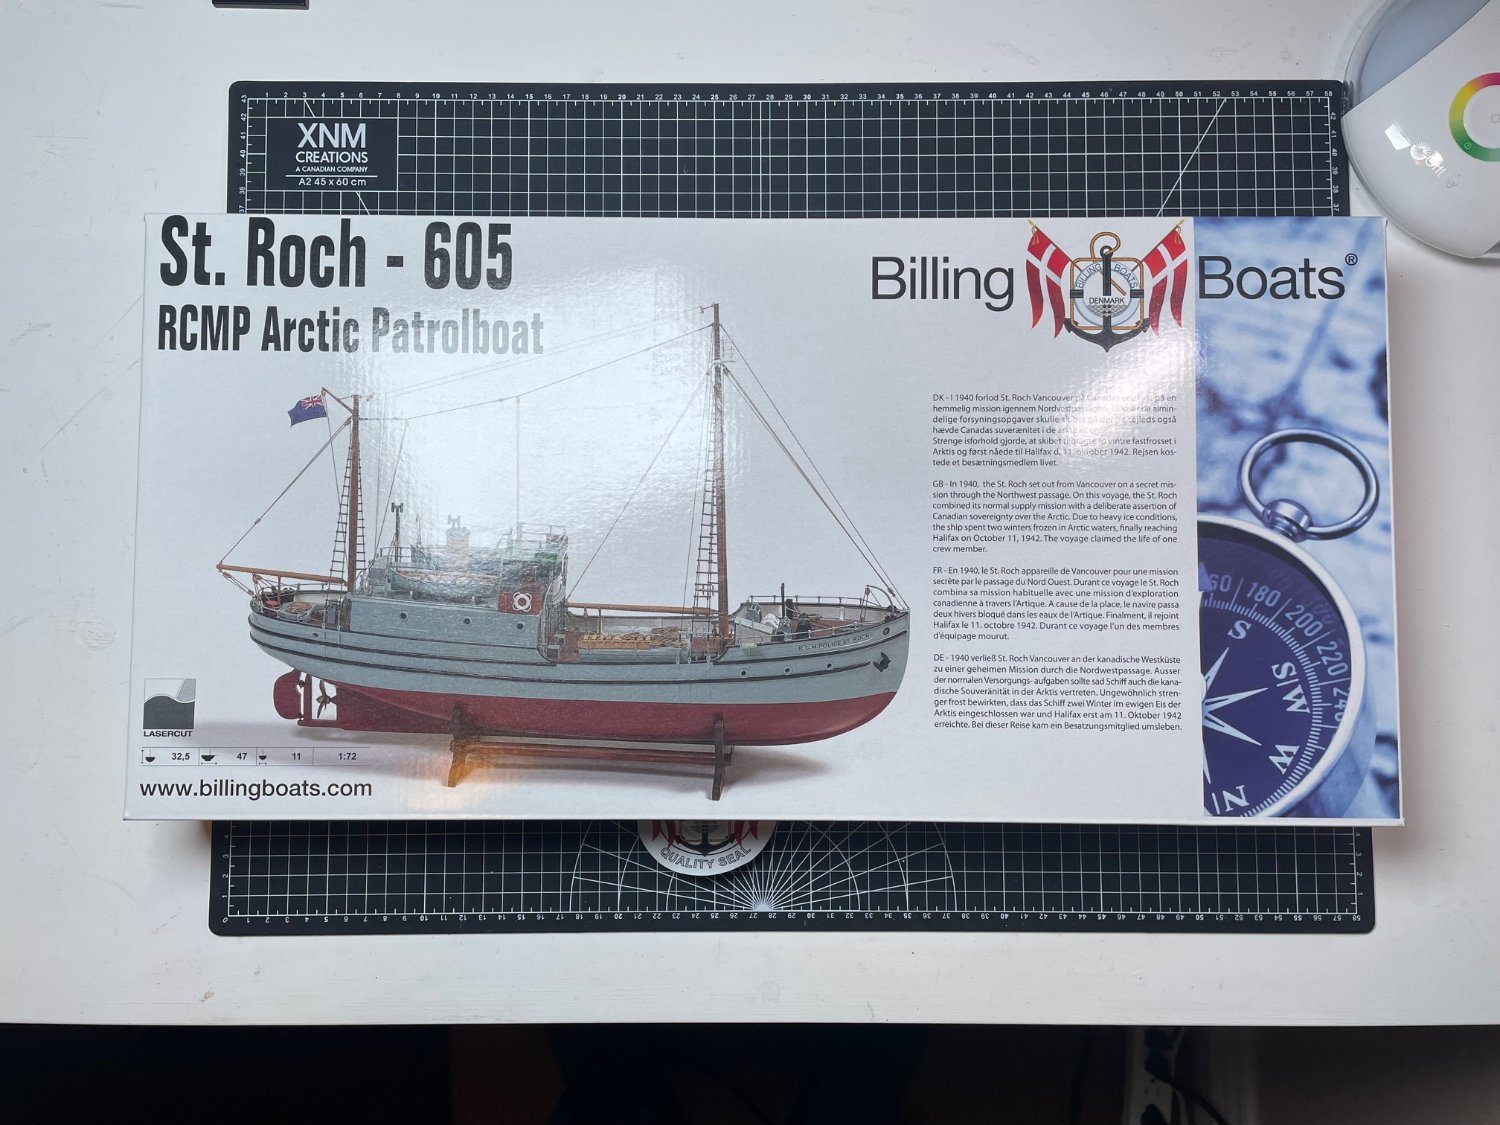
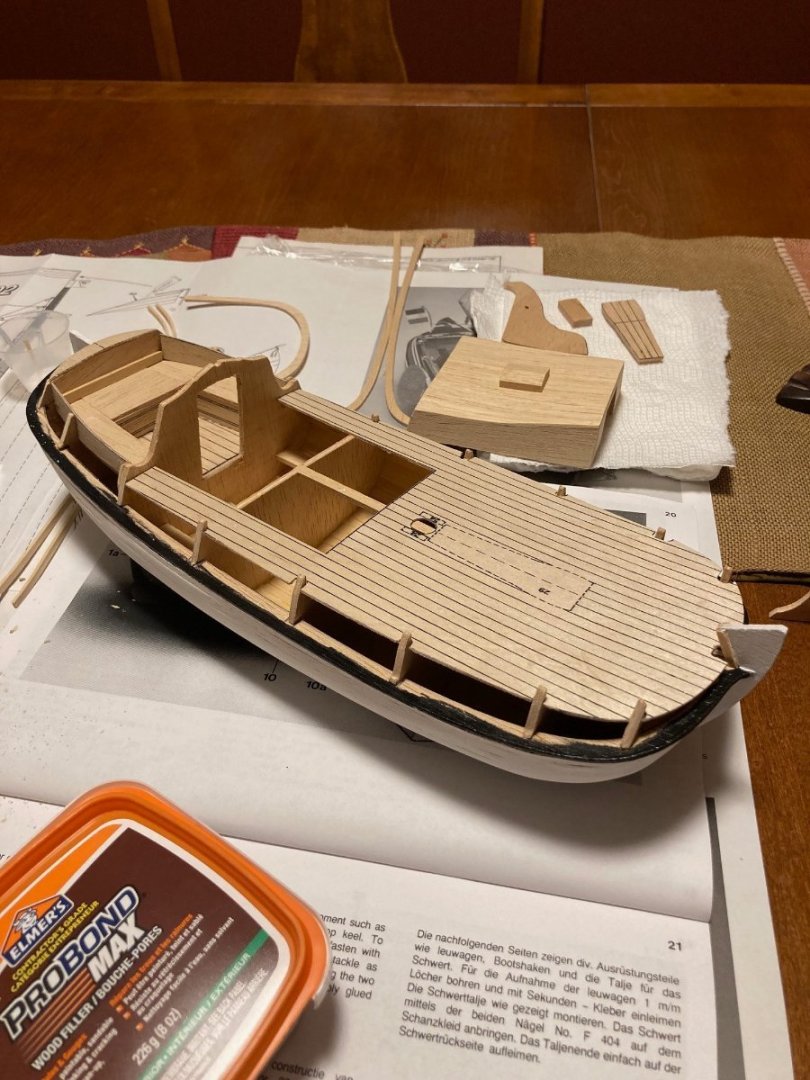
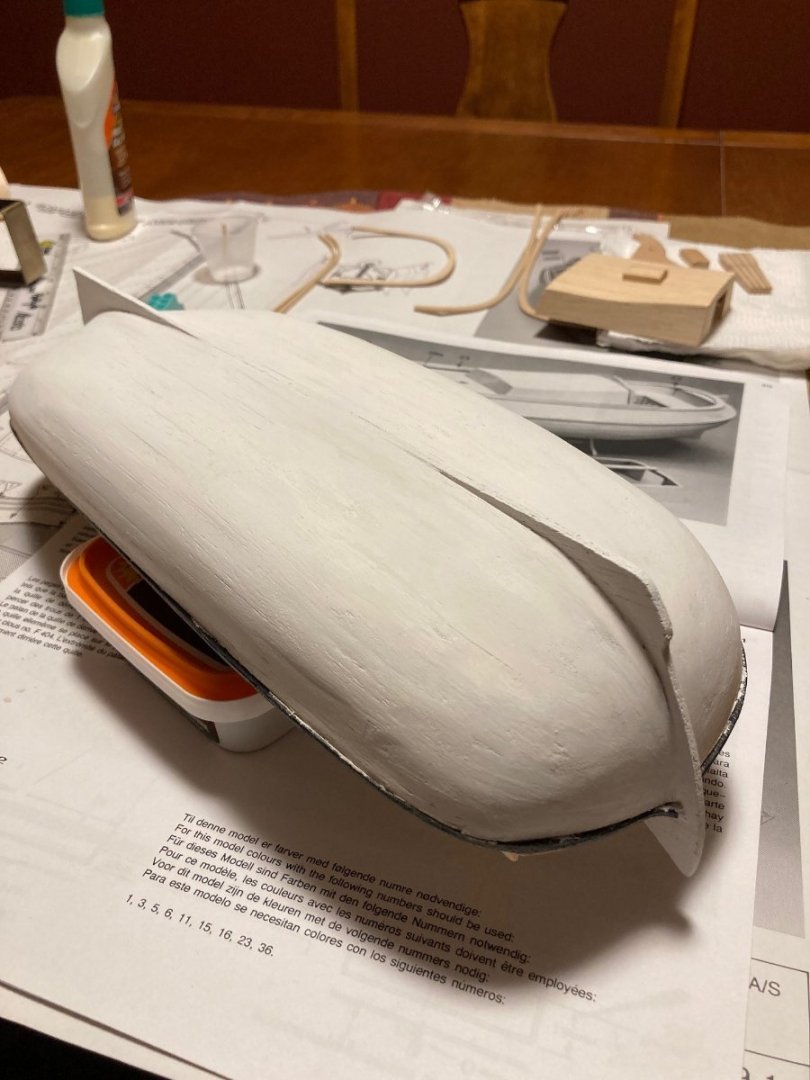
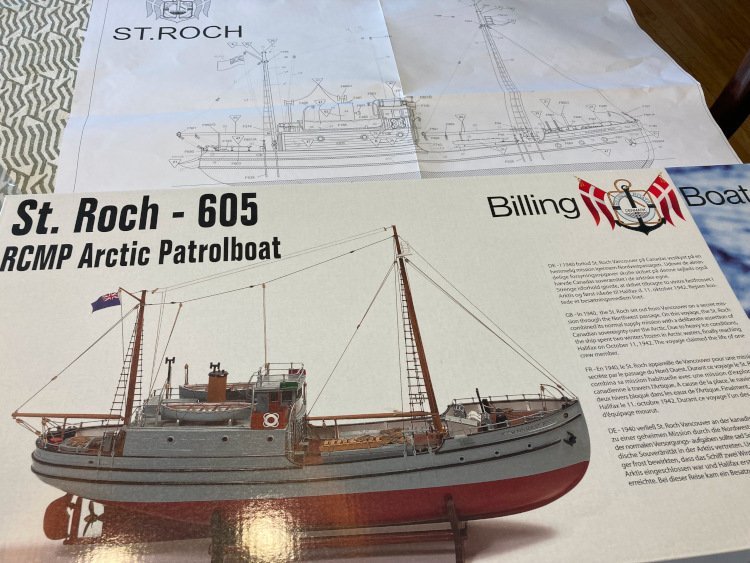
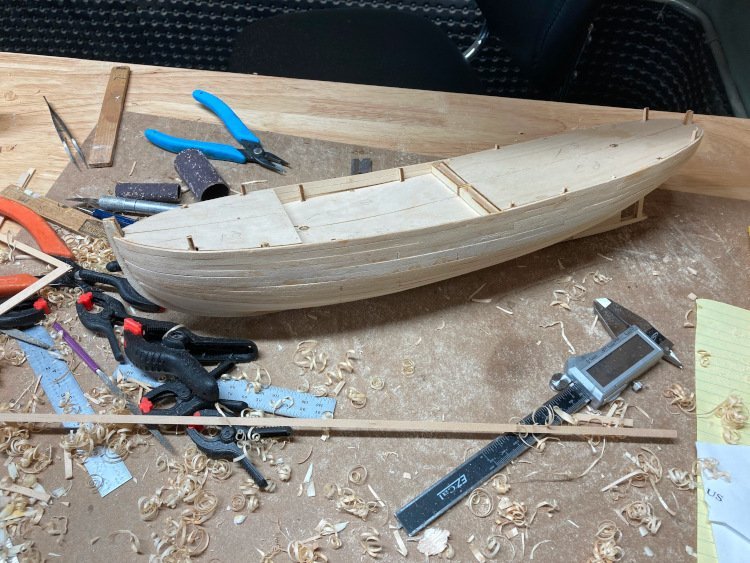
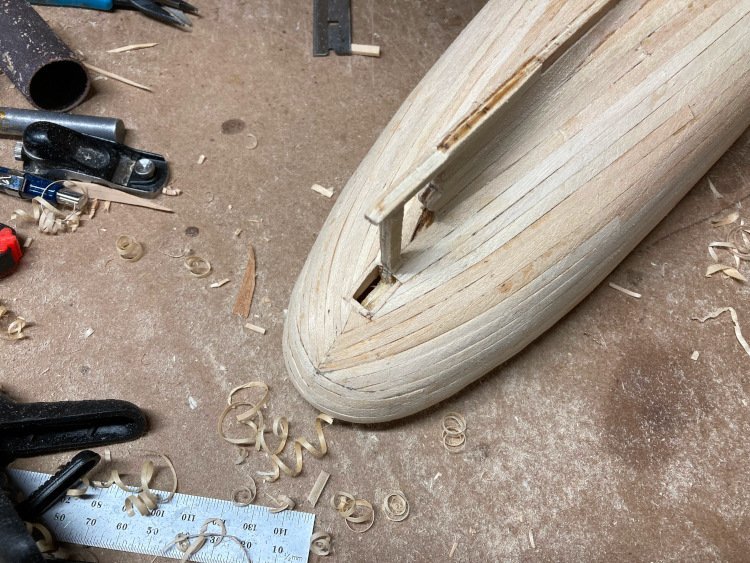
 I'm back with a build log after a bit of an absence. I've had multiple health problems over the past year, which is in part why I didn't do a build log for my HMS Pegasus and why it took me so long to build it, being away from my shop for long periods of time. However, I seem to be in decent shape for the time being (touch wood) and am back at my workbench. In my hiatus I had been pondering what my next project would be when I stumbled across this model on the Billing website, and after a little bit more research I knew I had found it. This one appealed to me for several reasons: -I wanted something simpler than my last few builds had been -this one has almost no rigging! -it's a Canadian boat. I haven't seen any other one available as a model, apart from the Bluenose -it has a remarkable history - it's only the second boat to ever travel through the Northwest Passage and the first to make the trip twice - it's the first do make the voyage in under one year and it's the first to circumnavigate North America - it resides today at the Vancouver Maritime Museum, has been declared a National Historic Site and the great Stan Rogers recorded a song about it. -there are plenty of pictures and videos online to use as a reference -did I mention that it has almost no rigging? When I was in my 20's I built (very badly) a Billing model, but I don't recall if the quality of the kit was good or bad and I had no frame of reference in any case. So this is for all intents and purposes my first Billing kit and I have a mixed reaction to it. So far the good things are: -the laser cutting is very good and the bulkheads and centre keel fit together extremely well. They're as good as I have ever encountered. -there are quite few specialized brass fittings which are really nice and of good quality. -while the model is simplified, there are no glaring errors in its representation of the real boat. However, there are some negatives too: -there are too many poor quality plastic fittings which come on a sprue just like it was a plastic model car kit. -the hull and deck planking material is pretty rough and not very consistent in width. -while I did want a simpler model, there is too much simplification with this one. Built straight out of the box it would look like one of those gift shop ship models. At 1:72 it's large enough for the designer to have incorporated much more detail. -the plans are poorly drawn. The instruction book is all but useless, which is fine - I didn't expect it to be otherwise, but the plans are disappointing. They appear to be a 1:1 representation of the model, but they are very inaccurate. For example for some of the deck components there are discrepancies in size of up to 1/2" between the elevation and plan views. It's impossible to take measurements from the plan. Nevertheless, it's going to be lots of fun adding detail and upgrading many of the fittings. I currently have big orders in at BlueJacket and Cornwall. So far, I have the hull planked, in my usual "suitable for filler and paint" style. I'm a terrible planker, but I never worry about it because filler and paint are my best friends. I've used some planking from my stash, rather than the kit provided planking. I've made two improvements to the stern area. The kit instructions would have you just cut all of the planking off even at the last bulkhead before the stern. Then you add the two stern blocks and sand them even with the finished planking, leaving them unplanked, just to be painted. I chose to install the stern blocks first and plank over them in the usual way, however I found it to be quite a difficult stern to plank. Secondly, the kit provides for no opening to accept the rudder; it's meant to just butt up against the bottom of the hull. The real boat has a framed rectangular opening, so I added that detail. That's where I'm at! David
- 61 replies
-
- 9
-
-
- St. Roch
- Billing Boats
- (and 1 more)
-
 Hello all, I Just want to announce that I started my HMS Victory build last January, but have only just gotten around to starting this build log, I'll add a few posts over the next few days to bring the log up to speed of where I am currently (78 hours in) with accompanying pictures. Opening the Box, numbering the parts, building the Slip and assembling the keel and the Hull Bulkheads took me to about 21 hours
- 11 replies
-
- 4
-
-
- victory
- billing boats
- (and 1 more)
-
 Santa has been kind to me , looking forward to making a start on this model of a truly historic vessel. St. Roch was designated a national historic site of Canada because: she became the first ship to cross from the Pacific to the Atlantic by the North West Passage; she was also the first ship to complete the hazardous journey in both directions. The Canadian-built St. Roch is valued as an excellent example of Canada’s maritime history. She navigated the Northwest Passage, arriving in Halifax in 1942, after spending two winters frozen in the ice. She was the second ship to make the Passage, and the first to conquer the journey from the Pacific to the Atlantic. In 1944, the refitted St. Roch returned to Vancouver via the more northerly, deep route of the Prince of Wales Strait in eighty-six ice-free days – the first to navigate the Northwest Passage in a single season. Retired in 1948, St. Roch was sent to Halifax via the Panama Canal in 1950, making her the first ship to circumnavigate North America. Under the command and leadership of Sergeant Henry Larsen (1899-1964) who was first mate and captain for twenty years, the voyages of the St. Roch demonstrated Canadian sovereignty in the Arctic. She extended and maintained Canadian control over its vast northern territories as an all-purpose supply, patrol and transport vessel and governmental representative to service isolated and relatively inaccessible R.C.M.P. detachments by settling disputes and conducting a census of the Inuit. During this time the St. Roch was the only federal presence in the far north. During the Second World War the St. Roch was sent through the North West Passage to protect war industries in the north, specifically a mine in Greenland which was the sole source of cyrolite essential to the production of aluminum. The heritage value lies in the original design and the multiple refits that were designed to deal harsh conditions and reflect the changing technologies in marine transportation over the course of her working life. The St. Roch has been restored to her appearance during her epic journeys between 1940-1944 that was a mix of original elements and subsequent refits. Additional value in her material fabric include the spare and well-considered details of her design in terms of the efficiency and economy of her living and working quarters.
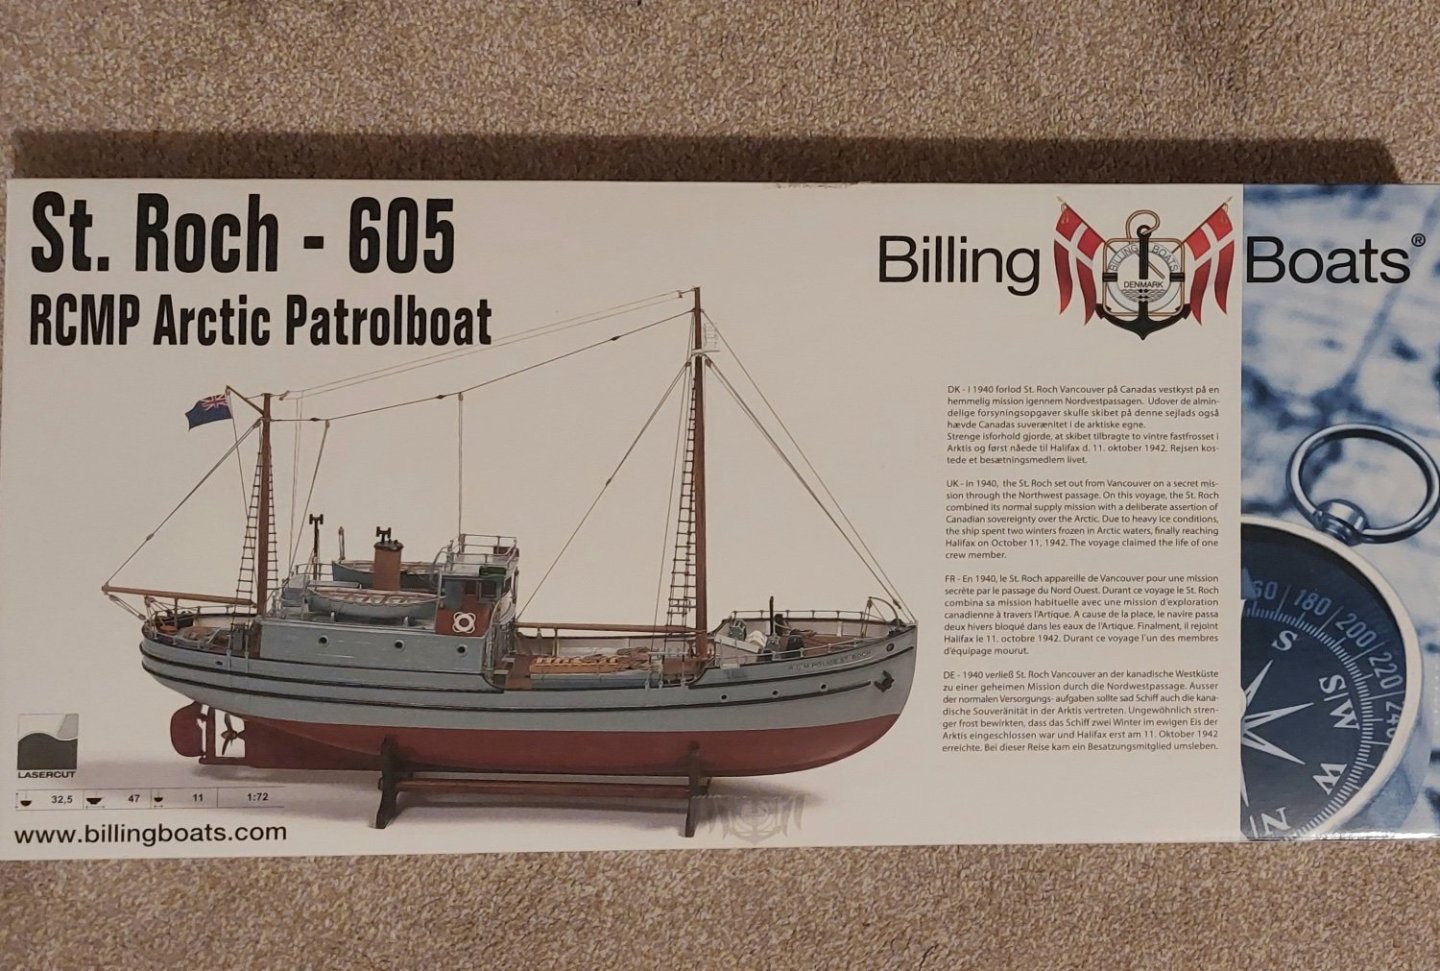
-
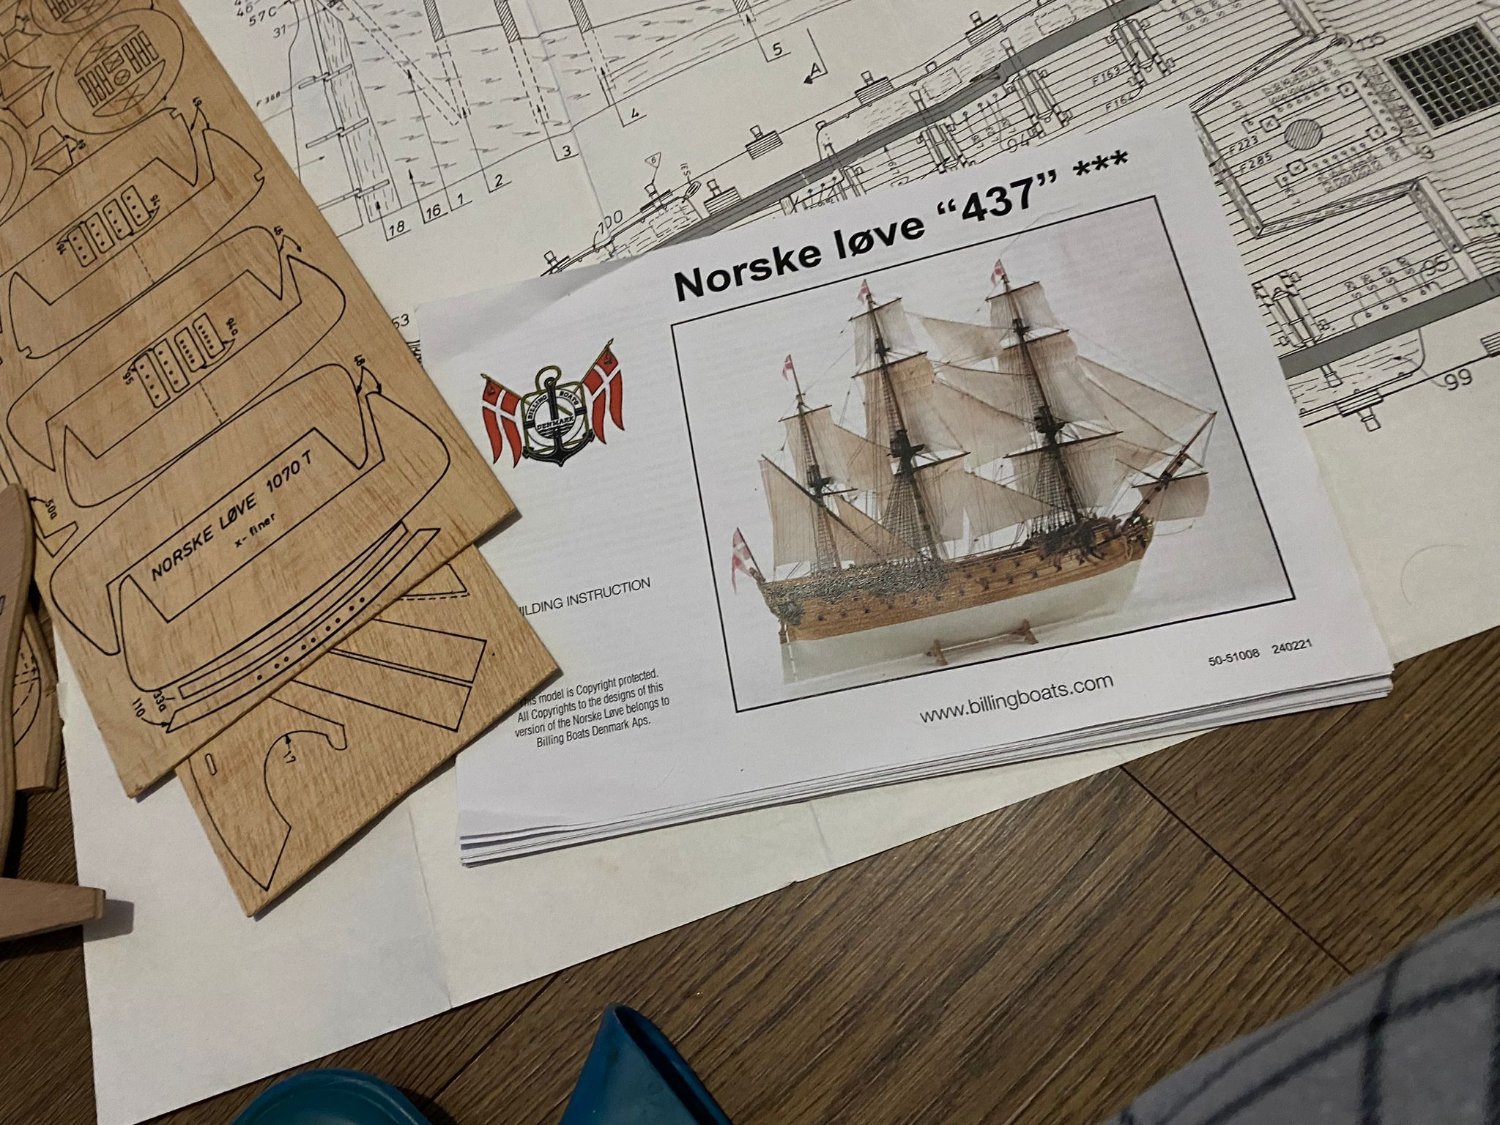
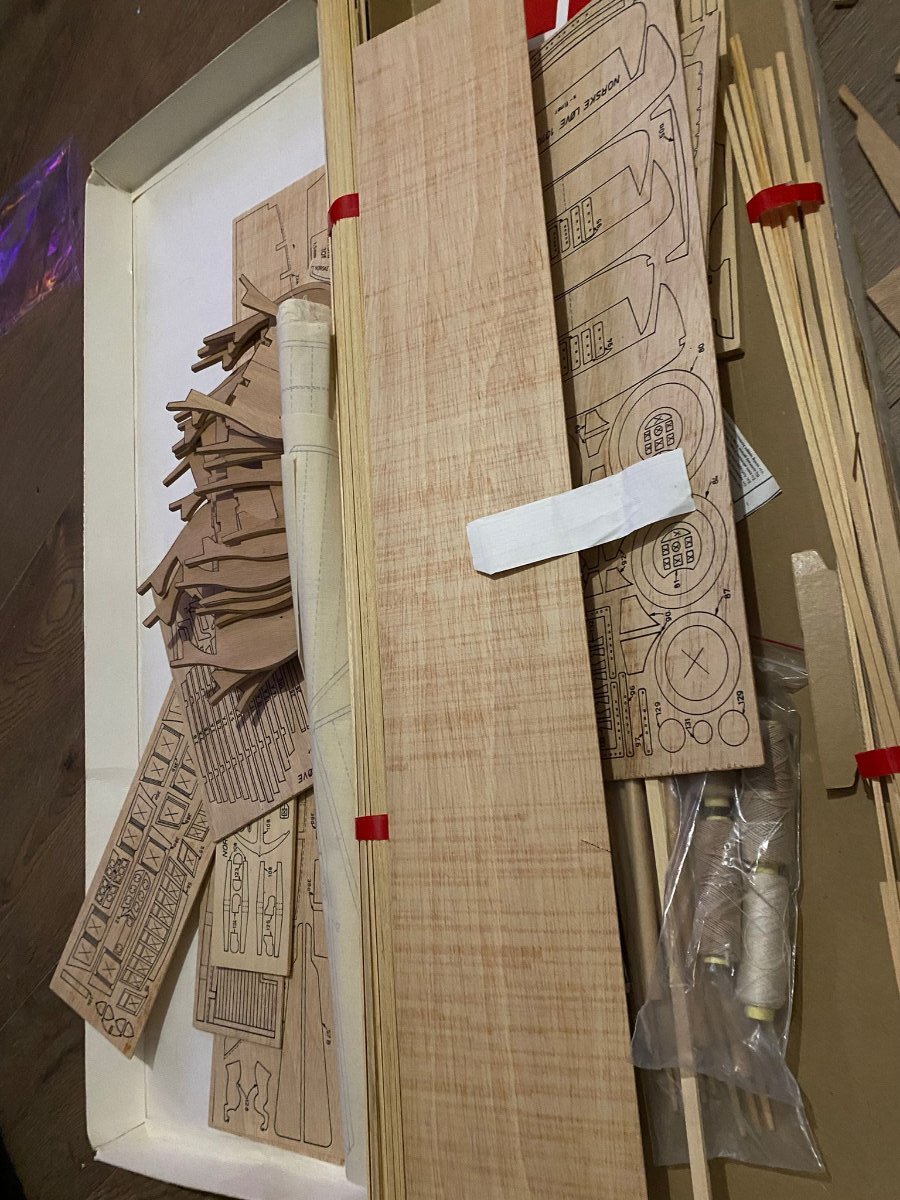
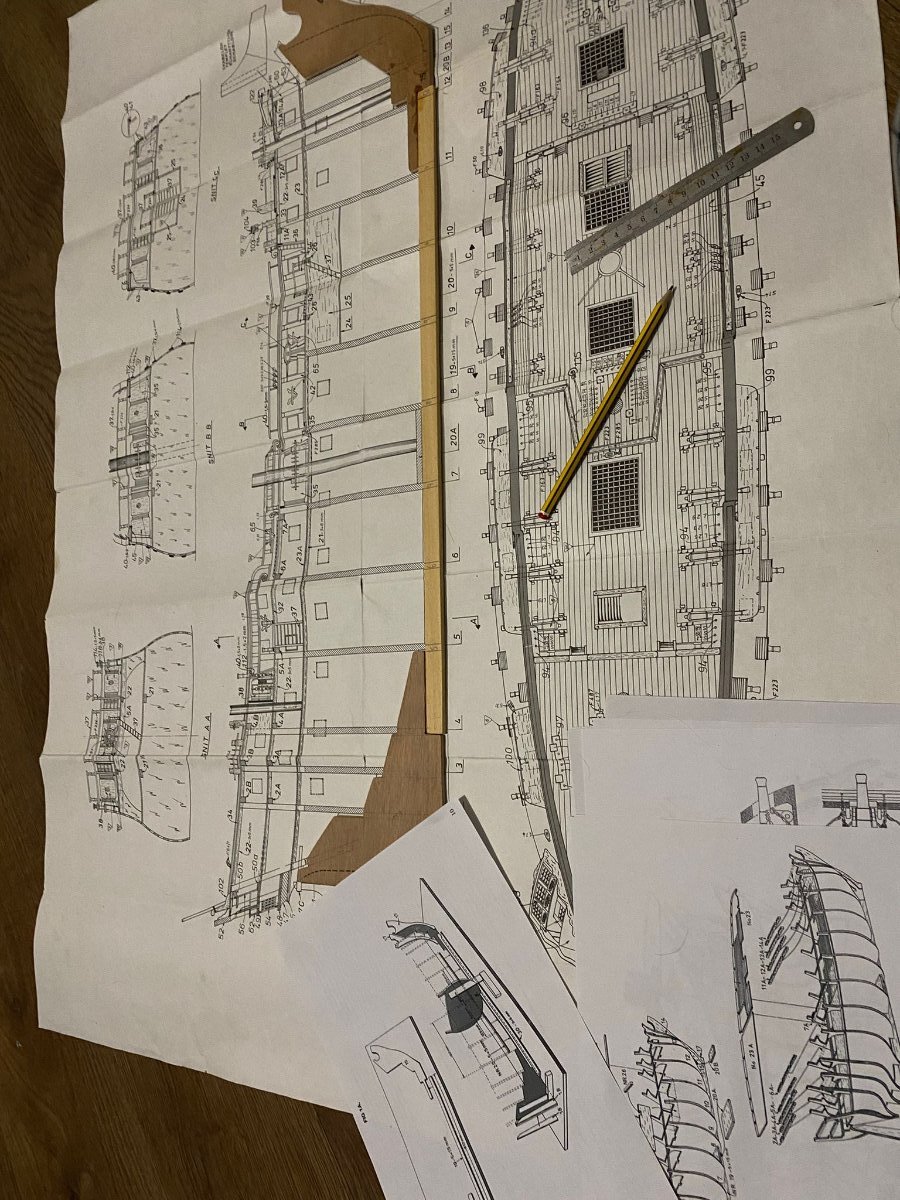
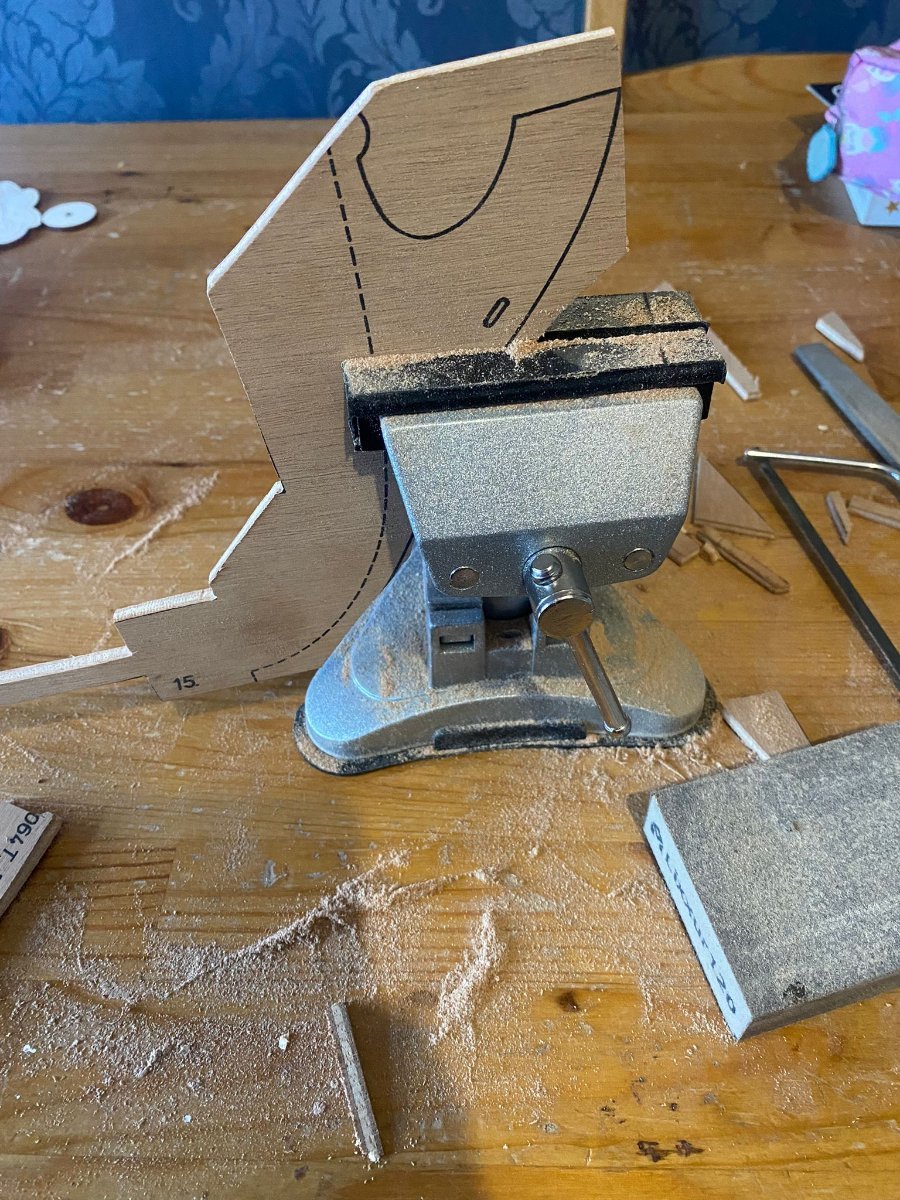
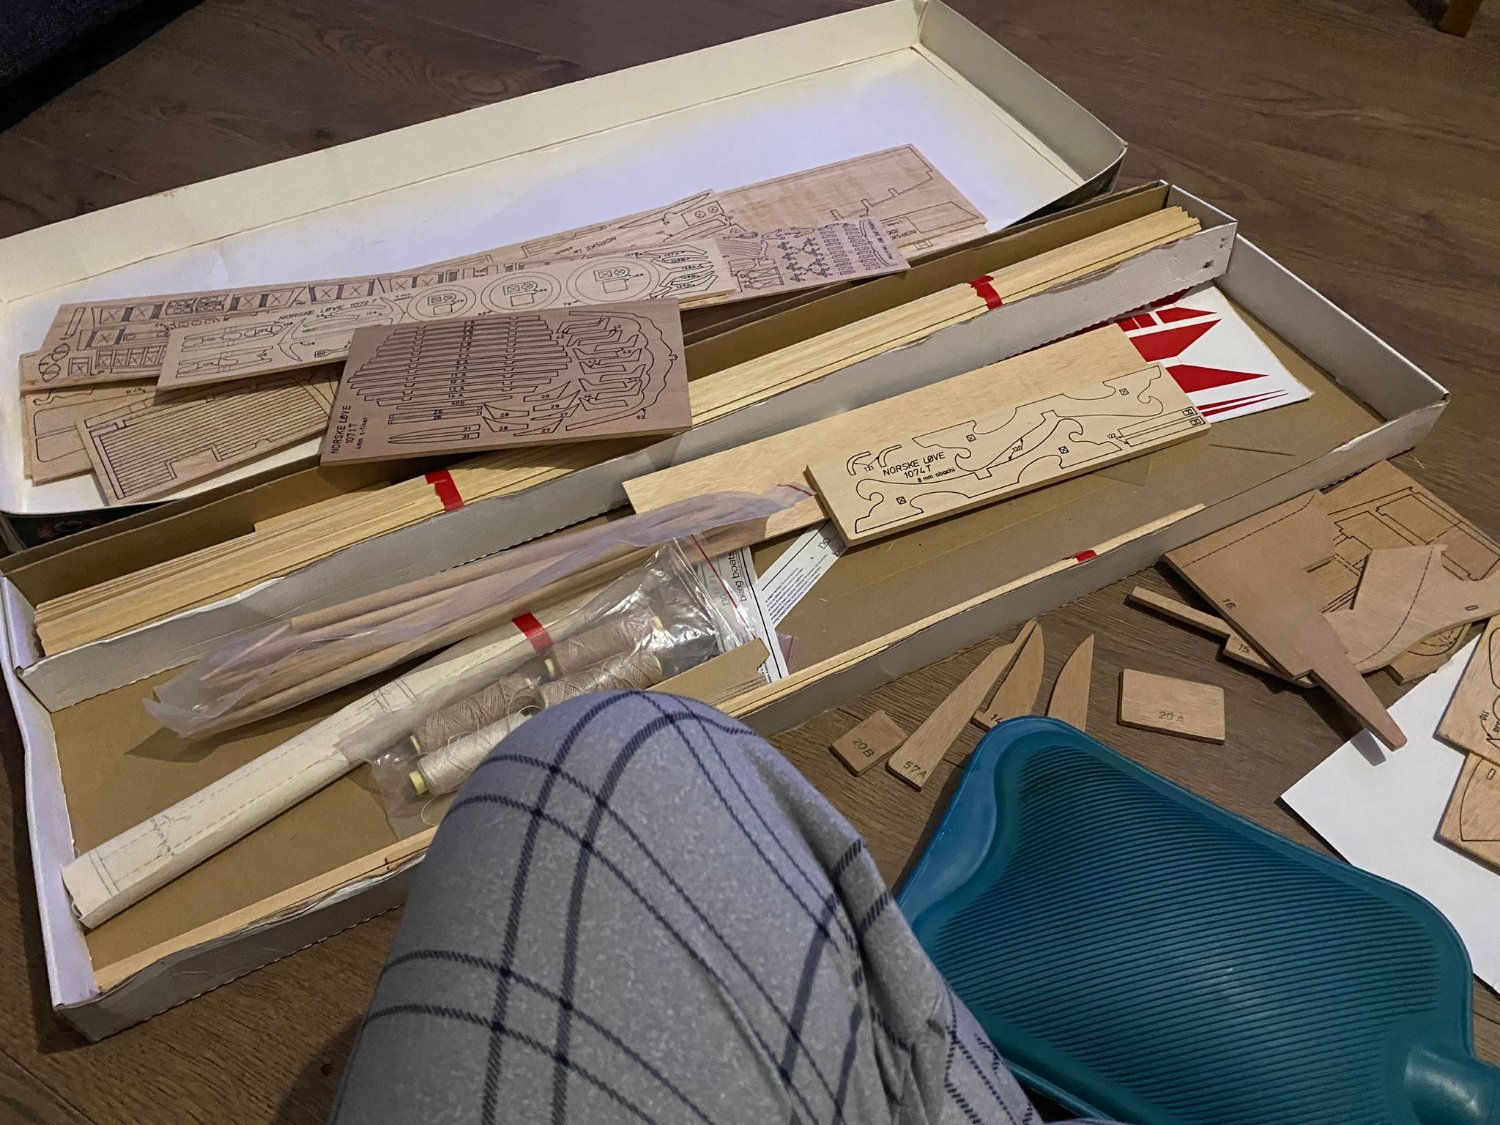
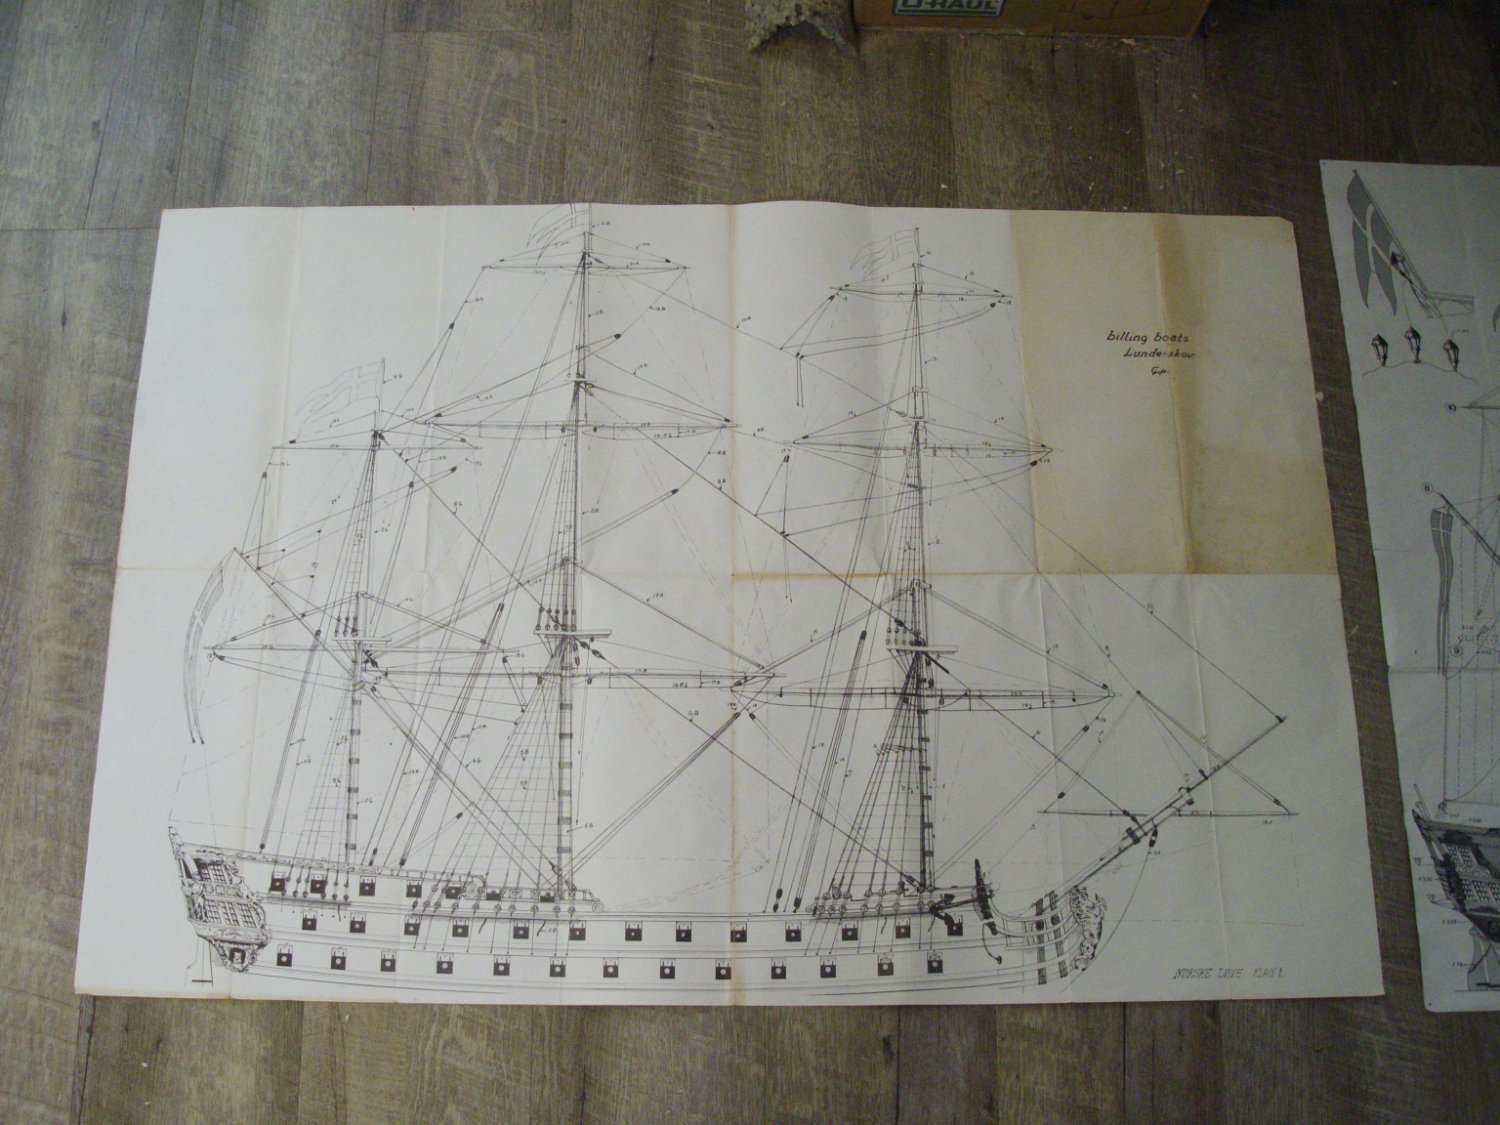
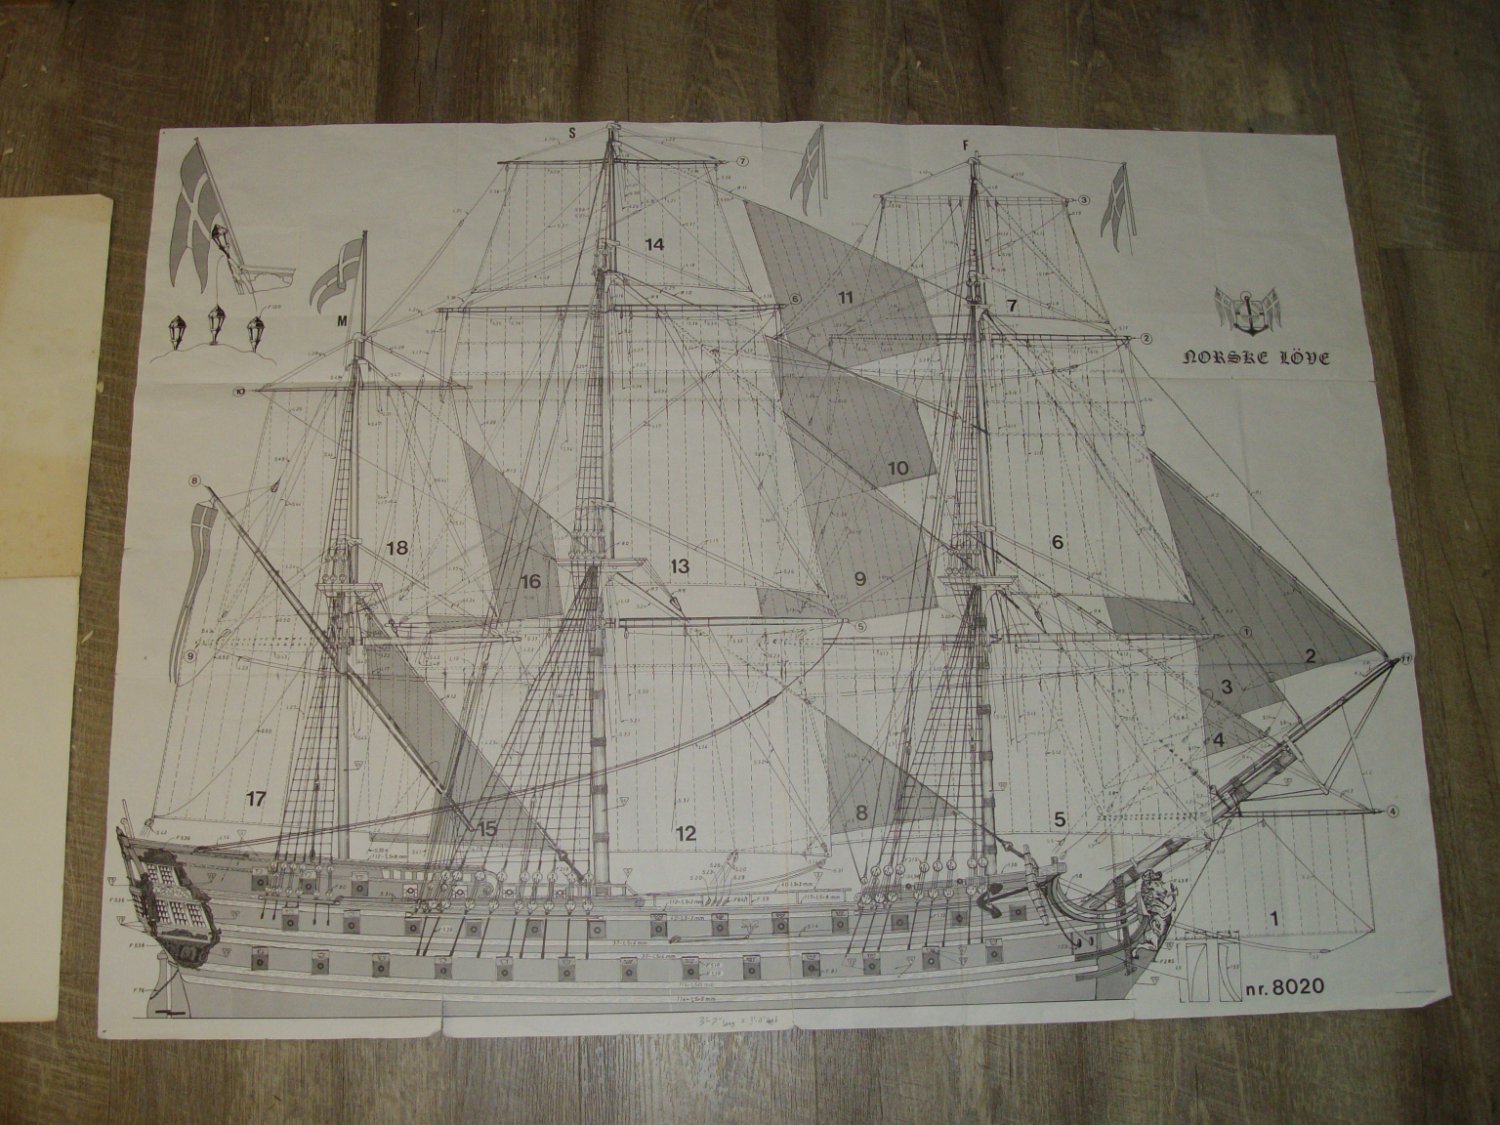
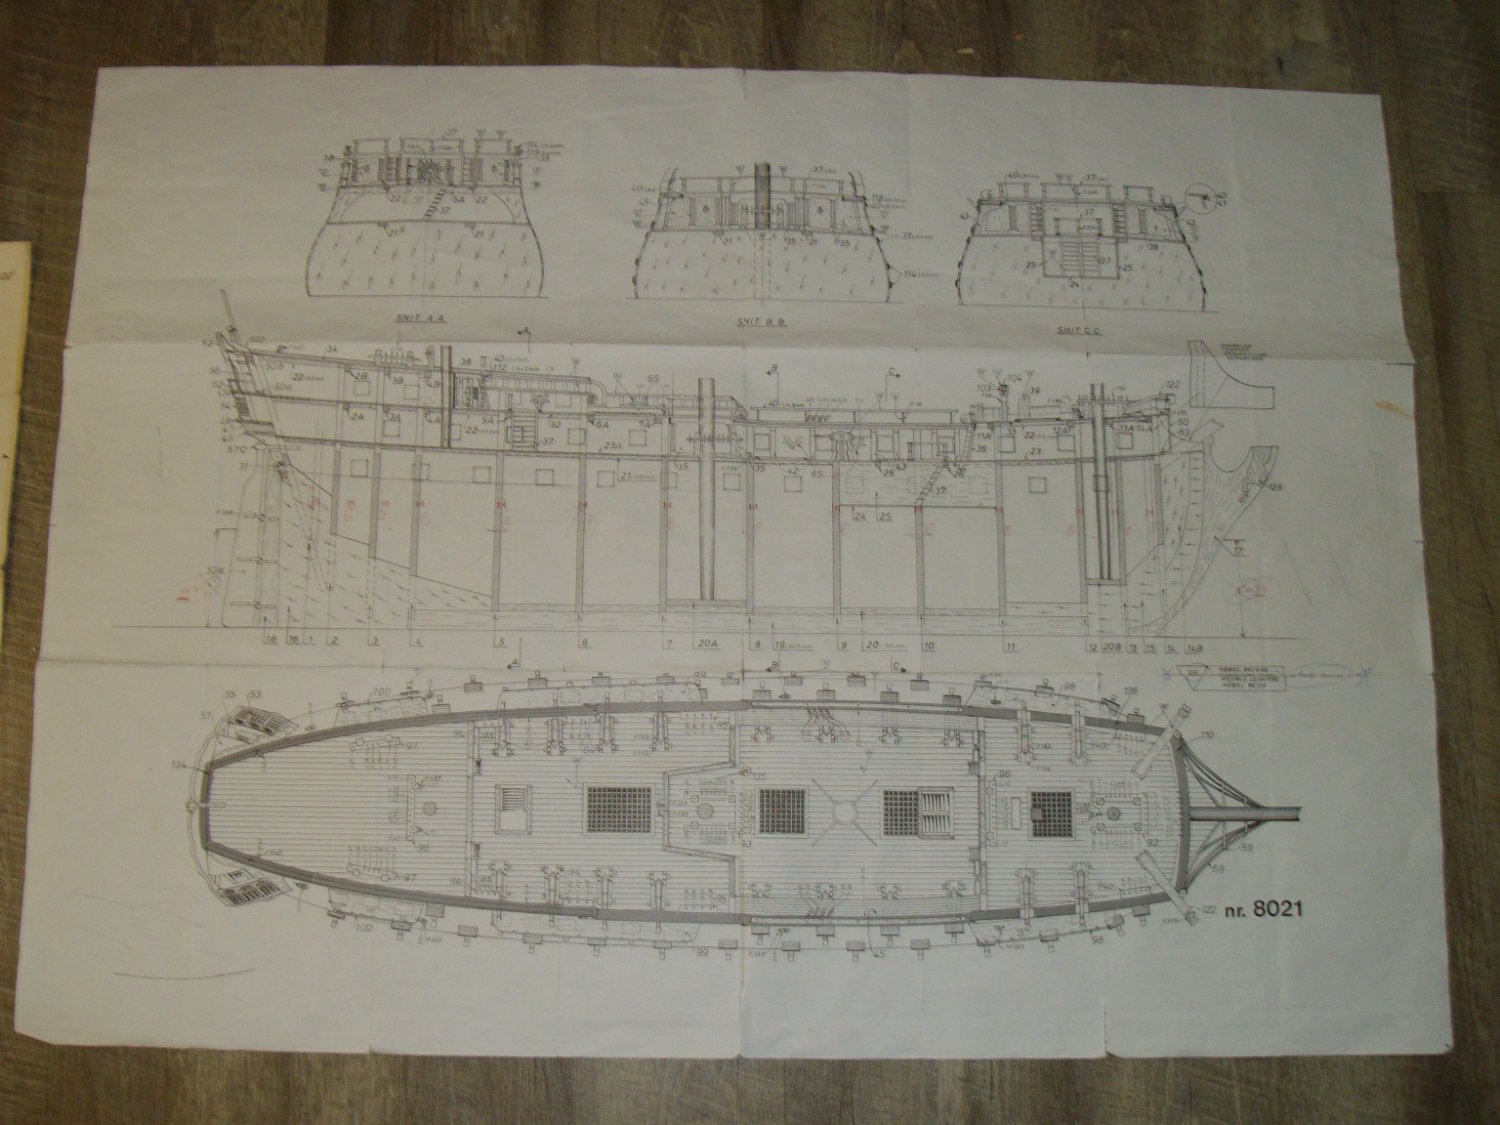
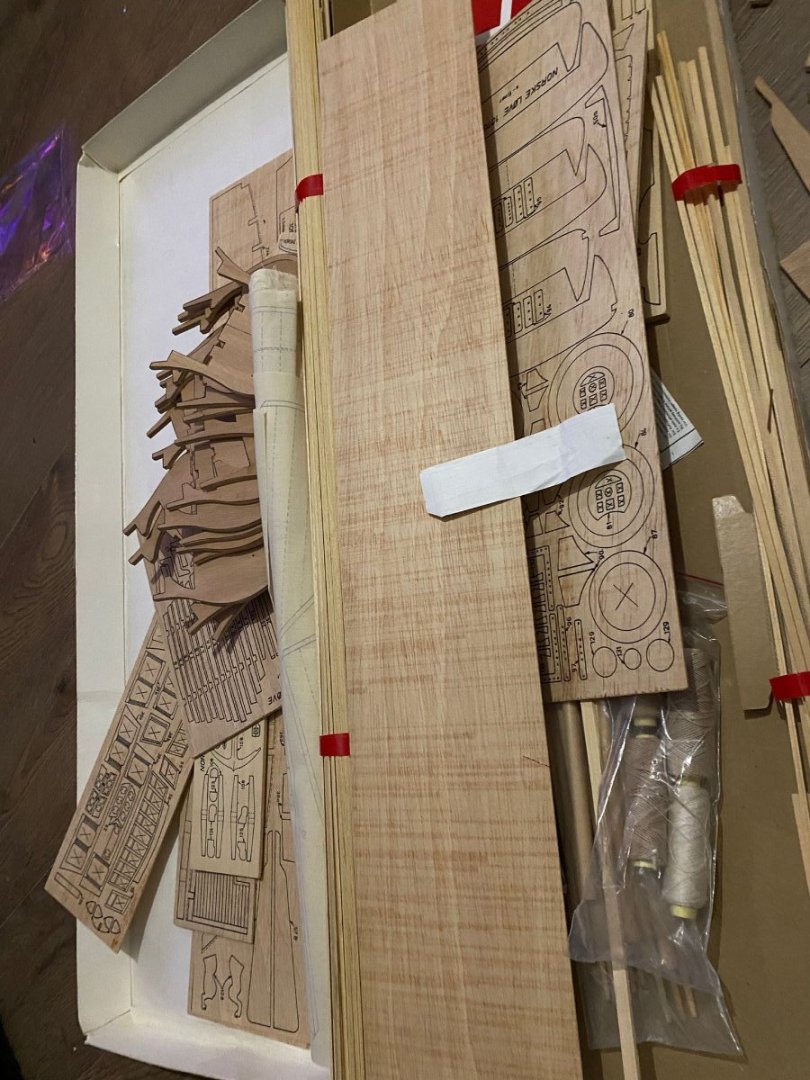
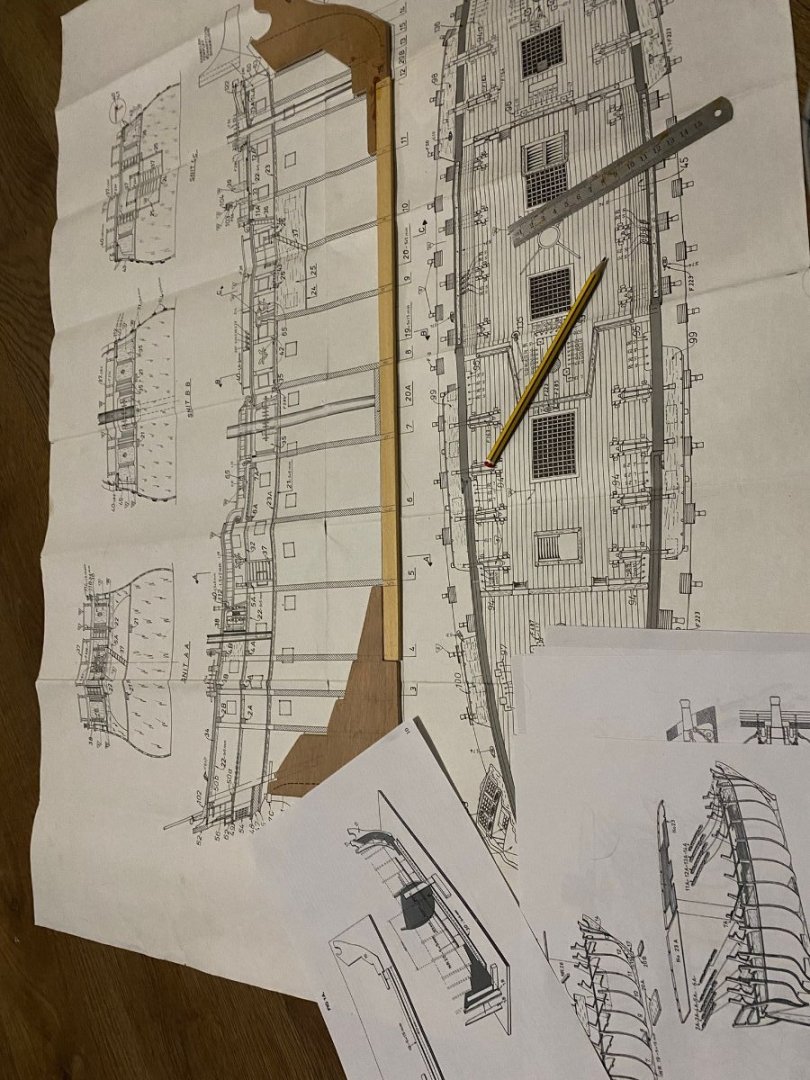
 Hello, first post here but long time lurker. I've recently started building the Norske Love model from Billing Boats that I brought from Ebay. Lets see how it goes, right! Billing Boat Norske Love that I brought from Ebay! Hoping all the pieces are here... Unlike the Occre models that I'm used to, Billing dont Lazer cut the wood fittings that you need. Didnt want to buy a jigsaw, so using the vice and a couple of small saws to cut out the pieces that I need. The model didn't come with instructions, only the massive blue prints in the photo, however, you can find the instructions easy enough online. First step then, cut everything out and sand it all down. Expect lots of cutting and sanding photos! Quick self promotion if its allowed! https://www.instagram.com/byron_dockyard/ I've posted all my previous builds on here plus random boat building / set up photos. I hope this is okay.


-
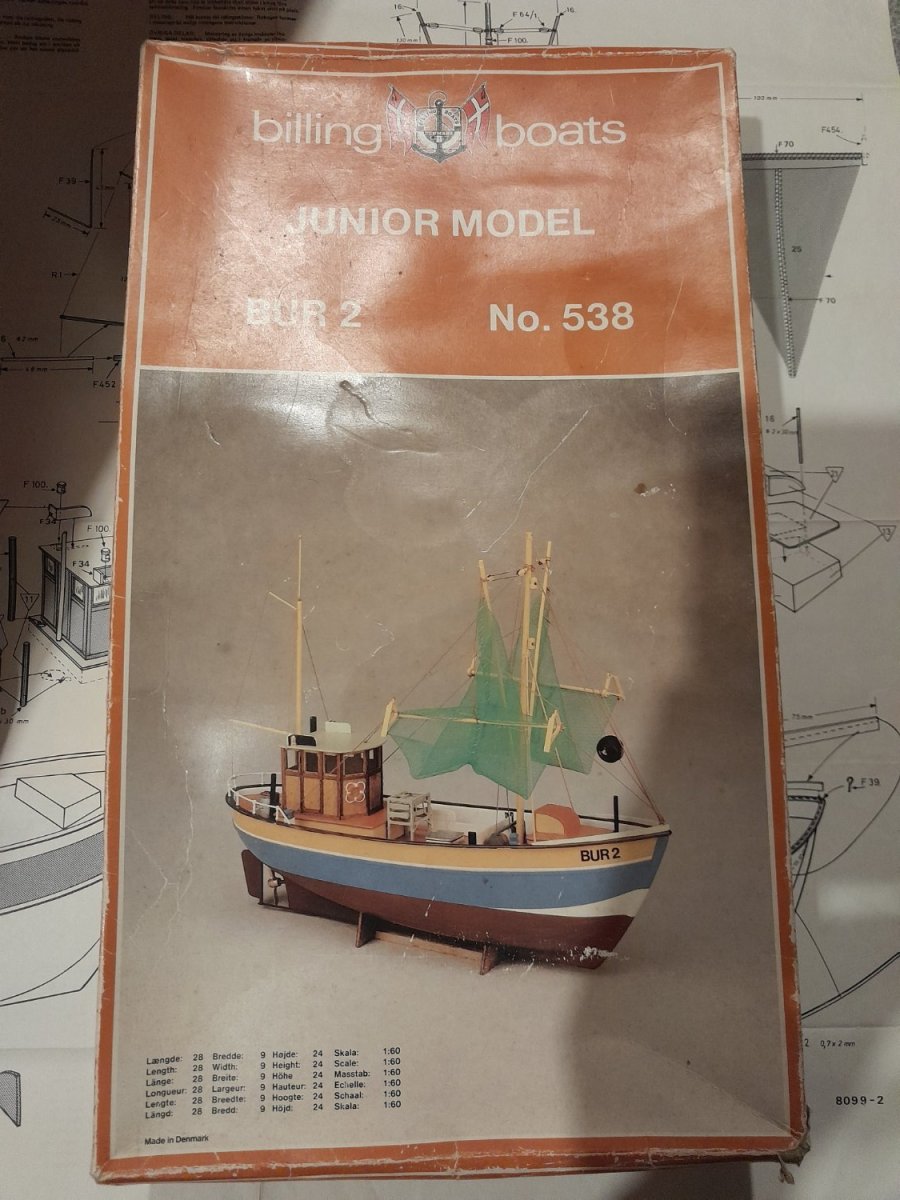
 Nearly forty years ago I was gifted BUR2 by Billing Boats as a birthday present. I started it, made a mess of it, got bored, and put it back in the box and the box in the attic where it has sat ever since. But, now I have a hankering to try model boat building as a hobby, and so I have decided to start off by completing this long mothballed project. Billing Boats have long since stopped producing the BUR2 kit, but their current "Rainbow Cutter" kit is identical in every aspect other than colour scheme and decals. So this build log will also be suitable to anyone building the Rainbow. The kit itself is mixed media. It has a lot of plastic: the hull is a single piece of moulded plastic; but it also has wood (strip, dowelling, and pre-cut), metal, rope, etc. Instructions are minimal although there is a large A2 plan sheet; fortunately builders of the Rainbow are much better served these days as Billing Boats now provide a proper instruction booklet that can be downloaded from their website. The big mistake I made with this kit as a child was painting the hull far too thickly. The paint ran leaving ridges of thick paint. I need to correct this by rubbing down the old paint and spraying a new coat over the top.
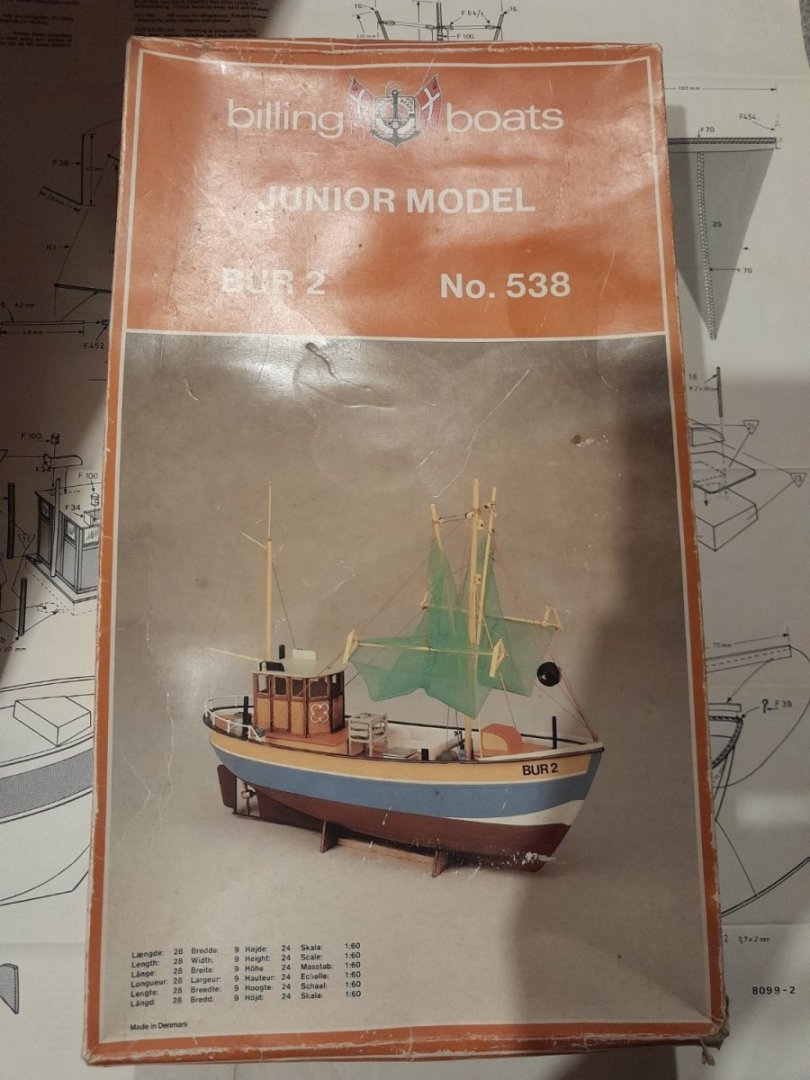
- 3 replies
-
- 2
-
-
- BUR2
- Rainbow Cutter
- (and 1 more)
-
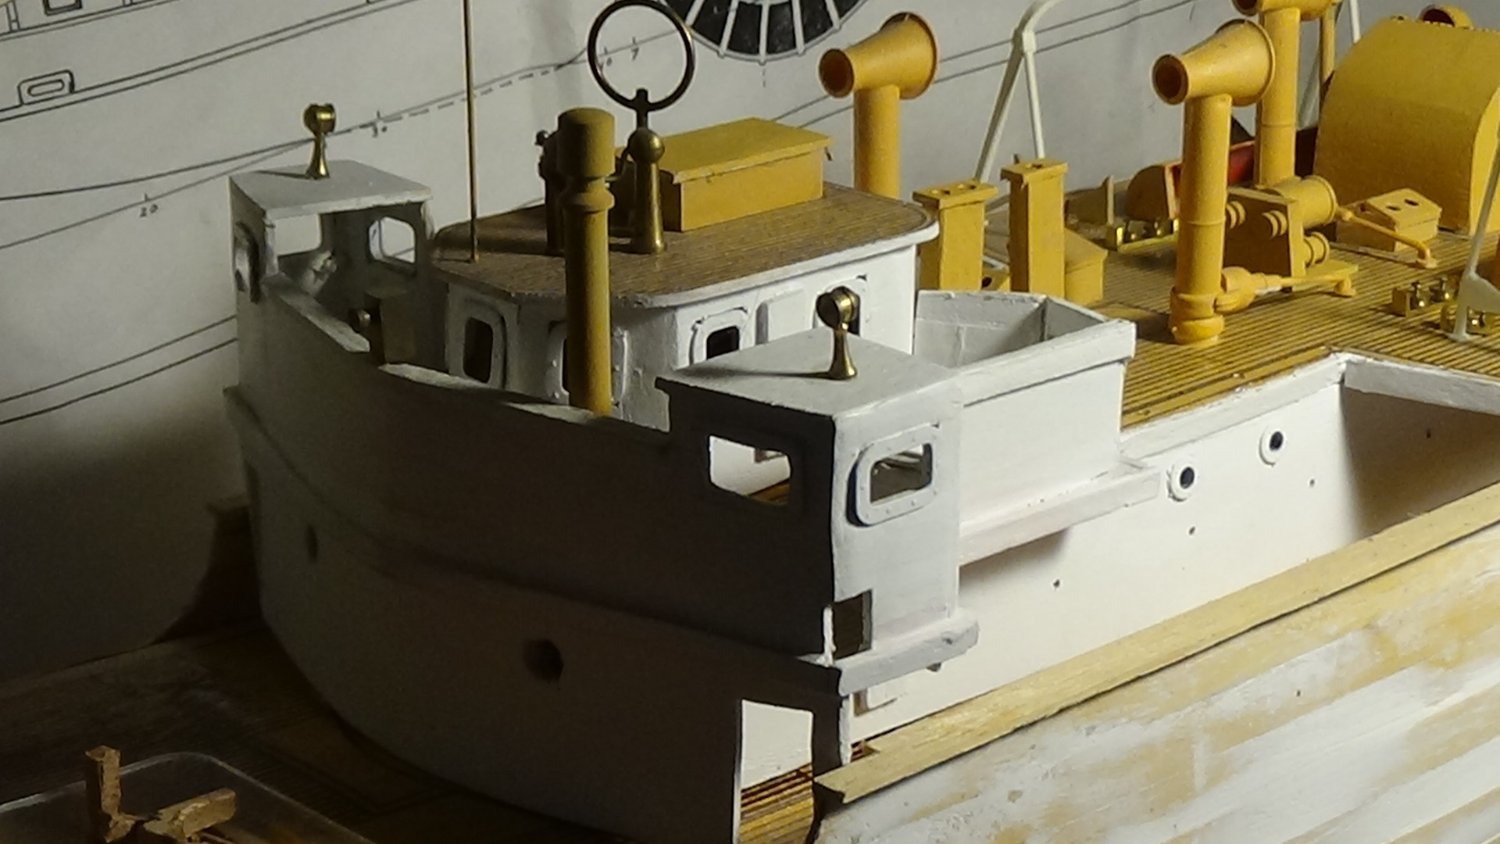
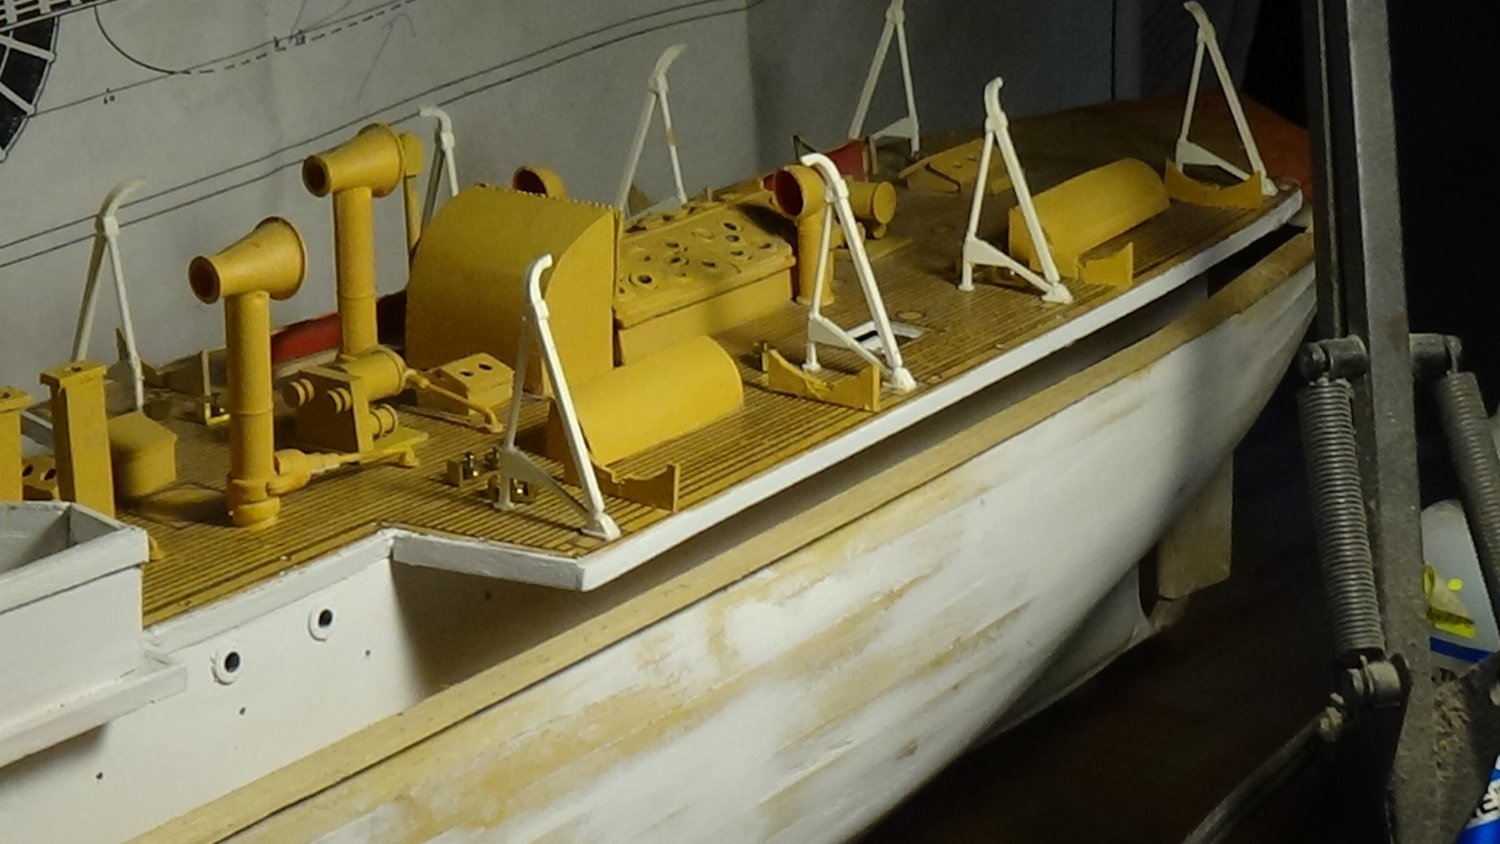
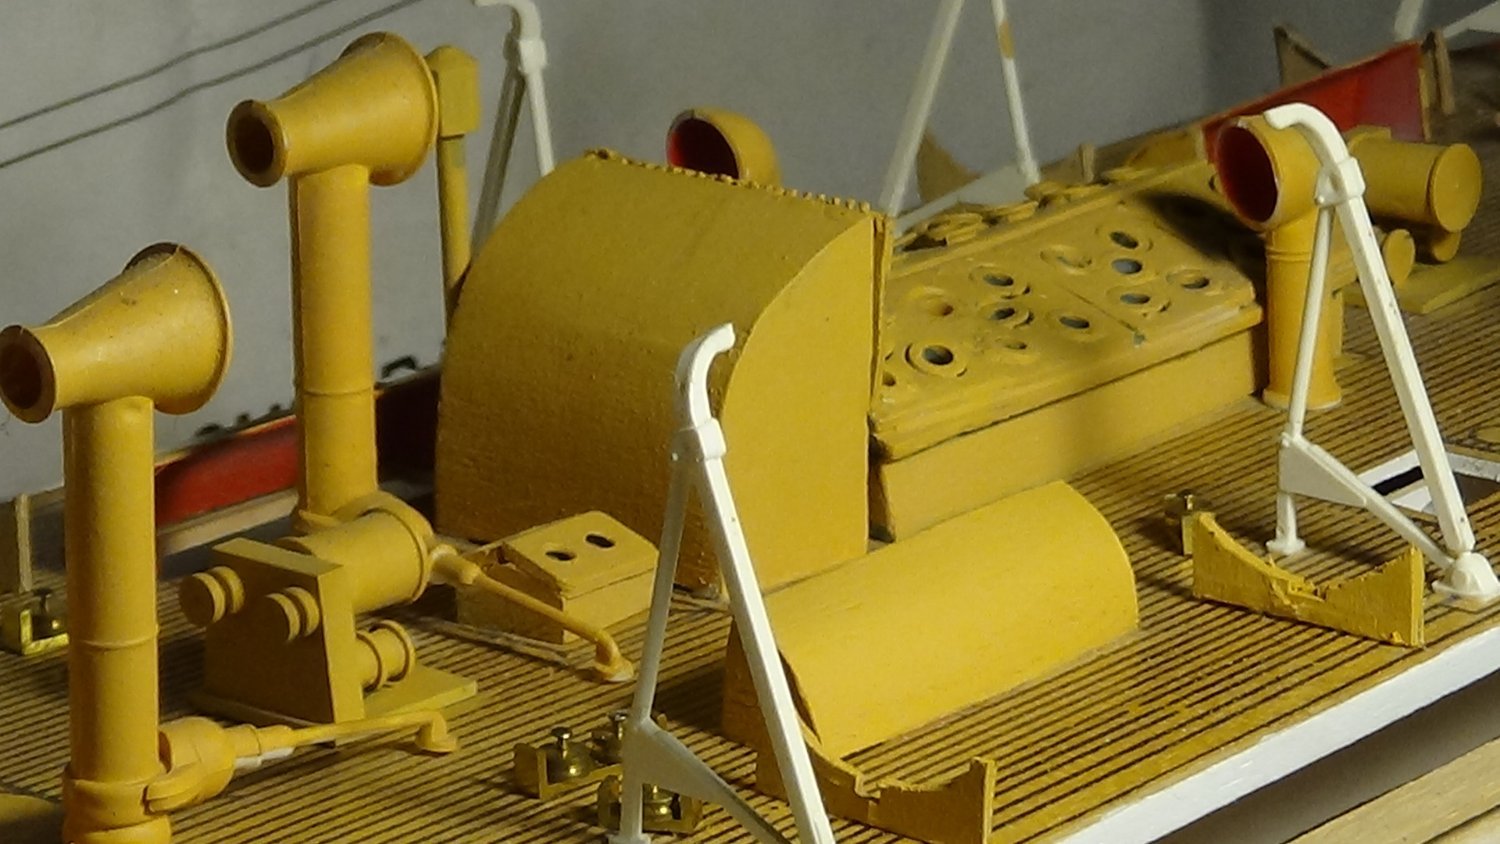
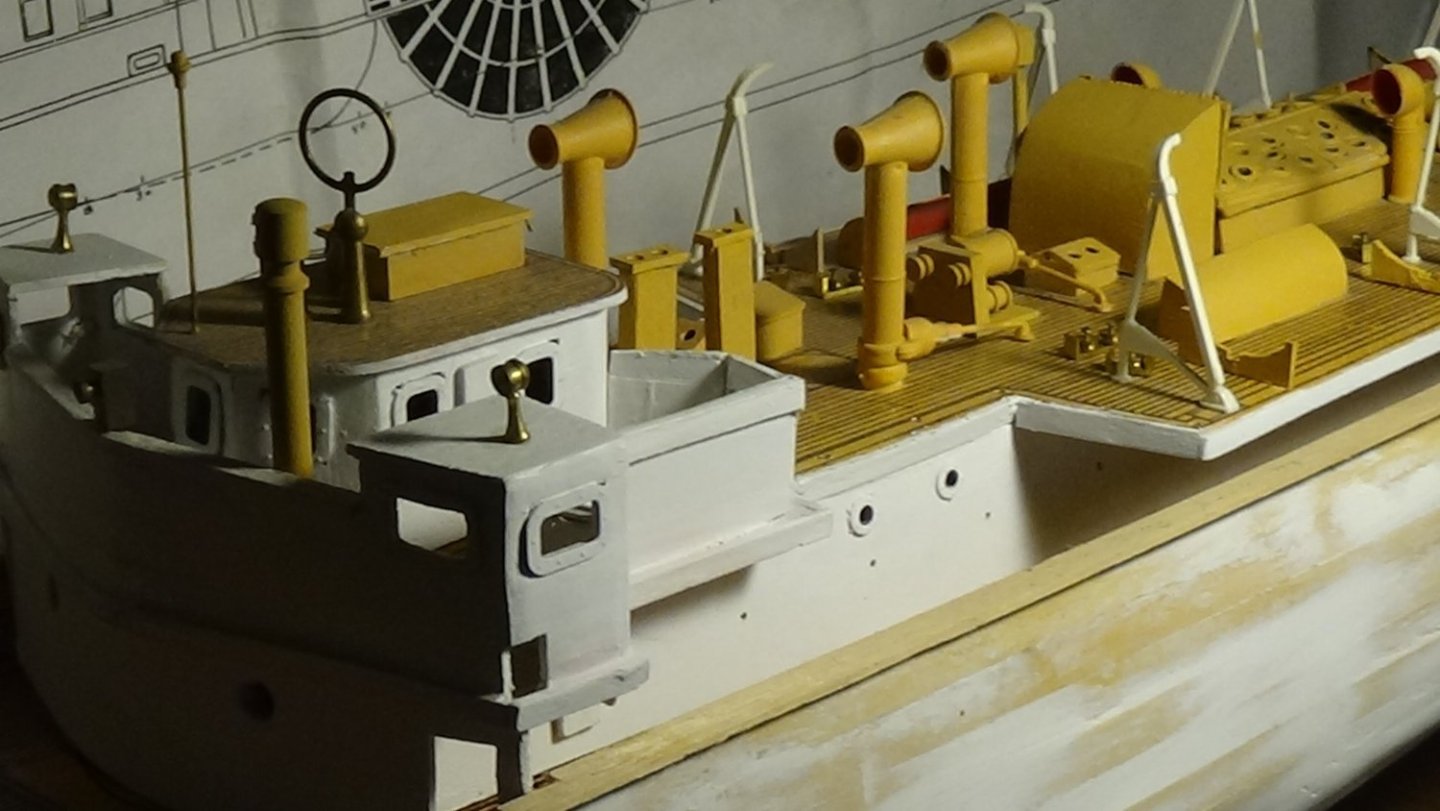
 Ahoy modelWQrights A Build I Been working On Off An On Like Many Others. When I Was in the Navy I Purchased This kit Through The Ships Store Now It Is Time to Finish This the Project Will Be A RC Build As Of the Construction Thus Far I am completing The Super Structure Decks And Fitting Out with the fittings. Should Have Everything topside finished By The end Of This week Then I Will Resume on the Hull thanks for you views and comments I am Honored Frankie Day
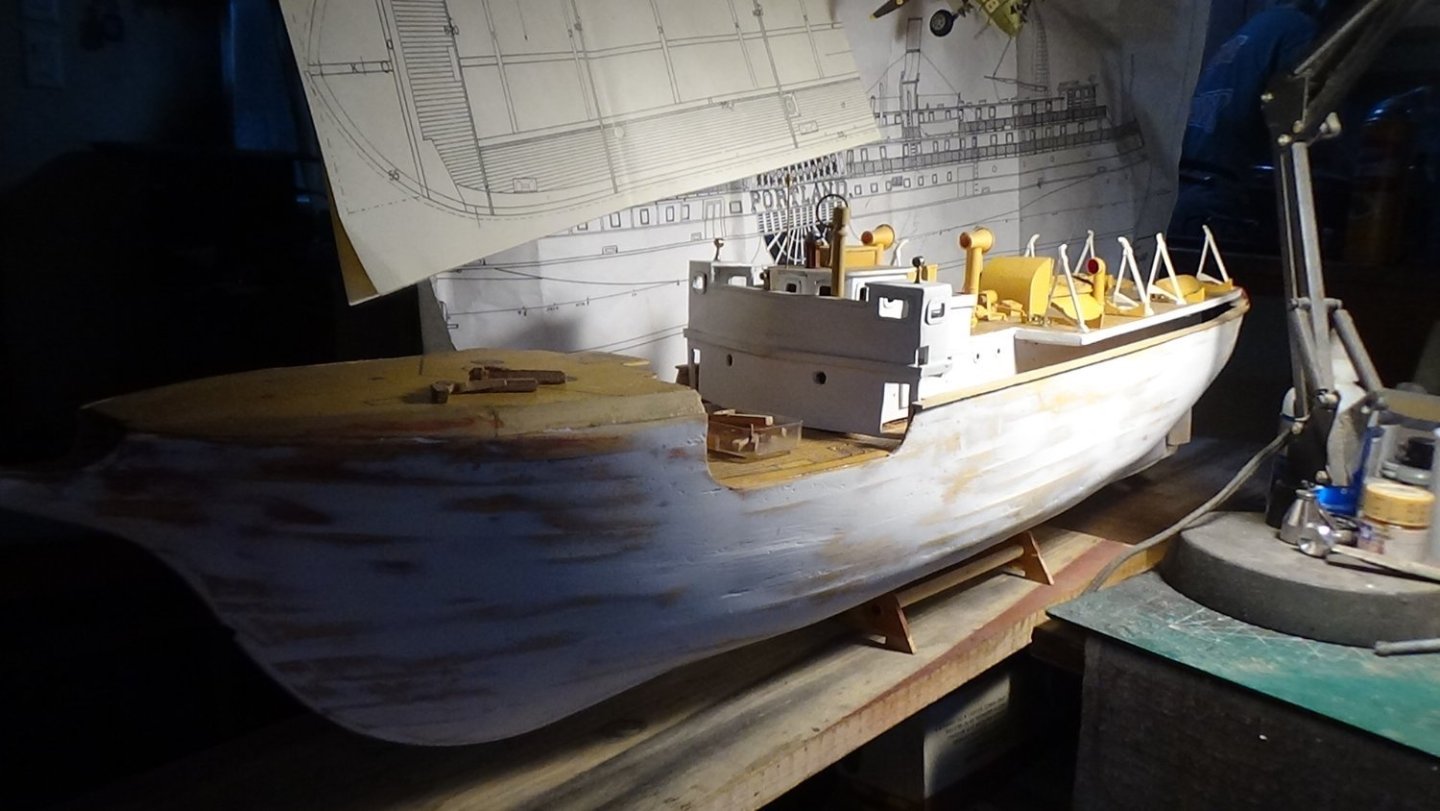


-
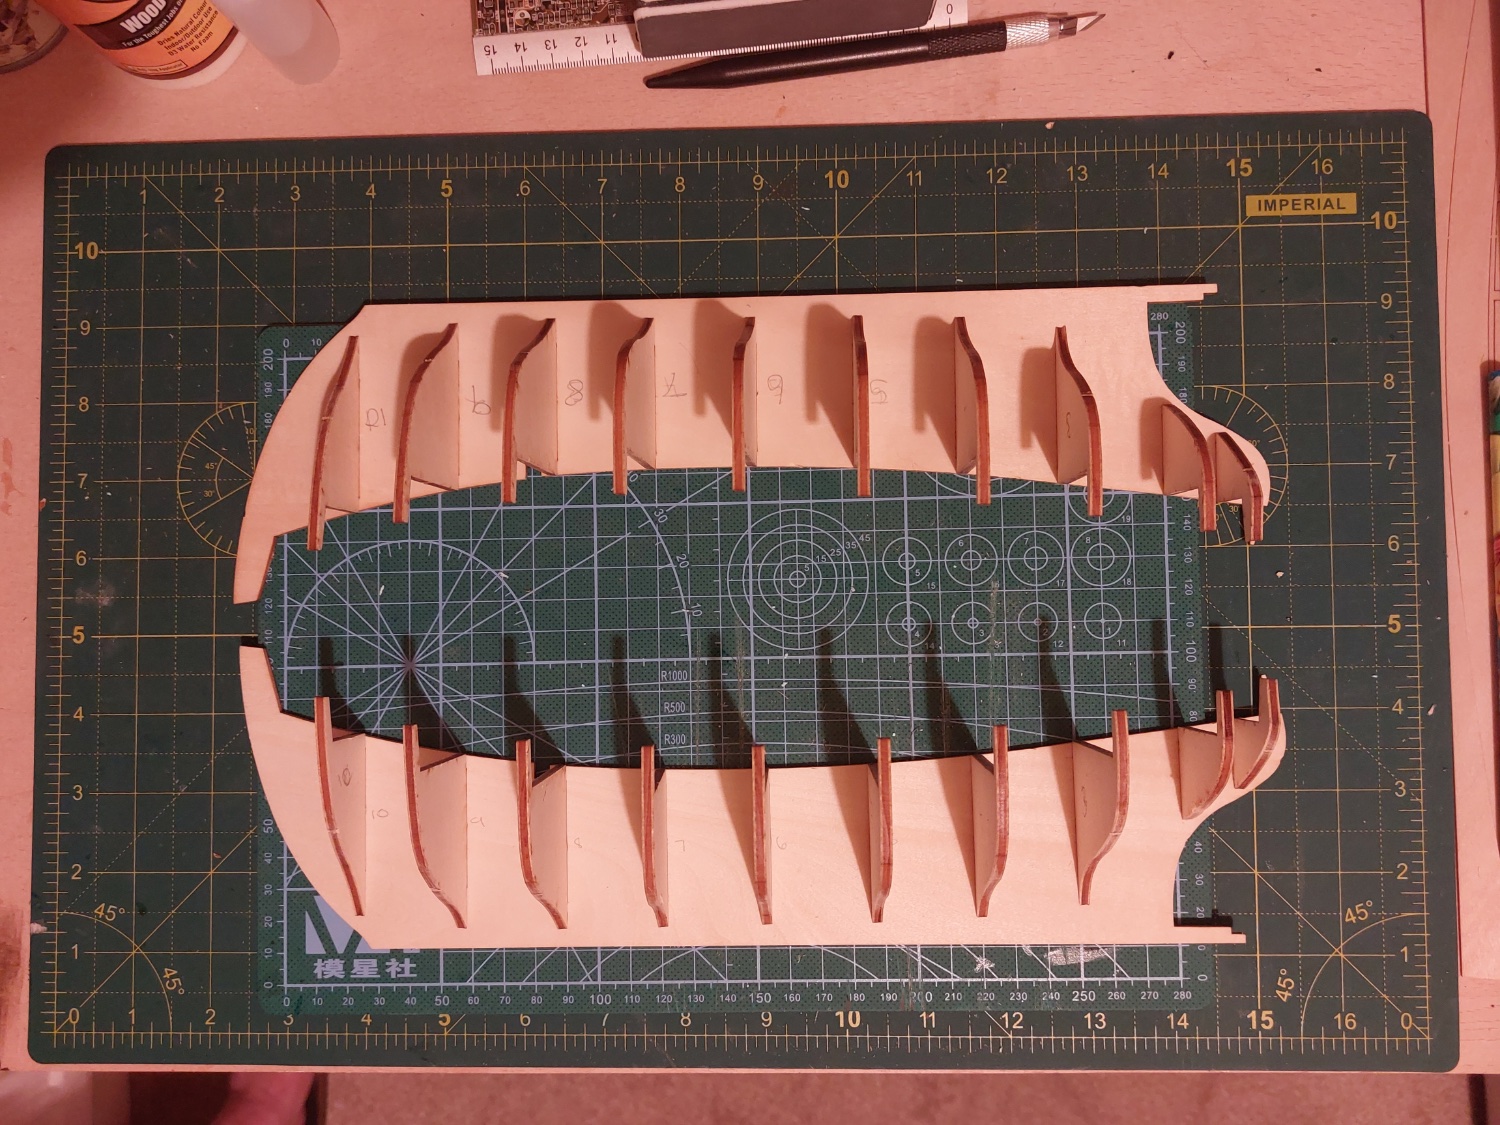
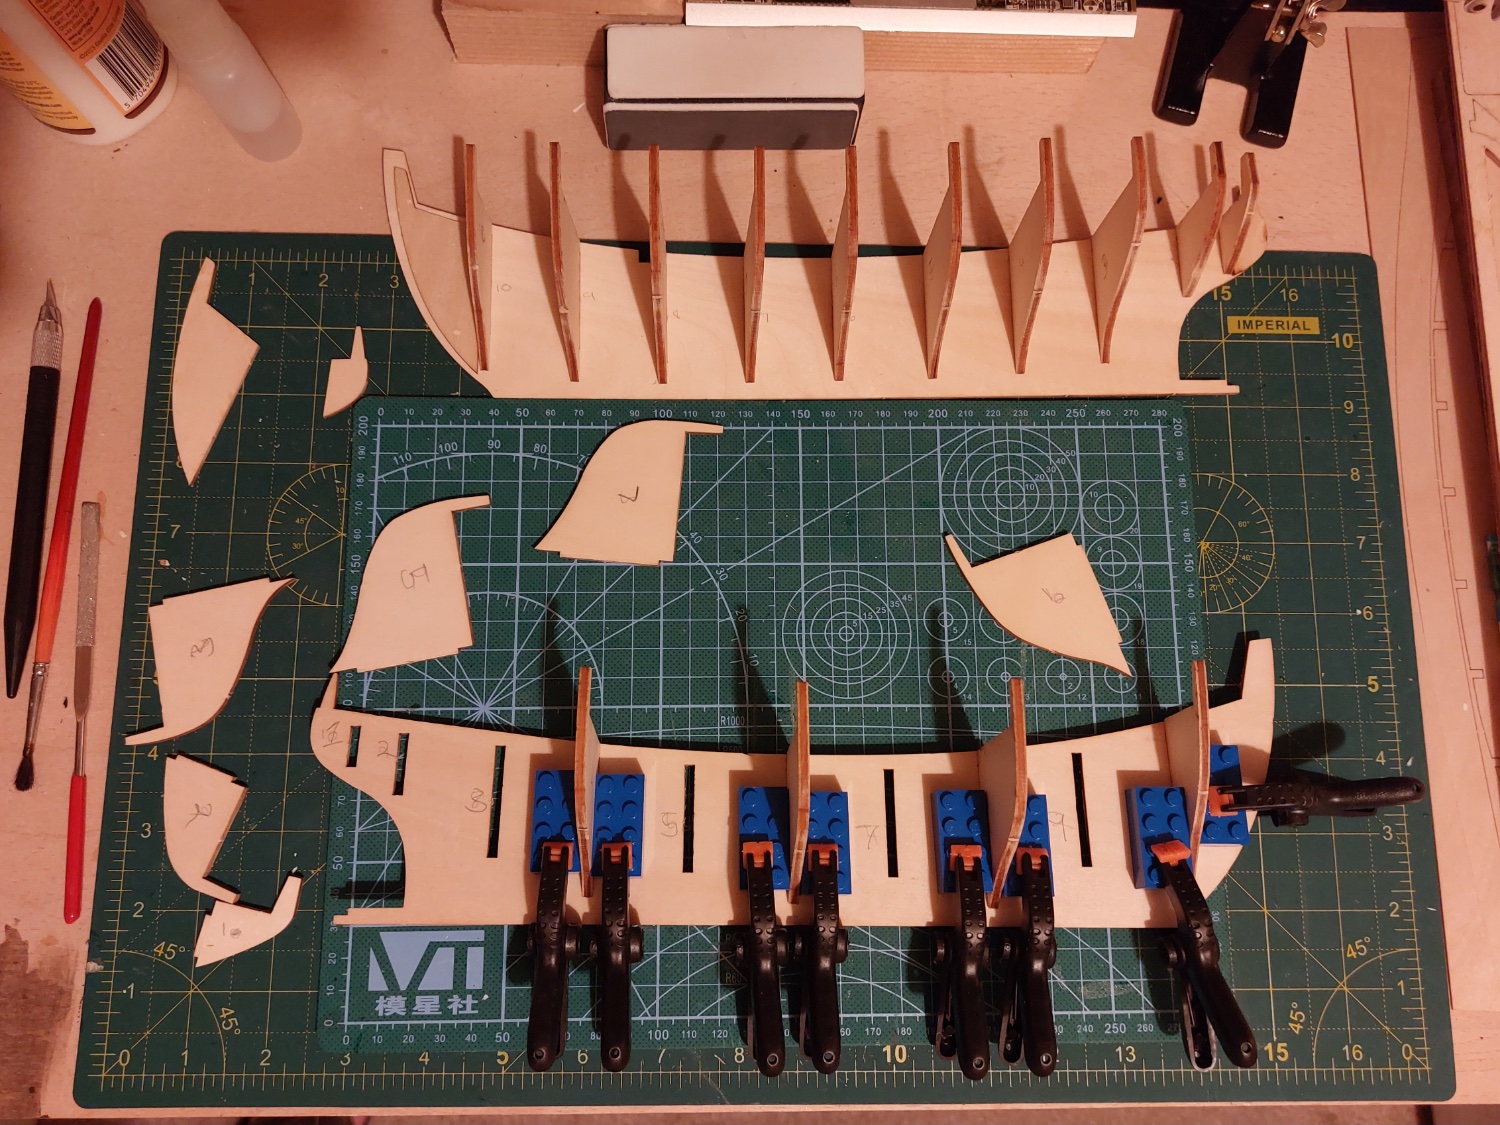
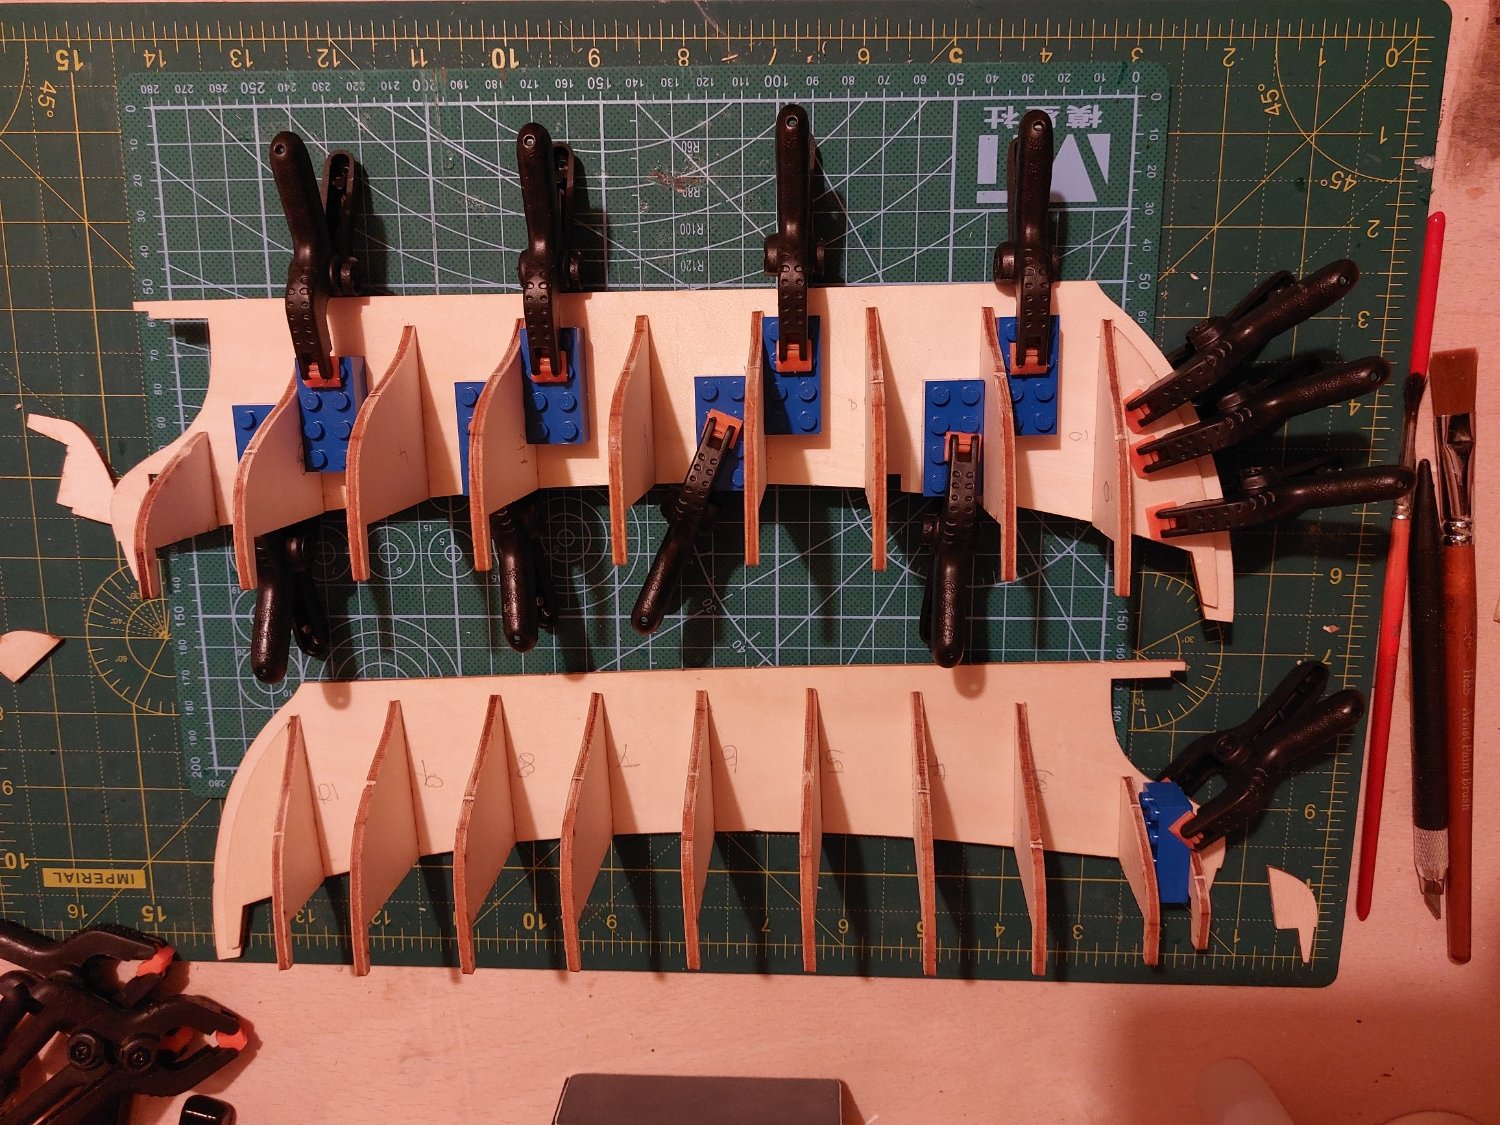
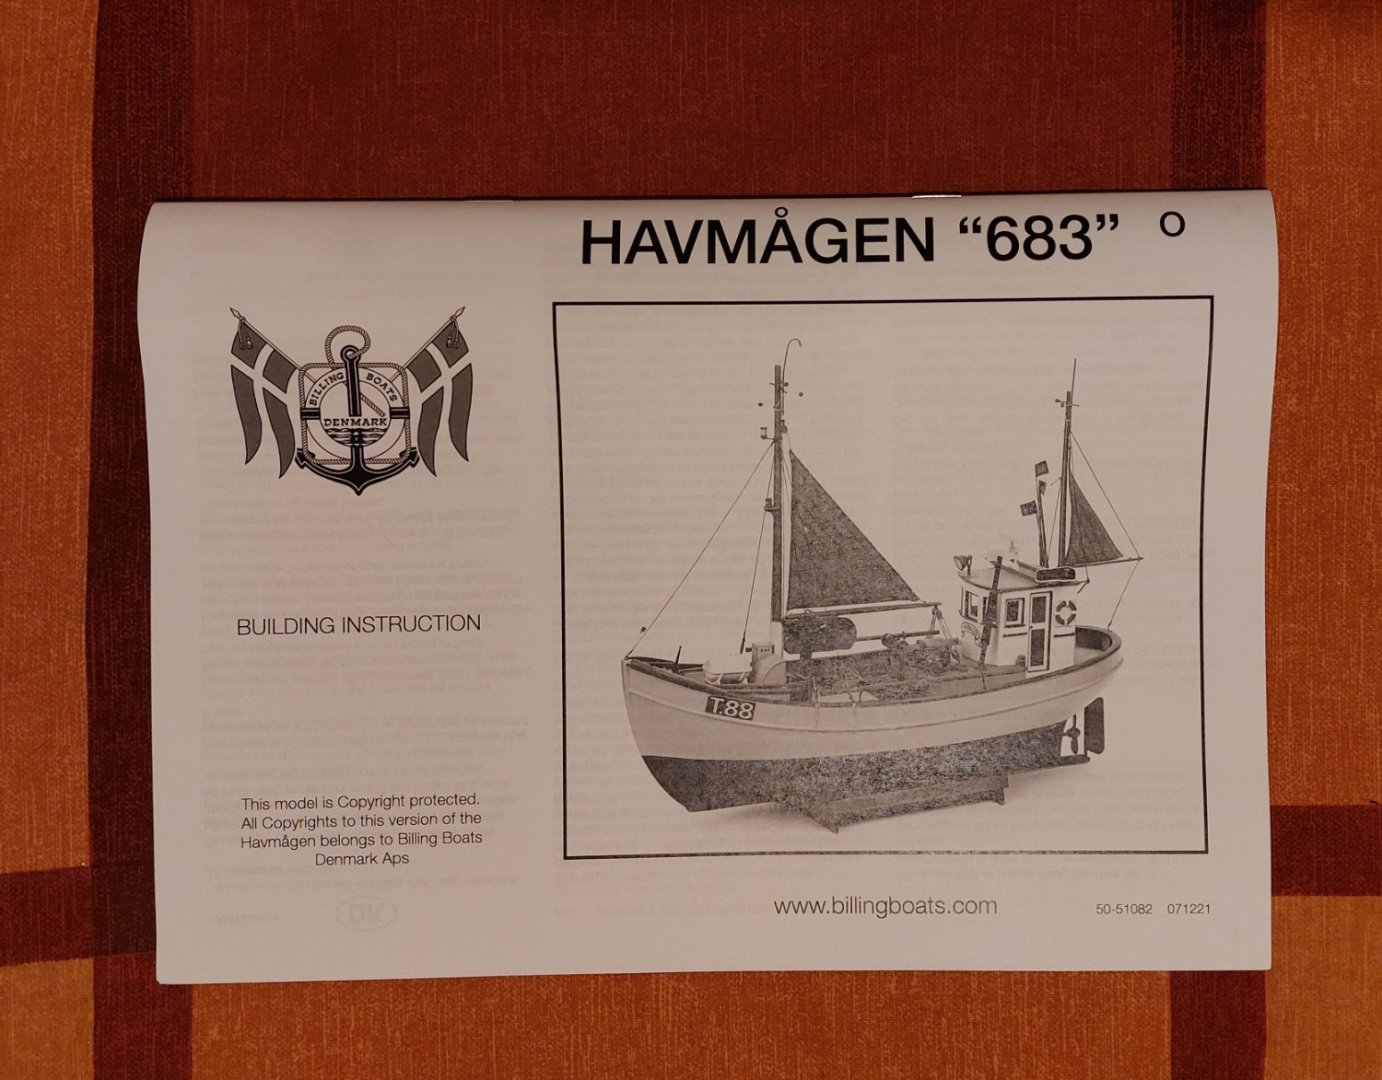
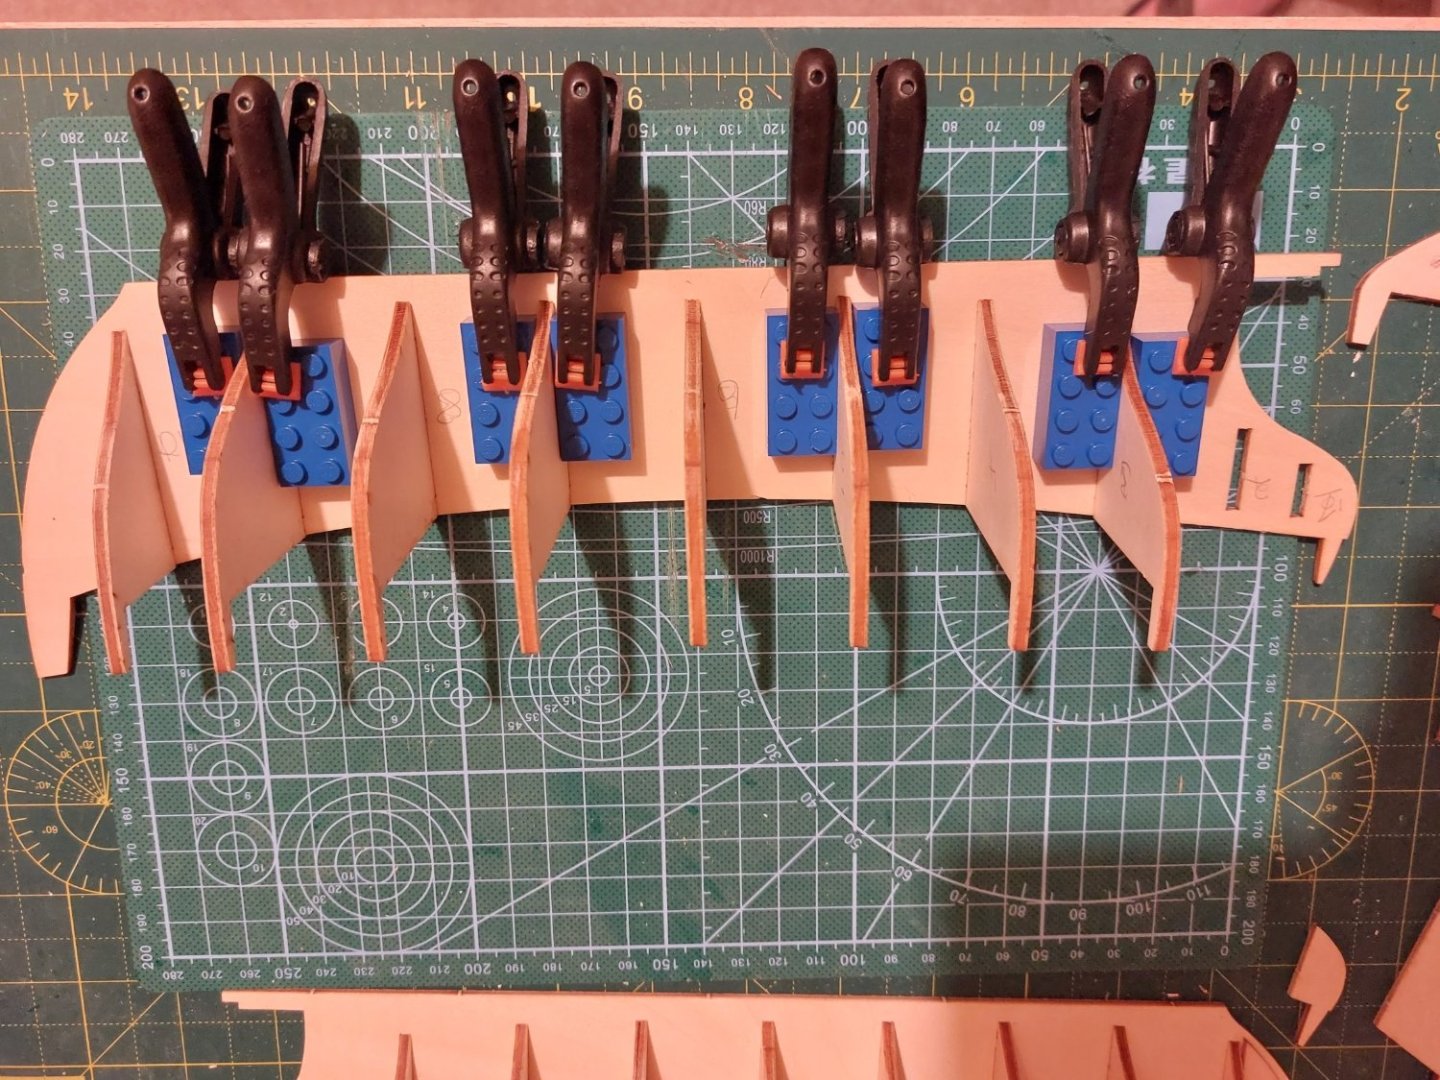
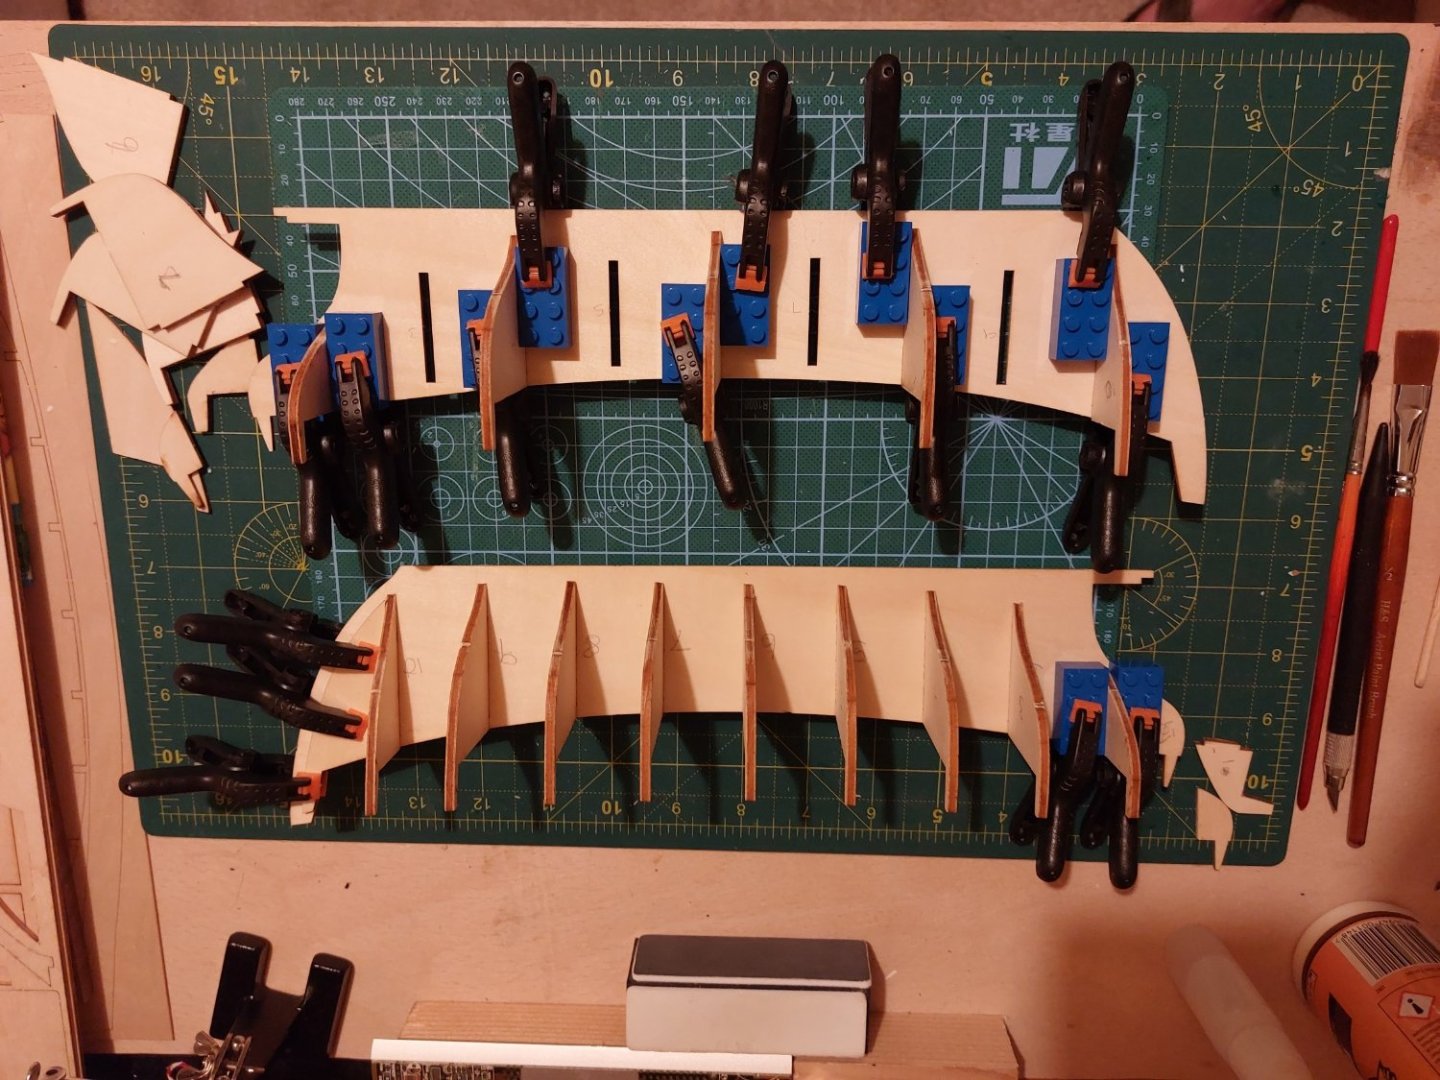
 As I near the completion of Barque Stefano, I had a hankering to build something that was simple, where I could just follow the instructions, straight out of the box. Time will tell how closely I manage to do that, but having looked longingly at Nordkap as a teenager, she was the vessel I settled upon. Here's a picture of what she's meant to end up looking like Nordkap builds up into an 81cm l.o.a, 21cm beam vessel - so there'll be loads of room in the hull for all the radio gubbins. She's also small enough not to be too cumbersome to move around when building. I bought a new building board, and set about separating the laser cut frames from the "sprues". Then I looked at the plans and noticed some strange discrepancies... There are two sets of measurements on plan 1 - the first shows the gaps between the forward extents of the frames (4-7) - this should measure up to 159mm. A second set of measurements show the filler blocks that will sit on top of the keel - these are 48mm, 50mm and 50mm - 148mm, leaving only 11mm for three frames - but the frames are 4mm at the least - closer to 5mm in fact... The instructions simply say that the frames are "quite vertical" and then leave the builder to work it out. Instead of guessing, I decided that using the deck would be a neat way of ensuring that the frames were essentially in the right position, so this part was cut out as well and used as a guide to get the frames in the right place. So... so far I've fitted the frames, and added the blocks in between - which have all turned out to be around the 48mm mark. This _may_ come back and bite me later, but I feel much more confident knowing that the deck fits with the frames in their locations, than simply hoping for the best. The observant among you may notice a curvature of the keel (higher in the middle than at bow and stern - it's around 4mm, although it looks worse, perhaps because of lens distortion in this photo) - ironically, having cut the keel parts to be 55cm and 52cm respectively, I now realise that these are perhaps slightly short for the deck... removing the deck after gluing the frames in place got rid of this curvature entirely, and so I probably will need to modify the deck a little down the line, but that's fine - it'll be millimetres here and there, not centimetres, and the hull will be the right shape. The next step is to add the stringers along the bulkhead tops, and as I do that I can ensure the keel is straight. I'm not worried about modifying the deck to fit, I just wanted everything to be in the right ballpark. I've also added the doublers that create something of a rabbet at bow and stern. More soon Rob
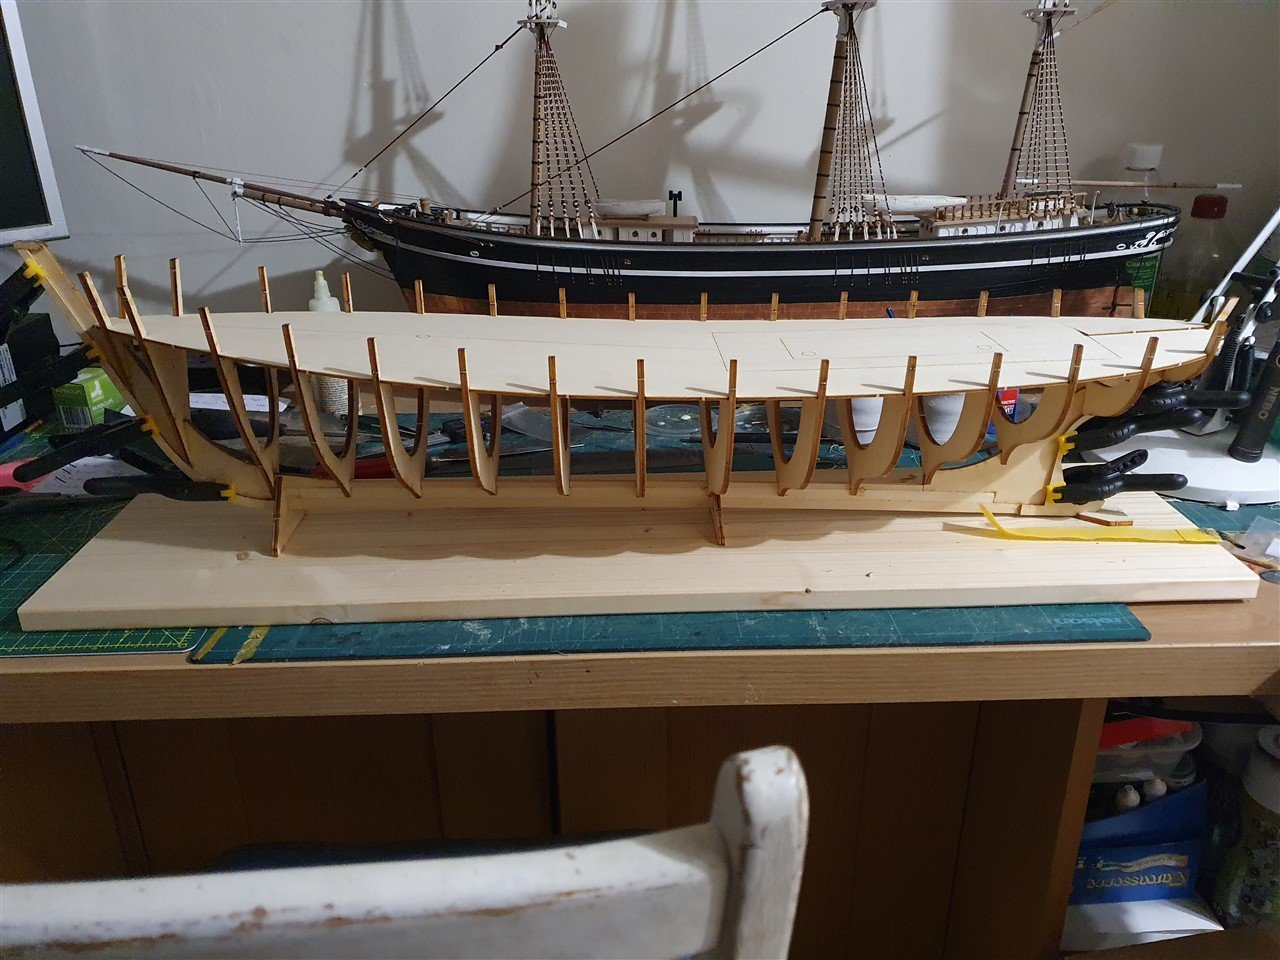

- 56 replies
-
- 7
-
-
- Nordkap
- Billing Boats
- (and 1 more)
-
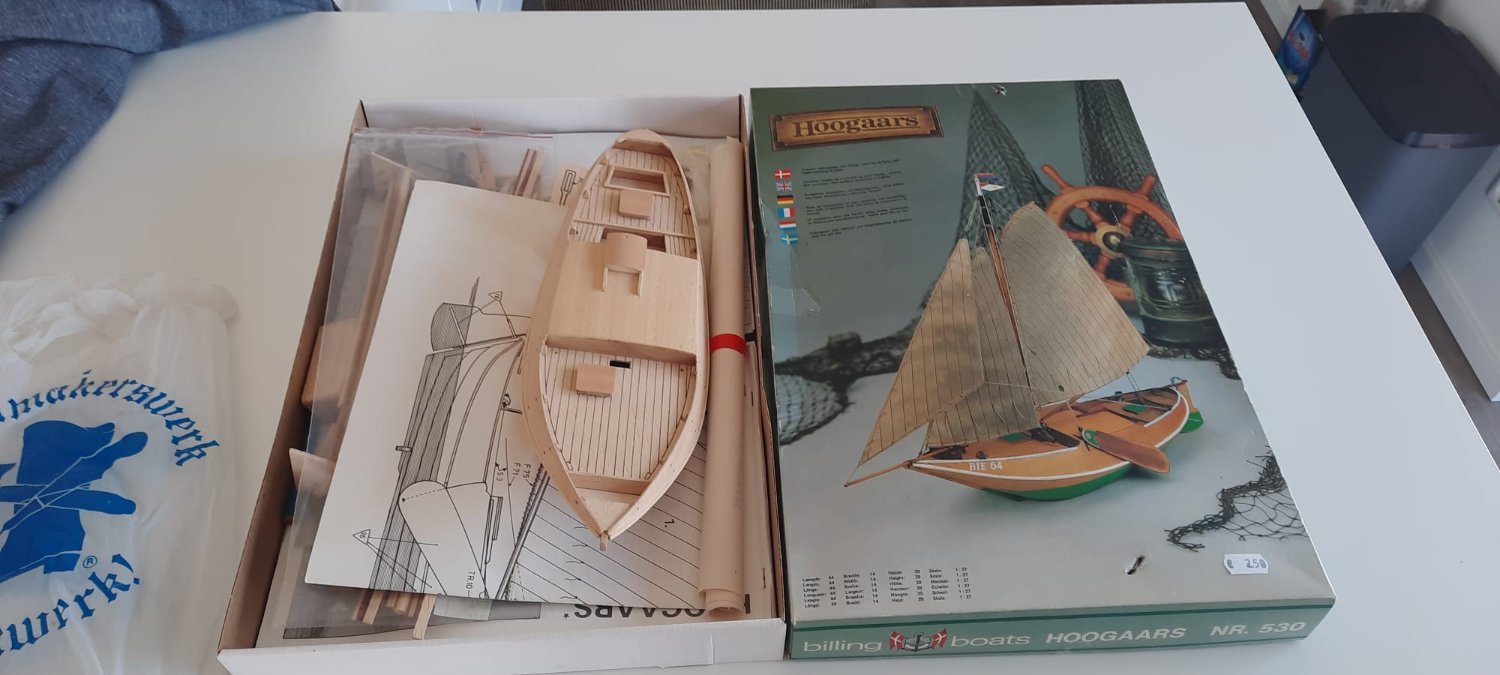
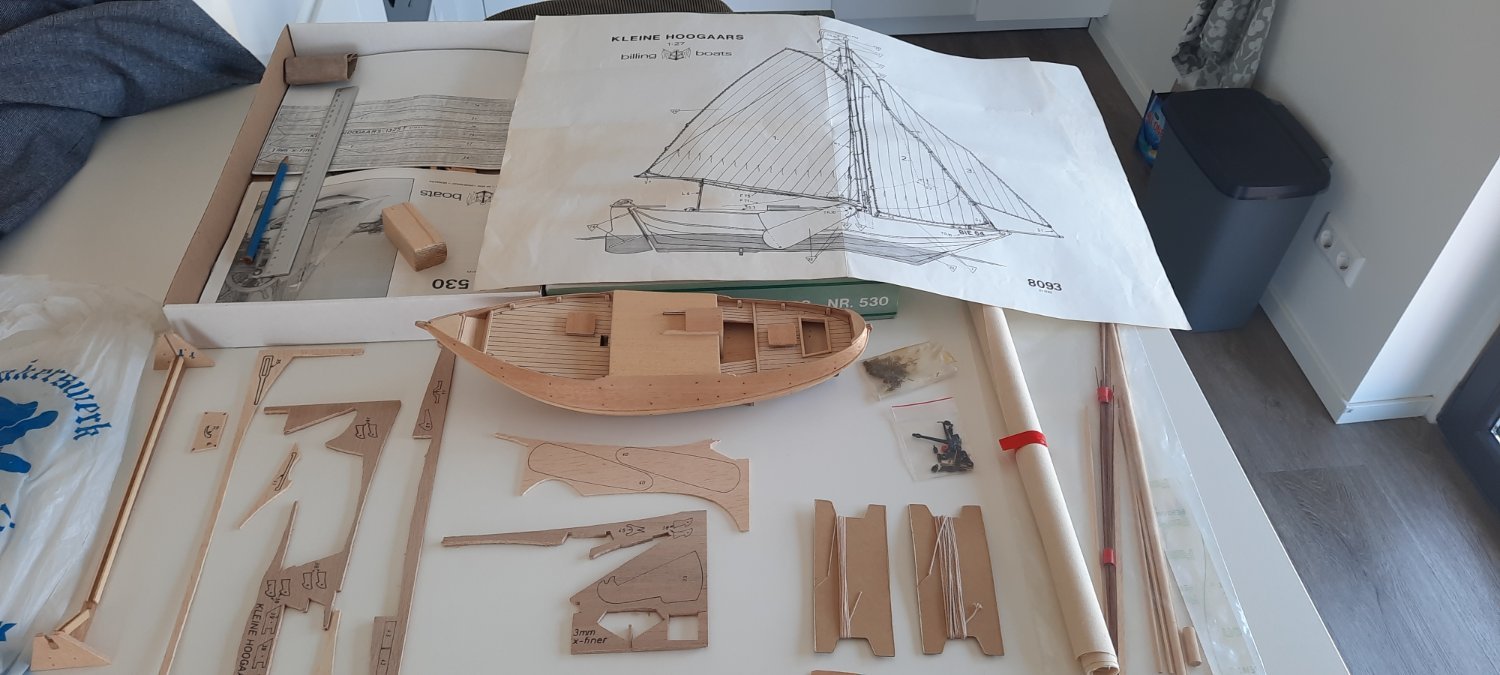
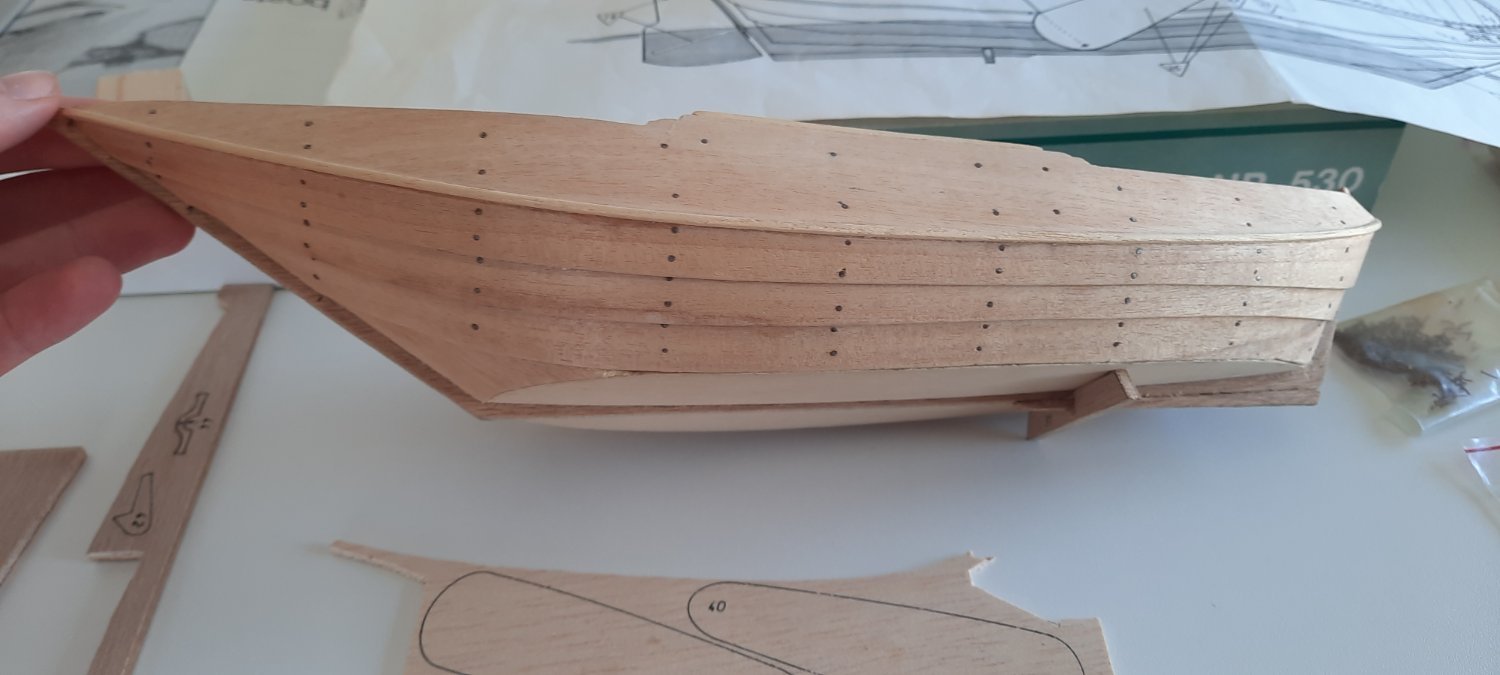
 Post 1: The Project Normally I wouldn't start a new project when I still have to finish the last one. But I picked this kit up from the local Thriftshop in my new home town, while looking for a nice cupboard to put in the new house. After spotting this old and covered with a fair layer of dust (now discontinued)Billing Boats kit, I quickly checked if all the important bits were present in the box and hurried home with my new prize. The Kit is of a 1:27 scale "Hoogaars" Yacht. Now I think that "Hoogaars" isn't really a household name for most people. But it is where I am from, If one thinks of a traditionally build wooden ship. Its these flatbotomed beaties. The Town where I grew up used to be home to one of the bigger shipbuilding warfs of this part of the Netherlands and her Hoogaars ships were known as far north as Friesland and as far south as southern Belgium. History and Background. Its not entirely understood what the name "Hoogaars" means, the name is known to have been in use since the 16th century. Hoogaarsen are mainly used in the Dutch province of Zeeland (The Old-Zealand). The ships are differentiated from their other flatbotomed colleques by the sharp rise of their bows. The ships hulls have a water droplet shaped bottom hull and traditionally the side strakes are clinker-built. Depending on the shipyard they are rigged *** either Gaff- or Sprit-Rigged. The Hoogaarsen were mainly used for the fishing industry, but also as ferries, cargoships and passenger service. And they are equiped with the characteristic "Swords" that make sailing possible despite the flat botoms. Hoogaarsen were replaced as fishing ships at the end of the 19th century in favor of motorised northsea trawler type ships. During this period there were a couple of examples of hoogaarsen being built with steel hulls and equiped with engines. Some older wooden hoogaarsen were also upgraded. This upgrade didnt turn out as a success however because the wooden hulls were not suited to house a vibrating early petrol engine, and many ships quickly wore out. Luckily the wooden Hoogaarsen were still popular as pleasure yachts and many were built with a cabin and more luxurious outfitting. This is what the ship kit is. The Billing boats Hoogaars is a replica based on a ship that was built in the Warf of the town of Tholen. It was used as a ferry and after a couple of owners it ended up with a Belgian owner. This is when J. Van Beylen, A ship researcher from the Belgian Naval museum, drew the boat in detail and documented the building plans. The real boat, in a sad turn of events, but in a way we ship enthousiasts might have grown accustomed to, it didn't stand the test of time, she burned down after years of neglect. The drawings by J. Van Beylen are the only thing that is left about the boat. As far as I know there are no photographs. After a quick google I found that J. Van Beylen dedicated a small part of a book he wrote, to this particular hoogaars. And the Zeeuwsche library had a copy in its inventory. So I'll be getting that to see if there is any extra information I can find. Contents of the box The contents are remarkebly, complete. Everything was neatly put back into the box. The Spars, rope, fittings, sails, even the scrap bits of ply-wood. The hull is partly finished. There are a couple of detailing parts that are yet to be assembled onto the model. The characteristic clinker Strakes. The building quality is relatively high which makes me suspect that this wasn't someone's first rodeo. Which also makes one wonder why it ended up at the thrift store. One thing that stood out to me, is that the parts are not laser cut. So I'll be heading back to the thrift shop to find myself a small modelers saw. My plan with this project will be to follow the instructions, but I'll be pulling on books and real life examples to add a little bit more detail is the places where the kit might be lacking a little bit. I am very lucky to live within walking distance of a couple of ships that are from the same Shipyard as this model so I'll be photographing them as reference. This project will probably be on the backburner until I finish the current project. But till then I'll be researching the subject. Thanks for reading.


-
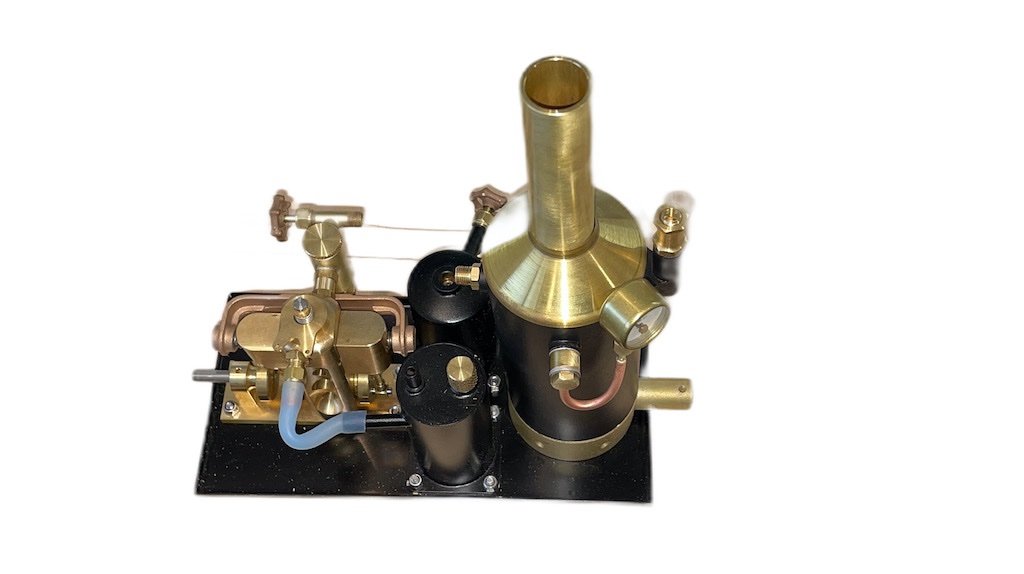
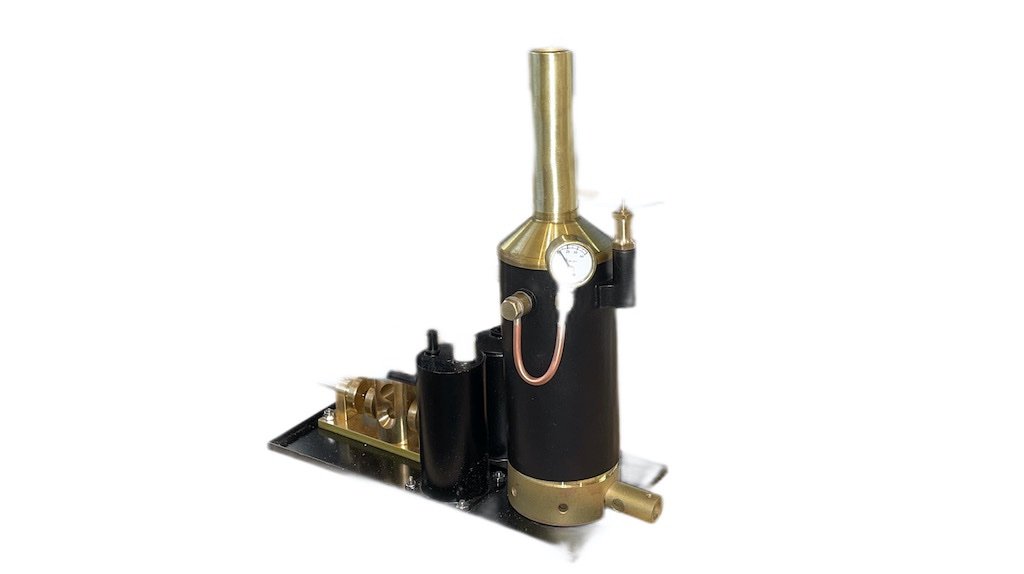
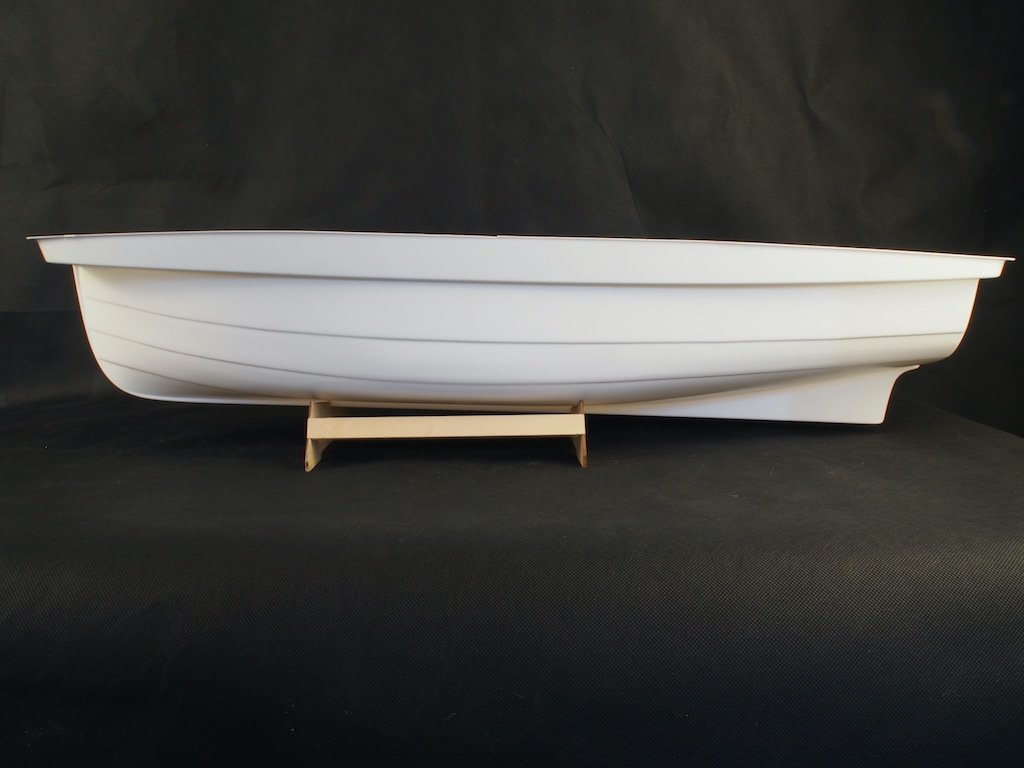
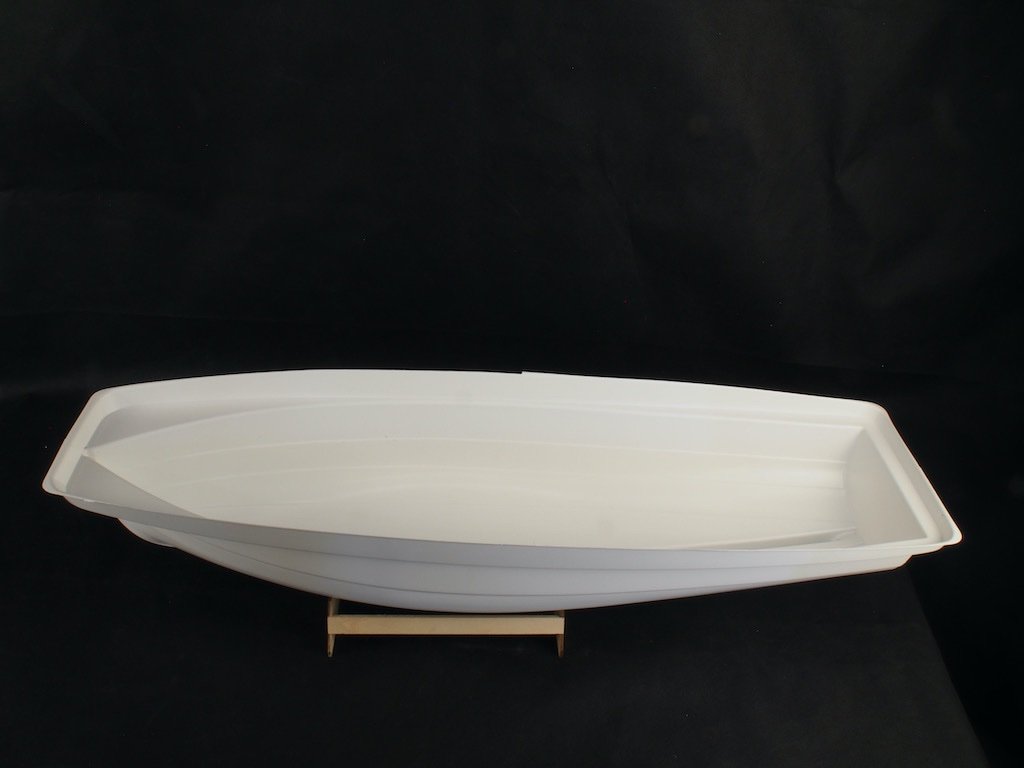
 Introduction I have long had a hankering to build a small launch with live steam propulsion. The African Queen seemed to be an ideal choice of subject, however finding a kit to modify proved somewhat elusive. In the end, I settled on the Billings offering in 1:12 scale as it claims to be suitable for Radio Control (albeit using an electric motor). Here is a picture of the box art. The next challenge was finding a steam plant suitable for inclusion in the model. After an exhaustive search, I settled on a complete steam plant from Miniature Steam Models (MSM) in Melbourne, Australia. It is a 2” boiler with the “Avon” twin cylinder double acting oscillating steam engine. The steam plant comes complete with a boiler certificate and the engine is matched to the size of the boiler. For the tech heads, it has an 8mm bore and an 11mm stroke (and it is reversing). Overall, it is very similar in size to the “fake” boiler/engine plant provided in the Billings kit. Here are a couple of pictures of the steam plant as provided from MSM. What’s in the box? The Billings kit is fairly typical of the Billings offerings. The hull is provided as a single-piece vacuum formed ABS mould. The rest of the kit includes a variety of laser cut plywood parts, some strip wood (not particularly high quality), some brass components and some plastic components. As I will not be using the provided boiler/engine parts, a lot of these will be redundant. I was concerned by the apparent flimsiness of the hull, and my plan is to sheath the hull in timber, and then fibreglass over the top of that. To this end, I have obtained some 1mm thick Alaskan Yellow Cedar from Hobby Mill EU to be cut into planks as appropriate. I will also be adding some aftermarket timber for the deck planking, as the kit would have you simple draw planking lines onto the provided plywood. I’m currently in the process of placing an order for this with Hobby Mill EU. Instructions are, I believe, typical of Billings – which is to say, next to useless. This is not a kit for a beginner, although it is marketed as “Advanced Beginner”. We shall have to see whether I have sufficient skills to pull this off – otherwise, there is considerable investment “down the tube”. The Hull Here are a couple of pictures of the ABS hull. As can be seen in the pictures, there is a considerable excess lip around the upper edge. I will need to remove the vertical component of this before I can do anything else. My current plan is to do that, and then fit the internal frames to provide some stiffening before attempting the outer planking. Welcome aboard for what might prove to be an "interesting" journey!
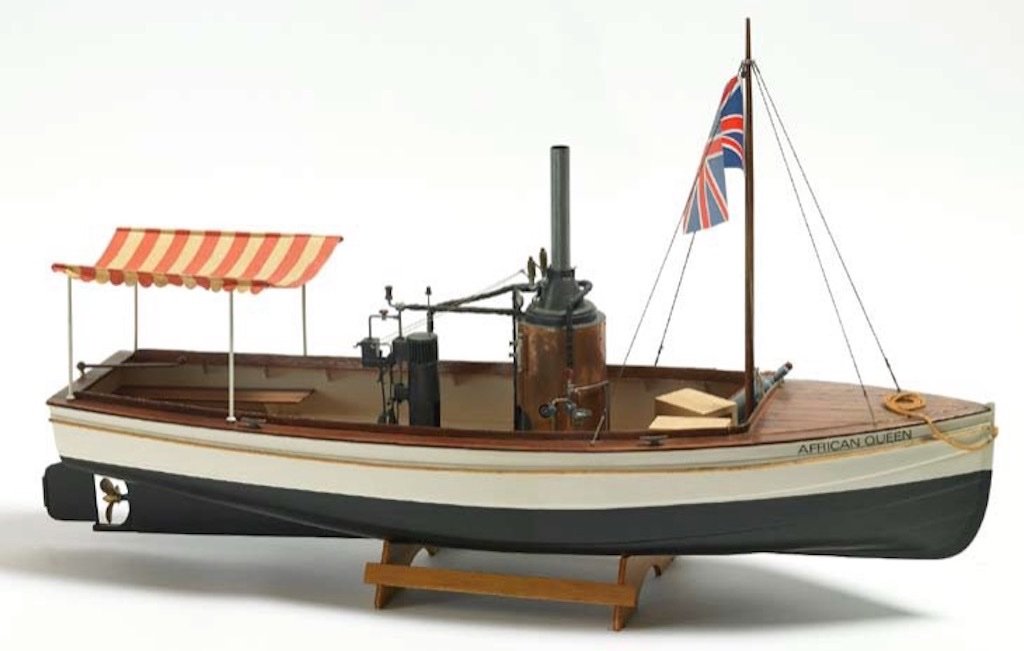
- 37 replies
-
- 18
-
-
- live steam
- radio
- (and 2 more)
-
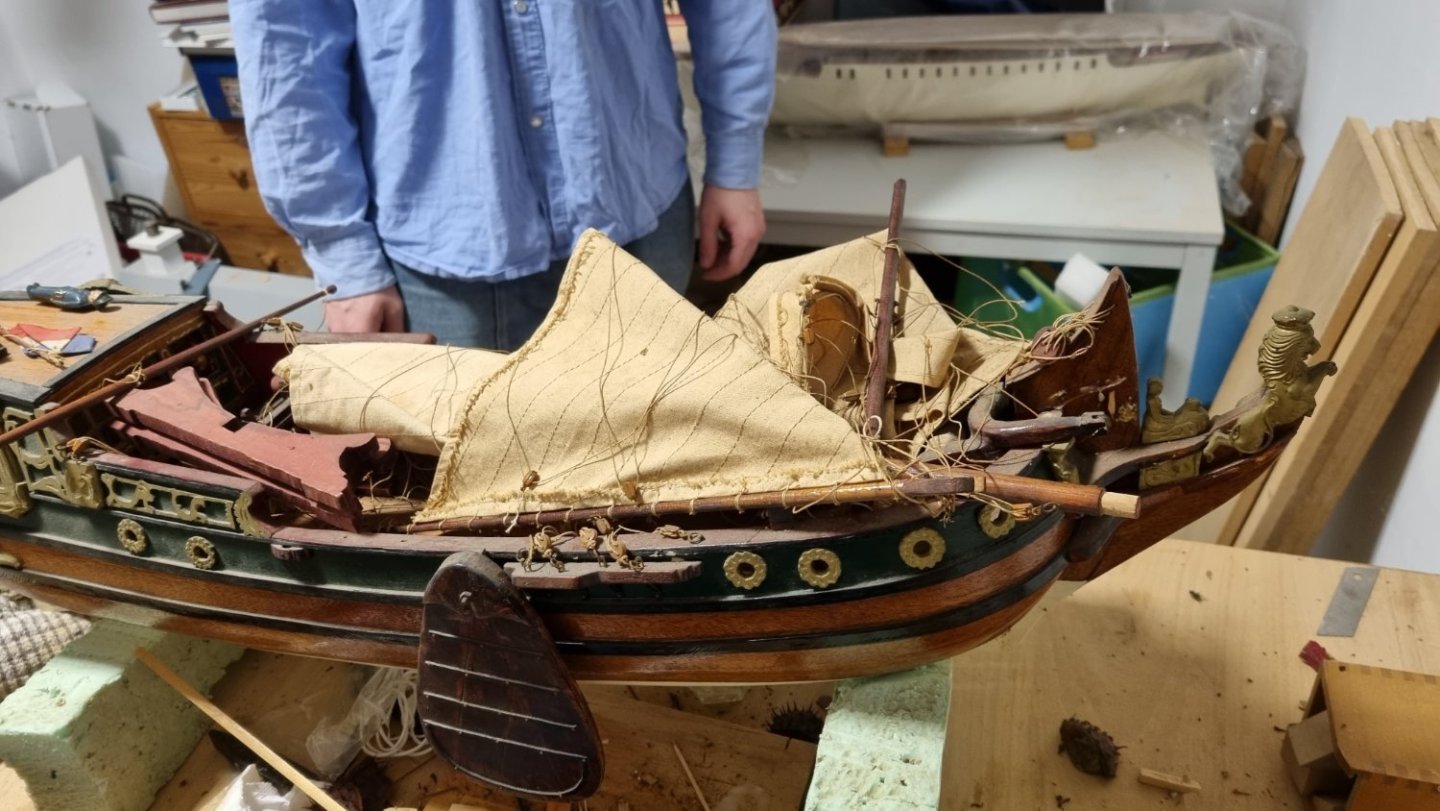
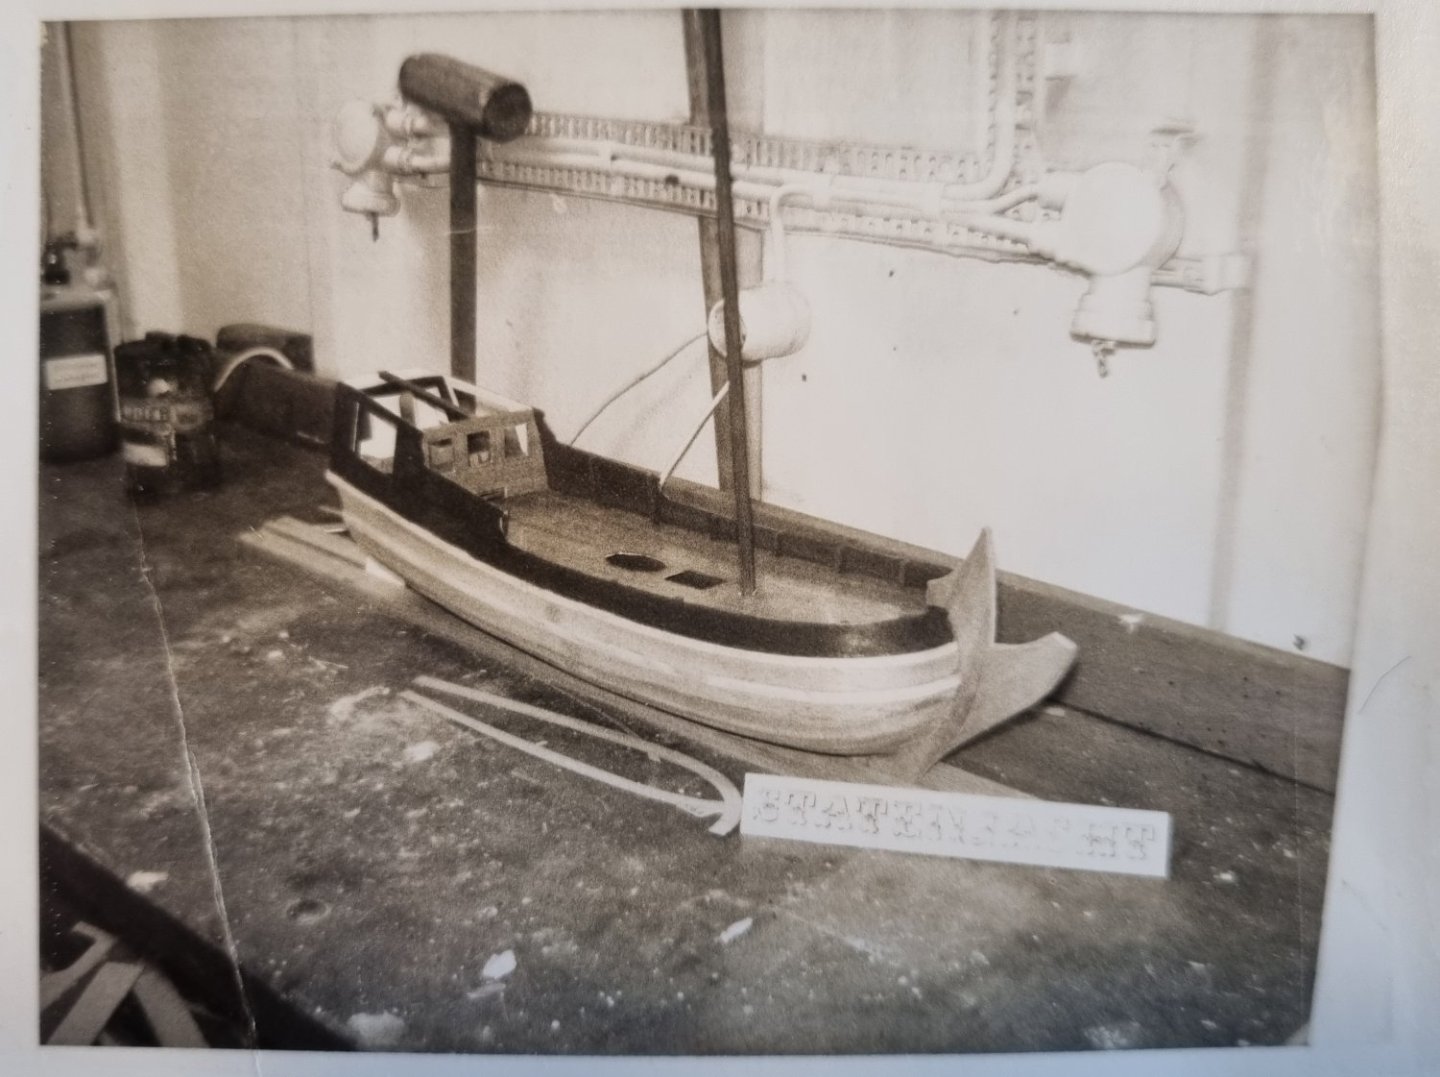
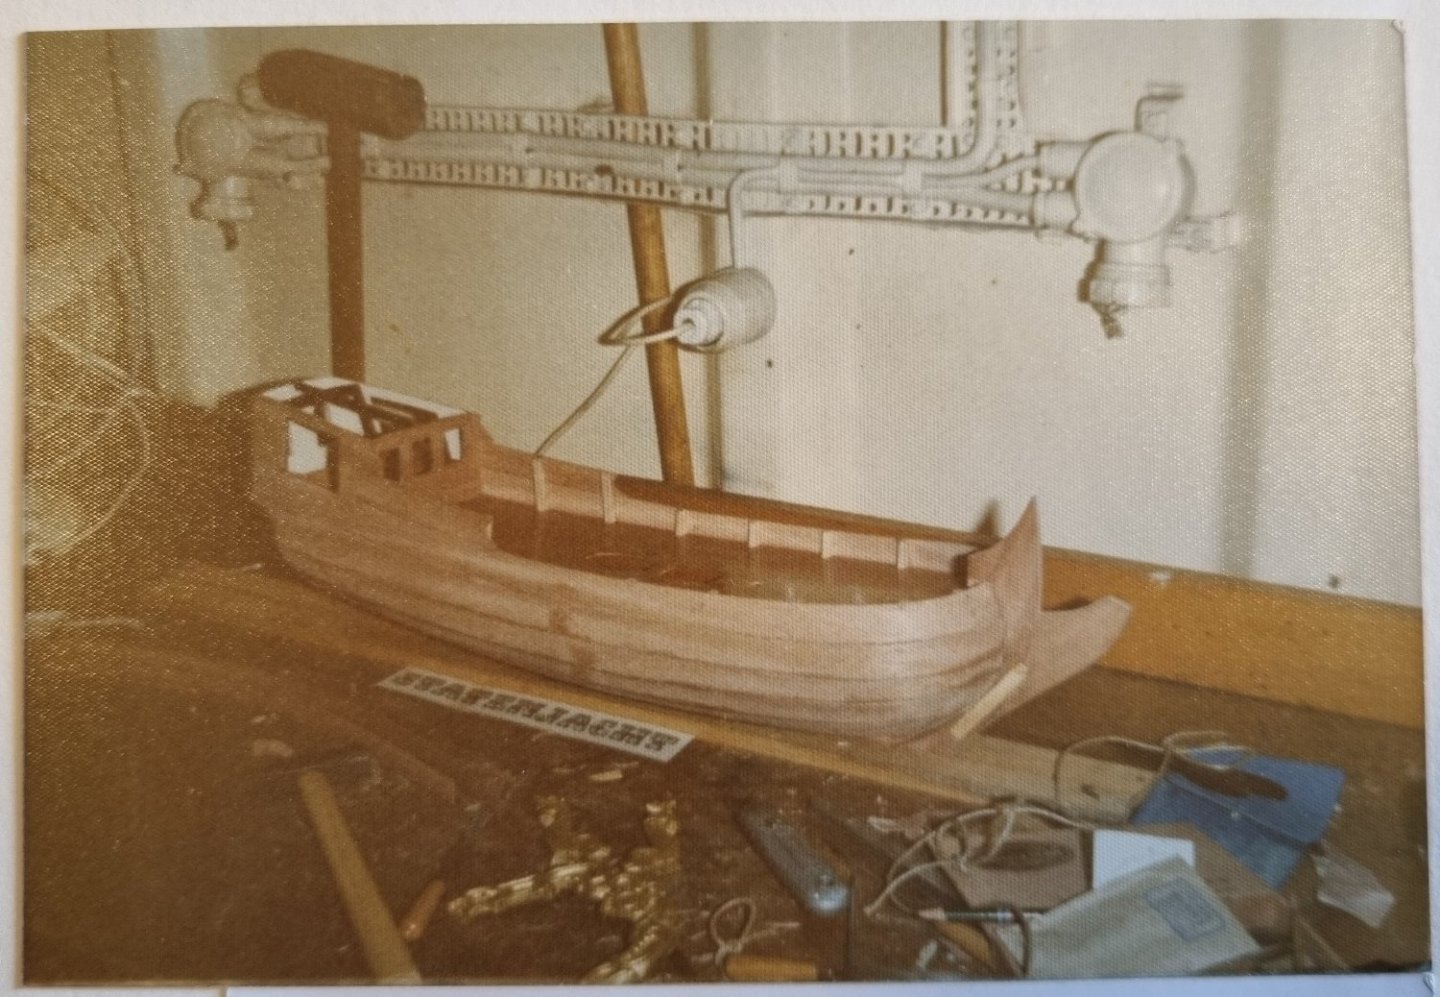
 I recently came in possession of two models in certain states of, well, being. one is just in a early state of building, and has been in this state since as long as I can remember. At some point I'll start an other log when I come to finish this one. the other is also older then I am and used to hang in my parents home... until it came down. After the unfortunate event she ended up in the attic. After another unfortunate event about a month ago she is now in my workshop, and I hope to restore her to the state I remember. The original build took place around 1973 on board the ship my father was serving his apprenticeship on. With the two models also a pile of picture albums came in which found these two.
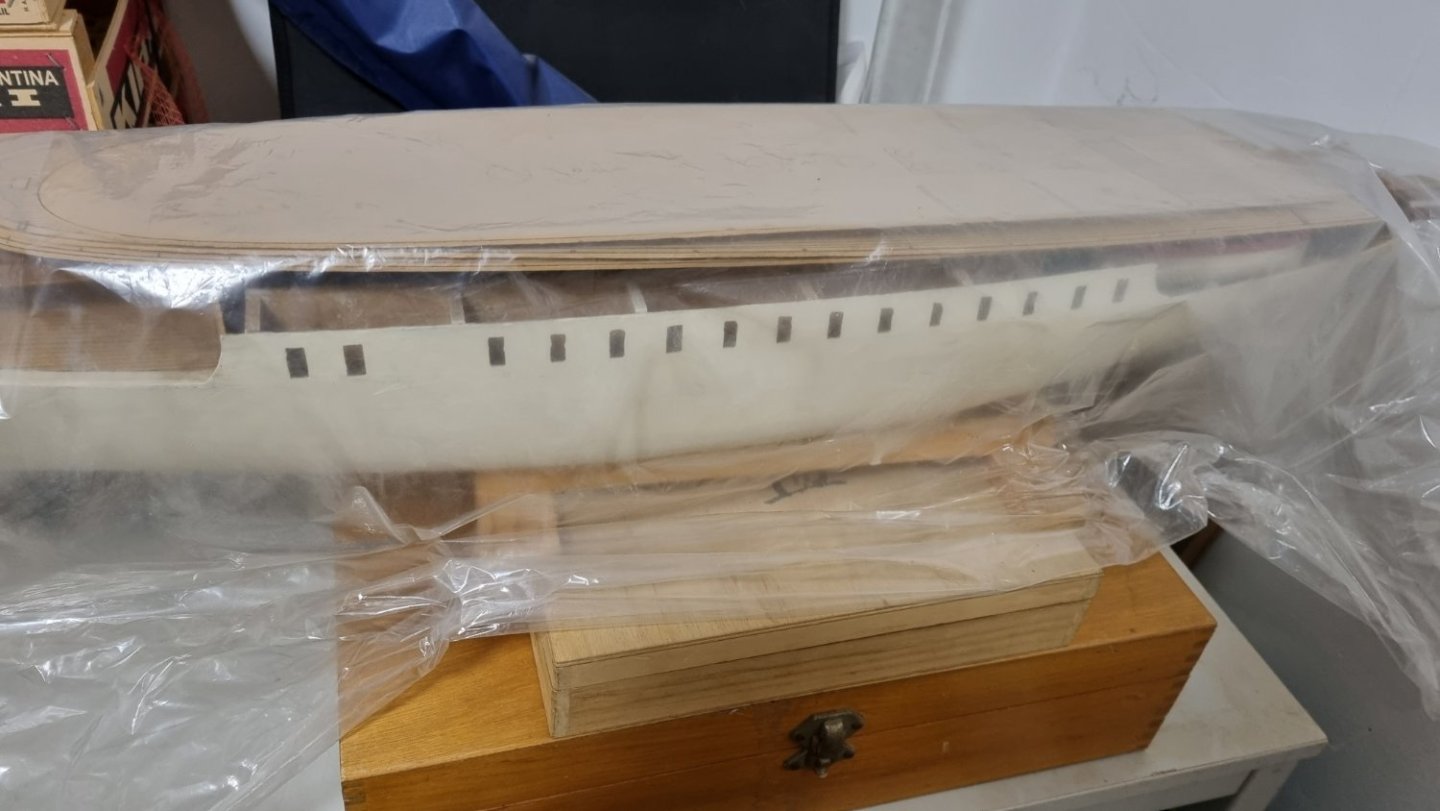
- 6 replies
-
- 2
-
-
- Statenjacht
- Billing Boats
- (and 1 more)
-
 After all the hyjinks with the Jylland I remembered I had another Billings Boats model in the cabinet of doom. Started 25-30 years ago on a kitchen table it had been set aside due to issues (mostly created by me) that I didn't know how to proceed with. I pulled the box out and bare bones inner hull assembly. A mixed media kit (as Billings are apt to be) but a smart looking ship. I shouldn't but decided to do a parallel build with the Jylland. The issues that had stopped me where 4 fold: 1. I had clamped the keel so hard I had introduced a rather severe hogging. 2. While the bulkheads where perpendicular to the keel they had 'variations' left to right. 3. The deck (I did add a false deck) was not entirely level (see above). 4. I didn't know how to affix the planking to the forward inner stem. They were supposed to be glued onto the inner stem, then sanded to allow the outer (visible) stem to be affixed. So....first off was the keel. I removed the existing one and introduced a nice straight one. This didn't allow all the bulkheads to seat but that will be handled as I plank. I have high hopes for this one. Largely to be built out of the box. The plastic pieces give me pause but I will use this as test subject to see how well I can get them integrated visually. -Mark
.JPG.6b877b2b9fe9b0fbe260119051800834.JPG)
.JPG.8d95db987c6b18fb6d5dac96f4f5f886.JPG)
.JPG.6ccc700c77bdd9b888e651282a1b0bd4.JPG)
.JPG.1c6178bb82e7da3868fca5156b8391dc.JPG)
-
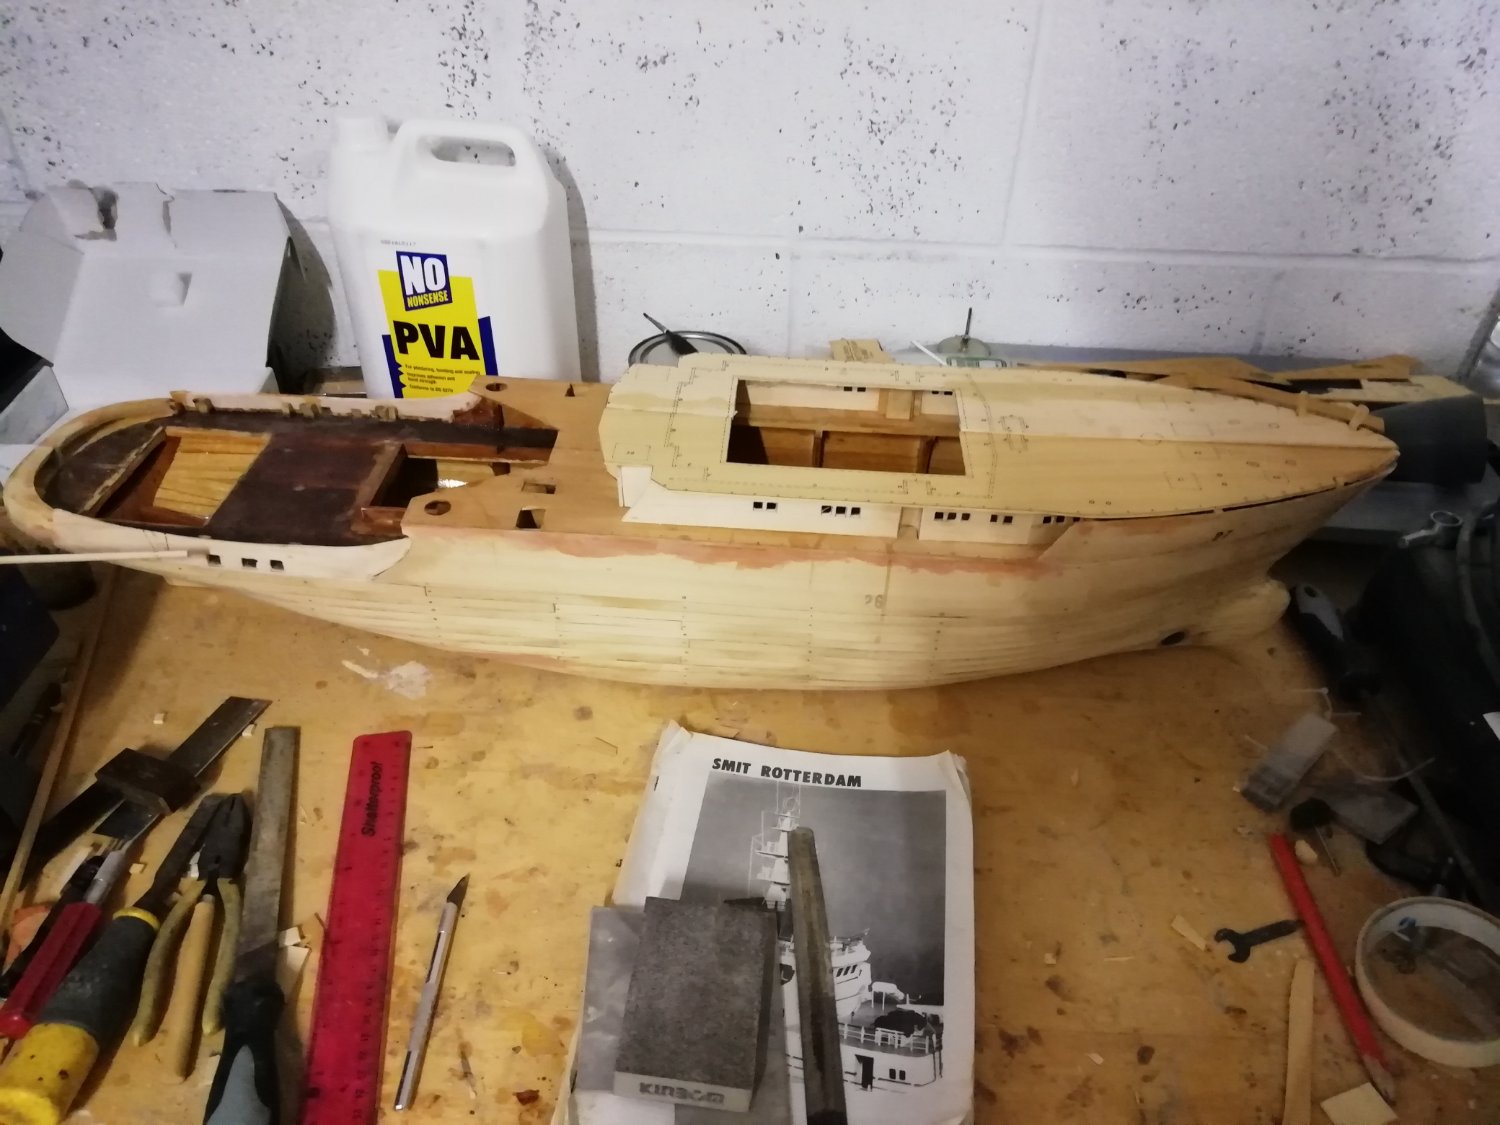
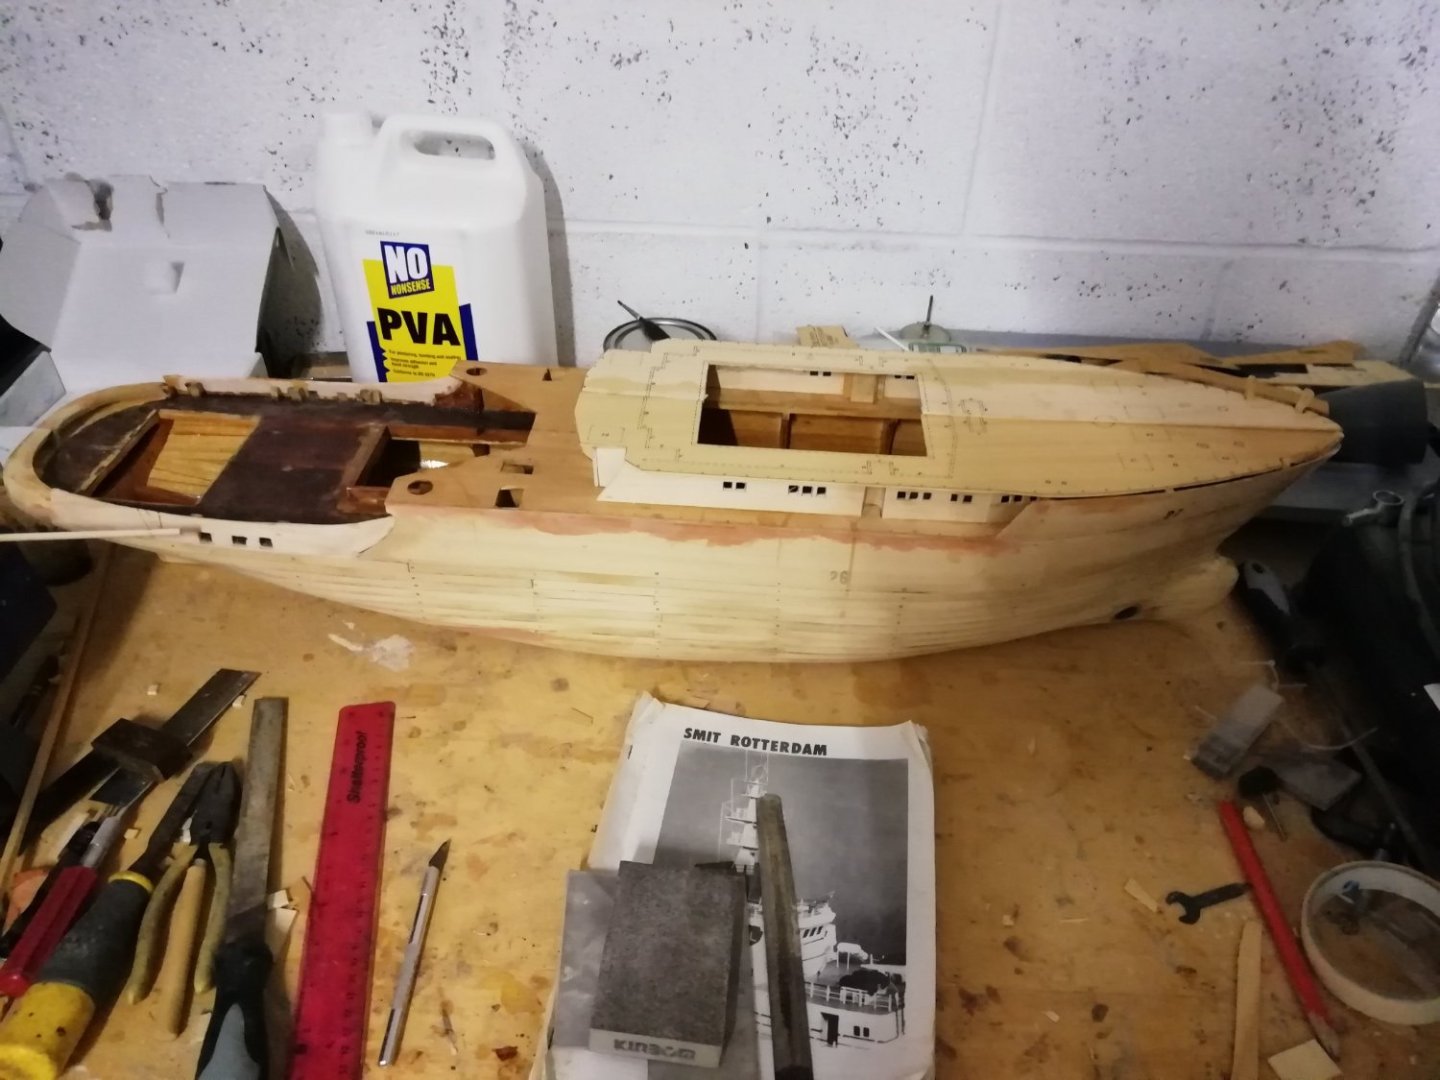
 Here's my Smit Rotterdam kit started in May 2021
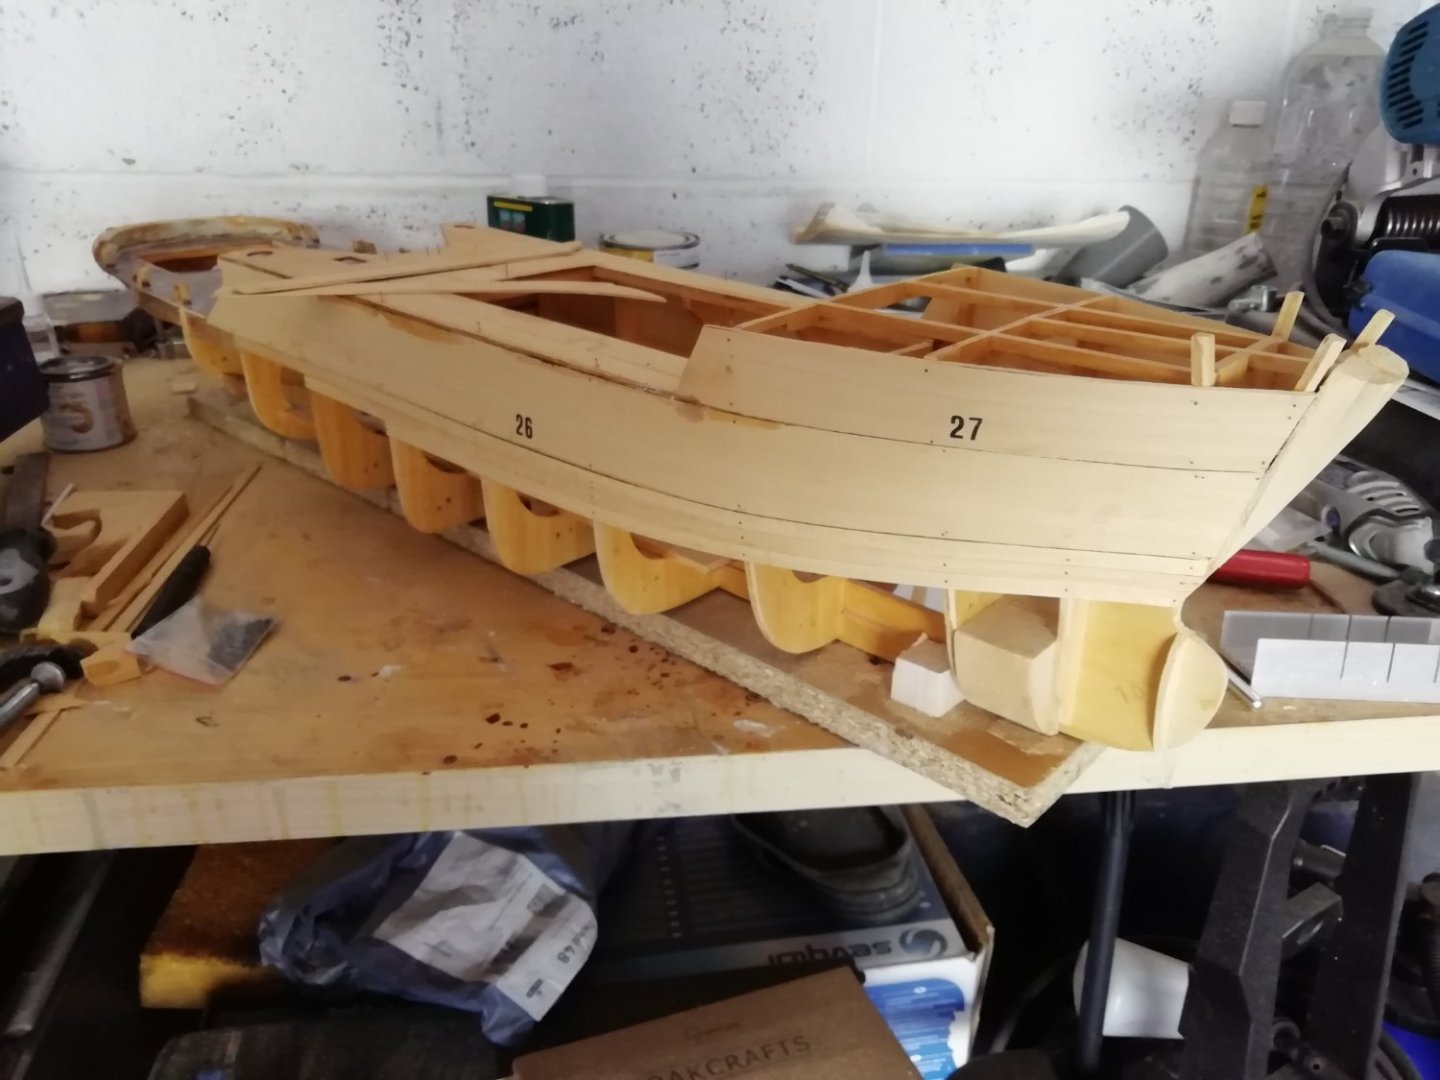


-
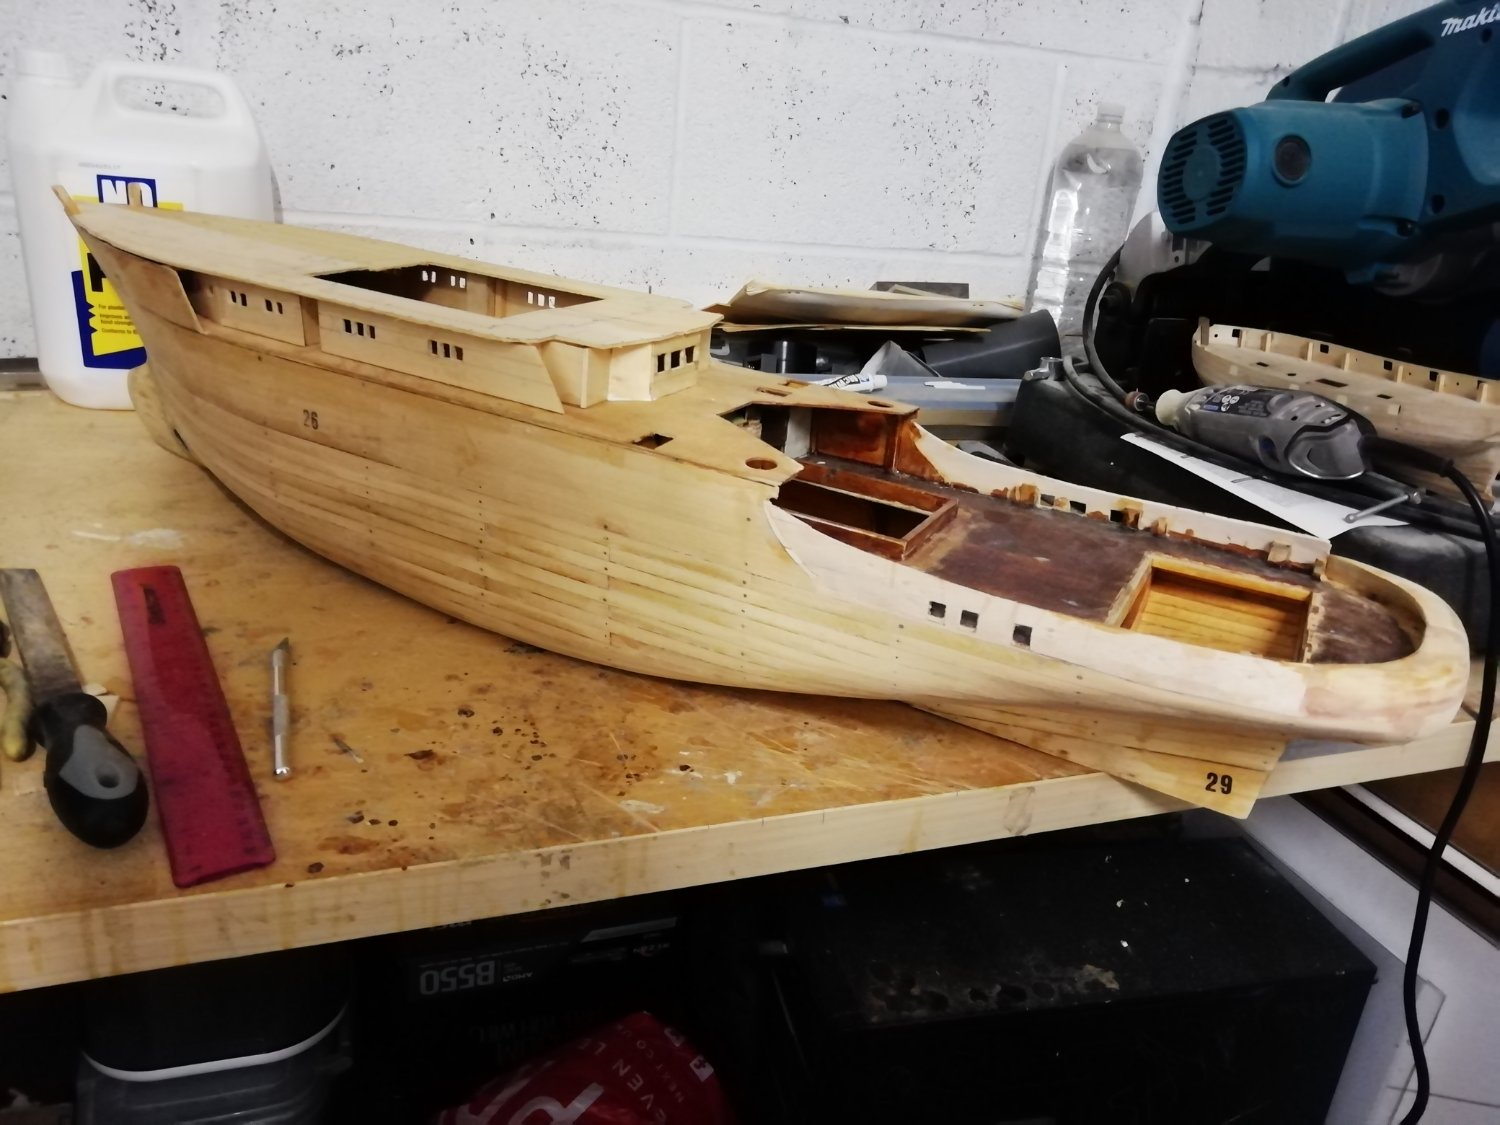
Second attempt at building a wooden model boat , this is my progress so far .


-
 A gift from my wife - I started this one a couple of years ago, I've added a little bit of new technology by printing out some of the parts with a 3D printer. Almost done the hull then off to the rigging. Most kits do not come with the fancy gold trim so I modeled my own and printed them up. Like they say - good from far - far from good. I still have lots to learn but I'm having a good time.
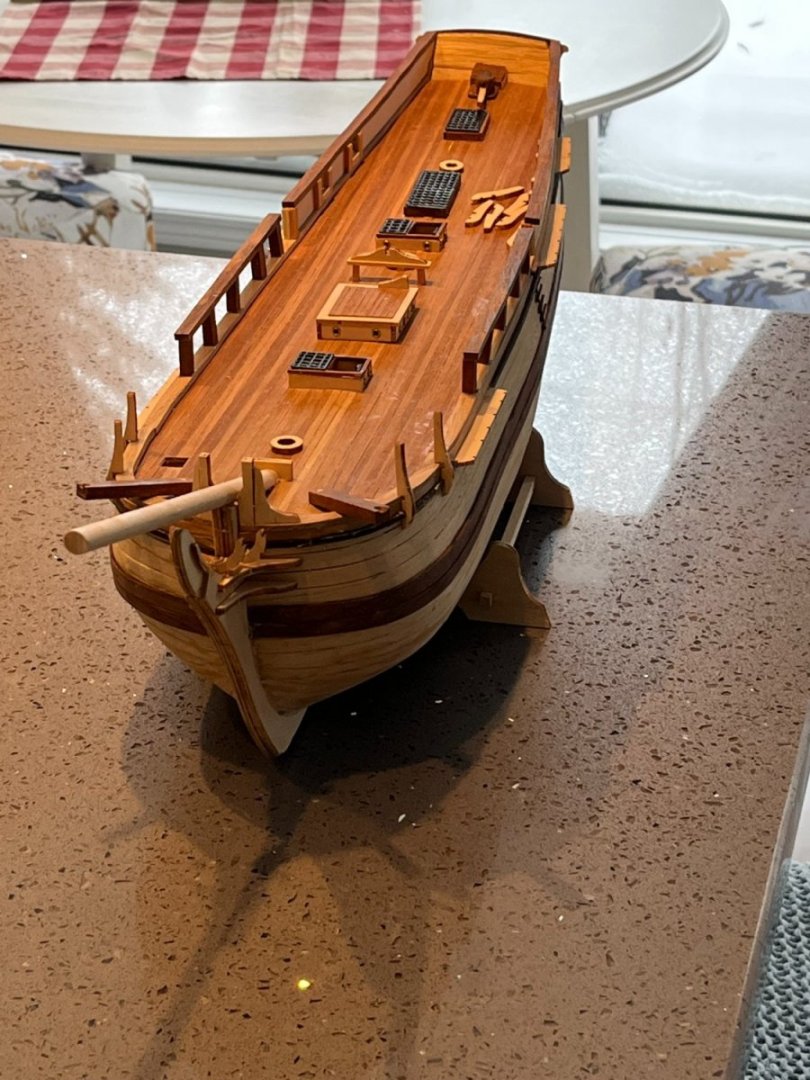
-
This model was gifted to me from a fellow veteran who has since passed away from cancer, I figure that the kit is around 30 years old but it has good bones. First thing is to strip off the old deck and replace with 1/32 plywood then mark it up to start planking the deck


- 4 replies
-
- 6
-
-
- Cutty Sark
- Billing Boats
- (and 1 more)
-
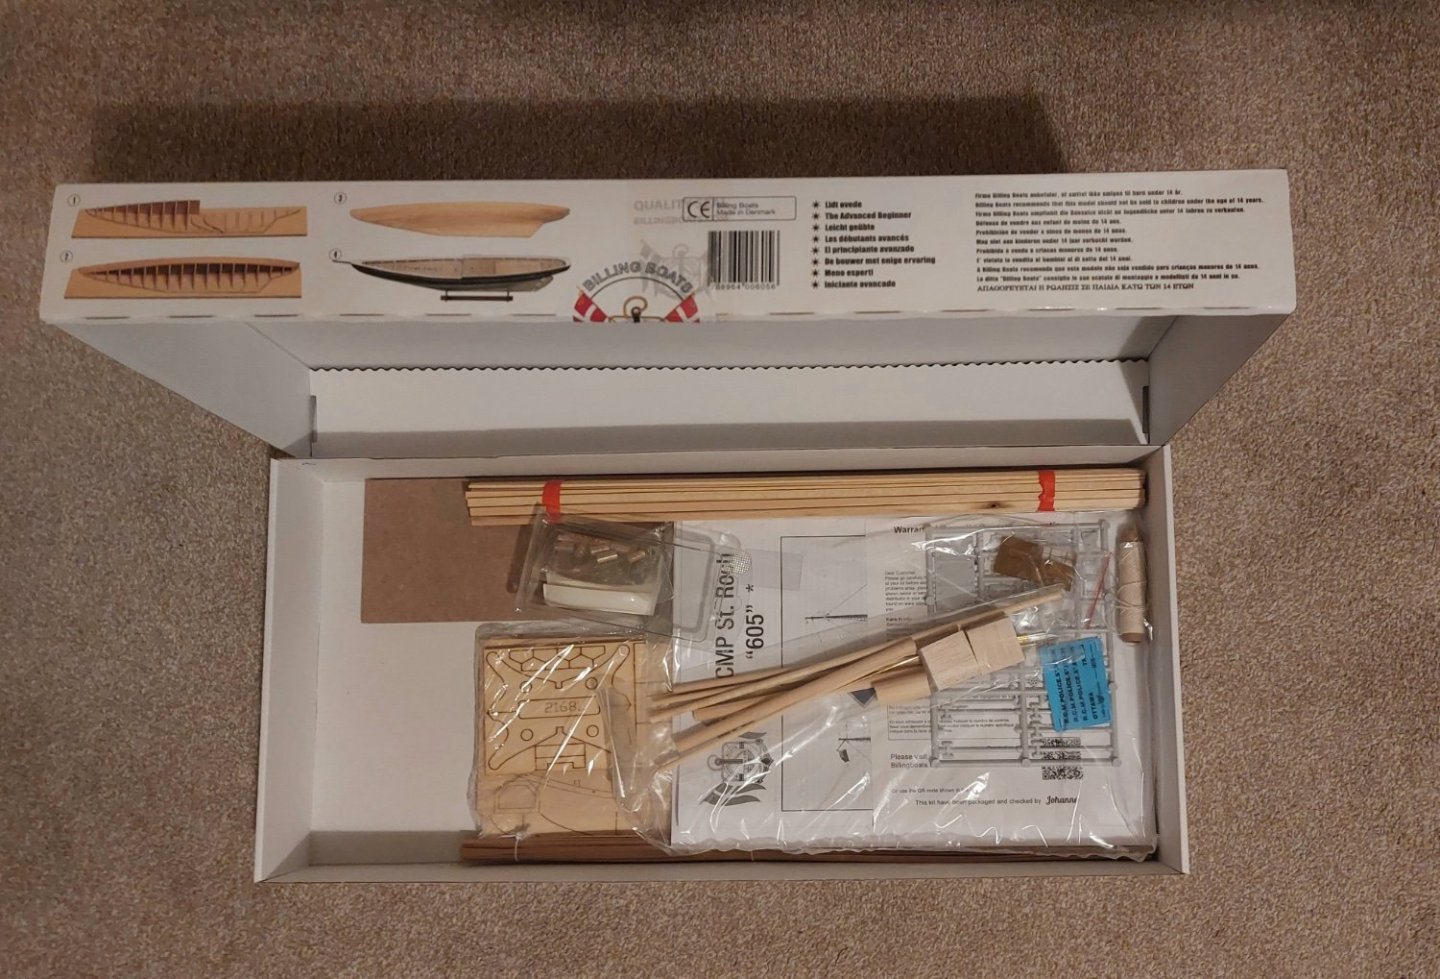
 Hi All, After having couple speed build videos completed on my YouTube channel, I got my first sponsored model kit, the BB605 RCMP St.Roch 1:72 scale from Billing Boats. This was an advanced beginner kit and should be very straightforward. The plan was good but the instructions could be better. The kit was well packaged and so far I did NOT see anything missing. I will keep the build log coming and as usual to film the entire build process and upload to YouTube after done. Hopefully, my build log and final video can provide some help to anyone who likes to build the legendary boat model. Thank you and good luck building!
- 8 replies
-
- 8
-
-
- St Roch
- Billing Boats
- (and 1 more)
-
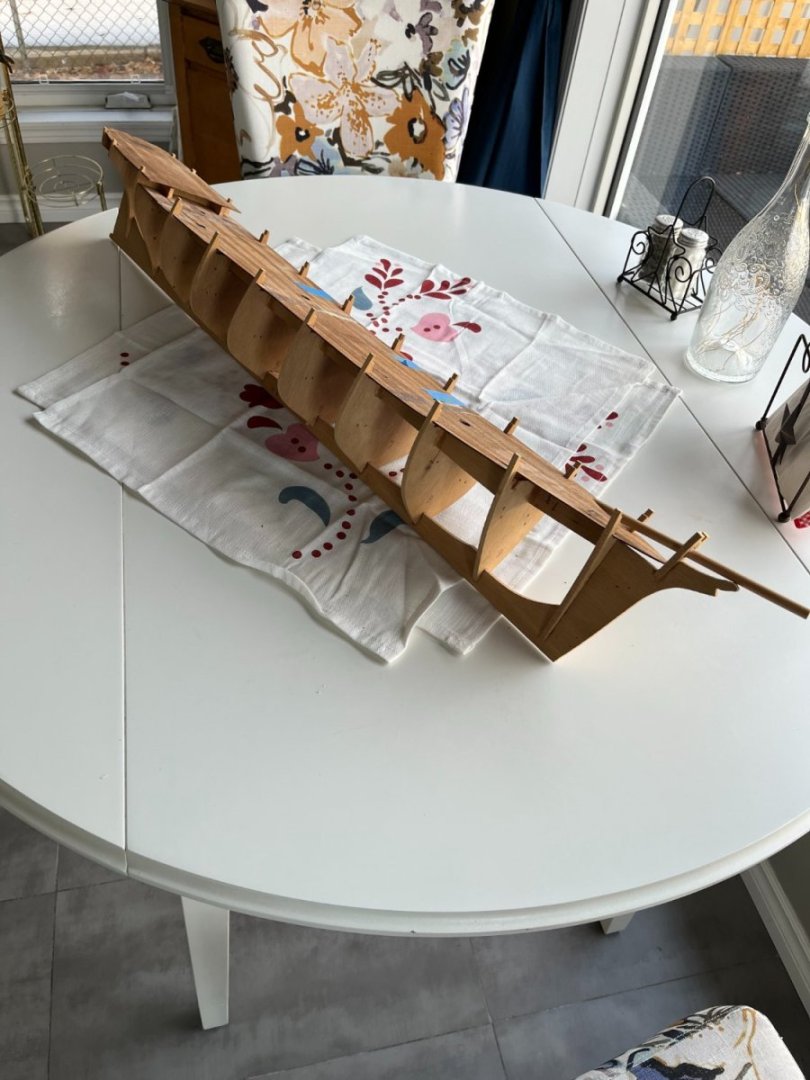
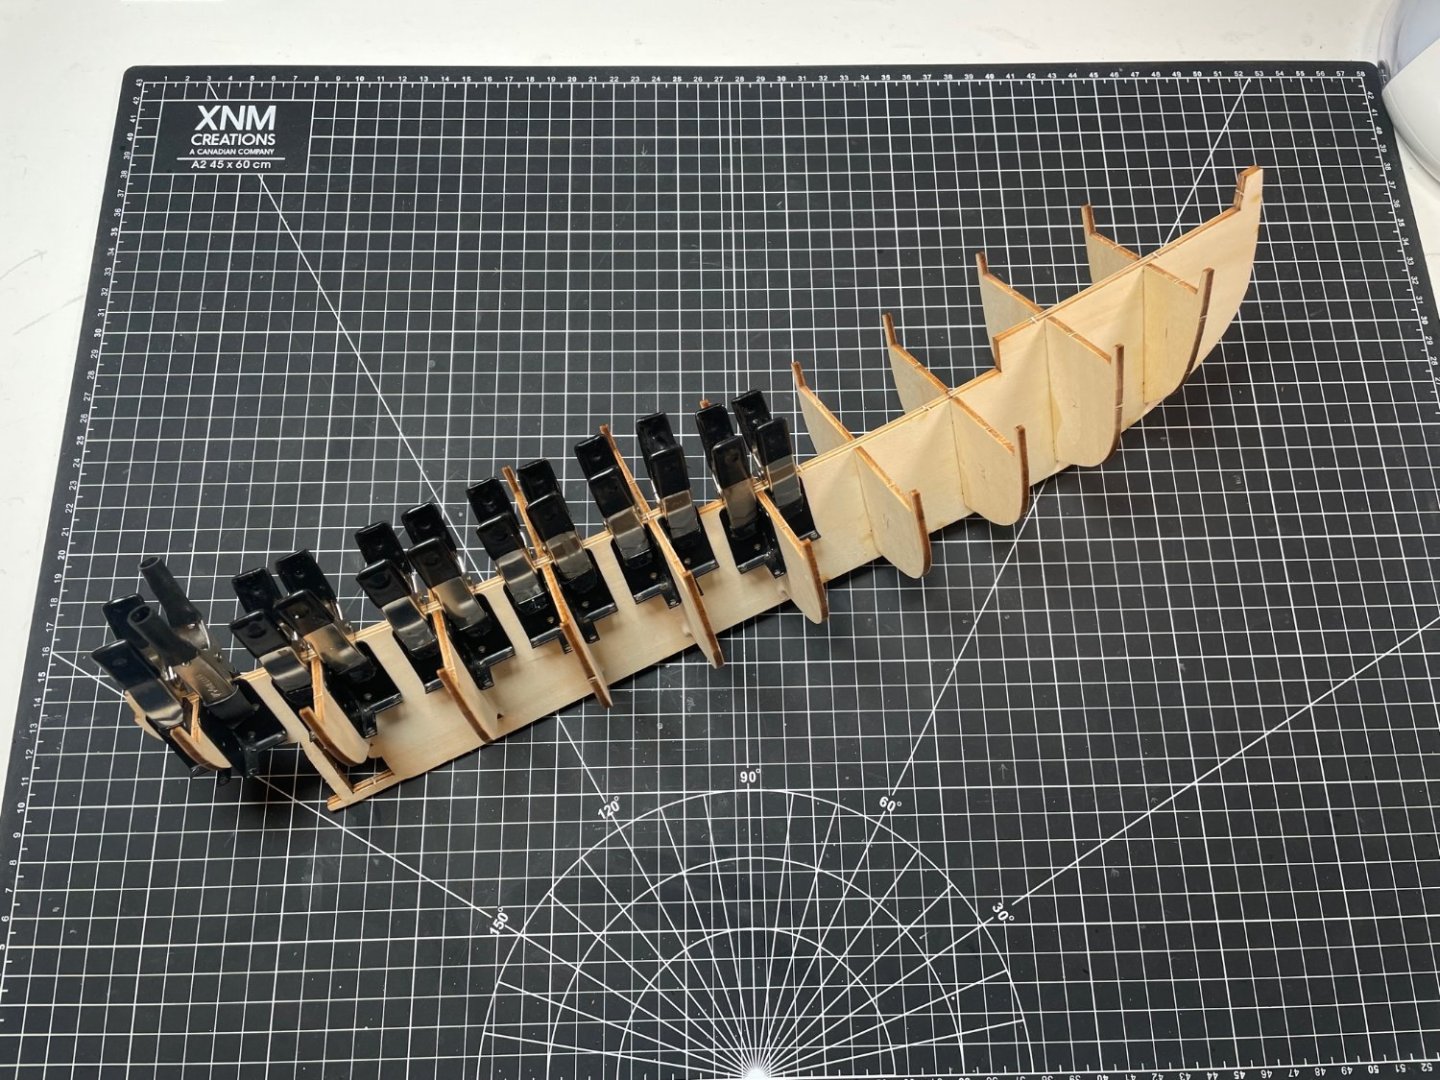
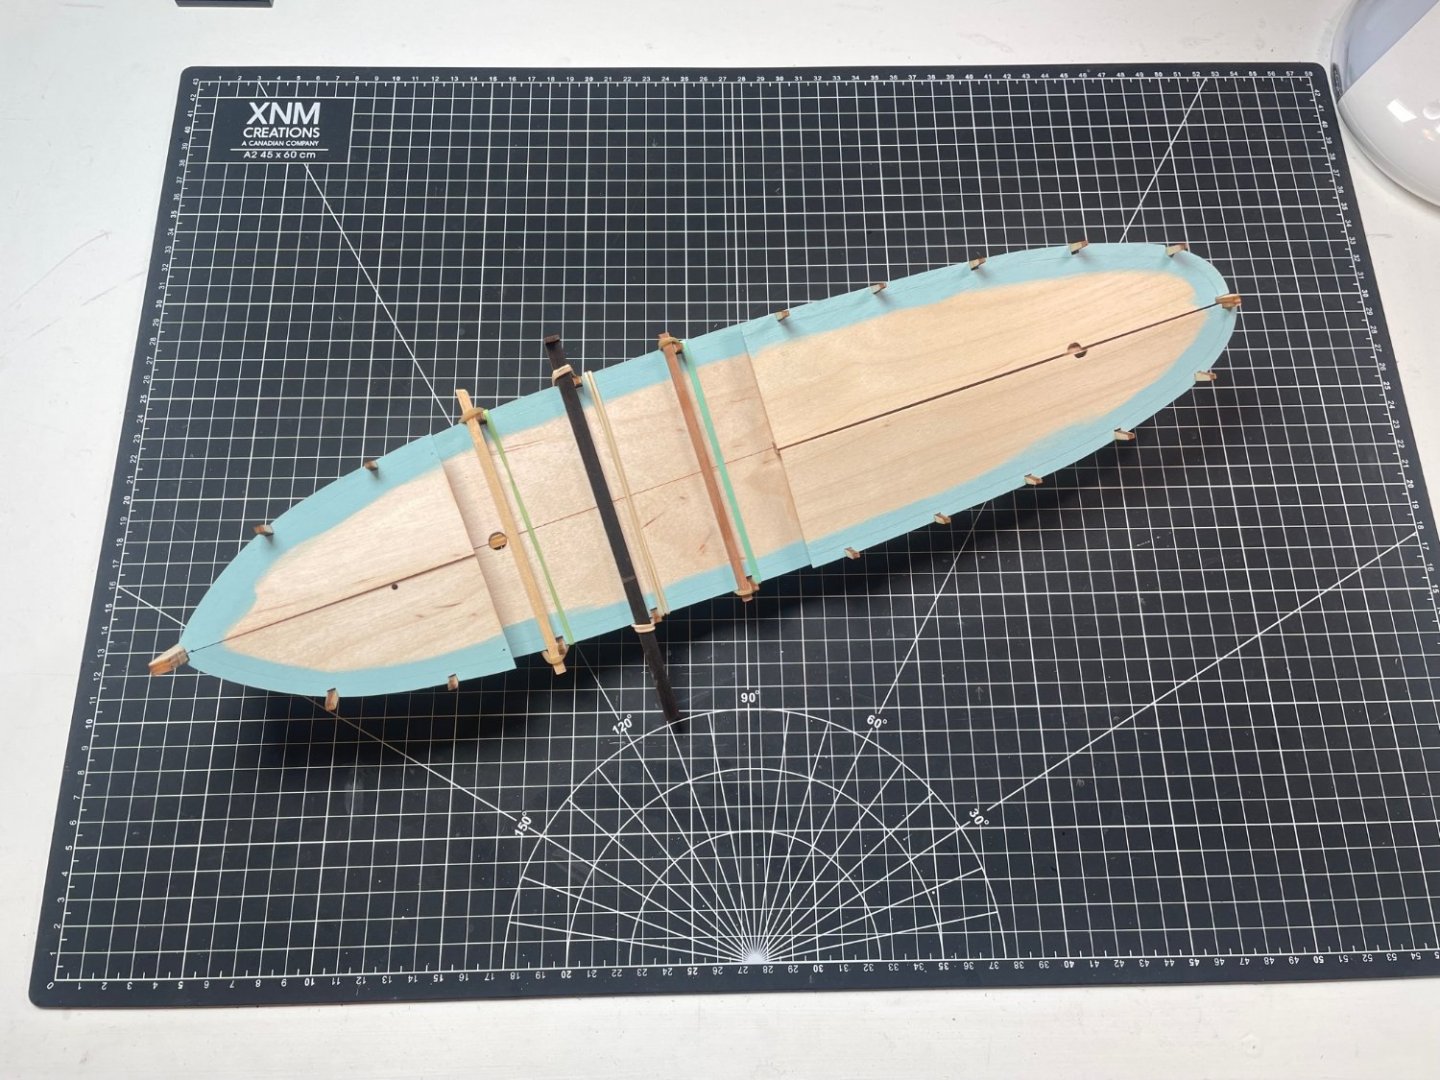
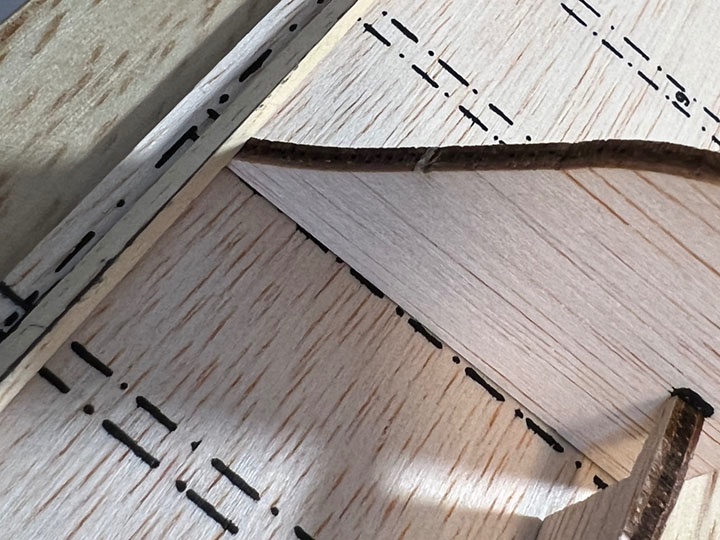
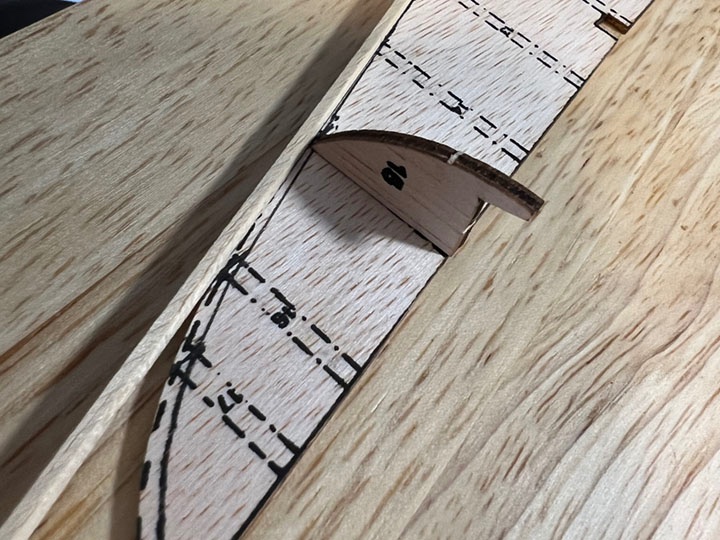
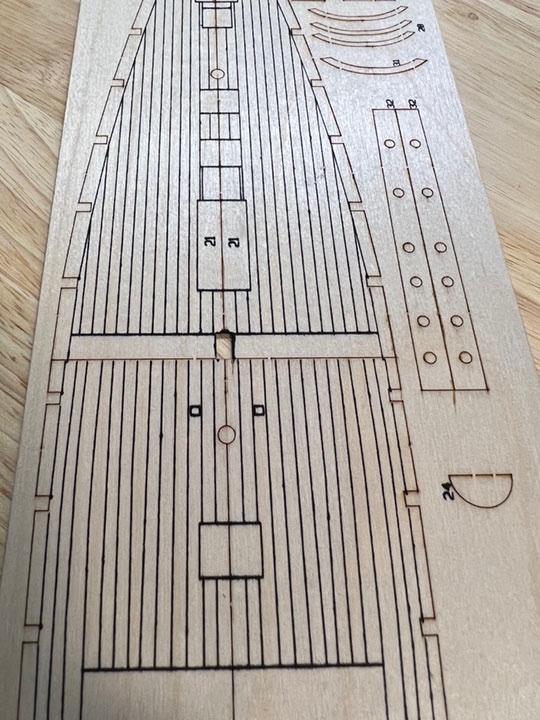
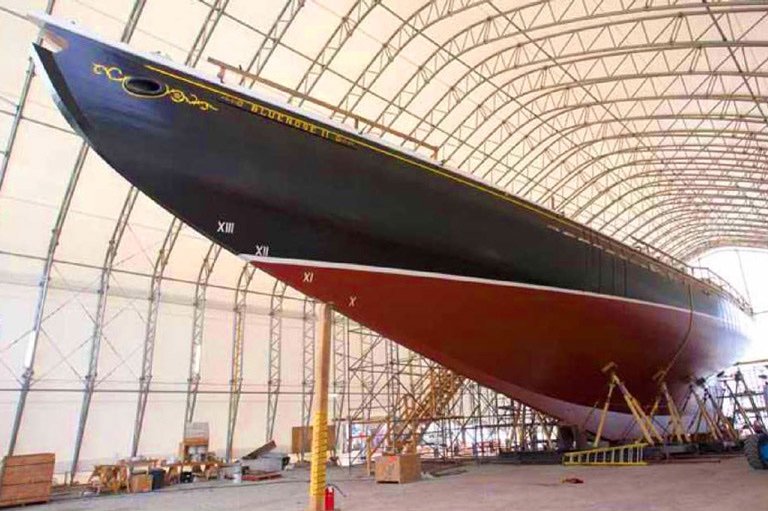
 Yes, another Bluenose, and yes another new guy to MSW. I have been lurking for awhile and I am at the point of starting my second build, thus the starting of this log. I have a lot of experience with plastic models and have also completed a wood ship (Artesania Latina's Virginia 1819). The ship was an introduction to wood ship building and I have since collected a number future kits as well starting to developing more detailed drawings for future scratch build projects. Like everything I see this as a progression of skill building and challenges so that once I get to stage where I am ready to do a scratch built POF / skeletonized ship, I will be ready for it. Thus why I am staring Bluenose II. The kit (Bluenose II No 600 from Billings Boats) itself is fairly straight forward, mixing laser cut ply and strip wood with plastic, brass and copper. Instruction are very brief at 1 page of description and 11 of diagrams. The kit also has a double side slightly larger than A1 sheet with 1:100 diagrams for rigging, plan and side view. Billings shows this as an advanced beginner and I would agree. You need to have some experience and spend some time looking at other builds and instructions such as those from Shipways to help formulate an approach to building the ship. In general, I will build this using the material provided with a few key exceptions. First, Billing has you build the as 2 separate halves; framing, and planking followed by glueing the 2 halves together once done. The main concern I have for this that the keel ends up being 4mm thick if the planking stops short and just under 8mm if it continues making the scale keel the equivalent of 400mm - 800mm (15" - 31"). Hard to be a fast ship with something that fat under the ship. So the solution is to use one false keel versus the 2 pieces. In addition I will add rabbets and shape the planking so that it blends into the plywood keel. The result should be closer to 200mm (8"). I am not total sure the keel width and so hopeful someone can fill me in on this so I can adjust. The whole thing will be painted so I am really looking for a smooth surface to work with. Second, pictures of the actual ship show a pronounced keel at the bow and all the way to the stern with a deep keel midship. Planking per Billings would have the planks terminate at the edge of the keel. To address this I will add additional strips to the false keel to make it more pronounced and visually look closer to actual ship. While this may not be dimensionally accurate, visual accuracy is my goal here. Third, The above points will have an impact on the deck width. Also problematic is the printed lines for the planks onto the plywood deck as they are out of scale and inconsistent. The solution is to sand the outer edges of the deck. This will lose about 2mm or the equivalent 200mm (4") from the breadth. The alternative is to fir out the frames 1mm on either side. Interested to know what others think of these options. Finally, Wherever possible, I will add missing details, replace plastic parts with wood and rig the ship closer to the real ship. I like the challenge presented in working at the smaller scale and seeing if I can bring the same level of detail that I have on my plastic work to that of wood. It might be said, Why not invest in plans or a better ship kit to gain the accuracy and this makes sense however this is effort that I am saving for future projects so the goal here is to build and replace in areas that are relatively straight forward while not expending unnecessary effort on what is essential a project ship. I appreciate any feedback and thoughts on this project. Don't hesitate to call like it is, I have thick skin and as said above, this is not necessarily about making the perfect display ship, but about learning new skills and getting better at the craft. Sincerely, Gord
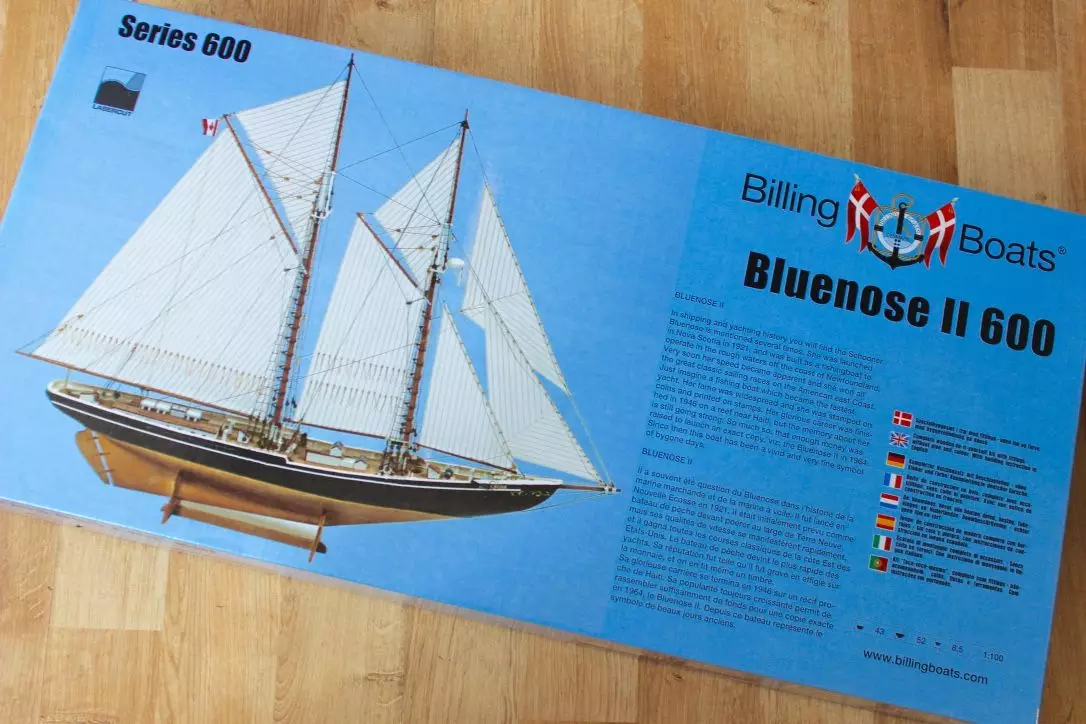
-
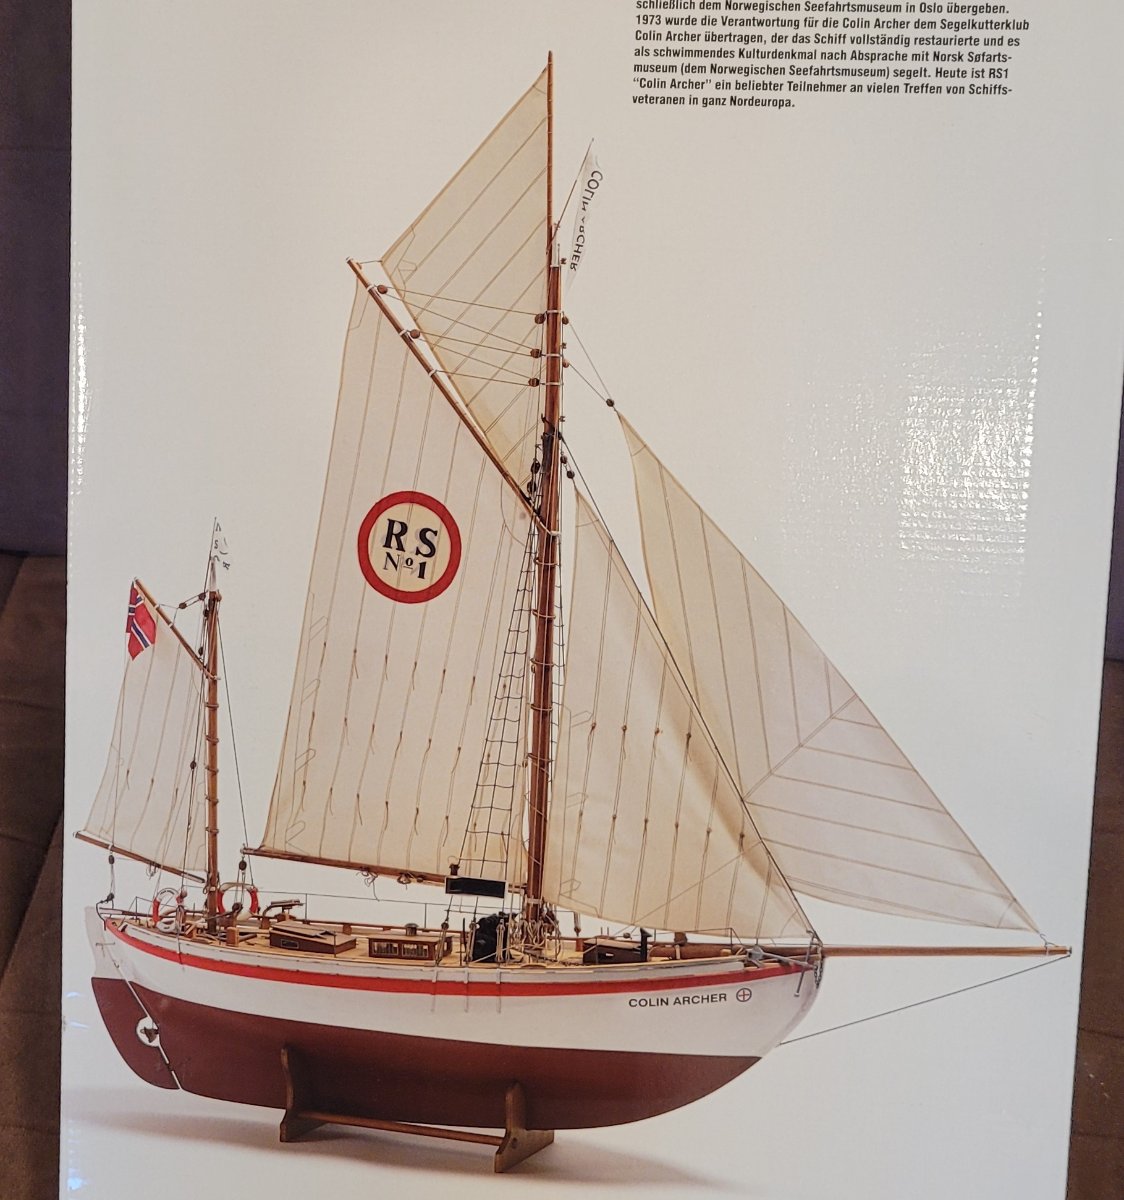
 RS1 Colin Archer, named for her designer / builder, was launched in 1893 in Larvik, Norway. The model, 1:15, is being kit built for Radio Control. The kit is by Billing Boats in Denmark. I wanted to build an RC boat and this one has a special appeal because Colin Archer also designed and built Leon, a 302 ton brigantine in 1880. I scratch built a model of Leon at 1:48. She now sits in a museum in Larvik dedicated to Colin Archer. Her build is described in forum "Build logs for subjects built 1851 - 1900". RS1 Colin Archer, after 40 years of very successful rescue operations saving many Norwegian fishermen, is now owned by the Norwegian Maritime Museum in Oslo. She is maintained and sailed at vintage ship gatherings in Northern Europe by the Colin Archer Cutter Club. The kit models her after the rescue years as she did not have an auxiliary engine until after she 'retired'. This picture is from the box top of the kit. On the way to being ready for planking, the hull is 37" long. Sparred she will be 50" long (62.5'), 54" high (67.5') with a 13" beam (16.25').

- 53 replies
-
- 3
-
-
- Colin Archer
- Radio
- (and 1 more)
-
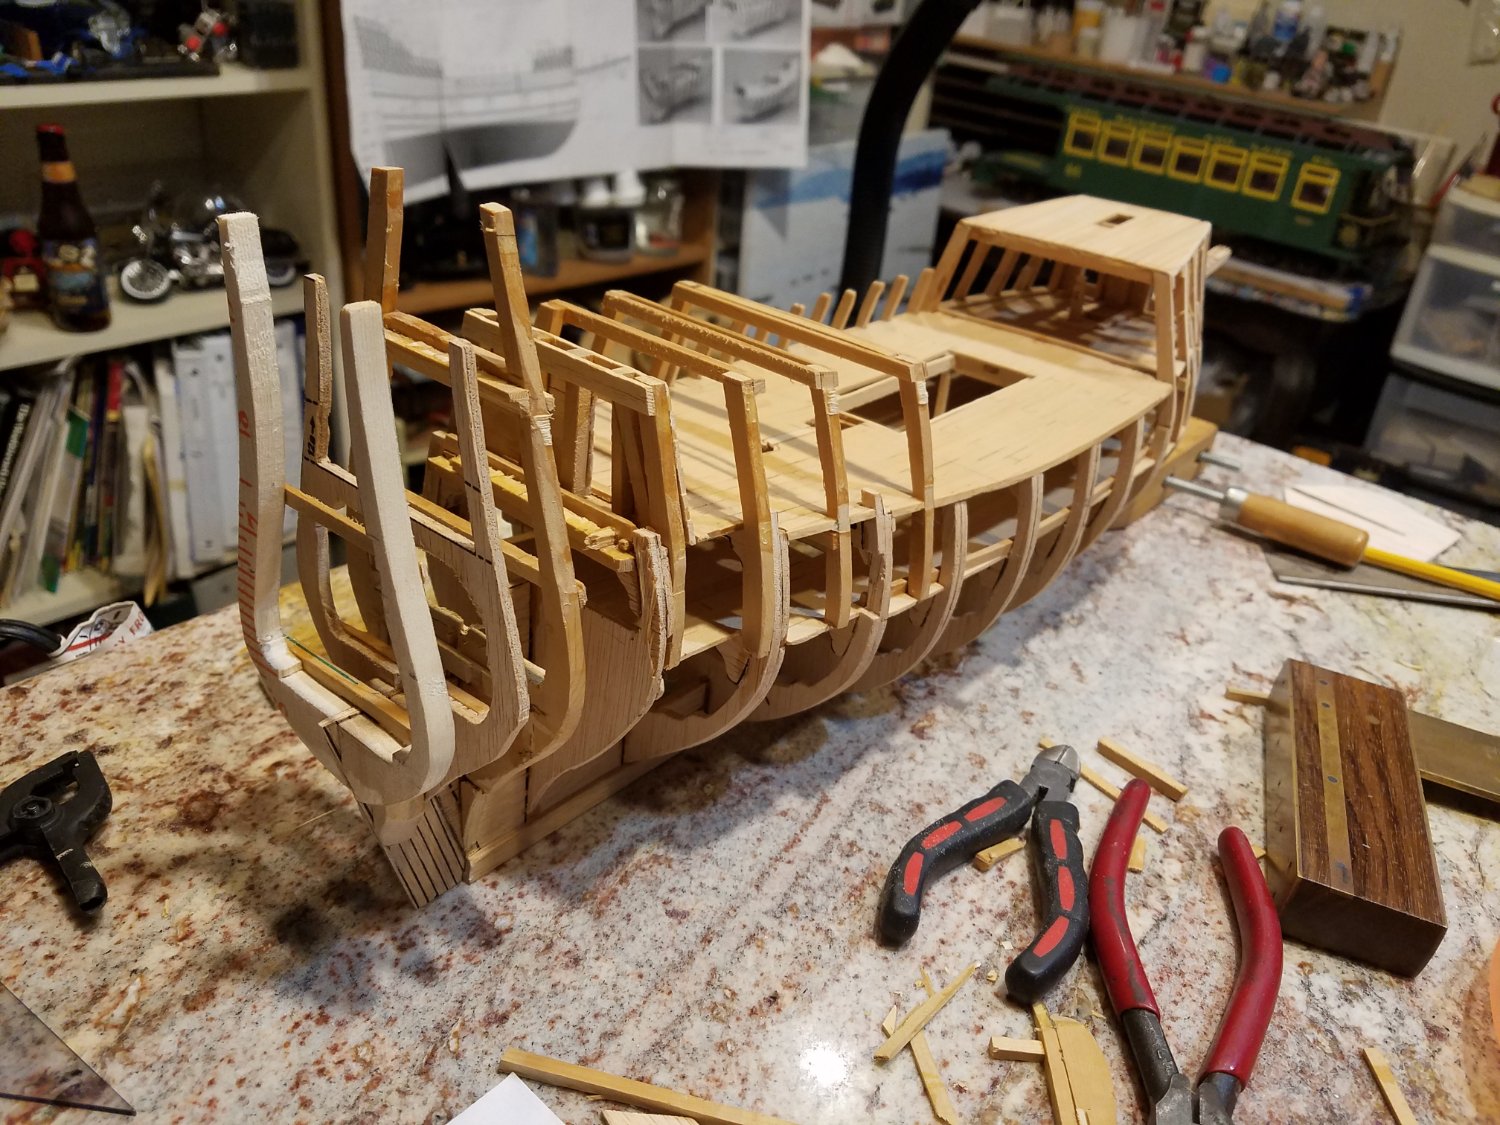
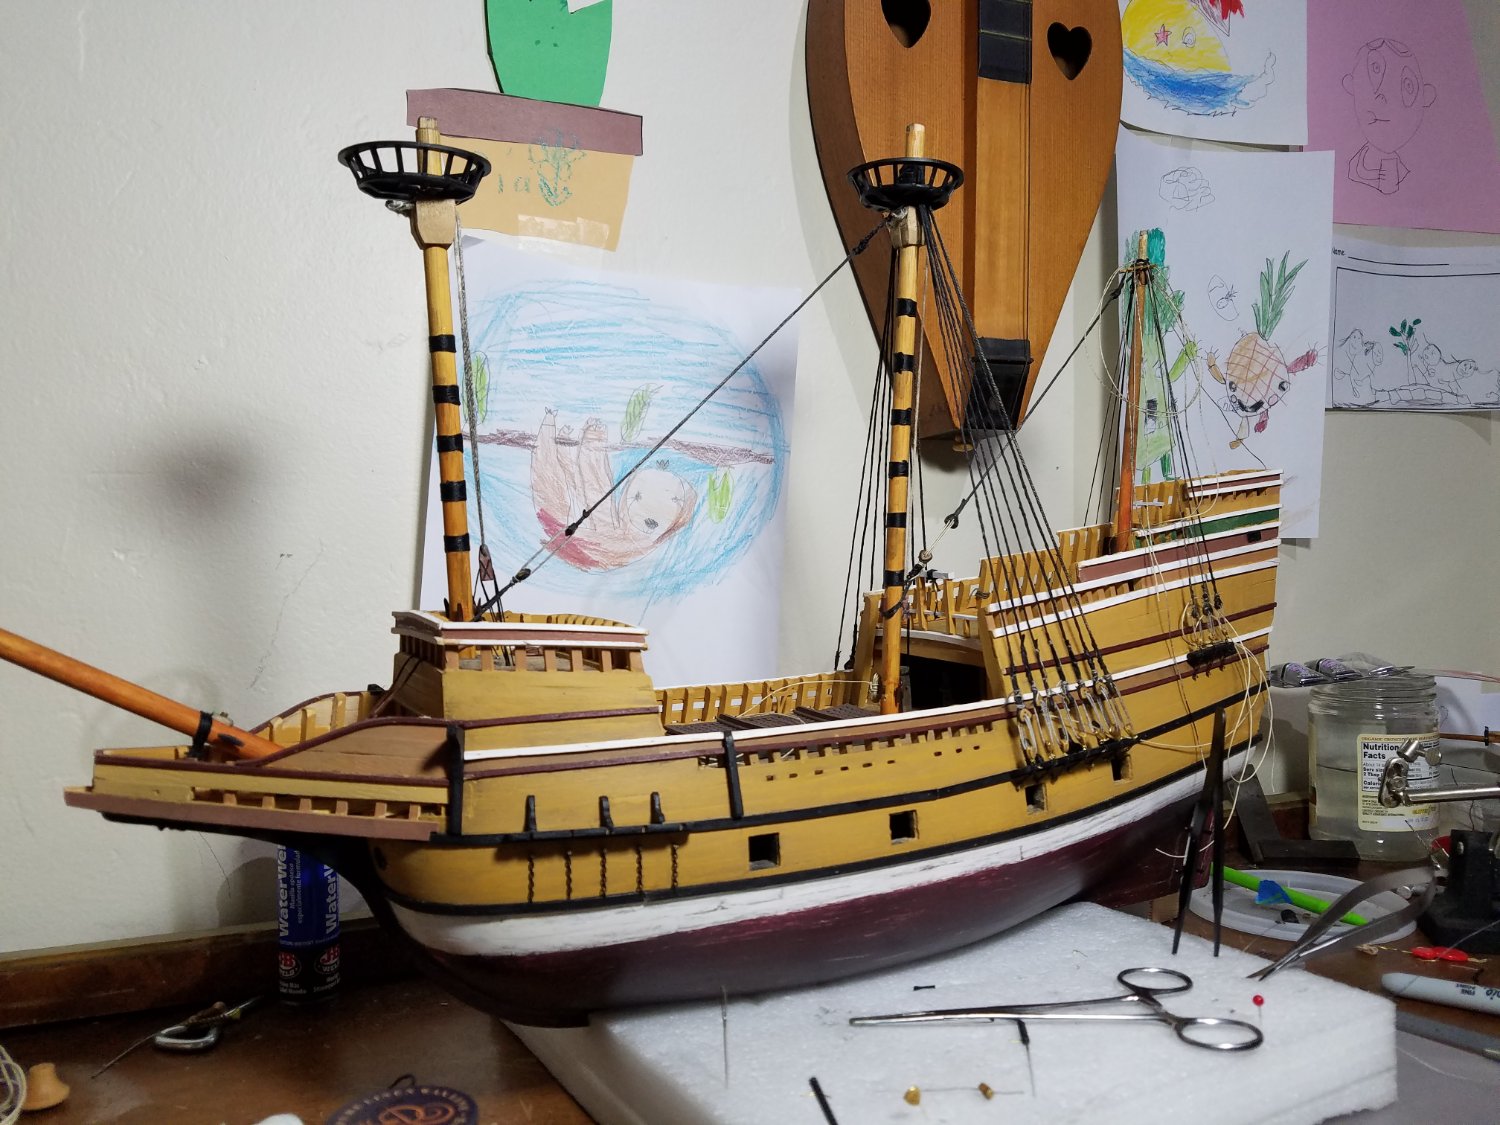
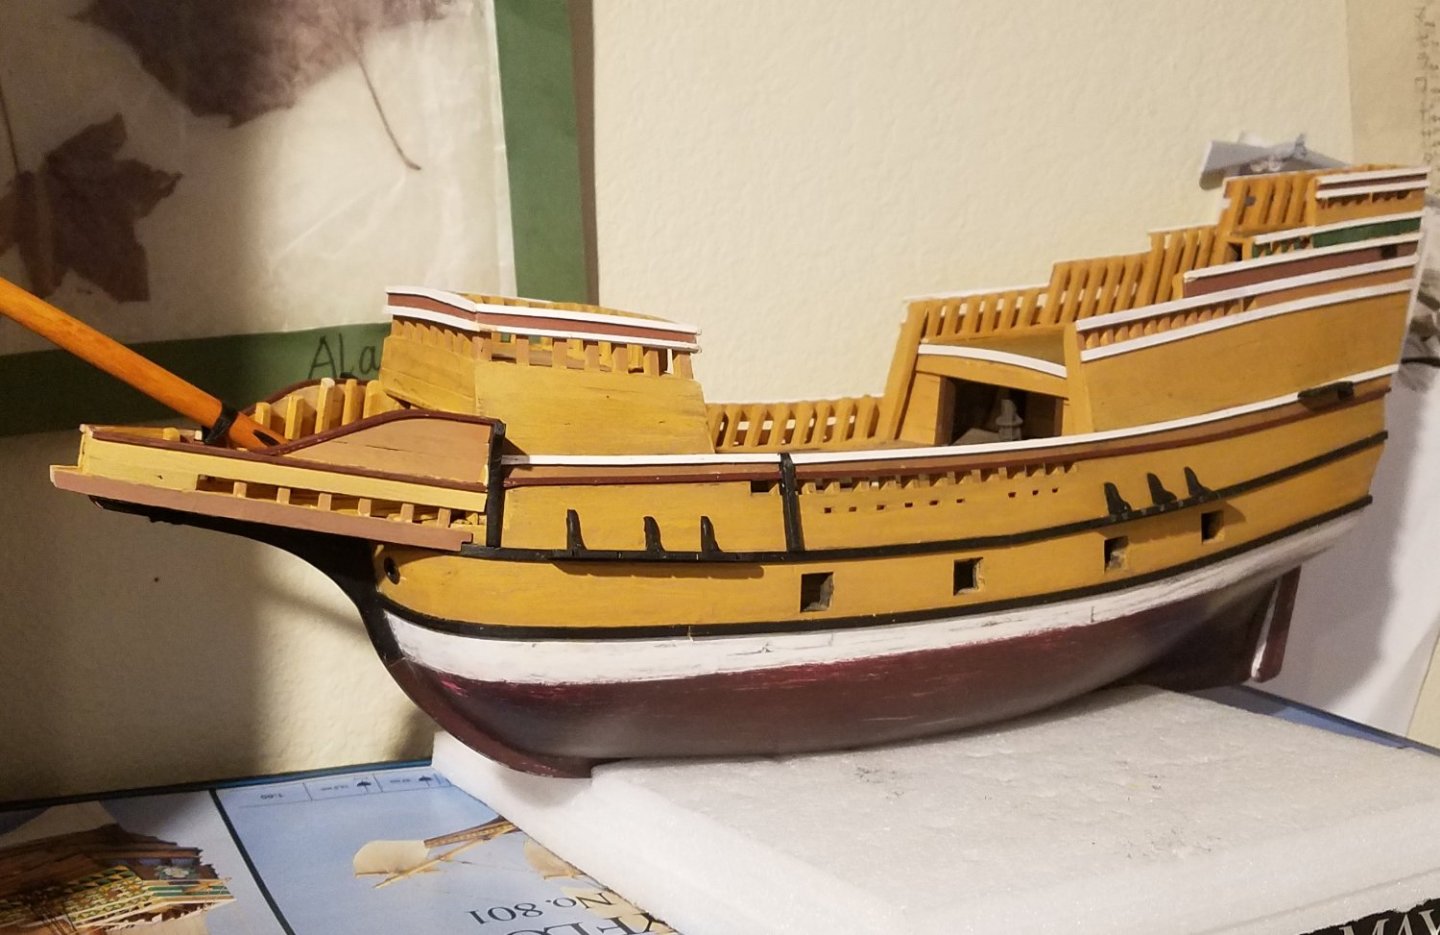
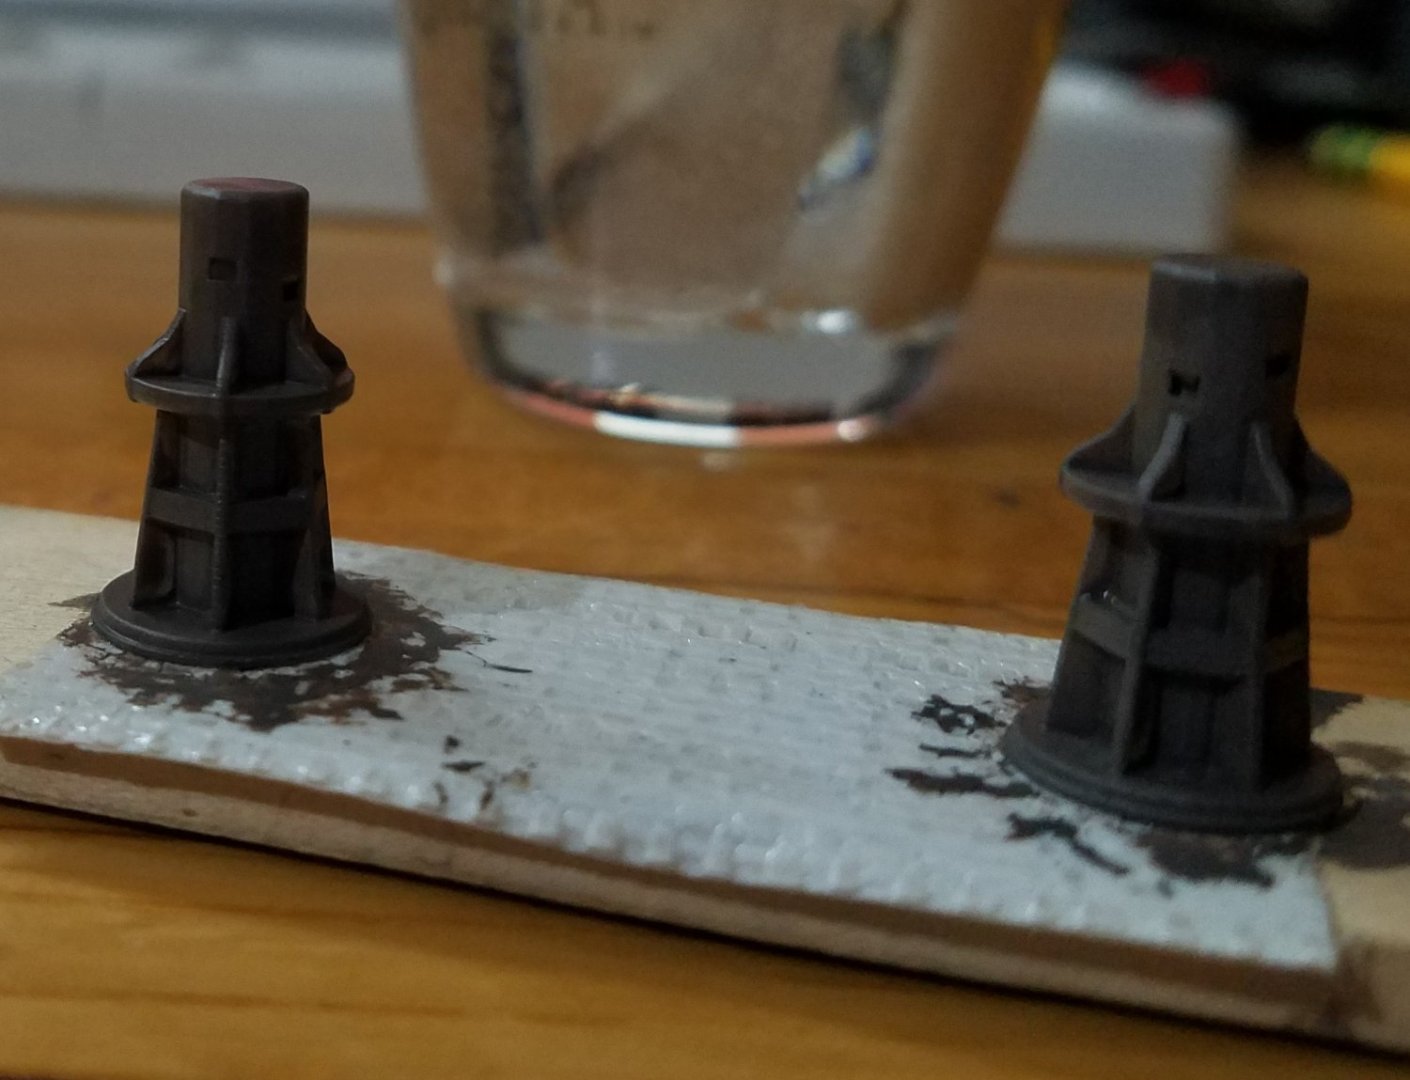
 This is the first Ship model I built. It was an Artensian Latina 1805 Swift. It is one of 3 ships I bought from our local hobby store when it was going out of business in 2003. It was also the simplest build and I finished it in less than a year which prompted me to lunge into the Mayflower kit,,, blindly. The mistake I made was assuming that this kit would be a fair representation of the actual Mayflower. I soon learned that it isn't even close. Unfortunately by the time I came to that conclusion I had already assembled the framing, so I had to modify an existing frame in the most brutal way possible. I won't blame you if you cringe at the next image [ Viewer beware] After purchasing "The Frigate Constitution And Other Historic Ships" I became disenchanted with the Billings Kit. It was already - by my inexperienced standards - not as good as the Artesania Latina Swift kit. The instructions were minimal and the plans were hard to cross reference. So I did a couple of months of research and decided that I would try to model the Mayflower II which was supposedly a reproduction of the actual Mayflower although if I am to believe the "TFCAOHS" it is not. According to Thomas Miller (quoted in TFCAOHS) the real Mayflower wouldn't have had a spritsail, topsail or mizzen. So with that shocking revelation I decided to stick to a ship that was already built, the Mayflower II. After obtaining some rough images of the plans for that vessel online, I began hacking away at the kit. I used some white cedar I had in my shop and some sugar pine for the timbers. I completely rebuilt the quarter deck, forecastle and poop deck so that they were closer to the dimensions I gleaned from the images of the plans. The modifications used up all the planking material that was included with the kit, so I used stirring sticks. Then I cast away the plastic bowsprit beak assembly and built my own from scraps from my shop. It's as close as I could get from the sketchy plans I had and the plentiful images shared on the internet. I added ballast and some paint prior to blanking the upper decks because I concluded it would be impossible to add after everything was covered. I like to paint as I go, it keeps accidents from happening. I chose to weather the paint job to approximate the wear and tear that was present on most of the images I had collected. I also 3D printed a lot of the details, like the capstans. I am currently rigging the vessel, using images as reference along with the book "Rigging Period Ship Models" by Lennarth Petersson. It is well illustrated and a huge help. With any luck I should finish this by the beginning of next year. I intend to work on this model in tandem with the Artesania Latina Constellation Frigate model - which also will require a lot of mods. I know there are a lot of mistakes I made on this Mayflower model; I learn from my mistakes, so when I start building the frame for the Constellation it will be after I've made the necessary modifications to the transom and bow and after .
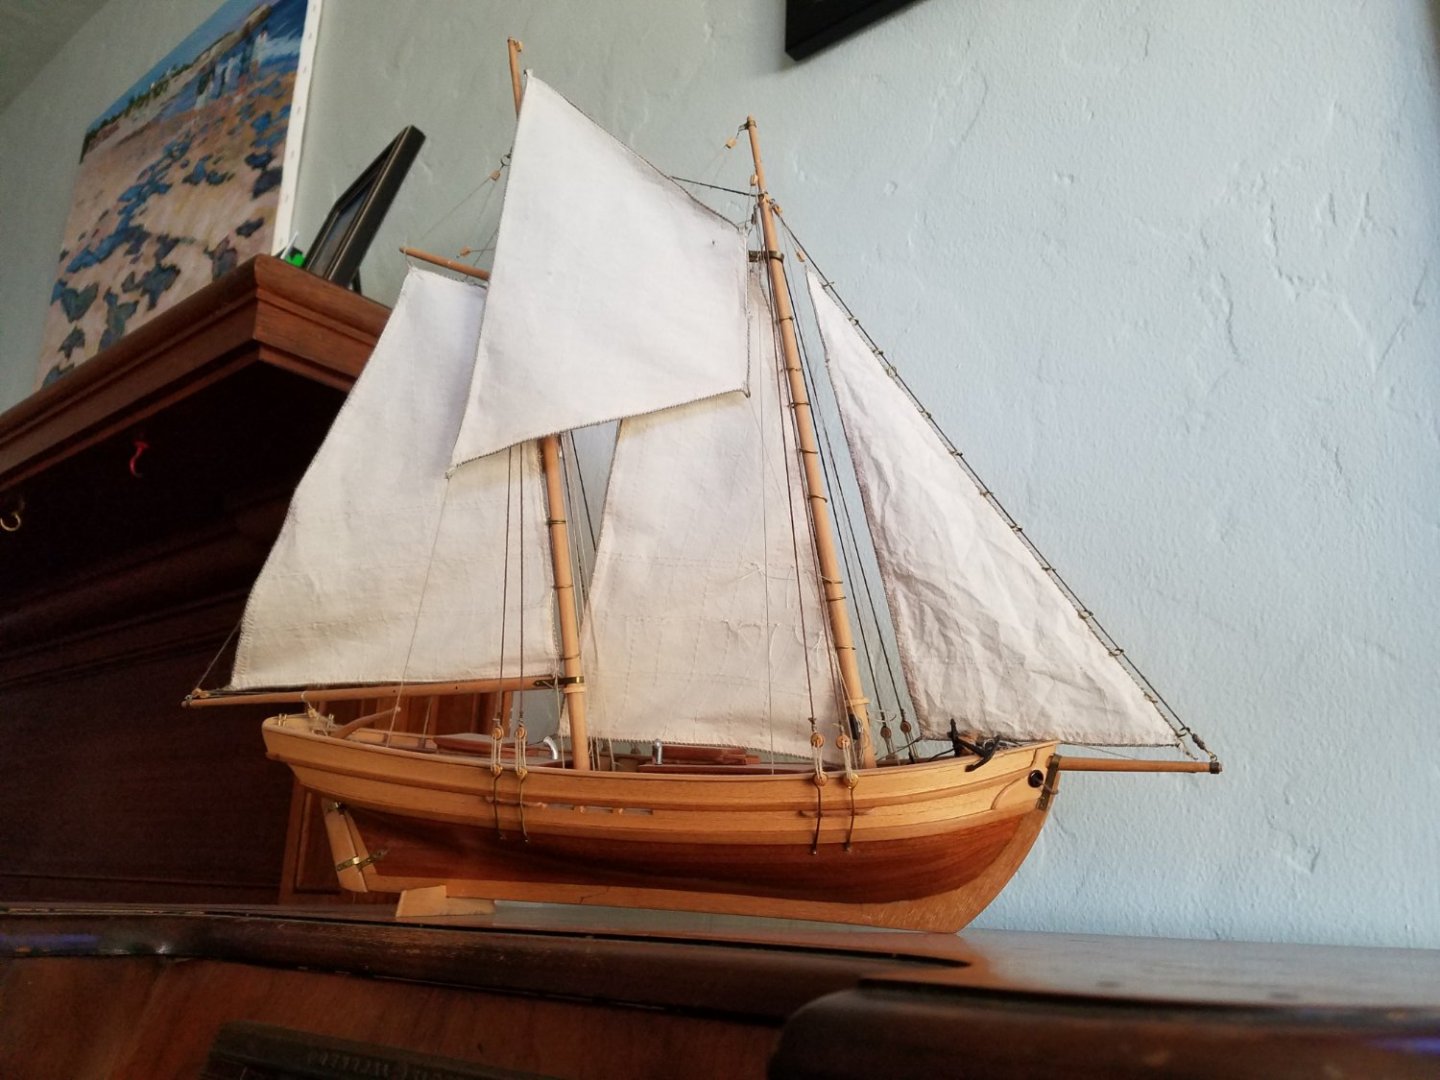


-
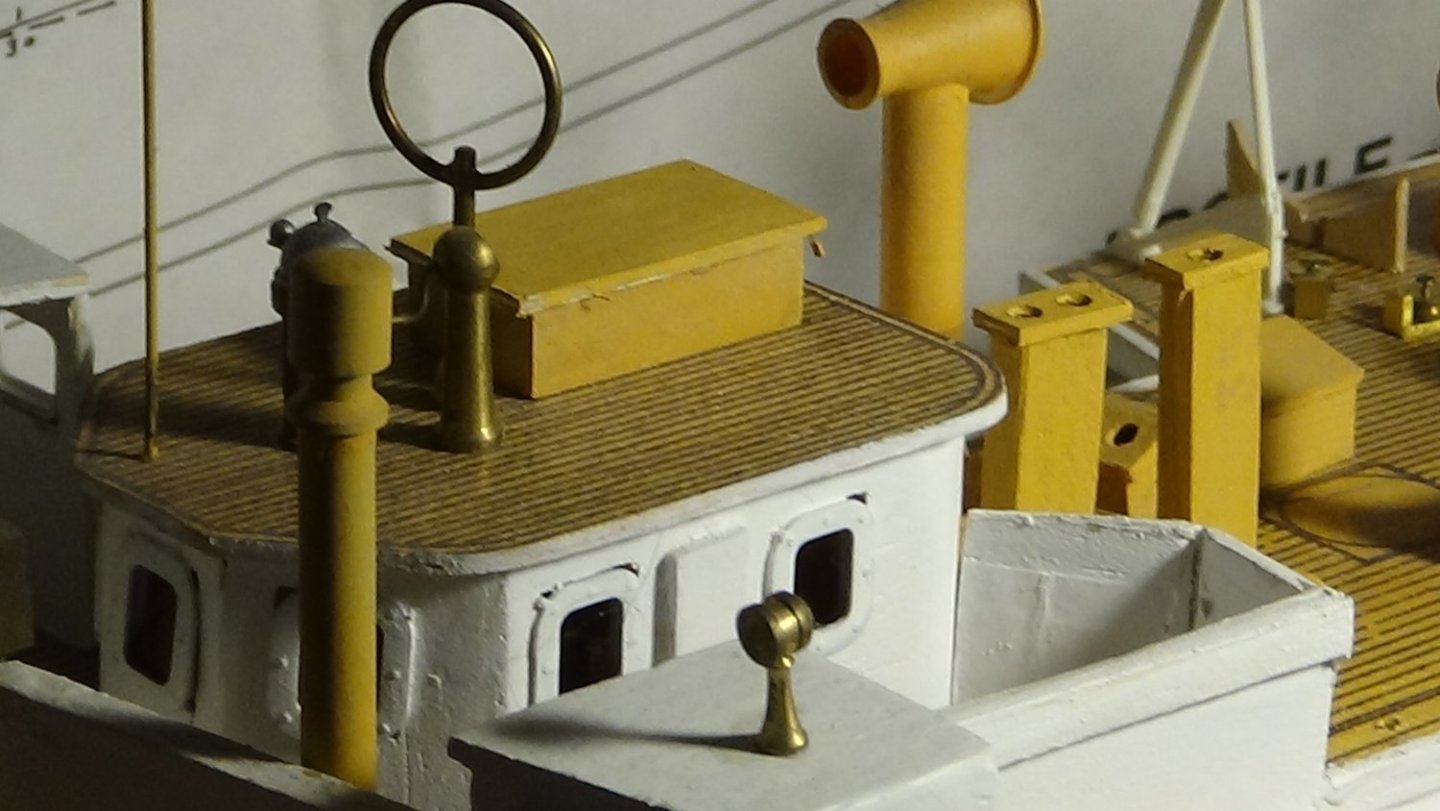
 My second Billings boat, in fact second ever wooden model. Started May 202, I don't have huge amounts of free time to work on her, so it's sporadic progress. So far the hull is planked and almost ready for painting, but in parallel I've been working on the wheelhouse. My impressions of the kit aren't all positive and it is clear this one came from the Chinese factory. The wood quality was a lot better when I tackled Smit Rotterdam about 20 yrs ago. The deck planks were missing - but I filled in an RMA form on Billings' web site and received 25 0.8*5mm mahogany planks a few days later. Excellent service!! I did gain 25 2*2mm strips that obviously had been mistakenly put in as the deck planks. I'm trying to incorporate the bonus wood where I can, to add detail. The plans are adequate, but the build instructions are 'the helicopter view' and not a lot of use for the beginner like me. More photos to follow
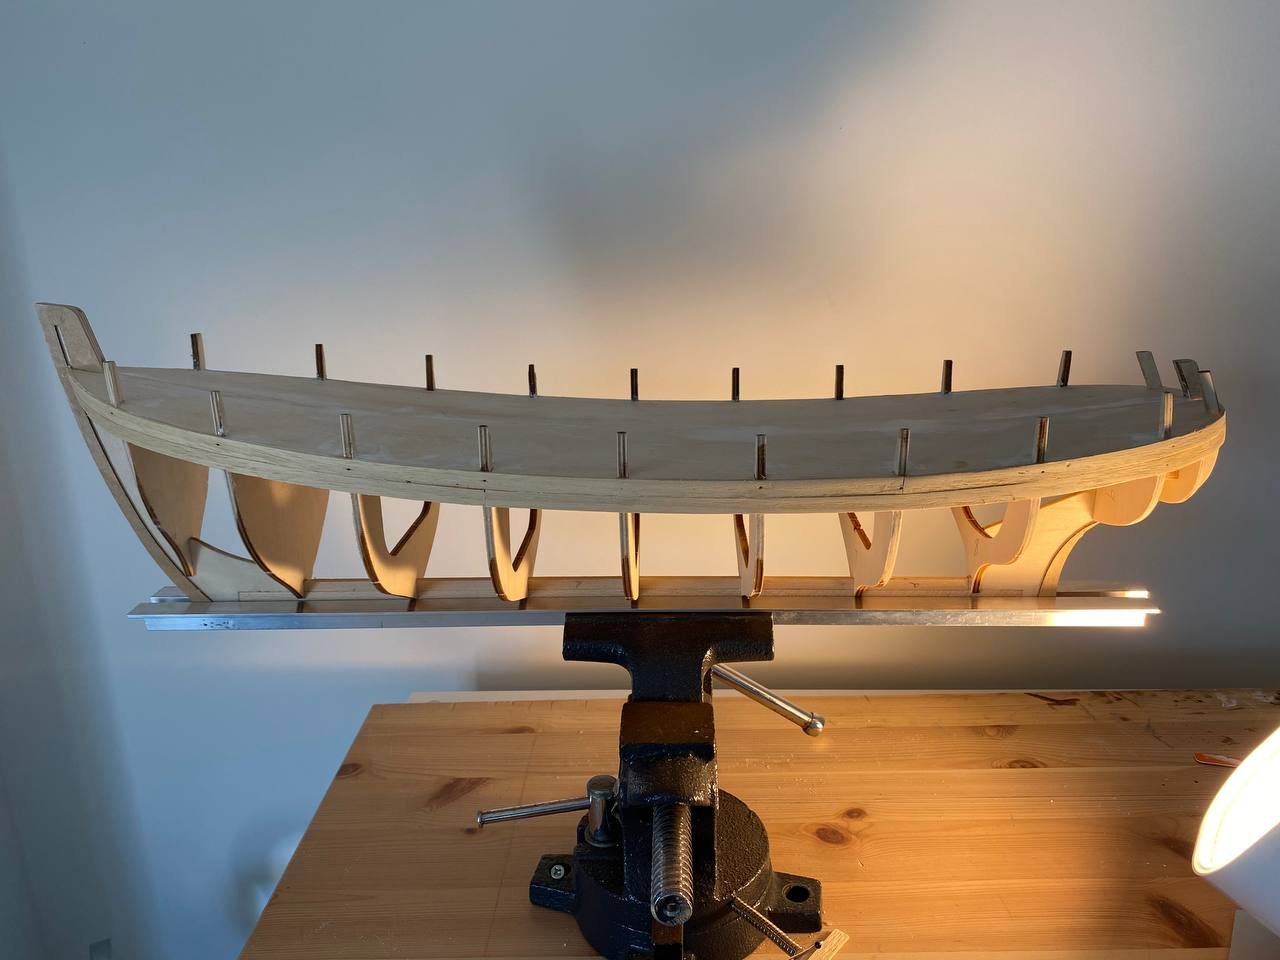
- 5 replies
-
- 6
-
-
- Krabbenkutter
- CUX 87
- (and 1 more)
-
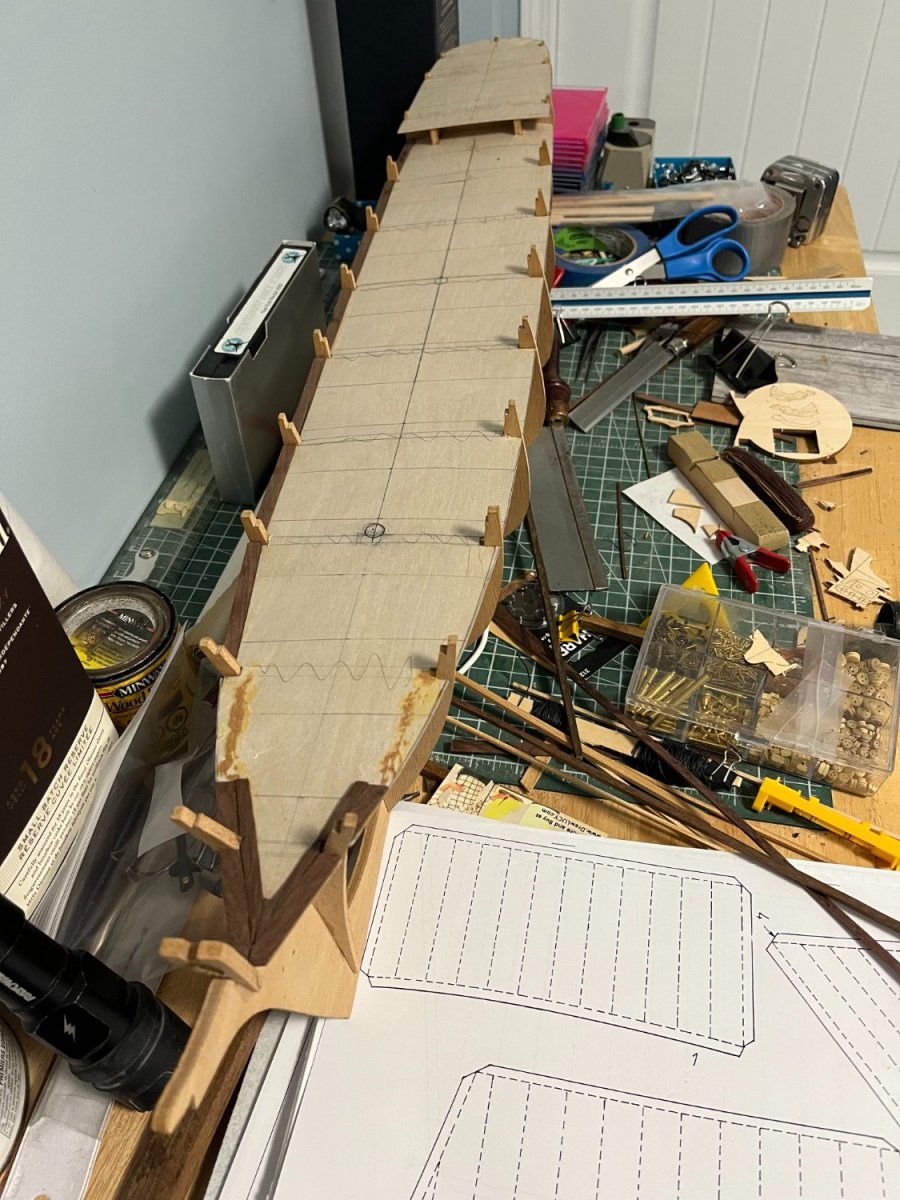
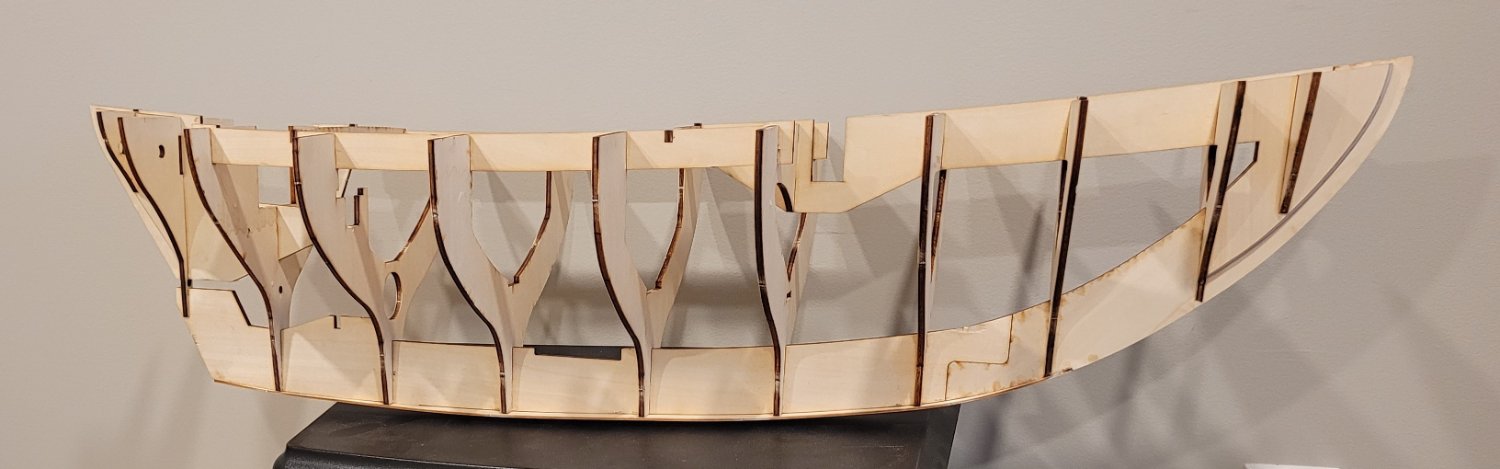
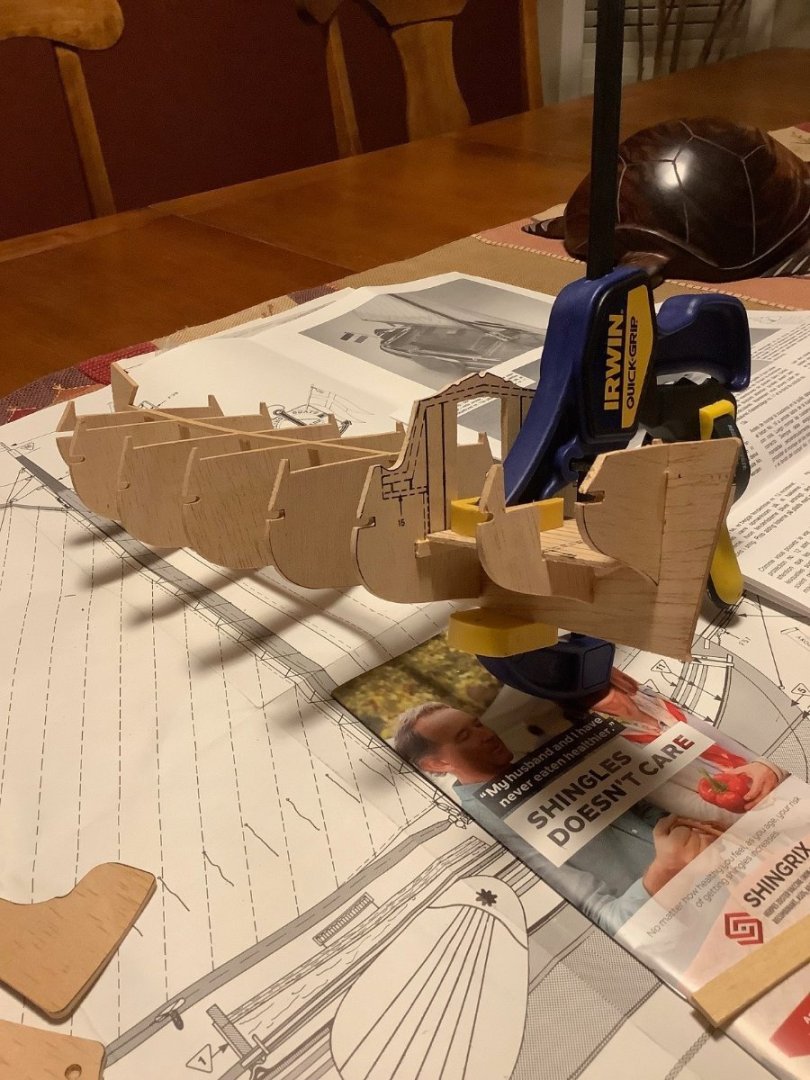
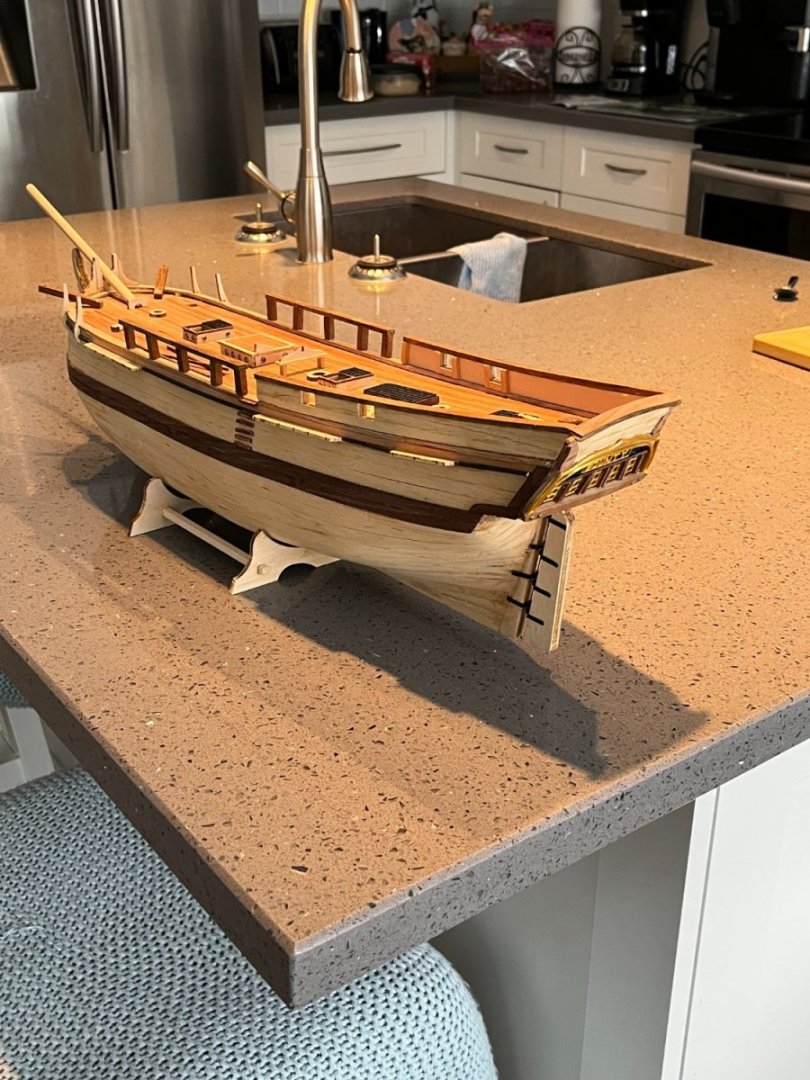
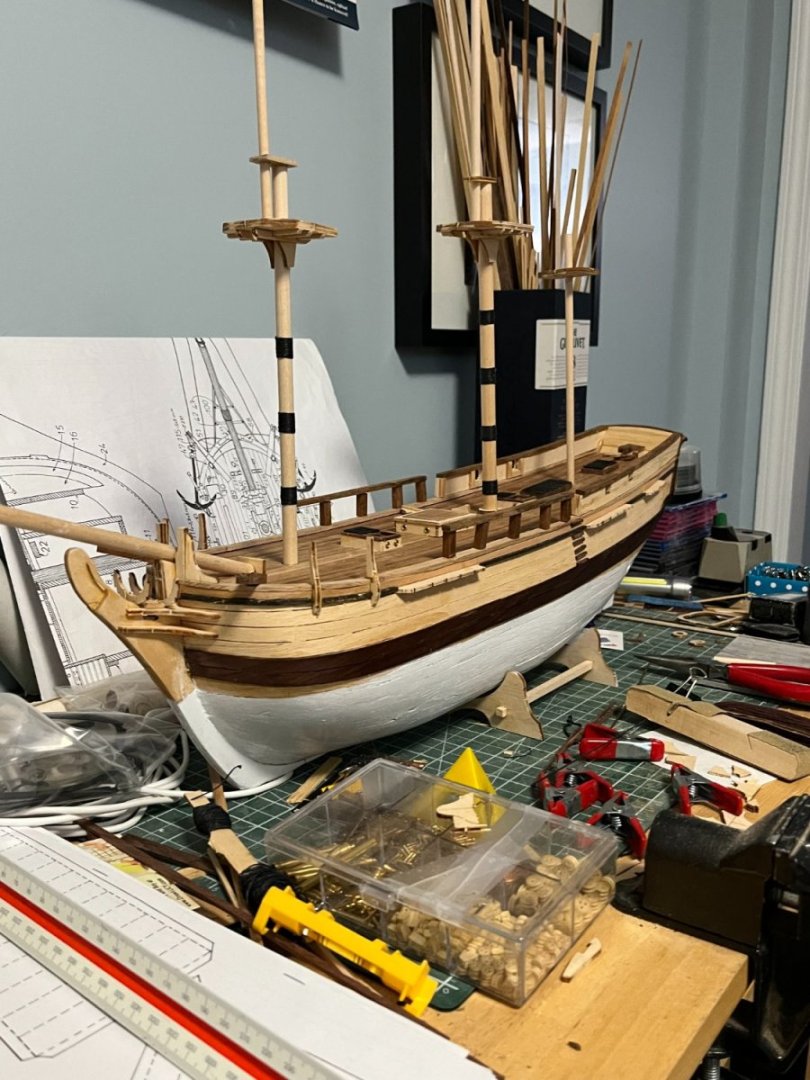
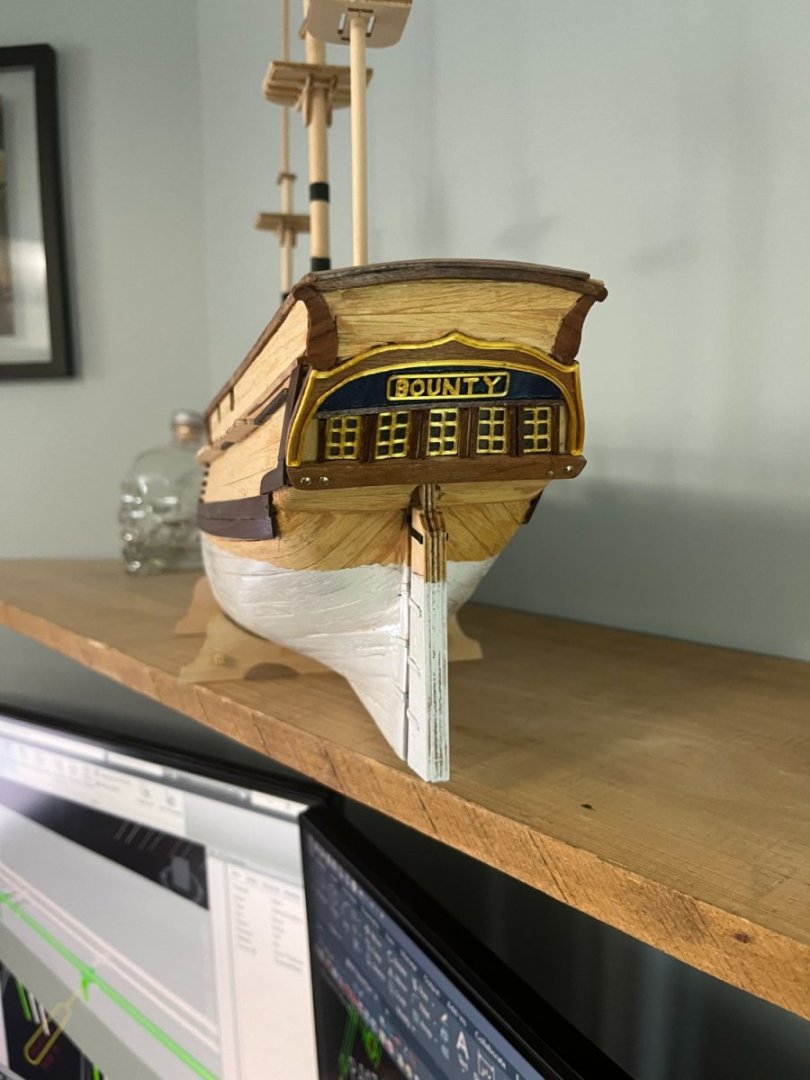
My Uncle had this one bouncing around his house (un-built) since probably the early 70's if not before. He asked if I could build it which I happily said yes. Win - Win. I build a ship, there is a place for it to go. So here we go! Note: This is the 'original' kit and not the new updated one. Actually pretty rough in the wood department - especially pre-cut stuff. I have spent quite a bit of time getting the pre-cut bulkheads to be usable as well as drafting my own plans off of the supplied ones to make something that fits the actual model. I am just going to jump in from where I am. I kept updating and modifying the plans based on photos and the the Billings Boats downloaded mini plans for the updated model. Finally I just said lets make some wood shavings and glue something. We can figure stuff out as we go. This model is a biggie - 30" hull length. I am adding a 1/32" false deck below the planking. The supplied deck will not be used (doesn't fit and stamped lines). This drawing exercise was essential for figuring out actual locations and good stuff like aft deck rake and bowsprit angle. In this pic the rear three bulkheads have been glued and now am gluing the forth from the back. I abandoned the slots on the left and right in each bulkhead since they didn't line up. I defined and cut the central rib going down the middle. Yes, there are places where things go below deck (faux stairways, etc) but I want it straight and strong. Once the false deck is affixed as well as the top level planking cutting through this rib will be fine. You can also see on the central bulkhead aft how much wood needed to be added for the upper deck. So the build is on, with LOTS of scratch upcoming. Sooner than later need to figure out how far the aft deck goes (my plans show much farther than the museum ship has or the new plans show). Cheers, Mark
.JPG.5942cc515d4a264043adf0905de7b69a.JPG)
.JPG.090be82c3e91d54e738fdf62c007a08c.JPG)