Search the Community
Showing results for tags 'bluenose'.
-
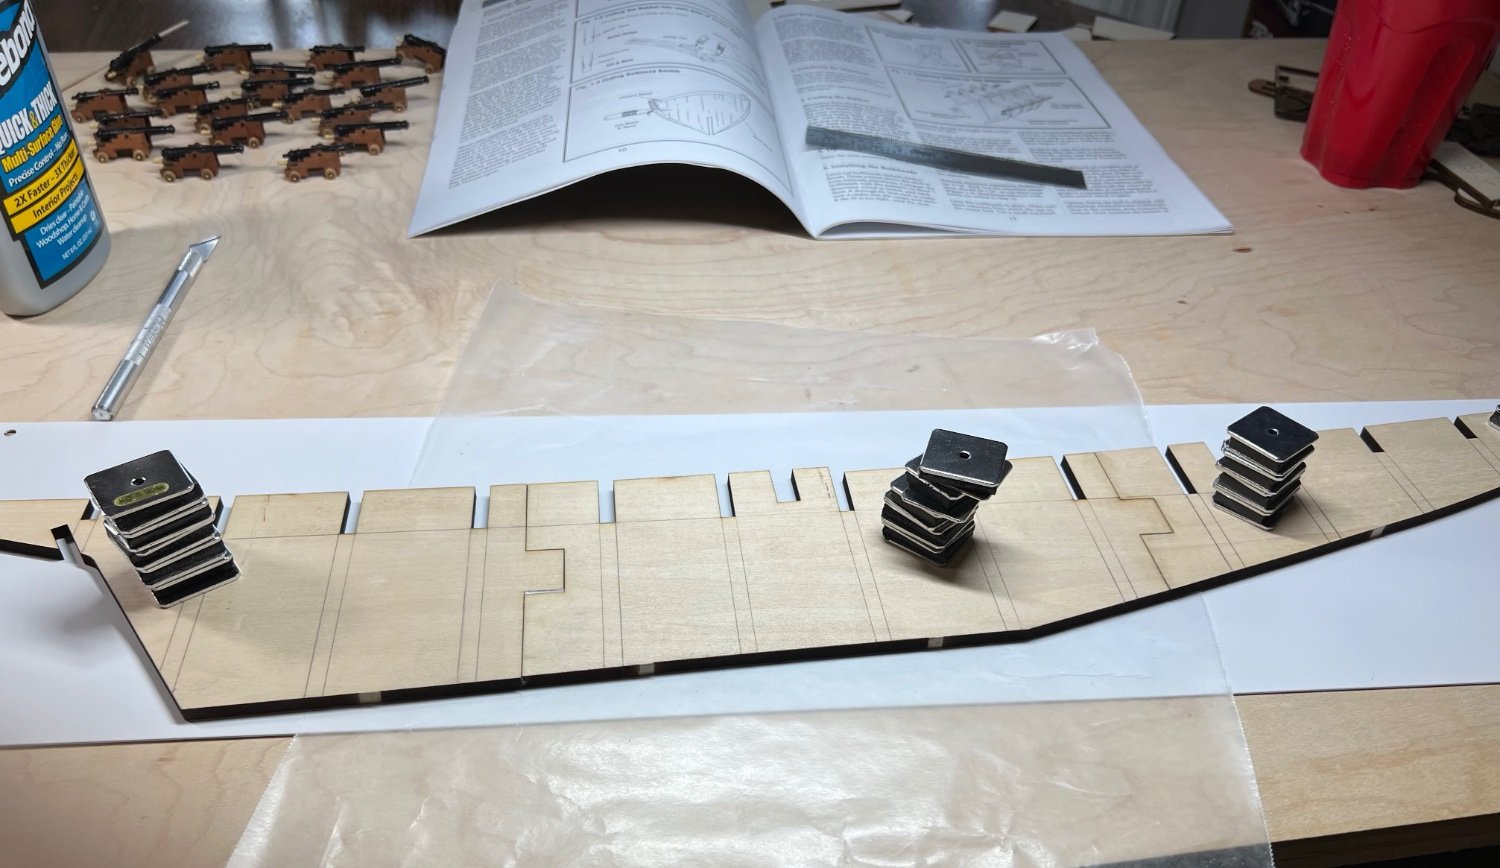
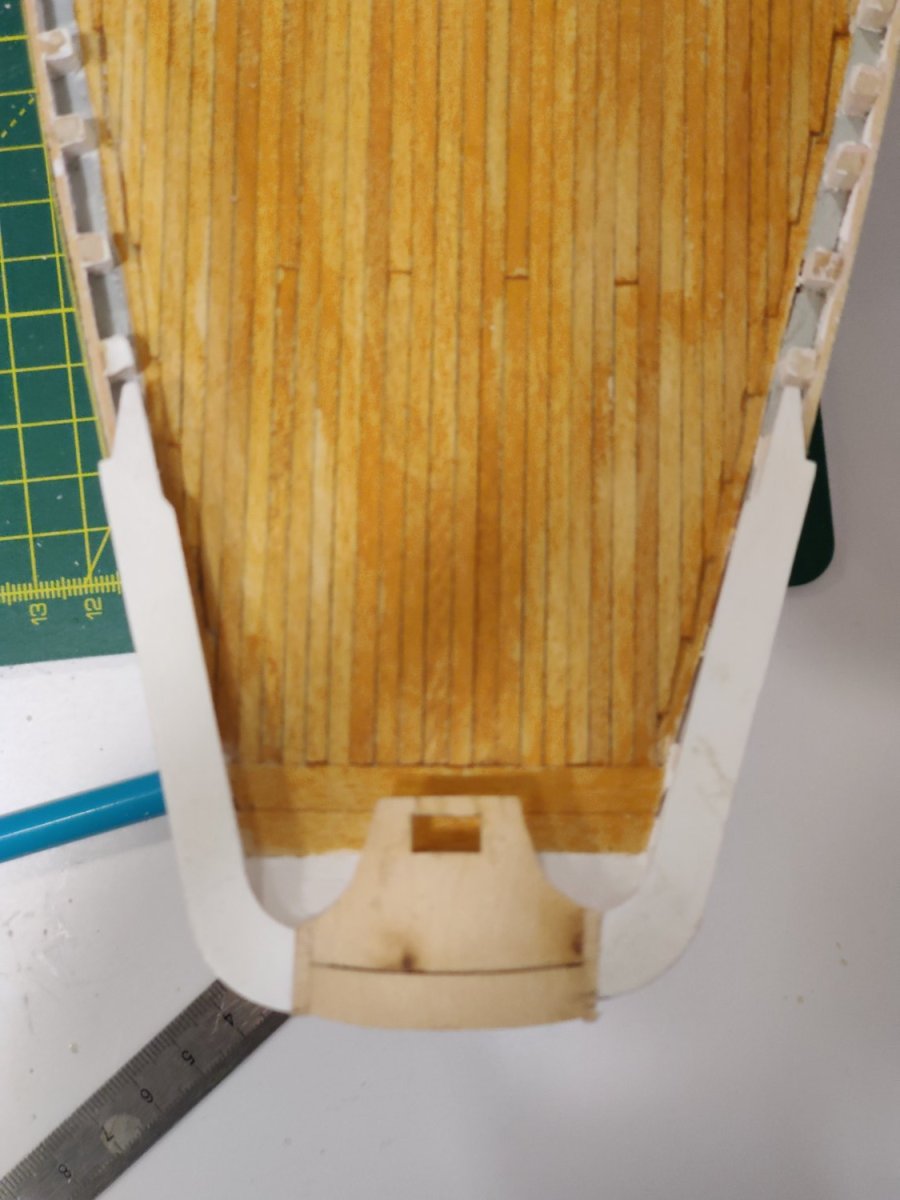
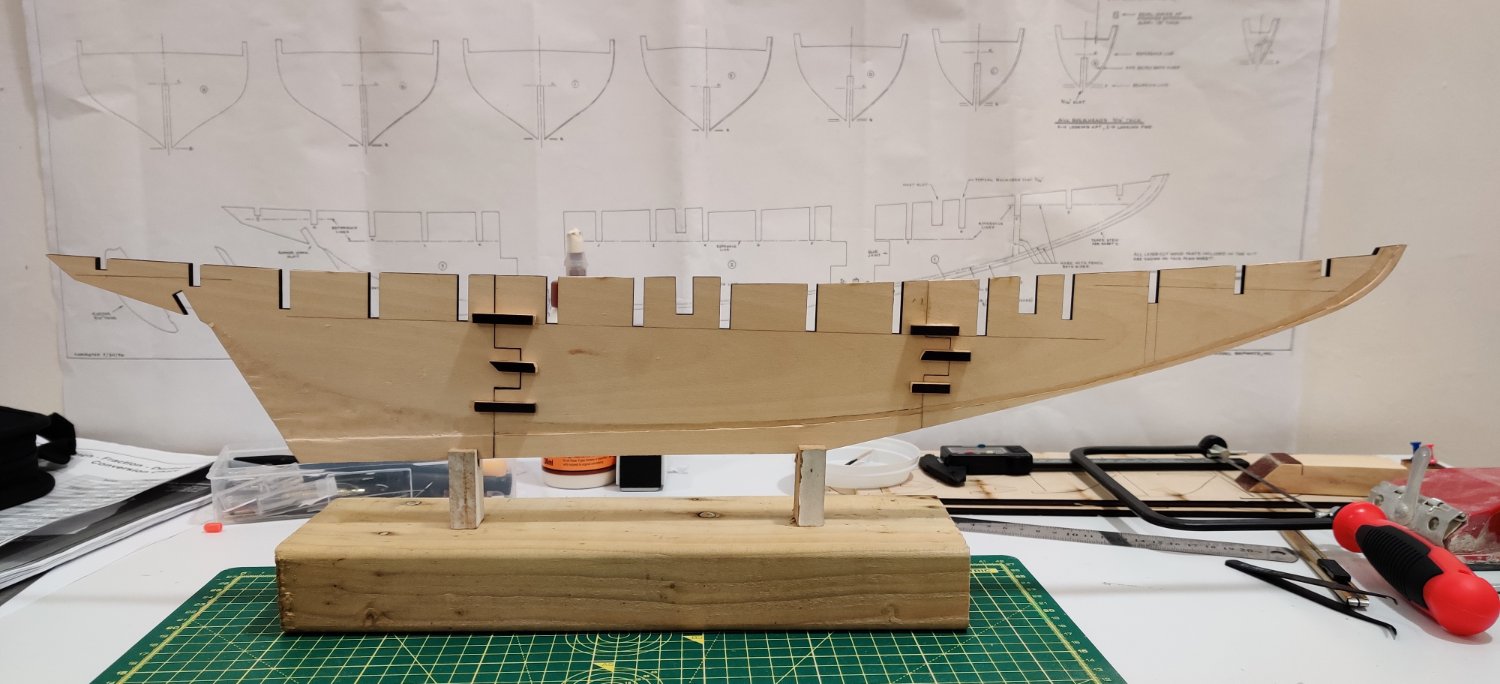
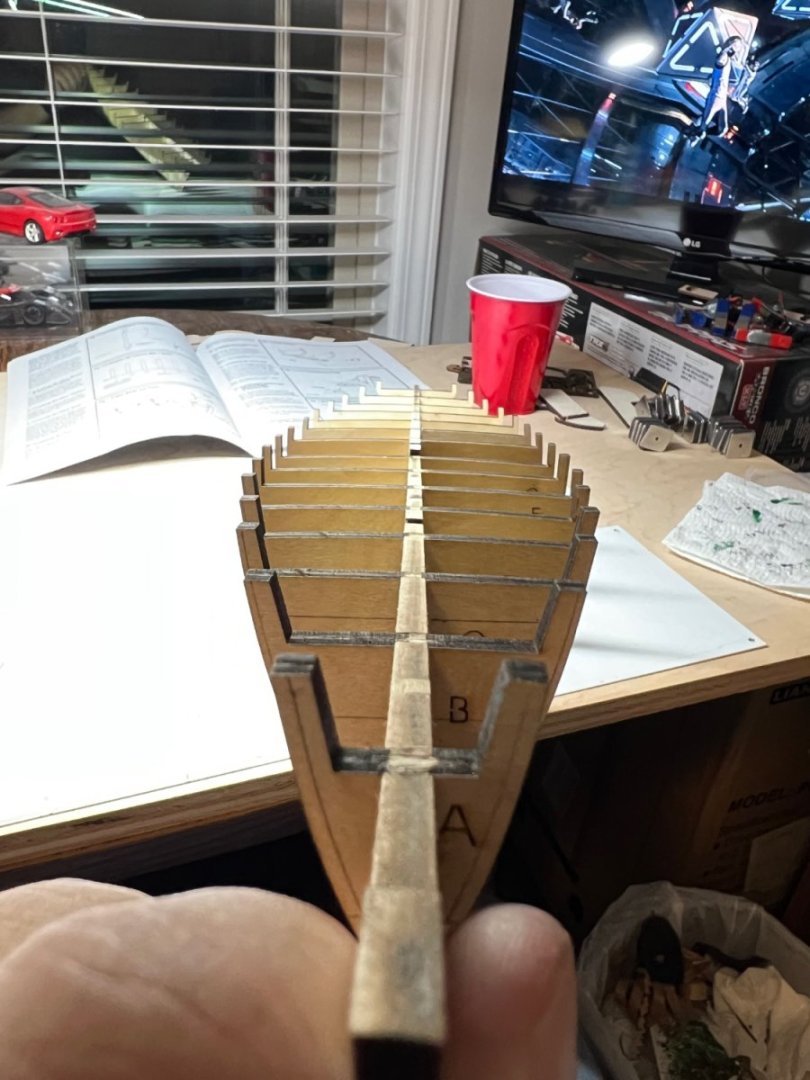
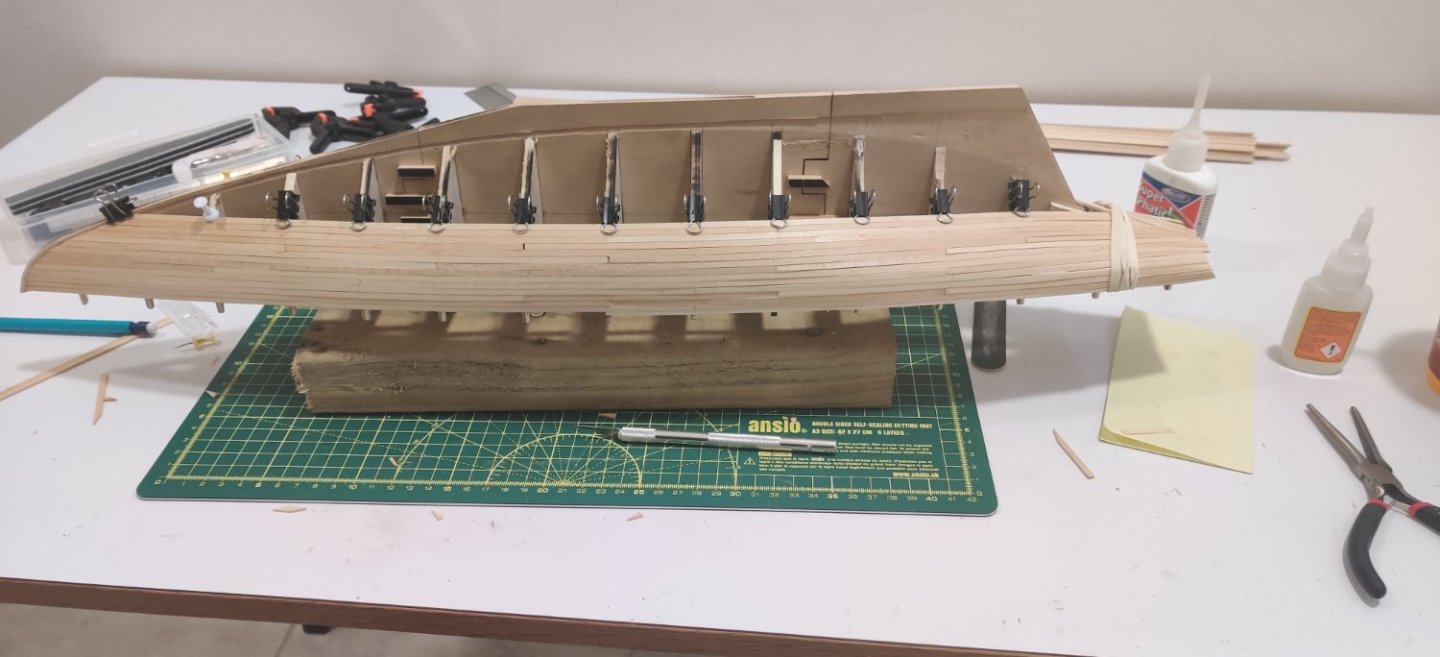
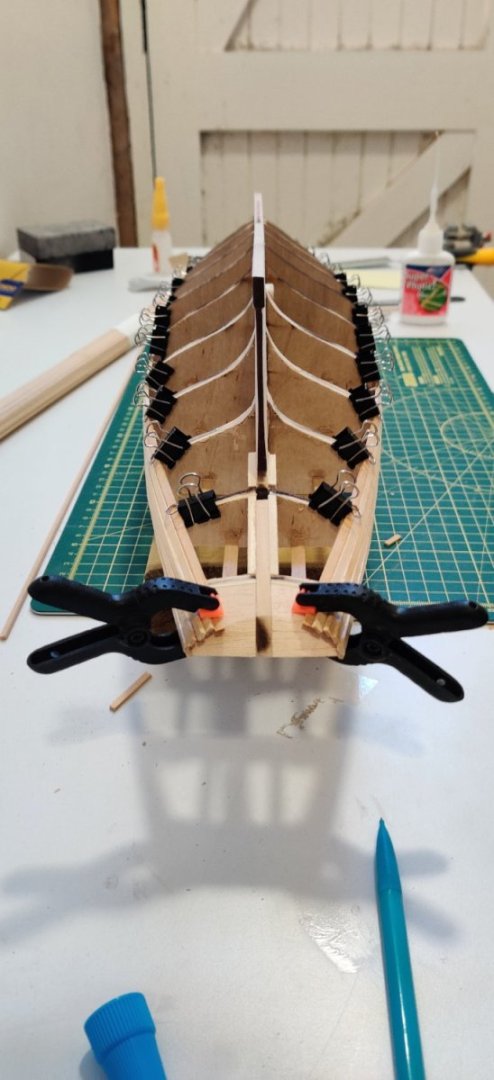
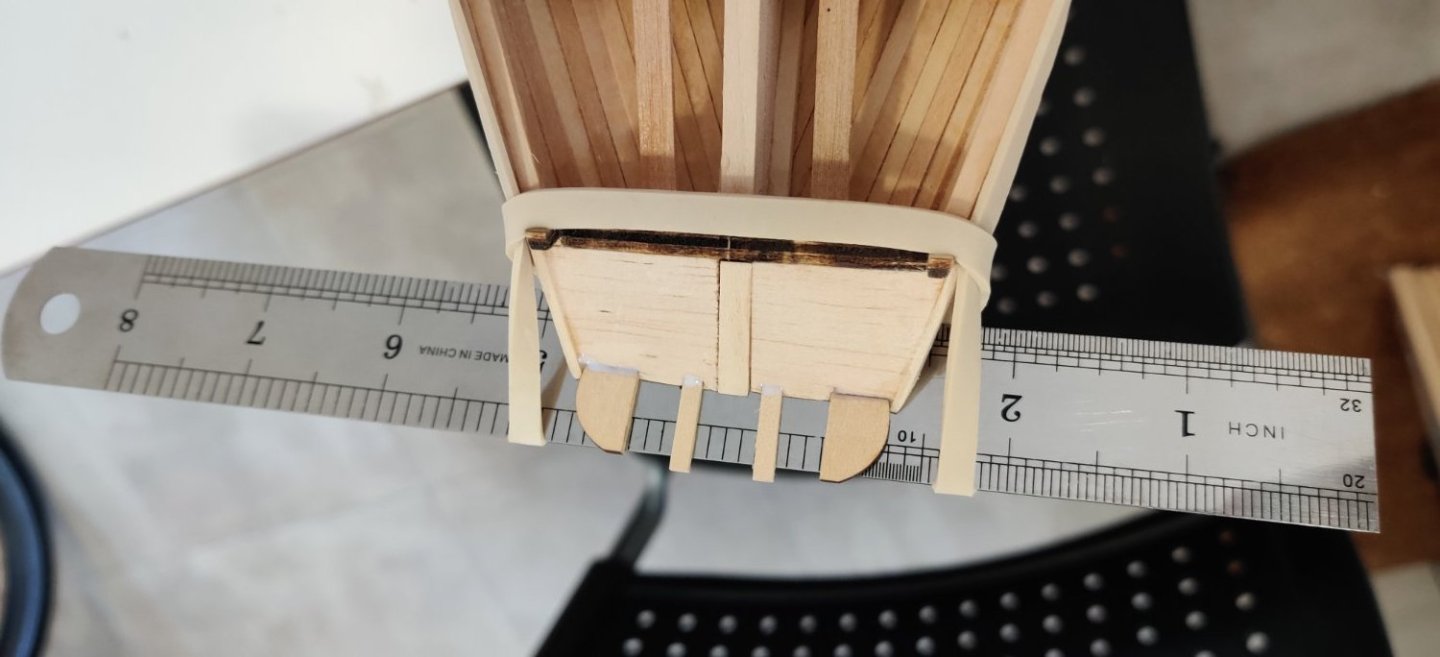
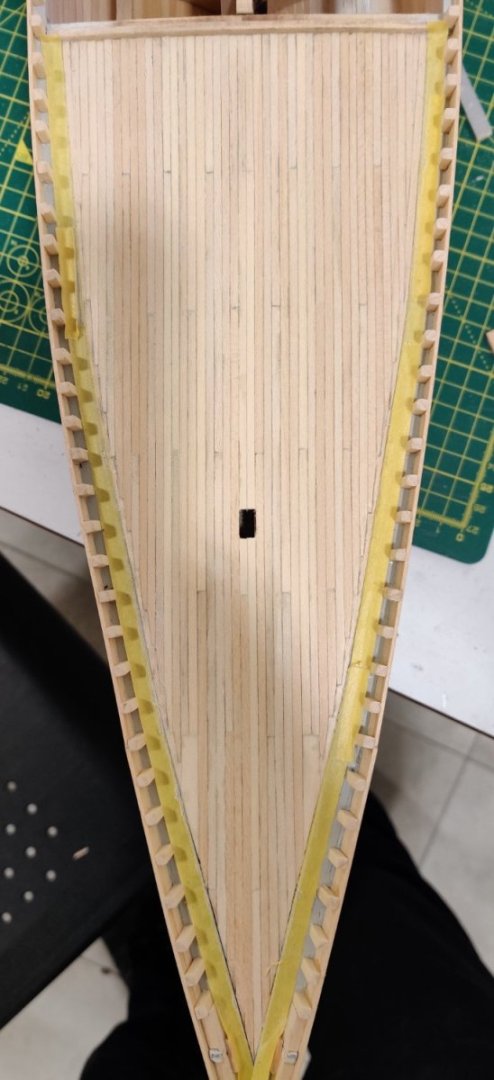
 Hi all. I’ve started my first build. It was a 50th Birthday gift from the in-laws. Made an okay start but now struggling. I’ve always fancied a go at model shop building and finally now have the opportunity. As you will see by the photograph below, I’ve made an okay start but now approaching a difficult section. I’d wrongly assumed that instructions would be specific, accurate and helpful. What I have in front of me now reads as follows… “Apply first planking. Some nails will help. At stem, leave enough space for cutwater positioning. Check thickness of keel.” It then goes on to say sand hull prior the second planking. okay, so that’s the entire planking instructions!?? Great. Q1) what is leave enough space for cutwater positioning on this ship specifically? Q2) check thickness of keel. Can anyone explain why? What do I do? I’ve read and watched many videos on planking but nothing is the same as this hull. I’ve also seen many videos now all showing several different methods of planking so no idea what to now do. As you will see, the deck is complete, bulwarks on…now the planking. any help will be much appreciated!
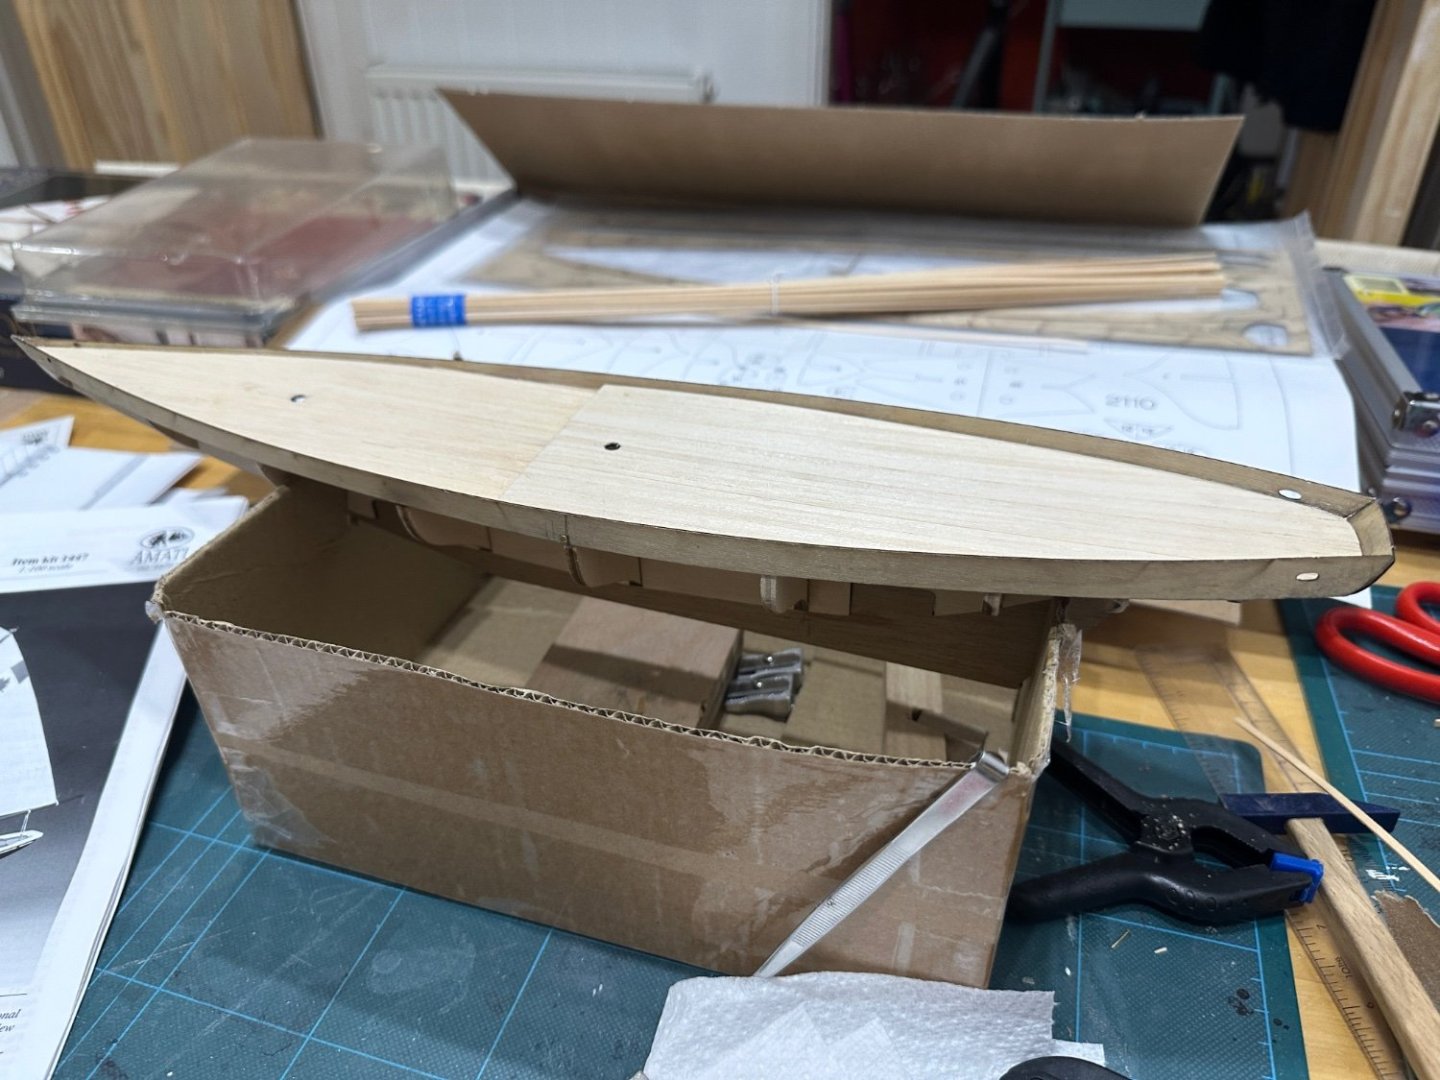

-
 I started a Bluenose in the mid 2000s and was way over my head. Attempt number two began today. Bulkhead K will have some internal character.

-
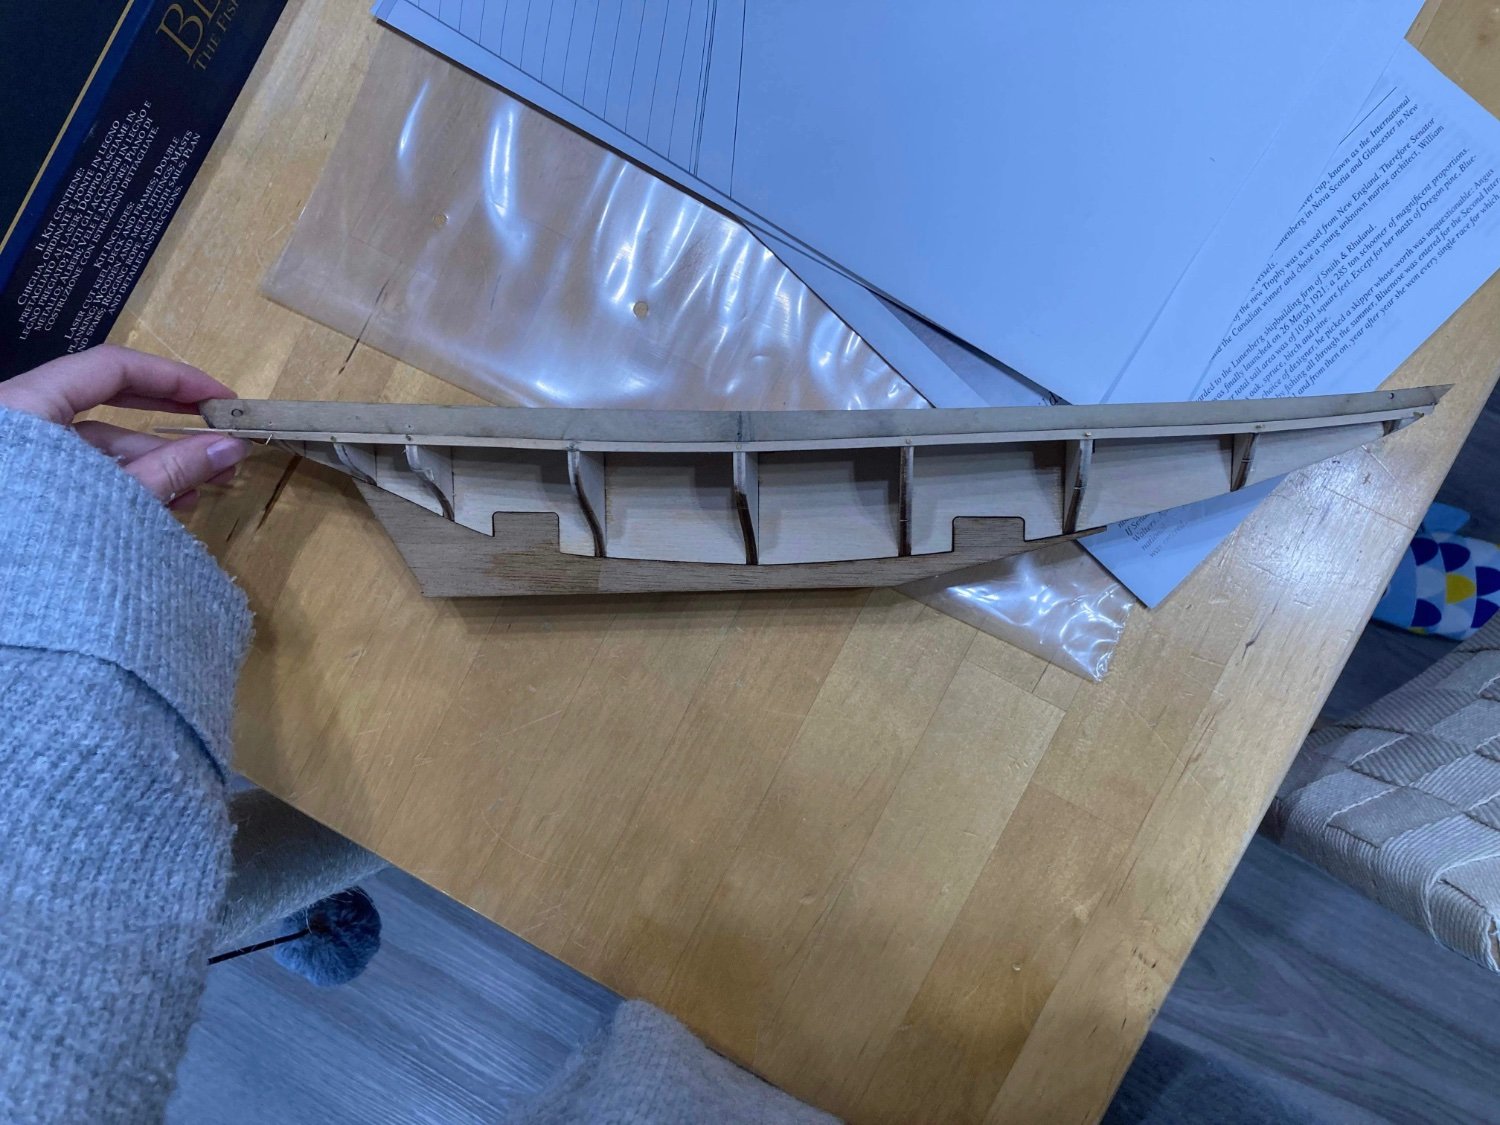
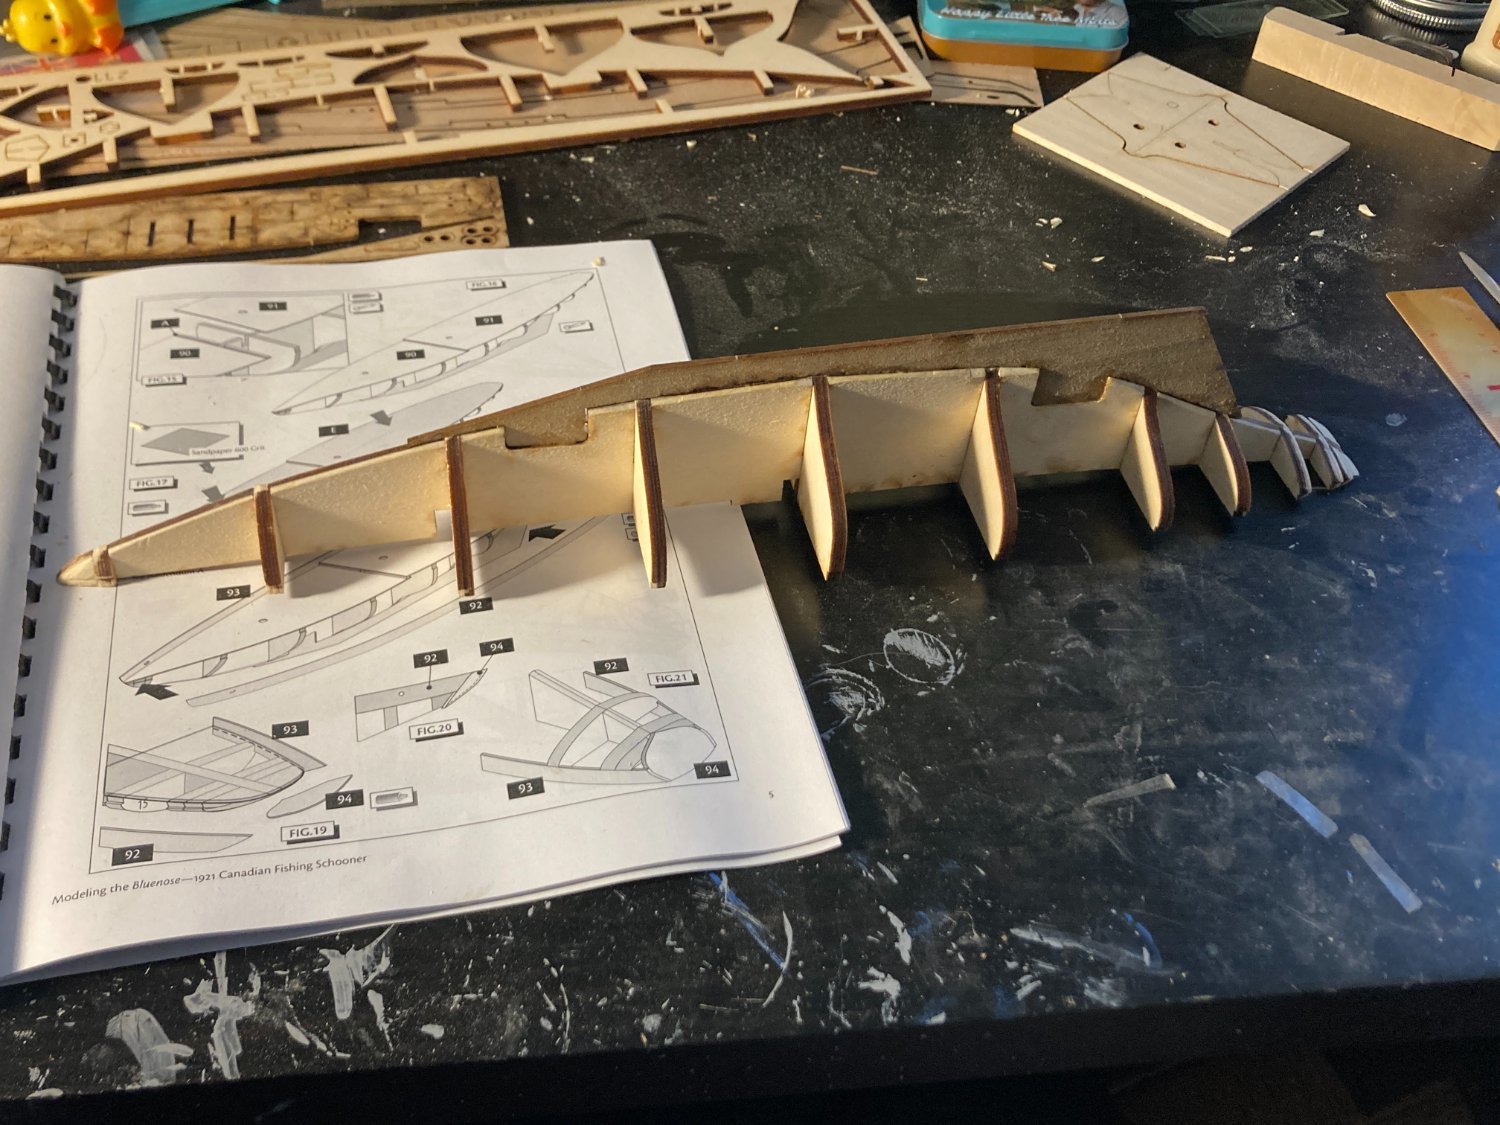
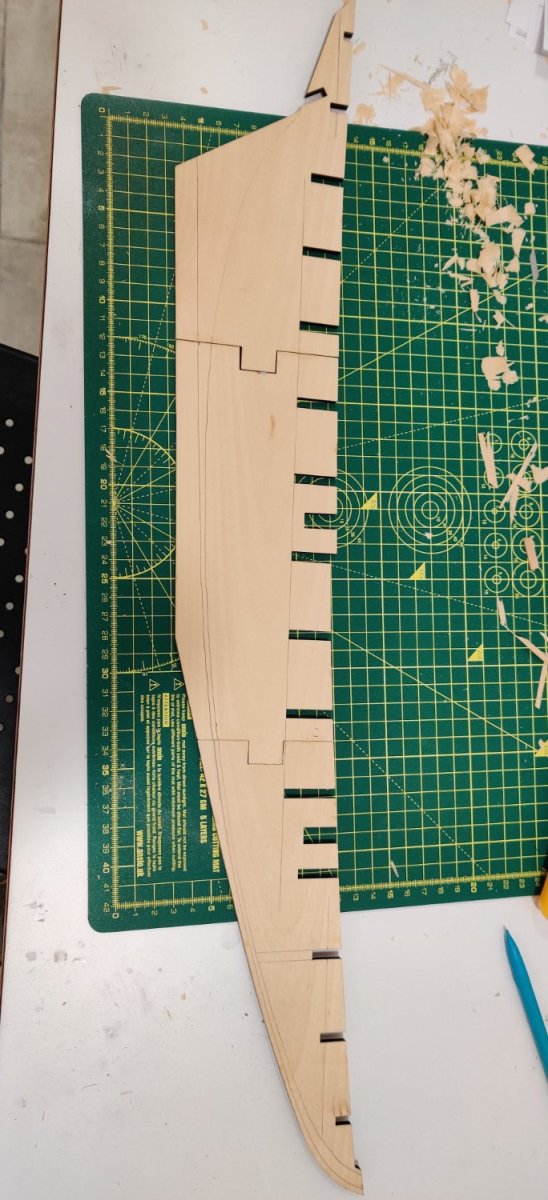
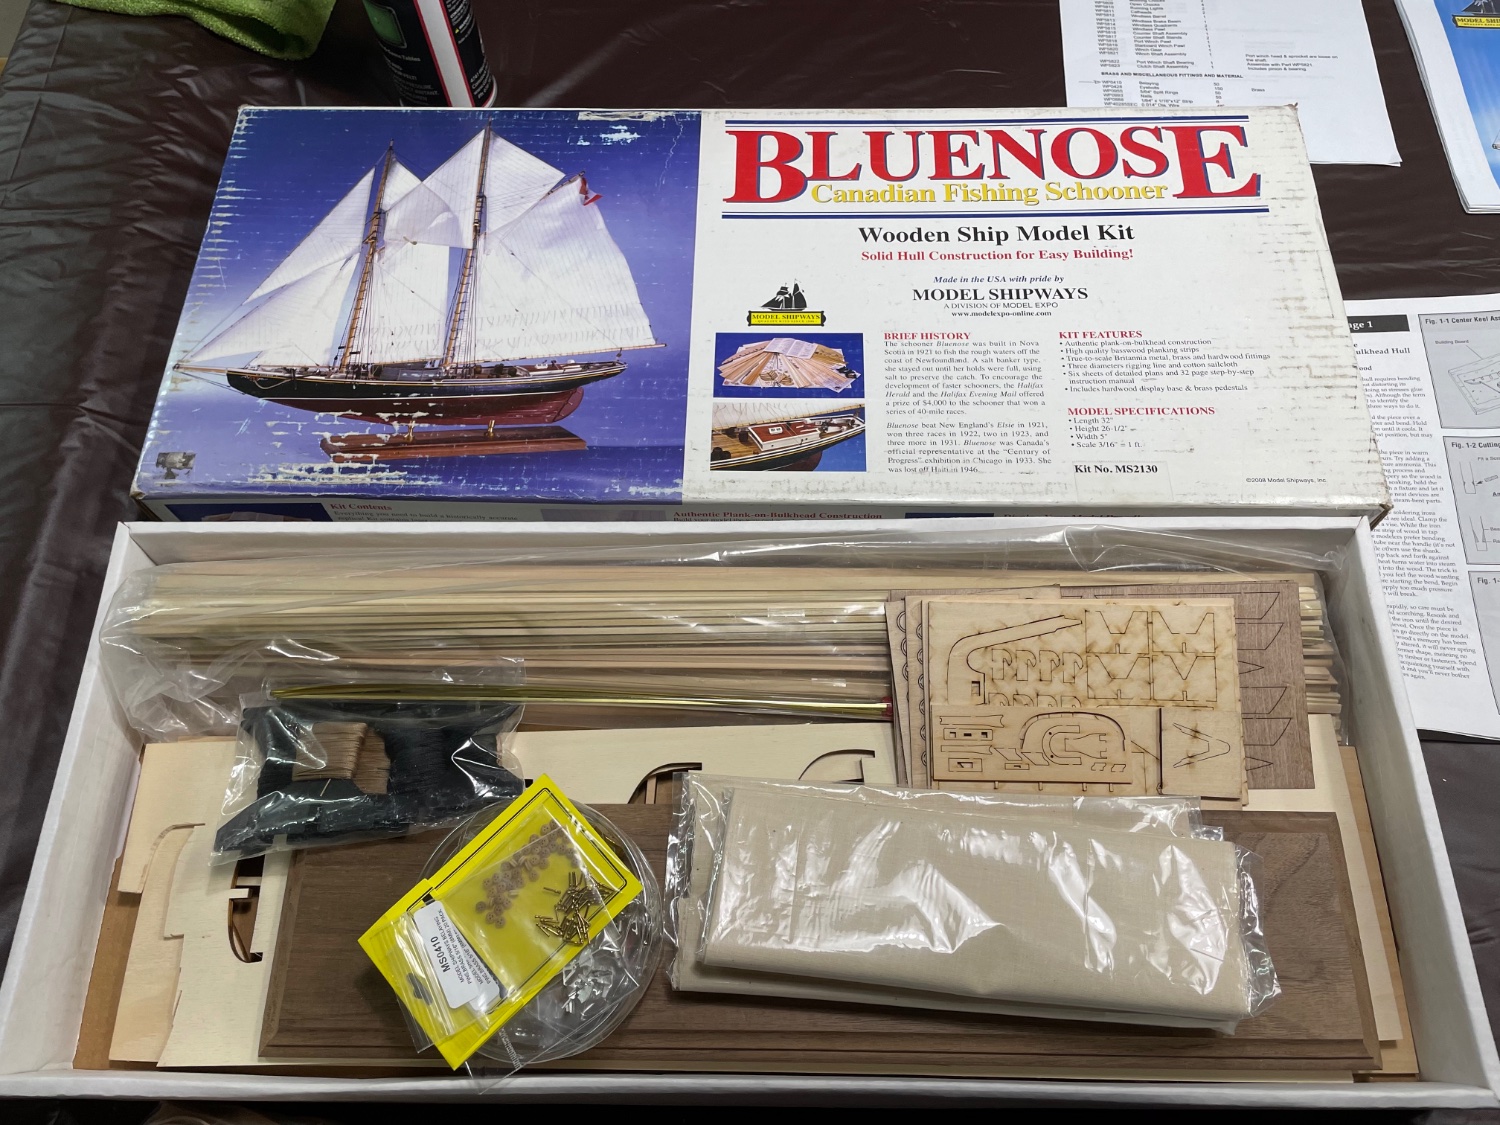
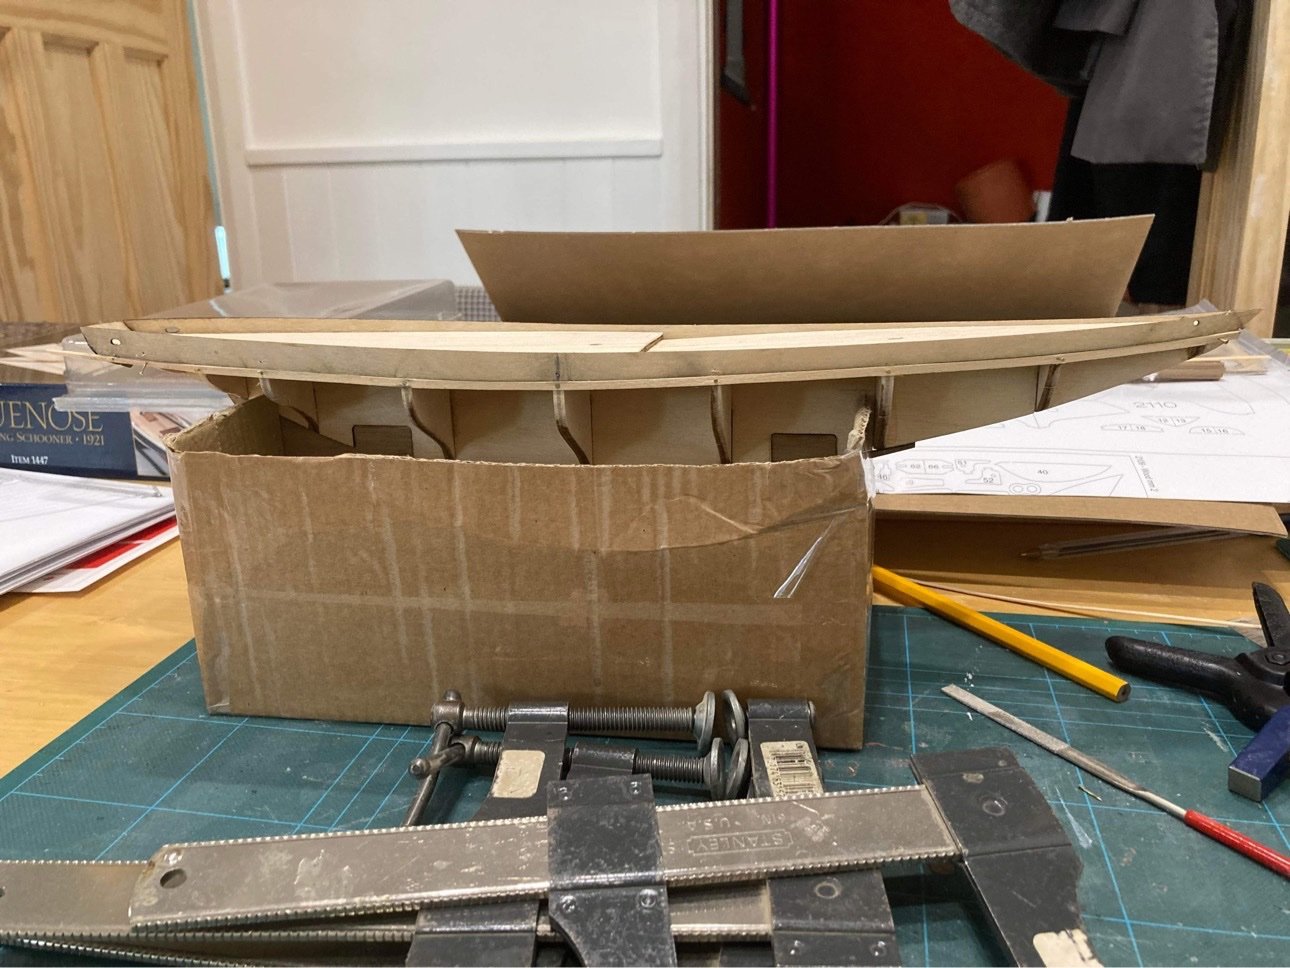
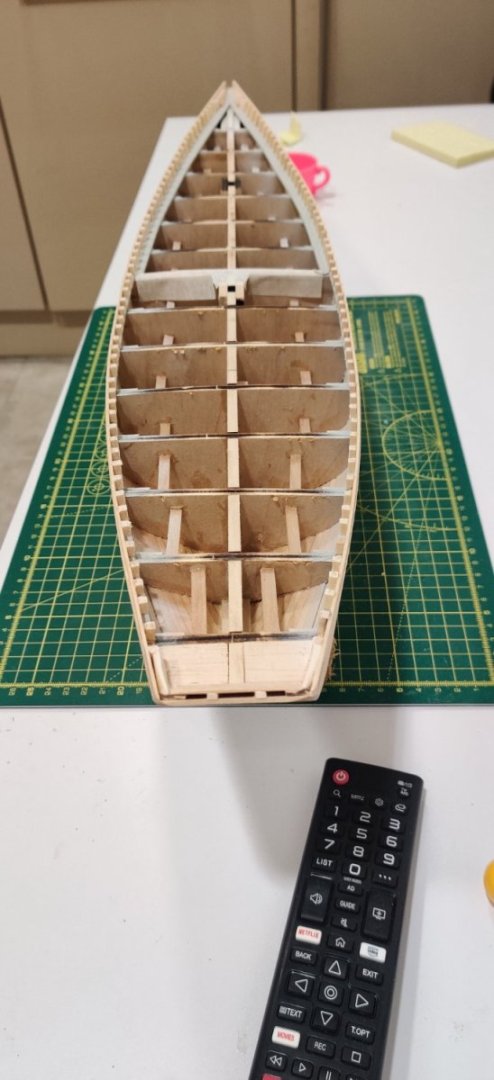
 I am new at this so I will do my best with this build log. help is welcome especially with planking since I have never done it before. if these pictures are in file format, please tell me and I will keep trying to make them not files. another thing thanks to Azzoun for providing the model and tools. that's the box. I have made the frame already, though it's not perfect. still needs some filing done to it. thanks in advance for any advice for this build.

-
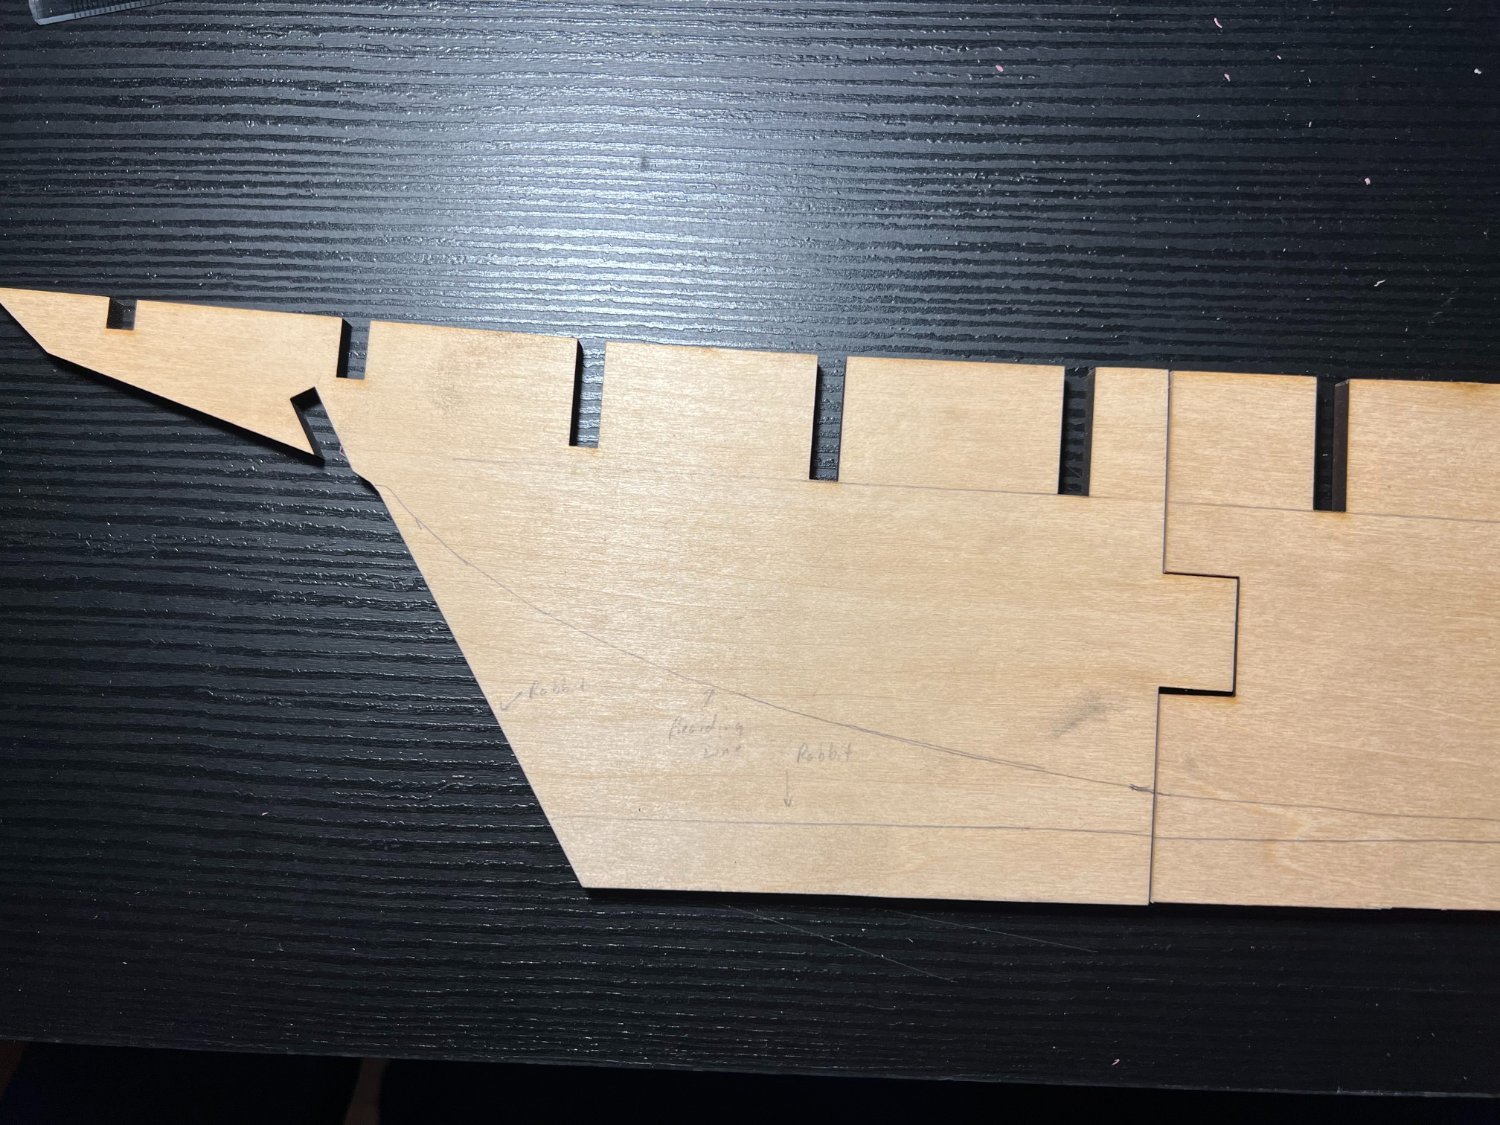
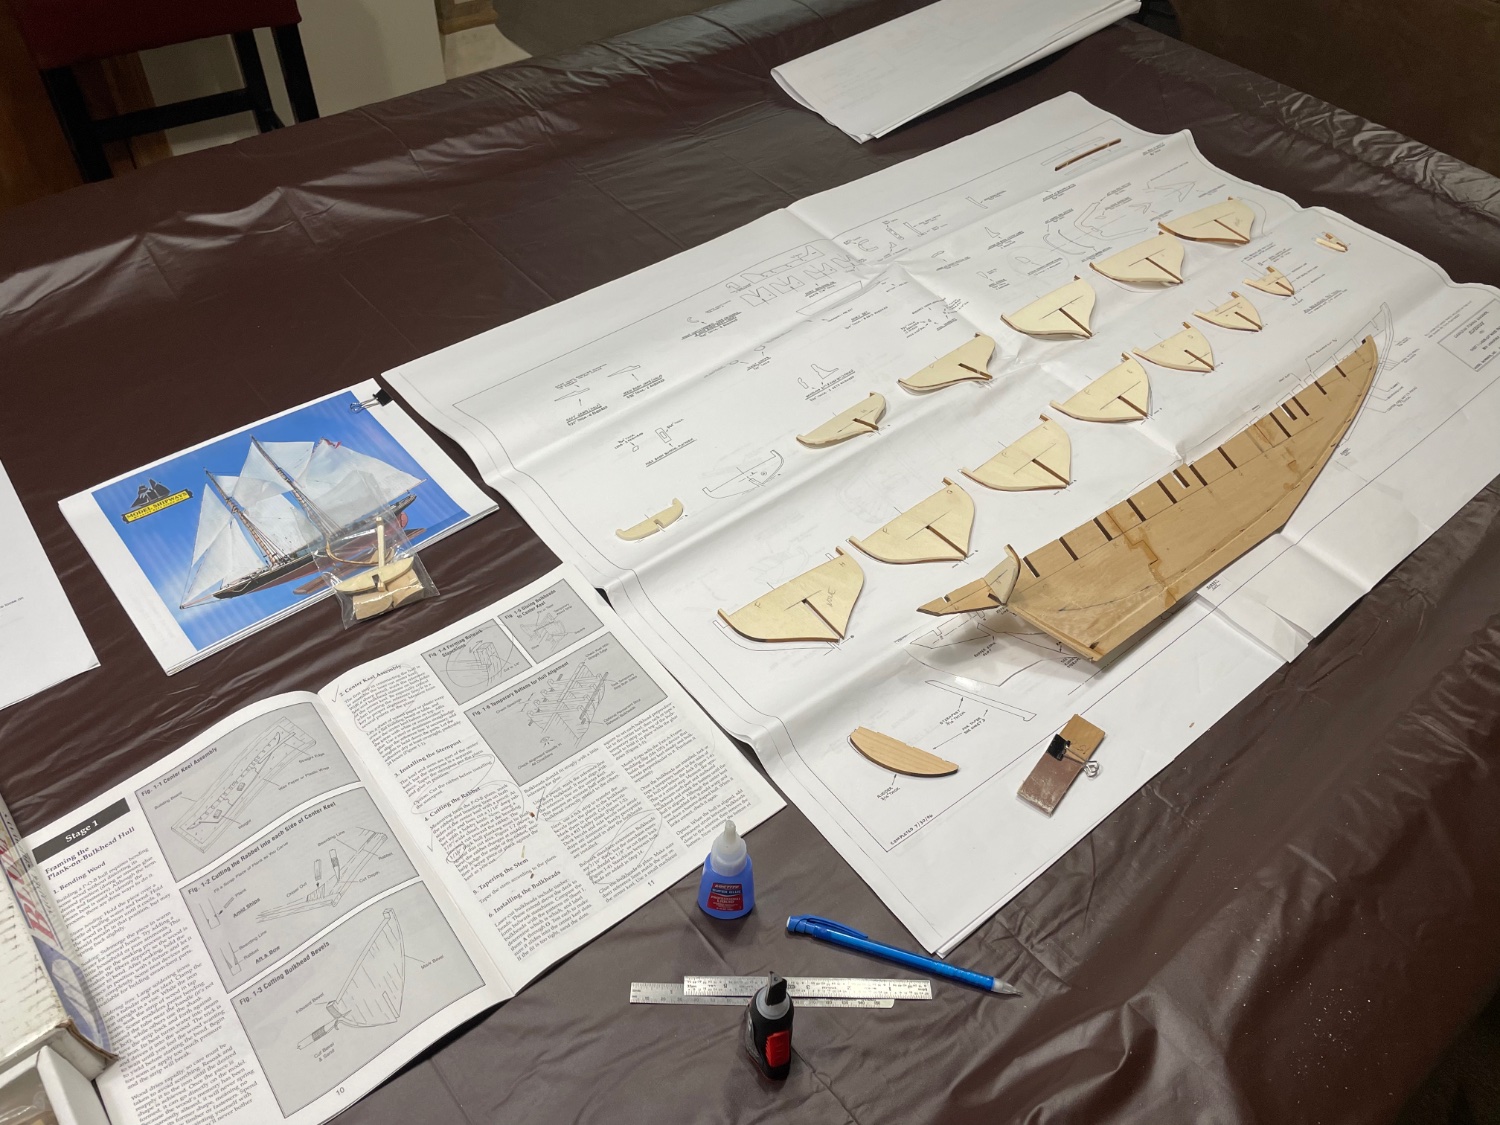
 I have inventoried all parts and, I am anxious to get started. I have separated the three sections of the false keel and am working on the reference lines, bearding lines and rabbits. I have noticed that the bottom of the stern section is 1/32 of an inch lower than the mid-section. I am not sure whether it should be planed or sanded even with the mid-section or left alone. I am nervous about carving the bearing lines and rabbit. I will make sure all my reference lines are correct and begin tomorrow. Joe
-
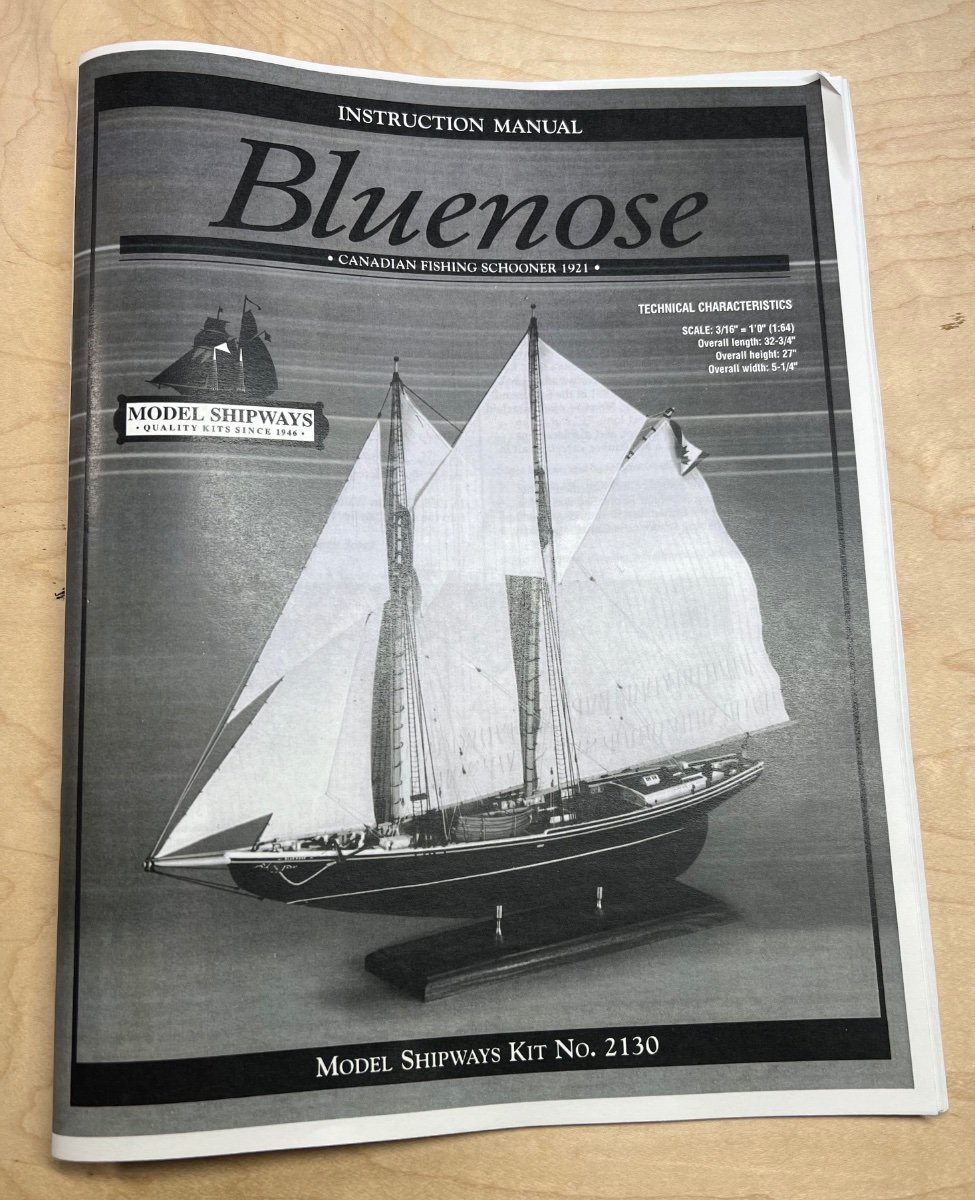
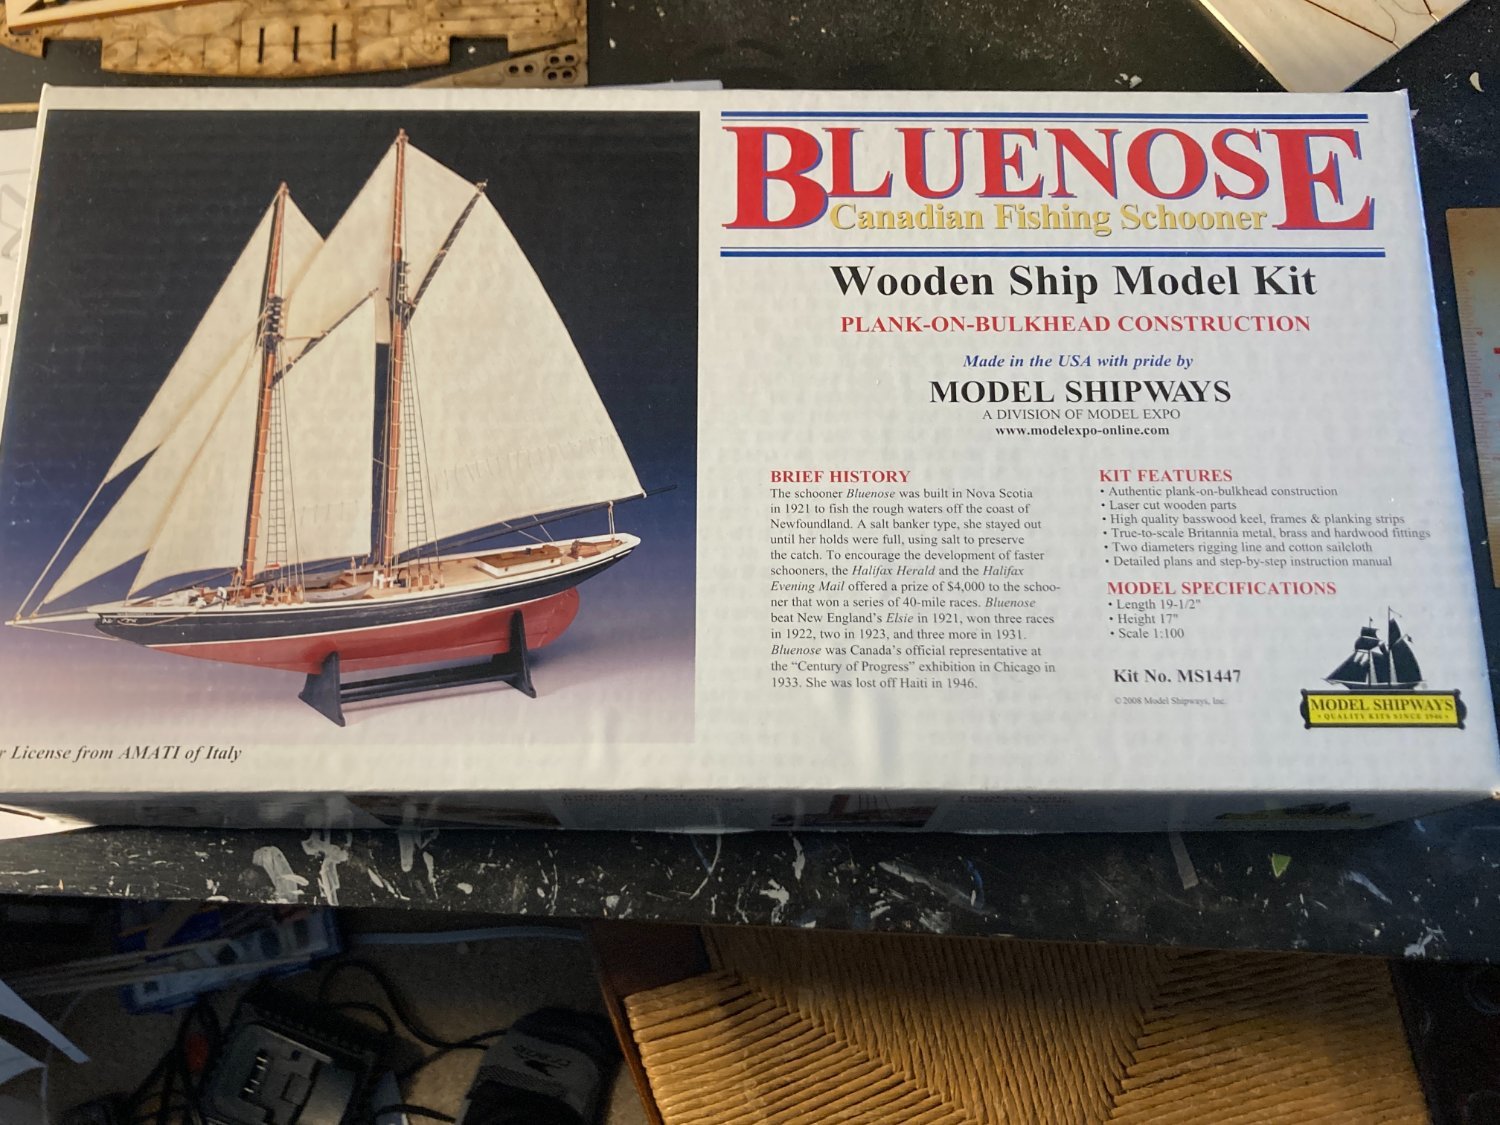
 Well, no rest for the weary, as they say... Finished the Ballahoo and have three more ships waiting for shipyard clearance. As I had indicated in my signature section previously, my son gave me the Bluenose as a gift some 16-17 years ago, when I had never thought about doing shipbuilding as a hobby, and had way too busy of a working life to devote time to this hobby. I opened the box, read some of the instructions, and pretty much thought "Nope, looks too complicated. I'll put it away for another day." So, here we are 16-17 years later and I have found model shipbuilding as a fun and rewarding hobby after all. After three completed ships, it is now time to work on the Bluenose. I think I have learned enough skills in my three previous builds to make my Bluenose looking good. Time will tell. There are plenty of really good build logs for the Bluenose that should help guide me on my way. I look forward to digging into them and doing as much research and observations as I can. Since there have already been plenty of prior build logs, I won't post the obligatory "open the box and look at the contents" picture and post. But, I will point out the difference in the box covers from what it looked like 16-17 years ago (shown in my pic below) and how Model Shipways box cover looks like today. Thought that was interesting. In doing a quick comparison of the instructions included in my Bluenose box to the online pdf instructions available on Model Shipways' website, they look the same, so it doesn't appear the build process has changed much, if at all. So... here we go with another build log! Appreciate all the follows, likes, comments and criticisms that this build log will generate. Thanks!
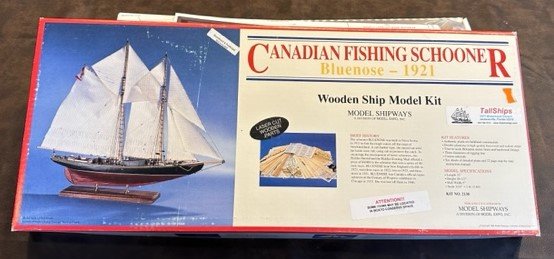
-
 I started this build about 2 years ago then took a long long break. I had planned on logging my progress so I took lots of photos but never got around to writing up anything about them. I've just started back into the build today and I hope to log my progress from here on in. So here's what I've done to date.


-
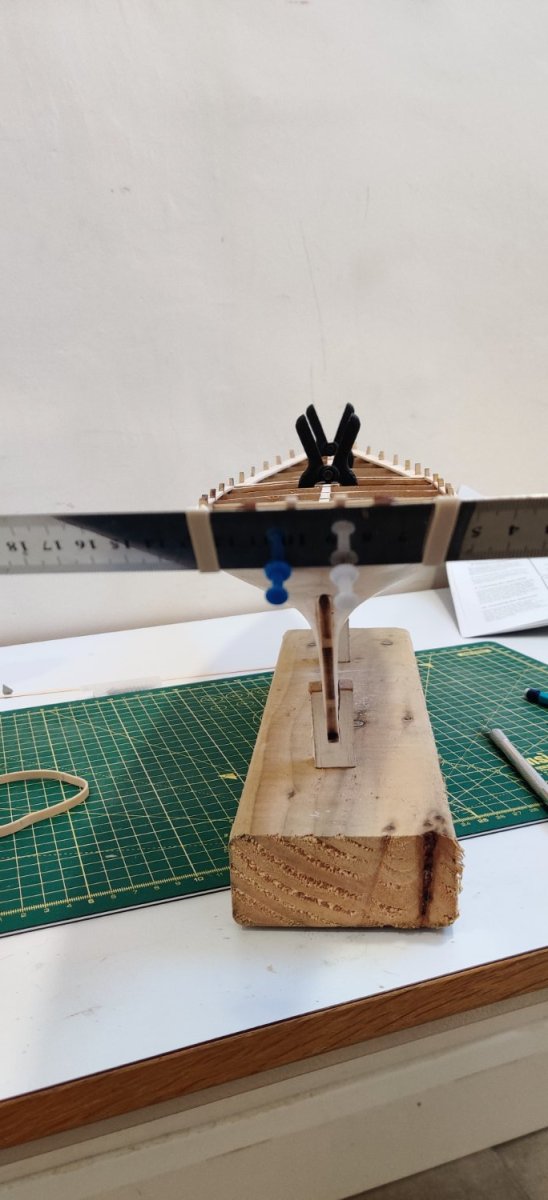
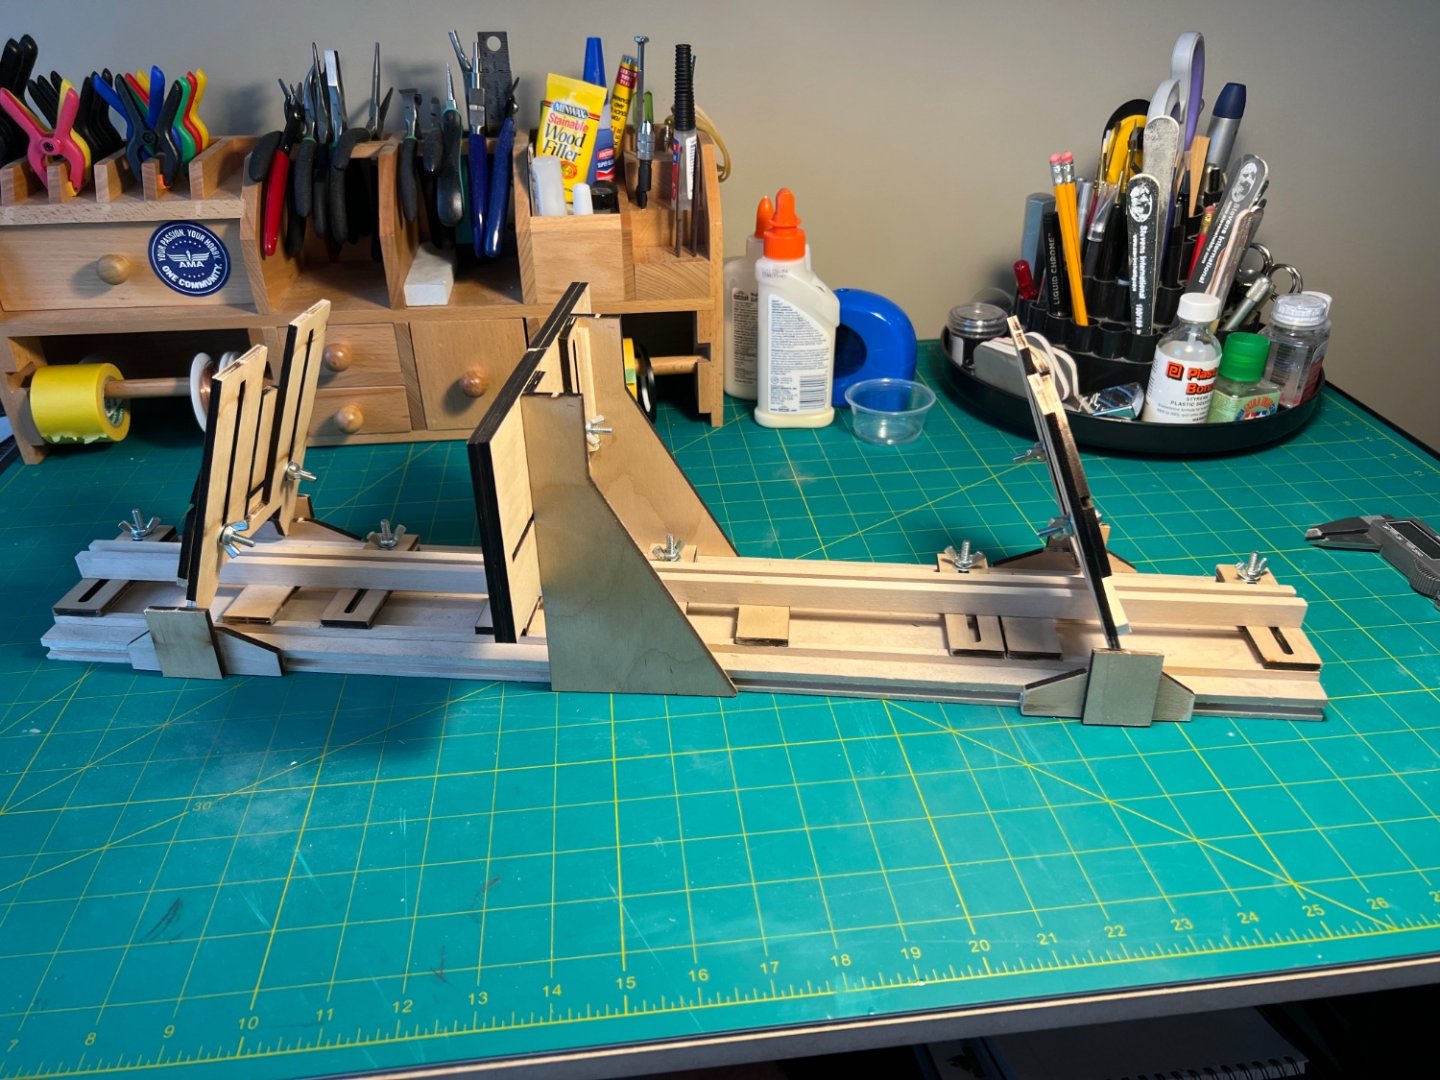
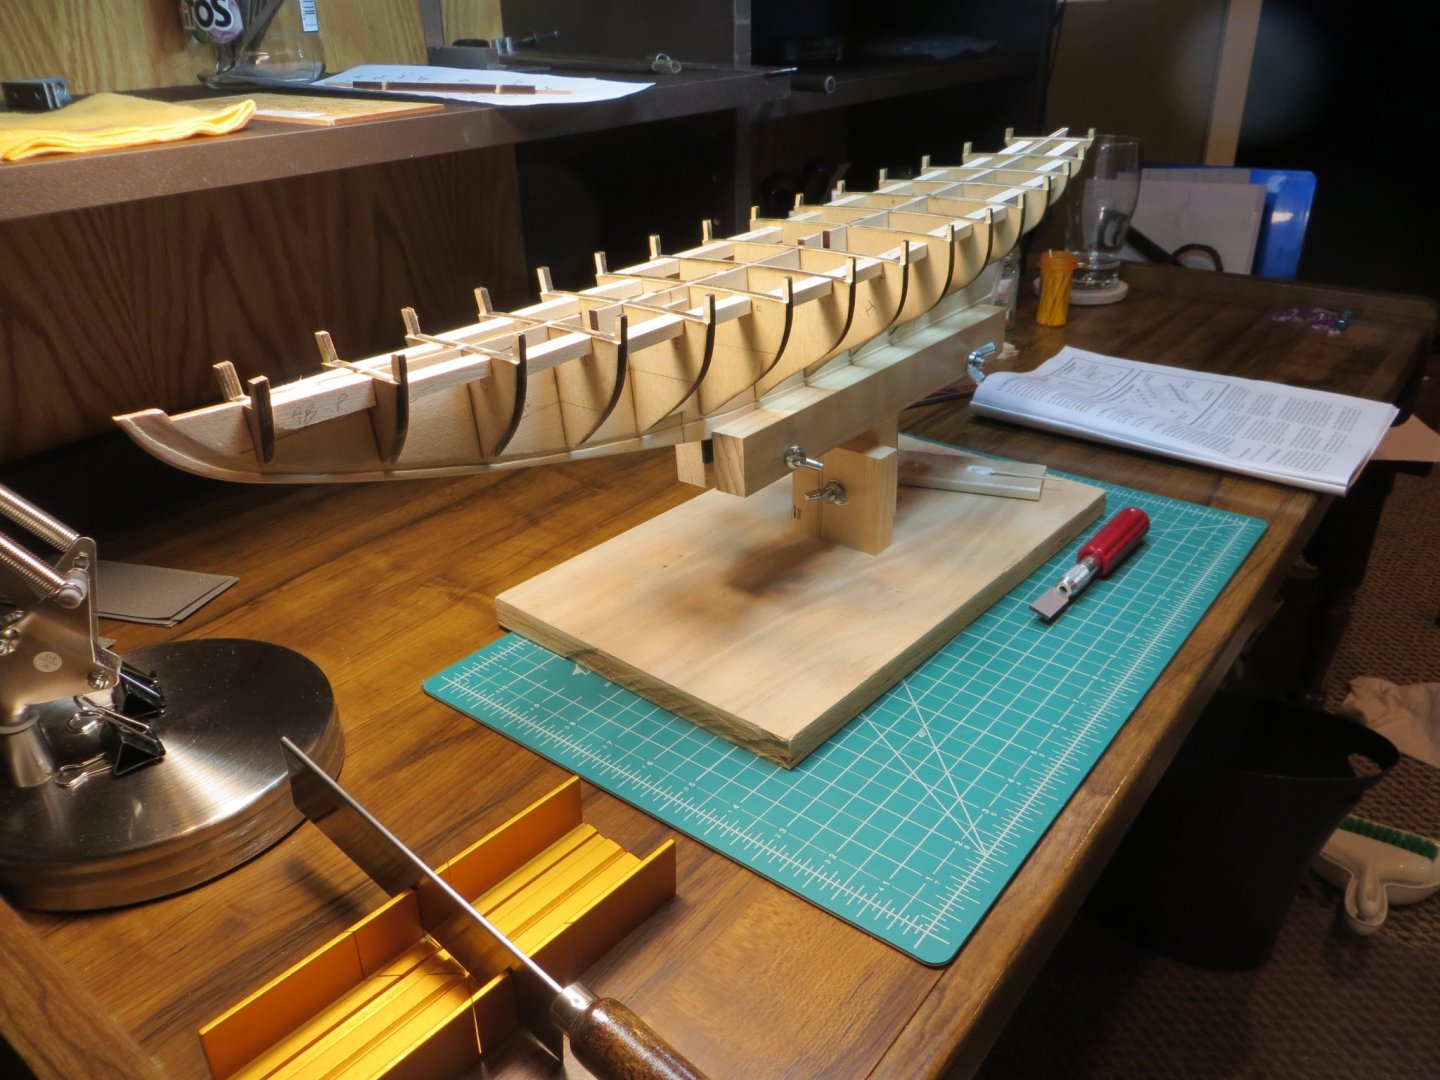
 This will be my first attempt at a full wooden ship build. I have built several plastic model ships (Constitution, Cutty Sark and Charles Morgan, all by Revell) and R/C model airplanes but, this will definitely be a test of skill and patience. I started by building the NRG half hull to get some experience with planking. That went pretty well and I learned a lot! I have always wanted to build a model of the Bluenose, as I am from Canada and have been fascinated by this ship for as long as I can remember. I took the opportunity to dig in deeper to its history by reading Bluenose by Brian and Phil Blackman and A Race For Sailors by Keith McLaren. This ship has a fascinating story and, unfortunately, a sad ending for such an icon of maritime history. I purchased the Fair-A-Frame from Model Shipways, as it looked to be the best way to hold the keel while I worked on bulkheads and everything on the deck (and I was able to get it on sale!). I modified it based on the changes that @Retired guy made prior to his Bluenose build. This is definitely an improvement to the unit and really locks in the jigs that slide along the base. I have been procrastinating since finishing the Half Hull, mostly because I am a bit intimidated with this build. Reading through the forums, there are so many talented folks and high quality builds of this model. Time to get under way and I hope that I can do it justice.
-
 One of my eBay finds out of my stash. I have decided to break up the marathon task of building railings on the Robert E Lee. I will continue building those railings in the evening as I wind down the day. Here is a link to my Robert E Lee Build My new day job will be the Bluenose Canadian Fishing Schooner by Model Shipways. This kit was purchased for just 78.00 including shipping on eBay. The previous owner had started this kit. The kit was only missing some of the deadeyes and belaying pins. Those were easily sourced from Model Expo and are on order. Today I have laid her out to determine what has been started, the work is salvageable. Previous owner had only progressed to step 5. I have also assembled the 3 piece Keel and started the work of smoothing out the bulk head tapers and Rabbit Joints cut by my predecessor. I have been wanting to build the beautiful schooner since I first saw a model of her in the Bluenose Hotel in Bar Harbor, Maine. Plan to visit Nova Scotia next summer and see The Bluenose II among other things Canadian. Wish me luck, I am hoping my skills are now up to the task of doing her justice. Cheers 🍻

-
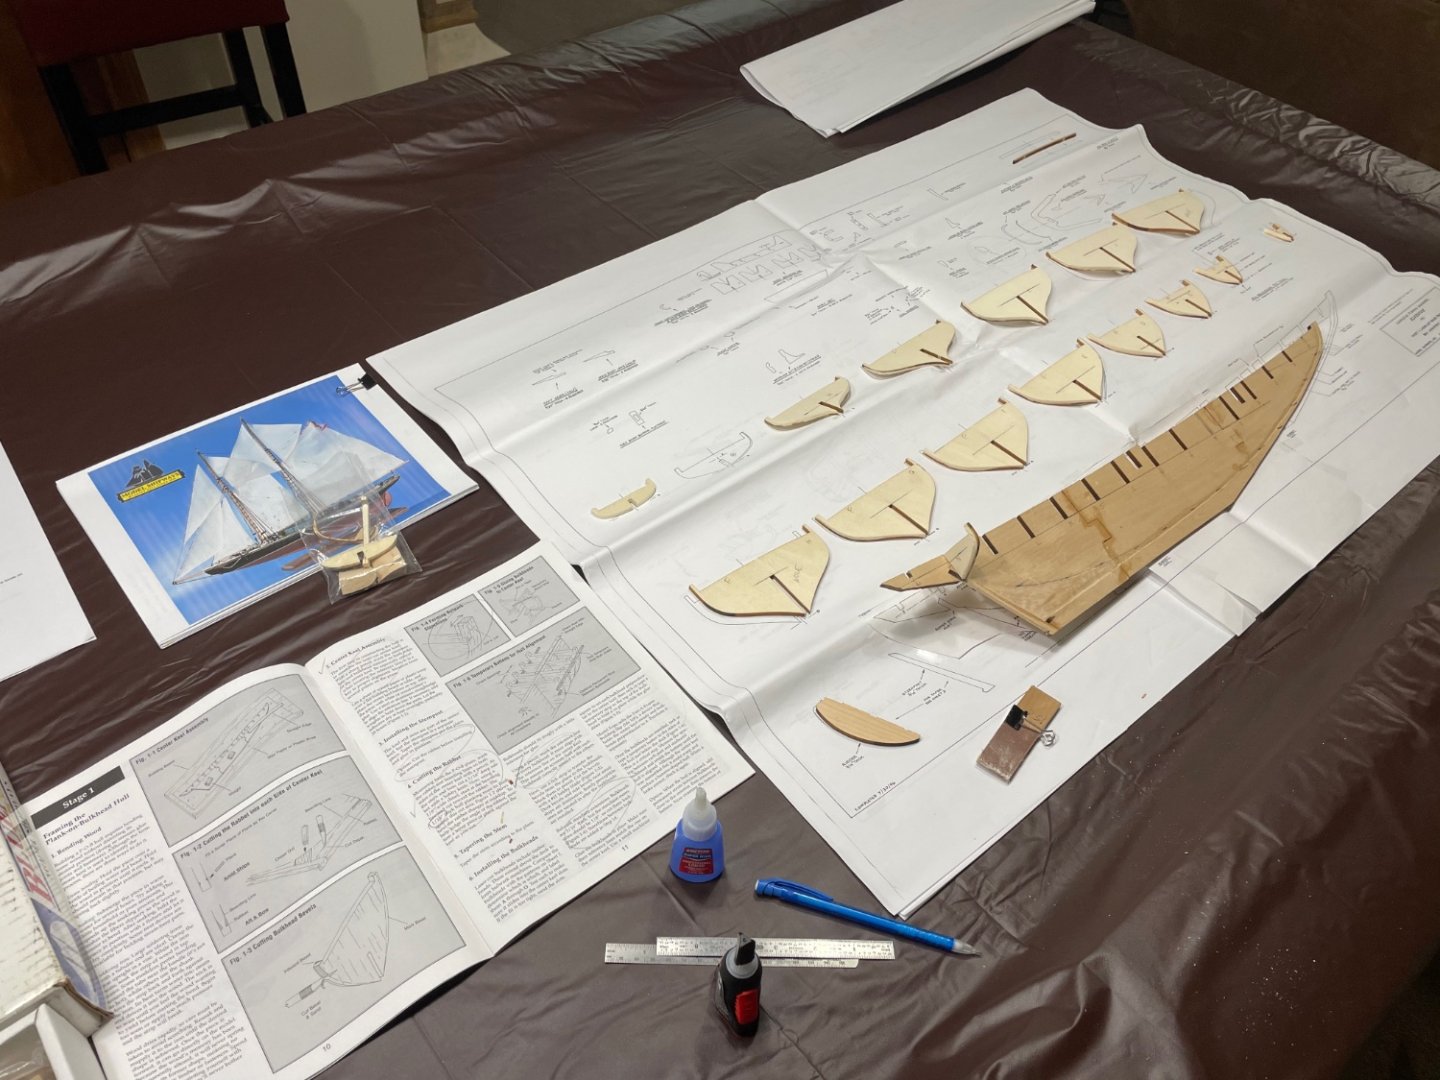
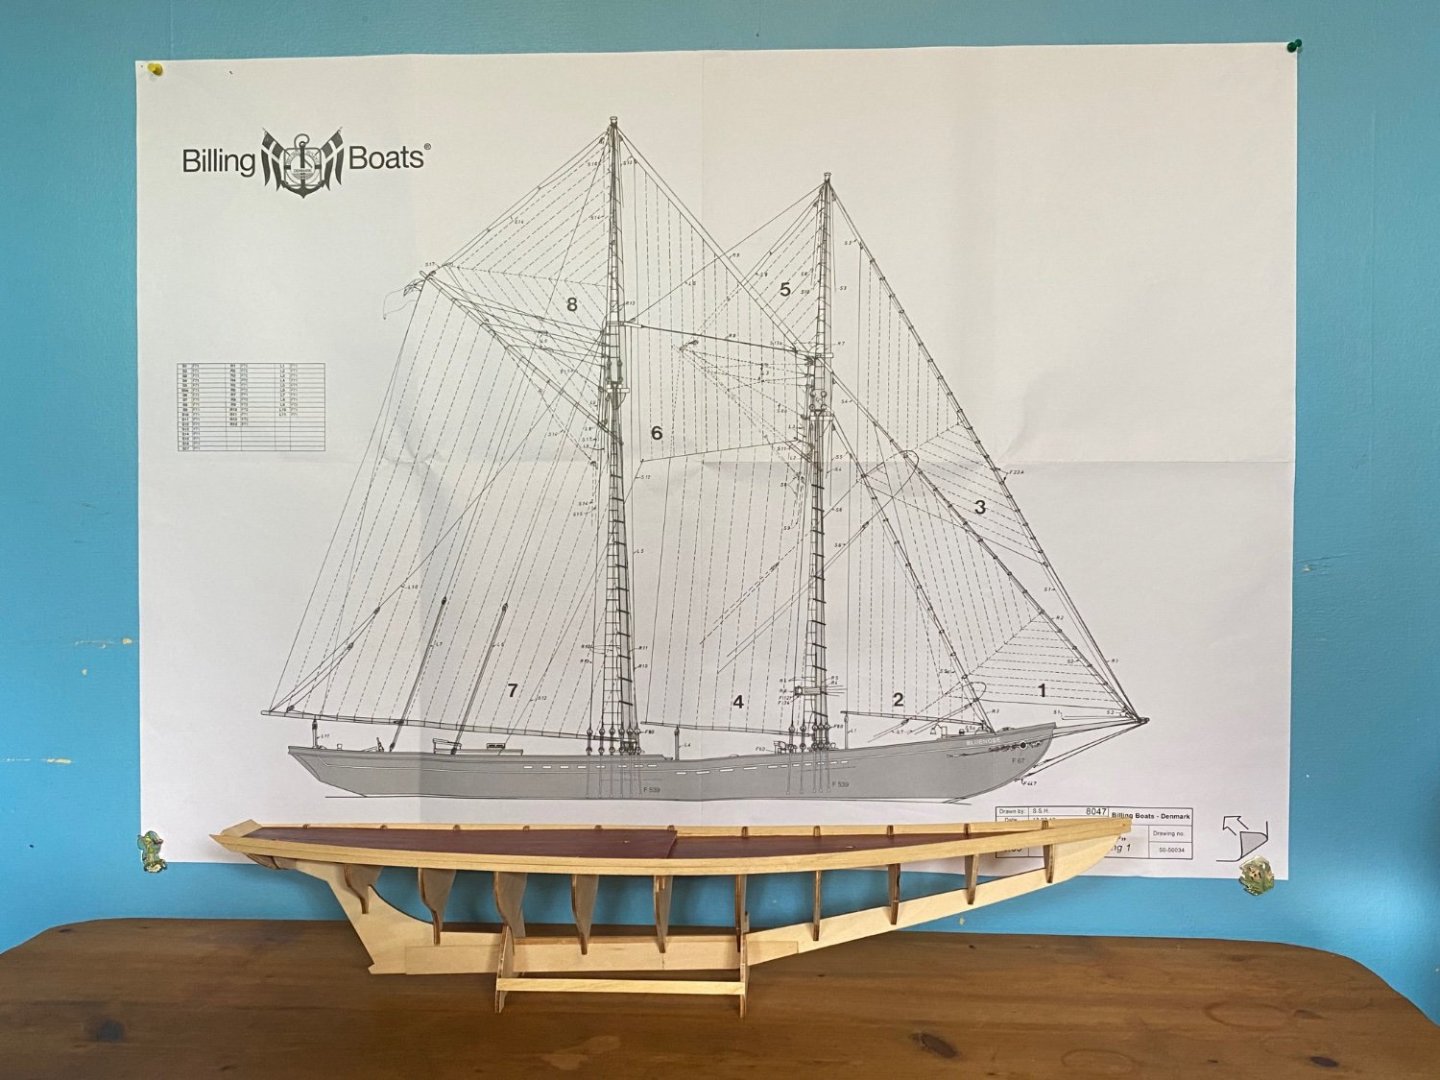
 I have recently acquired a Billing’s Boats model 576 of the Fishing Vessel Bluenose and I have to say that the instructions certainly do not fill me with confidence about this build. A little history, the boat came to me as a partial build from a fellow who acquired it from the original buyer/builder so I’m the third owner of the boat. After spending some time looking at the boat and studying it’s construction I’m almost regretting ever getting it. What looks ok at a glance becomes a poor start as I studied it. I noticed that some things were broken, parts not meeting up completely and so on. So after a bit of deliberation I have decided to partially disassemble the boat and try to fix them as best as I’m able. I have never built a boat before but I am/was a finish carpenter with what’s left of a decent eye and good hands so I undertook the disassembly with care and I managed to break the glue joints with patience and finesse. There was a spot or two where the deck didn’t touch the bulkhead thus making it seem to have shorter Stanchions than the rest of its mates on the raised aft deck which looked really bad to me. Anyway I currently have the deck removed and the glue cleaned up and I’m ready to get going on it again. The following pictures are how received the boat
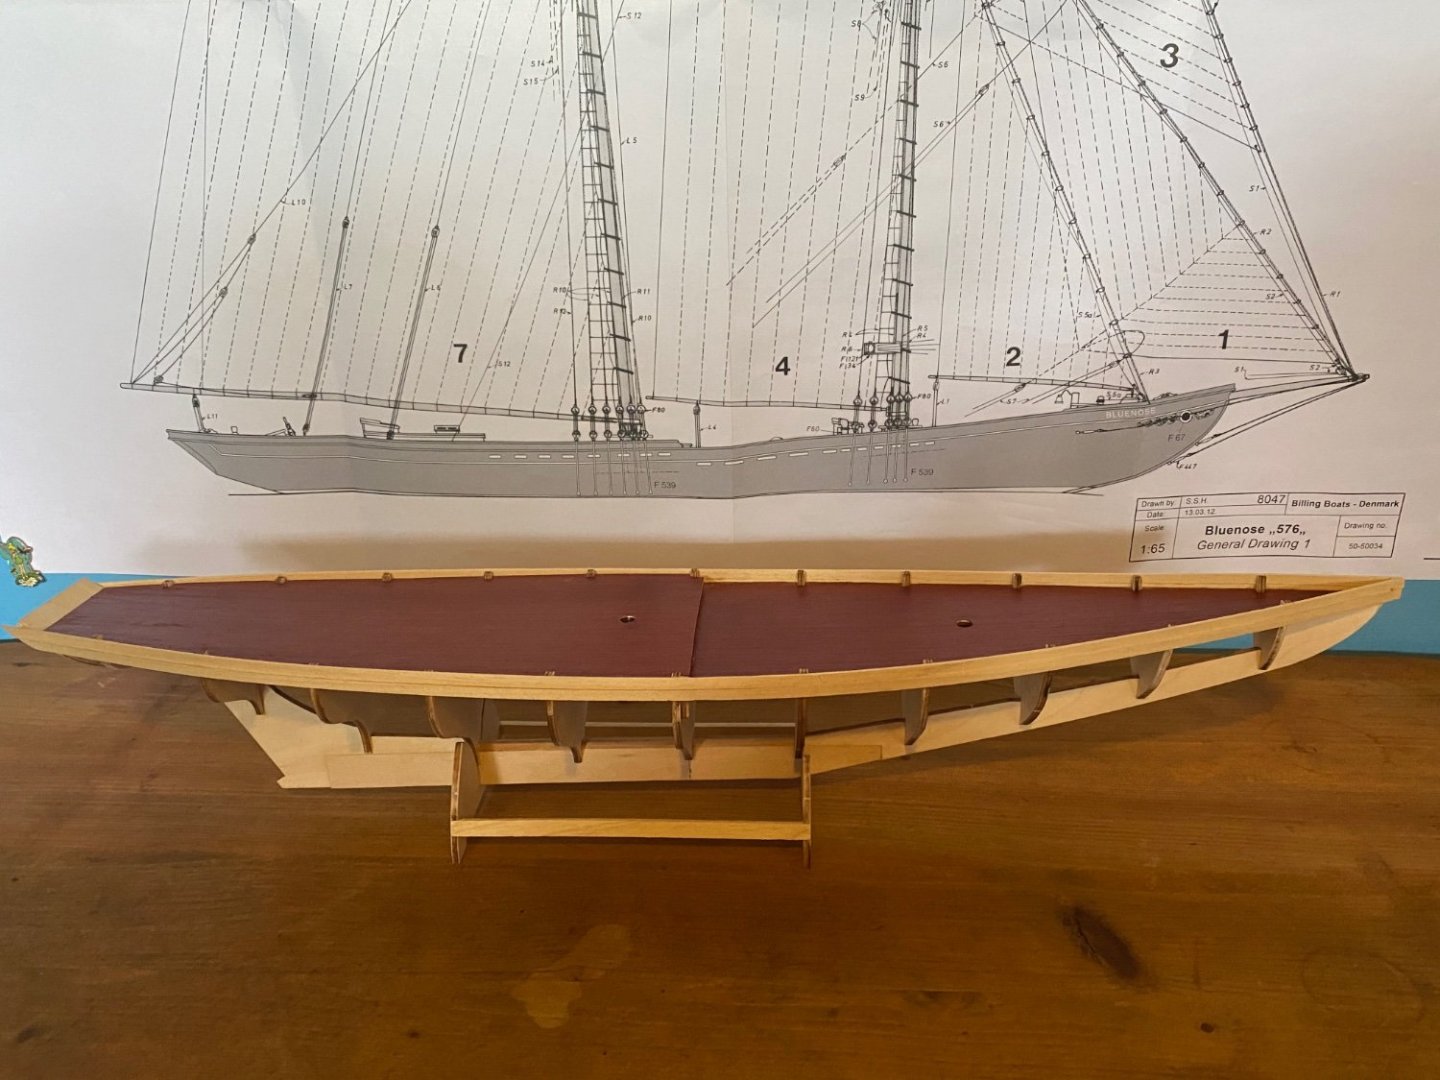
-
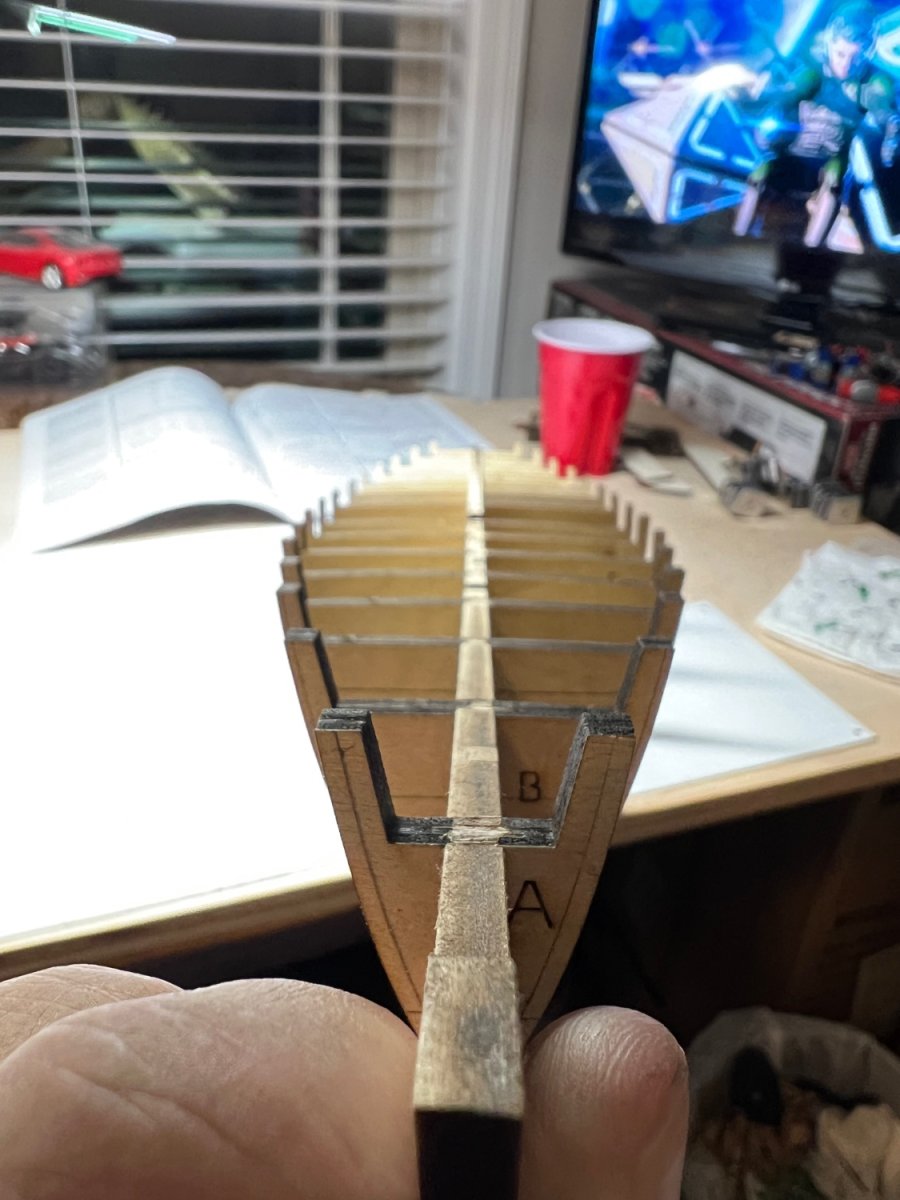
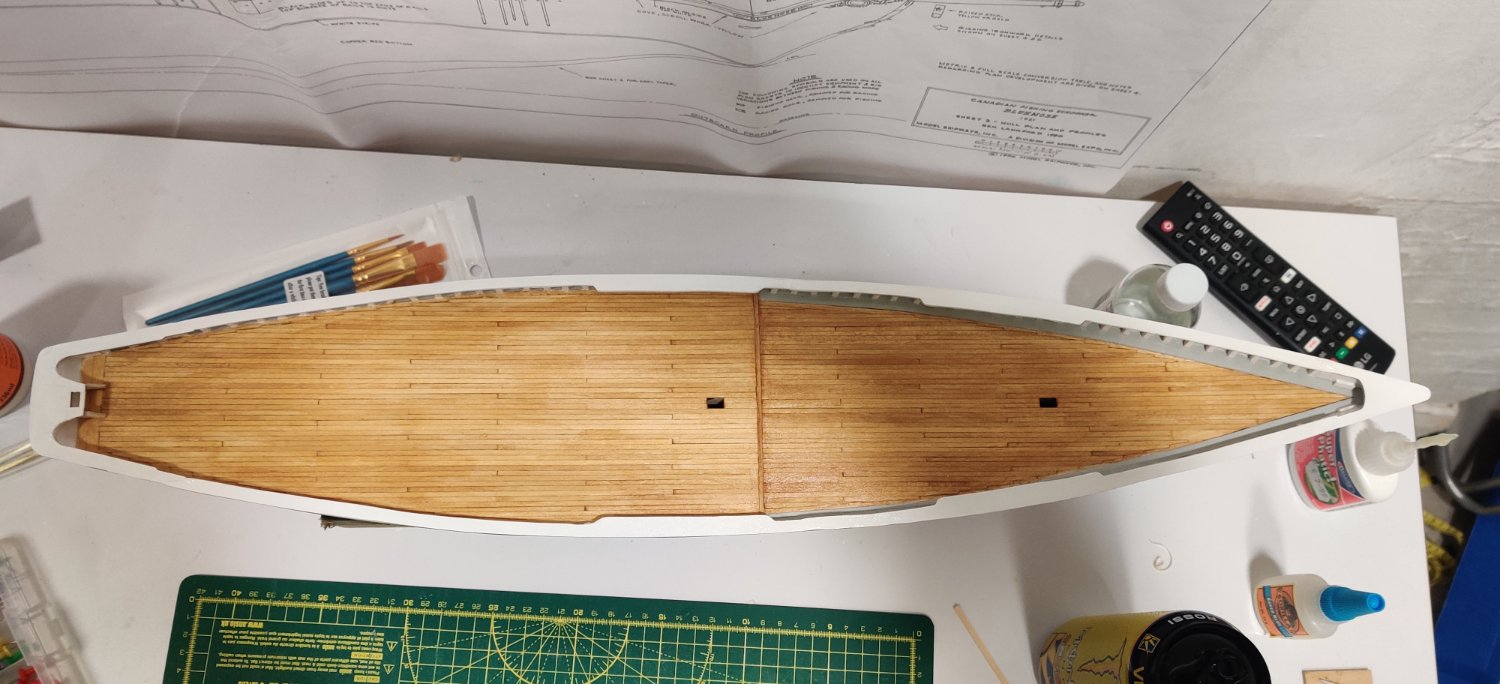
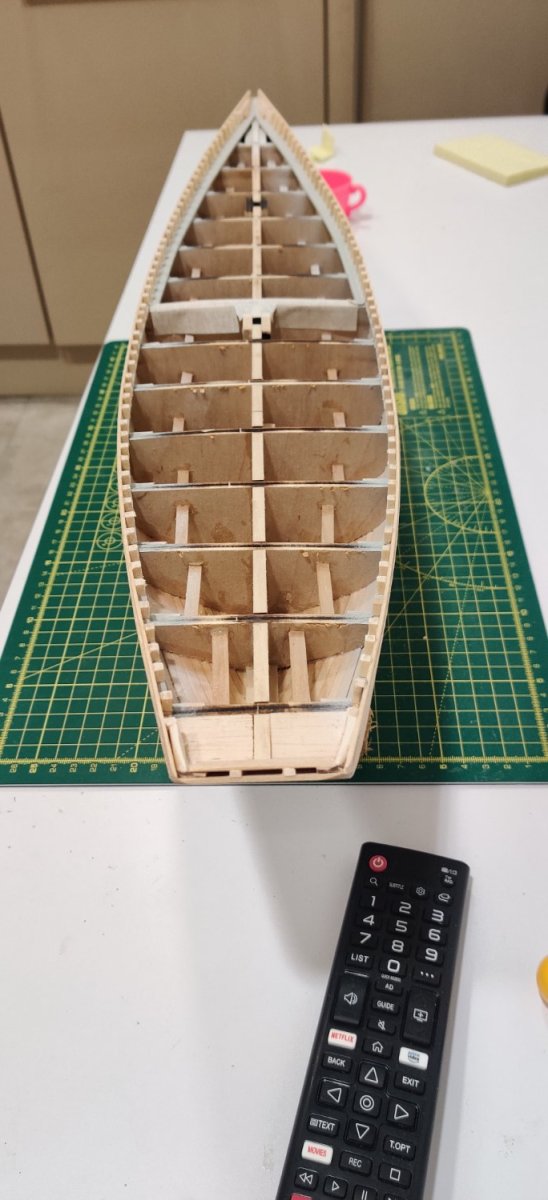
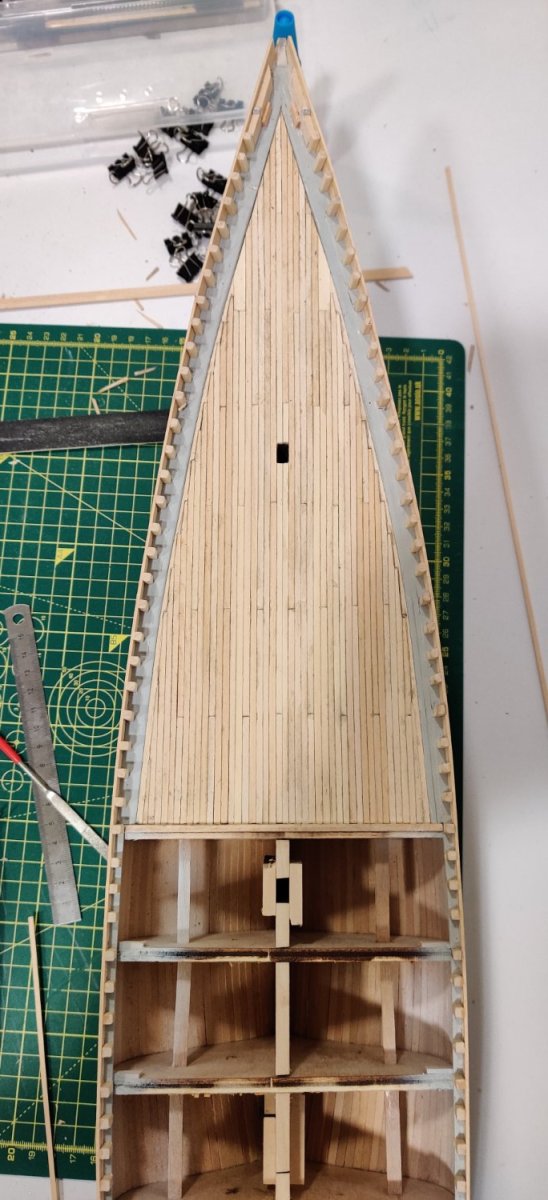
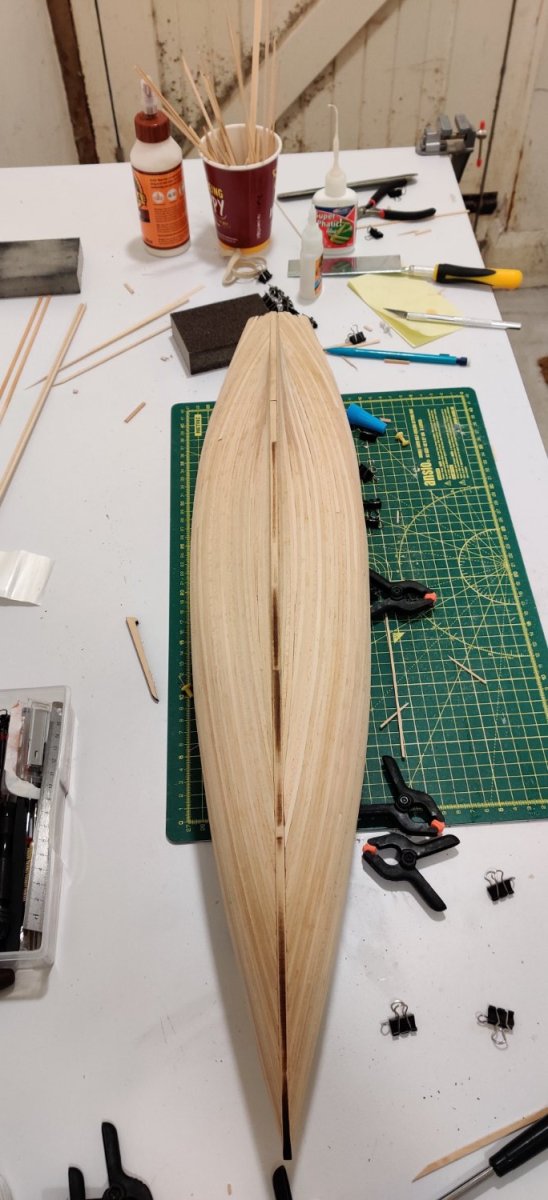
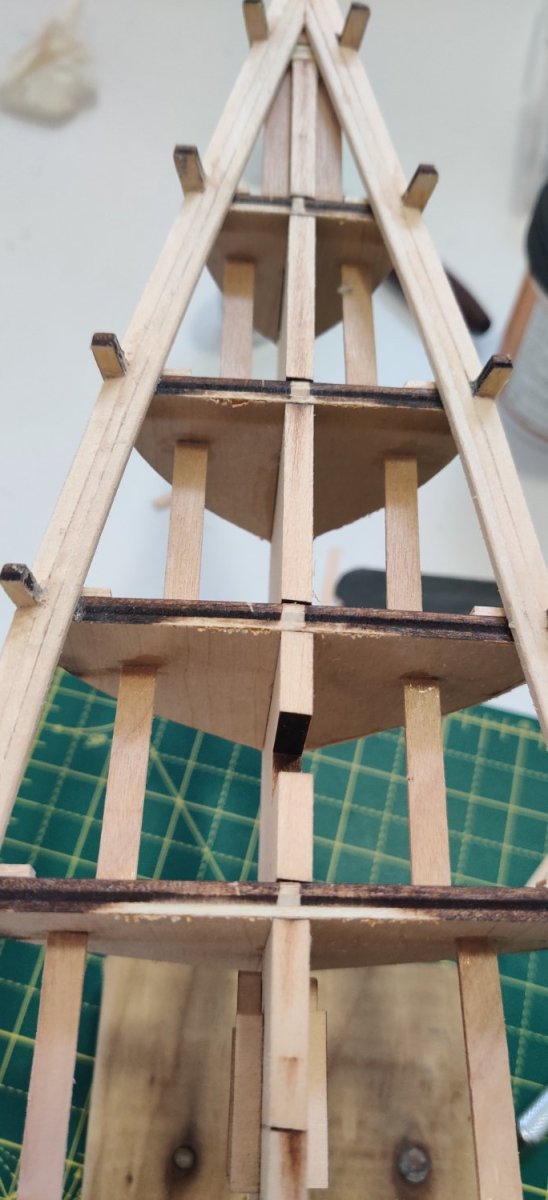
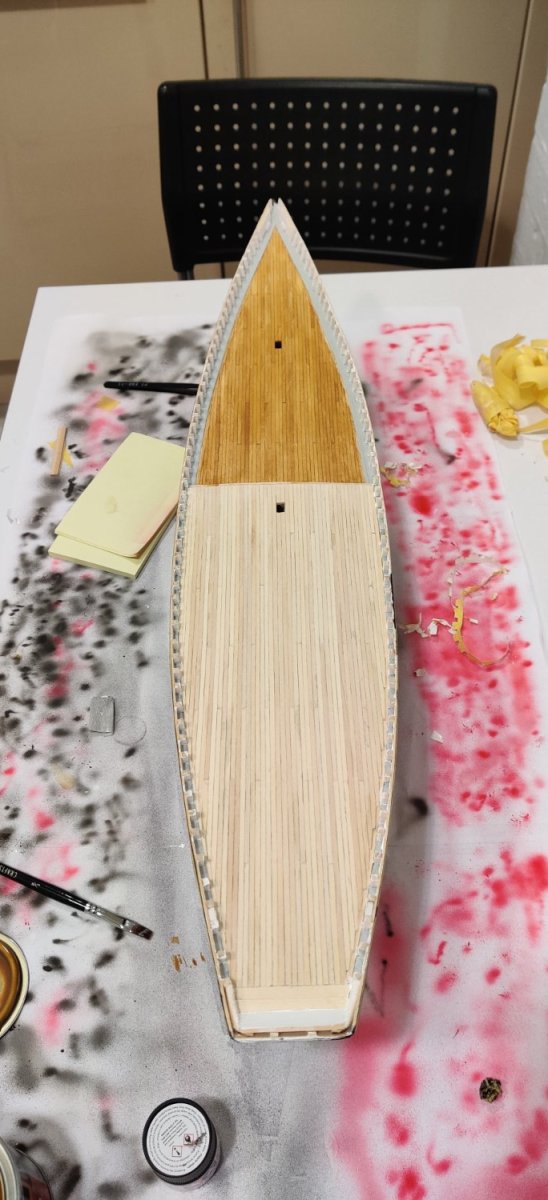
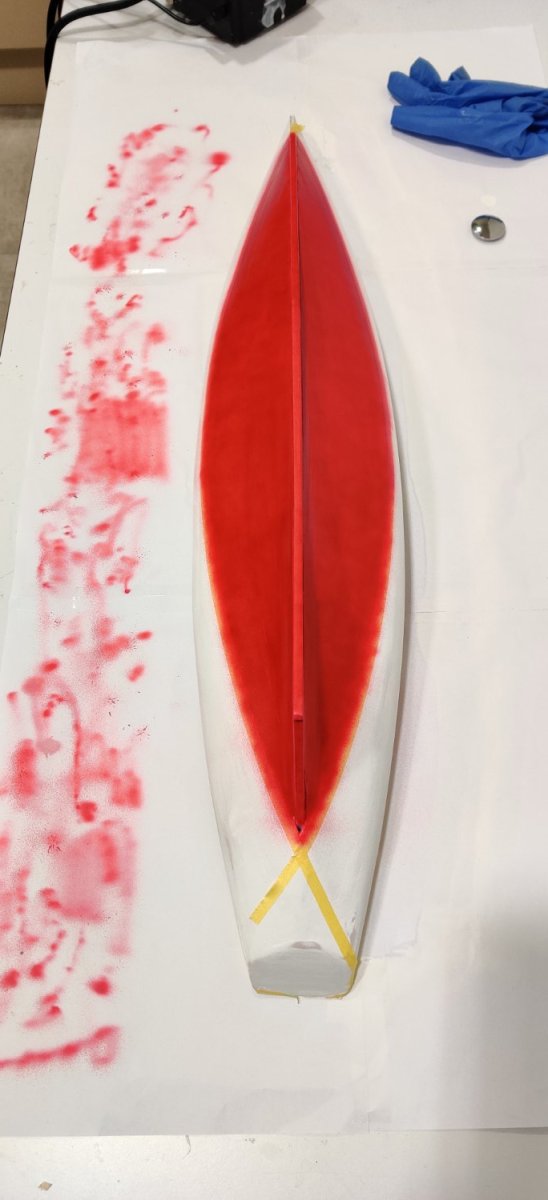
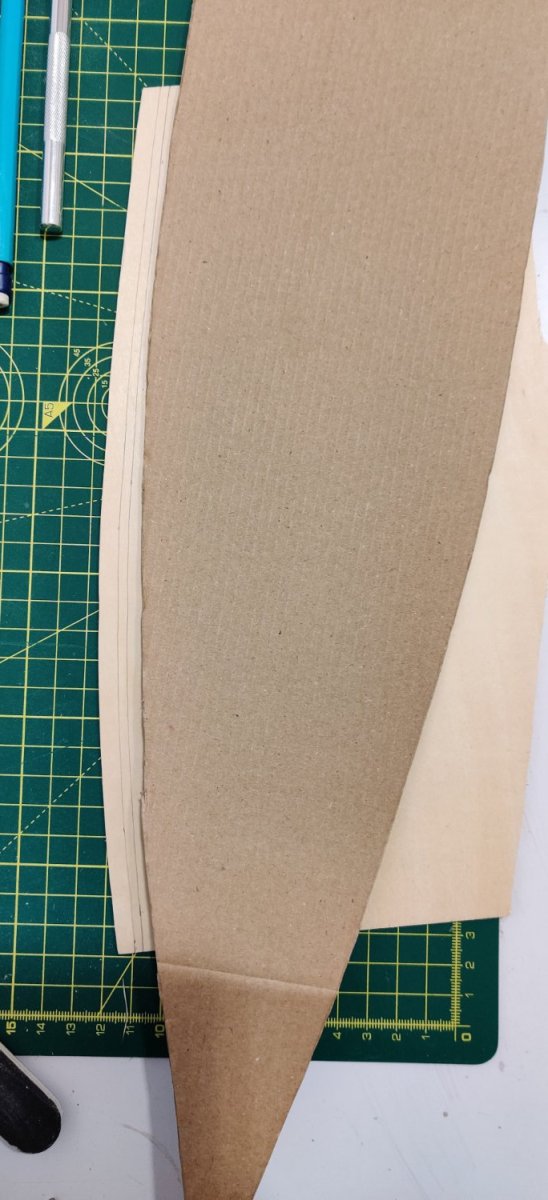
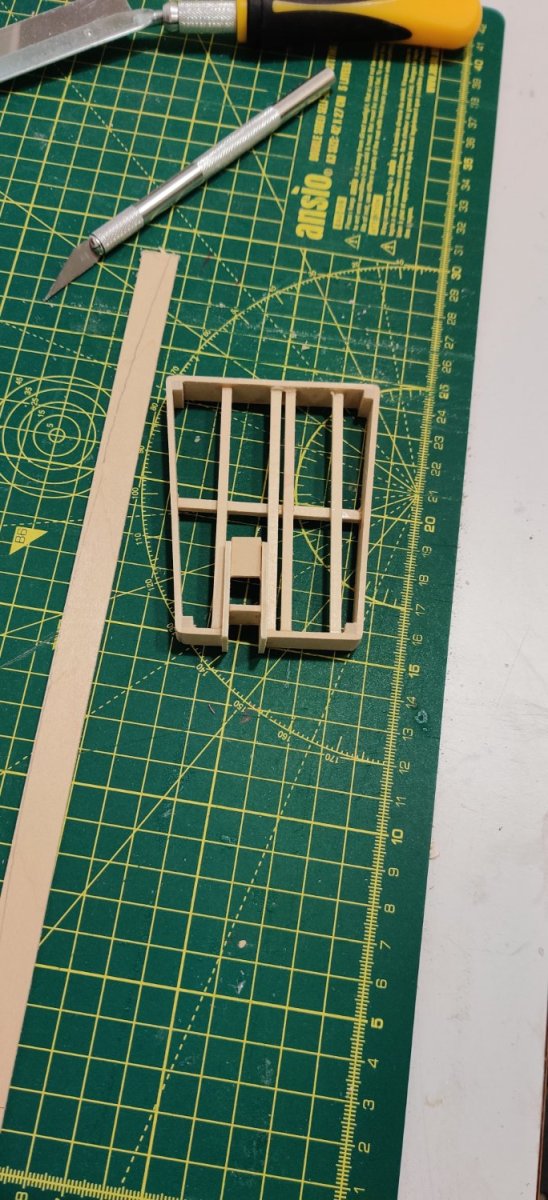
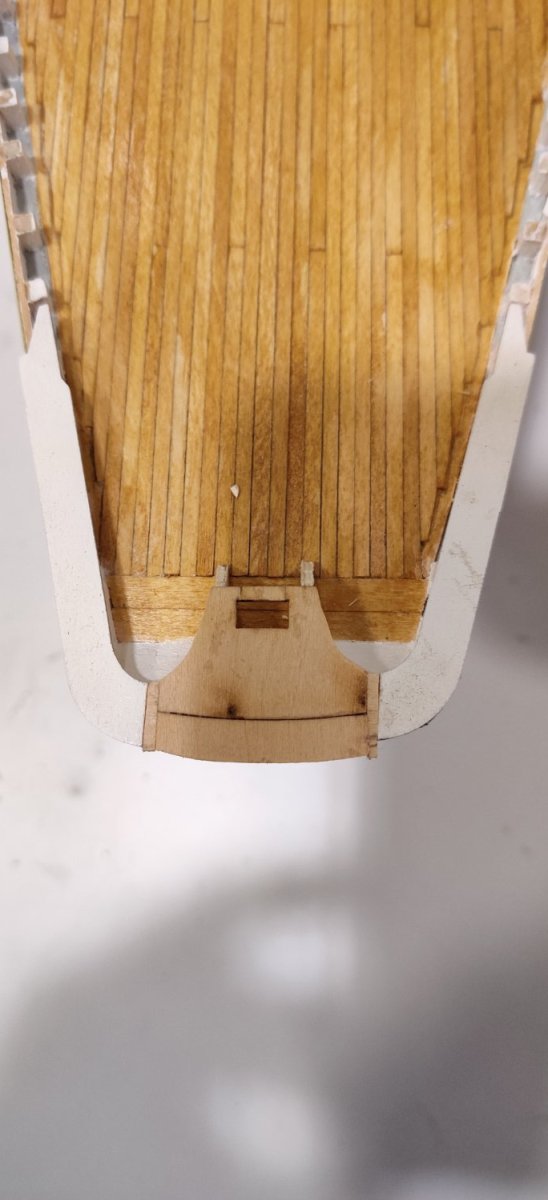
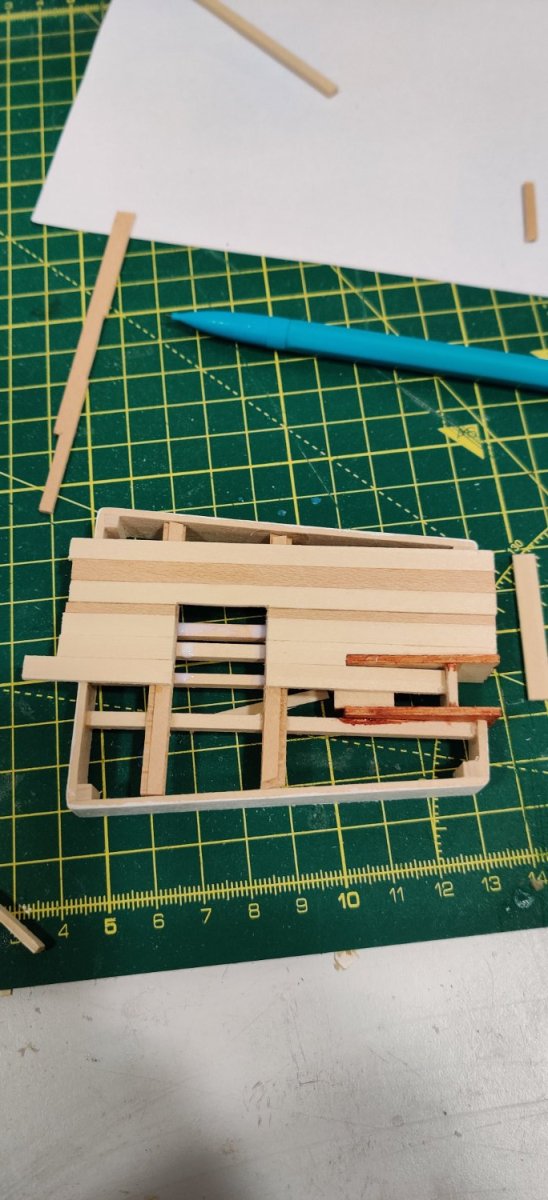
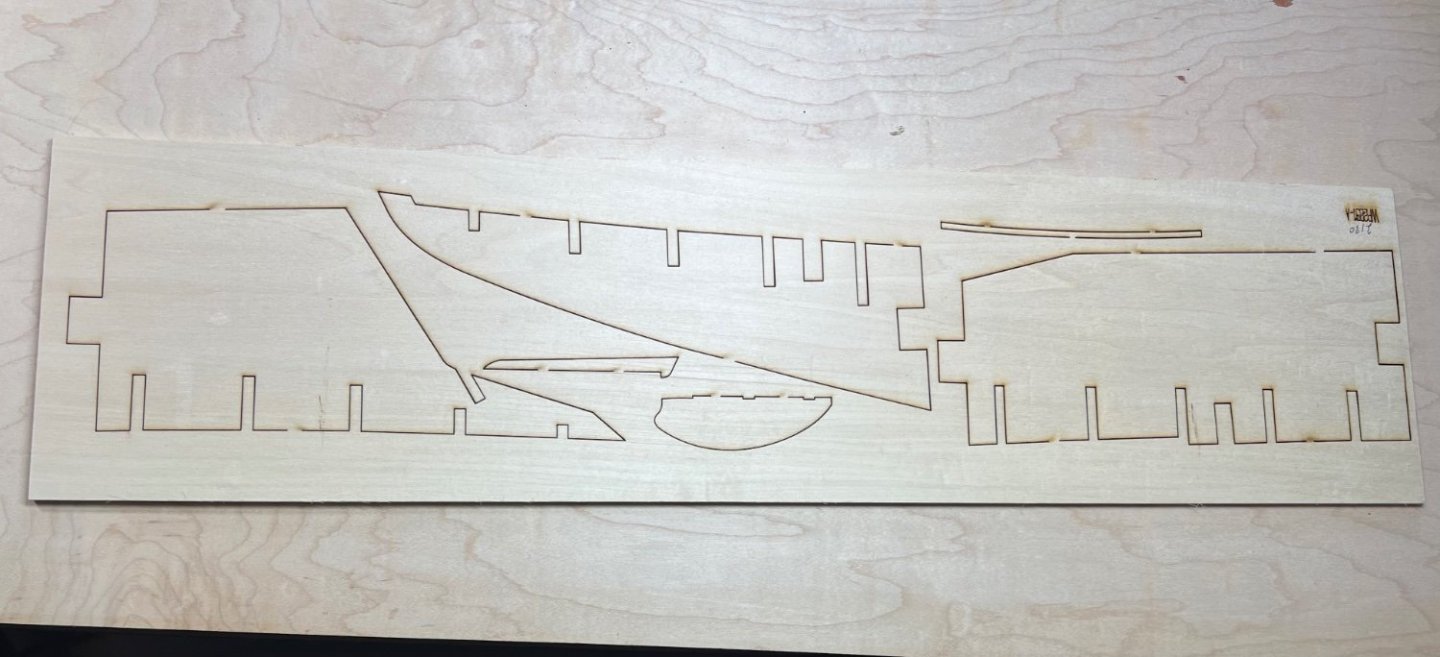
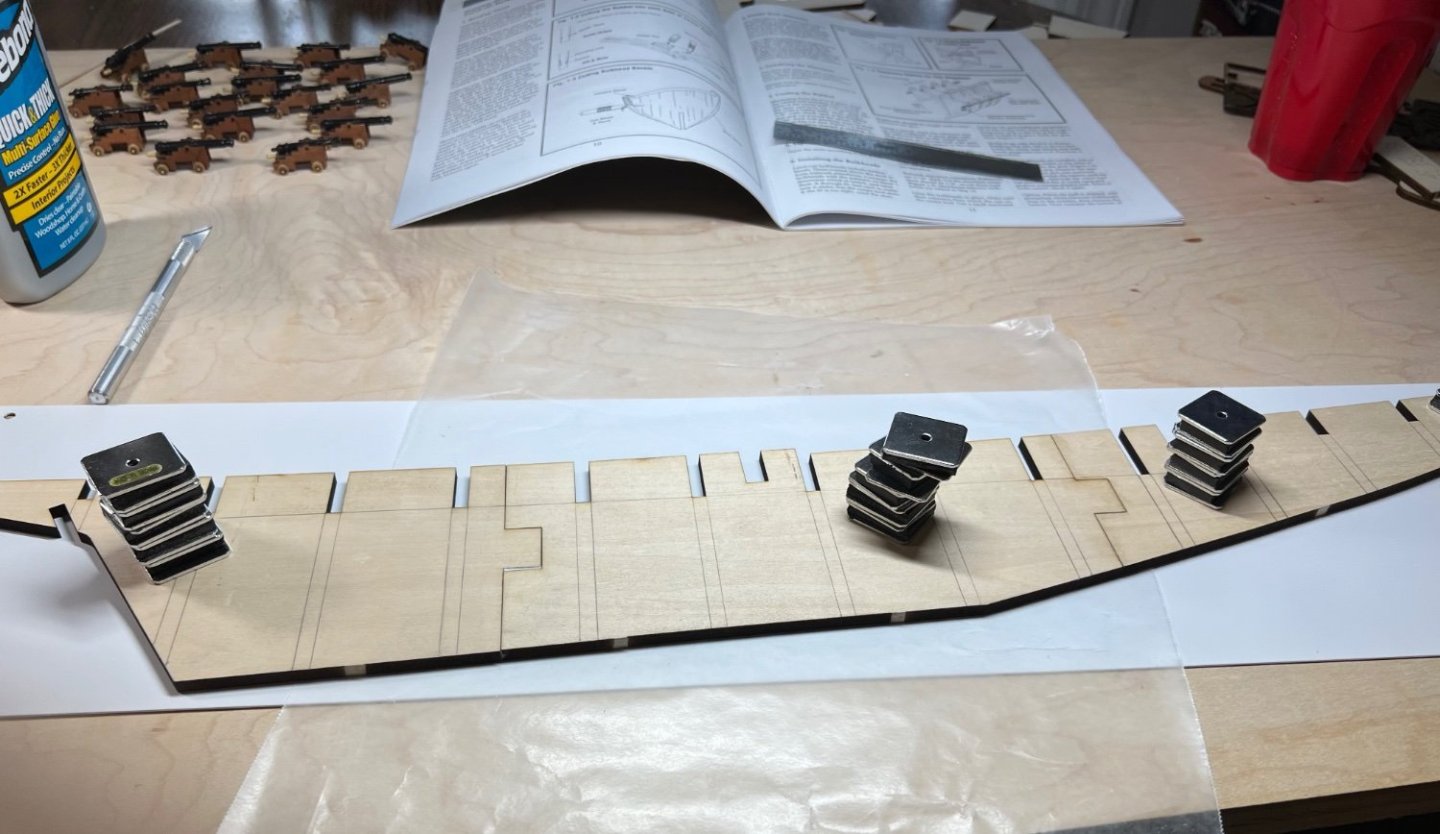
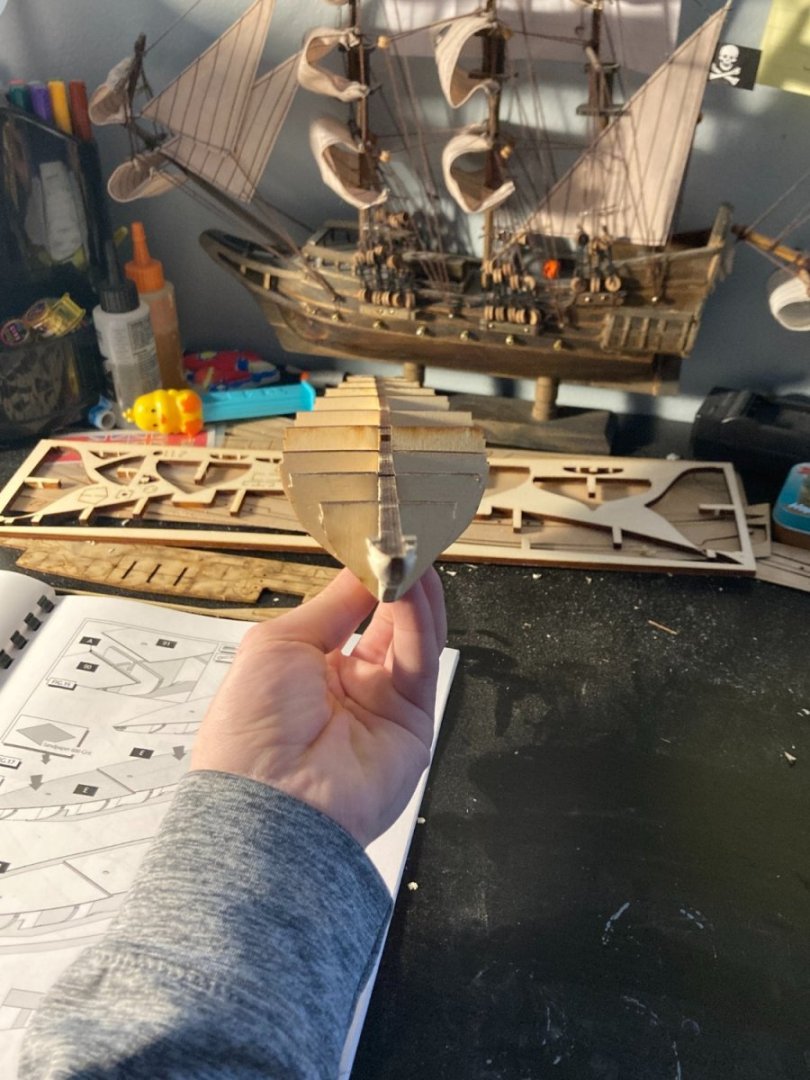
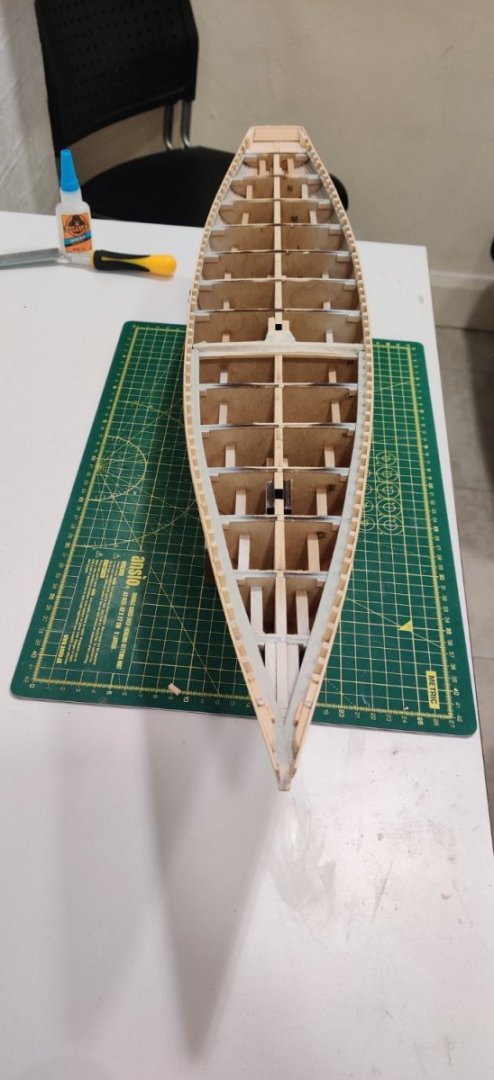
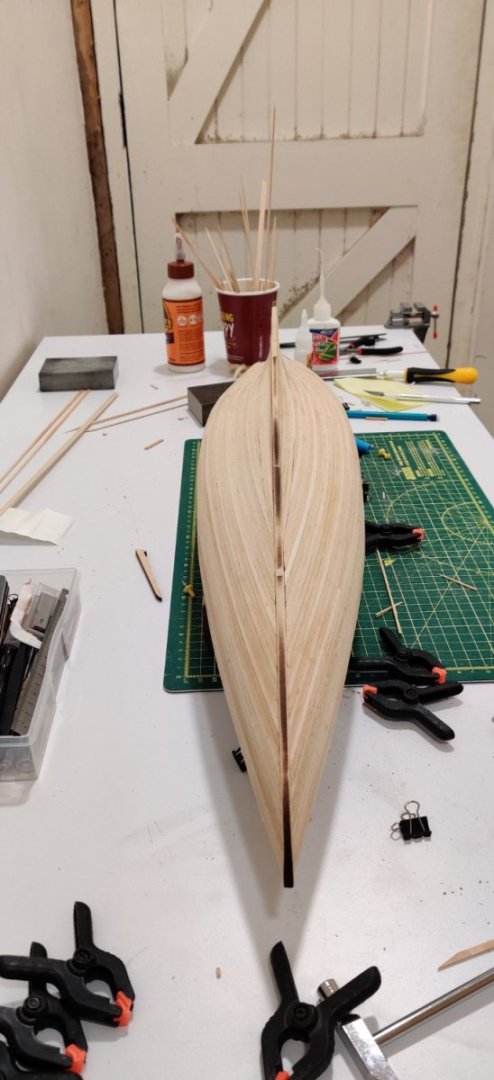
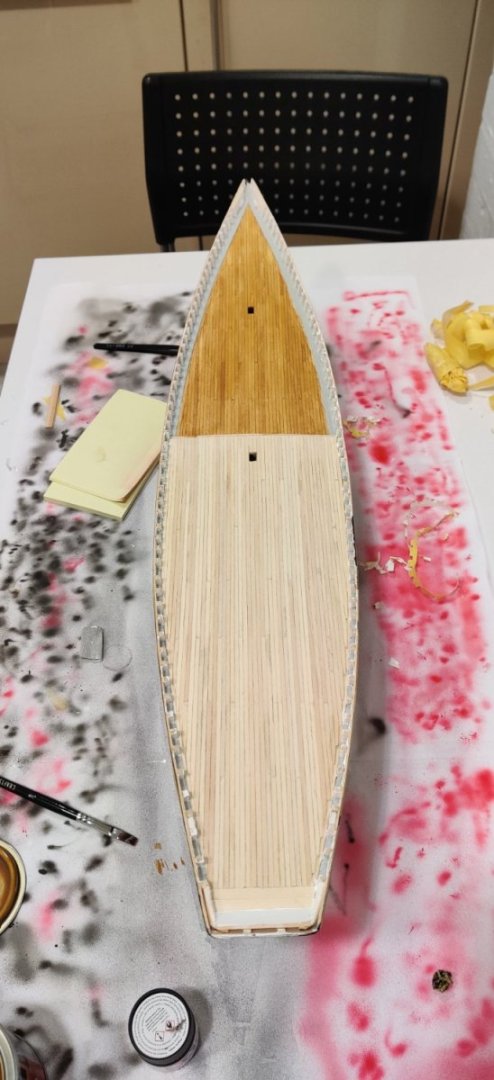
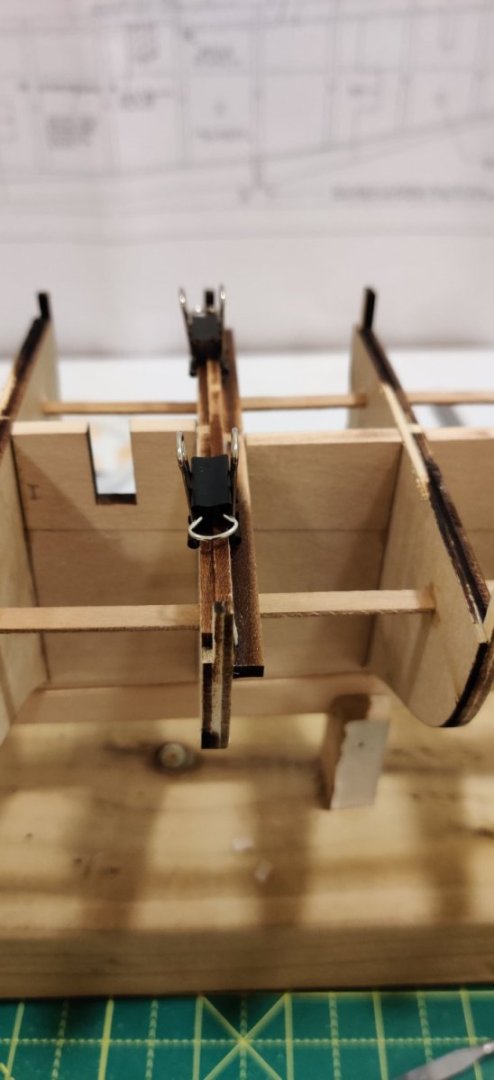
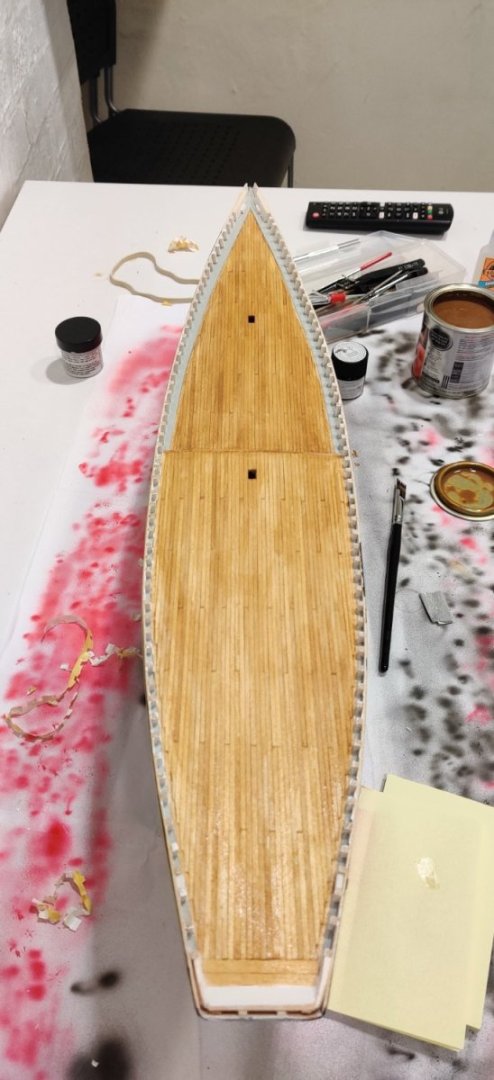
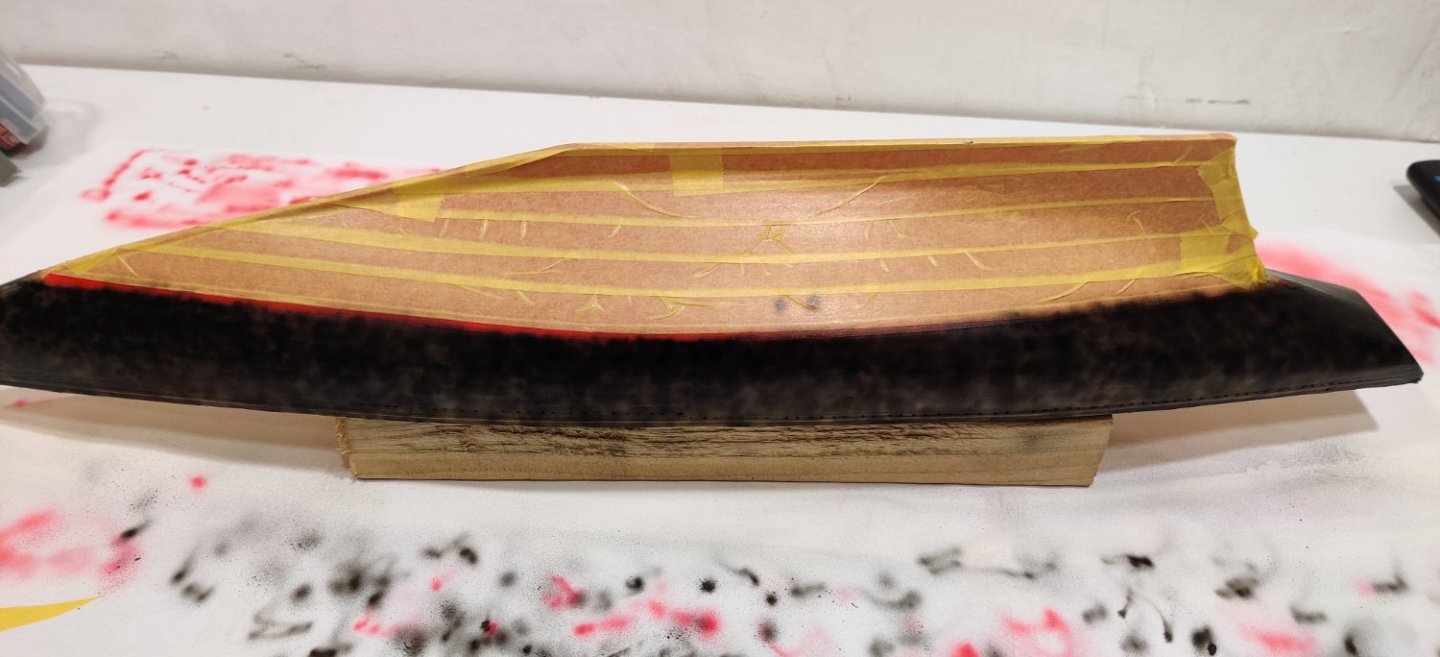
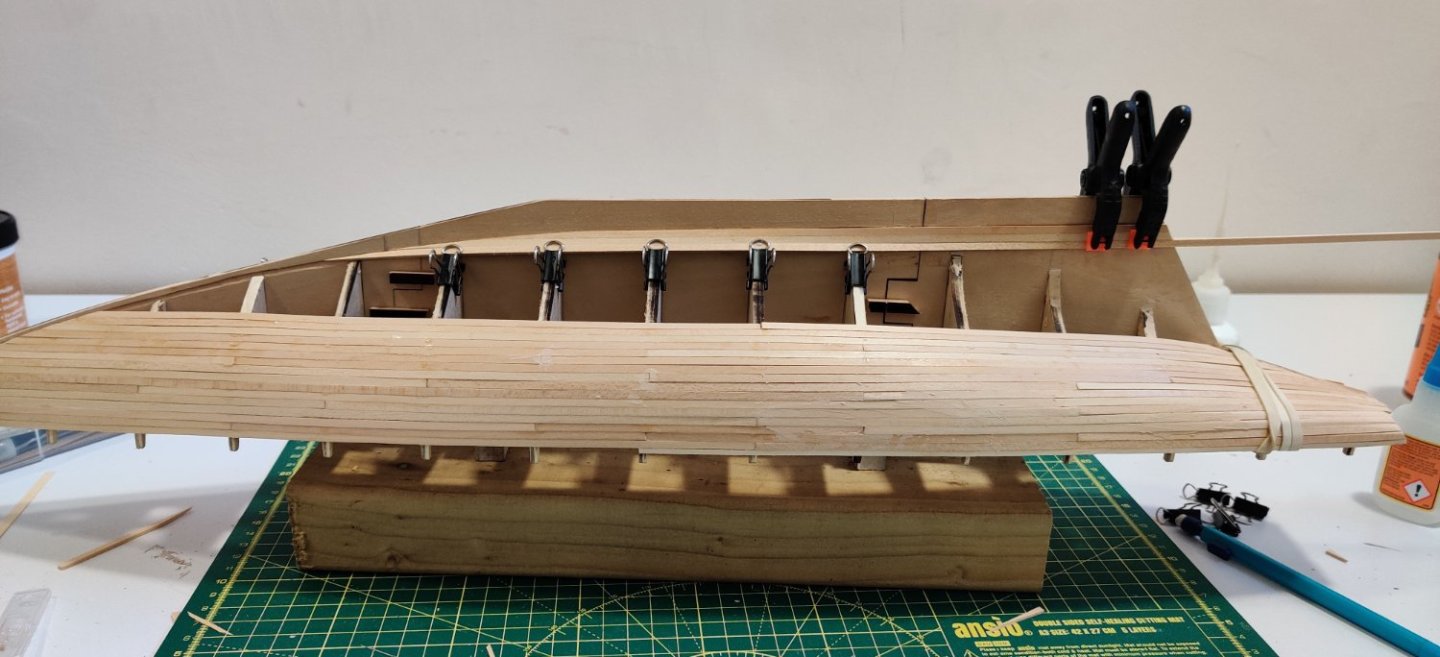
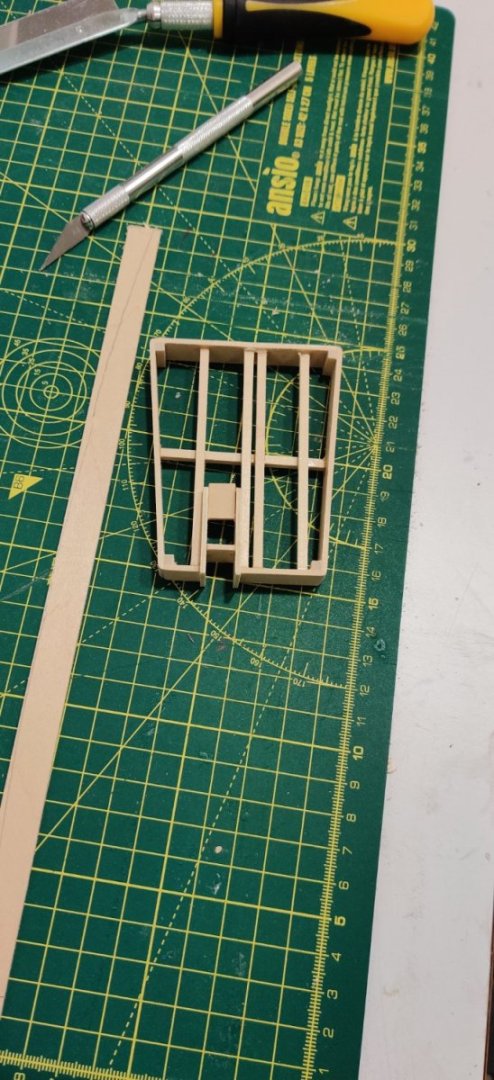
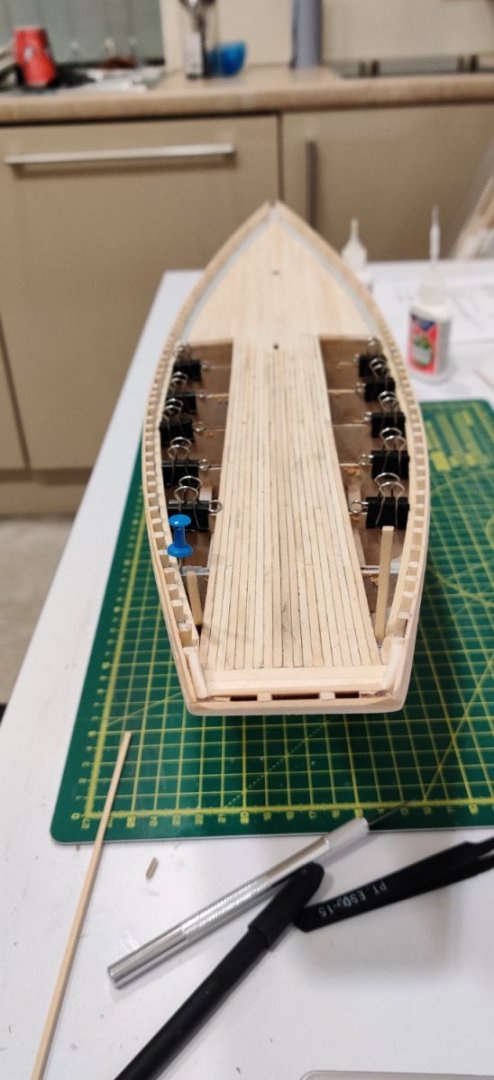
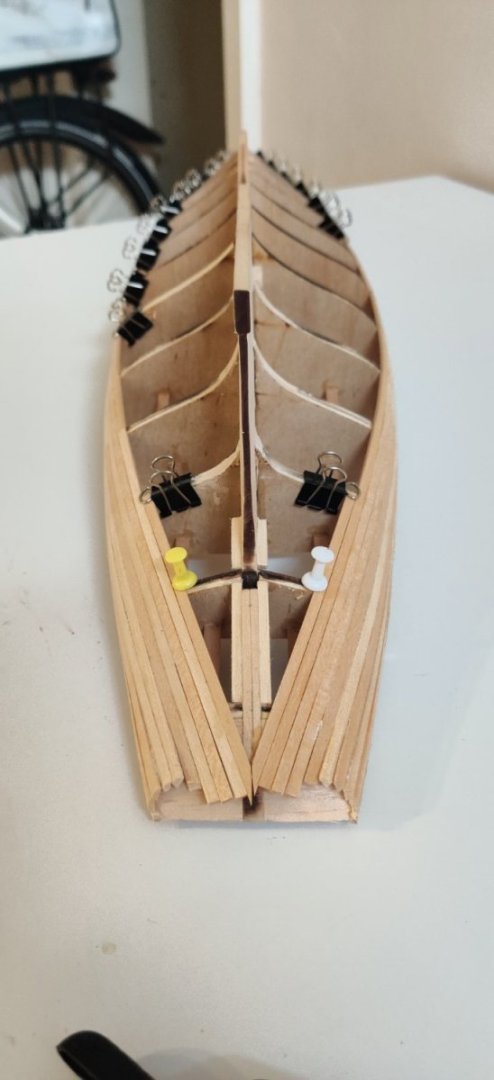
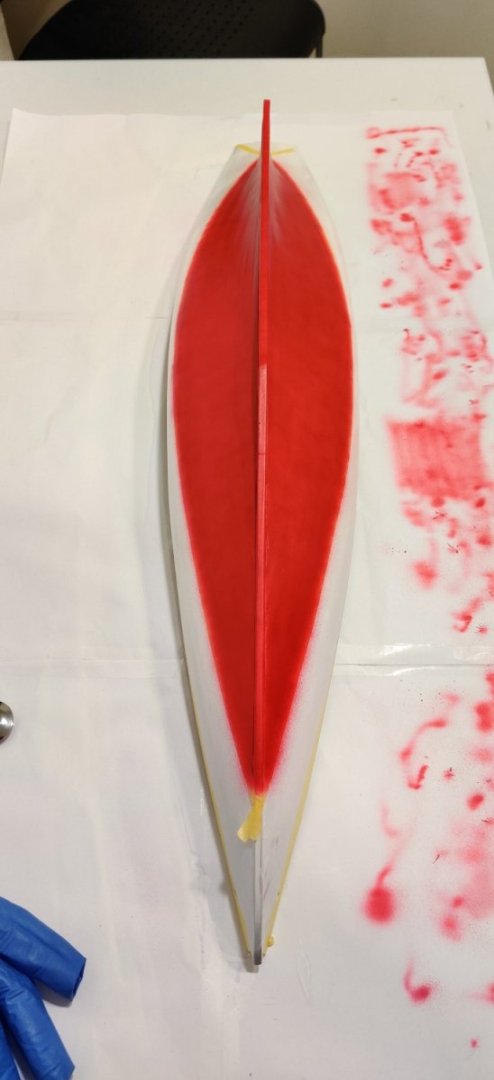
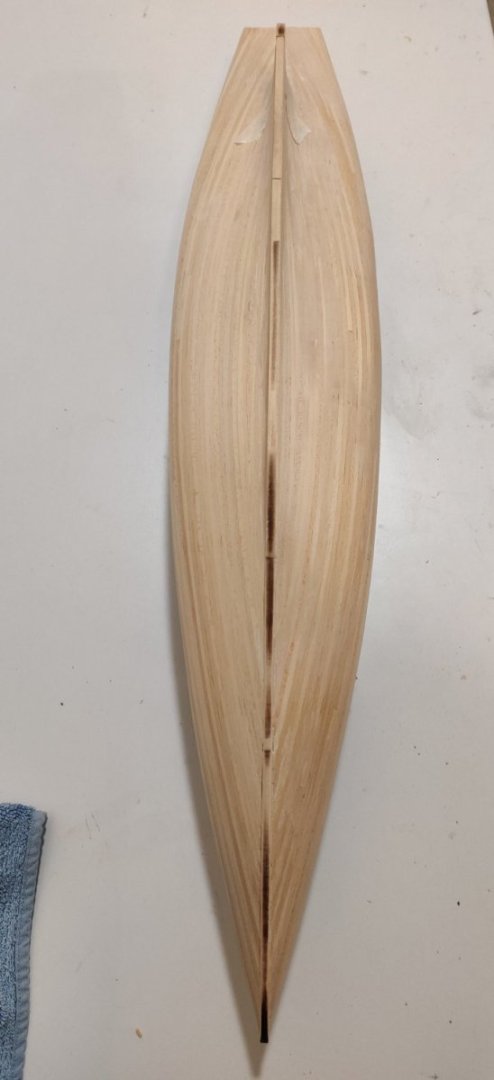
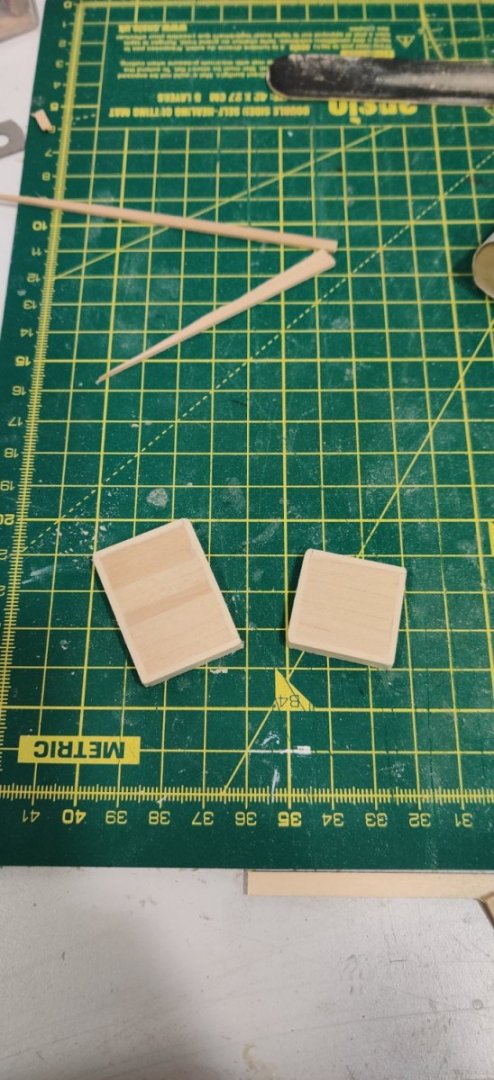
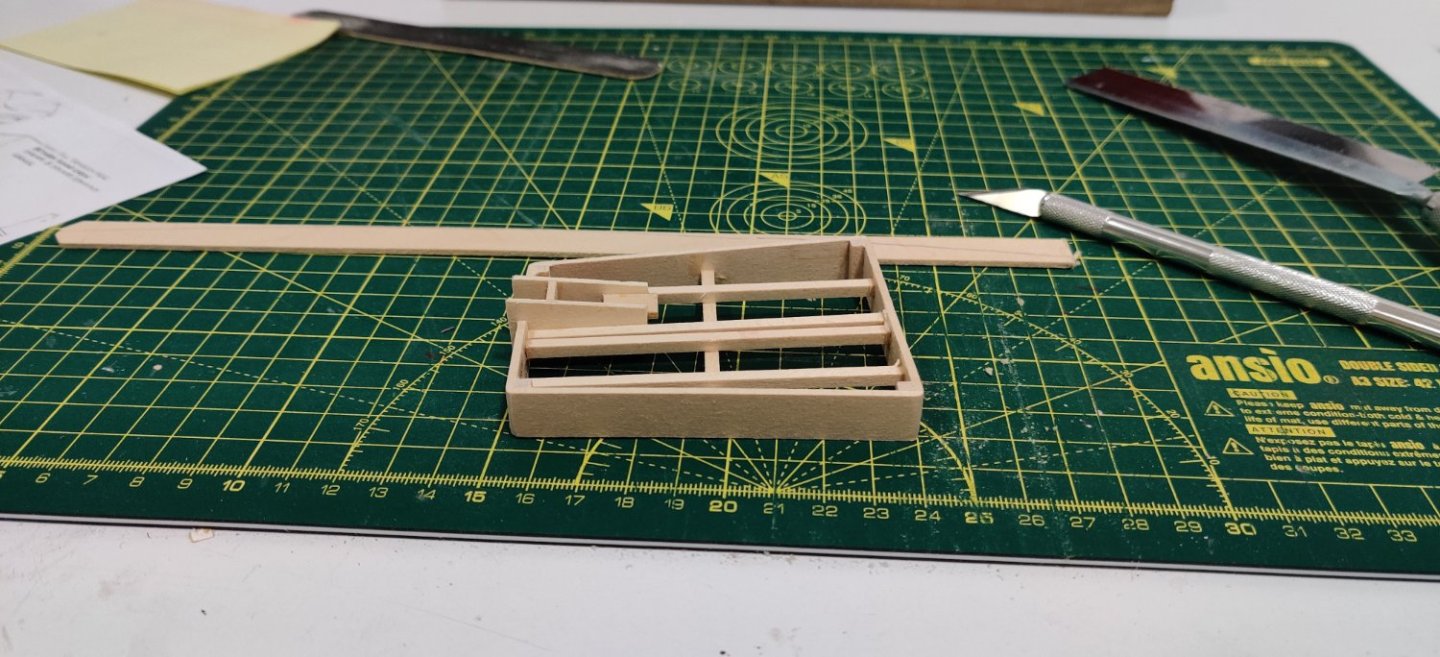
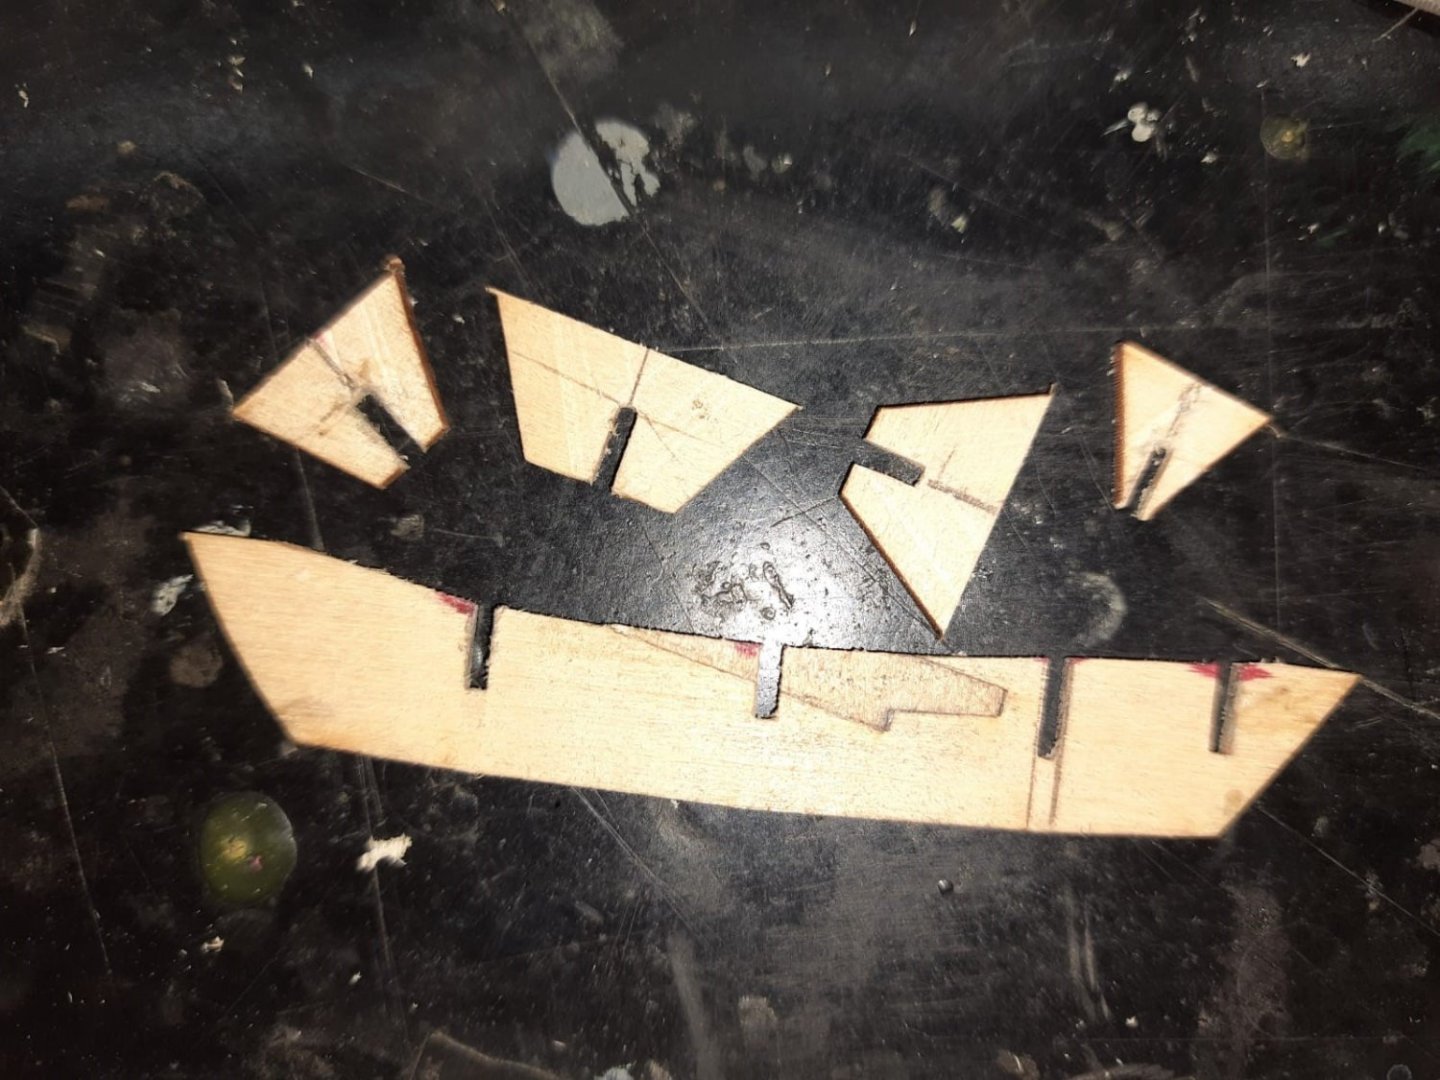
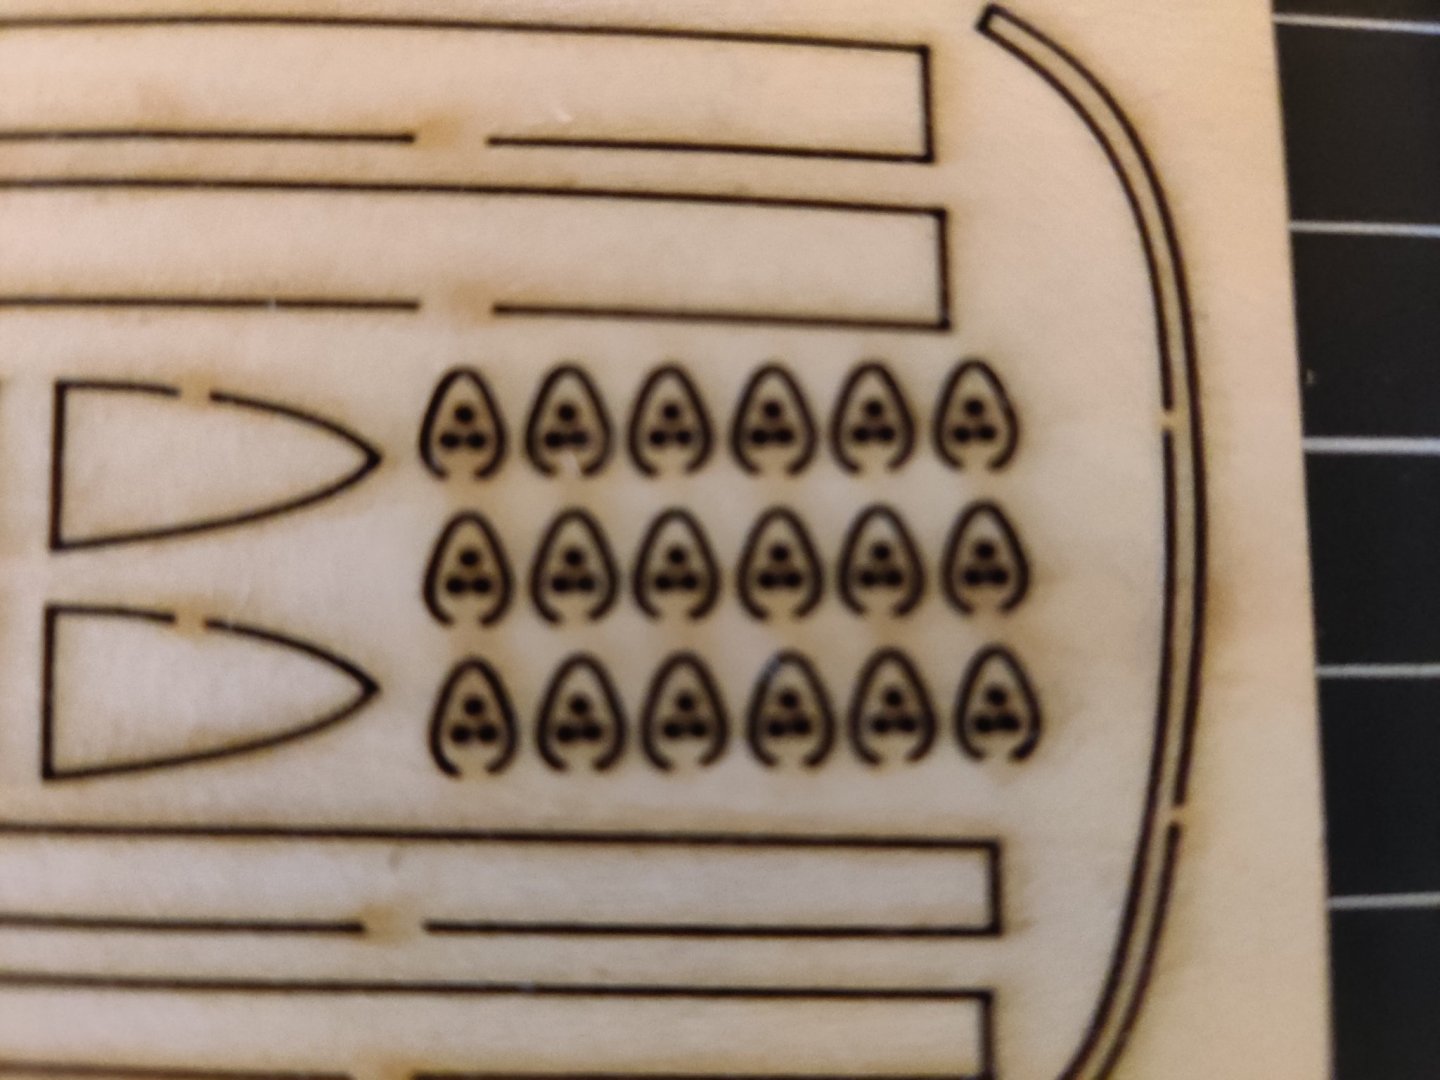
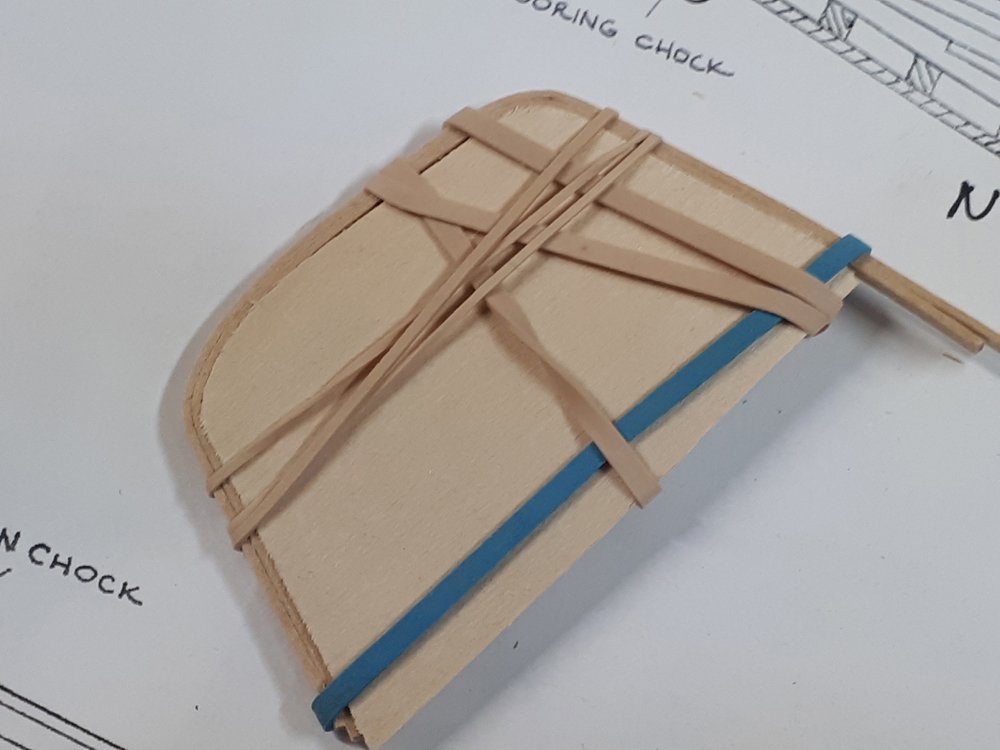
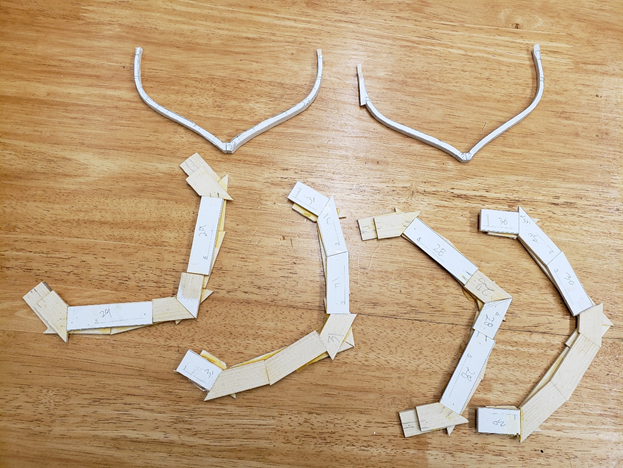
 Alright, time for ya'll to follow my struggle. The Modelshipways Bluenose will be my first ship model, I got the kit pretty cheap - $90,00ish - on the "Help us Move" sales Modelexpo just had. Huge model for a begginer, but since I live in Brazil, and it takes around two months for anything, really, to get here, I figured that I would get the big ship and double up on research time. So the kit arrived and, naturally, I have some noob questions that I'd like to ask you gentlemen. Dowels, regarding those. None of them are perfectly straight but then there is this one: Would it work to heat it up and straighten it, as you do with planking? Or would the wood eventually warp on me again, and thus I should contact Modelexpo for a replacement? Also, my kit came with two different types of wood for masts and yards - basswood and green vietnamese stuff-, which I'm not too fond of, I'd like to keep it consistent. The basswood, as I understand, isn't the best for masts and yards, due to its softness. So I might be looking into getting some nicer wood for that. As for the green vietnamese stuff. What is it? It feels light, it's fairly small grained, it's pretty consistent, it's kinda green, and it's "from vietnam" labeled: Last question: I have some Mr. Hobby lacquer paints at hand, are there any cons to using those on wood instead of acrylics? Lacquers seem to be often used as clear coats over wood, but better ask, they're much more agressive than acrylics. Afraid to screw up the big expensive ship, I decided to get my first taste of wood modelling with the dories. Overall, I'm pretty happy on how it's been going, even though the by the manual method of building them is hopeless. The jig Modelshipways provides is too fiddly, and there is no way, no way, the thin wood frames would hold the boat to it's proper shape, as per suggested. I won't elaborate further, getting you to propper understand the problems with the kit's dories would take a lot of text and some images, and I don't think you guys are interested in that. Rather, I'll show you what I'm currently doing about it: These are the leftover of the laser cut pieces for the jig that should be used to get the dories to their correct shape. I've cut off the jig's "footprint" from the waste portion of the laser cut sheet provided by the kit, if that makes sense". Now I'm converting those "footprint" pieces into a small POB model, I'm making my own keel and bulkheads. Then, i'll add some filler blocks, make the boat a solid piece of wood, and use it as a template for constructing the dories. I'm currently aligning evrything up and shaping the boat's top. That's it for now. I look forward to learning a lot from you! Cheers!
-
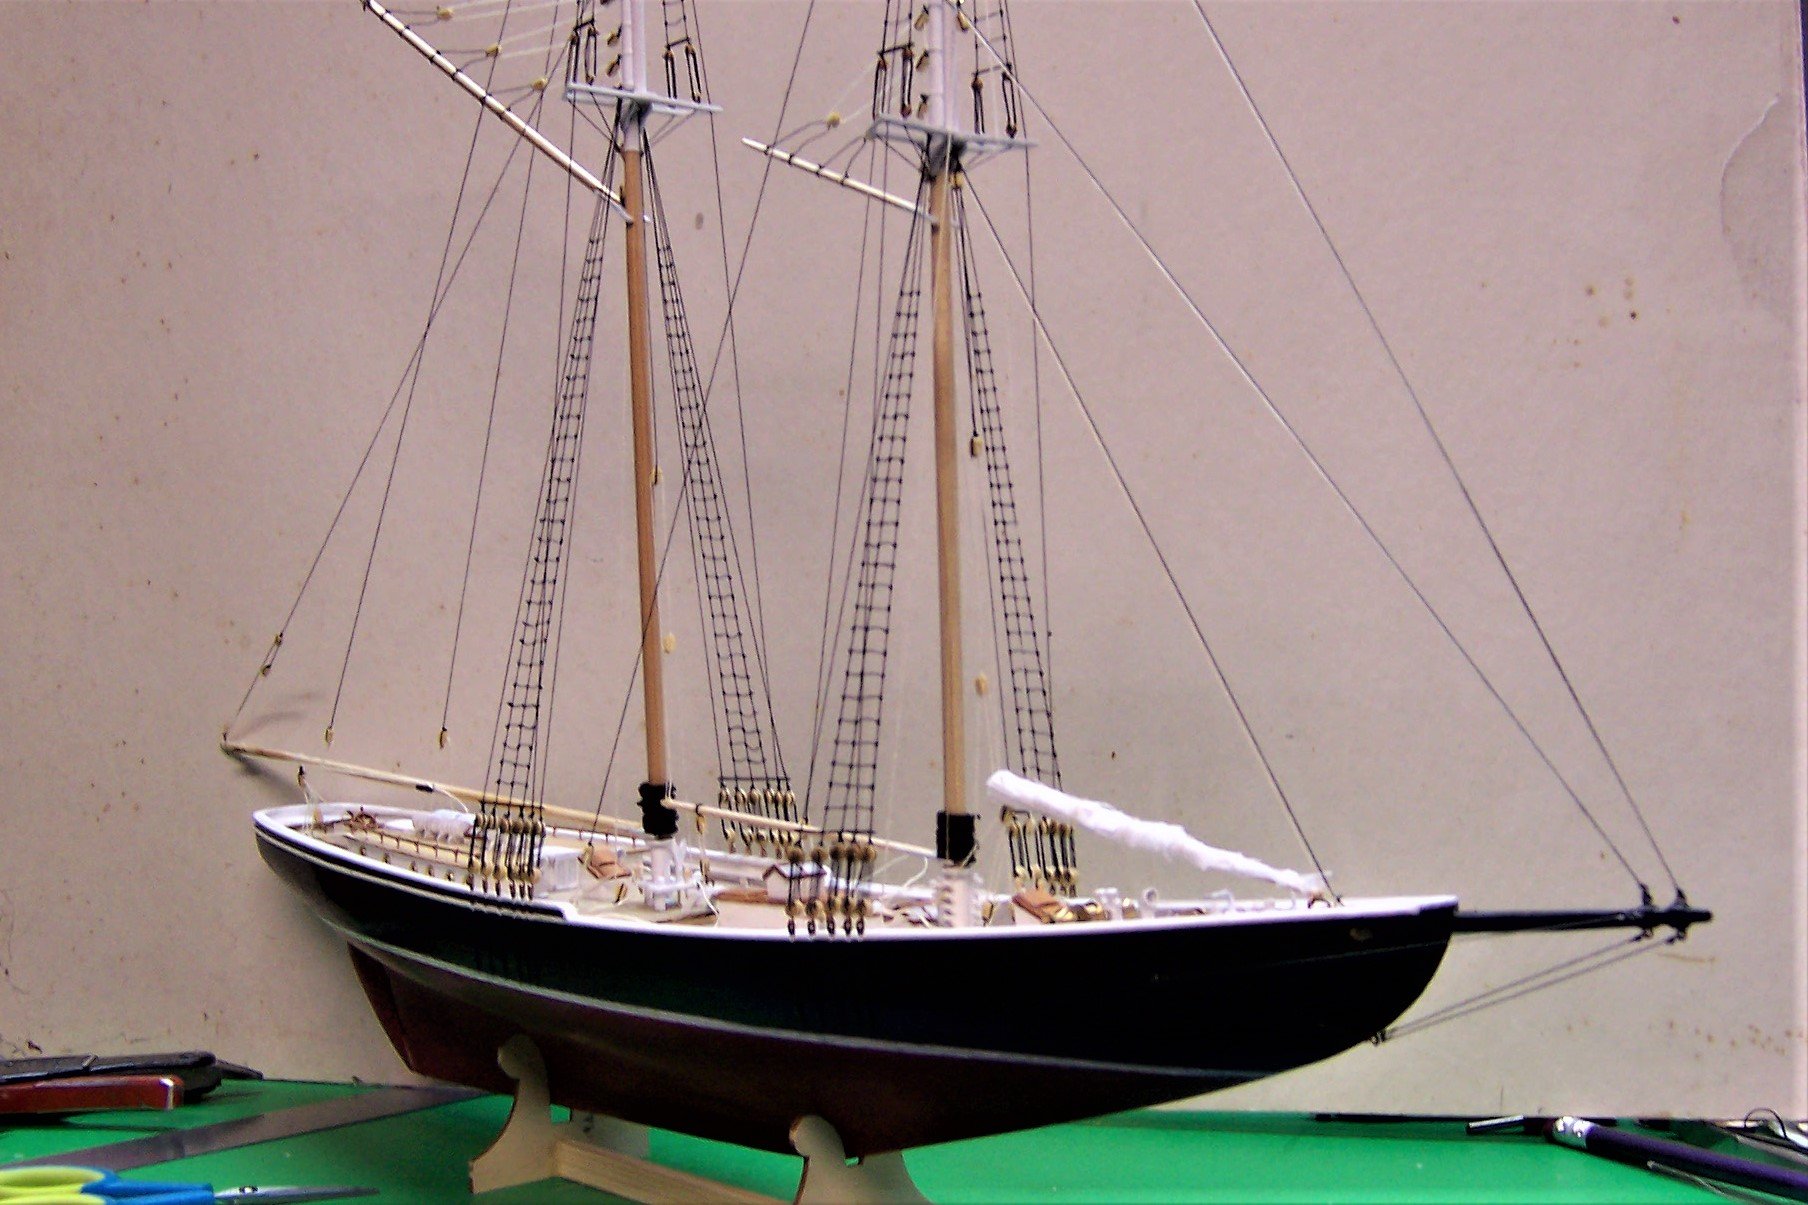
 Hi all, it's been a while since I added to my build logs, but that doesn't mean I haven't been busy. While building Occre's Calella, I interchanged with another kit, Amati's 1/100 rendition of Bluenose. Got so caught up in working on both and life outside the shipyard I omitted to post regular updates, for which I apologise. To try and get some kind of build log on here, I'm going to split up my activities per post, starting with keel and frames (and the first issues). For reference, this is where she is today: Hull finished, painted and varnished, deck finalised, masts are dry fitted, all yards finished, making sails now (a first!)
-
 I am in the process of picking up where I left off 45+ years ago. I am new to this forum and ship building in general. My wife got me a Christmas gift early in our marriage. Assembled the hull w planking and the moves and career put everything on hold. So far I’m planning by reviewing info I can find online, creating a workplace, deciding what tools, I need and my next step. I’m trying to find out about what fittings I need and where to get them as none were included in kit back then. And that scale (1:75) is no longer made by Billings. I’ve worked through some builds on this forum and will continue till I feel ready. Any advice greatly appreciated. Gary D
 -
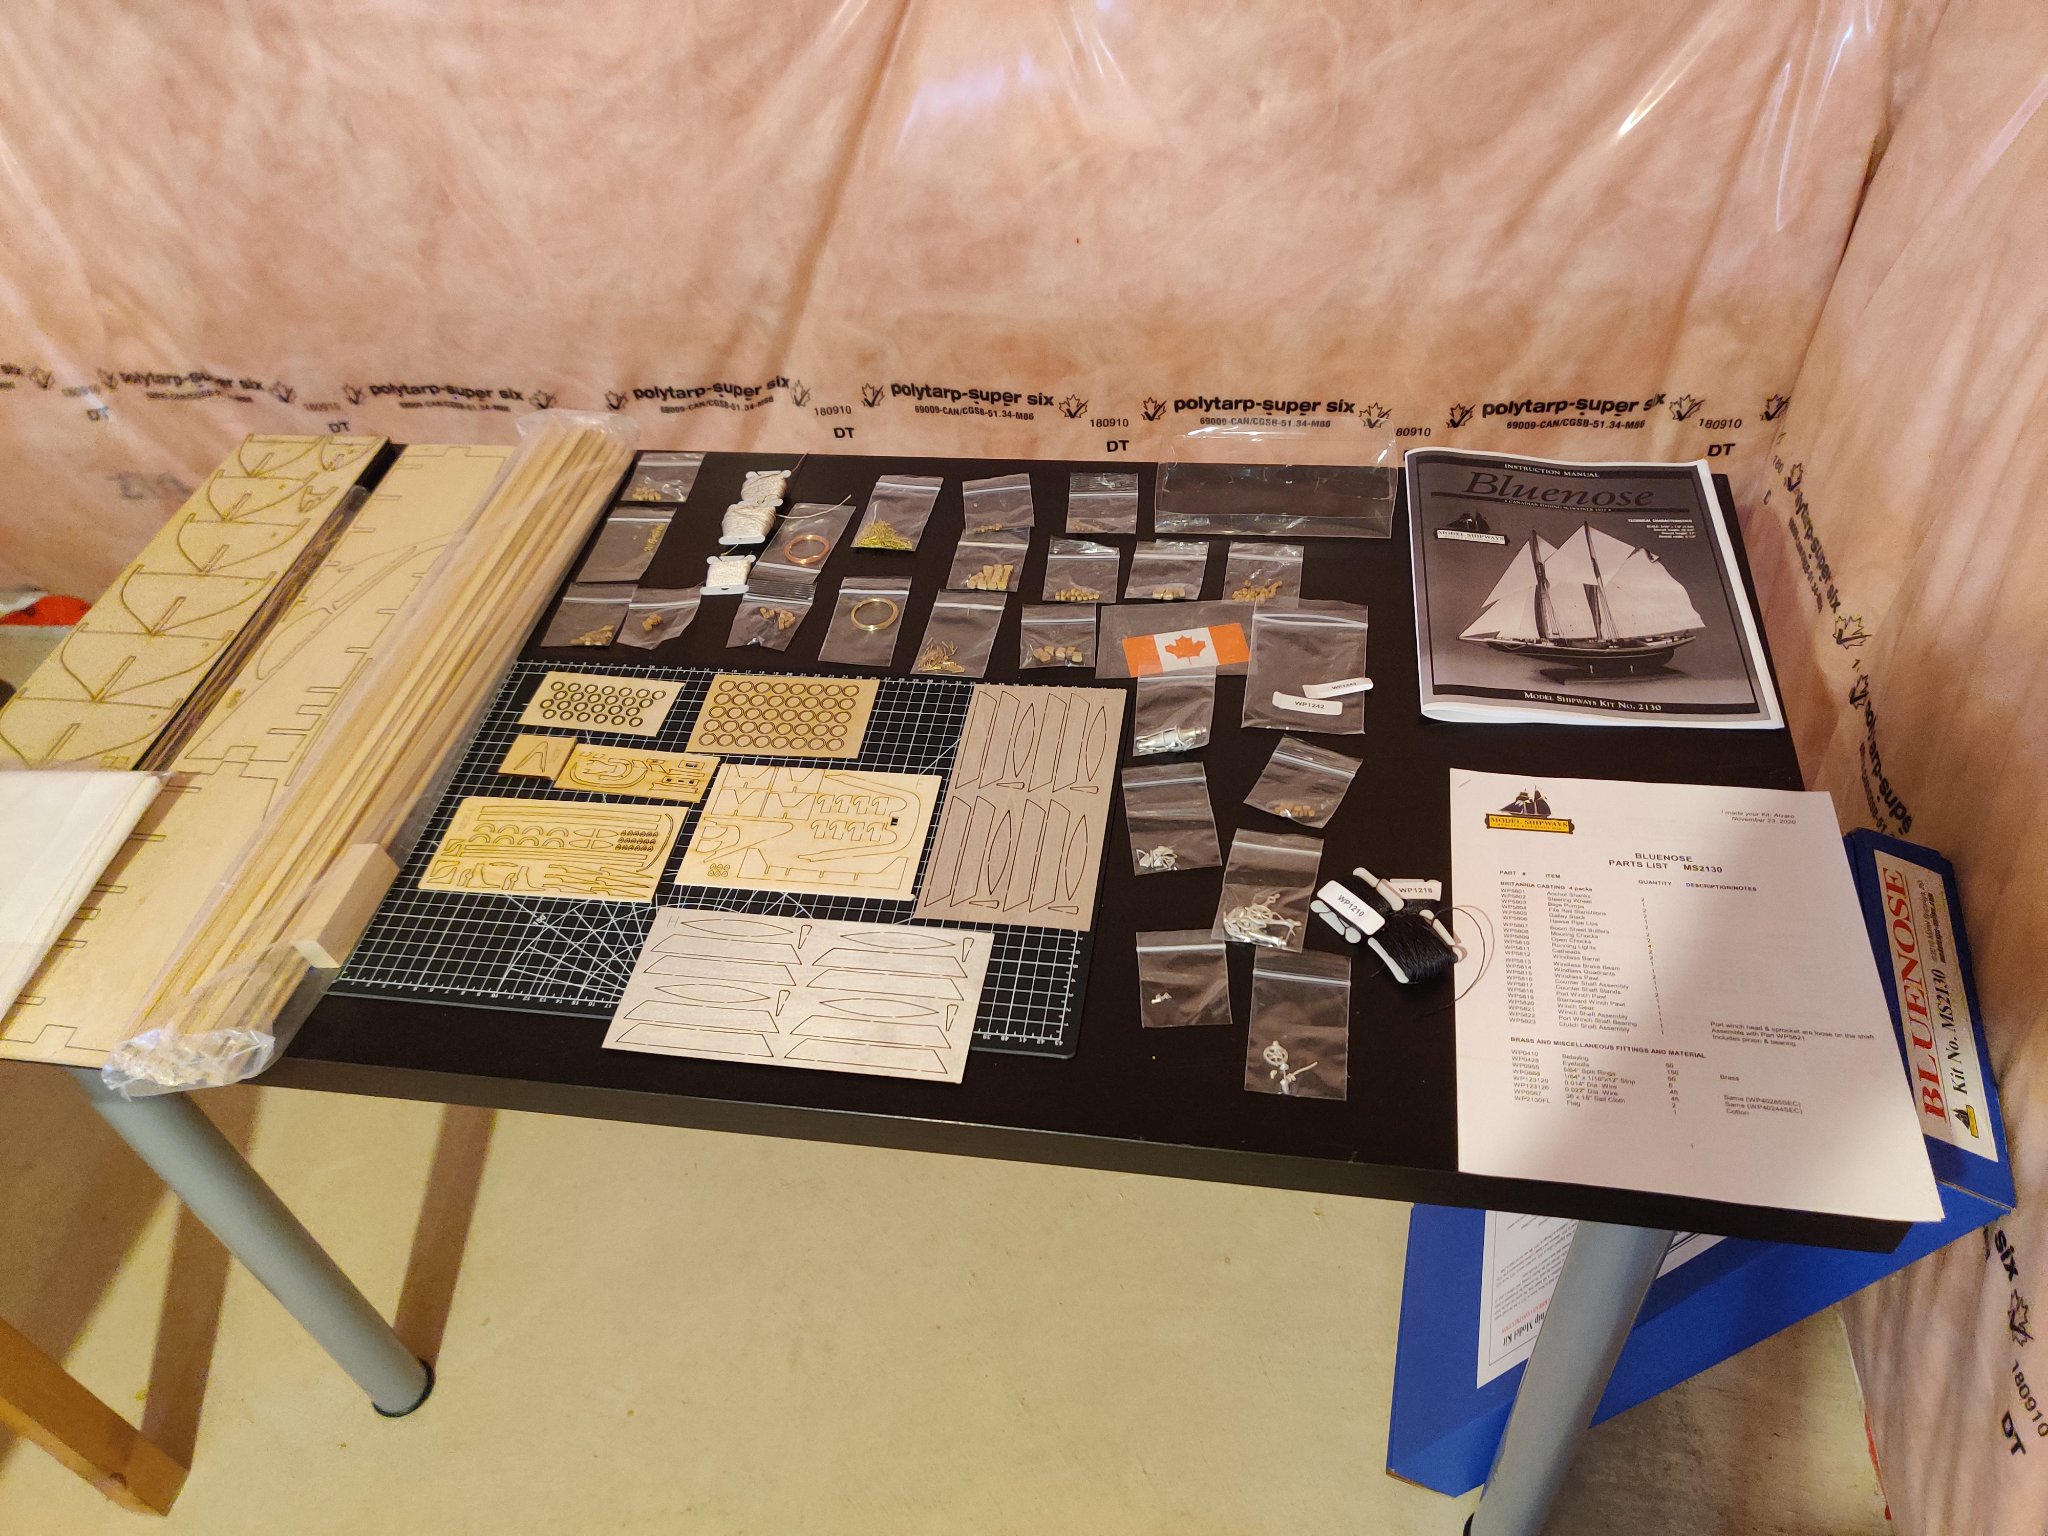
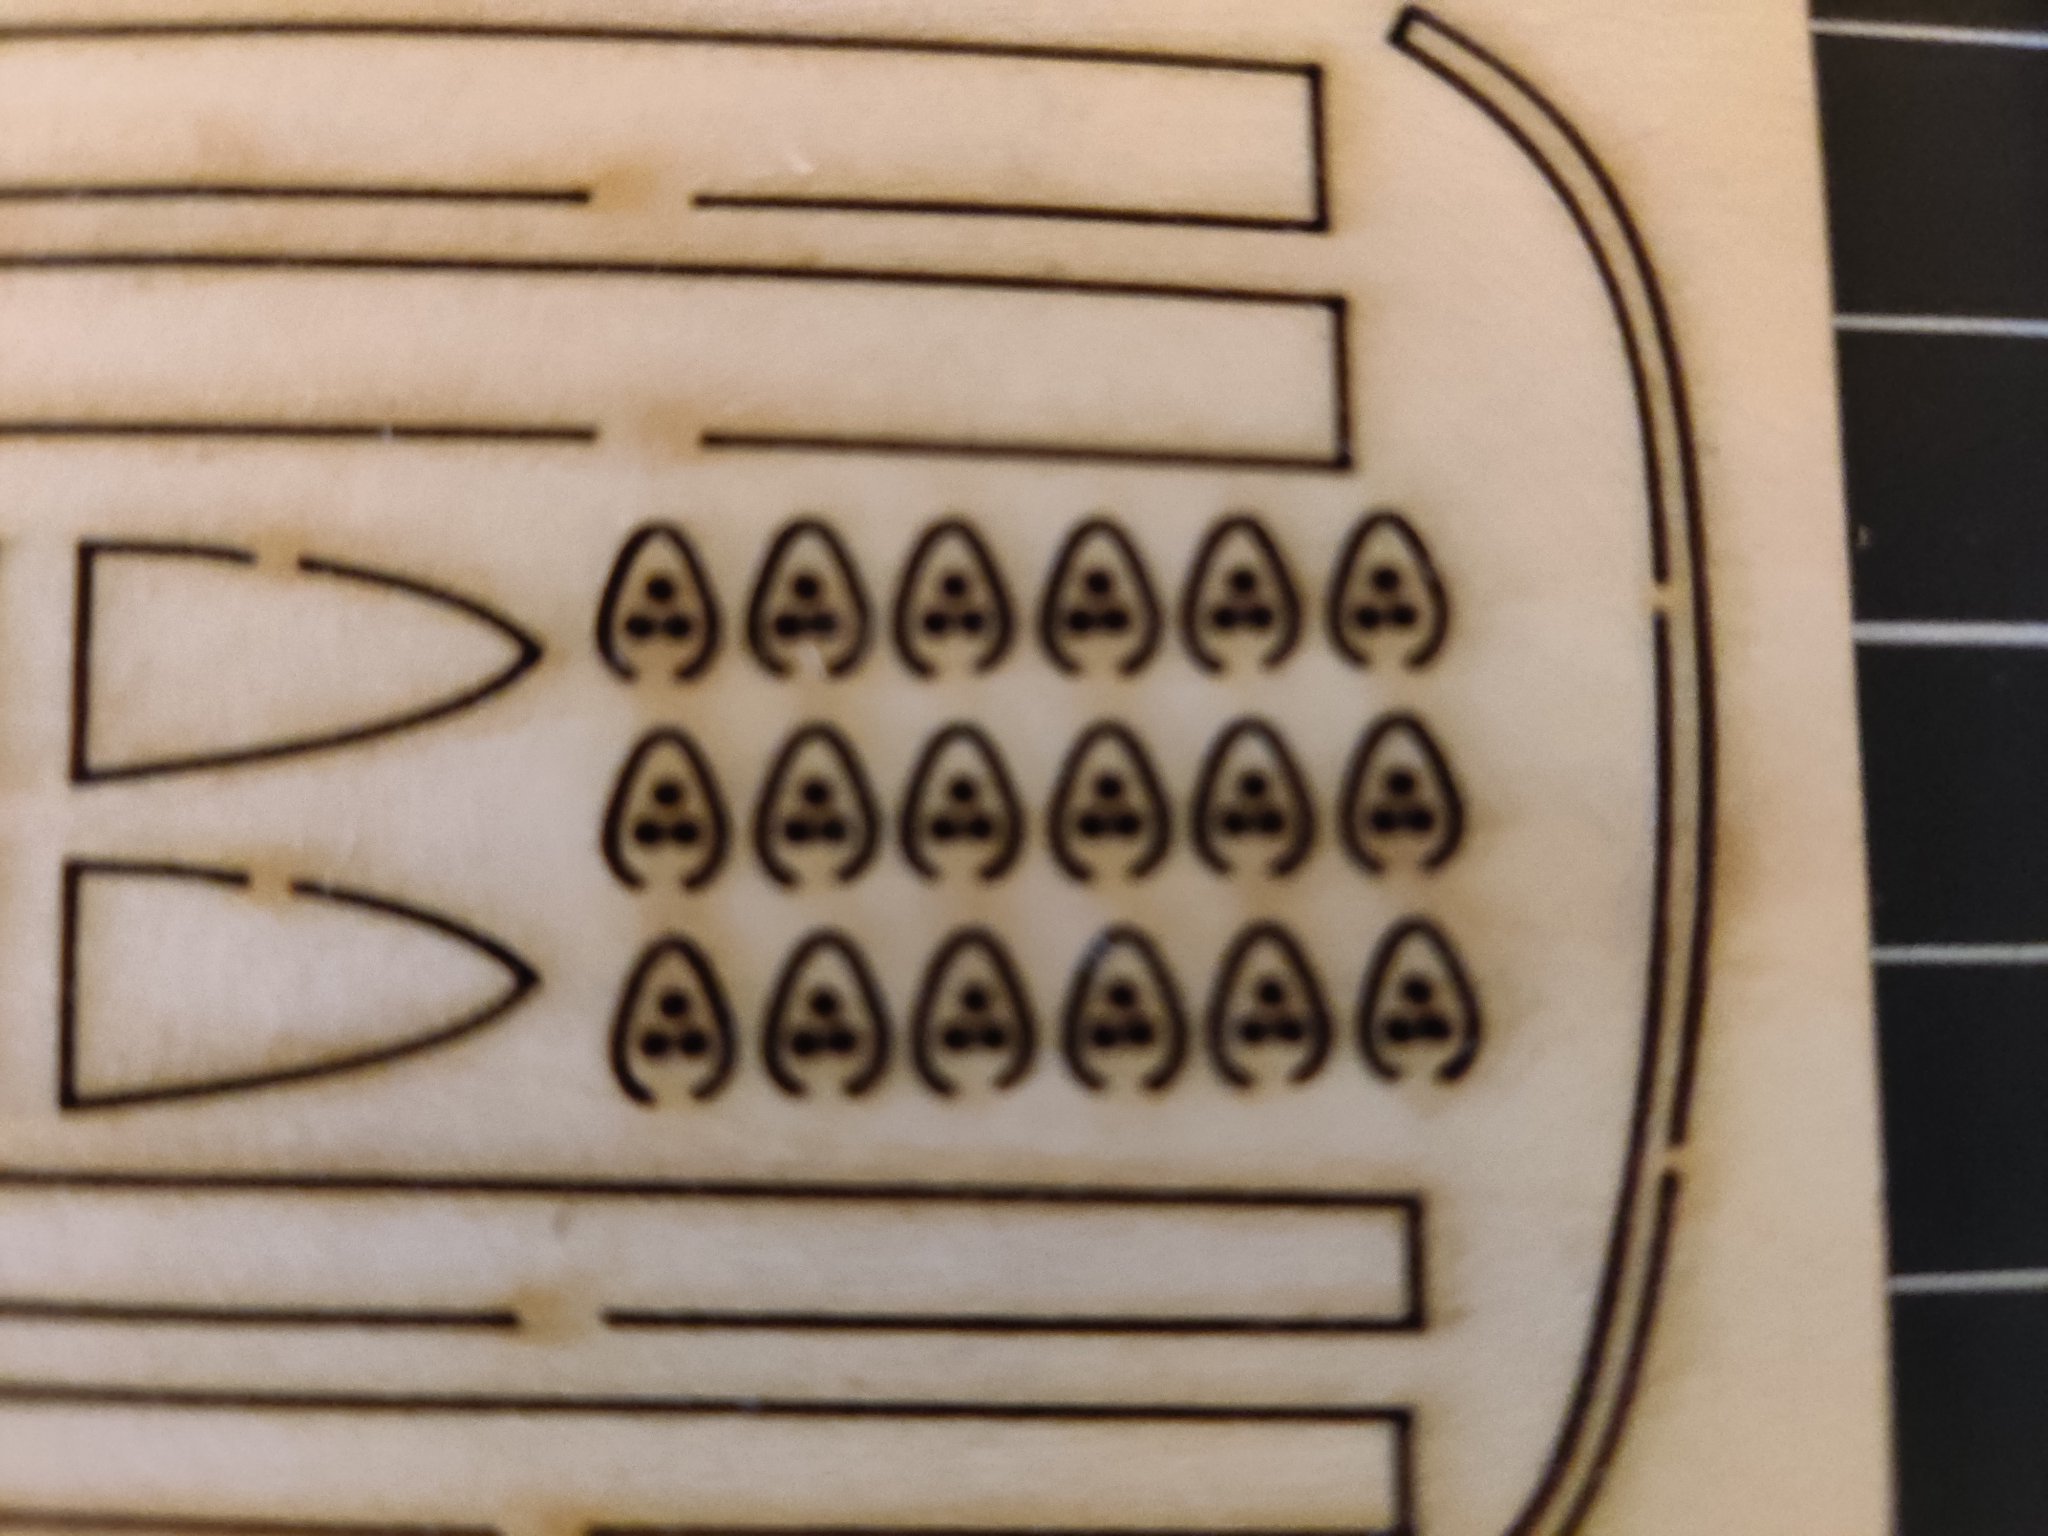
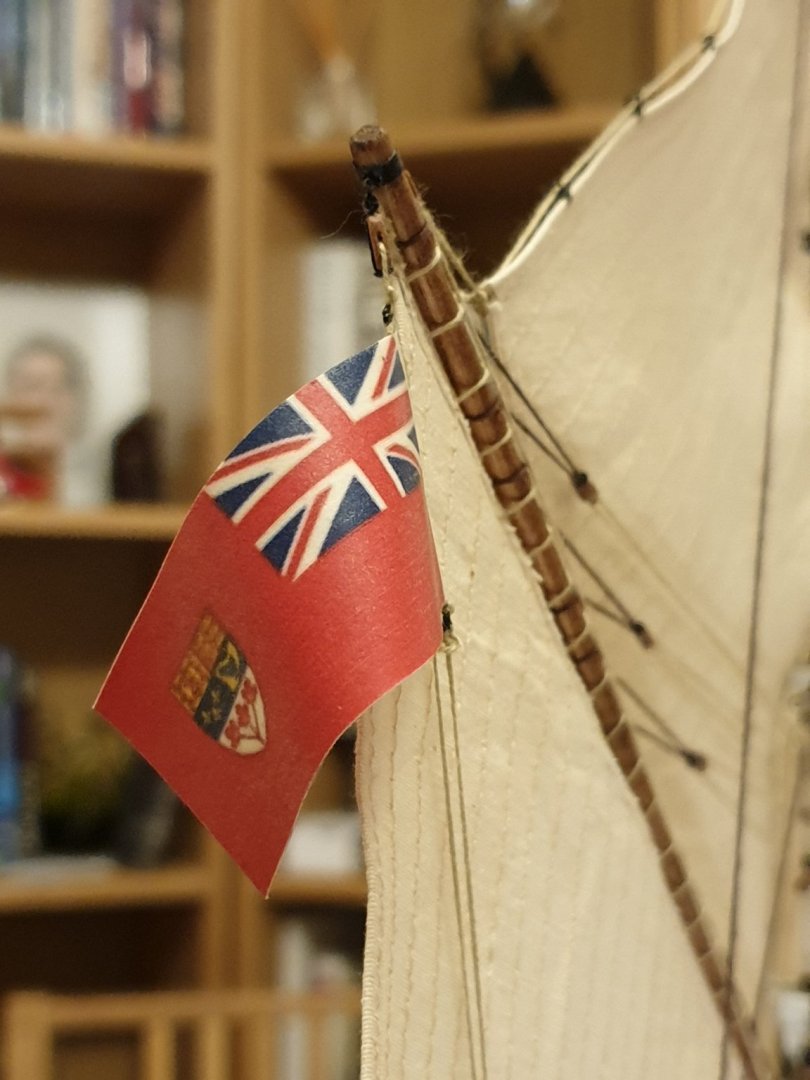
 I received my Bluenose kit today. This is my first ship build project. I spent lots of time looking at some of the other excellent build logs on here before settling on the Bluenose. The bluenose kit checked all the boxes for what I was looking for in my first model. I was looking for something with a Canadian connection (nothing more iconic then the Bluenose). I also wanted something that wasn't overly complicated and had lots of resources to help me through it. So I settled on the Bluenose. Today I spent some time inventorying the contents of the kit and reading over the instructions/plans. With only a couple exceptions I was impressed with the quality of all the parts. I do seem to be missing a few split rings as well, so I'll see if I can get a few more of those. I was fully aware that this kit came with the Maple Leaf Canadian flag but, as many other builders have pointed out, the Bluenose would have never sailed with the Maple Leaf as this didn't become the National Flag until about 20 years after she sank. So I'll be purchasing a Canadian Blue Ensign which is what would have flown on ships during this period. I'm also not completely sold on the laser cut deadeyes, I may end up replacing these with walnut deadeyes. It seems strange that they included laser cut oval deadeyes, but walnut circular deadeyes. Overall very happy with the quality of the kit. Looking forward to getting started!
- 2 replies
-
- 1
-

-
- first build
- bluenose
- (and 1 more)
-
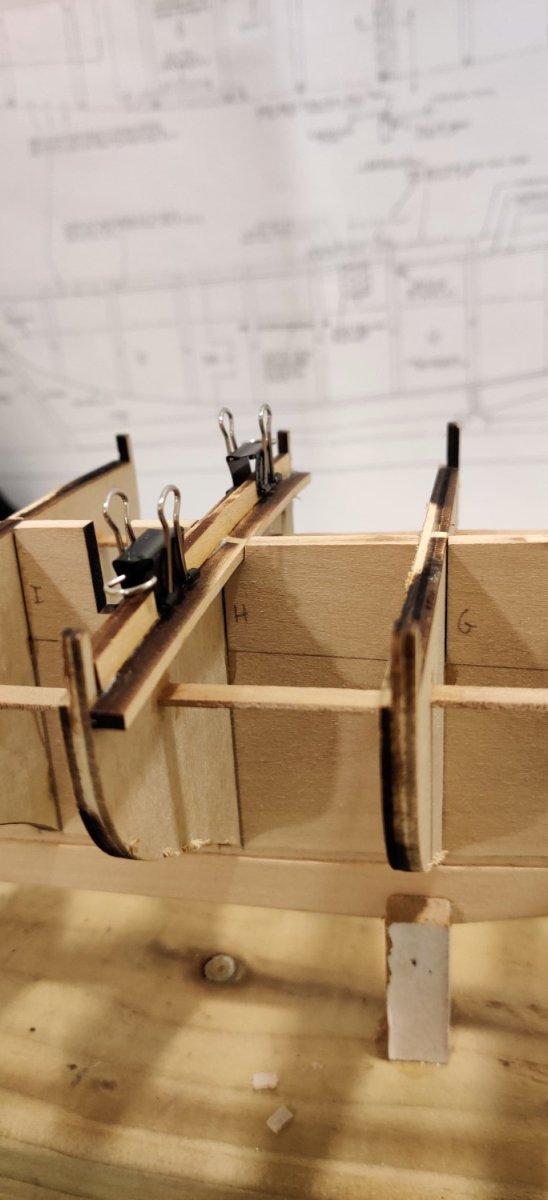
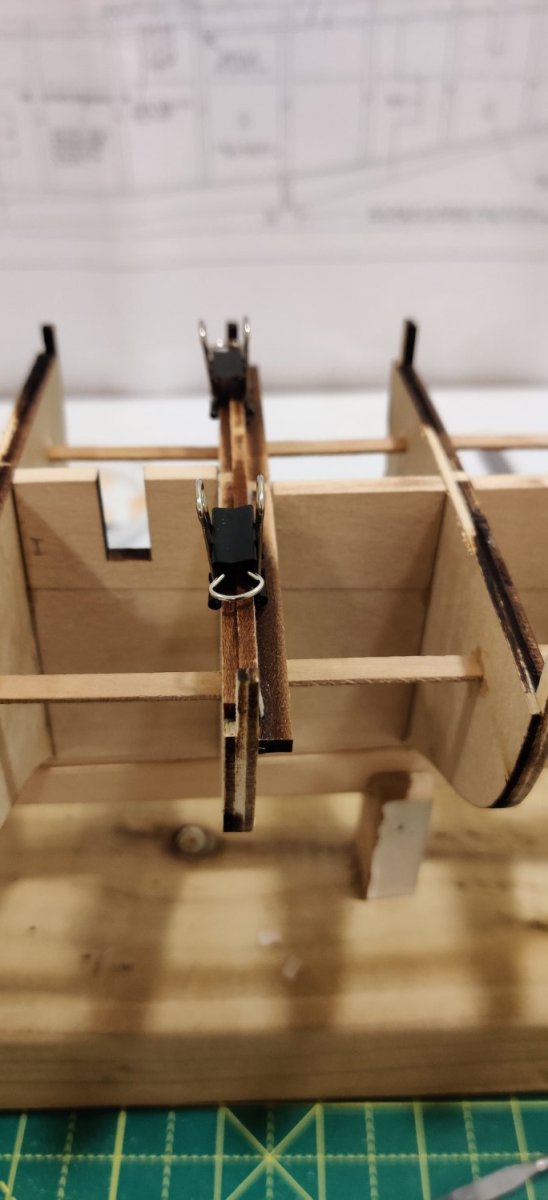
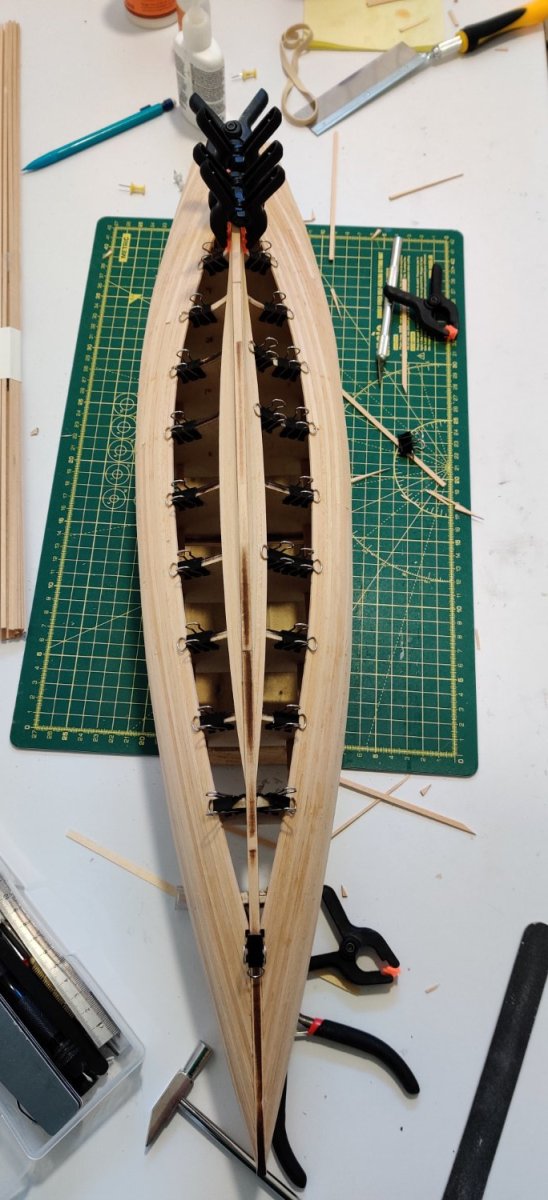
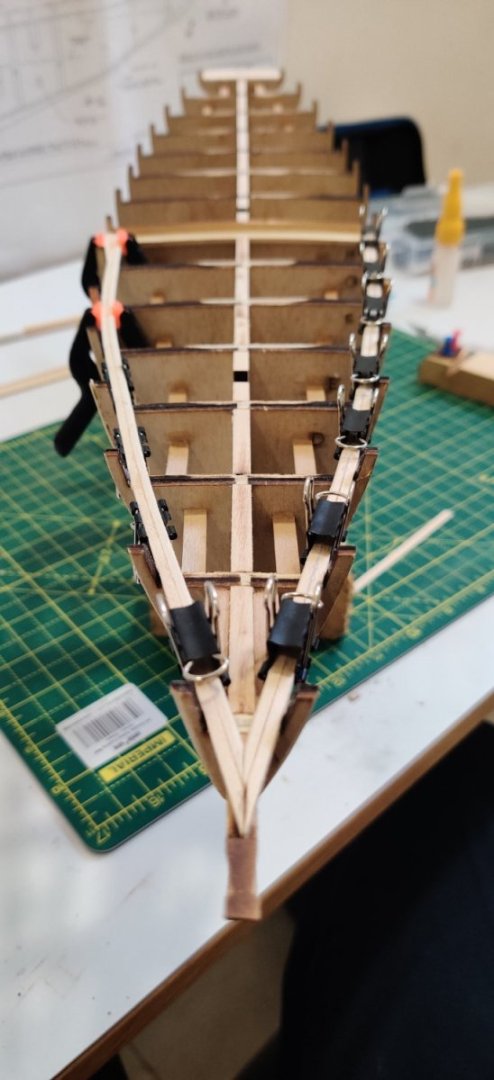
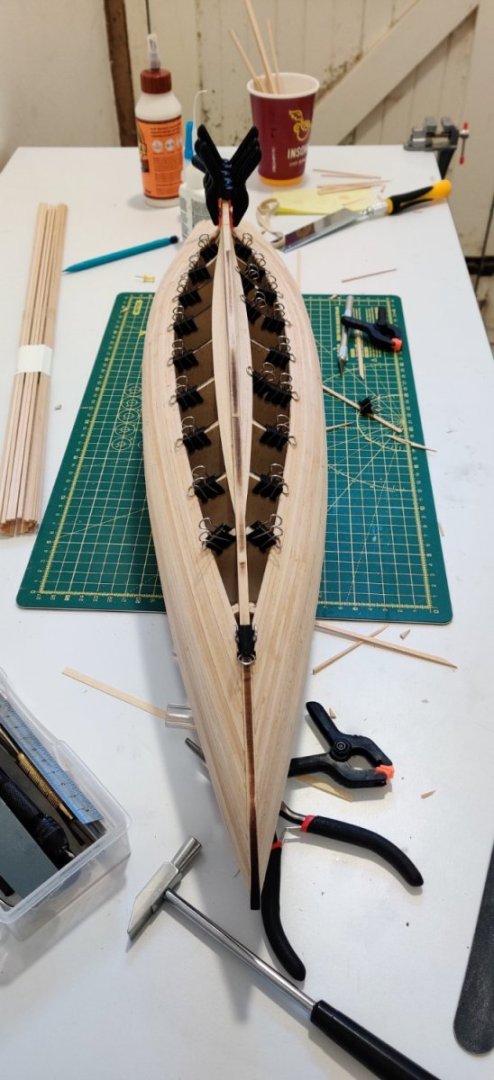
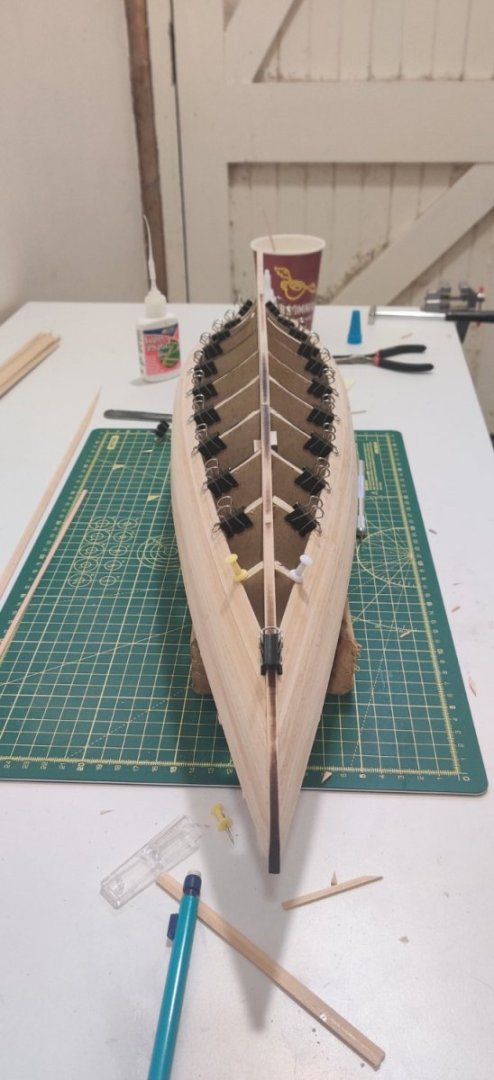
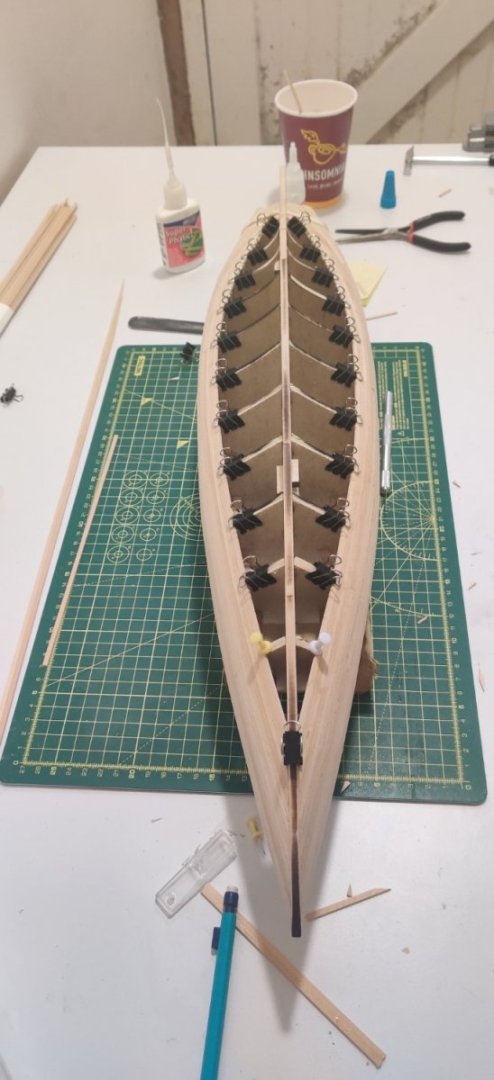
 I hope I do this correctly.... Have been reading many of the logs concerning the bluenose,and have started making contact with some builders. A great group of people who are so willing , and able, to help. A little background. Actually built a tug boat , POB, back in the 70's and quite liked it. No internet back then so just jumped in feet first and enjoyed it. Then came 3 kids , marathon running, racquetball , 4 hockey leagues for me, and 2 for the boys, work, and rebuilding houses....fairly serious rebuilds where i did everything from electrical,plumbing, gas,tile, framing, roofing...you get the idea. I'm hoping all this experience pays off here. I'm starting this new adventure with a bit of a different challenge. I live in a condo , and "she who must be obeyed" ( kudos to Rumpole of the Bailey), won't brook dust, noise, or a mess....so my plan.... my Dremel drill press and scroll saw Thanks to Kijiji and Amazon) will be used in my storage locker...pictures soon to explain how this will work as I know it sounds weird. I'm designing a rolling shipyard that will house a keel holder jig I saw by Doc Blake (just brilliant) and allow me to roll it into the elevator, and up 25 floors to the inner sanctum for the dry and quiet work. Once up there I can take the jig out of the chest and work on the dining room table. I'm thinking of building some shelving in there to store tool s planks etc,hand my cutting mat etc When I have cutting,shaping etc to do, I will have another mini-shipyard in the storage locker for that. I once rebuilt a Volvo engine on a 2 x 4 bench in the corner of my unheated garage in a Canadian winter ....tools tend to stick to your skin, so cut a hole in the roof and installed a little kerosene drip stove,,what the heck was I thinking? (Beer was cold though )...so I figure I can overcome this lack of space conunfrum once again. Have ordered a plethora of tools and material as well as the MSW kit and hope to be ready when it all arrives. Yikes, sorry, didn't mean to write a book. I'll try to post weekly if there's anything I think may be of interest, or I'm stumped....right now I have sore finger tips from making a ton of those modified little bull dog clips to hold the planks to the bulkheads. Oh , and Happy Thanksgiving to those below the 49th. Cheer Ron B
 -
 Greetings MSW users. While researching my project I've found MSW to be a wonderful resource. I especially appreciate the friendly and encouraging atmosphere. No build is too small or question too dumb. All are treated respectfully. So unlike much of our world today. I began modeling while in elementary school and continued through secondary school. Mostly cars and airplanes. Simple plastic models and a few wooden airplanes. The hobby taught me about tools, patience and an appreciation for detail. These skills translated well into my later career. I drifted away from the hobby during college and many years of working. After retirement I began to think about building wooden ship models. Something I had always wanted to do. For my first project I bought a solid hull Cutty Sark model by Scientific Models on Ebay. This 1:200 model was about the size of a plastic Cutty Sark I had built during secondary school. While it turned out OK for a first attempt, It was not large enough to do complete rigging. Only the standing rigging and sheets were practical at that scale. At least for my limited skills. Many fittings and details were only approximate representations. The hull had been started and there were a few parts missing when I obtained the kit. Why Bluenose? I was casting about for an interesting but not too complicated POB kit to challenge me and build skills without being overwhelmed to the point of giving up. My wife was pushing for a fairly large sloop rigged boat to become part of our decor. I picked Bluenose for the beautiful and sensuous lines. It also had interesting fittings and rigging, but was not so complicated as a man-of-war or square rigged schooner. The history of the ship was intriguing. Many research materials and build logs are available. Plus my wife found it acceptable. I studied build logs and researched model kits. The three most popular Bluenose kits were Artisana Latina, Billings Boats and Model Shipways. Artisana appears to be the least accurate. Photos and comments in general were not very favorable. The Billings is very popular and it has some construction advantages. However the build logs complain about inaccuracies. Model Shipways kit appeared the most accurate. I was also impressed they allowed for mistakes by including extra wood. I did find at least one inaccuracy in the plans as will be noted later. None had highly rated instructions or plans. At this skill level that shouldn't be a problem though.
-
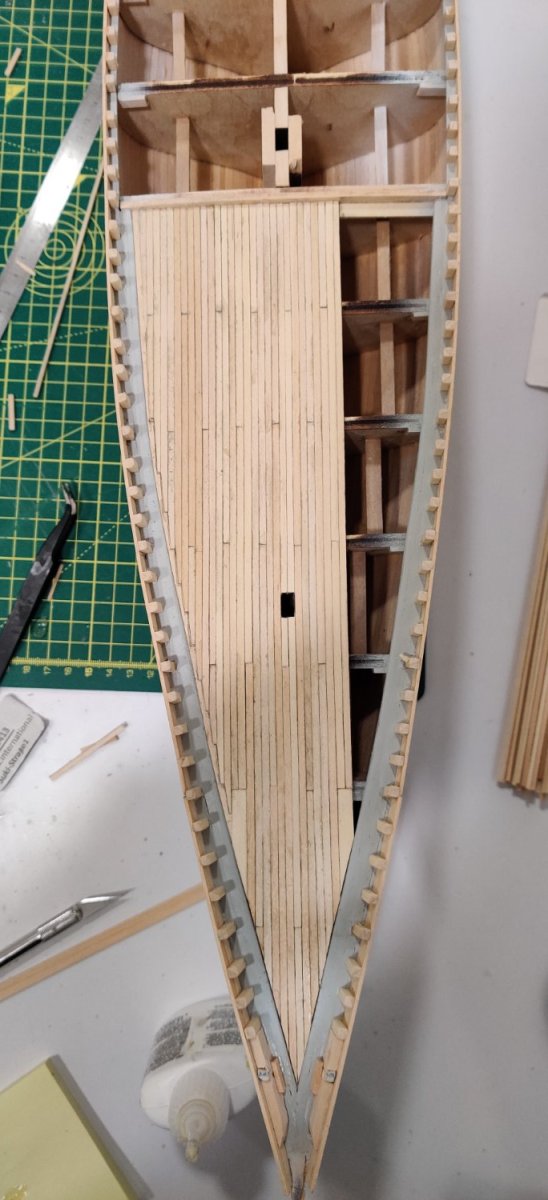
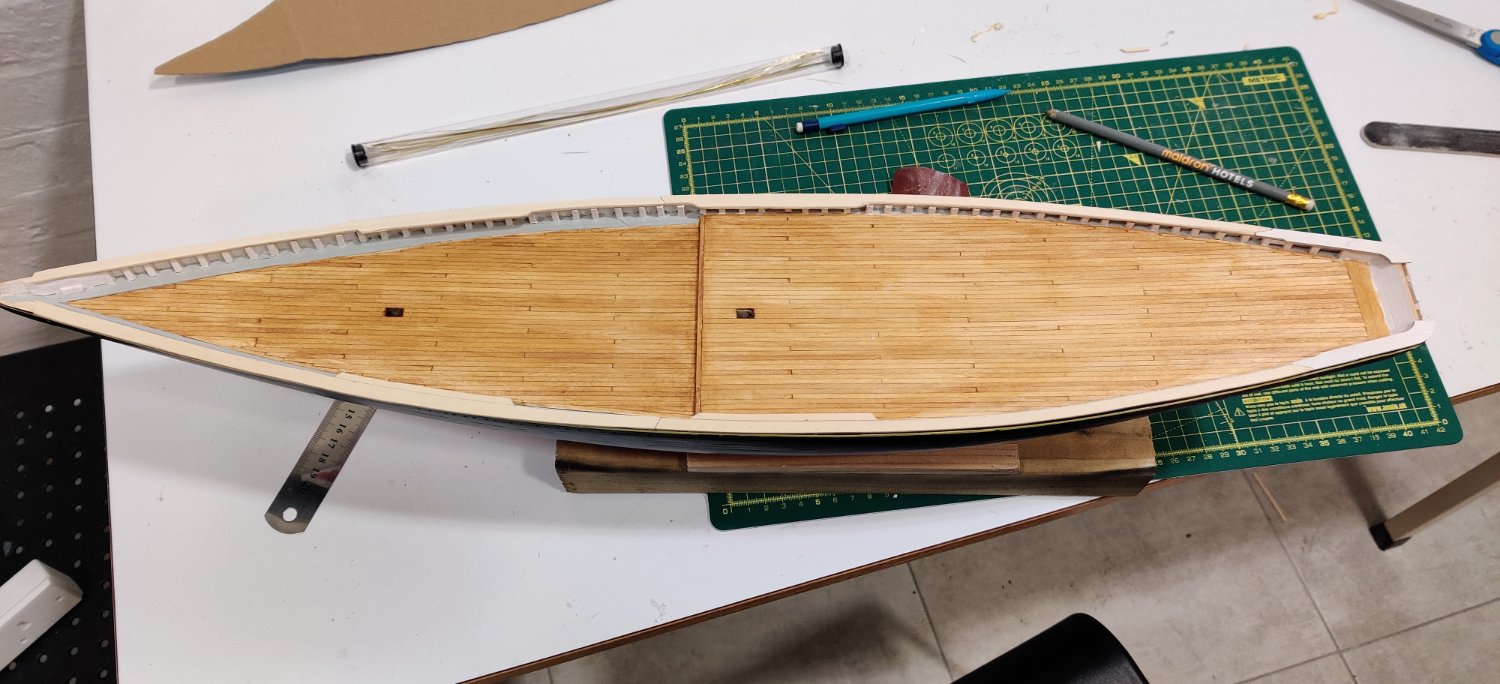
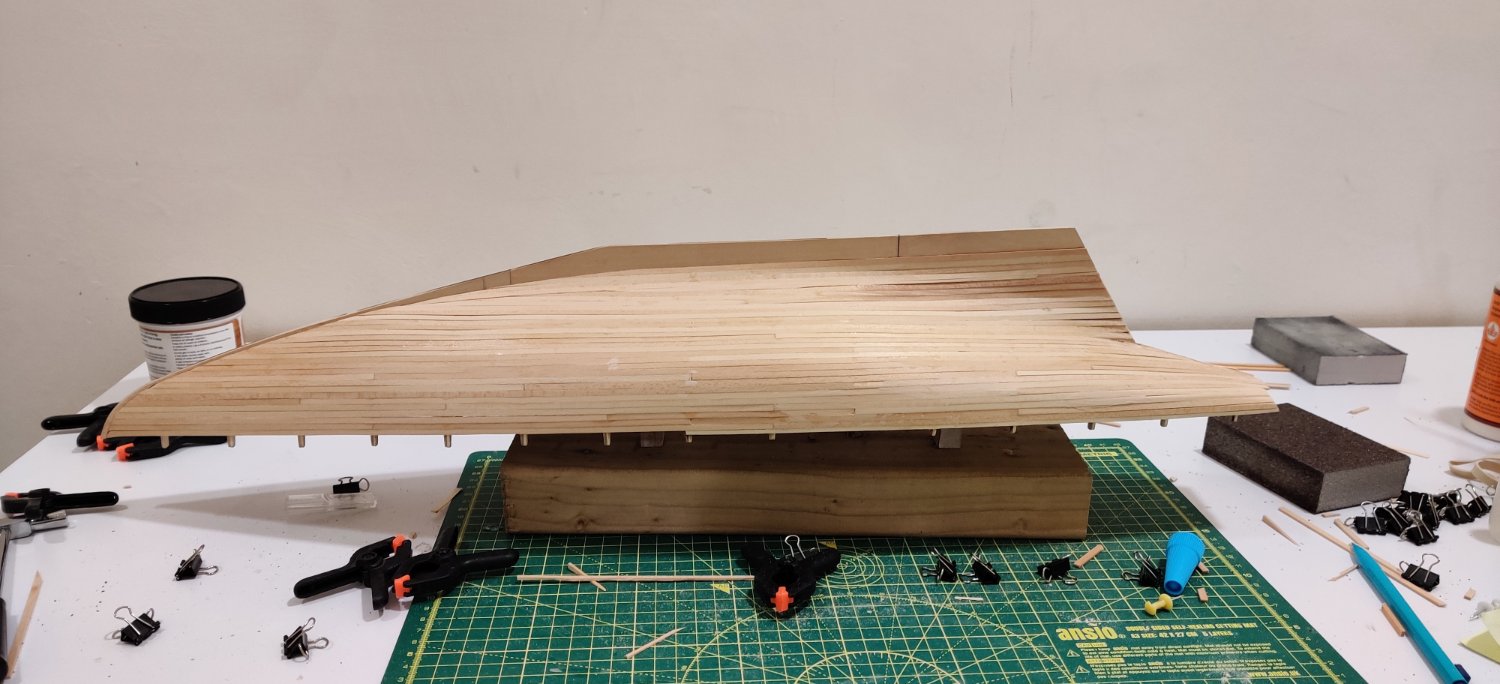
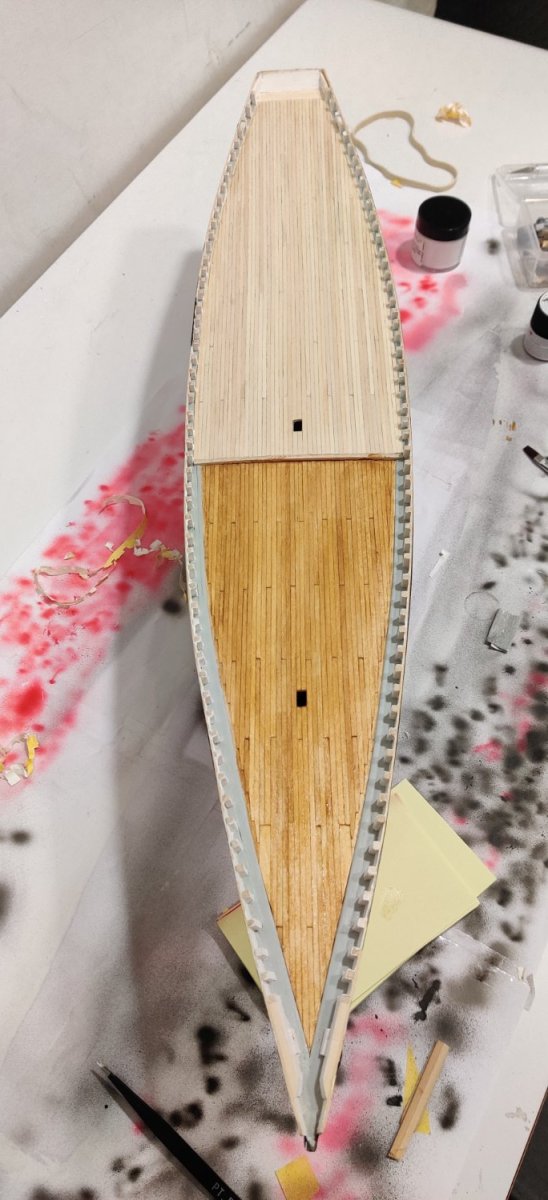
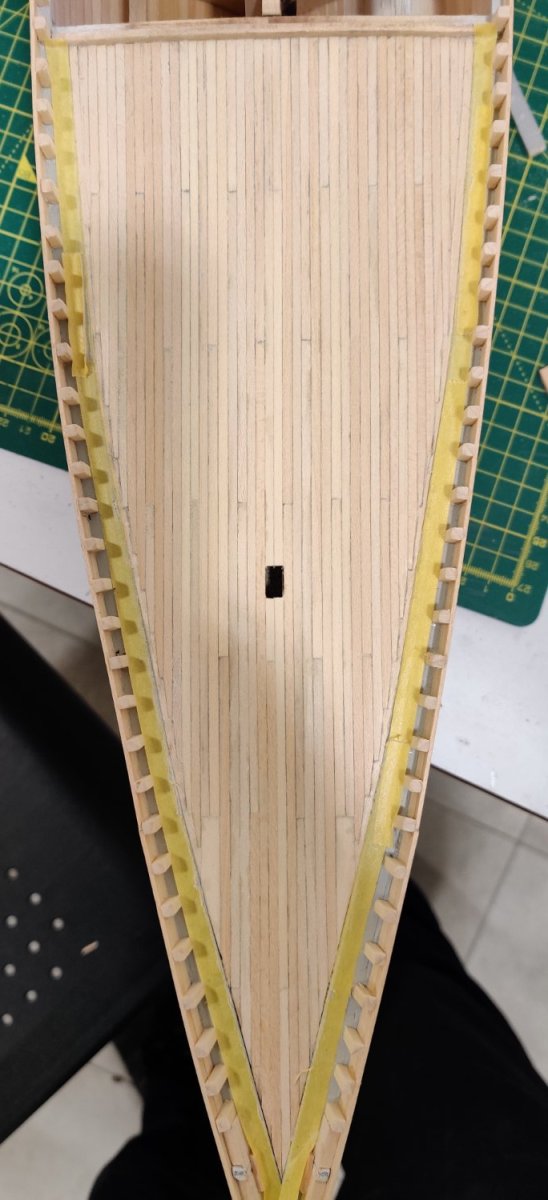
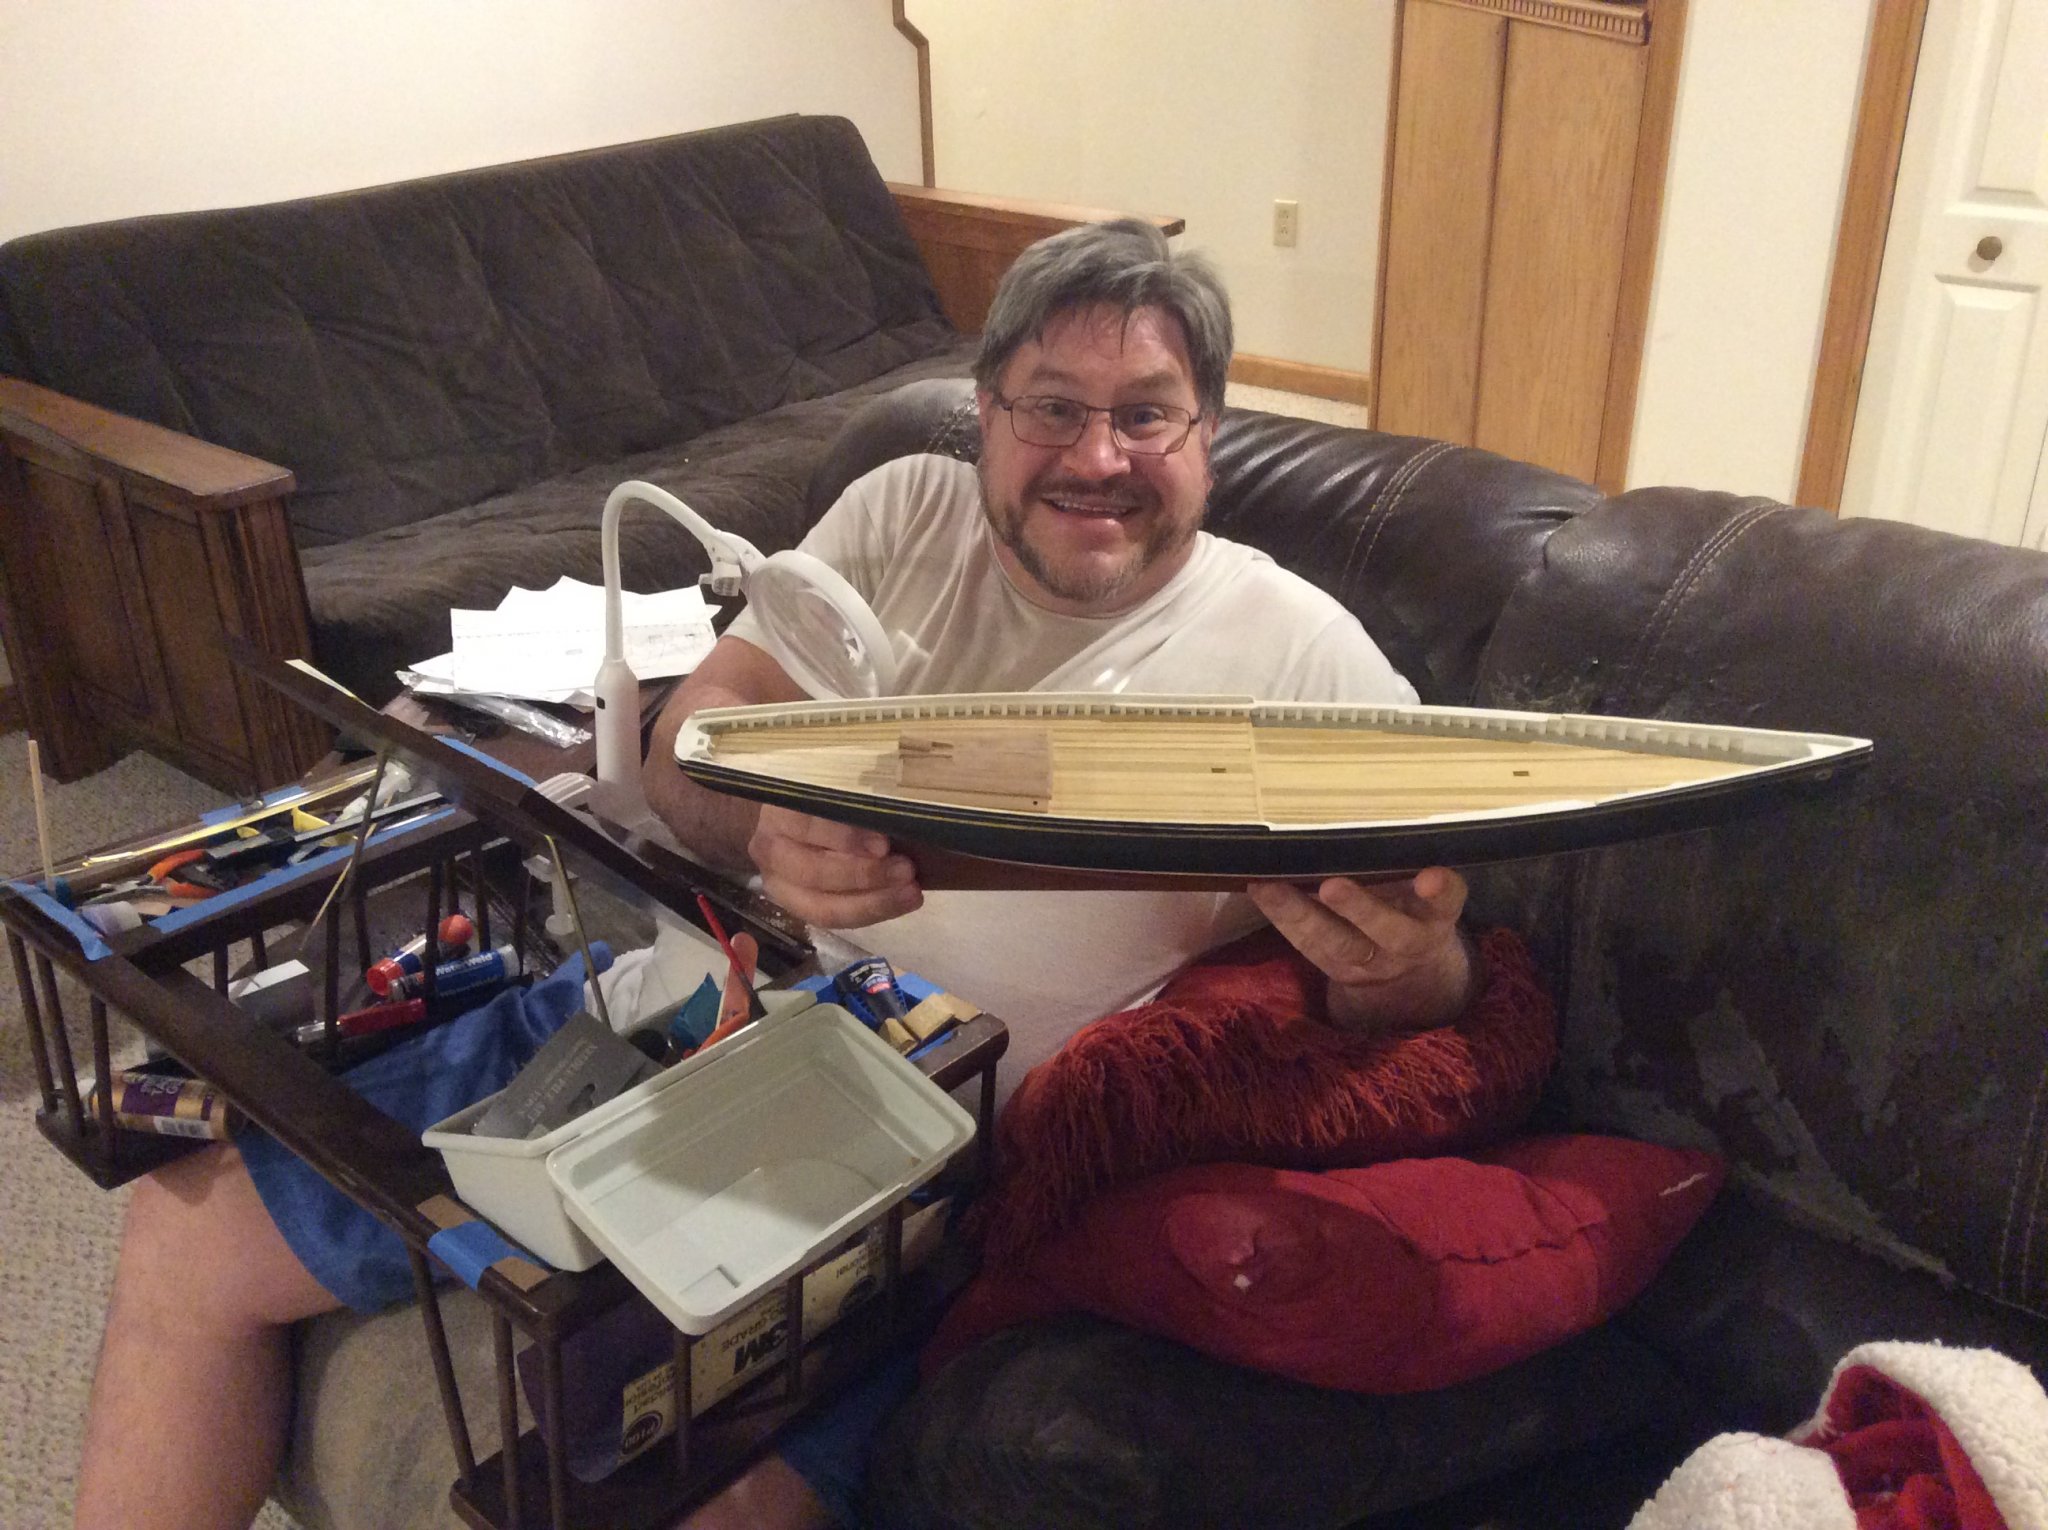
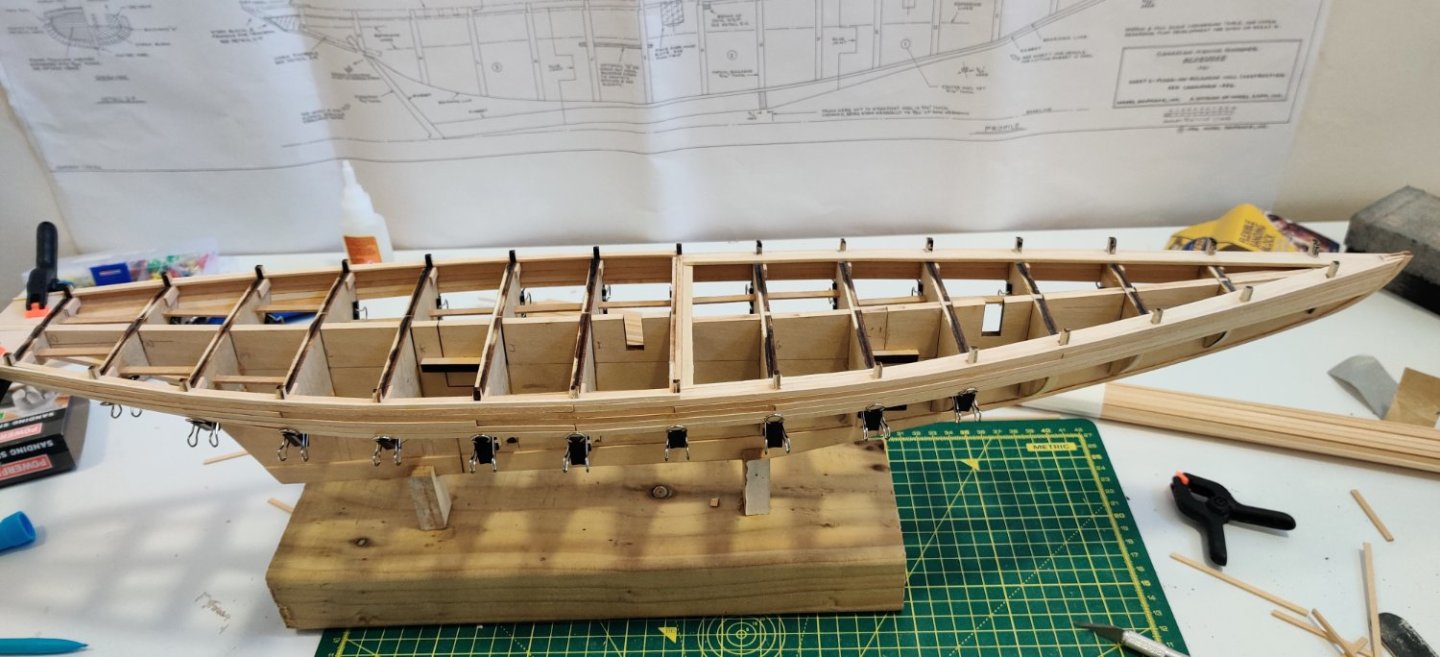
 After some prompting from Dr. Per (Nirvana) and a few others on the Forum, I decided I should start a build log. I started my Bluenose kit on June 15th after a lengthy wait for it to be shipped due to the Covid19 pandemic. I built several Revell plastic models including the big Cutty Sark when I was in my teens. I also got the solid hull wooden model of the HMS Bounty up to the rigging stage before real life took over. I never did finish it. So, I recently retired and decided to pick back up on this ship building hobby again. I've really enjoyed working on the Bluenose I. After all these years, I really consider this my first wooden ship model build. I selected the Bluenose because it is not quite a beginners model and I like the sleek lines and all the sails! I decided not to purchase any practicums. I've read a lot of the build logs for Bluenose while I waited for my ship to arrive. I'm mainly using the procedures detailed on the web site of the "Suburban Ship Modeler". I only have a few pictures from my completion of the initial framing stage. There have been a few challenges. For example I broke off the aft piece at bulkhead "O". I know this is not uncommon based on other blogs. I was determined not to have this happen to me. Then I dropped something on the floor and caught the aft piece with the top of my head!! Stupid!! No permanent damage. Just followed the advice of the others before me on how to repair it. It took 20 days and 44 hours to complete the framing up to the installation of the Stern blocks. Here are a couple of pictures of the progress at that time, July 5th. In the process I am following, Suburban Ship Modeler said to begin planking the hull rather then turning the ship over to plank after working on the deck stuff. This made sense to me. I am currently 12 strakes away from completing the planking of the hull. I will provide the latest pictures in my next post. If anyone has advice regarding assigning Tags or other steps on the Forum, please let me know. Thanks, Ed
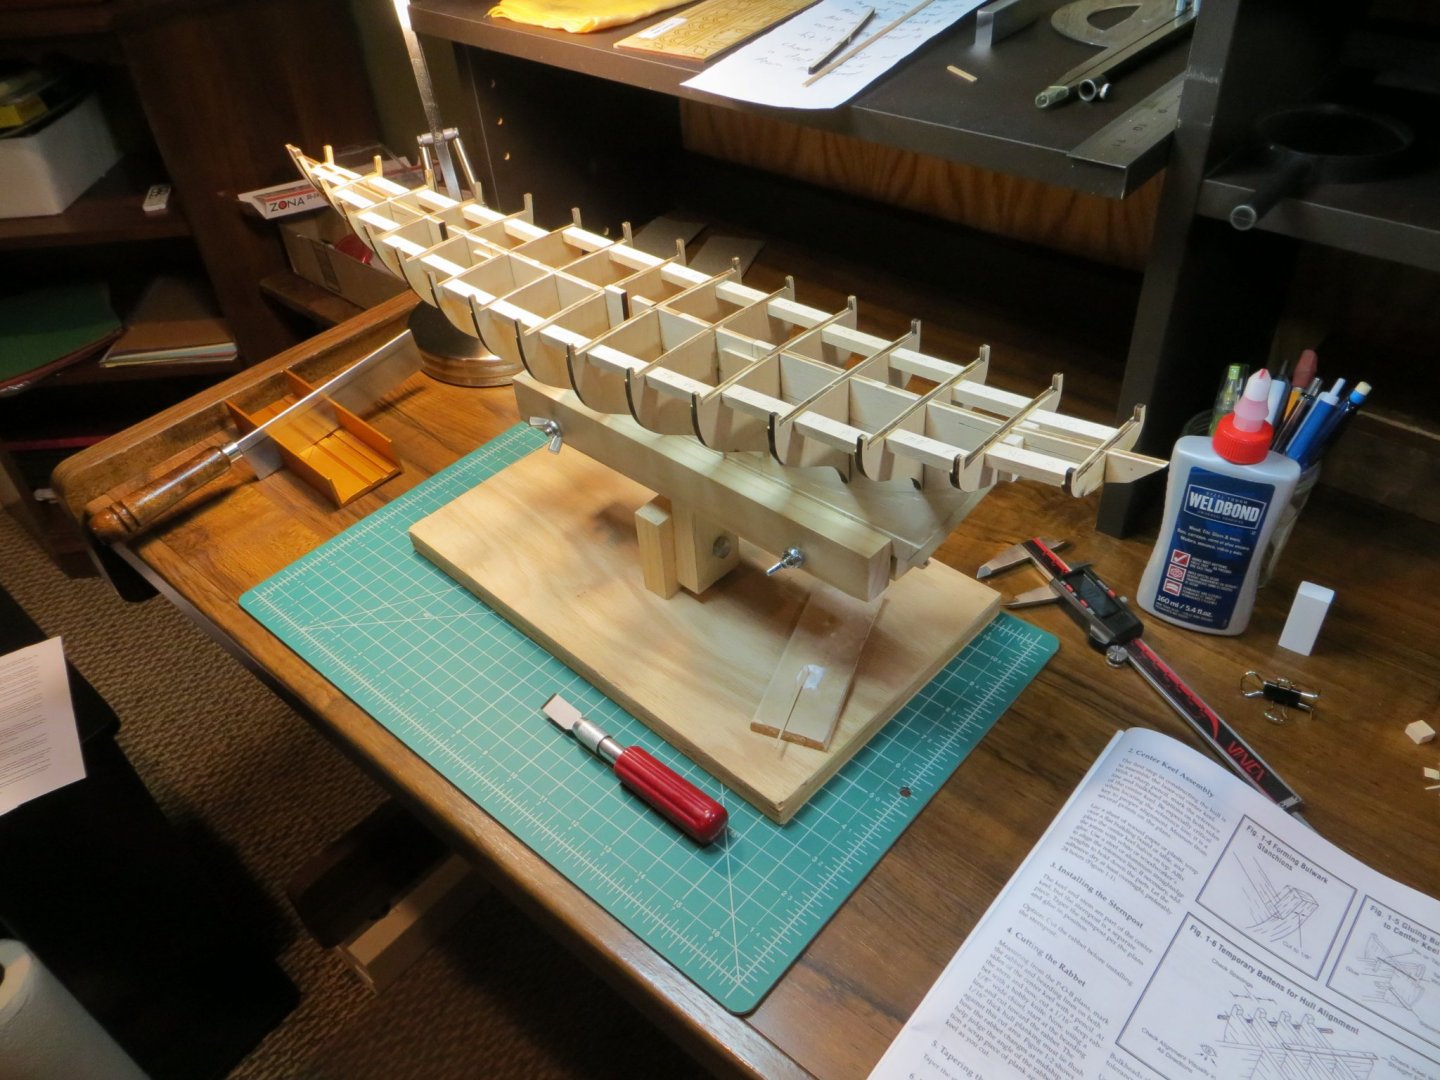
- 96 replies
-
- 5
-
-
- model shipways
- bluenose
- (and 1 more)
-
 Click on the tags in the title above (shown in black) for an instant list of all the build logs for that kit subject.
 -
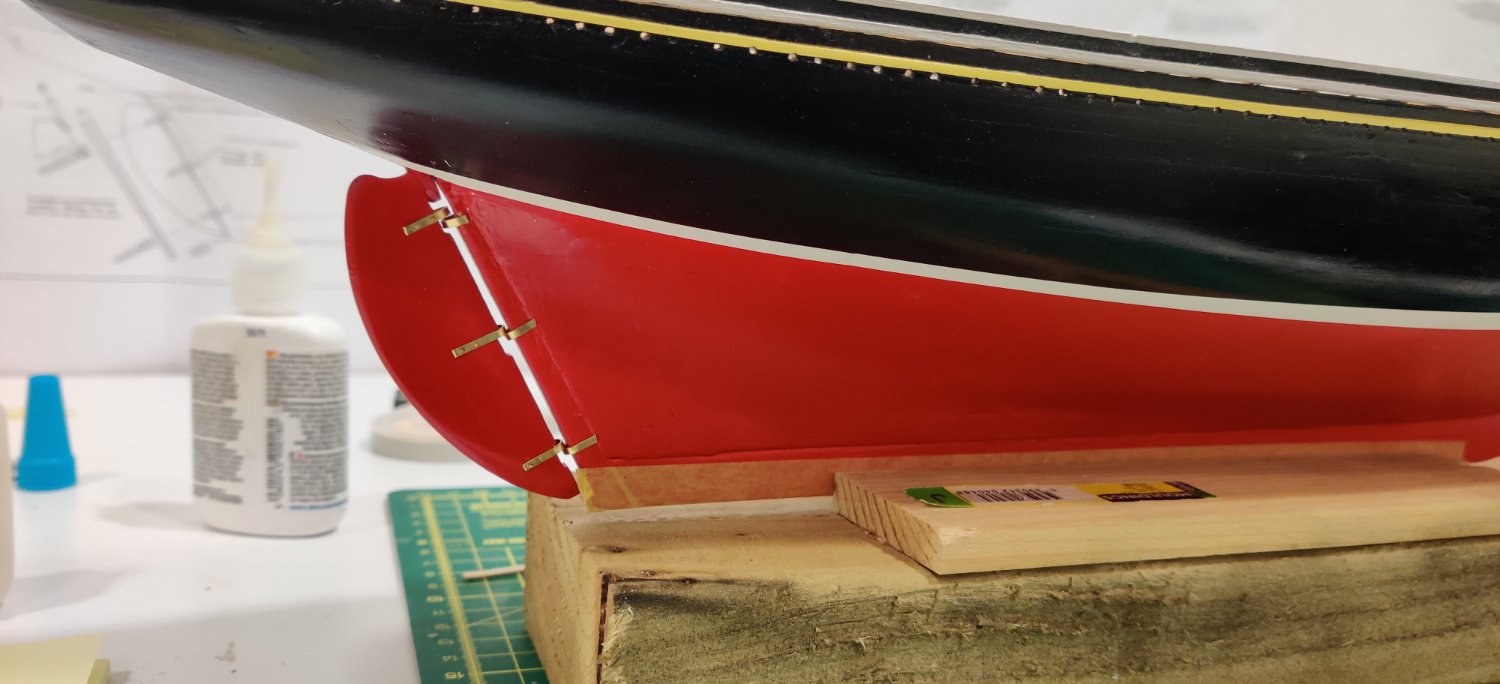
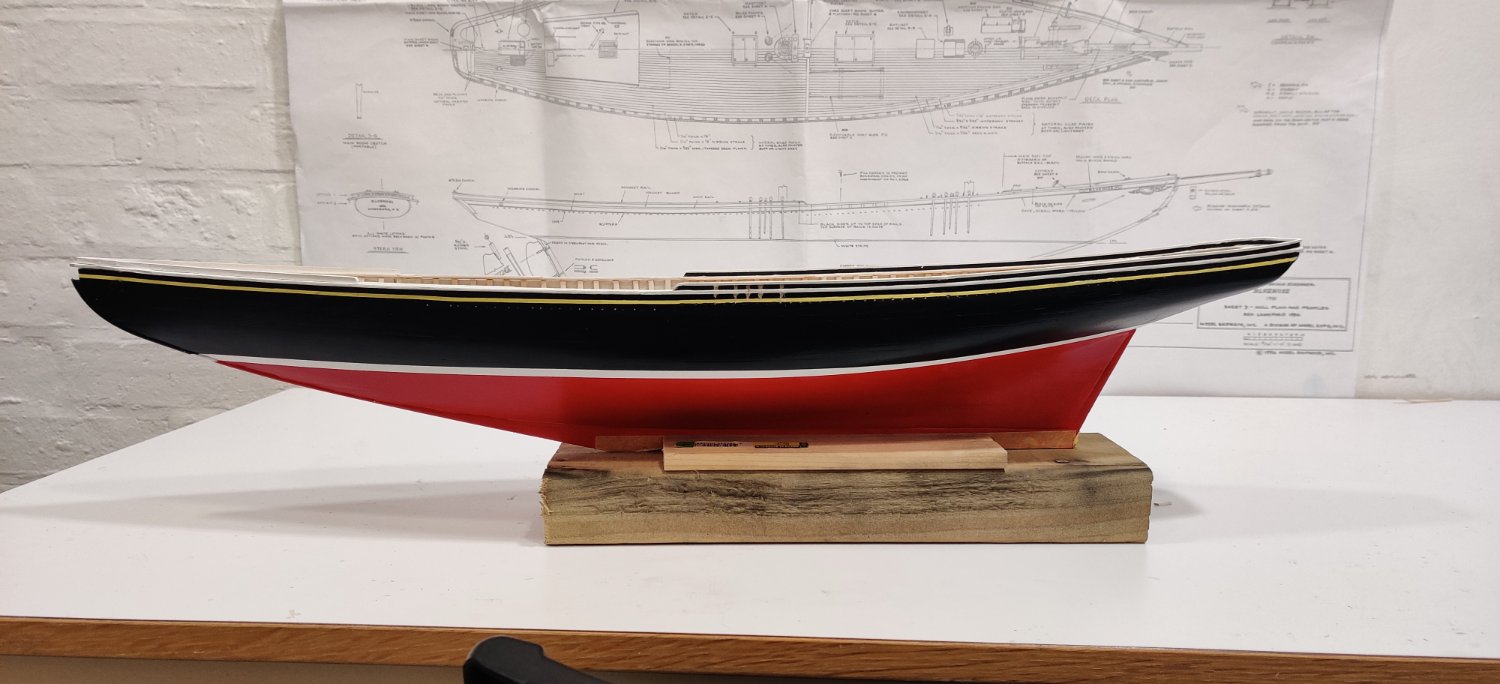
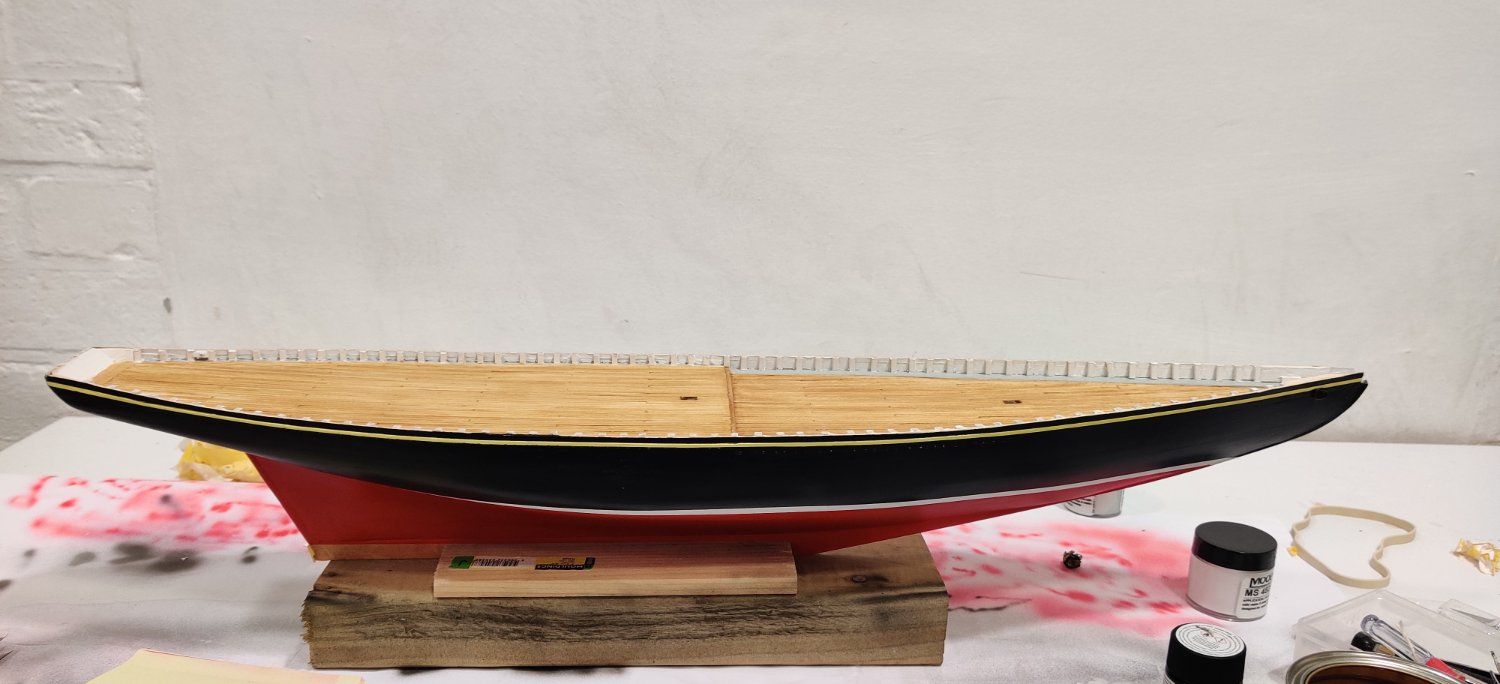
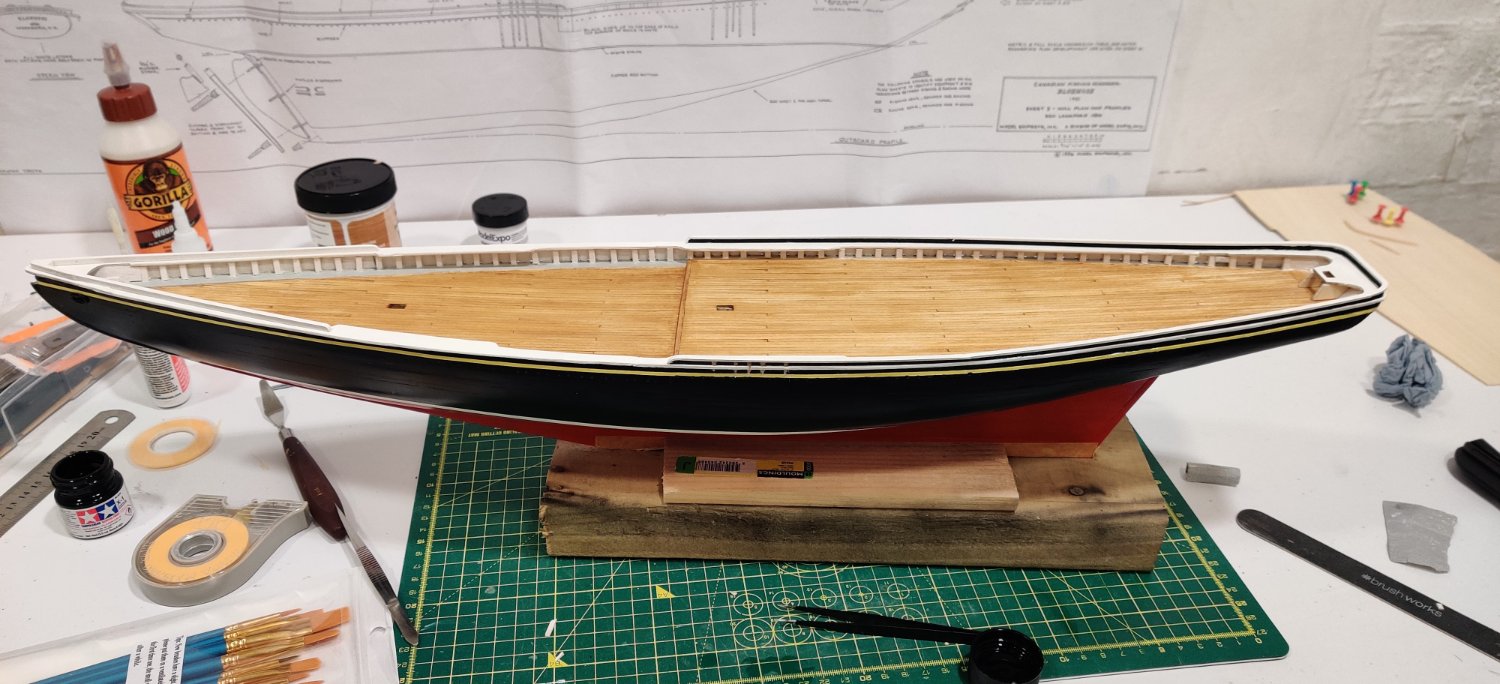
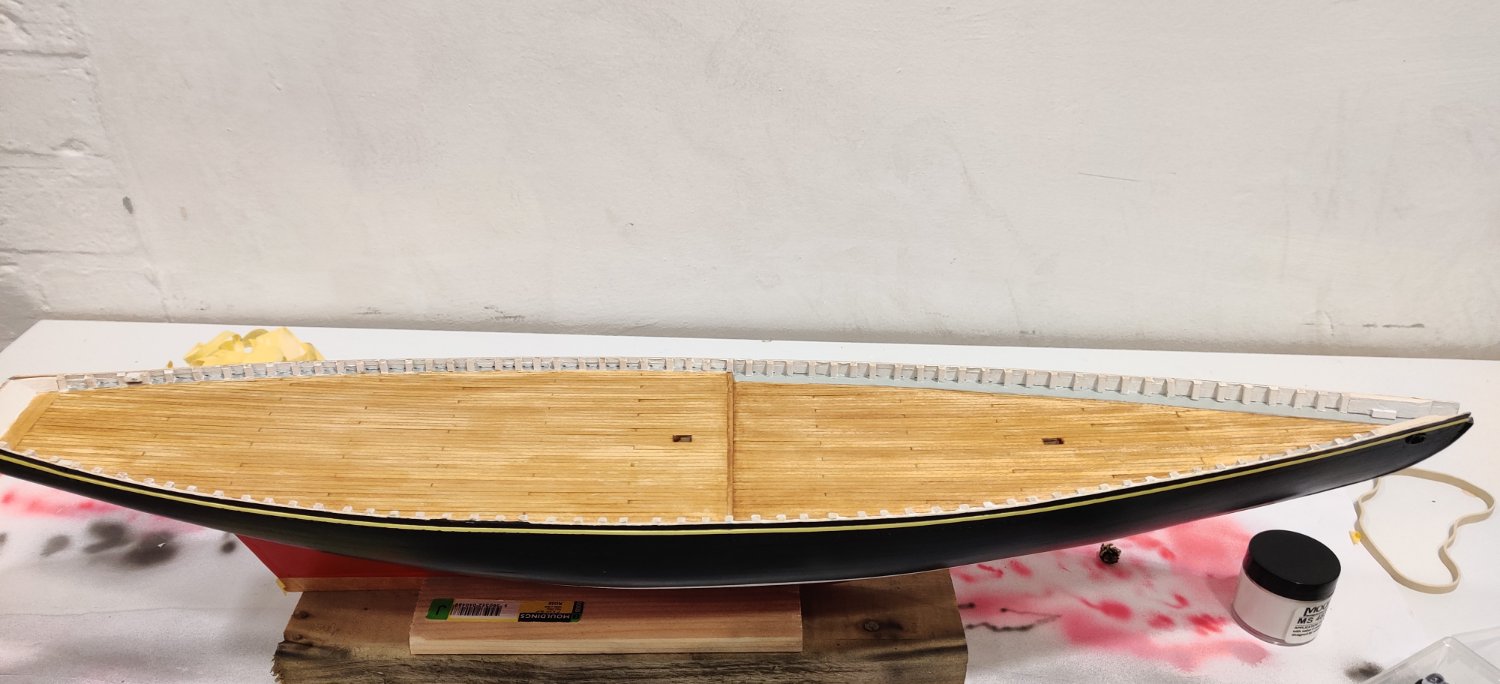
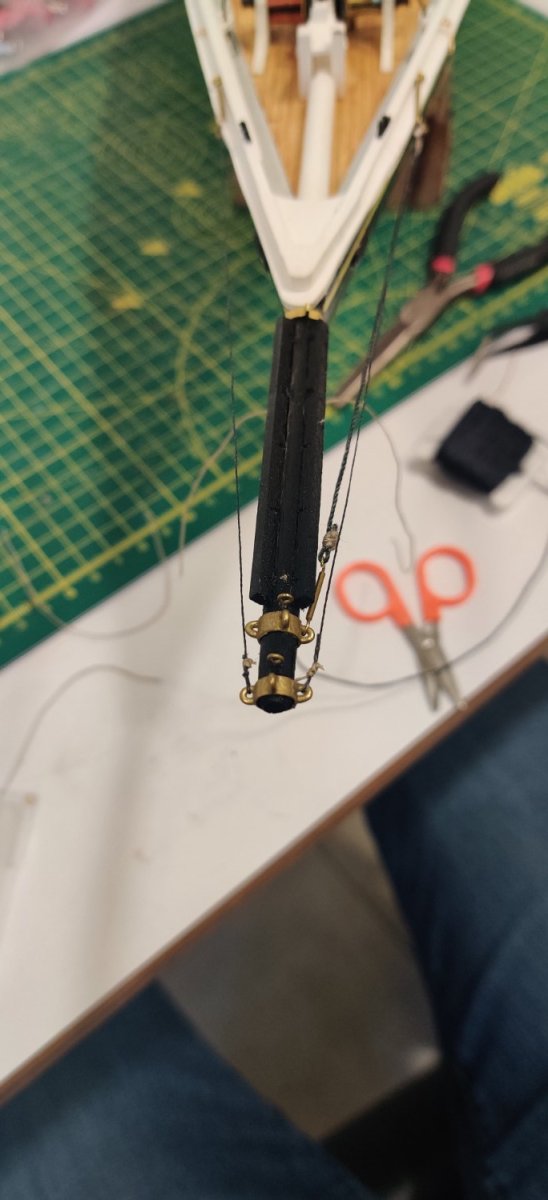
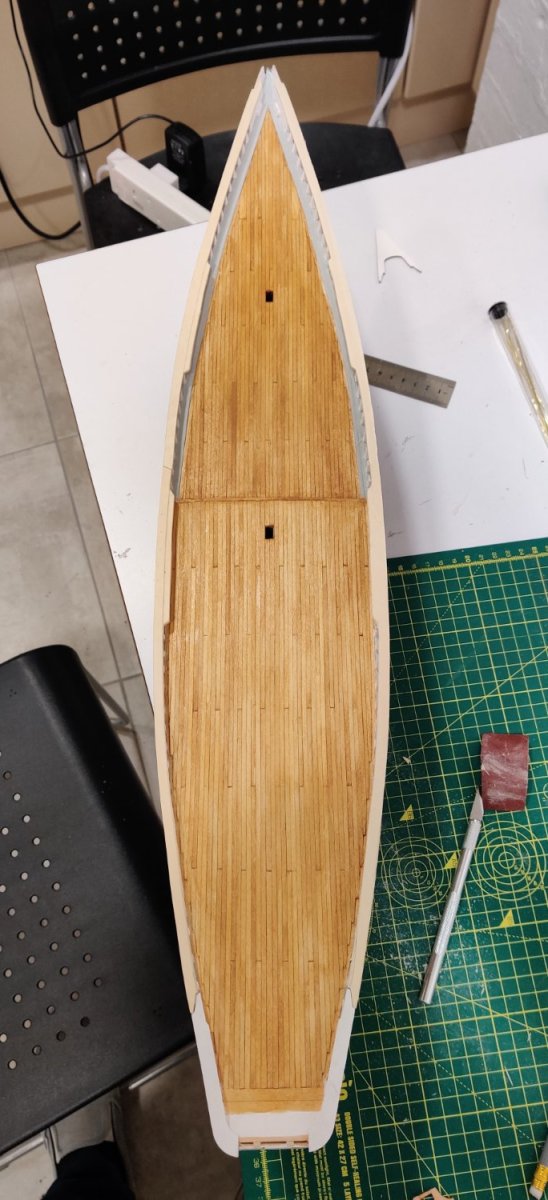
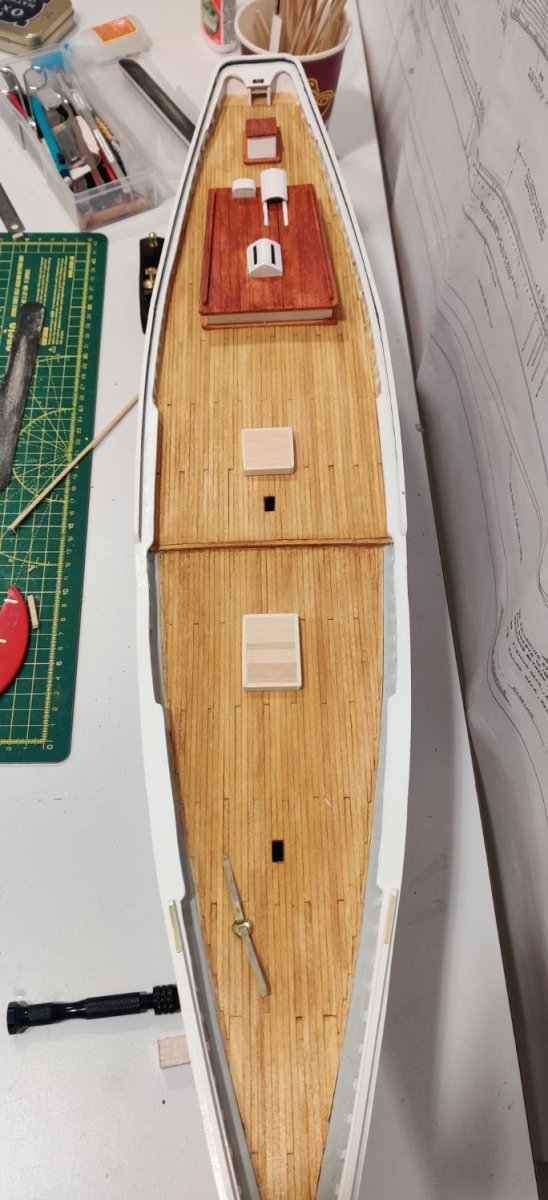
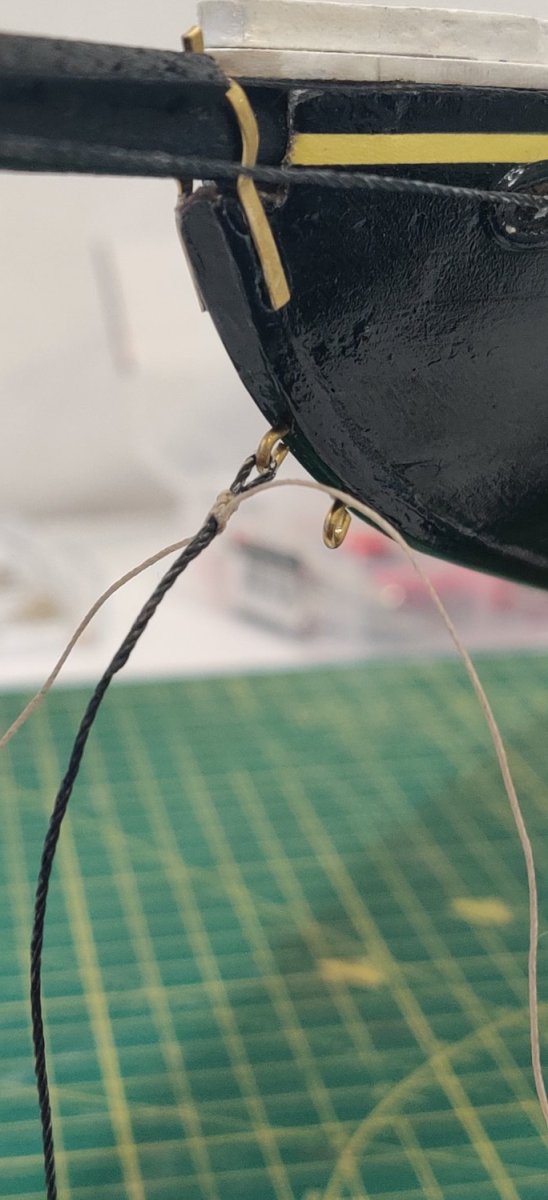
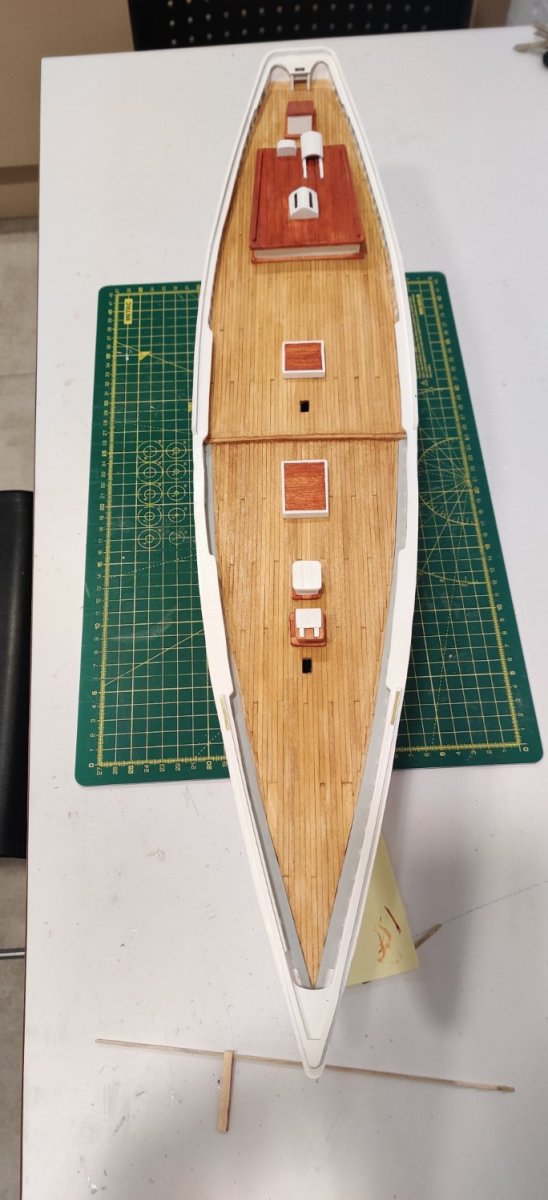
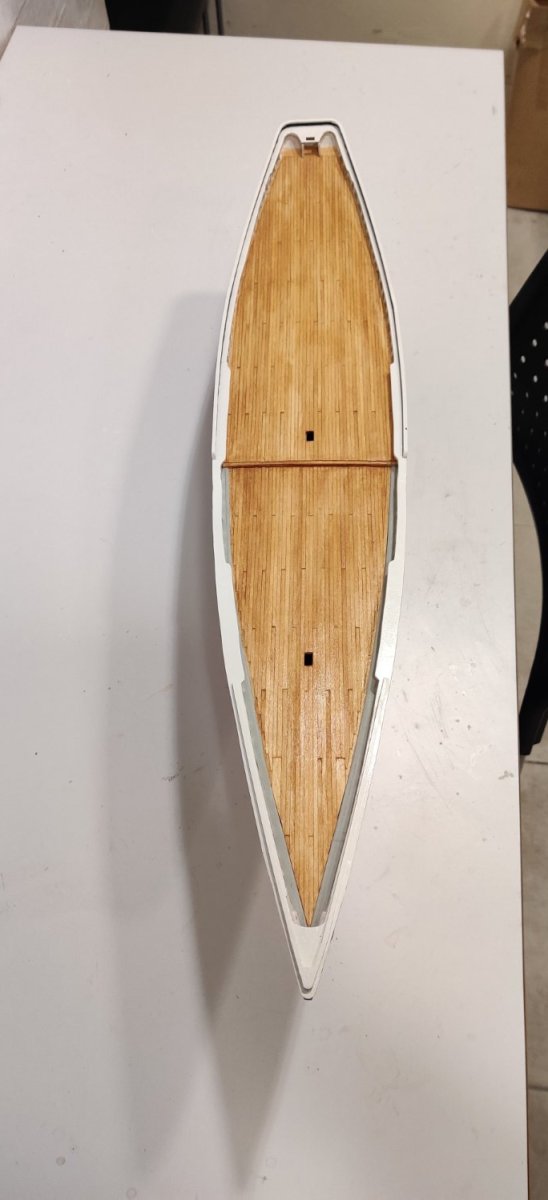
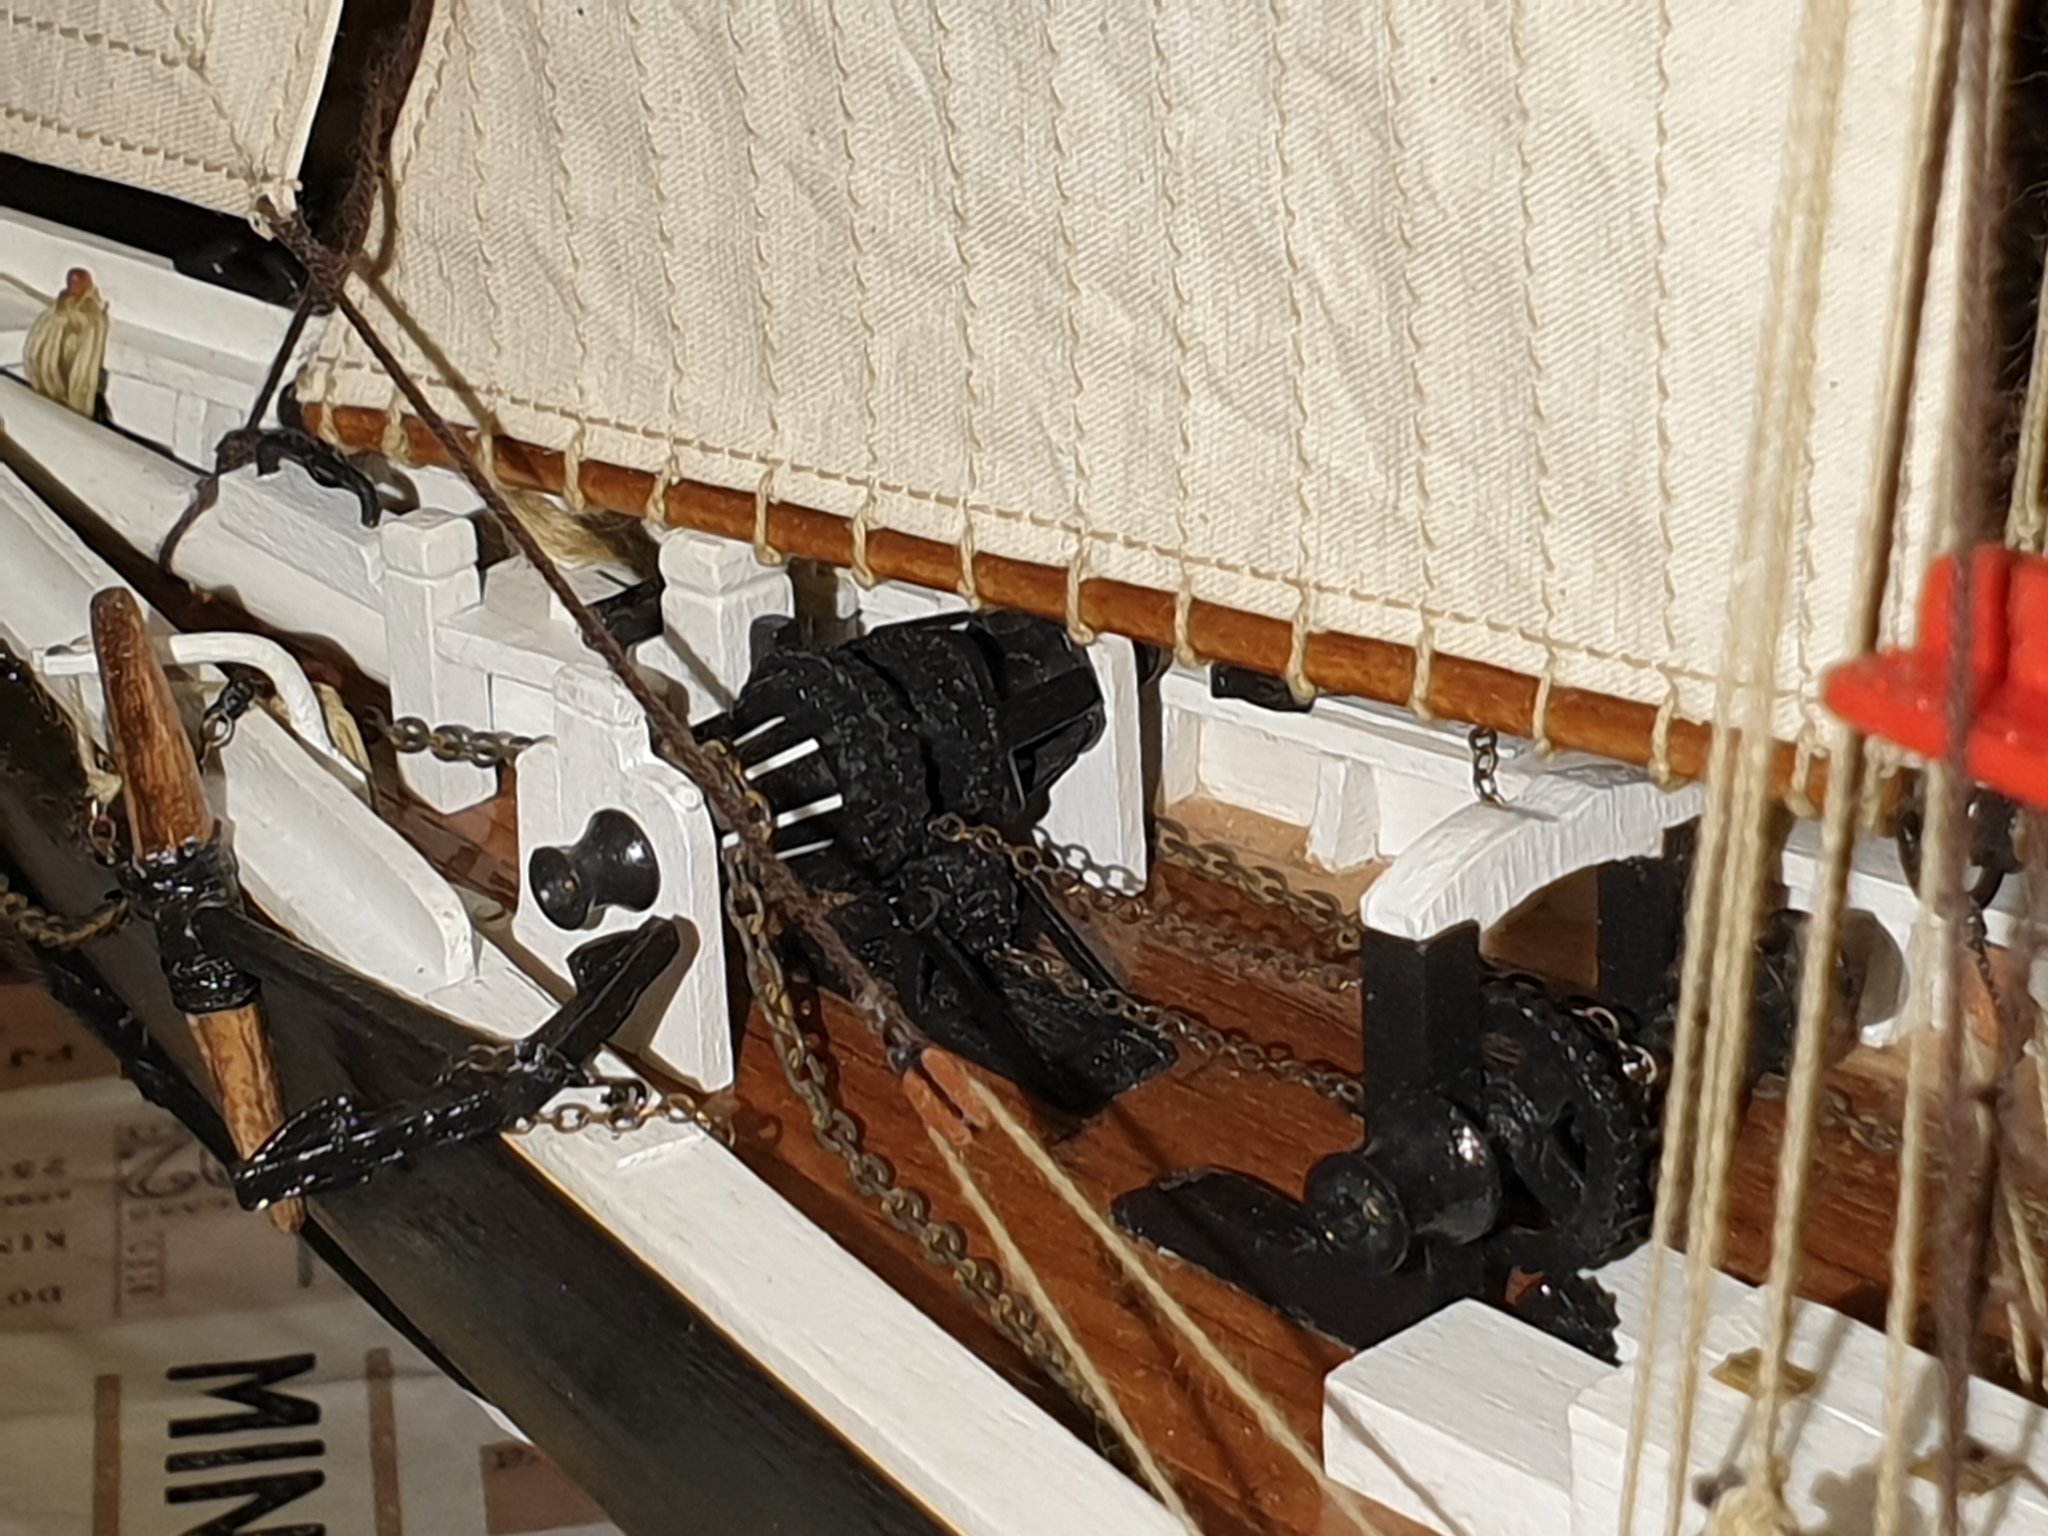
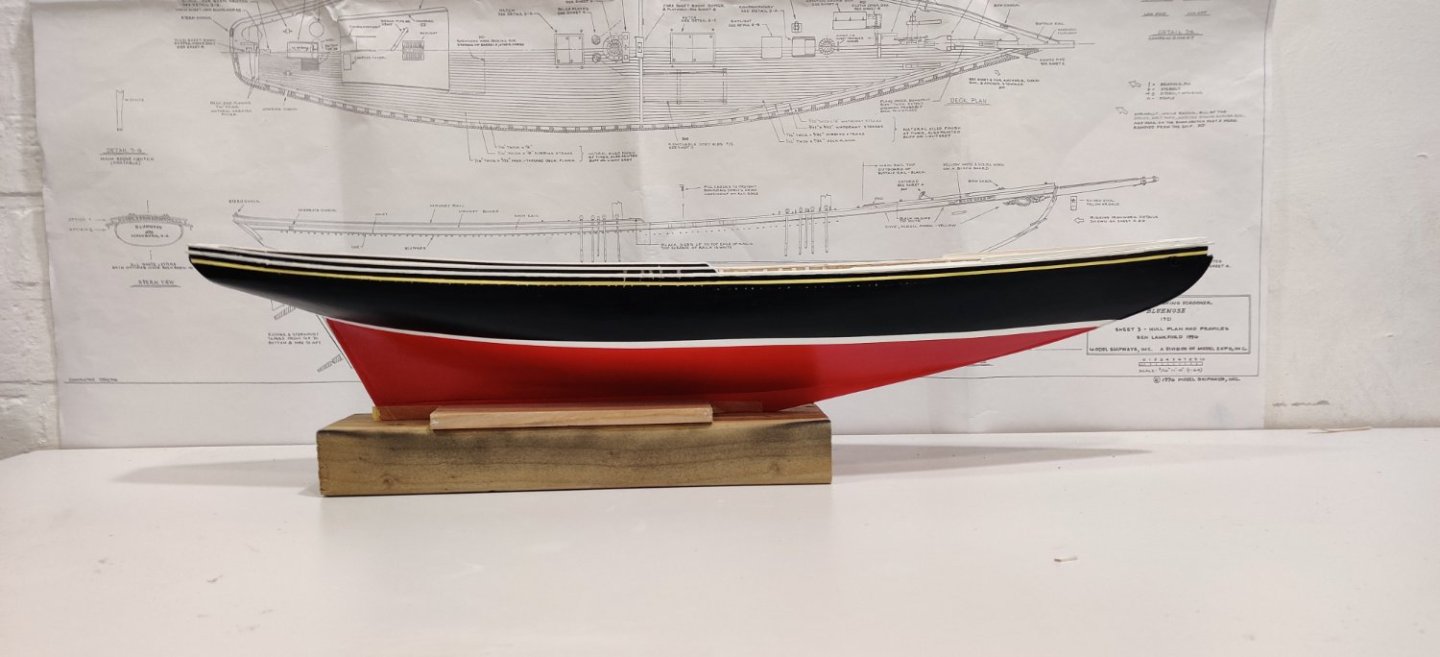
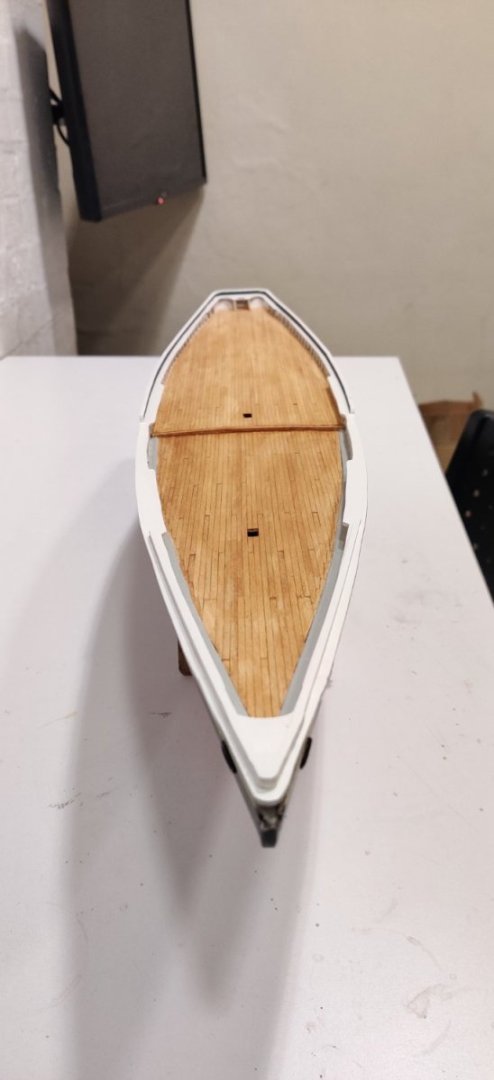
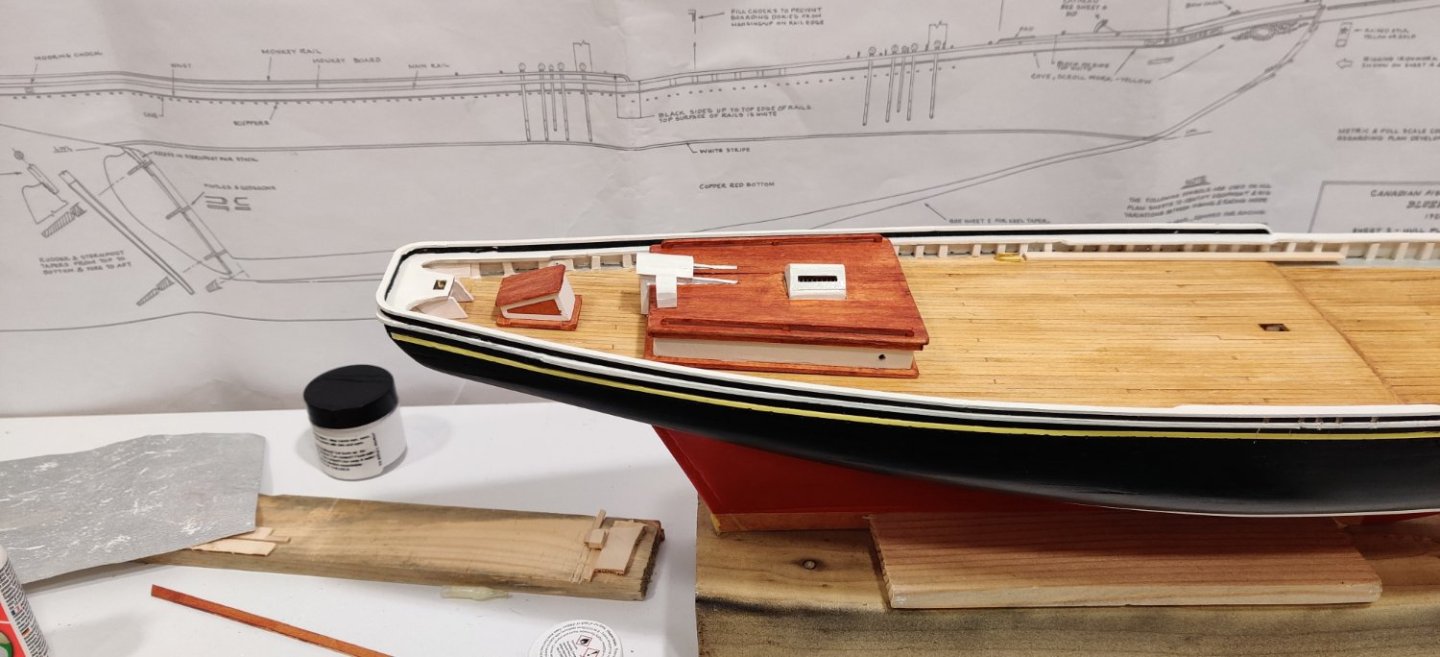
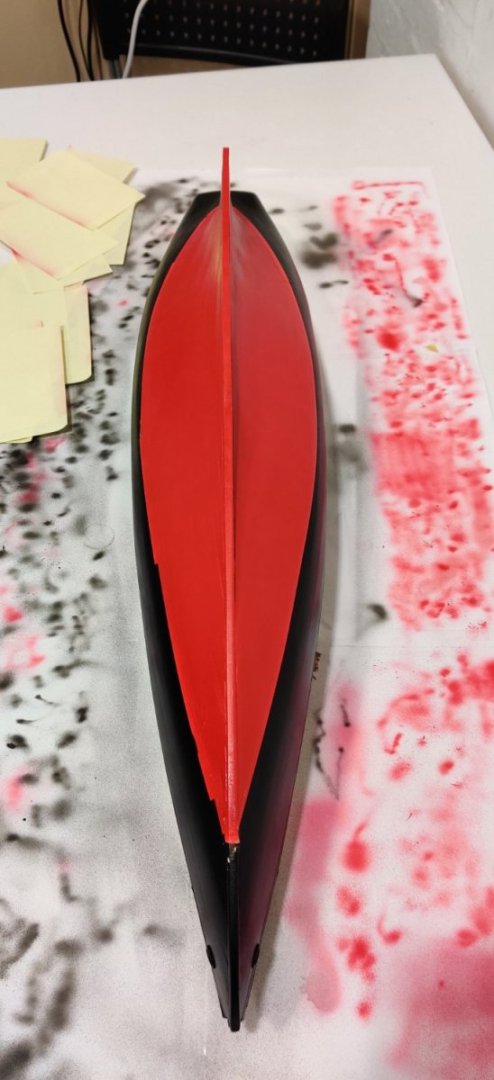
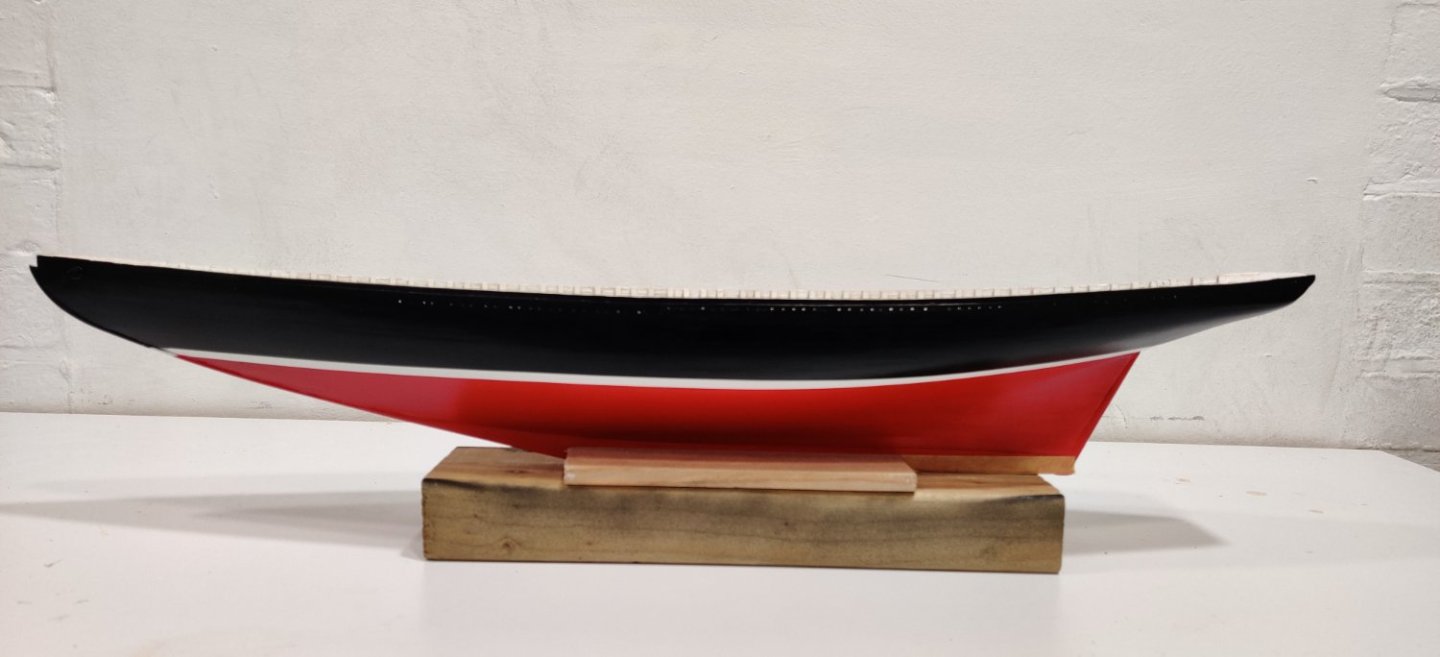
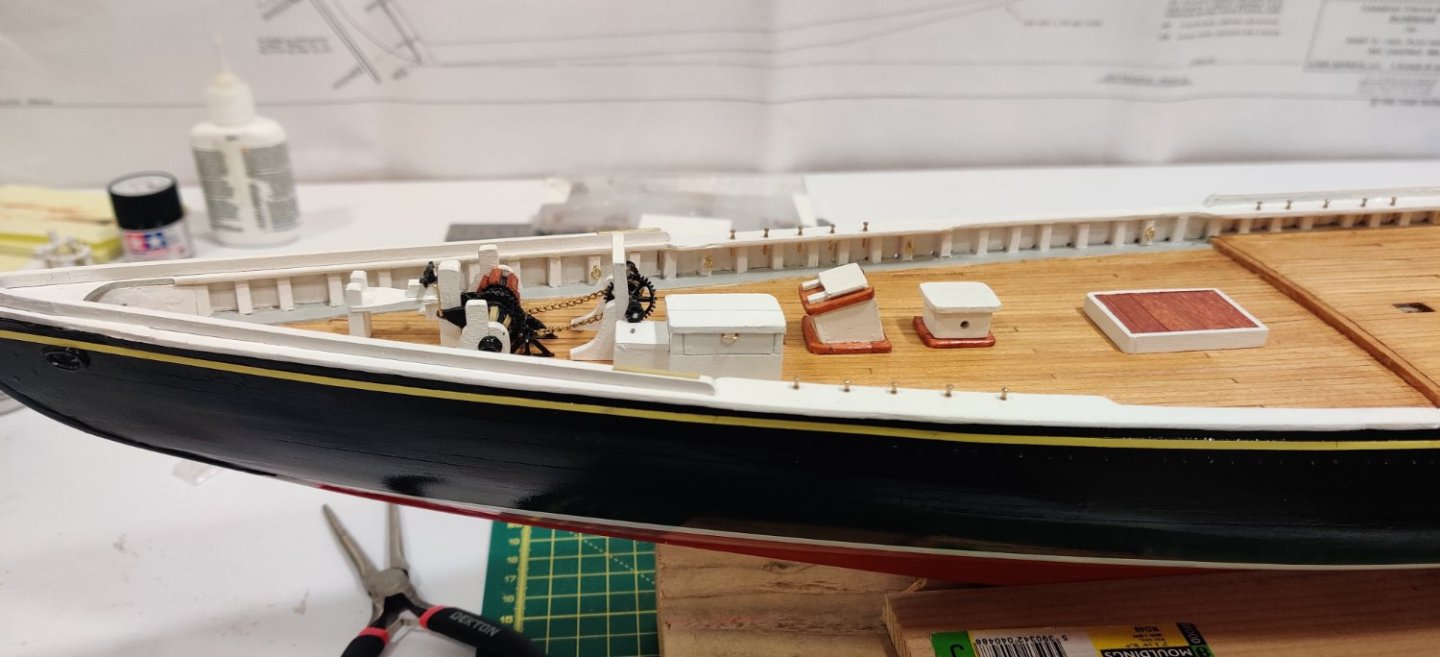
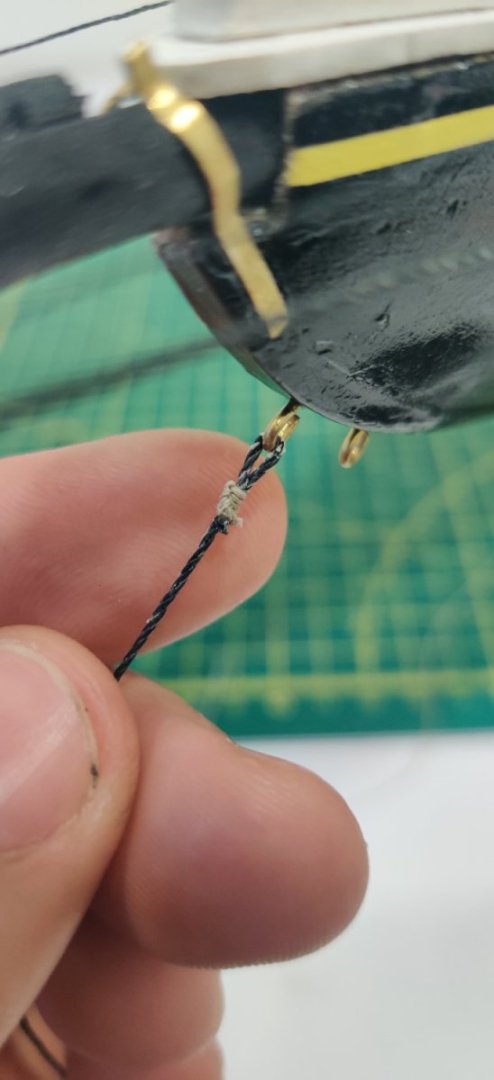
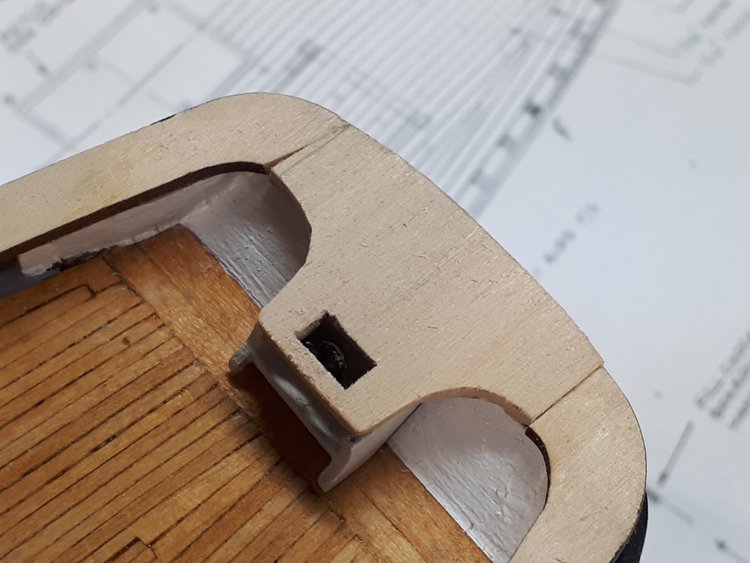
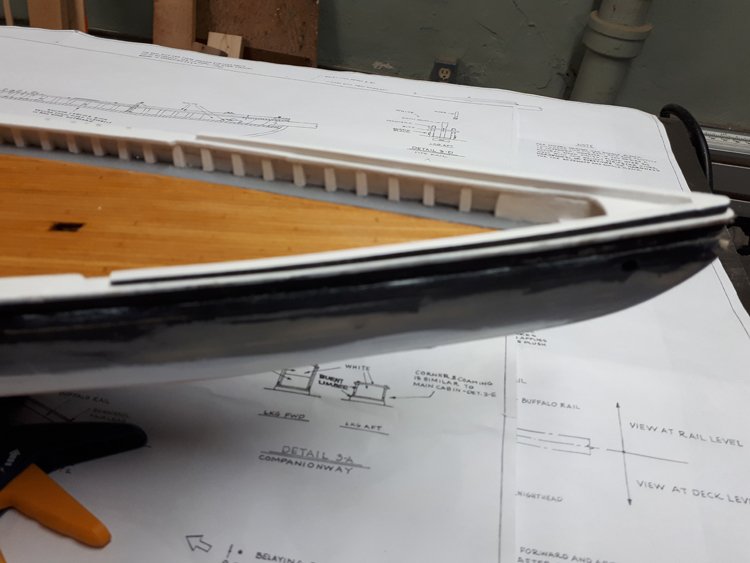
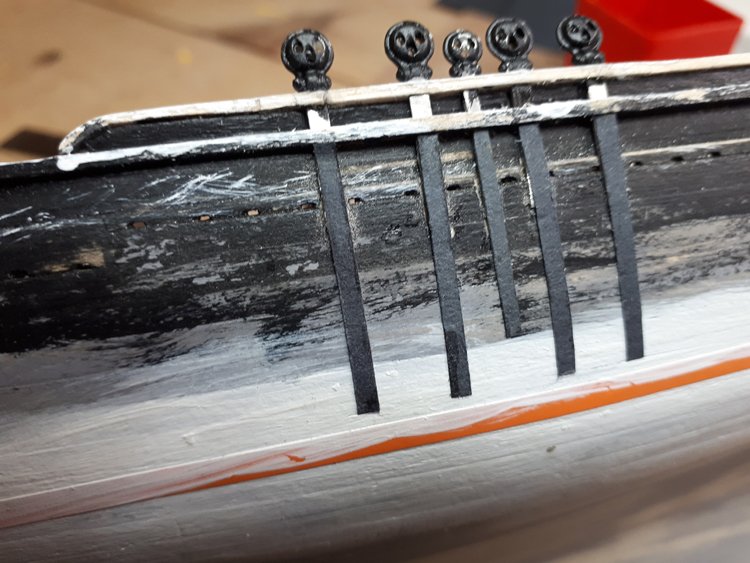
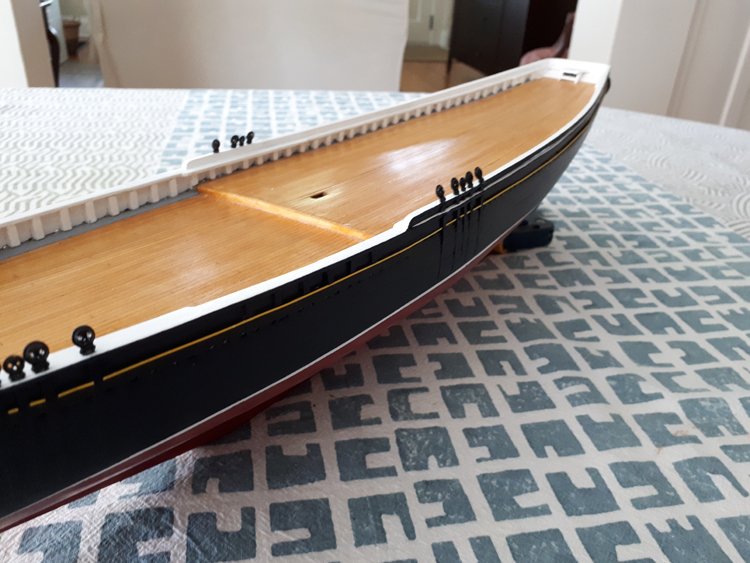
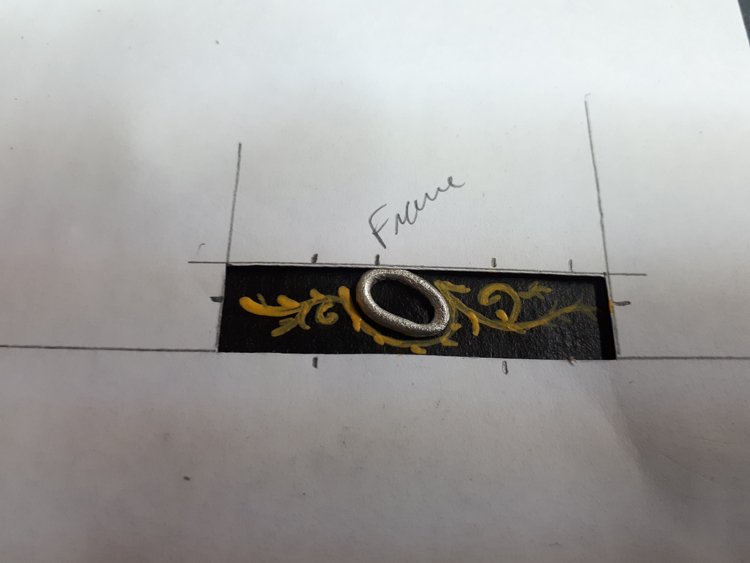
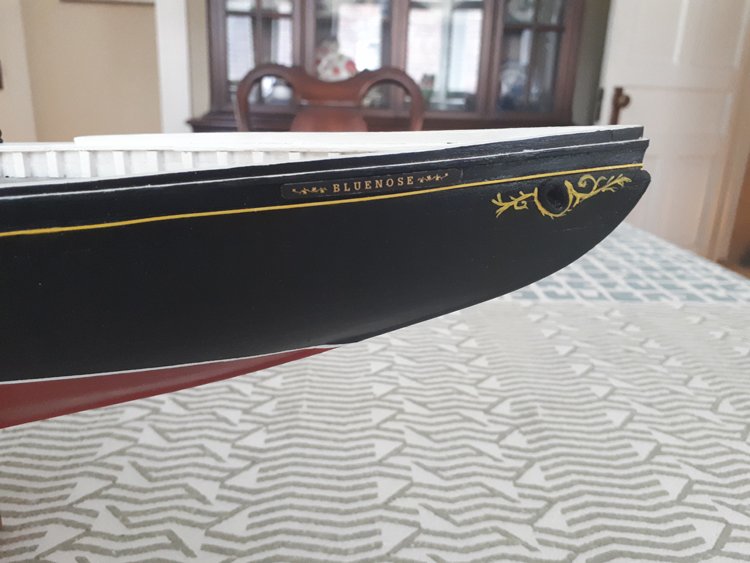
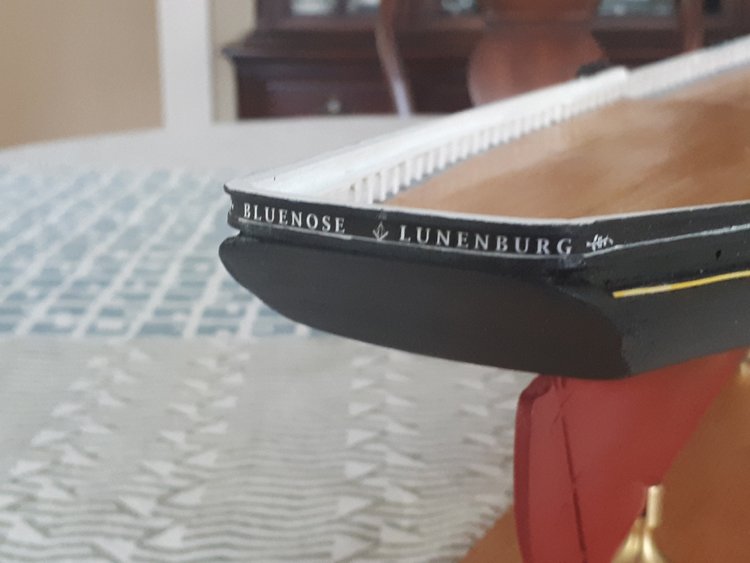
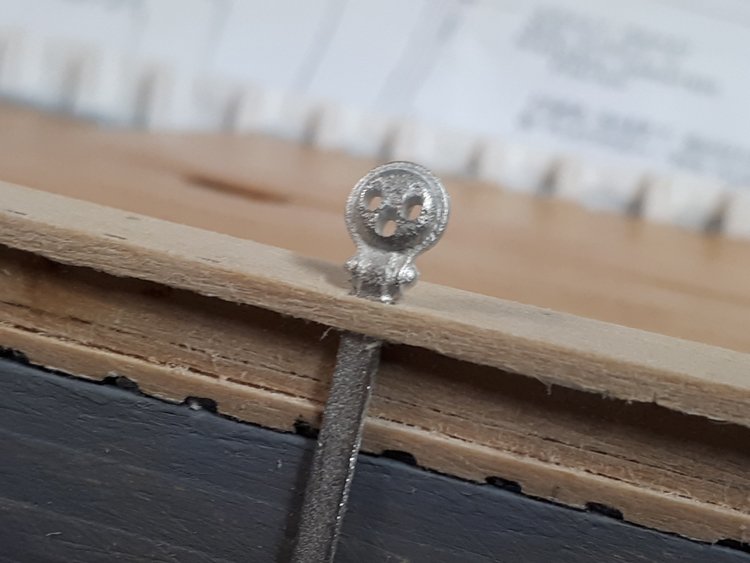
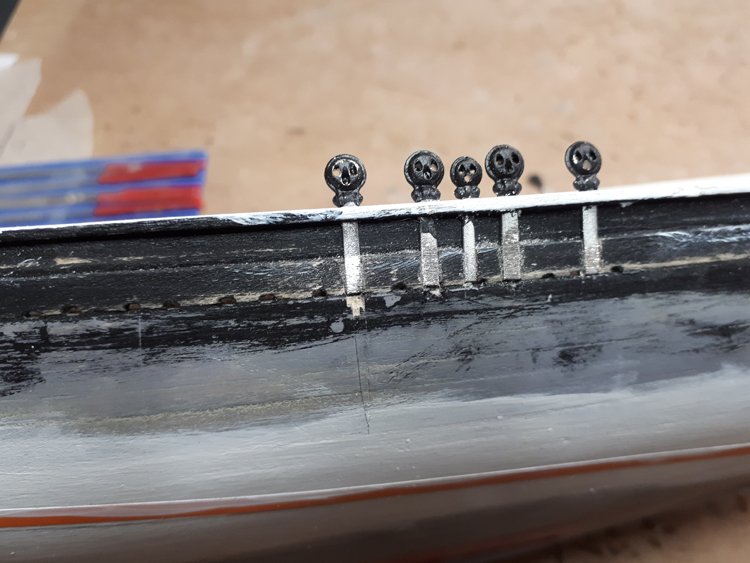
 Here is the nutshell version of my Bluenose build log to date. I previously had this build log on another forum, which I have now left and want to get it up and running here. Hull, Deck and Rails: The early stages of this build are very quick and easy. It’s not a difficult hull to plank. The deck is not too challenging either. I never know how best to finish the deck. Basswood takes a stain so poorly, so this time I simply used amber shellac which seems to work well enough. I know that many builders have found that the stern section of the rail doesn’t fit property. Mine didn’t quite fit either, so it necessitated making a new stern section. I did the rest of the rail in sections. The buffalo rail at the bow is an easy detail to add. The monkey rail which wraps around the stern and half way down the main rail is a bit tricky. I laminated two thin strips to make the curved portion at the stern. Deadeyes: I had to make a decision about how to approach the deadeyes. On the real Bluenose, they are secured with a bit of hardware that sits between the deadeye and the rail (not sure what it’s called.) The options were to try to recreate it with some brass wire, which I have seen many modelers do, or omit this detail altogether or opt for these cast pieces from BlueJacket. As you can see, I opted for the cast pieces. They capture the look of the real thing and I knew that I could never recreate the effect successfully myself without it looking too big and awkward. Chainplates: According to the plans and as shown in this picture, the chainplates are flush with the hull. The integral chainplates with these deadeyes would have been long enough to use them for the fore mast, but were too short to use for the main mast. On top of that, I knew I would never be able to inlay all twenty of them skillfully enough, so I cut them off at the waist I added strips of black construction paper. When all painted, it’s a compromise that I can easily live with. I used 1/16” masking tape for the white stripe, but I wasn’t sure how I was going to do the yellow stripe. According to the plans, the stripe is actually a groove running the length of the hull and is very narrow. There is almost no space above the scuppers to fit in and I was convinced it had to be very narrow to look right. So again, I made a compromise. I actually used a piece of styrene strip, .01” x .04” I painted it yellow, then glued it on. It's not strictly speaking correct, but if gives the effect and I know I could not have achieved a neater look any other way. Decoration: I practiced painting the decorations on black paper with a template cut out to the size and shape with key reference points marked. From a normal viewing distance of let’s say 50’ 🤗 it won’t look too bad. For the stern lettering I opted for the Masonic emblem rather than the Odd Fellows emblem. It was the Masonic one that it was launched with. I outlined my detective work on this subject in a separate thread: https://modelshipworld.com/topic/24244-bluenose-and-the-masons/?tab=comments#comment-713347 So that catches everybody up. Now on to the deck details. Thanks for looking in! David
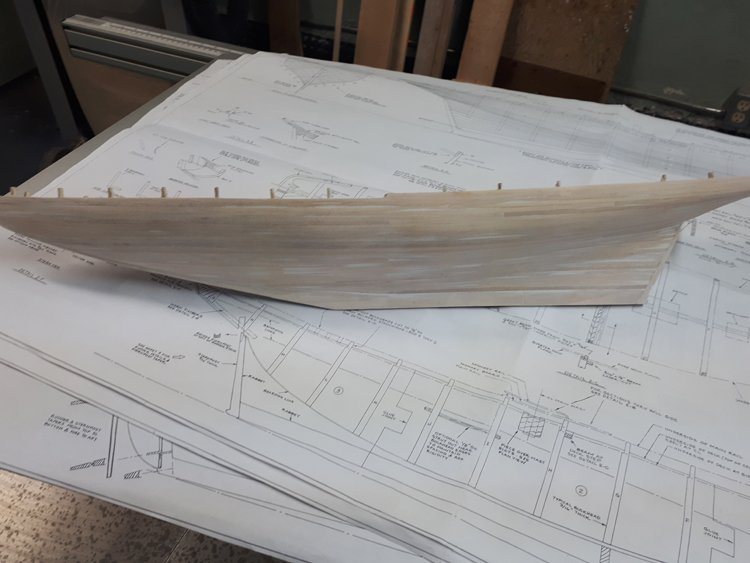

- 37 replies
-
- 11
-
-
- Finished
- model shipways
- (and 1 more)
-
 Hi... New to the board and looking forward to sharing this log of my first build... in all honesty this technically my second build. I had started my first build (HMS Bounty by Artesania Latina) some time ago and was almost to the point where I was ready to start the rigging, but did not get a chance to complete the model due to work, family and life in general. Unfortunately when we moved the model was damaged beyond repair, so I never got the opportunity to complete the kit when I finally did get some free time... major bummer. Anyway, this will hopefully be the first kit that I will get a chance to complete. I have been lurking around on this board for a bit and spent some time reading through the Bluenose build logs that others have posted on this board, and they have been a tremendous help in helping me to understand the amount of work and potential issues that would be involved in the build. I am definitely very happy that I found this board and wanted to send thanks to all who have shared their knowledge and experience by posting their work. I will consider it a success if my finished model is a fraction as good as the builds I have seen on this site. I will be updating this thread with updates and pictures of what I have done so far, since I had already started the build before I found this site... in the meantime all the best and see you soon... Michael
- 9 replies
-
- 3
-
-
- bluenose
- model shipways
- (and 1 more)
-
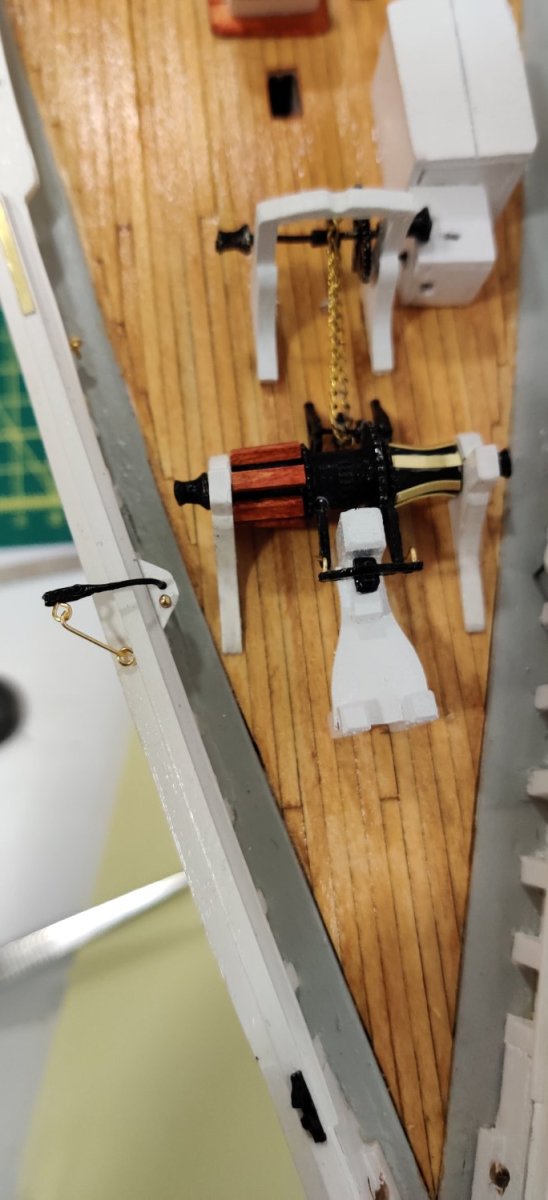
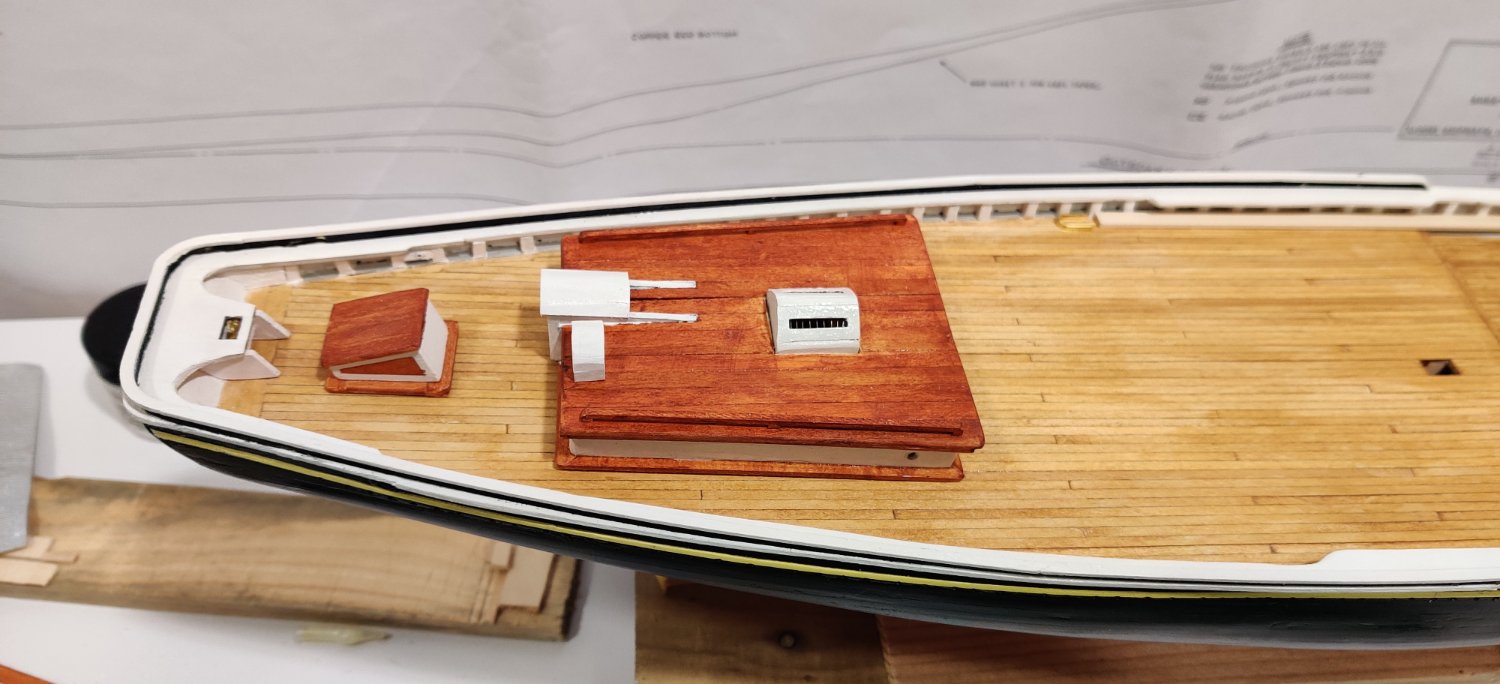
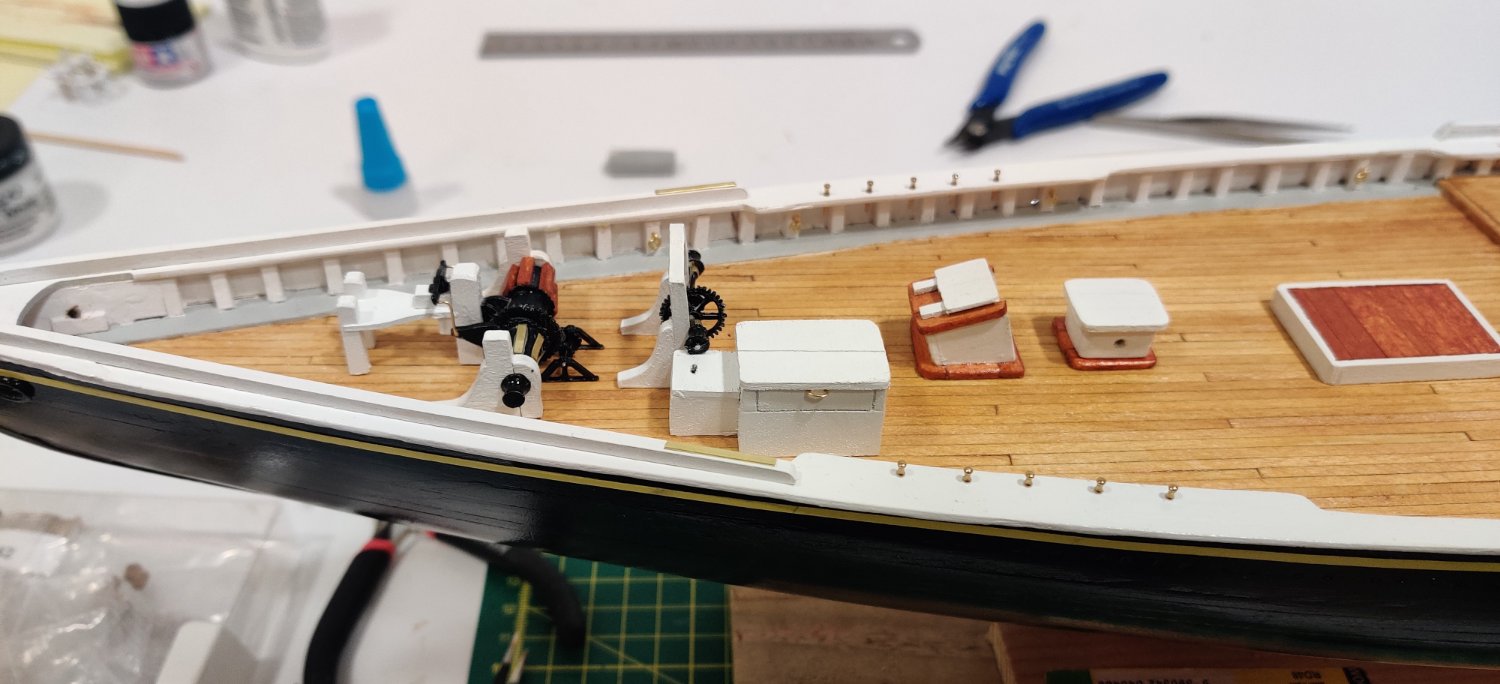
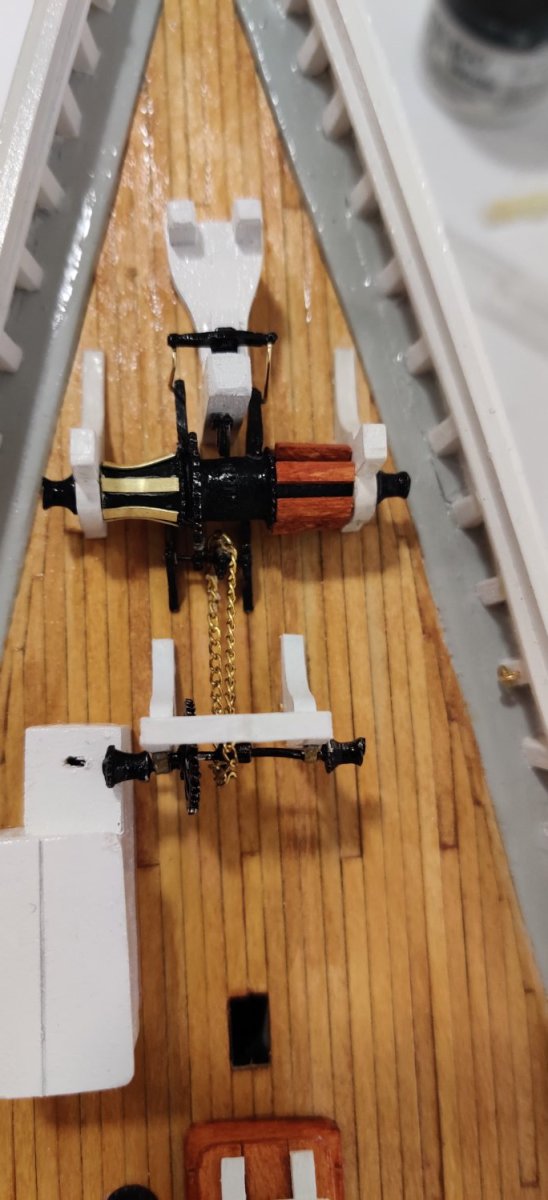
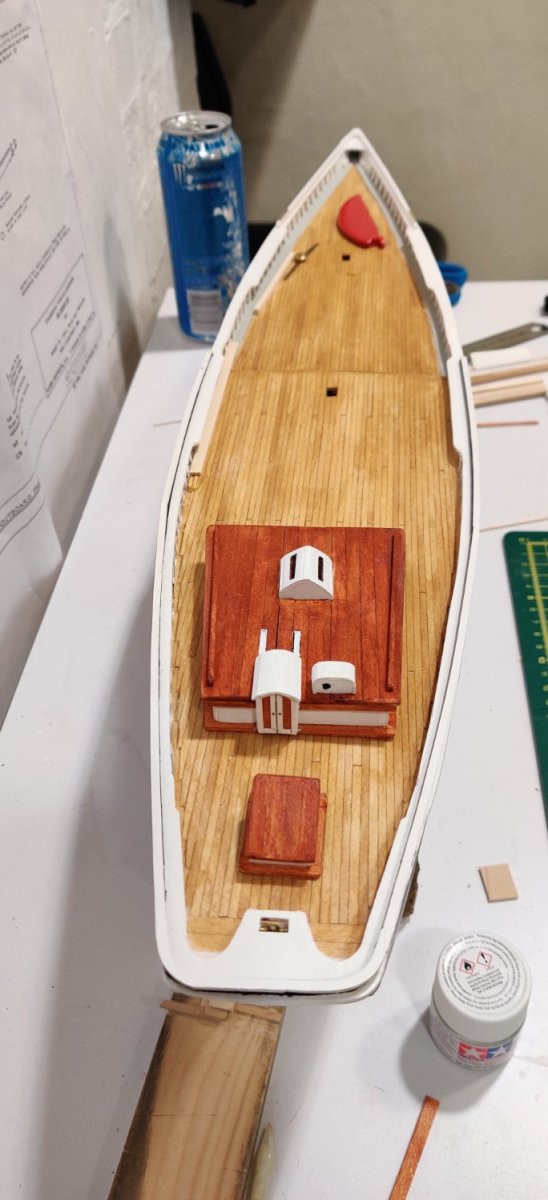
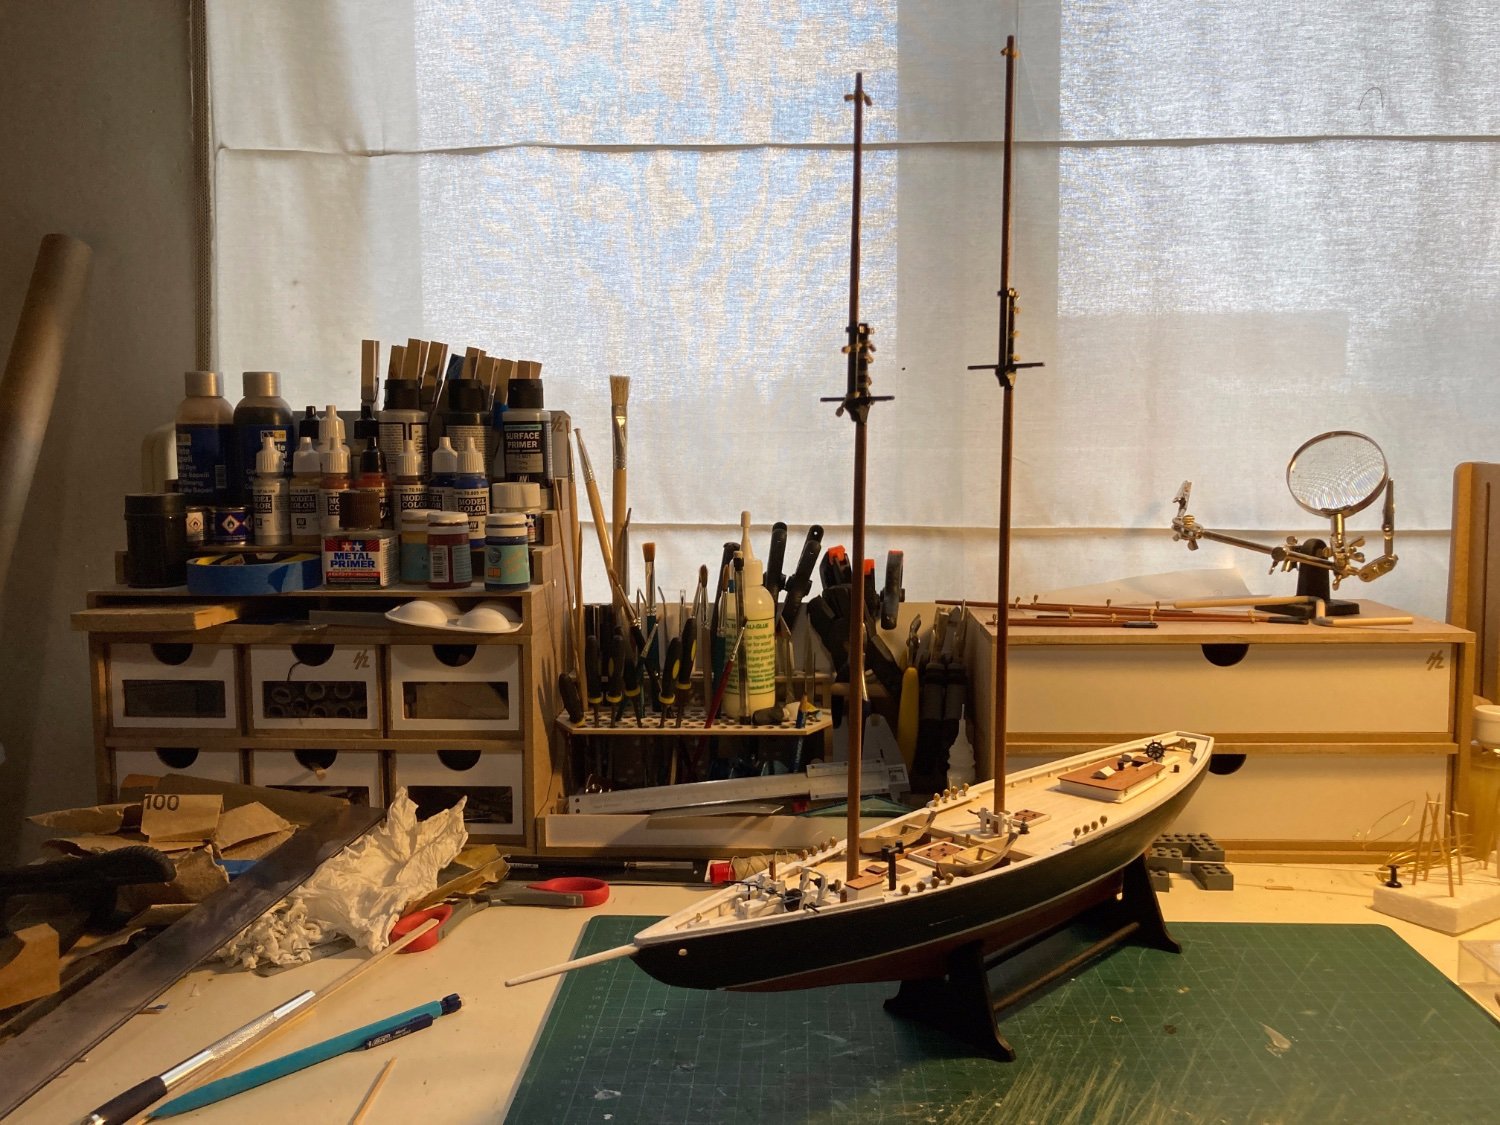
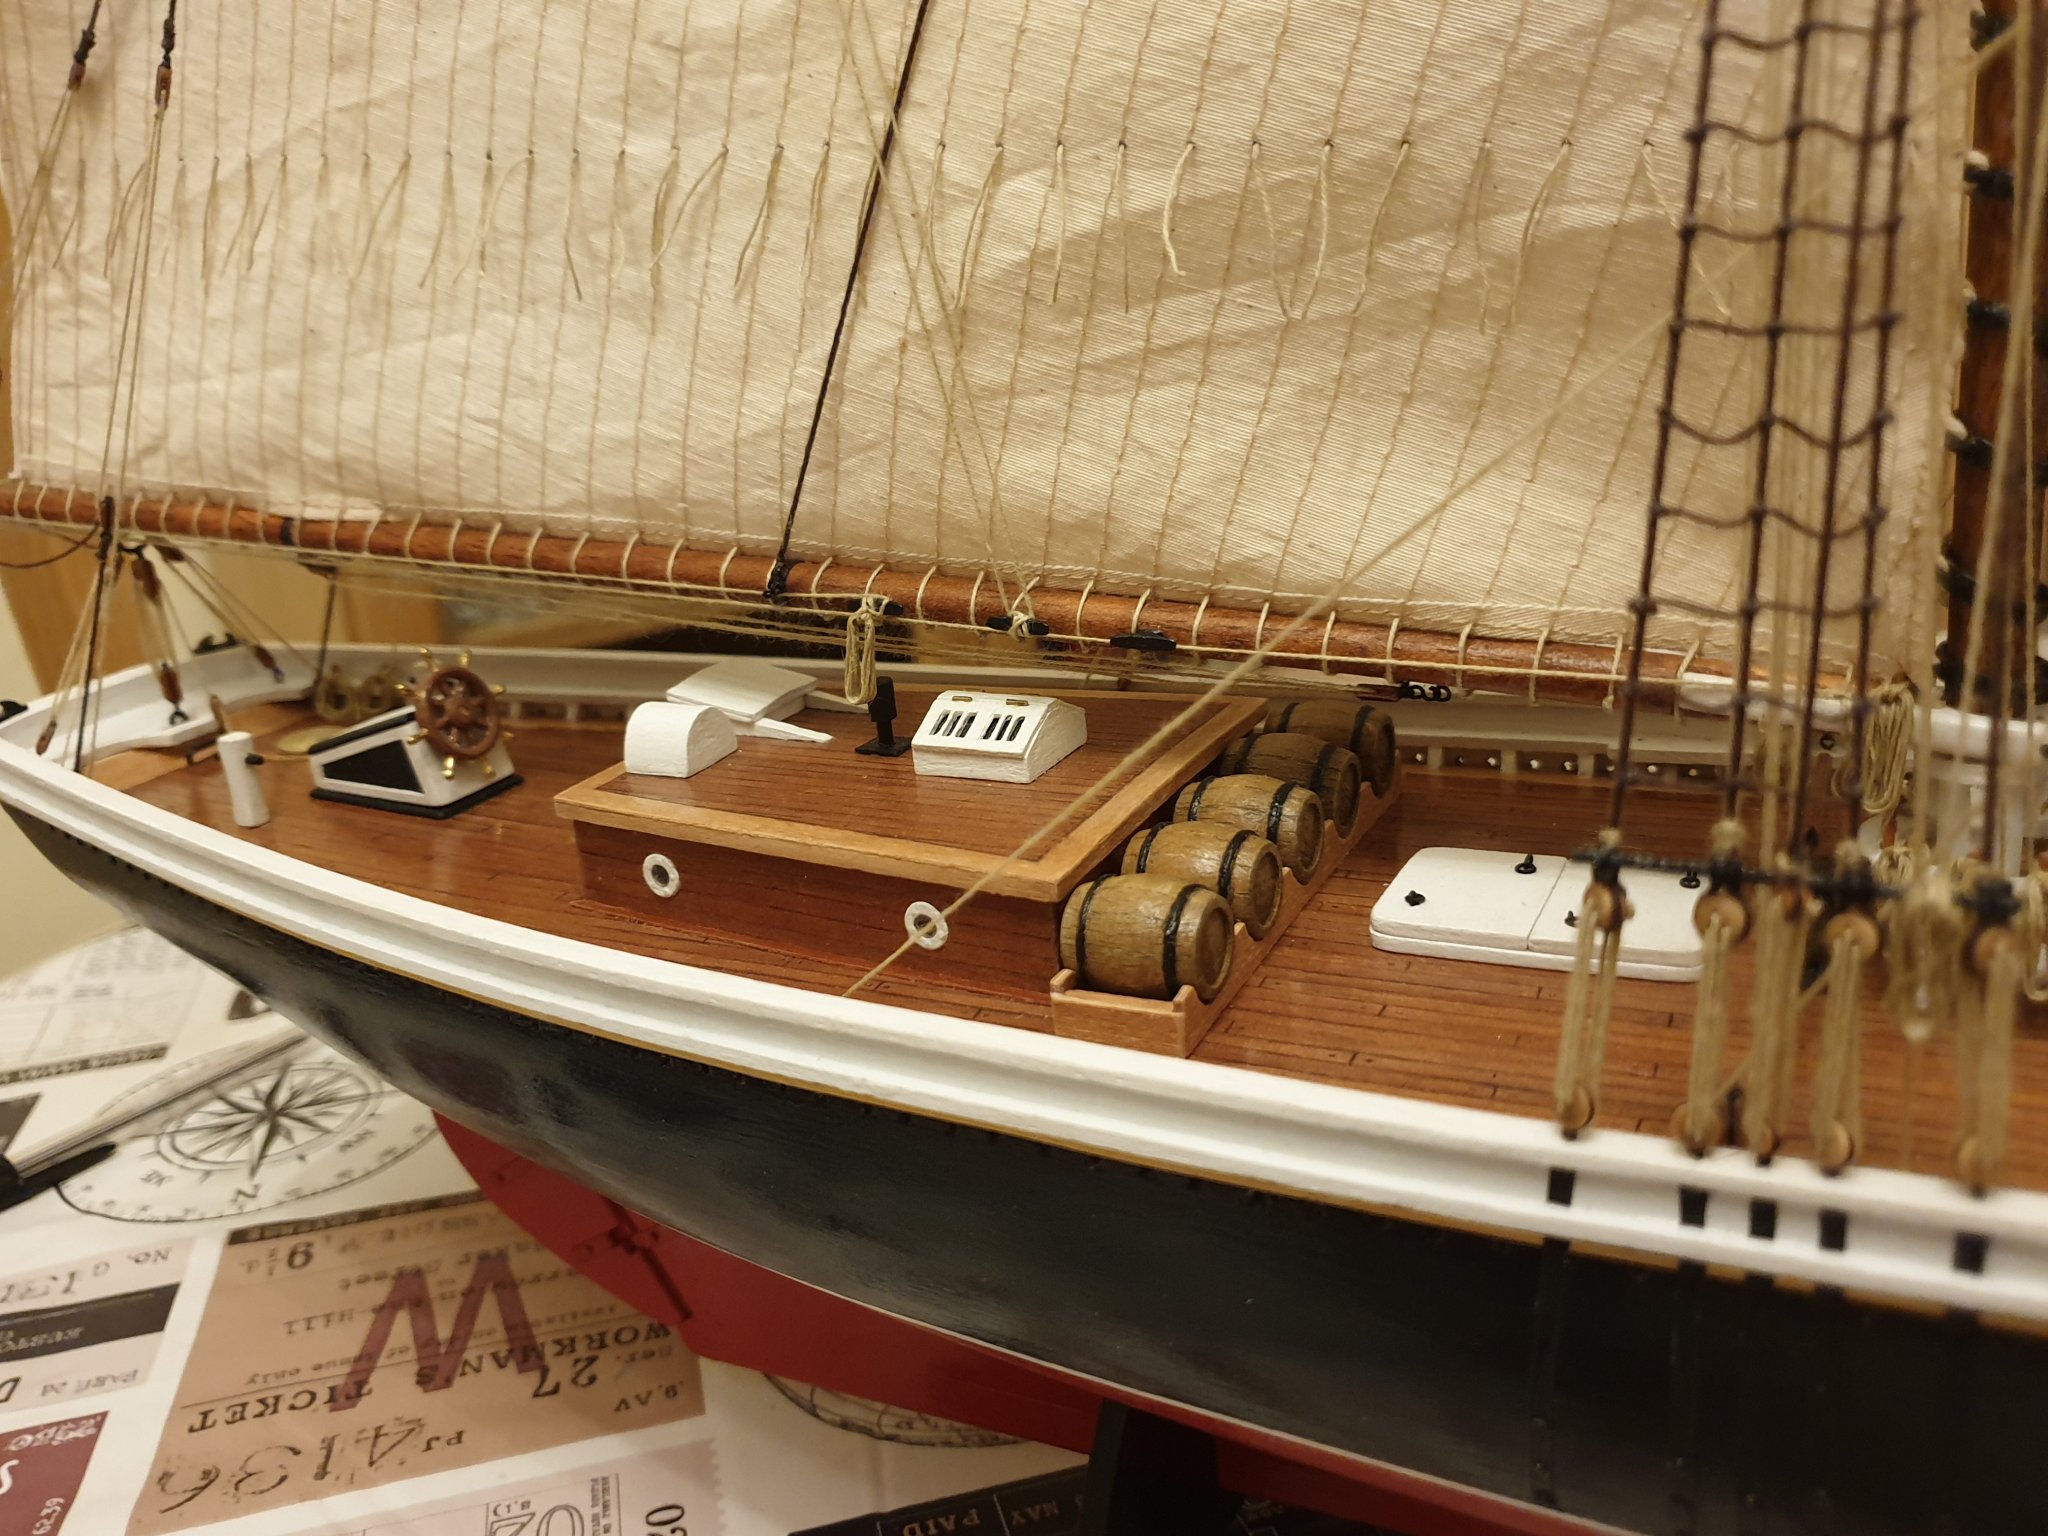
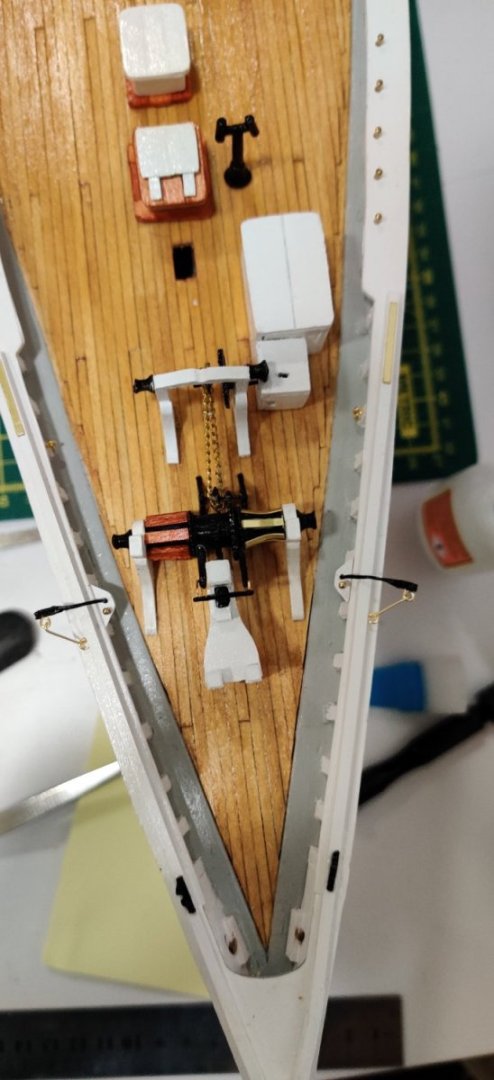
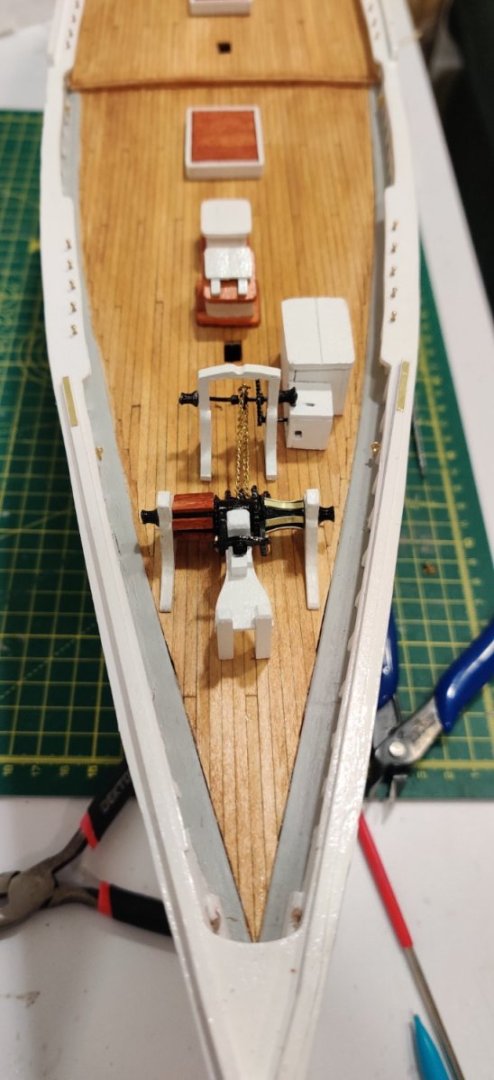
 Greetings! It is good to be back in the Shipyard! A long time ago (2009)in a city far, far away (Buffalo, NY) I started building the Model Shipways Bluenose using the Bob Hunt Practicum. Got the hull all planked, and I was really proud of my work. Had a really good build log going. Then life happened, and MSW crashed. The last couple weeks, thanks to a Coronavirus reduced work schedule, I have picked it back up. I had forgotten how much I really enjoyed this tiny intricate work. I have started on the deck “furniture” beginning aft, and working forward. So far I have completed the cabin (with binacle, skylight, chimney and gangway) the helm, bitts and boom crutch. Currently I am working on the rudder, pintles and gudgeons, and the boom sheet buffer. I have several dories made, but really am not happy with the way they look. What I am REALLY bad at, is remembering to take pictures. Here is one snapped by my daughter last night while I was making ring bolts.
-
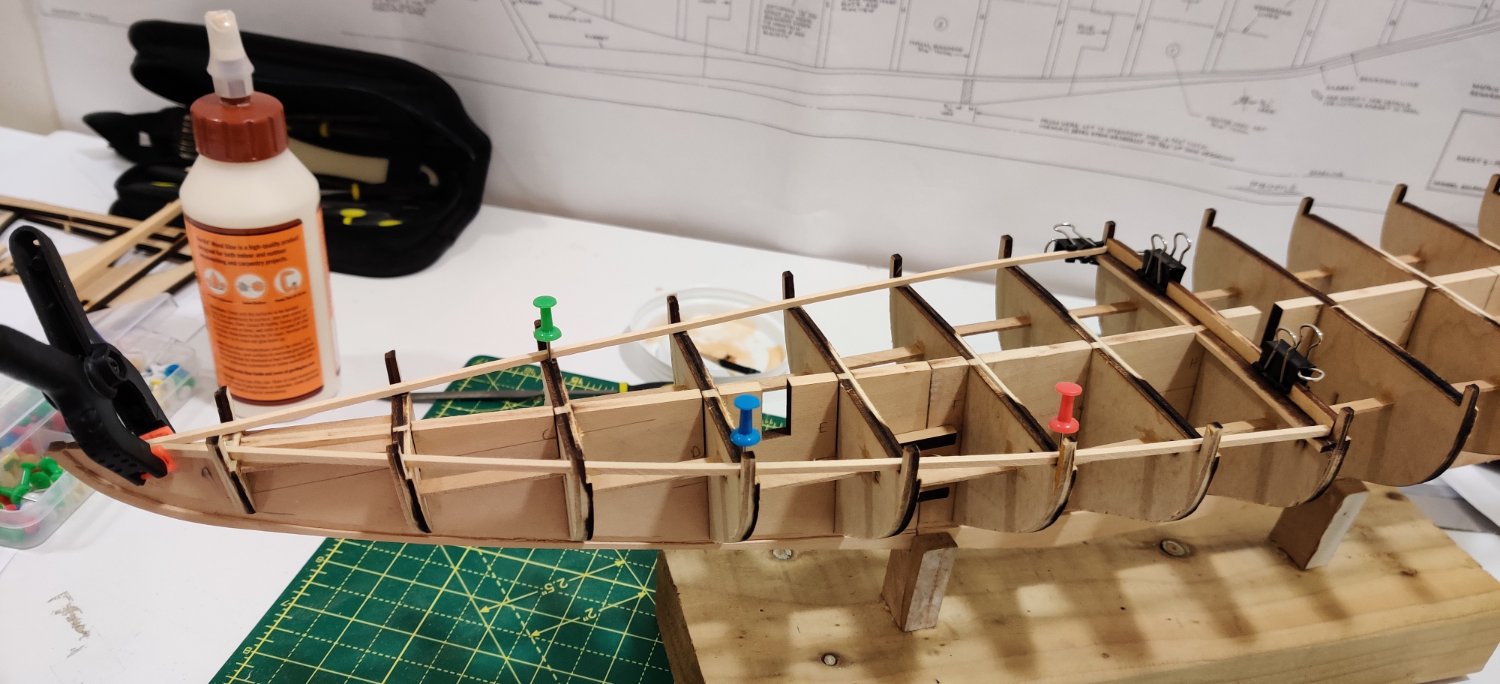
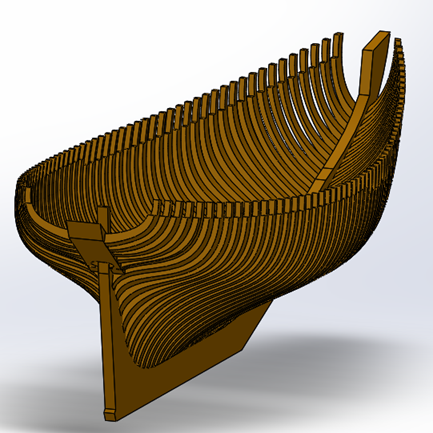
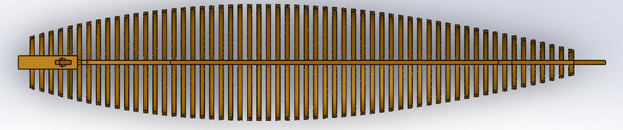
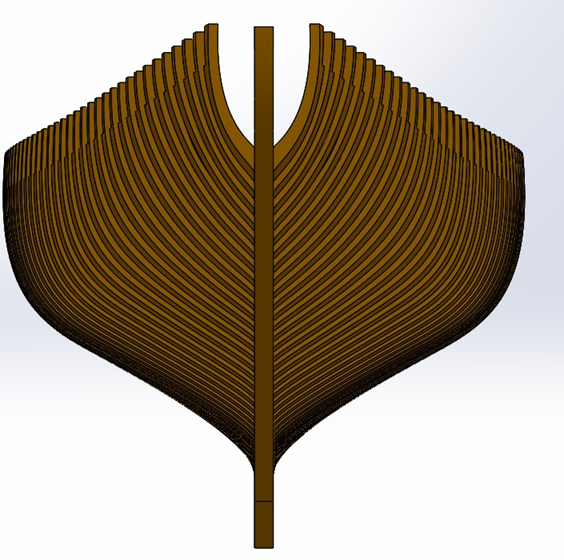
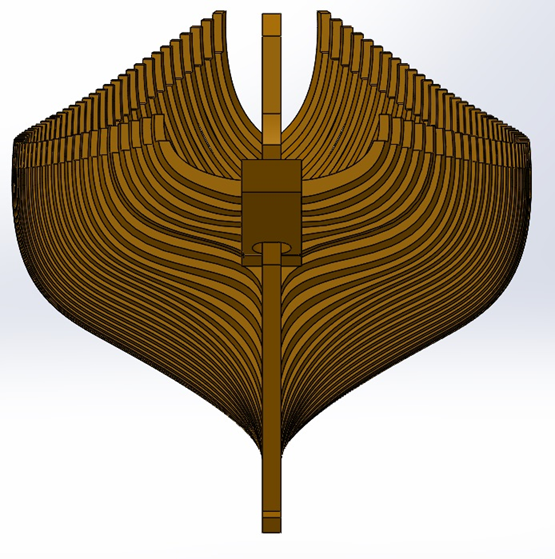
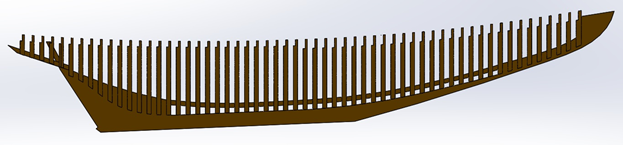
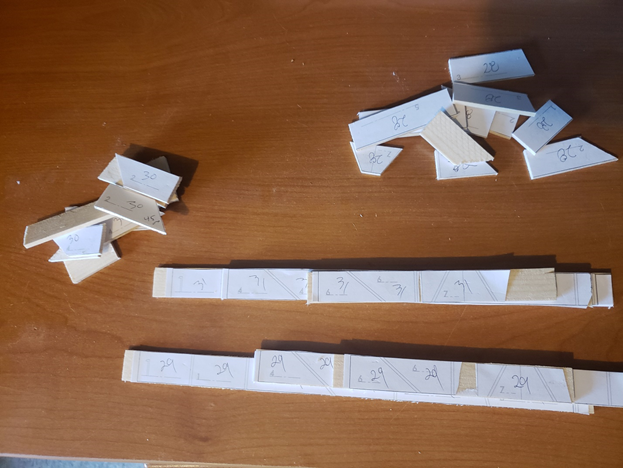
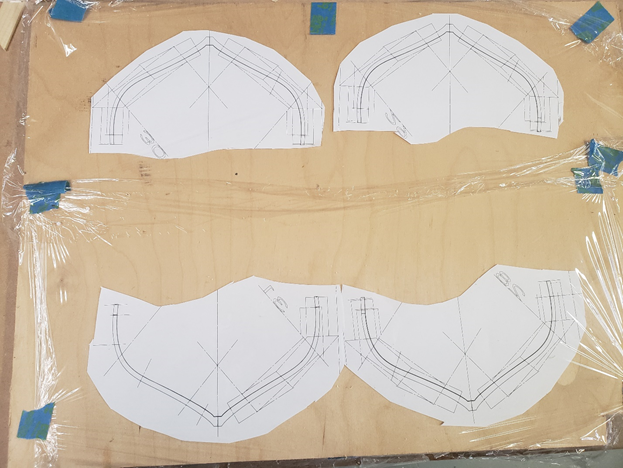
 Seeing the Bluenose II off the starboard beam of our cruise ship last fall, sparked my desire to build a model of her. She was an awesome sight and I was convinced this would be a great project. Then I started to do some research and figured I needed to cut my teeth on some simpler builds. I purchased Steve Rogers “Model Boat Building Made Simple” and built my first rowing skiff. I had so much fun I went on to build his “Spritsail Skiff” and am now working on his “Skipjack”. But in the back my mind, the Bluenose II was a constant presence. Using the measured drawings from L. B. Jenson and Gene Bodnar’s wonderful Modeling Practicum, “The Queen of the North Atlantic ―The Schooner Bluenose”, I started lofting a 3D model of the Bluenose II in SolidWorks. This has taken me almost a month. It is amazing how intimate one becomes with the lines of a hull through the process of creating a 3D model. I had many false starts, but finally developed a simple set of equations and a table that describes the spline control points for all of the frames of her hull. I imported and scaled the side view, top view as well as the hull lines as my starting point: Resulting in my final model: Now, as they say, it is time to make some sawdust: Now I go into mass production mode as I need to make over 60 frames. It is bizarre timing, but today I reported to work as usual and was immediately sent home due to the Covid-19 crisis. My company is limiting on-site access and having us work from home. I don’t know how that will work out, but at least I have some time to crank out more frames. 🙂
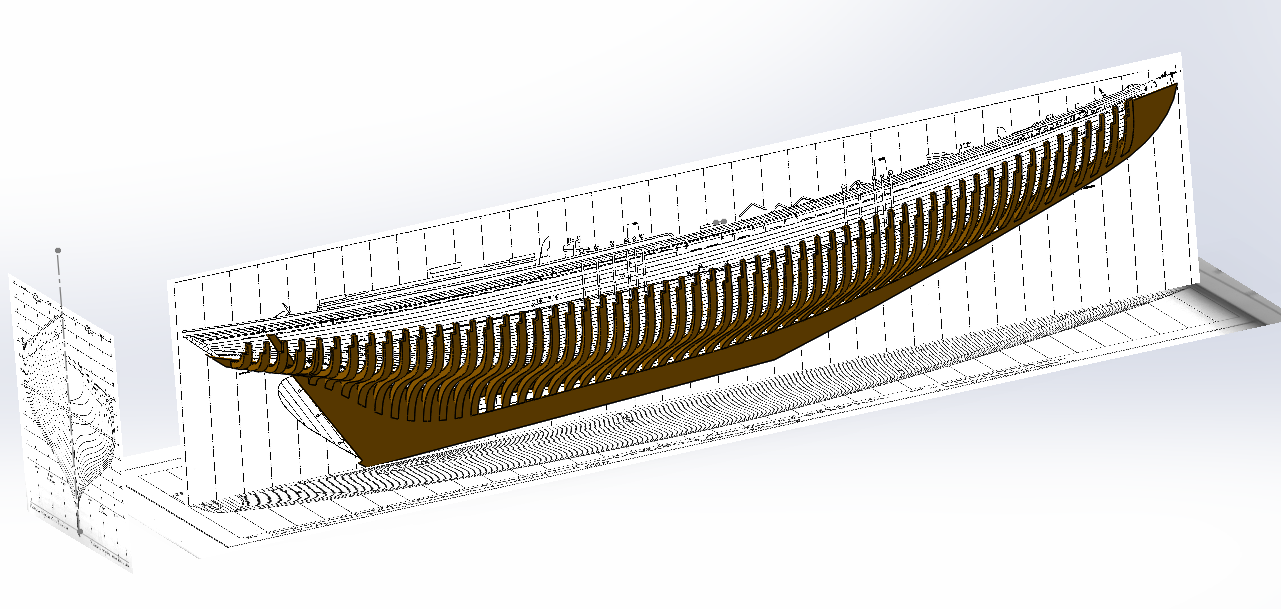

- 58 replies
-
- 11
-
-
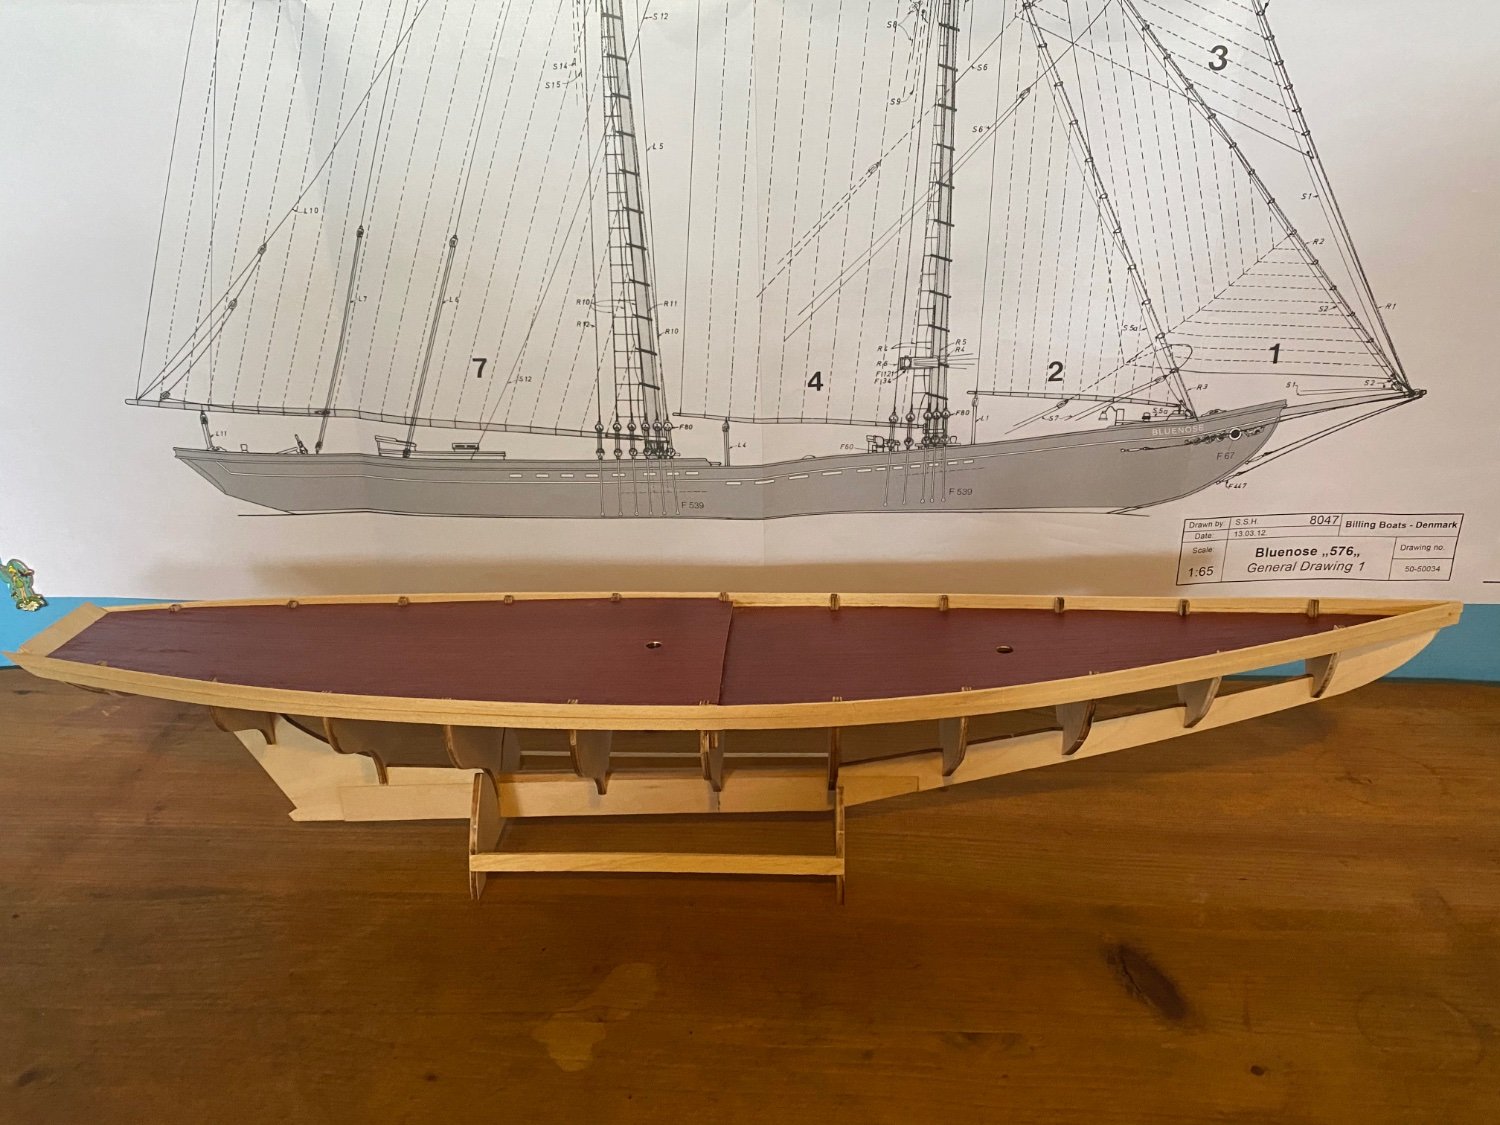
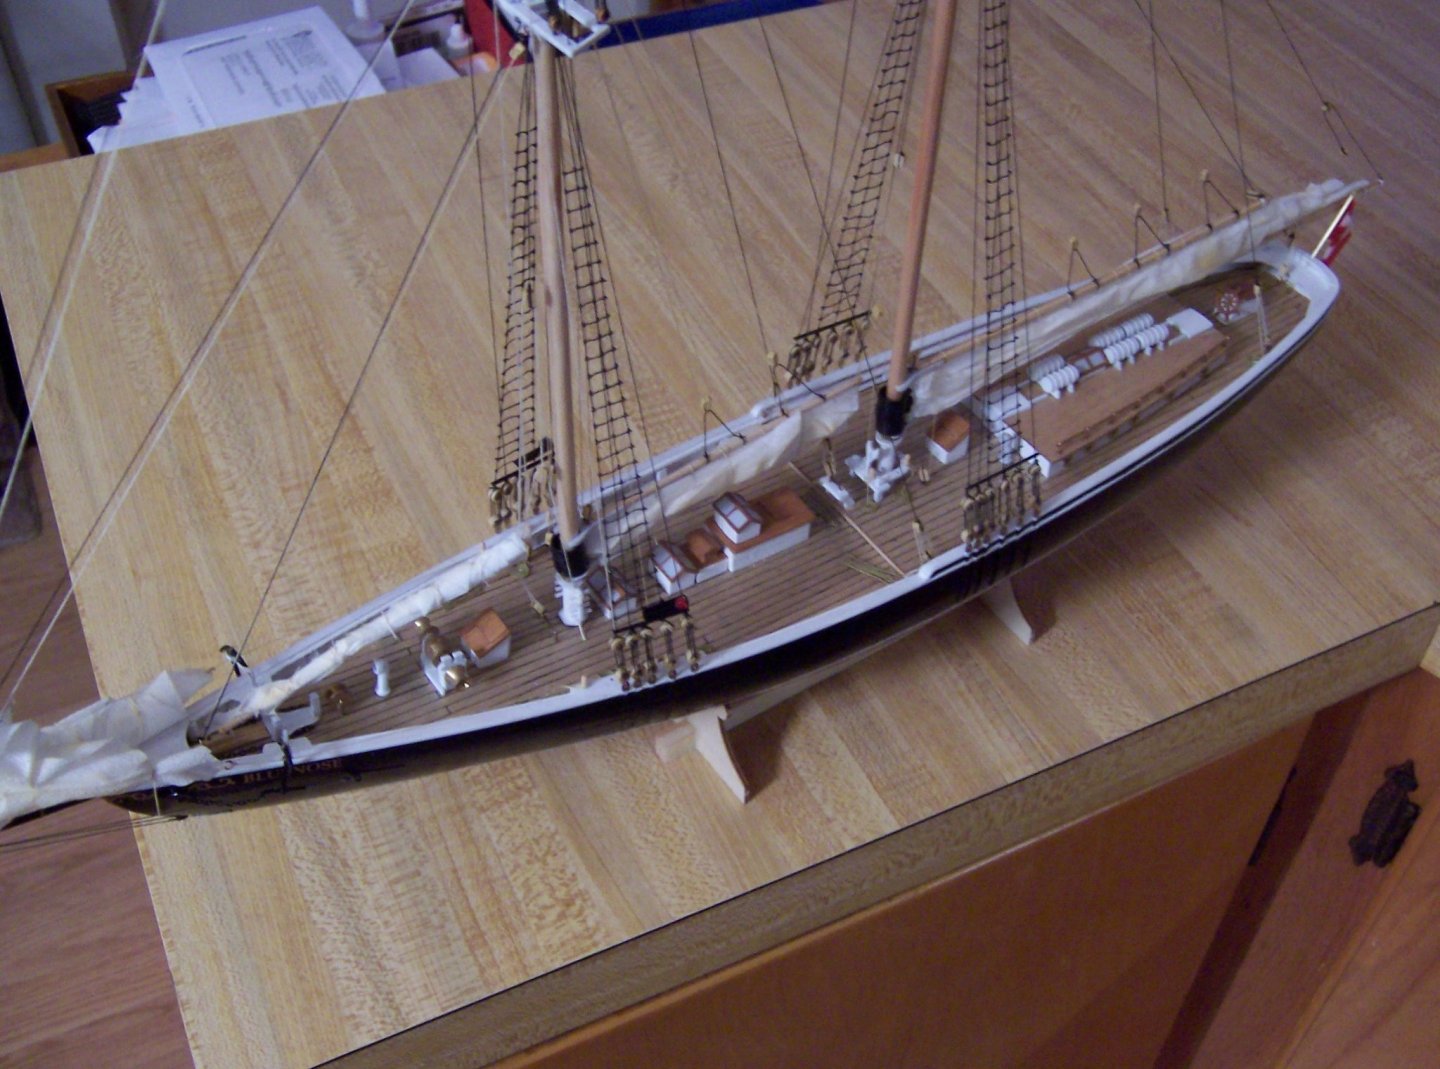
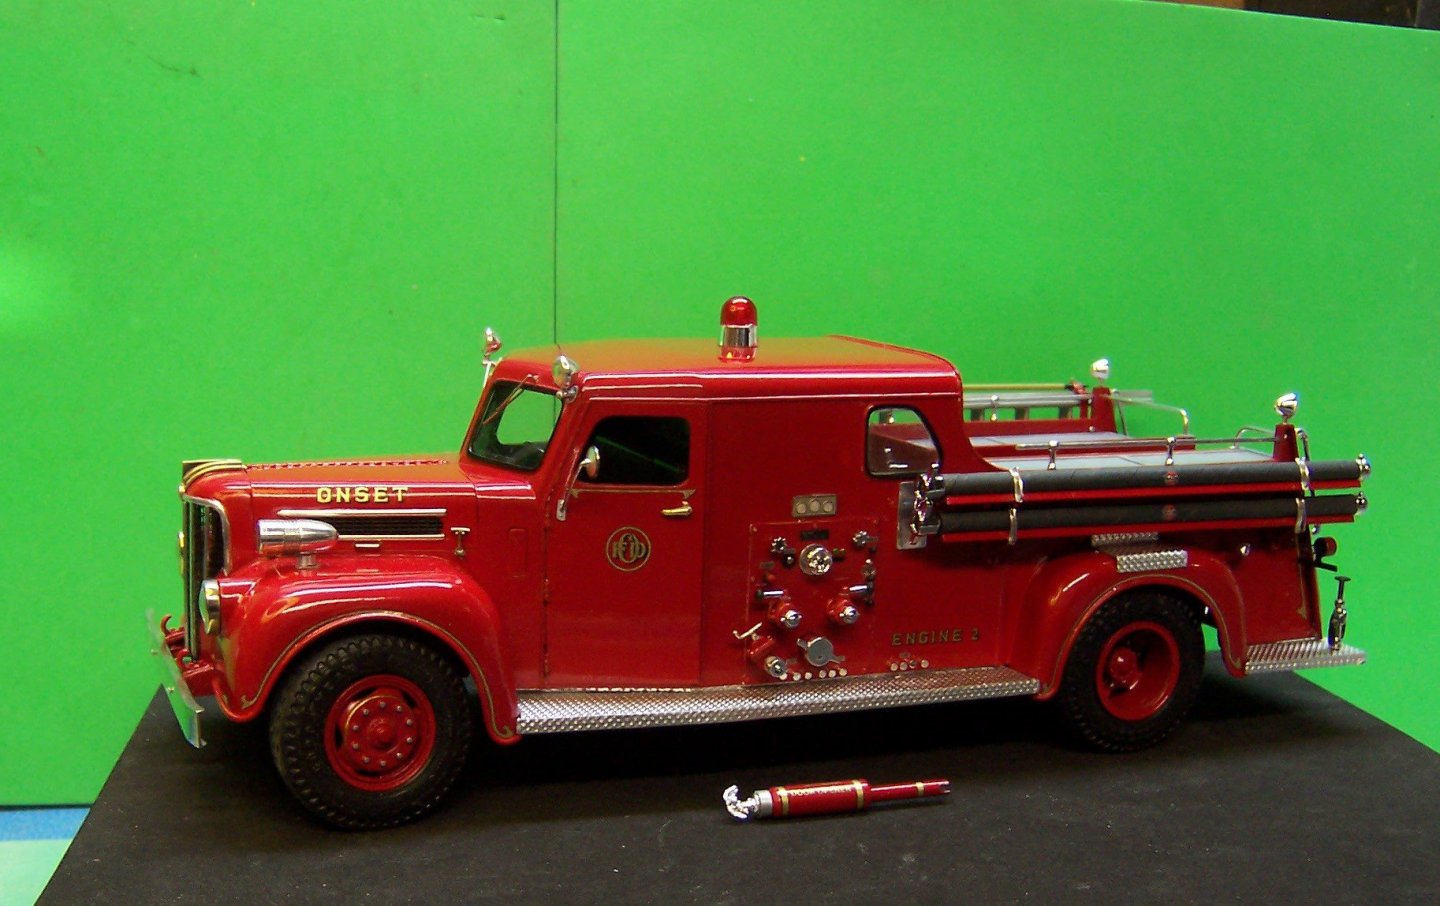
 Last summer I got a Billings 100 scale kit of the Bluenose. My wife expressed an interest in having a model of a schooner so we did some on-line shopping and ordered the kit. It took some time but finally came last June. Laser cut parts were excellent and easy to remove from the wood. Plastic parts remind me of car kits of the '60's. So much more detail in today's extrusions. Nevertheless I used most of them. Planking the hull was a lengthy process as it is impossible to pin the wood to the bulkheads without pre-drilling the holes. Not being an expert at this kind of building I followed the general method of planking the hull but with the pieces being so small (1/8" x 1/16" roughly) it was difficult to taper them. So in some areas a separate filler piece was shaped and inserted. Then as the hull was sanded smooth I used ACC in some of the gaps and let the sanding dust fill them in. It worked quite well. The kit instructions were less than desirable. Numbers in some of the drawings indicated what some of the standing and running rigging were but there were no corresponding numbers for some lines in other views making it difficult to determine where the lines should go. But with some on-line investigation Most of the work was able to get done. We decided that the sails would be furled. Kit material was way to heavy and thick for the scale of the model unless it was to be built in full sail. Even then, doing the necessary folding of the edges, etc would have been very burdensome and time consuming. Probably not the way most furled sails would be done but the effect was good for this build was to use single ply facial tissue. I superglued the edges of the material sufficient to allow a pin hole to be punched through about every half inch for tying the sails to the booms. For the jib sails, I made small brass wire loops, ran them through the holes and closed them up. Thread was then run through each loop. This allowed the sail to be bunched up in front. The rest was tied off. Here are a couple of photos of the work in progress and the final result which we are generally pleased with. The deck pieces were also laser cut but had no lines for planking. I drew lines with a fine drawing pen and then coated the deck with clear polyethylene. I made a jig out of sheet plastic and cut two holes the size of the deadeyes. In between I cut a slot. The deadeyes were put in the holes with the pre-drilled thread holes aligned and then threaded them. Using a jig assured that all of them would be the same. Two jigs were made because the deadeyes were of two sizes. The shrouds were put in place first and ratlines were individually tied with clove hitches and secured with ACC. Then the ends were cut off. In the photo above the booms were raised but were lowered in the final build with furled sails. I'm sure there is plenty to pick apart by those of you who are a lot more expert at model boat building than I am. So go easy on the criticism, although it will be graciously accepted. Here's a 1/25 scale model of a piece of fire apparatus that is more my type of building. It is a combination of sheet plastic, sheet brass, resin castings and is scratch built except for the tires and wheels. It represents a 1954 Maxim 750 gpm pumper. The real one is still around and was photographed and measured for the build.

- 1 reply
-
- 4
-
-
- bluenose
- billing boats
- (and 1 more)
-
 There we go... 10 months or so. The kit turned out to be unusable, so the build is about 90% scratch.


- 5 replies
-
- 8
-
-
- bluenose
- billing boats
- (and 1 more)
-
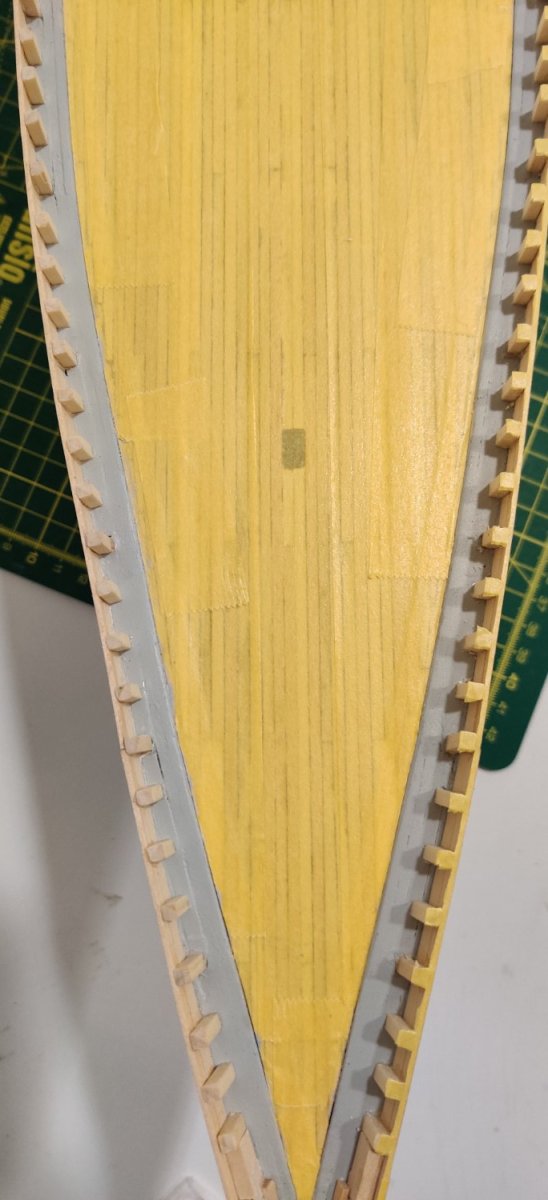
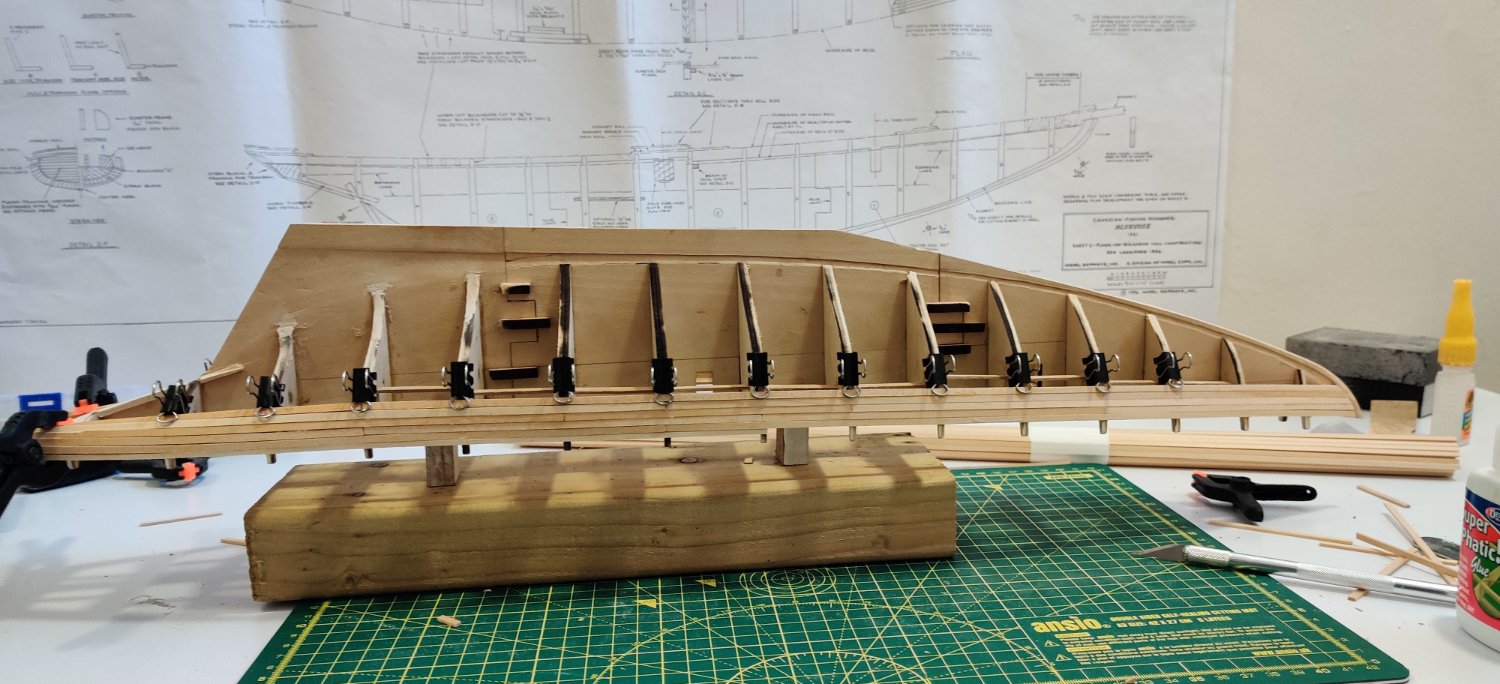
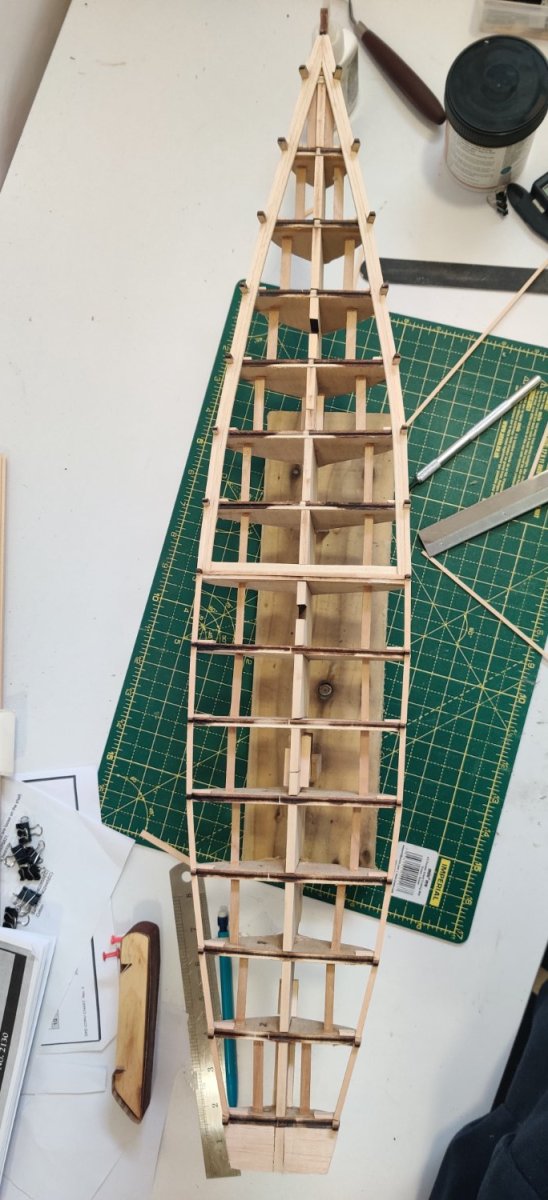
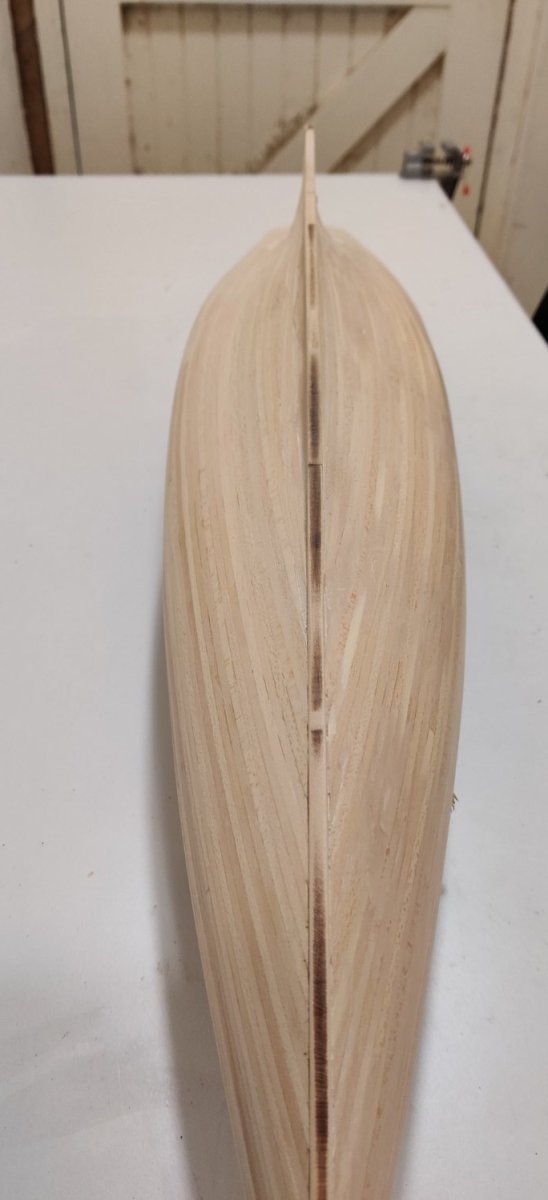
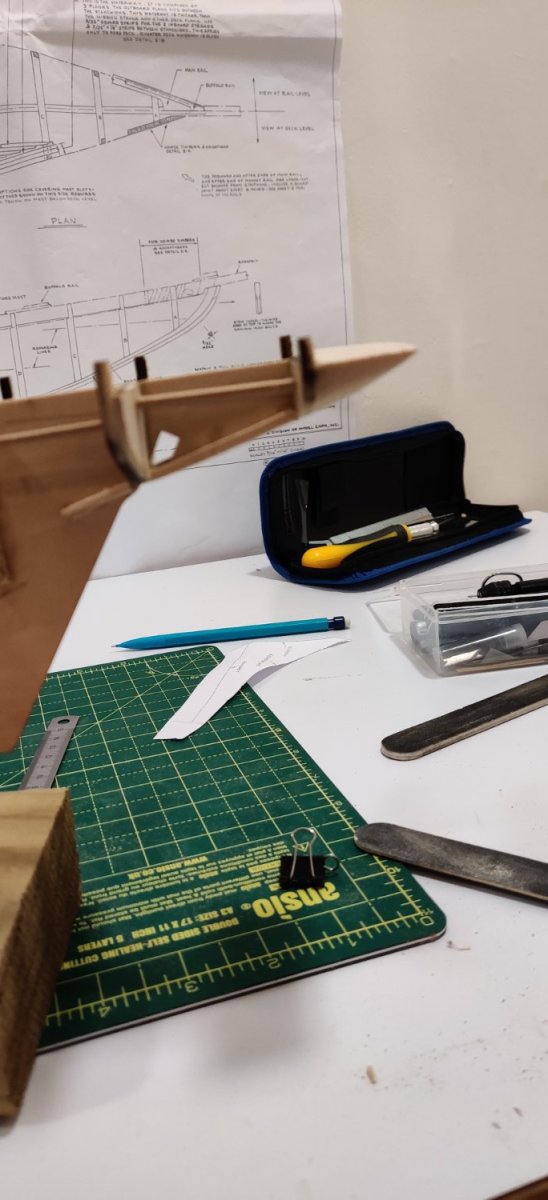
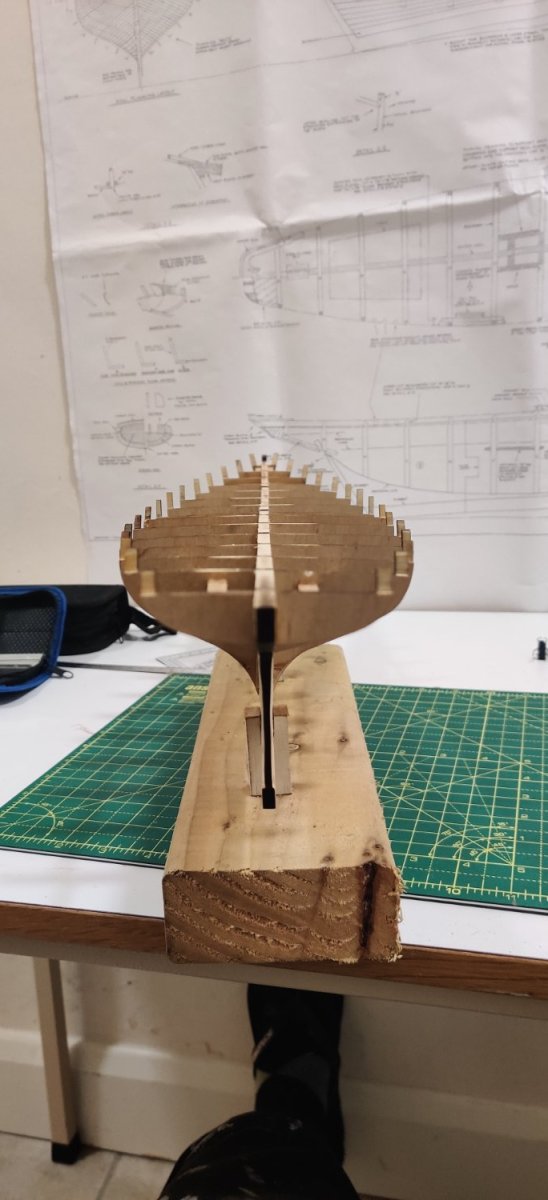
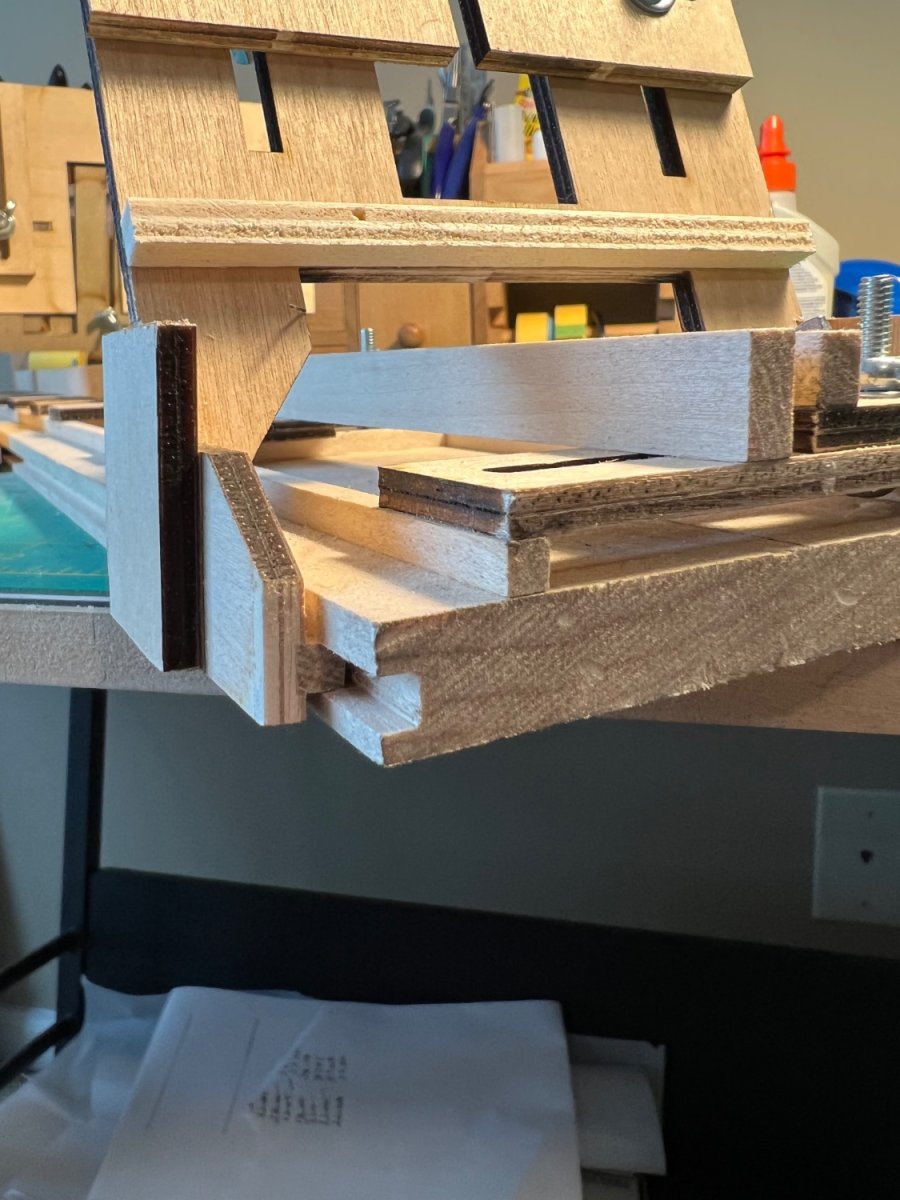
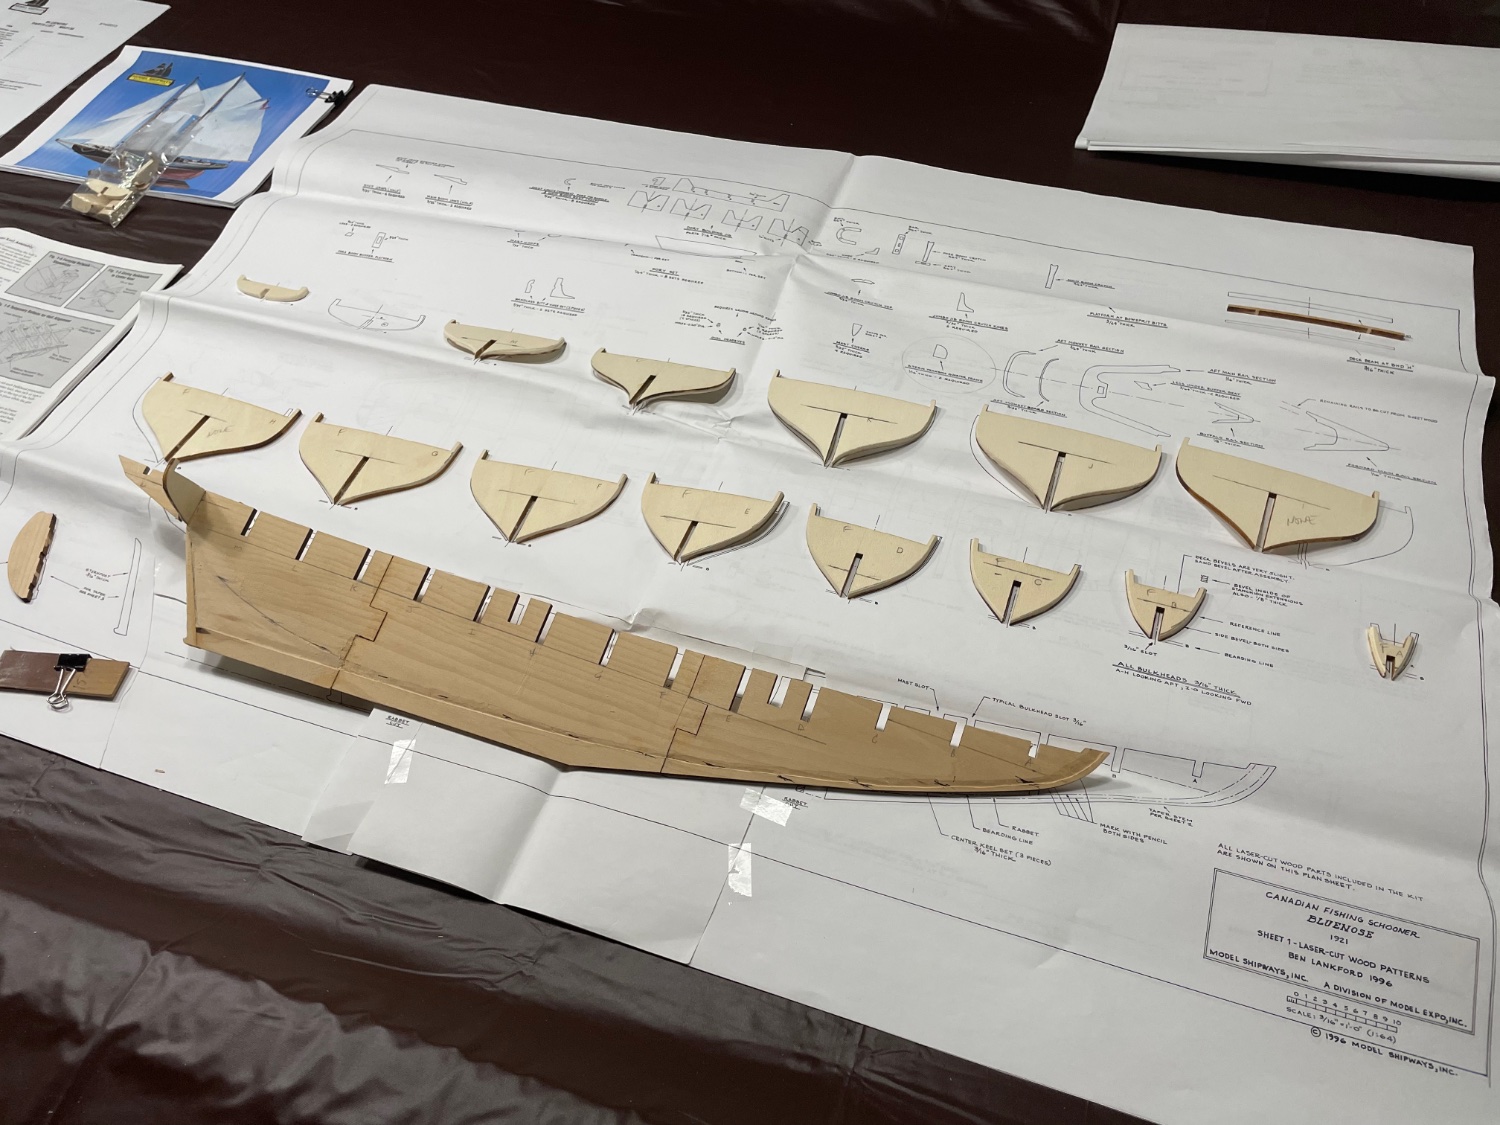
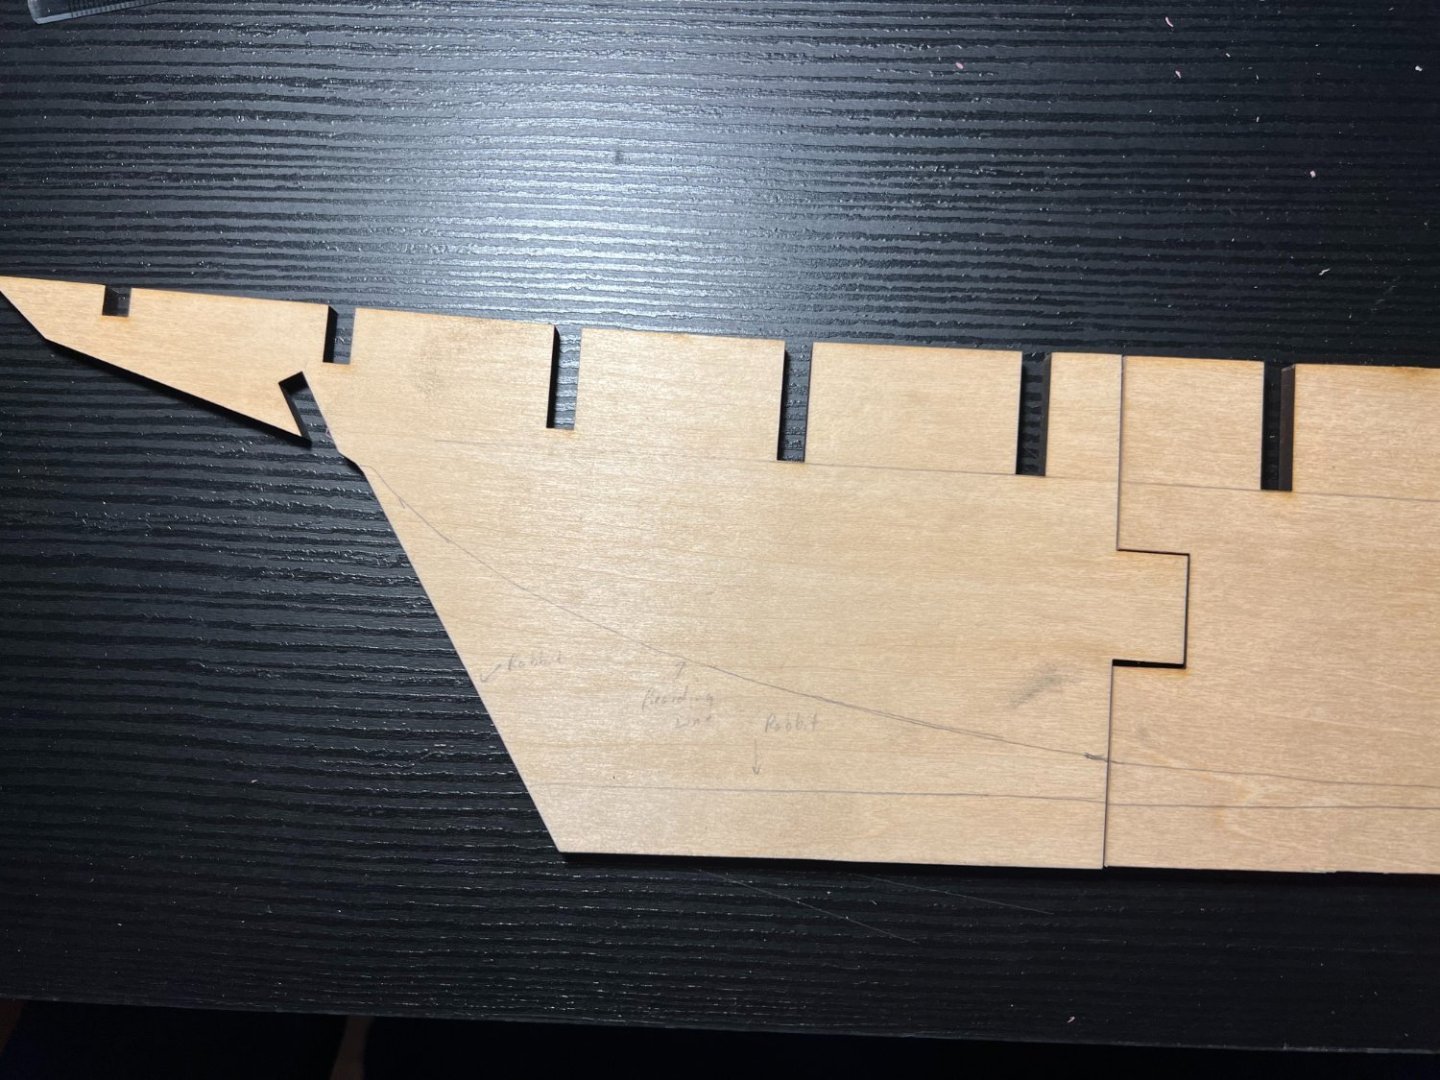
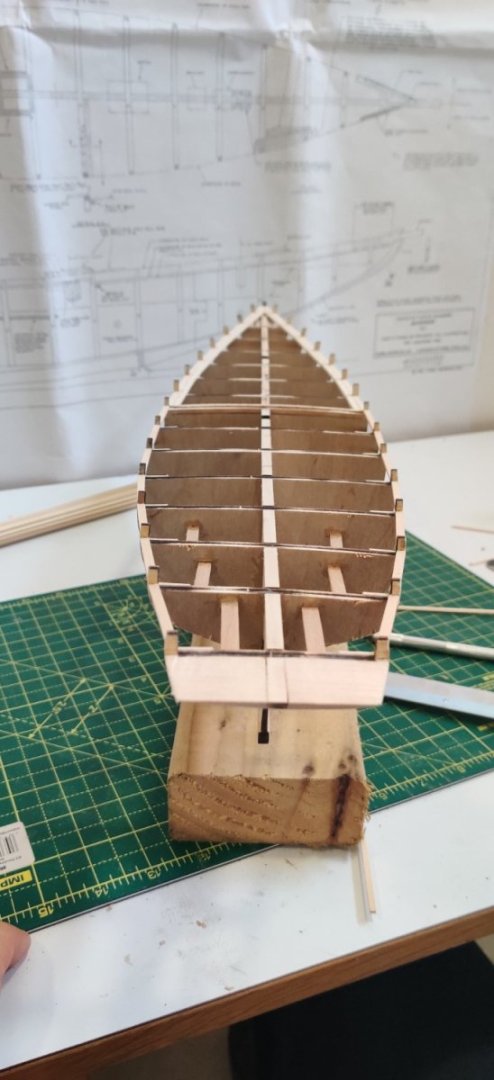
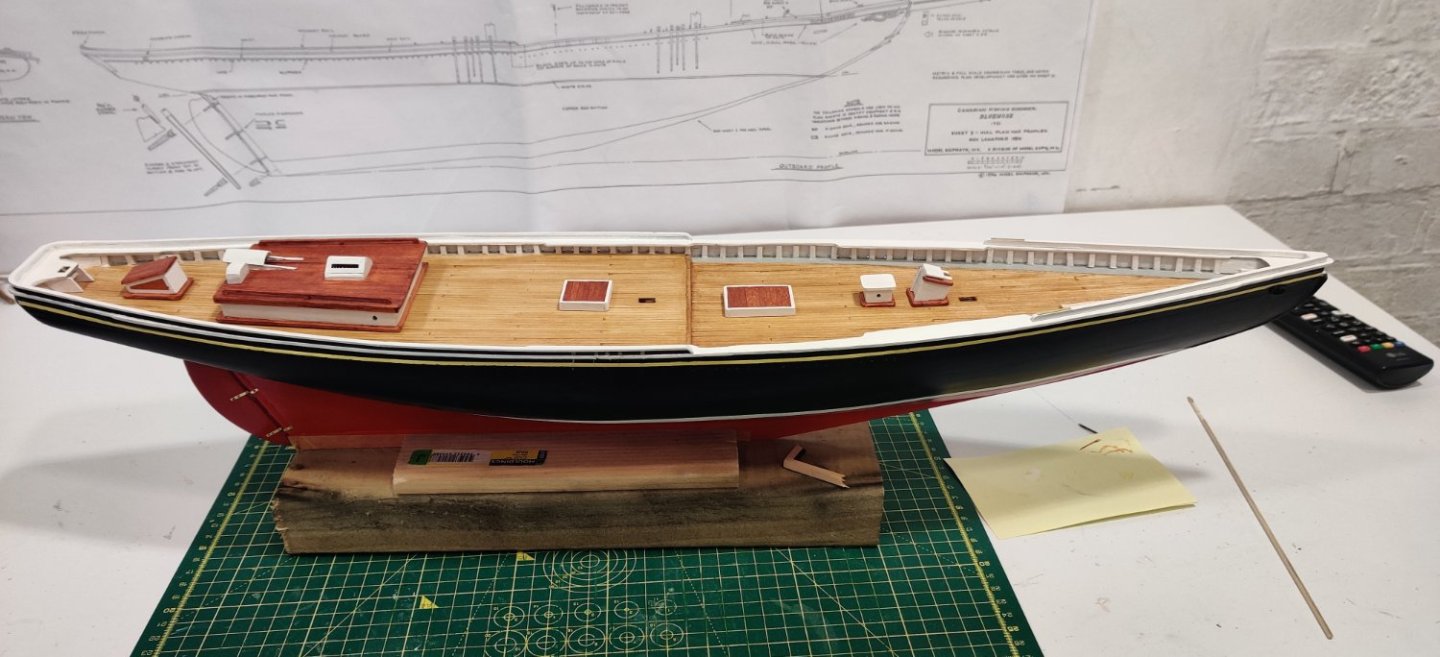
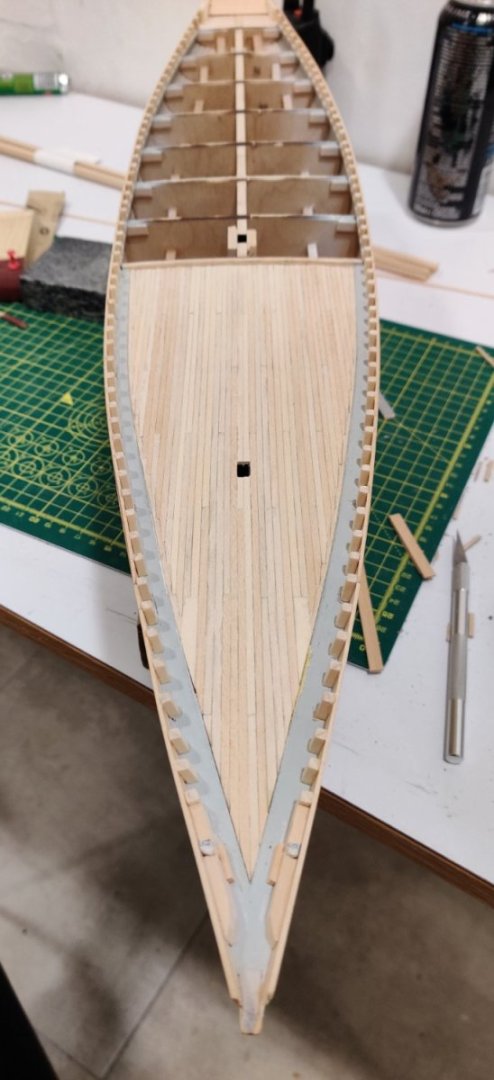
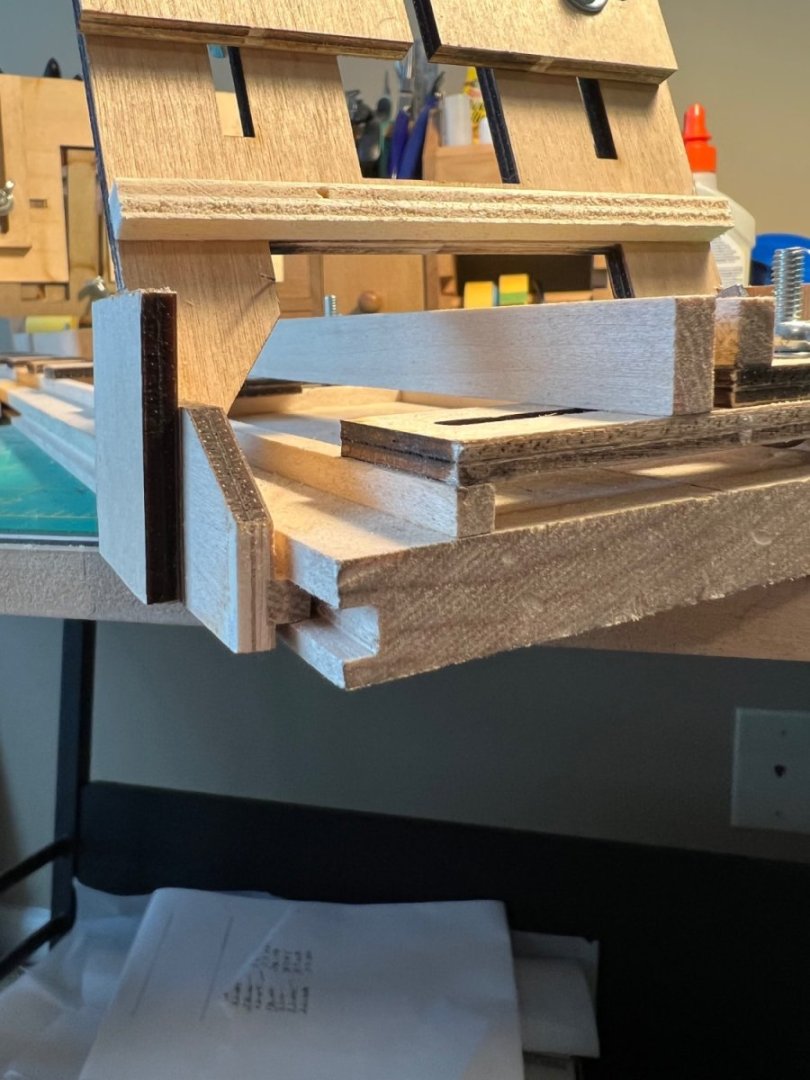
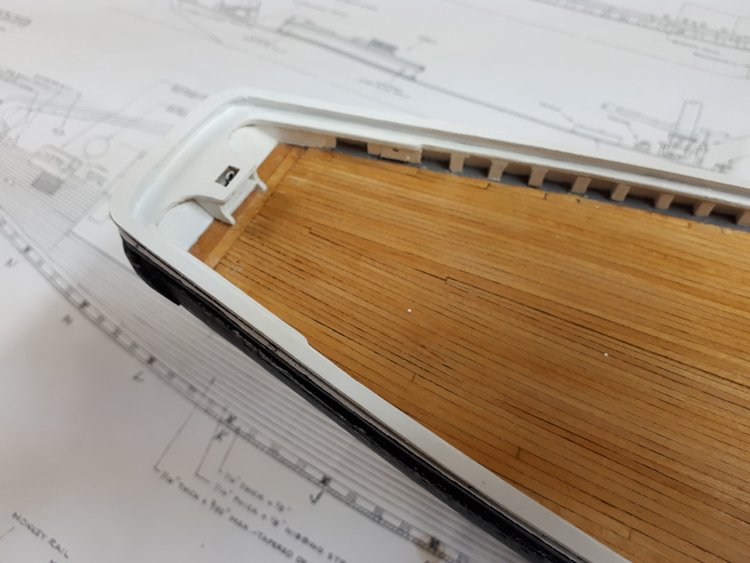
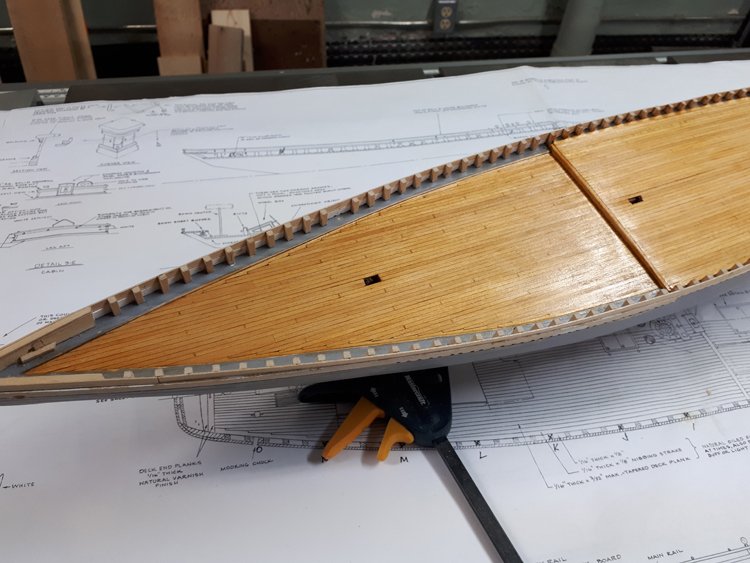
.thumb.JPG.33e8fc9704bbb01f03cf31c187b62df9.JPG) Hi, Just join this site and what a great site it is 👍 I see that a lot of people (most from Canada) build the Canadian fishing schooner Bluenose 1921 and so happens I am building this too, hope this is not to many do like the shape and lines of this schooner. When I bought this model I also purchased the Fair-A-Frame from Model Shipways as well, while building I did modify it so that head stock would slide in a grove this makes it more ridged and keeps everything nice and square, also they show that the adjusting rail which moves to clamp the keel was at a different height than the one you glue down, so I notched the rail to allow both rails to be the same height, these are small changes which I found really helped. Did not take any pictures of the start when I joined three parts to the center keel once that was dried I took some tracing paper and traced the beading lines and rabbet lines onto the center keel. Next up was to remove 1/16 from bulwark stanchions just below the deck then took some tracing paper and traced each bulkhead so that I could mark out how much beveling I had to do all these bevels were done before gluing to center keel, also bevel inboard bulwark stanchions, once this was done I did a trial fit to see how it all fit. Regards Richard
Hi, Just join this site and what a great site it is 👍 I see that a lot of people (most from Canada) build the Canadian fishing schooner Bluenose 1921 and so happens I am building this too, hope this is not to many do like the shape and lines of this schooner. When I bought this model I also purchased the Fair-A-Frame from Model Shipways as well, while building I did modify it so that head stock would slide in a grove this makes it more ridged and keeps everything nice and square, also they show that the adjusting rail which moves to clamp the keel was at a different height than the one you glue down, so I notched the rail to allow both rails to be the same height, these are small changes which I found really helped. Did not take any pictures of the start when I joined three parts to the center keel once that was dried I took some tracing paper and traced the beading lines and rabbet lines onto the center keel. Next up was to remove 1/16 from bulwark stanchions just below the deck then took some tracing paper and traced each bulkhead so that I could mark out how much beveling I had to do all these bevels were done before gluing to center keel, also bevel inboard bulwark stanchions, once this was done I did a trial fit to see how it all fit. Regards Richard -
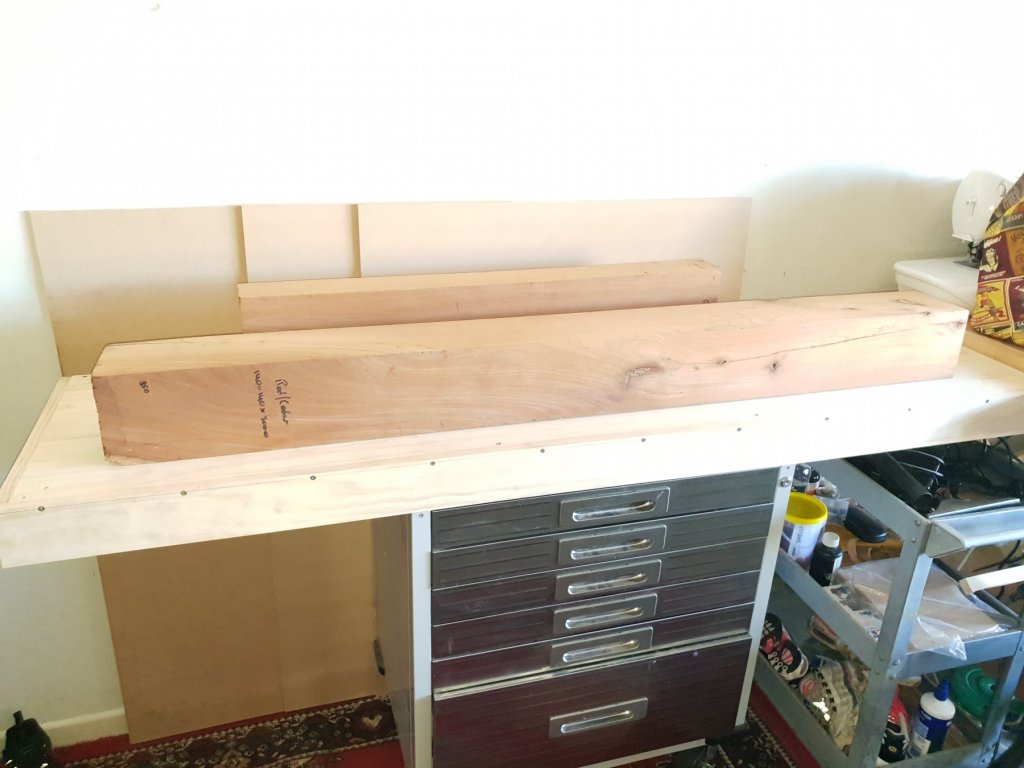
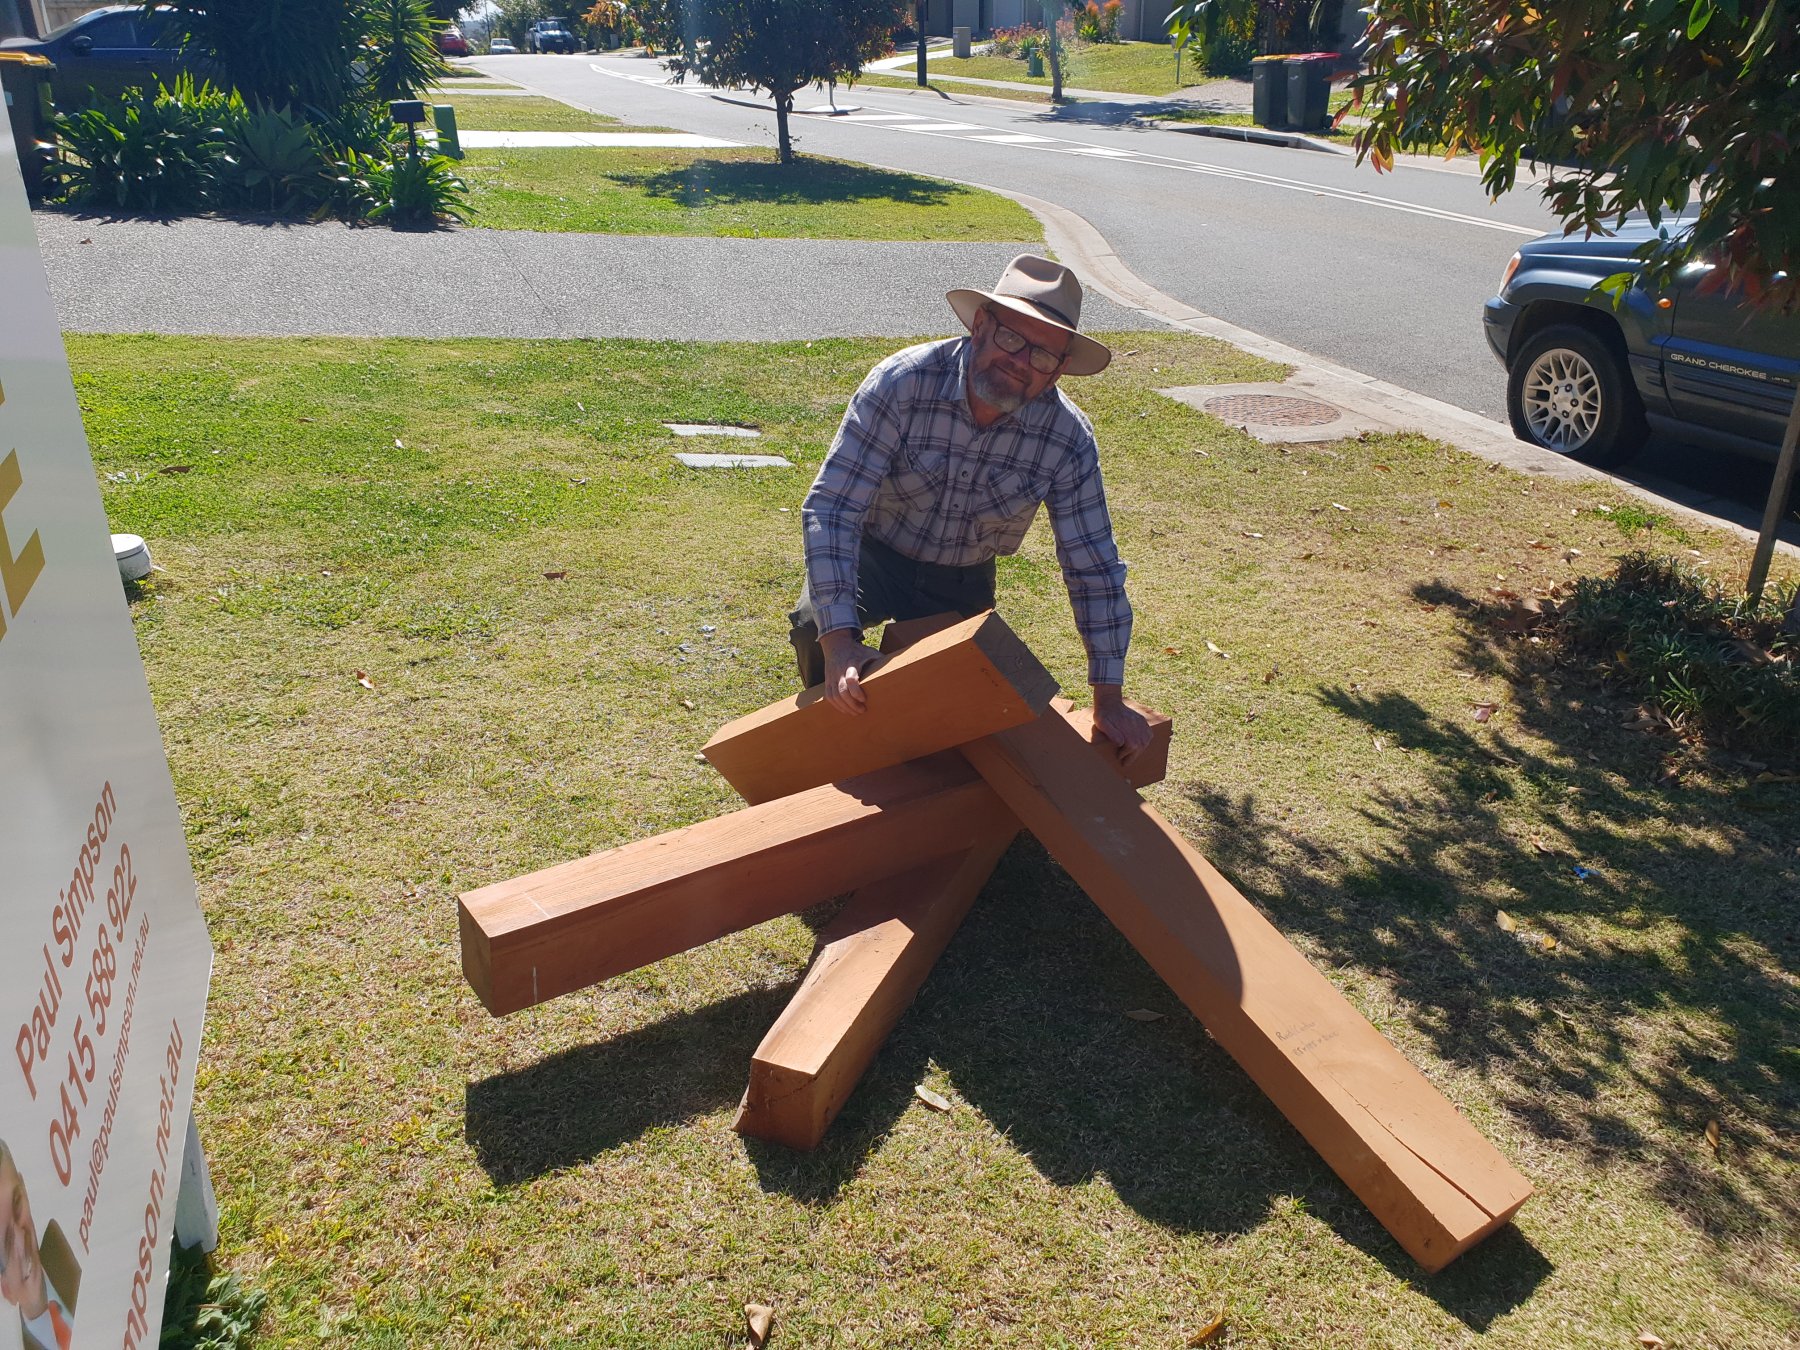
 . I suppose we have to start somewhere. I plan to build a 1:24 scale version of " Bluenose". I have read in depth Jond's version and will follow it closely as it worked. He is a very patient and excellent modeller. Both my son and I are overwhelmed with the successes of this very famous Schooner. My son said that " this is a beautiful boat dad ....I just love the lines". It was only after reading further into it ( Bluenose ) That we became educated enough to realise what " Bluenose " was and what she represented. My son Damian certainly hit on the lines. He said without even knowing anything about her.." Dad....this is the ship to build". She is beautiful. My son is an artist and has an instant eye for beauty. He recognized in an instant that " Bluenose " had to be "it". At nearly 69 years of age it comes to the time that we listen to our siblings and no longer have to tell them what to do but do as advised!!!! We have started the journey into " Bluenose" and I guess it will never end as learning is endless. What a boat!!! I have made several ships in bottles, and a few kit builds but now the challenge is set for me. This ( to me) is a big challenge and I will need helping out. I am learning naughty terms....sorry ( nautical ) terms and have a thirst to learn more. Meanwhile hopefully, here are a few shots of how I am starting out. The first is of yours truly having just arrived home with a lot of red cedar logs. The second is of our building board specially built to the size of the yacht with two huge logs of cedar on top. The build board is mounted on a trolley with wheels so I can get to any part of the build. We live in Australia. The pics are of the building board for Bluenose and the huge hunks of red cedar we bought from my ol mate down the road lie in readiness for the hull planking. I have two more logs like this. So I guess a build log starts with exactly that. LOGS!!!!! The sheets behind are MDF to form the hull formers on which the planking will be done. The formers will be sacrificial. We await the plans from Canada which will be scaled up by double the size. I believe they are Eisonor plans. Pete