Search the Community
Showing results for tags 'caldercraft'.
-
 Hello everyone. Yes, I am starting my second project. First one is in rigging stage and i love working with wood, so.... I bought this kit a while ago and i couldn't wait to unpack it and start modeling. My first ship of the line. I wanted to build this one 5 years ago but i knew i didn't have enough knowledge or practice so i had to start with something smaller like endeavour. The wait is over, lets get to the work.
-
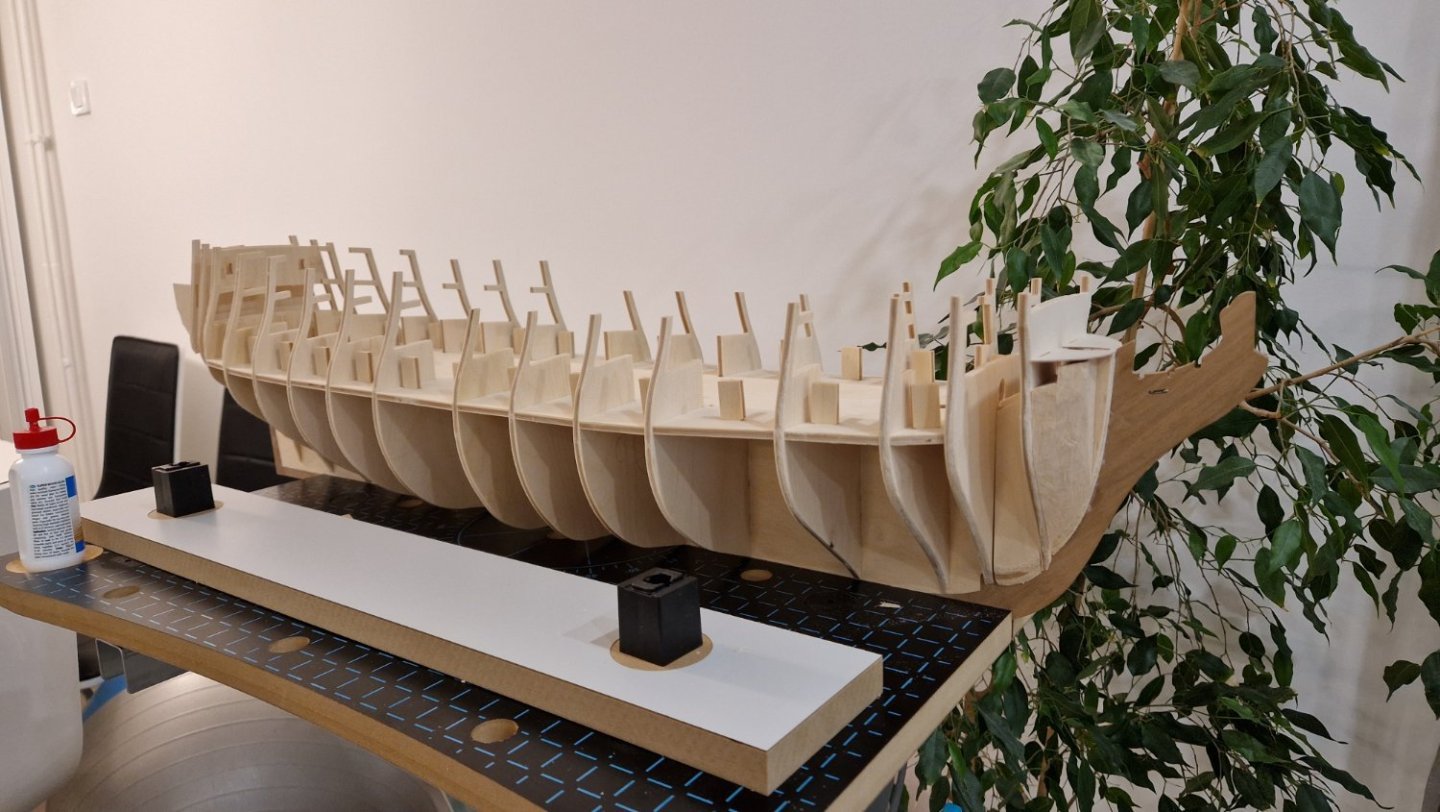
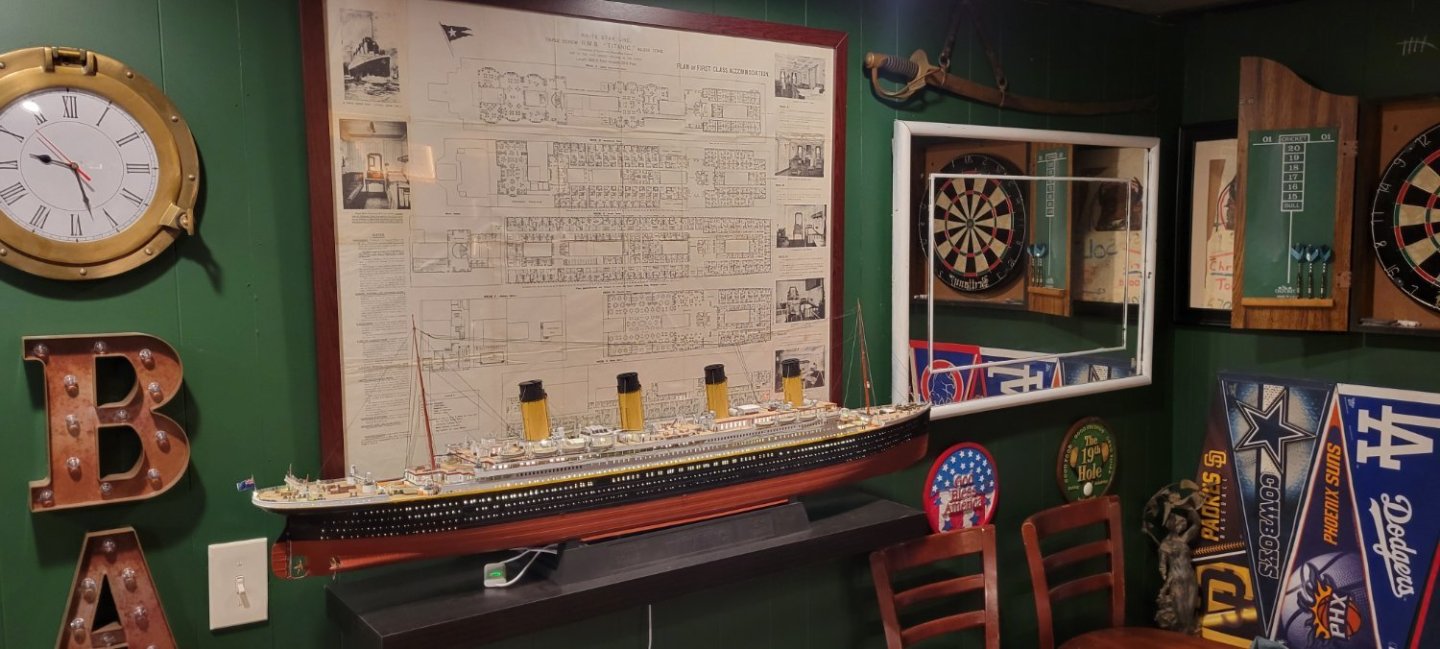
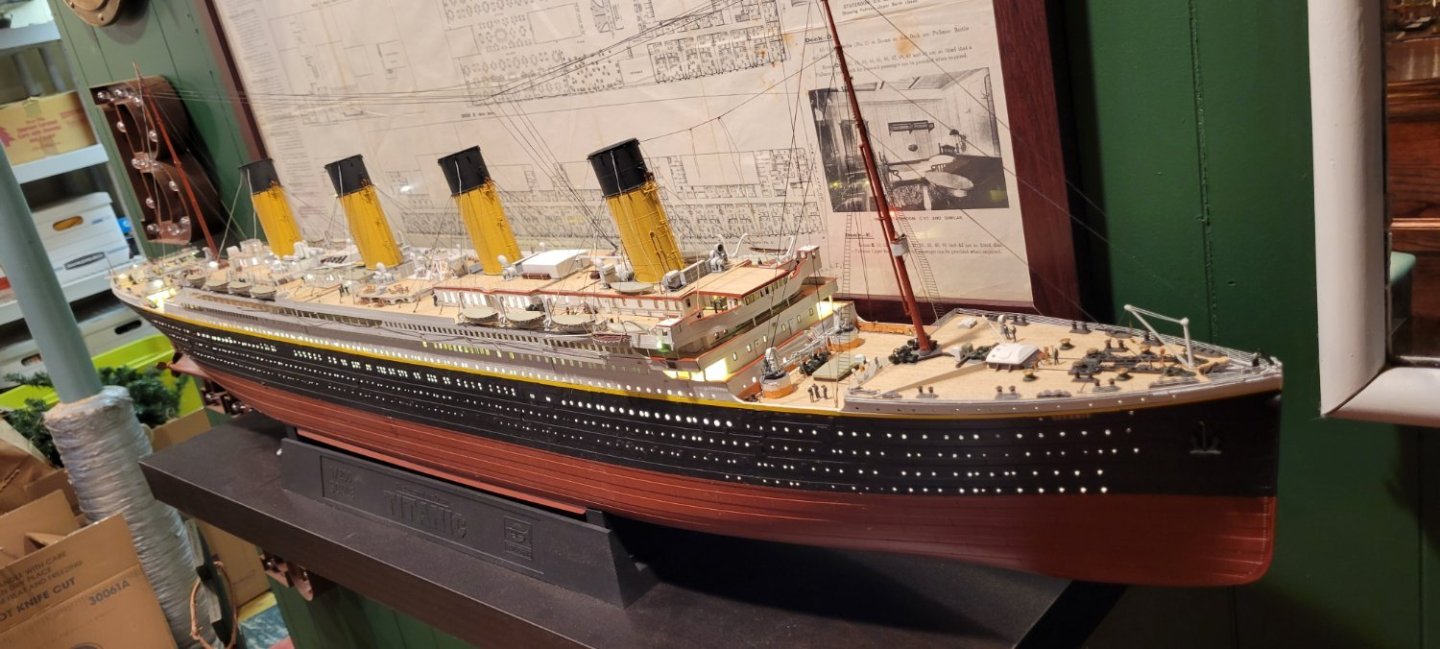
 Hello everyone! Well....after 40 years of work, I retired 2 years ago and have been trying to find things to do. As a teenager, I certainly worked on plastic models, with all their glue stings and poorly fitting parts and horrific paint jobs. I remember getting a small Cutty Sark wooden model, with poor instructions and parts that were only printed to wood sheets. Everything had to be cut out and even the hull was a solid block of wood that had to be shaped and sanded....never came close to finishing. Last year I took on a plastic model, Trumpeter's Titanic. It was a massive undertaking and took just about a year to finish. I had to learn how to handle photo etch, a paint gun, the use of CA glue and manipulating teeny, tiny parts. I took most of last summer off in the build as I own a sailboat in upstate NY, USA and that took priority, but I finished her last November or so. Is she a show room piece? Lol, no, but I am very proud of how she looks. I have fairly good wood working skills and can problem solve a lot of things with wood. I love sailing and have always wanted to buy one of those pre-made wooden ships for my office. The ones that cost about $500-$700 USD. Instead, I decided, why not try to build one!!!! I know this kit is VERY hard and having never even tried to build a wooden model or the subsequent issues and tasks concerning rigging, I just wanted to take a stab at it. So I found a kit in stock in the UK through Arrow Models. I ordered her and within about 2 or 3 weeks it arrived in the USA. Arrow did a great job and while I was a bit nervous working with an overseas company where I could find little feedback, they were tops! Great communication and great customer service. There are a few Caldercraft 1:72 build logs on MSW (I see more now as I've learned the search process here) and a few YouTube video logs that I am using. Perhaps (upon my initial search) not as many as some of the other models and kits. I thought I would add a log that is from a person with absolutely NO experience with this type of kit and certainly a kit that requires a high degree of skill or expertise or as is my hope....just the patience and perseverance to gut it through! I've posted a few Titanic pics in this post, I promise going forward it will be all Victory all the time. I just want to see how the posting process works and I will start adding right away. As of Feb 21, 2024 I am on the first planking task, about 5 planks up. So.....I'll see you at the finish line and thank you! Chris Index to My Build Laying out the Keel Mounting the Keel and adding Bulkheads Installation of Middle Deck Dummy Barrel Strips Gun port Patterns First Planking layer Sanding and finishing First Planking Quarter Galleries Deck Planking of Middle Deck Staining/Finishing Deck Planking Second Planking layer Three books every modeler needs
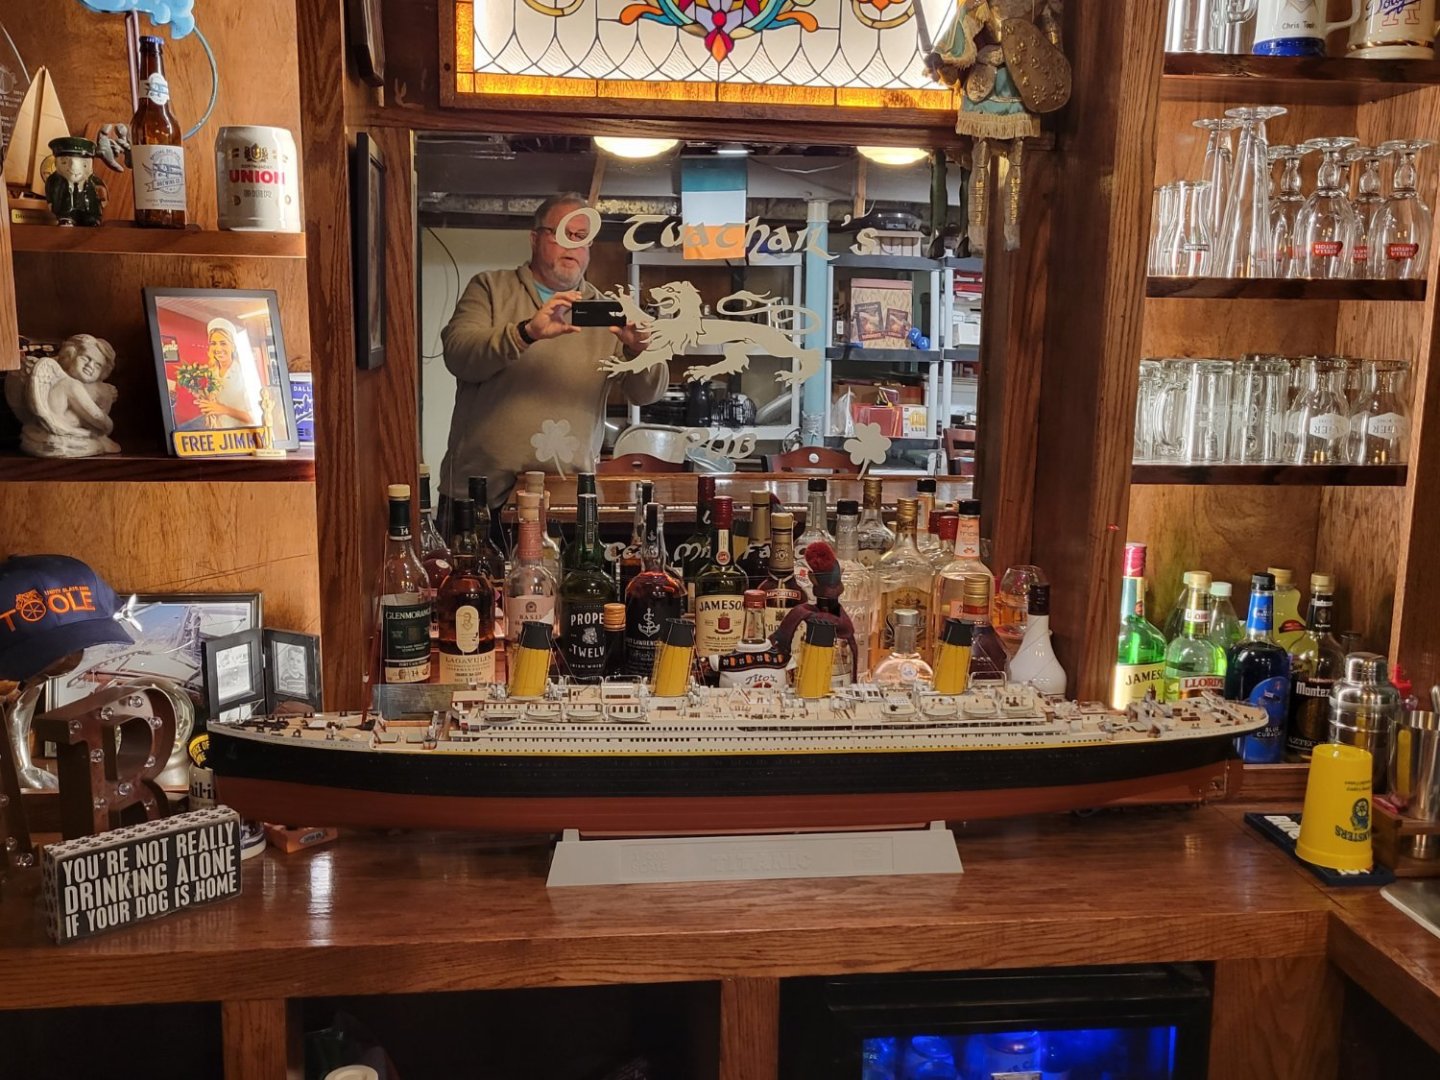
-
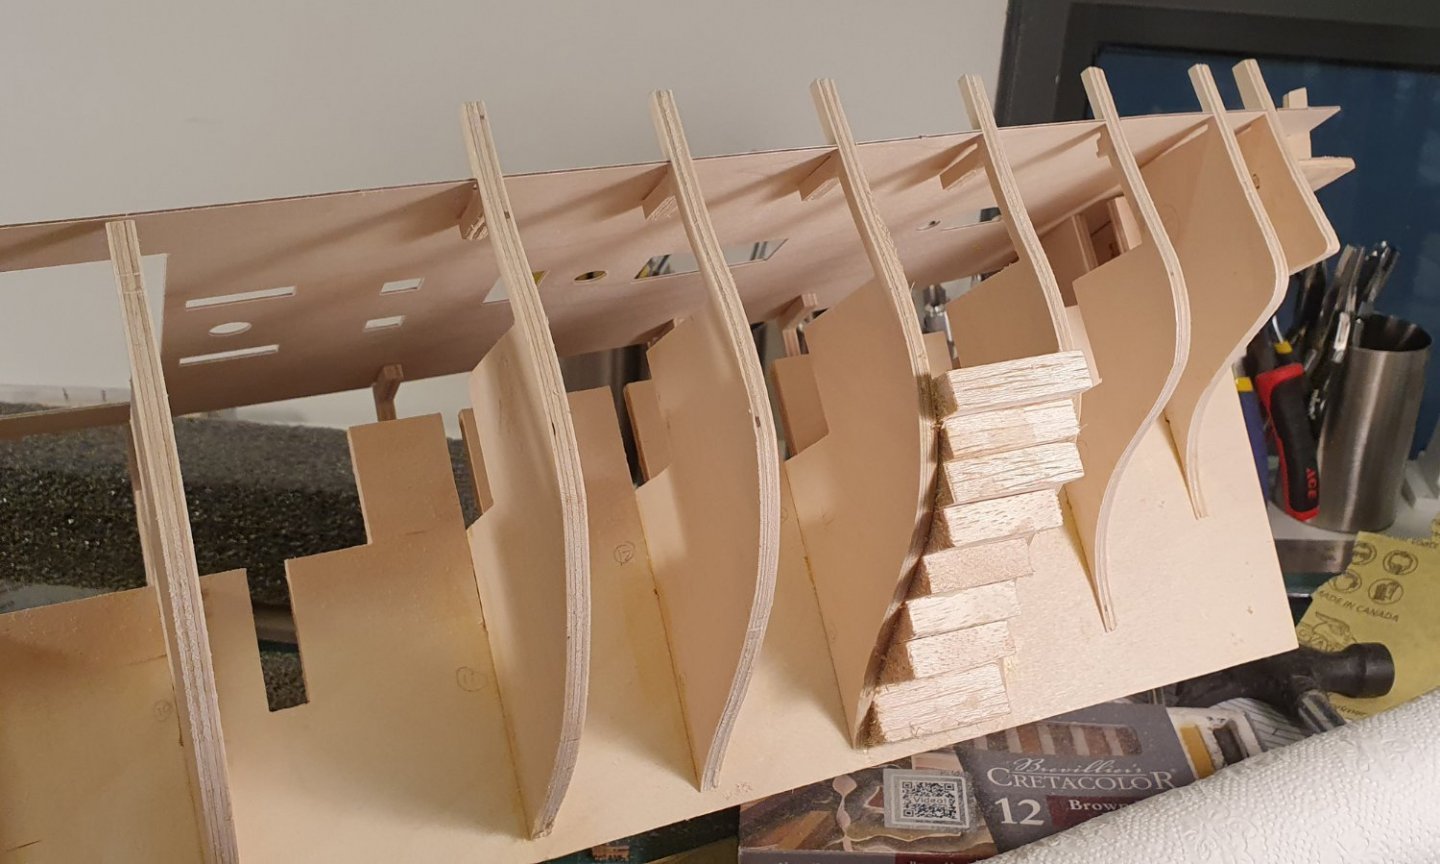
 Hello I've been lurking on this website for a couple of years and building ship models to various levels of completion but thought it was actually time to build something to completion and post it on this website. The frame and bulkheads went together nicely and I am putting on my first layer of planking. I did some rabbet work and a bearding line down by the keel, stem, and post rather than following the kit instructions to the letter.
.thumb.jpg.55ac79dffeb13acd497f61ce627ceaa3.jpg)
-
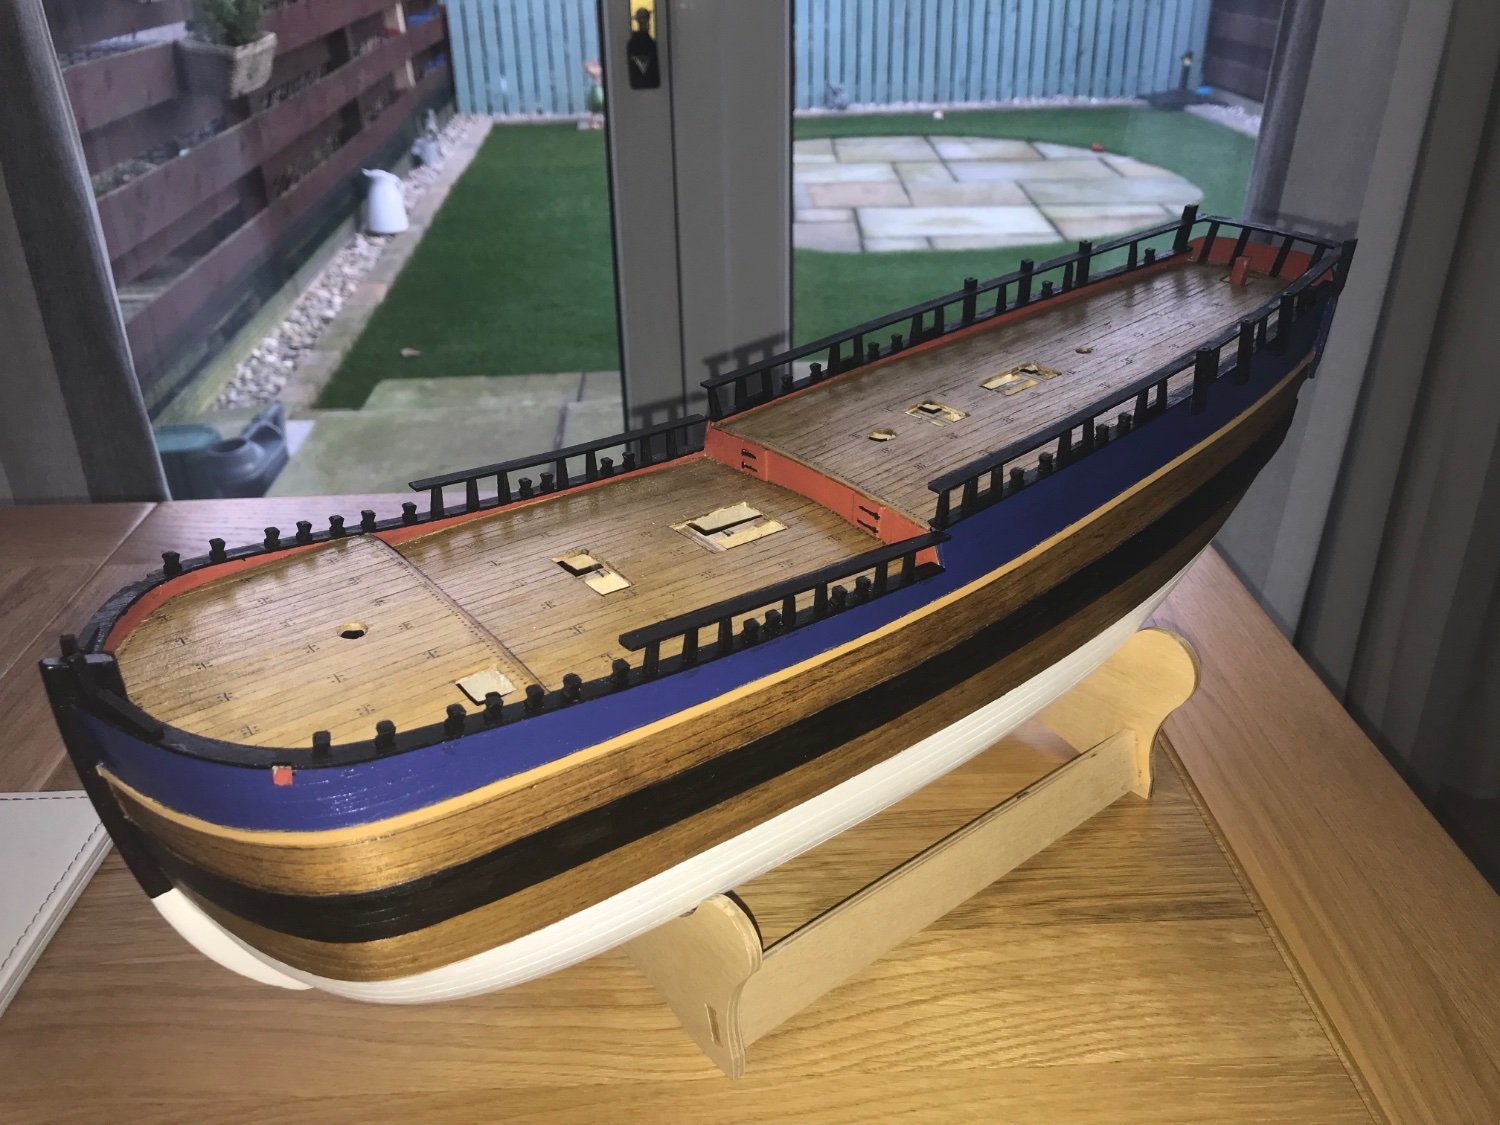
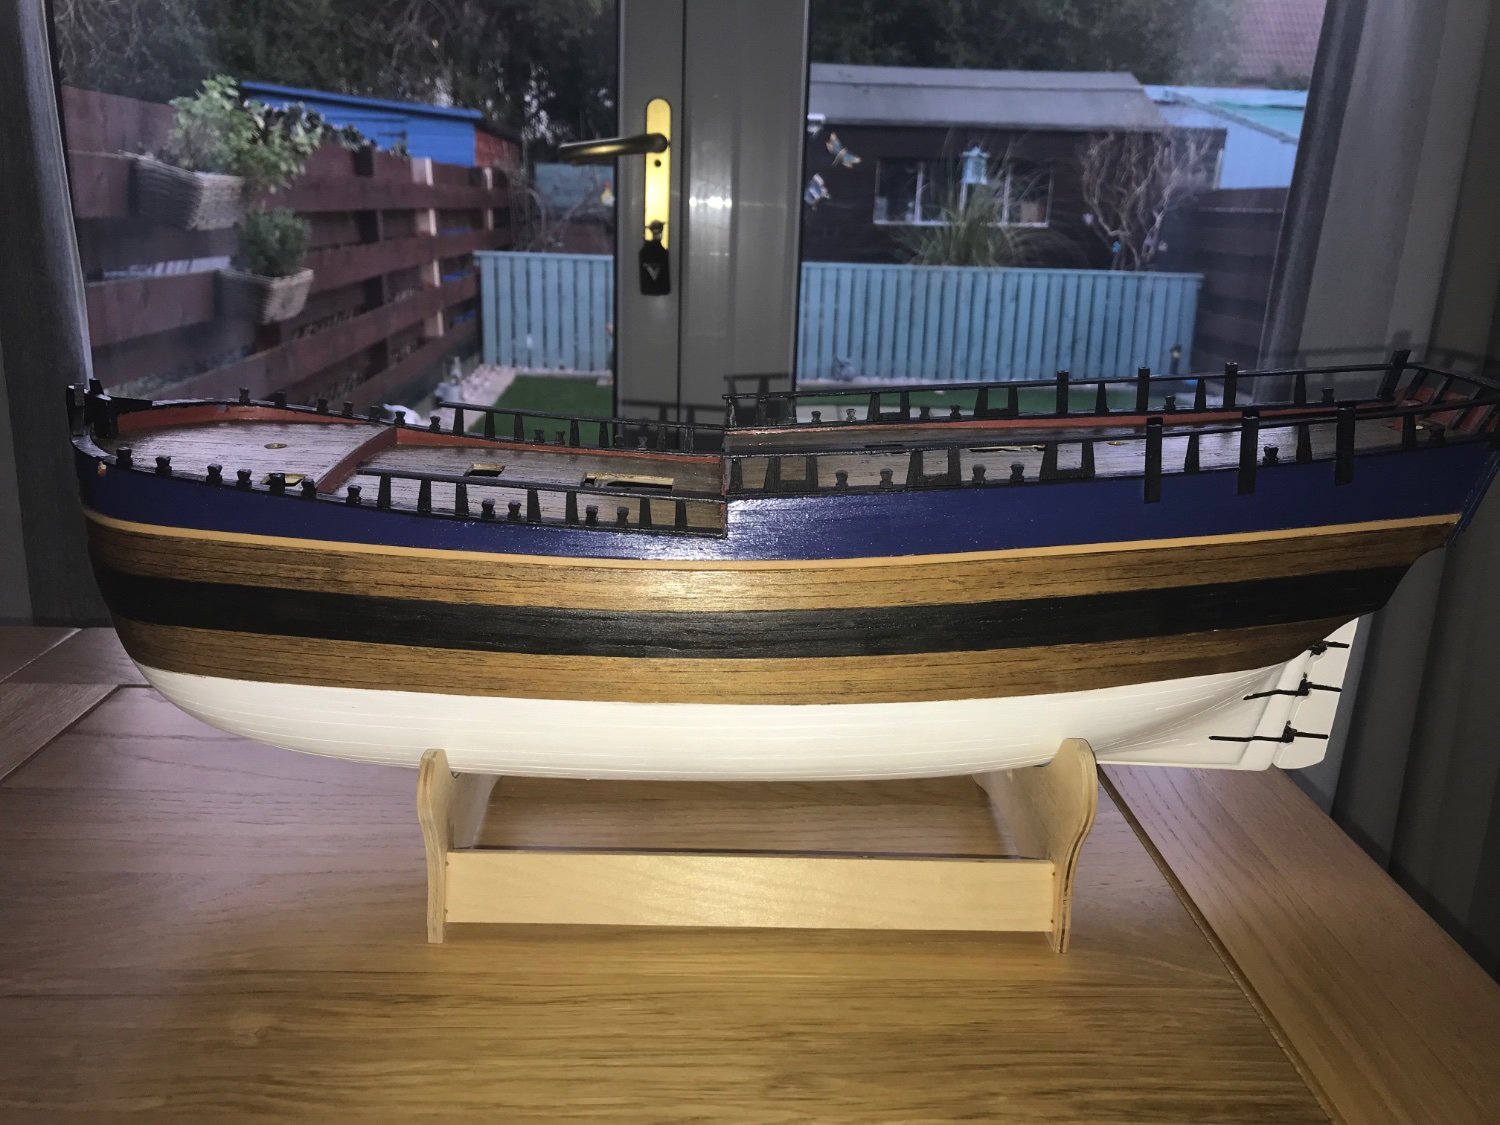
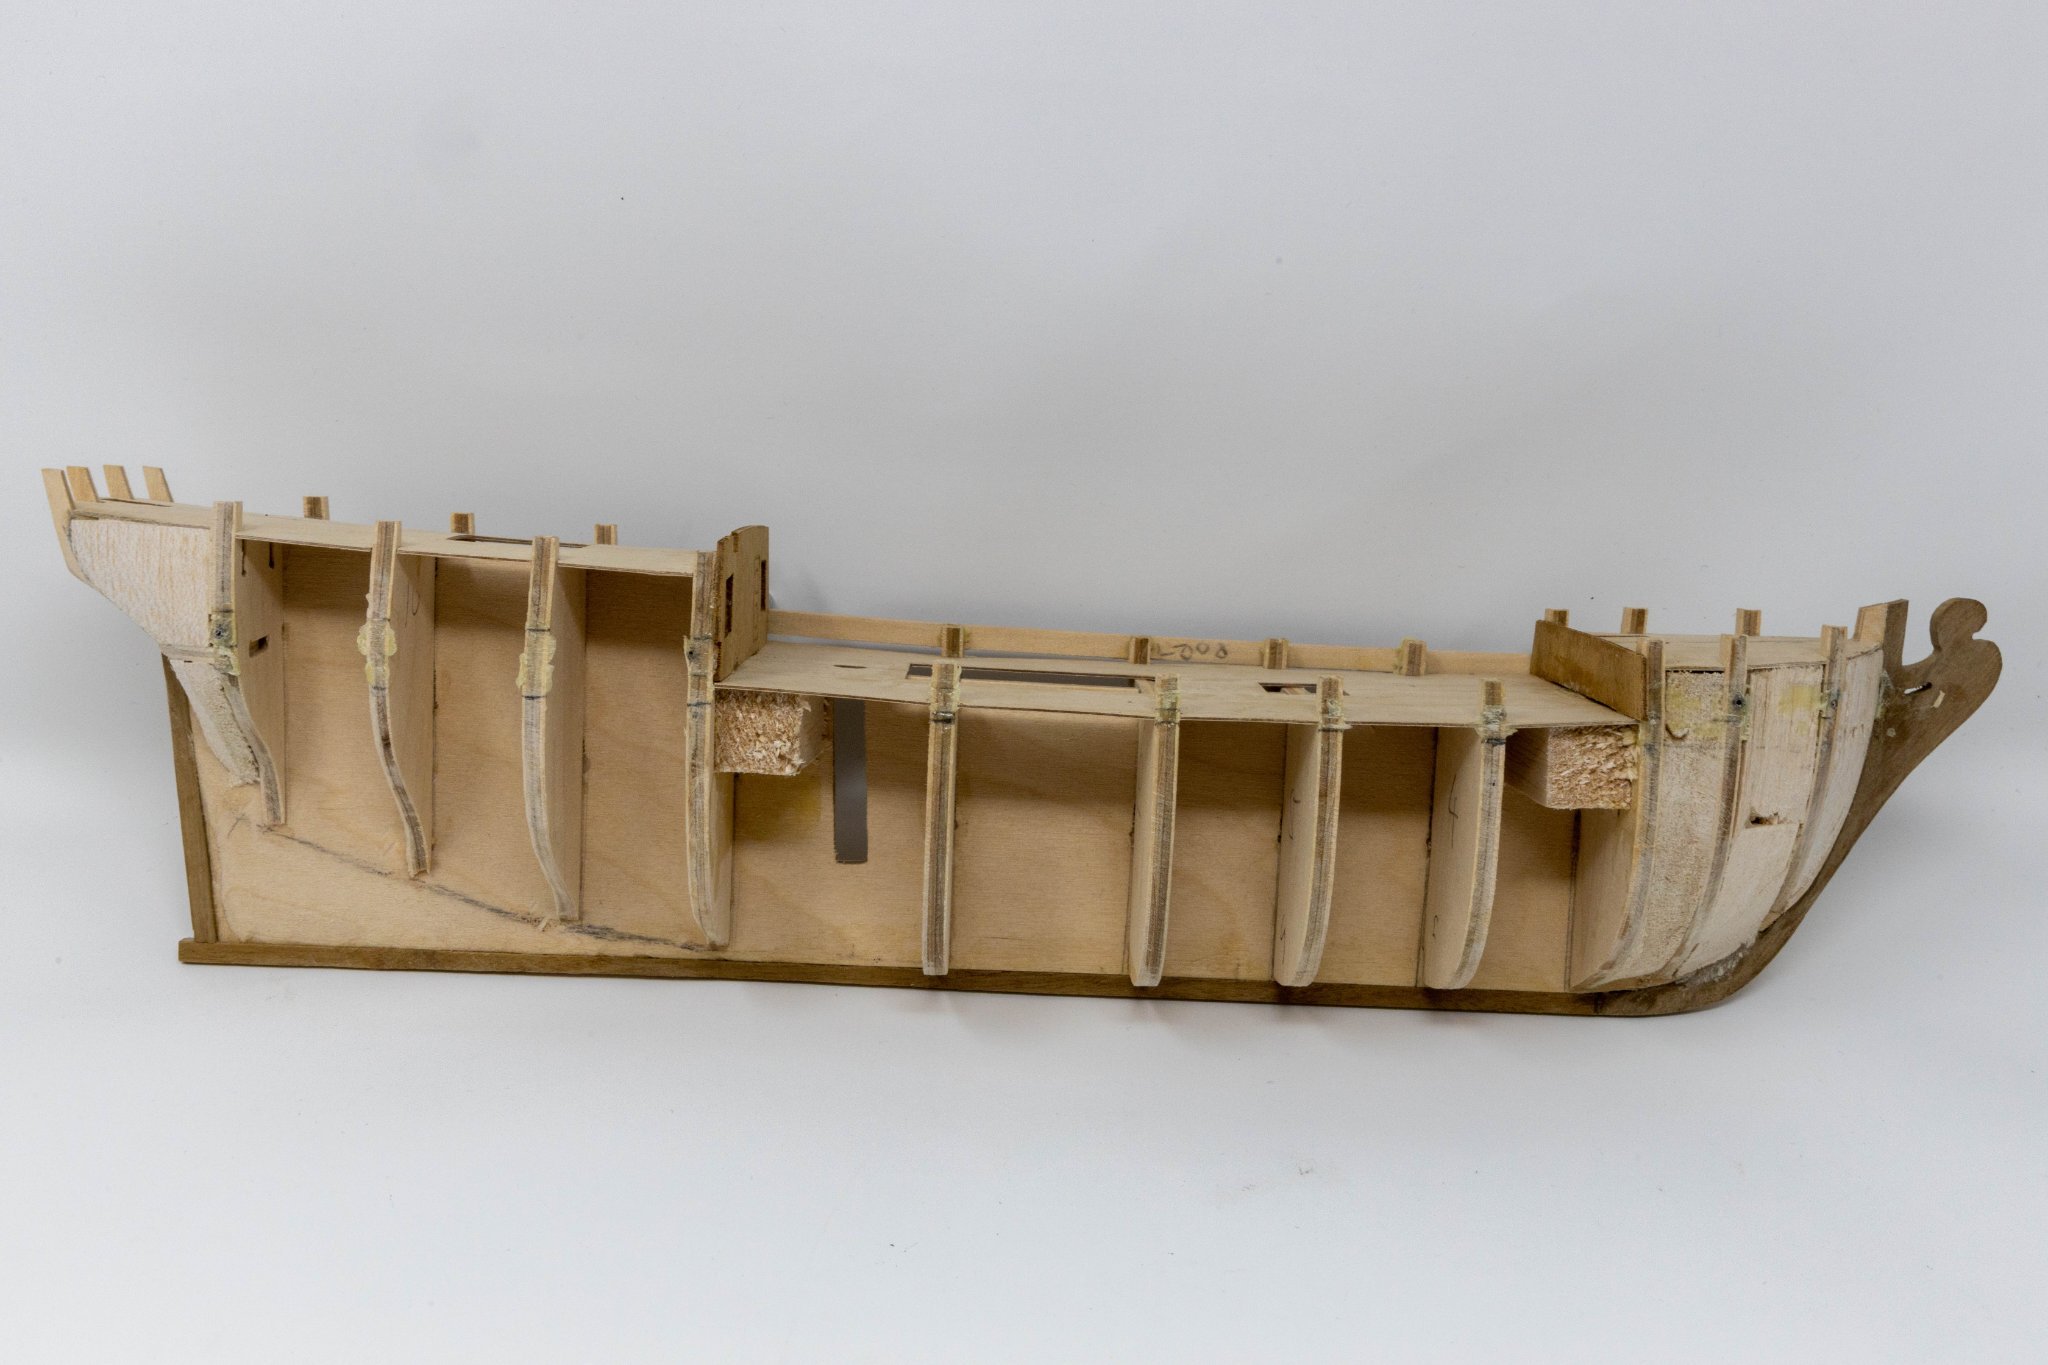
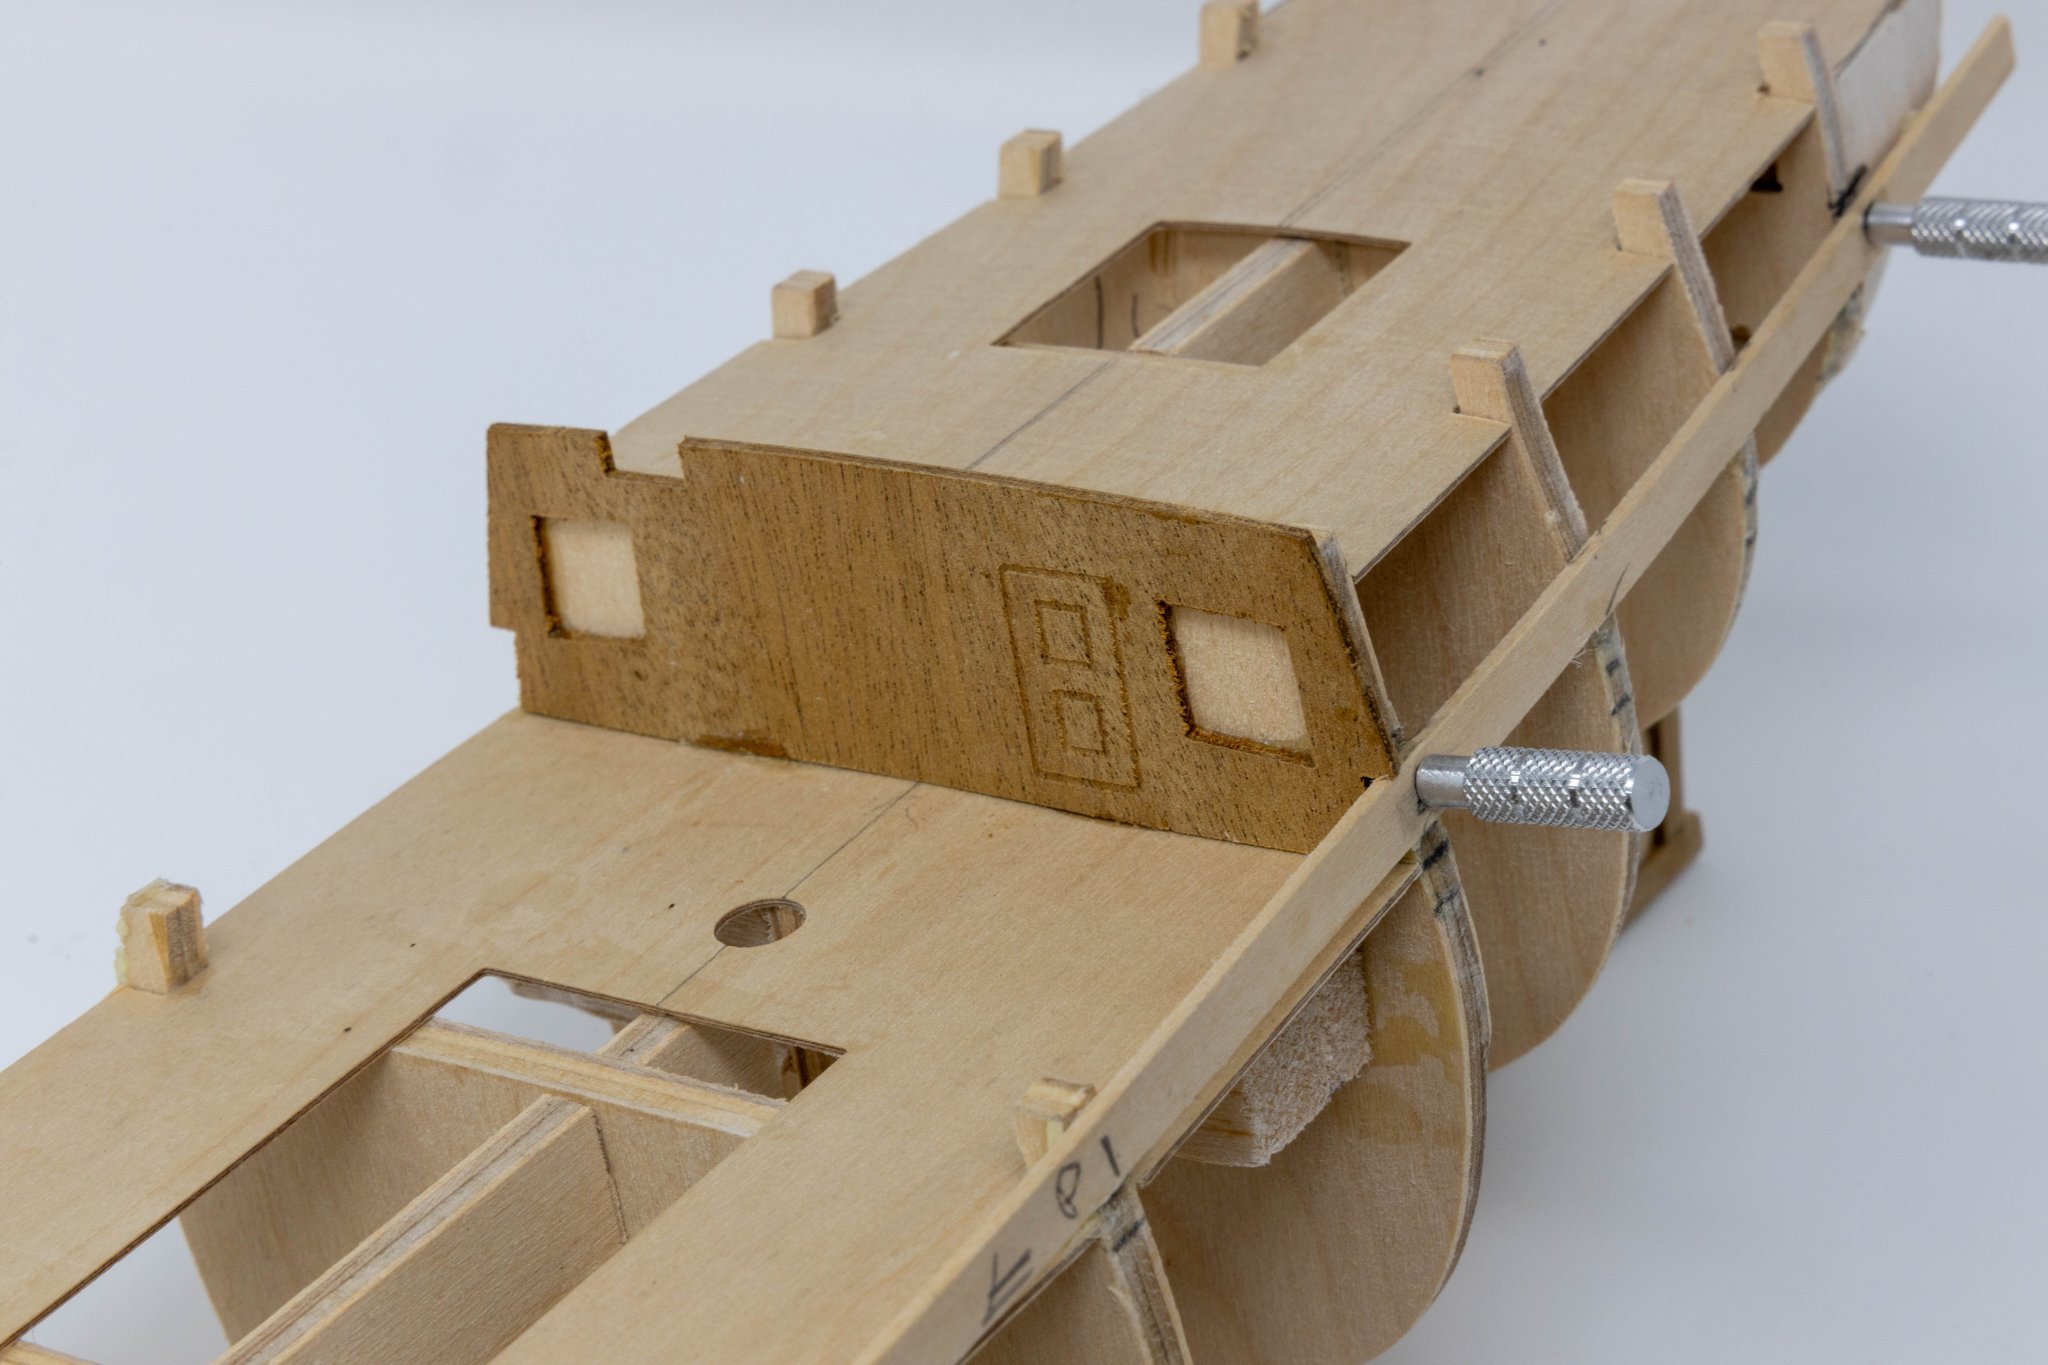
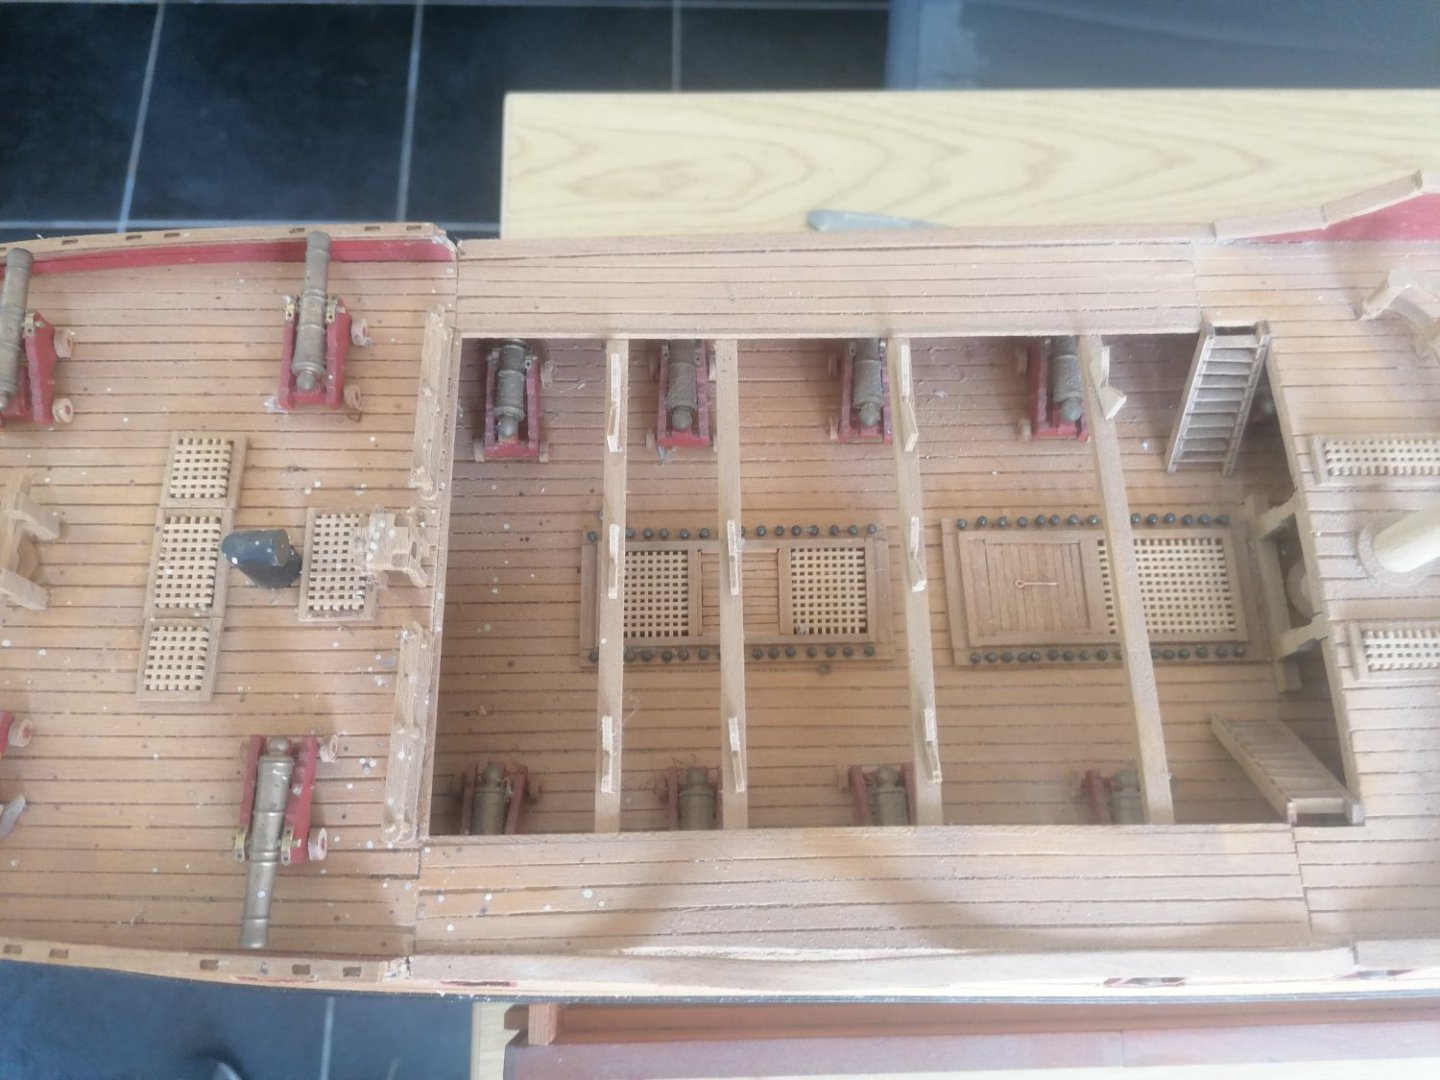
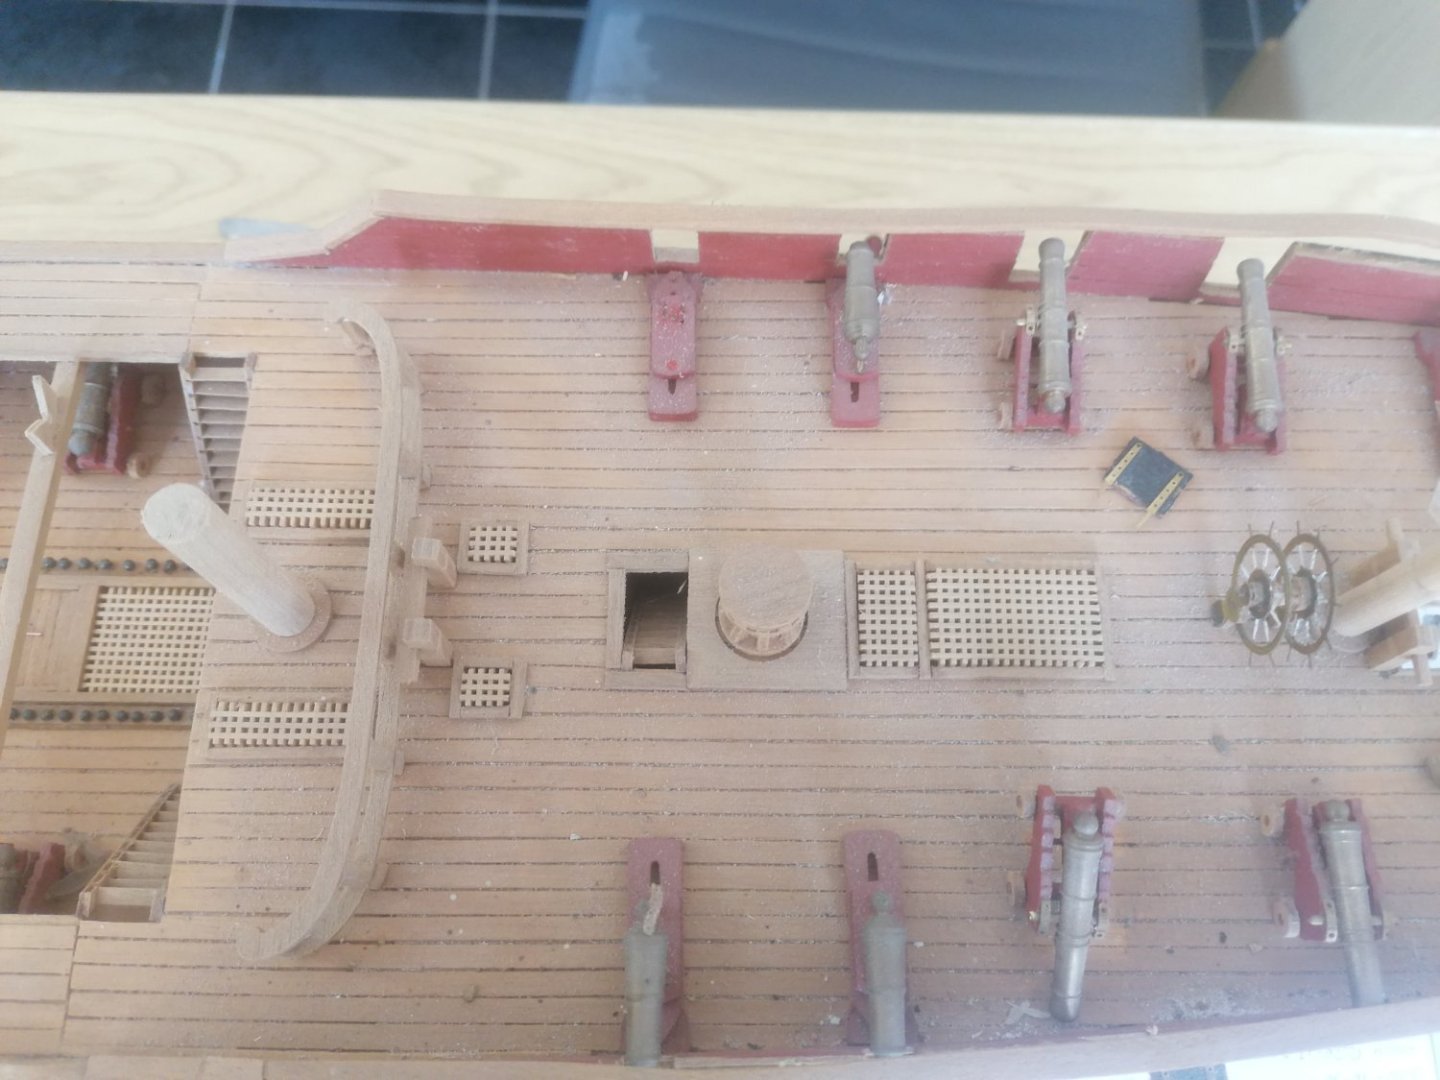
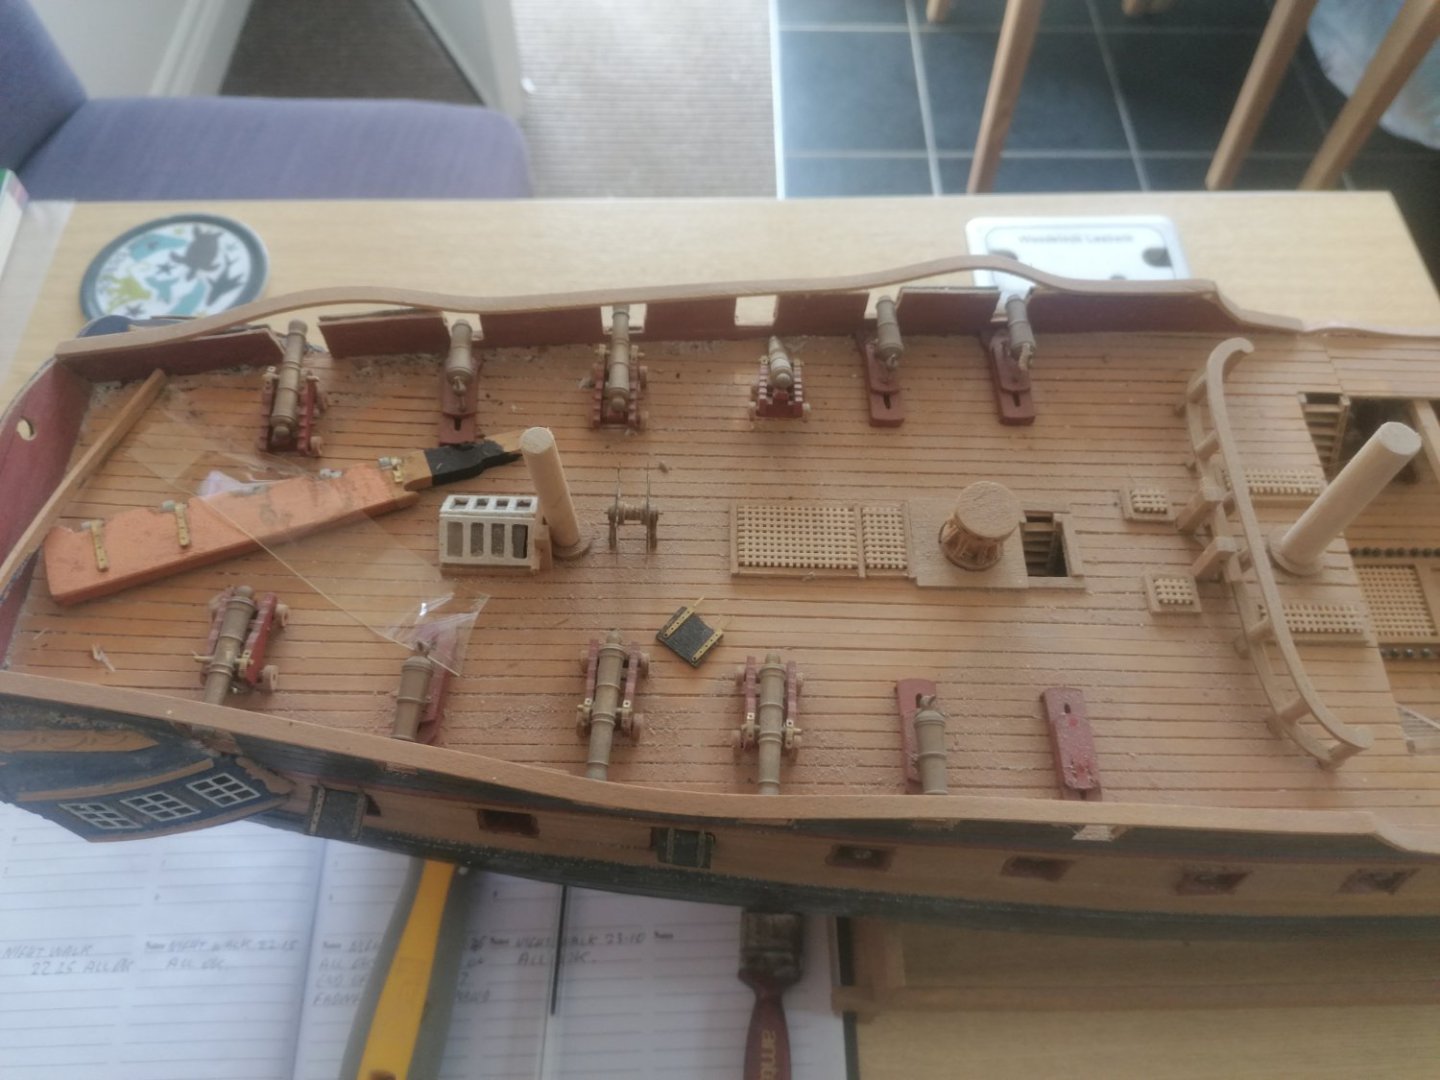
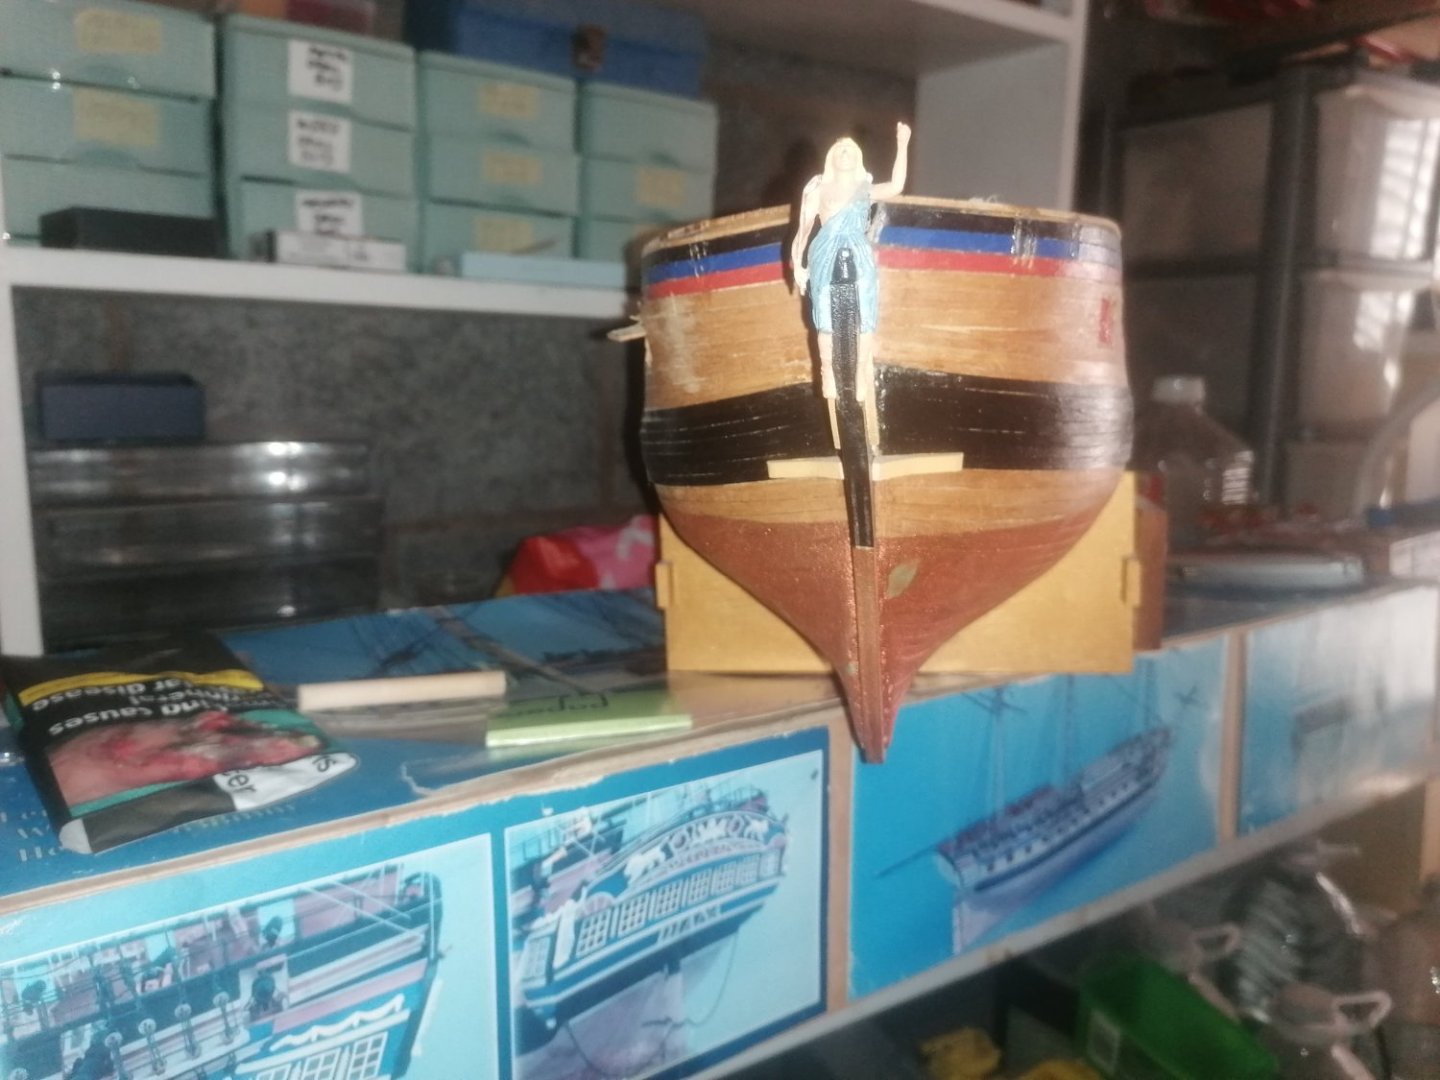
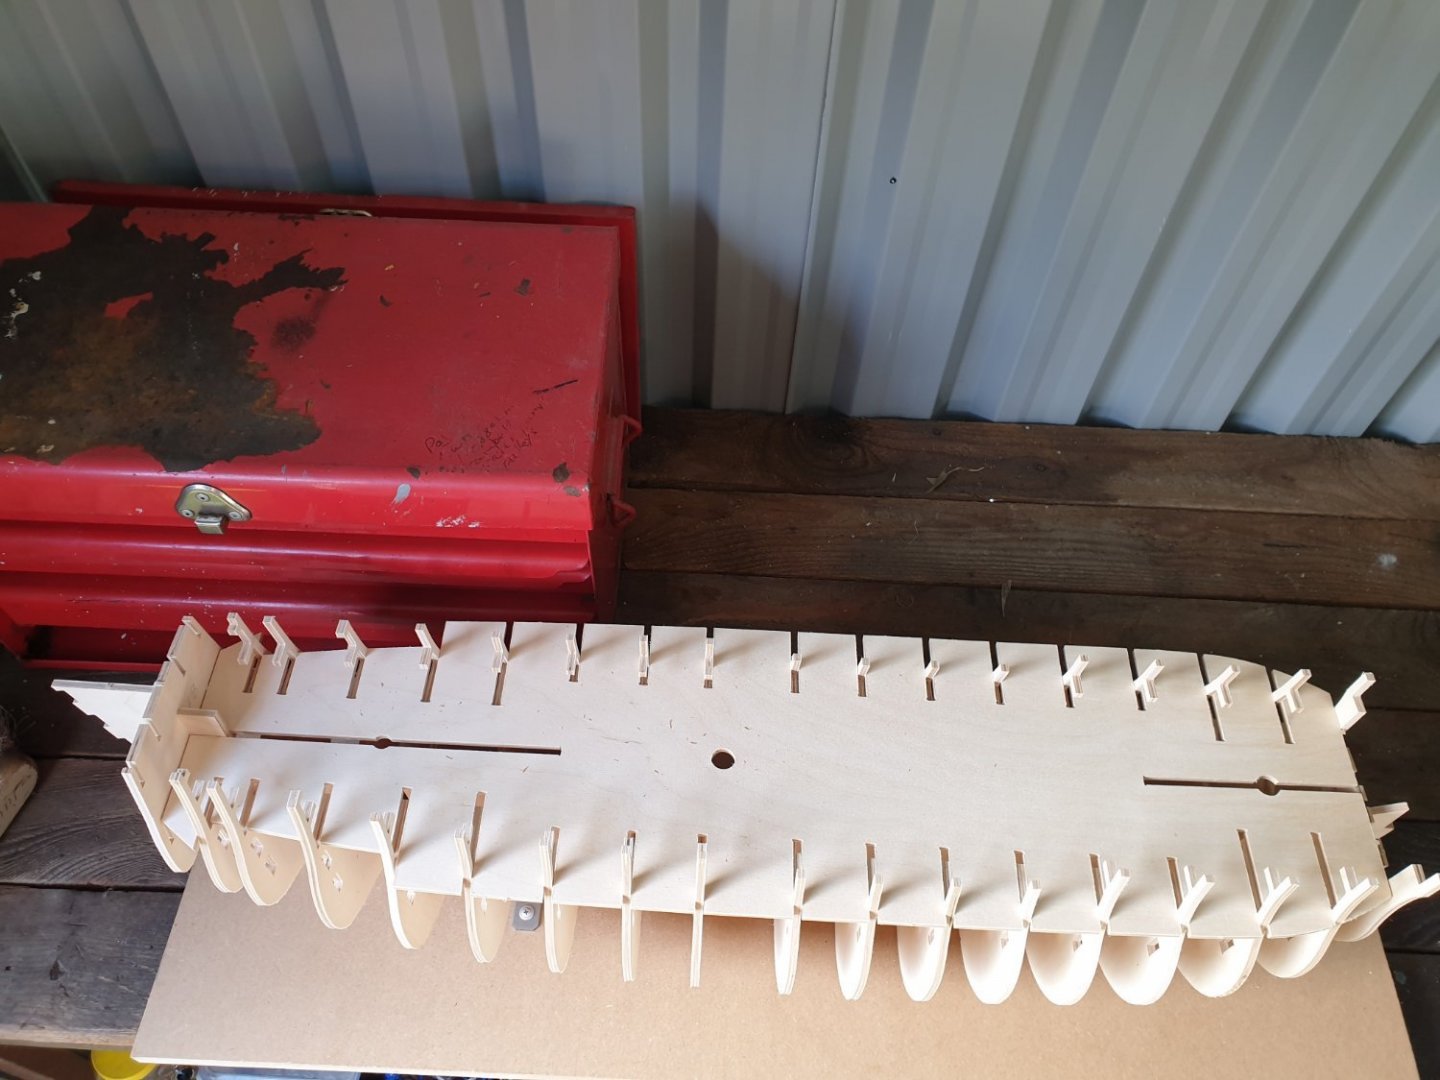
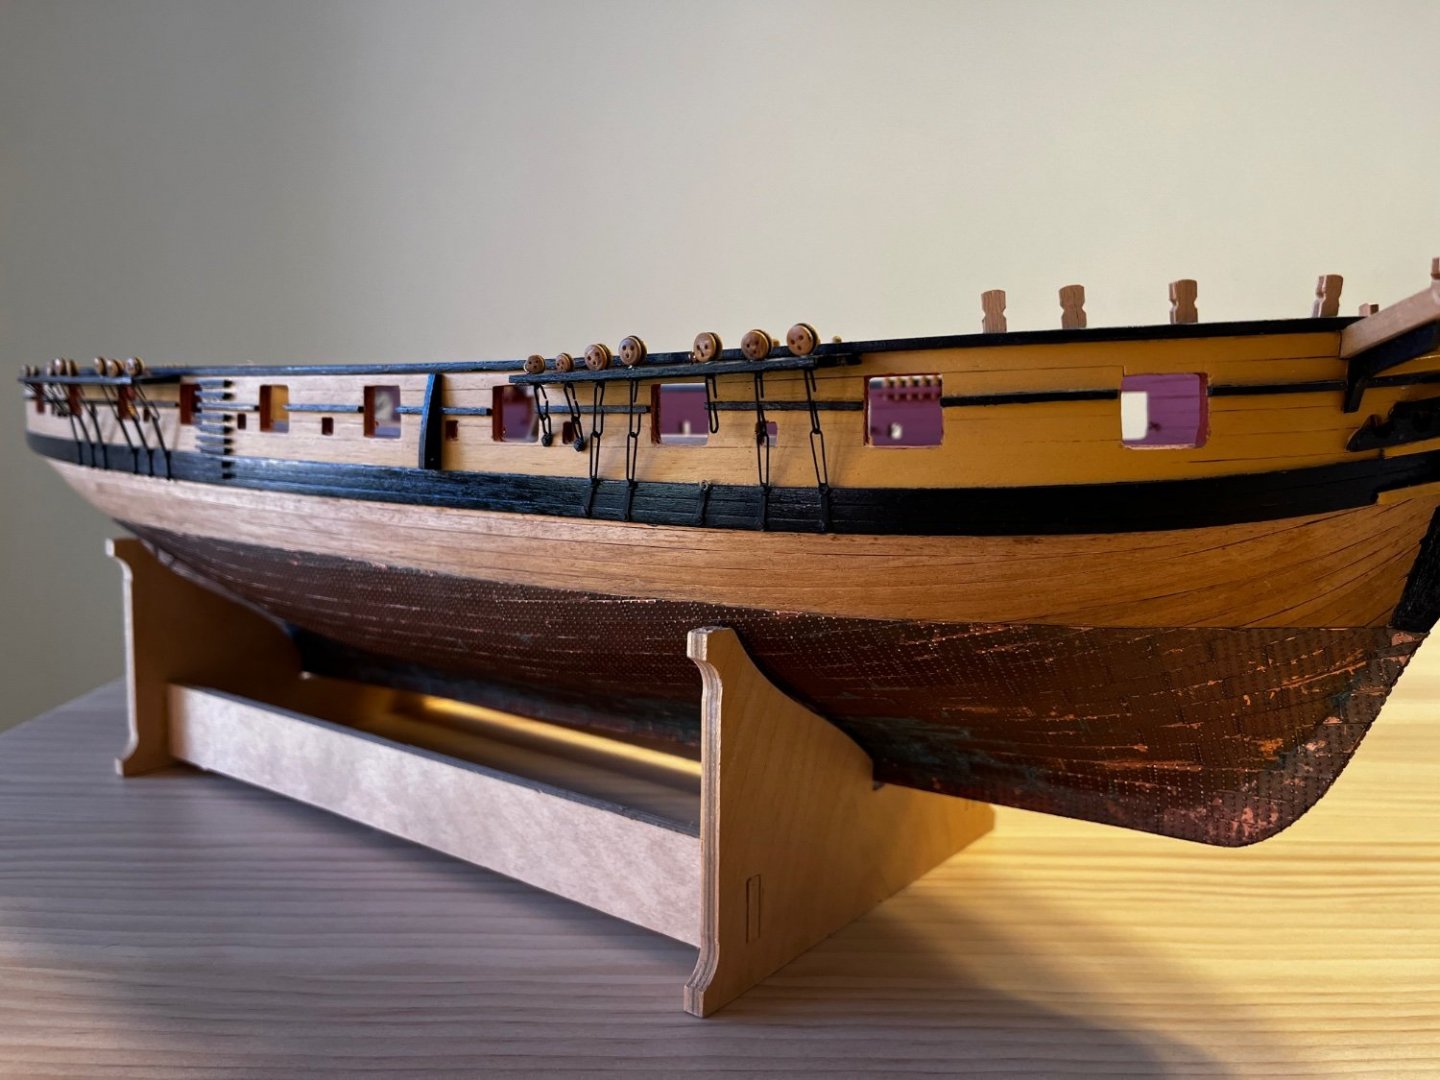
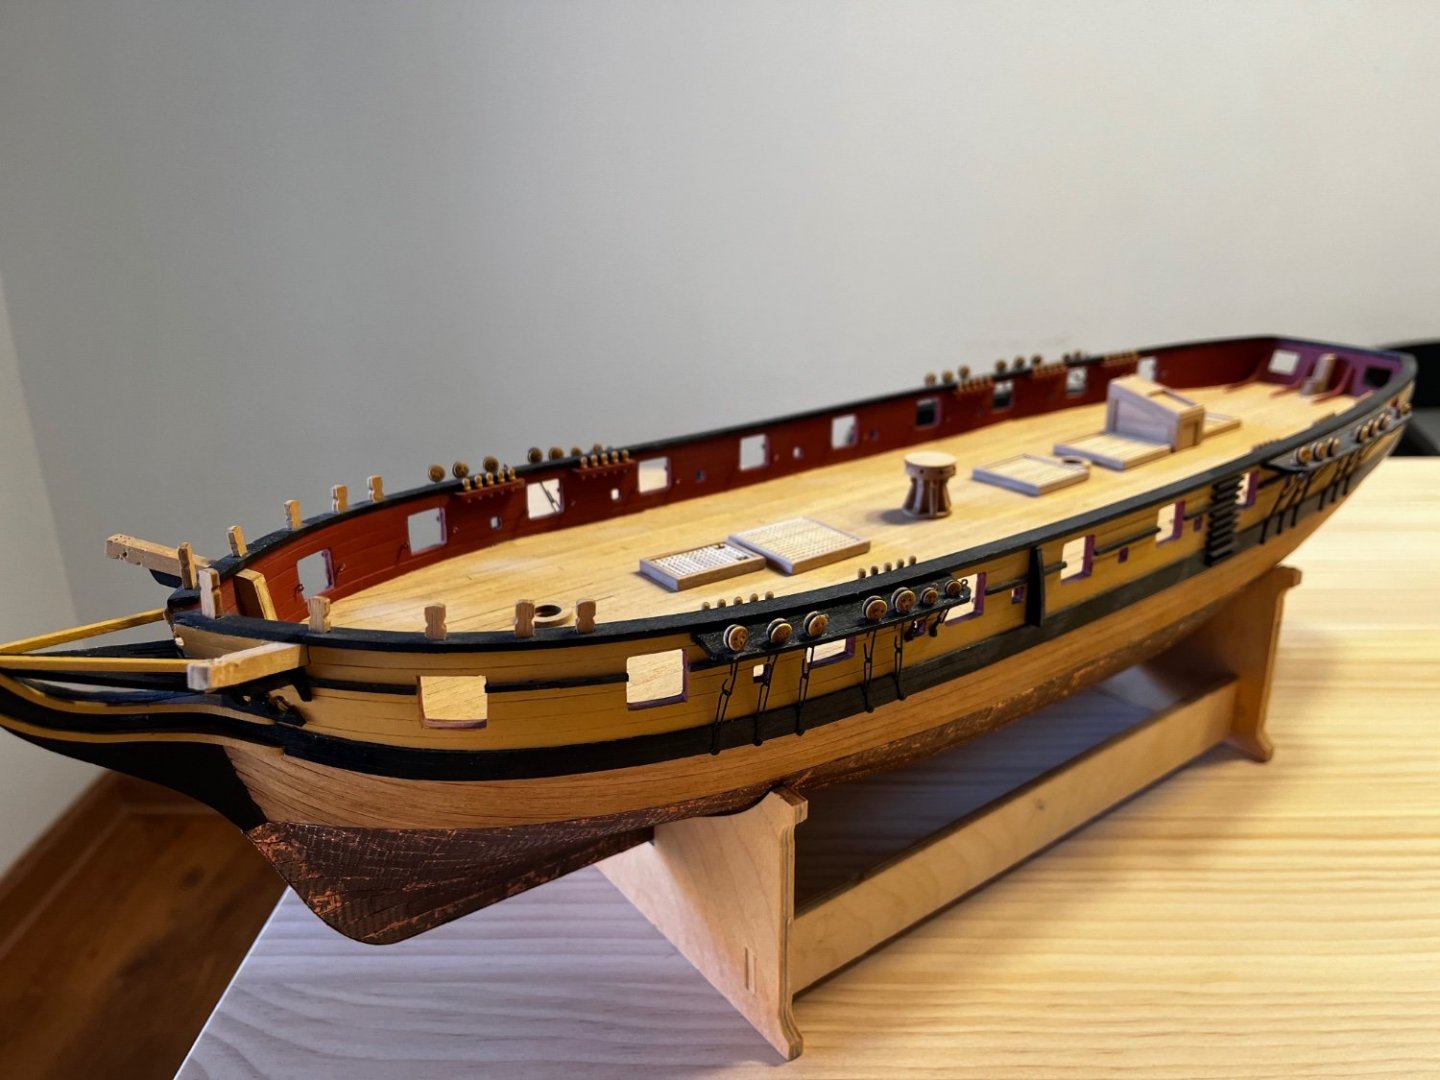
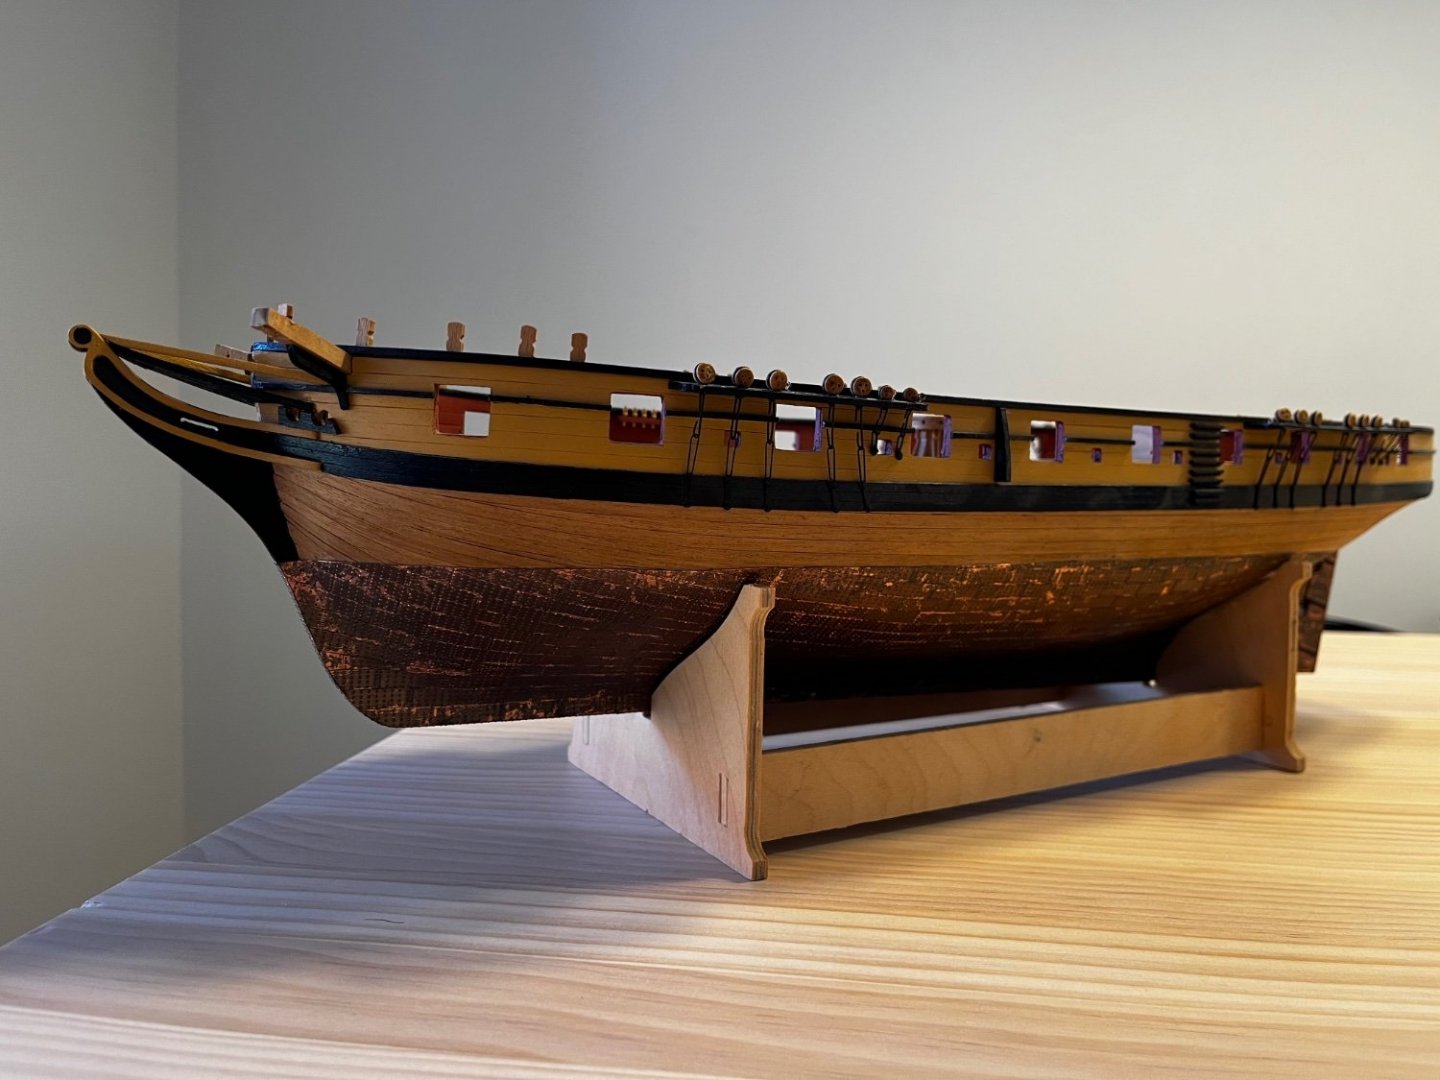
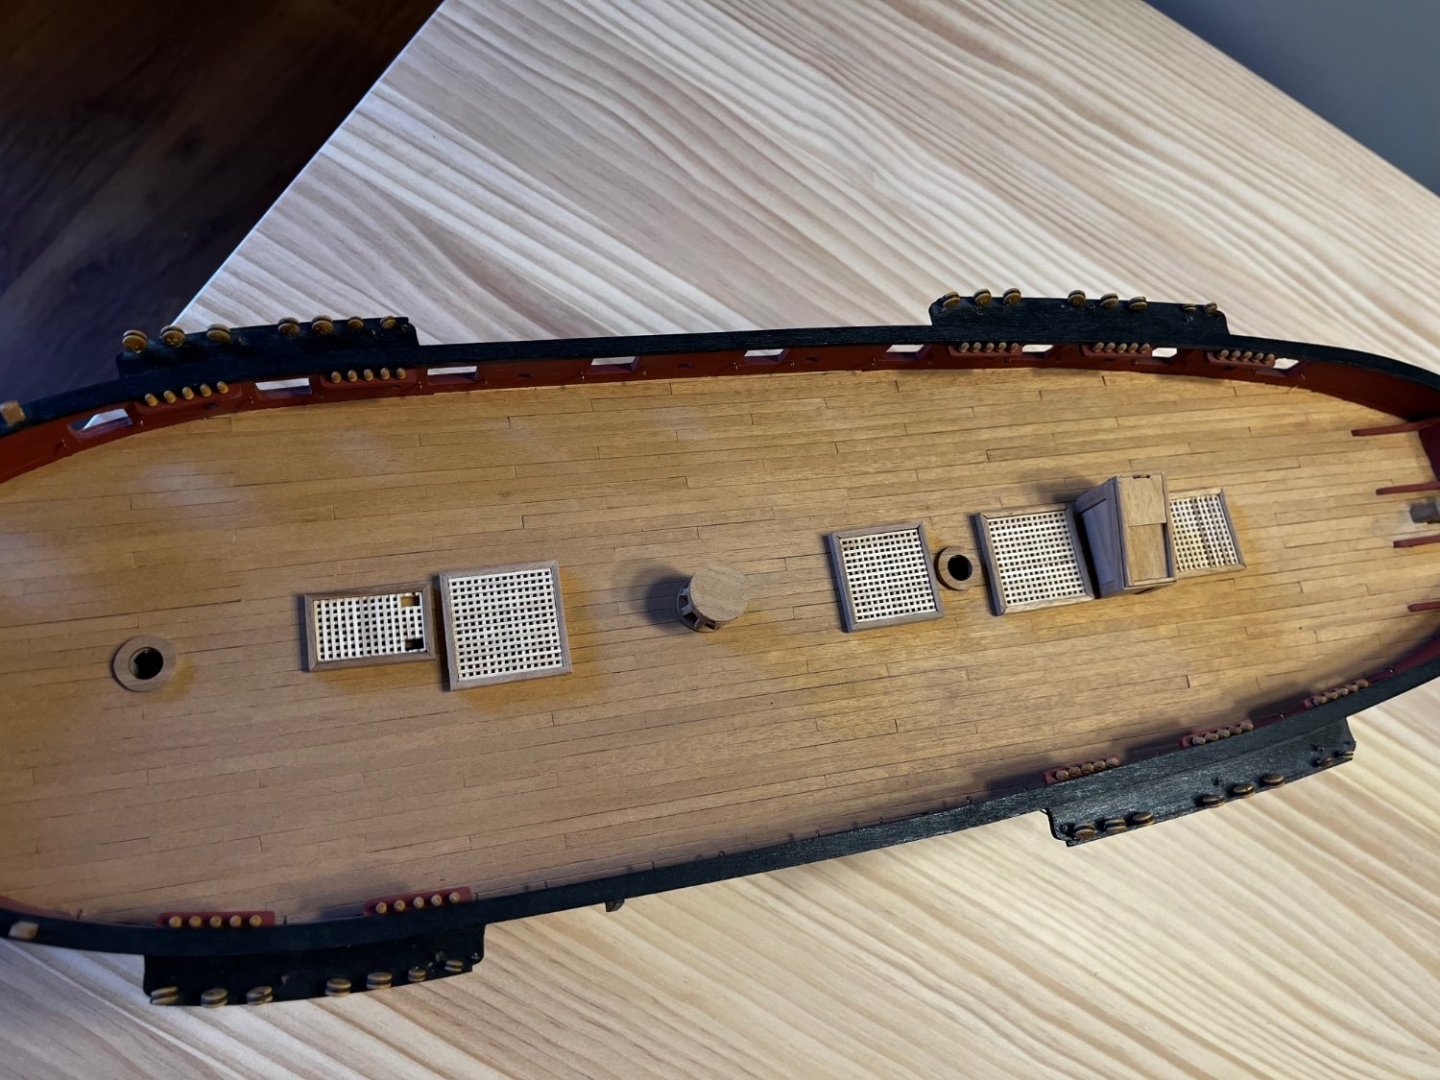
 The model is called HMS Mars by Caldercraft, but she was never in British service under the name Mars. Mars was the original name given to this Dutch privateer vessel. When captured by the Royal Navy and taken into service, she was renamed HMS Orestes. But because Caldercraft advertises the model as HMS Mars, I included that in my log title. This build log was started somewhat later in the build. My last model was Le Superbe from Mantua. I chose this Caldercraft model Mars for it's 1:64 scale (more detail) and expected short build time (to get some more experience in short time). So far I've been very positive about the quality of the materials used in this kit. I've also found out that the order of building parts of the kit is important, and left to my own judgement, I deviate soon from the instructed order of building. I usually find that order presented by the kit manufacturer isn't practical, considering that first build parts can be in the way of building other parts. Especially when painting parts. So this log is not necessary in the right order. And the first part will be more pictures, because I've worked ahead.
-
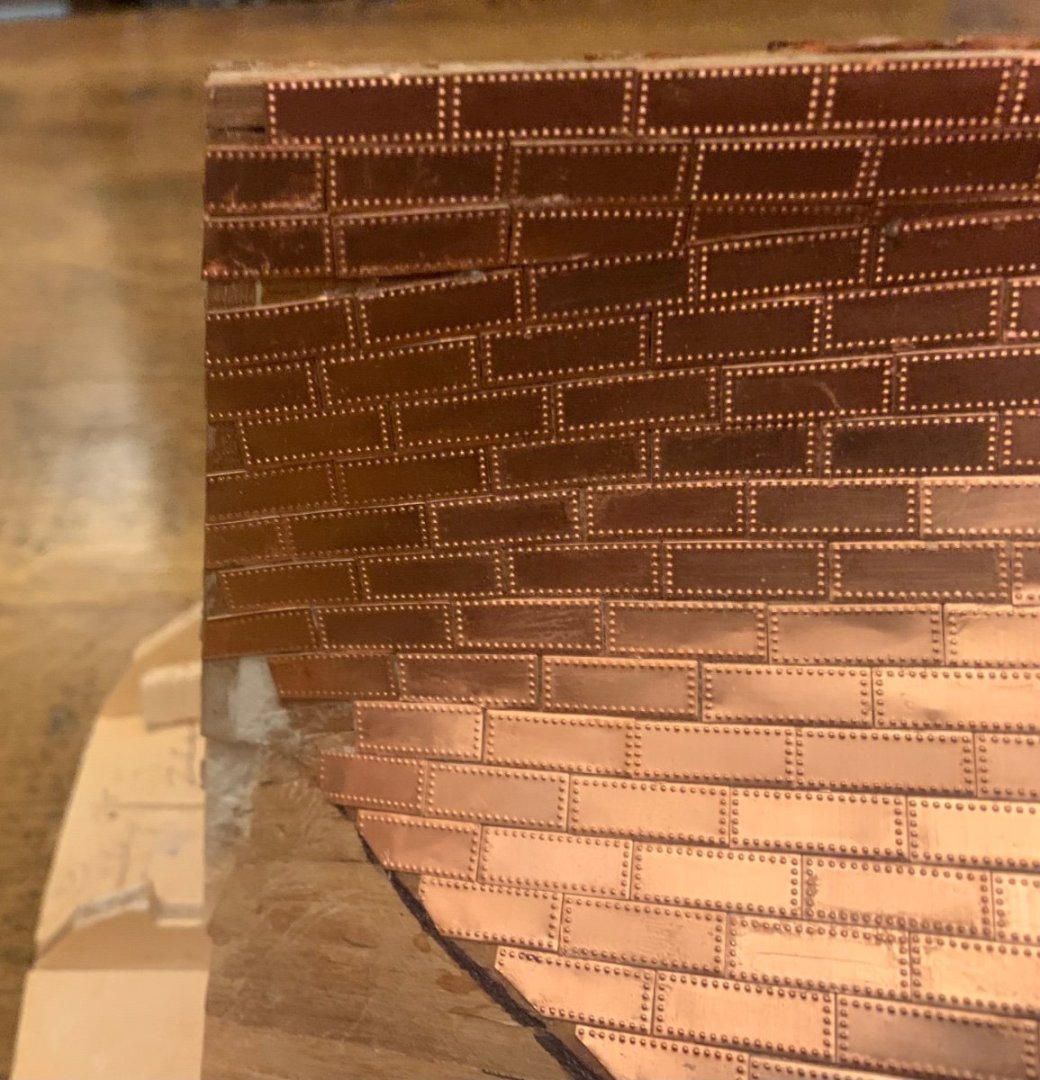
 Hello Everyone. I'd like to present my current build . It is HMS Agamemnon from Caldercraft . It is my second Caldercraft kit (first was HMS Victory) and overal fifth wooden model ( USS Constitution from Constructo , San Juan Bautista a partwork kit , ORP Błyskawica and DKM Bismarck - partwork from Hachette) . There are lots of avesome builds of this kit on Model Ship World . I was inspired by Vicnelson , Hennie ,Sjors , SaskienSoCal builds . I've been working on this kit for about one year . After I had finished first and second planking I've sanded the hull and fill gaps with Tamiya putty . Then the hull was sprayed with surfacer 1000 and afer that painted with admirality paints . Now I've started coppering the hull


-
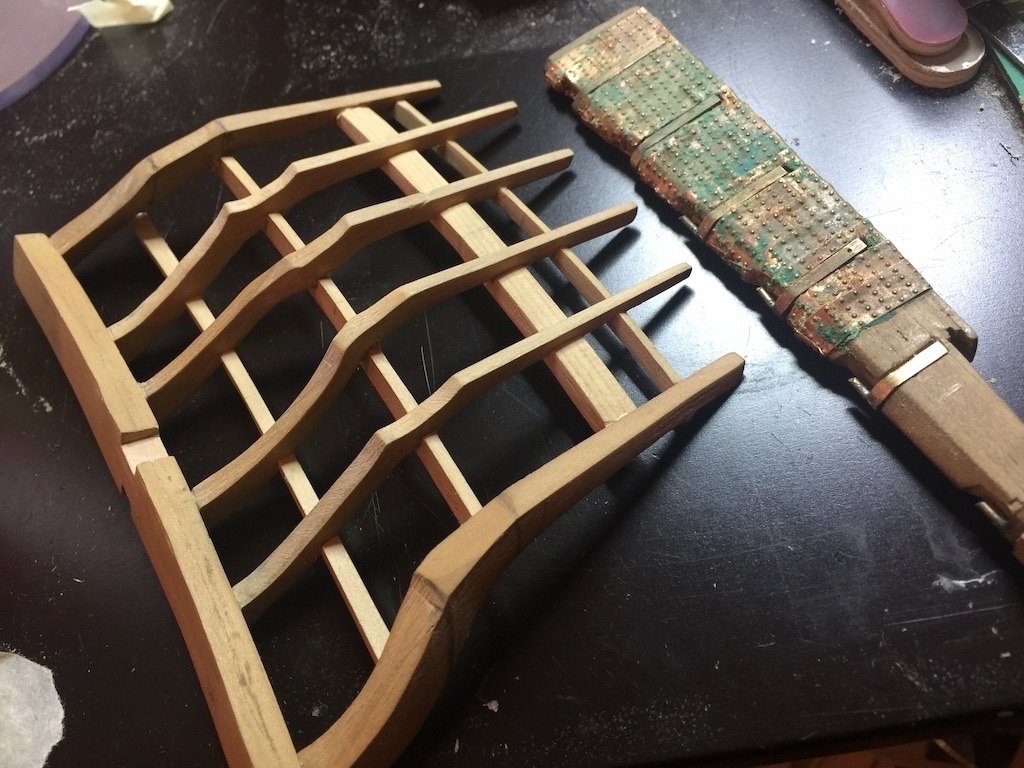
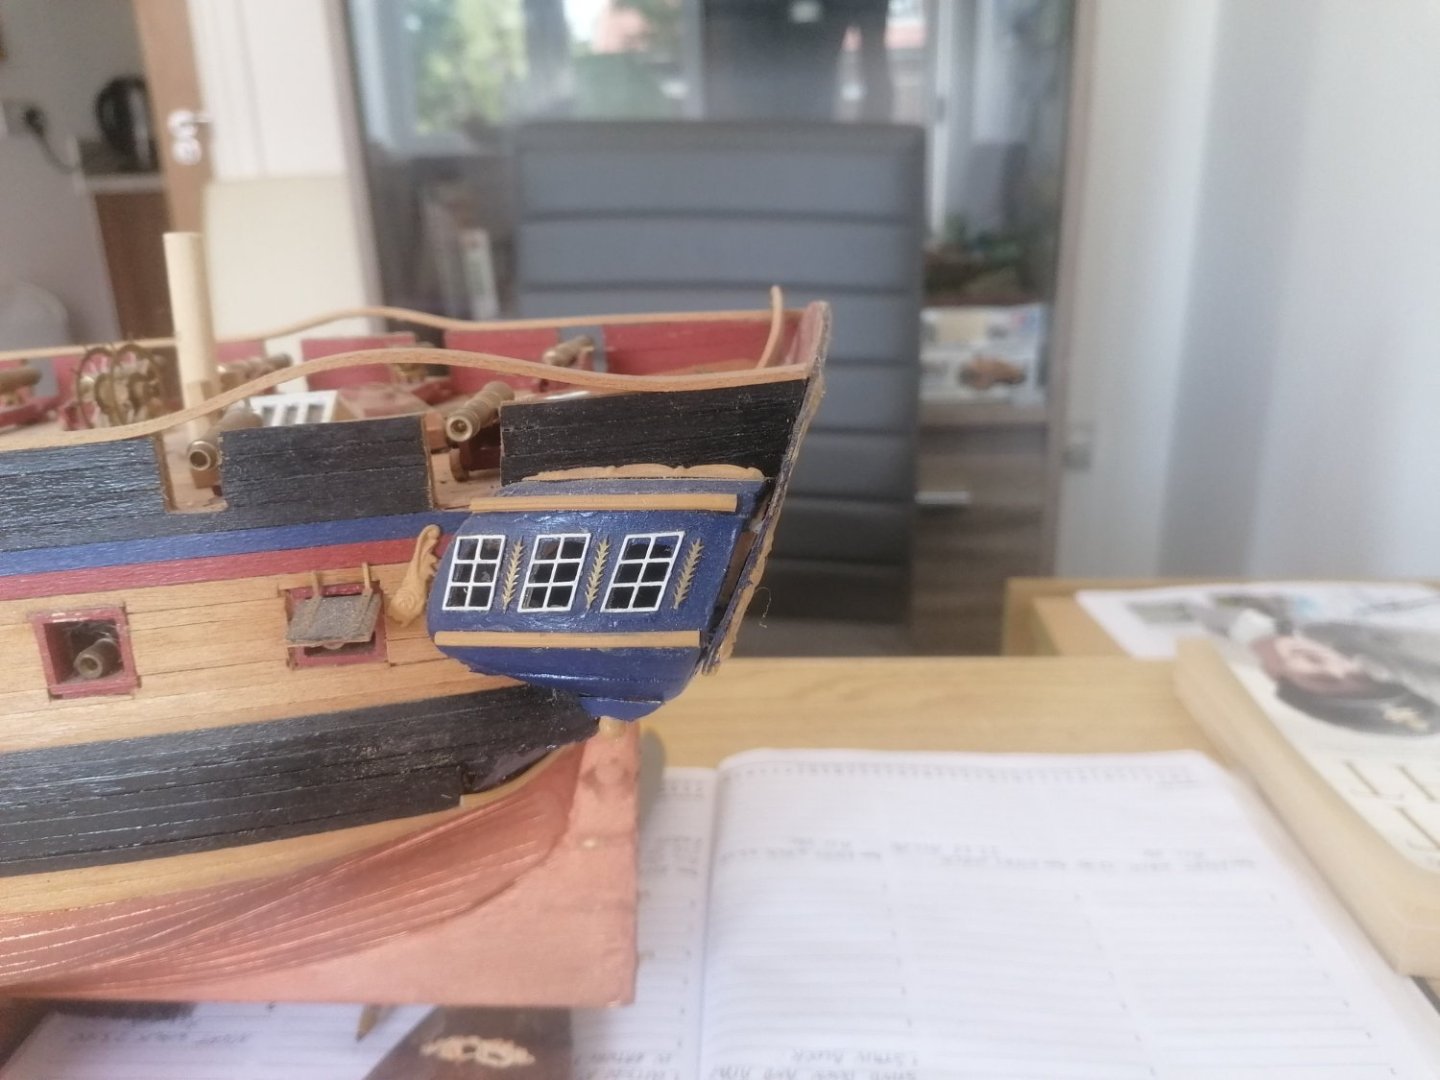
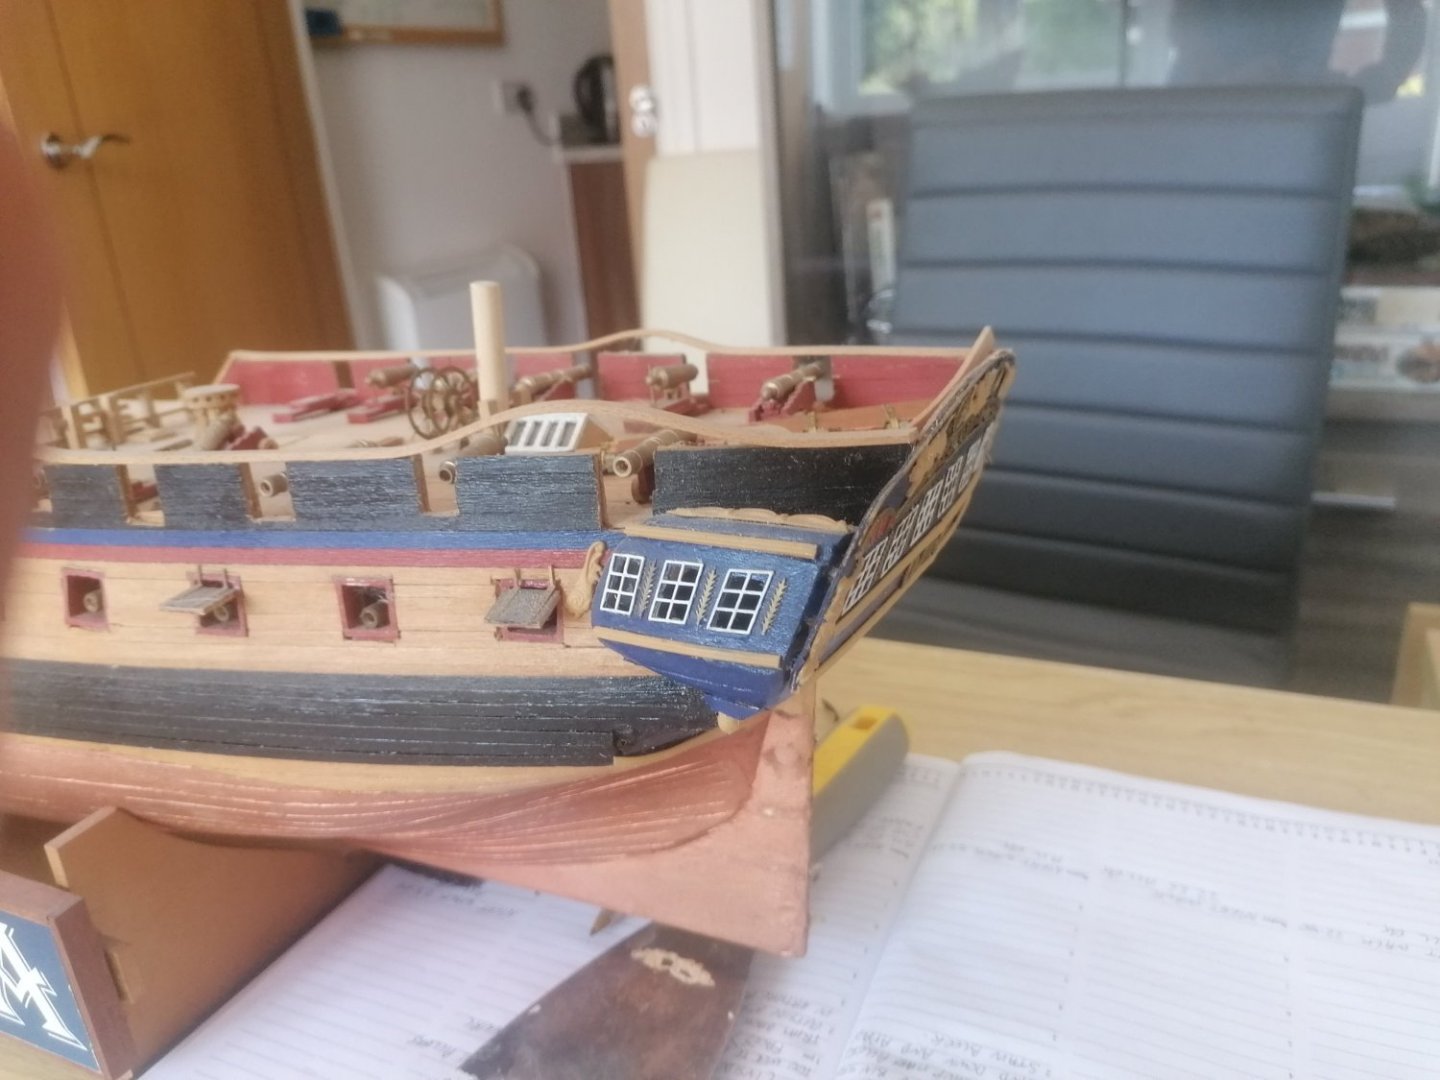
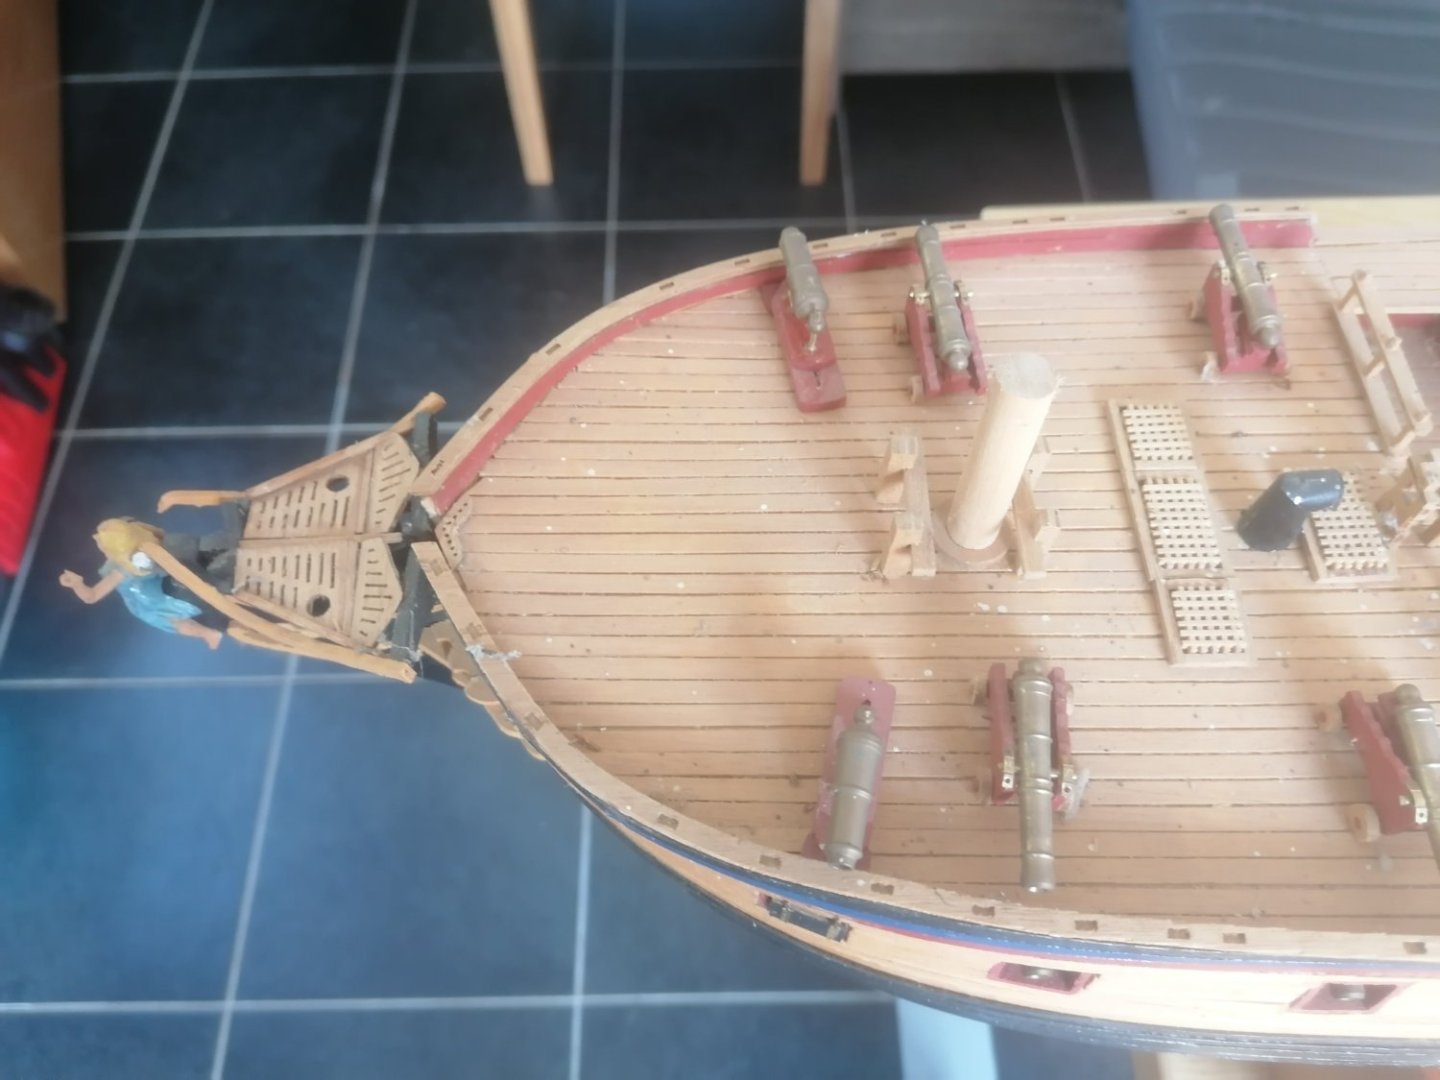
 Somewhile back ‘Shipyard Sid’, aka Dave, found himself in the position of having to look for someone to take over the build of his HMS Diana for reasons he has already stated on this site elsewhere. Looking back at the relevant posts I had obviously missed these at the time, however, living only a mile or so away Dave recently asked me if I would like to take on the model. Diana has been on my wish list but wasn’t in my immediate contemplation. I have my Victory research which I just completed and have undertaken to publish on this site and have also very recently commenced the associated build of the Victory based on Caldercraft’s 1:72 scale kit, alongside the recently released Artesania Latina Cross Section of the same scale as a complementary pair (build log imminent). I also have a backlog of completing my scratch 1:64 HMS Trincomalee and Chuck’s Winnie also begging for a start as well, so no shortage of projects. So, what’s one more to add to the collection😊. I must admit that this hobby is getting like the Admiral’s DIY list which out-competes model building for my time, it seems only to get longer the more I do! But who wants to be bored. I think I will try to complete this simultaneously with the Victory but may take a few weeks to get up and running – that DIY list is pressing apparently, seems there is some artificial need to have completed certain milestones by Xmas, I have never understood that link, but it may be why DIY stores stock Xmas decorations. Happy for someone to explain the causal link between the two, but I undertake to wilfully remain sceptical of the whatever wafer-thin explanation someone can dream up! Back to Diana, obviously I have said yes. It is a shame Dave feels he can’t complete the Diana to the standard he desires, when I picked up the model, I also got to see his Caldercraft Victory he completed some years back and it is a wonderful example to behold, which he should be rightly proud off. I’ve enclosed below some photos of where Dave had got to with the Diana. As he pointed out to me, there is the need to do some remedial work, primarily to the copper plating, and on a cursory examination some of the gunports also need some attention. Some of the copper plates have come off, and some others are in the process of exfoliating themselves, bearing in mind Dave hasn’t touched tis for at least 2 years. In terms of the main deck gunports some of these need realigning. I think I will start with the copper plating, remove any damaged and loose plates and those that require some realignment. Dave fastened these to the ship with Evo Stick, so hopefully a combination of acetone and heat (not at the same time!) should loosen these. I’ll just see where the process takes me. For the planking I plan on removing all the inner planking and then establishing the high and low points of the all the gunports relative to the deck for the outer planking so as to determine how many strakes are involved in the realignment process. Hopefully I can just remove the planks within those limits, re-establish the gunport openings and make good the planking. Gary
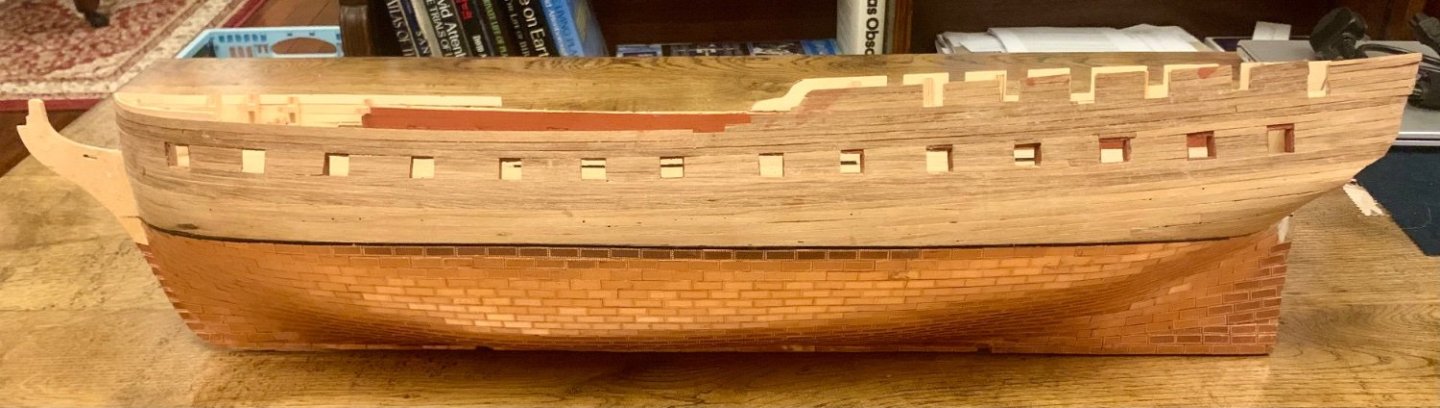


-
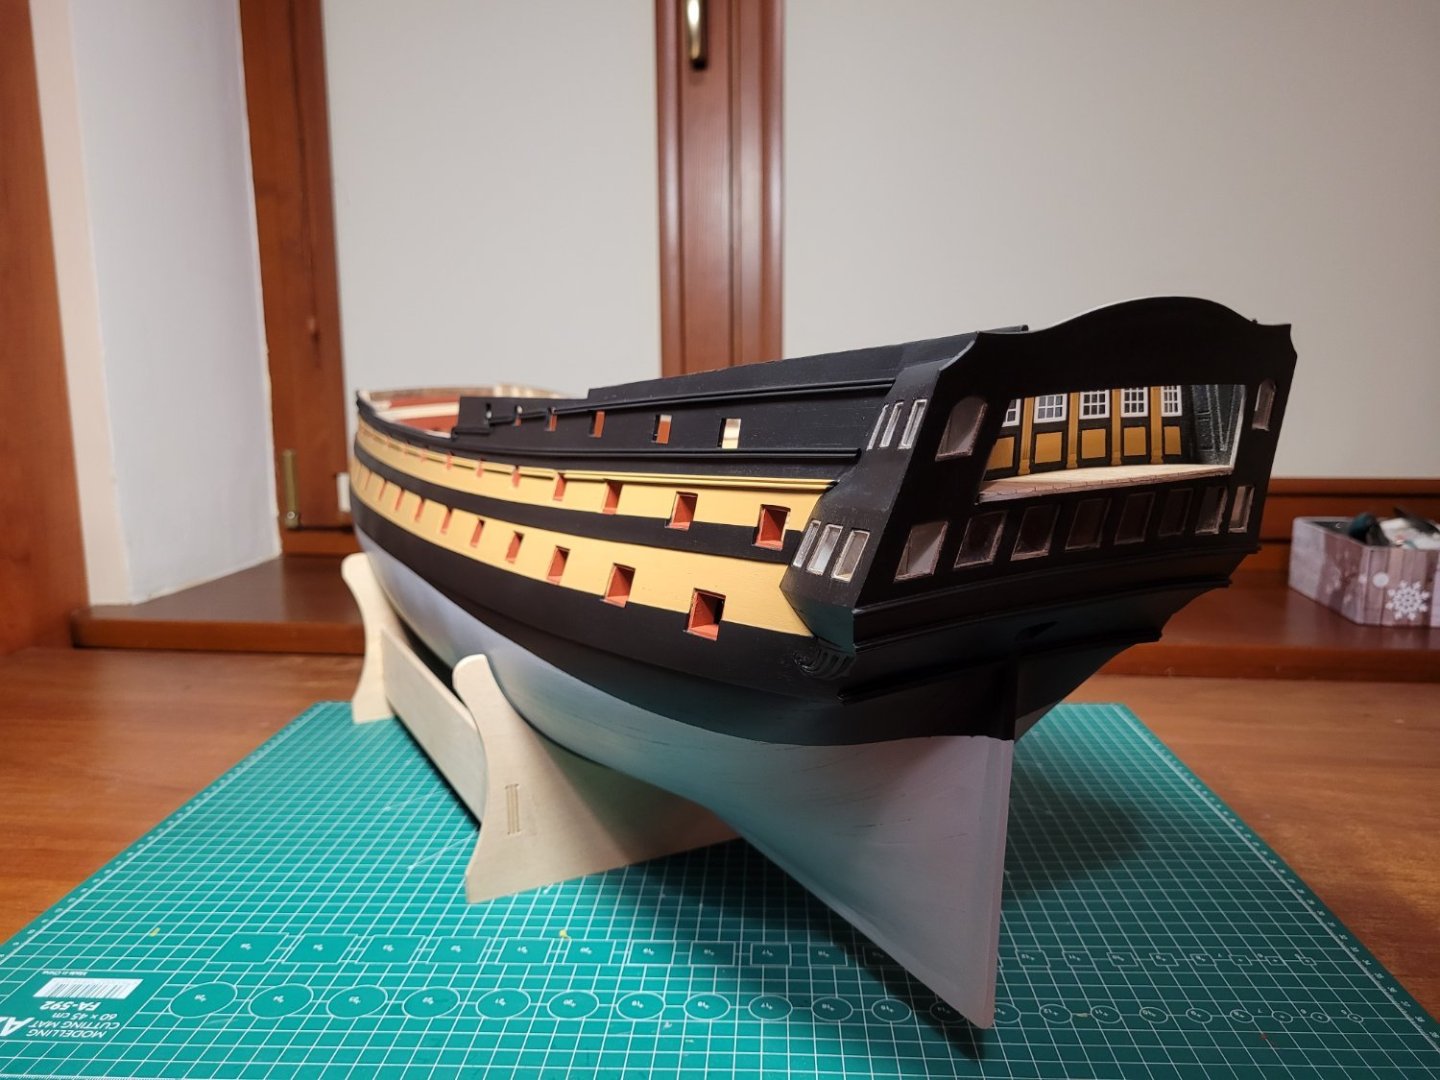
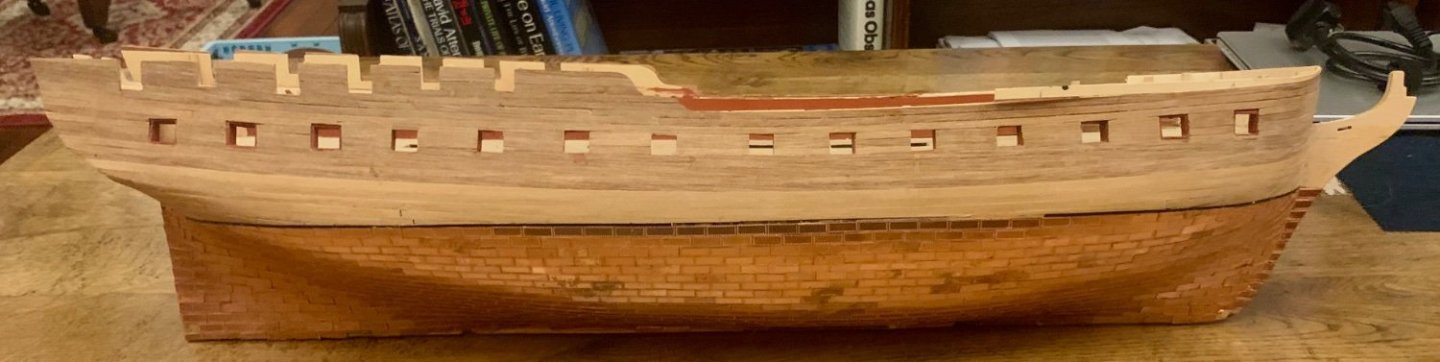
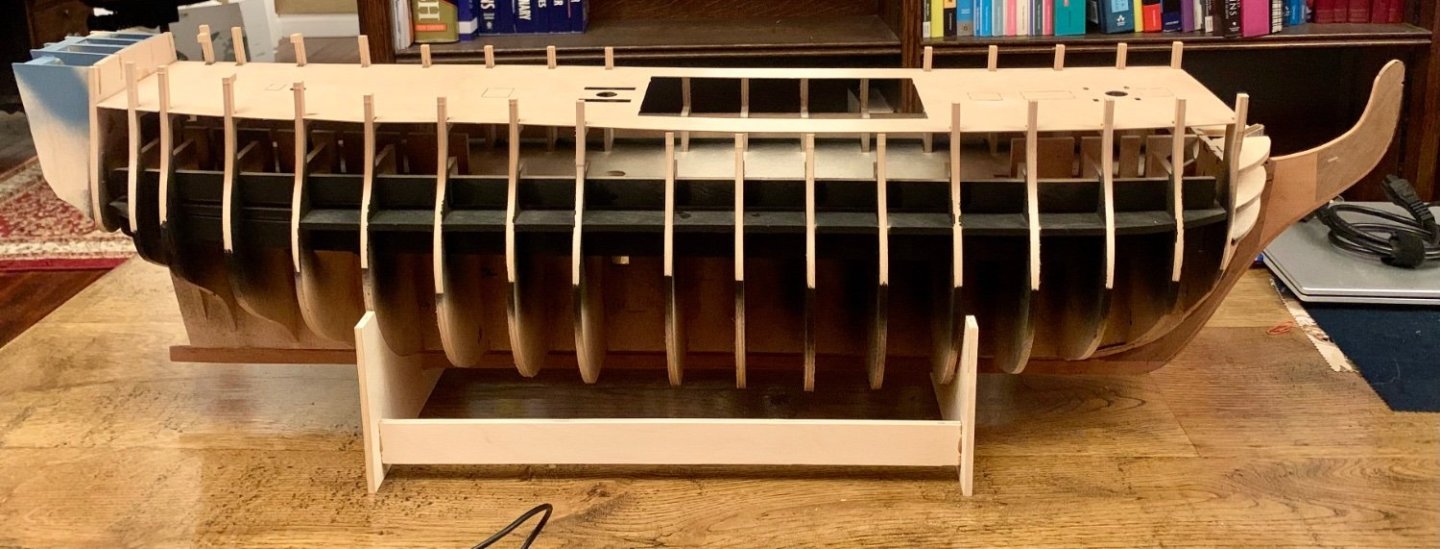
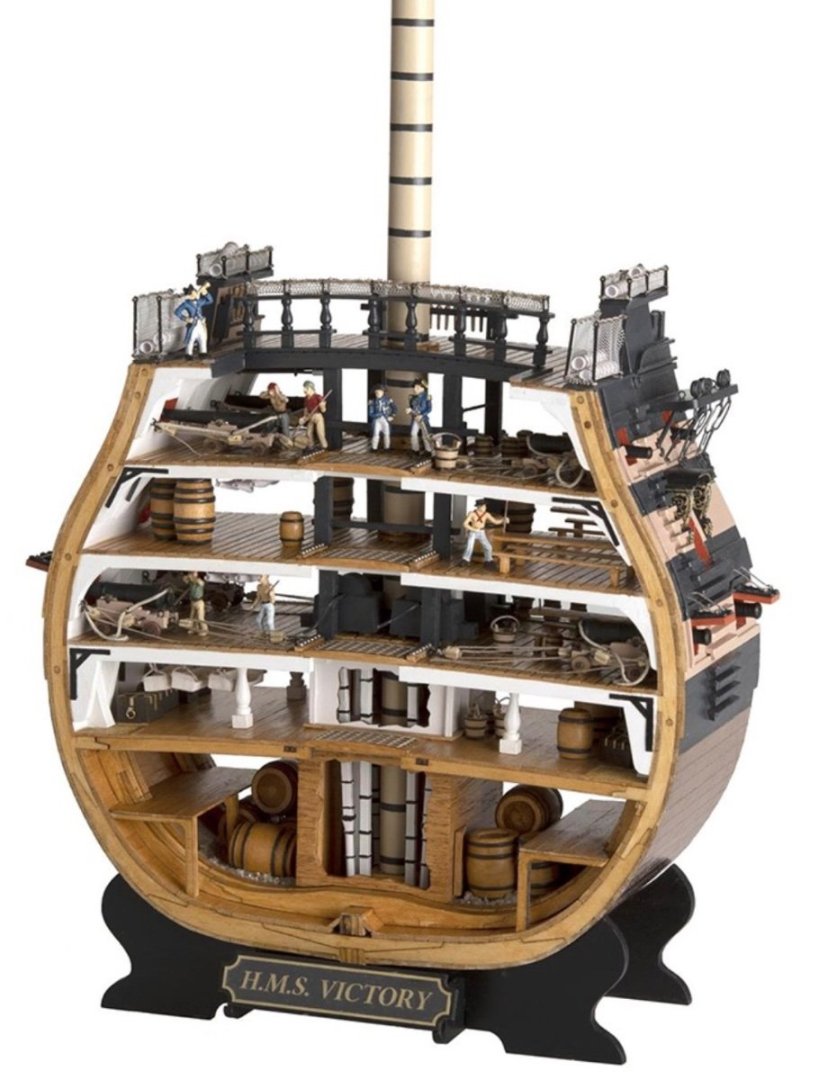
At the time of commencing this build log (November 2023) I have already been working on Part 1 of the project since 2015, which amounted to researching the ship herself and what Victory really looked like at Trafalgar. Now I know people will point to the Victory herself in Portsmouth and say that’s what she looked like, after all they have been restoring her off and on for a century so you would think they (NMRN) of all people would know, but actually no, it isn’t what she looked like. It may be that is how they label her, and that it has been the objective of her restoration since the 1920’s, and has been ongoing ever since. It was clear to me back in 2015 that the present Victory did not look like some of the strictly contemporary images I had recently been viewing, this is described in the attachments, and of course you will need to read the work for the background and results. You will see I use the term ‘strictly contemporary’ throughout the paper, and this is important, it both highlights and describes primary sources of works of evidential value from 1801 to 1806. Art Works and other records of Victory first produced at a later date, of which there are many, especially after 1814/16 when the ship was radically altered, are voluminous whilst passingly informative, do not carry the same provenance when considering her Trafalgar guise. Unfortunately, a substantive body of the Nelsonic art works, including images of the Victory, grew in preponderance in the 19th Century, and these works continue to dominate the visual record. Accordingly, there is a lot of myth that surrounds Victory, much of this grew up in the century after Trafalgar, especially with the Victorians recasting Nelson, Trafalgar and HMS Victory to reflect the values of their time. Much of this ‘doe-eyed romanticism’ hung over into the early 20th Century and made its way into the restored Victory and Nelsonic cannon of the time. The accompanying volume to this build-log looks back to the records before this dreamy rose-tinted time, but I also draw on the modern research that can be validated. I deliberately caveat my references to modern studies, as even some of today’s authors, including some of the biggest of names in maritime history, are not beyond repeating the hyperbole and mistakes of their Victorian antecedents. Neither are they beyond repeating the ‘findings’ of others, which upon examination of the historic archive do not hold up to scrutiny. I have labelled the result of my research ‘Nelson’s Victory Revealed’, my intention is to release that work in PDF format in conjunction with this build log. Included in this first part is the first instalment, principally the contents, introduction and review of the background research materials. I’ve also enclosed numerically the final 2 parts, the Bibliography and End Notes as they will be needed throughout for cross reference purposes (parts 12 & 13). There is a separate dedicated thread for the Research under ‘Discussions for ships plans and Project Research ….. etc.’, I’ll also post these over there as well. So, after enough waffle, on to ‘Part 2’, of the project - the build! Whilst I would have liked to have built the Victory in 1:64 scale utilising the prospective Amati Victory as a basis with the ability to detail all decks, it is not available at this time, and I am keen to make a start so waiting isn’t an option. So, I have purchased the Caldercraft 1:72 version from Jotika. I had considered scratch building, but I am being realistic about my abilities. I have scratch built HMS Trincomalee in 1:64 plank on bulkhead, or rather more correctly, part built – I’ve completed fitting out the Gundeck, but a First Rate is an entirely different proposition. I had though initially about opening up the Caldercraft Middle Gun Deck and detailing it, however, it just happens that Artesania Latina have also just released a 1:72 scale Main Mast Cross-section, timing couldn’t be better. I’m going to build this in tandem with the Caldercraft kit, or more accurately slightly ahead of it. This will allow me to detail items such as the double height chain pumps, Riders to all decks, pump well and multiple shot lockers, and multiple gun patterns. In terms of reference material, well there is that small volume I’ve already mentioned, and I have also collected in pursuit of my research a substantial volume of reference material, all of which is listed in the Bibliography. Then there are also in 1:48 scale all available Victory draughts and plans from the NMM, together with those of the Boyne. In addition, I have Bugler’s 1:48 plans and a set of John McKay’s drawings in 1:64 – so no shortage conflicting materials to draw from! Then there are the prints I have also obtained from the NMM, including both Turner and Stanfield’s Trafalgar works, as well as those of EW Cooke and Pocock. Some of these are now framed and adorn the library by kind permission of the Admiral, I’ll get around to posting a few photo’s of these. I claim they are for inspiration, but truth is sat in front of an open fire next to a decanter of Talisker Whisky there is collectively more of a soporific effect (cue Master and Commander on the iPad and miss the end of the film again 😊). I will also need to capture some side profiles early for the later fabrication of the many fenders, and the head chutes. At some time there is the stern and quarter gallery shapes to confront and reconfigure, but this will be an iterative process as these can only be done when the hull is at a stage that the quarter gallery patterns can be fitted and shaped., which in turn help establish the stern shape. The kit will be augmented with an authentic mix of Blomefield and Armstrong-Frederick guns – spoiler alert, Victory did not carry a uniform pattern of guns throughout at Trafalgar, like much of the British Fleet there was a fair bit of mix and match. Also, forget 104 guns, there were 96 + 2 Carronades, speaking of which, there will be some bashing of carronades to get something akin to the prevailing pattern in the early 1790’s when Victory’s were probably cast, rather than the poorly formed replicas we see aboard the ship today. The Upper Deck will get its steam trunking, sick berth, and internal galley chimney. There will be more supplements to the kit as the build progresses. Painting will be in the new colours as I’m a believer in the science and the research undertaken to establish these, particularly when combined with the Rase Mark analysis on the ship. There will be some tonal adjustments to the palette to account for the optics at scale. She will also get the pattern extending around the stem, NO black gunport lids – that is wrong, and lower white masts with the hoops painted out and white underside fighting tops as were worn at Trafalgar. I’m not going to do an un-boxing, there are enough of these around already. What I do need to sort is either a building board or cradle of some form, but I think I’ll address that when I’ve got the skeleton assembled and have more of a feel for handling the model in the space available. Below is a photo of progress to date, first up were modifications to the stem. The kit provided stem reflects the present Victory, but is both too short and low for 1805. This necessitated some amputation and the insertion of a filler piece to throw the head further forward and upwards. There was some additional shaping and profiling with the horizontal bow filler pieces to obtain the necessary profile, which itself was thinned down from the stempost forwards and from where the third cheek down to where it is affixed to the keel. A sacrificial profile or template for the placement of the bearding line at the bow was added at this point, this follows the correct profile and will require further refinement as the work progresses. I also took the time to replace the kit keel which as supplied is a uniform 5mm x 10mm. Based on the Bugler midship section it needs to be 7mm x 11.5mm plus a false keel strip. In addition, it needs reducing in width at each end tapering down from 63mm out to fair-in with the stern and stem posts. Elements of the keel were pre-rabbeted to match the bearding lines. All of this will be covered in copper plates anyway. A new stern post was fabricated using the kit version as a template, instead of a uniform 5mm the correct width at the top is 8.5mm tapering down to match the keel. This will be fitted after planking. Brass rod is used throughout to strengthen the joints of these pieces, much of which is capped over with pear strip. I have also blasted the dummy gunport liners and cabin spaces with some rattle can paints, these areas won’t be seen directly, but I felt some appropriate colouration wouldn’t hurt. For those who haven’t seen the AL cross section yet I’ve attached two images below, one shows the frame they are using to build up the cross section, and the other is of their finished product. That’s it for now. Gary Nelson's Victory Revealed Pt. 1 Background Materials.pdf Nelson's Victory Revealed Pt. 13 References Endnotes.pdf Nelson's Victory Revealed Pt. 12 Bibliography.pdf
- 2 replies
-
- 7
-

-
- HMS Victory
- Caldercraft
- (and 1 more)
-
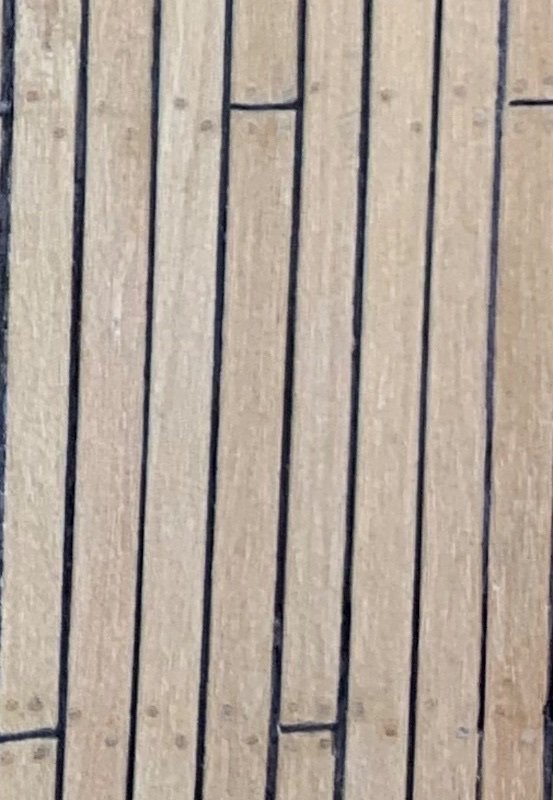
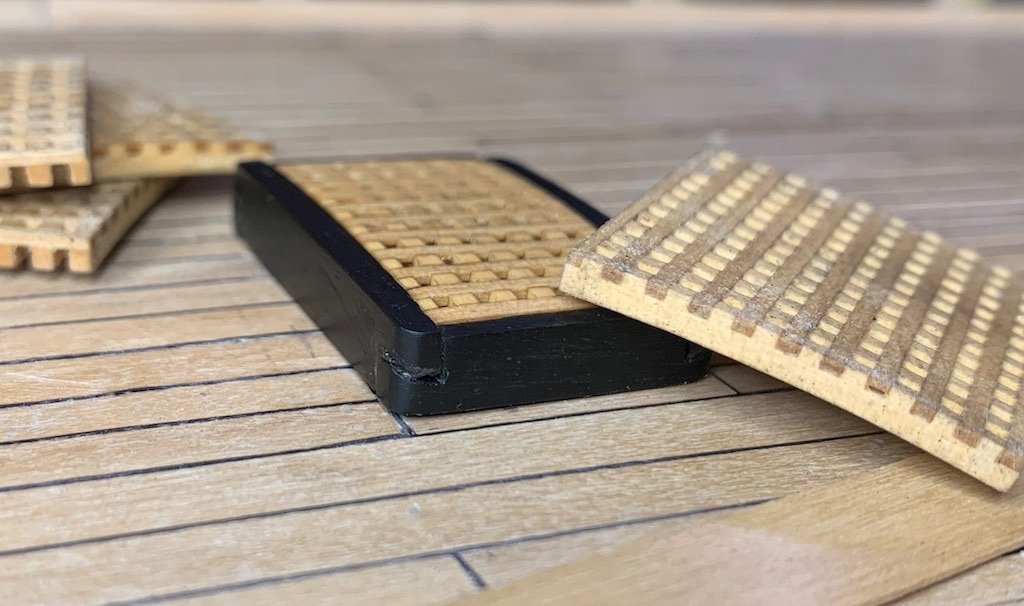
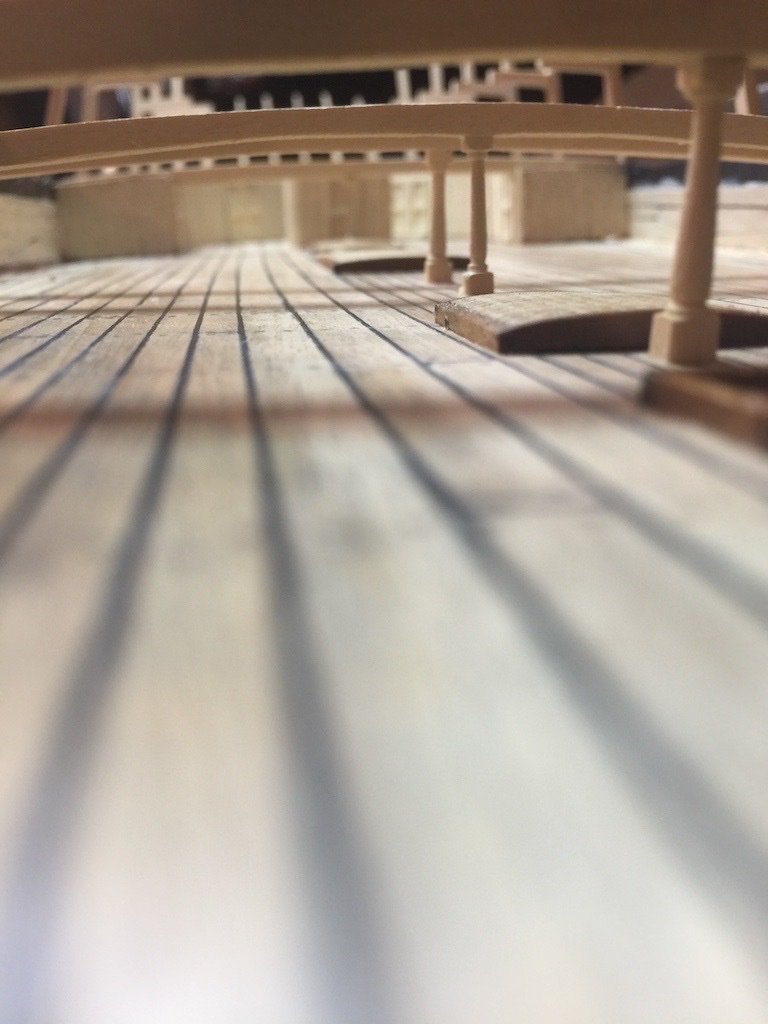
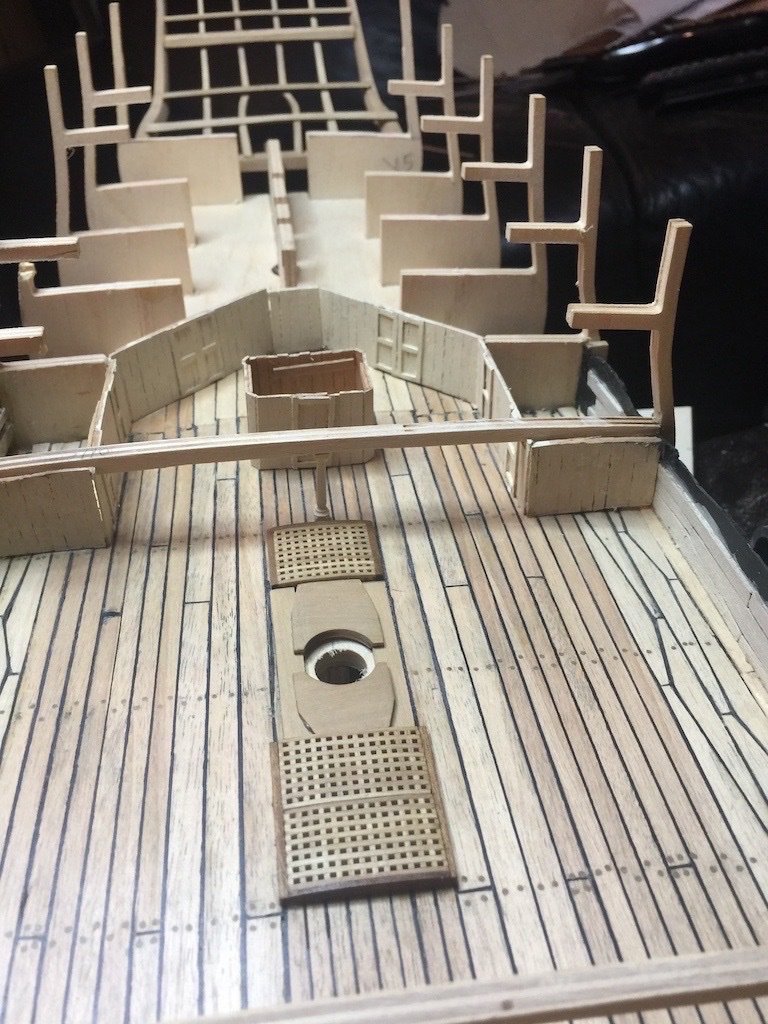
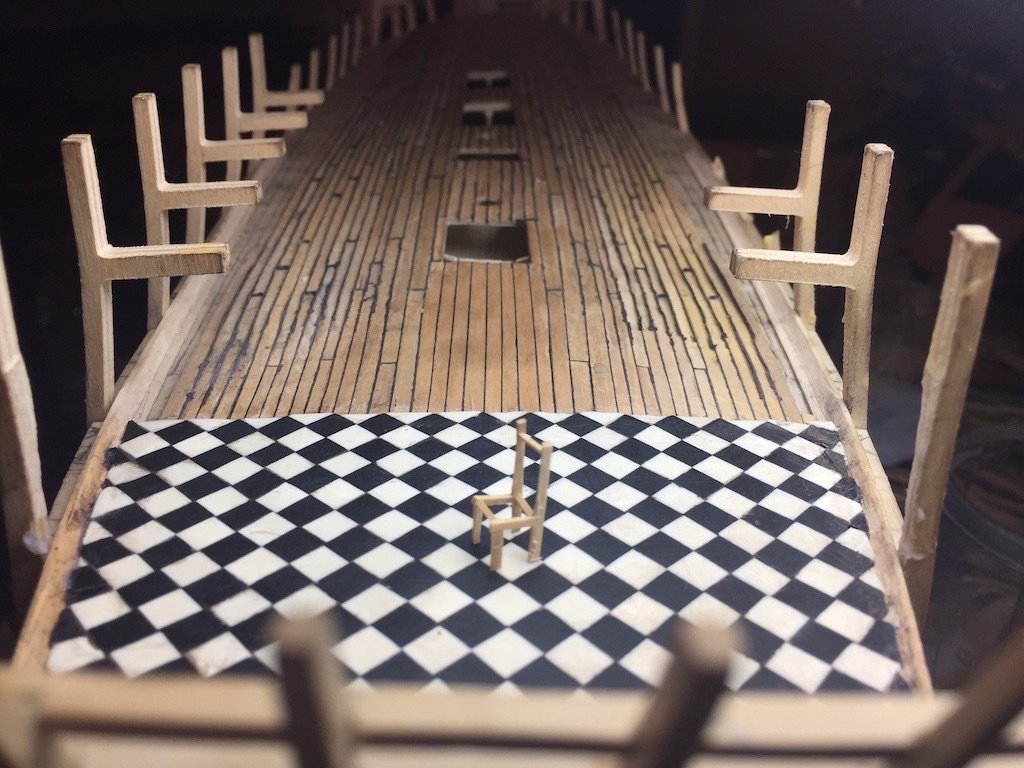
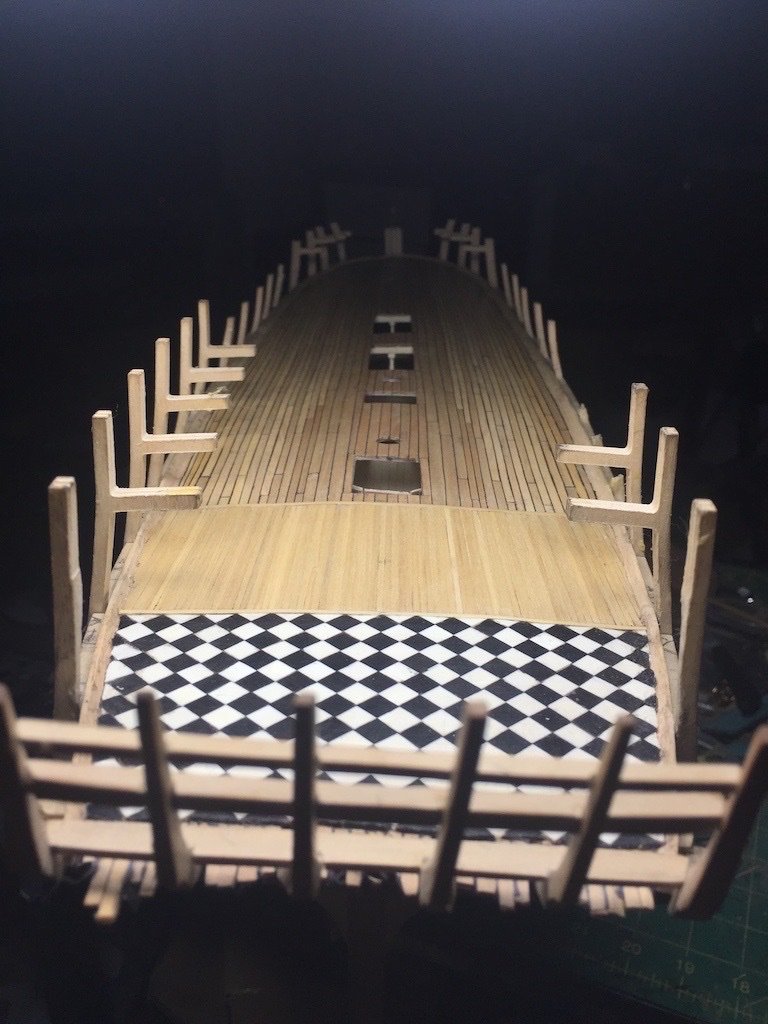
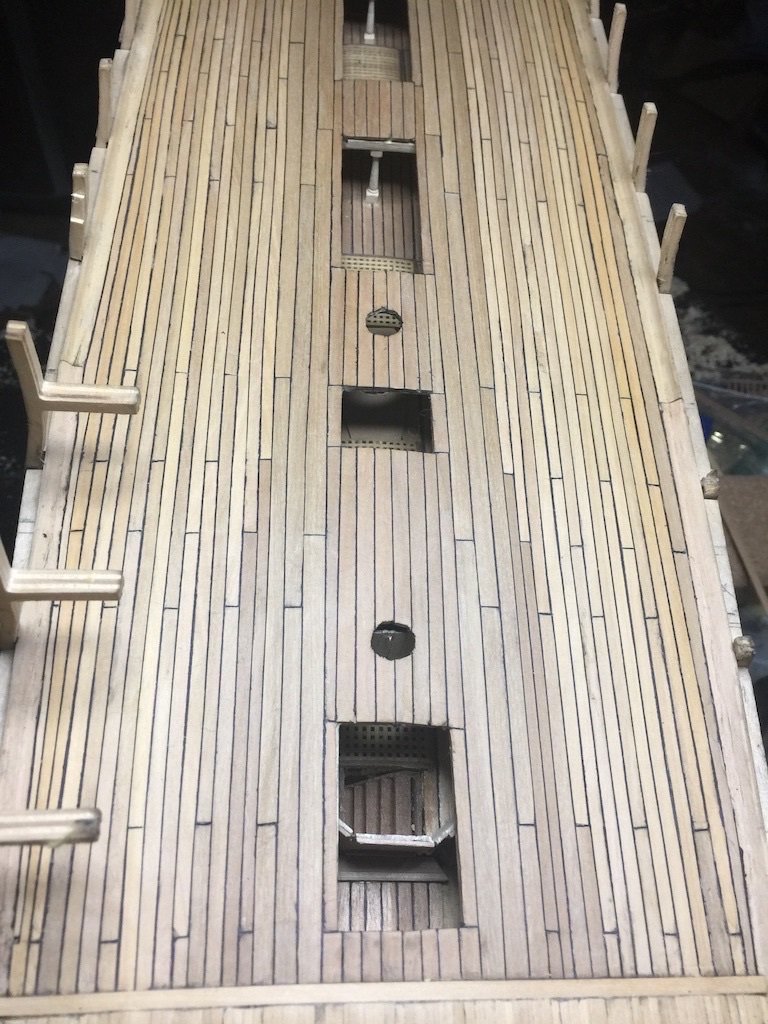
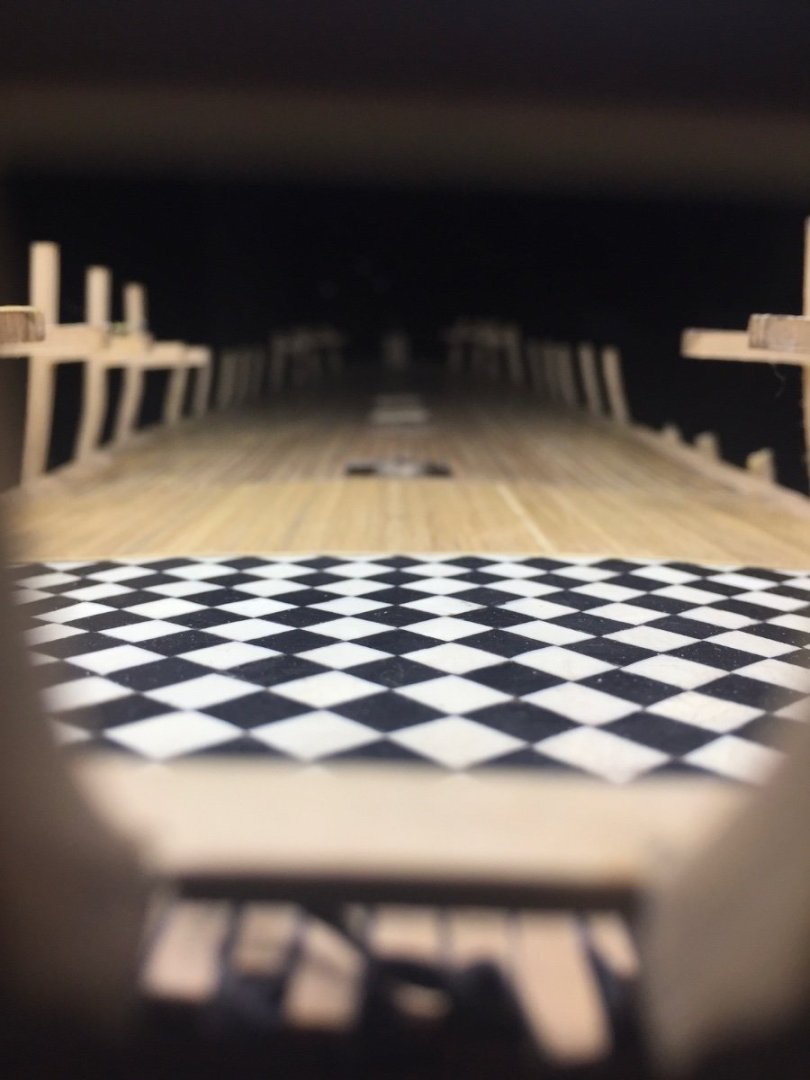
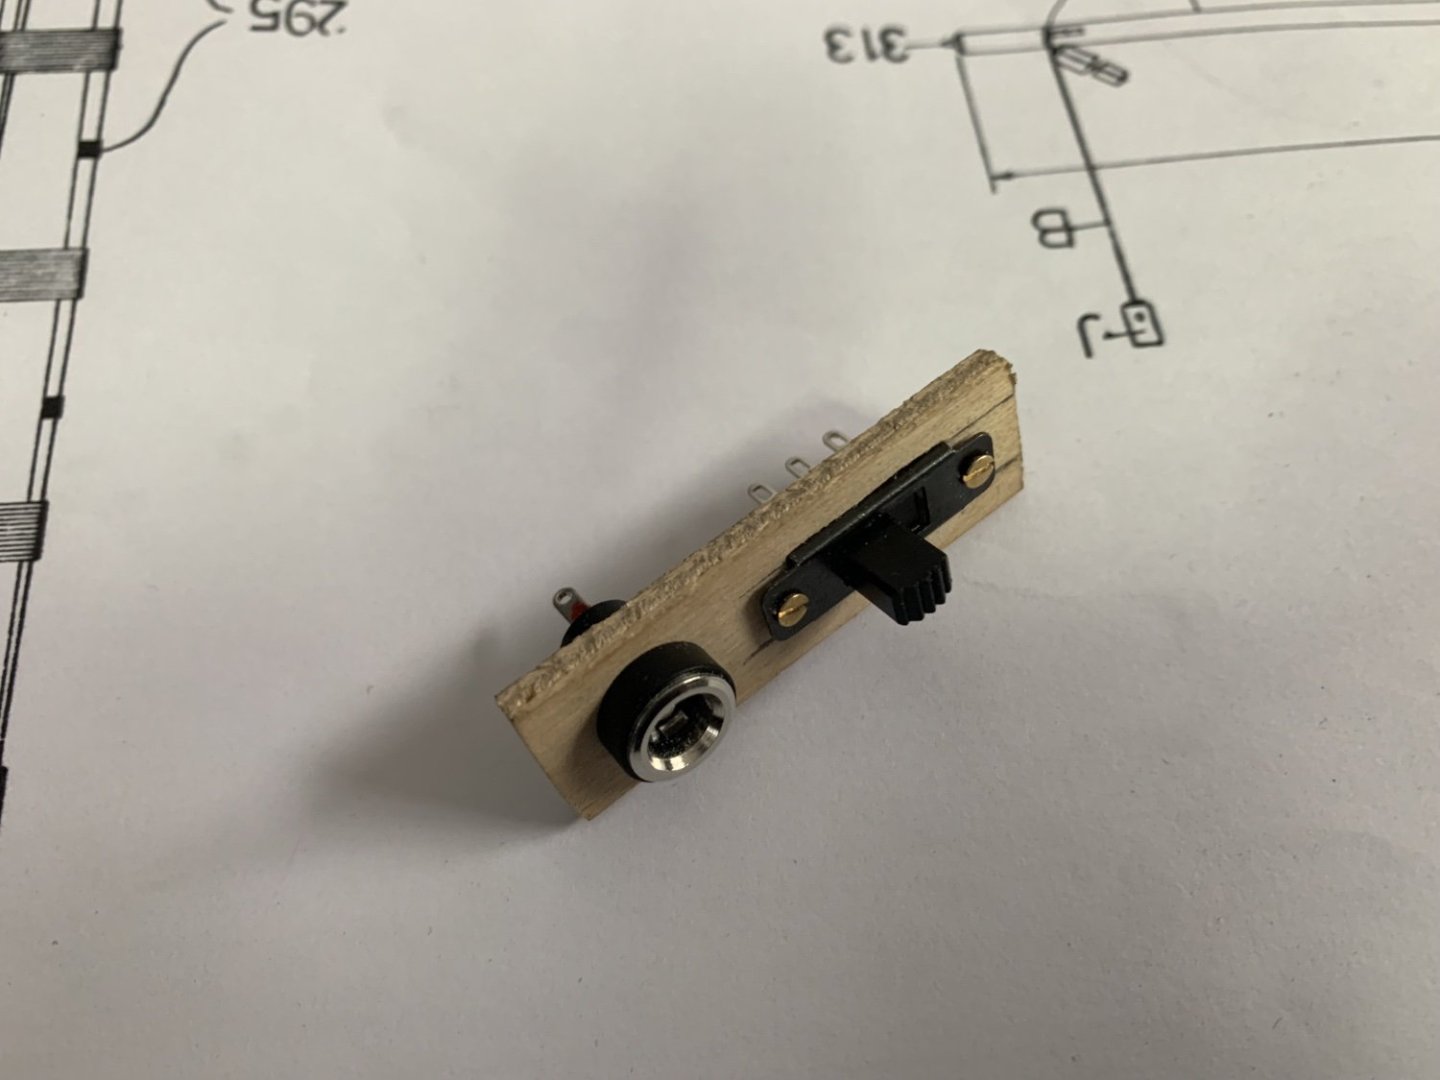
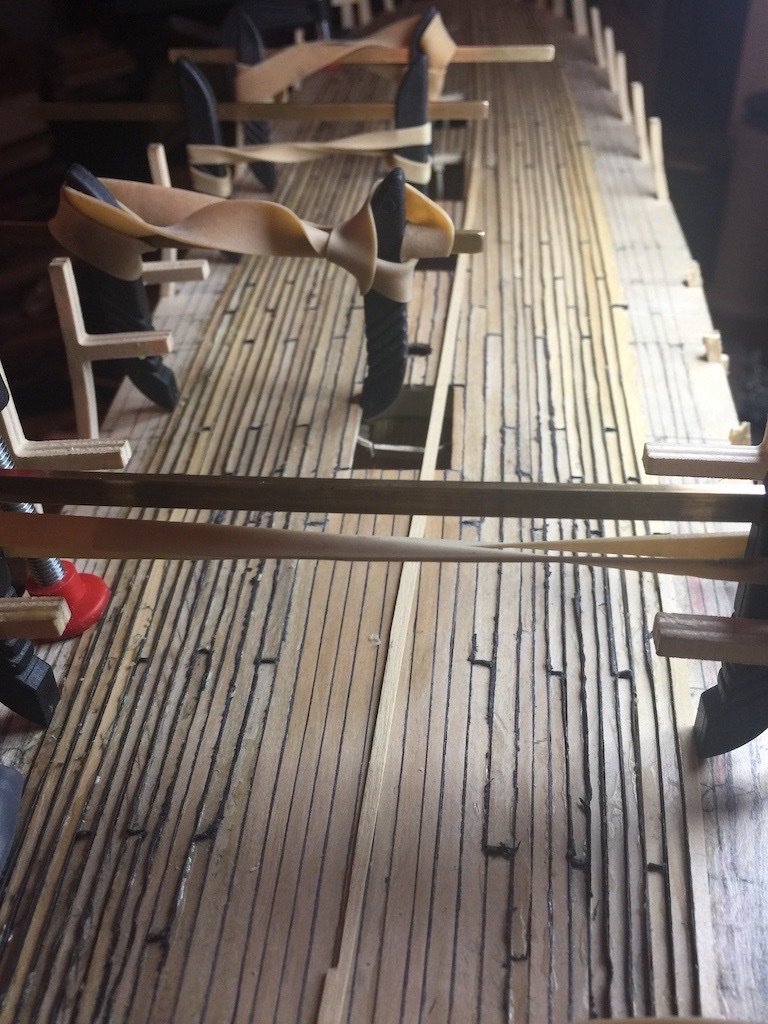
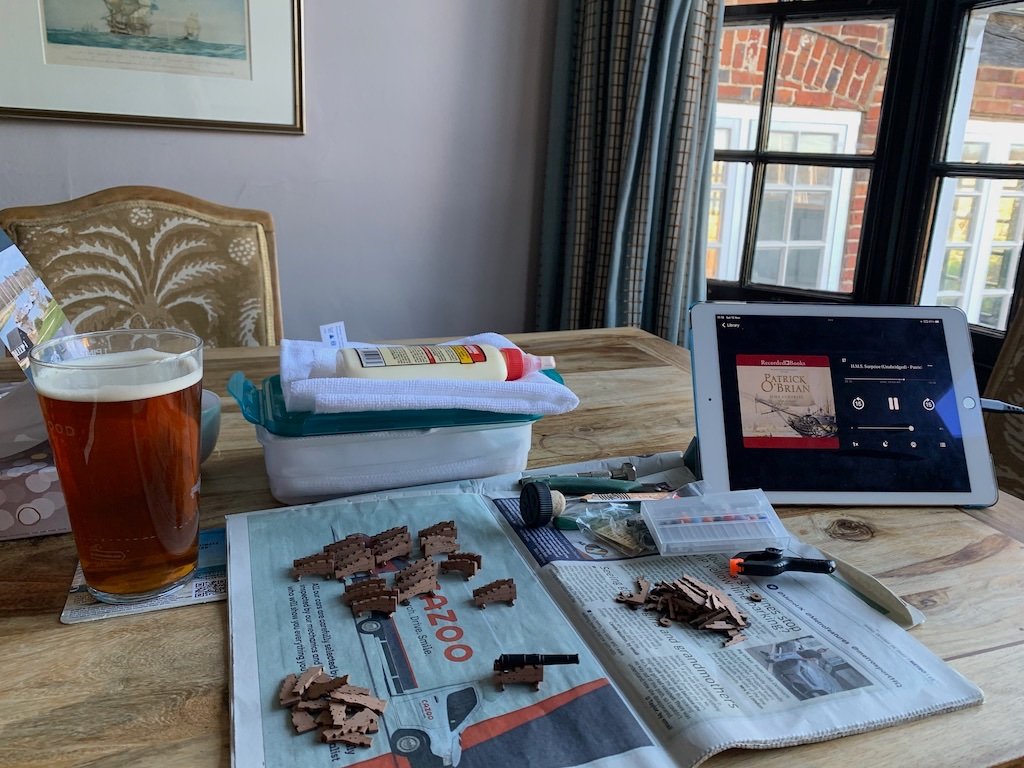
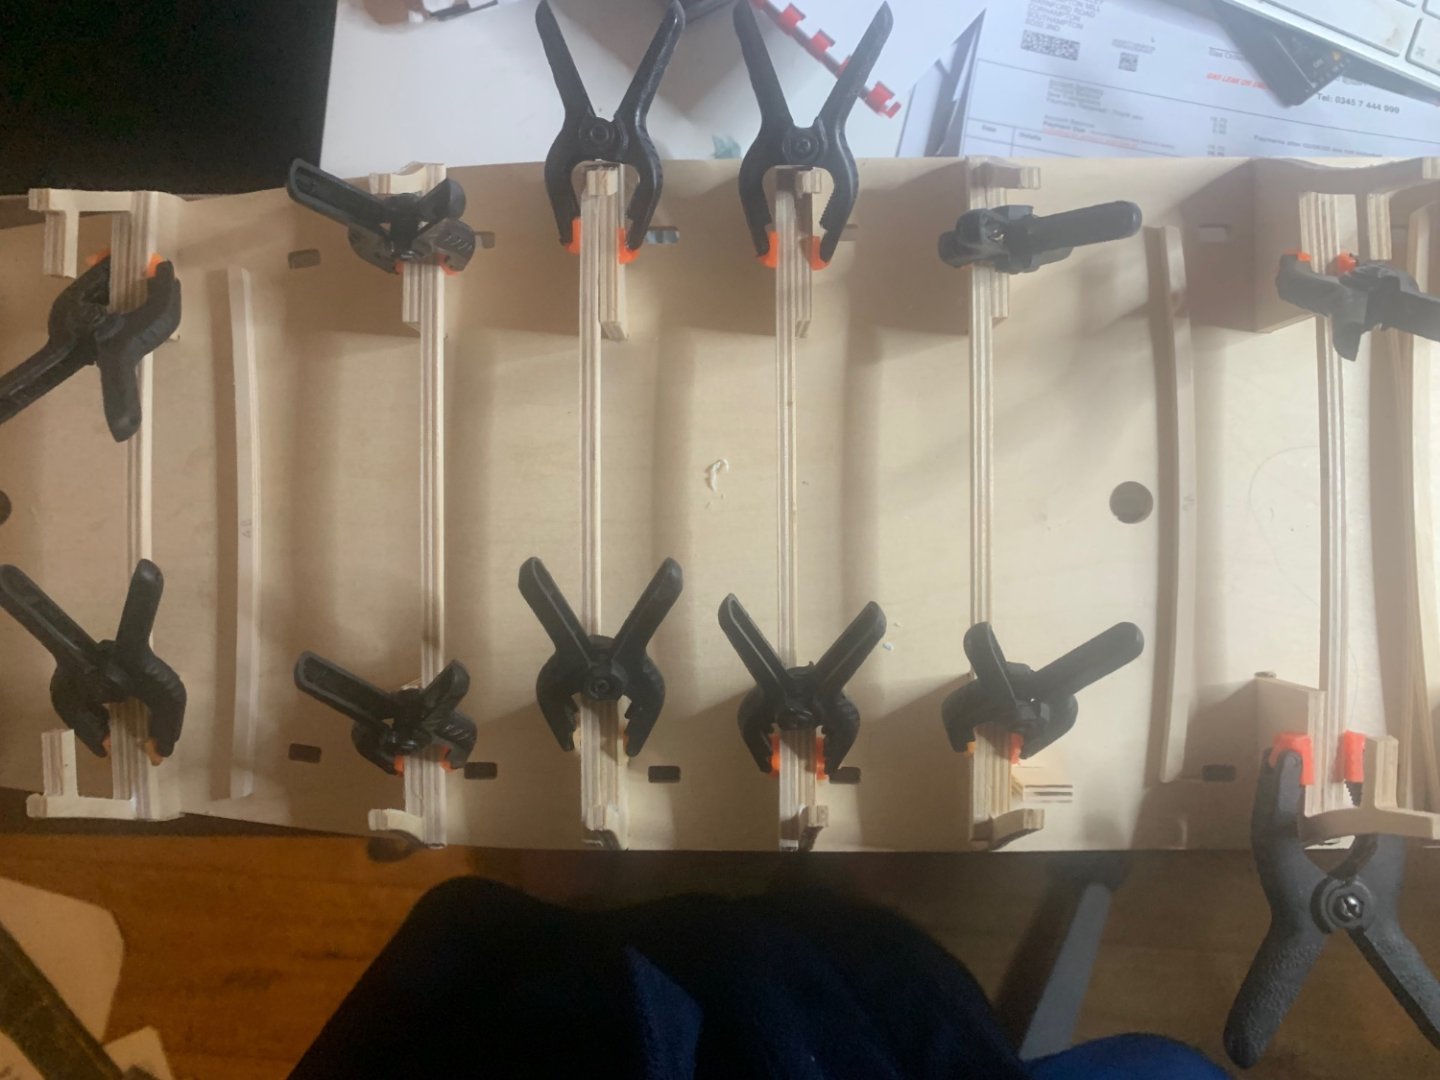
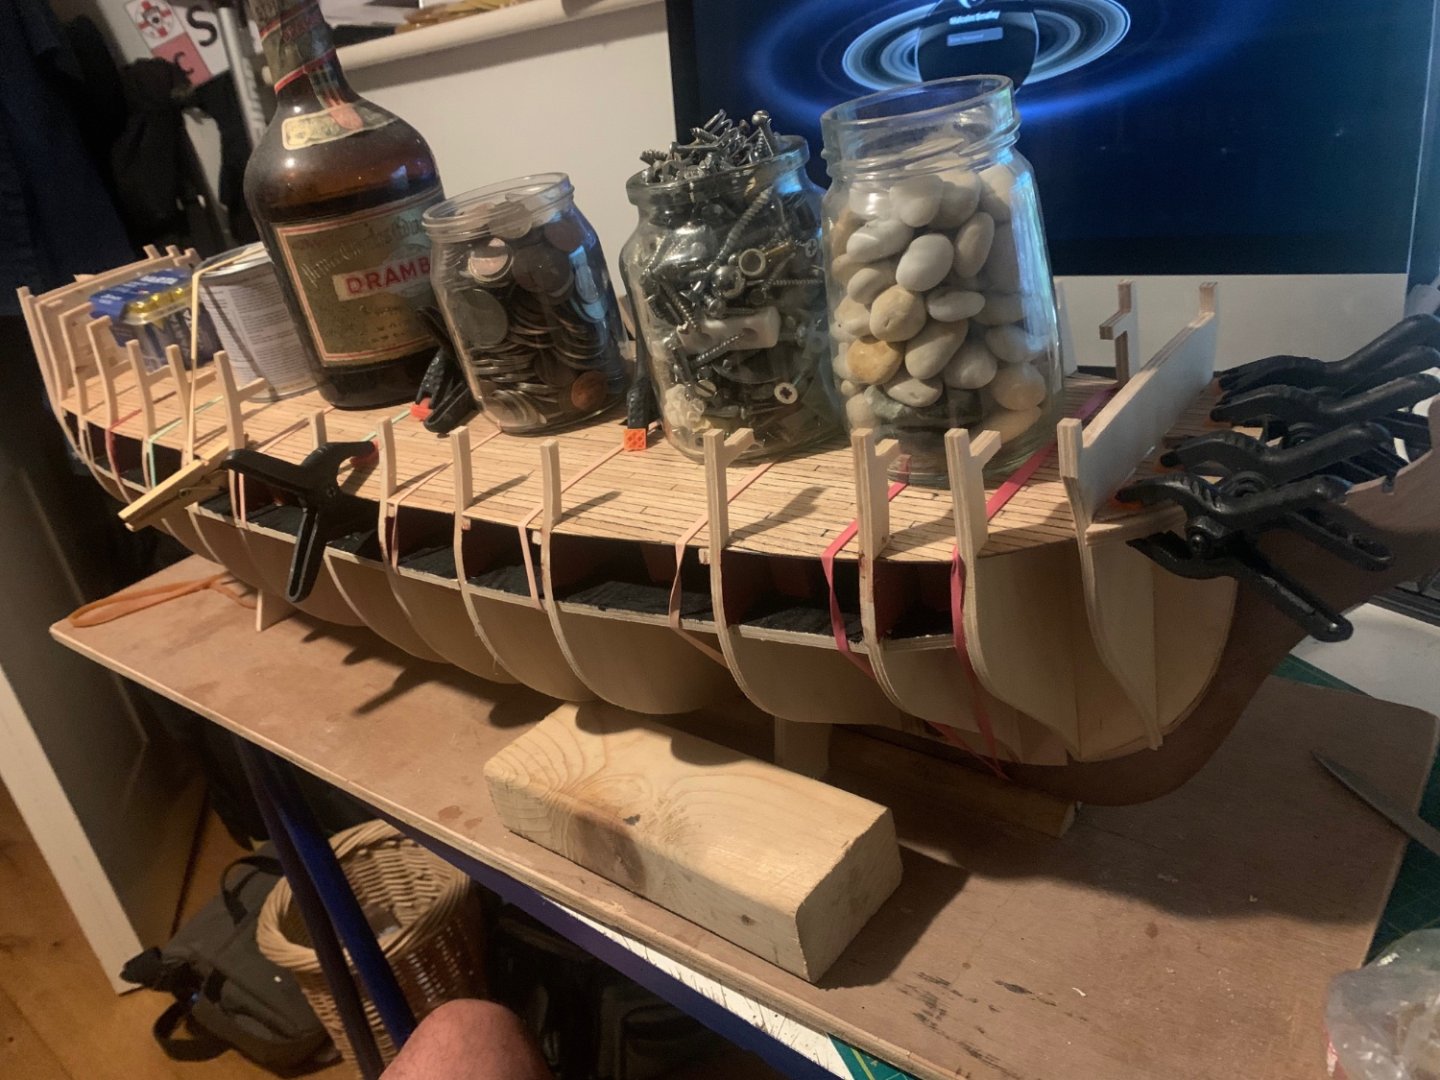
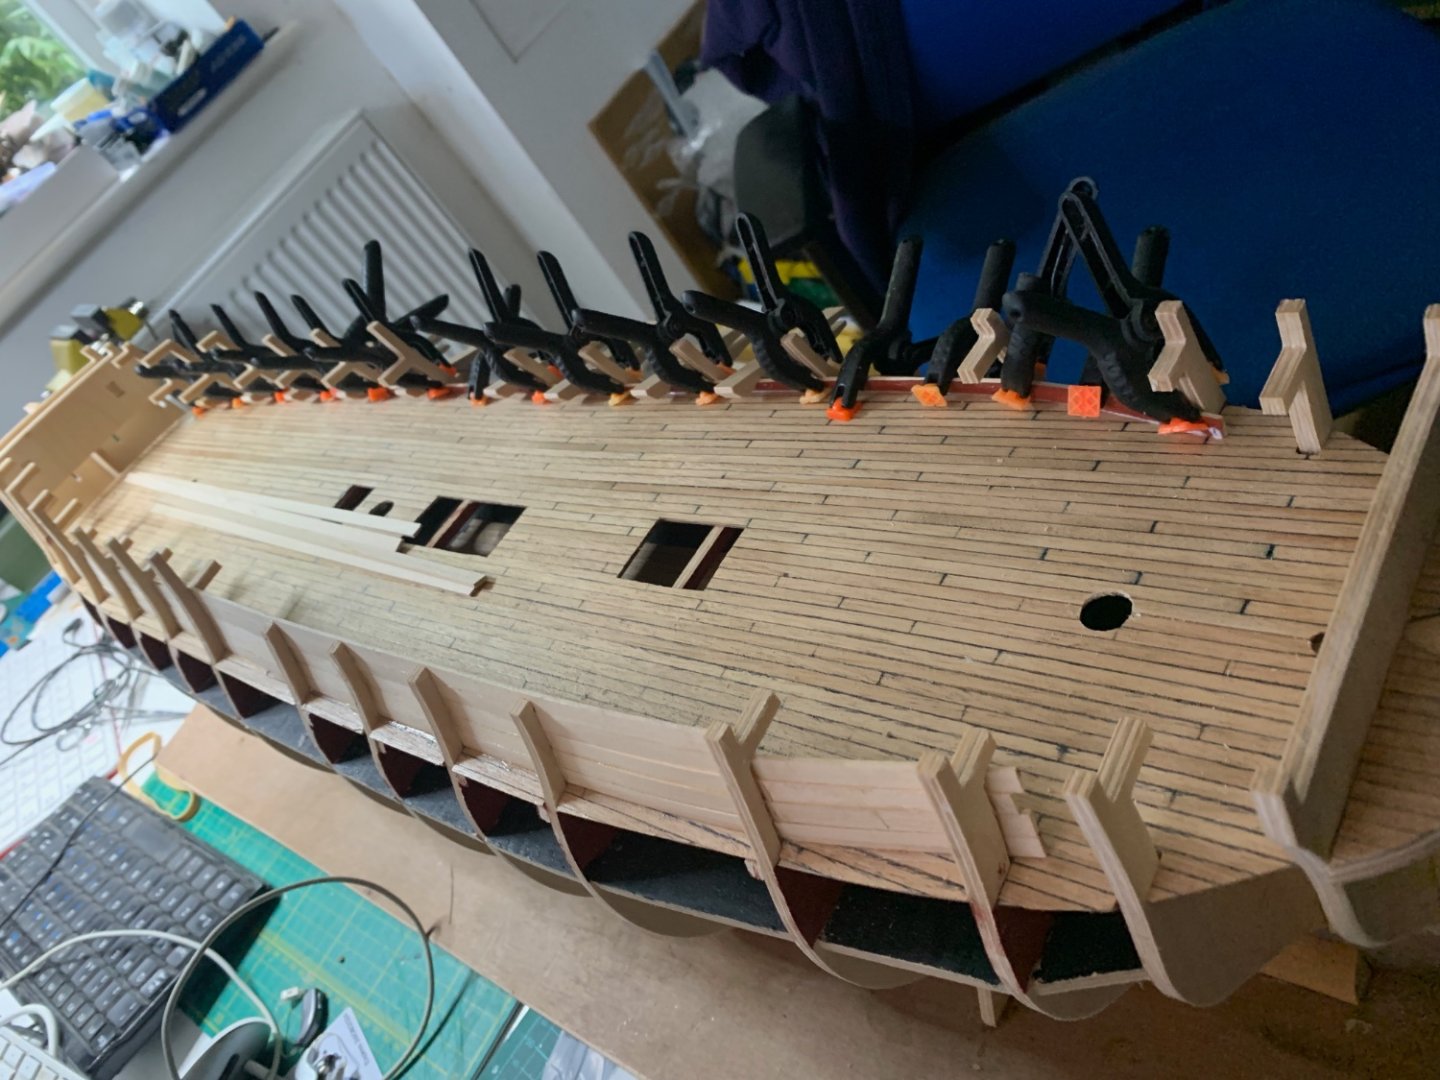
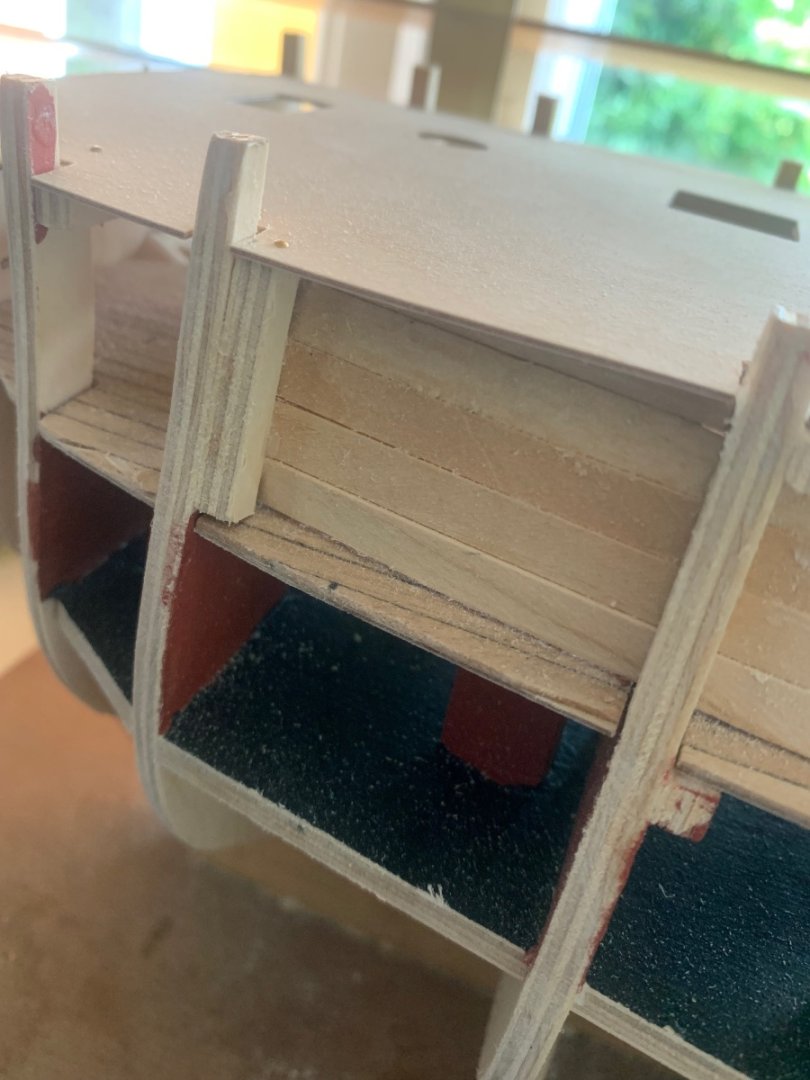
 I've been wanting to start a log here for some time on this build as it's been an on-and-off project for years (purchased in 2006, started in 2009, currently at the stage of planking outer hull). I've taken some pictures over the years which you can see below. These show progress to-date and I'll update this build-log as I make significant progress going forward. Summary: As a project I intend to use the caldercraft kit as the base but will replace and enhance much of it where I can, because I love adding details, even if they're not going to be seen. I also really enjoy working with hardwoods and have a good set of Byrnes model machines which are a joy to use (disk sander, circular saw, thickness sander and rope walk). My first completed kit was HMS Sherebourne which I also heavily modified and my high level plan is to start with smaller ships, then the large frigate, a 74 then, if there's time (!) a 100+ gun ship, all from the same period and same scale of 1:64. I plan to represent her after her 1801 refit, with full sails and replicating the same planking patterns shown in the admiralty plans and the Anatomy of the Ship book. The captains quarters will be fully fitted and lit, as well as additional details on the lower deck. Stern and rudder, made from boxwood. Rudder shows some original testing of coppering which I've since removed and plan a different technique. Lower deck planking (boxwood). After testing a few different techniques of representing the caulking between deck planks I settled on using strips of cartridge paper which I felt resulted in the most pleasant finished product. However, it's a lot of work! You have to cut long strips of the paper, stick it down one long edge of the plank with wood glue before adding the next plank. At the end you shave it back and sand. The bands you can see on the pic below were used to squeeze the planks together as they had a tendency to spread. This results in the occasional exploding plank but, well, the end results are nice! (you can see shaved planks in the lower centre of the pic) Rear lower deck and some details of roughly built cabins which are unlikely to be seen. You can see how the planking has progressed however including those tricky odd-shaped planks near the waterway. Also visible is my earlier version of trenails, and earlier version of gratings. Details of the central pillars on lower deck and you can see how nicely the caulking worked out. Gundeck started: Same method of caulking. Captains quarters floor is decorated with ebony and artificial ivory tiles. The chair is just there to help remind me of scale. One of the cannon; a slightly modified Vanguard Models 18lb carriage gun - lovely kit. I've spent some lovely days in the Master Builders hotel at Bucklers hard; on this occasion you can see my 'workbench' as I build all the gun carriages. Gundeck planking finished but no trenails yet... (smaller planks for the officers quarters - an idea I pulled from the plans of the '74 gun ship by Boudroit And now... the tedious bit! Trenails! I chose the 'syringe' method which is where you take 19 guage syringes, insert them into a pile drill, press into boxwood block and slice the top off the block. I went through quite a few syringes, and it took days to get enough made. The end result, hysterically, is very accurate trenails. So accurate however that you can't really see them. It would have been easier to see if I used pearwood instead of boxwood planks. However, I decided at this stage to go for accuracy instead of aesthetics. I needed a healthy break from the build after completing all the trenails! Instead of starting on the outer planking I decided to build some of the fun bits on the gun deck. I built these from scratch (boxwood gratings and ebony coamings built with the correct corner fitting). Finally, here's the switch built into the base which is for the lighting. This is fitted near the keel and the planking surrounds it. The lights are yellow flickering leds (I'm yet to figure out a way to upload a short movie showing the lights in action). ...more to follow.
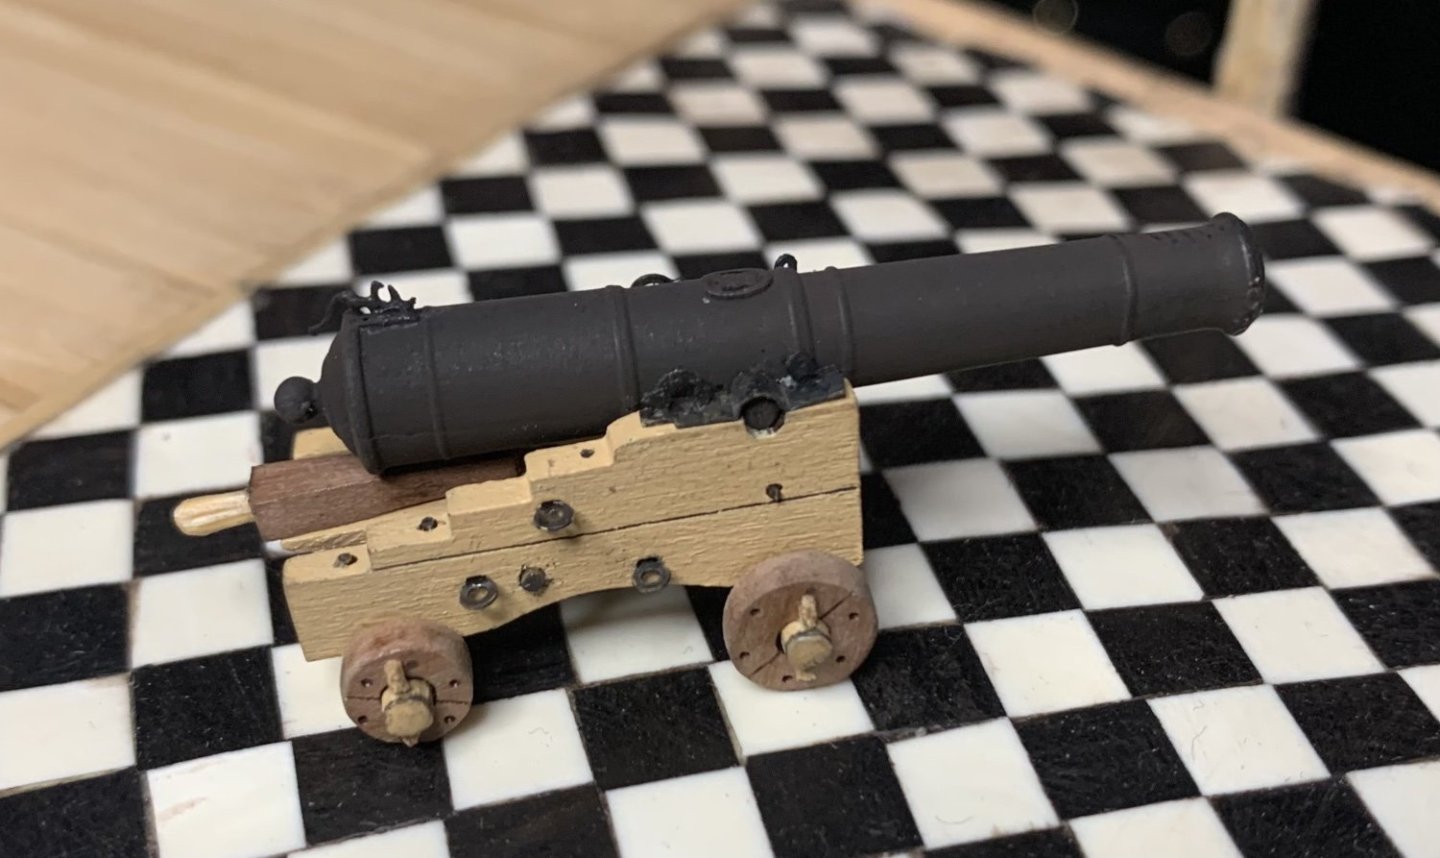

-
 This is my first build. I bought the model second hand with the keel and bulkheads all glued in place. The had the false keel stem and stern also glued in place. I was lucky as I also purchased HMS Supply, in the same state as Convulsion, together with HM Bomb Vessel Grando, HMS Bounty and Albertros together with lots of tools and equipment. I started the build in February and did not take any photos until I had finished the second planking.
- 11 replies
-
- 3
-
-
- Convulsion
- Caldercraft
- (and 2 more)
-
 Firstly I would like help with the title for this log as I have bought the model with the hull. at first glance looking almost finnished. How wrong I was. I have taken time out from my Golden Hind build so as to clear my head and look at starting again with a fresh mind and set of eyes. Then, at the Southern model show I saw this.
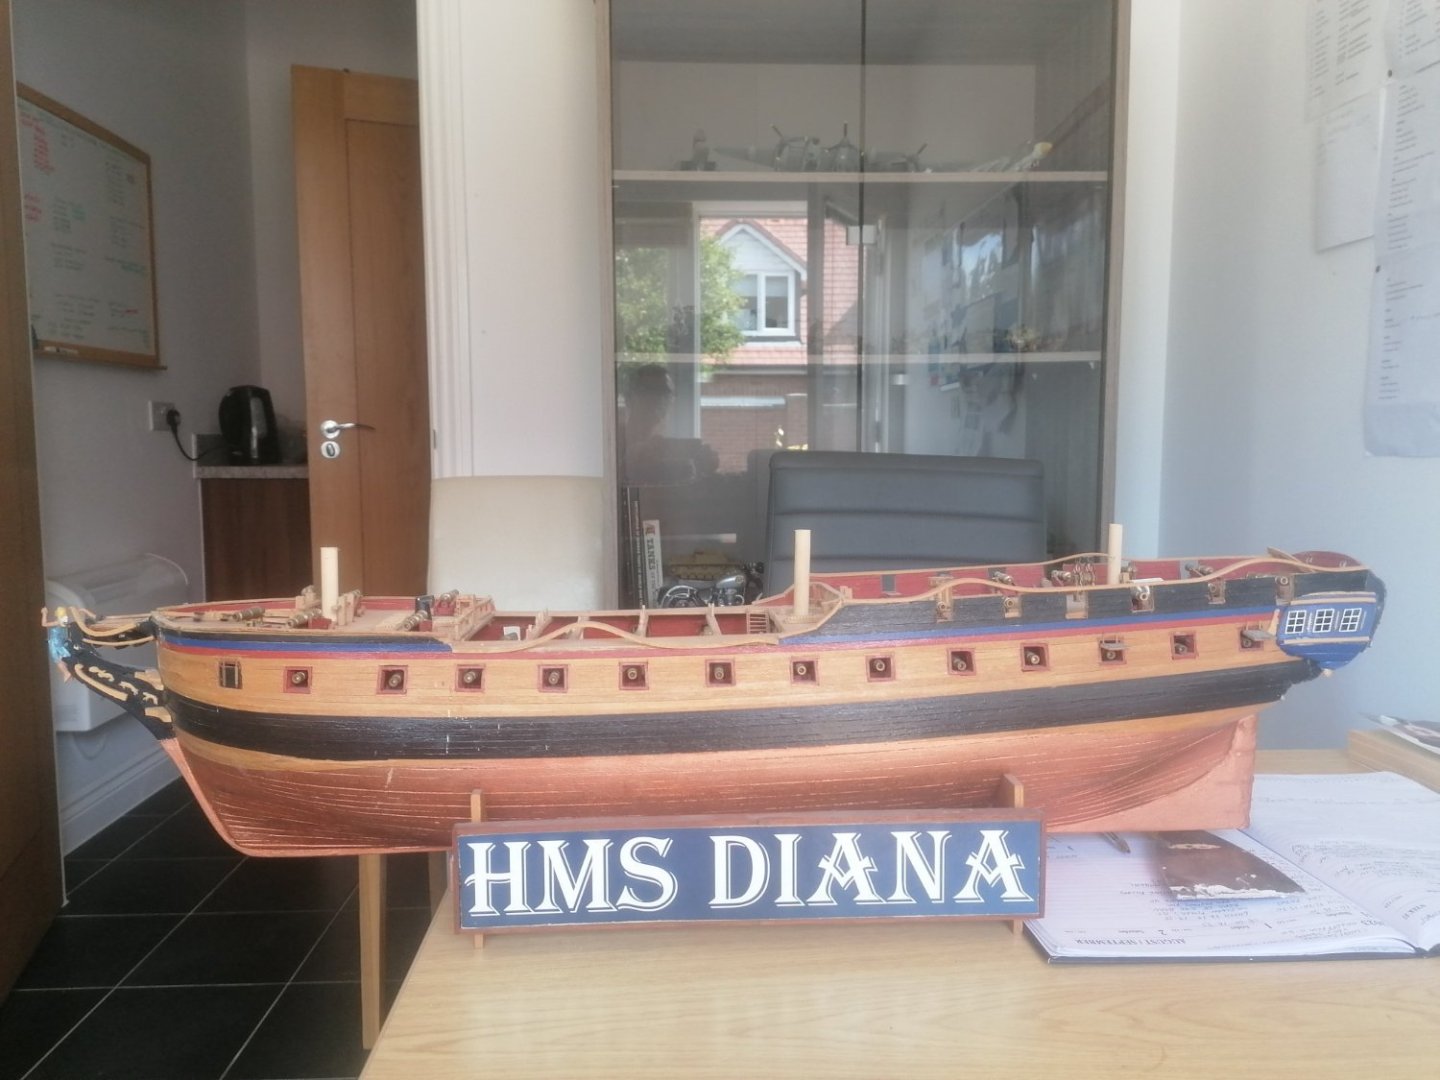


-
 Bonjour, The Granado is my second wooden ship build these year. This follows the ship Endurance which you can follow the link to in the MSW gallery. Before to start I learned many things with the forum. Thank You Timmo, Joe, Kevin, Brian, Vane... I was a little bit disappointed when I opened the box because 3 sheets missing. Thanks to Glenn (Cornwall) the problem was rapidly solve. Like everybody the fitted of the gunport pattern is not easy. At the end Ithe gunport cutouts of each pattern (port and starboard) were not fully aligned (1-2mm) !
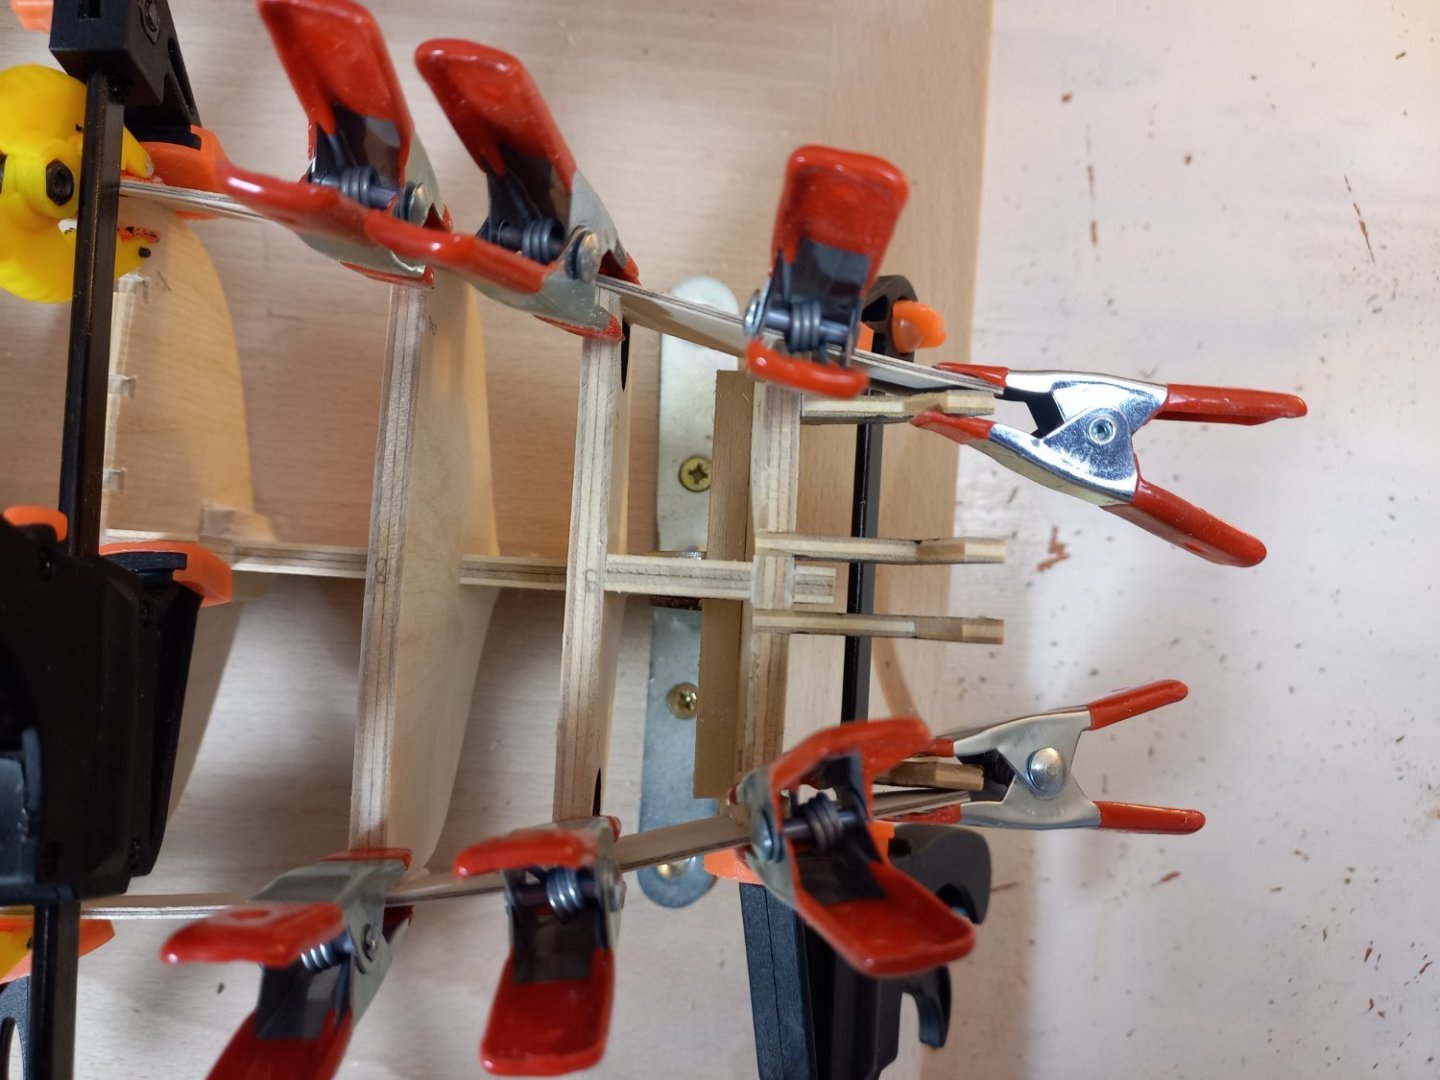
.thumb.jpg.bcf05ffc08f9a29b014466aa03f0ba62.jpg)
.thumb.jpg.5769dd69c685acc88474bd3b7b80453d.jpg)
-
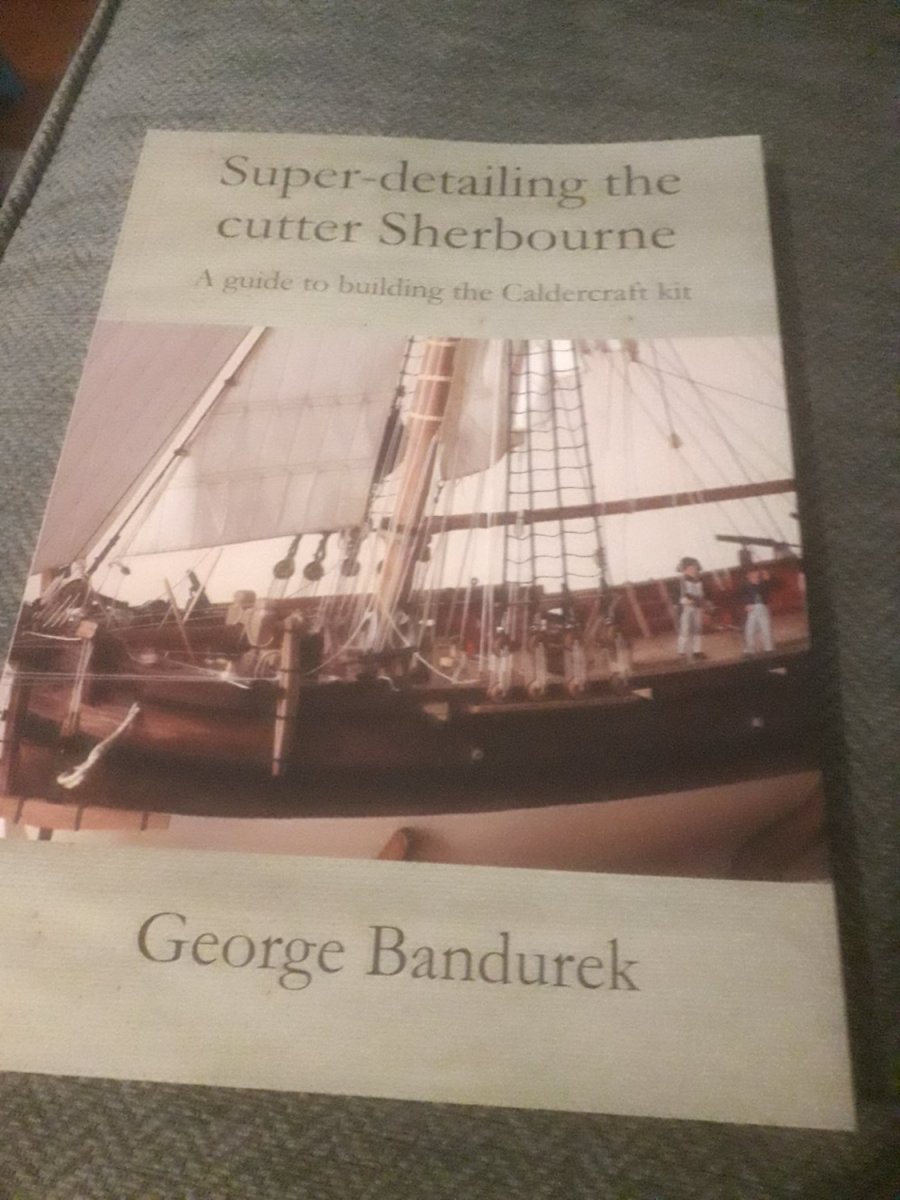
 I found this book via MSW: It is privately printed (2011) which explains the wonderfully uncommercial title. It is however a very well written and generally useful book for anyone who is trying to move on from an out-of-the-box kit build. It can of course be used as an enhanced set of instructions for the Sherbourne; but it is equally valid as a good read with lots of nice photos and a source of useful tips for any ship modeller. There is an associated website with some downloads from the book: https://www.grbsolutions.co.uk and a contact email which is how I got hold of my copy.
- 2 replies
-
- 8
-

-
-
- caldercraft
- Sherbourne
- (and 1 more)
-
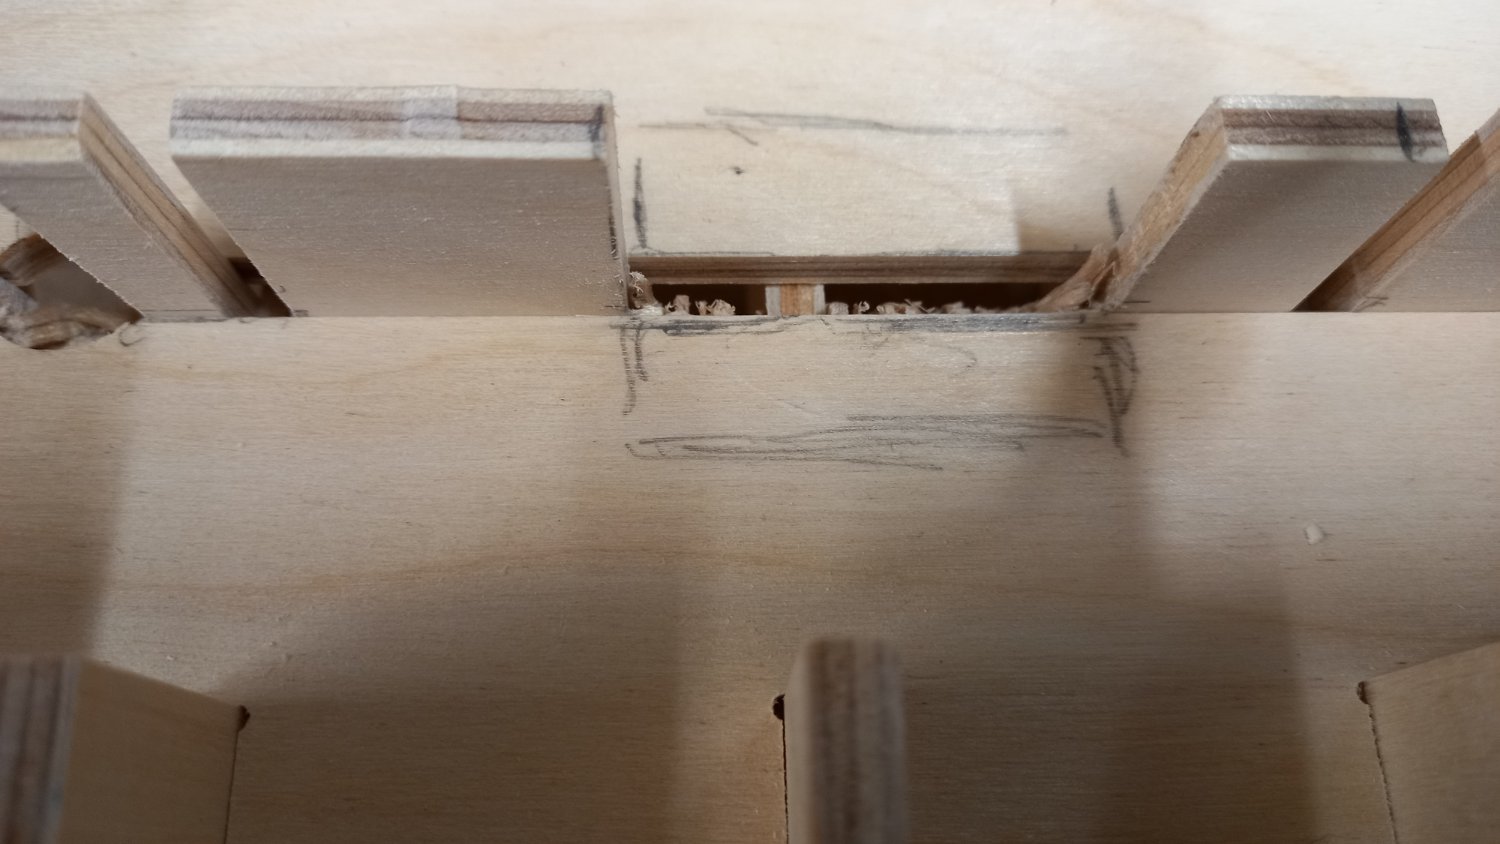
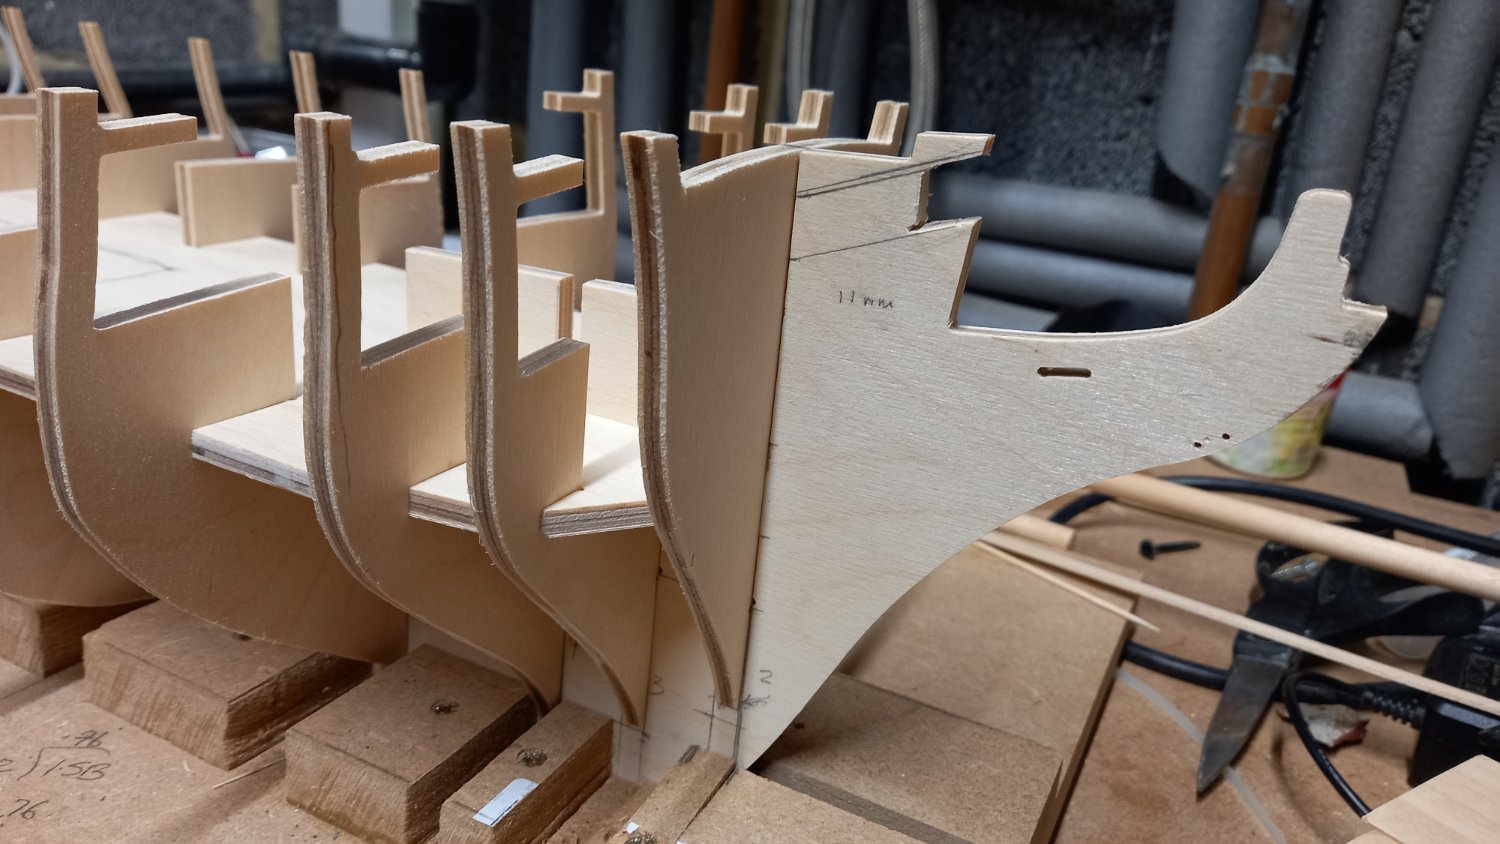
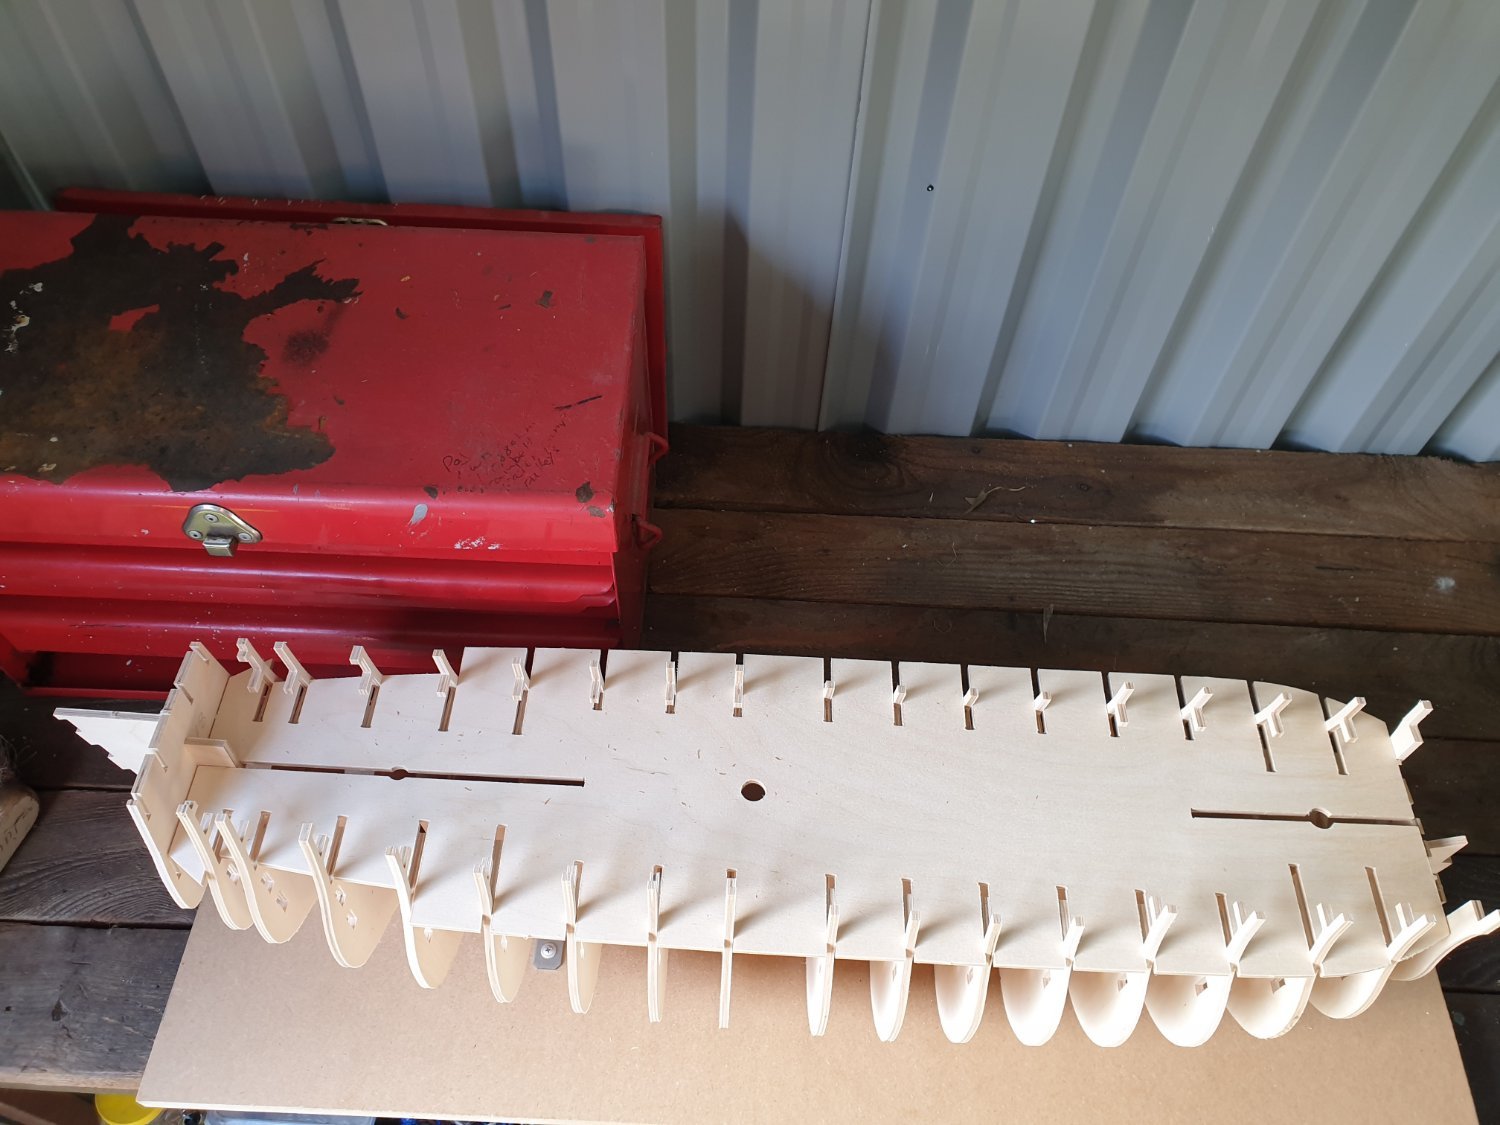
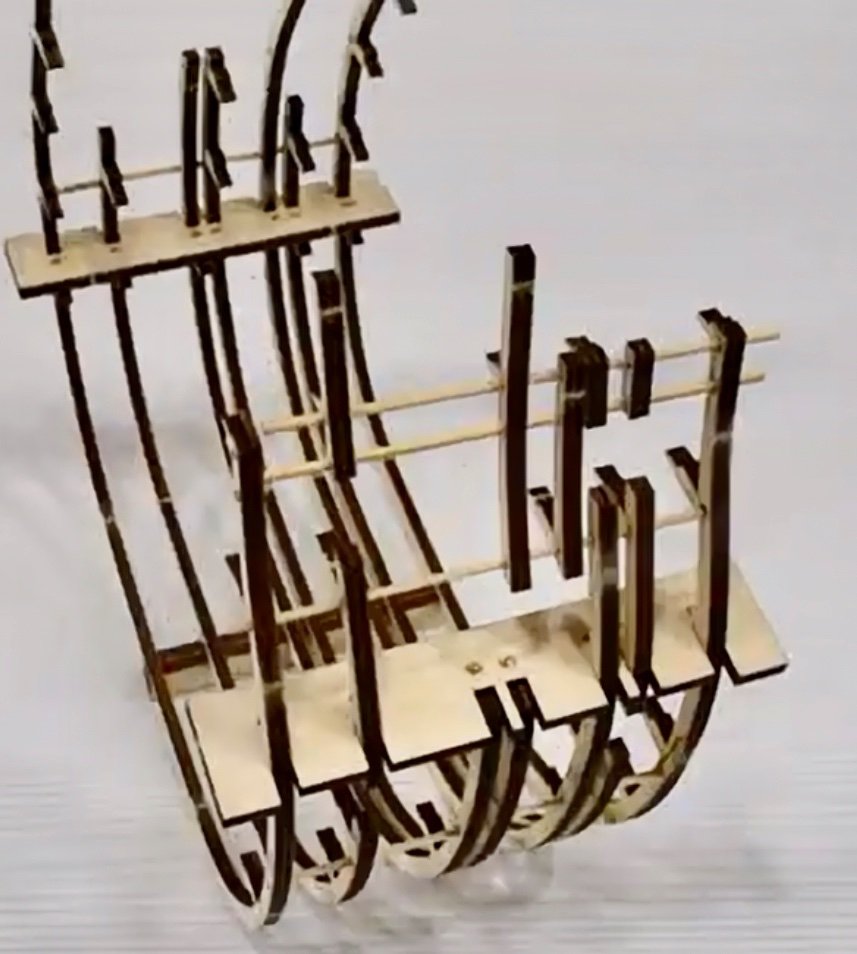
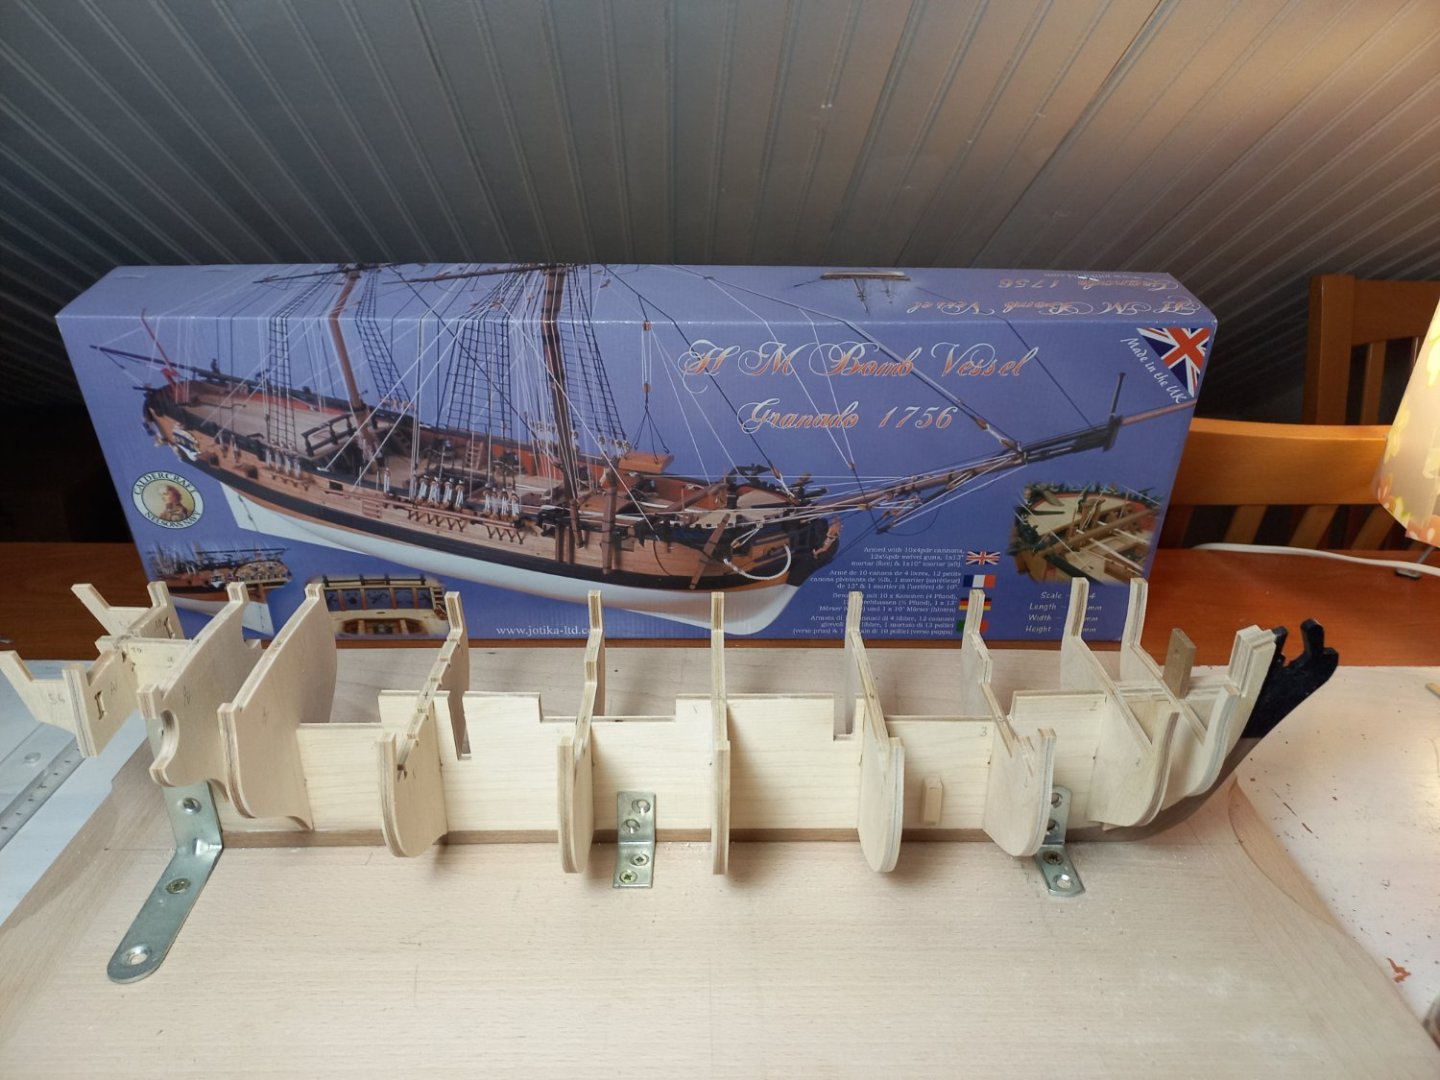
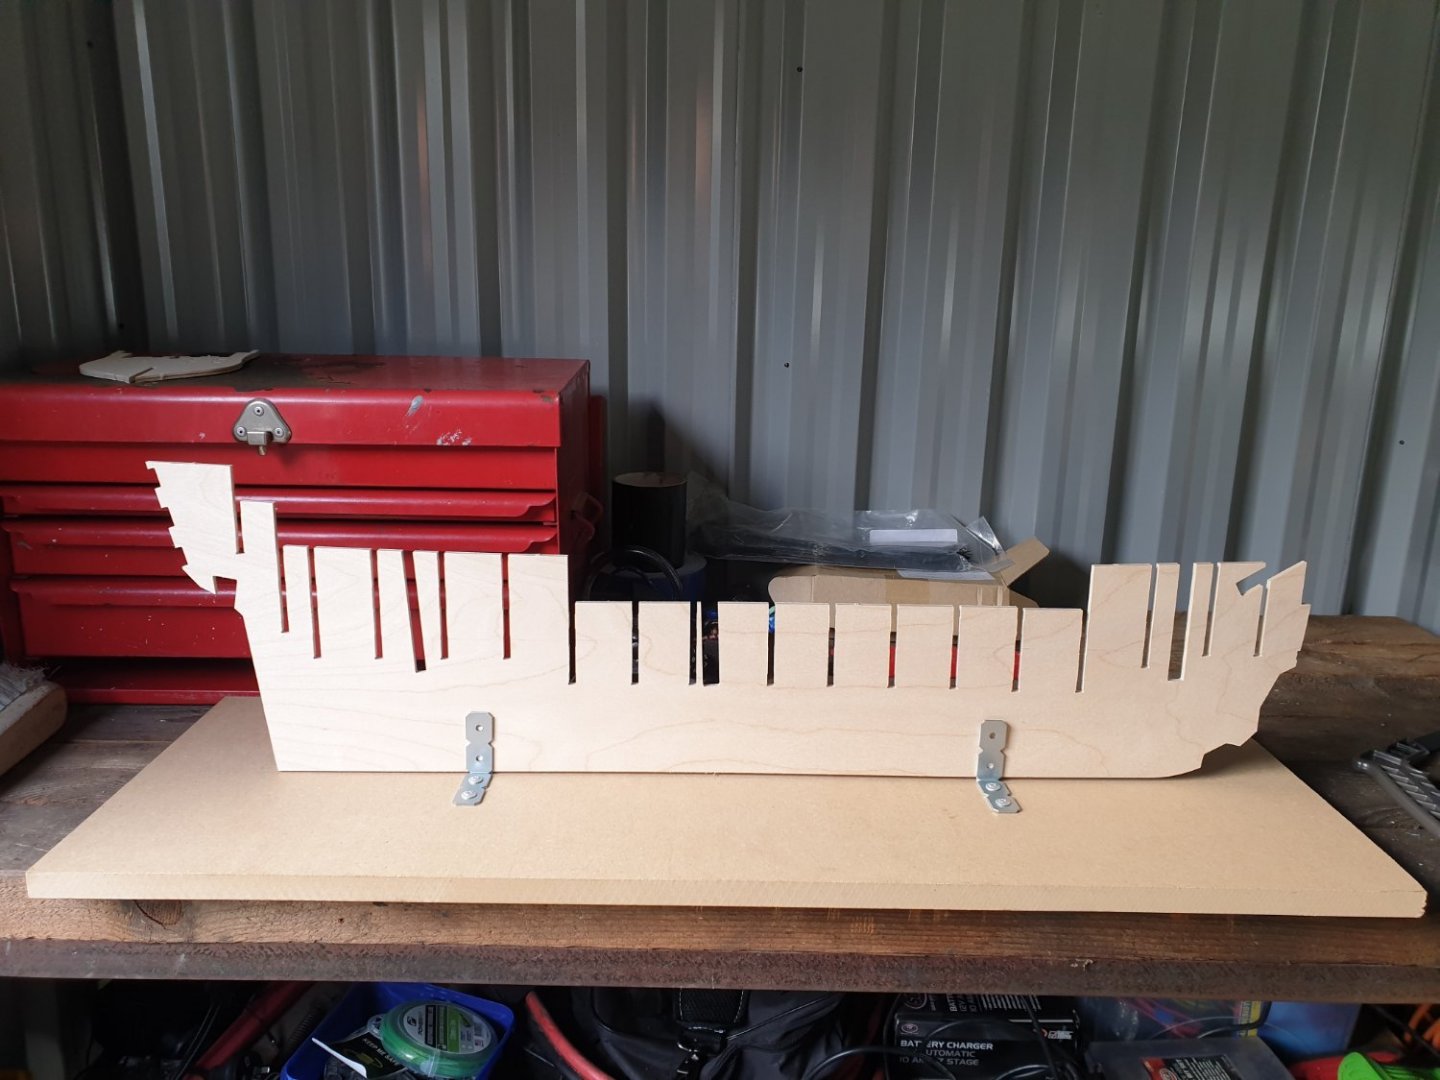
 After reading several blogs on this beautiful ship I couldn't resist removing her from the box and taking a look at whats on offer. After the issues I had building the Endeavour ( I am still working on the rigging) the first thing I looked at was the plywood keel and to my pleasant surprise there was only a slight twist at the bow. Instead of using the brackets supplied by the kit for making the initial building board (these were not completely square) I built myself one out of MDF. Once the keel was placed into this and dry fitted the decks everything looks to have squared up nicely including the bow section. I would already like to thank a number of members including Dunock,DavidEN and BeefWellington for there considerable help in pointing out a number of issues with the initial build including the cutwater, the angle of the bowsprit, removal of the section of the false keel to allow some of the lower deck to be planked. The position of the mizzen mast and again it was necessary to remove another section of the keel. It was also mentioned that the first gun port from aft will fall foul of number 3 bulkhead These are all issues I will need to address before gluing takes place but intend to hold fire whilst rigging the Endeavour and given time hopefully will be able to figure out the best coarse of action moving. Here is some photos of major patys dry fitted. Notice already I have broken off a number of the upper deck supports. Not a great start. Another reason I chose to build this model is due to being the proud owner of The AOTS series and therefore will adhere to this as close as possible and perhaps consult bothe James lees and Lavery for anything which needs further clarity.One thing which I have notice with the this Caldercraft kit is the sizes of the masts, which are the same as the Endeavor. Although it is once again my intention of building the masts from sqaure boxwood stock, I notice that the according to AOTSD the main,fore, mizzen and bowsprit should be 11.1mm,9.7mm,7.3mm and 11.1mm consecutively . So I currently only have boxwood up 10mm thick. So I will need to order some 12mm thick for this job. I am still not sure whether or not I need to make a rabbet or not and to also replace the stem with boxwood. At present I am unsure of the drawing if I need to add a walnut keel and stern post too, or I actually need to cut into No 3 bulkehead to allow the line up of No 1 gunport or can I just move the gunport at a later date. Any advice in this area would be appreciated.

-
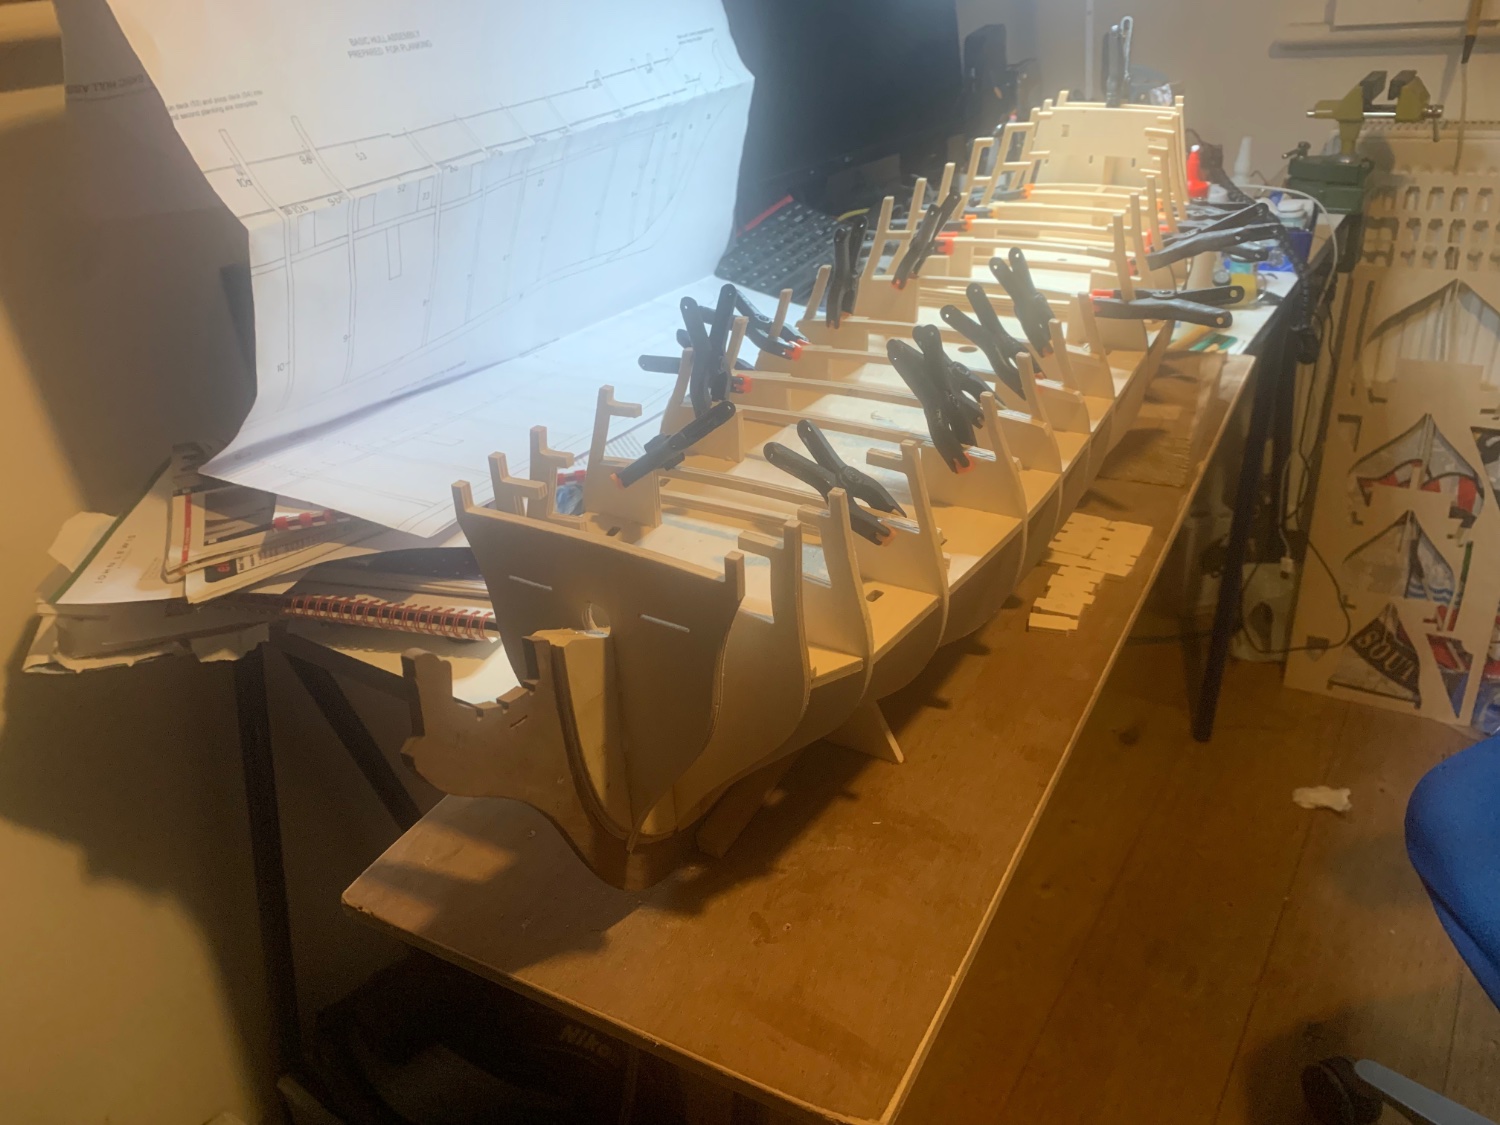
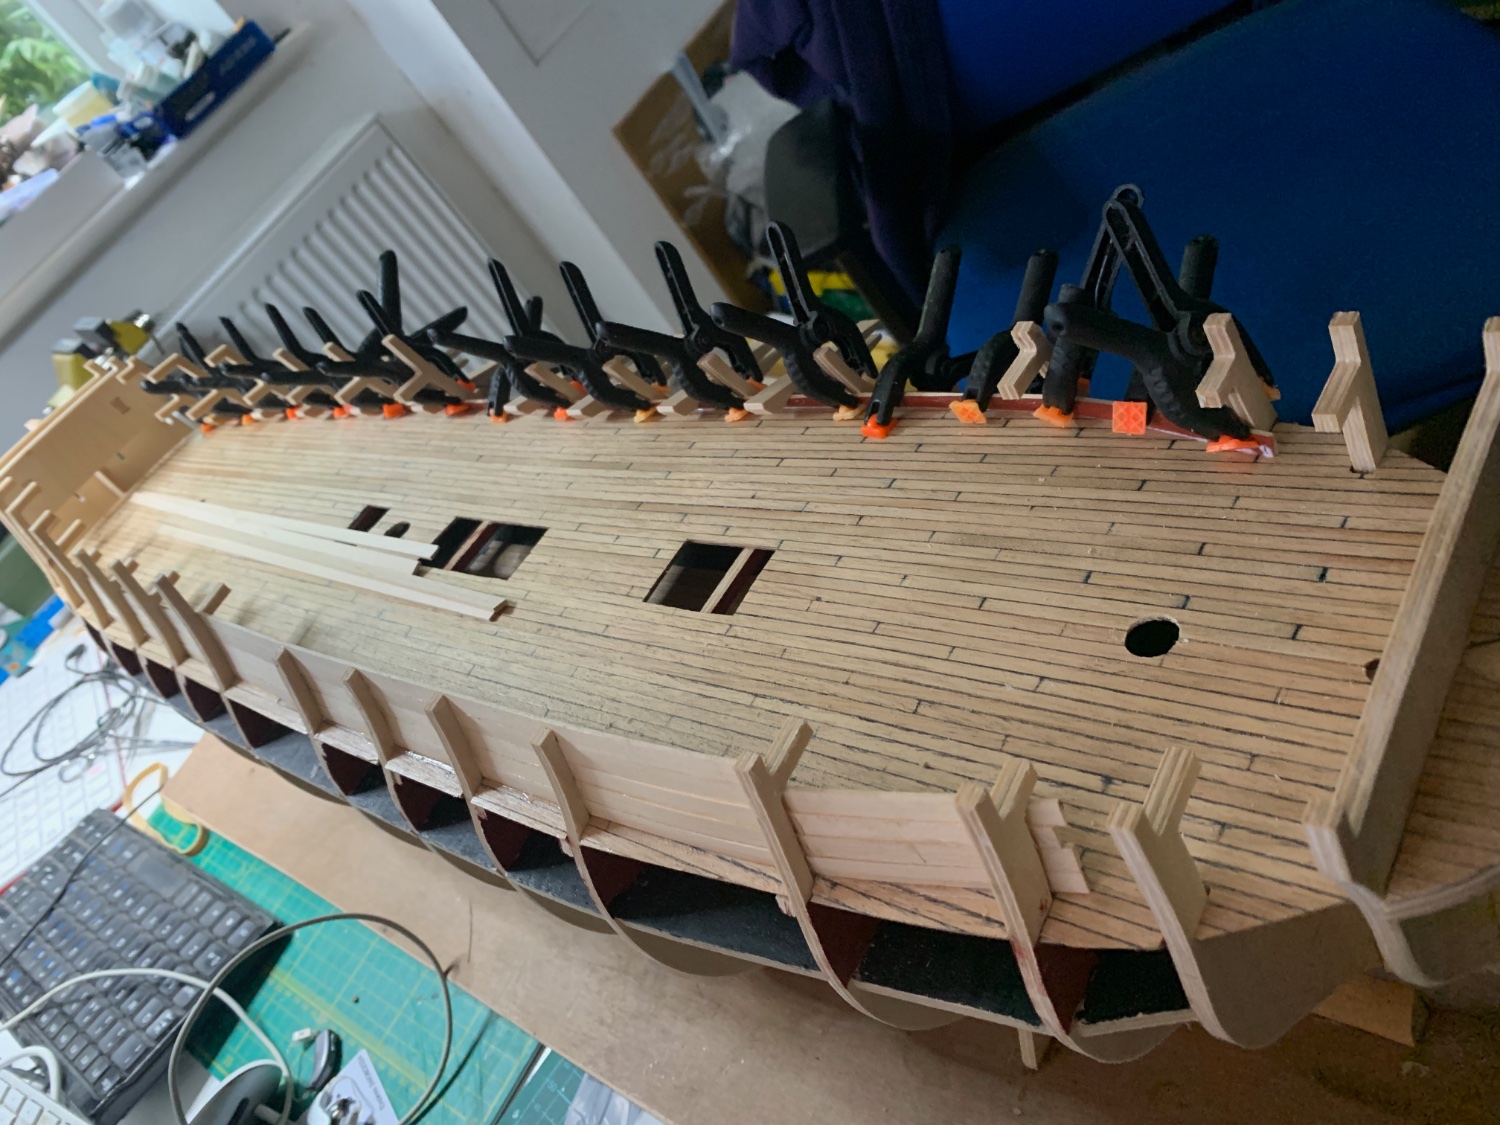
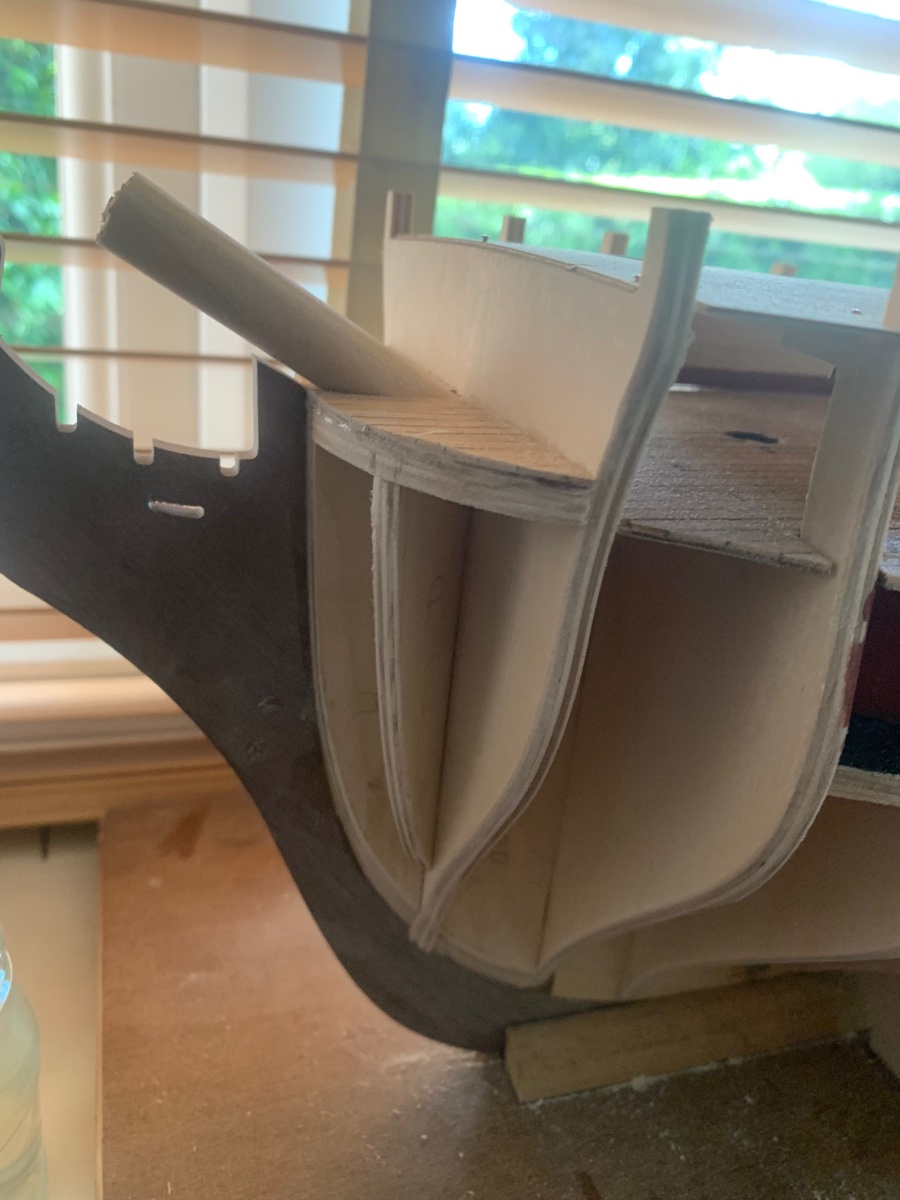
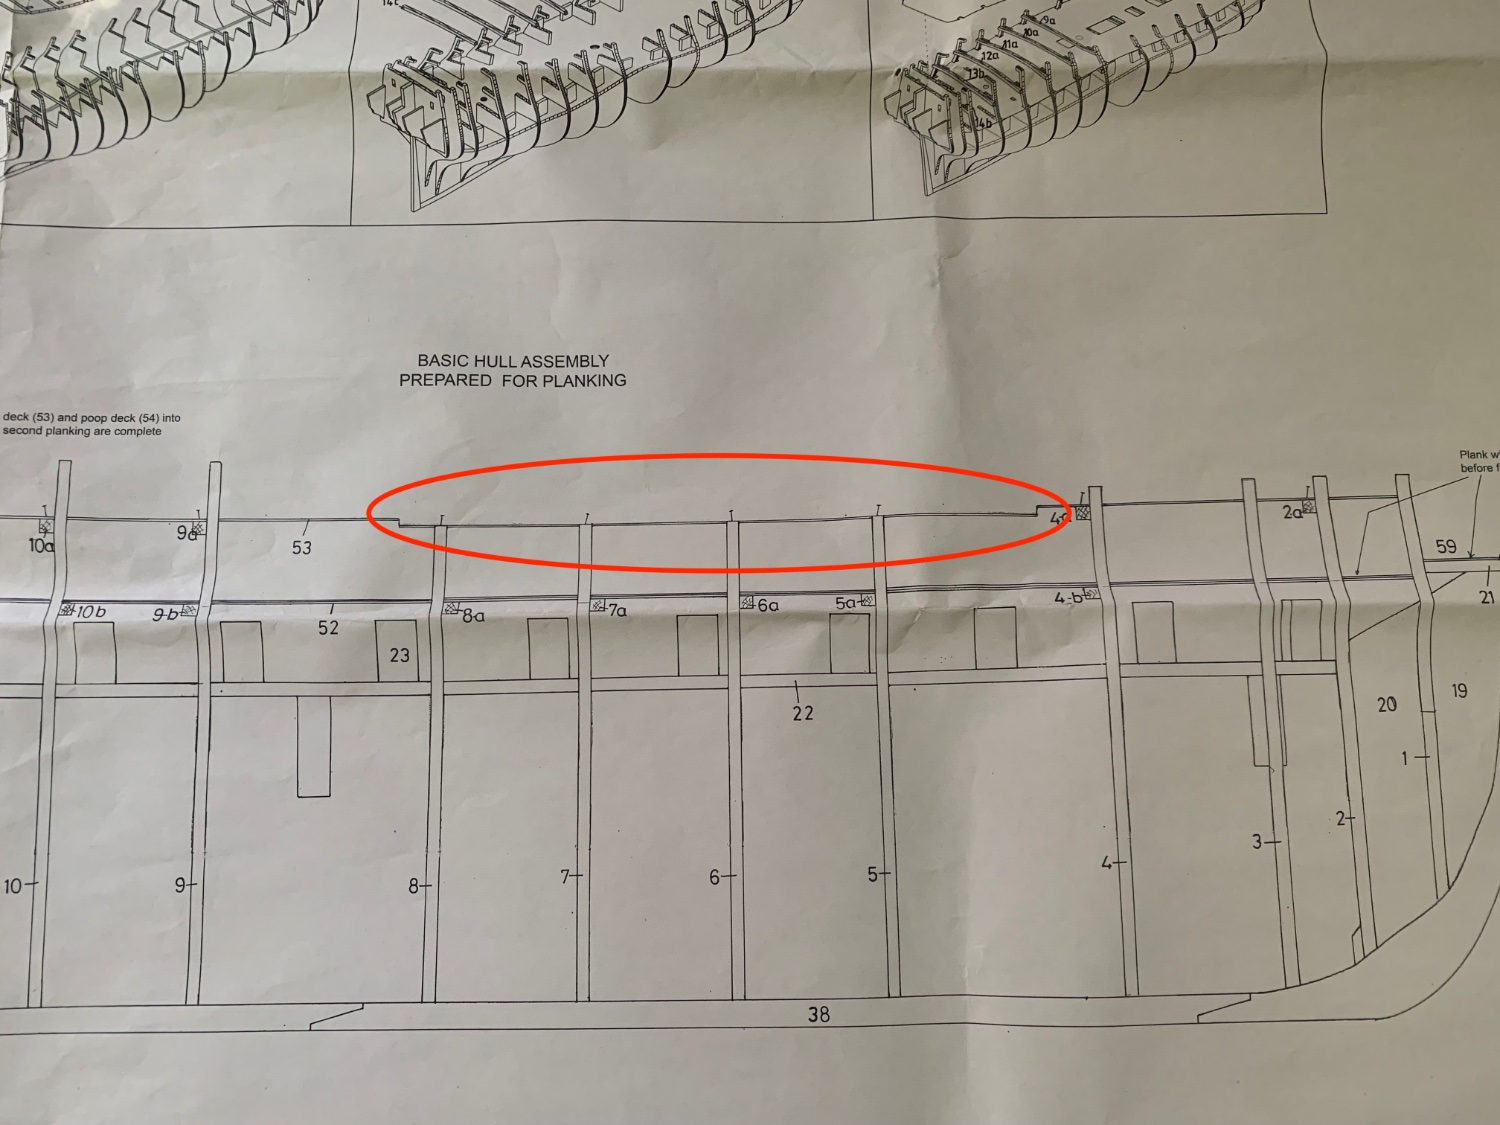
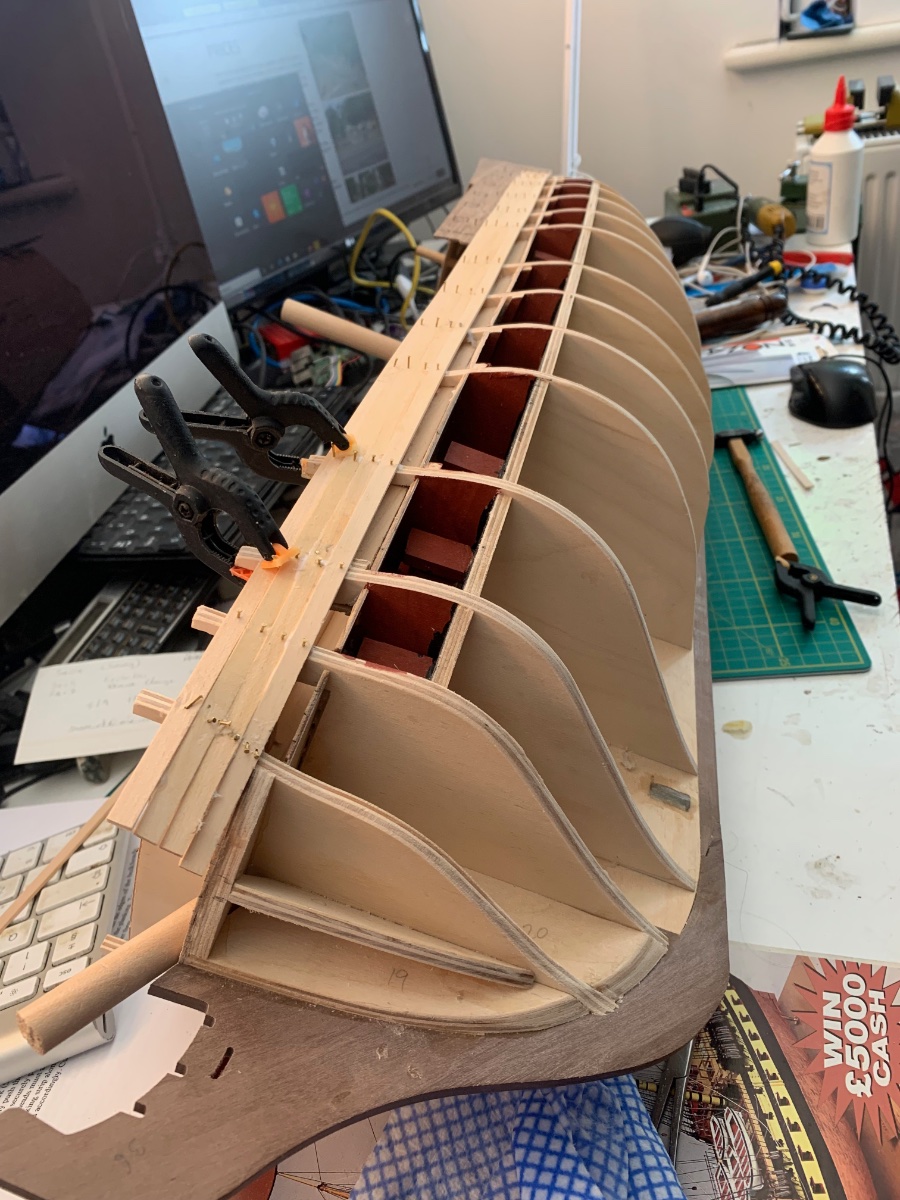
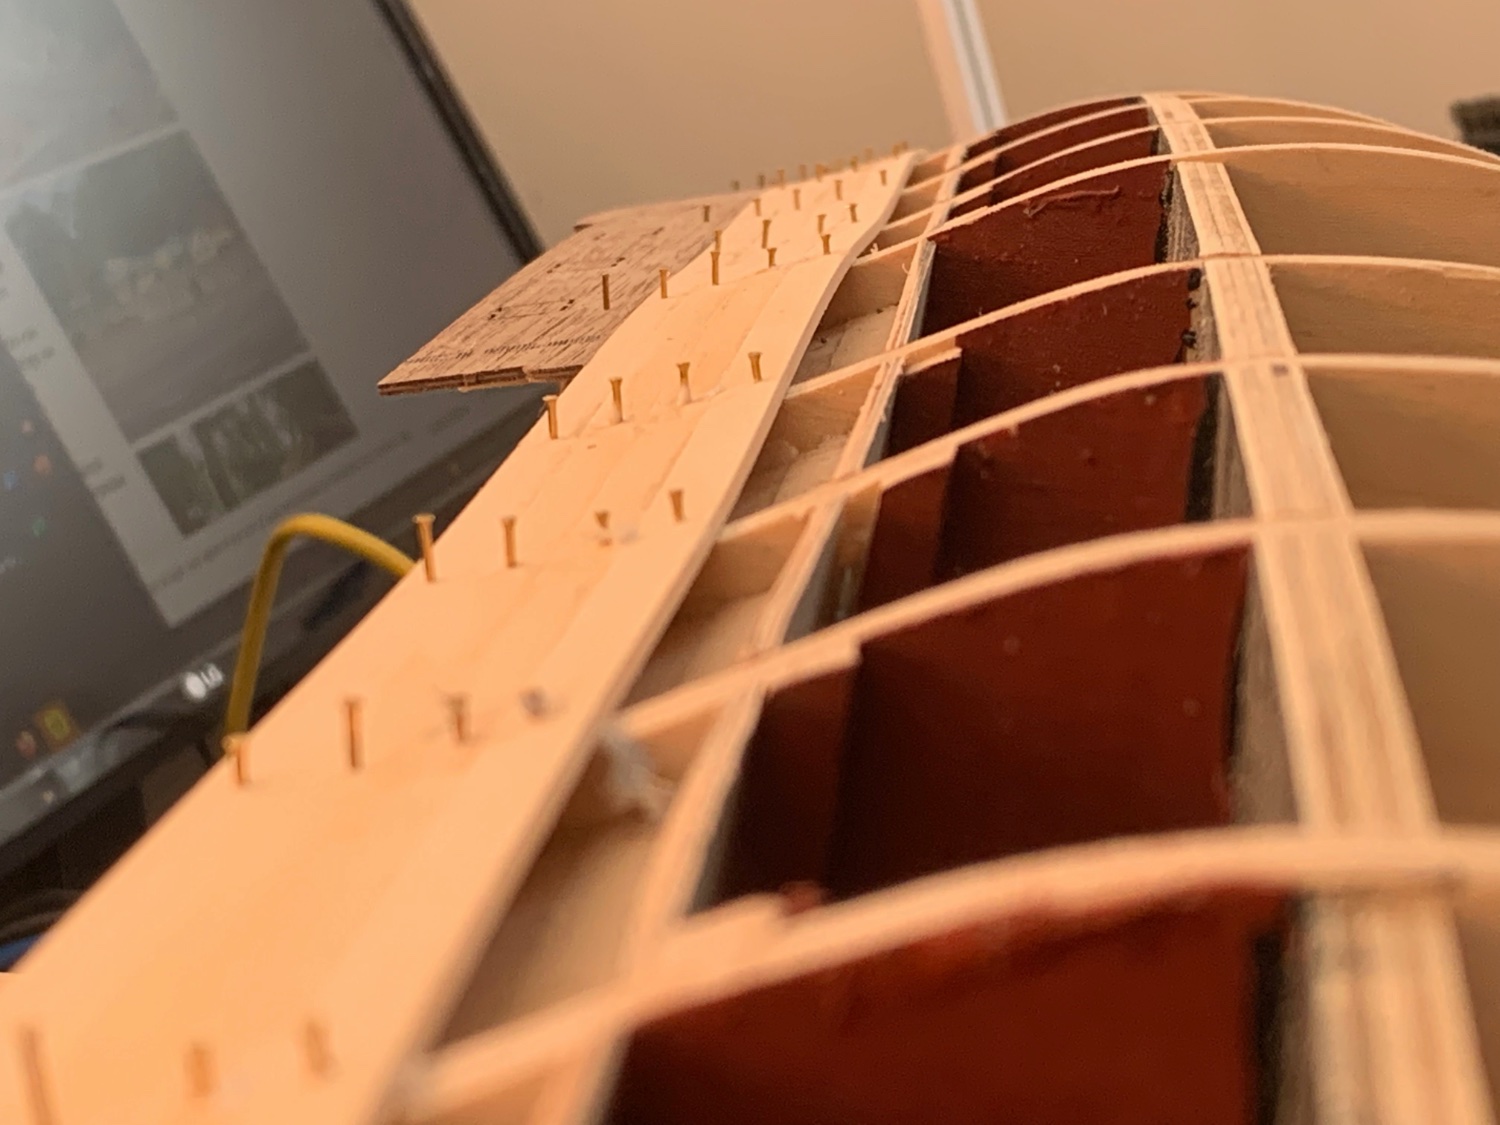
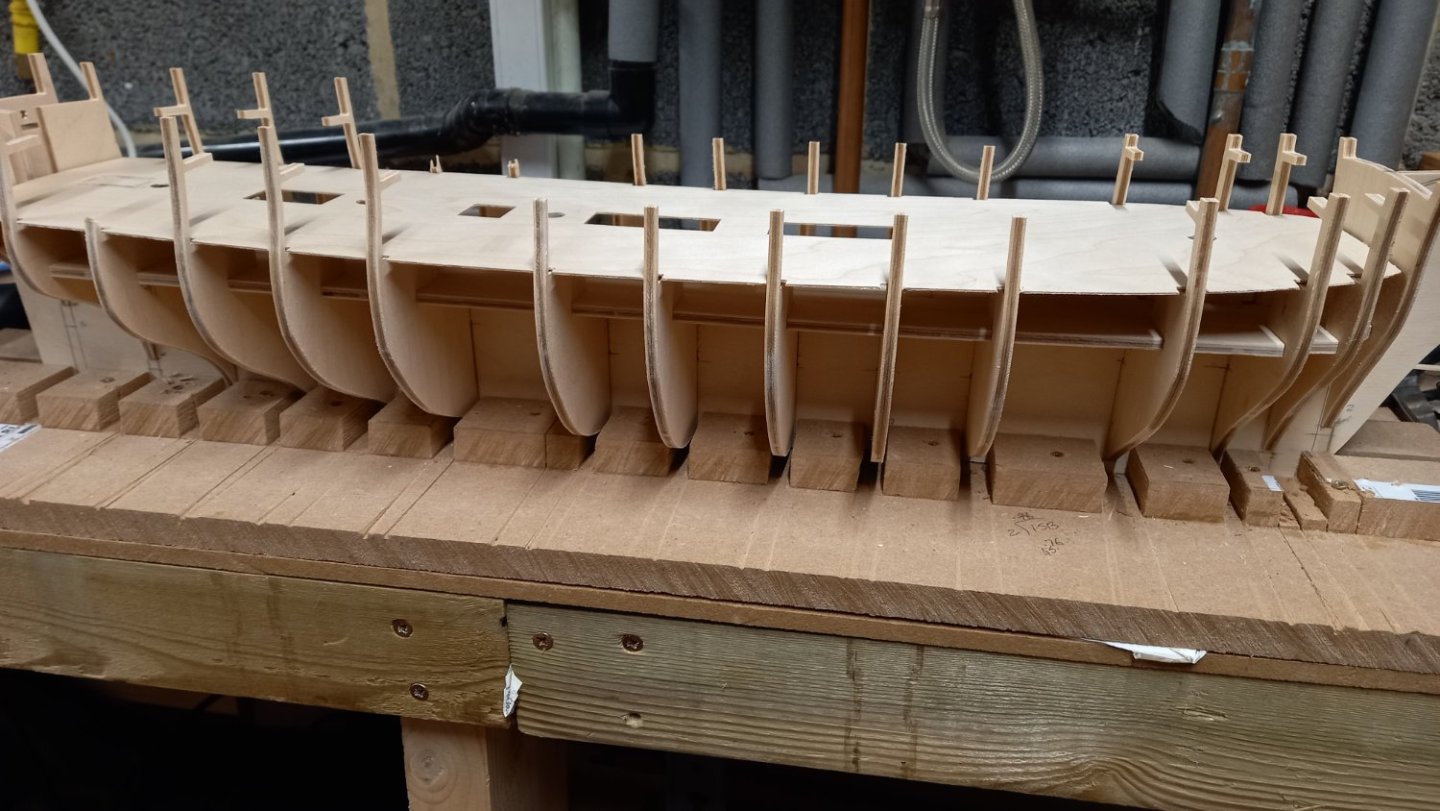
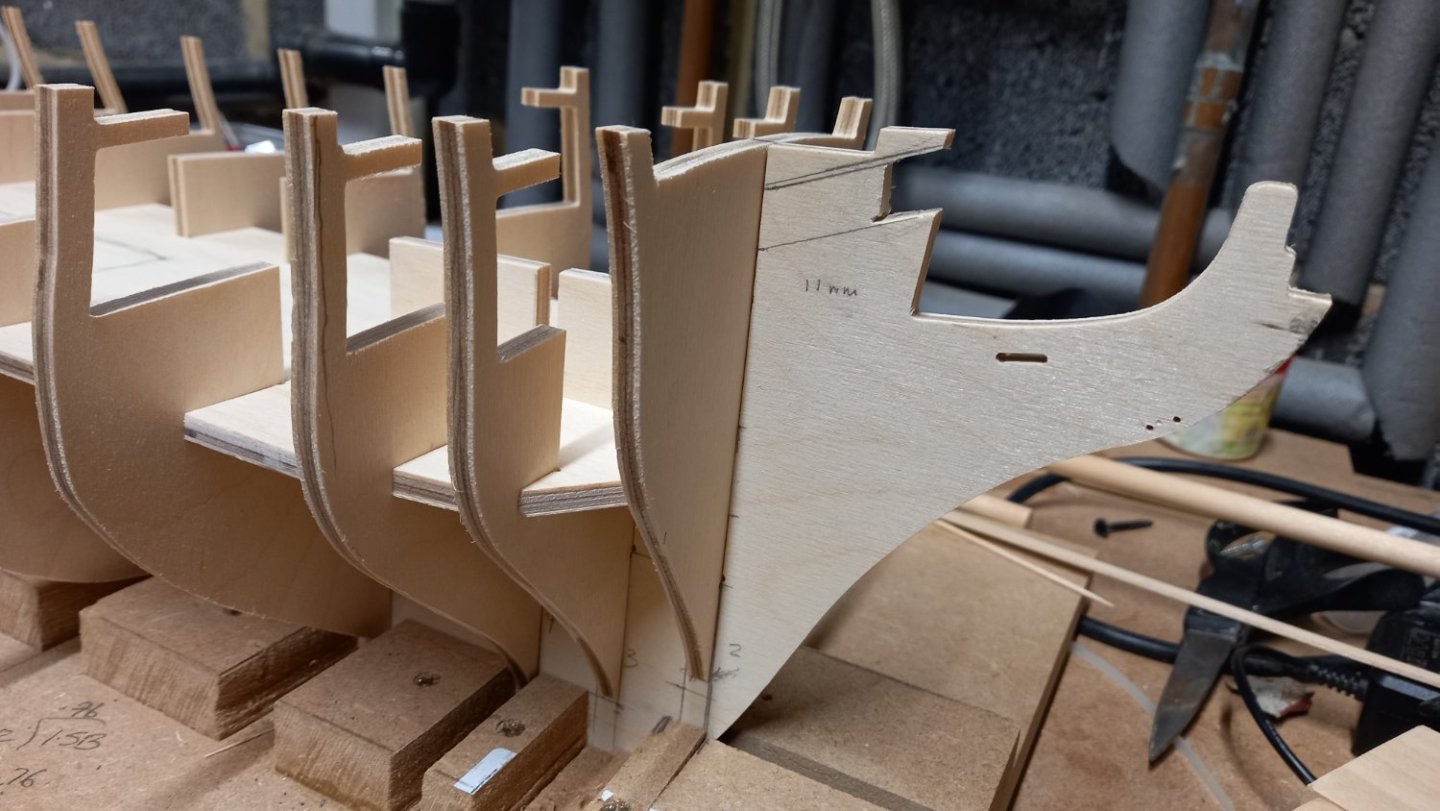
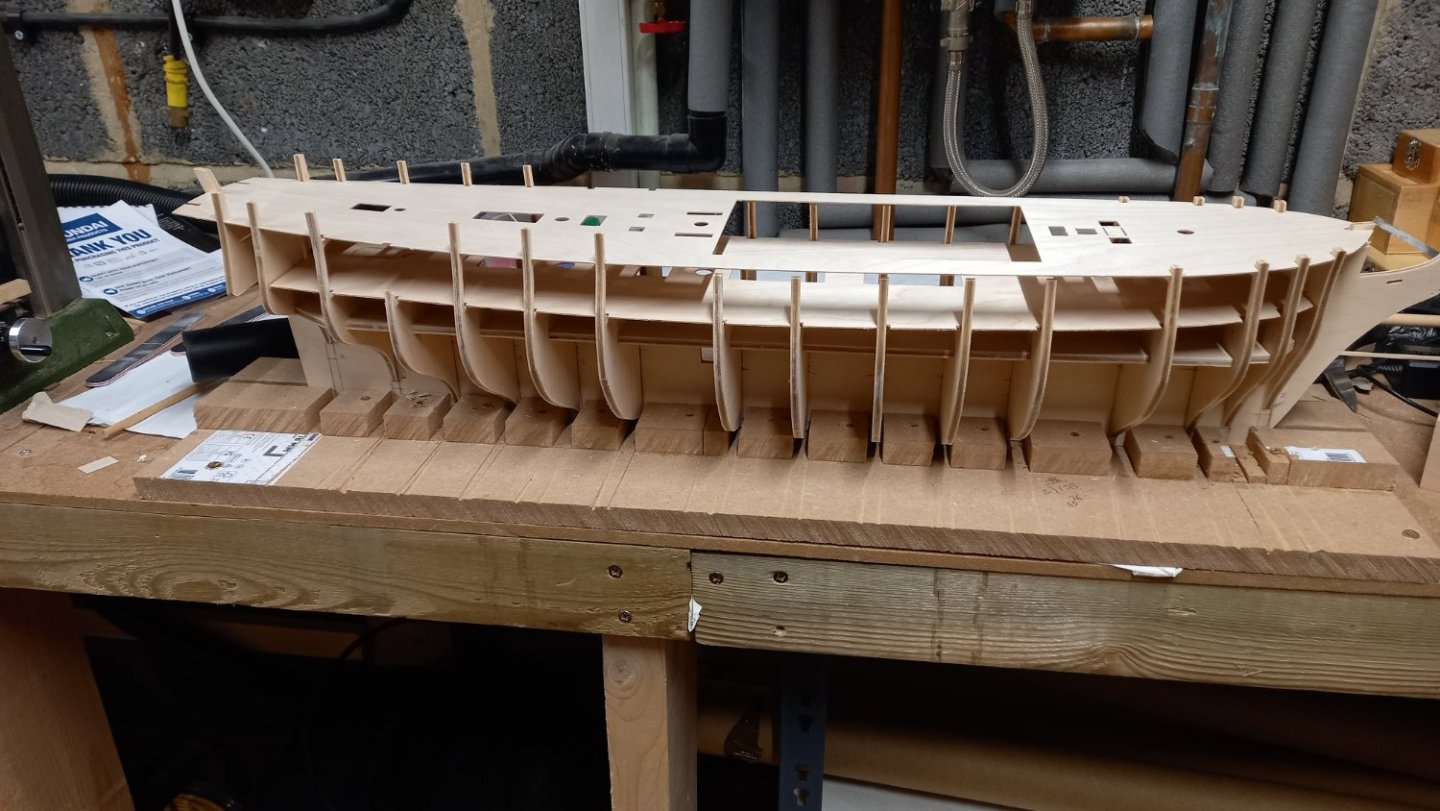
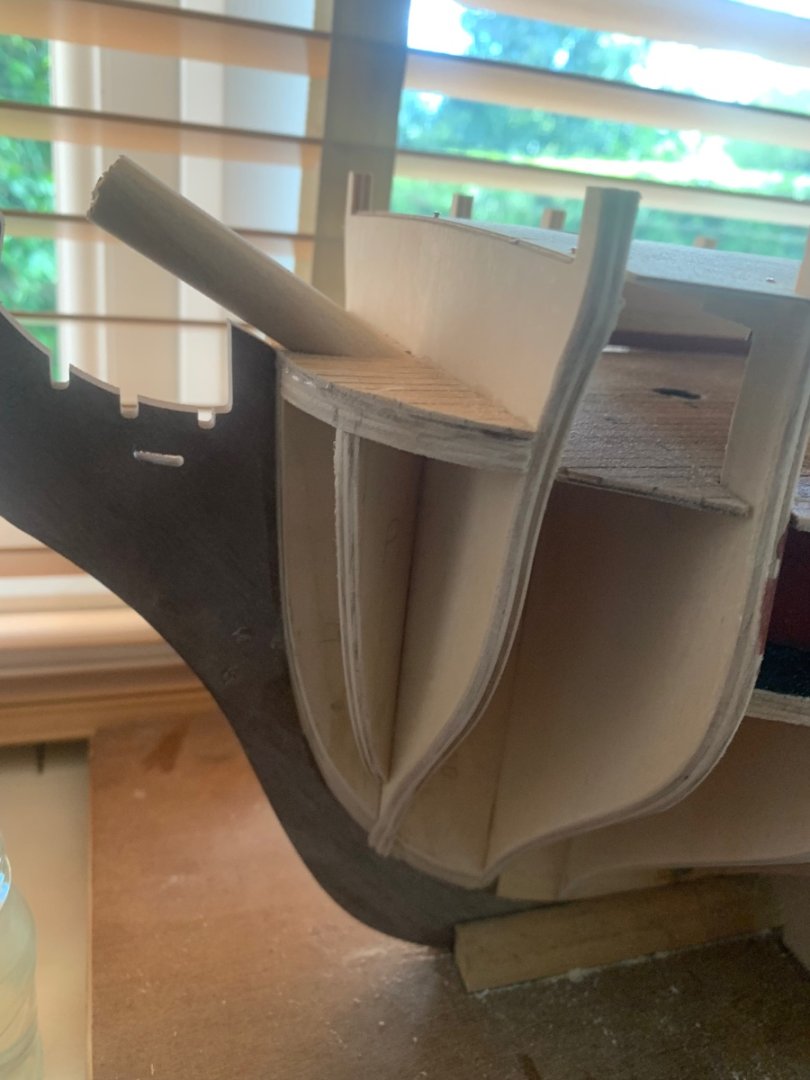
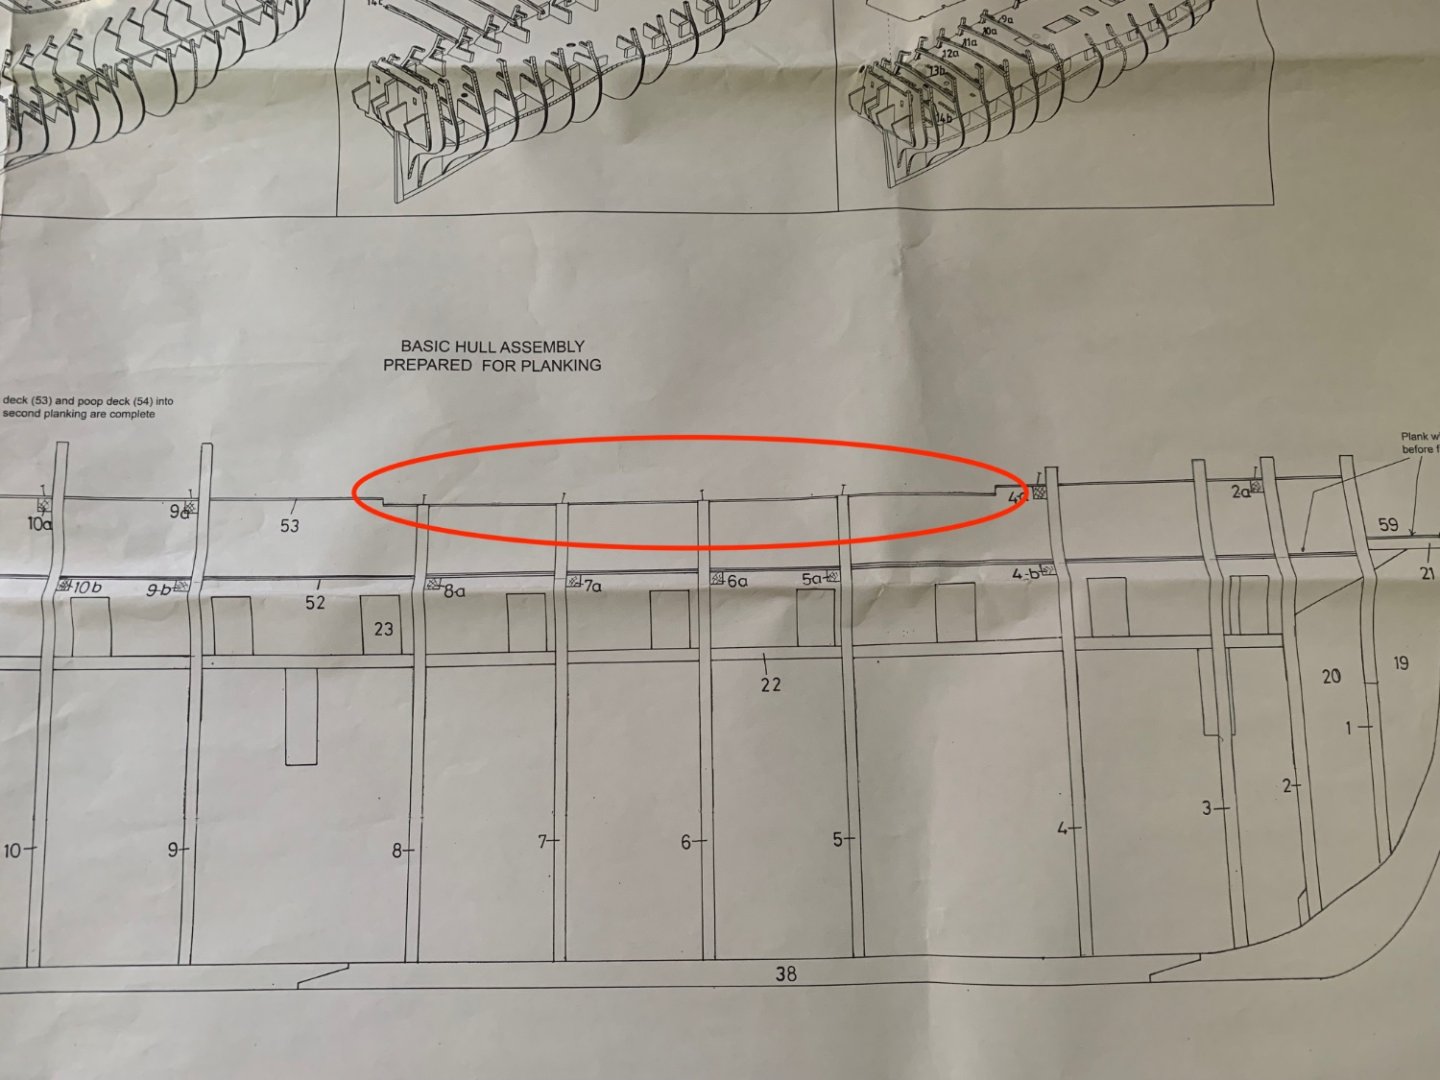
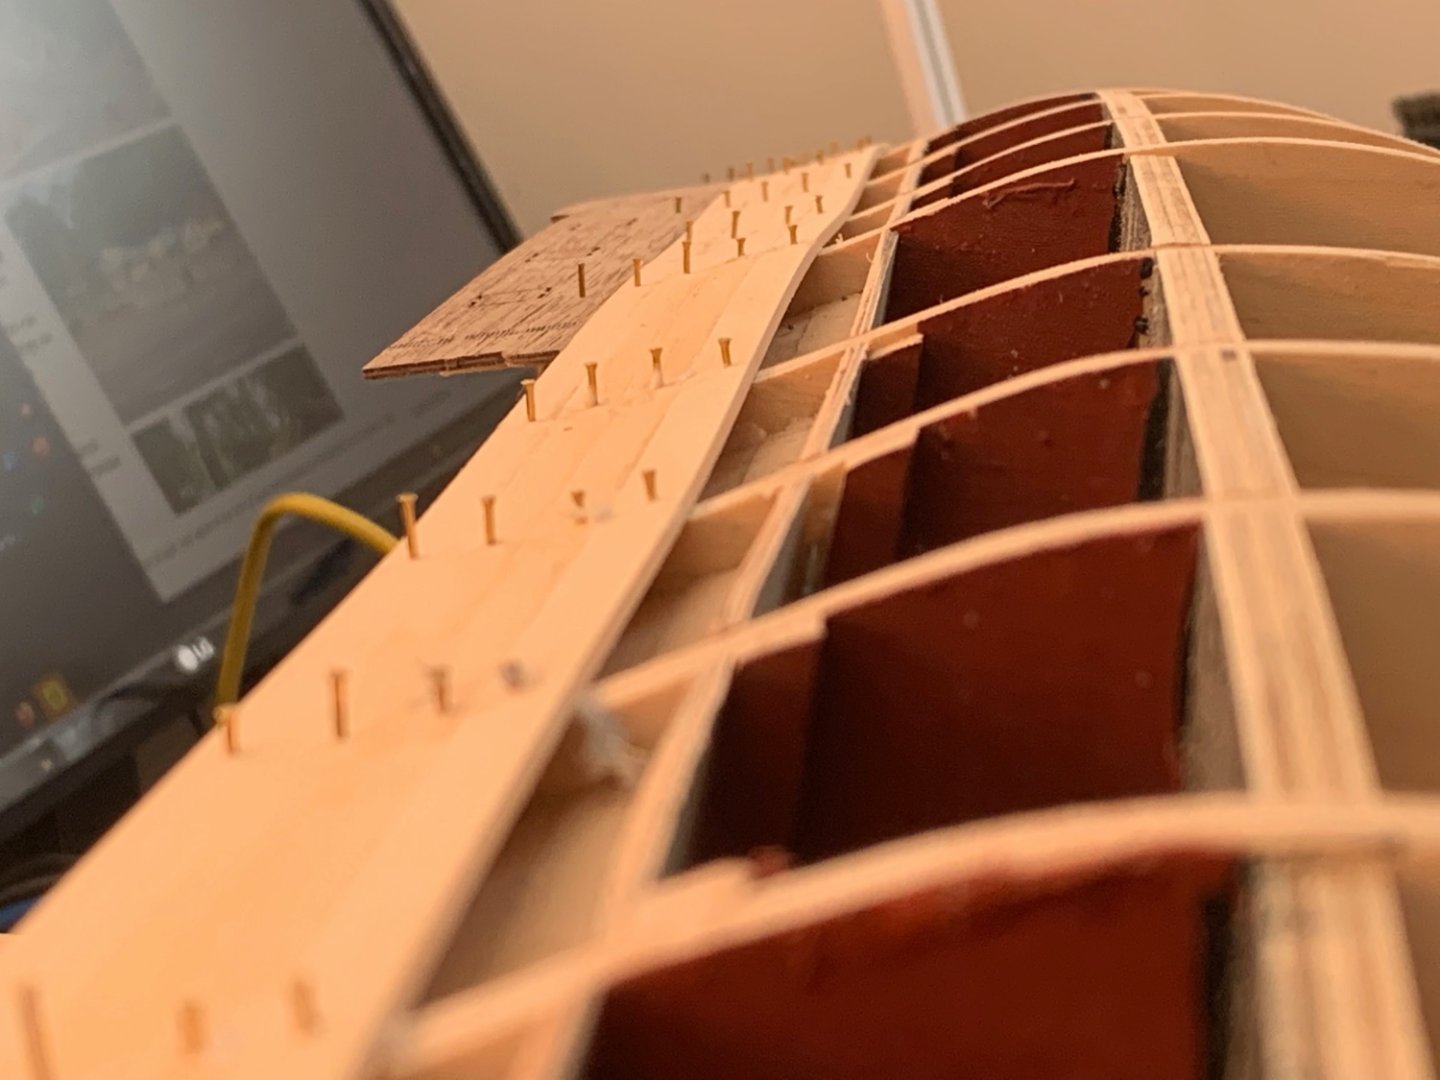
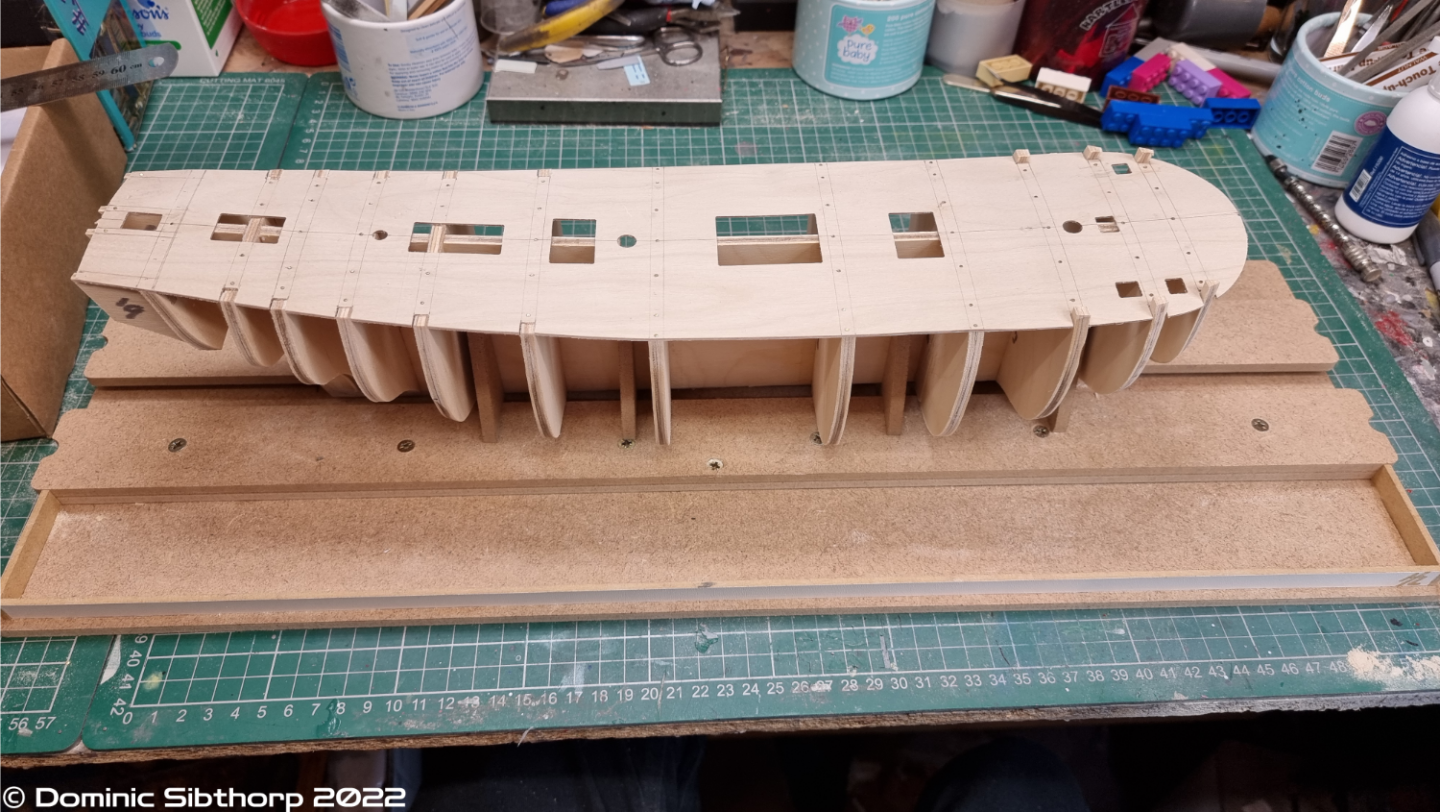
 Agamemnon is my third build over a period in excess of 20 years. To be honest I'm been a bit shy in posting anything up to now as I'm in awe of the quality of many of the builds that I've seen in these pages. But I've also gleaned a lot of valuable and essential information from other contributors and feel its time to fully join the community. I think its also a great resource to help with those, all too regular conundrums and confusions we come across. So here goes !! So a bit of history - I have been interested in building 'Aggy' since I came across the September 2001 edition of Model Boats (UK) which had a great review. Prior to this I'd always had an interest in models and particularly this naval period and have a fine collection of 1:1200 Napoleonic Naval war-games models (Langton Miniatures) but I saw this article, read it a dozen times and wanted to build in wood. However, I was sensible enough (back then) to realise that Aggy was not an ideal 1st build. So I ordered HMS Jalouse as an introduction. Loved it. It took me about 20 year to complete mind - sat for many years half rigged until I finally found time after the kids had grown up to compete it (I nicknamed it HMS Lockdown!! - there were some benefits.) After completion I was keen to embark on another build. I still had the 2001 magazines. Still not sure I would have the stamina for HMS Agamemnon I embarked on HMS Pickle as an experiment. A huge shout out to MSW contributors here particularly @flyer 's build log. 15 months later and I'm looking for the next build....Luckily a big box was already under my bed. 21 years after seeing that mag it was time..... So I'm about a month in. Frames built. Gun deck installed. Inner planking in place. And today I started the 1st planking. All fairly straightforward so far. But a couple of points of note. I thought long and hard about Treenails and decided not to model them. There is a thread somewhere on this forum discussing this which I'll link to if anyone is interested. But basically decided that on visible decks a lot of effort was made to cover Treenails - less so on functional gun decks. So having visible Treenails was not necessarily accurate, even though they look nice!. I have not yet fitted the stern post and took the opportunity to taper the ply at the stern to allow the planks to run smoother to the transition with the stern post and rudder. This is something that is called out in the instructions for Pickle - 'Bearding' and worked very well. Inner wall planking where it terminates at bulkhead 3 seemed wrong. Its not clear whether this butts up to BH3 or lies inside BH3. I did it inside but realised that this would make for a peculiarly shaped gun port when this was cut later. Being a lot thicker at the bow end. So I added a filler piece to BH3 and reran the planking to this so it now runs parallel to the line of the deck and future outer planking. I also added an extra 45 degree bulkhead in the bows as I think this will aid the shaping of the 1st planking in that area. I was slightly confused by the plans for the upper deck - they seem to show a step down between BHs 4 and 8 but no mention anywhere else about cutting the deck. Looking at other build logs @Sjors @TrunkMonkey seem to lay flat so I think an error in the plans or an earlier version. Although the magazine article also lays this flat. Finally, today I started on the 1st planking for the 1st 5 planks and am noticing a slight wave in the planking. See pics. I think the phots exaggerate it and its actually a fraction of a millimetre so can be sorted in the filling & sanding phase. Also I've only done the port side so far so will need to see if the same is true on the Starboard. It may be the bulkheads themselves were not exactly aligned. So end of first post. Hopefully first of many with every expectation of months & years of build ahead. Some pics below with apologies for my cramped & messy workspace!! Malcolm
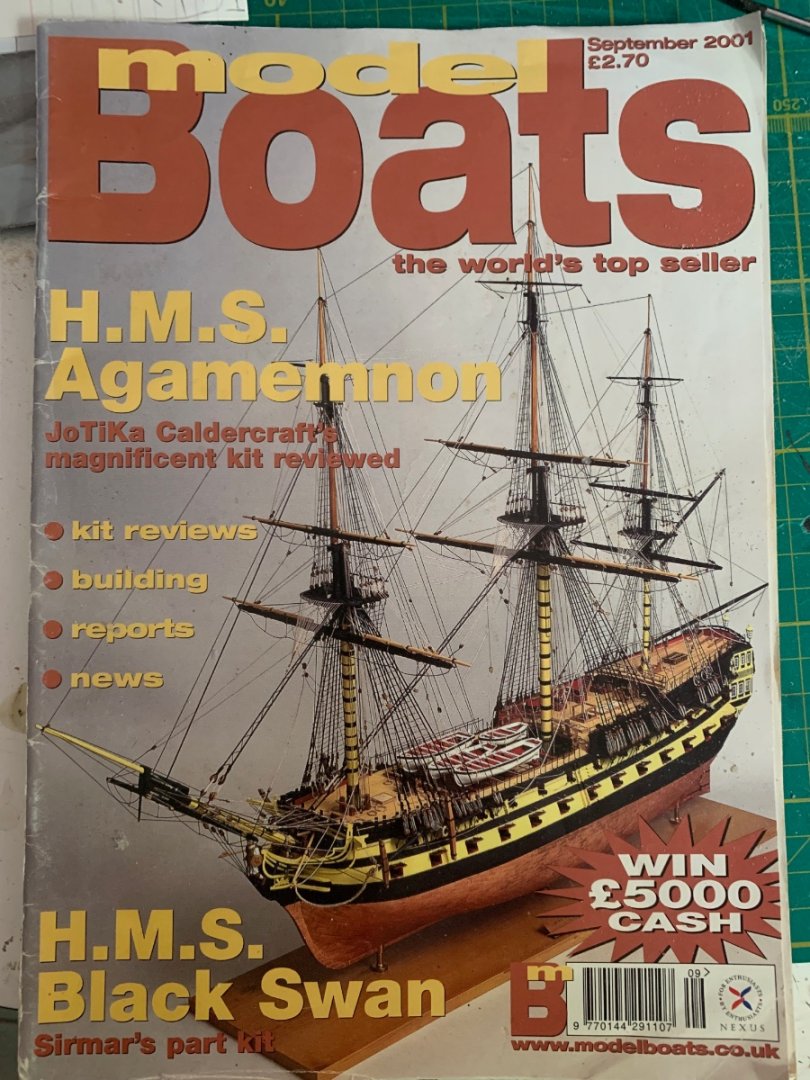


-
 Next project, Started 6th July 2022.


-
 I have decided to create a build log as it is the best way to garner advice from the many many experts on this site. As those who may have read my greetings on the new member introductions thread will already know, I am re-starting the build of Caldercraft/Jotika's HMS Cruiser which has been stalled for approx 14 years! The hull, as seen below, has been boxed up for most of that time and despite 2 international moves (Sydney to Connecticut to Santiago - my Cruiser is very well travelled dont you know) and 2 domestic moves has faired very well. The unused kit parts are in a decent condition too. This is my first build and I chose Cruiser accordingly i.e. to use it as a learning build, and I should keep telling myself this, but as I got into the build I found myself wanting to do the best job I could rather than simply completing the build as a learning exercise. As the photos show, the hiatus occurred at the deck furniture stage. Al these parts are pretty much completed. Non of the deck furniture is attached to the deck as yet. I have the following items under consideration at the moment and would be happy to receive comments and advice: 1) Decking. To varnish or stain? If so what varnish or stain? I like the colour and look of the deck planking so I'm leaning towards a varnish however I dont want it to have a glossy shine. I was thinking shellac but to be honest I have no idea if I am going to find that here in Chile. There is one decent modeling store in Santiago that sells this type of consumable, but I am not confident. 2) Copper plates. I bought the Caldercraft copper plates. You will see that in the intervening 14 years since they were installed they have "weathered" - I even have some green cuprite/patina! However, you will also see that as my less than skillful application of the individual plates shows, there are many areas where the CA has seeped and consequently the copper has not "weathered". I am not sure what to do. Ideas? 3) Ship's boat/launch. I bought a launch for the Cruiser from Caldercraft and have yet decided how to stow it - I have been looking at other build logs for some ideas but I think I will make some sort of frame over the capstan and position it there. I am open to suggestions. 4) Ship's wheel. Definitely need to buy something more realistic 5) Stand. I am at the stage where I should be thinking about the stand. I think I will buy some wood and make one up. I cannot find anything remotely like a brass column here, I may have to order them online, or I may knock something up from wood. Undecided. 6) Cannon tackle. All the cannons are completed. Should I (can I be bothered to) tackle them up more realistically? I have stuck with the 20 long guns supplied with the kit (I could have bought the more accurate carronades) so it's not like I am trying to achieve full realism and historical accuracy. At least, that's my excuse for not including more realistic tackle 😕. Again, I'm undecided on this and I will have to buy some more blocks if I am going to upgrade them. One last point, receiving stuff by post in Chile has been a nightmare in the past, the pandemic and subsequent move to a more online based economy has vastly improved the postal/delivery services here, but I know that if I am to make an order with e.g. https://shipwrightshop.com I will have to wait probably weeks (more likely over a month) for delivery as customs here are terribly inefficient. Anything from overseas gets held up. The Admiral is going to New York to visit the Ship's boy next month so I could get any ordered items delivered to his address. I include this info simply to state that buying additional parts etc is not so easy and does affect my thinking/planning. So, finally, here are some photos of the build to date:

-
 I couldn't resist adding a sixth model to my list of works in progress. I must say that I think that I prefer the CNC-routed approach of Caldercraft to the laser-cut approach of Amati. My fingers don't get so dirty! Pictures will follow. So far the bulkheads, false deck and dummy barrel strips are in place.
 -
 A brief introduction to this kit --- Unpacked and contents checked. All complete and in very good order. Ply sheets perfectly flat and undamaged, All strip wood is of finest quality and straight as a die. Fittings and brass sheets perfect. Eight big sheets of plans. Full size plans are important. With my eyes measuring from reduced plans then scaling up or down is hard work. Ordered necessary paint pots with kit plus, balsa sheets for stem and stern blocking. Bought a building board from my local hardware shop. Already have wood glue and cyano in stock from my last build. Tanganyika strip supplied instead of lime so no extras to buy. Have a copy of Marquardt's AOTS book and, James Lees Masting and Rigging in stock also several logs (of excellent quality) on this forum Noticed from other logs on this forum that there may be a problem with the width of the mizzen channels but have found enough 2mm walnut sheet in my spares box to cover this. So all ready to go. First is to build the jig, then assemble the false keel and bulkheads and the false decking. Working as a draughtsman for 53 years, 20 of these using AutoCad I much prefer drawings rather than pictures so am really looking forward to working on this kit. Photo's to follow. Best regards, Sam.
 -
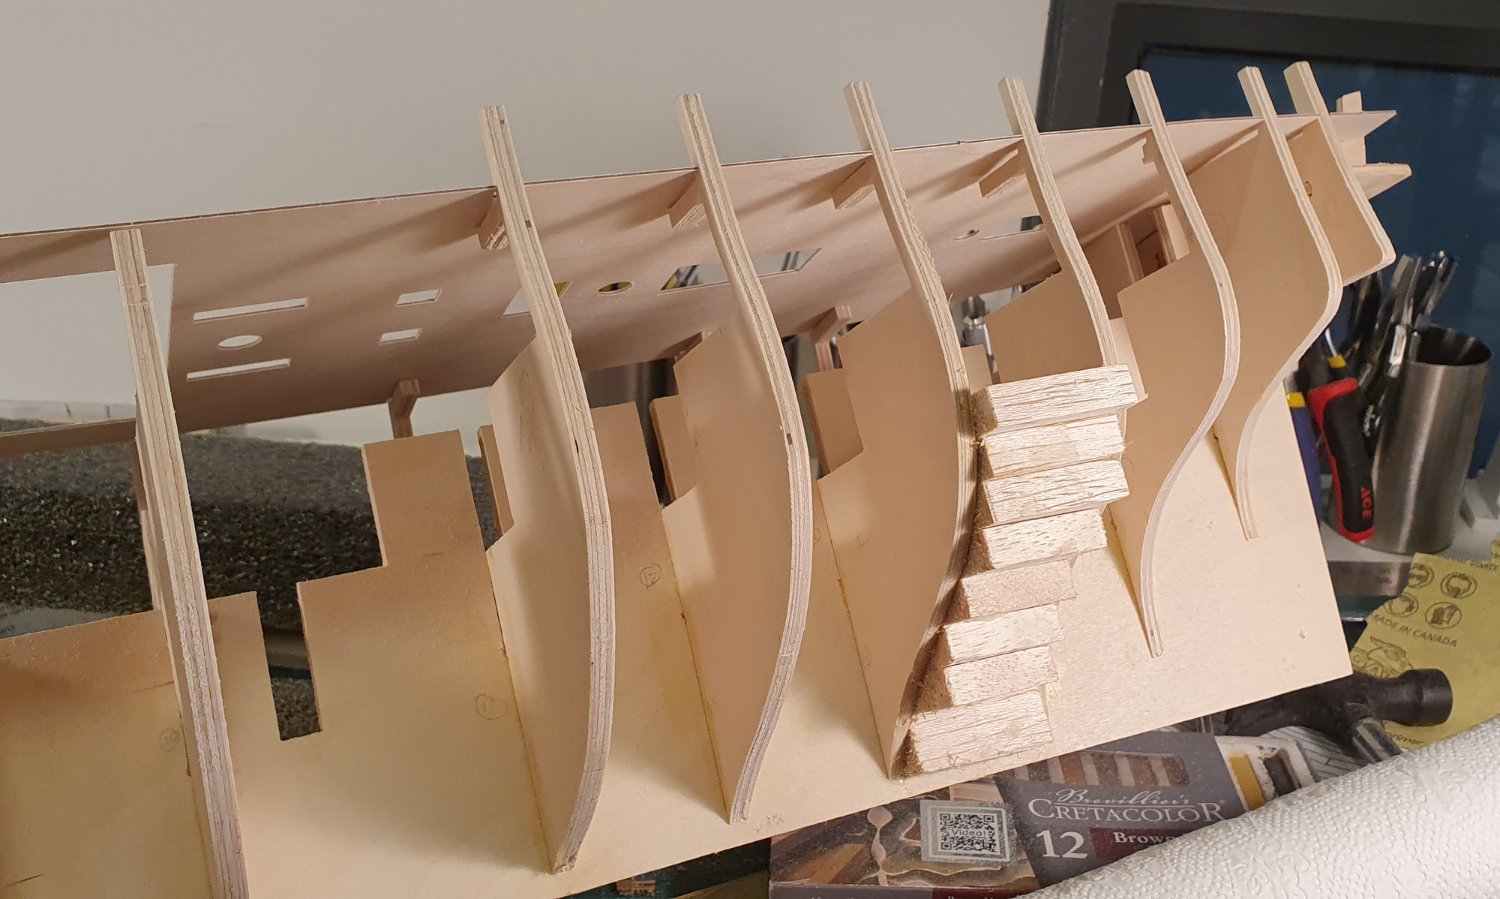
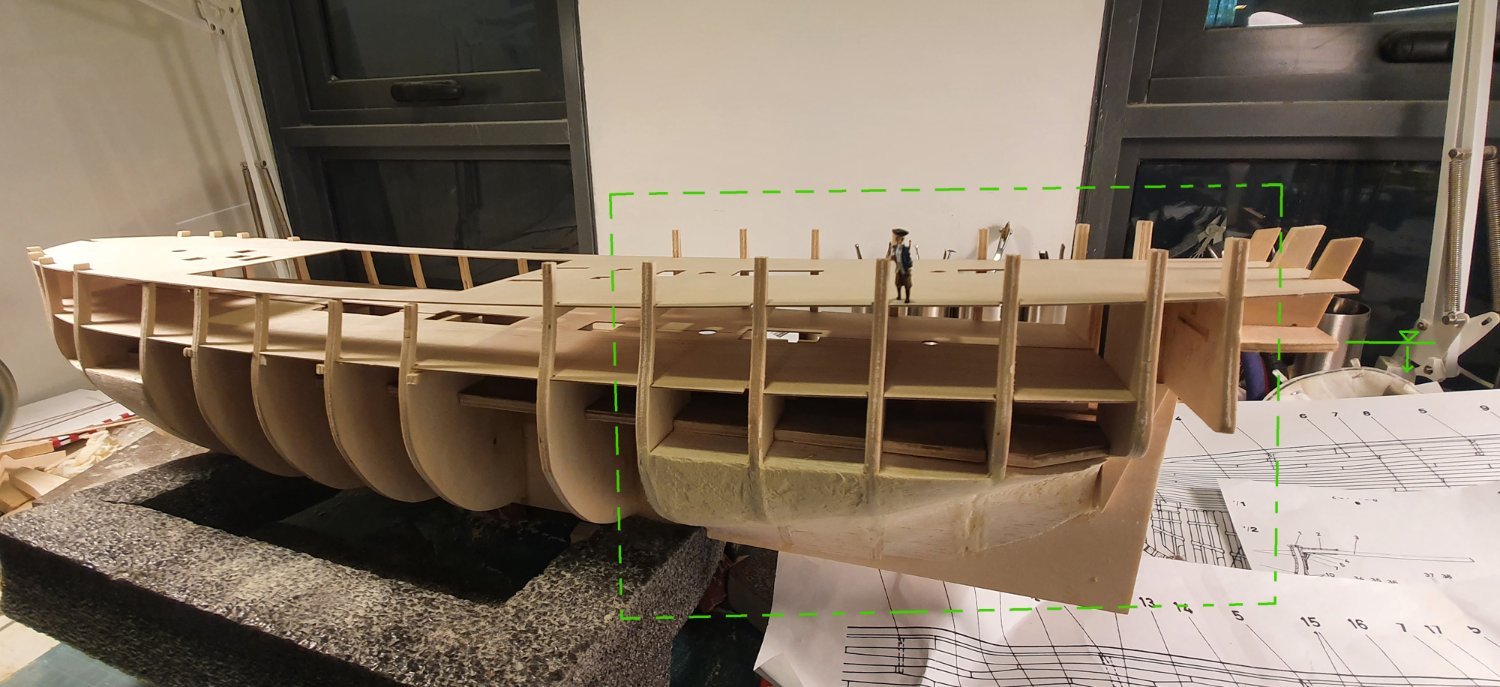
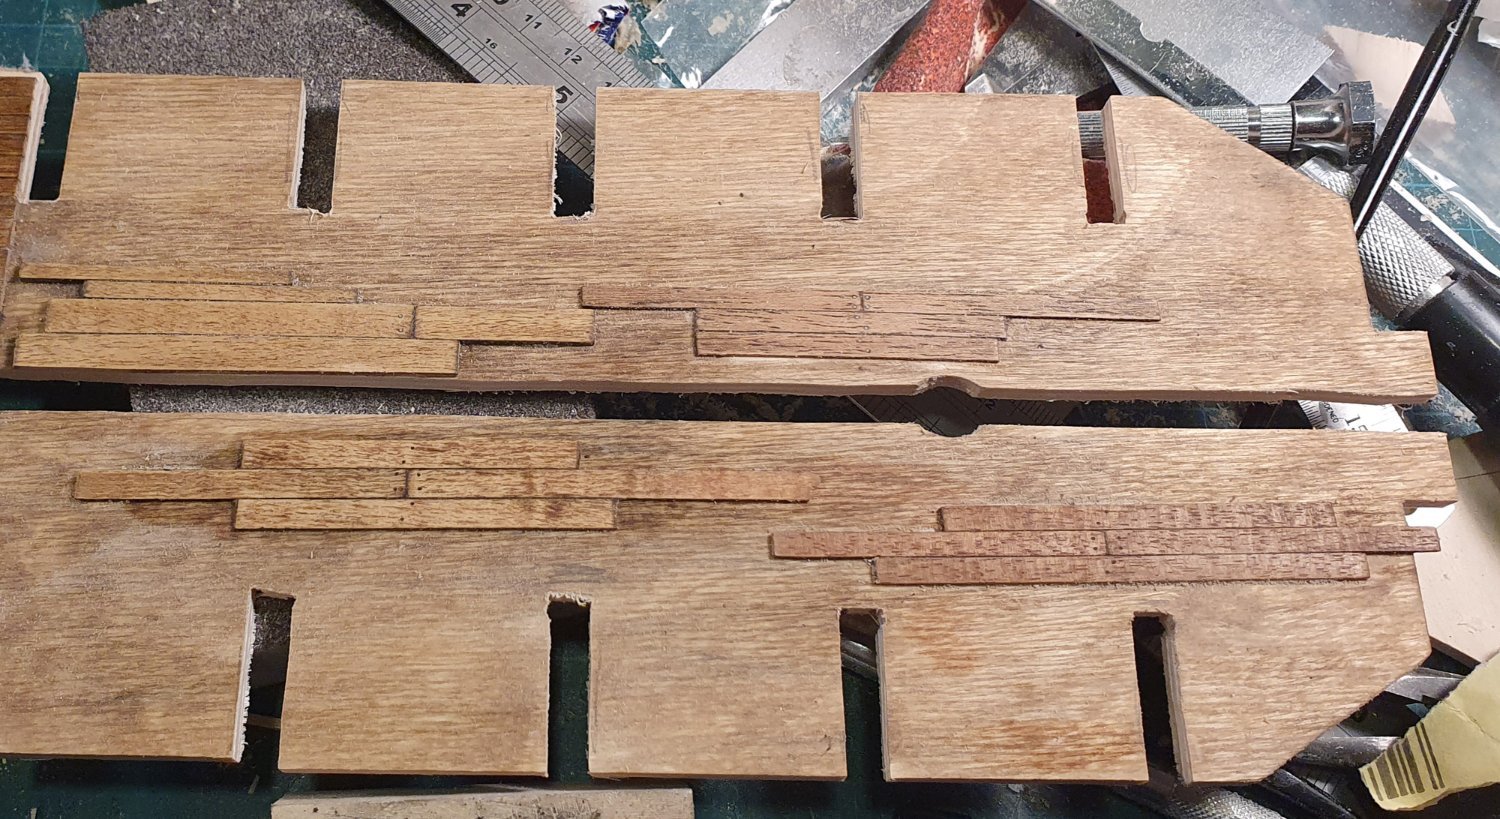
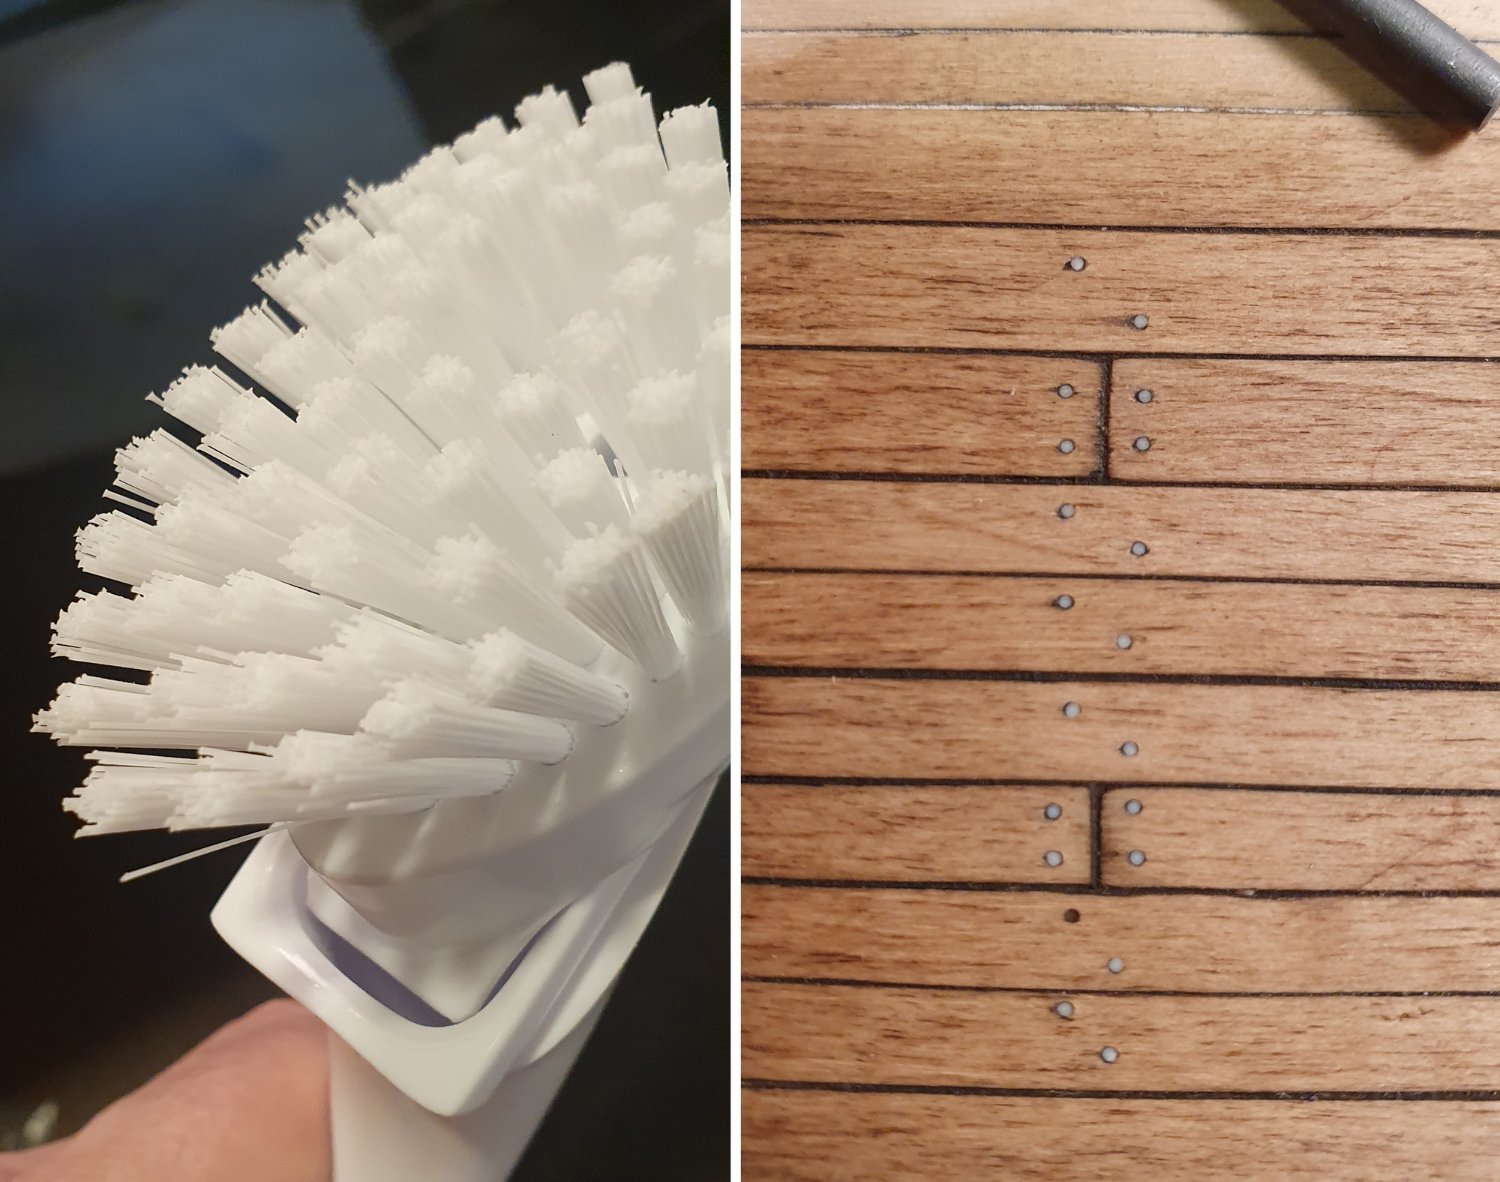
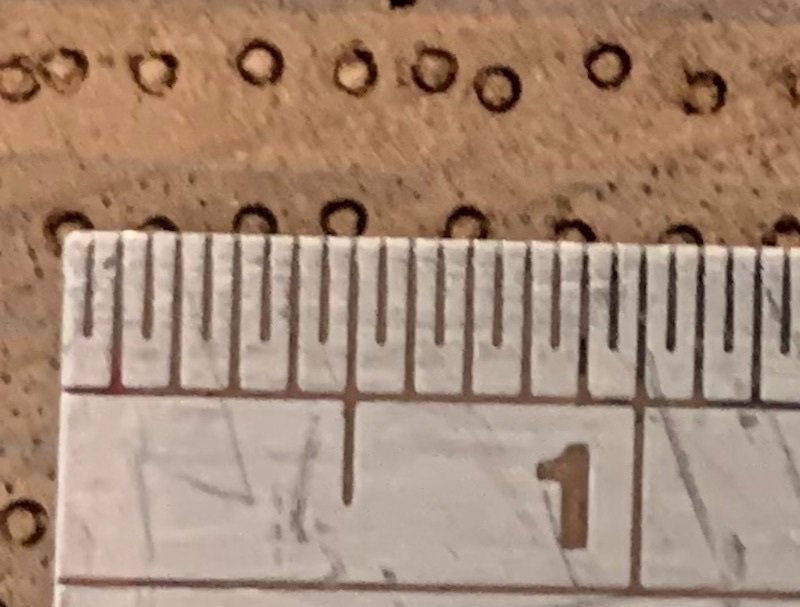
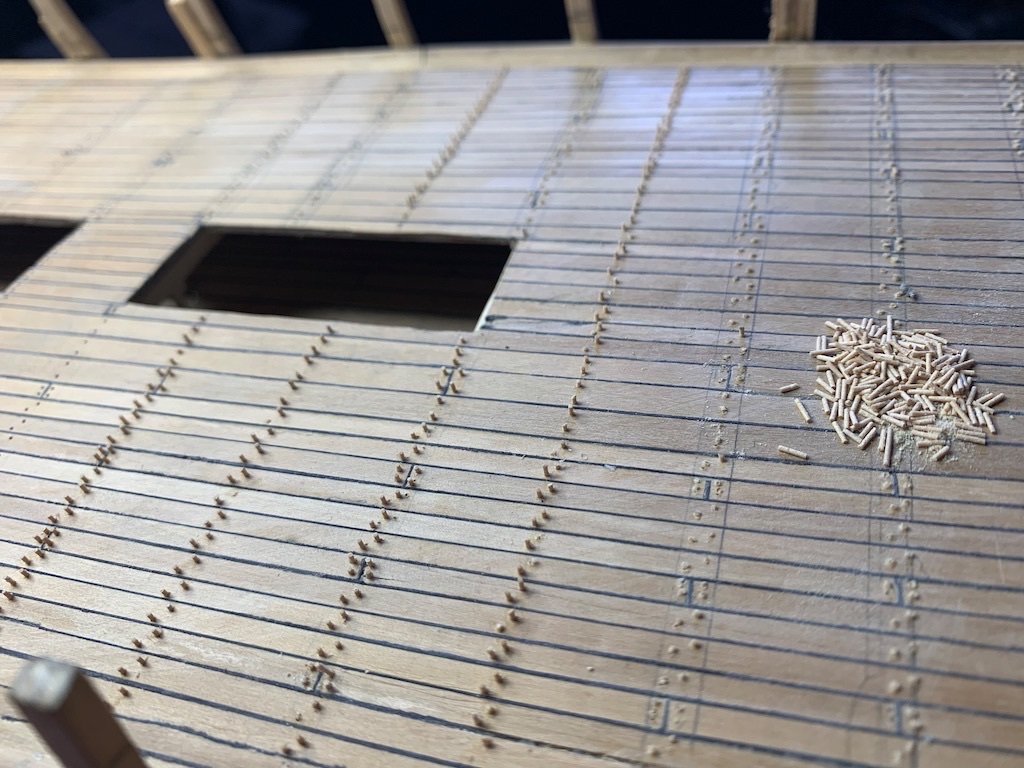
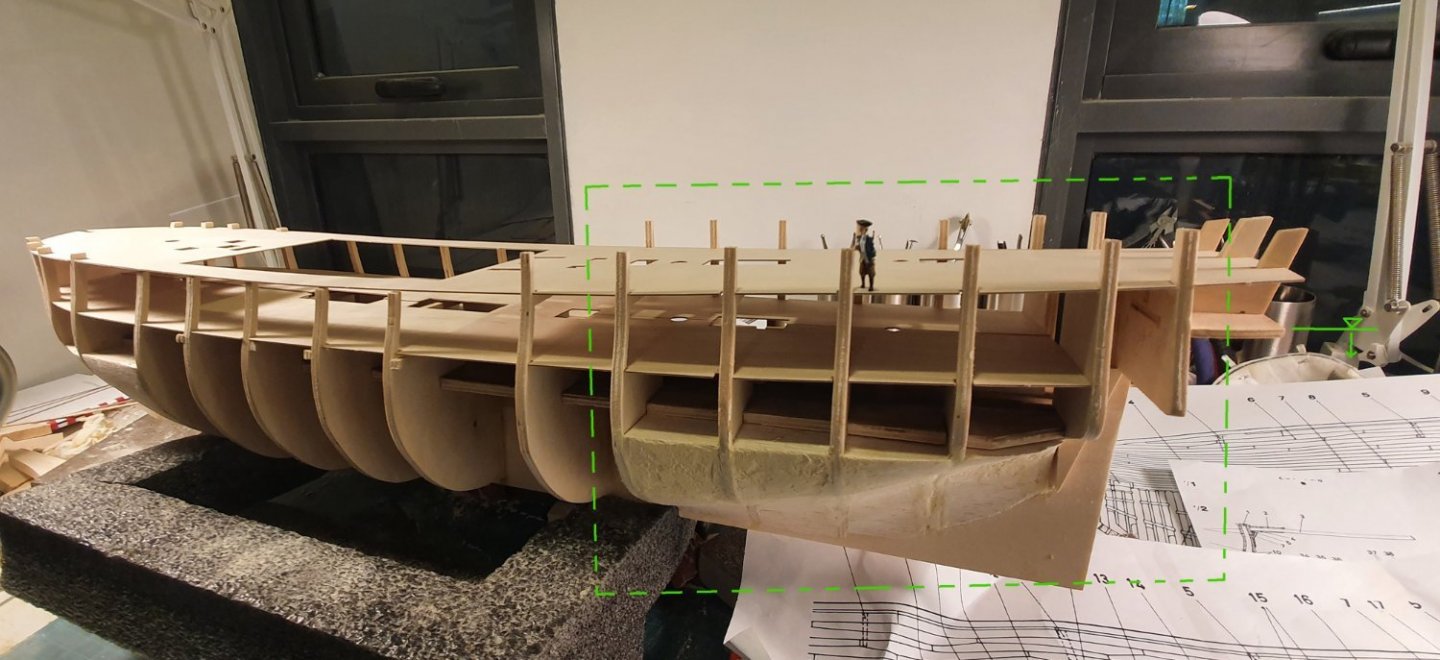
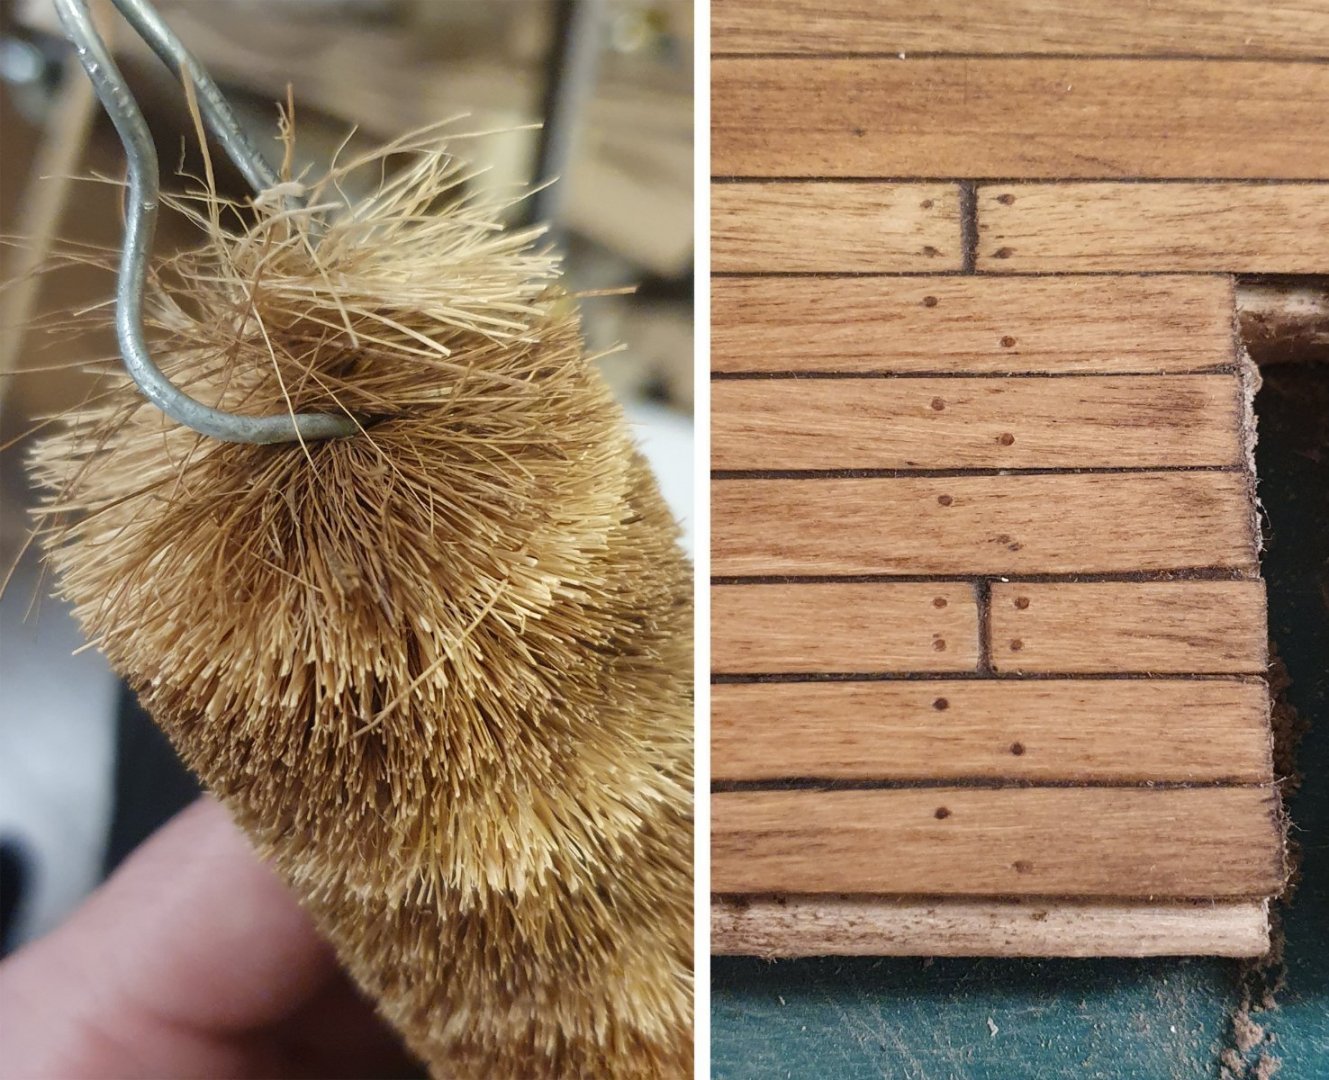
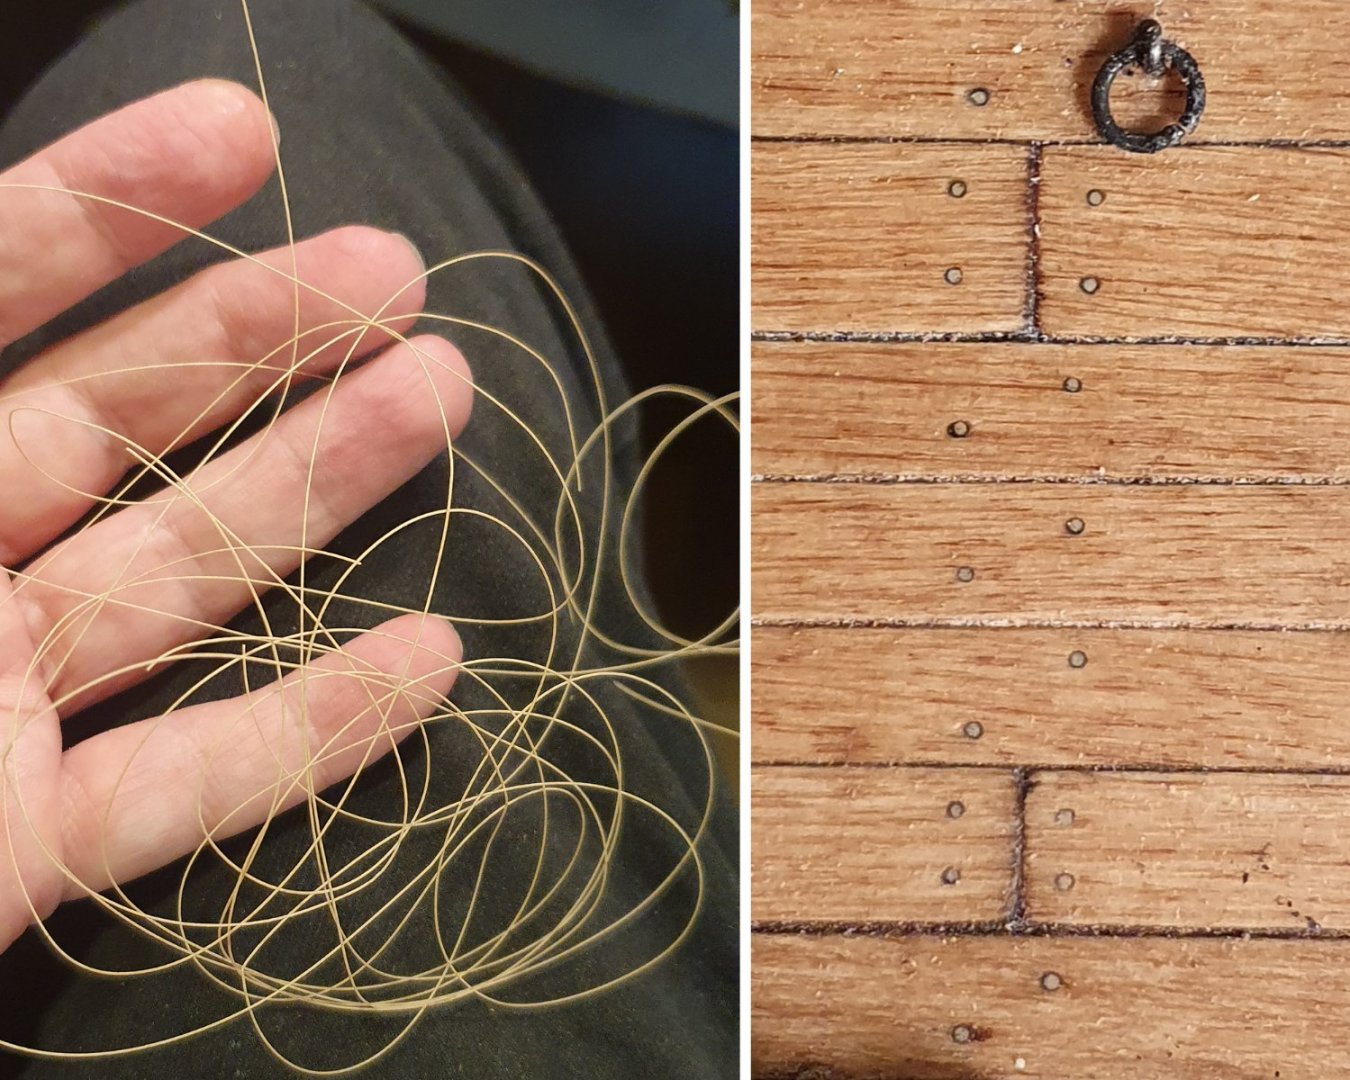
 I have decided to attempt a build log. I learn so much from the build logs of other members that I felt that I should venture something in return so, after a gentle prod from Dunnock, here we go. I am fairly new to the hobby having taken it up two years ago. I had just completed the Charles W. Morgan which was very enjoyable and selected the HMS Diana for my next build as it is a very pretty ship. I did hear that the kit itself has issues but thus far it has gone together without too much trauma. I started this build in January 2021 so the first few posts will be a catch up to where I am now. The book The Frigate Diana from the Anatomy of the Ship Series by David White (AOTSD) is a very valuable resource for anyone attempting this build and is my first call for reference having more or less shelved the drawings and instructions. I also reference the drawings of the Artois class ships housed in the National Maritime Museum (NMM) along with photos of their collection of contemporary models and of course the wealth of information contained in the build logs of other members. The basic frame went together fairly easily but I did have to use the heavy file to get the pieces to fit together. I introduced some balsa blocks to fill the bow and stern section as my hull planking skills are a bit shaky and I need as much help as I can get when tackling the complicated curves in these areas. I also sawed off the section at the bow and replaced it with a new piece made out of 5mm thick lime wood as I was not happy with the exposed edge of the ply. I wish I had done the same at the stern post. I suspect that there may be something not quite right in the positioning of the rear deck that forms the lower edge of the counter. Having now completed the build in this area I found that the quarter deck galleries ended up sitting too high. There is a good possibility that this may be a result of my bungling but I have noticed this phenomenon in other builds. If I was starting again I would do a lot more checking of the profiles of the aft bulkheads against the drawings in the AOTSD and the drawings from the NMM. It is only around 4 or 5mm difference but it is quite a difference to what is shown in the NMM drawings. It should be noted that these sit a bit higher in the drawings for the Jason and the Seahorse but these are still lower than where mine ended up. I will just have to live with whatever I have as it is too late to go back and do any modifications. The lowest deck can only be glimpsed through the gun deck hatches so I used this an opportunity to test out some planking mockups. I settled on a maple plank and I tried to give it a more distressed look using various stains and pastels but feel that the end result was a bit dark. I went a touch lighter for the gun deck itself. I am aiming for a more weathered look as I do not possess the mad skills required to produce one if those immaculate looking models and I can always pass off any wonkyness as an intentional depiction of wear and tear. I wanted to add trenails but ran into a bit of bother. I have heard that bamboo skewers can be lathed down to an appropriate trenail size but that proved very time consuming and frustrating and didn't provide a very good result. I think that the skewers are best left for the Kebabs. I then tried some 0.5mm diameter styrene which was good in terms of a consistent shape and size but they were too white and I needed something closer to a 0.3mm diameter. While wandering about the supermarket I found a scrubbing brush that had bristles that were 0.35mm diameter which was an improvement on the styrene but still too white. I then went back to the supermarket and found a brush, which I assume is for cleaning bottles, that had natural bristles that were a better colour and the correct diameter if you could be bothered sifting through them. Despite the fact that they are too dark and painful to work with I ploughed ahead and completed half the gun deck before I discovered that I could get excellent trenail material if I ran the faux wood filament through the 0.3mm diameter nozzle on my 3d printer without printing anything. It is the correct size and dimension and they almost become invisible depending of the angle of viewing much like the real thing. They are a little light but it is as good as I can do. As this is my first post I will stop here and submit as I am not that confident of success.
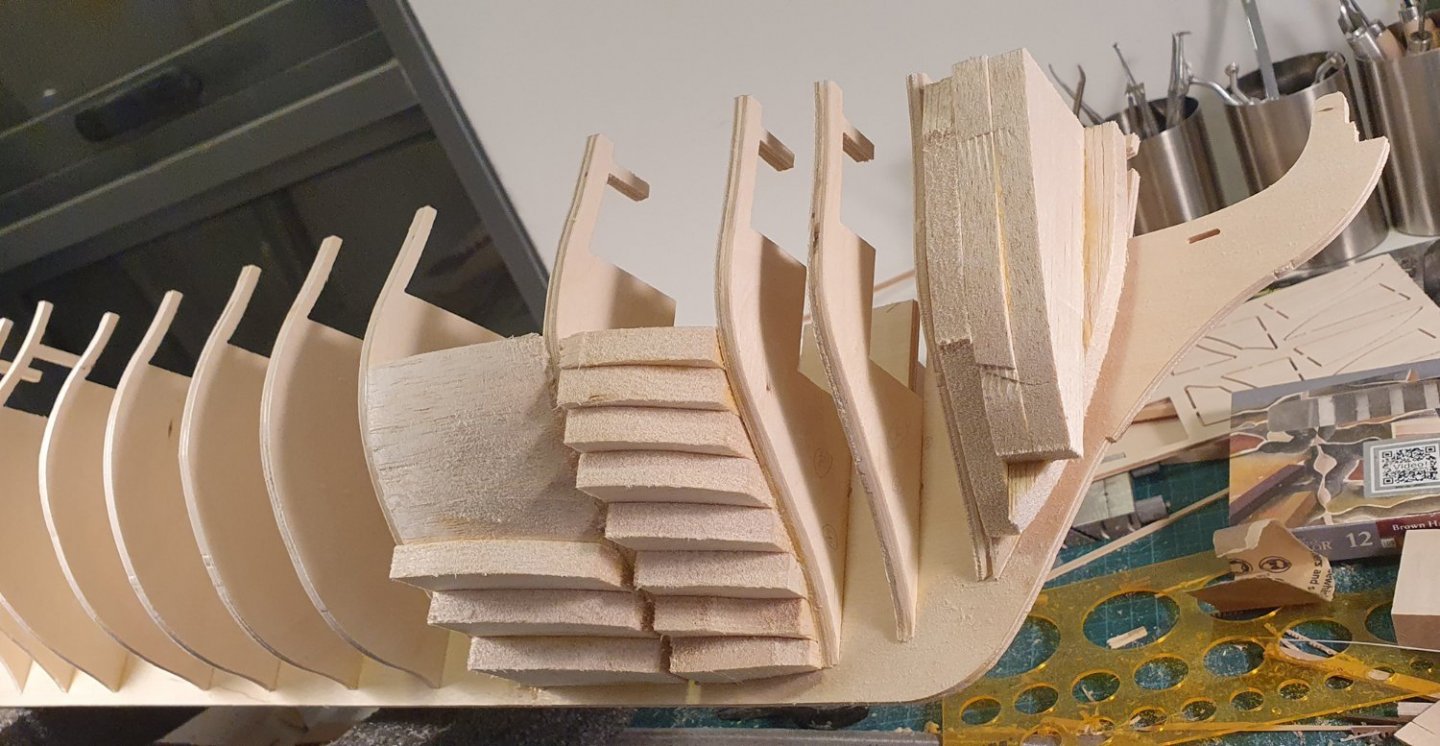


-
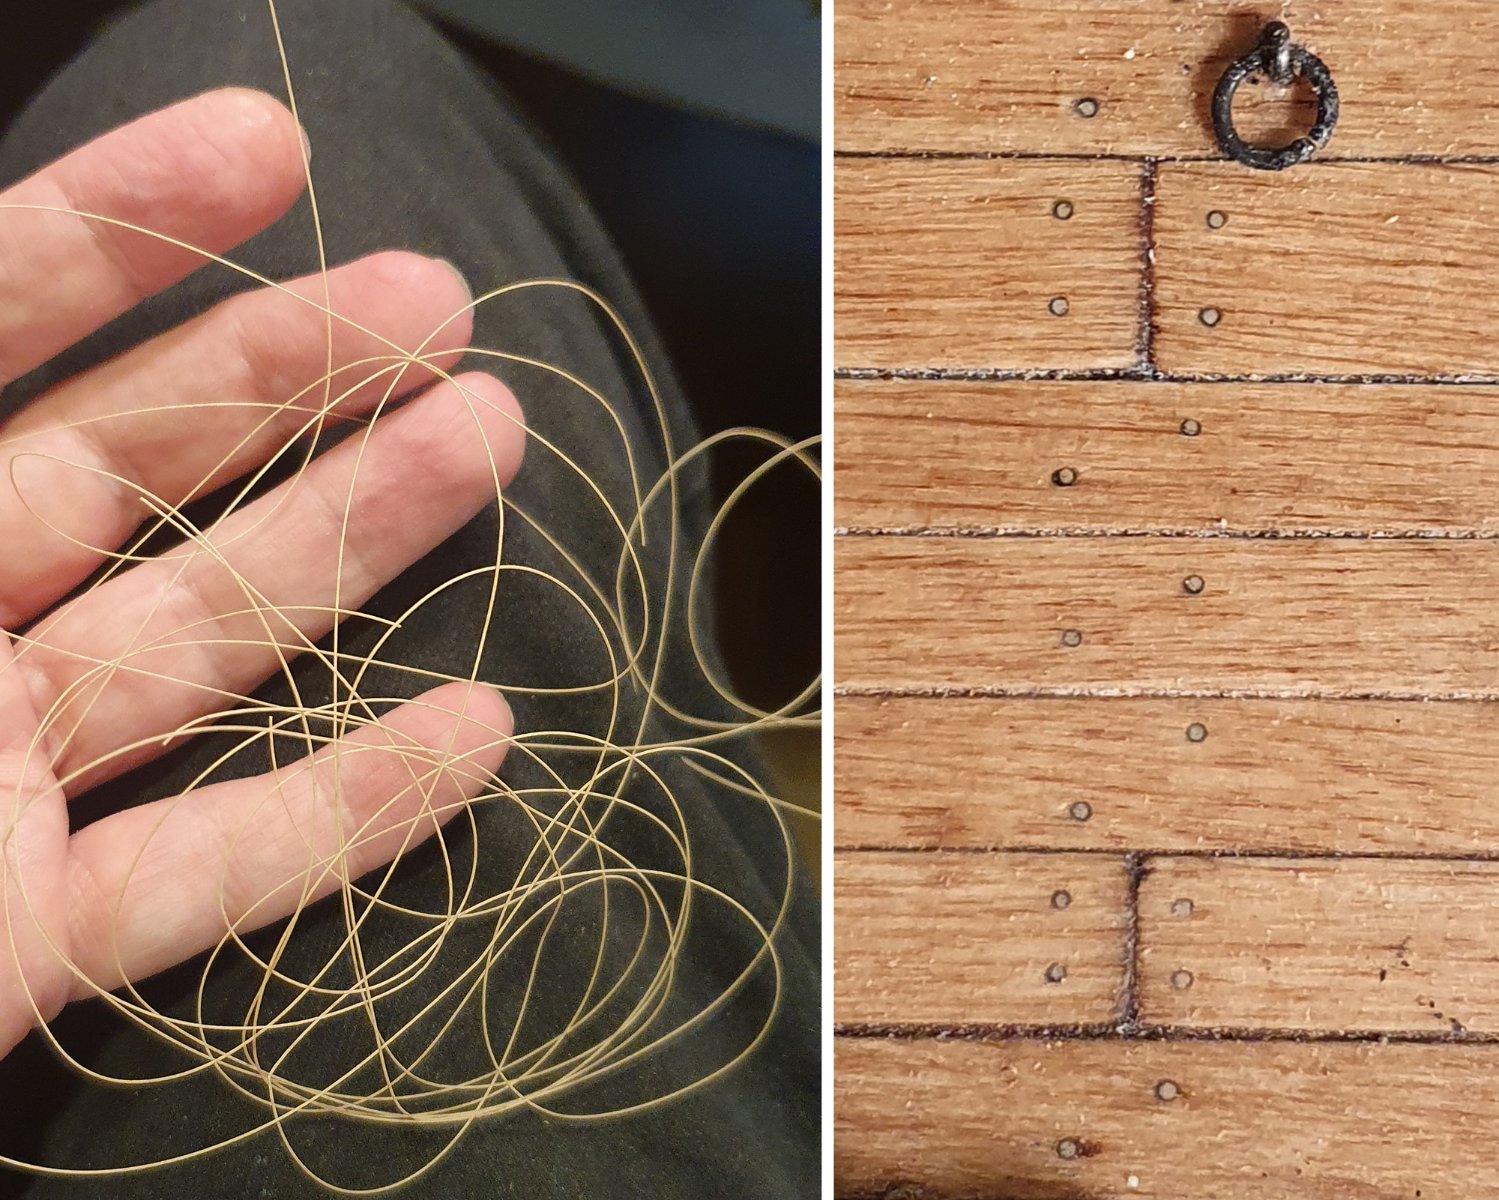
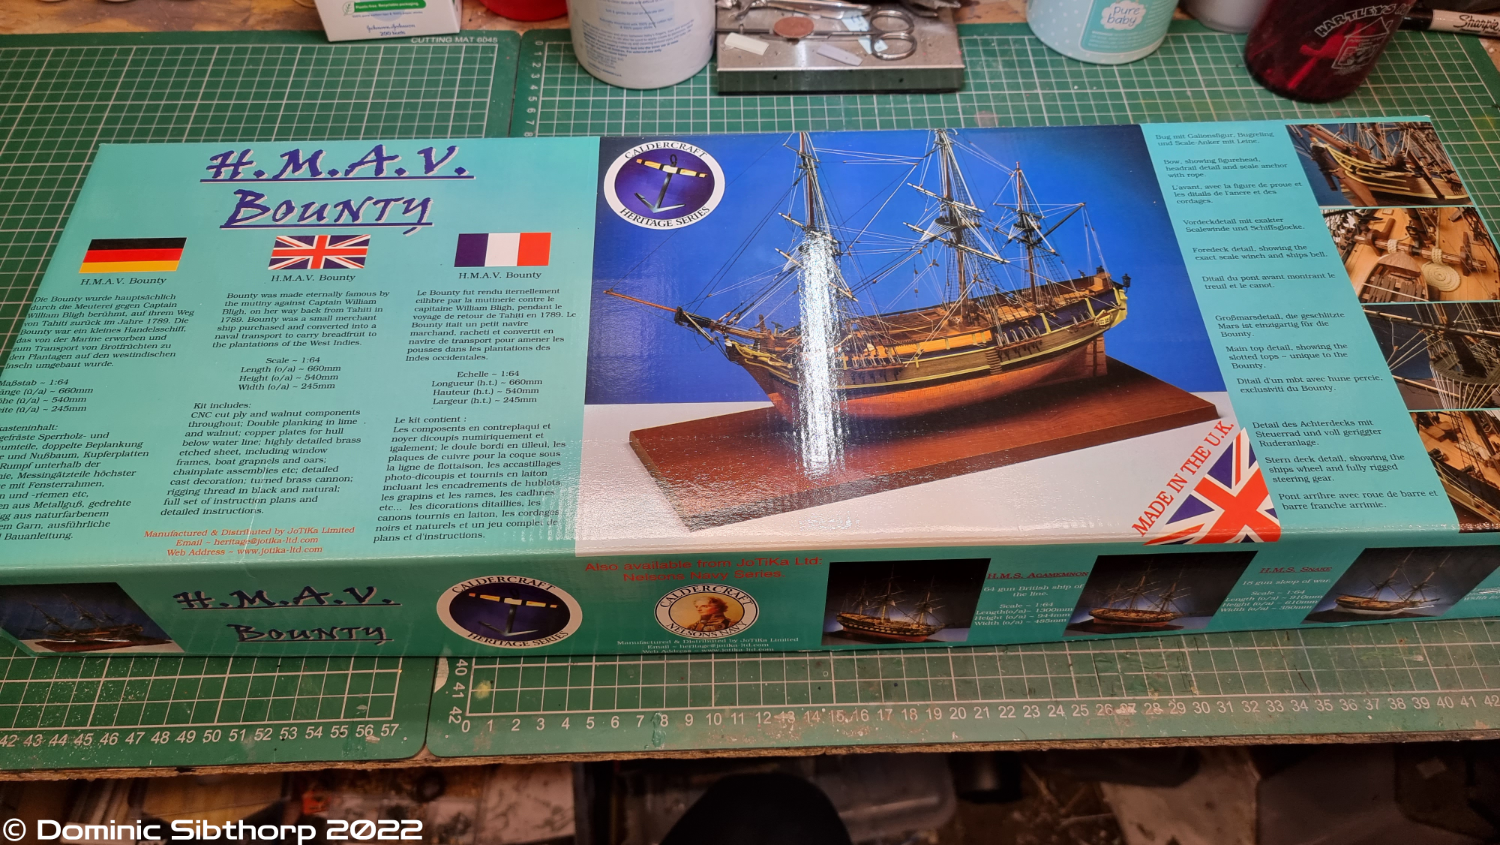
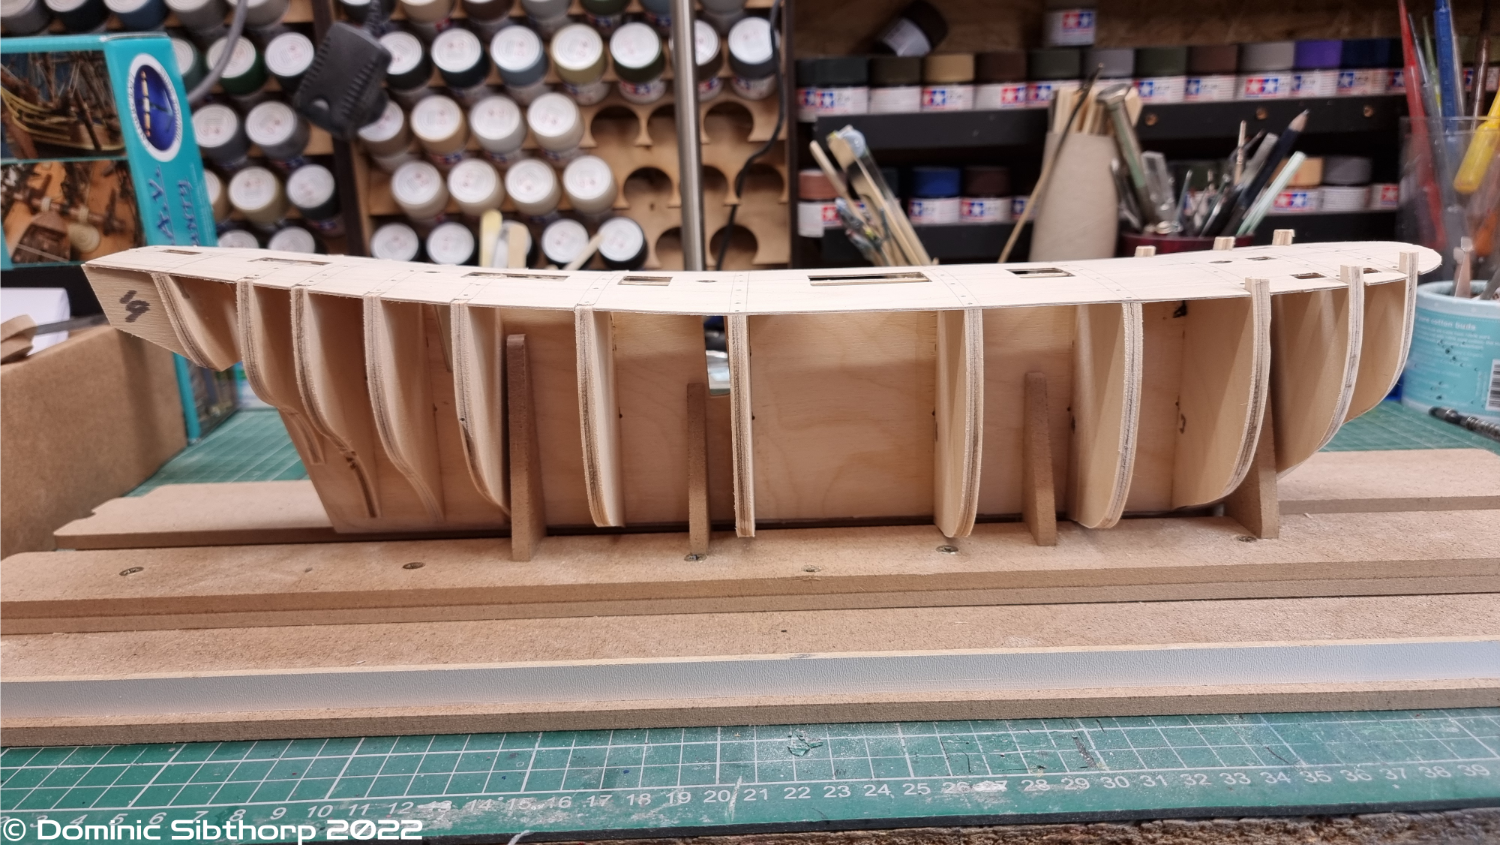
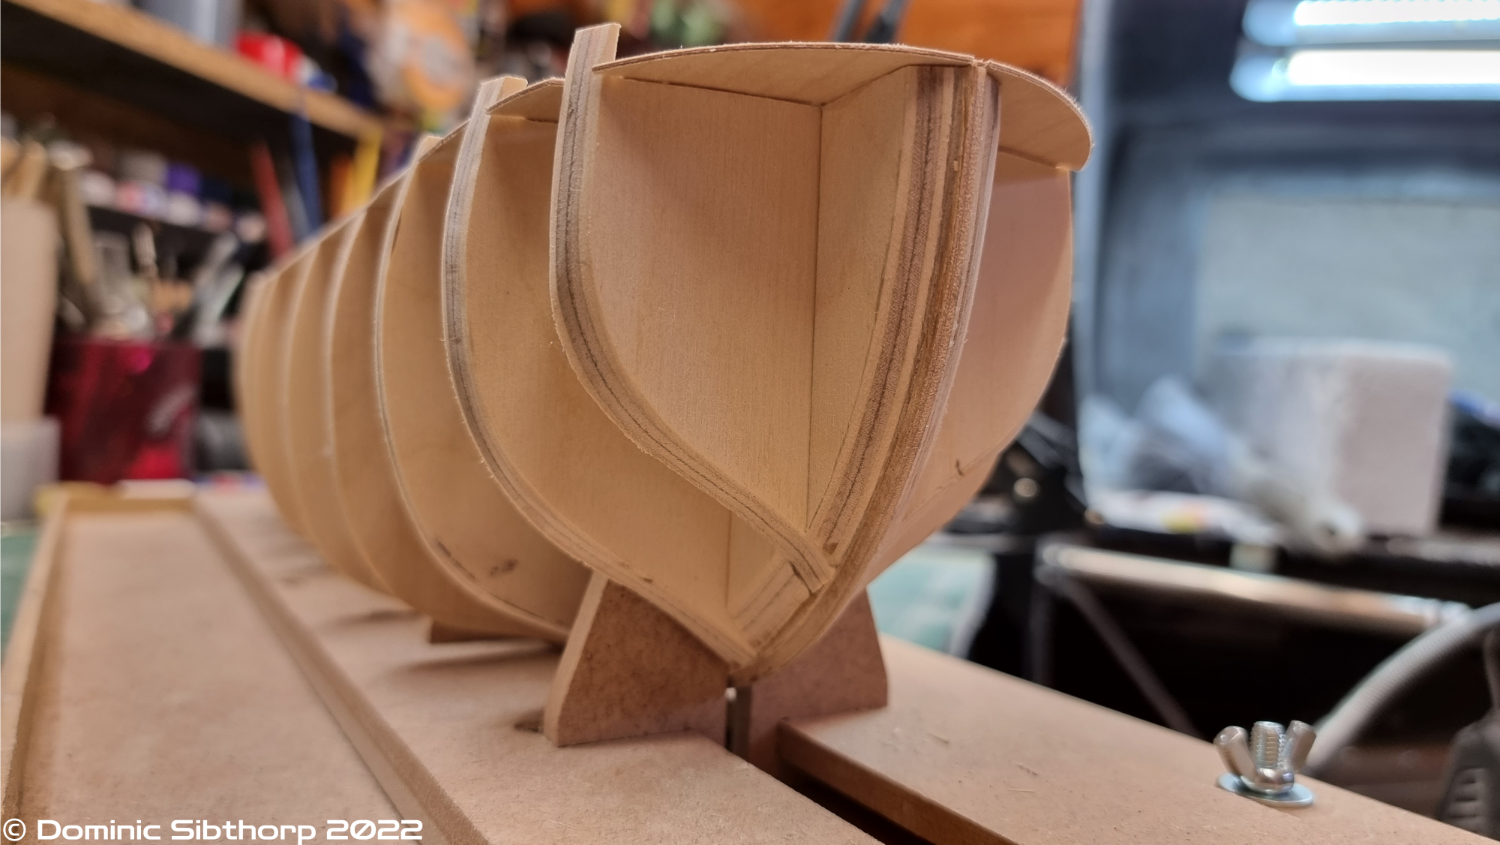
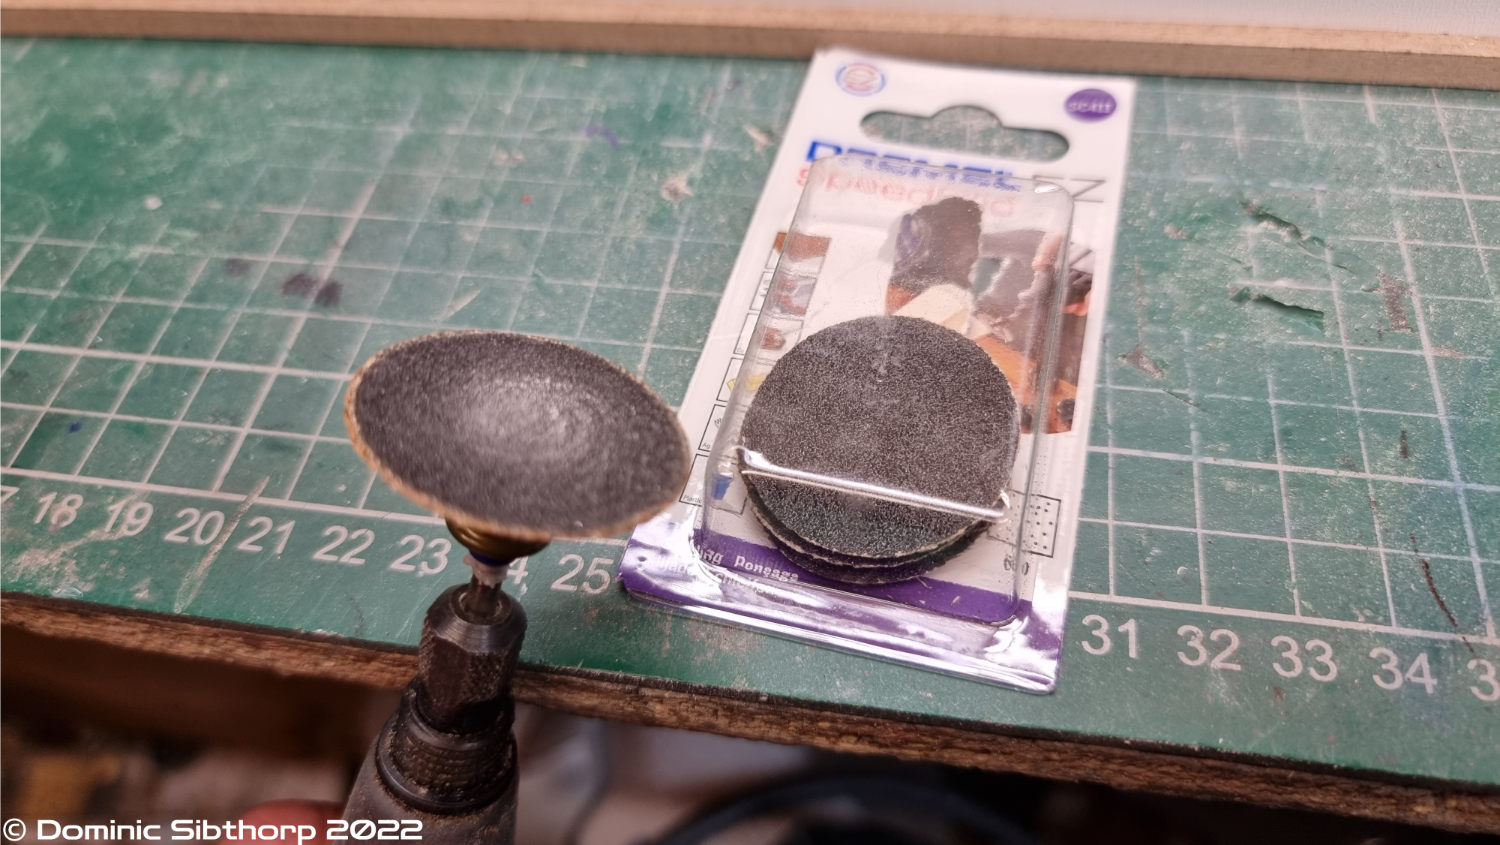
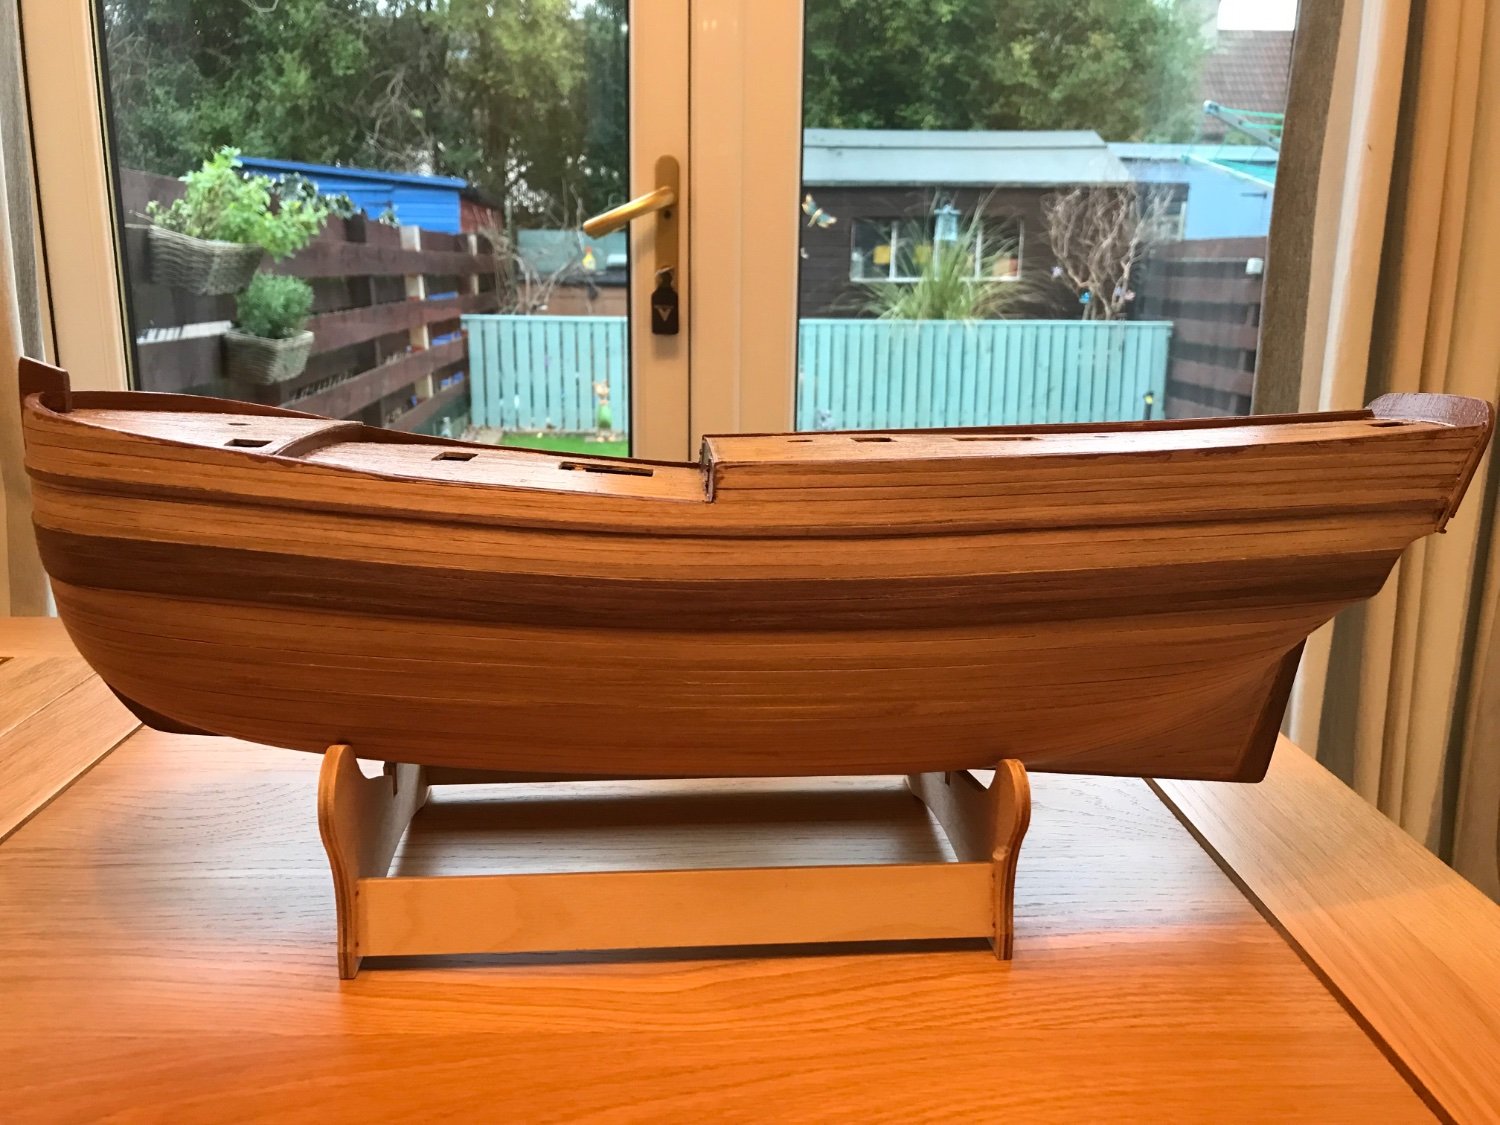
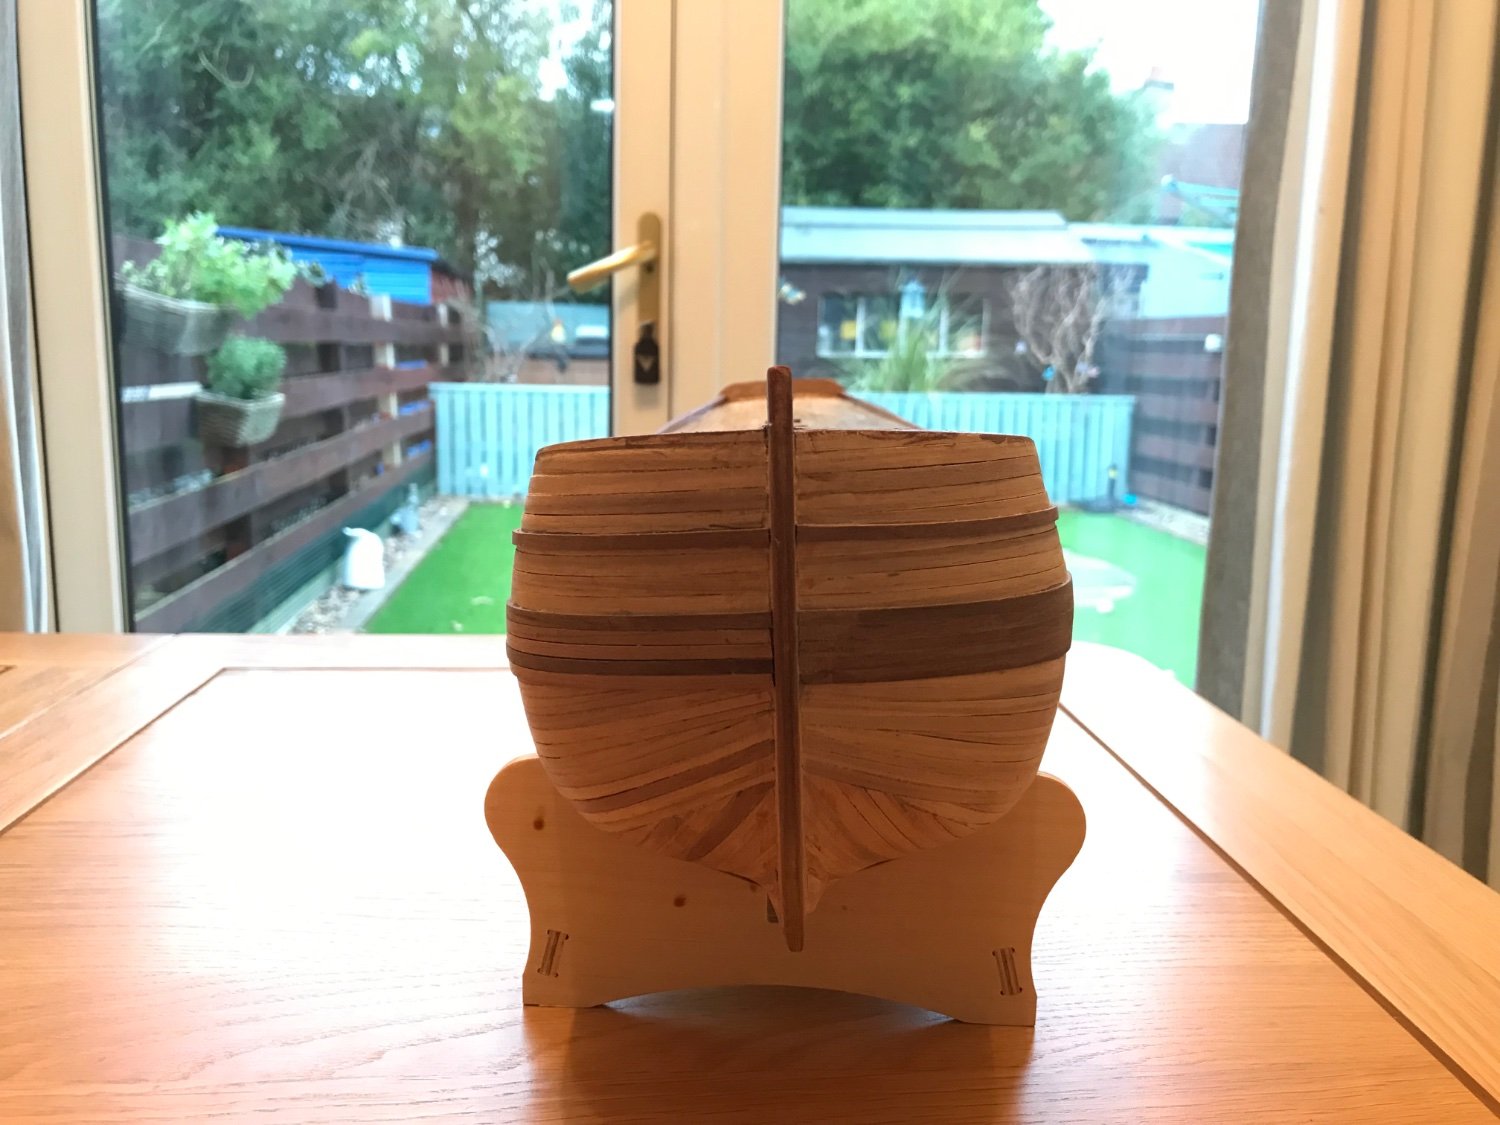
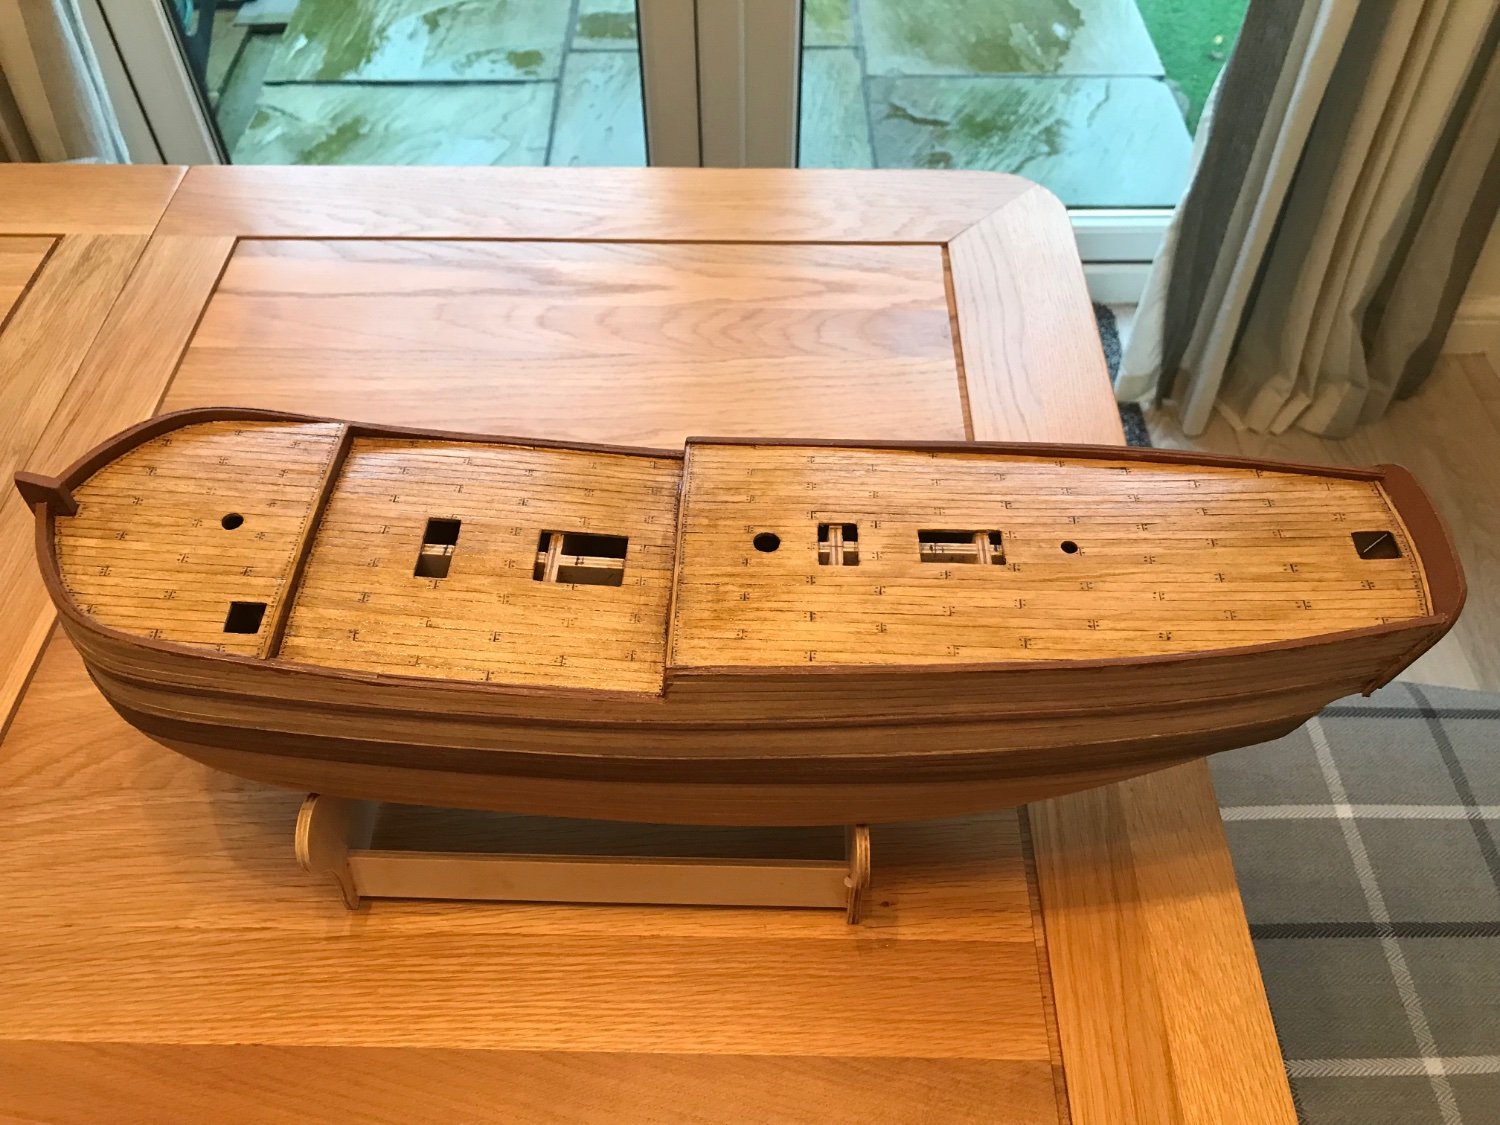
 Greetings folks. It's been a while since I last battled with timber, I got lost in plastic, but I decided I wanted to return to wood. Having learned new skills and improved on existing ones, I felt I could probably do a better job than my previous efforts. And to start with, I wanted to right a wrong on the last ship I completed, HMAV Bounty. On the last one there were a number of errors, most glaringly was the main rubbing strake. It sweeps too low, way too low, at the bow, and it's annoyed me for years. Plus I enjoyed the kit last time, it was a good quality kit with only one minor issue: the length of the centre section of the keel is a few mm too short. Wasn't a problem last time as I coppered the hull as per the kit, I am not planning on doing that this time as it is subject to a lot of doubt as to whether she received that upgrade before leaving Portsmouth (or was it Plymouth?) for the last time. I also invested in some new tools that I didn't have before, and a proper slipway rather than a home made one. Following the general consensus on here I was directed to the Model Shipways one, which I have to say is pretty good. My only gripe with it is it's designed for ships that have the keel already attached, so at the moment it isn't easy to get it to sit level, but that's not an issue at this stage anyway. I also wanted to try a better method of the hard sanding work, using my Dremel and the sanding discs attachement ezclic thingy, and I have to say it makes that job soooo much easier. Anyway, so far I have got the keel/bulkheads assembled, false deck fitted and the majority of the fairing done on the bulkheads. Time to soak some planks and work on the bit I hate the most, planking the hull... Thanks for stopping by...


-
 This is my first plankton plank model. Sl
 -
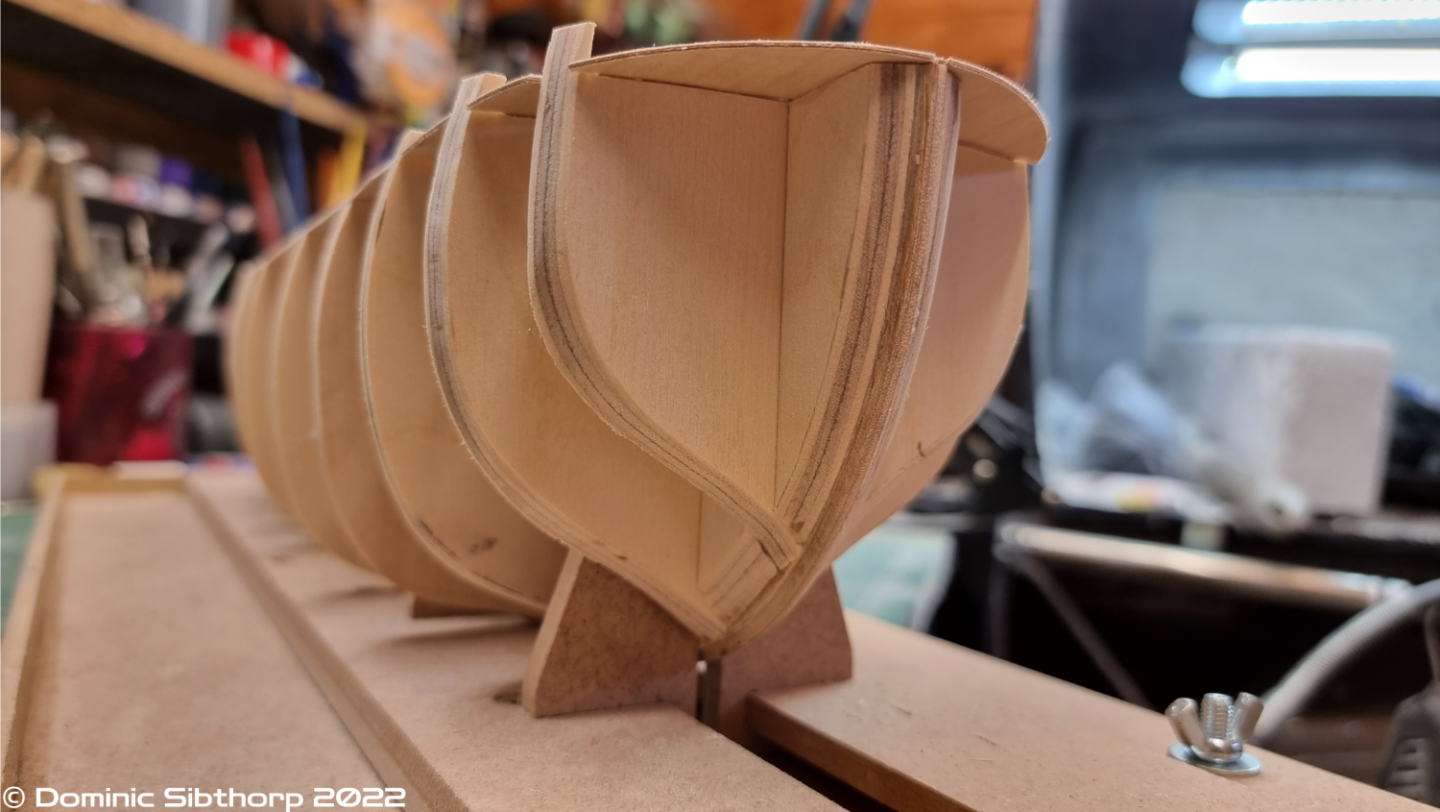
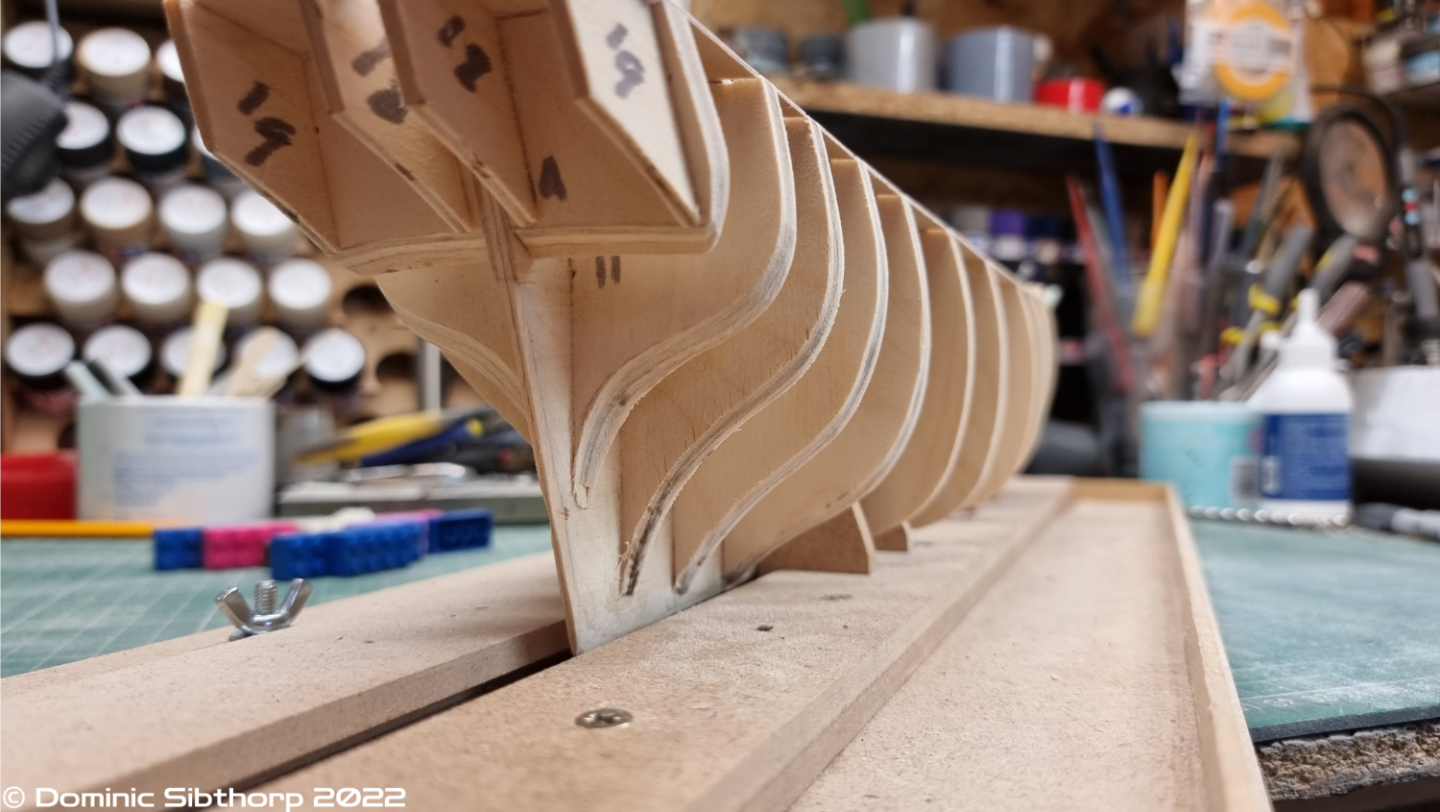
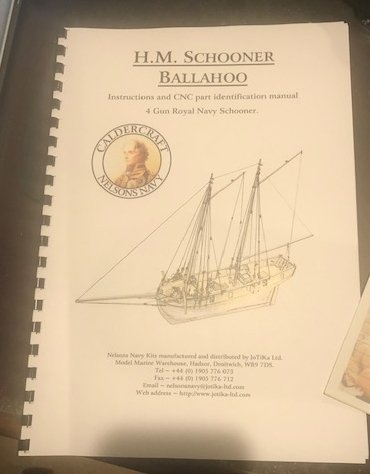
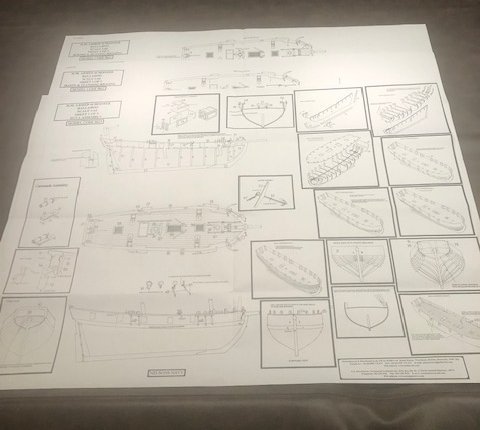
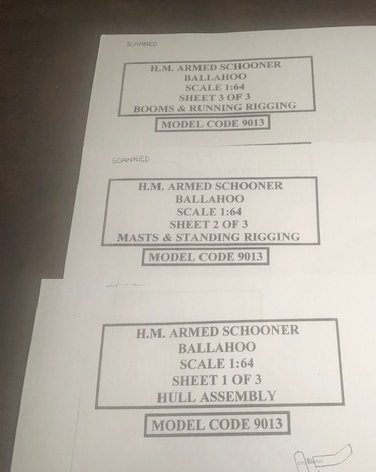
 Still trying to finish my Muscongus Bay Lobster Smack, but waiting on some more rigging line in order to finish rigging the sails, blocks, etc. So... while I am waiting on USPS to deliver that line, I thought I would begin my next project waiting in the shipyard. Decided to work on the Ballahoo. This one is going to be very much different than my first two builds... the Norwegian Sailing Pran or the Lobster Smack... in that the instructions are definitely not as detailed as those first two, which were specifically designed for the "novice" first-time shipbuilders. The Ballahoo comes with a 10-page instruction and part ID manual, as well as three (3) large 33" x 24" plan sheets. This Ballahoo ship has been sitting in the "shipyard waiting room" since last March when I purchased it, and I hadn't opened it until now. But, with an inventory check, it appears everything is in order. I've already reviewed a couple previous build logs for this Ballahoo, and will be referring back to them often as I progress through my own build. I welcome other comments, suggestions and advice, as well! Have started removing the bulkheads and keel from the sheet and sanding all the edges smooth. I'll update more as I move forward on this, with a brief pause to finish the Lobster Smack once I get that new rigging line. Thanks! Gregg
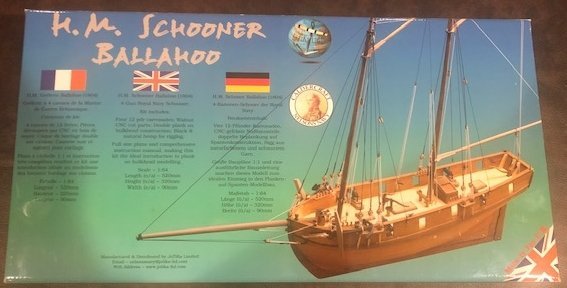
- 65 replies
-
- 4
-
-
- Ballahoo
- Caldercraft
- (and 1 more)
-
 As I am now retired I thought I would get back into modelling. I therefore needed a model that was a little bit more of a challenge, hence Caldercraft HM BARK ENDEAVOUR 1:64. I thought I would start a build log and hopefully get your comments as the build progresses. the following photo’s is where I have got to, at present along with issues I came across. I did have some issues with the kit it’s self with poor CNC cutting and issues with the depth of the keel remaining after test fitting the planking. As planking comes to just short of the keel edge. I emailed Caldercraft on these matters please see email feedback from them below. Hope this will help others on there builds Hi Graham Thank you for coming back to me with the images, I can now better understand your areas of concern. With regard to images 1 and 2, this is correct, the deck should only just reach the outer edges of the bulkheads. When the outer hull is planked these hull planks continue up past the deck to the top of the bulkhead stubs; with regard to bulkheads 7, 10 & 11 which have no stubs, the hull planking still extends up past the outer face of the 0.8mm ply deck and will effectively finish flush to the upper face of the deck planking at the ‘steps’ between decks. With regard to images 3 through 6, again this is correct. The height of exposed keel on Endeavour was approximately 8 inches (203.2mm), at a scale of 1:64 this equates to 3.175mm. The walnut keel supplied has a height of 5.7mm, after planking with 1.5mm lime and 1.0mm walnut this leaves an exposed height of keel of approximately 3.2mm. What is missing from the model is the false keel, you may or may not choose to add this. The false keel was a sacrificial timber attached to the underside of the keel, we don’t generally apply these as they never look right to scale. You may have seen false keels applied to some models in my experience they are generally applied as 1.5 to 2mm thick planks which looks right but really isn’t. As a general rule of thumb a false keel is approximately quarter the height of the keel to with a 3.2mm keel on Endeavour this would give a false keel thickness of 0.8mm which simply looks odd/wrong when applied. When scaled up of course that thin 0.8mm slither equates to a 2inch thick timber. With regard to the deck length this is best described as a design consideration with the deck being approximately 3mm longer than need be at the transom (there are a lot of these considerations throughout various areas of all models to try to allow for build differences from one modeller to another). The reason for the extra material on the ply deck is that we know from experience some modellers struggle with correct fitting of angled rear bulkheads where a ‘full’ slot is not provided and also cumulative effects where the stern counter patterns may not be precisely fitted. If you get the angle of the bulkhead spot on and glued tight against the locating notch in the keel and then you get the stern counter patterns precisely glued in place and again tight flush to the bulkhead then it will result in approximately 3mm of material needing to be removed from the aft edge of the deck. On the other hand if one or both of these stages are out by only small degrees you may only need to trim 1mm of material from the aft edge. Kind regards Richard Wright Technical Manager JoTiKa Limited Model Marine Warehouse Hadzor Droitwich Worcestershire WR9 7DS United Kingdom Tel: +44 (0)1905 776 073 Fax: +44 (0)1905 776 712 Email: richwright@jotika-ltd.com Web: www.jotika-ltd.com I need to thank other members for there advice in getting this far especially 1st & 2nd planking issues. Being a novice builder I did not realise that tapering of the planking should really start from plank two. Therefore had to strip five rows of first planking off and start again. 1st planking completed required a lot of sanding and a good bit of filler. 2nd planking went on easier but I struggled in holding these in place as did not want to pin these. Looking at completed planking now it has turned out quite well. For the main deck planking I decided on the four BUTT plan with 100 mm planks as this worked better for me. Will update Just finished the capping rail unfortunately I made a mistake that I am going to have to live with in that the capping rail on the mid deck is out of alignment to the Quarter deck due to not taking into account the curve of the hull planking also managed to get the hull painted and stained. Not sure what happened below the stern quarter as the the stain went on rather dark on the Stbd side and did not look good so I painted it walnut brown (do not like this and going to have change if I can). But otherwise quite happy with the way the build is going at present.
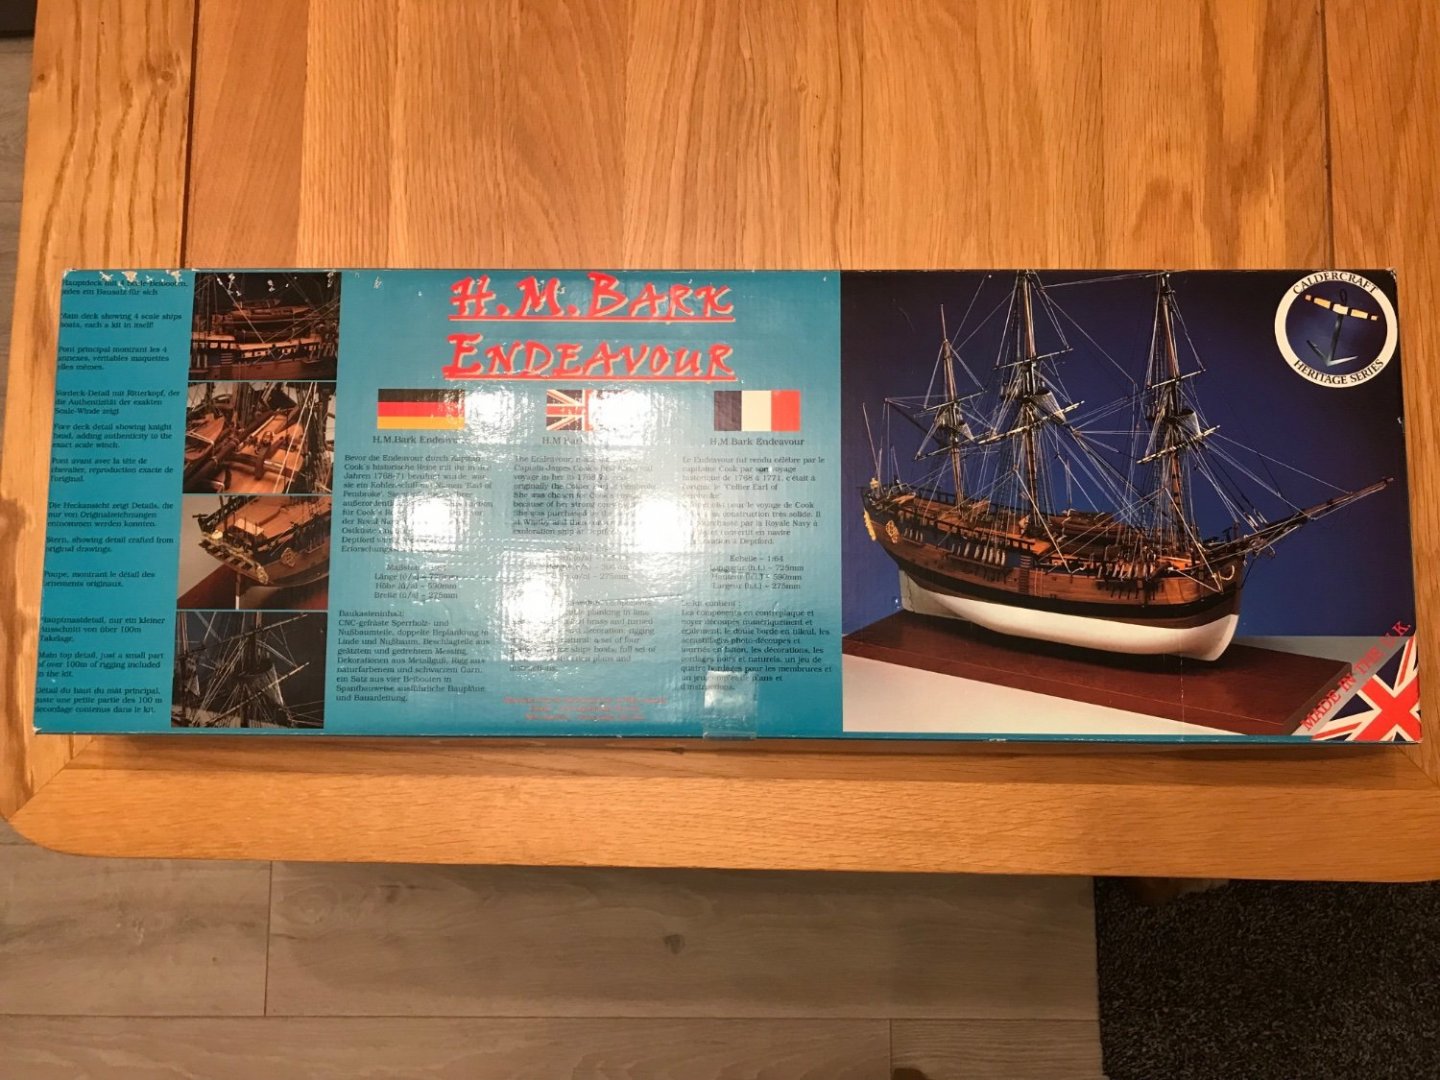

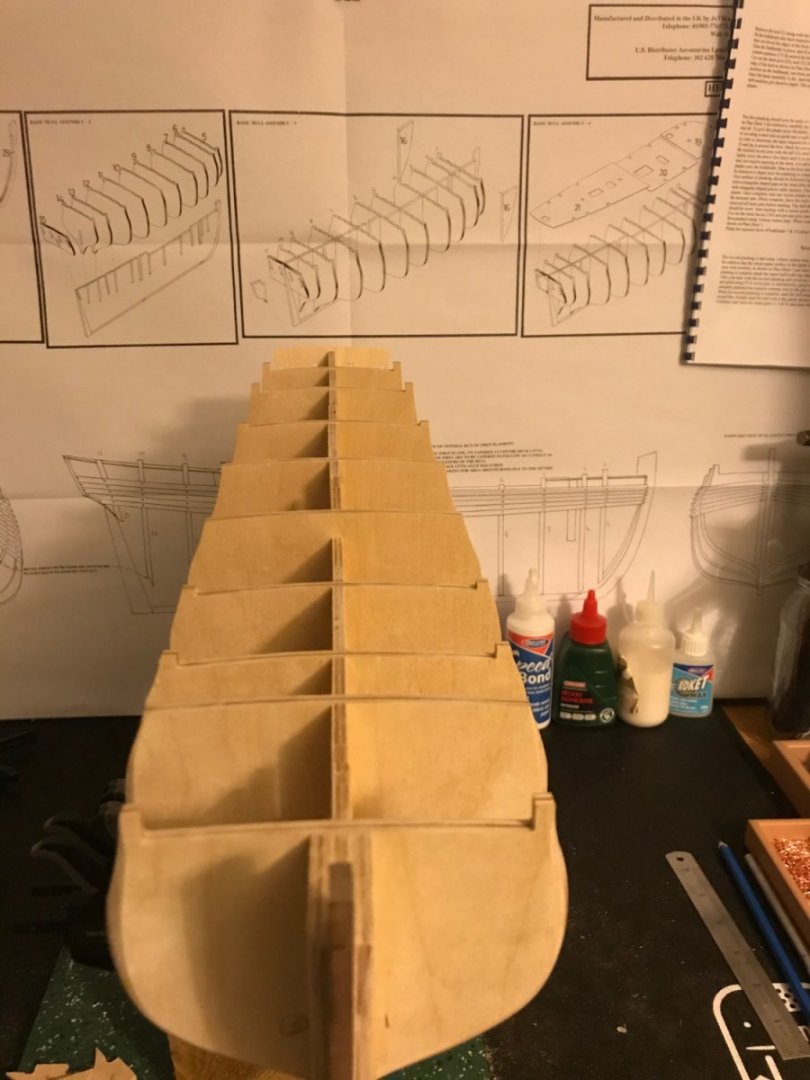
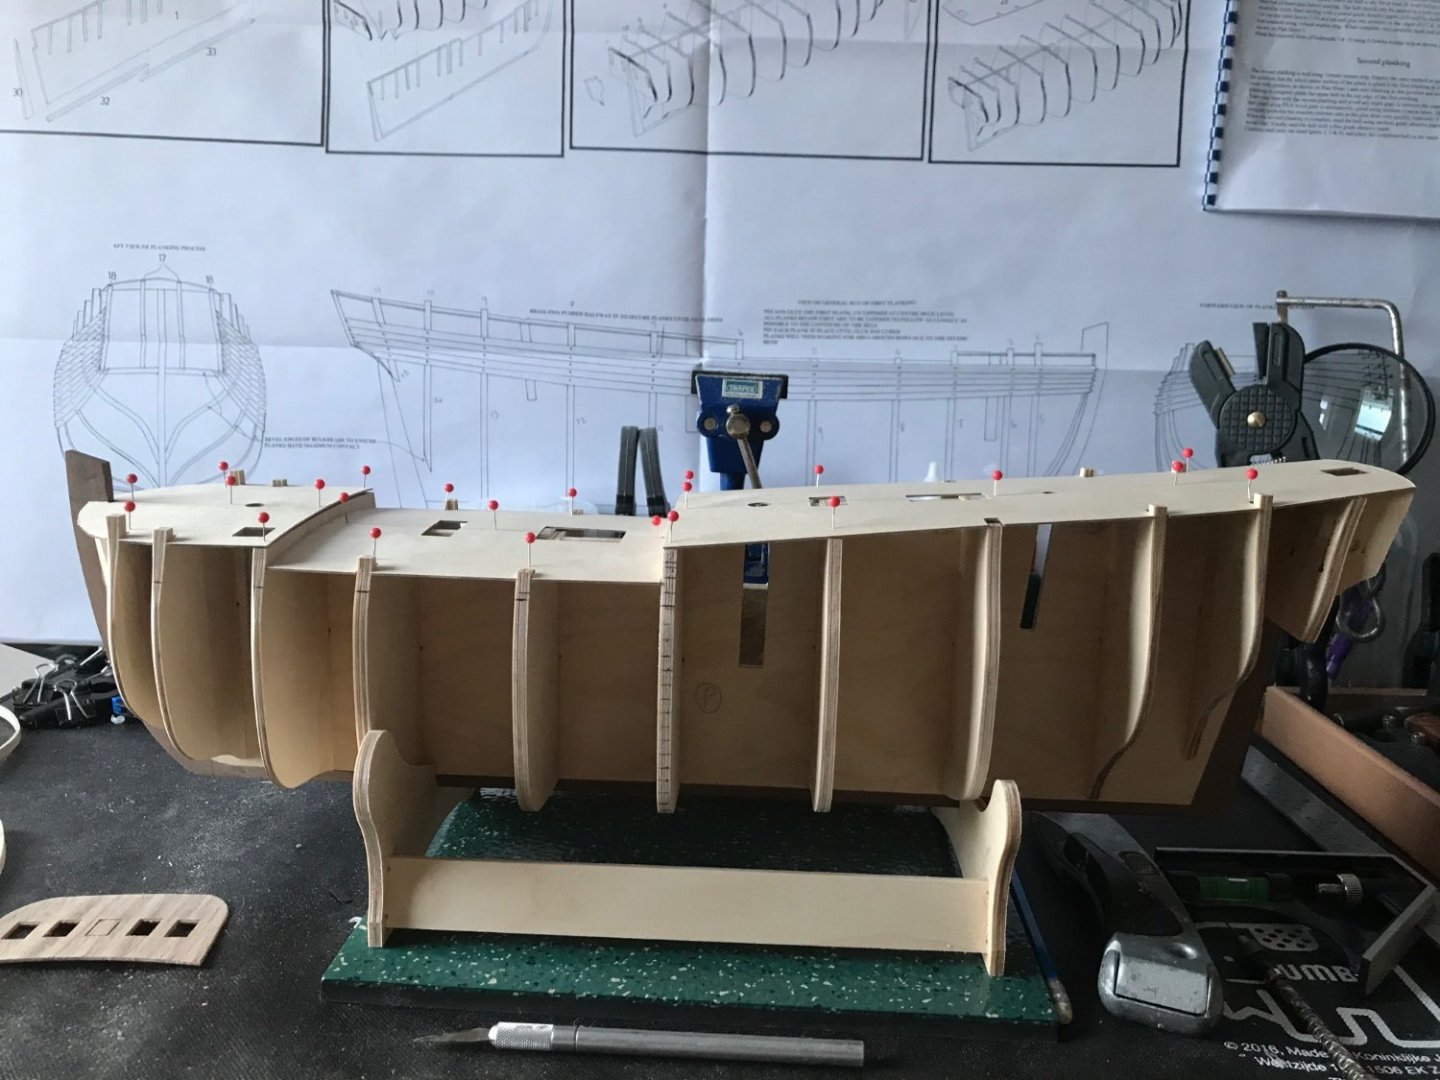

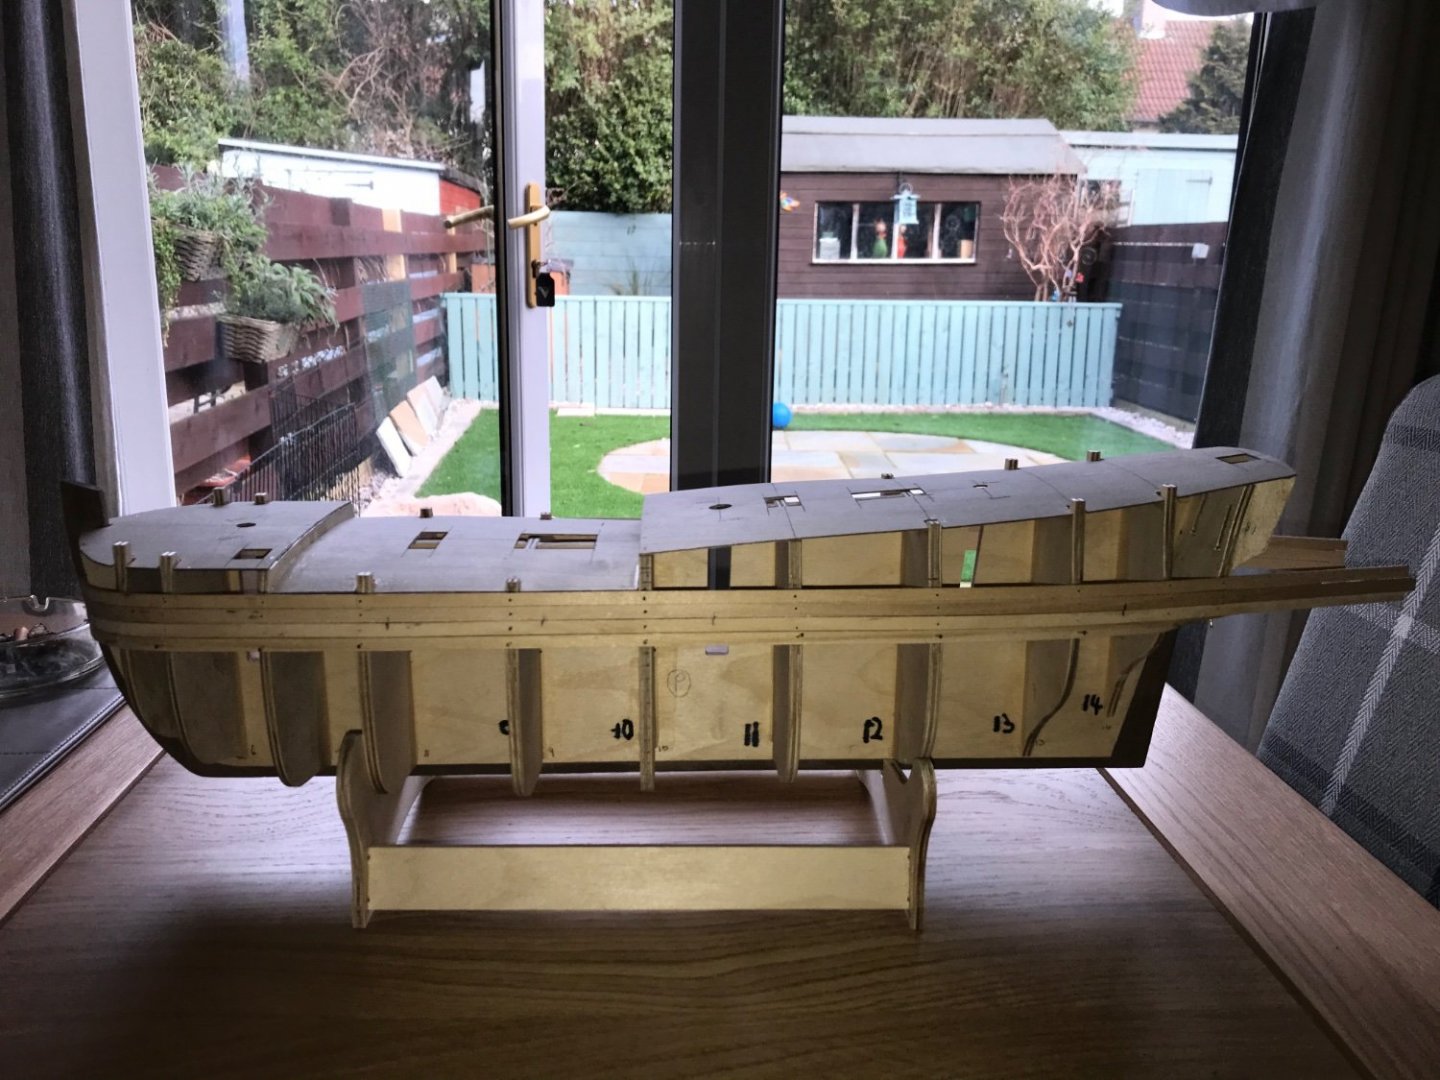
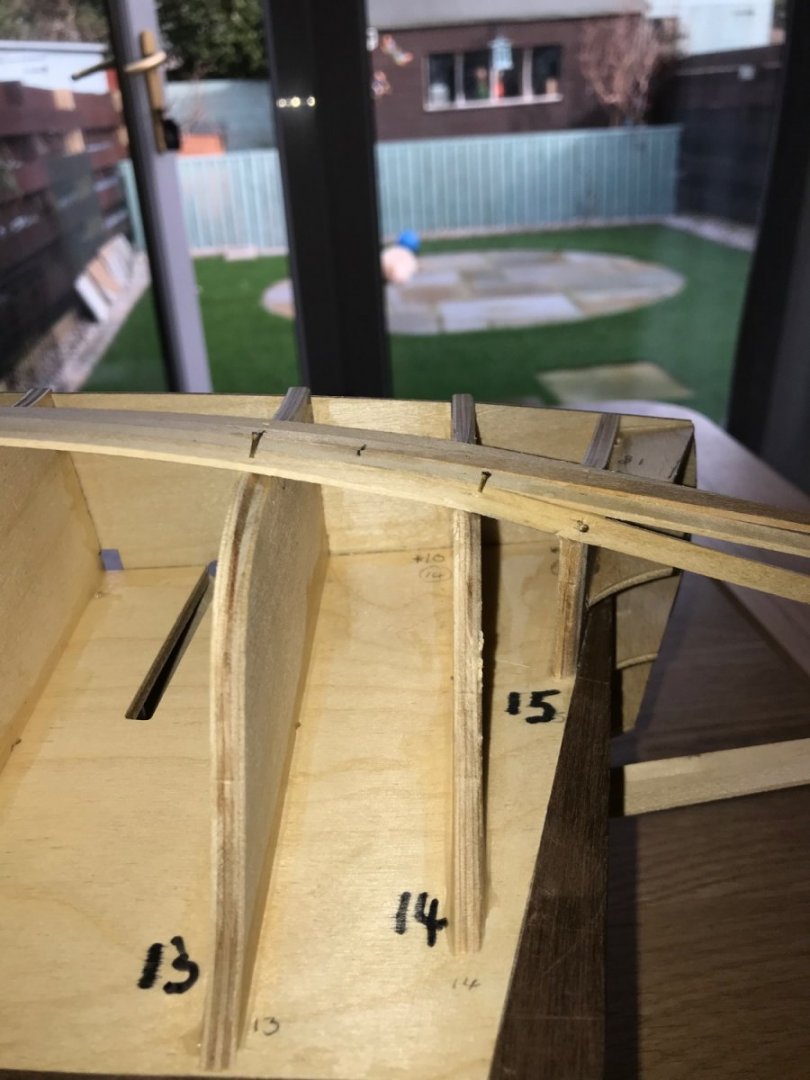
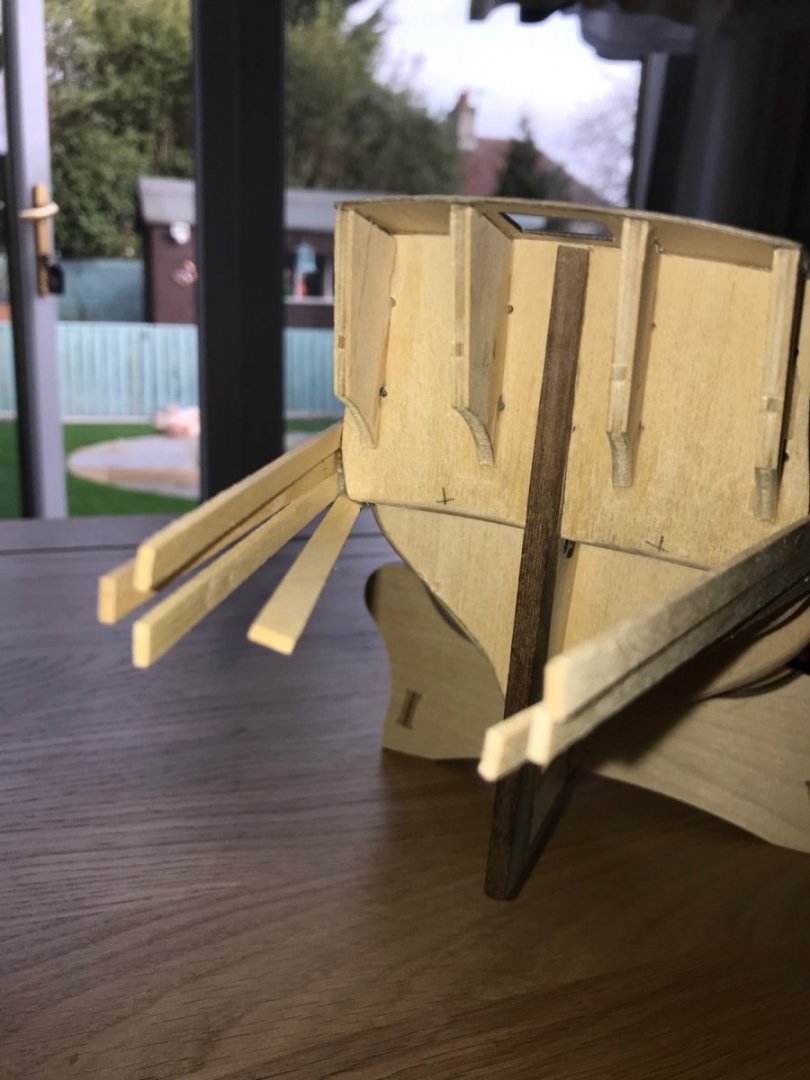
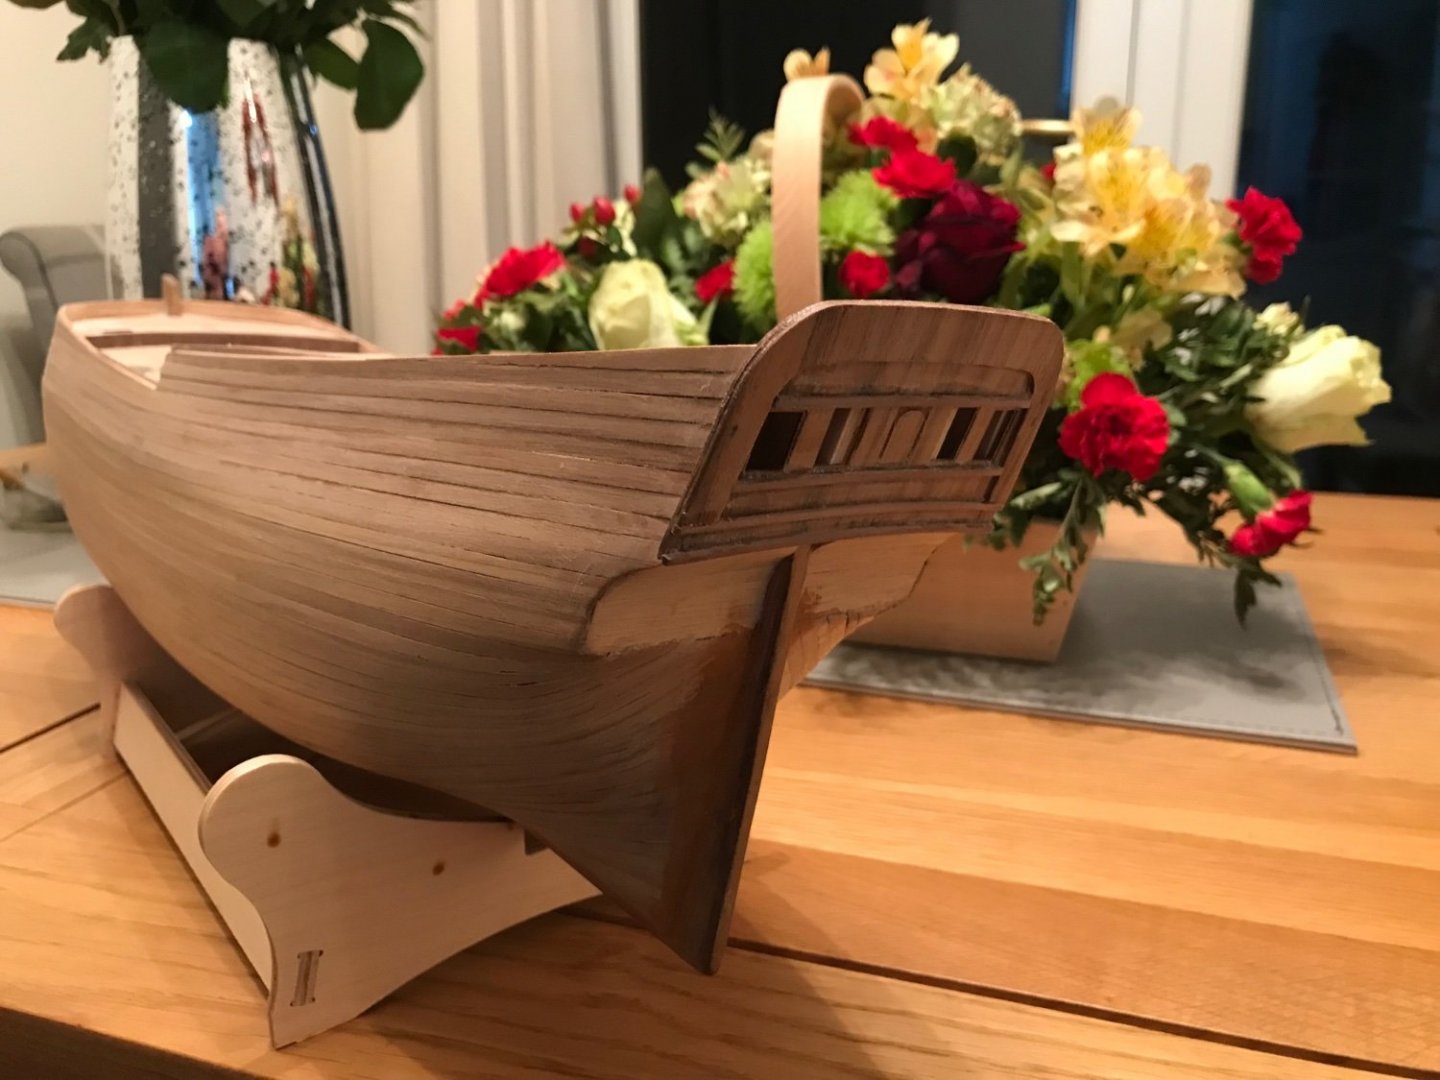
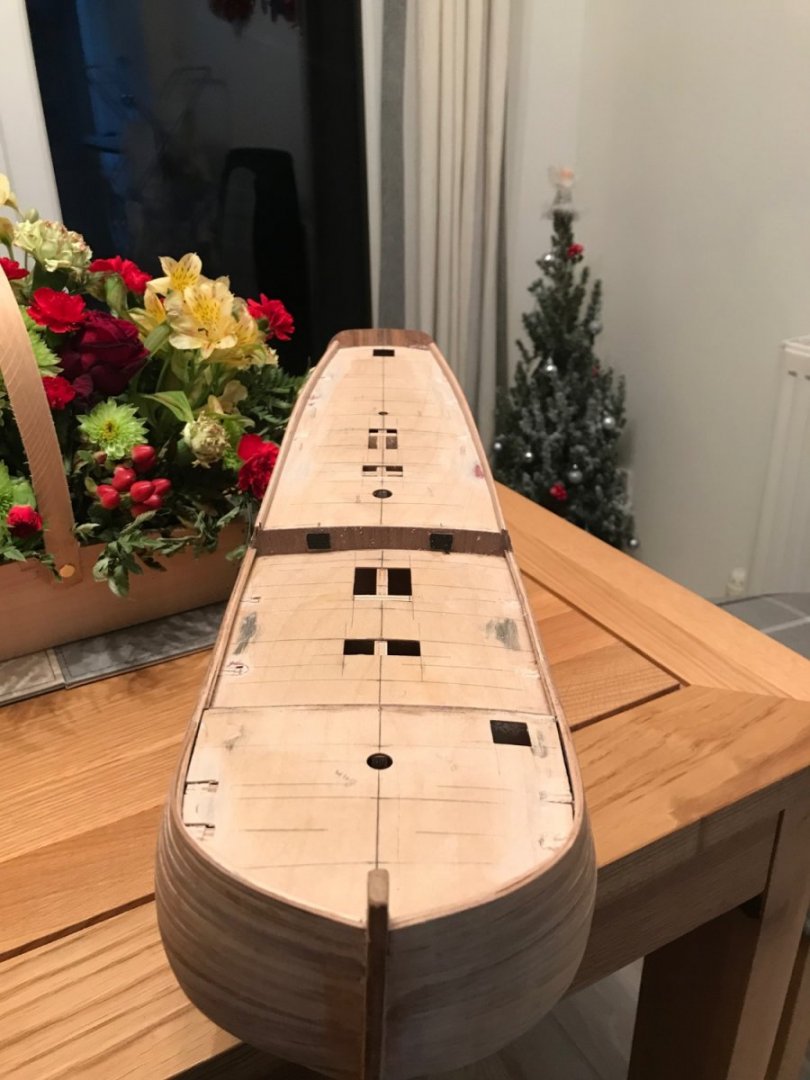

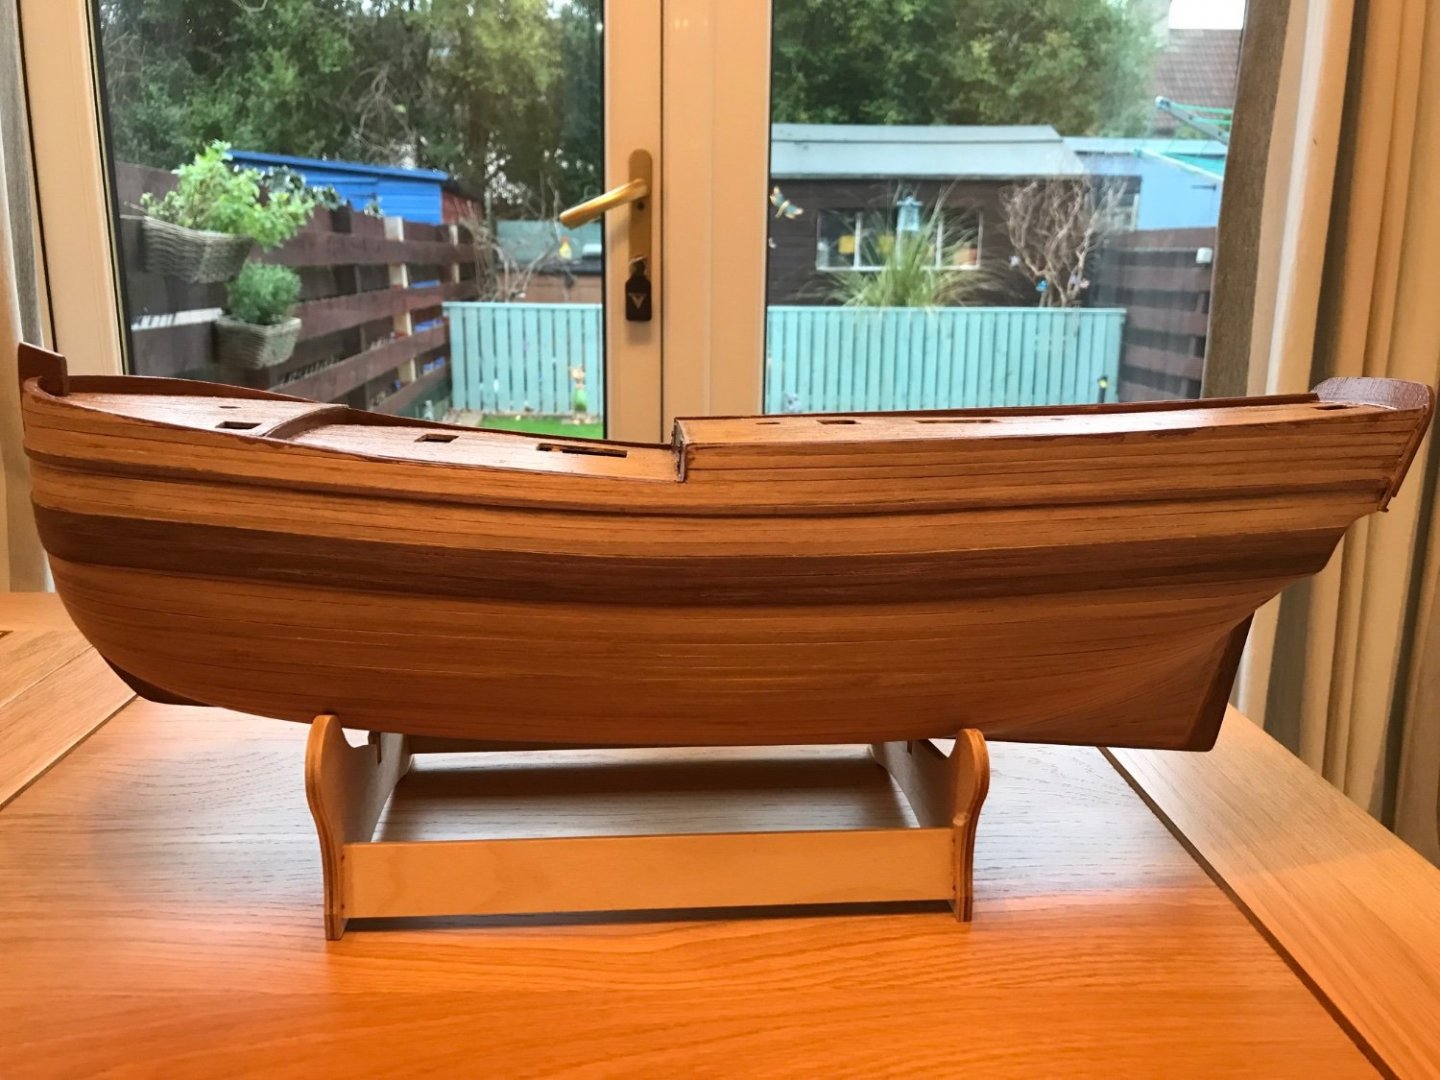
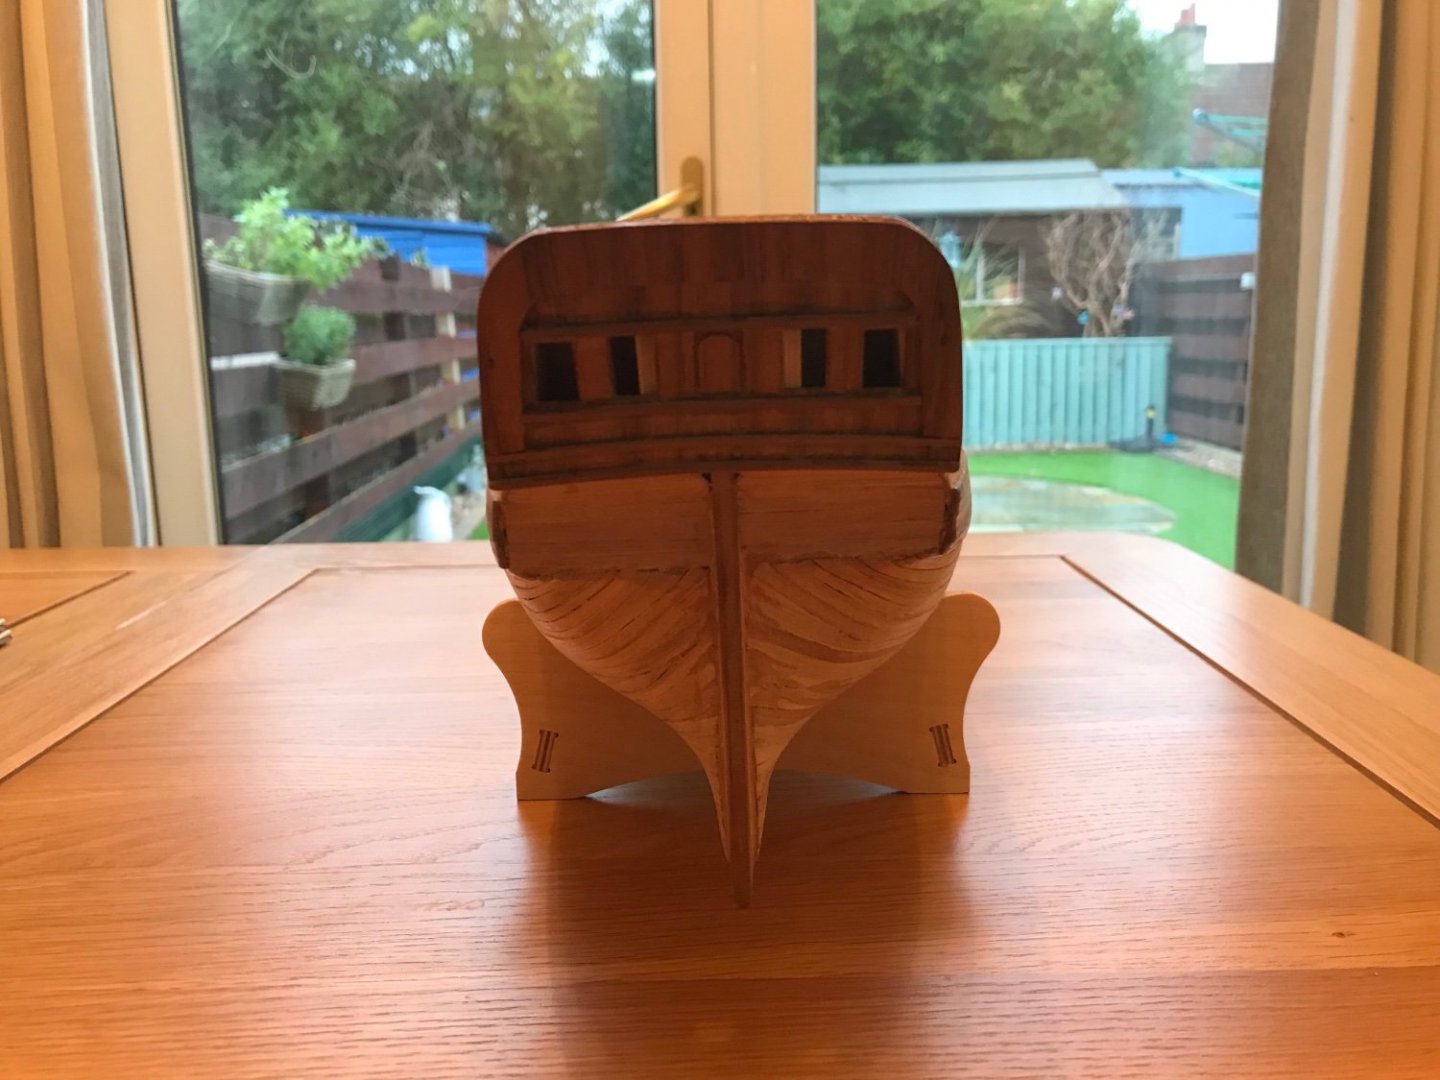
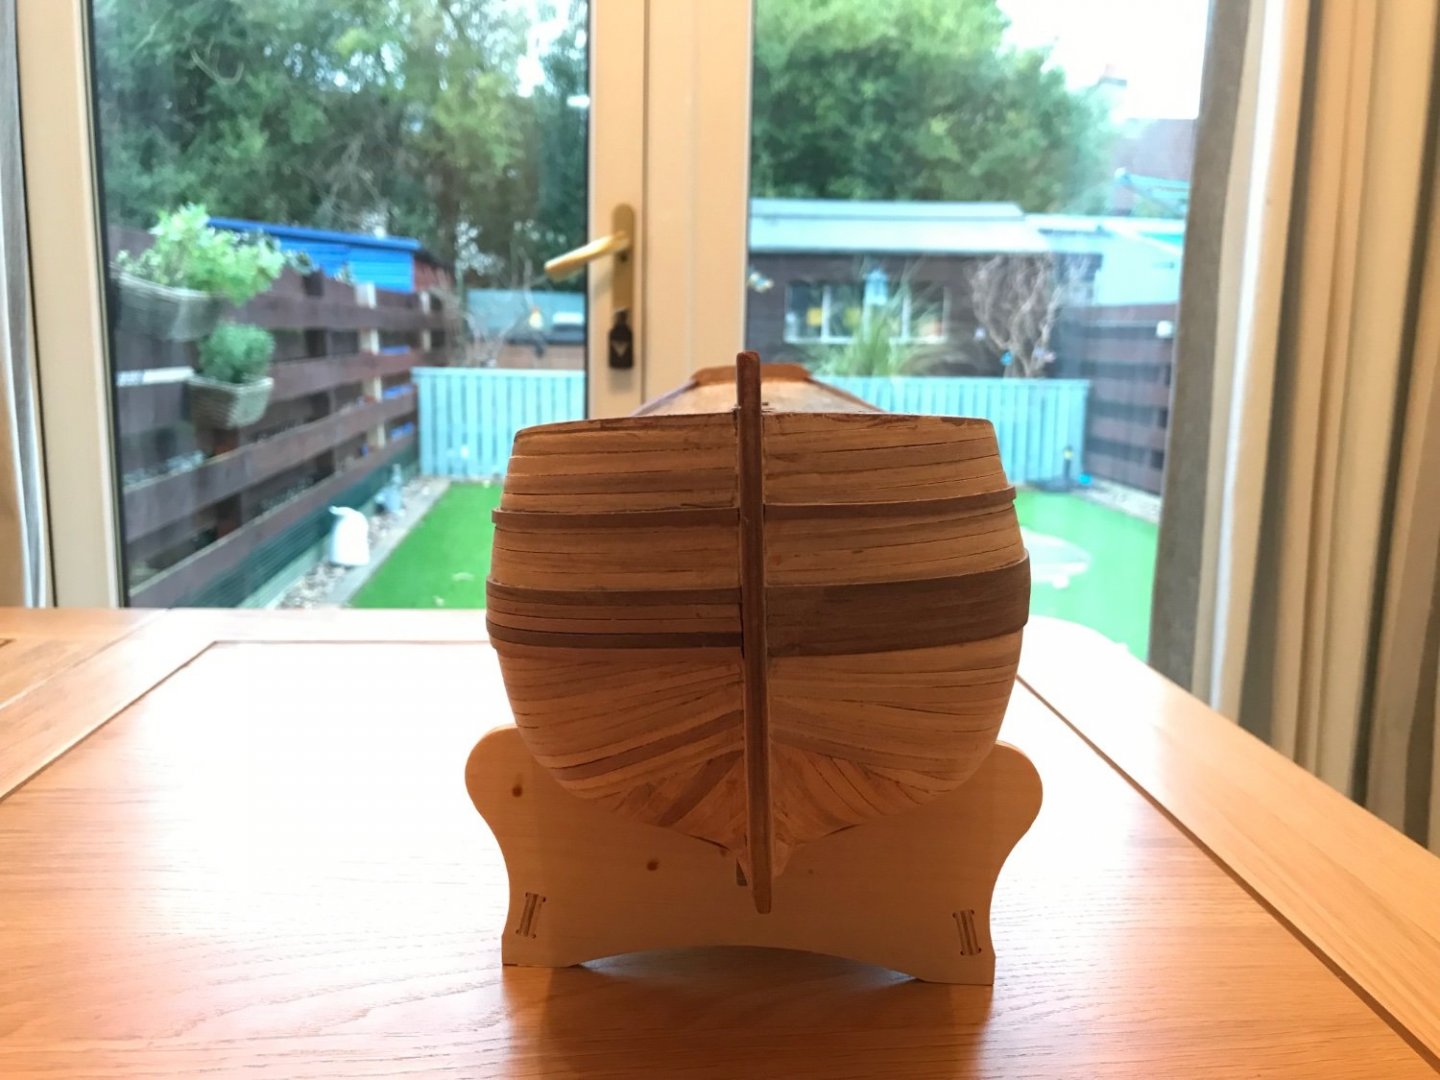

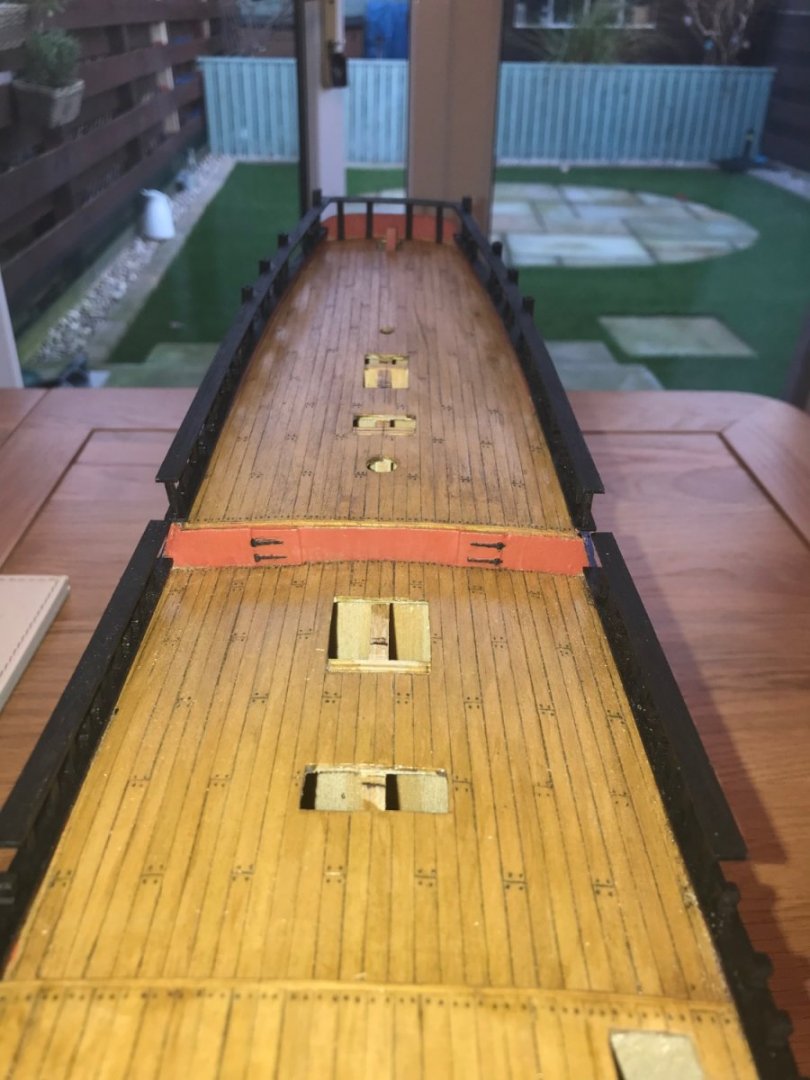
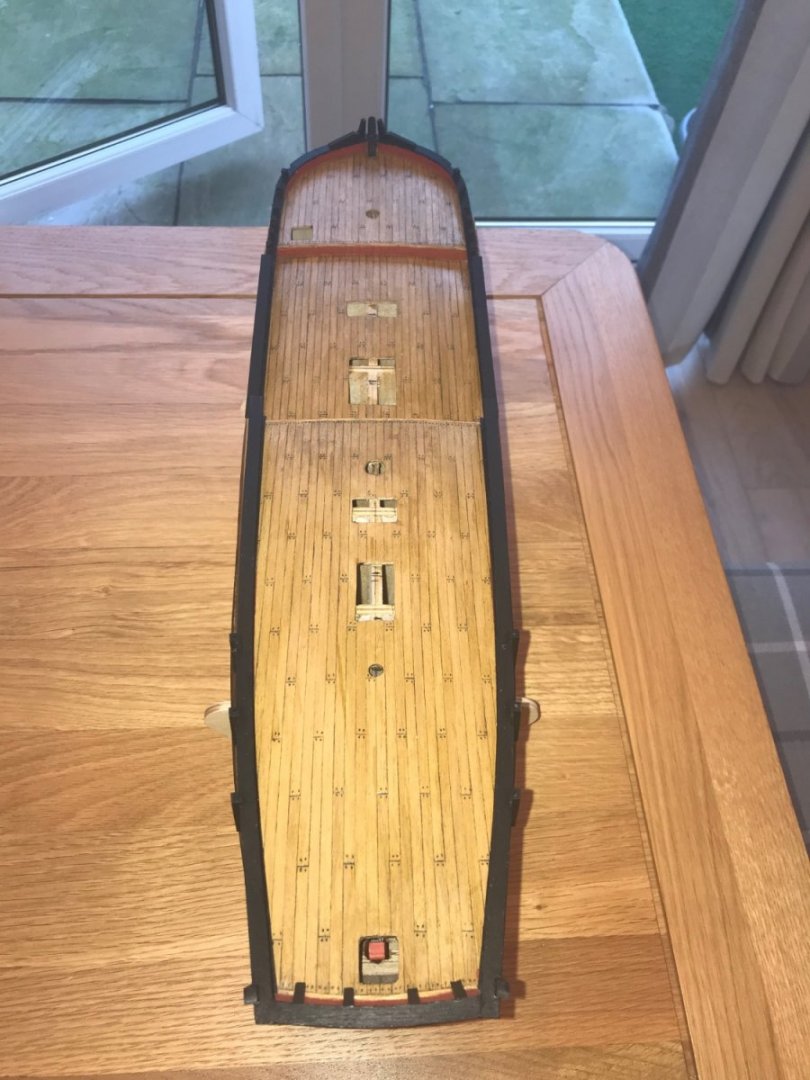
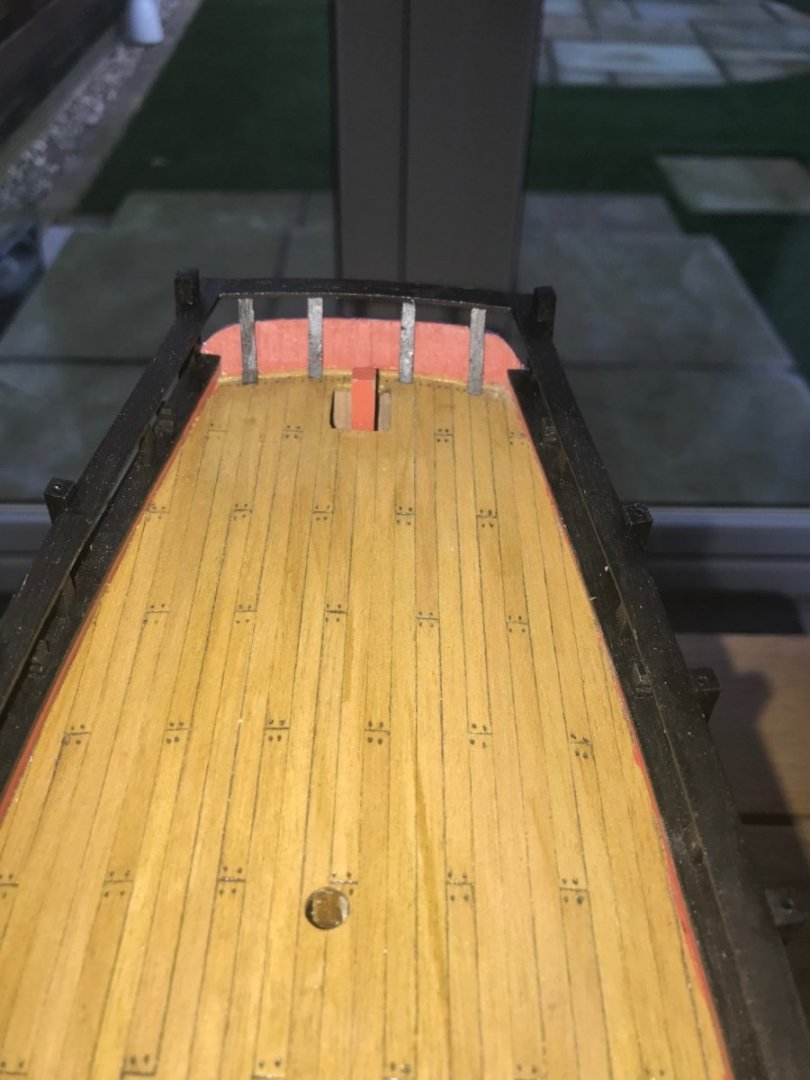


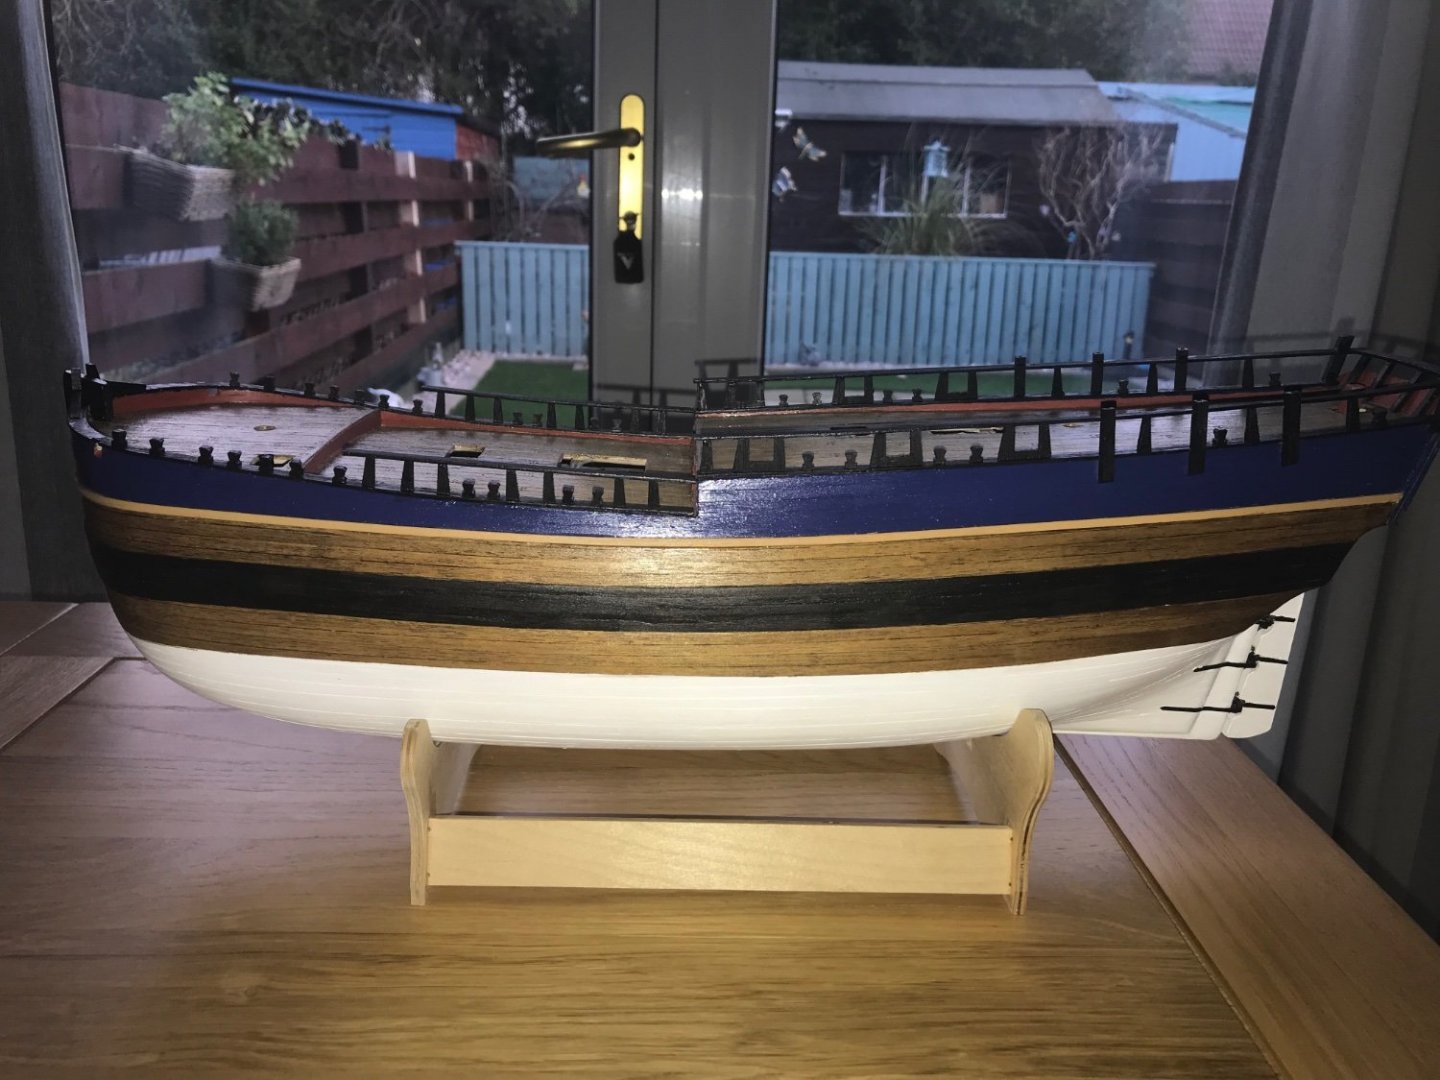
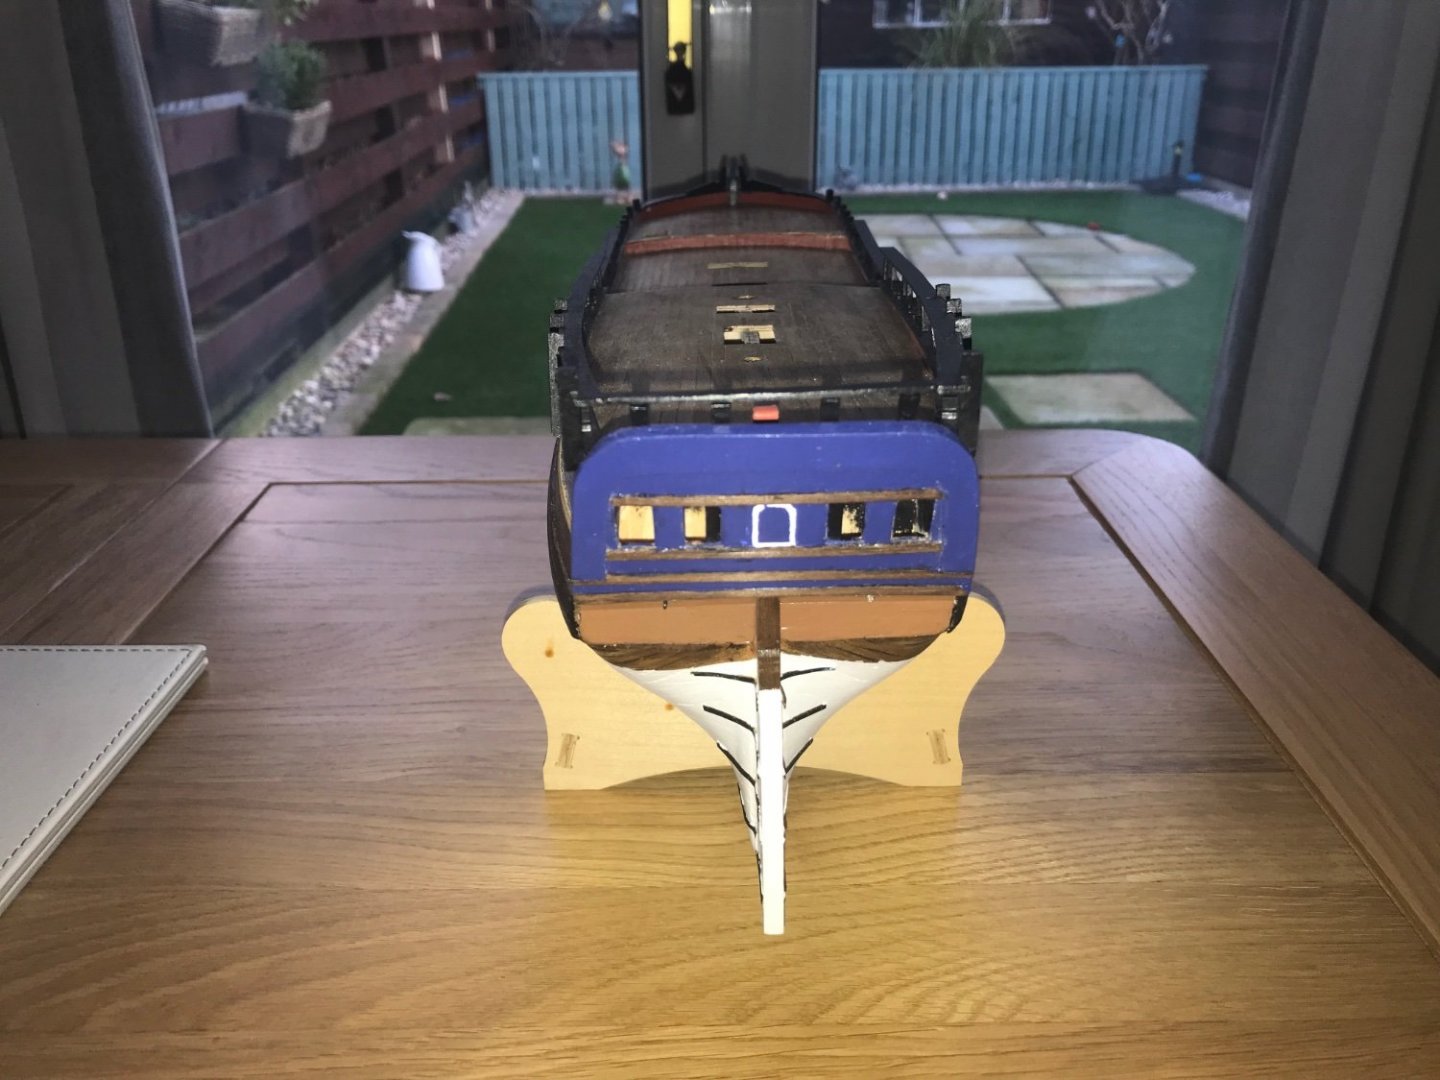
-
 Sail plans for schooners are poorly documented with little information about the varied combinations of sails that they carried. I am building HMS Whiting (Ballahoo or Fish class) and in the absence of any useful drawings have taken to reading log books. There is one by sub-Lieutenant John Roach that I photographed at The National Archives in Kew, London and have now partly transcribed. (Wikipedia calls him George Roach and gets it wrong. They refer to Rif Winfield and I think the original mistake is from the Naval Chronicle in 1806 which erroneously put George on Whiting. The log book clearly states John Roach.) There are lots of mentions of sails and sailing in Roach's log and I have noted which ones are present or missing. He also mentions some of the spars such as the jib boom which answer other questions. The sketch below is a summary of what I found. The drawing itself is based on one by Phil (Dr PR) and the proportions are not quite right for Whiting. https://modelshipworld.com/topic/25679-topsail-schooner-sail-plans-and-rigging/ Fore and aft sails, starting from the bow Flying jib. Several mentions. Jib. Comments such as 'took in the jib boom set the reefed jib' show that there was at least one row of reef points. There is no mention of a fore stay sail. There is one mention of a bonnet on the jib, Fore sail. This was used a lot and could be double reefed. Main sail. Like the fore sail this could also be close reefed. It was replaced by a try sail in bad weather. Main top sail. Several mentions. Ring tail sail. Several mentions. Square sails, starting from the deck There is no mention of a course or lower square sail in all the time from April to October. However, there is a curious reference to a 'lower' studding sail which might be alongside the (missing) course. Fore top sail. This was reefed and the mention of a 'first reef' suggests that there were probably two rows of reef points. Lots of mentions of studding sails (starboard and lee are two variations) which I presume are next to the top sail. Fore top gallant. This went up and down several times so was probably set flying. The log book does not give the mast arrangements. The main mast would have had a lower and a top section and I am fairly confident about that. The fore mast could be made from two or three sticks and Roach does not solve that problem for me. The top mast and top gallant mast could be one long pole, or they could be in two separate sections. At present I tend towards a combined top and top gallant mast, largely because the top gallant sail was (probably) set flying and would be relatively small. Later and larger schooners as shown in Peterssen had separate sticks. I might have to visit Kew again and photograph some more log books to get more snippets of information. I will include detailed interpretations in my build log for Whiting, but welcome comments on this post too. George
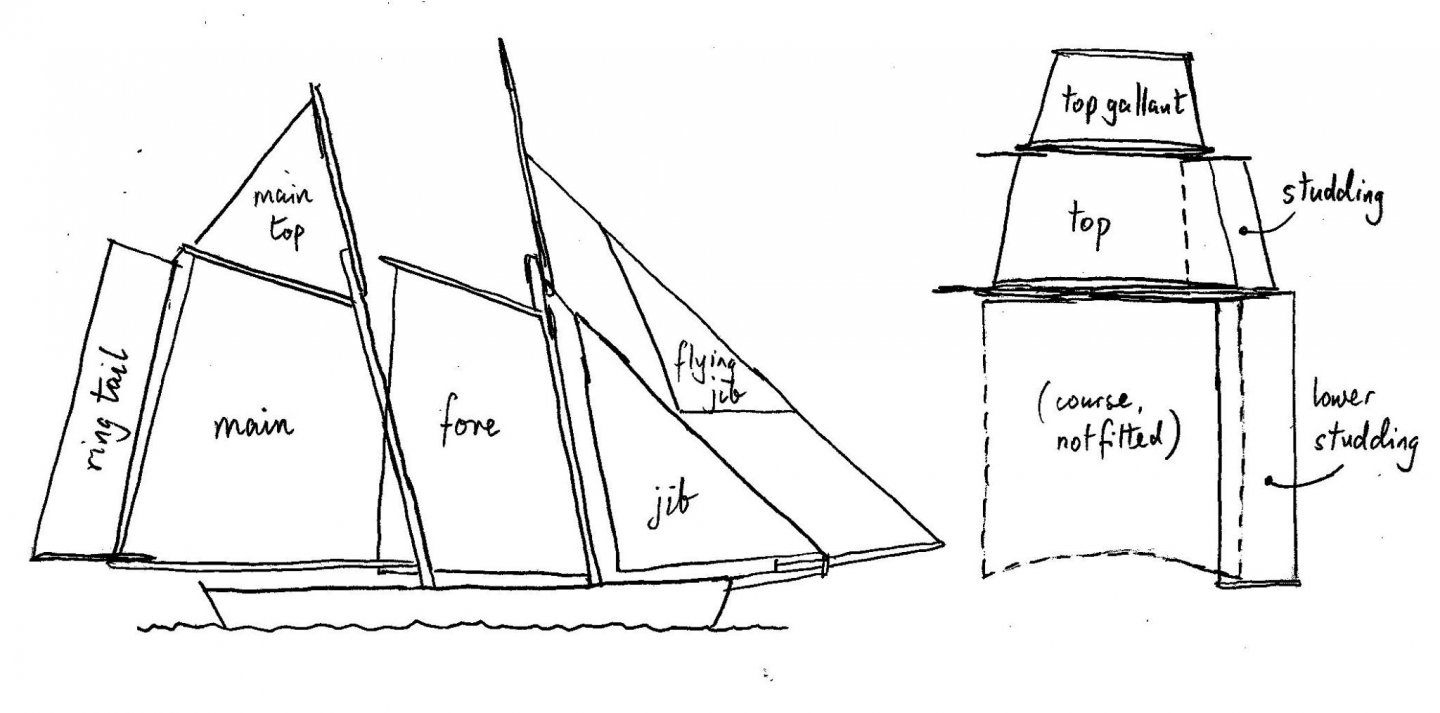
- 22 replies
-
- 4
-
-
- caldercraft
- jotika
- (and 4 more)
-
 I've been lurking around this superb forum for a while now, and thought it was about time i contributed something back. I bought this kit many, many years ago - well before i even had an inkling of how to build the thing- i just liked the lines of her! So as you can see, i've made some progress, then got stumped, and shelved the whole project for a long while. I thought it was time to bring it out of mothballs, and attempt to finish her. For the most part, i've just been following the build instructions. I deviated a little by adding the balsa fillers at the stem and stern. I've got to the stage where i have faired the hull (as much as is possible with the bow piece, keel and stern piece fitted), and am about to start the first layer of planking. The instructions ( such as they are) tell you to first fit the deck facias. Both of these sit proud of the deck to where the planks would go. That seems ok for the rear one. My first question for those of you who have built this kit is: should the forward facia be sanded flush with the edge of the bulkhead to allow smooth flow of the planking? Beileive it or not, it doesn't even mention it in their instructions. I have measured the distances on the supplied plans for the position of the first run of planking, (last image) and got them just about right i think (unless someone can tell me differently).
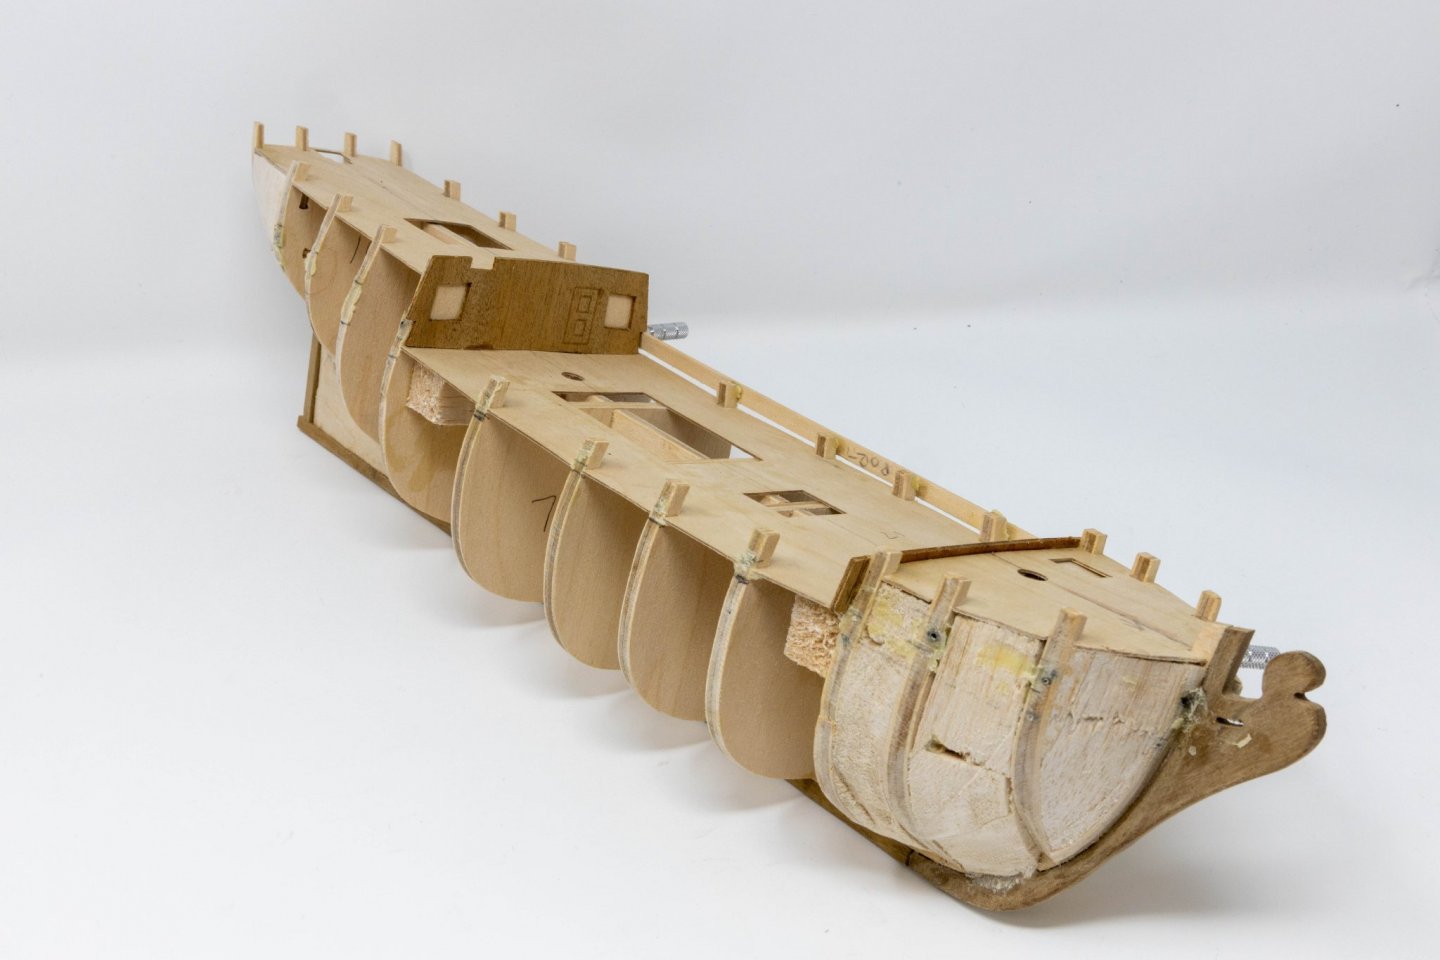
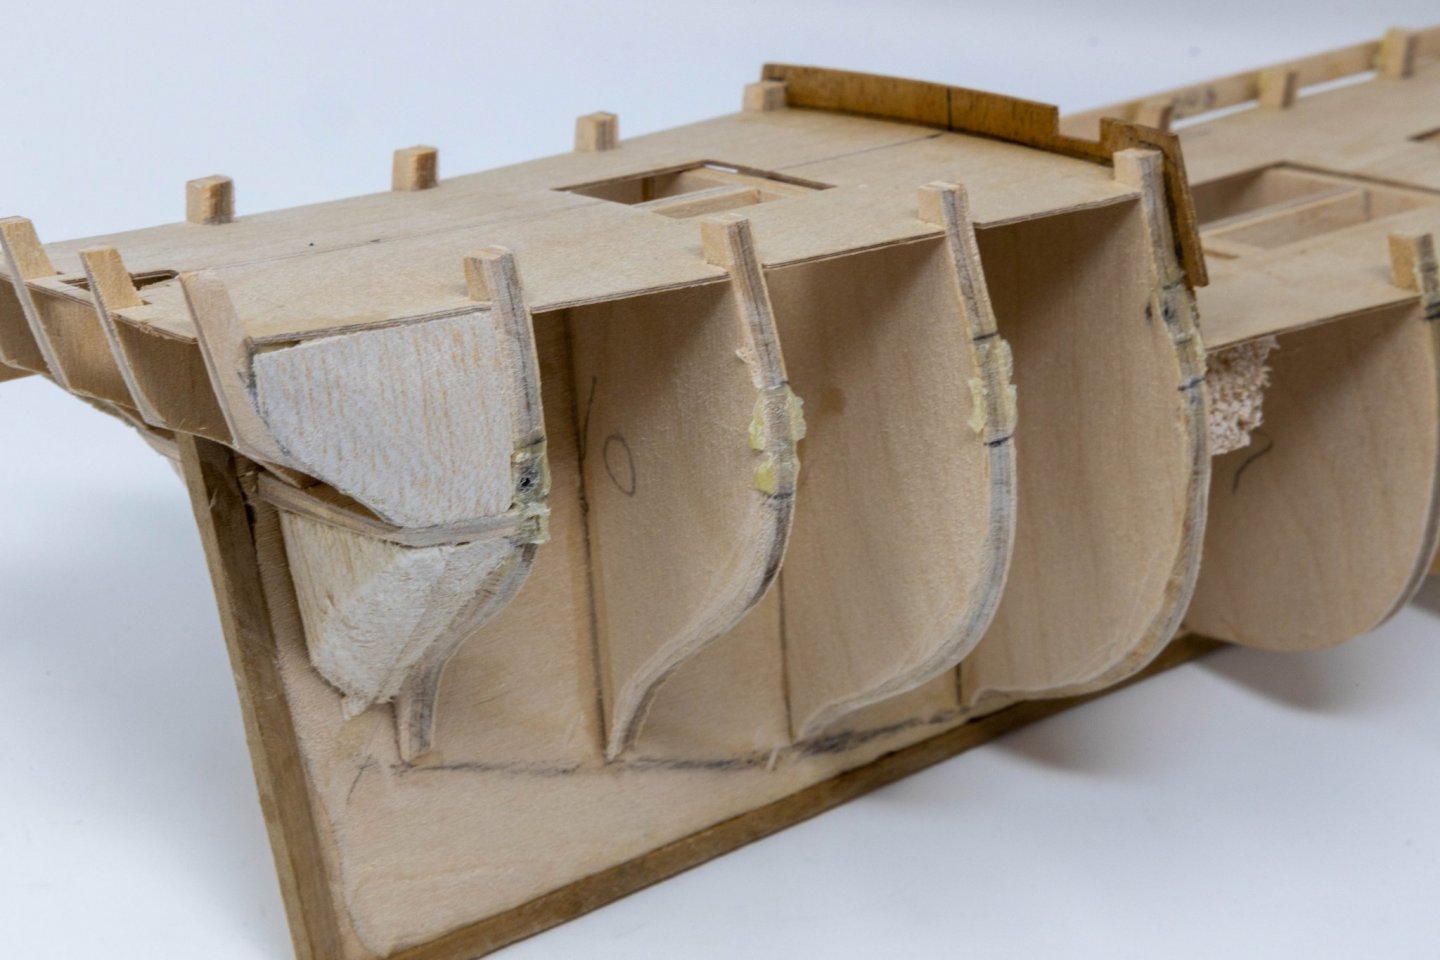
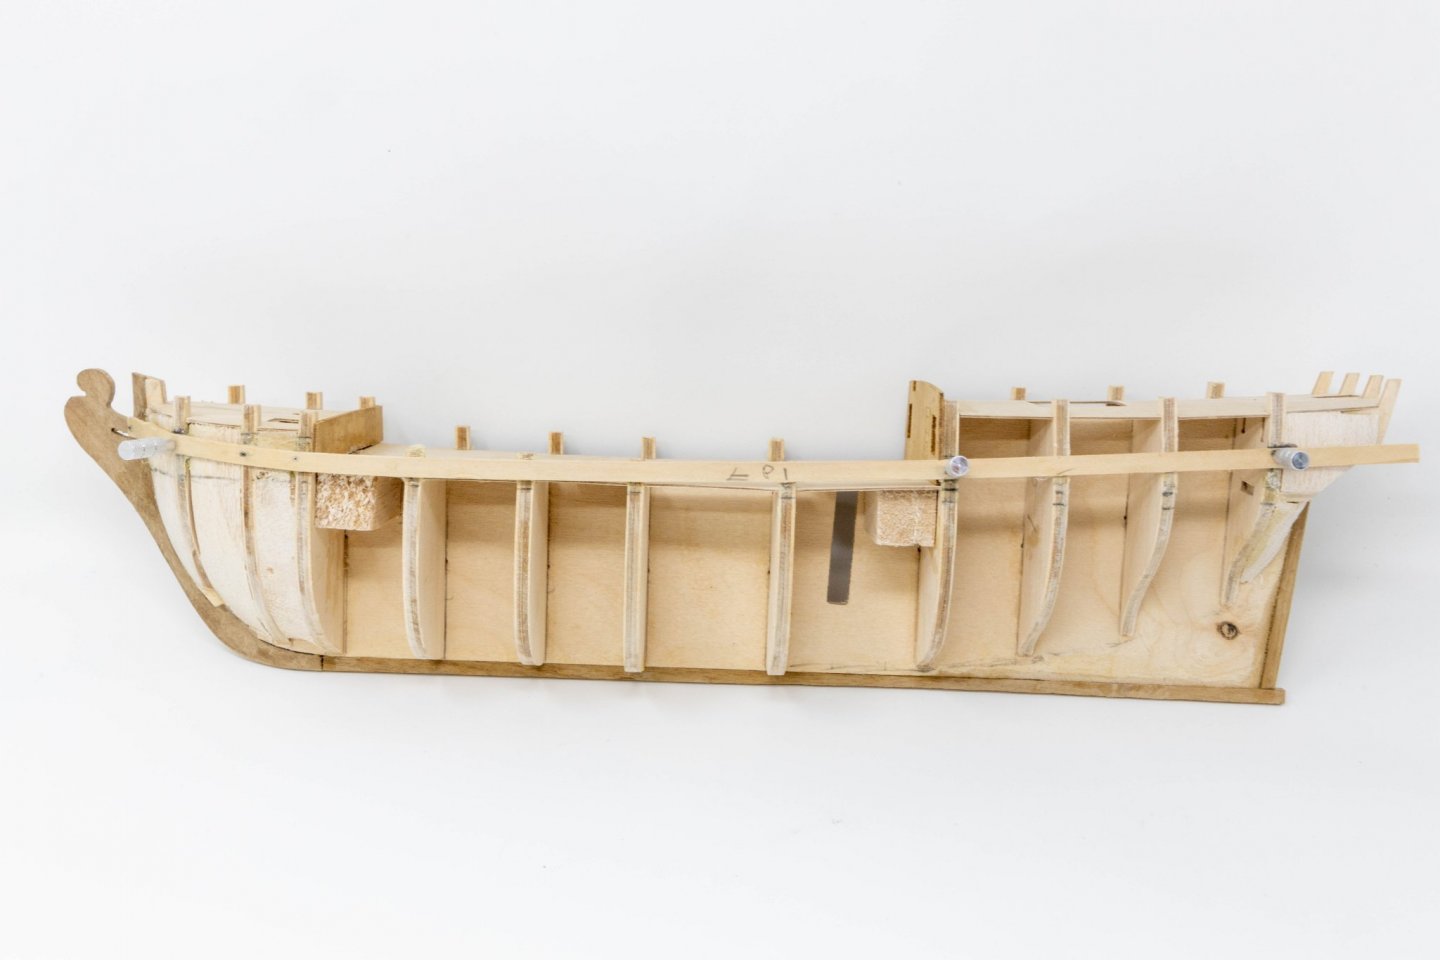


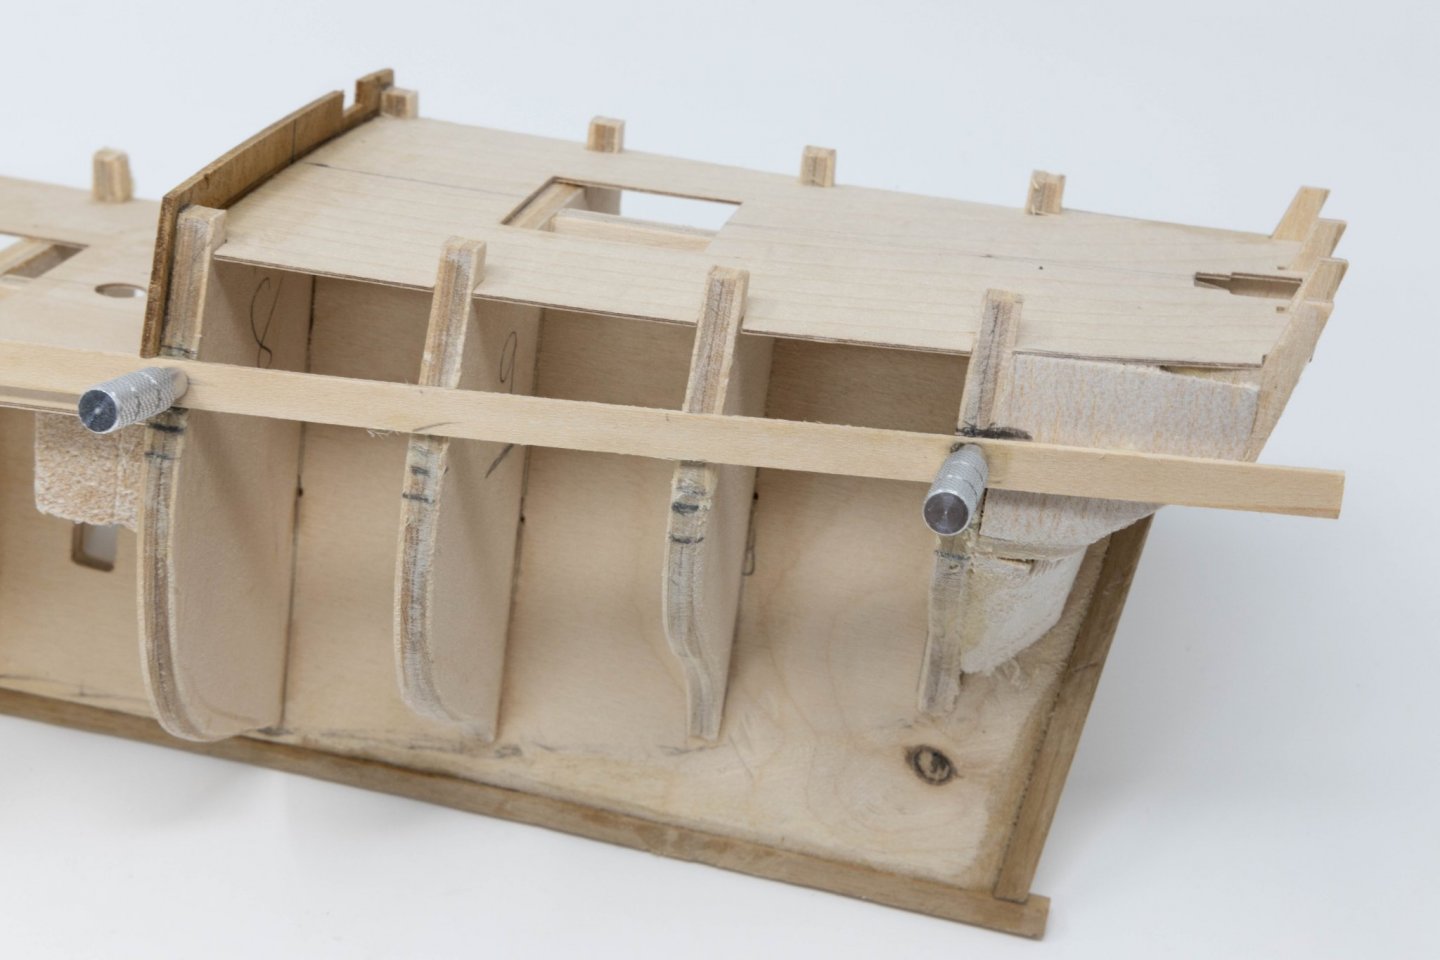
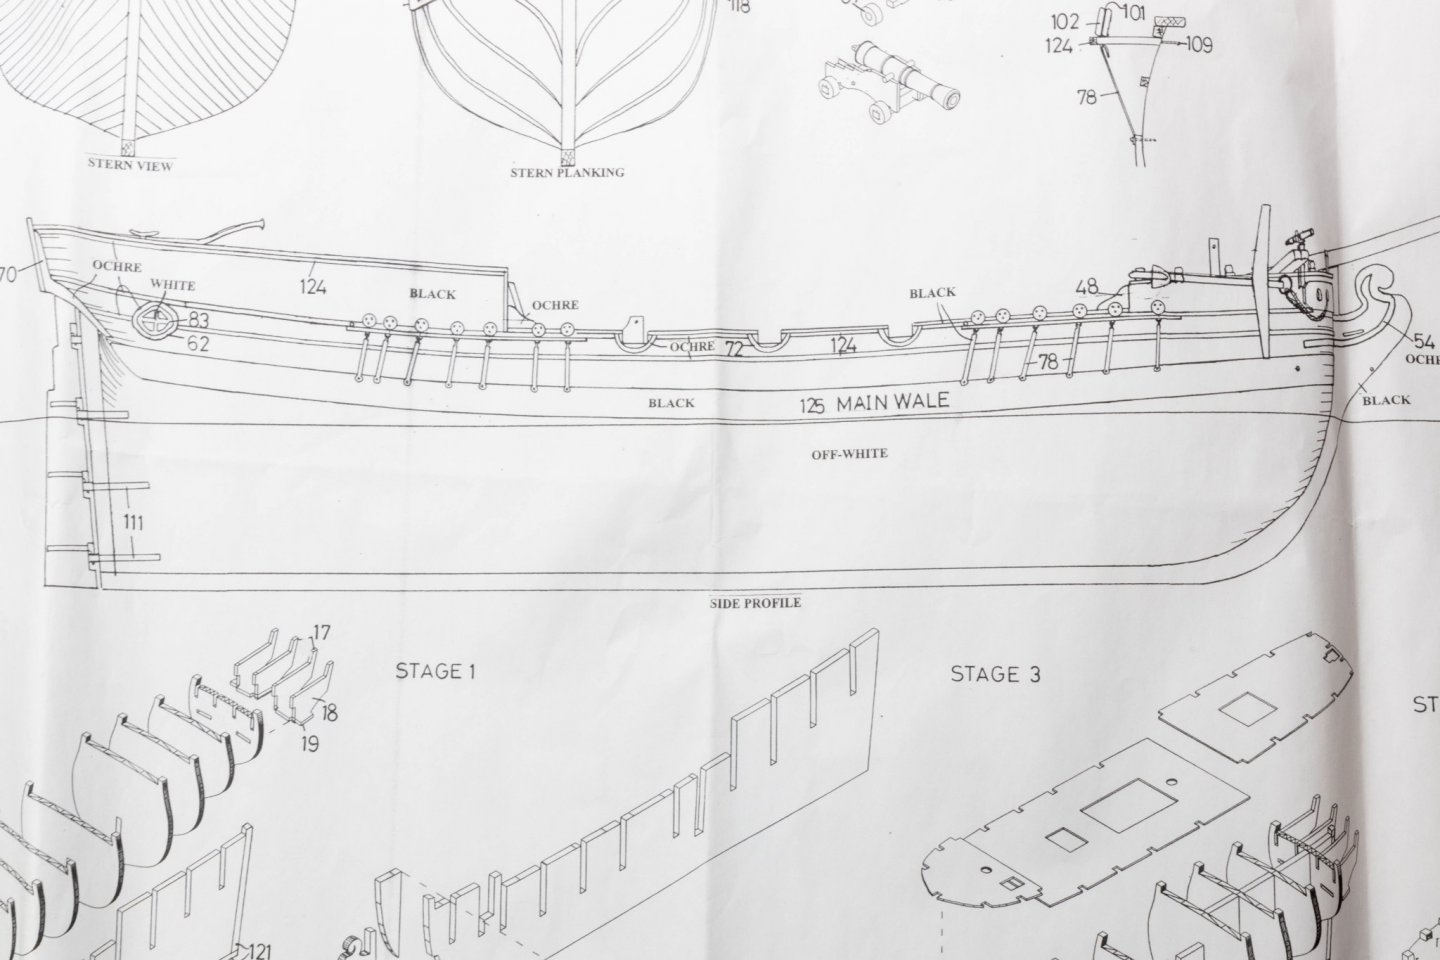
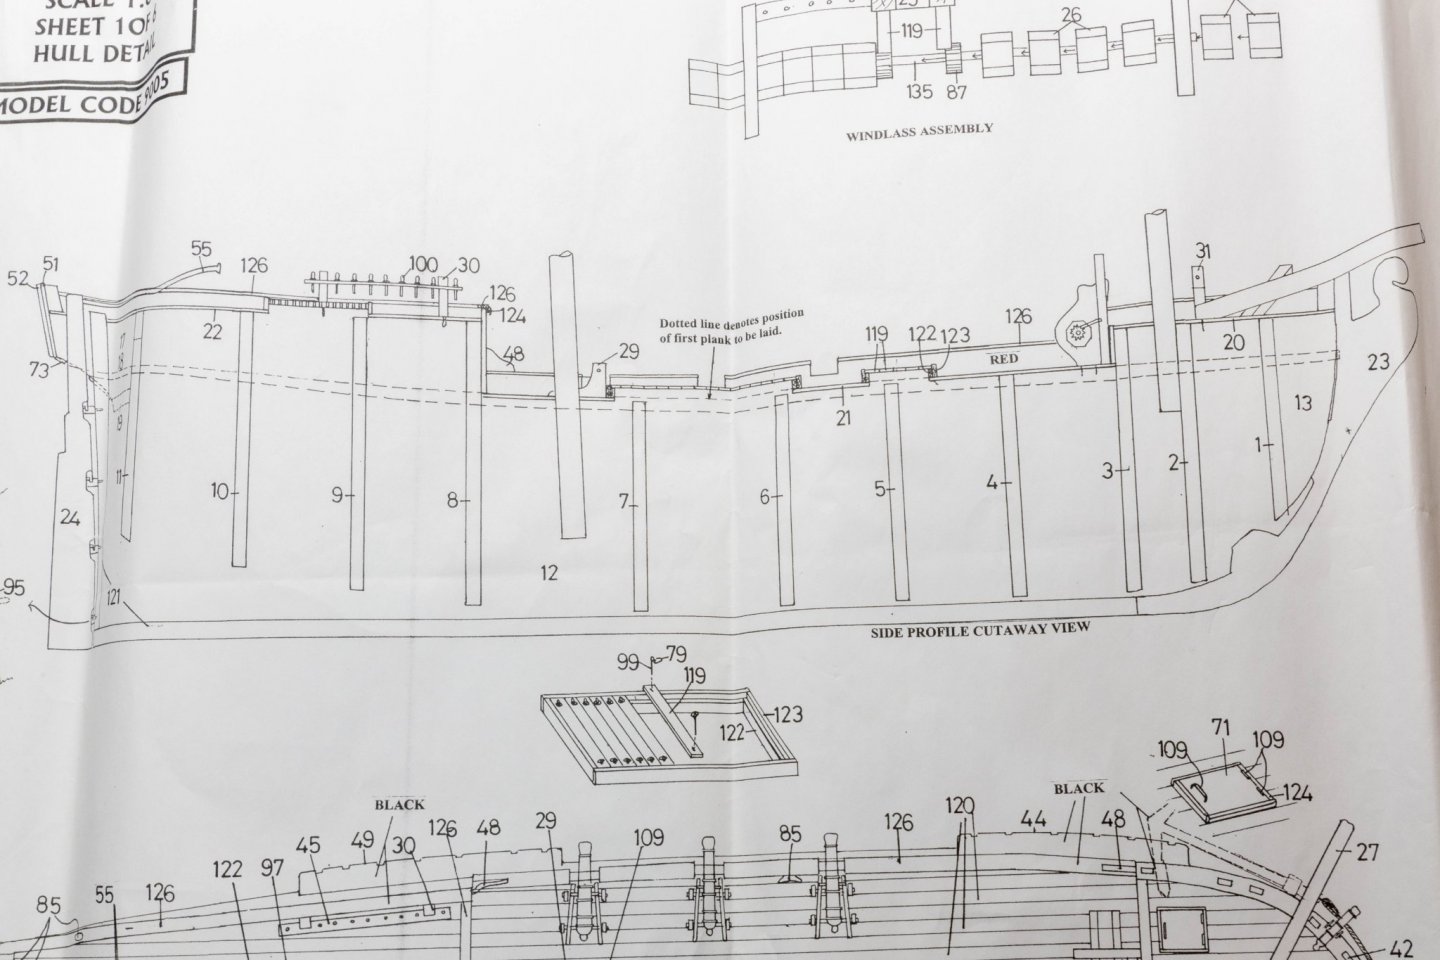

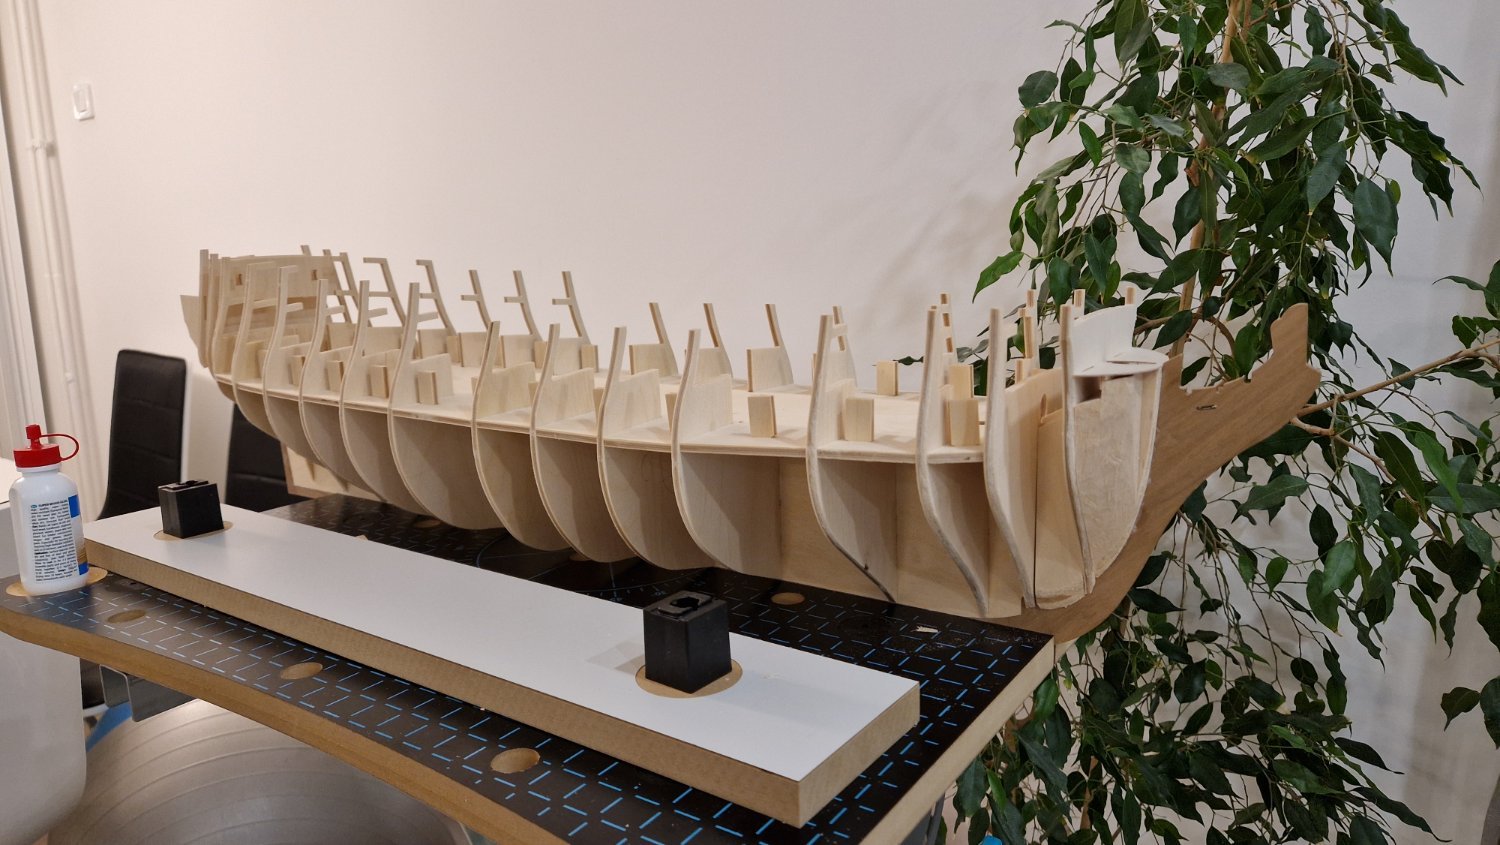

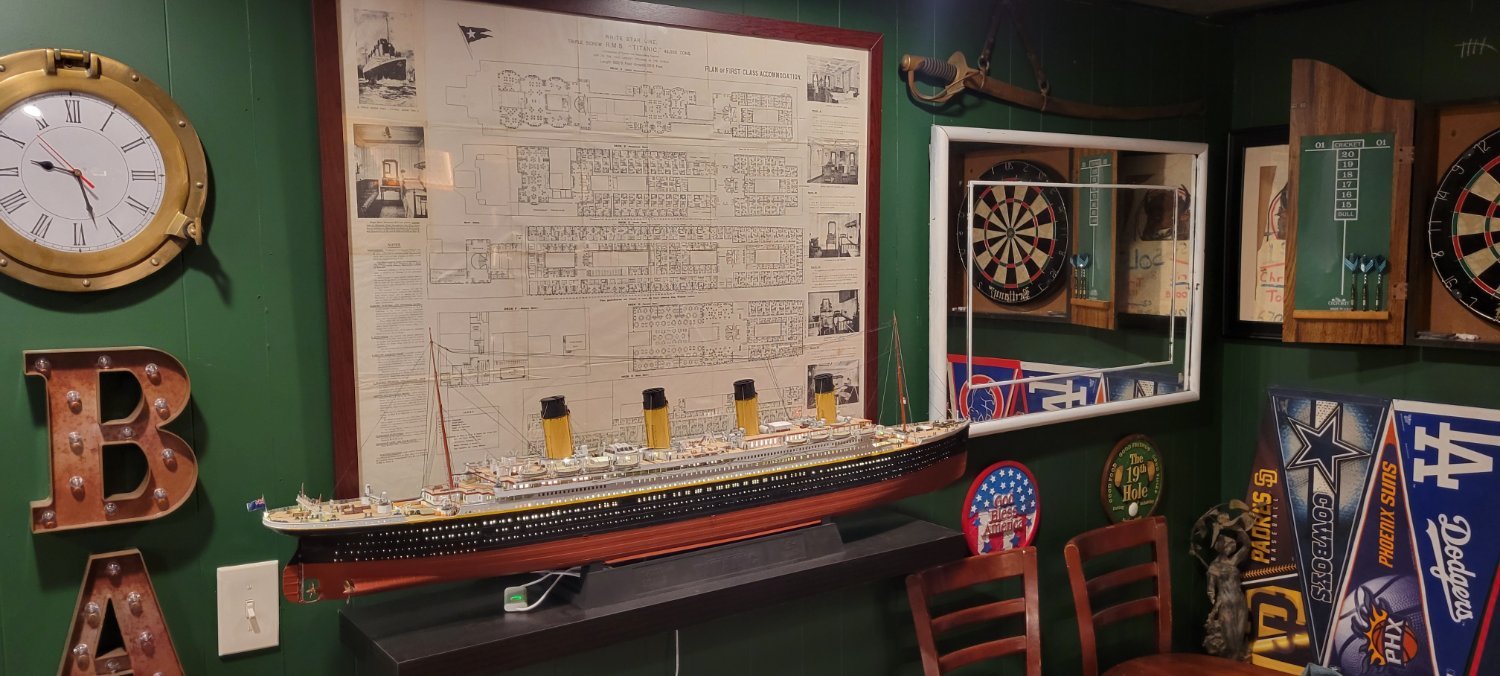


.jpg.123a6ec8182b77e9f1b75da52933f599.jpg)

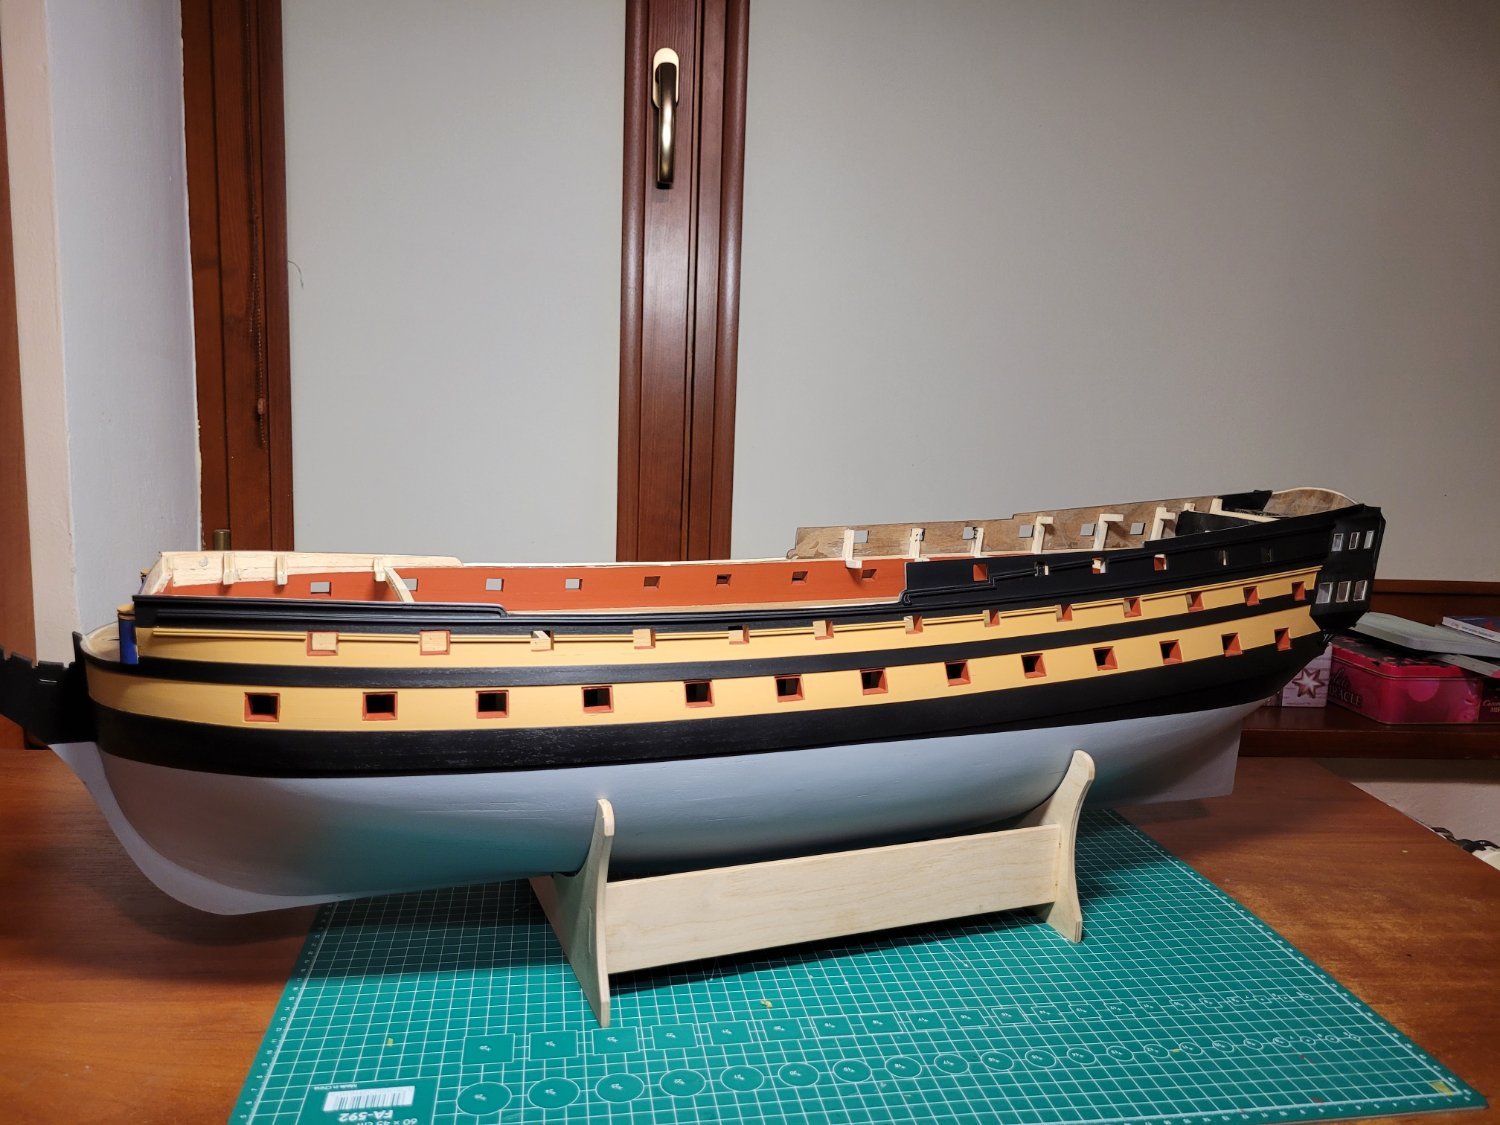


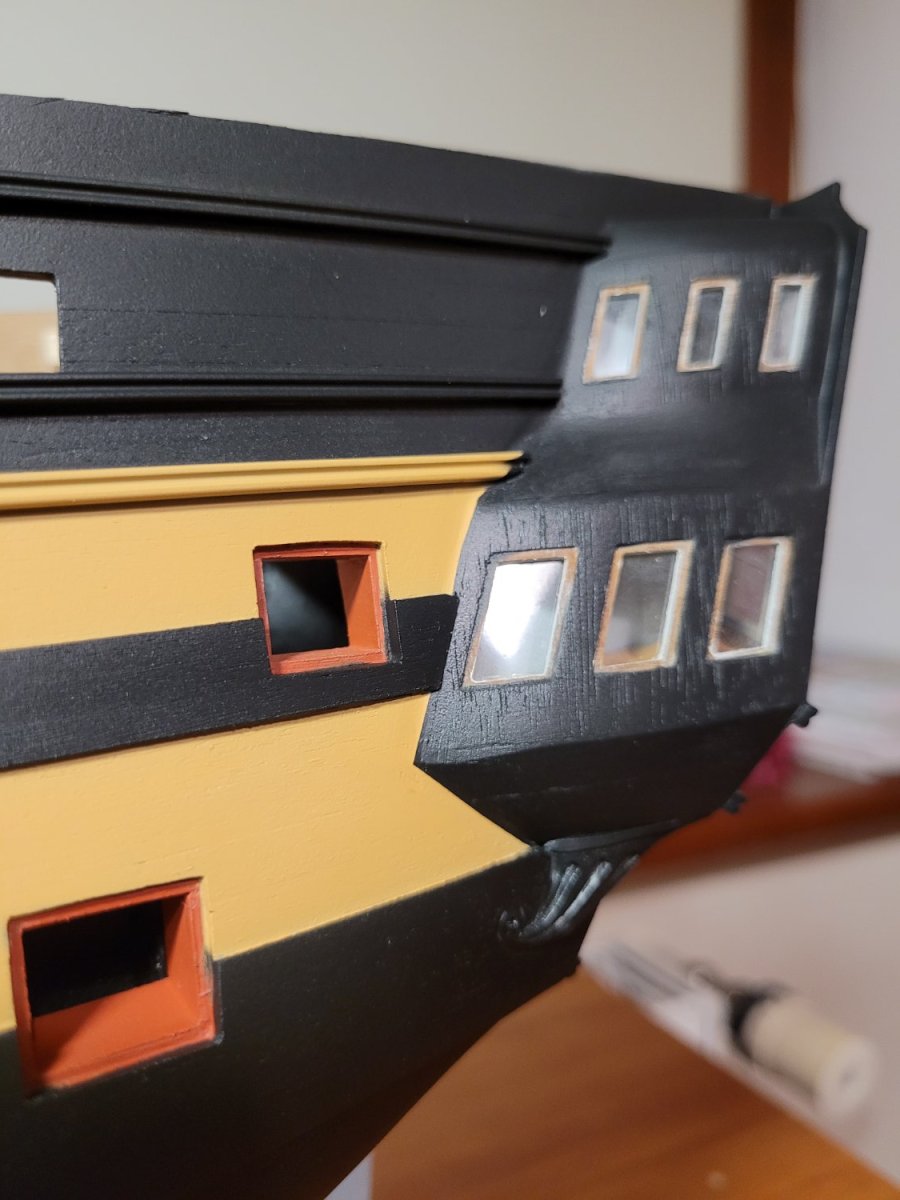
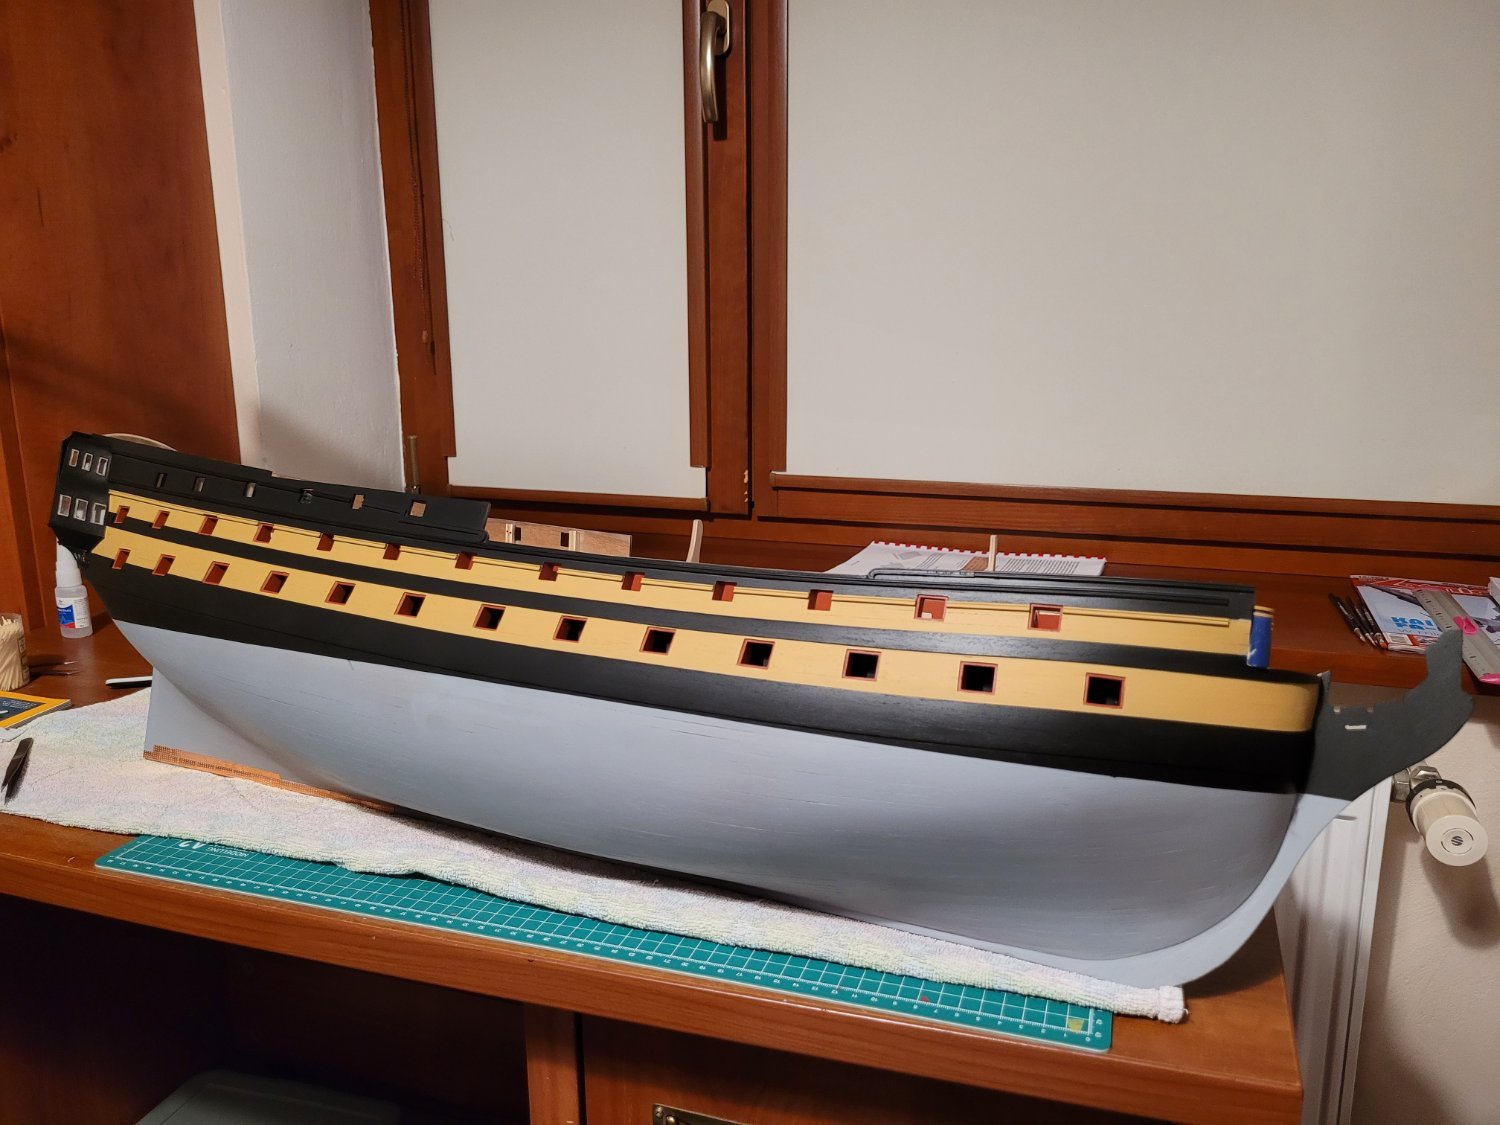
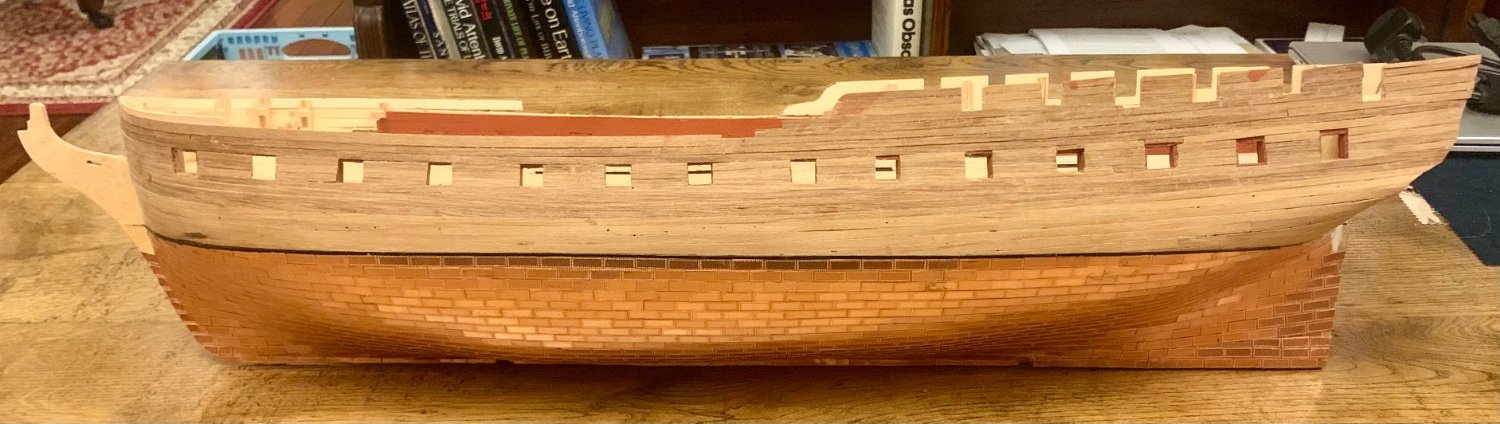
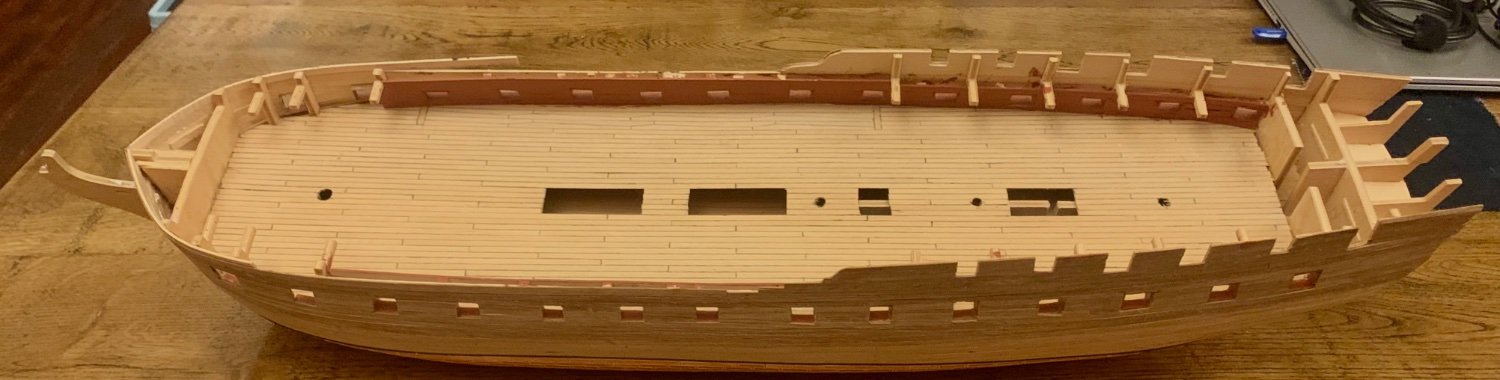

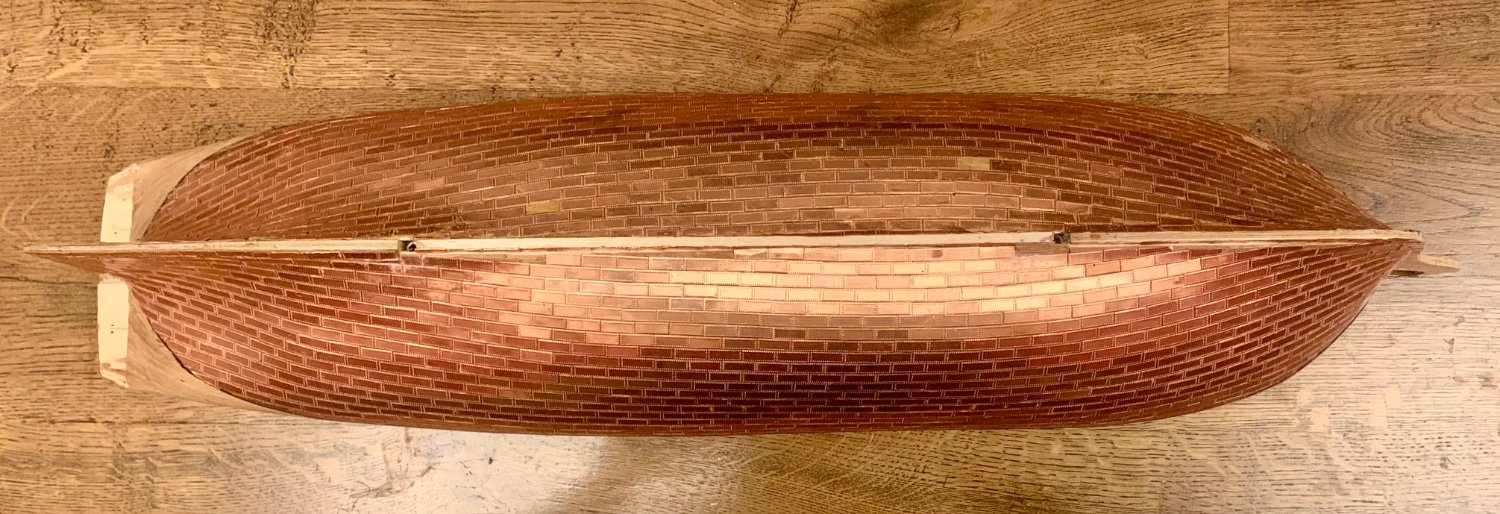
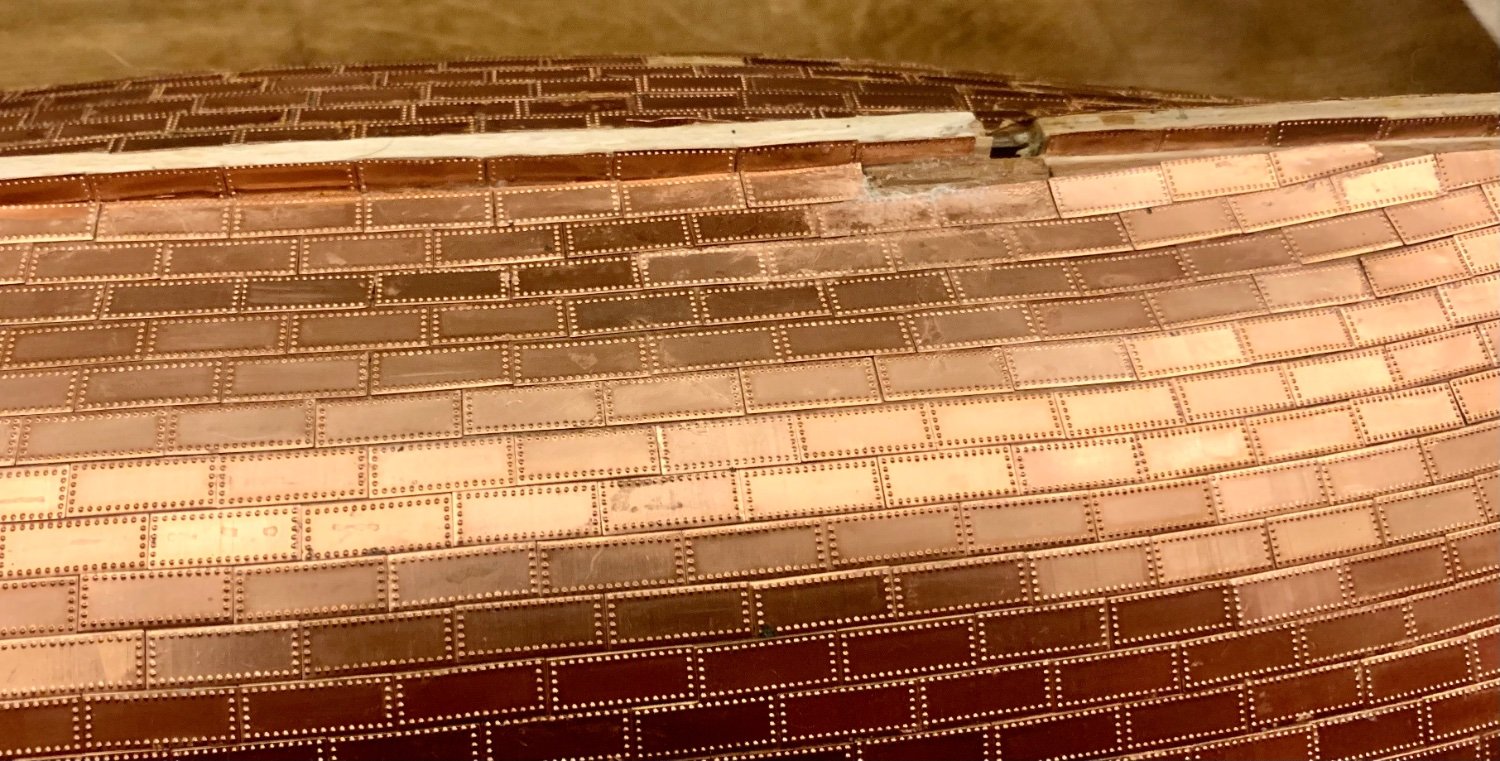


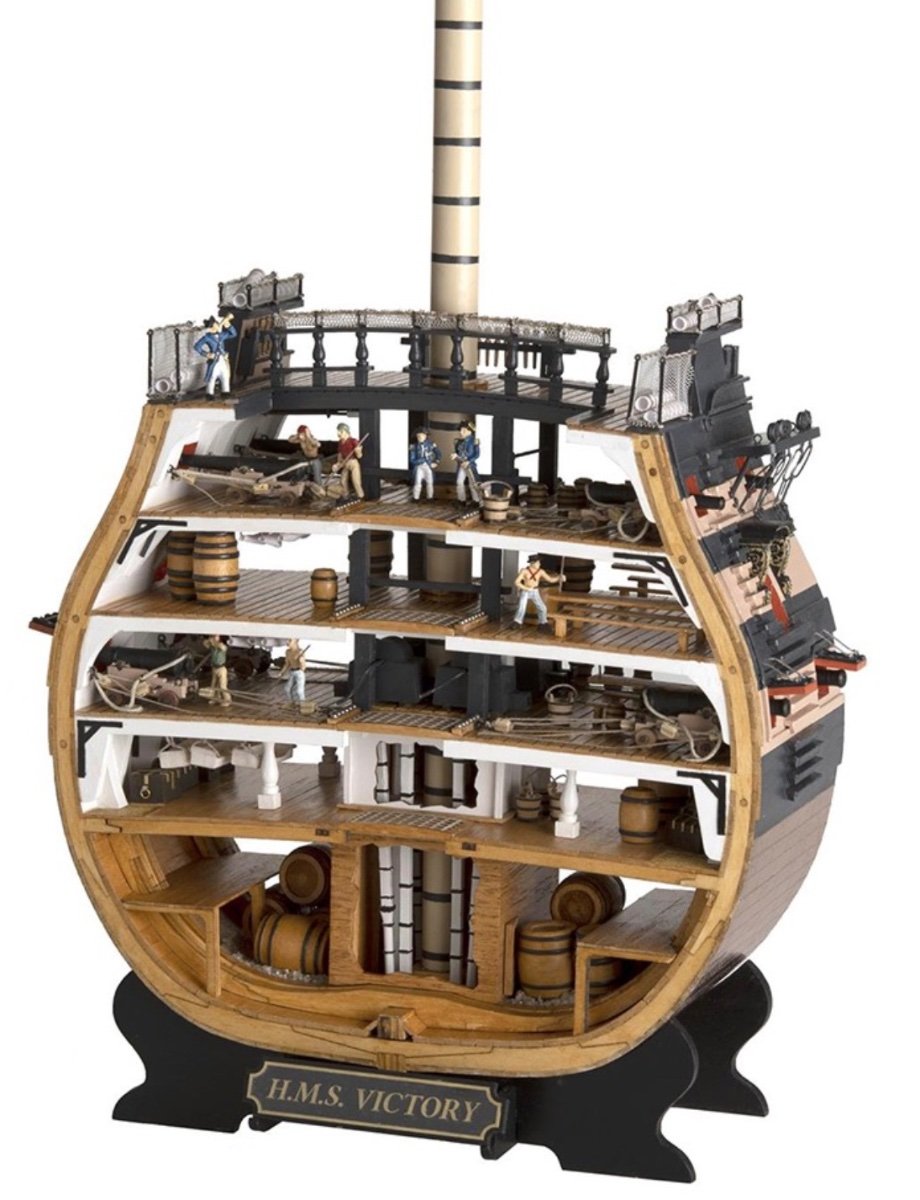


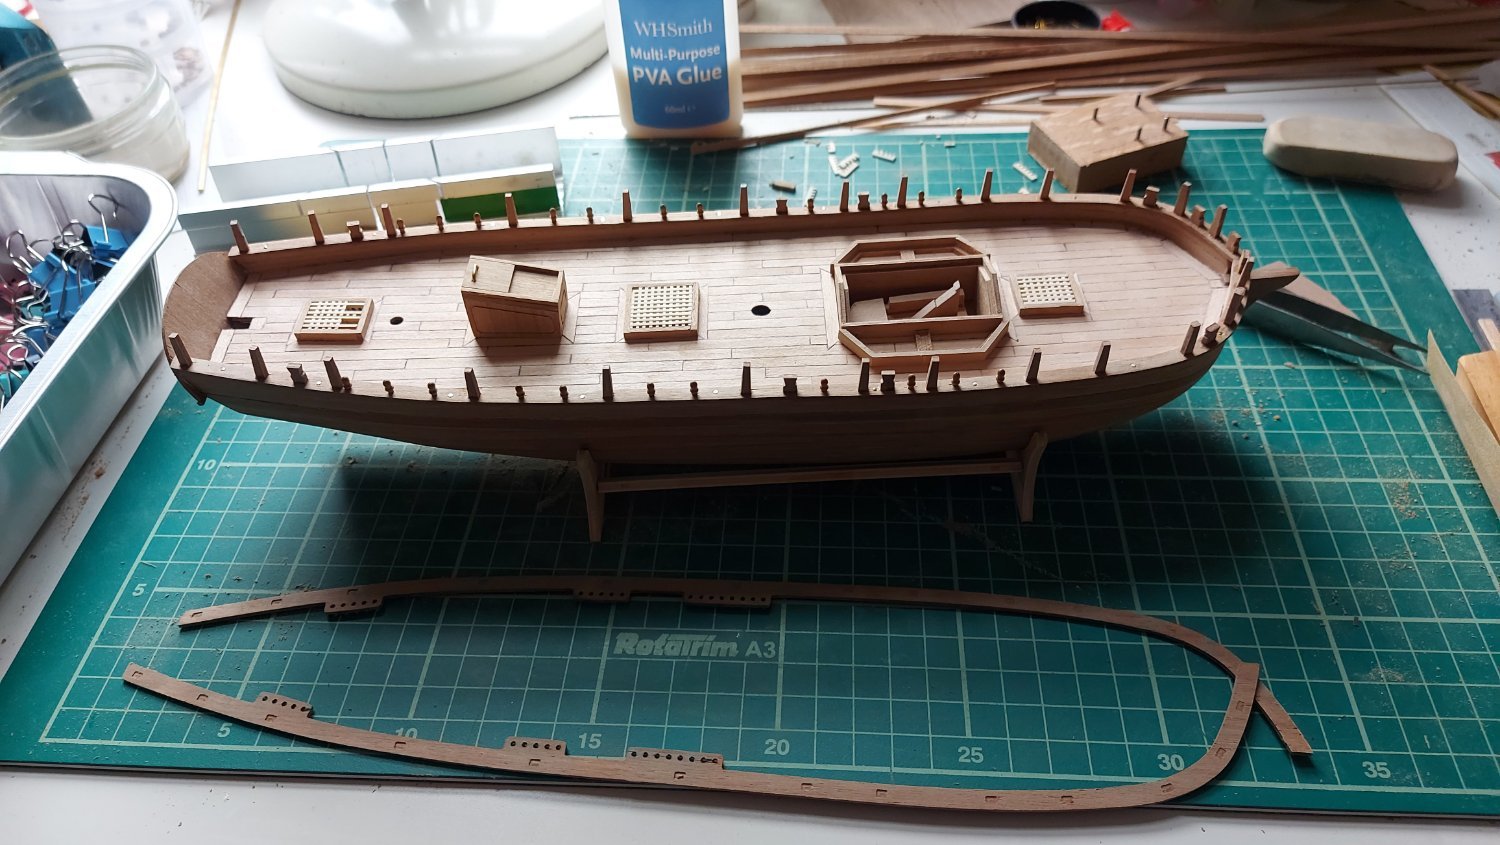

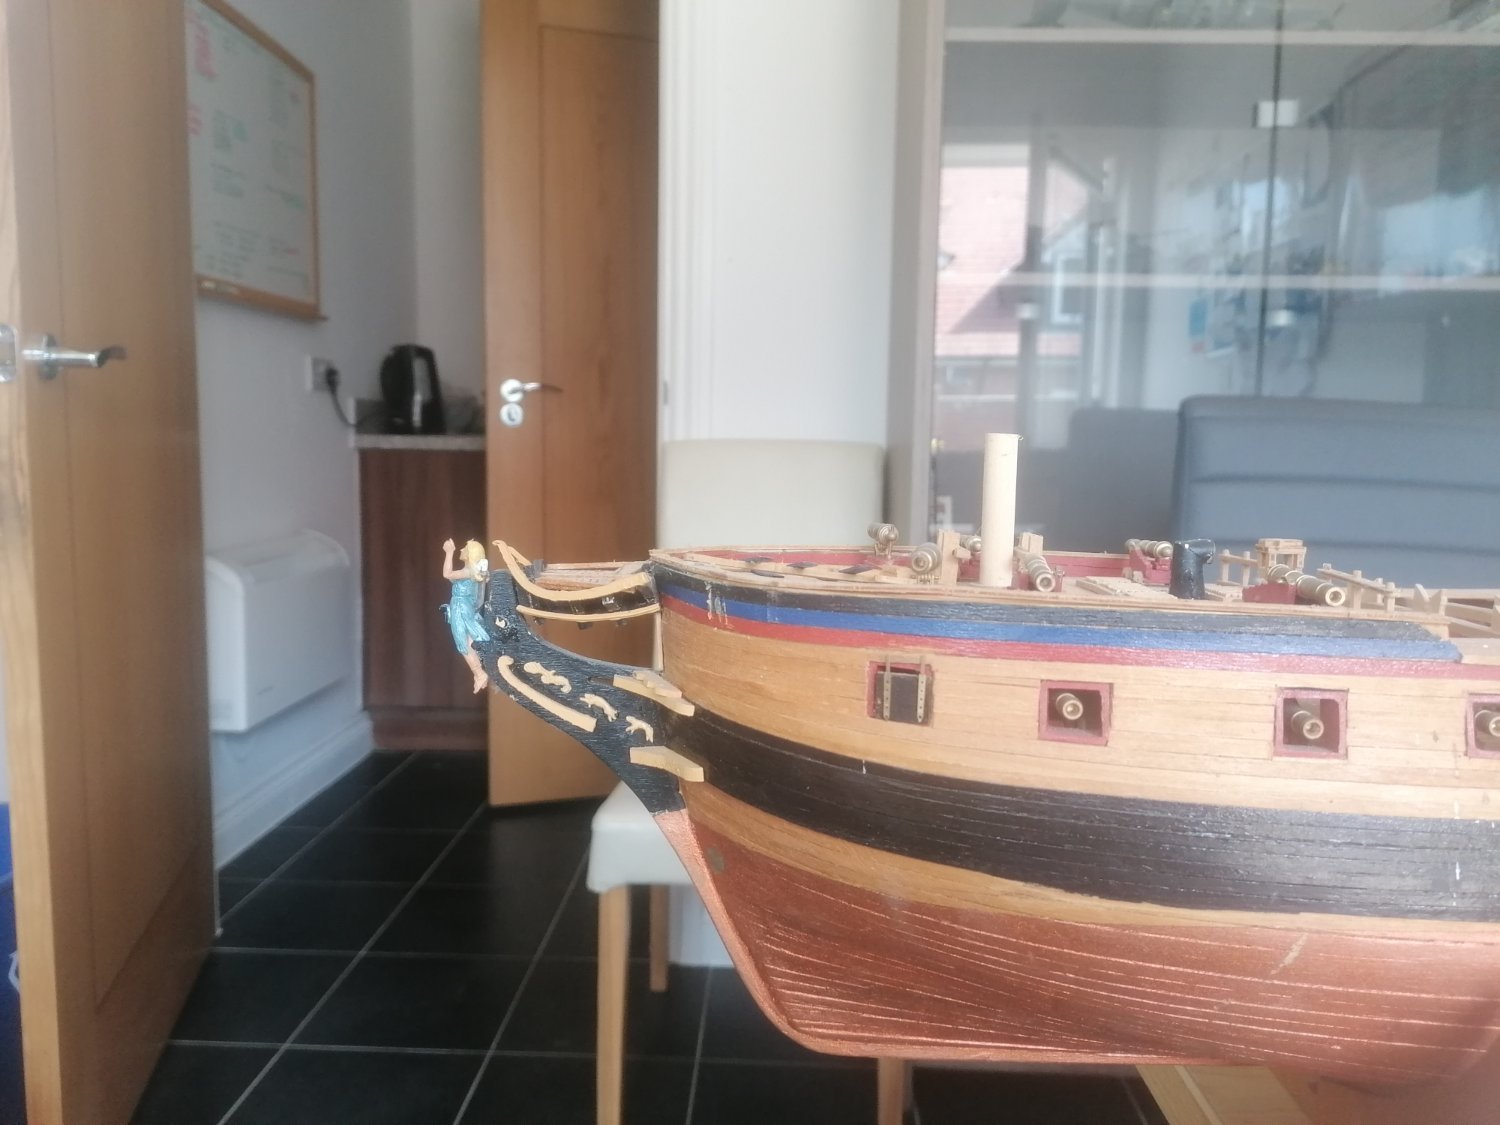
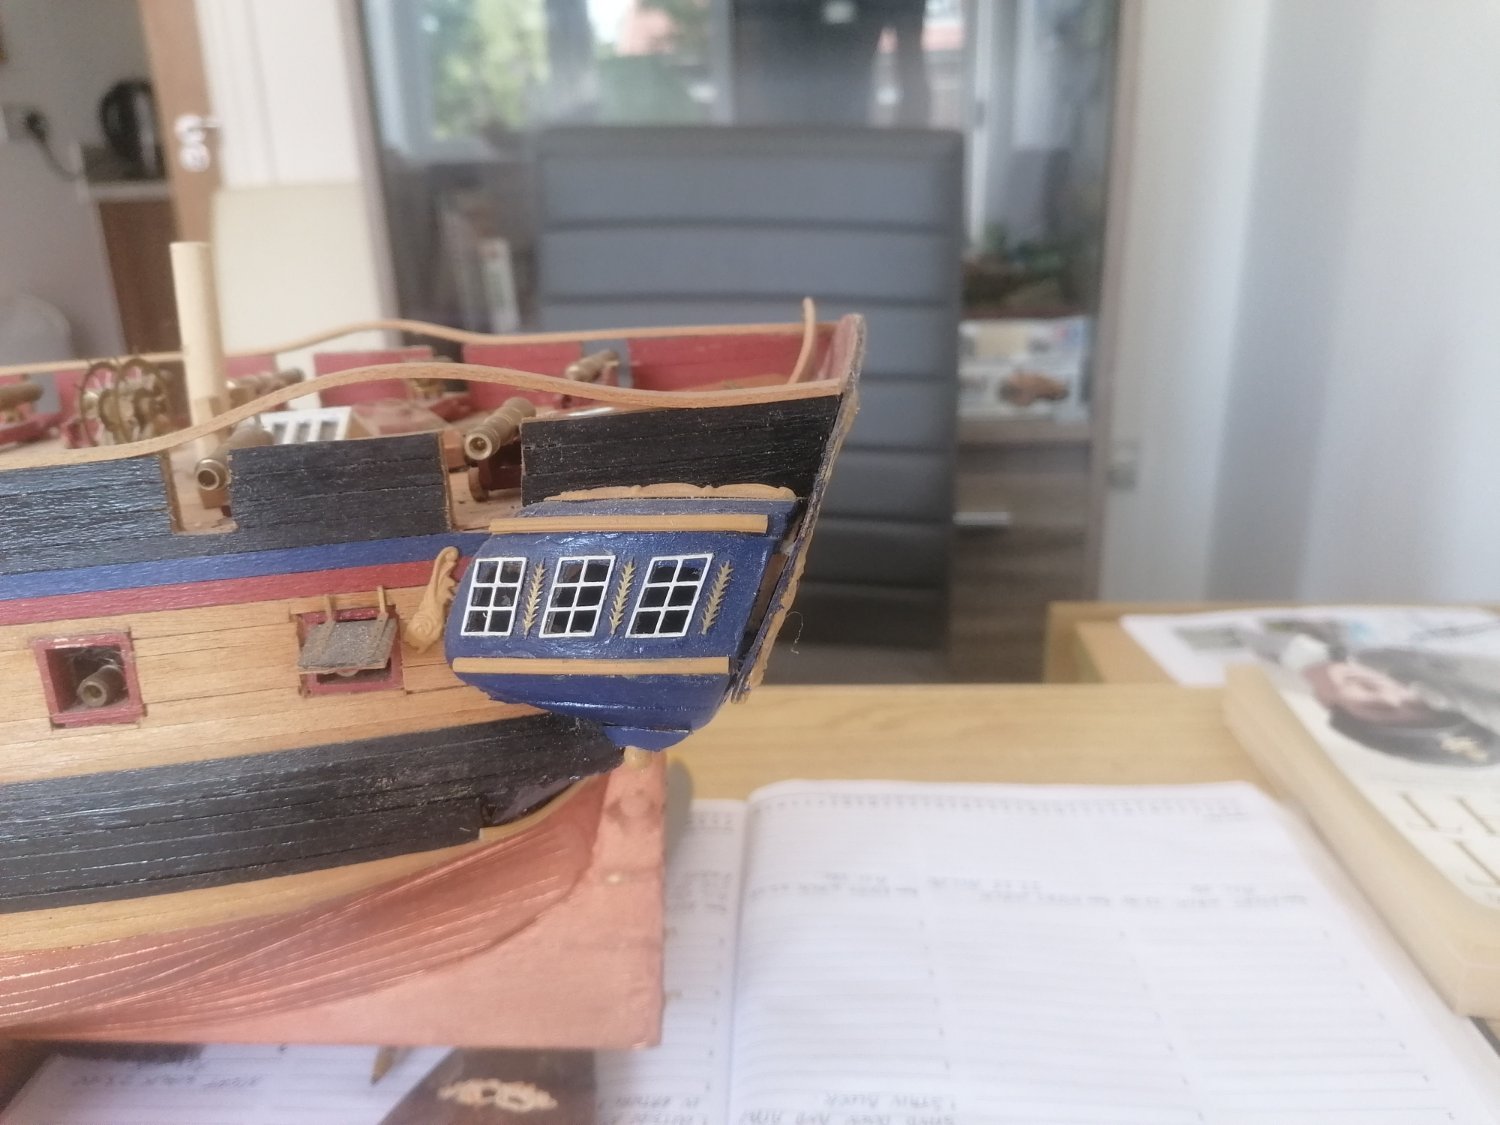
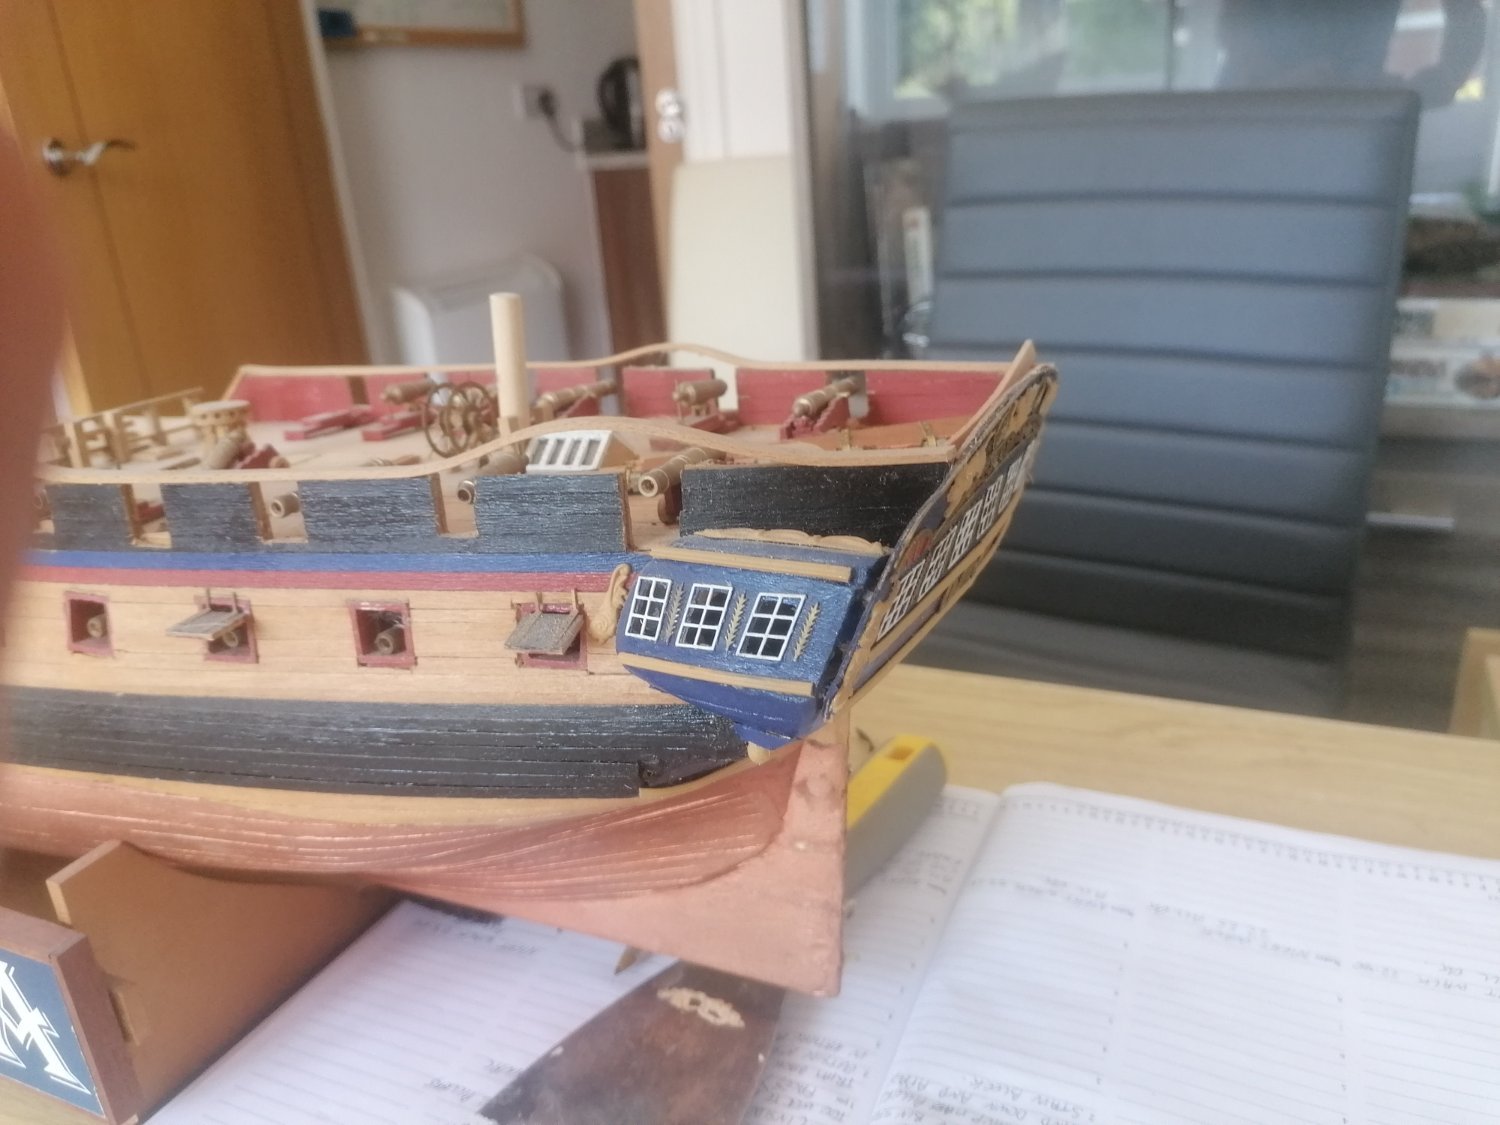


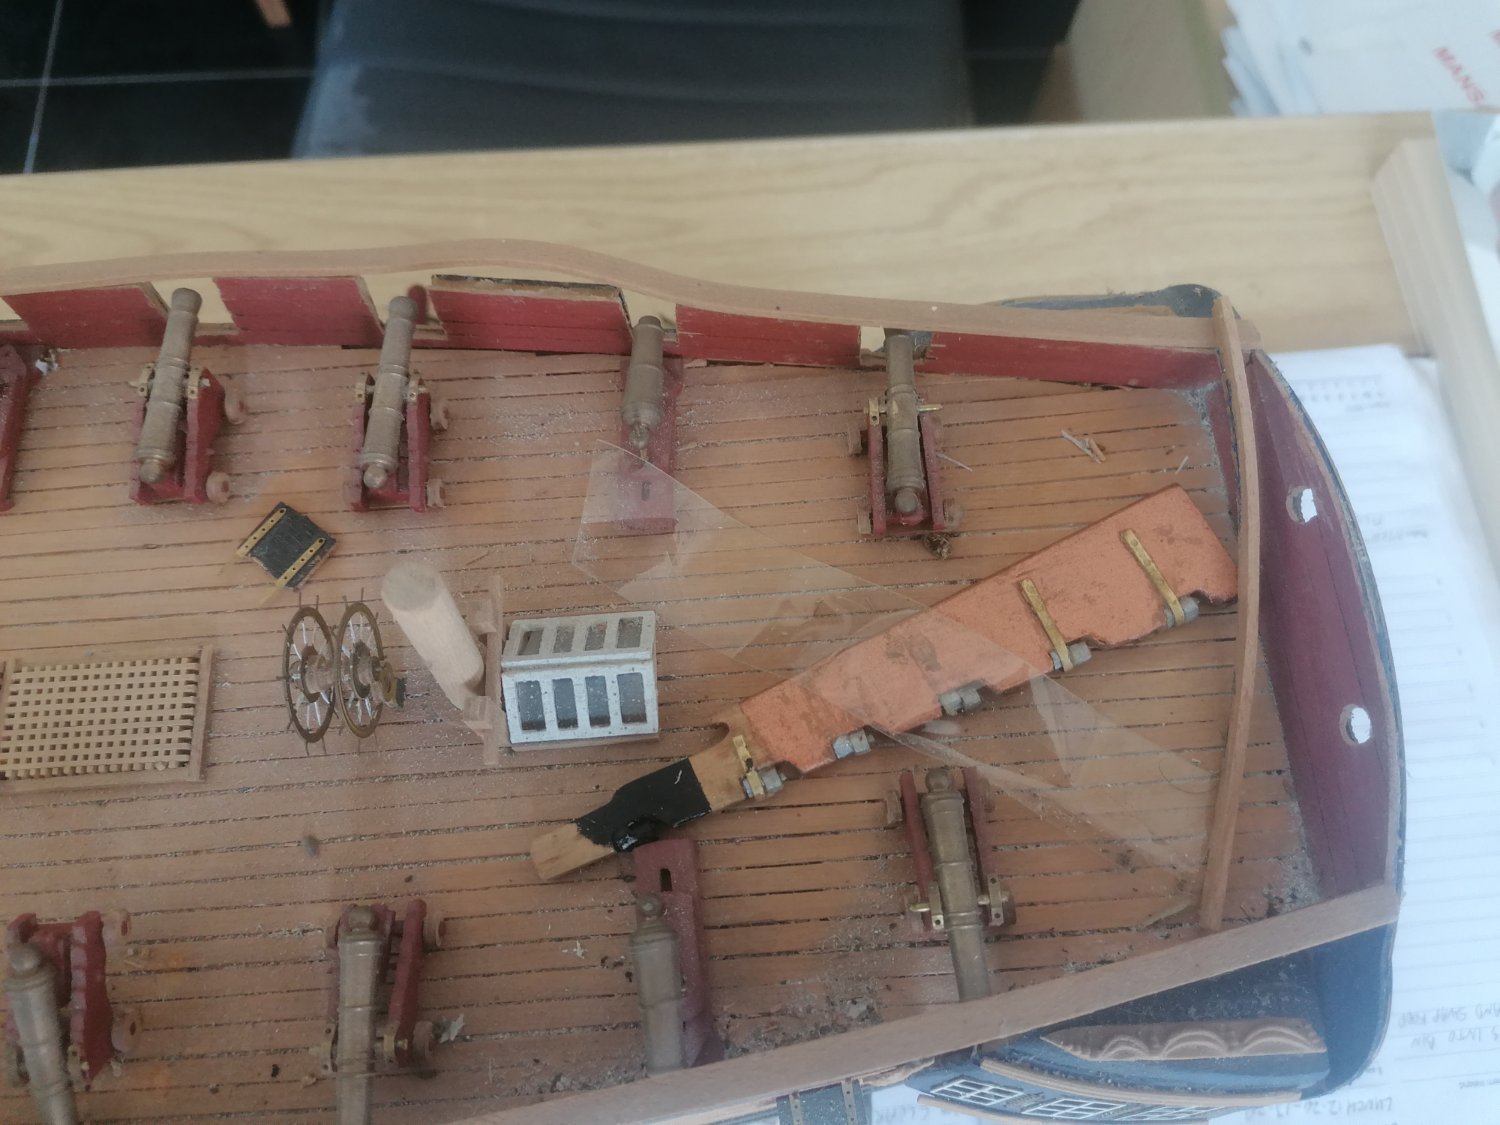

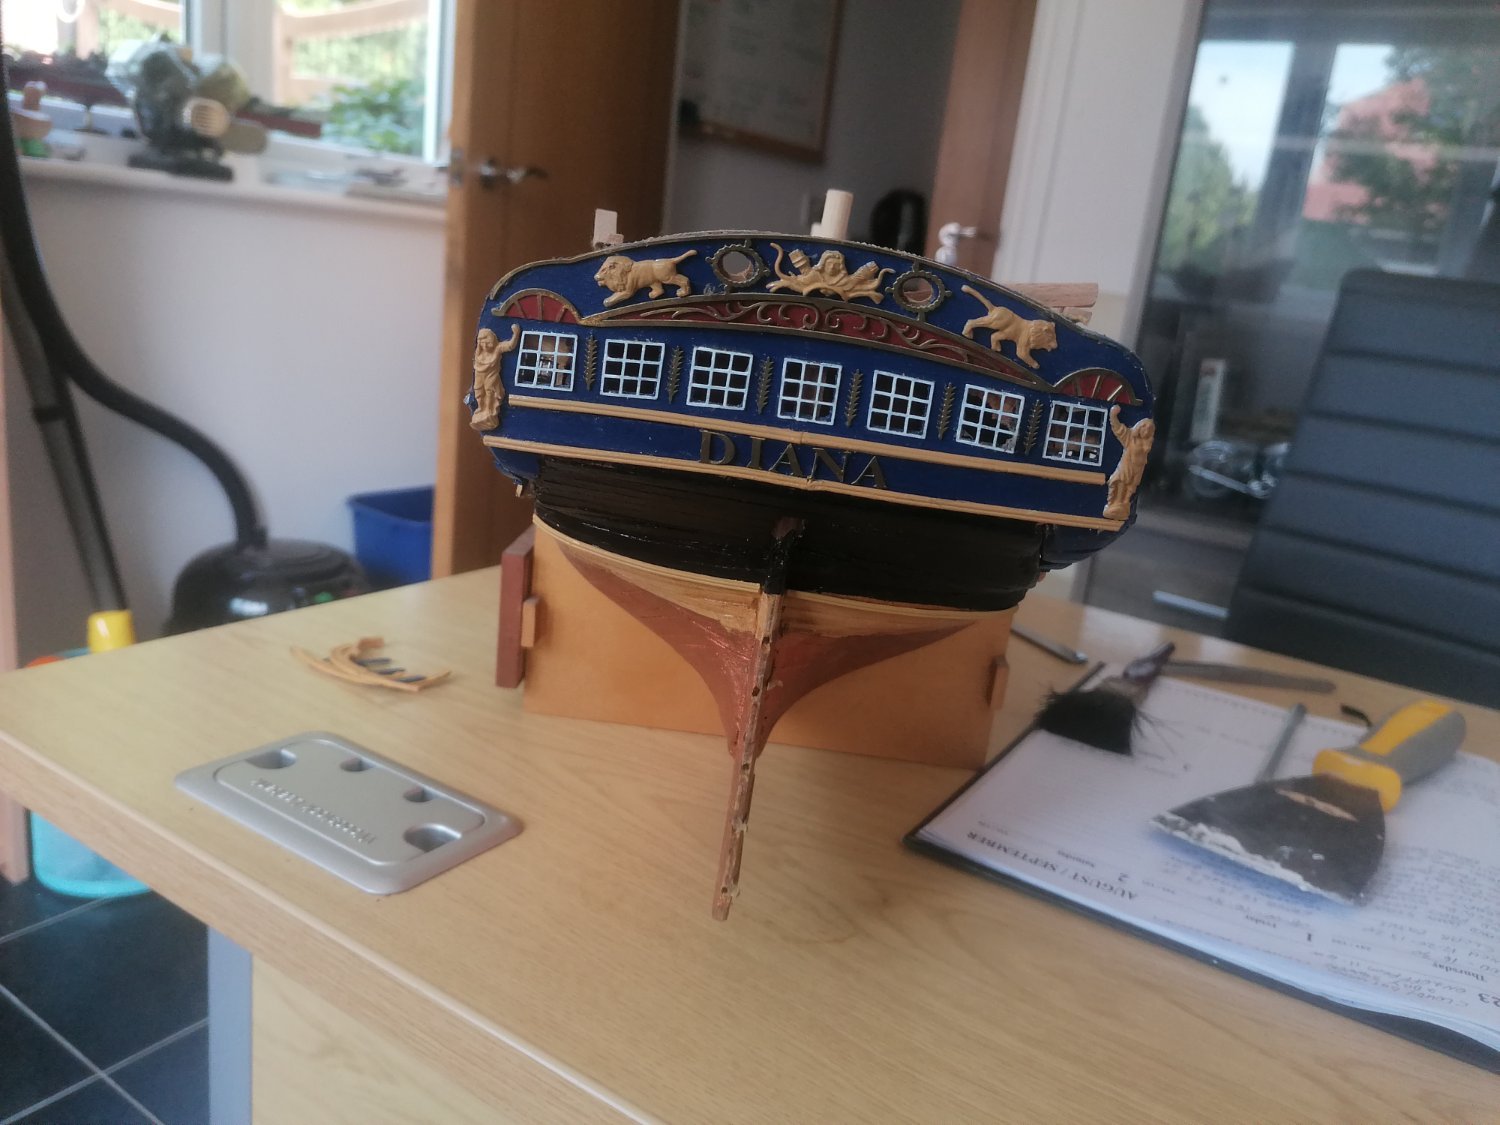


.jpg.668dea2f809628cc68f73f8e7d569bf8.jpg)
.jpg.2243b5d813accdae760a6174e0d196ec.jpg)