Search the Community
Showing results for tags 'clipper'.
-
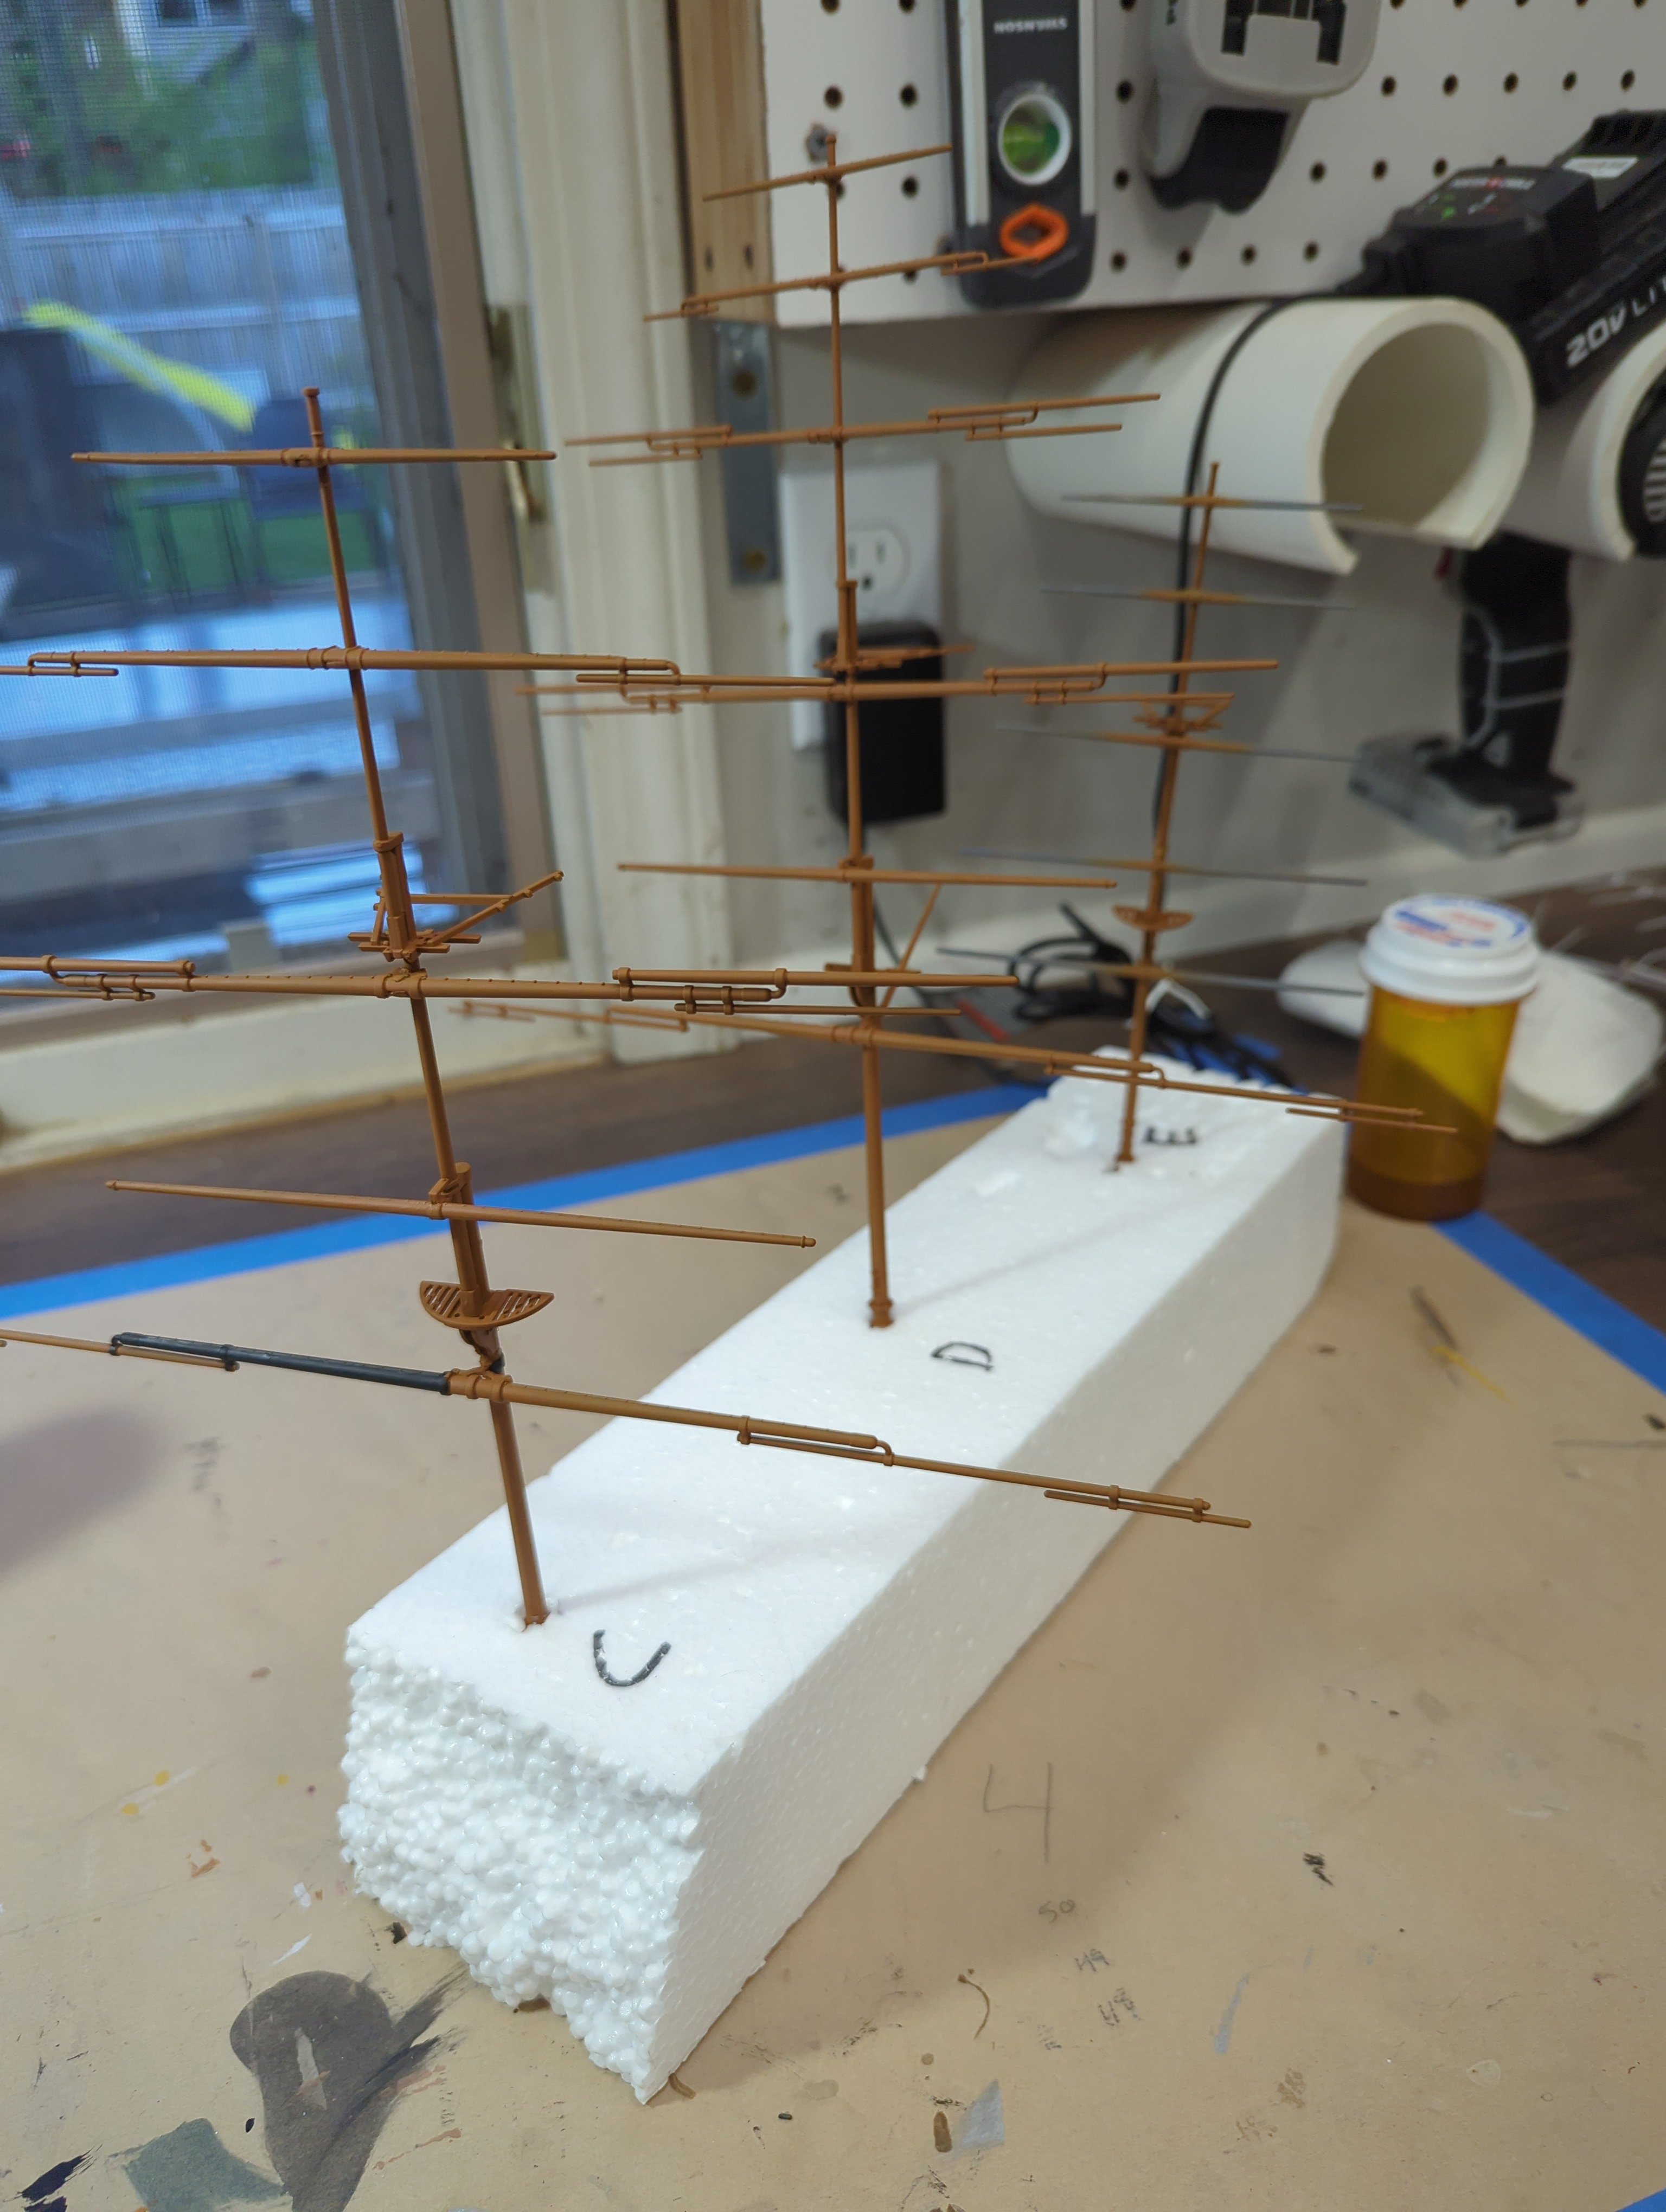
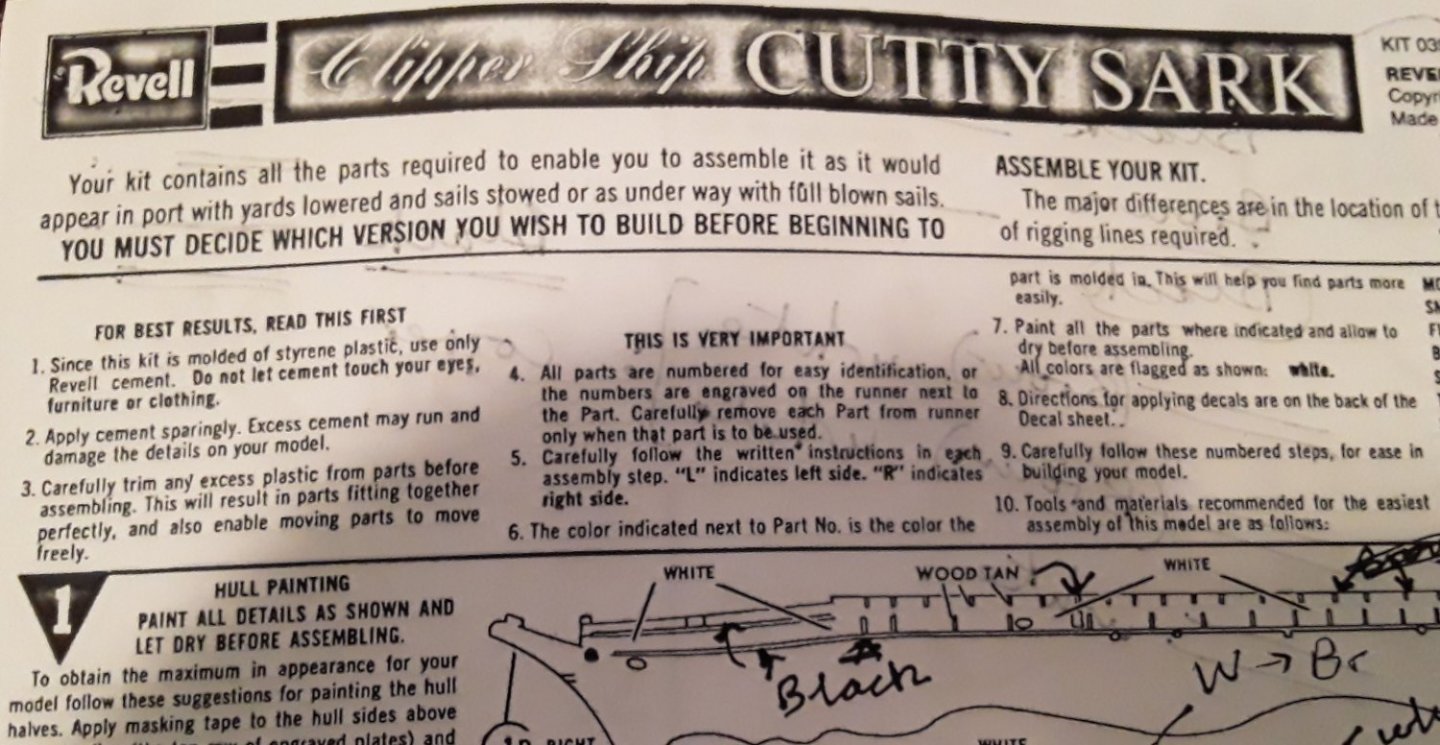
 Hi all, I'm new here. First build log. Got back into modeling of late and finally joined the forum. I tinkered around a bit with some other kits to build some skills and I feel like this one is where the practice and patience is starting to pay off. I actually kind of feel guilty about how well this kit has gone, almost too easy. Anyone else have experience with this kit? Zero flash. All parts have fit perfectly so far. I know this is not how it usually is. I have been bumbling my way back into the hobby and have made lots of mistakes and am probably still doing things incorrectly, so constructive criticism is welcome from all of you, masters. Obviously I need to do a lot of touch up painting. One question I have is how to paint the masts? The instructions say to paint everything brown, but I think that looks kind of dumb and probably isn't accurate. Any suggestions or good sources to go to for ideas? Starting this build log part way into the project already, so apologies for no earlier pictures. But here is where it lies today.

- 4 replies
-
- 4
-

-
- Cutty Sark
- clipper
- (and 2 more)
-
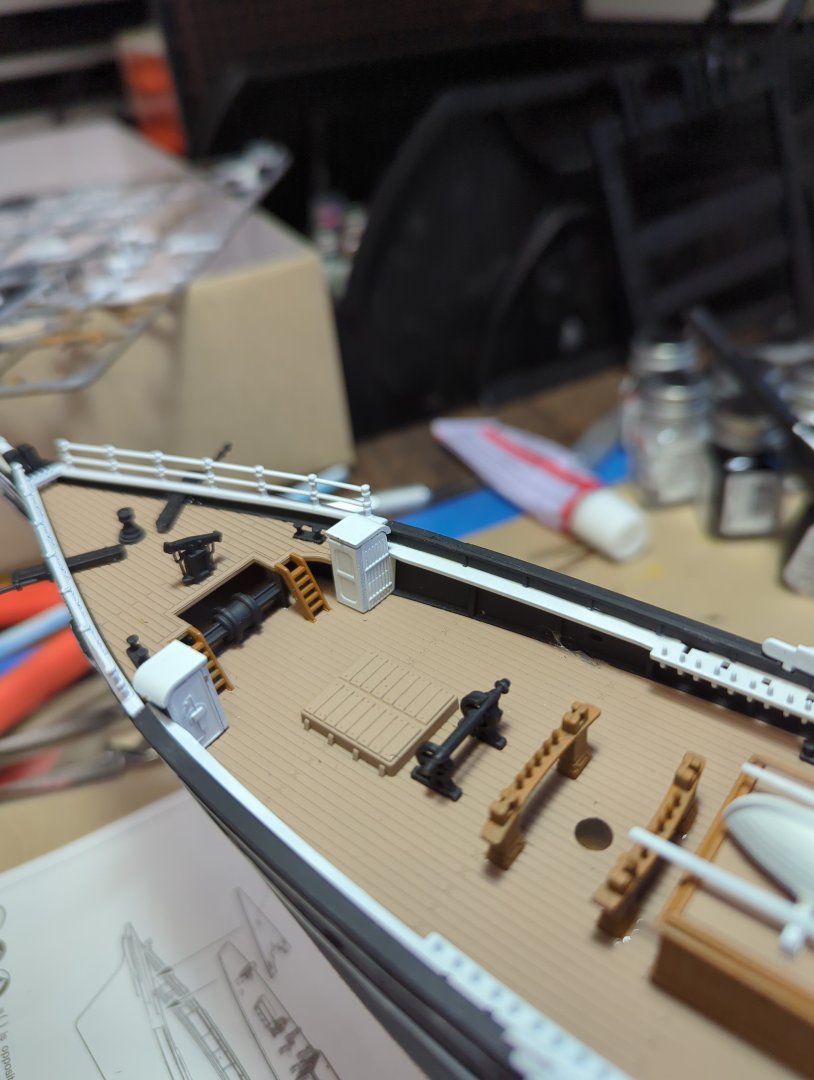
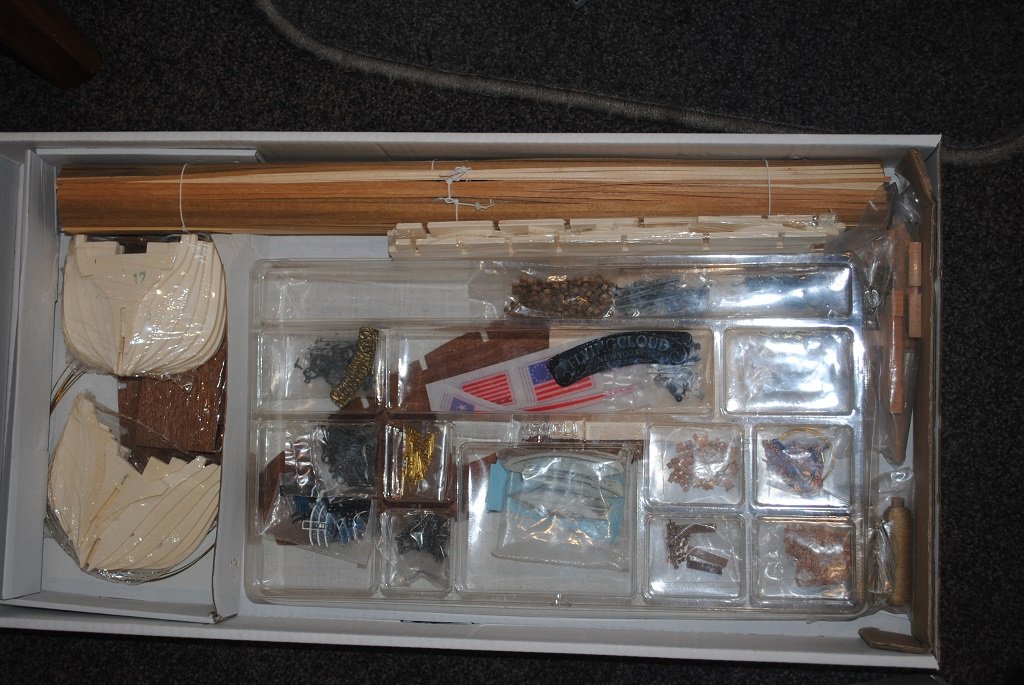
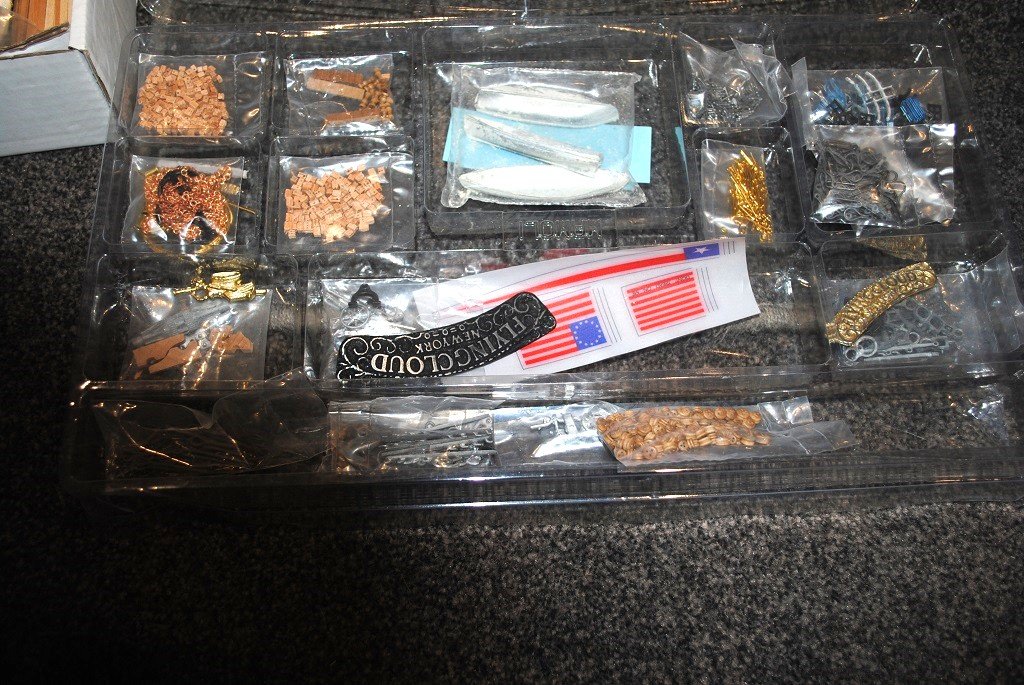
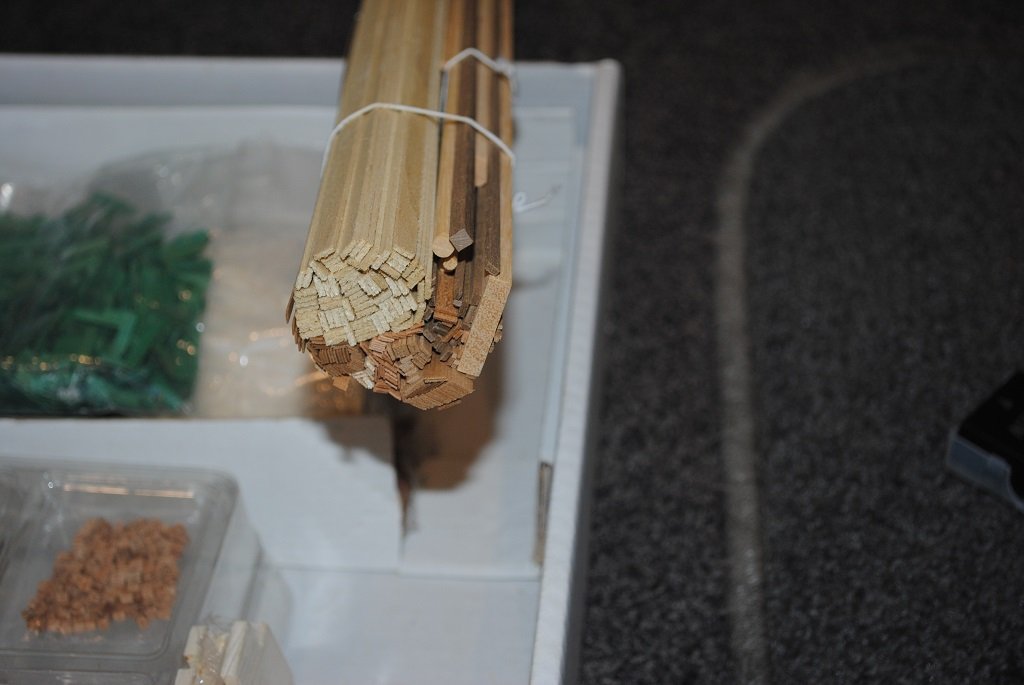
 Hi All, I decided to put HMB Endeavor on-hold for now as I was not feeling "The Love" so much with this. I have long been keen to get into the Flying Cloud, it's been in the cupboard fort a few years and it's t6ime to get into something completely new. So, out with the box and reviewing plans/instructions. Pretty early on, it was evident that the Italian Parts List was in need of translation. I have been working on a Spread Sheet this for a couple of days now and am at the stage where I can, very soon, make a start. (I have a few hundred other items to add to this....) To get things in order immediately, I have employed the services of Custom Hobby Decals, Australia, to render decal for the Stern Decoration/Trail Board Name in place of the kit supplied white metal castings. (I am hoping that the final render for these will be ready in a day or two.) I have also located some excellent reference material as well as some other bits and pieces. sobco.com/ship_model/fc/Flying_Cloud_plans_bradner.html The kit is double POB, reasonably standard stuff. I'll be looking to Cooper the Hull rather than using the kit supplied "Greenish" wooden plates. This will be the first time that I will have attempted a Mamoli kit and I am looking forward to a Clipper to keep the Cutty Sark company. Cheers....HOF Photos and Spread Sheet if anyone has an interest: Flying Cloud Parts List.xlsx
- 9 replies
-
- 5
-
-
- Flying Cloud
- Mamoli
- (and 1 more)
-
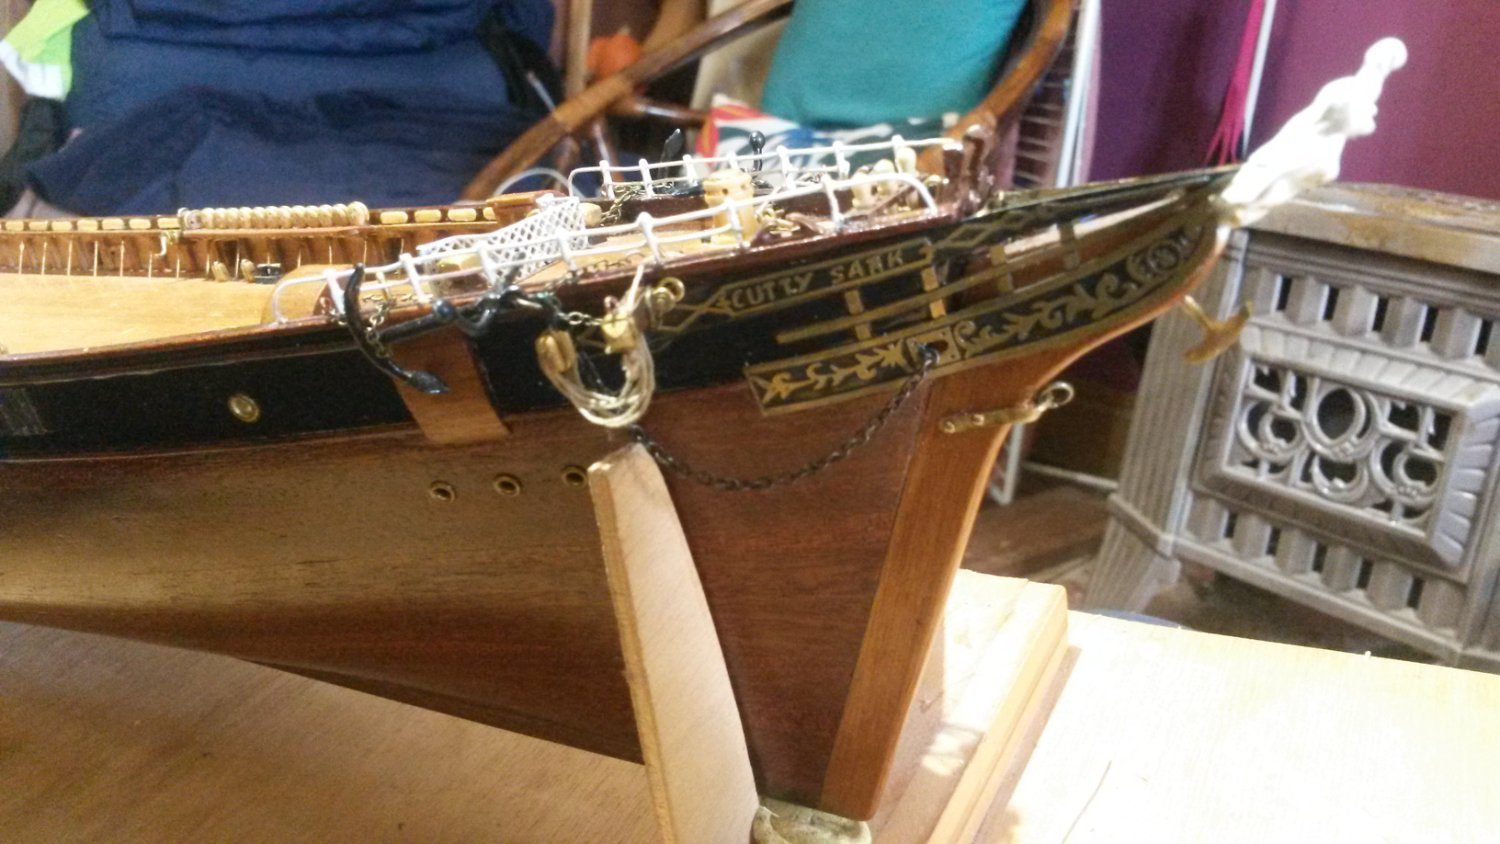
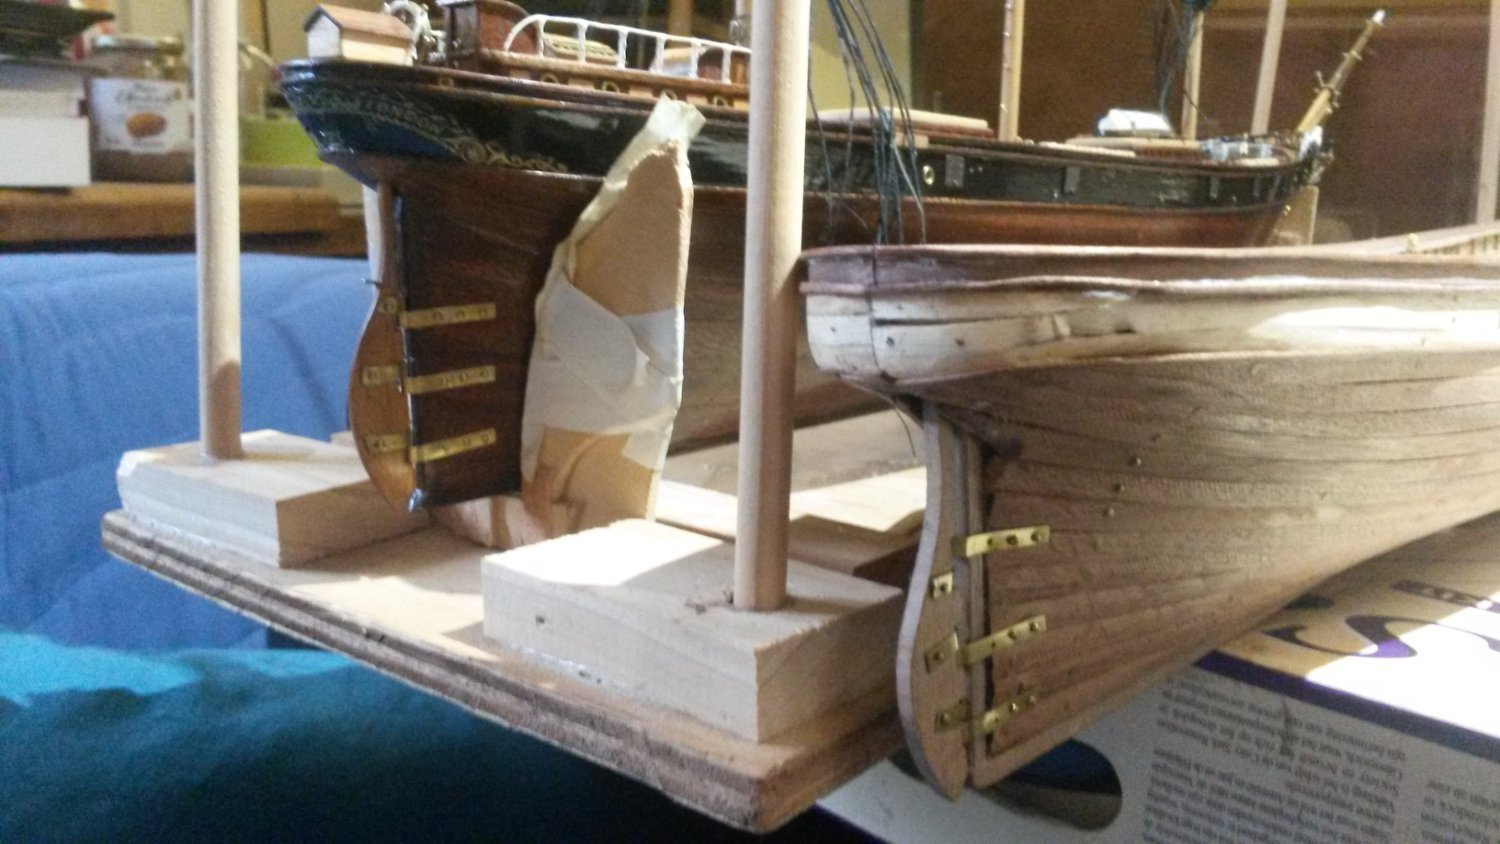
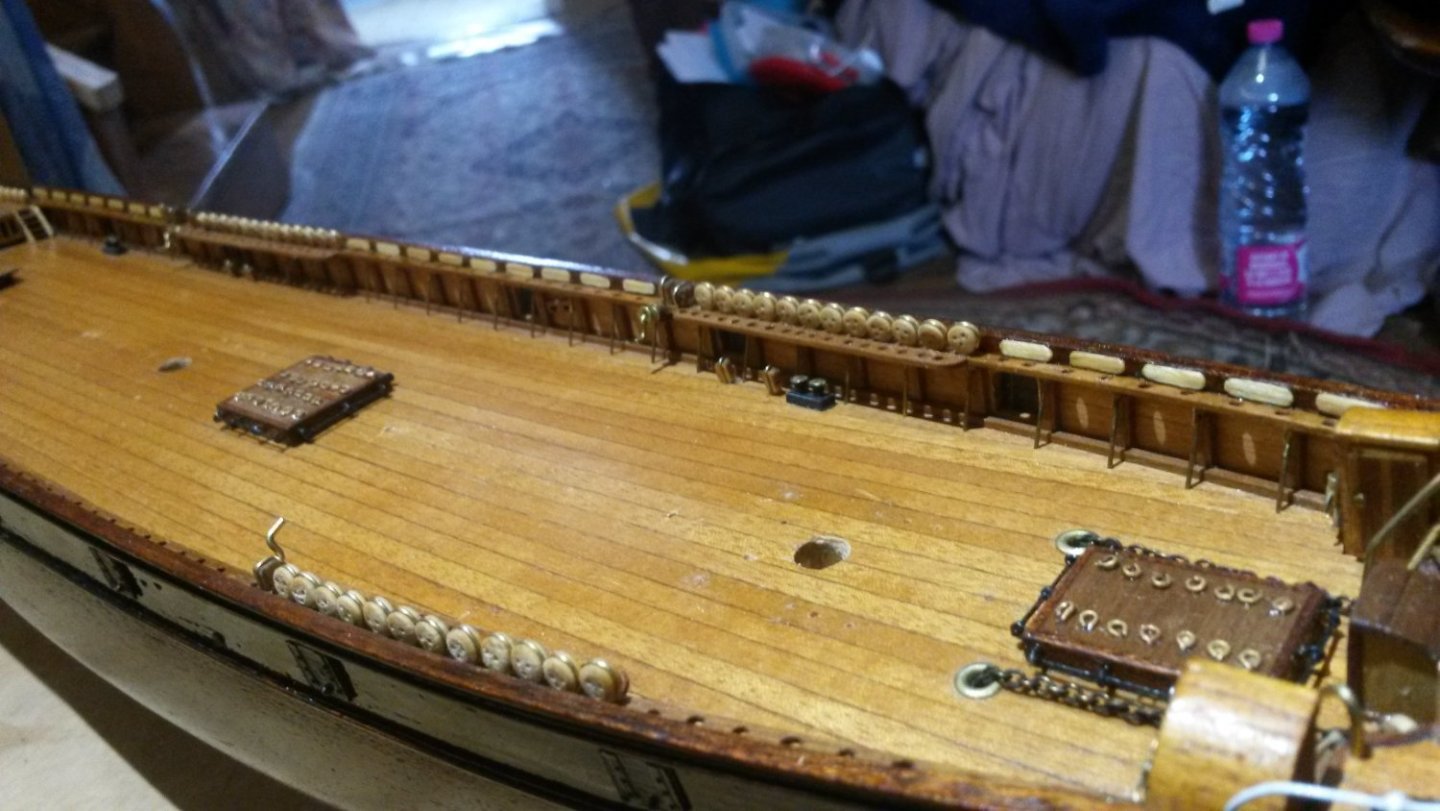
 First build after about thirty years, a christmas present that i try to do justice to. Sorry ,but quite advanced in the build and i did not log it. Made the mistake of trusting the kit at first , built the hull and some other stuff before looking at the rigging plans and realising the errors of my ways. Didn't even know the ship still existed , i am ashamed to say ! (But maybe they should have informed me in the instructions!) Some stuff will have to stay , but i am trying to scratch what i can to improve things and i am quite happy with that. The scale is rather small for such a ship , i think the kits at 1/84 or 1/72 would be preferable. So here is a kit illustration and a few recent photos. Feel free to comment on my catastrophies prow main deck with misplaced anchor hawsers plus oversize planking and deadeyes...many non kit additions. the poop , pictured with a cousin that i have just recovered for spares, allthough she is not on her best form. She makes me feel better when i look at mine ! try uploading here as i have been struggling!


-
 Question, In the instructions it shows gluing the ship to the stand early in the build. I worry that might restrict flexibility in painting. Can/should I wait until closer to installing masts etc? David
- 91 replies
-
- 2
-
-
- Cutty Sark
- plastic
- (and 3 more)
-
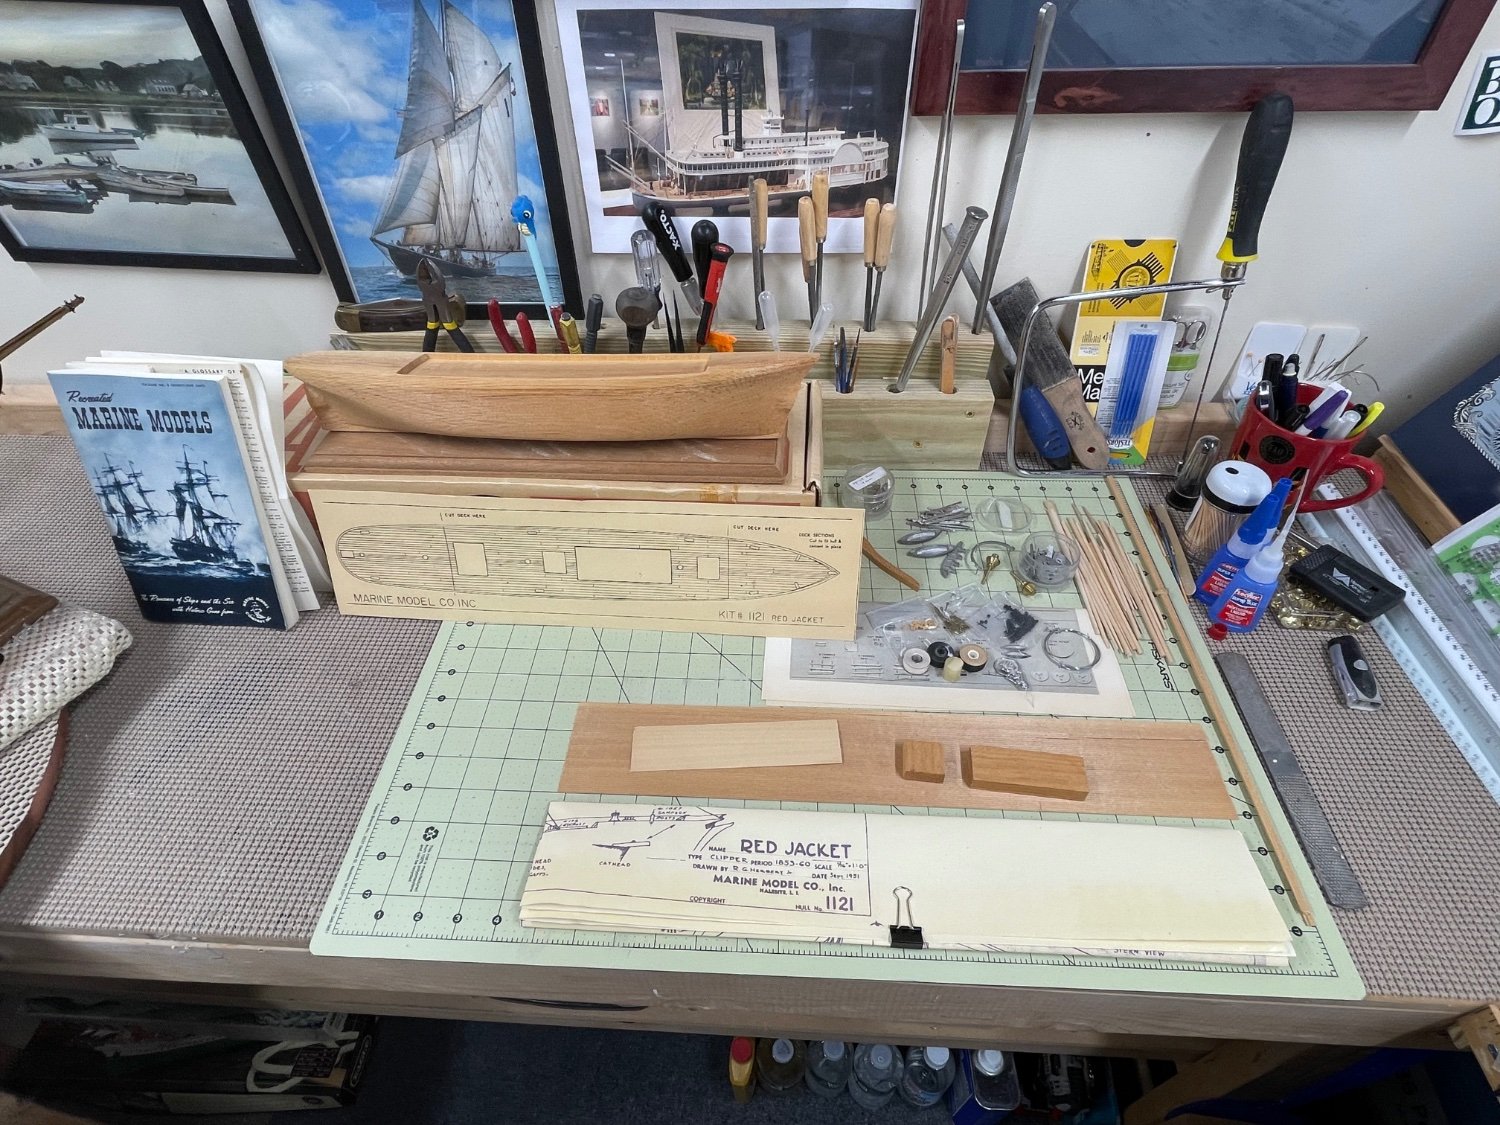
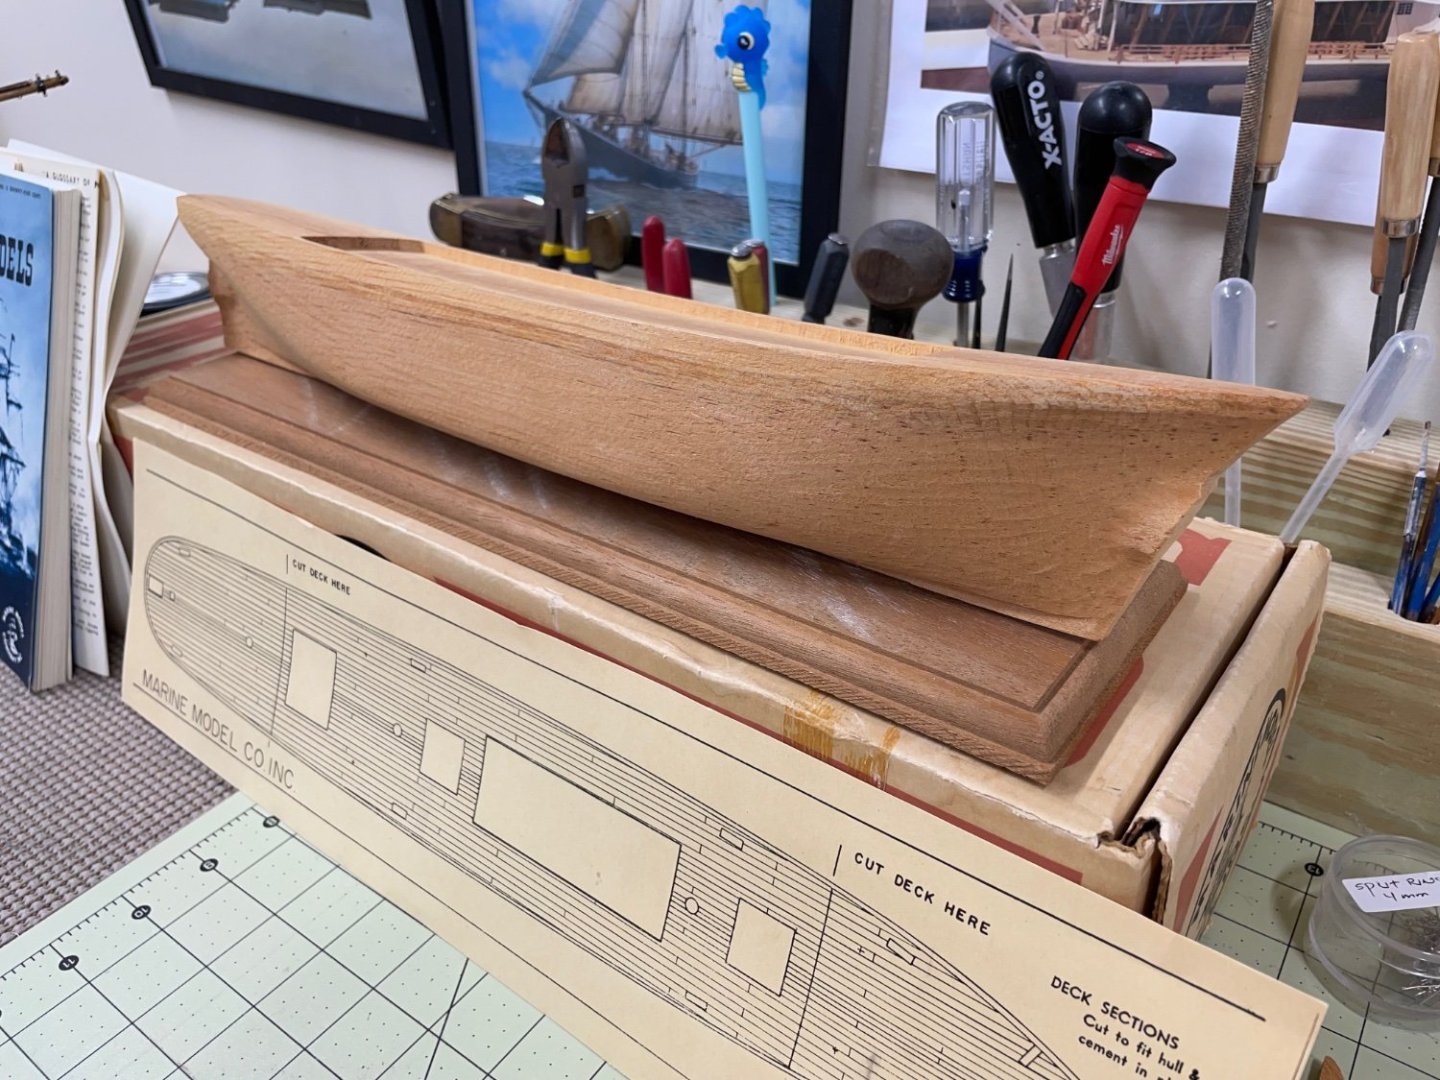
 Picked up this vintage kit from @Cornhusker1956 back in August. Here is the build log, I promised. I do have a soft spot for these old kits. My first wood ship build was the Charles W Morgan by Marine Model Company. I built that kit in 2020. The date on the blueprint is 1951. This kit seems to have survived well and deserves to be rescued. This is a solid hull kit so my first order of business will be to get this “pre carved” hull into proper shape from stem to stern. Many thanks to @Cornhusker1956 for entrusting this little beauty to me. Cheers 🍻

- 44 replies
-
- 7
-
-
- Red Jacket
- Marine Model Company
- (and 2 more)
-
 Hi all, After some time into the build i decided to create a build log of my progress on the sergal cutty sark 1:78. This is the first wooden ship model i am building, so everything is new to me and this forum was and is a blessing to me to learn all the tips and tricks of building ship models. The sergal kit comes with very little instructions, only about 4 pages of text without pictures, and a lot of real size plans. Not ideal for a beginner like me so im getting the "know how" else where. I also bought the Campbell drawings of the real ship, which help me to add detail. I started this kit in 2015, but after planking one side of the ship it stayed untouched on my shelf for about 6 years. Suddely i felt an urge to continue the build, and i did not stop since. Its going very slowly due to working a full time job. SO hope you enjoy this build log, and im looking forward learning from all of you fellow ship builders.
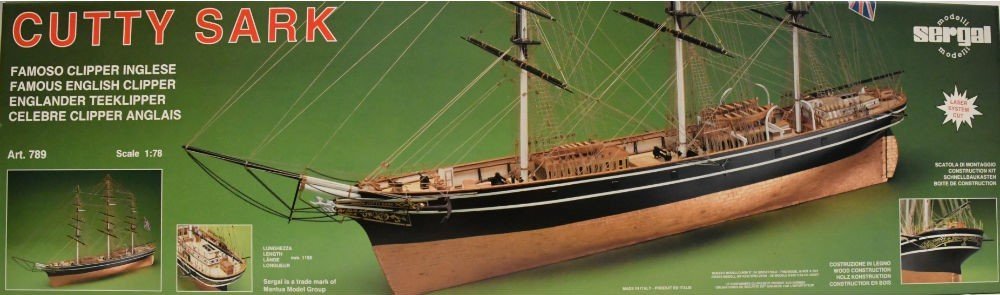
- 15 replies
-
- 2
-
-
- Cutty Sark
- Sergal
- (and 1 more)
-
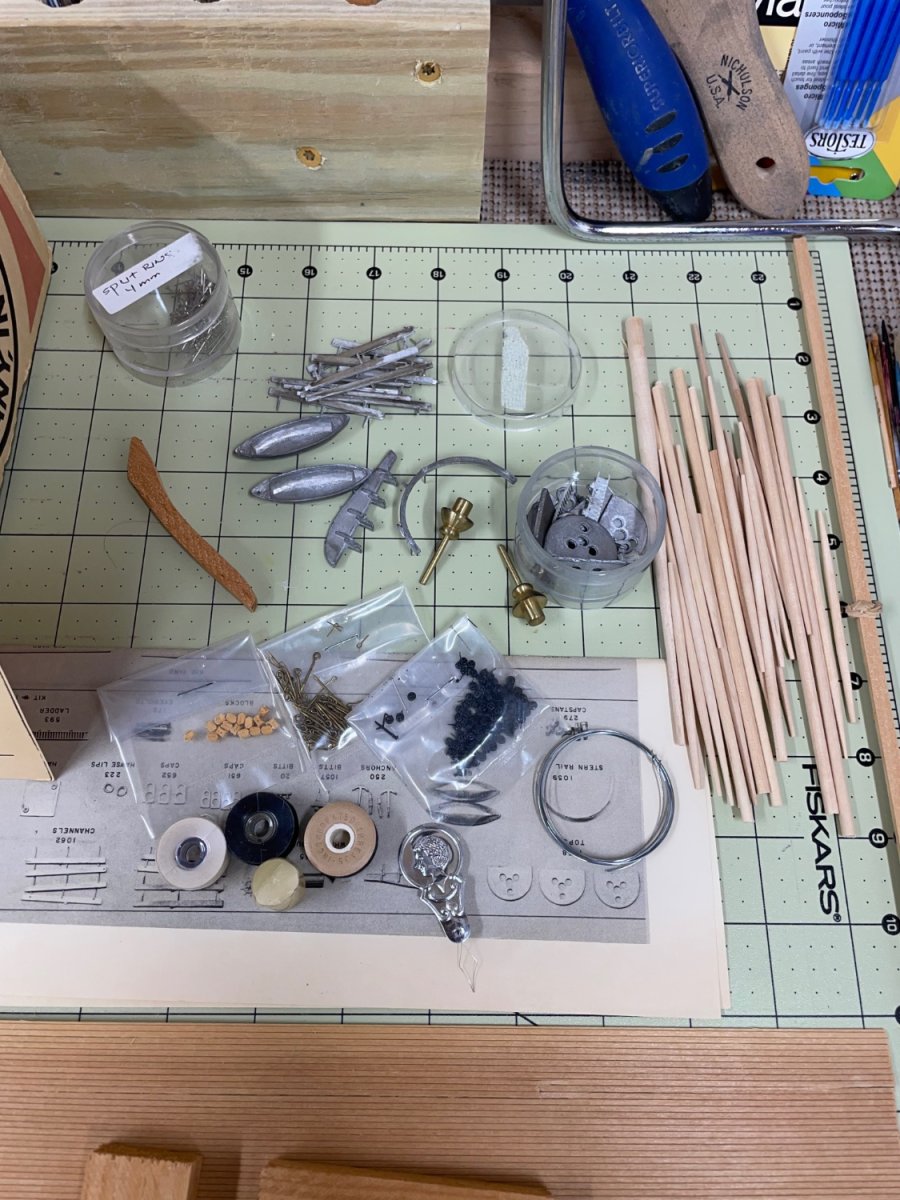
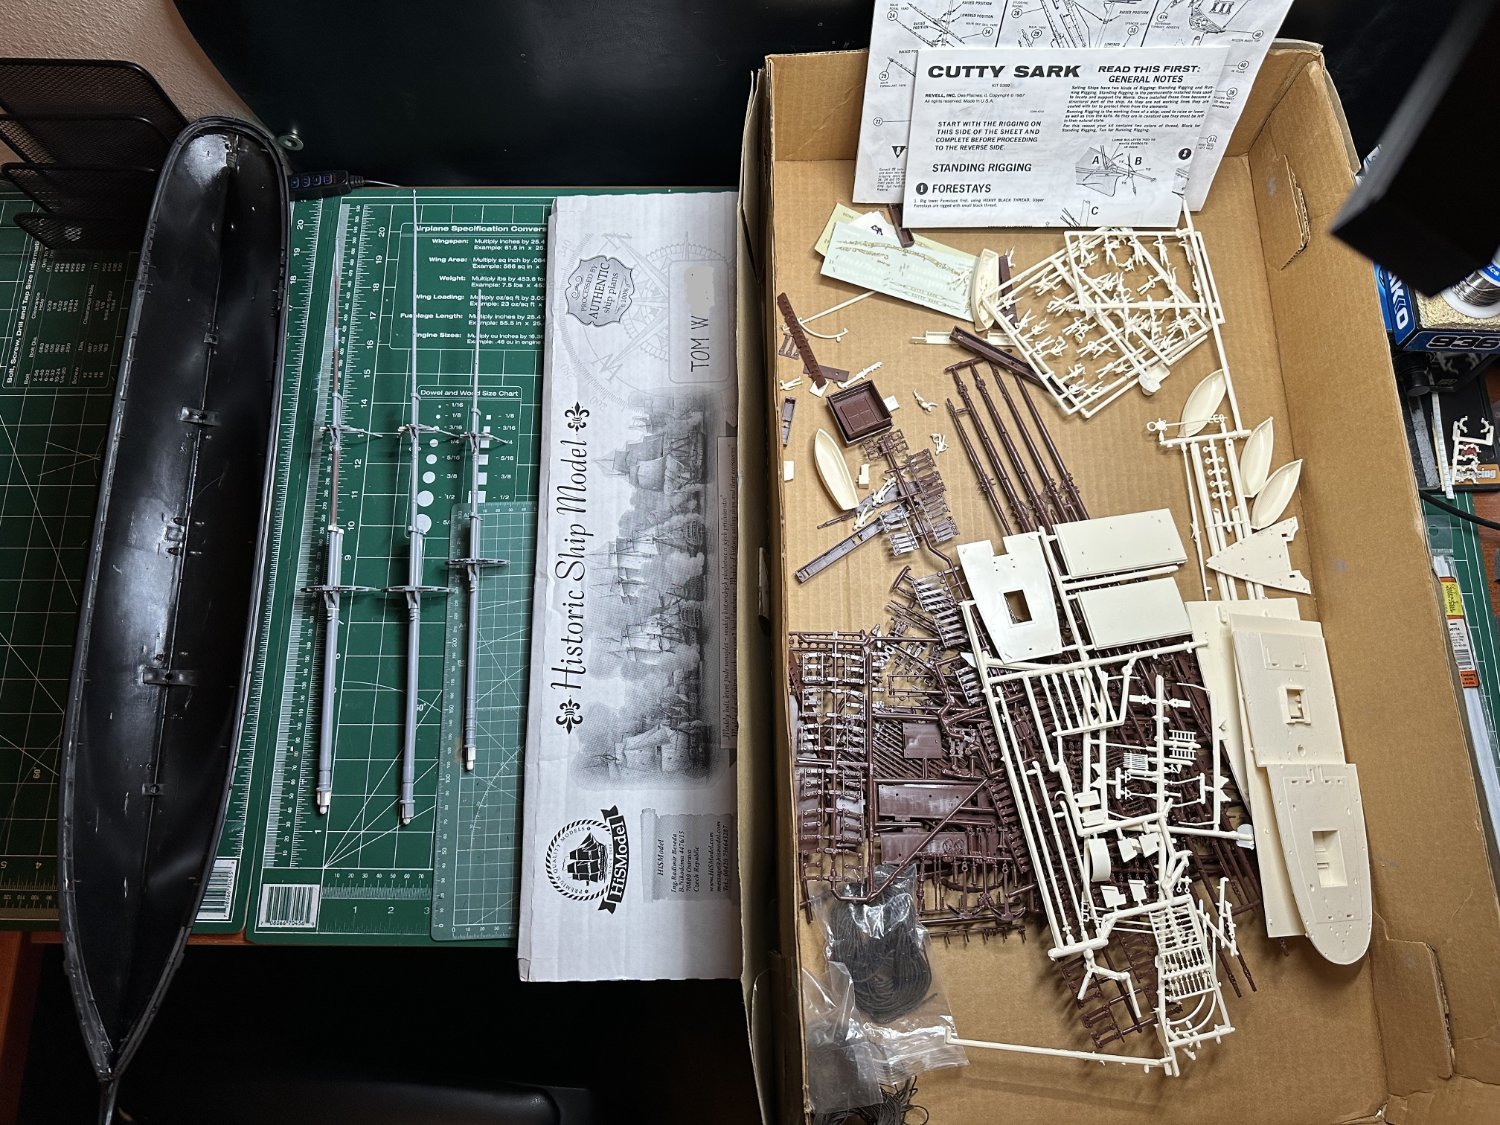
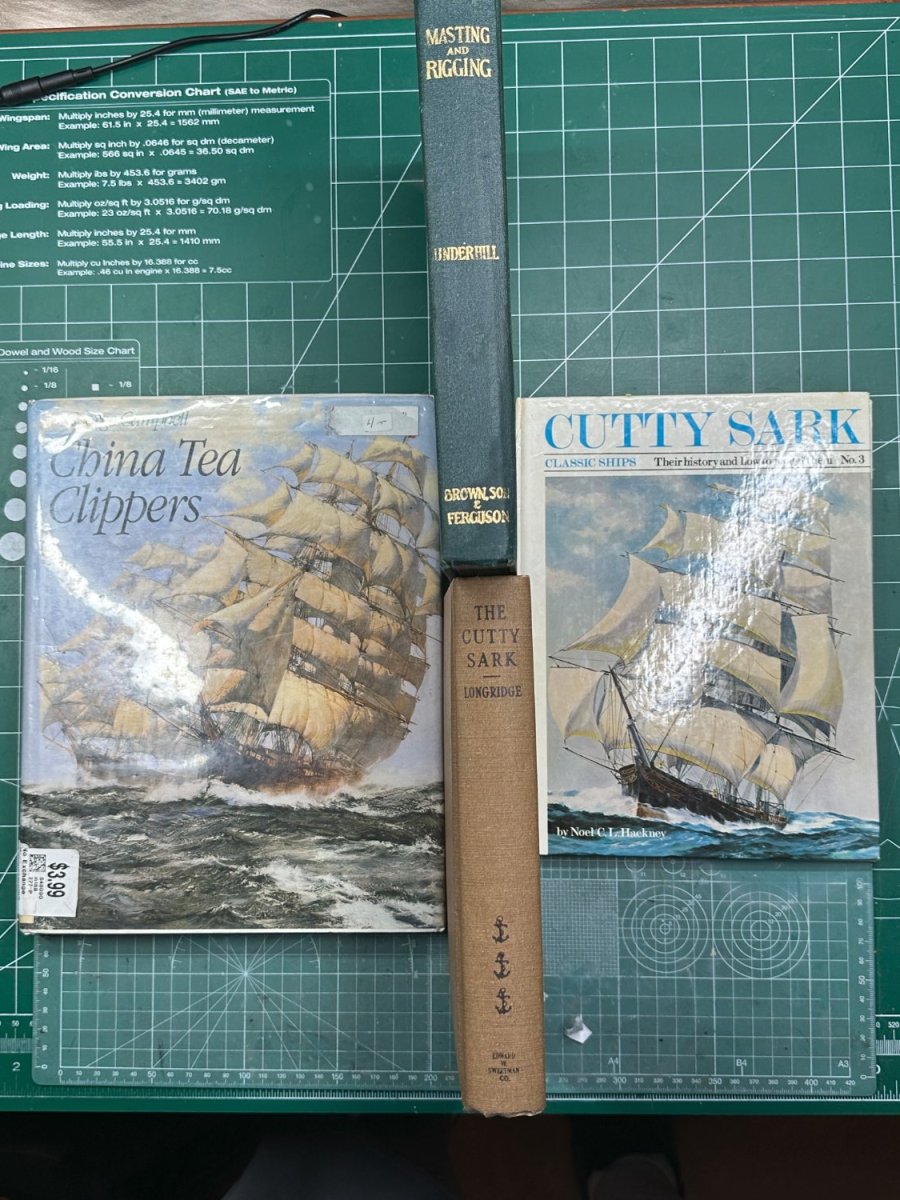
 Hello. I have been inspired to pick up on my long ago started Cutty Sark. I started this one in roughly 1987-1988 right after I finished the Revell USS Constitution. It didn't take long for me to get burnt out on after doing the Constitution. It has been packed away ever since. It has survived 2 marriages and several moves. Fortunately I wasn't very far along on it, and it was able to fit back in the box, even with the hull halves glued together. After unboxing it again only one broken leg on the foremasts second section. Not to bad for having been unloved for years. I have read the following build logs a couple of times to pick up ideas and tips. Cutty Sark by Bruma - Revell - 1:96 Cutty Sark by Kevin-the-lubber - Revell - 1:96 Cutty Sark by bcochran - Revell - 1/96 Cutty Sark 1/96 Cutty Sark by VitusBering - Revell - 1:96 - Redux Cutty Sark by Bill97 - FINISHED - Revell Here is where I am restarting from. I have already started to rework the foremast. I am also working out how to lower the main deck, if it's even feasible. I was the recipient of another kit that had been started a few years ago so I have it for experimentation. The rest of the kit isn't usable the decks are horribly warped and the masts are assembled very poorly. But have plenty of spares of everything else. I have also picked up the most recommended books I have seen listed. I will probably have plenty of questions. And my naval terms knowledge is not very good. But I do port from starboard (I think). Looking forward to getting in deep with this. Thanks for looking. Tom W.

- 2 replies
-
- 4
-
-
- Cutty Sark
- Revell
- (and 2 more)
-
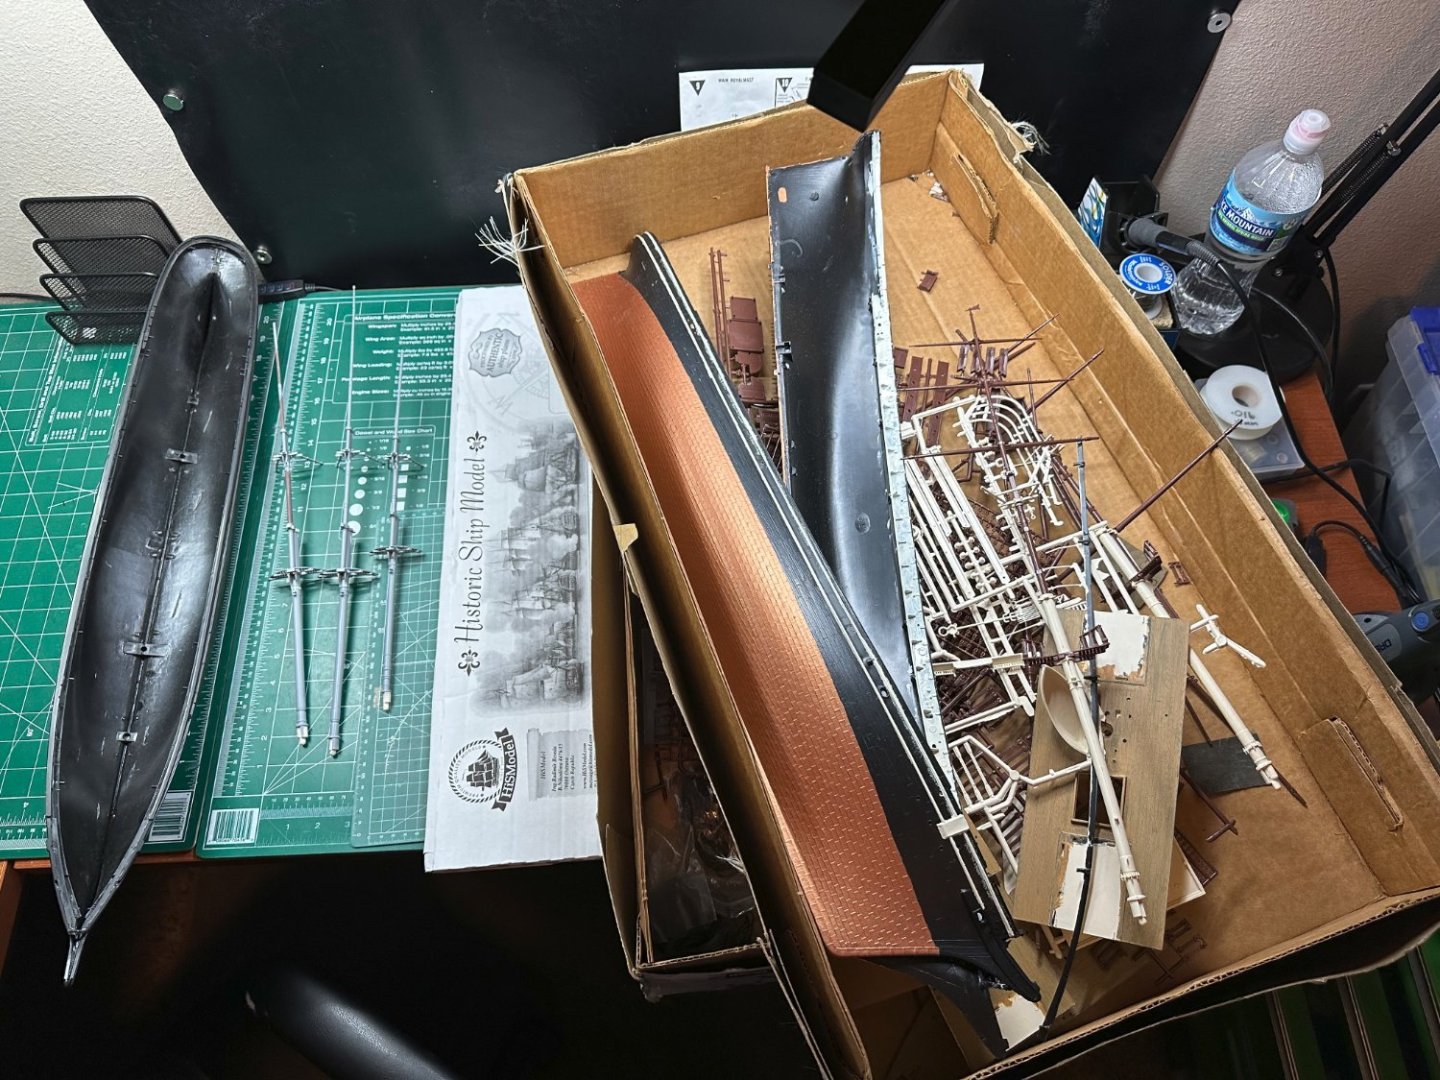
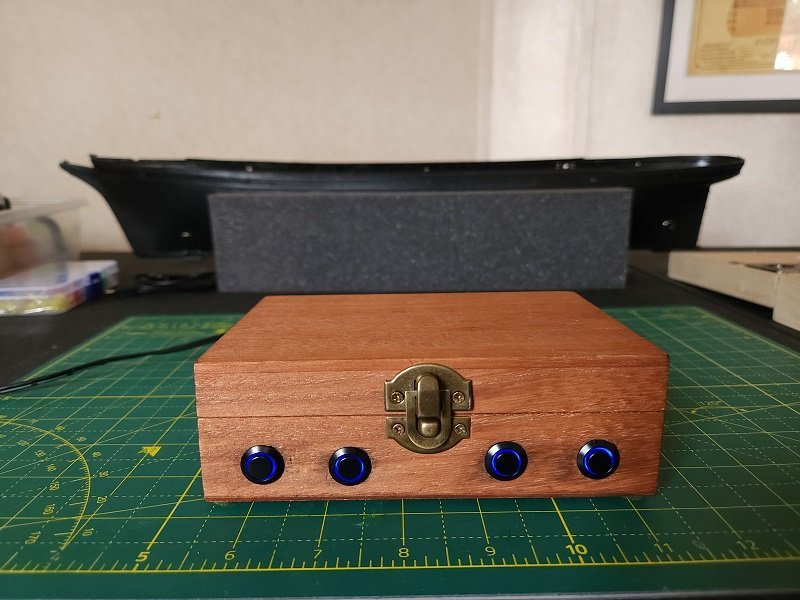
 Well, I have been lurking here and meddling in others' build logs for quite some time. Most of you know I abandoned my previous Cutty Sark build and I'm very anxious to start anew. I have the kits (one as a working kit, the other is spare) and almost all of the necessary extras. However, I'm still awaiting one more delivery consisting of a wood deck, windows, rope and a few other accessories. They're coming from Radimir at HiSModel in the Czech Republic and, though he's a bit late, I am confident they will arrive soon. Until they do, I have finished the control box for the lighting. The lighting will consist of navigation (running) lights and interior illumination of the three deck houses. Power is a 12-volt 2-amp wall wart that plugs into a socket in the back. Output voltage is currently set at 6 volts for each regulator. I haven't installed the box-to-ship connectors yet, I need to determine the pinouts and that's a tedious process. The wood is very soft so I have some tearout from the drill but not enough to make me do it over. I may make another one in hardwood at some future time. I debated with the boss over labels for the switches and she won out (she always does). They're not really necessary and detract from the aesthetic.
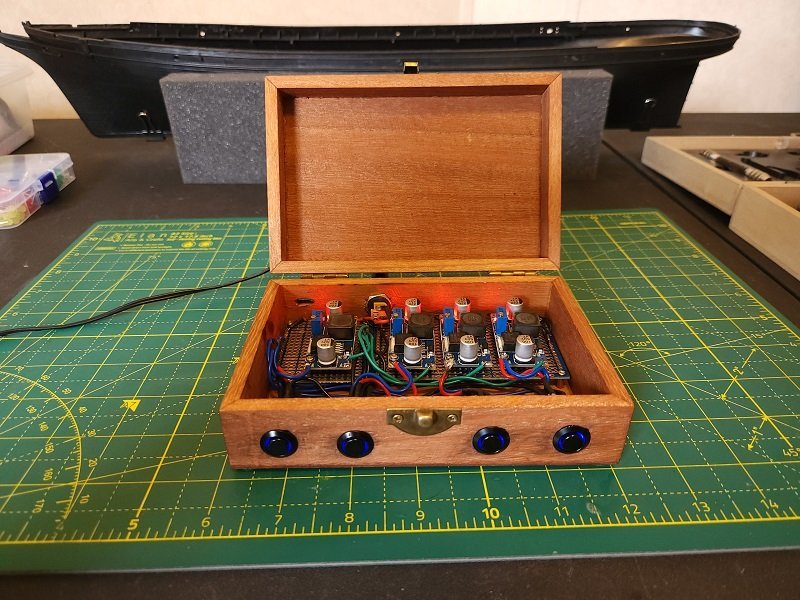
- 85 replies
-
- 5
-
-
- Cutty Sark
- Revell
- (and 2 more)
-
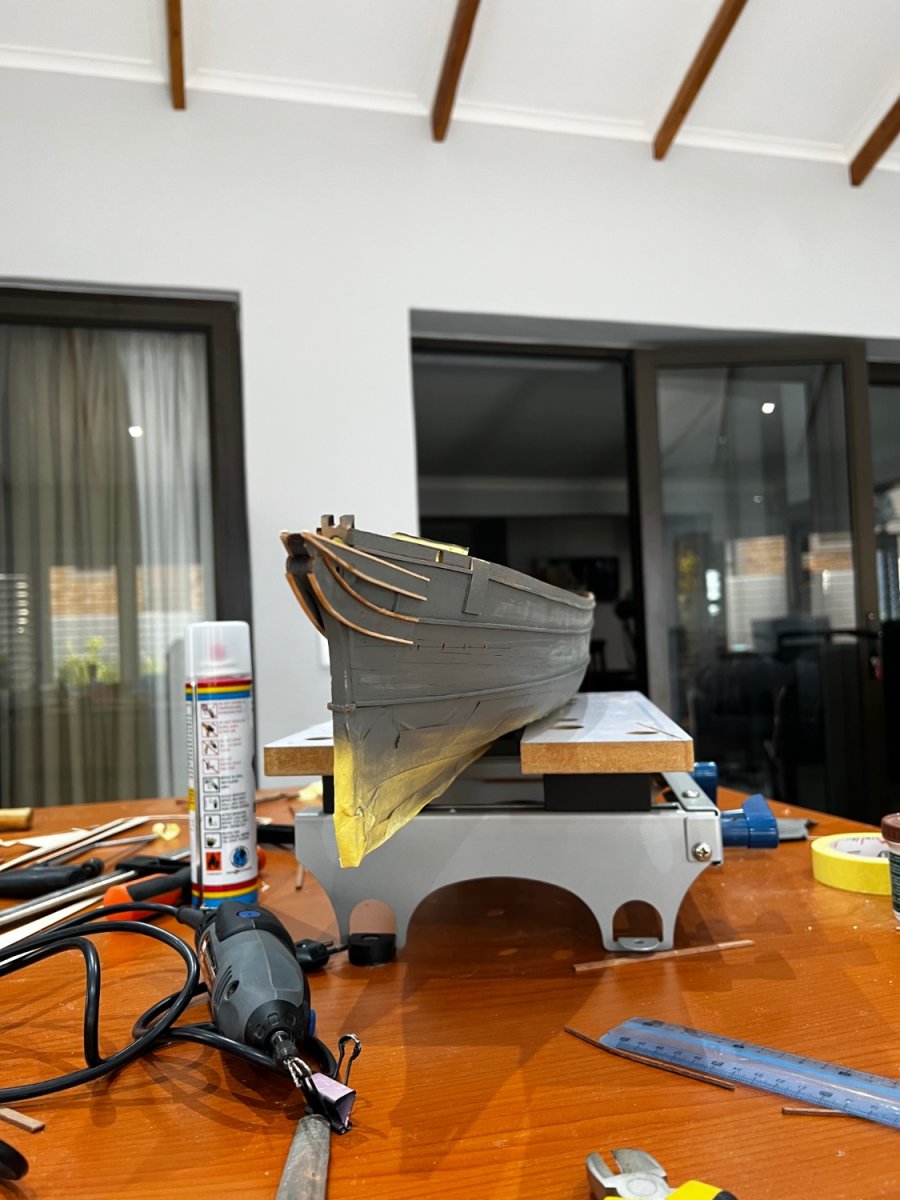
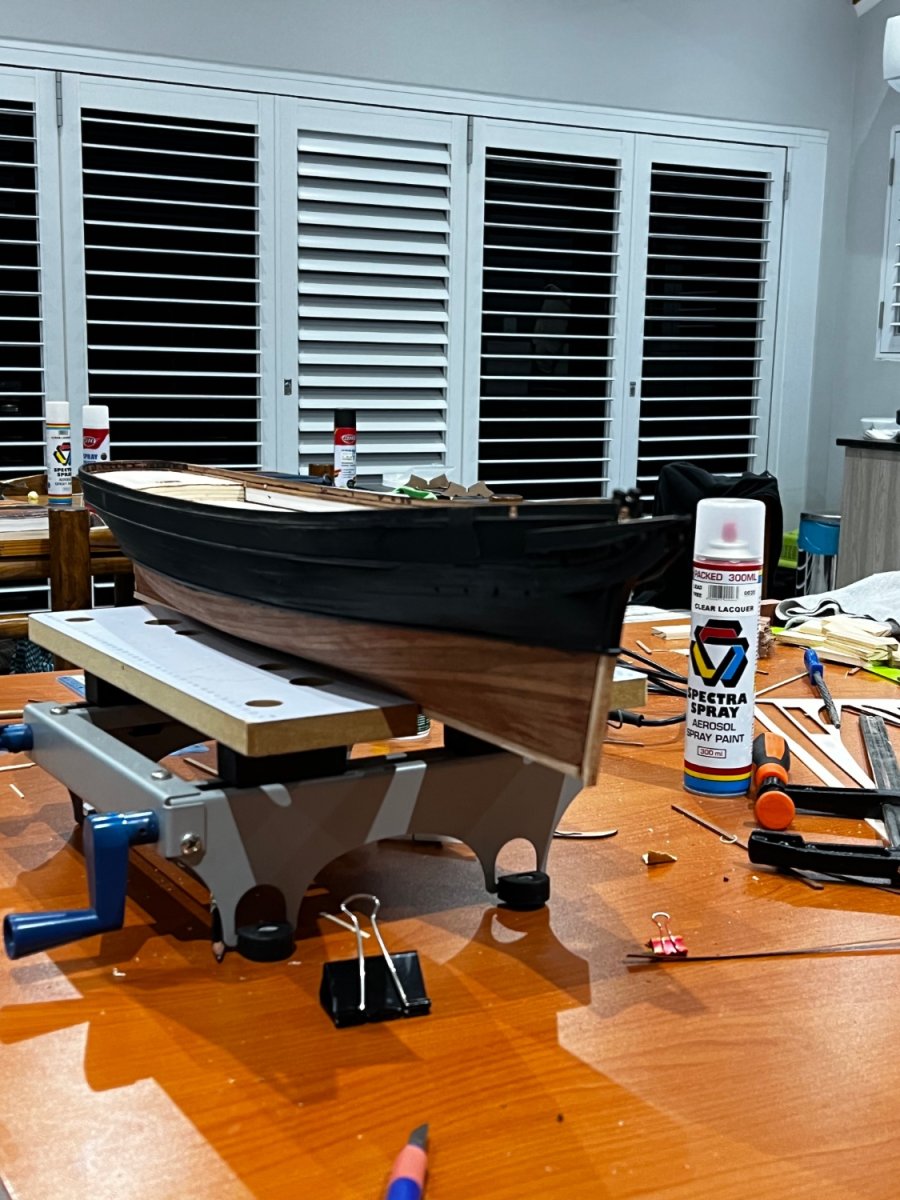
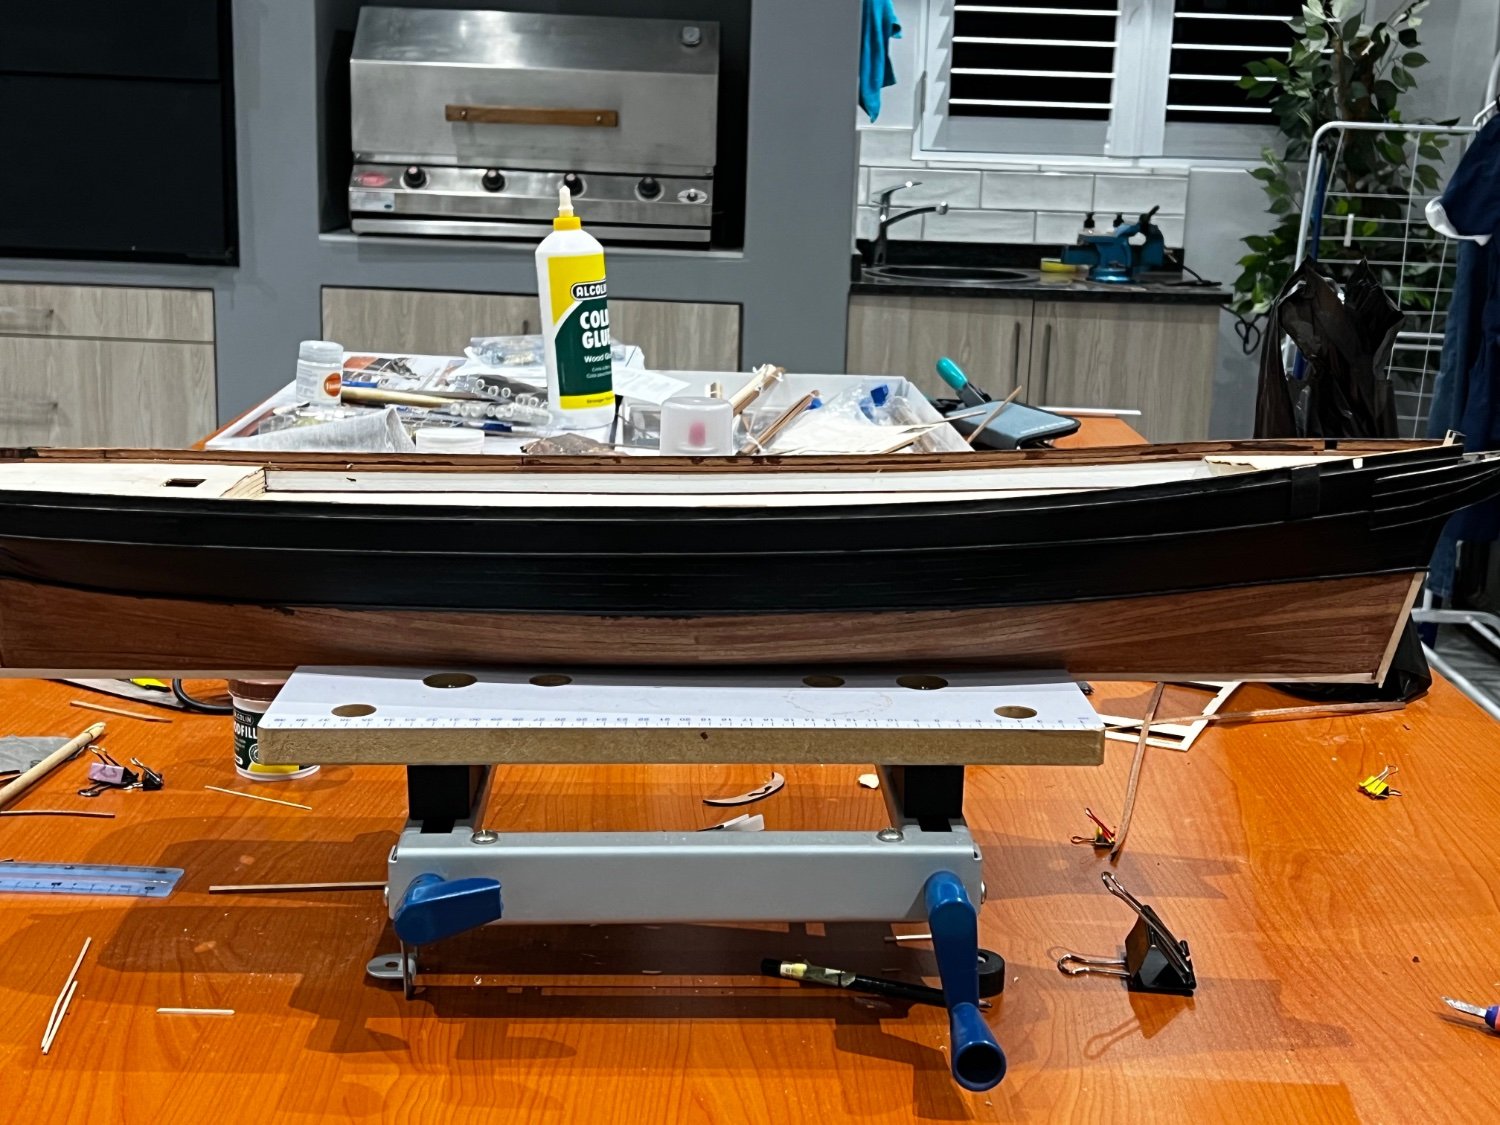
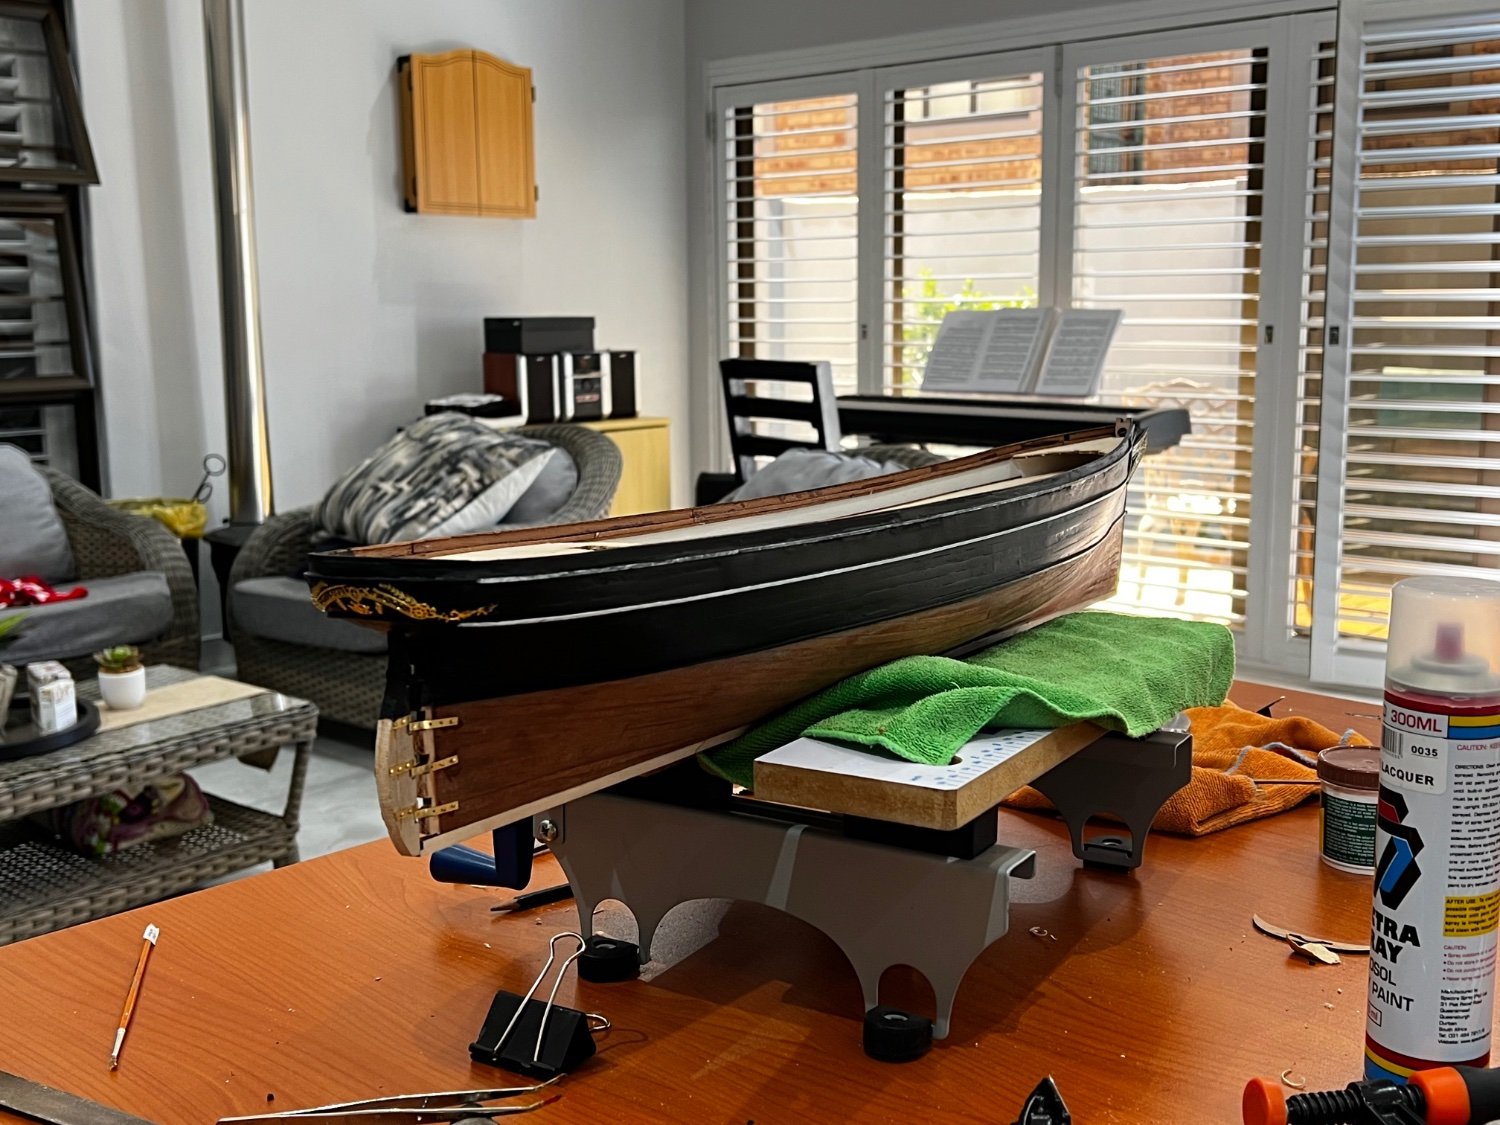
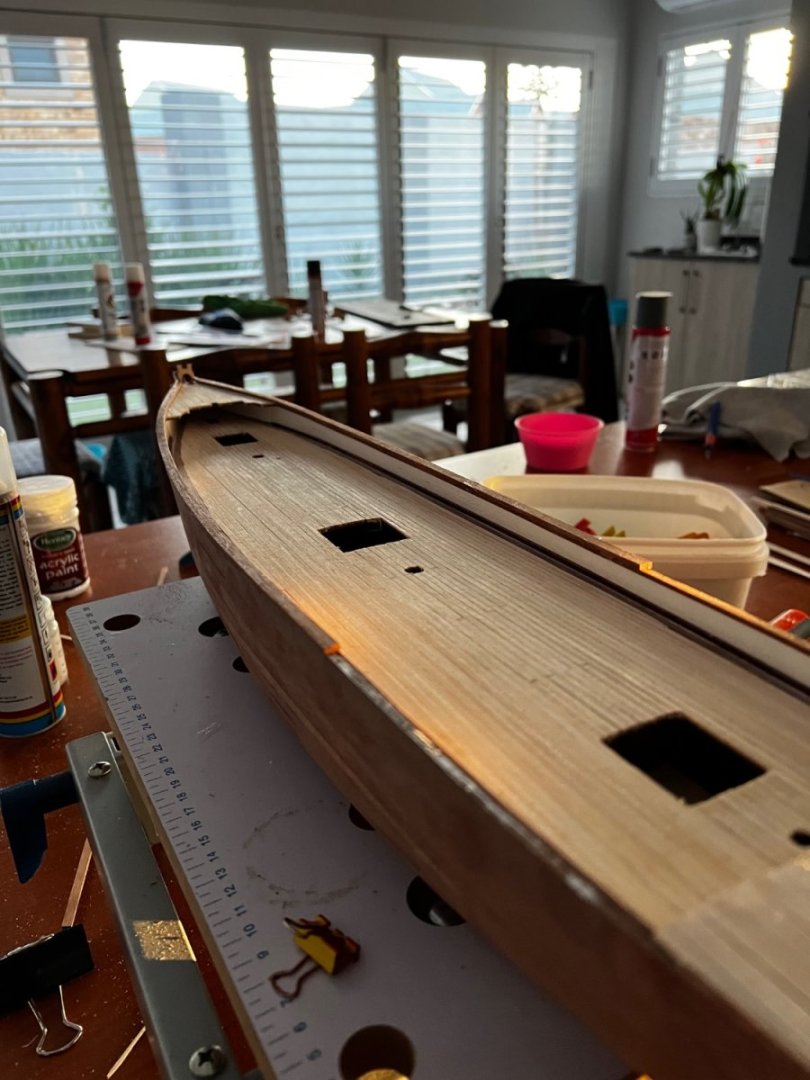
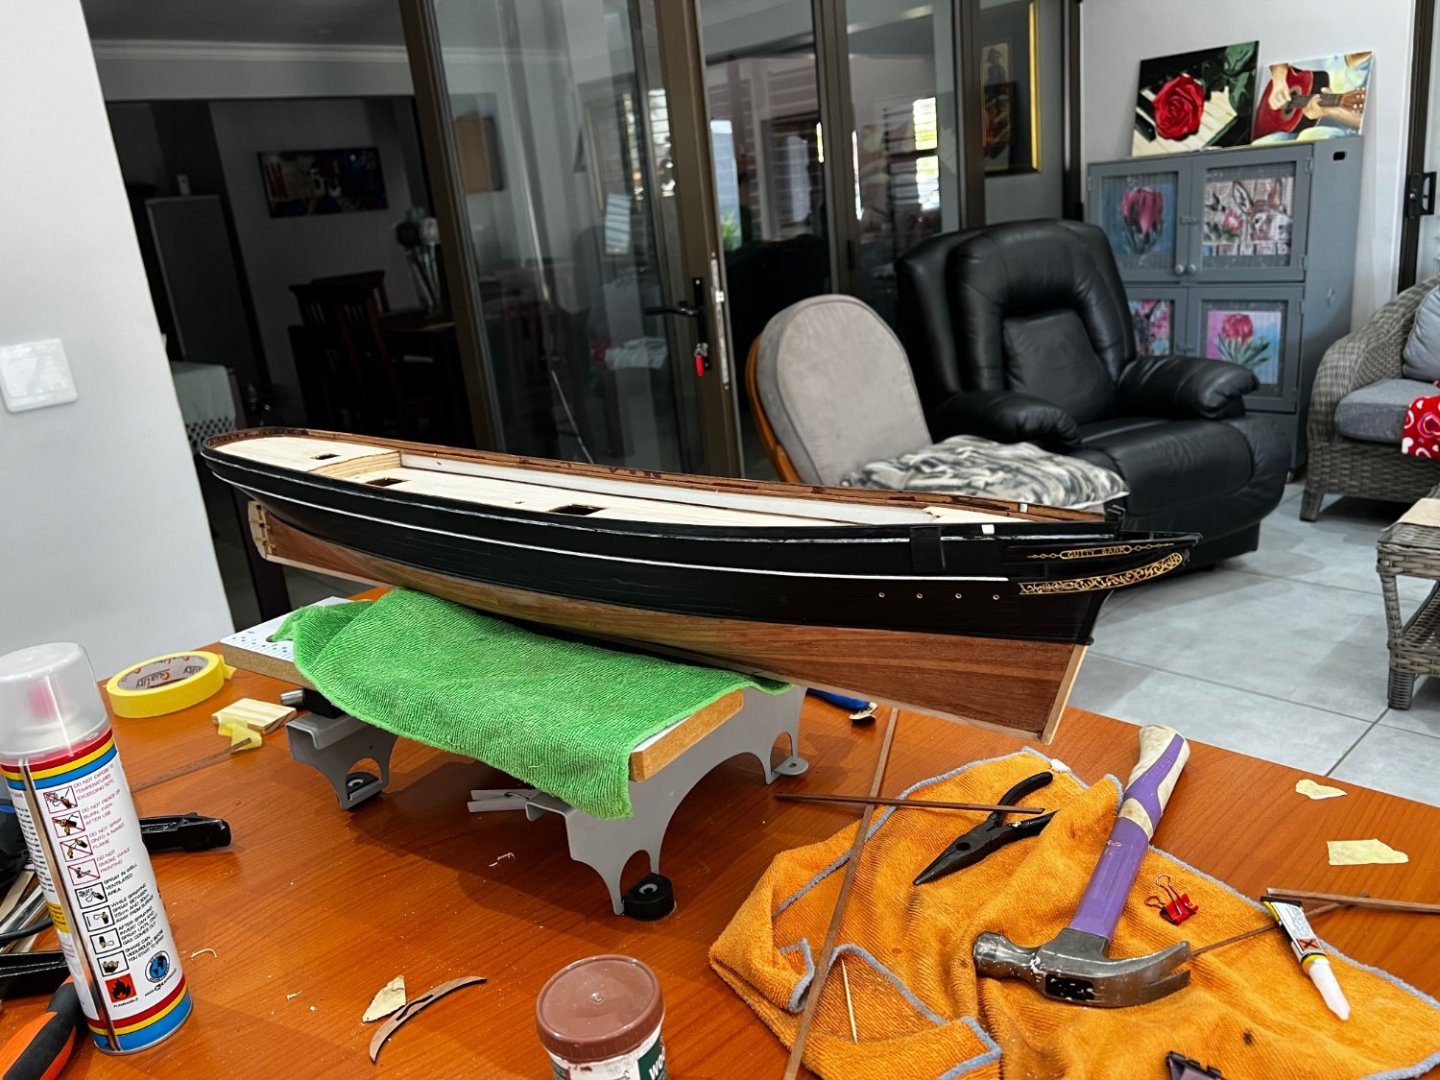
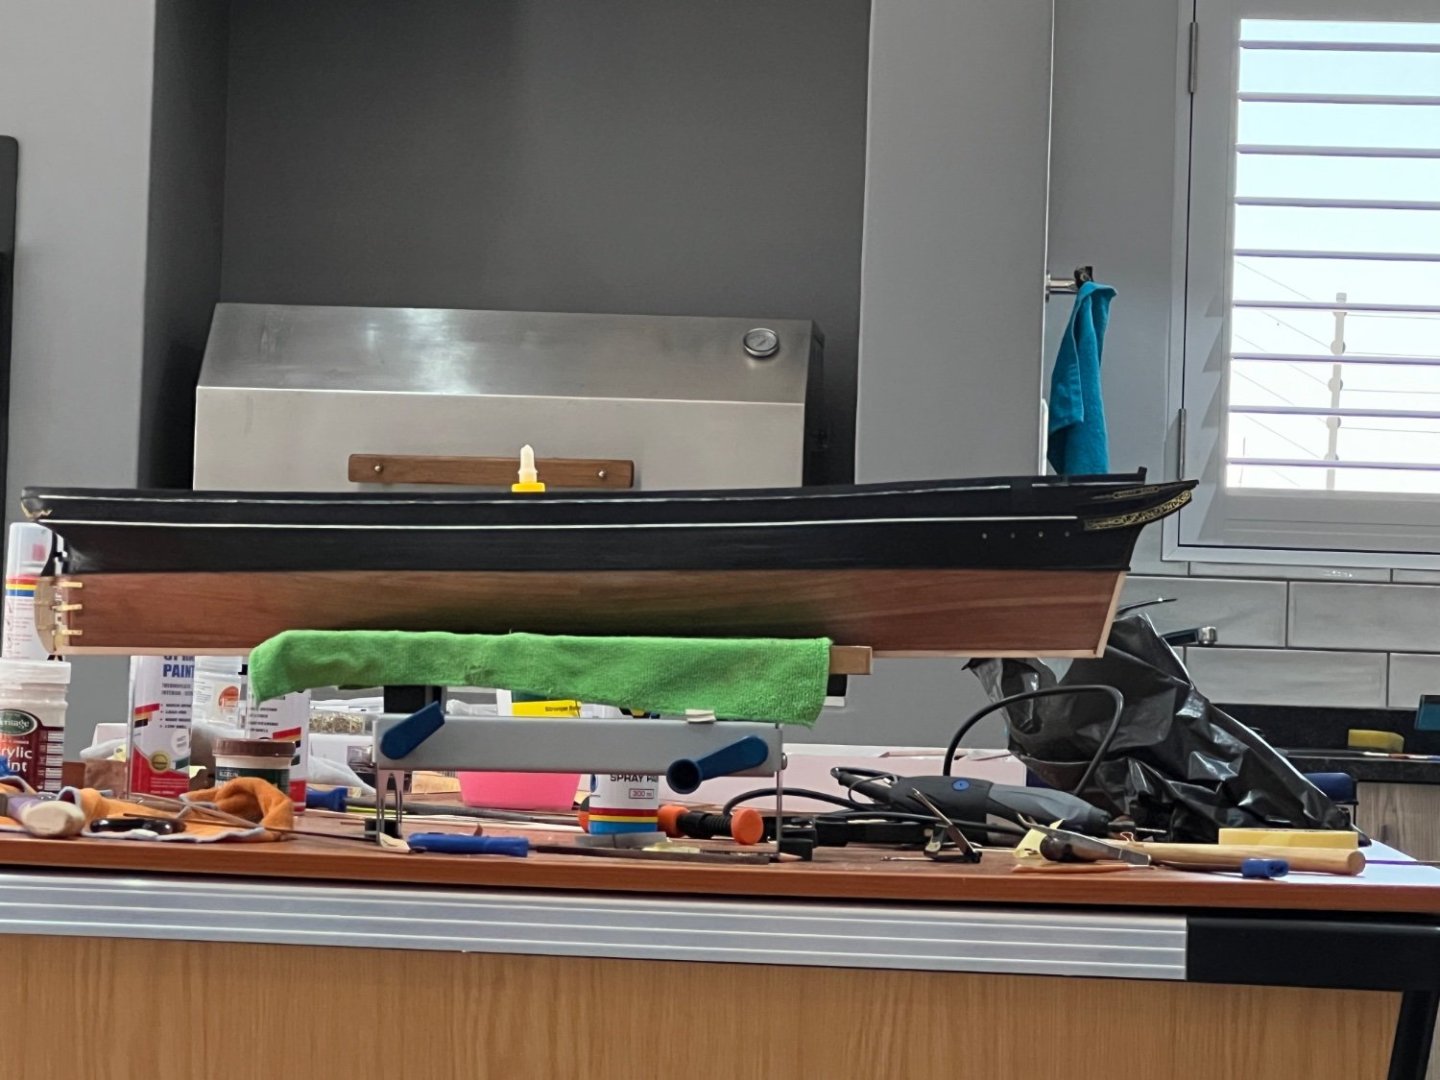
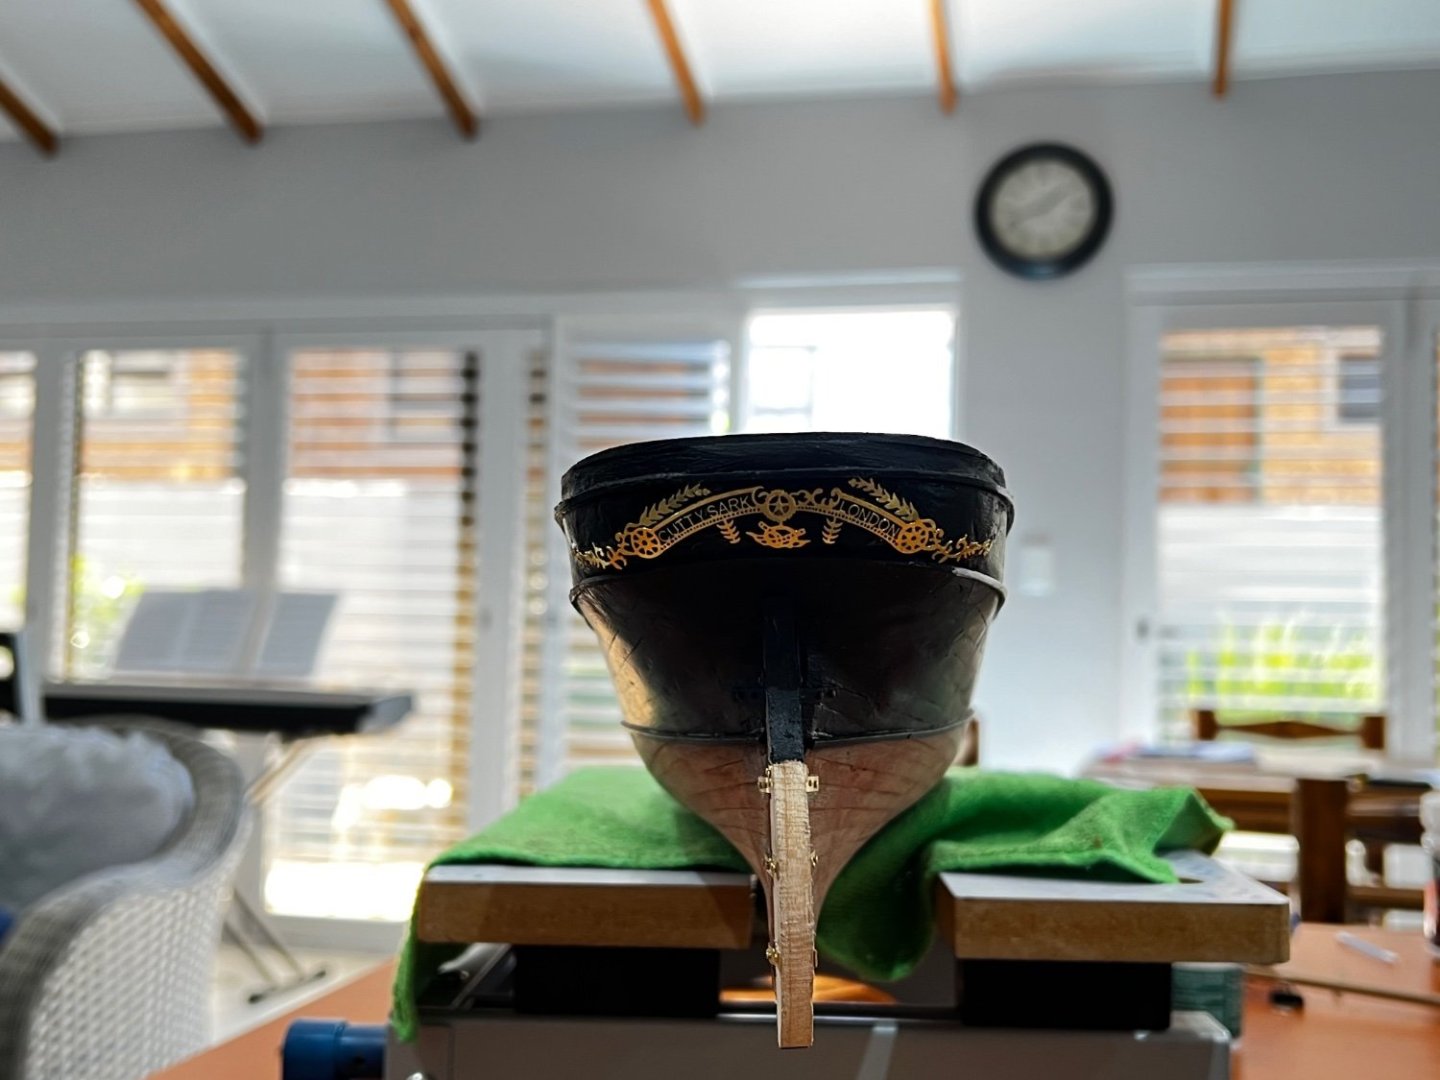
 Hi all. This will be my first build log and will be of my 3rd model ship kit. I started this build back about a month ago and have only now thought to do a log. Not many photos have been taken up until this point. I will post the photos that I have up until today. I will then update you all as I go on to another step.


- 47 replies
-
- 6
-
-
- Cutty Sark
- Artesania Latina
- (and 1 more)
-
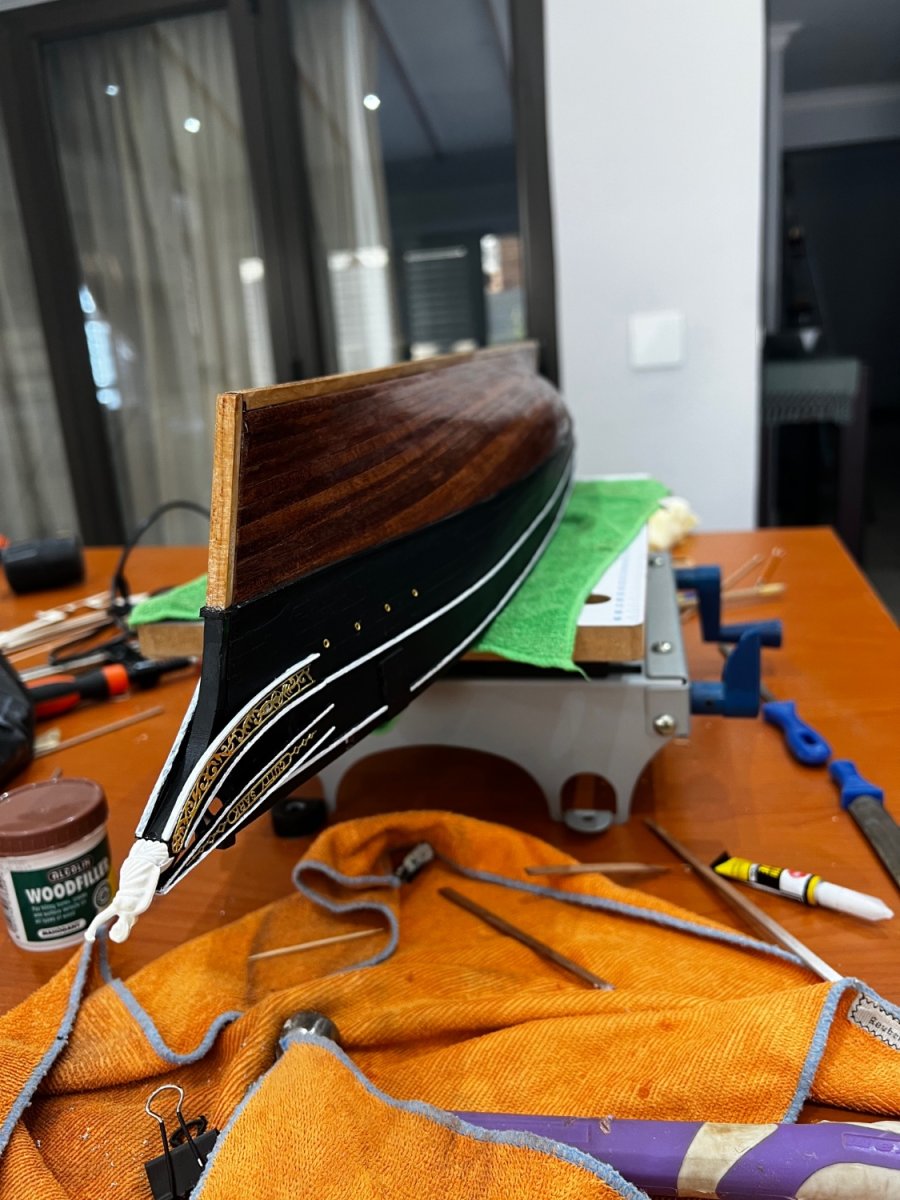
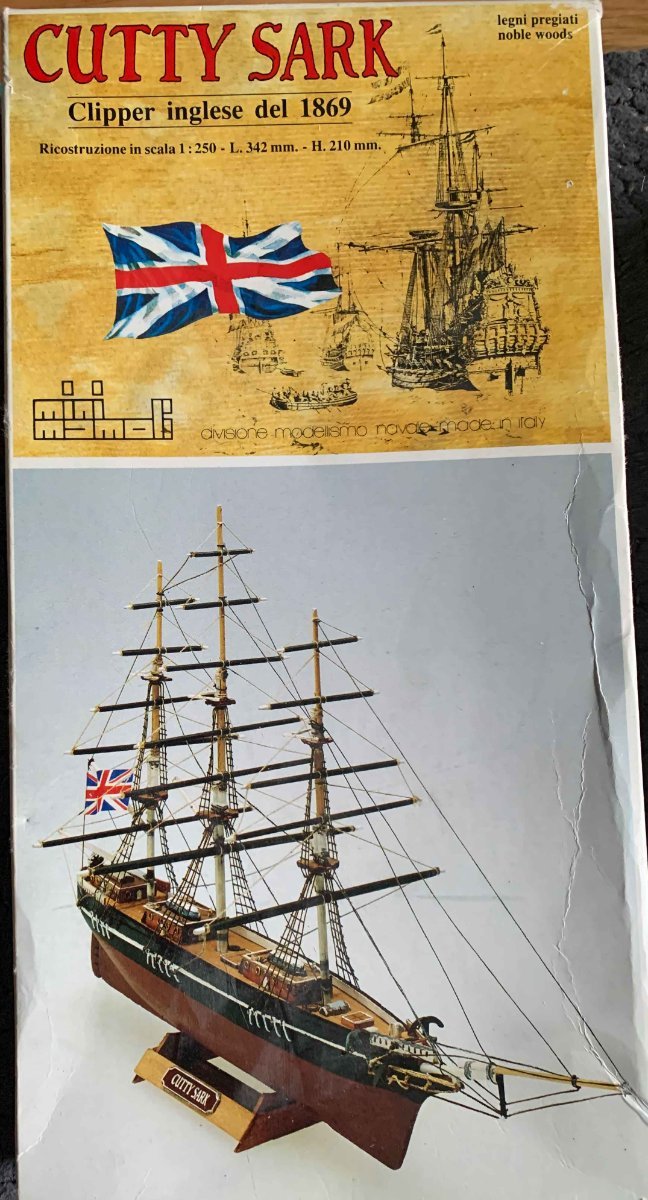
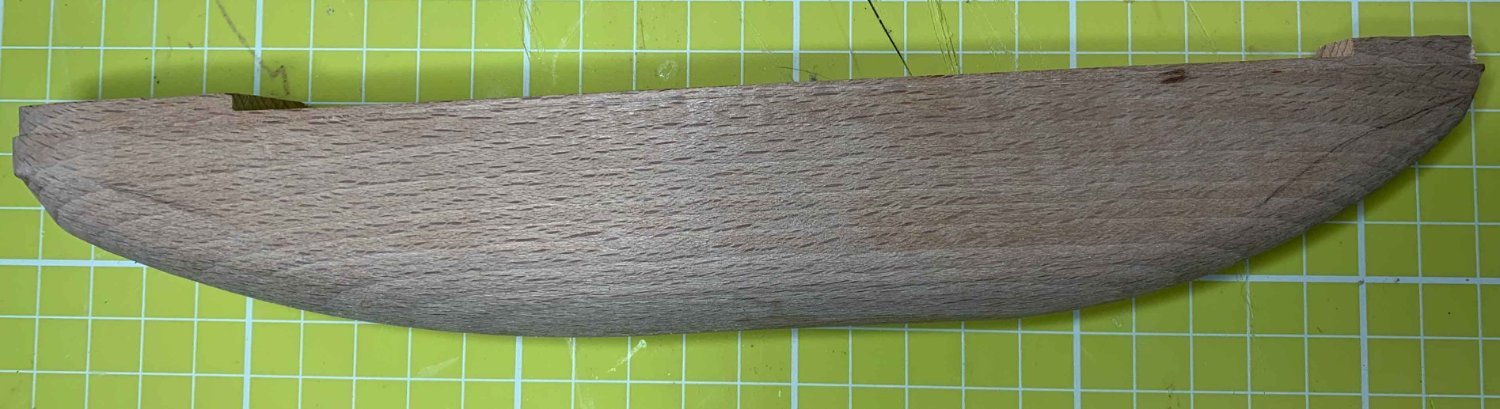
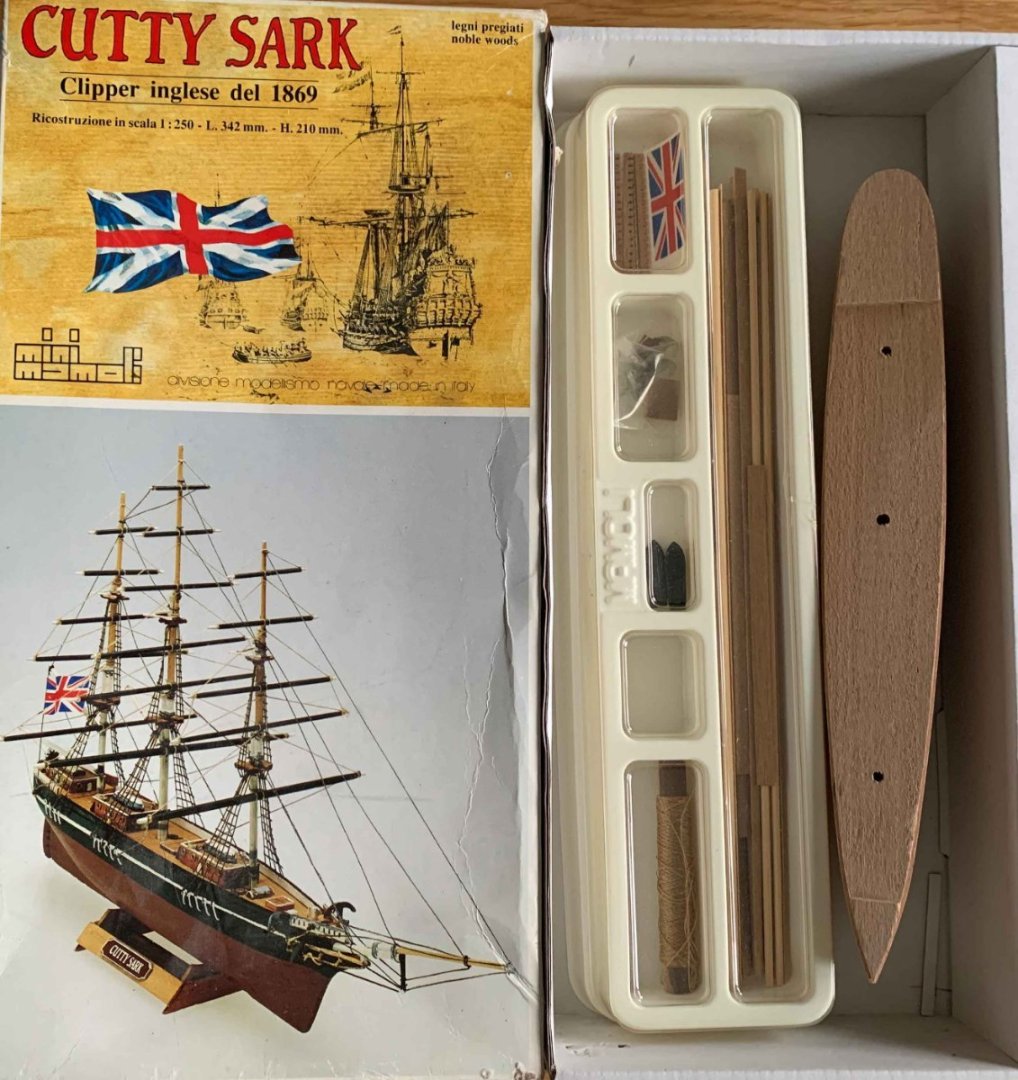
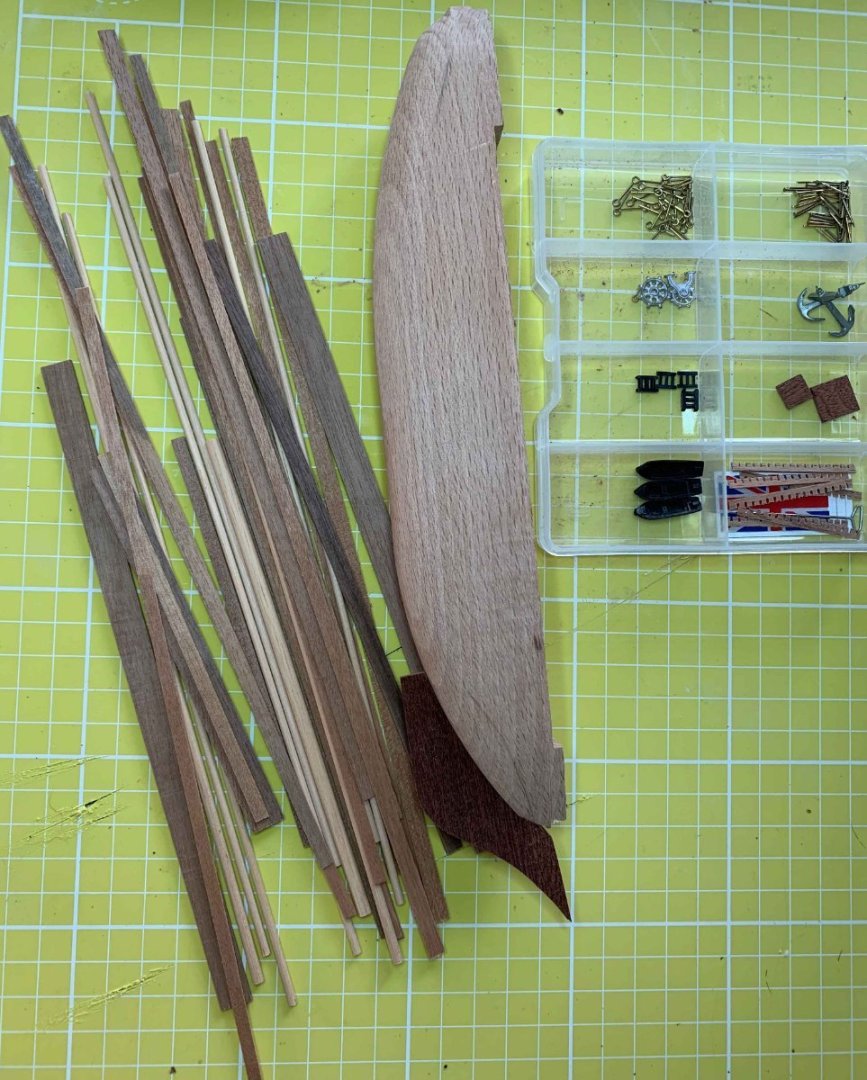
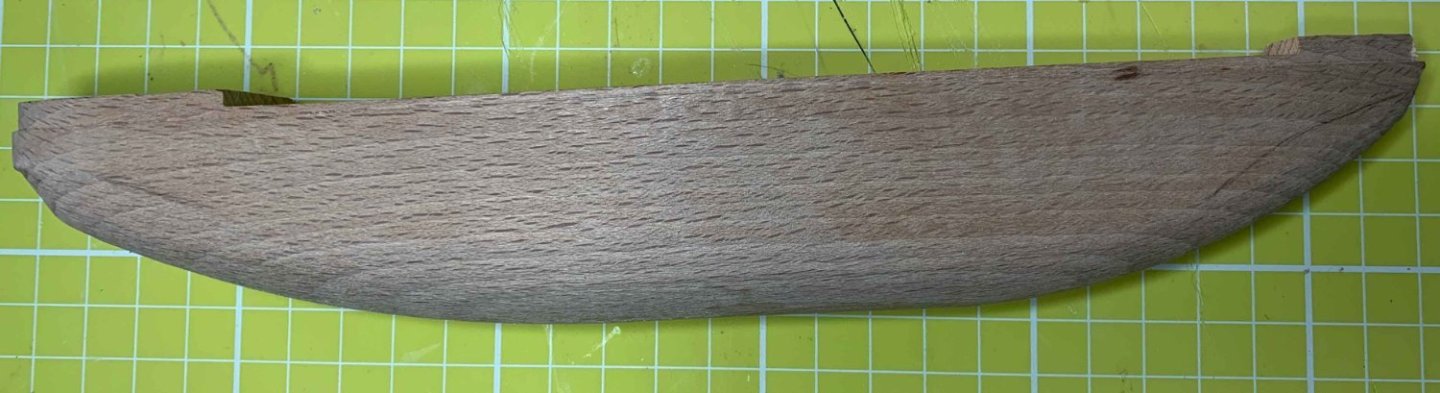
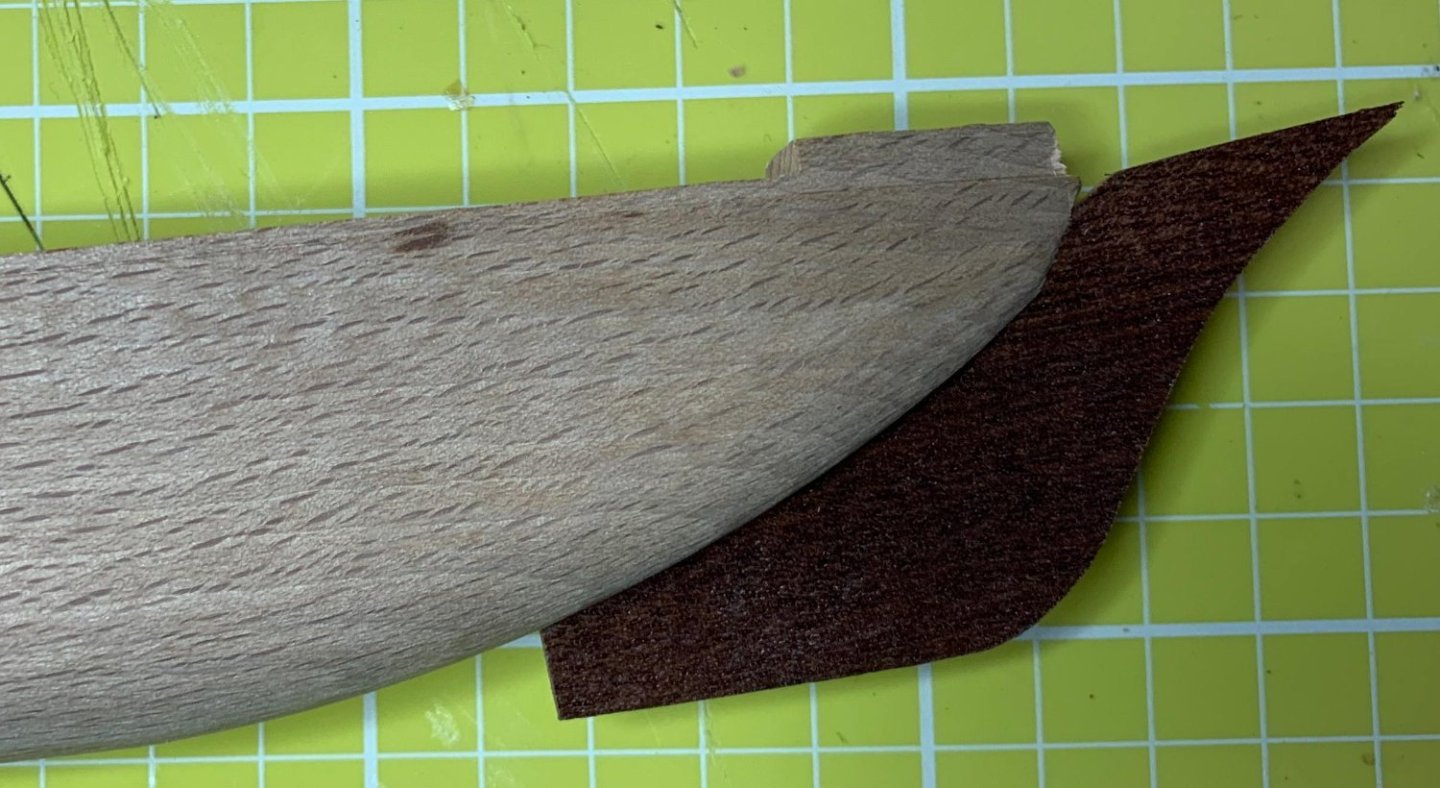
 Decided on this from my small stash of models as it looks like as fun build without too much detail. As you can see, it's an older version - This is NOT the Dusek version which is much better. Box contents - not a huge amount! Solid hull will need some shaping. Wheel all wrong, added 1 ships boat, eyes, pins and 2 more ladders to the contents. The slotted pieces usually used for gratings are meant to be the guard railings. A small start, but much to do to get a reasonable shape 😅 With a bit of luck I may be able to pull this off - Lets see!
- 9 replies
-
- 5
-
-
- Cutty Sark
- Mini Mamoli
- (and 1 more)
-
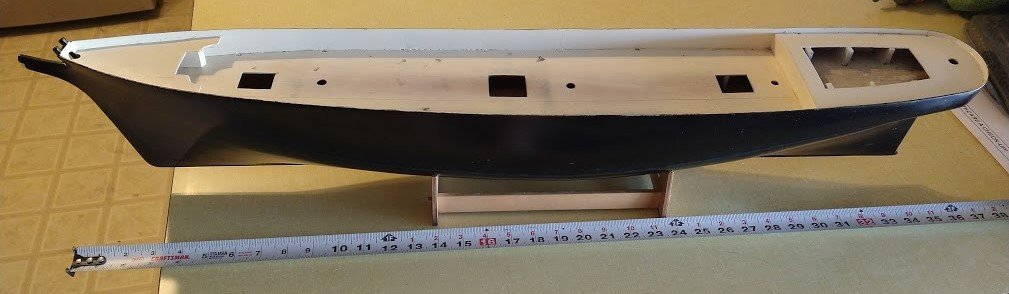
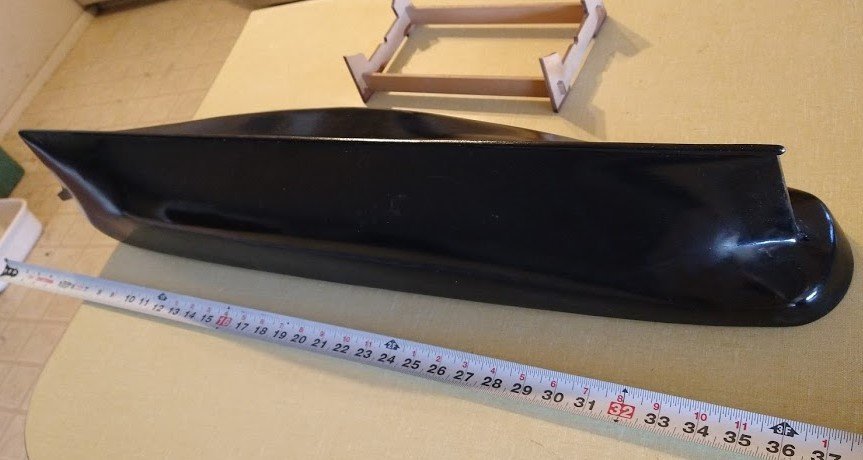
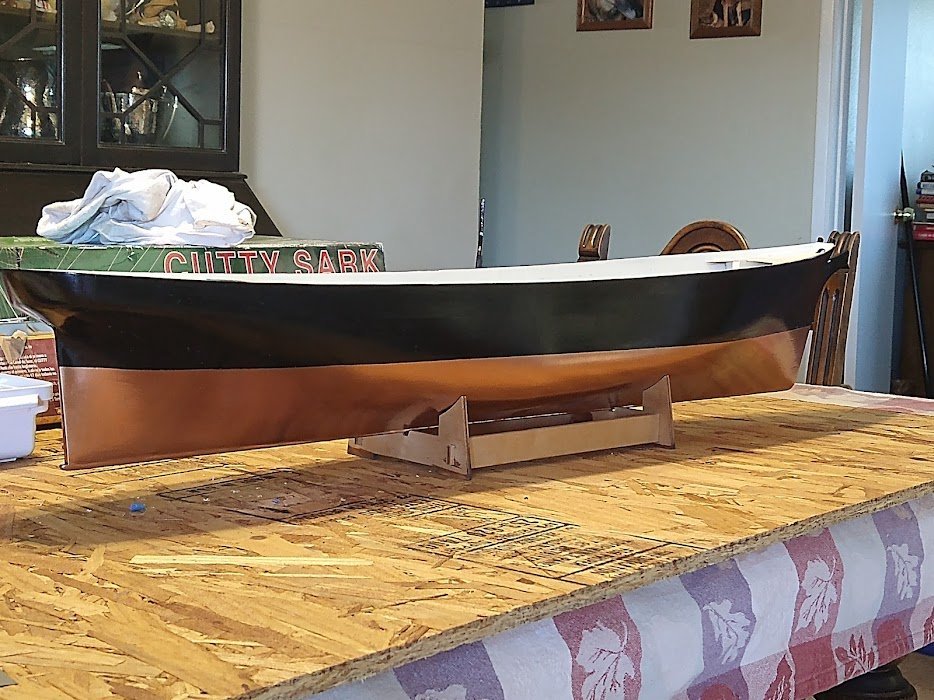
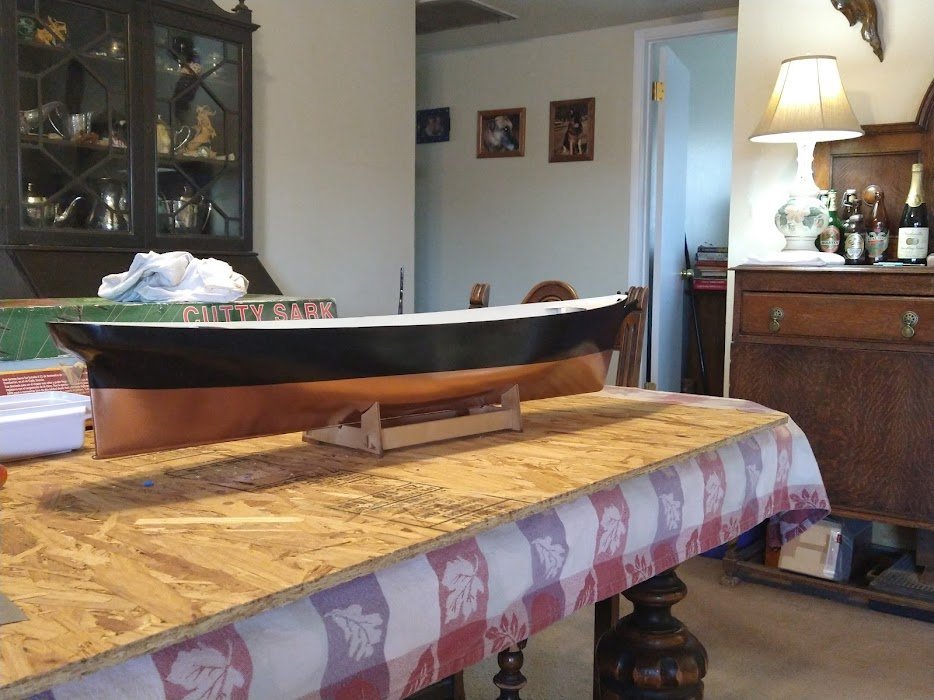
 This model was gifted to me from a fellow veteran who has since passed away from cancer, I figure that the kit is around 30 years old but it has good bones. First thing is to strip off the old deck and replace with 1/32 plywood then mark it up to start planking the deck
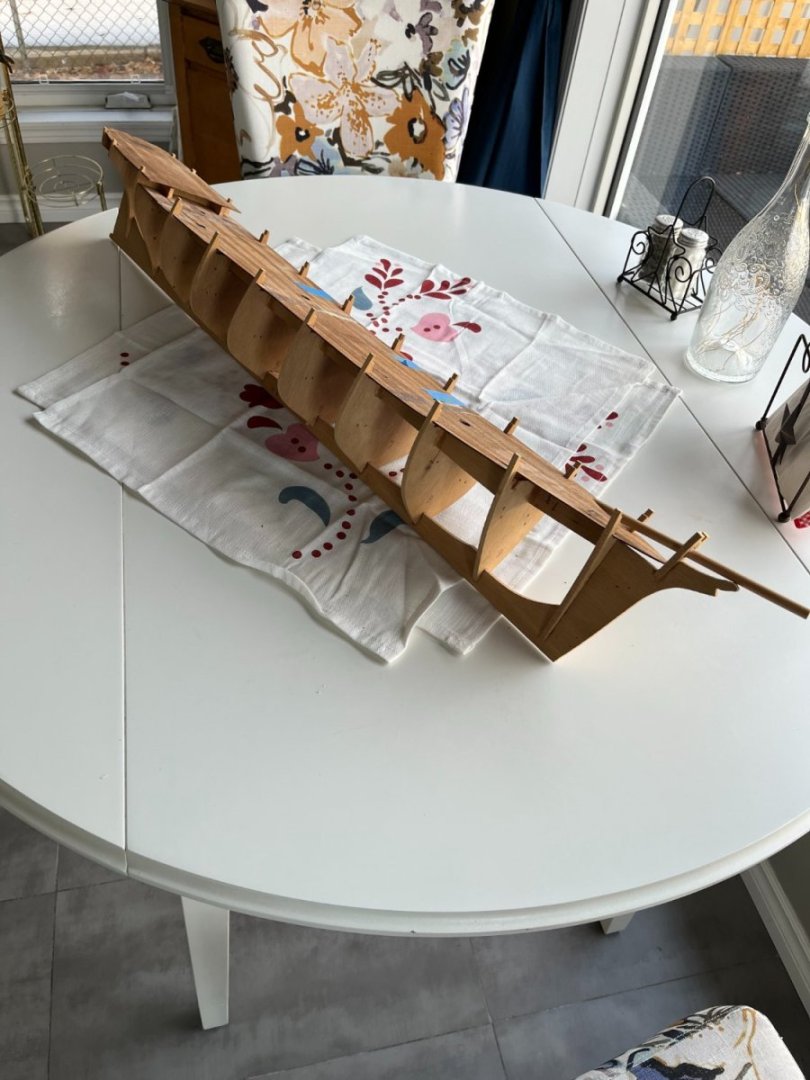


- 4 replies
-
- 6
-
-
- Cutty Sark
- Billing Boats
- (and 1 more)
-
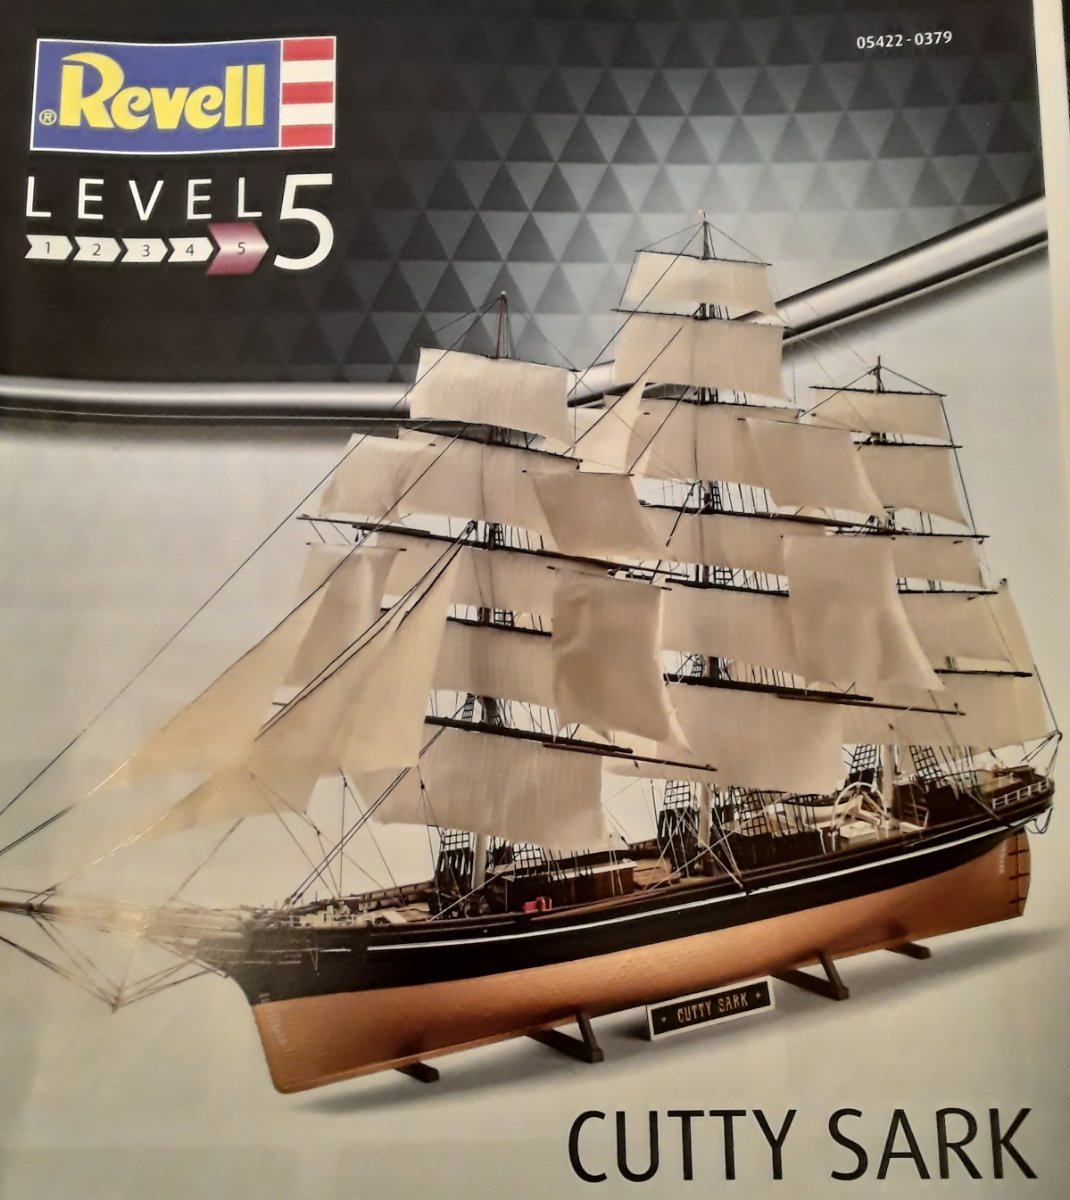
[edit] Please see the last page in the log for more info on the abandonment. This is not the end - I have replacement kits on the way and will start a new log soon. My darling better half gifted me with two virtually identical kits. She knows I've missed my built H-399 (1974) kit that was sadly destroyed in a wildfire (long story). She found one ostensibly new-in-box but had reservations so she also got a 05422 (2017) kit as a backup and spare parts. She's a keeper. I've been gathering stuff - I have an accessory kit from HiSModel including beech decks, cloth sails, wood blocks and deadeyes, etc. I'm awaiting delivery on paints and adhesives. I have all the necessary tools and other goodies, I think. I will likely build using as many parts as I am able from the H-399 kit (it appears to be complete) just for nostalgic reasons. My previous build was standing rigging only but this one will be under full sail. I anticipate that I'll be leaning rather heavily on you folks here (bless your souls) as the build progresses. I'm guessing I'll start in earnest around the first of the year (2023) and between now and then I'll be studying the invaluable topics here. The journey begins...
- 248 replies
-
- 3
-
-
- Cutty Sark
- Revell
- (and 2 more)
-
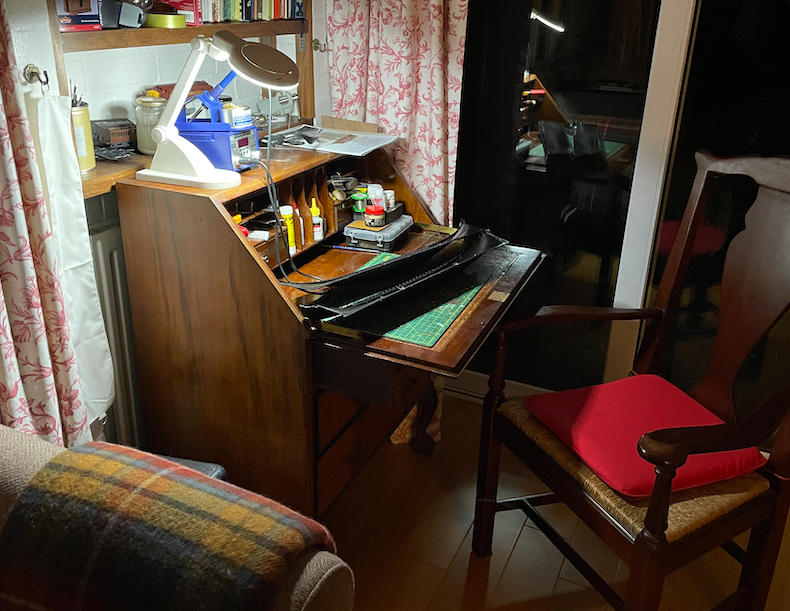
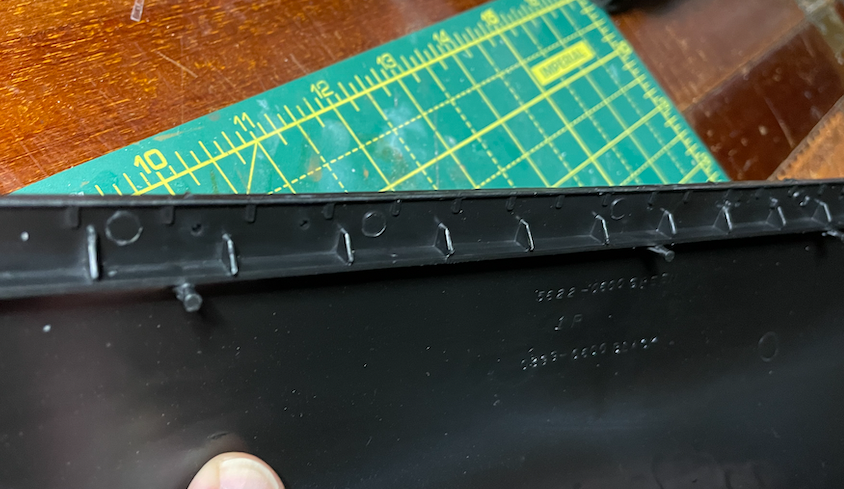
 My stepfather has been building a partwork HMS Victory for the best part of a decade, and so I finally caved and bought myself a ship to work on too. I decided to stick with something at least (mostly) injection moulded rather than wood, but it's ended up slightly larger than I expected - baby for scale: It will be built here: The build will not be wholly as instructed, as there are a couple of modifications I'm planning to the base kit which are quite simple such as the bulwark stanchions and moulding around the deck houses. More significantly there are a few aftermarket parts available for the kit - the main one being the replacement of the plastic, three-part deck with a laser cut oak veneer equivalent. The supplied deck has 'positive' timber outlines and so even if I can fix the glaring gaps between the three deck sections and rescribe the grain it's still going to look quite bad. There are also photo-etched names and ornamentation, draft decals and flags which I think I will avail myself of, but the rigging and its level is yet to be determined (see later) Anyway, on with the build, commencing with purchasing two hardback books about the ship (by C. Longridge) and getting the hull together. The first modification are on the bulwark stanchions - seen here: These should be metal posts rather than fillets, so I have cut away and sanded them flush as below. You can see the fairly awful decking laid in place: I experimented with fixing the decks together with supporting styrene to get them as level as possible and extra clamps, but even so the joins are very obvious indeed. As such, I'm expecting to use the laminate decking and will work under that assumption: Despite enjoying the occasional ferry and reading the Aubrey-Maturin series I've no meaningful knowledge of rigging and only a very minor familiarity with terms (please excuse me - lots of googling going on). I am aware that hismodel provide both rigging plans as well as CNC machined deadeyes, photoetched eyelets and hooks, etc. but frankly I don't know if that's just going to end up being too much for me. I think I would be quite happy with the rigging as described by the Revell kit instructions, except for the fact that the shrouds and their associated deadeyes/lanyards are moulded plastic - it just doesn't look right to me. QUESTIONS ABOUT RIGGING: Is real rigging a fools errand for a first sailing ship build? I don't mind taking time but I don't want it to be impossible! I'm thinking given the low cost to replace the eyelets and hooks with photoetch/wire as standard. My first thought was to use the Revell hardware placements like-for-like, and then add any additional for the 'real' rigging as I go along (if I take that path). Is that sensible, or should I really know upfront? If I go ahead with replacing the shrouds with thread, how much time is that as a proportion of the time spent doing a) the Revell rigging, or b) real rigging? I want to know if I'm going to commit to that whether I should just go the whole hog, or whether there really is a large gap and I need to think carefully. It is also really not clear to me why I would replace the belay pins, though it seems to happen frequently - I appreciate they are about twice the size they should be, but they are still very small. Does the fact they are plastic play a role? QUESTION ABOUT OTHER AFTERMARKET PARTS: Most build logs seem to replace the plastic railing stanchions with turned brass equivalents - not cheap at all, worthwhile? Many thanks for reading, see you all soon.
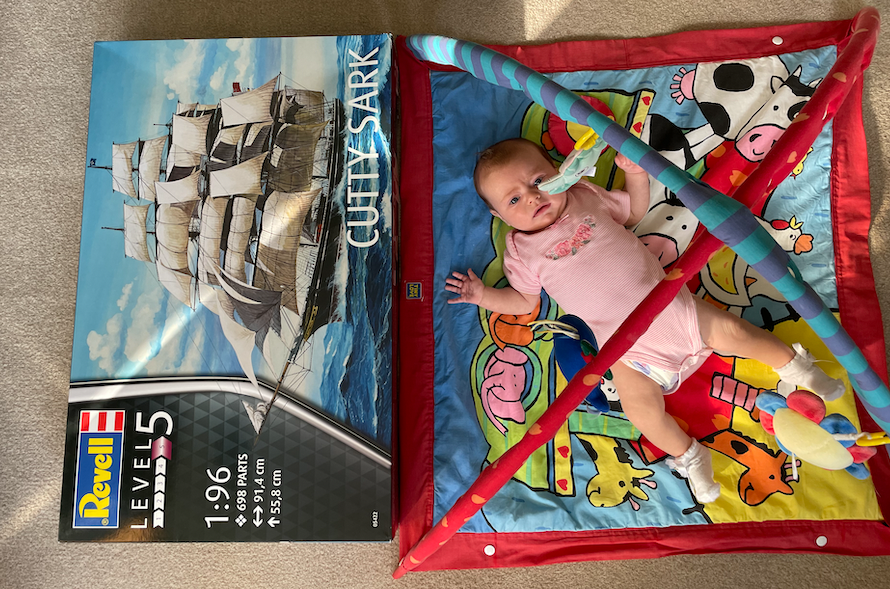
- 6 replies
-
- 6
-
-
- Cutty Sark
- Revell
- (and 2 more)
-
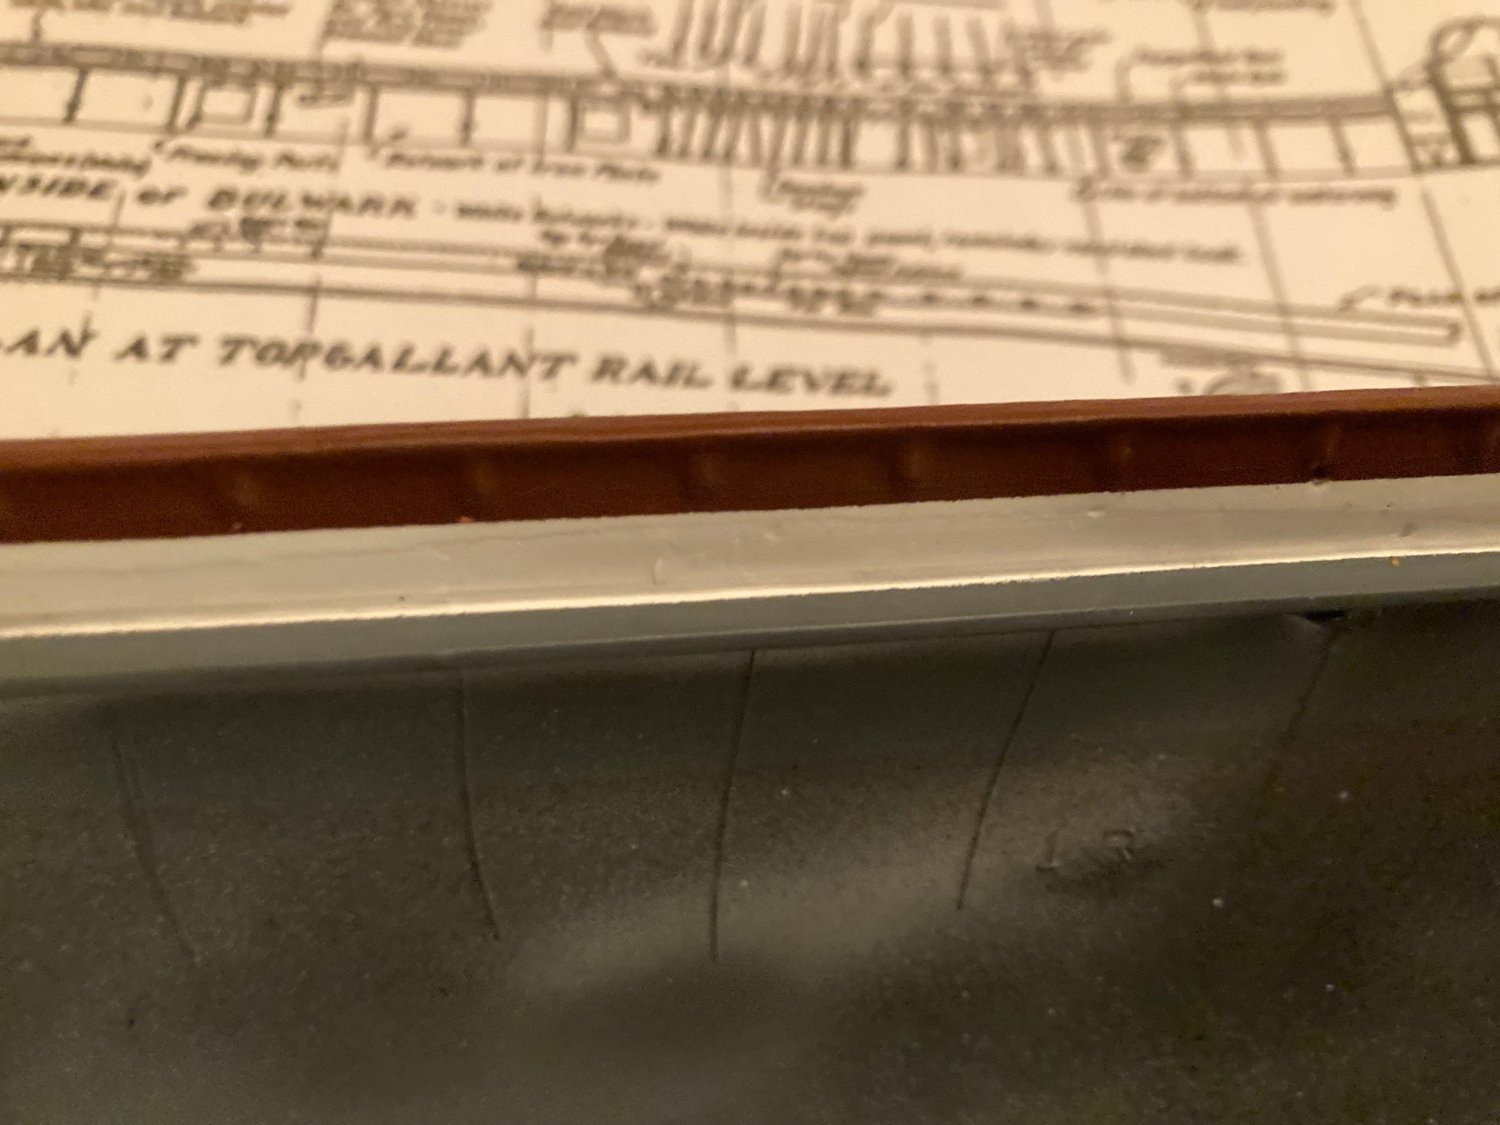
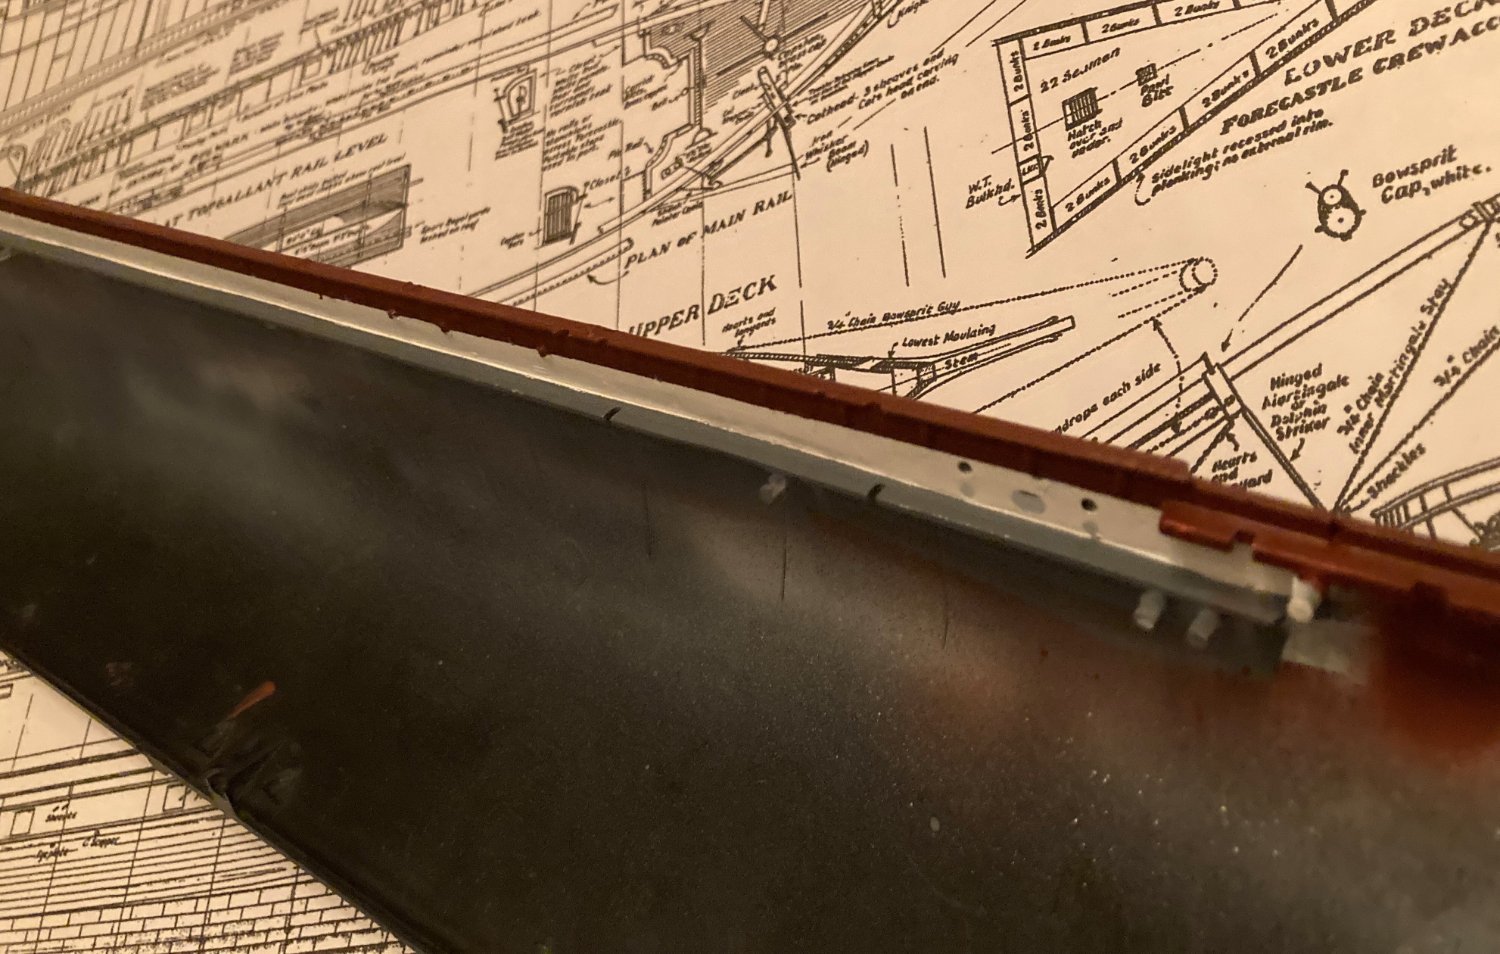
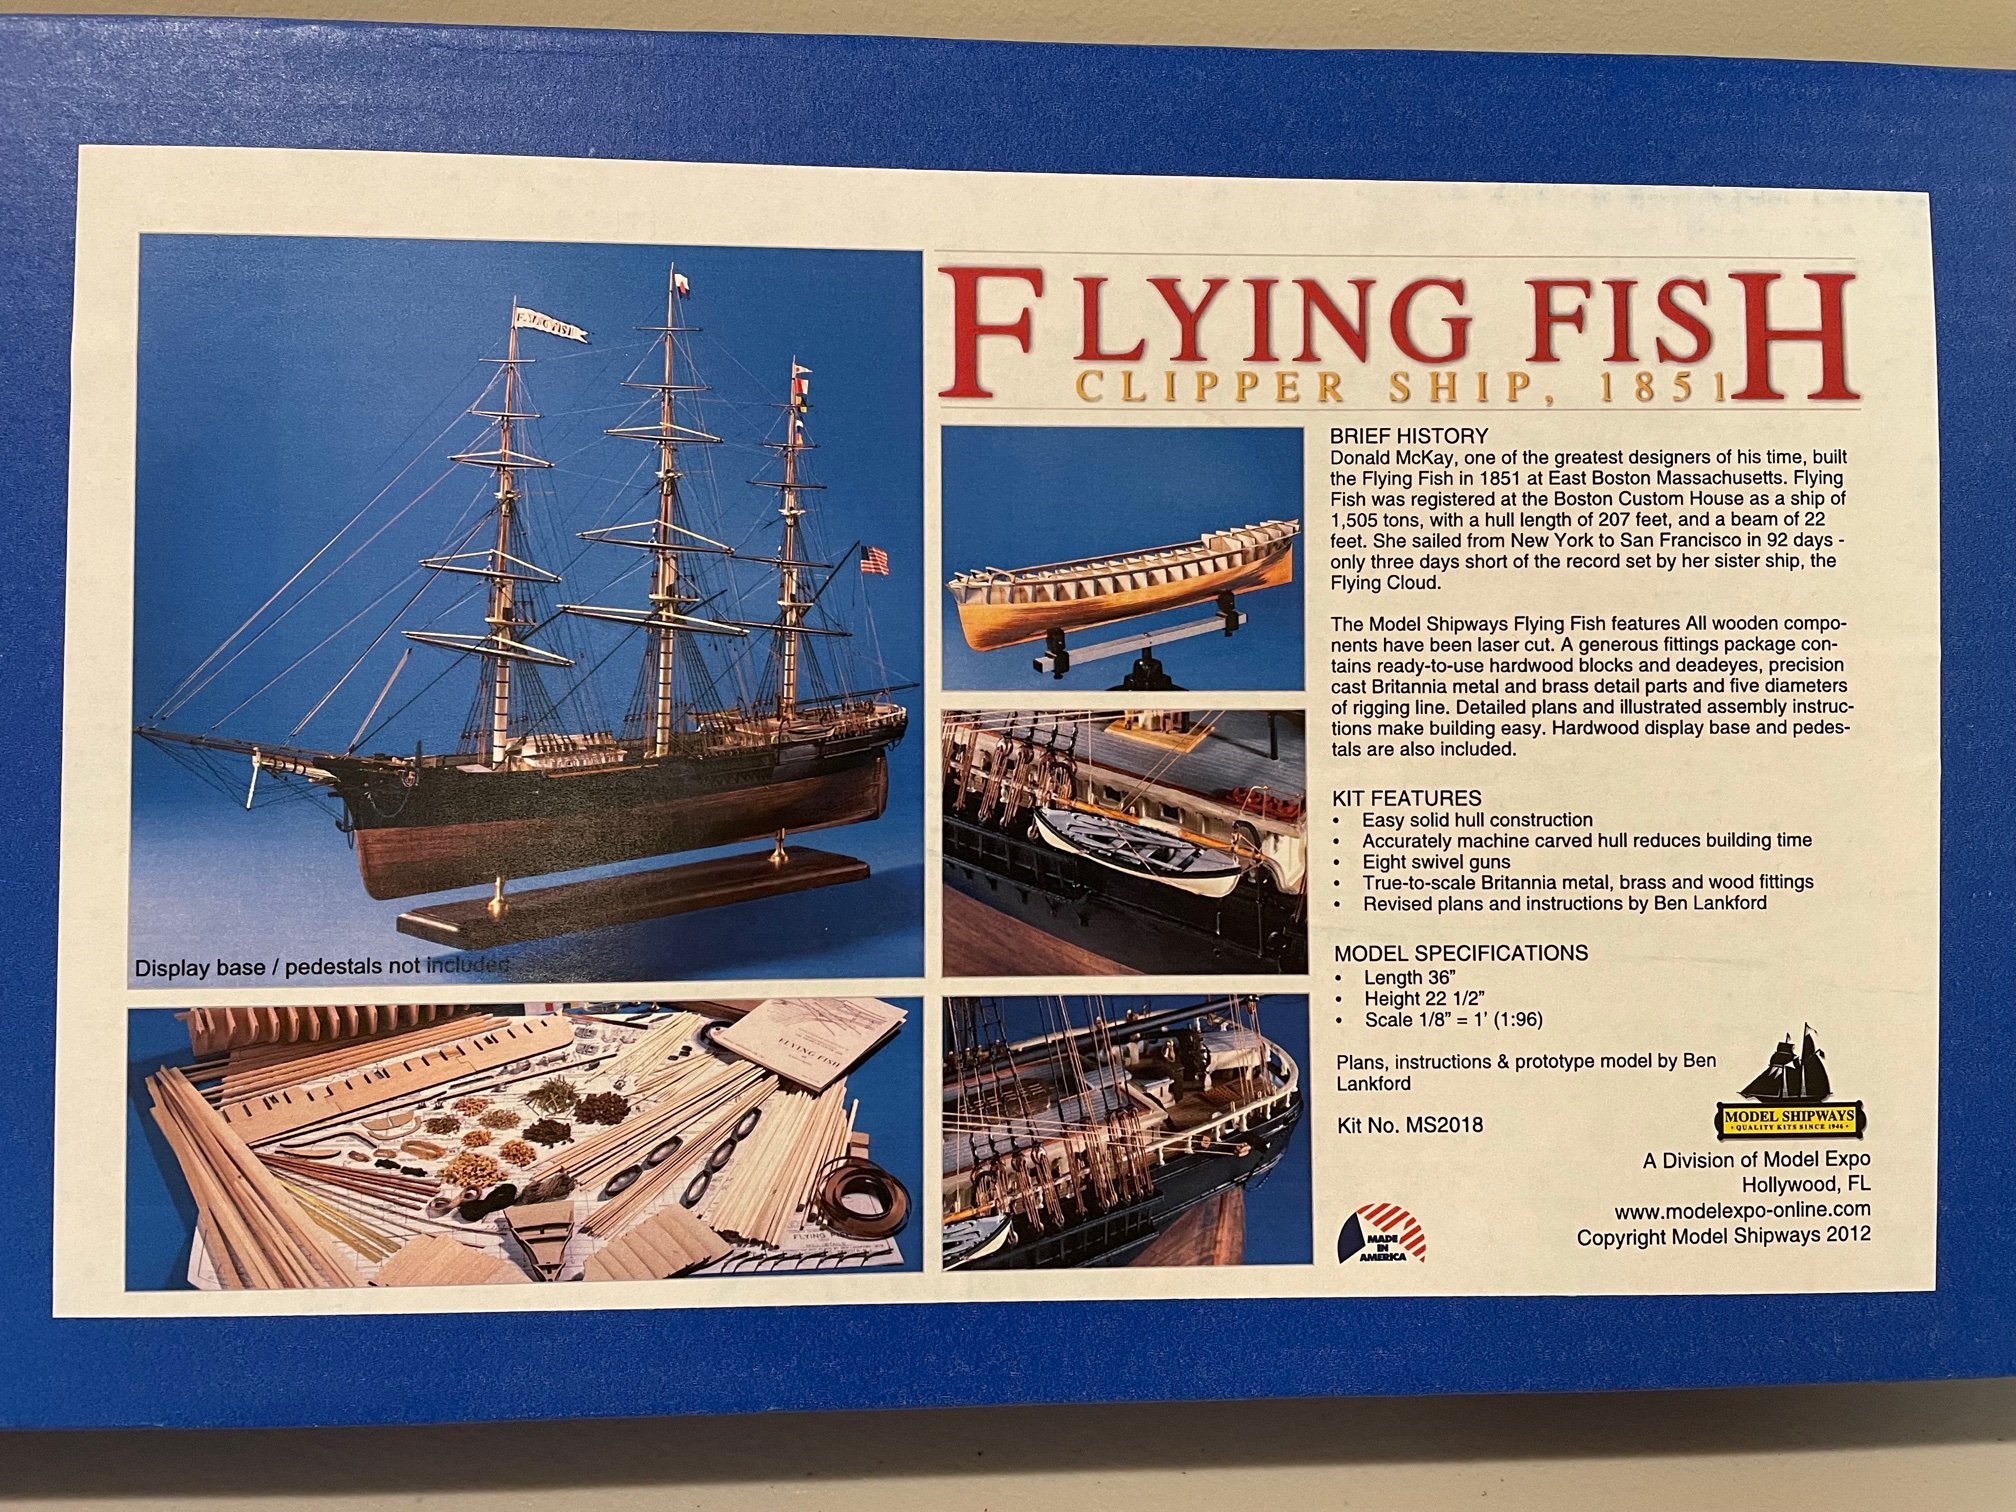
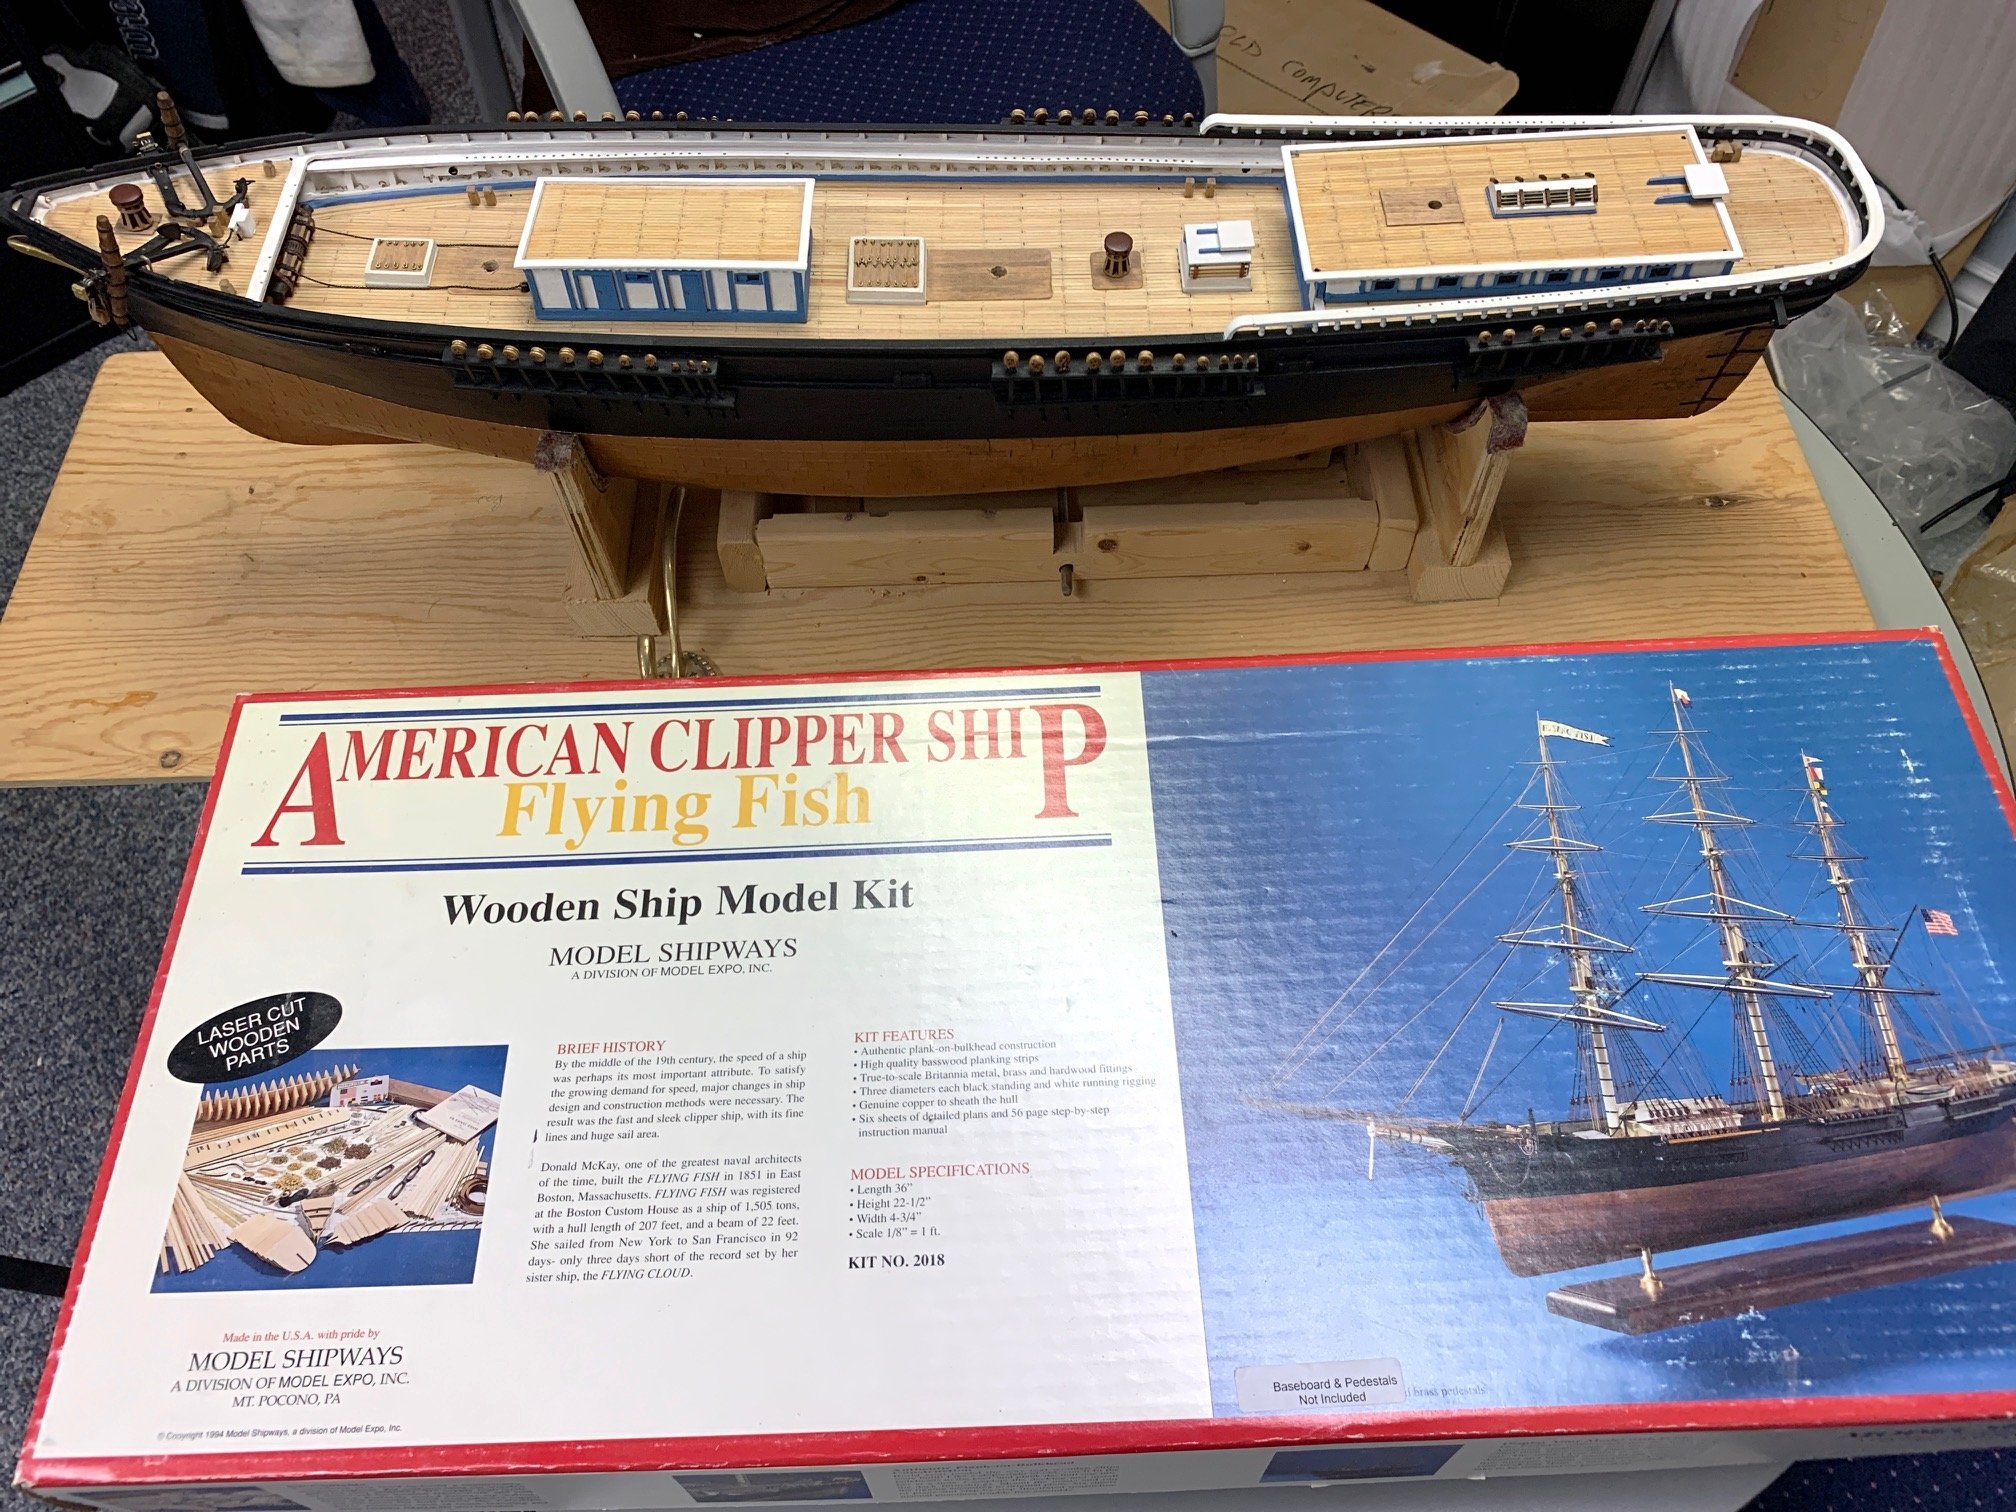
 Log entry No. 1 Well, I'm going to take the plunge and start a build log. I could probably name this build log after one of my favorite Dr. Suess books I had as a child; One fish, Two fish, Red fish, Blue fish. There are several Flying Fish builds on MSW, so why not one more. I started this Model Shipways build in 1998 when my kids were small and had grand ideas of building the Fish as a grand piece for my office. Despite working as carefully as I could, I got frustrated with all of the mistakes I was making and put it aside in 2000. This was not the first ship model I've built. I just made a lot of careless mistakes rushing the build. Reading through the Fixing Mistakes thread on MSW gave me the motivation to take on the Fish again. The first order of business will be to fix all of the mistakes I've made. Here's some of the mistakes I will need to fix: 1. Did not fair bulkheads 5 and 6 enough resulting in a kink in the planking rather than a smooth run. I will need to remove the planking I've done and fair the bulkheads properly. 2. Sanded the planks as I went before I attached the stem. This resulted in a misshapen bow and too thin planks. Need to repair and bow and properly fit the stem. 3. Broke bulkheads 1 through 3 in the forecastle. Need to properly trim the replacement bulkheads I made from scrap basswood. 4. Did not properly taper the planks and installed stealers when I didn't need to. I will be removing the incorrect planks and re-installing them. 5. Need to replace the stern part of the planksheer that I ineptly carved. 6. Cut the stern part of the keel off too short so that it doesn't extend below where the rudder will be installed. I work exclusively with hand tools. I do not use so much as a dremel or air brush. One of the reasons is that I like to work at night when it is quiet. I don't want to disturb the admiral with the noise of machinery. The second reason is that I love working with hand tools. Surprisingly, despite sitting in an unheated garage for 20+ years, the hull is still true with no twist. I'll be working slowly and methodically and will post progress periodically. Please wish me luck. Wawona59 (John)
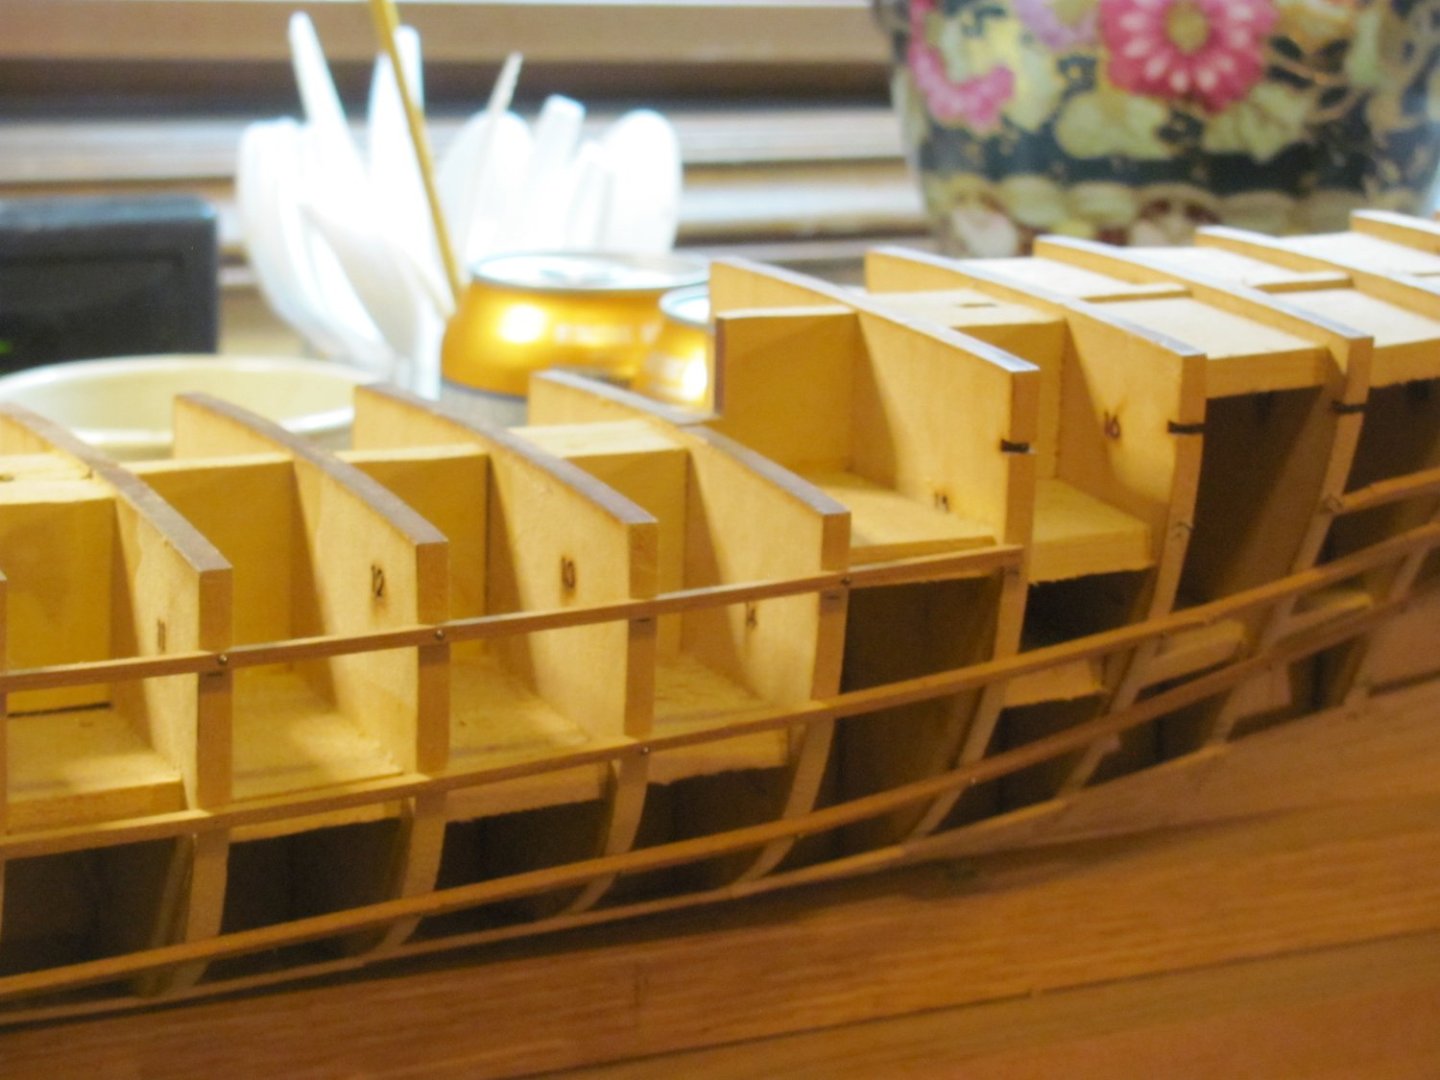


- 34 replies
-
- 3
-
-
- Flying Fish
- Model Shipways
- (and 1 more)
-
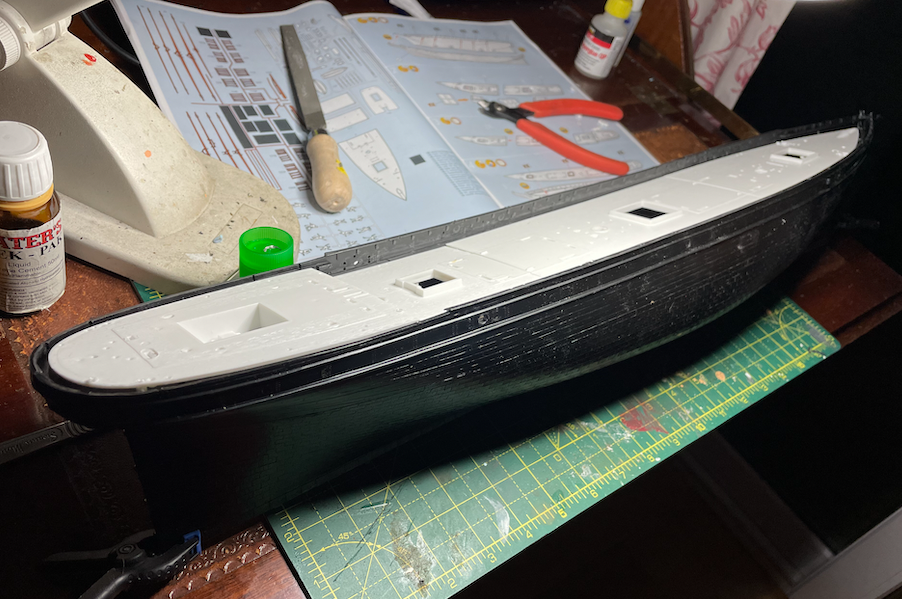
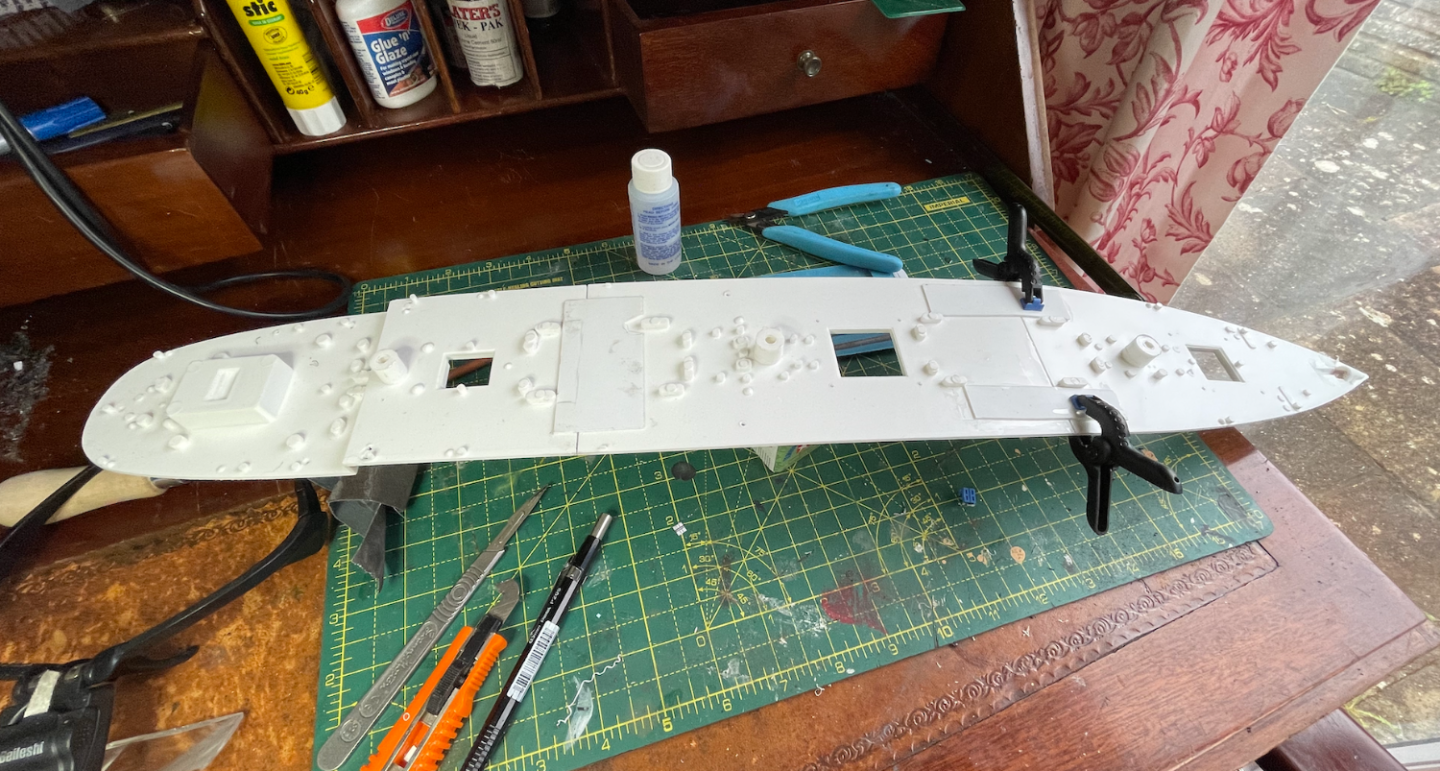
 I am working on the Revell 1/96 Cutty Sark. I haven't gotten too far along, even though there have been many hours spent. The hull is painted and ready to assemble. I have been working on the deck as paint drys elsewhere. The photo taken in Australia is my reference along with books and plans. The model will be what I call clean, by not trying to create a diorama on a stand with weathering and all, just making a replica of a ship in 1/96 scale. I am not sure who else likes the look. I removed the wedges from the inside of the hull. I am going to replace them with small plastic rod. Testors enamel is being used with an air brush and also painting by hand with a paint brush. There are brass stanchions with brass wire. Decals are being used to add the white panels to deck houses. I will also use decals to add the white portions of the inner bulwarks. The eye rings are made by me with annealed wire. The deck covering is from His-Model. I plan to fully rig the ship, something I haven't done before. I am not going to add green to the copper, as copper only turns green in the open air. In the water, it remains copper. The only part of the sheaving that is green is the part out of the water. There is a good picture showing this at the Charles W Morgan website. The ship was being lifted out of the water. Also, I am not going to weather anything. I'll be posting more as I go. I am new to this build format.
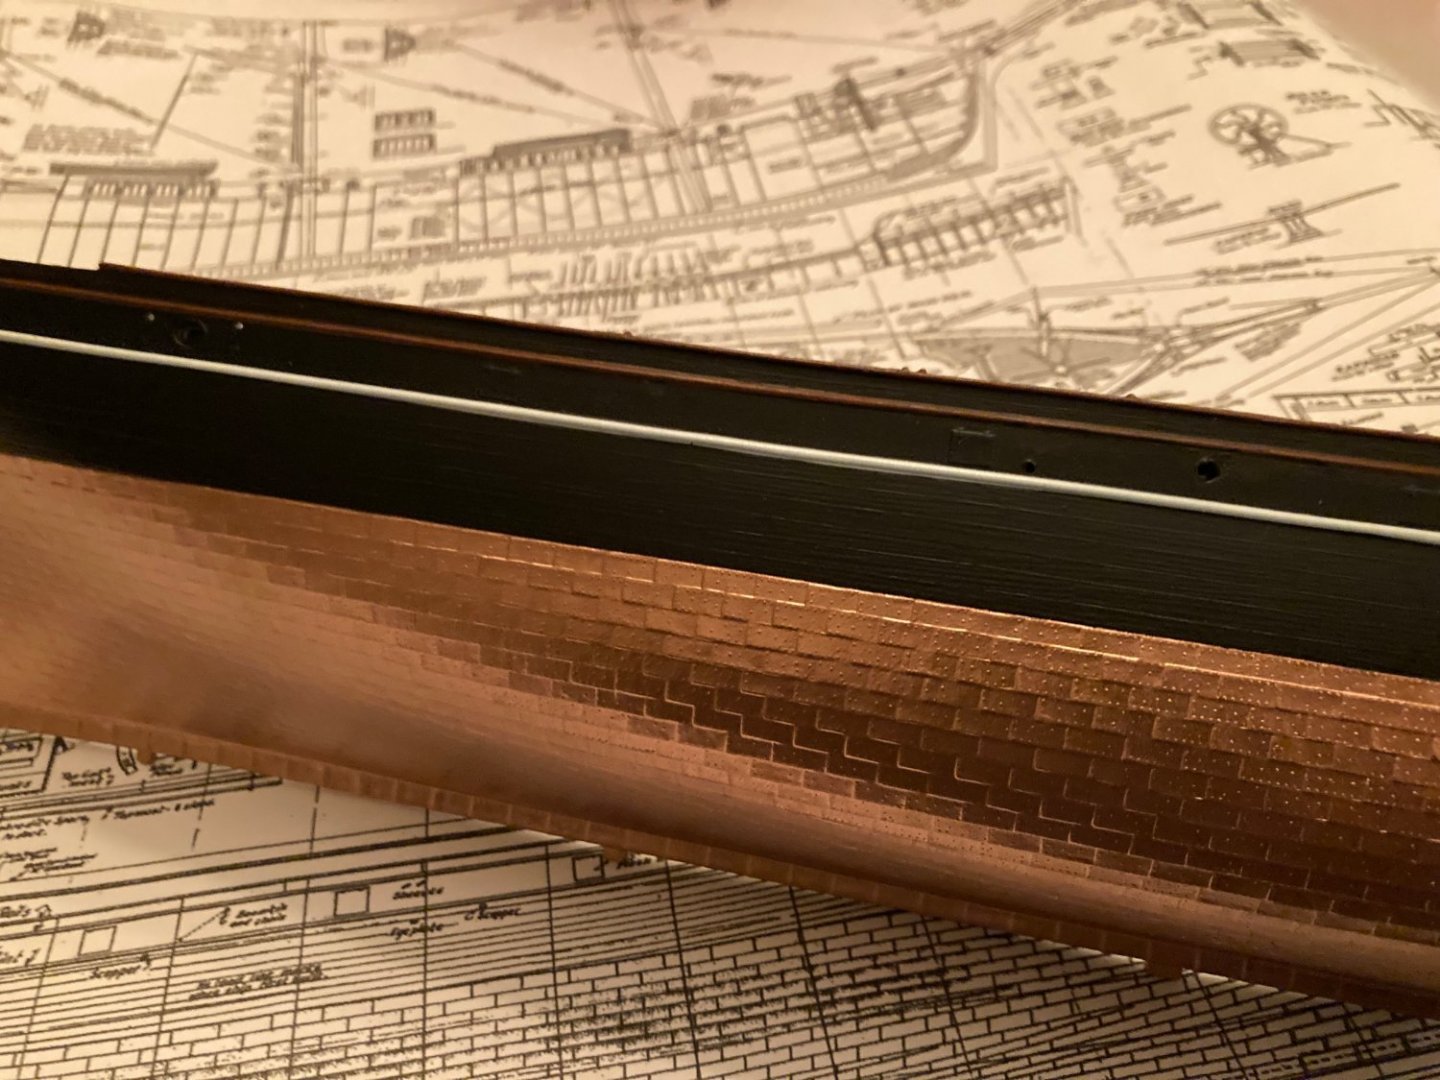


- 481 replies
-
- 9
-
-
- Cutty Sark
- Revell
- (and 2 more)
-
 I have been reading with interest the blogs about buildings Model Shipways Flying Fish. This is opportune for me as I have been building the solid hull version of this model for over 40 years. I have been particularly interested in other builders interpretation of the aft cabin and stem of the Flying Fish. I have been fortunate in that I was able to observe and photograph the china trade painting of the Flying Fish when it was up for auction in 2005(?) at Northeast Auctions.. Since then we have all benefited from the pictures of the Flying Fish painting by James Buttersworth that is now available to view online. Both these paintings have cleared up questions about the ship such as mast and bowsprit colors aft cabin face and to some degree, the figurehead. While I think I am the only builder building the solid haul version, I will attempt to relate my own experience building this model and the results of my own research and thoughts. I hope you did this interesting.
- 174 replies
-
- 4
-
-
- Flying Fish
- Model Shipways
- (and 1 more)
-
 I have just started the Revell Cutty Sark 1/96 model. There are several excellent build logs already available and so I plan to focus more on tips and especially the mistakes I will make. If I don’t mention a step , it’s because I followed the vanilla instructions and have nothing of value to add. I have made many paper, wood and Lego models over the past years but its been many years since I last built a plastic model. I am working from the latest instructions, enhanced by the 1987/88 version. I am also following a couple of the existing build logs I found here.
- 14 replies
-
- 2
-
-
- Cutty Sark
- Revell
- (and 2 more)
-
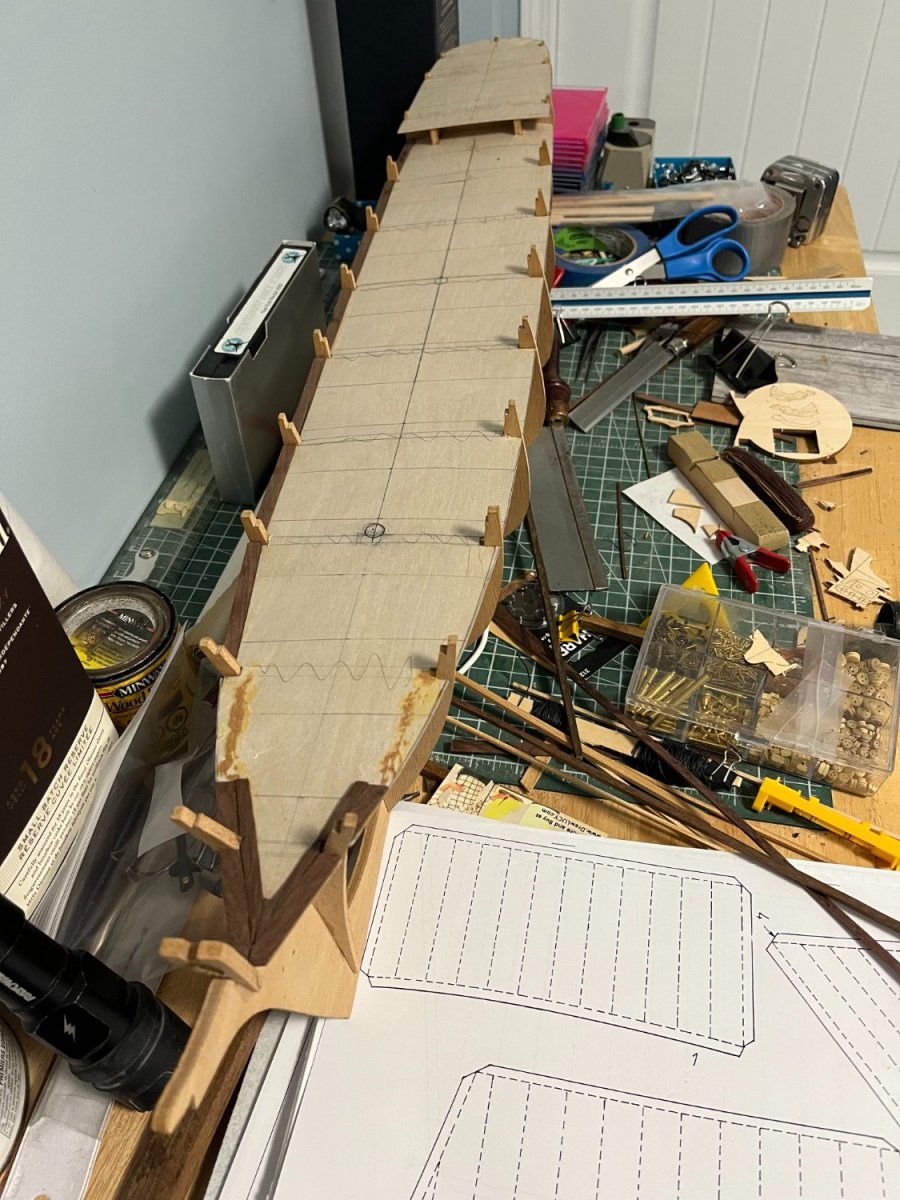
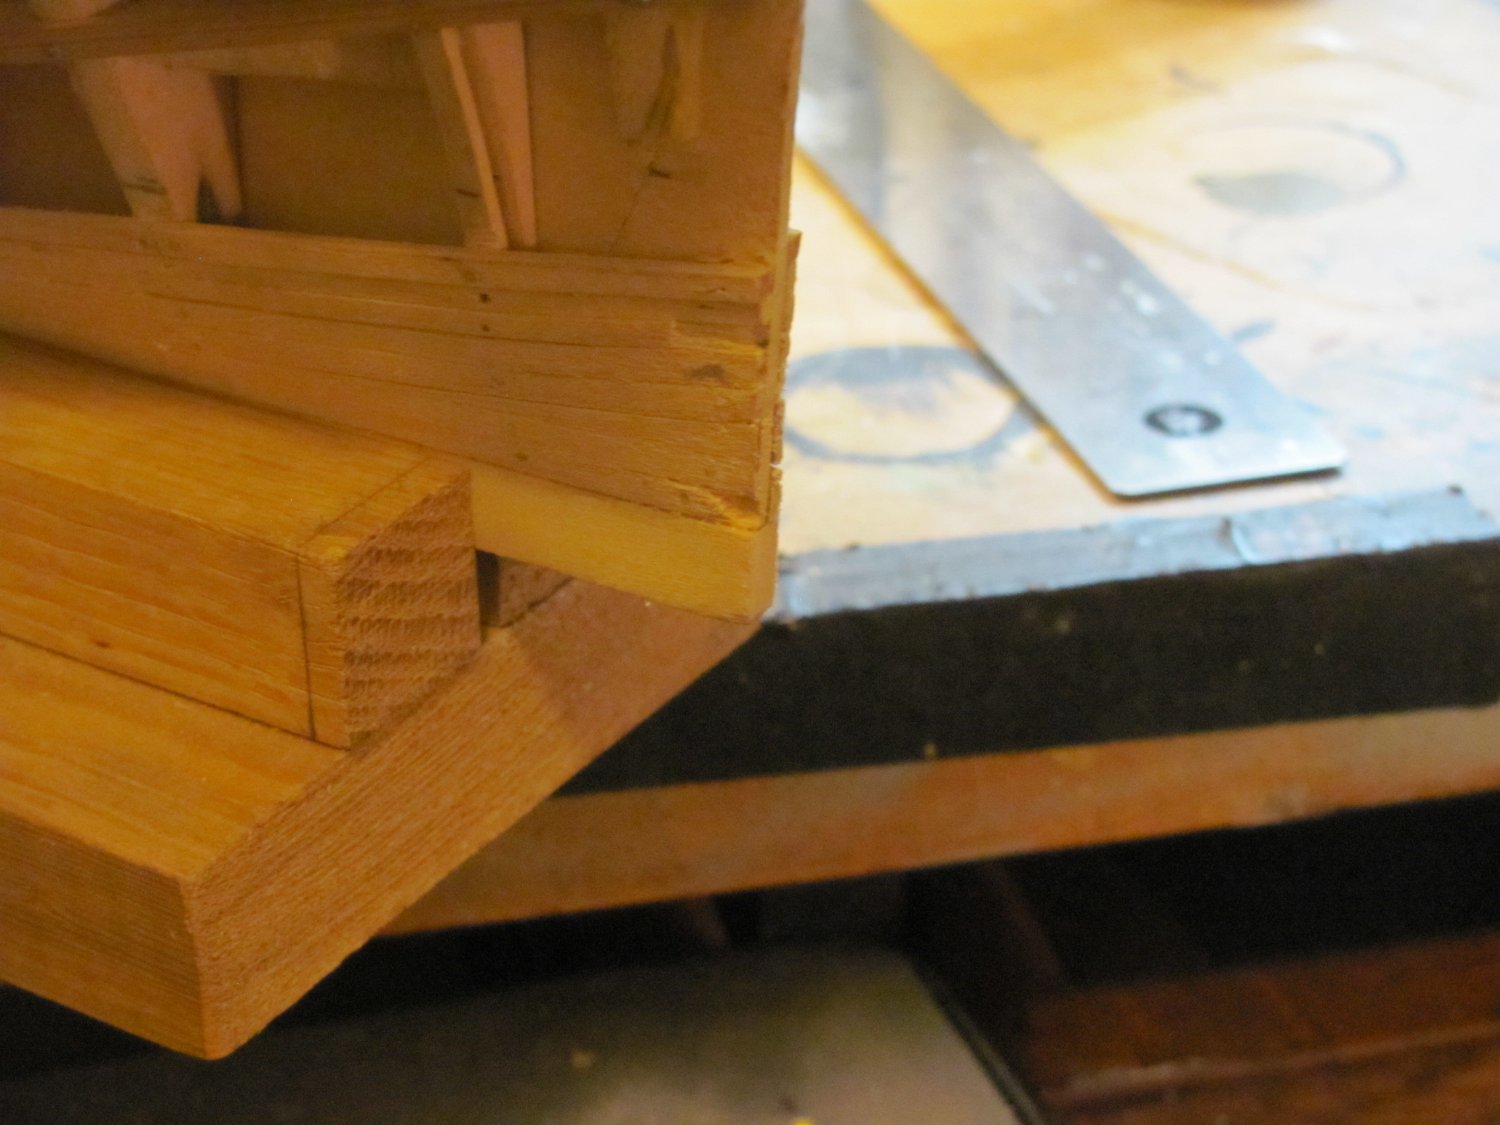
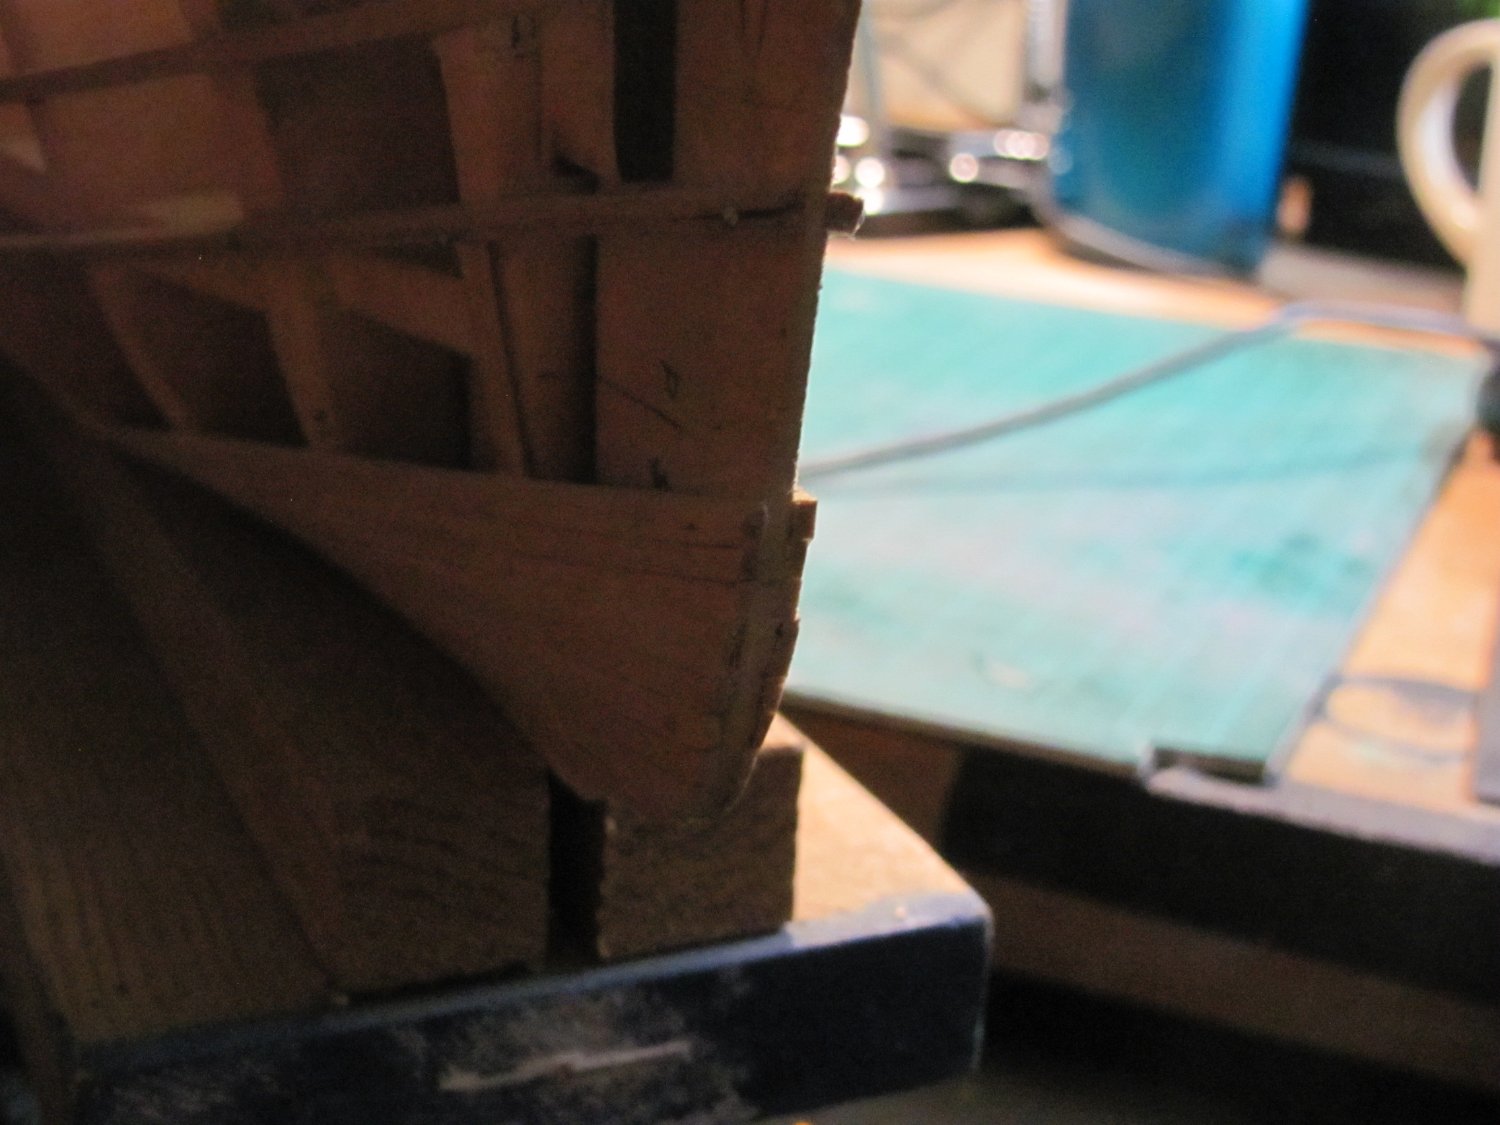
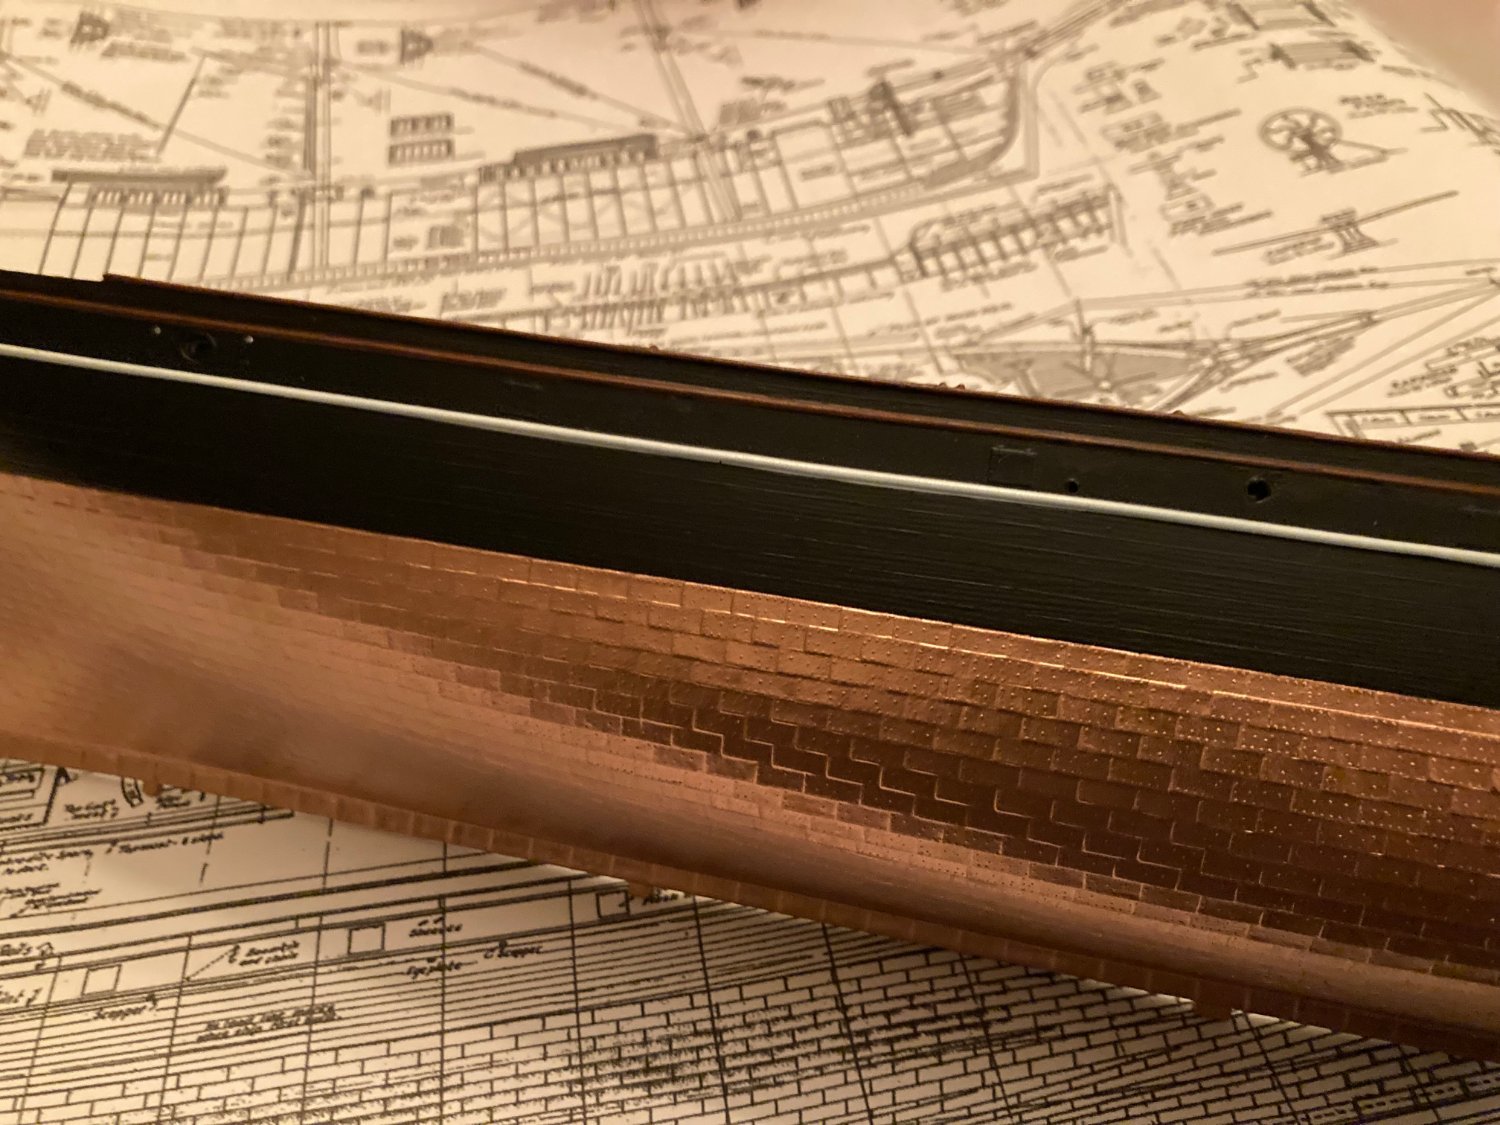
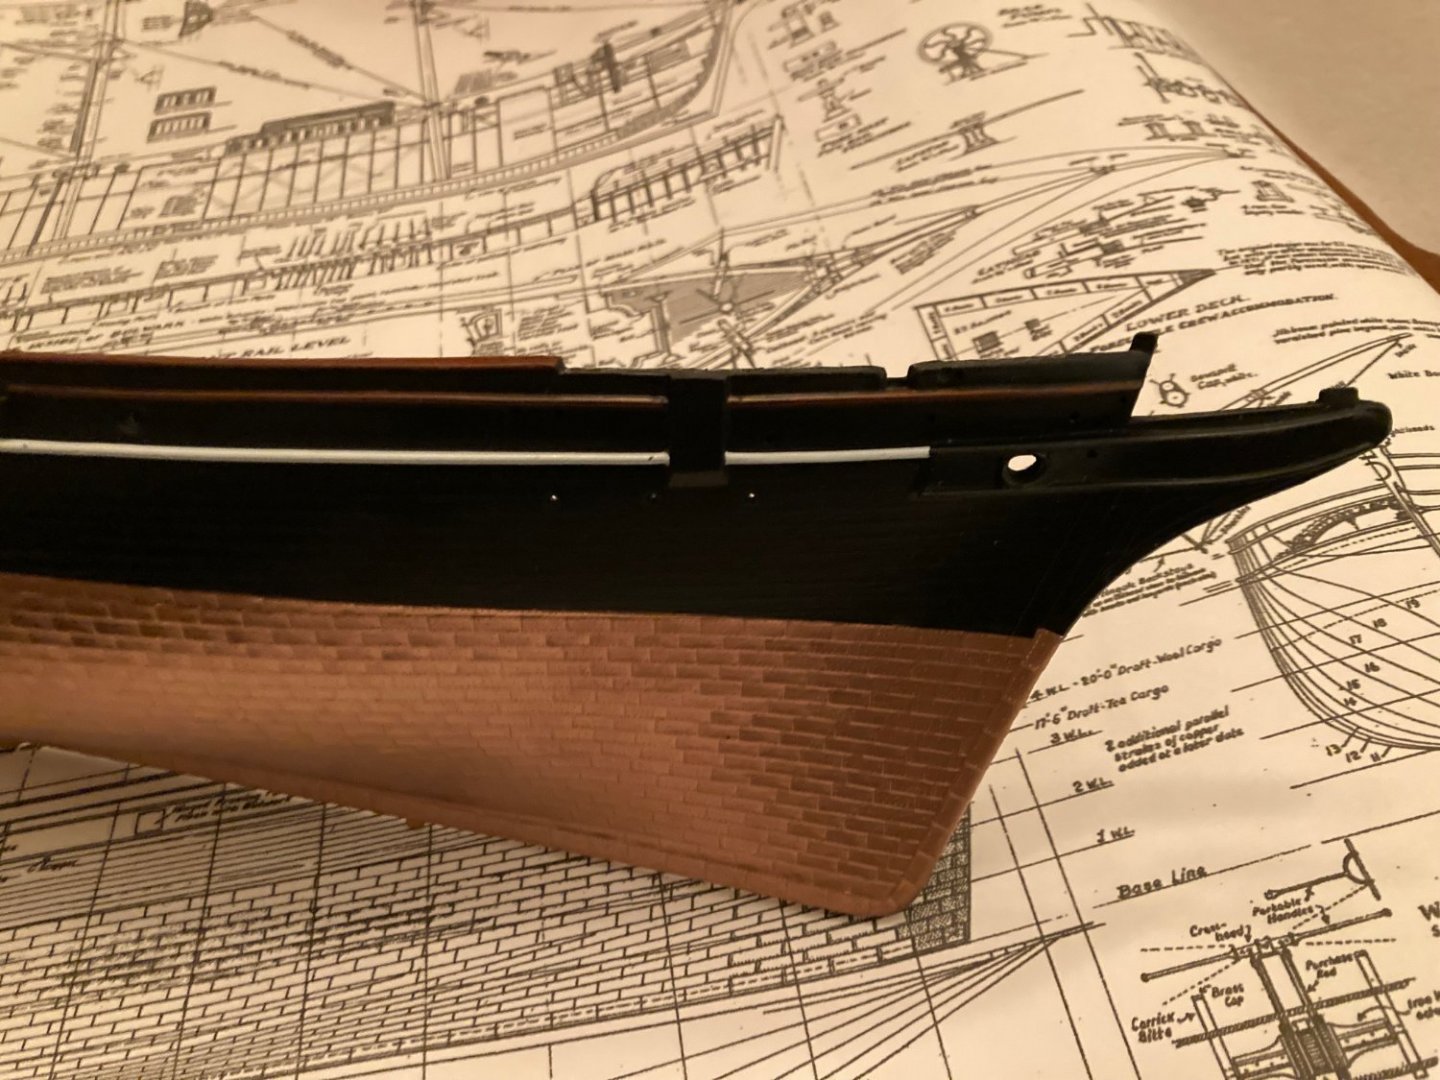
 Ok, This is my Build Log. First a bit of history as the images to be posted begins with my 4th build of this ship. I have loved building Model ships ever since I was a kid (a very, VERY long time ago). My first was a half hull Cutty Sark that was placed on a plaque and then wall mounted, I was in 7th and 8th grades for this one.. My next attempt was when I was in High School, a 'Revell' Plastic Cutty Sark Model that went very well, but didn't hold up well over the years and is now gone forever. No picture that I can find of that one. My 3rd attempt is the 1:78 Cutty Sark wood planked ship by 'ARKIT'. I started it back in 1988 while in the U.S. Navy, but when they shipped my model home when I discharged, it was destroyed. So attempt 4 (and current) is a 1:78 Wood 'Sergal' model of the Cutty Sark. I have Been working on mine for a while, I laid down the keel On this latest attempt in 1993, assembling and planking the Hull. I got the hull sanded and painted. But when it came to mark the copper plating line, I took a loooong break from it as I was afraid I didn't have the skills then. (that was 29 years ago). This is where I stopped for this long 29 year hiatus: In between these years I have been honing my wood working skills better. Here are some examples: Now it's 2022 and I have a renewed desire to get back at it. I designed a jig to cut the line to mark the top of the copper plating line. I then Taped off the upper part of the hull right down to the line I scribed. I then painted the lower part a copper color. You see, I have seen other models that have been plated but the plates are next to impossible to get them perfectly in place without tiny gaps. These gaps I saw had shown with the black paint showing through where the plating was not as close as it could have been. Hence, I painted the under side copper so any gaps would be invisible. I'm now at that point where I need to glue on the hundreds of plates to the hull. Which brings me up to date with the newest pictures: If any are wondering why I painted the hull copper first, I have a good reason. I have been looking around at other folks that built this ship and notice that the copper plates were not applied perfectly and the black under coating of the hull was showing through. So I wanted to make sure that didn't happen here, So I painted it the same color as the hull plates, so If they don't go on perfectly, the seams are still hidden.

- 39 replies
-
- 4
-
-
- cutty sark
- sergal
- (and 1 more)
-
 Hello, I stumbled across this forum looking for advice for my first model ship and boy did I spent time coming across interesting topic after topic...So I thought I'd give something back and start a build log. I started this model a while ago but wanted to make some progress first before starting the log. Just in case I wouldn't go through with it... I'm from Berlin/Germany so excuse my english. I'll do my best. However I expect to struggle especially with the naval vocabulary. I actually got the exact same kit when I was a child. I was about twelve years old I think and in over my head. I don't even know anymore who spent that much money to give me that present and then left me alone to deal with it. I managed to plank have the hull, then went out of wooden walnut strips, because most of them broke while I tried to glue them to the ribs. It looked awful. So I left it to the dust. It gnawed at me over the years that I couldn’t finish it back then. So last year, 22 years later, I bought another kit and started looking over the kit’s contents and the build plan. What a mess – hence the search for advice and my arrival at this forum. It is my first model. I like working with wood however. I have built two skin-on-frame kayaks, several sheds and play huts as well as pieces of furniture. However, nothing as delicate as a 1:124 model. I can handle criticism and suggestions for improvement. I really want it to look good, so please don’t sugarcoat it when you stumble across some mistakes I make just because I’m a beginner. Long story short: here’s my build log:
- 12 replies
-
- 1
-
-
- Thermopylae
- Sergal
- (and 2 more)
-
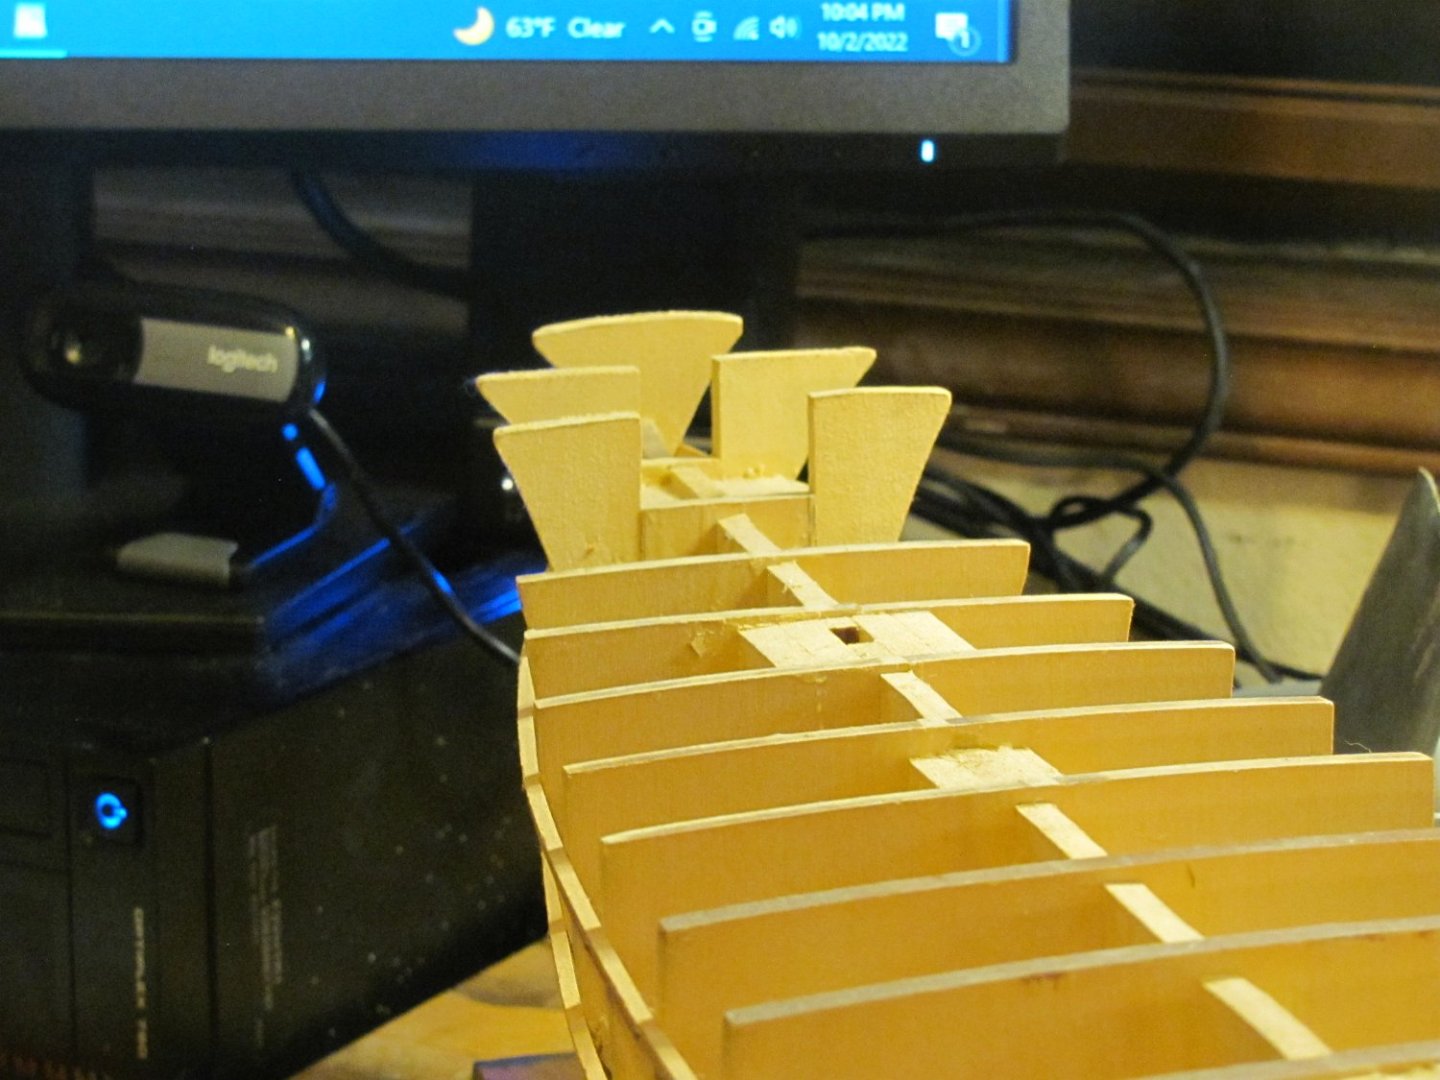
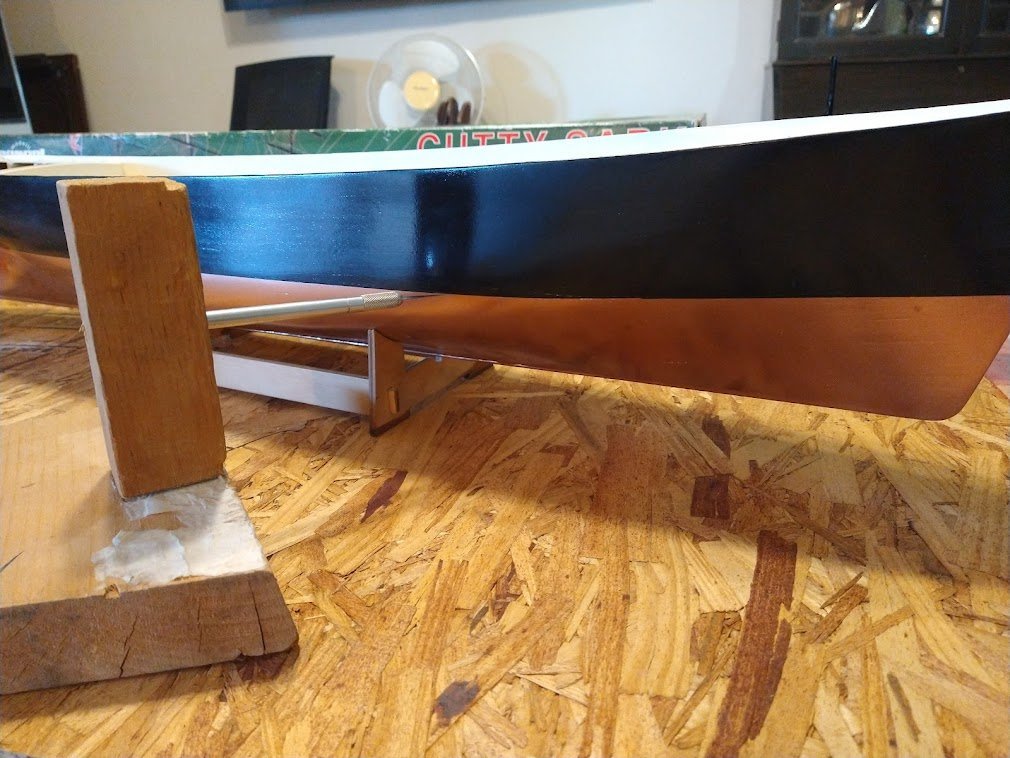
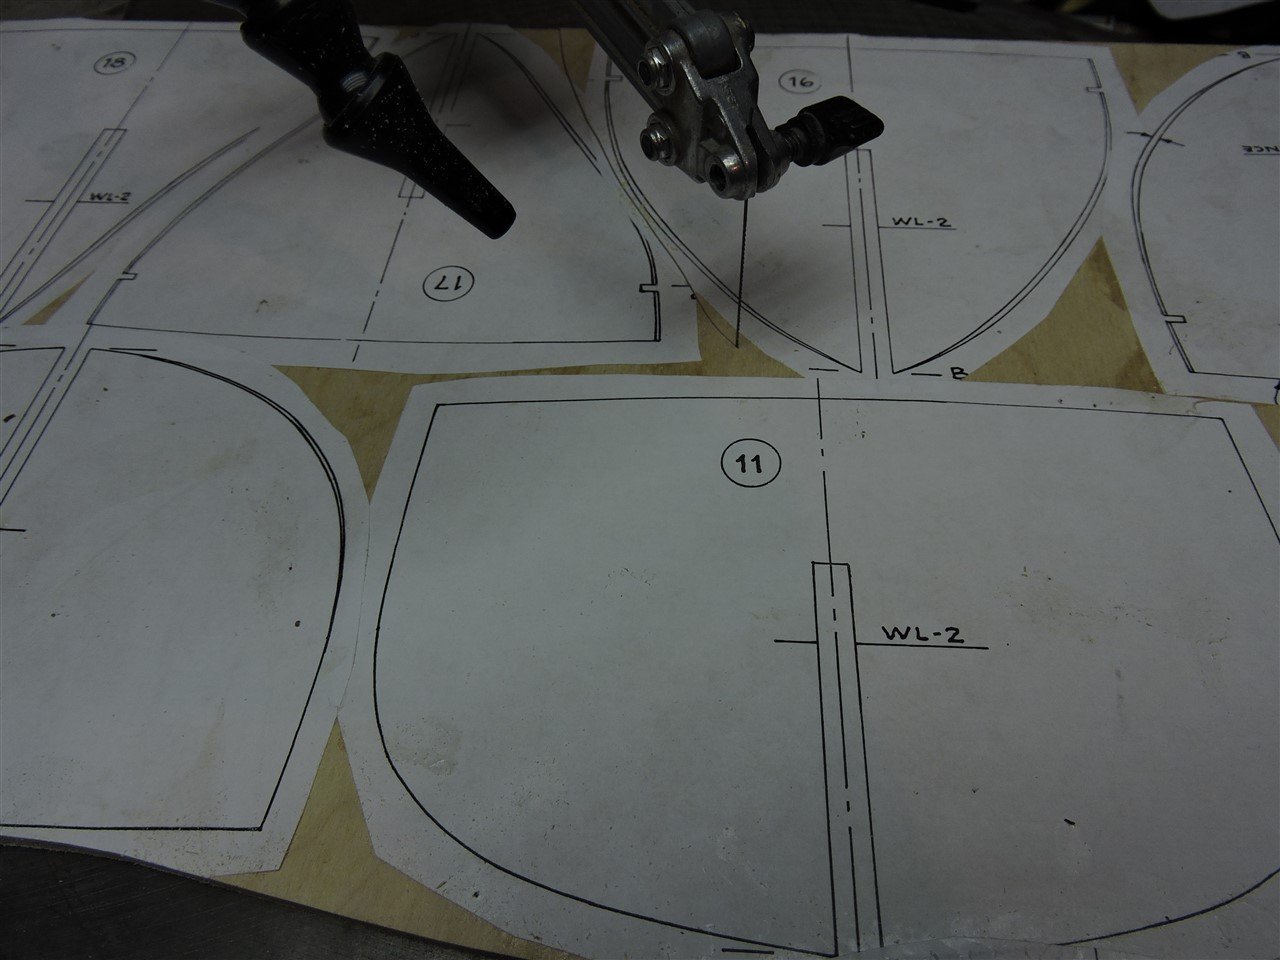
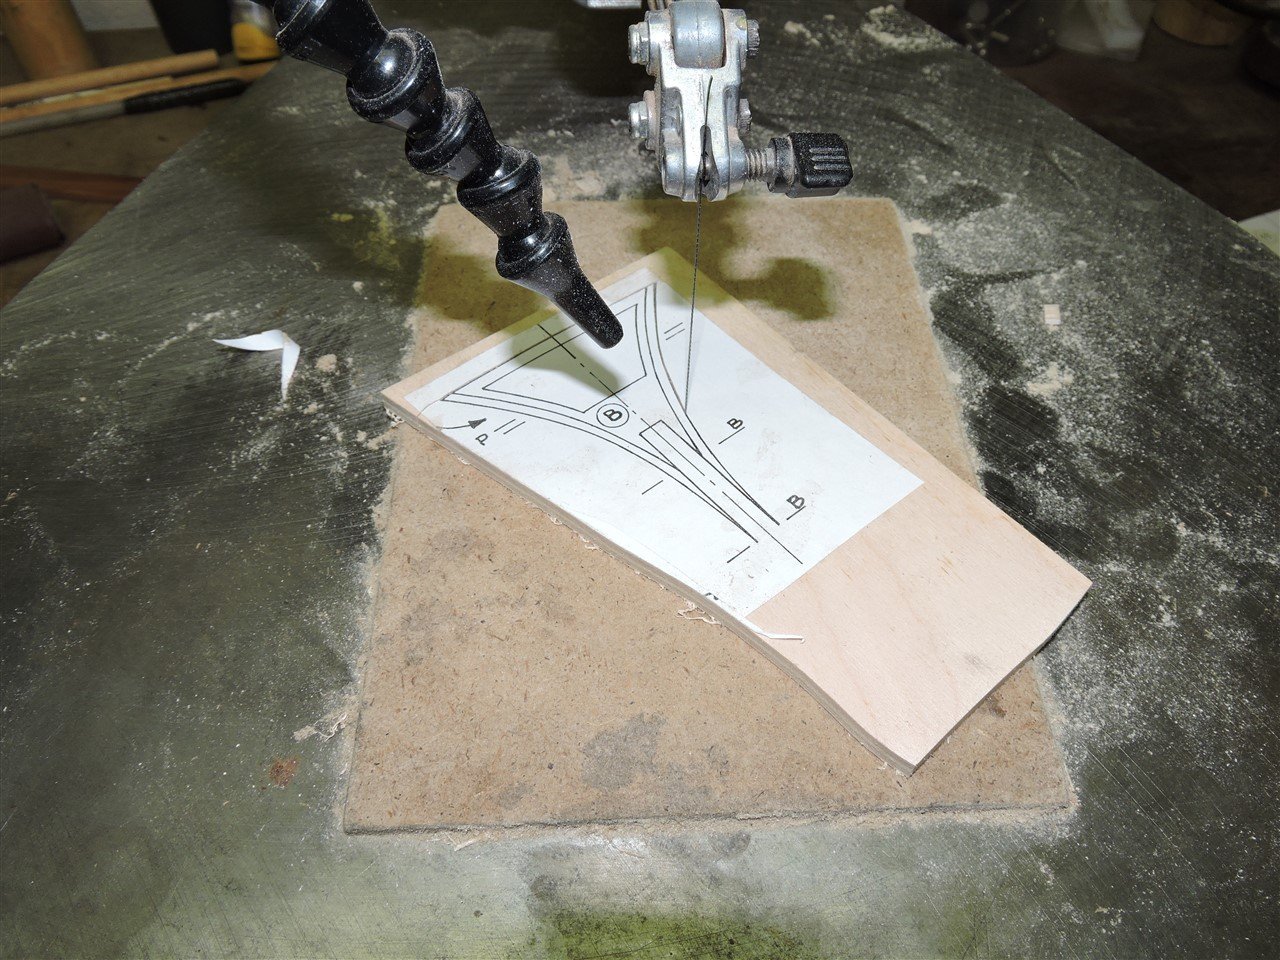
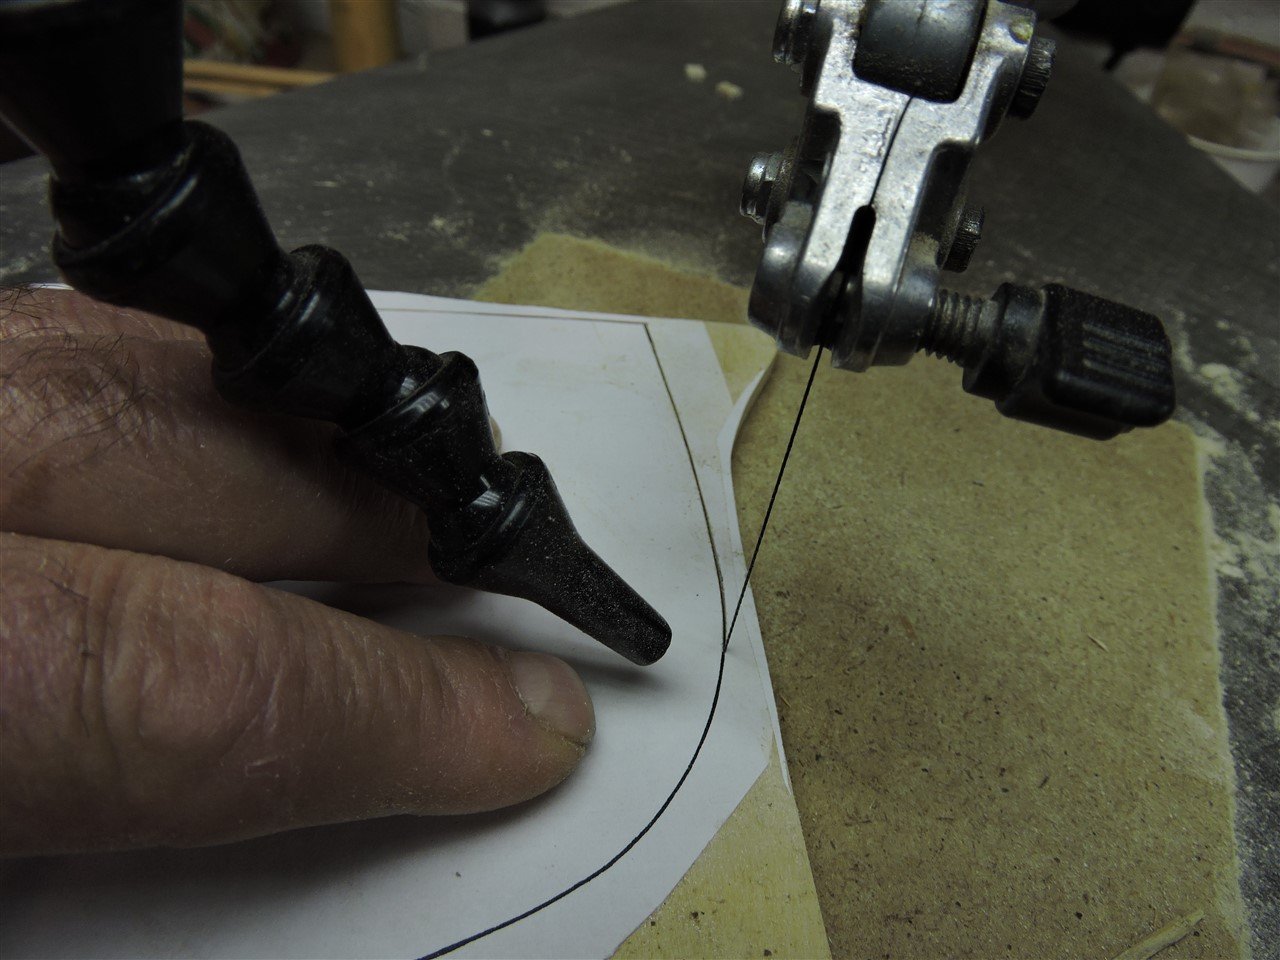
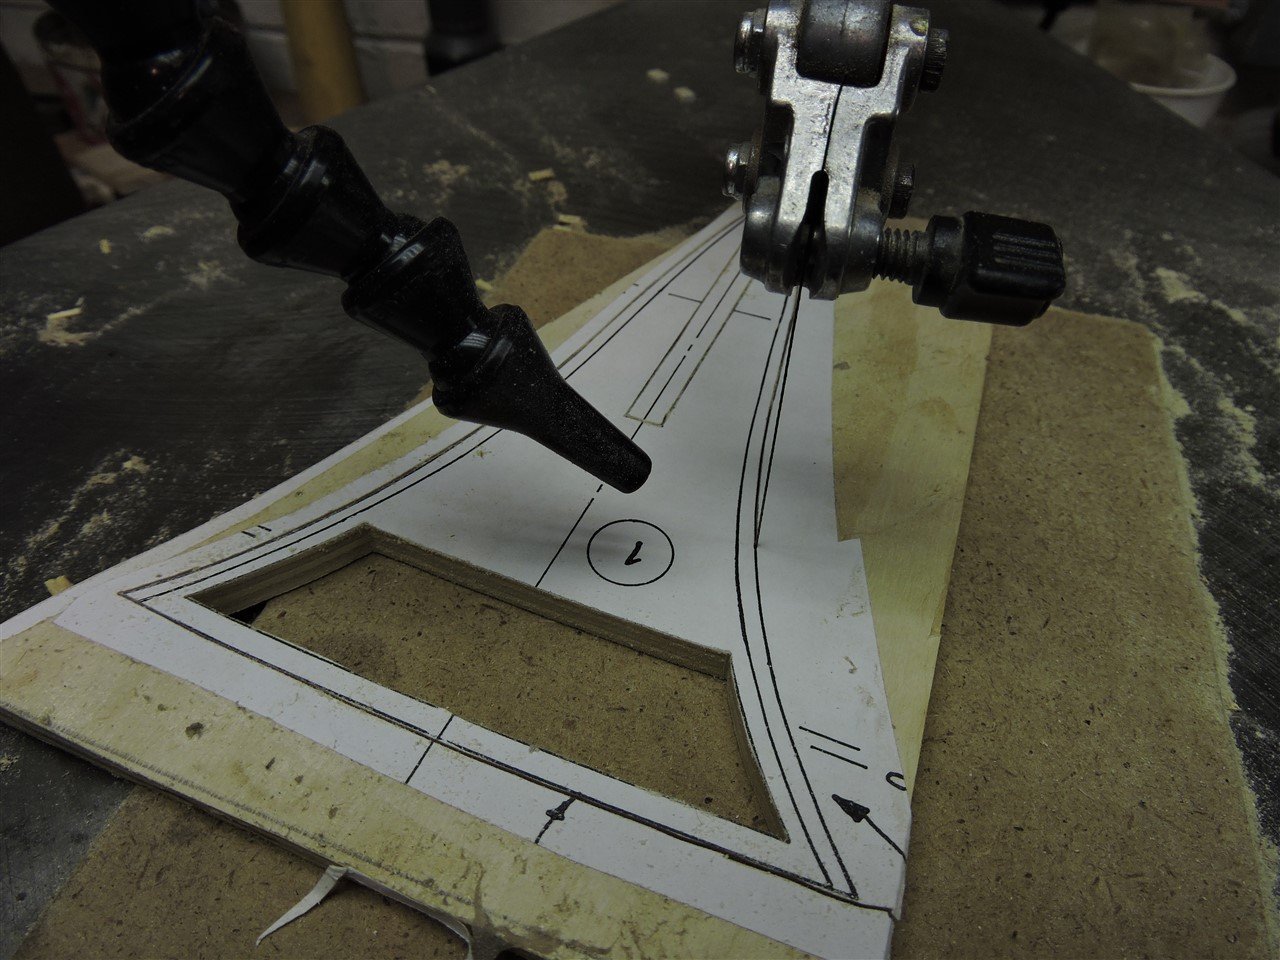
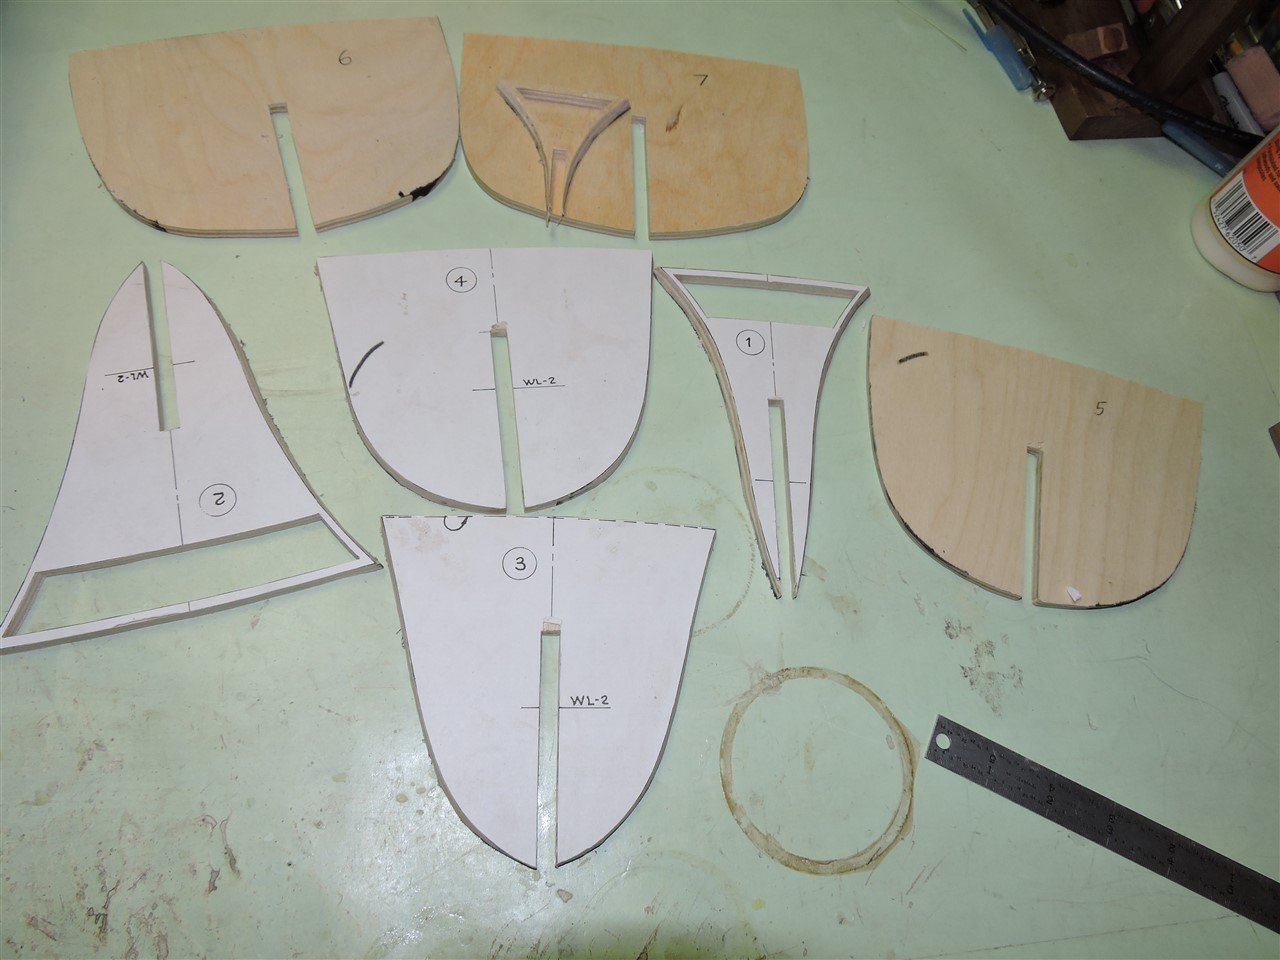
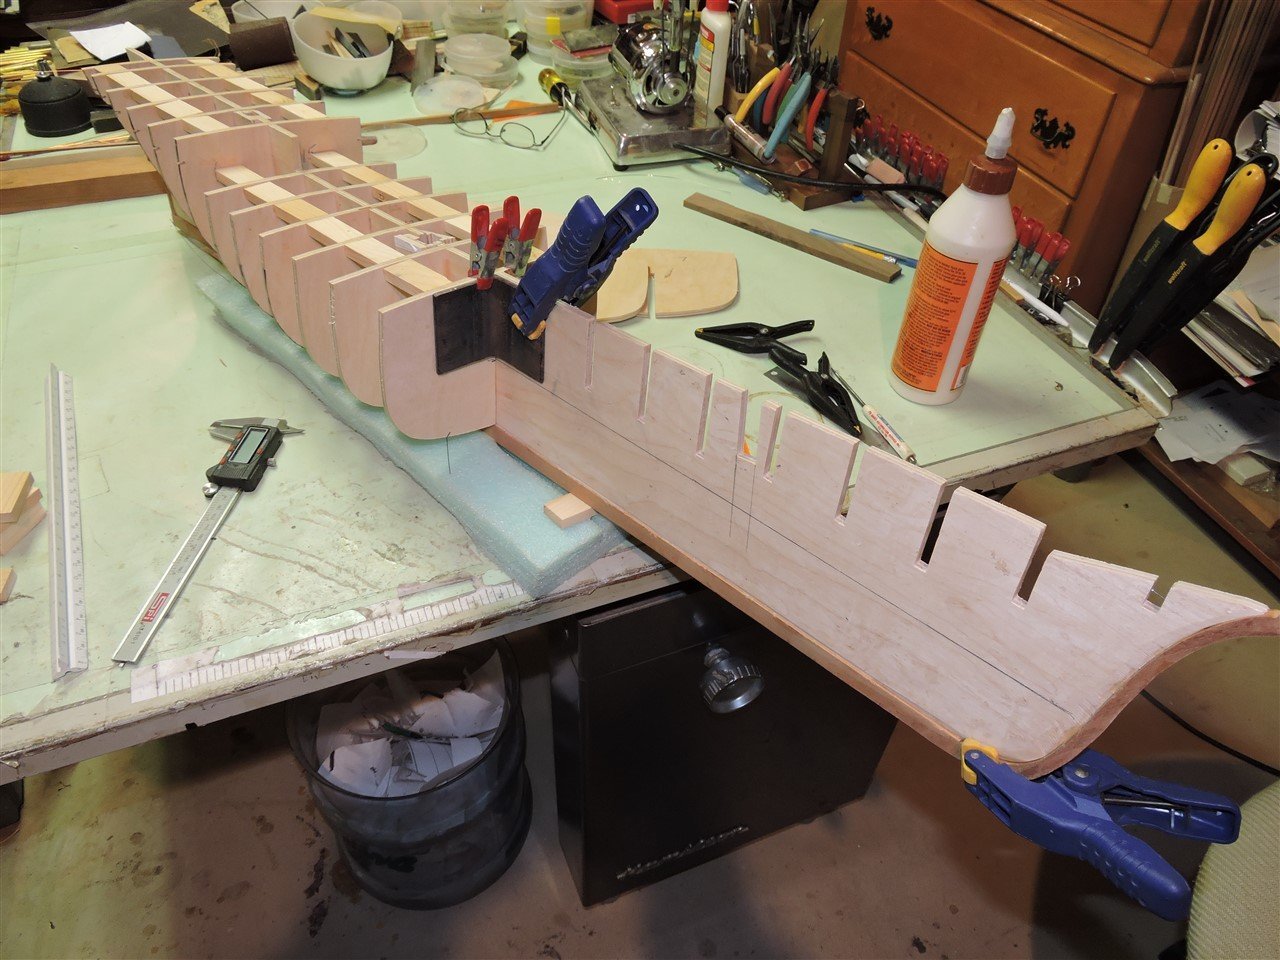
 Hello all In the early 2000's, I got the model Flying Fish and last December 13, 2021 I started the build. I enlarged the plans 50% to 1:64 (3/16 scale ) to keep it the same scale as my other models. I used rubber cement to glue the patterns to 1/4" plywood. I then separated them with a scroll saw and proceeded to cut them out. I tapered the bulkheads and then attached them to the center keel piece.
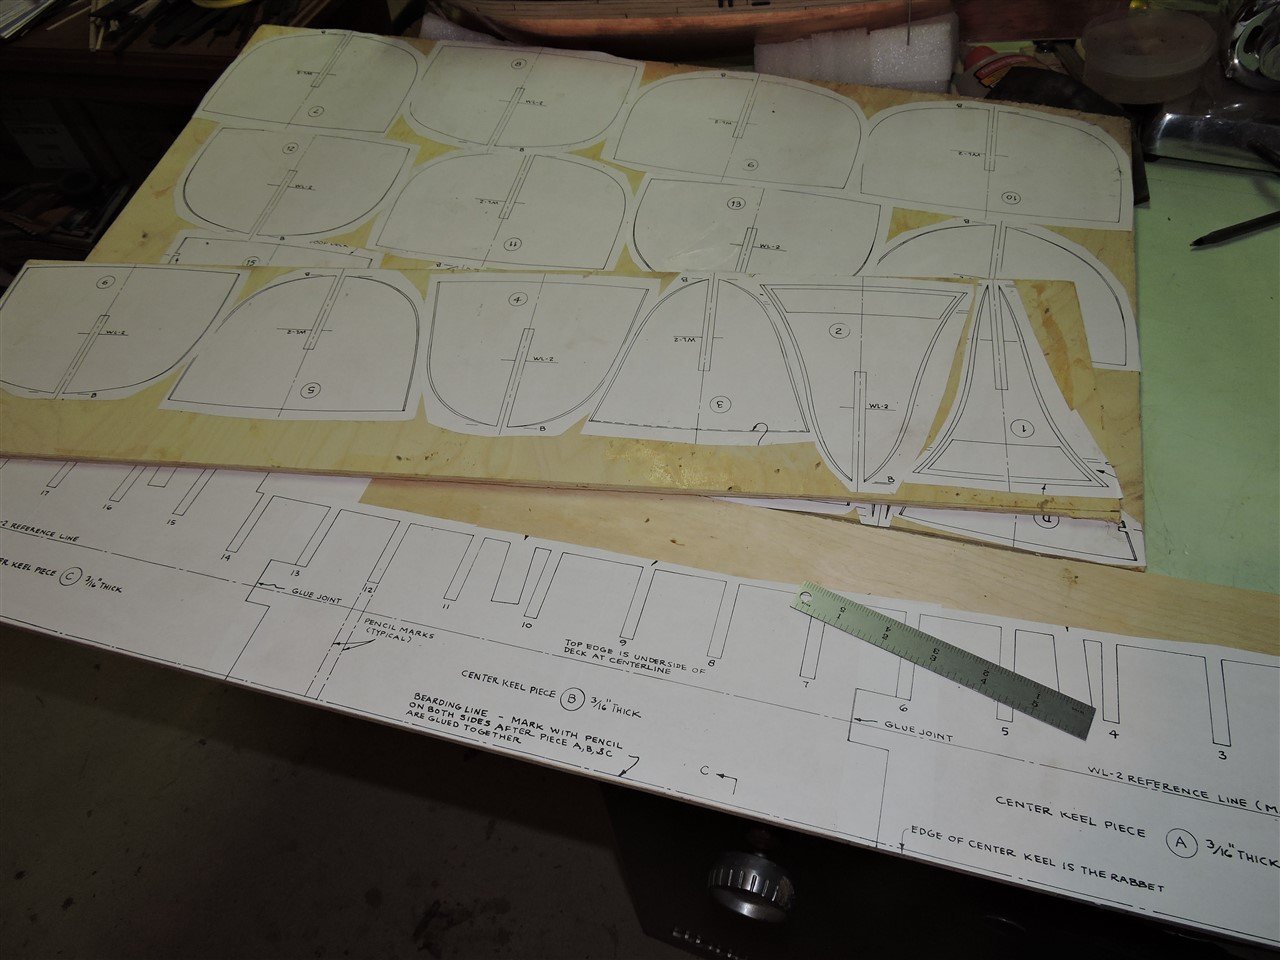
-
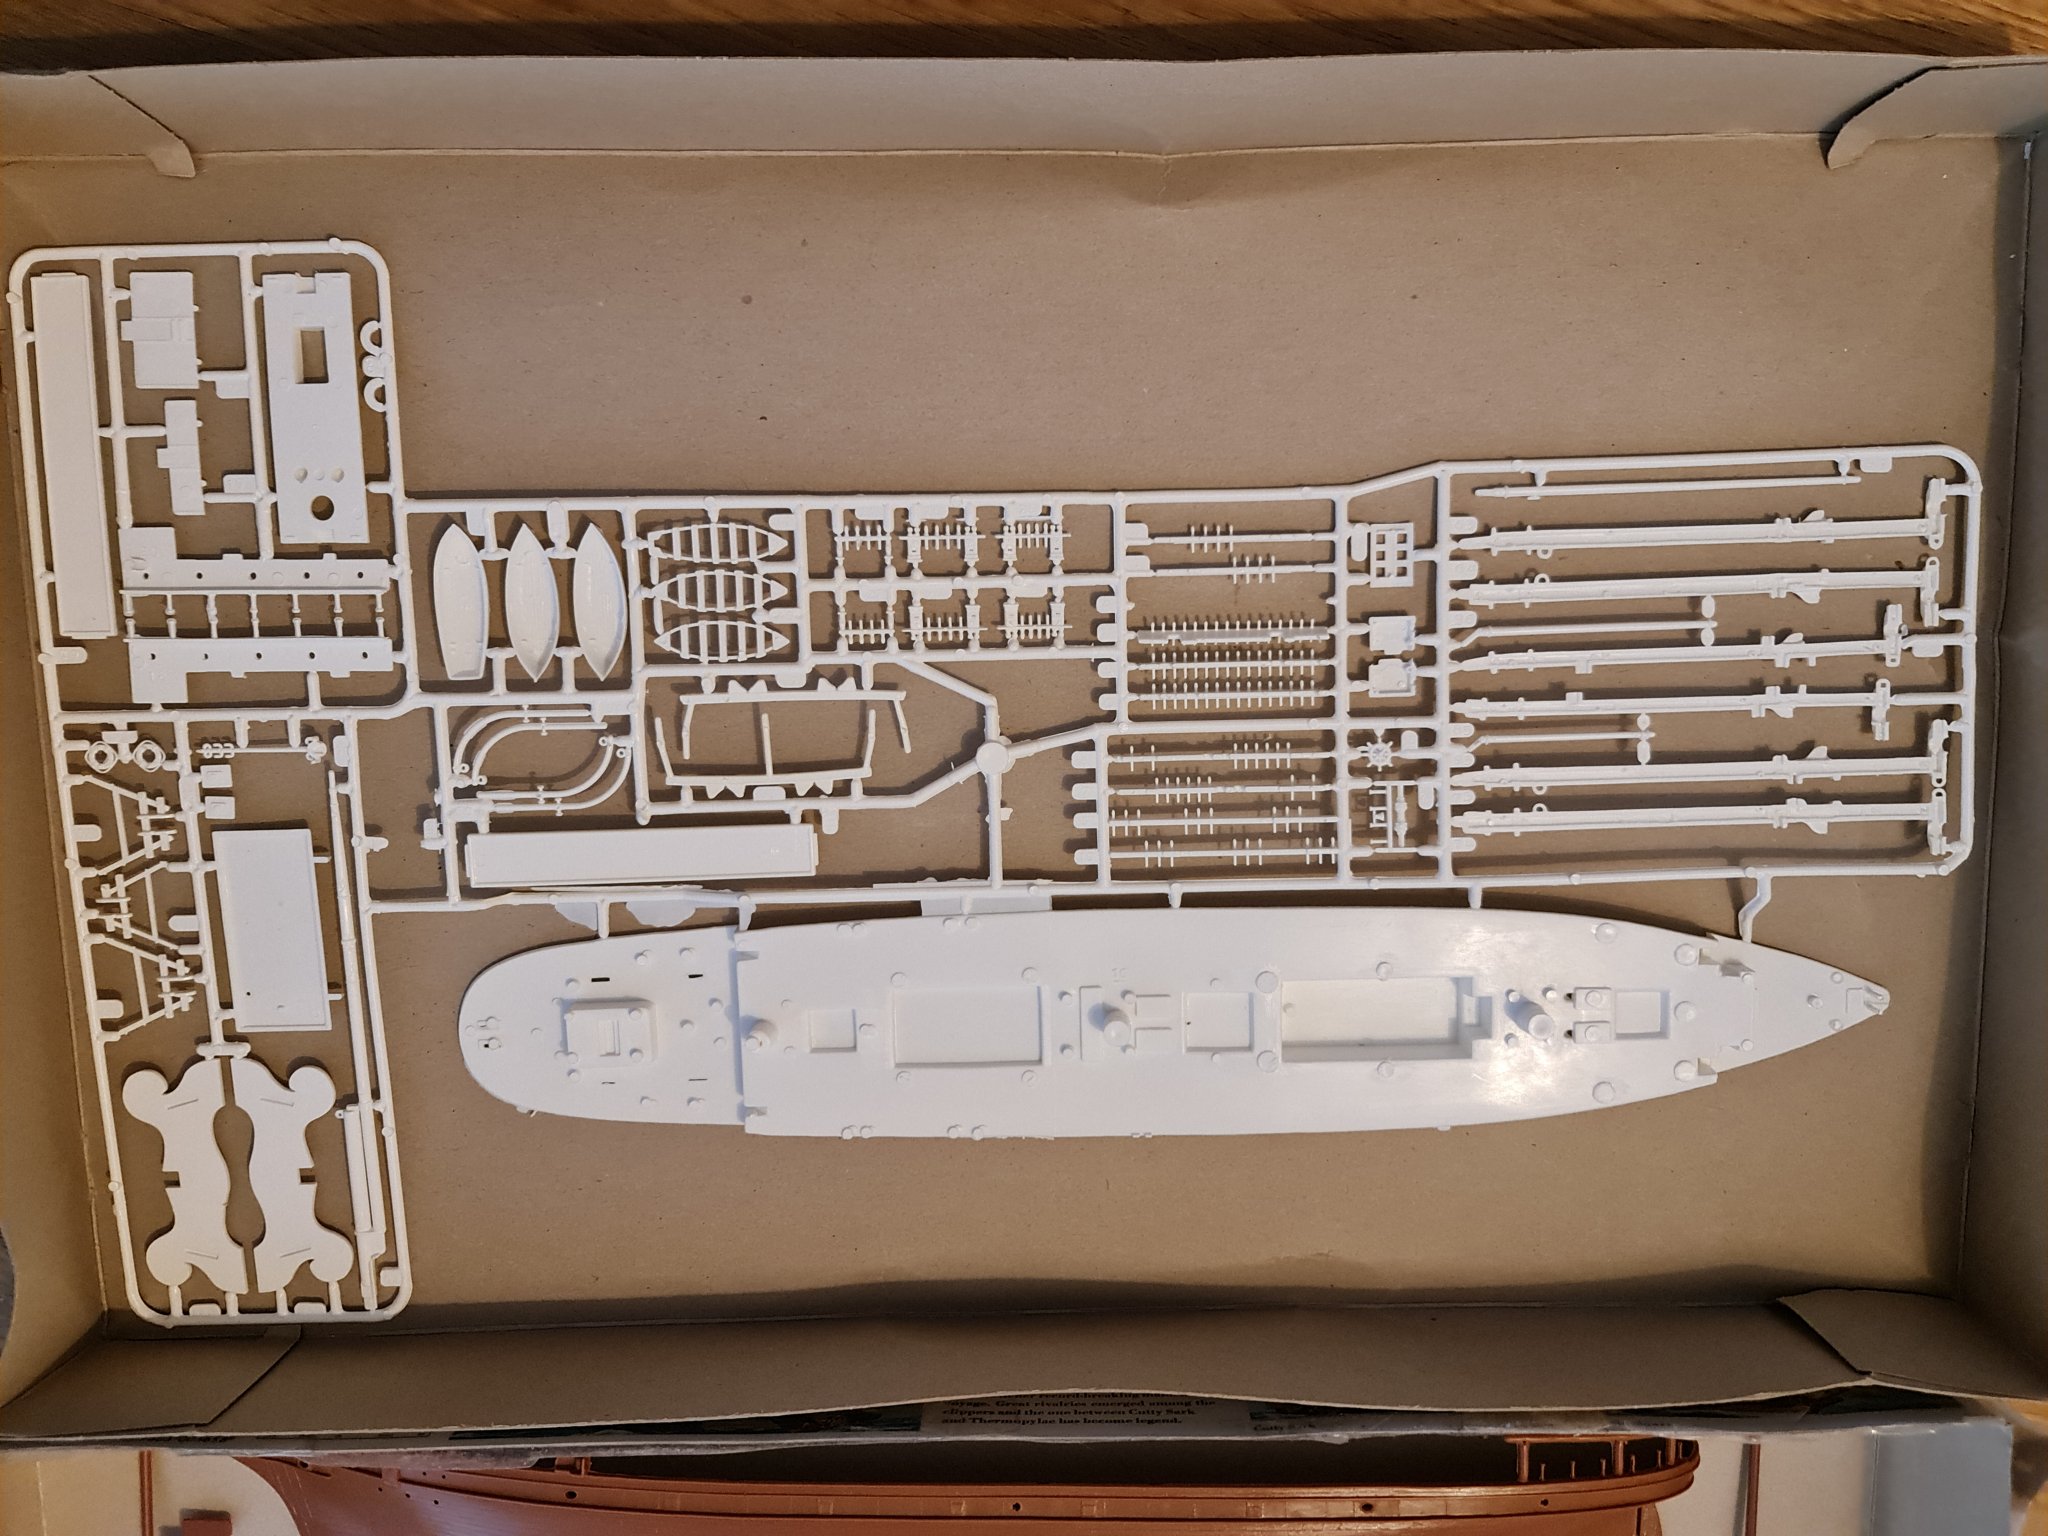
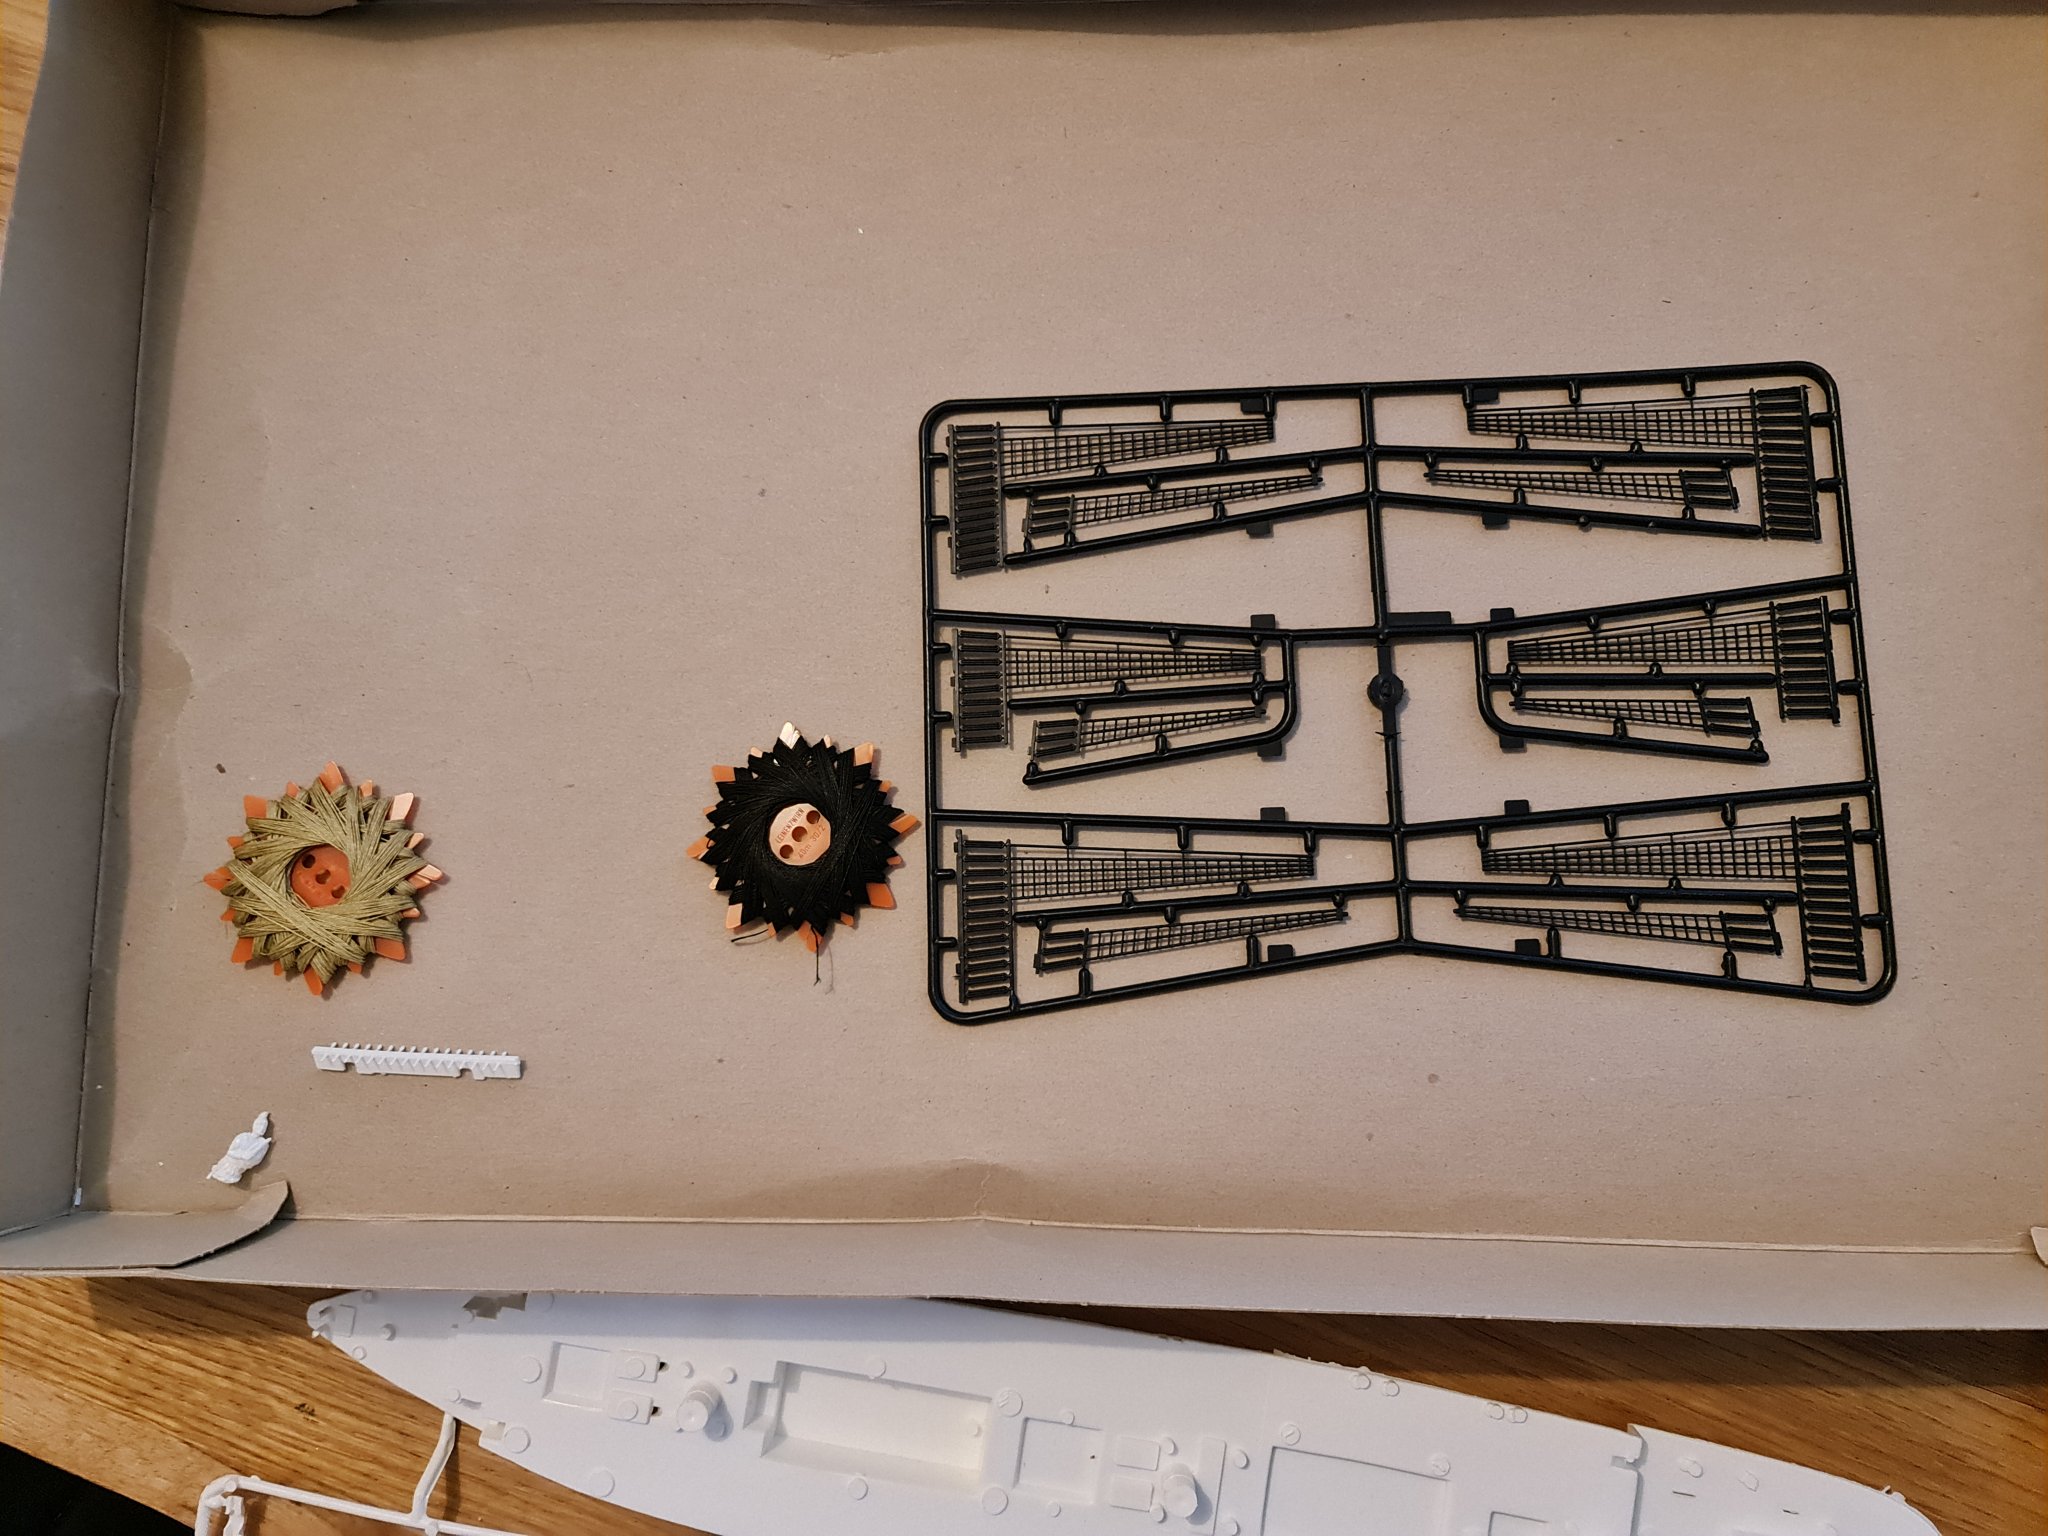
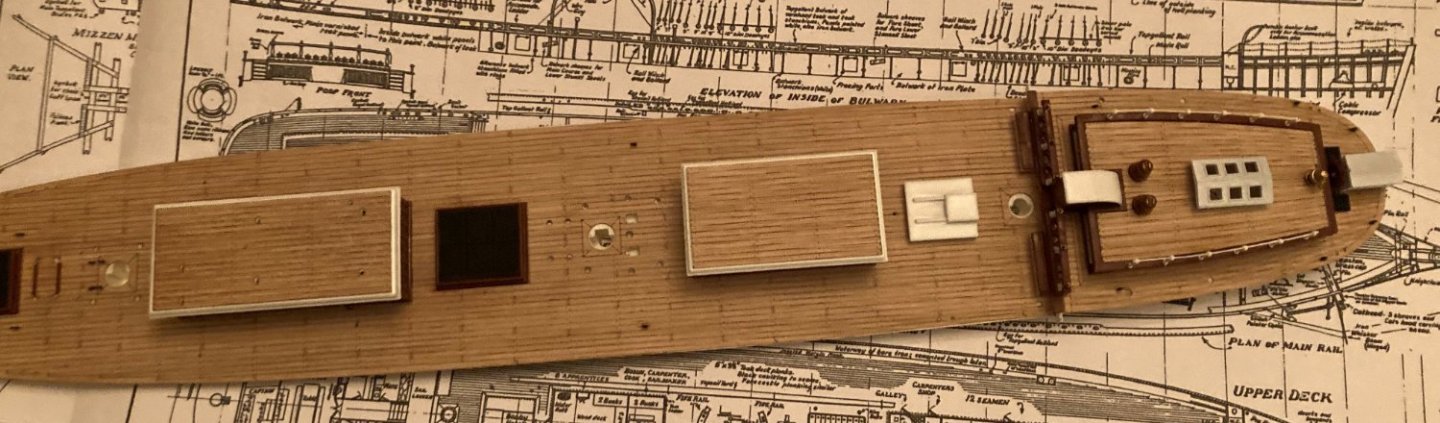
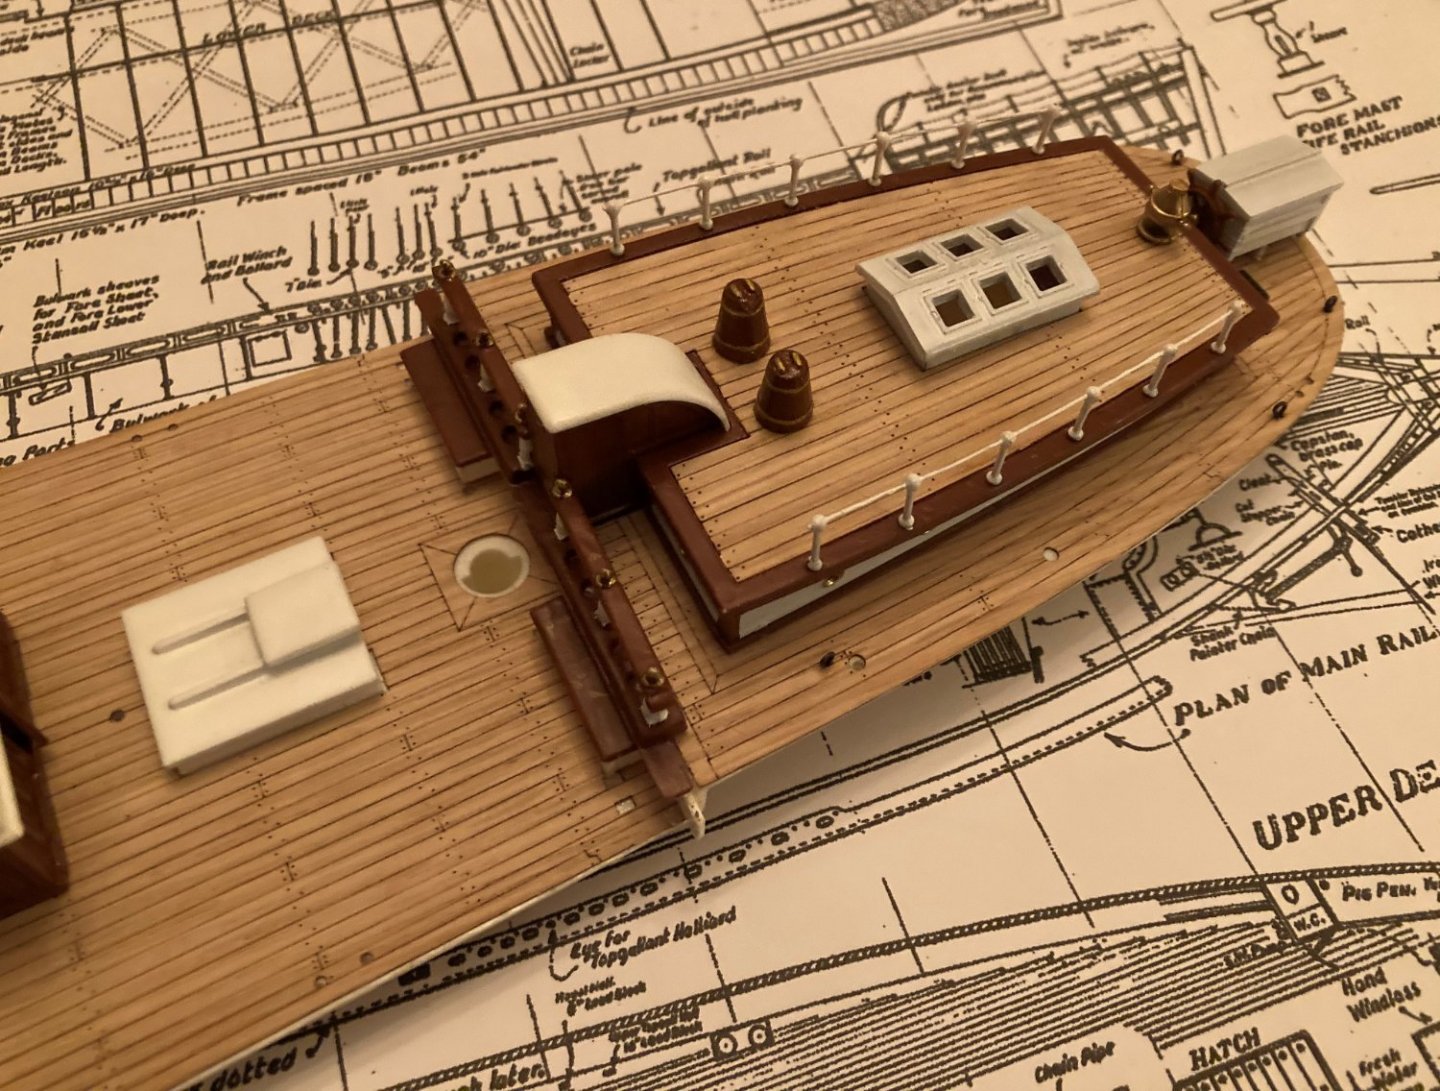
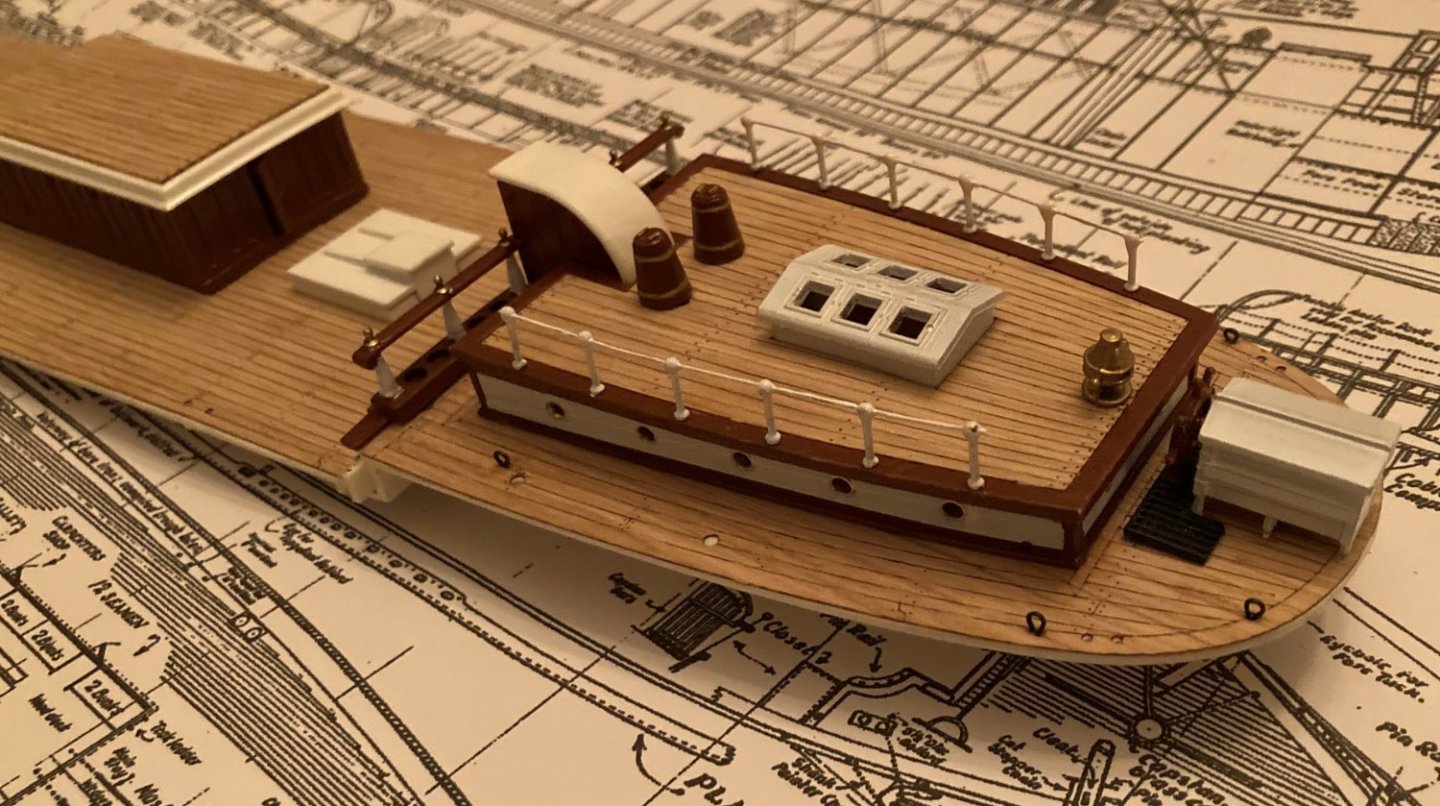
 13/12/21 I started looking at this kit 2 or 3 weeks ago, as an ‘in-between’ project while I take a break from the Victory. The kit is from 1976, it’s a bit brittle and there’s a lot of flash, some of it so heavy that I’ve needed to look at other logs in order to know what to trim off and what to leave. While I don’t want to get into 3D gymnastics on this kit, I’m re-making most of the deck furniture i.e. the windlass rotor, winch rotors, fife rails, sail lockers, cabins etc, as these are very quick and easy to model in F360 and equally easy to print. I wouldn’t say the end result is better than the kit part, detail-wise, just cleaner/crisper and I get to duck dealing with some joints.
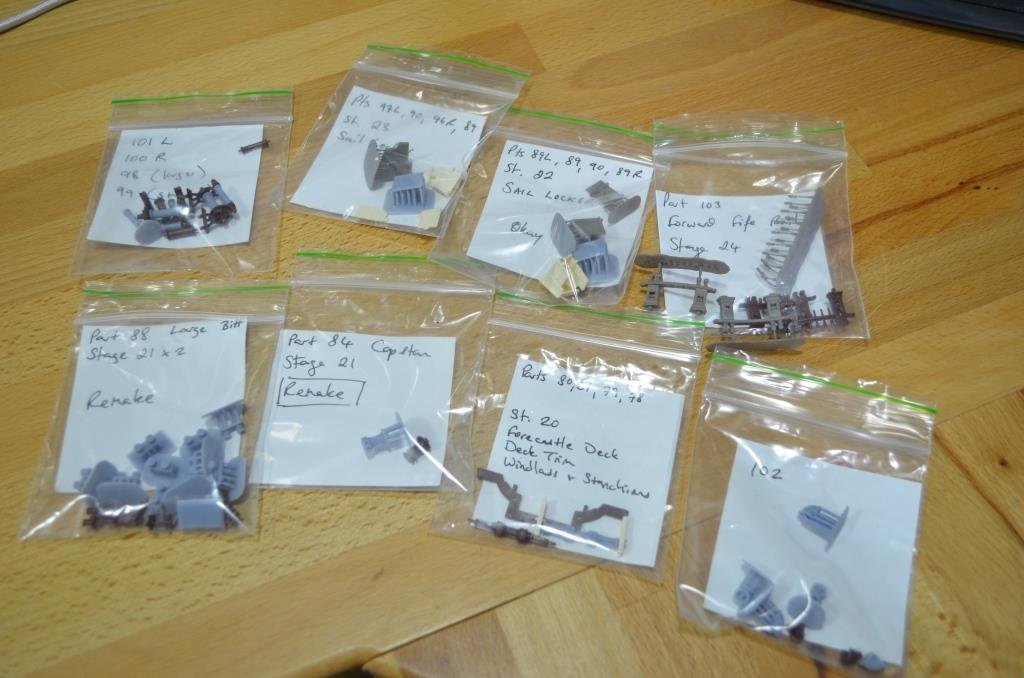
- 443 replies
-
- 5
-
-
- Cutty Sark
- Revell
- (and 2 more)
-
 Starting up with my 3rd Build after the Phantom and Rattlesnake.
-
 Hi. I am new to Model Ship World. I began building the Flying Fish in early 2006 and worked on it slowly over the next 6 years. And there is remained gathering dust until this month, when I decided to pick it up again in hope of taking it to completion. As can be seen in the photos I will be adding, the Hull has been completed and the deck structure are at an advanced state of completion. I look forward to meeting others of you who are also working on this model. Jared
- 101 replies
-
- 3
-
-
- Flying Fish
- Model Shipways
- (and 1 more)
-
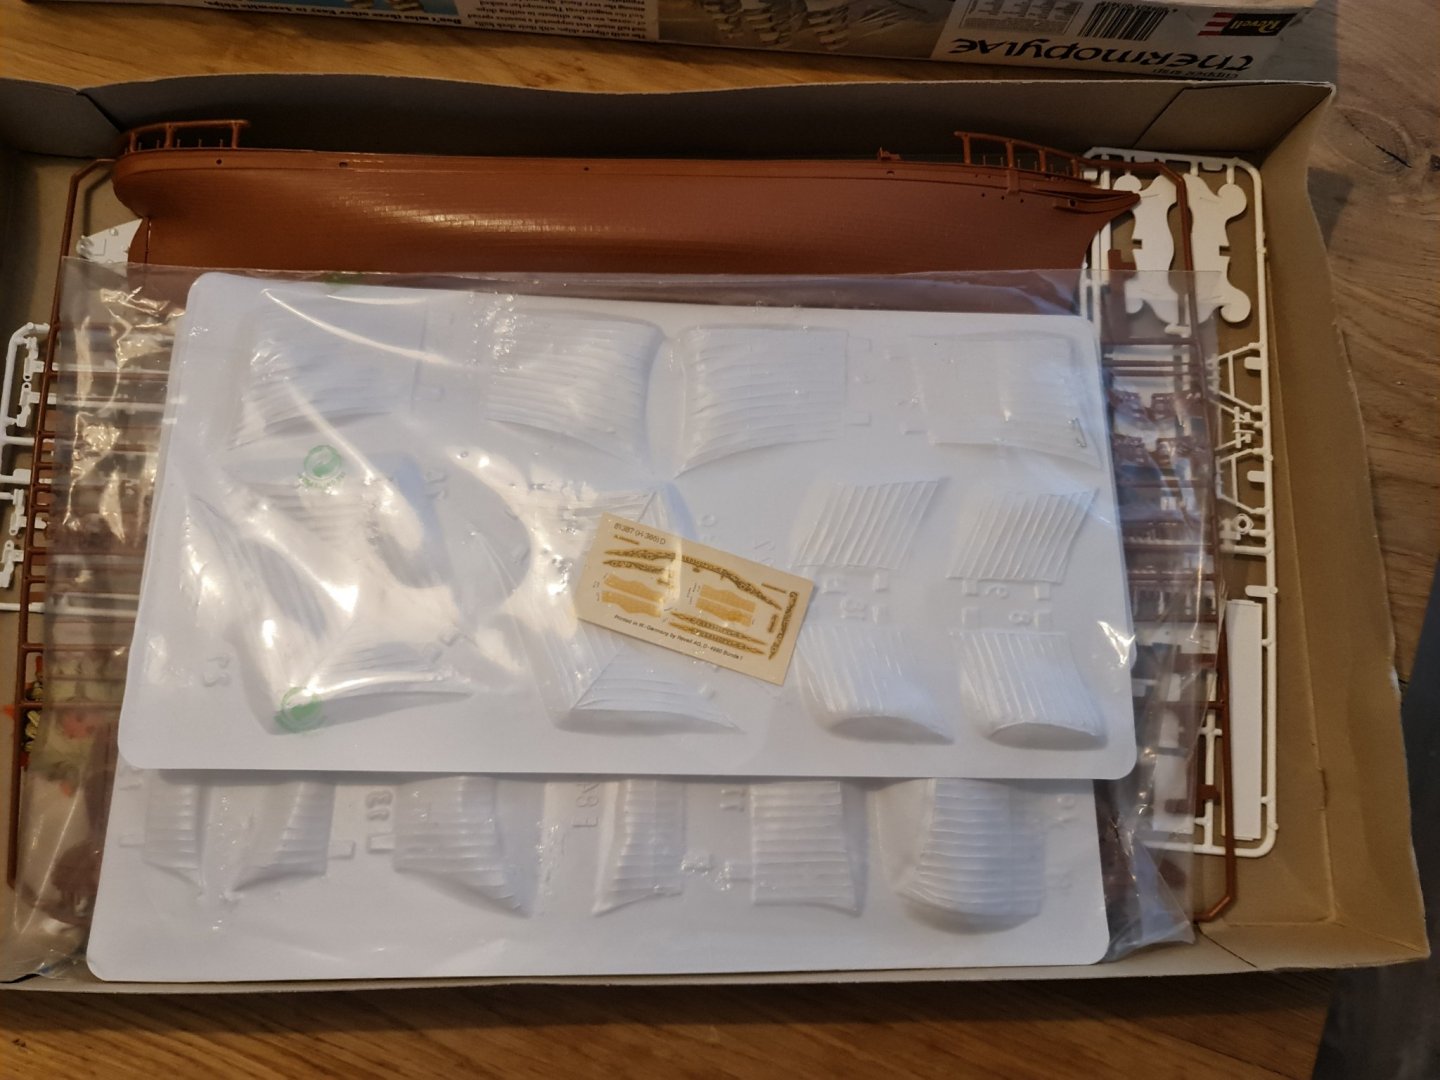
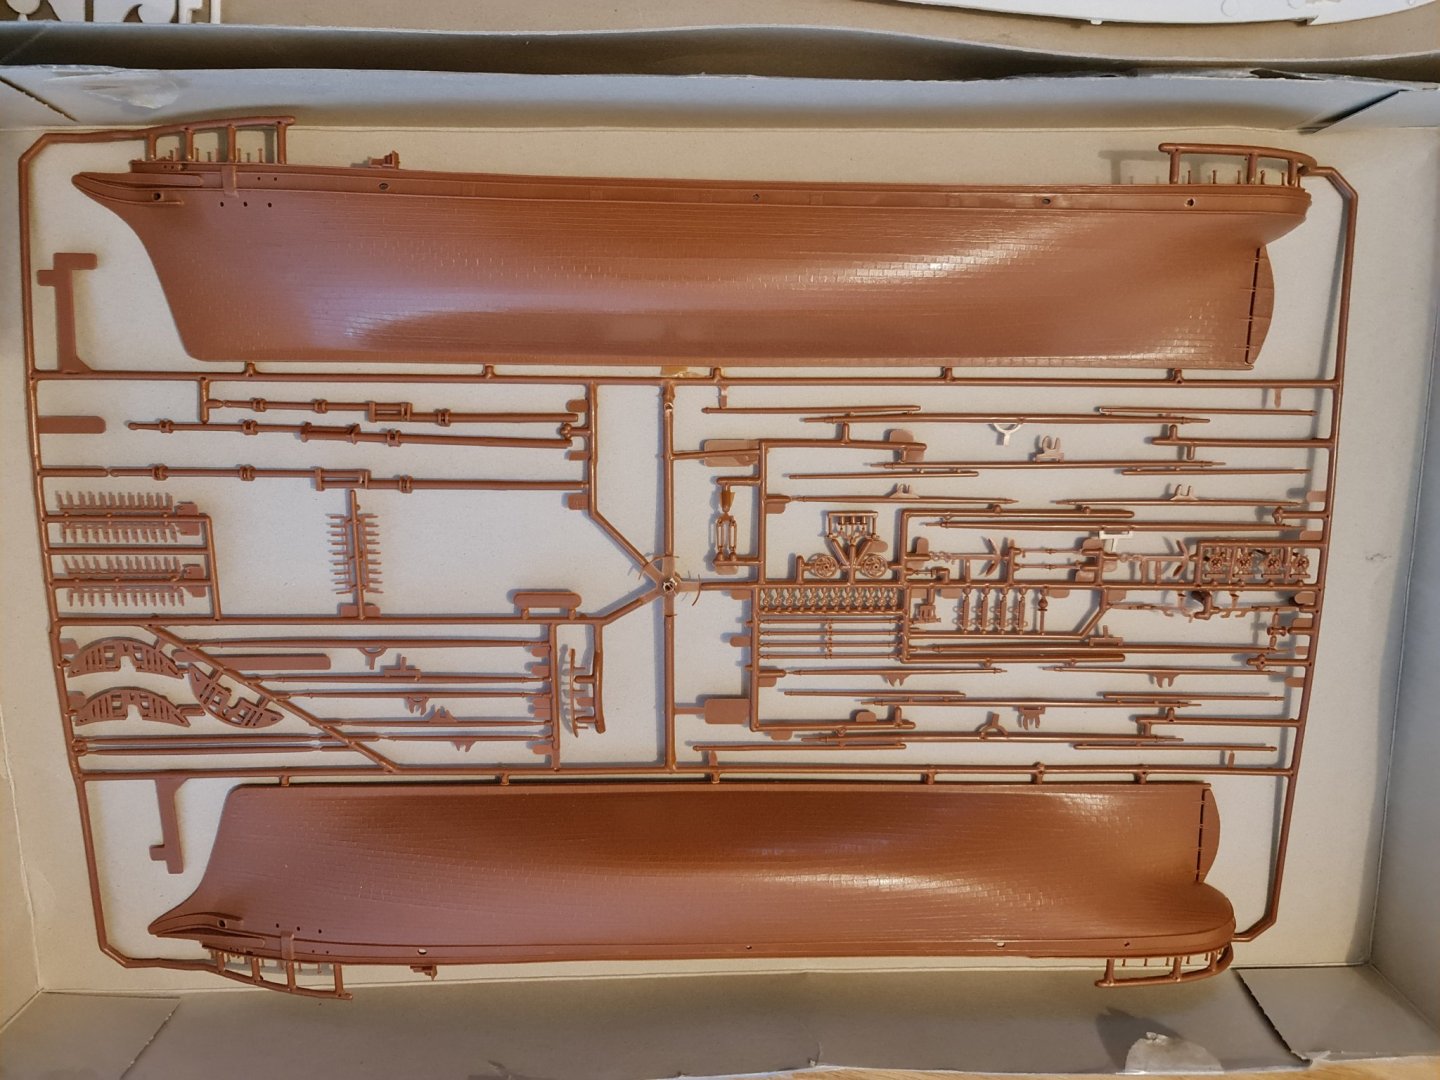
 The second project I will start next to the 1/225 Revell HMS Victory is the 24" Clipper Thermopylae. A simplified kit from the 60's. It is the same kit as the 24" Clipper Cutty Sark, with a few parts made for this model. It will not be a very accurate build, but I will make the best I can of it. A few pictures of the kit and it's content: The only things missing are the instructions and the paper sheet with the flags on it. Is there anyone who has this kit in his/her stash, who is able and willing to send these as a PDF or scans in A4 format to me?


- 6 replies
-
- 1
-
-
- Revell
- Thermopylae
- (and 2 more)
-
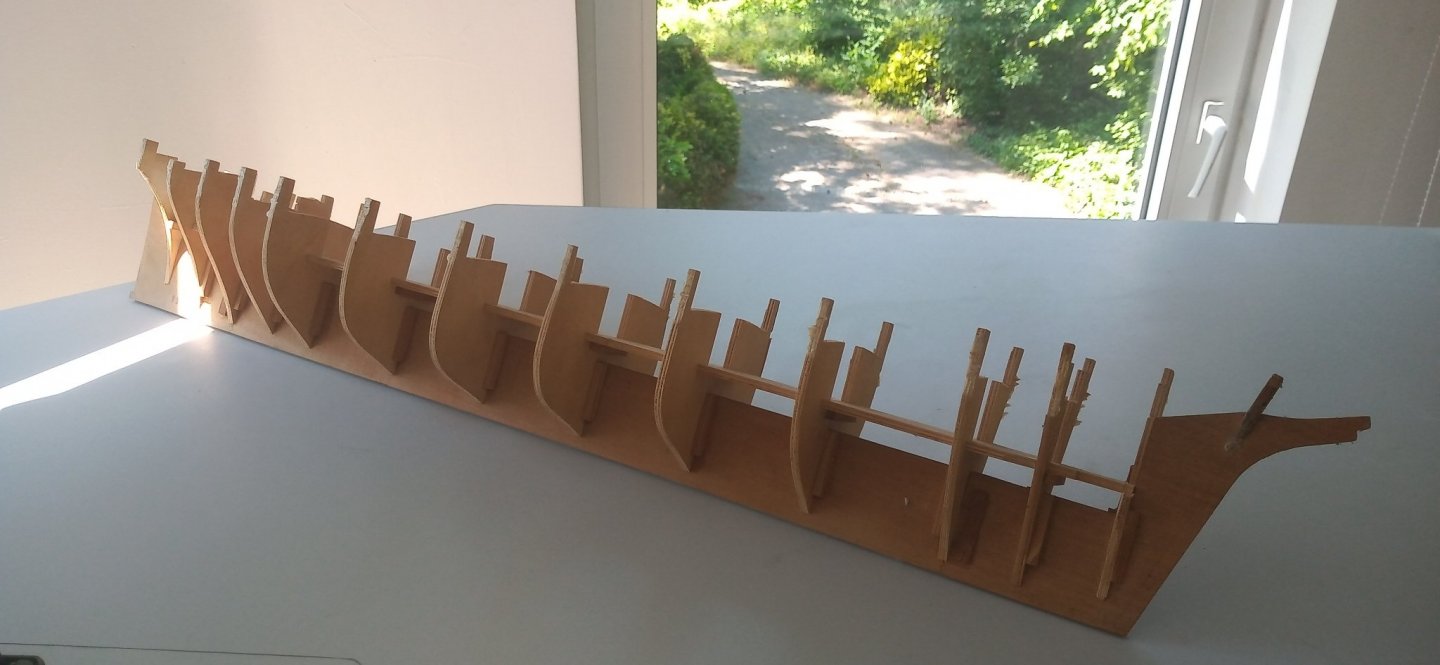
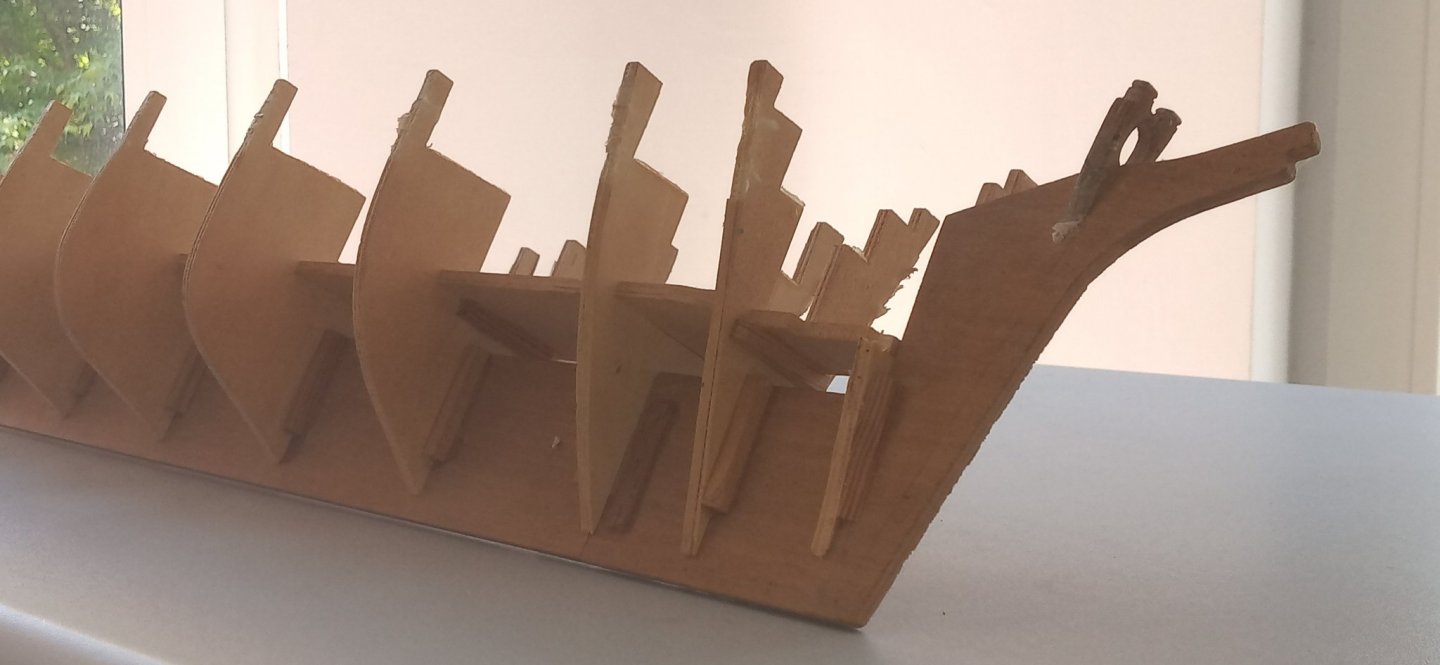
 Yes, another Cutty Sark build log. 😉 I have been lurking on this wonderful site for some 2 months and I cannot but start a build log myself about the beloved Cutty Sark. Let me first introduce myself. I am living in Belgium, so English is not my mother tongue, forgive me therefore my mistakes in English. As a youngster I started building plastic planes, the Cutty Sark and Saturnus V rocket, but also gliders (Kleine UHU from Graupner, Piviere from Aeromodelli and a glider based on my dad’s plans) and a motorplane (Taxi from Graupner) in balsa wood. A sailing boat (Collie) and a motorcruiser (Nautic – both from Graupner) completed the collection. At a later stage I built a tugboat (Oceanic from Revell) and started on a pusher boat Thyssen II from Graupner. While at sea, I built the Harvey 1847 (from Artesania Latina) and Bluenose II (from Billing Boats) with little tools. Children, chores and other hobbies kept me away from modelling. Now as a retiree, I have more time but also more hobbies, but modelism is becoming more and more important in my daily life. So I started by renovating my Collie, as well as my Kleine UHU and completed the Thyssen II. Going out and flying/sailing with my models will be for after the pandemic and in the meantime I dusted off my Cutty Sark from Sergal. Renovating Harvey and Bluenose II will help me in improving my skills. I bought several books about the CS as well as general books on POB modelling. I also discovered Modelshipworld and now I cannot wait any longer to get started – or continue as only the bulkheads have been placed on the keel. As I aim for a very detailed ship and will be consulting Longridge book, comparing with the Campbell plans, I allow myself a 10 years building time frame. Leo
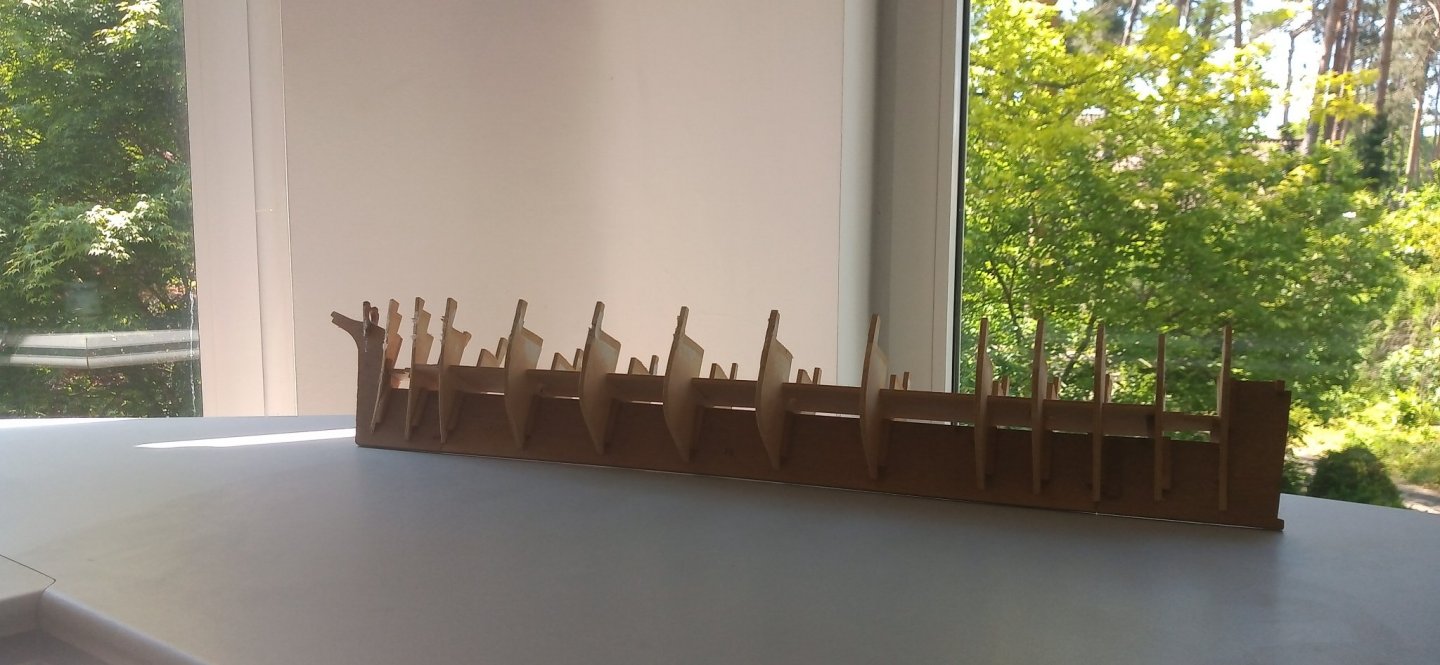
- 35 replies
-
- 2
-
-
- Cutty Sark
- sergal
- (and 1 more)