Search the Community
Showing results for tags 'mayflower'.
-
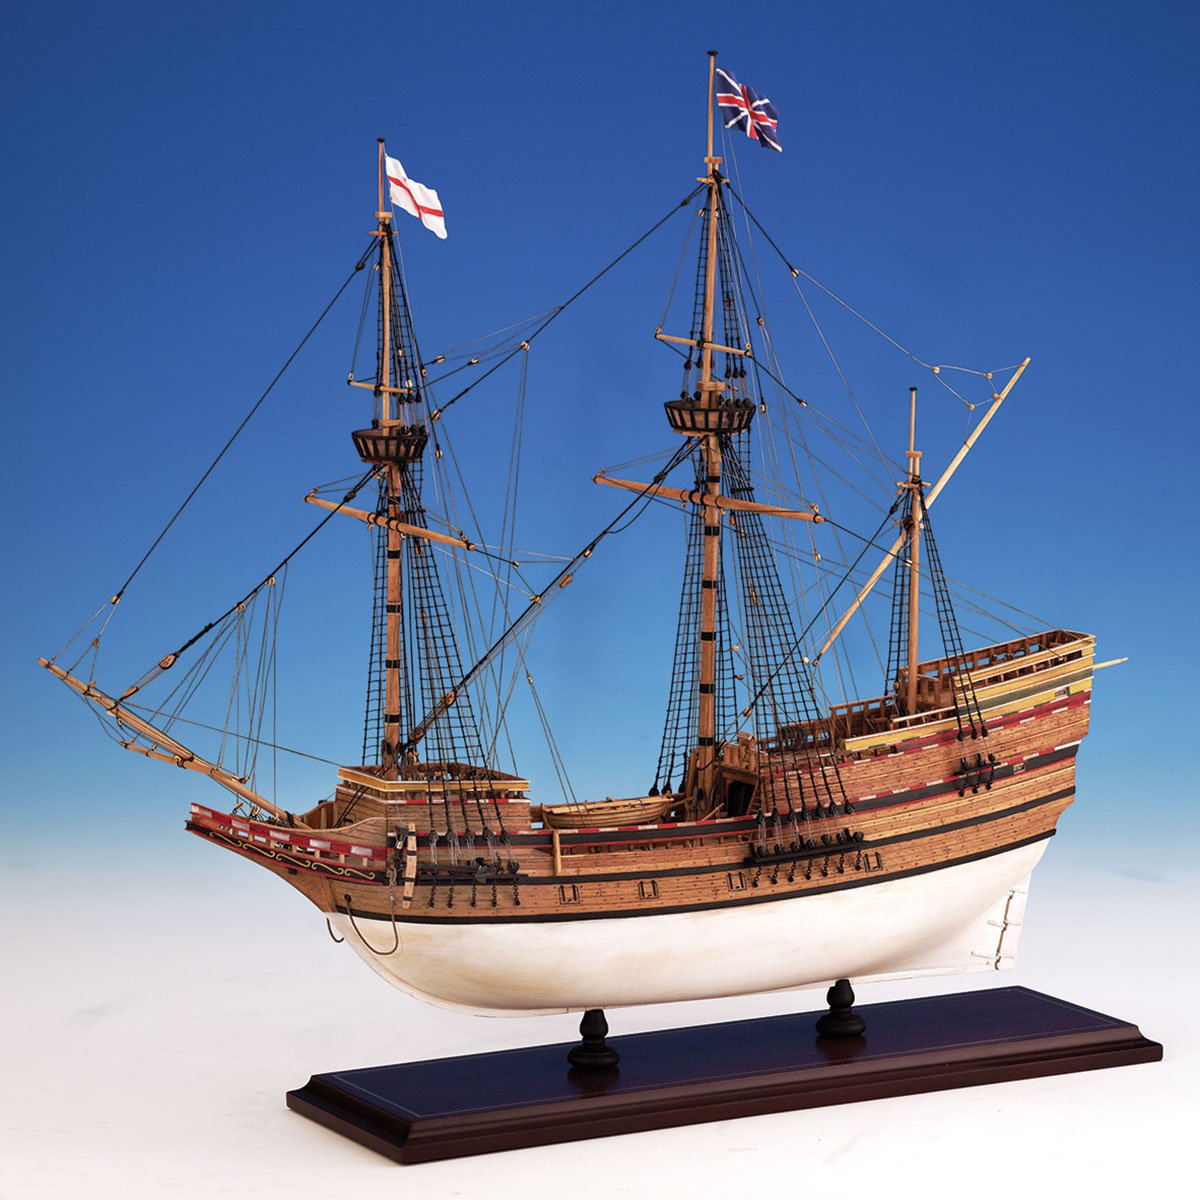
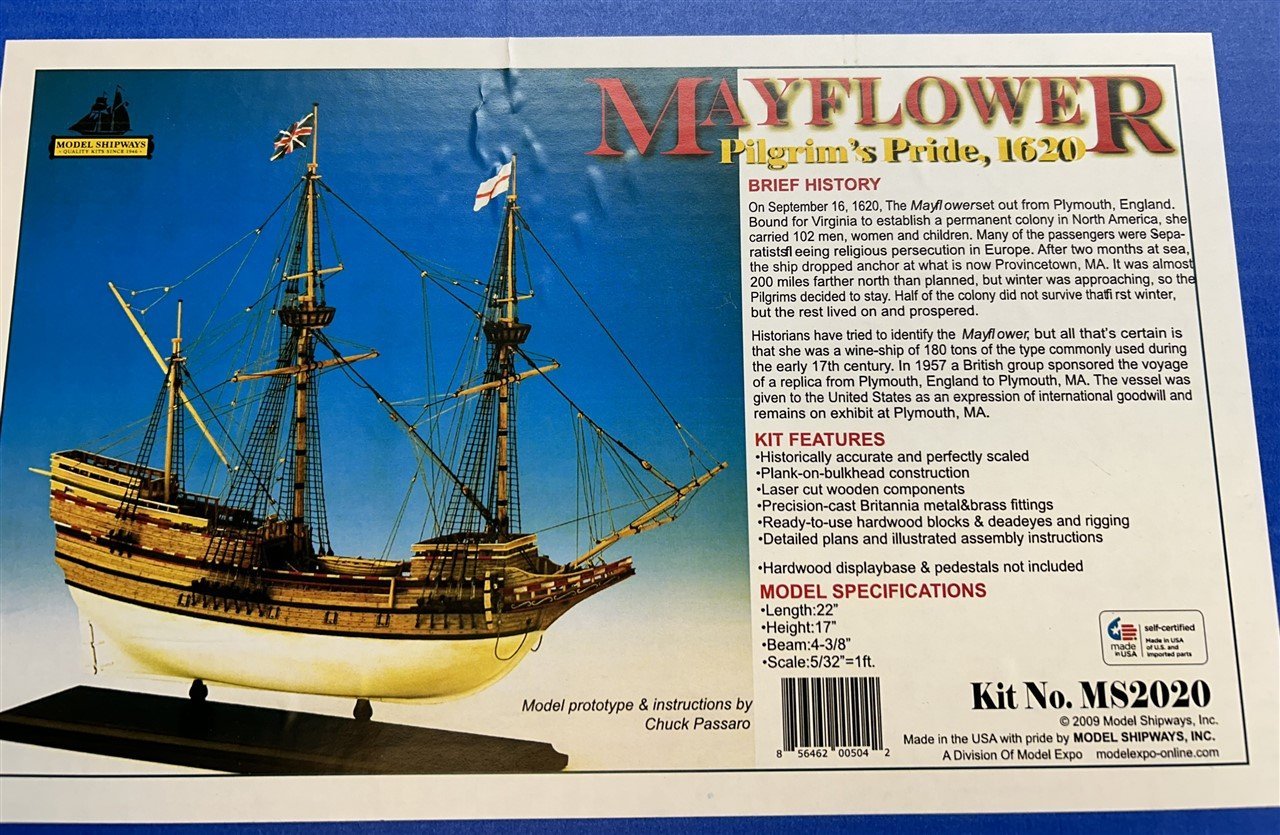
 My next build will be the the Model Shipways Mayflower 1620, MS2020. To be a little pedantic, this is really a model of the Mayflower II replica of 1956, based on research of William Baker and the best knowledge of what Mayflower of 1620 might have looked like. The replica ship was sailed from the UK to the US in 1957 where it was gifted to us and exists today as a floating museum. It has recently been undergoing a new restoration, where the color scheme has changed from the original Baker scheme as depicted on the box cover shown below. At some point I will need to decide if I want the designed scheme or to follow the changes of its current incarnation. This is not a terribly complex kit, parts wise. There are 4 sheets of plywood parts for the framing, and 4 others of assorted parts, plus the usual strips, dowels and other bits. I will make just a few observations of the contents quality here. Firstly, the keelson piece (bulkhead former) was quite warped. As this forms the whole basis of hull alignment, that was a disappointment. Got to get this bit straight or else you end up with a banana boat! More on this later. Also the cutting on the plywood could be better. Several parts were not cut all the way through, so there was some work to do to finish the cuts. The plywood in my kit was quite "splintery" at the edges and tended to get a good bit of delamination when cutting or sanding. That's going to present some challenges while fairing. One thing I tend to fuss about is Britannia metal parts and how badly they tend to be made. I was pleasantly surprised in this kit because as these things go (low expectations, I know) , these are not too bad. Even the crows nests might be usable, though there is a good chance I might want to scratch build new ones when I get there. The blocks and "rope" provided are typical MS fare, which is to say not very good. I will be making an order to Syren to get proper materials.
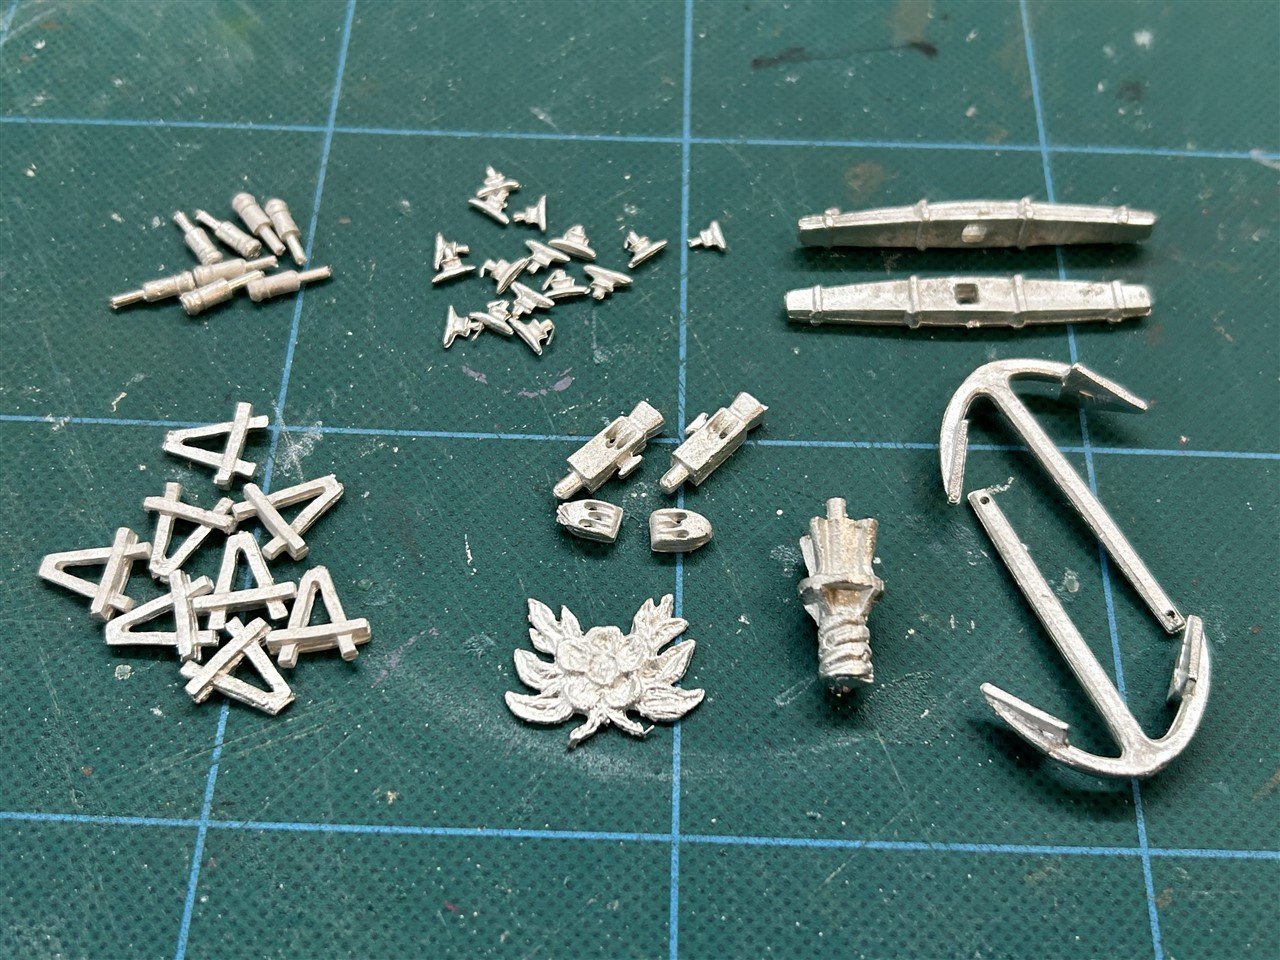
-
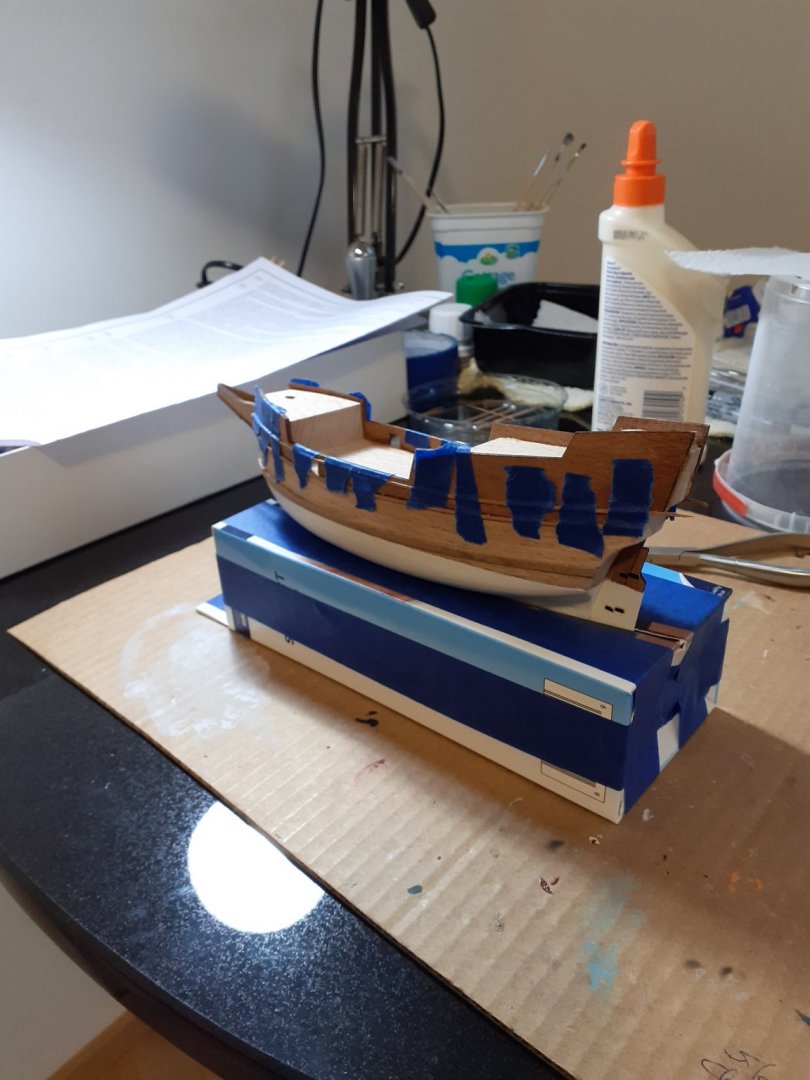
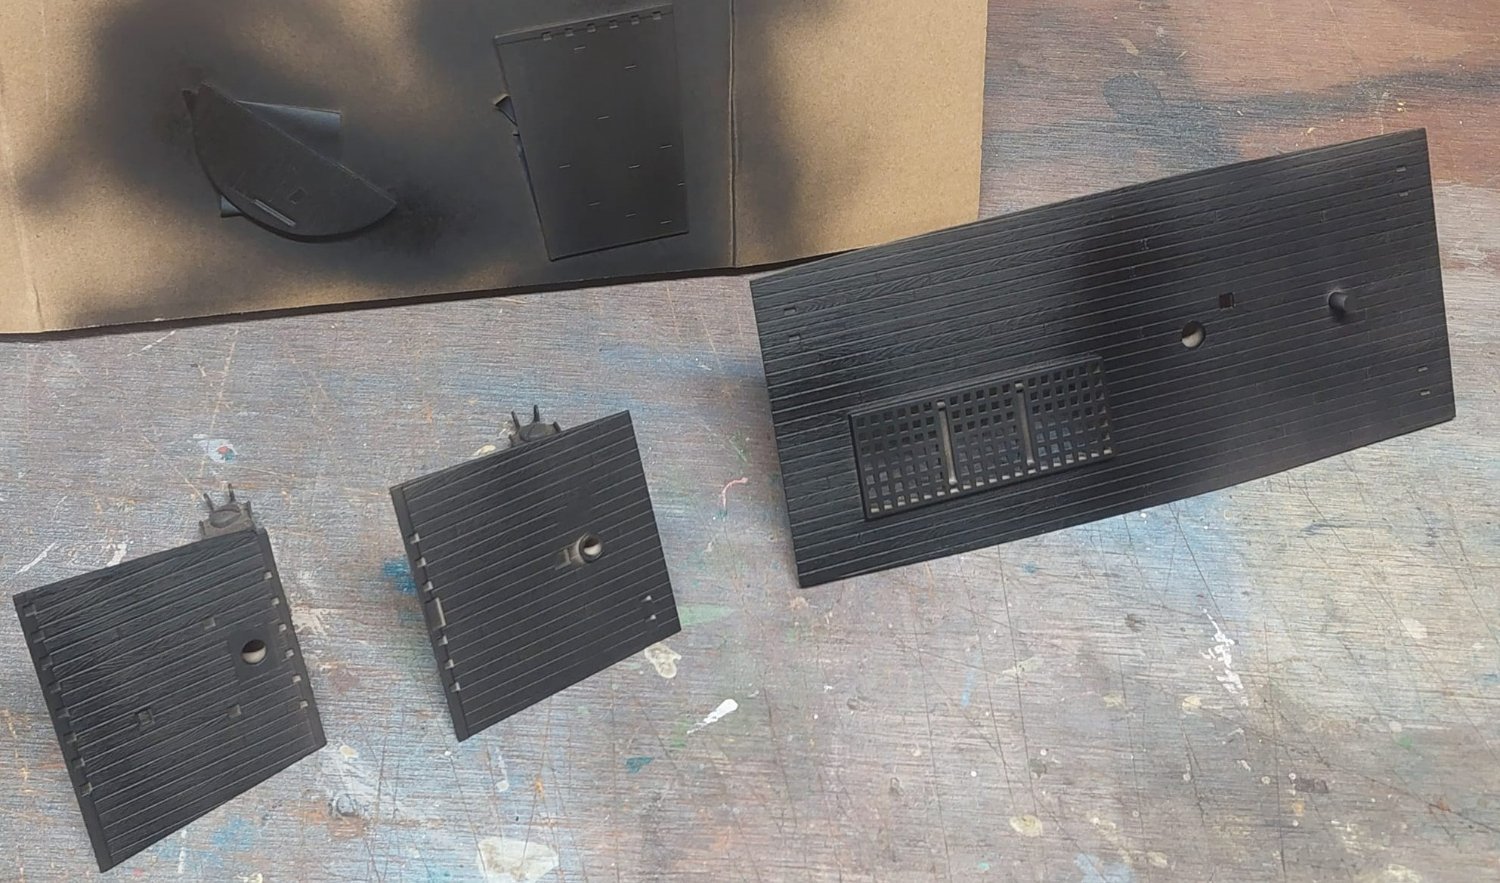
 I'm going to try and do a build log as I go, I set up this post vs. piggyback off Bill97's excellent Build. I just placed an order from True North Paints (enamel like Model Masters) , once I get those in I'll be able to pick up the pace a bit. Since I'm doing this for a client, I'll need to work as directed, one side will have the cannons extended and one side will have the ports closed (they can turn it when they like). I'm going to strip the paint off the stern and probably remove the fish and redo the wood grain detail (client is undecided as of now and understands there is no information either way on the matter). I'll also need to figure out if I'm going to use the stern gun ports. I've ordered the Parrell rollers needed for the yards, I'm researching the correct blocks needed, the small ones in the kit are strange. My reference is the "Rigging and Masting of 16th. century ships. The deck detail technic I used came from "How to Build Plastic Ship Models" by Kalmbach. Base coat flat black, let dry 24 hrs. then topcoat in your choice of tan/browns, I perfect Testors Armor Sand due to being light enough to detail the caulking on the planks and still give a dark water wash. I've also pre-prepped the deadeyes and other various parts in a basecoat of flat black.

-
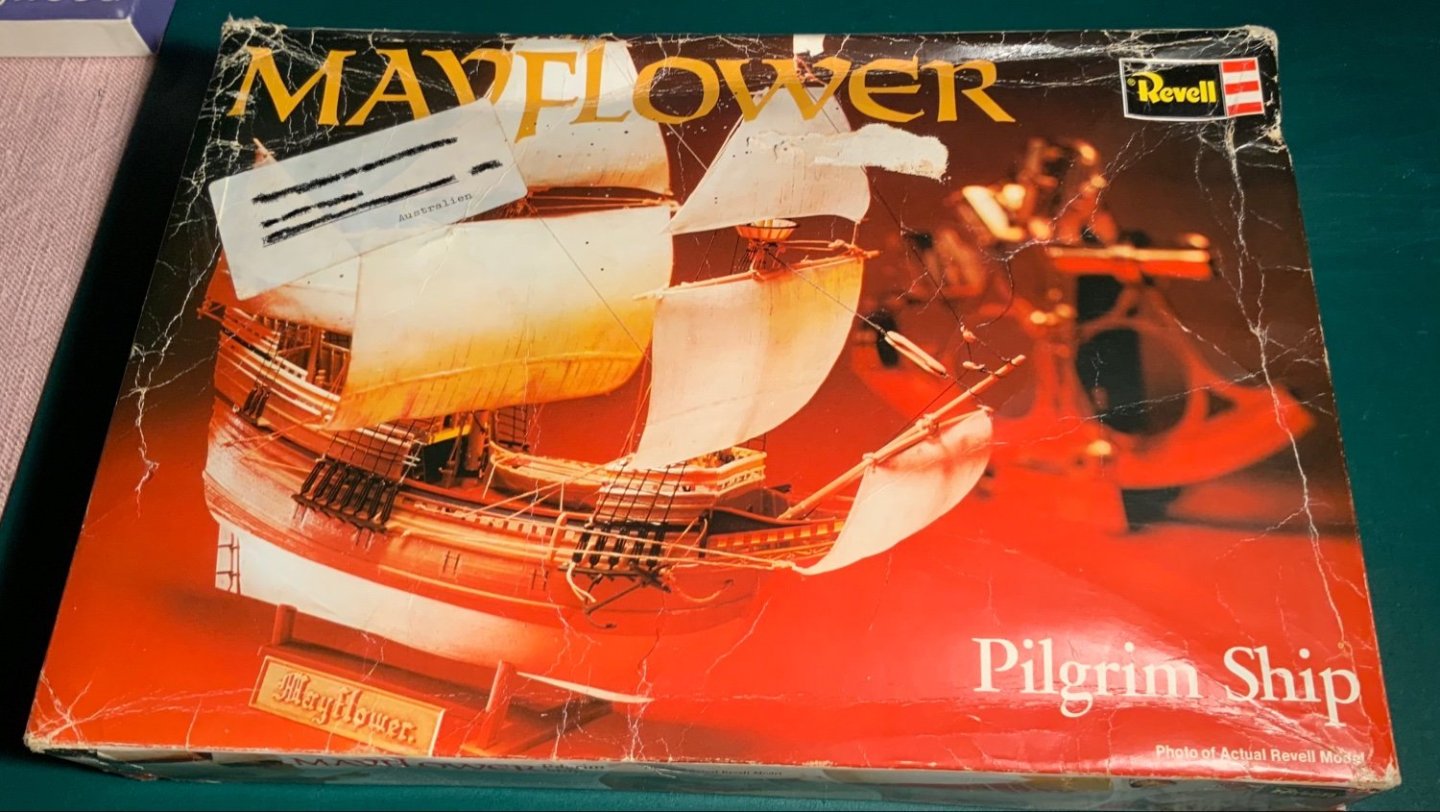
 There's quite the story behind this one. This is a model I have walked past for years at my local hobby shop, before this event took place. I have a great uncle who lives in Reno Nevada that i rarely get to see. Well, my dad and his girlfriend went to see him yesterday, and i got to talk to him on the phone. He said he wanted me to build a ship for him to display at his house, and this is the story thereof. I was able to go to the model shop a few hours ago and pick this up. Another comment: The stated scale of the ship (1/150) is laughably inaccurate. This replica of a ~100 foot ship builds to around 19 inches. A 1/150 model of said ship would build to about 9 inches. The math computes to a scale of about 1/64, and to back that up, this is actually the same mold as the 1/64 Revell mayflower. I am impressed by the size, which i consider purely a canvas for extra detail that's impossible to put onto a smaller scale ship. As for painting, I will likely base the majority of the paintwork, especially the upper paintwork, on the box art as well as my Golden Hinde. Ready? Here we go!
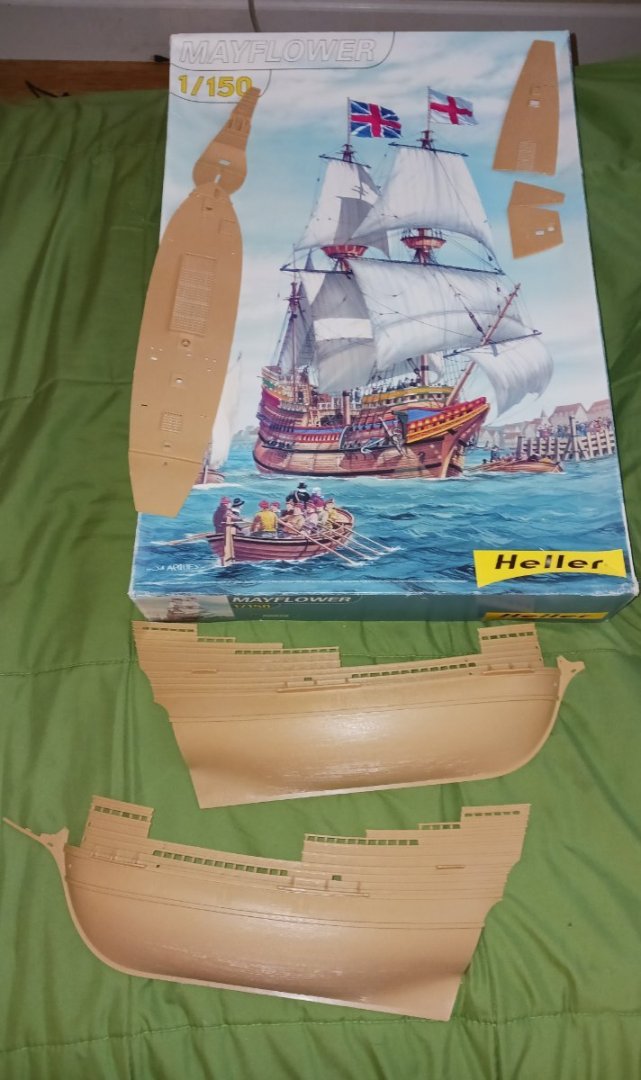
-
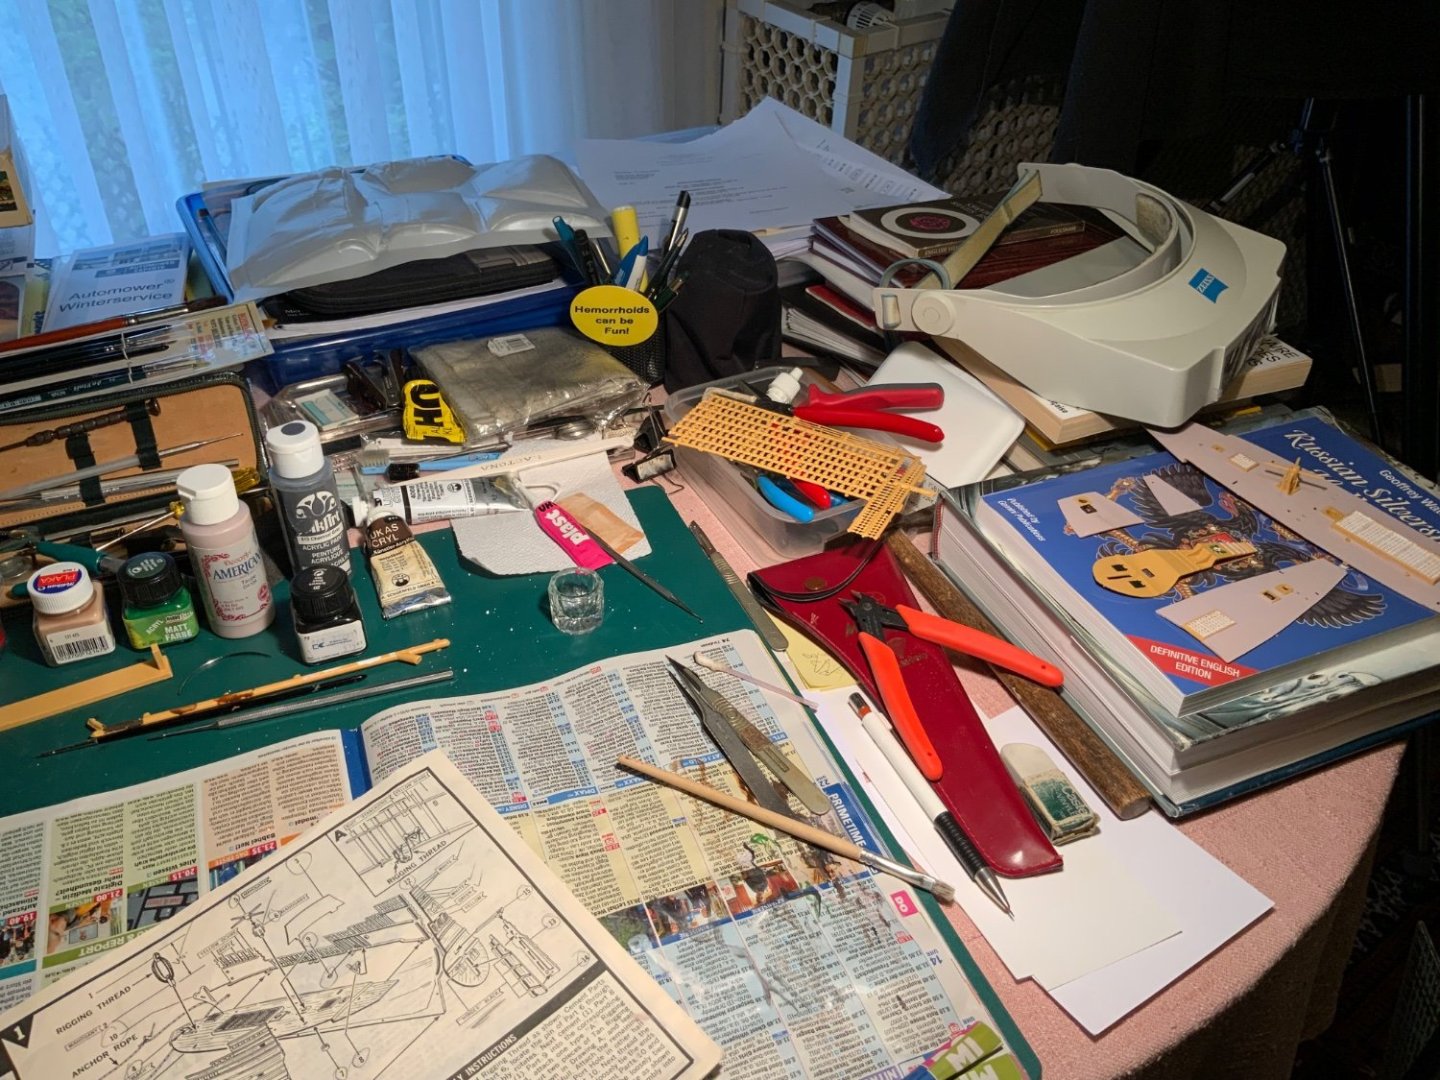
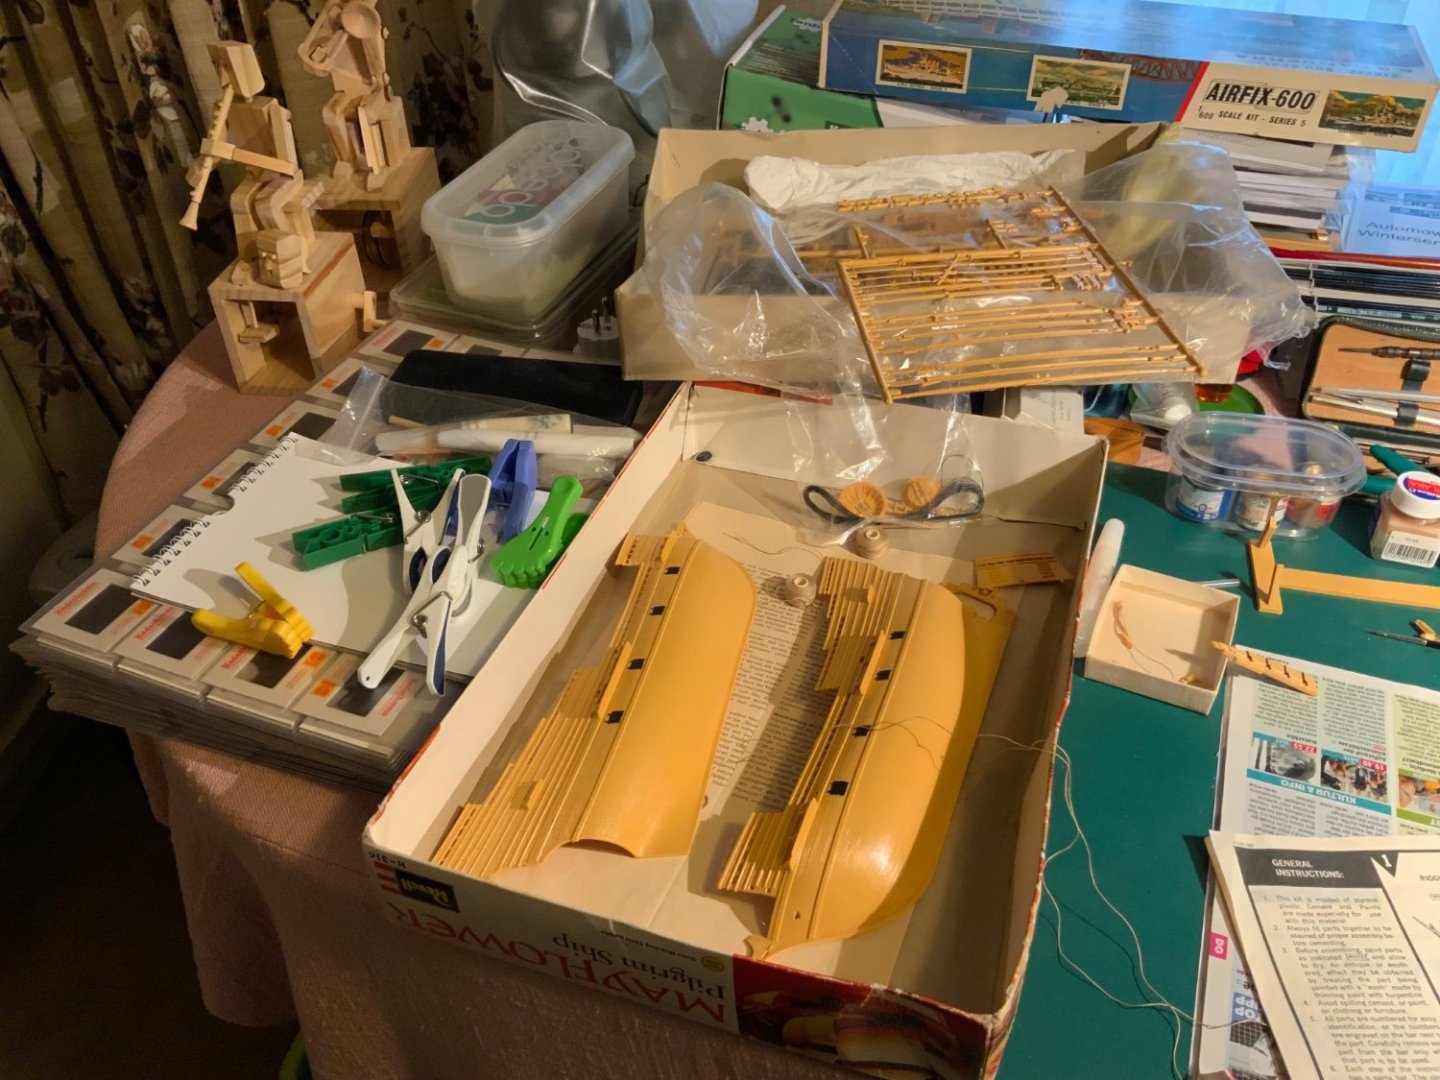
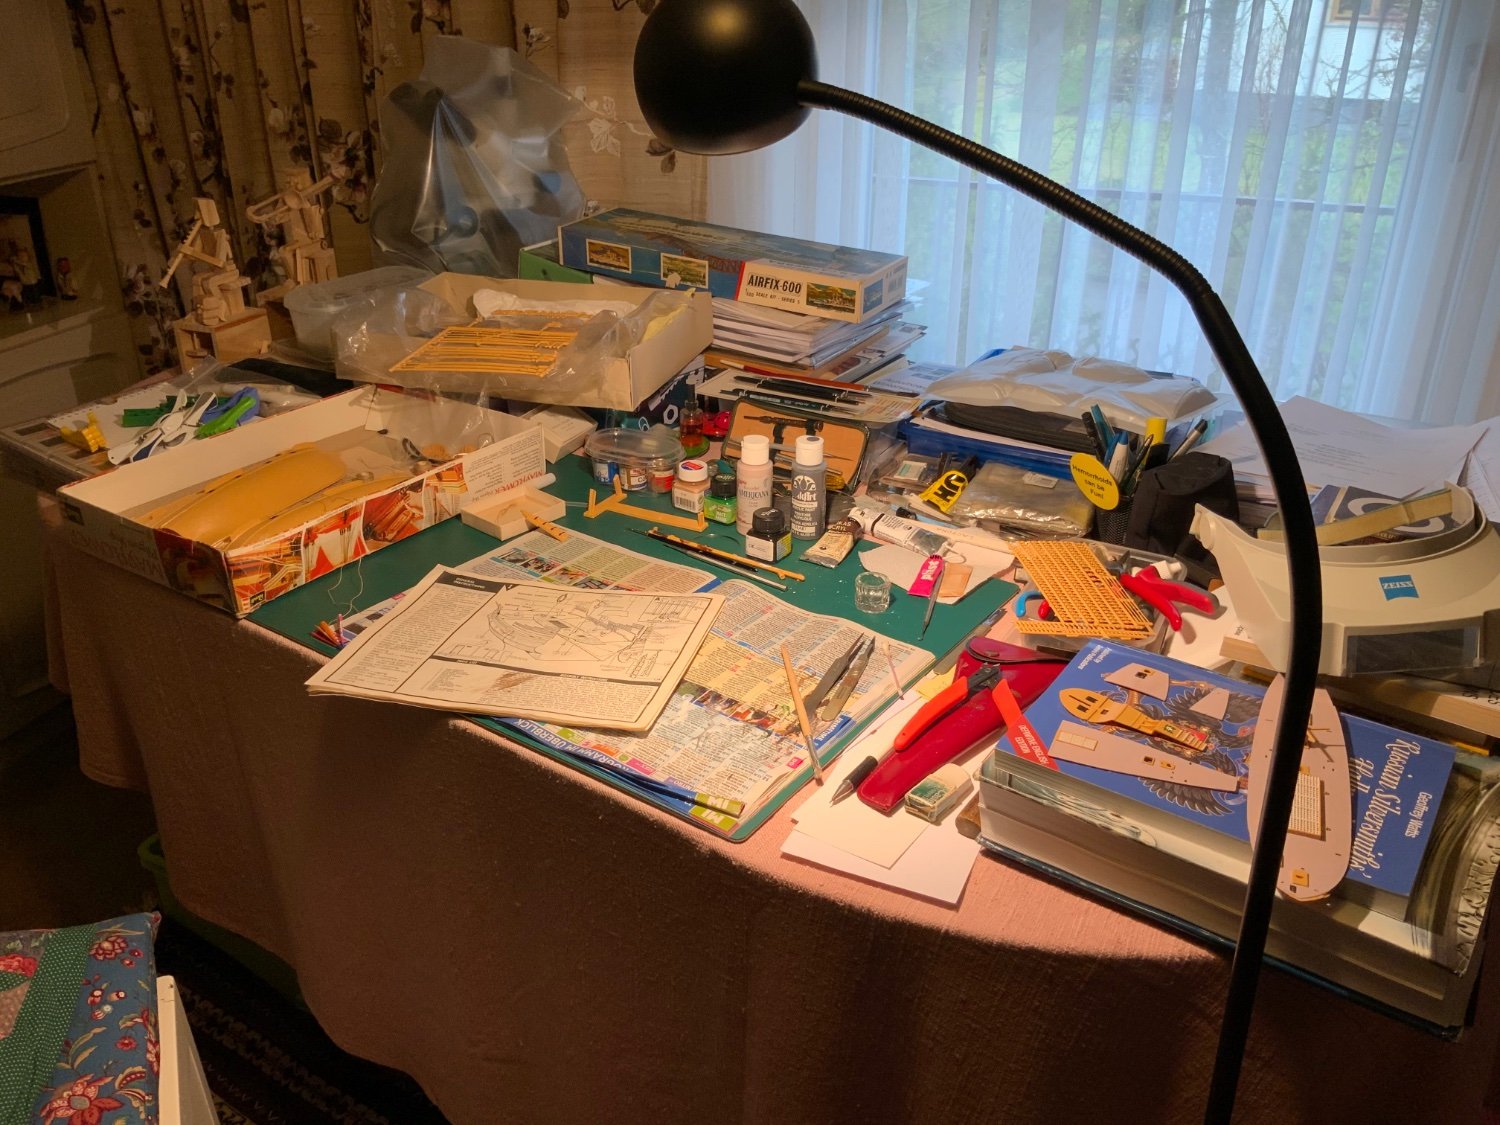
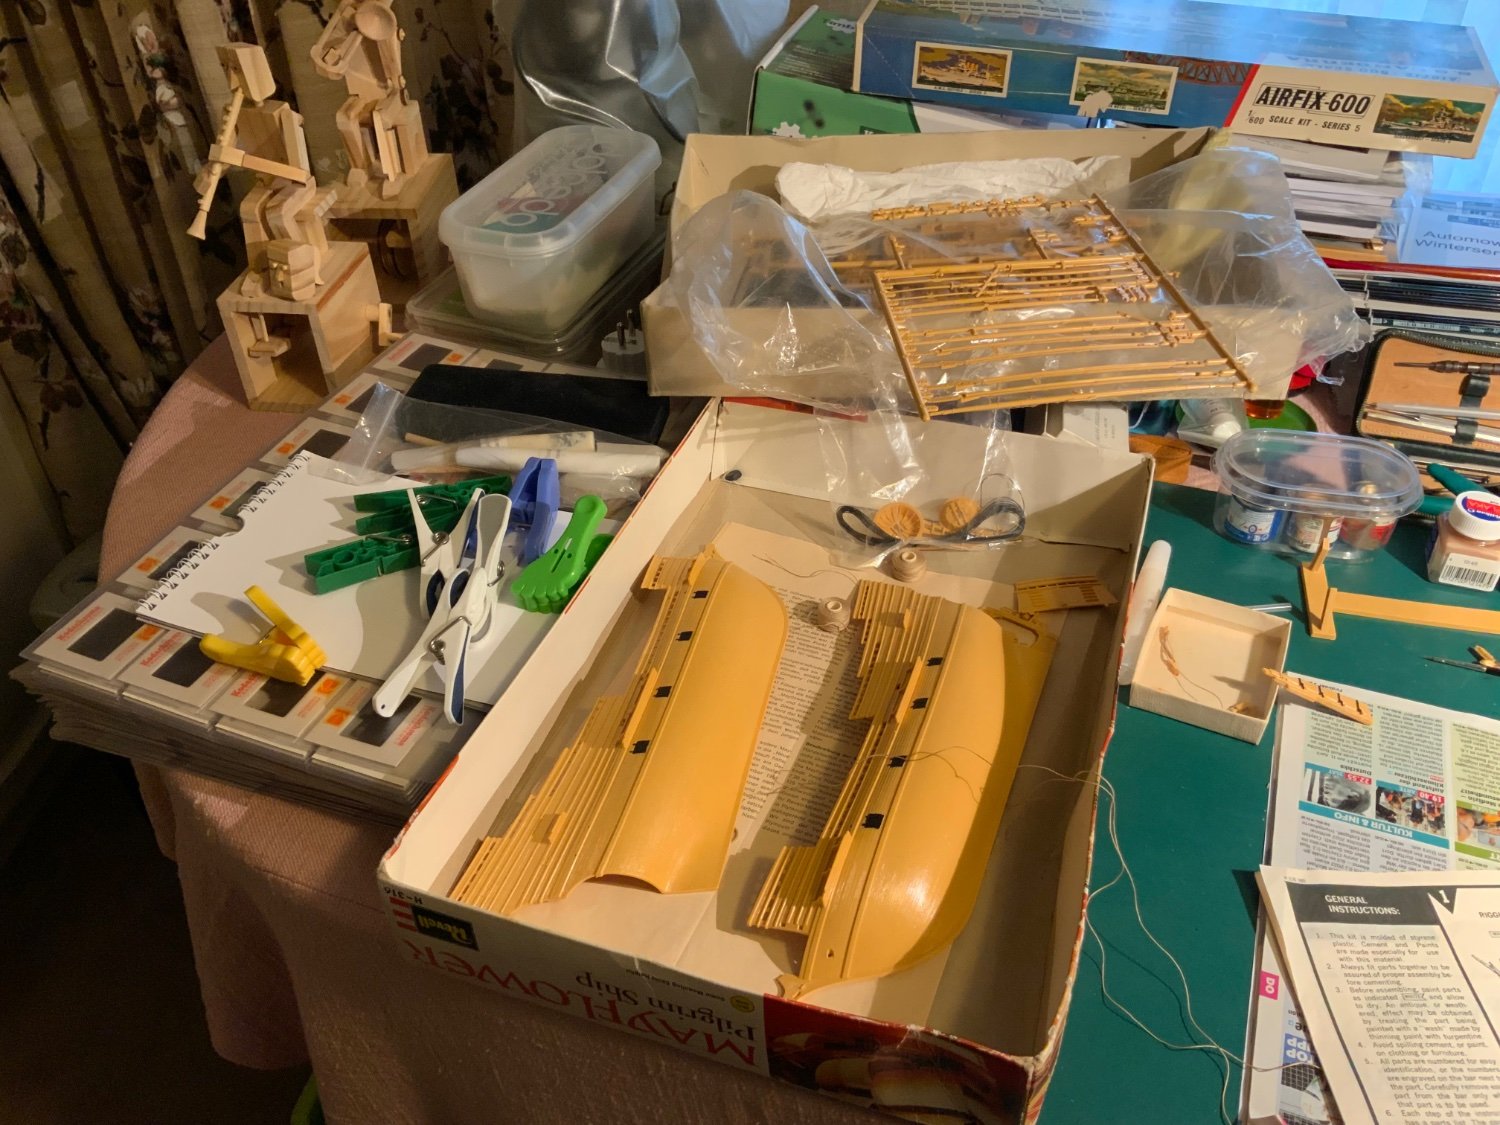
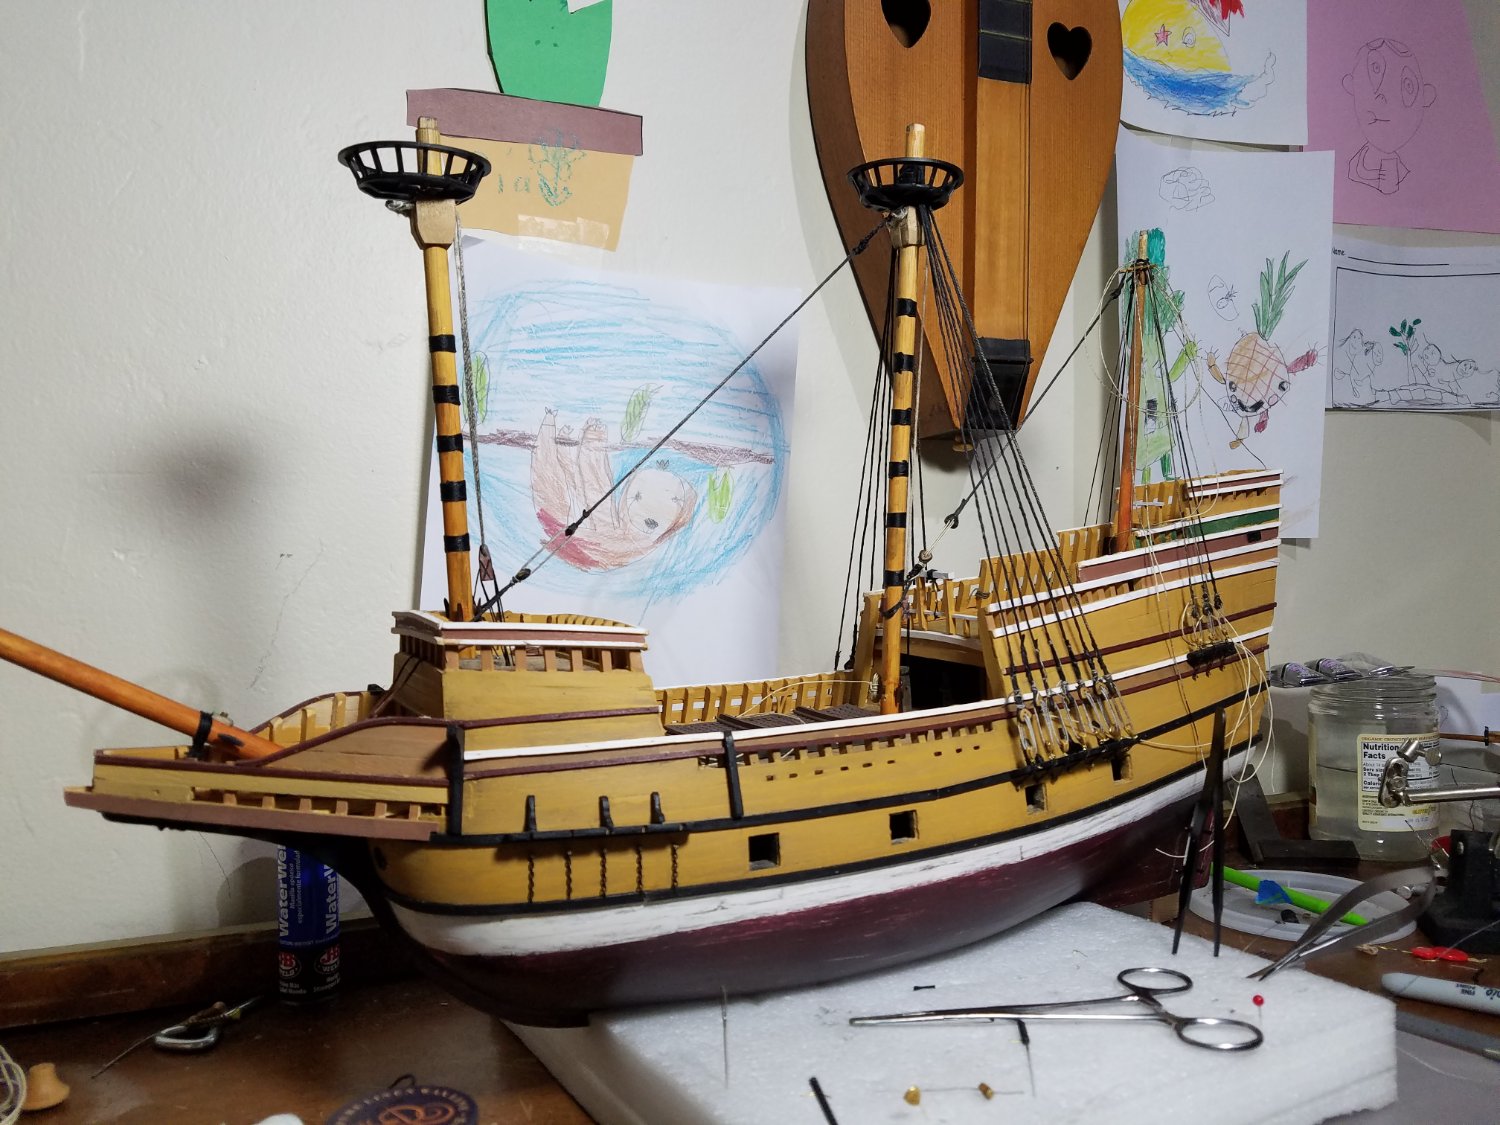
 I am 89 years old and have never built a boat before! I used to make plastic kit planes when I was a boy. In the very early 70s I was given a damaged Revell kit by mother in law who worked with an insurance company. The kit was returned as part of an insurance claim. The box was stored and resurrected this year. I took one look at it and put it away! It looked far too complicated and difficult to make! I was encouraged to try to make it as an occupational therapy project by my daughter! Only Revell pieces were used except for four hooks that I made from wire. The pictures and comments that follow document my build. I had some fine forceps and a few old dental instruments that I was given many years ago. Some pieces were damaged, the ‘sails’’ were broken and some pieces were missing.


-
 Idea here is to paste steps from the instructions and check them off as completed. (still debating on whether to do this hard copy only) Introduction: Recently finished MS Dory kit, 90% done with MS sailing skiff, 50% done with Bluejacket Dory. Looking to build the Mayflower as a tribute/gift to my brother who is proud of our Pilgrim heritage. My Swift "build" (my other thread) is in Hanger Queen status about 30% done🏗️) MS= Model Shipways Start date: TBD (awaiting model delivery...shooting for mid April) To begin, remove the false keel (bulkhead former) and lightly sand its edges (At the Bearding Line) Reduce the thickness of the bulkhead former gradually to 3/32” wide.
 -
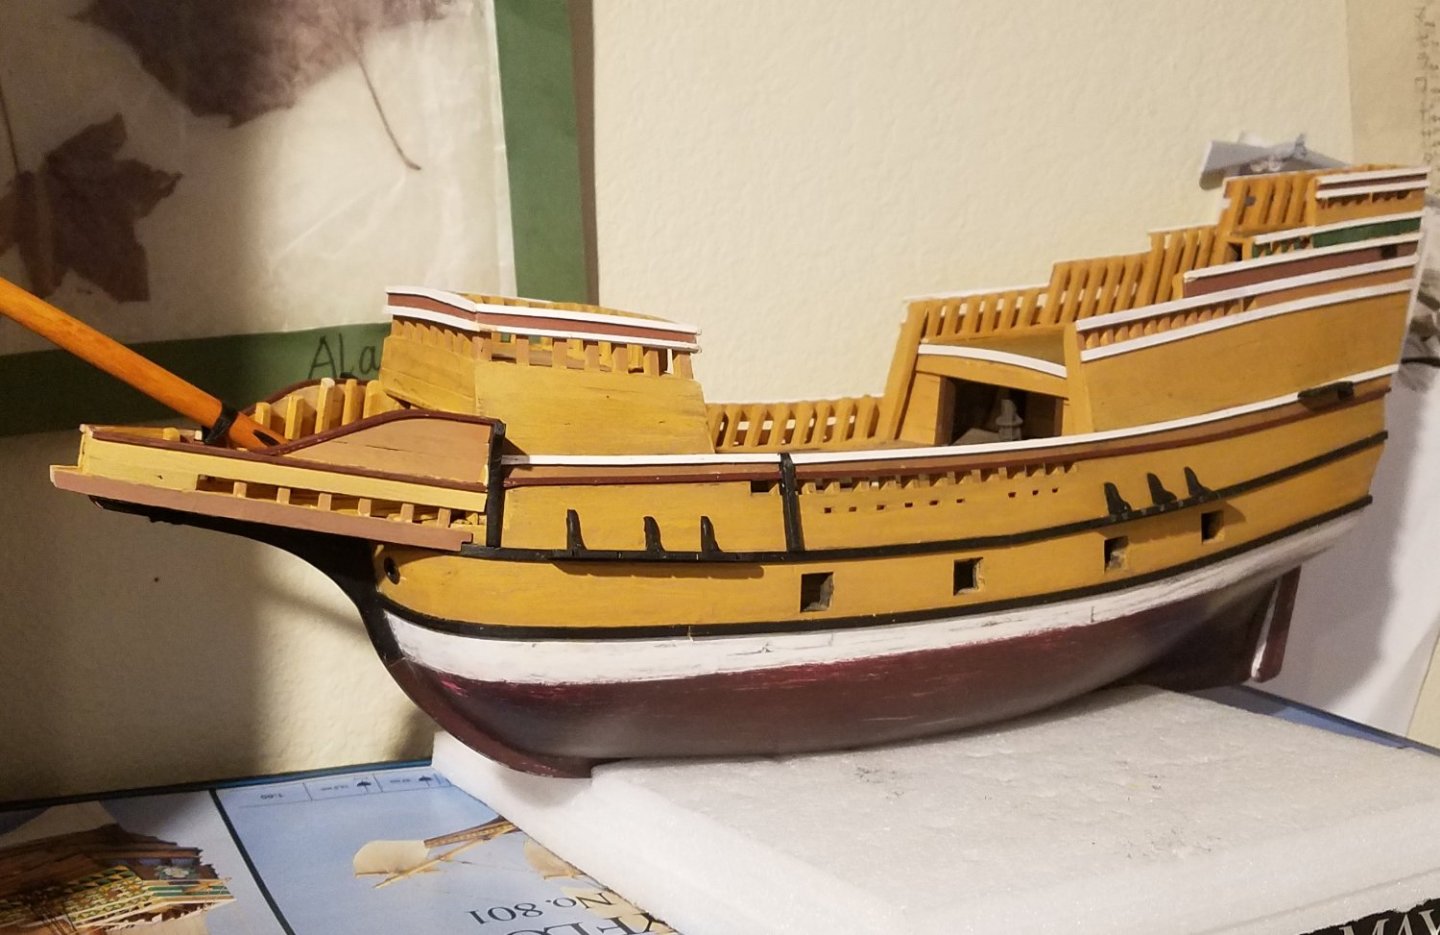
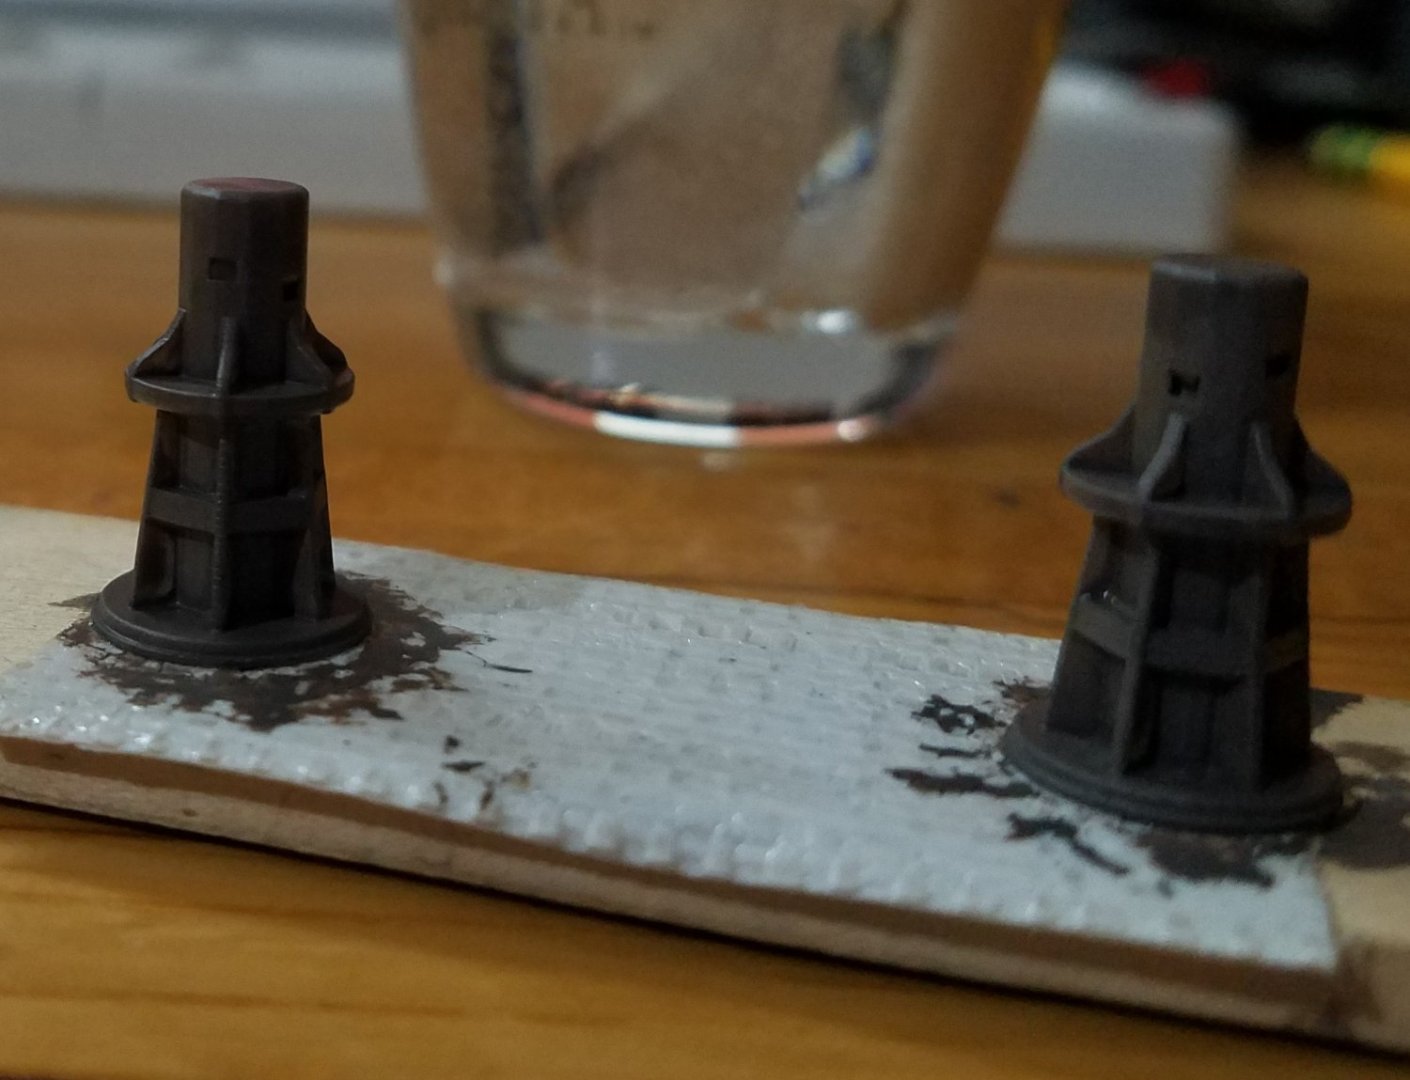
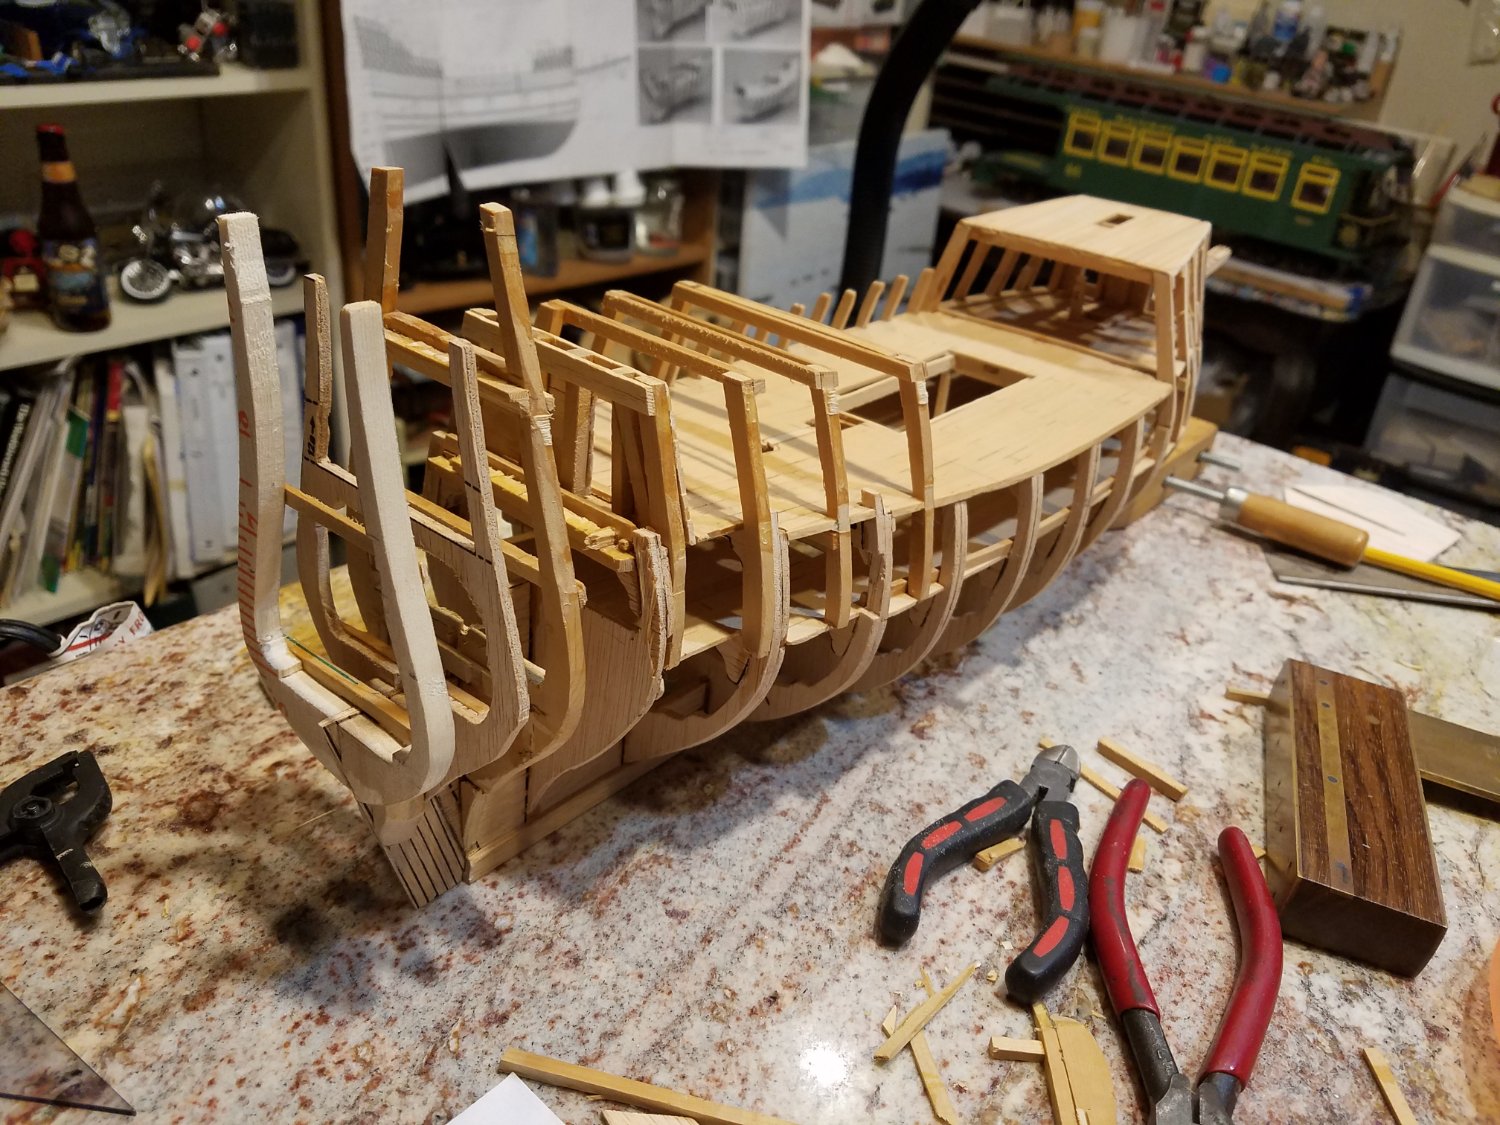
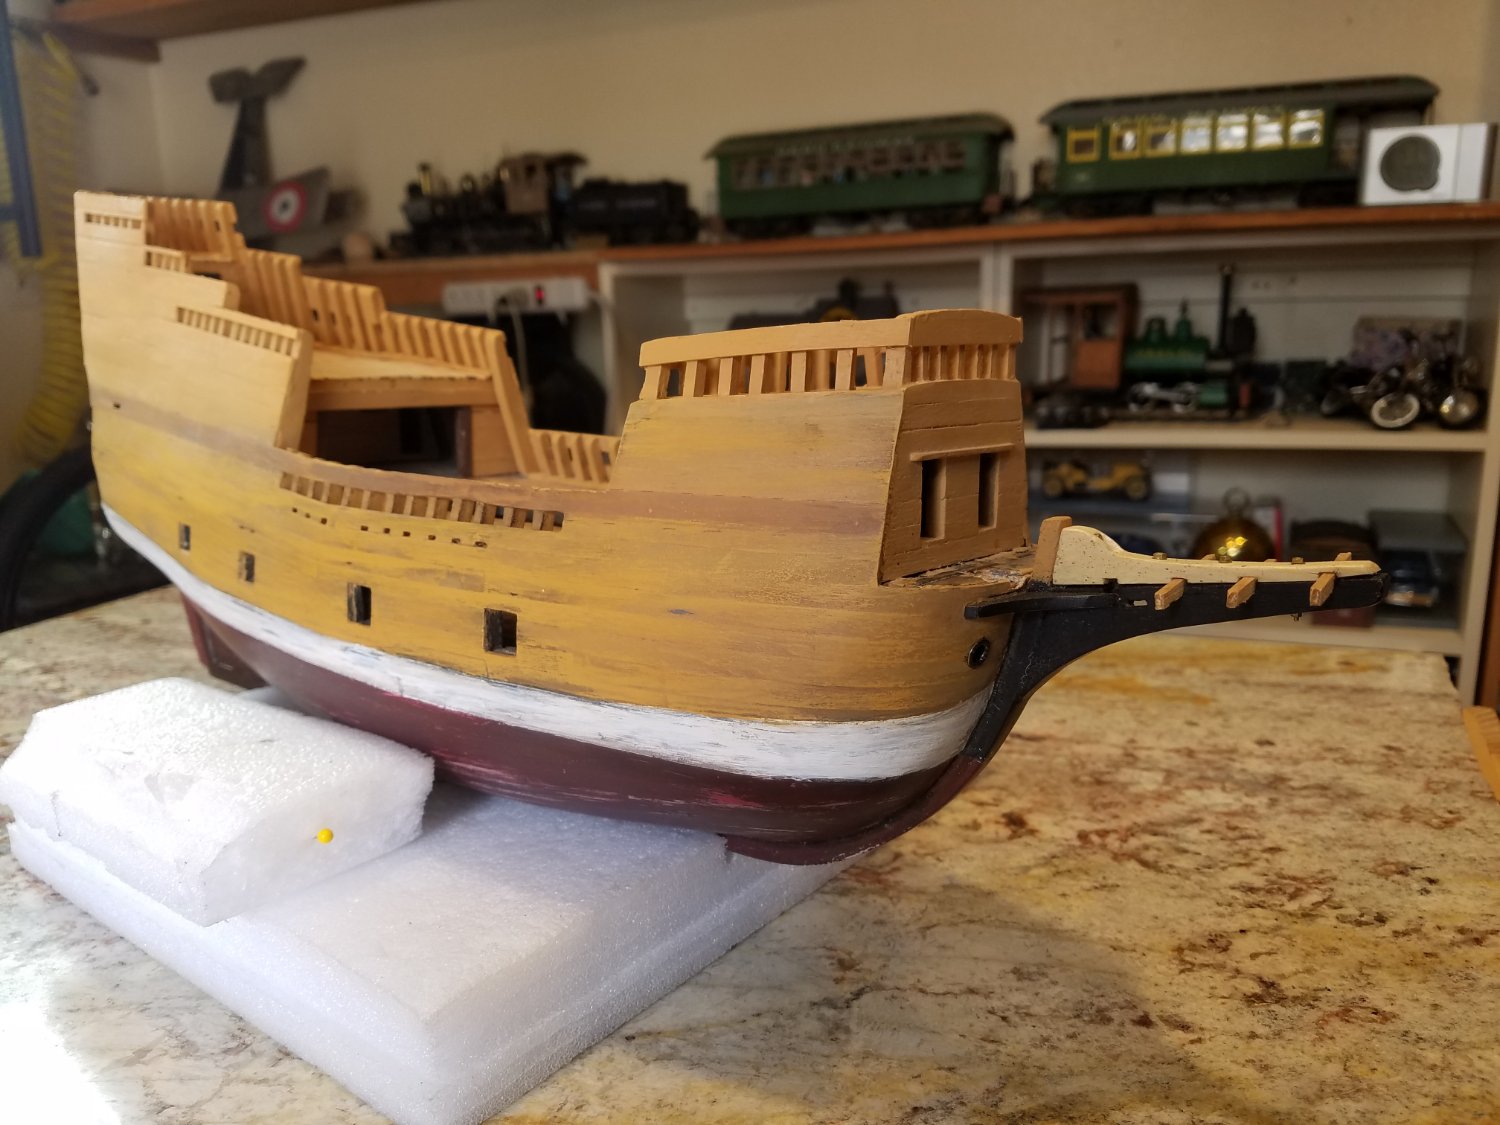
 This is the first Ship model I built. It was an Artensian Latina 1805 Swift. It is one of 3 ships I bought from our local hobby store when it was going out of business in 2003. It was also the simplest build and I finished it in less than a year which prompted me to lunge into the Mayflower kit,,, blindly. The mistake I made was assuming that this kit would be a fair representation of the actual Mayflower. I soon learned that it isn't even close. Unfortunately by the time I came to that conclusion I had already assembled the framing, so I had to modify an existing frame in the most brutal way possible. I won't blame you if you cringe at the next image [ Viewer beware] After purchasing "The Frigate Constitution And Other Historic Ships" I became disenchanted with the Billings Kit. It was already - by my inexperienced standards - not as good as the Artesania Latina Swift kit. The instructions were minimal and the plans were hard to cross reference. So I did a couple of months of research and decided that I would try to model the Mayflower II which was supposedly a reproduction of the actual Mayflower although if I am to believe the "TFCAOHS" it is not. According to Thomas Miller (quoted in TFCAOHS) the real Mayflower wouldn't have had a spritsail, topsail or mizzen. So with that shocking revelation I decided to stick to a ship that was already built, the Mayflower II. After obtaining some rough images of the plans for that vessel online, I began hacking away at the kit. I used some white cedar I had in my shop and some sugar pine for the timbers. I completely rebuilt the quarter deck, forecastle and poop deck so that they were closer to the dimensions I gleaned from the images of the plans. The modifications used up all the planking material that was included with the kit, so I used stirring sticks. Then I cast away the plastic bowsprit beak assembly and built my own from scraps from my shop. It's as close as I could get from the sketchy plans I had and the plentiful images shared on the internet. I added ballast and some paint prior to blanking the upper decks because I concluded it would be impossible to add after everything was covered. I like to paint as I go, it keeps accidents from happening. I chose to weather the paint job to approximate the wear and tear that was present on most of the images I had collected. I also 3D printed a lot of the details, like the capstans. I am currently rigging the vessel, using images as reference along with the book "Rigging Period Ship Models" by Lennarth Petersson. It is well illustrated and a huge help. With any luck I should finish this by the beginning of next year. I intend to work on this model in tandem with the Artesania Latina Constellation Frigate model - which also will require a lot of mods. I know there are a lot of mistakes I made on this Mayflower model; I learn from my mistakes, so when I start building the frame for the Constellation it will be after I've made the necessary modifications to the transom and bow and after .
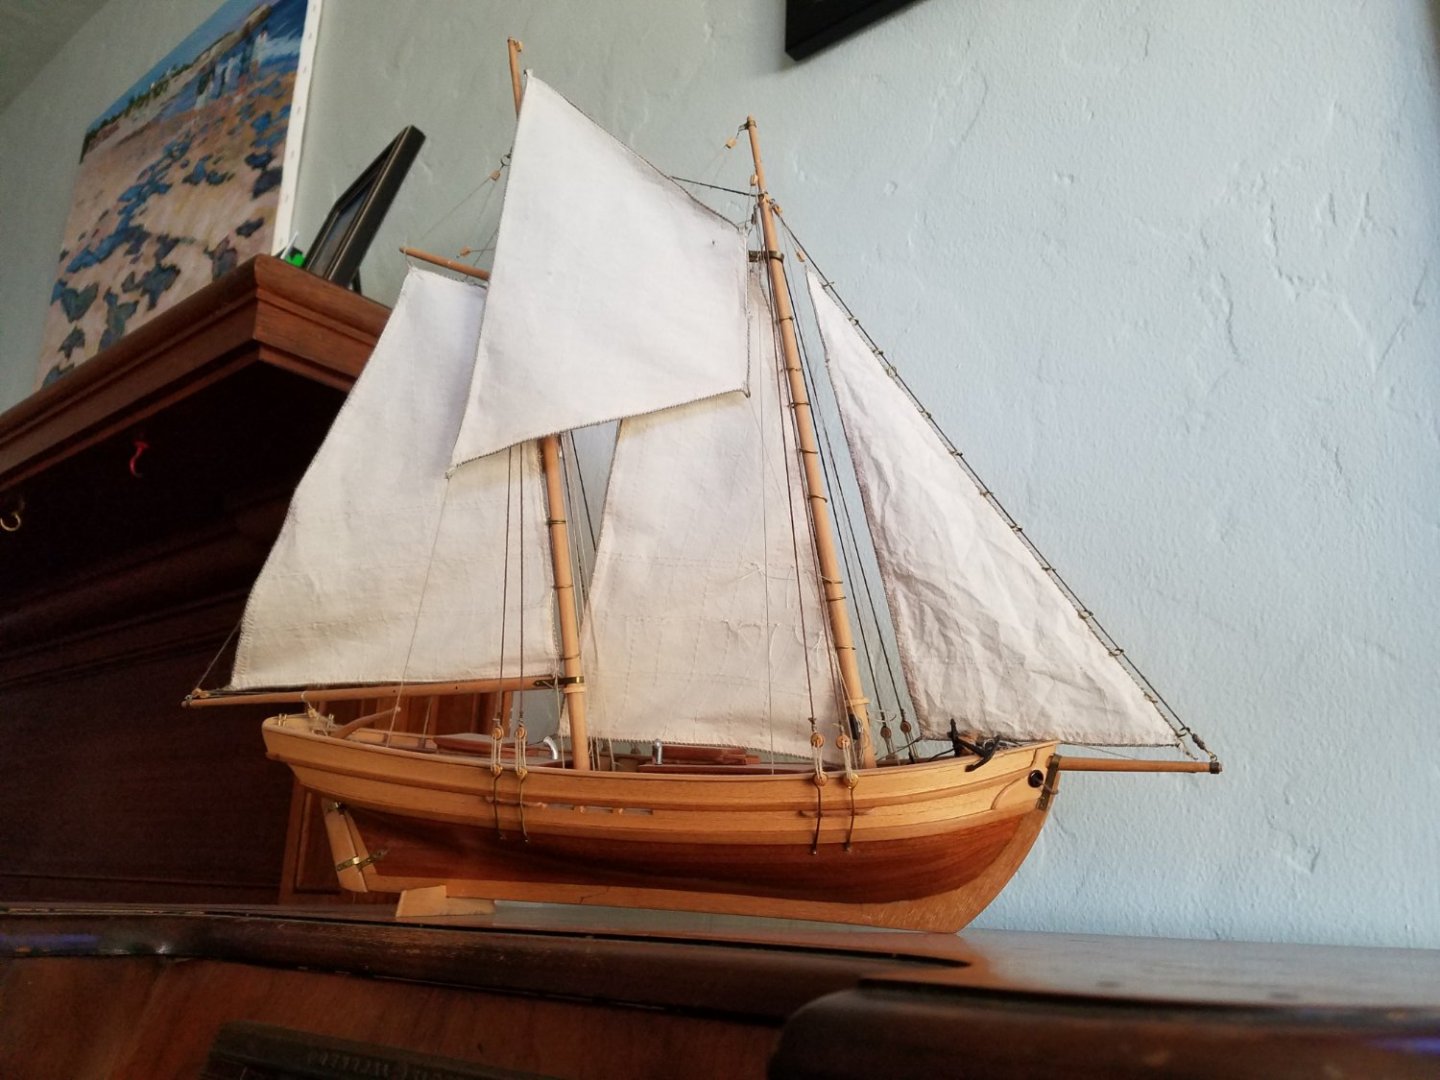


-
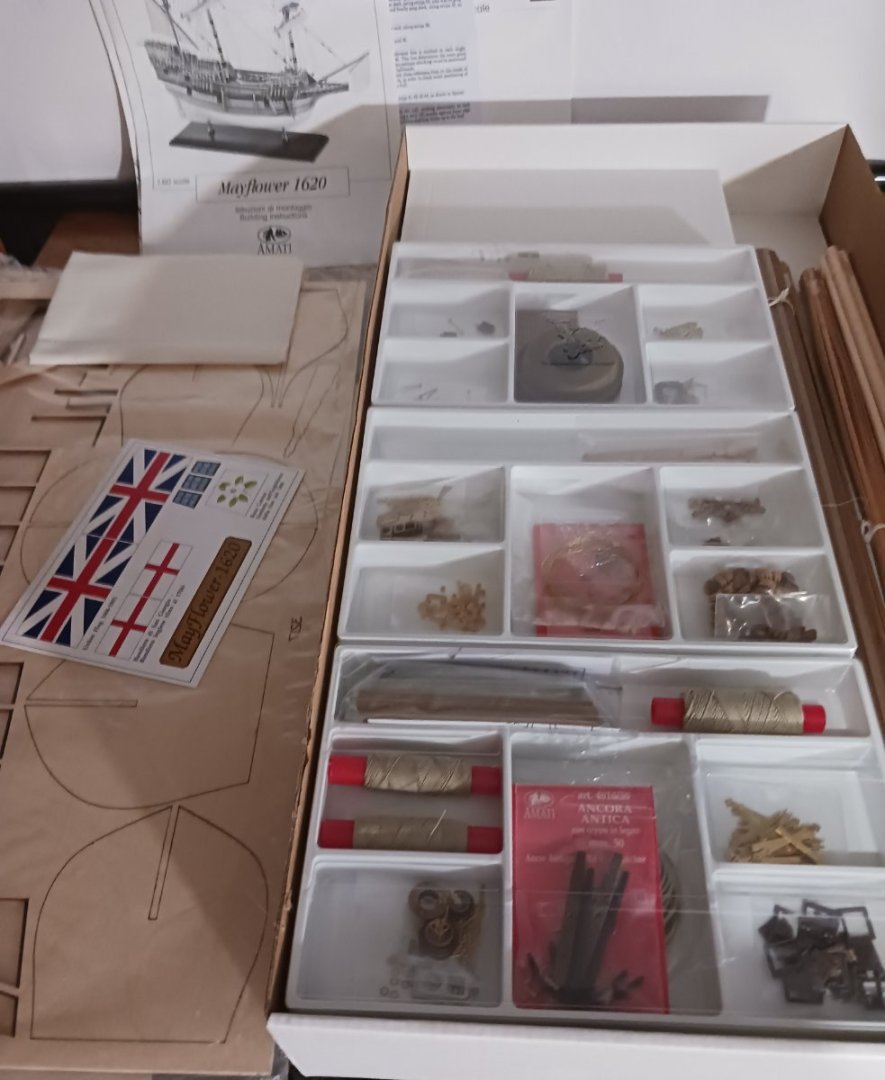
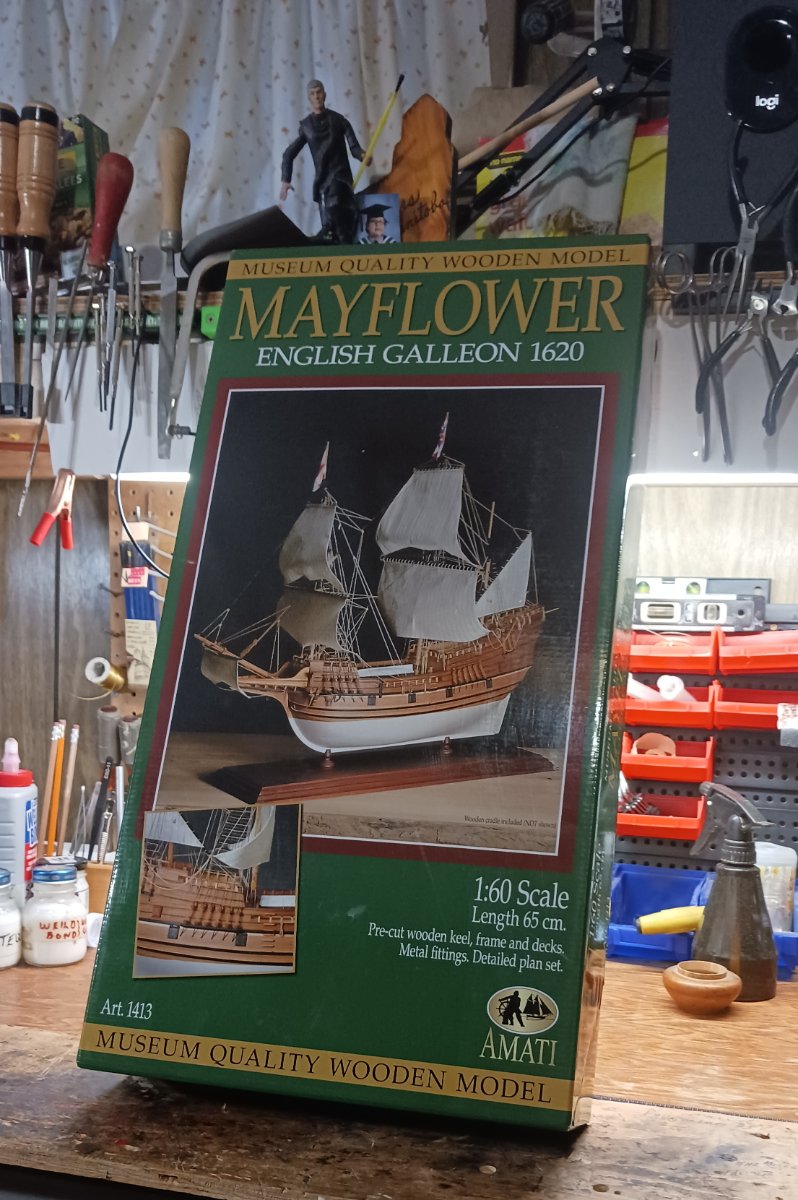
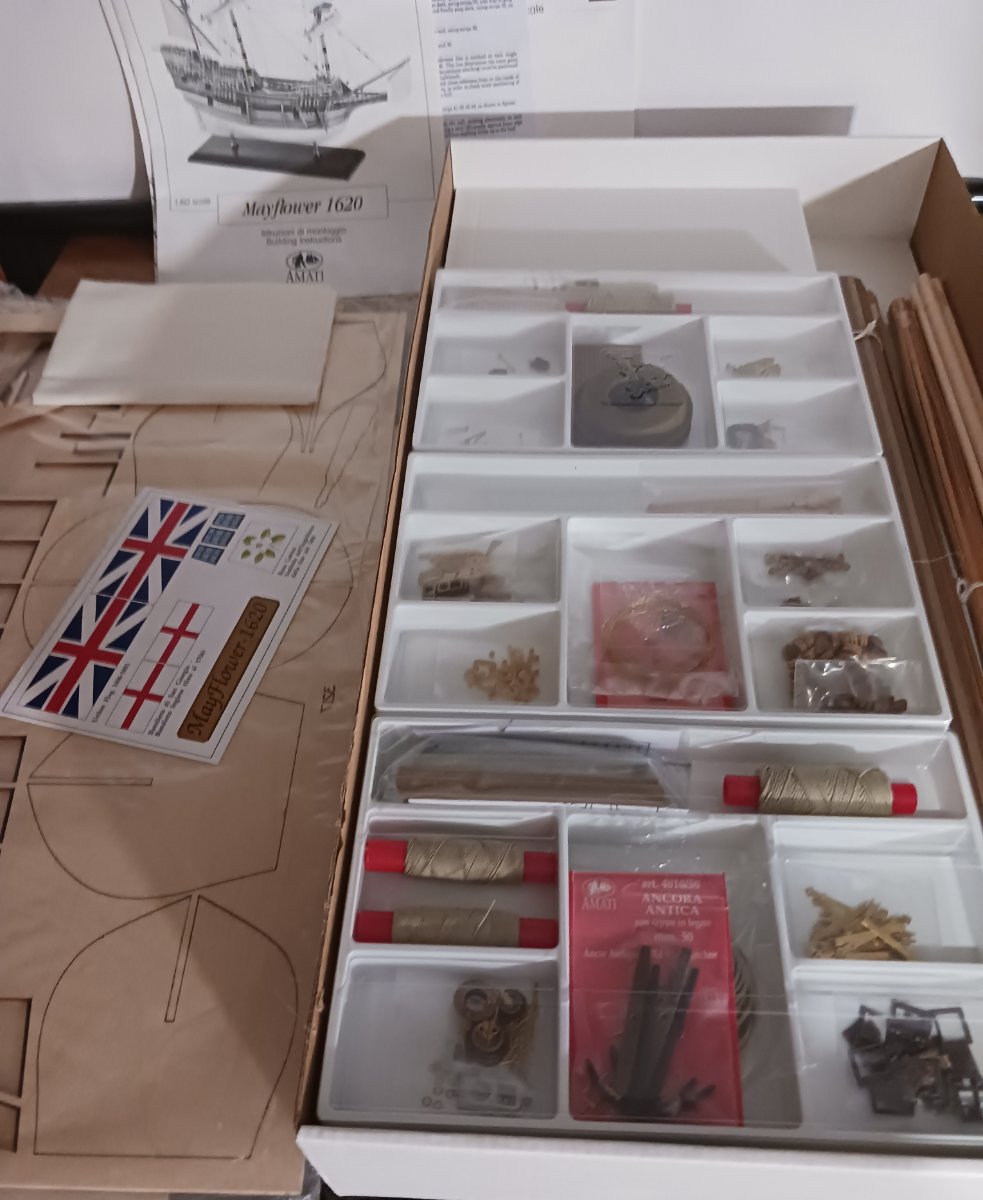
 Well today is box opening day, I have peeked a few times thought. Lol. I chose this Amati Mayflower model because of wood work and overall look. Many of the Mayflowers I looked at are Mayflower ll, they seem to have a lot of colours on them, for me its a bit too flashy for my likes. I dont see any other Amati Mayflowers logs so this will be my attempt to build one. It is so good to know if I run into any problems MSW will have the answers, slowly and I mean slowly getting to know my computer and how it work here on MSW.. Thanks ever so much !!!!!! Well got to go set things up for the build wish me luck lol ,one thing I noticed was that there was two bags full of dead eyes LOL the fun never stops . This hobby is so much fun ,does everyone get excited on box opening day then build days then finishing day, then NEW kit day lol 😆 Again thanks MSW for steering me in the right direction so glad to be a small part, see you buddy's got ships to build
-
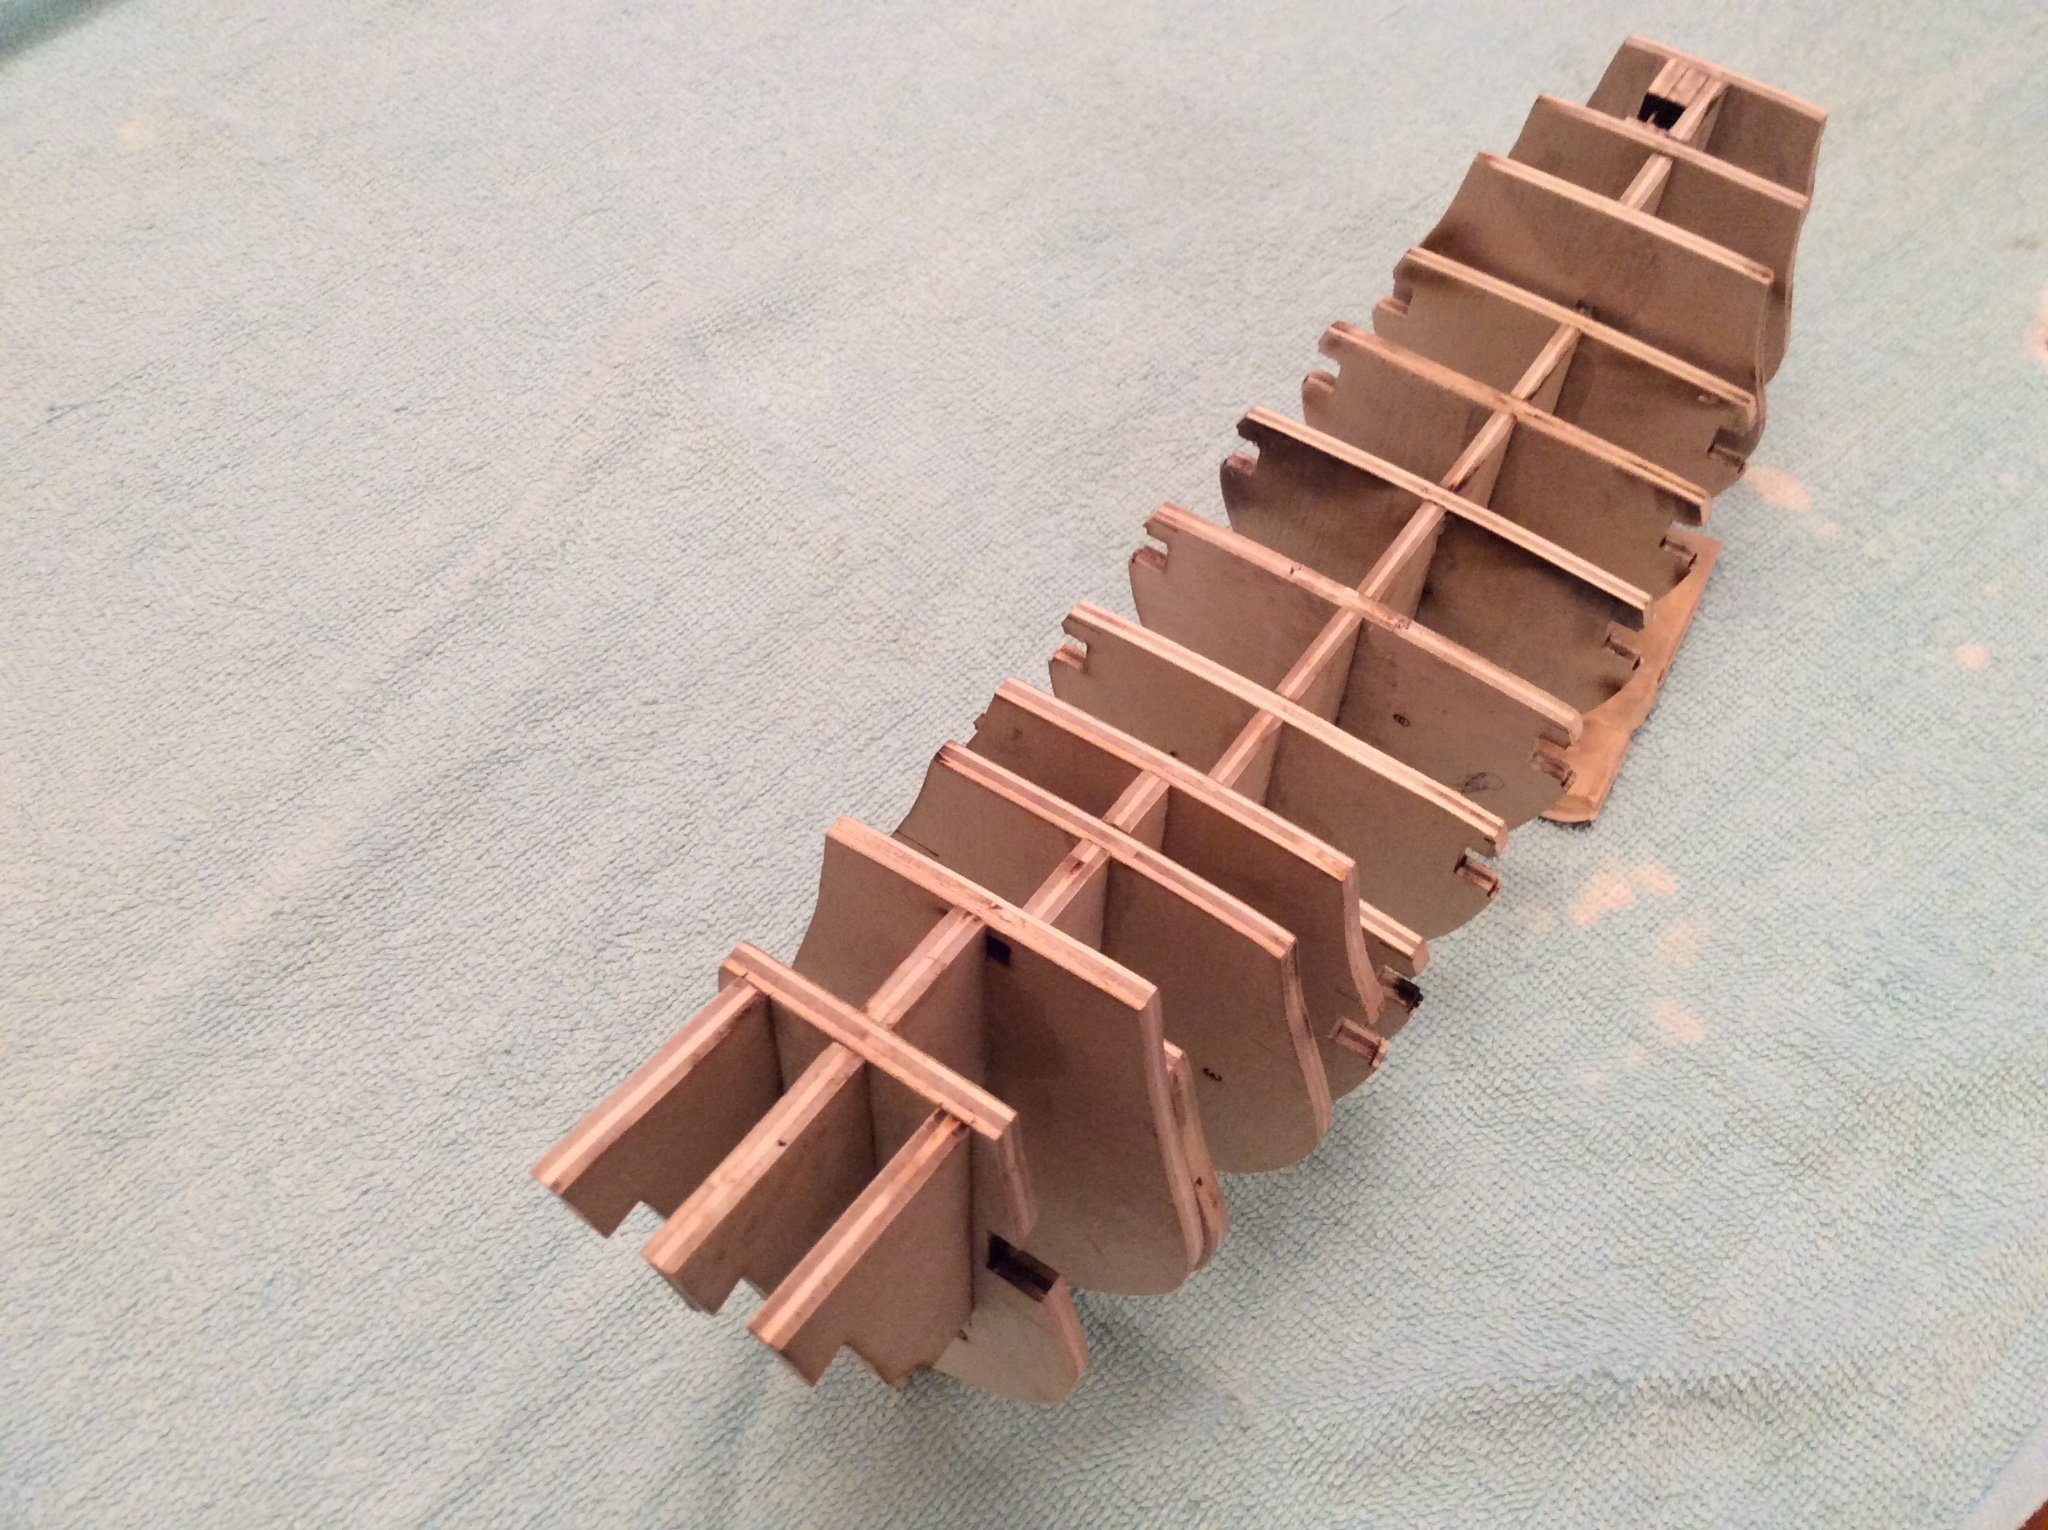
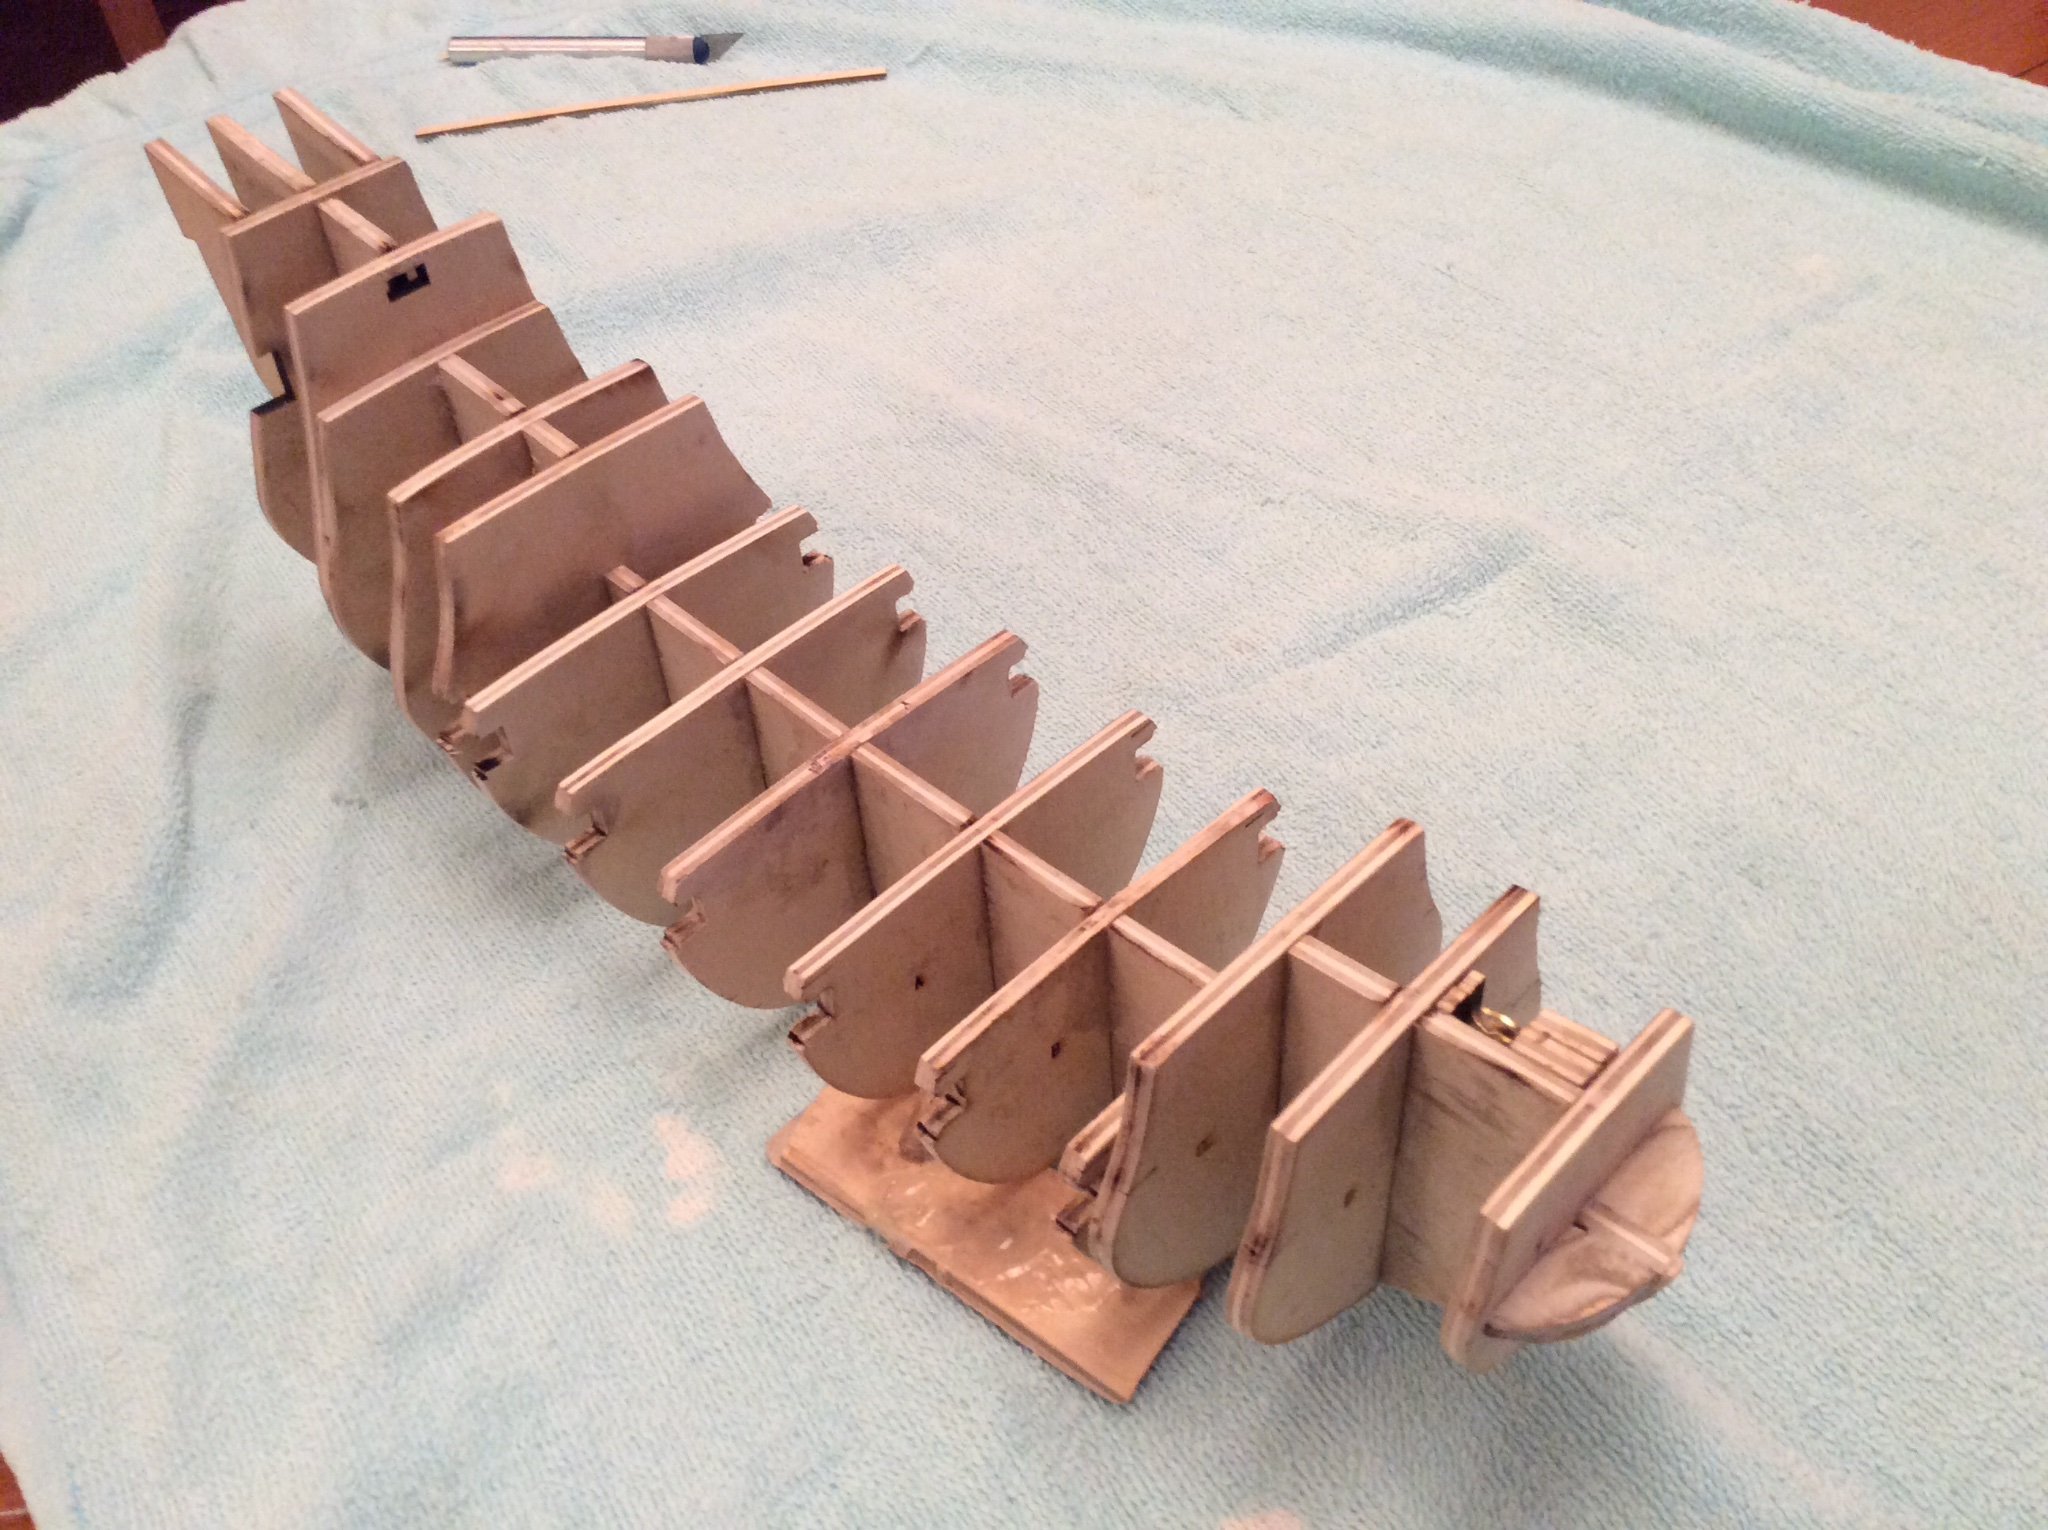
Hello all! I have built real boats from scratch but this is my 1st model scratchbuild. I chose the Mayflower since it has pleasing curves and colors, and also being a 16th century ship hopefully the rigging won't be that complex. I saw a very large model of an aircraft carrier at the Smithsonian and have loved large models since. After a couple of 1-200 models (Titanic, USS Missouri, Bismarck) and 2 Model Shipways kits (Constitution, Bluenose) I decided to go really big and build in 1-19th scale. Why 1-19th? I bought 1-76 scale plans and blew them up 400% which gives 1-19 scale and a 6 ft person around a 4 inch height. This is the bulkhead assembly: 20220624_171209.heic
-
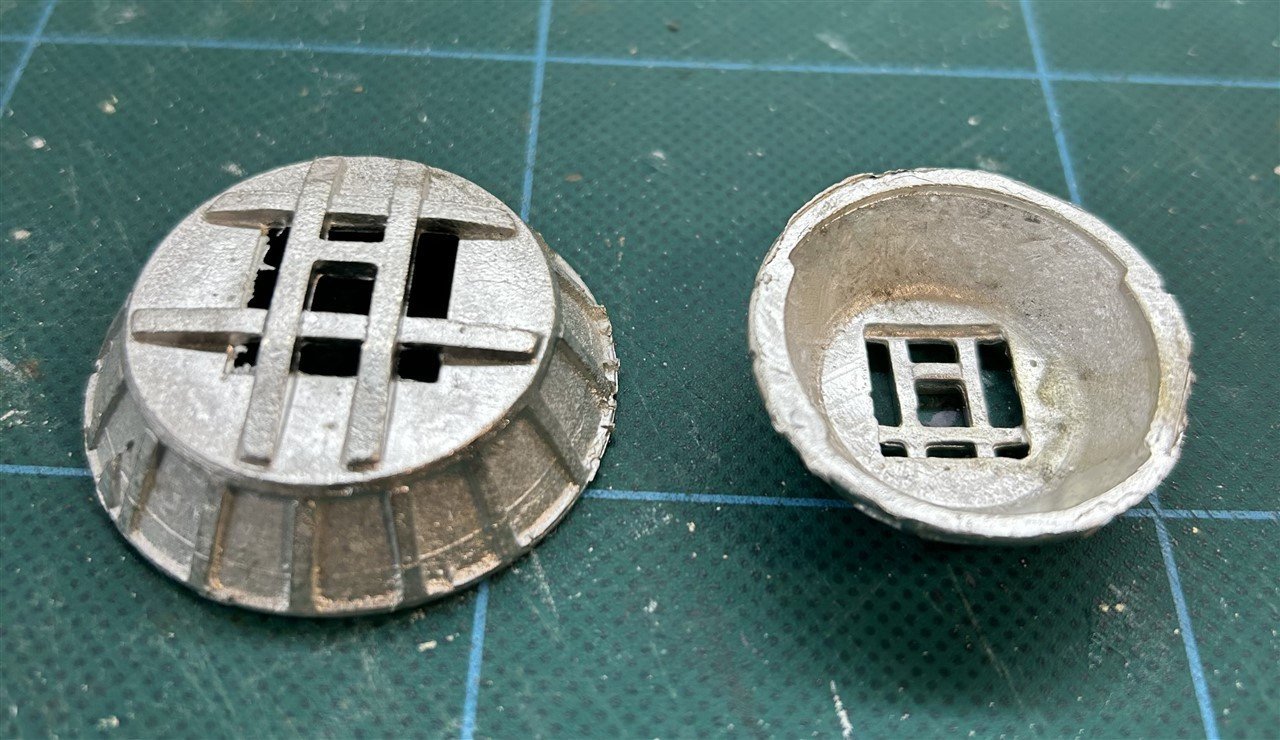
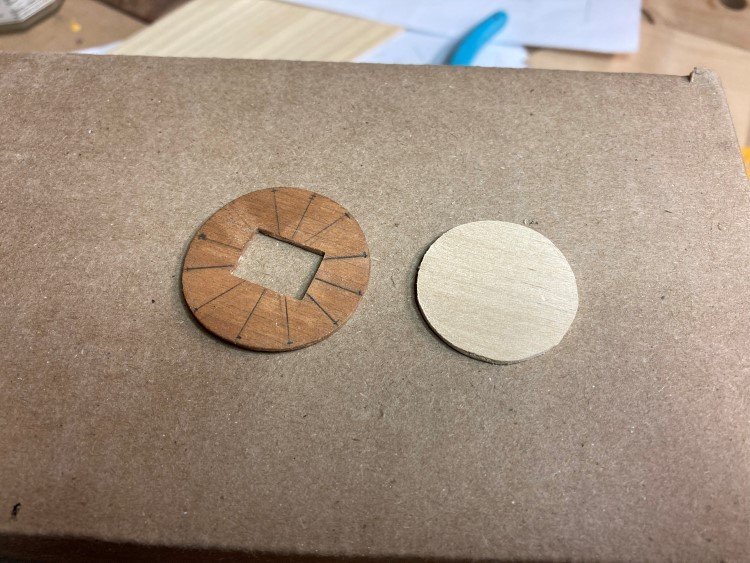
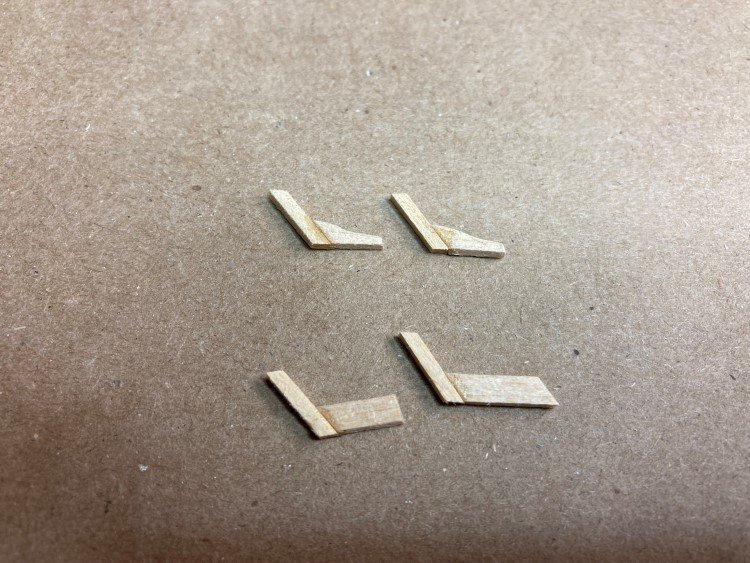
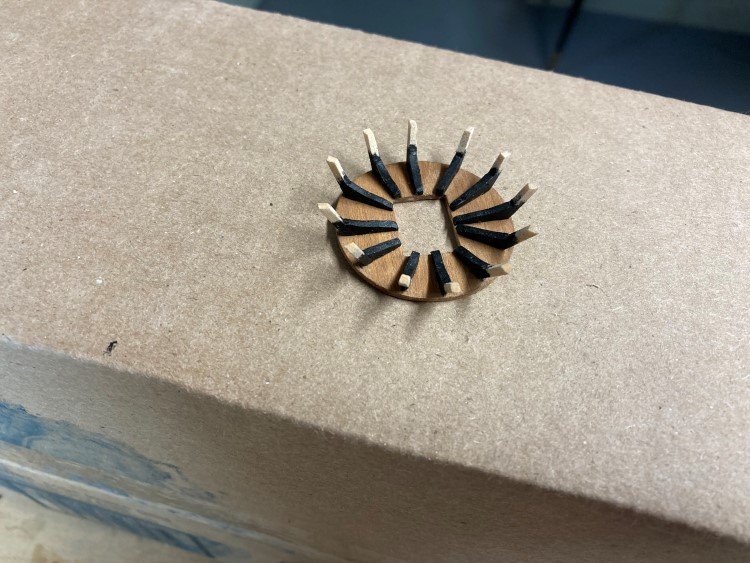
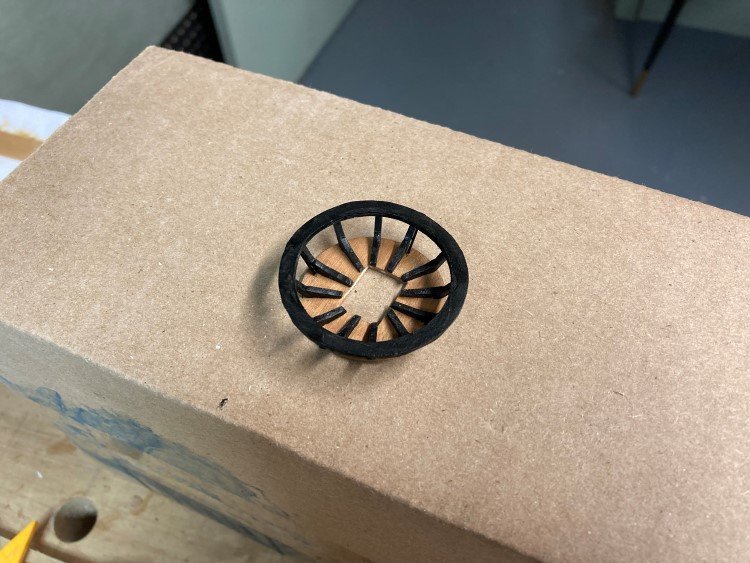
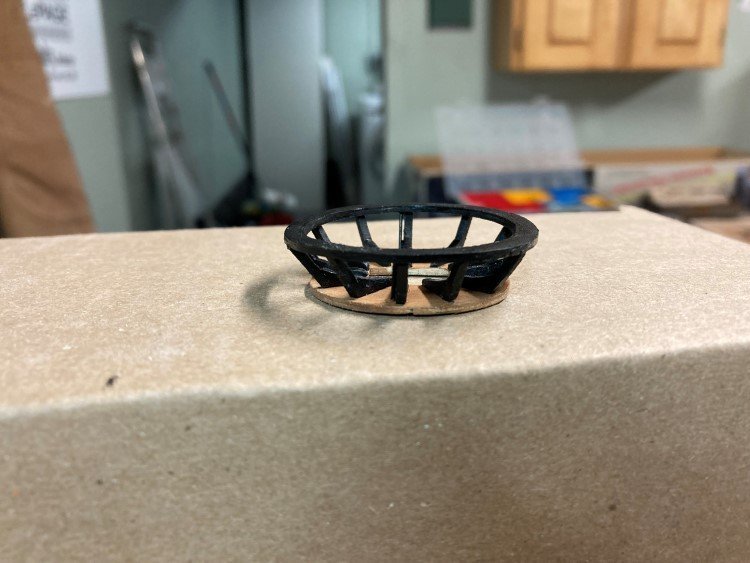
 I expected to be now concentrating on my Agamemnon, but it seems the ship modelling gods had something else in store for me. I have been asked by someone to build a Mayflower for them. This is not a model that I would have chosen for myself, as I'm not particularly interested in 17th century vessels. My favourites are late 18th century. Nevertheless I'm happy enough to build it for someone else. Keeps me off the streets. There are several Mayflowers available, but I settled on the Model Shipways version, as I tend to like their kits generally and Chuck Passaro designed this one, so it seemed to me to be the best option. I don't tend to complain too much about cast metal parts. Usually I find they can be made to be acceptable with a little filing, paint etc. But I don't think I've ever seen anything as bad as these cast metal crow's nests that came with the kit. In the instructions, it shows wooden components which appear to be quite acceptable and which I assume is how the kit originally shipped. However, I was surprised by what I found which look like something my grandmother would have baked tarts in. These just won't do. Not only do they look horrendous, but I don't know how I would be able to use them. It's difficult to see in the picture, but there is almost no lip or overhang on the upper rim, yet it's necessary to mount deadeyes and futtock shrouds. I just don't see how I could do that. Also, much of this ship has a natural finish, so painting these things to blend in would be almost impossible. So rather than starting at the beginning, I decided to get this problem behind me first and I set out to design and build something that I could live with. Here is what I have come up with: I simplified them slightly. The plans show 16 brackets of about 1/32" wide. I was having quite a bit of trouble with that, so I reduced the number to 12 and made them 1/16" and I found that worked better for me and still looks ok. The crow's nests on the replica Mayflower II have closed sides, and I believe it was the idea for this model too. However, I'm going to leave them open. I experimented with closing them in and wasn't happy with the look. Also, all of the other kit versions of the Mayflower have open sides, as do many other ships of this period. There isn't a lot of glue surface on the upper ring and there's going to be a bit of tension on it, so I added four pieces of brass rod that run through to the bottom, which should give it a bit more structural integrity. You can see one of them in the picture above, but I don't think they will show up when all the bits and pieces are in place. So, now I can relax, knowing that I have that little problem solved and go back to the beginning. David
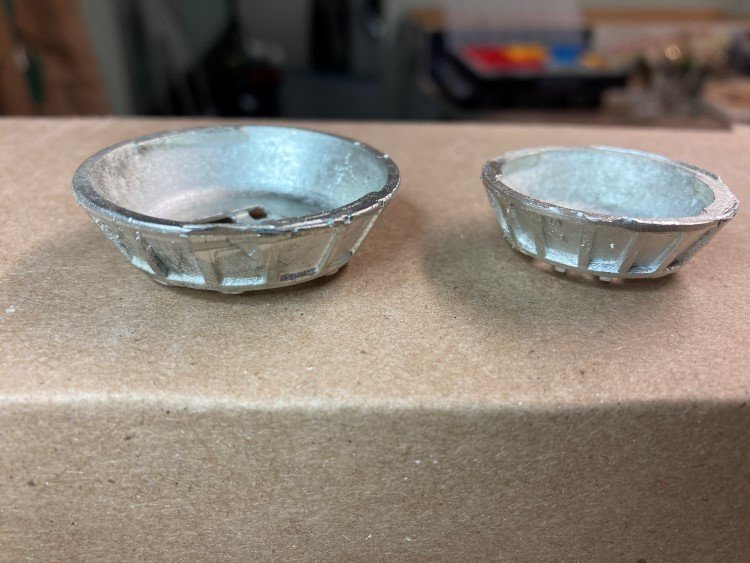
- 43 replies
-
- 13
-

-

-
- Mayflower
- Model Shipways
- (and 1 more)
-
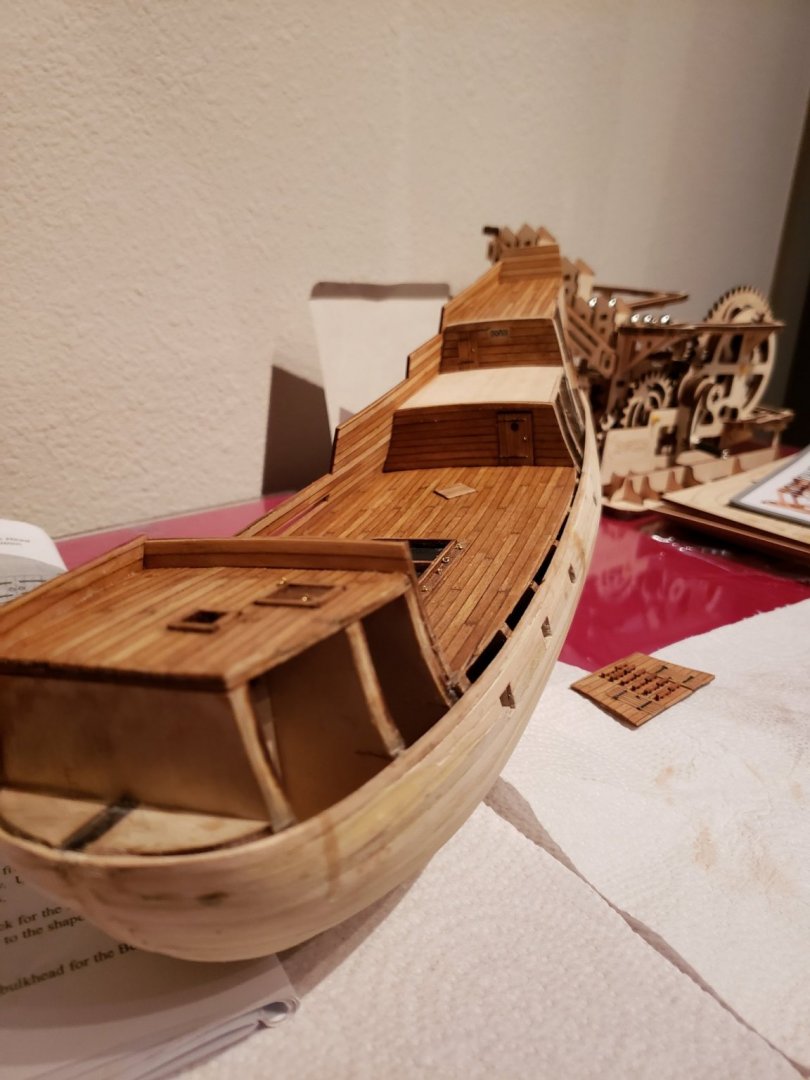
 “Start a build log”, they said…. OK, here goes. Falling back my army background I will be spending time in reconnaissance, planning and finally execution. If you checked back on my intro, I picked up this kit at a 2nd hand shop. The previous owner (PO) started it and got as far as decking and planking the upper hull. I know zippo about ships and have never built a wooden ship so I apologize in advance for any confusion or my lack of what may appear to be basic knowledge. I took inventory of the remainder of the parts and am trying to figure out what they are and what they are for. I can somewhat match the physical description with the written one but the part names don’t always make sense to me.
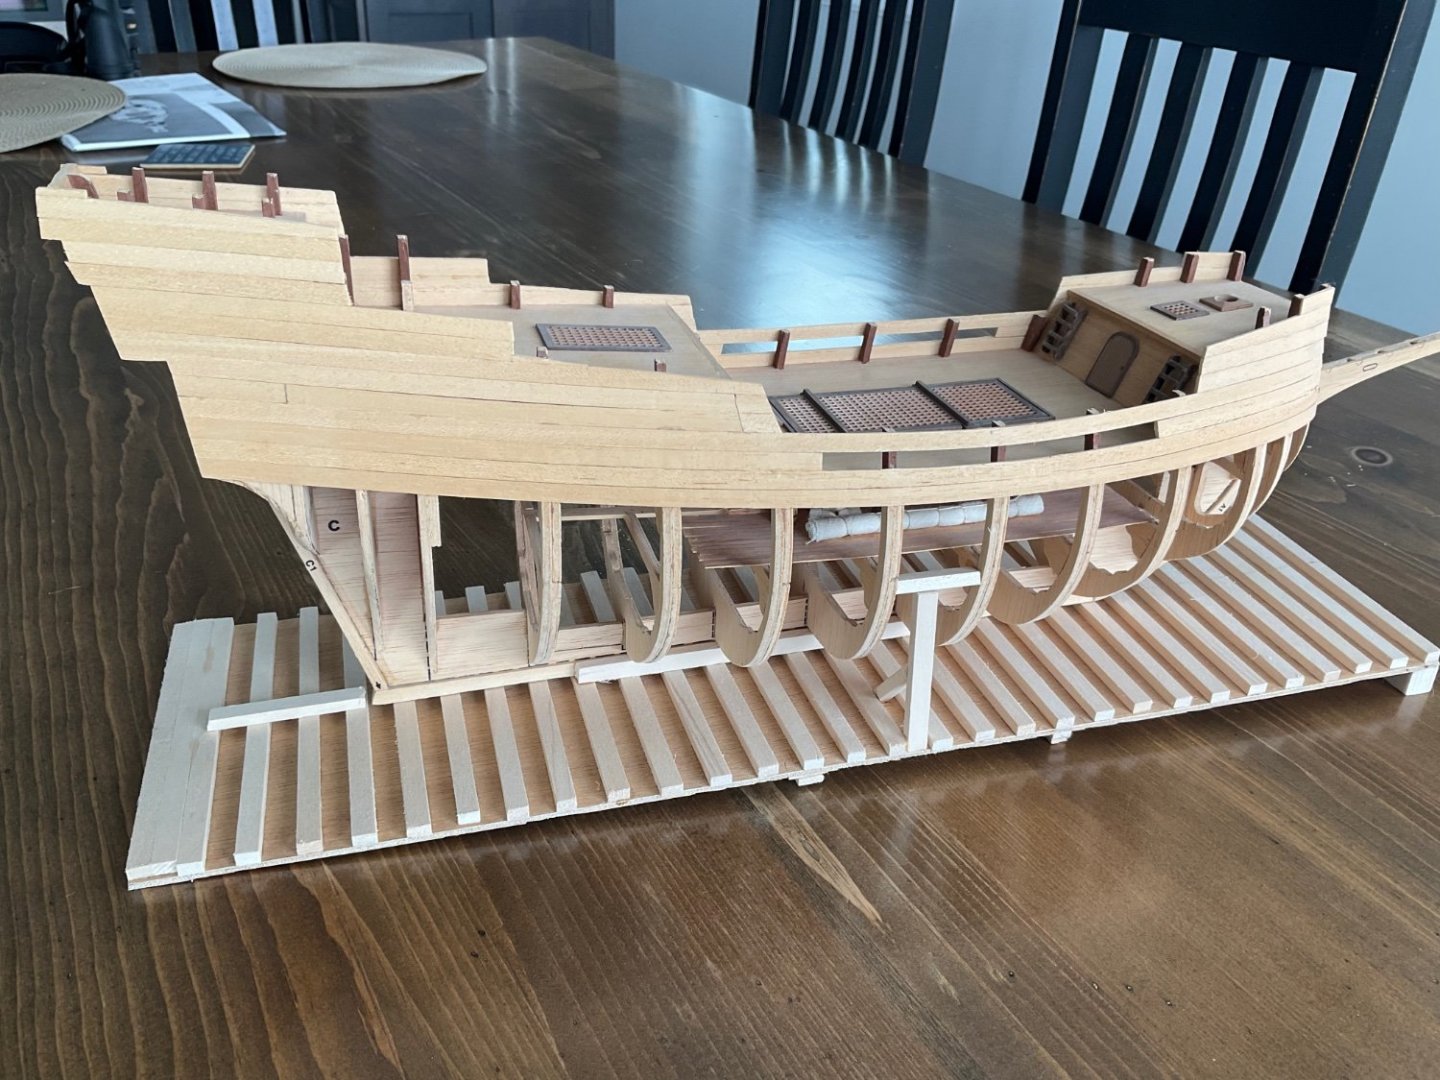
-
 Greetings all. Well here I am with a new build after abandoning my build of the Diana which I started about five years ago, but only built it on and off and obviously realized it would never be finished. Anyway I was advised by a good friend why not build a small ship “something to potter about with” he said. So here we have the model shipways Mayflower to in my friends words “ something to potter about with” and which my son bought me a few weeks ago. I have just two weeks ago had a prostate cancer op called a TURP which went really well, so let’s hope the build of the Mayflower goes as well. Well here we go, a few photos to start us off. Upside down ?? May have to start again regards. DAVID
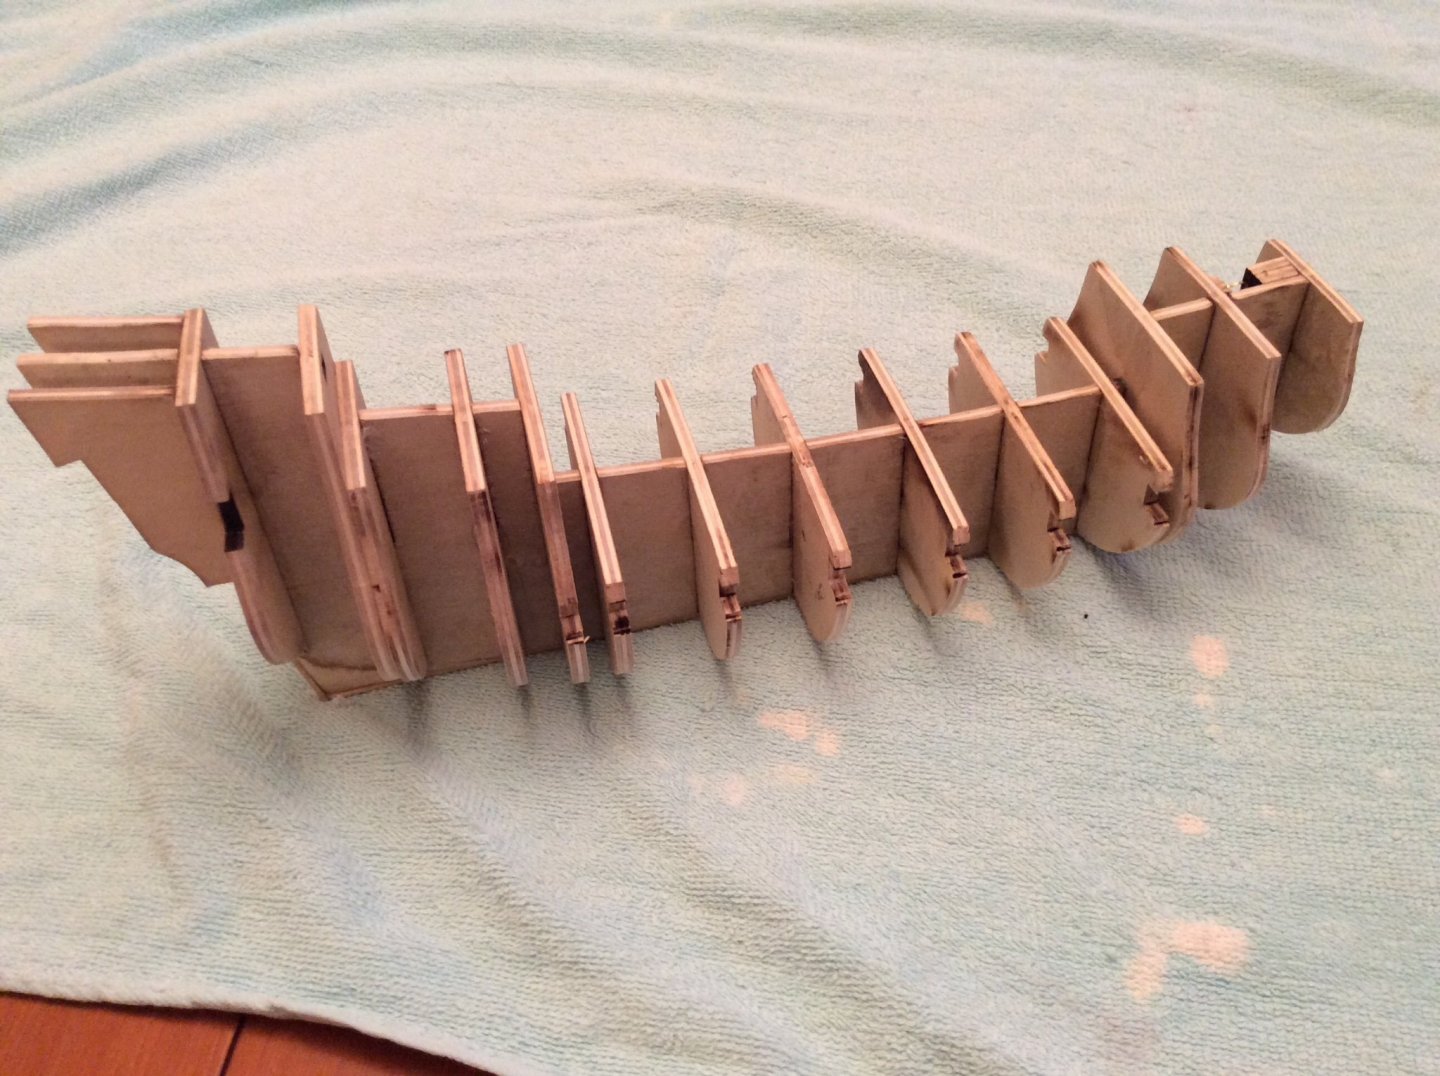


-
 So its been decades since I last did a model. I did the Mayflower over 40 years ago. It was damaged beyond repair while I was deployed overseas. I figured I'd start back in and replace this model. I got the 1972 kit off of E-Bay. It comes with the plastic rat lines so I thought I'd make them myself for a more realistic look. Let's see if my skills as a modeller/painter have improved over time and if my hands and I eyes can handle doing rigging.
 -
 I started this, my first kit, in January of 2020 and just recently finished it. I found this forum when I was already nearly finished so I'm posting some pics of the build here all at once.
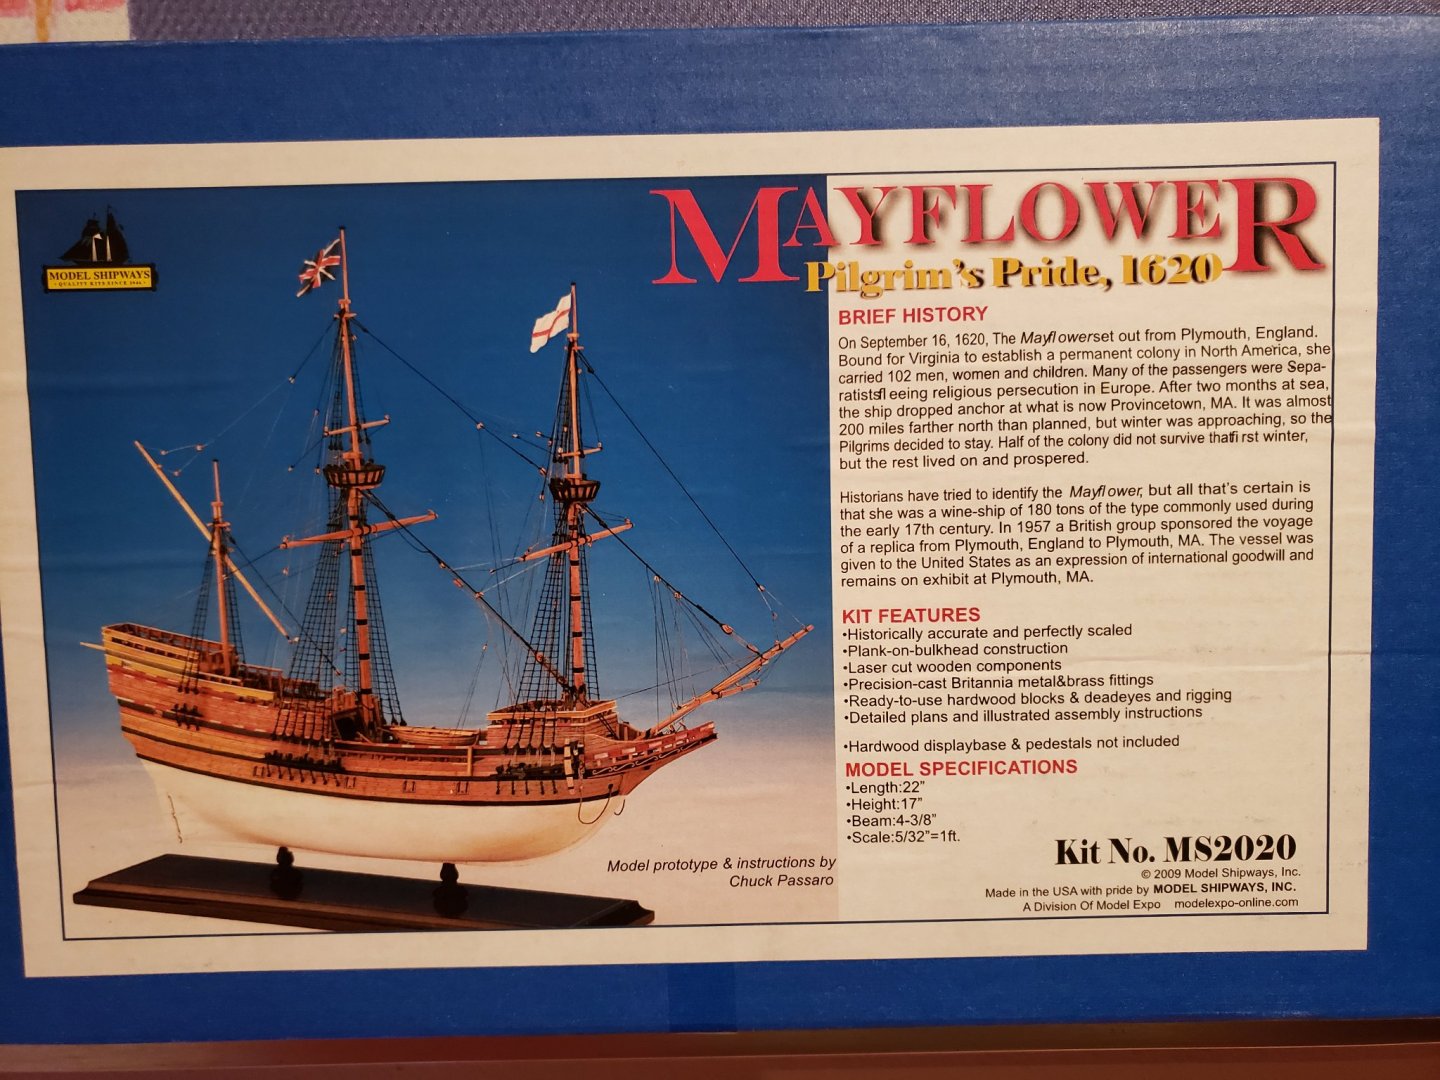


- 12 replies
-
- 3
-
-
- Finished
- Model Shipways
- (and 1 more)
-
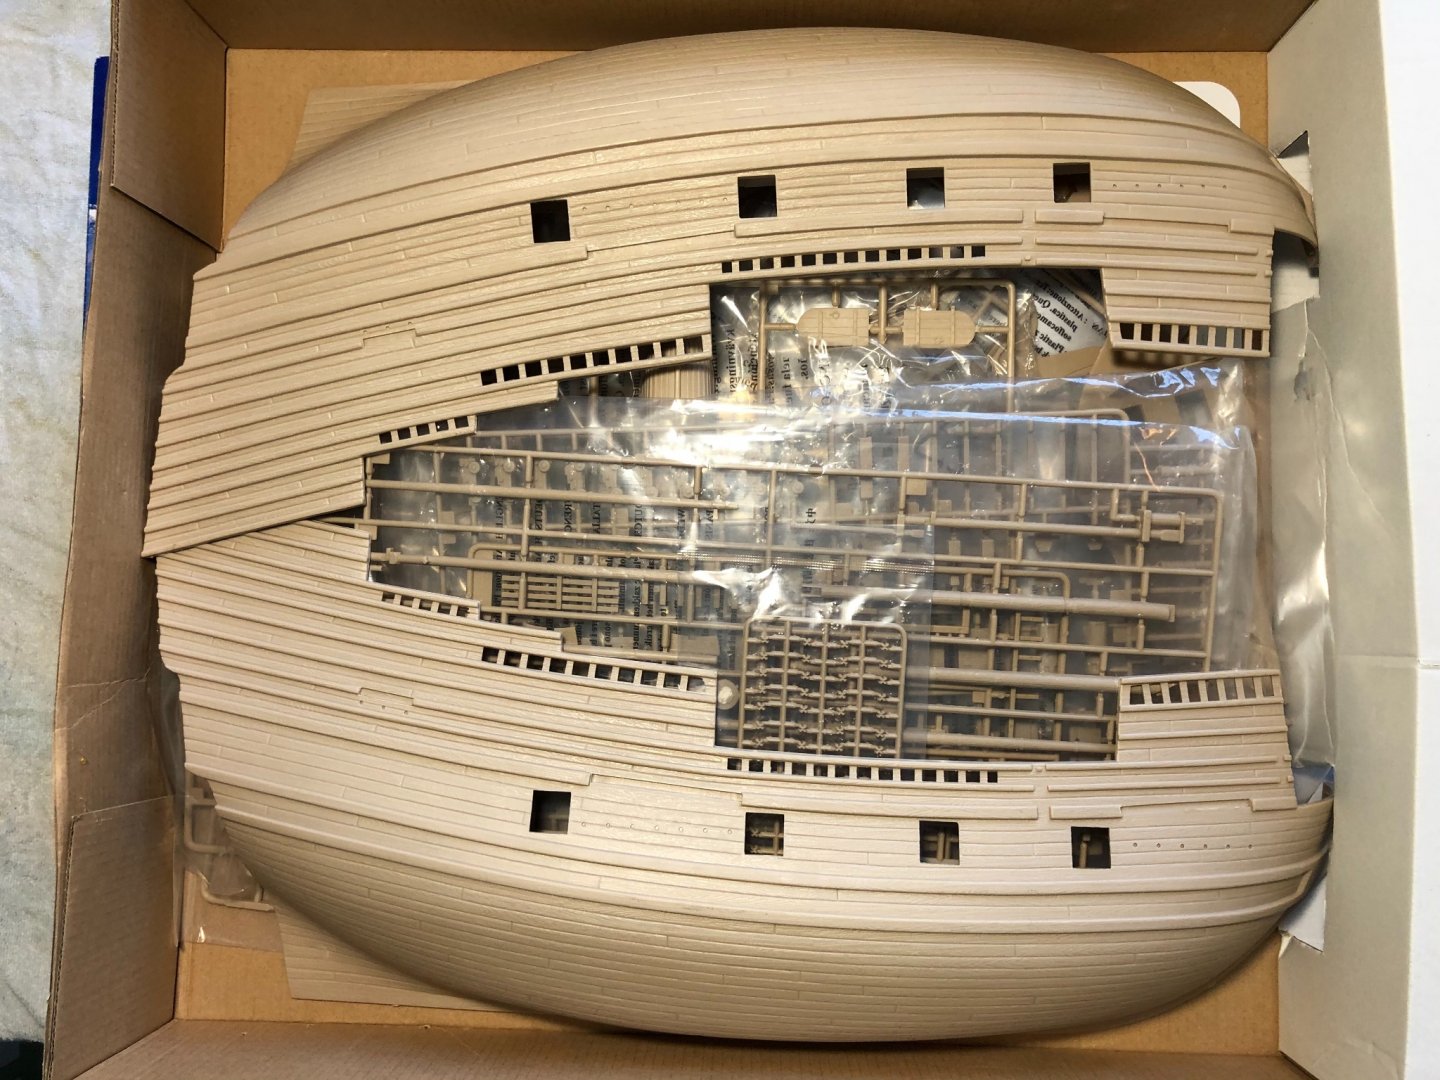
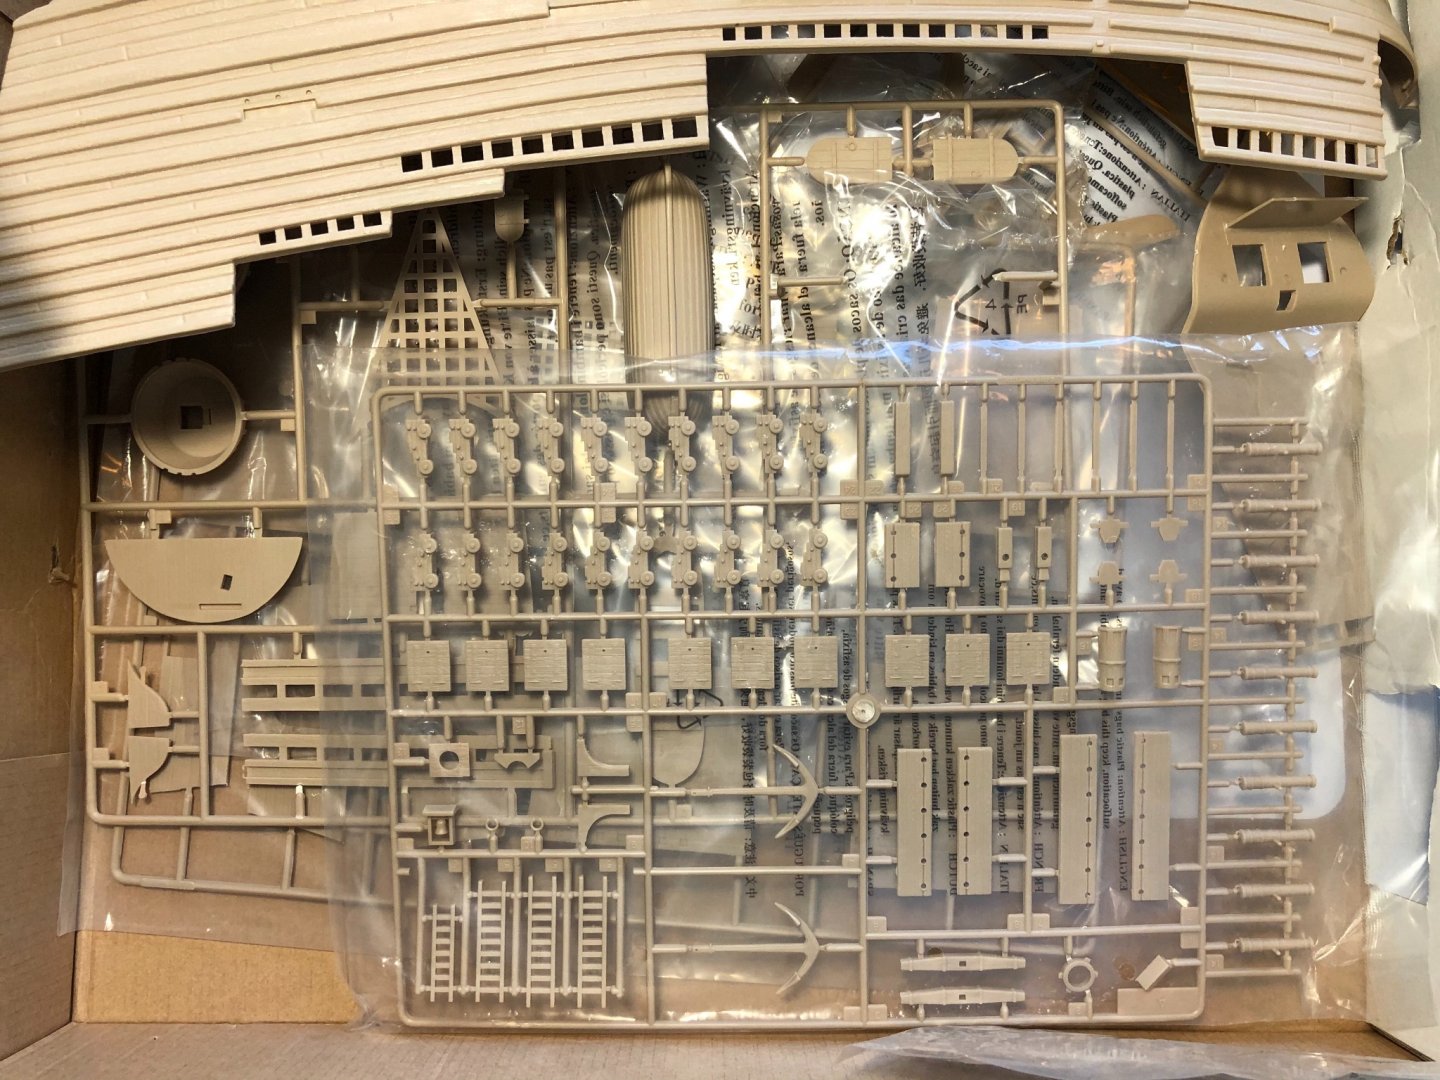
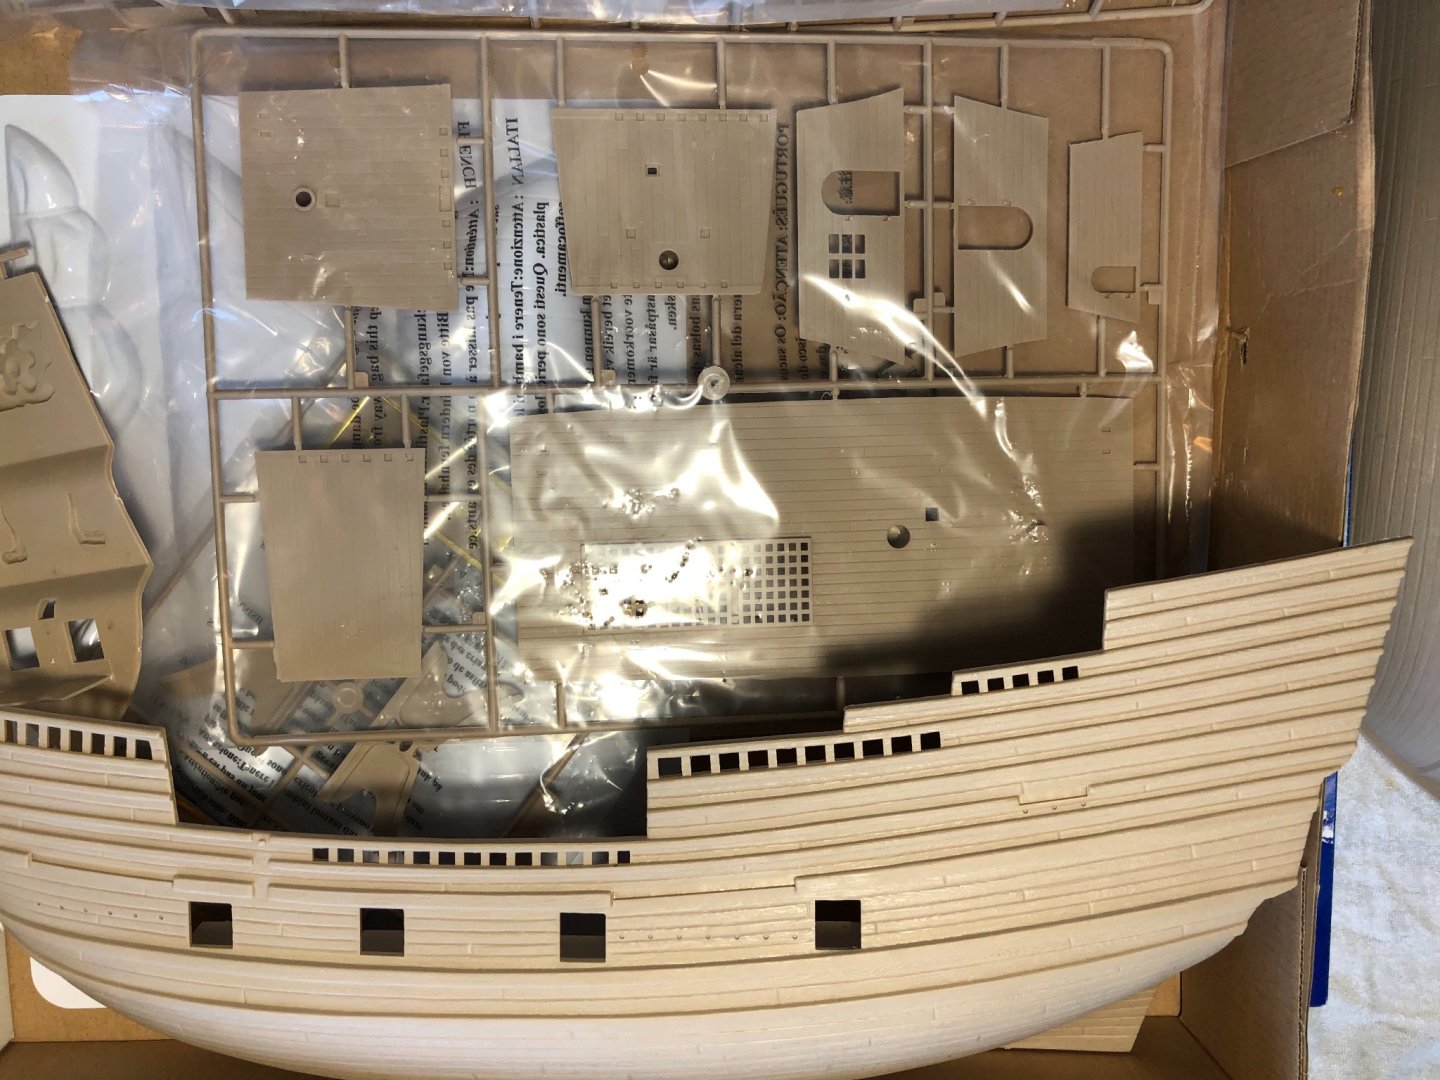
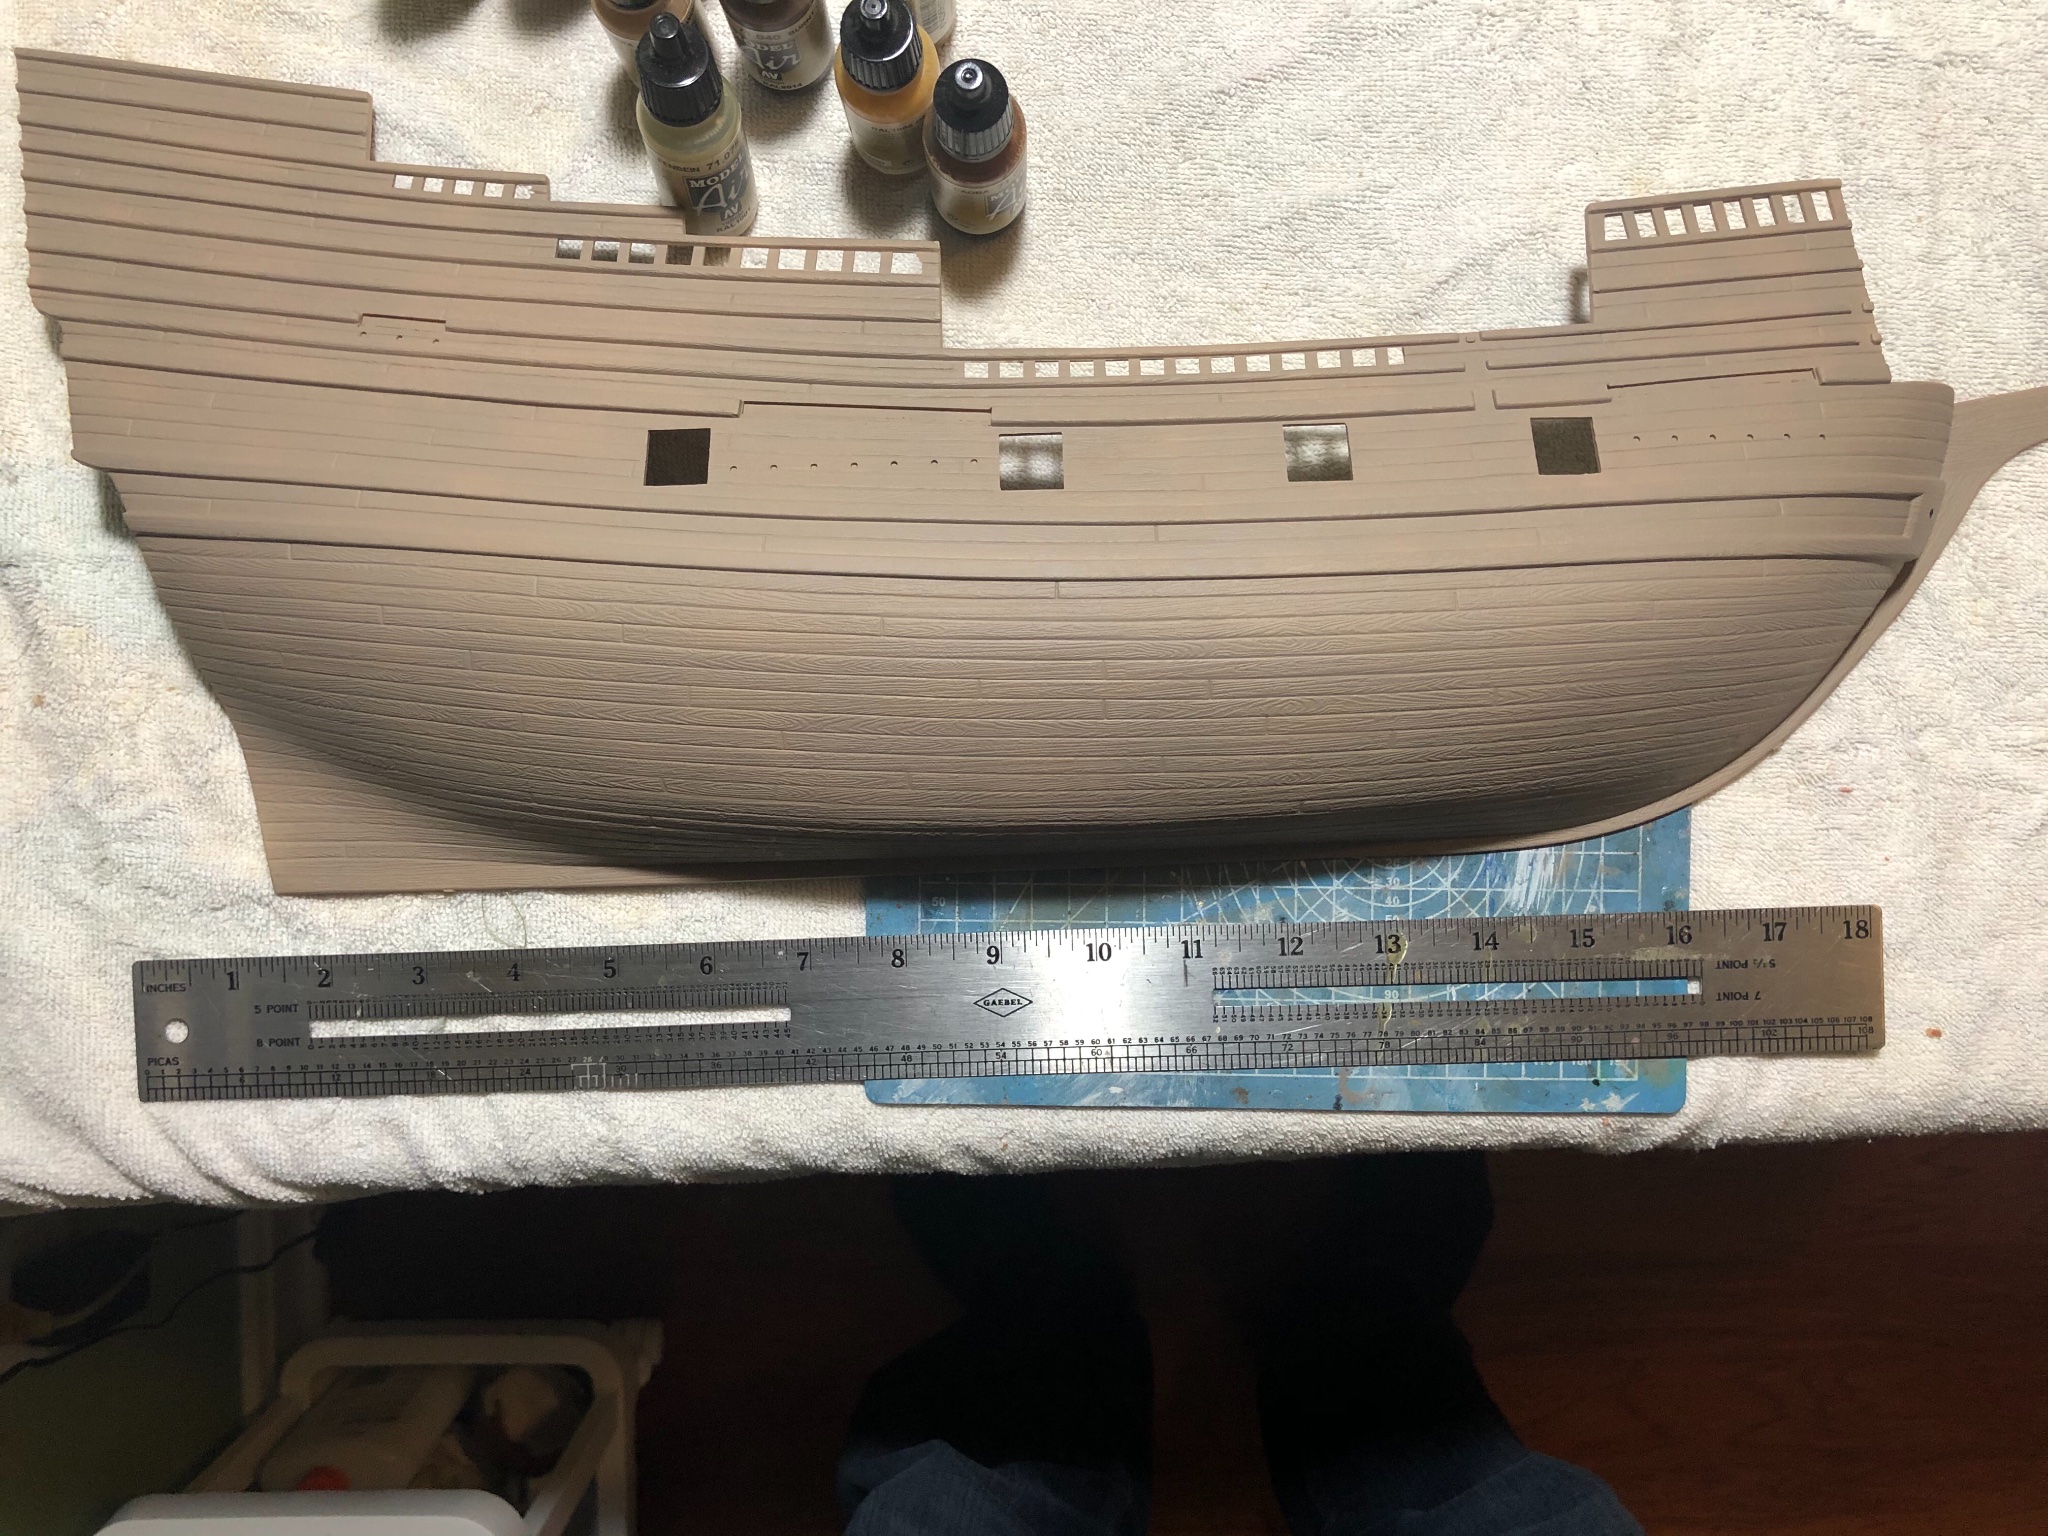
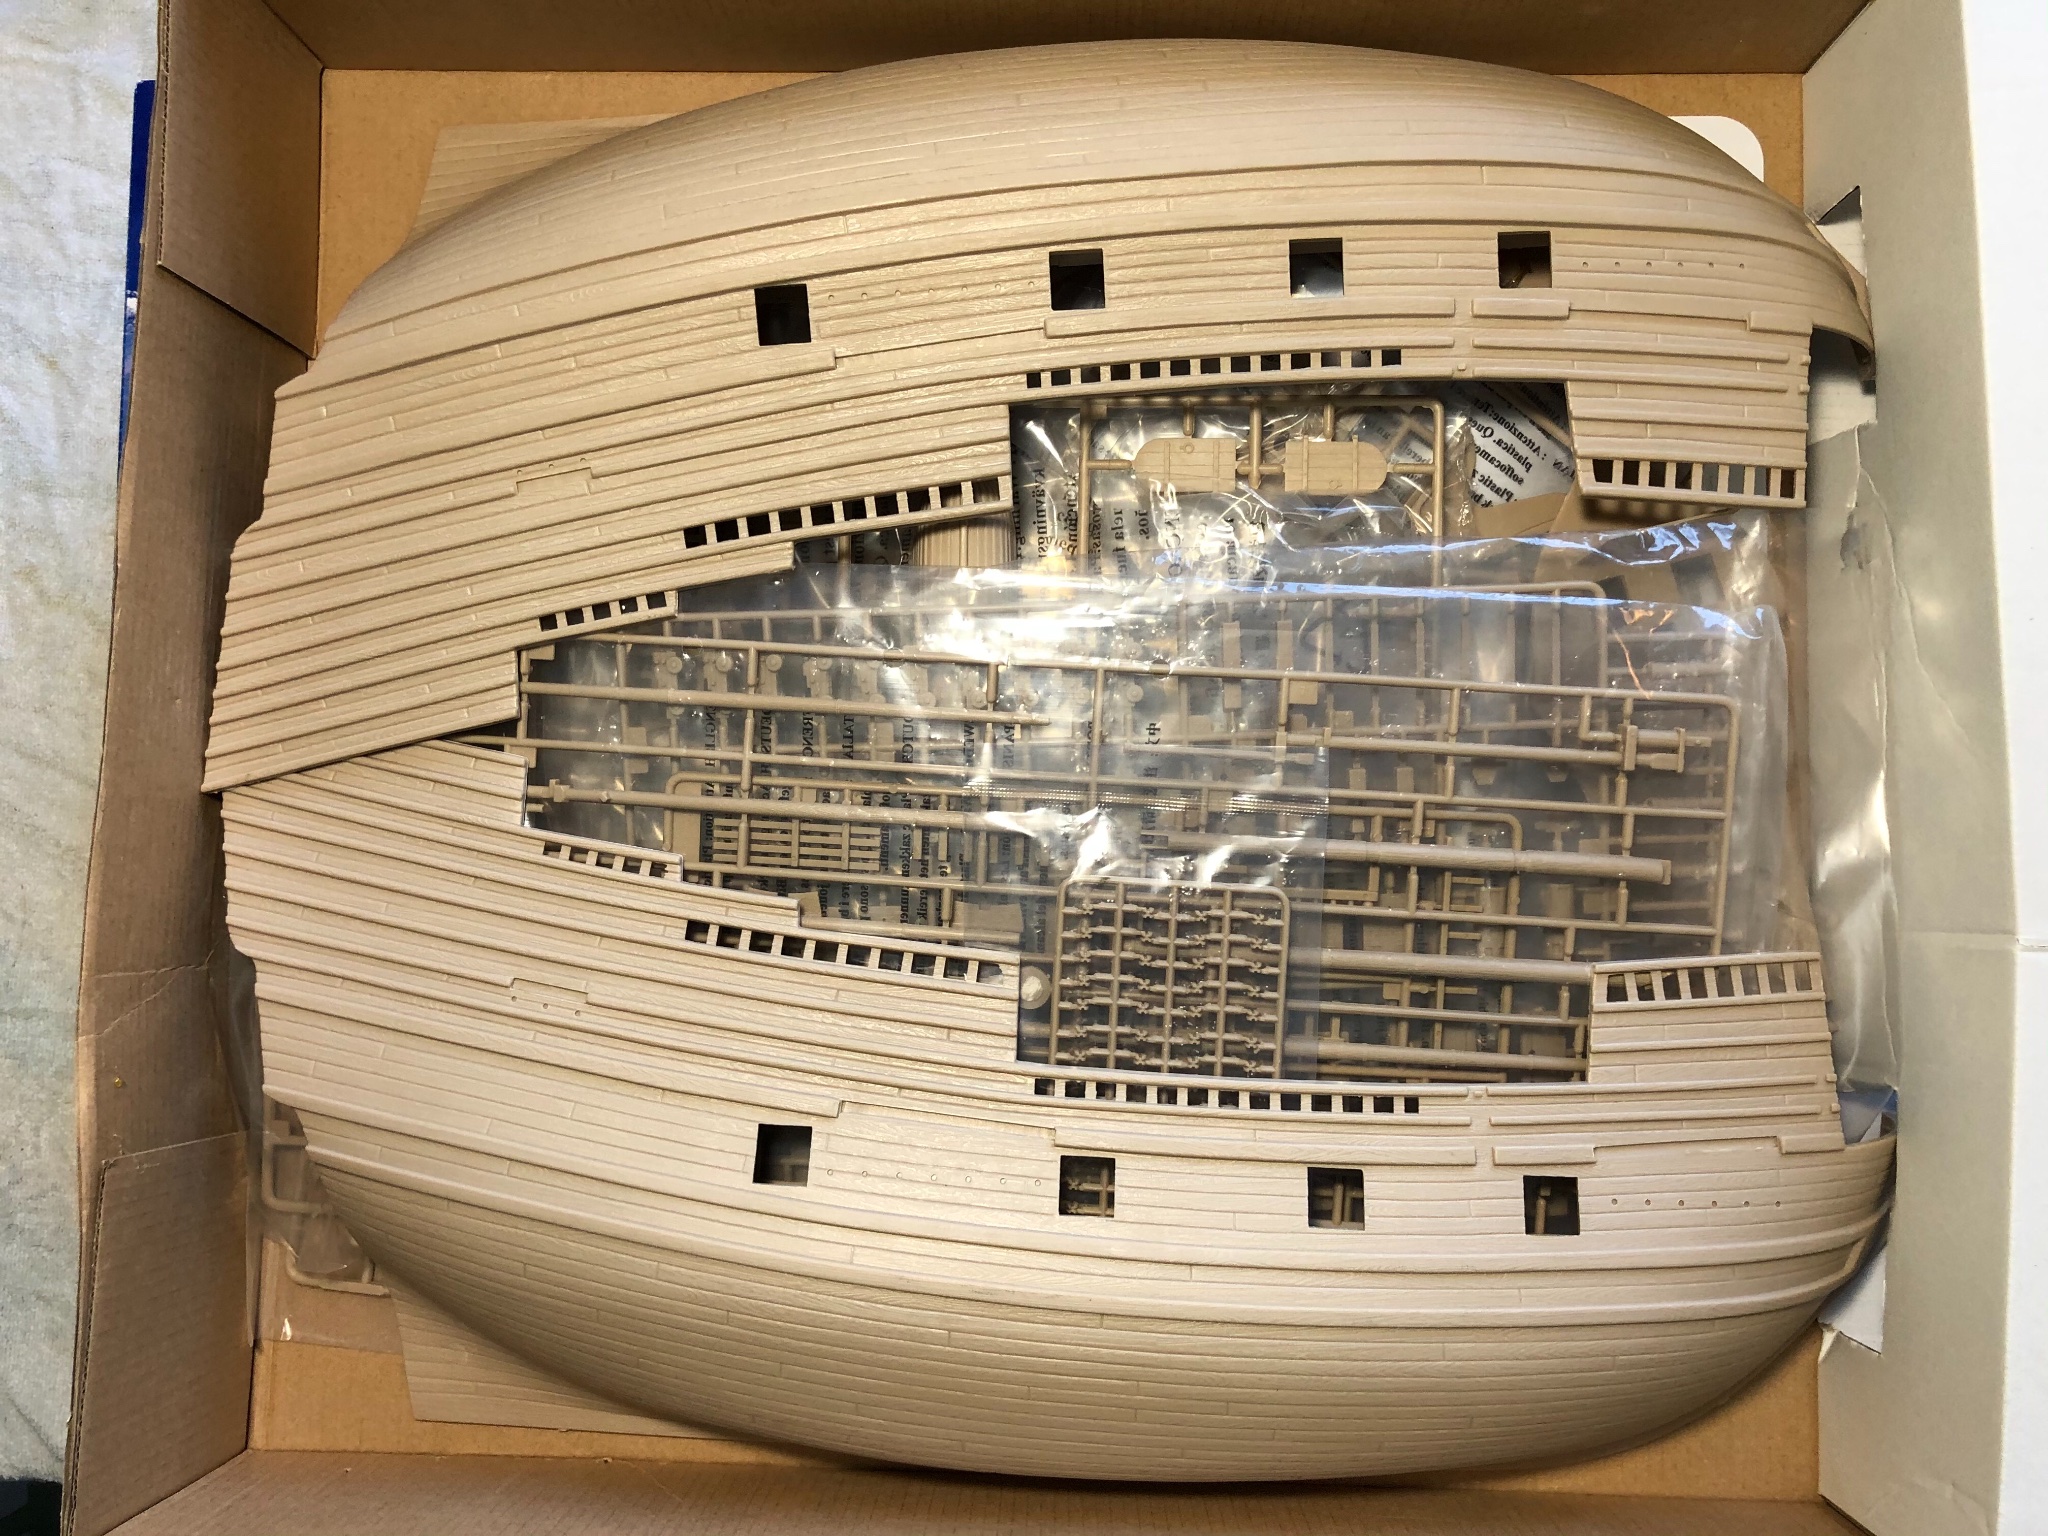
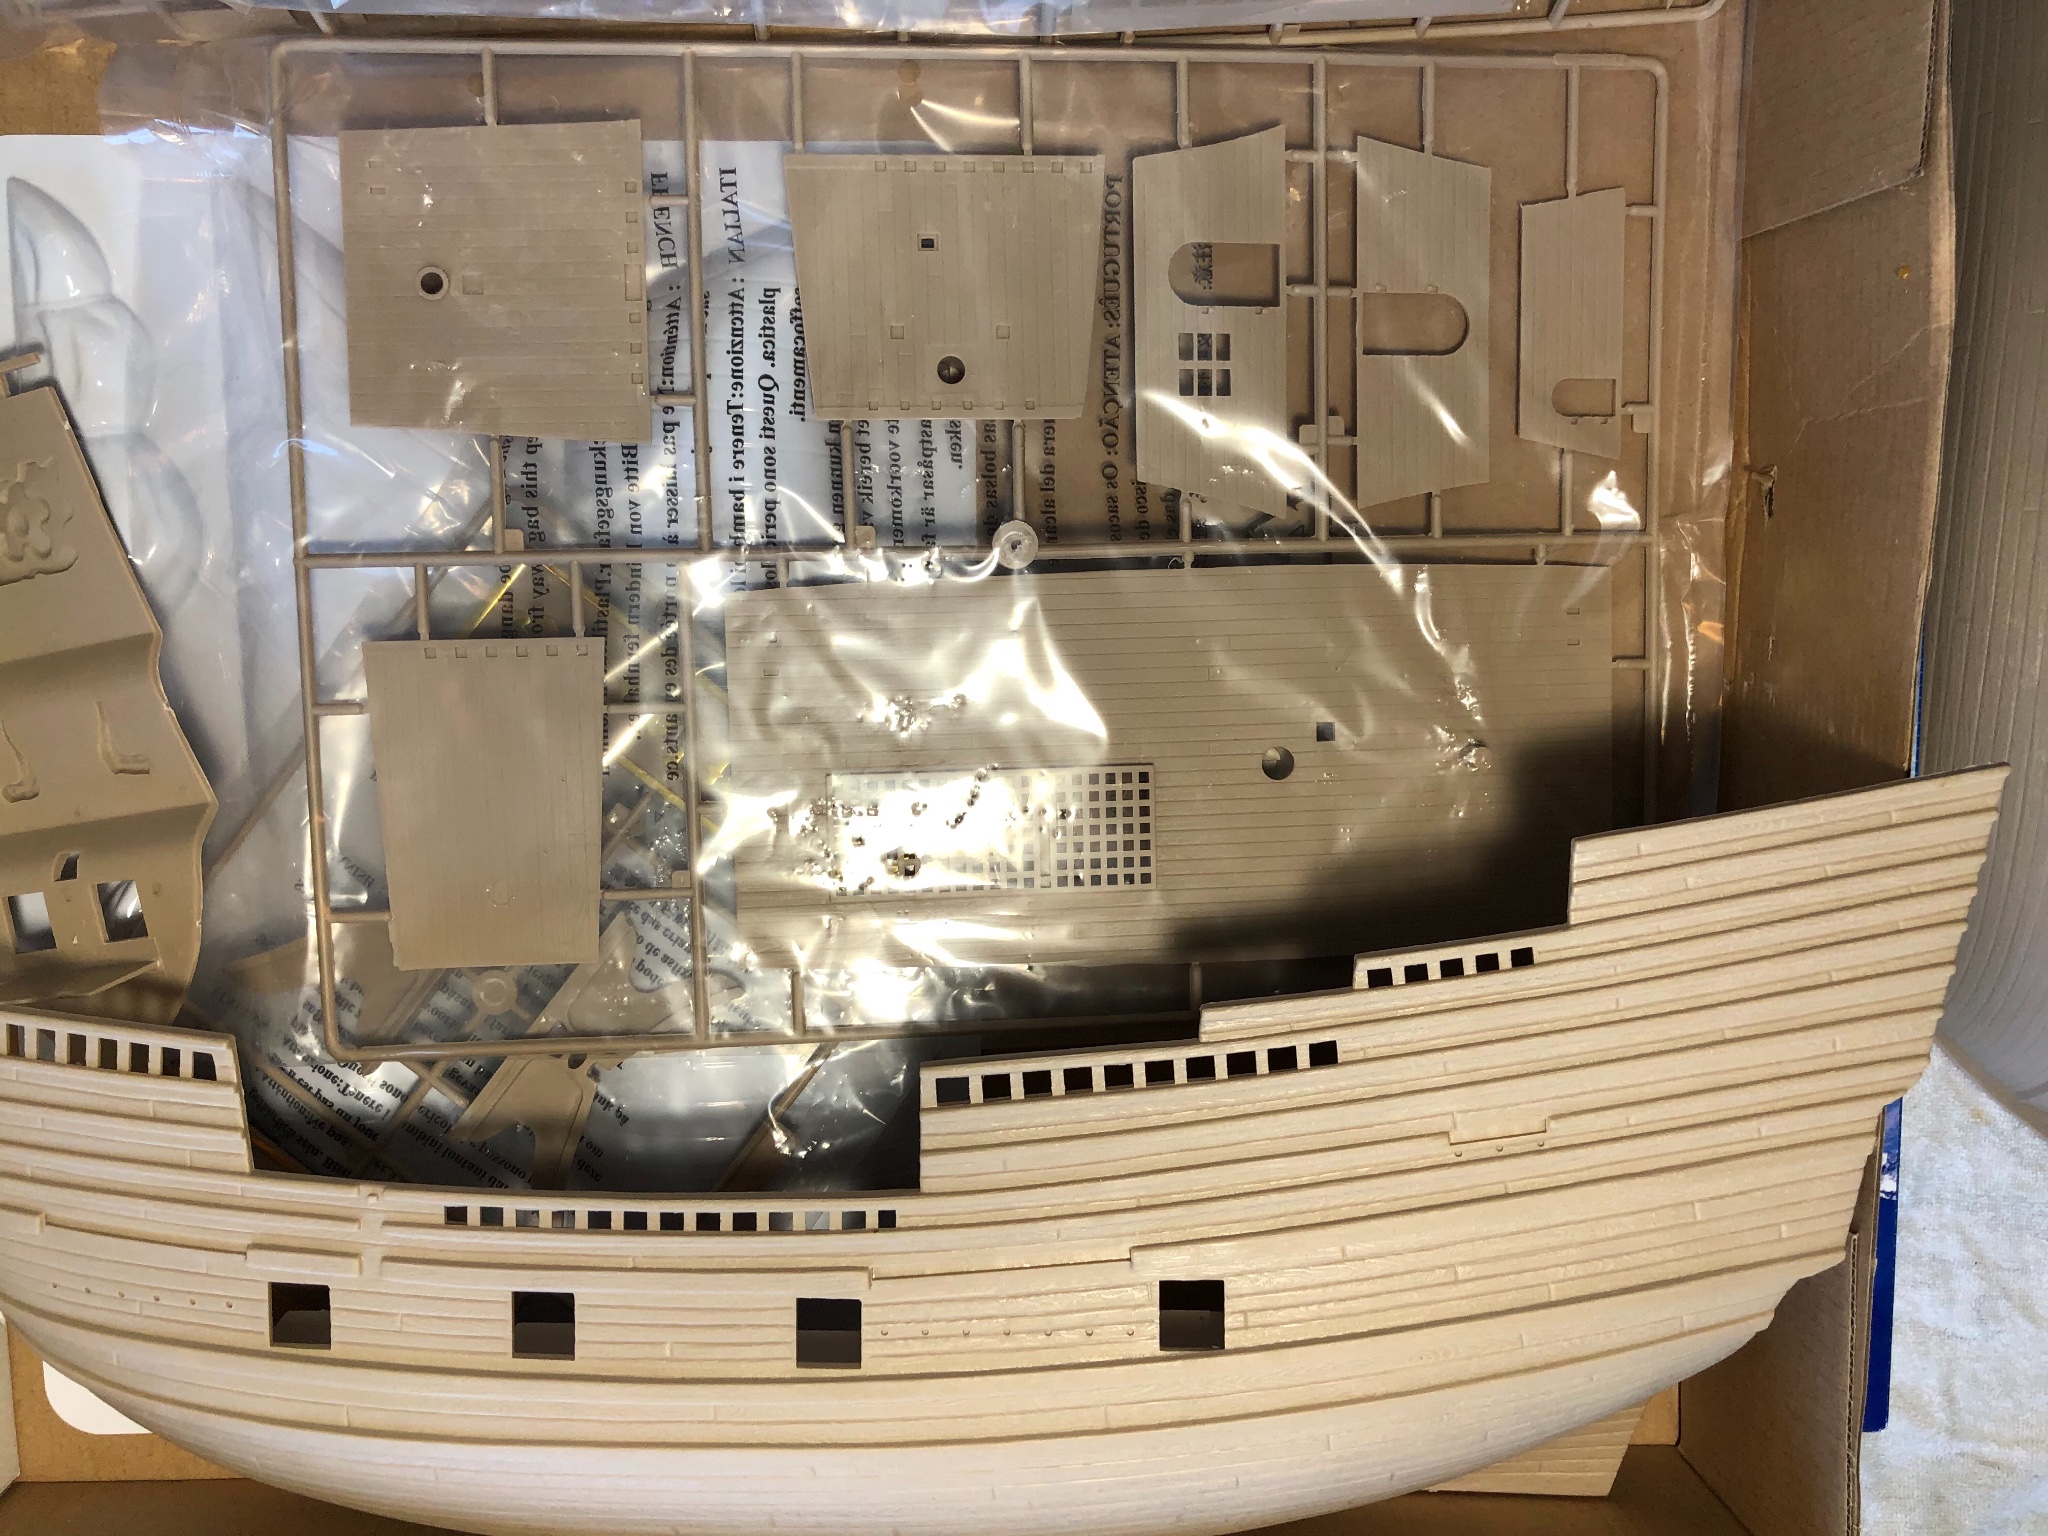
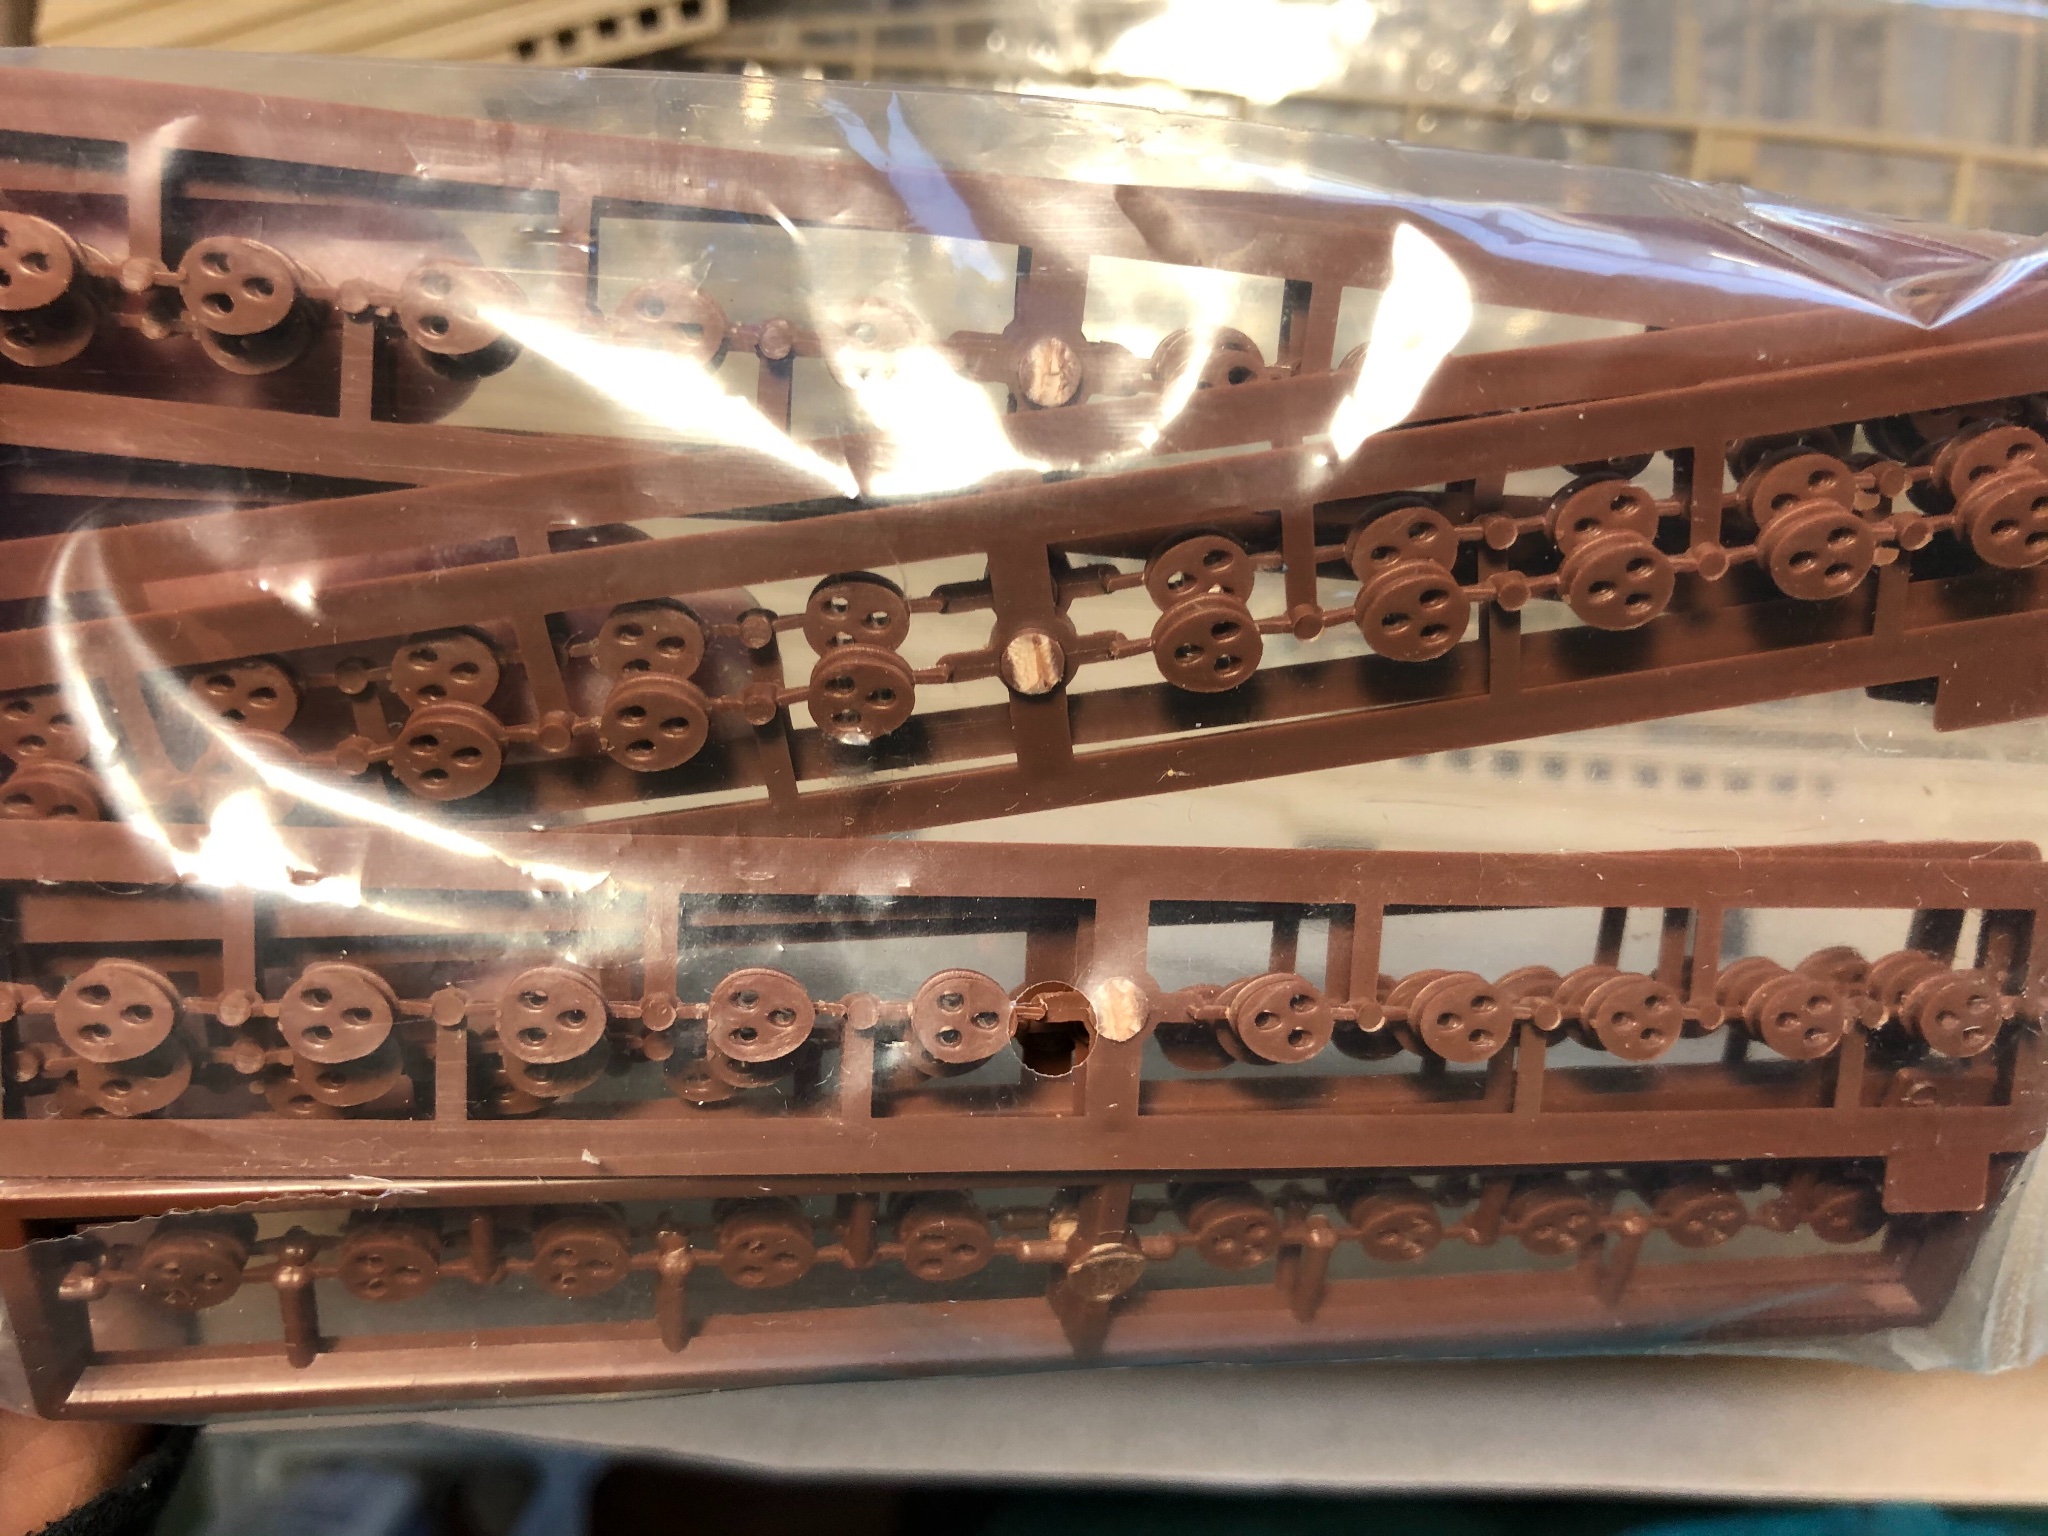
 Well here goes! I received the Trumpeter 1/60 Mayflower as a surprise gift. I patiently waited as a finished my Revell 1/100 Man O War. Now that it is finished and proudly displayed in it’s case I am ready for the Mayflower. I have never built a Trumpeter model, and in fact had not heard of the company prior to receiving the kit. I understand this Mayflower is the largest scale of the historic ship. It is huge with the hull being over 18” long. I have yet to begin gluing parts together so I don’t yet know how well Trumpeter model pieces fit together. Once I start I will report on that. However on first examination I am very pleased with the molding of the parts. Little or no flash to speak of. Parts clearly labeled. the instructions are simple drawings with arrows and numbers. Very limited text instructions so having experience from other builds will certainly be helpful. I would have found this very difficult if it were my very first build because of the limited text. There are 2 new techniques I will need to learn for this build. I will have to make my own ratlines. My previous builds had the premolded ratlines. I also will have to rig the deadeyes to attach the ratlines to the side of the ship and up in the masts. I will definitely be referring to MSW for technical advice on doing these two new skills. I began priming hull and deck sections with Vallejo surface primmer. Will be painting with Vallejo acrylics.

-
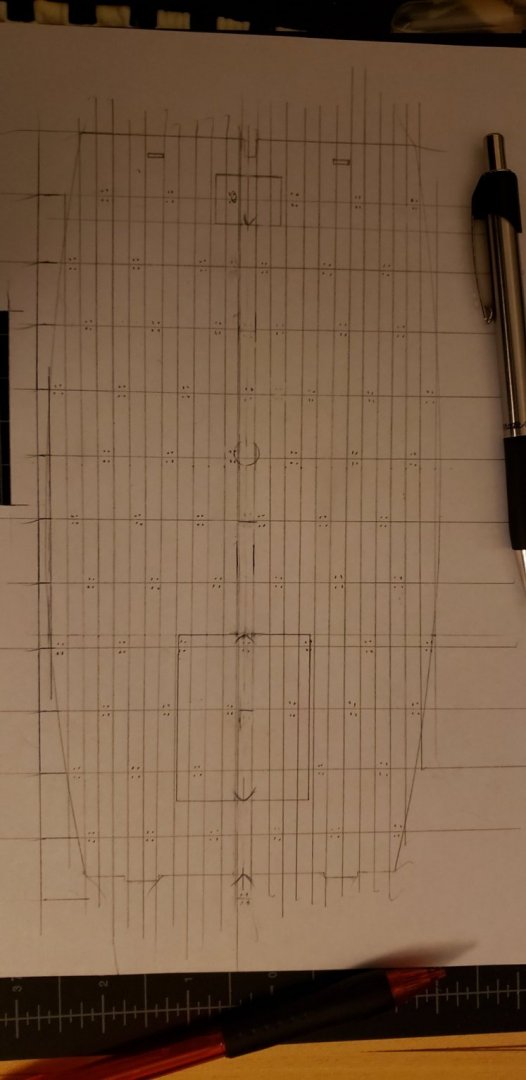
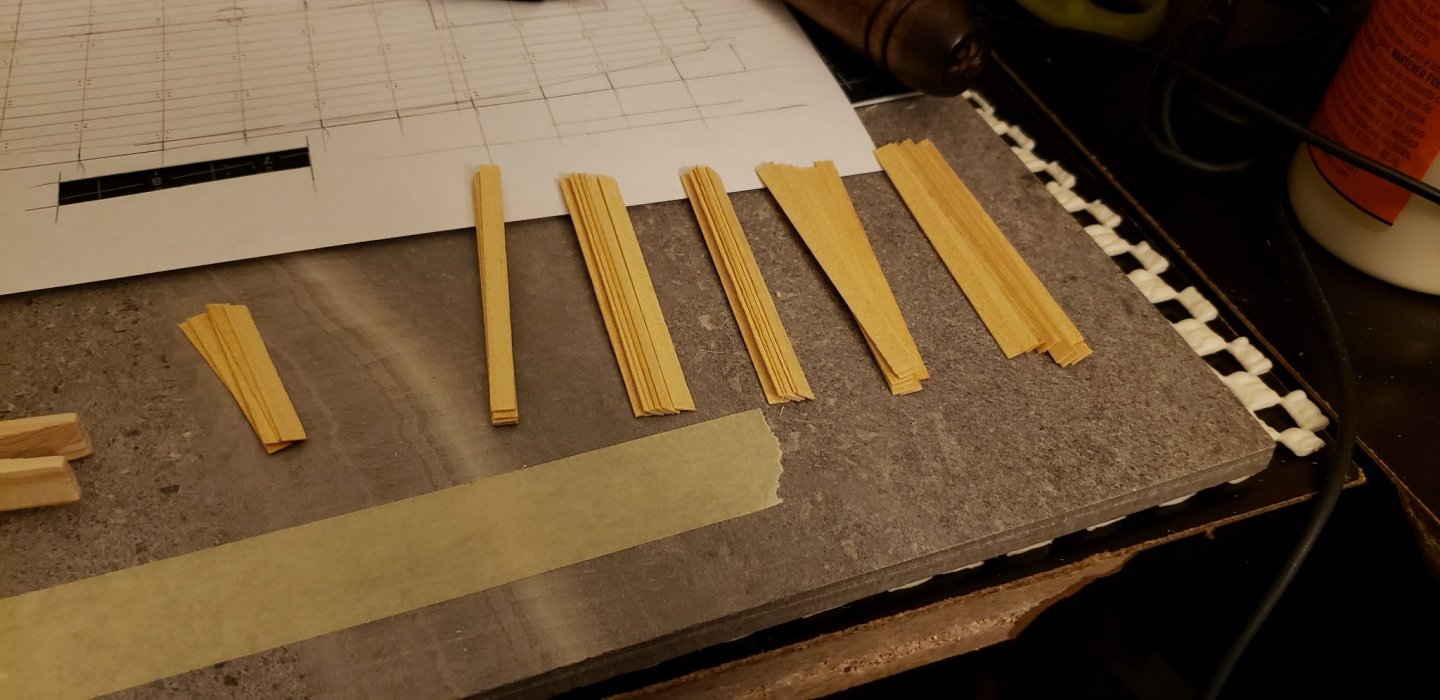
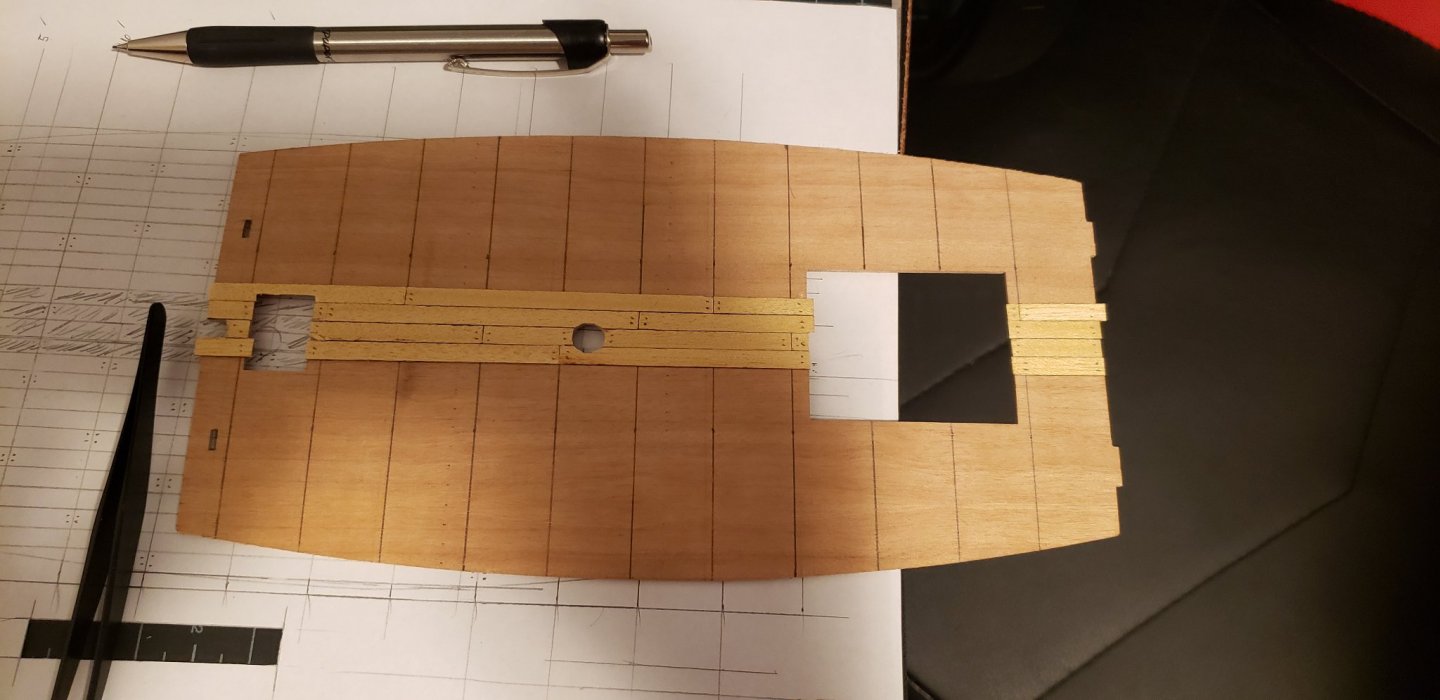
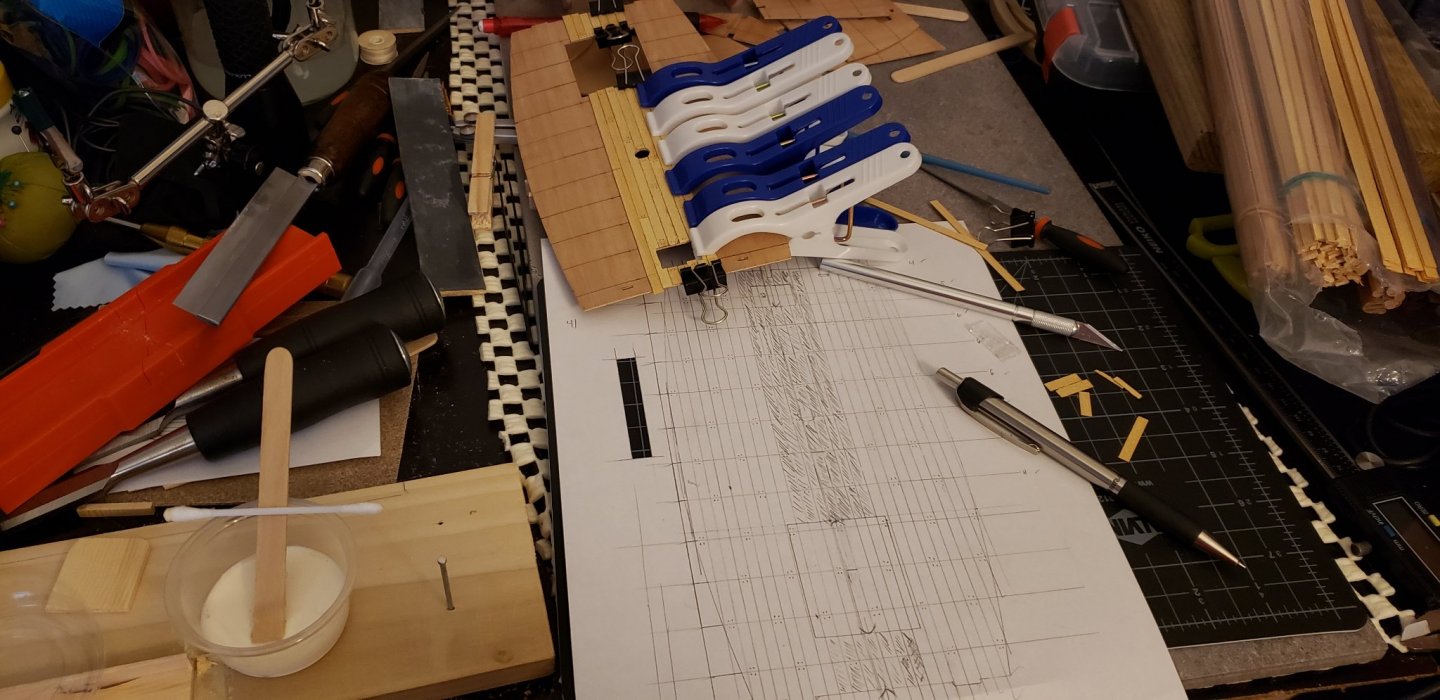
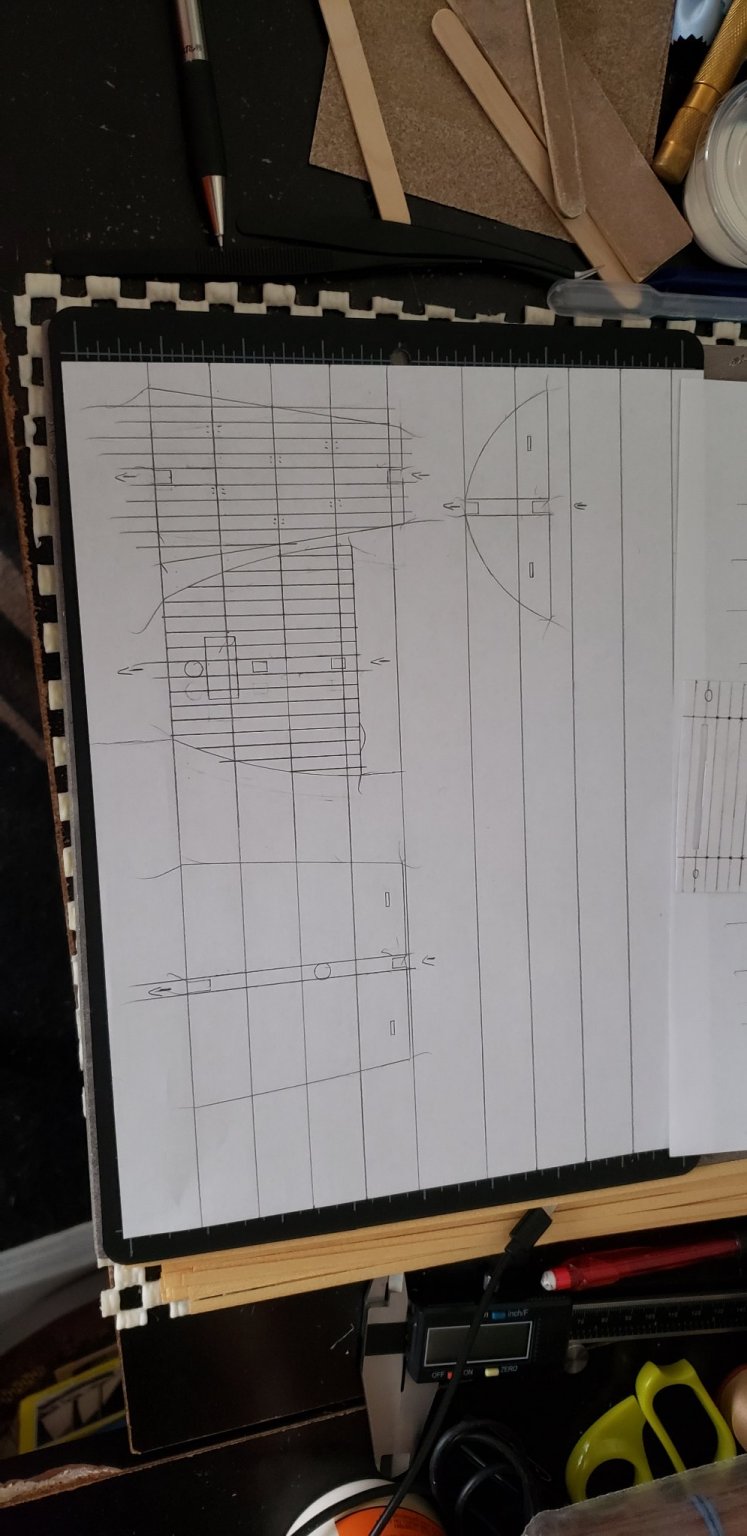
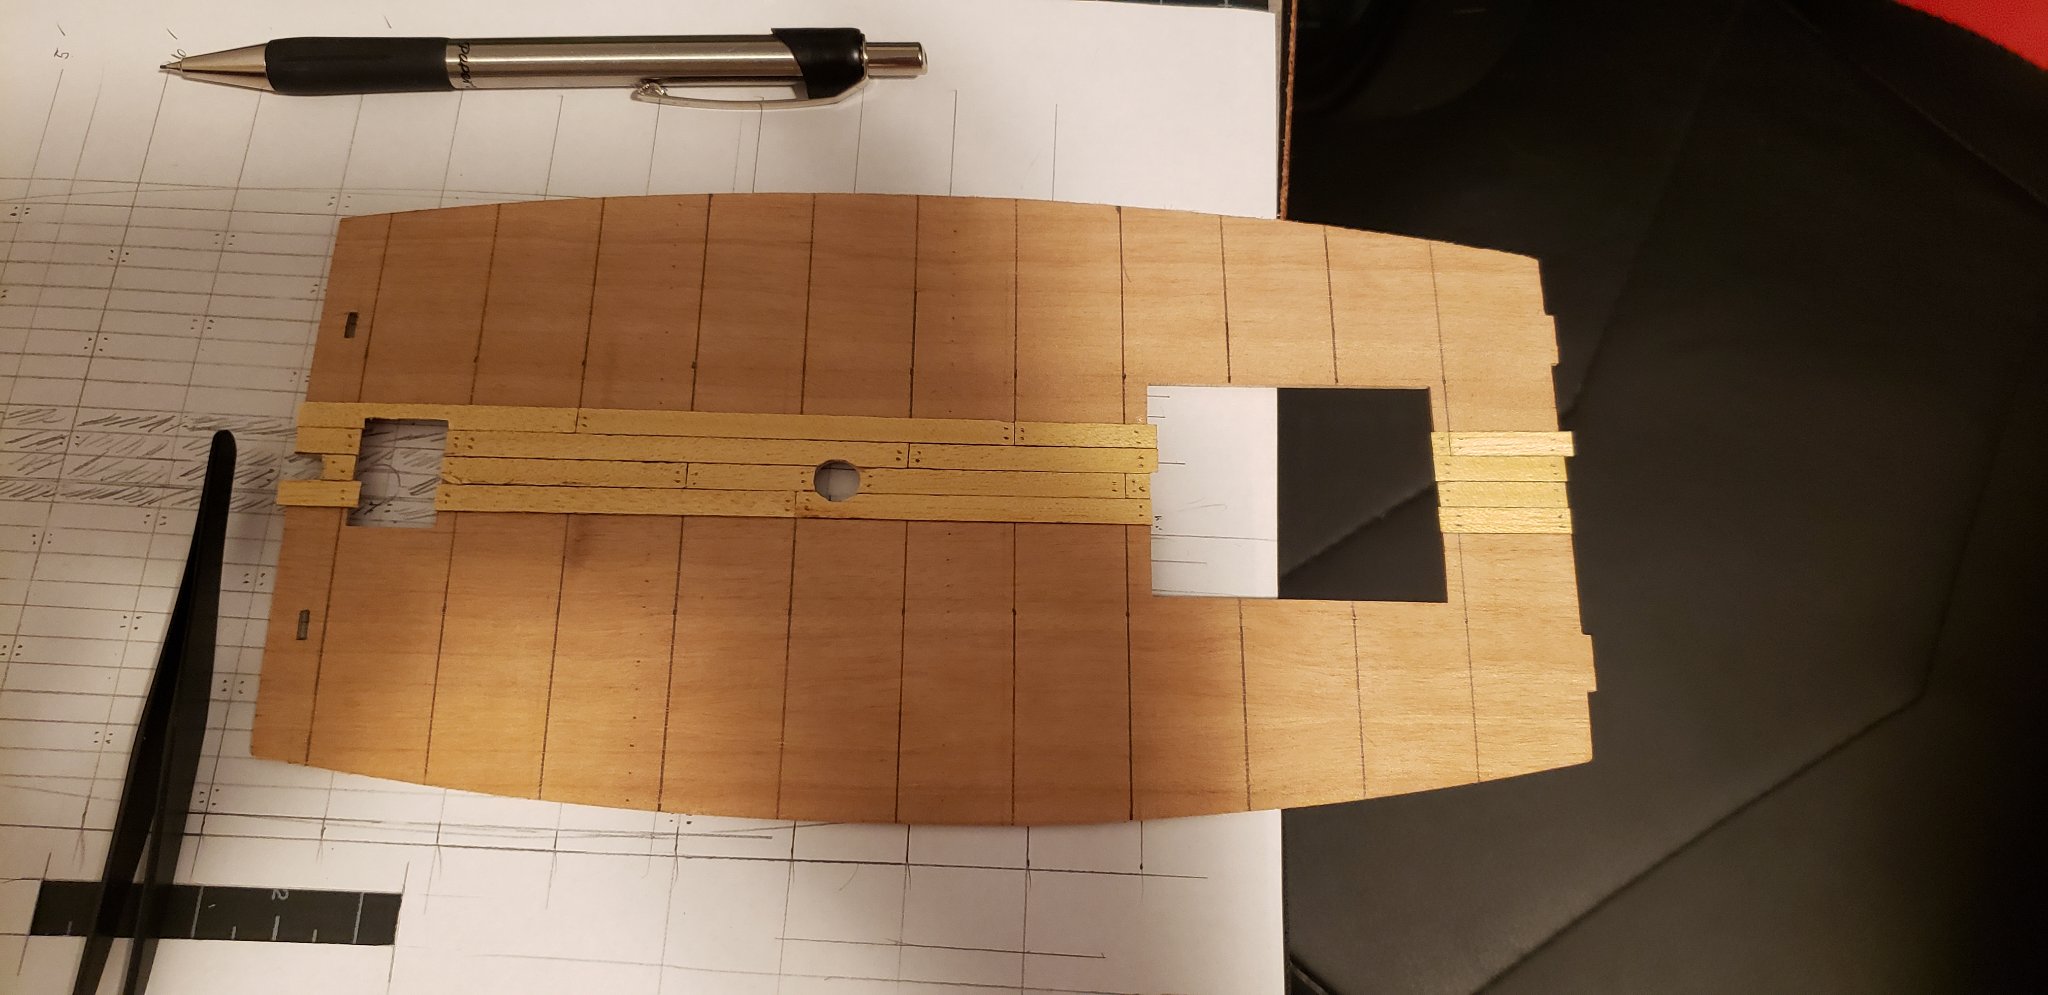
 Howdy everyone! When I was a kid, I did a lot of plastic models but then stopped about 15 years ago due to college and early adult job hopping. Now that I've got the time (and more disposable income), I've started back up and wanted to get into something I always dreamed of doing... wooden ships. I grew up in Maryland near Solomon's Island before moving out to Arkansas when I turned 13. Some of my fondest childhood memories is seeing the sailboats out on the Bay so building these allow me to rekindle those feelings. I picked up this kit at a hobby shop in Memphis (nearest one to me, at about an hour away) about a month ago and have been steadily working on it. It's not my first wooden model, but it's my first one with actual rigging (my first was a Chesapeake Bay Skipjack). Here are some pictures of the progress that I've managed to get so far. I'm not expecting this to be a fast build by any means, as the only time I can work on this is when my toddler is asleep, but I'll try to keep this thread updated at least once a week of any progress that I've made on it. For starters, I got the framing set in place. It's as close to straight as I could get them. I've yet to fair them up yet as that appears to be "major step" 5 in the included instructions, I'm only on step 2. After doing a lot of reading and research, I decided to go with a "3 butt planking style" for my deck and drew some pictures to reference off of. The plank length I decided on was a scaled 16 feet, which comes out to 3 inches by my calculations. To make things easier on myself, I created a little bit of a jig with some spare wood so I could get the basic plank length uniform. The riser on the left that they butt against is just a couple paint stirring sticks that have been laminated and then brad nailed to the plank of scrap poplar. My "fence" is some more of that stirring stick cut down to 3 inches, and glued perpendicularly to a popsicle stick after making sure they were square. I used a chisel to carefully carve out the rabbet that they sit in, giving myself some room for longer planks later projects. I didn't cut out all of my planks yet, just enough to give me 36 "full lengths" to start with. I also realize that the drawing I made of the deck to reference off of is shifted from the actual deck... simply put, I drew the picture "starting" at the stern side of the deck but then decided afterwards (before actually planking it) that I wanted them to be started flush against the stem side instead. I'm just too lazy to go through the process of redrawing that one in particular. The other deck images are all based on starting flush at their respective stem sides. ~Dan
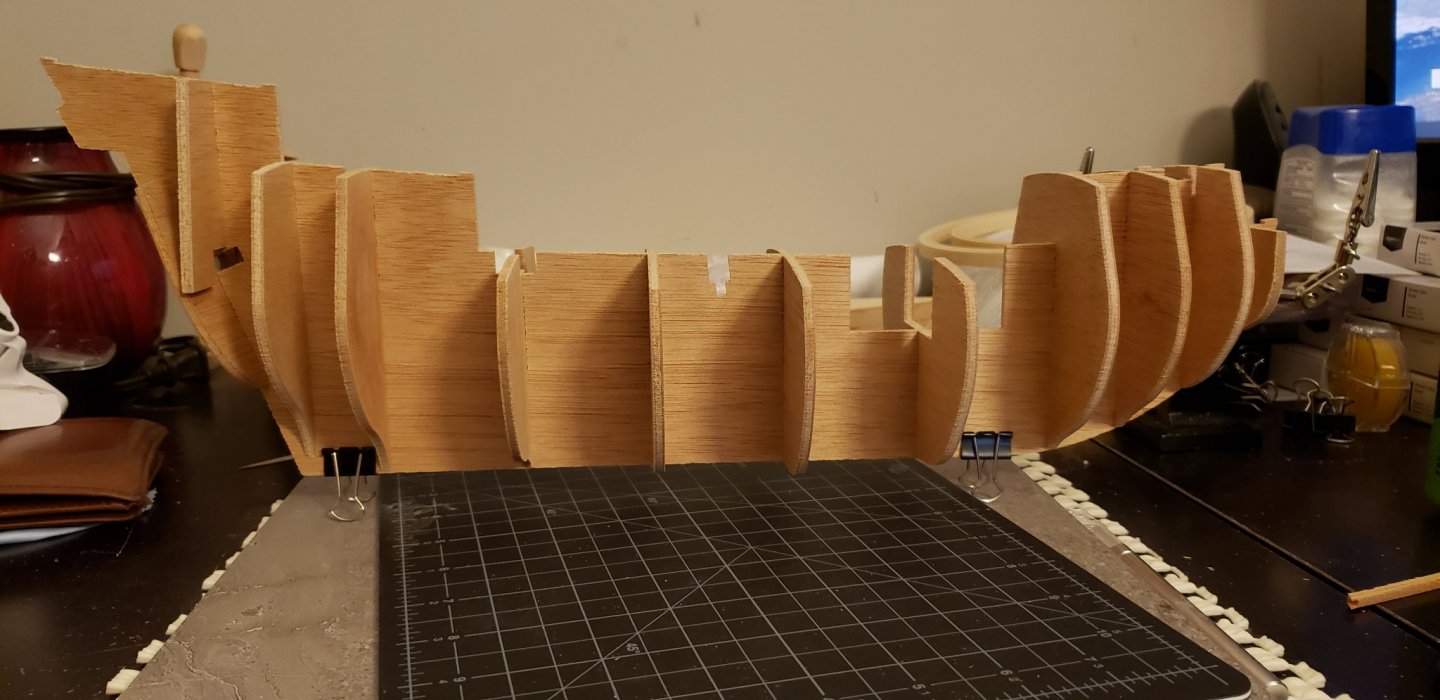


-
 Started my new build, the Mayflower by Billing Boats. I will try to follow a better format with this build log. Below are the first photos of my build. In the bottom, photo, are items #2 and #3 bulkheads or a frames? They appear to be frames while #1 is a bulkhead. Am I missing something???
-
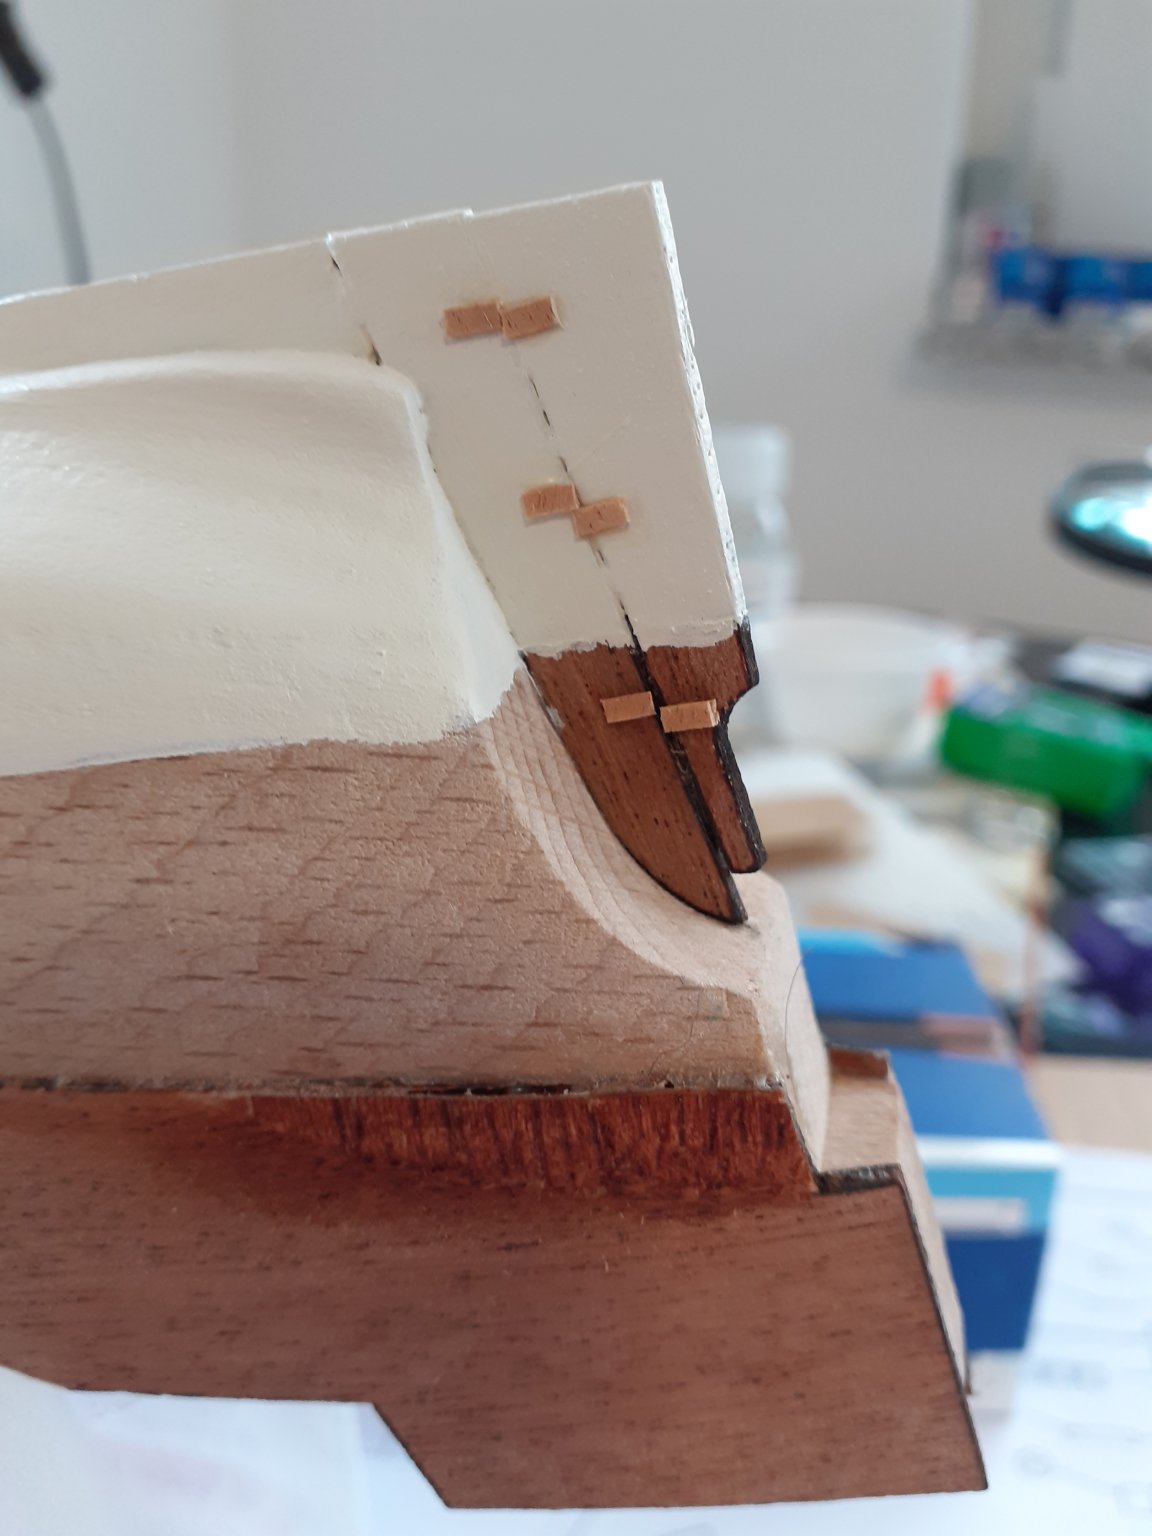
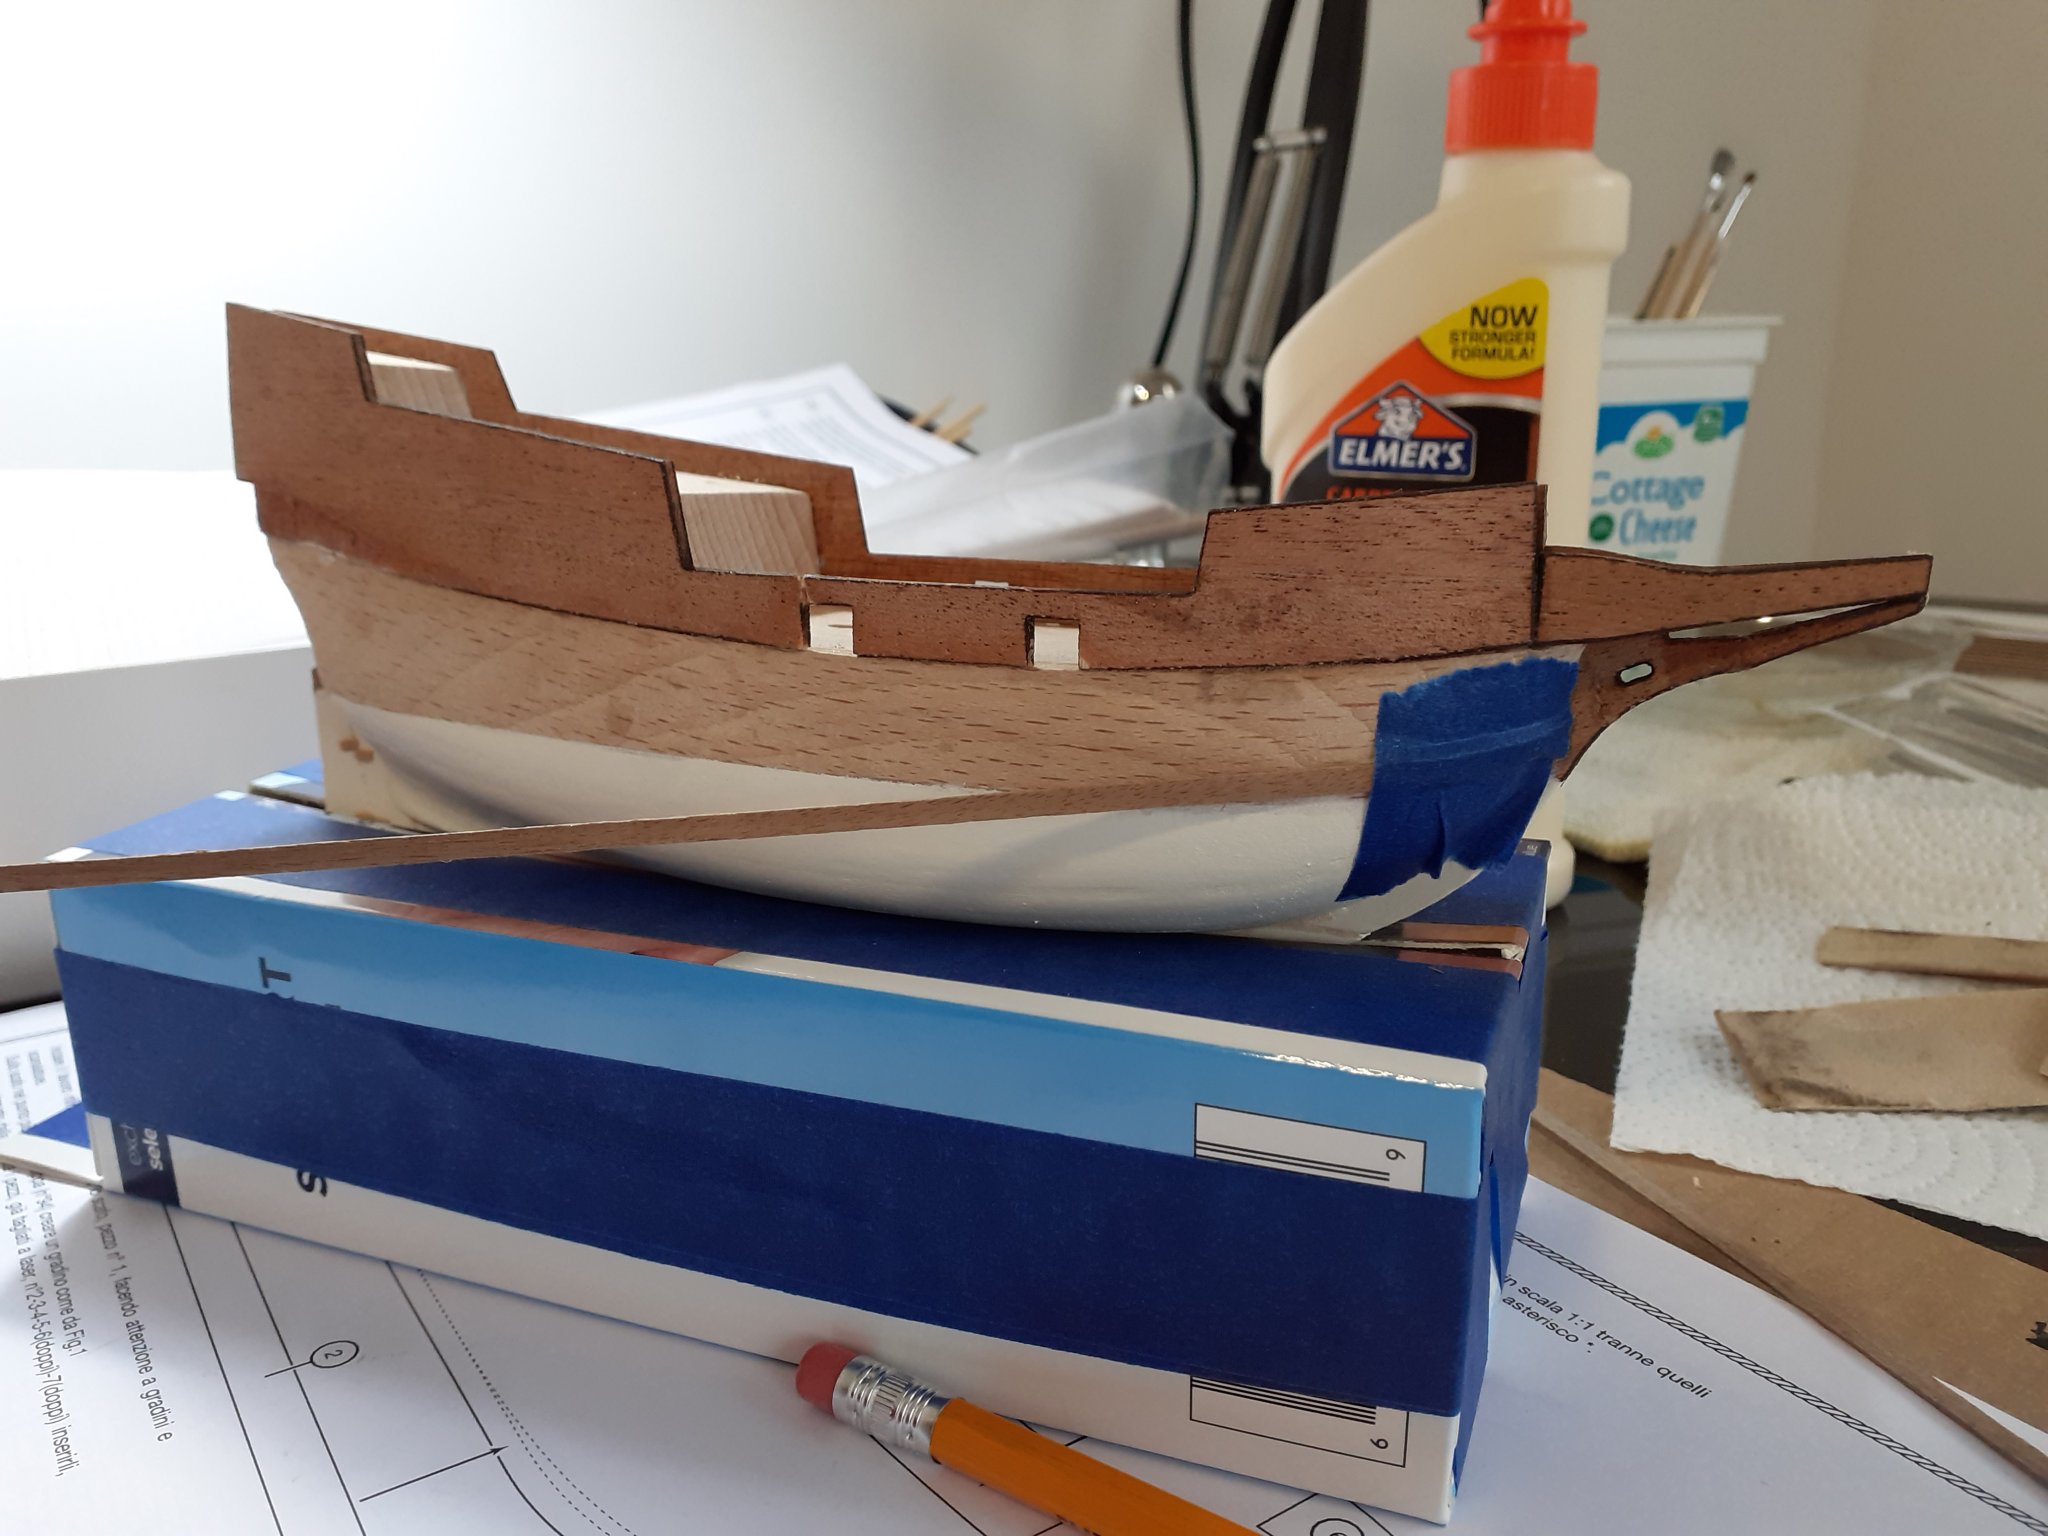
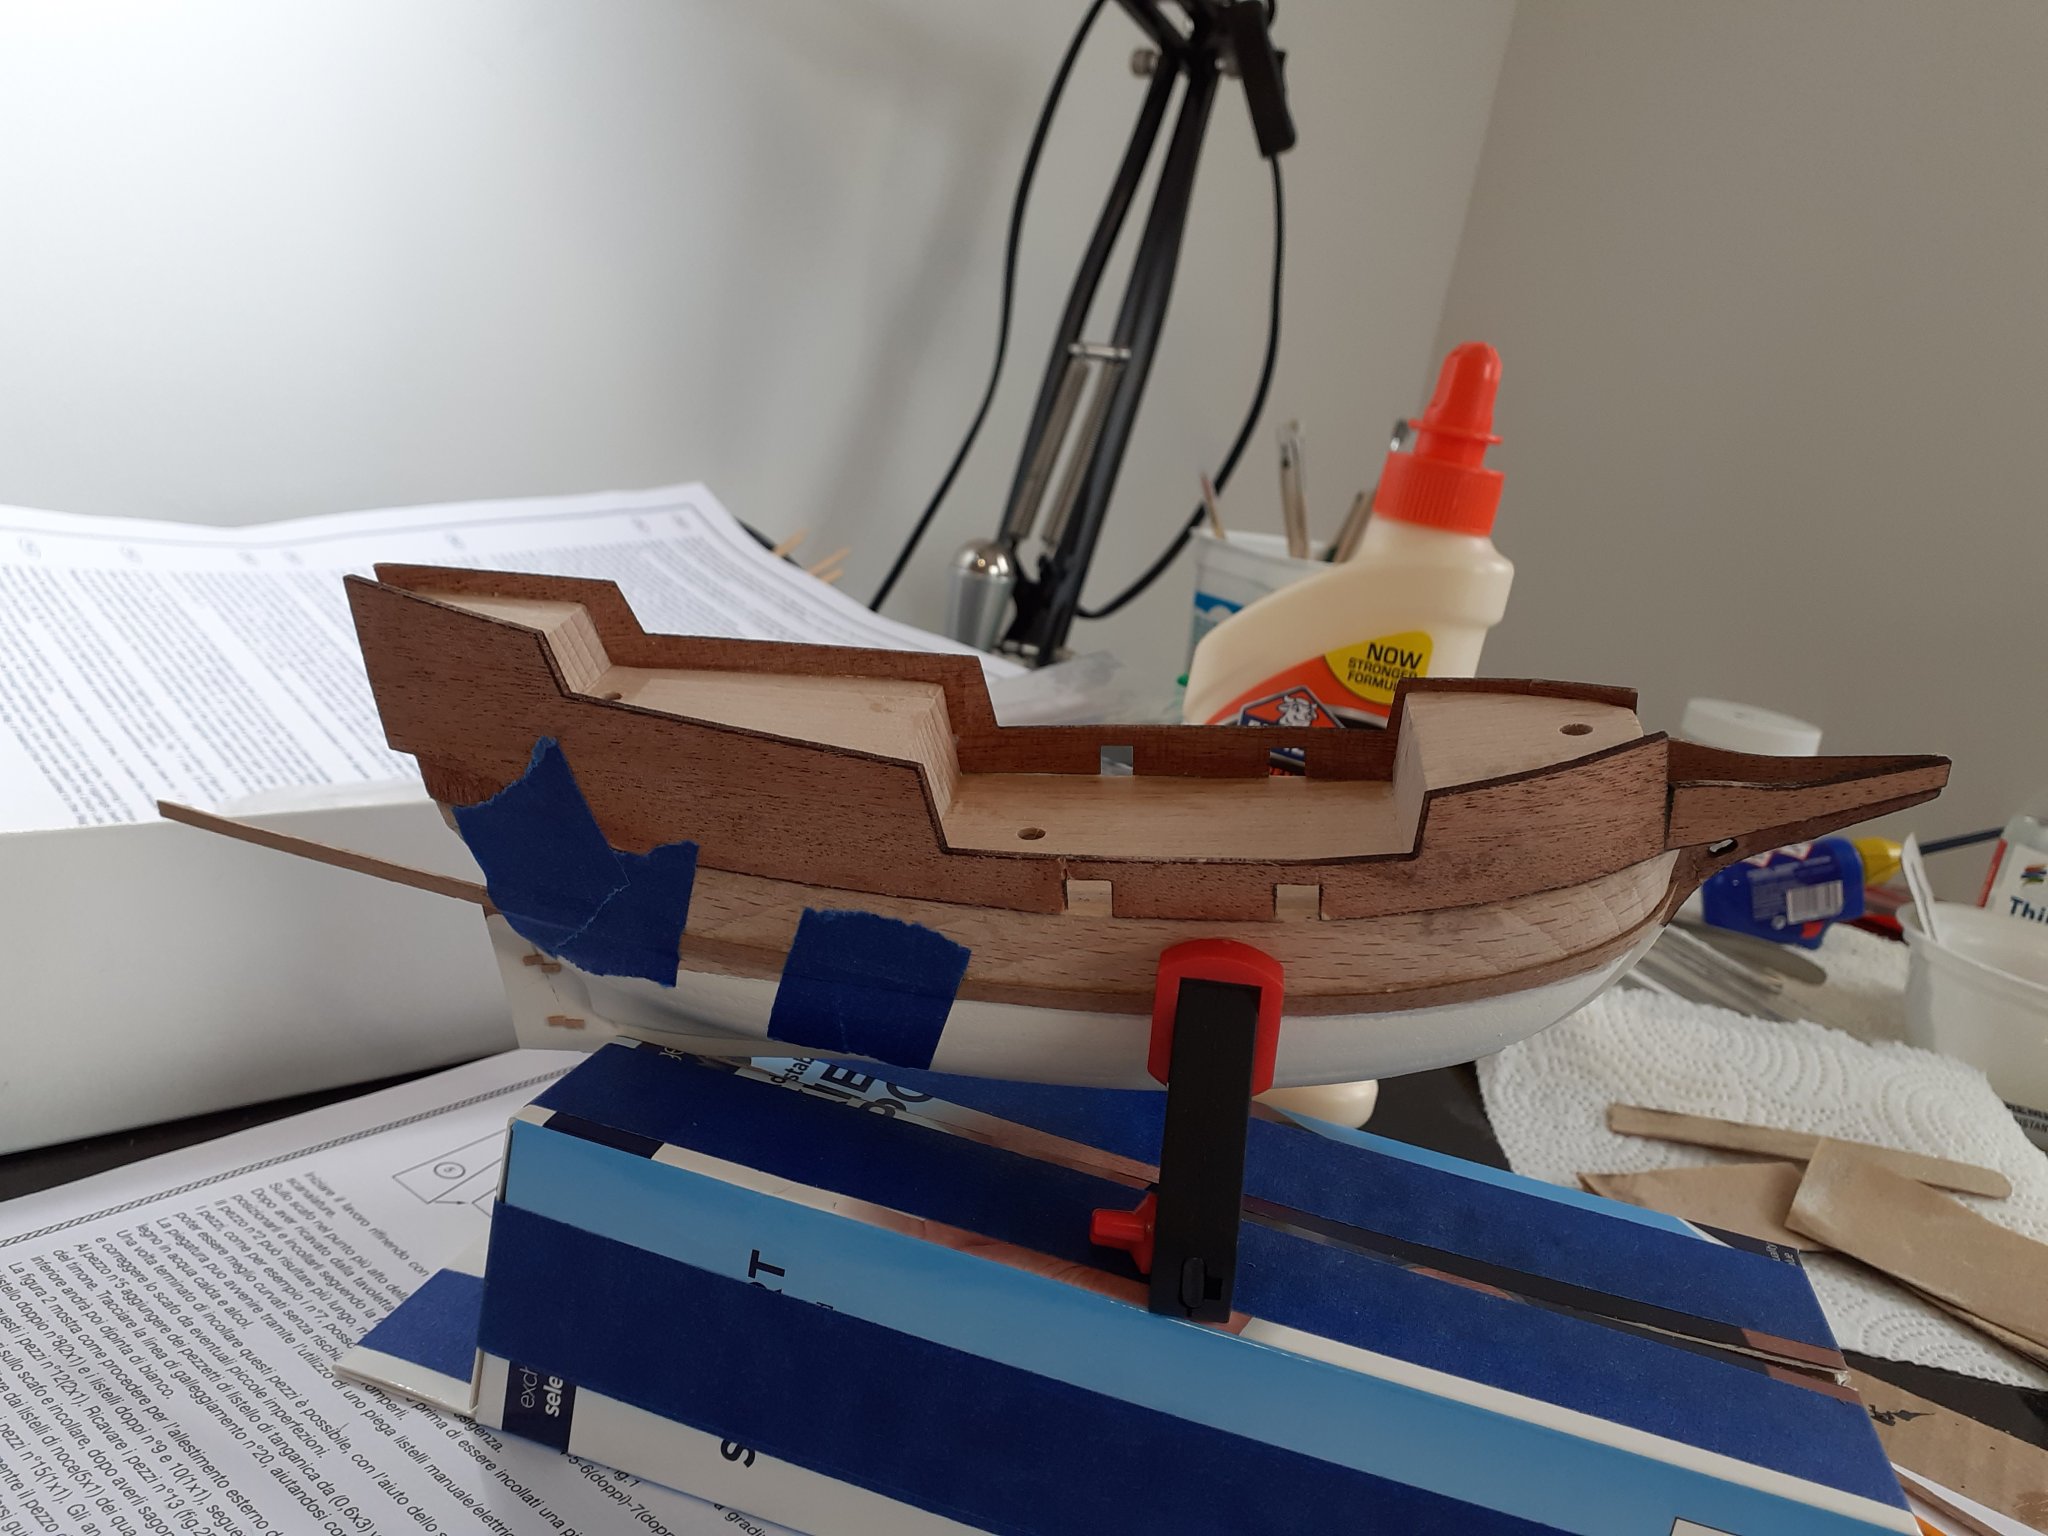
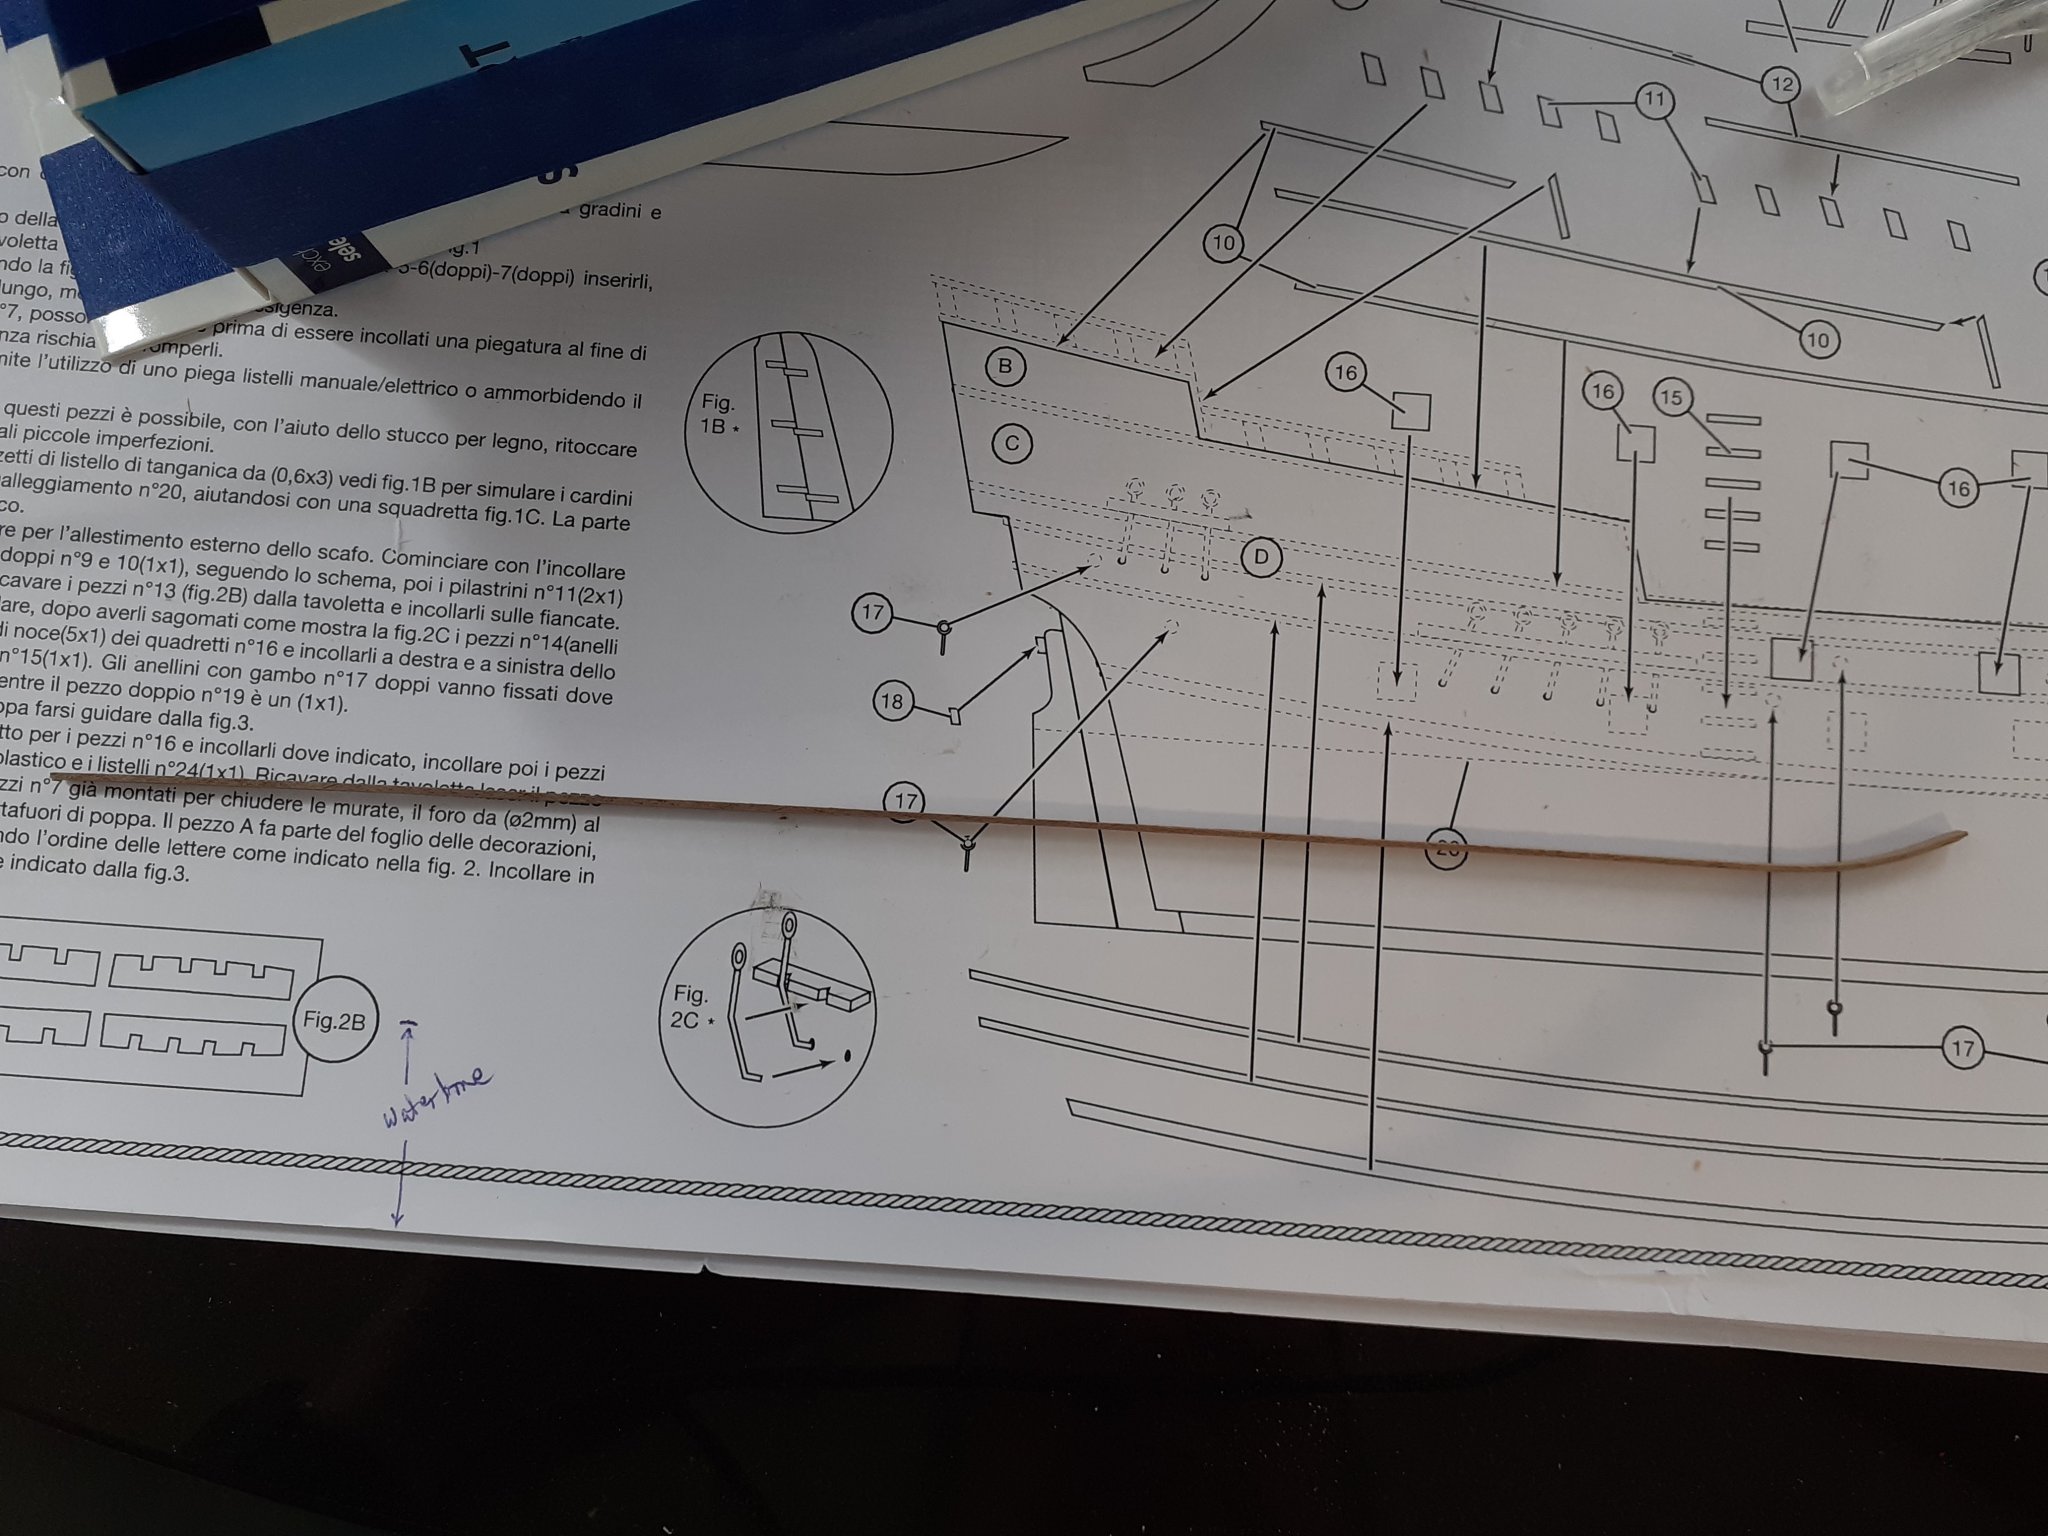
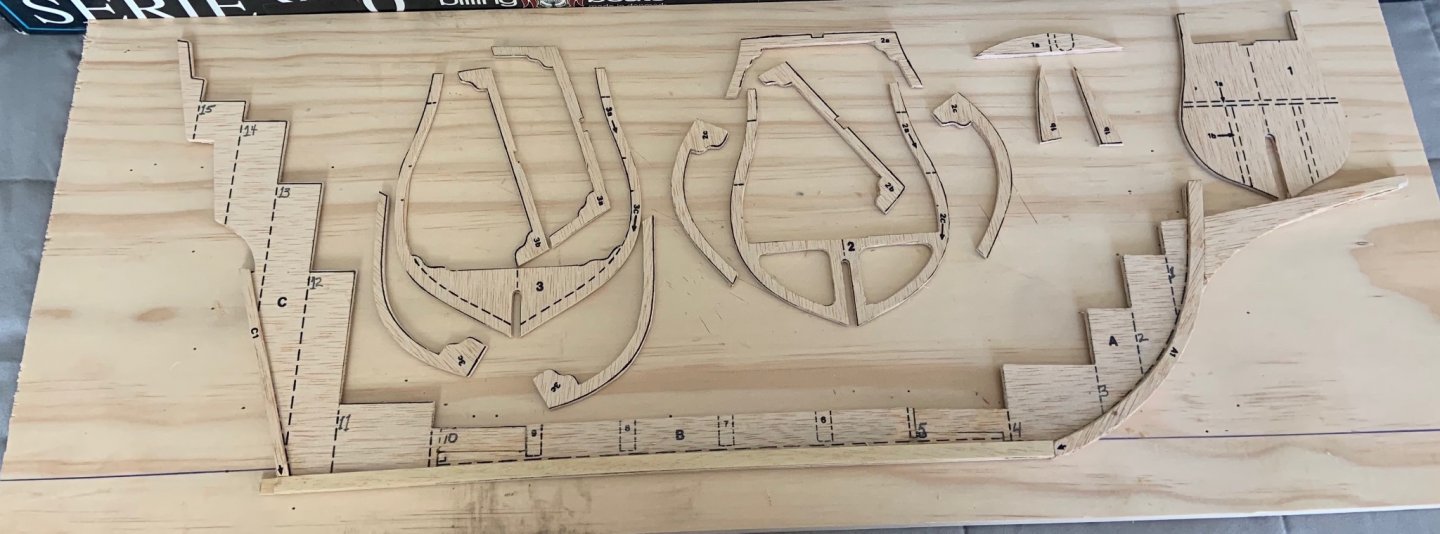
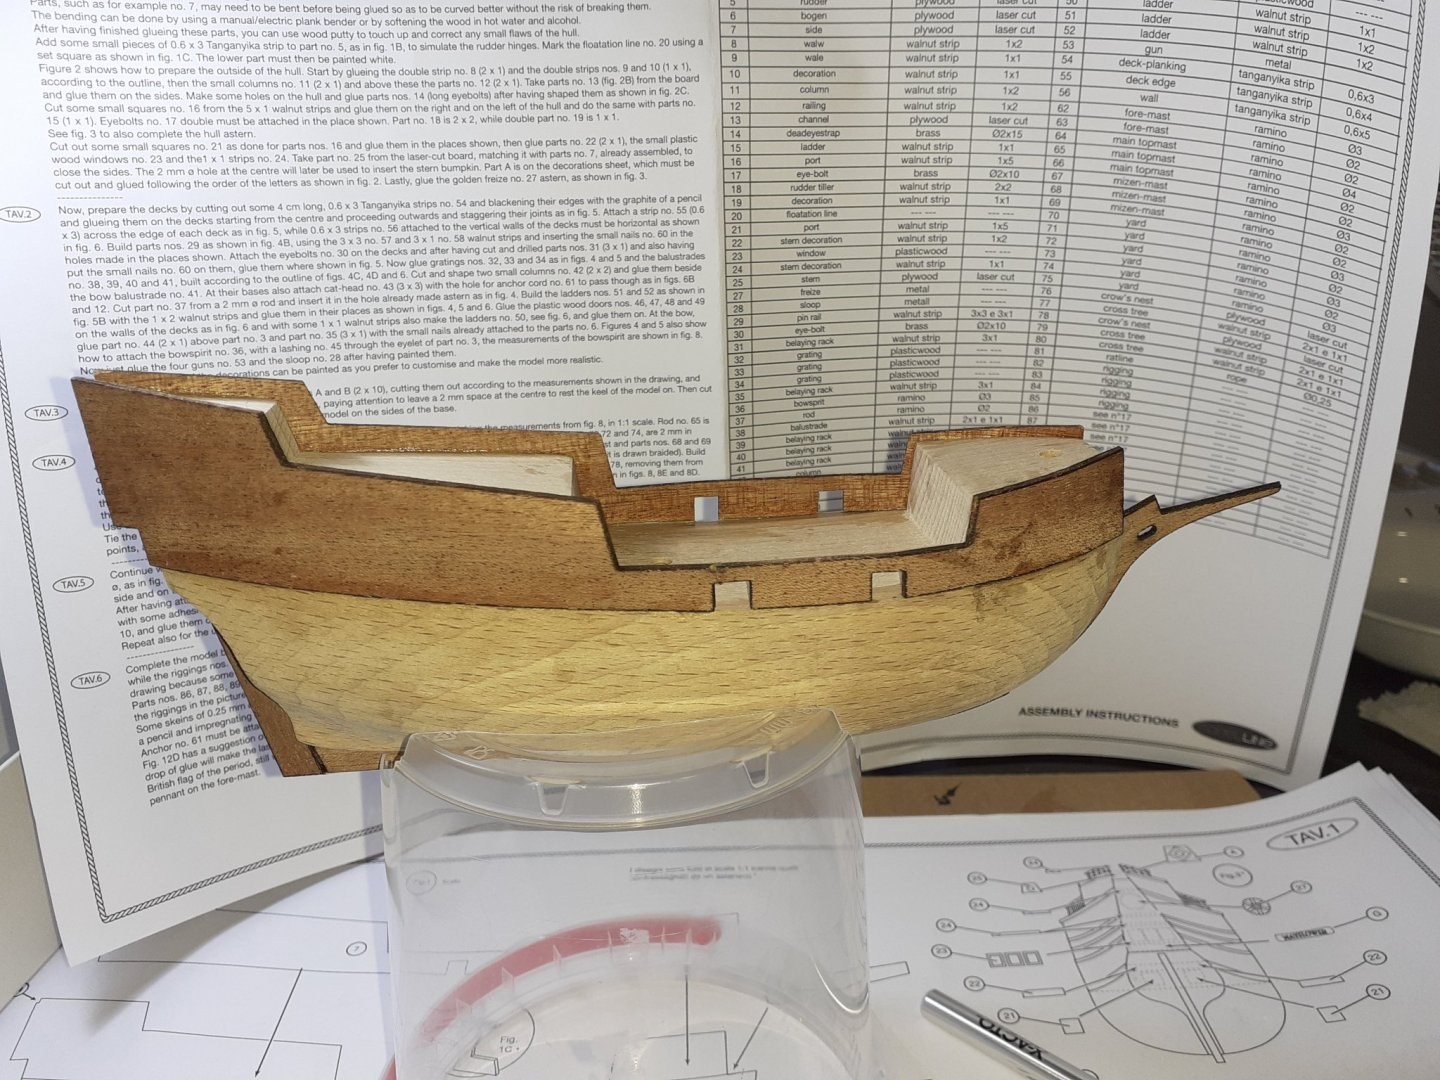
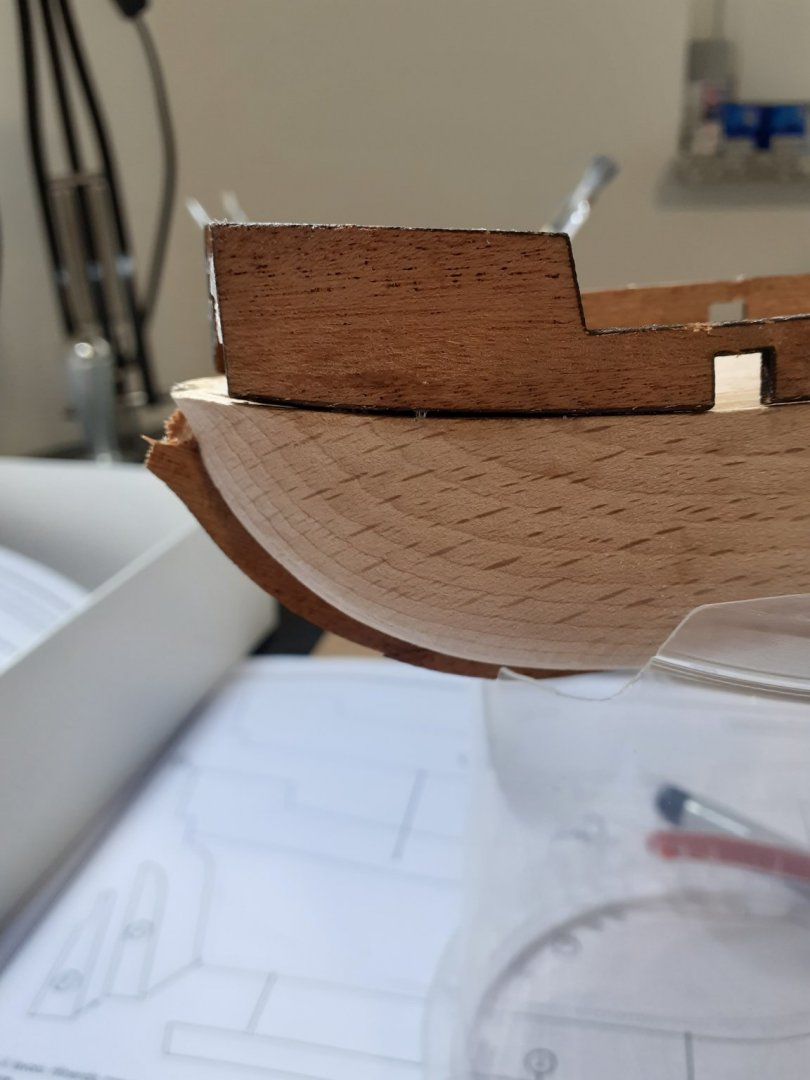
.thumb.jpg.c459ce4140b54c12eddb8eedfd446df3.jpg) Mayflower 1620 - 2020 Dutch Cargo Fluyt - ca. 1608 Artesania Latina 1:64 scale Hi all, this is my first instalment of my first ship model. Ship modeling is a new genre for me, having built so far only aircraft plastic scale models. For this start-off of mine, I chose the kit of the Mayflower from Artesania Latina. My choice was driven by its reasonable price and by its rating as a kit of medium difficulty. In addition, this month, on September 16th, it is exactly 400 years since when the Mayflower finally set out from Plymouth for her historical voyage that brought the Pilgrim Fathers to America after a first attempt from Southampton in August of the same year. I live in the Netherlands, in the outskirt of the city of Leiden, the city where the Pilgrims Fathers resided for 12 years before their departure. The city of Leiden is celebrating this anniversary with several events spread over the year. Considering all these connections, I though that the Mayflower was a nice and motivated choice for my first build. The parts of the kit are of good wood quality and are quite precisely cut. The bulkheads and the keel need just a bit of filing to facilitate their assembling. This is the basic structure just assembled out of the box on my workbench.
Mayflower 1620 - 2020 Dutch Cargo Fluyt - ca. 1608 Artesania Latina 1:64 scale Hi all, this is my first instalment of my first ship model. Ship modeling is a new genre for me, having built so far only aircraft plastic scale models. For this start-off of mine, I chose the kit of the Mayflower from Artesania Latina. My choice was driven by its reasonable price and by its rating as a kit of medium difficulty. In addition, this month, on September 16th, it is exactly 400 years since when the Mayflower finally set out from Plymouth for her historical voyage that brought the Pilgrim Fathers to America after a first attempt from Southampton in August of the same year. I live in the Netherlands, in the outskirt of the city of Leiden, the city where the Pilgrims Fathers resided for 12 years before their departure. The city of Leiden is celebrating this anniversary with several events spread over the year. Considering all these connections, I though that the Mayflower was a nice and motivated choice for my first build. The parts of the kit are of good wood quality and are quite precisely cut. The bulkheads and the keel need just a bit of filing to facilitate their assembling. This is the basic structure just assembled out of the box on my workbench.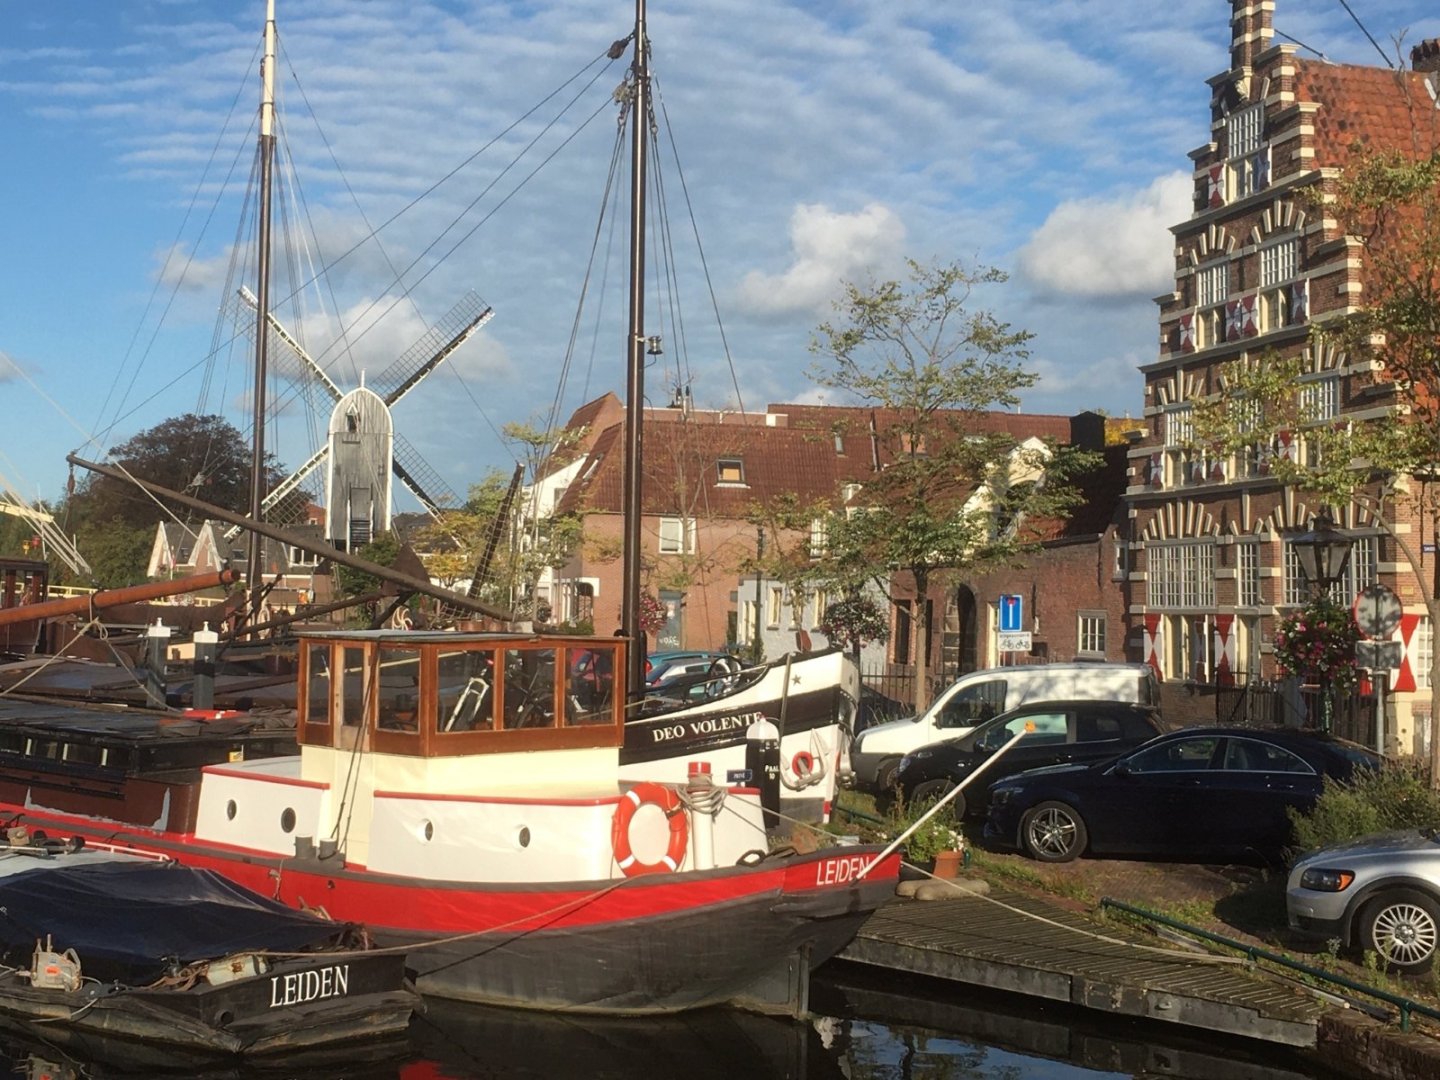
resized.thumb.JPG.c285ff4e79670ec6e7a911b797e5a30d.JPG)
- 42 replies
-
- 11
-
-
- first build
- artesania latina
- (and 1 more)
-
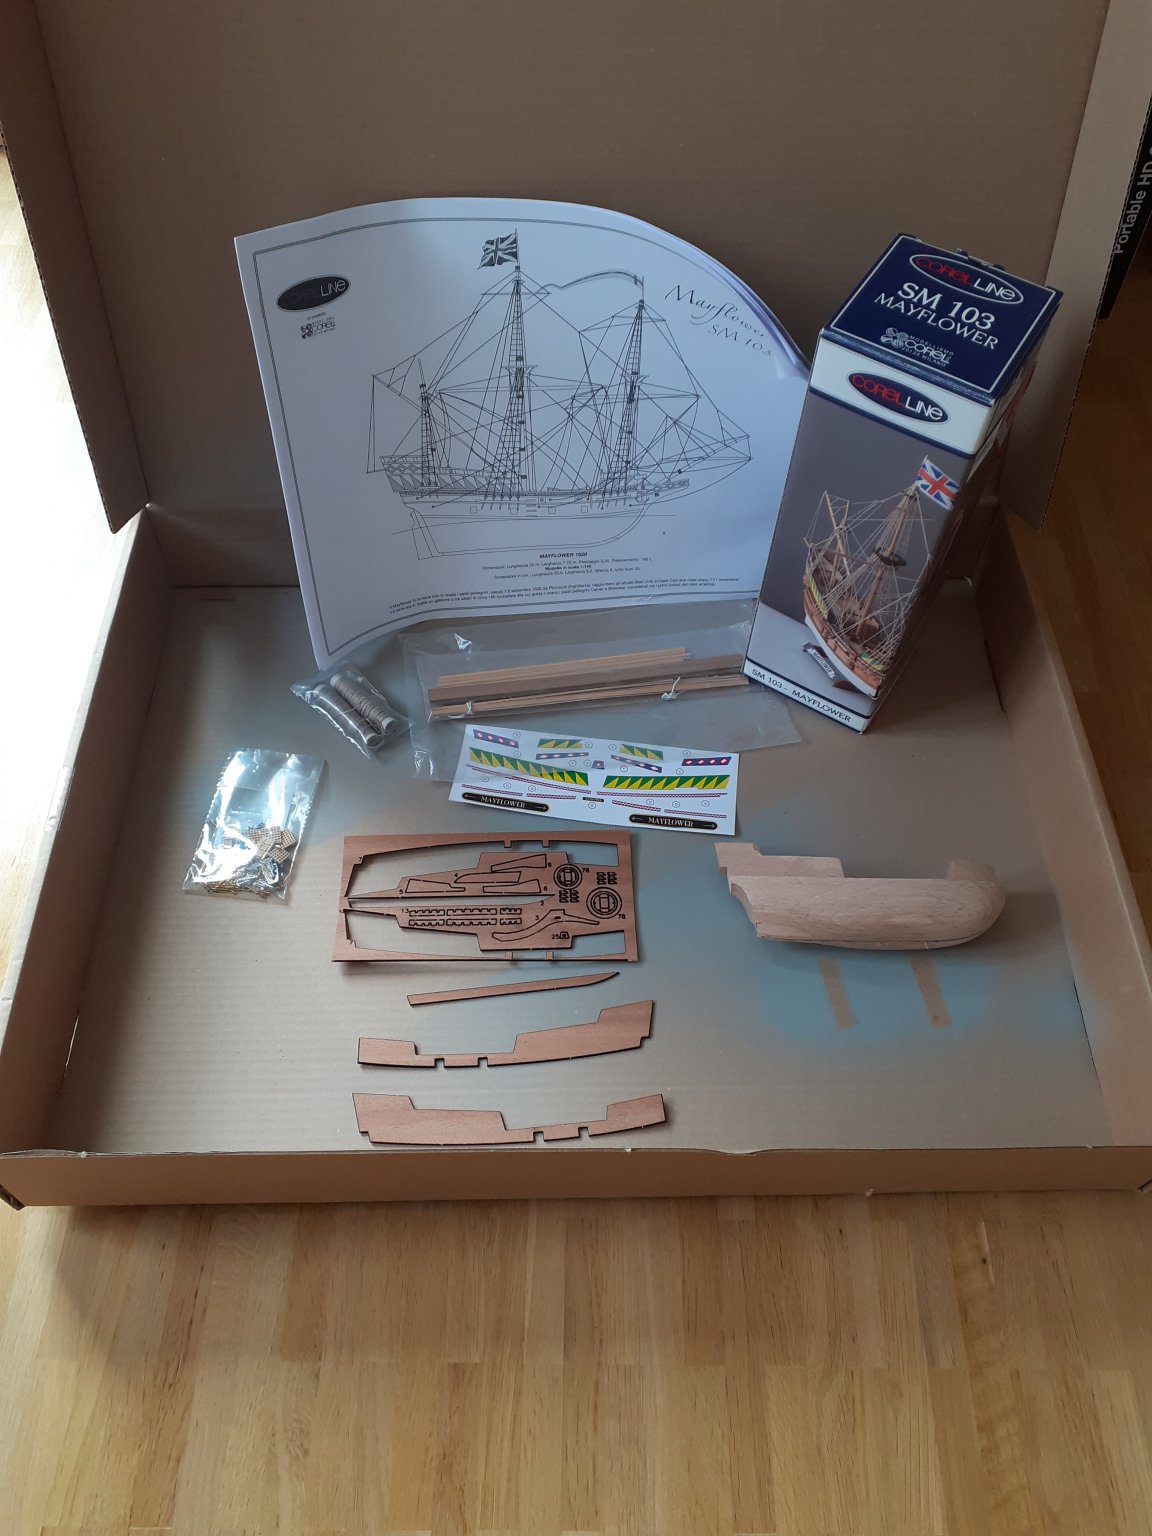
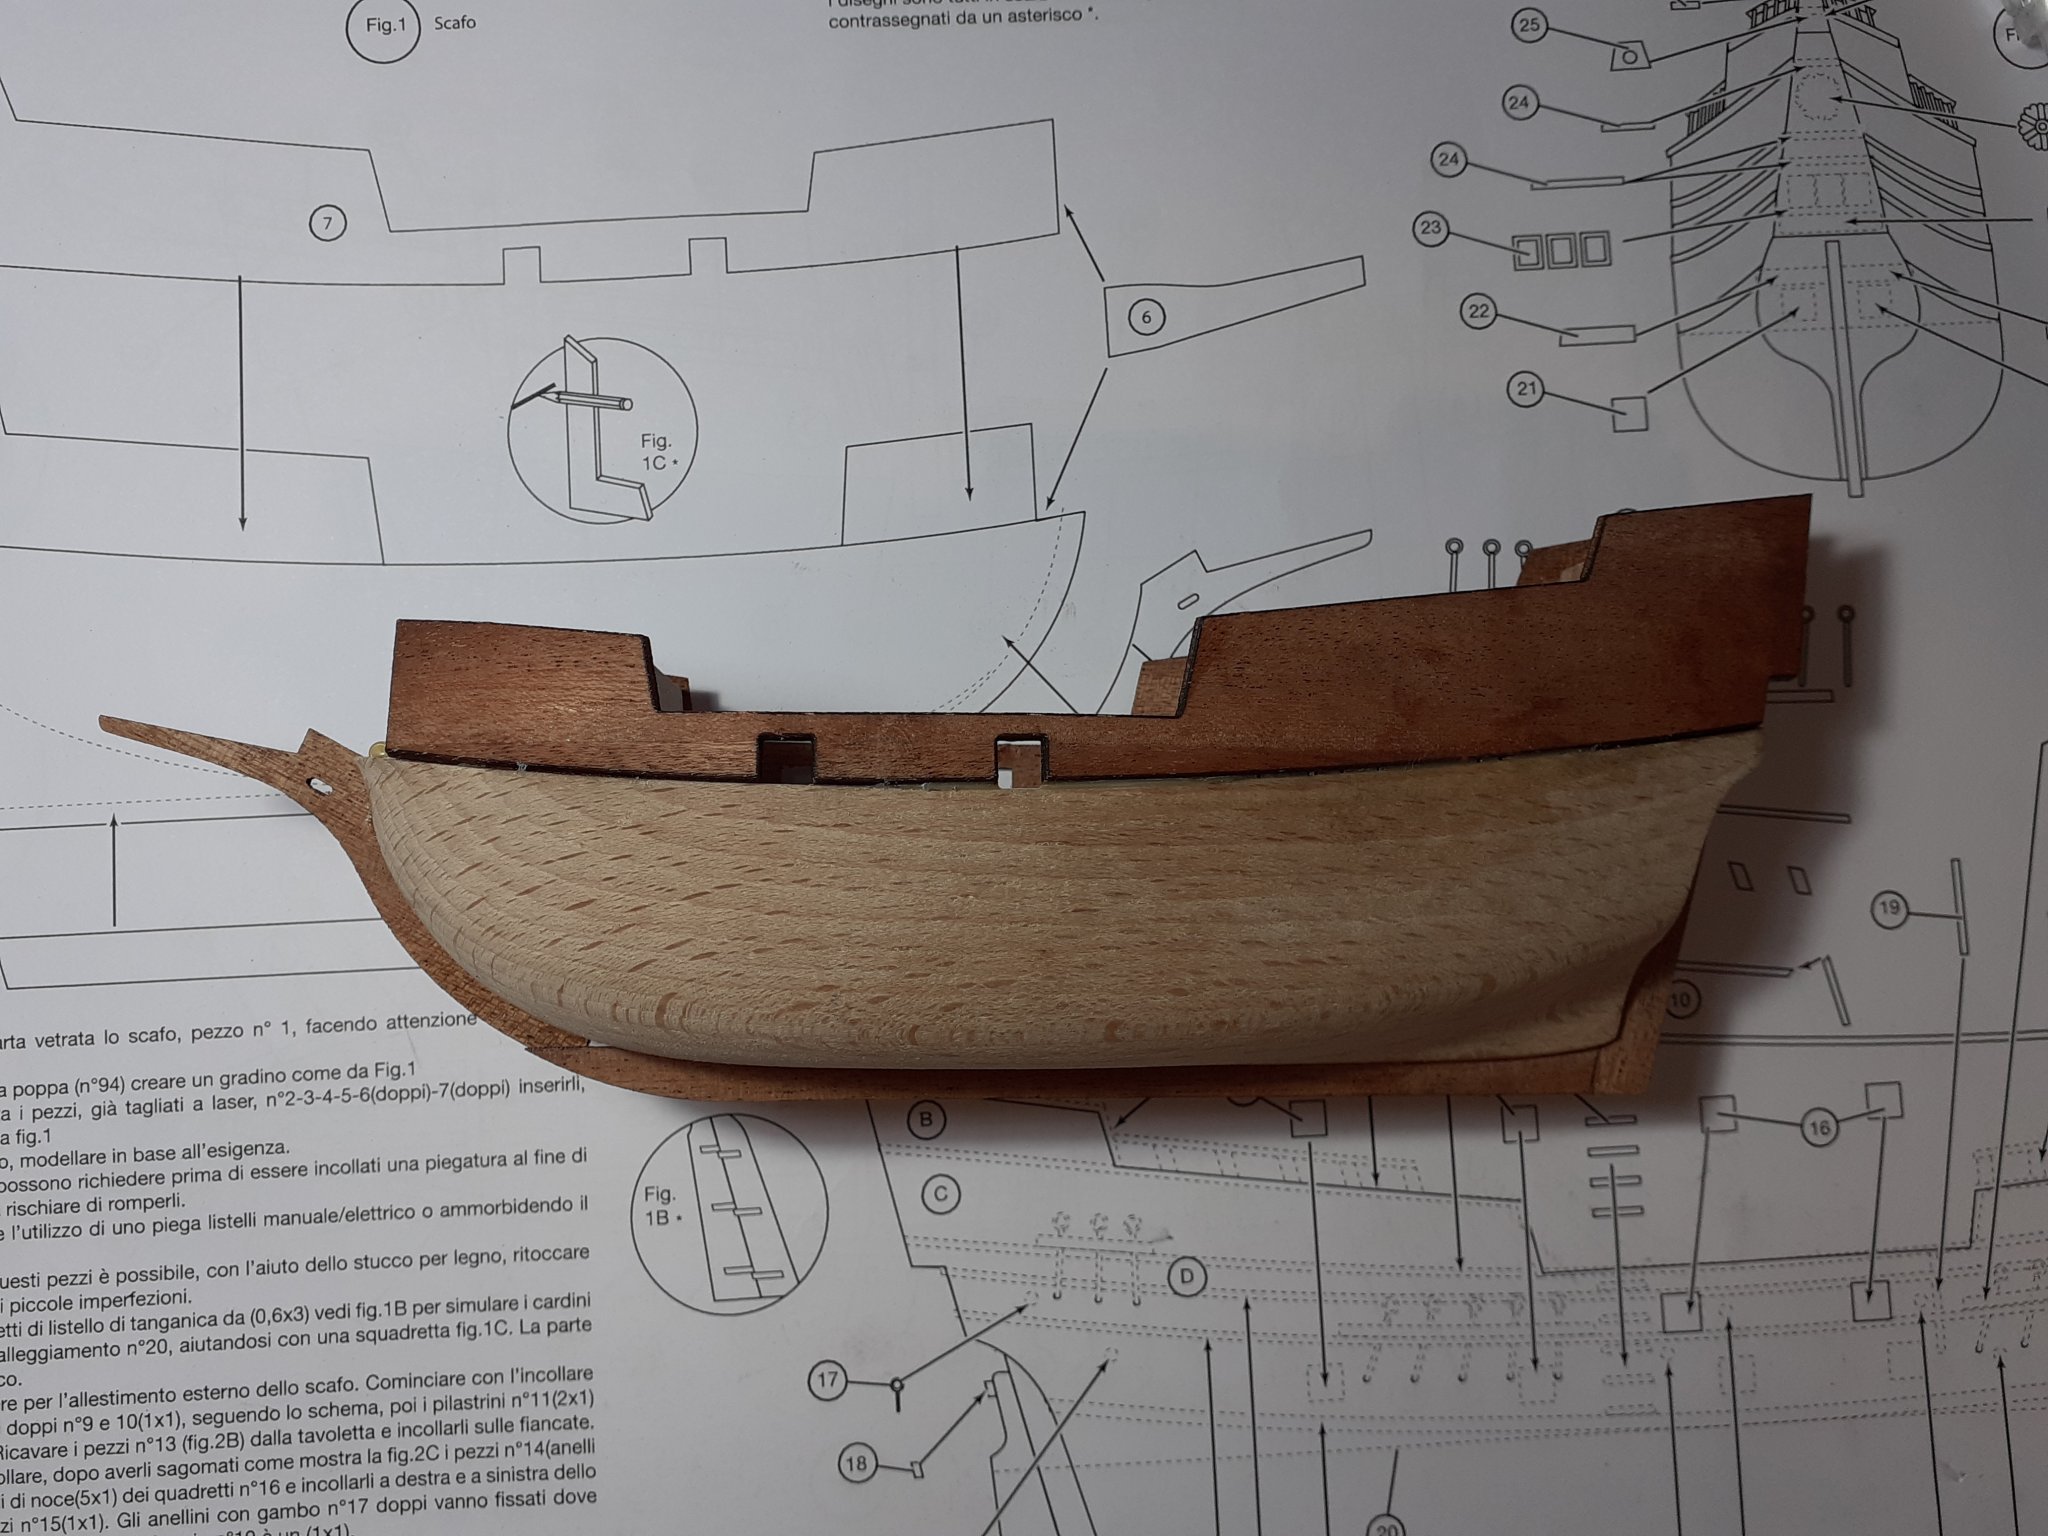
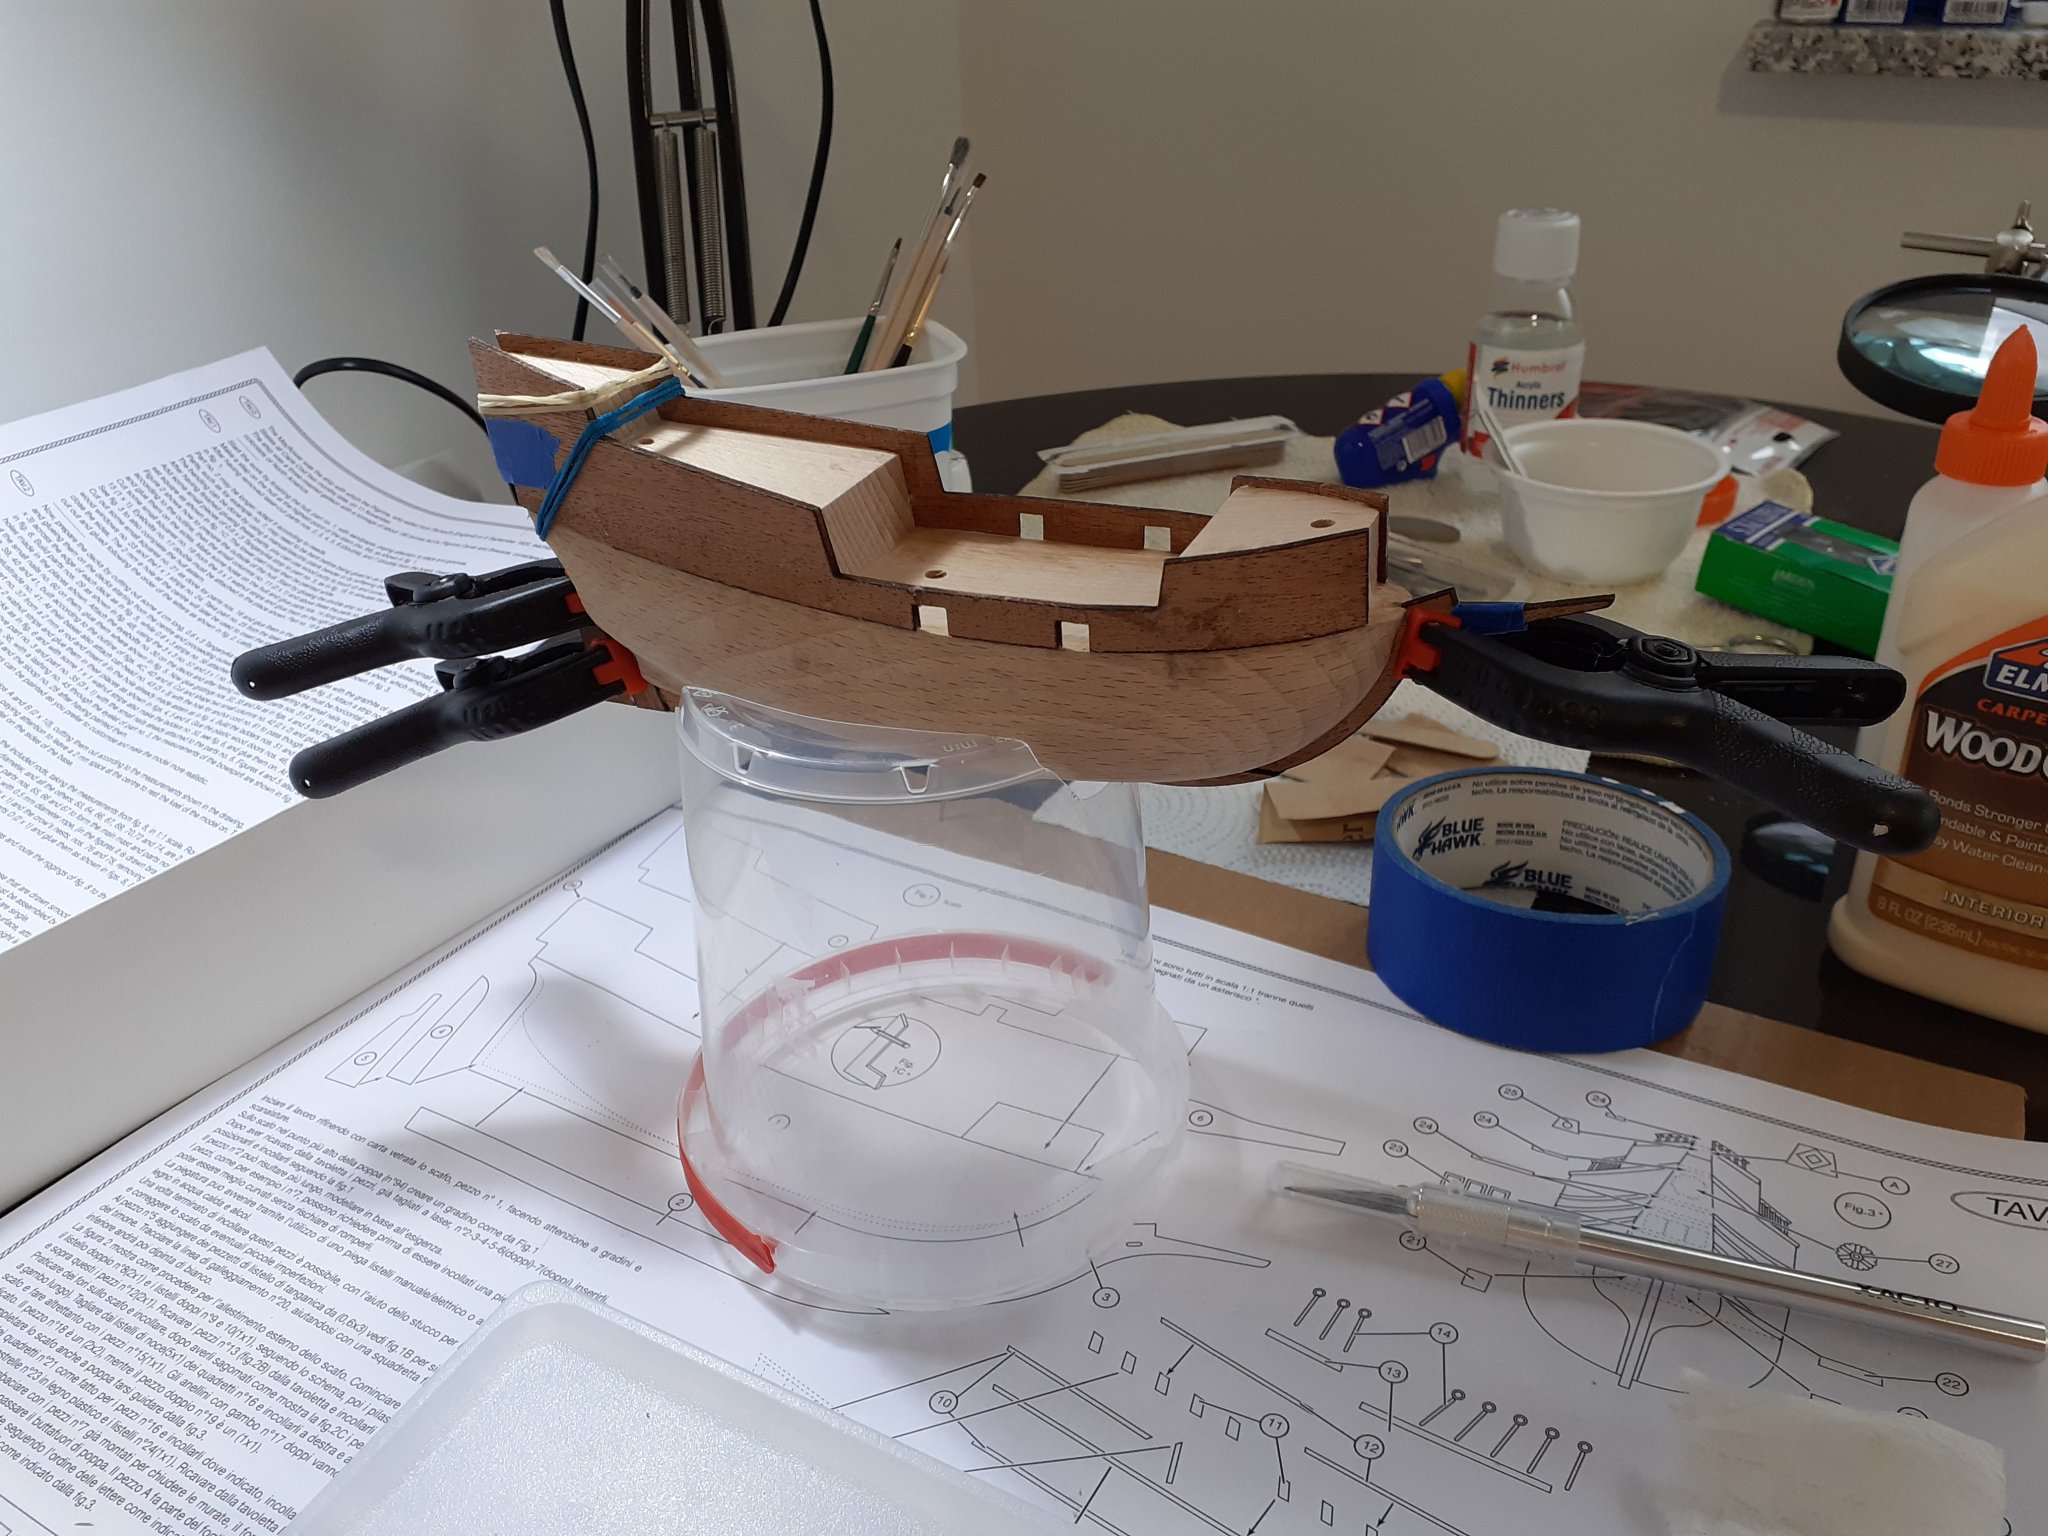
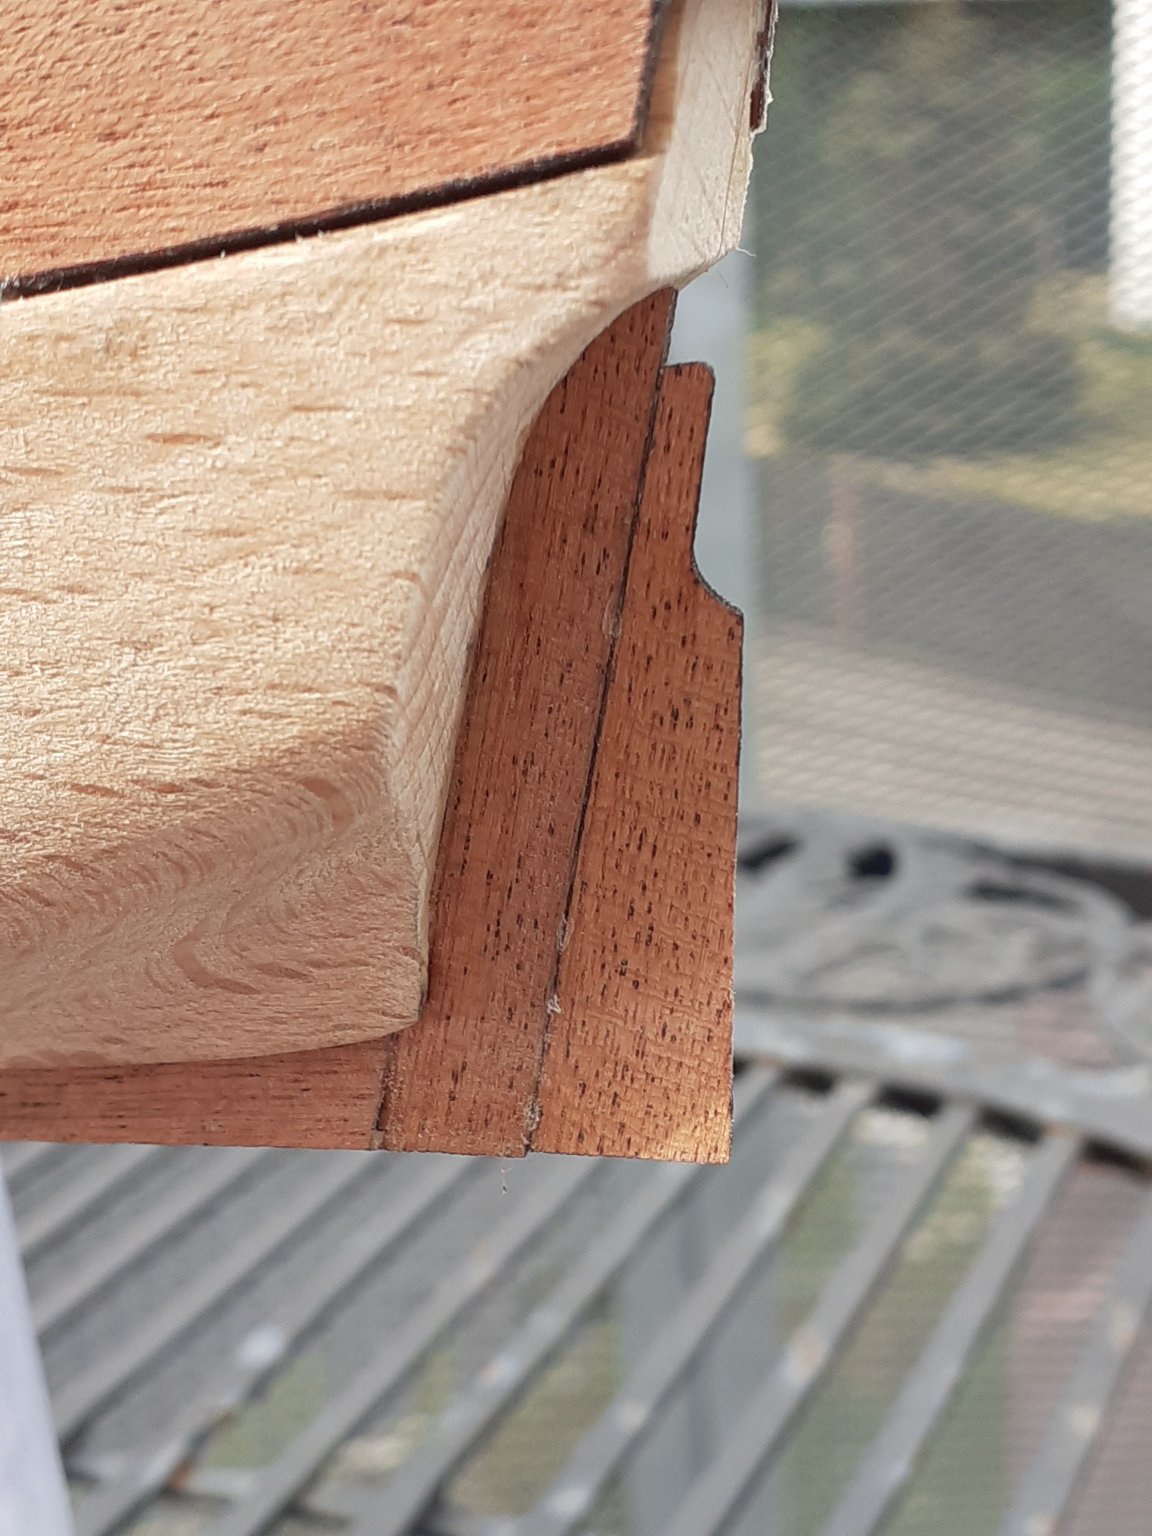
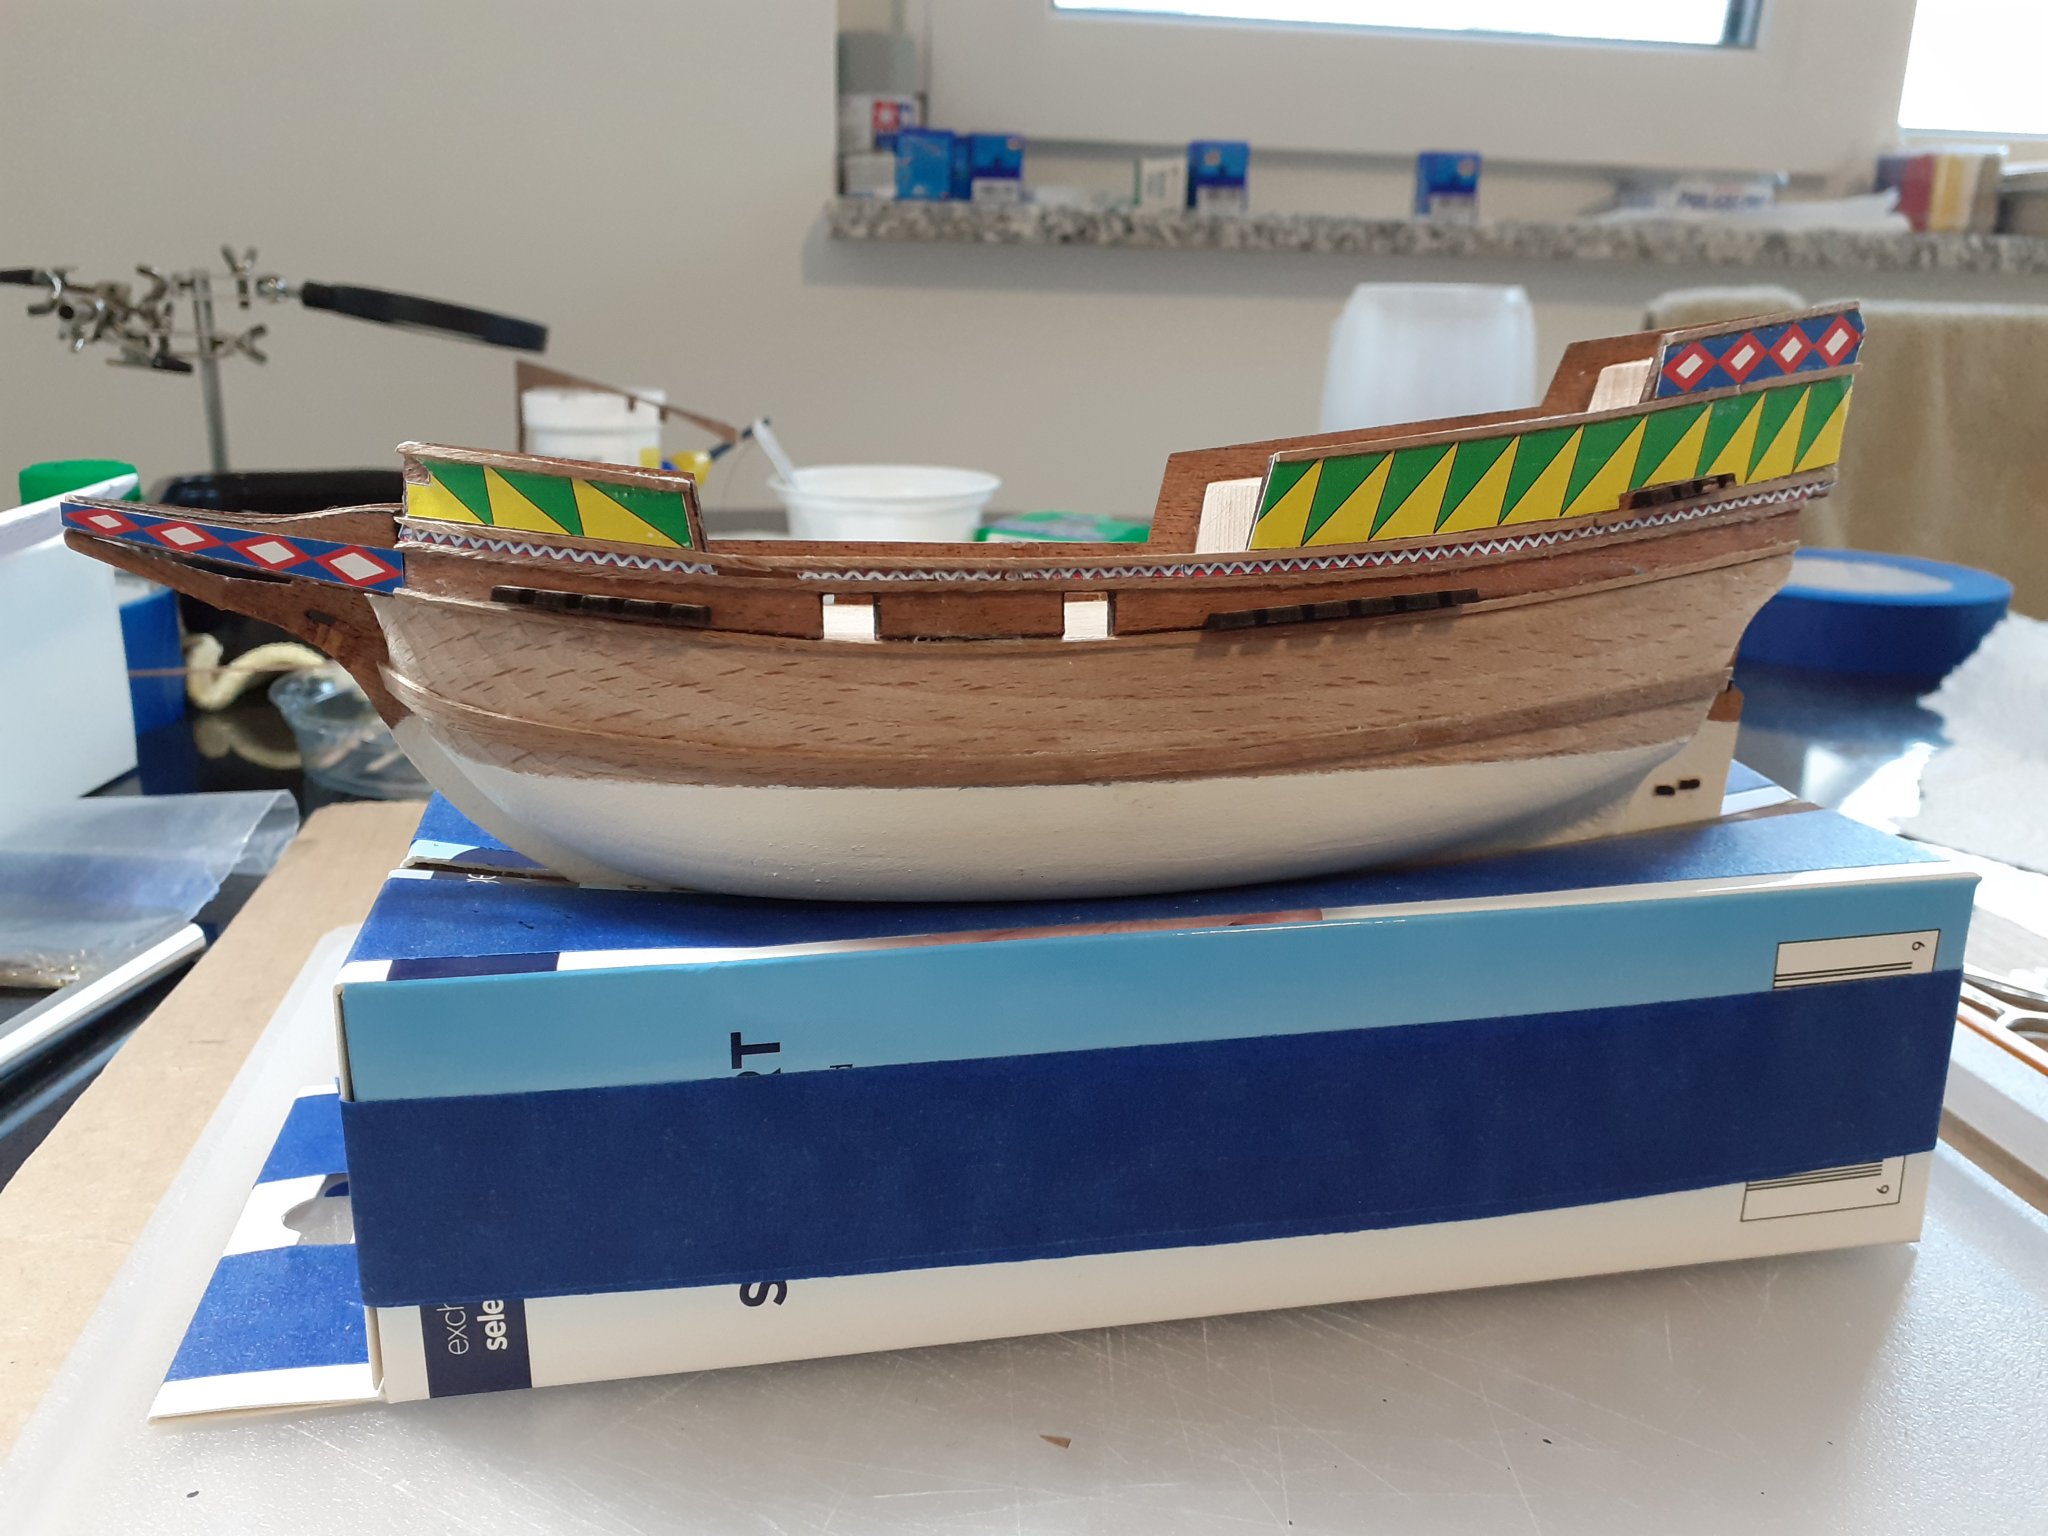
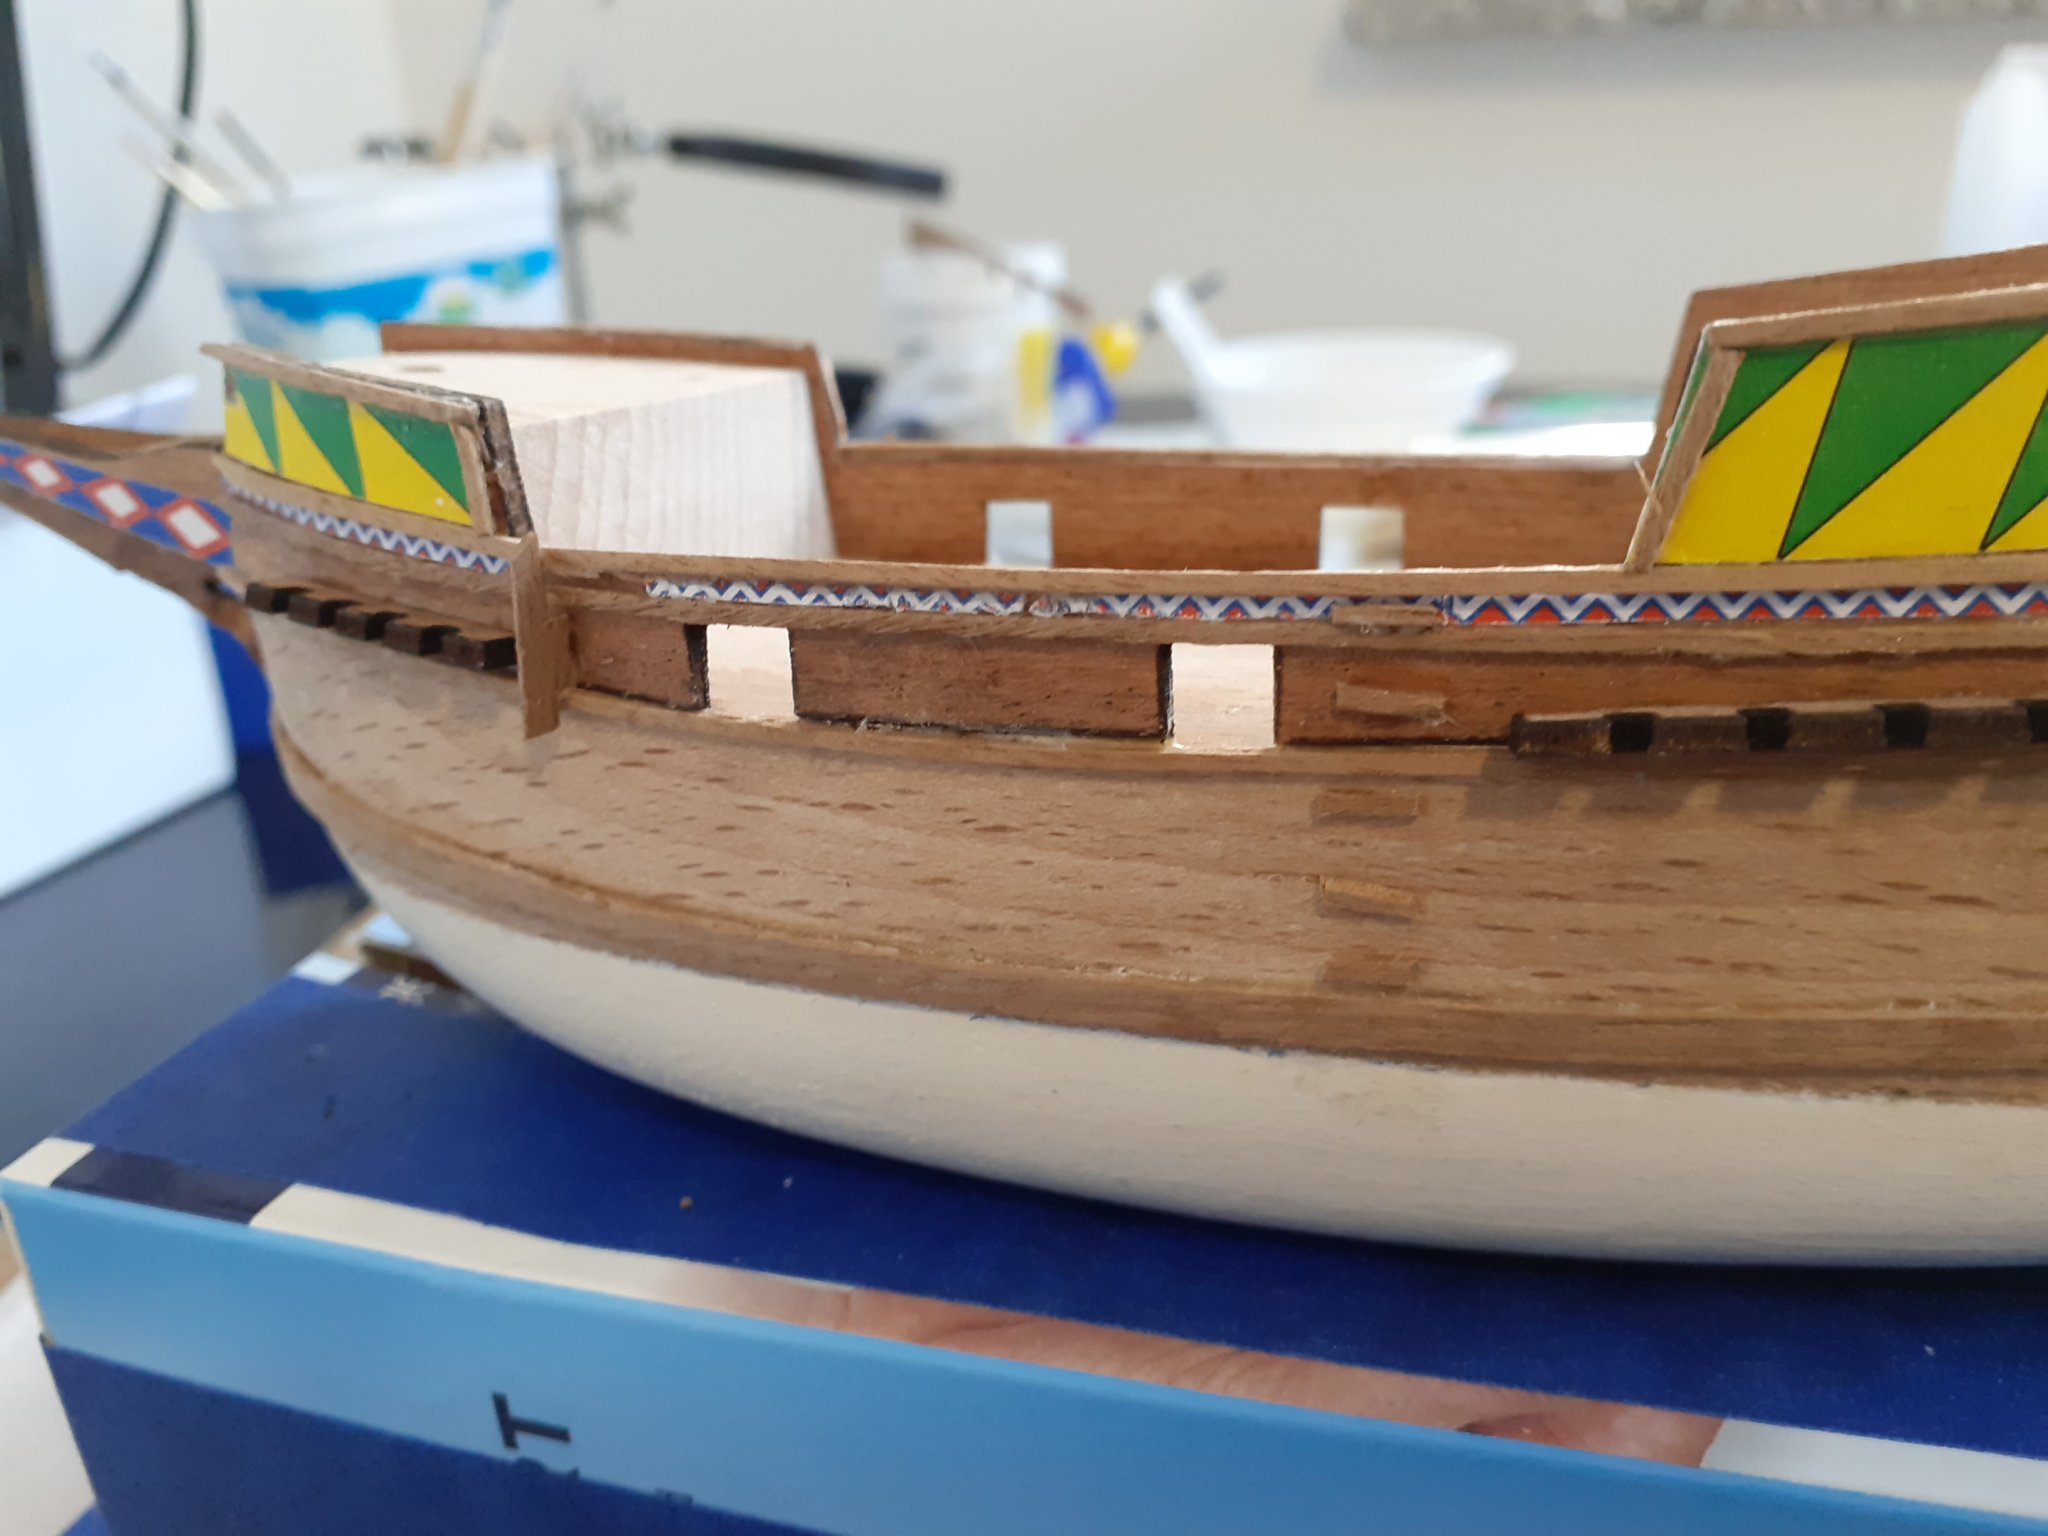
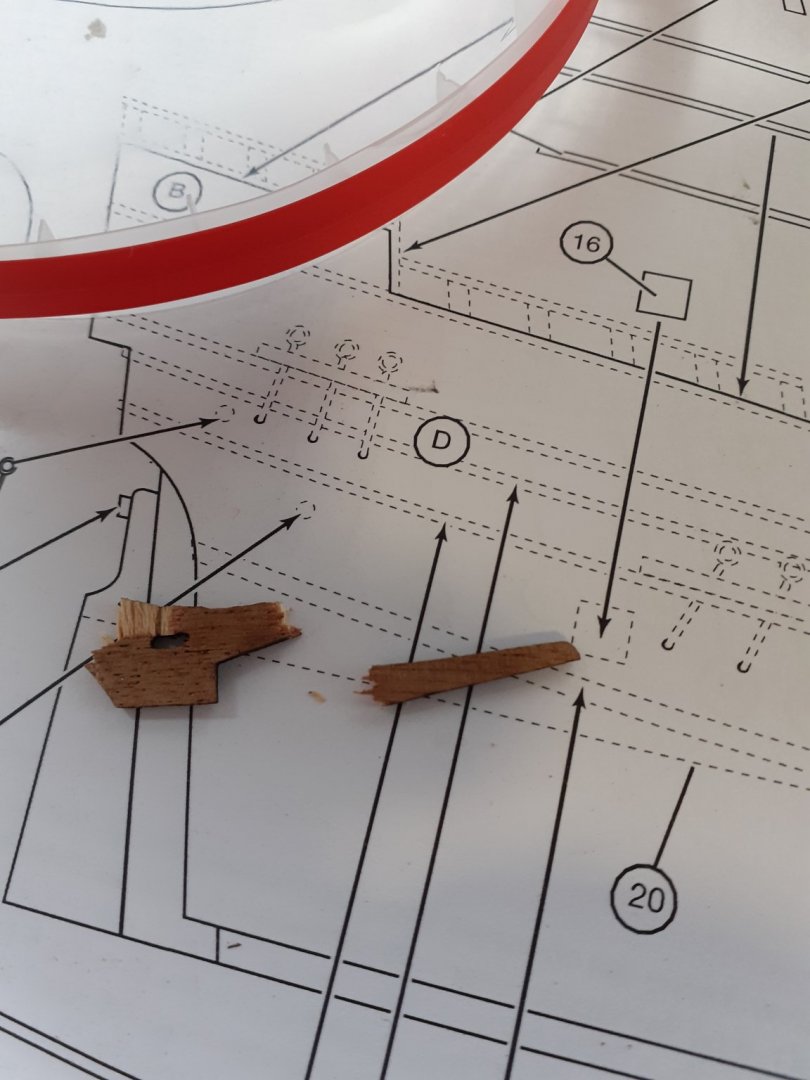
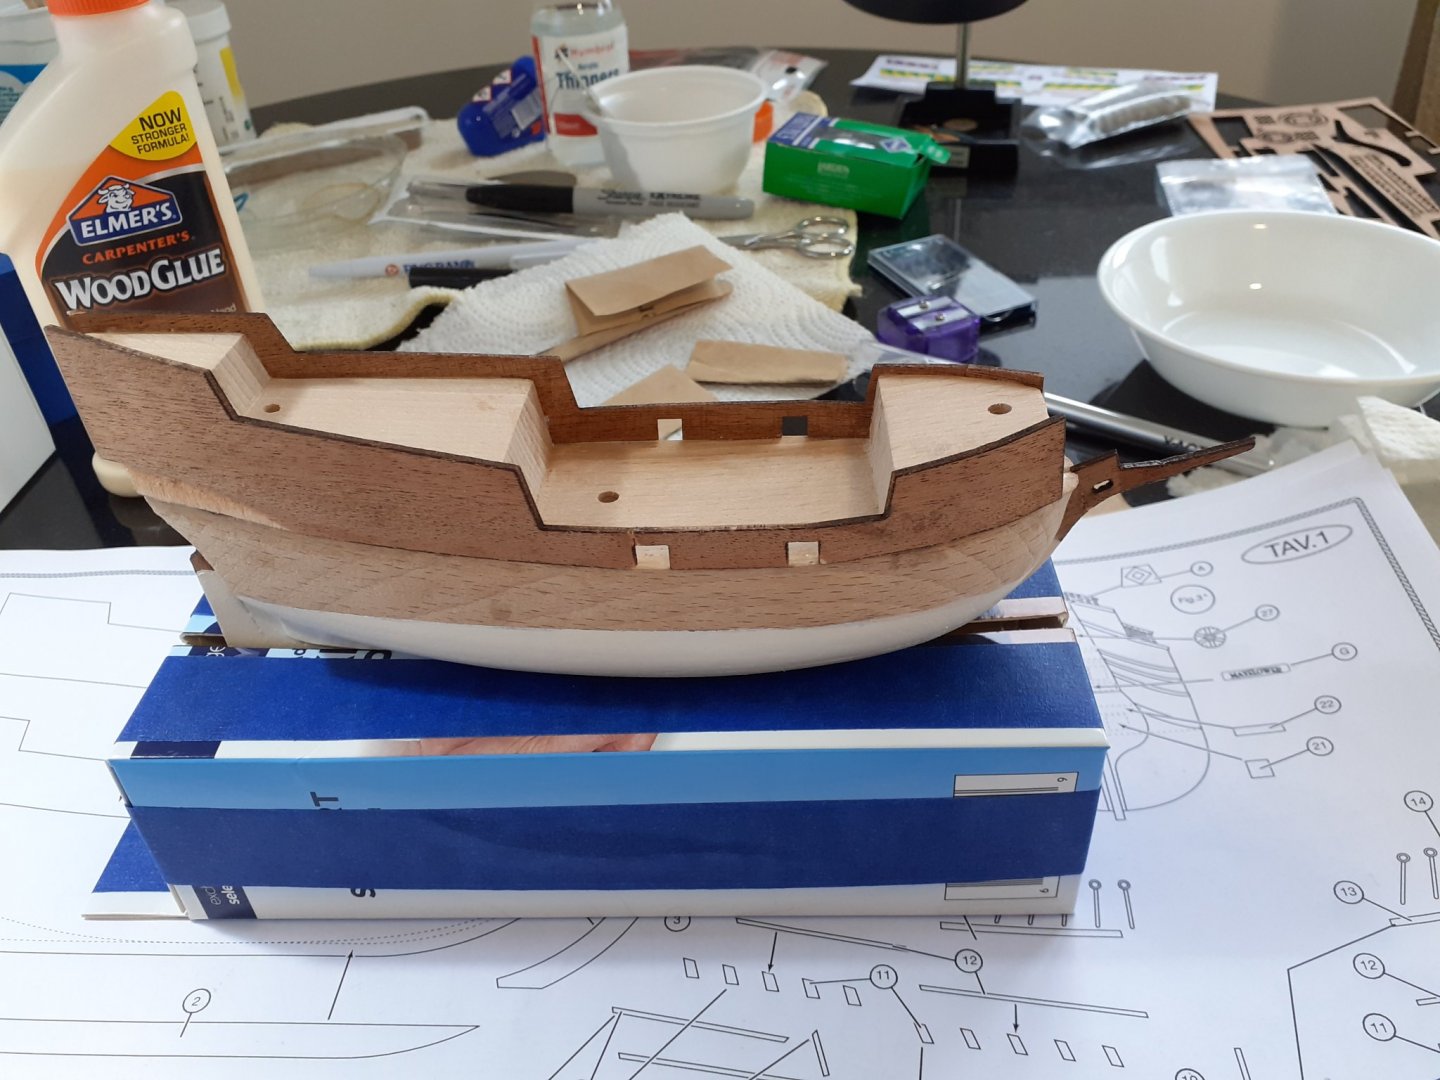
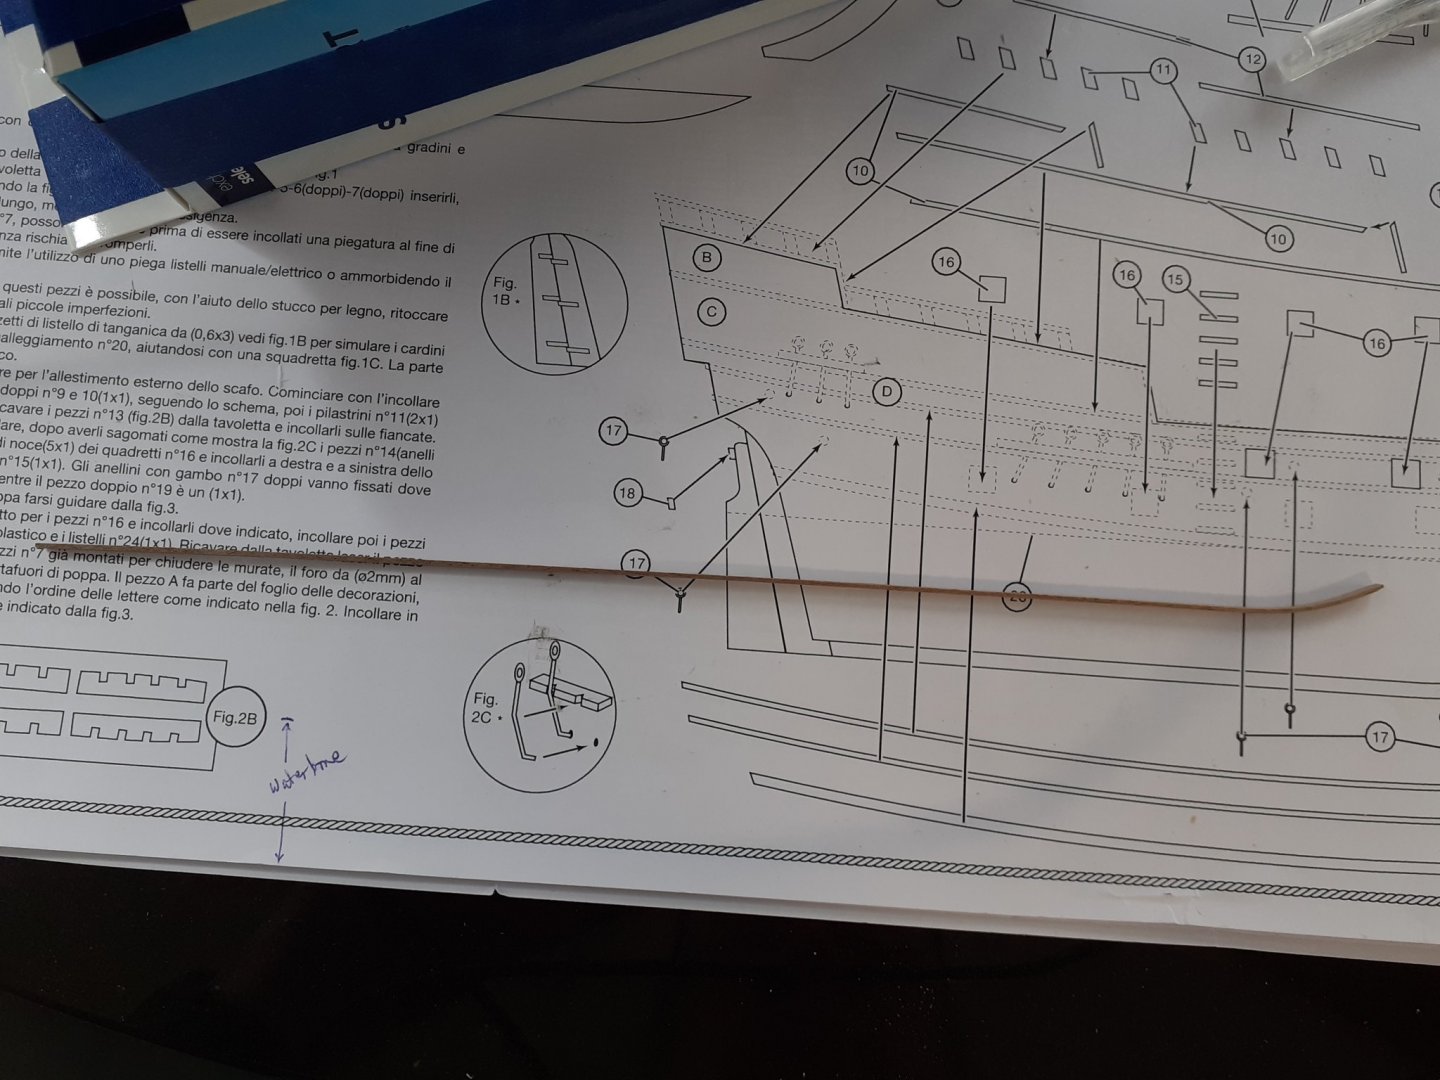
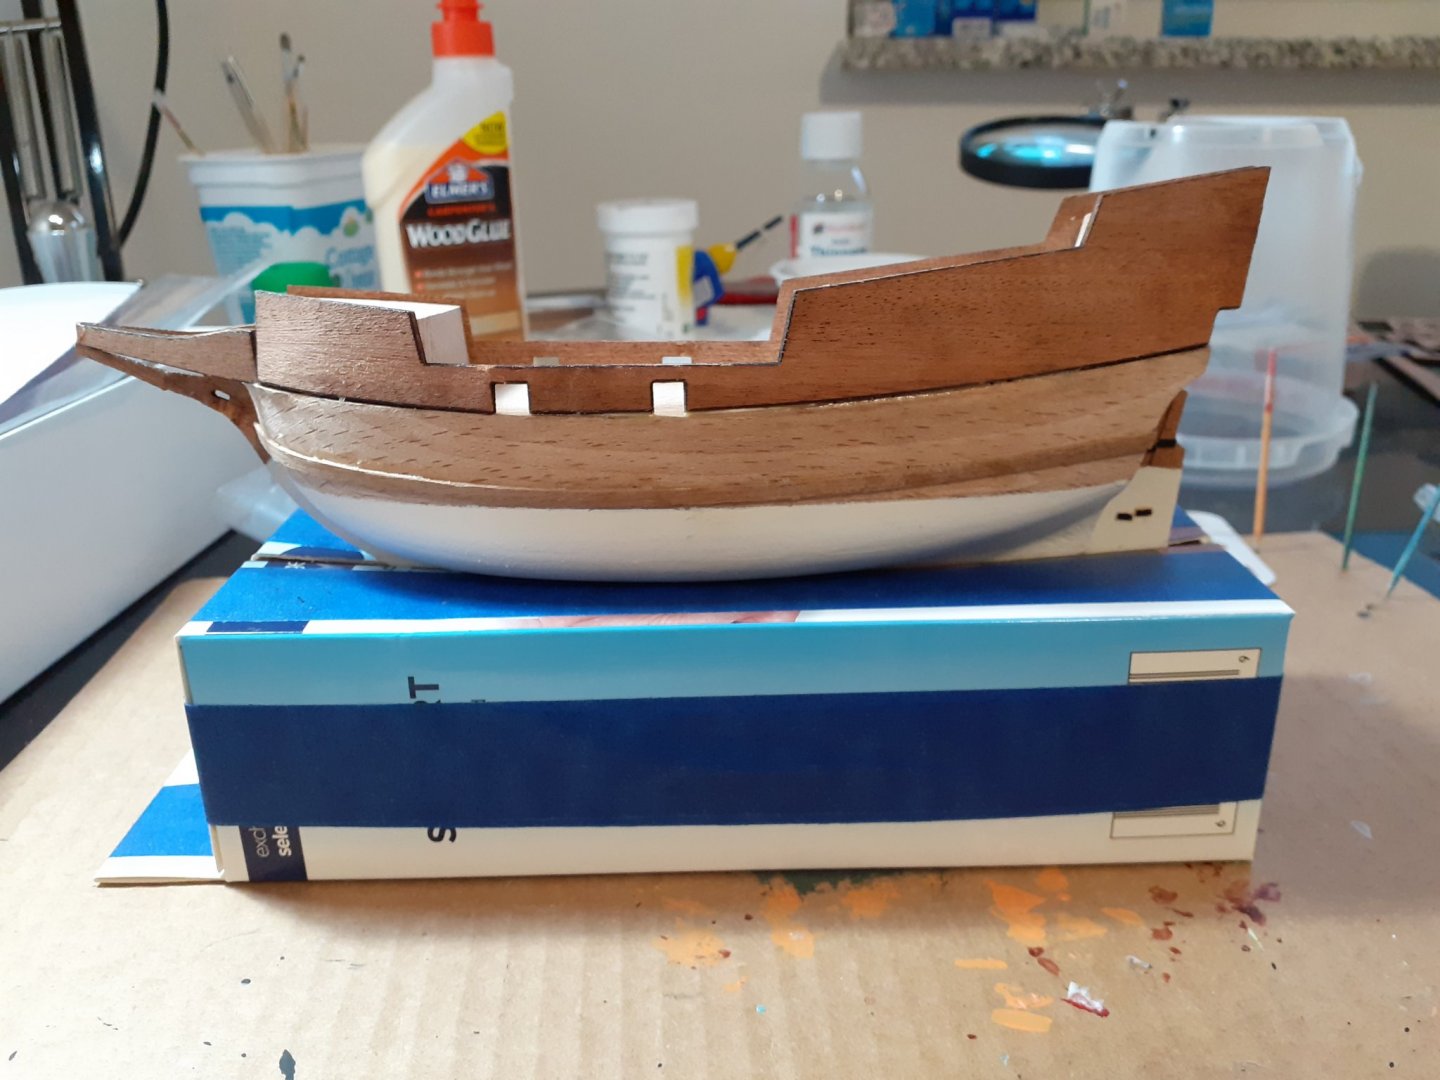
 OK, now that I have some time I'll start a build log. As mentioned in my intro I picked up Corel Line's pre-cut hull Mayflower model. Probably just my speed as don't think I'm yet ready for planking a hull. We'll see how this one goes before I think about what may be next. So the pics attached today cover a week of activity - Last Saturday (8/1) to yesterday (Friday, 8/7). I am trying to work on the kit a couple of hours after work each day; we'll see how that goes. 1st pic shows the kit contents. 2nd & 3rd are with the upper sides, keel and bowsprit on - before the accident... 4th & 5th - What can I say? Definitely a case of butterfingers. I was able to find the 2 pieces that broke off so it was onto mending mode. 6th & 7th - While mending the bowsprit I added the rudder. 8th & 9th - Painted the bottom of the ship and added the rudder hinges. 10, 11 & 12 - Started adding the decorative planks on the sides. (The 1" diameter hair curler paid for itself.) 13 - 17 - Painted rudder hinges, added thin side decorative planks, added paper decorations (replicates paint on upper sides and forepeak), added ladders & decoration just forward of upper front gunports. Now that I know how to do a build log, I'll post more frequently. Lots still to do - still working on the 1st page of the plans but definitely not in a rush to get this done. Enjoying the experience.


-
 Click on the tags in the title above (shown in black) for an instant list of all the build logs for that kit subject.
 -
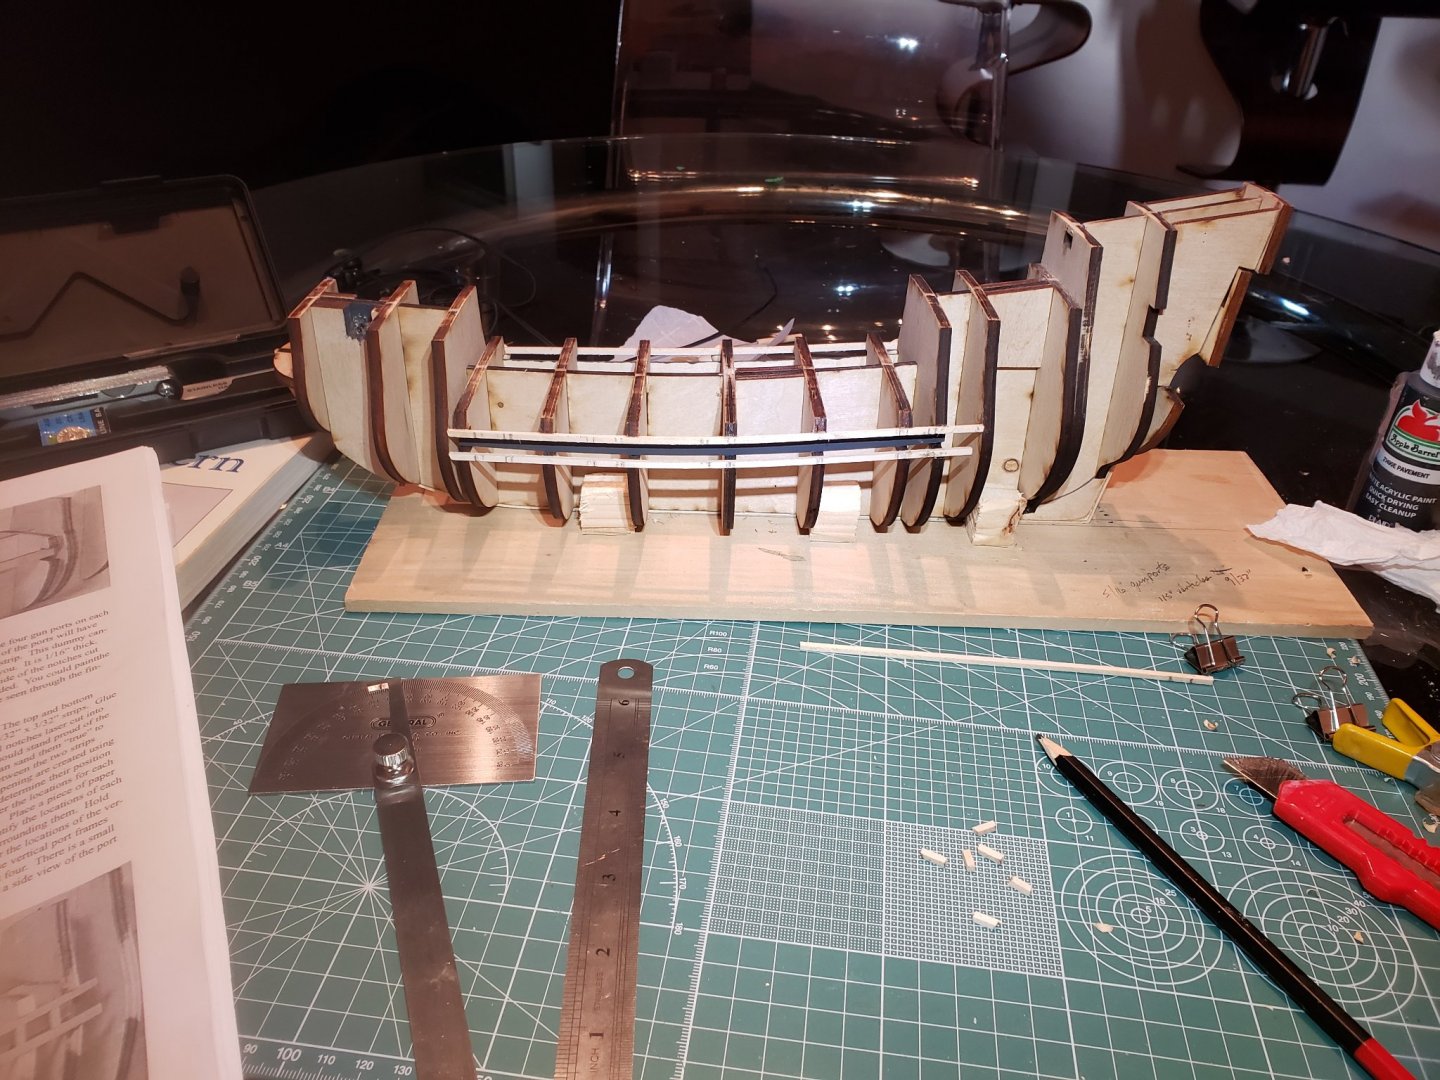
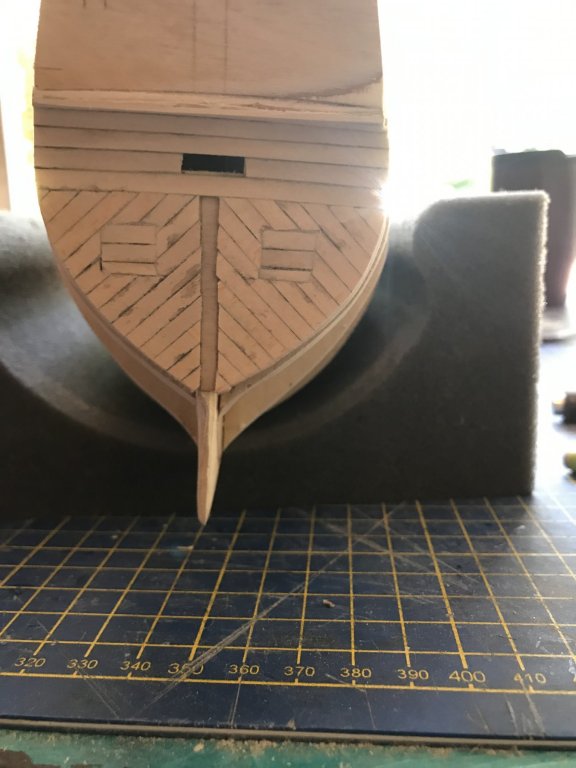
 Last month I started the Model Shipways Mayflower. I noticed there are several build logs for the Mayflower but none are finished. I hope this is not a bad omen. I will use the first couple of posts to catch the log up with my current progress so apologies for the long posts. Initial thoughts upon opening the kit were the laser cutting and wood stock were typical of Model Shipways ie generally good quality. The instruction booklet looks well done with many pics to exhibit the build narrative. Looks to be well written as well. I am not great at picture taking so apologies in advance. First step was to create a small rabbet by adding strips along the false keel and a little shaving at the lower stern of the false keel. The bulkheads all needed a little tweaking to fit into the false keel slots but once done the fit was well aligned. I then glued them in place with Titebond. There are a few other supports to add to the stern as well as the three stern plates. These all fit and aligned perfectly. I should mention the bulkheads and stern plates all have reference lines pre-etched into them to facilitate alignment and give you a good idea where things should go. This is a great feature for a kit. Next up was to add the strips to support the openings for canon. All fit well and the plans were very clear on all above steps. Lots of fairing to the hull was next. I am never really certain when I have faired enough. I use the batten test but was the planks are actually glued in place there is always some difference in how they lie. A little more sanding is usually needed. Key for me is to go slow on this step. Once that was done the stern plate on the lower stern is planked. I used artist charcoal to simulate chalking. It does tend to get into the basswood a bit but cleans up with a light sand. Before starting to plank the hull the two side templates are temporarily attached to ensure proper alignment. The reference lines on the bulkheads are also helpful with this alignment.
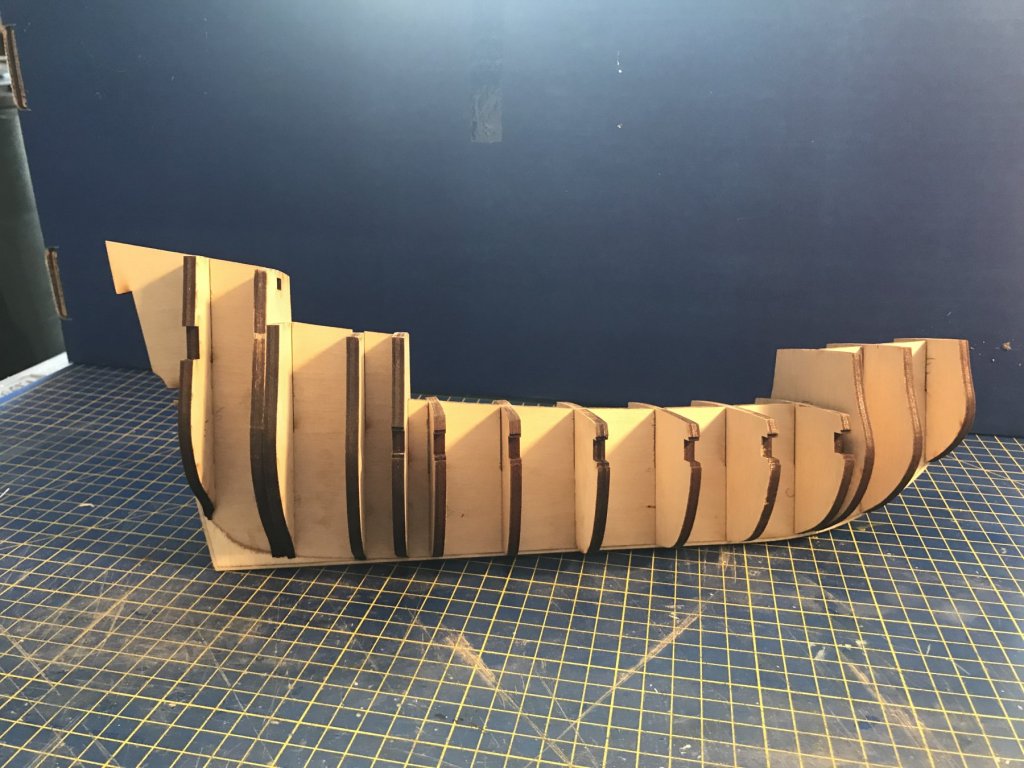


-
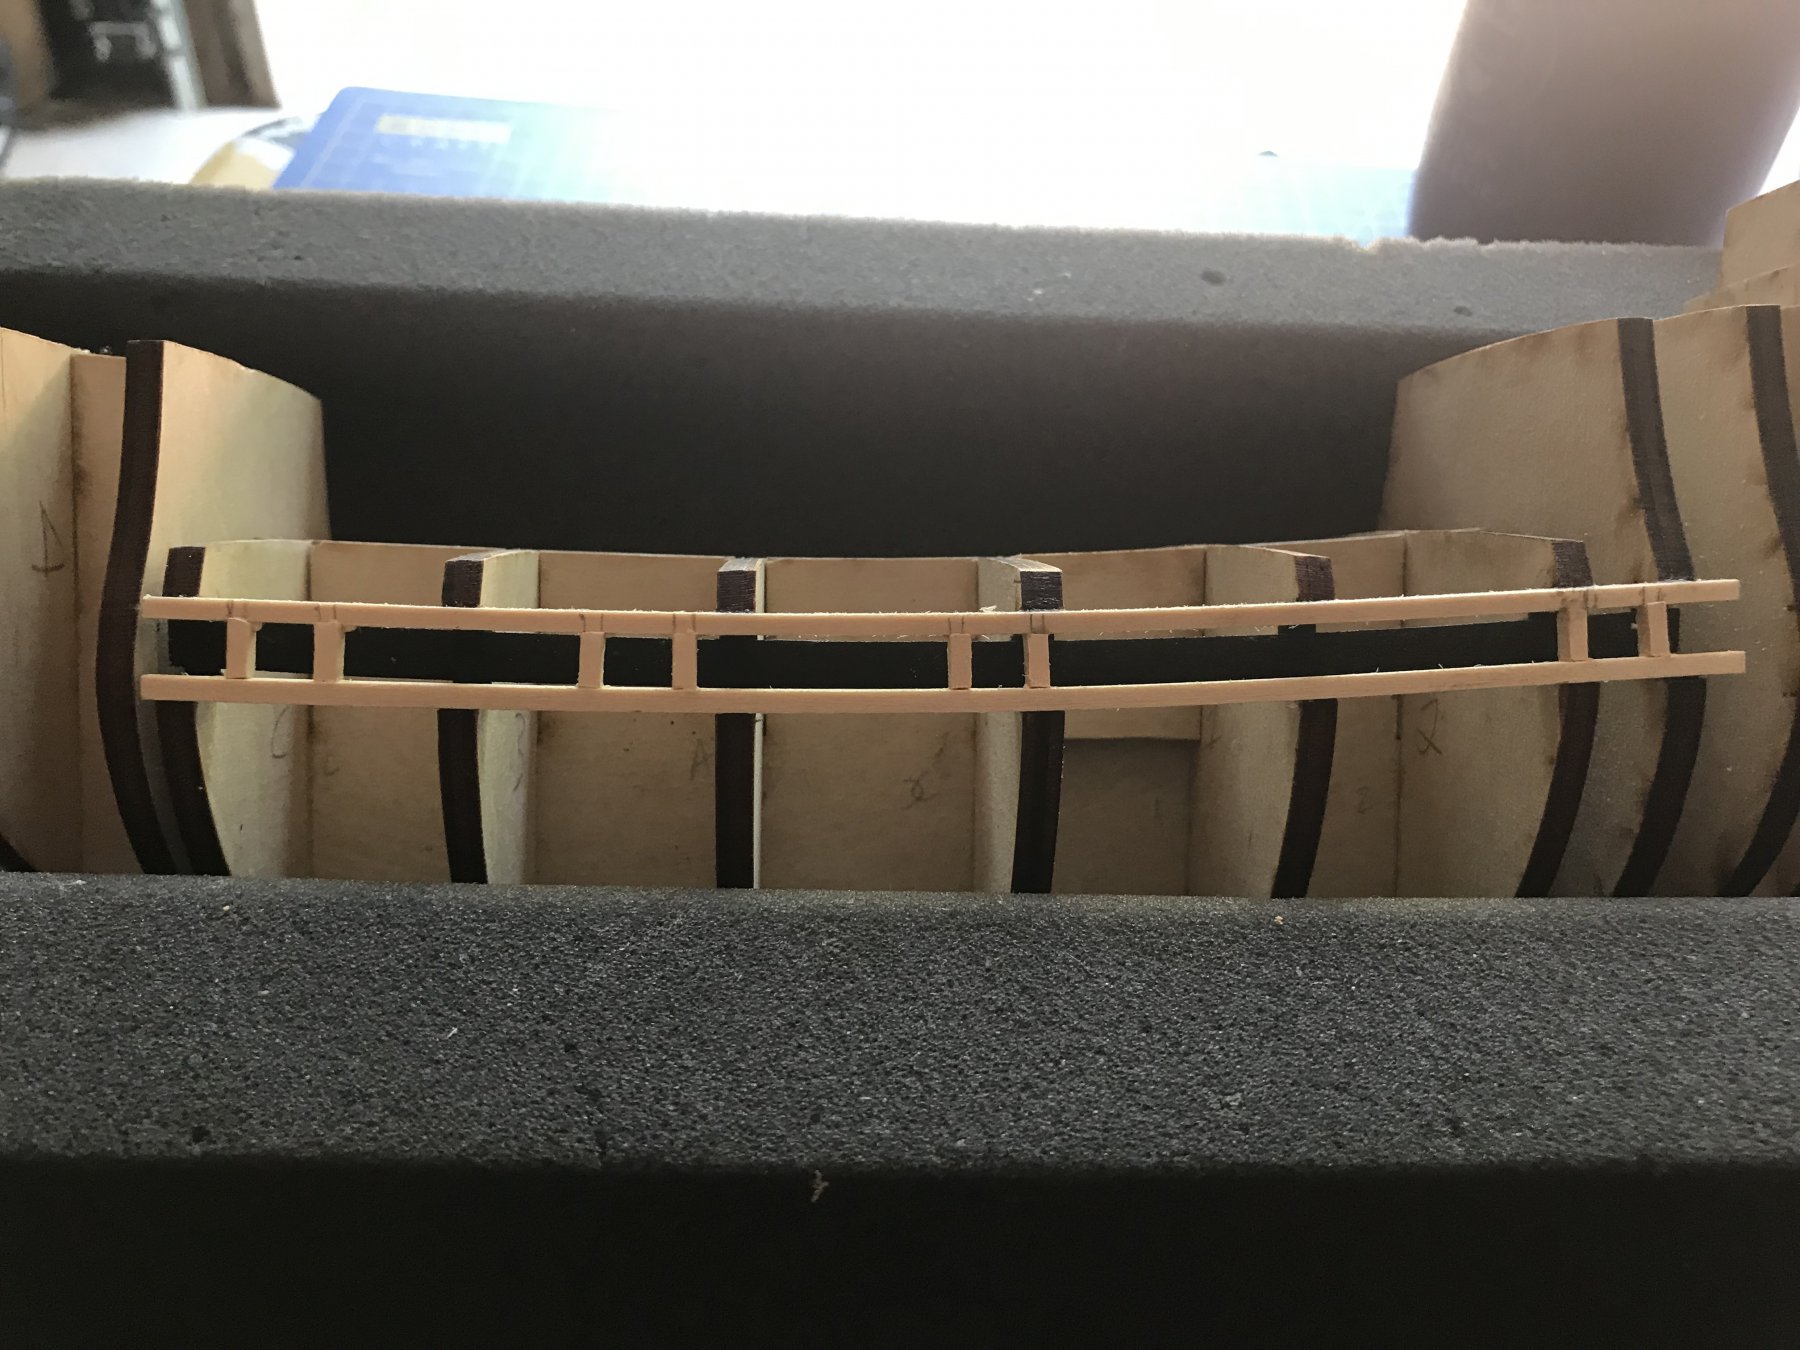
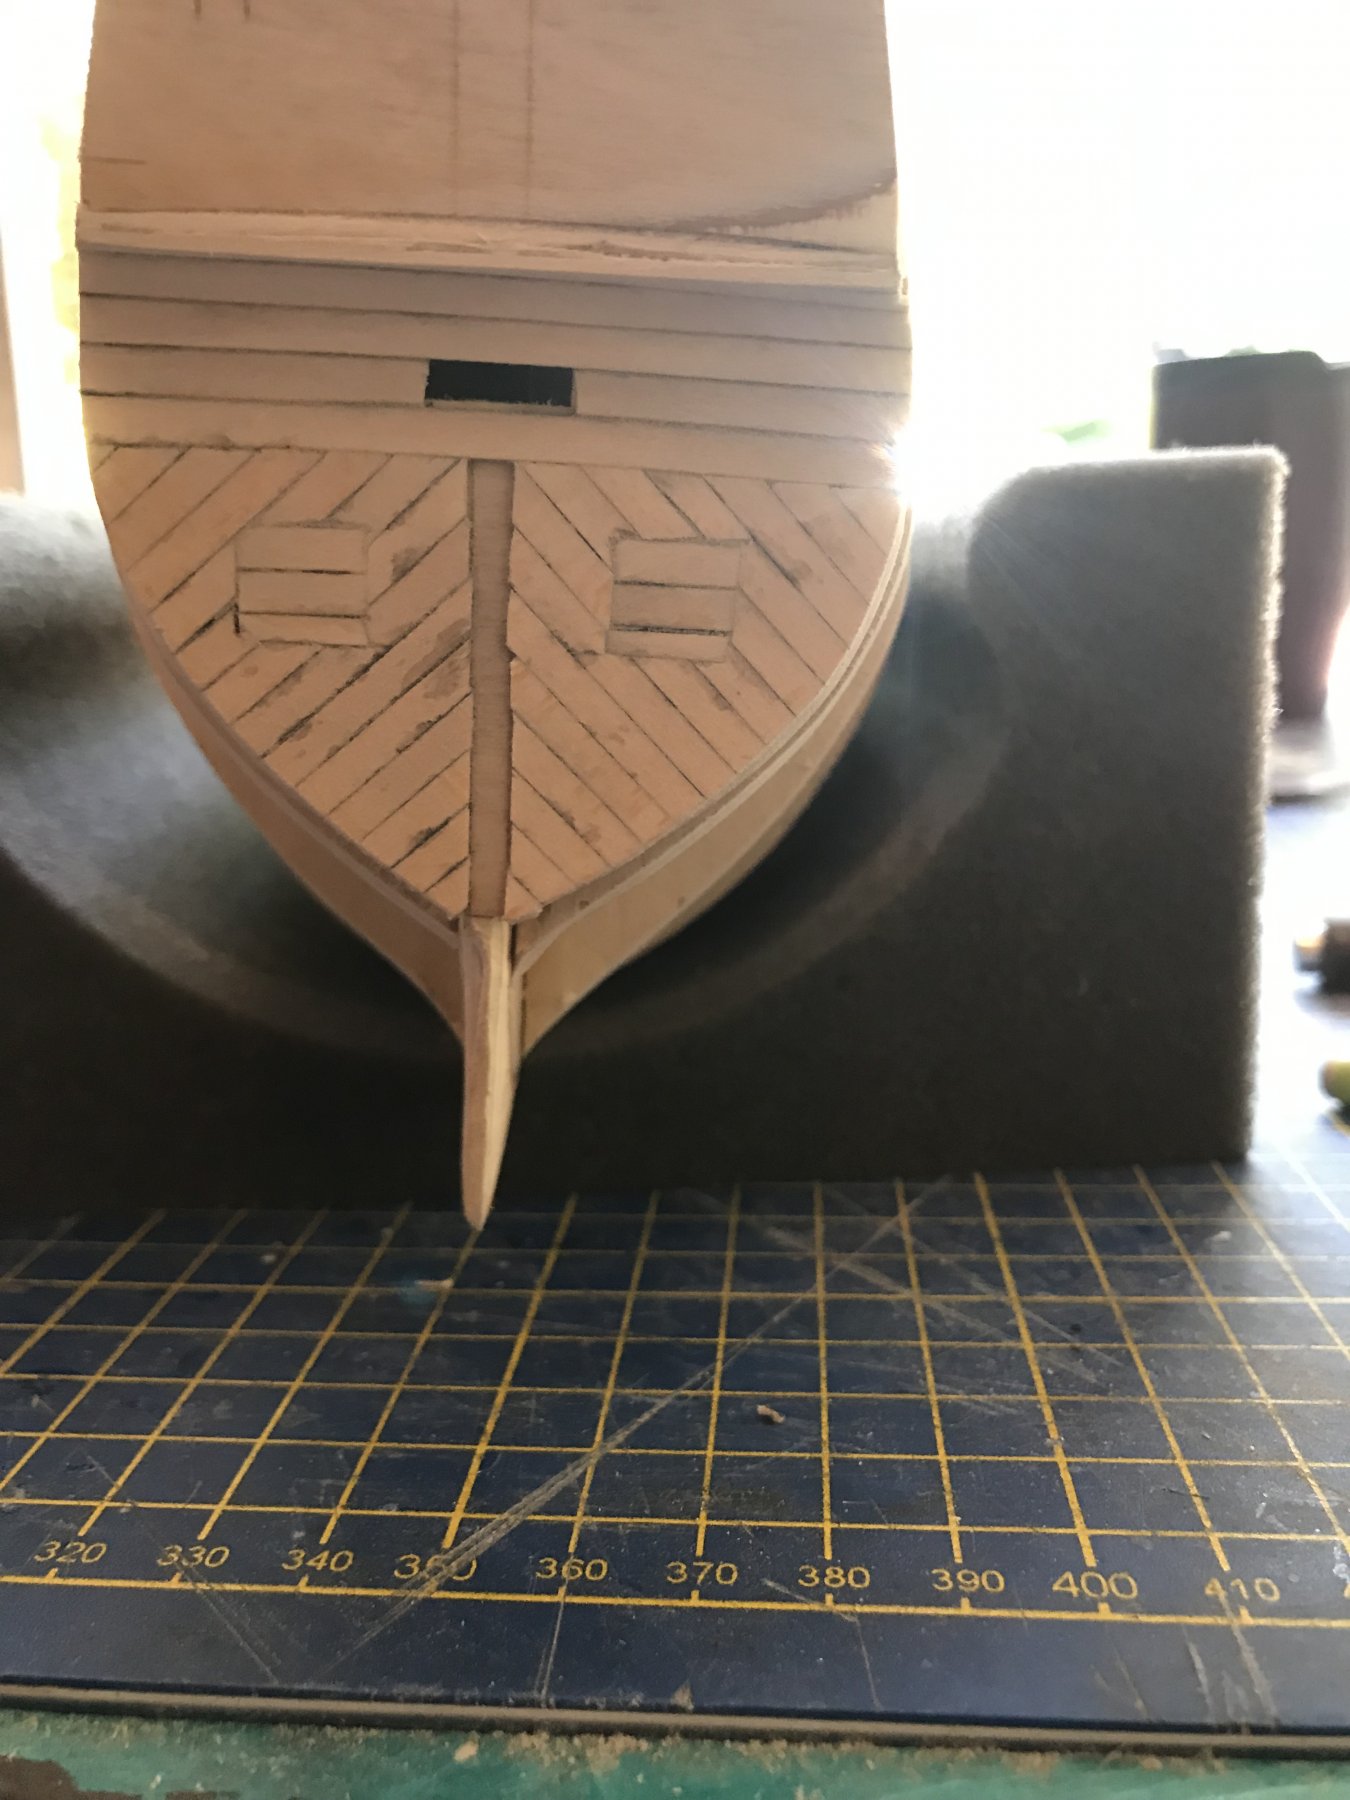
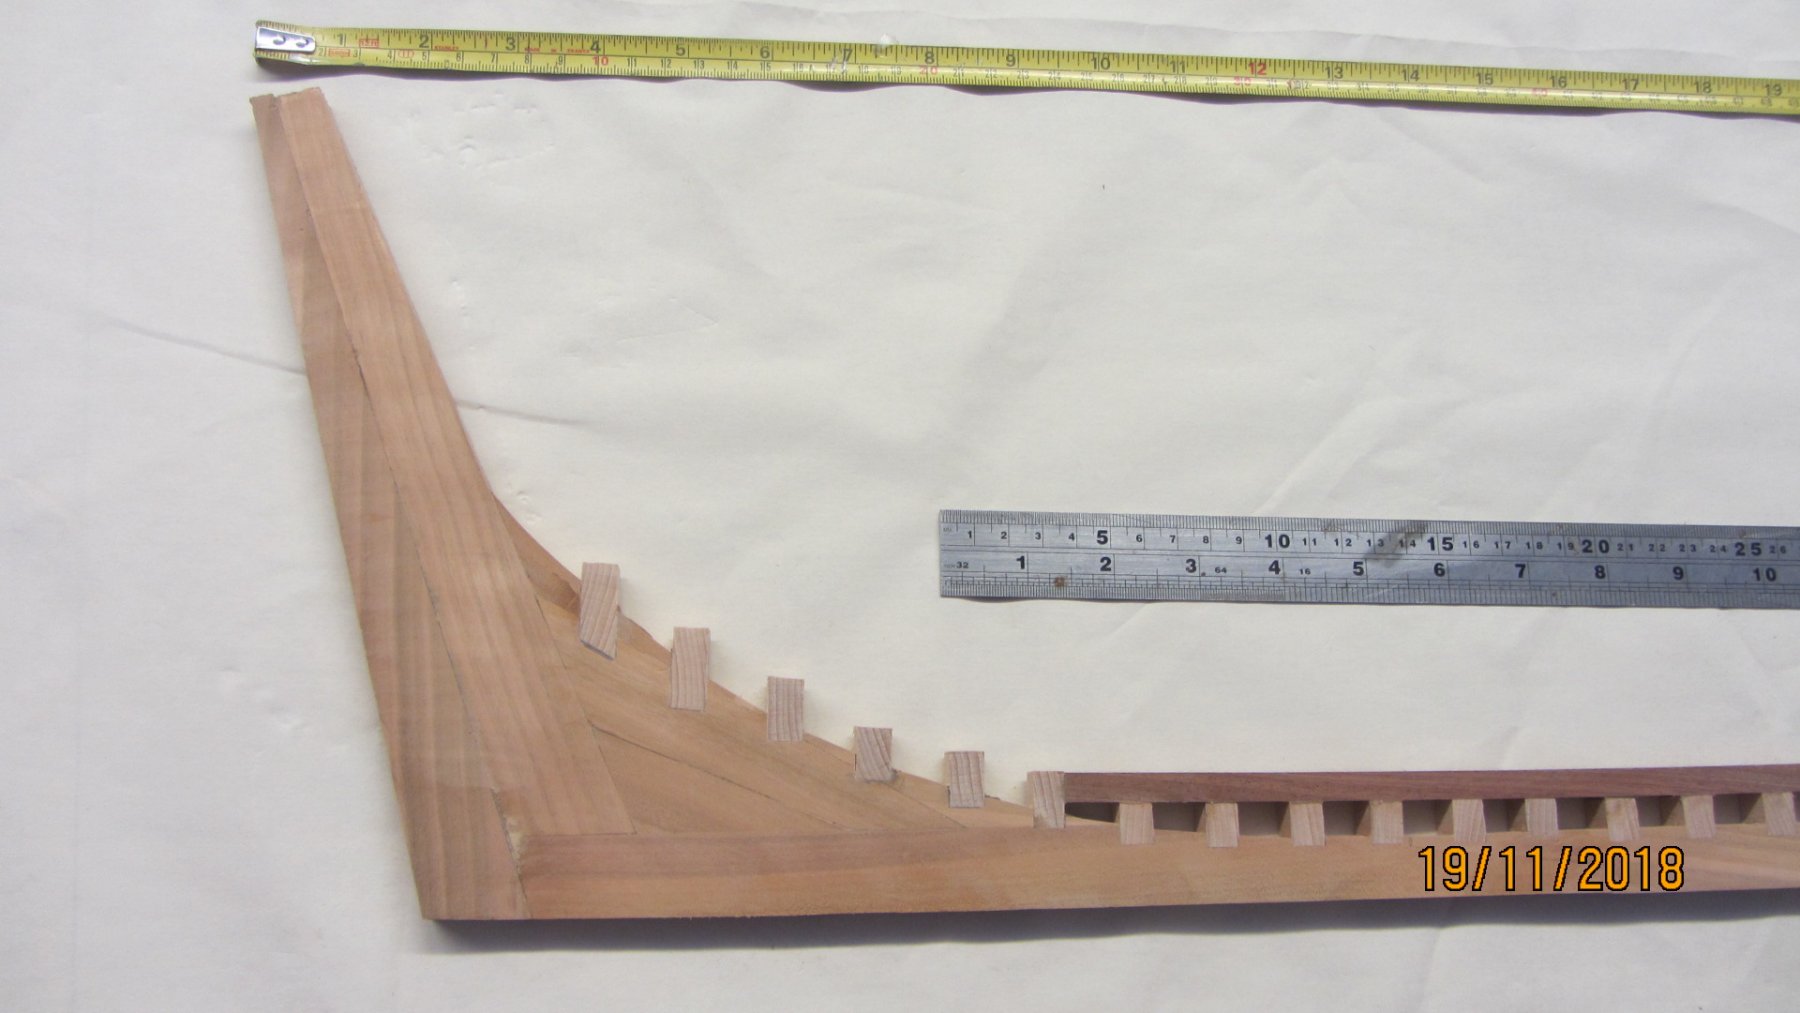
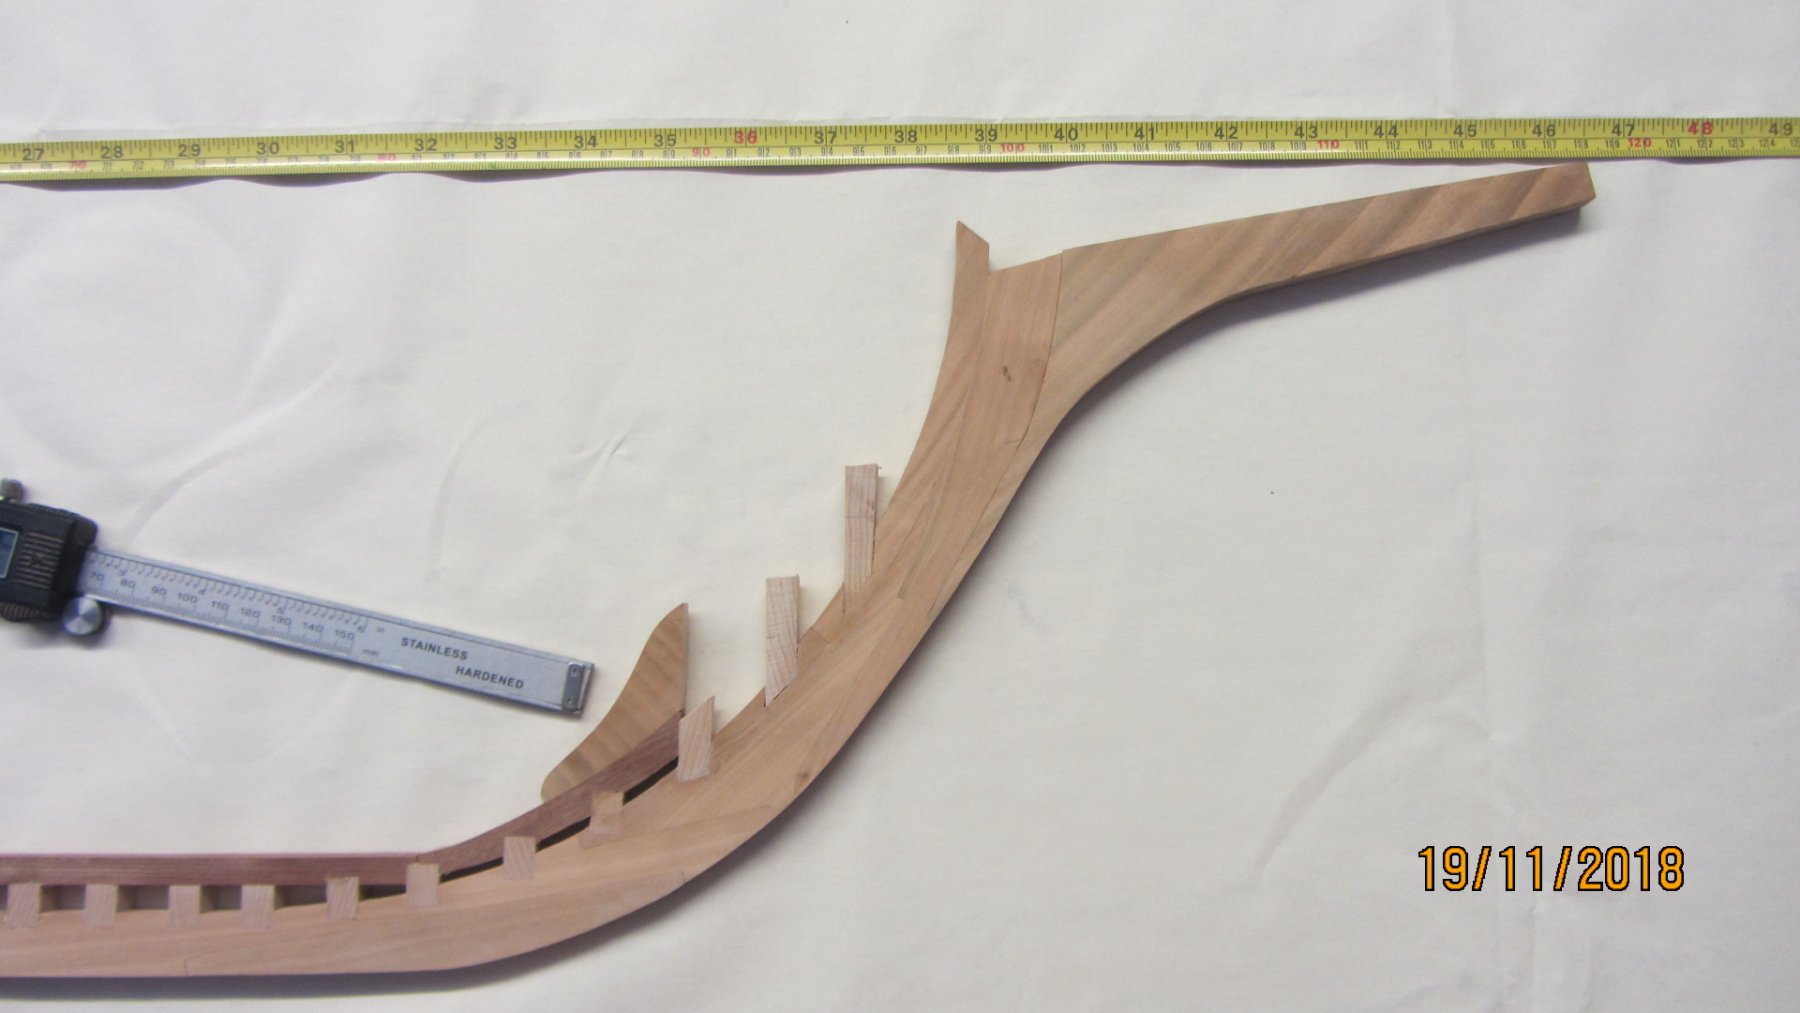
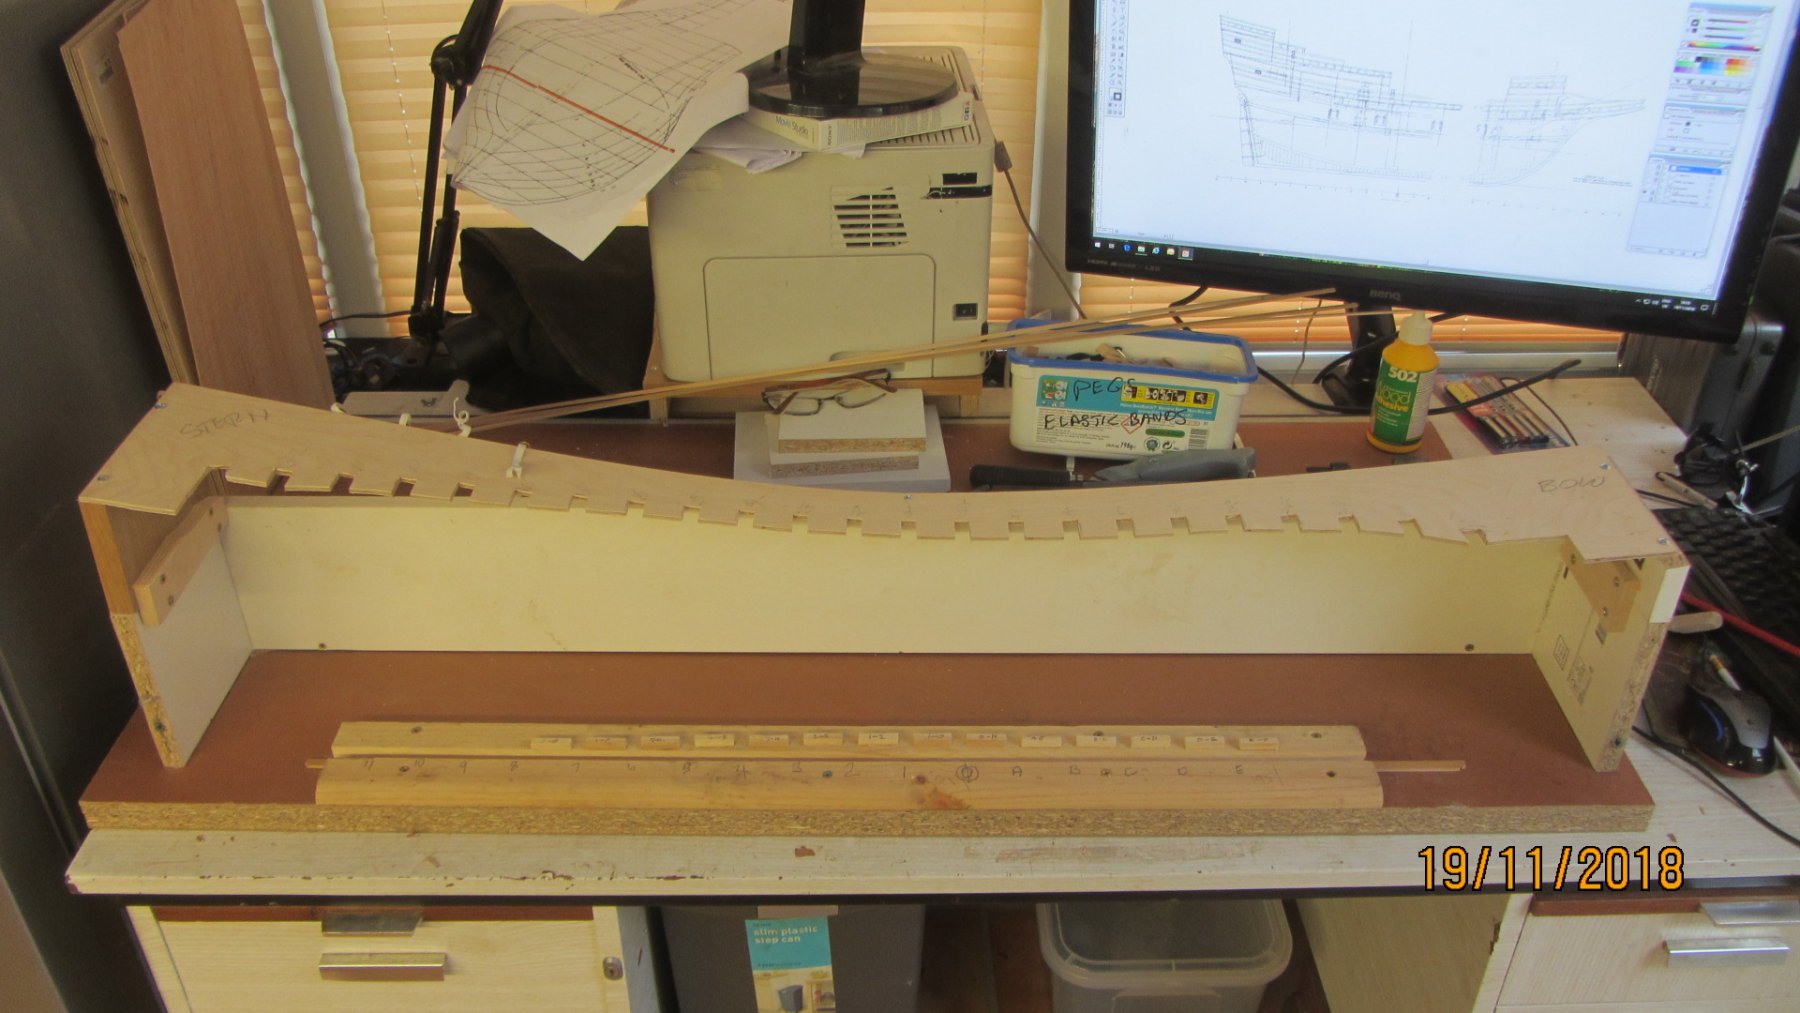
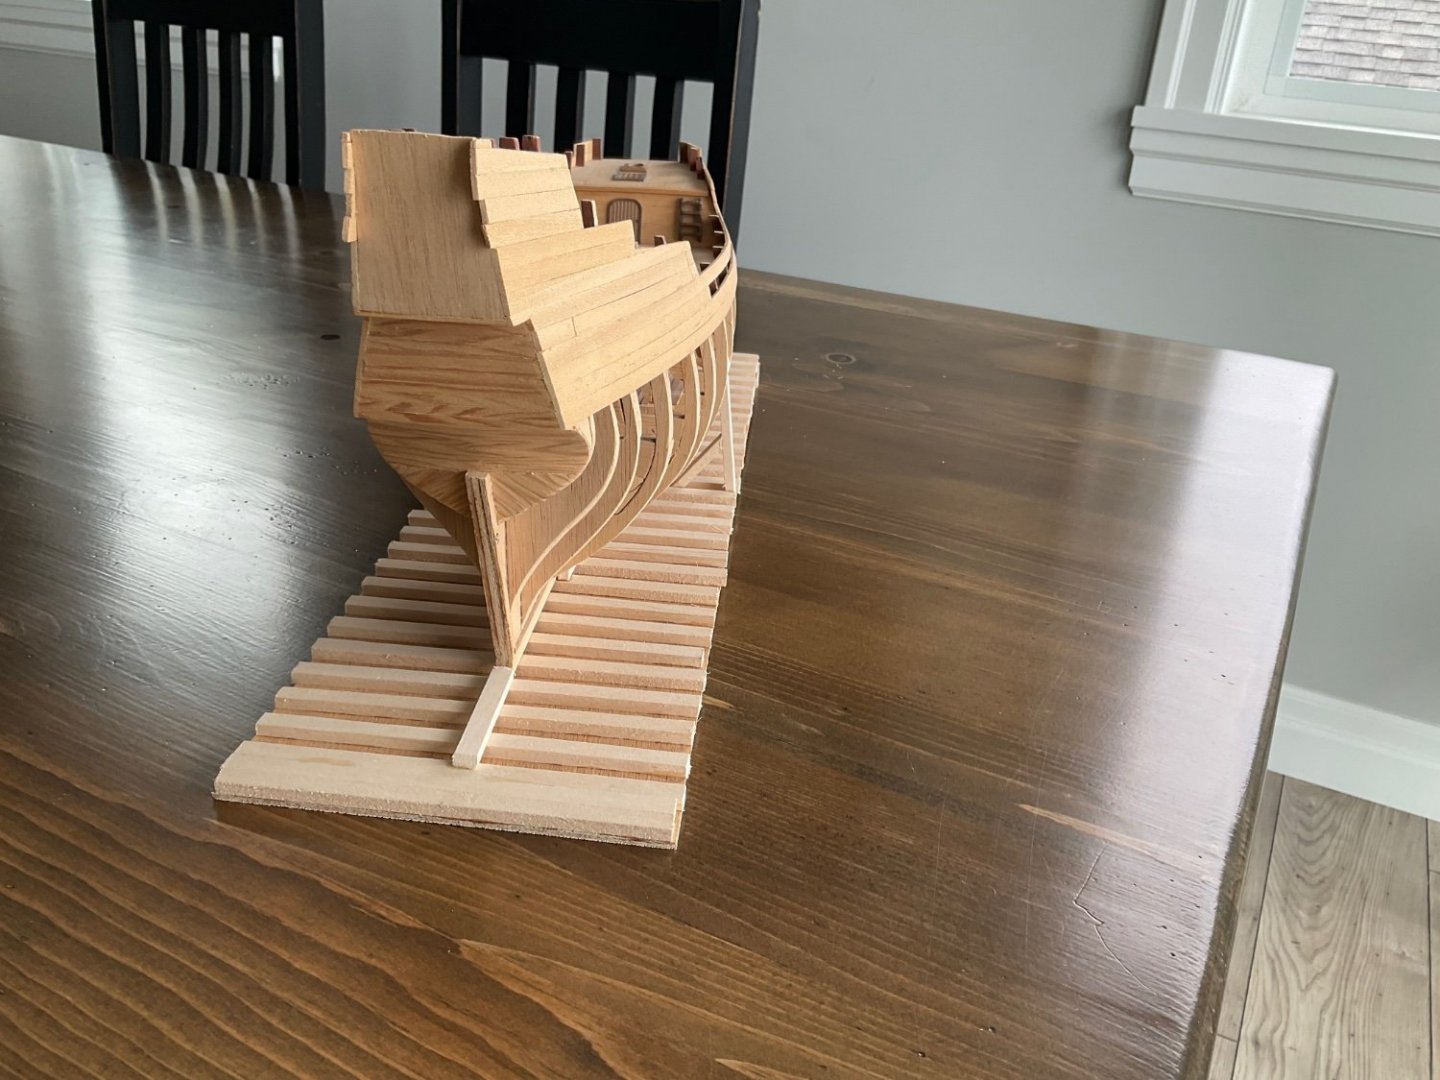
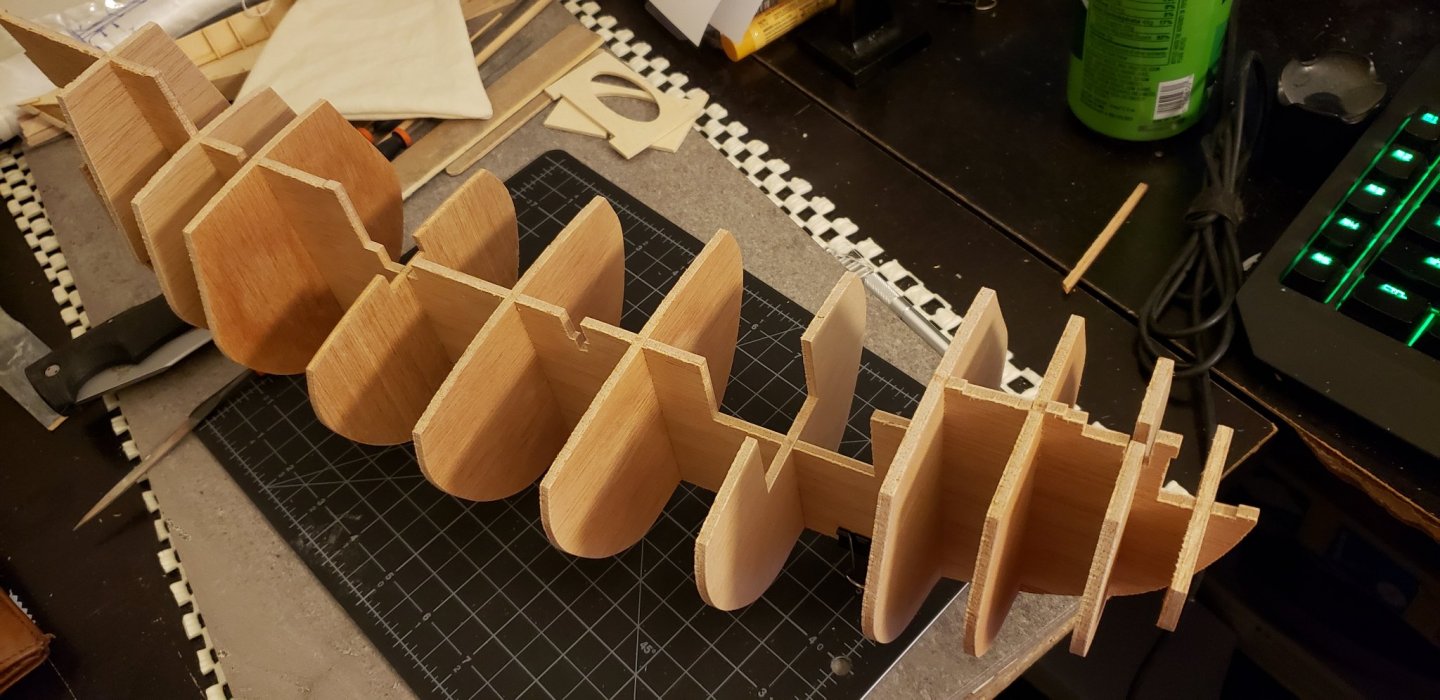
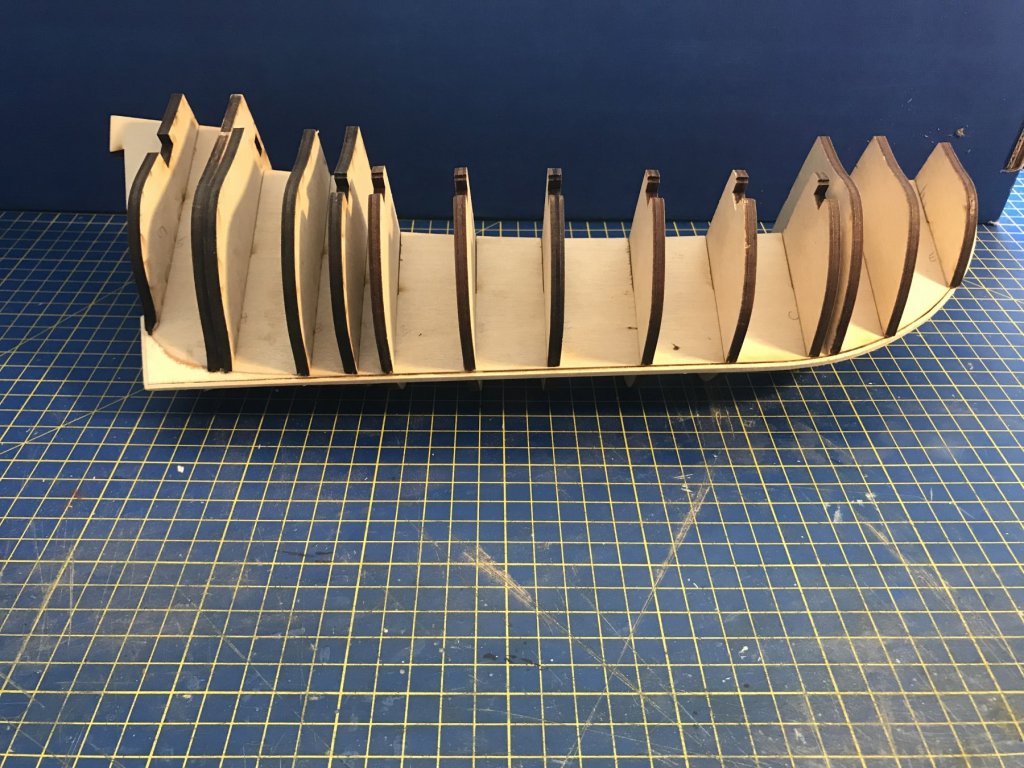
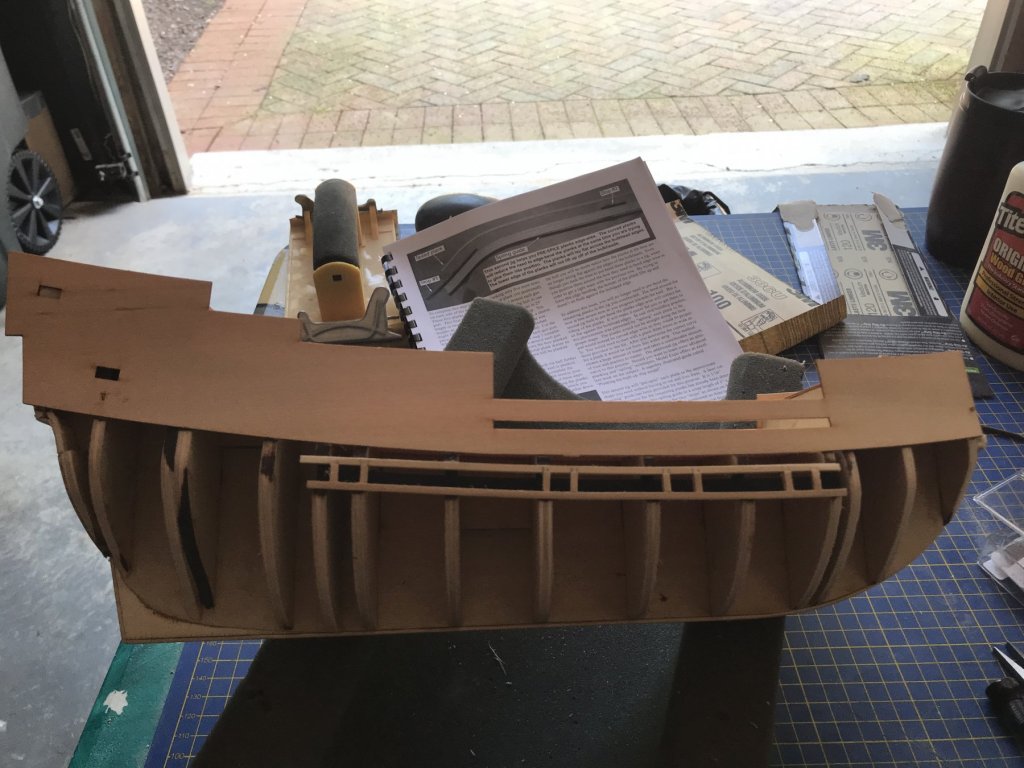
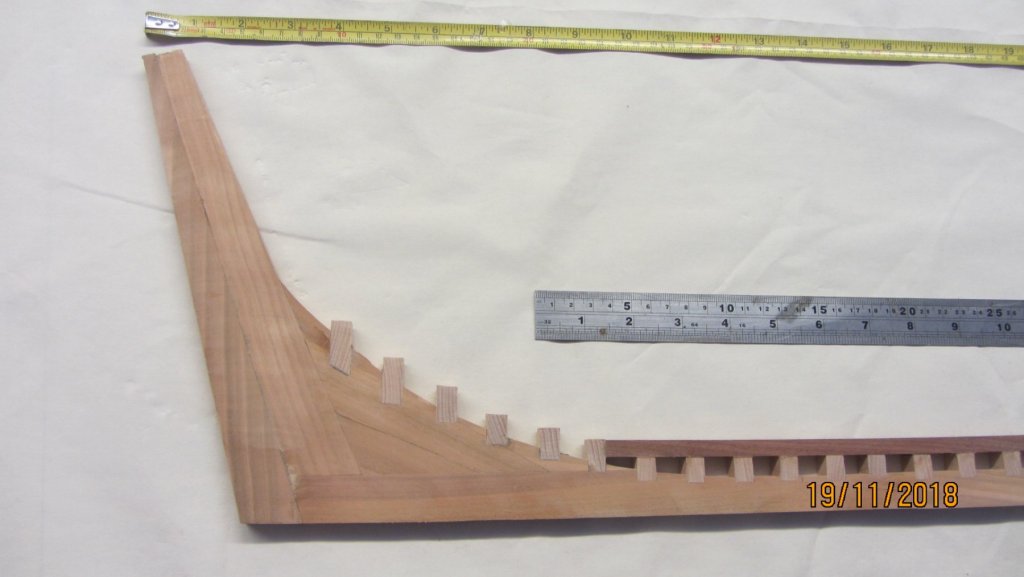
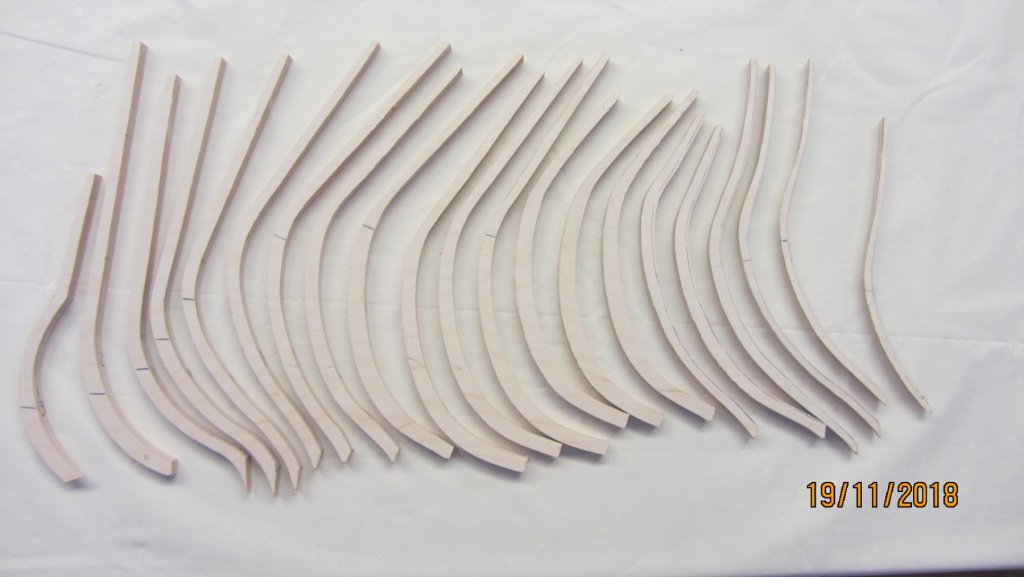
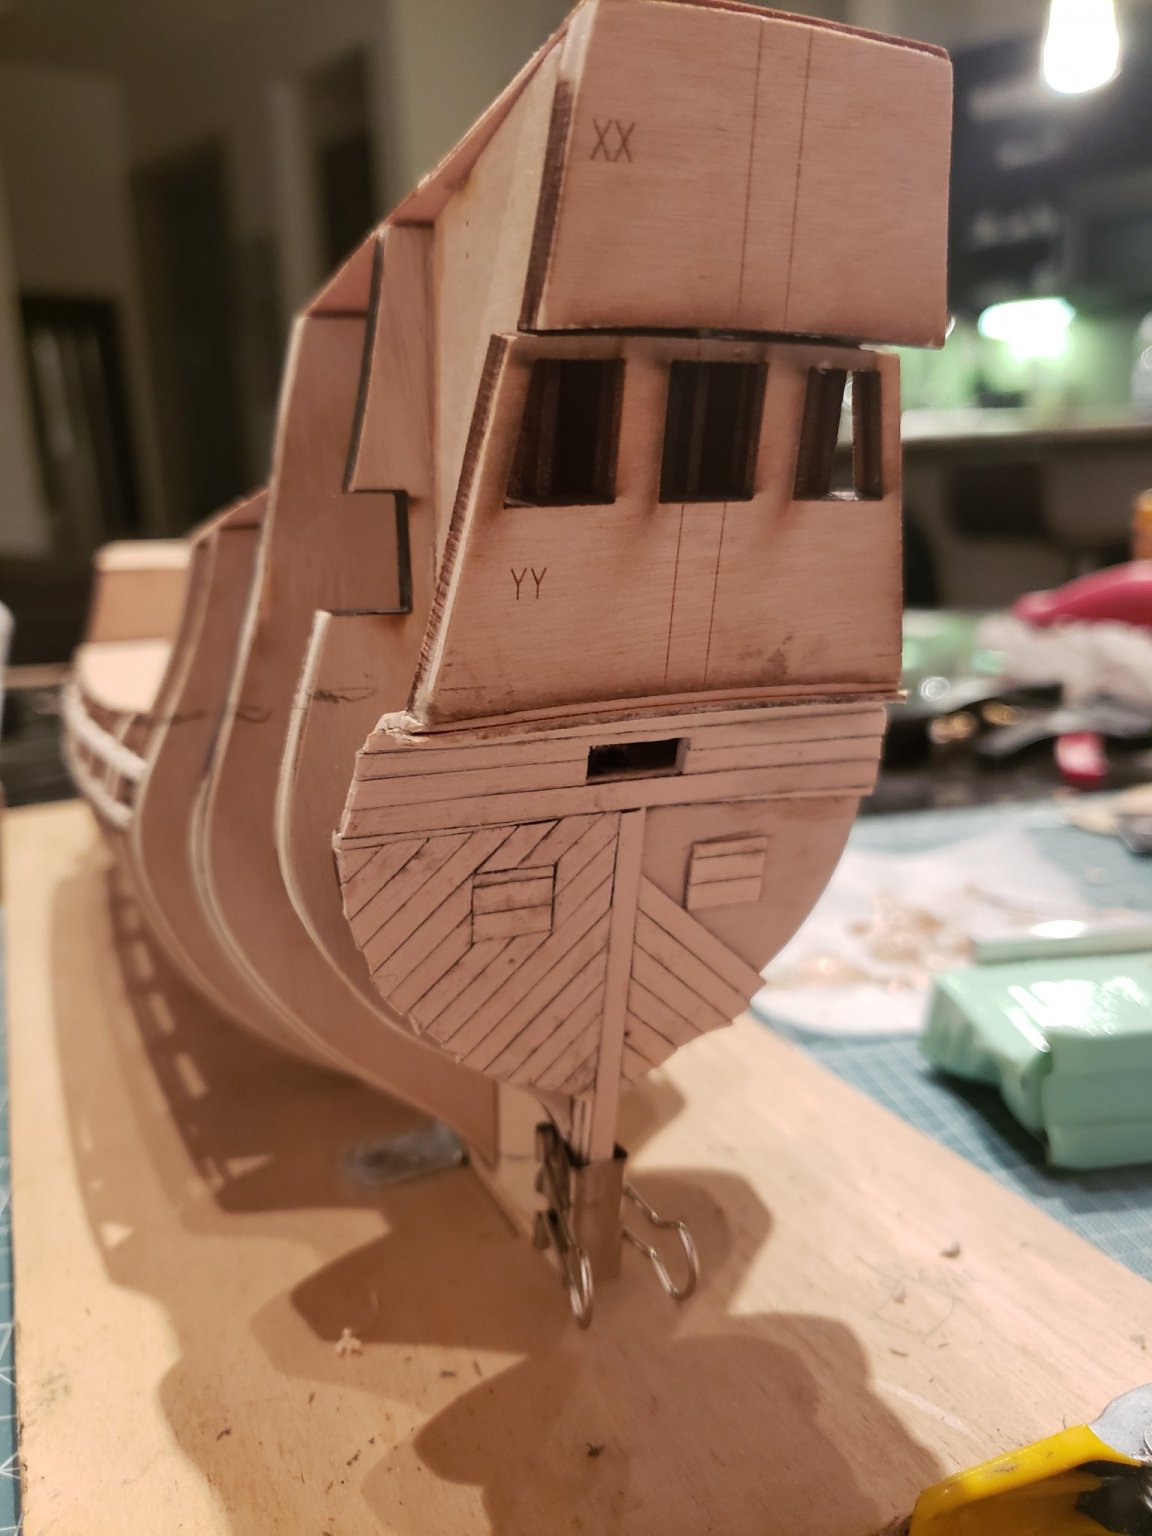
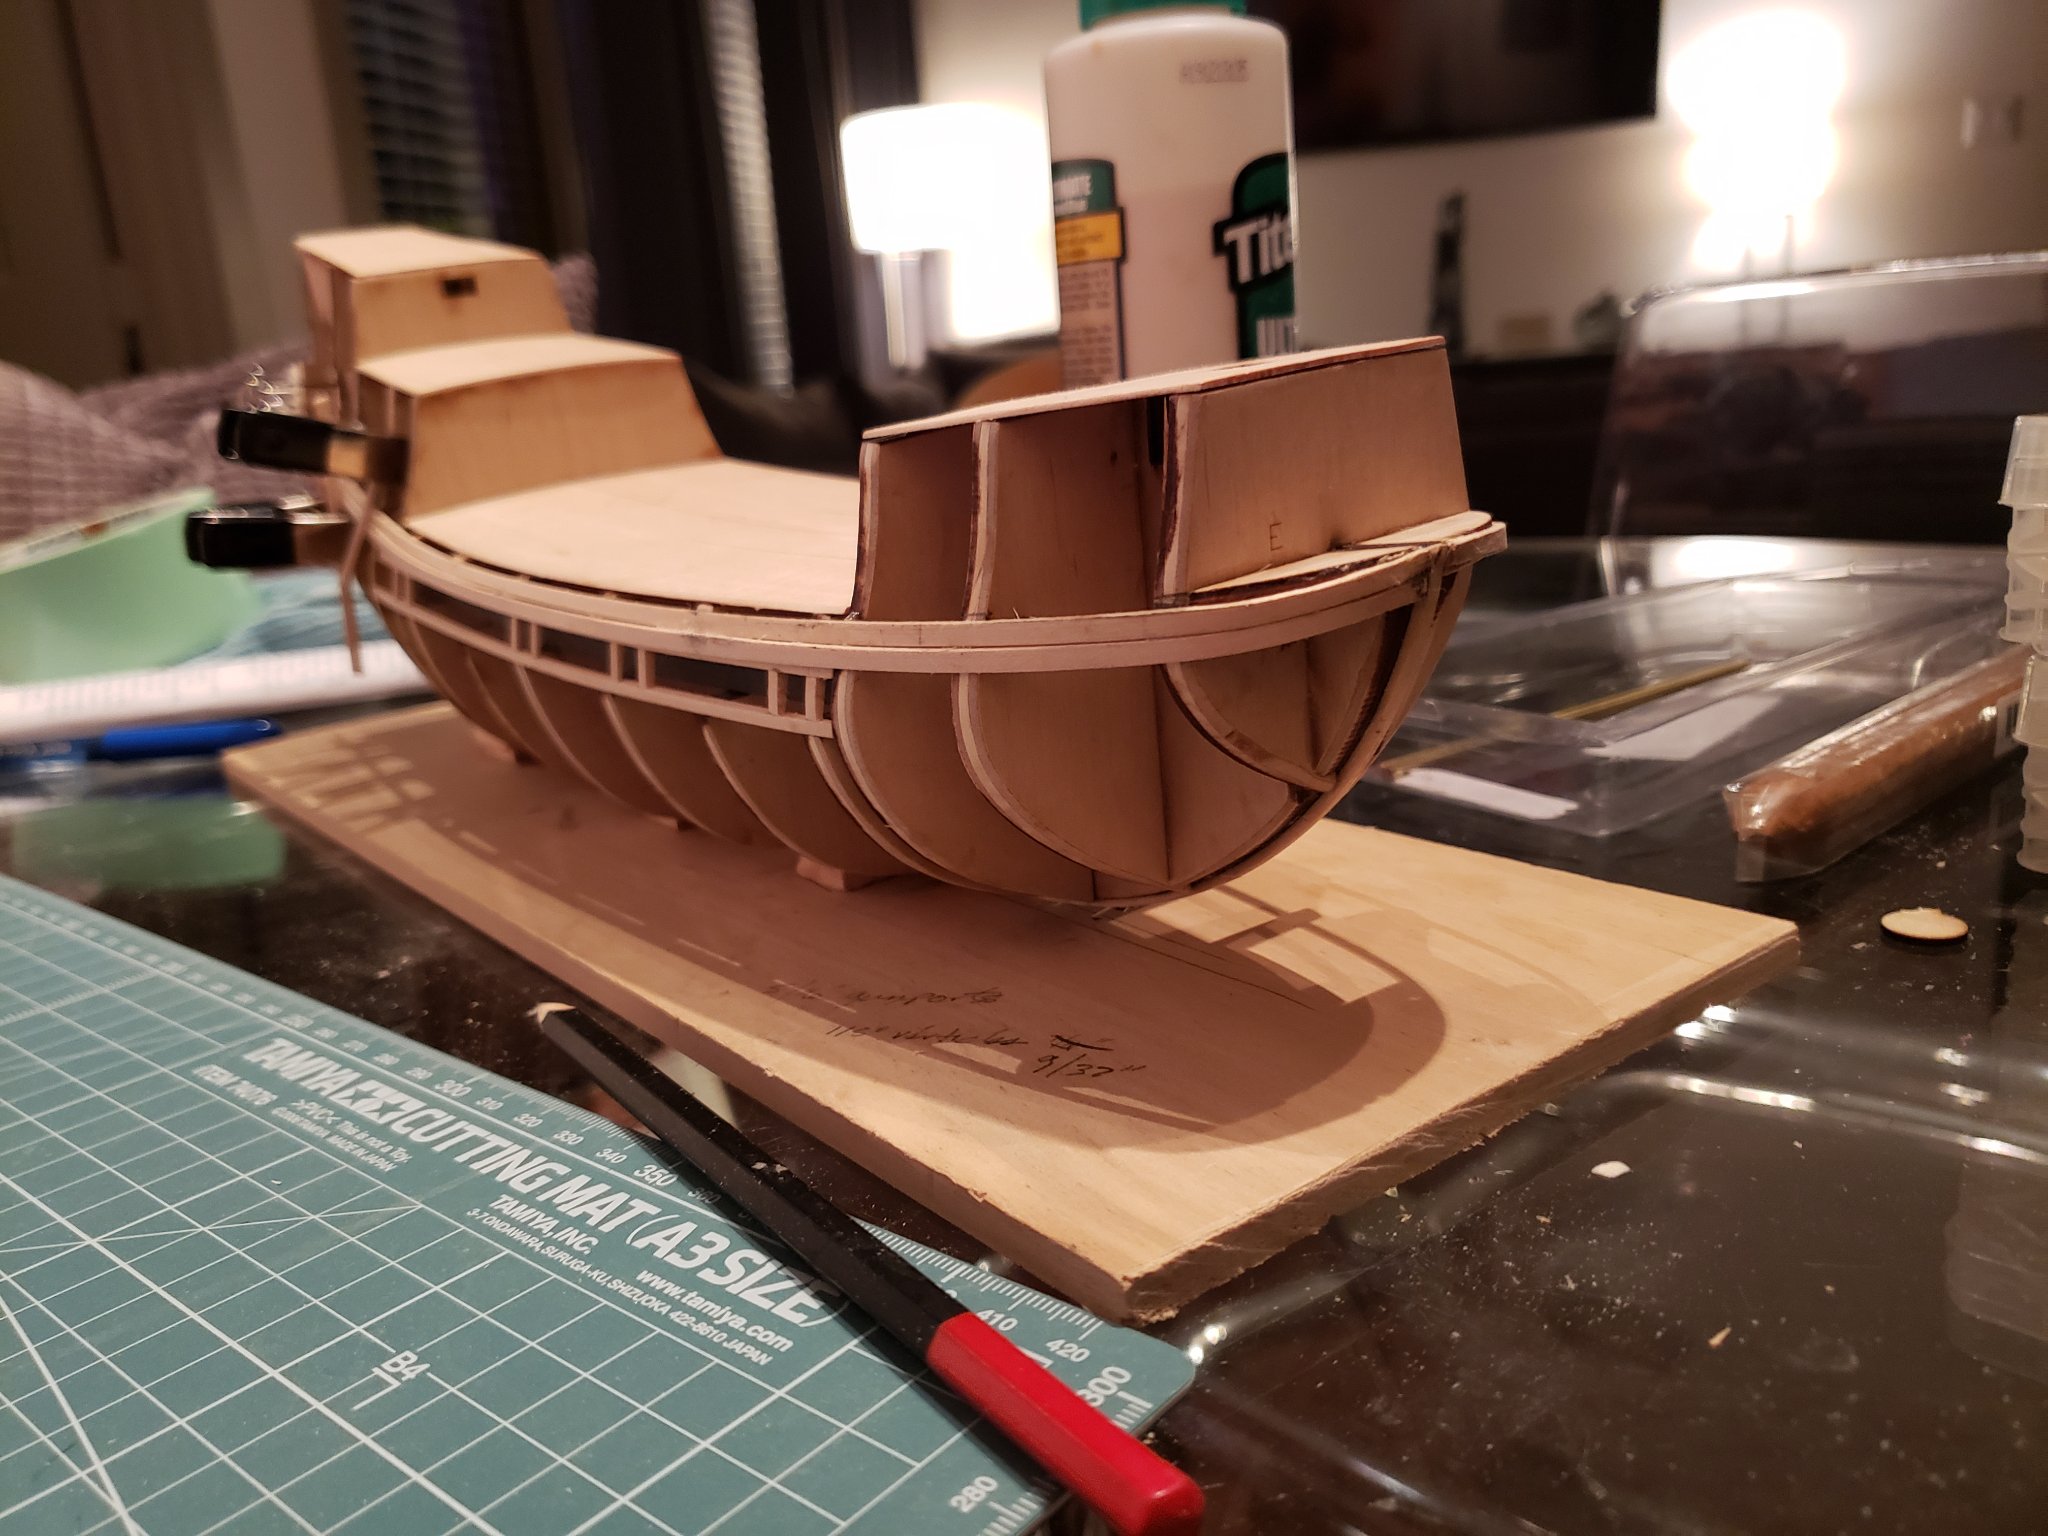
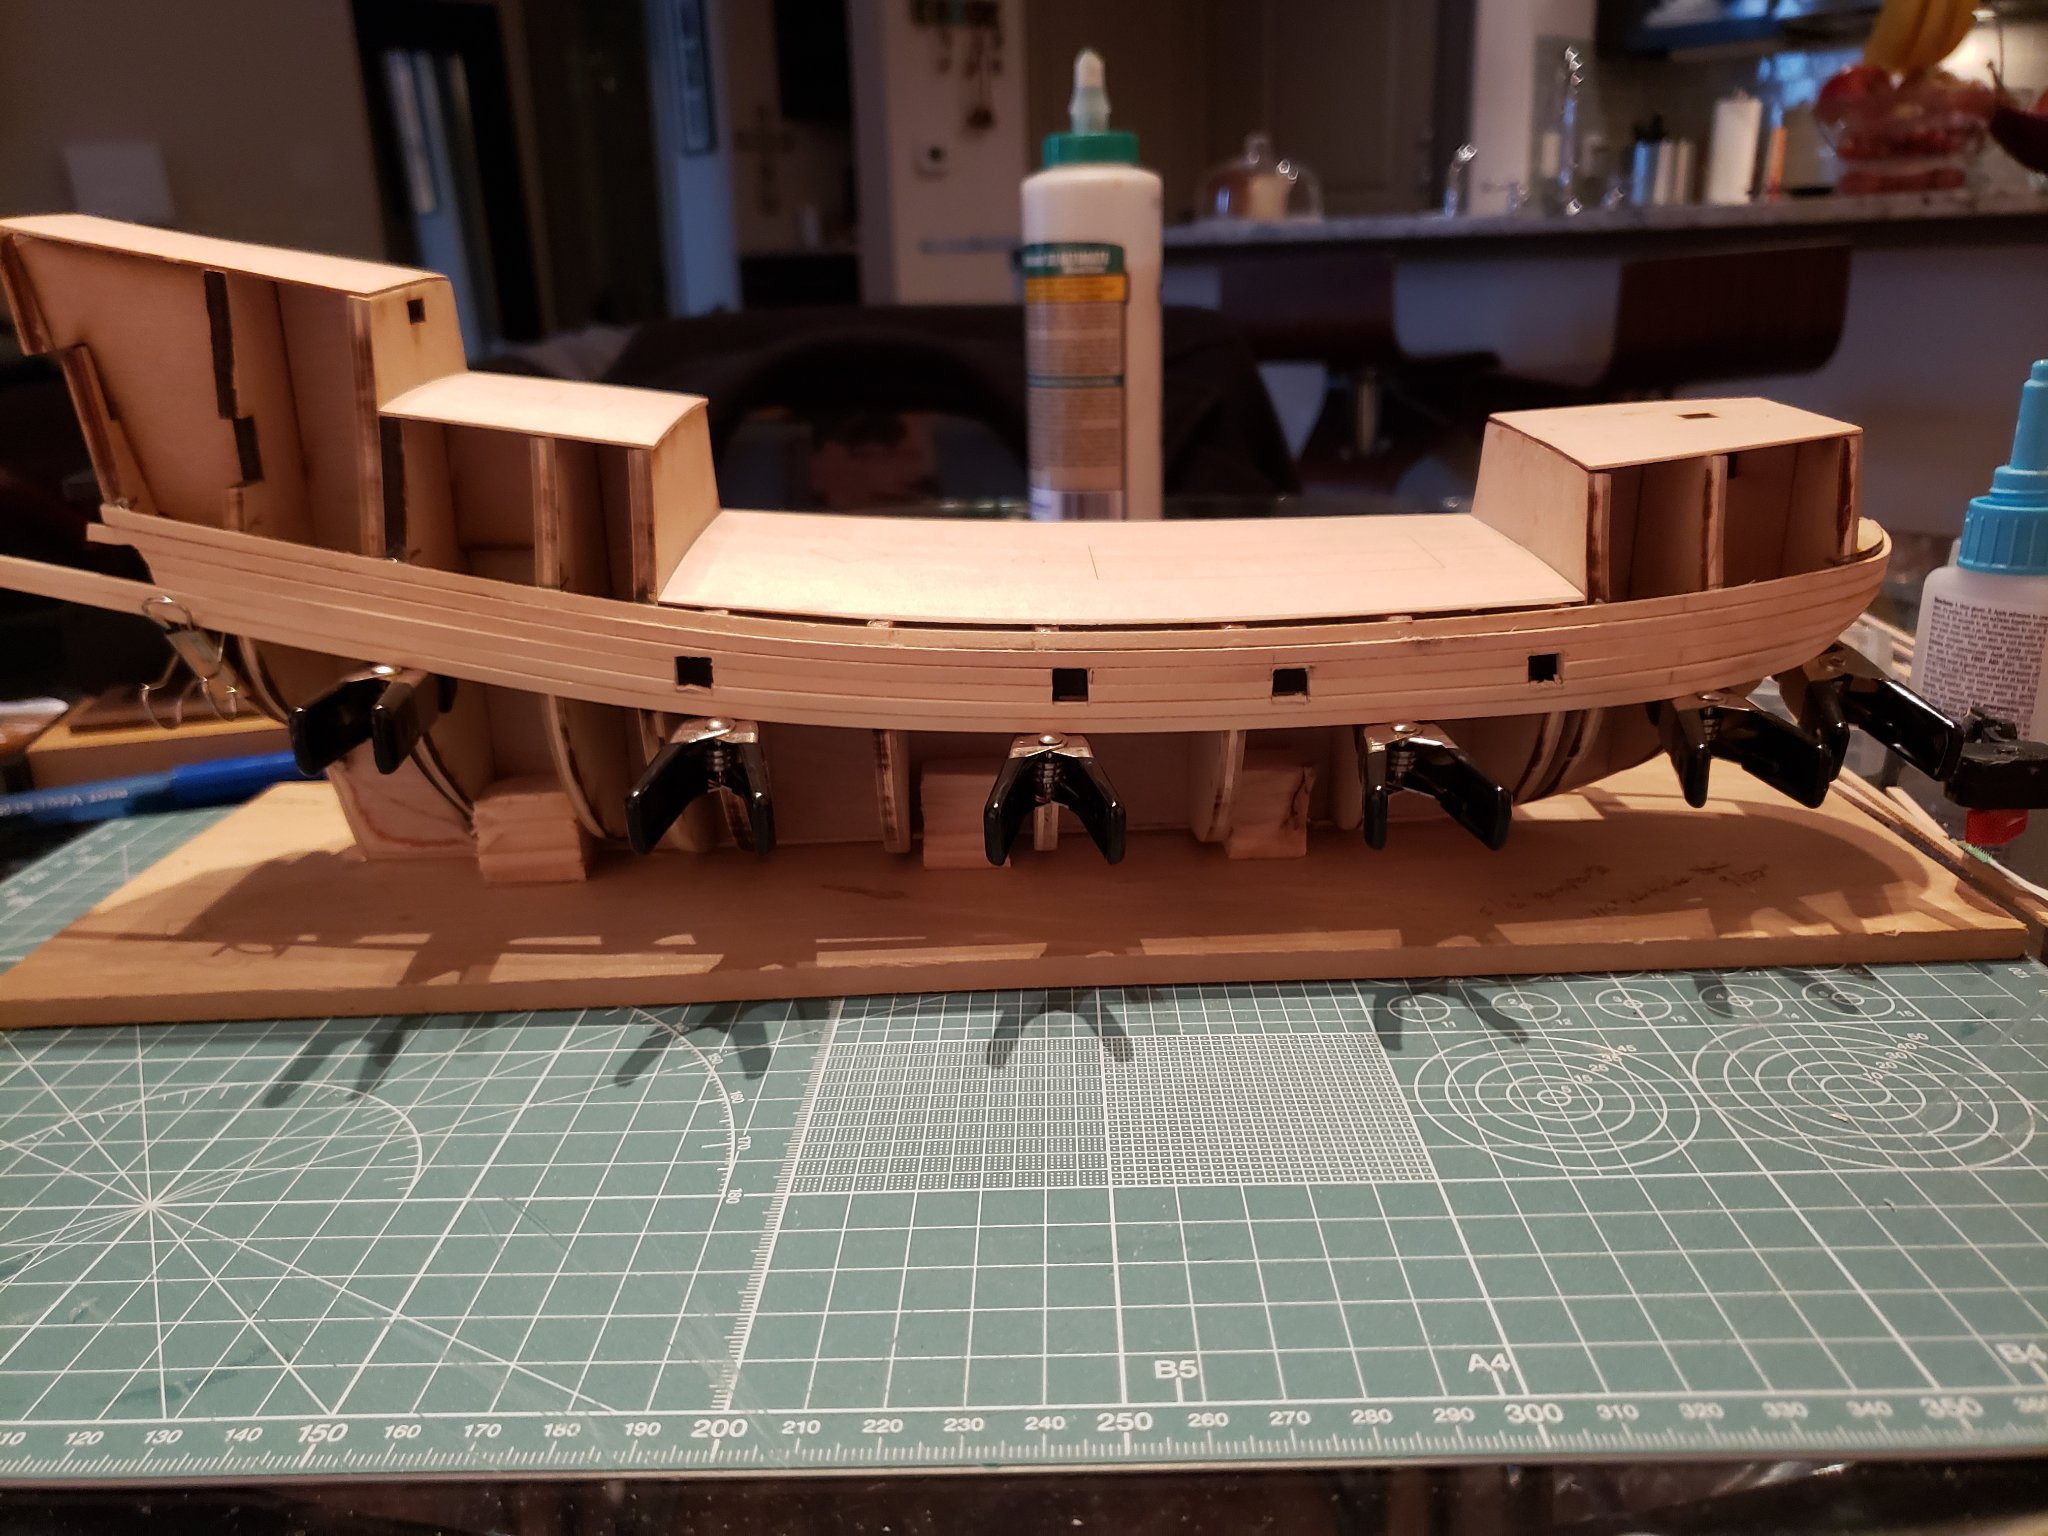
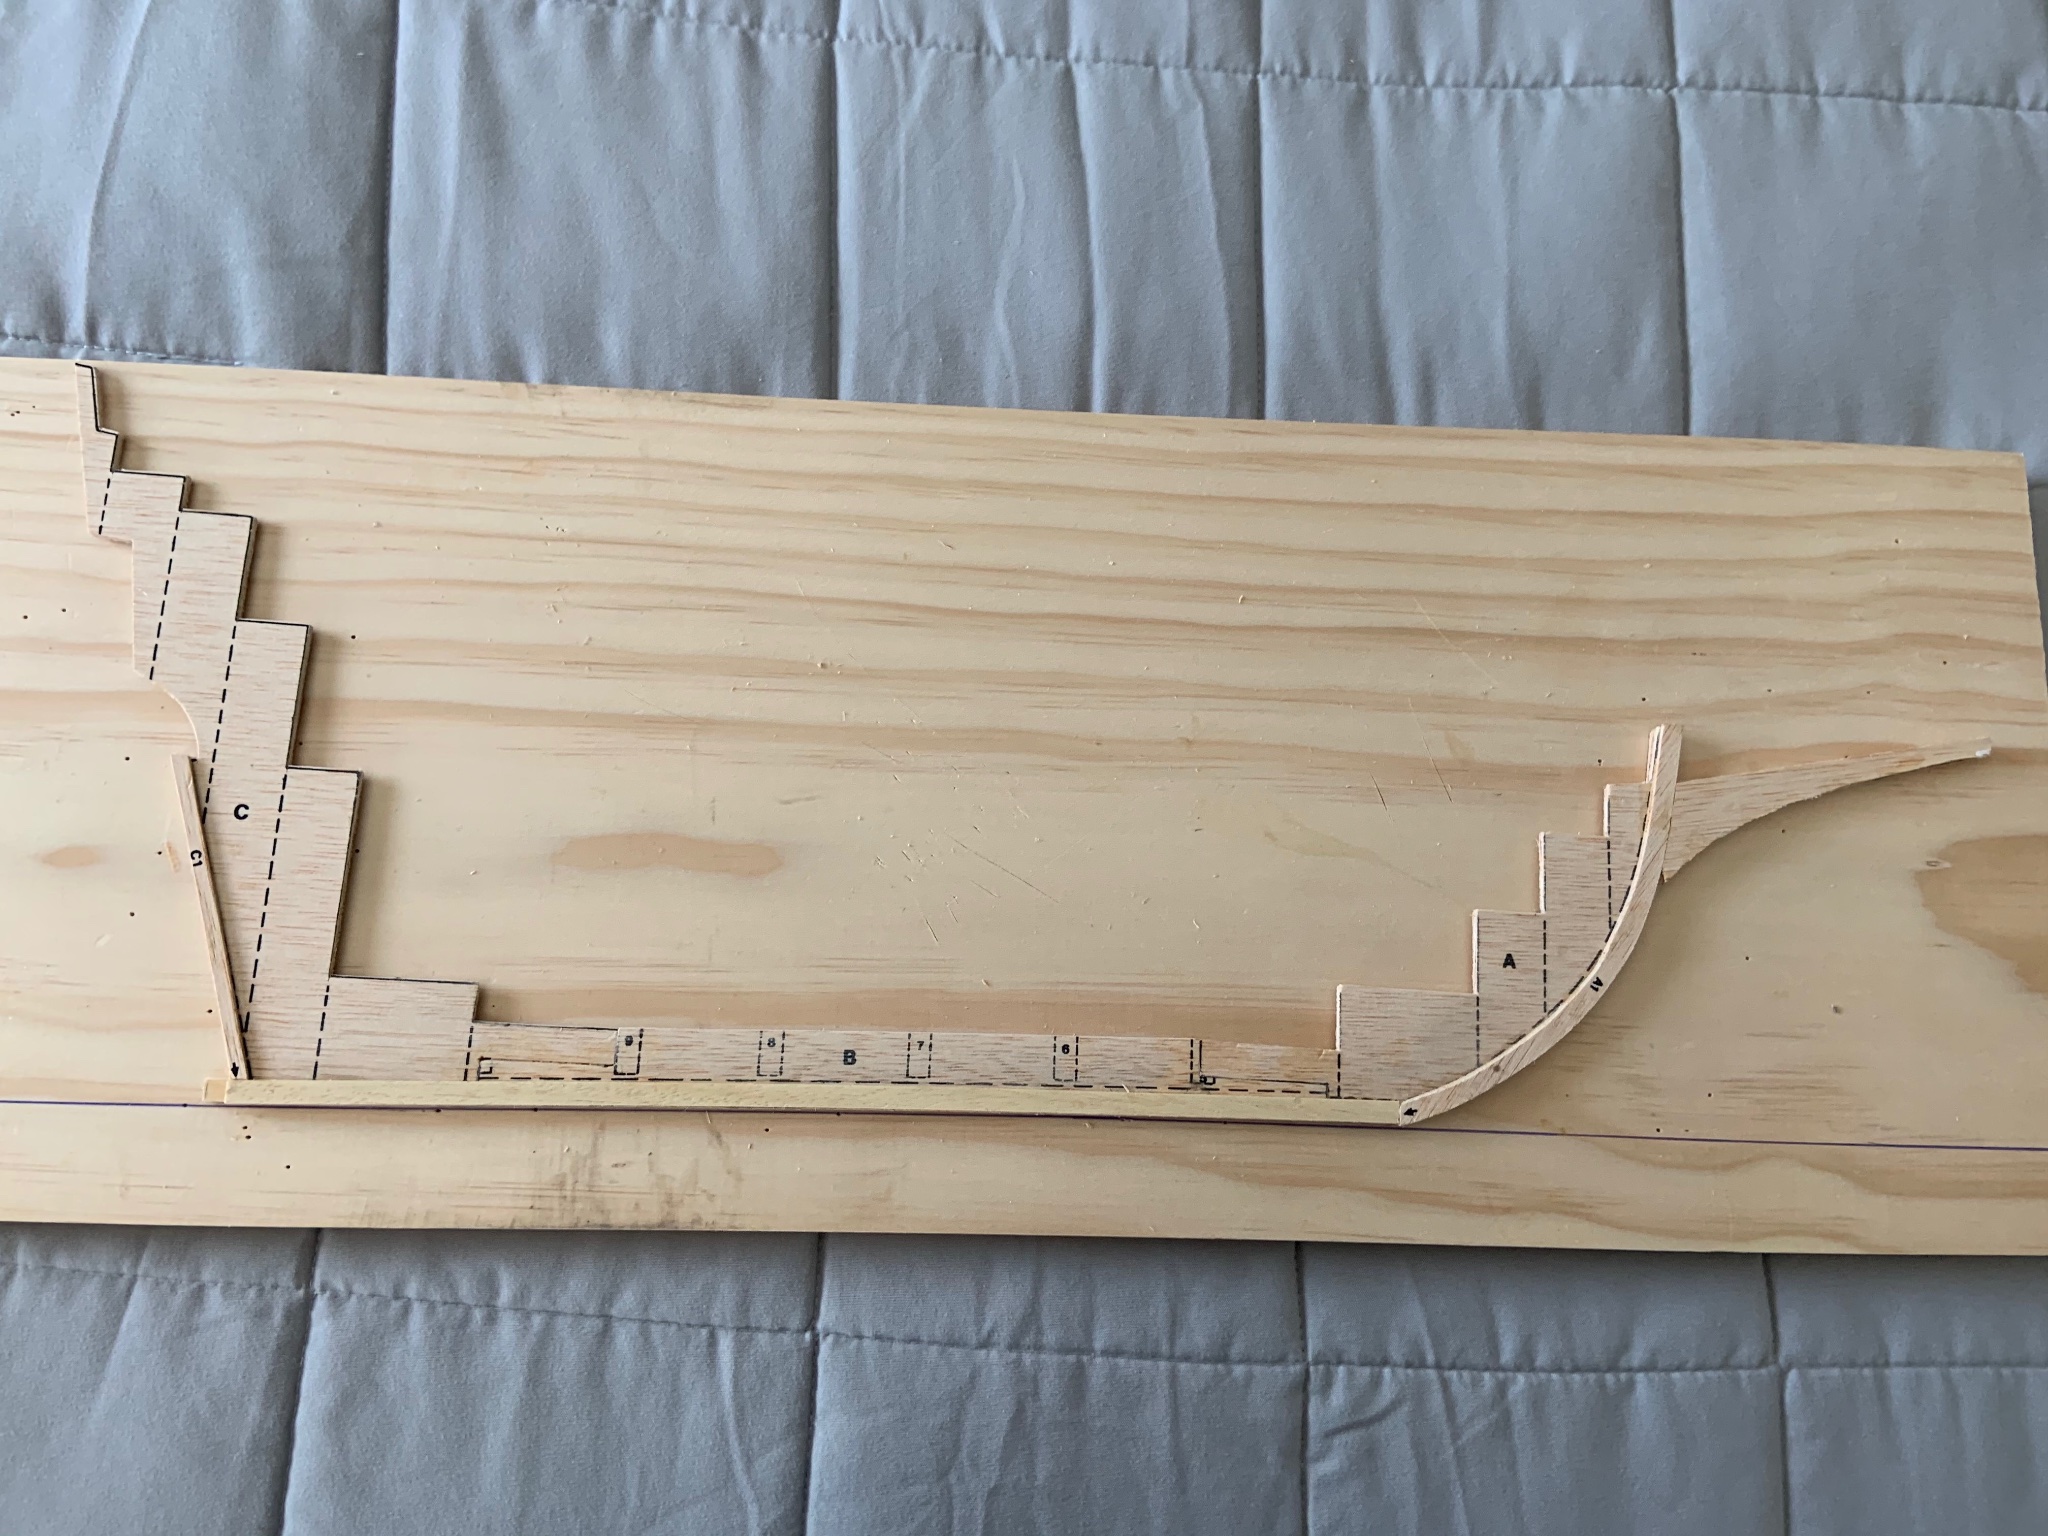
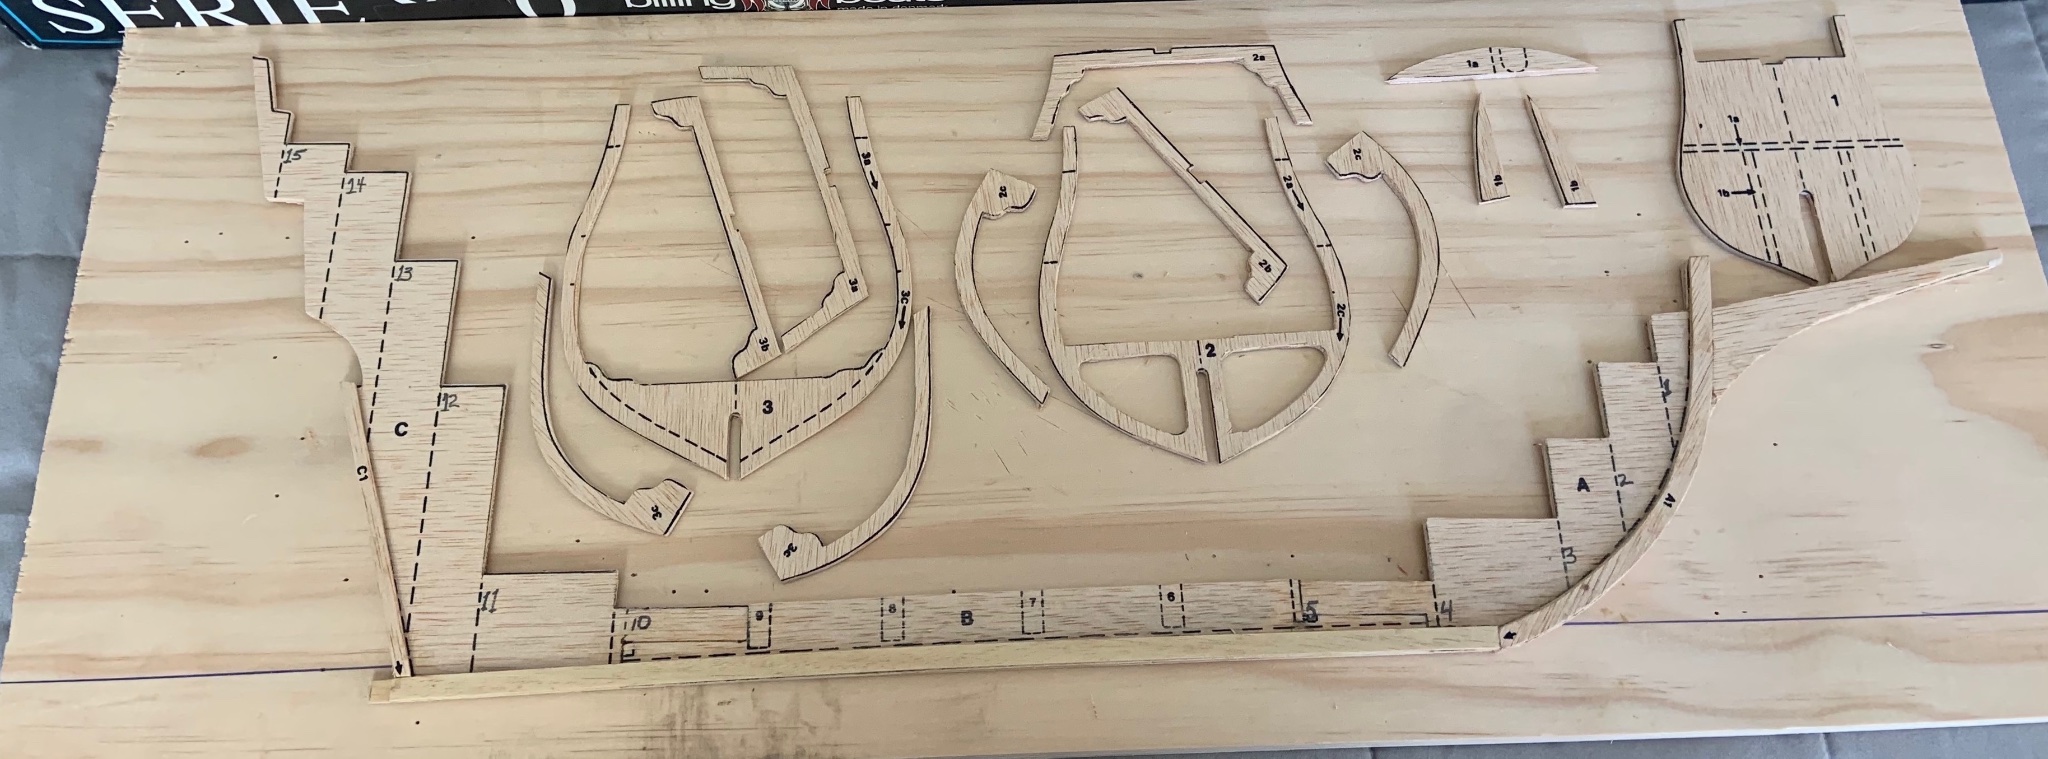
 Merchant ship Mayflower by Antony - Scale , 1600 as first built in Harwich UK. This is the Start of a Mayflower build. The main points are: - It has to be a Longitudinal section (from Bow to Stern) Must be large enough to give scale and details of the conditions aboard the Mayflower in the 1620’s. And be completed before the 400 Mayflower celebrations (16th September 2020). I have the plans from https://www.plimoth.com/products/mayflower-ii-model-ship-plans Thanks to Jaager here on MSW. https://modelshipworld.com/index.php?/topic/18809-mayflower-2-plans/ I also have the book :- The Mayflower and other colonial vessels. by William A Baker. And a Thanks to Druxey for pointing out a link. https://www.thenrg.org/resources/The_Journal/58-4%20Nautical%20Research%20Journal.pdf I will Not be building the ship from the plans I have But will maintain the basic shape from the plans. I will be putting in 3 decks. I think this is only way they would of built her in the early 16 century. Also I will be planking the inside of the Hull as it gives the model much more strength. Probably was not done on the original 1600 ship. There will be No rigging or mast on this model. Drawing are done in Adobe Illustrator CS2 which is my preferred drawing software. The Keel is of mixed timbers . 12 inch ruler and veneer is for scale comparison. Detail of Stern area. Not yet finished. Detail of Bow area. Not yet finished. Ribs cut out. Not yet fitted. Jig For holding Keel and Ribs. Yes its another monster size of model. But it will be fit for purpose.
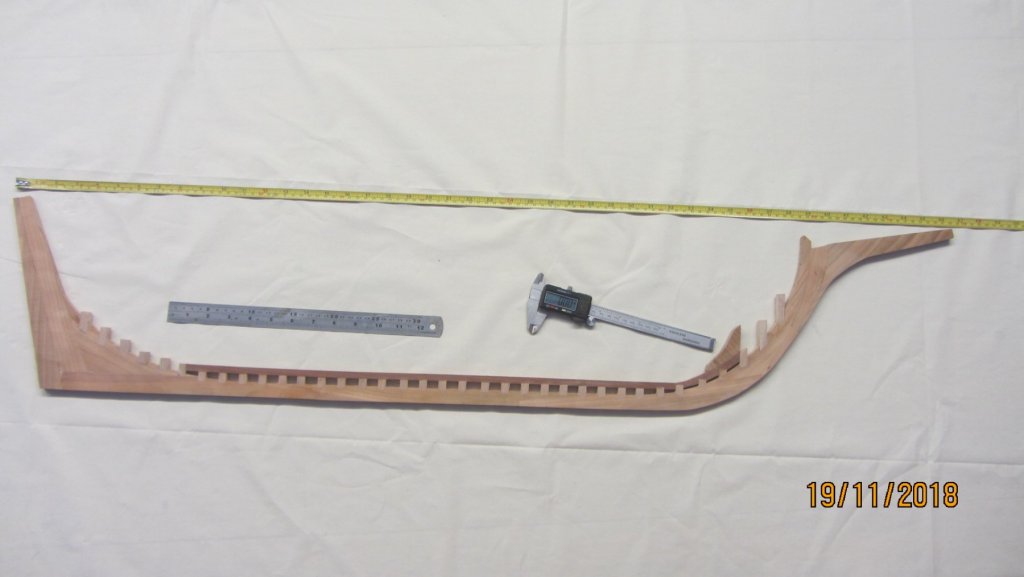


- 79 replies
-
- 19
-
-
 This marks the start of my build of the Model Shipways Mayflower kit, designed by Chuck Passaro. This is the last kit in my possession to build. I've been following the Medway Longboat (1742) project with interest, but I will need to hold off on that project for future. Mayflower will be my third project and first actual ship build. Kit supplied wood will be used for the first layer of planking. I will be using cherry for any wood that will be left unpainted. Deck planking will be maple or cherry. I have yet to decide. Below the whales will be panted tallow. Modifications to the color scheme will be addressed as we are further along. Those of you who have followed my other projects know that I work slowly. I anticipate this project will take much longer than the previous ones. My goal is to attain a quality representation of the Mayflower. I received the Syren Serv-o-Matic serving machine at the end of my Pinnace project and have been sanding the char from the parts. I will be treating the wood with several coats of Wipe-on-Poly before assembling all parts. I will include photos in my next post. Included in this post are photos of Chuck's prototype of the Mayflower. Steve
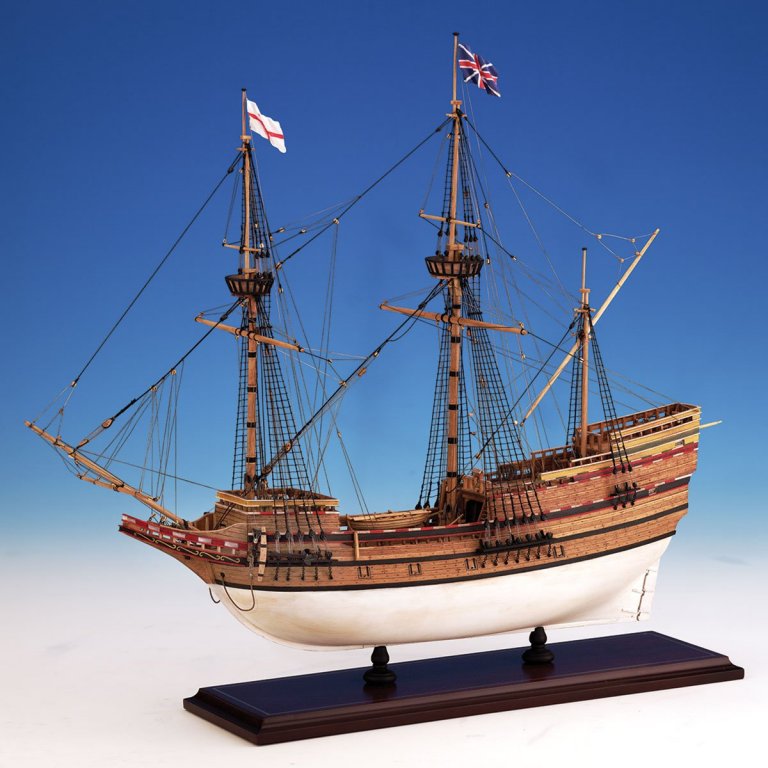

-
 A new project for my daughter. She started Kindergarten. I am planning on giving this build to the Elementary School around thanksgiving. I know I am starting a bit late. I might be over my head...🤔
 -
 I bought the kit in 2008. This far I have: Glued the frames to the keelson Glued the decks in place I am now at the stage where I have to shape the ribs. I am not sure how much I must do this? How is the part that must be beveled measured? The instruction manual mention marking the the edge of the rib with a felt pen. I'm not sue how and by how much? I also, on advice, filled the front between the keelson and the front frame with soft wood to make planking easier. Did I do it right?
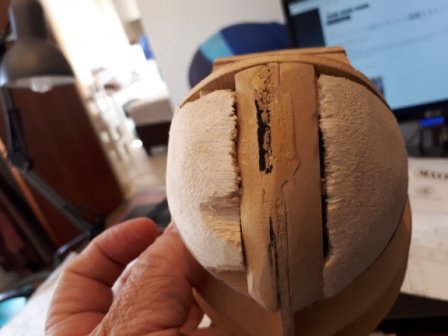
-
 My kit arrived today. I was surprised at how quick MS was in fulfilling my order! I've not done this vessel so any tips will be useful. I do watch You Tube but there is a dearth of Mayflower kits to be seen. I used what I can watching how other ships are built. I have one problem. How do I keep my cats from my build? I tried posting pictures of dogs but my cats, like the U.S. military, don't scare worth a damn.


resized.JPG.be21a5fe01678d239cf109c20fa6d58a.JPG)