Search the Community
Showing results for tags 'panart'.
-
 The Great Pandemic of 2020 pretty much took out the world and changed life in fundamental ways. For myself, my home based business went kaput. Fortunately, just before they fan got turned to high, a distributor purchased the tattered remains of a once great product line, another casualty of the "pandemic". So, I'm sitting in the empty remains of my assembly area, also known as the garage, and decide to turn the whole enterprise into the hobby workshop of my dreams. It was/is a work in progress. By August of 2020 I was itching for a new project and came across the HMS Victory by Panart 738 for a nice price. I started building her in August of 2020 and finished in January of 2023. I took a few pictures along the way so I am going to try to post some of them here with some comment along the way. I wrote Technical manuals back in the day and I was not thrilled with the quality of the instruction manuals and drawings. More coming soon!
-
 Background My father was a model ship builder and completed a number through his life so I was always around it. He passed a while ago and I finally got around to trying my hand at it, though I wish I had done so when he was still around. Unfortunately I didn't pay that much attention when he was building as I had what at the time were much more exciting things to do. So the result now is a desire, but not a ton of skill, to carry on my father's tradition. After expressing that desire, I was gifted the above kit in late 2017 and got straight to work, expecting it to be similar to the plastic models I had built as a kid. Boy was I wrong! But I set out nonetheless, determined to complete the model. I didn't know about MSW or many of the online resources and assumed that the plans and instructions would serve to pull me through. After all, Dad didn't have the internet when he started! I quickly started putting the hull together, pictured below (I did take a few pictures through the process, and I was going to document it for the whole few weeks it would take me to build it. However, my illusions were quickly shattered). The hull construction was fairly straightforward, each piece was detailed on the plans and I was able to match them up by number and using that with the plans, put the hull together. After putting the hull together, the instruction was to file down some of the pieces. This was my first mistake. I pulled out my new Dremel and got to work removing way too much material. This error would not be evident for a while. What I should have done is lay some planking and see exactly how much I needed to remove to create the bow shape. (You will all be happy to know I put the Dremel away and haven't used it for this project again) The next instruction was "The first planking has to be done with 1,5 lime-tree laths; the second with 1x5 walnut laths. Proceed from the top towards the bottom alternating every three or fours laths of the flanks to be covered." I was stumped. But that is a tale for the next post.
- 25 replies
-
- 4
-

-
- Baltimoe Clipper
- baltimore schooner
- (and 2 more)
-
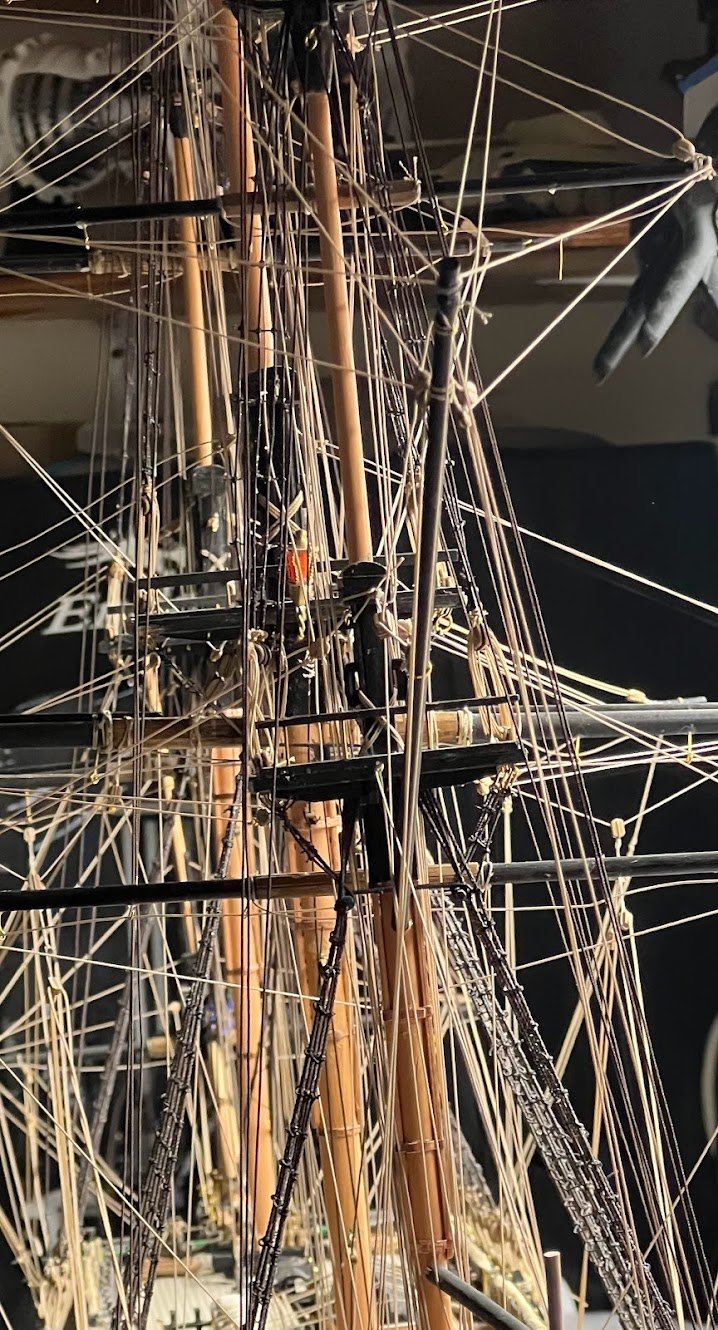
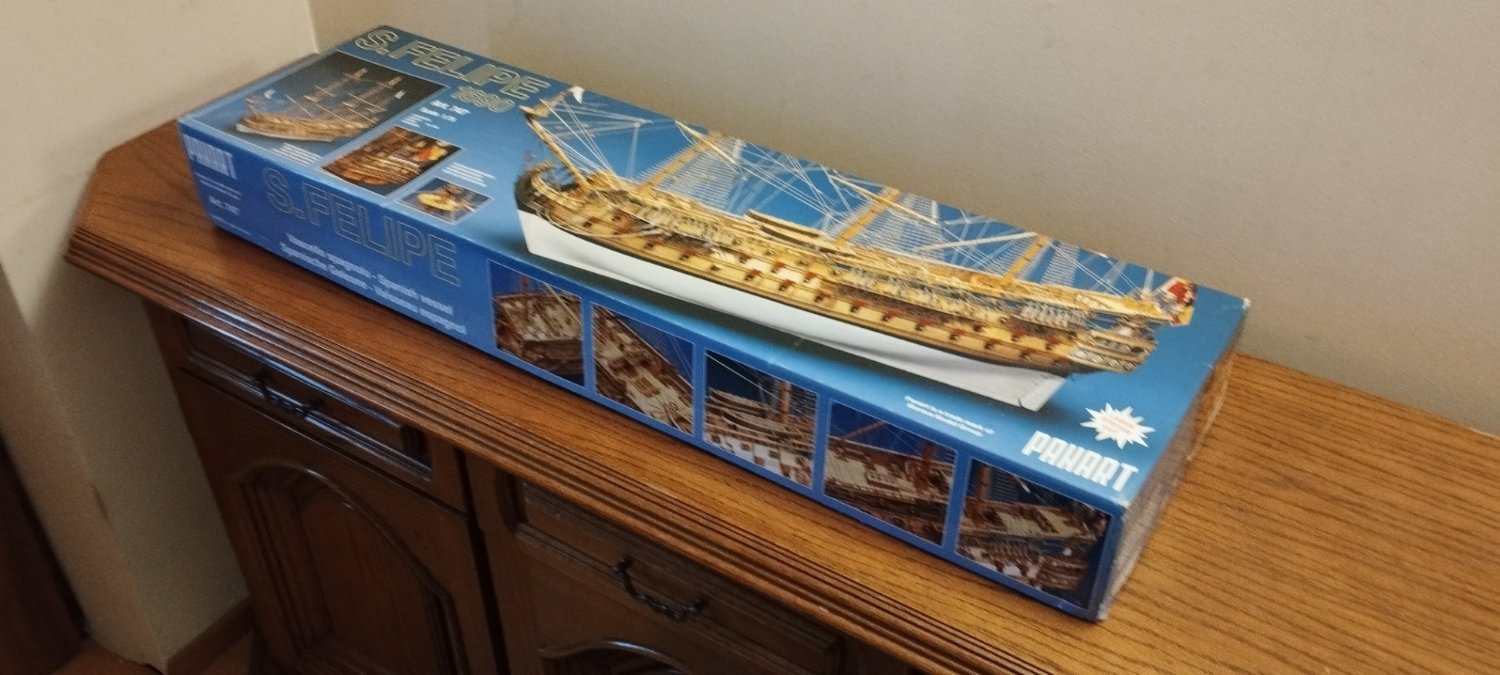
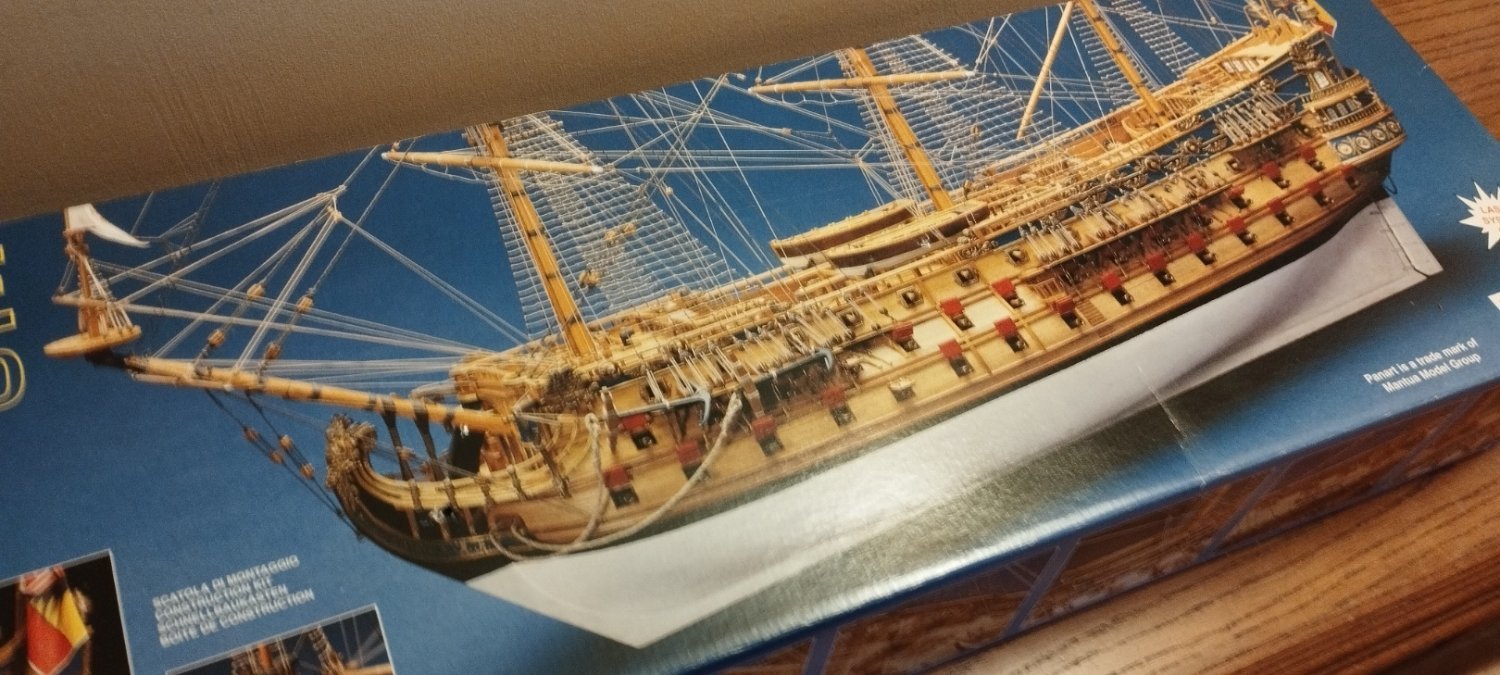
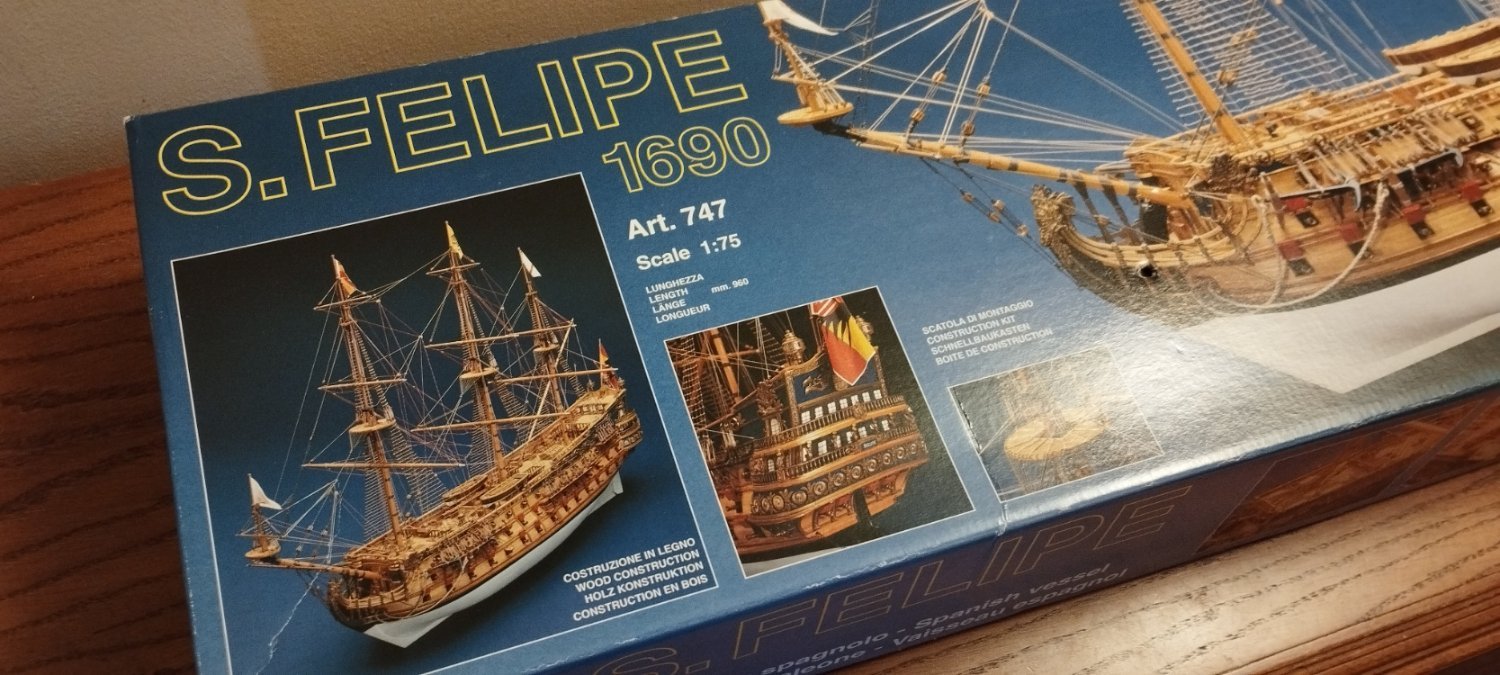
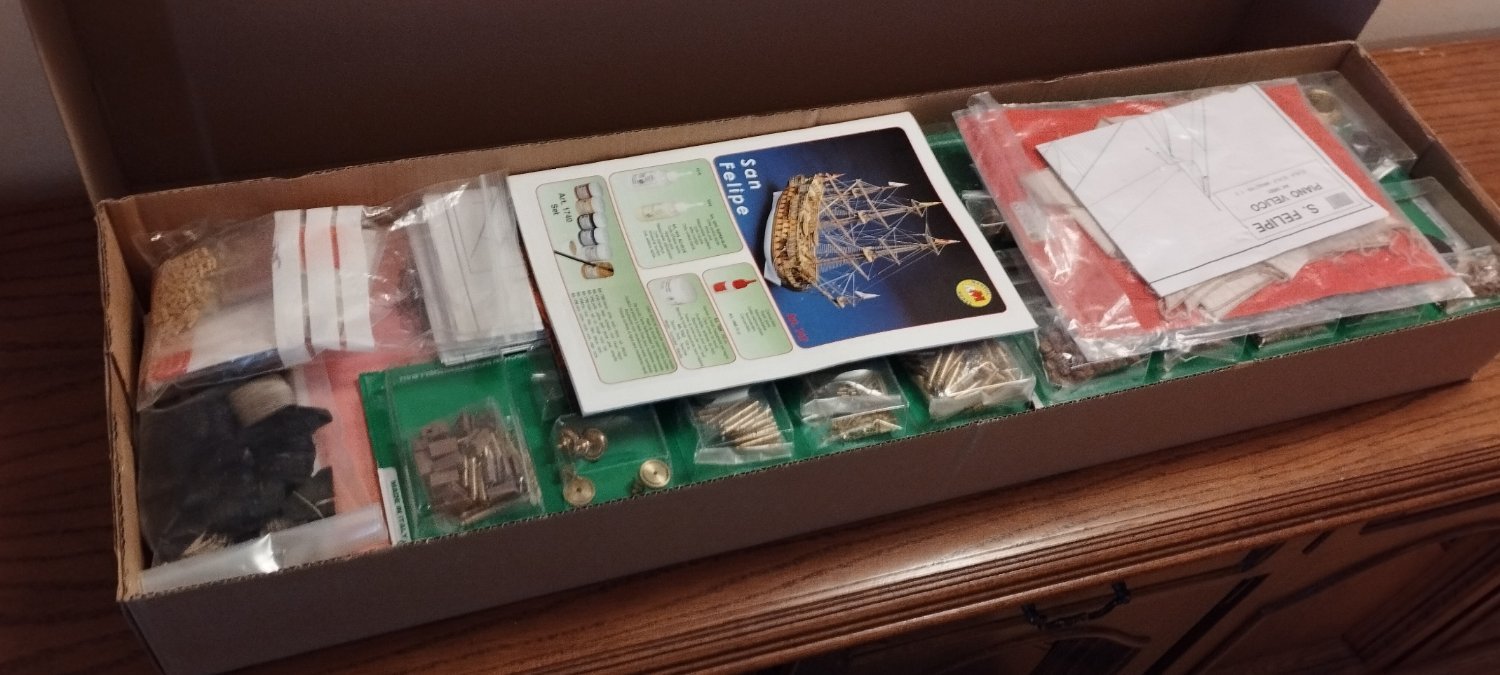
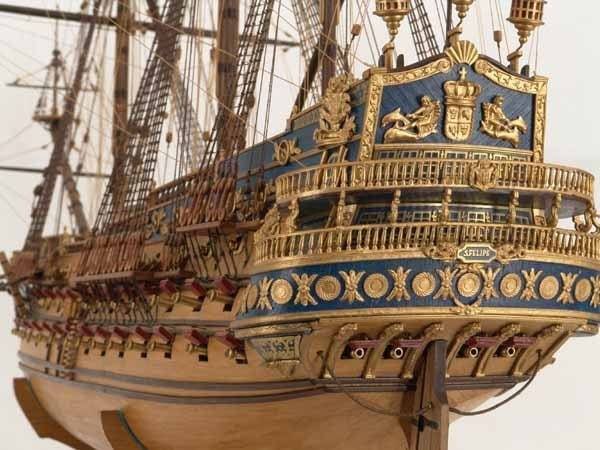
 The SAN FELIPE - Mantua set in 1:75 scale will be a huge challenge. Photo instructions and drawing plans are not compatible in many places. They often lack logical consistency in terms of the sequence of construction stages. The frame structure elements differ from the deck dimensions by as much as 5 mm (!). This cursory look at the kit gives a foretaste of the difficulties I will encounter while working on the model. (Google Translation)


-
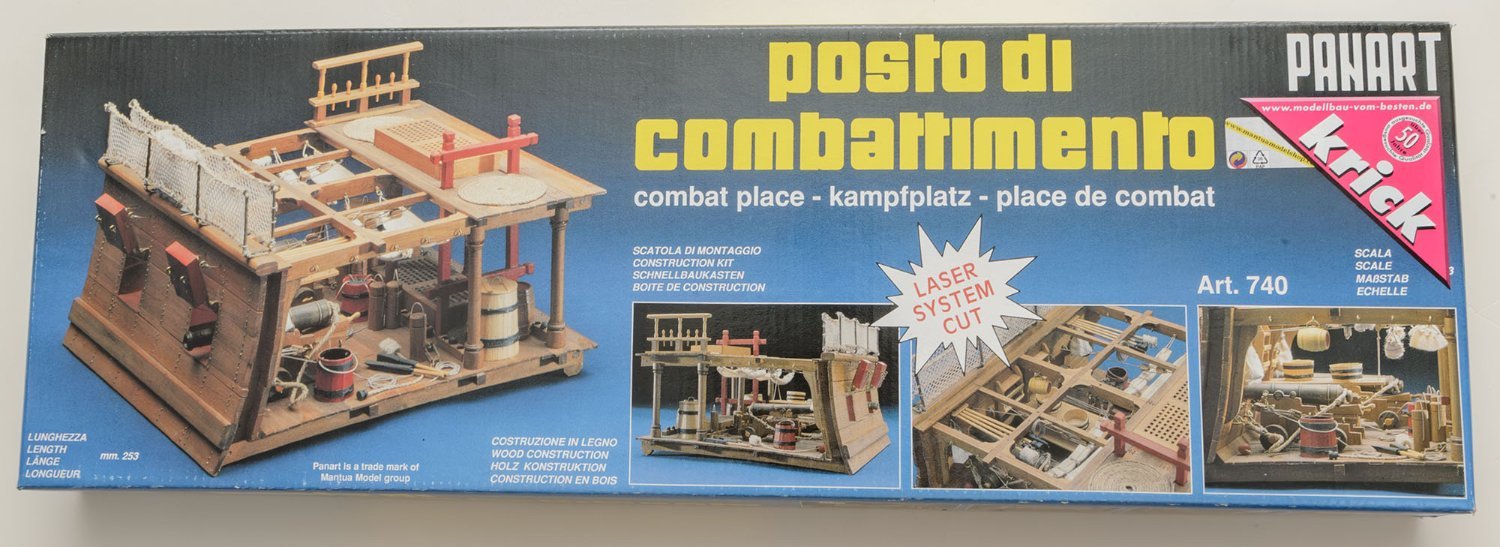
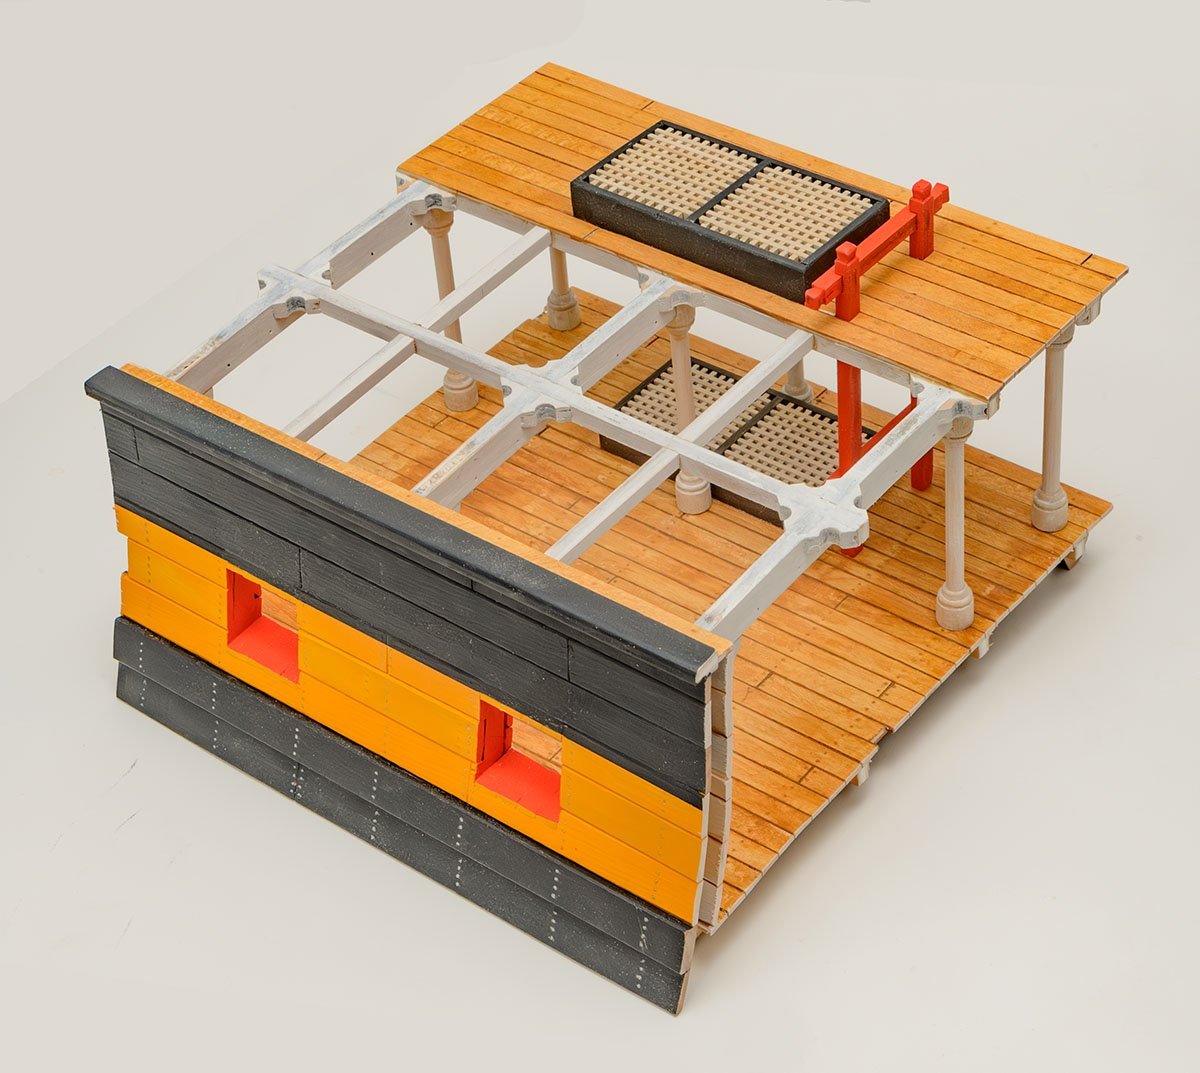
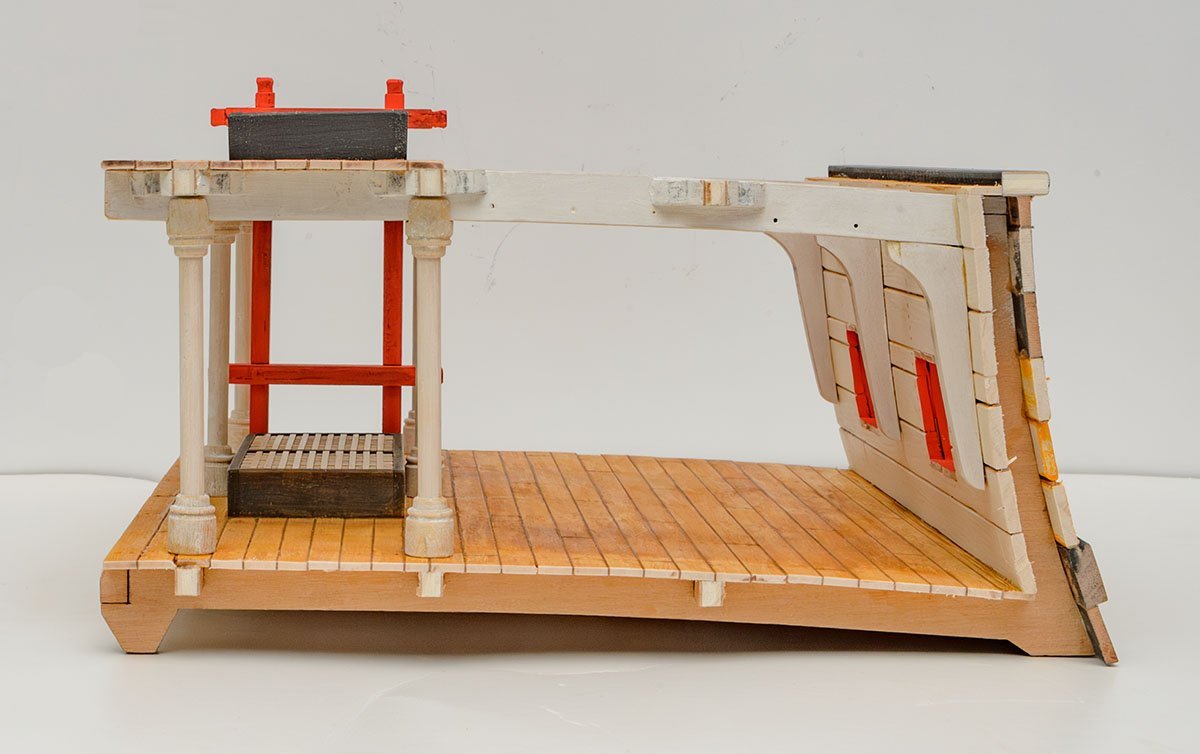
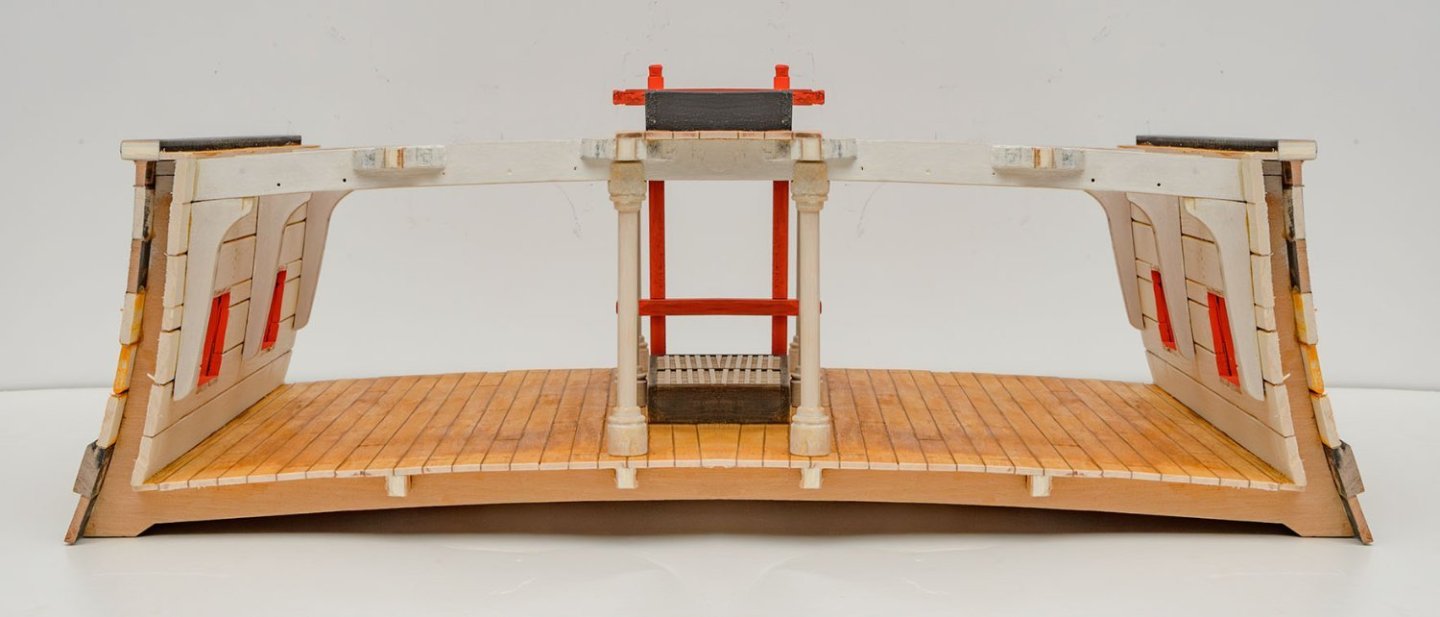
 This classic kit has had various names for decades. You can find many build logs by searching the names. - Posto di combattimento - Battle station - Section Deck Between Gun Bays - Combat place
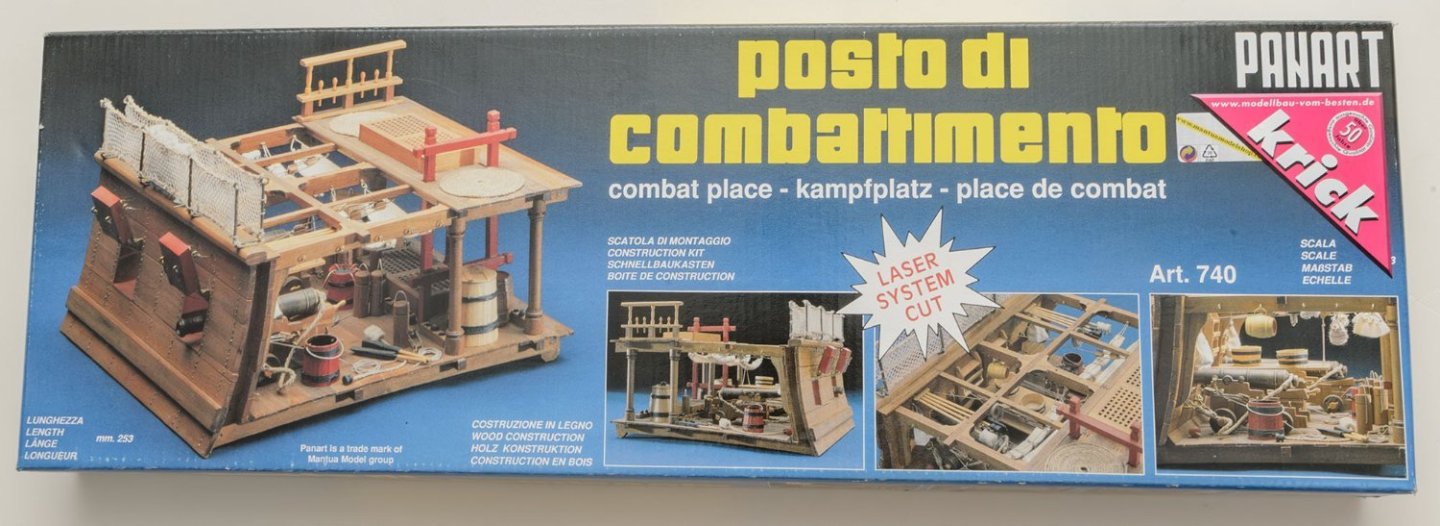


- 8 replies
-
- 4
-
-
- combat place
- Panart
- (and 2 more)
-
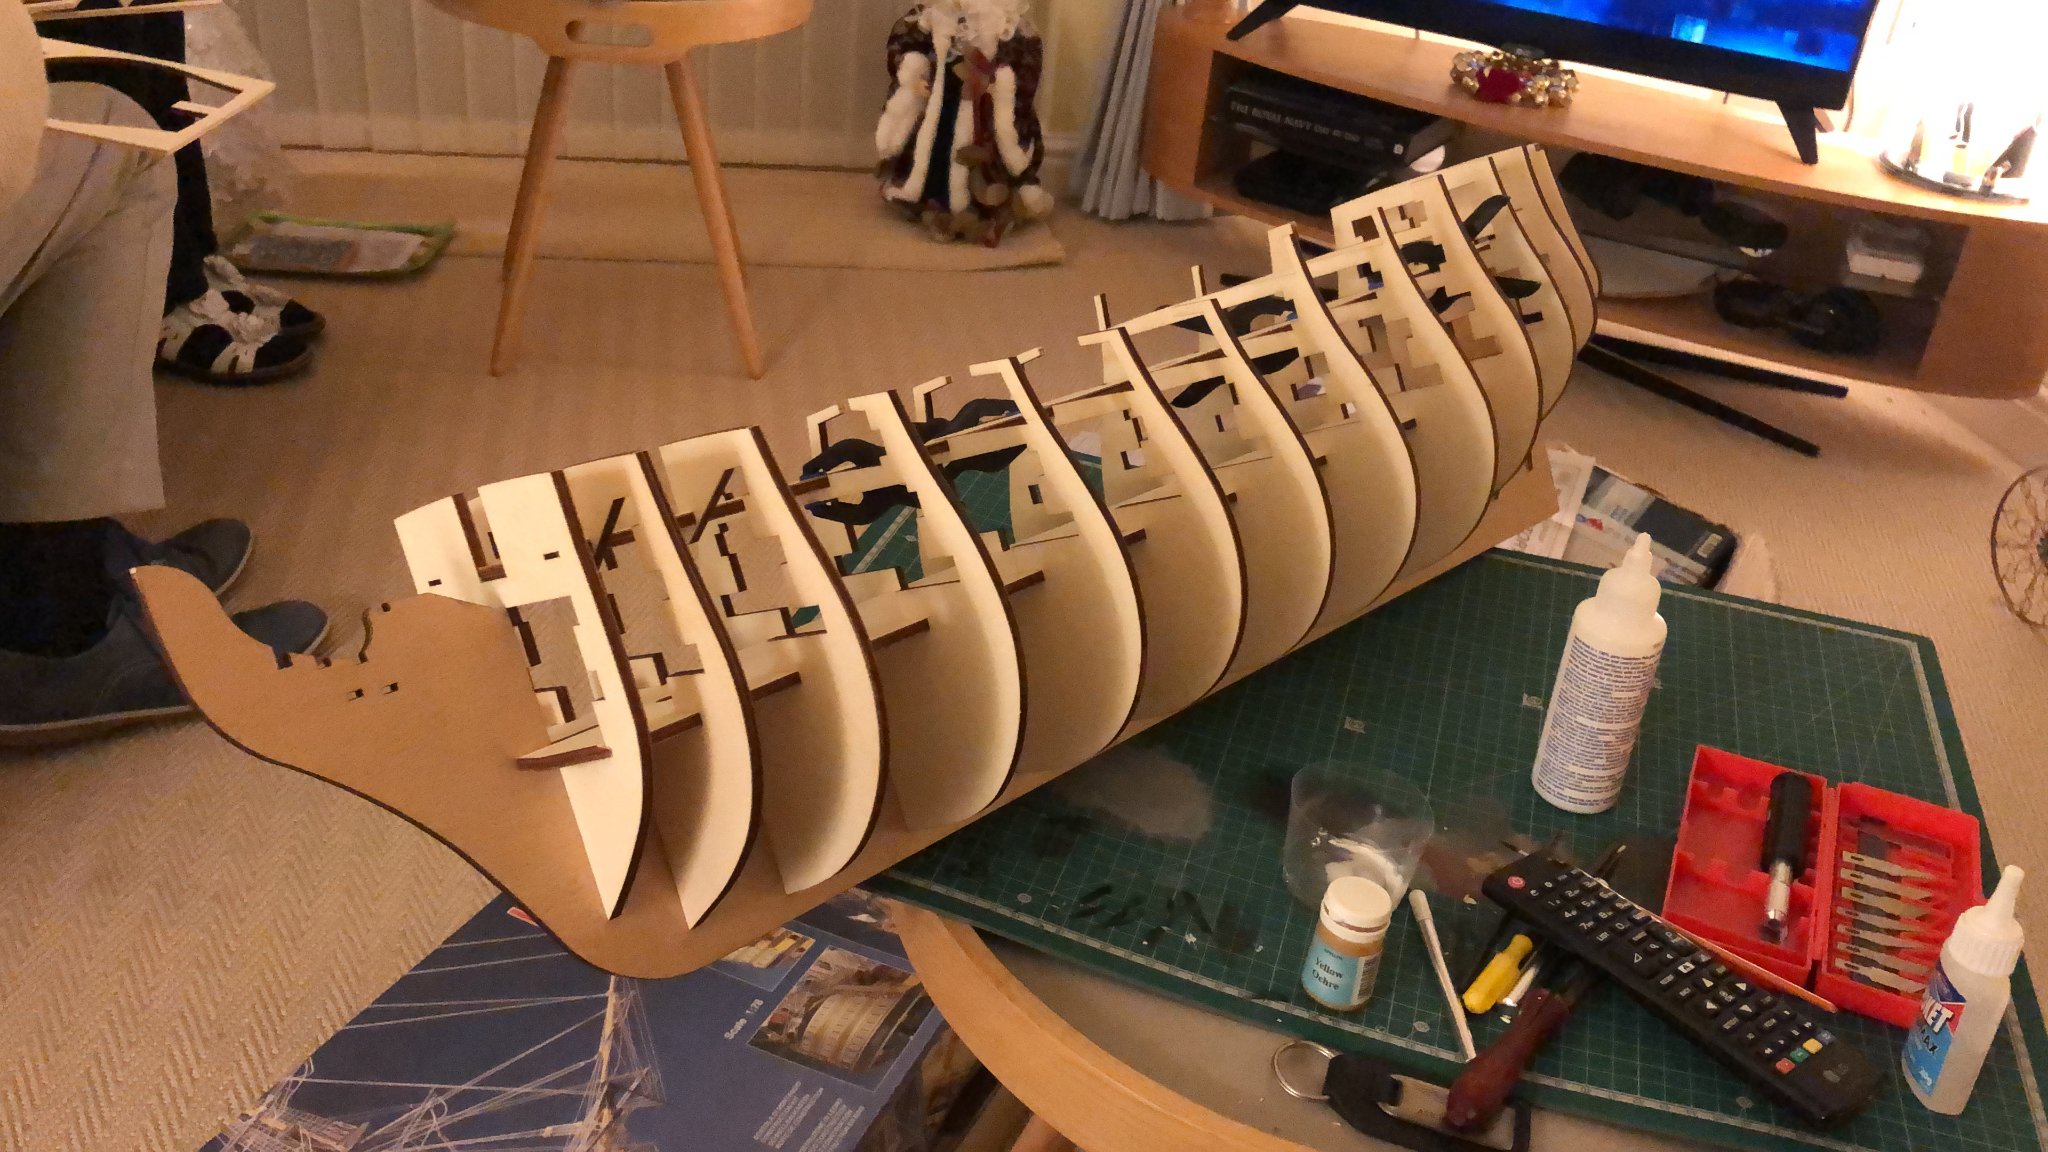
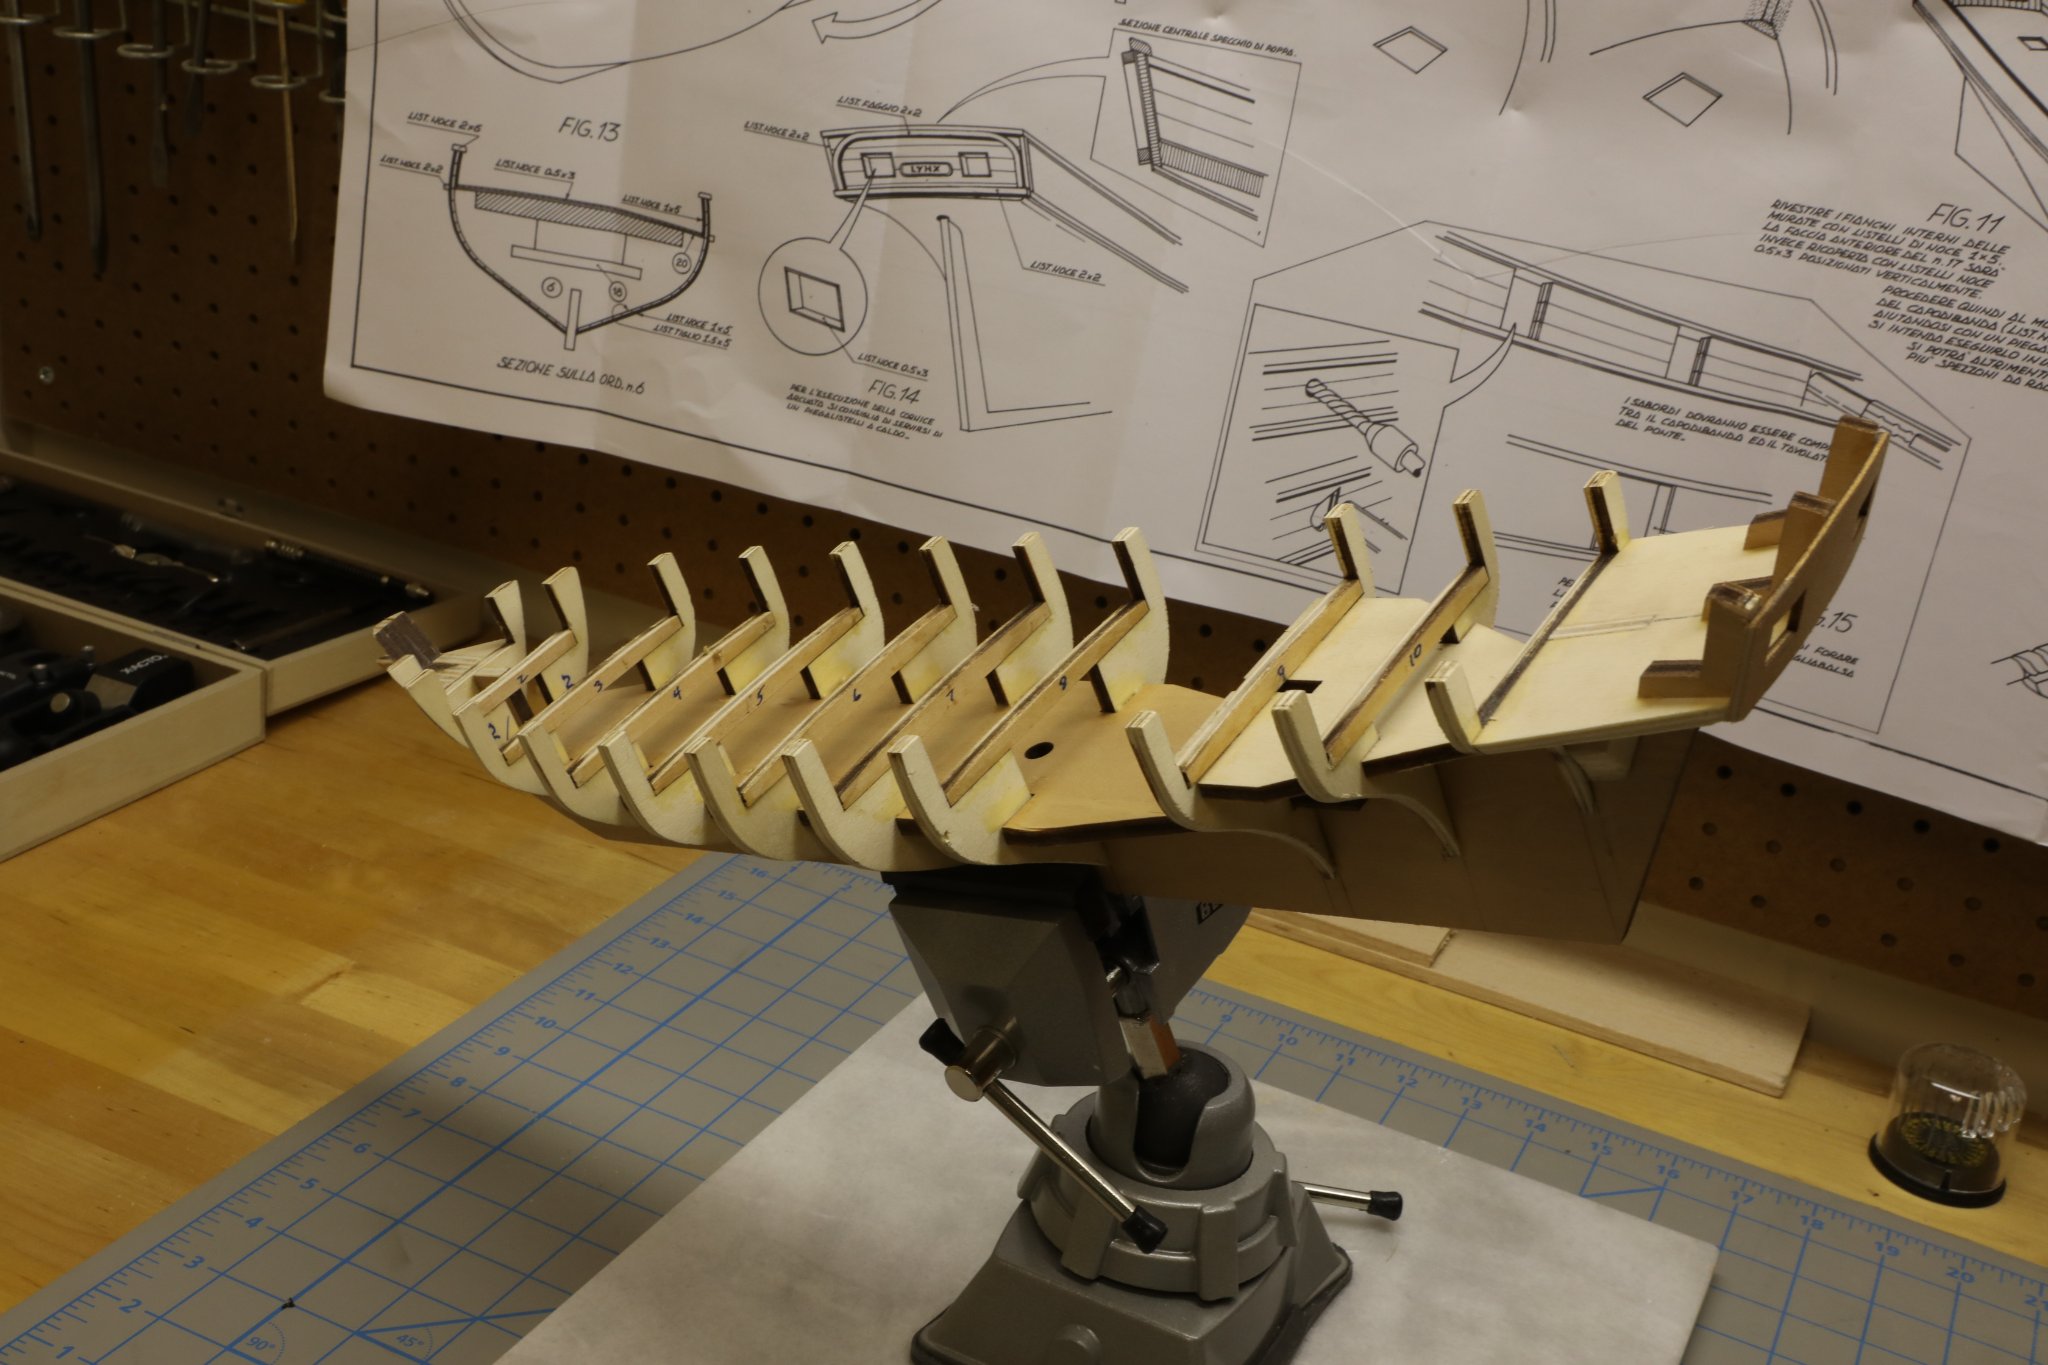
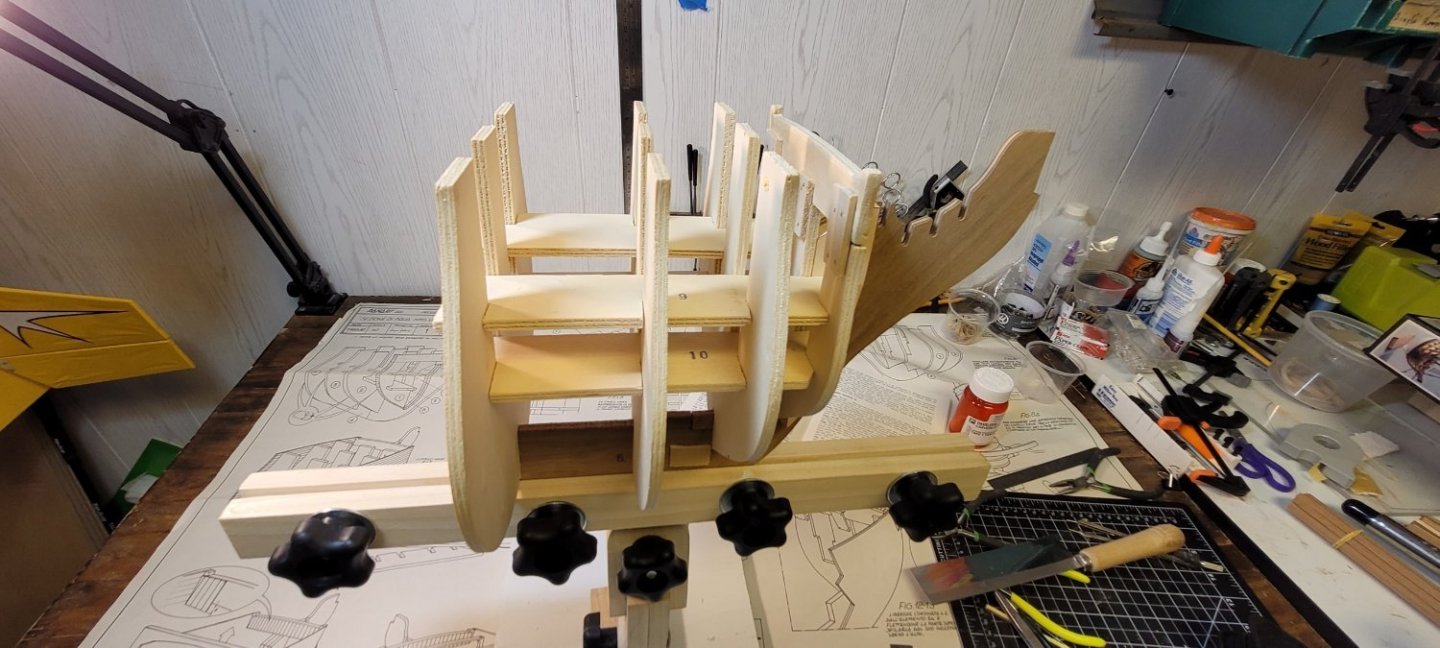
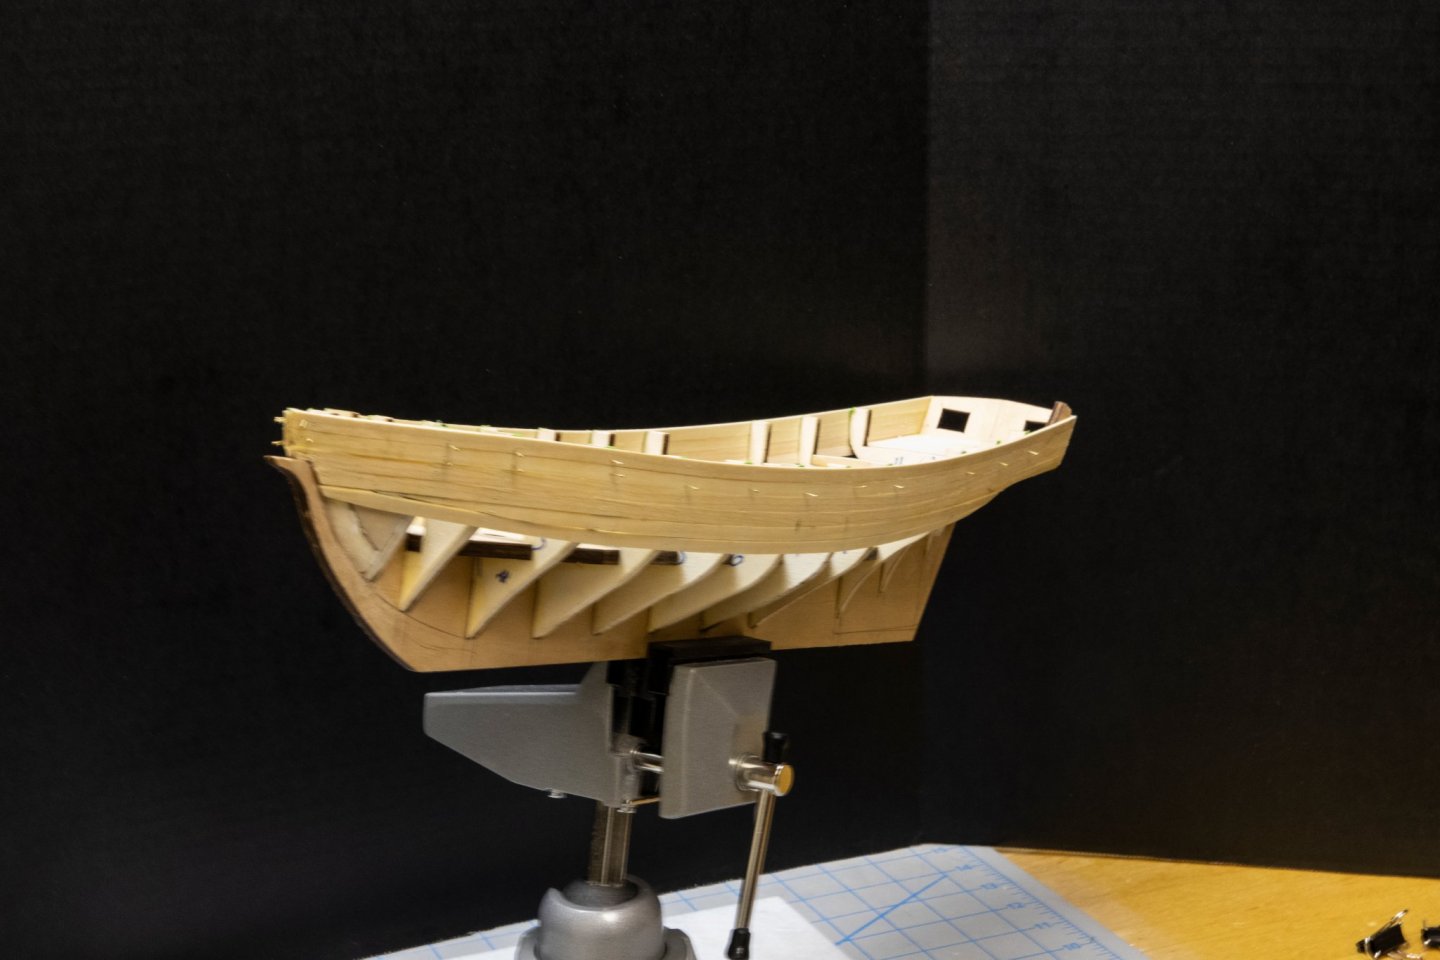
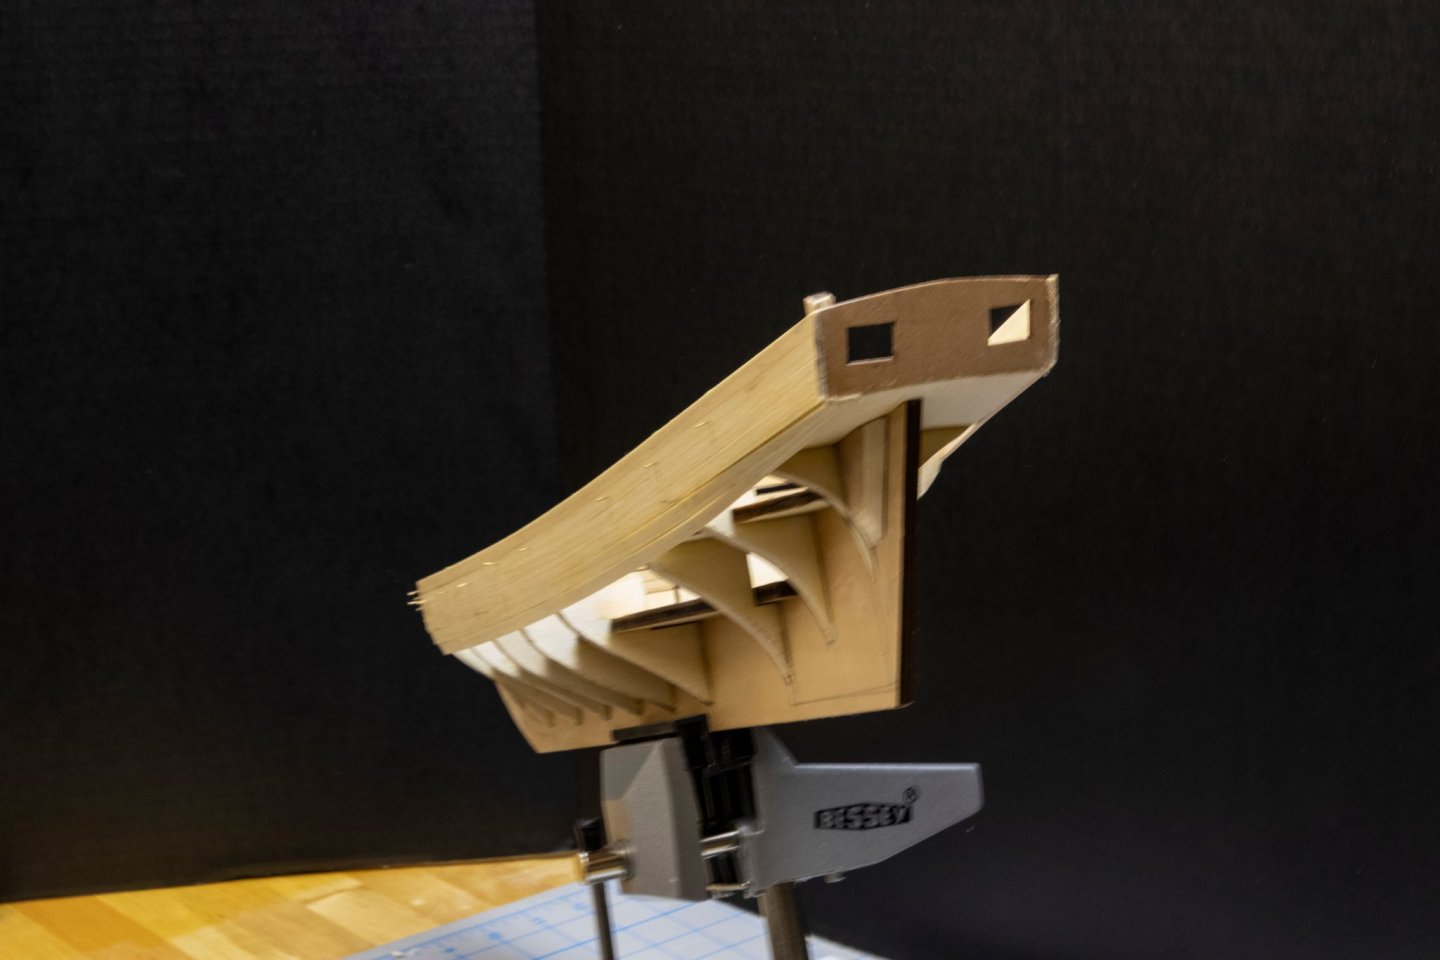
 Hello All This is my first build log and is of my third model, the first two being "Phantom" by Model Shipways and "Le Renard" by Artesania Latina. I purchased this kit 25 years ago, opened and looked at it, then put it on the shelf. I don't recall my thougts on it then - I'm 74 now so can plead a "senior issue" - but when I opened it in January to begin the build I thought "Holy Moly, what have I gotten myself into!" The plans were all in Italian, there were some basic instrucions in English in the manual, and it's triple planked. Yikes! Since I am still fairly new at modeling I wasn't going to do a build log. Perusing the logs of those accomplished modelers who have done this kit I decided to forge ahead with it. Thank you to those who have shared your expreriences! You have been inspirational and instructive! Since this is my first post I'll only add a few pictures of the start and of the current status. I started in January and as I write this the second layer of planking is complete. I've promised myself not to go any further until I'd started the build log The flate piece for the form is warped. I added a stiffiner. Interior view as the model is now. Another piece has been added to the stiffener so that I can clamp it in my vise. The second layer of planking complete. I'll end this post now. My computer has been sqirrely lately and restarts on a whim. I'll begin my updates very soon.

-
 This is my seventh build. I do believe it's above my skill level but for better or worse I'm going to give it a try. I've never done a second planking so this will be interesting. Also, the sheet plans are all in Italian. I've been using the Google translator which works really good. I started using a soldering iron with a jig that I made for the bending of the planks. I've found that water soaking the planks before I heat them to bend work quite well. More photos to follow as I progress.


- 5 replies
-
- 1
-
-
- Panart
- bow section
- (and 1 more)
-
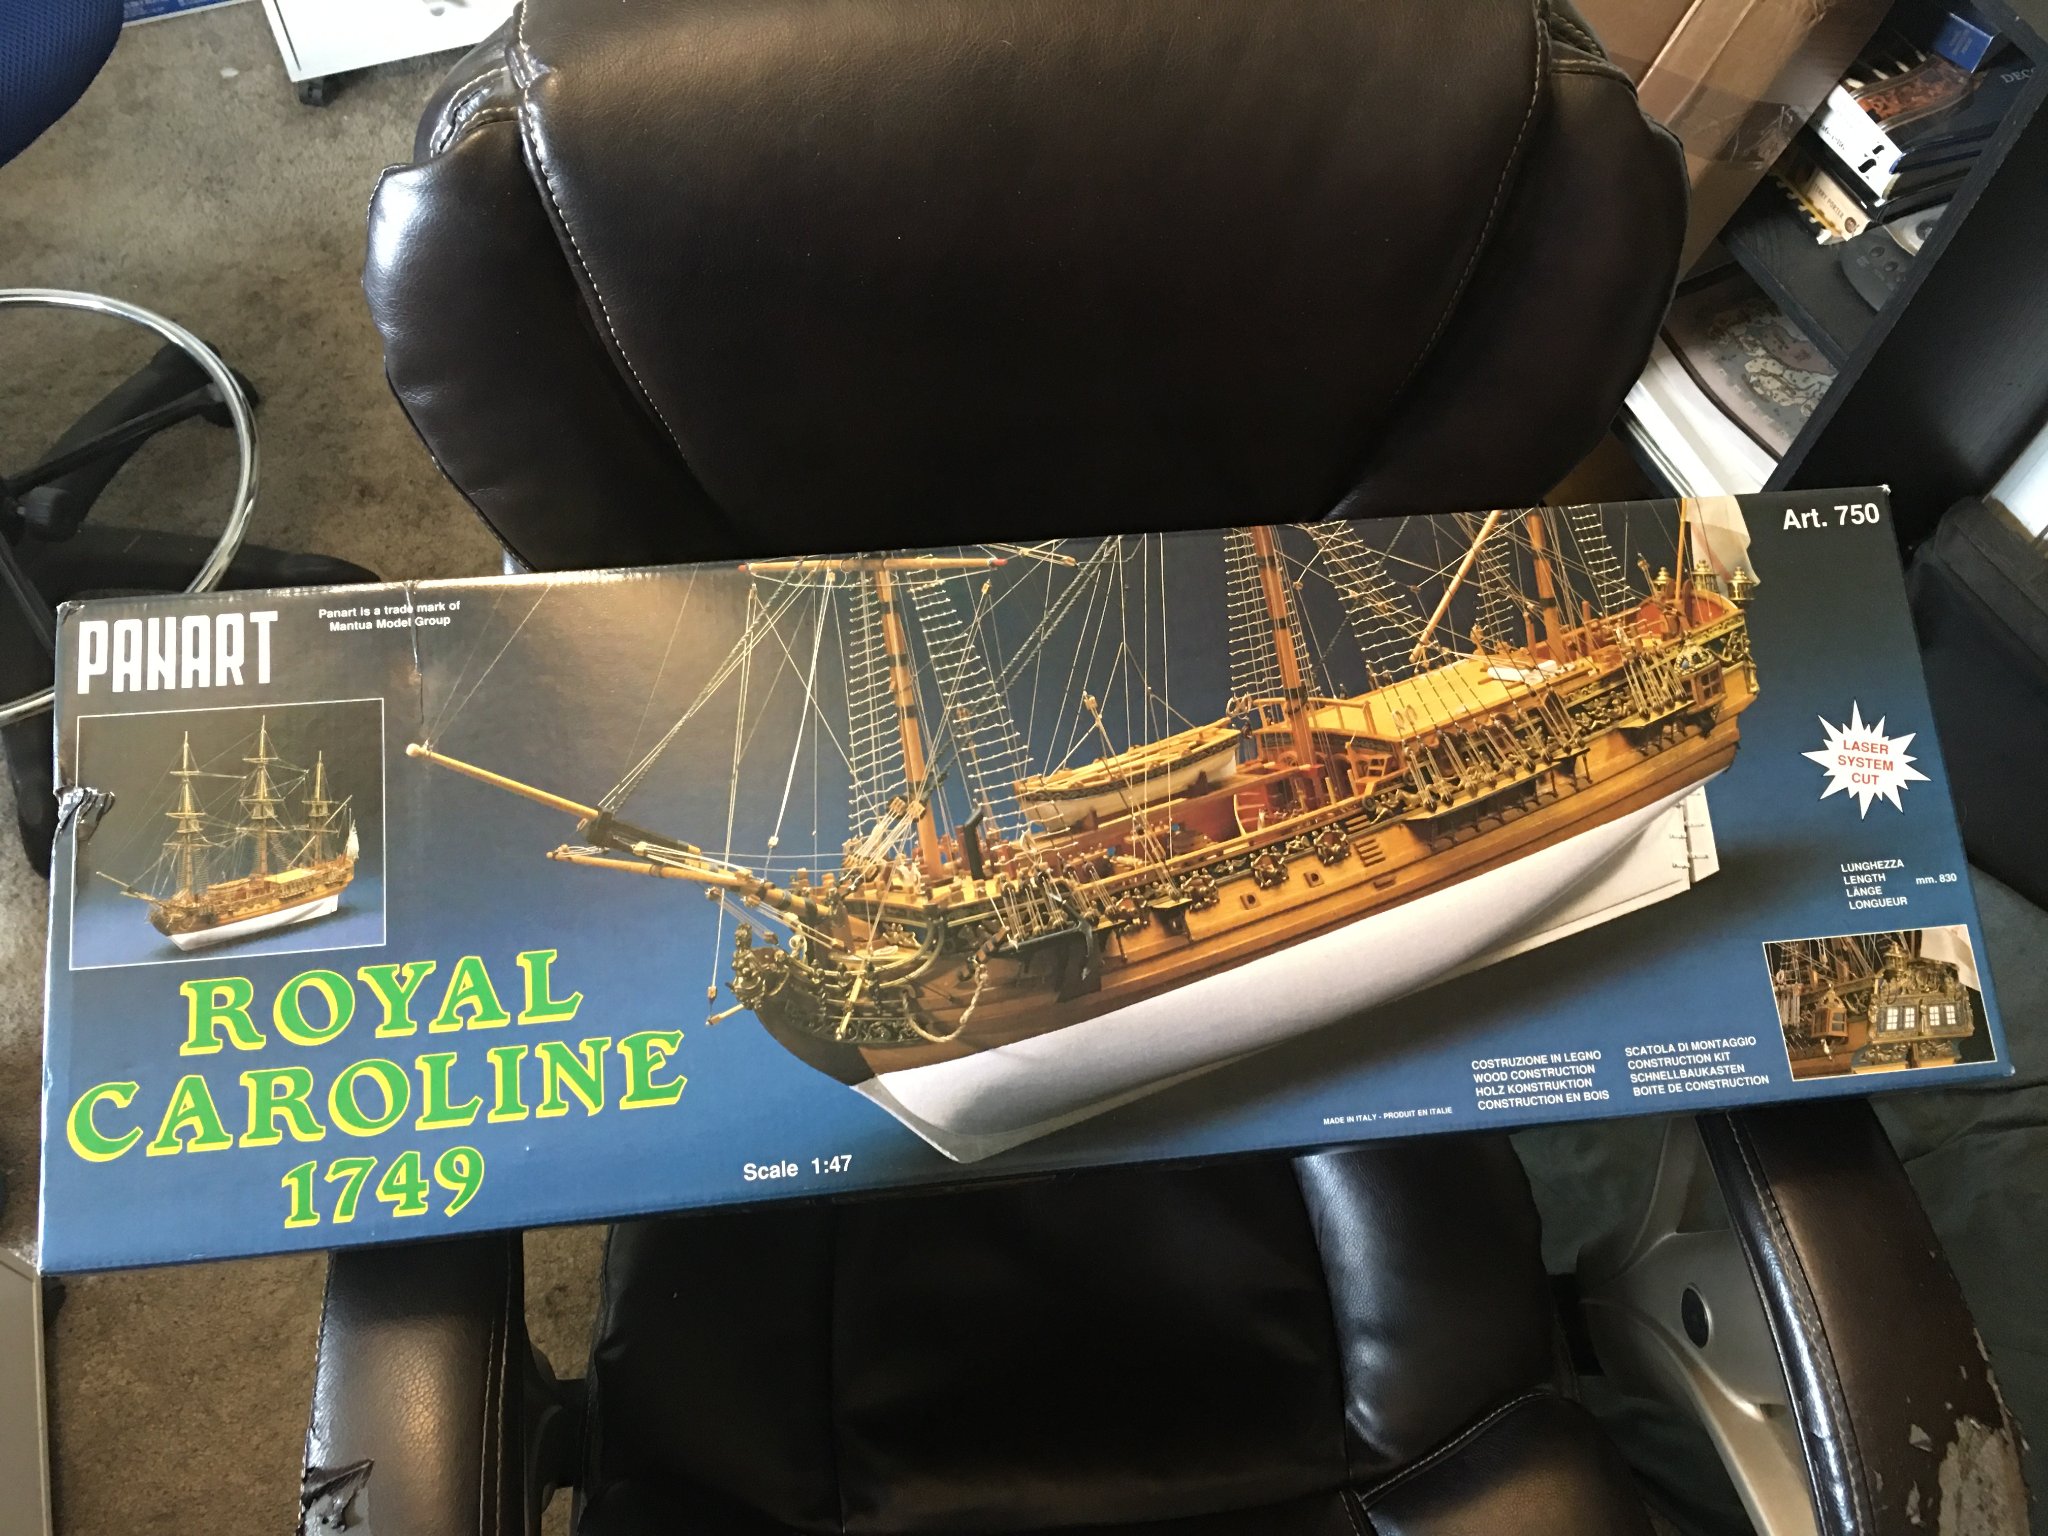
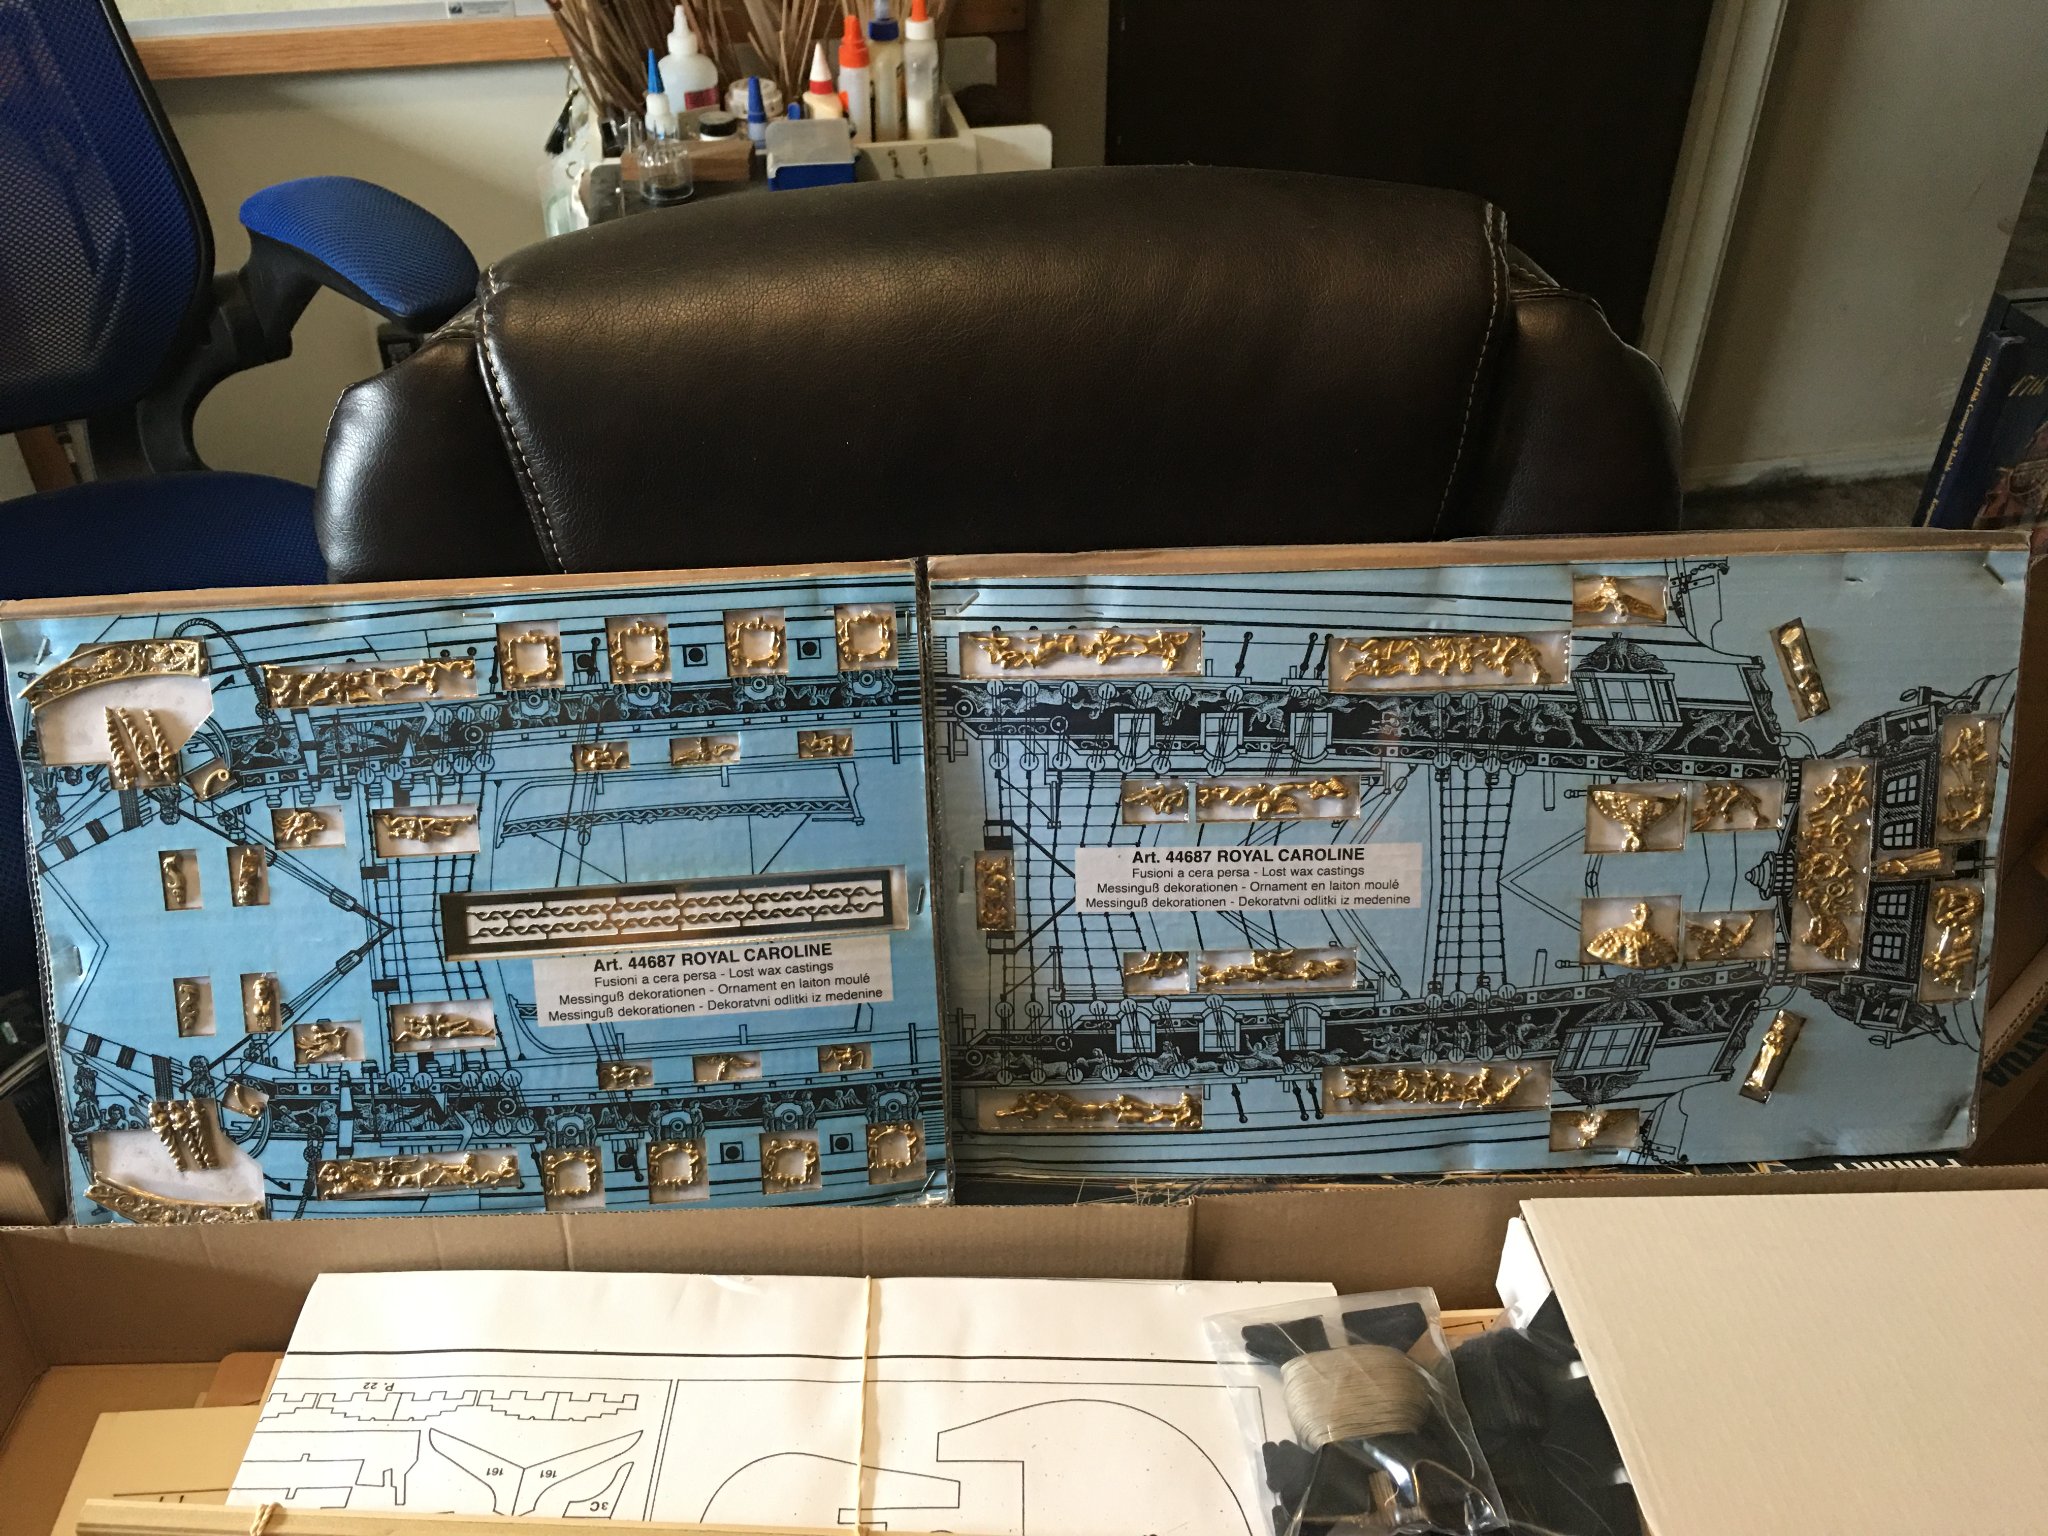
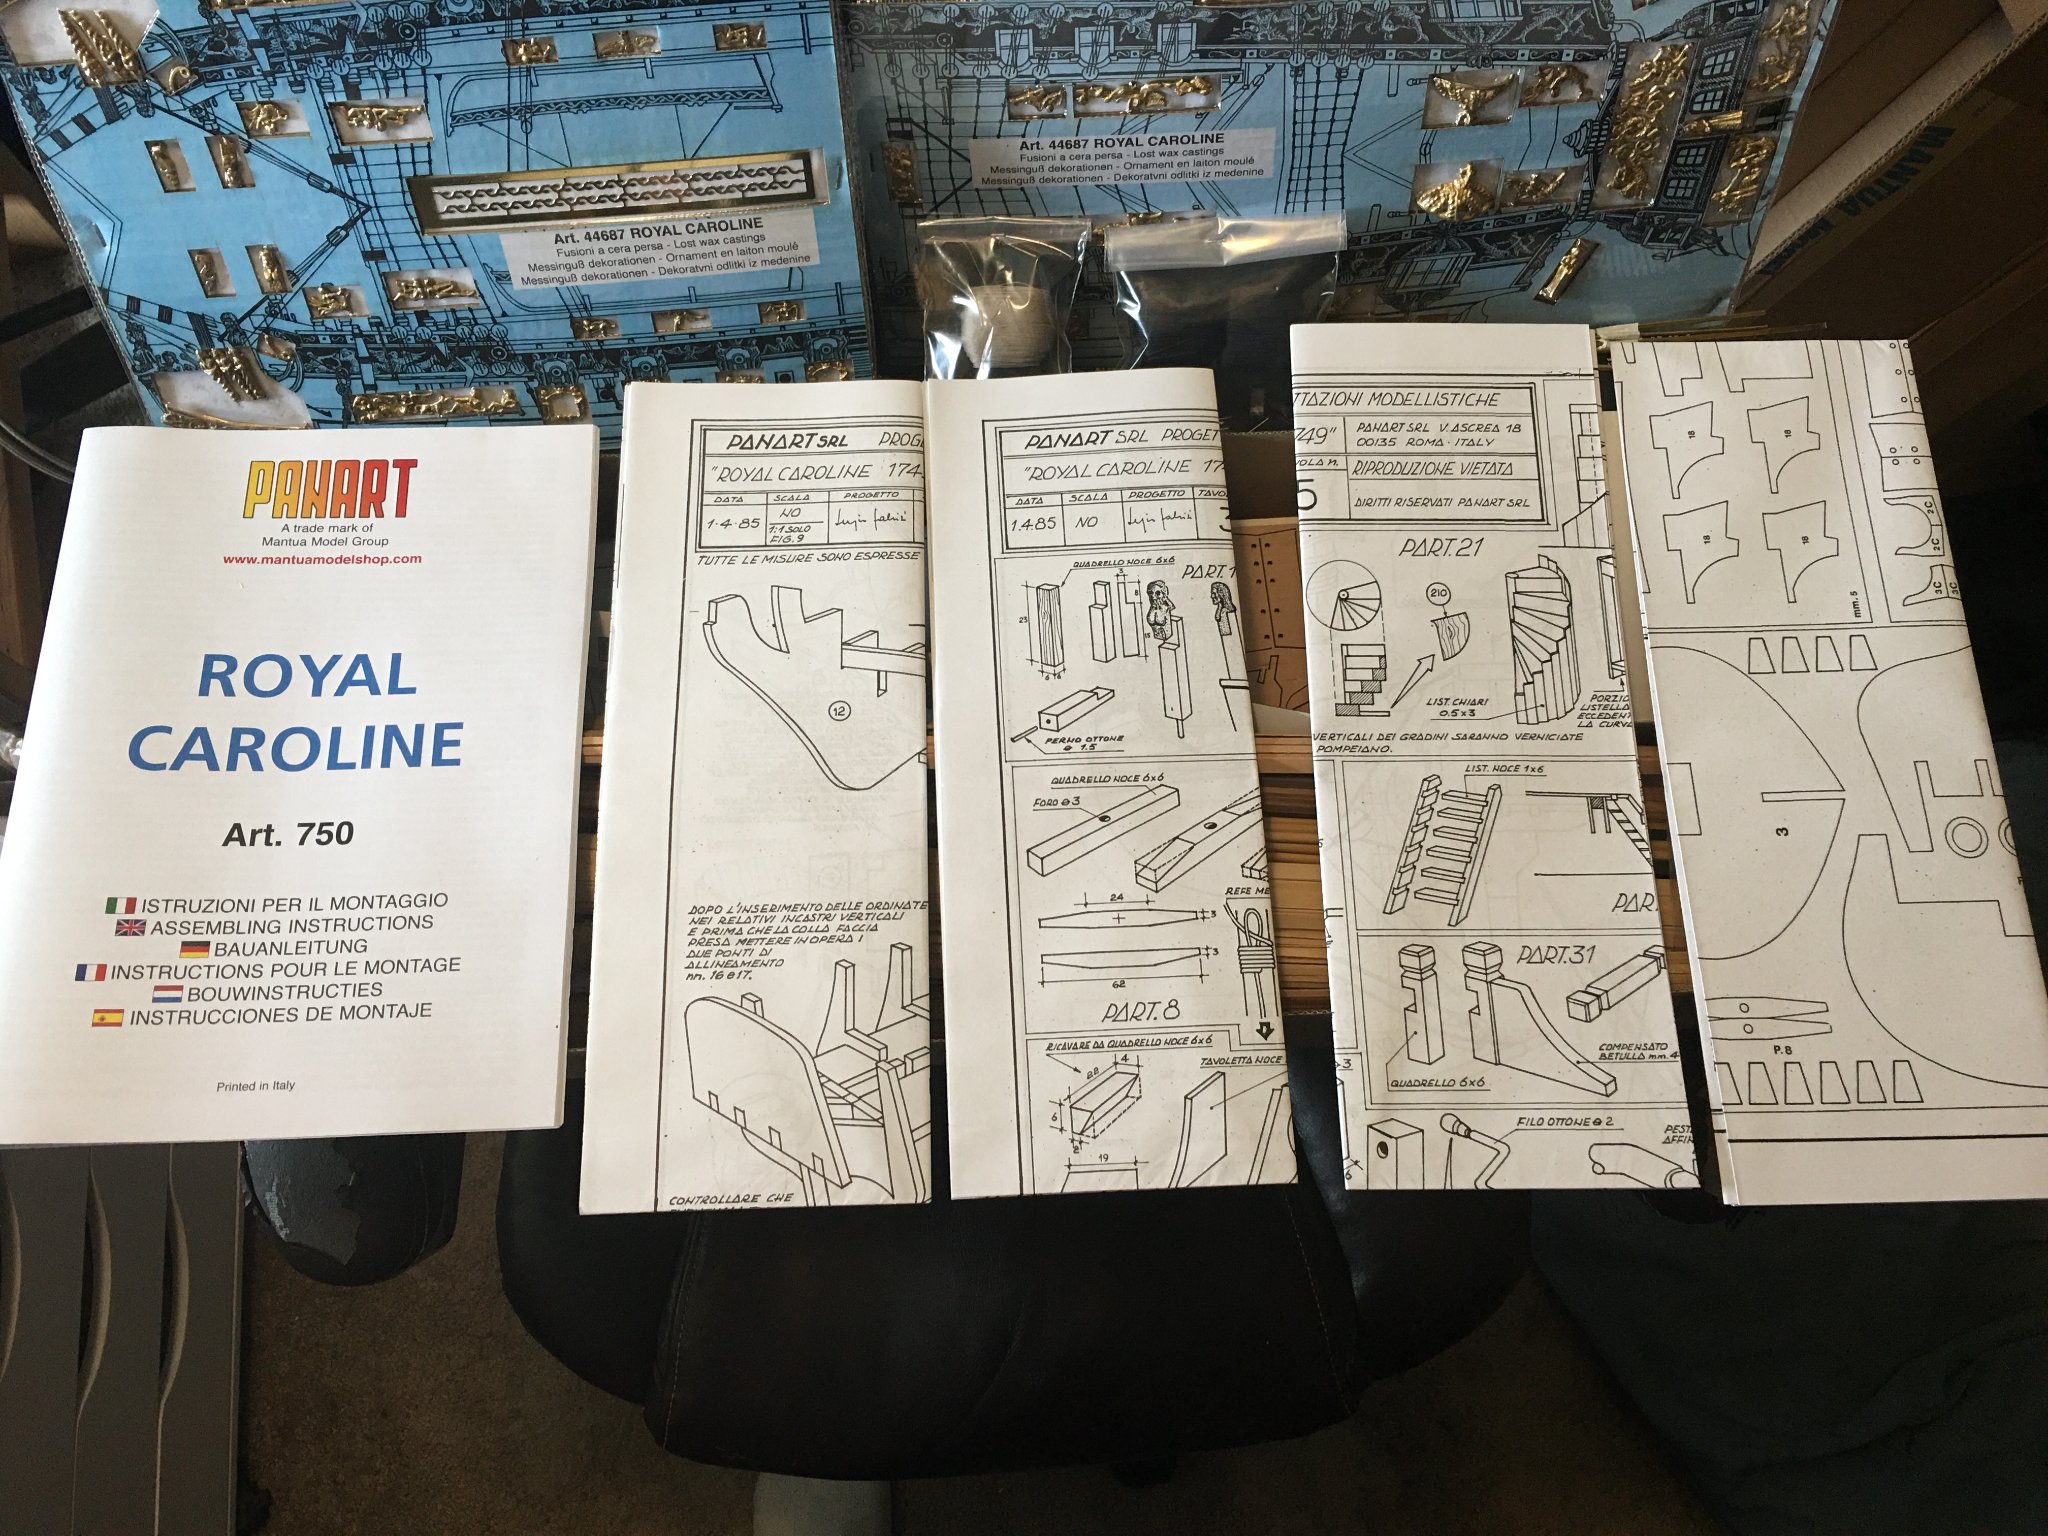
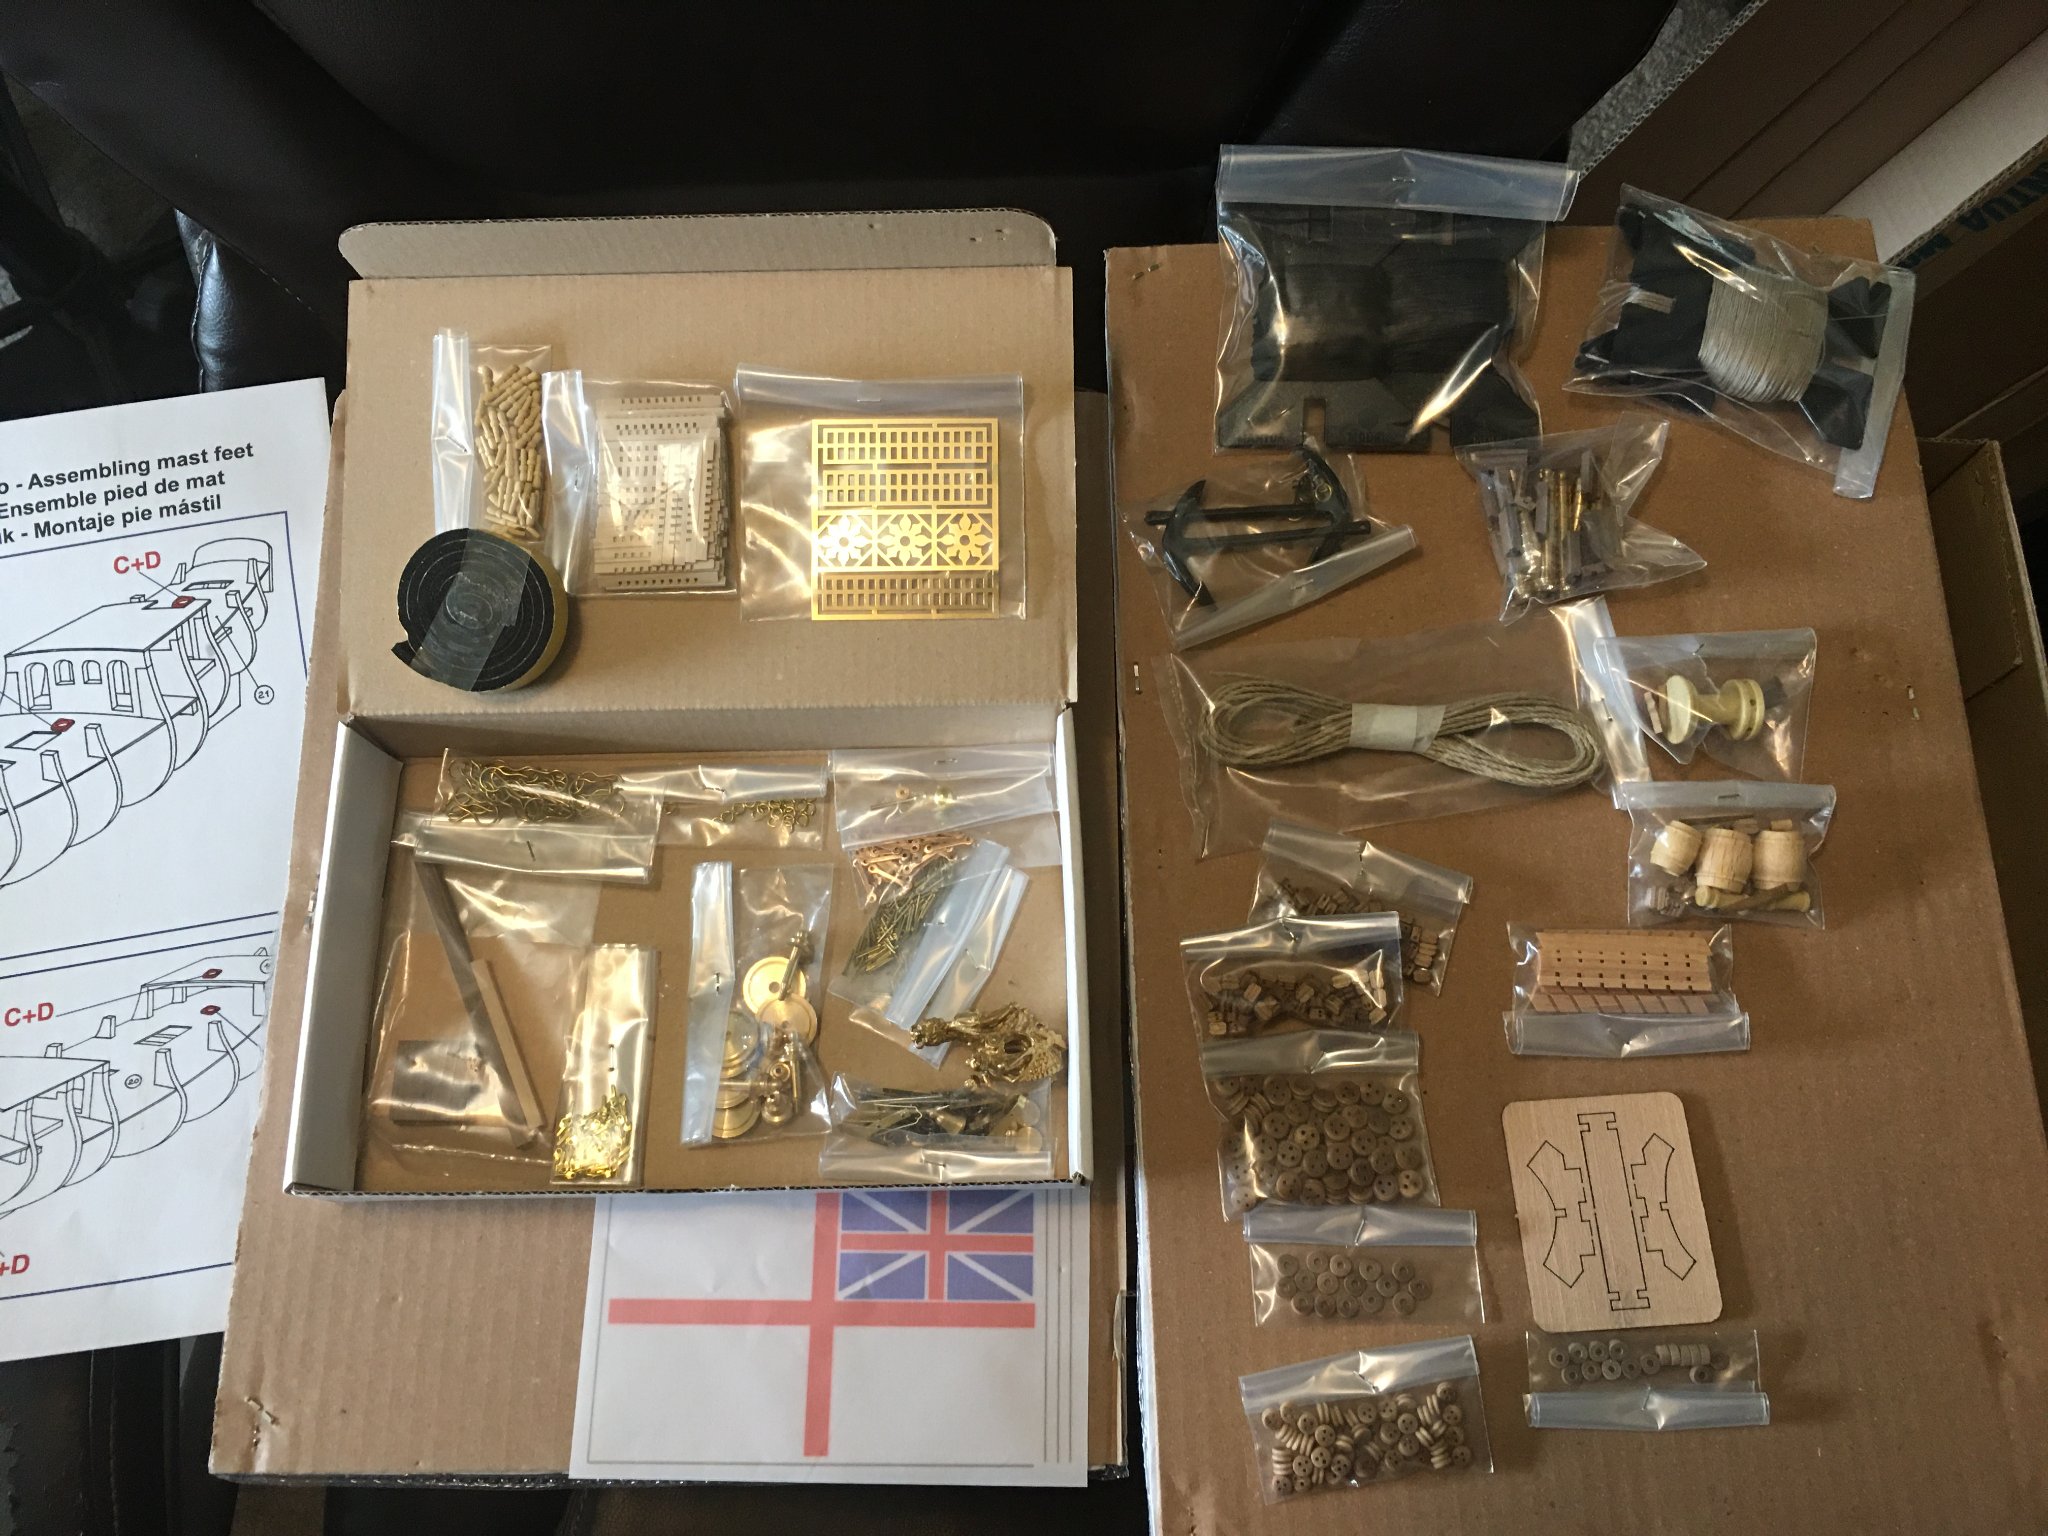
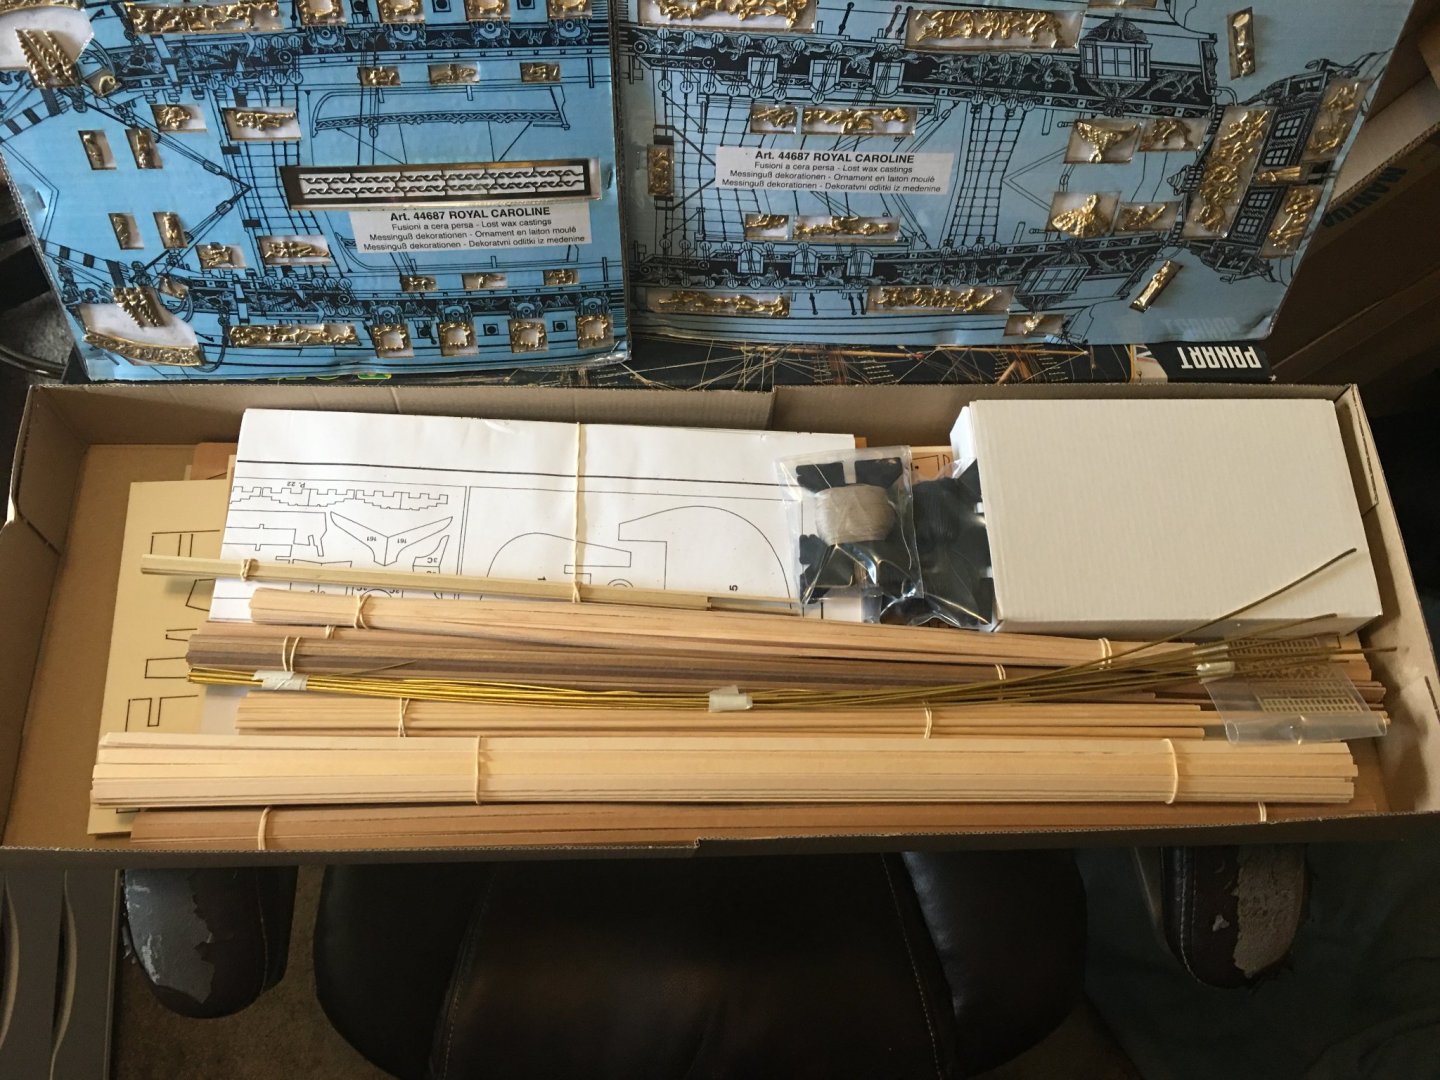
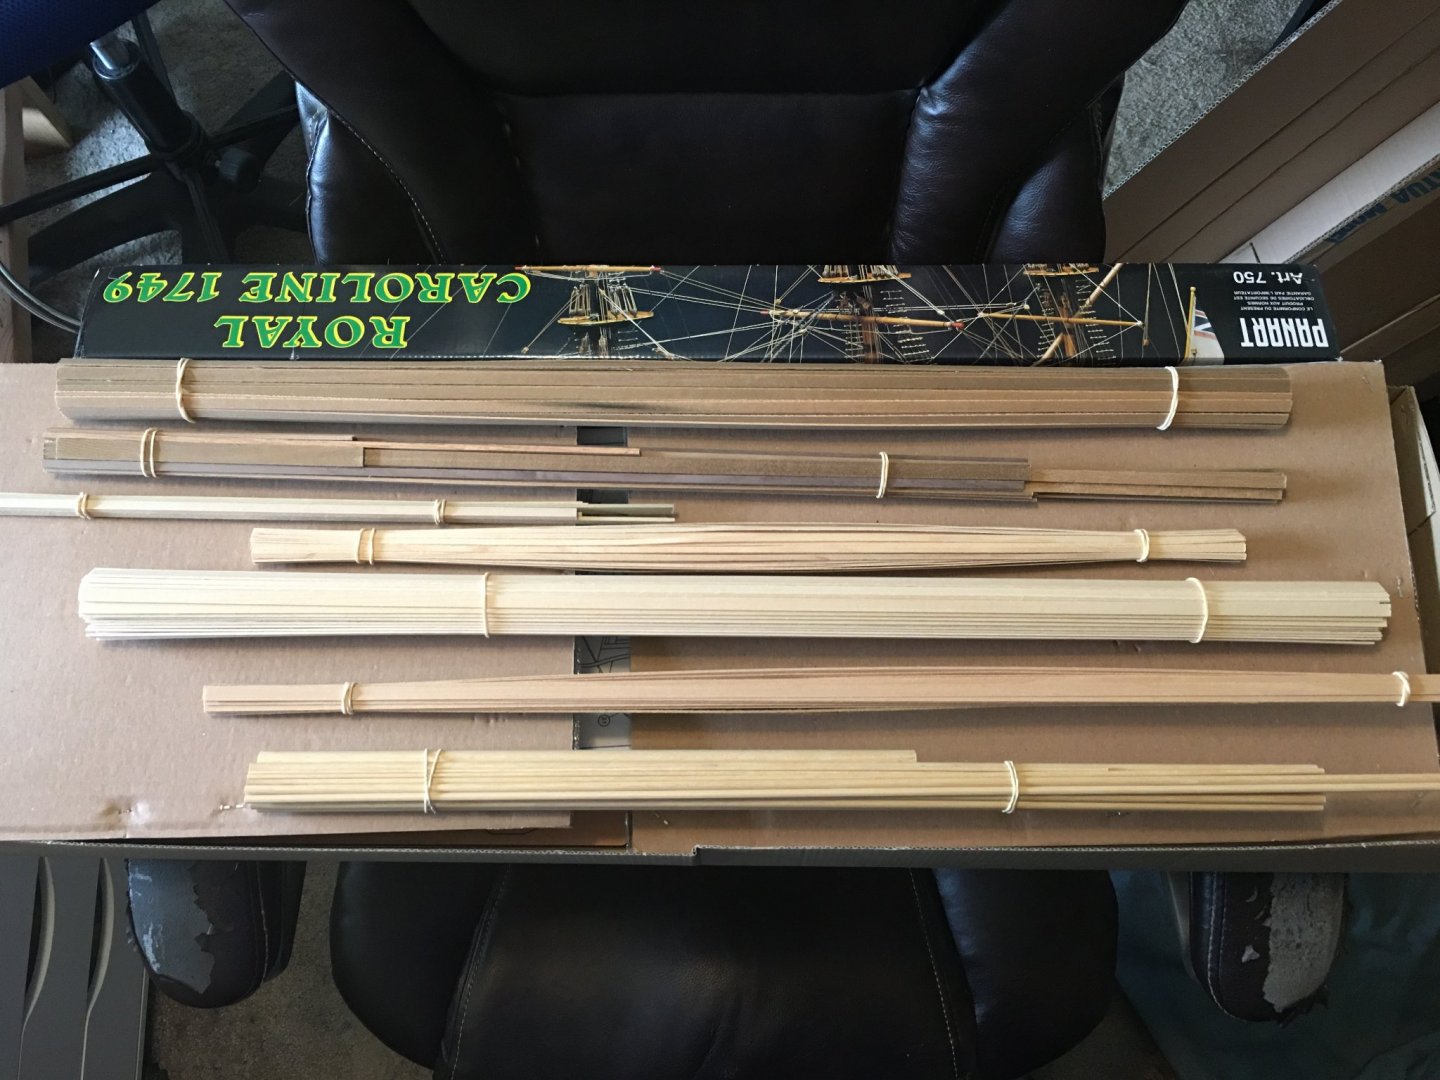
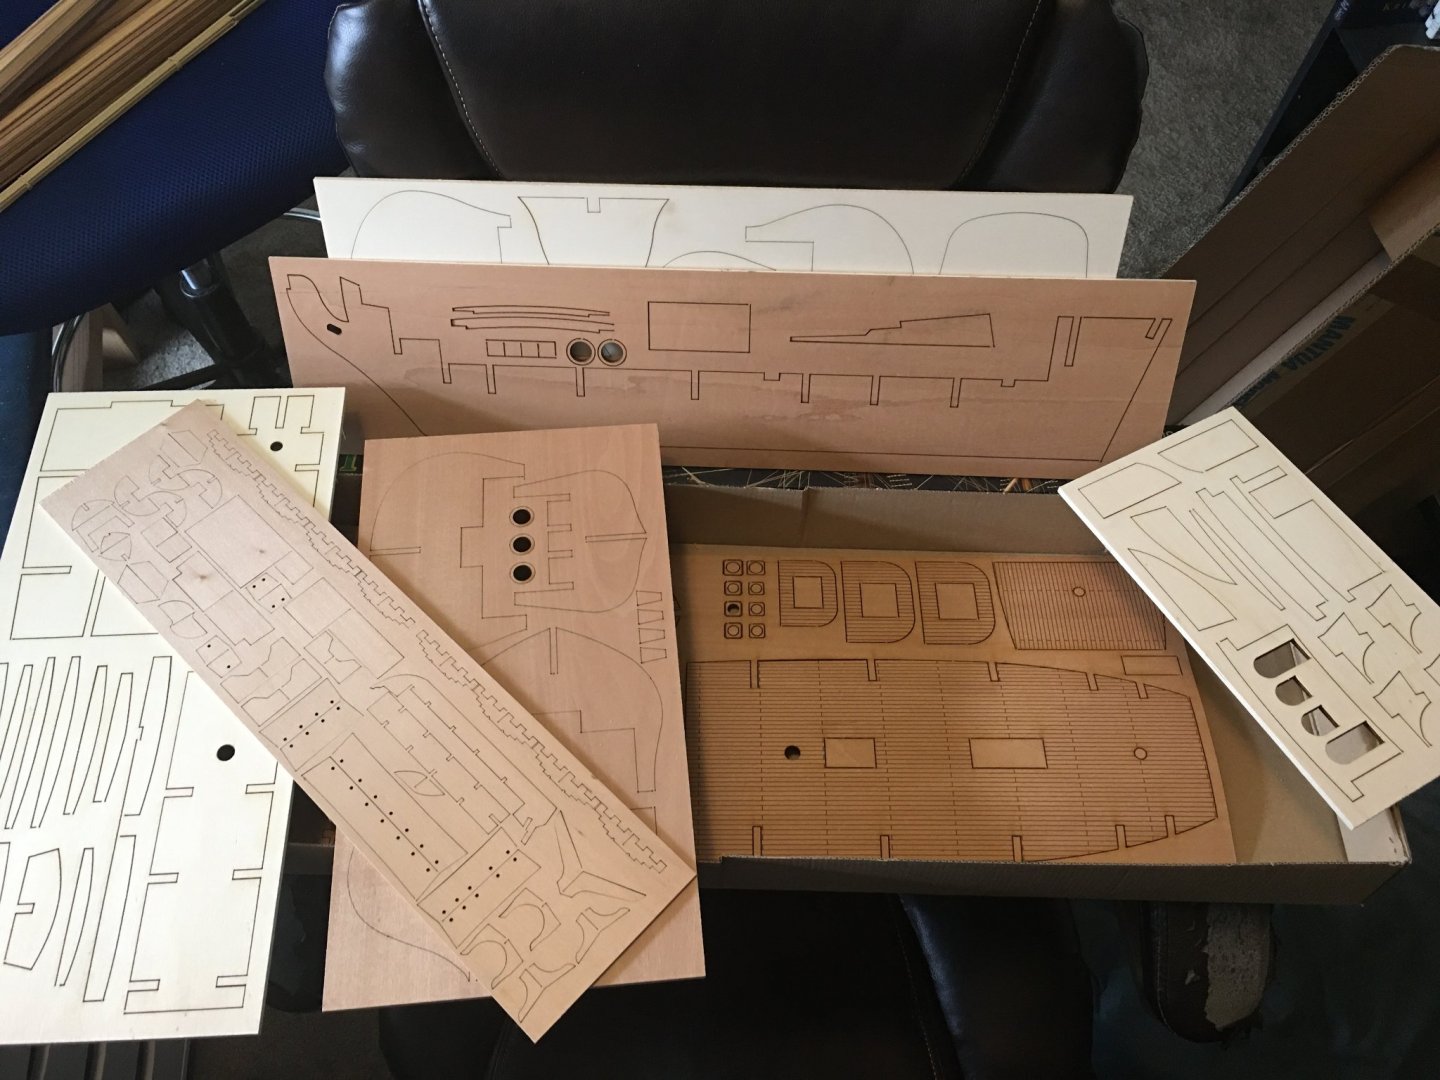
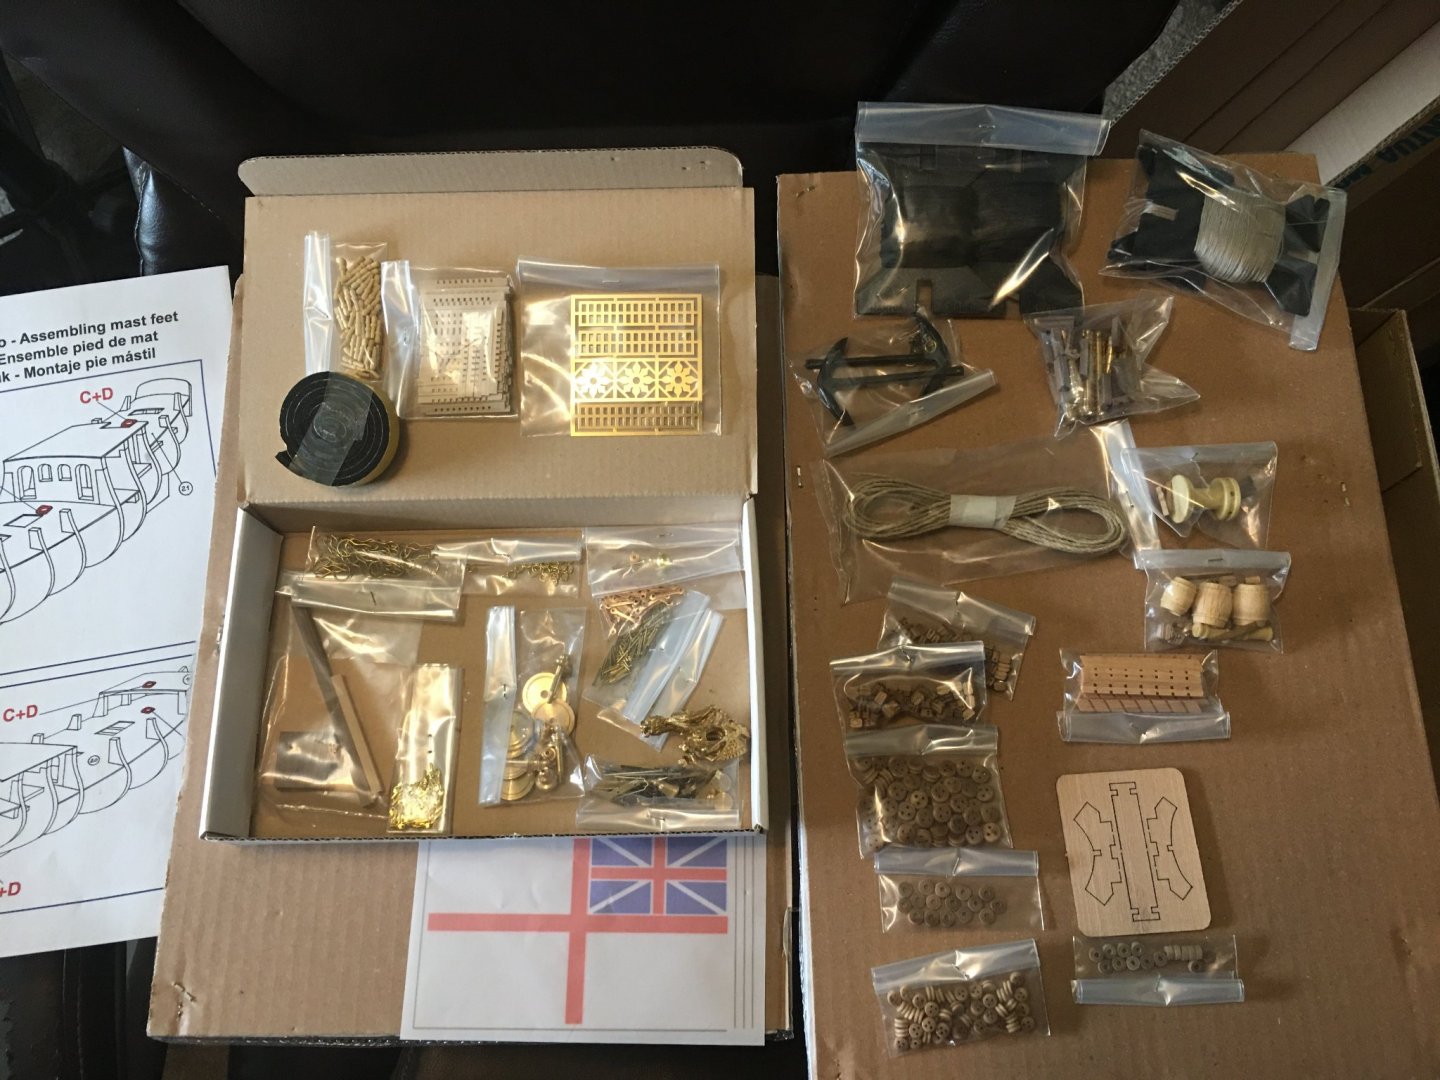
 Hello all! I have discovered a long time ago that I cannot simply build one ship at a time. As I am only working on Royal Louis right now, and am nearing the halfway point, I found myself with the itch to start a new build. I do enjoy doing things this way as it allows me to switch back and forth between builds when I get to a point where I need more research or am simply bored with what I am currently doing. I was originally going to build Sovereign of the Seas, but every store I checked was currently sold out with no expected date of restock due to global shipping conditions. The one I found was priced far higher than normal and so I passed. Thanks particularly to Doris' breathtaking build of Royal Caroline, this beautiful yacht had been at the top of my wish list for some time and so I decided to go for it. As usual for me, I intend to heavily bash this kit, particularly to build out the interior cabins and provide lighting to illuminate those details. Working with a far larger scale than I am usually accustomed to, 1:48 compared to my other current build of 1:90, means that I will have ample opportunity for showing those details with clarity, and far less excuses for shoddy work... 😬 So please, pull up a chair and join me if you like. I build slow, so get a big bucket of popcorn and settle in. I hope you enjoy the journey. First off, the unboxing. I will not go into too much detail here as these are all largely the same. What is inside is typical for a Mantua brand kit. Decent laser cut parts, clean wood and fair castings, fittings and some line for rigging. Nothing spectacular but the components will make a fine model out of the box. Some stuff I use, some I do not and will be explained as the build goes on.


-
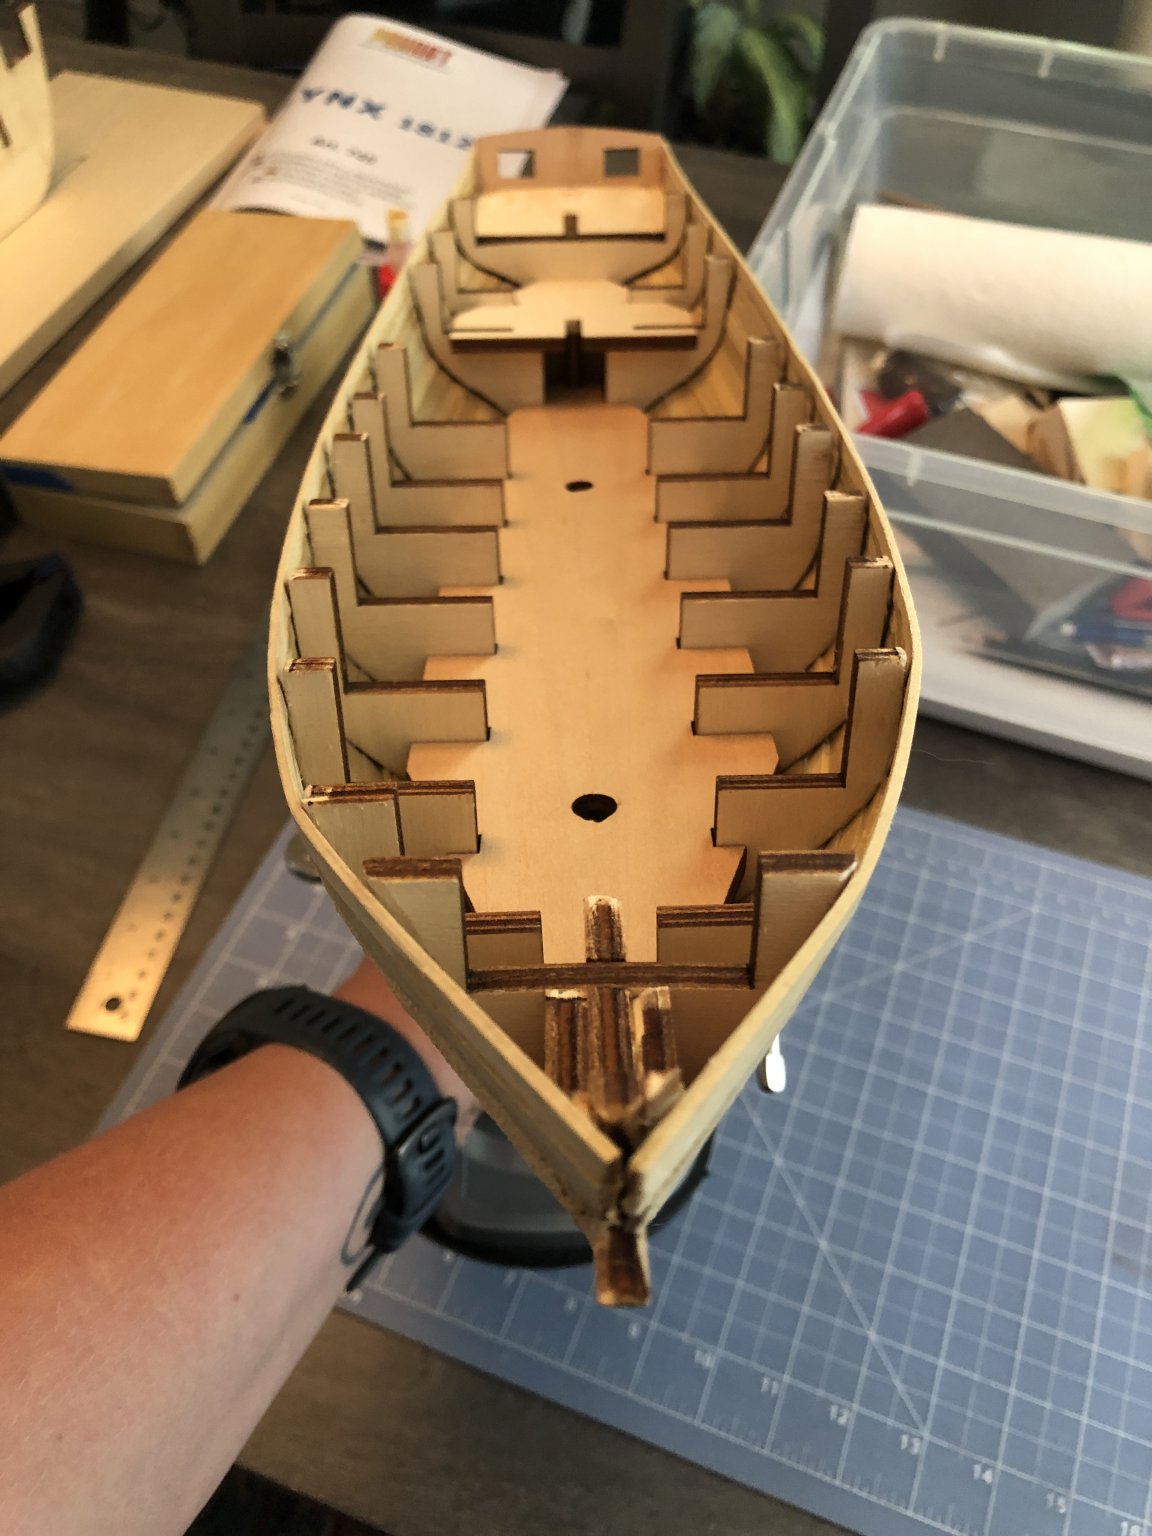
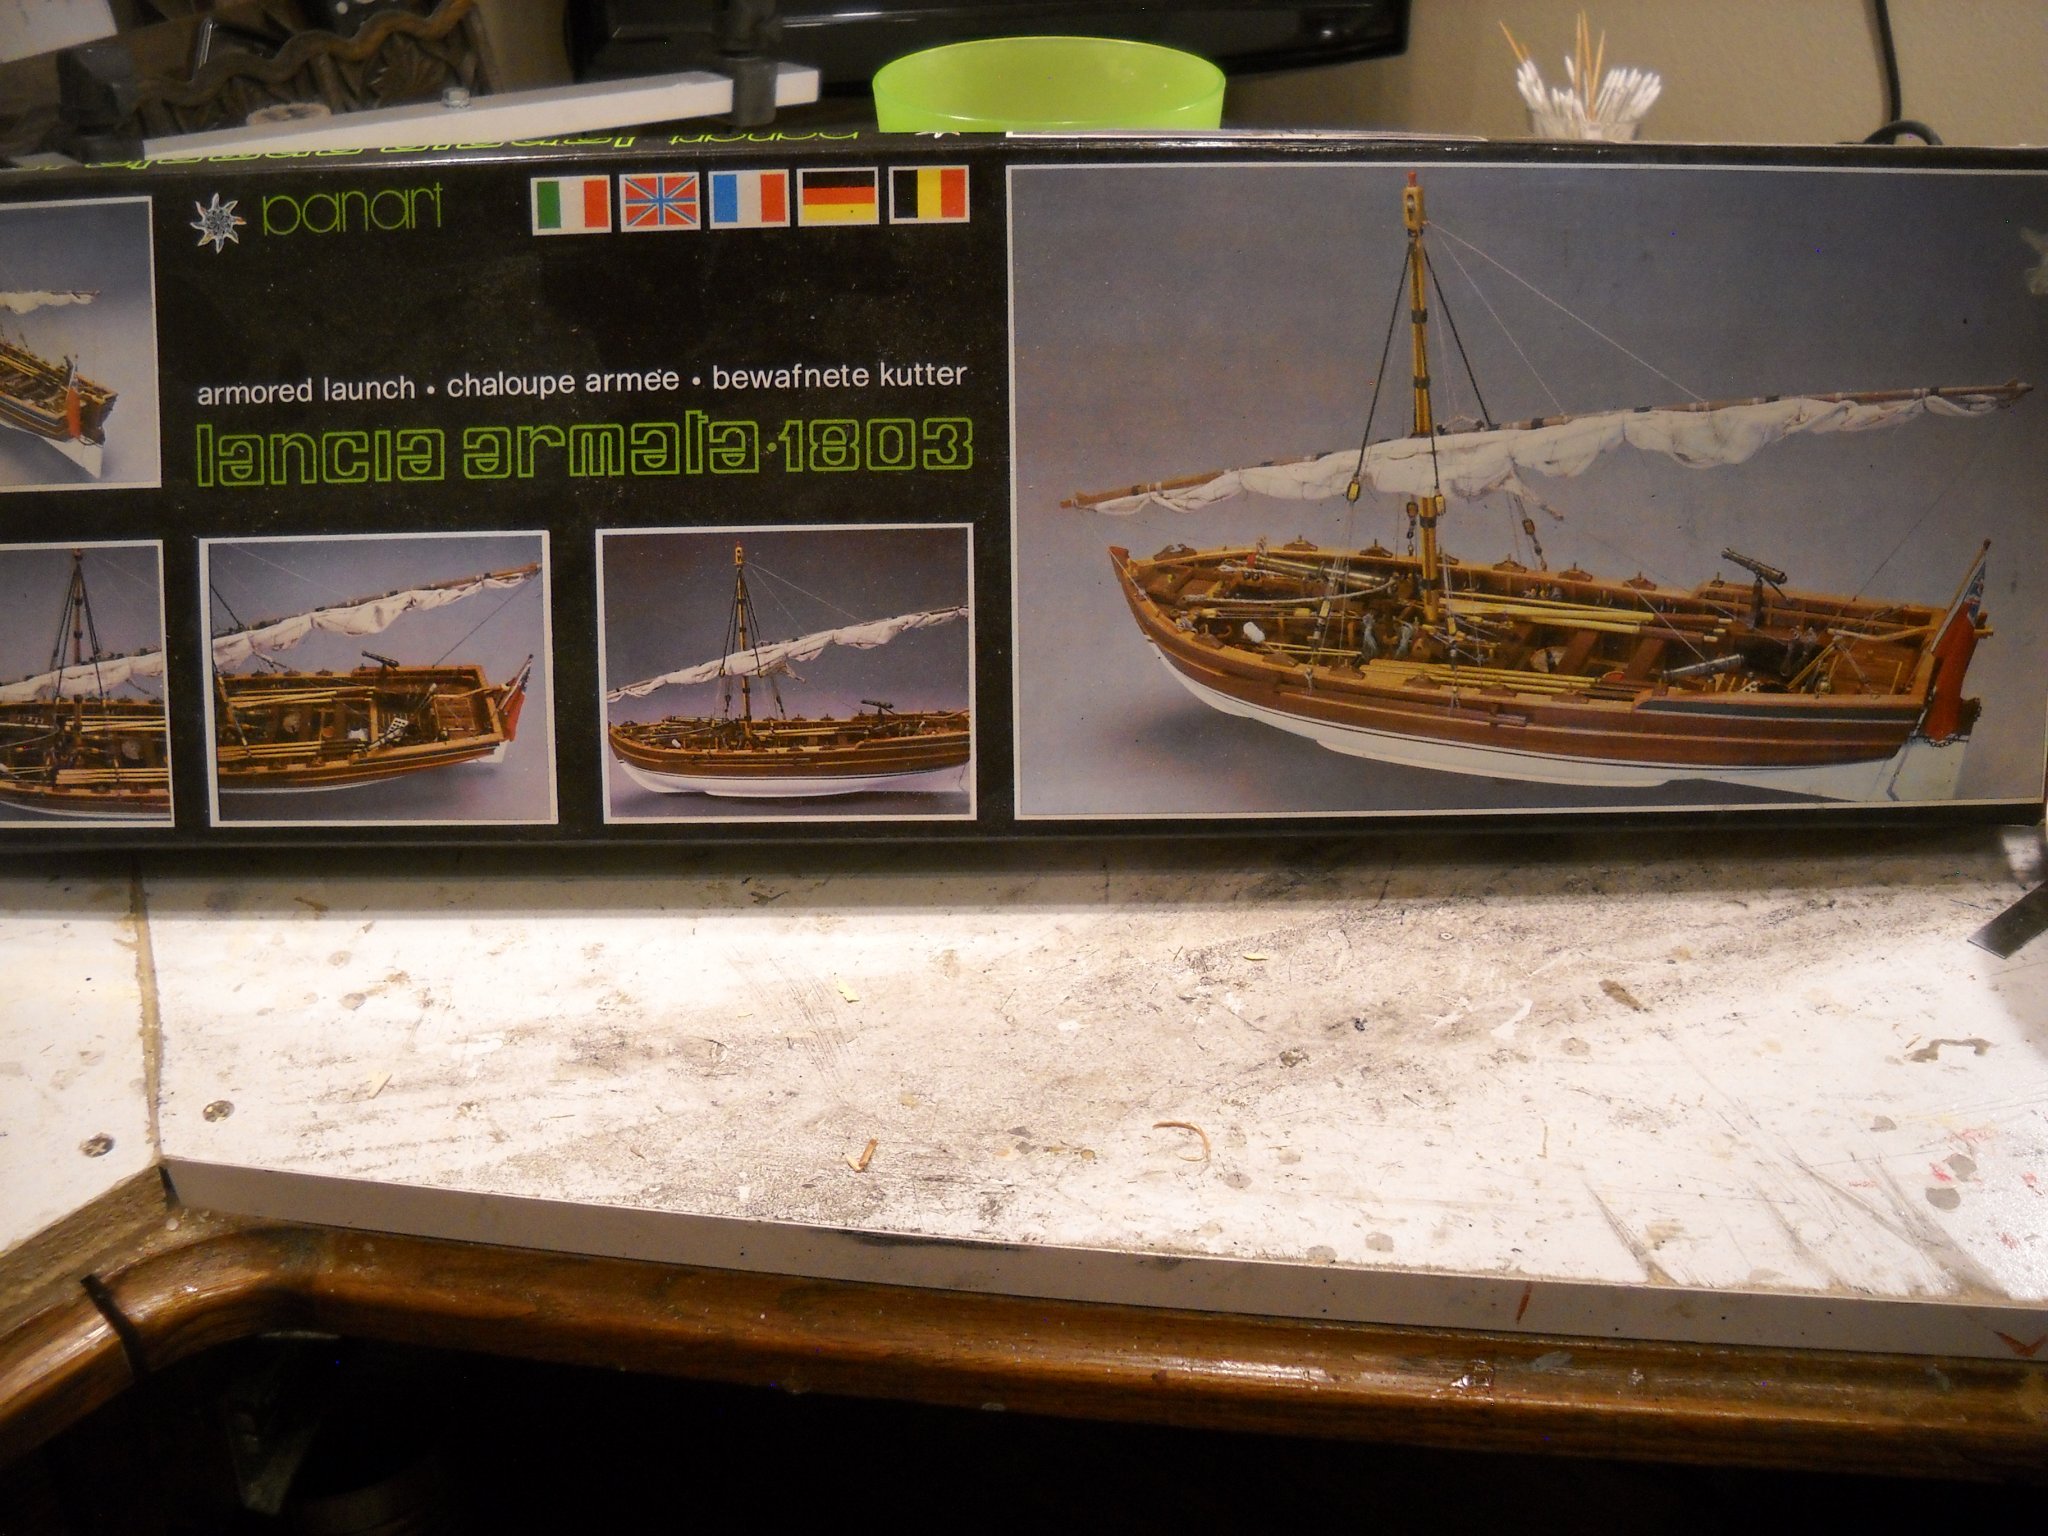
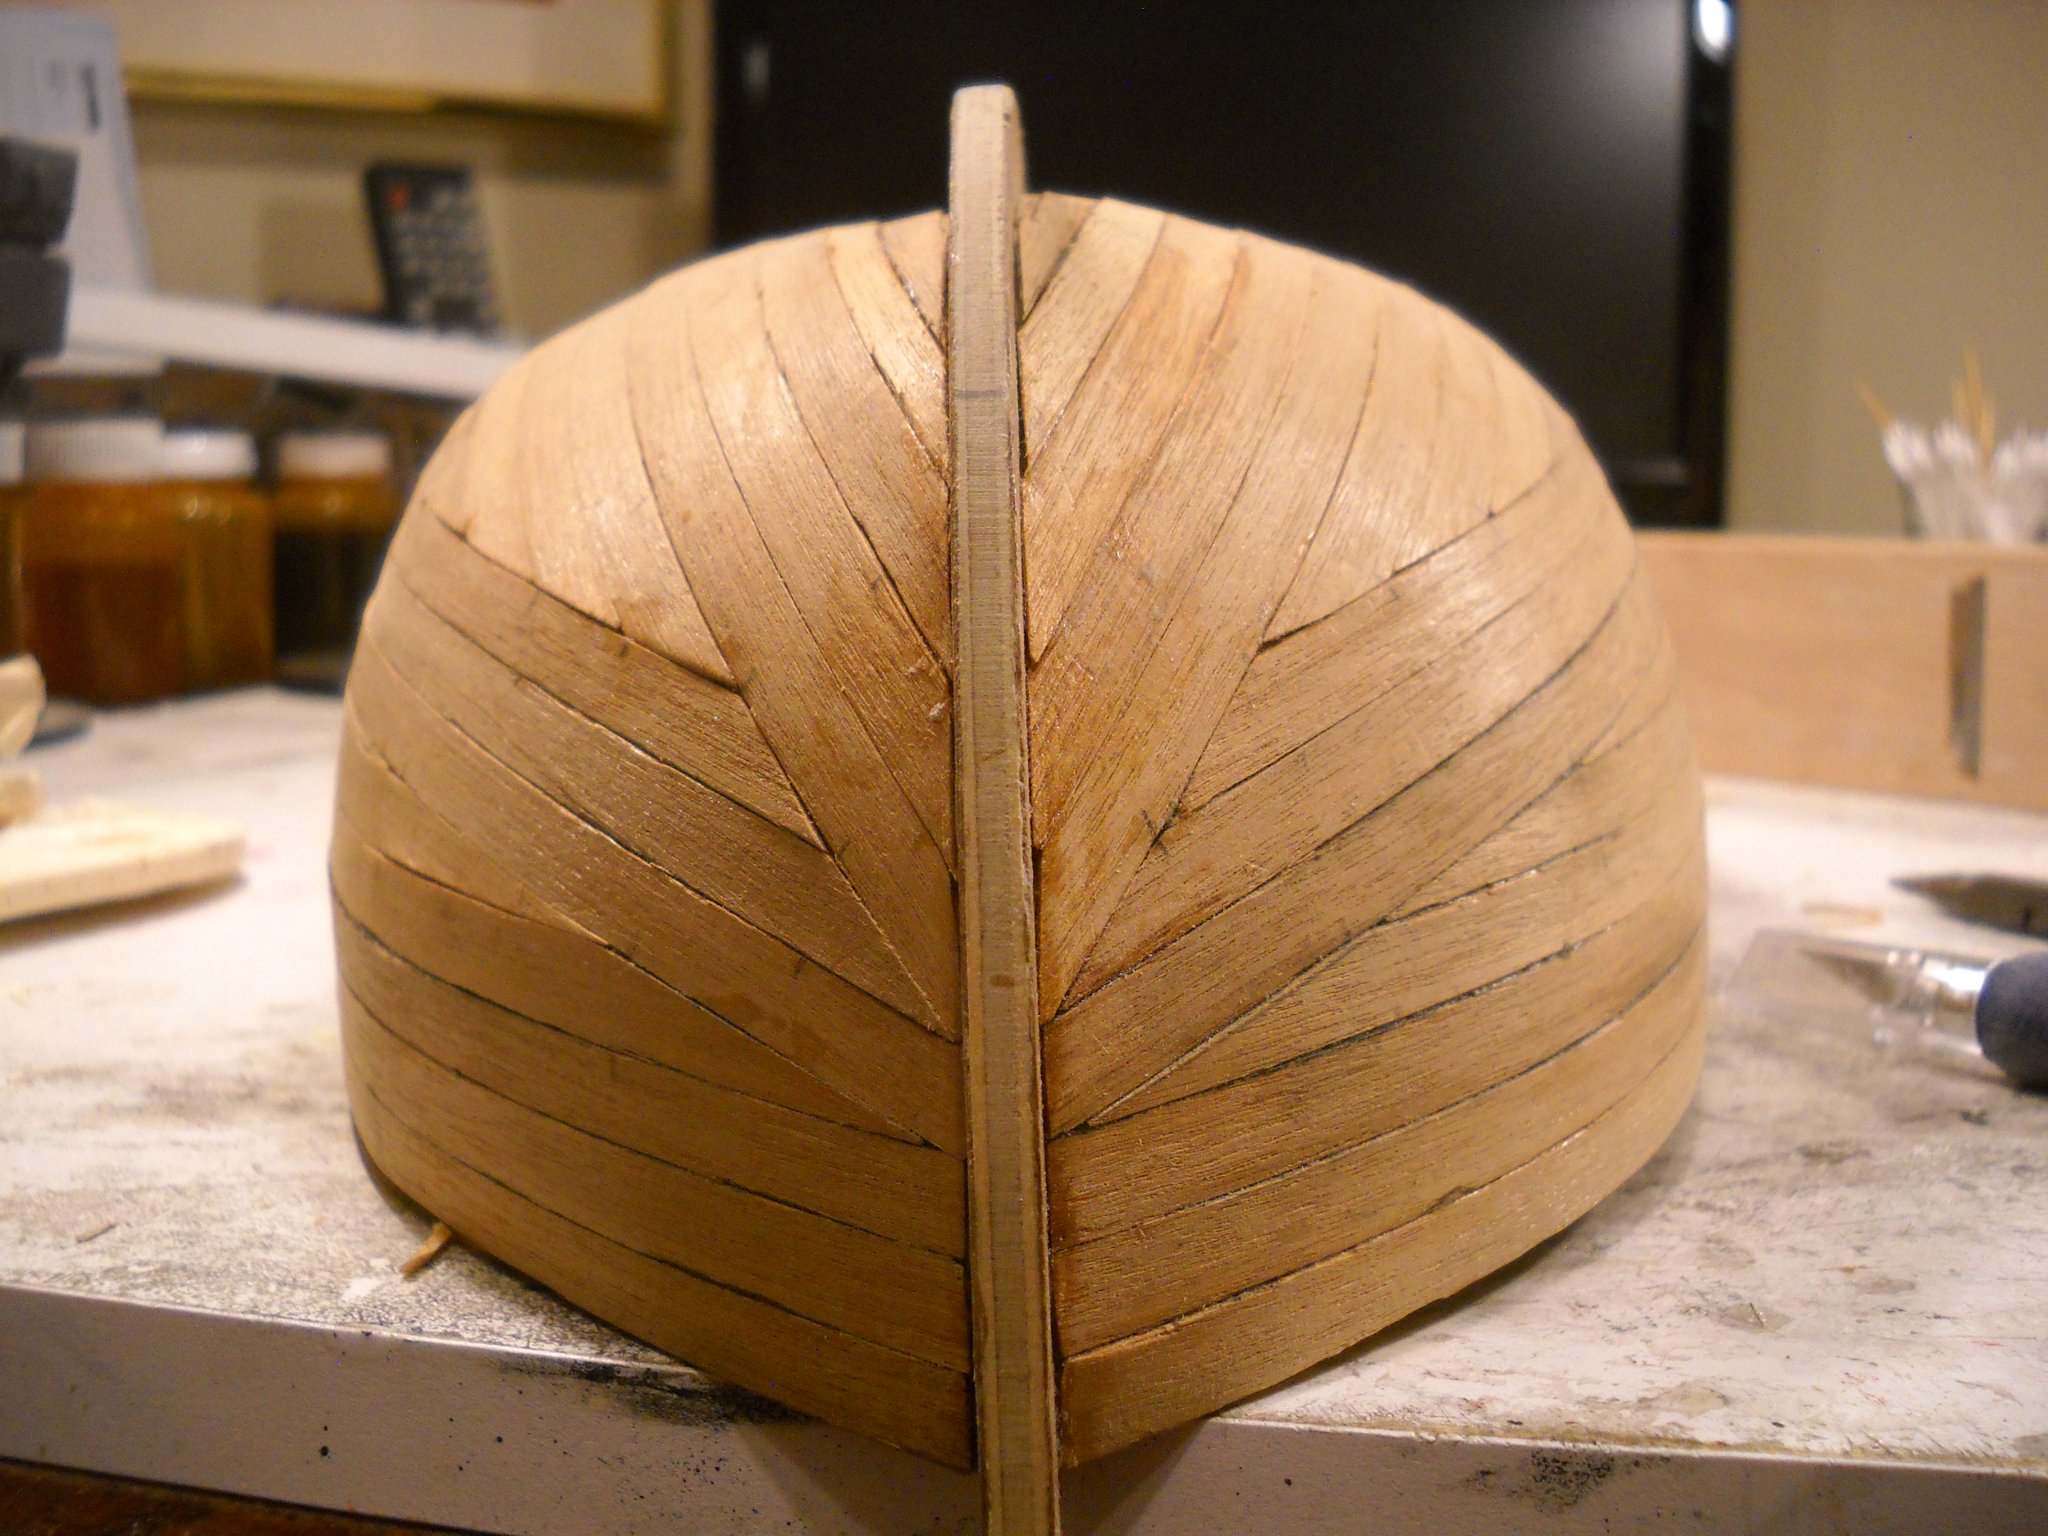
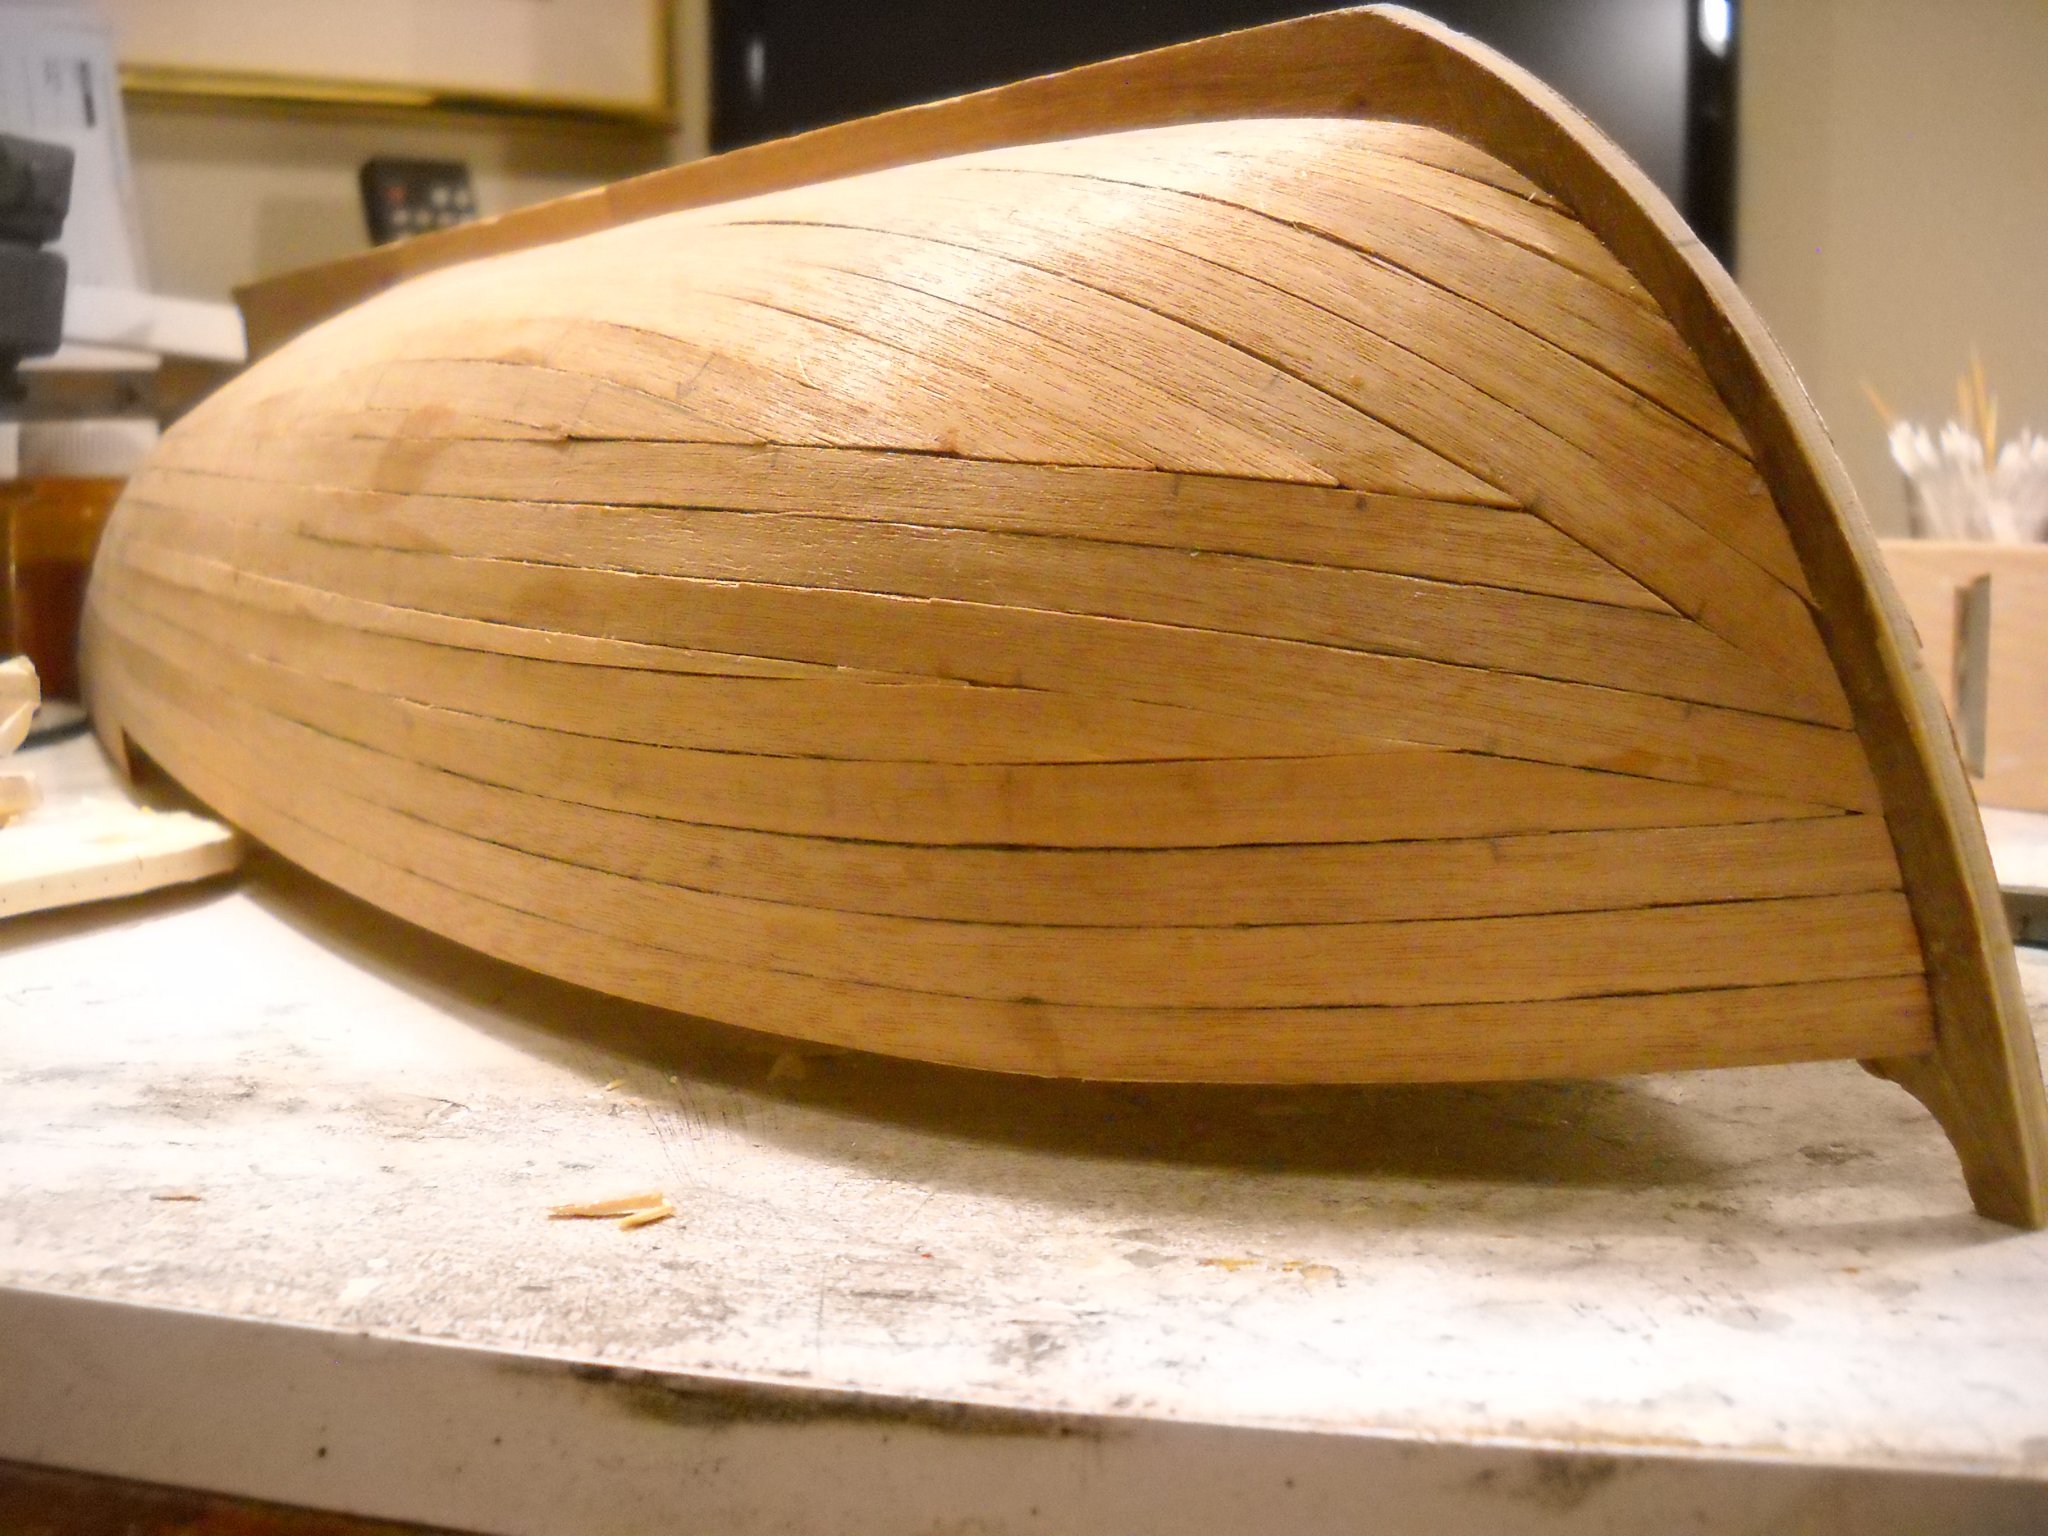
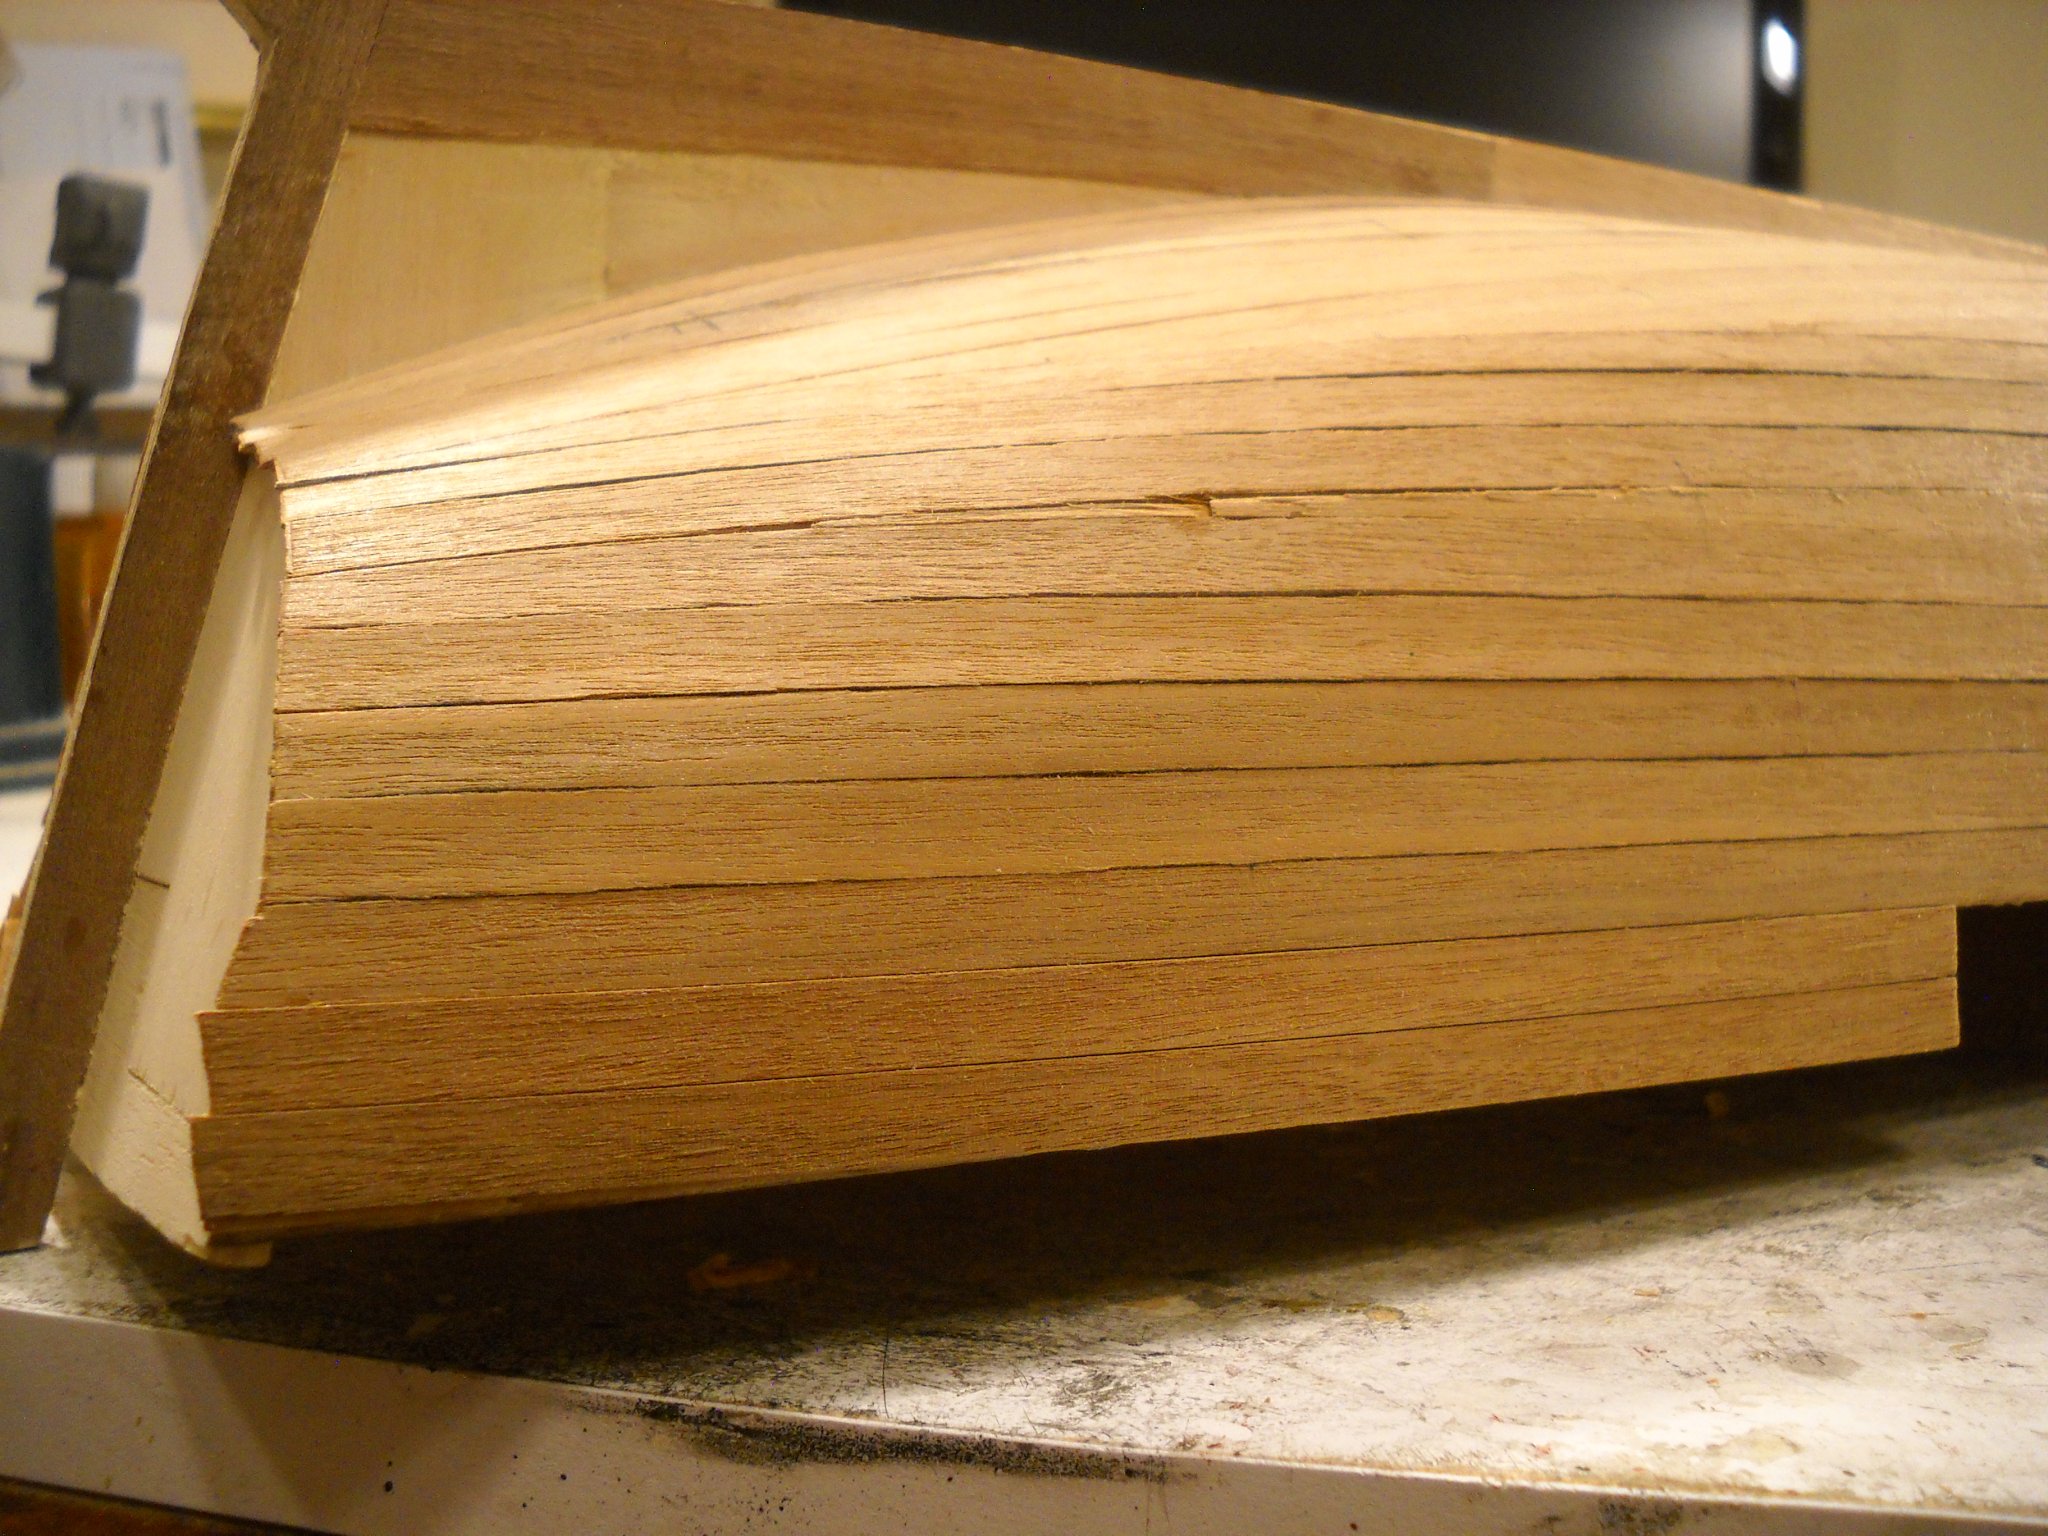
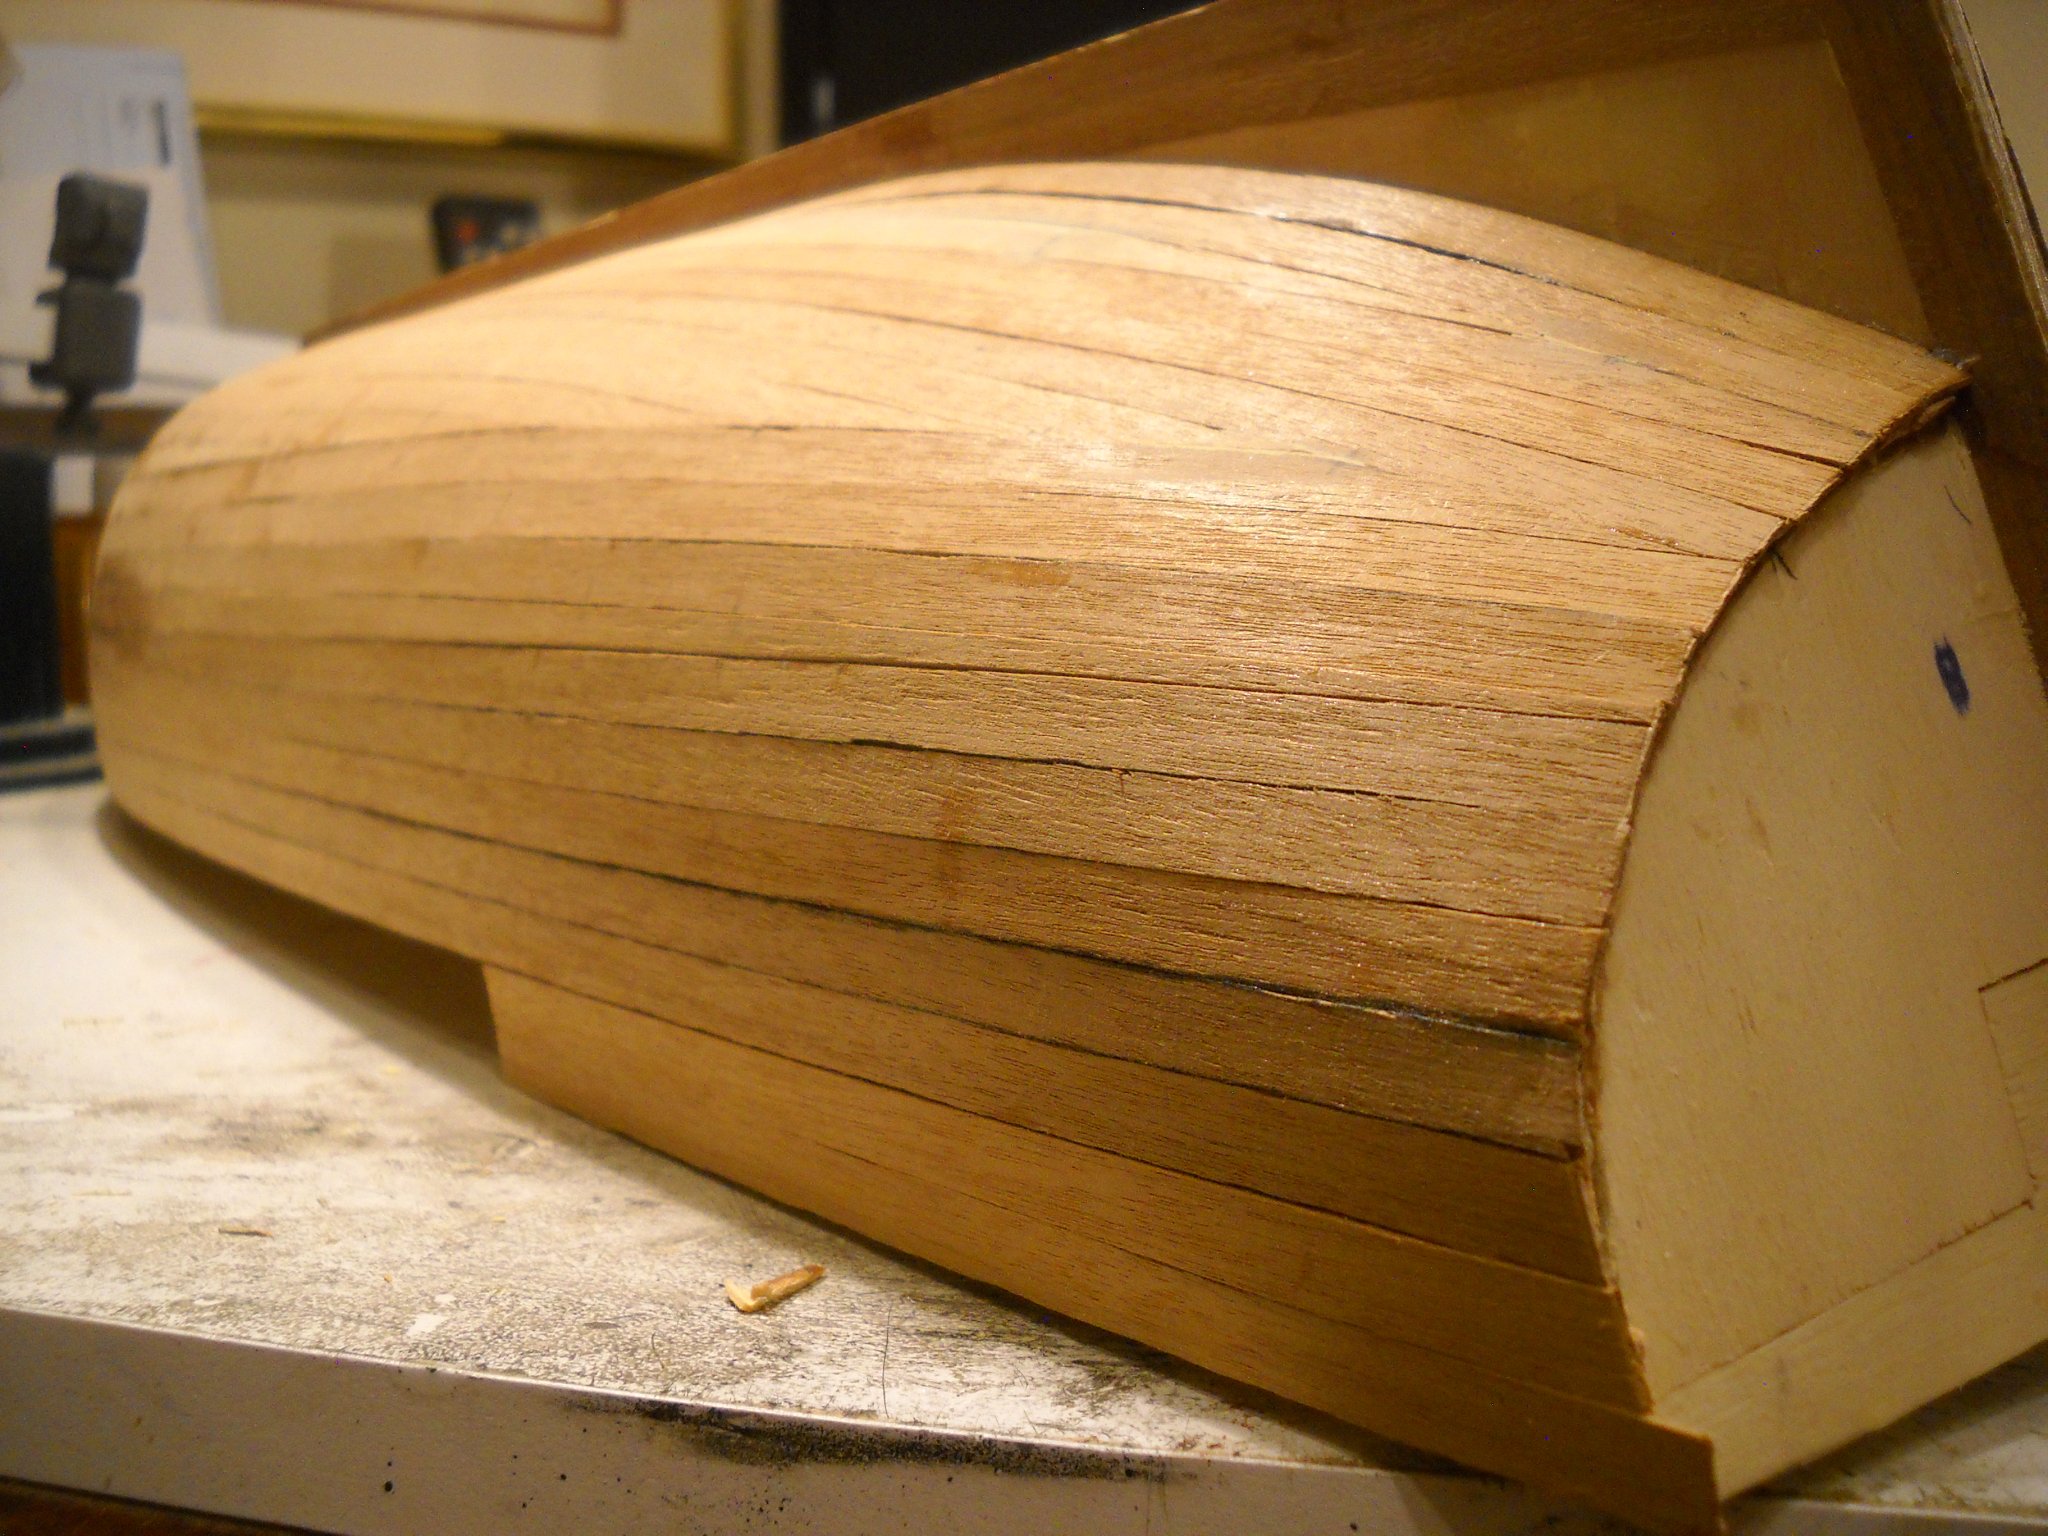
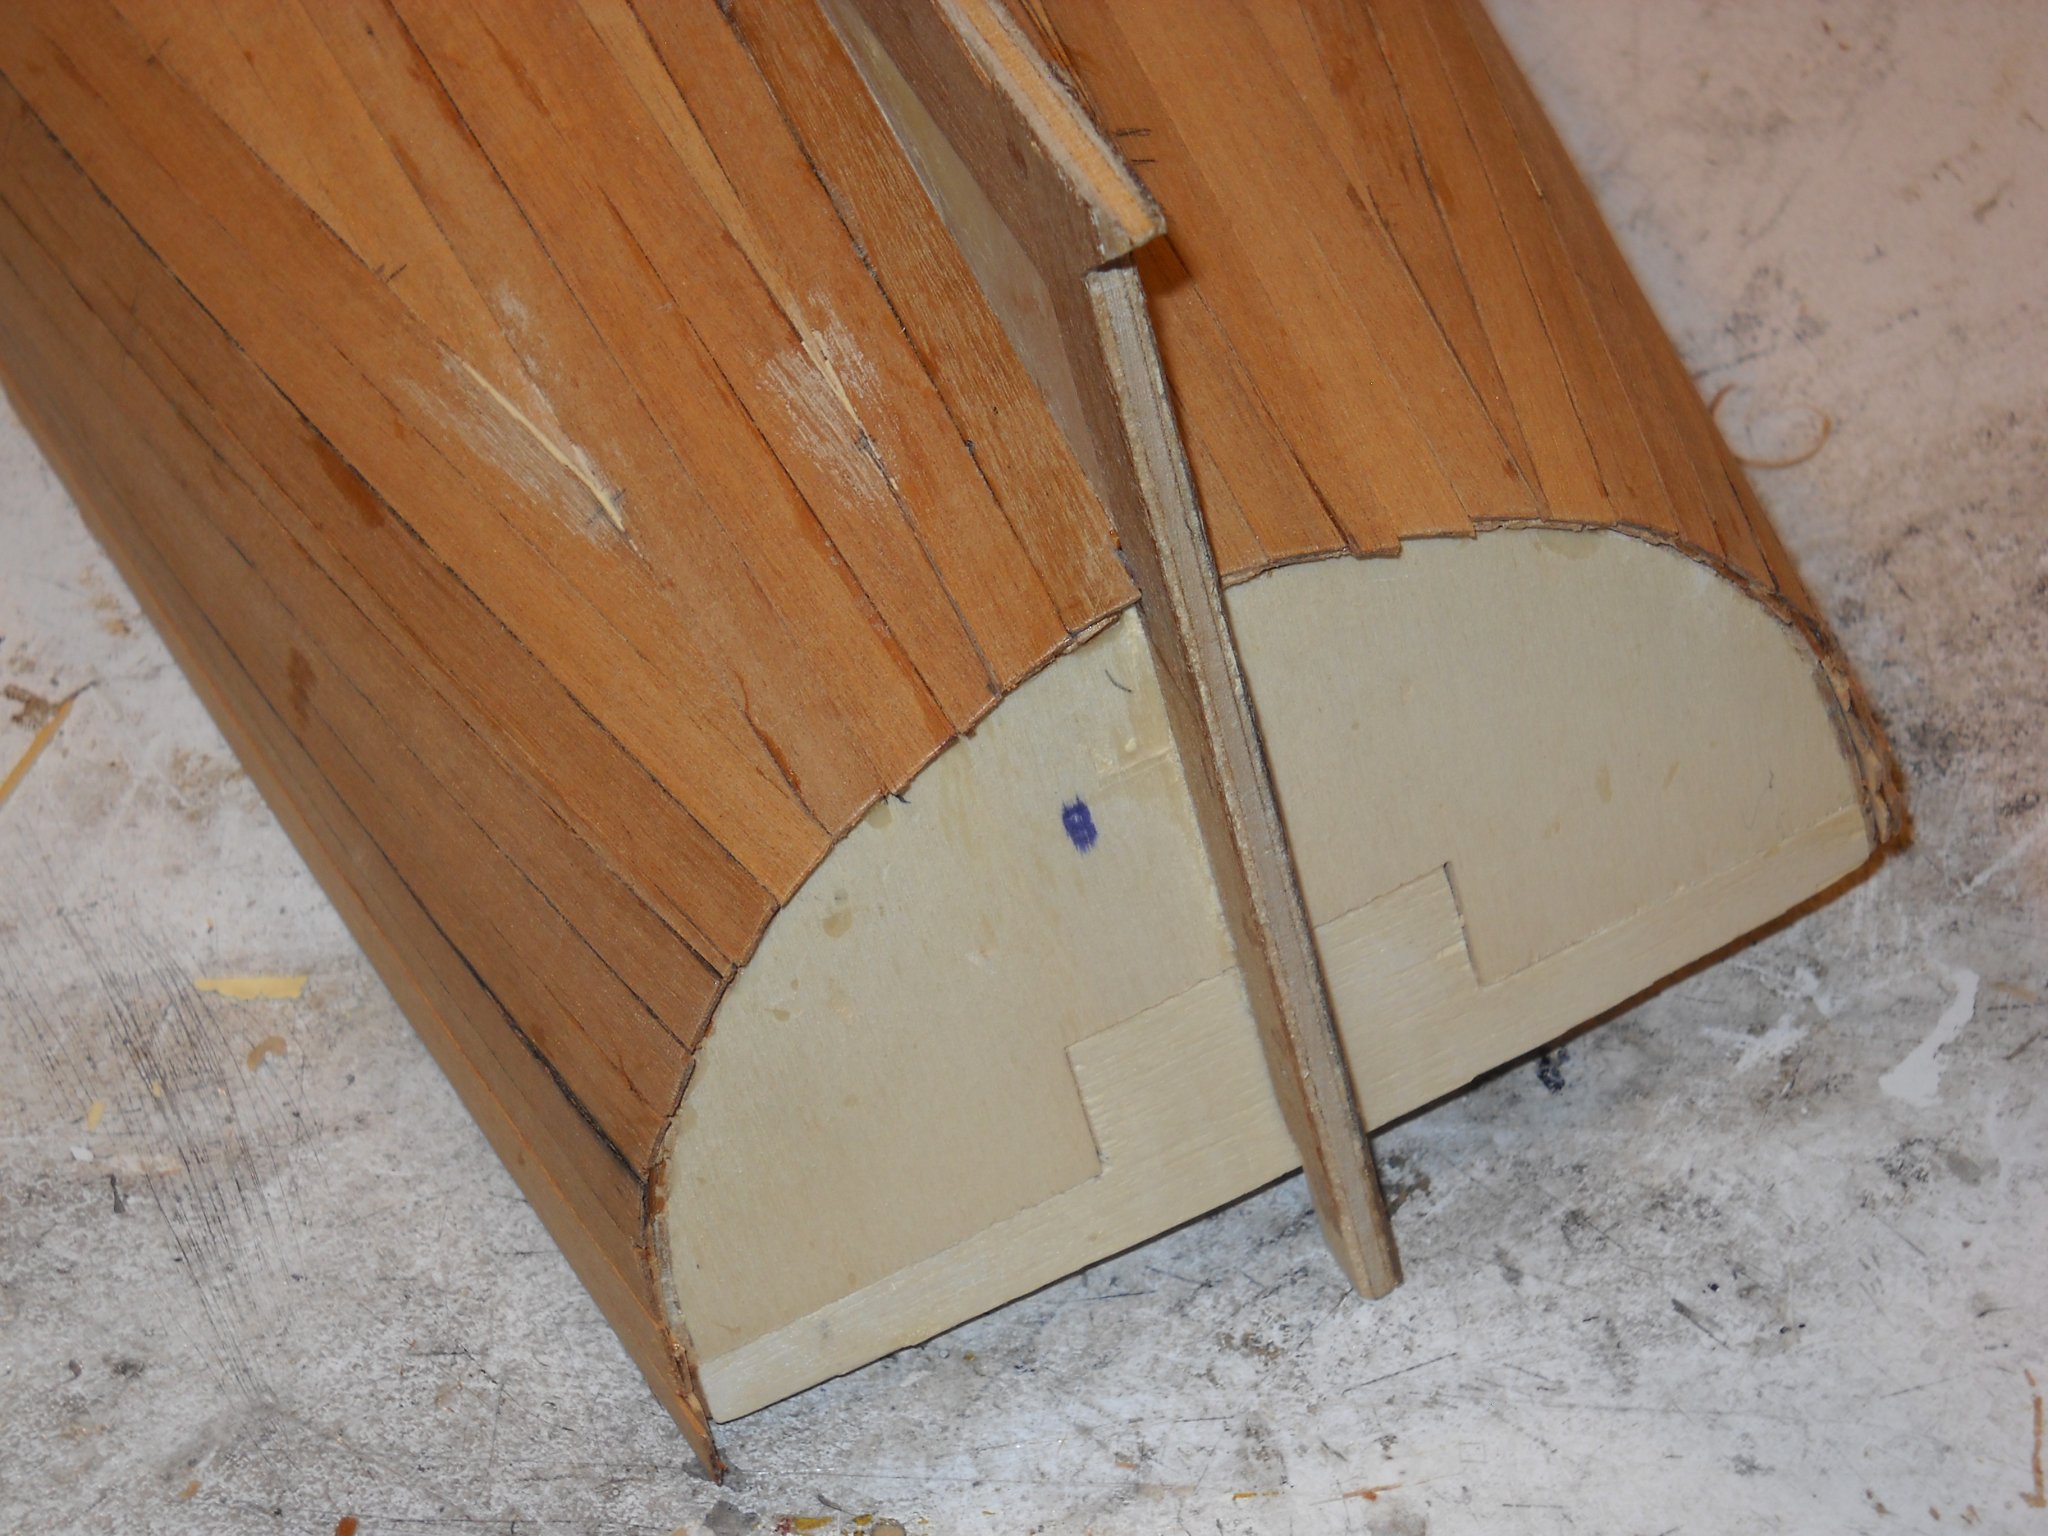
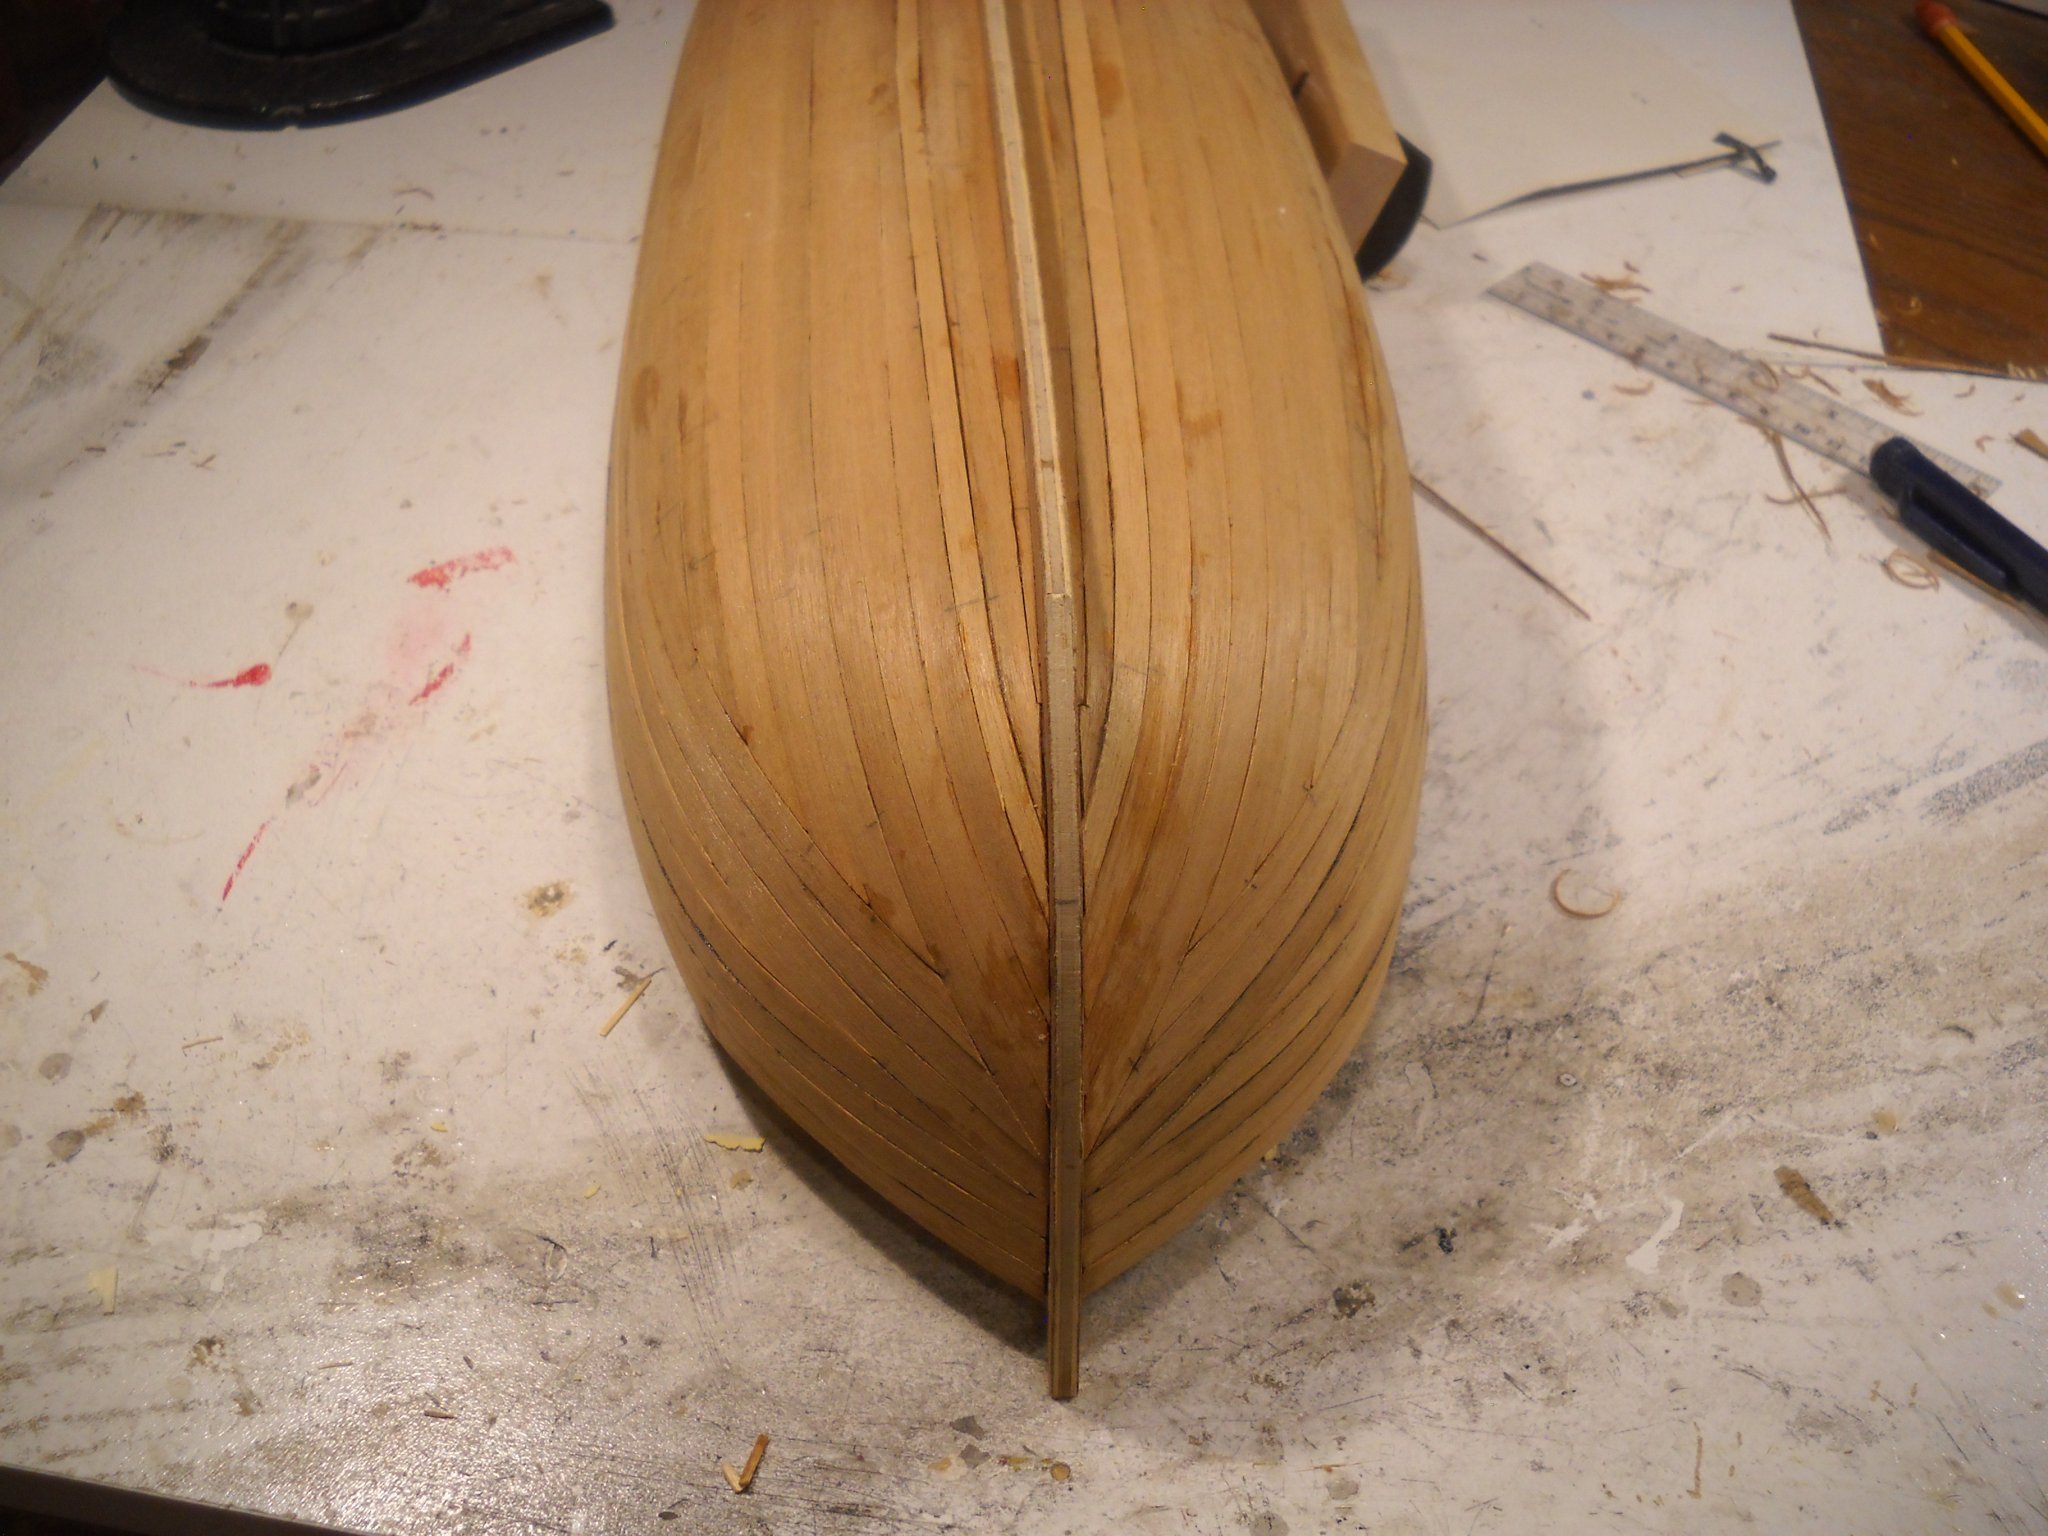
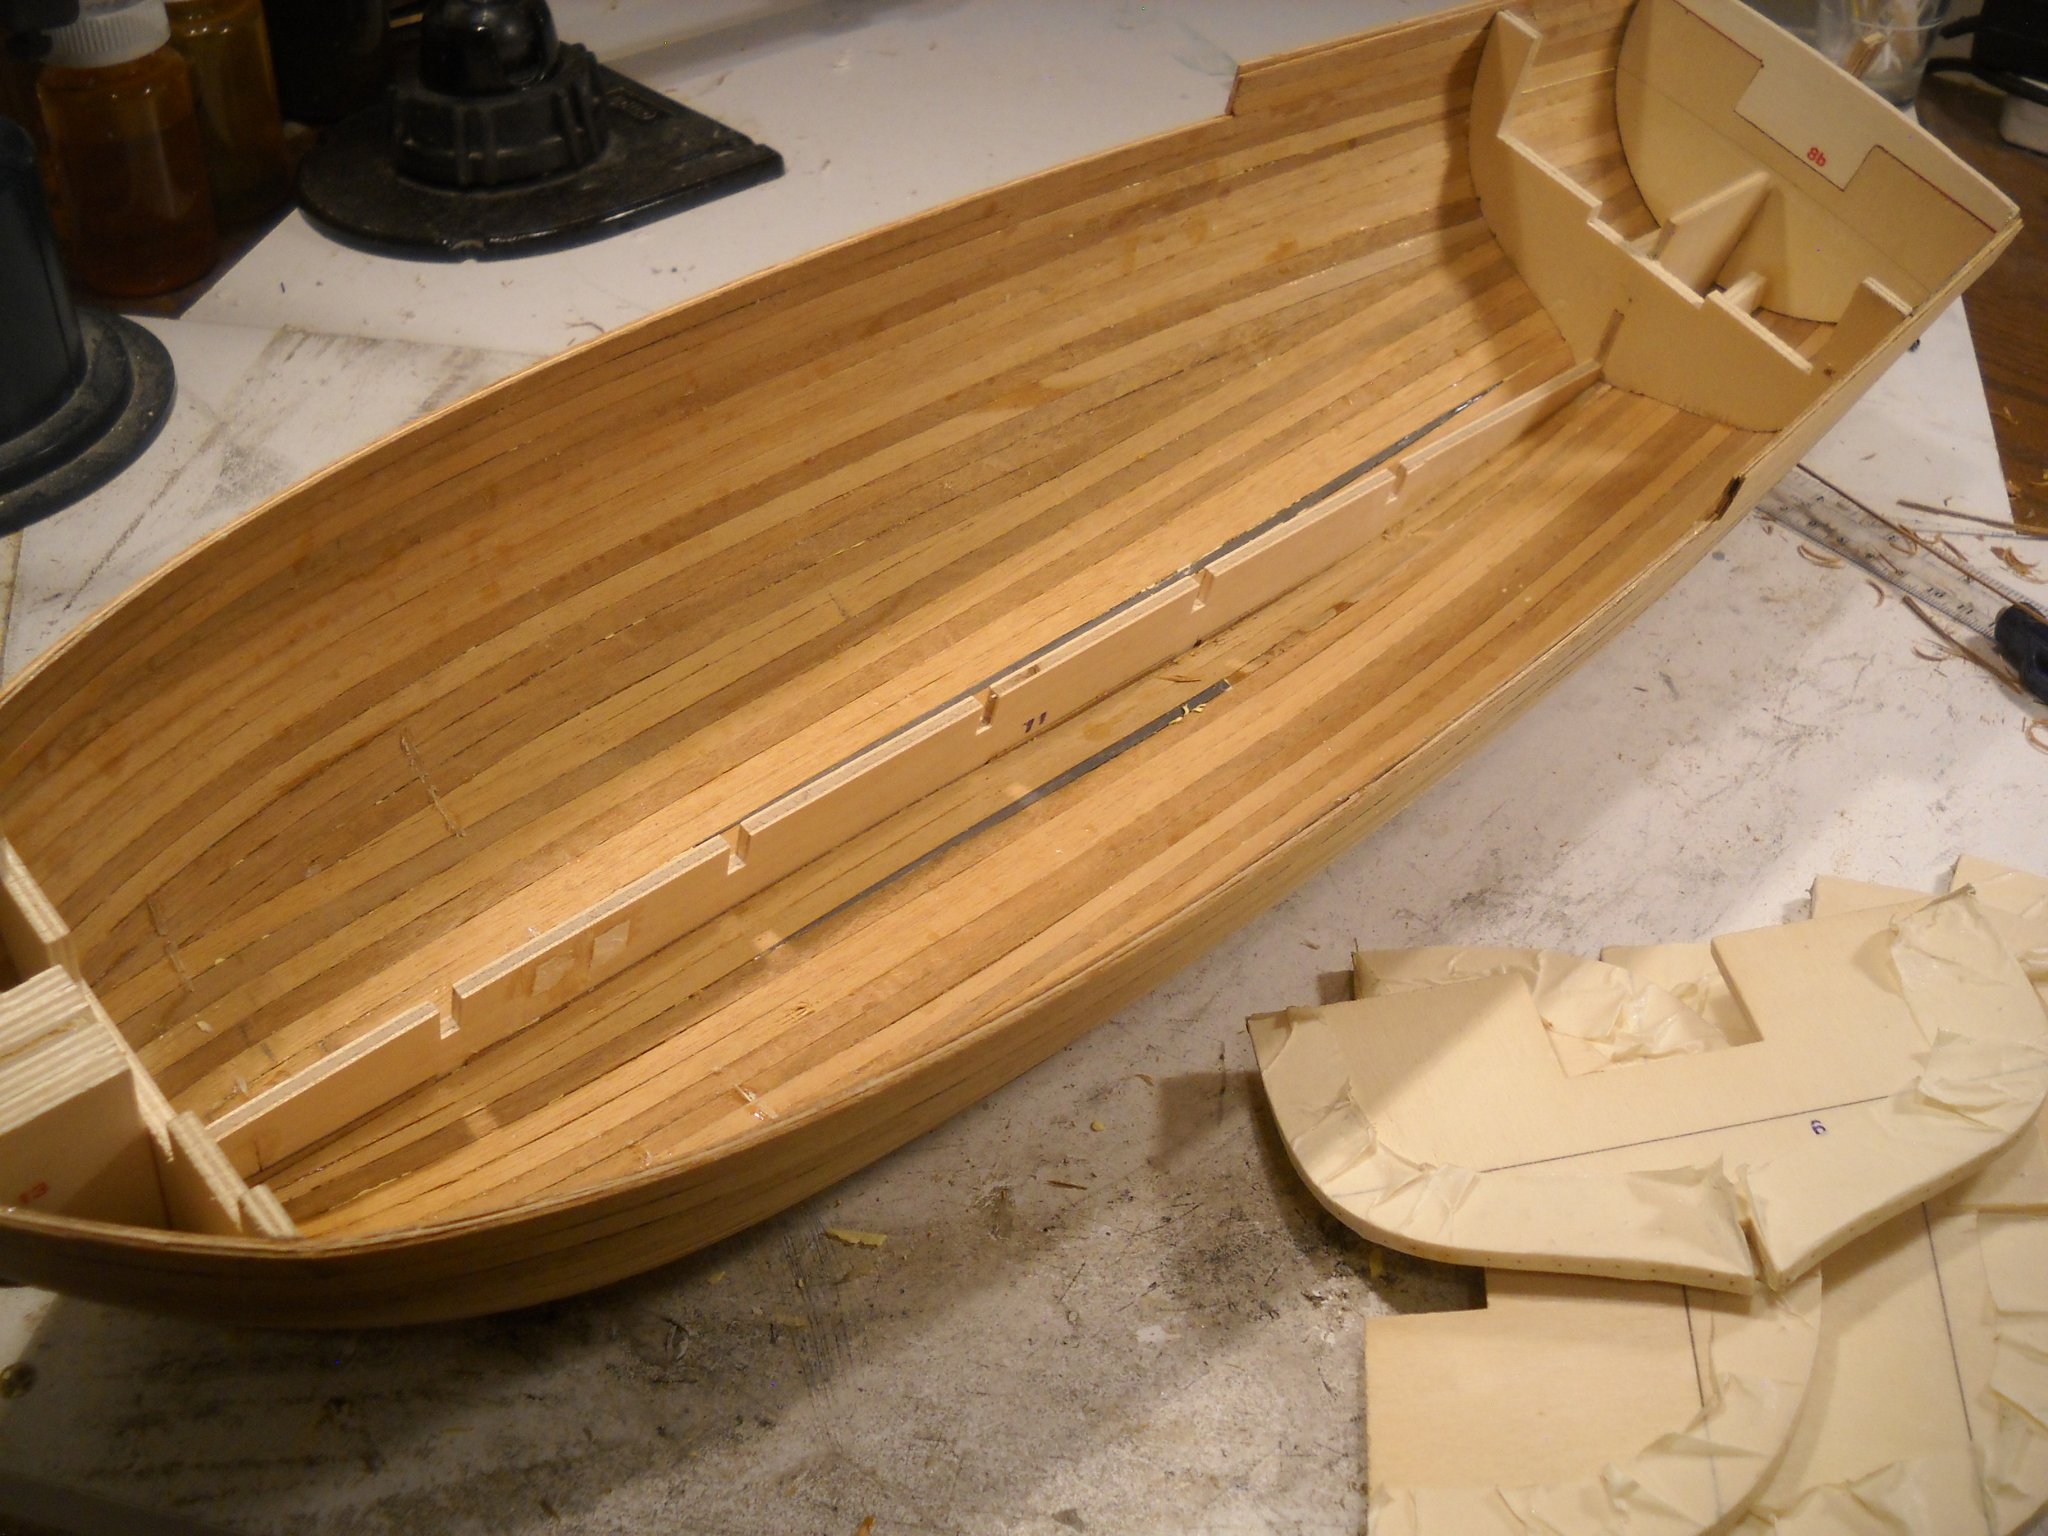
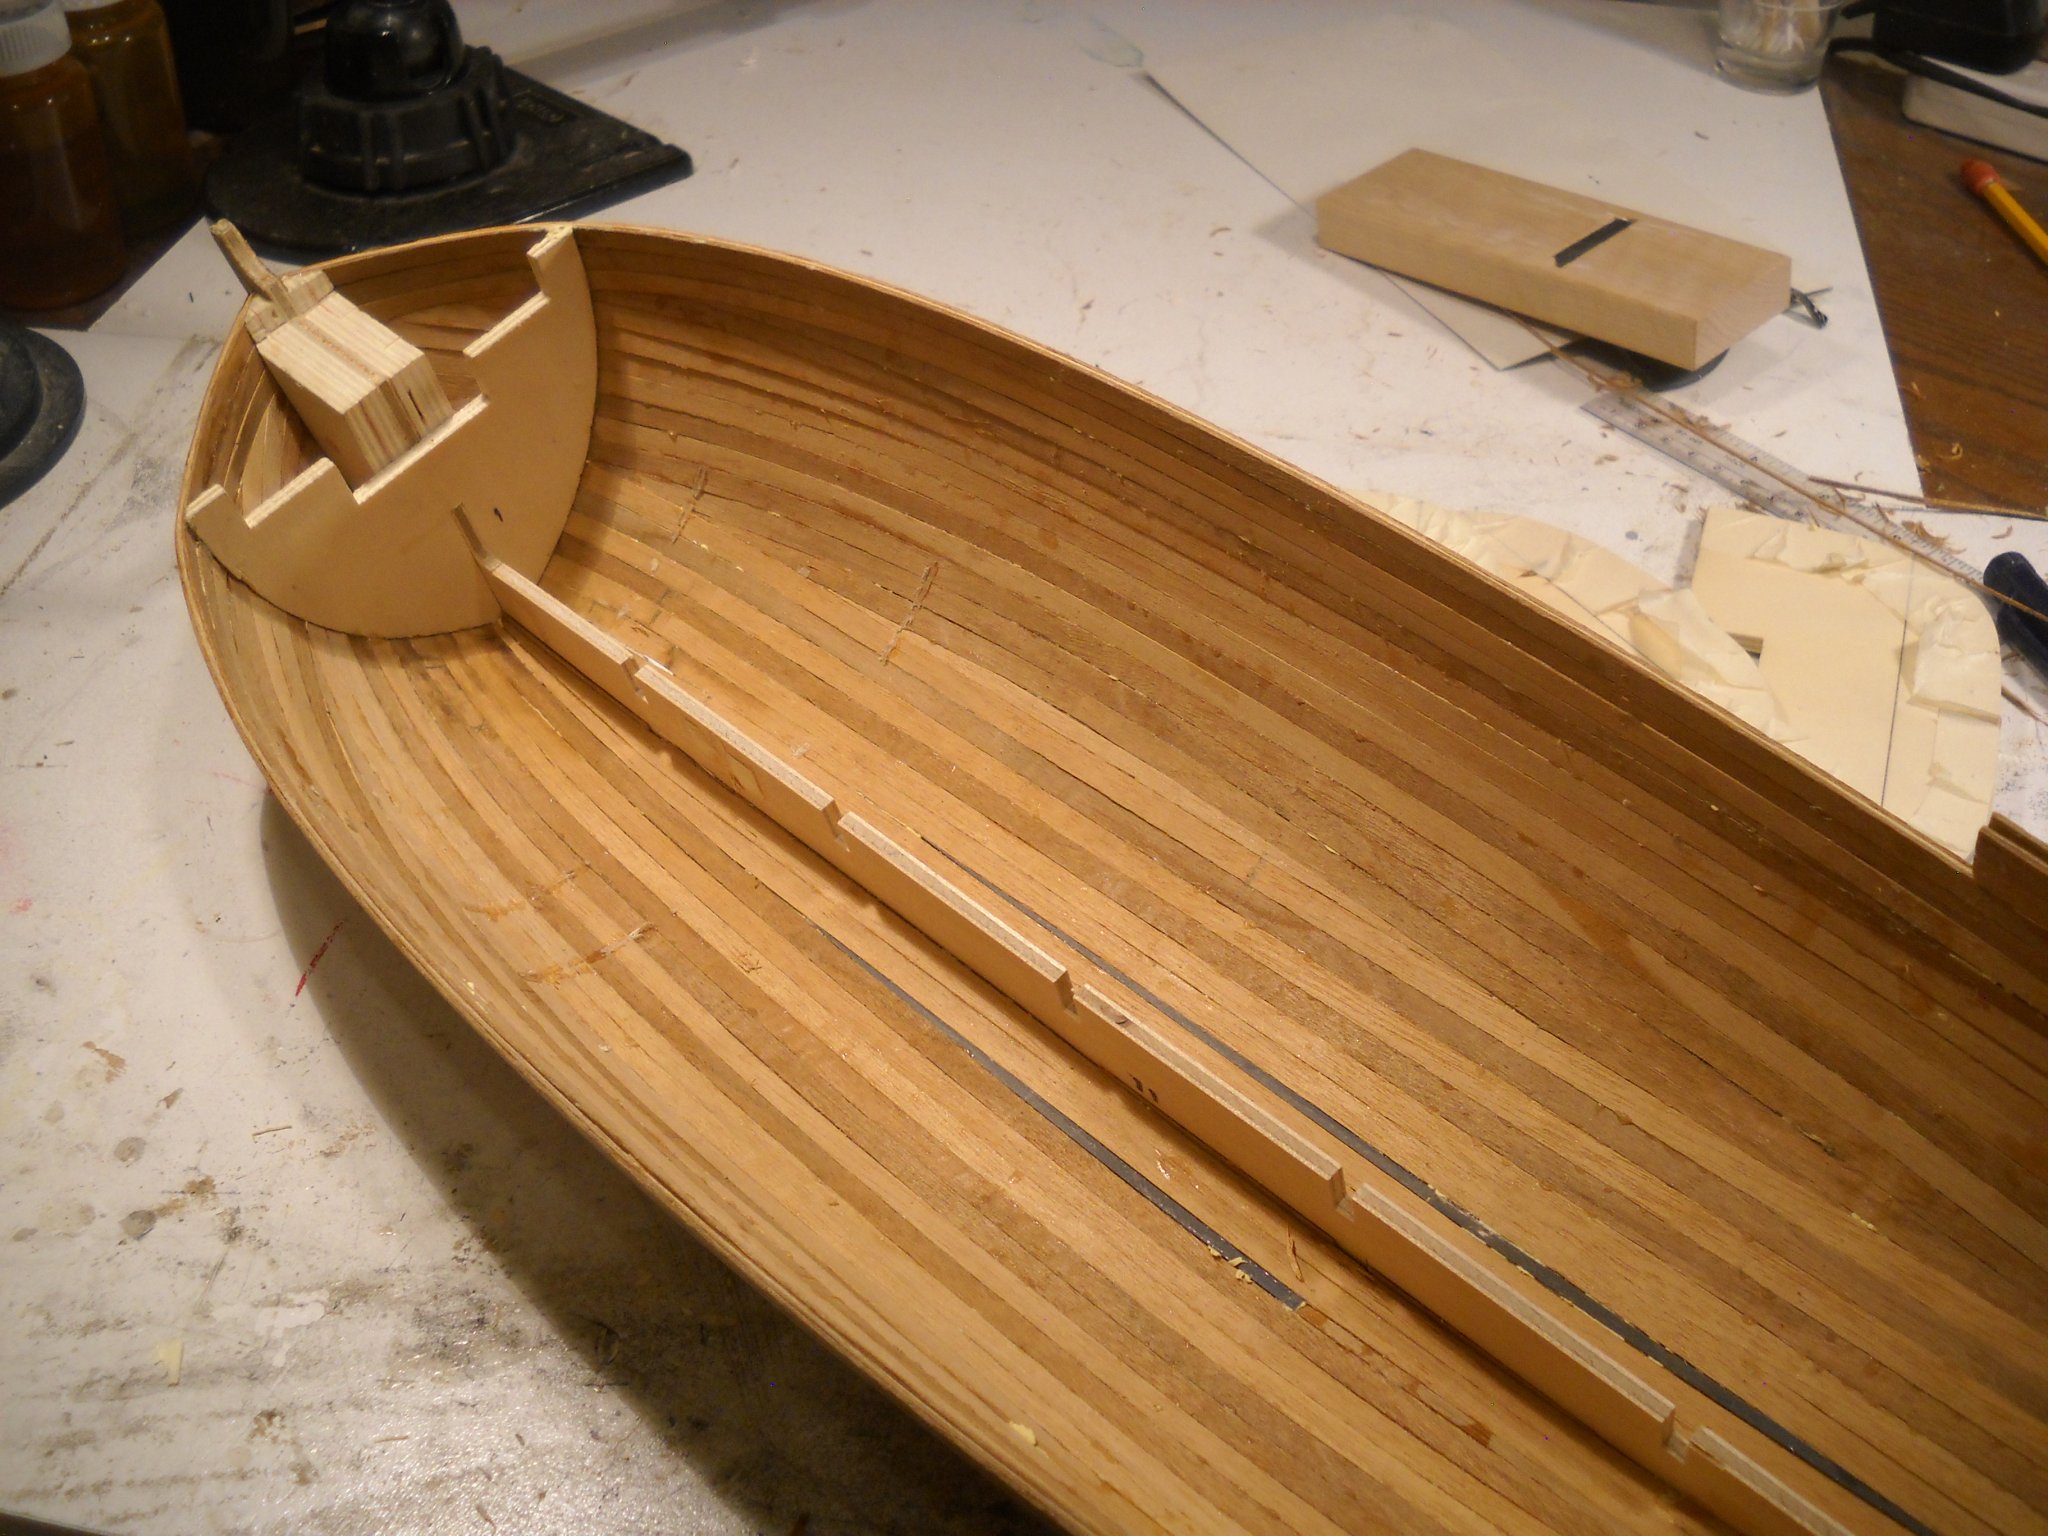
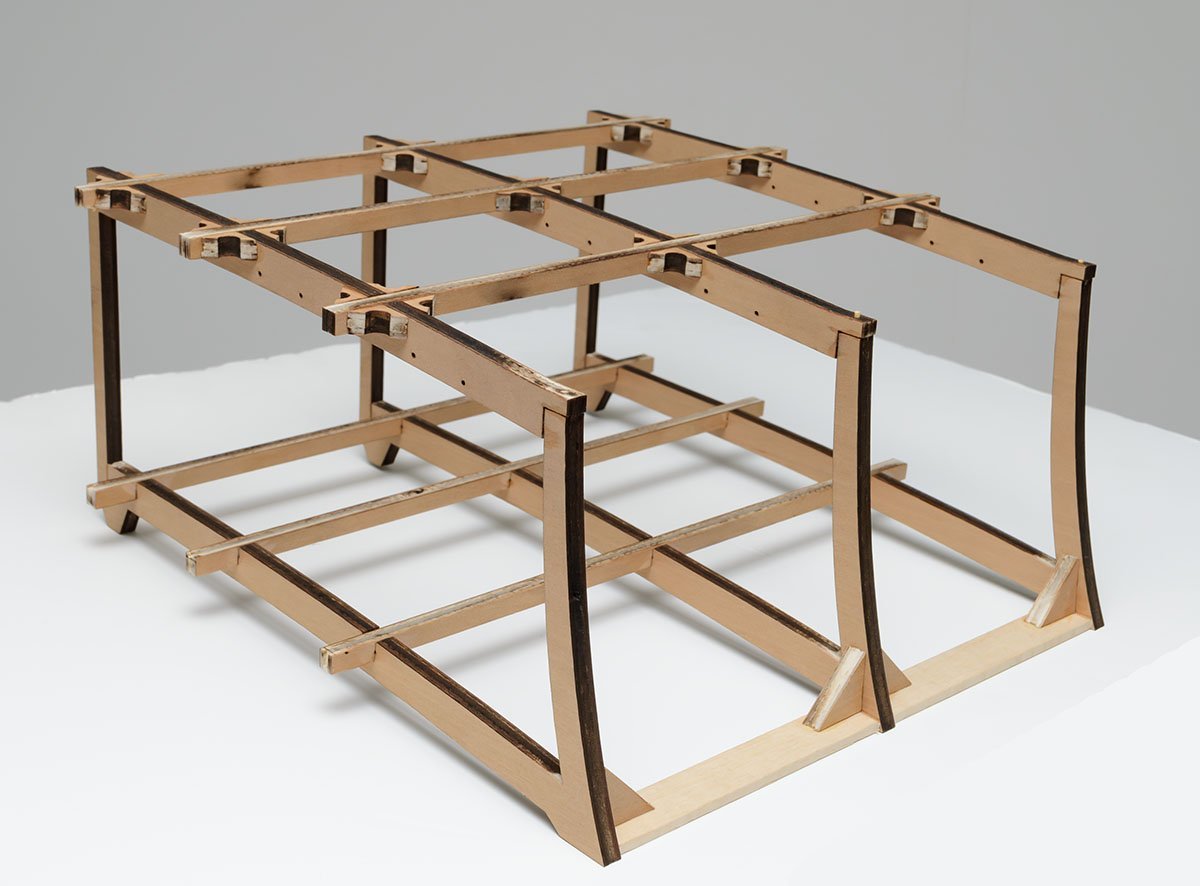
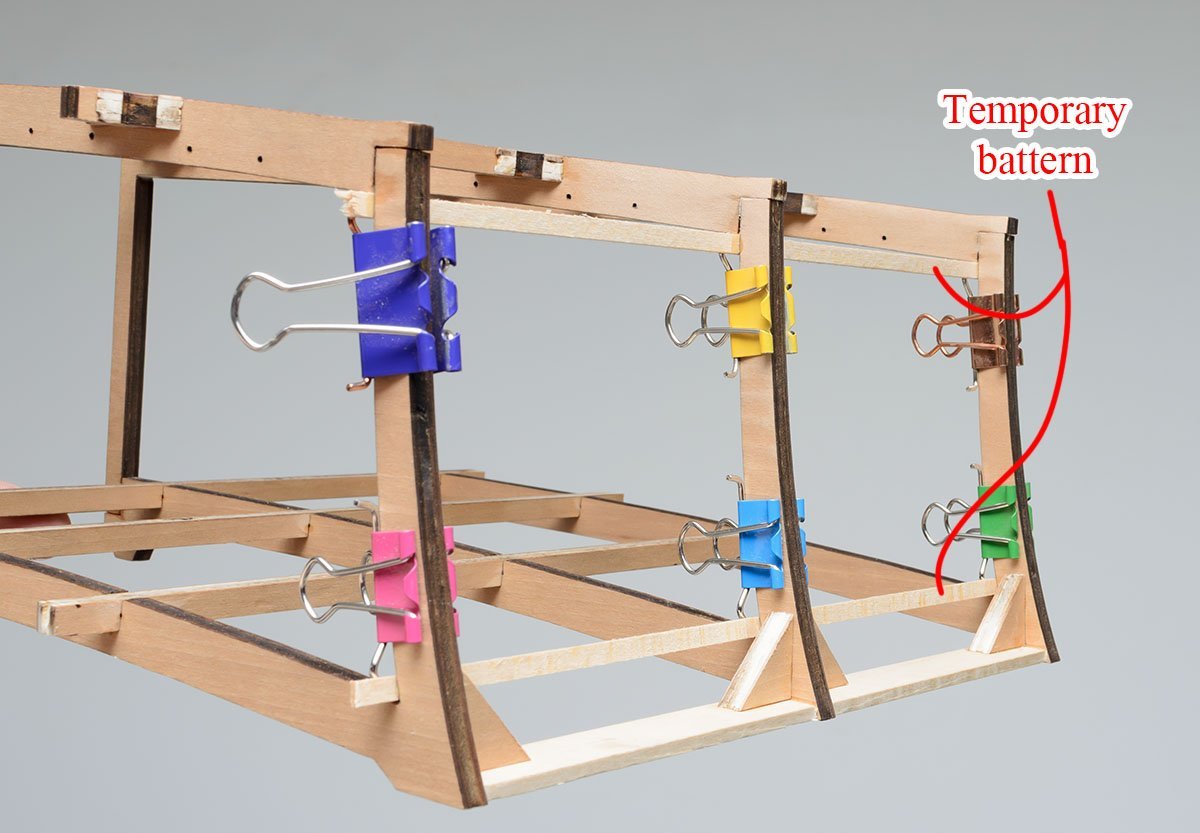
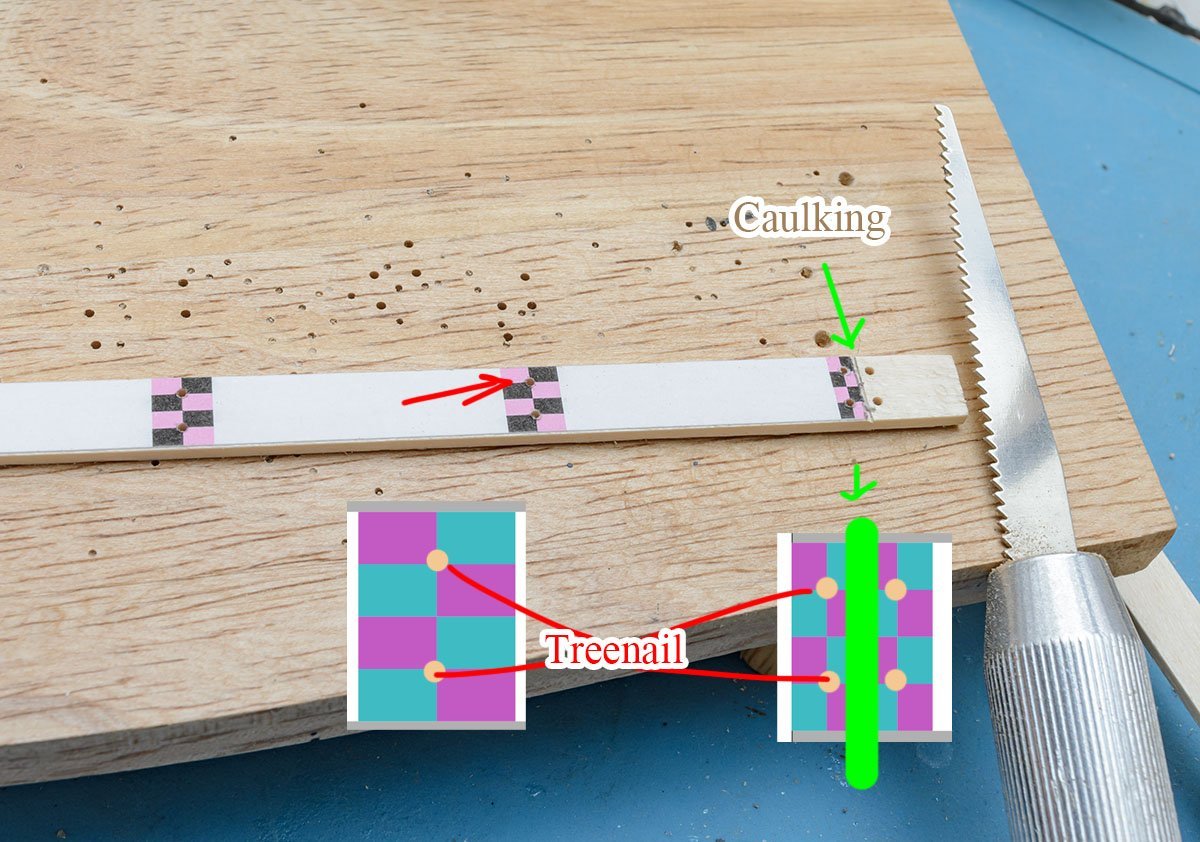
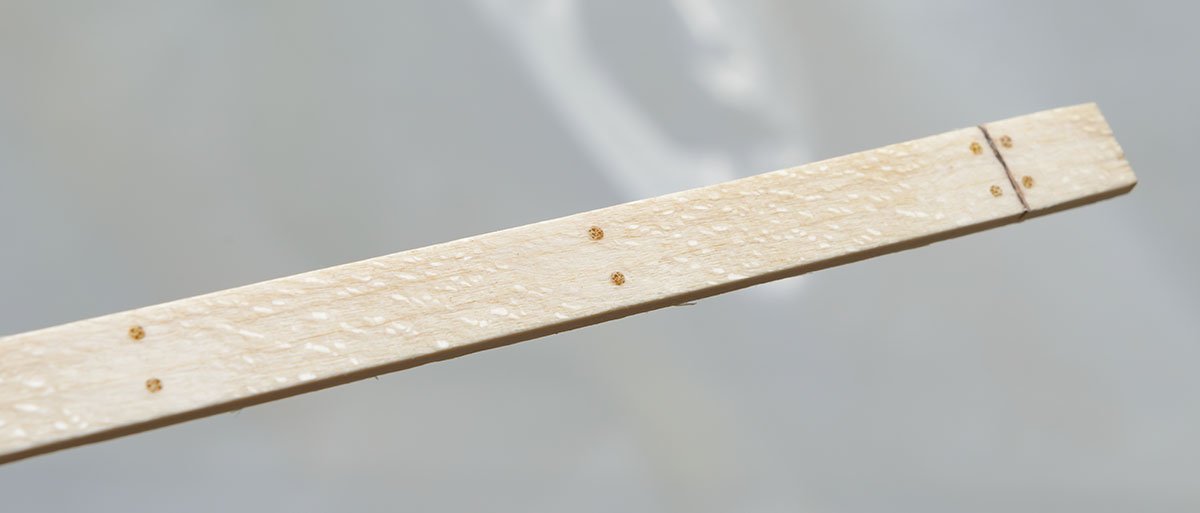
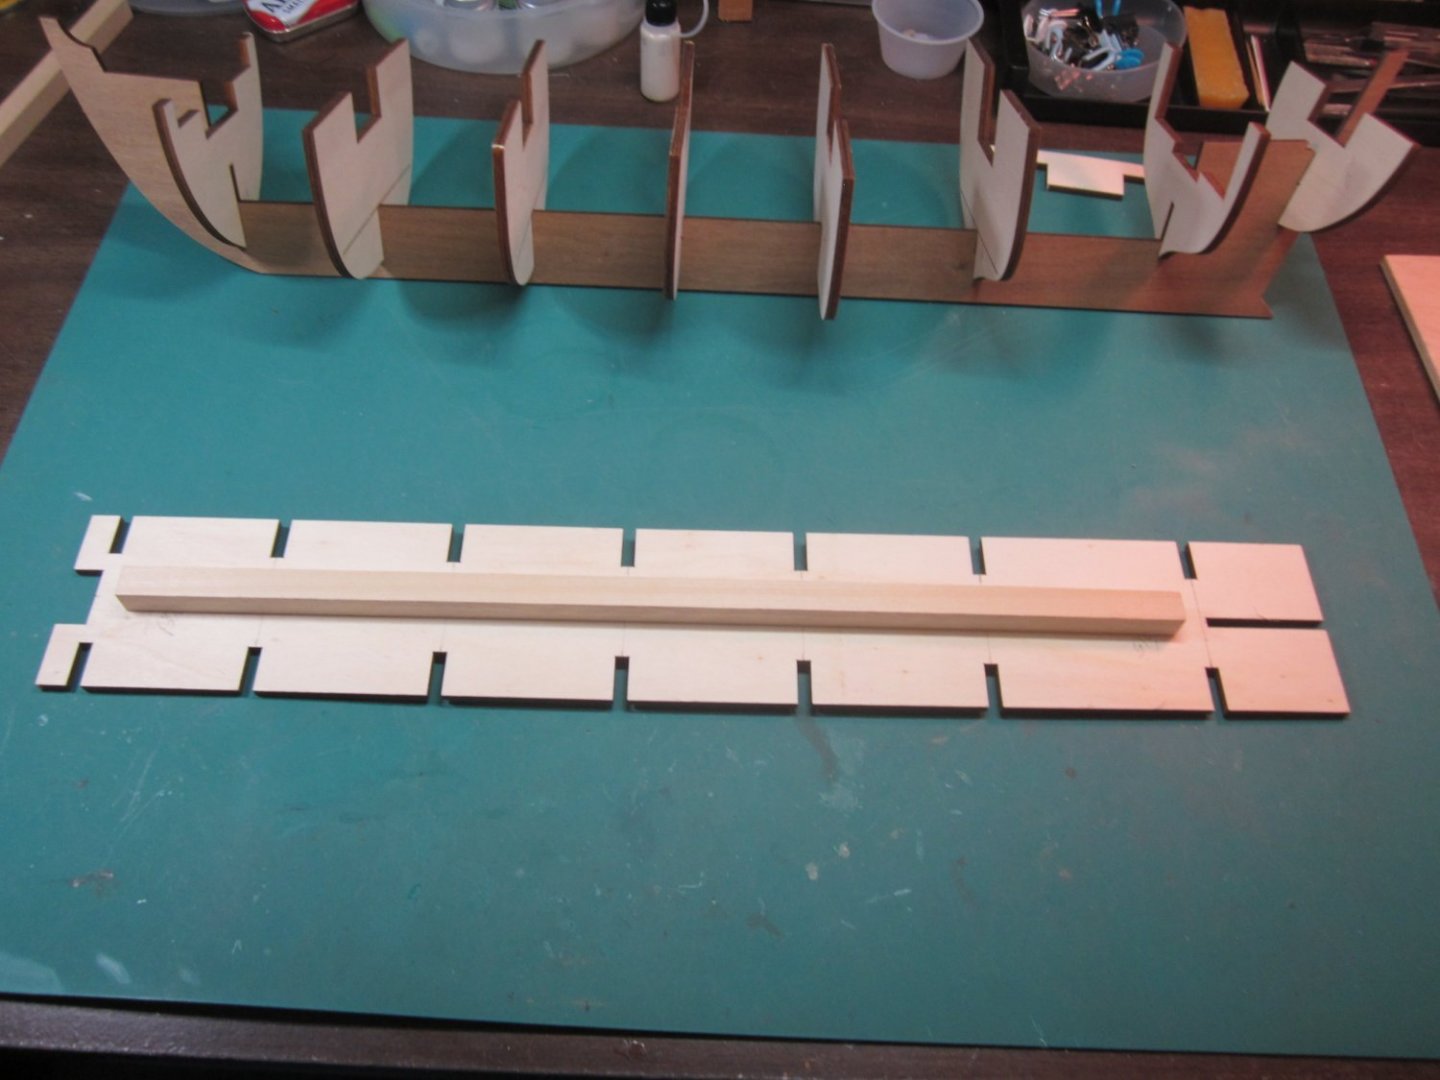
 Hey all, I have to admit honestly I have cheated and already begun this build. Truth be told, I wasn't even going to post a build log. However, early on I began running into problems and questions based from the plans (if you can call them that) and I thought I should at least let you guys know what my thought process was in resolving them. I have built another Panart kit (gundeck cutaway) and overall the experience was OK. There were many occasions where the instructions totally contradicted the drawings and the drawings totally contradicted what few pix there were. Fortunately, there were more than a few MSW members that helped me along with that build. It turned out quite nice and I have to say working with the large scale was a lot of fun. Sadly, this kit does not have the same appealas the gundeck. I have found a few old build logs, but honestly have gained little insight to the problems that I see. Lancia Armata is not much more than an armed ships boat, but at 1:16 scale even a small boat has lots of detail. This is one those builds where you plank the frames then knock out the frames and there are some issues around that. The biggest one is the lower part of the frame is supposed to remain fixed so basically you are breaking off the top 2/3 of the frame. There is a horizontal slice at the breakpoint but I doubt it extends far enough to give a clean break. I am definitely considering extending that slice before I cover the frames with planks. Then my biggest nitemare, the planking diagram (insulting to even give it that much credit) shows some bizarre pattern for planking. Keep in mind this build is supposed to have 3 plank layers. Yup, you heard me right. Here's the only drawing they show: Looks like what a 5 year old might turn out as their first planking attempt. I mean honestly, this is pathetic. And it is the only drawing that shows any planking at all. Is this how all 3 plank layers are supposed to be laid? Is there supposed to be a garboard? How about a rabbet? Are they truly suggesting that I lay these 5 planks and then carve fillers for all the gaps? This lack of detail is inexcusable. I apologize, I am still on a rampage due to the lack of details. Fortunately, I have enough builds under my belt to realize the deficiencies in the drawings/instructions. Someone that took this kit as their first build would be totally hosed. I will try to be more positive in the future. I am already making my own adjustments to get me thru this BS. I have decided to plank this just like every other build I have done. If you are familiar with any of my other builds you know that means marking off bands and breaking out the proportional dividers. I will have some pix and an explanation forthcoming. Sorry for starting out so negative, but it will get better.....
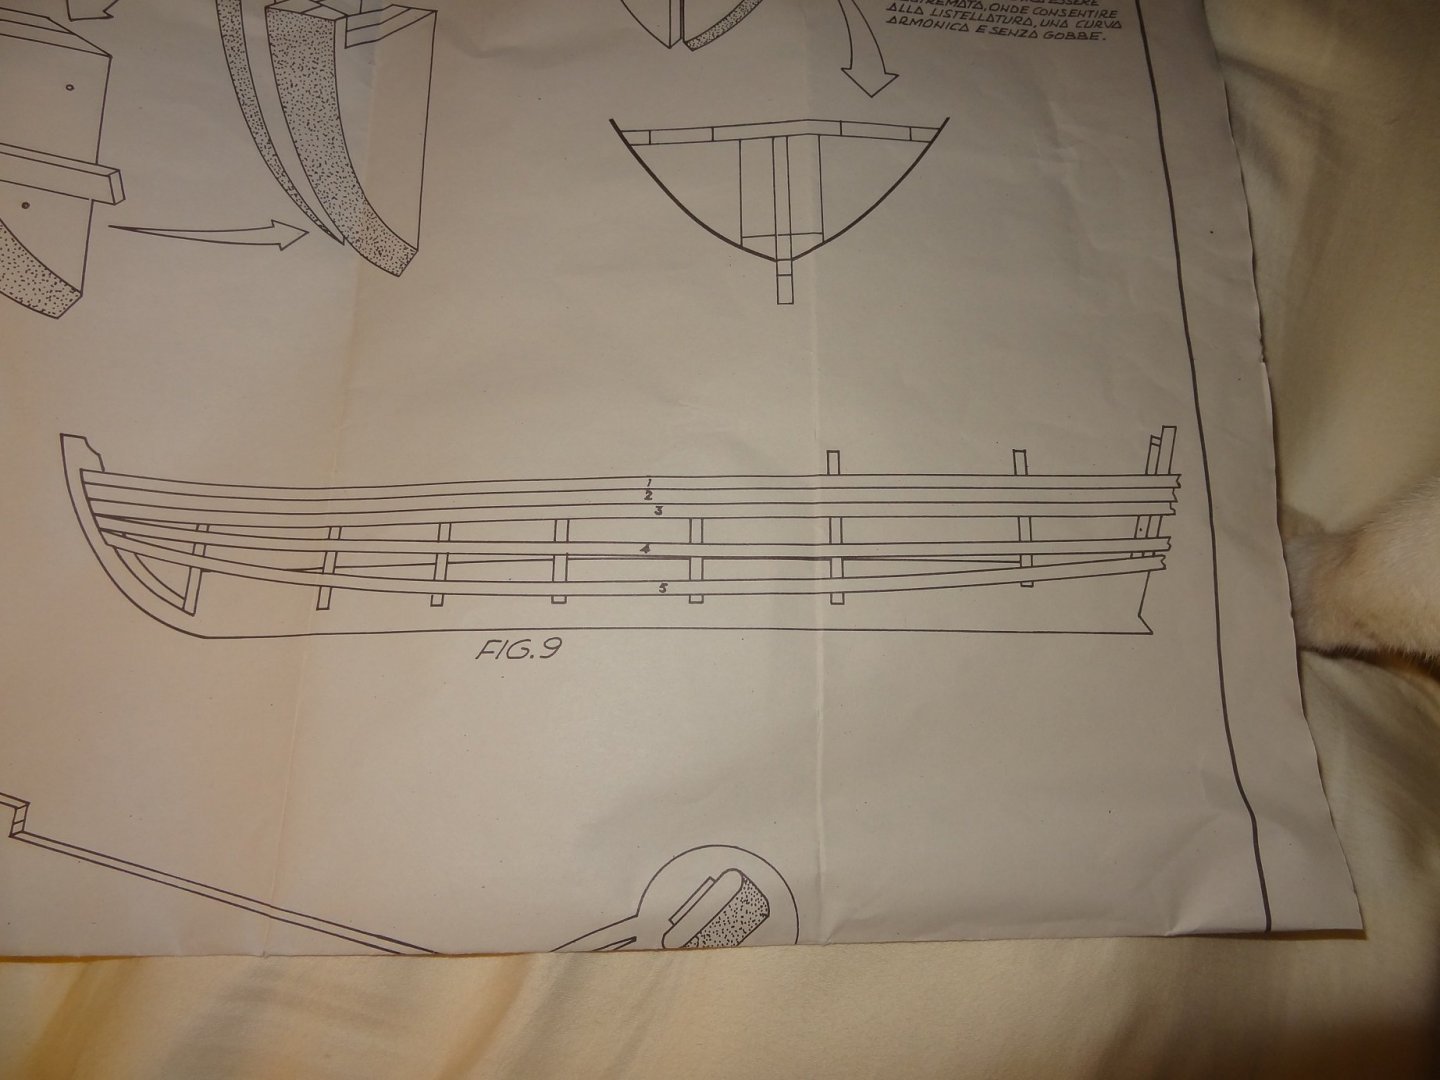
- 62 replies
-
- 2
-
-
- lancia armata
- panart
- (and 1 more)
-
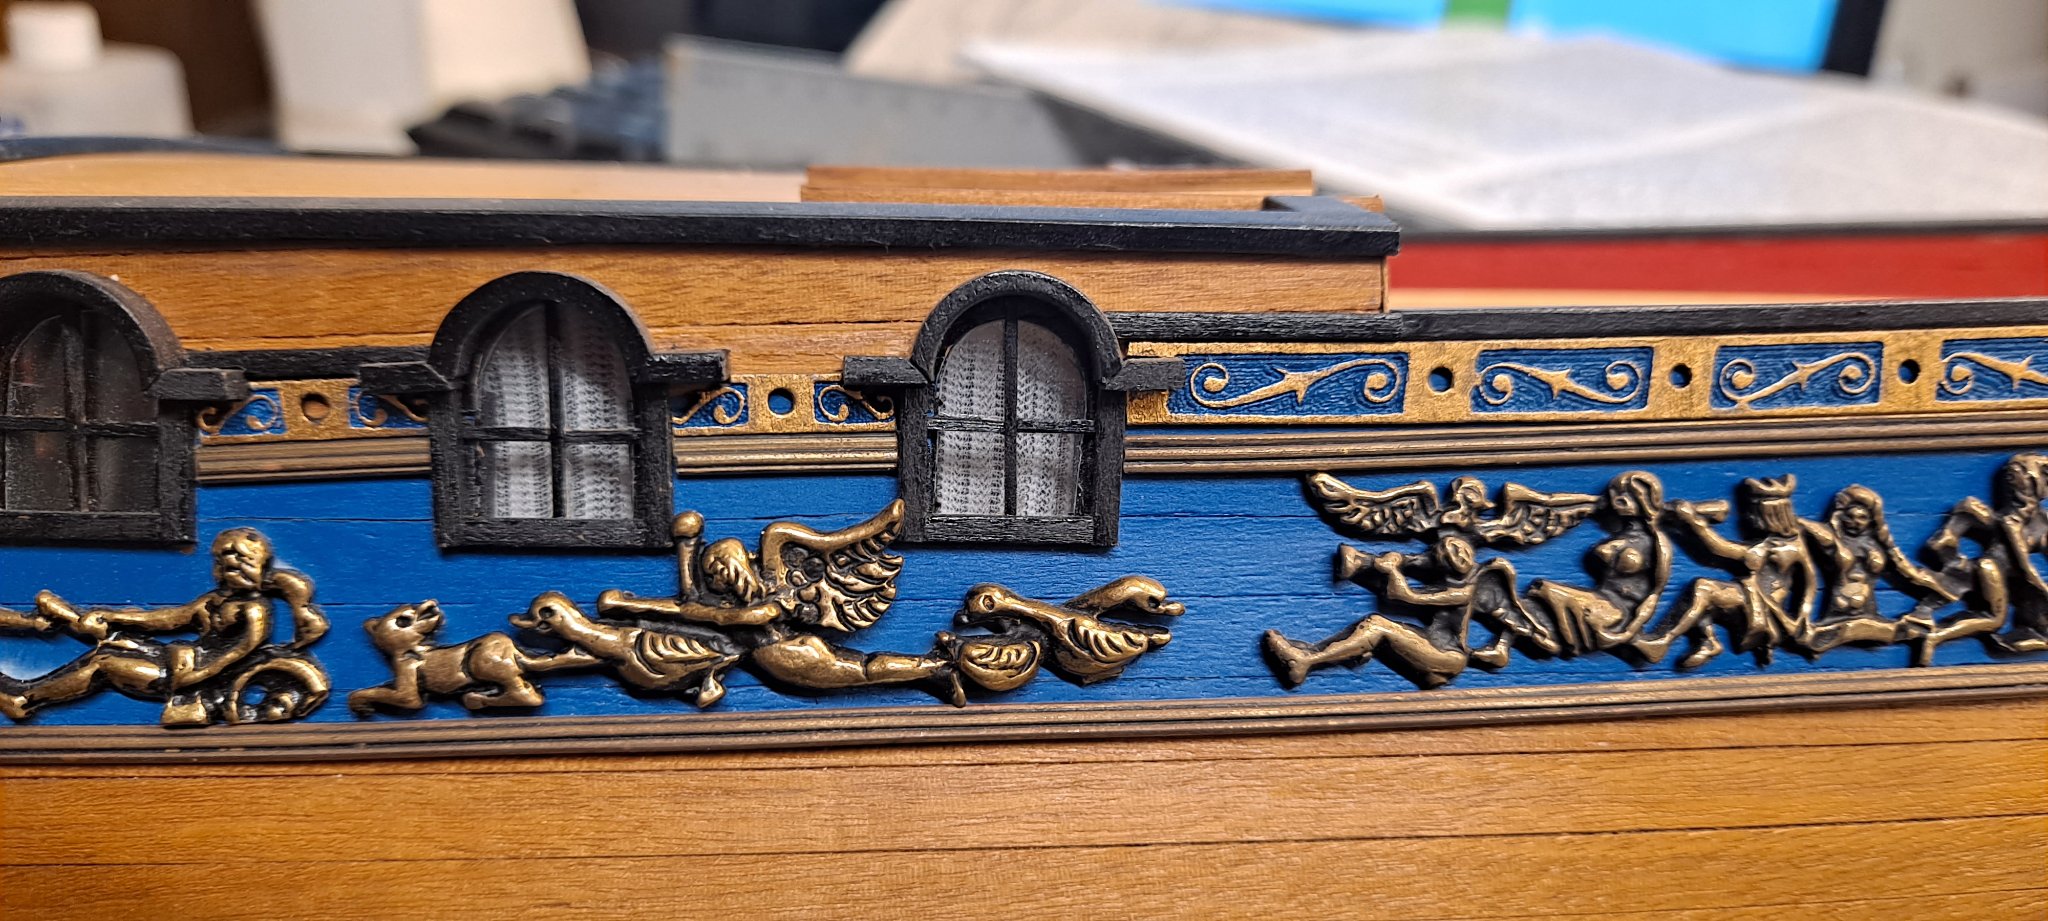
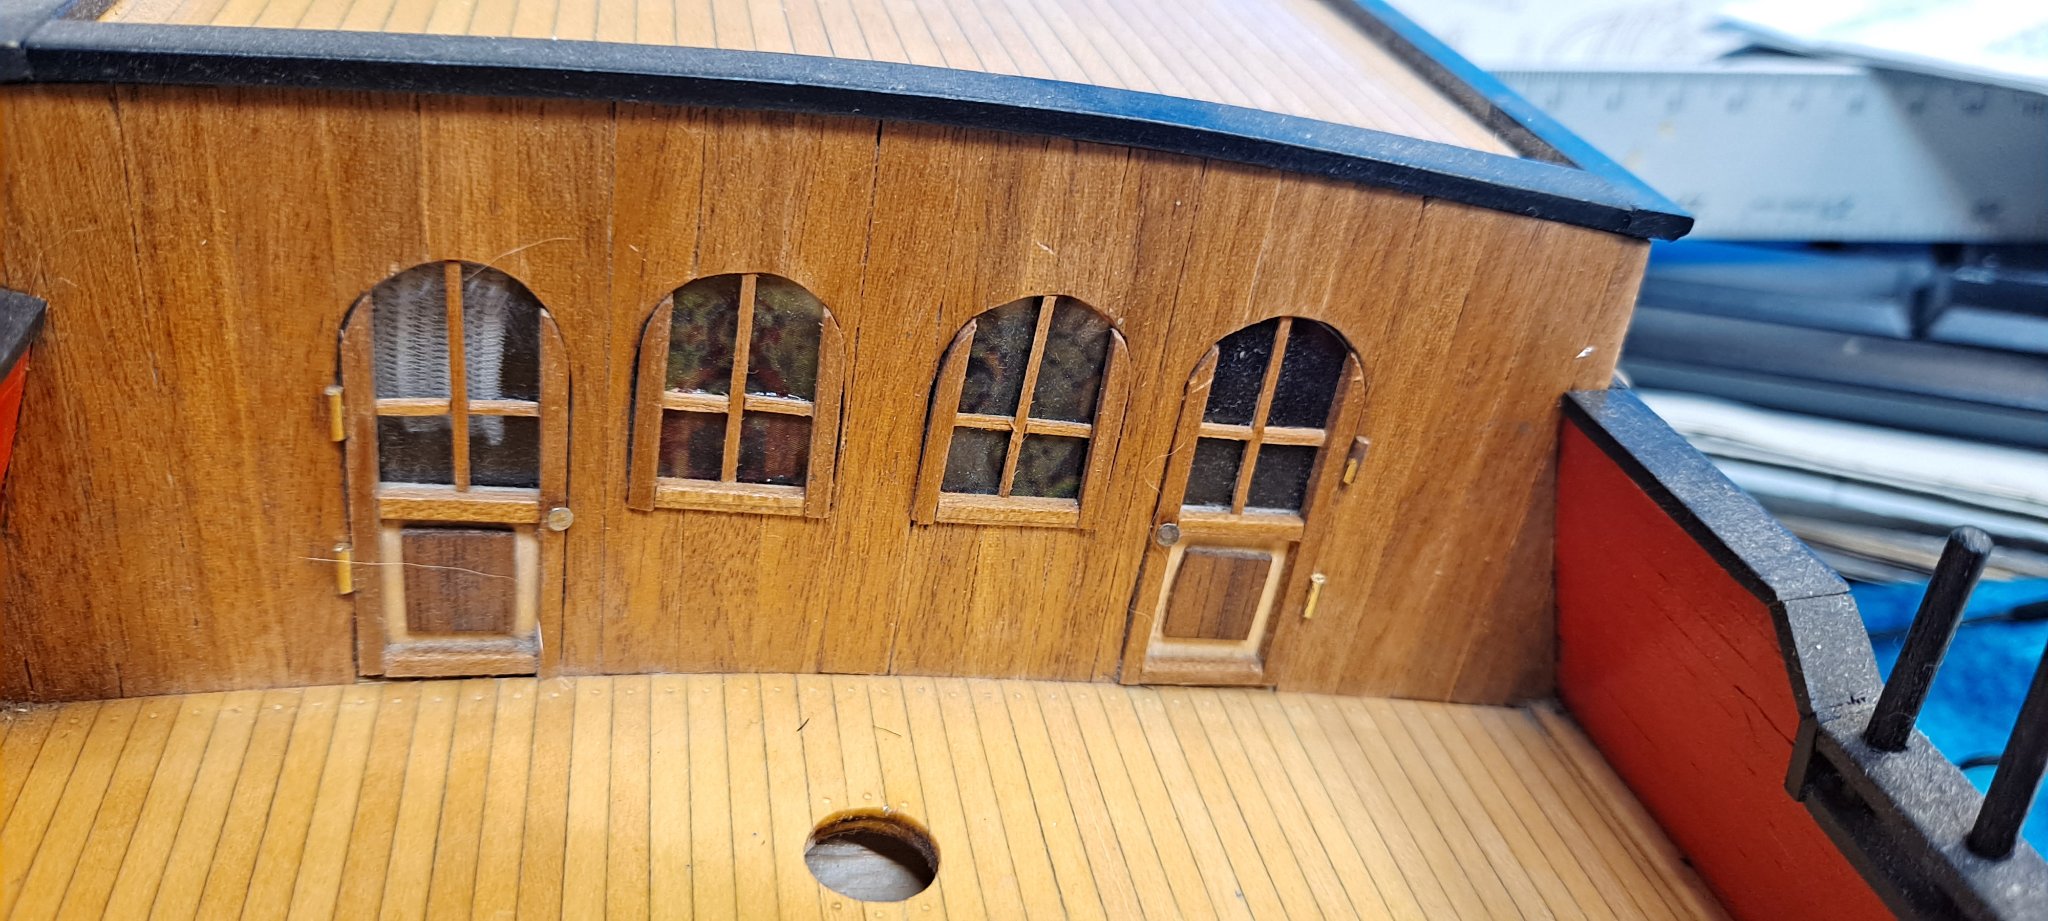
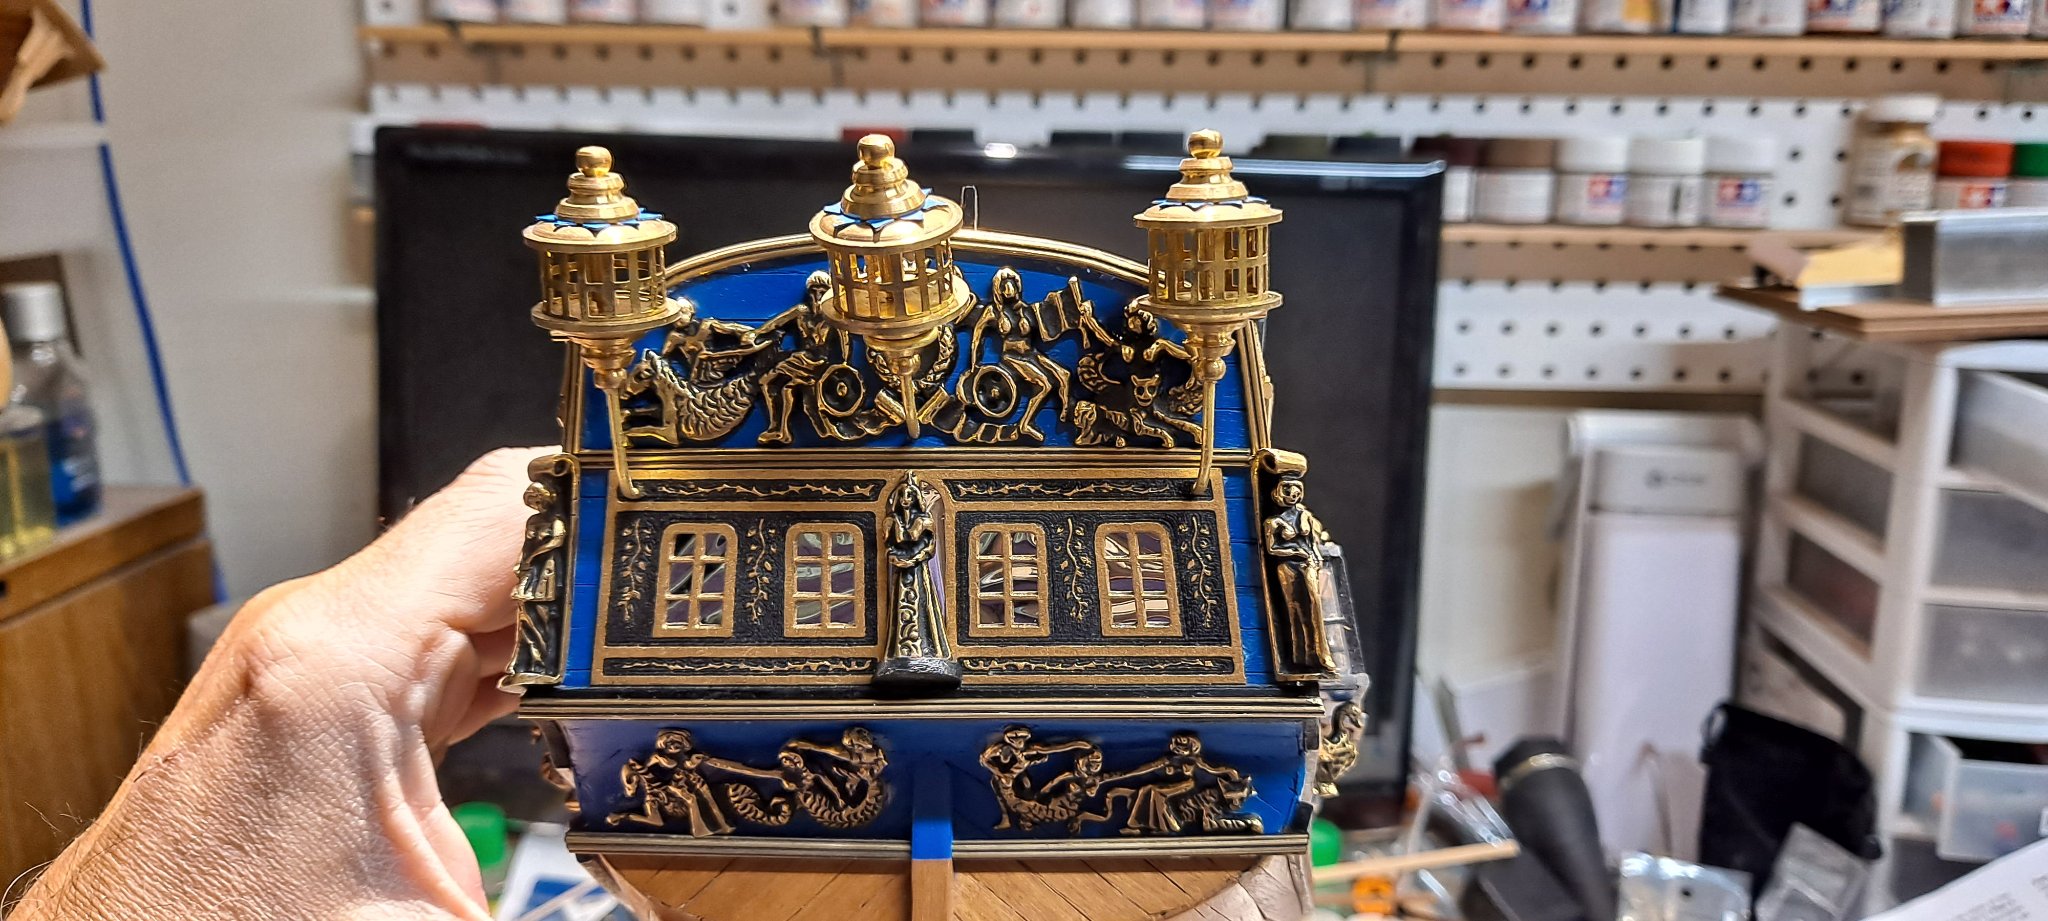
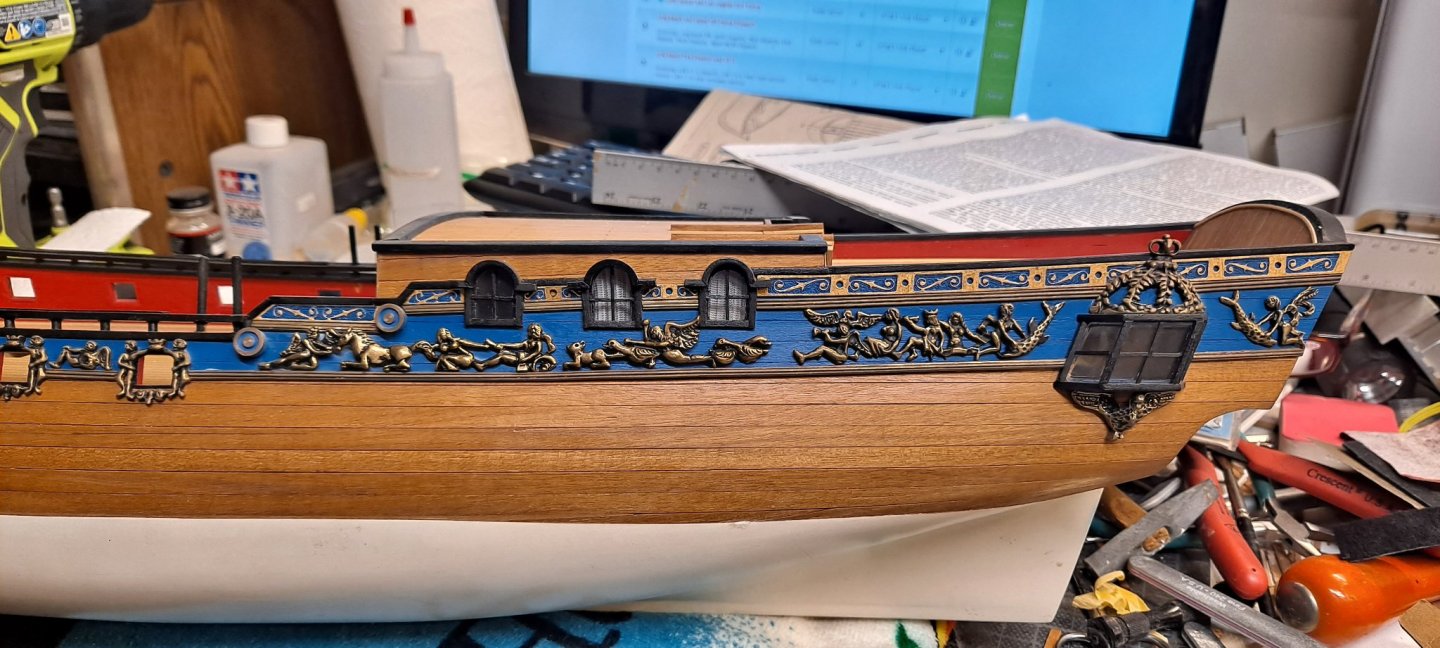
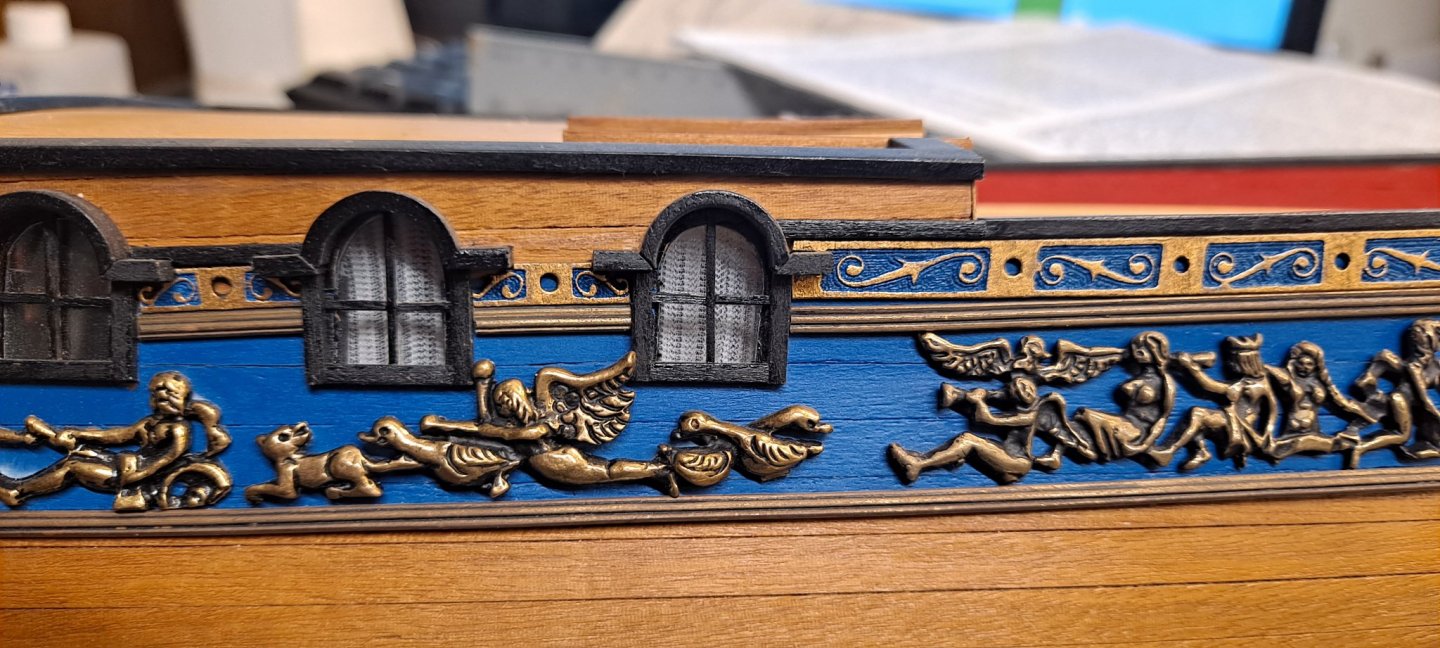
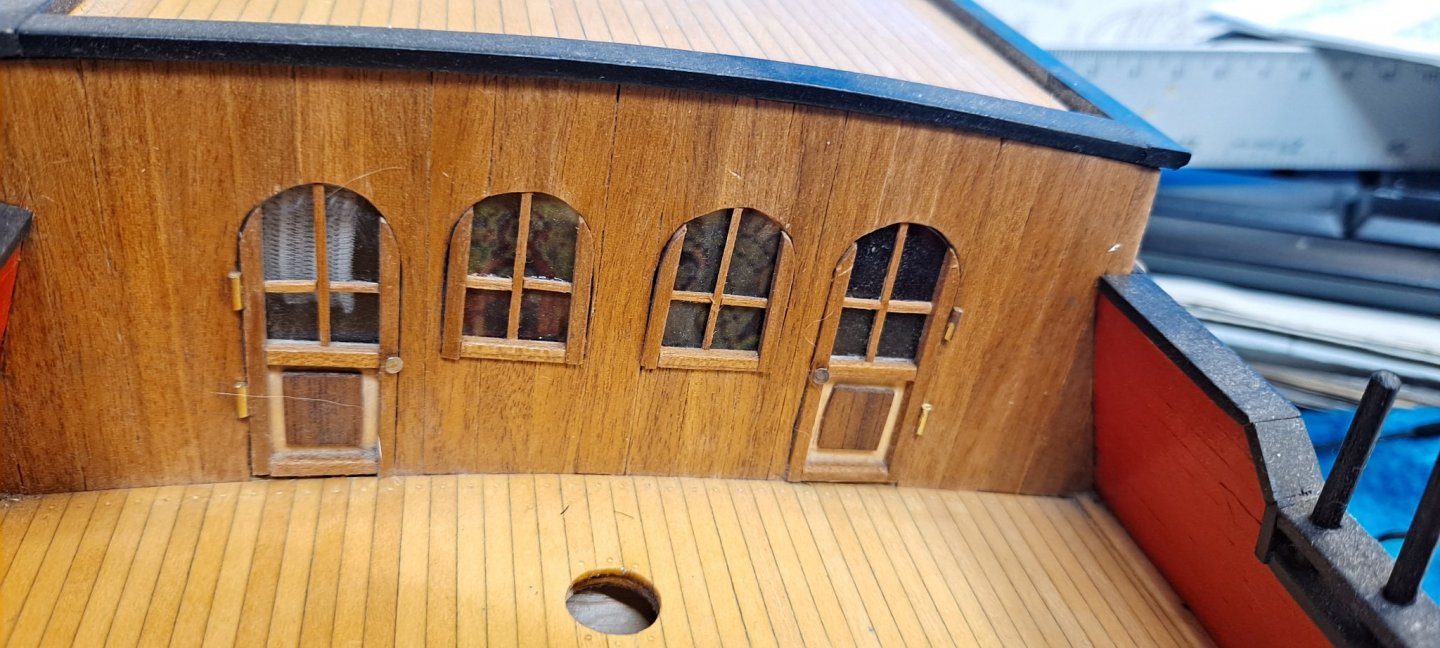
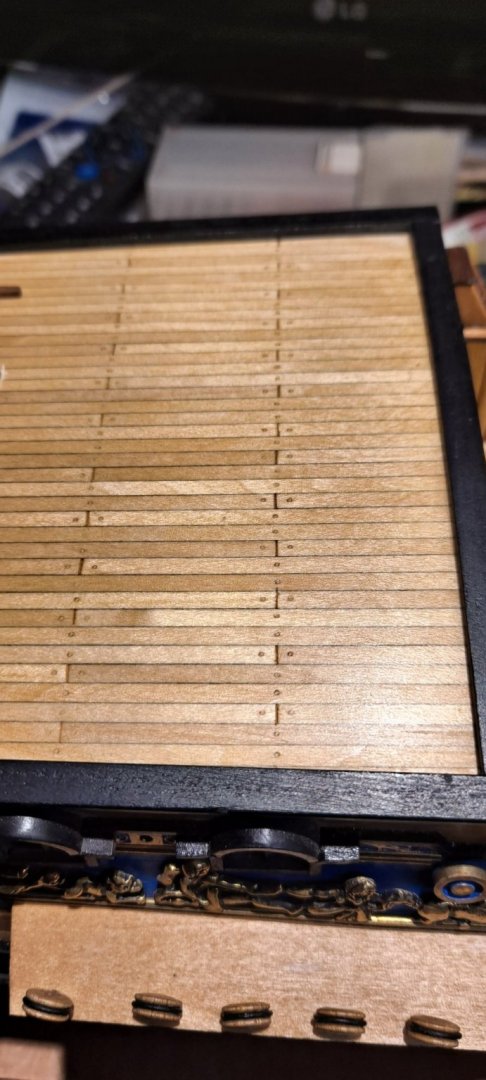
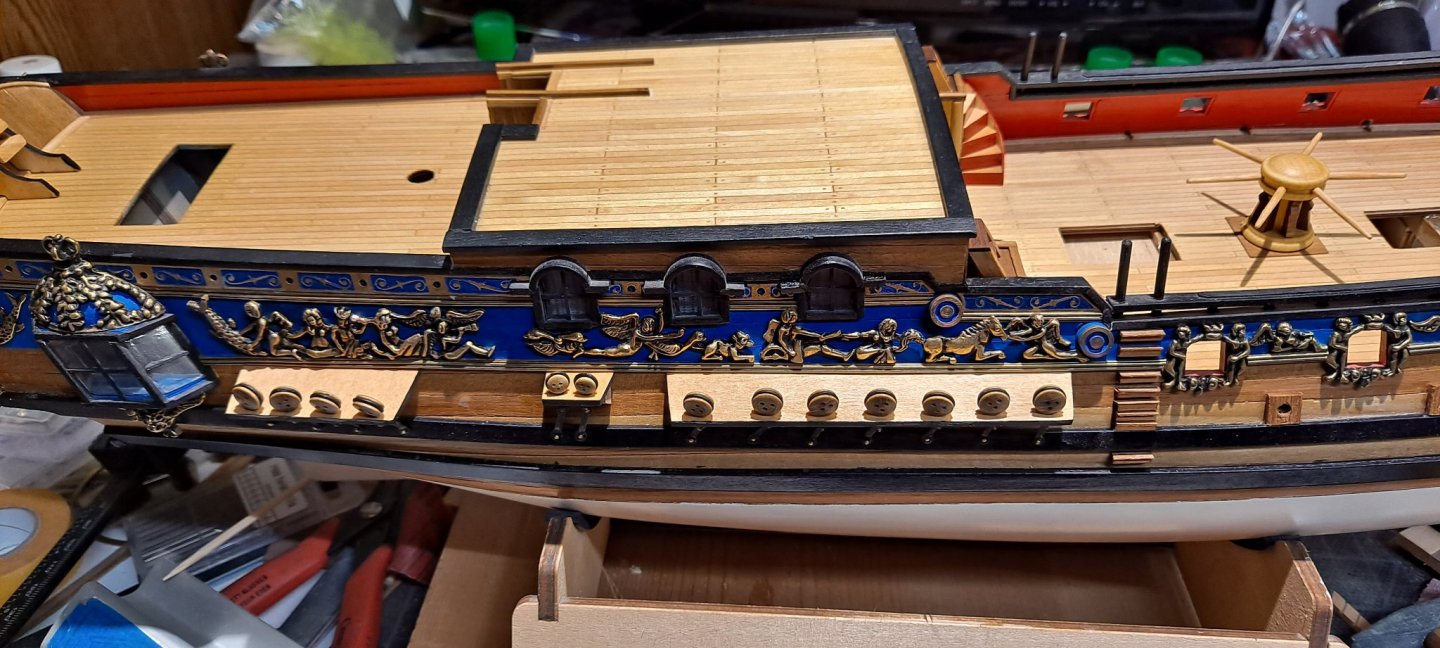
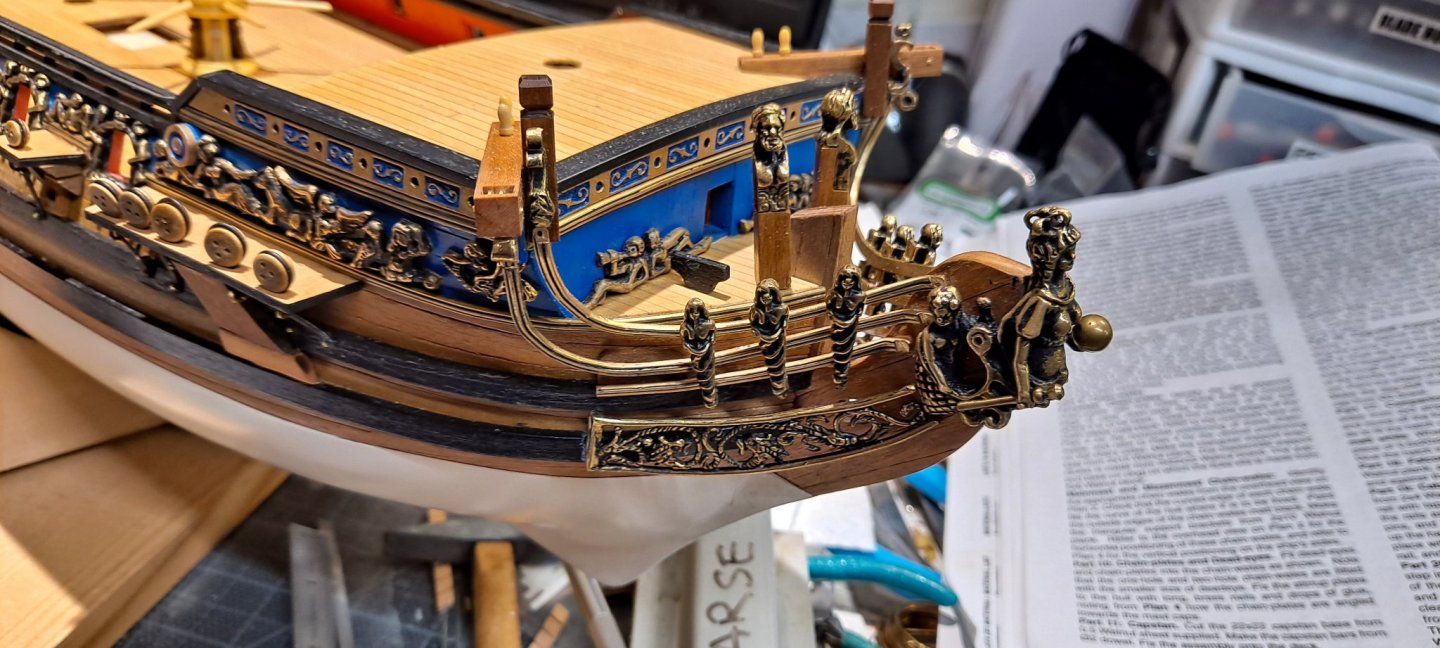
 Hi everyone, I posted a few pictures and started a poll a few weeks ago regarding getting back into building. I have several kits in different stages and was just bouncing around without getting anything finished. I decided to go with the Royal Caroline because it had significant work done and because I love that ship. I have been encouraged to start a build log by a couple of people so here it is. I was hesitant to make a log because when I started taking pictures, it was already in progress as you will see with the first pictures. I will add more pics as I progress. The best part of all, is that I am back building and it feels good. Hopefully I will stick with it and complete this beautiful kit. Thanks to those that are interested. The first 4 pictures are from the current state when I picked it back up. I hadn't even installed the wales and nothing had been added to the deck. None of the bow brass work had been installed. I did mess around with installing drapes, and though it's very hard to see, I tried adding some "stained glass" to some of the windows. I have always used the wood strips that come with kits to do the deck planking. This time I bought some Midwest architectural grade basswood and it worked out very well. It's precisely cut and after adding some oil, it really came alive and made the "caulking" very nice and visible and most of all nice and even. Caulking done with a pencil. Here I started adding stuff to the deck, such as the capstan and the winding staircases. And then I added the channels and deadeyes as well as the small steps on the side of the hull. The scupper holes too. Here is where I added all of the brass work to the bow. This was no fun at all. Those brass "rails" had to be bent to shape from some very hard brass. I had to modify a pair of needle nose pliers in order to keep a firm grip on the brass. I hated the process. And finally the gallery. This was also a real pain due to the brass parts. For the windows, I decided to go with mylar. I had never used it but I didn't want to cut out the areas behind the windows just to look at a dark empty hole through some acetate. My daughter didn't like the mylar at all, but my wife loved it. I like it too. I also placed the lanterns, but only for this pic. I will remove them temporarily so they don't get damaged during all the handling. I'll be posting more pics as I progress.
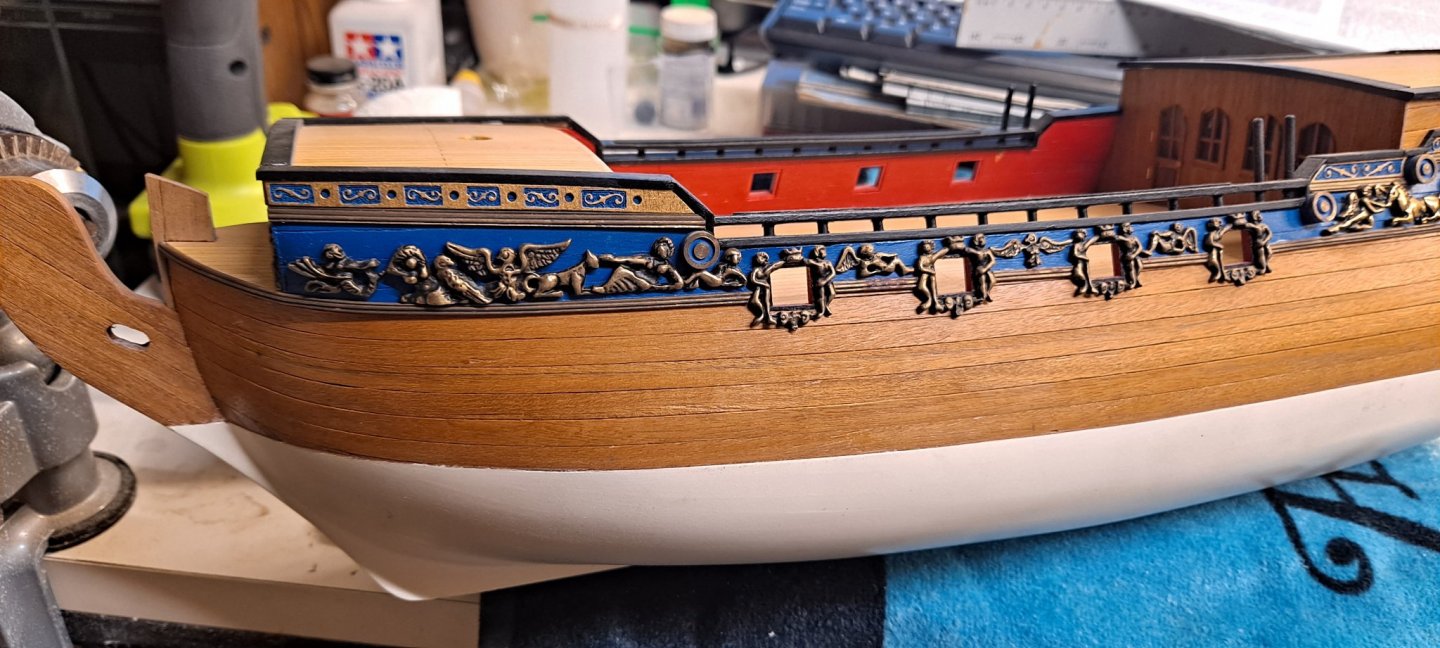


-
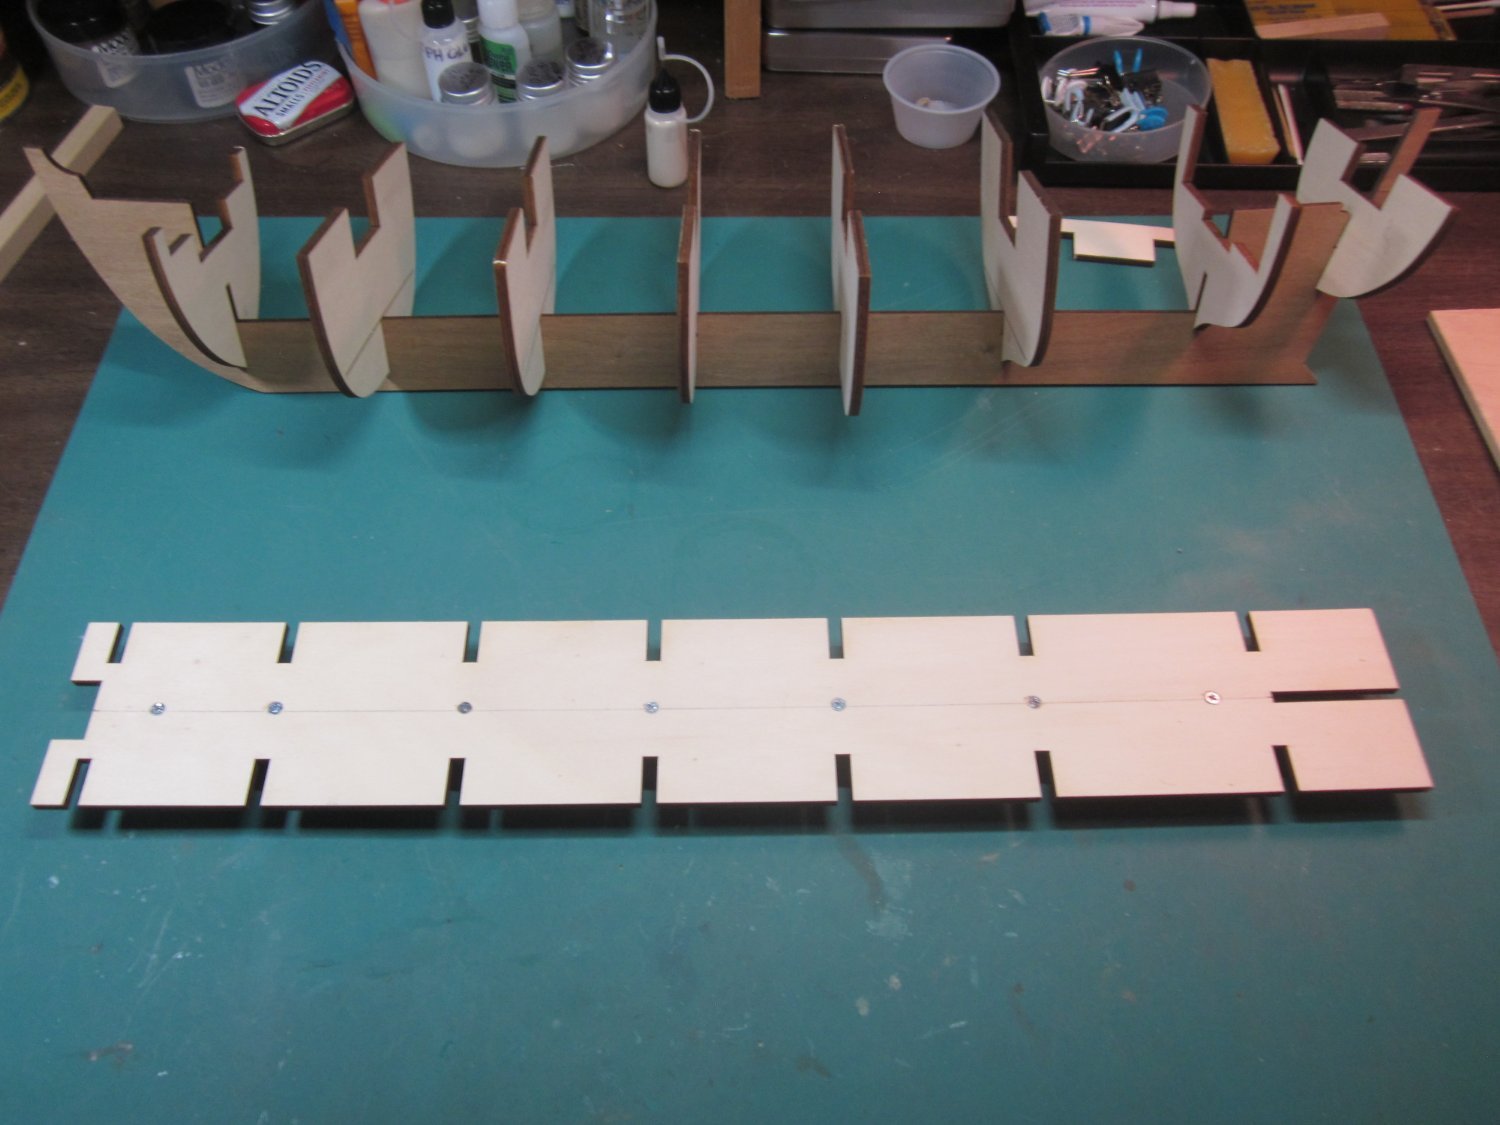
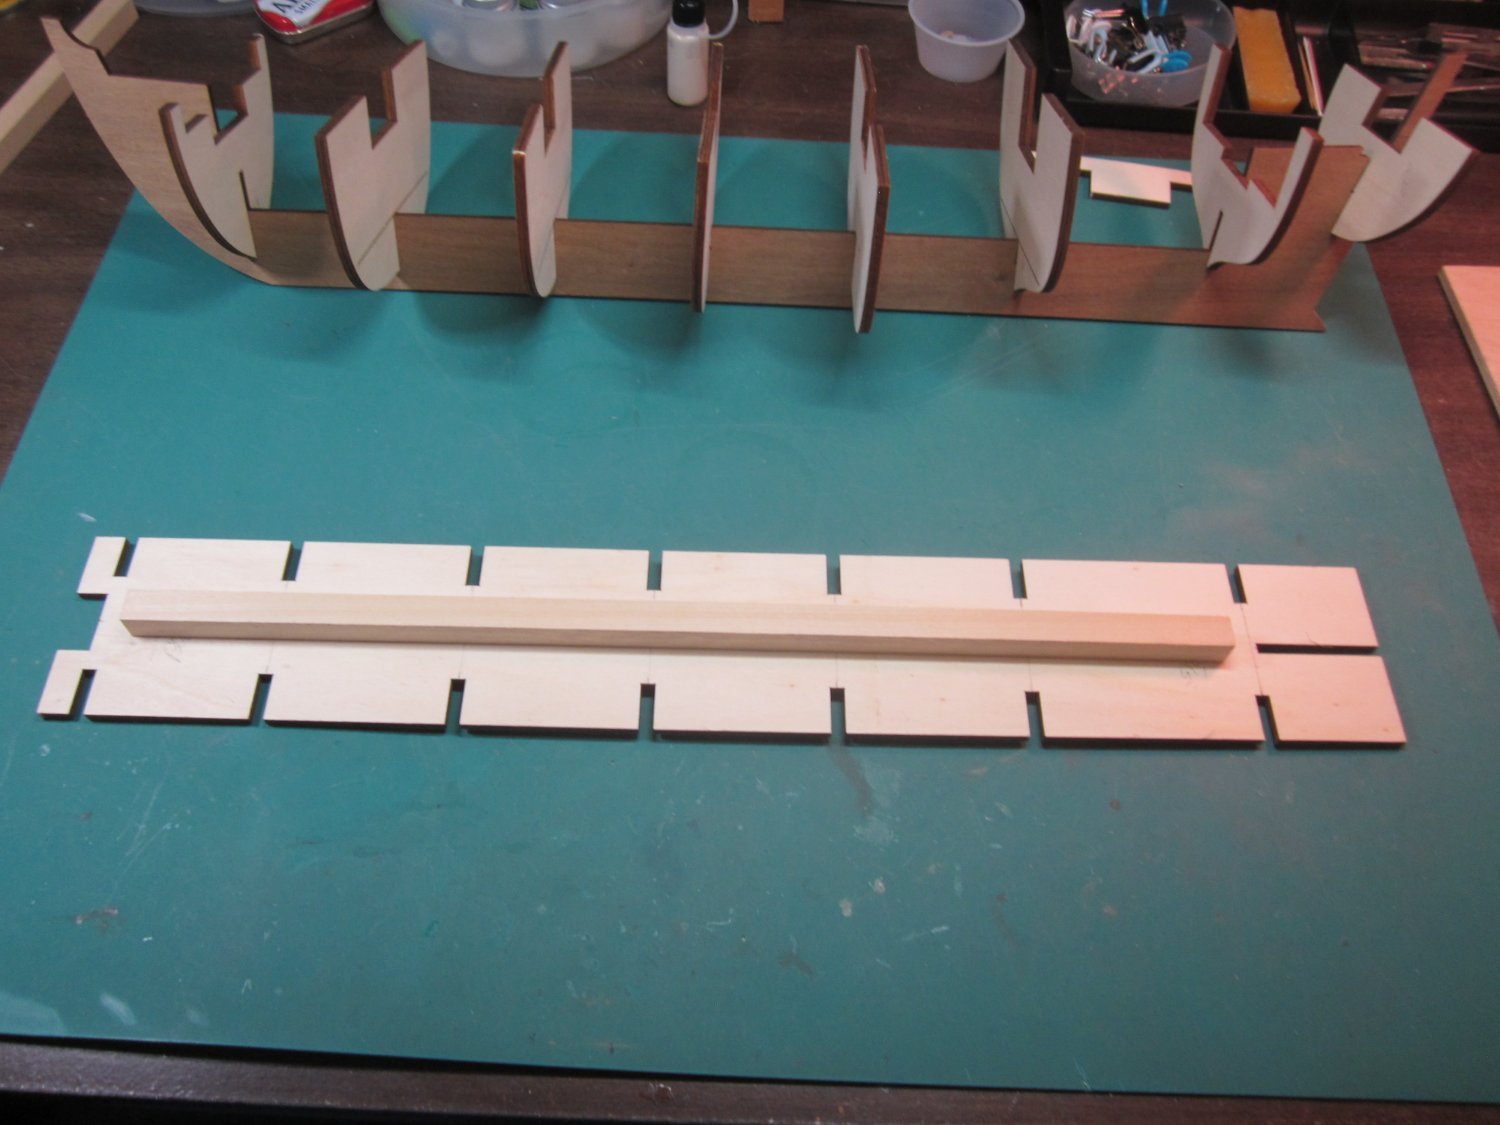
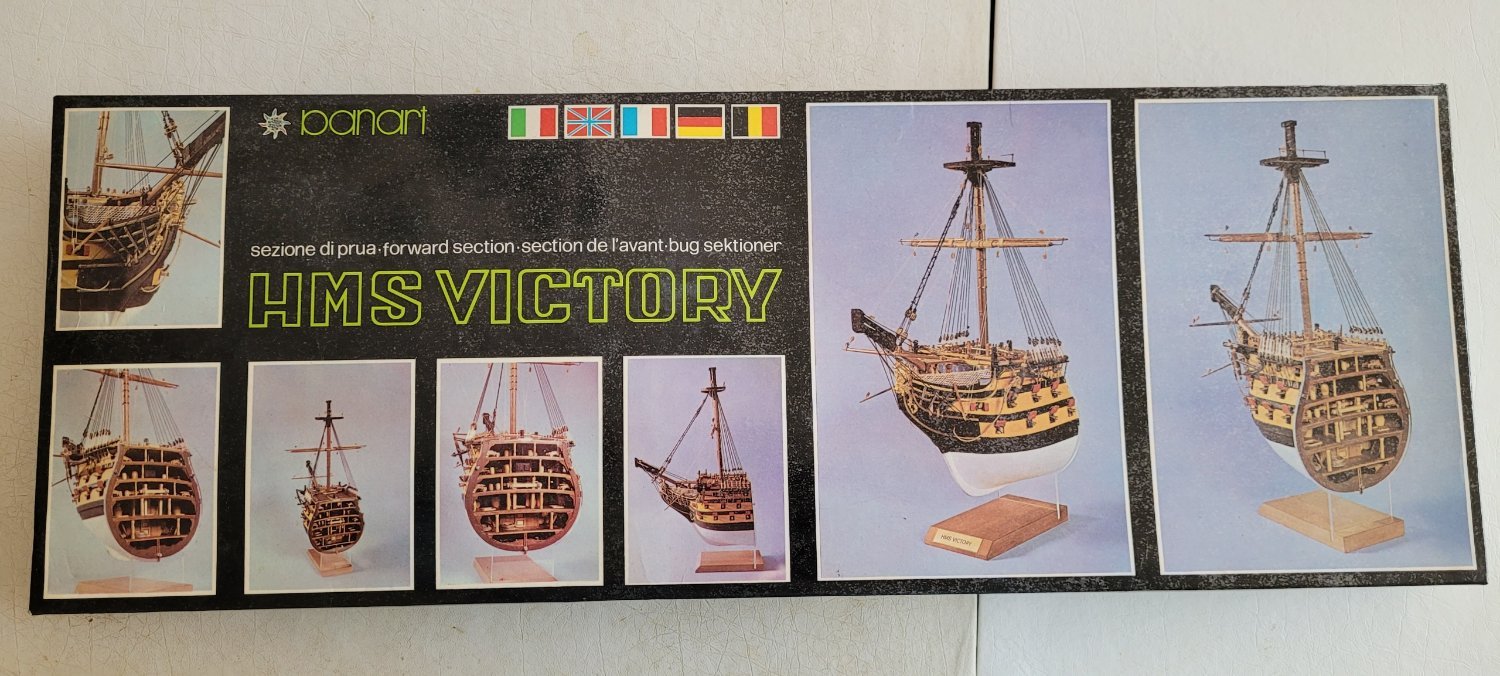
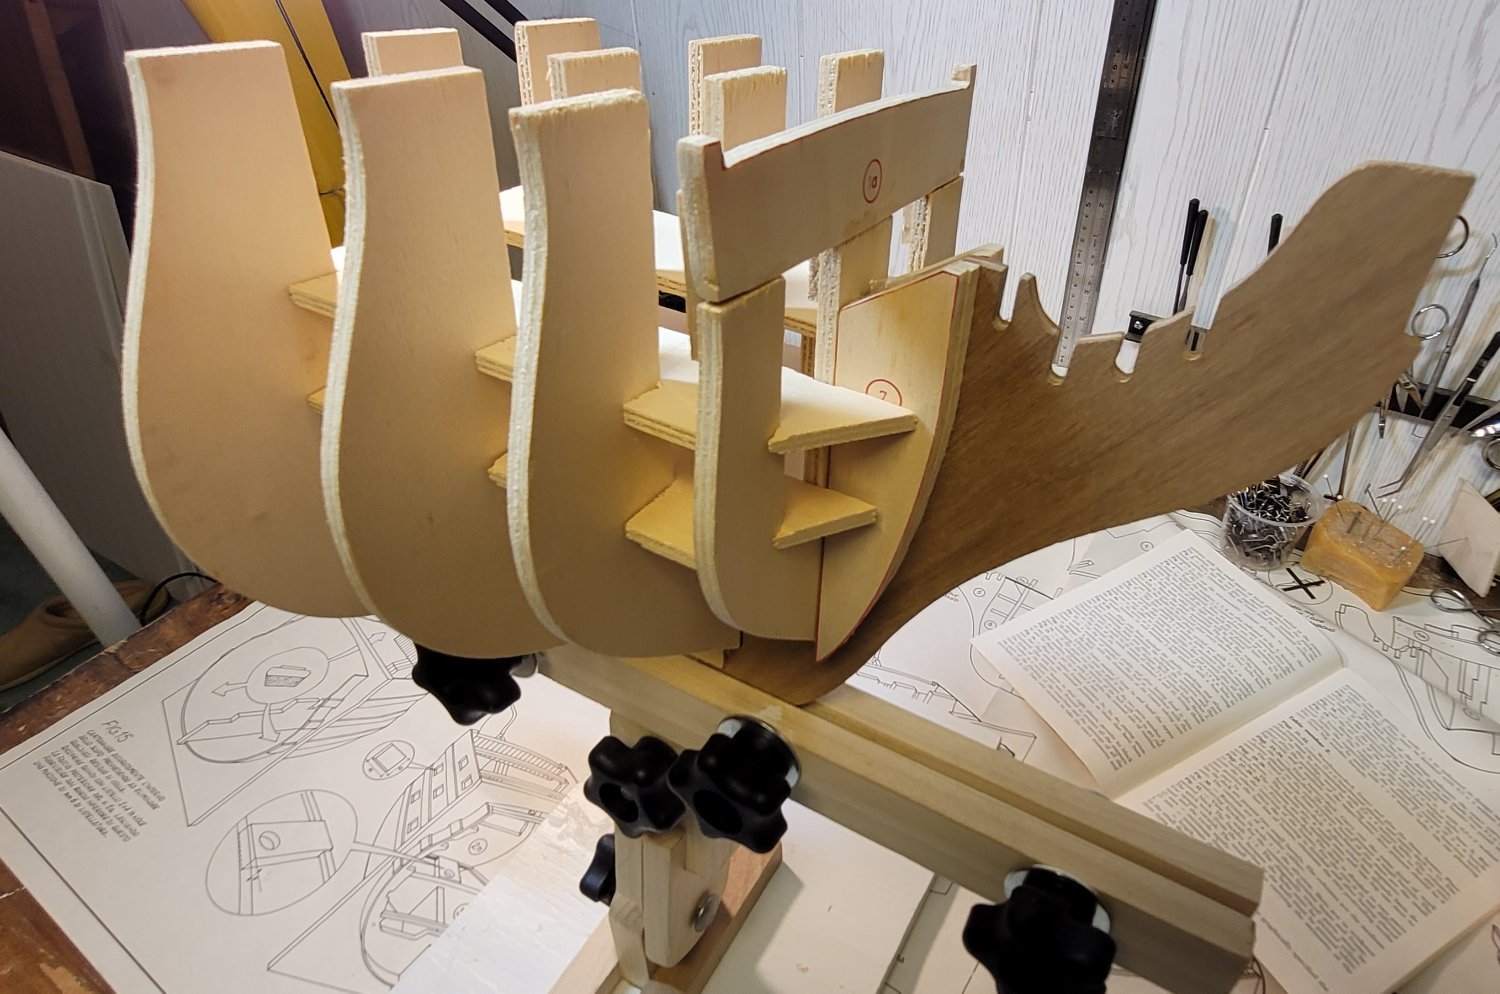
 Welcome to my ongoing log of my build of HMS Victory by Panart. Although I have modelled in the past, this is my first model ship, working in wood and metal rather than plastics. Having taken on the project with zero knowledge of model shipbuilding and working with wood at such a small scale it has been a great challenge building this ship to the high standard I wanted. I've built up my skills throughout, learning a lot from fellow modellers on this website, and can say this is my favourite project I've ever worked on. At this current stage I'm really happy with the results and would like to share the images of the build as it progresses.
-
 After long period of no model building due to moving to new house and renovations I decided to restart with a standard kit. In the mean time build some RC kits (Hovercraft and DF65 Sailing boat) fo use within the Modelclub Selection was made for this small Battle station from Panart. Once this is finished I will restart with the Wasa I need no to check how I can share pictures. Log will follow shortly
 -
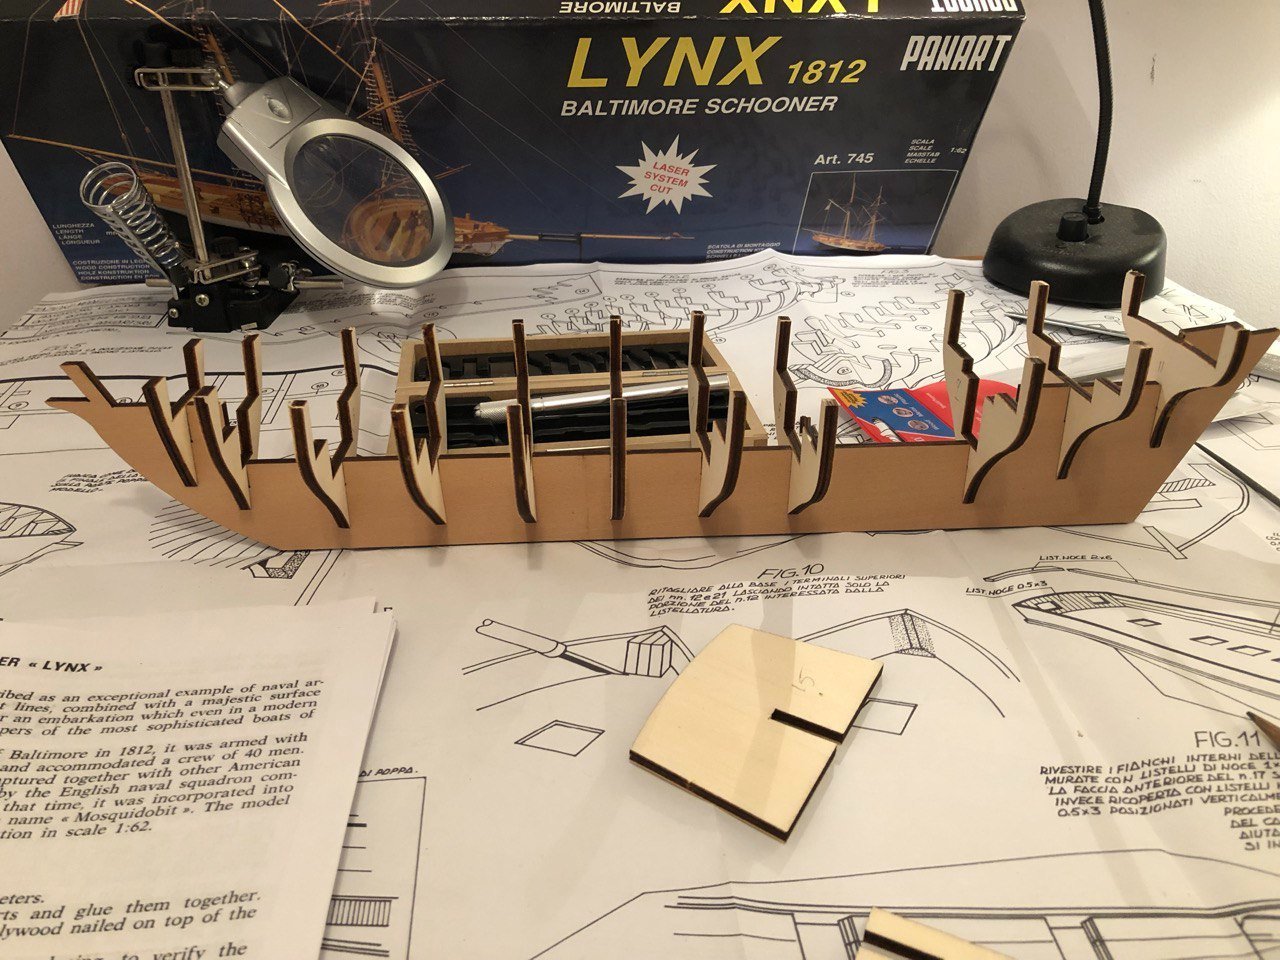
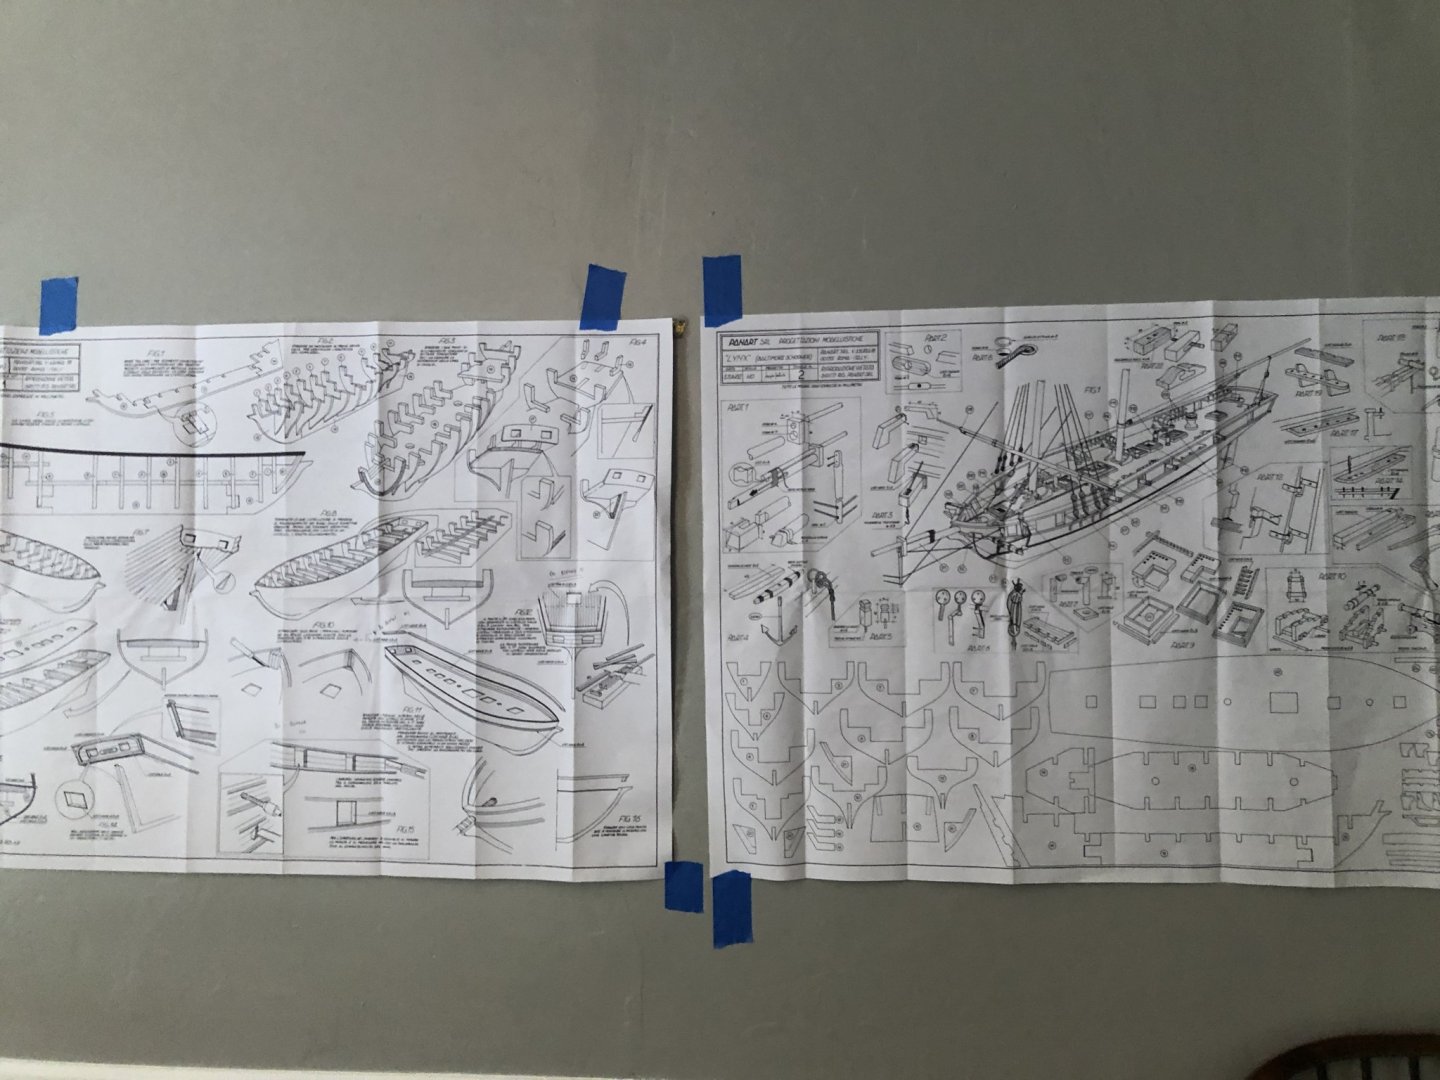
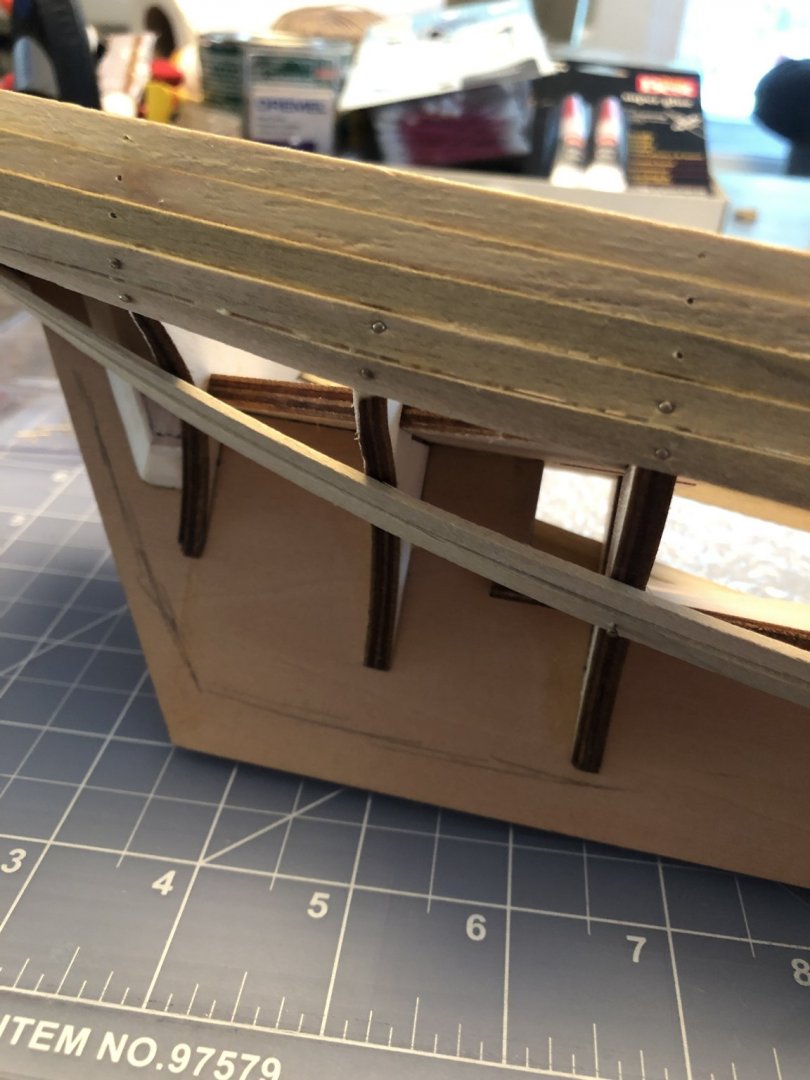
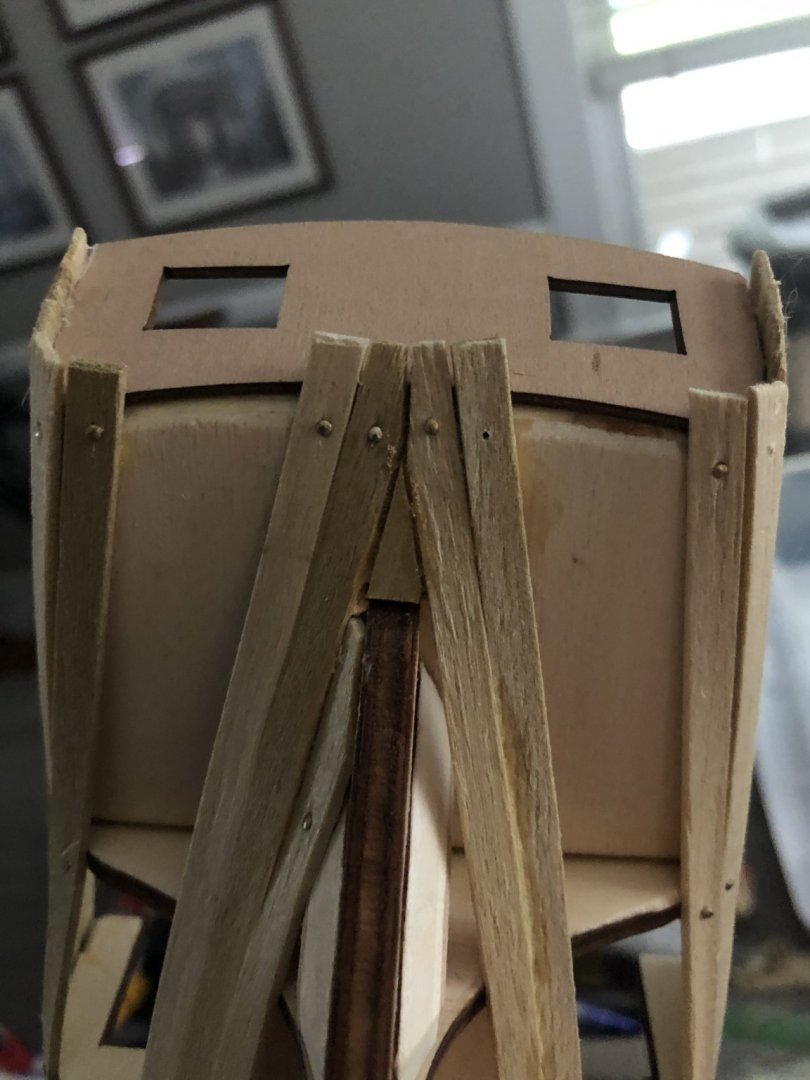
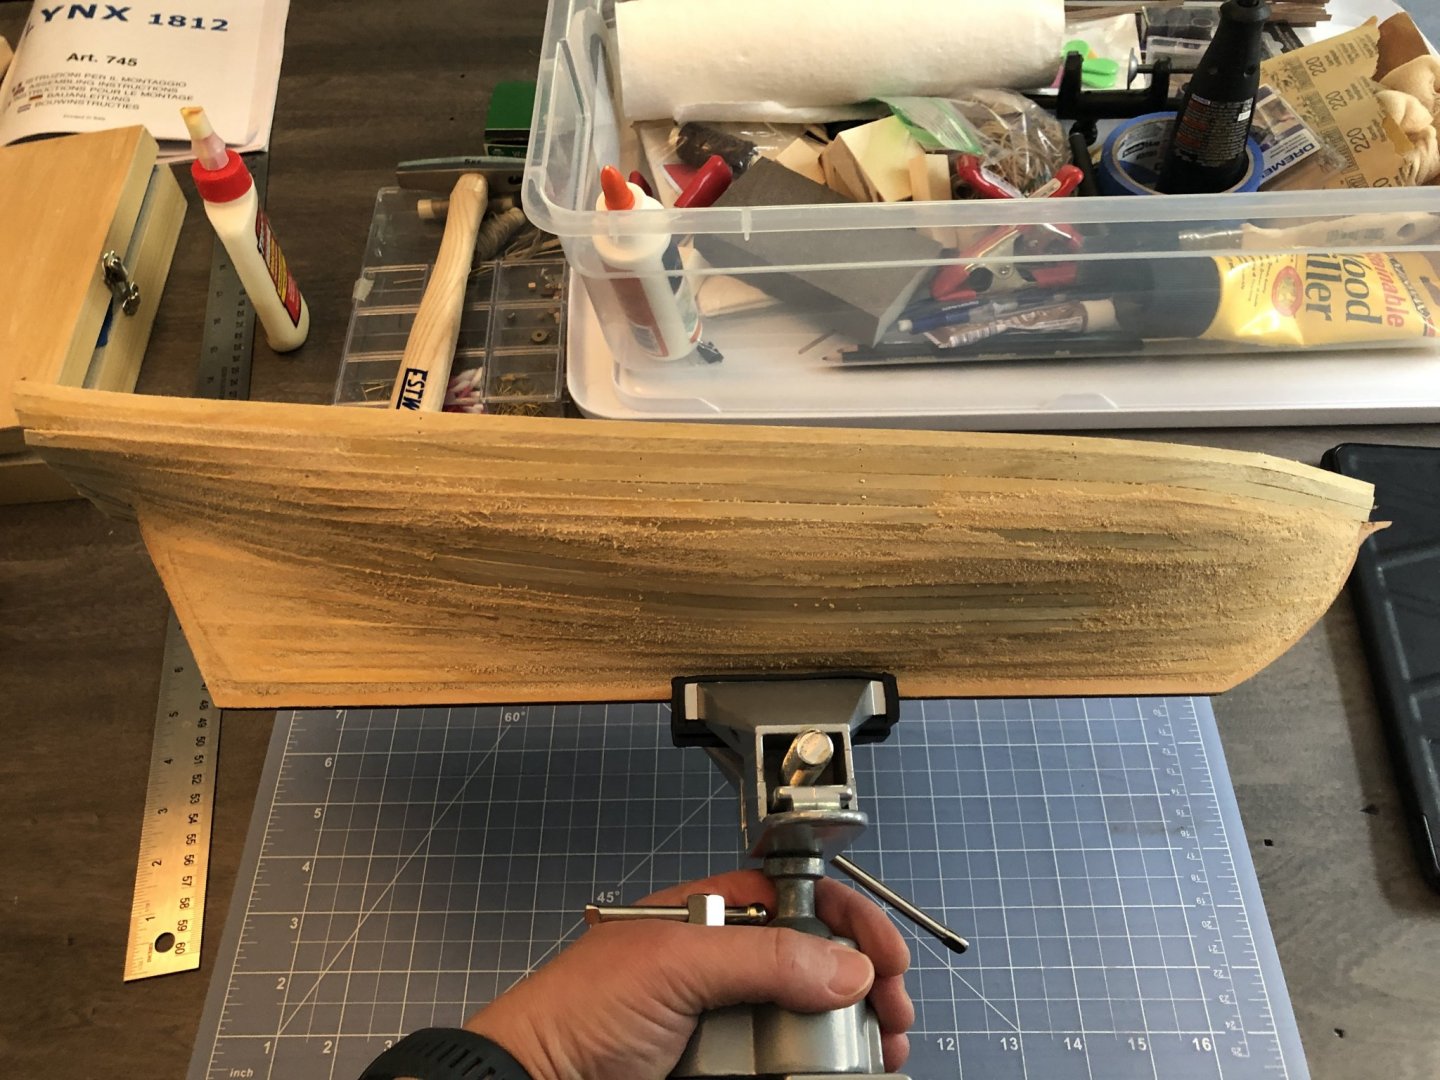
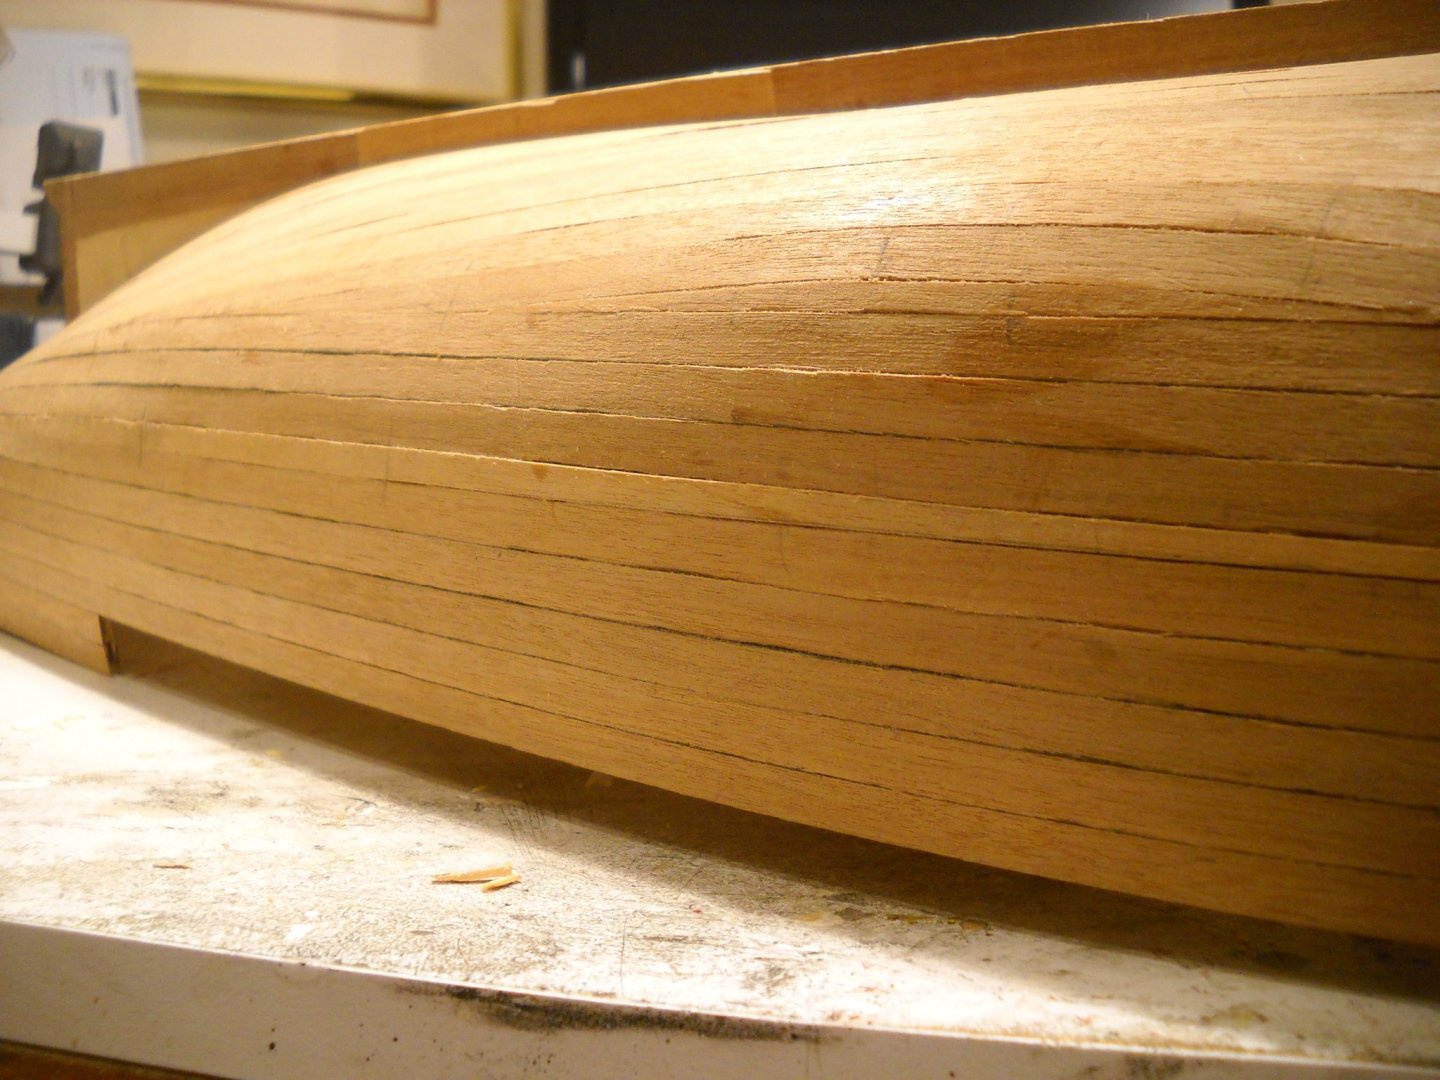
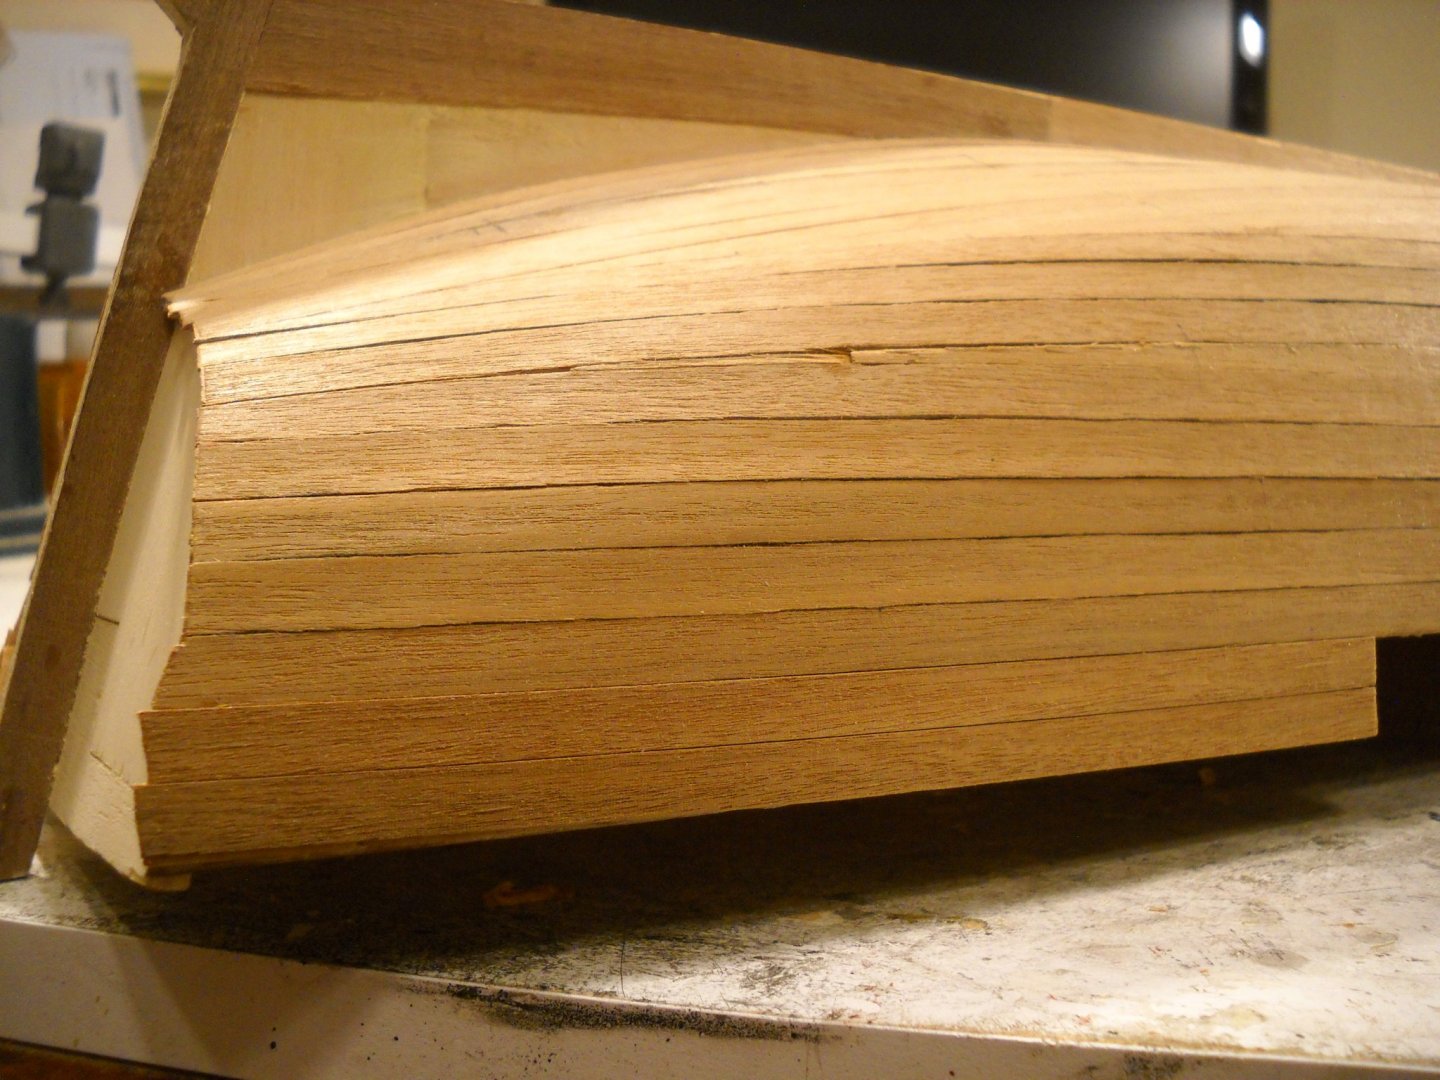
 Greetings All, Where to begin...? I had intended to start posting my progress, but life got in the way. However I first must acknowledge all other building blogs for the Lynx - they did help steer me in the right direction. Shortly after I started, I had the bulkheads aligned with the keel; and had begun planking:
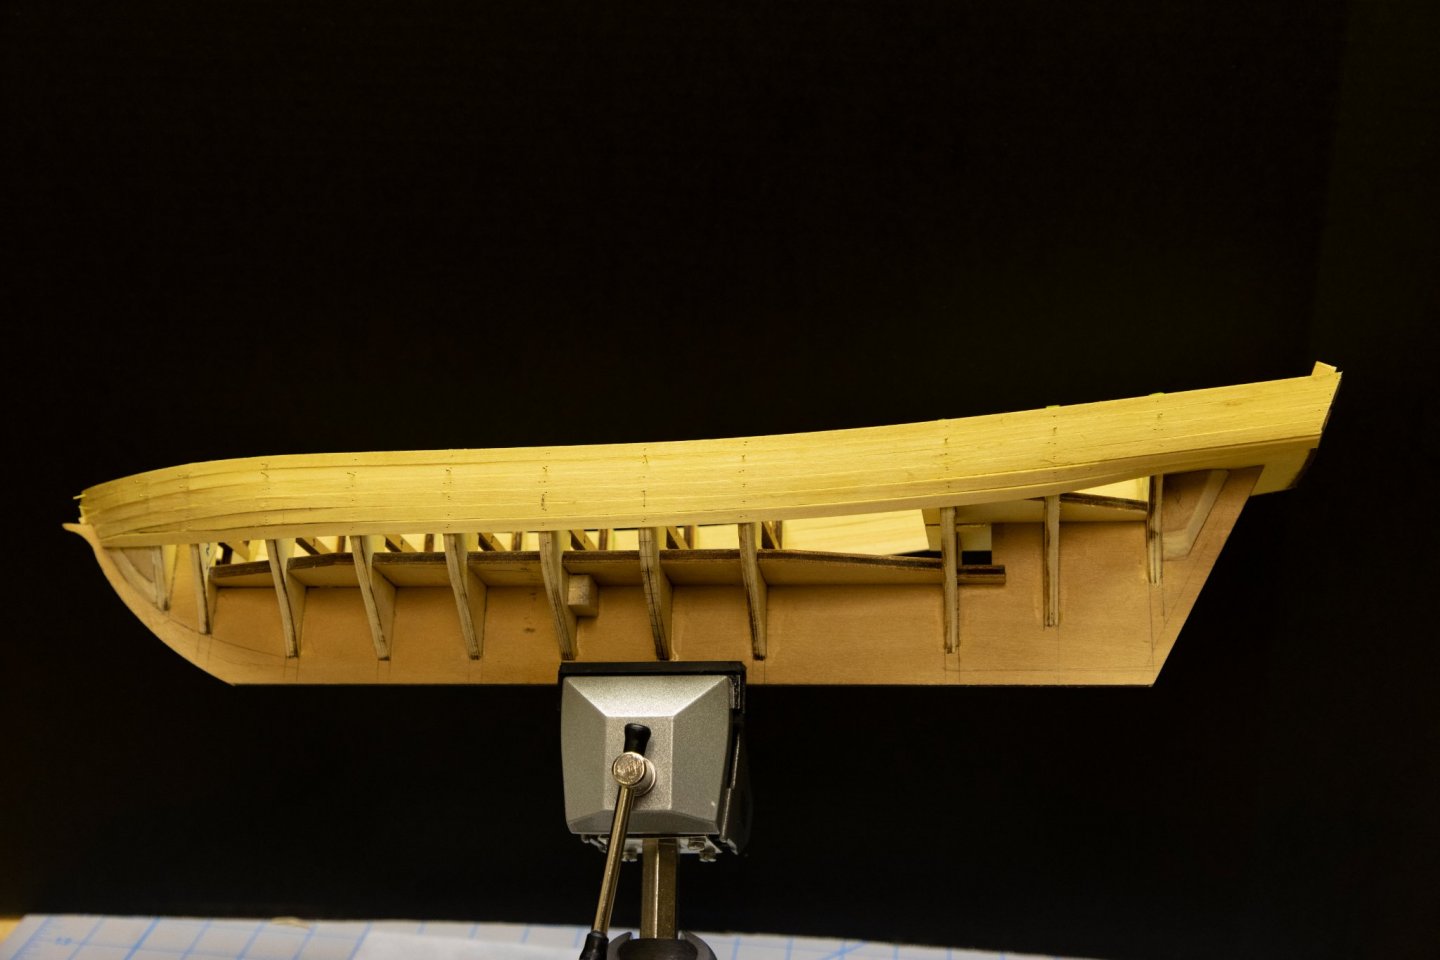
-
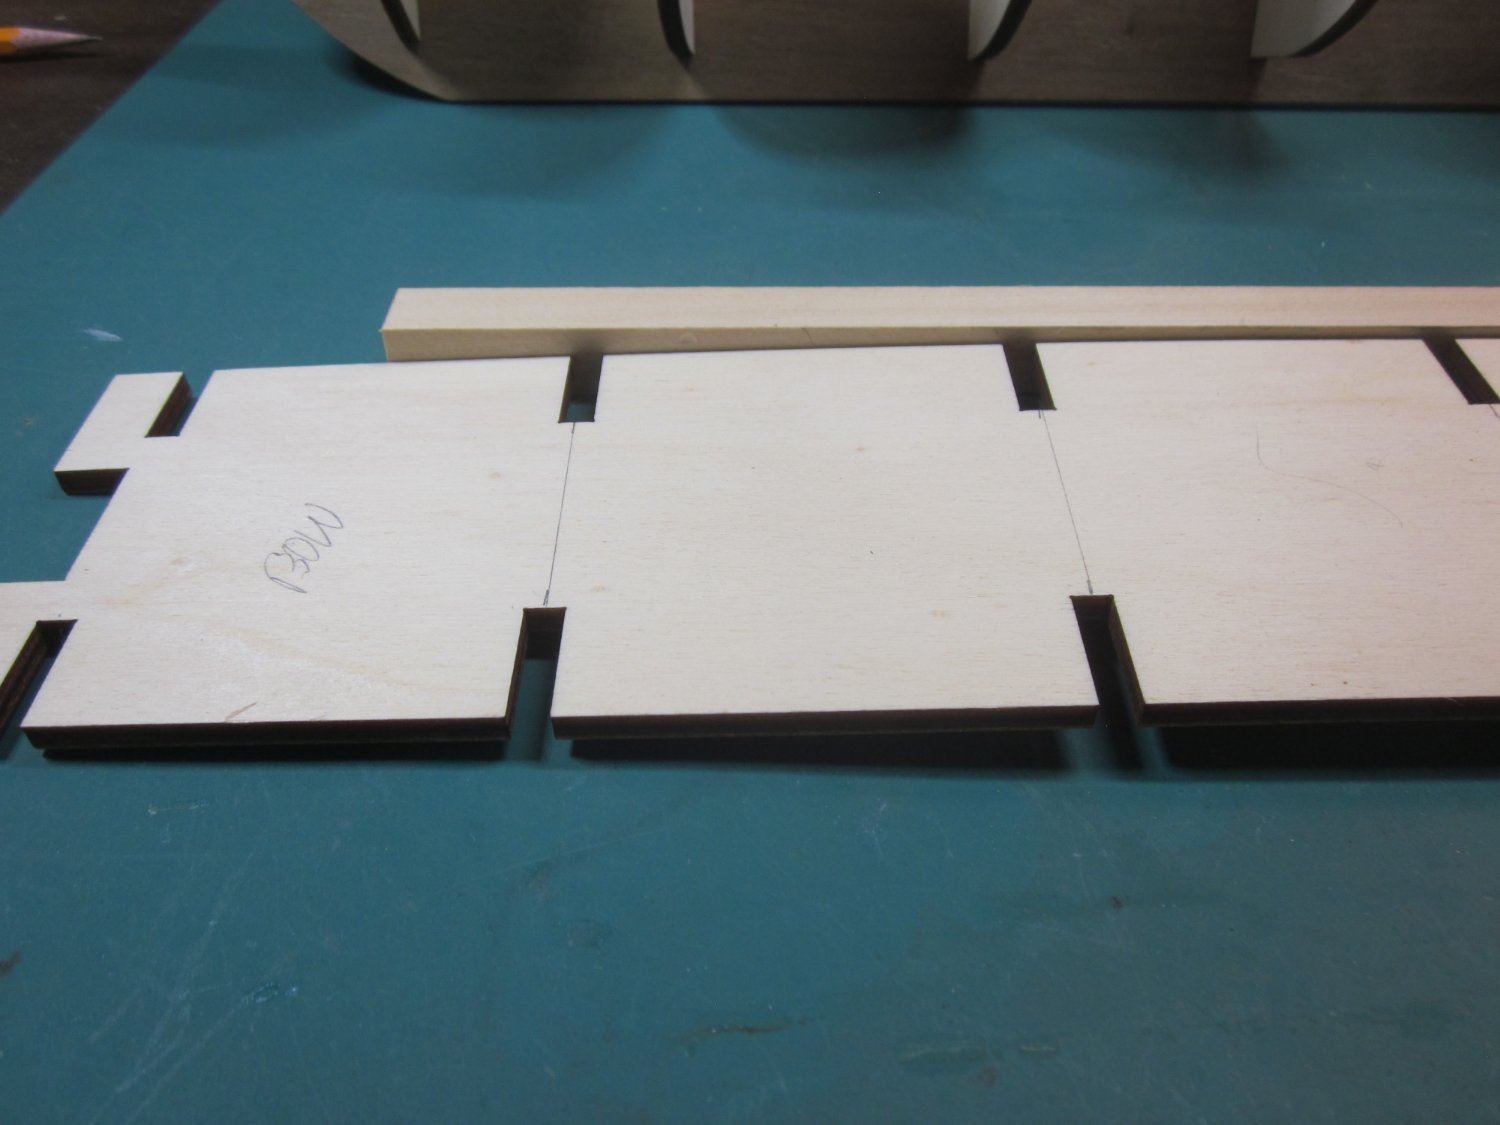
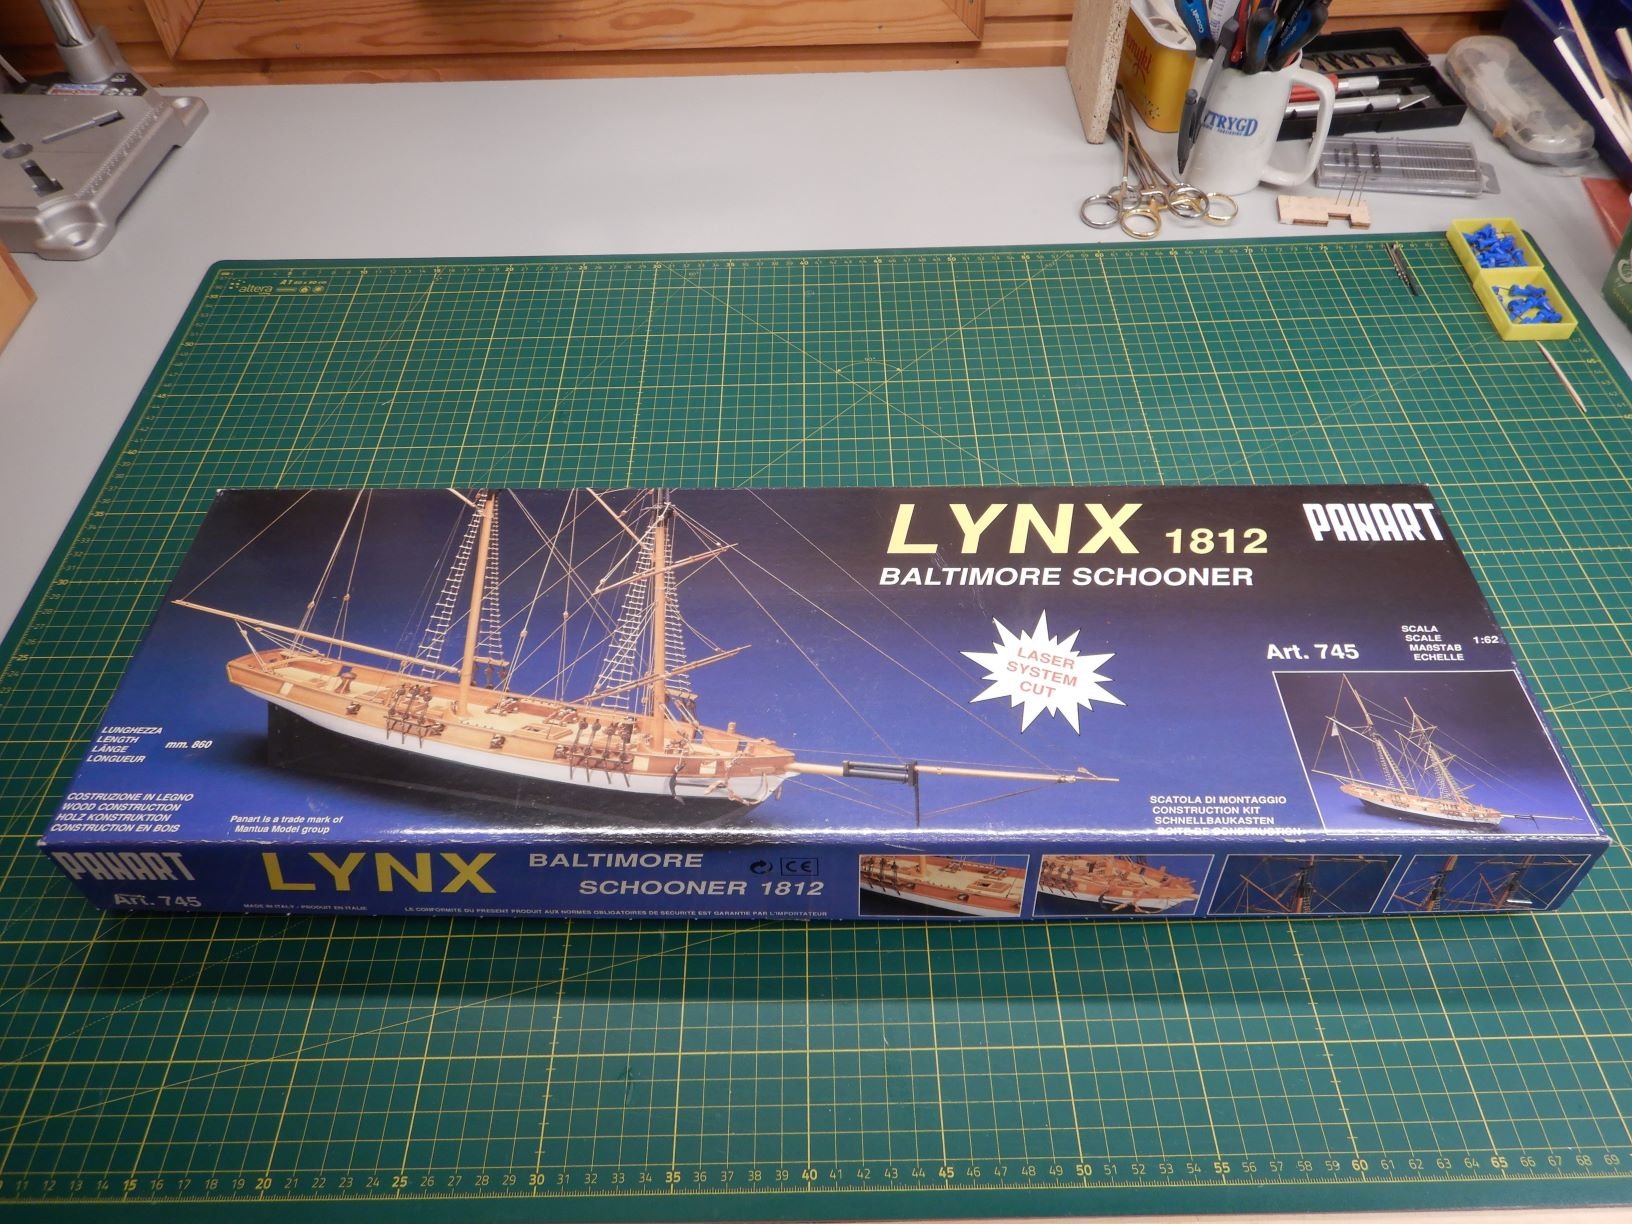
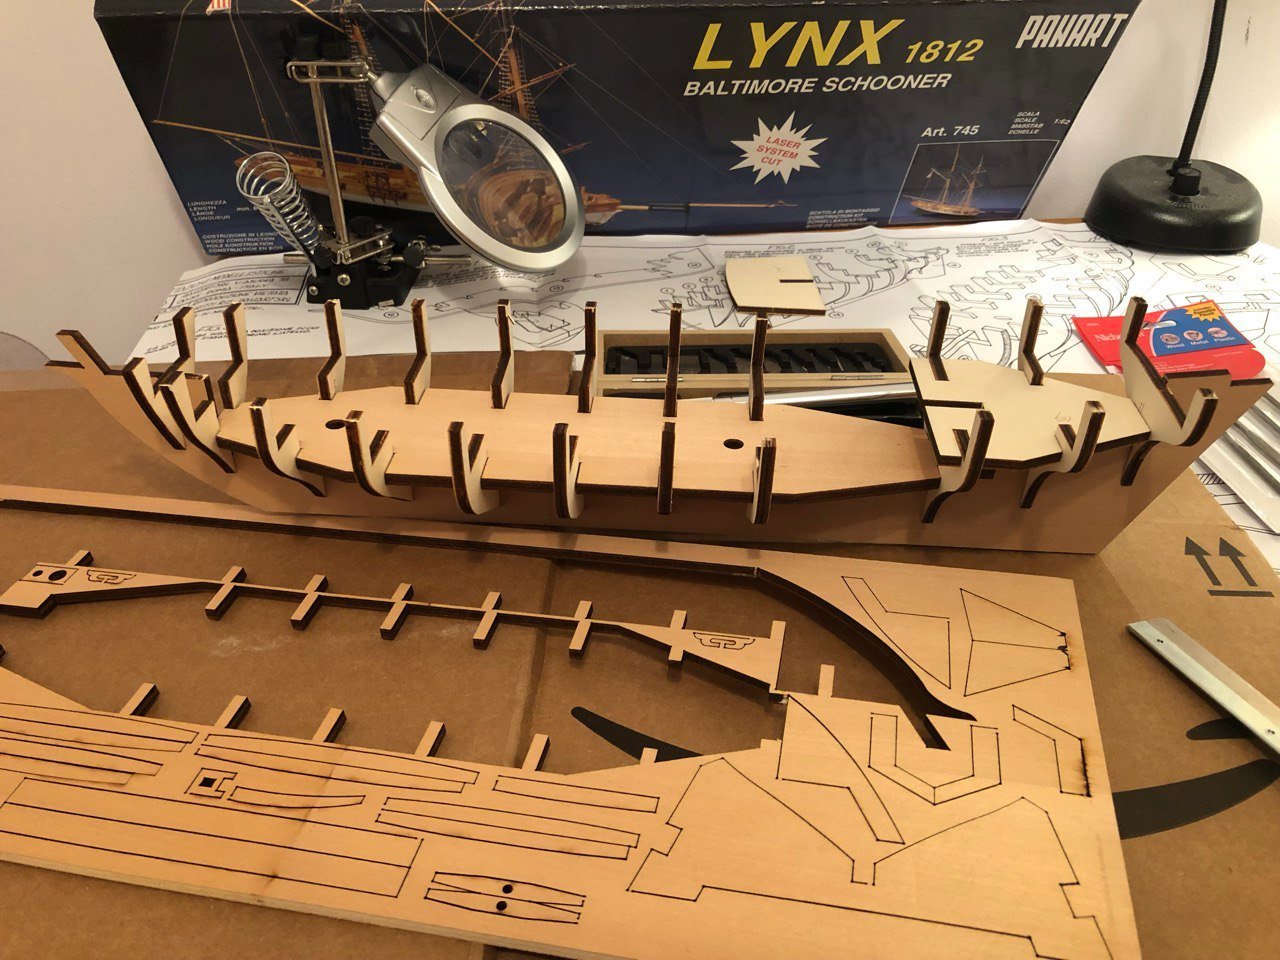
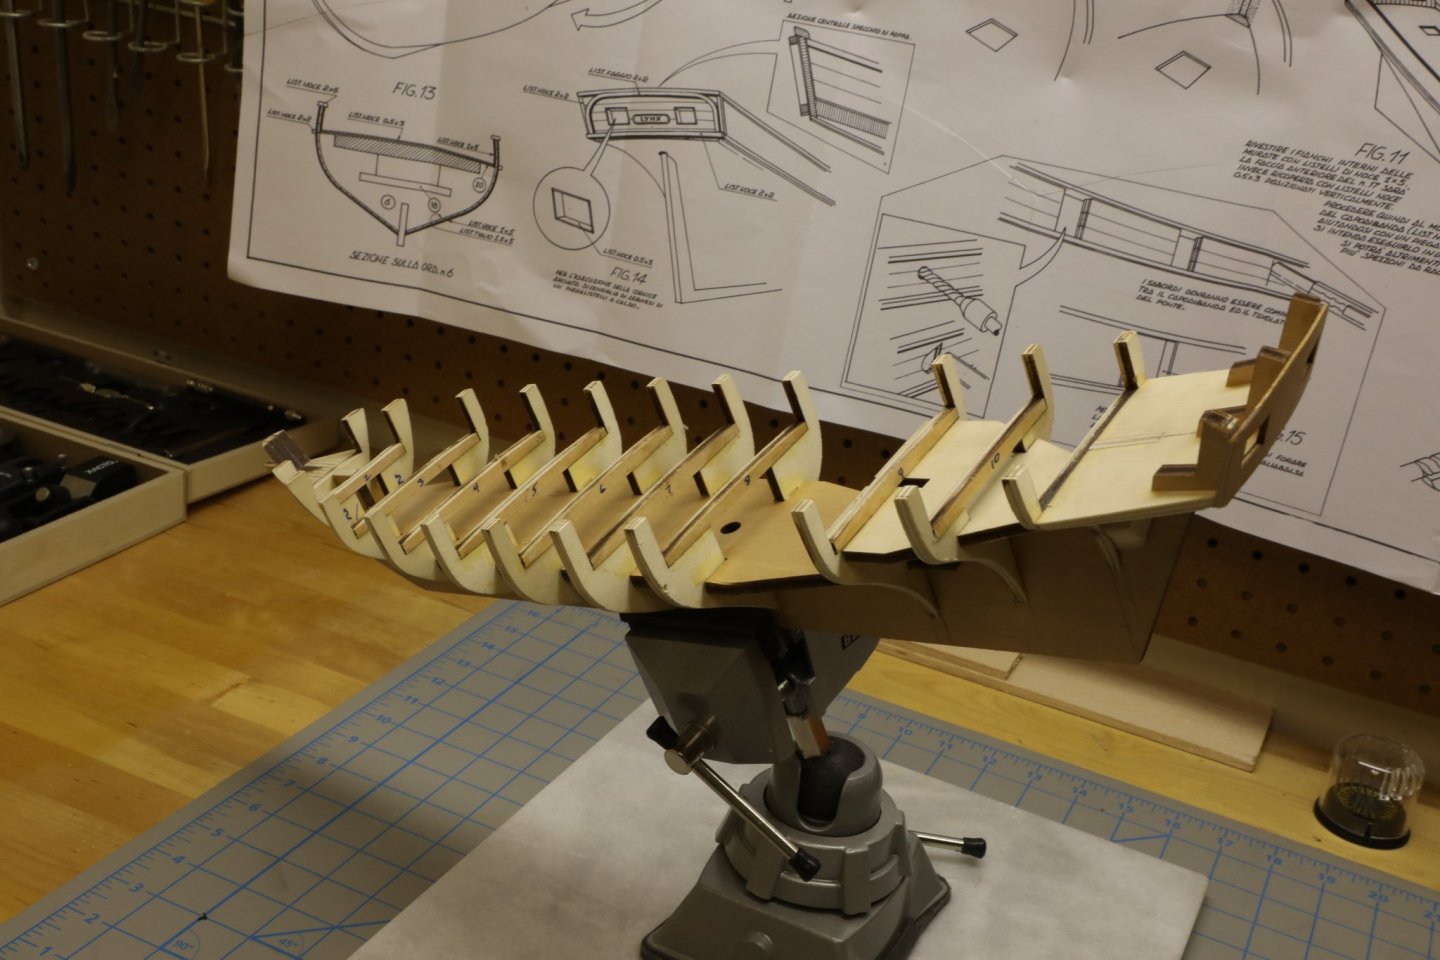
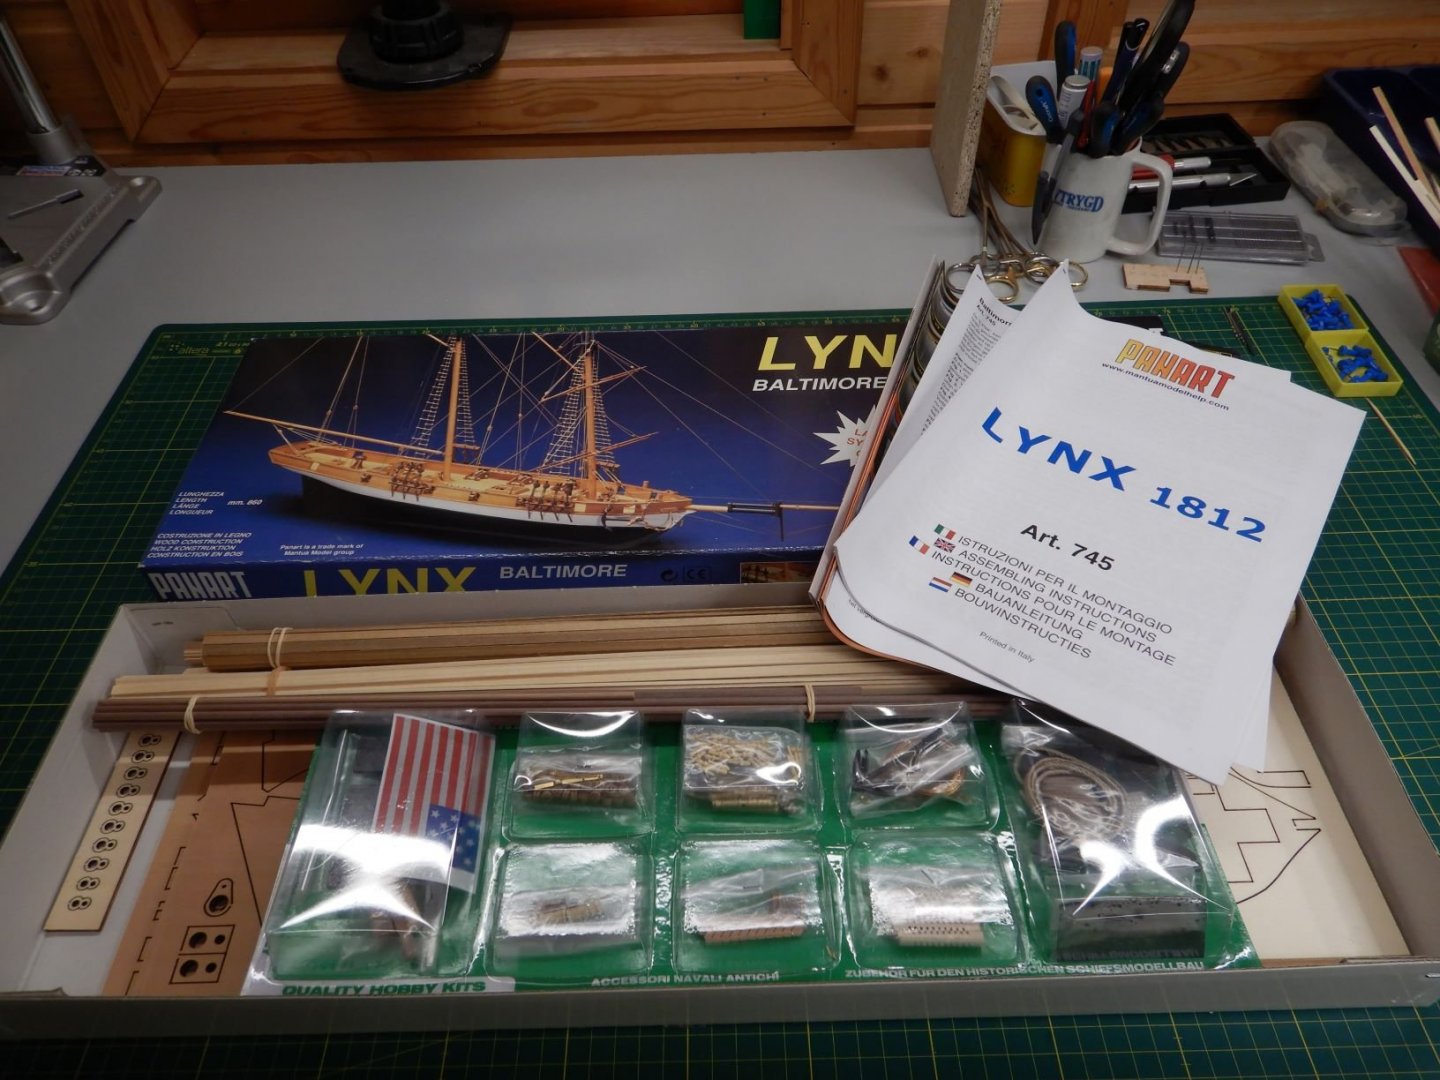
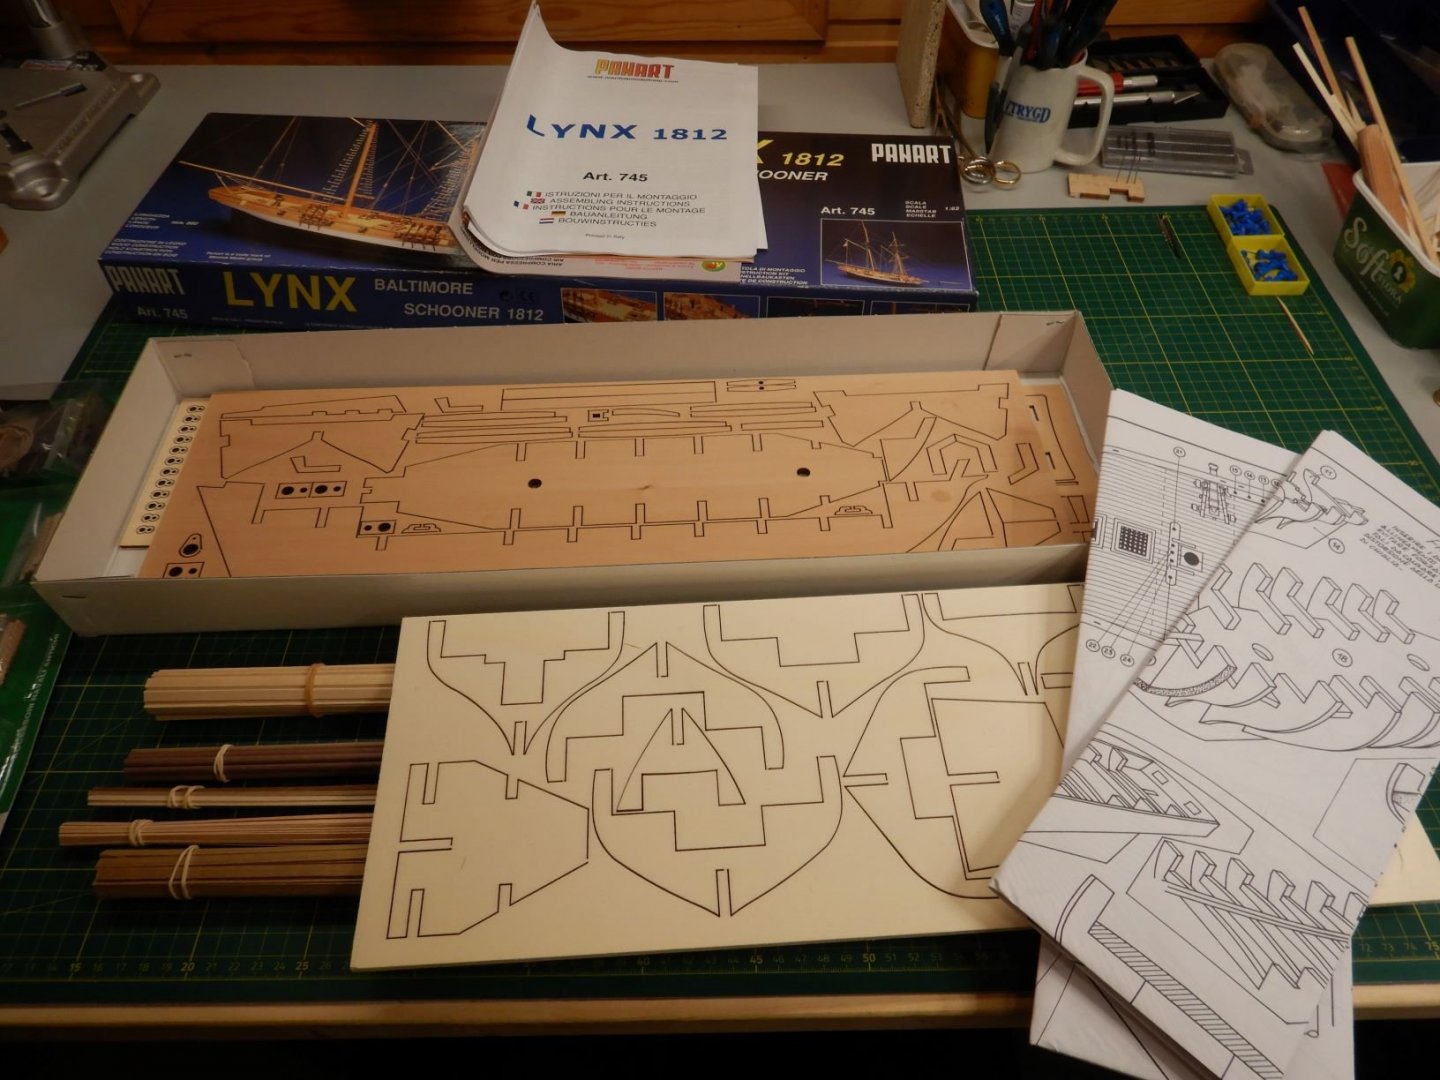
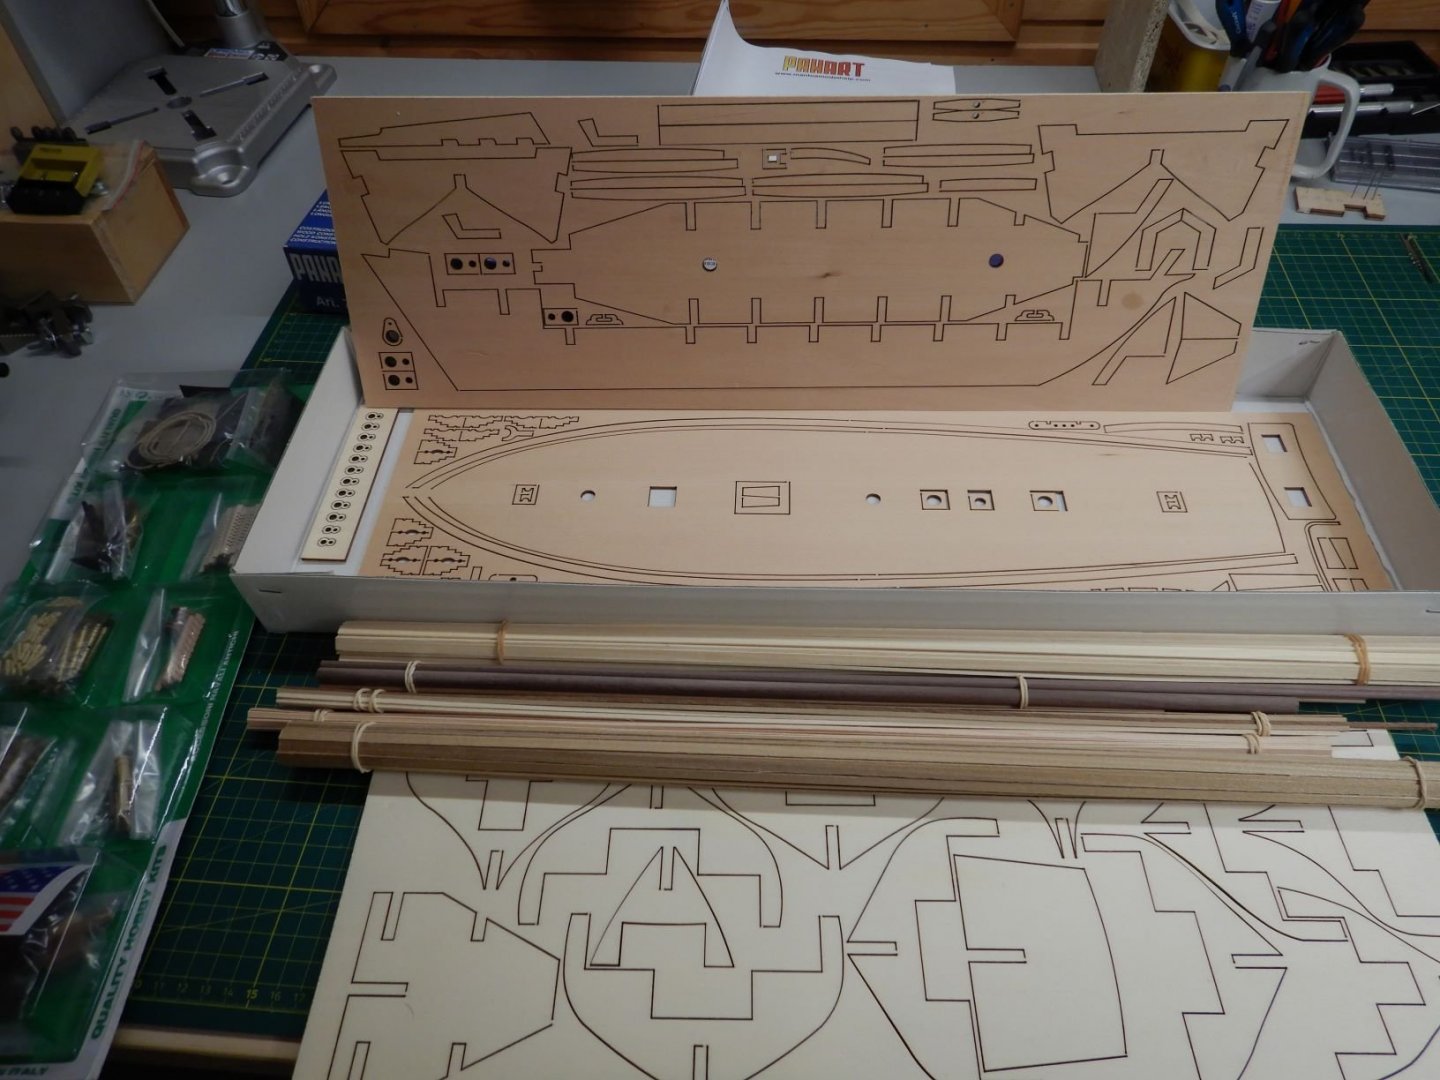
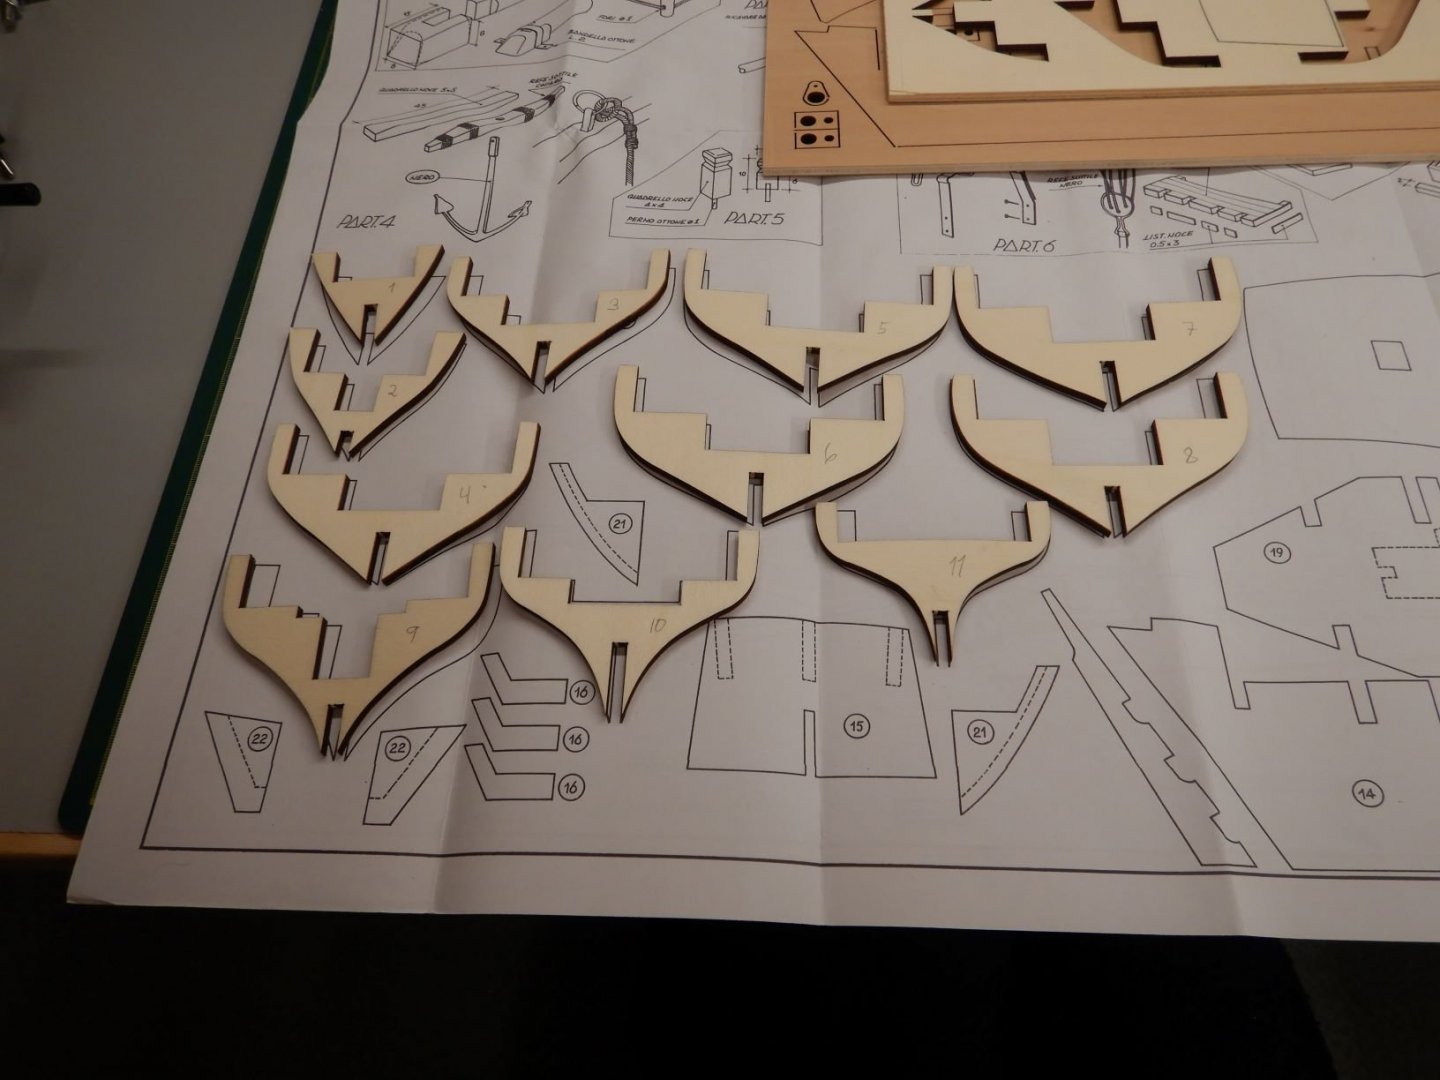
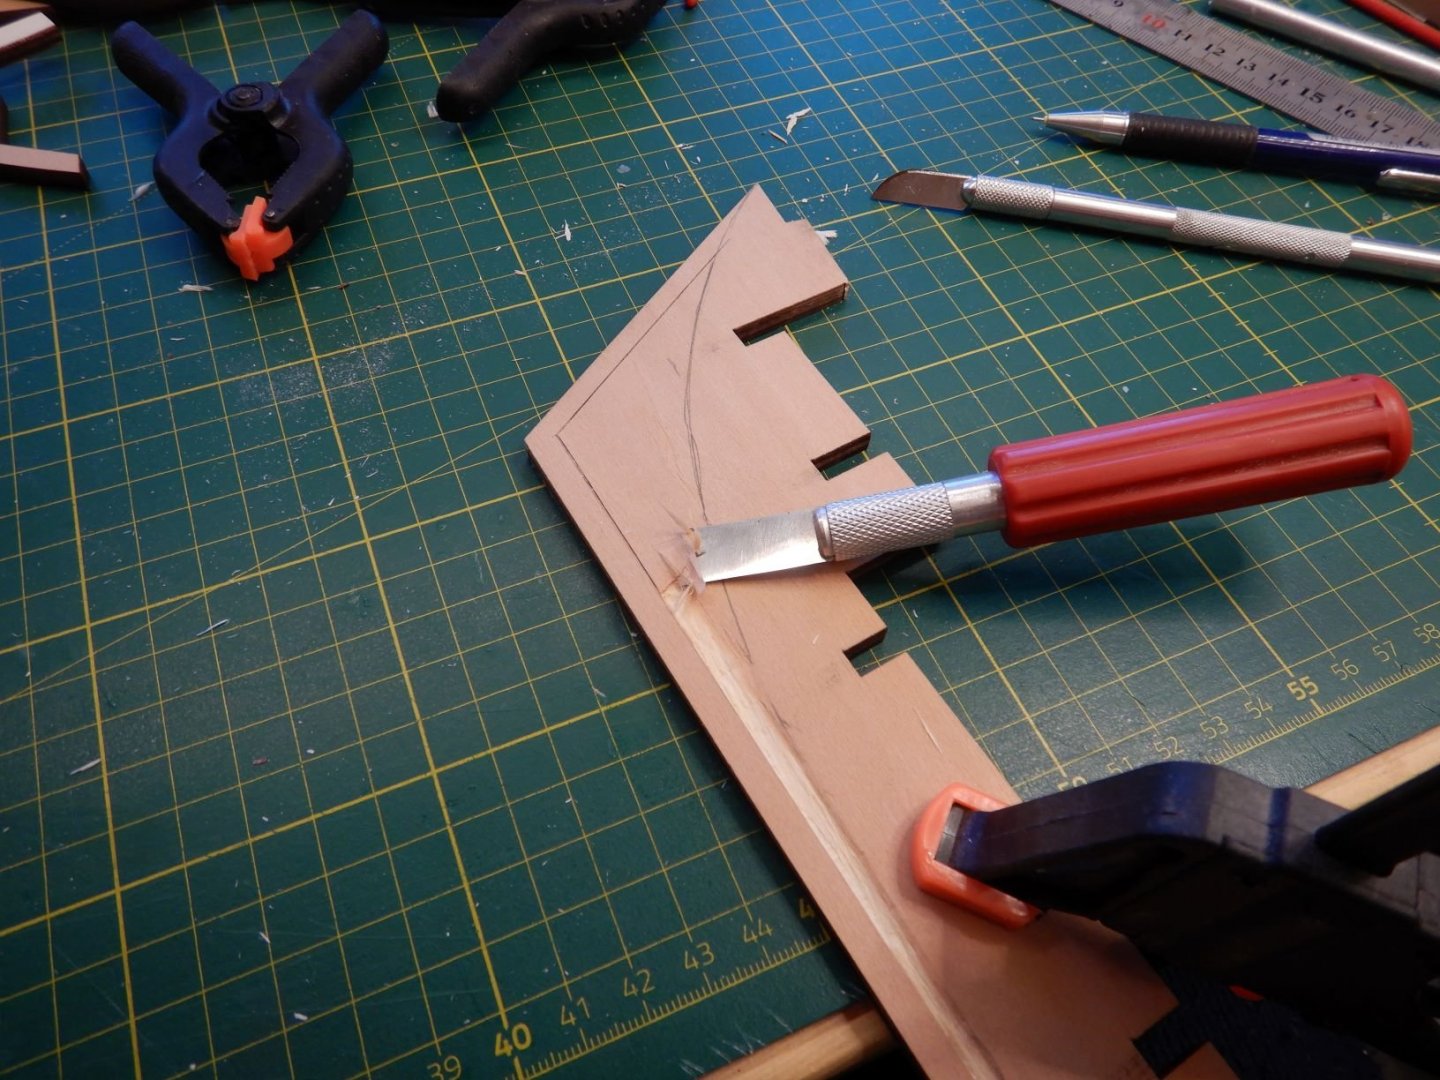
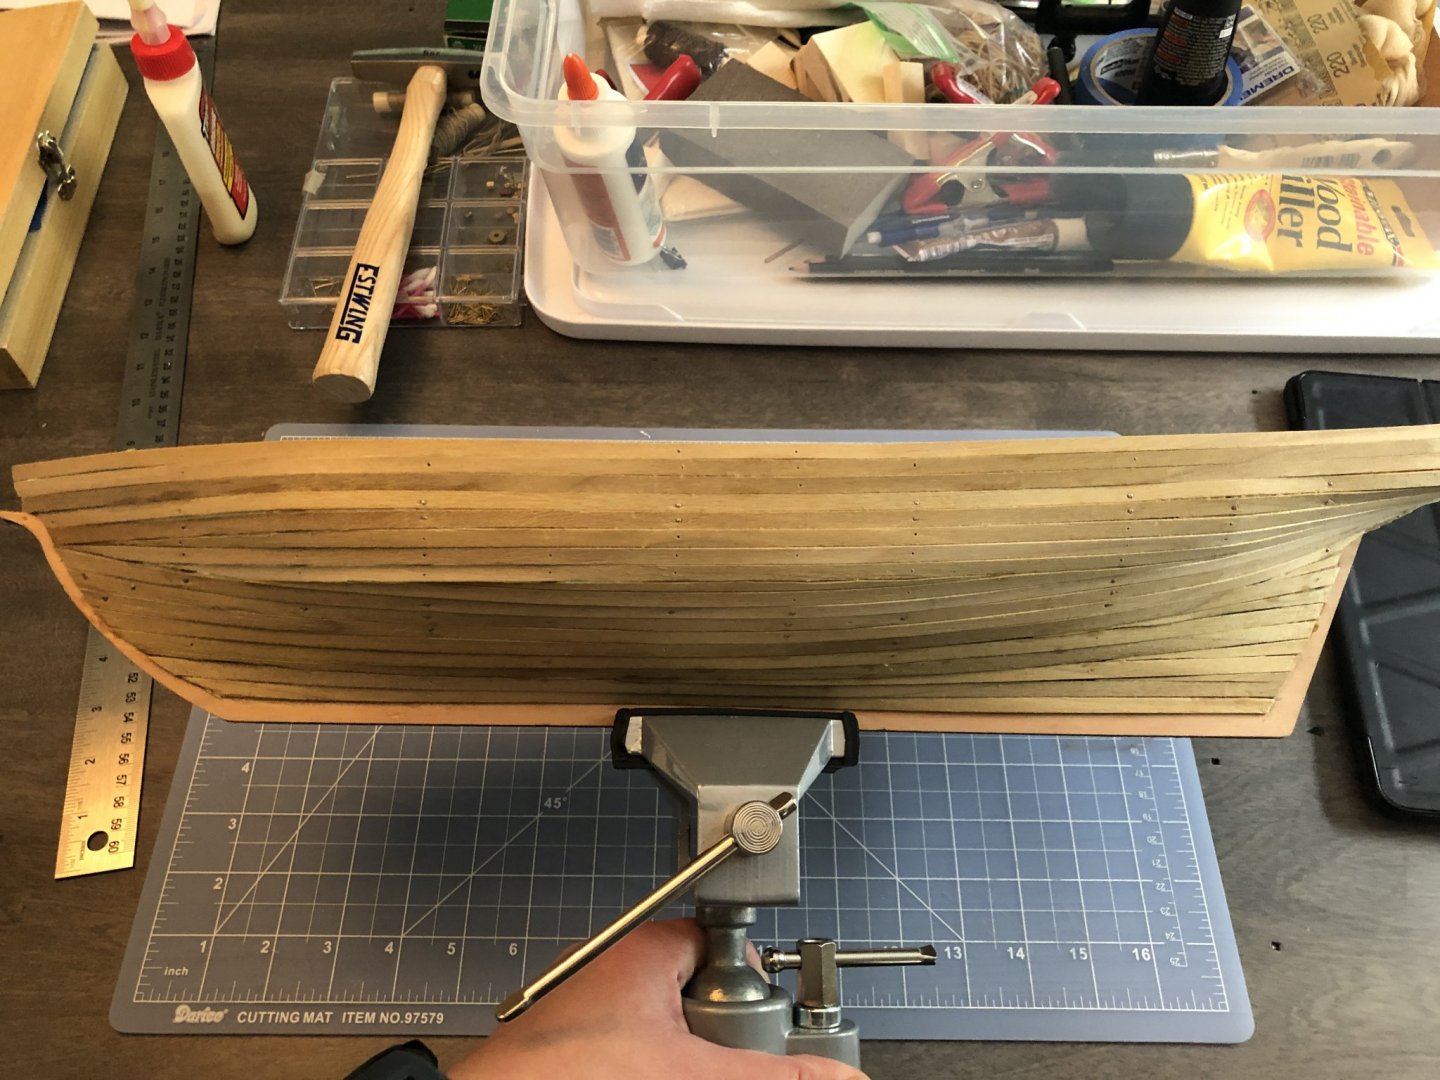
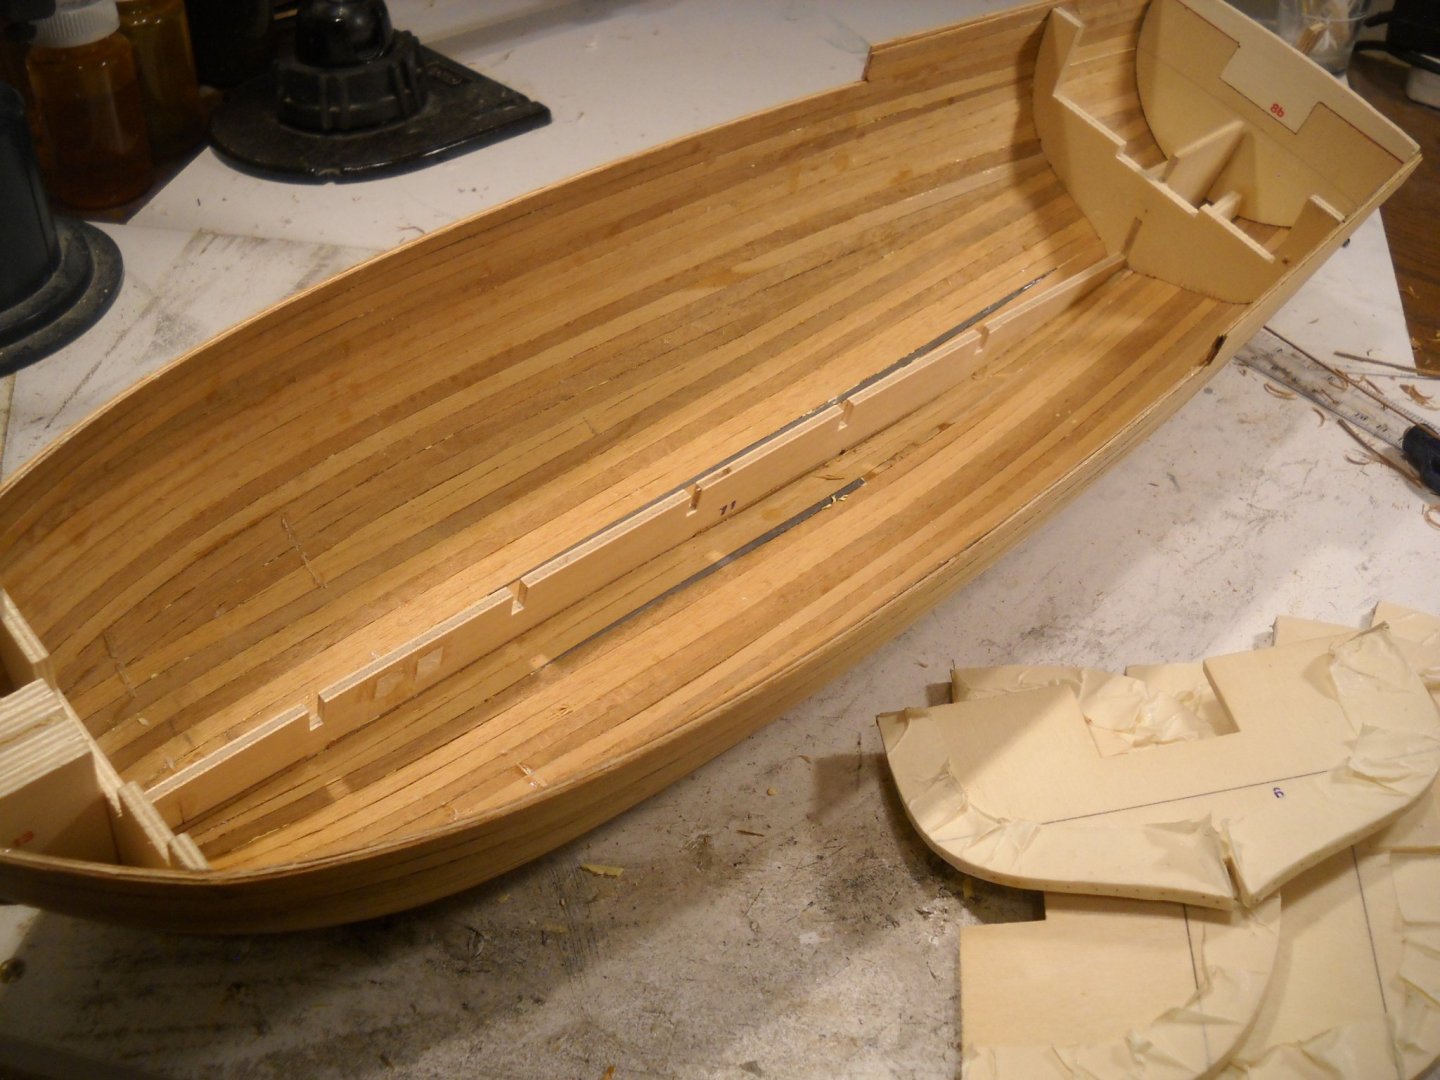
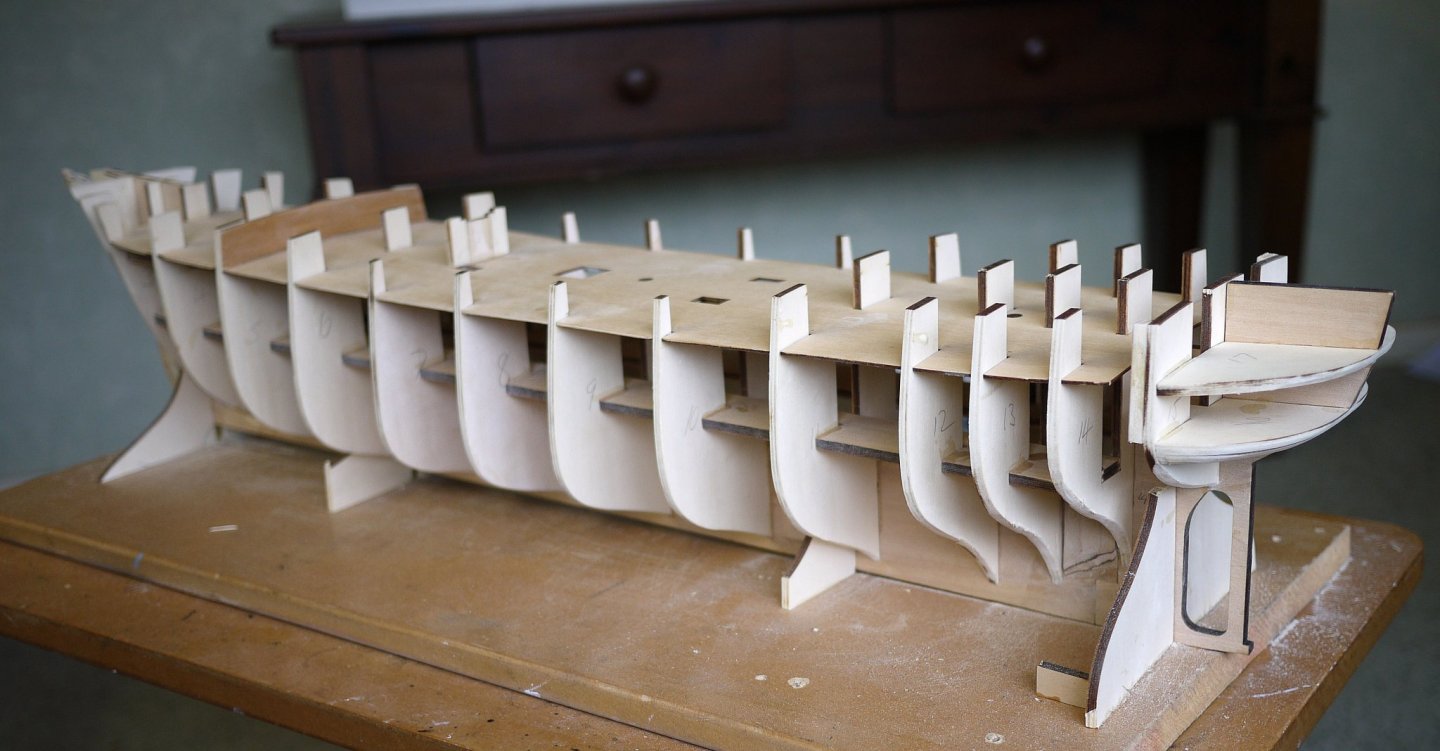
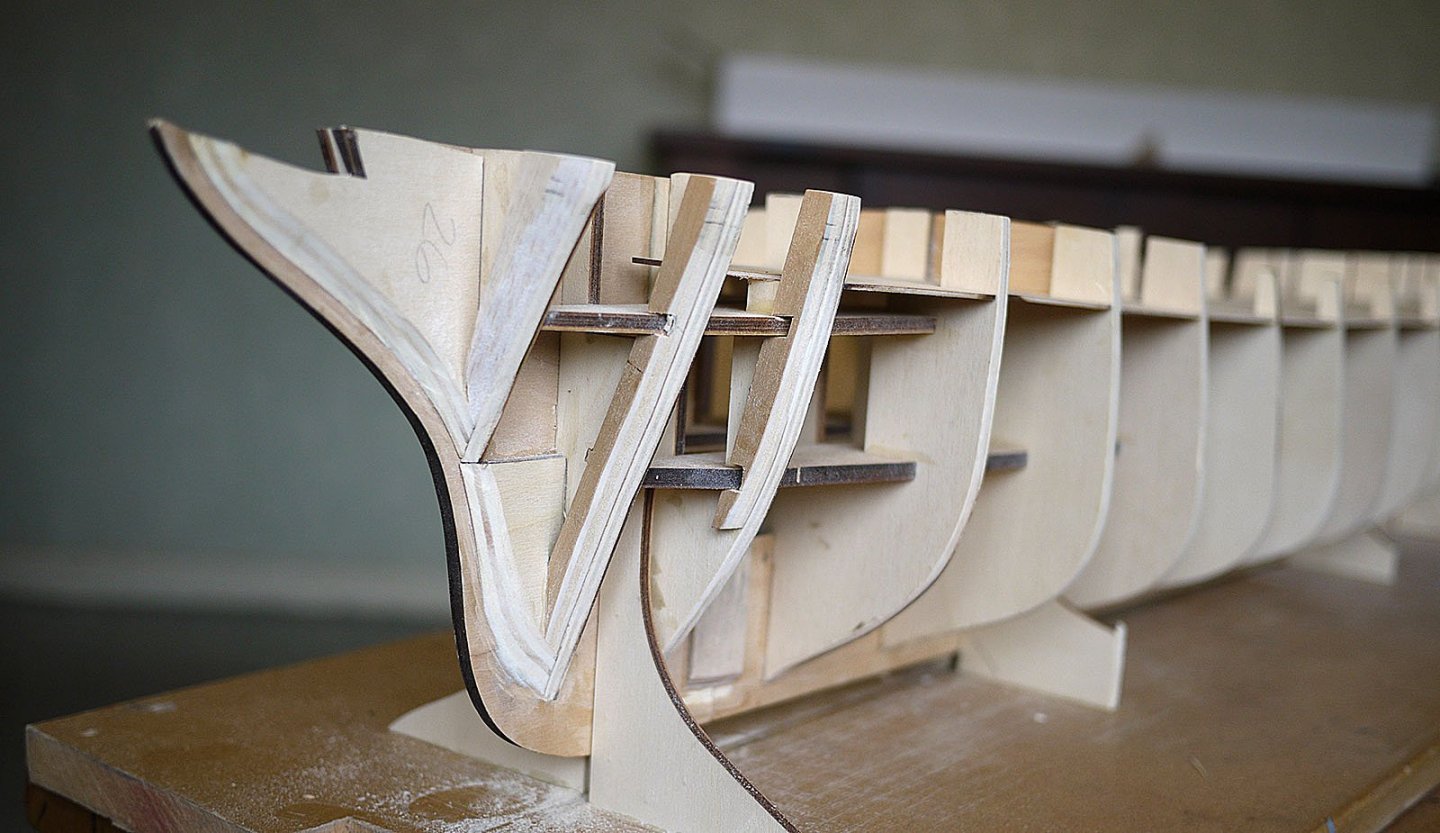
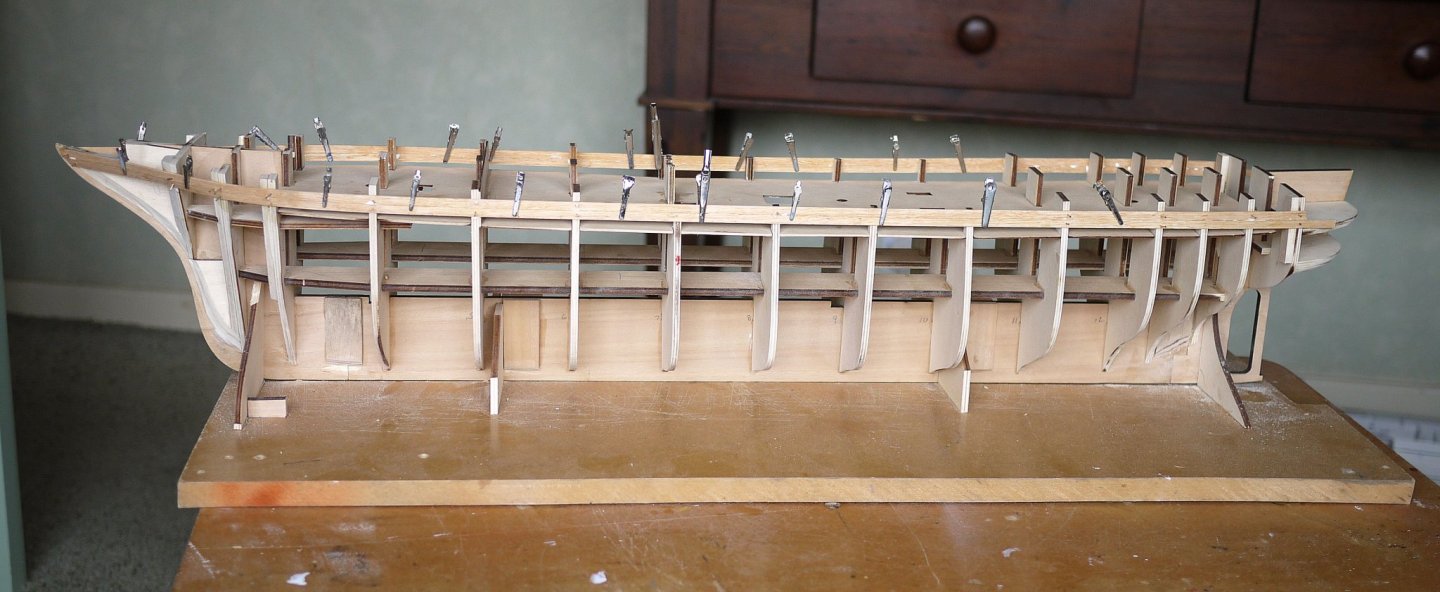
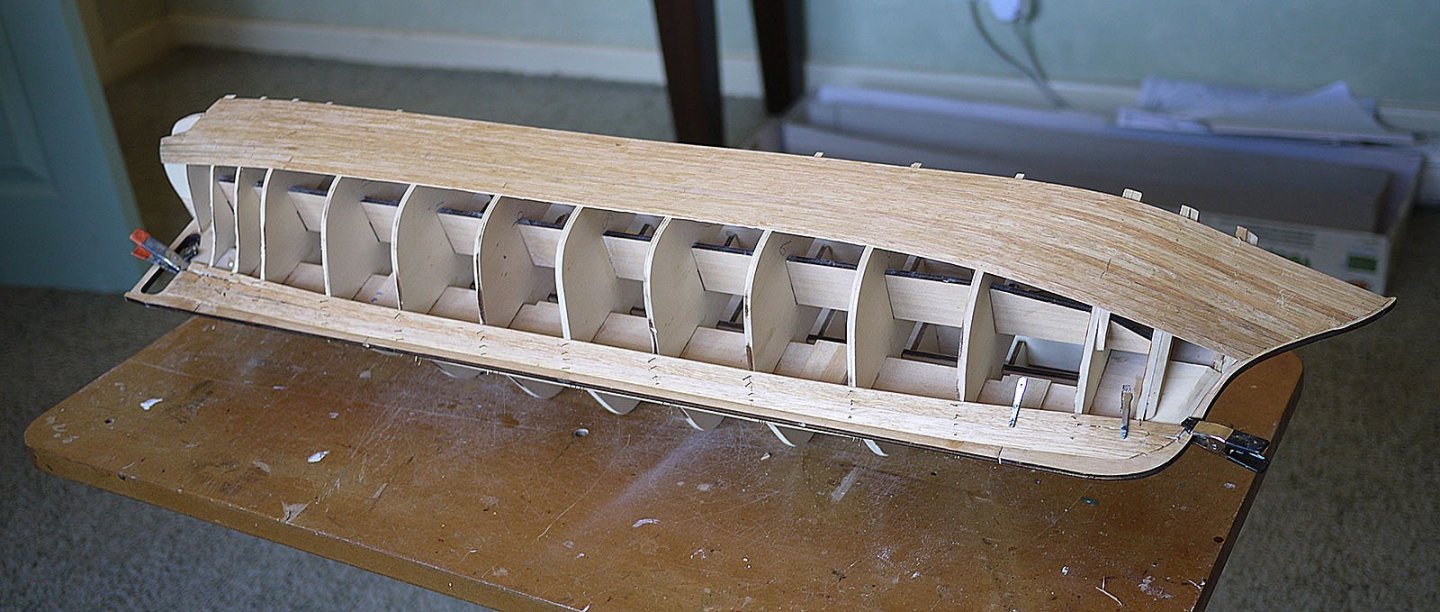
 Hello all! Here we go again! After finishing Le Renard, I have decided to start the build of Panart's kit of the Lynx. I really like the lines of this ship with it's huge rig and raked masts. I will be continuing my Bluenose build, but have found out that I like to have two (or more?) projects at different stages going at the same time. This will be my first model with double planking, so we'll see how that goes! So here is a few photos of the box and it's contents. The quality of the lasercuts look great, with no burn marks, and no warping. The rest of the materials also look good. There is two sheets with plans printed on both sides and a pamphlet of written instructions. Upon starting to look things through and planning the point of attack, I realised that even though the lasercuts look great, they are not numbered in any way.. There is however a full scale drawing of most of the pieces on the plans, so I cut loose the bulkheads and layed them on the plan to figure out which was which. The drawing (or the lasercuts) seems to be inaccurate as none of the bulkheads fit perfectly on the plan. A little bit of guesswork is needed here.. Bulkhead no. 6 and 7 is very similar, but I think I got it figured out. The keel is in one piece, but the plans and instructions say that it is three pieces that need to be joined together. Maybe they have updated the kit and not the instructions? I decided to cut a rabbet in the keel to take the planking. No mention of this in instructions. This is where I am now, more updates to come as work progress. Stay safe! Gaffrig.
-
 Well folks I've been sitting on this one for a few years now. I had always planned to build it for my daughter, Caroline. Before I got anywhere near buying the kit I lost my beautiful girl in a horse riding accident, that was in 2005 and she was 13. I've had the kit now for about 6 years but haven't been in the right place (on a lot of levels) to do it but the time has come. There will be a few special little things done during the build and eventually my son will get the model. This is the first kit I've done in a while as I prefer scratch builds but we'll see how it goes. Bear with me, this may take a while. The keel was laid on 13/1/2021
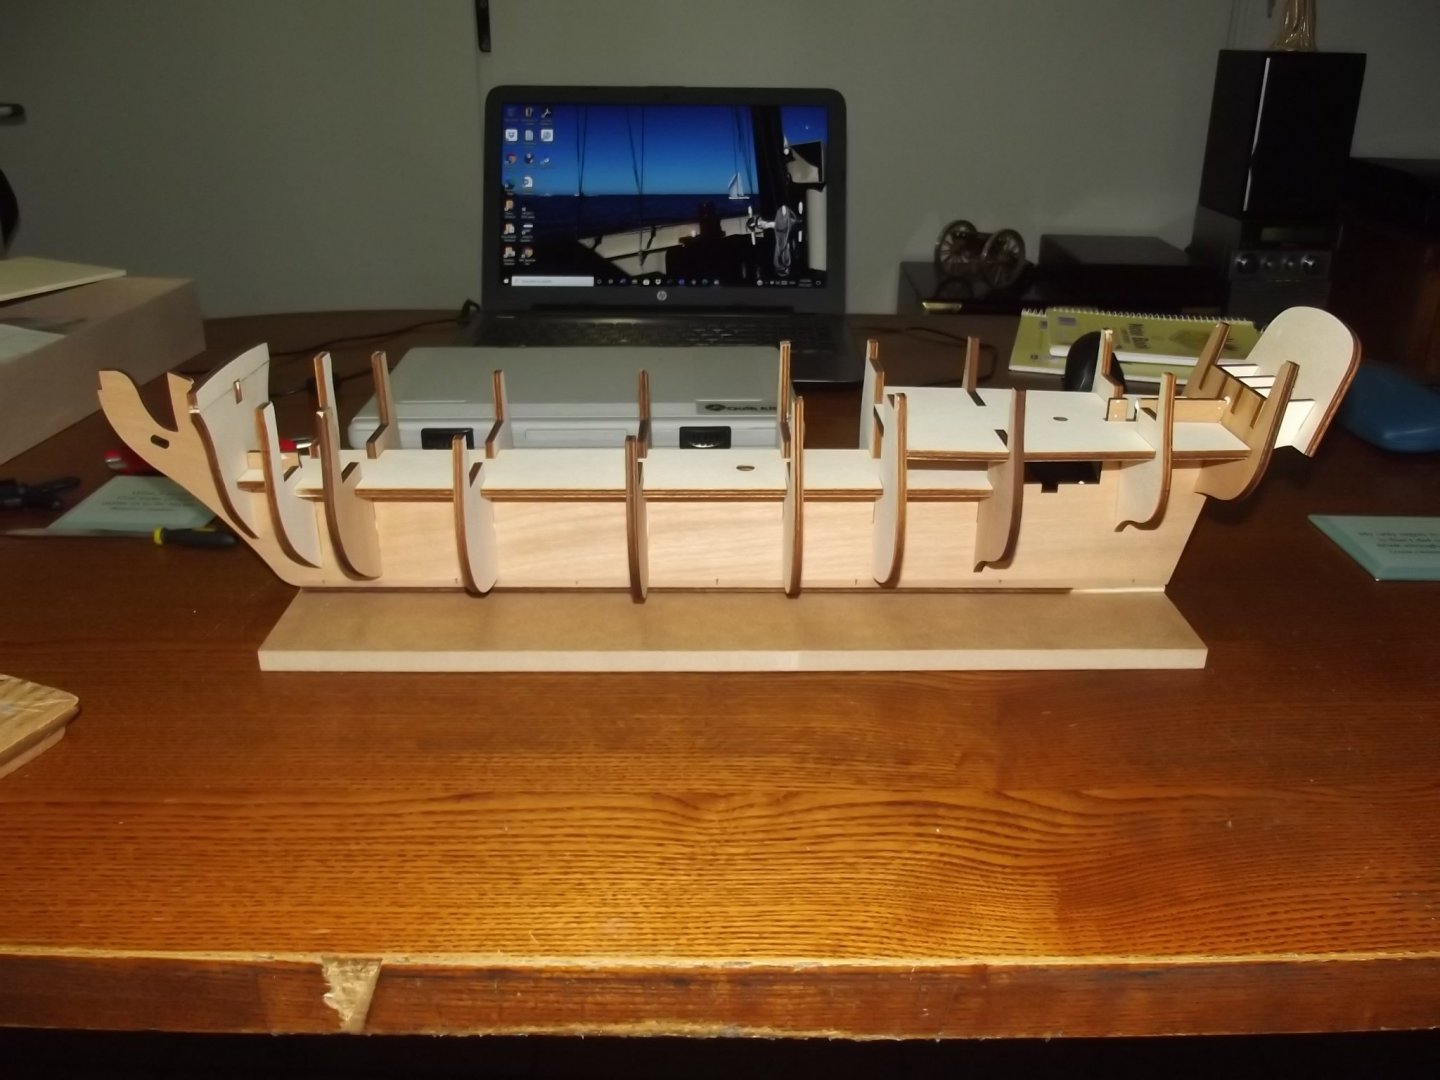


-
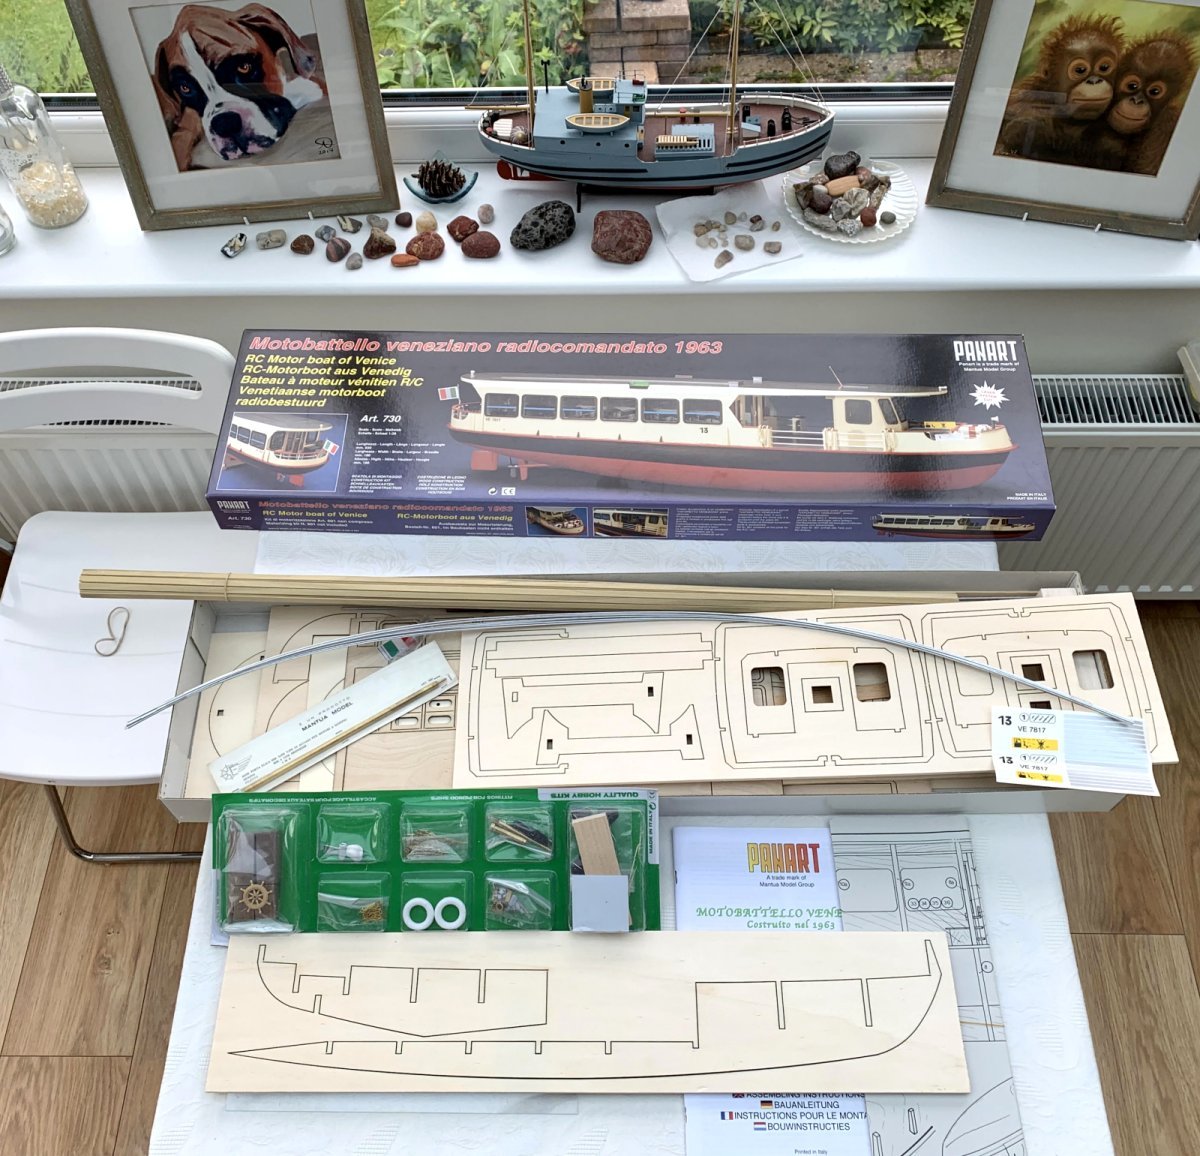
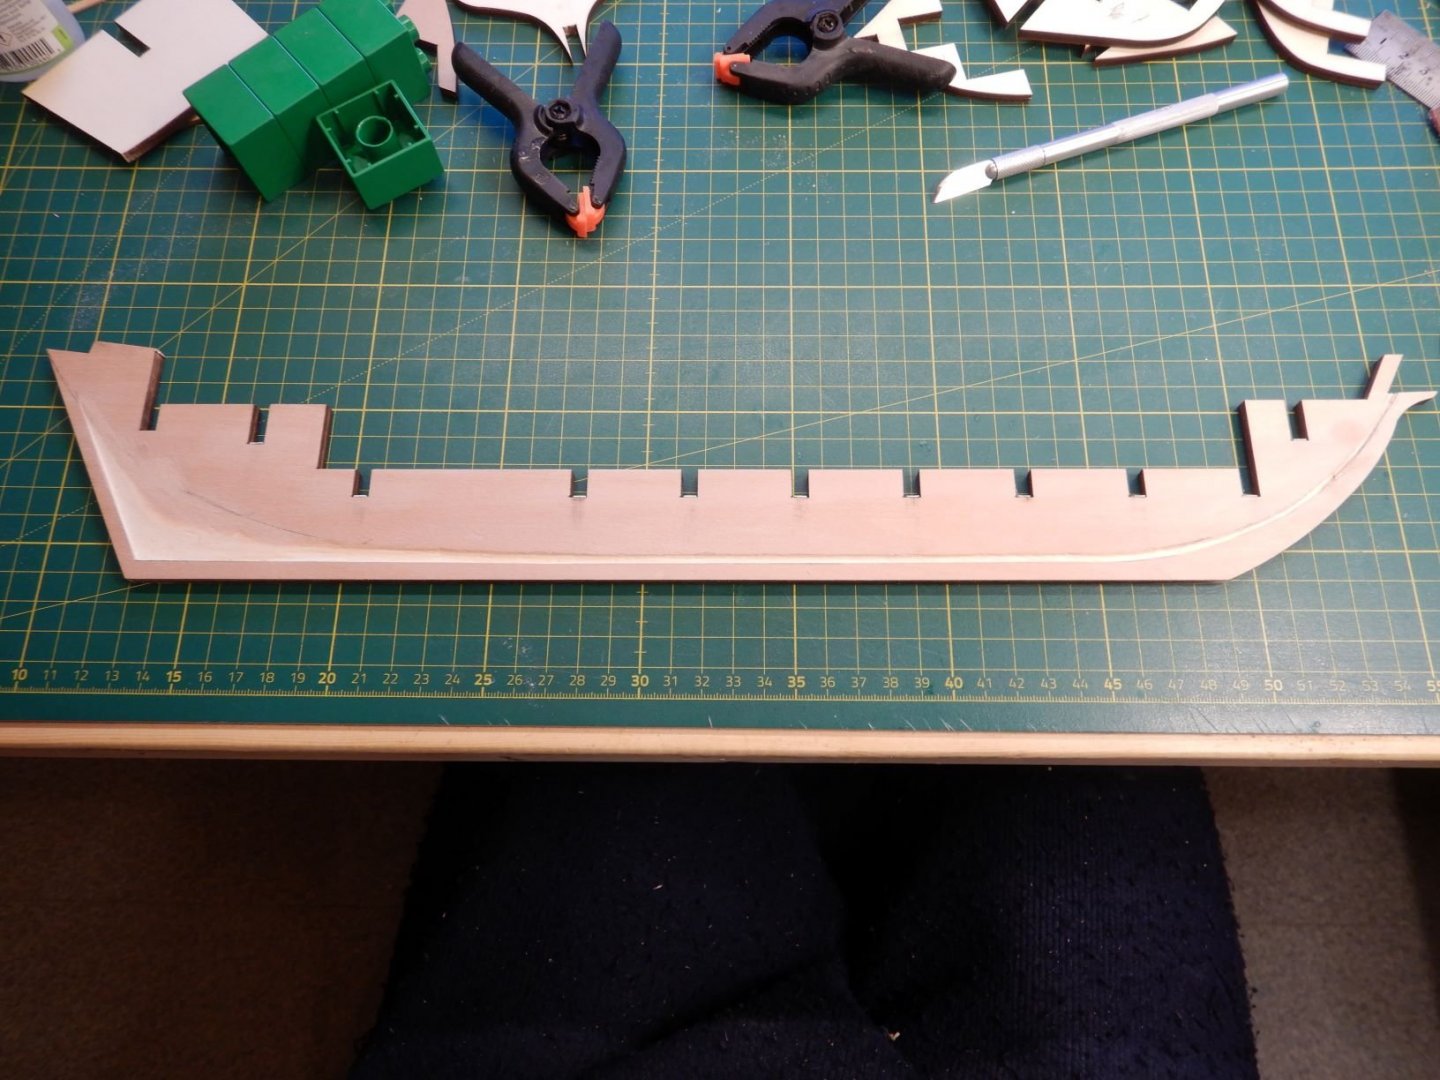
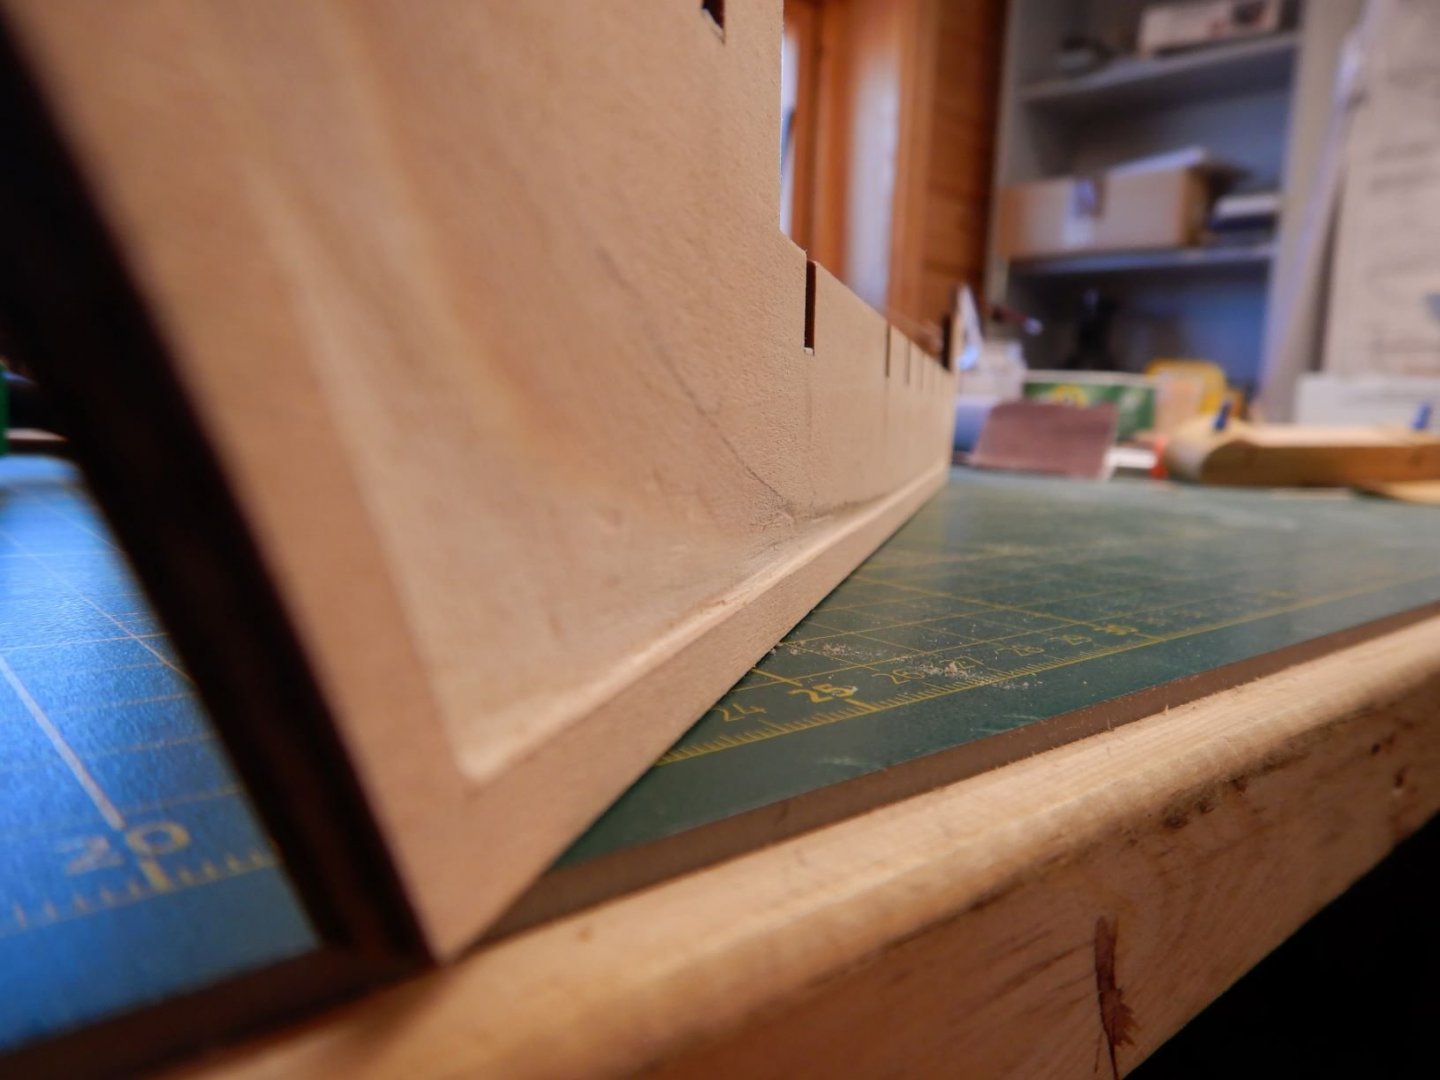
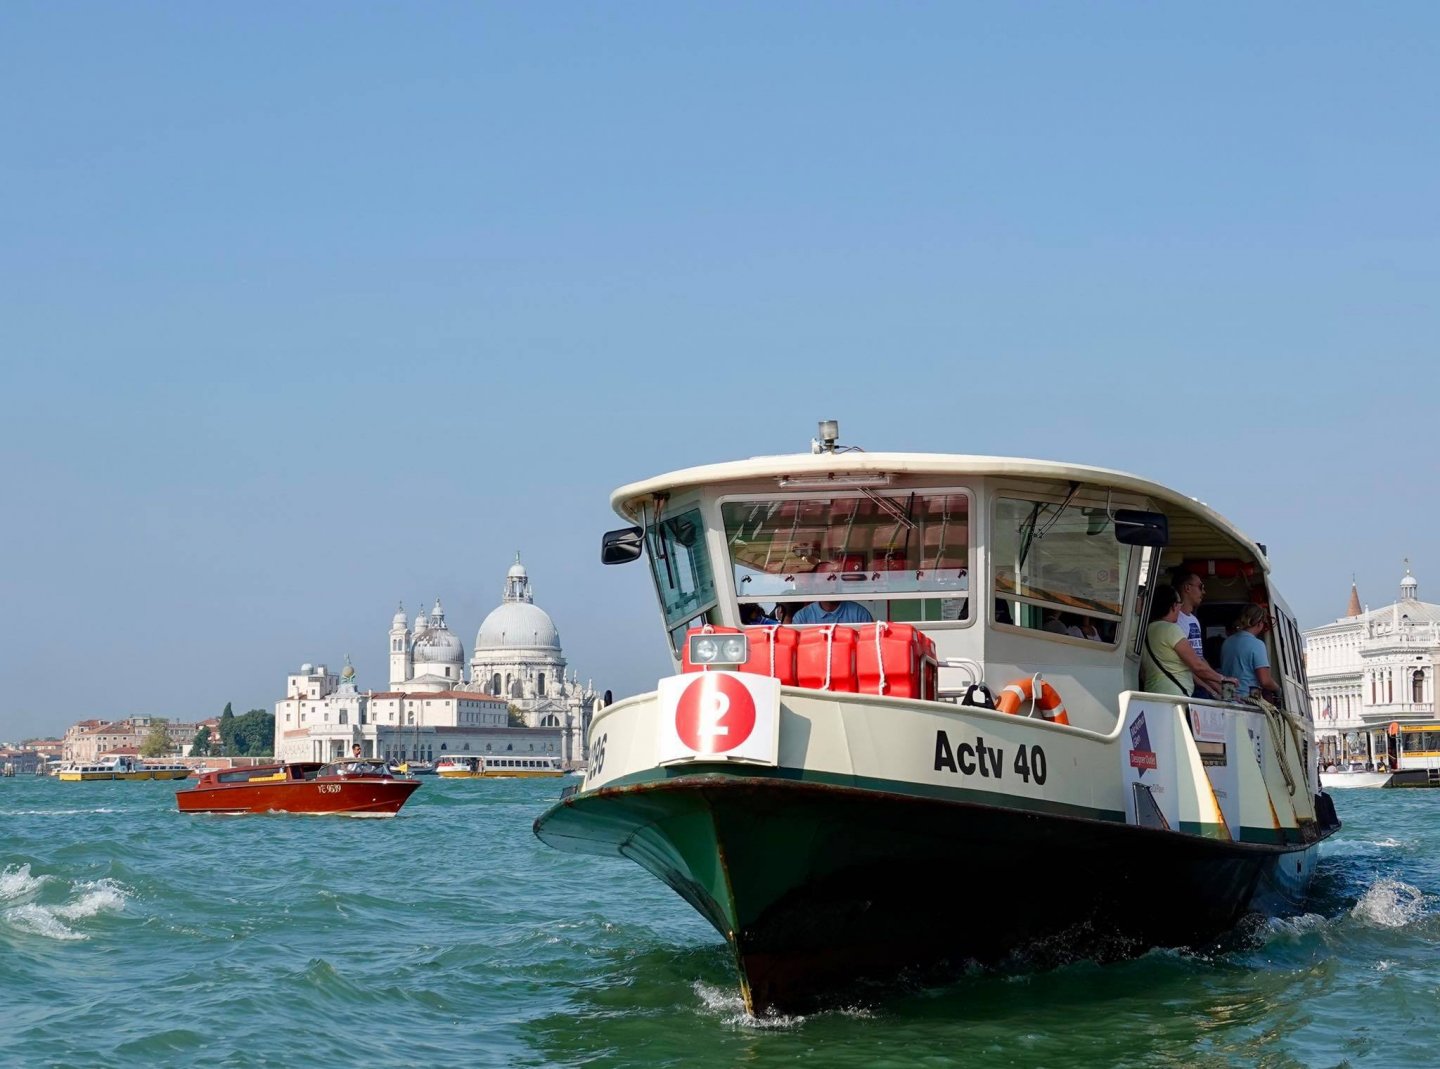
 HI ALL and thank you for visiting these pages. This will be just my second attempt at building a wooden boat kit, my first one being the BILLING BOATS ST.ROCH which took me forever to complete, lol. I kept putting the kit away for months at a time, but this time, I'll be able to commit much more readily. I always fancied building this Venice Passenger boat since first seeing one on a trip to Venice (I took the photos below). I have no idea what attracted me to them - it just happened and then I became a little fixated after following Steve Gogs' amazing Build-Log (which has now very sadly been lost). Amazingly, just as this model arrived, I also stumbled upon an old BENTLEY Airfix kit which I built as a schoolboy in the early 1970's. I spotted it on Facebook's MarketPlace and couldn't believe my eyes - a totally "Brand New In Box", unopened kit with the original price tag of £4.65p from Toy Town in Leamington Spa. WOW!!! I just might build the Bentley first and try to get my grandson interested in the hobby. I should imagine the car-kit will get him hooked quicker than a long, drawn out boat build. Anyway, it's good to be back on here and I very much look forward to chatting with you all and benefiting from your knowledge and experience. Regards, Tom.


- 54 replies
-
- 13
-
-
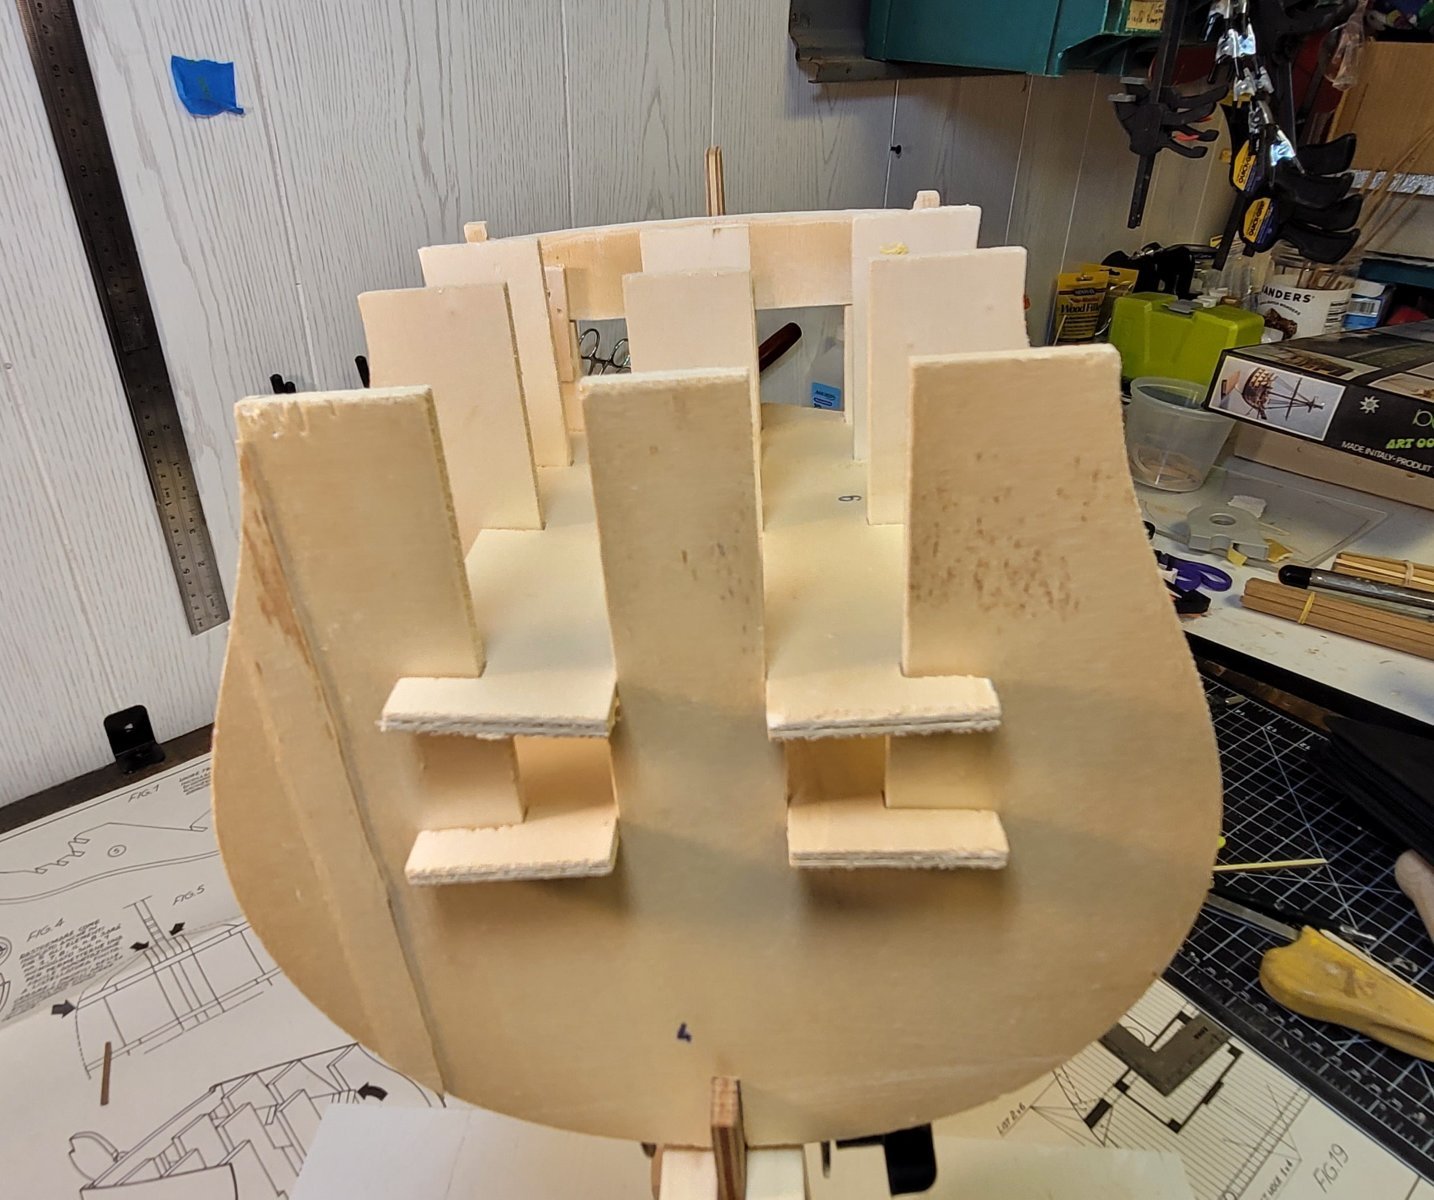
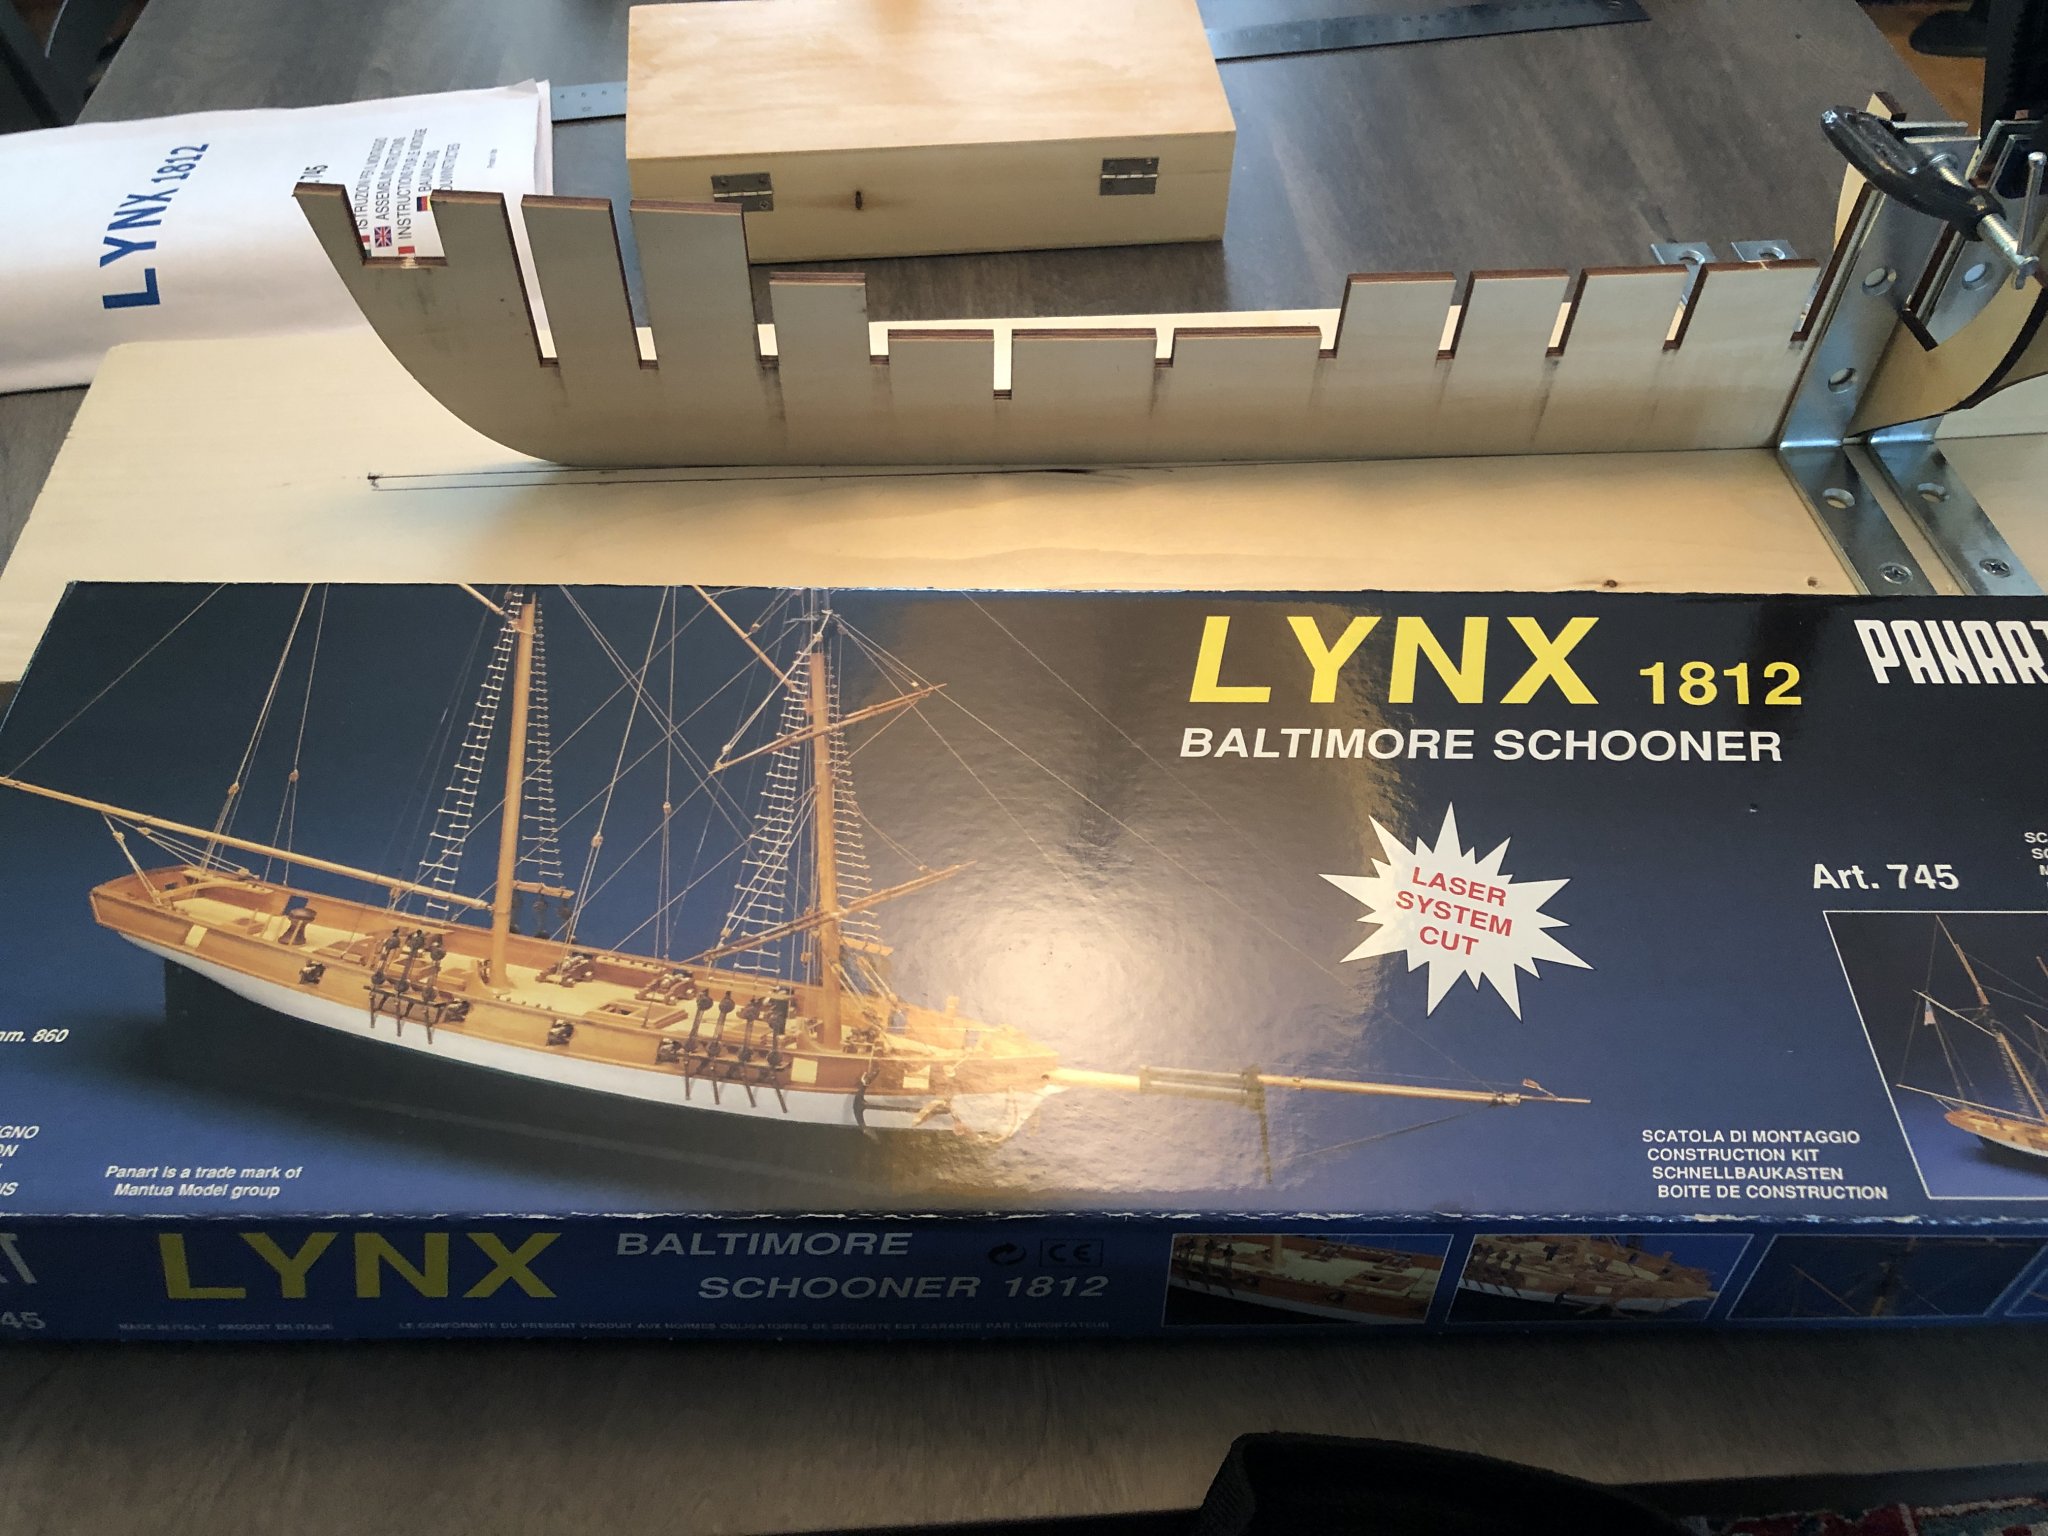
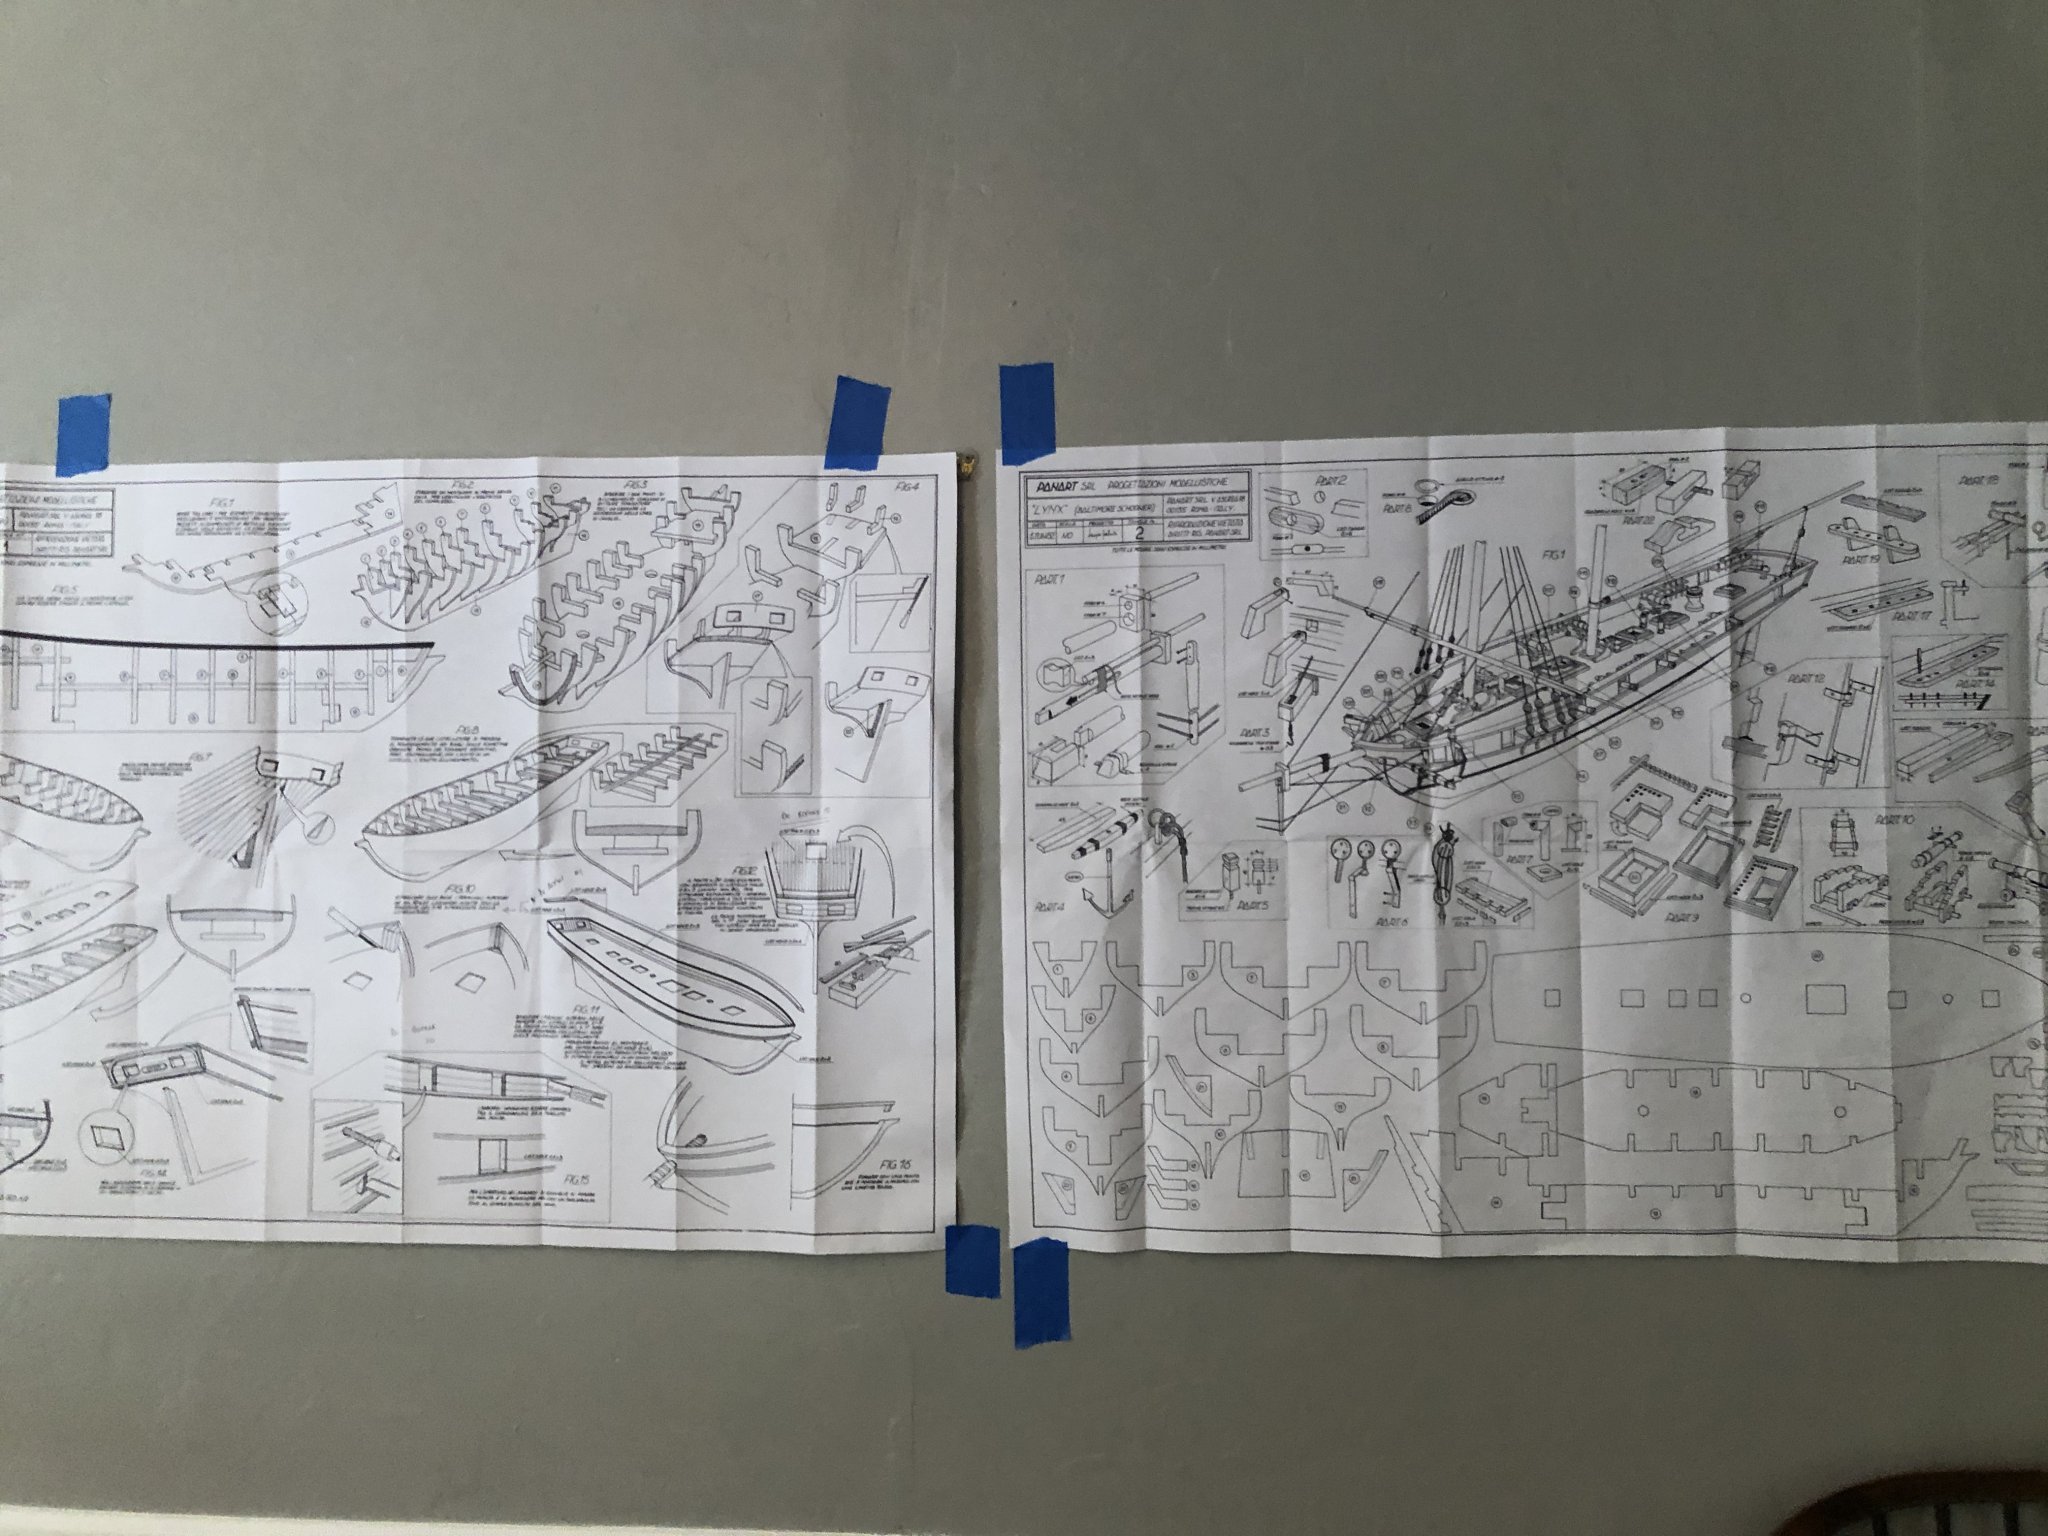
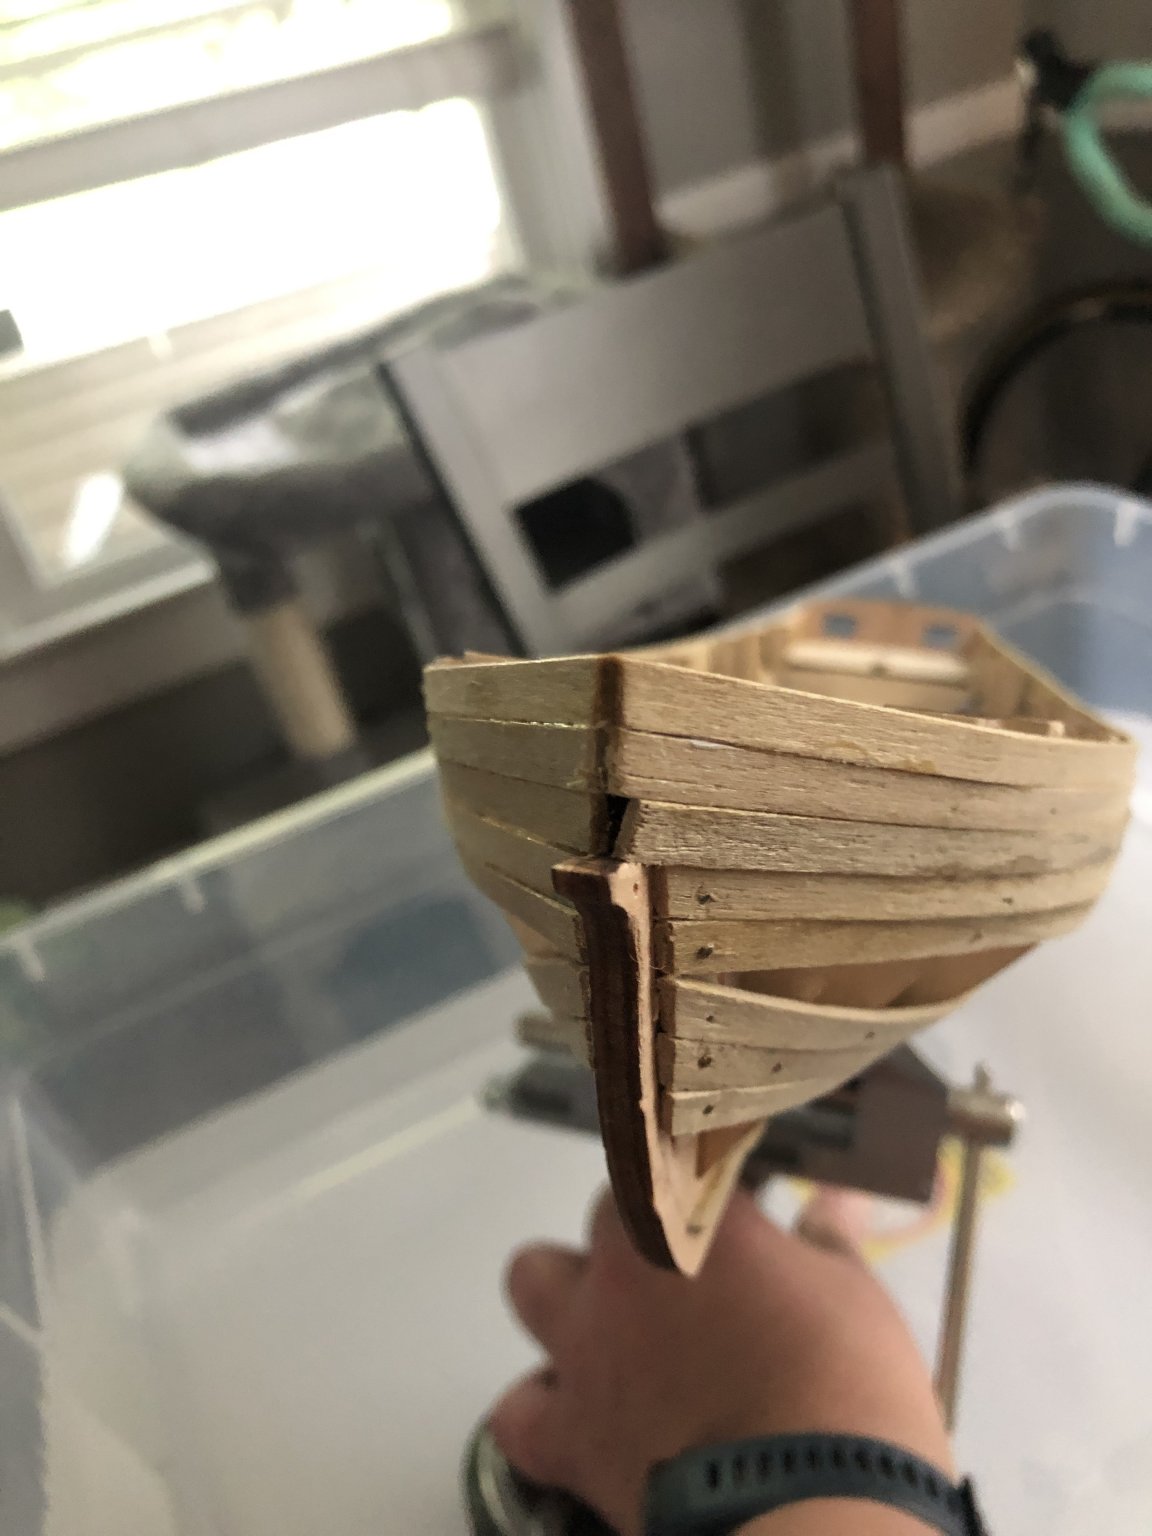
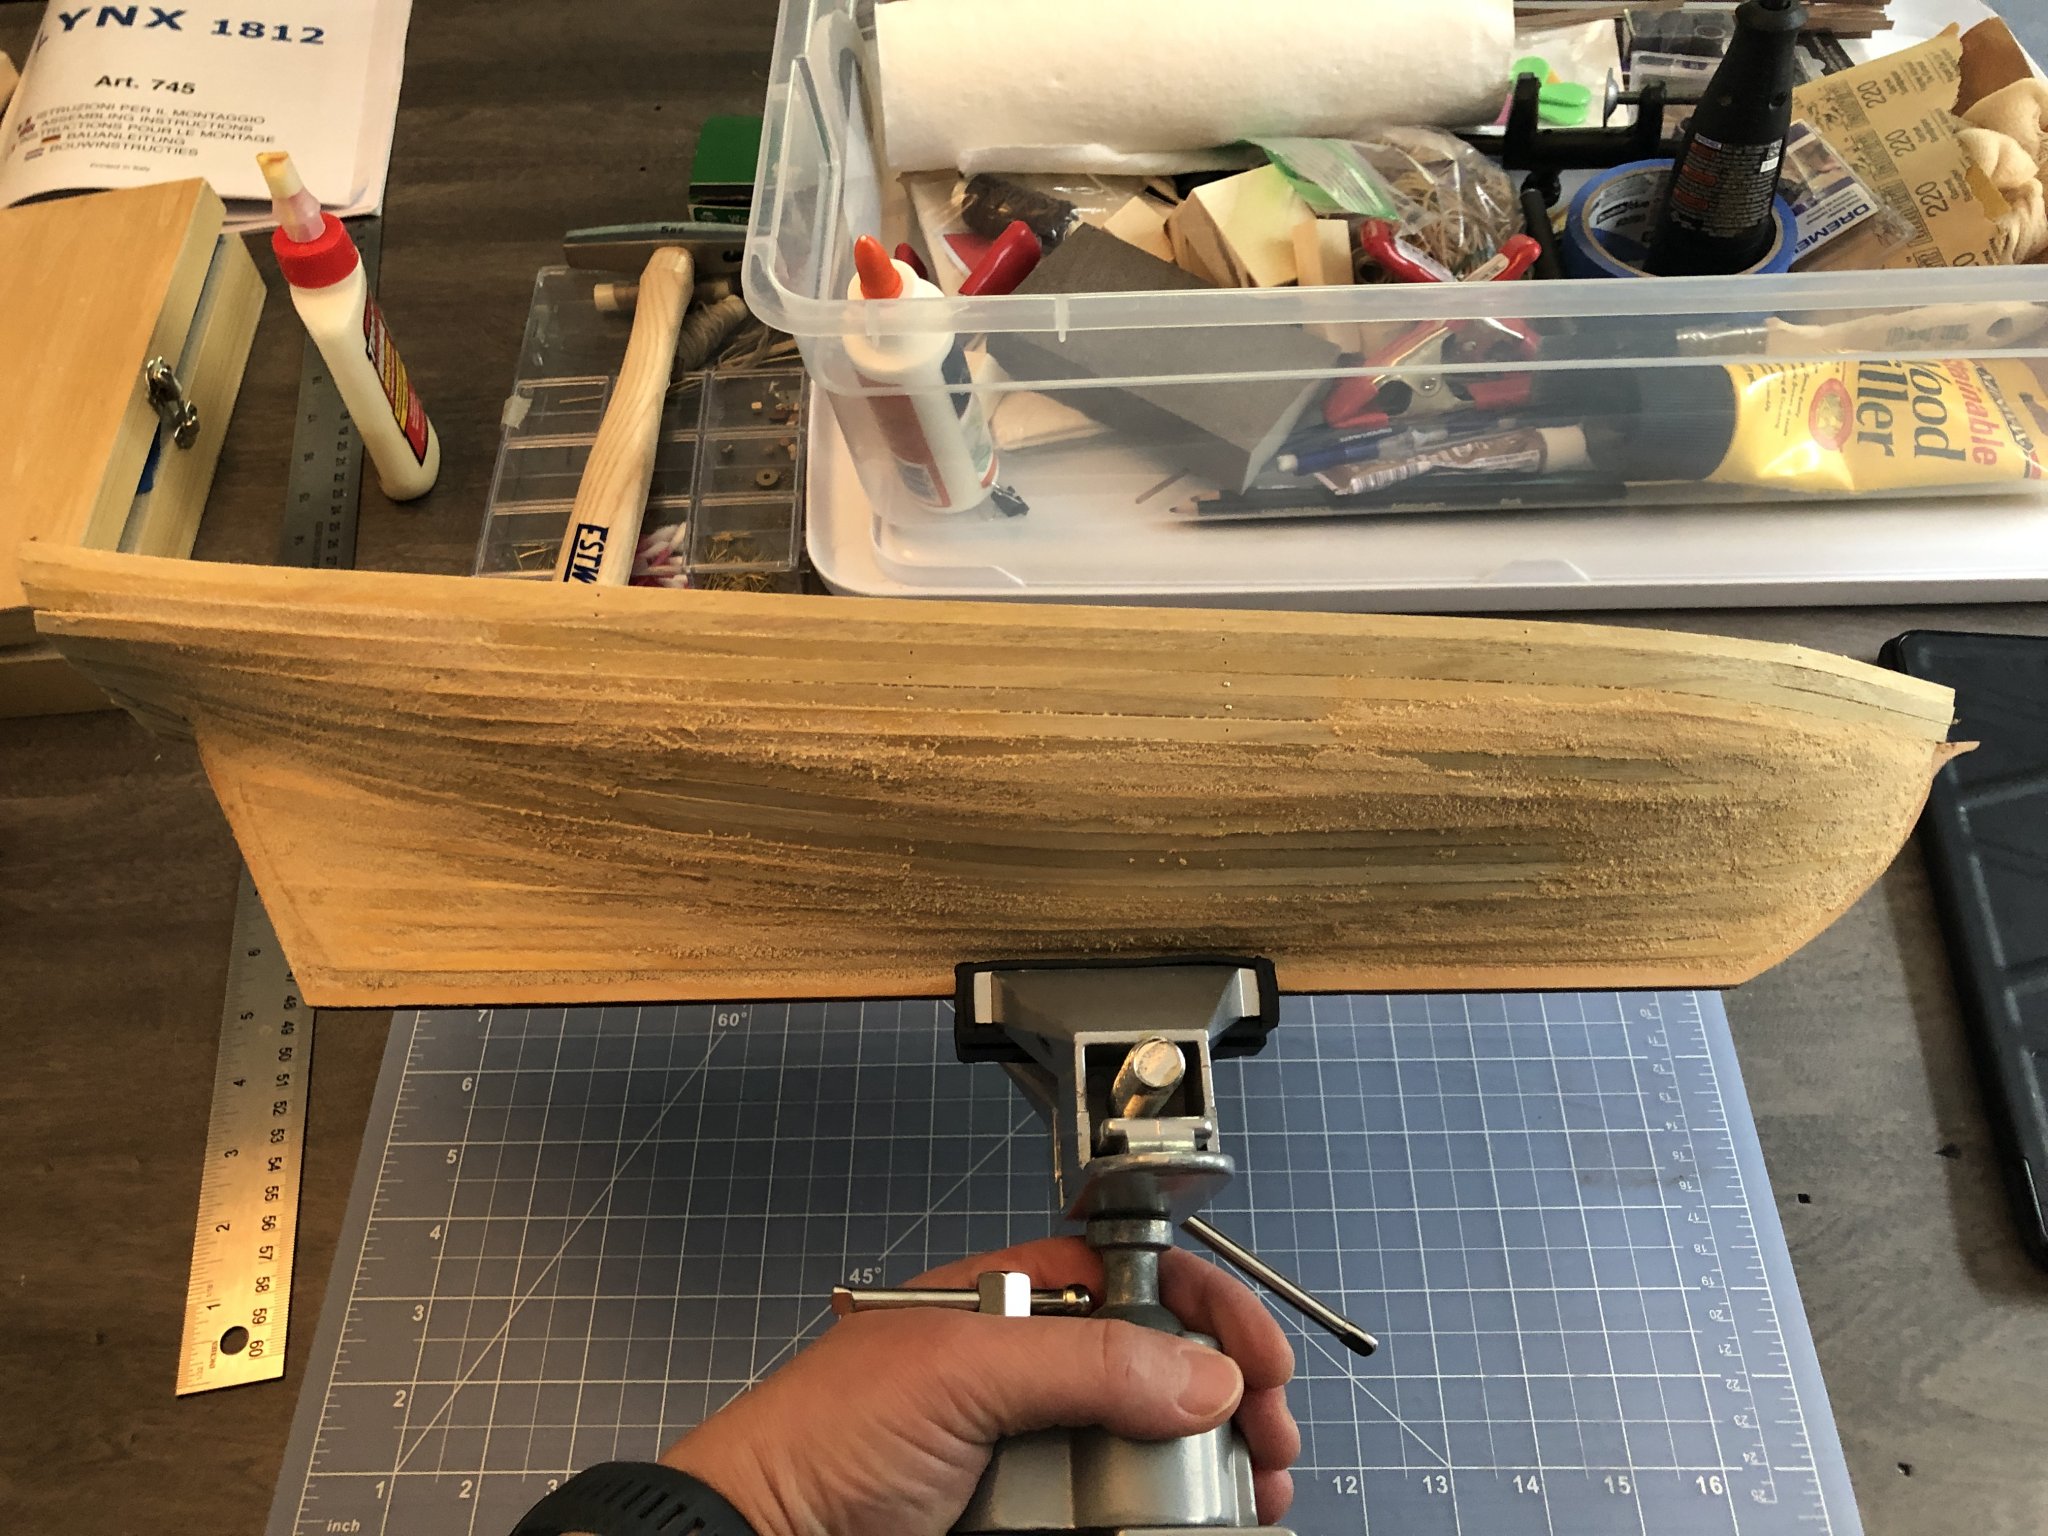
 I started working on this model about a month ago. My dad and I FaceTime when we find a few hours to work on our respective models. I don’t have too many pics of it from the beginning and have finished the first planking. This is my second kit/build, my first being the AL Scottish maid. Mantua seems to not use as high of quality materials and I didn’t think that there could be any possibly worse instructions than AL, but here we are. I’ll be filling both sides in with wood filler today and sanding the hull down to start second planking this week.


-
 I bought this new on Ebay a couple of weeks ago for a very good price. This is my 5th model. 1. Model Expo 18 Century Long Boat, 2. AL 1805 Swift Boat (that I completely screwed up), 3. AL Hermione, 4. Model Expo Chaperon. It is always disappointing to see a new log that gets abandoned. I hope this doesn't happen here. Since I have finished five models before, I don't think this will happen. Also, I would like to keep the log clean meaning not a lot of "back patting". I don't need the gratification. A simple "Like" is good enough. If you have helpful suggestions or constructive criticism, I want to hear it. Box that it came in. I finished the final layer of planks and I lay bare my planking sins at the altar of Model Ship World. ☺️ Before sanding and filling. I would've liked to not have to paint it but I fear that I got sloppy with the CA. I can get a little bit of CA on my fingers and the next thing I know it is on the bare wood.☹️ That's it for now. RussR


- 14 replies
-
- 8
-
-
- panart
- armed launch
- (and 2 more)
-
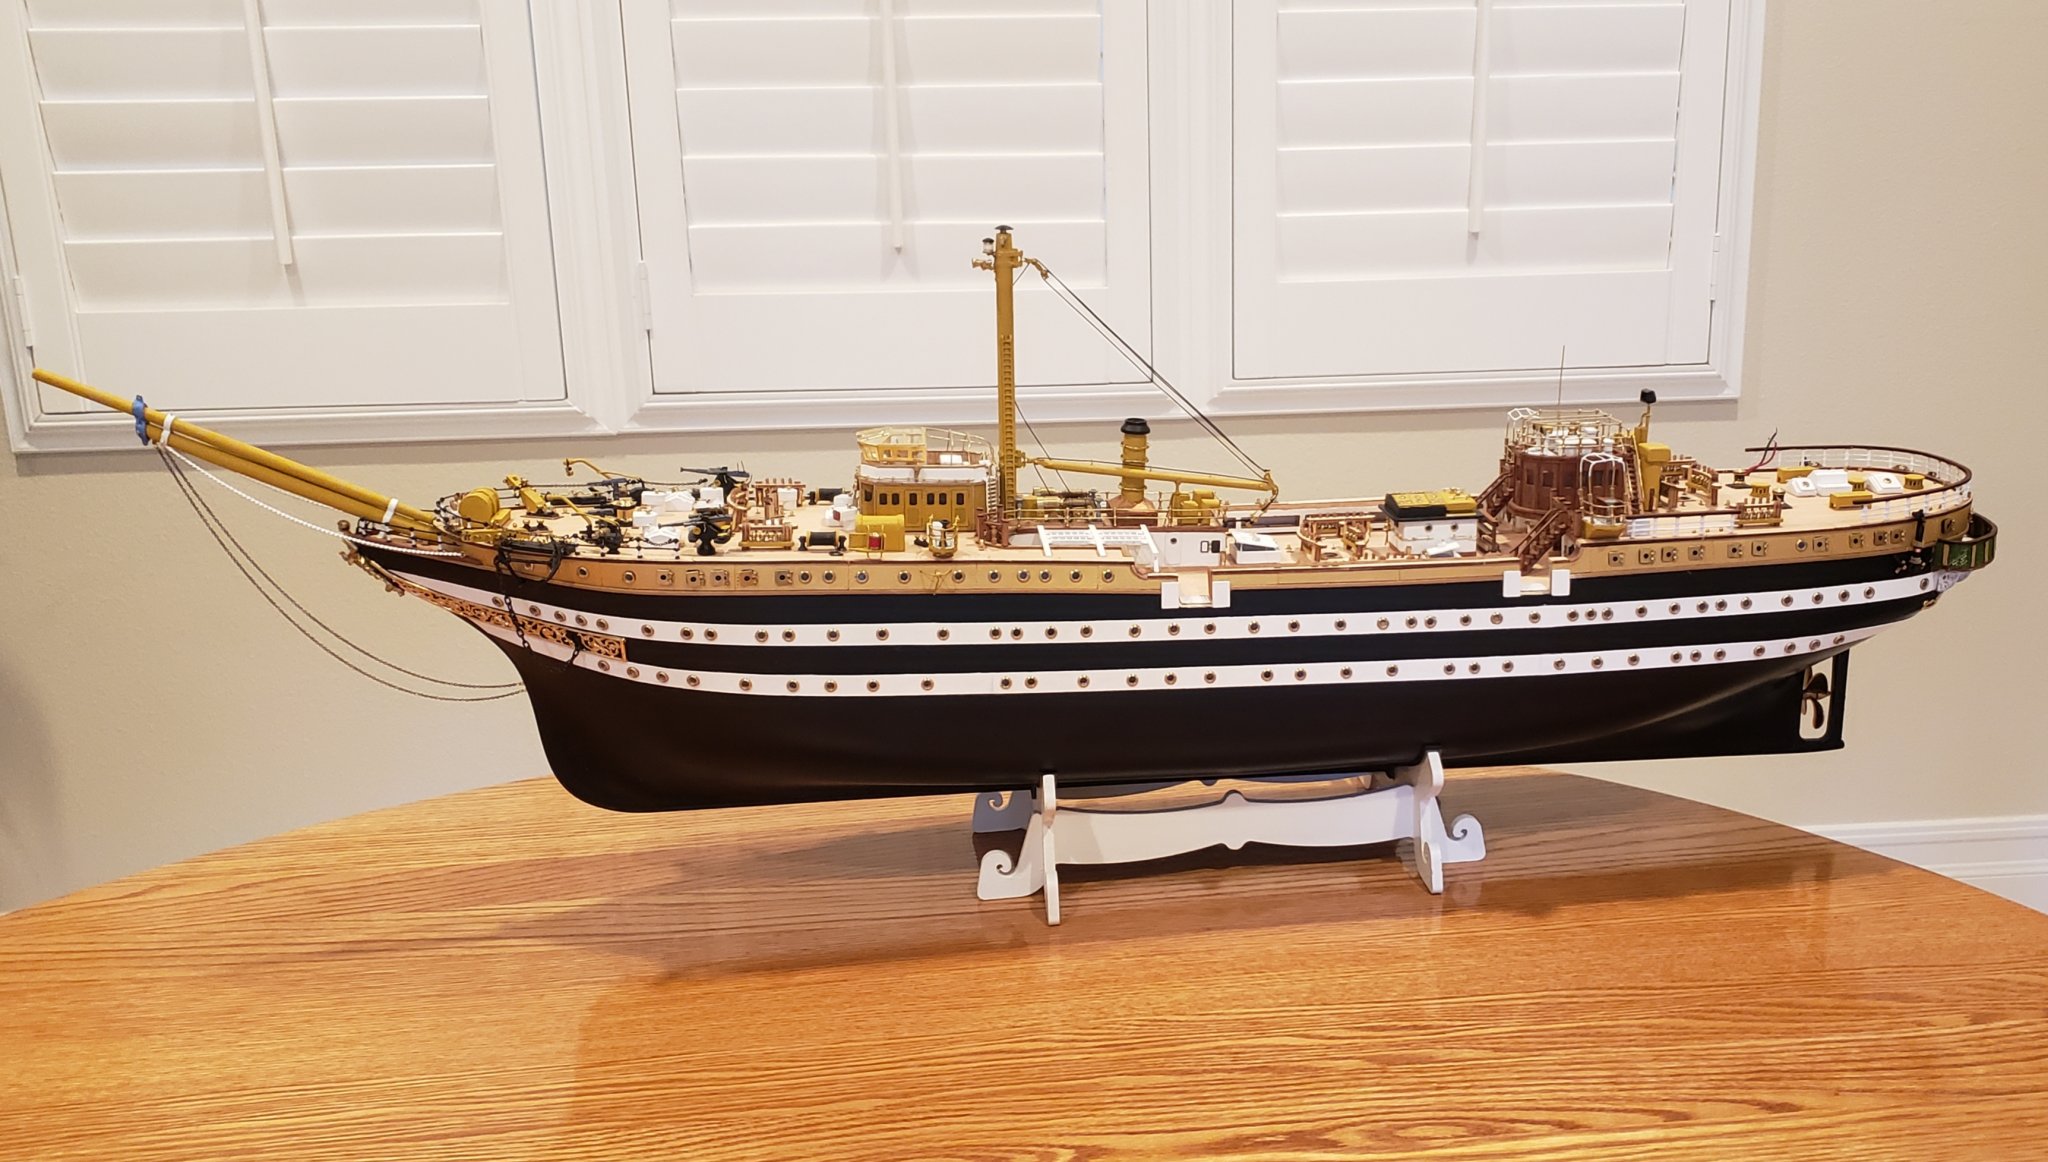
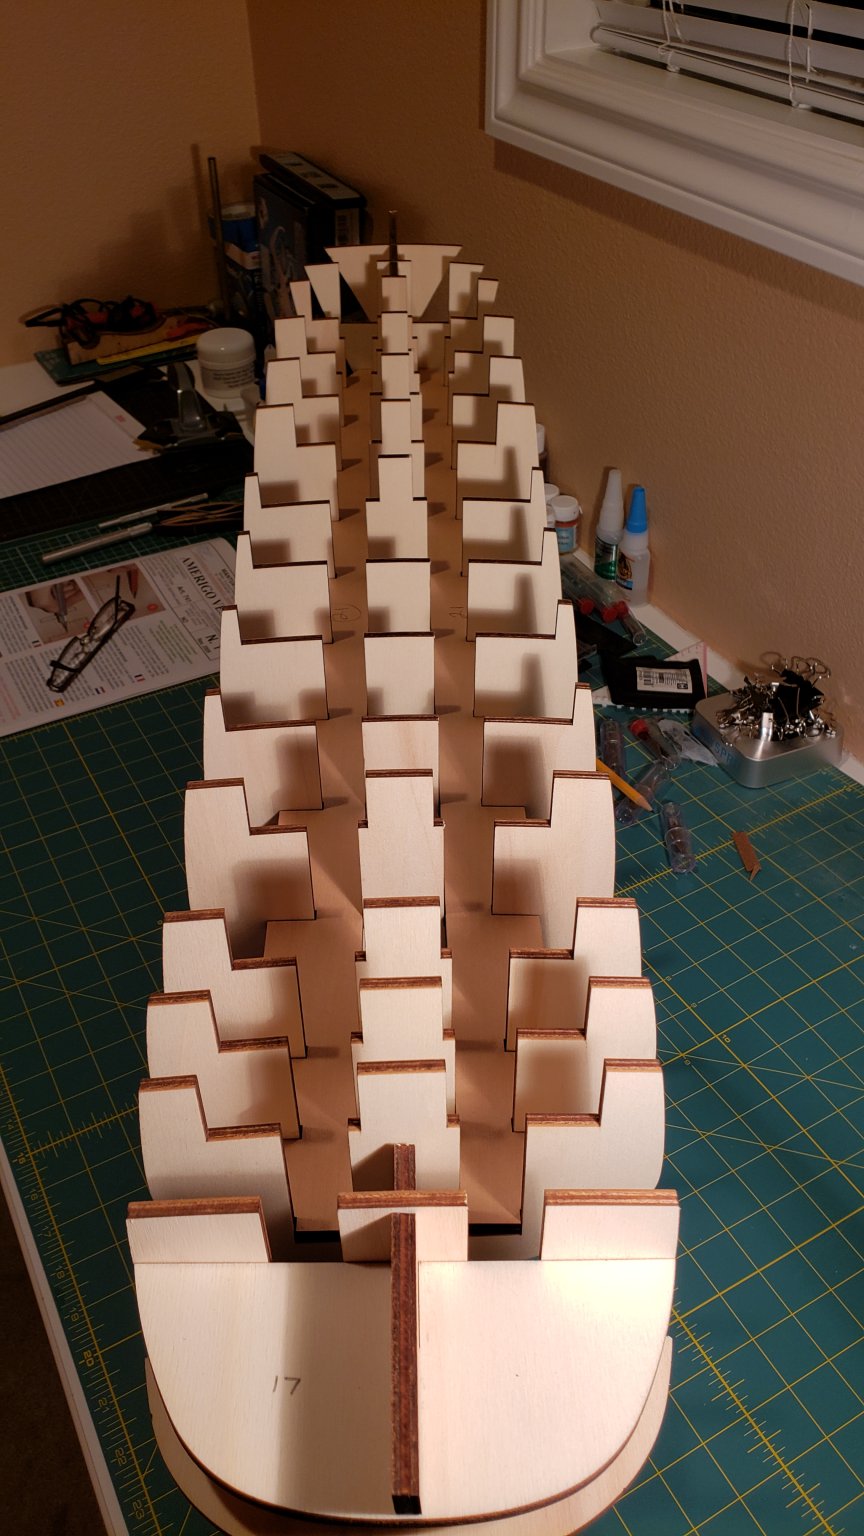
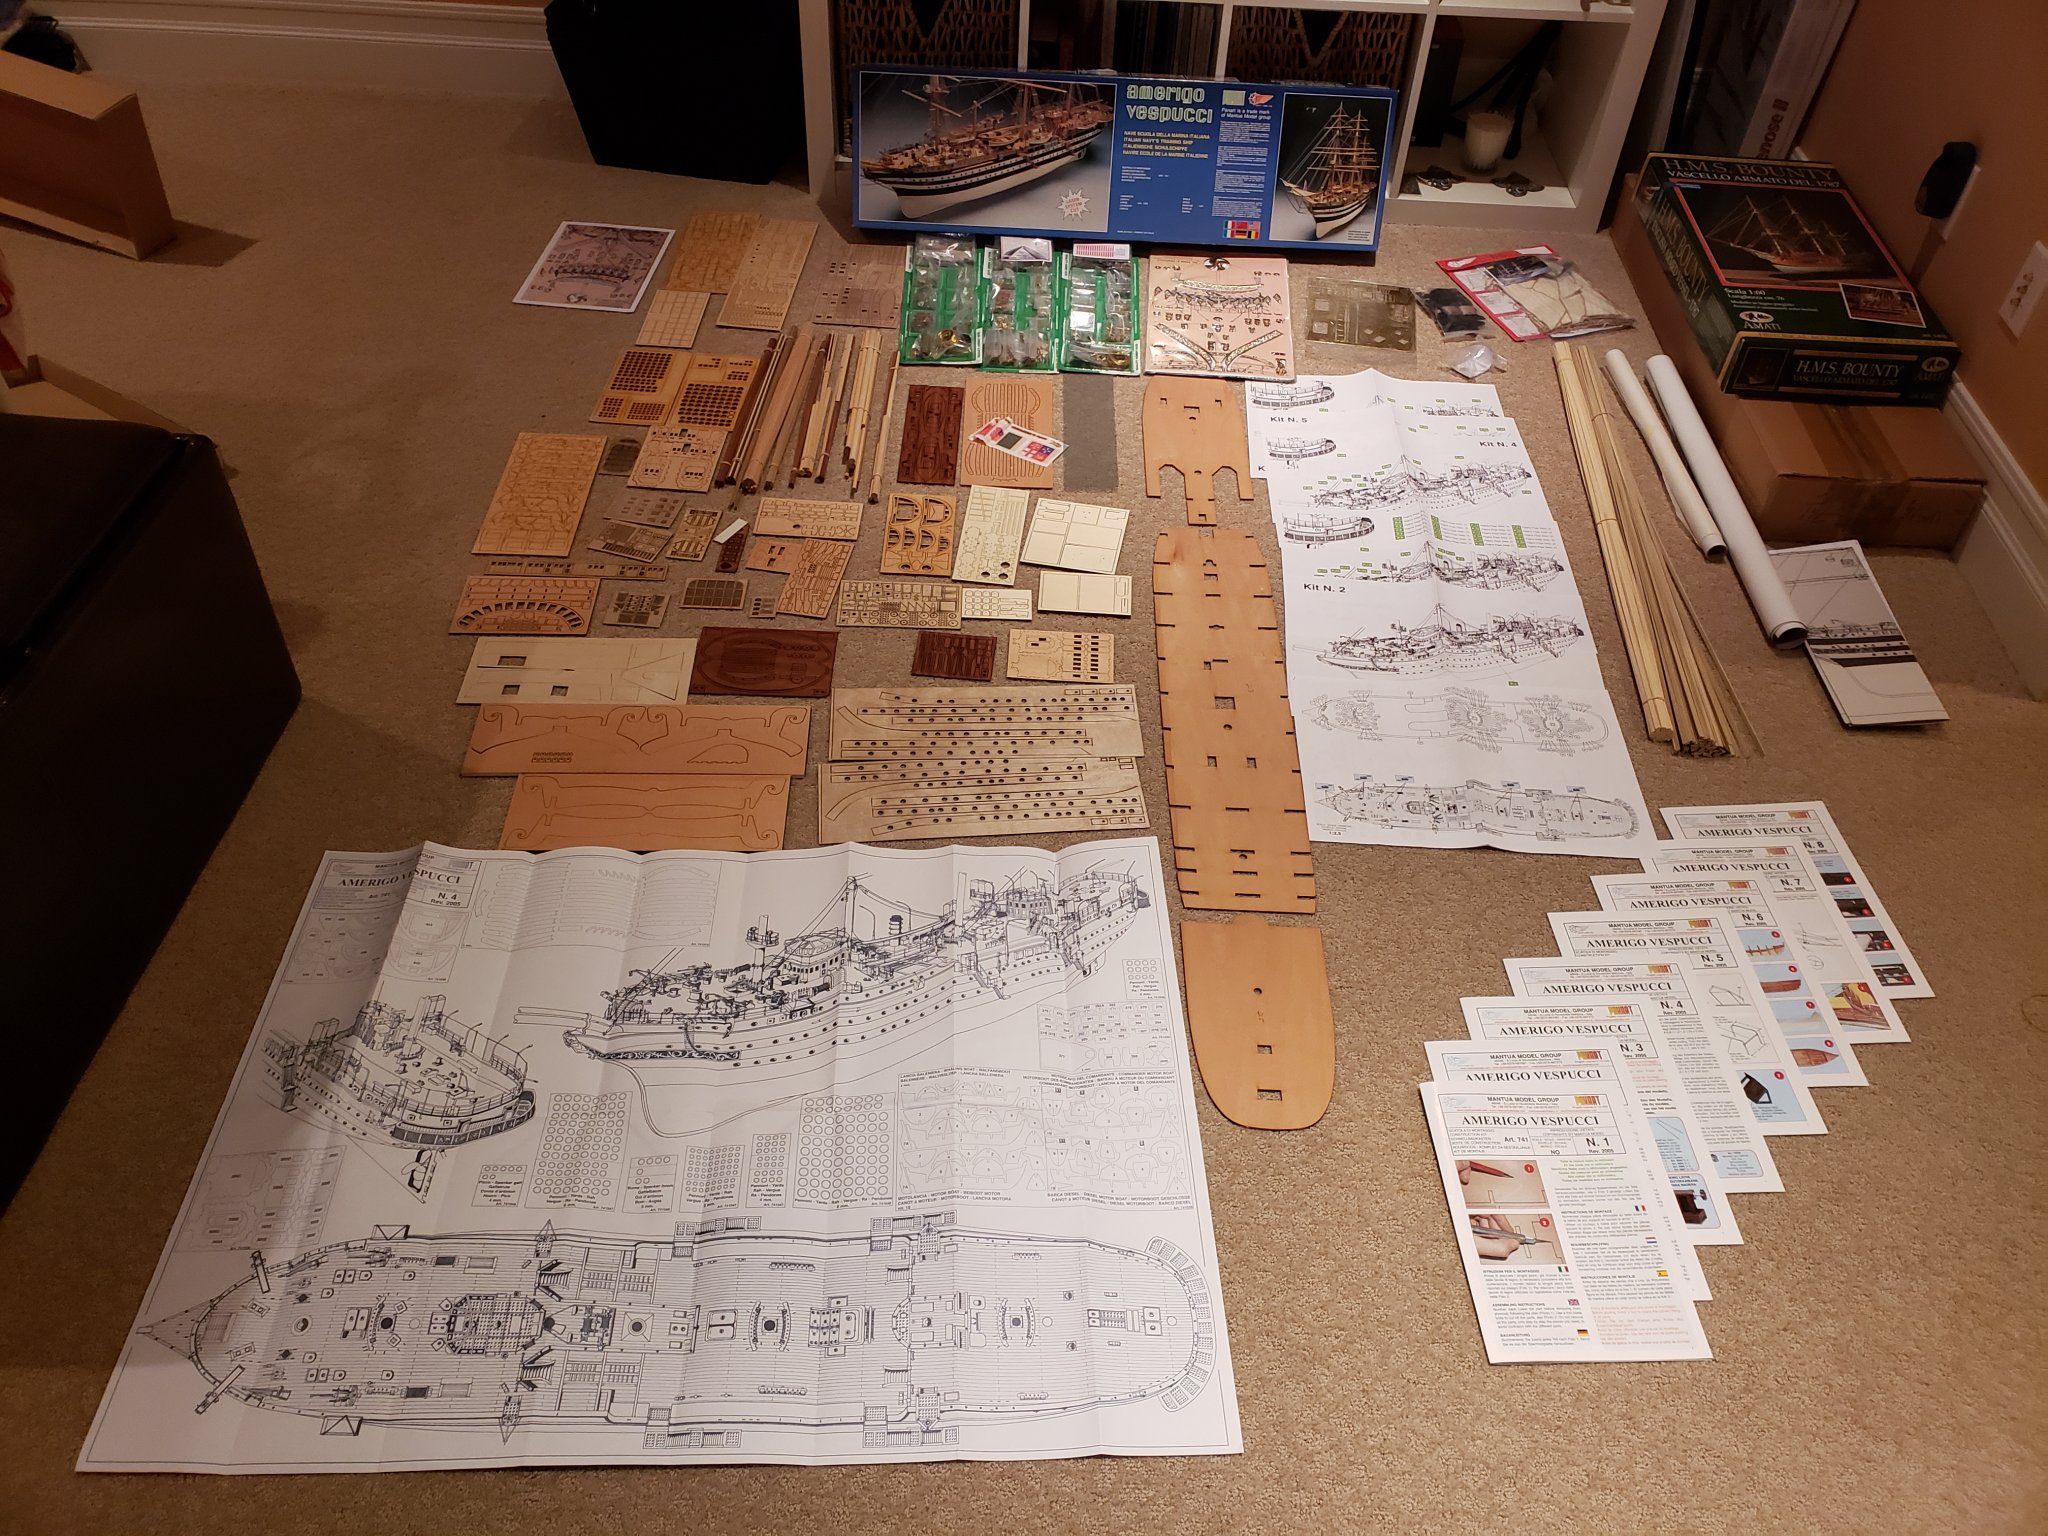
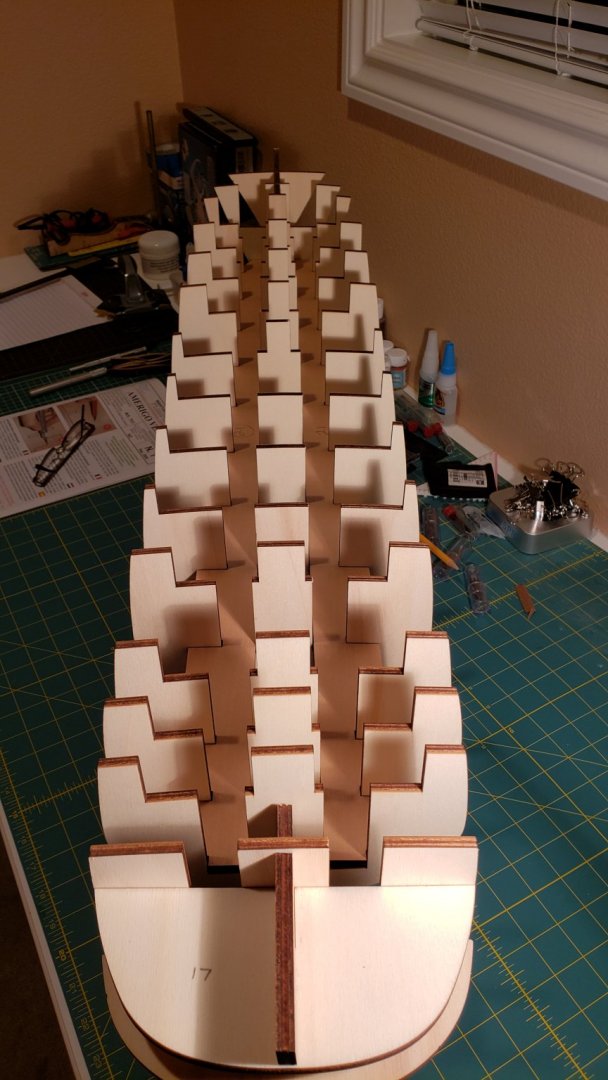
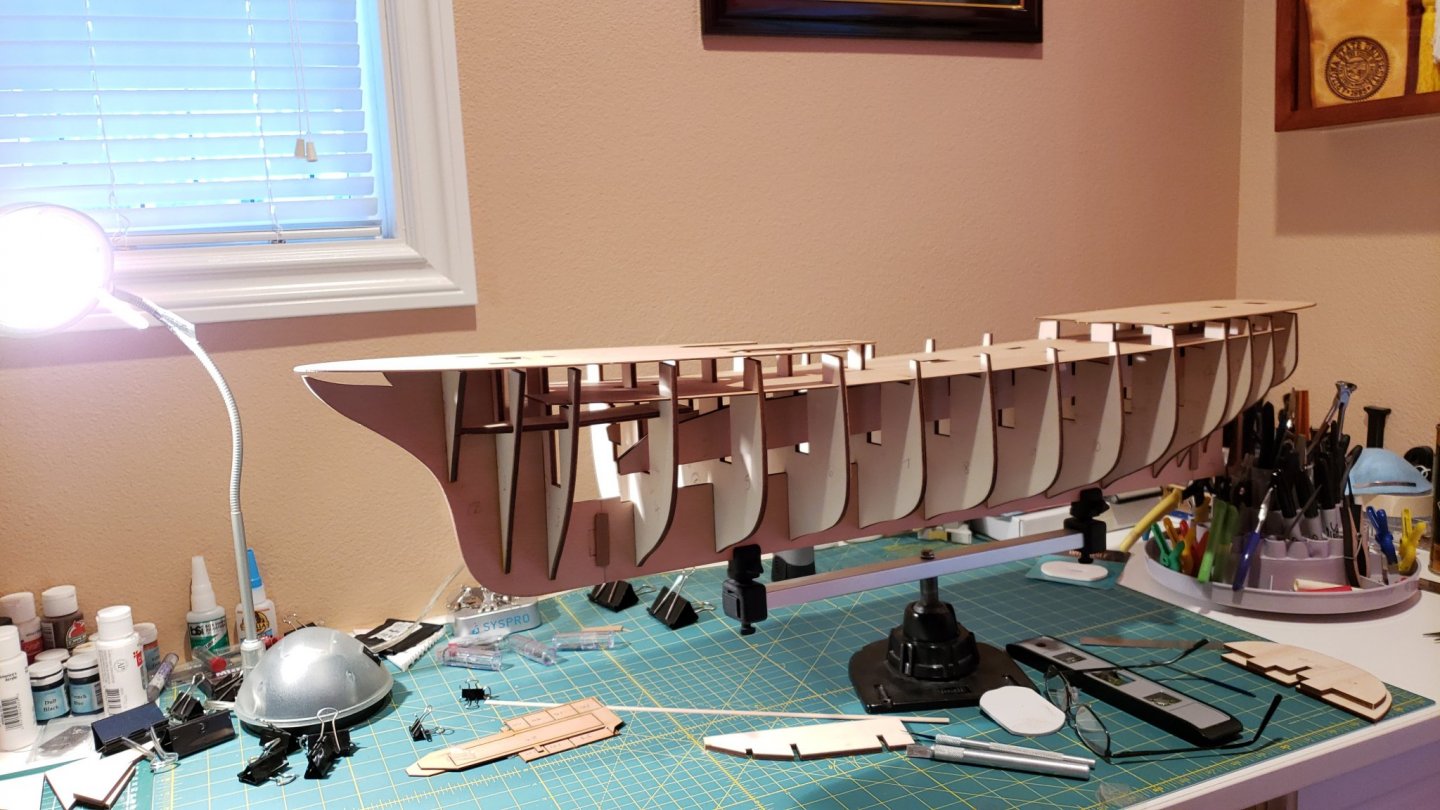
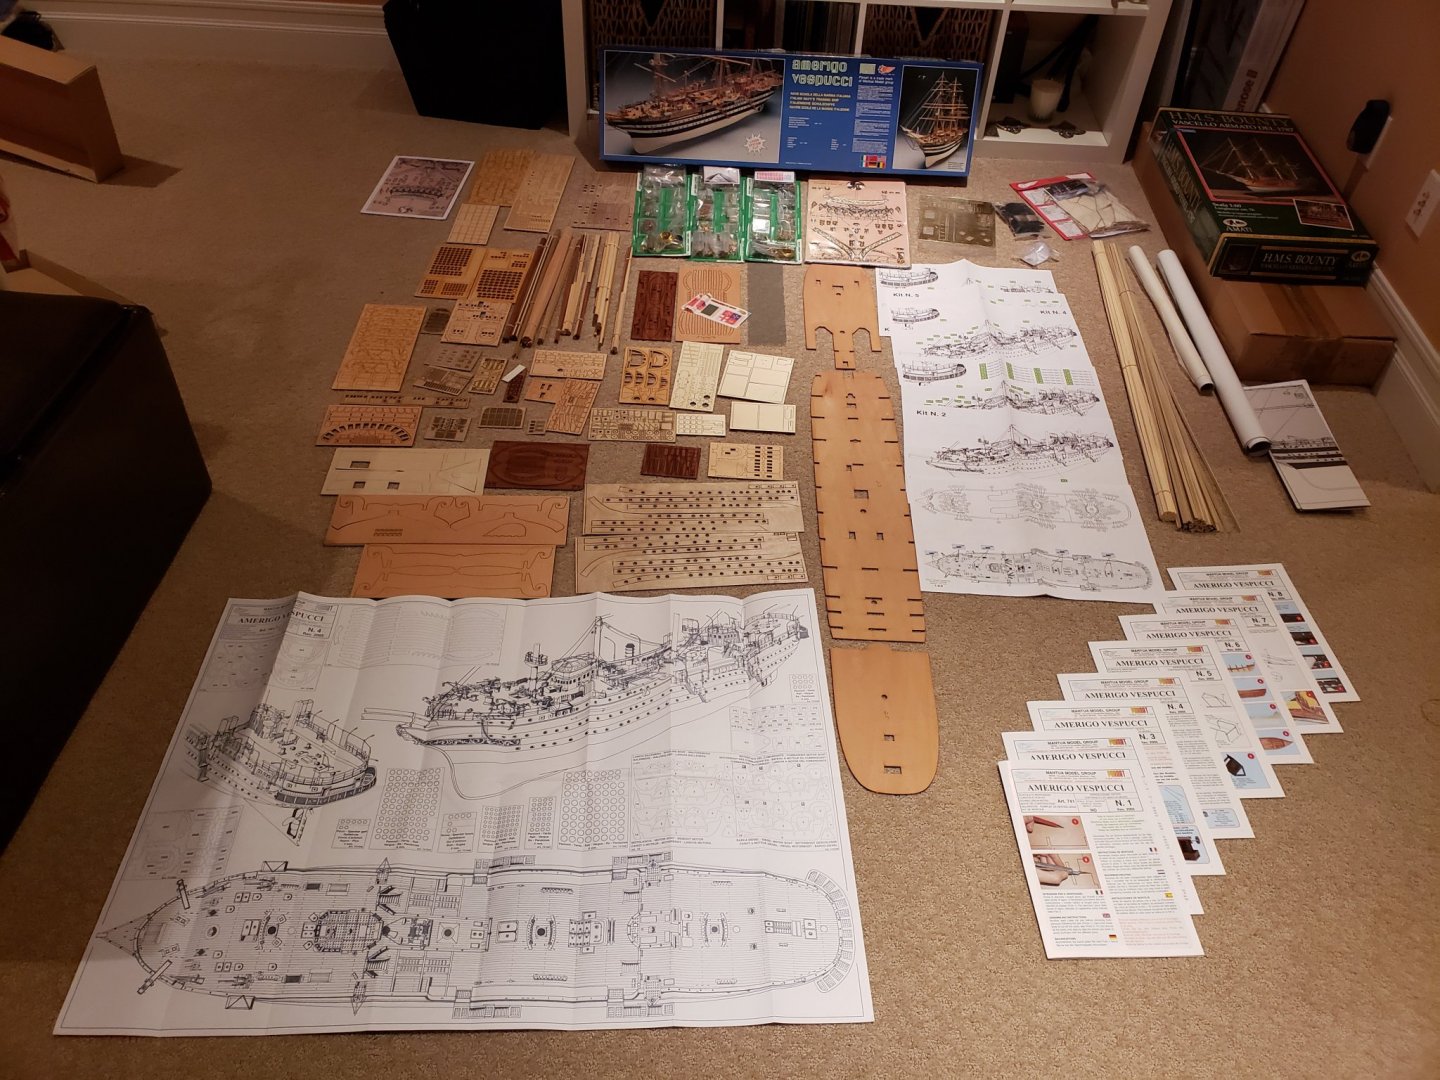
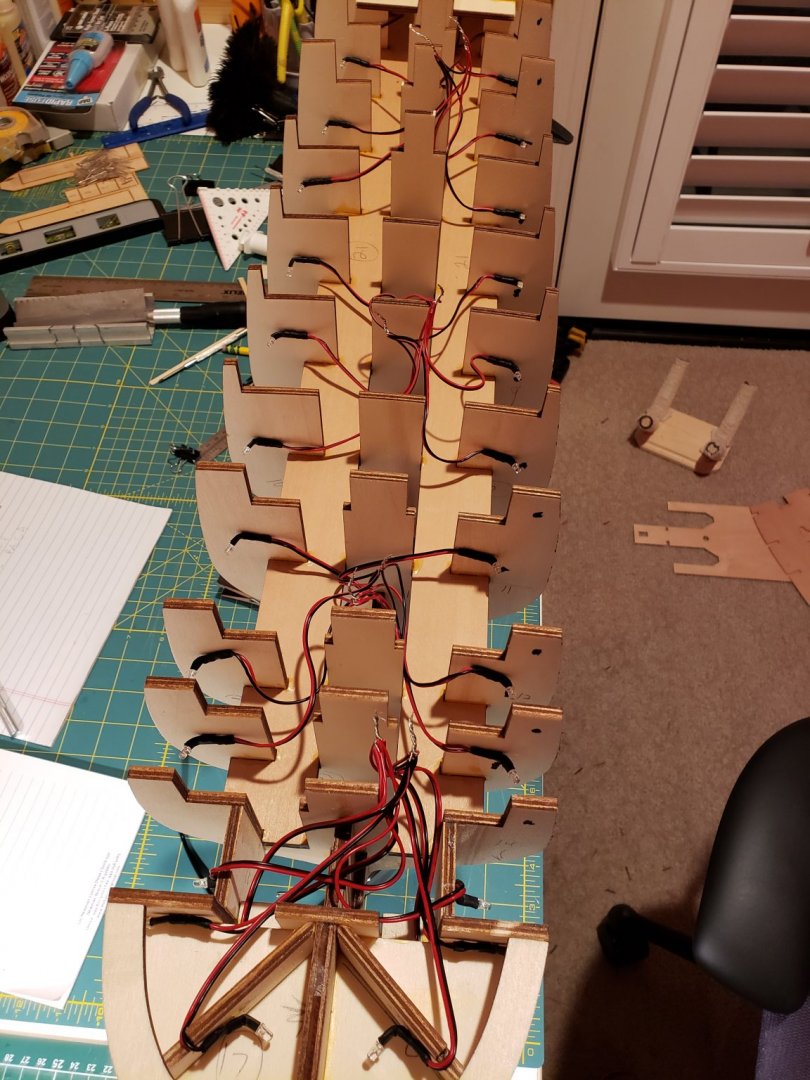
 I started my build on the Amerigo Vespucci in March 2019. Here are photos as I progressed thru the build. Still a way to go. Progress up to the end of Manual # 5 I decided to add LED's to the build and here I have wired it up with 70 LED's.
- 2 replies
-
- 2
-
-
- mantua
- amerigo vespucci
- (and 1 more)
-
Click on the tags in the title above (shown in black) for an instant list of all the build logs for that kit subject.
-
 Hi all, New to this forum so please bare with me. I have just started building this Panart 1/78 scale version of HMS Victory and thought I would share my experiences here. I’m retired and live on a Scottish island and needed a new hobby, wooden ship building. Experienced I’m not I would call myself average. This the third kit I have made the previous two both being Caldercraft, HMS Sherborne and HMAV Bounty. Caldercraft kits are great but wanted to build a decent size Victory that didn’t require a bank loan to purchase. Anyway, let’s see where this goes.
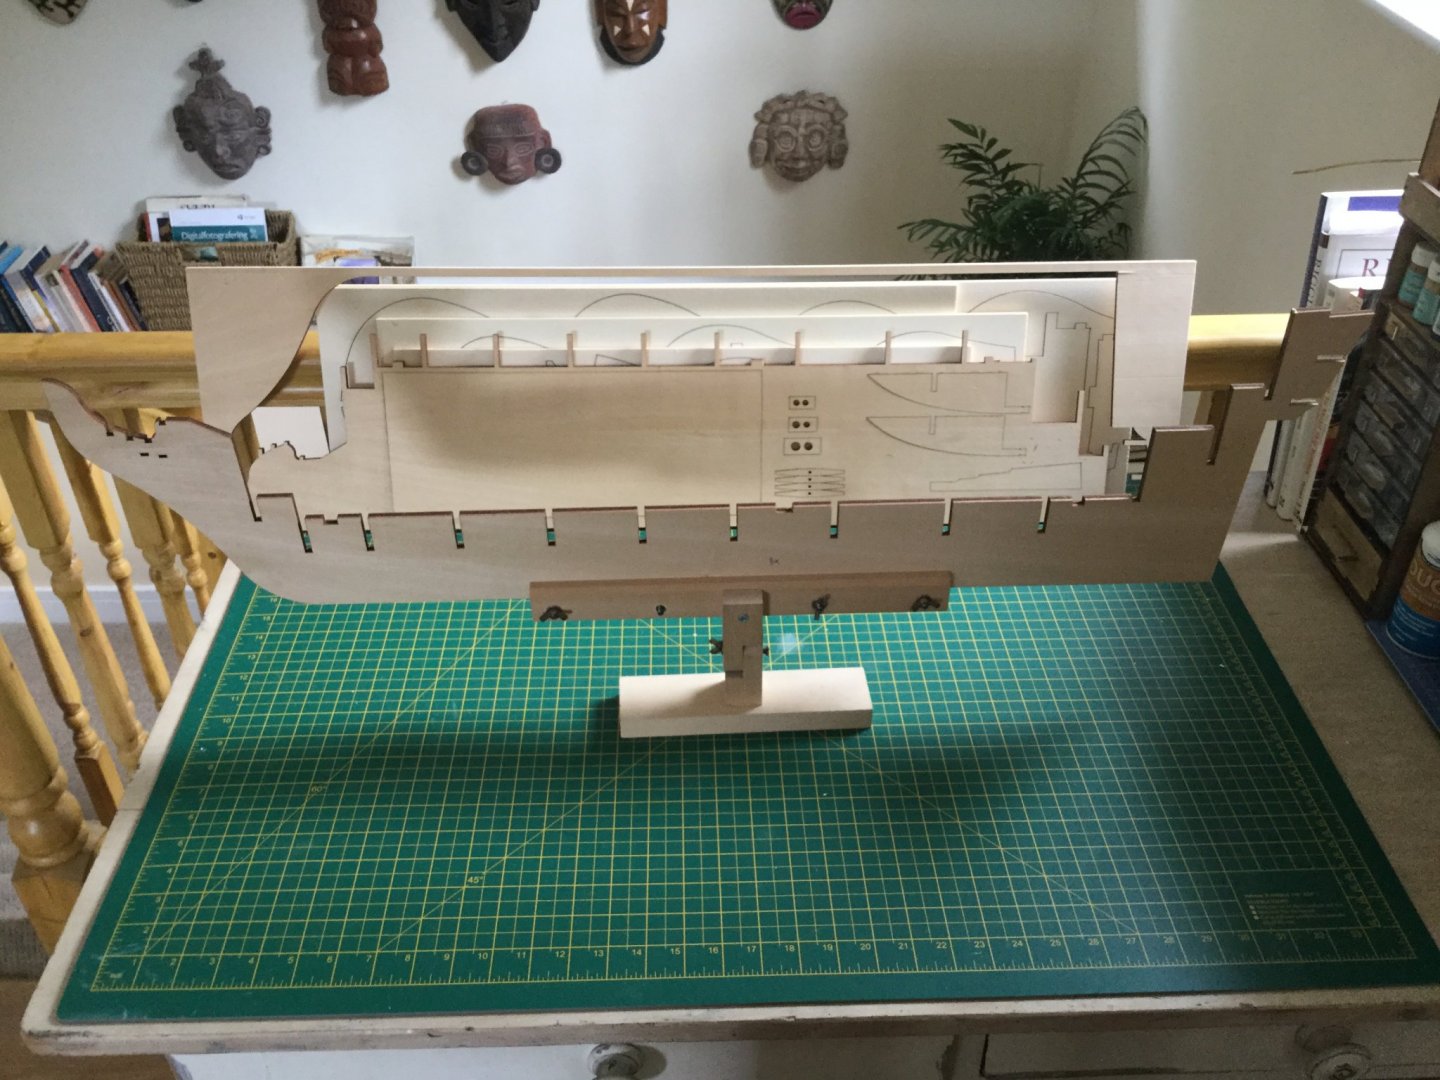
-
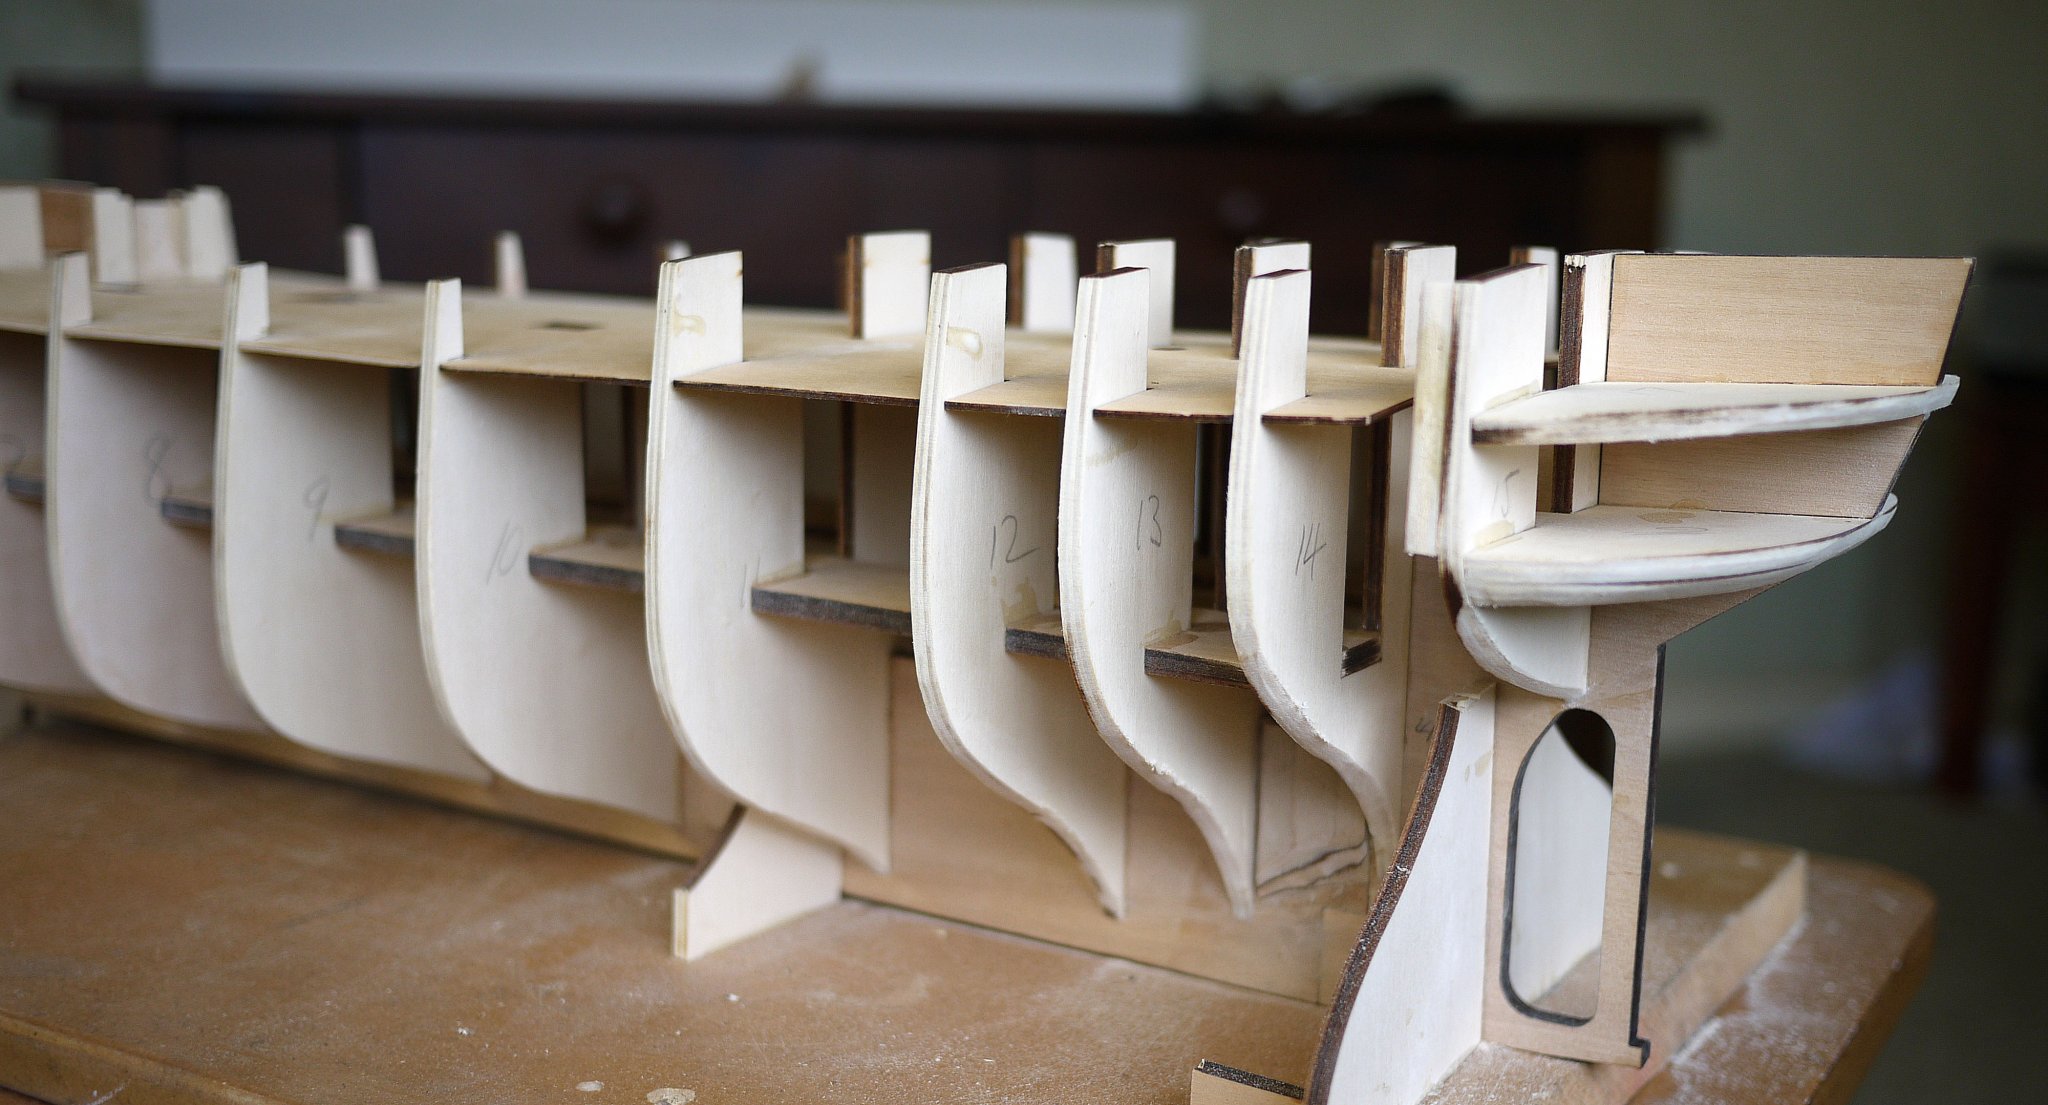
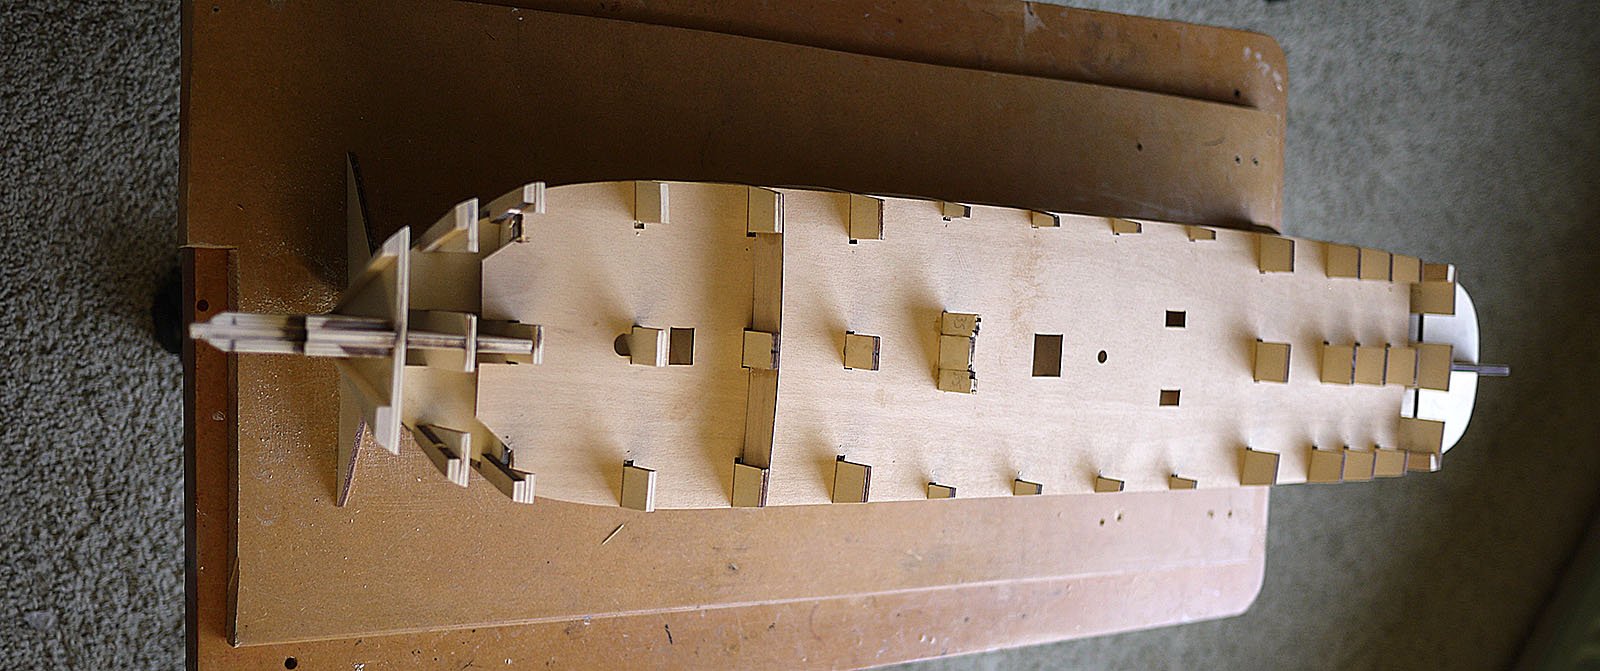
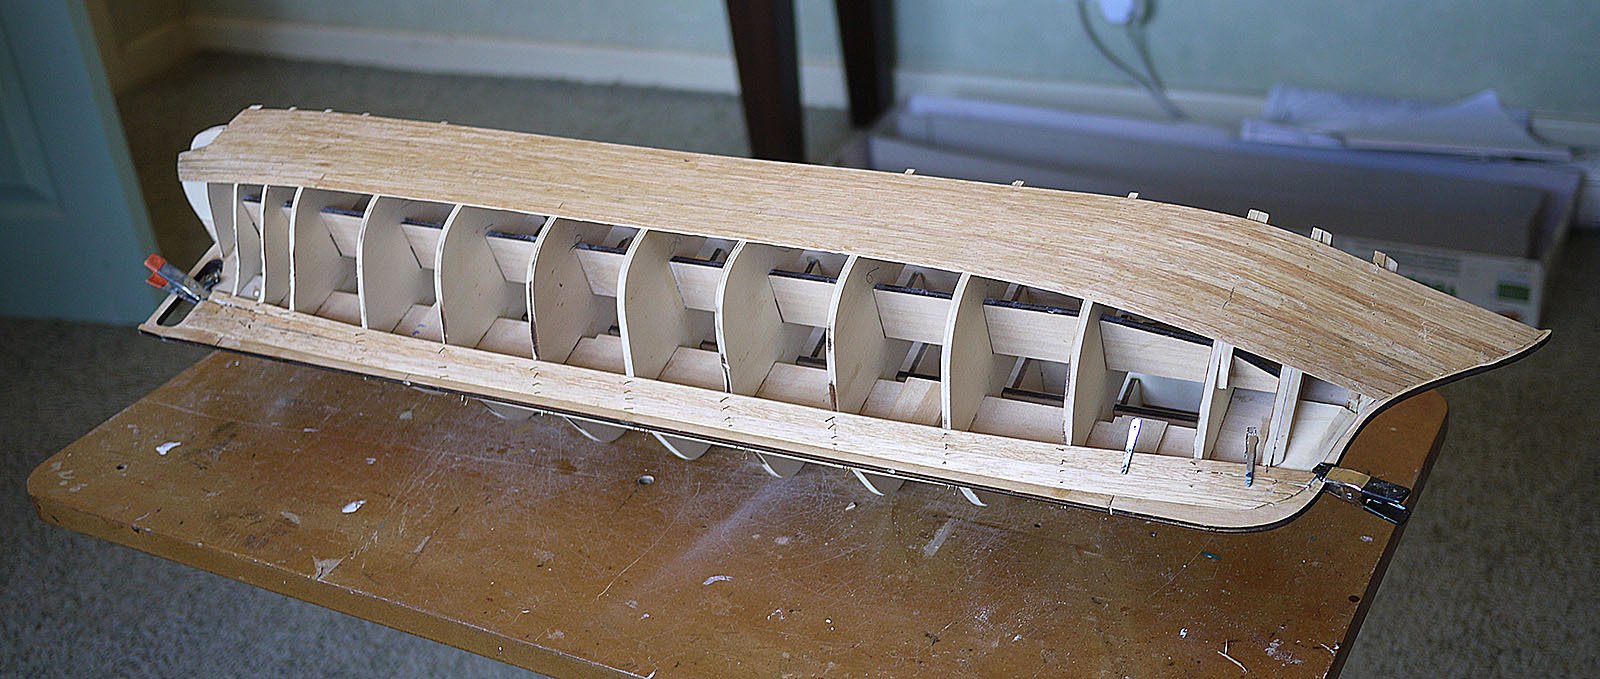
 Hi, I have recently started the Amerigo Vespucci, 1:84 scale from a Panart kit. I quite enjoyed the interaction I got from members on my Royal William log so I’ll again share my build with you. I bought the kit off Ebay for a good price, it is an early version about 20 – 25 years old and differs quite a bit from their current version, I think for the better. Lime for first planking, not balsa, etched sheet brass for the plating not ply, planked deck instead of printed ply and 12 sheets of plans many 1:1, but poor badly translated instructions instead of the step by step guide. Although old everything was in very good condition, straight keel and bulwarks, which were very well laser cut, matching the plans perfectly, the strip wood is very nice, straight cleanly cut and still flexible enough although has hardened quite a bit. There are hundreds of castings and machined brass fittings all nicely bagged, these will need a serious cleaning as they have become badly tarnished. A very comprehensive and well presented kit. I admire many of the builders on this site for their skill, painstaking dedication to detail and accuracy but I’m afraid that’s not me. My build will be as simple as I can make it, mostly straight from the box with just enough detail to make it a nice looking well made model that will not take me years, with the chance of getting fed up and quitting. I wanted to start the build by first preparing the mounting. I want to mount it on brass pedestals on a large mahogany plinth so needed to do the preparation for this prior to planking rather than risk damaging the model at a later stage by turning it upside down. My first problem is that due to the lack of availability of stuff due to the Covid restrictions I can’t get anything, the wood yards are closed and even popular online modelling suppliers have run out of anything I want, glues, sealers wood strip and my columns. I started by joining together the three sections of keel, I reinforced the joins then beefed up the area where the pedestals will be fixed with rods, I drilled them out and hope that they line up later. I dry fitted the bulkheads, they only needed the lightest of sanding before becoming a perfect fit. I made up a keel support out of scrap, not very neat looking but works well enough.. I glued all the bulkheads into place, I added extra support on the outer edge of the front three and stern bulkheads. I usually infill these areas with balsa but the lines of the hull are so friendly that I didn’t think that it would be needed. I spent quite a bit of time fairing the frames making sure that they were as perfect as I could make them. I have now started the first layer with the 6 x 1.5 lime planks provided, so far so good. That’s me starting my journey please feel free to join me. Ken
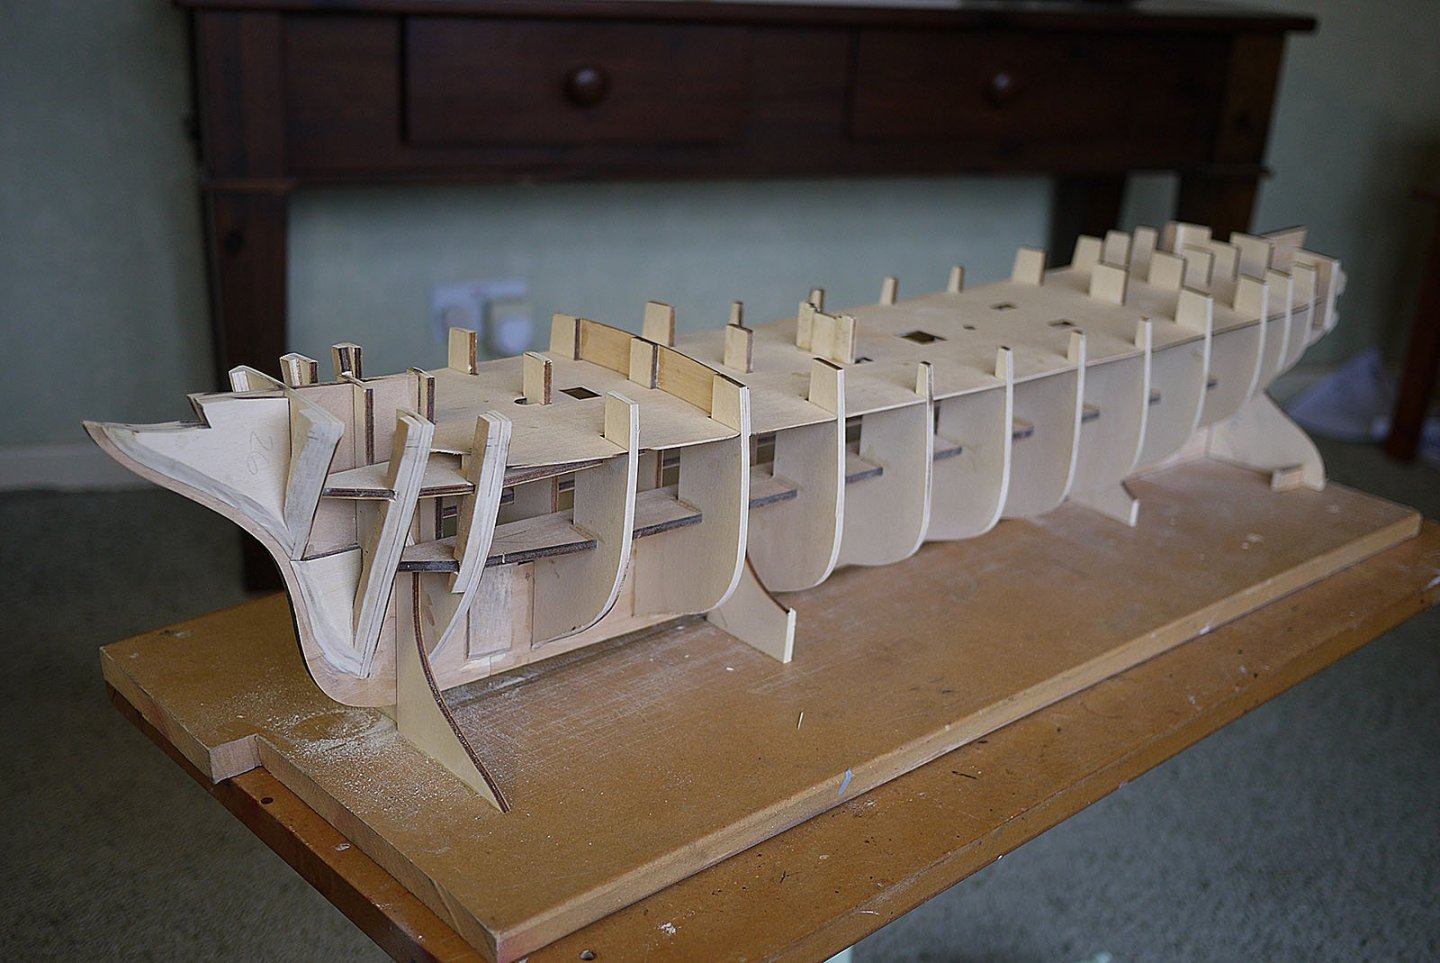


-
 Hermione now sits in my library on a nice furniture covered with glass. Coronivirus lock-down continuous though things look much better. In the last days Cyprus marks single digit numbers. Actually I wasnt planning to start a new model so soon, but lock-down drove my hand to the cupboard where the R.Caroline kit was stored. A kit in a scale that I really desire to build... where details can be seen, I hope. Its my second ship of the 18th century. After Hermione I though the scale and the rich decoration of this ship, it can become a much enjoyable build. So am sailing again.
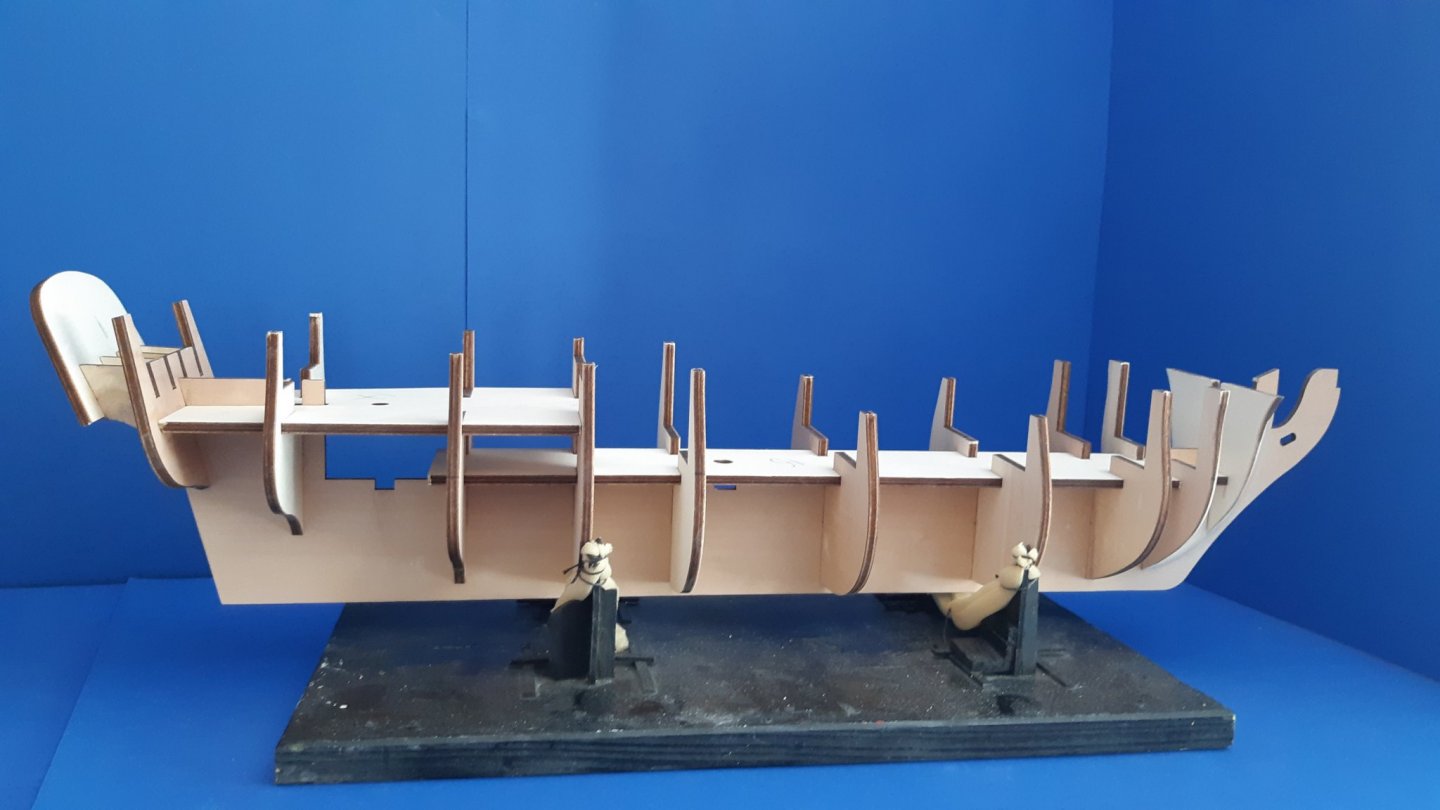
- 123 replies
-
- 8
-
-
- panart
- royal caroline
- (and 1 more)
-
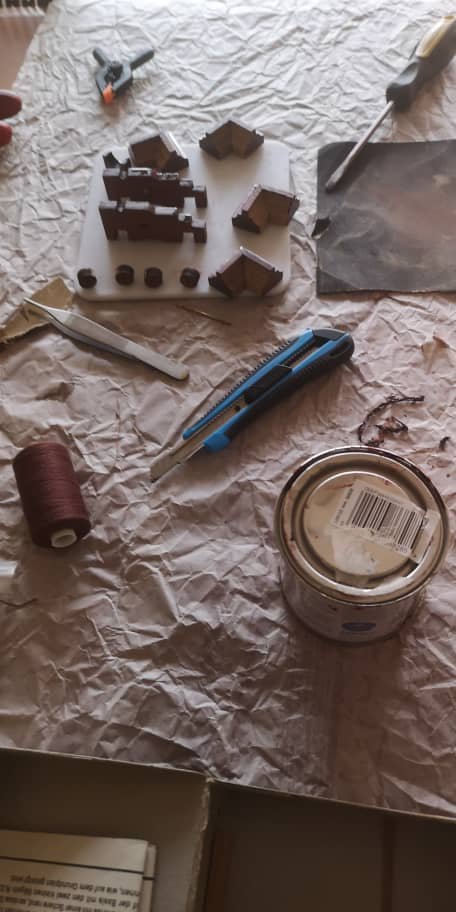
 Good morning Guys, Stuck in under lockdown in Ghana, so I thought I would post progress on the Panart Battle Station I am doing. Everything is hard here. Even when the shops are open you can't buy modelling materials so it is a mater of make do. No micro drills, no proper paint, no razor saw. Nothing is easy. Even the correct glue is hard to find, and that's when the shops are open! The kit has been carried around the world for about 10 years whilst I made the Billing Cutty Sark, and now is suitably mature, so started. Before I started I made up a couple of Mantua Cannon I had in the cupboard. Here is the US Coastal cannon, and here is the French Marine Cannon. Battle station details to follow Finlo
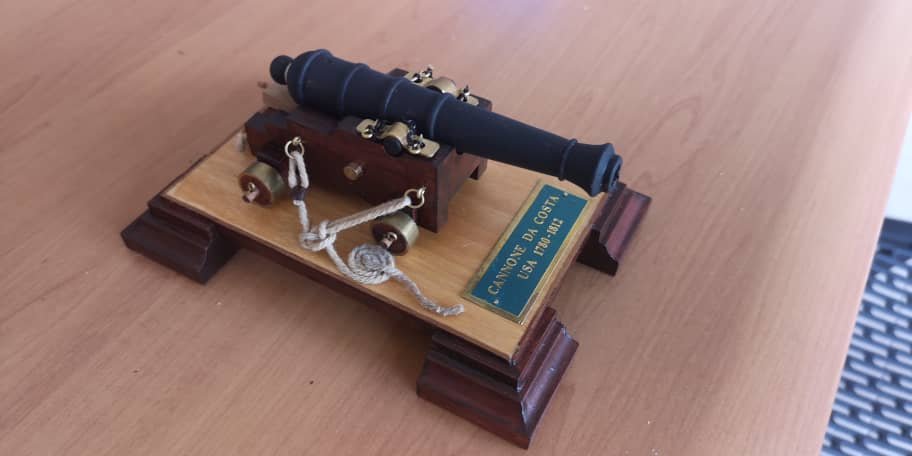

- 5 replies
-
- 4
-
-
- battle station
- panart
- (and 2 more)
-
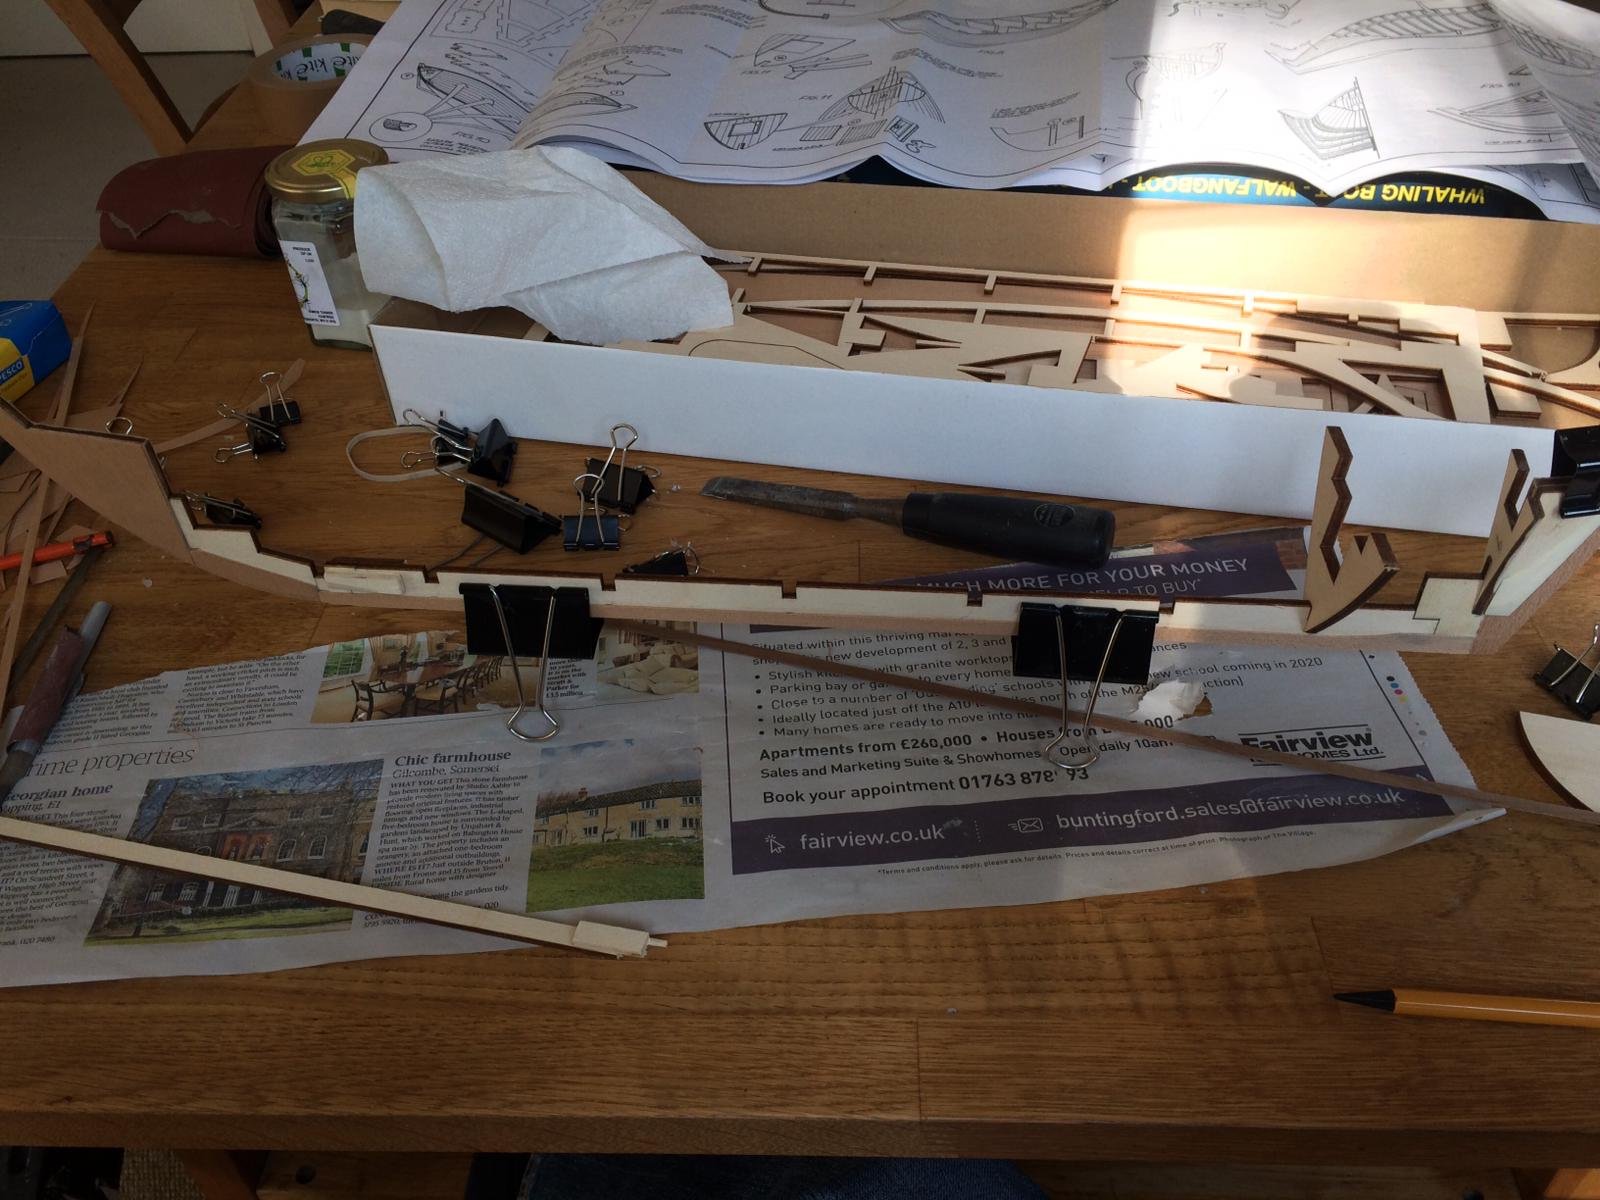
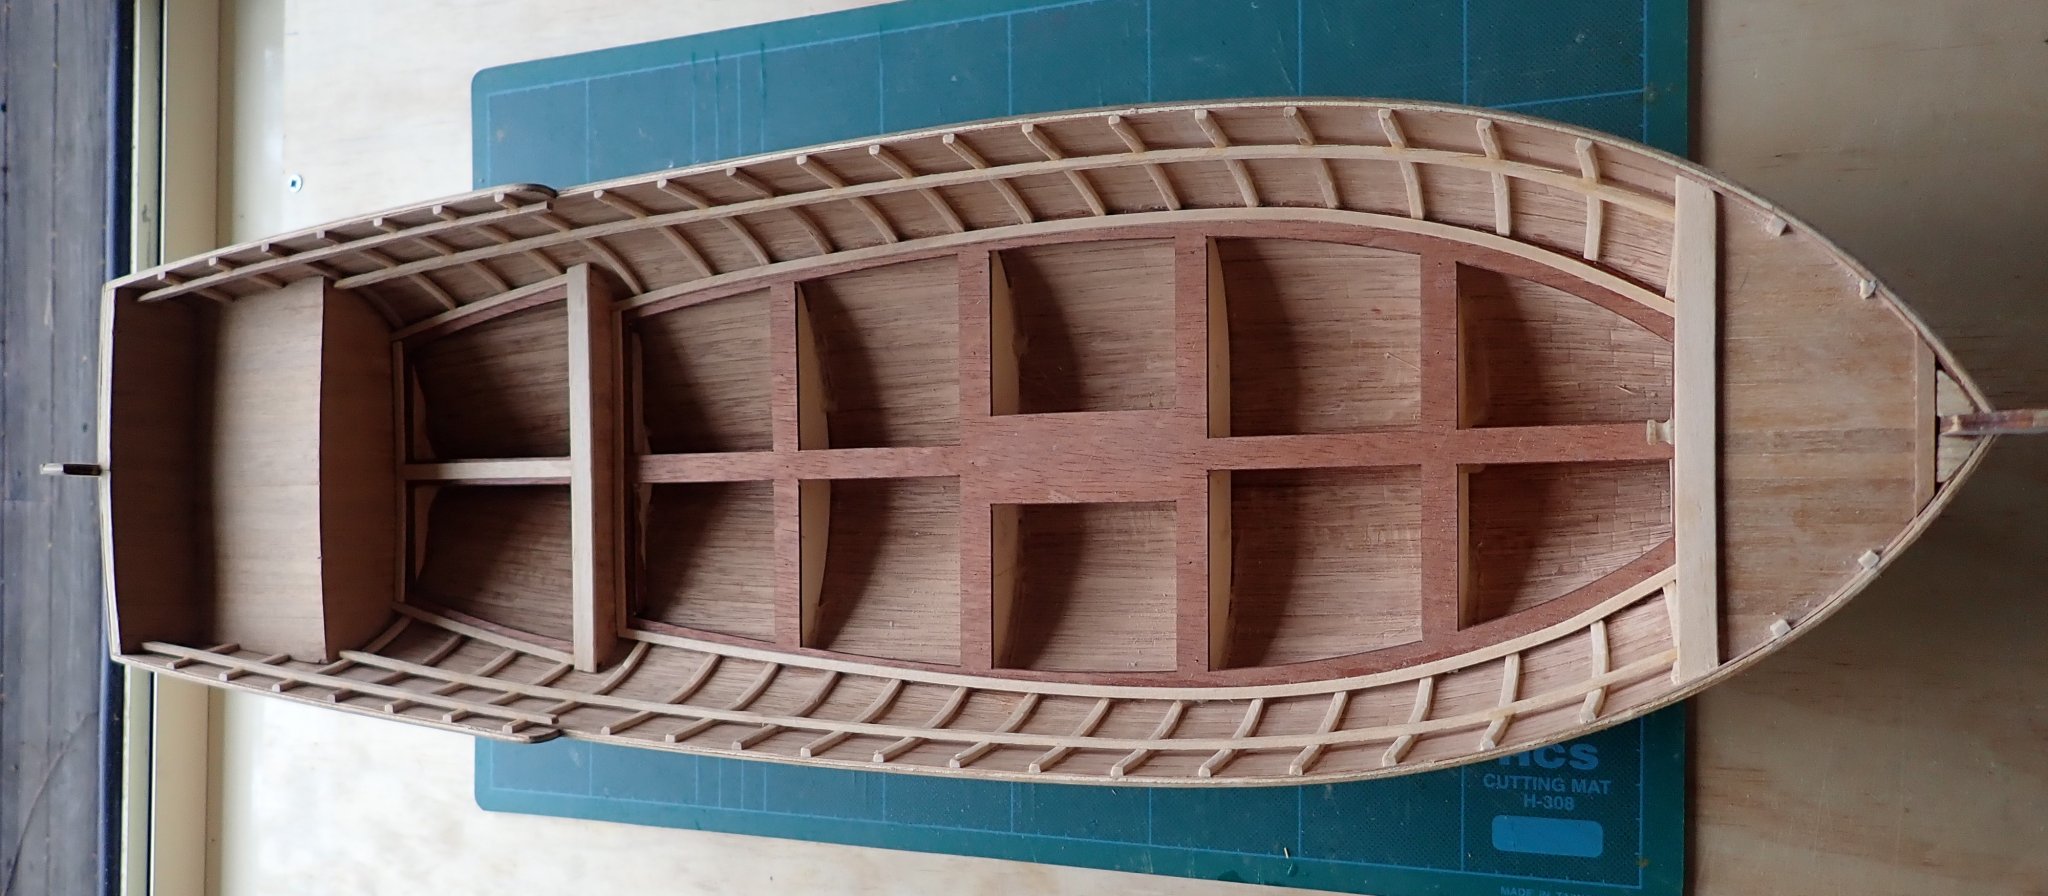
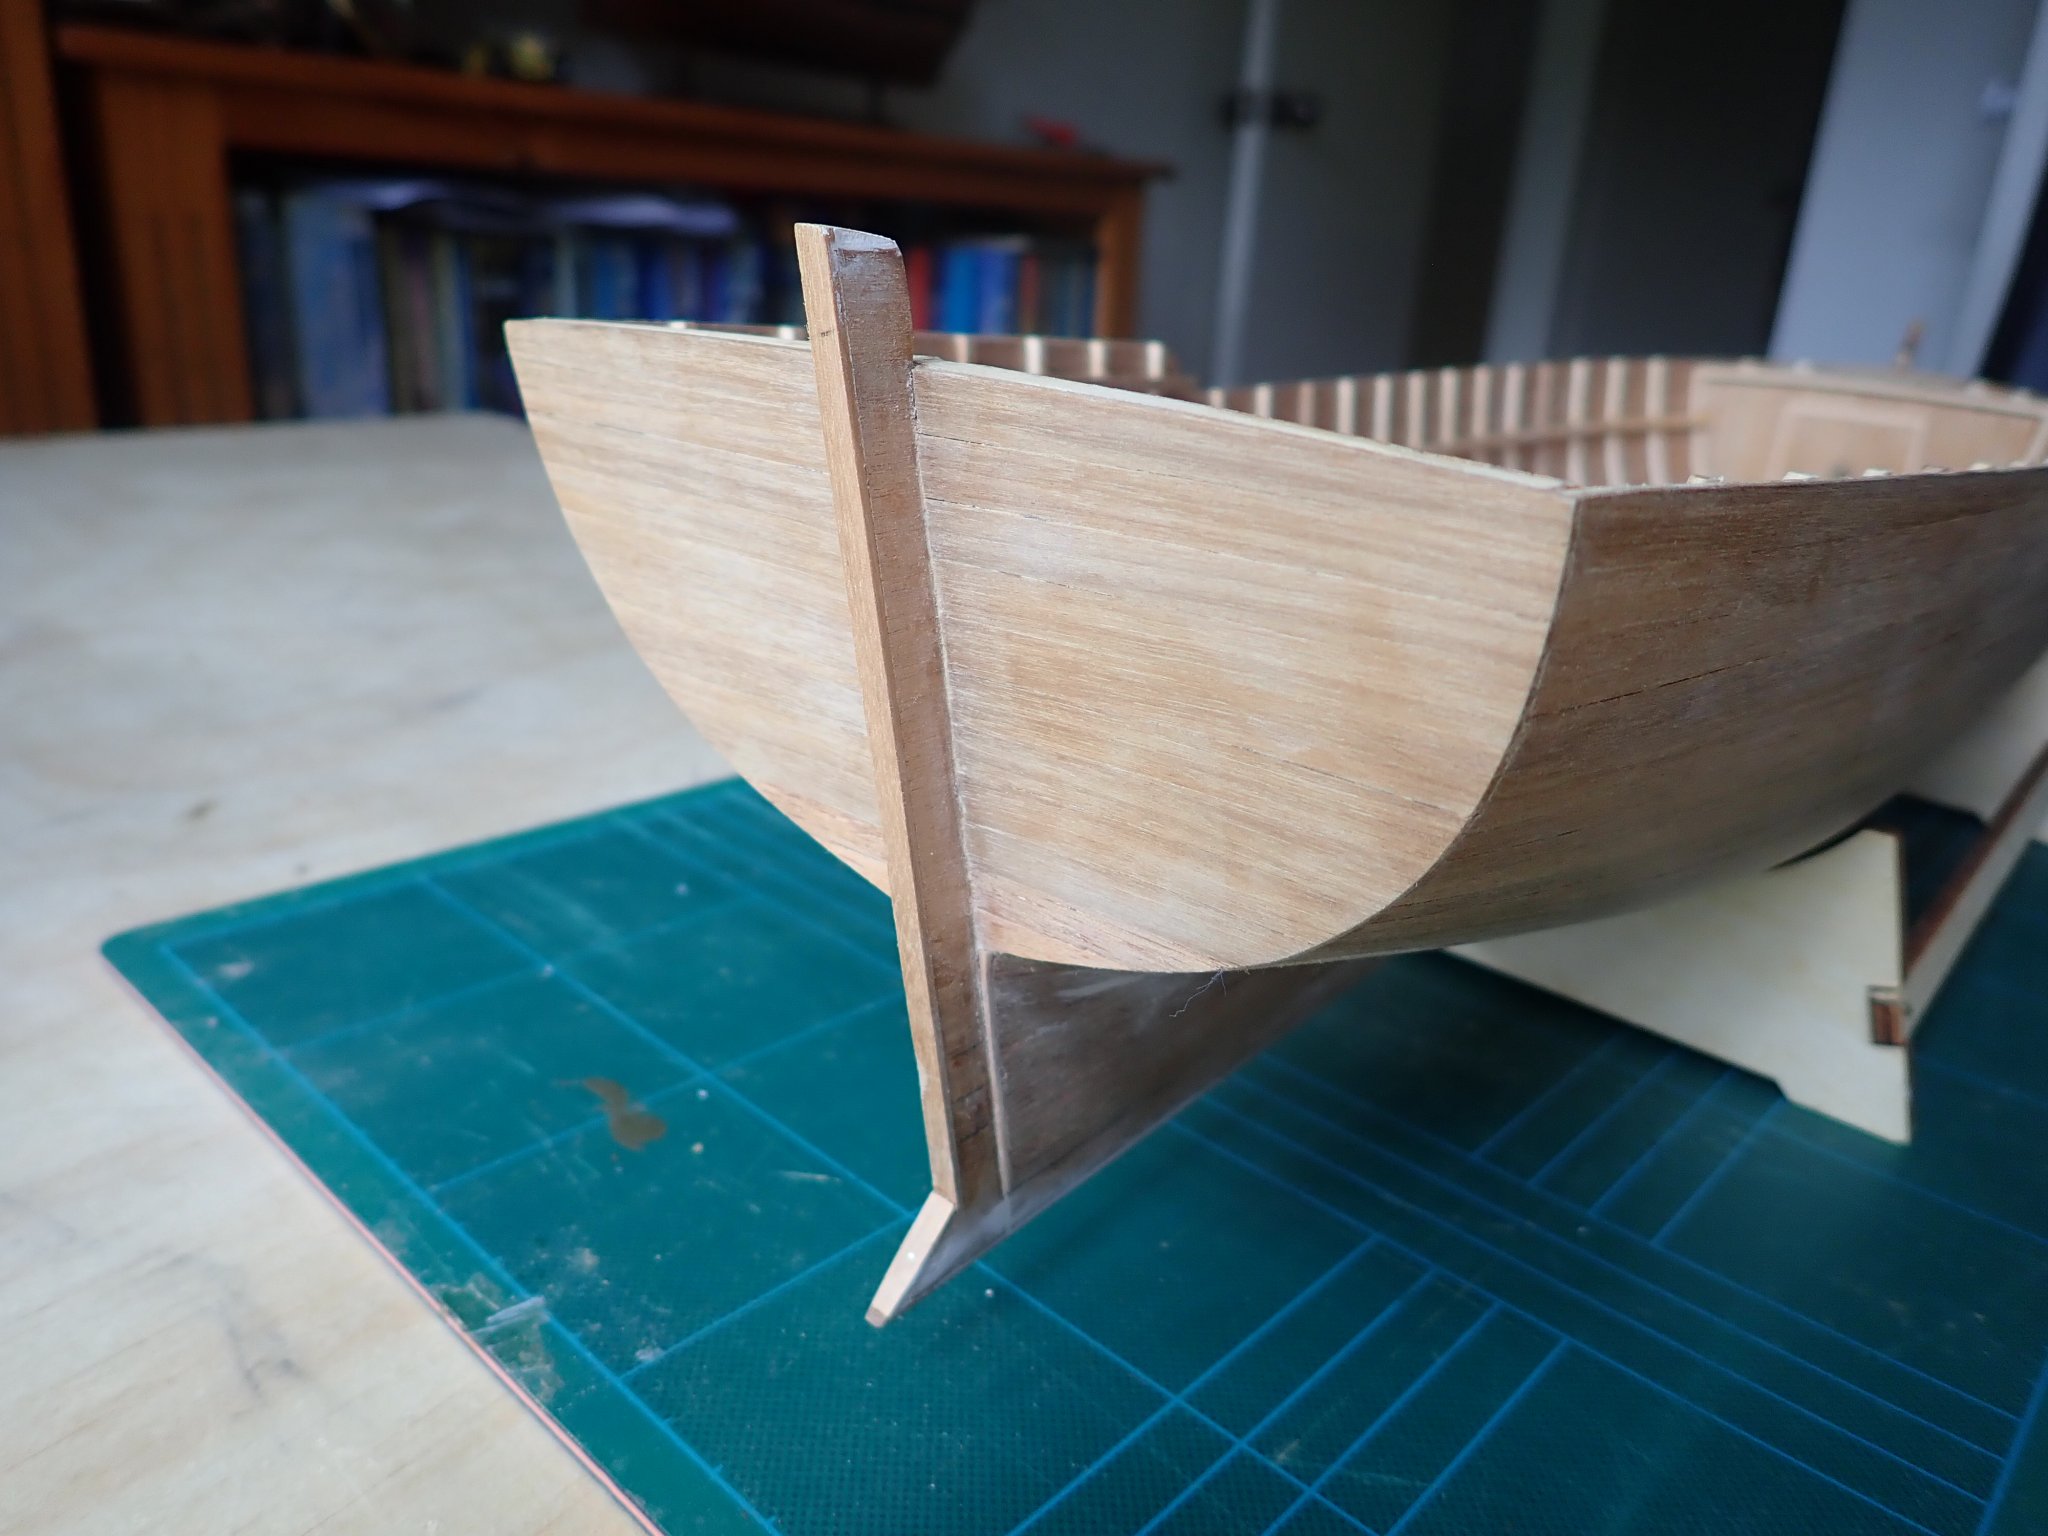
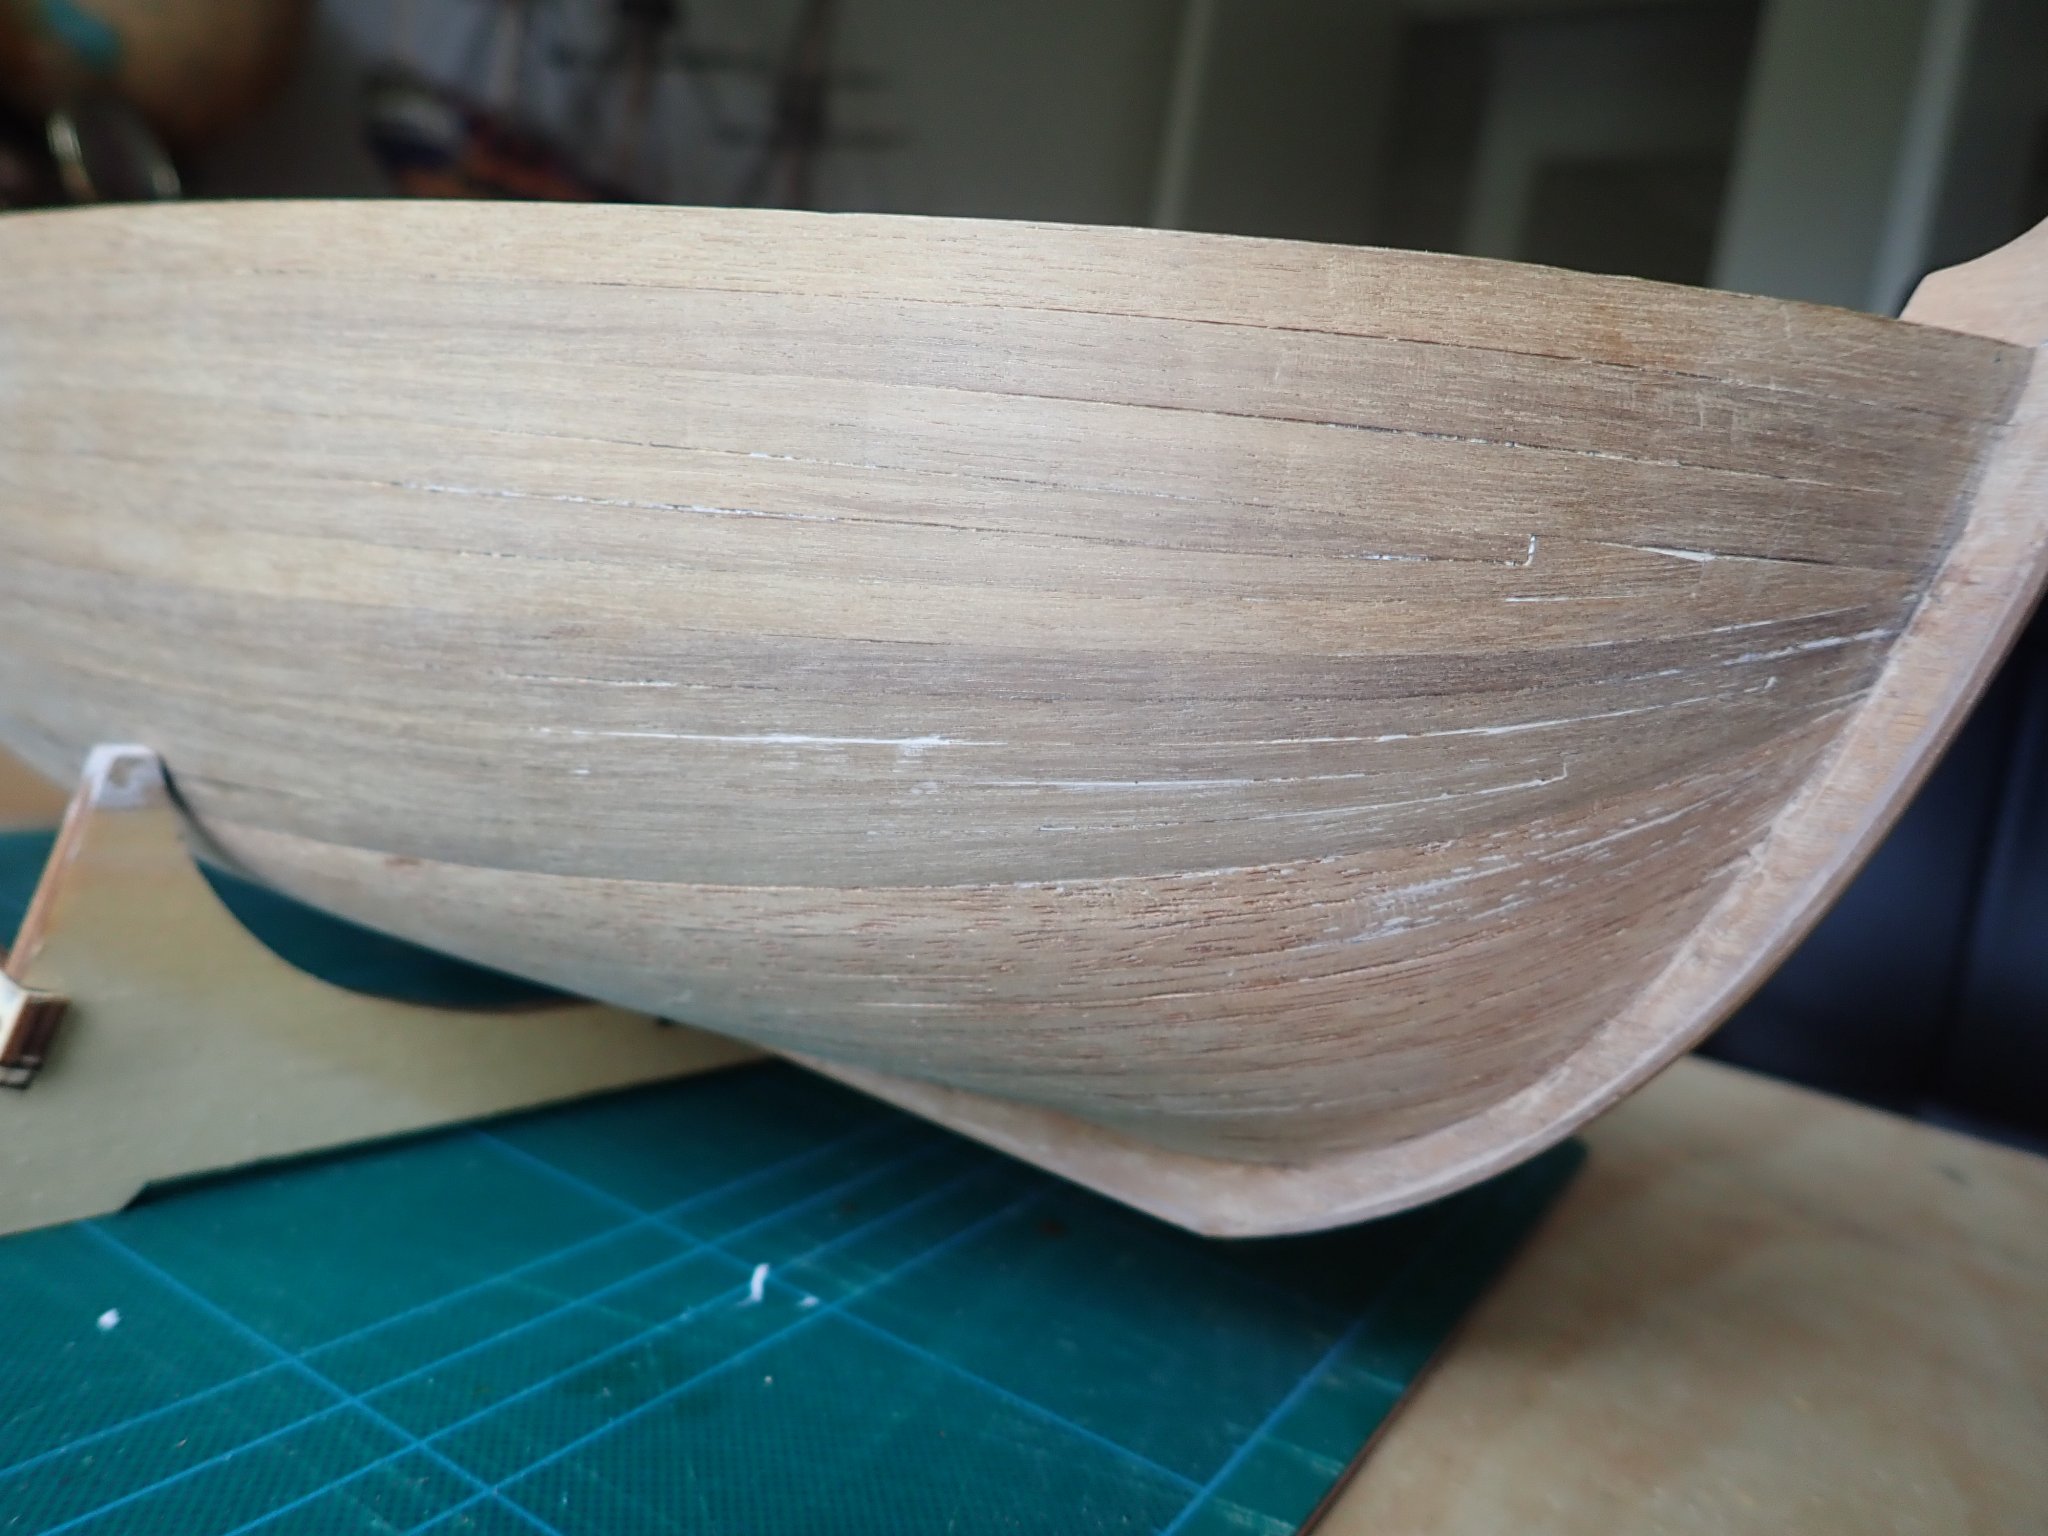
 Hi, so I've just started this kit as my first build - not only do I lack previous experience, I lack many handy tools and anything more than than a kitchen table to build on, but here we go! Keel and veneering seems fine, and just starting on the bow and stern faring blocks. One thing I can't quite understand (from the instructions 'translated' from Italian) is how the bulkheads can be glued to the keel, have the planking glued to them, but still be removed later, to get the open hull result. Should they just be pinned to the keel? special glue to use that's easily dissolved? My current range of available glues is from PVA to...PVA I'll keep posting photos, if just to show the pitfalls of a beginner buying an intermediate kit!
-
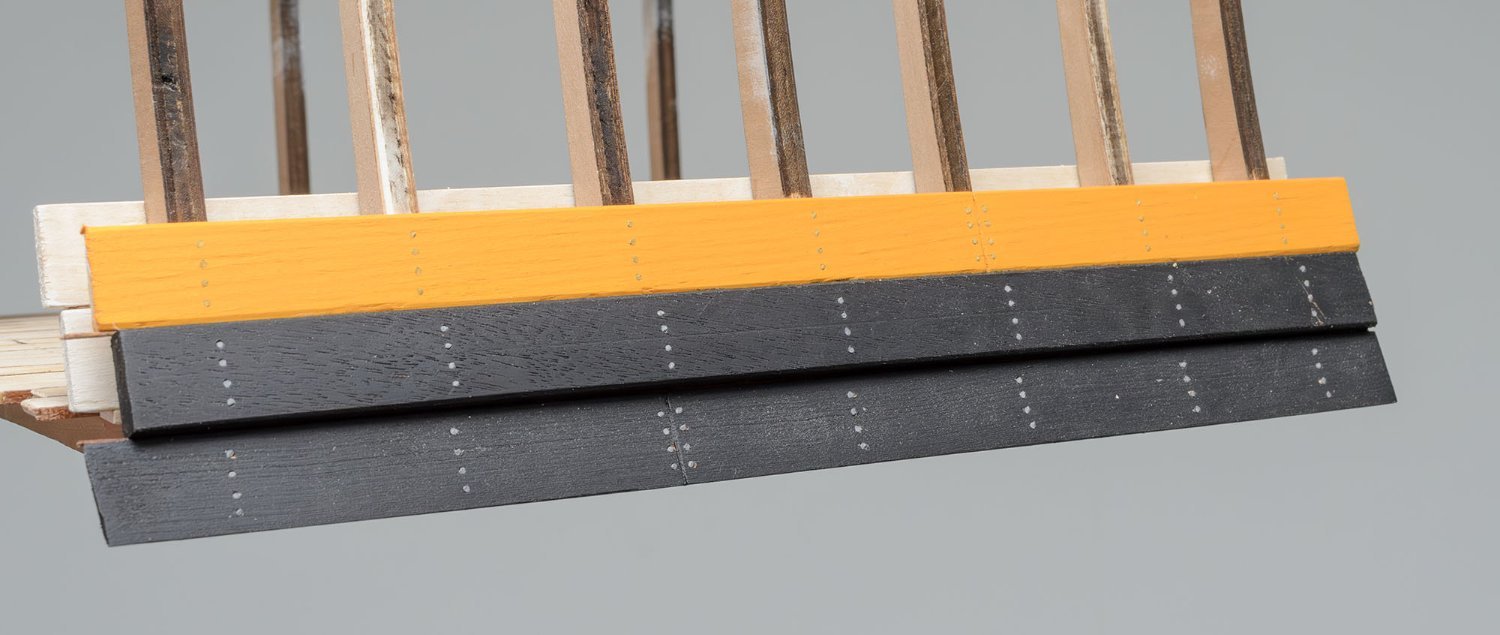
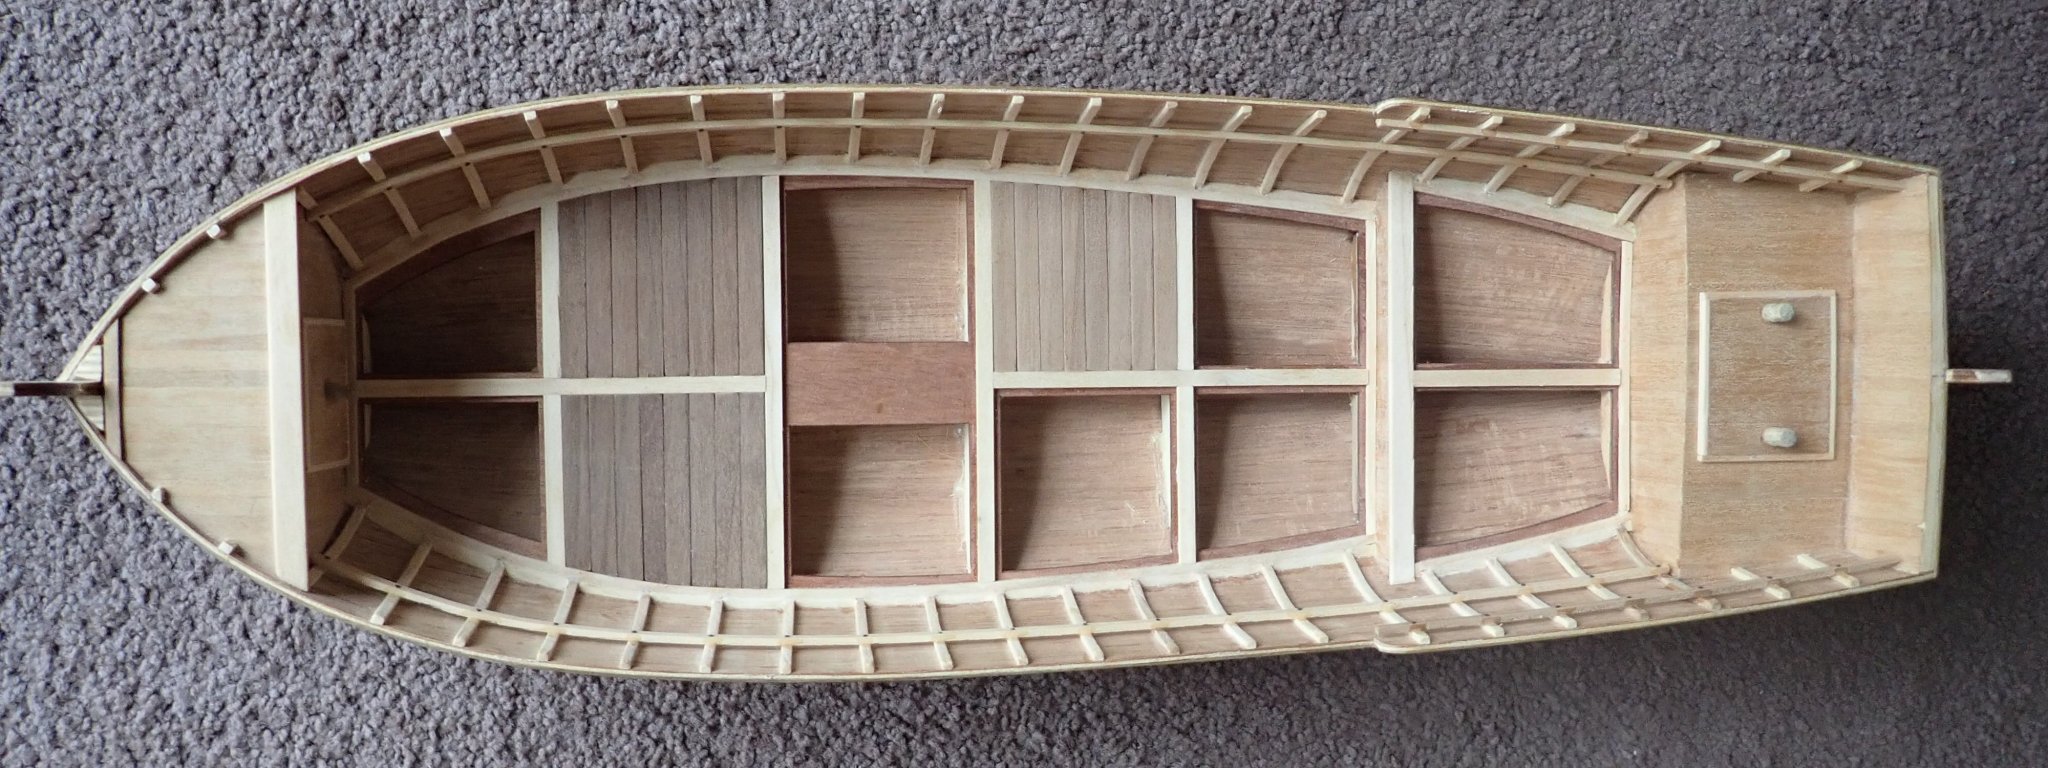
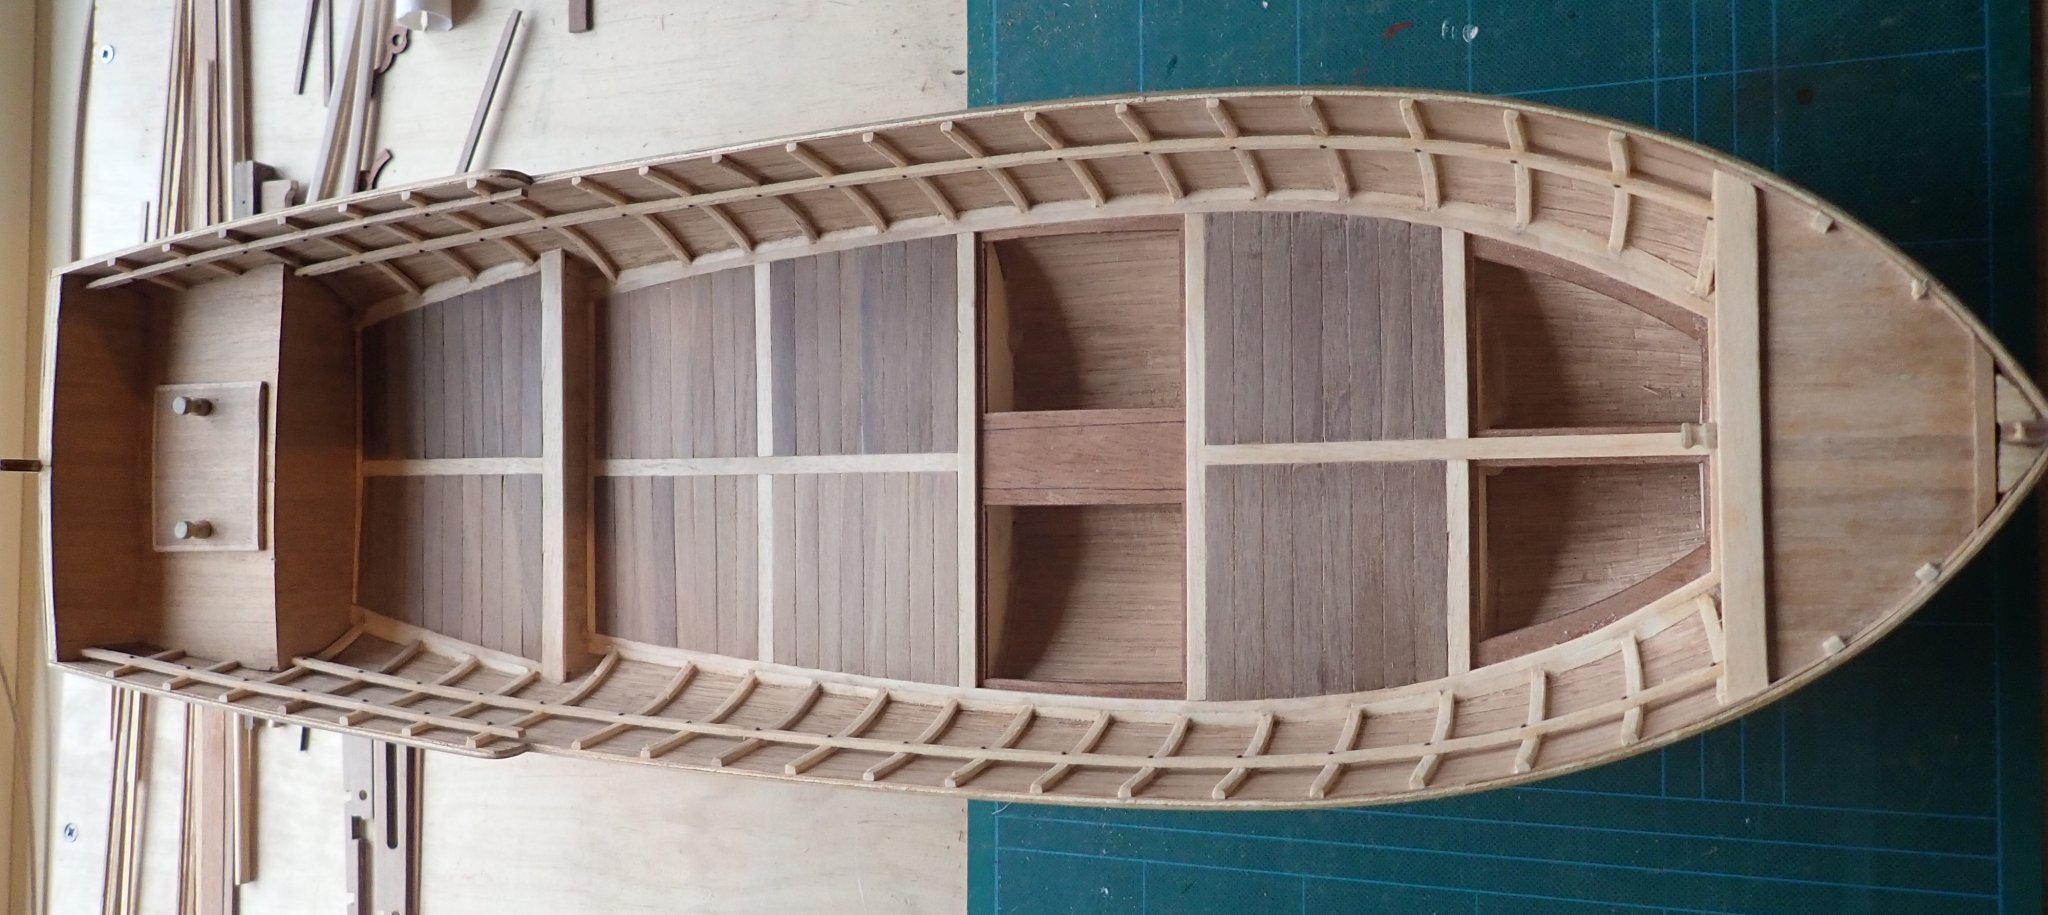
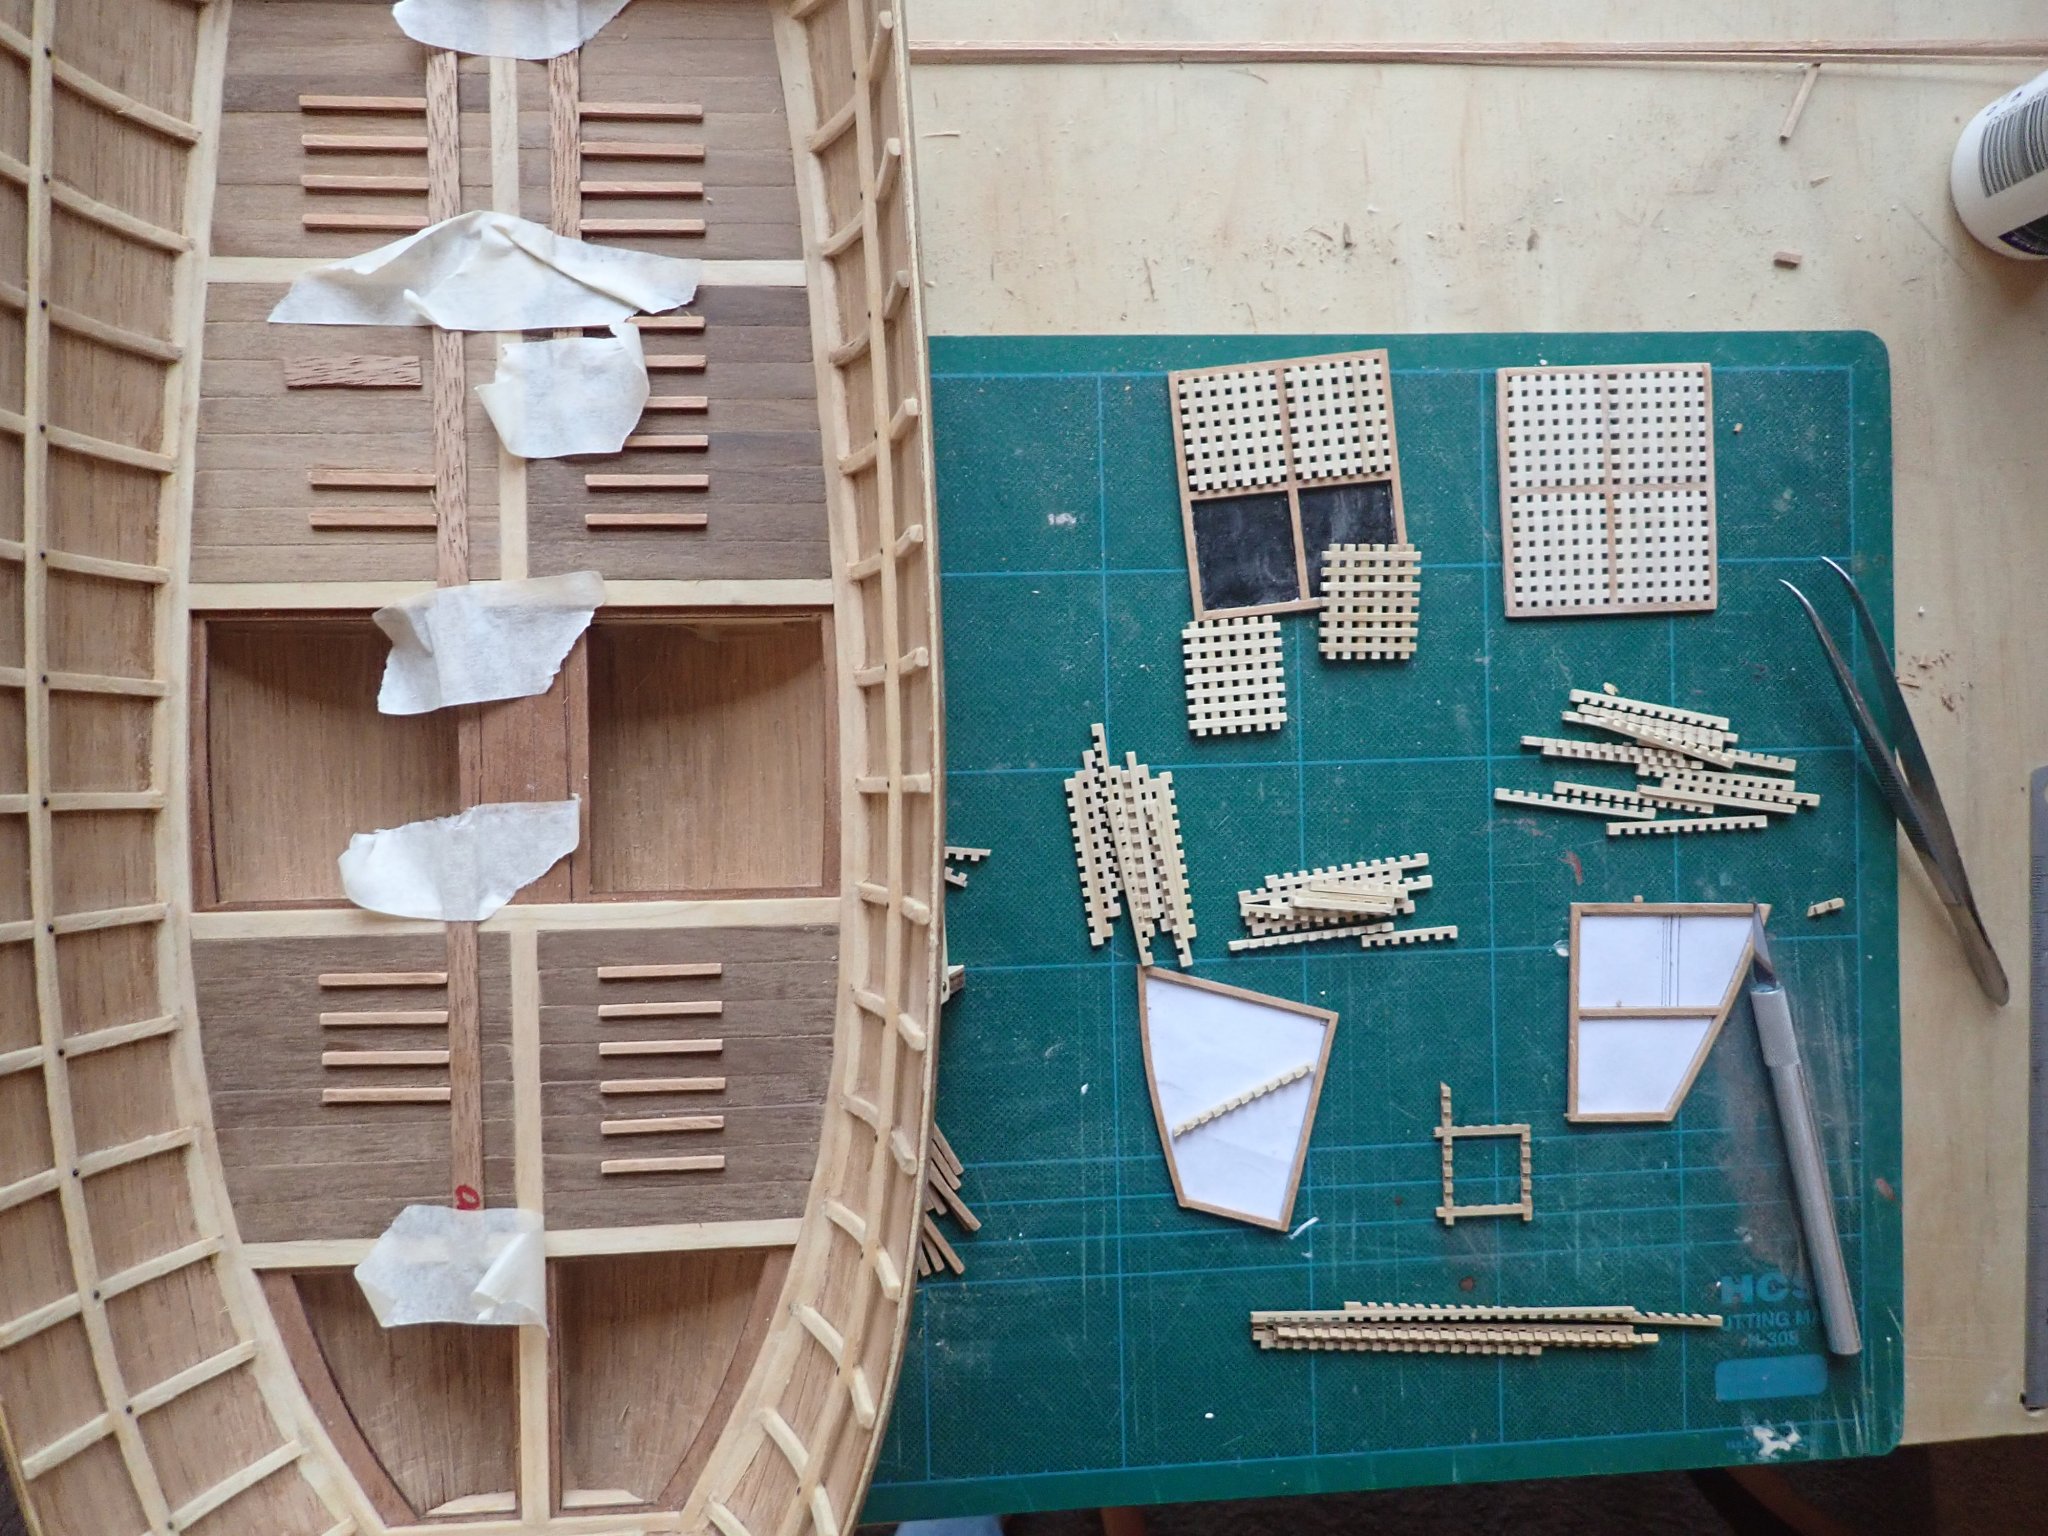
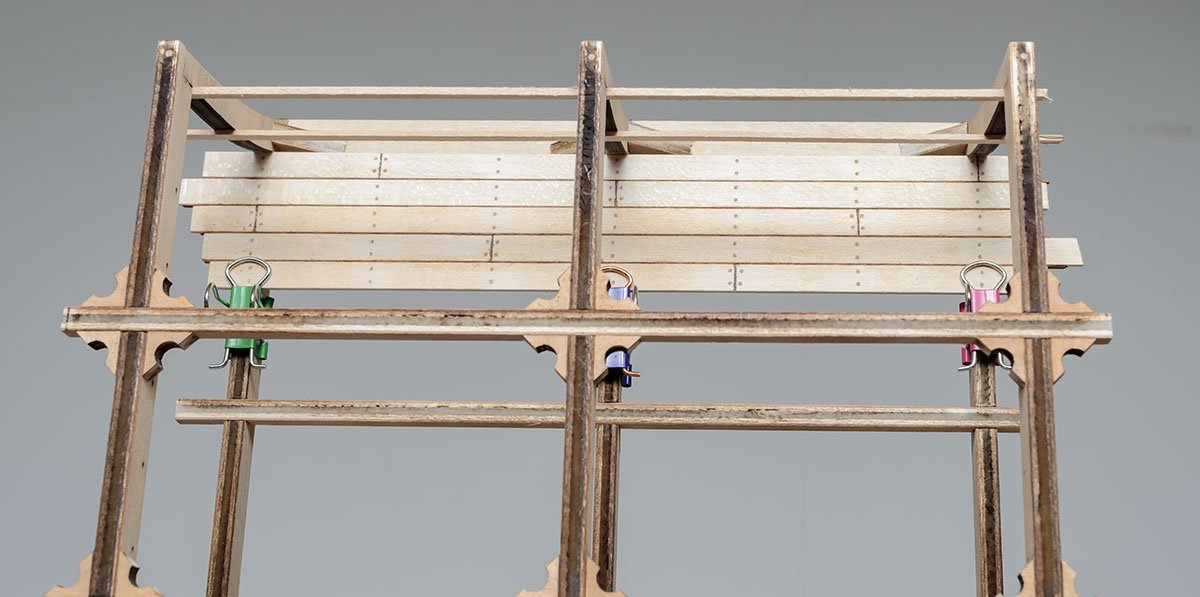
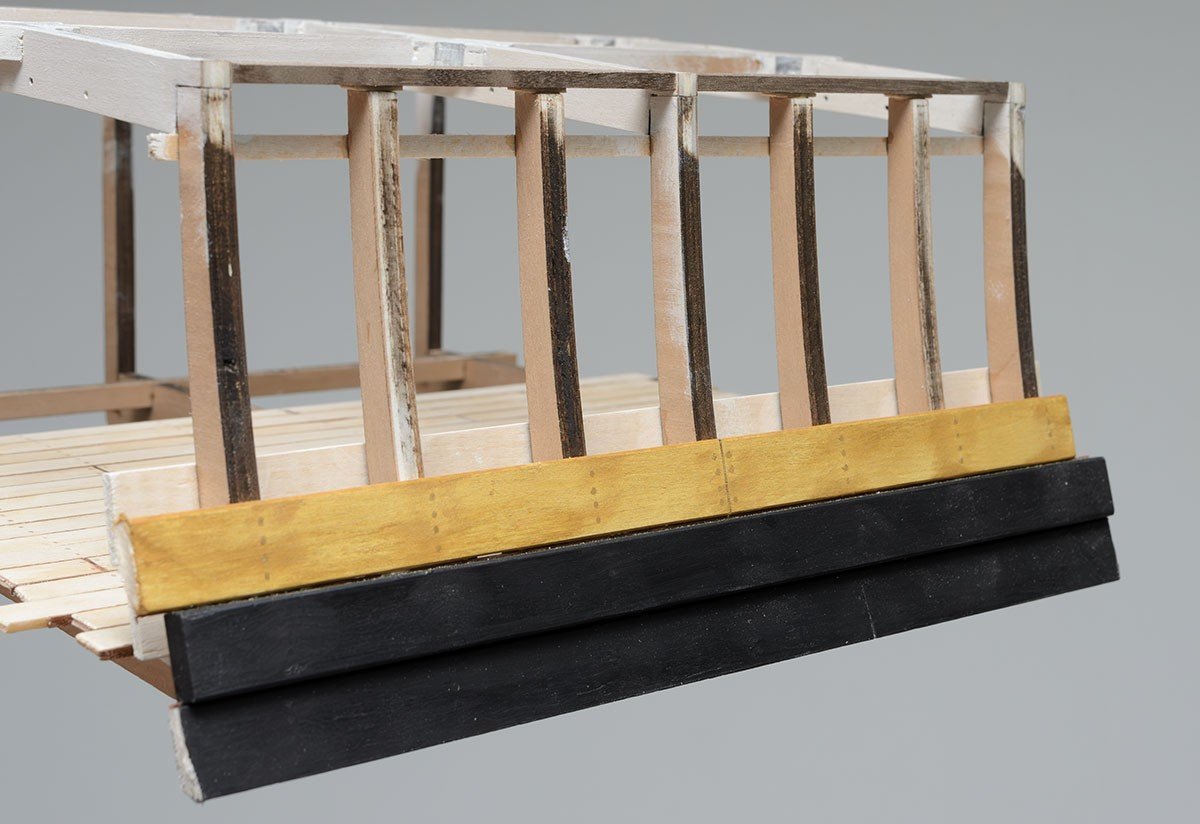
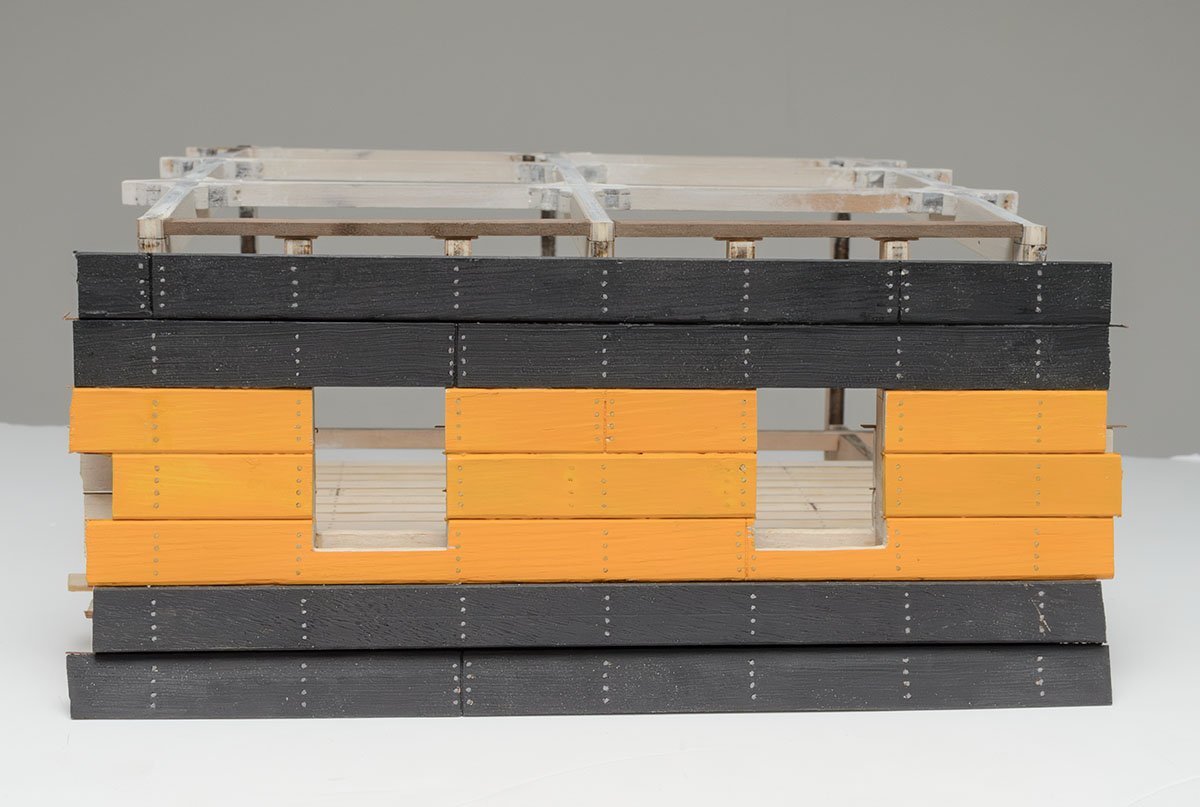
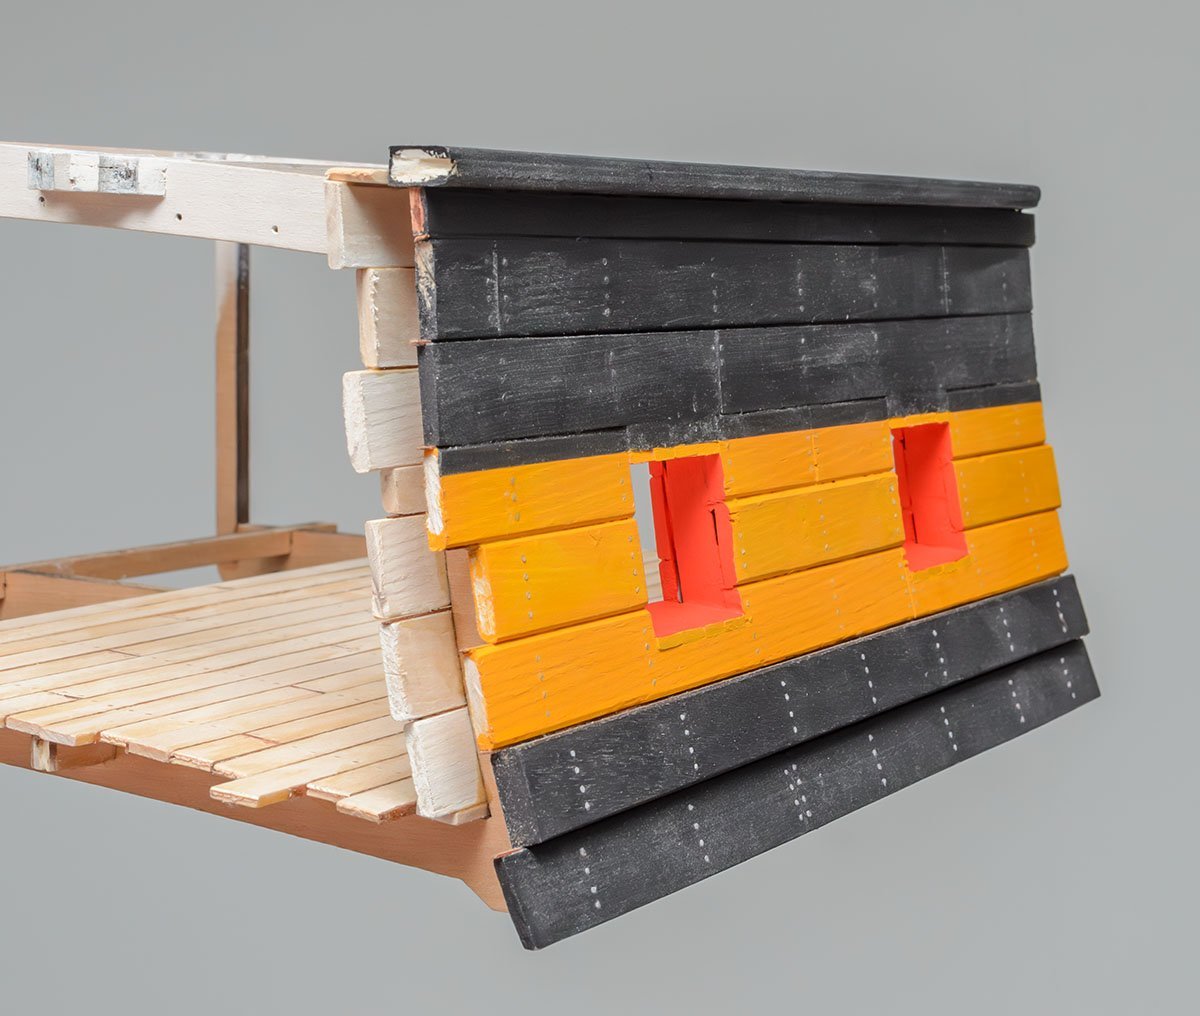
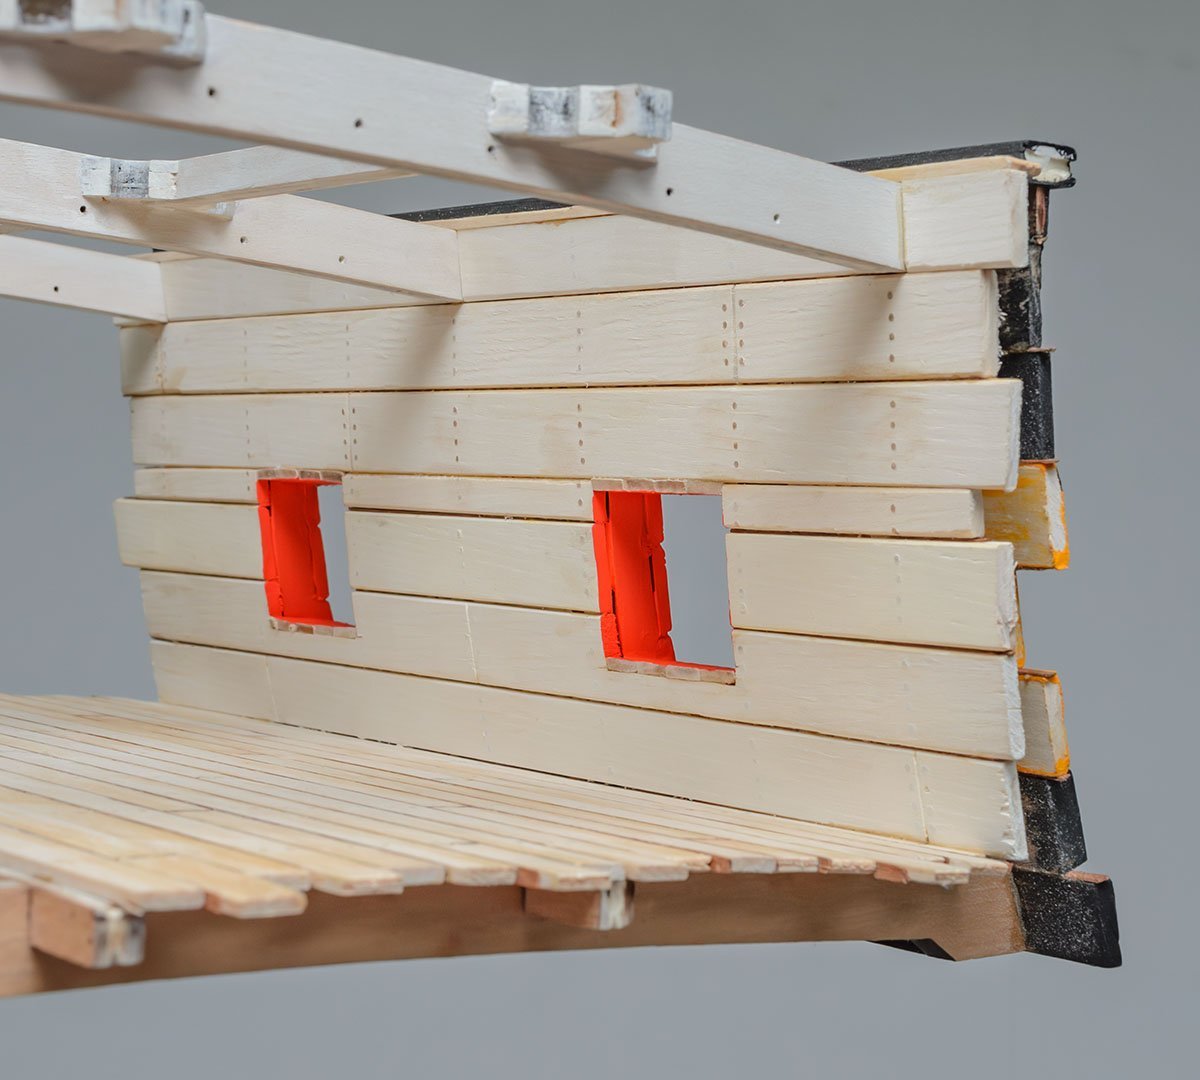
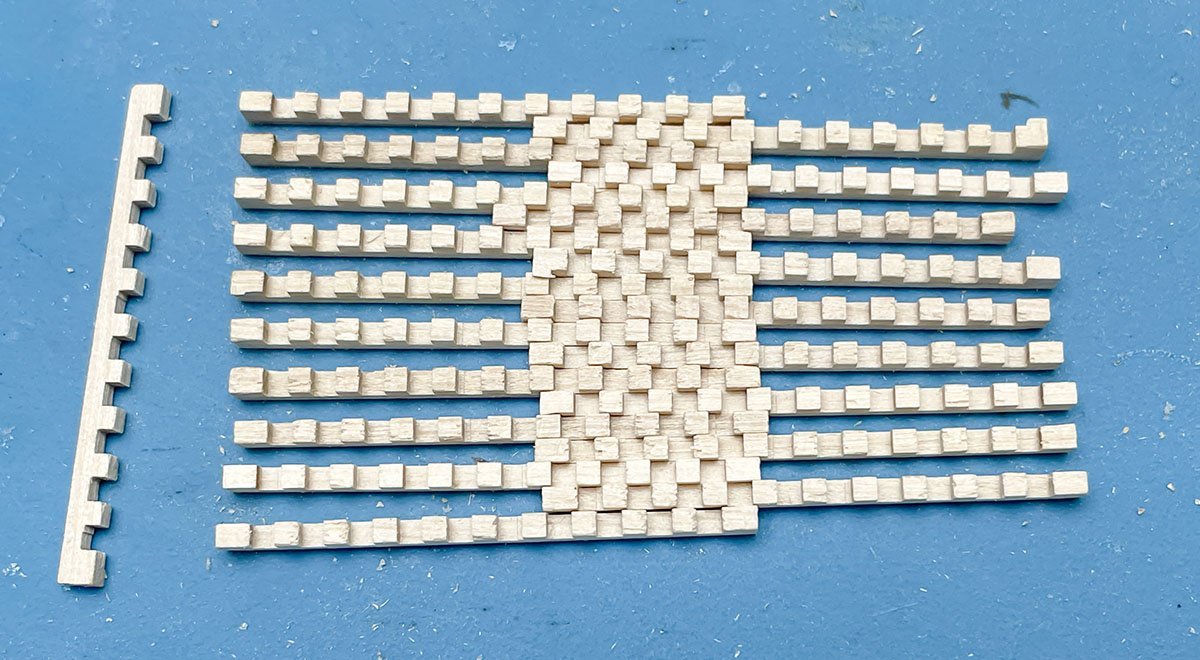
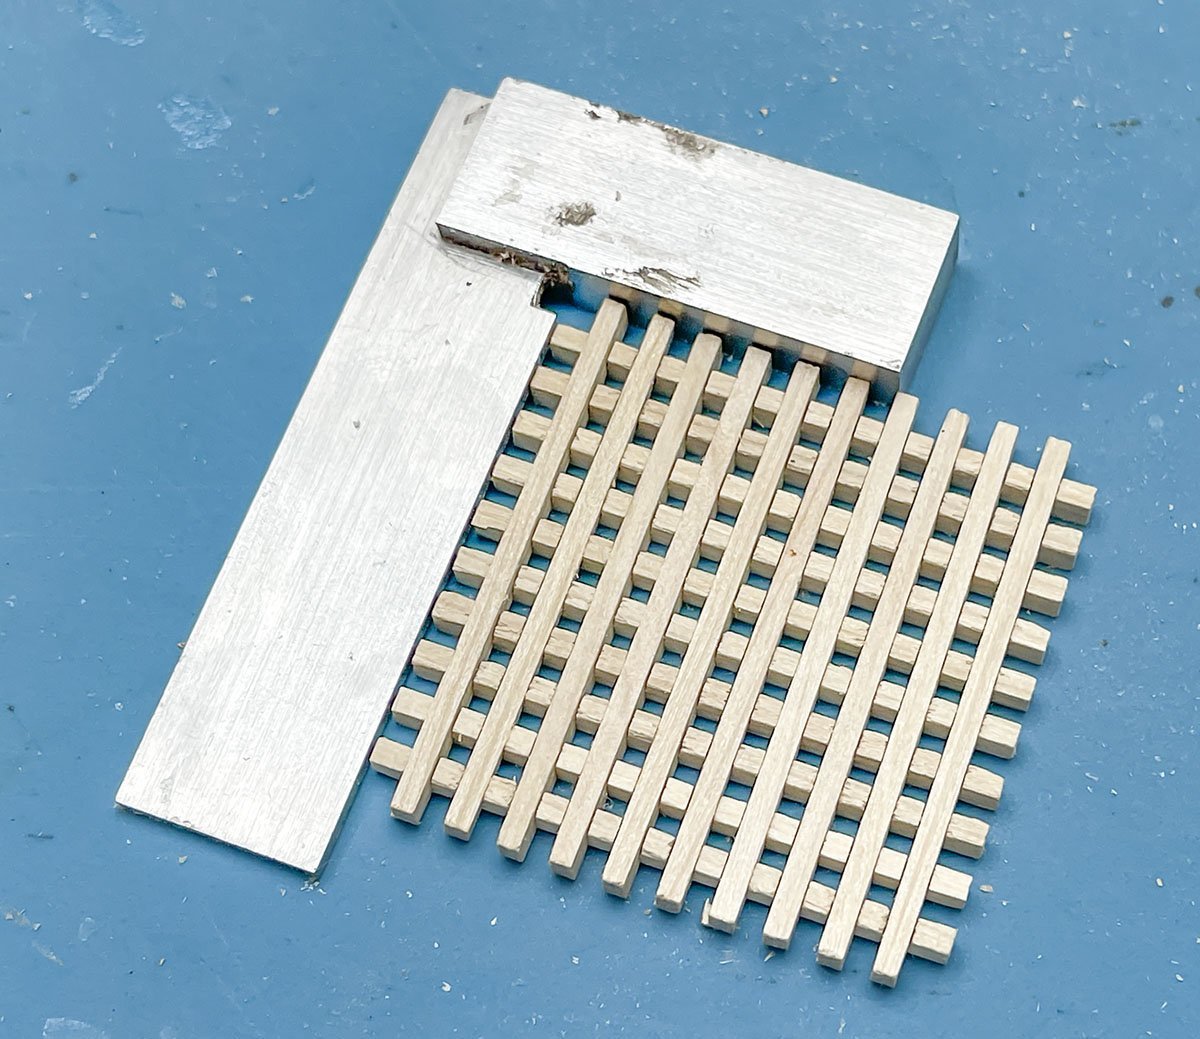
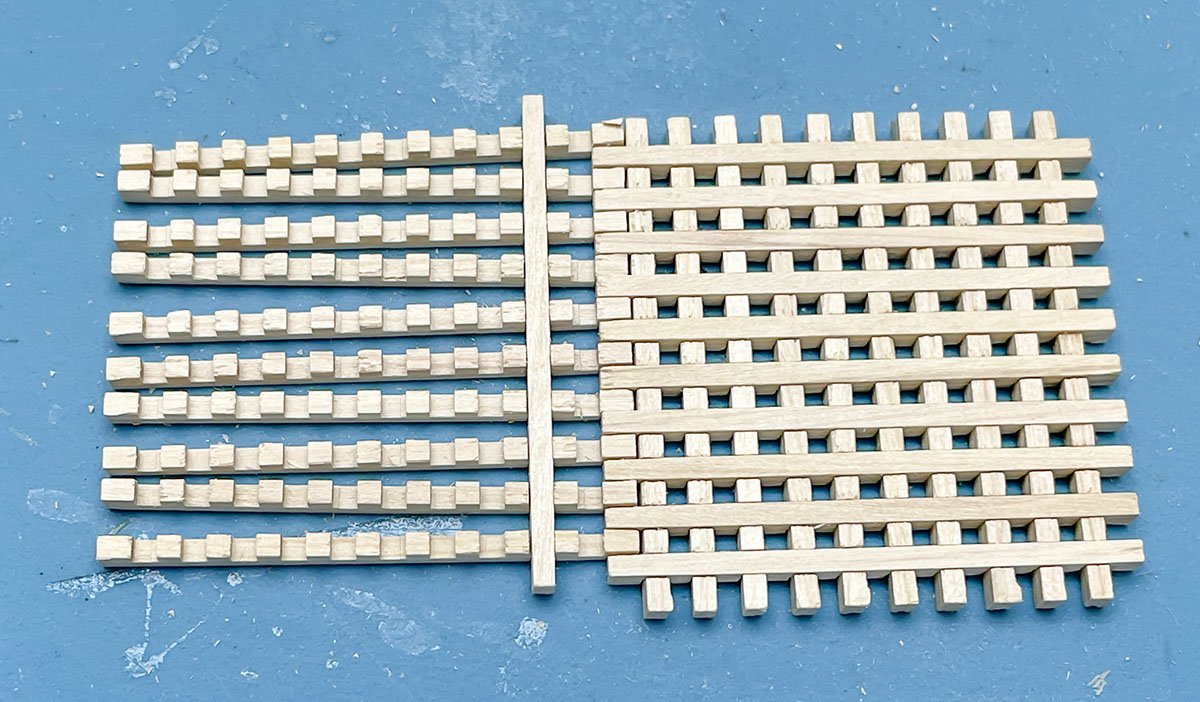
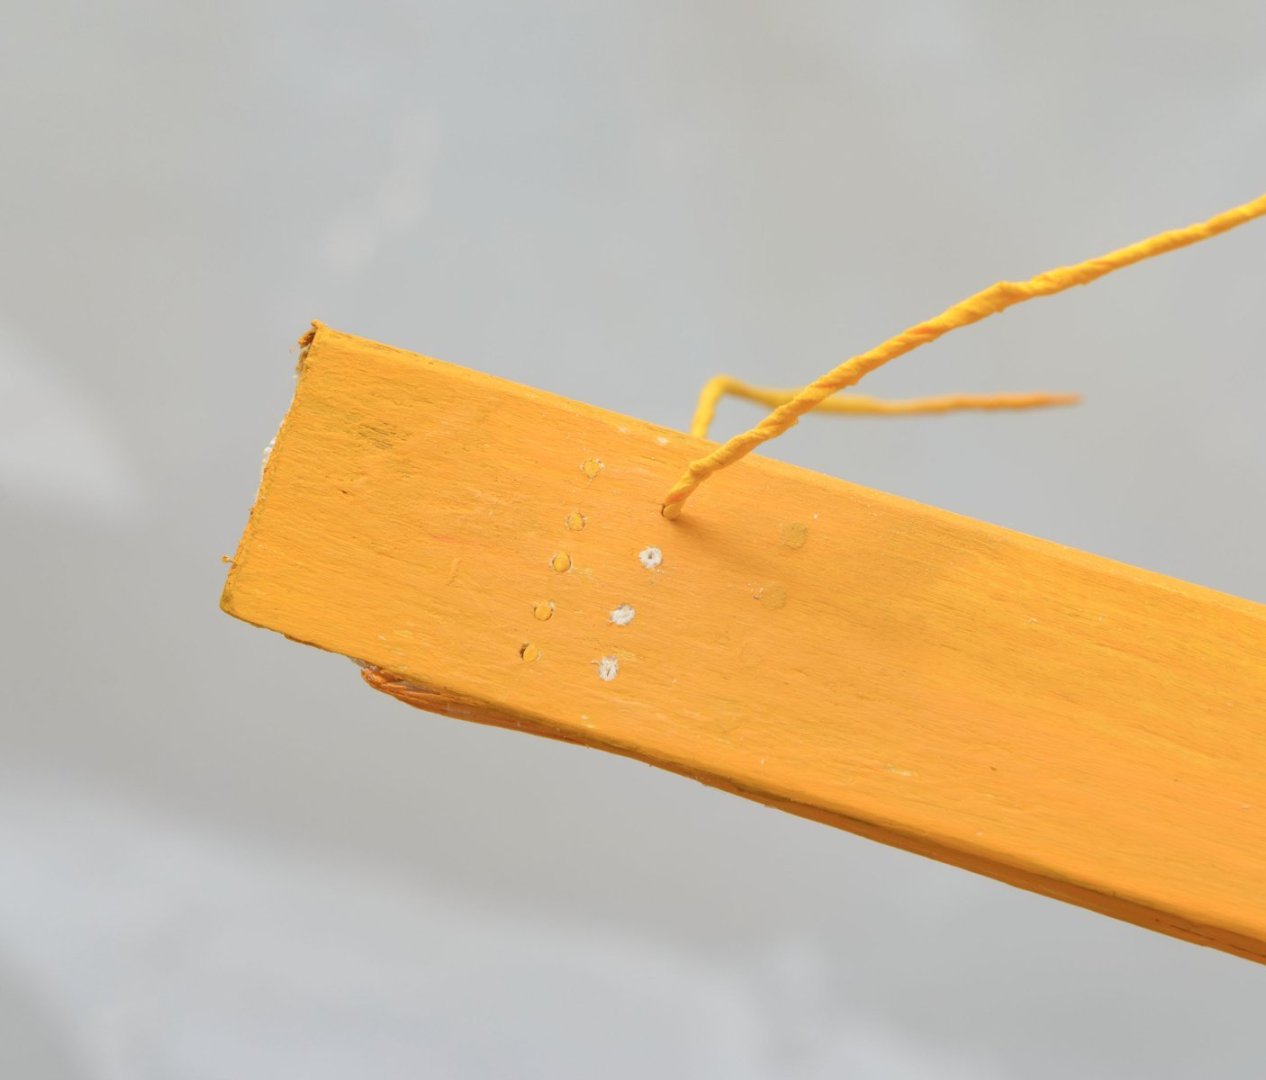
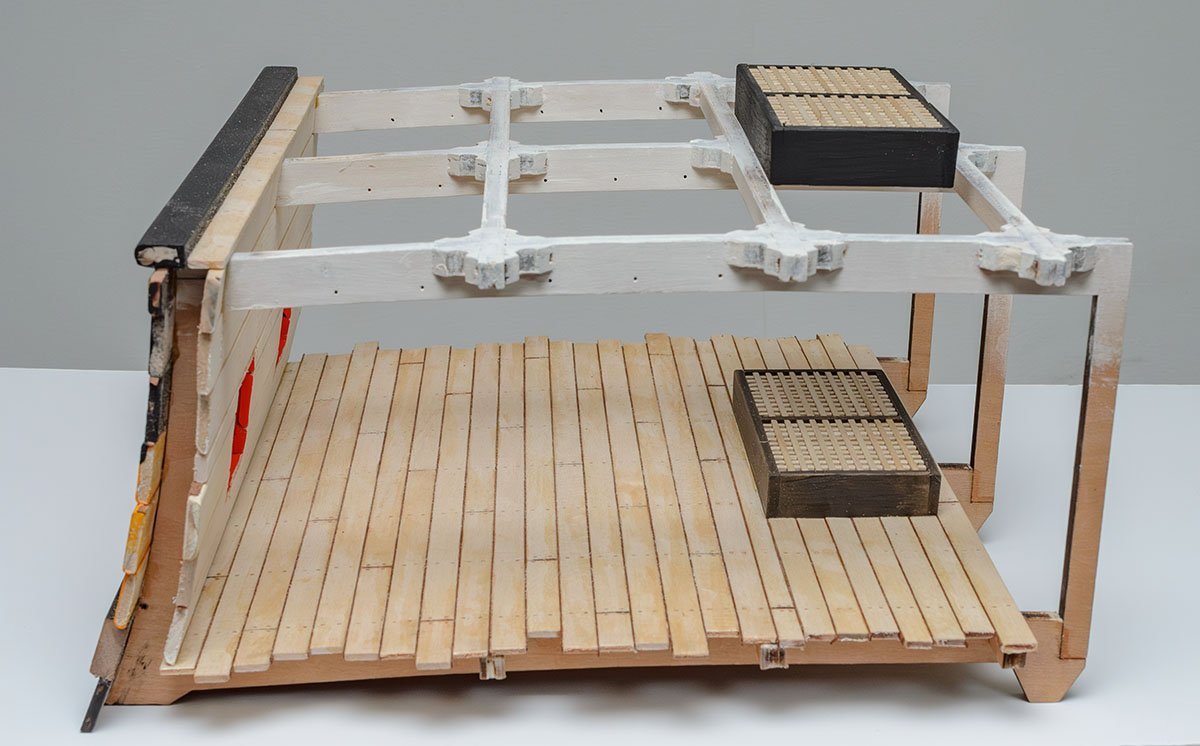
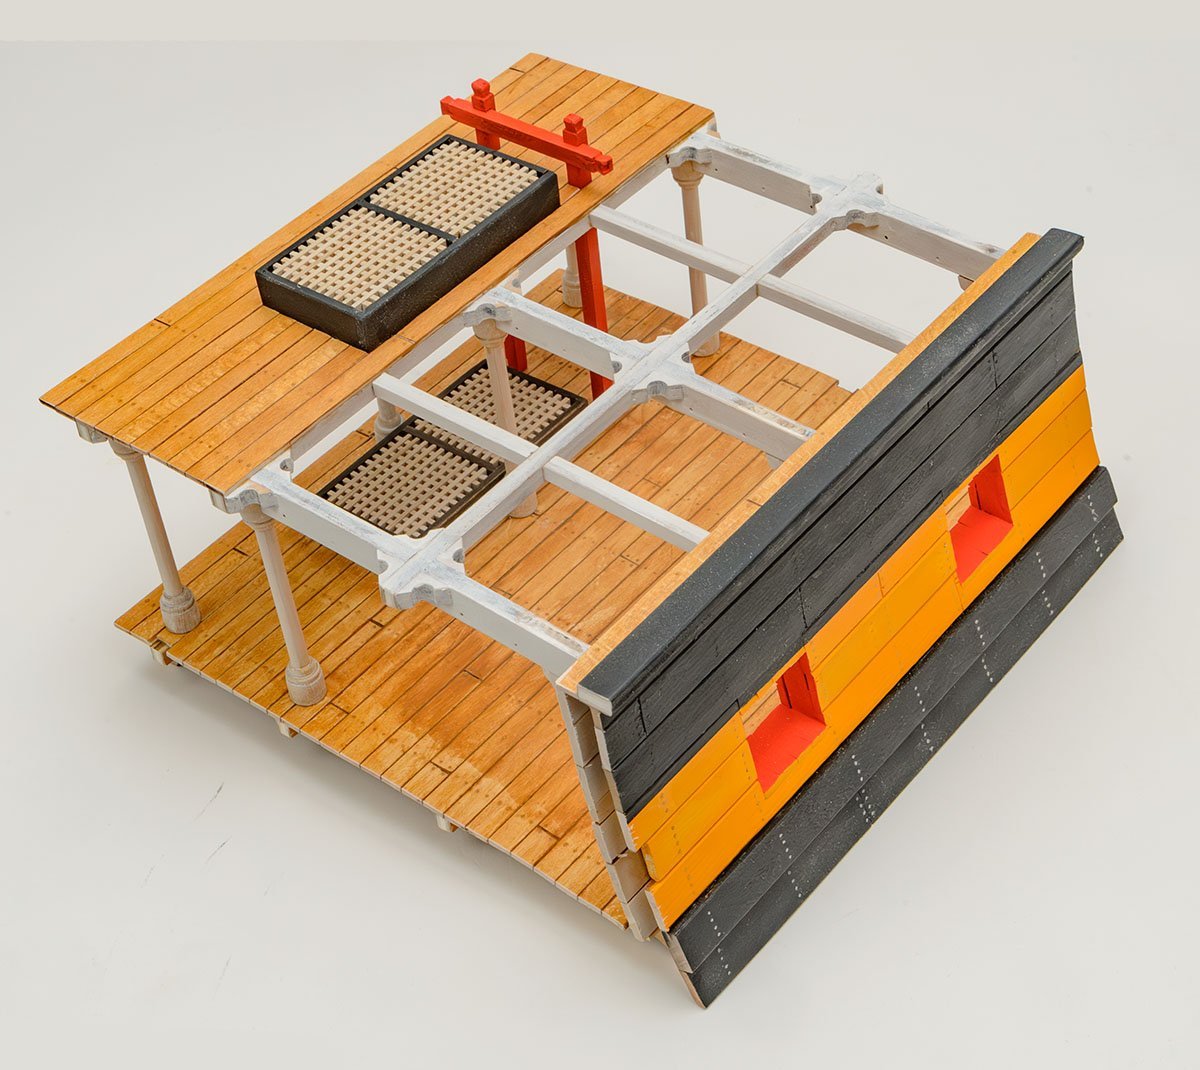
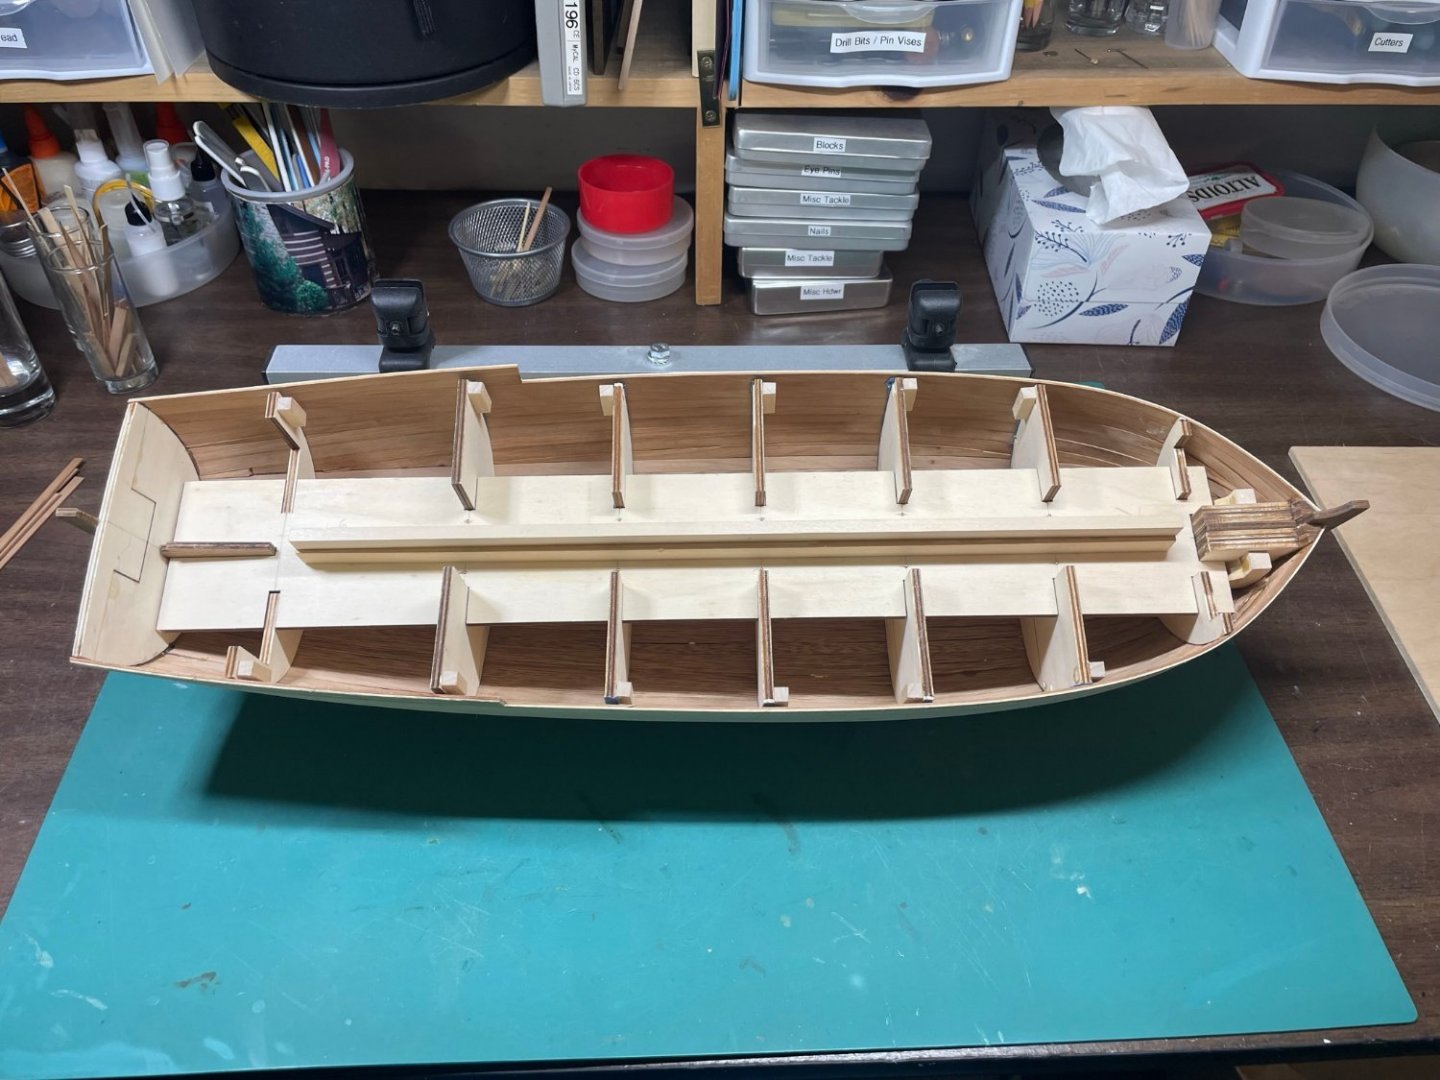
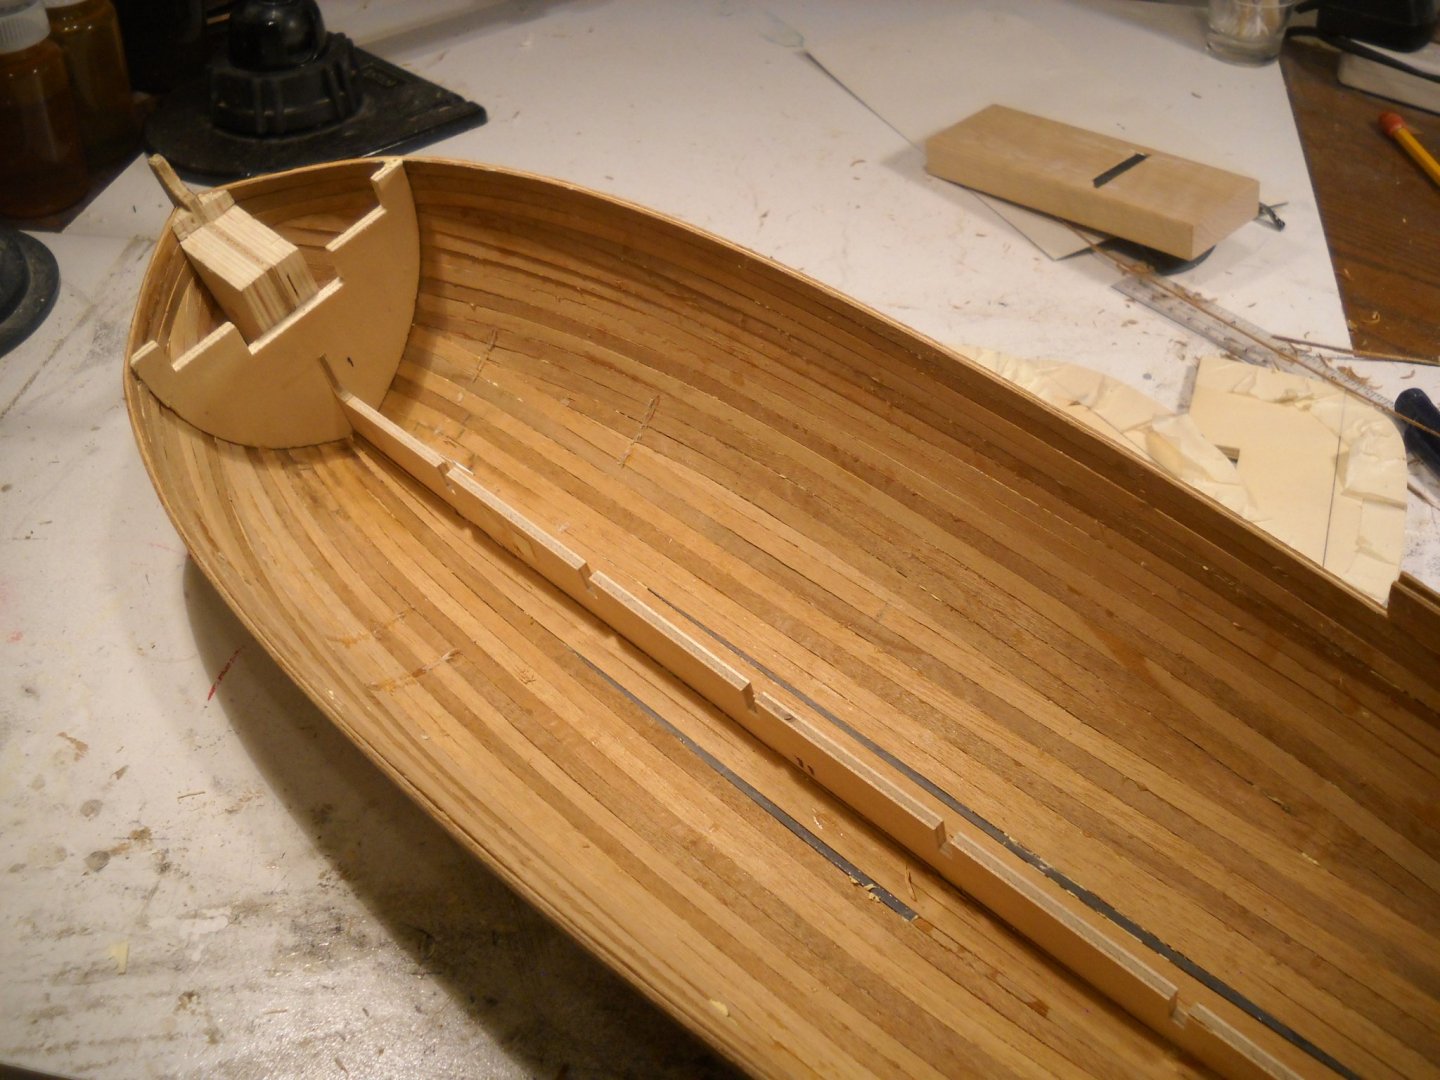
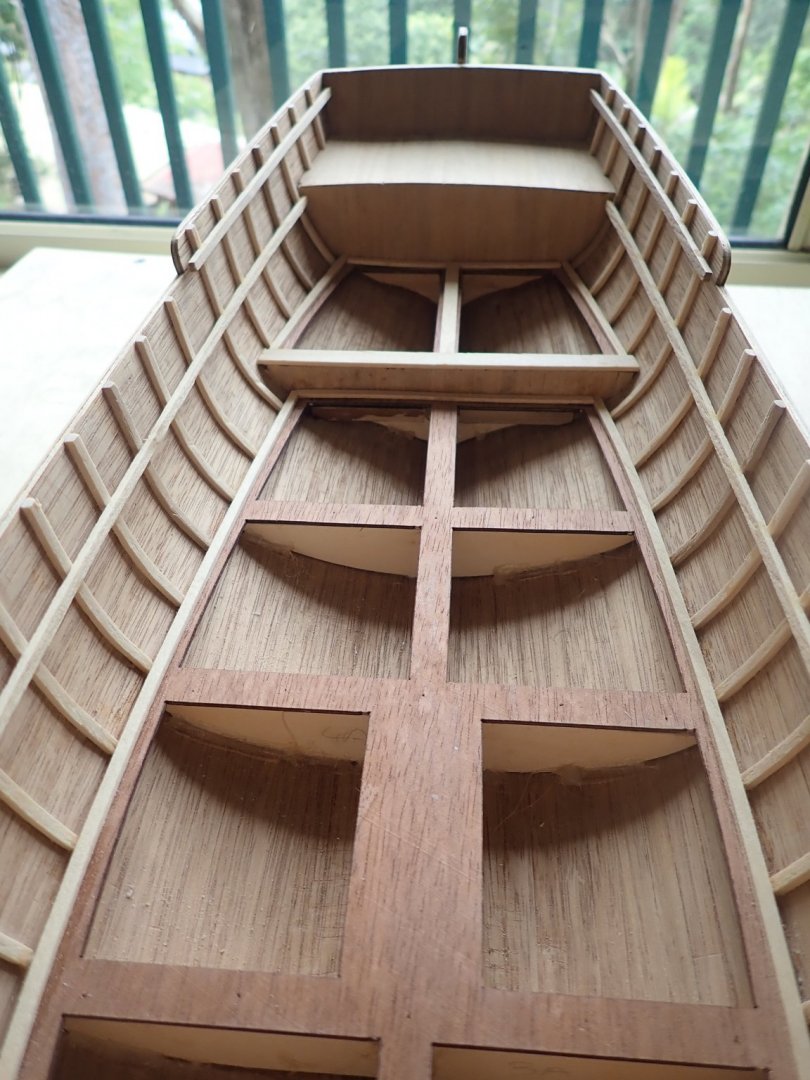
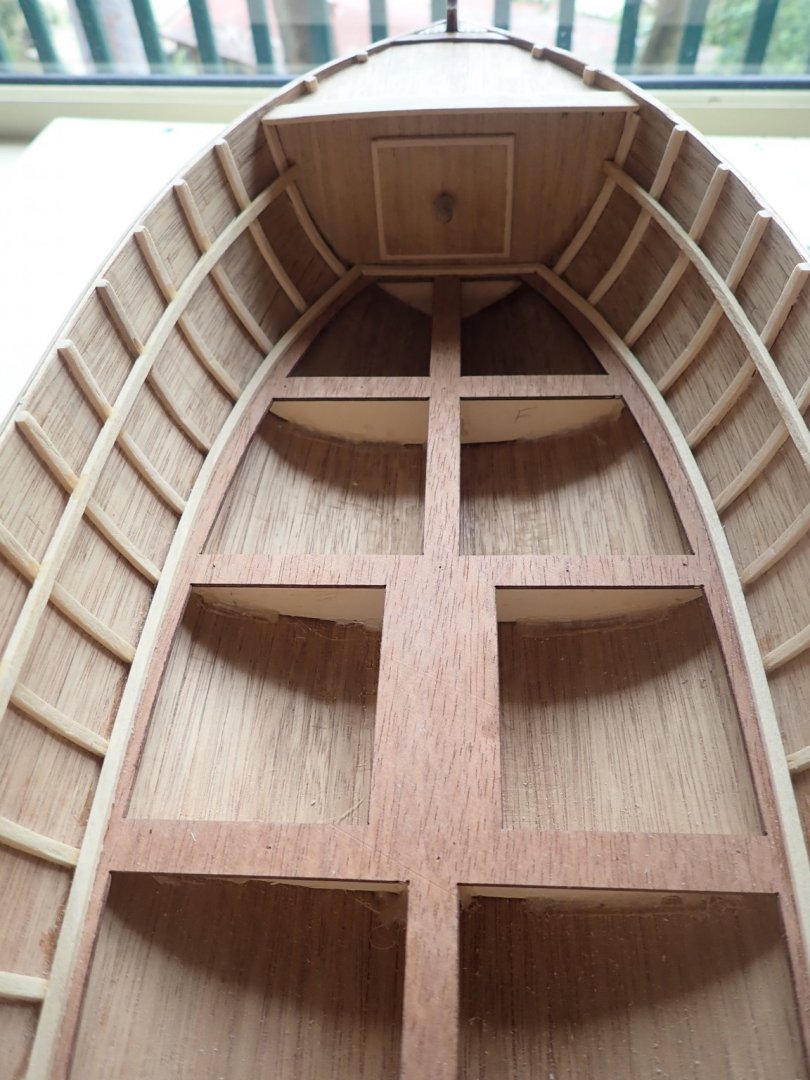
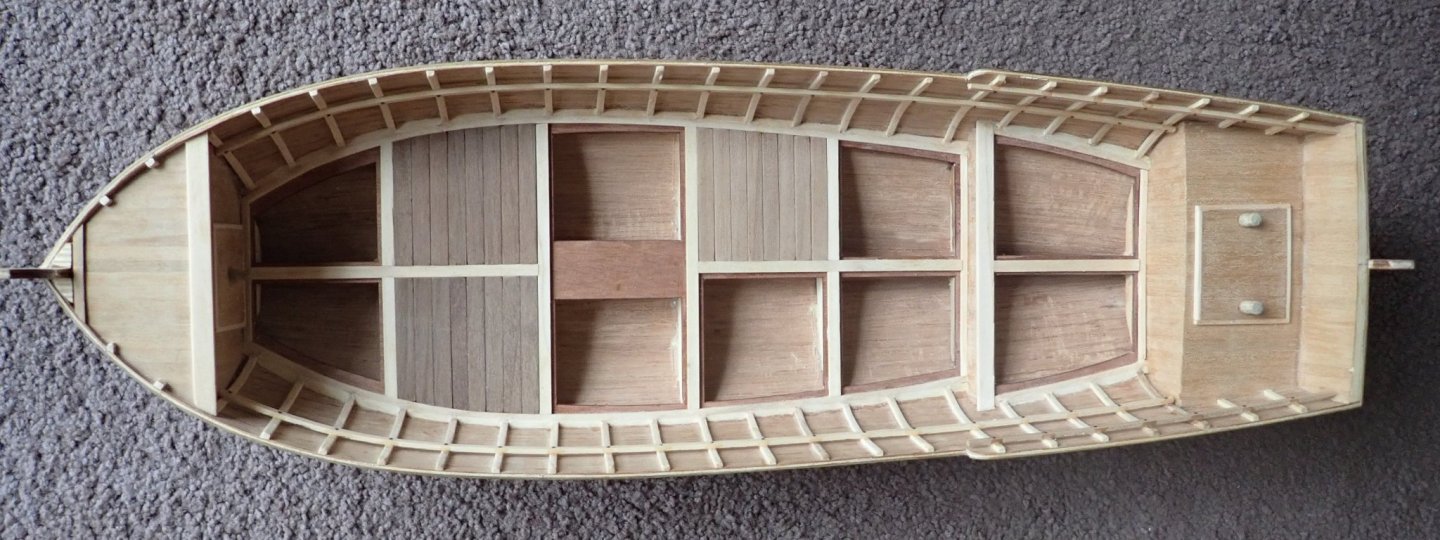
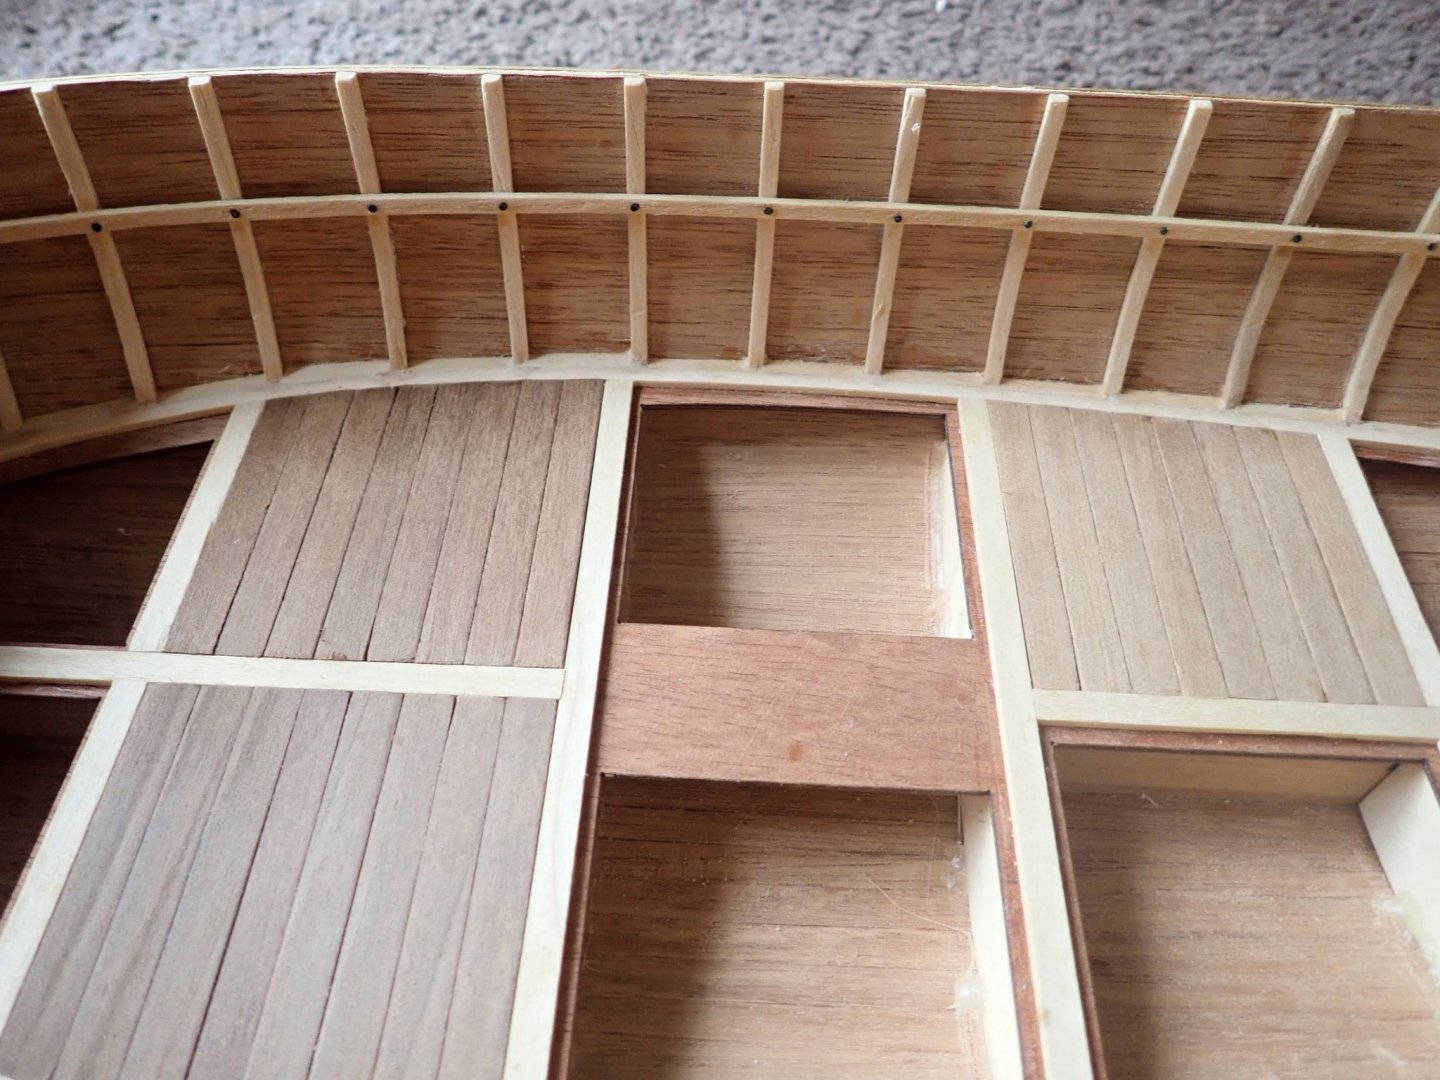
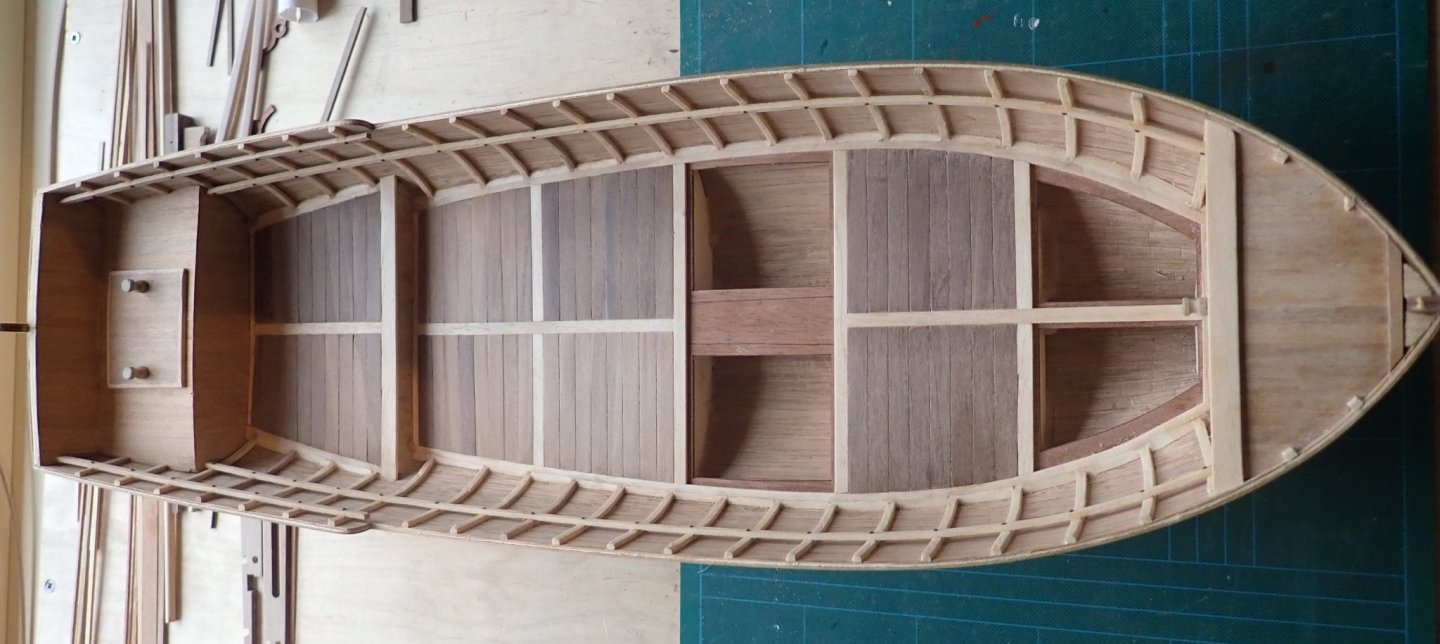
 Hi, This is a build log of Panart’s 1/16 scale, Armed Pinnace, though as I commenced this model quite a number of years ago, the log actually starts from where I finished back then. If I’d known then what I know now about model ship/boat building, I would have approached the build of this kit somewhat differently. I would have planked the hull using scale lengths, for instance. Also I would have thought ahead about the colour scheme and painted/stained various parts before assembling. I’d finished the basic triple-planked hull construction and done a reasonable amount of work on the interior. I was however not happy with the wood supplied for the outer planking as I thought the grain was too obvious for my liking. The instructions say that this wood is walnut, but it looks as if it might be beech with a very pronounced flecked grain. I did use this for the hull below the waterline as this is to be painted and the grain won’t be a problem. Above the waterline I used walnut strips which I had available. The two different types of wood can be clearly seen in the photos. Several drop planks can be seen at the bow in the photo below. Other build logs mention a problem with the foredeck being undersized, but I cannot remember if I had that particular problem, though the appearance of the deck as I’ve built it, does not quite match the drawing on the plan. This may affect the installation of the gun slide, so we’ll see. As well as the hull planking, I’d finished installing the ribs, the stringers, the decks, planking at the stern and bow and fashioned and glued in place the bow hatch. The instructions actually say to fit the cap rail (that goes on top of the planking and the ribs) before putting the ribs in place, but this would have been extremely awkward as the ribs would have had to butt up against both the deck and the cap rail. Very fiddly indeed. Instead the ribs were installed and easily trimmed at the top ready for the cap rail at a later date. Then the next thing to do was to reacquaint myself with the plans and the instructions, the latter not being the greatest. The infill blocks between the ribs at deck level were installed and the decorative nails at the rib/stringer junctions were pushed home after drilling pilot holes. The supplied nails were shortened as they were not meant to penetrate all the way through the planking. The stern hatch cover was made and glued in place. The shuttering was then made. This was actually the very last of the instructions, which doesn’t make sense as these need to be fitted before the interior of the boat, including the cannon carriage and slide, is completed. I also didn’t follow the instructions anyway, but simply fitted and glued the transverse planks directly to the deck. The cutouts from the deck that I should have used, gluing the planks to these before putting the shutter in place, had gone missing anyway. The shutters completely installed but not yet sanded. The anti-slip strips were cut to size and glued onto the shutters. A strip of wood was taped to the shutters to allow the strips to be aligned. The partly assembled gratings, which will cover the four remaining holes in the deck, are also visible in the above photo. These will be the subject of the next post. Cheers. Richard
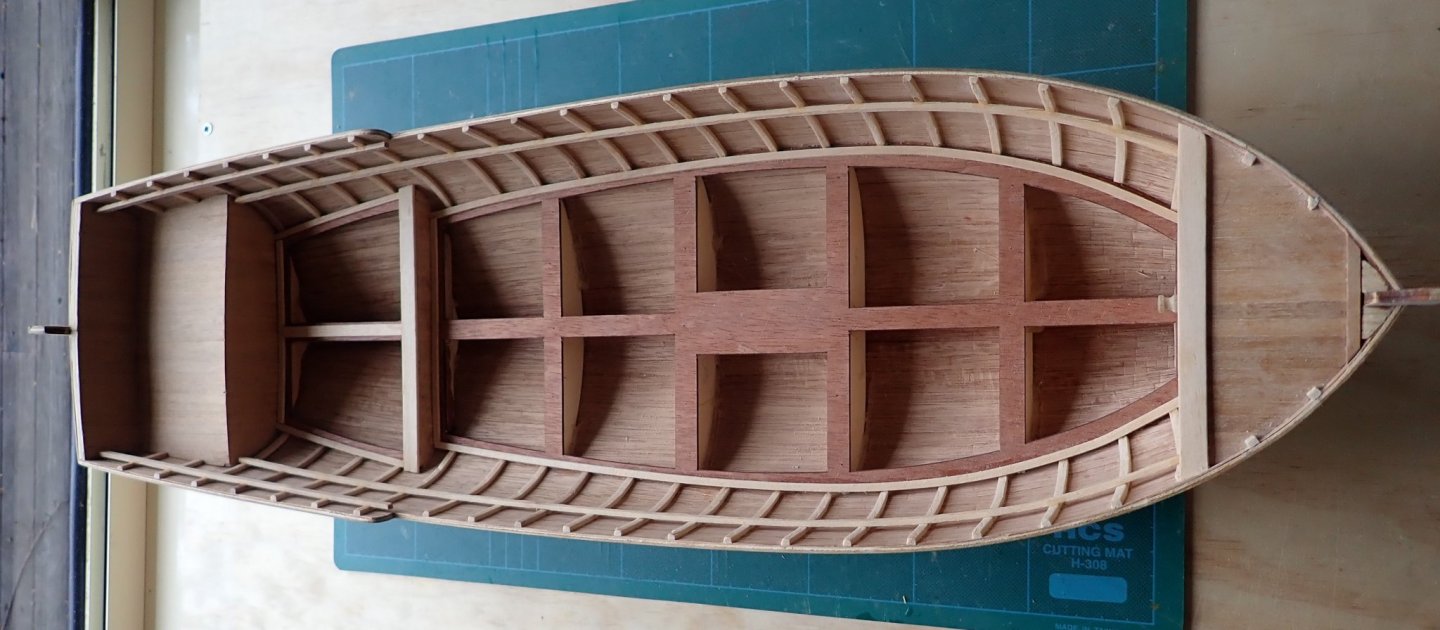


- 30 replies
-
- 11
-
-
- armed launch
- panart
- (and 1 more)